TotalCon 40 is an annual gaming convention that is held in Marlborough, MA at the Best Western Conference Center. There are events for miniature games, board games, RPG’s, and much more. Attendance is well over 1,000.
This year it was held between February 19th and 22nd of 2026. I usually run several tabletop miniatures games there. This year was no exception. I ran eight 4-hour games across the 4 days.
Several players who participated in my games are eager to see some game shots. Not to disappoint, his post will be picture heavy and text light!
On Thursday of every TotalCon, there is a large flea market in an adjoining room to the main hall. From Friday to Sunday, I get a very big table in that room. Because of the flea market’s need for space, I settle for a smaller footprint on Thursday. That smaller table was fine for two games (afternoon and evening).
Battle for the Pond
This was a Combat Patrol:WWII retro sci-fi game using the pond that I described in my last post.
My game flyer.The tabletop set up for action. The F.R.O.G. Commandos are on the near side, with the Star Ducks on the far end. The Star Ducks are Archive Miniatures Star Rovers figures from the late ’70’s/early 80’s. The Frogs are Critter Commandos figures from the early 1990’s.The Star Duck players move up.The Star Ducks use one of their two jet pack moves to occupy islands. In the game, control of the smaller islands was worth 5 points. Controlling the largest island earned players 10 points.The Frogs were also jet packing. The Star Ducks used mortars to lay down a protective smoke screen against their automatic weapons fire.In the end, the luck of the cards deserted the Frogs, with almost every island in Star Duck control.
High Noon at the Cyber Ruins
I ran this Combat Patrol retro sci-fi game at Cold Wars, but on a bigger table. I used a different mat and adapted the game to a smaller footprint.
Game flyer.
To win the game, both sides get credit (victory points) for inflicting enemy casualties and finding hidden ancient robots.
The game was definitely full!Retrovians and Space Cowboys move into the ruined city.The Space Cowboys find a robot (an Archive Robot Cook) and get it to join their side.Reinforcements arrive! Here come the Space Roos.Retrovians take cover under fire while trying to clear the walls.Retrovian infantry move into the city.
In the end, the casualties on both sides were high. But, the Space Cowboys possession of robots allowed them a narrow 15-10 victory. That wrapped up Thursday’s games.
I decided not to run a Friday morning game this year. Last year, resetting the flea market room took too much time. It interfered with my morning game setup. Instead, I had plenty of time to move everything into the “big room” and set up on the “big table”. My first game was a Wars of Ozz game. It was titled “The Great Munchkin Heist”. I had also run it at Cold Wars. This time I had an even bigger table than I had there!
The Great Munchkin Heist
The game set up – I loved creating this panoramic expanse!Players arrive – once again demand to play was high!1st Munchkin Brigade set upThat’s a full game!Nitpik’s “Morin’s Monsters” armed with napalm blasters hope to cook up some Great Pumpkinheads.A regiment of Great Owls (Munchkin allies) overflies the Lemon Drop Legionnaires and hits them in the rear!Jinjur regiments (female pirates and Munchkin allies) breach the wall.The Munchkins breach the western gate and their light cavalry pours through to look for technological treasures.In the center, two axe-wielding Nitpik regiments have had enough of the Munchkins. The Jade Automata and the Pink Nightmare regiments charge over their defensive wall. Their counterattack wipes out the Munchkin artillery and drives two Munchkin infantry regiments from the game.Another view of that mechanical counterattack.Meanwhile, the cleaver Jinjur pirates locate some of Nitpik’s technological wonders in a wrecked building.
The game ended – in a dead tie 23-23! A real nail-biter to be sure!
The next game builds on this one. The Munchkins have found technology, but welshed on their agreement to share! Thus, they betrayed their allies. As a result, their former allies have jumped over to the Nitpik side. The Munchkins are fleeing to safety, with Nitpik in hot pursuit.
Revenge of the Tin Men
Another big game! The players plan.The Munchkins have 4 heavy crates of technology carried by 4 regiments. The crates slow down the Munchkins. The little folk need to cross a line with the crates safely to gain victory points. Additionally, each Munchkin base that escapes the Nitpik pursuers gets a point. Nitpik gets points for recovering crates and for eliminating Munchkin bases. The Munchkins have set up a delaying picket line of light cavalry and sharpshooters between the two balloons. This is to give those fleeing a chance to escape the Nitpik and allied horde.On the right, the Munchkin picket line. On the left, the pursuers!There were many Nitpik pursuers. This included those who switched alliances, like Frost Ogres, Great Pumpkinheads, and Jinjur pirates. Traffic control became a challenge as they tried to catch the Munchkins.The pursuers coordinate their movements.The Munchkin Aerostat frustrated several Nitpik regiments. As they tried to advance, the Aerostat laid down effective disruptive musketry on the mechanical men. Nitpik cavalry broke through and tried to run the Munchkins down. Several crates were lost as the Munchkins routed in disarray.The game ended with this scene showing Sam disappointed. The Munchkins nearly won the game. Her unit only needed 1 more inch to cross the line of the crater with the crate. So close! (well played though Sam!!) In the end, Nitpik won a VERY narrow 12-10 victory.
That wrapped up Friday night. The next game would happen Saturday morning set in North Africa.
Il Duce’s Desert Gamble
This what-if modified What a Tanker scenario also filled up quickly as well.
Vichy French armor facing the Italians.Royal Italian Army armor facing the French.The players plot their moves.An Italian Macchi C.202 Folgore (Italian “thunderbolt”) dogfights a Vichy Dewoitine D.520.Leif smiles as he records temporary damage on his tank. The damage was caused by Leif’s very bad dice rolling for a very old and worn out French FT-17!A Vichy SOMUA S35 knocks out an Italian Semovente 90/53.French forces advance.
The game ended with Vichy winning 540-440.
For Saturday afternoon, I ran Operation Torch: Vichy Mounts an Armored Counterattack. This was also a modified What a Tanker game.
Operation Torch: Vichy Mounts an Armored Counterattack
The Vichy players plan their assault.The American players are ready!The Americans watch as the Vichy French get closer. They have plans of getting air cover and naval gunfire on the French!Knowing this, the French spread out to avoid massing a big target.Mal considers his next move.Aircraft are deployed, but the US Navy rules the skies. This allows for the Avenger to call in naval gunfire from the USS Savannah. This destroys multiple Vichy vehicles.
The US air superiority and naval gunfire carried the day – with the US winning a significant victory.
RETROVIANS MUST BE CLEANSED
Saturday night’s game was upon me, and I had decided to run another Combat Patrol retro sci-fi game. This time, the Retrovians would face the Archive Star Rovers Warbots. They would also confront my own creation – the Mark 1 Sphere tank.
Happy Gamers at the start! Retrovians are on the left, Warbots on the right.A Retrovian Bra’sheer tripod moves out front of its infantry. The Mark 1 takes up a supporting position as the Warbots march forward to glory.The Mark 1 safely delivers machine gun fire from its sponsons. Meanwhile, the Warbots also take fire and are stunned.
I did not take many pictures of this game. I do believe that the Warbots wore down the Retrovians. Yes, they were “cleansed”. It was nice to see these figures back on the tabletop.
This was the penultimate game for me of TotalCon 2026. I headed off to my room. I was ready for the 2026 TotalCon “Tournament of Ozz” on Sunday morning.
I had 7 out of a possible 8 players. At random, one player got a “bye” in round one. The match-ups were done at random and 7 different 21-point brigades were assigned at random. Inflicting the most damage on the enemy was the victory condition to move forward in the tournament. Tie breakers were also in play if that was needed.
Glory on the Line!
In Round 1 – the match ups were:
Impkins (Ken) versus Munchkins (Eric)
Munchkins (Bob) versus Gillikins (Dave)
Winkies (Brad) versus Gillikins (Jacob)
Winkies (Leif) got the round 1 bye
Round 1 begins!Brad’s Winkies devastate Jacob’s GillikinsBob’s Munchkins get into a shooting match with Dave’s Gillikins.Round 1 winds down.
The Round 1 results were:
Impkins (Ken) defeated Munchkins (Eric)
Munchkins (Bob) defeated Gillikins (Dave)
Winkies (Brad) defeated Gillikins (Jacob)
Winkies (Leif) got the round 1 bye
Yielding the semifinals as:
Impkins (Ken) versus Winkies (Brad)
Munchkins (Bob) versus Winkies (Leif)
The semi-finalists!Leif casts a poppies spell to thwart Bob’s cavalry,Bob’s Munchkins prepare to unleash musketry on Leif’s Winkie Guard. They would rout!Meanwhile, Ken’s Impkins got hit hard by Brad’s Winkies.
The Round 2 (semifinals) results were:
Winkies (Brad) defeats Impkins (Ken)
Munchkins (Bob) defeats Winkies (Leif)
Yielding the FINALS as:
Munchkins (Bob) versus Winkies (Brad)
Brad and Bob get ready to rumble!
In the end, Brad outlasted Bob – though it was close! Congratulations to Brad as the 2026 TotalCon Wars of Ozz Champion! Congrats to Brad!
The 2026 runner up Bob, the 2026 champion Brad, and your happy GM.
Thank you to all who helped me at the convention. Special thanks to Leif and Brad.
I also want to extend a very special thanks to Bryan Clauss, Steve Parenteau, Kevin Baumann, and the entire TotalCon staff. They do a magnificent job running a great convention! BIG THANKS!!
Lastly, a few areas that you can check out if you dare:
Followers of this blog have seen several posts showing my “rusty” preparations. I have been getting ready for my numerous games at 2026 tabletop wargaming conventions. That preparation involves painting up figures and terrain for scenarios that involve a good amount of ruins and wreckage.
In a previous post, I shared how I built transmission towers and rusty walls for a Wars of OzzTM game involving Professor Nitpik’s Industrial City (the Robotic Sanctum). I ran that game at Cold Wars and will share more about that convention shortly. The theme for Cold Wars this year was “The Wild West”, so I also had planned to run a game involving Space Cowboys (technically Archive Texican Space Rangers” from Star Rovers).
I don’t run western games, but I could cobble together a retro sci-fi game using Buck Surdu’s Combat Patrol:WWIITM gaming system (with my modifications). In my game Archive “Space Cowboys”, and uplifted kangaroos (“Space ‘Roos” ) combat blue-skinned “Retrovians” (from War Games Supply Dump). Both armies are searching for hidden ancient robots in the apocalyptic ruins of a long-dead civilization on a newly-colonized world called Dust.
To really make the ancient ruined industrial panorama that I wanted, I needed more buildings and structures than just my transmission towers, rusty walls, rusty generators and ruined chemical plant. I also wanted a lot of wreckage strewn about as terrain.
To those ends, I ended up making two ruined factory buildings, two industrial structures, and 61 scatter bases of industrial wreckage. These were all built at the same time. This enabled me to work around issues like drying and curing times as time was short. Oh yeah, and we had a few snow storms here in Massachusetts along the way that ate up some hobby time (not helpful at all).
I wanted to share my project and all its components here with you. As these were simultaneous efforts, you will see multiple project stages here. You may notice that I used a lot of repurposed bits of metal and plastic and Juweela products. The lists will be at the end of this post as is my habit. My concept was to achieve a Stalingrad-like look.
For the two buildings, I converted an iPad 16 box top and bottom. I used Apoxie Sculpt, steel washers, sand, multiple pieces of plastic, desiccant cylinders, and a lot of Juweela items to make the 61 scatter bases. And for two flat industrial structures, I reused two pieces of packing materials to repurpose them as flat rusted structures.
I started out with this iPad 16 box. I would use the top and bottom of this. It is plastic and cardboard.
I sawed out windows and doors on both box pieces and made each a bit differently in terms of architectural arrangement. I then hot-glued foam board to make rooms. For flooring, I broke up old popsicle sticks. These I had used previously to mount figures for painting on other projects. Lastly, I drilled out holes in the walls to simulate old bullet holes.
Cutting out the windows and doors on the first building.Adding the walls, bullet holes, and flooring.
Then it was on to sculpting the outside walls. I did each building separately from here on so as to handle both curing times and to learn as I went as to best practices. Apoxie Sculpt and a Green Stuff World brick roller worked well.
Sculpting the walls. I used an awl to create and shape shell and bullet impacts on the outside.Using the windows as gripping spots made the sculpting easier. I did need to then wait for curing.
While the walls cured, I worked on the wreckage bases – also using Apoxie Sculpt. I made the bases differently in terms of both size and shape. It helped to use one or more steel washers underneath the base sculpts. Using different sizes helped to make the shapes varied.
The biggest washer that I used and a base covered with Apoxie Sculpt.Examples of the other sizes and shapes – all with steel washers underneath.
As the corrosion texture paint takes time to dry as well, I started adding that to various pieces of debris that I had saved up. I like to use a cheap old brush that could serve no other purpose – especially as it usually destroys it. The corrosion paint needed to dry and then got a second application.
Using the AK Corrosion Texture paint. Here I am using it on desiccant cylinders (from pill bottles), crushed plastic straw sections, and rubber inserts from a drain plug replacement.
After a day, the Apoxie Sculpt on the first building had cured. But I wanted there to be a small outside rim to it that could hold wreckage and brick debris. While a sheet of polystyrene was gluing to its bottom, I worked on the second building.
First building cured.Bottom view – I needed more here underneath…but before that I finished the second building’s outside.Second building outside sculpting…….and second building flooring installation.
As the first building had cured, I started to paint it. Then I was able to glue a polystyrene base to building number 2.
Building number one with early paint work, and building number two being glued to the PS sheet under a heavy textbook.
As I was again dealing with drying and curing times, I went back to work on the wreckage bases. I used up some white sand on the Apoxie Sculpt bases and applied with PVA. Once that had dried, I added as much wreckage as I could to each.
Wreckage bases – I started with the largest. The two buildings are shown in progress as are the next batch of sculpted bases curing.Close up shot of the larger wreckage bases in progress. Glue must dry…Close up of building one with insides primed.
At this point, I added the flat clear plastic packing material to two square pieces of polystyrene by clamping and gluing them in preparation for corrosion texture. Then it was back to the wreckage bases. I had run out of white sand, so the next batch of wreckage bases got a PVA/grey sand application. As I used a lot pigments later, this made zero difference. At the same time, I also dirtied up the interior building walls and flooring using a sponge and various dark washes. The rim outside the buildings got a sandy texture paint covering.
The dark sand drying on the next wreckage bases, the flat structures with first application of corrosion texture, other bases in progress, and the buildings in the back.A second coat of corrosion paint has been applied to the flat structures here. I also sorted the wreckage bases by size before adding pigments.The flat structures and some other rusty paints I would add before augmenting with pigments.
Below you can see the wreckage bases after I added pigments to them. I fixed the pigments with Vallejo Thinner applied with a spray from a lens cleaning bottle.
Next, I added rusty industrial wreckage and scattered bricks to the buildings’ interiors.
After adding industrial wreckage and bricks to building 1……and building 2.
Clearly, pigments were needed at this point to make the bricks and wreckage look older and dirtier. More pigments and dark washes to the rescue!
The buildings after adding the pigments and washes to dirty and rust up everything.Top view of both buildings as completed.
I was now ready to mock up the tabletop with everything! But first, the flyer for the game – which I finished before this project:
Game flyer.
The wreckage (all 61 pieces and the buildings really helped complete my vision. There are 24 possible search locations for the 4 ancient robots, known only to the GM. The four ancient robots I used were: “Folder Bot 3000” (aka Bender) from Armorcast Terraform Terrain Ltd.’s “Robot Townies” collection; and “RT22” from old Archive miniatures Star Rovers line circa 1977; and two Archive Miniatures Robot Cooks also circa 1977 (also Star Rovers).
The four ancient robots! Folder Bot 3000, RT22, and the two Robot Cooks.
I randomly select the locations for the four robots (see numbers on the map below). My playtest worked well, and here are some shots of the mock-up tabletop.
The mock up of the tabletop for the game. The Retrovians three squads and command group are in the forefront. The Space Cowboys are at the opposite side.A side view.View from the Space Cowboy’s side.Generator side view.
I did not use all of the wreckage in the mock-up. I will share a Cold Wars post soon. However, as a preview here are a couple of shots of the game set up at Cold Wars in all its glory:
Photo of the game in progress at Cold Wars with me as the GM. (photo courtesy of Ken Howe).Space Cowboys and Retrovians start searching for the robots.The shoot out starts – while one robot has been found in the upper right. This was Bender, and he was not happy to be found and attacked and killed a Space Cowboy.
More about Cold Wars soon in a future post.
I hope you enjoyed reading this and seeing my rusty panorama come to life – on the tabletop anyways. If this WIP post helps you in any way, that is great! I am including these terrain pieces in Dave Stone’s PAINT WHAT YOU GOT 2025/2026 Challenge as these were completed in early February. For now, that’s it, until next time!
329 miles to Lancaster, PA and Cold Wars!
The materials are listed below as a reference for me (and you maybe).
For all of my previous posts on terrain projects, please see this page. For all of my previous posts on sci-fi projects, please see this page…for any of my previous posts on scratch-building, see this page.
PAINTS, INKS, GLAZES, SHADES, WASHES, PIGMENTS, FLOCKING, GLUES AND MORE THAT I USED ON THE TWO RUINED BUILDINGS:
iPad 16 Box (top and bottom)
Hot glue
Foam Board
Toothpicks
Popsicle sticks
Apoxie sculpt
Vallejo Surface Primer “Grey”
SIBE AUTOMATION “White Polystyrene 8″ X 12″ X 1/8″ Plastic Sheet”
PVA
Huge Miniatures “Brick Red”
MSP “Brown Liner”
Vallejo Game Color “Sepia” (wash/shade)
Vallejo Wash FX “Dark Grey” (wash/shade)
Liquitex “Burnt Umber” (ink)
Secret Weapon Washes “Sewer Water”
Vallejo Thinner
Vallejo Surface Primer “German Green Brown”
Vallejo “Light Slate Grey” (pigment)
AK “Dry Ground” (texture)
Vallejo “Carbon Black” (pigment)
Juweela Metal Scrap Rusty Industry (23336)
Juweela Debris Assortment (23316)
Juweela Debris Brick Red (23315)
Juweela Debris Assortment (23315)
Juweela Bricks (23034)
Juweela Metal Scrap Rusty Gear Wheels (23317)
Army Painter “Red Tone” (wash)
Secret Weapon Washes “Red Black” (wash)
Secret Weapon Washes “Ruby” (wash)
P3 “Red Ink” (ink)
Vallejo Game Air “Red Terracotta”
PAINTS, INKS, GLAZES, SHADES, WASHES, PIGMENTS, FLOCKING, GLUES AND MORE THAT I USED ON THE 61 WRECKAGE BASES/PILES:
Play sand
Apoxie sculpt
PVA
Various scrap plastic pieces
Cylindrical desiccant holders
Rubber sink stopper rim
Juweela Metal Scrap Rusty Industry (23336)
Juweela Debris Assortment (23316)
Juweela Debris Brick Red (23315)
Juweela Debris Assortment (23315)
Juweela Bricks (23034)
Juweela Metal Scrap Rusty Gear Wheels (23317)
AK “Corrosion Texture” (texture)
Vallejo Model Air “Rust” (71.080)
Vallejo Model Air “Rust” (71.080)
Vallejo Model Air “Rust” (71.069)
Vallejo Model Air “Orange Rust”
Citadel “Ryza Rust” (dry)
Vallejo “Old Rust” (pigment)
Vallejo “Pigment Binder”
Vallejo Thinner
Vallejo “Dark Slate Grey” (pigment)
Vallejo “Dark Yellow Ochre” (pigment)
Vallejo Game Color “Sepia” (wash/shade)
Secret Weapon Washes “Sewer Water”
Army Painter “Red Tone” (wash)
Secret Weapon Washes “Red Black” (wash)
Secret Weapon Washes “Ruby” (wash)
P3 “Red Ink” (ink)
Vallejo Game Air “Red Terracotta”
PAINTS, INKS, GLAZES, SHADES, WASHES, PIGMENTS, FLOCKING, GLUES AND MORE THAT I USED ON THE 2 FLAT INDUSTRIAL STRUCTURES:
SIBE AUTOMATION “White Polystyrene 8″ X 12″ X 1/8″ Plastic Sheet”
Back in 1978 and 1979, Archive Miniatures produced a line of figures for the board game Cosmic Encounters. According to the Lost Minis Wiki, at some point Archive Miniatures produced a line of figures for the board game. These included four catalog items: “Wrack” (#2101), “Oracle” (#2102), “The Mind and the Macron” (two figures for #2103) and “The Healer, Zombie, and Sorcerer” (three figures for #2104). I am not sure if that was a limited release as the research I could find on the 1977 version of Cosmic Encounter seemed to suggest that there were many alien races available for the game – many more than this page from the Lost Minis Wiki suggests were made. Cosmic Encounter continues to be sold and is available in its current configuration here.
In any case, I stumbled on the Macron three years ago, and managed at some point since to acquire a complete set including The Mind since then. My goal back then in acquiring the Macron figures was to have basically a squad of giant cosmonaut zombies for retro sci-fi games of Buck Surdu’s Combat Patrol™. Having The Mind as the unit leader controlling the giant zombie cosmonauts seemed to be a nice concept for a unit. I wanted a unit of ten, and I previously posted here how I made a mold and recast many more. I had since shared these with Buck and IRO as shown here and here respectively. I also wanted to complete these in September as part of Azazel’s“Scenic and Squaddie September ’19 Community Painting Challenge” that I try to share in when I can. Amazingly, it has been three+ years since I recast these figures, and I thought I’d better do something other than tanks for a bit! As an aside, this last month has been a bit crazy, as I had my 35th West Point reunion, job interviews, BARRAGE in Maryland, etc. I am hoping to catch up on reading others’ blogs and posting on the events of September soon! It’s been a while since I managed to complete a blog entry too.
Ironically, the Macron figures were sculpted by Nevile Stocken in 1979 – and the current president of France, Emmanuel Macron was born in 1977! So of any of you thought I was making that up, I have provided the links.
Back to the project – I found my recasts to be satisfactory, but I needed to do a good amount of filing and green stuff repairs to bring the recasts up to a good standard. The figures are large – about 2¼” (about 57mm for you metric types). The Mind is about half as high, but bulky. However, as these will be used as aliens, I can get away with them as giant cosmonaut zombies! I also have been looking at many posts from folks trying the new Contrast paints from Games Workshop. I thought this project would afford a nice opportunity to try them and learn about how best to employ them in the future.
The original figures (the darker ones) and the original package – along with my recasts before any filing or washing. I decided not to change their poses as that would have been more work than I wanted to take on for this project – besides, the contrast paints would make them different enough in my opinion.
The bottoms of all of the original Macrons say Archive, #2107, and date from 1979.
Interestingly, The Mind says it was #2103, the same number as the package. It also says Archive Miniatures, NS (Nevile Stocken), and dates to 1978.
The front of The Mind. The figure is supposed to be a floating brain with a hideous single eye in front. I needed to repair the old figure as you see here.
Now I have a squad! The figures are all mounted on 1.25″ steel washers for painting – and the bases are mounted to the specimen jars with poster tack. One new feature was that I added water to my specimen jars to prevent unwanted tumbling during the project – and that worked well.
I made this color palette for my Contrast Paints – and it was helpful.
My first try with the contrast paints was “Apothecary White” on the Macron figures. That worked but “Volupus Pink” on The Mind was an instant reject (I kept hearing the dad in “A Christmas Story” saying it looked like a pink nightmare) I redid it as you will see below.
Redone – and all the paints I used are listed at the end of the post. There were a LOT of paints used here – nearly 50.
Definitely styled in the ’70’s! I wanted the eye and the brain to be menacing and bloody – and the final product (not this shot) was acceptable.
Early on I decided to give each Macron its own contrast paint color. I wanted to see how that worked, and I wanted to make it easier for game play identification.
The contrast paint “Plaguebearer Flesh” was effective as a base coat on the faces. Clearly, there was need for more washes and highlights.
Each of the Macron with the contrast paint used on their space suits. My thought was they might have worn different colors in life to denote their roles before they died and The Mind seized and reanimated their bodies.
This is “Shyish Purple” after a wash – I ended up washing and highlighting these a lot.
Mid-project – “Aethermatic Blue”.
Later after using “Nuln Oil” and other washes – this one was “Iyanden Yellow”.
Later after using “Nuln Oil” and other washes – this guy was done with “Volupus Pink”.
After highlighting, I used “Astrogranite Debris” on the bases and washed them with “Druchi Violet”.
This one was done in “Blood Angels Red”. You can see that I dry brushed the bases. I used 4 different paints in that process. This is before varnishing.
The Mind before varnishing.
So after varnishing – The Mind and The Macron – and their base colors – for your enjoyment:
The Mind (frontal view)
The Mind (rear view)
Blood Angels Red
Gryph-Hound Orange
Shyish Purple
Ultramarines Blue
Talassar Blue
Terradon Turquoise
Aethermatic Blue
Magos Purple
Iyanden Yellow
Volupus Pink
And a couple of group shots:
My take on the contrast paints is quite similar to that of Azazel on his blog – he has a lot of experiments (he’s up to 12 at last look) and I did lean somewhat on his experiences a bit. I will use them as base coats when the figures need some pop – but I really think they are not a be all and end all line of products. Like every other paint/wash/glaze/ink etc., the user can find a niche – or a broad use – depending on the desire you have for the final product. I like what the contrast paints did here – but I don’t want to use them on a Tiger II! So, another tool in the kit bag – but I really think I’d want to continue to wash, shade, highlight, etc. on future projects.
Thanks for looking and hopefully you enjoyed reading about and seeing these. Let me know your thoughts, faves, (or least faves if you want!). I appreciate the feedback as always, and will be catching up on my blogging this week (I hope)!
PAINTS, INKS, GLAZES, SHADES, WASHES, PIGMENTS, FLOCKING, GLUES AND MORE USED ON THESE FIGURES:
On Saturday, July 27th, the Mass Pikemen met for our monthly gaming session – this time it was another go at “Attack of the Warbots“. This game uses the Combat Patrol™ rules system, and the figures are Archive (from the late 1970’s/early 1980’s), Mega Miniatures (late 1990’s/early 2000’s), Wargames Supply Dump (now OOP), or my own creations. The links below for each can tell you more about them if you’re interested.
On the other end of the table, their Martian allies and a Roberker were attacking through some barriers and a ruined chemical plant as the Space Roos and Star Ducks responded. Meanwhile, inside the compound, there was RT-22 (commanding some Robo-Servo guns that were around the compound) and helping a Space Dwarf Assault Squad to repair the captured Mark 1. These were desperately attempting to repair a captured Mark 1 tank before the enemy stormed their repair facility.
The game went quickly once it started.
Randy advances his Warbots. His Mark 1 did not get to activate.
On the first turn, the Mark 1 above did not get to activate as no “5” came up. The Warbots chose not to pay one of their bonus chits to get a “5”. This allowed Leif to jet pack up a Space Roo with an RPG – who got a lucky hit and destroyed the tank.
Christine’s Aphids meanwhile took heavy fire from the Warbots and Juggerbots, and were in danger of being wiped out. The remaining Mark 1 approached the wall. Leif jet-packed a lone heroic Space Roo over the wall to attack the tank with a satchel charge, only to stun it. The Aphid Platoon Leader, Lt. Hemipteran, valiantly attacked the other side of the tank with a satchel charge, and the remaining Mark 1 brewed up from the explosion.
The last Warbot controlled Mark 1 burns from the Aphid leader’s attack.
Meanwhile, on the other end of the board, Mike was making good progress with his Martians and his Roberker. Unfortunately for Roberker, a lucky Space Roo bullet hit his CPU, causing him to go rogue. In the game, a rogue robot attacks whatever he can see. Luckily for the attackers, he went rogue at the enemy Space Roos (commanded by Leif), who were eventually able to put him down with rifle fire and some of Christine’s Mortar duck supporting fire (called down ON TOP OF the Space Roos position). This was done with Leif’s approval – his Roos were valiant. Of course, several Roos bought the farm here.
Mike moves up his Martians.
Roos assault by the chemical plant right before Roberker goes rogue.
The Martians move up and shred the remaining Roos as Roberker burns. The cards indicate casualties.
Meanwhile, the Warbots on the other end managed to fire a plasma arc weapon and breach the wall such that one of Chris’ Warbot figures could go through at a time. Simultaneously, Leif successfully pulled some high cards and luckily repaired the captured Mark 1!
At this point, the game was called with a marginal victory for the Biological Alliance. They would have had to get the tank off the table, and there were Warbot reinforcements coming. My new ruined chemical plant had a lot of action!
This will be a very short blog post – but for those of you who love the old Archive Star Rovers figures, this will touch your heart! As many of you know, I have been collecting and painting Duck Wader, Star Ducks, Power-Armored Frinx, and a number of other Archive gems. I use them in Combat Patrol™ retro-sci-fi games – many of which my daughter Ellen Morin and her fiance Chris Smedile have played in and enjoyed.
Ellen’s birthday is in September, as is mine, but we did not get around to celebrating until the first Saturday in October. She got me a couple of very cool gifts. One was an awesome Boston Bruins sweater (cannot have too much Bruins gear by the way). The other was a painting of Duck Wader and some Frinx breaching a wall, with Star Ducks jet-packing through the air above! She used photos from my blog to sketch and ultimately paint the scene. I think it was an awesome gift! Here is the painting below:
The Power-Armored Frinx are back, and this time as cavalry riding glyptodons into battle! The Frinx were a creation of Archive Miniatures back around 1977 or 1978. They are a smallish lizard-like race, often wearing power armor.
Glyptodons on the other hand were very real and existed from the Ice Age until about 11,650 years ago (give or take). They were prehistoric cousins of the modern armadillo, only they were mega fauna – and were as big as a Volkswagen bug. Plus, there is that massive spiked tail to consider. Why Archive put these two together is anyone’s guess, but the combination is indeed quirky and fun.
Artist conception of a glyptodon – as big as a car
For you non-US folks, this is an armadillo. It’s about the size of a cat or small dog. None are around me in New England, but I saw plenty as road kill when I lived down South.
Sketch of Power-Armored Frinx on Glyptodon from page 3.10 of the Star Rovers Module 1 rules
As a Frinx backgrounder for those interested, I have previously written several posts on the venerable Frinx, going back to my casting of their infantry in February 2016 (here), my painting and figure conversions of my Power-Armored Frinx infantry platoon in February 2017 (here), my May 2017 discovery and acquisition of an original Star Rovers RPG (here), and my casting of the Power-Armored Frinx on Glyptodon (Archive #2042) in July of 2017 (here). So this journey has already been 2½ years in the making. Phew!
Interestingly, the 1981 Archive catalog that came with my Star Rovers game does not have the #2042 listed, despite the drawing shown above being in the rule book. My guess would be that the kit was uneconomical to produce and/or difficult to produce well. I document several these issues in my casting post – but originally the kit contained no less than 11 pieces as shown below. As reference, the scale of the set is 25mm to 28mm.
Original Power-Armored Frinx on Glyptodon kit
I made my own modifications to this particular set and made molds to recreate the kit. It is indeed rare and given that it was already OOP by 1981, there cannot be many of these around. I thought they would serve well in a traditional cavalry role for my Frinx platoon. I cast several and shared with Buck Surdu (who graciously provided me the original you see above so that we both could have some). Buck did a great job painting seven of my recasts of these back in 2017 which you can see here.
This month to add to my Frinx forces I managed to finish 5 Power-Armored Frinx on Glyptodons (let’s call them PAFOG for short!) models. As shown above, each set has two Frinx riders on a glyptodon. I chose 5 because I felt that 10 Frinx riders would be a good number for a cavalry squad in either the recon or screening role in my Combat Patrol™ games. It also would give the unit enough punch if deployed as a mobile counterattack force. I sorted out what figures that I had, and chose the ones I would use for the cavalry squad. Some of the riders’ weapons were not very well cast, so I converted these weapons. I used Bombshell Miniatures sprues of Arc Weapons (#36013) to replace six of the blasters. My initial plan is currently to give these weapons better capabilities versus robot foes, which should prove interesting given that I have a lot of robots now.
My initial assortment of PAFOG before I cleaned the chosen 5 – you can see that I still had modeling clay on the original on the bottom right.
Boot camp time – must select the best for the cavalry!
The final five plus the Bombshell Miniatures Arc Weapons. I decided to use the largest arc weapons that you see here as their sizes worked well.
Washed and ready for priming. As you can see, the details are much less crisp than I would like. His weapon was replaced with an arc weapon. This is the front rider (recast).
This is the back rider (recast).
In order to make these Frinx “pop”, I needed a plan. Clearly, my painting was going to do a lot to overcome the plainness of the riders. I also needed to figure out how I was going to base them for painting and handling – unlike other Archive Miniatures these had no bases. These are also very heavy (solid lead/tin). The feet of the glyptodons were not level, so choosing the right basing was a big quandary for me for several reasons. I tried several approaches in my mind, but eventually chose to emulate Buck’s choice and use washers. I did choose smaller ones than Buck did – using #8 steel washers and E6000 epoxy under each foot, allowing for hardening overnight.
On their washers for an overnight set.
Once they had set, I began by priming the bottoms, letting that cure, and then doing the tops. My goal was to make the bottoms reddish brown, leading to a more brownish top as the drawing of the glyptodon above shows. It was not easy! I had to do a lot of handling of the paint jobs and eventually I moved them to popsicle stick frames with poster tack, which was good for a temporary, if imperfect, solution.
Early stages of priming and base coating of the glyptodons.
Eventually I mounted the glyptodons on these temporary frames for painting – still not ideal.
After carving away 6 defective metal weapons, I mounted the riders on poster tack mounds on specimen jars. The saddles really did not present me with many other options for mounting them for painting.
As for a color scheme, I decided to go with the branch color of the US Army Cavalry (now Armor), that being yellow. Besides, yellow is a difficult color to pull off, so I thought it would pose a nice additional challenge. I primed them, and subsequently airbrushed the riders with Vallejo Game Air “Moon Yellow” as a base coat. I then used Reaper MSP “Grey Liner” over the riders to help show me what parts I could paint to bring out the best details. This step really was useful.
Frinx riders after airbrush the primer and base coat.
Early stages of painting the riders
Adding some metallics to the riders and inks to the arc weapons
Painting completed for riders – awaiting a wash application
The 10 riders washed and waiting for their weapon conversions. I converted 6, and yes, I painted an extra arc weapon just in case! I primarily used inks on the arc weapons over a chrome base coat for a retro sci-fi look. After this, I applied a gloss varnish to them.
It was time now to return to the sturdy mounts – and I had gotten to the point that I was happy with my painting on them. However, what was missing was a set of reins for each glyptodon. When I cast them, I did use the original bits in their mouths, but the original reins were totally inadequate in my view.
I decided to make reins from the smallest jewelry chain I could find. Figuring out how to affix the chains was a lot of trial and error on one of the extra unpainted glyptodons that I had. I tried using wire, thread, as well as just hooking the chain to the mounts – all for naught. Then, a light bulb went off – toothpicks!
I determined that I needed 27 links for the main chain loop for the reins. I threaded the last chain link through a wooden toothpick. I then inserted the toothpick into the bits by the mouths. I used a push pin to slide the link into position on the toothpick, and applied a very small amount of Gorilla Glue on the wood/chain/bit connection. After the glue dried (often with the assistance of a hand held hair dryer), I snipped the toothpick with a sprue cutter as close as I could to the bit. The net effect was like a tent peg and a rope, securing the chain to the glyptodons’ bridle bits. I repeated the process on both sides, then tack glued the chain at the top and above the ears to make a loop. Then I dry brushed the chain with Tamiya “Gun Metal X-10” and let it dry. Lastly, I applied Citadel “Nuln Oil” to the chain.
Painted glyptodons before final wash application and addition of reins.
I applied Citadel “Agrax Earthshade Gloss” on the back, expecting the later matte varnish to dull it down. Still need reins!
These are the original reins – not acceptable!
Time for some jewelry making, I mean rein making (sounds weird huh!).
27 links, no more no less!
He looks a bit like he needs an orthodontist. This is how I mounted the chains into the bits.
Main chain loop mounted, before painting it and the bits.
After this, I removed the glyptodons from the frames in order to give the mounts a matte varnish airbrush treatment. Then I mounted the riders to the mounts with E6000 epoxy, and let it harden. I wanted to connect the chains to the front riders hands. For this I needed a massive 4 links of jewelry chain per model, push pins, and patience. I used Gorilla Glue, push pins, and the blow dryer to get the additional chain segments in place. I then applied the same painting and wash techniques to the 4 links.
4 links, no more, no less! I used push pins to help as I cut the links.
The glossy riders on the matte glyptodon with the new chain attachment which has not yet been painted. Subsequently, the whole PAFOG got a couple of matte varnish coats.
After final varnish of an airbrush matte coat.
For you metric system users, an idea of the weight and size of the model as completed.
For us in the USA, its a mere 4.64 ounces of heavy metal goodness…not a quarter pounder I’d eat by the way…
The PAFOG squad project was now complete – except that I needed to make corrals for them as they are so heavy as to slide in my other Frinx box. No worries, as I want them to survive for many future games, and I’ve done that for other outsized figures
This project also counts for me in a community painting challenge that my Australian friend Azazel has sent out for July 2018. It is for a “Jewel” project – and given all the work that went into these from acquisition to casting to conversion to final painting – I’m confident that these will meet the requirement!
The eye candy follows, and hopefully you will find these as cool as I did. I always appreciate your feedback dear readers – let me know your thoughts and suggestions. Thanks for looking!
Frinx, form up!
Move out!
This is the section leader’s mount. The section leader has blue markings. These figures are the originals and have the original weapons. In a Combat Patrol game, they will draw two cards for movement. Between the power armor and the glyptodon’s armor, they should have some ability to take damage.
A good view of the back ends where the bony spiked tails are found. Here, on the right is the section leaders mount, and on the left is a mount with one Frinx armed with an arc weapon and the other with a blaster.
Nice group shot – note the conversions with the arc weapons.
Close up of the right side.
A conference with Lt. Ma’k (the Frinx platoon leader in red), some Frinx Amethyst Squad infantry, and the Texican Space Rangers.
Surrounding the Space Dwarves in a final charge!
For those interested, here is the list of the paints, etc. that I used in this project.
PAINTS, INKS, GLAZES, WASHES, AND FLOCKING USED:
Citadel “Imperium Primer”
Vallejo “Surface Primer – White”
Vallejo “Flow Improver”
Vallejo “”Airbrush Thinner”
Testors “Universal Acrylic Thinner”
Vallejo Game Air “Beastly Brown”
Vallejo Game Air “Dead White”
Vallejo “Red”
Vallejo Game Air “Moon Yellow”
Vallejo “Black Grey”
Citadel “Agrax Earthshade” (wash)
Reaper MSP “Grey Liner” (wash)
Vallejo Game Air “Black”
Vallejo Model Air “Black (metallic)”
Vallejo Mecha Color “Yellow Ochre”
Vallejo Mecha Color “Brown”
Vallejo Model Air “Rust 080”
Citadel “Ceramite White”
Tamiya “Chrome Silver X-11”
Tamiya “X-20A Thinner”
Vallejo Mecha Color “Turquoise”
Vallejo Model Air “Medium Gunship Gray”
Tamiya “Copper XF-6”
Tamiya “Gun Metal X-10”
Vallejo Game Air “Wolf Grey”
Citadel “Hexwraith Flame”
P3 “Green” (ink)
Citadel “‘Ardcoat”
Secret Weapons Washes “Just Red” (ink)
Citadel “Soulstone Blue”
Vallejo Game Air “Fluorescent Red”
Citadel “Nuln Oil Gloss” (wash)
Secret Weapons Washes “Purple” (ink)
Vallejo Mecha Color “Yellow Fluorescent”
Vallejo Mecha Color “Sand Yellow”
Citadel “Seraphim Sepia” (wash)
Polly Scale “WWII British Aircraft Gull Gray Light”
Archive Miniatures Star Rovers game and miniature range had a lot of very fun figures, many of which I have painted and discussed in past entries in this blog. A couple of the line that caught my eye were “Long Gone Jones” (Archive #2211), a space dwarf, and “Agribot S1L1” (Archive #2204). Both were sculpted and put into production around 1977. I’m not exactly sure of the name derivations, but methinks there was some degree of Archive humor there based on the late 70’s – and I leave it to you readers to make your own guess!
I had previously acquired one Long Gone Jones (let’s call him LGJ) miniature on eBay, but had not found any others. However, Michael Thomas at classicminiatures.net (who produced the Robot Peacekeepers I previously described here) also had the molds for these figures. So I placed the order from him, and got ten LGJ’s to add to my original one in addition to three Agribots. I thought I would now have enough to build a squad for sci-fi games using Combat Patrol™ .
Each LGJ is in power armor, has a jet pack, and is armed with an automatic weapon coming out of his right arm. The Agribots look like they have a hovering mechanism, and are armed with what looks like a machine gun.
For the unit’s organization, I decided to have a LGJ squad leader with a dedicated Agribot as the squad headquarters. He would lead the squad’s two Space Dwarf Assault teams (A and B). Each team would have its own LGJ team leader, 4 LGJ troopers, and an Agribot. I’ll probably treat the LGJ weapons as analogues to sub-machine guns, and the Agribots as mobile medium machine guns. This made a total of 14 figures for the squad. I was thinking about the organization of Soviet Machine Pistol squads in WWII as inspiration. My numbers aren’t exactly the same, but we are talking about Space Dwarves here! To round out the end of June, I finished off the Space Dwarf Assault Squad.
The Space Dwarves I got from Michael Thomas
The three Agribots I got from Michael Thomas
Frontal view of my original Long Gone Jones (darker one on the left) and the one I got from Michael Thomas (right). The mold he uses has held up well.
One of the Agribots I got from Michael Thomas. It has the typical crispness one would expect from a 1970’s mold – clearly I needed to be creative to make this one look good. The other side cast better as you see below.
Agribots better side
First, I cleaned and washed the group. Then I filed off the mold lines and flash on the figures. After this, I mounted them on ¾” steel washers with Gorilla glue, and affixed the washers to poster tack on top of specimen bottles. I primed the squad white with Vallejo “White Surface Primer” with my Iwata Eclipse airbrush, and let that harden.
I wanted to give these figures a totally retro sci-fi look – so I again used the Createx paints to airbrush even more colors (added Pearl Blue, Pearl Lime Green, and Pearl Green) onto the squad than I had done with the Robot Peacekeepers. I figured the dwarves would want more individuality! For ease of play on the tabletop, I did plan to similarly color coordinate the lenses on the LGJ’s and the Agribots with Vallejo Mecha Color fluorescent paints. On the optics/lenses, the squad leader and his Agribot would get Vallejo Game Air “Fluorescent Red”, Team A got Vallejo Mecha Color “Green Fluorescent”, and Team B got Vallejo Mecha Color “Green Fluorescent”. These would take multiple light thin coats to get the desired effects. And of course with so much metallics, I needed to use a lot of Citadel “Nuln Oil Gloss”. I list the paints and materials I used at the end of the blog for those interested.
The squad awaits mounting and priming
And here they are primed and mounted! I labeled the specimen jars to keep track of which one was in which squad, and what the color plan was for each figure.
After airbrushing the base colors.
Pearlized Createx colors used (bottle backs)
Createx bottles fronts – I love that many of them are designated “Wicked Colors”. “Wicked” is a common term here in Massachusetts to designate much more than “very”.
After a painting the small details and using multiple washes, I detailed the optics/lenses with white to help with the adhesion and look of the fluorescent paints.
Awaiting the first coat of gloss varnish
My plan for varnishing the group and the bases was to initially apply an airbrush coat of Vallejo “Gloss Varnish” before working on the bases. The bases would then get a treatment of Citadel “Astrogranite Debris”. I like it better than “Astrogranite” – it sets up better for dry brushing later. Once that was dry, I washed it with “Nuln Oil”, let that dry, and then dry brushed the bases with Vallejo Game Air “Wolf Grey”. To give the bases a nice lunar look, I added Citadel “Gulliman Blue” glaze and let that dry. Lastly, I gave the entire squad a second coat of Vallejo Mecha Varnish “Matt Varnish” for protection and to dull the shines down to an acceptable level.
After application of gloss varnish – shiny new space dwarves…
Squad leader close up after gloss varnish
Squad leader’s Agribot after gloss varnish
I think you’ll see below on the finished figures the difference that the matte varnish adds, while preserving the metallic look of the power armor that I was attempting to capture.
Finished Long Gone Jones squad leader and Agribot. Their base color was “Pearl Red”.
Team A
Team B
Space Dwarf Assault Squad leadership – the team leaders are in “Pearlized Copper”.
The three Agribots, arranged to see the side and back details.
Front and back details of the team leaders.
Front and back details of the Space Dwarf troopers in “Pearl Tangerine”
Front and back details of the LGJ troopers in “Pearl Plum”
Front and back details of the LGJ troopers in “Pearlized Green”
Front and back details of the LGJ troopers in “Pearlized Blue”
Space Dwarf Assault Squad moves out for action!
I am pleased with the final product – and I can see them being on one side or the other of many future tabletop conflicts. Whoever is paying them the most of course! That’s the nice part of not needing a Codex! I do think that they are colorful enough, but power armor covers them nicely.
I hope that you enjoyed looking at this – and this was my most productive month ever in terms of painting – 57 figures in total (3 units) for “Junit”, a community painting challenge run so very well by our Aussie friend Azazel. If you’re reading this and are not familiar with his blog, it’s well worth the look.
June’s production – 32 Archive Texican Space Rangers, 11 Mega Miniatures Robot Peacekeepers, and 14 in the Space Dwarf Assault Squad.
I always read your comments and feedback – and as the goal of this blog to entertain and bemuse you – let me know if I did (or did not). So let me know your thoughts – and as always, thanks for looking!
Space Cowboys! More properly Archive Miniatures Texican Space Rangers (circa 1978), are the subject of this blog, plus some Steve Miller Band stuff from the 1970’s. Most people are familiar with the Steve Miller Band song The Joker:
Some people call me the space cowboy yeah Some call me the gangster of love Some people call me Maurice ‘Cause I speak of the pompitous of love…
Lyrics from The Joker, Steve Miller Band, 1973
Some also know that the opening line of The Joker refers to the band’s 1969 hit Space Cowboy – a rousing song with psychedelic undertones.
I told you ’bout living in the U.S. of A. Don’t you know that I’m a gangster of love Let me tell you people that I found a new way And I’m tired of all this talk about love And the same old story with a new set of words About the good and the bad and the poor And the times keep on changin’ So I’m keepin’ on top Of every fat cat who walks through my door
I’m a space cowboy Bet you weren’t ready for that I’m a space cowboy I’m sure you know where it’s at Yeah, yeah, yeah, yeah…
Lyrics from Space Cowboy, Steve Miller Band, 1969
If you have not heard it before, and/or if you want a theme song for this blog post, here it is:
I’m sure that in some way, shape, or form, these songs influenced the sculpting of these figures.
Back to the miniatures!
In the early stages of my chasing down Archive Star Rovers a couple of years ago, I discovered two figures that were called Texican Space Rangers. One figure was Travis B. Crockett who was armed with a couple of laser pistols. The other was Armando Garcia, who had an assault rifle, a laser pistol, and a very imposing sombrero. Both had very cool jet packs as well. I did think that they would make an awesome unit for Combat Patrol™ games. Archive packaged them in two ways. One was as a set (along with a dog I have not found) as #2045 Texican Space Ranger Group. The other was individually as #2225 (Travis) and #2226 (Armando).
There are a few images in the Star Rovers game that showcase the Texican Space Rangers. I think the artwork is very cool and worth sharing as well.
Here the Texican Space Rangers are being attacked by Eyegars and Flygars. Note the dog disappearing here as well on the lower left (maybe why I cannot find it?).
Travis hanging out with a Hurraku Space Phraint at a bar! I made a platoon of these Arduin types earlier this year which you can read about here.
Quite the bar fight mash-up here. I see Armando on the left, some Space Centaurs, Felynxi, Clint Eastwood (?) and a Chewbacca look alike under the table? Also a Nevile Stocken logo behind the bar near Armando.
I searched, and the only source that I initially found for the figures was on eBay which made the prospect of building a platoon-sized unit very expensive. Because of this, back in June 2016 I made a mold of Armando Garcia and cast several for personal use and for some friends which I wrote about here. I had a plan to cast Travis B. Crockett, but did not get around to it, which was lucky for me as I found a better option.
Michael Thomas is a hobbyist who bought a spin caster and has been collecting OOP miniature molds and making them available for a very reasonable price. I discovered that Michael has both Texican Space Rangers (among many other lost and OOP miniatures) available at http://classicminiatures.net/. The product codes are RKV-0122 for Travis and RKV-0021 for Armando, with their prices being $3.50 and $3.75 respectively, which is very reasonable. I had a sufficient number of Armando’s, so I ordered enough Travis figures to round out a small platoon sized unit of 32.
My concept for the Texican Space Rangers was to have them as a small constabulary-type unit (like the Texas Rangers). I made a command group (1 of each type), and 5 infantry teams. Each team would have one Travis and five Armando’s. Filing and cleaning the originals ones I got from eBay and from Michael was a breeze, while my castings needed much more work to make them presentable. They are moderate in terms of crispness, but not like today’s figures. But hey, this is what it was like in the 1970’s! Once that was done, I used my airbrush to prime them, and moved on to painting them.
I also had a pretty important secondary goal on this project, which was to use as many of my old Polly S, Polly Scale, Deka Lack, and Armory acrylic paints as possible. My Polly S paints were ones I bought in the early-to-mid 1980’s (really). My Deka Lack paints are ones that I purchased in West Germany (remember that?) around 1987. The Polly Scale paints were made after Testors bought them out, and my guess is that they date from the 1990’s (they were gifts Buck Surdu got for me slightly used from a gaming convention flea market). My Armory paints were all bought by me in 1996. All of these paints are viable, but they have lumps and clumps and do not always thin easily. I thought as a challenge, I would use as many as possible as theme colors, and add washes, inks, and glazes to enhance the models. Besides, they won’t be useful indefinitely. If you are interested in the history of Polly S , I did find this blog post that was interesting.
Additionally, I follow a couple of blogs that were inspirational for this project. One was imperial rebel ork’s post about his Western/sci-fi mashup. He has three chapters there. Also, our good inspirational friend Azazel from down under made a painting challenge for units for June, so this works and this is my entry (or at least one of them)! On to the theme colors…
The platoon leader’s main color was Polly S “Venetian Dull Red”, while the platoon sergeant’s was Deka Lack “Blaü” (blue). for the teams’ main colors, the A team got Polly S “Desert Pink”, the B team got Polly Scale “German Armor Light Tan”; the C team got Polly S “Interior Green”, the D team got Polly Scale “WWII British Aircraft Gull Gray Light”; and the E team got Polly Scale “German Mauve”. The Travis figures also have US red, white, and blue on their collars, and the Armando’s have the colors of the Mexican flag (red white, and green). I list all of the paints, glazes, inks, washes etc. that I used for this project at the end of this post (only 55 this time!).
The Travis B. Crockett’s I got from Michael Thomas, unpainted.
The Texican Space Rangers, primed for painting. I ended up with some reductions so I actually painted 32 for this unit.
Here I started working on the heads and the theme colors. Some (not all) of the old paints I used are in front for fun.
In the middle of the project. I did heads first, then legs, with torsos last.
The platoon sergeant before washes and inks. This is an original, not a recast.
The platoon leader early on – I cleaned him up substantially as the project continued.
The command group, and Team’s A and B painted and awaiting varnish.
The whole platoon finally painted and awaiting varnish.
All varnished and ready to leave their specimen bottles!
In the storage box
Command Group frontal view
Command Group, rear view
Team A
Team B
Team C
Team D
Team E
All of the leaders (being the Travis figures). You can see the differentiating colors on the hats and uniforms, which I hope will aid on the tabletop for play.
Examples of the different Armando figures
This was a fun project, though the older paints are much harder to use than modern ones. Still, I am glad that those oldies got a chance to be useful.
Thanks for reading, and I always appreciate comments and feedback in the comments section!
PAINTS, INKS, GLAZES, WASHES, AND FLOCKING USED:
Vallejo “Surface Primer – White”
Vallejo “Dark Flesh”
Vallejo “Medium Flesh Tone”
Citadel “Reikland Fleshshade”
Vallejo “White”
Vallejo Game Air “Black”
Vallejo “Brown Rose”
Polly S “Venetian Dull Red”
Vallejo “Dark Blue”
Polly S “Desert Pink”
Polly S “Venetian Dull Red”
Polly Scale “WWII German Armor Light Tan”
Polly S “Interior Green”
Polly Scale “WWII British Aircraft Gull Gray Light”
Polly Scale “German Mauve”
Vallejo Game Air “Moon Yellow”
Deka Lack “Blaü”
Polly S “Slime Green”
Vallejo Model Air “Signal Red”
Vallejo “Red”
Citadel “Auric Armour Gold”
Vallejo Model Air “Gun Metal”
Vallejo “Dark Blue”
Vallejo “Glossy White”
Polly Scale “WWII German Armor Dark Brown”
Armory “Leather Brown”
Armory “Prussian Blue”
Vallejo Model Air “Aluminum”
Vallejo Game Air “Dead White”
Vallejo Game Air “Beastly Brown”
Secret Weapons Washes “Just Red” (ink)
Citadel “Gulliman Blue” (glaze)
Citadel “Waywatcher Green” (glaze)
Secret Weapons Washes “Blue” (ink)
Secret Weapons Washes “Armor Wash” (wash)
Citadel “Agrax Earthshade” (wash)
Secret Weapons Washes “Parchment” (wash)
Citadel “Nuln Oil” (wash)
Citadel “Nuln Oil Gloss” (wash)
Citadel “Soulstone Blue”
Citadel “Waystone Green”
Citadel “‘Ardcoat”
Citadel “Agrellan Earth”
Citadel “Agrellan Badlands”
P3 “Bootstrap Leather”
Secret Weapons Washes “Sunshine” (wash)
Vallejo “Glaze Medium”
Vallejo Game Air “Wolf Grey”
Secret Weapons Washes “Stone” (wash)
Secret Weapons Washes “Purple” (ink)
Testors “Universal Acrylic Thinner”
Vallejo Mecha Color “Purple”
Vallejo “Flow Improver”
Vallejo “”Airbrush Thinner”
Vallejo “Matt Varnish”
Thanks again and feel free to let me know your thoughts!
I was fortunate enough to get a couple of Archive Miniatures robots from the Star Rovers line that I could add to my Mark III Warbot Platoon for use in Combat Patrol™ retro sci-fi games. The first was “Roberker”, a Giant Robot (Archive #2010), which I had only seen before on Lost Minis Wiki and on David Wood’s blog. It is nearly 3½”/85mm tall, and was supposedly one of the largest robots on the market in 1978. It is armed with nozzles on its arms, so I think it is more or less a giant flame-throwing robot. Nevile Stocken commented on FaceBook that it was his creation, and inspired by Fred Saberhagen’s Berserker novels. The second was another late 1970’s Stocken creation, “Juggerbot” (Archive #2009 or Archive #2331), which I had a version of already, but only one, which I use as the platoon leader. I decided to make this one the assistant platoon commander/platoon sergeant.
This same good friend, David Wood (UK version), knew that I was on the hunt for these and graciously provided them so that I could augment my Warbots. Additionally, Azazel’s blog had put out an “April Assembly” challenge, that these two could certainly be participants.
The models are both challenges for assembly – so I needed to make sure that they were structurally sound for the tabletop. First, I will review Roberker, then Juggerbot. I list the paints I used at the end of this post for those interested.
Roberker
I trimmed and sanded the mold lines as best as I could. Roberker was described by David and Nevile as “a swine to pin”. I now know the truth of that very British expression. I spent most of a day drilling and pinning the arms, legs, and head. Using Gorilla glue, I made initial connections of the parts. Then, I used kneadatite (green stuff) in several places. Specifically, I needed to have strength for the spindly arms and legs. I augmented the pinning by adding a superficial kneadatite belt around the chest and shoulder areas, and by making sure that the legs and hips were married. Lastly, I made a strong base connection with the green stuff.
Roberker pieces after cleaning
Roberker original base
First gluing of legs, torso, and head
I then glued the arms, but saw that reinforcement was needed
Here, you can see the kneadatite reinforcements that I made. This really made the model very strong.
Roberker is no small robot!
I then based the figure on a 2″ steel washer, which is relatively heavy and will protect the model from being prone to tipping over. I then primed, painted, and varnished the model similar to the way that I did the Mark III Warbots. I did however want the figure to look like it had flames coming out of its head, and that it had a sooty appearance having torched many of its victims over the years. Also, for the hand nozzles, I went with a copper and verdigris look.
Roberker after airbrush priming
Roberker painted and ready for varnish
Roberker completed, front view
Four-way view of the model
I am very happy with how Roberker came out – and he will be a terror on the tabletop I am sure.
Juggerbot
As I said, this is my second Juggerbot. My first is the platoon leader and he is basically golden. This one was to be similar to the Mark III Warbots in color scheme and treatment. Here as well, I trimmed and sanded the mold lines as best as I could. I did also need to do a bit more work with the pinning and the green stuff here as well. That is because I wanted to have a slightly different positioning of the arms, which necessitated making a “vest” of green stuff that covered the shoulders and the top conic section of the robot.
Juggerbot as received
My original Juggerbot (the Platoon Leader on left) and his new assistant commander on the right in progress. Note that I was able to give the arms different positioning with the kneadatite “vest”
Side view of the two Juggerbots
Juggerbot after airbrush priming
Painted and awaiting varnishing
The completed new Platoon Sergeant Juggerbot, right side view
Coming at you!
Three way view of the new Juggerbot model
This model met my expectations – now the command and control of the Warbot platoon will be more robust.
This shows the size of my different retro sci-fi figures. From left to right, the Warbot Juggerbot Platoon Sergeant, the Warbot Juggerbot Platoon Leader, SFC Mallard, Roberker, Duck Wader, a Mark III Warbot, and a Khang Robot Squad Leader. It looks dire for the two Star Ducks!
Thanks for looking – please let me know what you think in the comments section at the bottom.
Back in early 2016, I found an interesting miniature on eBay that I had never seen before. It was from the Archive Star Rovers line. It was a large bug-like creature with a large blaster and a huge sword on its back. It reminded me of a deadly grasshopper. Doing a little research, I learned that the figure was made around 1979-1981, and was designated as Archive #2318, “Hurraku Space Phraint”.
From the Archive Catalog in my Star Rovers game from 1981
I immediately thought that a group of these figures would make a great platoon for a retro-sci-fi game of Combat Patrol™. However, like many Star Rovers figures they proved to be very scarce. Eventually I decided that I would need to cast my own to make such a unit (you can read about that effort here).
I made a mold, and recast a bunch of these, and shared some with my good friend Buck Surdu. Buck called them “Space Bugs” (which of course they are), and painted up a unit himself – you can see his work on these here. I really liked what Buck had done with his and his use of glitter paint. His work inspired me to seek a way to get a shine on mine without being, well, overly shiny. Meanwhile, my Space Phraints waited as other projects and personal stuff got in the way (as it always does!).
Over time I researched and dug deeper. I found that there is quite an interesting back story to these bugs. I discovered that Phraints were originally in the Arduin Grimoire RPG system, which was a contemporary competitor to TSR’s Dungeons and Dragons system in the mid-to-late 1970’s. It was written and marketed by David Hargrave and his company, Grimoire Games. Phraints played a major role in Arduin, and were prominently shown on their rules systems covers (see below). One of the main differences from D&D was that Arduin went from fantasy to futuristic sci-fi all in the same universe.
Apparently (and unsurprisingly) there were a series of lawsuits by TSR against Hargrave, and his company, alleging trademark infringement, etc. It’s history at this point, but truly a fascinating (and drama-filled) chapter in the early era of fantasy and sci-fi gaming. If you would like to learn more about that kerfuffle, here is a good link.
So where did Archive come in? Archive Miniatures had the license for the Arduin line. According to Archive founder Nevile Stocken, the original Phraint figure was a Steve Lortz sculpt in their Arduin figure line (#783). Nevile adapted the original Phraint figure and created the Hurraku Space Phraint. He did this by removing the hive the front foot was resting on, as well as the quiver on the back. This leaned the figure forward. The large sword on the front was removed and replaced the quiver on the back. The Hurraku was then given what Nevile described as a BFG (“big f’ing gun”). The Phraints are truly interesting, and this is another great link on their characteristics. I like that they are emotionless – and incapable of lying.
OK, enough Phraint back story (hope it was interesting anyways). Back to the platoon making!
Originally, I had 39 Space Phraints. It was time to clean and file the metal miniatures, which are large for the ranges 25mm scale (the Space Phraints are about 1¾” or 44 cm tall). Overall, I found it difficult at most times during the project to discern the difference between my recasts and the originals, except during this phase. However, upon better inspection, I found 3 figures out of 39 that were not of acceptable quality, so I went to 36 figures for the unit, with the unfortunate three going to the remelt pile.
I ended up with 36 Space Phraints (1 original, and 35 recasts), for the platoon. It would consist of 3 squads composed of 2 teams of 5, each led by a squad leader, making each squad having 11 figures. Additionally, there would be a Platoon Leader, a Platoon Sergeant, and a Sith Knight. The Sith Phraint would be great fun to game with when I use Greg Priebe’s Star Wars supplement for Combat Patrol™. I decided to make the figures look the same so as to reinforce the “hive” effect. In other words, they would look to unfortunate opponents as a swarm of huge humanoid insects. To us they all look alike, while to the Space Phraints, they do not.
Cleaning and filing of the figures took some time. I use a high tin content when I cast, so this was not quickly accomplished. I also needed to repair some swords that were too short, some blaster stocks that did not cast well, and some foot talons with green stuff (kneadatite). I’m not the greatest (or worst I imagine) with green stuff, but I think that it worked out well (you be the judge dear reader!). I also used a small pin vise bit to round out the blaster ends. The figures are very much in line with those of the era of the late 1970’s. This is not to say that they are not good, but they are much less crisp than today’s plastic and resin models. Plus, 35/36 were obviously my recasts, and some details are lost in that process. For me, all this meant was that I needed to really work with my painting to realize my vision for them.
After cleaning and filing – the one darker figure is the original Space Phraint. Three of these 39 were not good enough and are in my future remelt pile.
I mounted the figures with gorilla glue to 1¼” steel washers, and the washers to specimen bottles with poster tack. Simultaneously, I also began to search for a suitable base color, and I wanted to have something green that was not too glossy – I wanted subtle iridescence. This would mimic the sheen you see on some grasshoppers as their chitin reflects the sunlight. As I have an airbrush and compressor now, I decided upon a novel approach (for me anyway). I would use a pearlized airbrush paint with Createx Airbrush Colors “Pearl Green”.
This airbrush paint is designed for model hot rods and muscle cars. I thought that this would work and that I could shade and highlight later as needed. So, I airbrush-primed all of the figures with Vallejo Gray Surface Primer, and let that harden for 24 -48 hours. Then I broke out the “Pearl Green”. I needed a higher pressure to use this paint (40 vs 20-25 psi for the primer). I also did thin it a bit, and I was able to get good coverage of the figures with my airbrush. The Createx line is made for airbrushing, which is a plus.
After base coat of “Pearl Green”
Unit after “Pearl Green” application
After that, I grabbed my regular brushes as I wanted to shade the figures for ease of painting, which I accomplished with Citadel “Nuln Oil GLOSS”. The pearlized paints are very smooth, especially after airbrushing, and I found that the gloss version of Nuln Oil worked better on this base coat of green than the plain one. It really got into the nooks and crannies and stayed there.
After initial shading
For the antennae, I wanted something that would be closer to what a bug would have and not be like a bunny’s ear. For this I used Vallejo “Dark Blue” and washed it with Secret Weapons Washes “Purple”. The eyes, to me, needed to be special. I built up the eyes with serial light coats of Vallejo “Gloss Black”, followed by a 50/50 mix of Vallejo Mecha Color “Yellow Fluorescent” and “Green Fluorescent”. Lastly, I topped the eyes off with a small drop of “Yellow Fluorescent”. This approach really gave the eyes character, and gave the impression of a compound eye structure.
Close up of the eyes (sorry for the blurry image but this head is only 1/2″ long including antennae)
On the bandoleer, I went with Vallejo “Game Air Black”. I decided not to try to highlight them at all as I had too much variability among casts with regards to their details. I also thought that the contrast from the black would be greater with the green chitin which was what I wanted. For the blaster, I went with the last of my 1987 West German Deka Lack “Weiss”, followed by highlighting with Vallejo “Gloss White”.
Moving to the rear of the figures, I painted the swords’ pommels and hilts with Vallejo “Steel” and the grip with a mix of Vallejo “Gunmetal” and “Game Air Black”. Each sword’s scabbard had an inlay and a jewel. The inlay and jewel got Vallejo “Chrome”. After the “Chrome” had dried, I lightly applied Citadel “Waystone Green” on the jewel to achieve a crystalline appearance. For the scabbard and the straps, I stayed with “Game Air Black” to continue the contrasting effect with the chitinous green.
I then went to the front of the figure and dealt with the blaster. For a further contrast, I painted the bulb at the end gold with Citadel “Retributor Armor” . The blaster rings got a covering of “Chrome” followed by an application of Citadel “Soulstone Blue”. To highlight the lobster-like claw structures on the arms and calves and the mandibles, I used Vallejo “Yellow-Green”.
Painted front, before shading
Painted back, before shading
As I earlier said, the upside of the “Pearl Green” is its effect – and the downside is that for subsequent paint applications adhesion is less than other paints. To address the need for both shading and for paint protection on the tabletop, I brushed Army Painter “Quickshade-Soft Tone” over all of the models. I tried my best to sop up any extra pooling shade. I then let these dry and harden for 48 hours. A couple of figures picked up some paper towel fibers at some point, but that was remedied easily with a wet brush once everything was dry.
During this drying period, I sculpted placards for the bases out of Apoxie Sculpt. I wanted the Space Phraints to look the same, but for gaming purposes, there needs to be some differentiation for the players (especially those of a certain age). Apoxie Sculpt is much better than green stuff for this purpose. I mixed this two-piece material, and spread it thinly over my cutting board. Using rubber stamps, I made placards for each figure, and some more for future projects. These I allowed to dry and harden for 24 hours. At that point, I removed and trimmed them, and applied them to the bases with gorilla glue. I primed them with Citadel “Imperium Primer”. For a placard painting scheme, I brush painted:
Vallejo “Signal Red” and “Retributor Armor” for the platoon leader (PL)
Createx “Pearl Blue” and “Retributor Armor” for the platoon sergeant (PSG)
Vallejo’s “Metallic Black” and “Red” for the Sith (SITH)
Createx “Pearl Green” and “Retributor Armor” for the 1st squad leader (1)
Createx “Pearl Green” and Vallejo “Silver” for the 1st squad team leaders (A and B)
Createx “Pearl Green” and Vallejo “Game Air Black” for the 1st squad troopers (A and B)
Martha Stewart Crafts “Duckling” and “Retributor Armor” for the 2nd squad leader (2)
Martha Stewart Crafts “Duckling” and Vallejo “Silver” for the 2nd squad team leaders (A and B)
Martha Stewart Crafts “Duckling” and Vallejo “Game Air Black” for the 2nd squad troopers (A and B)
Createx “Pearl Plum” and “Retributor Armor” for the 3rd squad leader (3)
Createx “Pearl Plum” and Vallejo “Silver” for the 3rd squad team leaders (A and B)
Createx “Pearl Plum” and Vallejo “Game Air Black” for the 3rd squad troopers (A and B)
Placards
Placards mounted awaiting paint
Once my shade had dried, I highlighted chitinous areas with the “Pearl Green” that may have been overly darkened. I also used Vallejo “Game Air Dead White” and “Retributor Armor” to highlight on the blasters as the Quickshade needed some adjustments here.
I then moved on to the bases, and used a combination of Citadel “Martian Ironcrust” and Army Painter “Black Battlefield” flocking to cover the bases. I learned at this point that I should have trimmed the poster tack from the edge of the bases at an earlier stage in the project. This would have made addressing the edges easier. As it was, I removed the edges, and used Citadel “Martian Ironearth” on the edges to cover any unpainted parts of the bases. I also dry brushed the Space Phraints’ feet with “Martian Ironearth” to replicate their walking on the red planet and catching its dust.
When using either “Martian Ironcrust” or “Martian Ironearth”, I always use a hand-held blow dryer after to dry and crack the paint for a better effect. Now it was time to apply a matte varnish and remove the shine from the models.
After the Army Painter Quickshade and highlighting…I need varnish!
I applied two coats of Vallejo “Matte Varnish” with my airbrush, allowing for 4 hours between coats. I was really happy with the results – the iridescent effect that I wanted was achieved!
After the matte varnish, achieved green iridescence!!
I detached the Space Phraints from the bottles, and retouched their bases, but finally they were done. I decided to take some formation shots and some action shots below. For Combat Patrol™ games, I plan to have them be able to climb walls without penalty, and to be able to use two cards for movement. Additionally, to replicate their emotional state, I will have them use the Japanese deck for morale results.
I am very proud of these – it was a very large and long project.
As always will appreciate any feedback in the comments section.
Thanks for looking and as promised, here are some more photos below – enjoy!
Command Group out front
1st Squad
2nd Squad
3rd Squad
Platoon formation
Top view of command group
2nd squad view from the rear
2nd squad moves through a refinery of Armorcast terrain

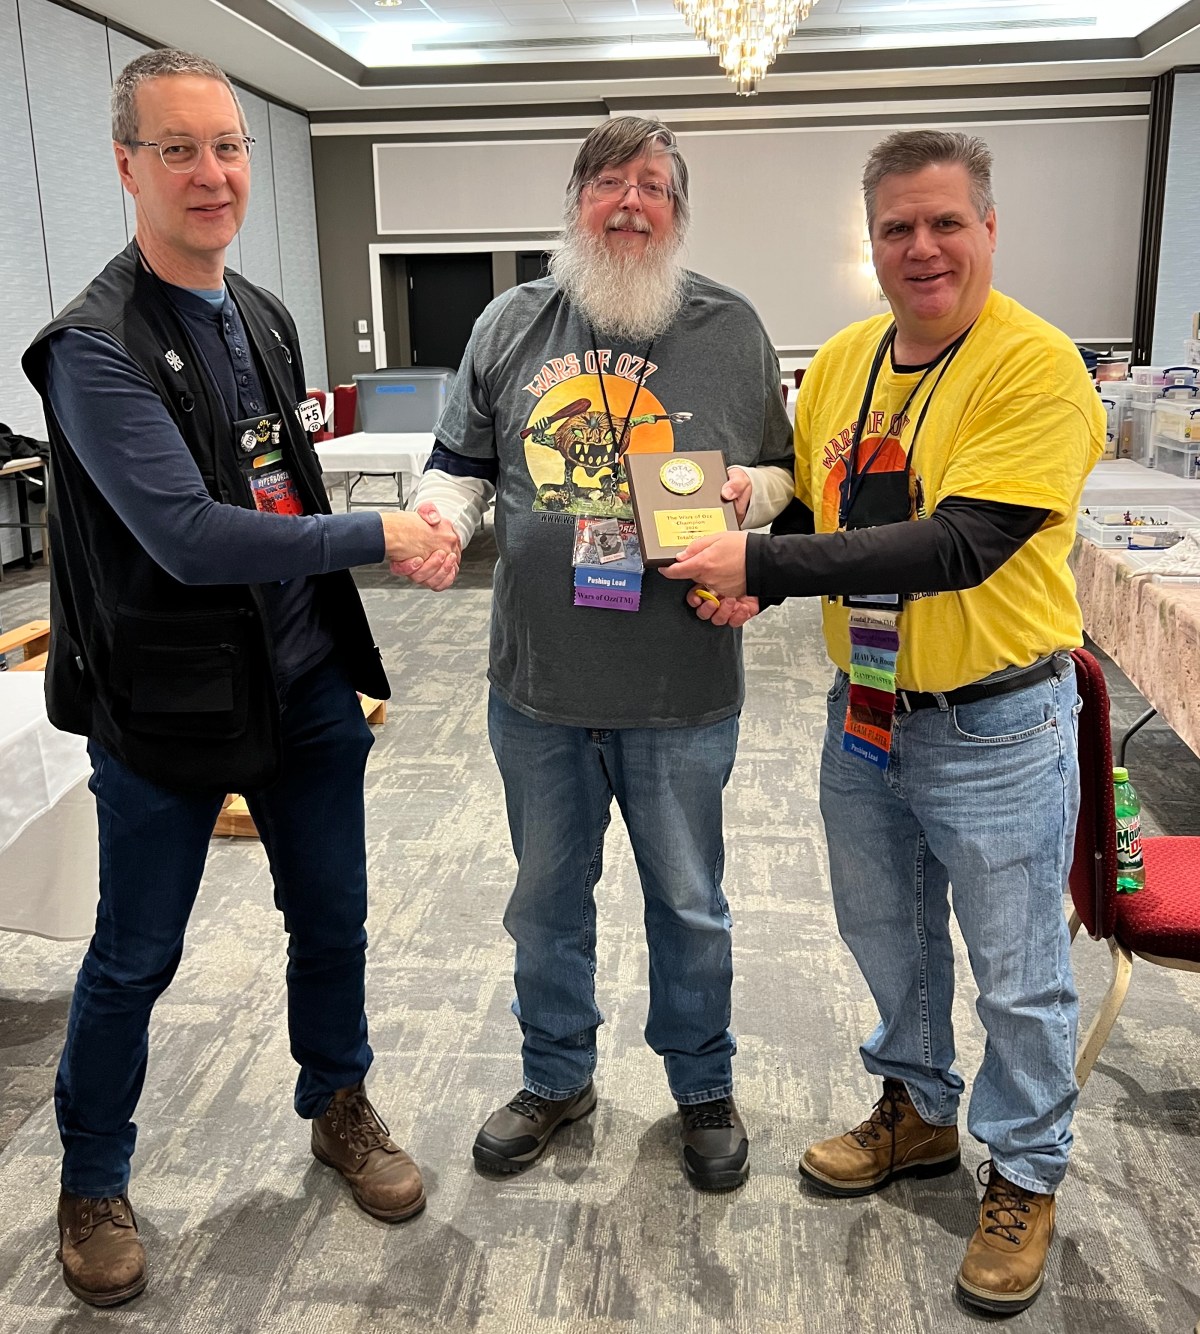
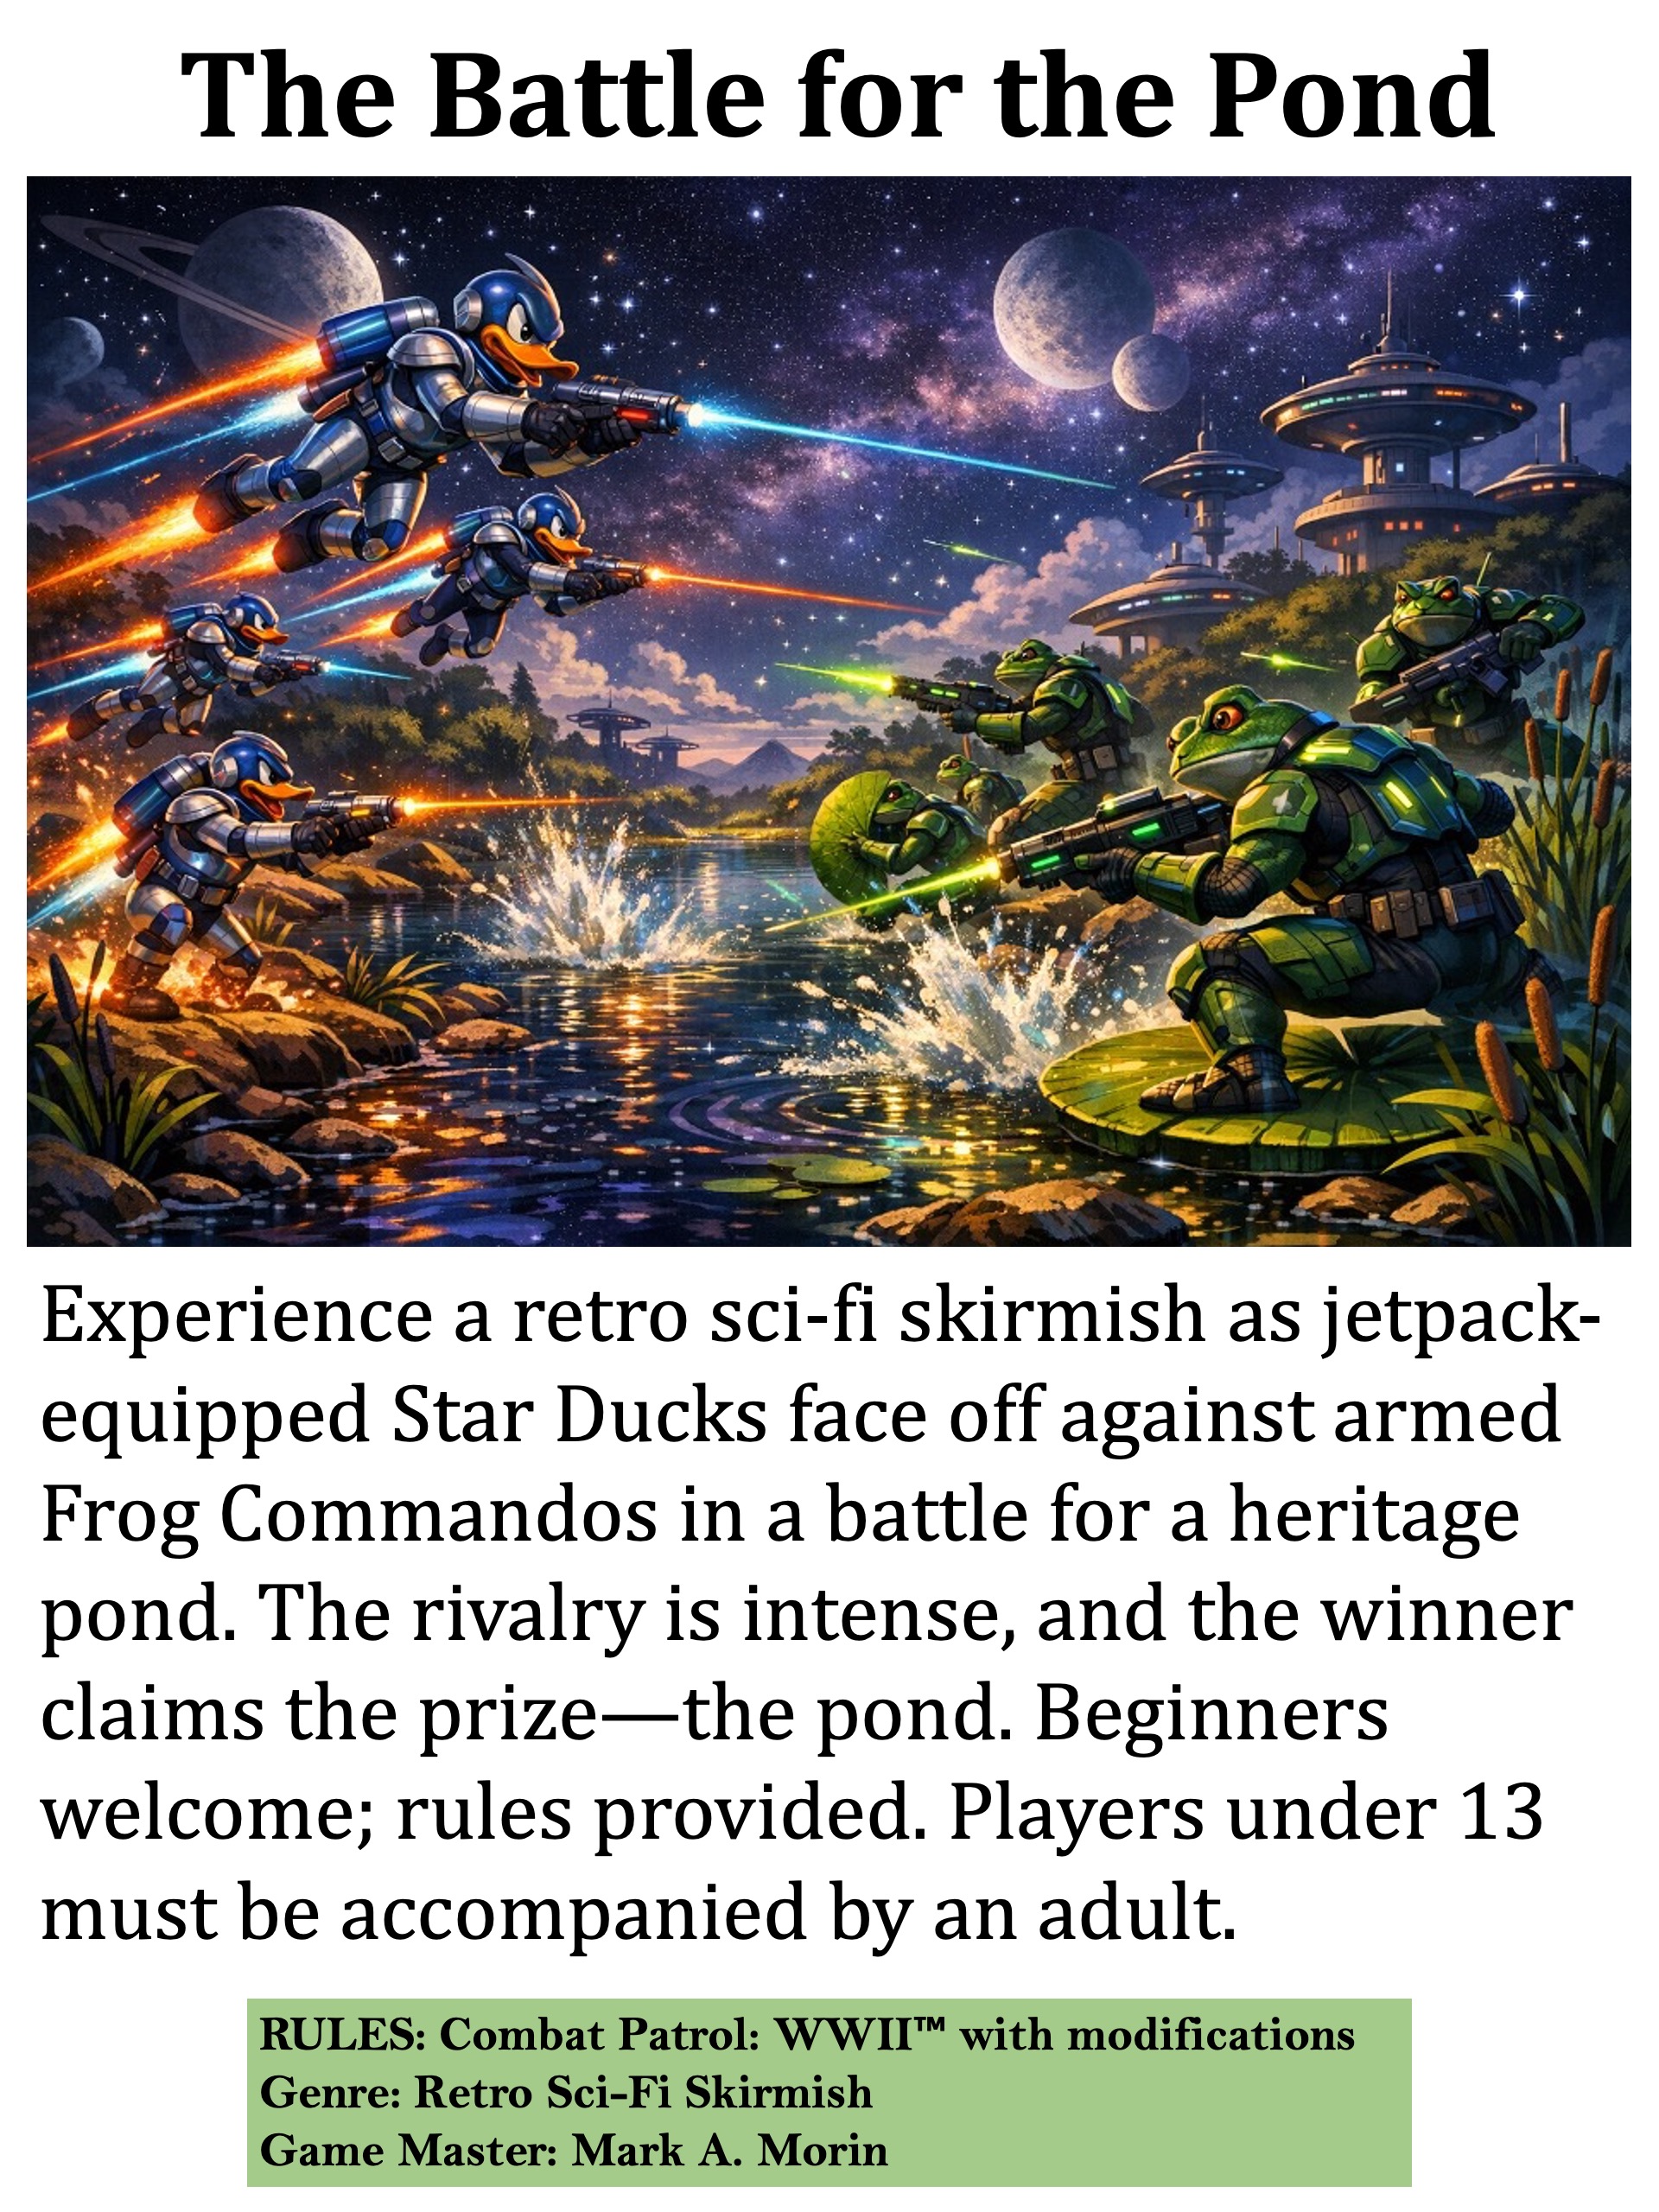
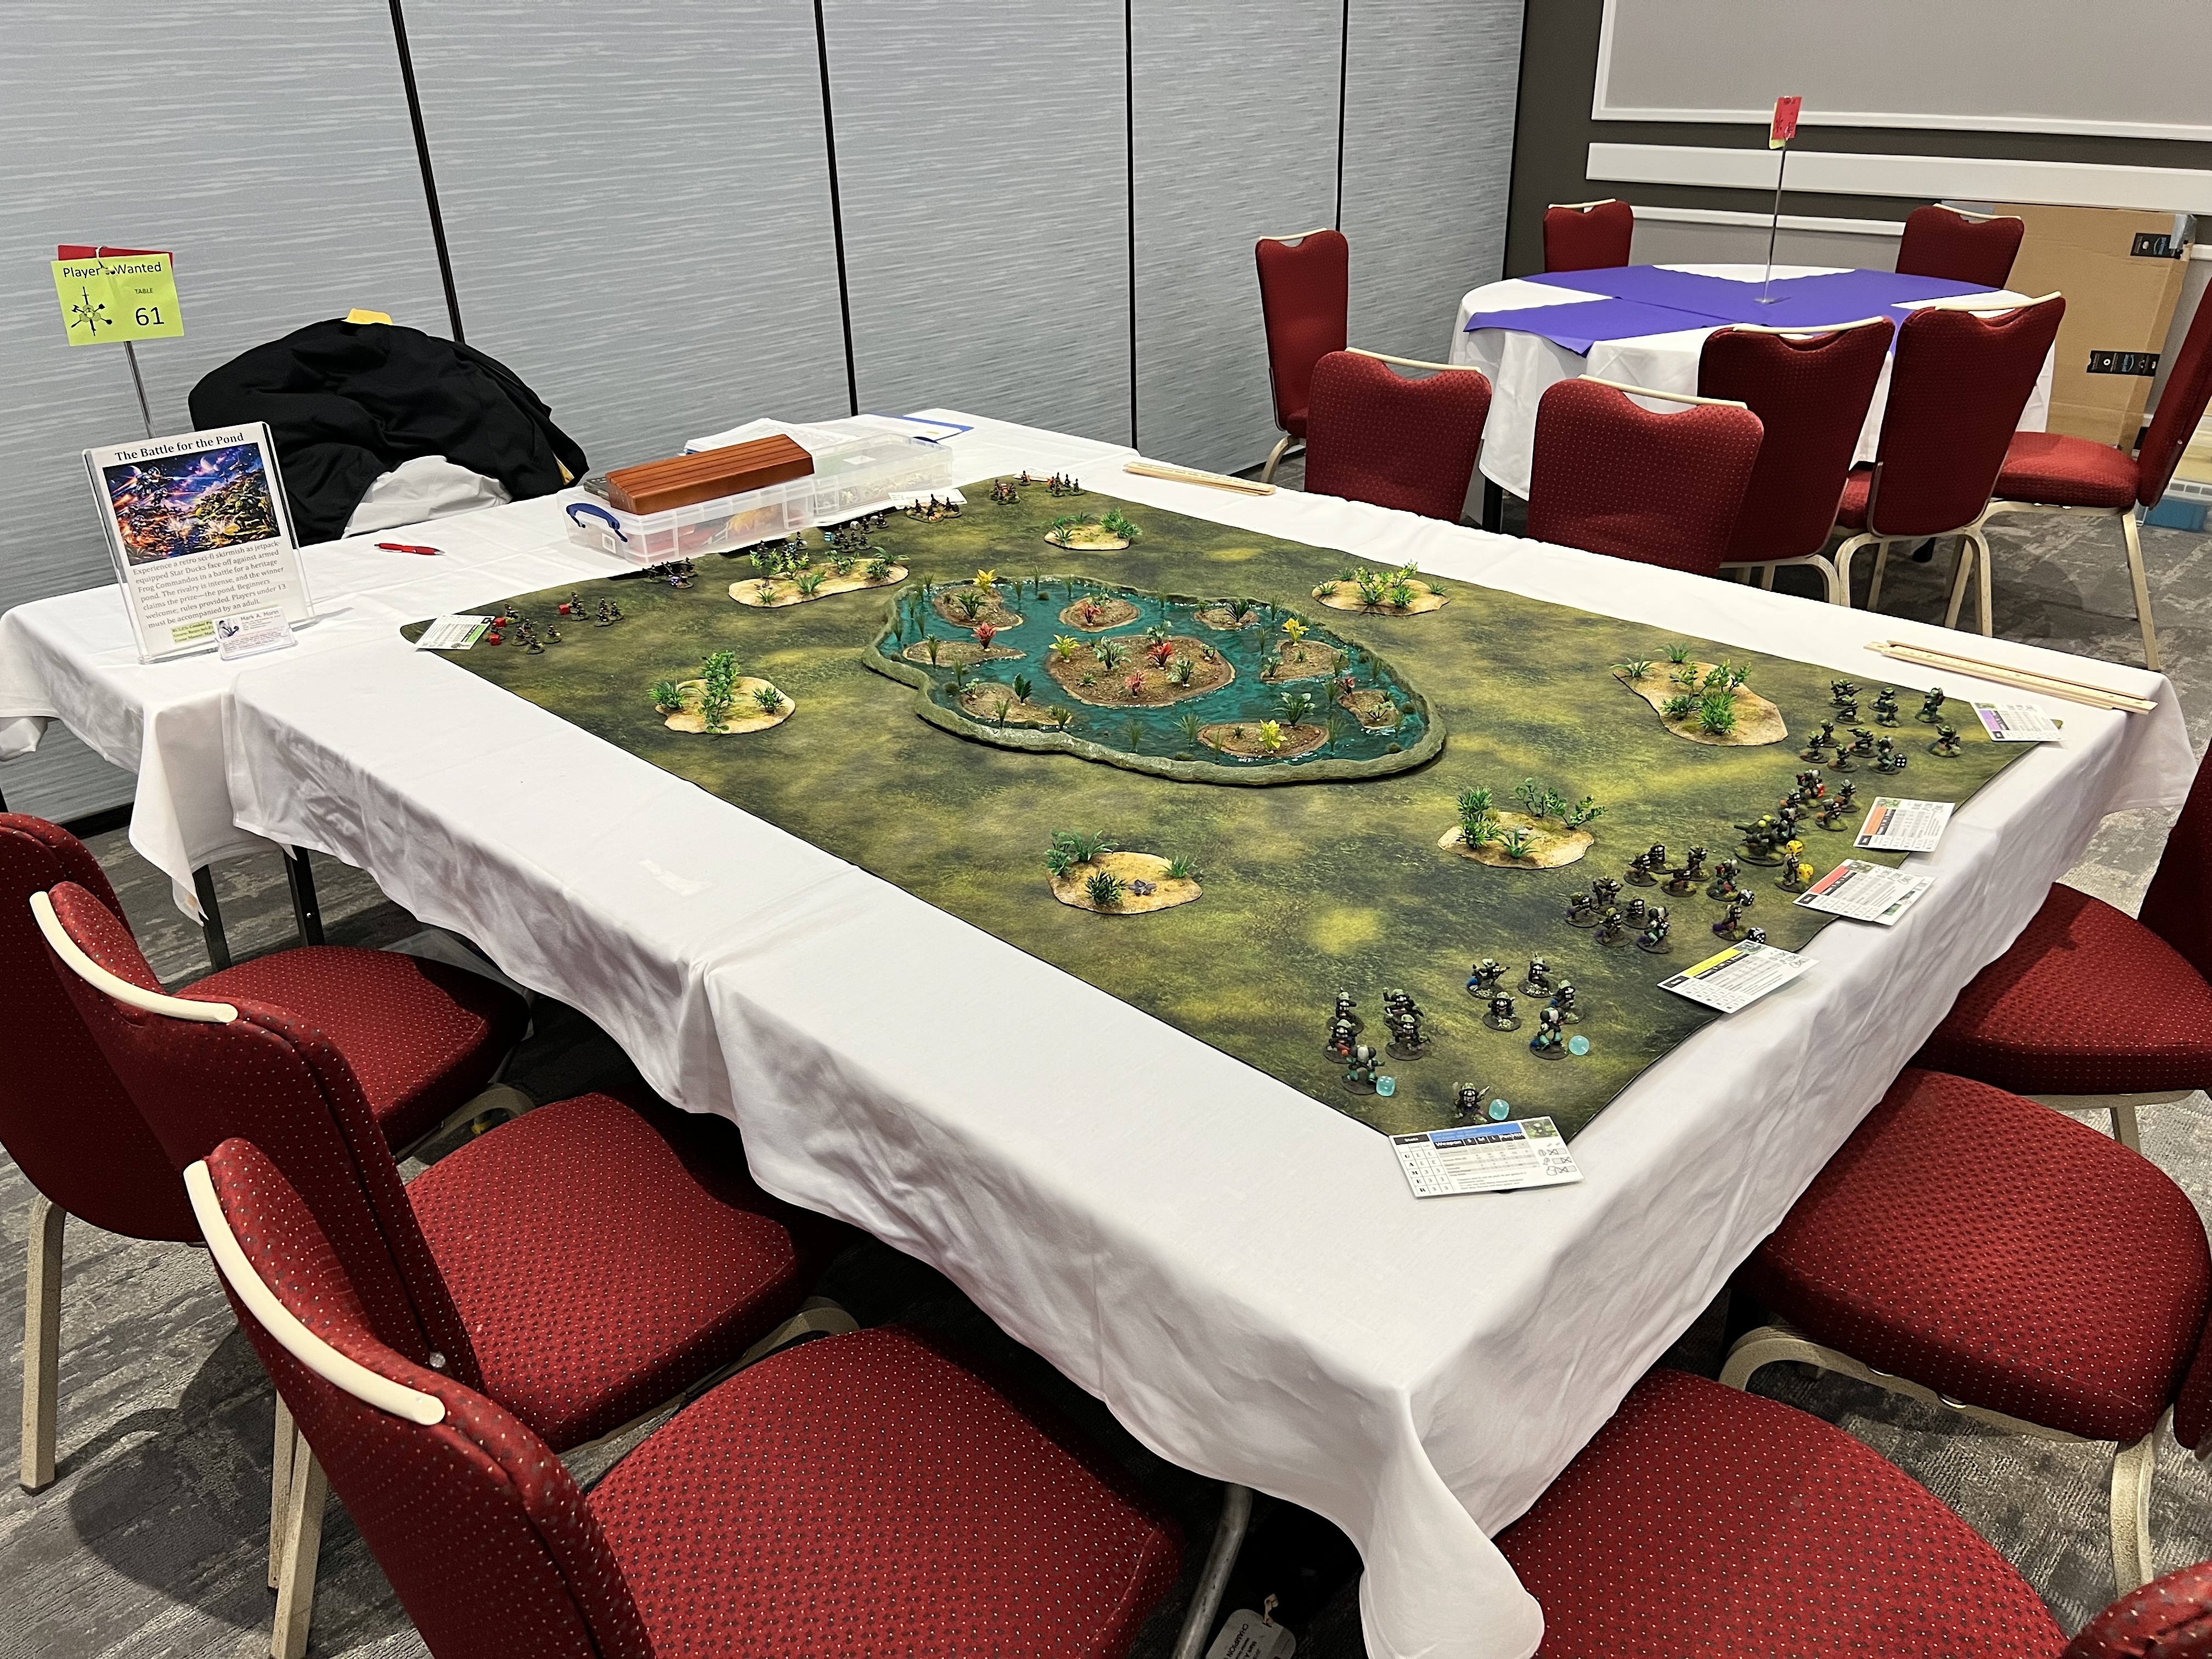
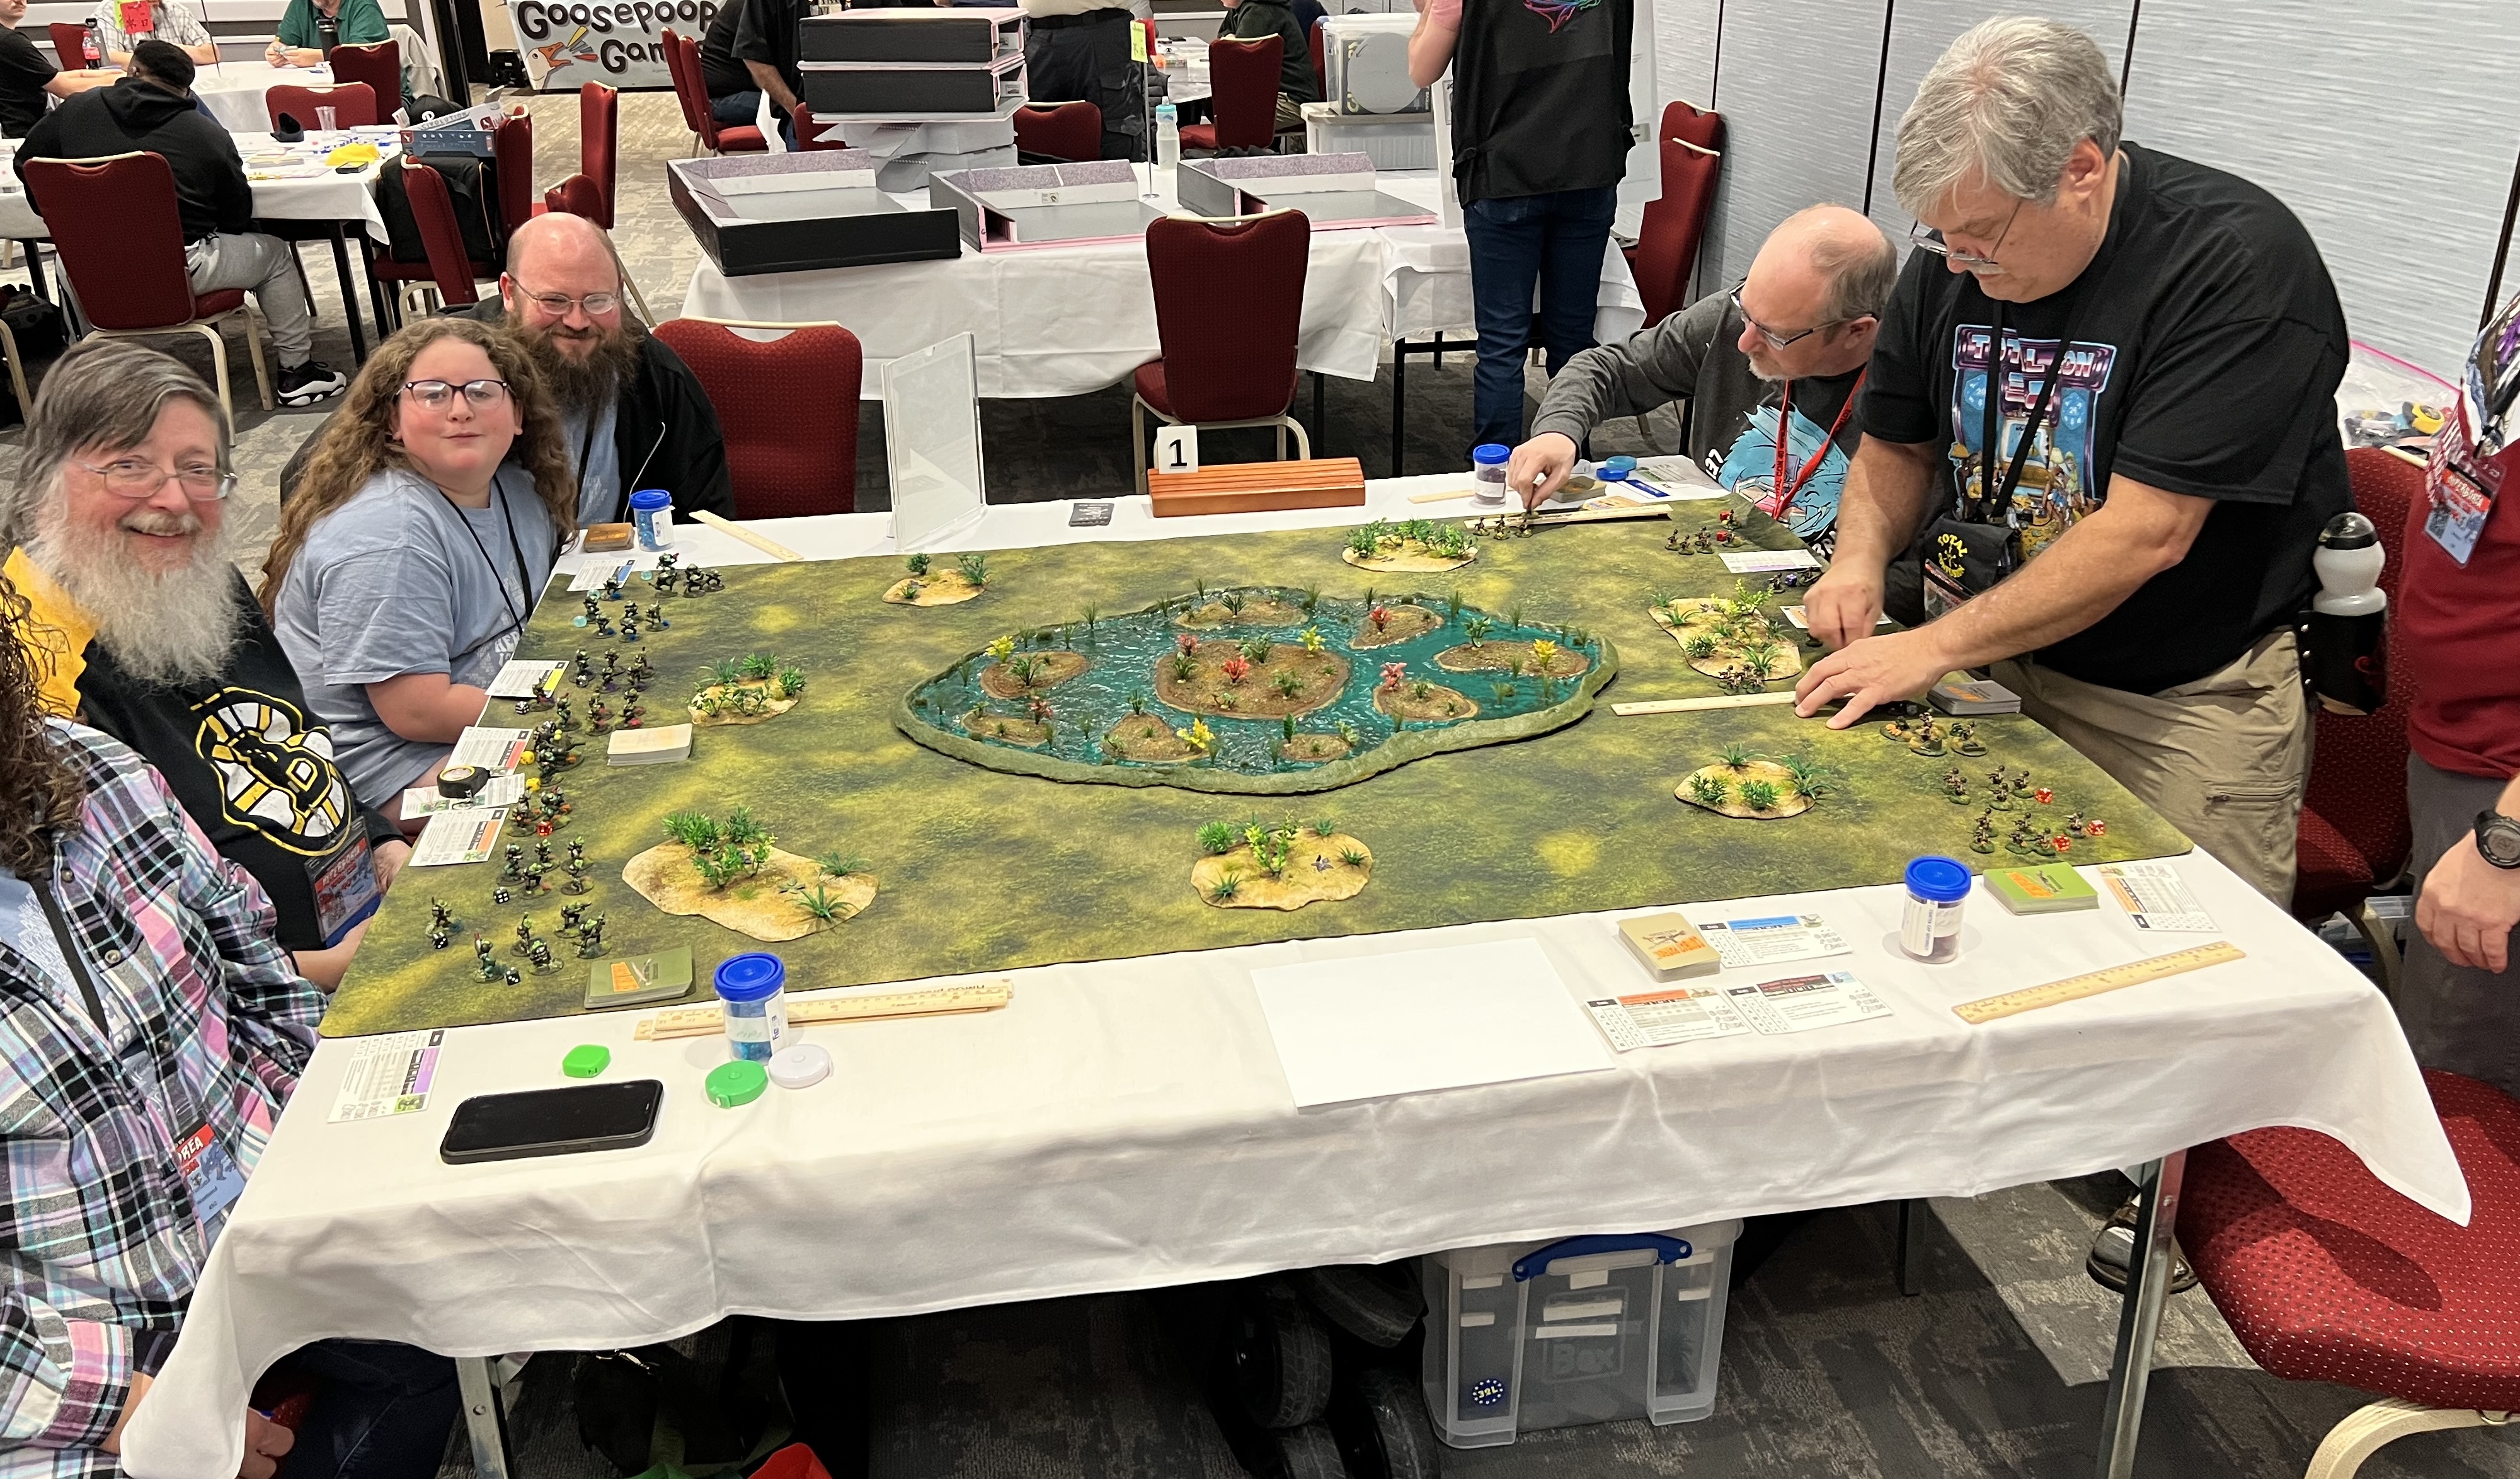
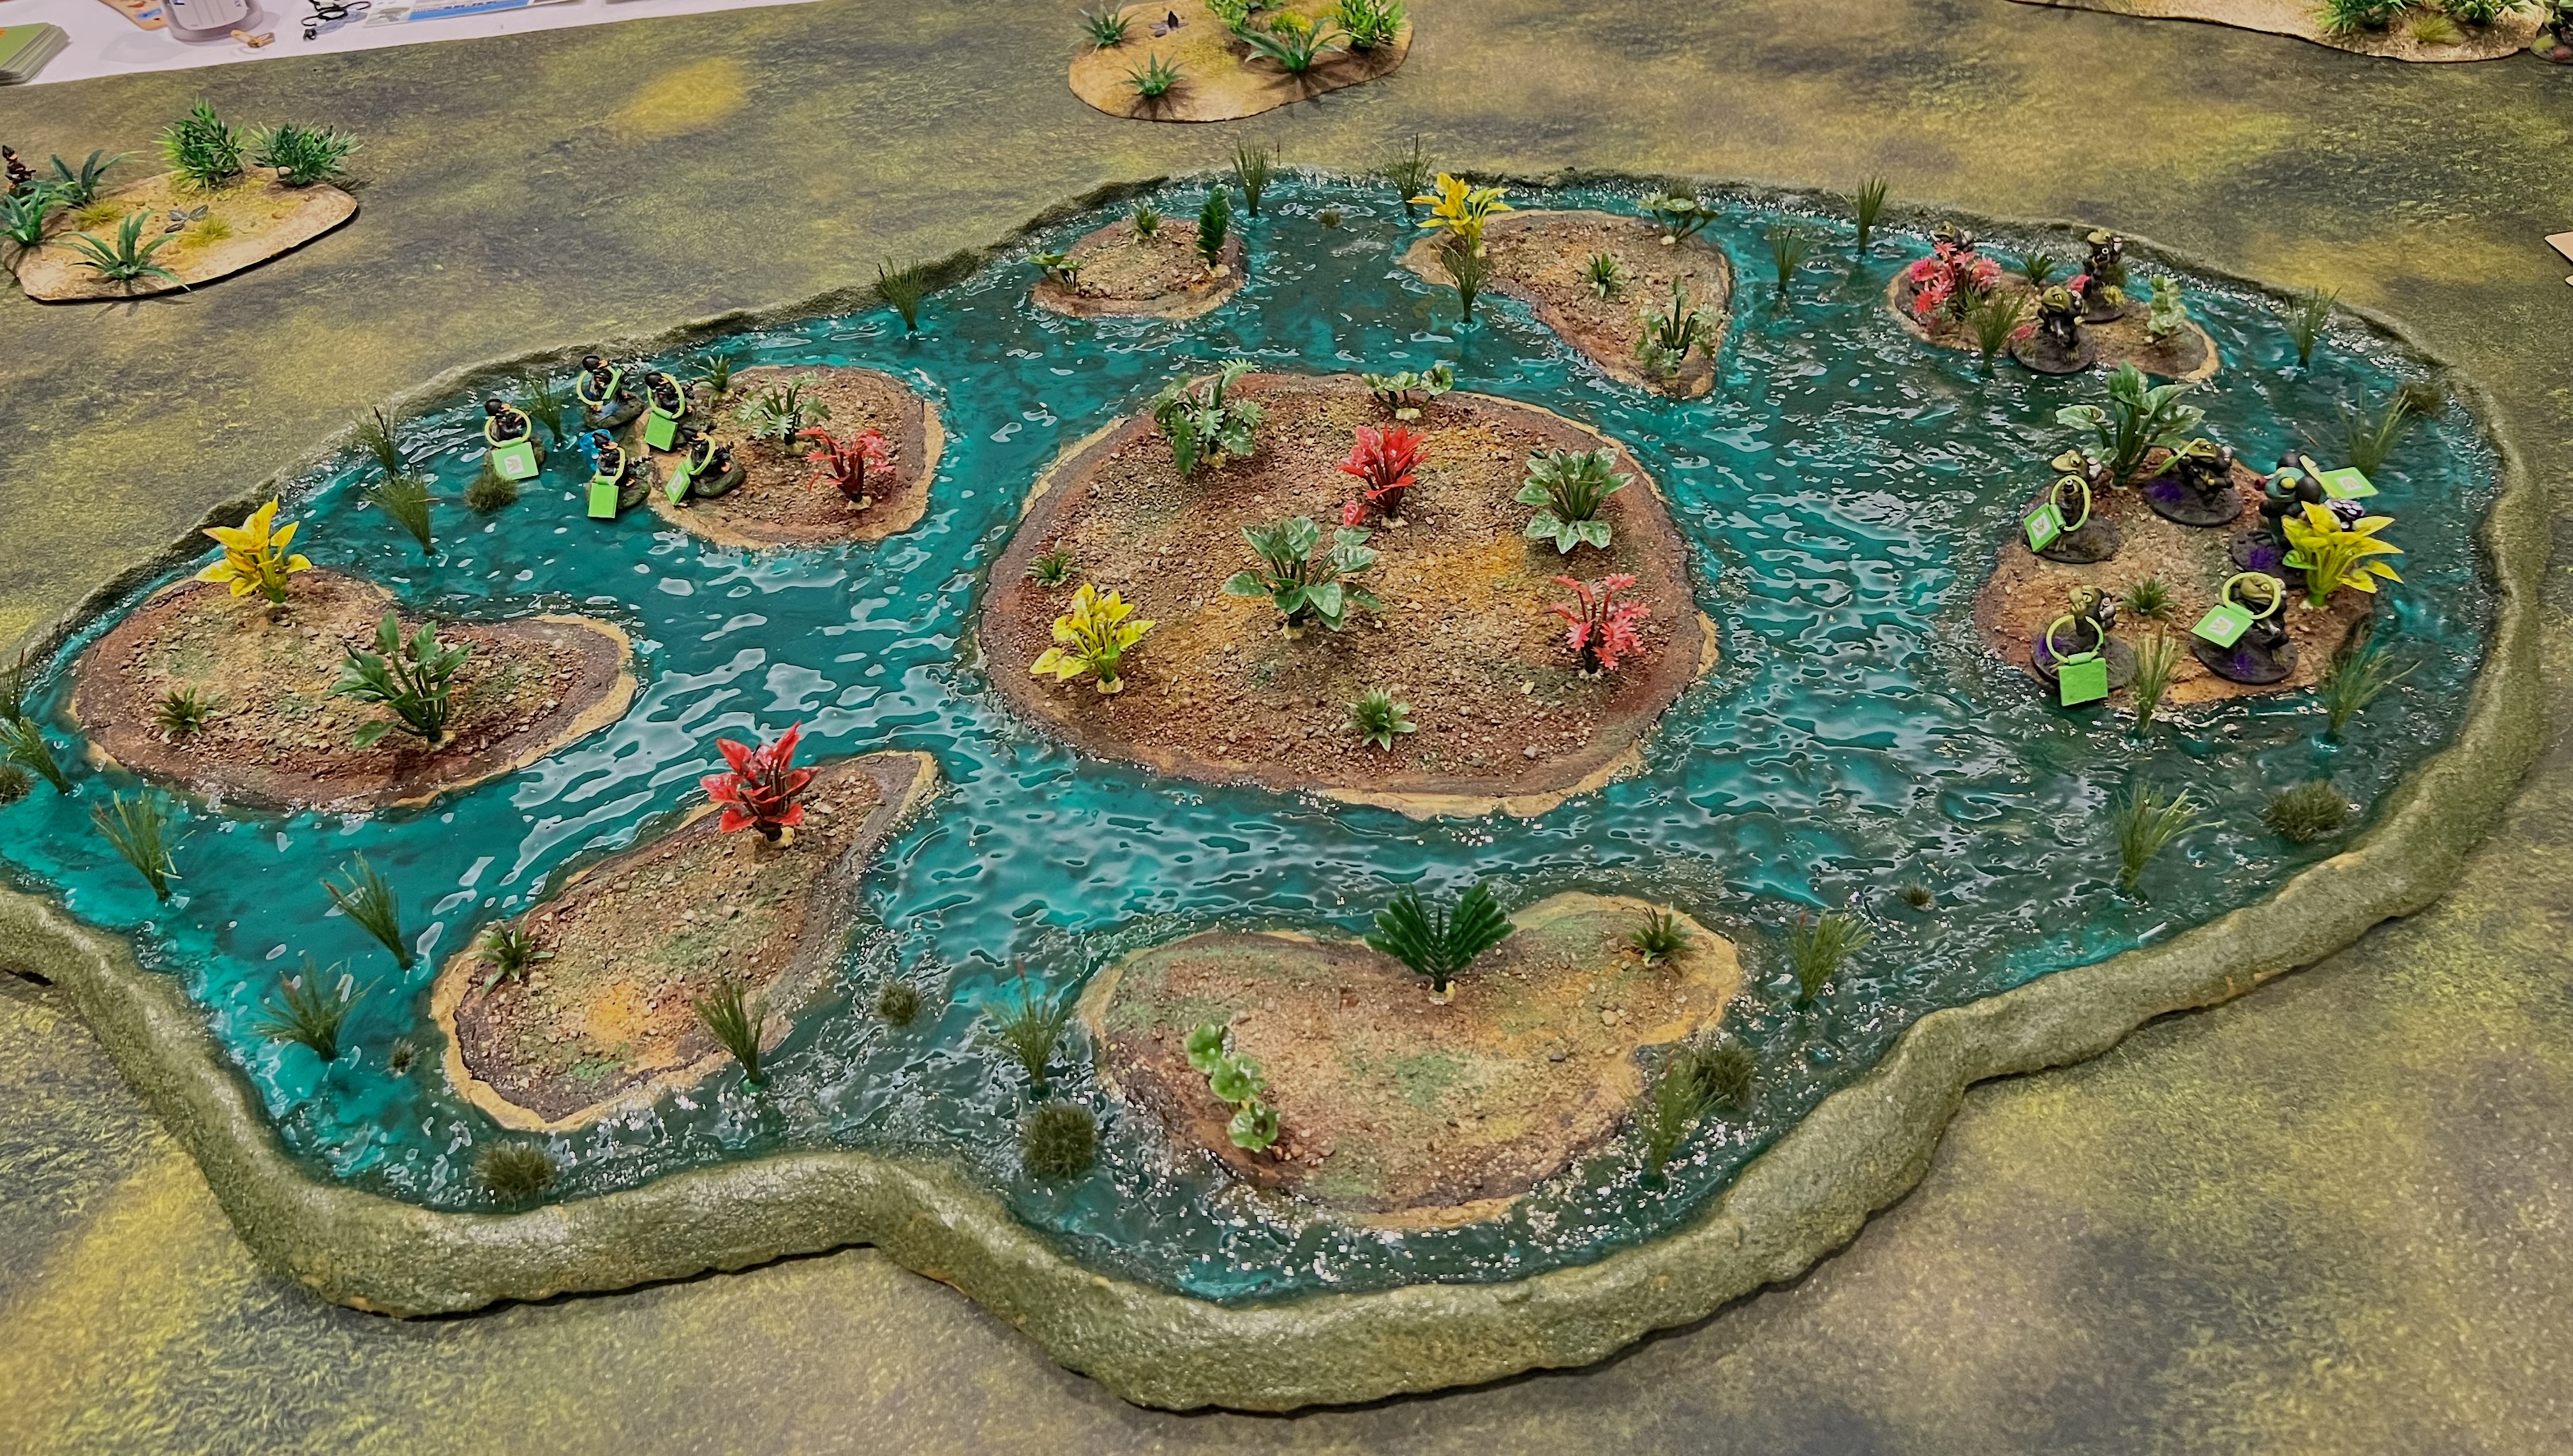
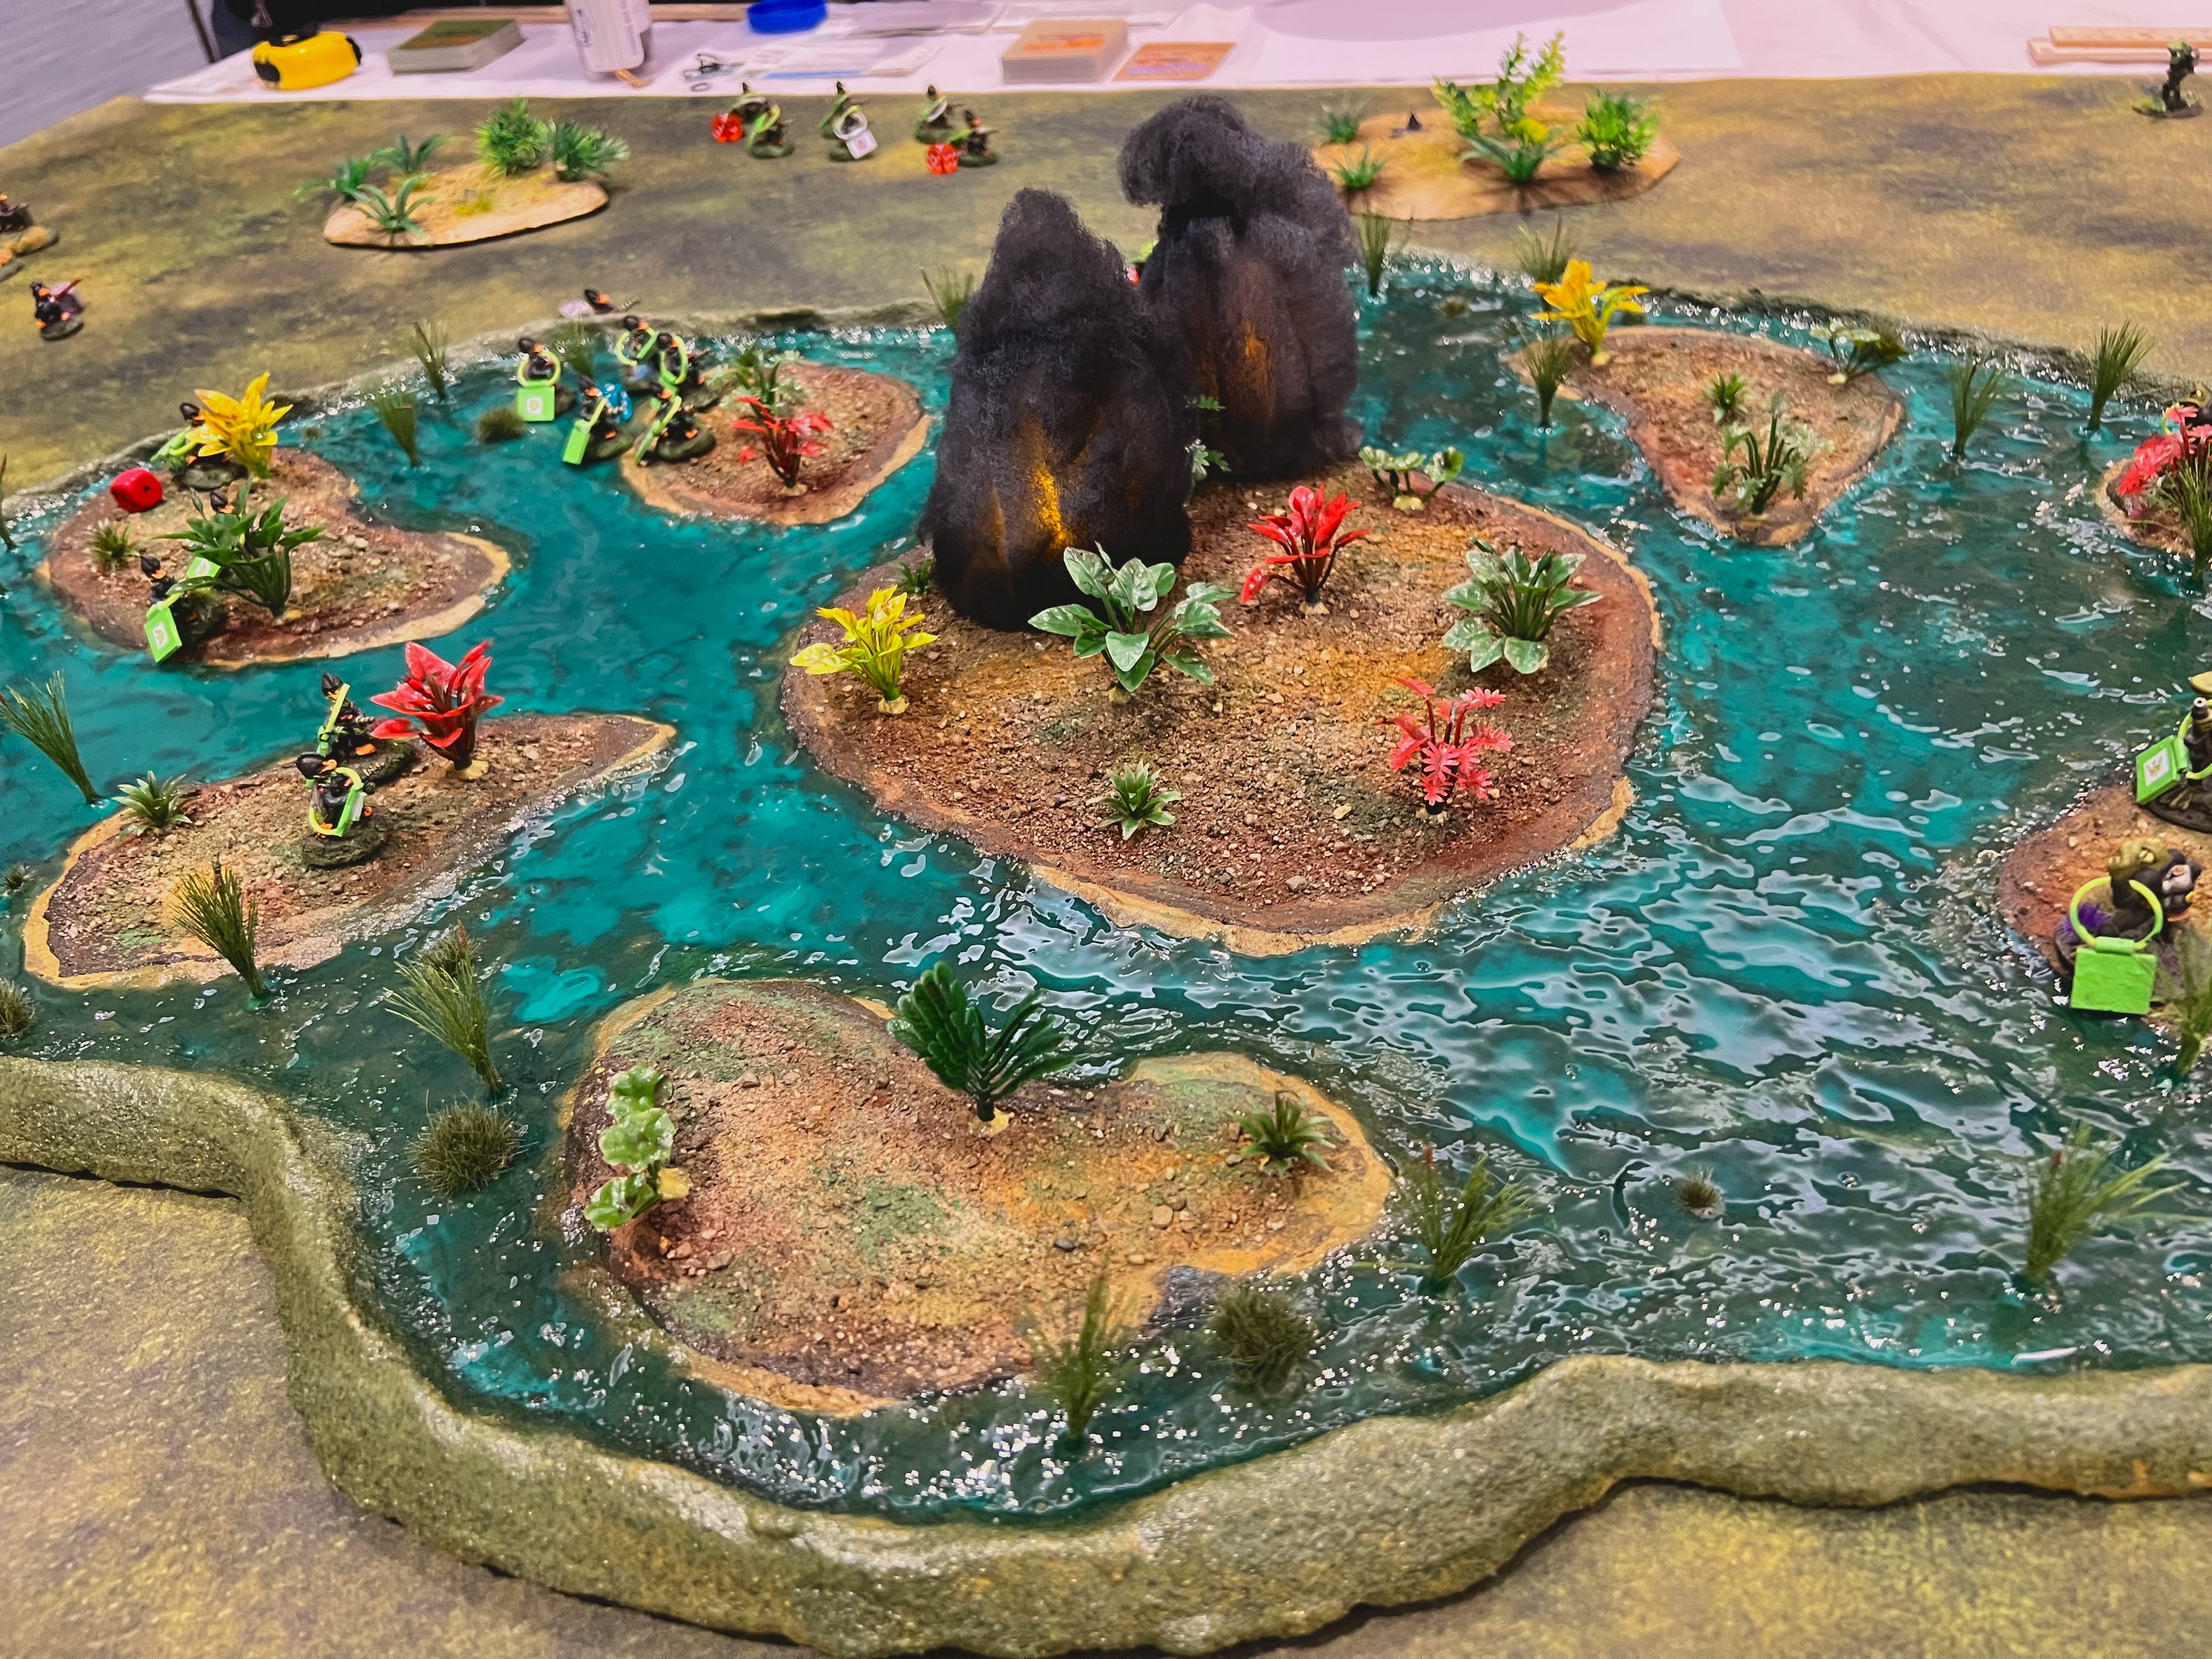
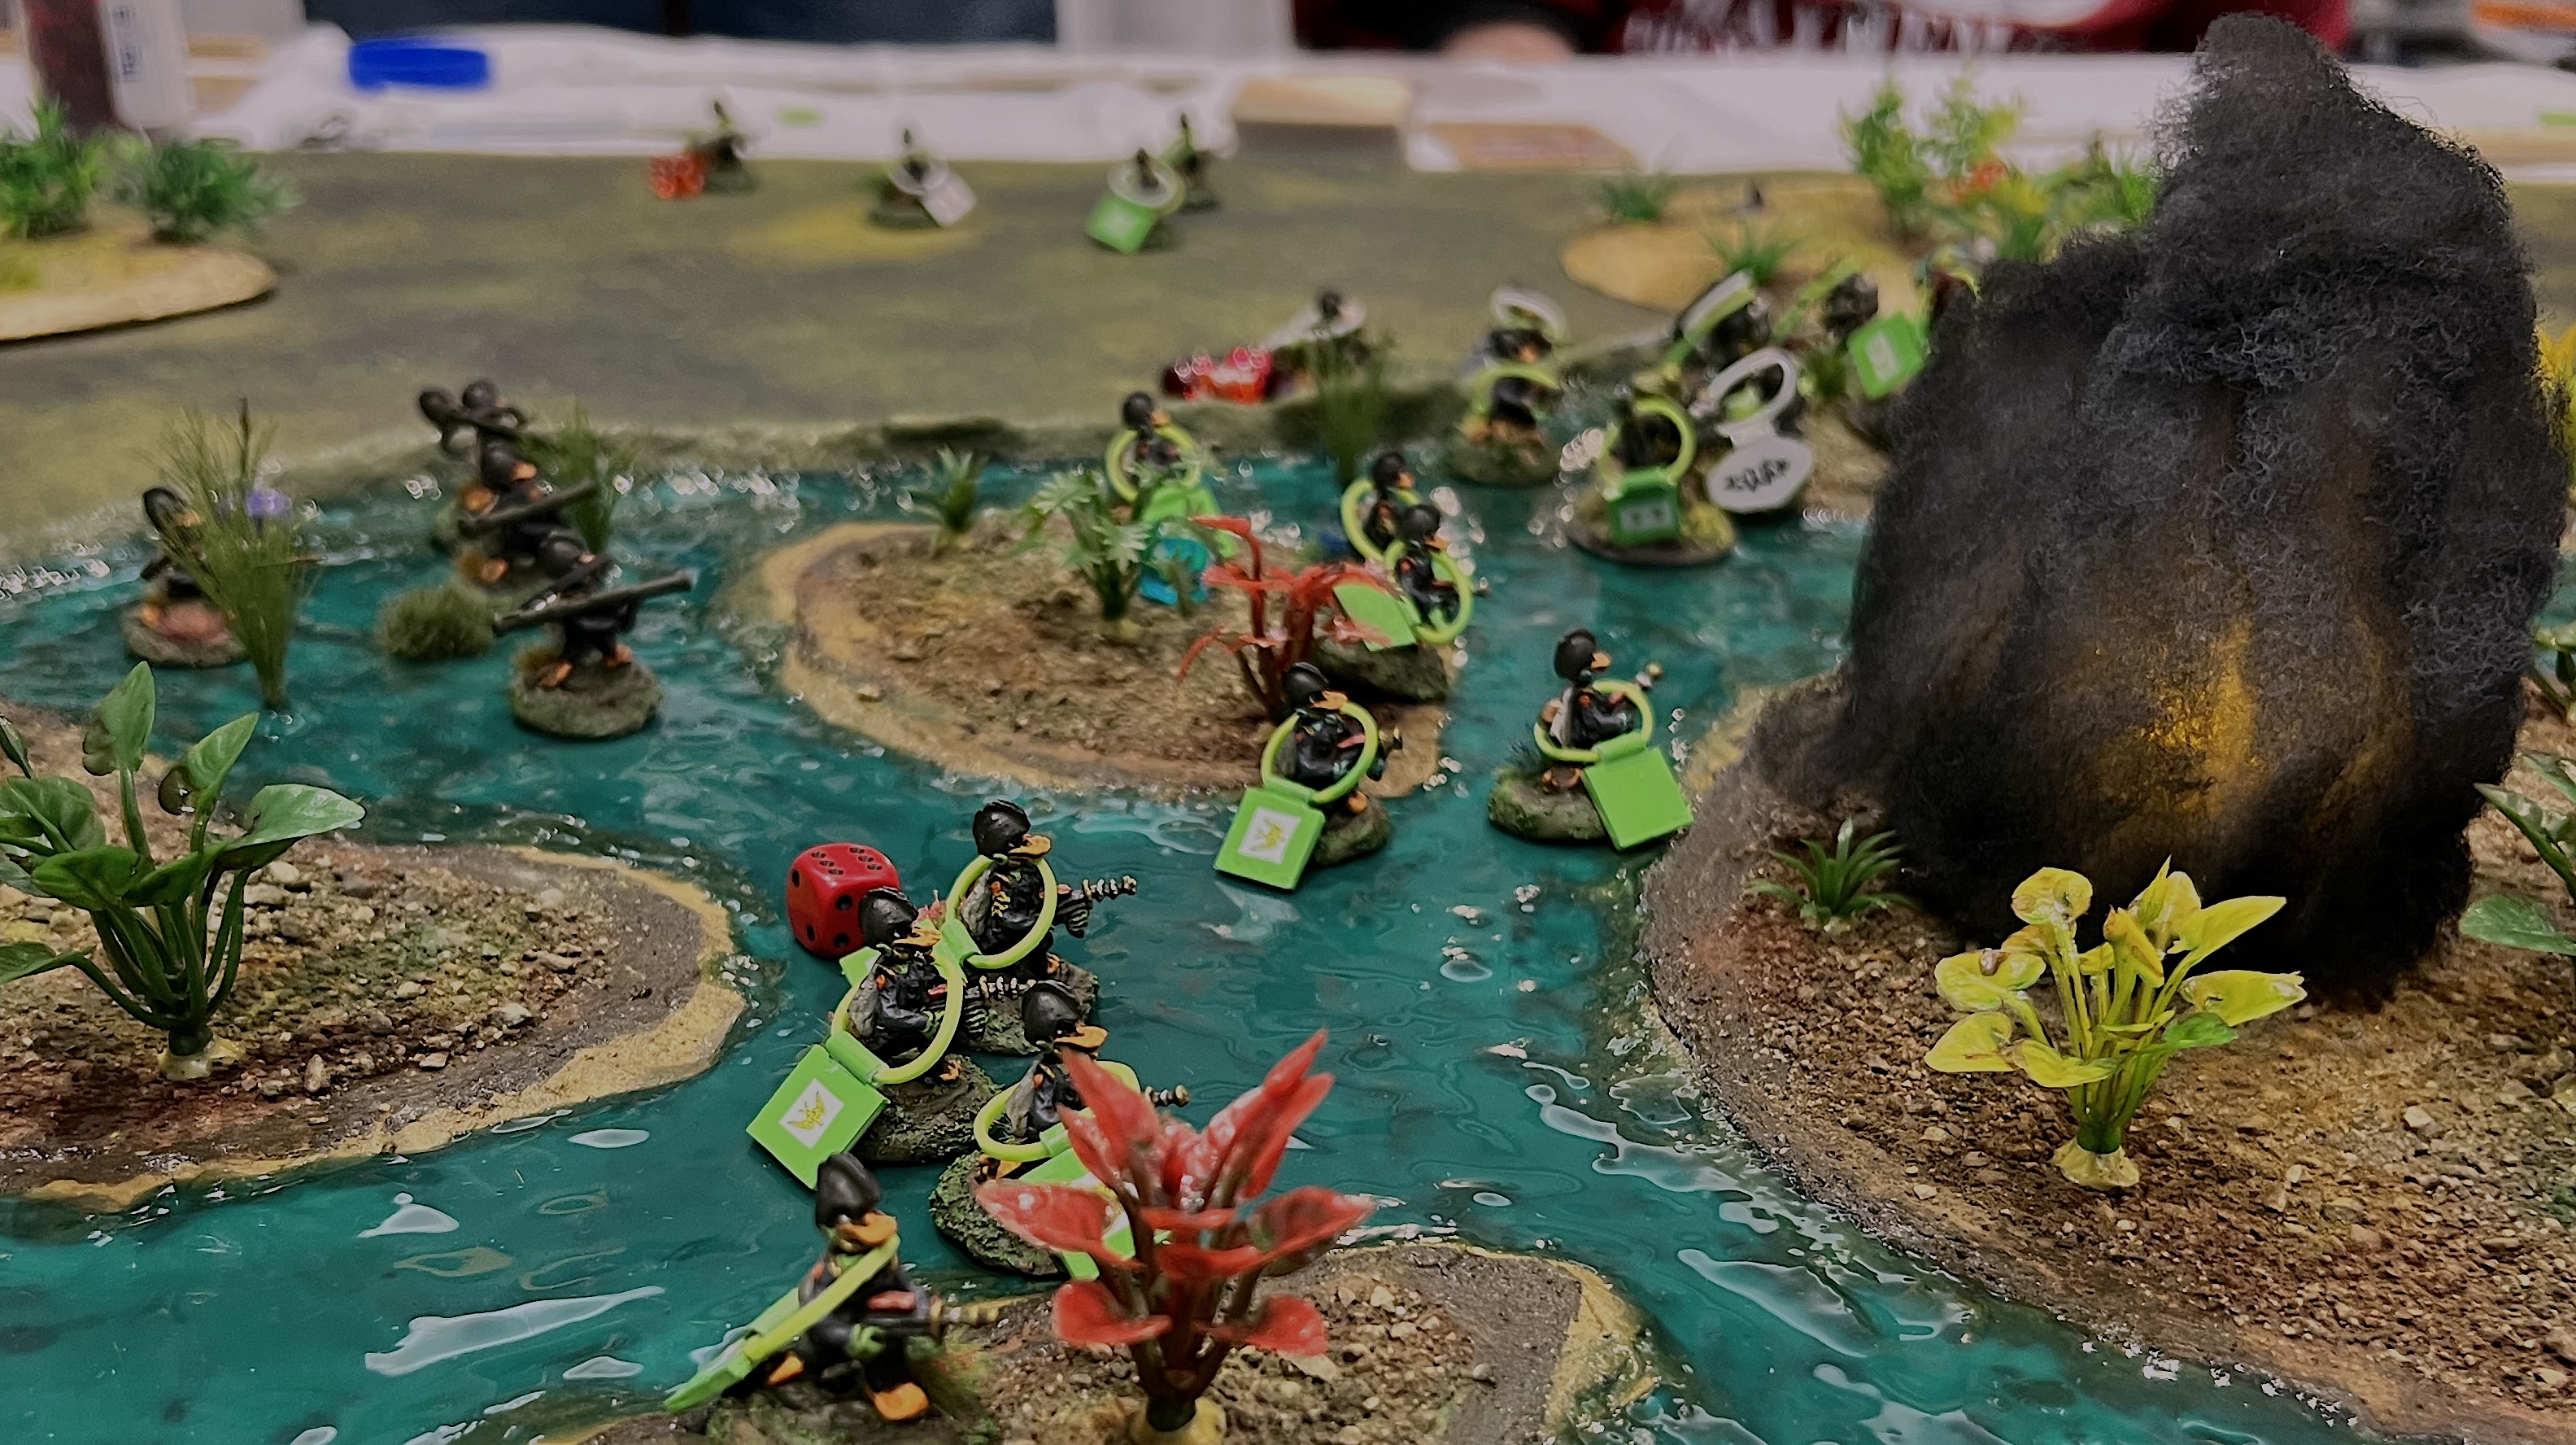

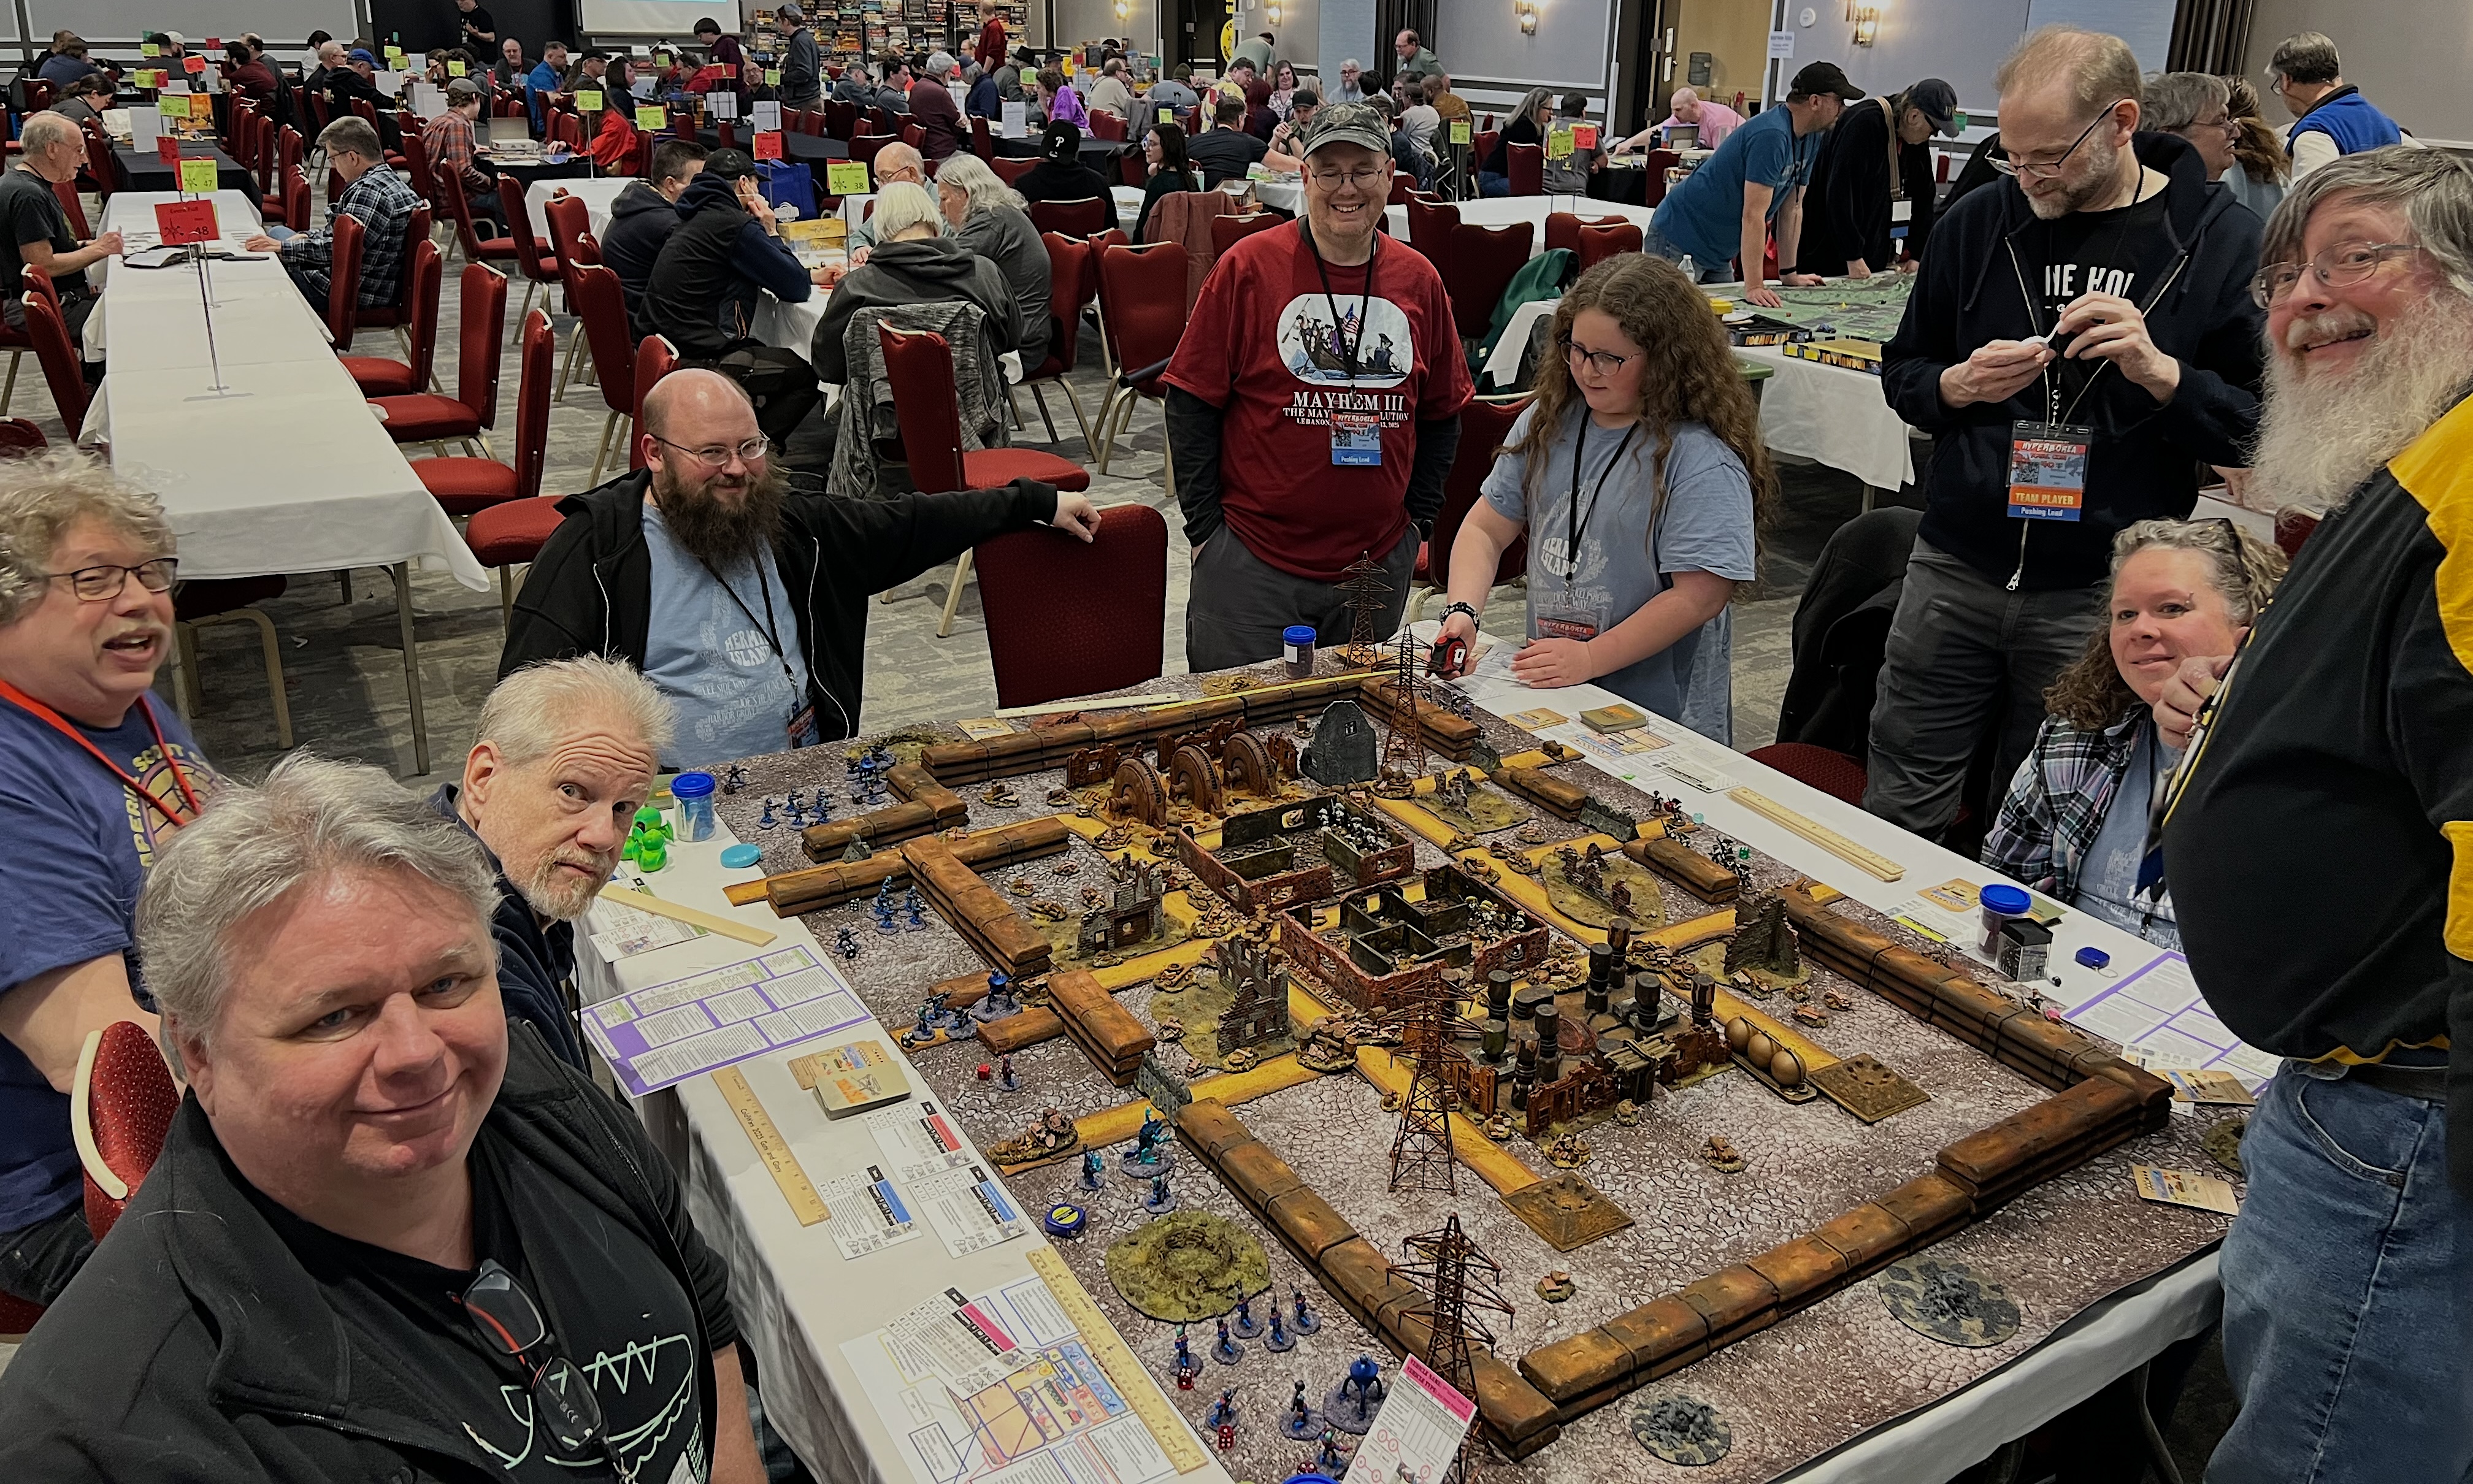
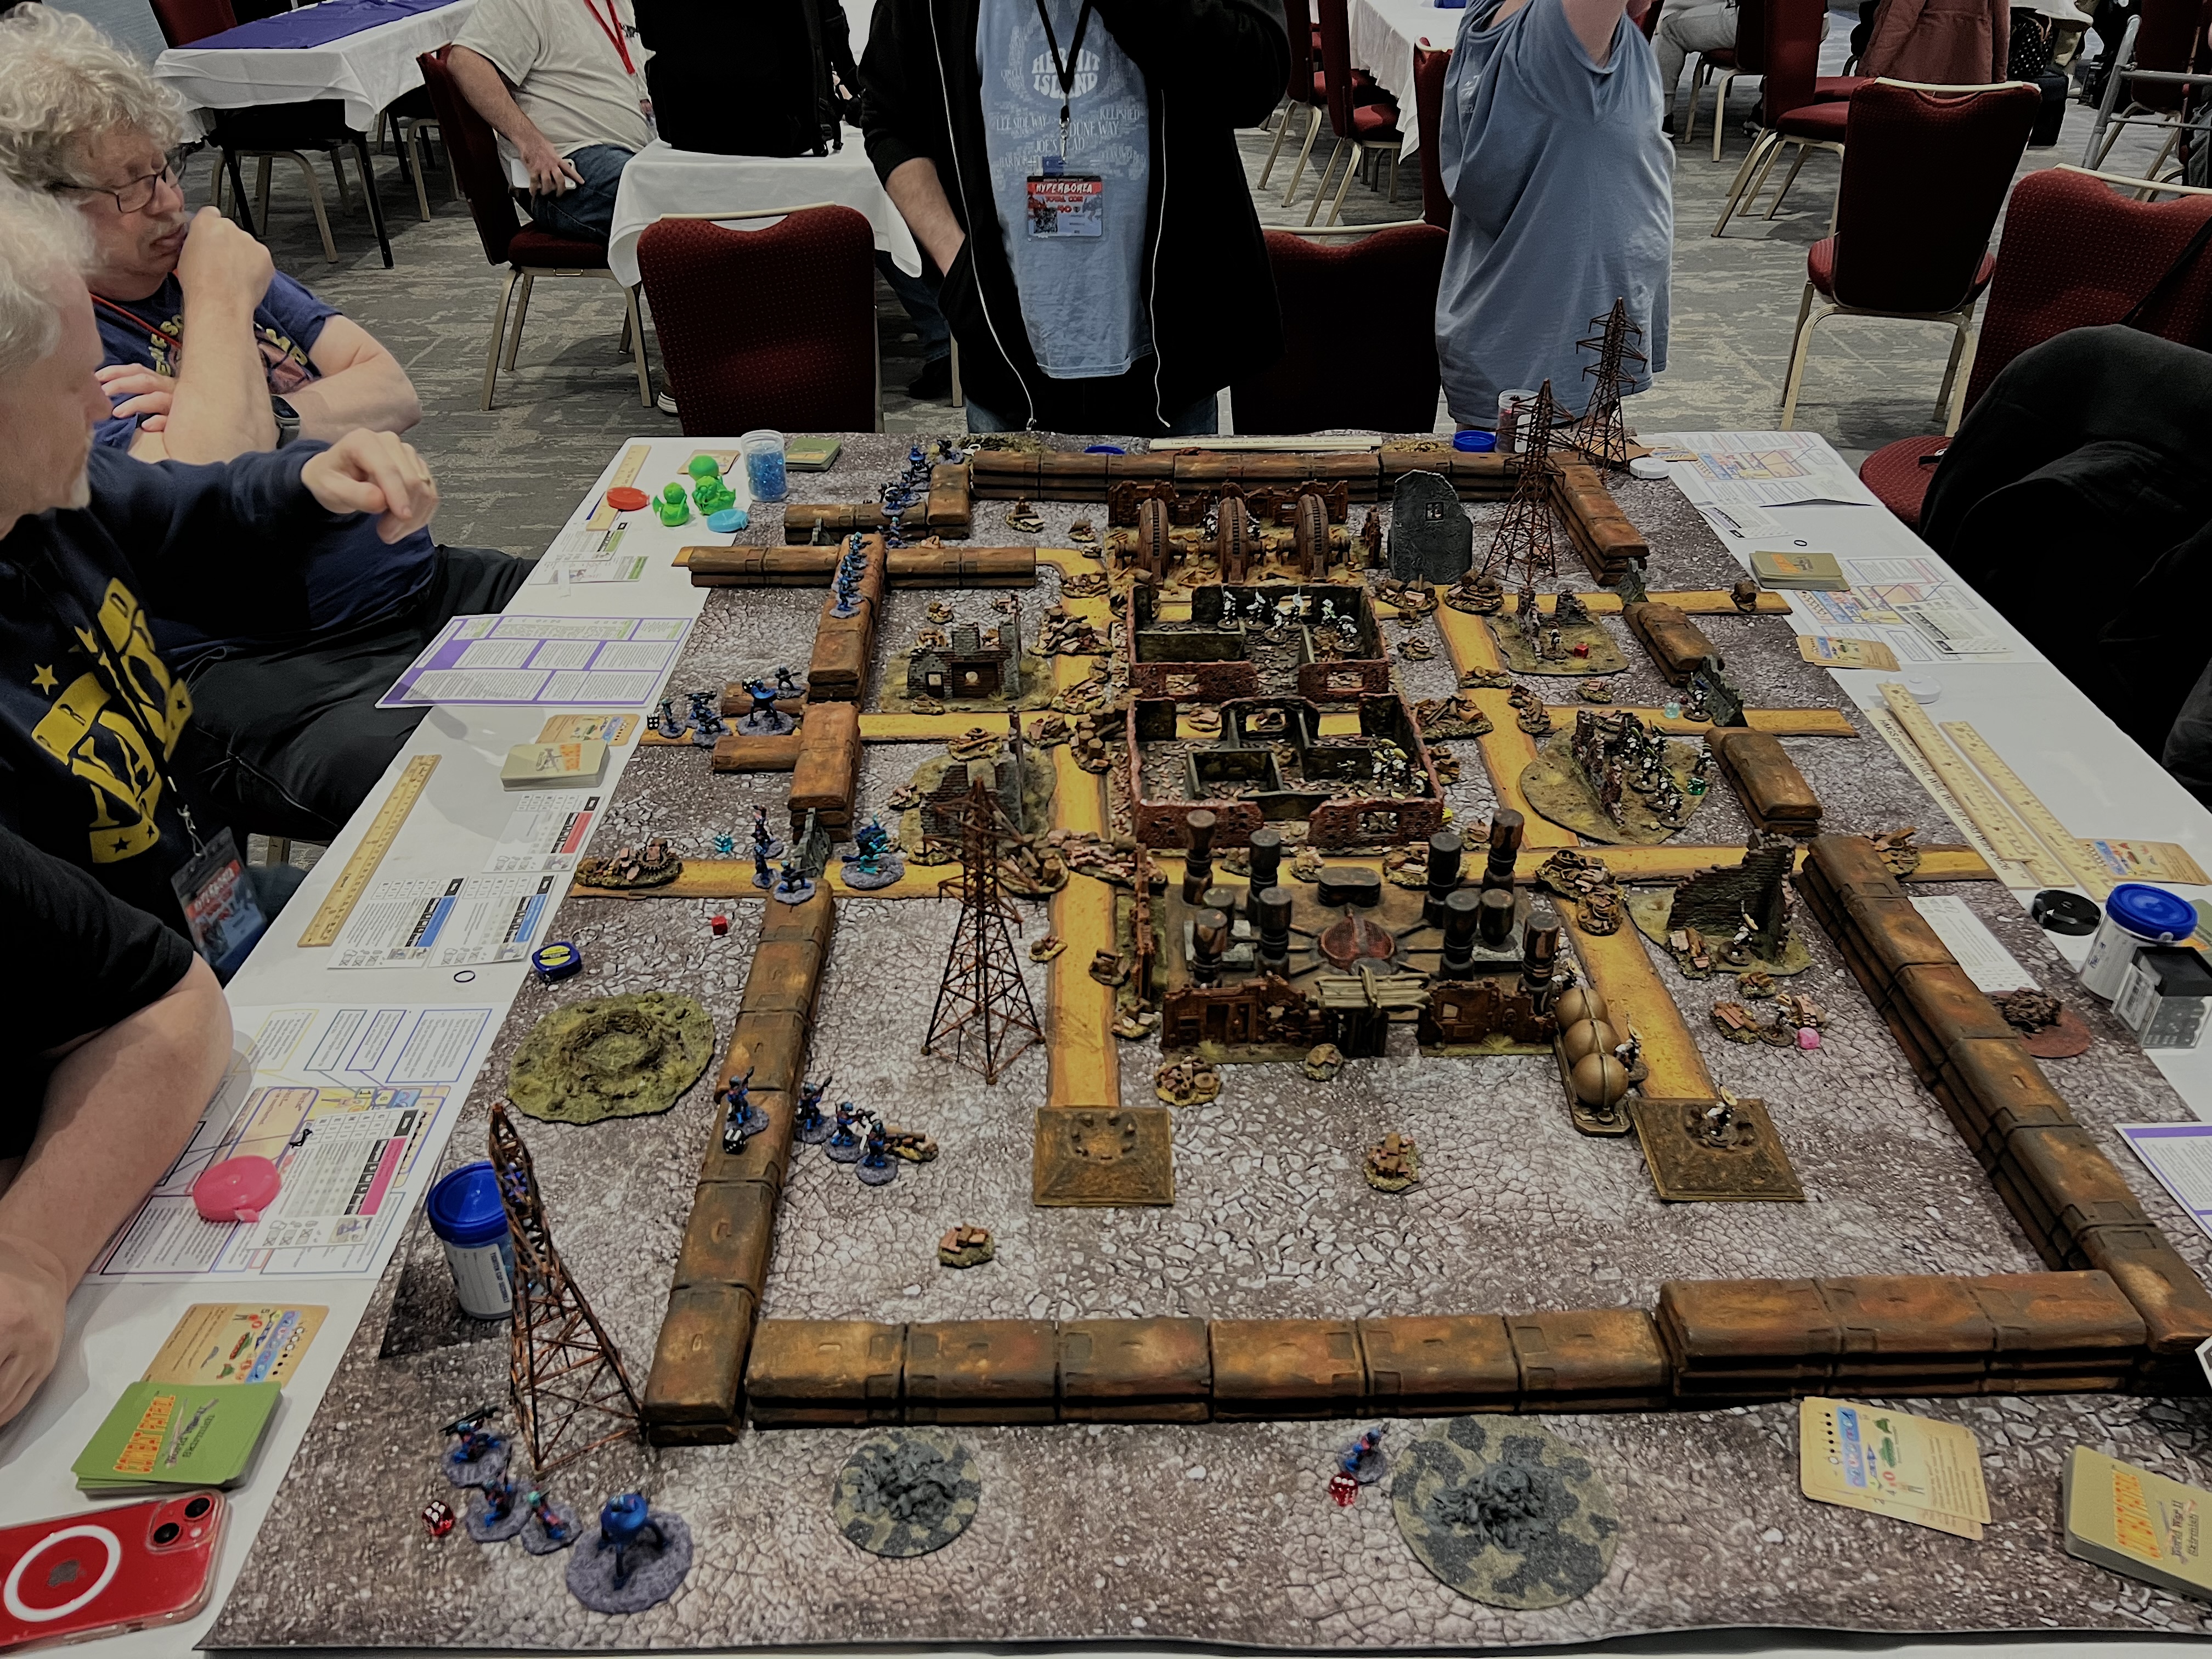
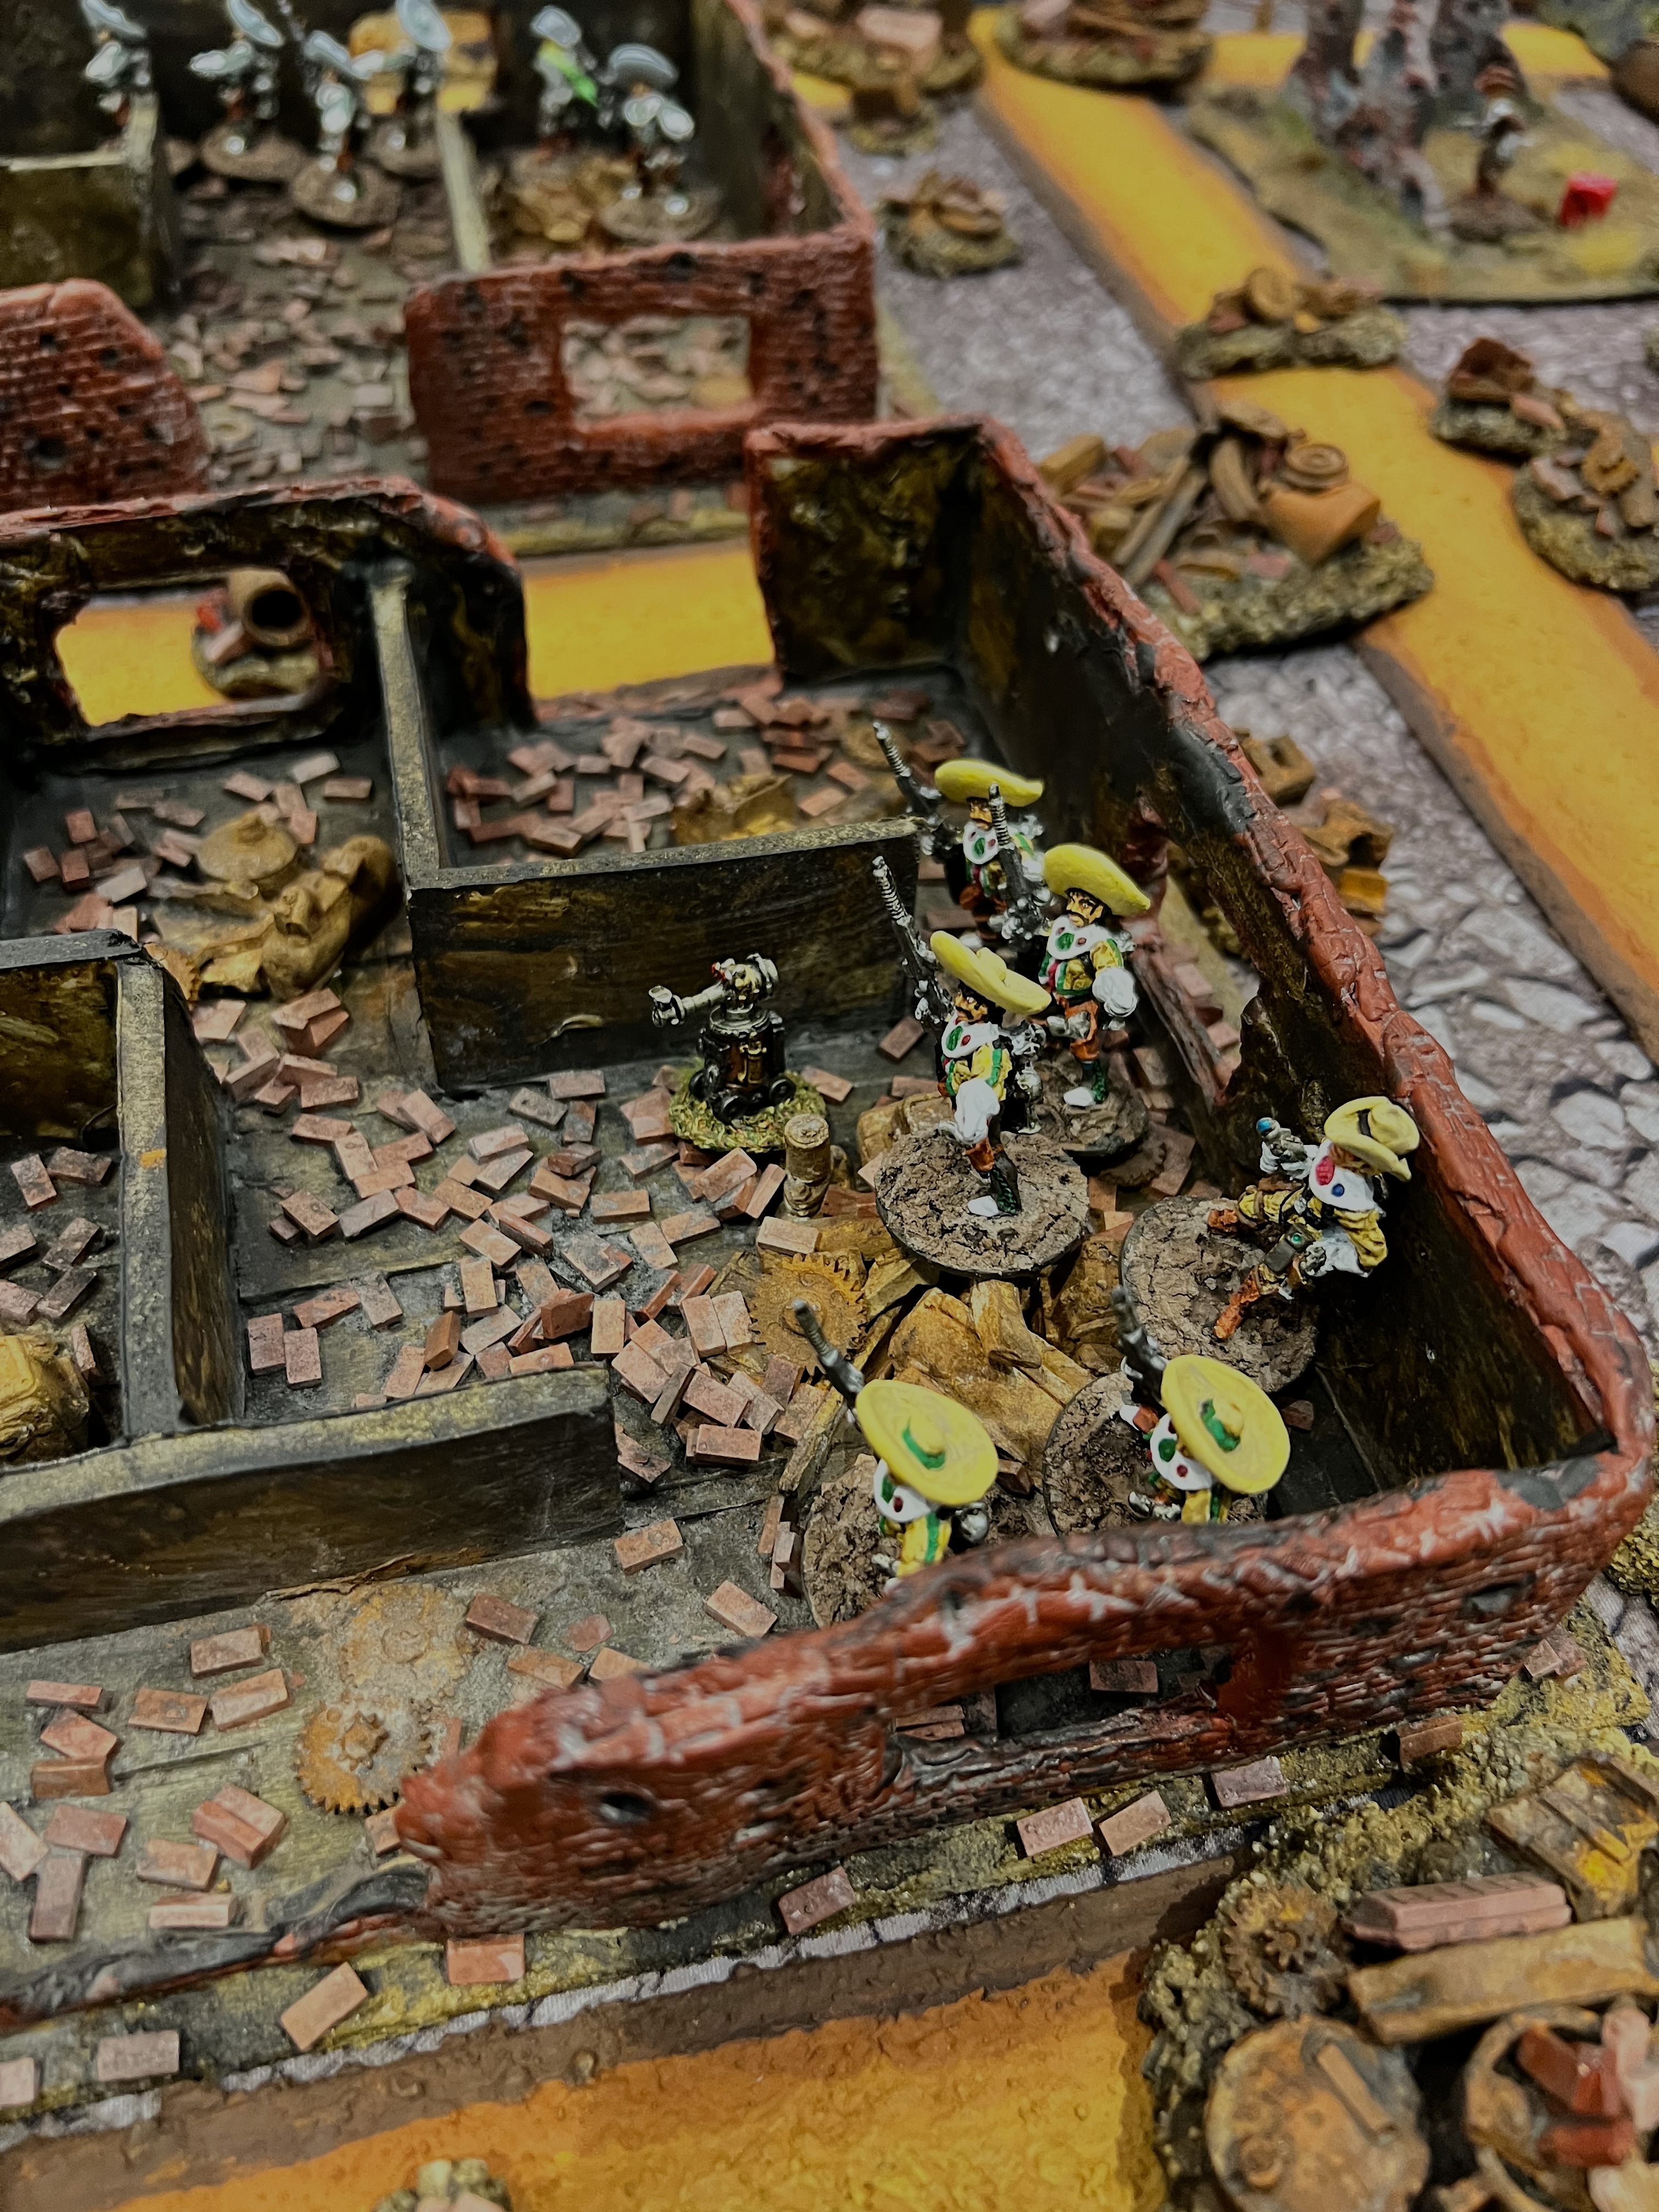
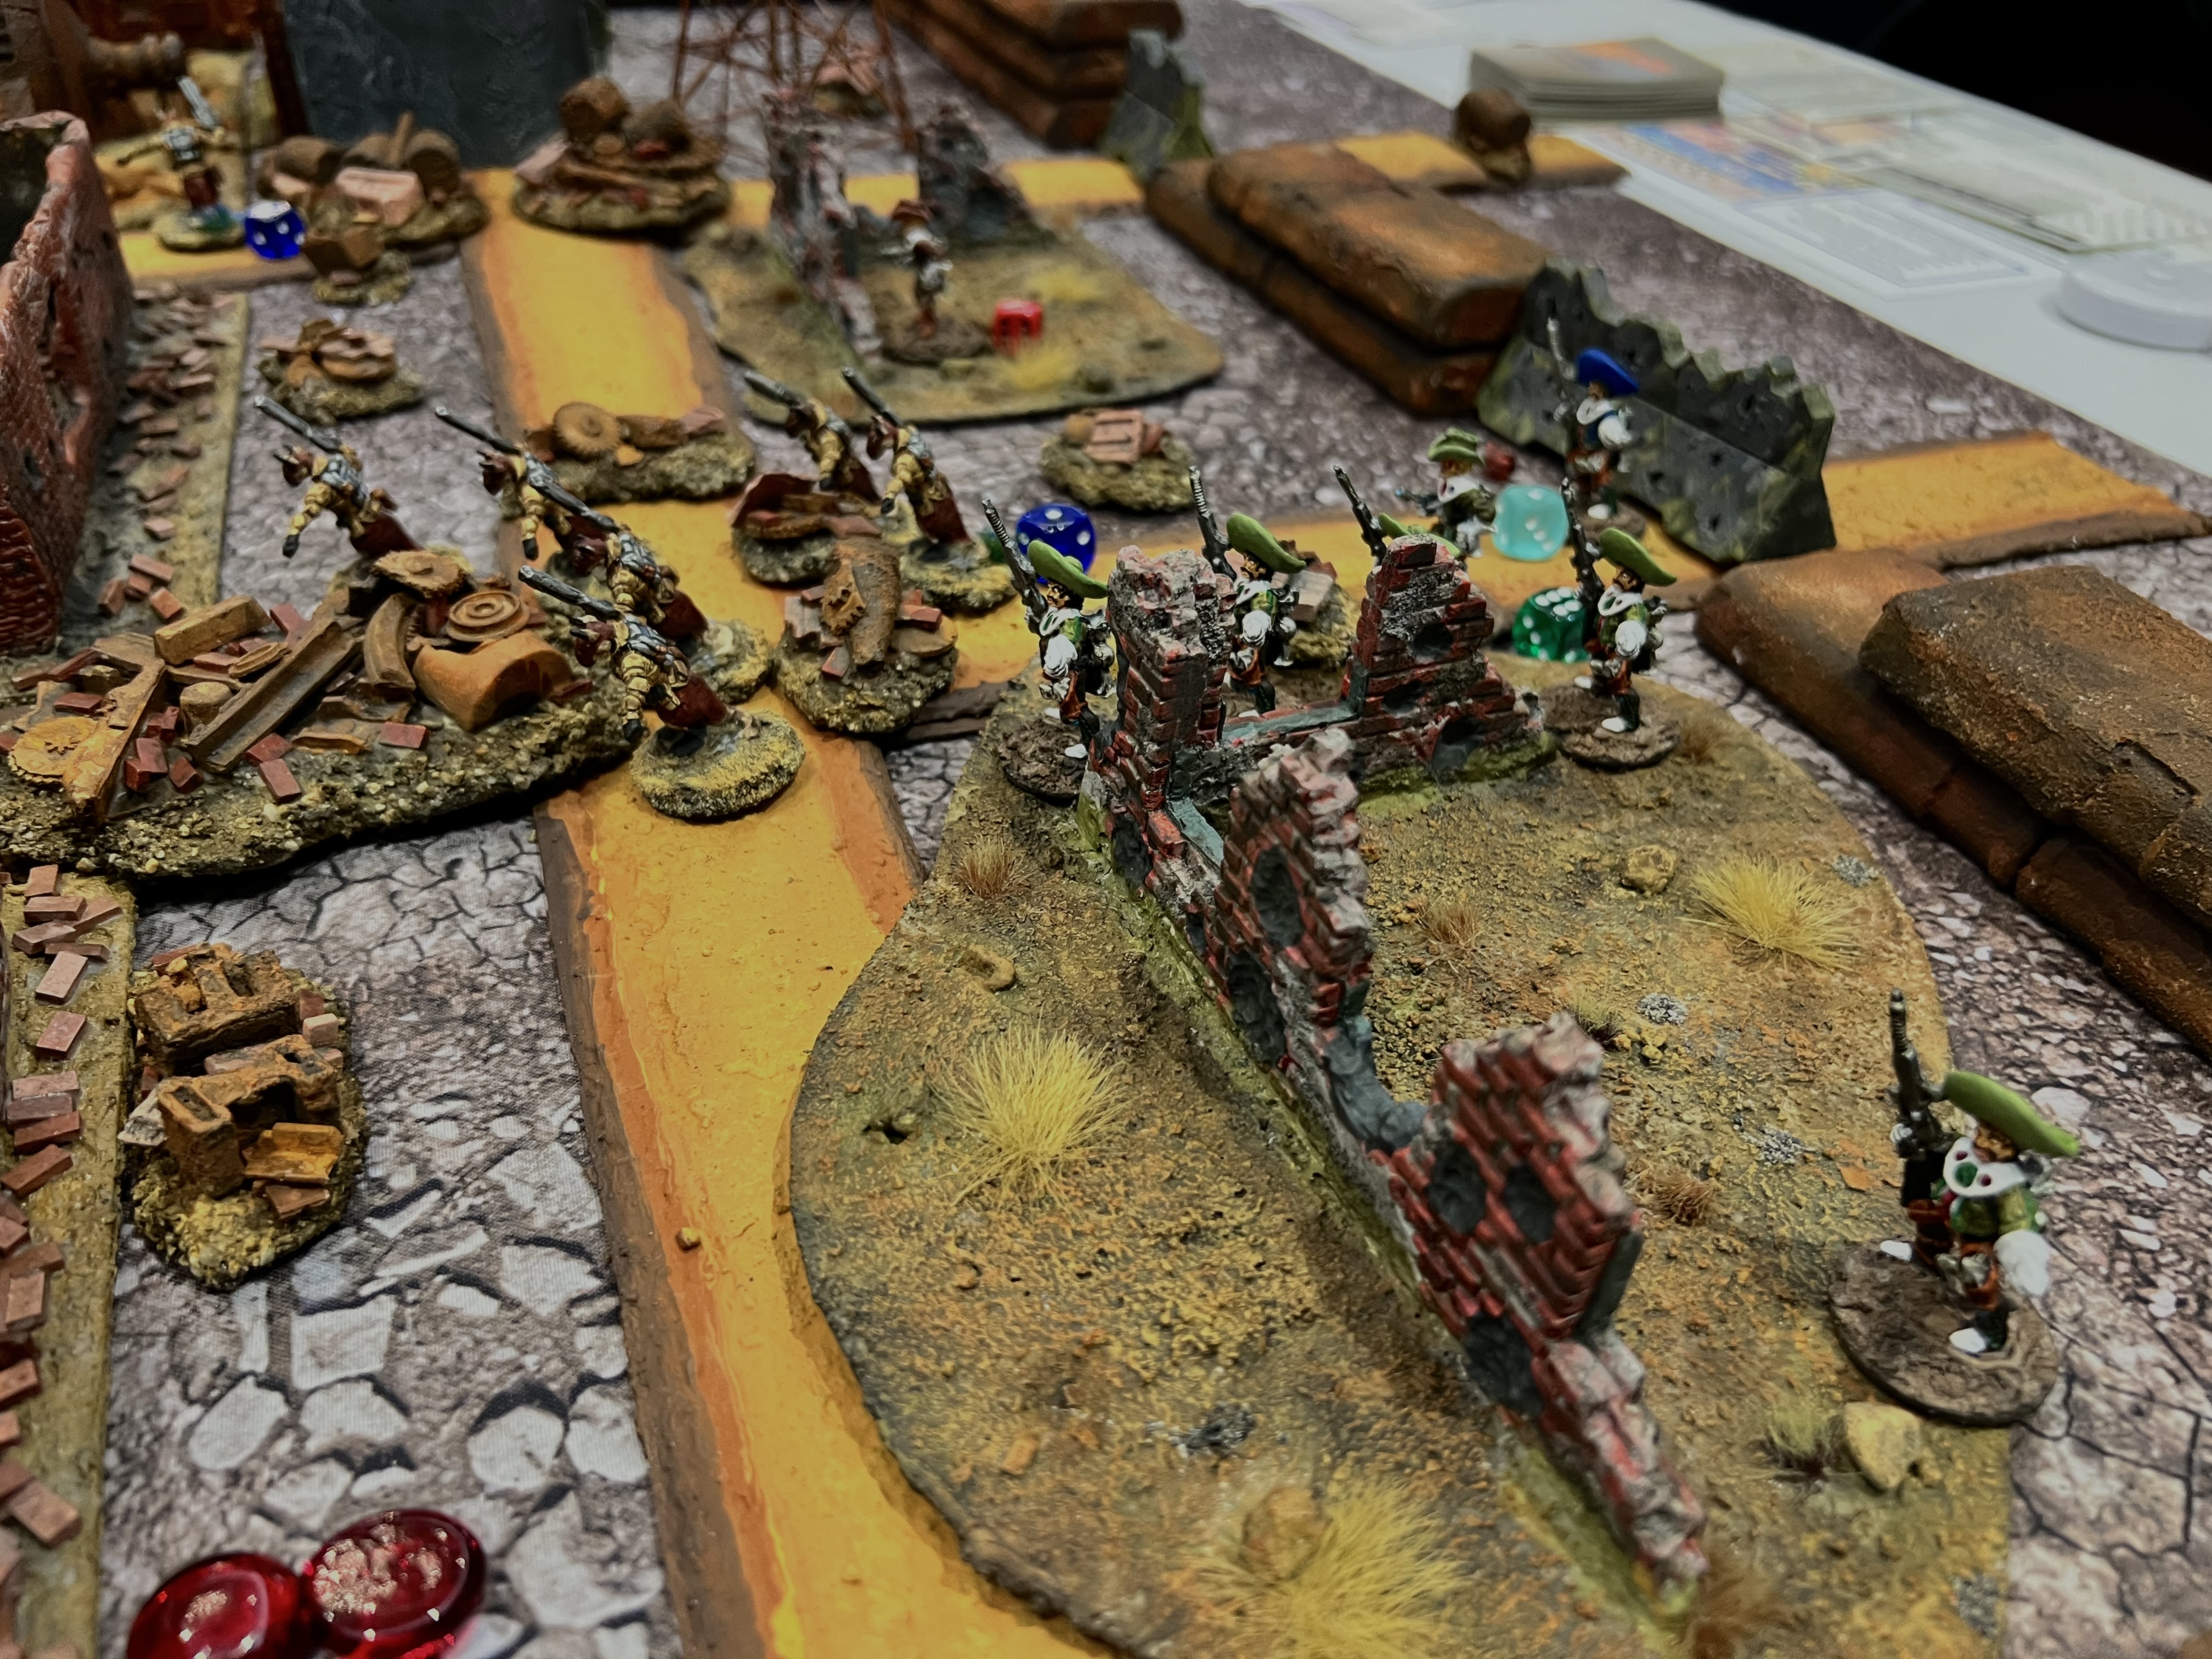

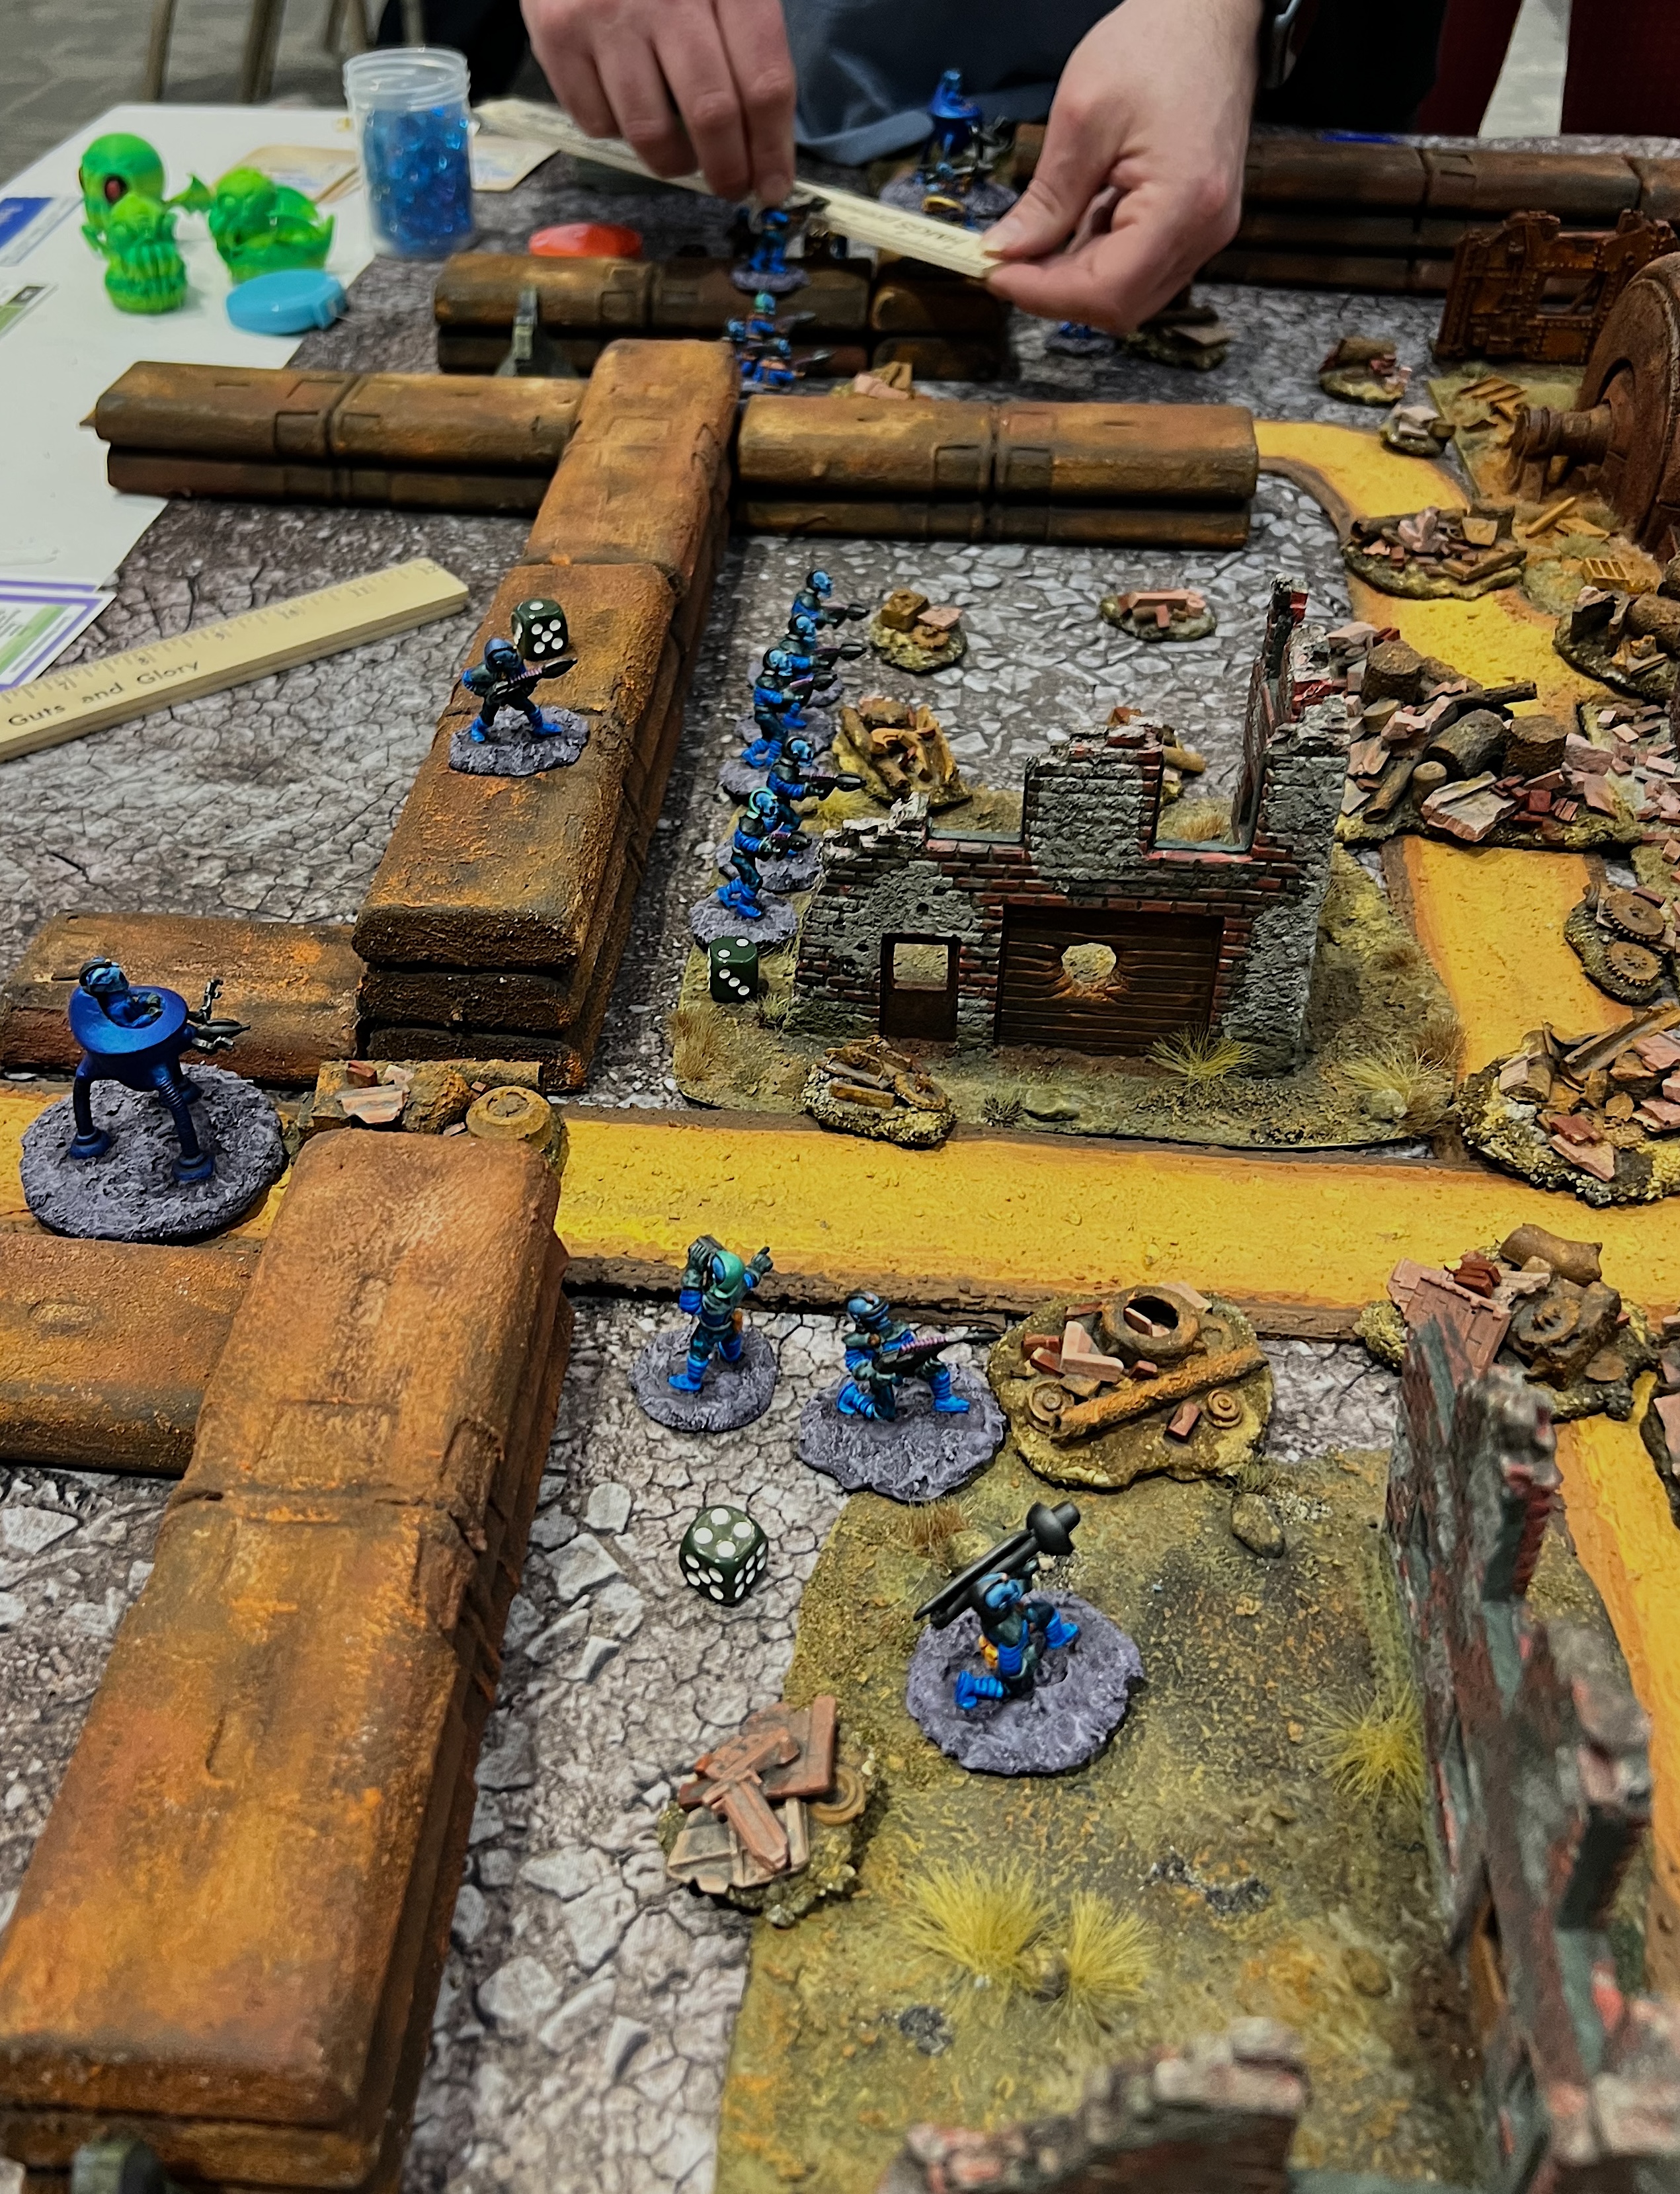
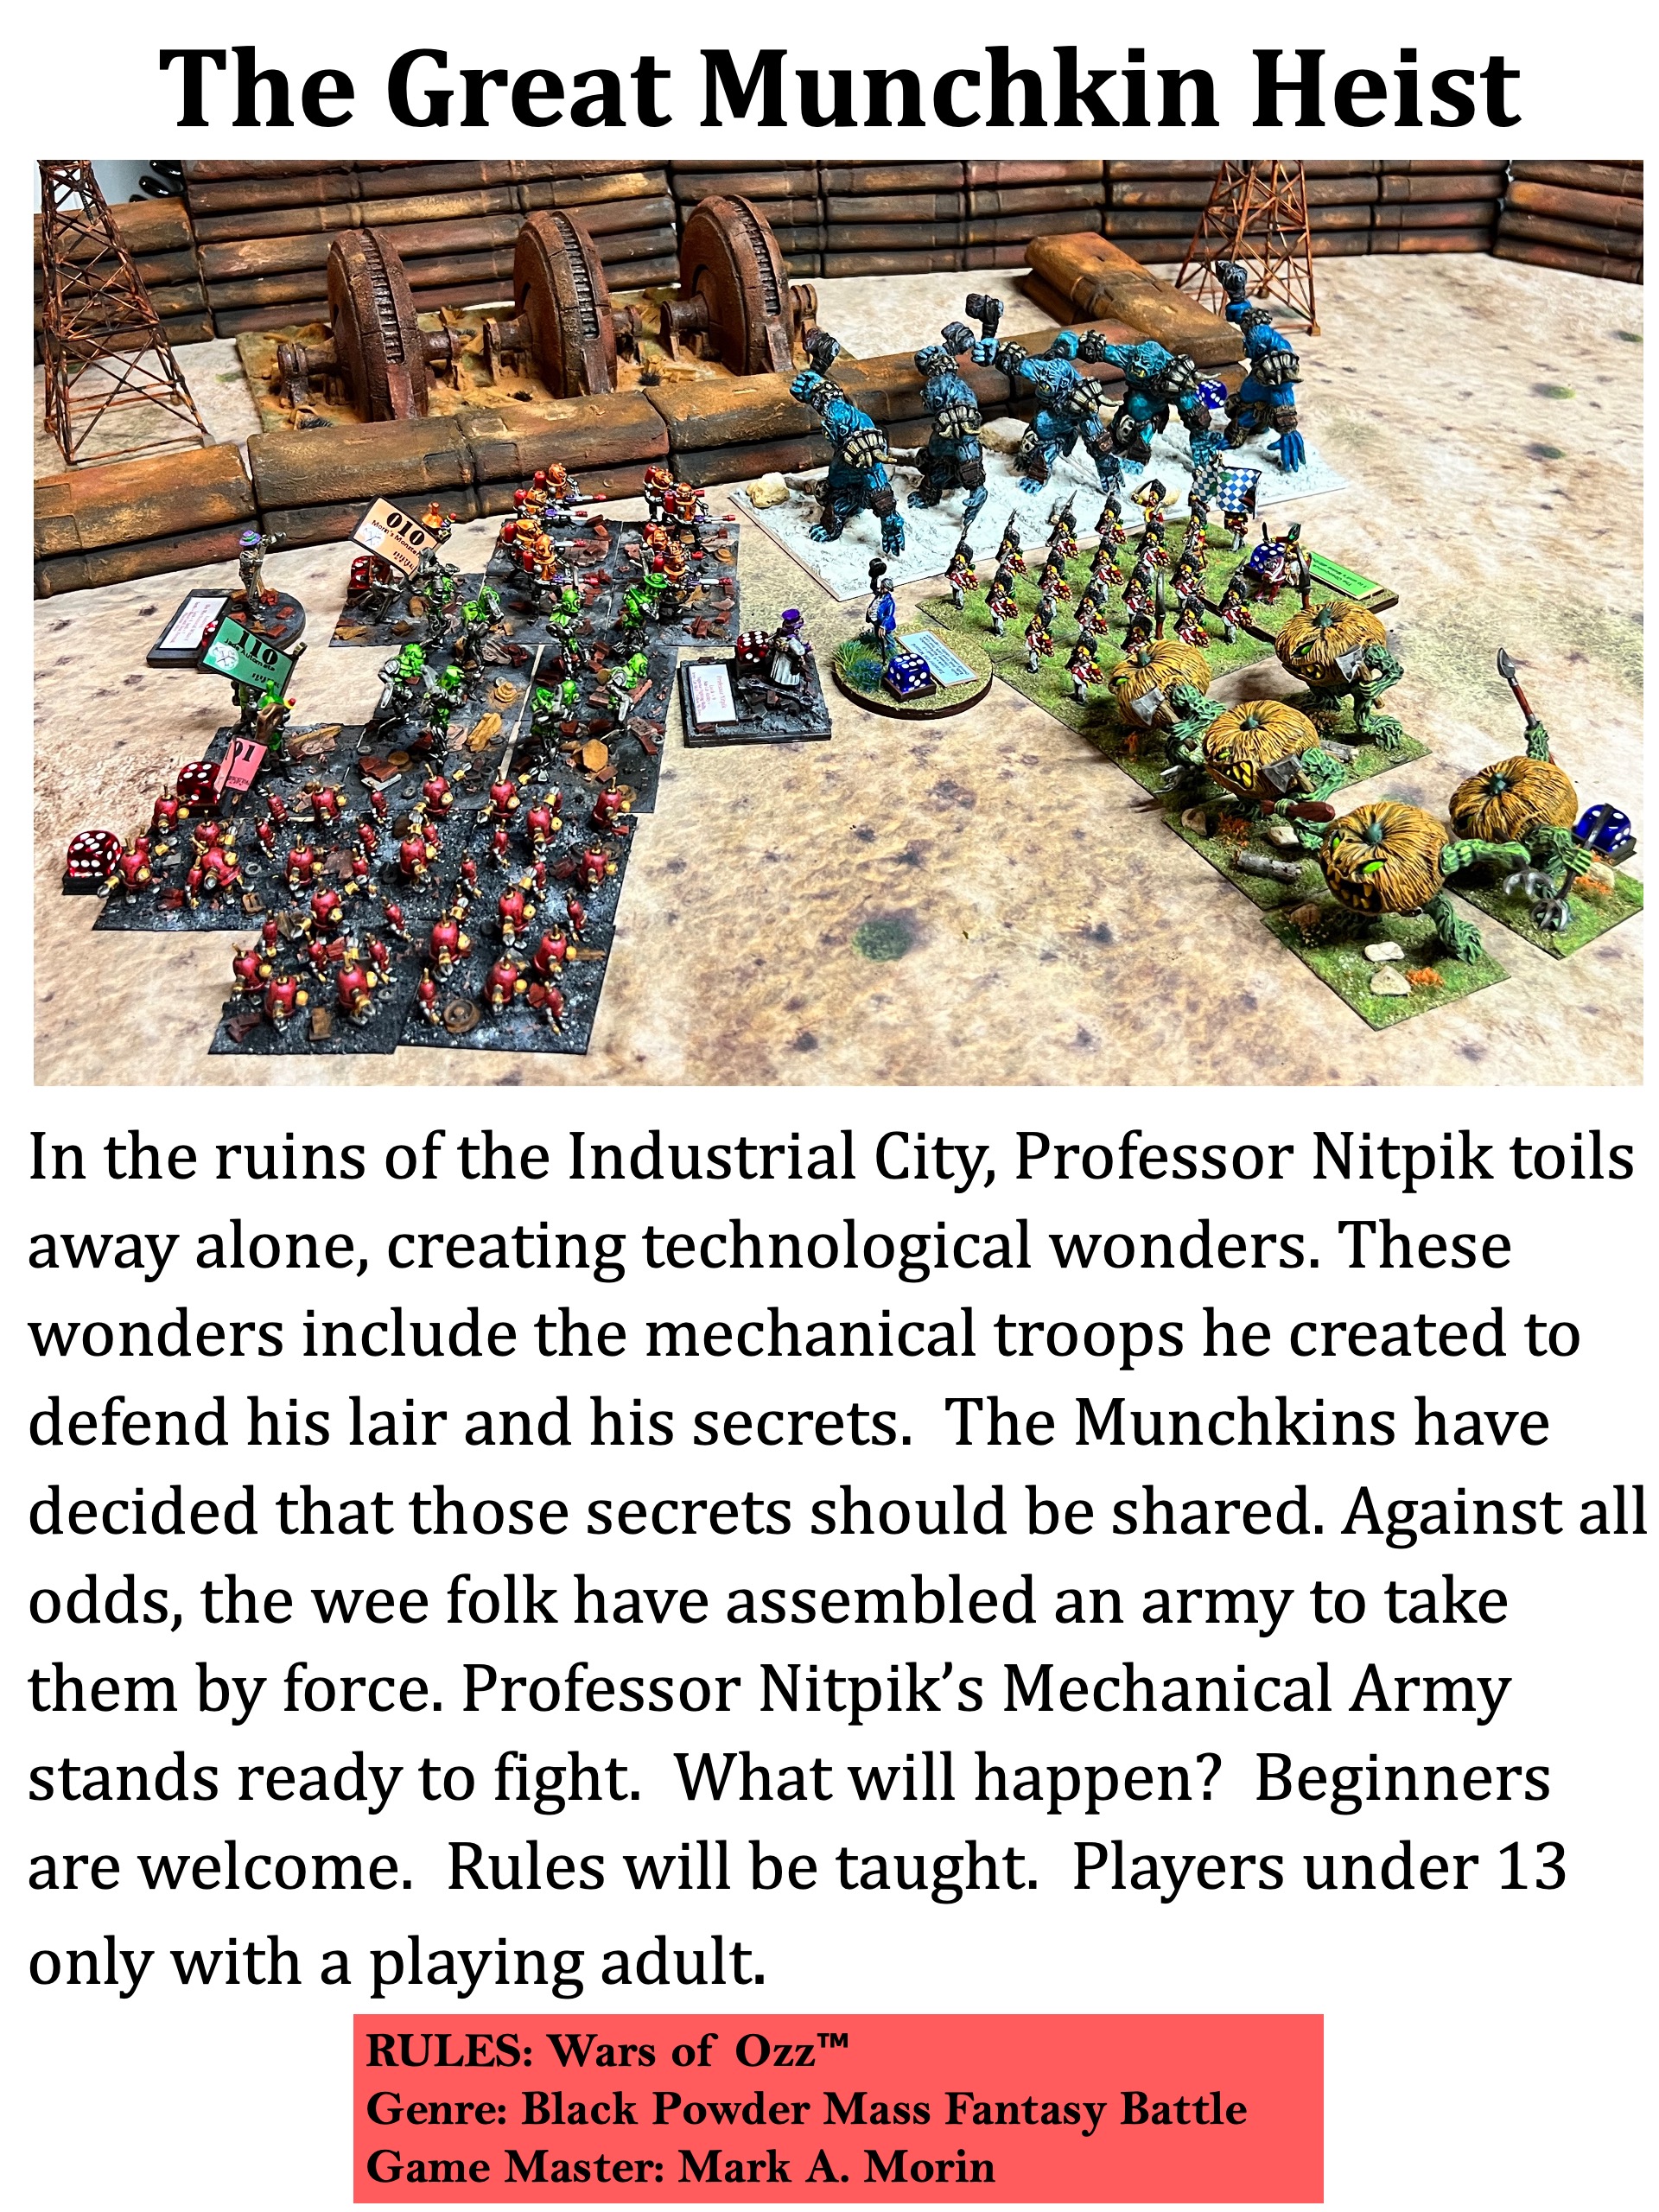
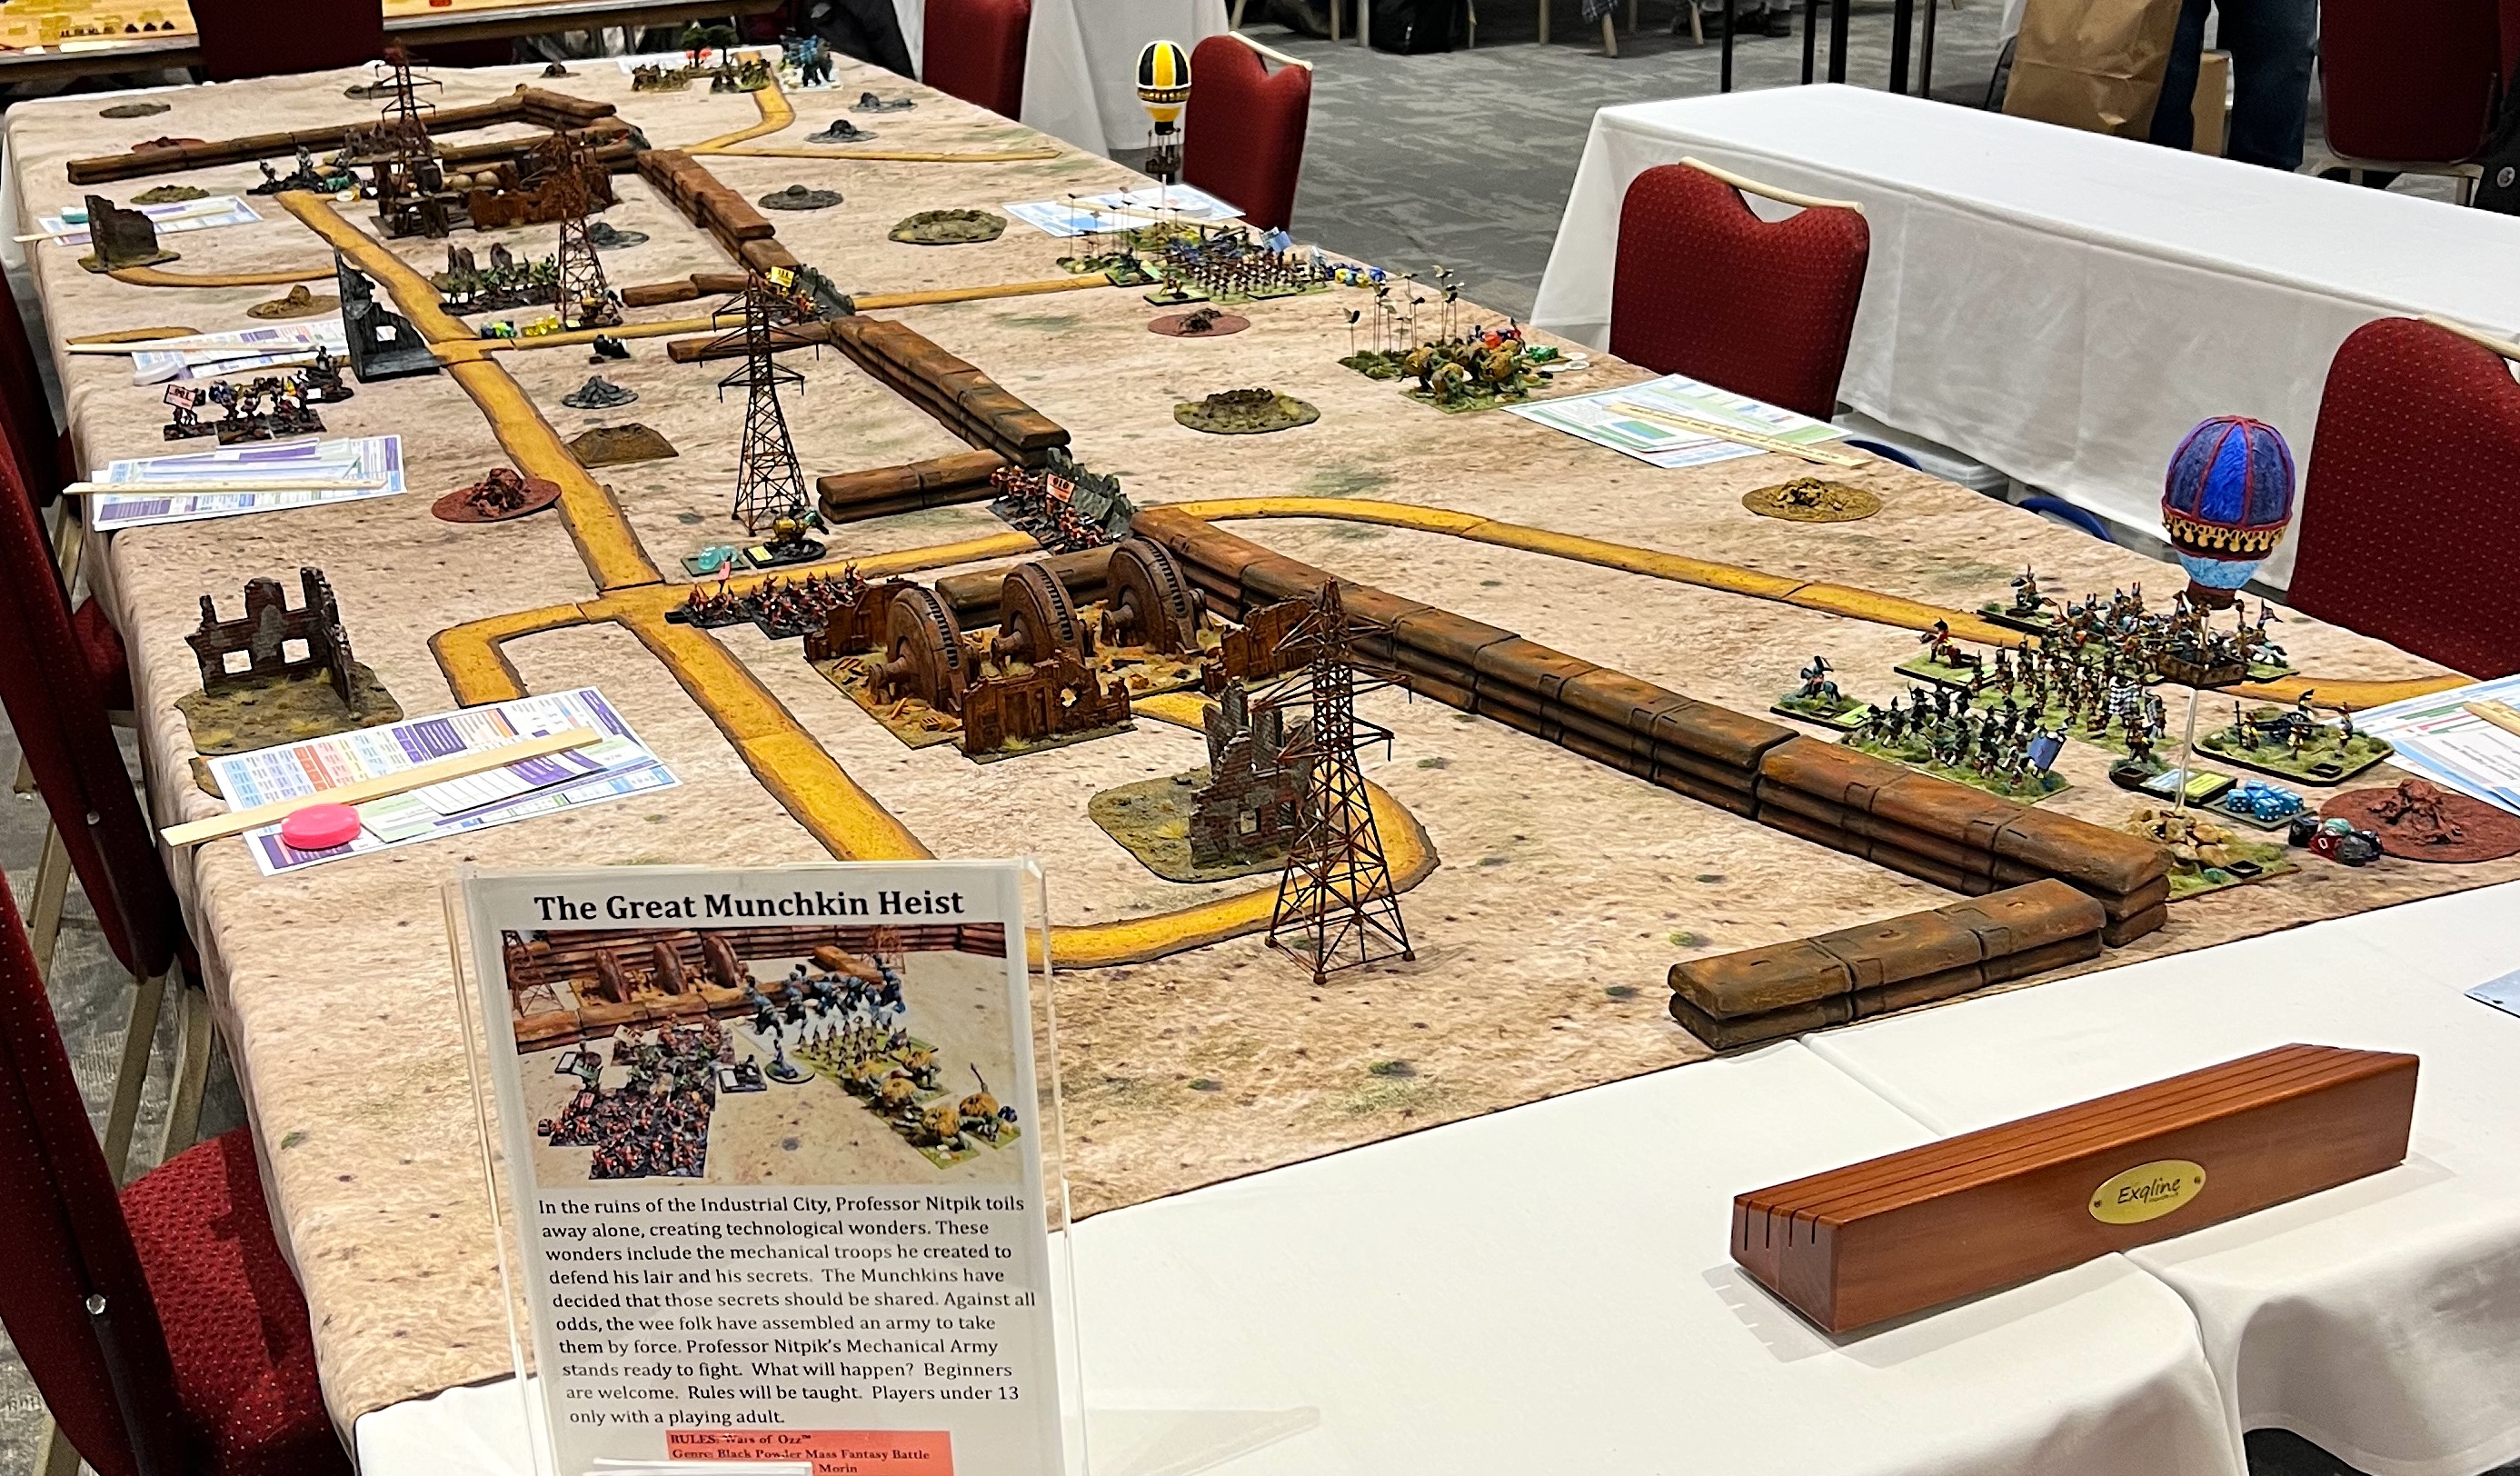
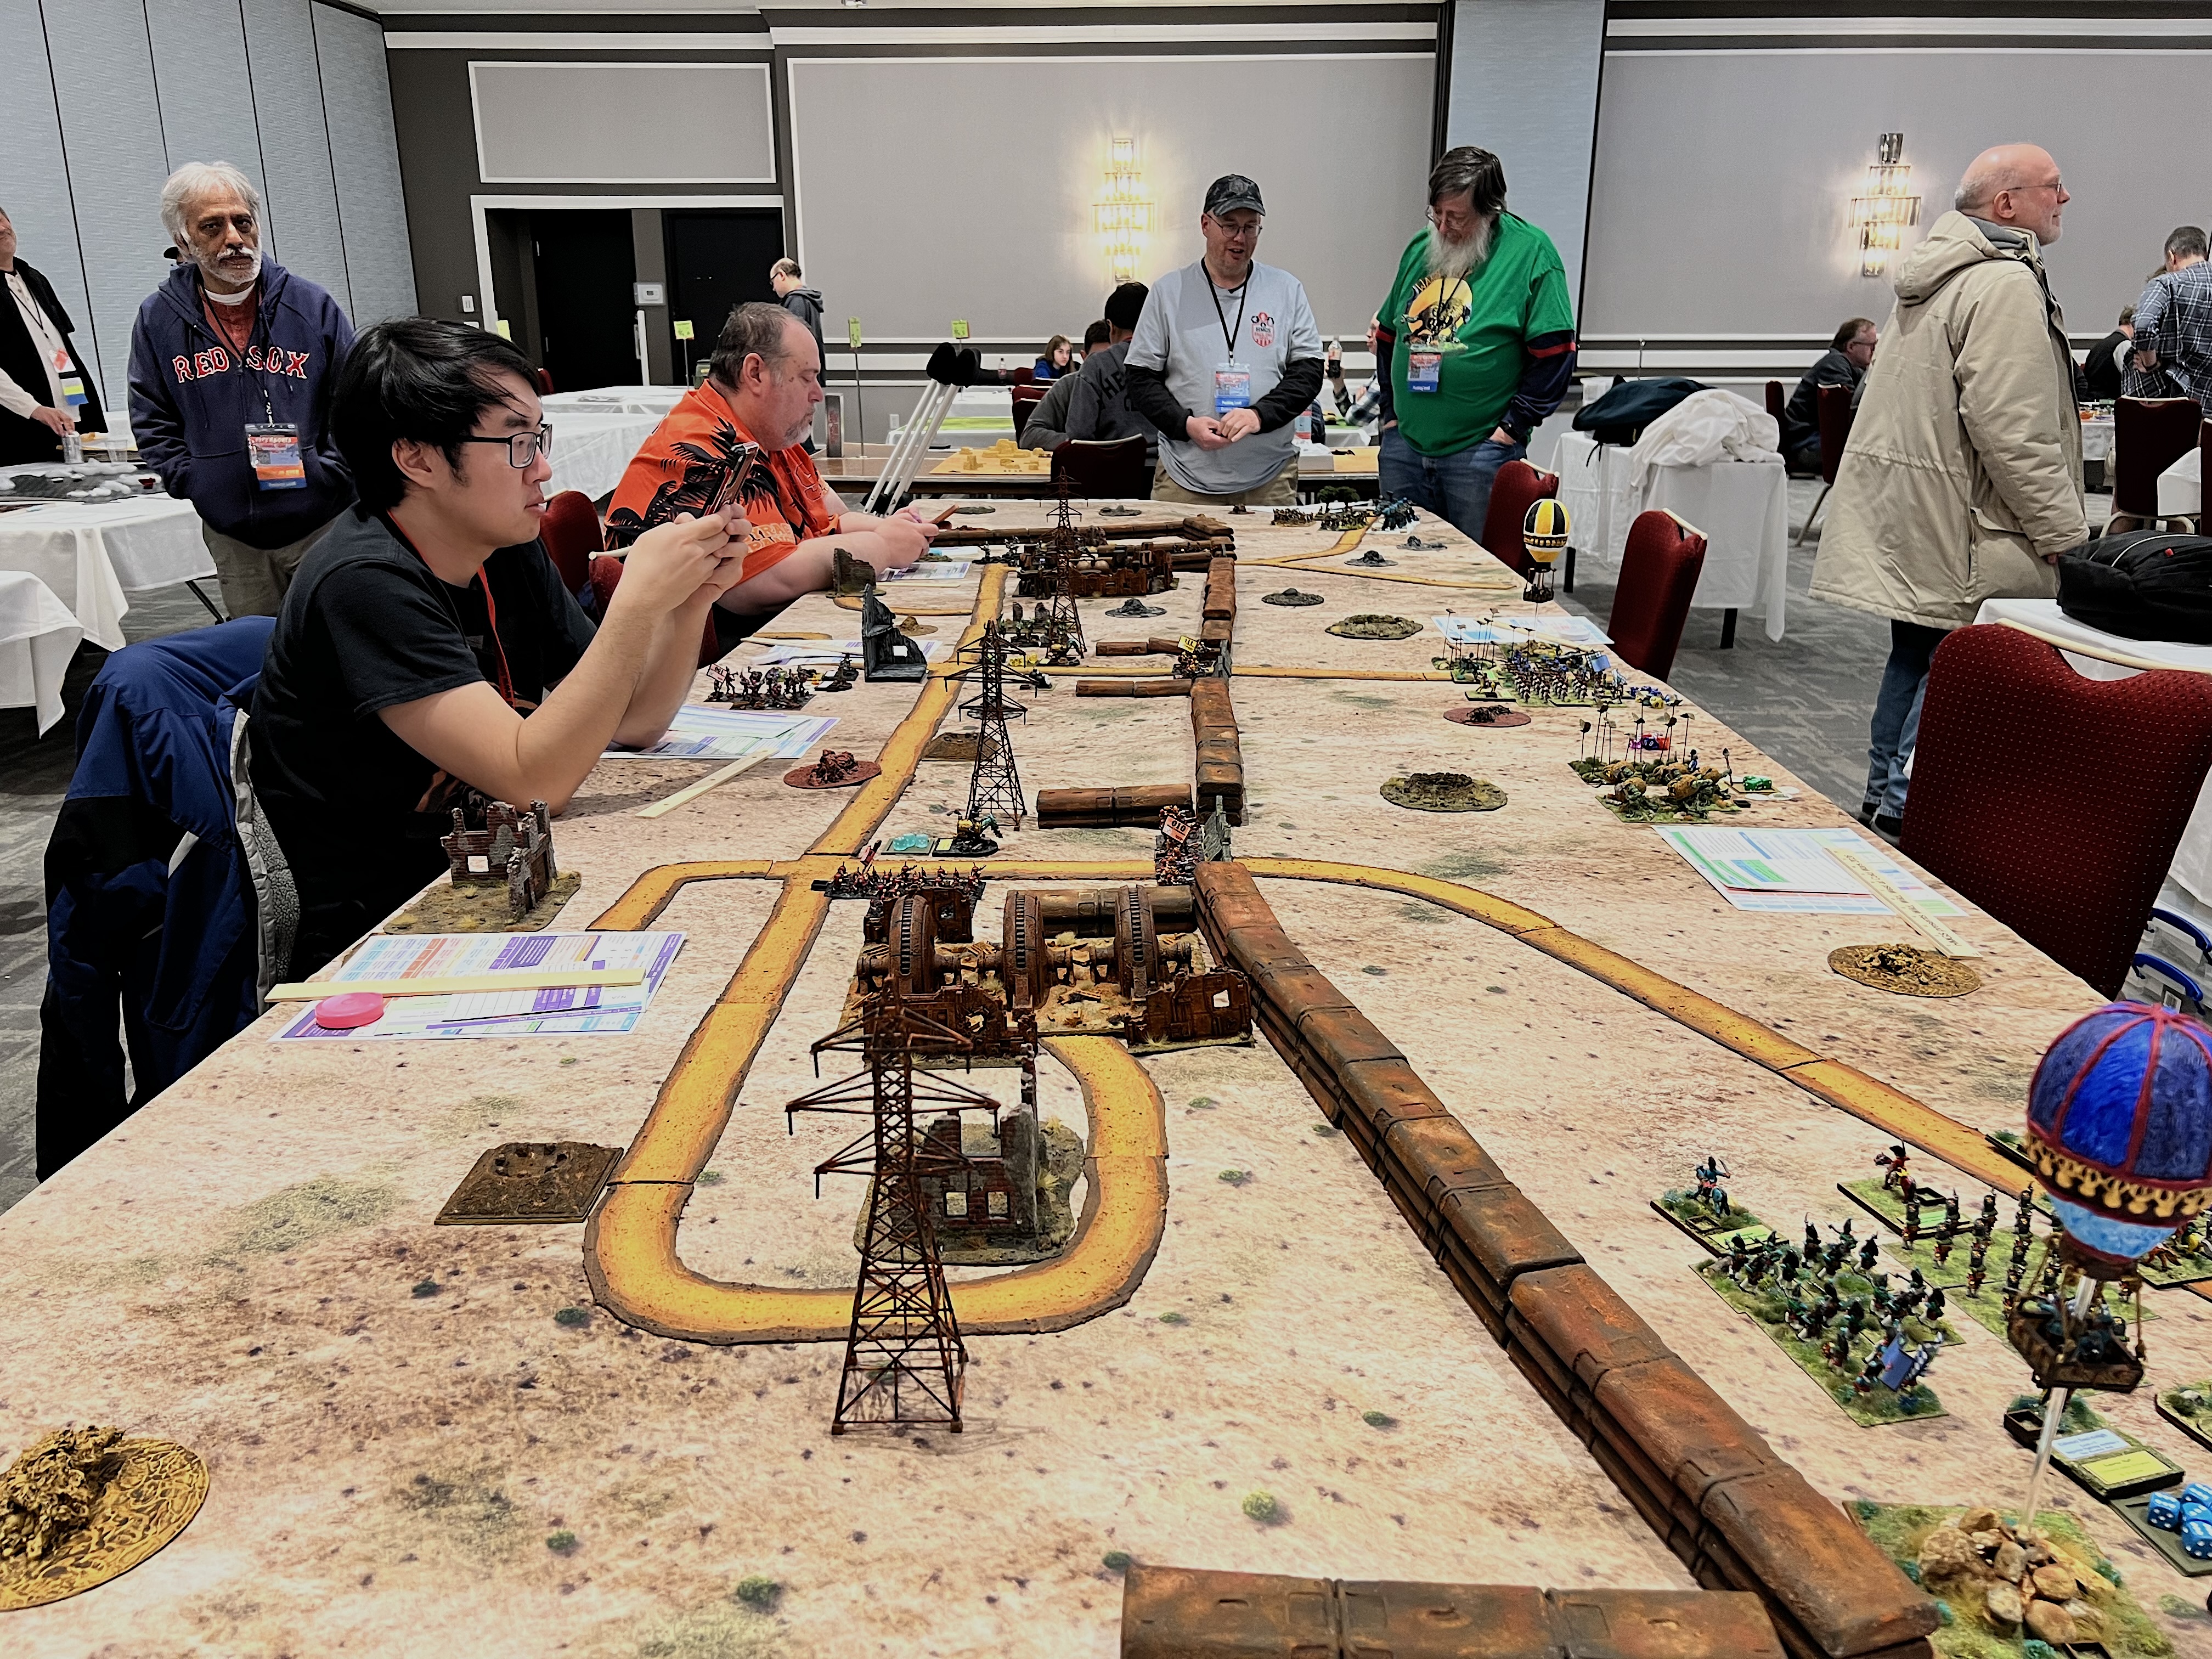
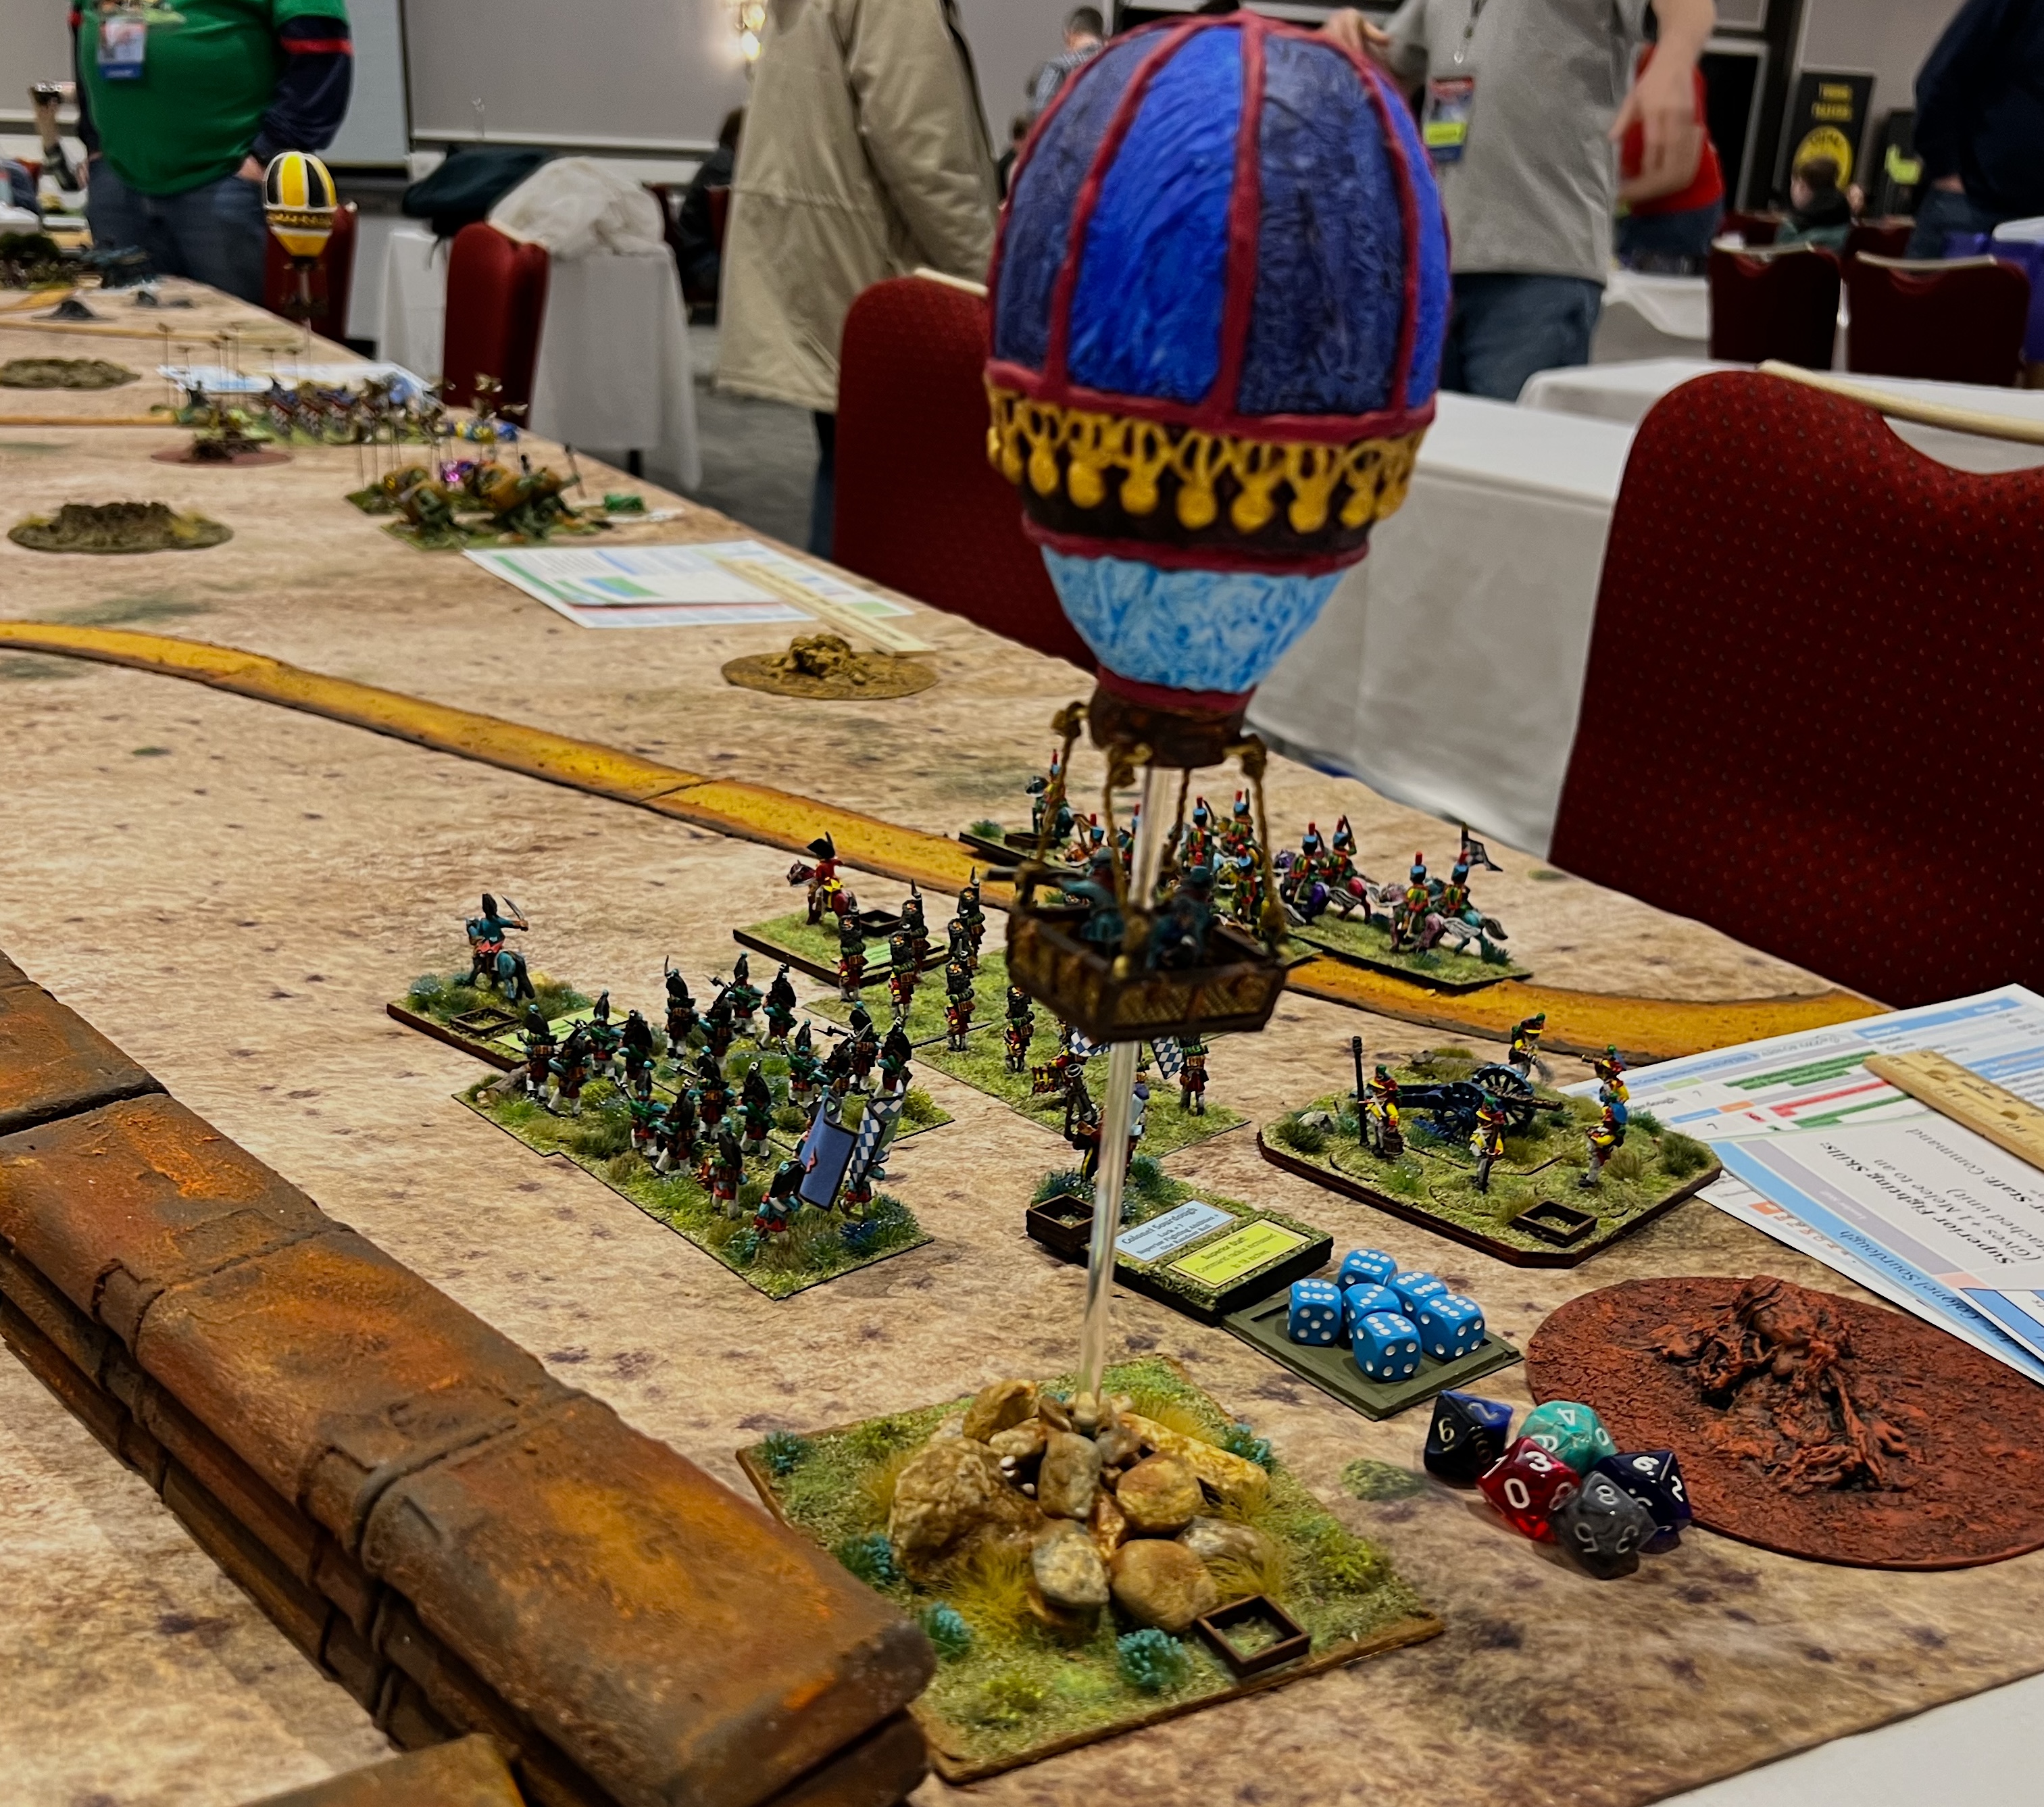
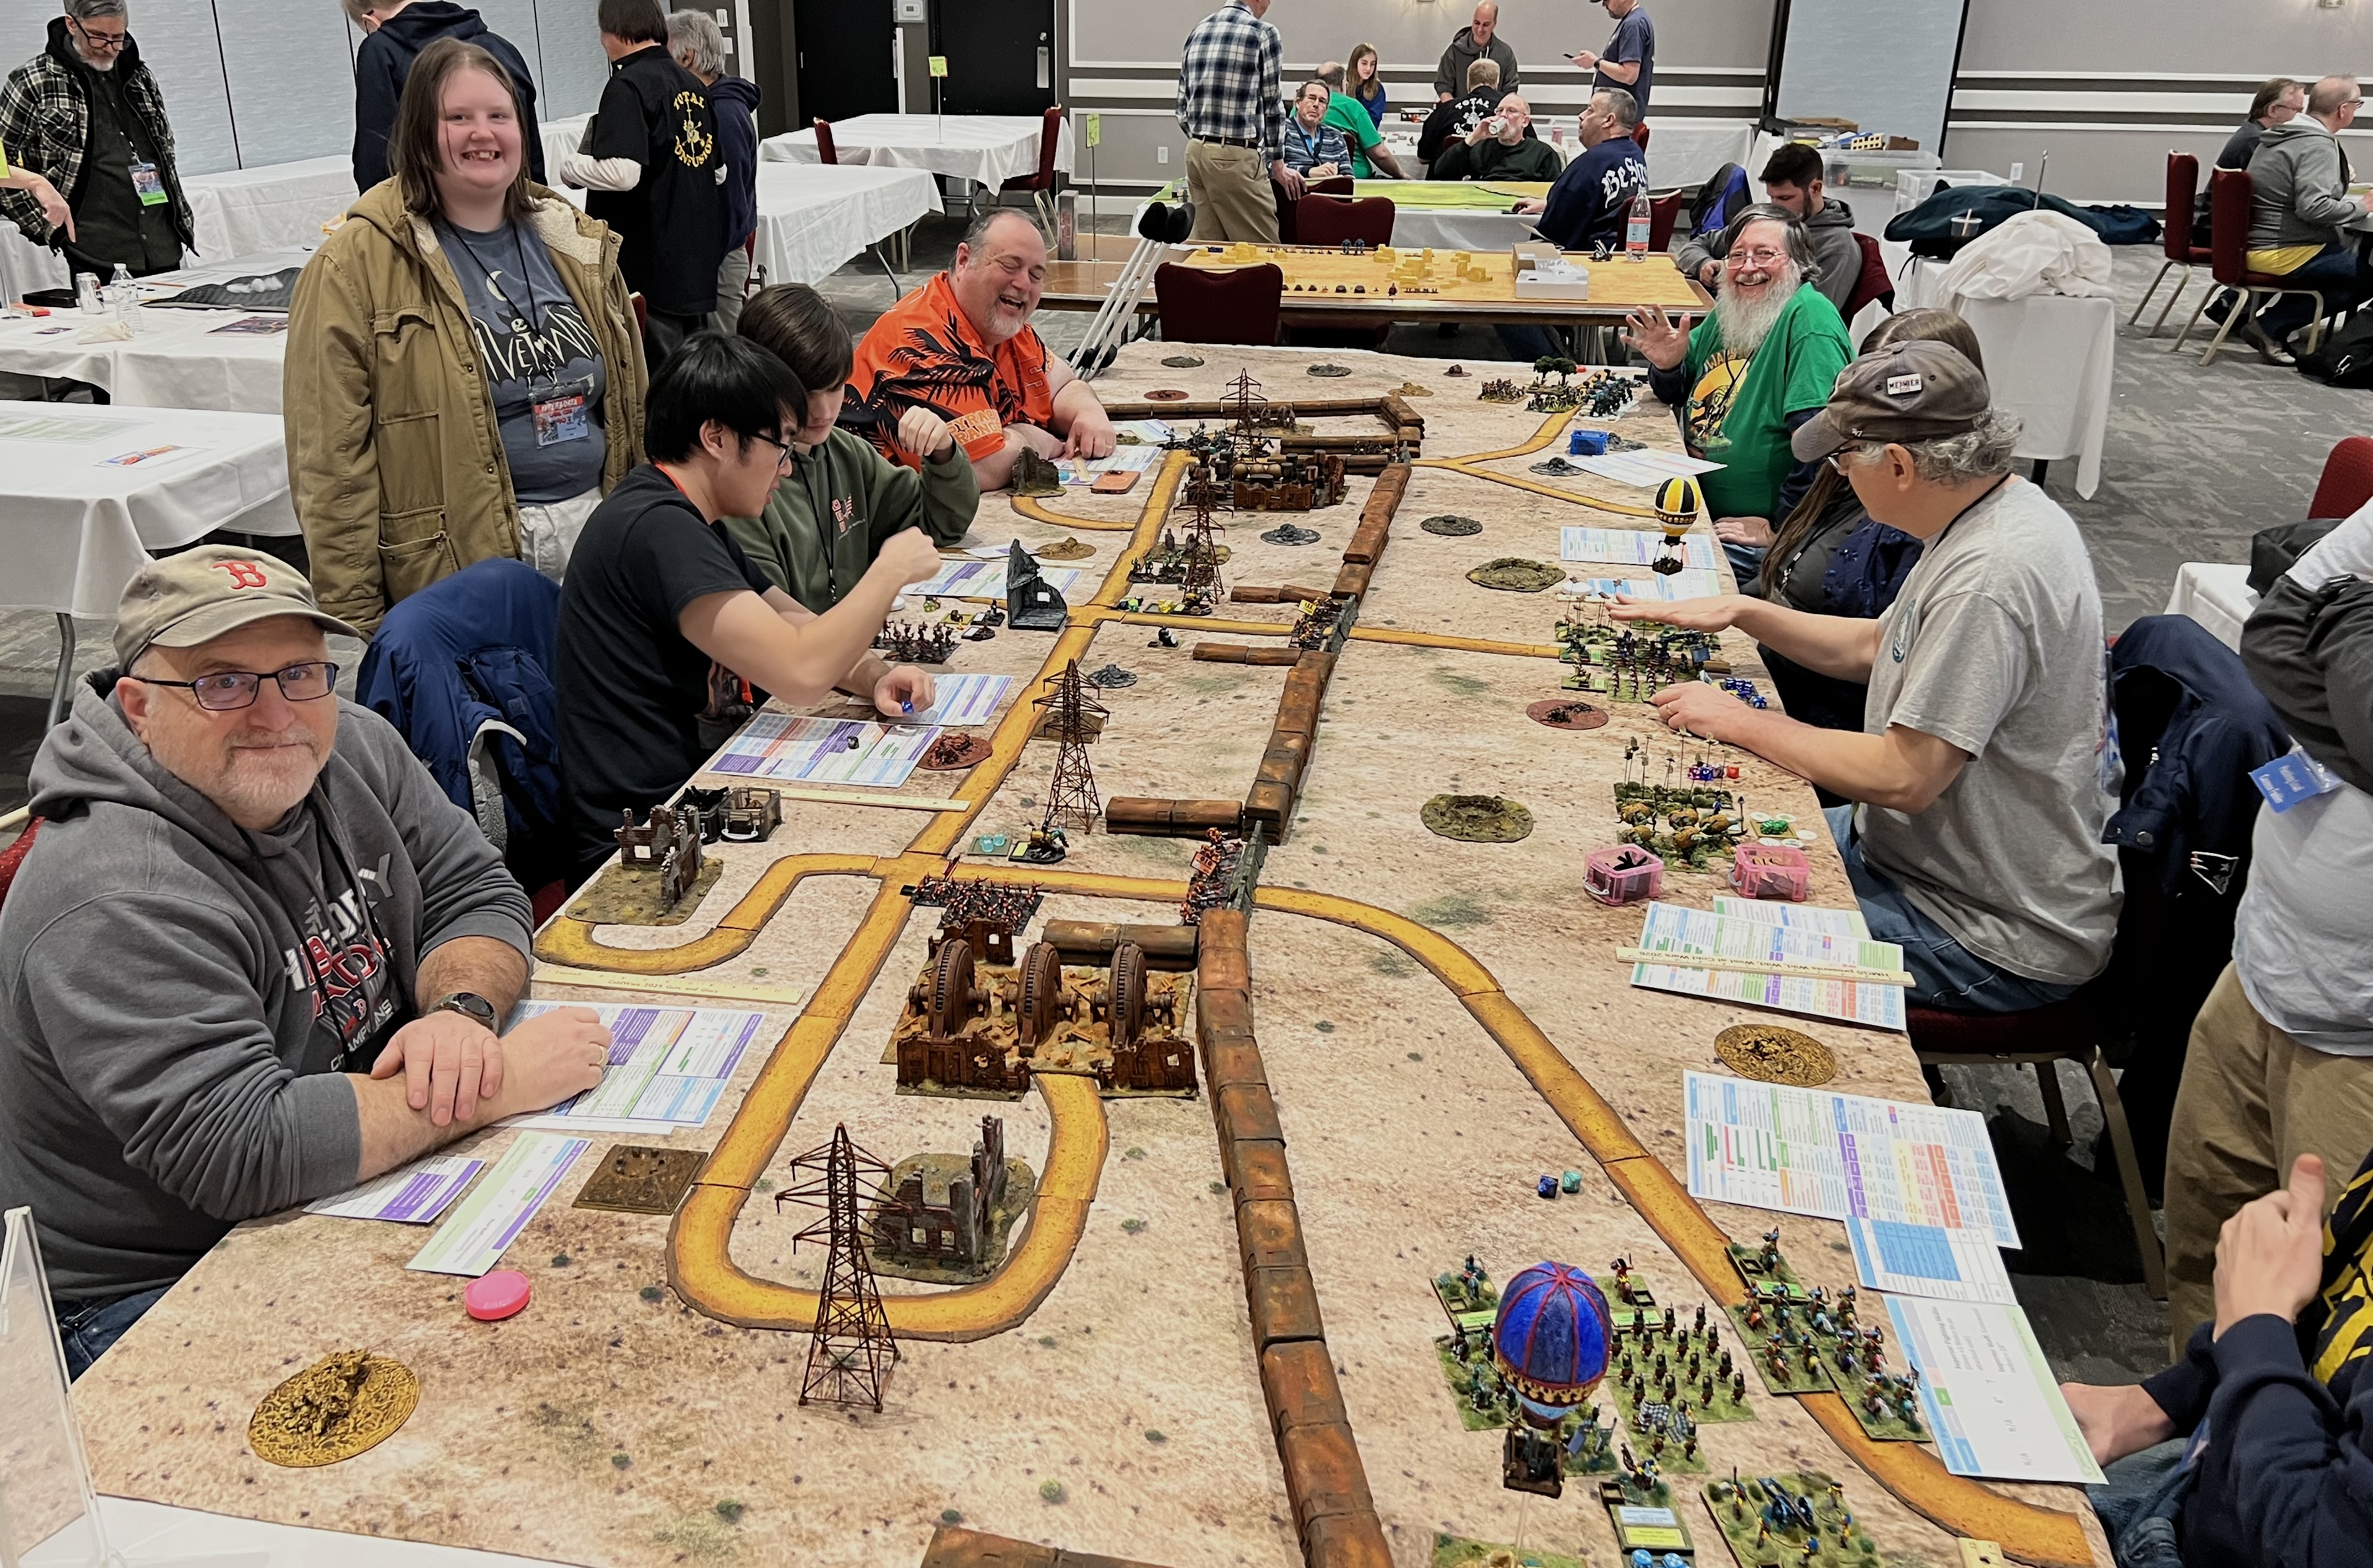
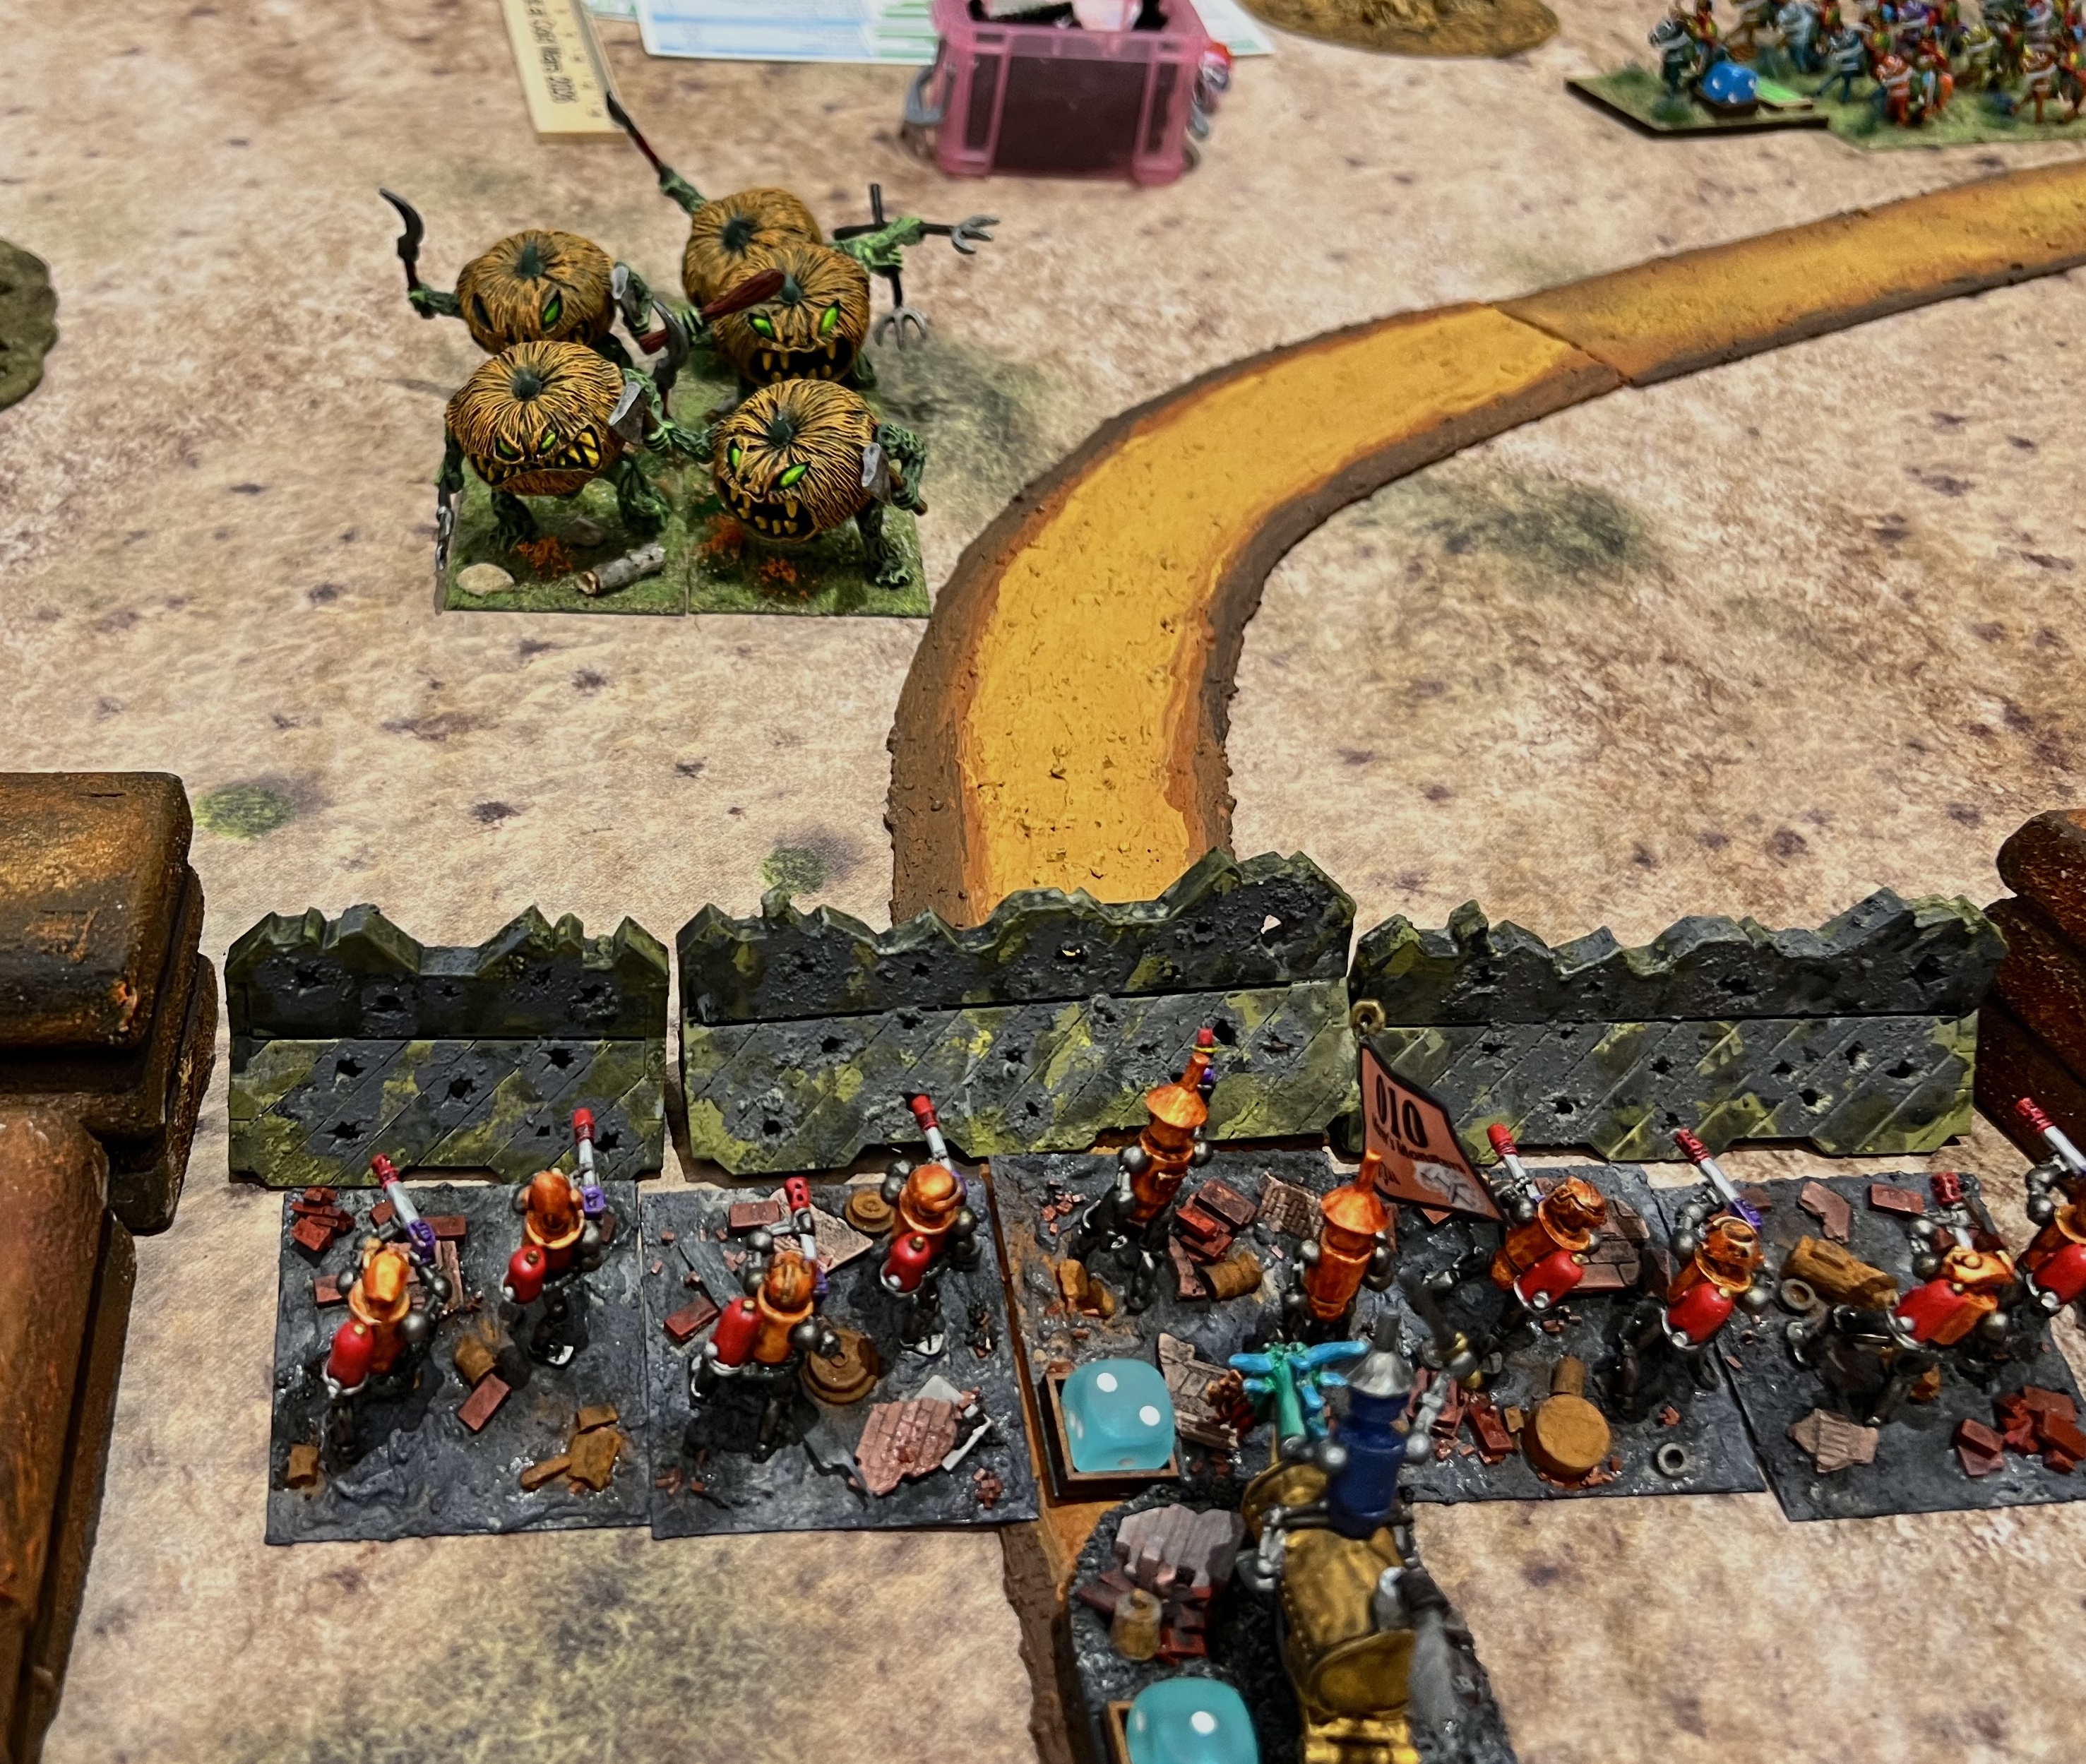
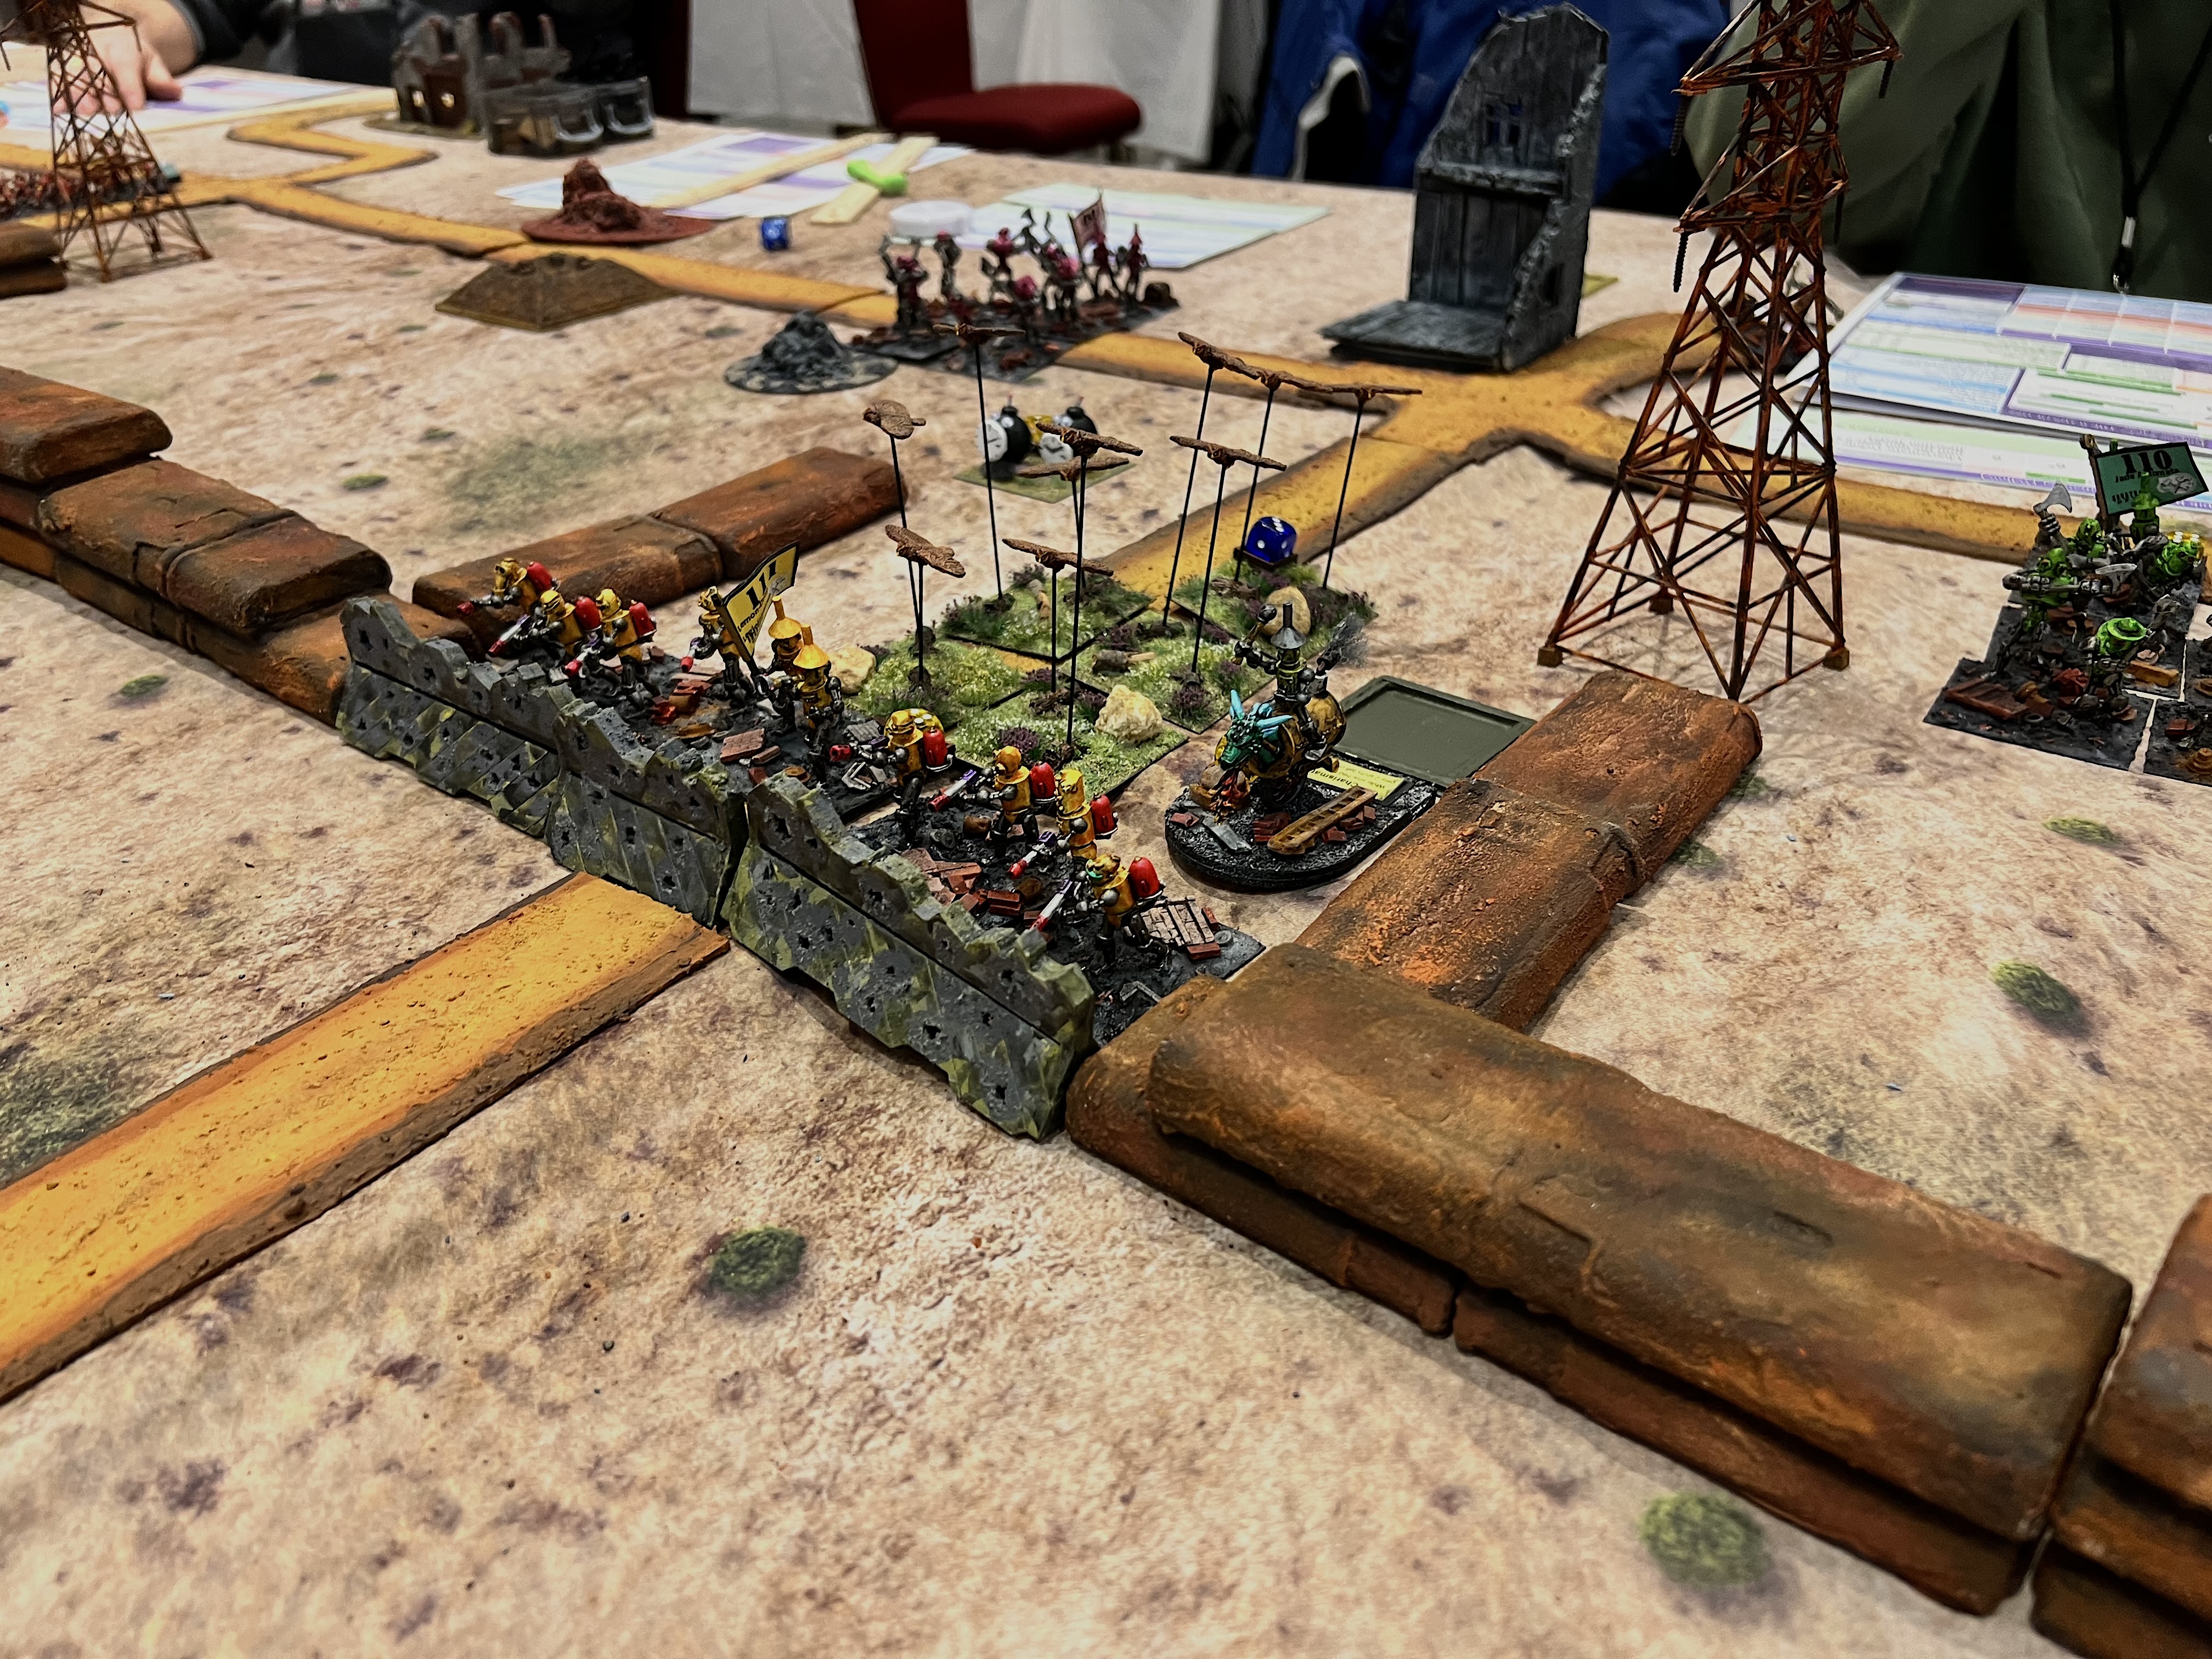
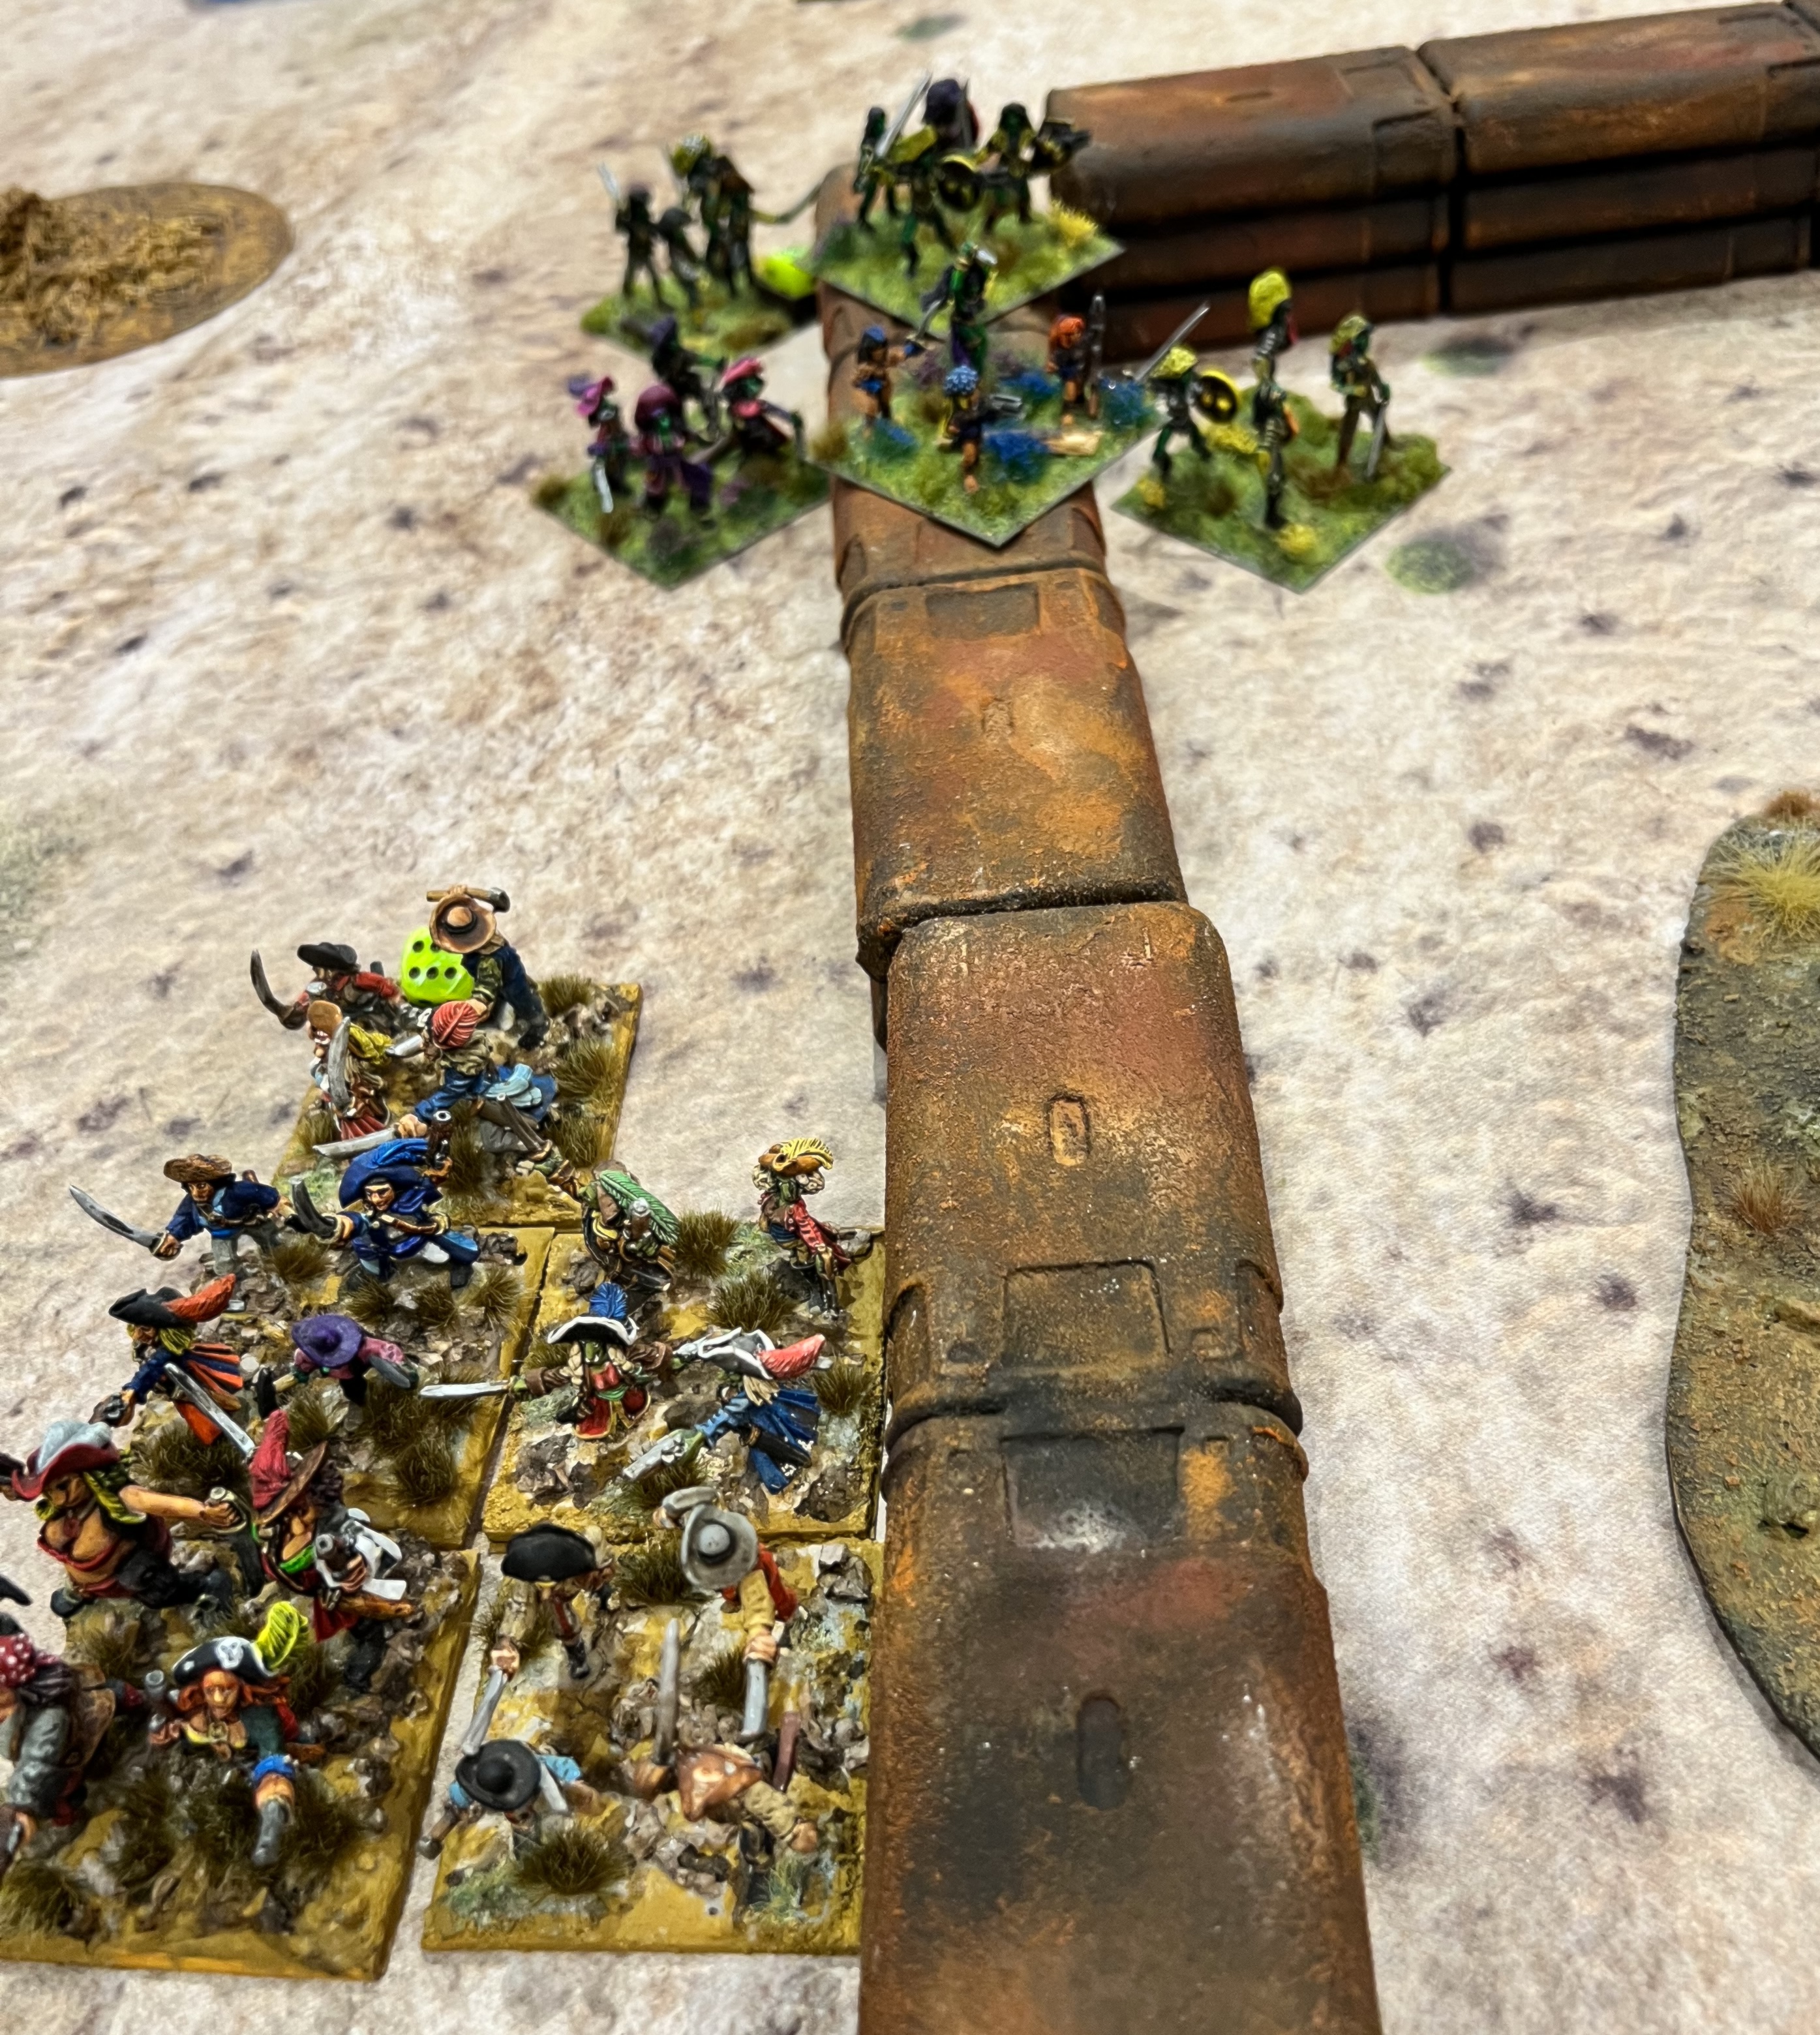
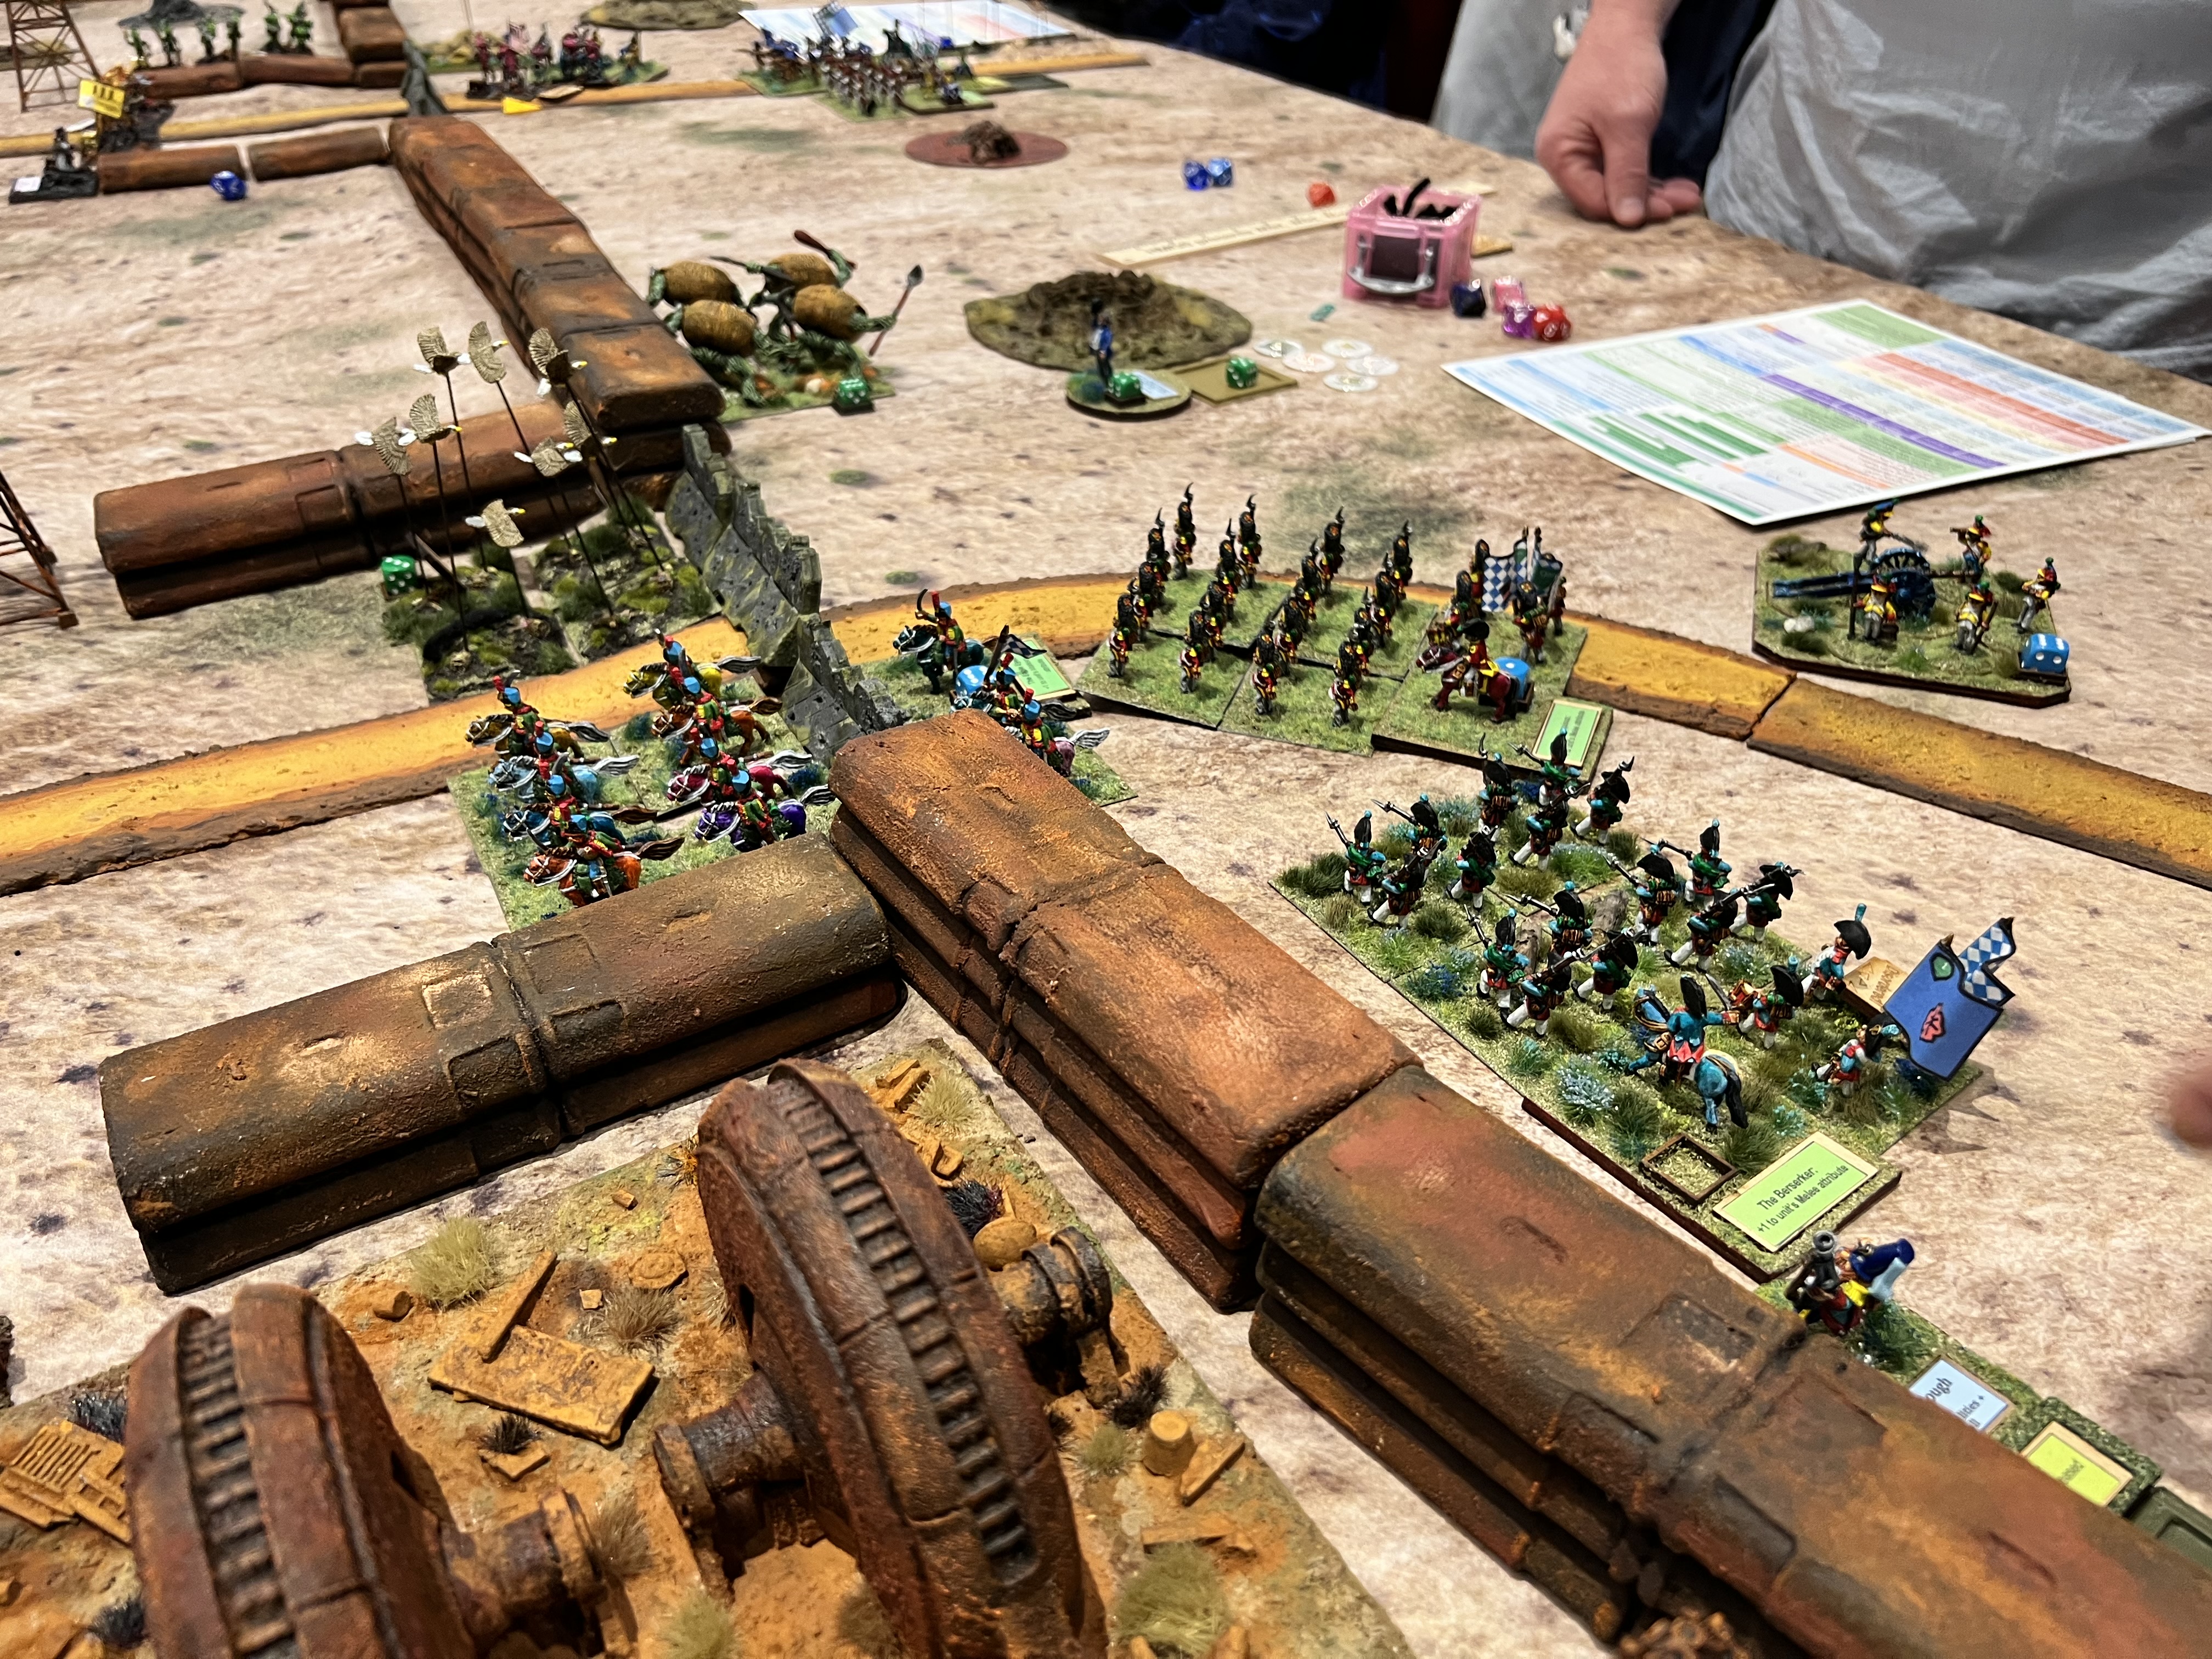

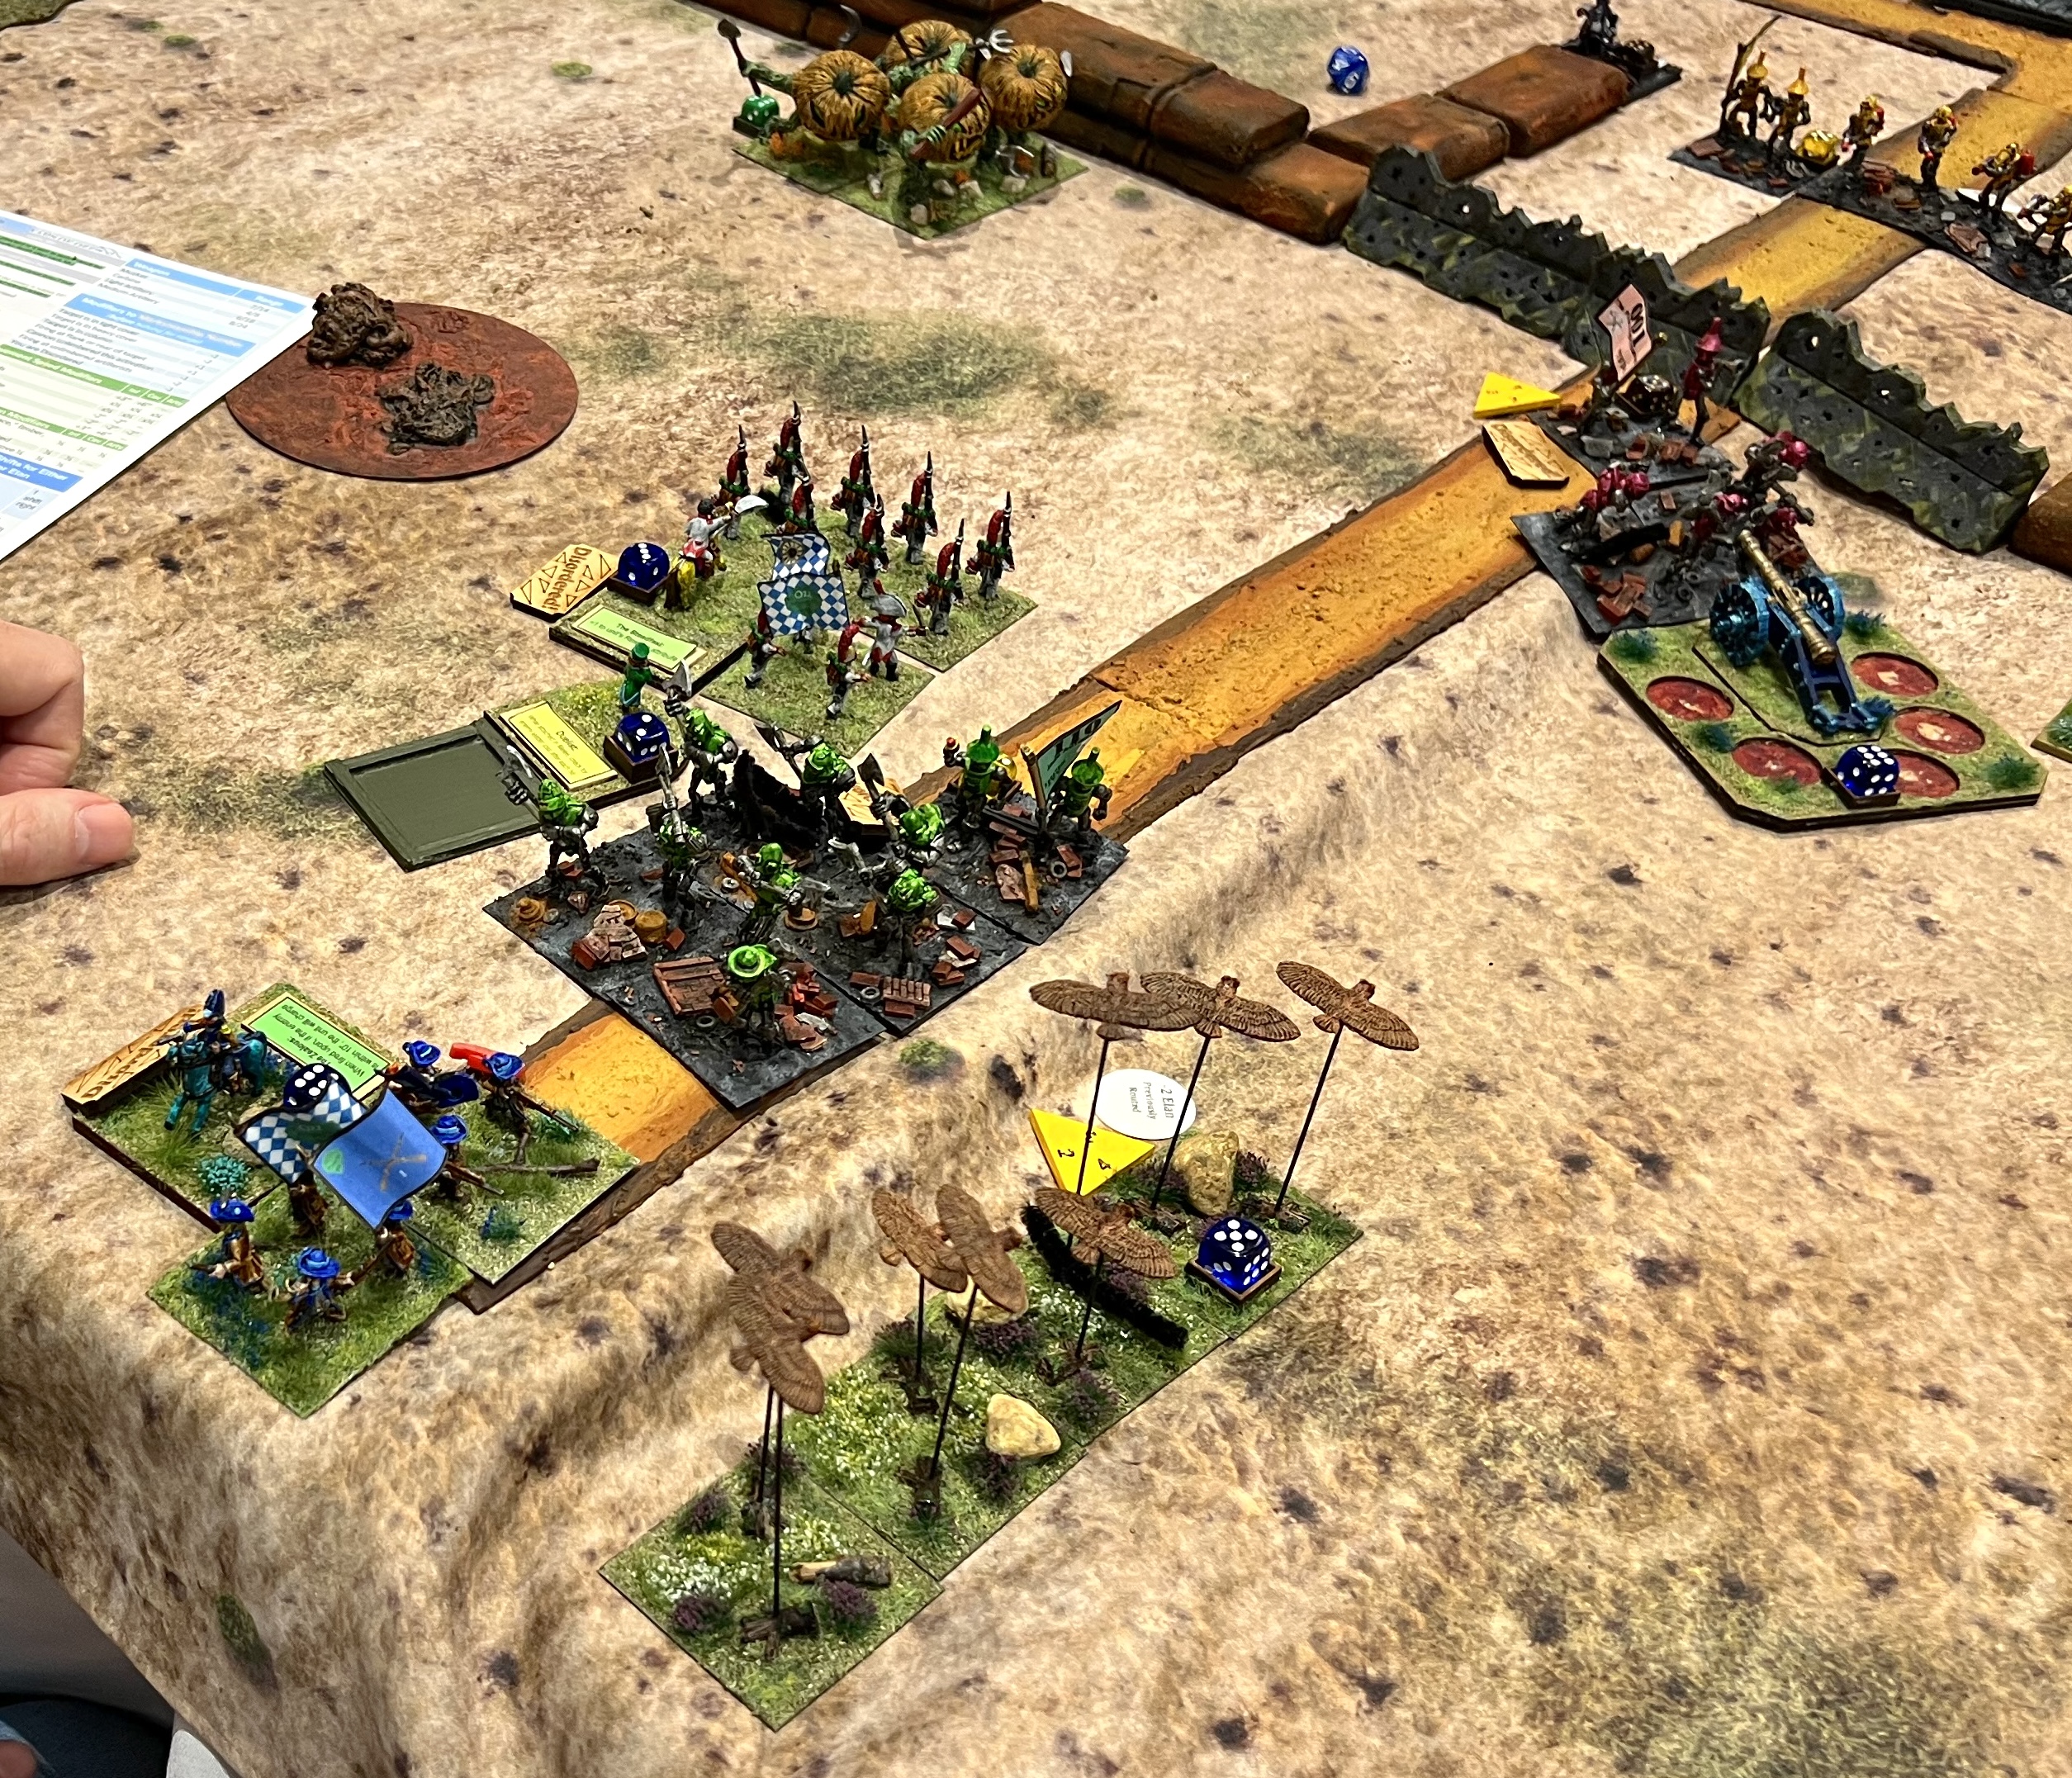
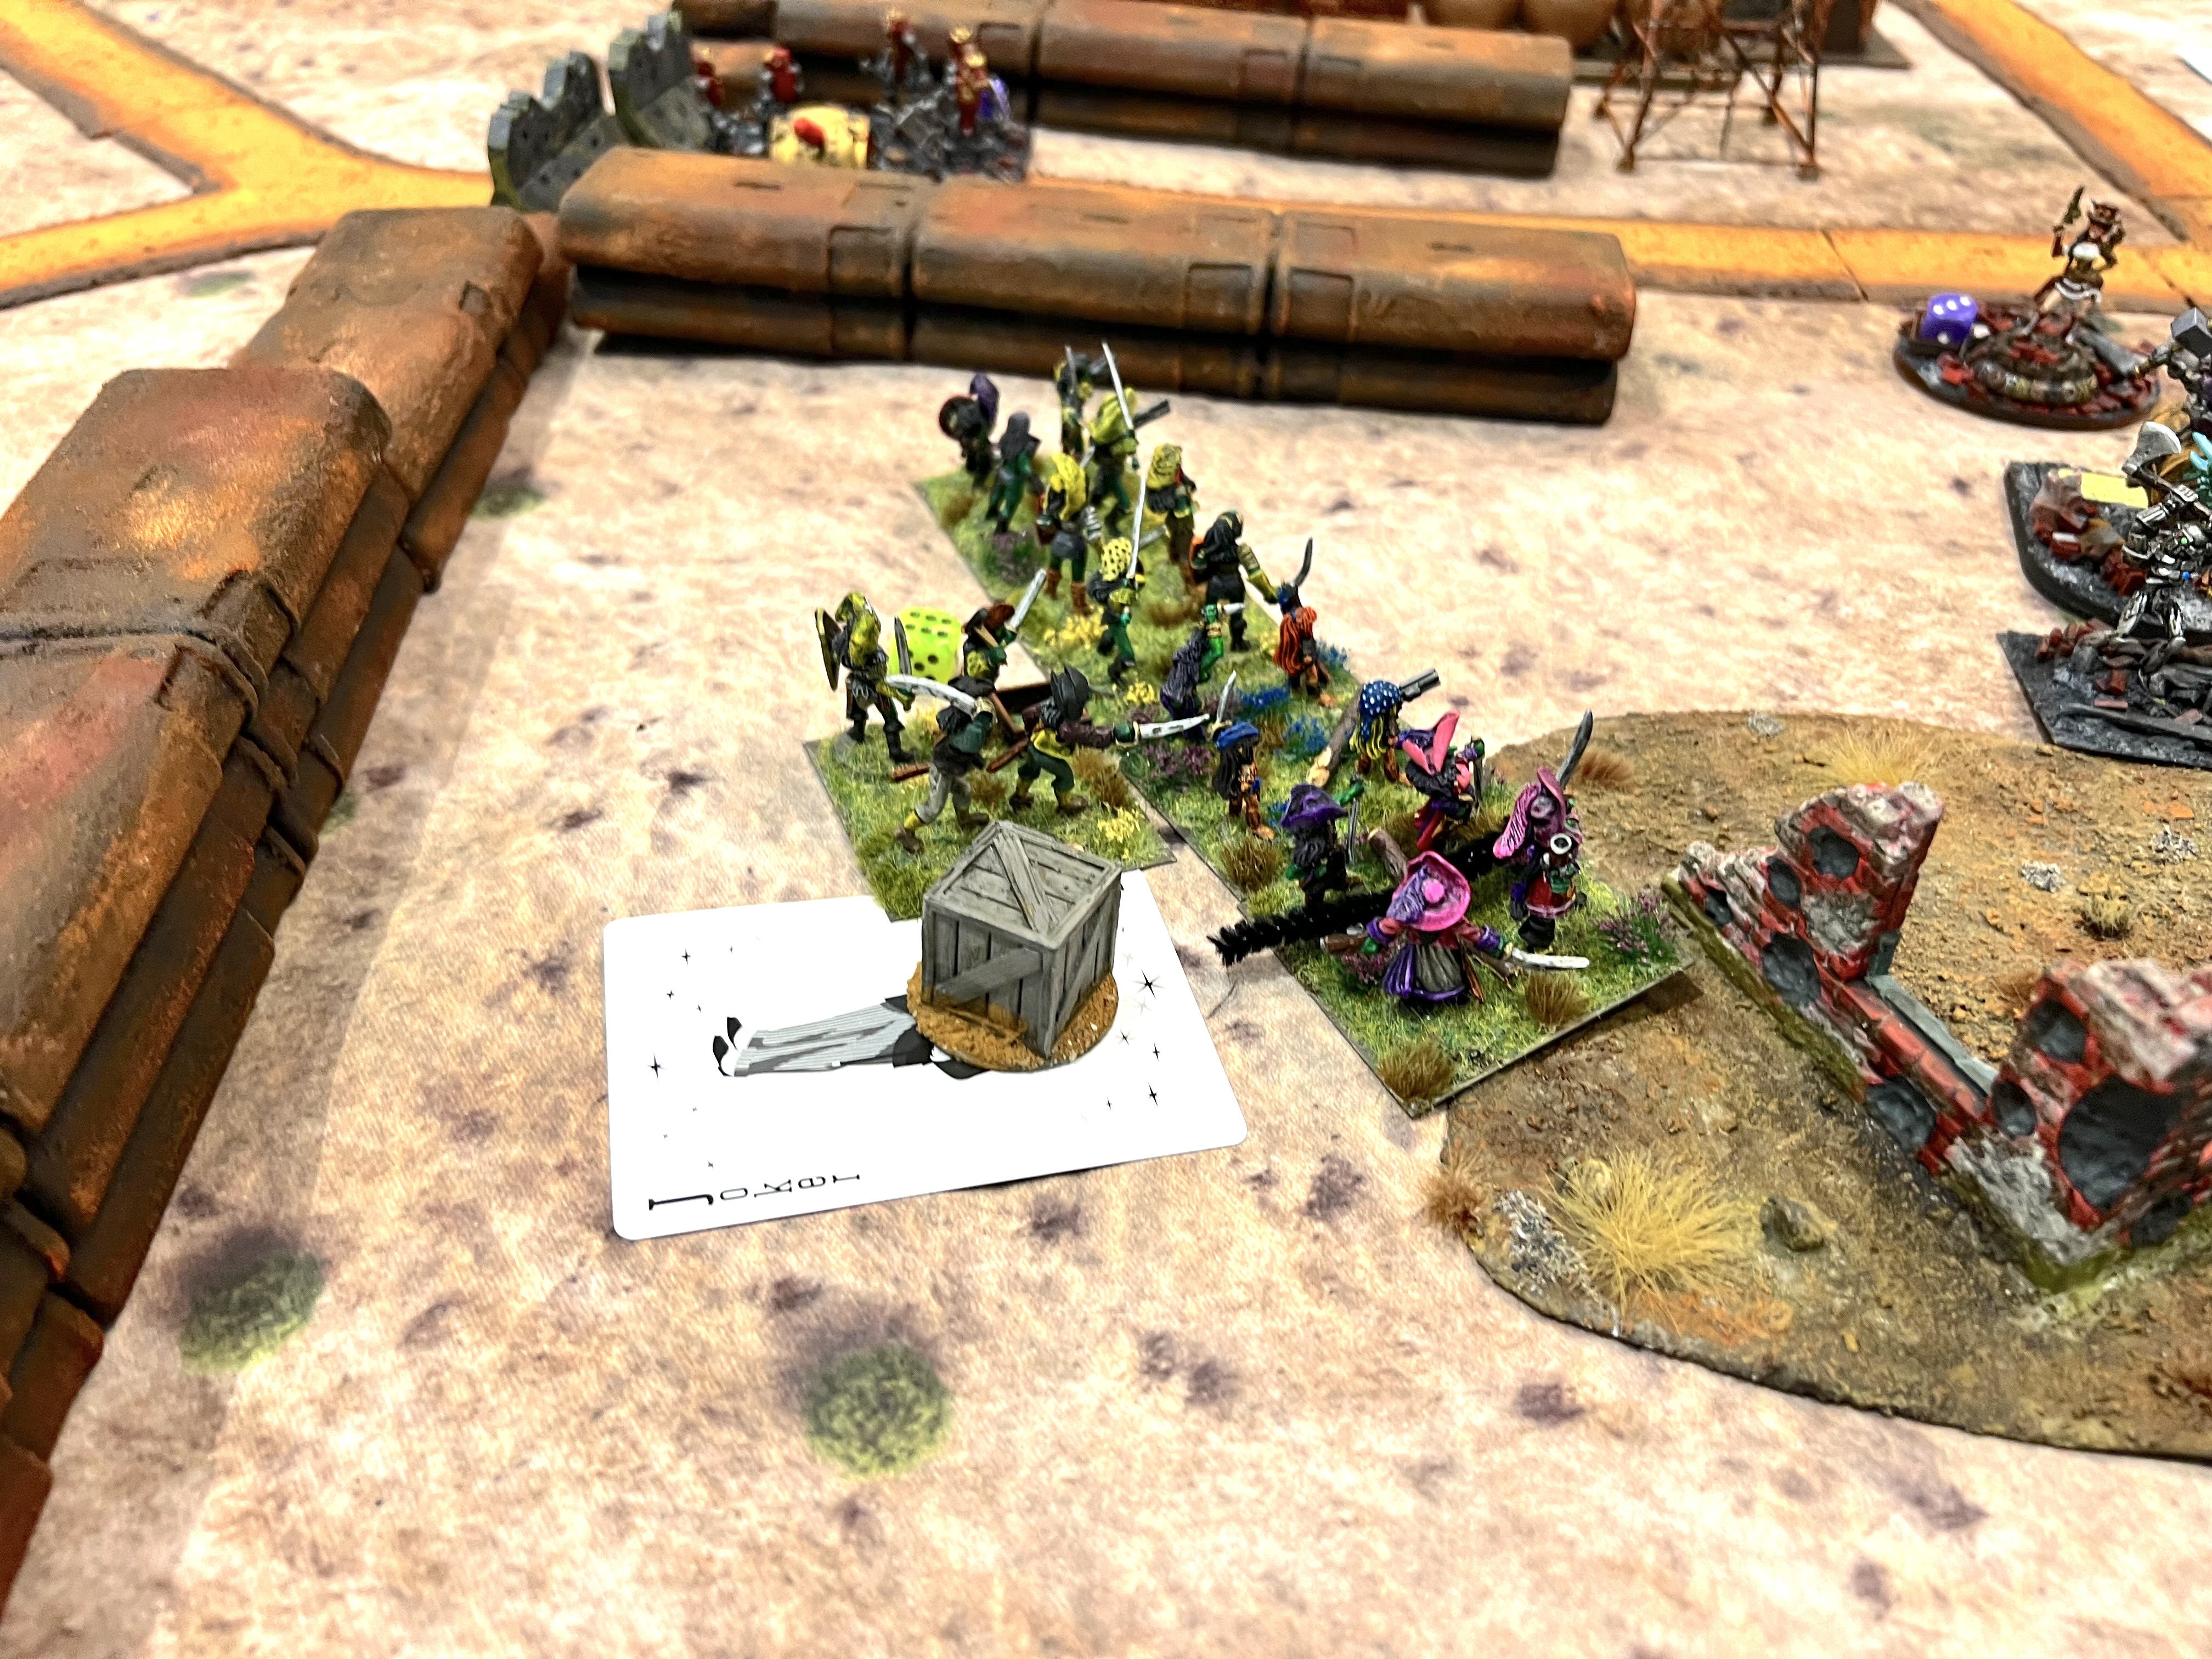
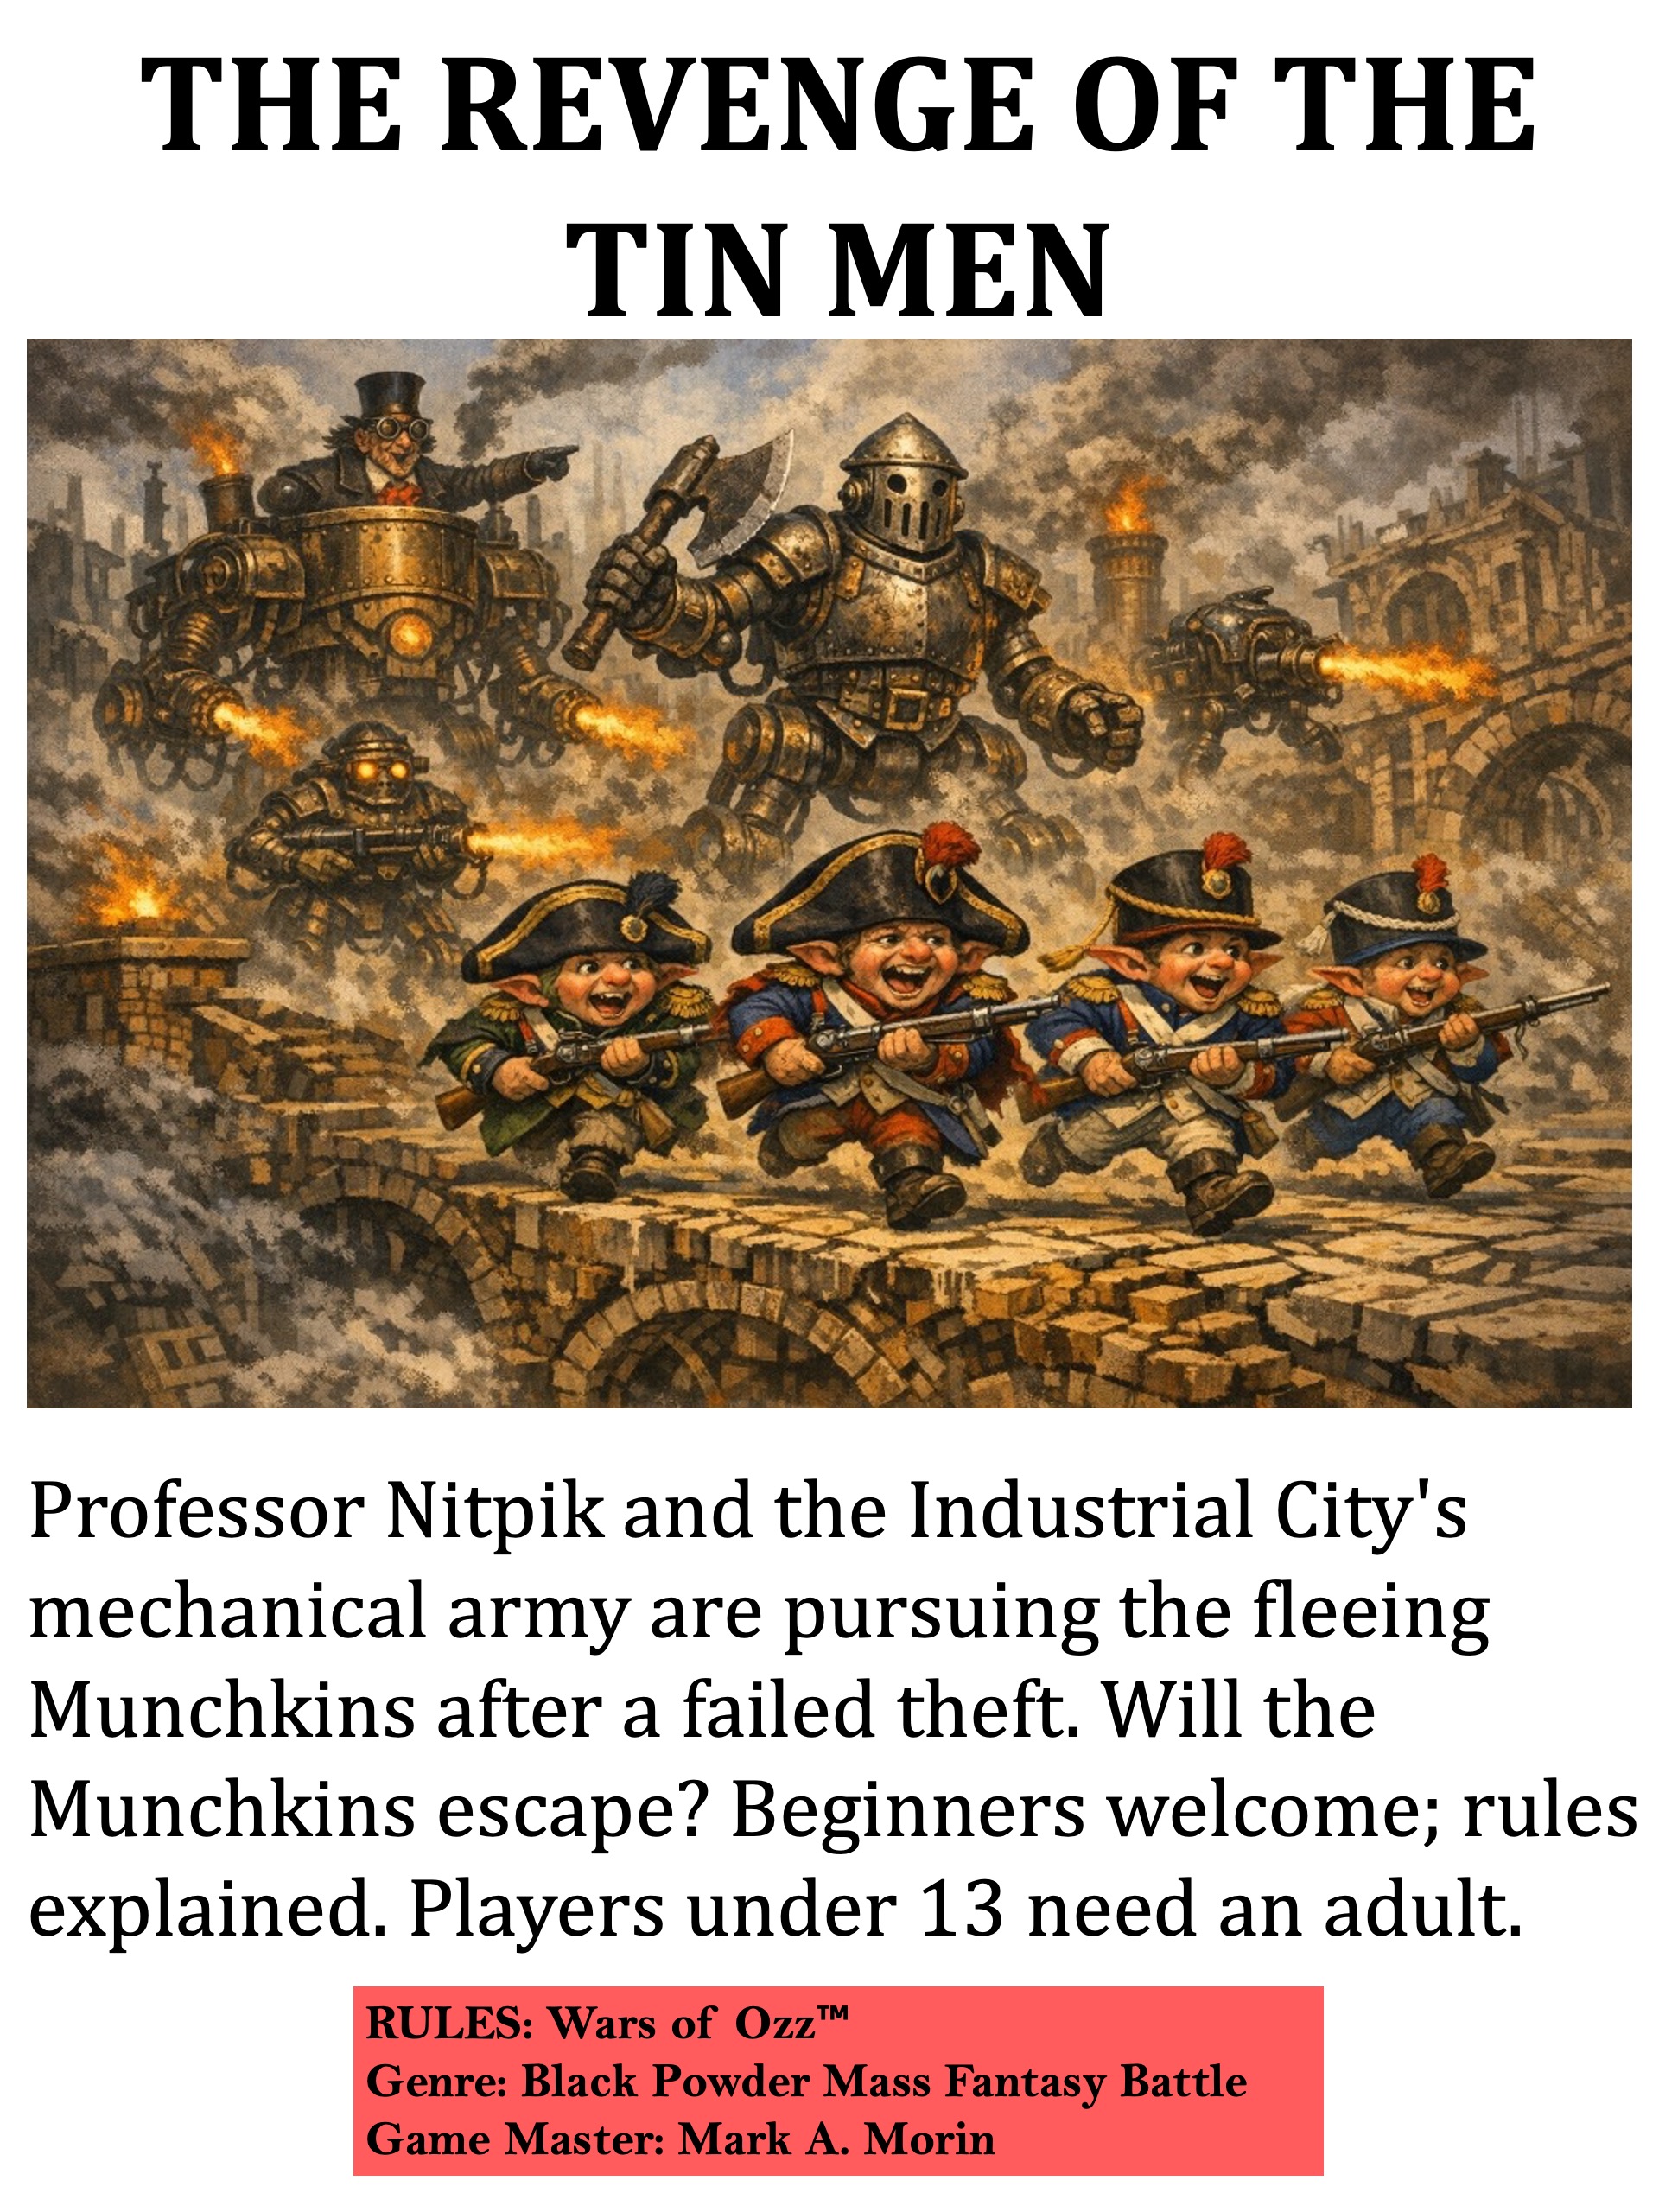
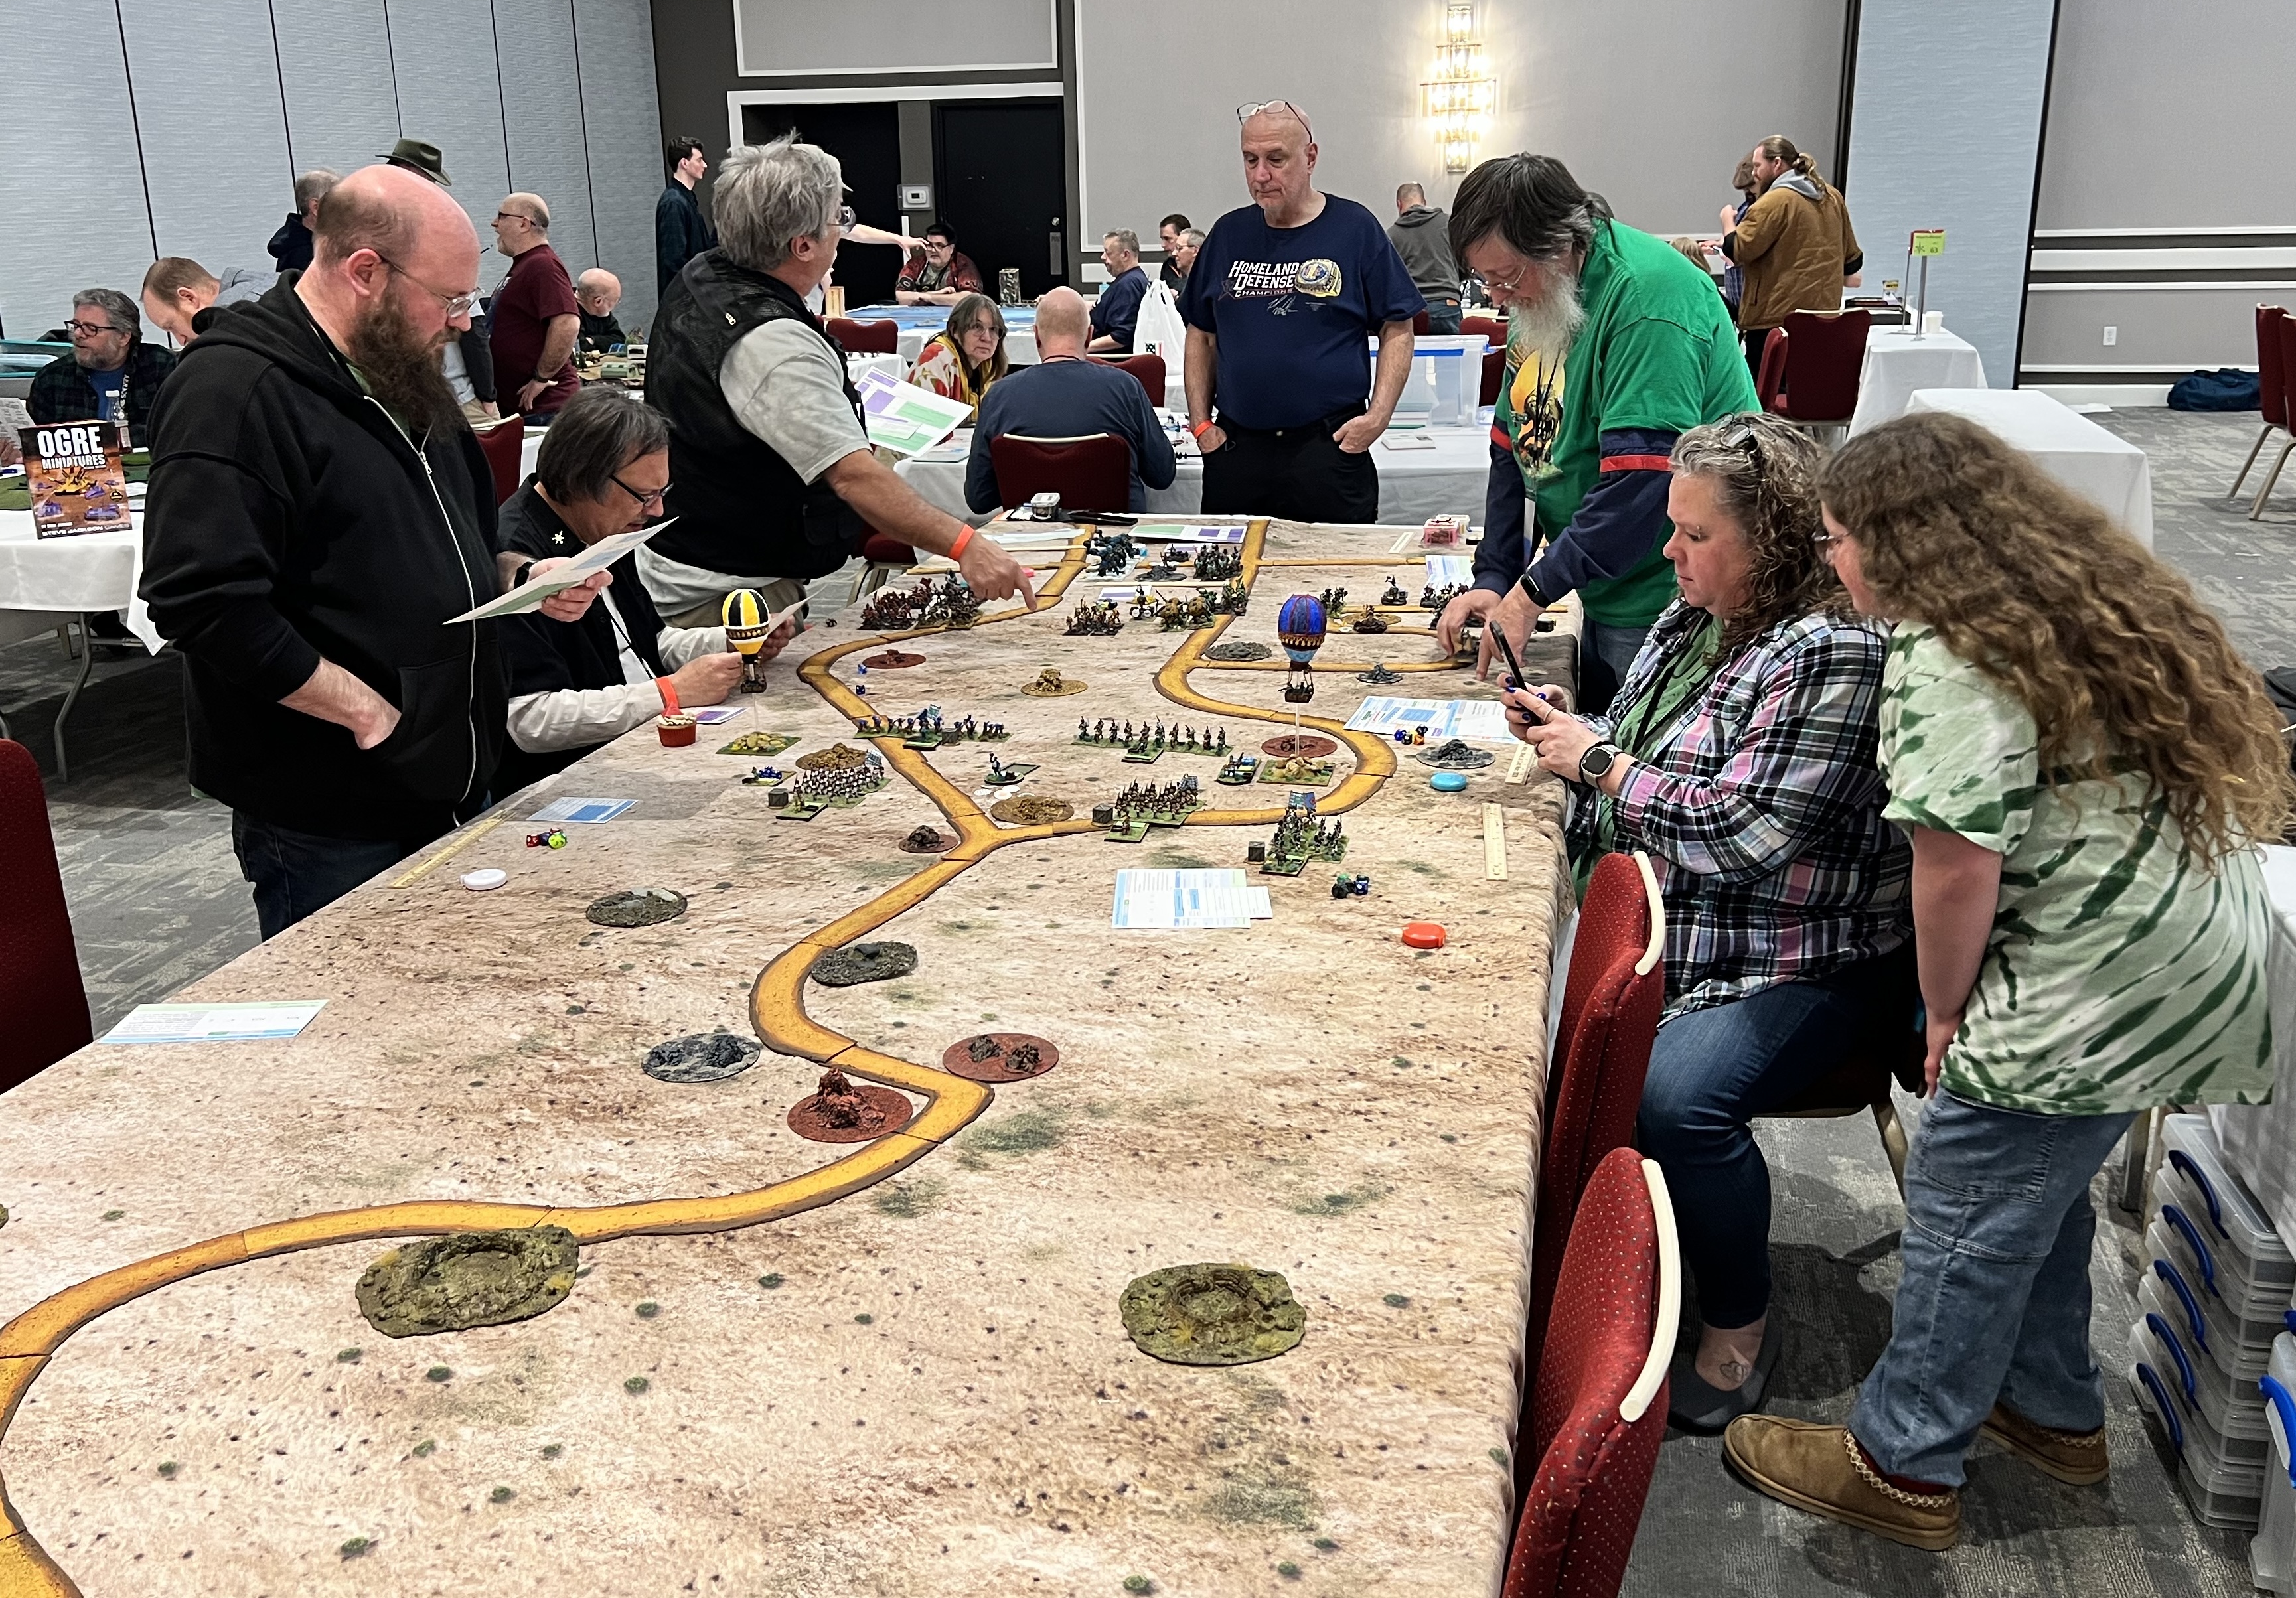
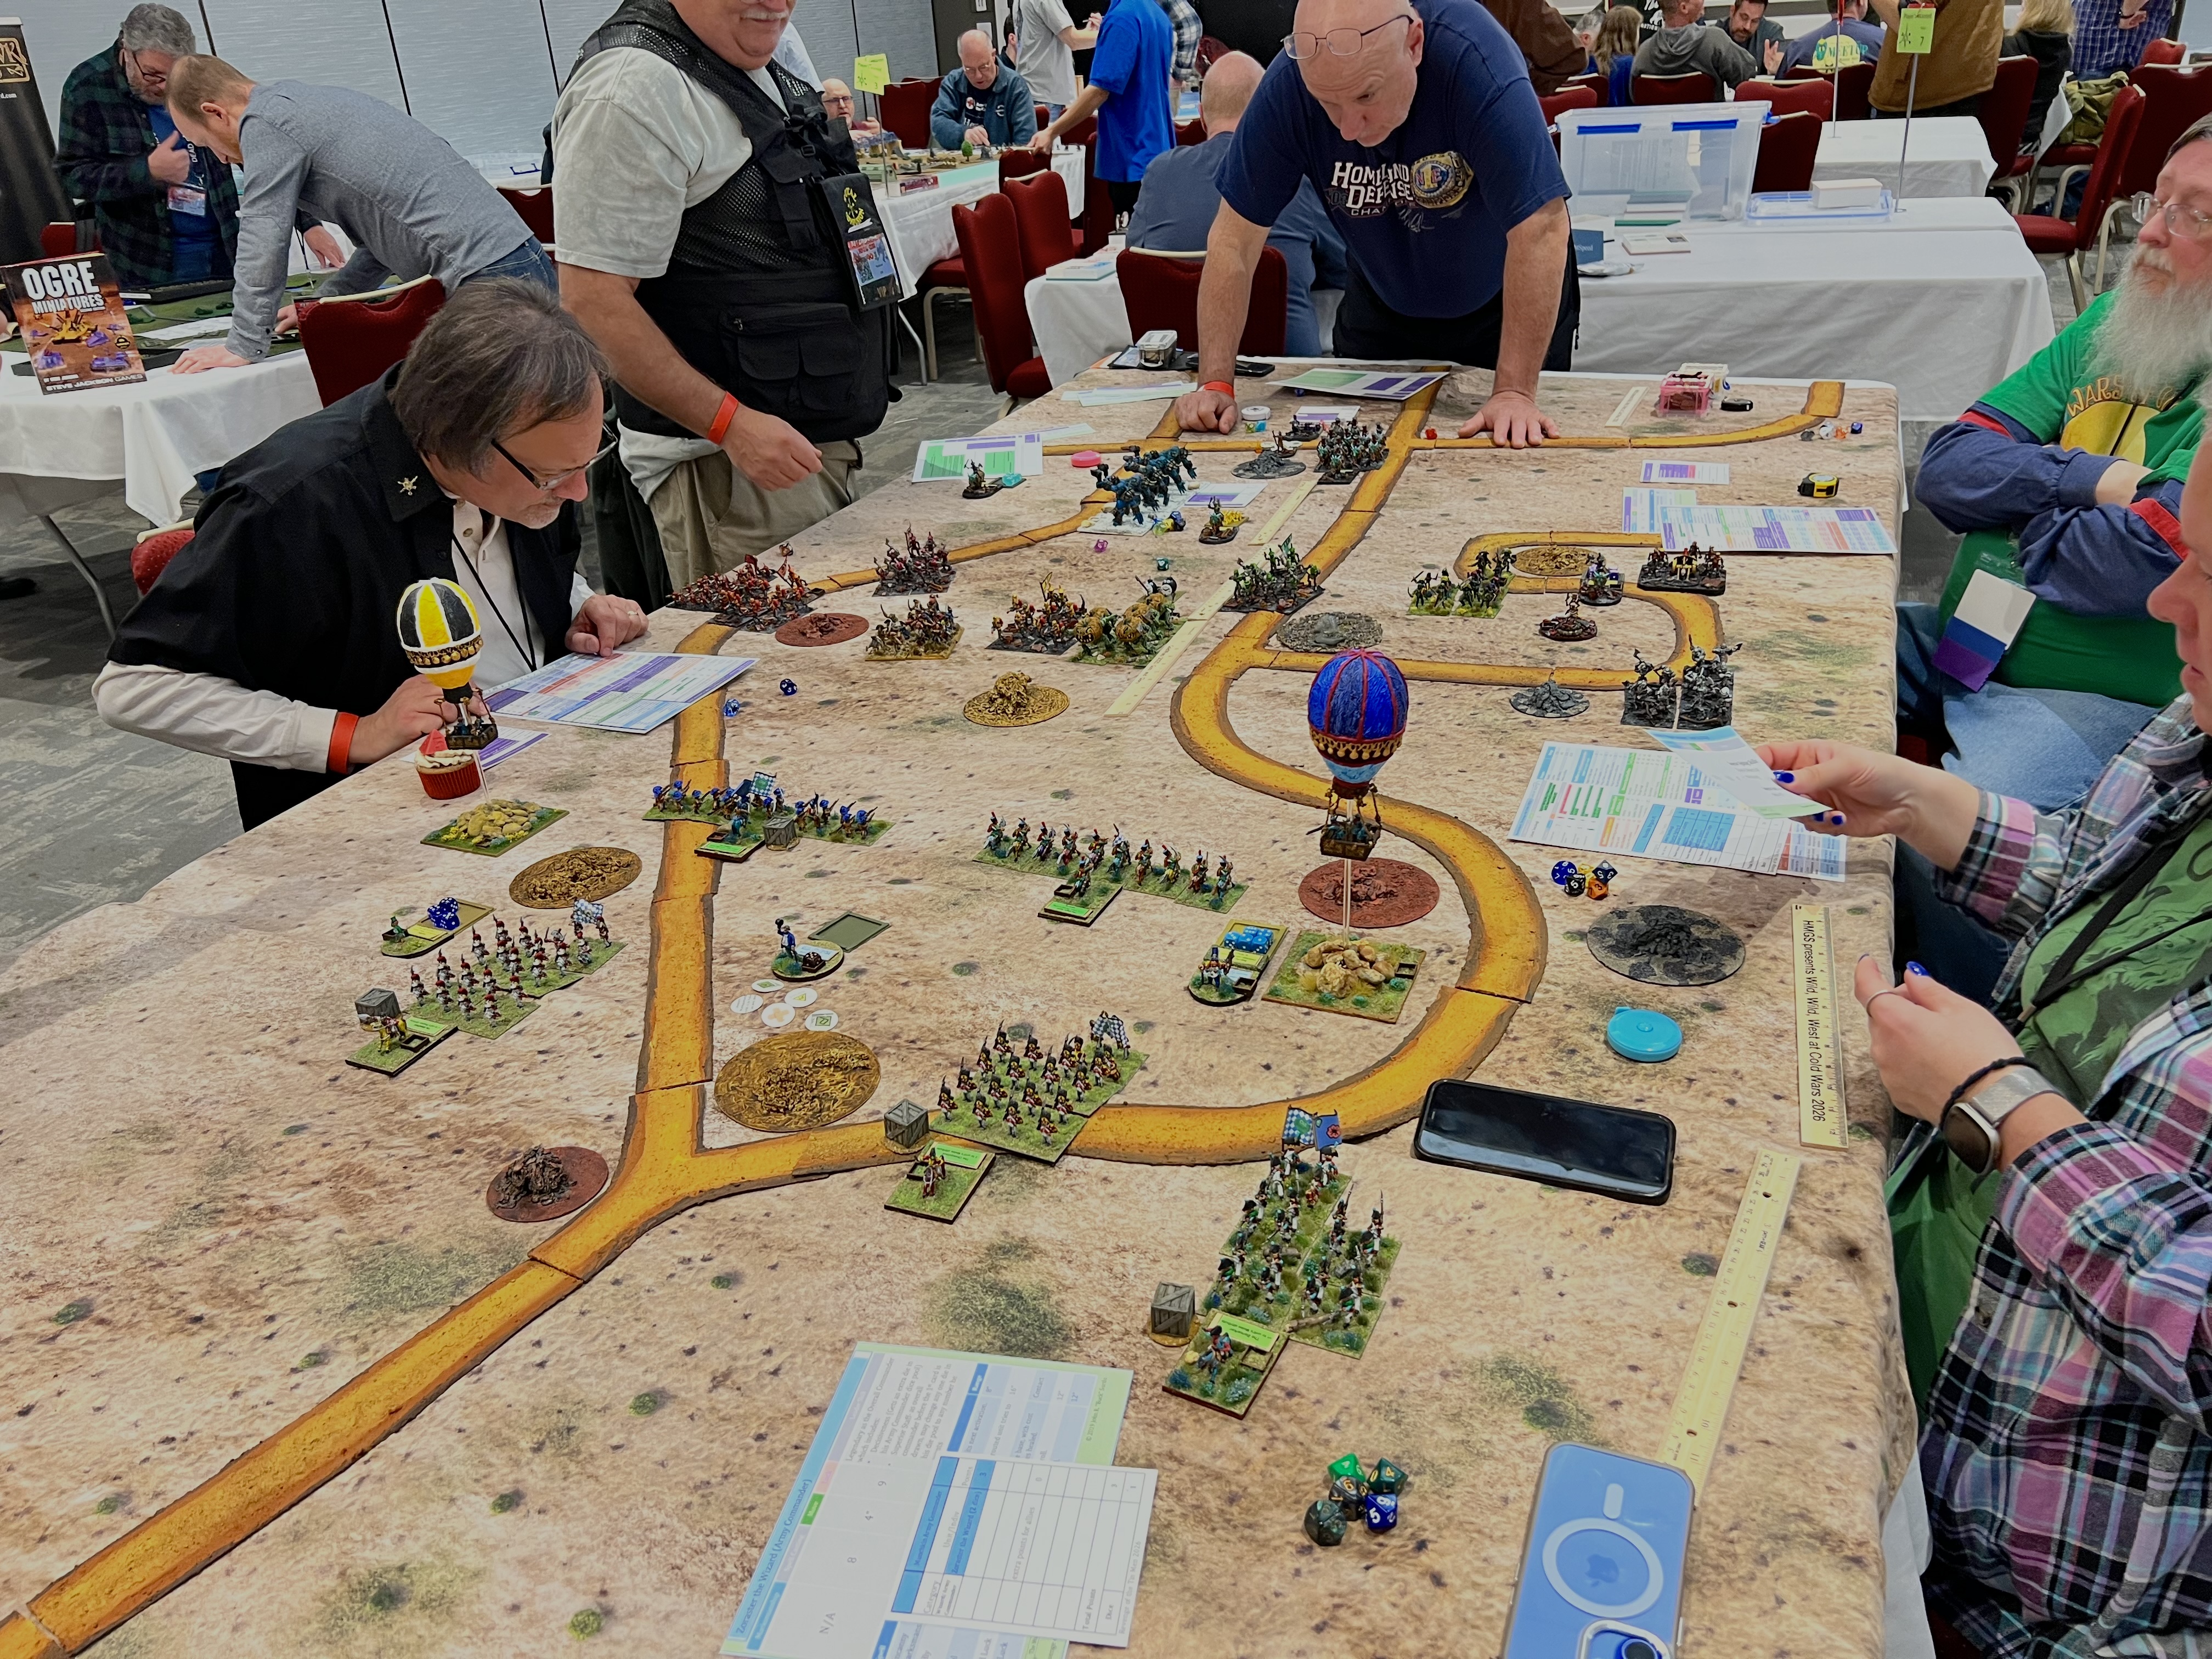
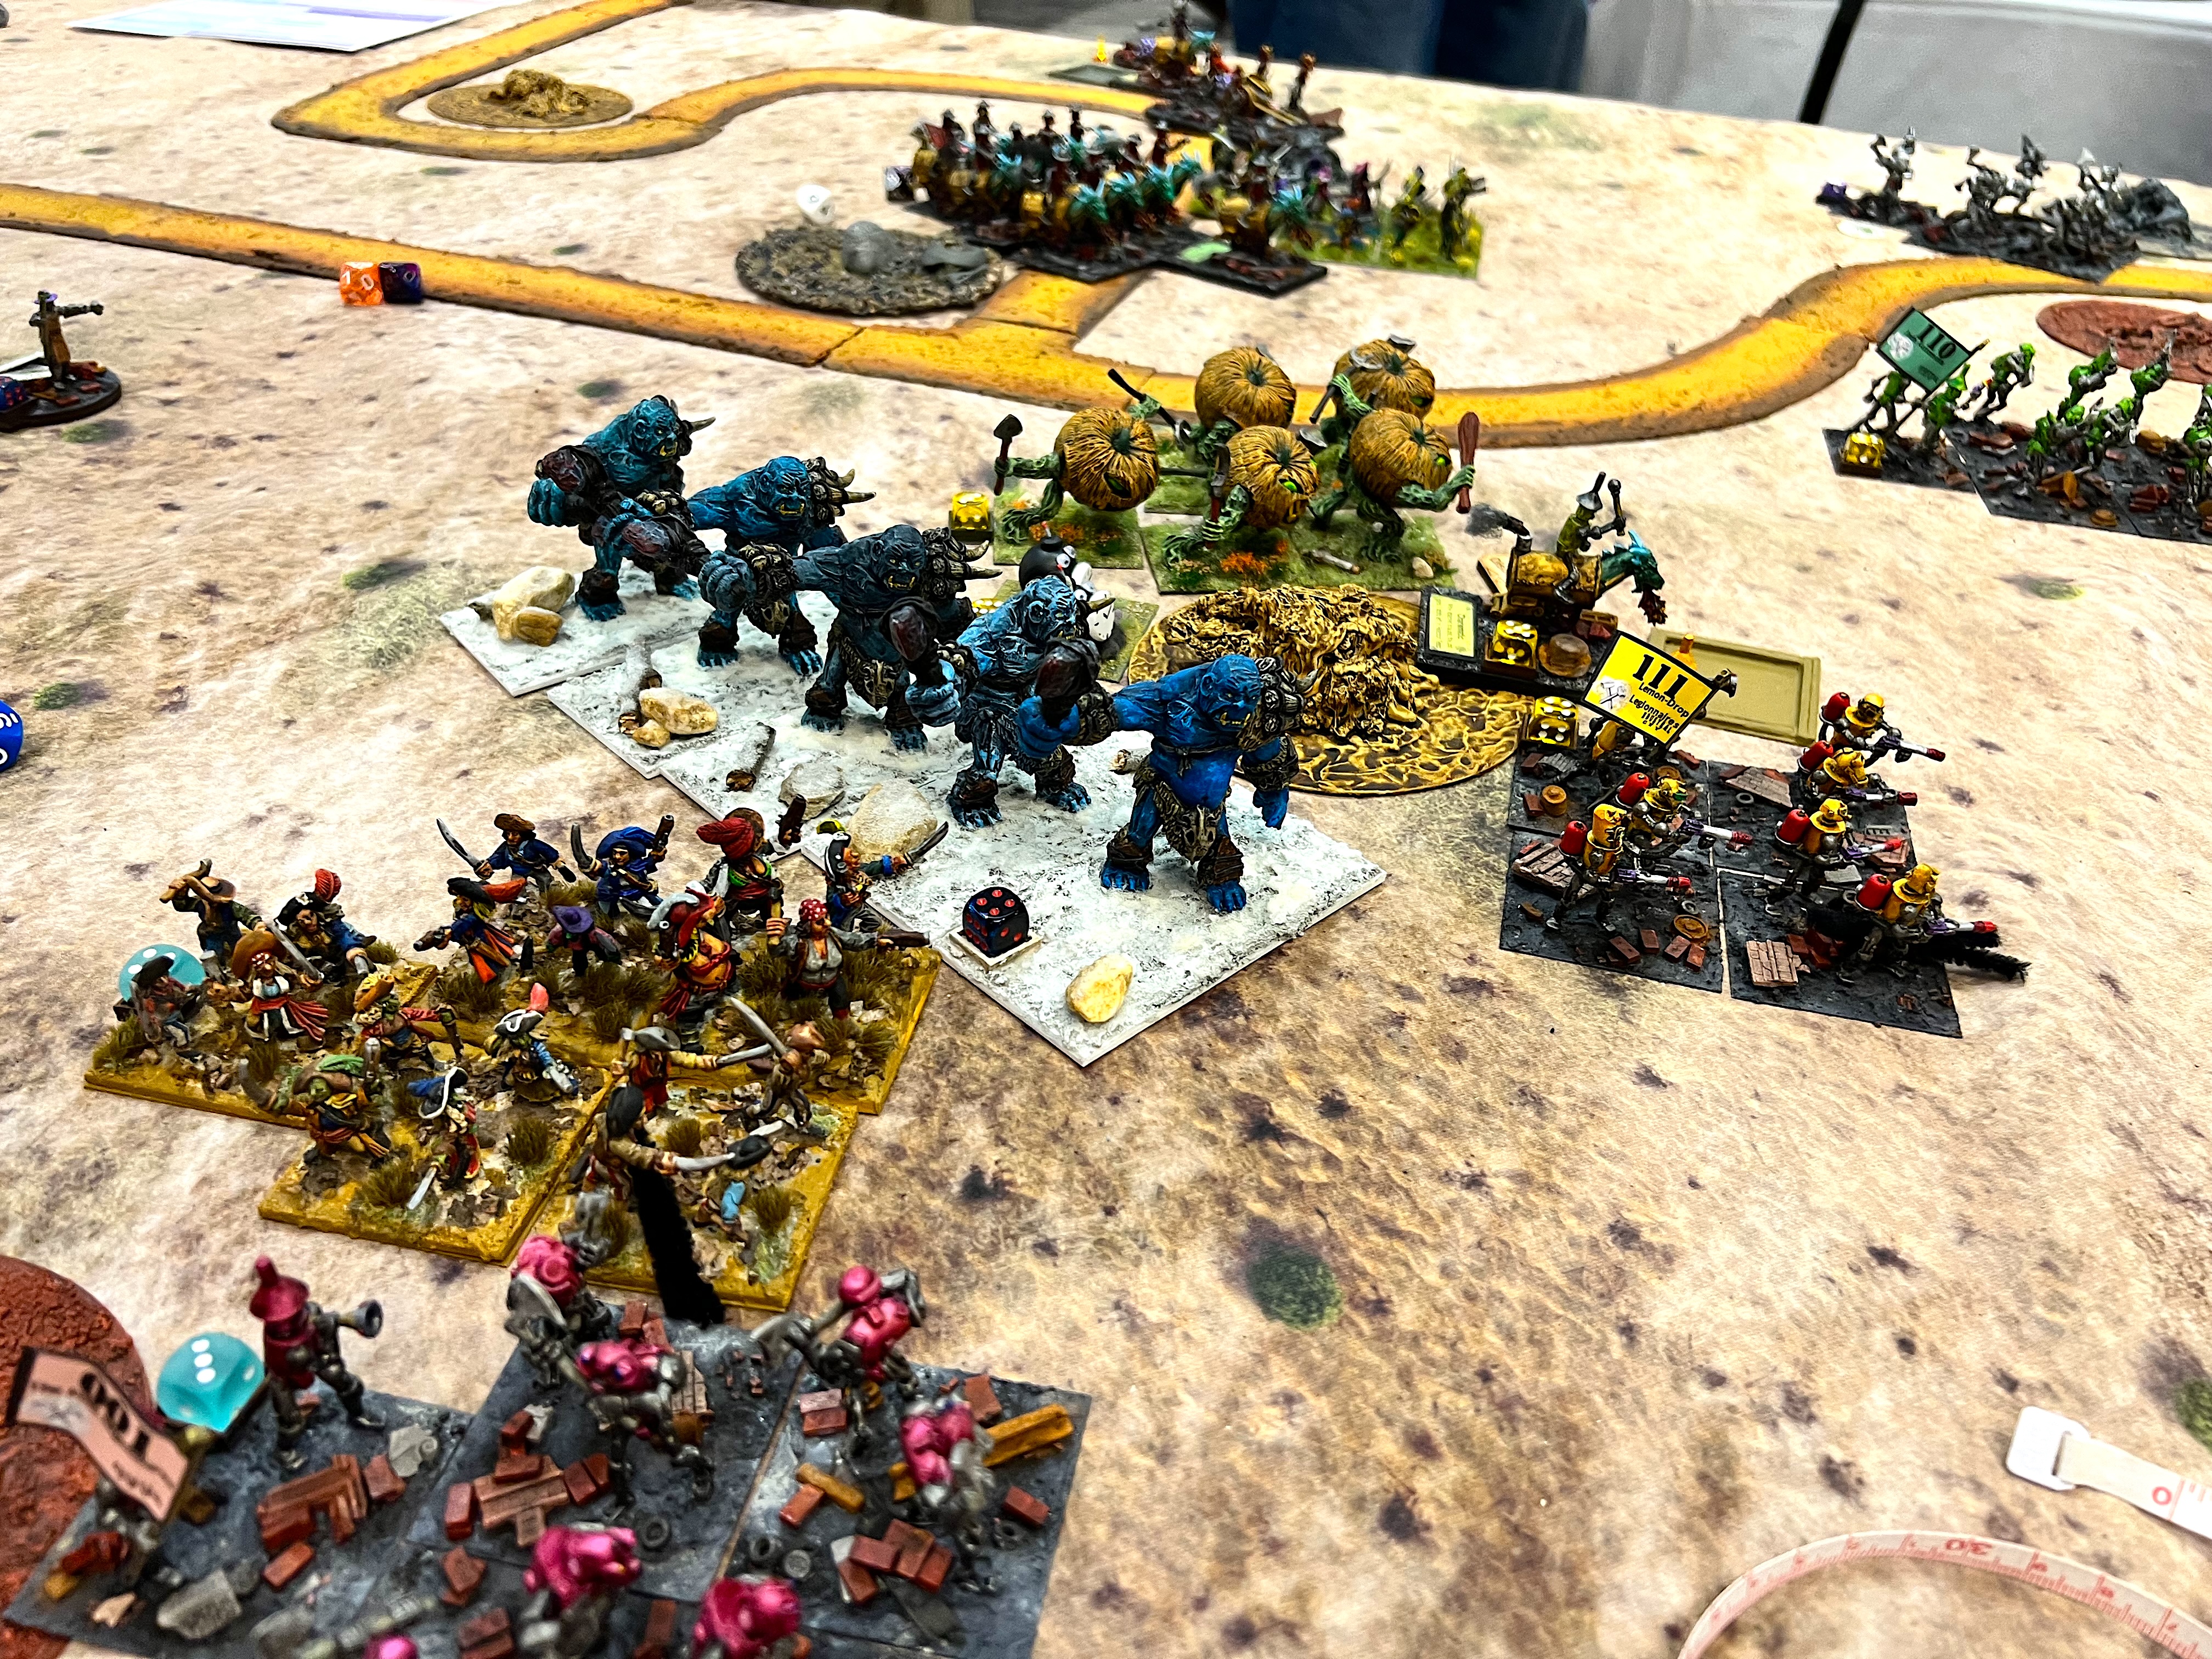
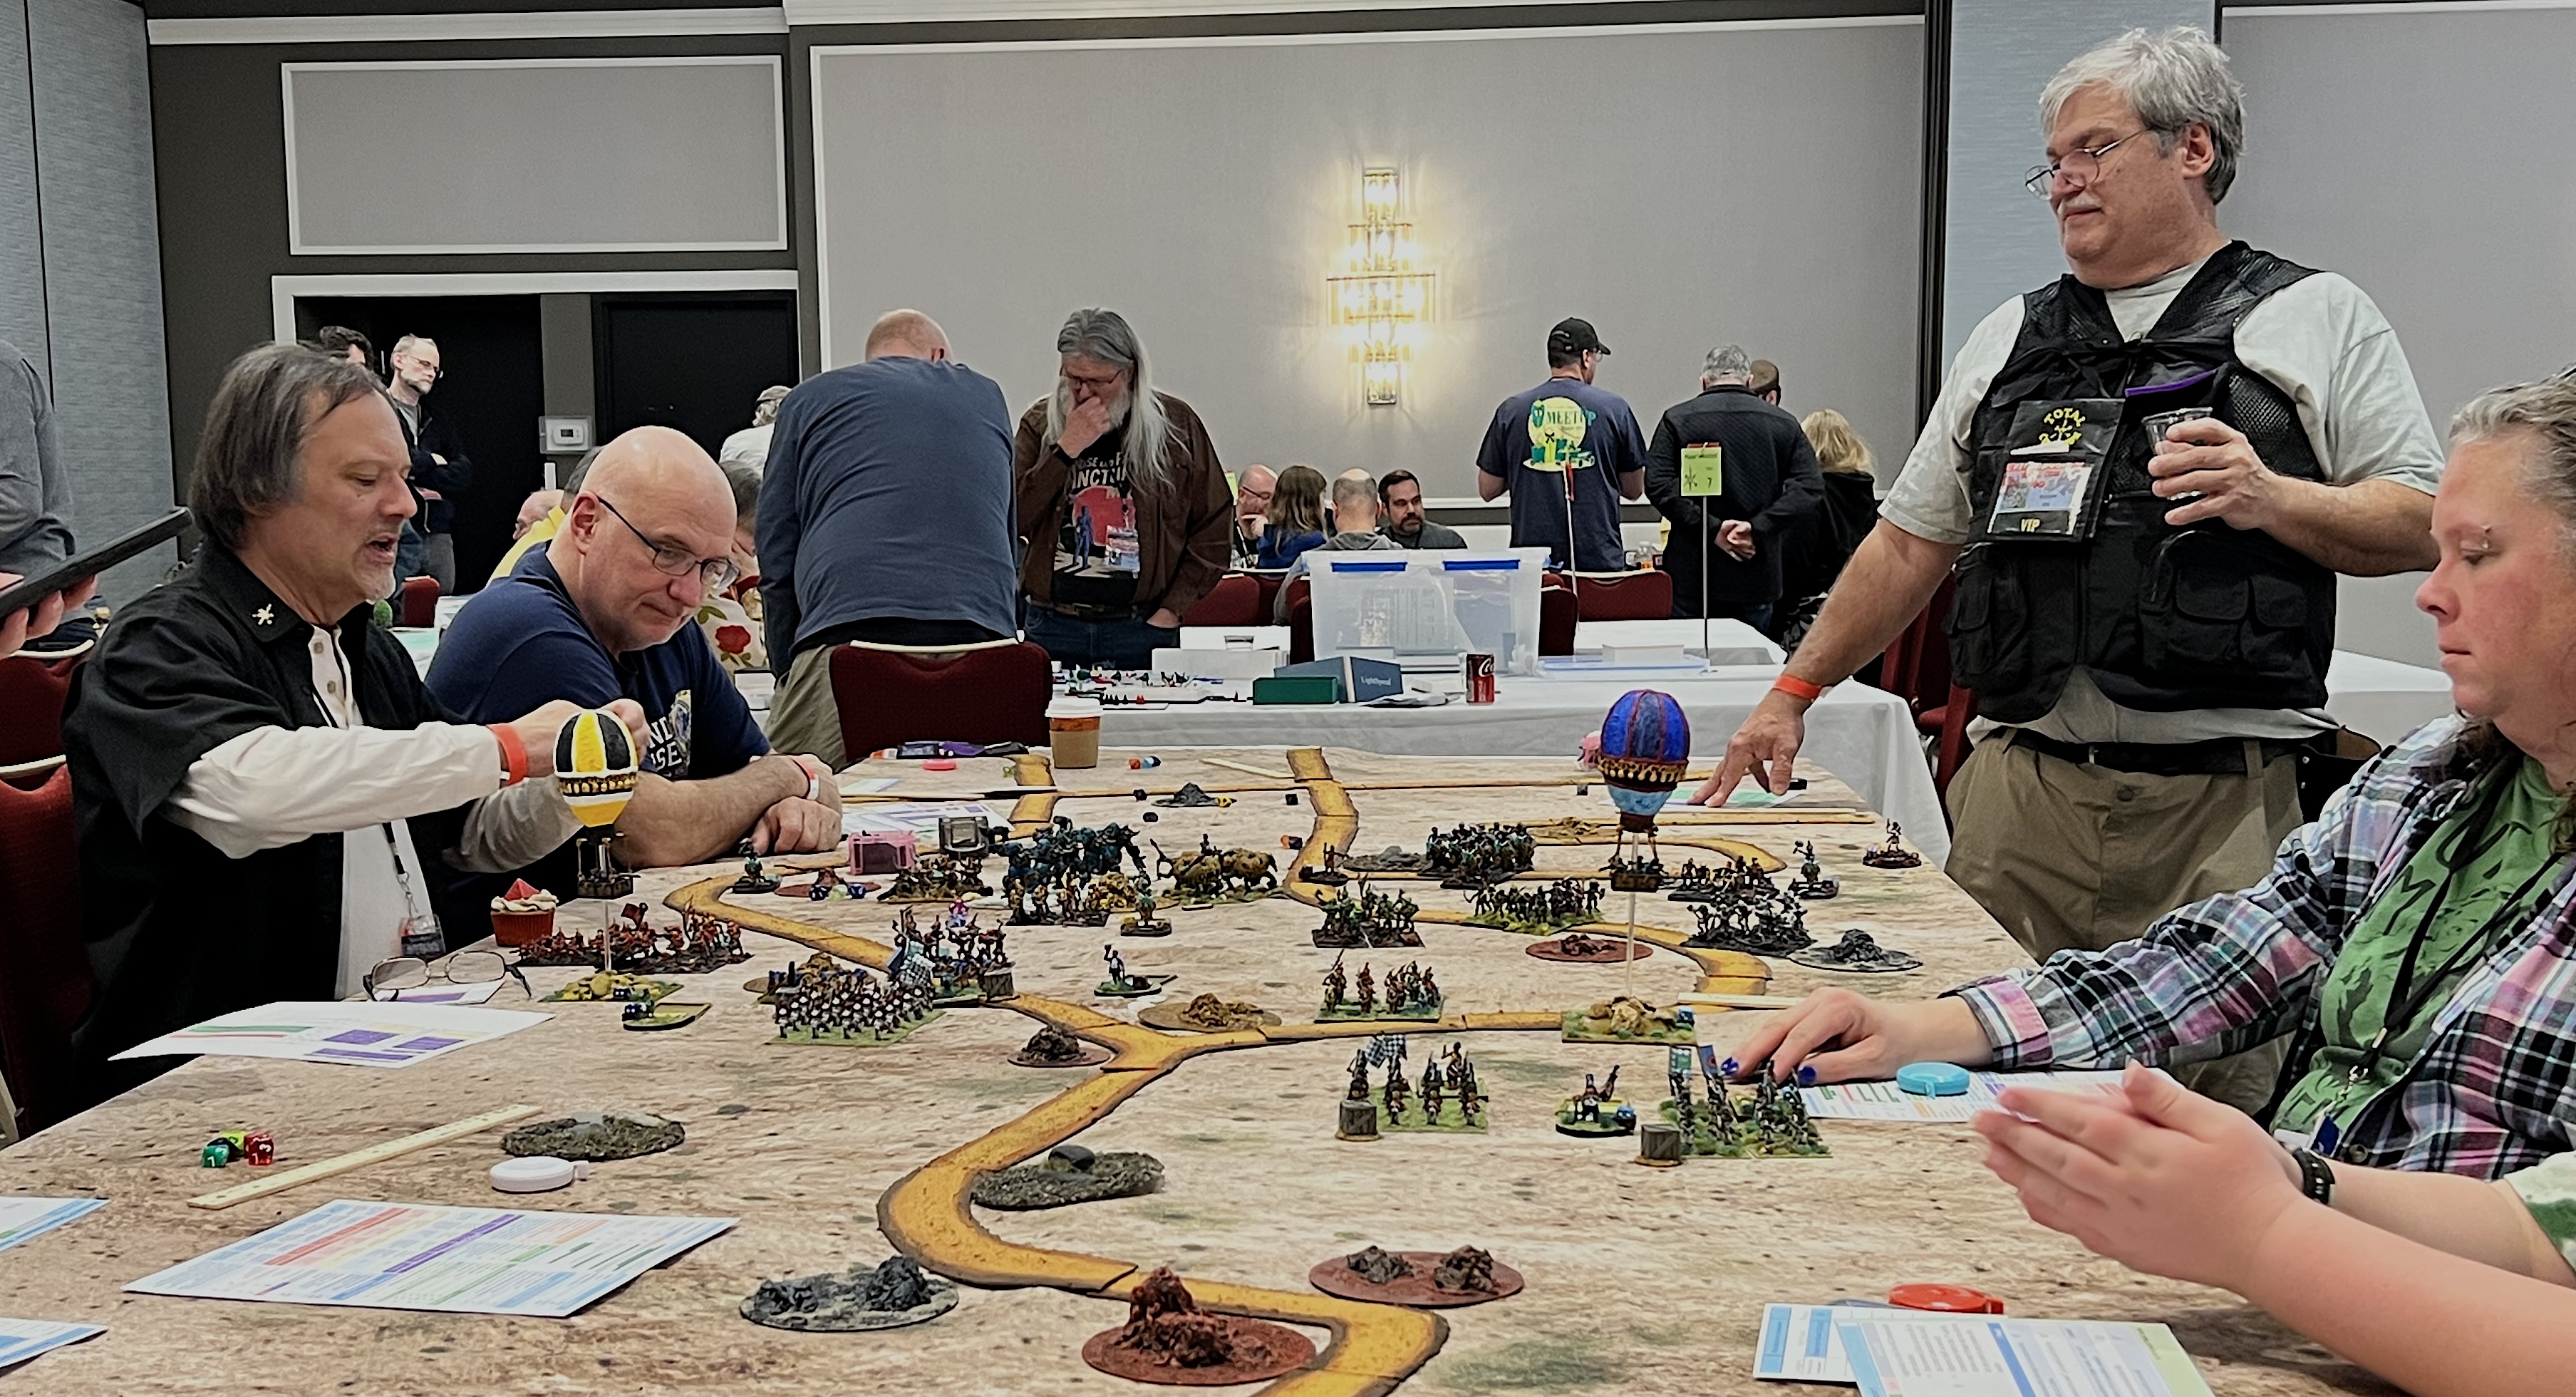
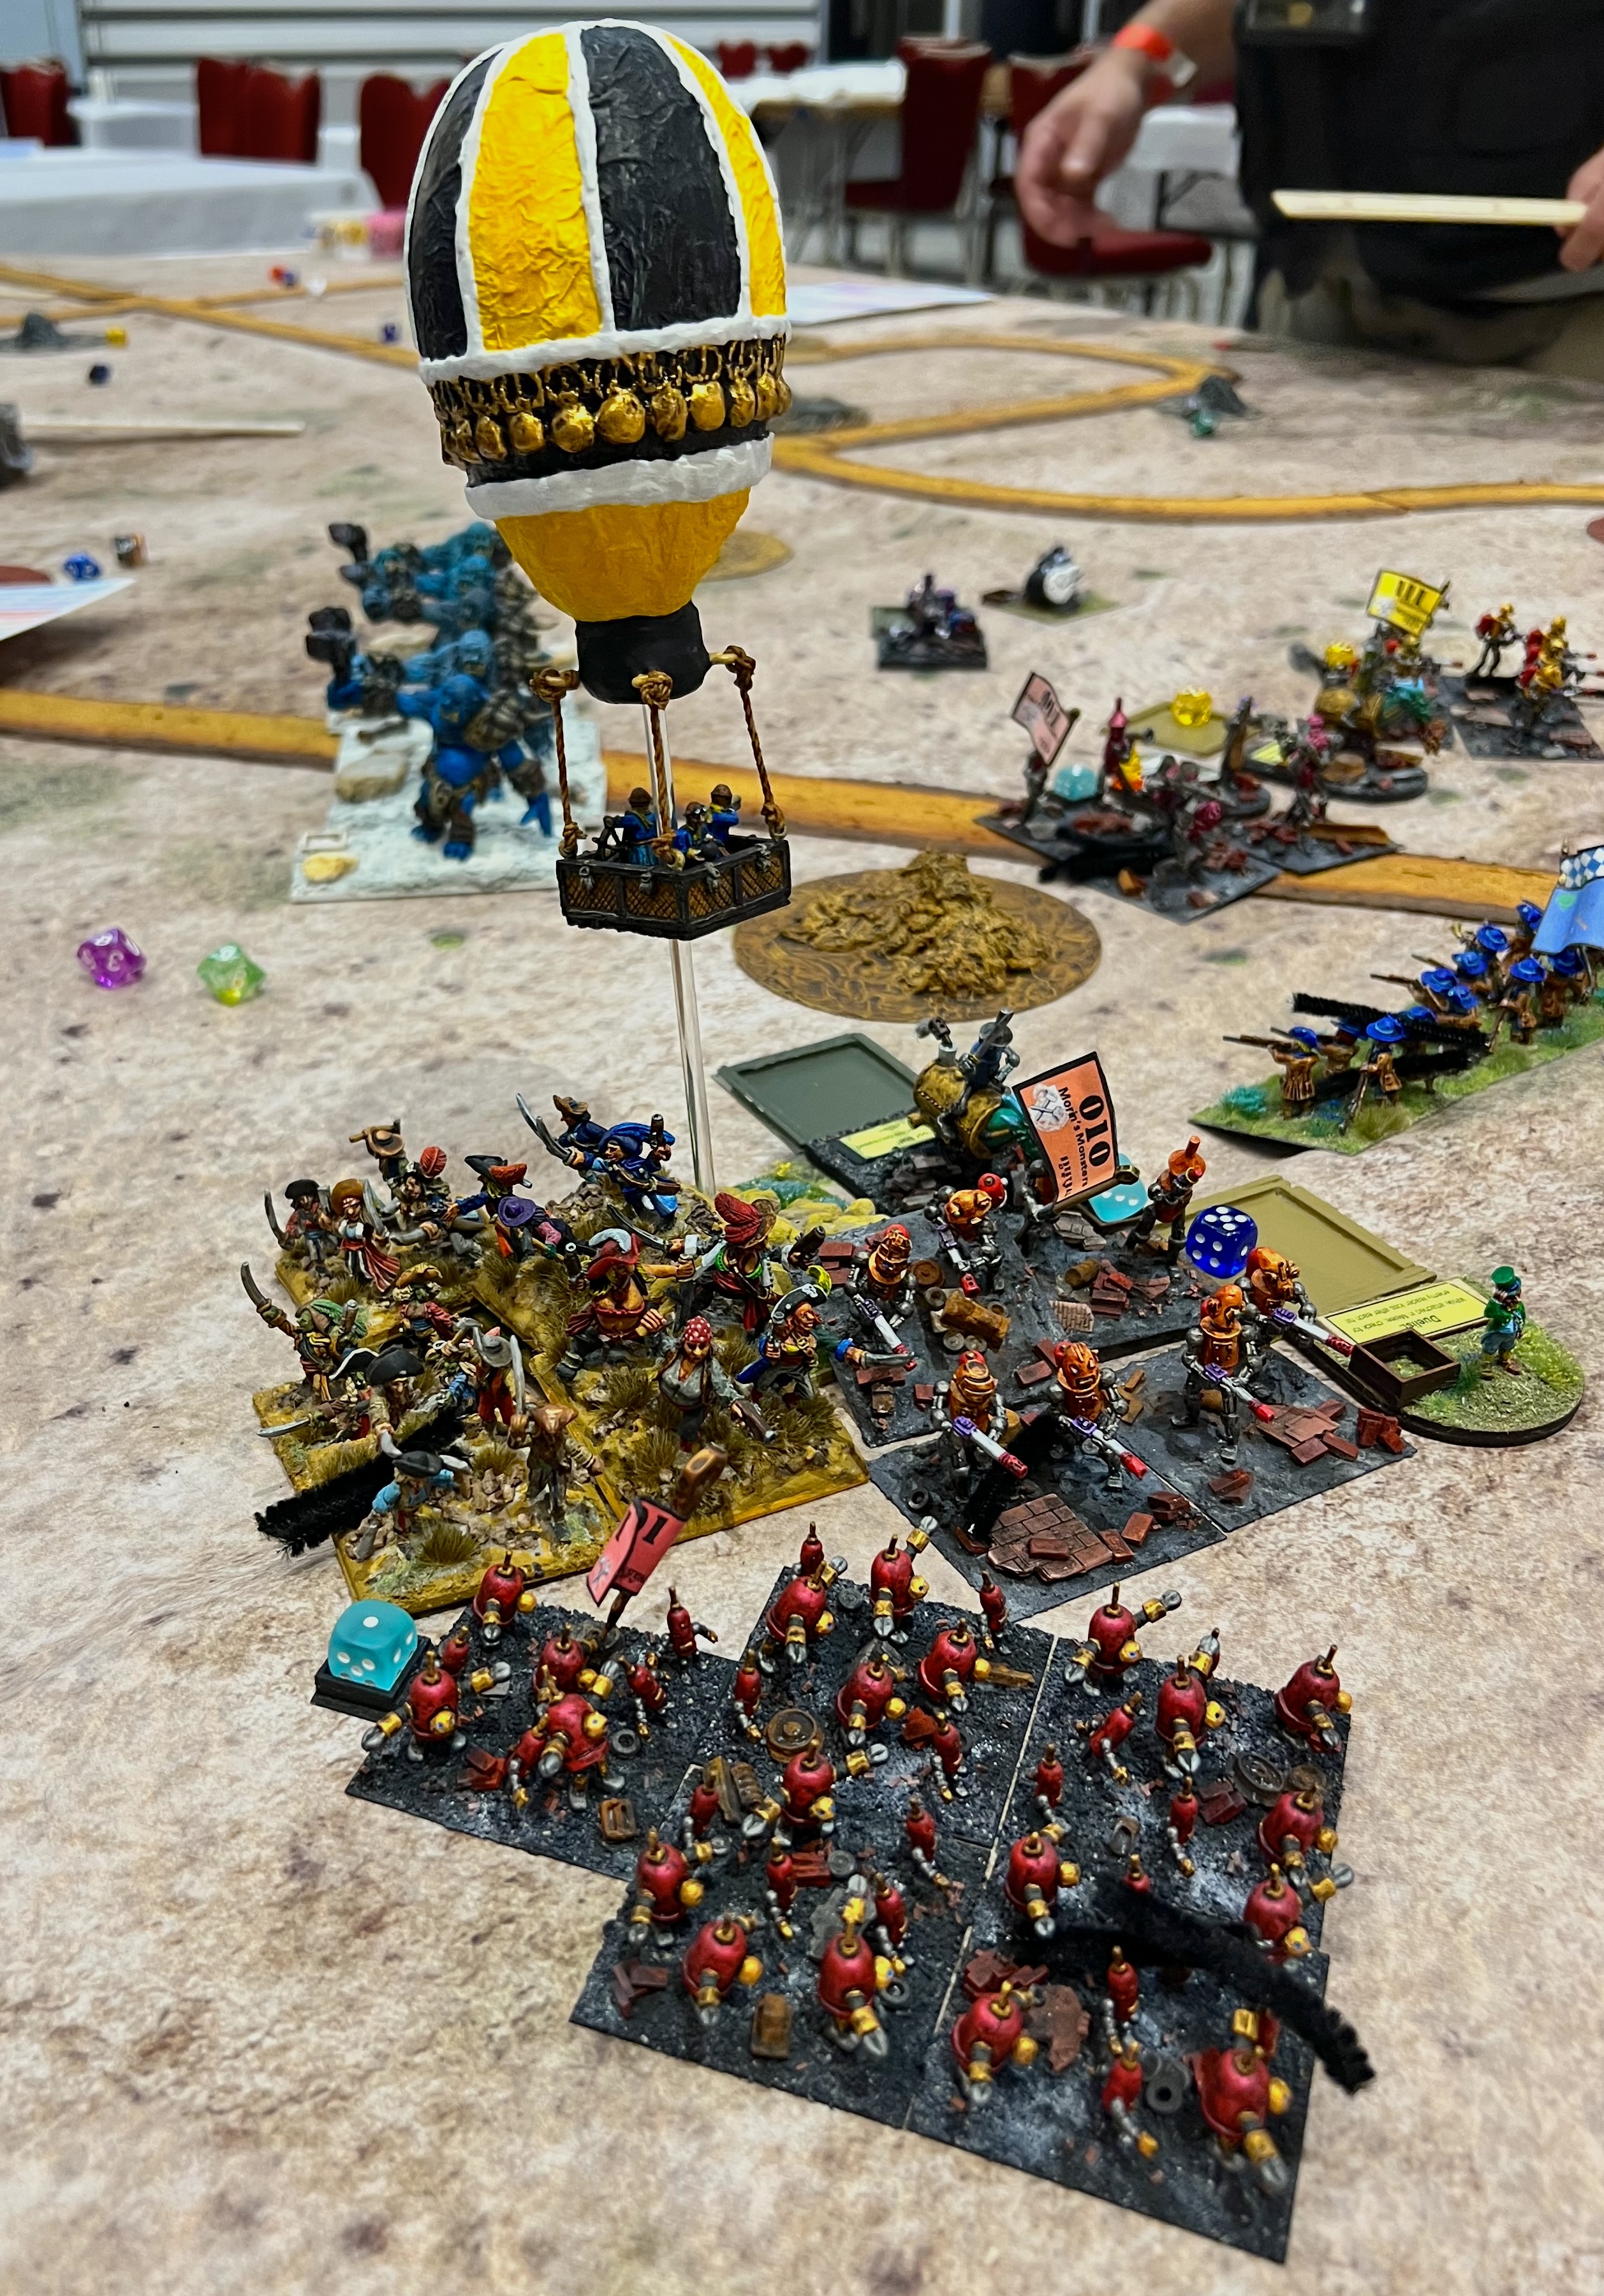
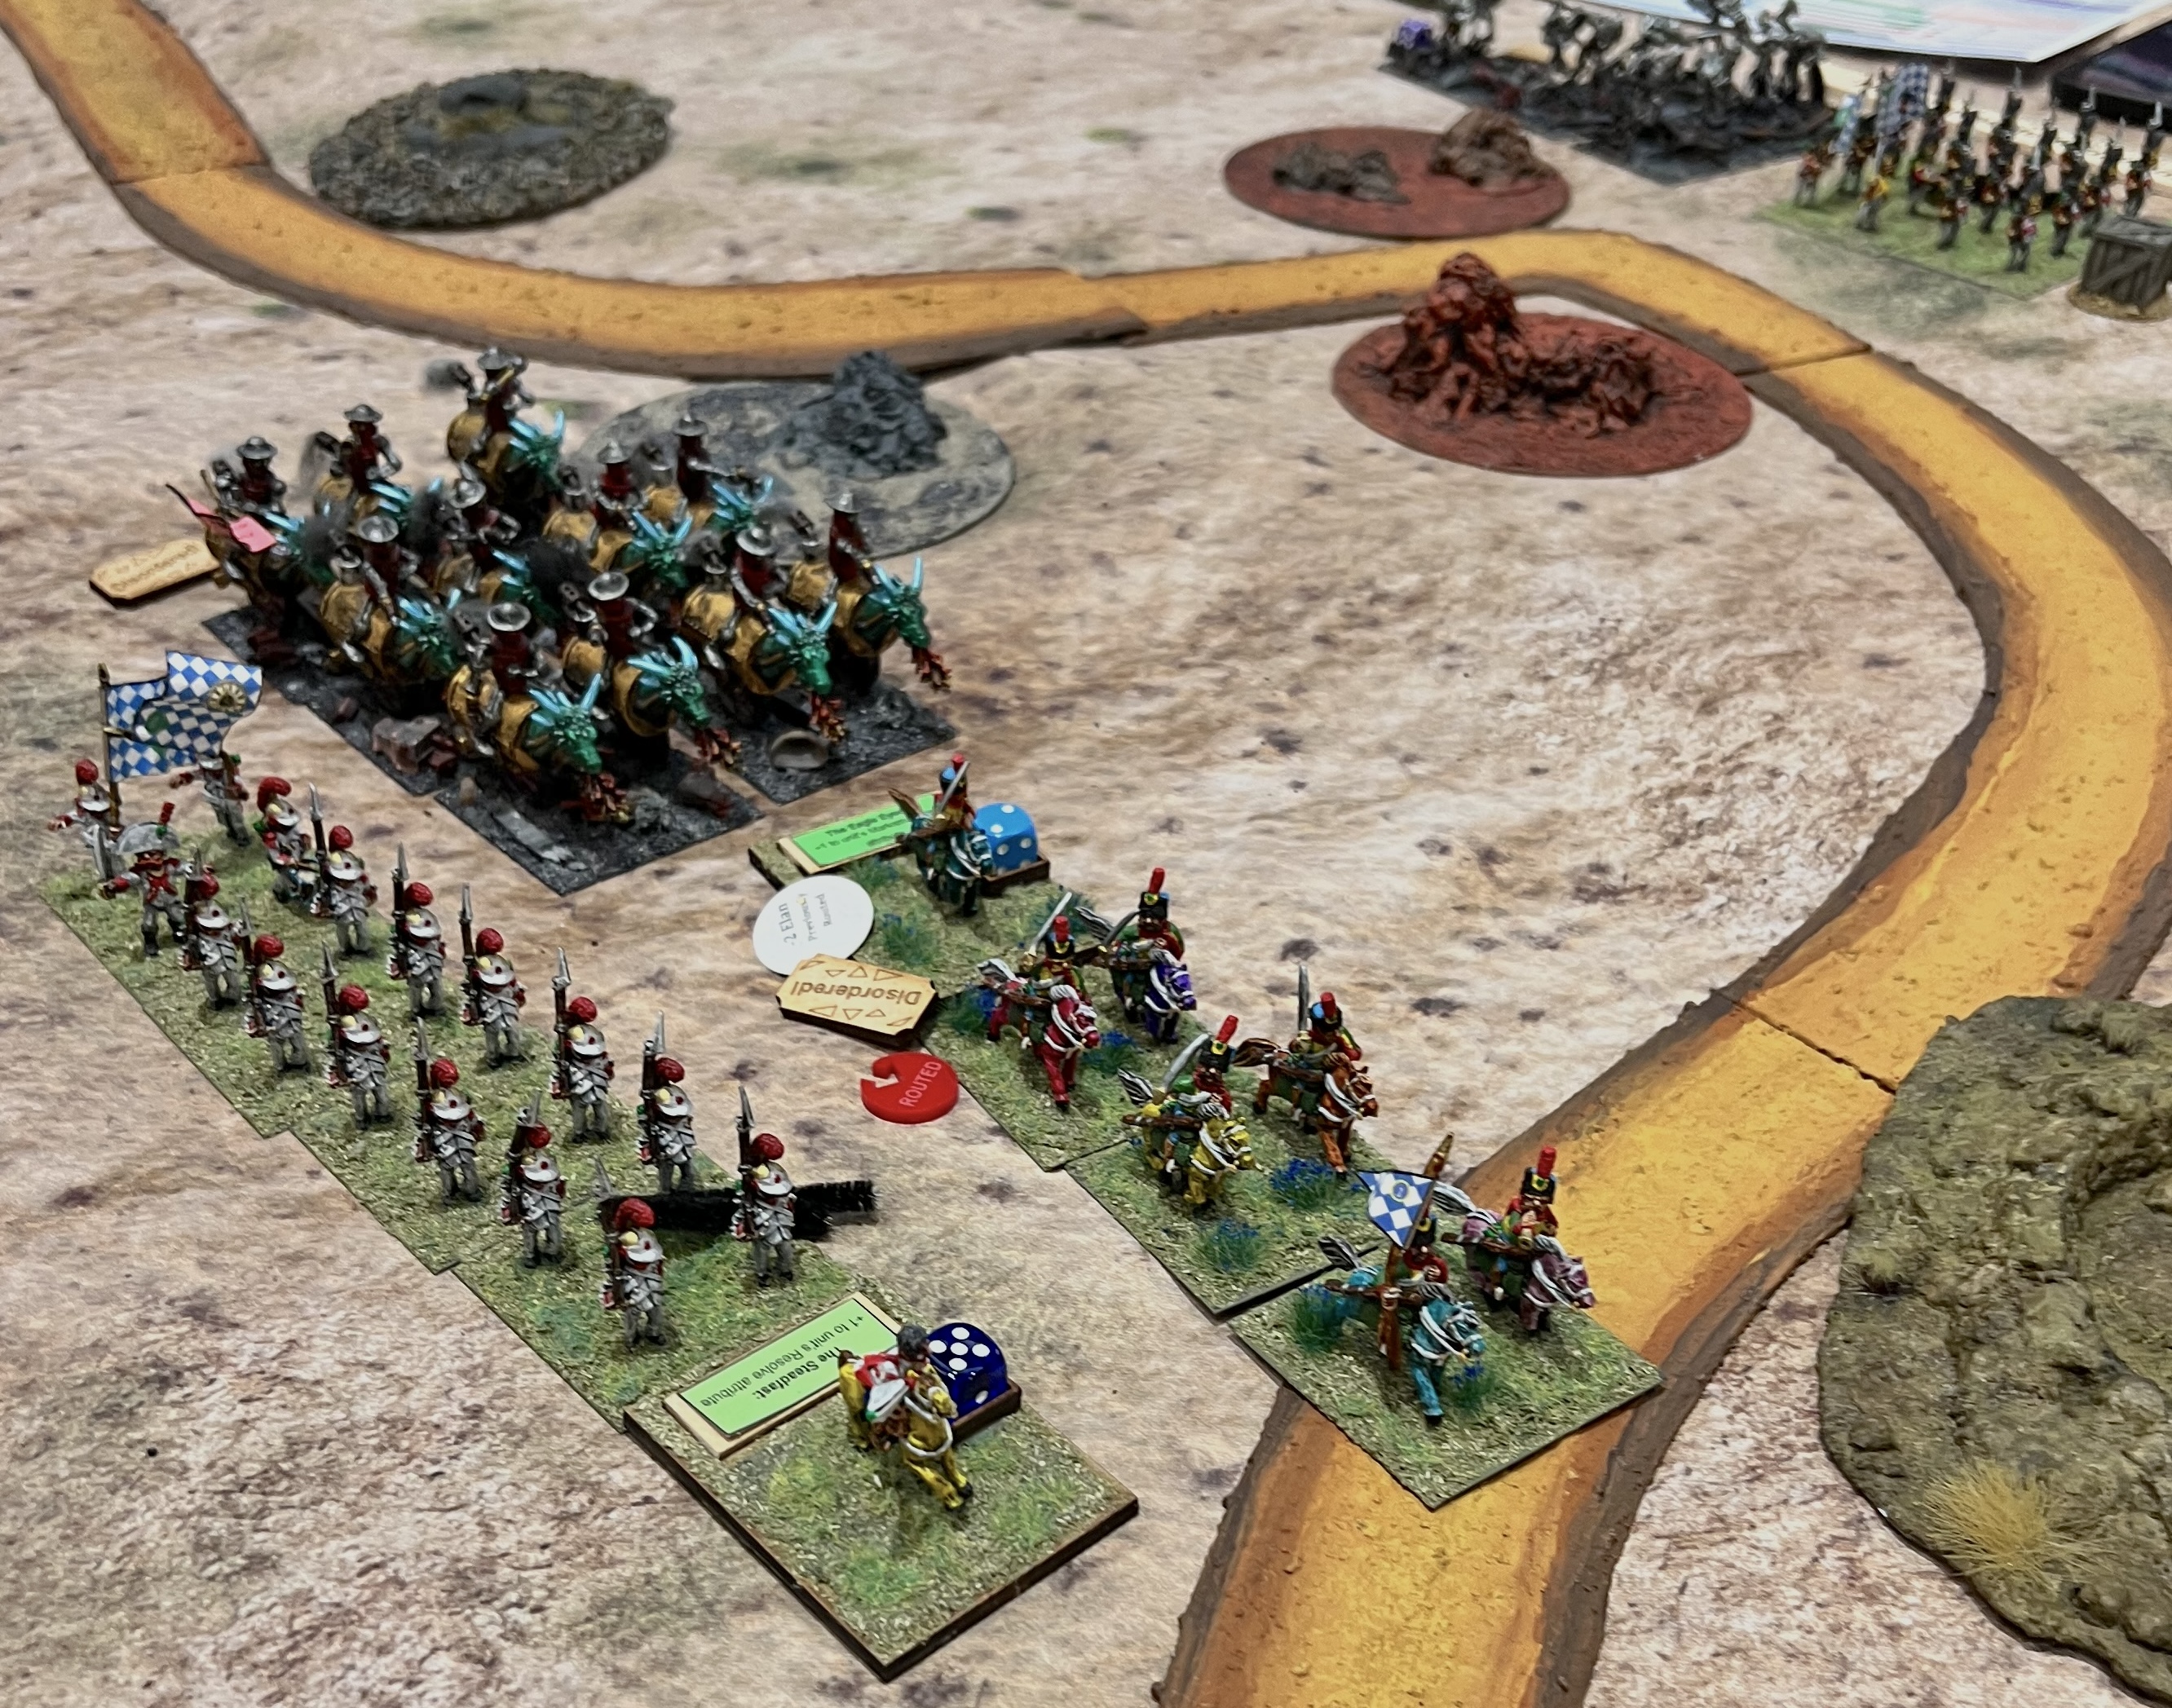
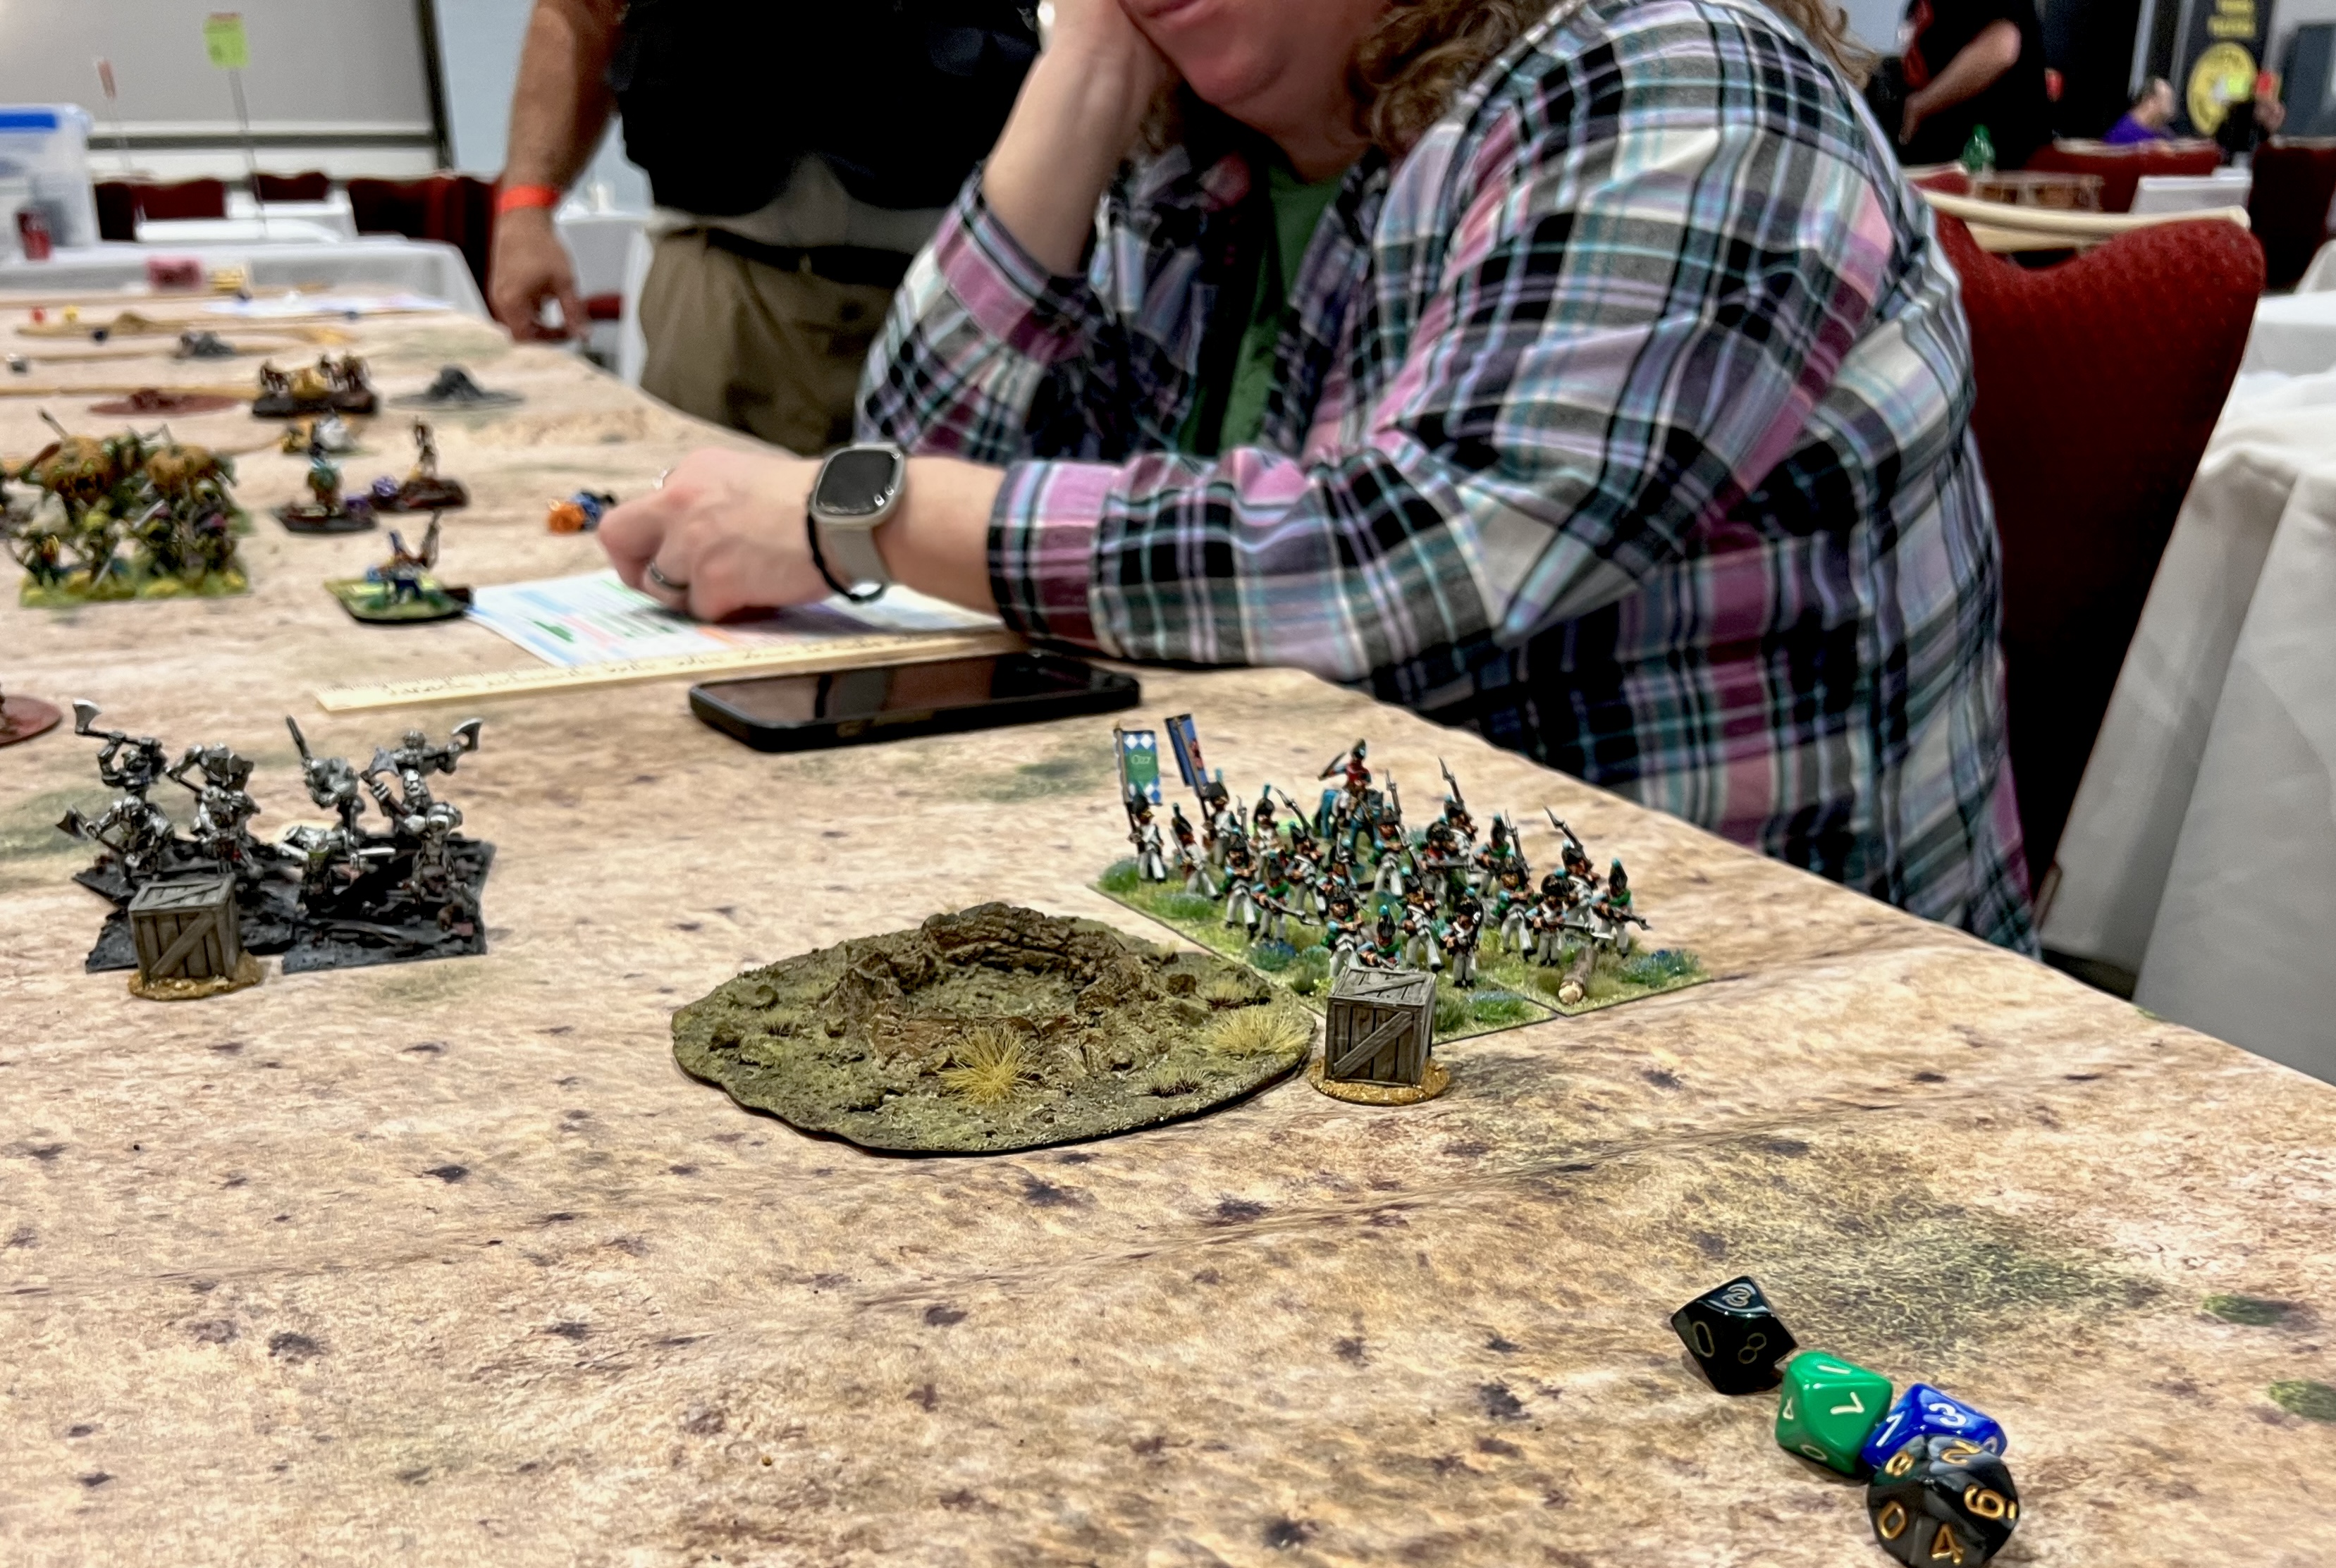
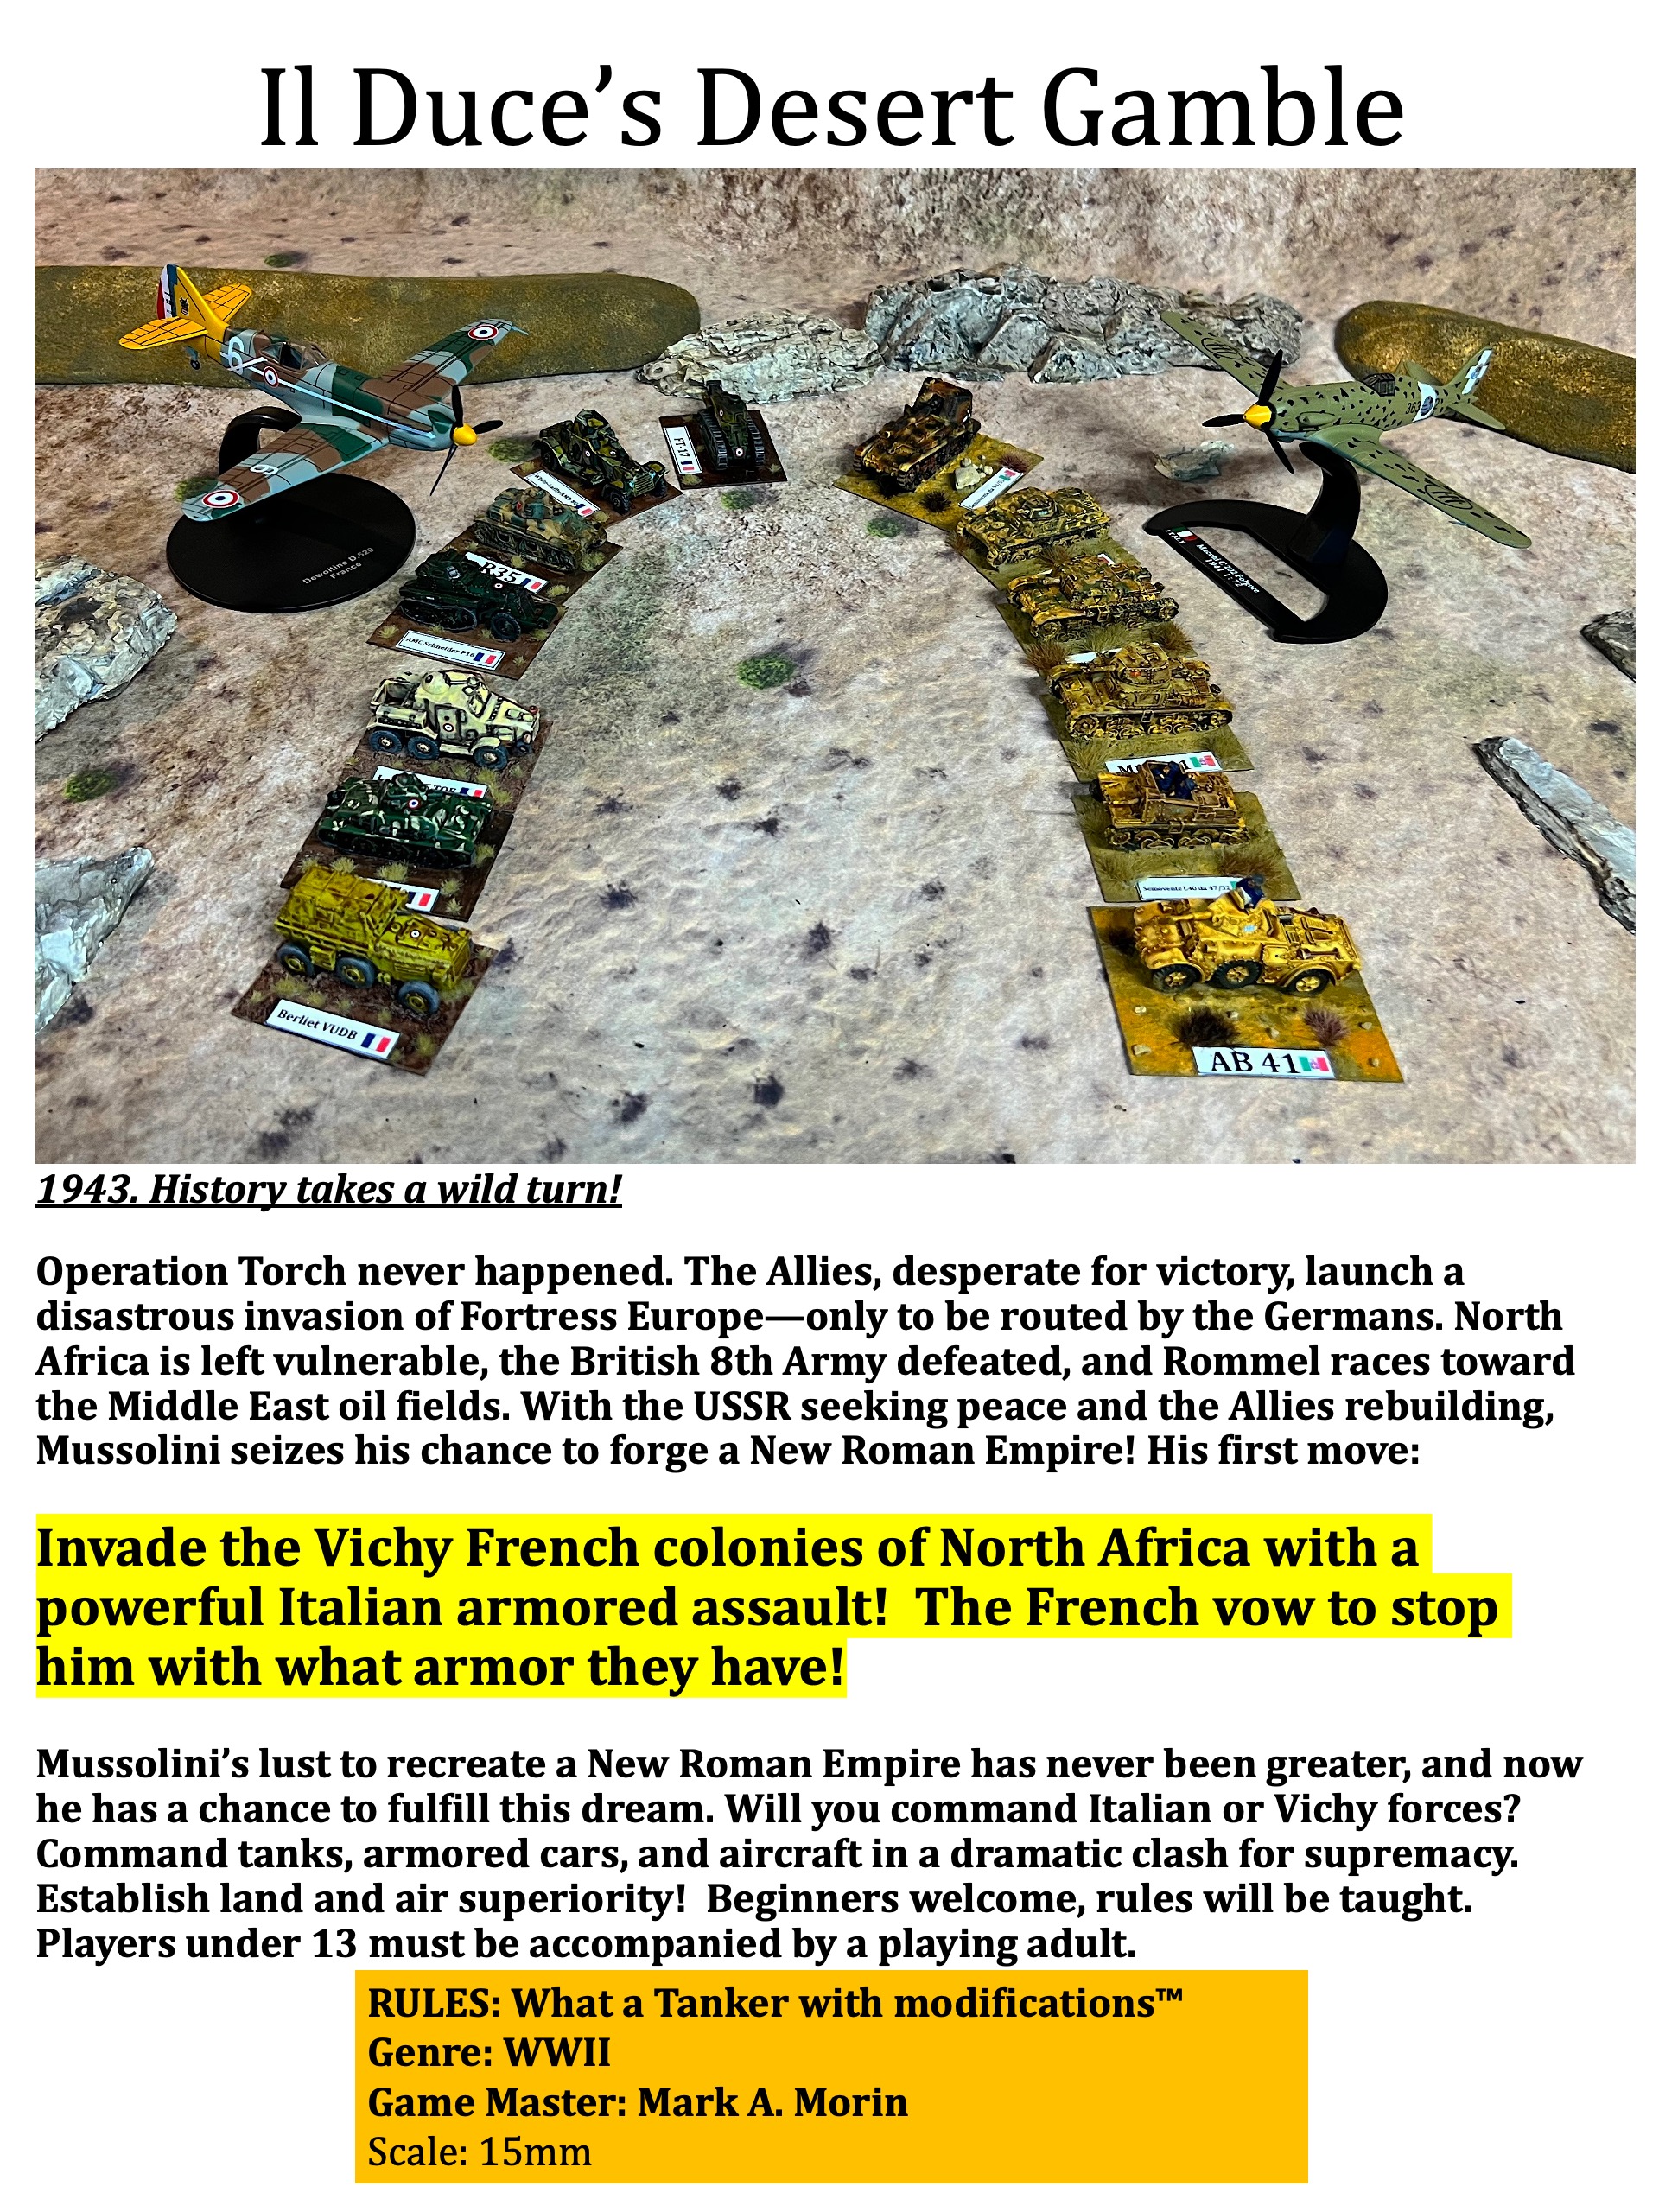
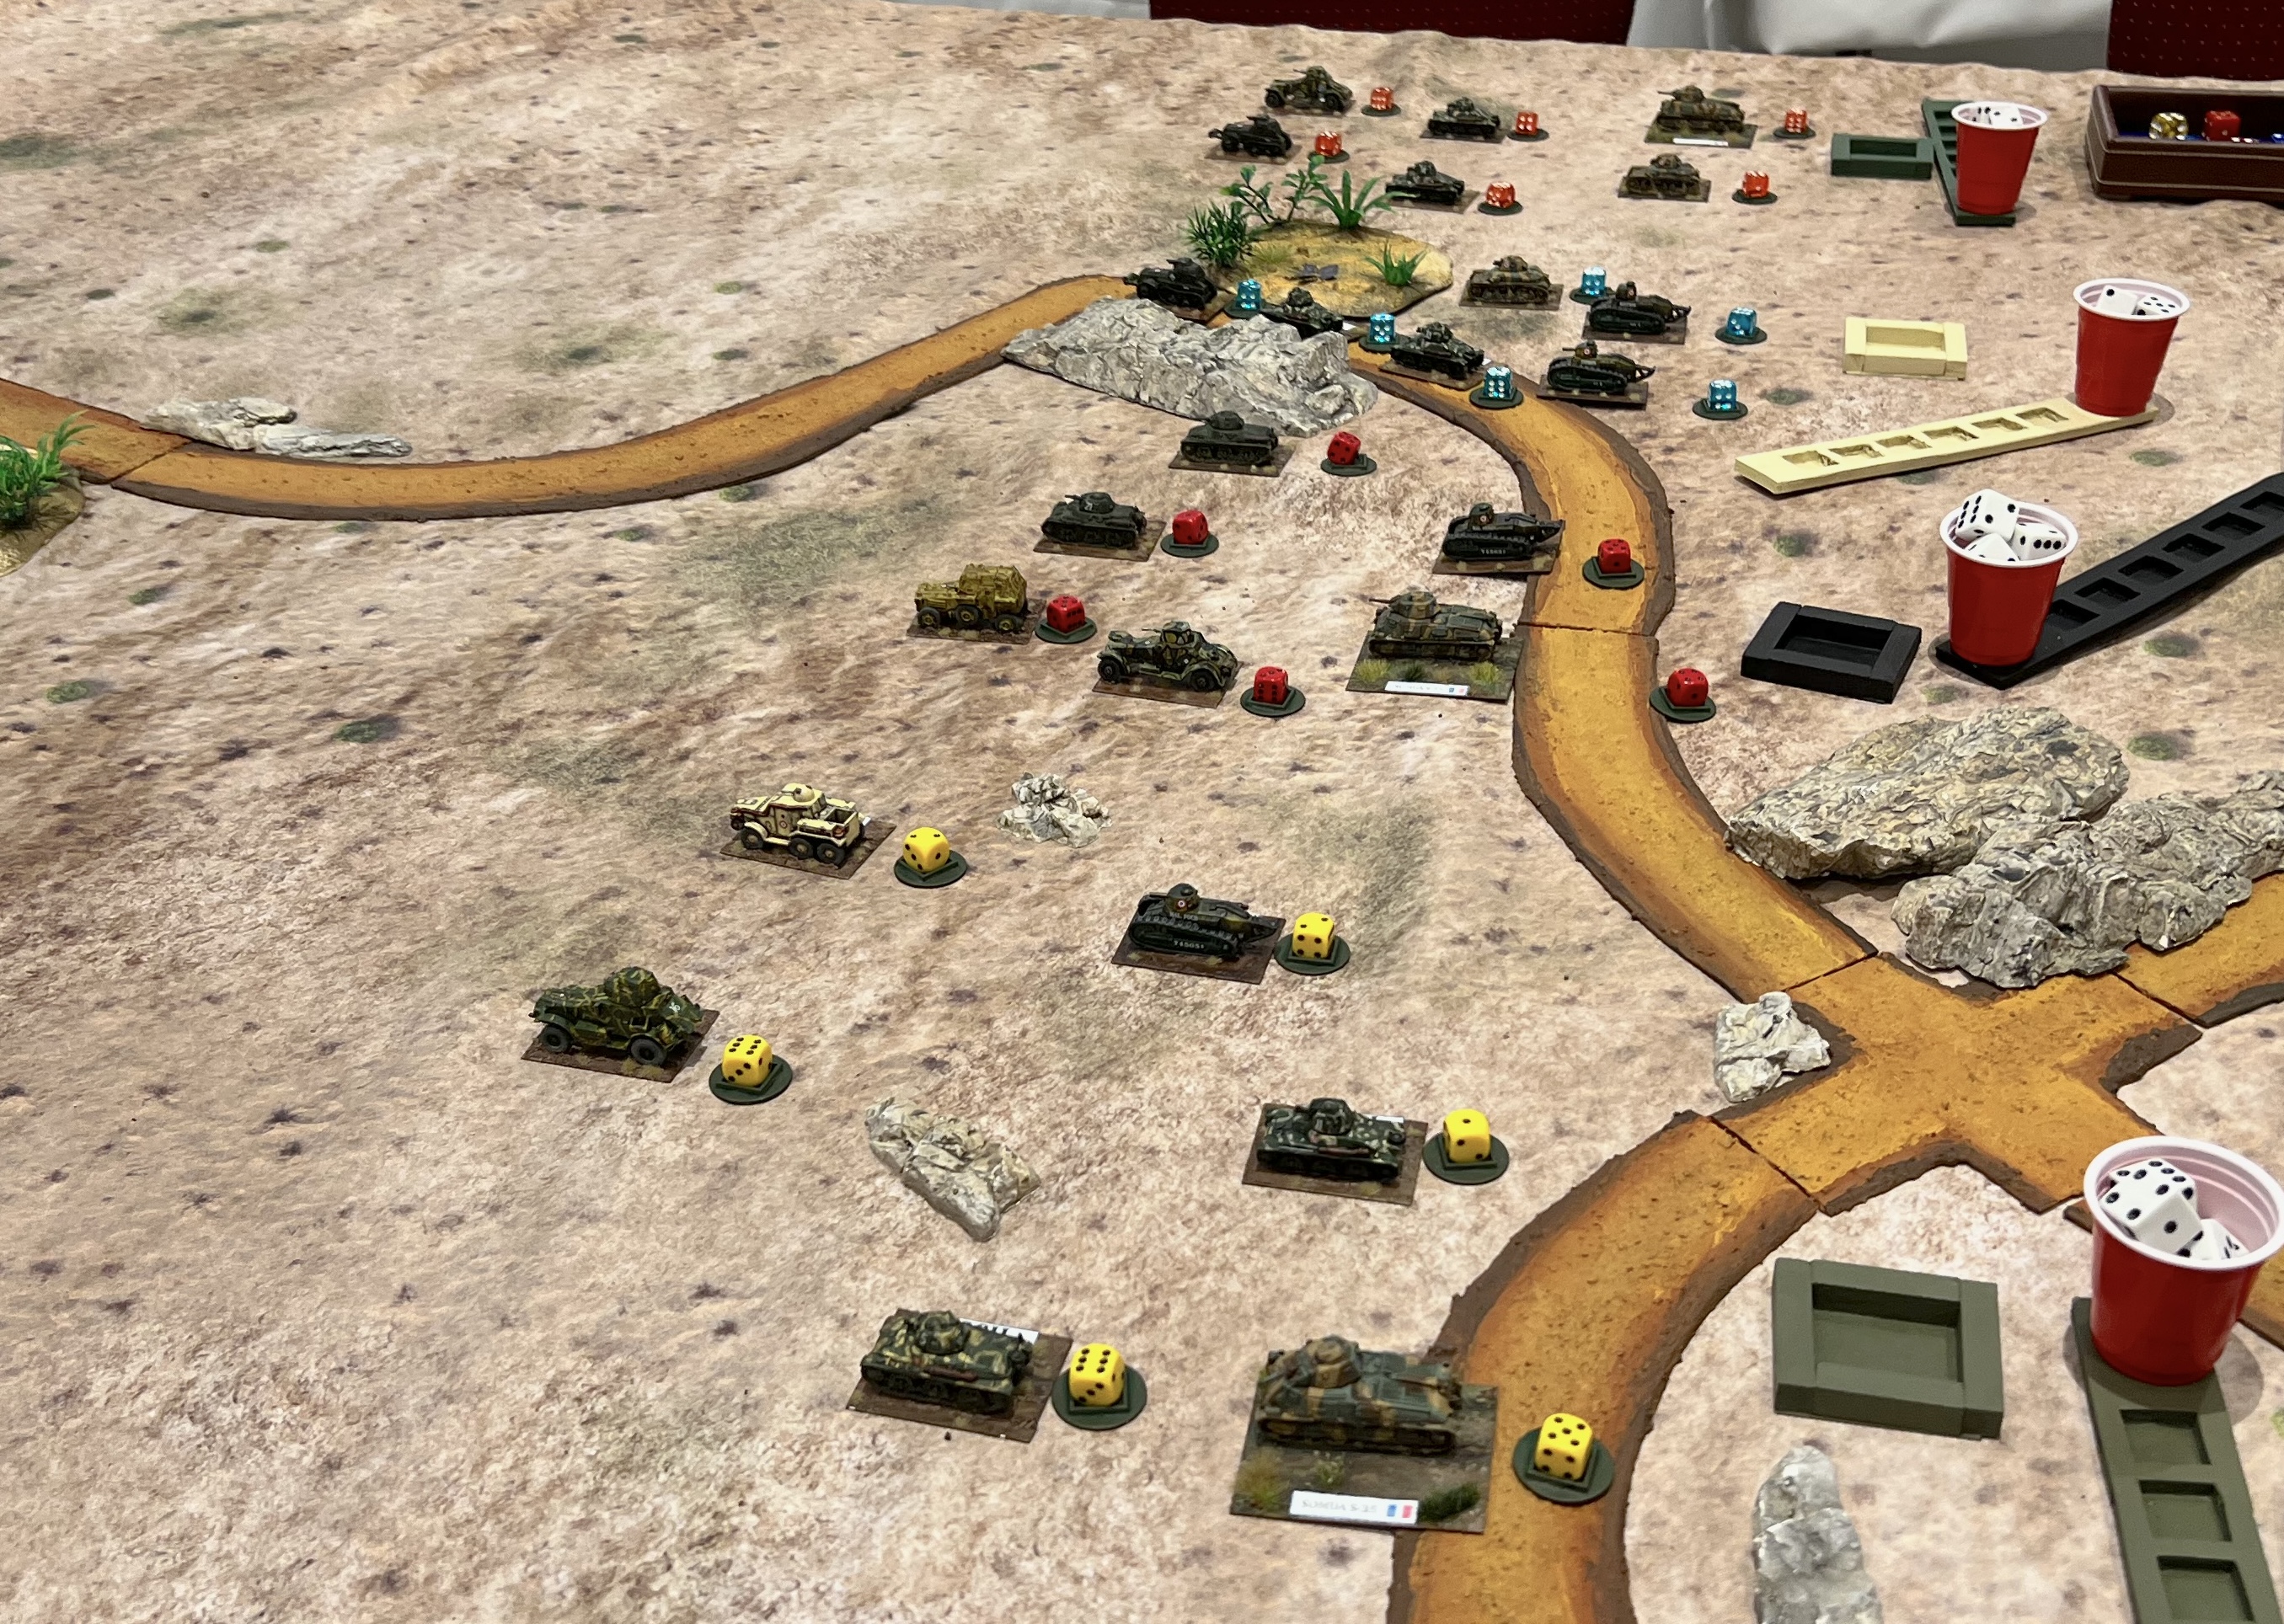
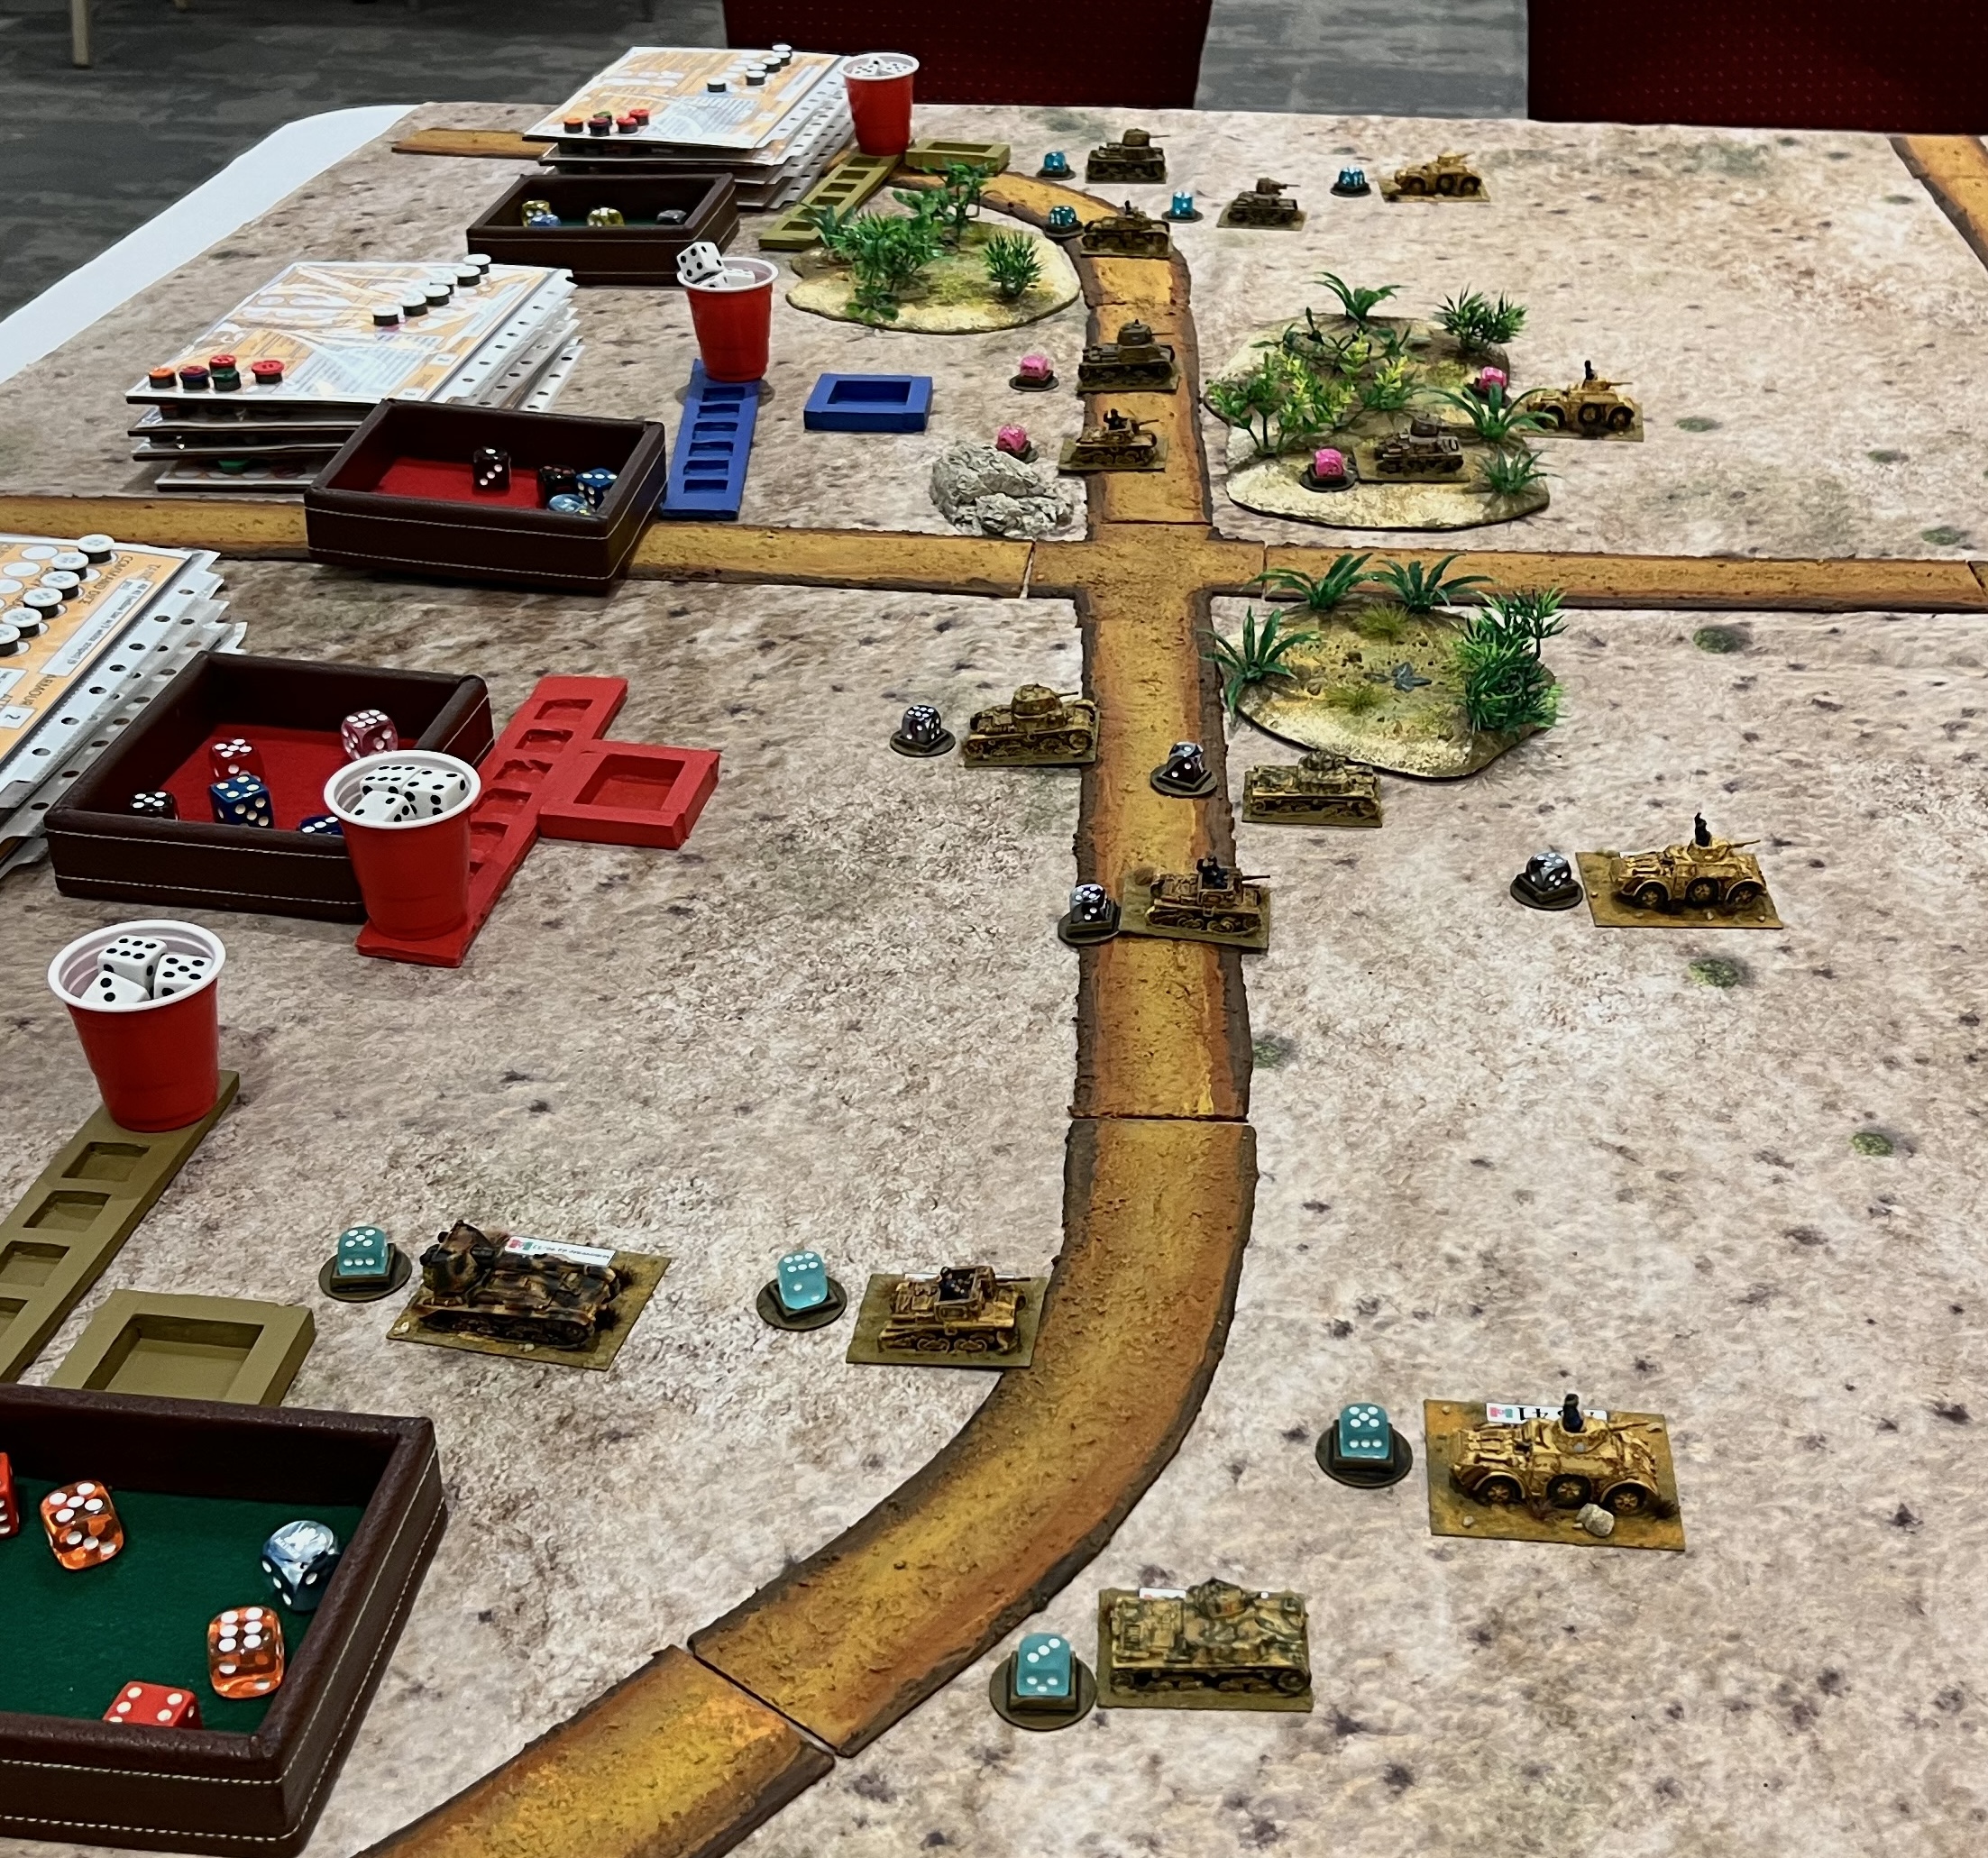

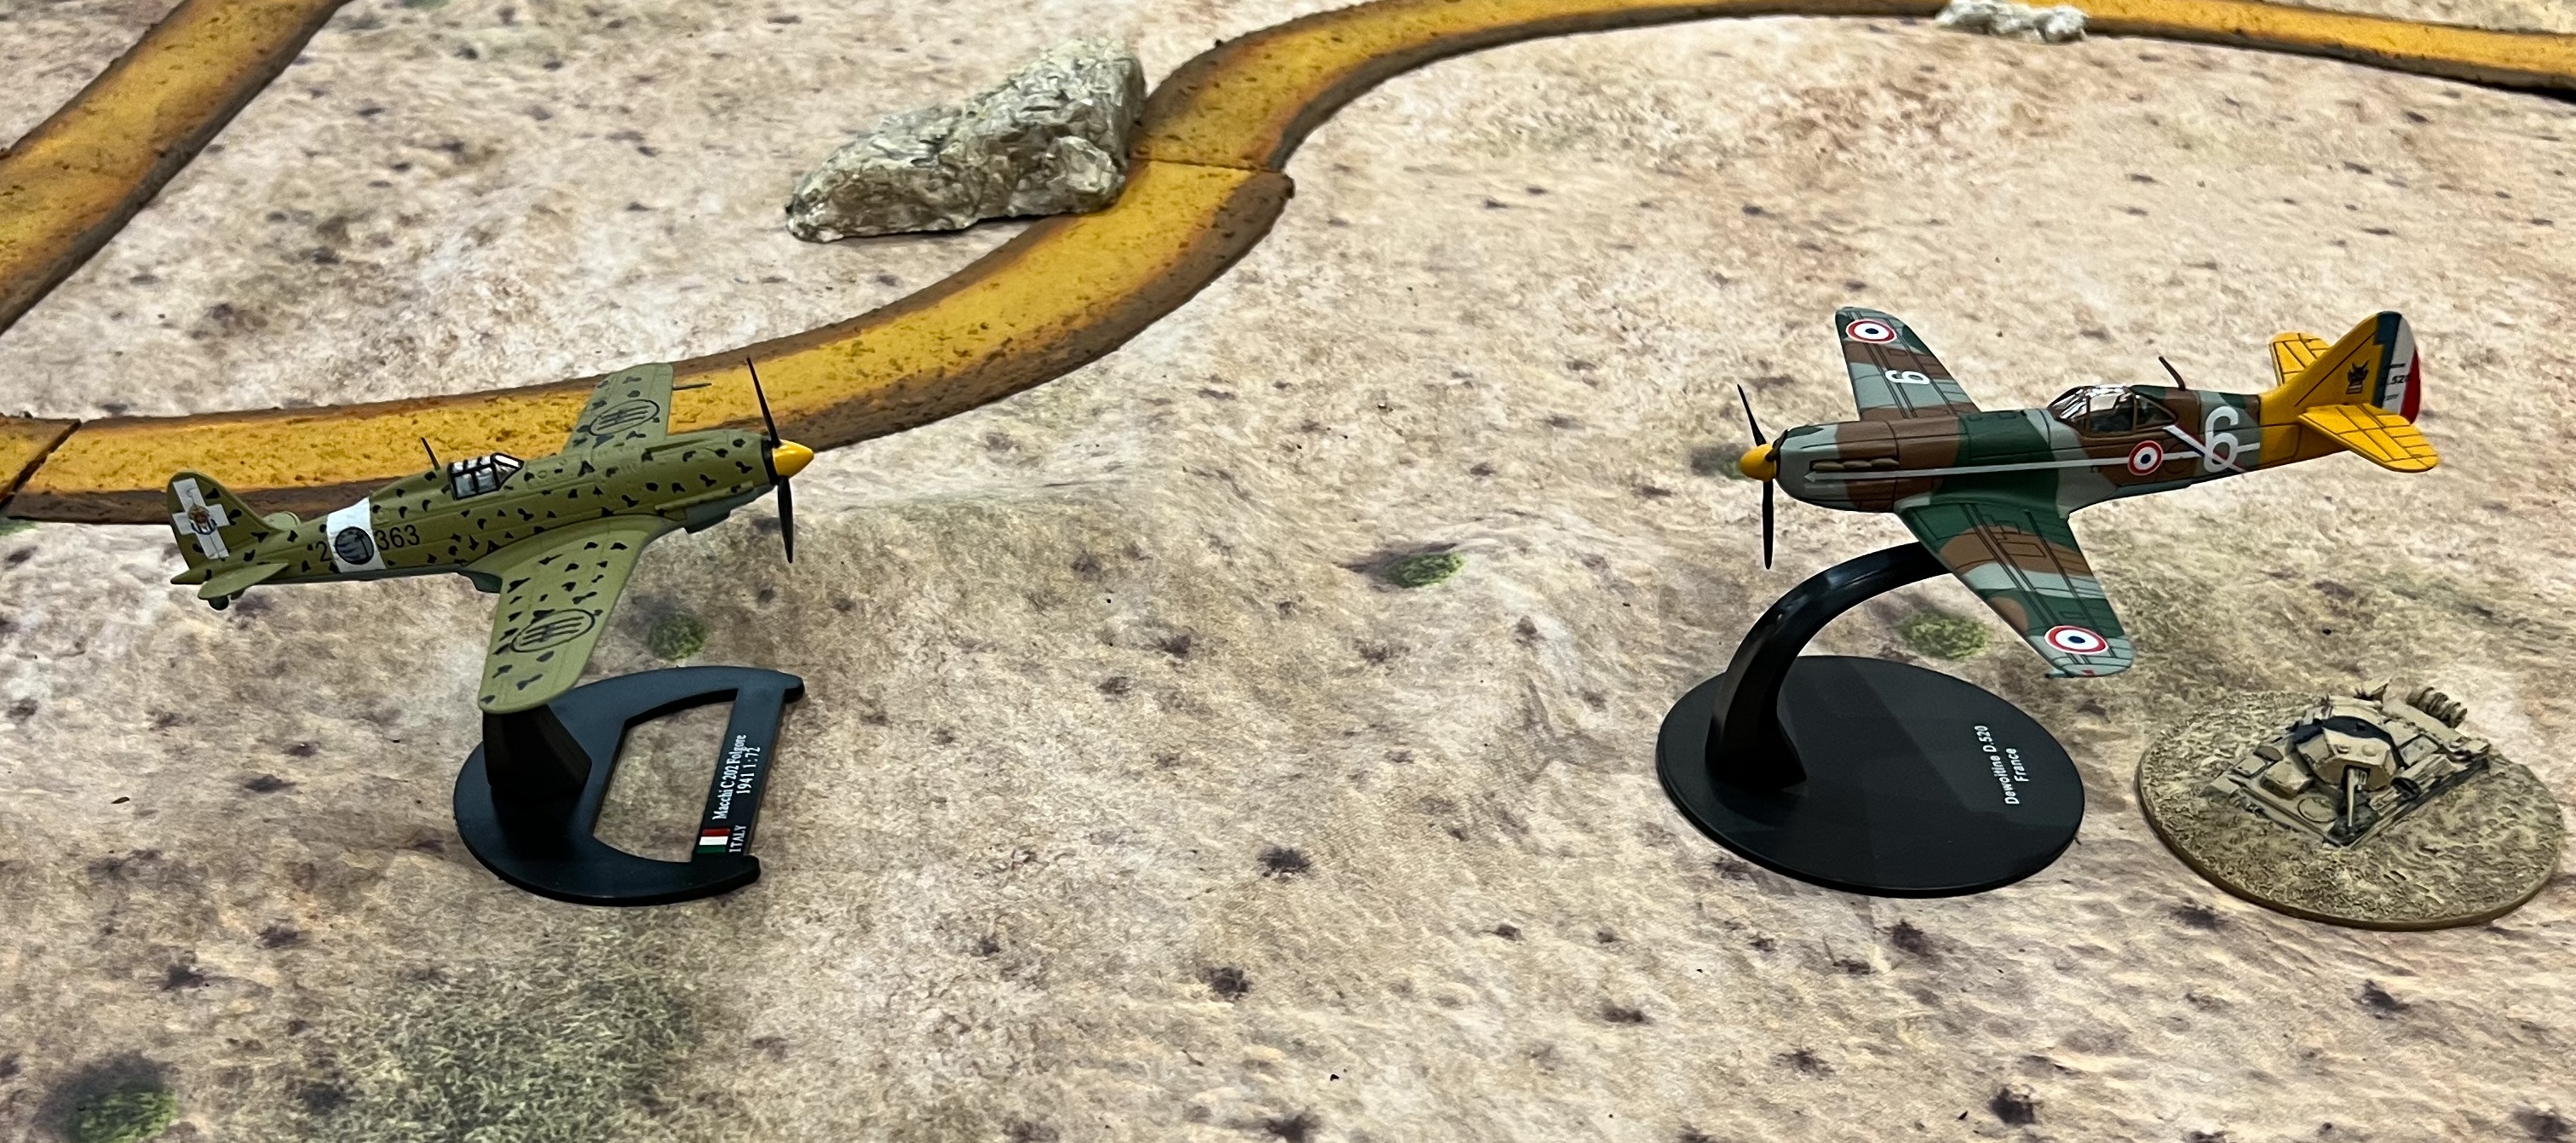
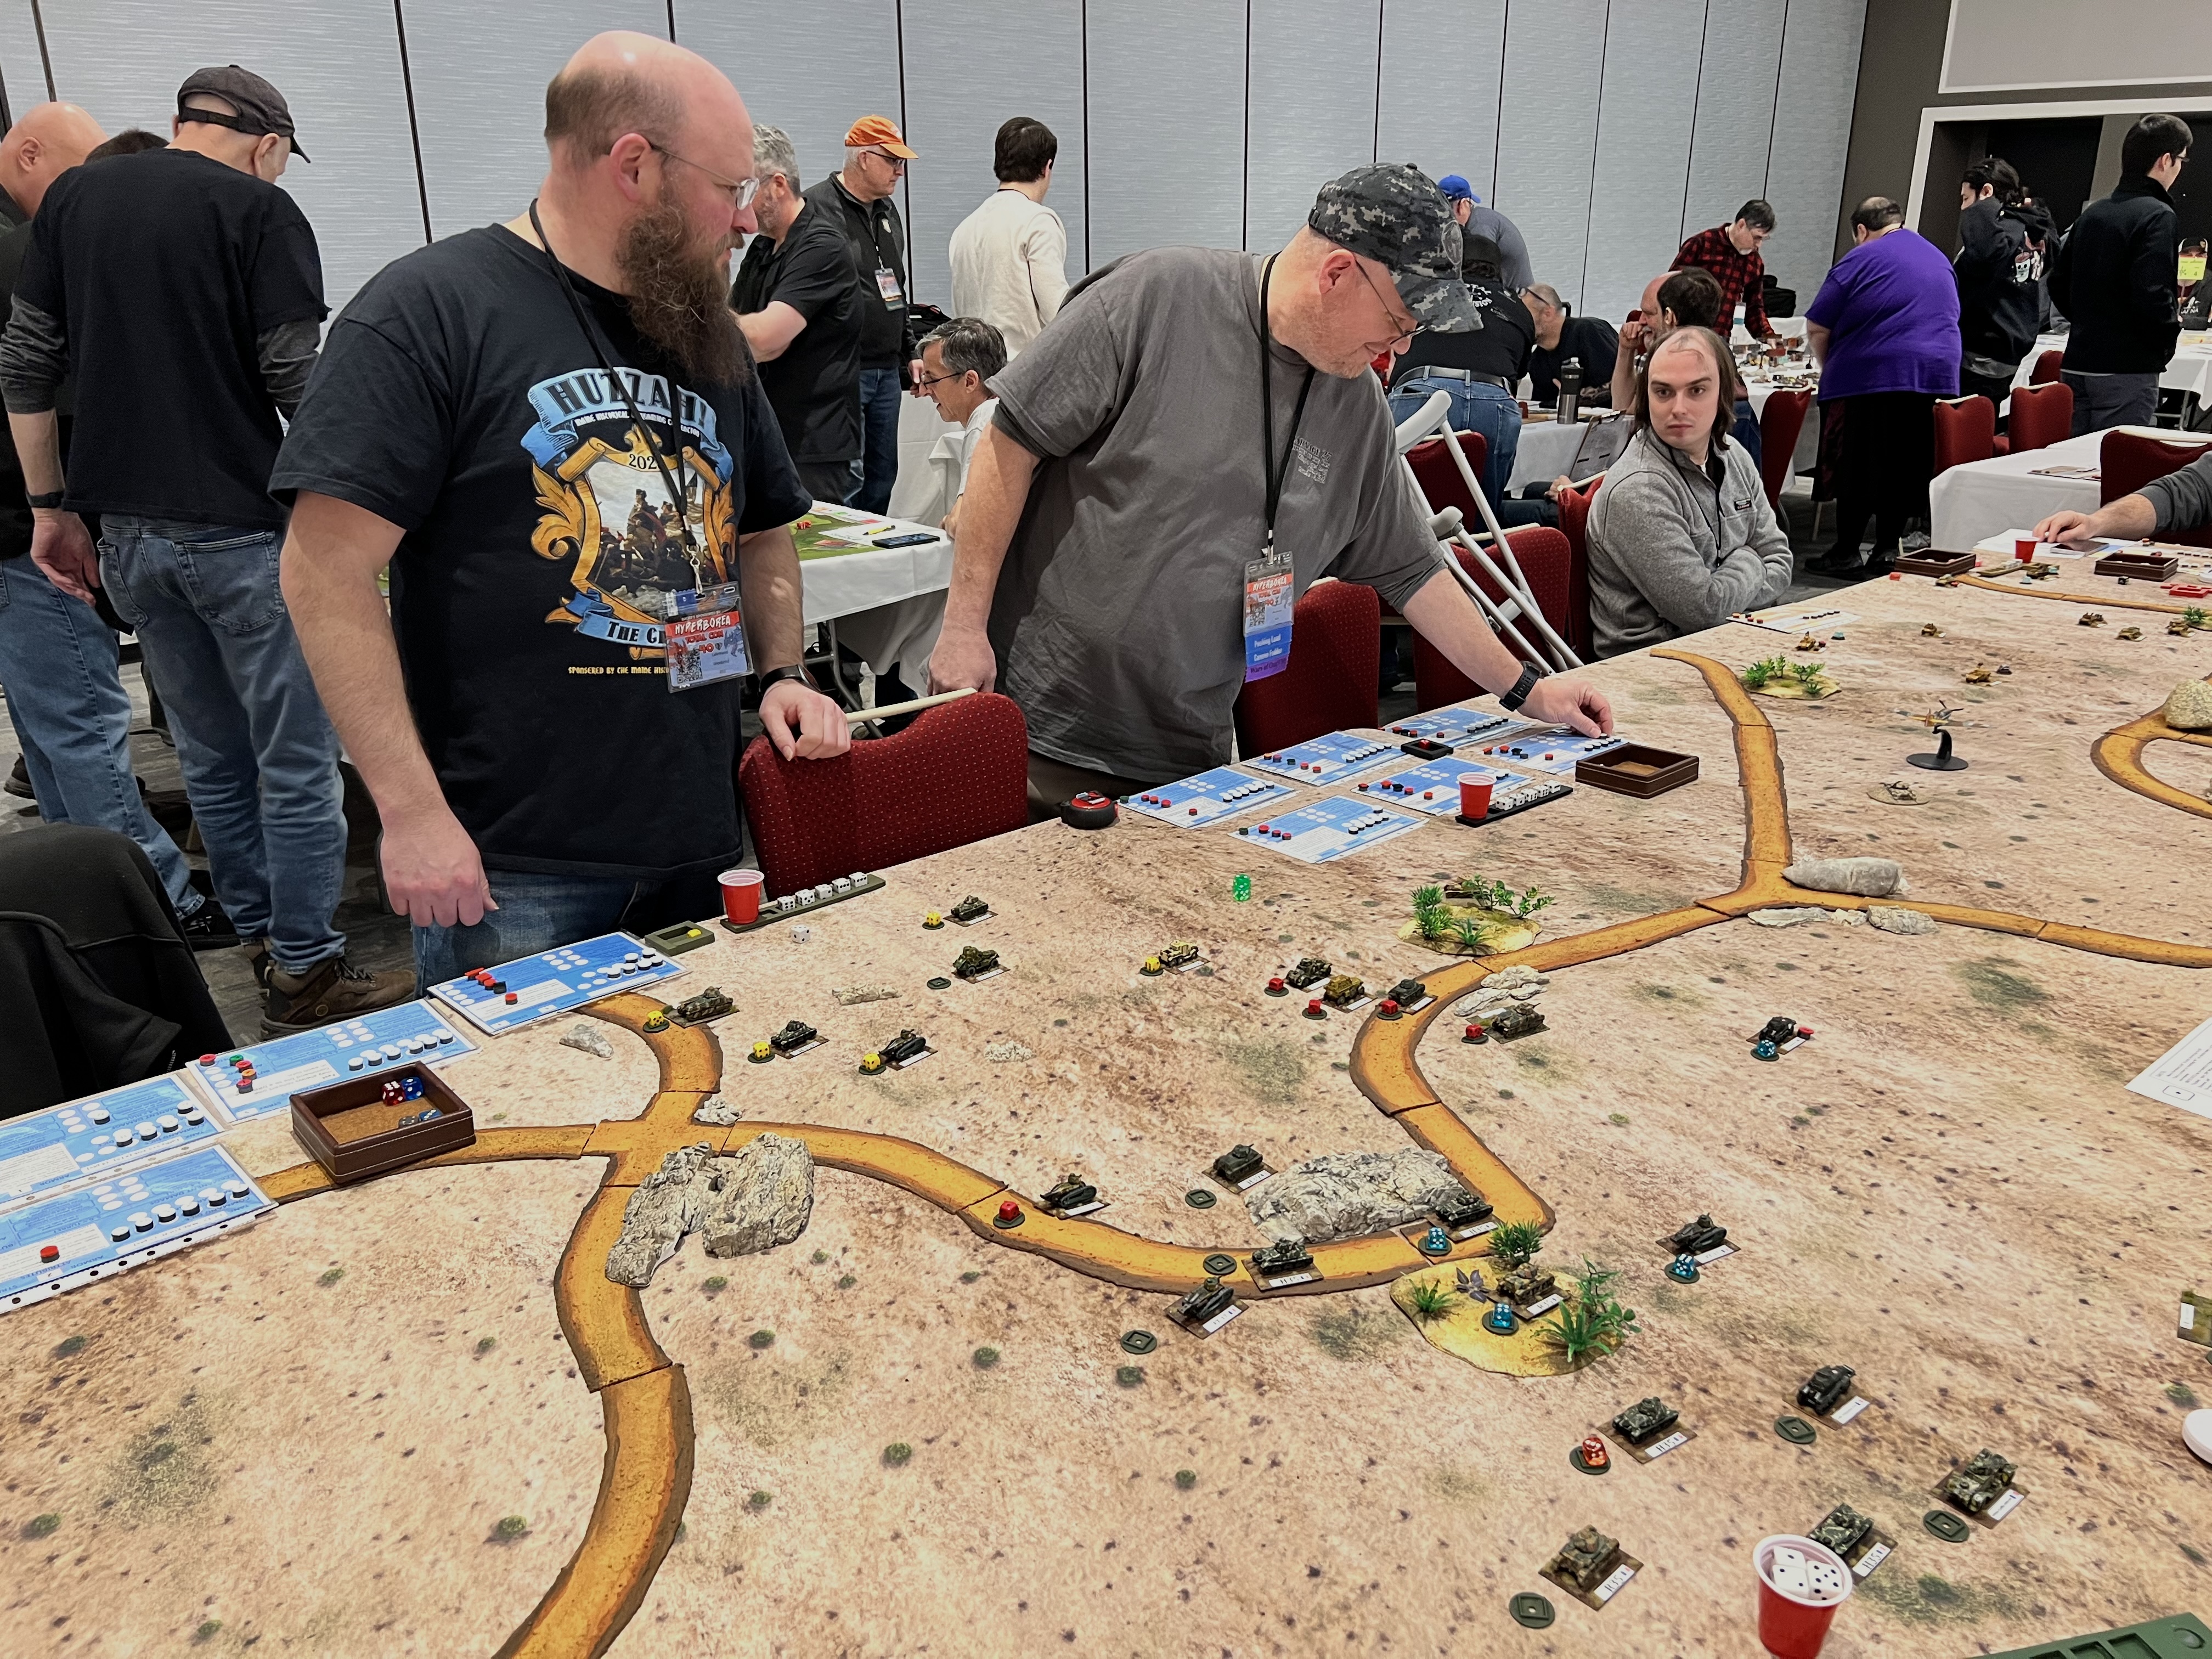
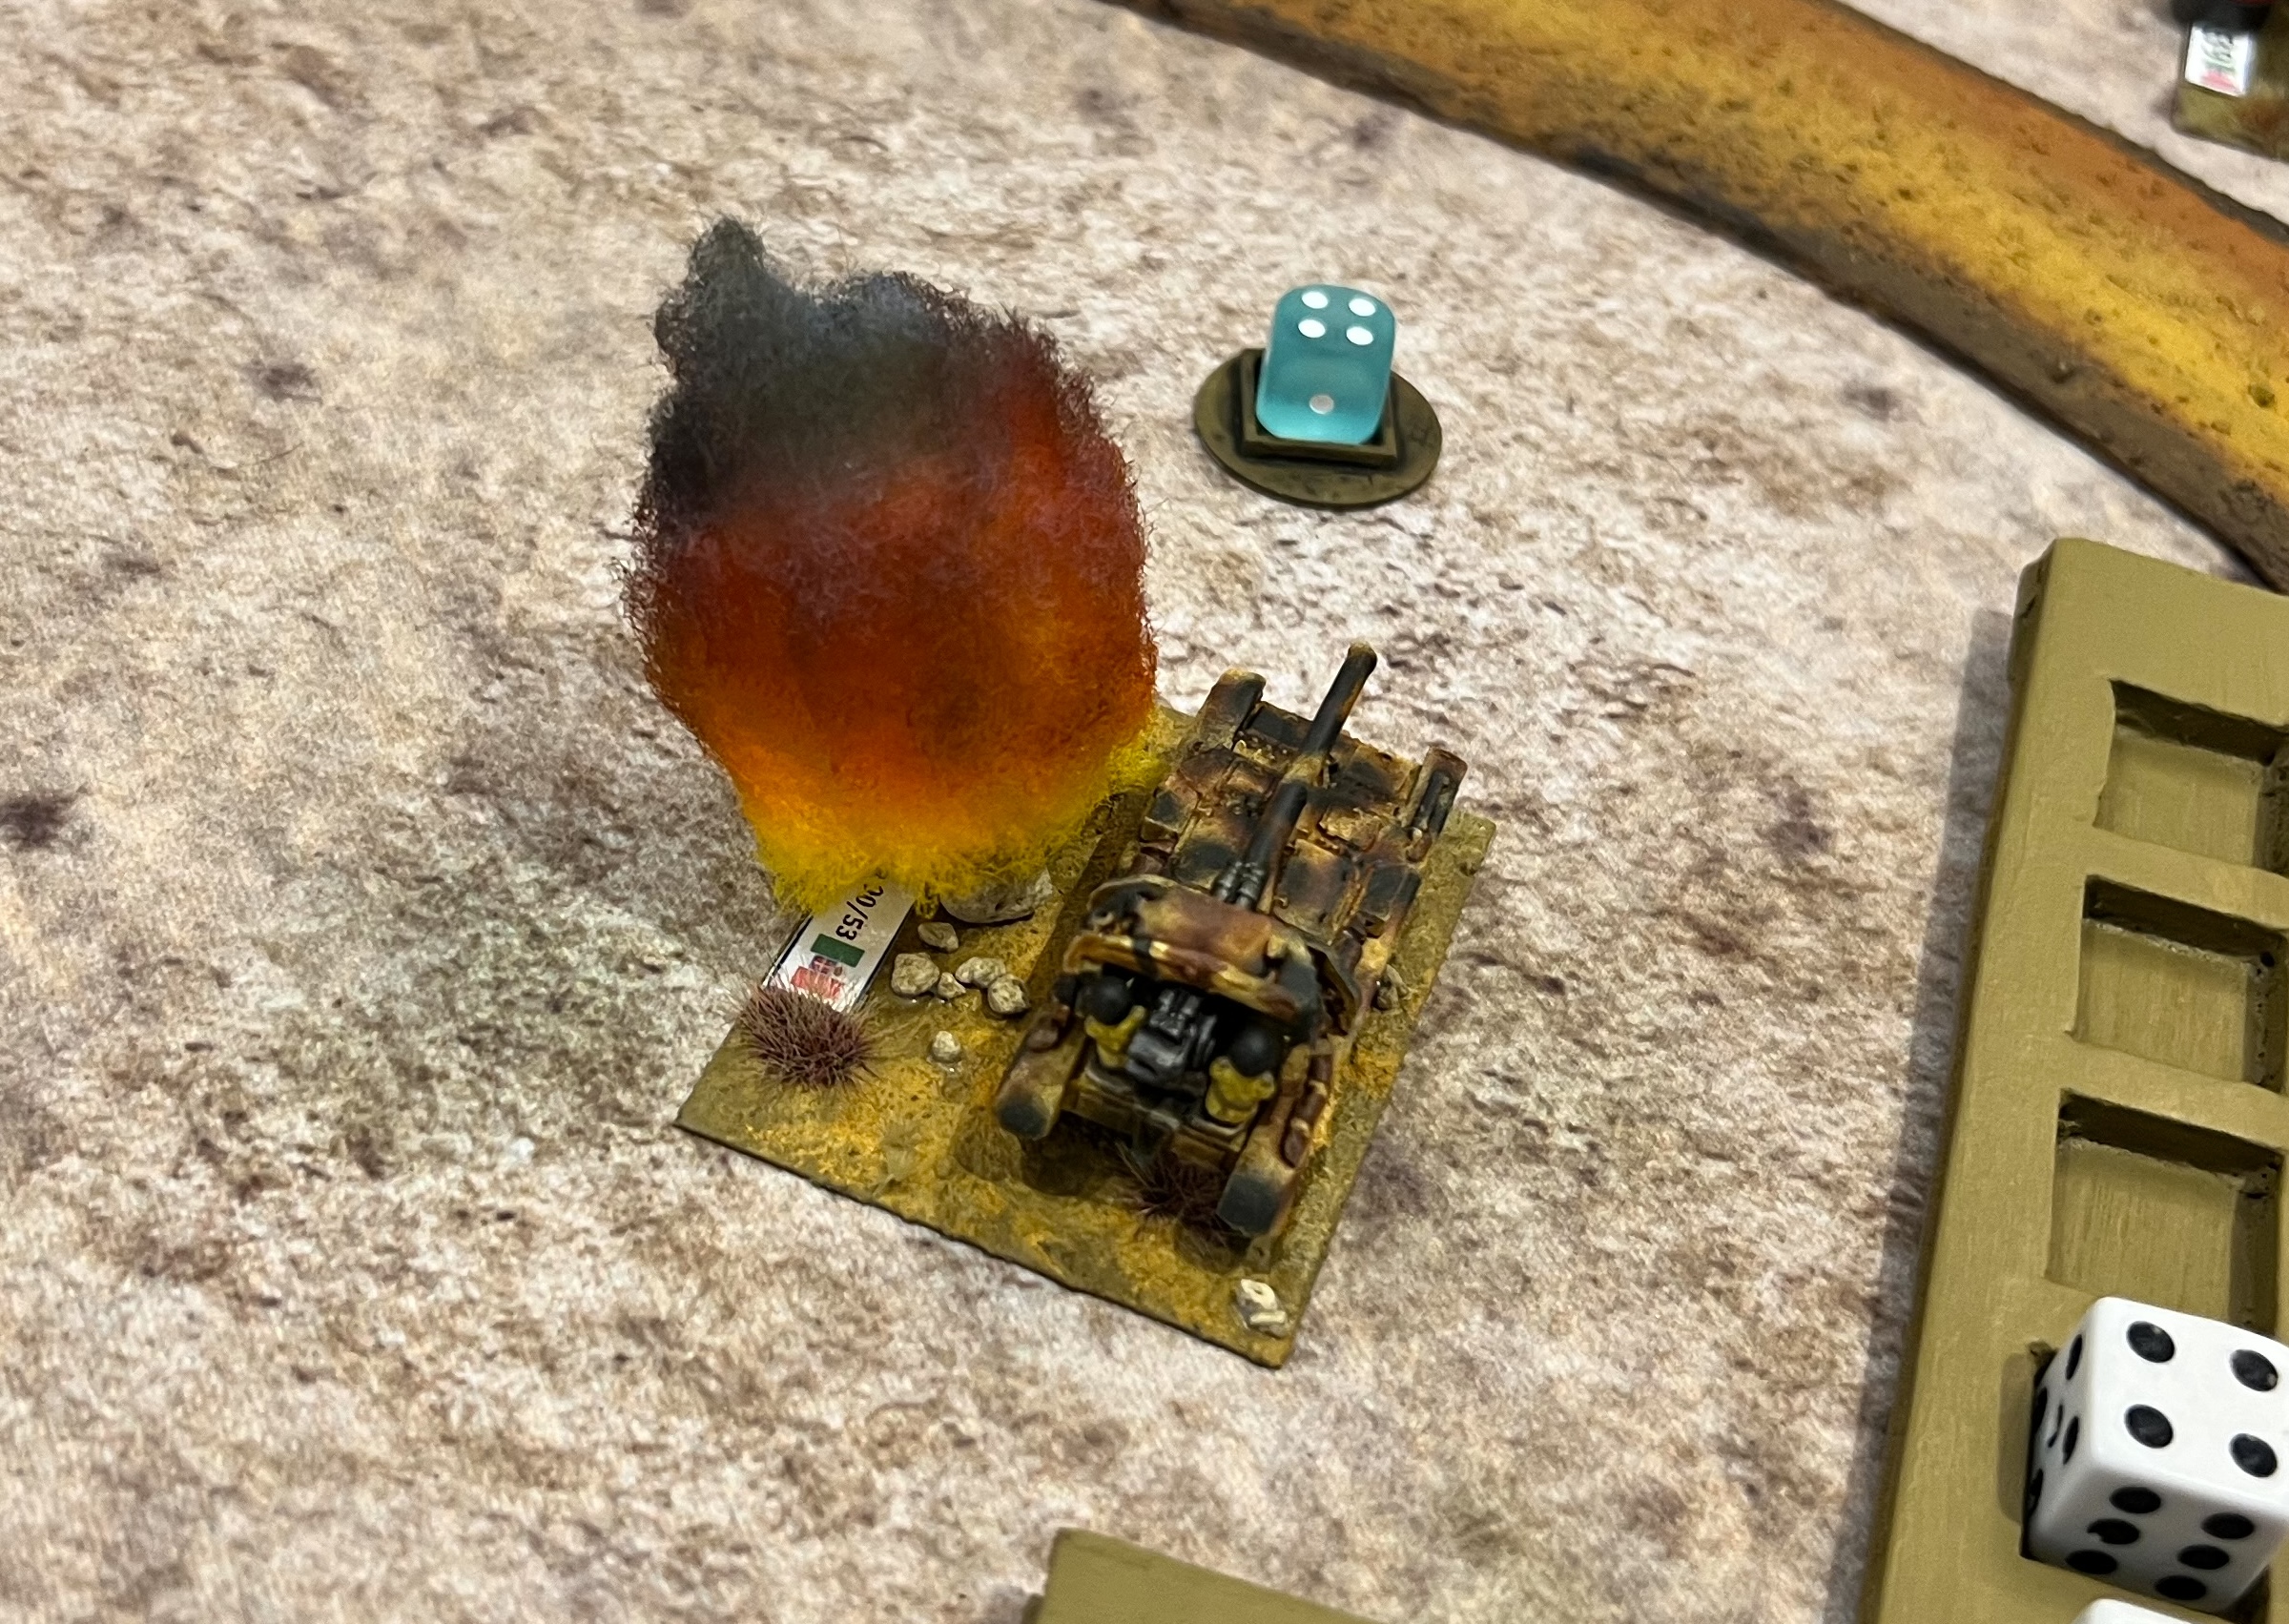
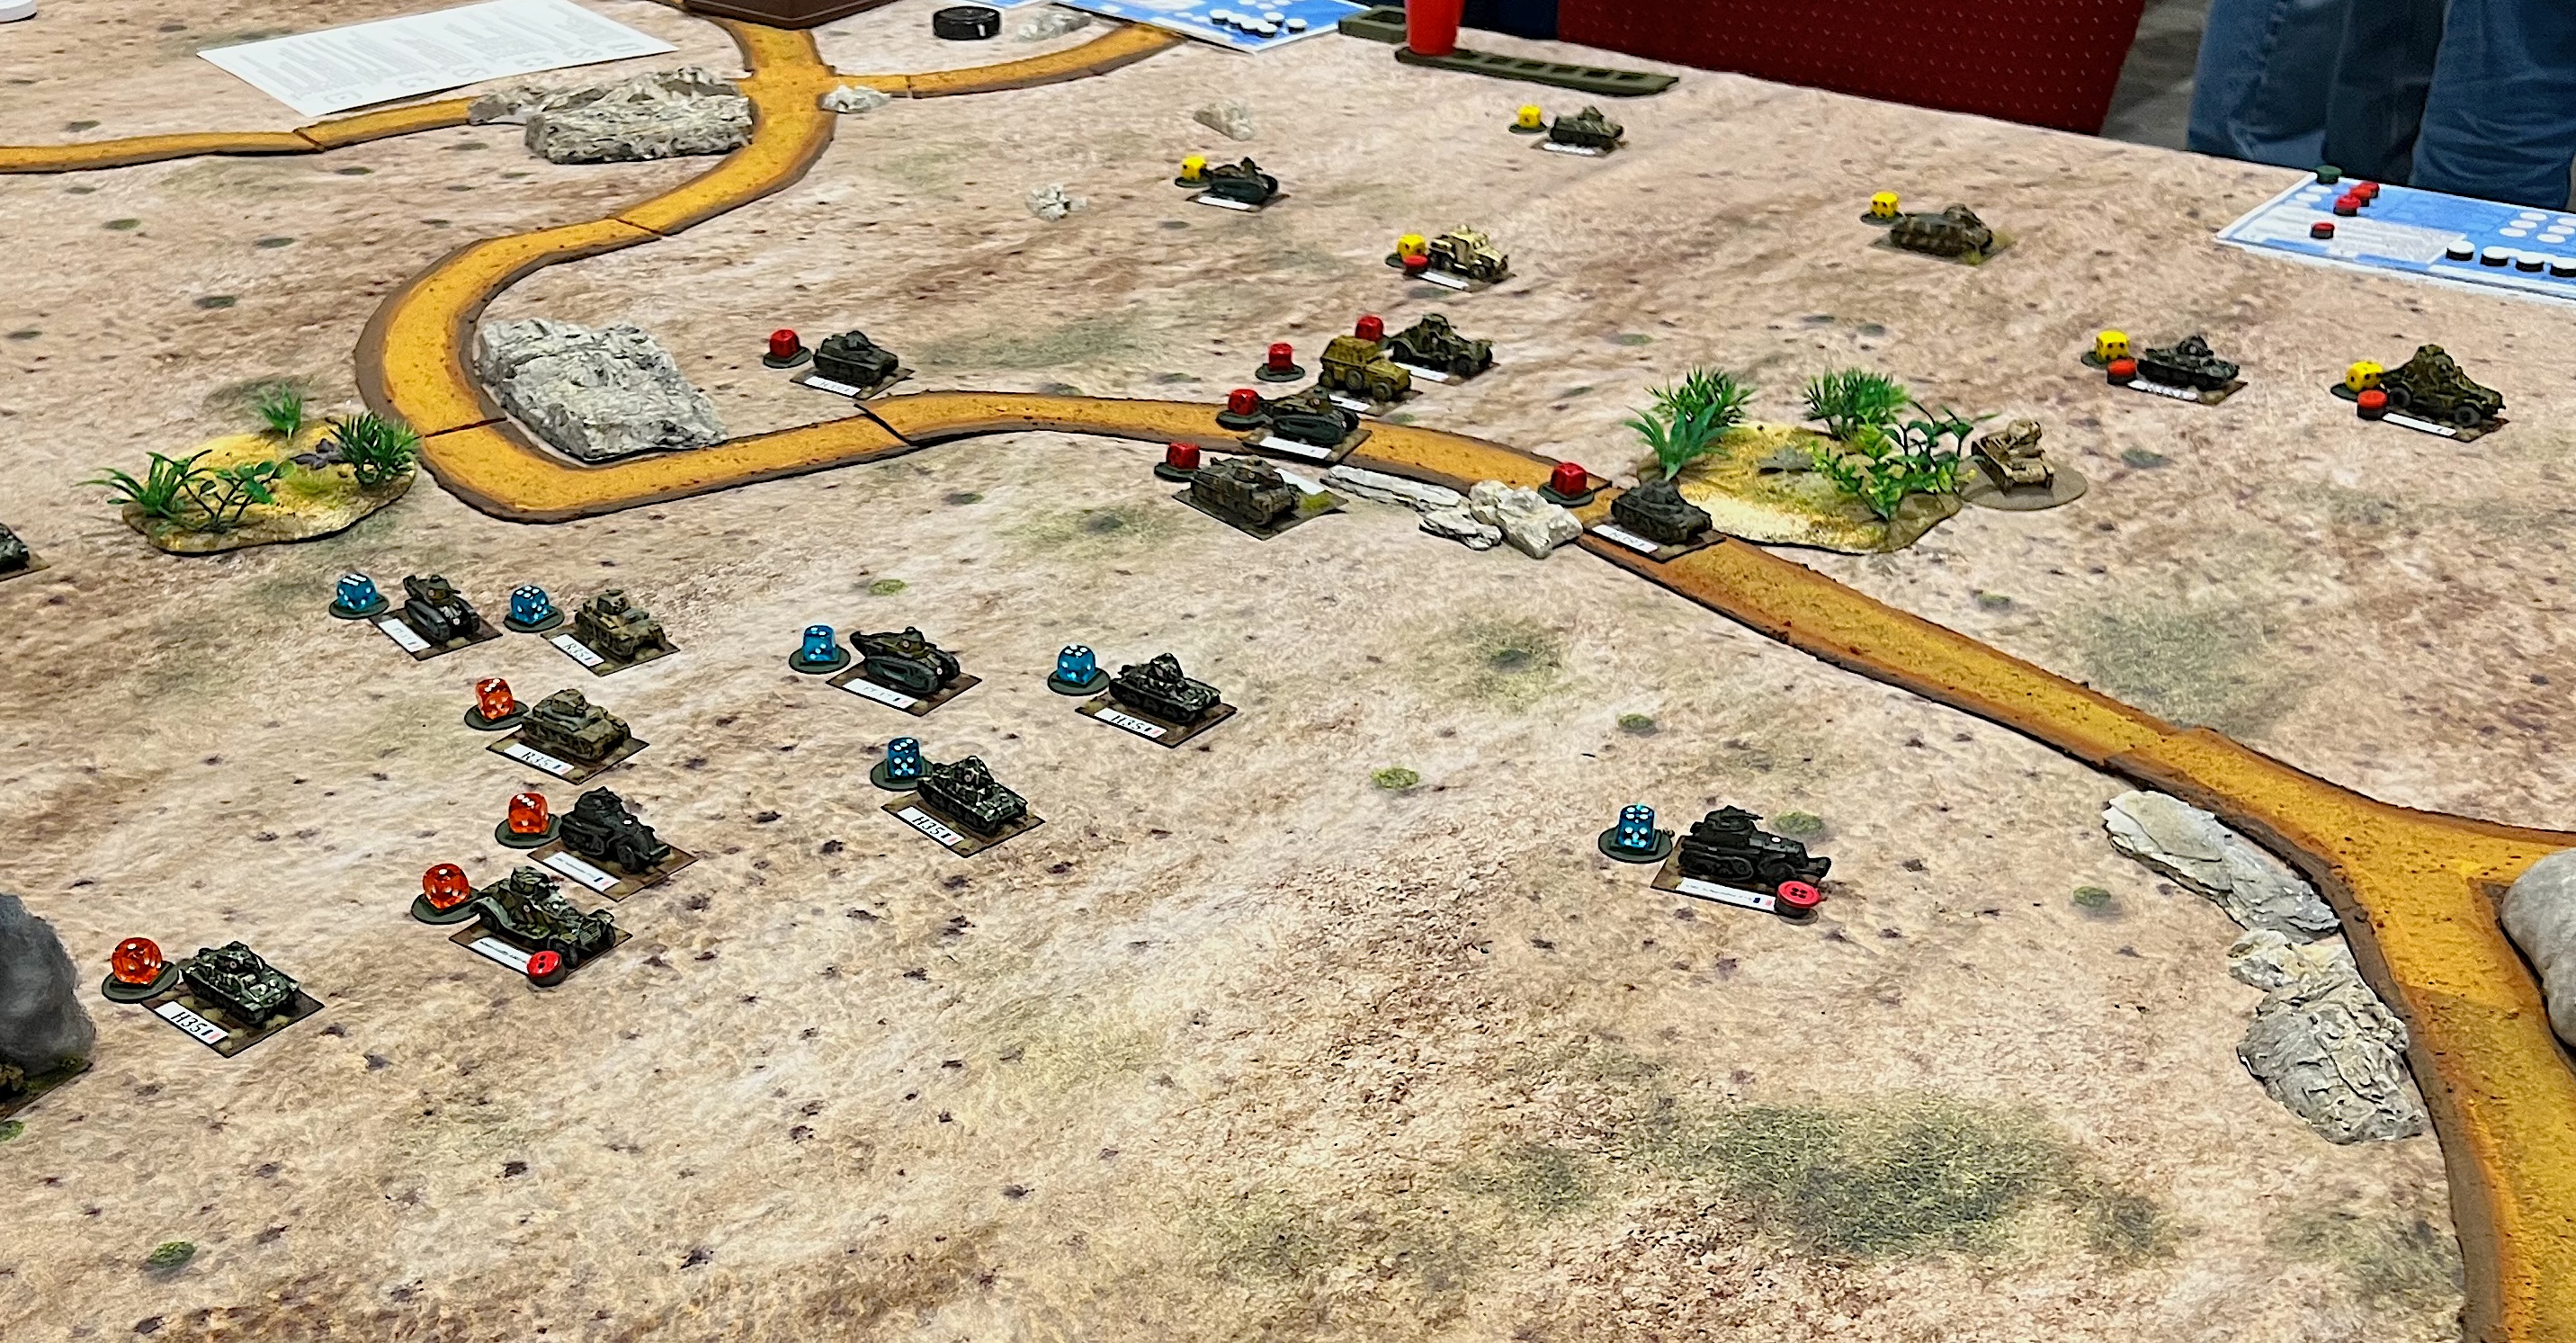

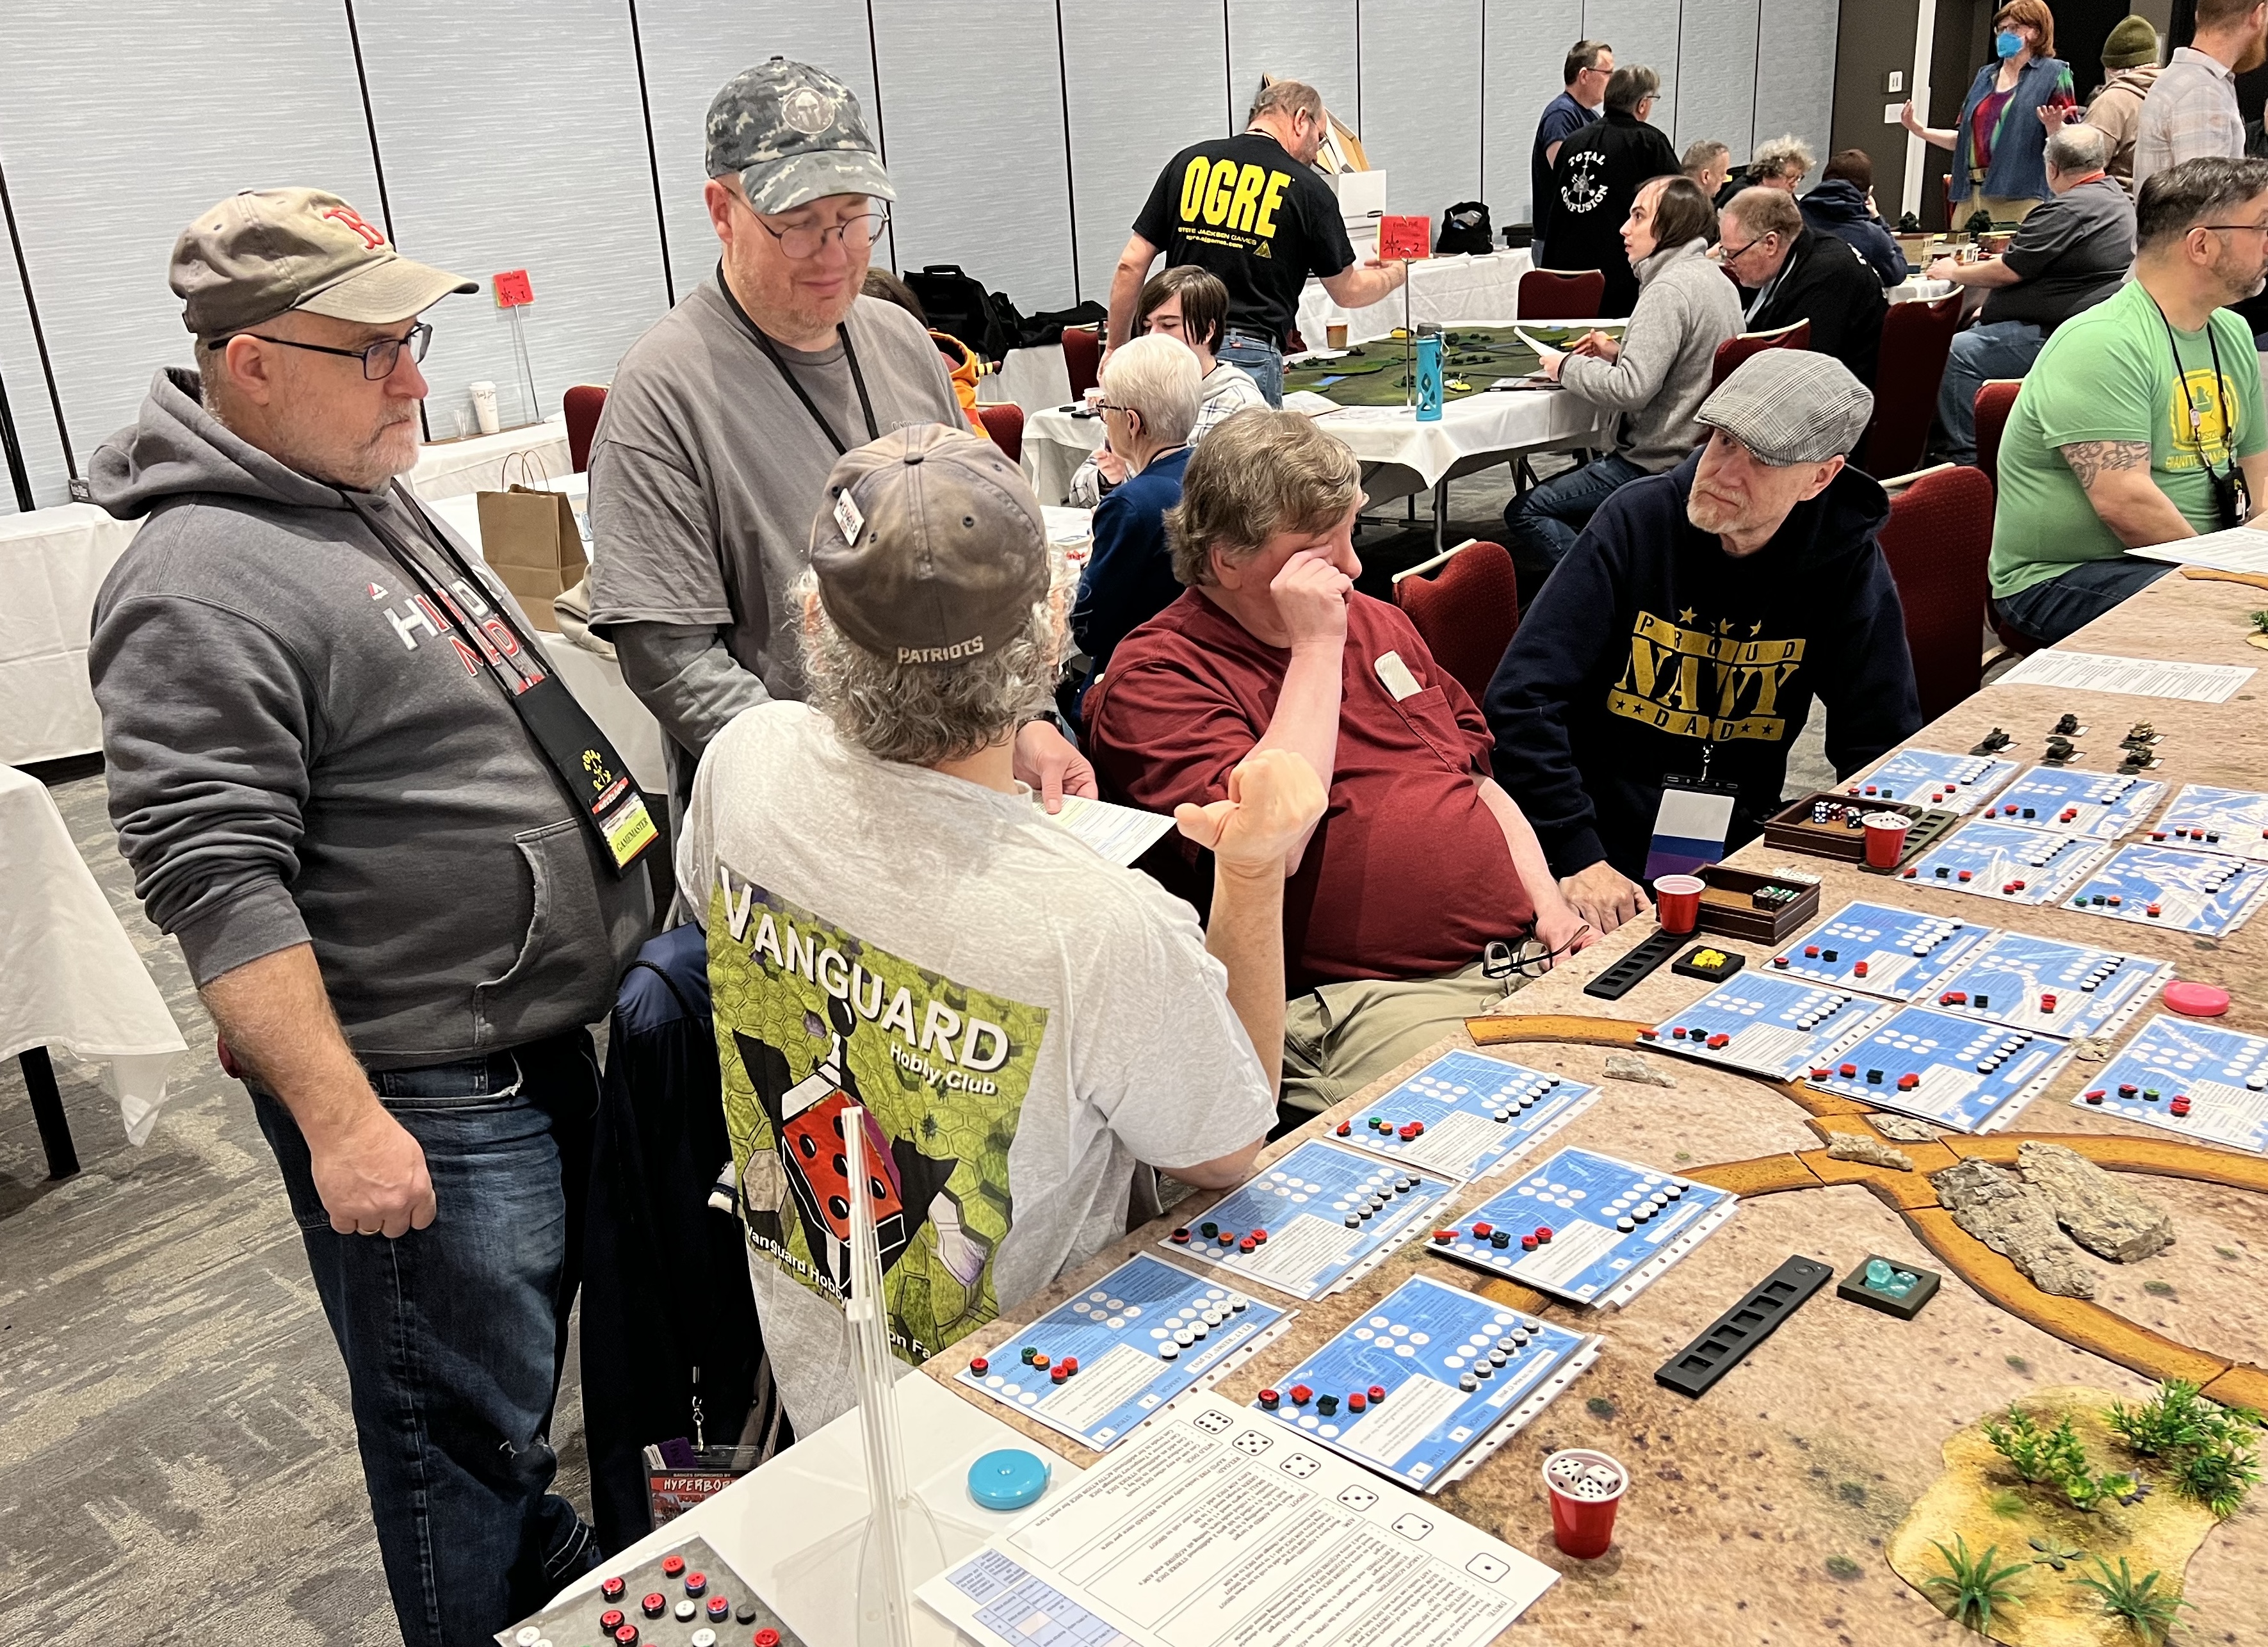
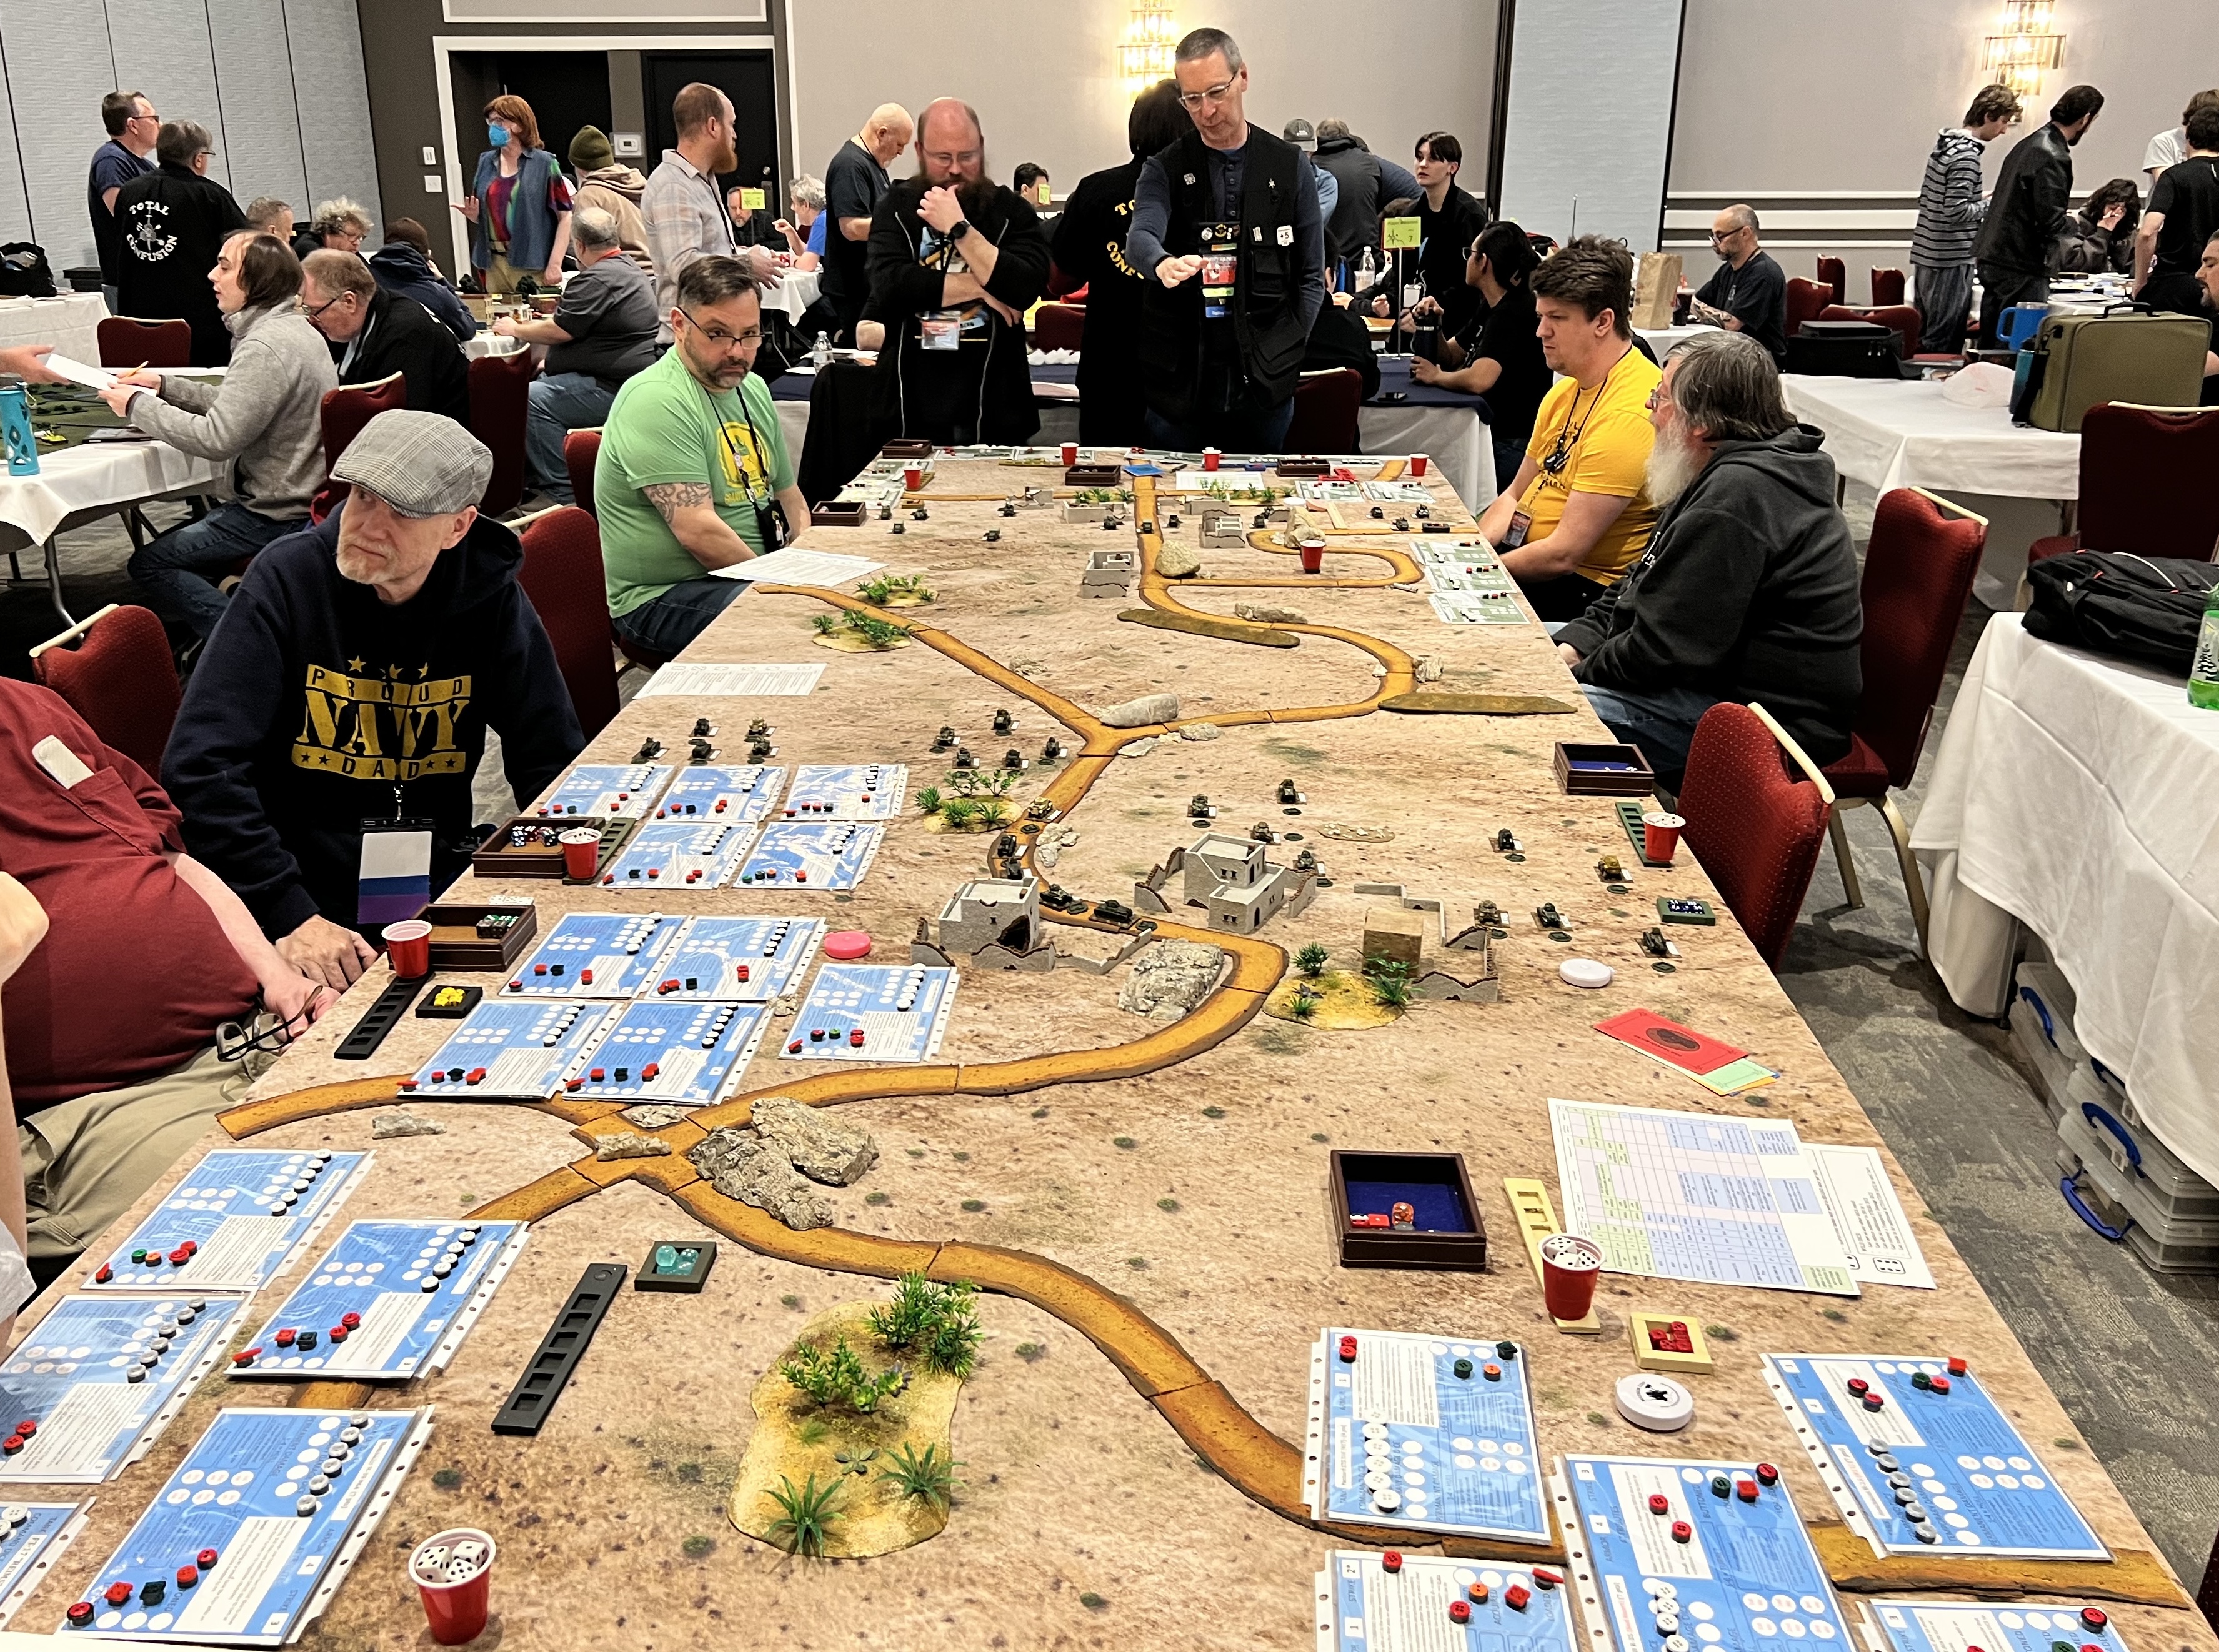
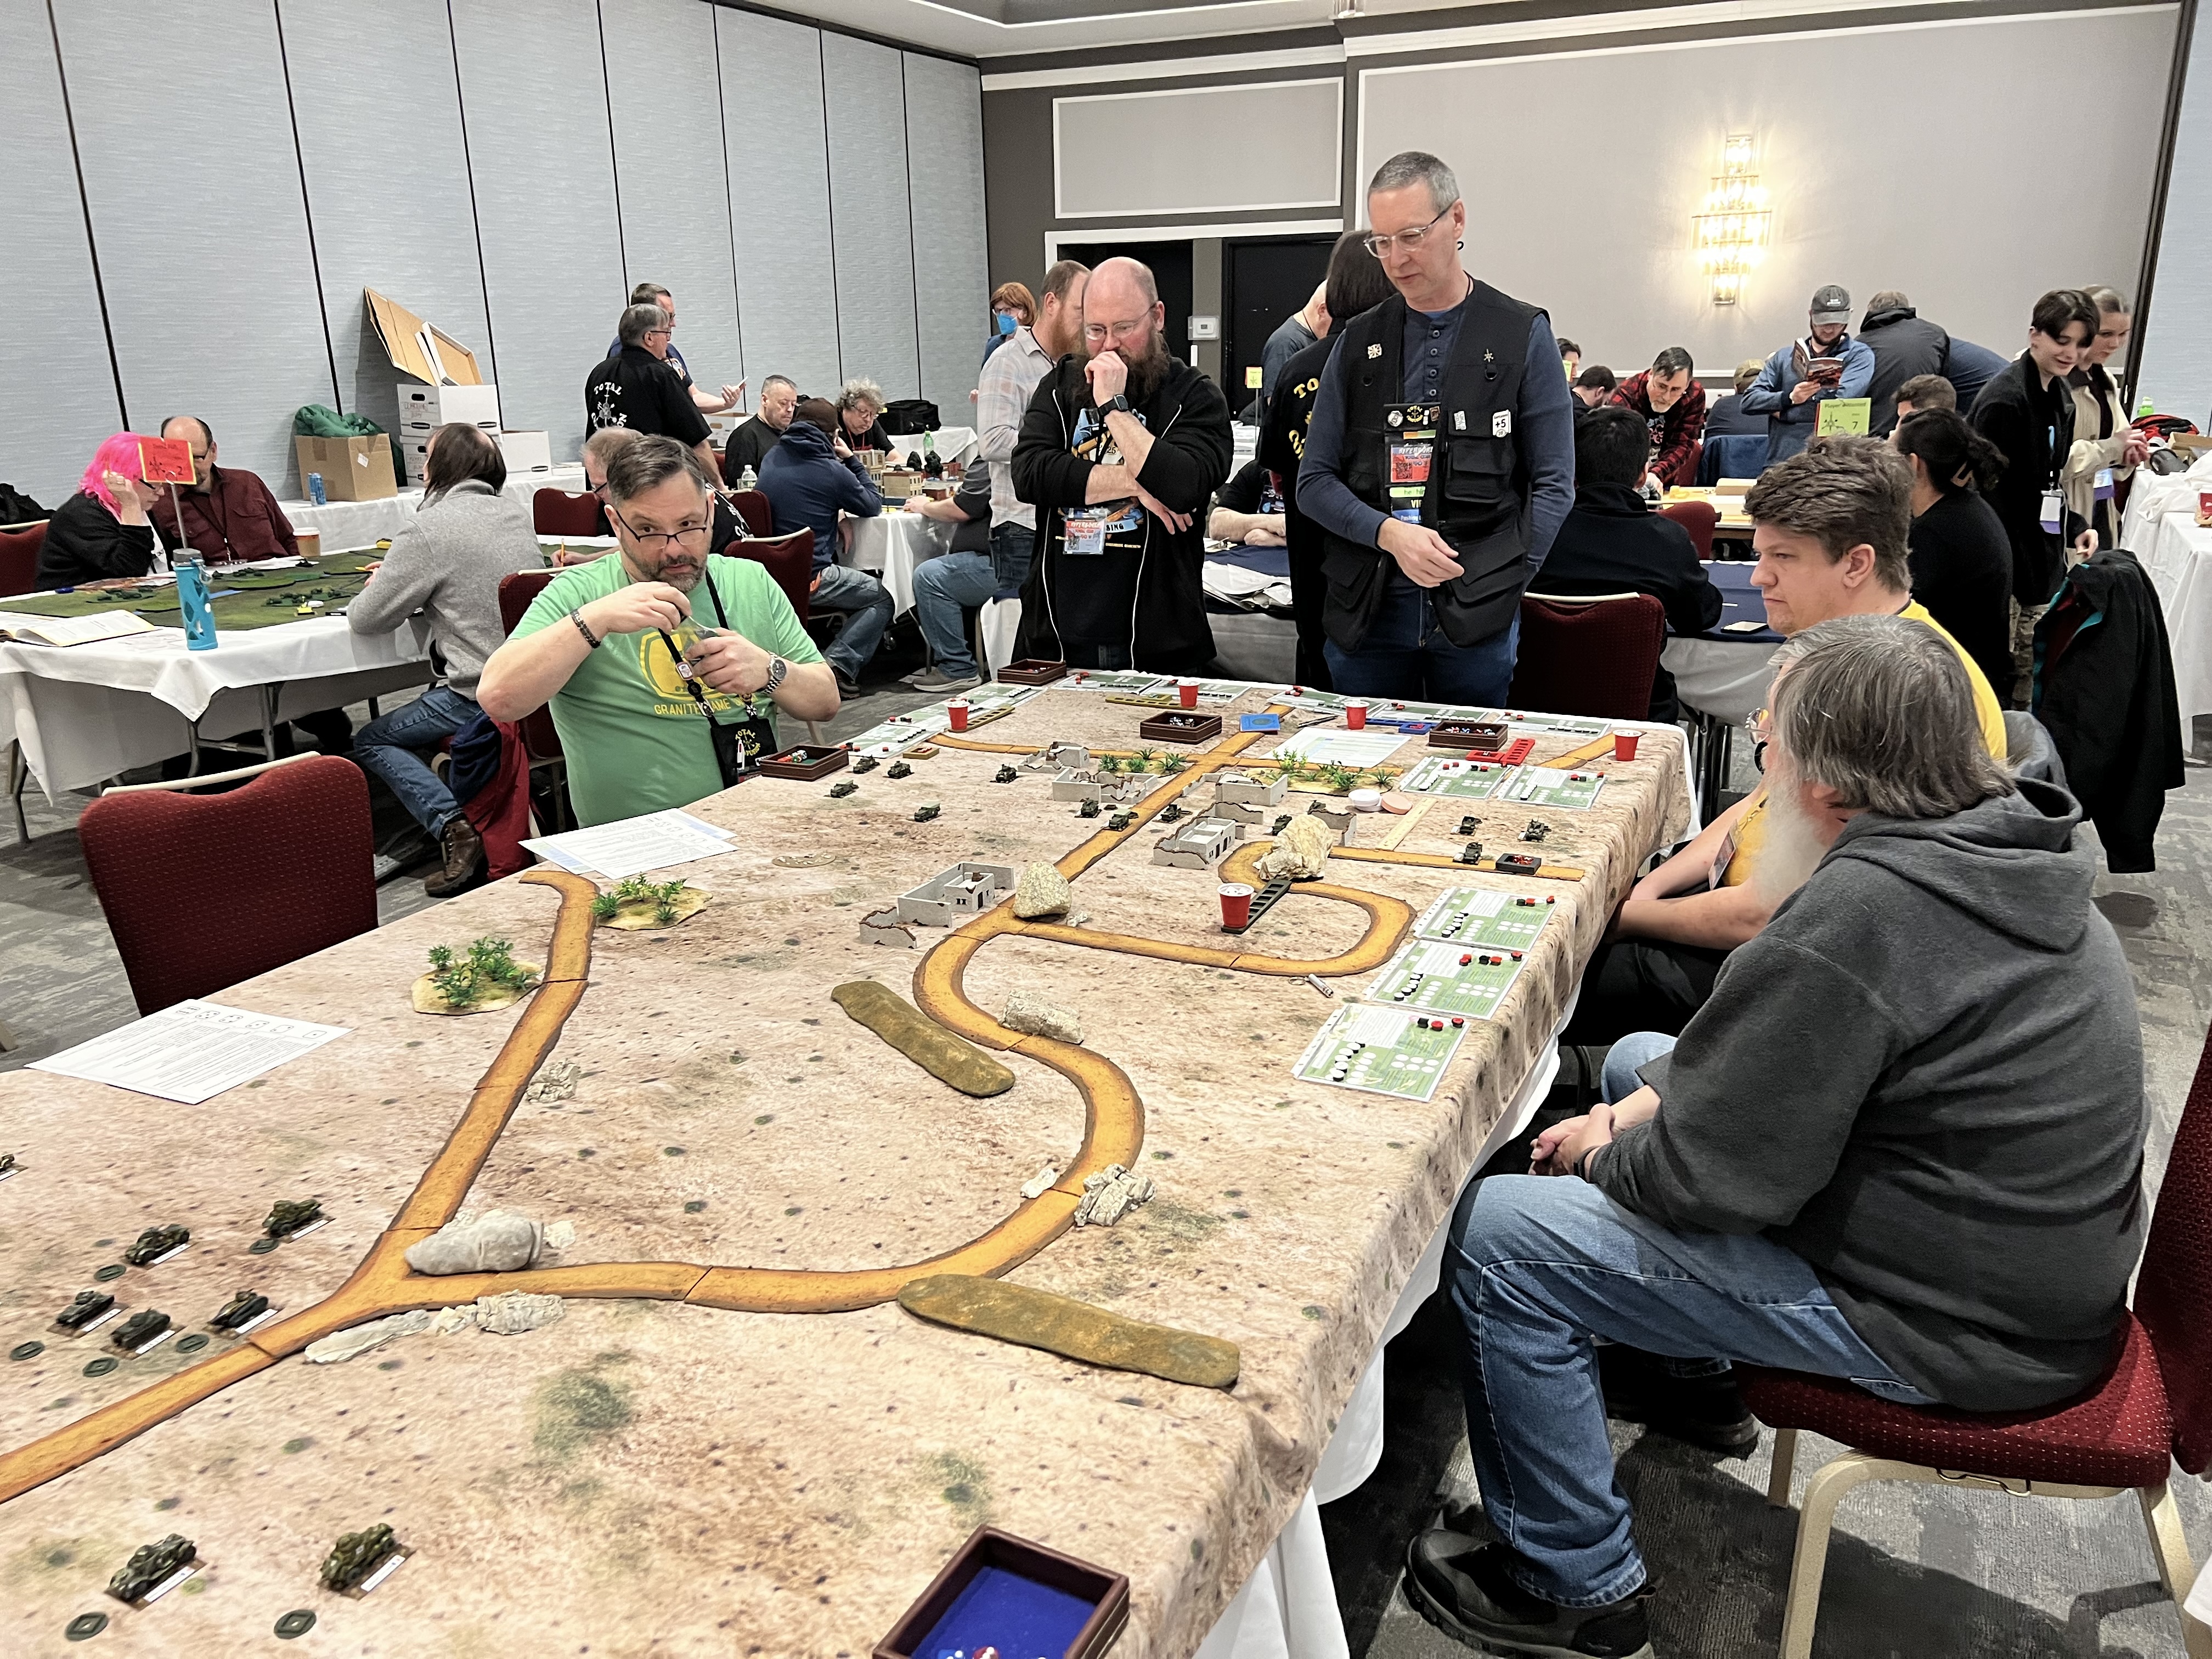
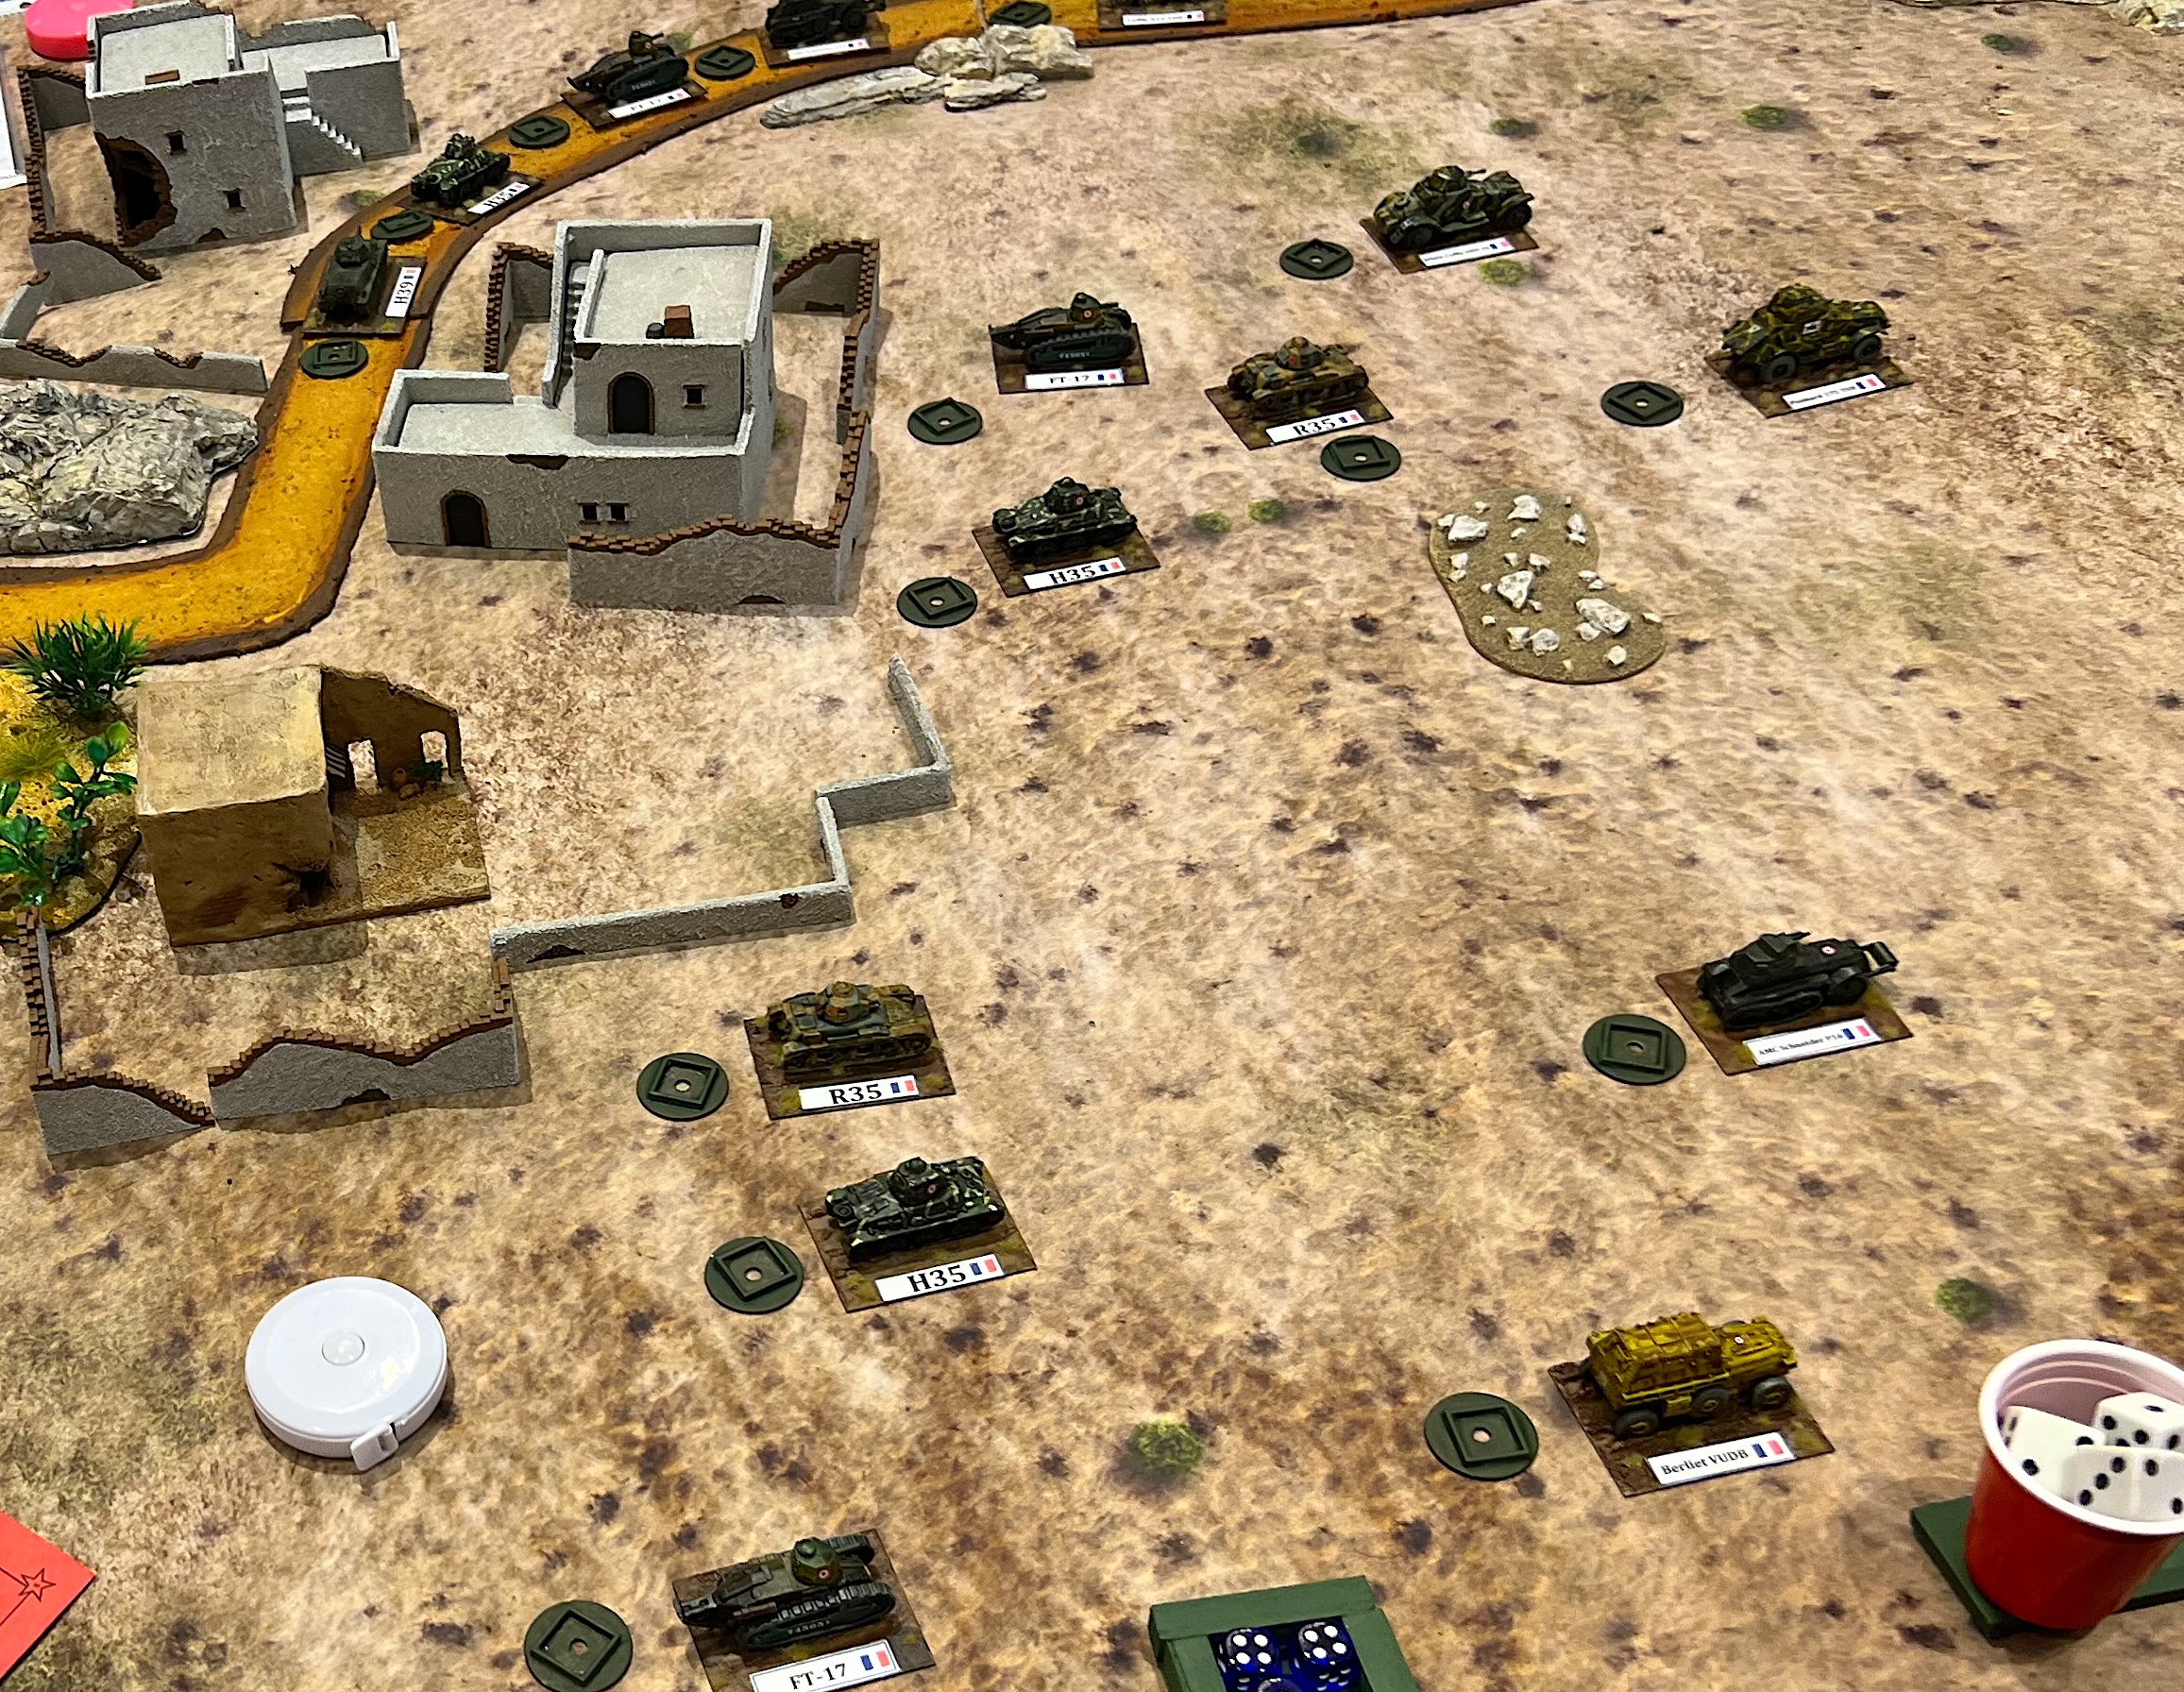

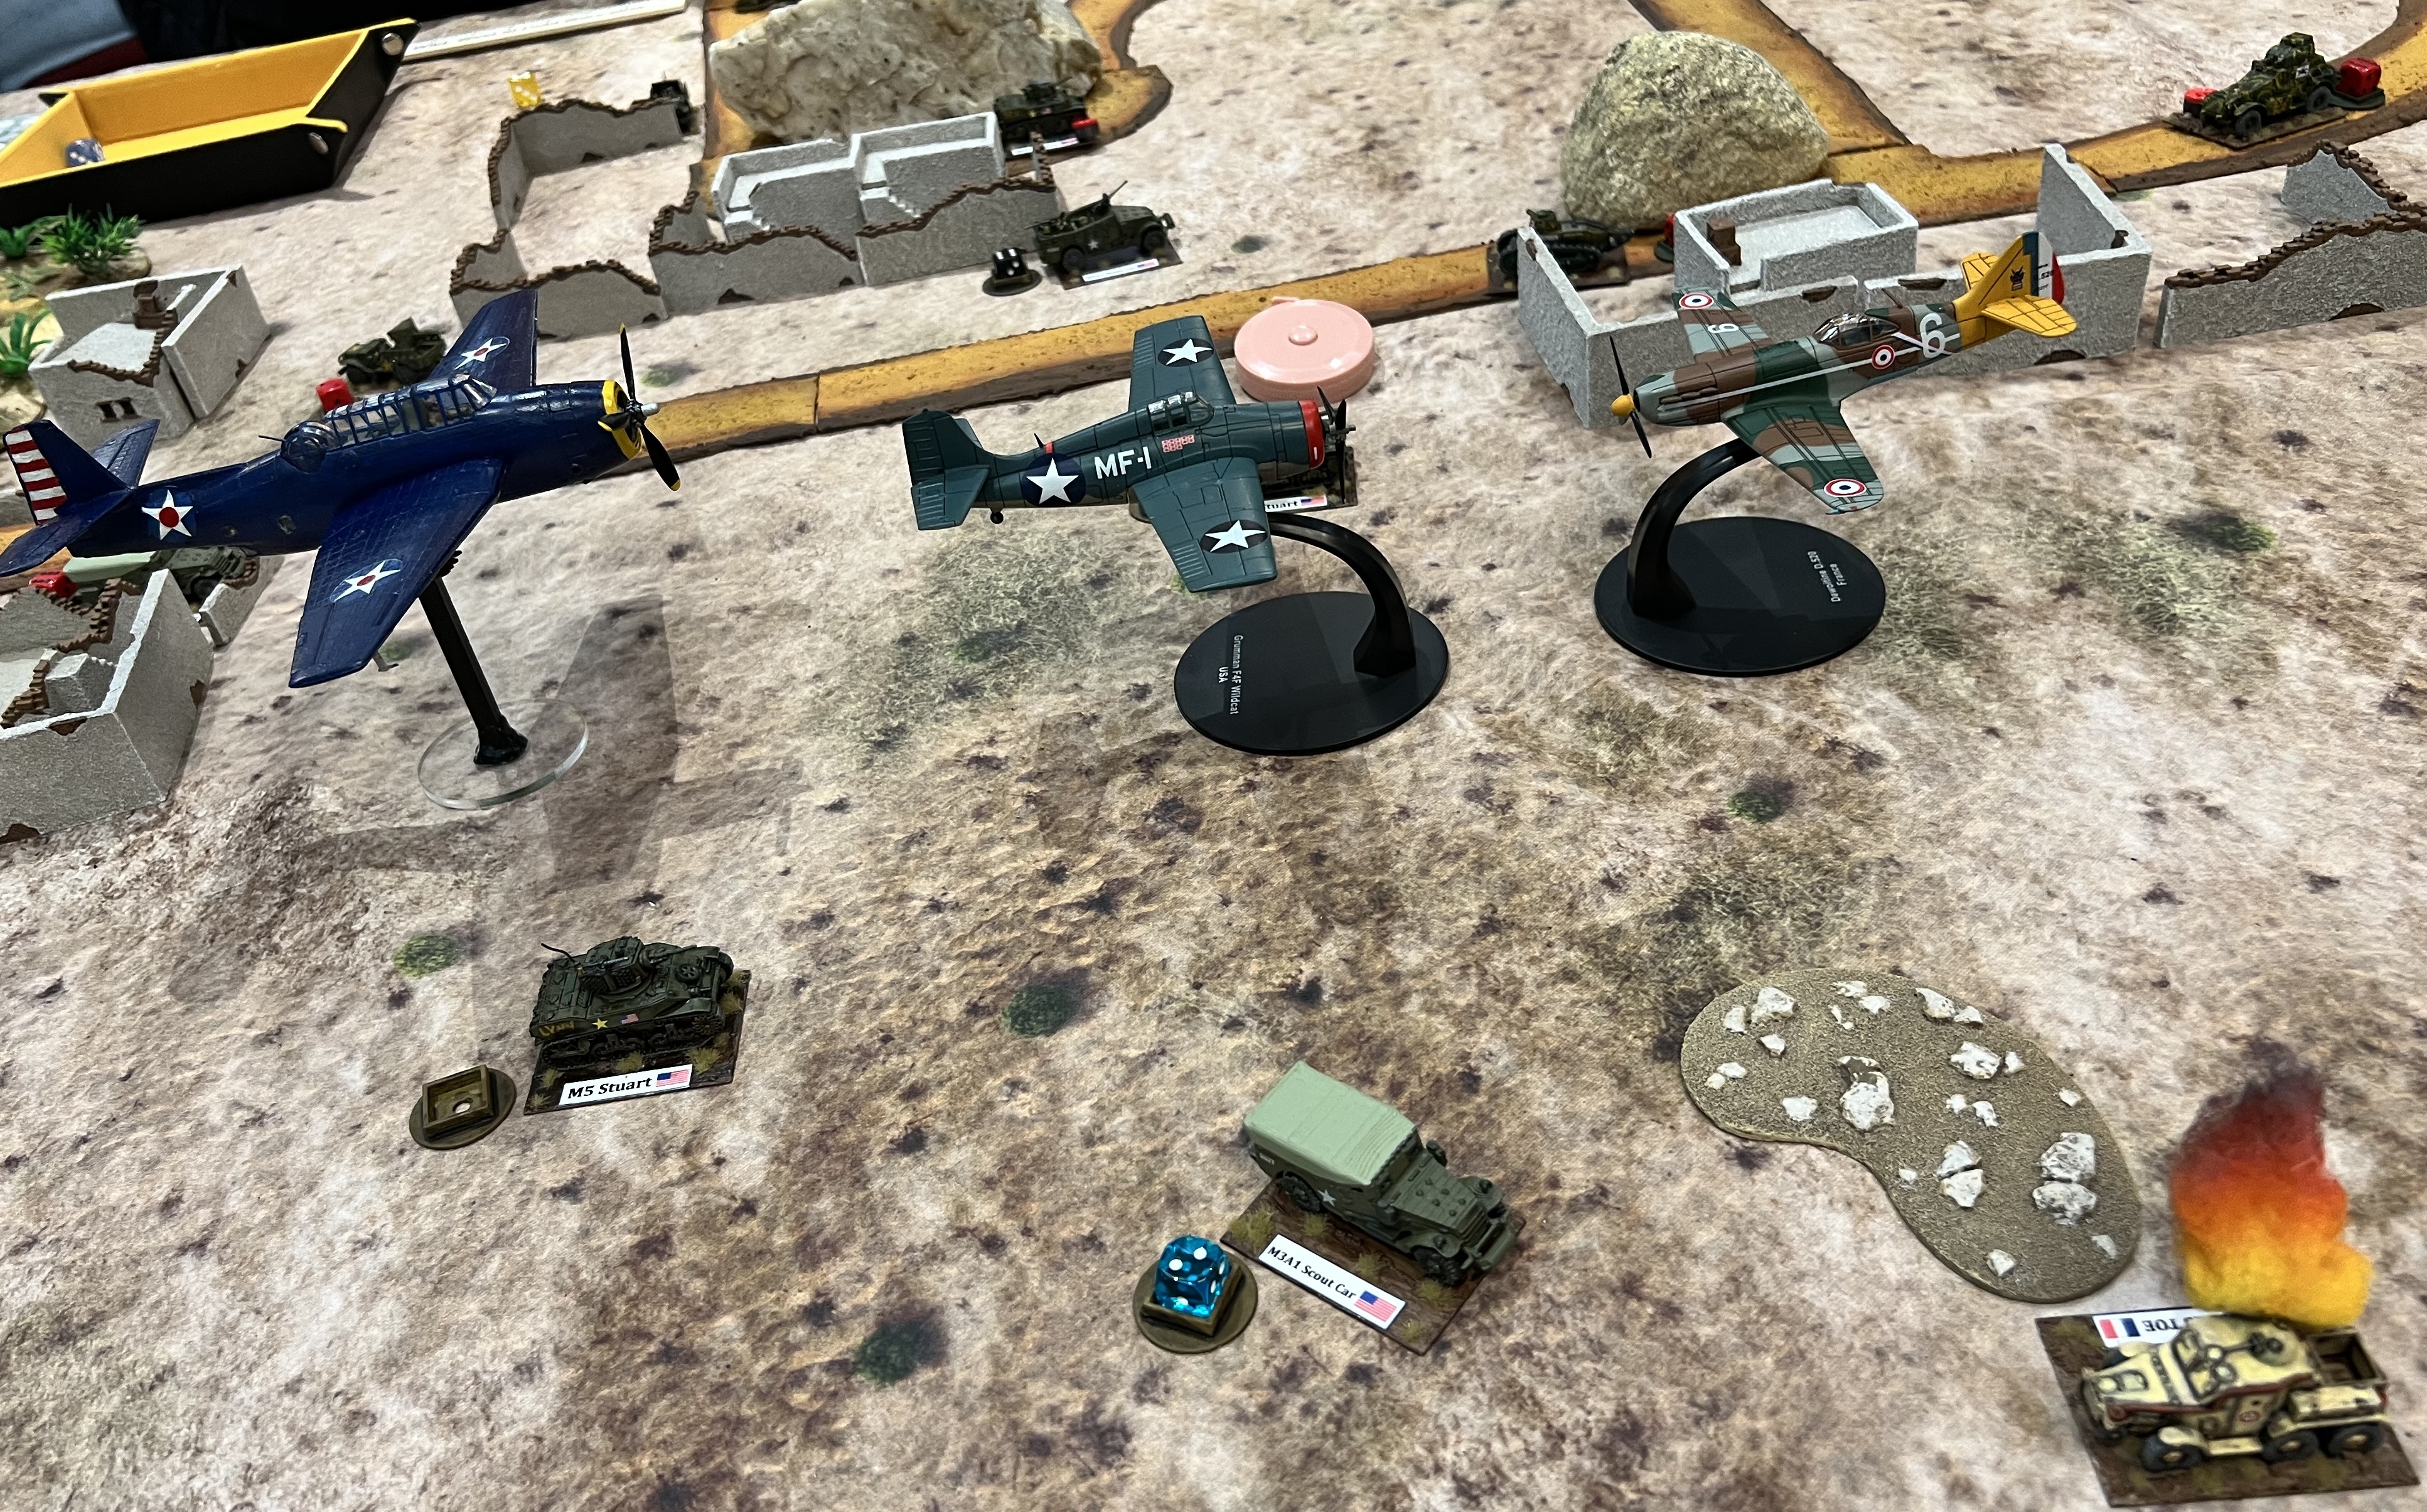
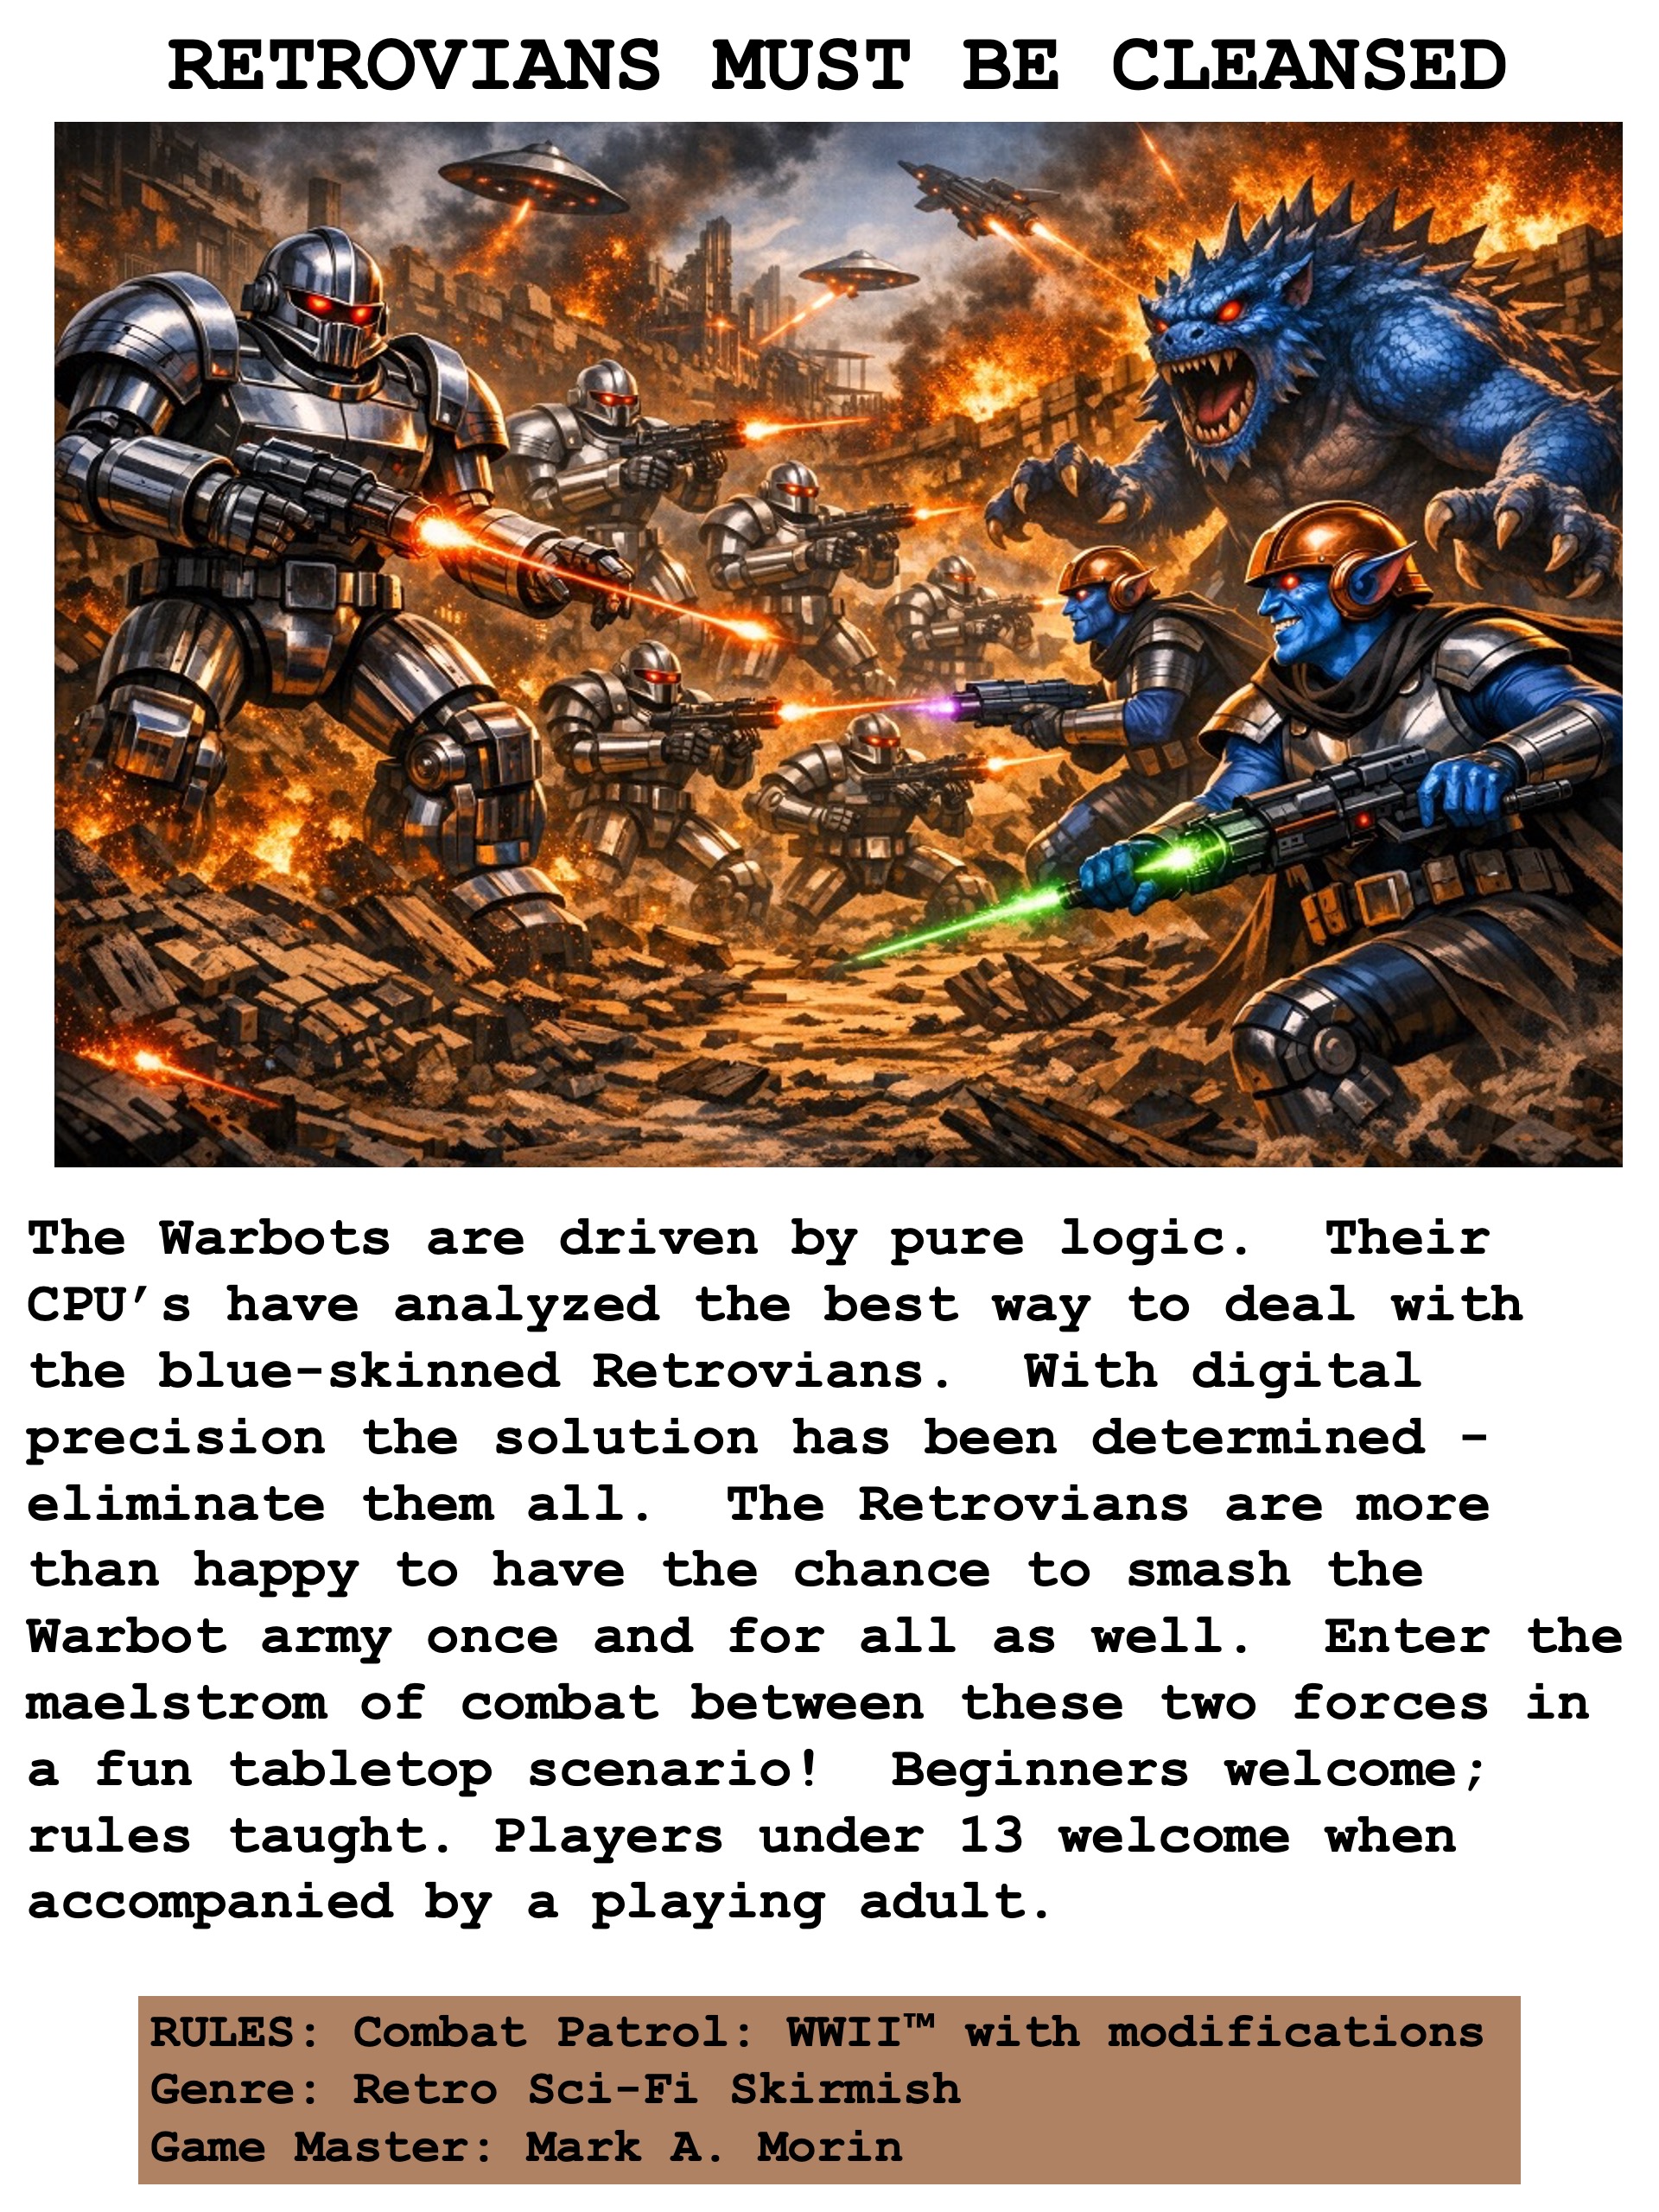
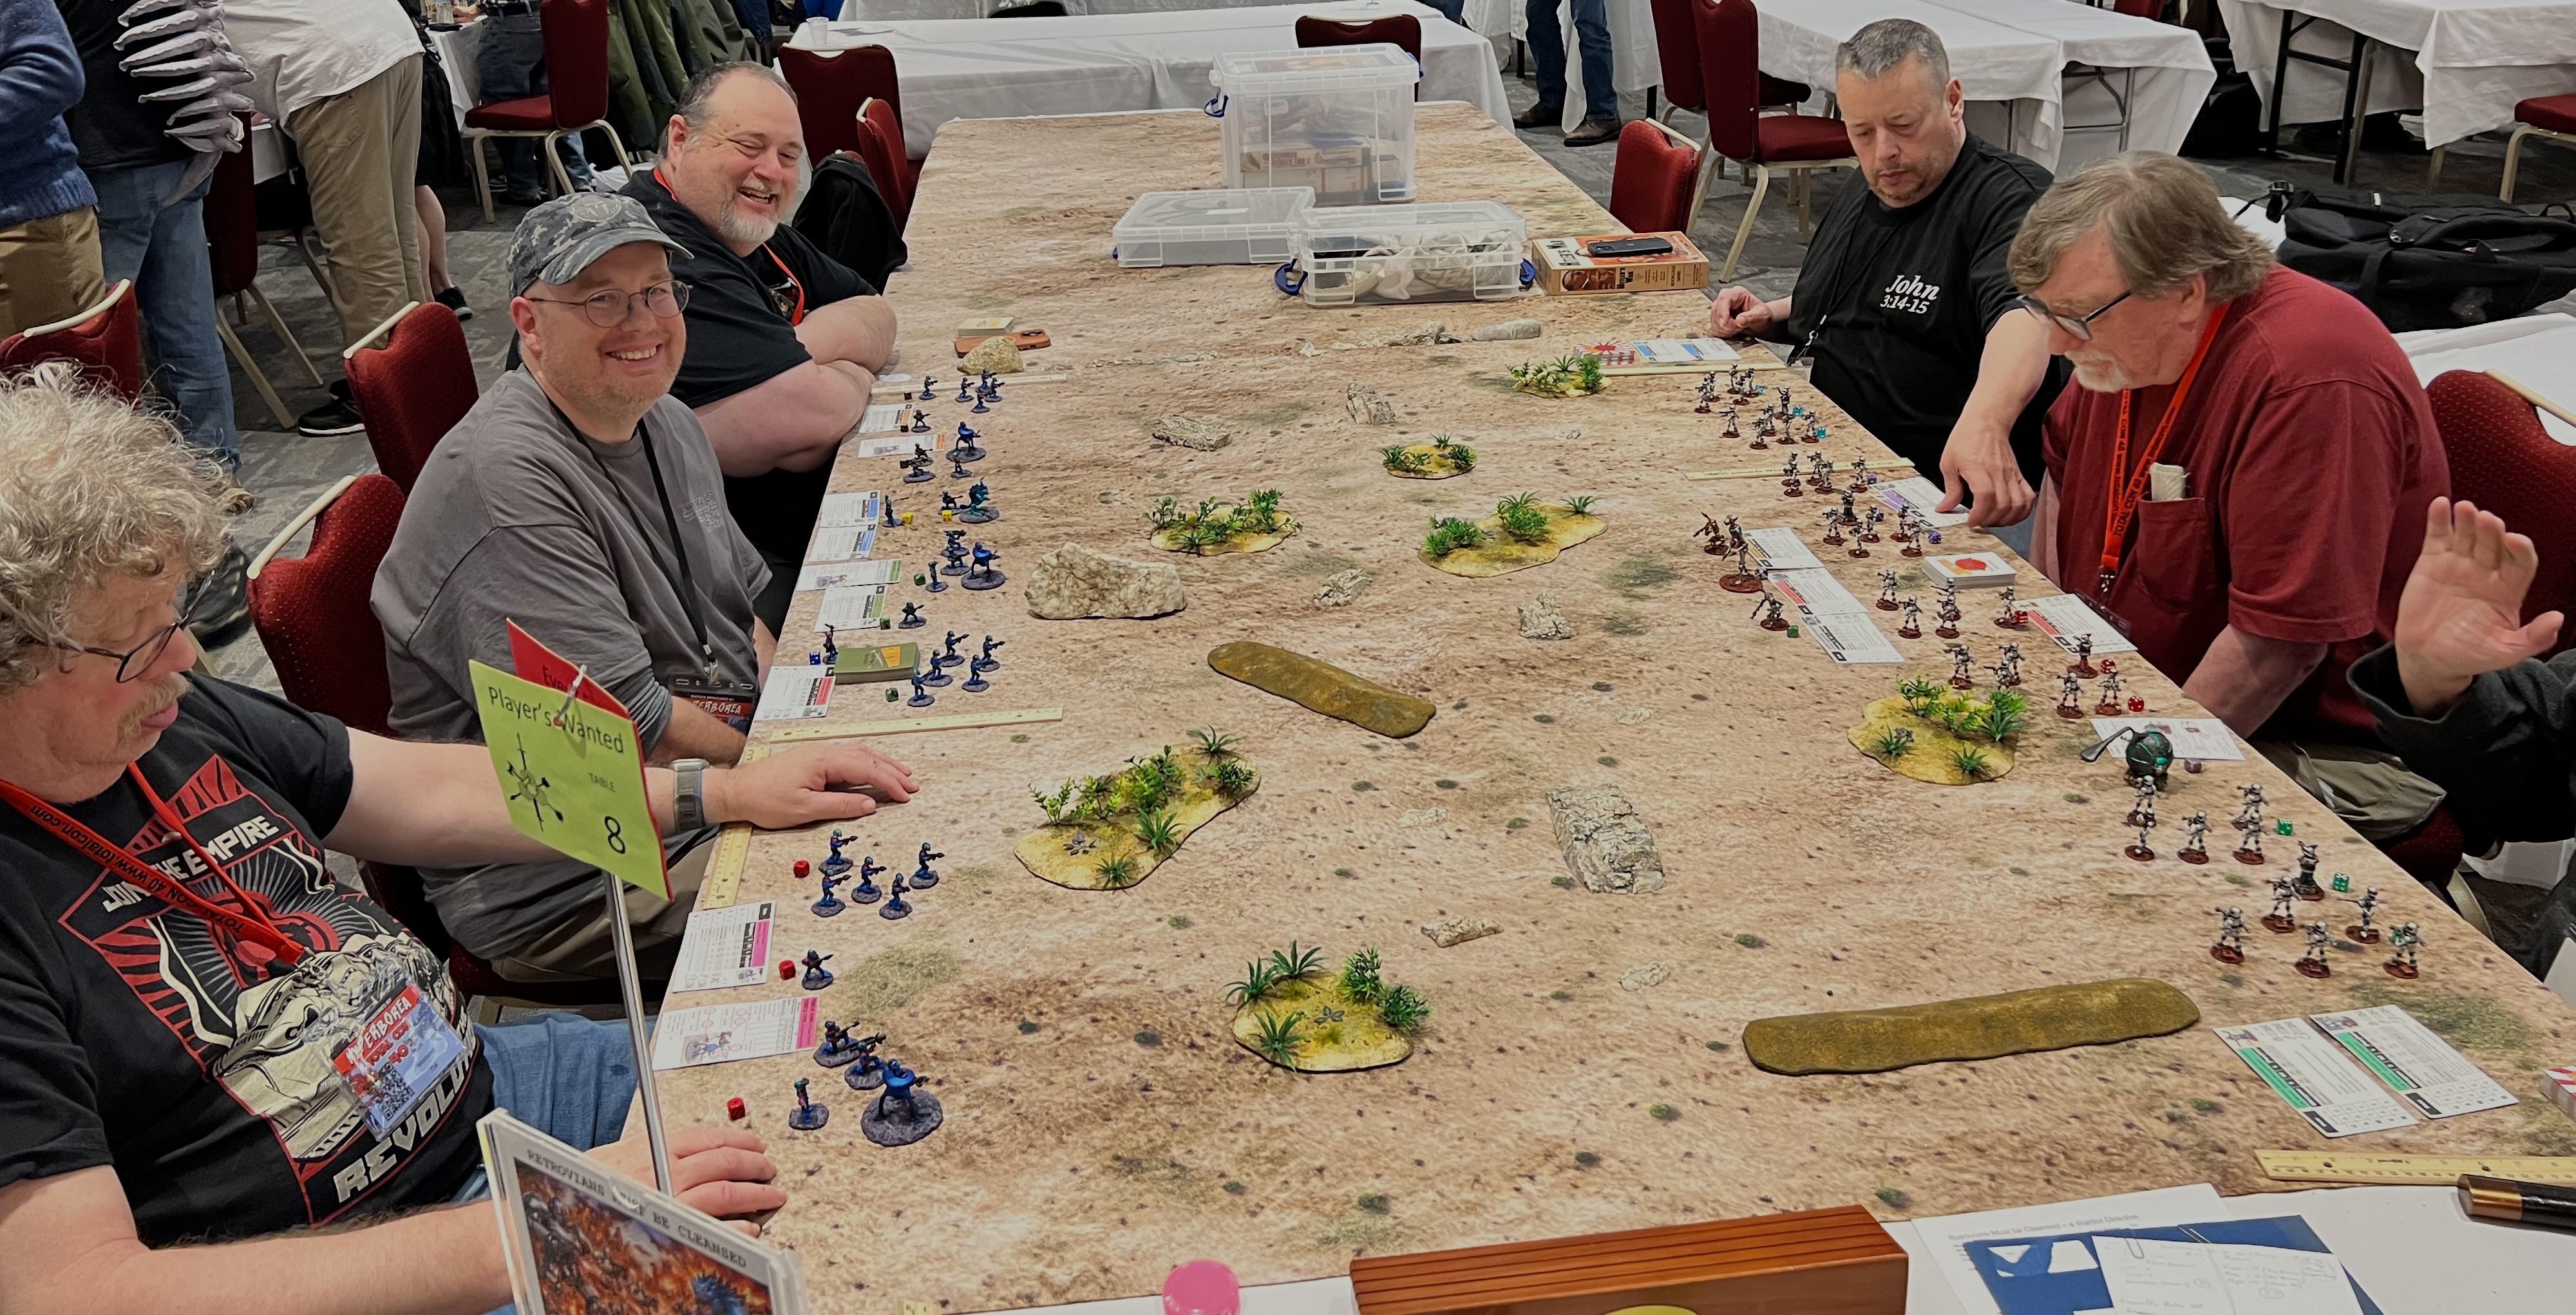
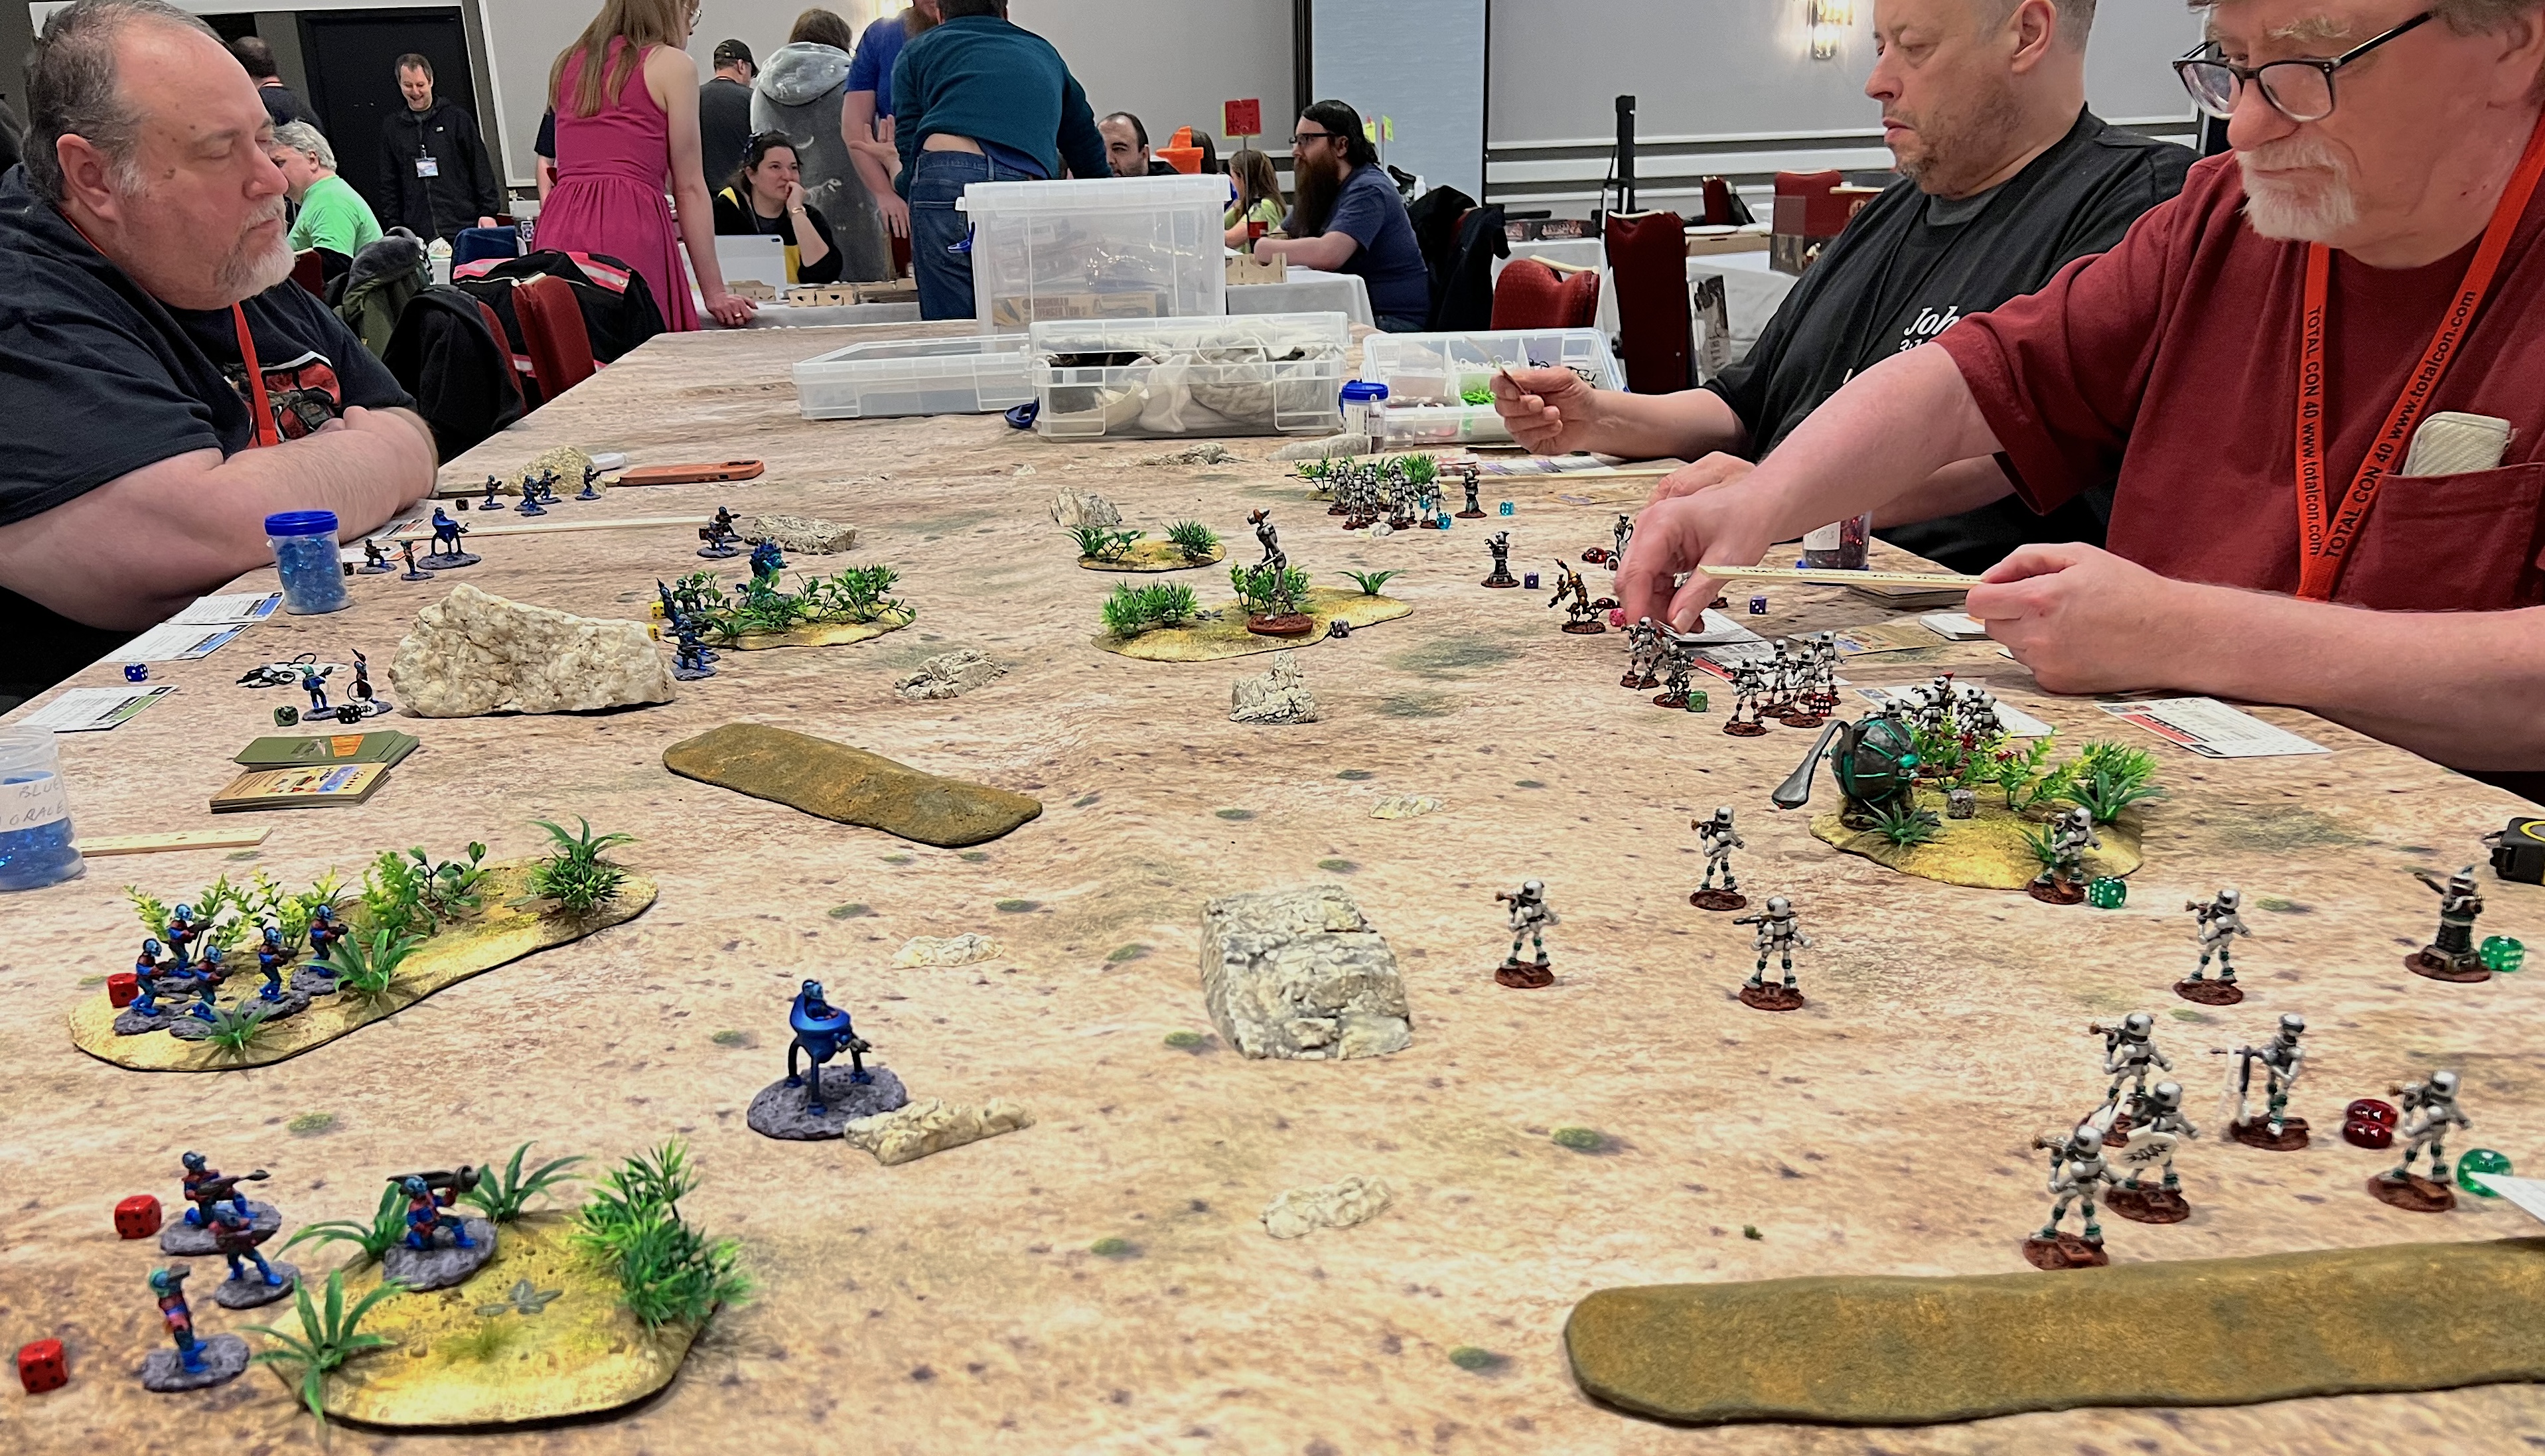
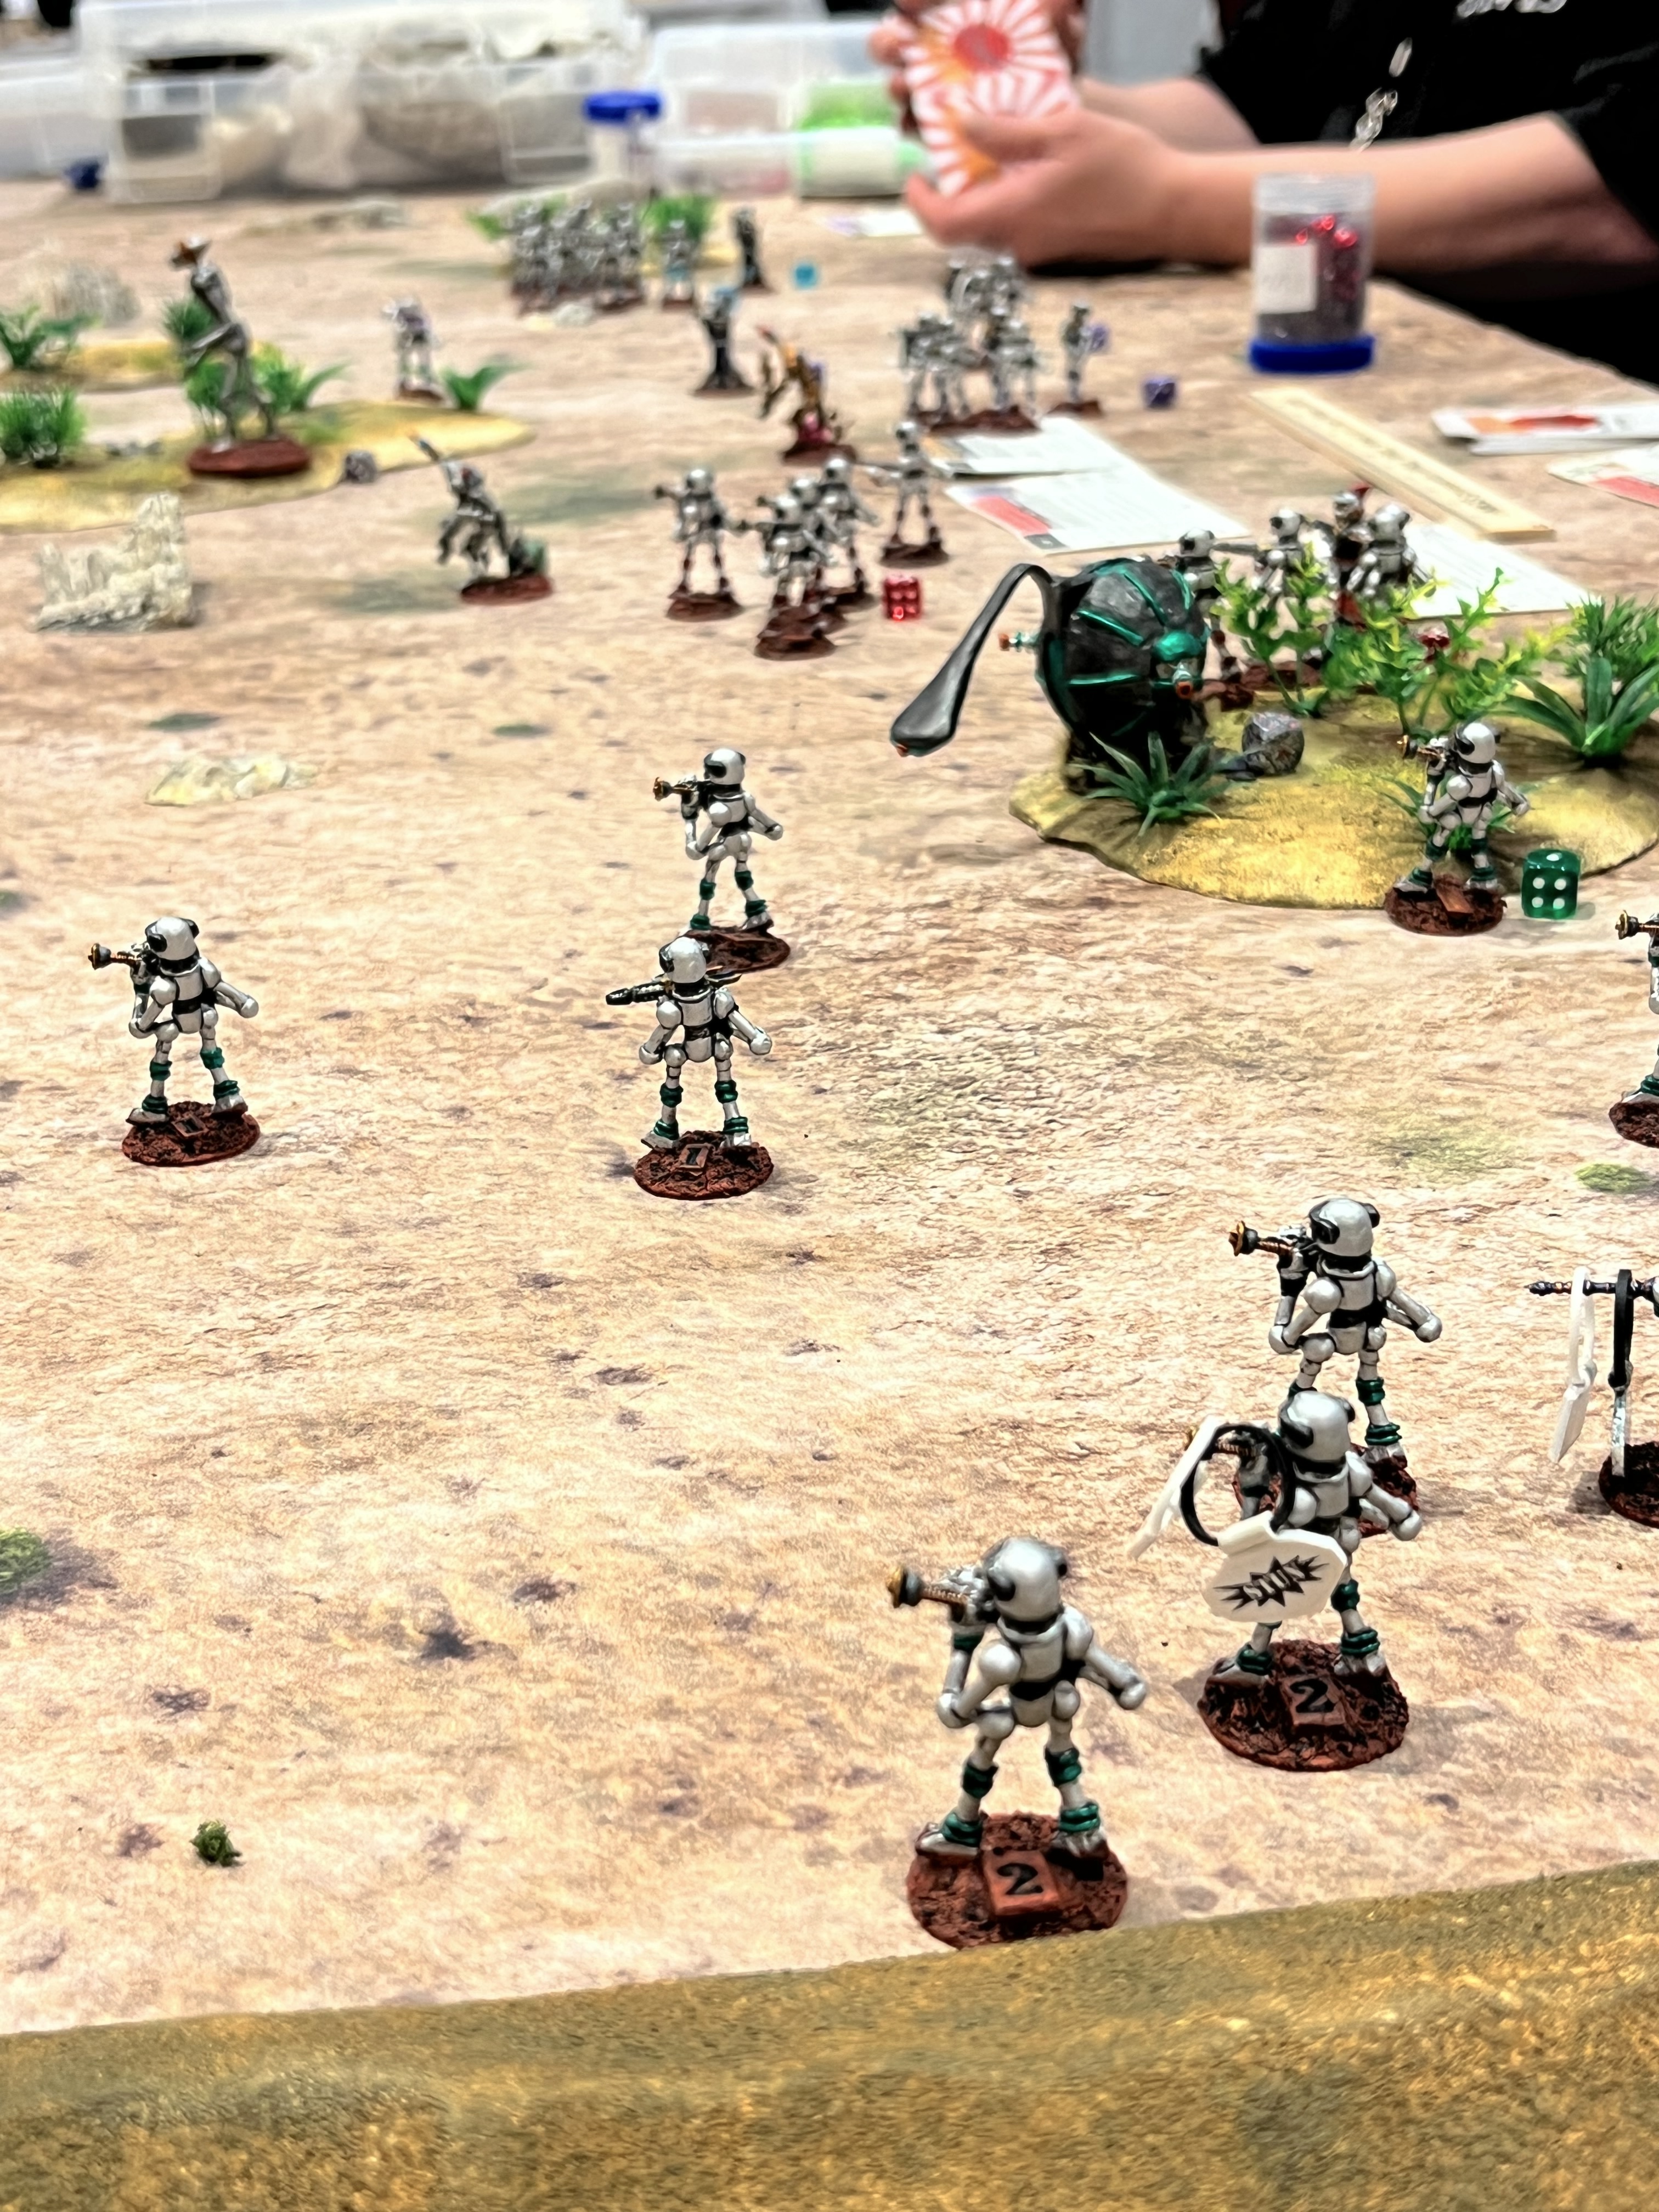
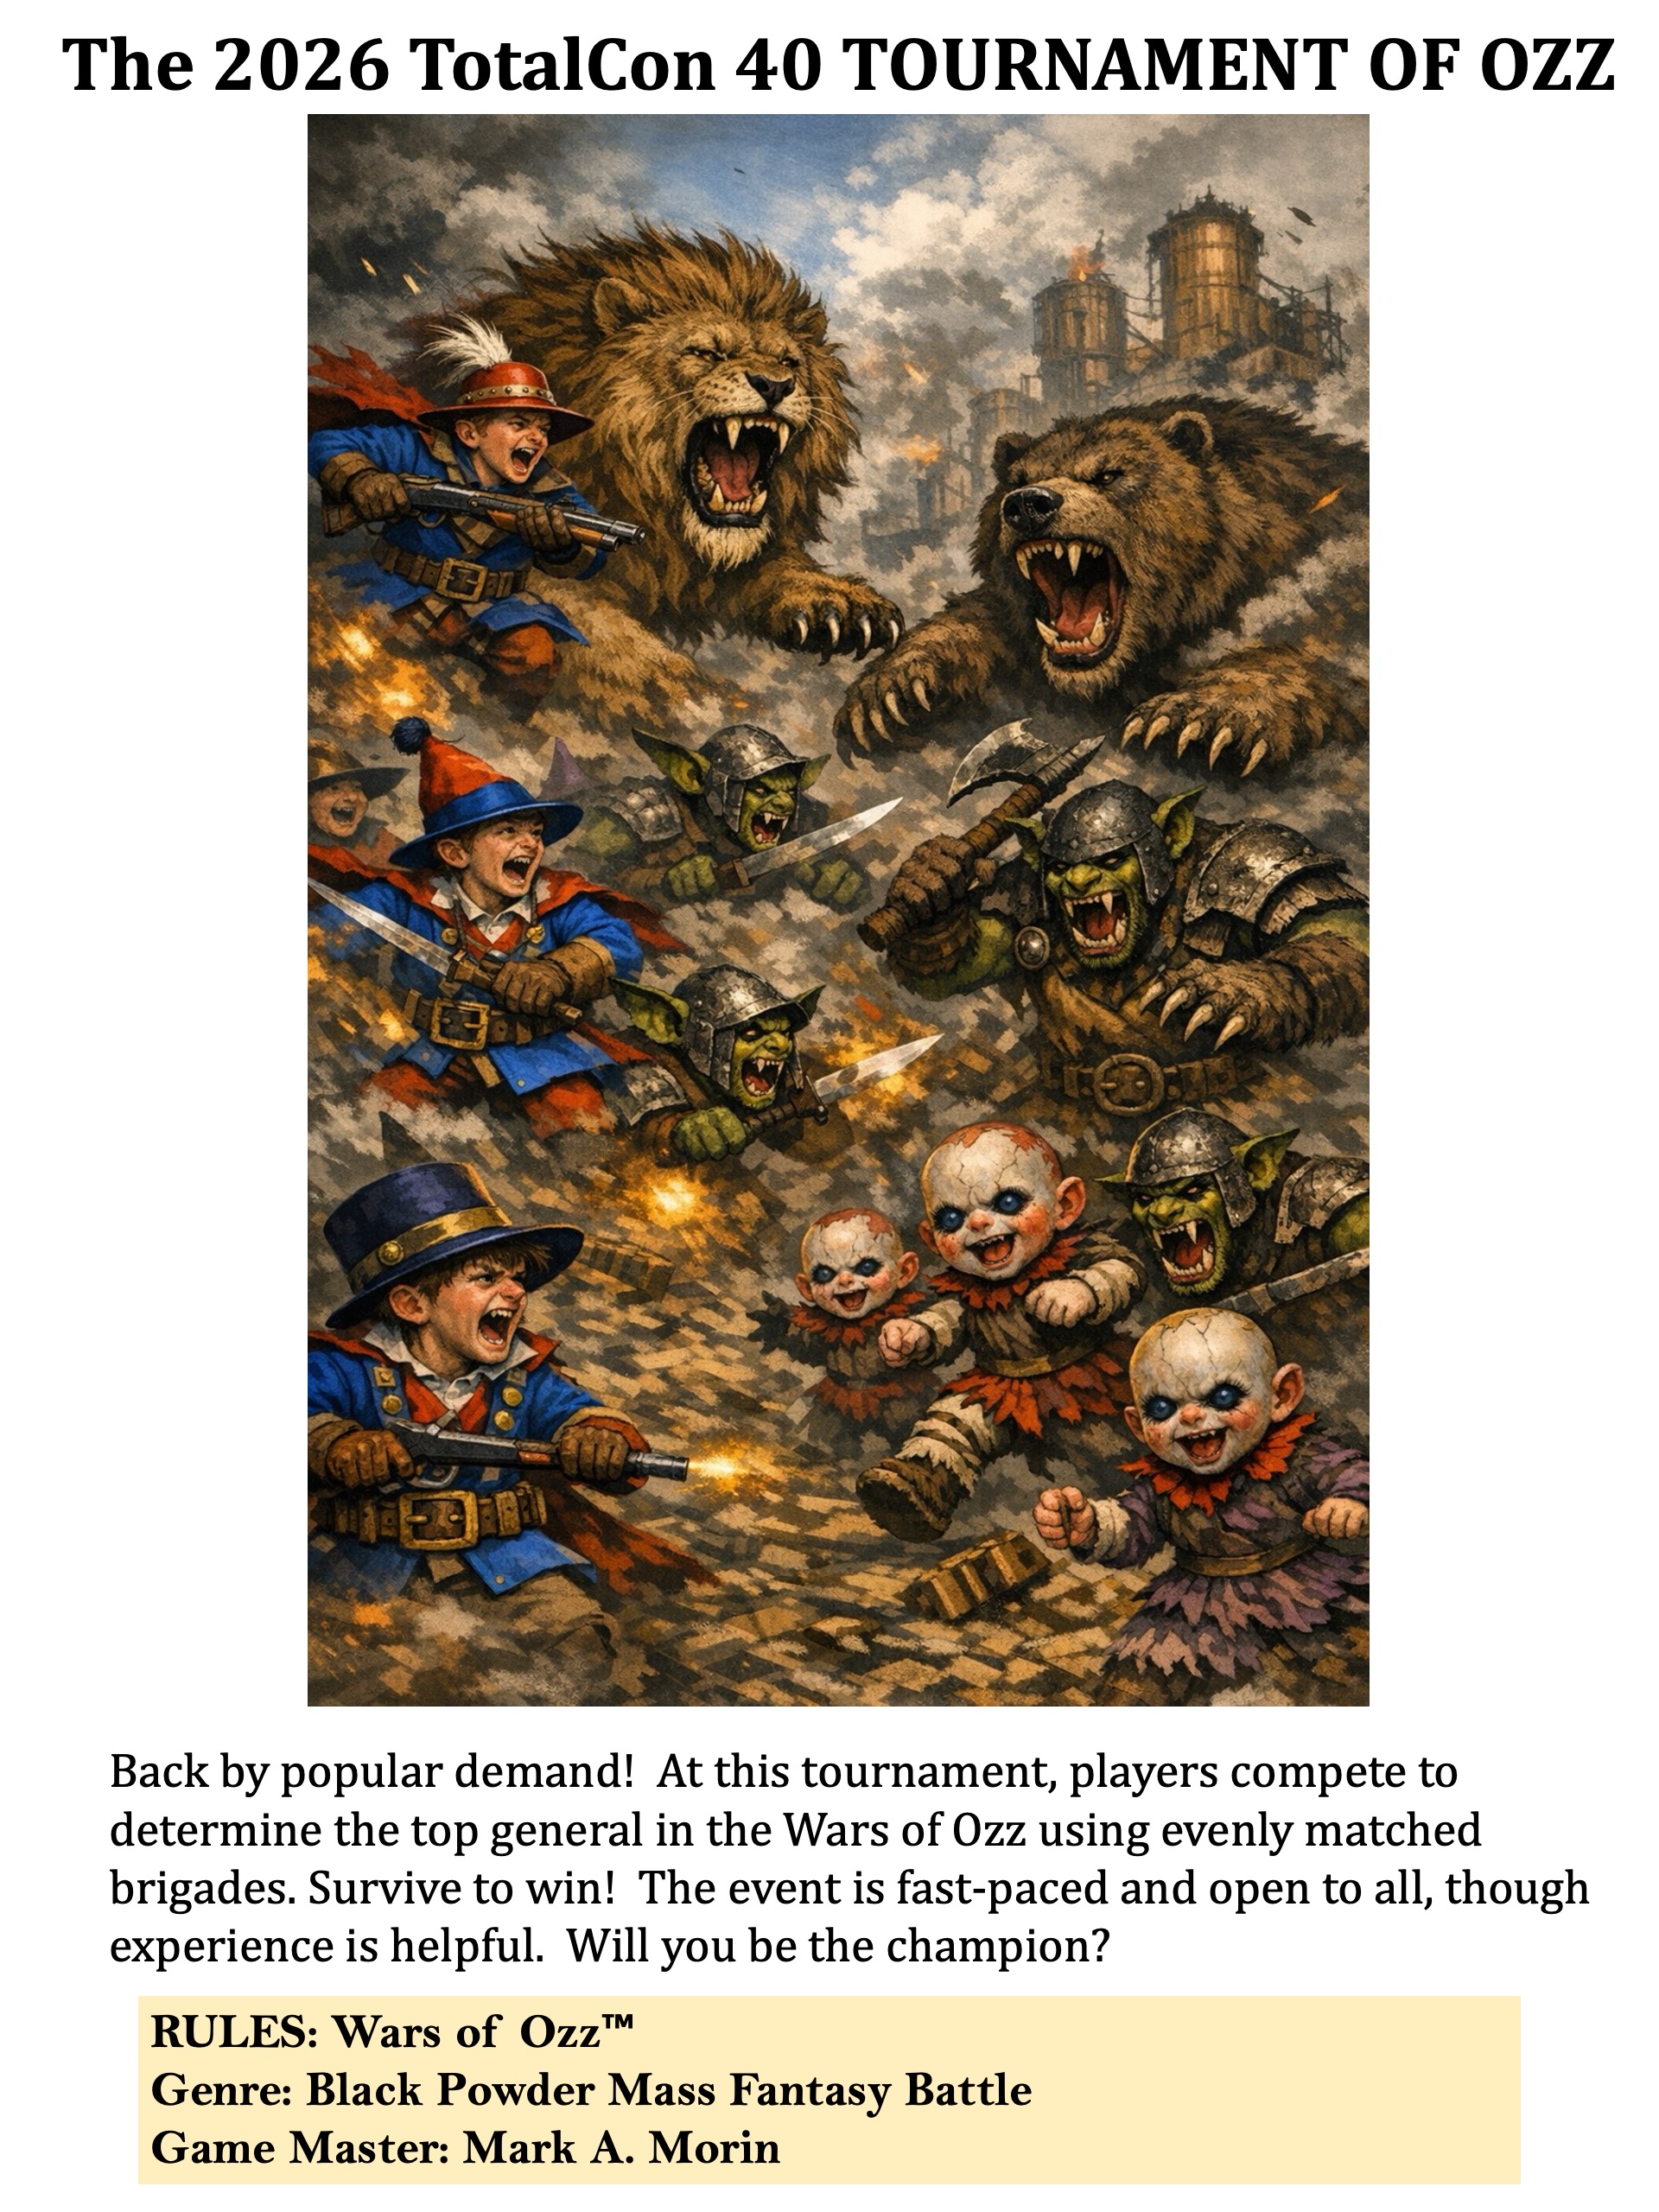
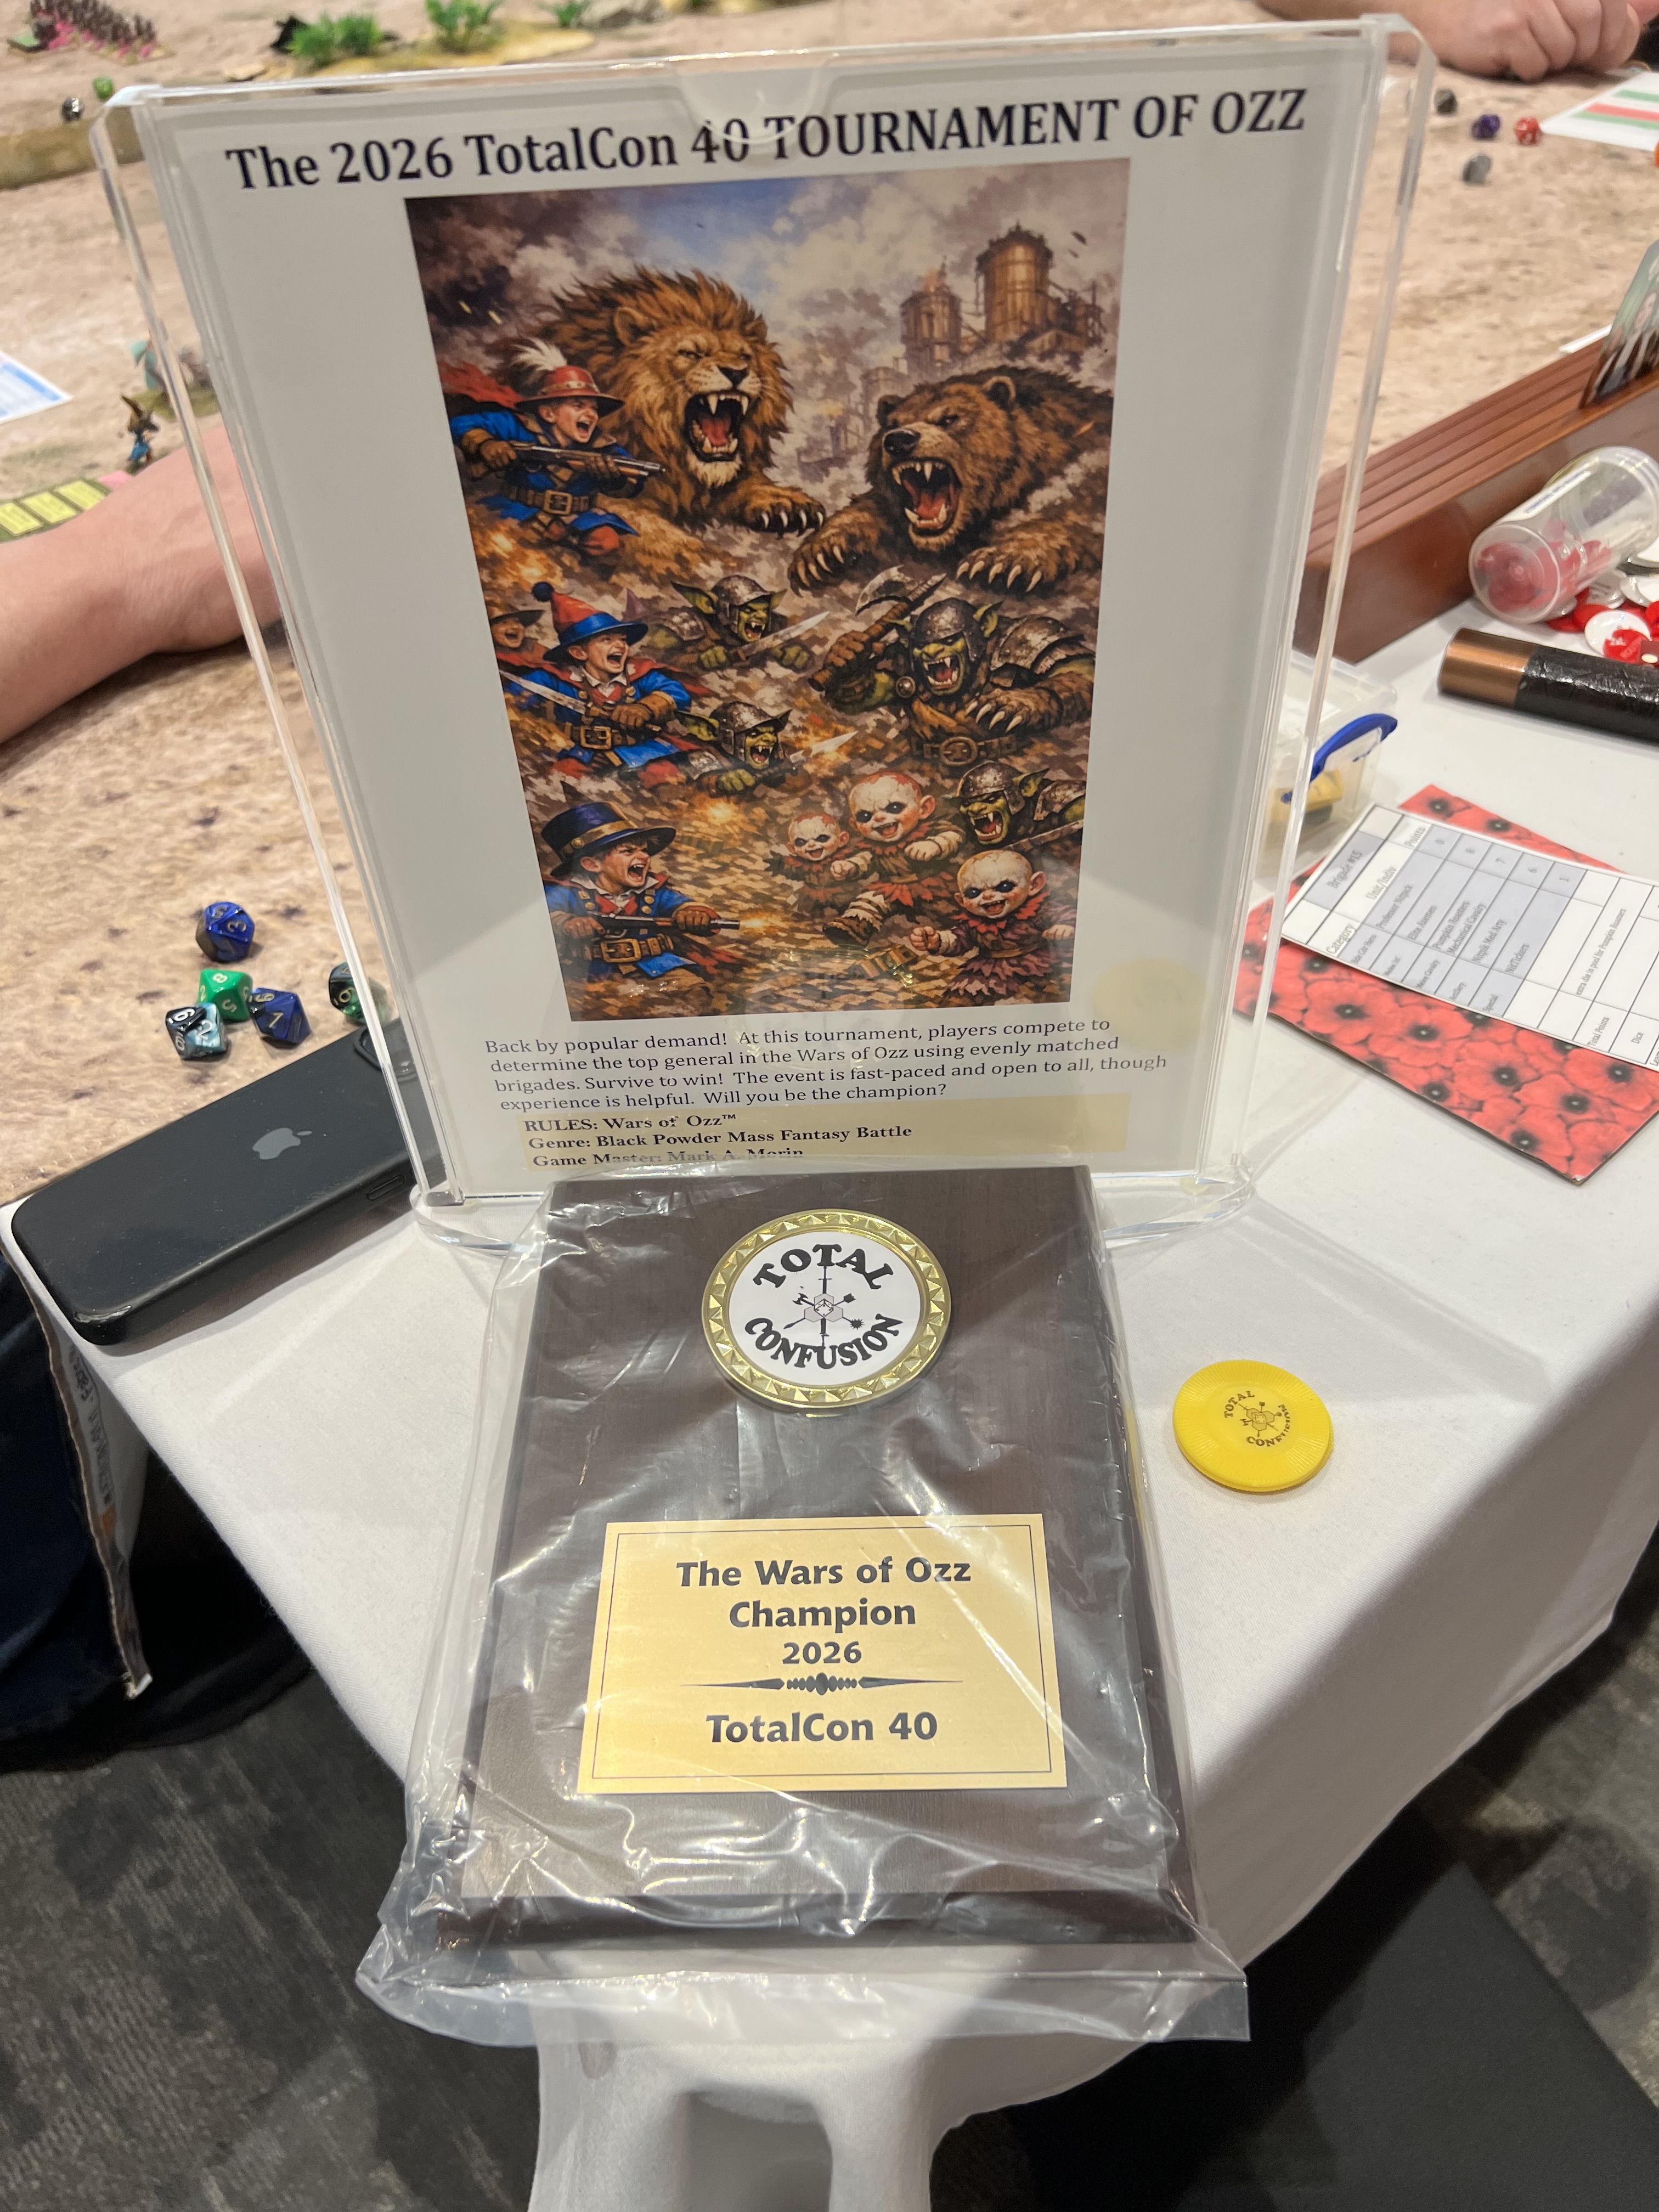
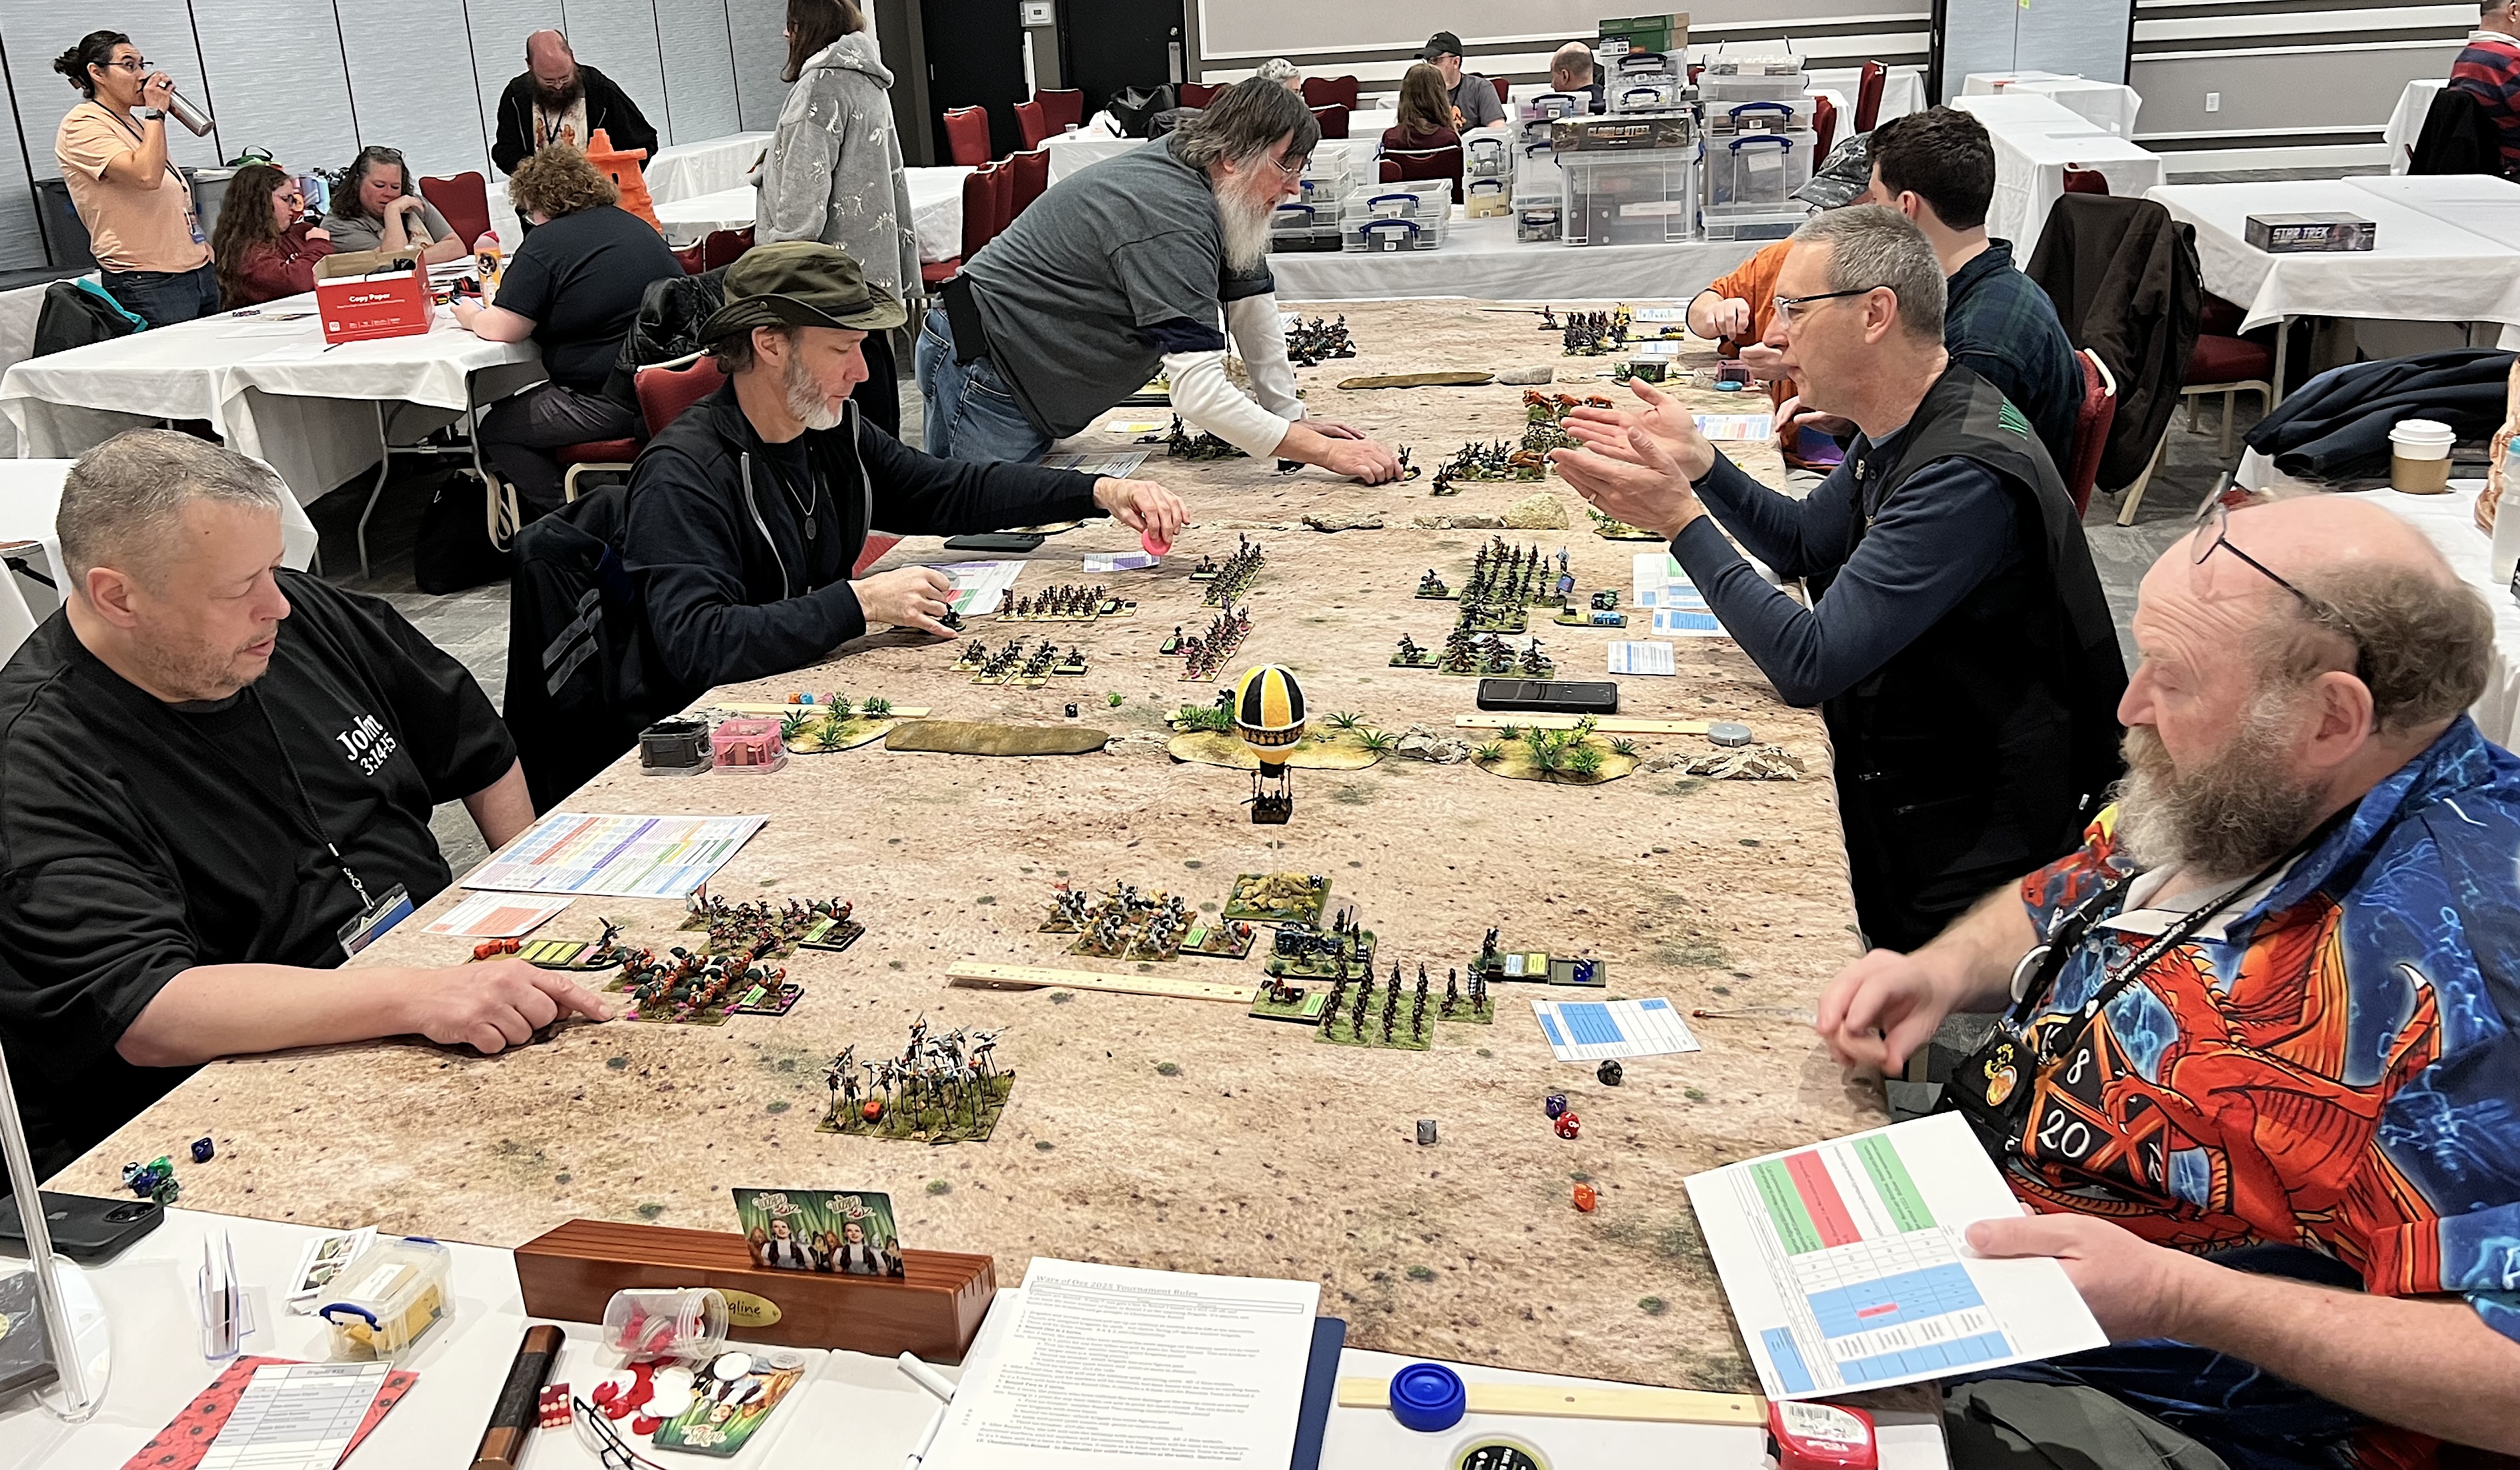
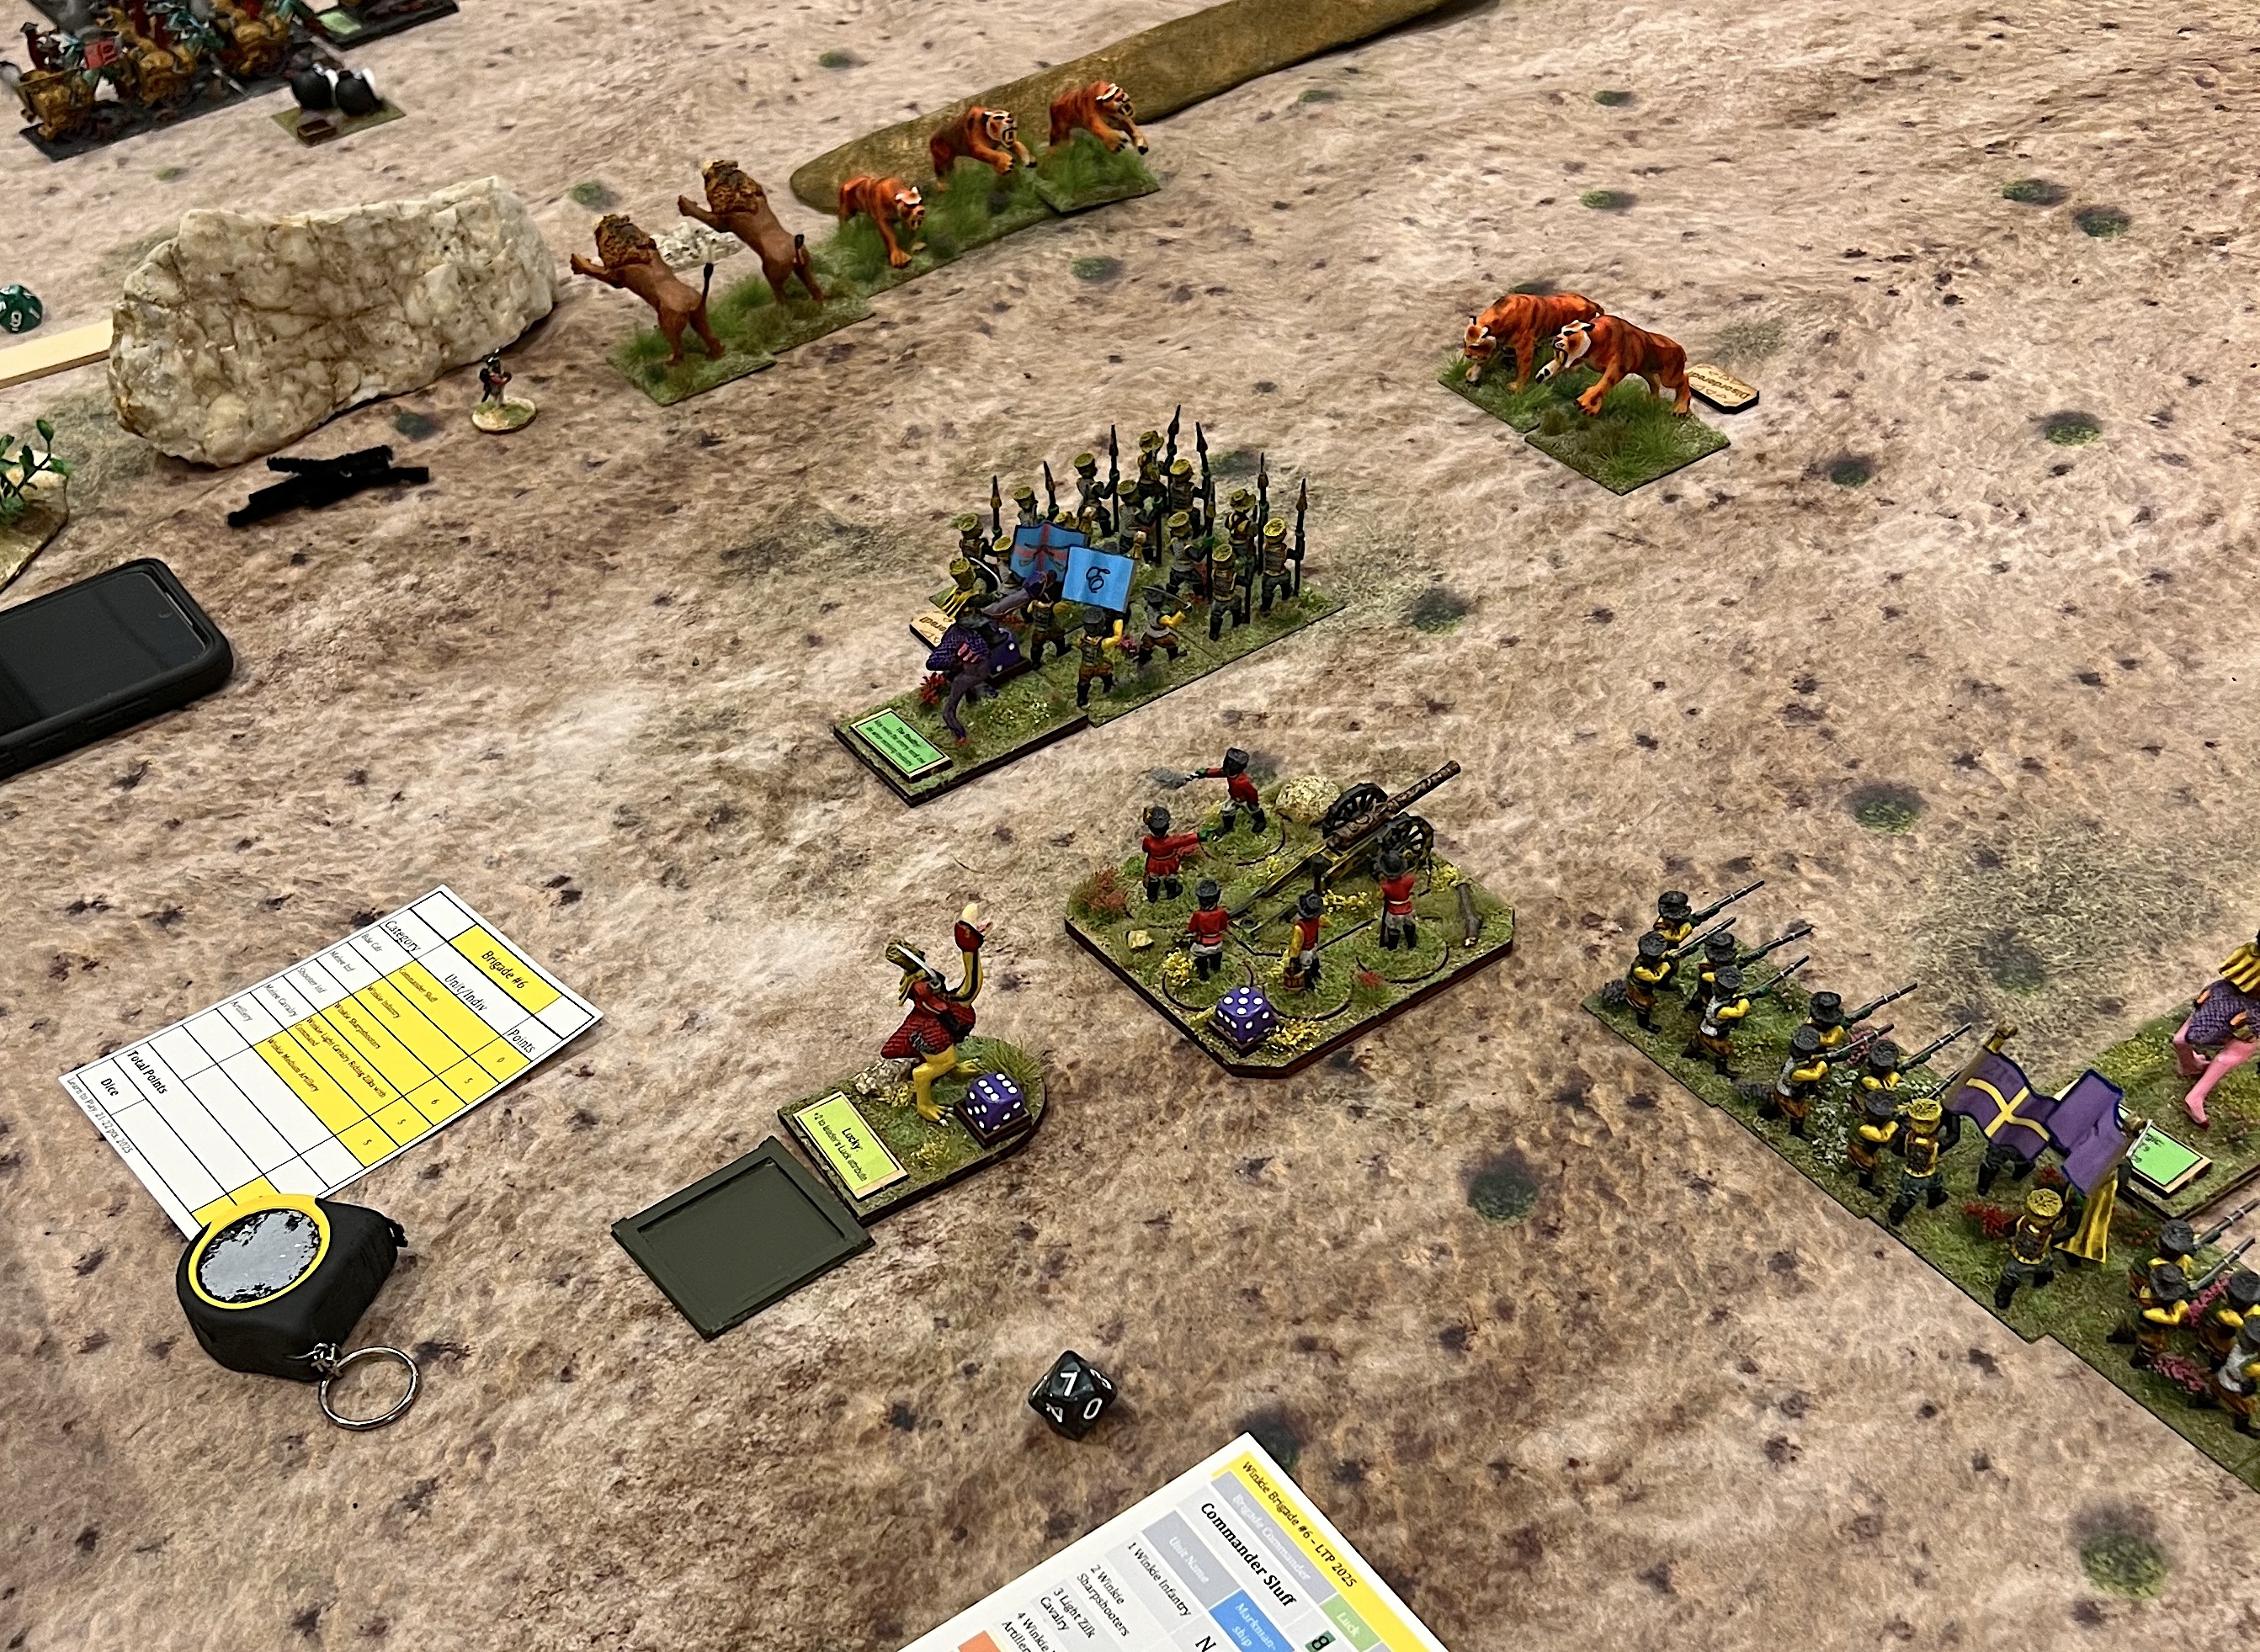
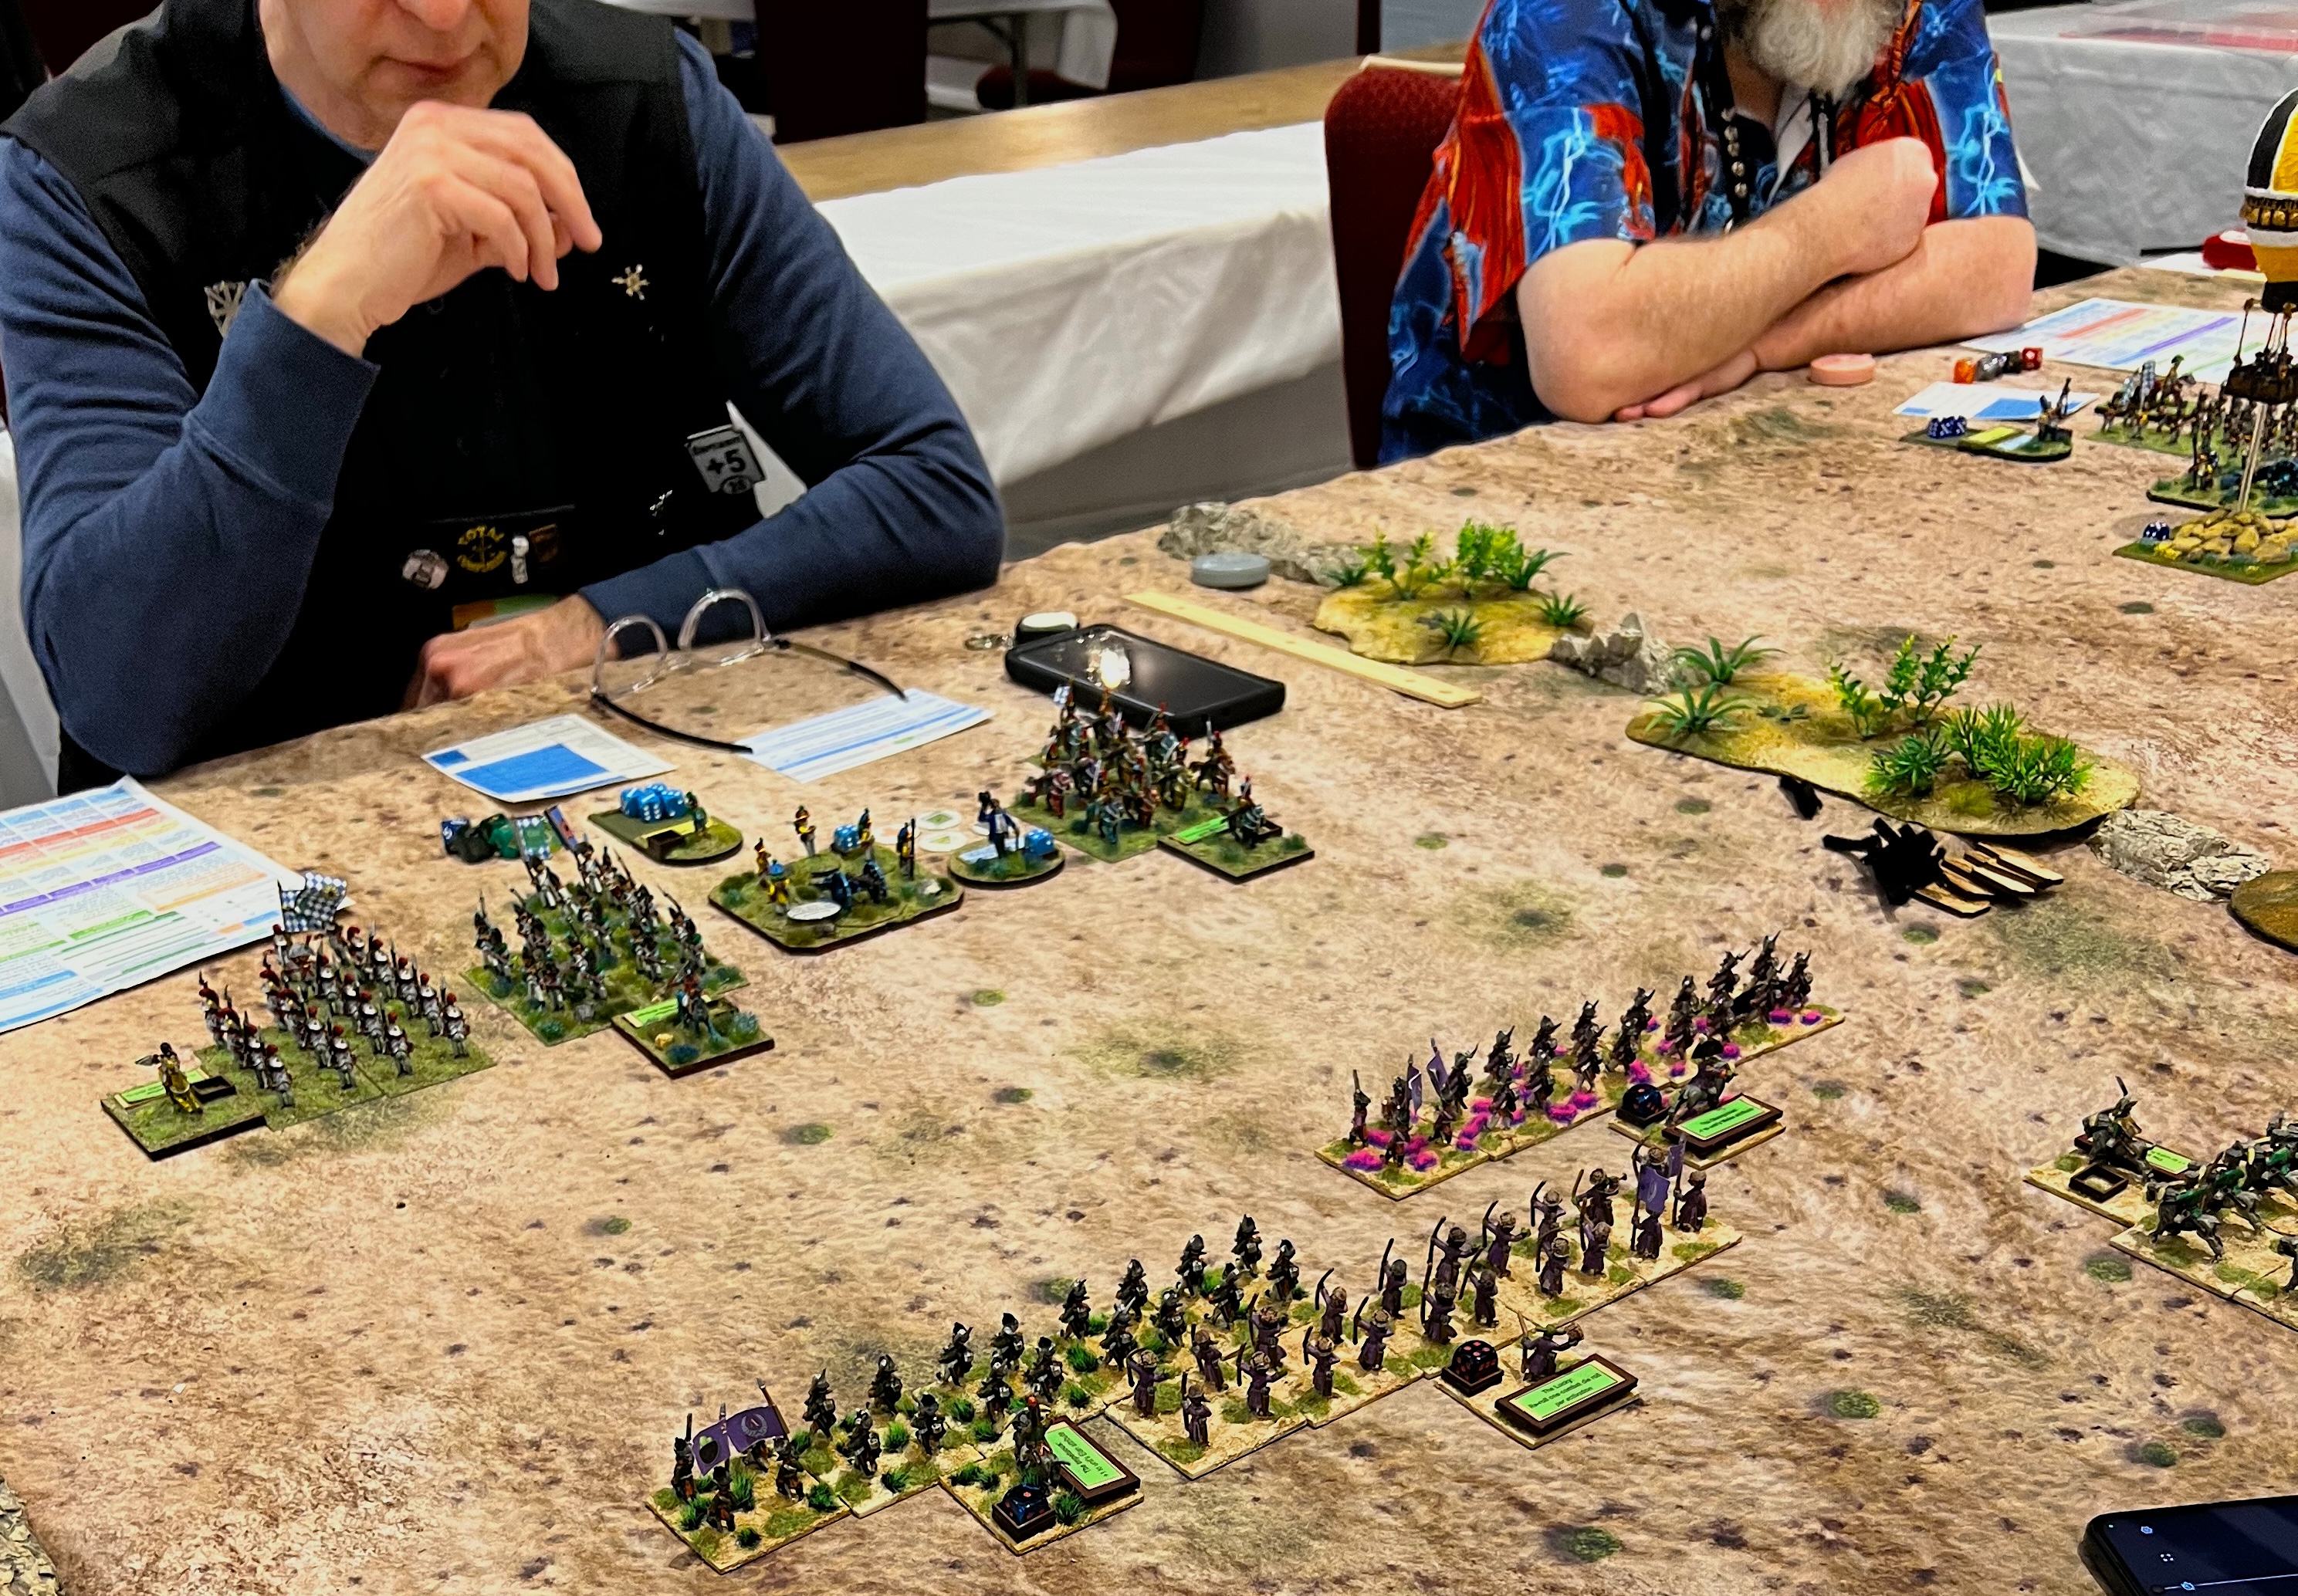
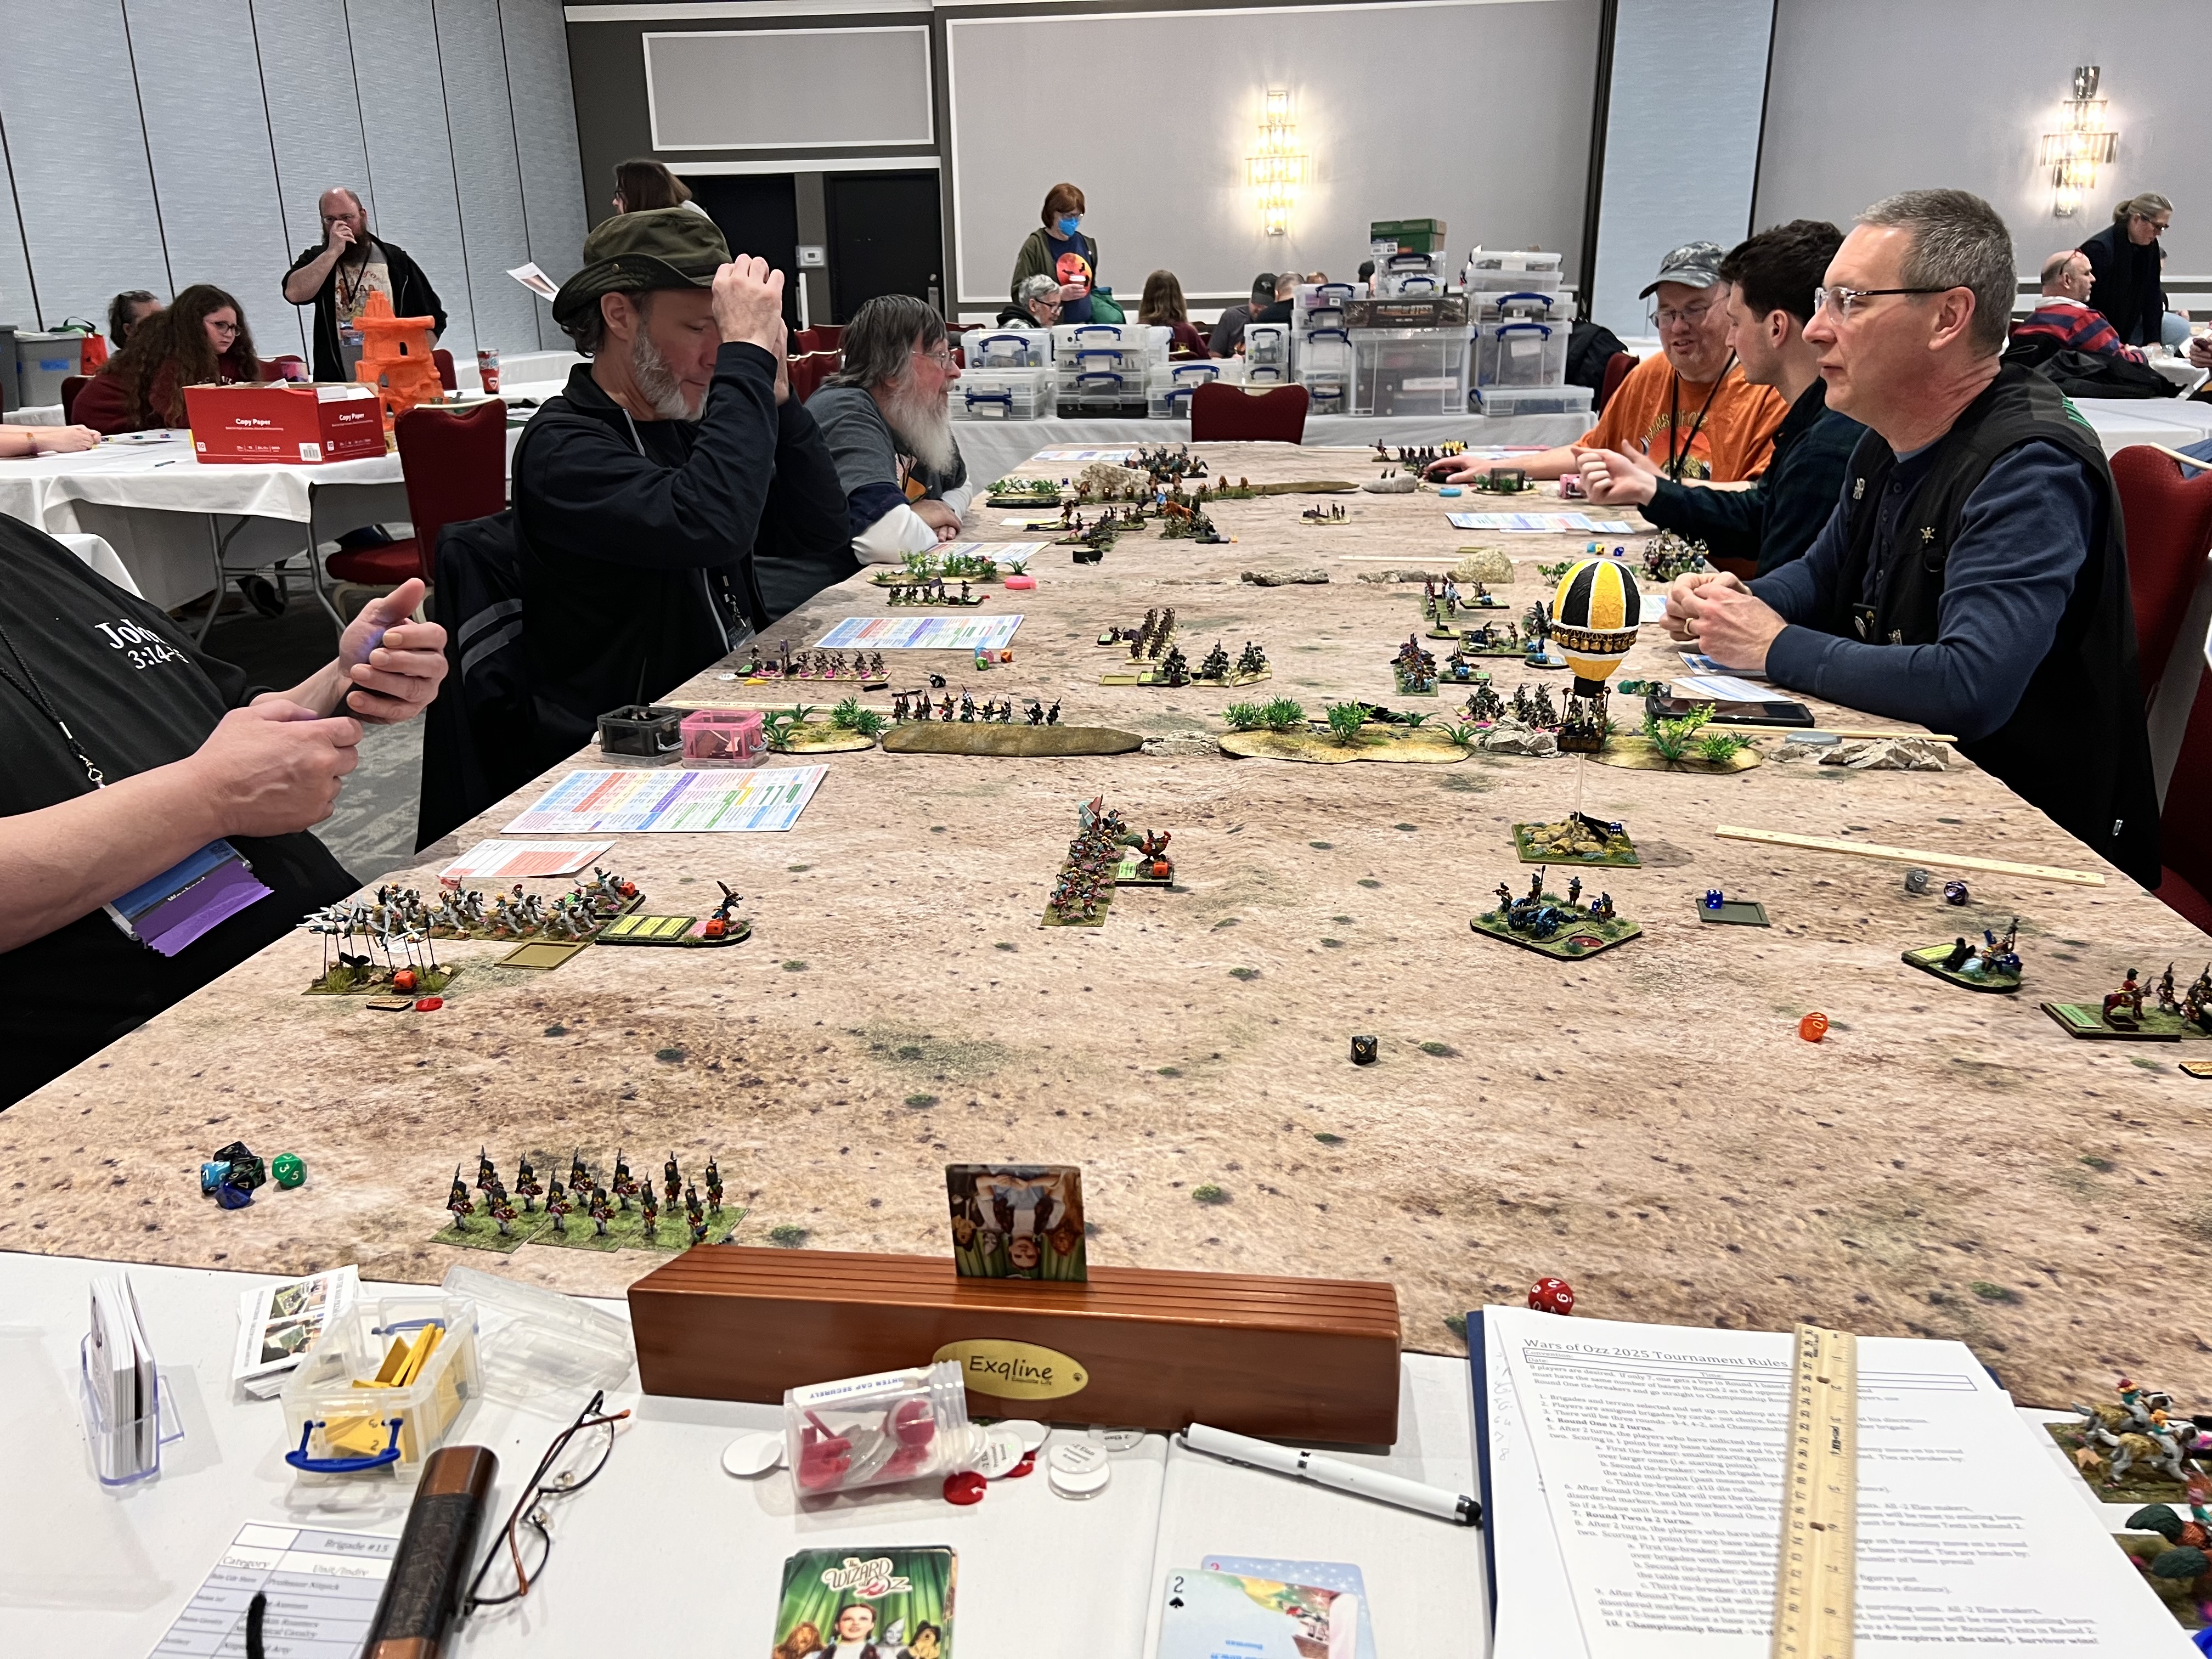
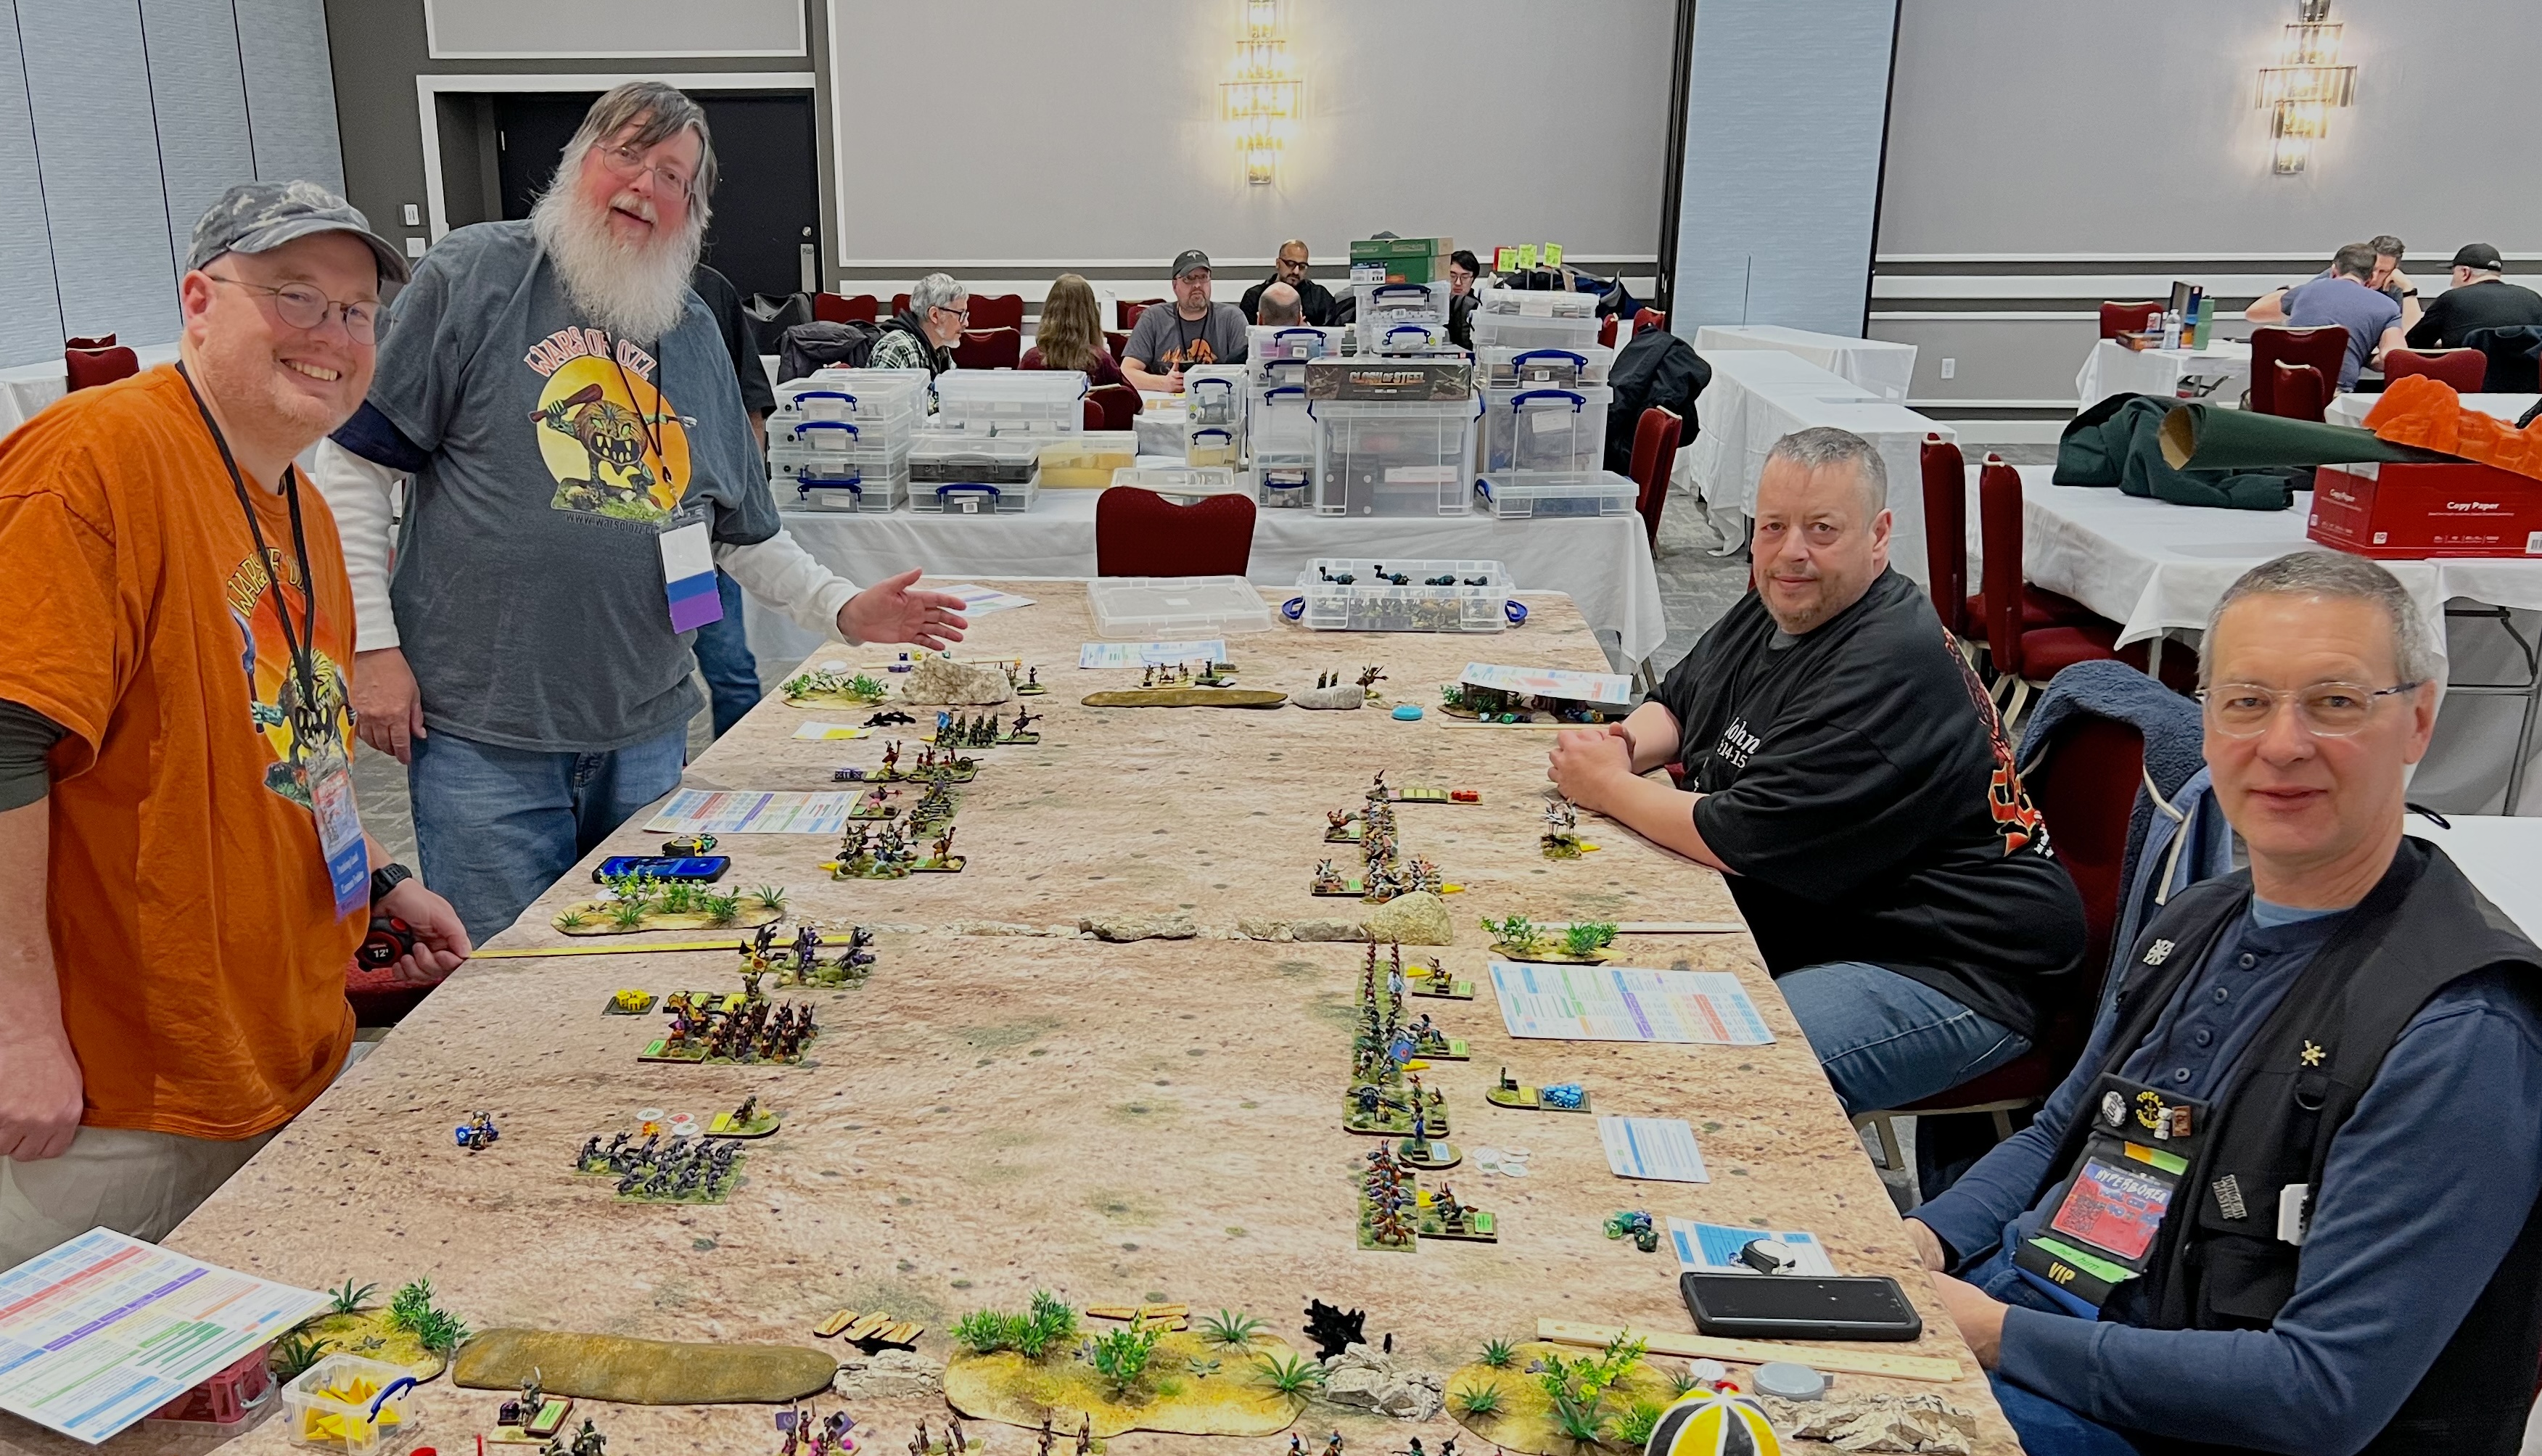
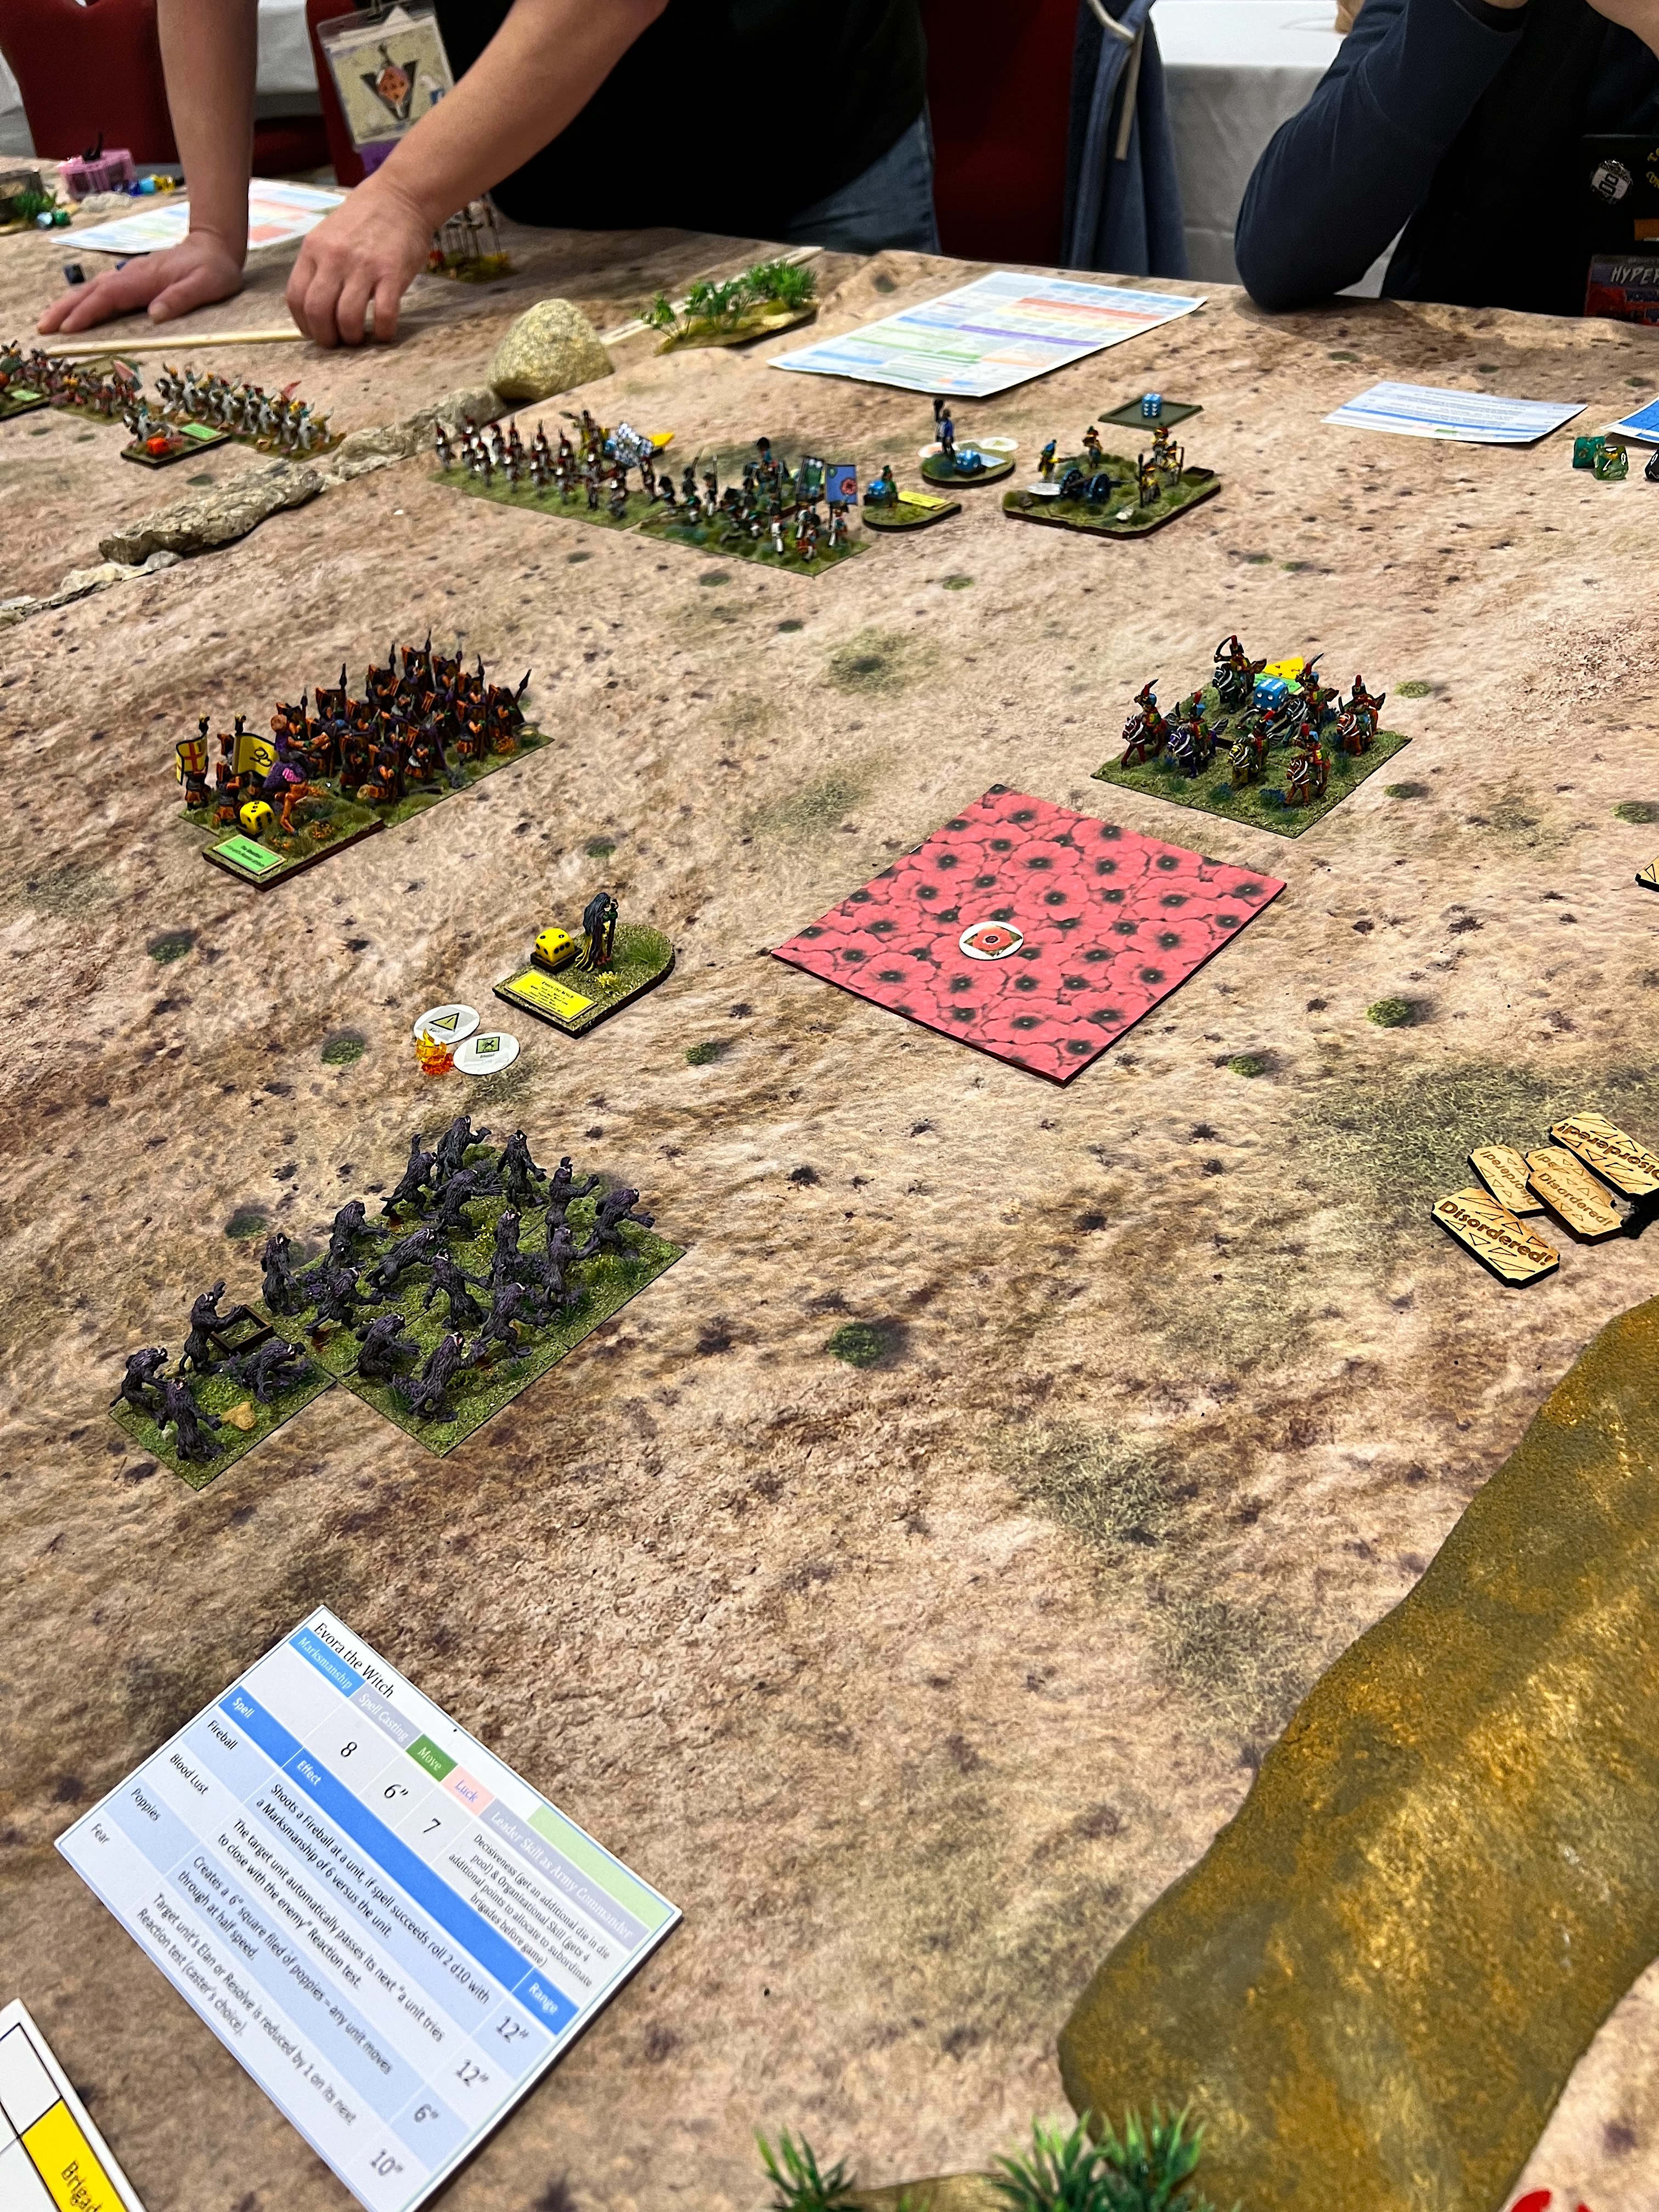
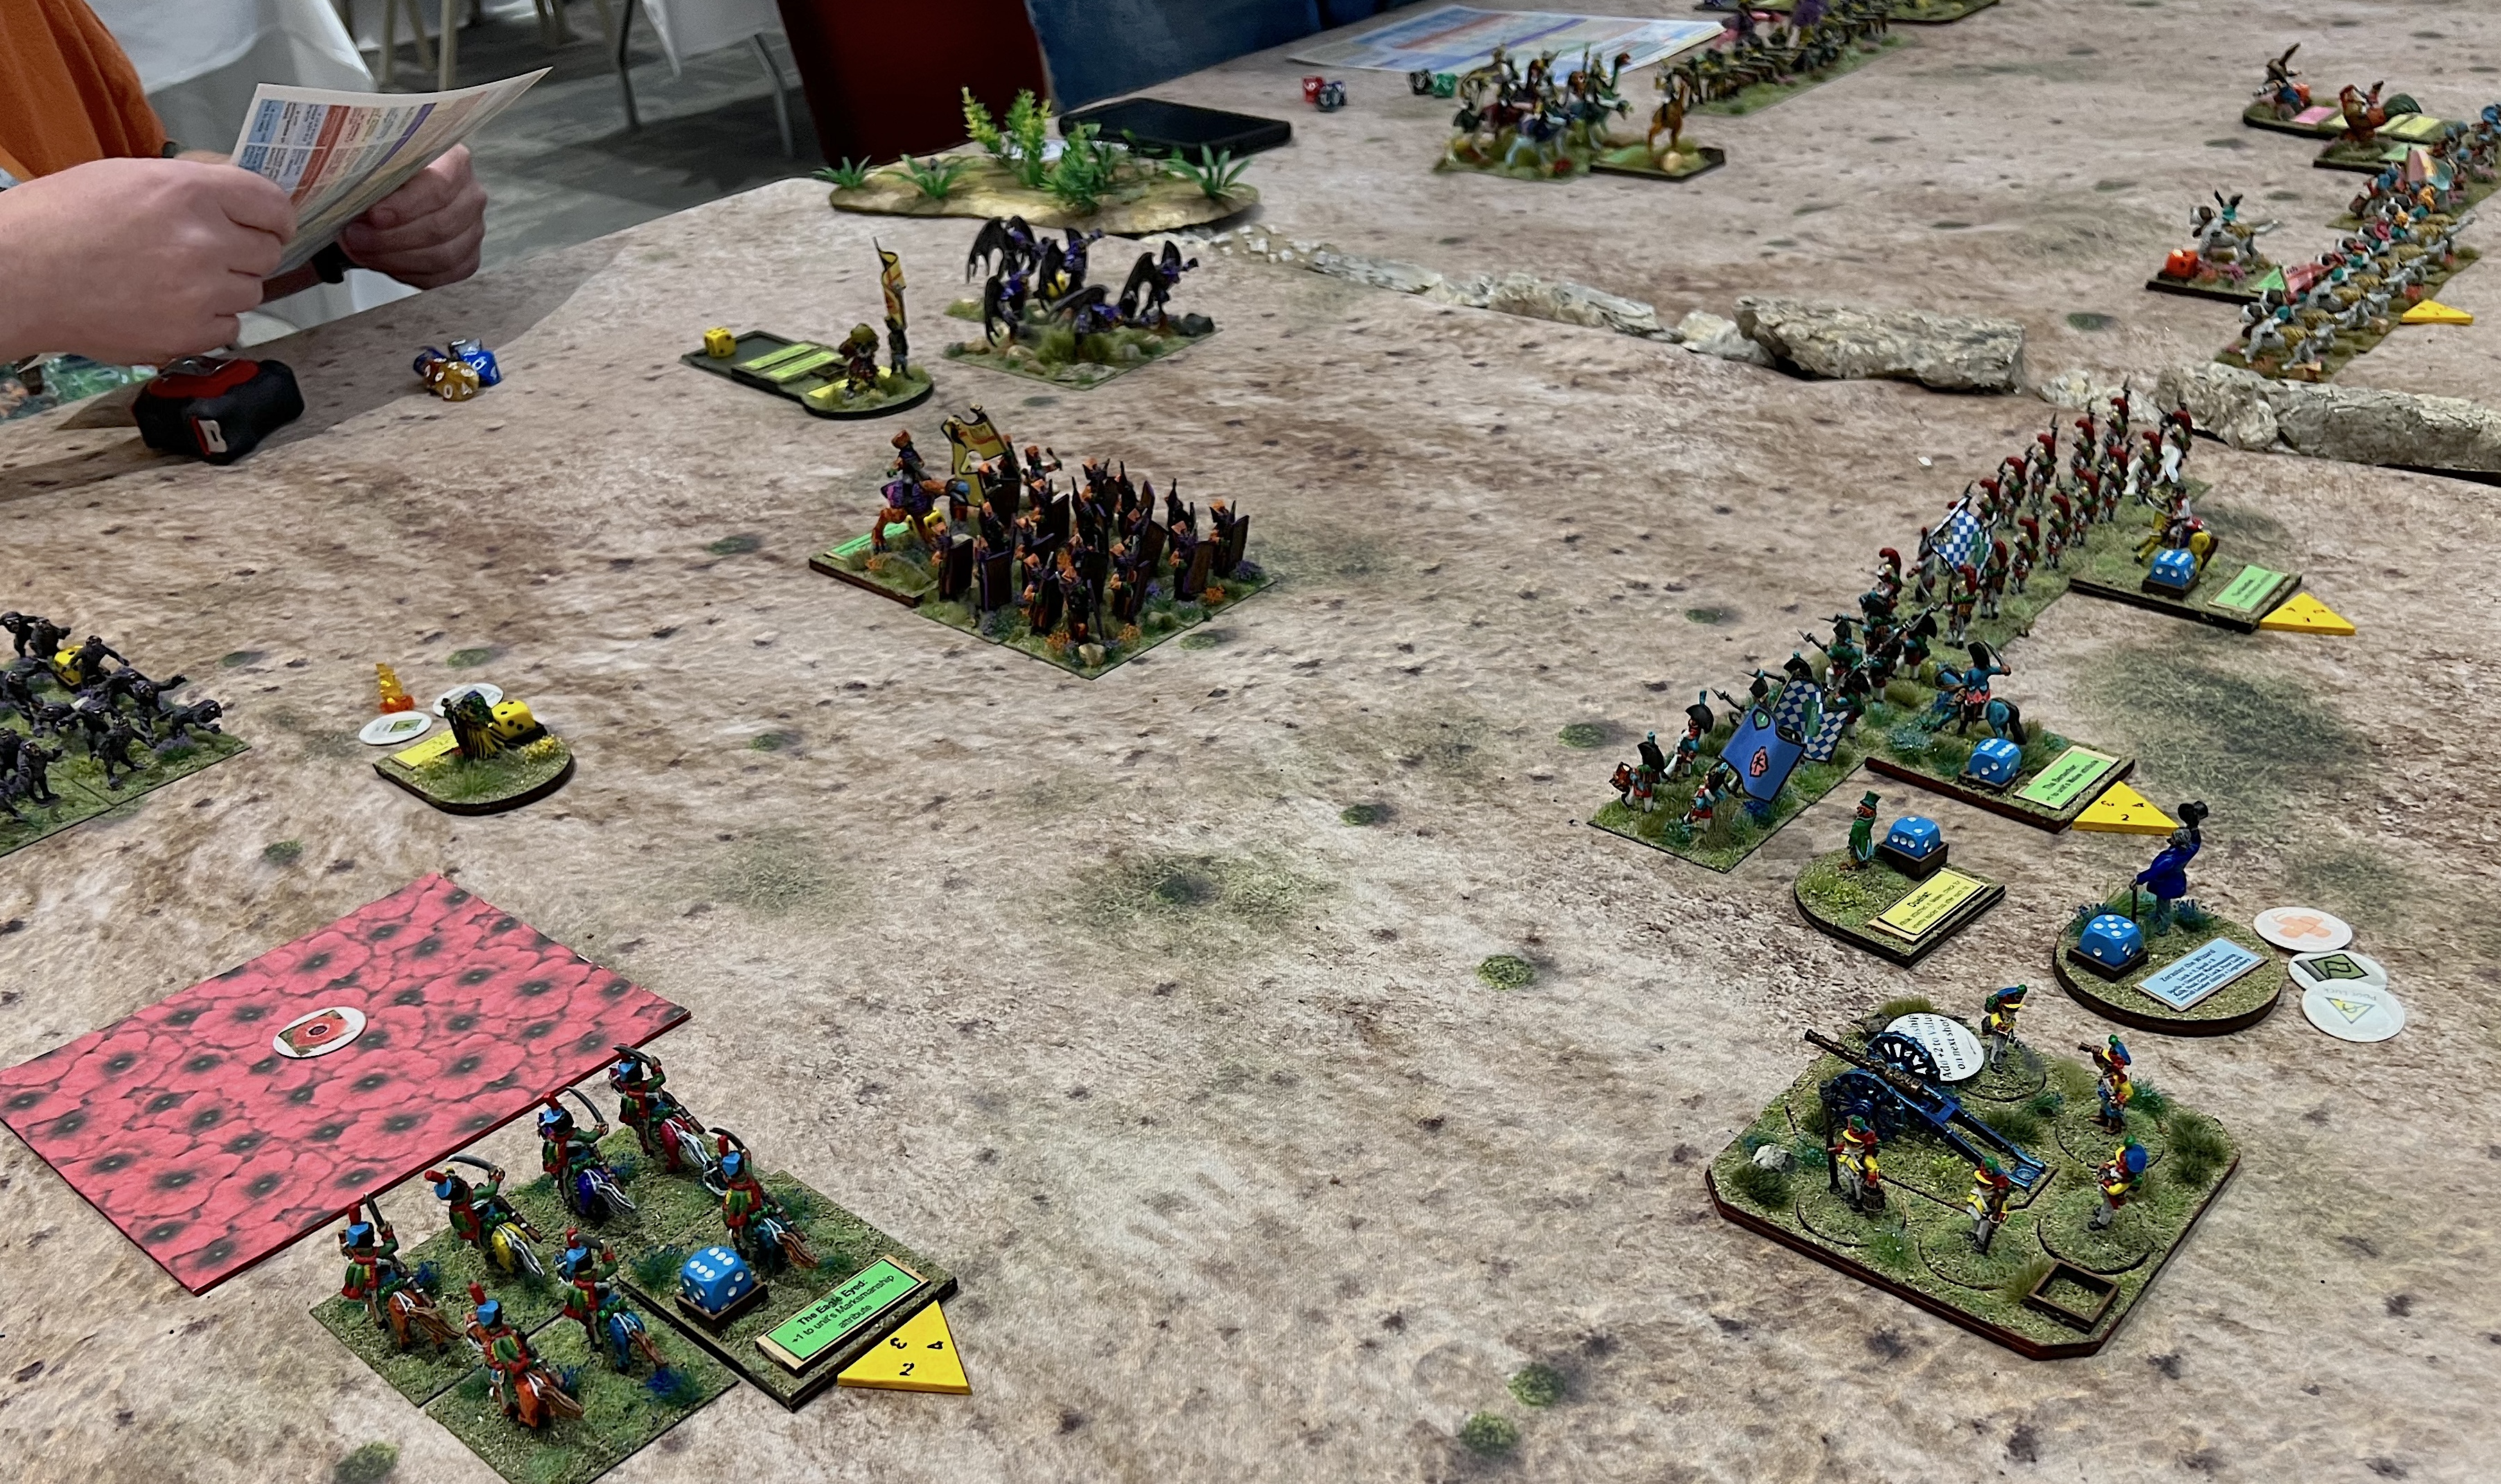
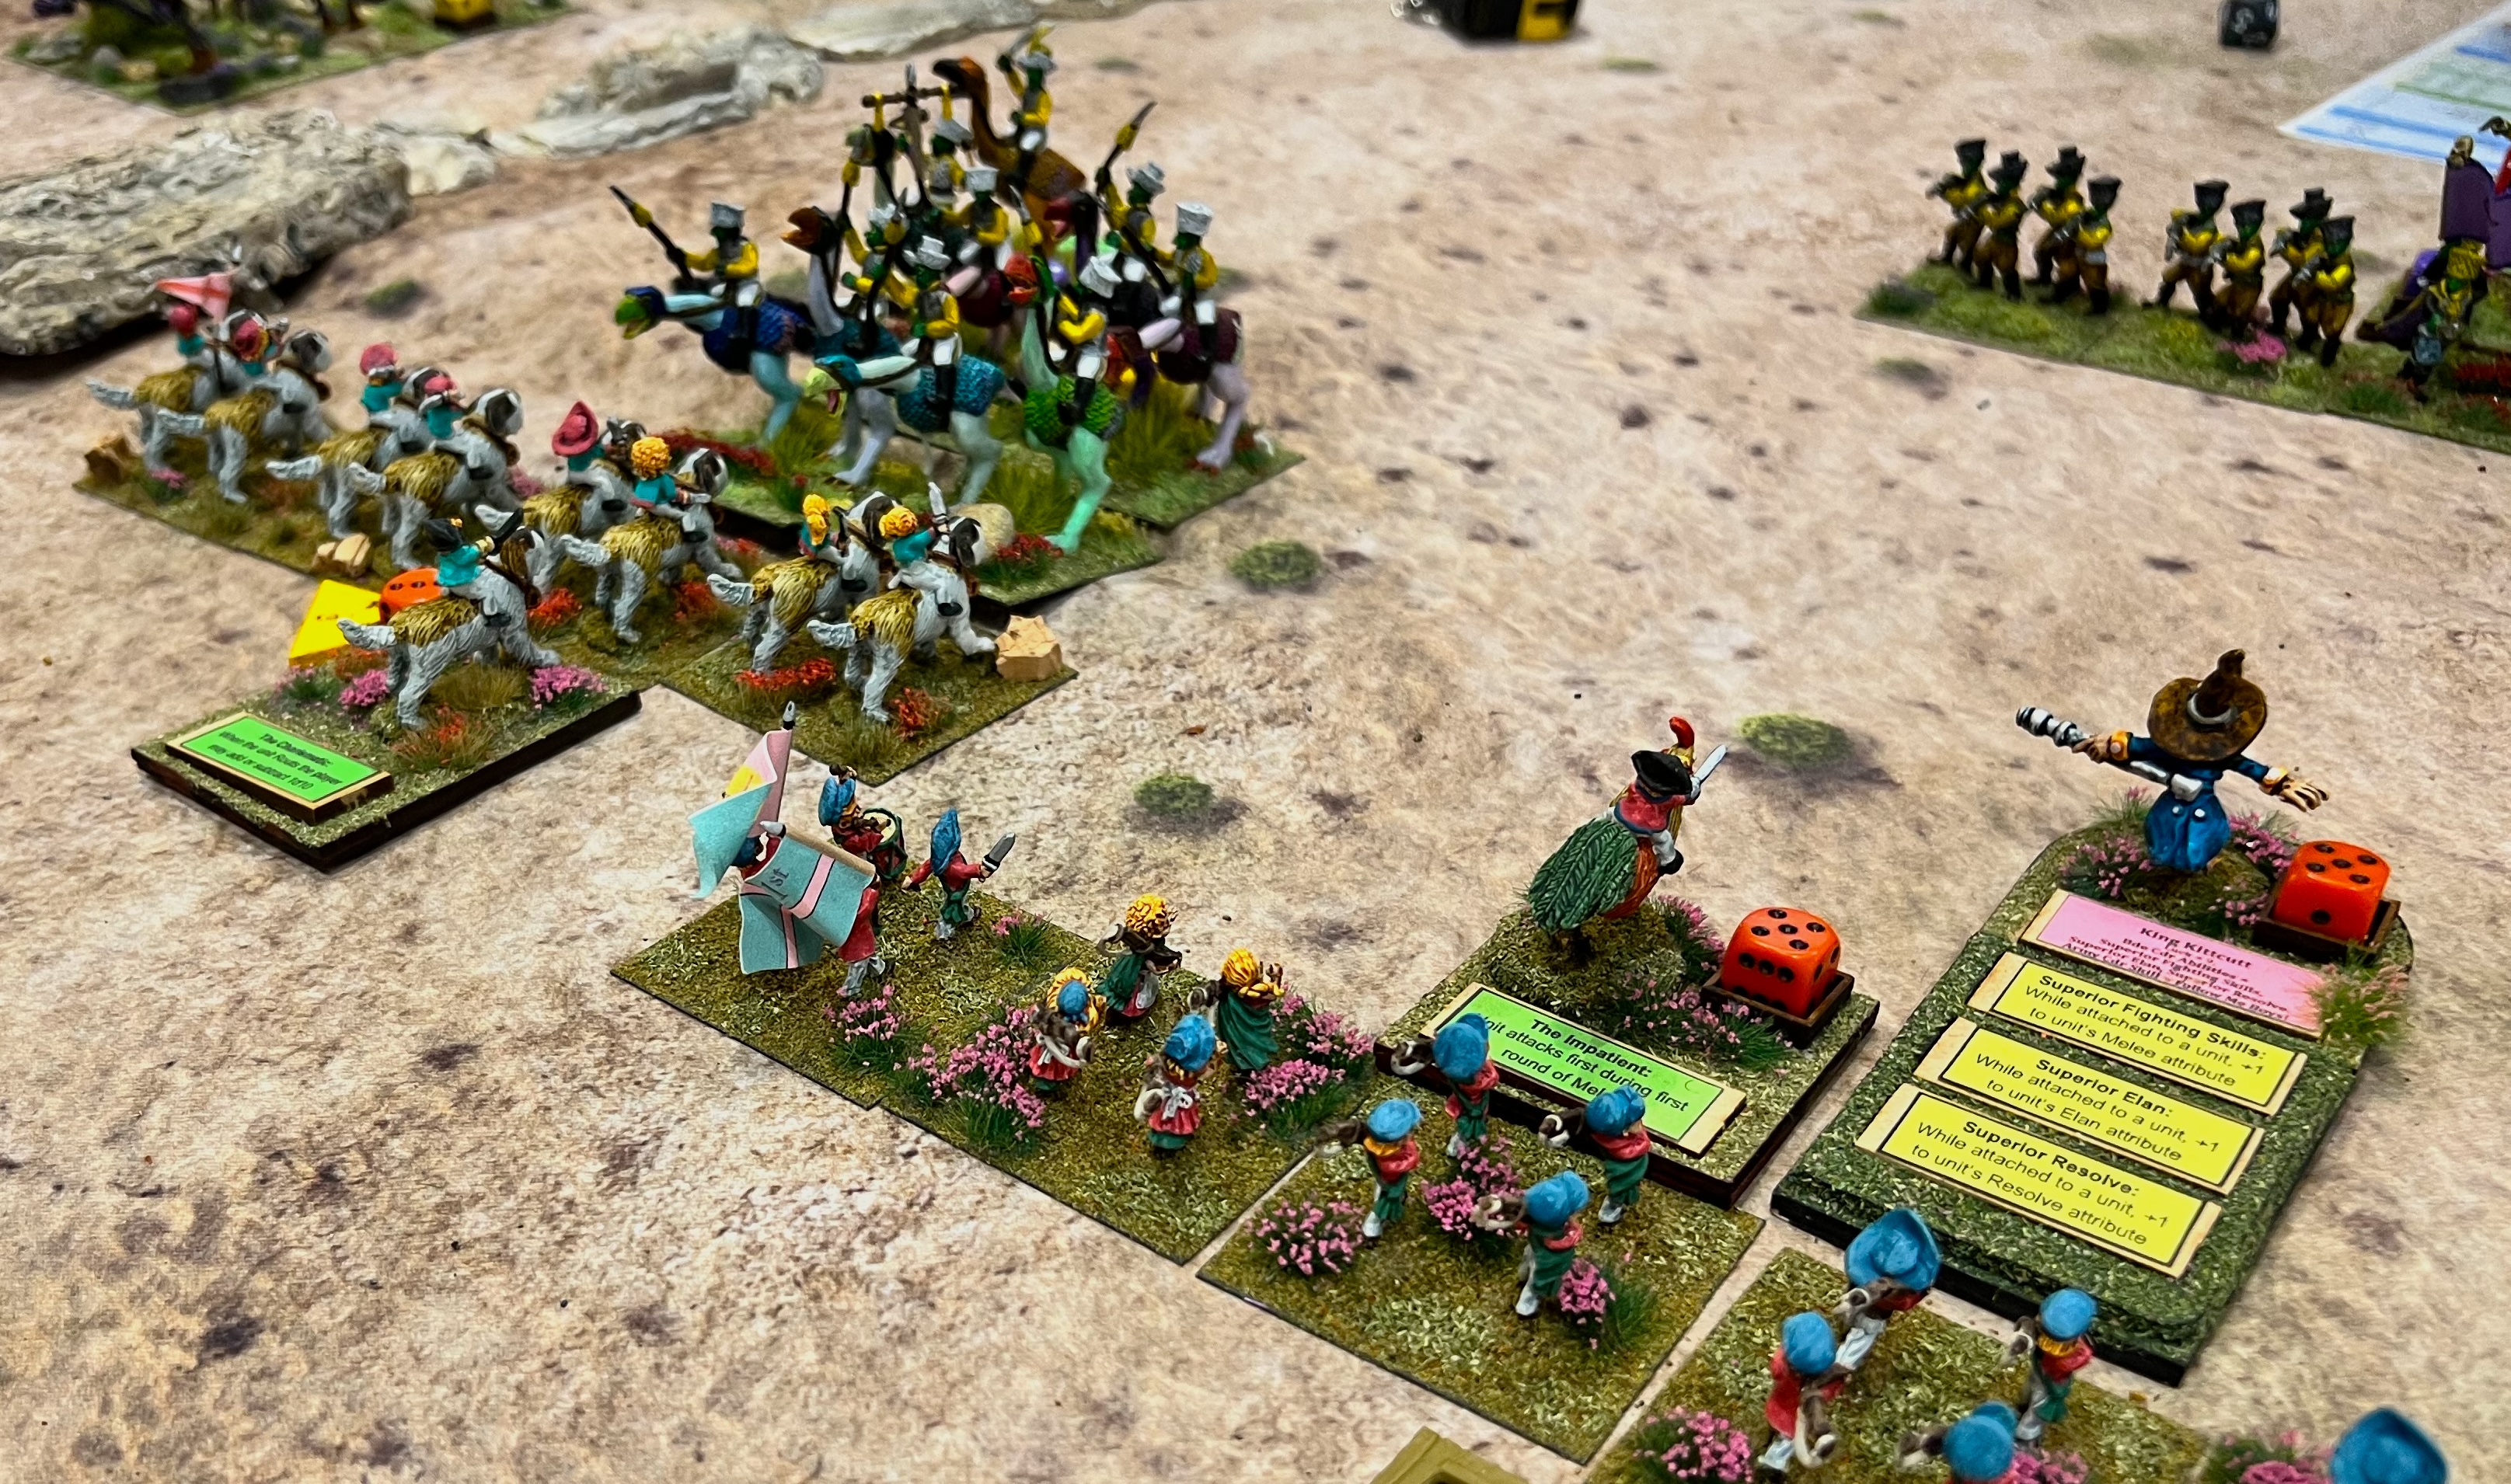
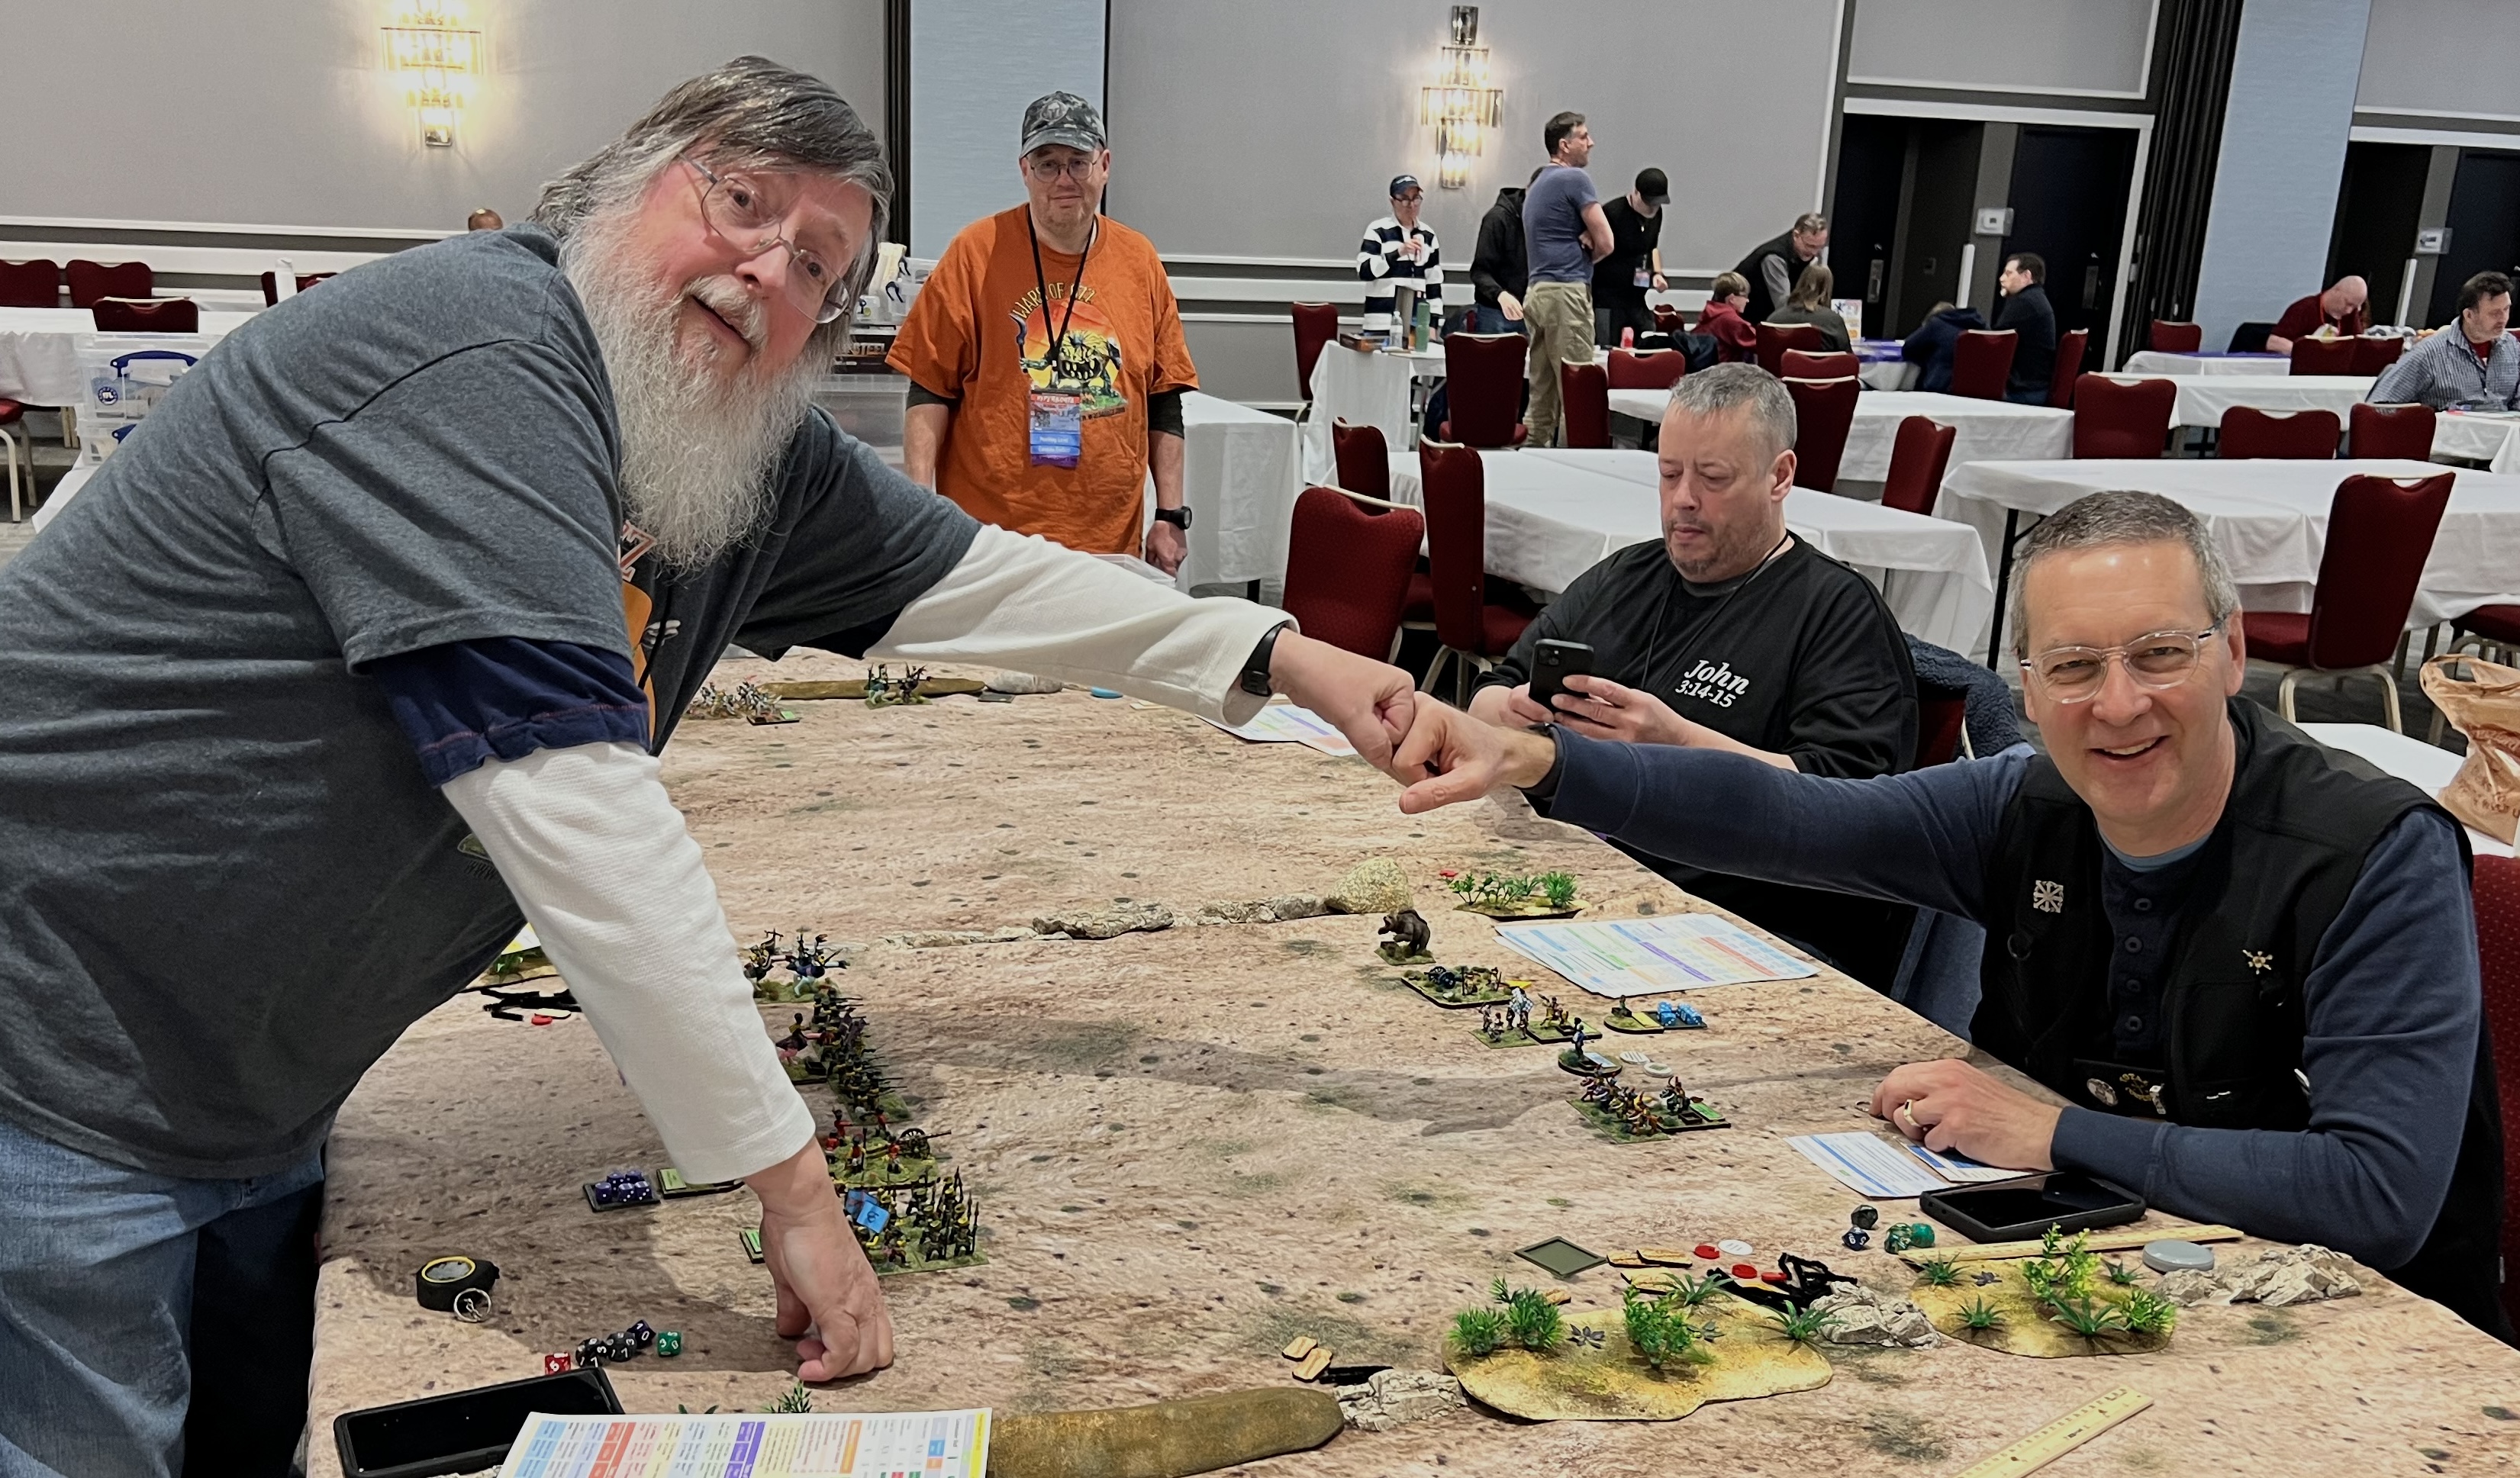
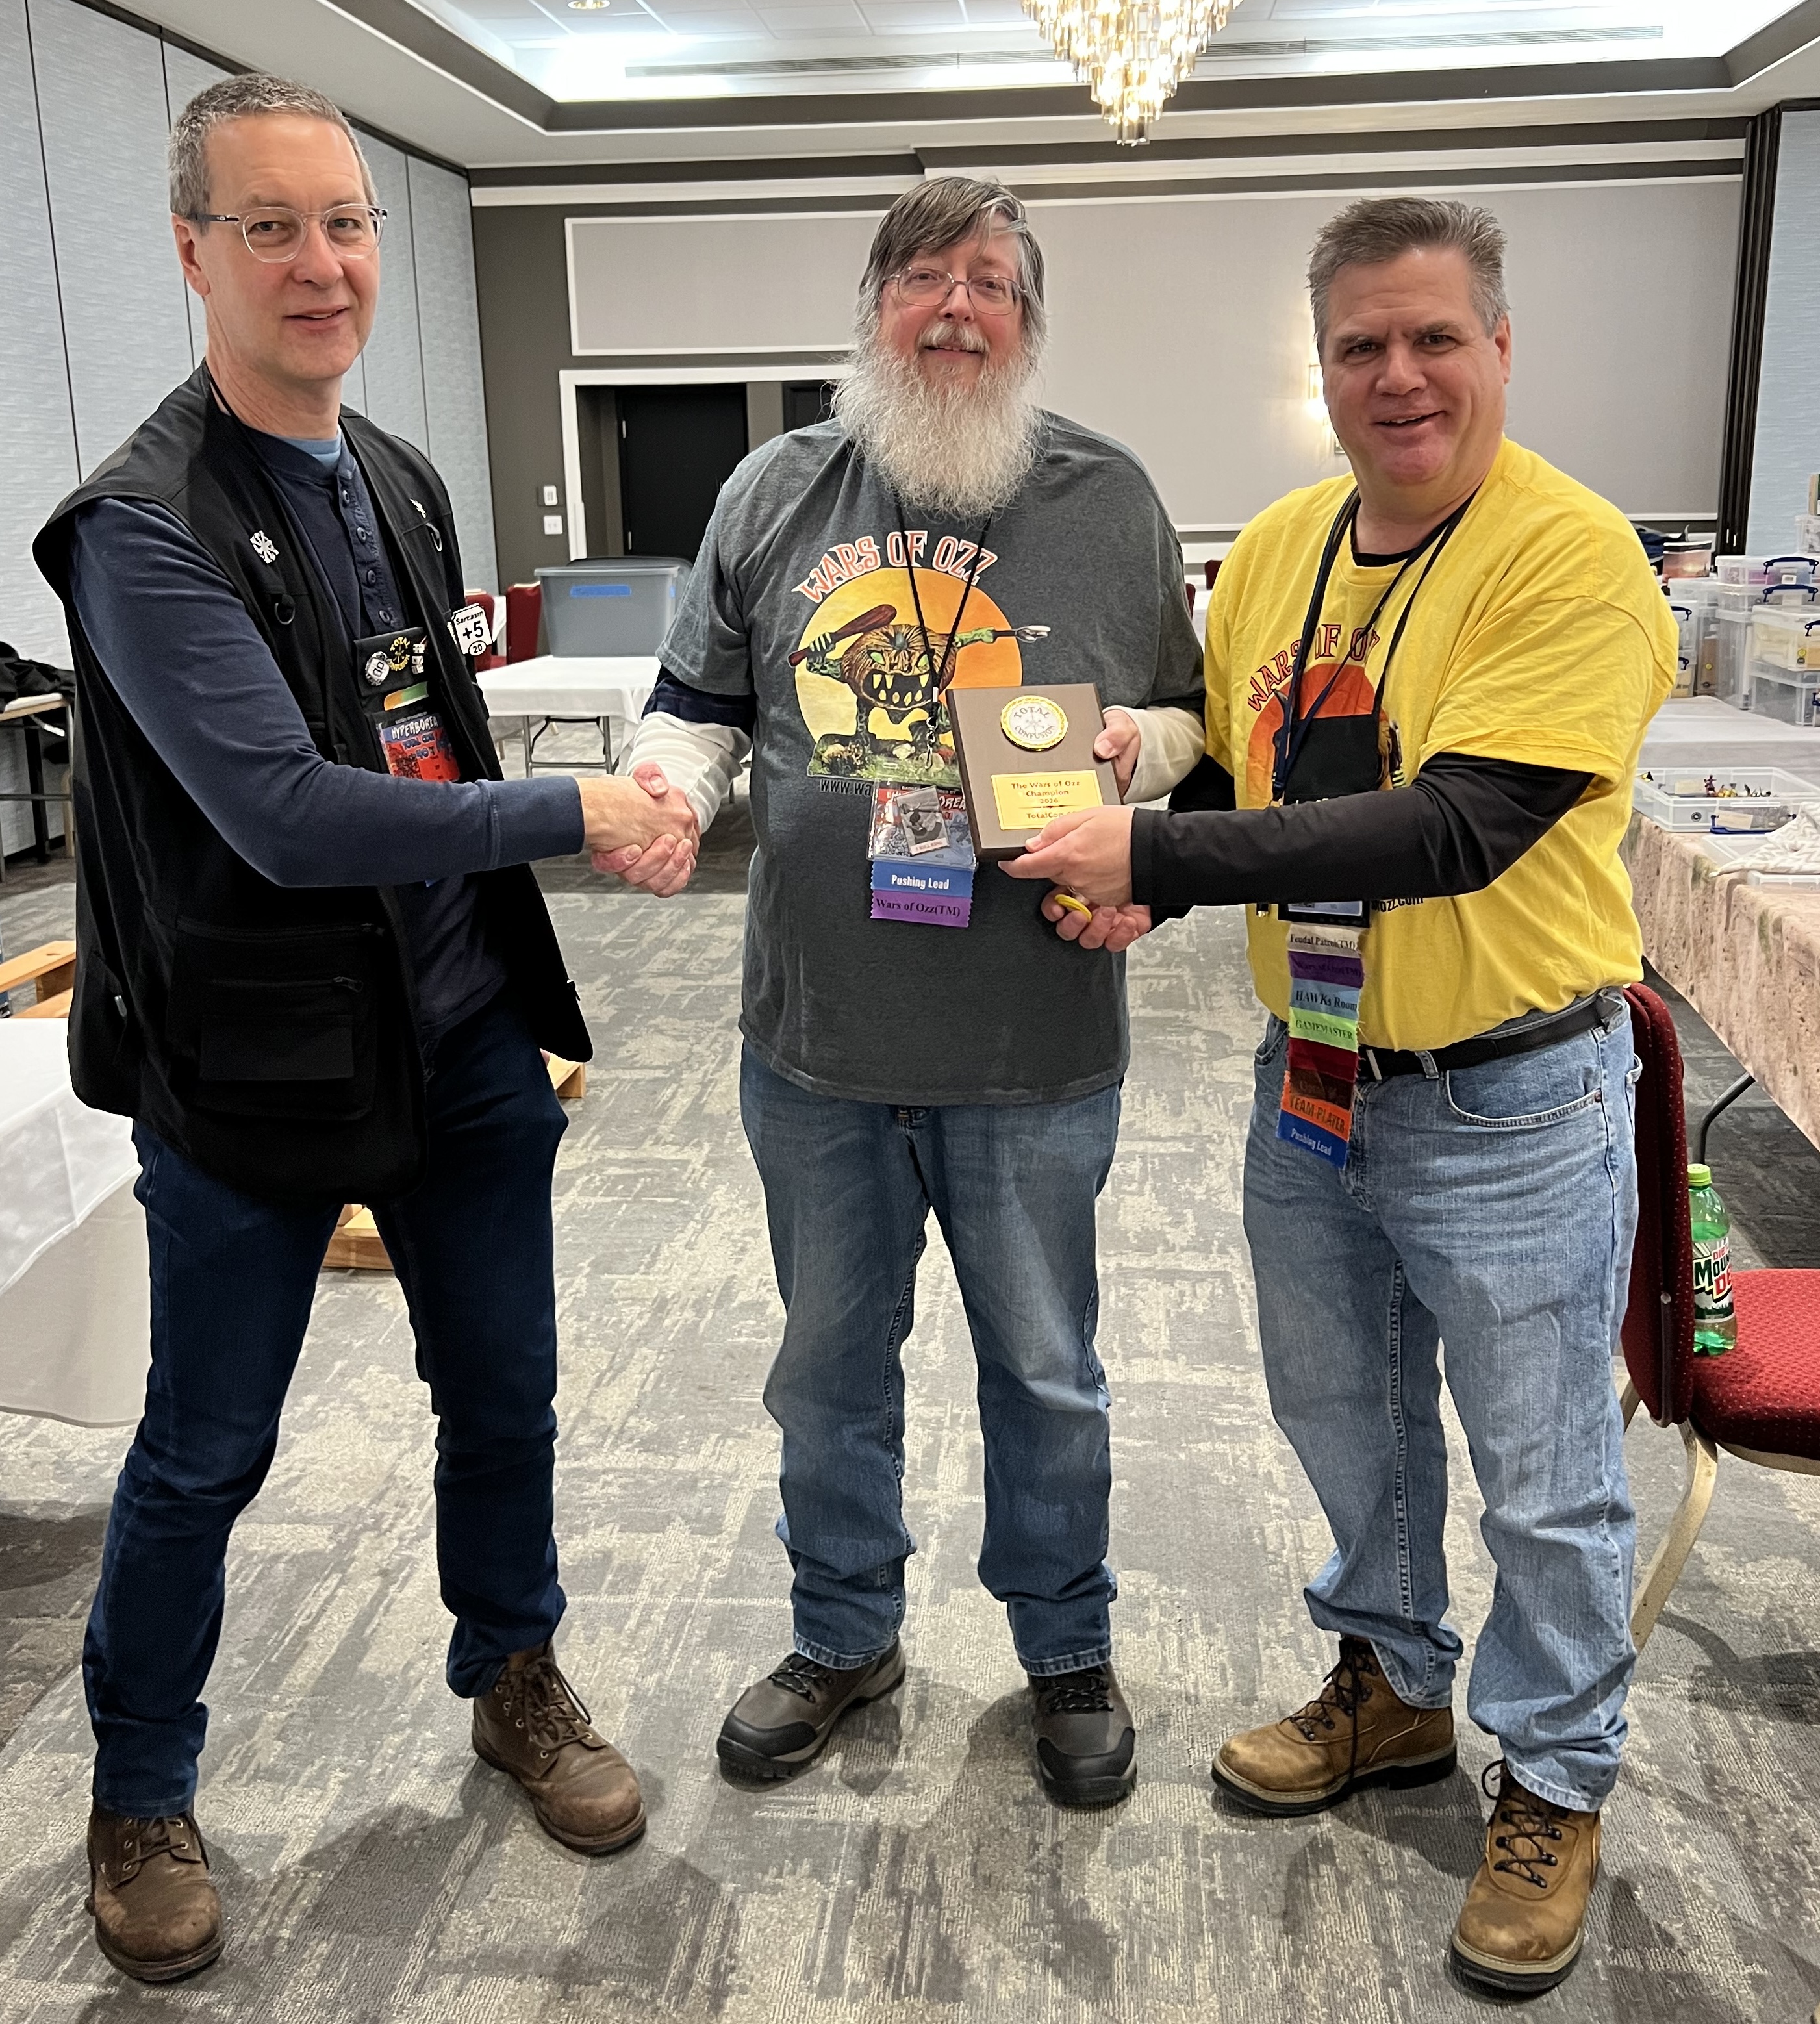

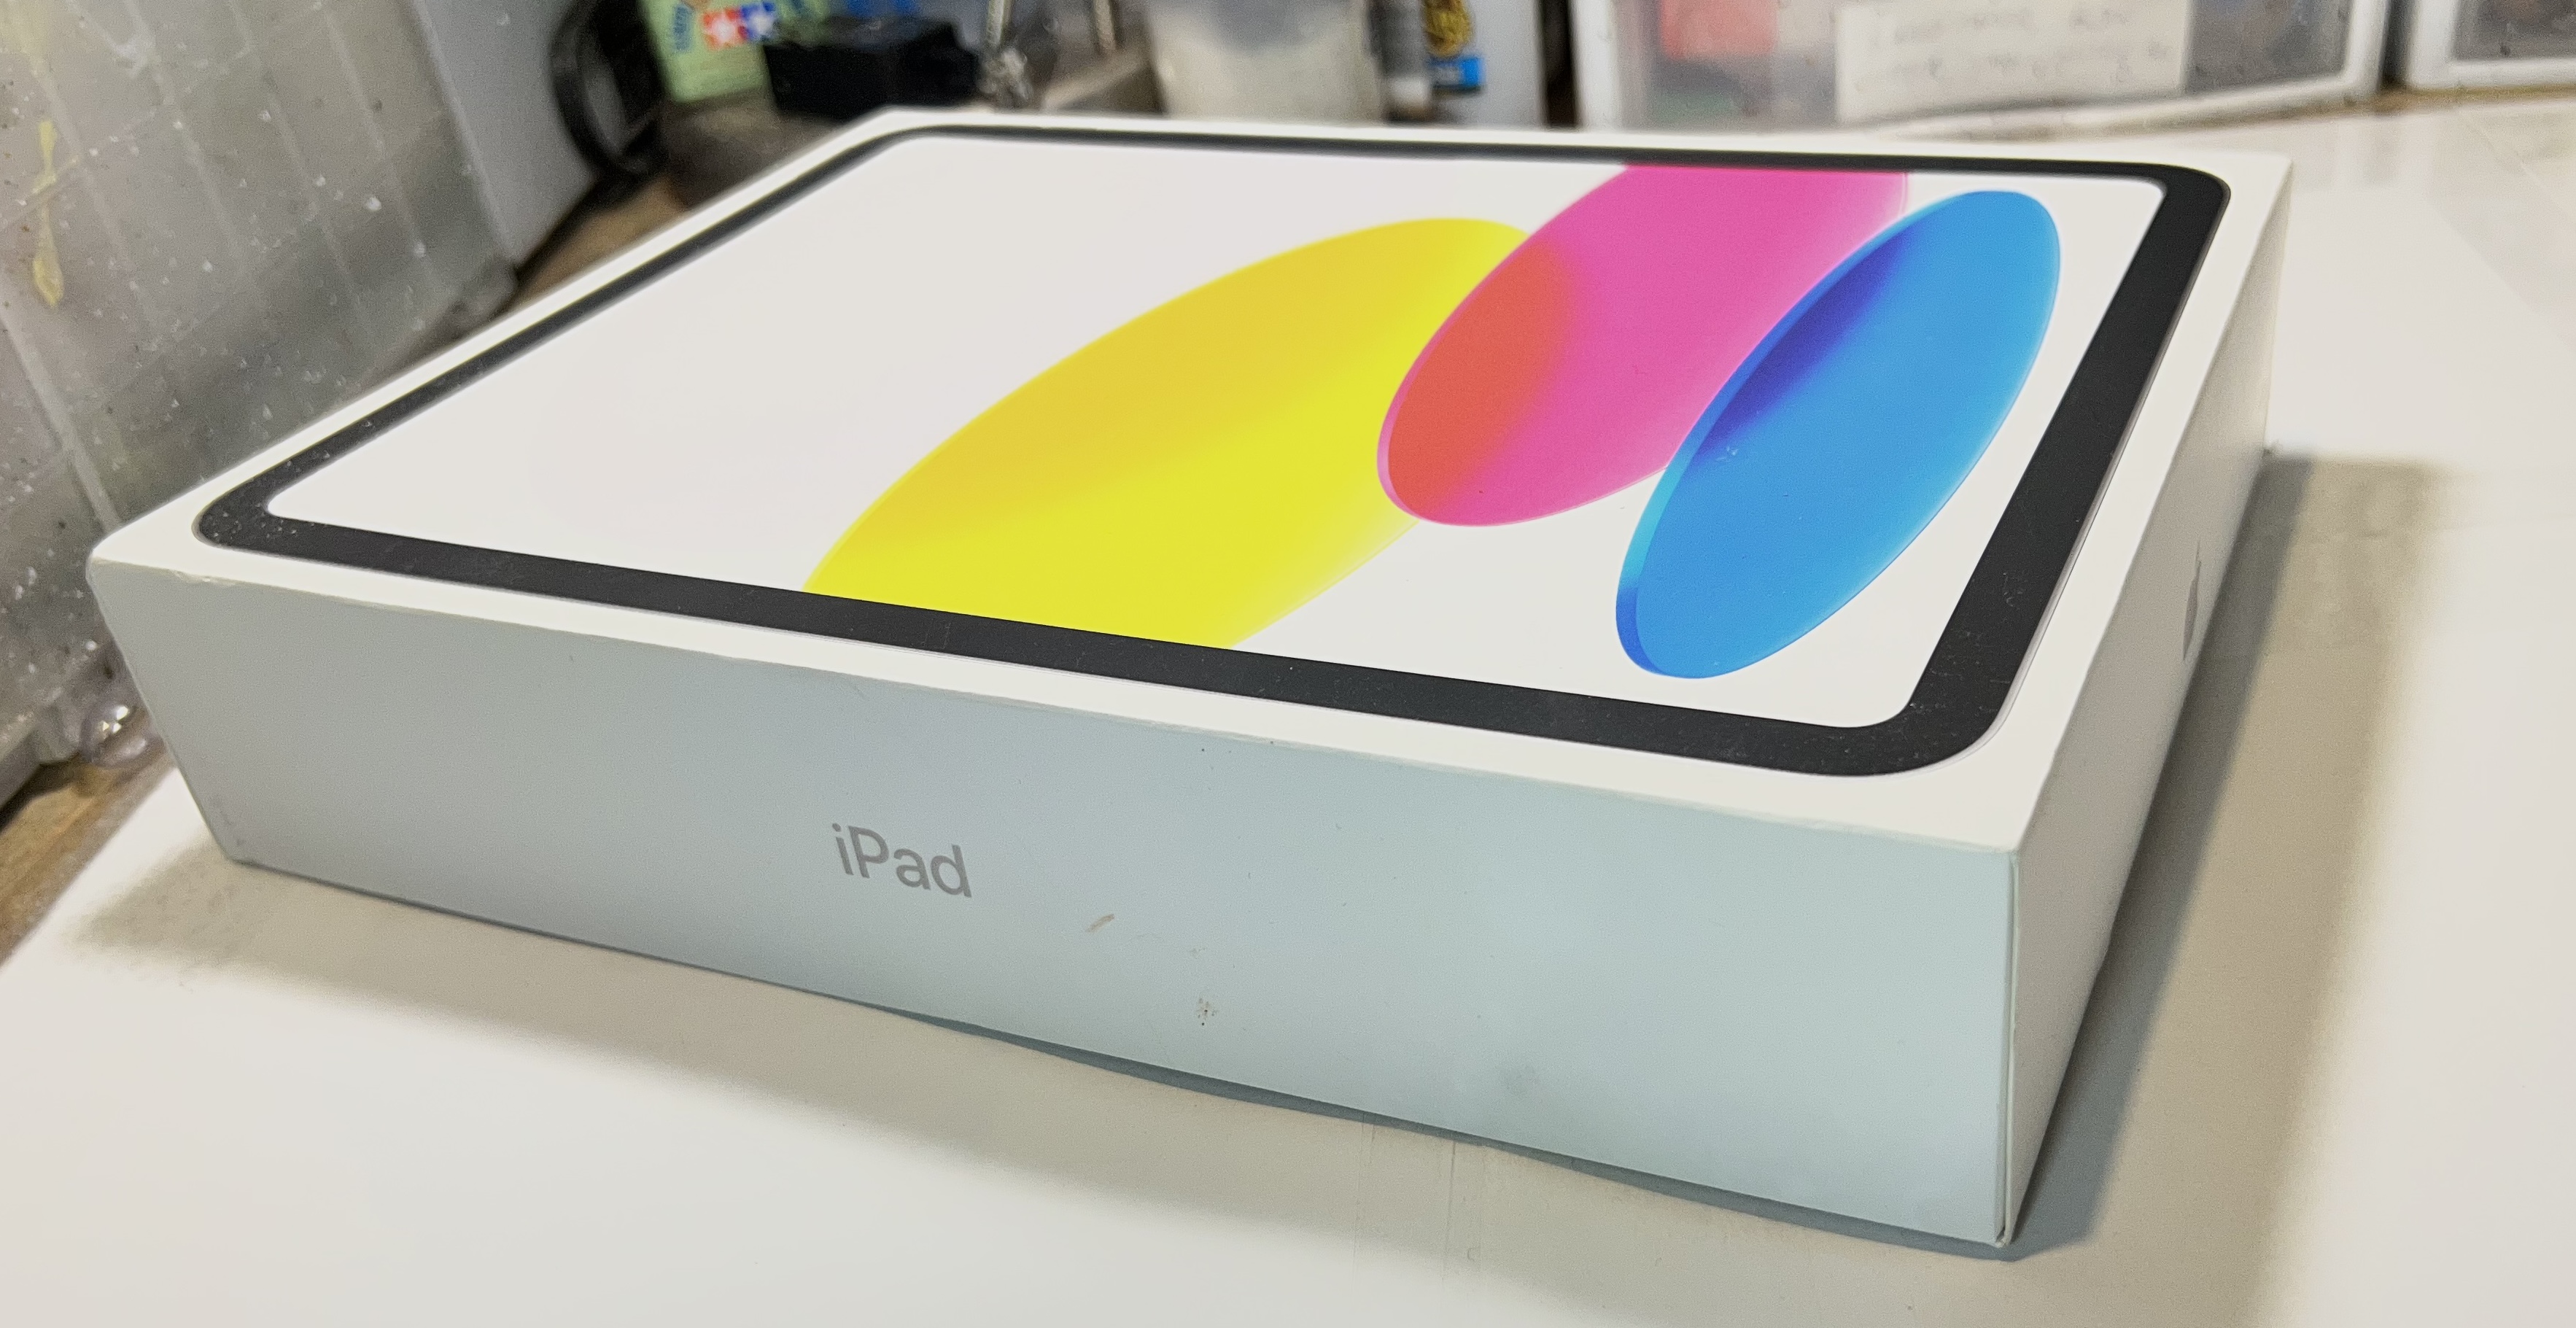
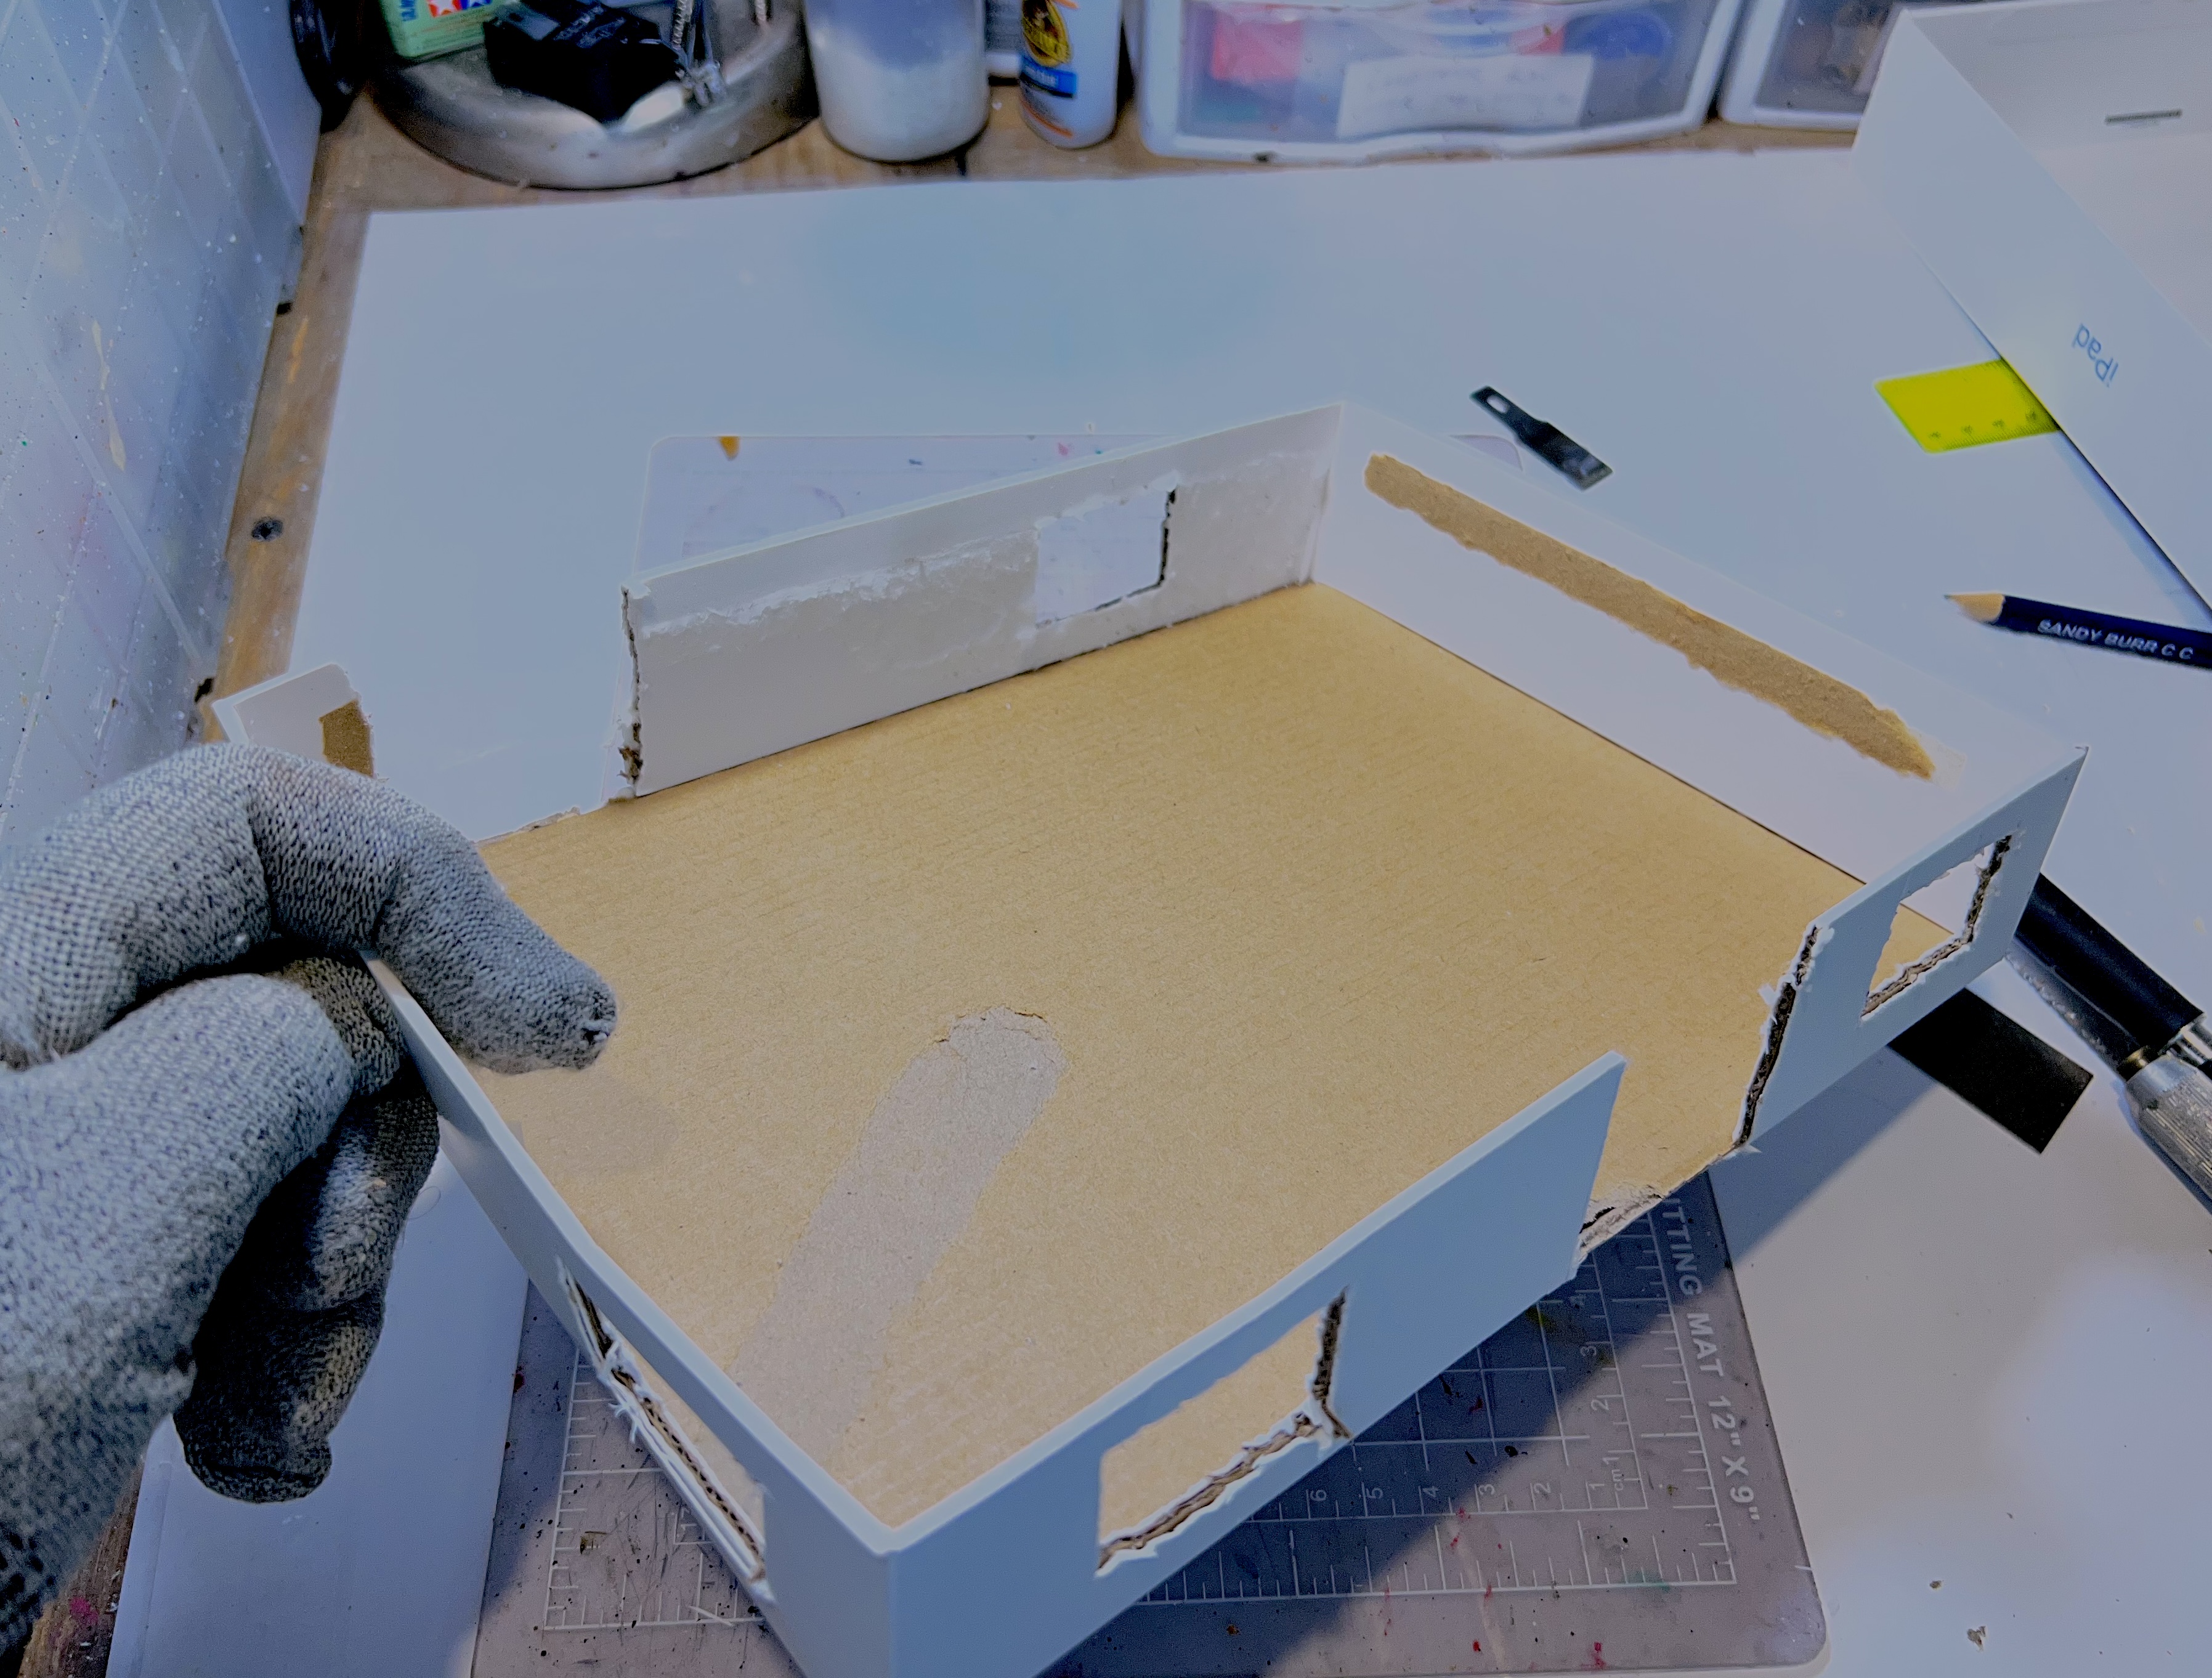


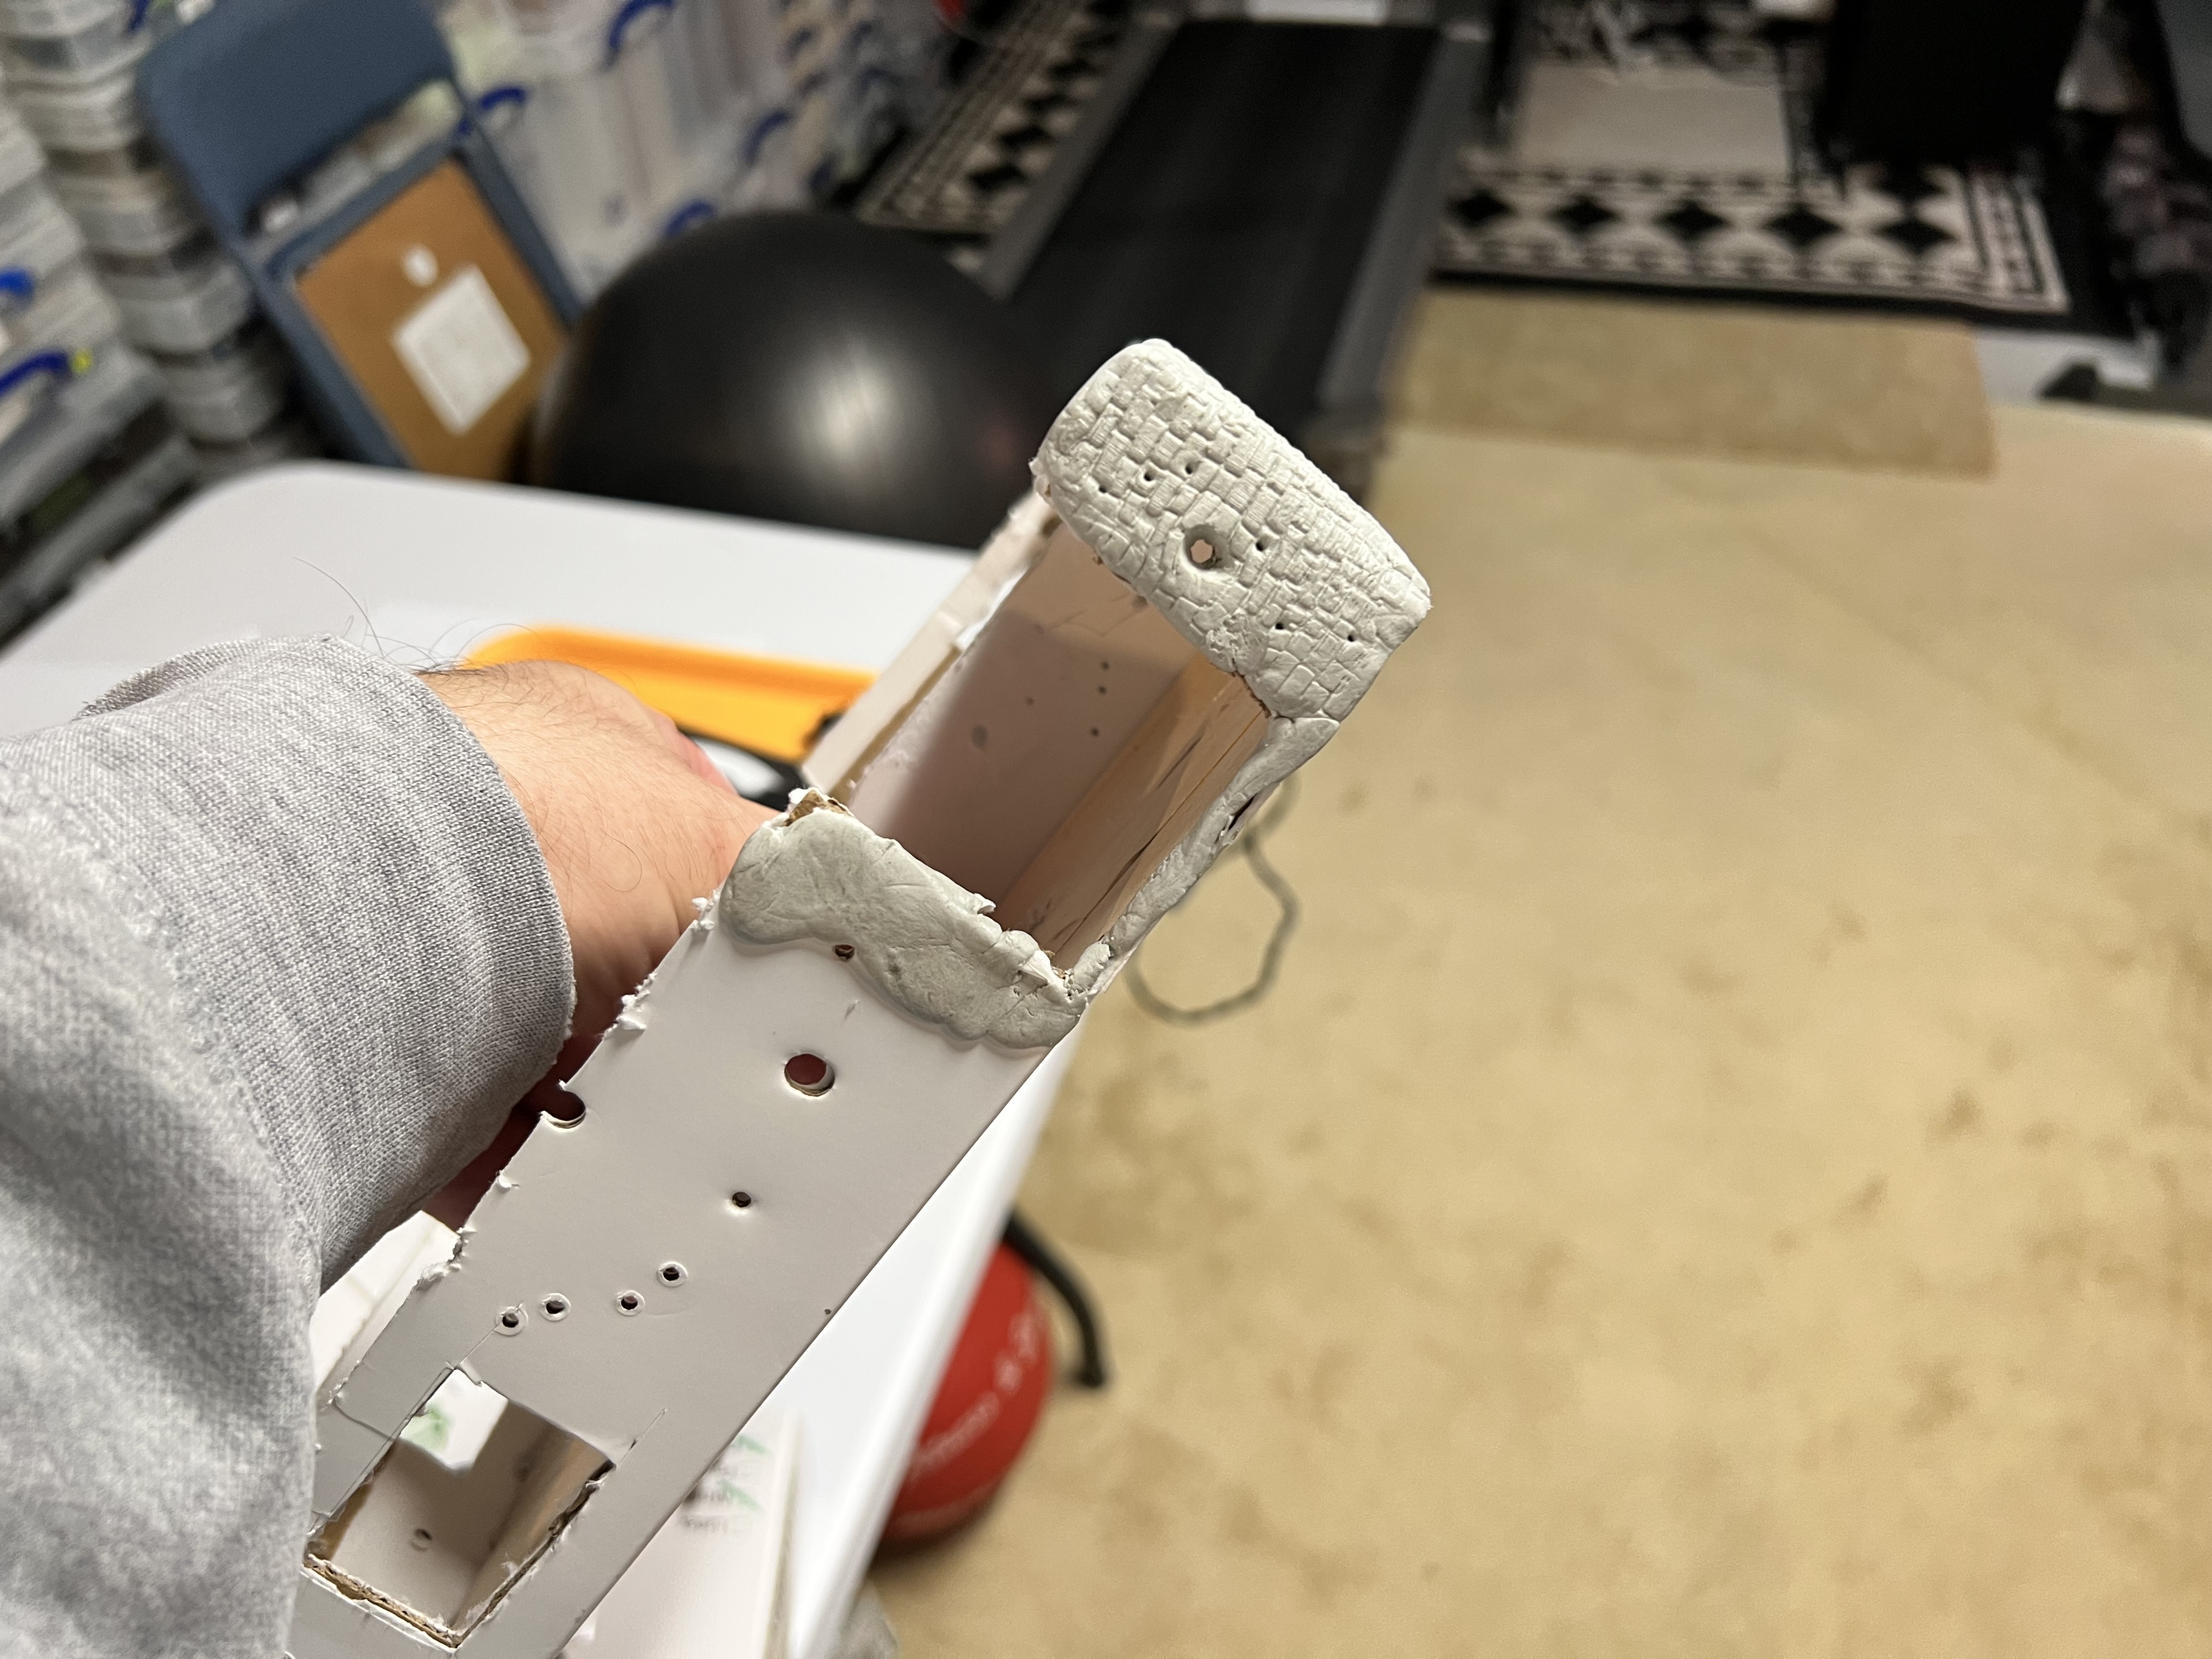
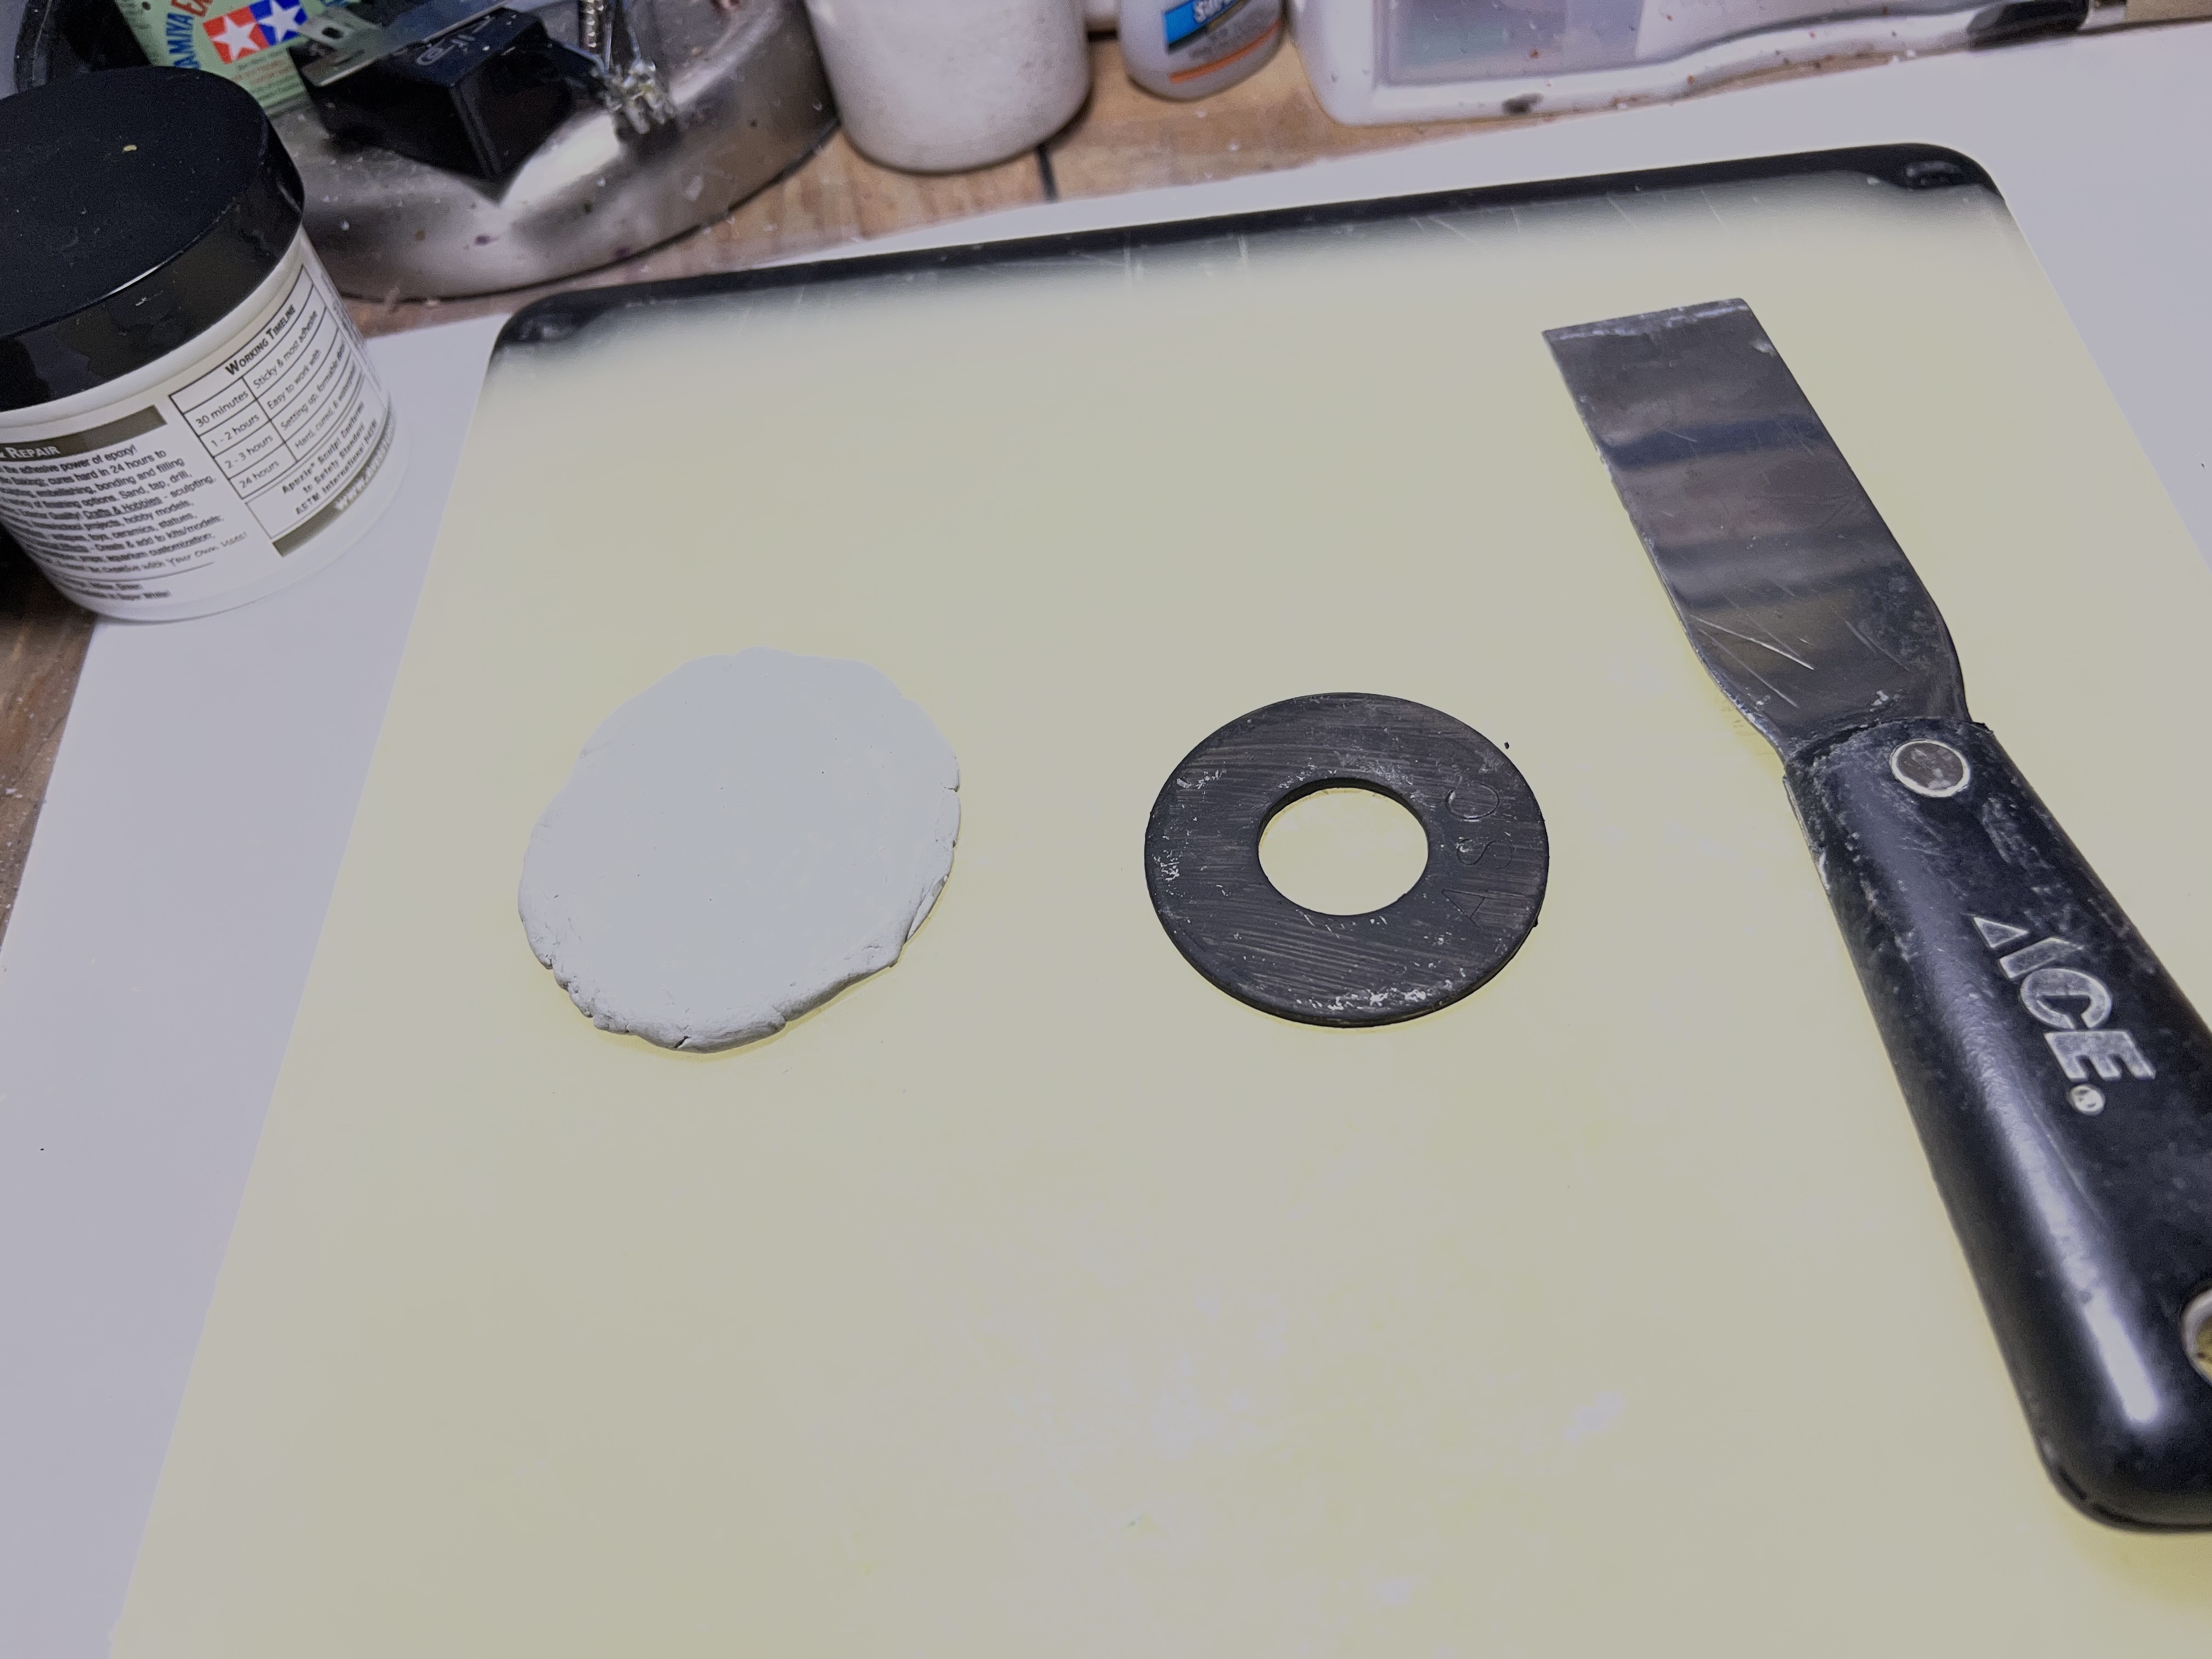

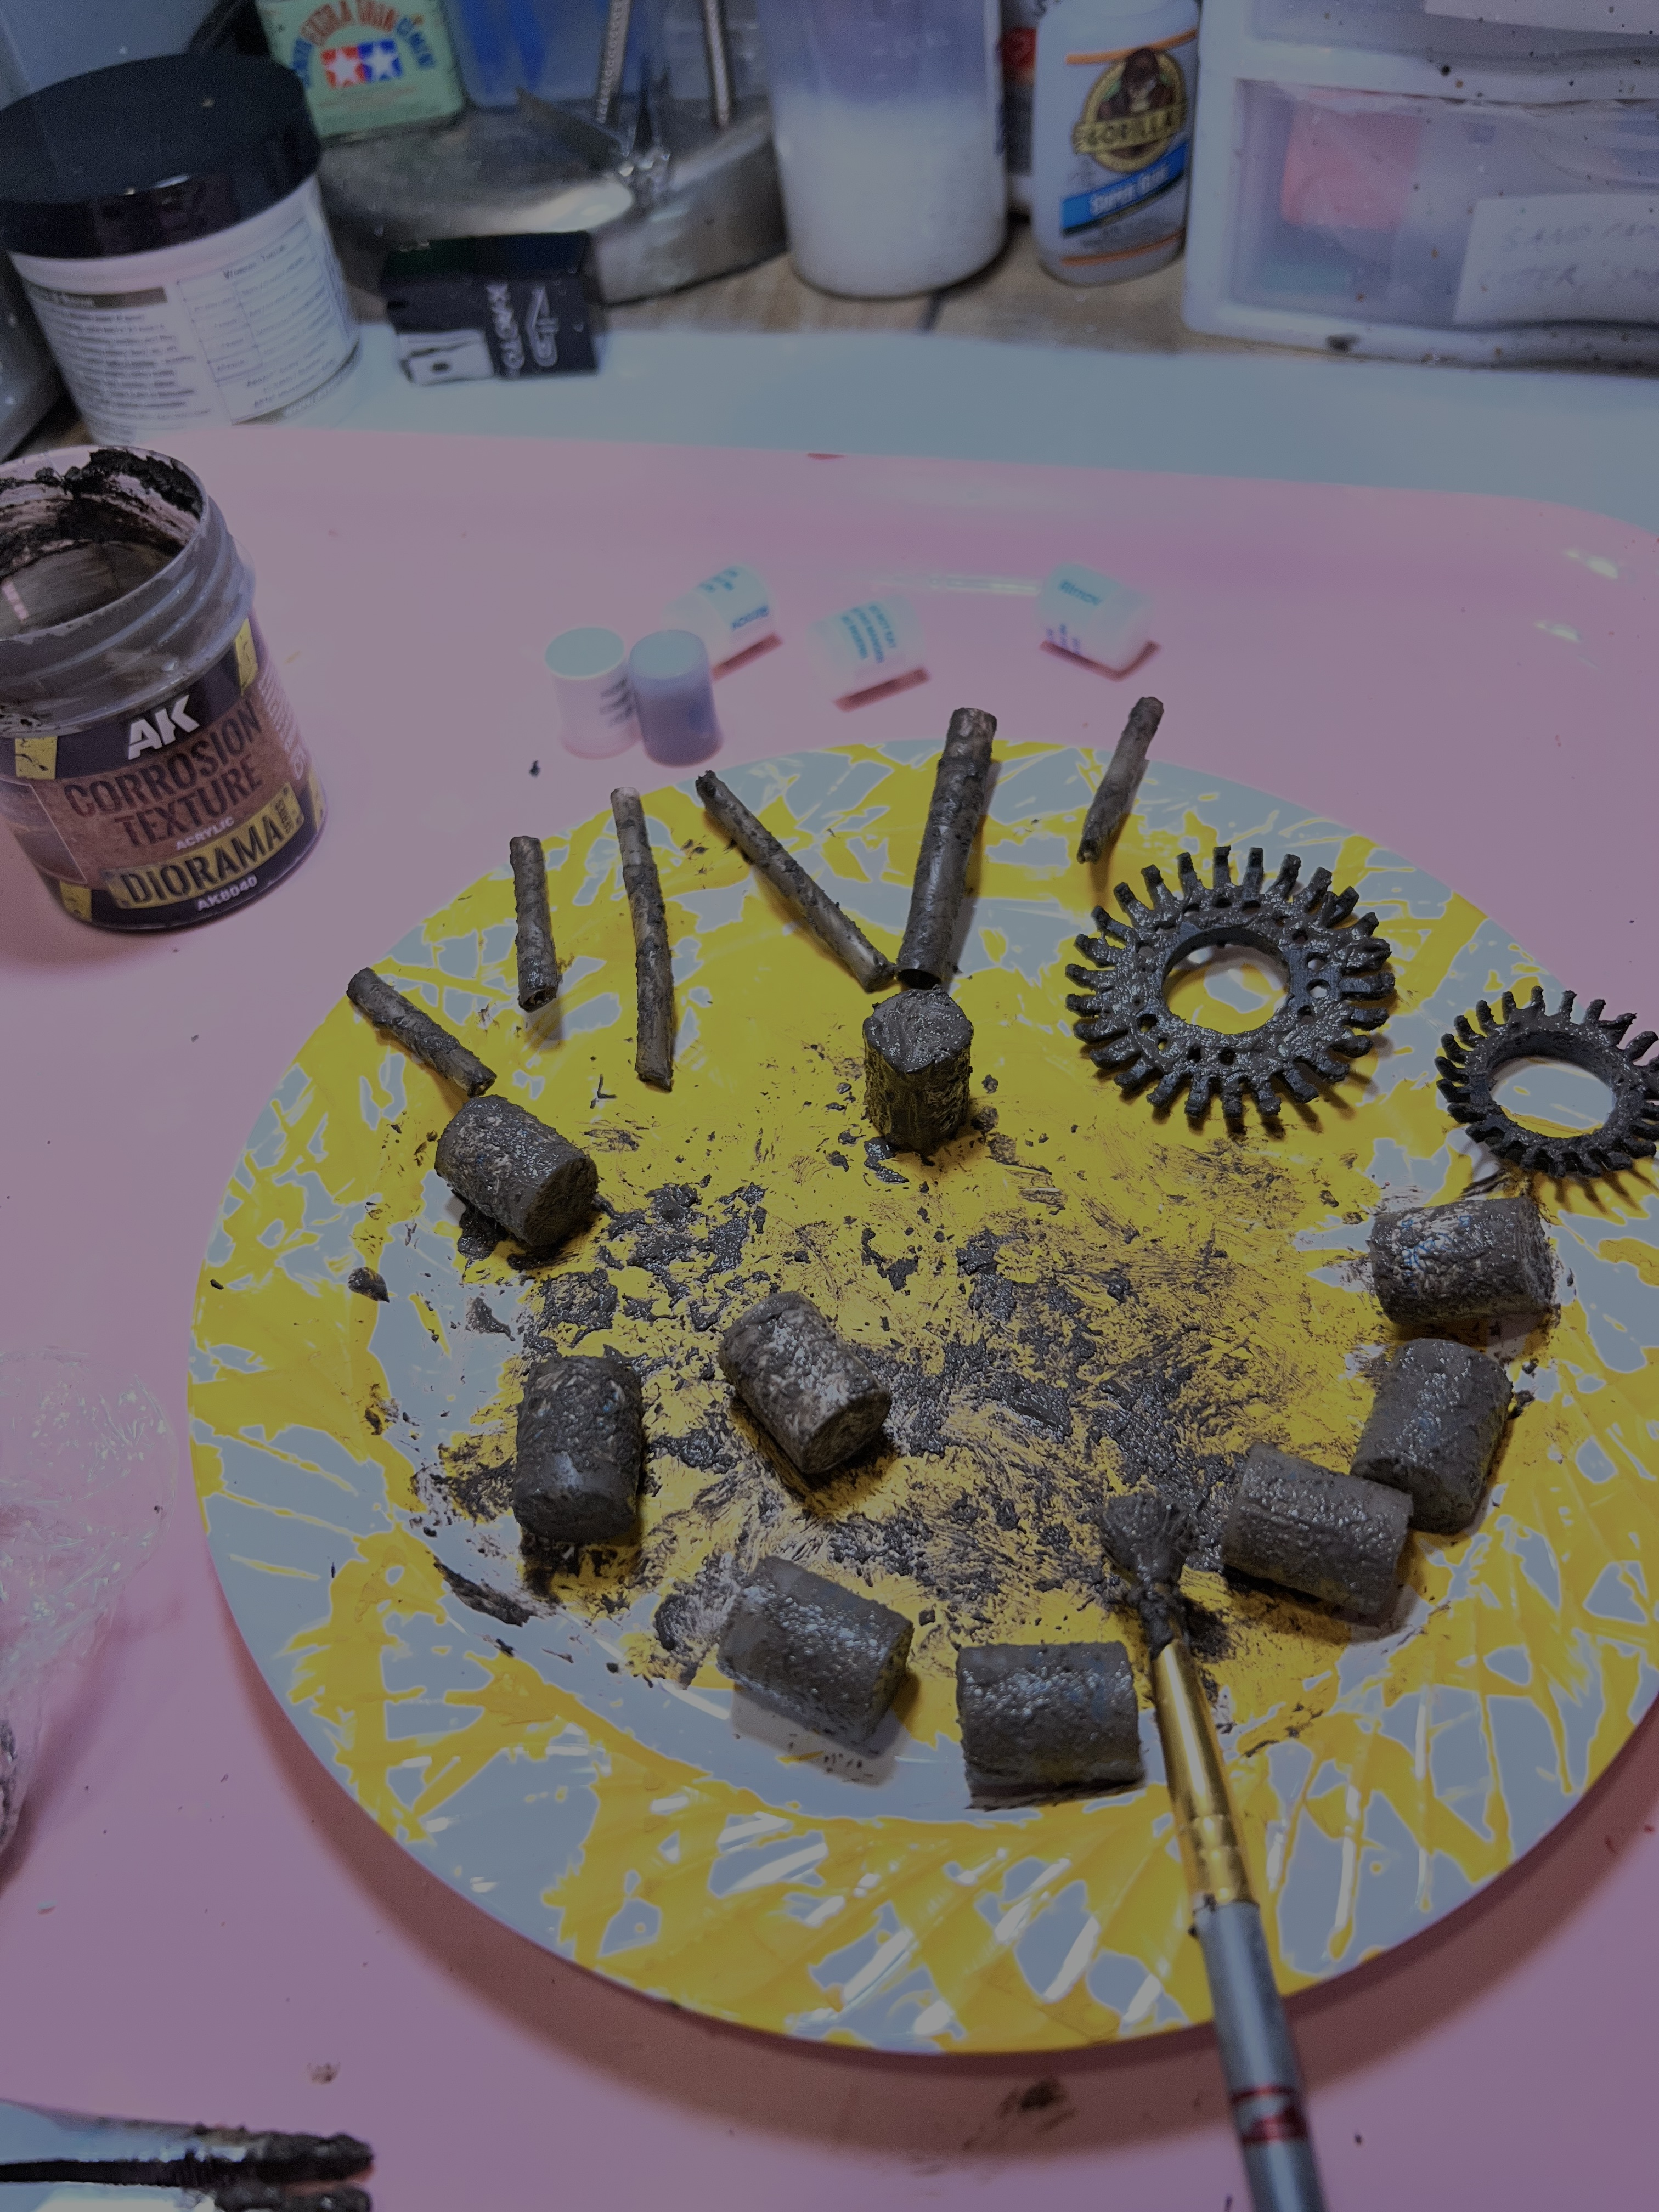
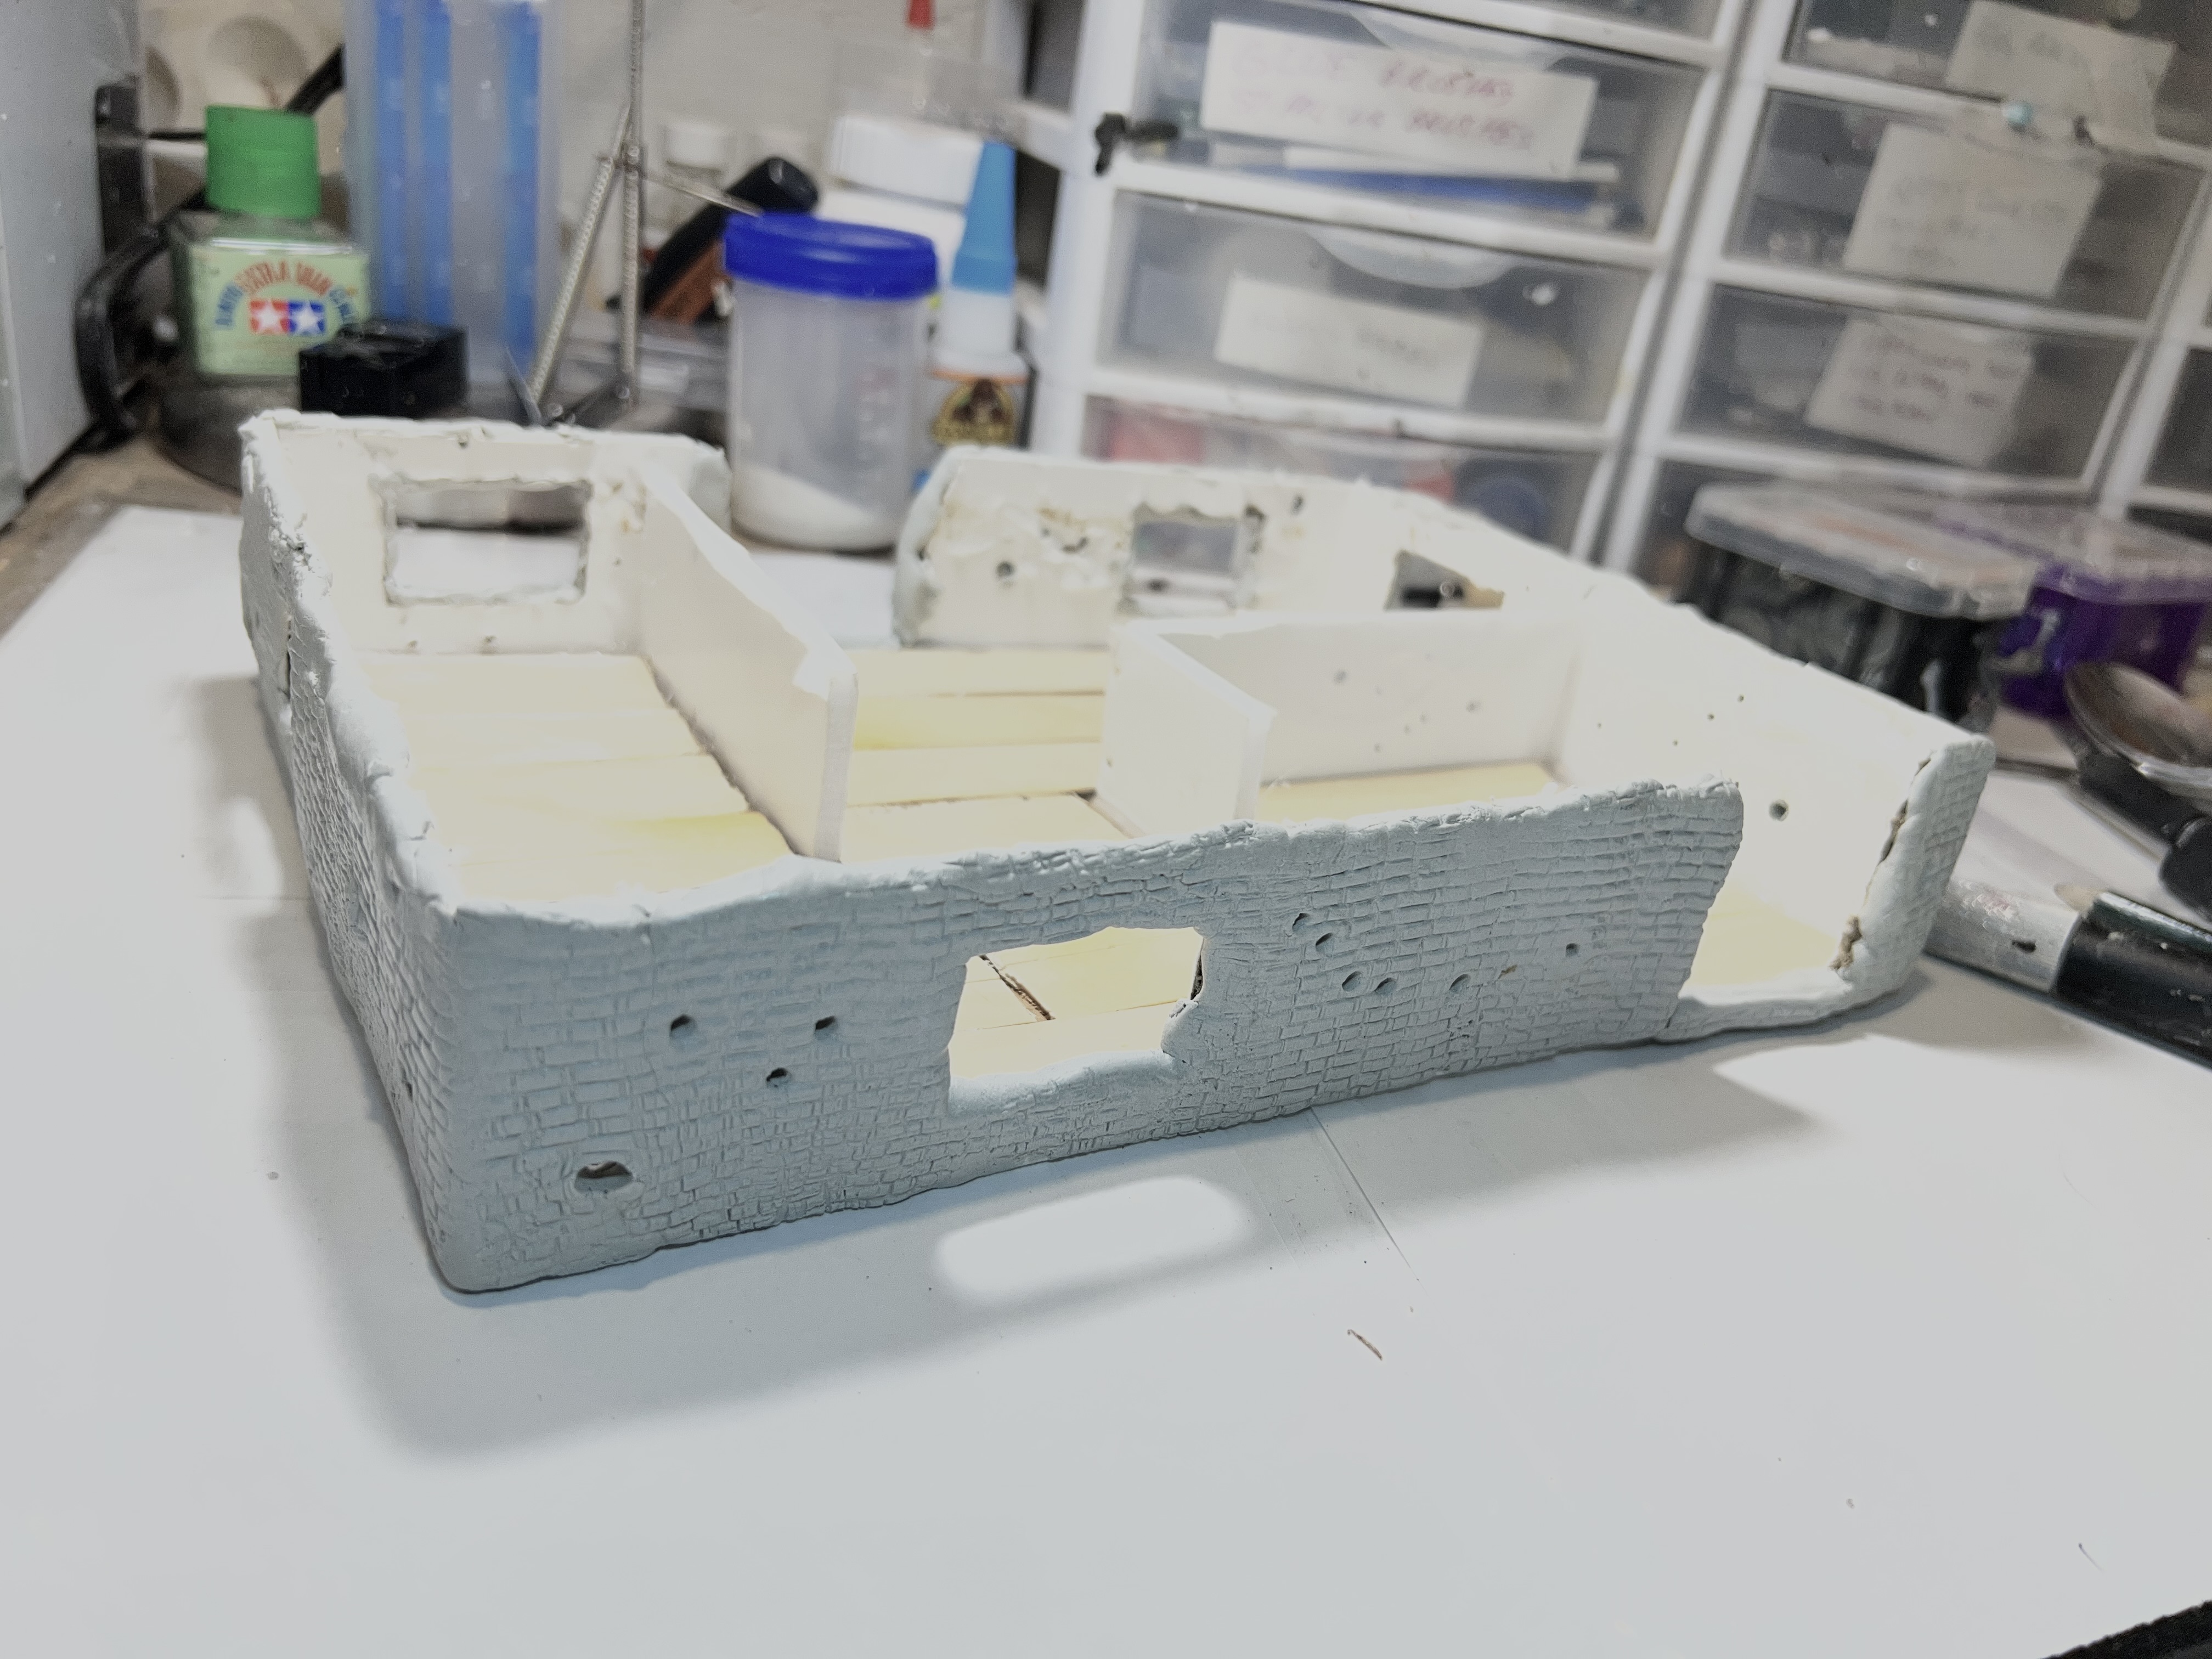

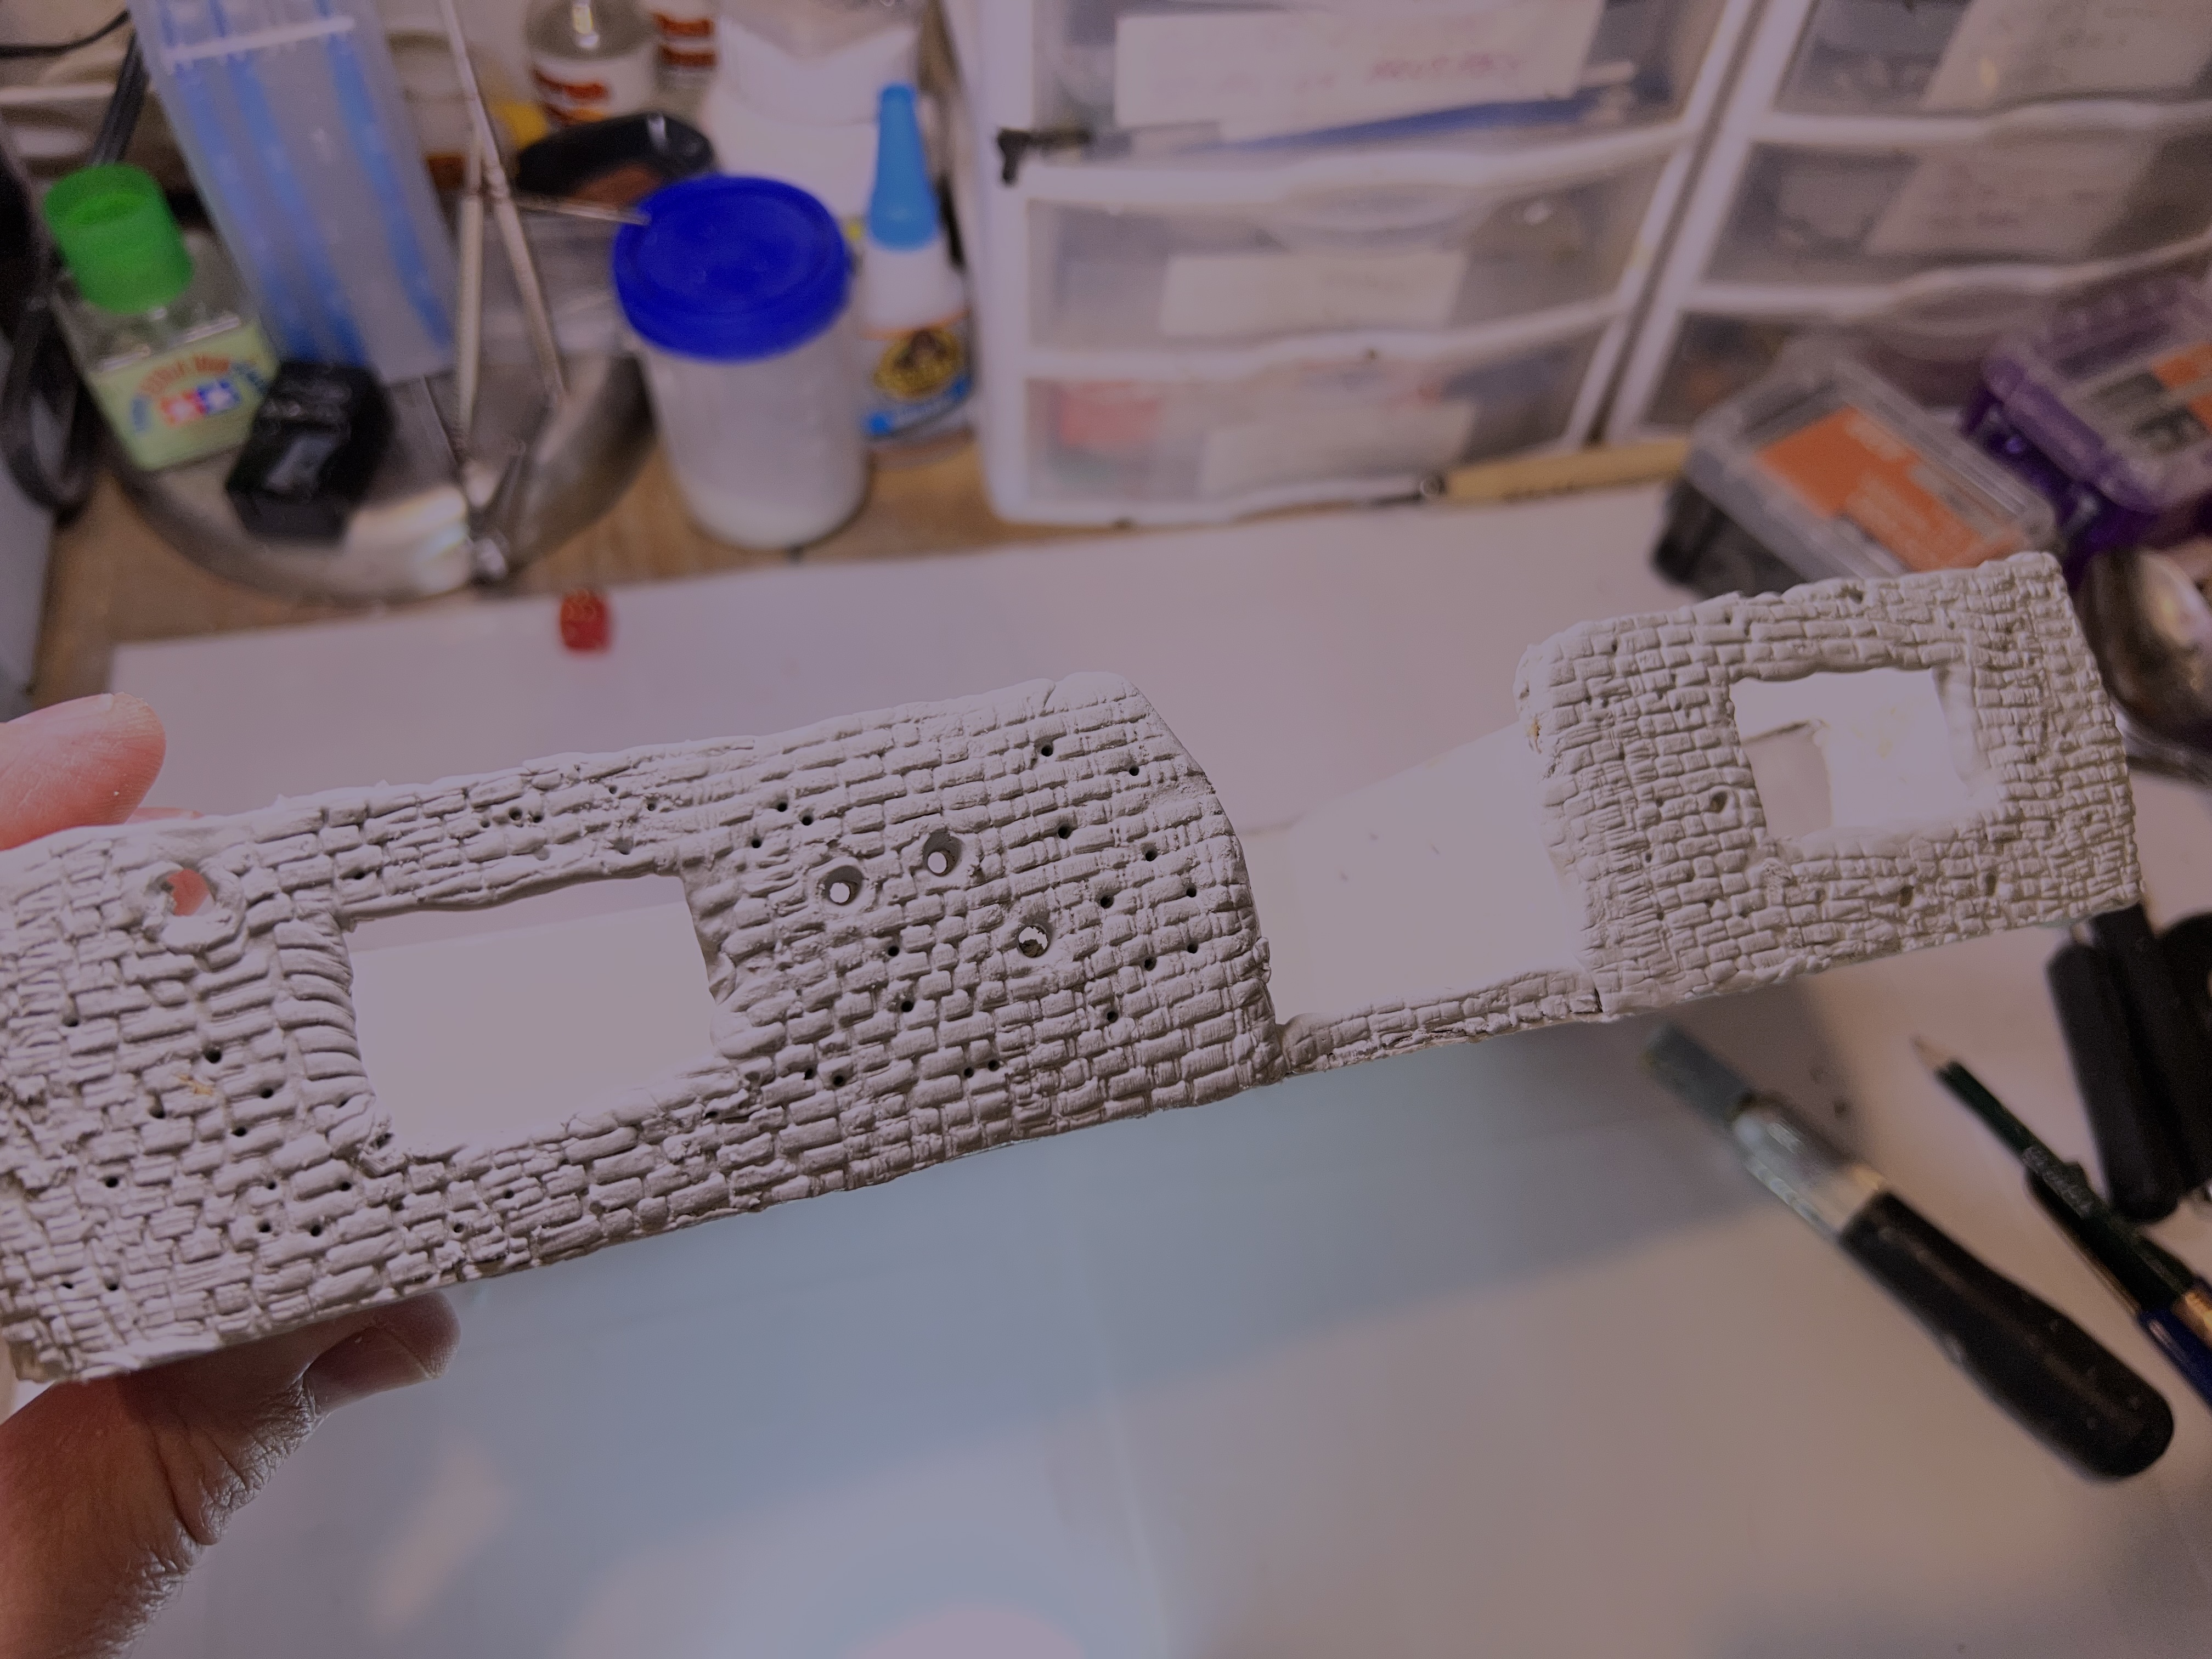
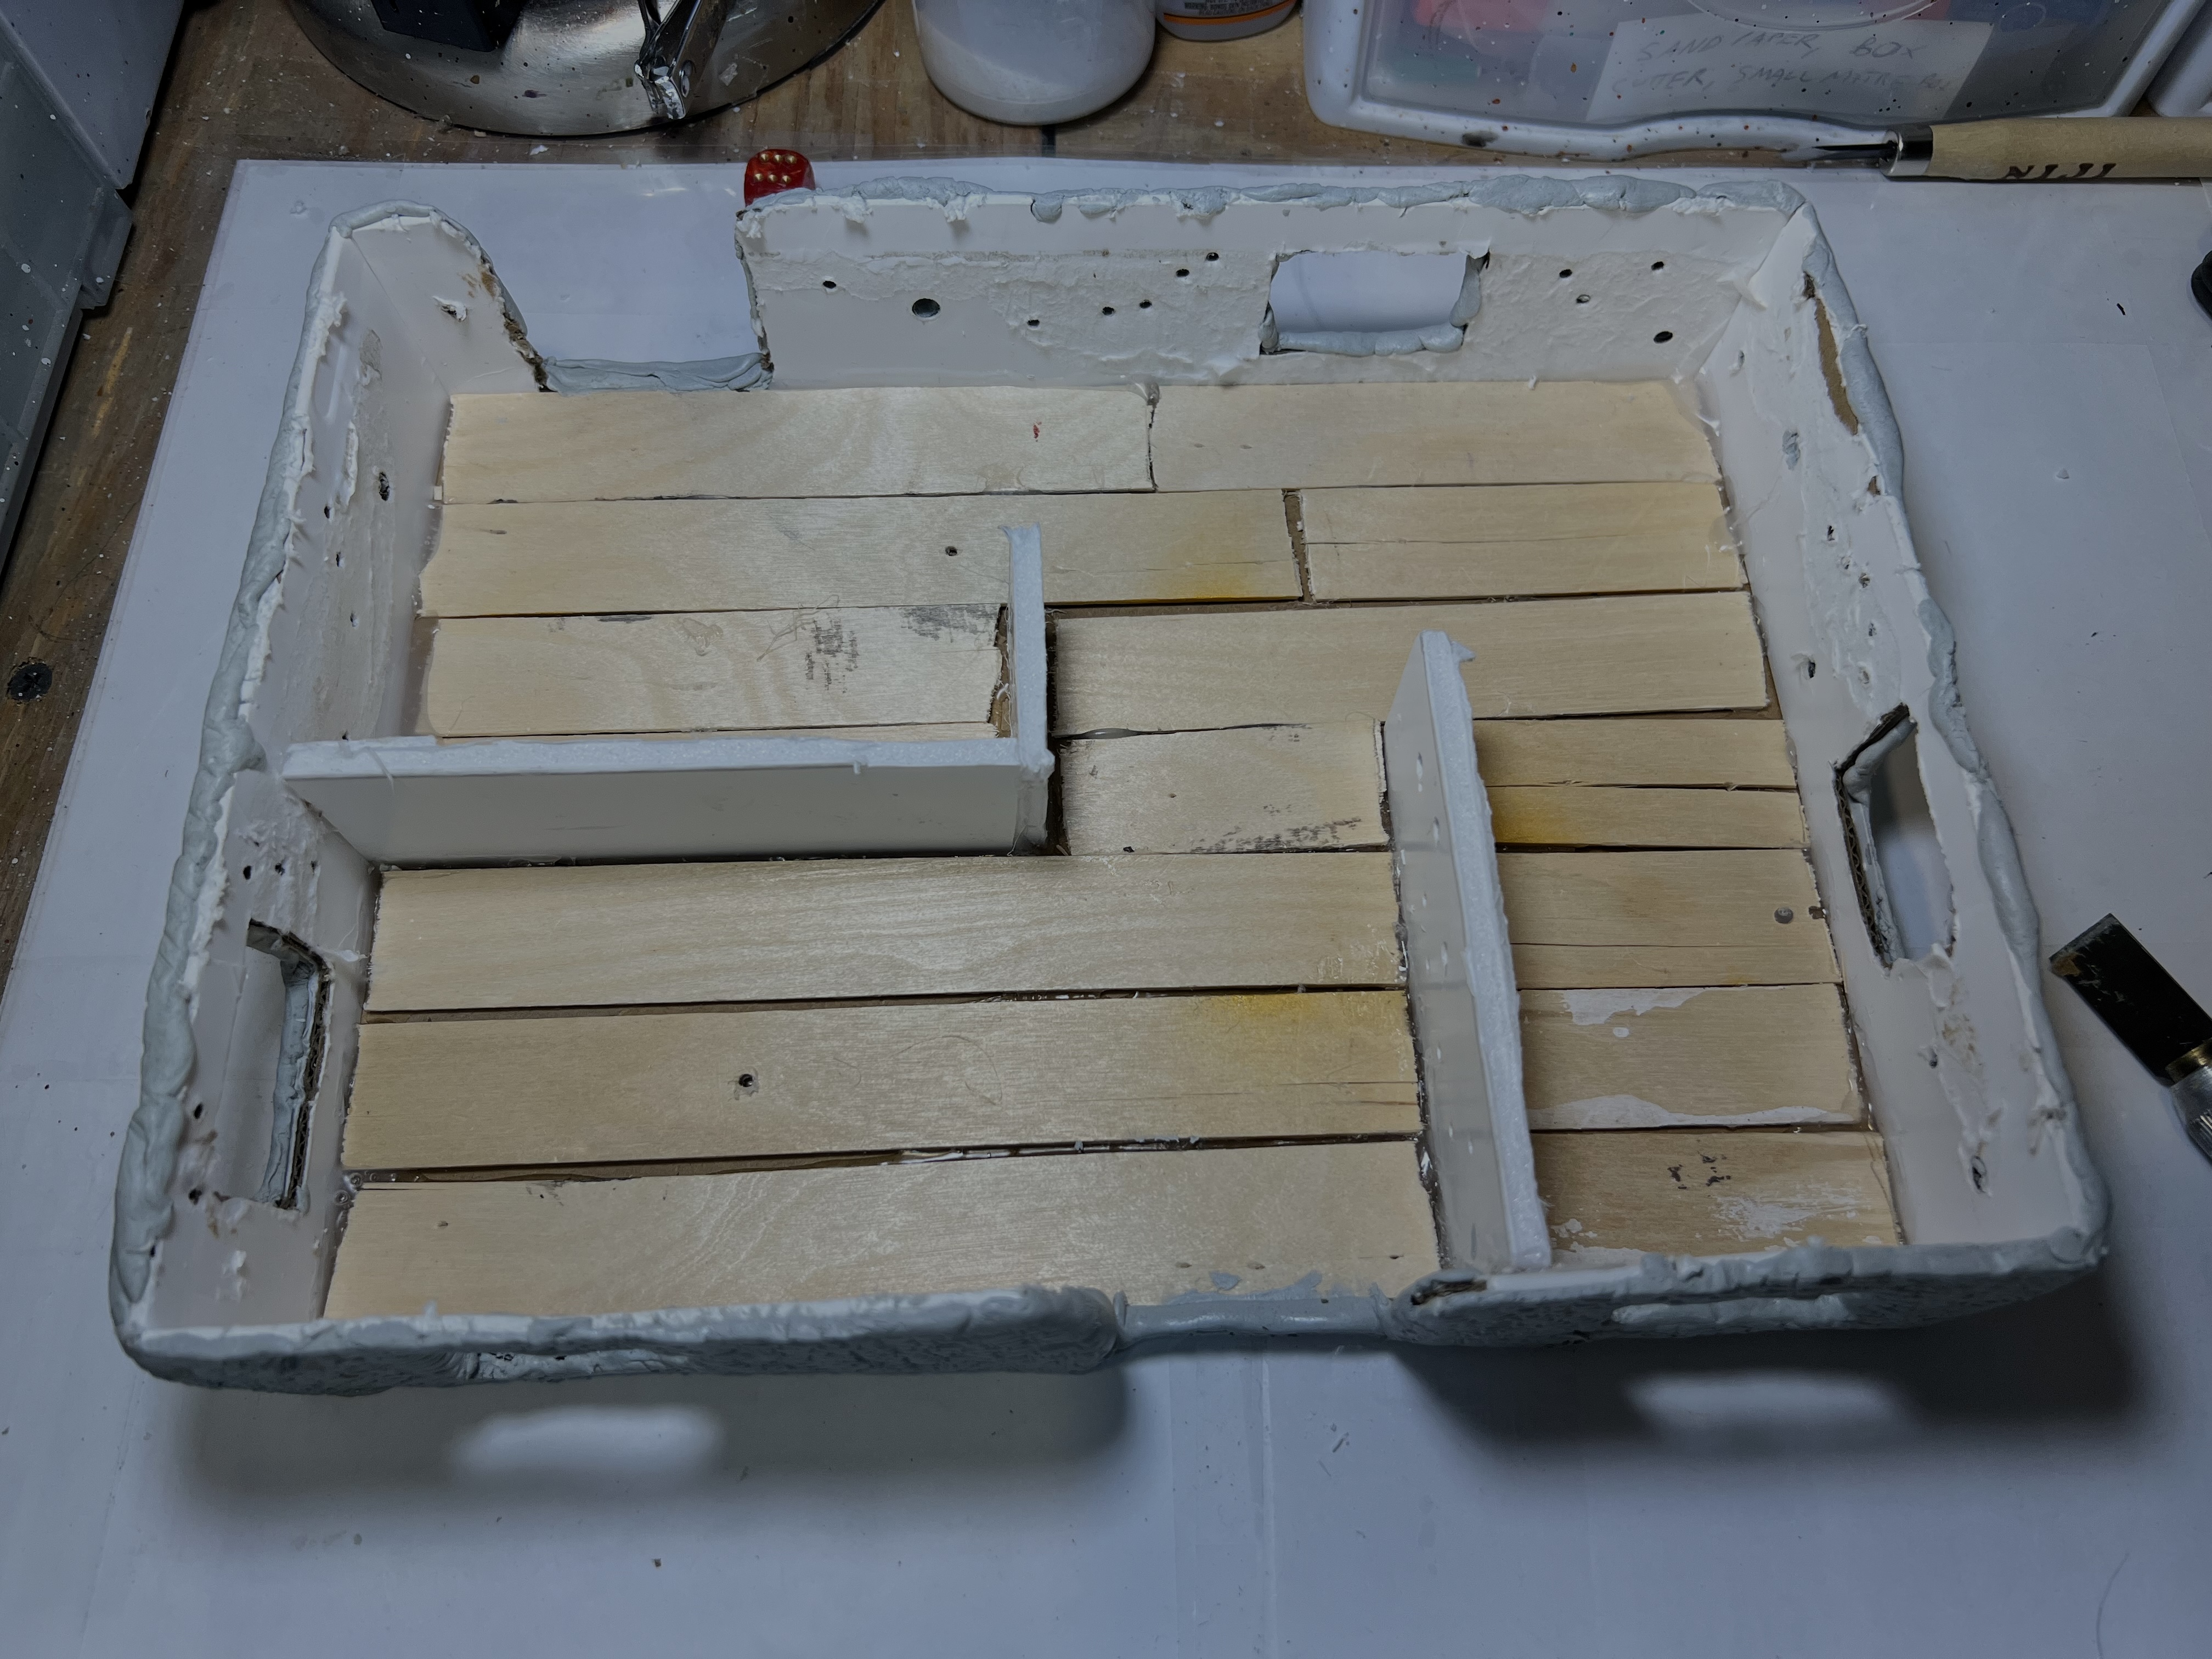
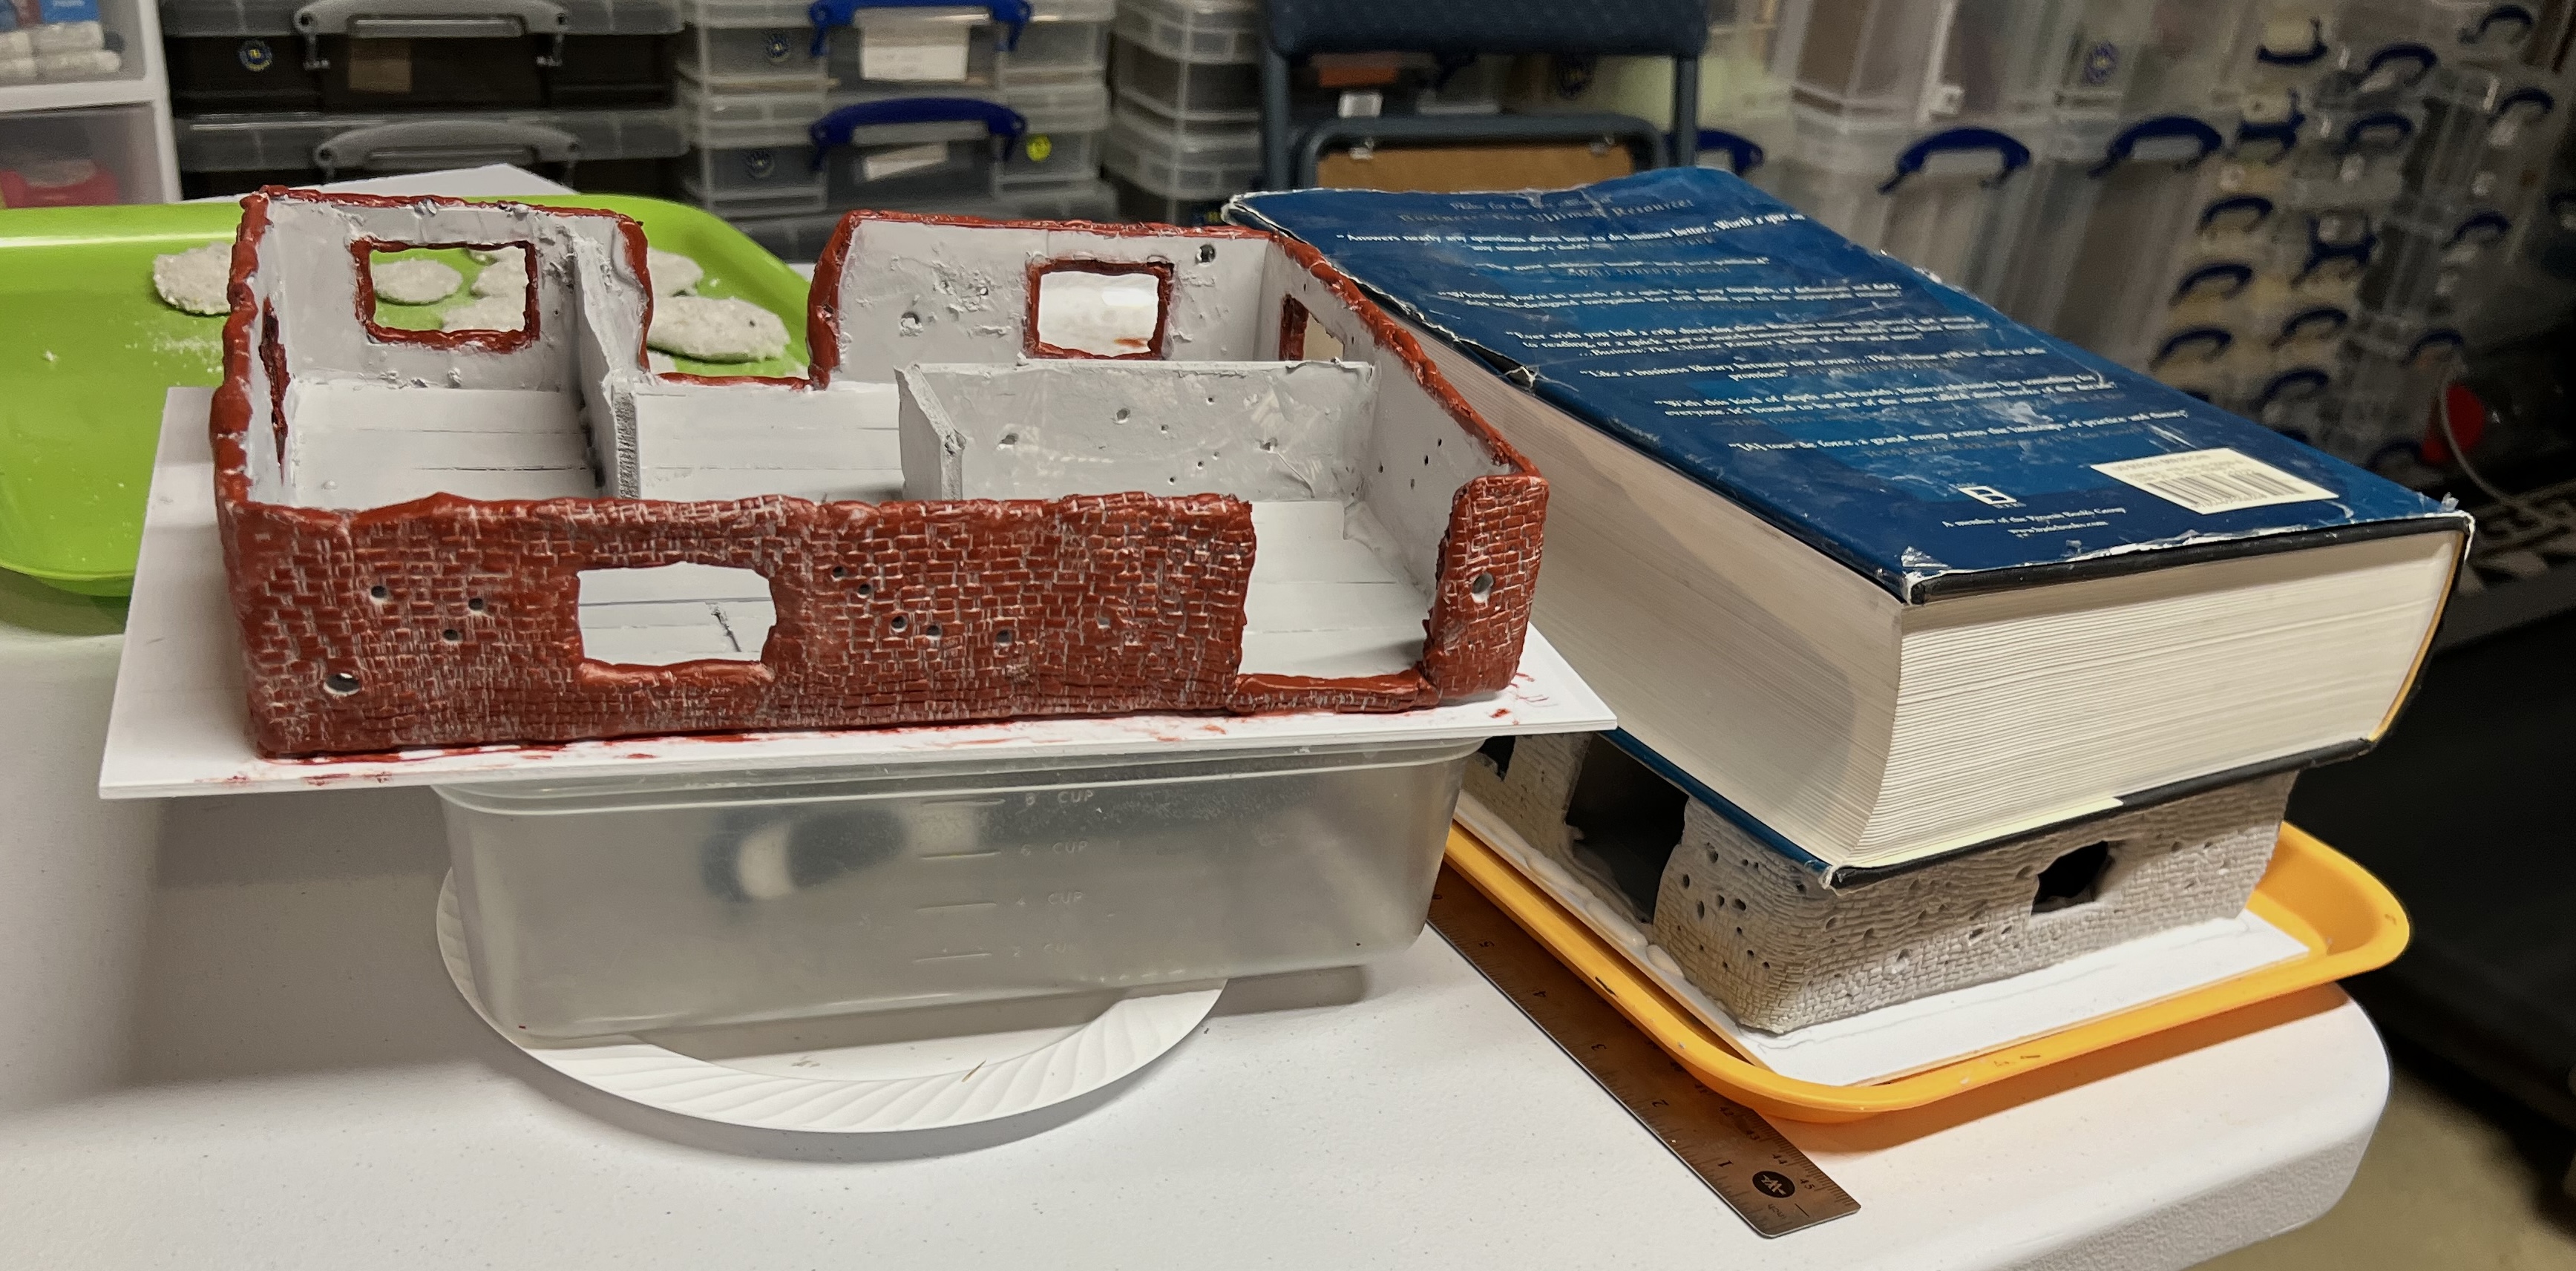
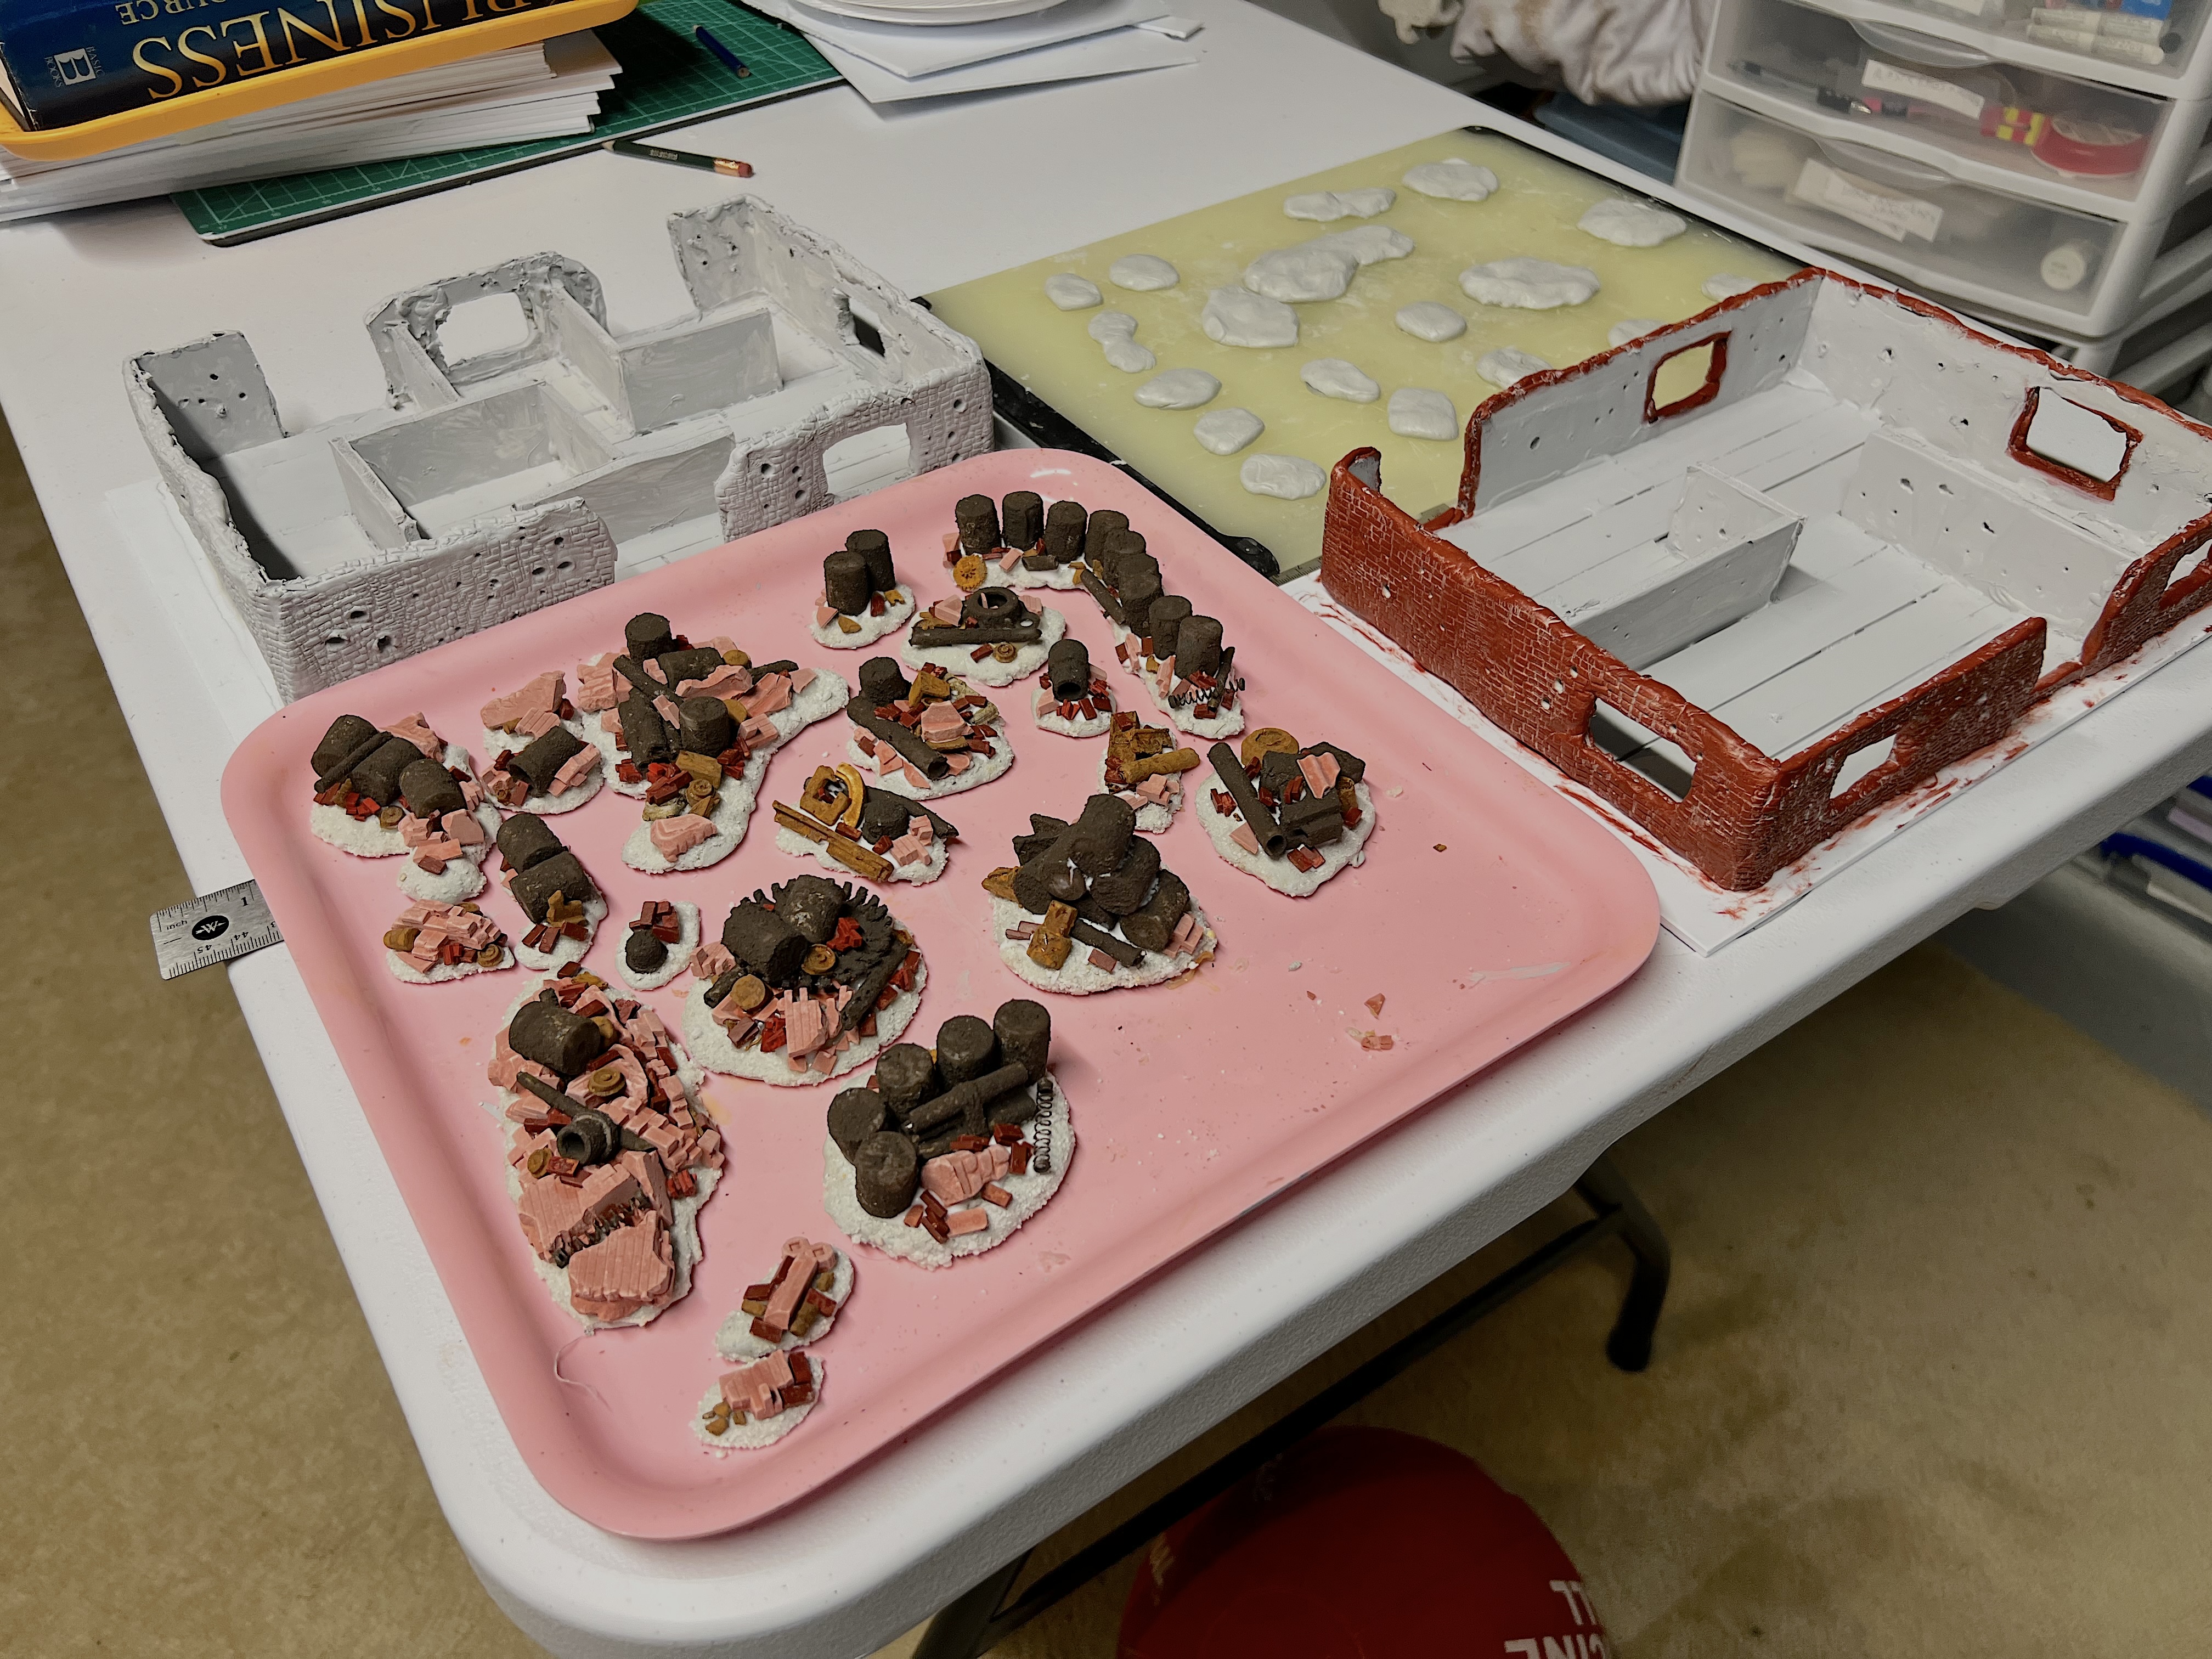
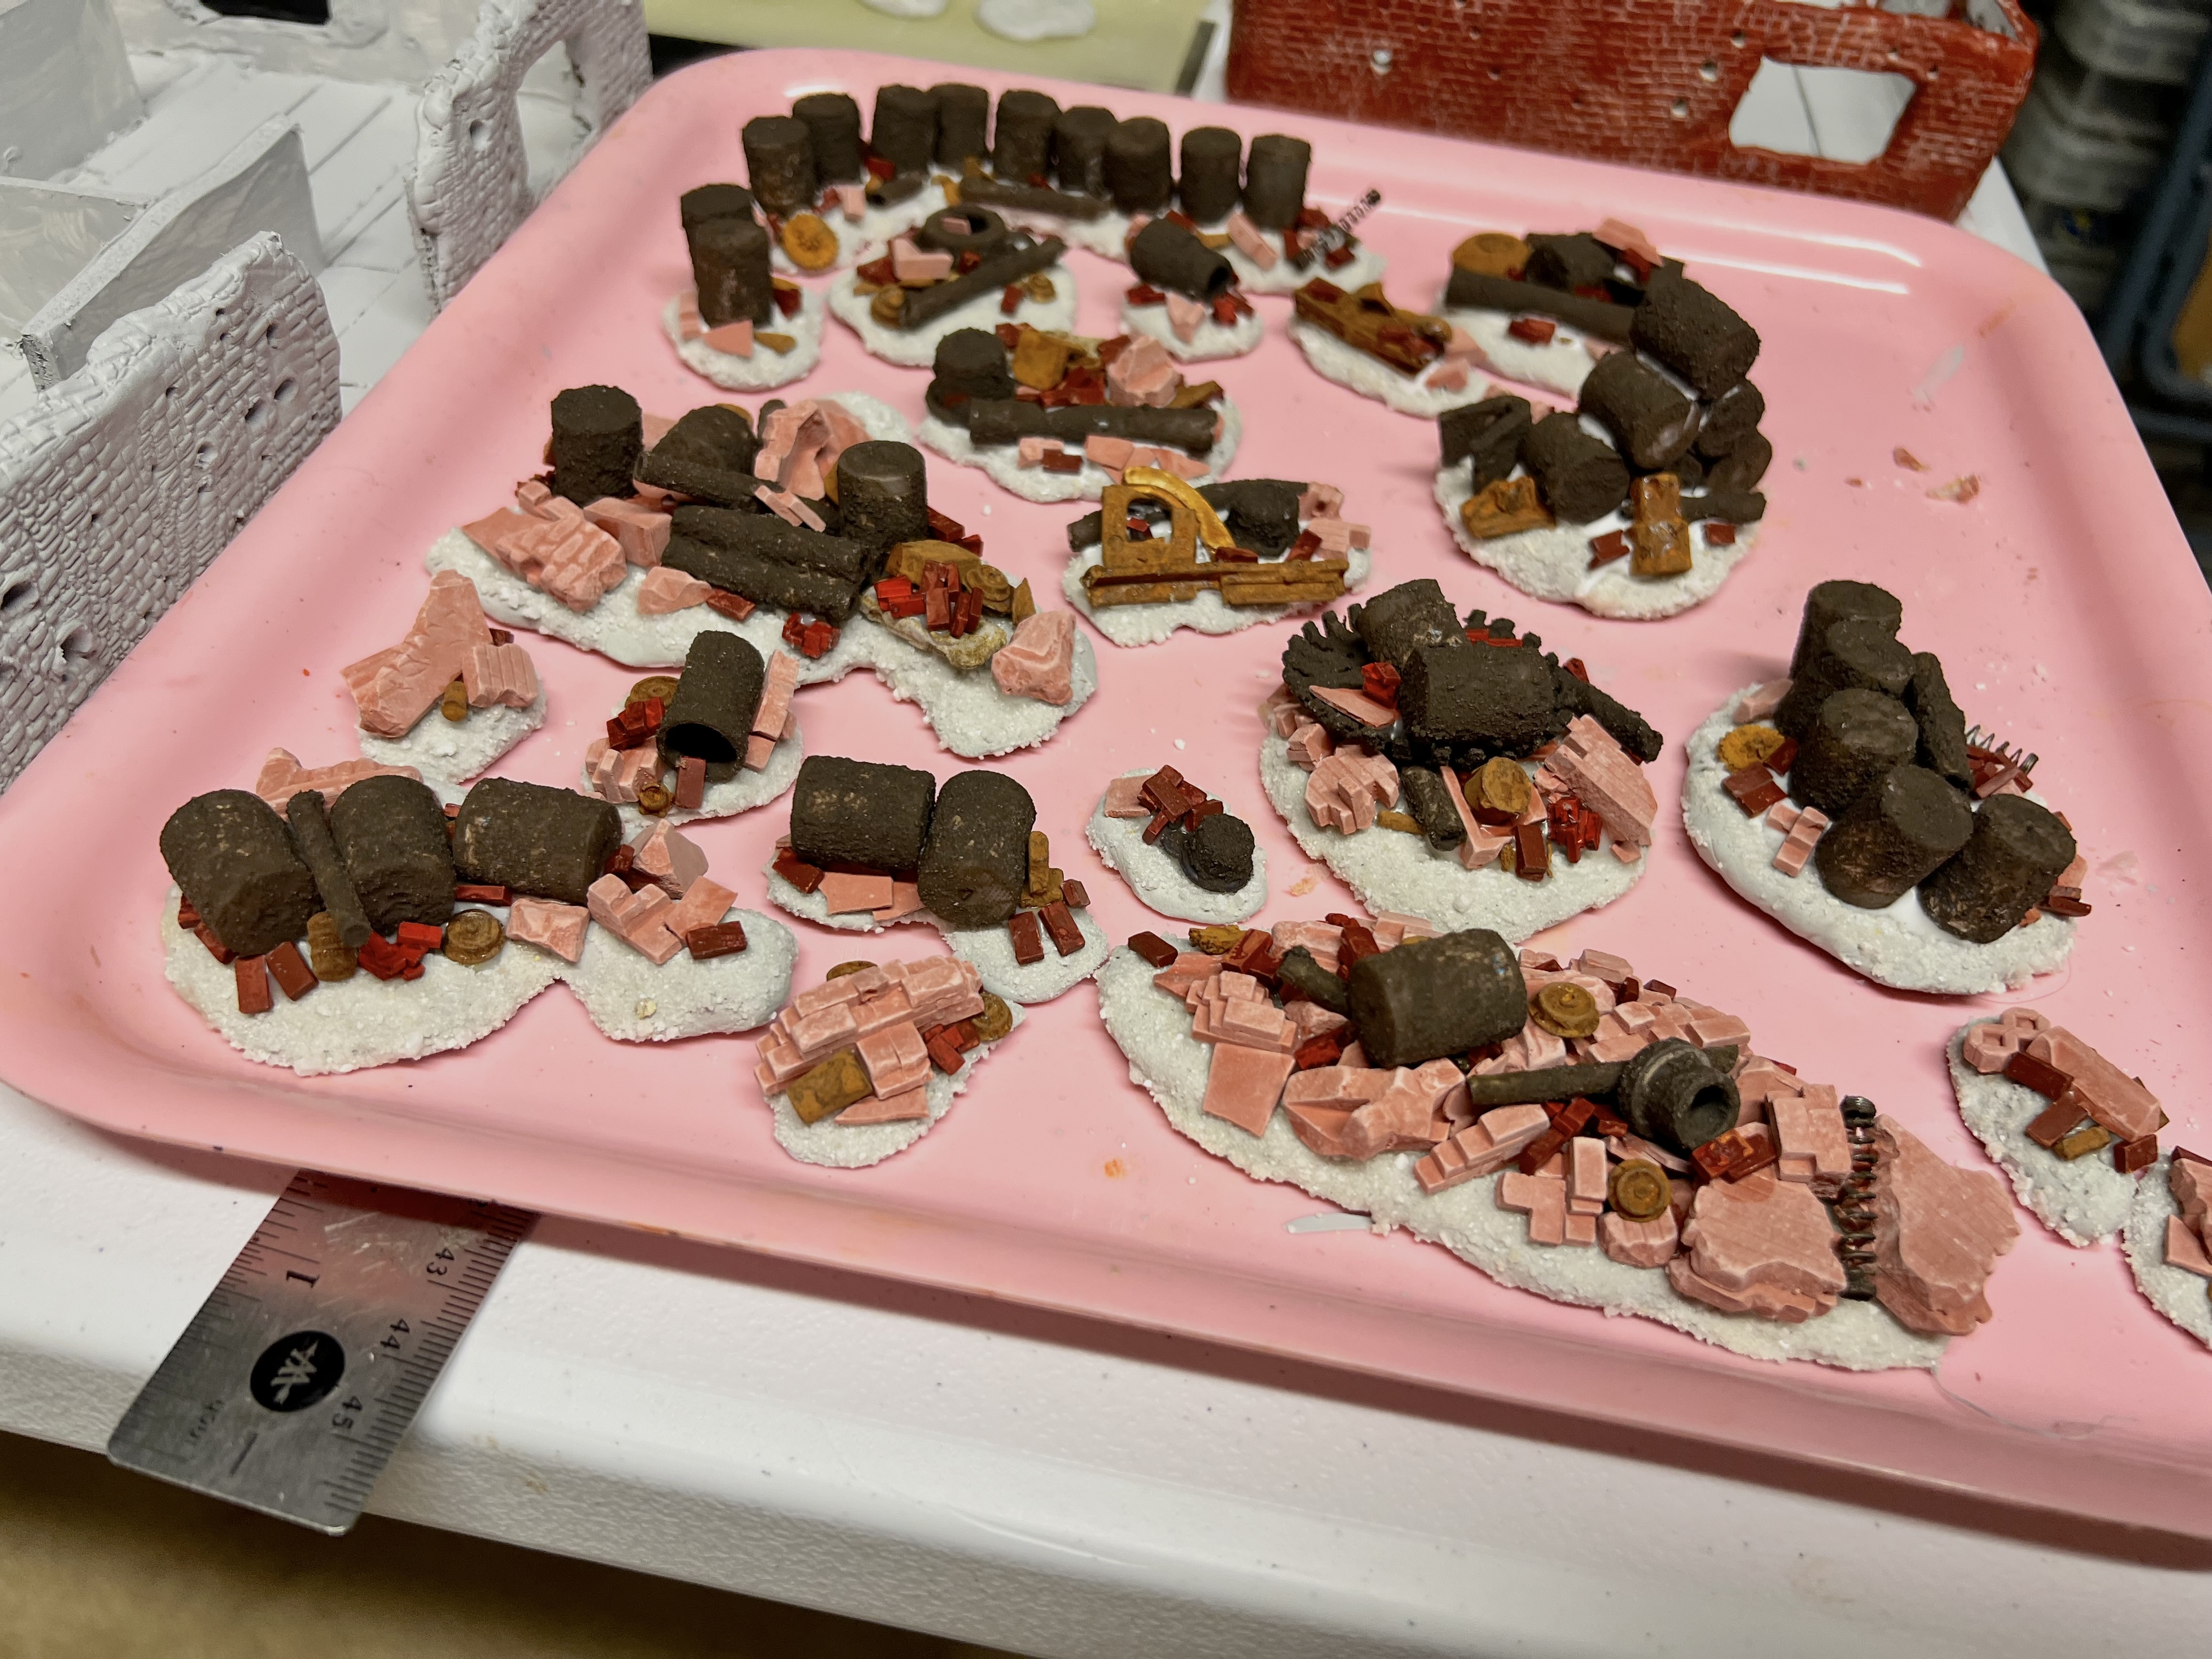
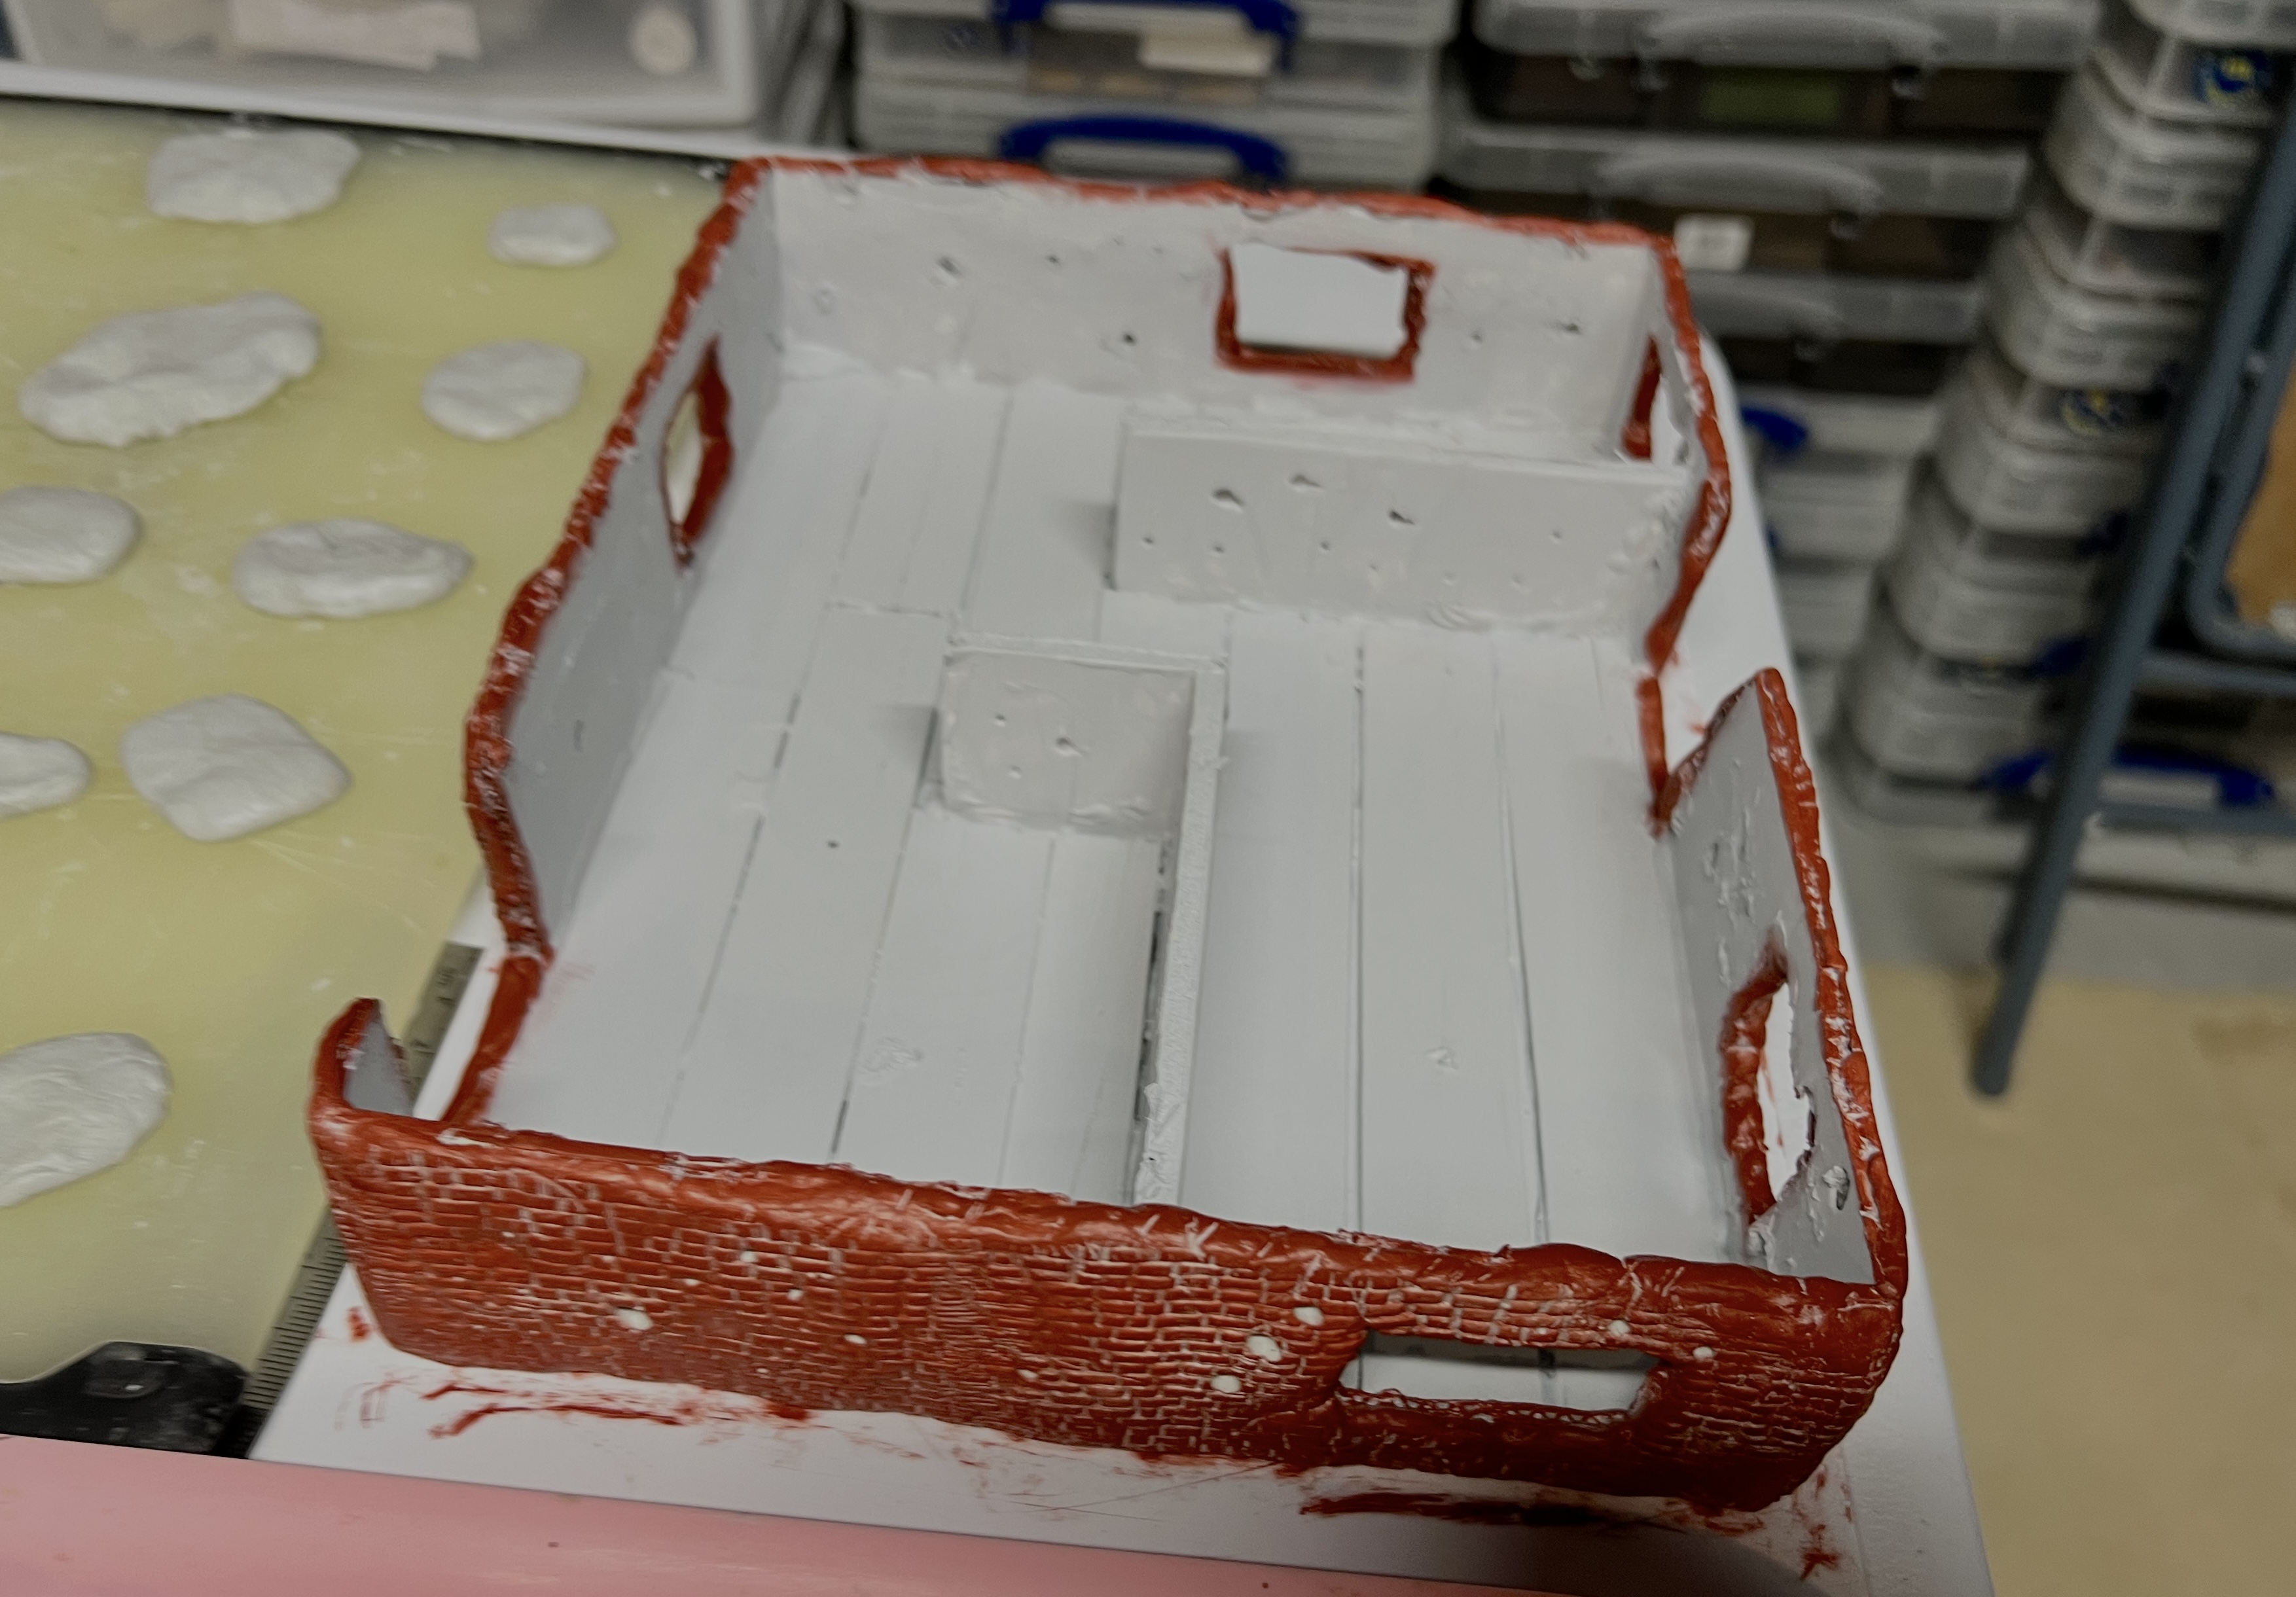
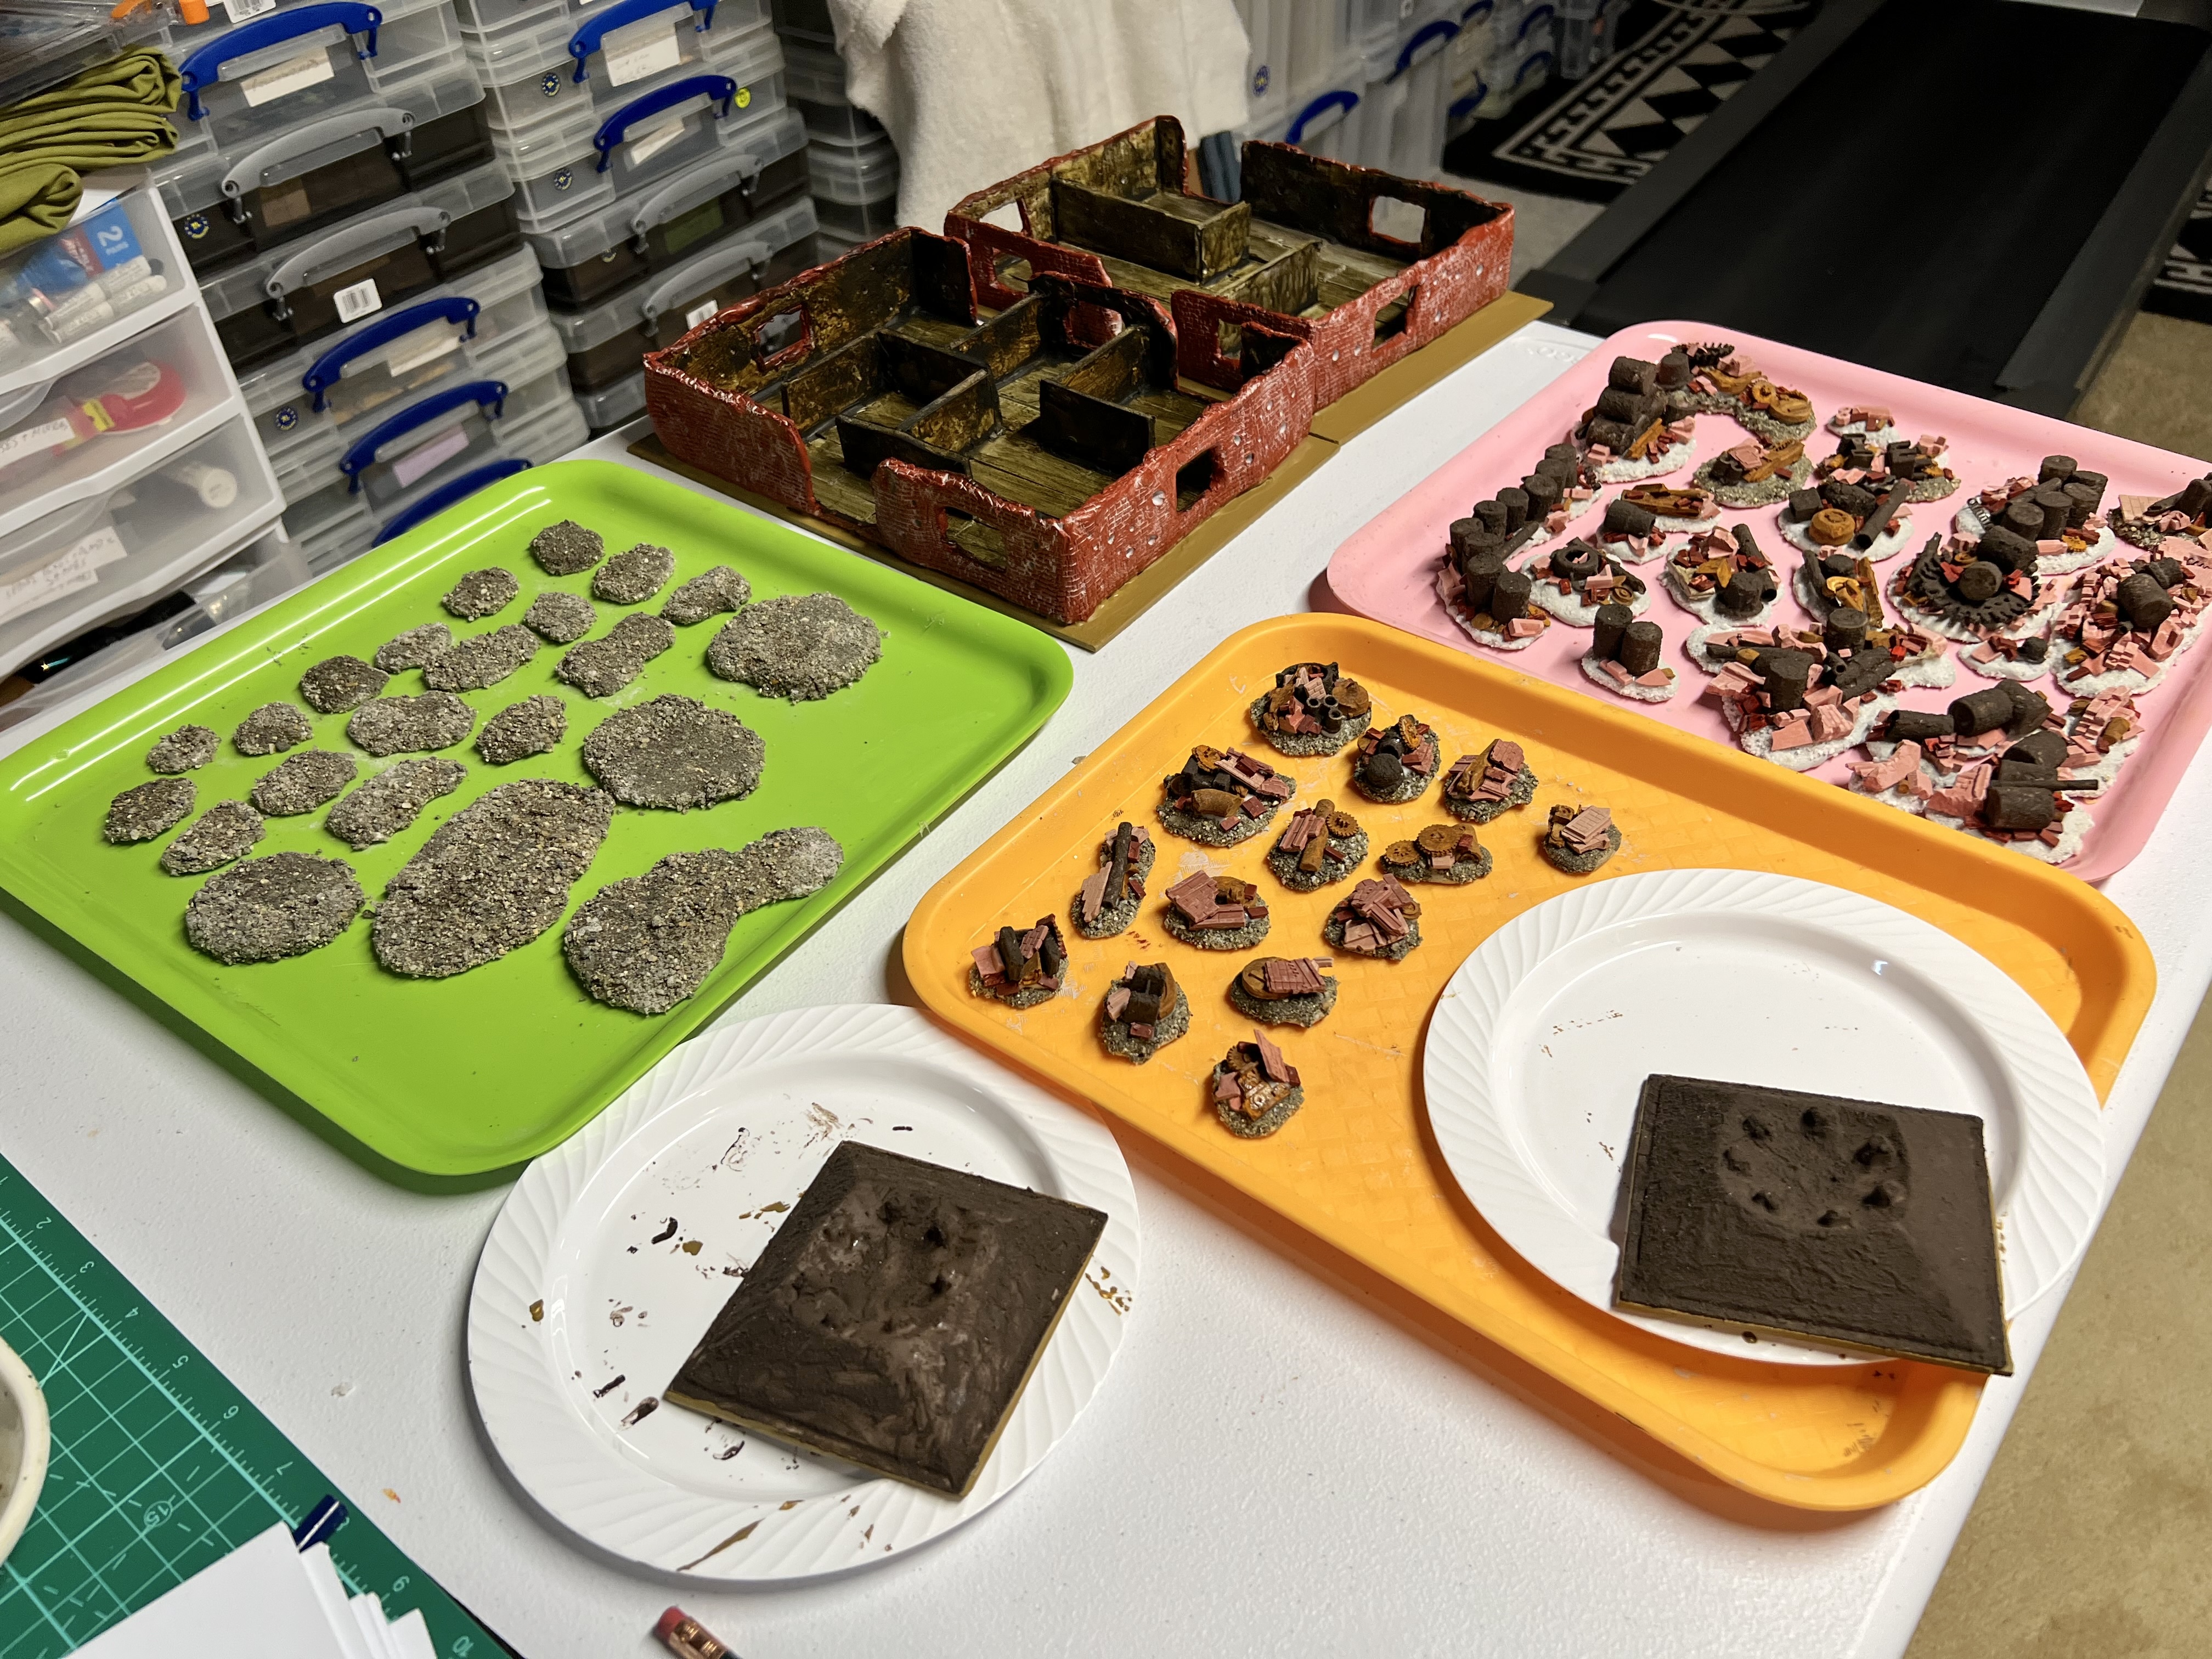
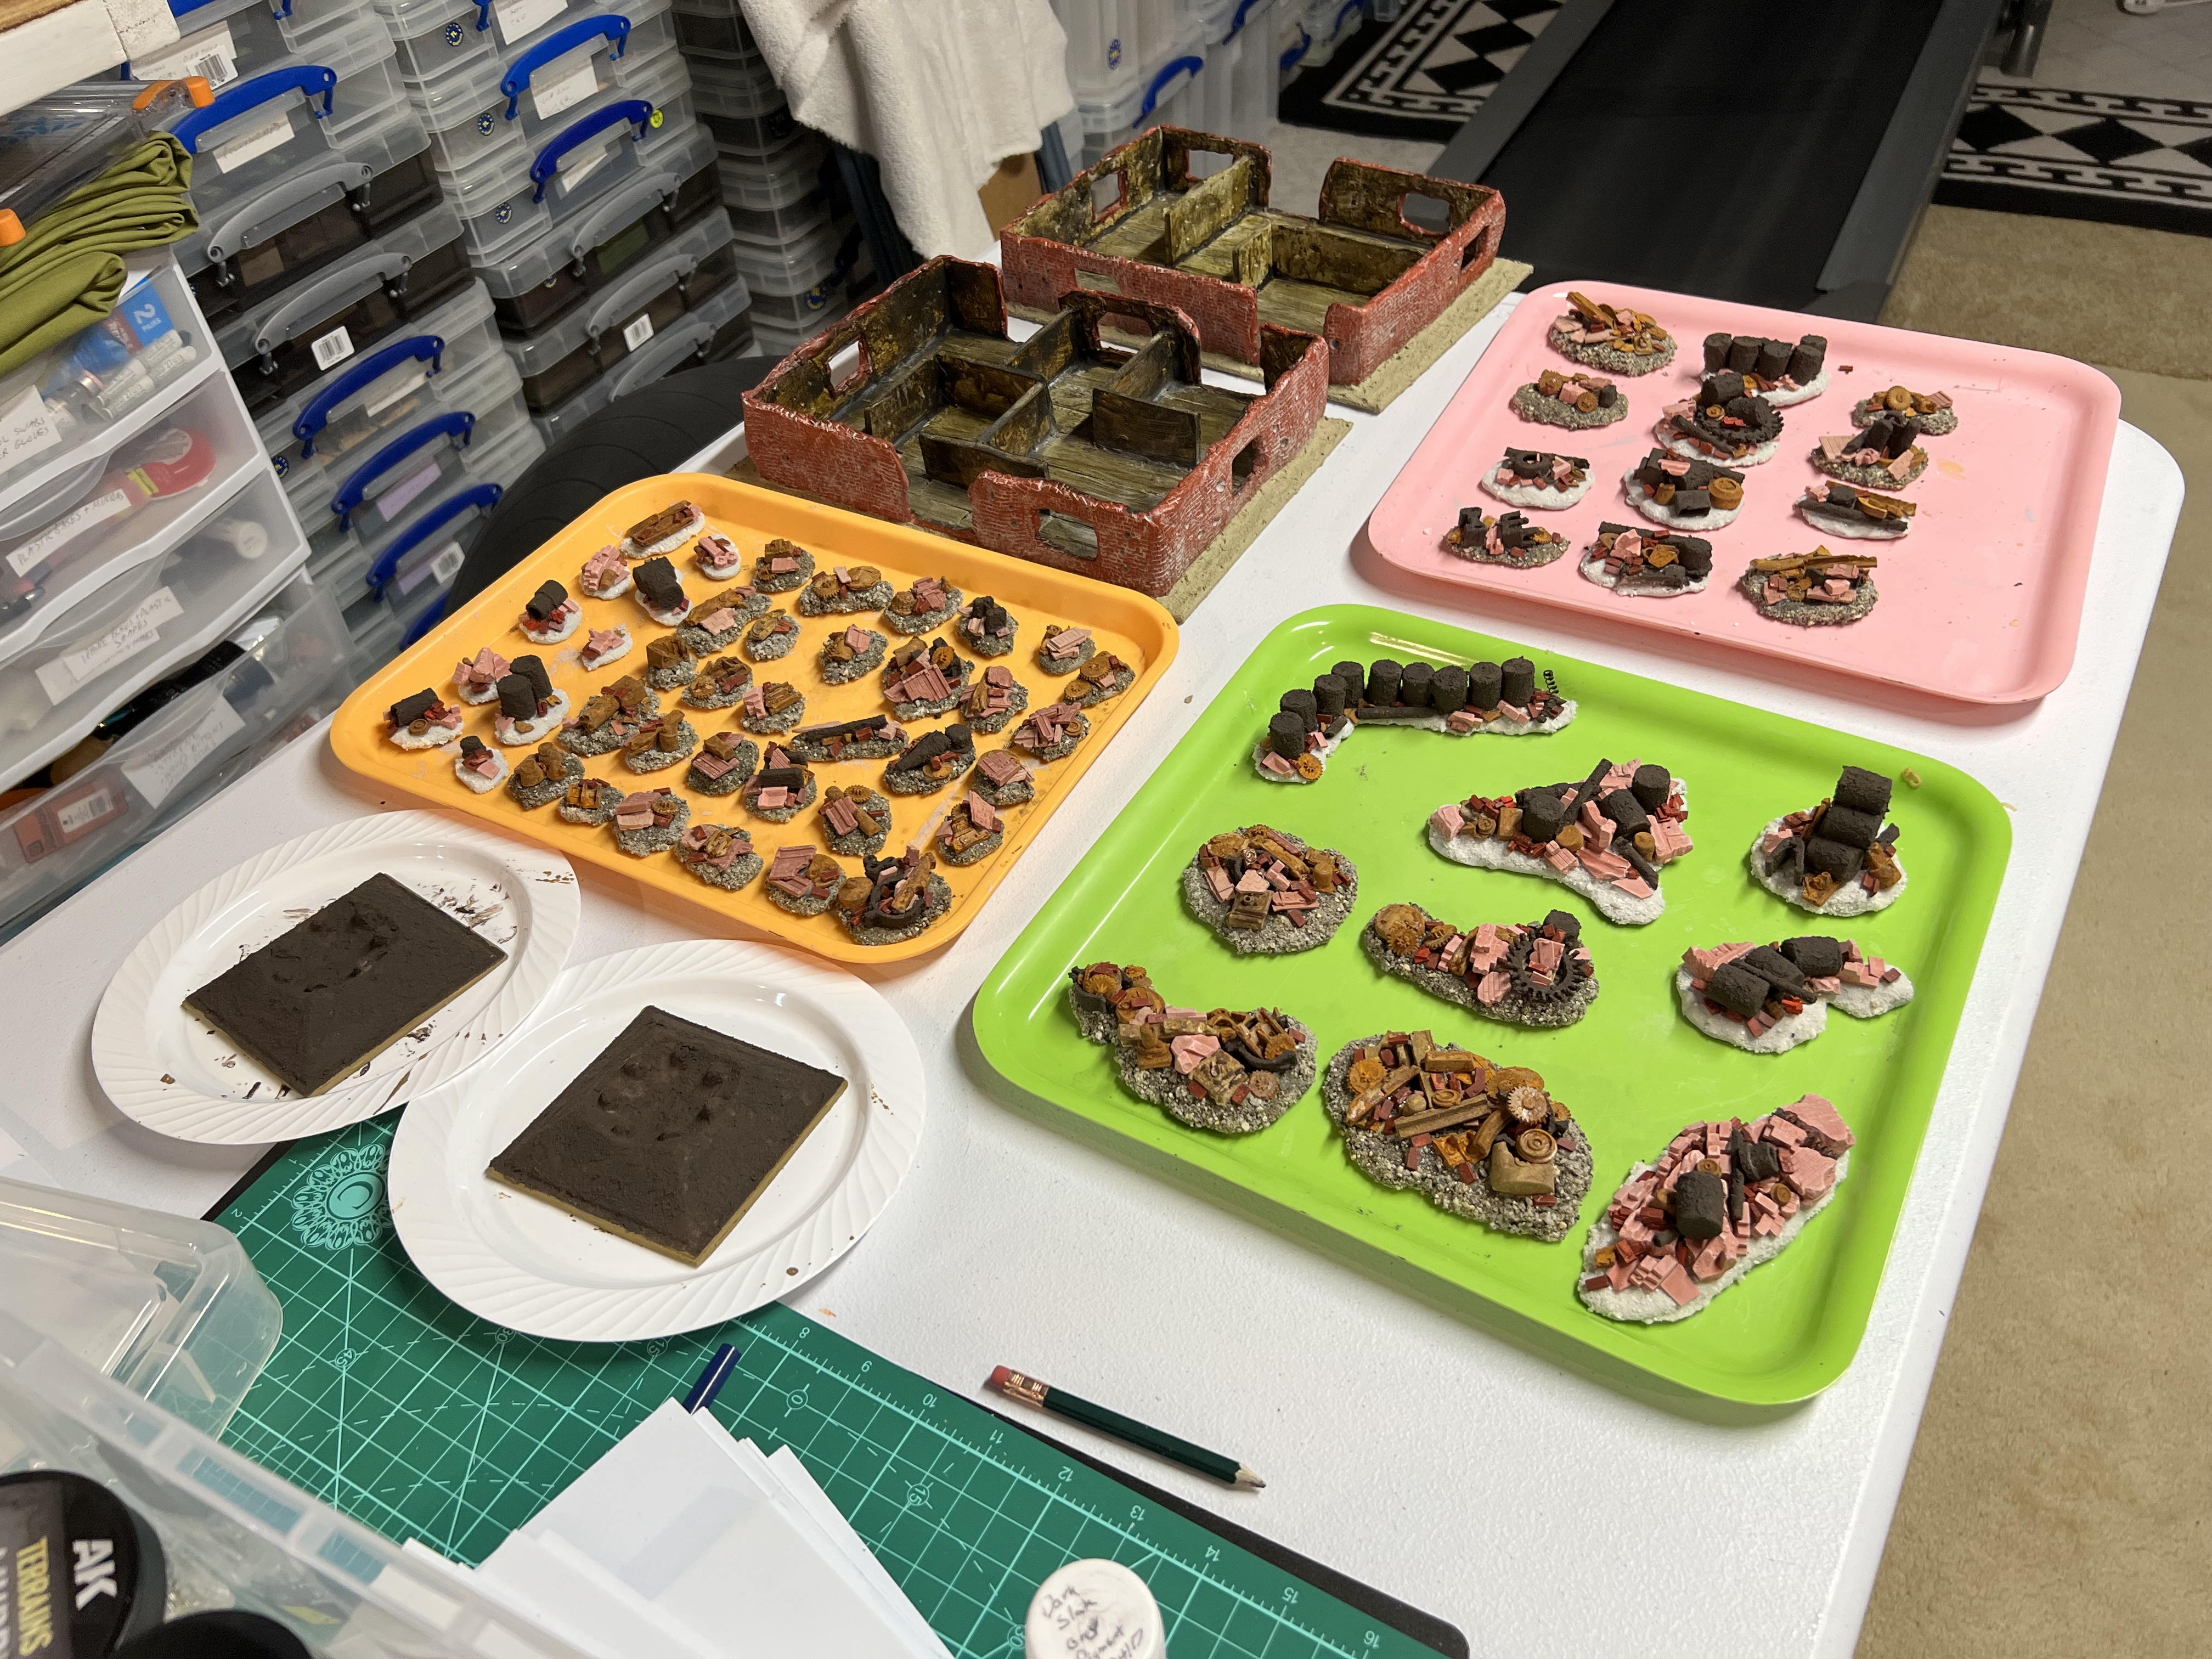
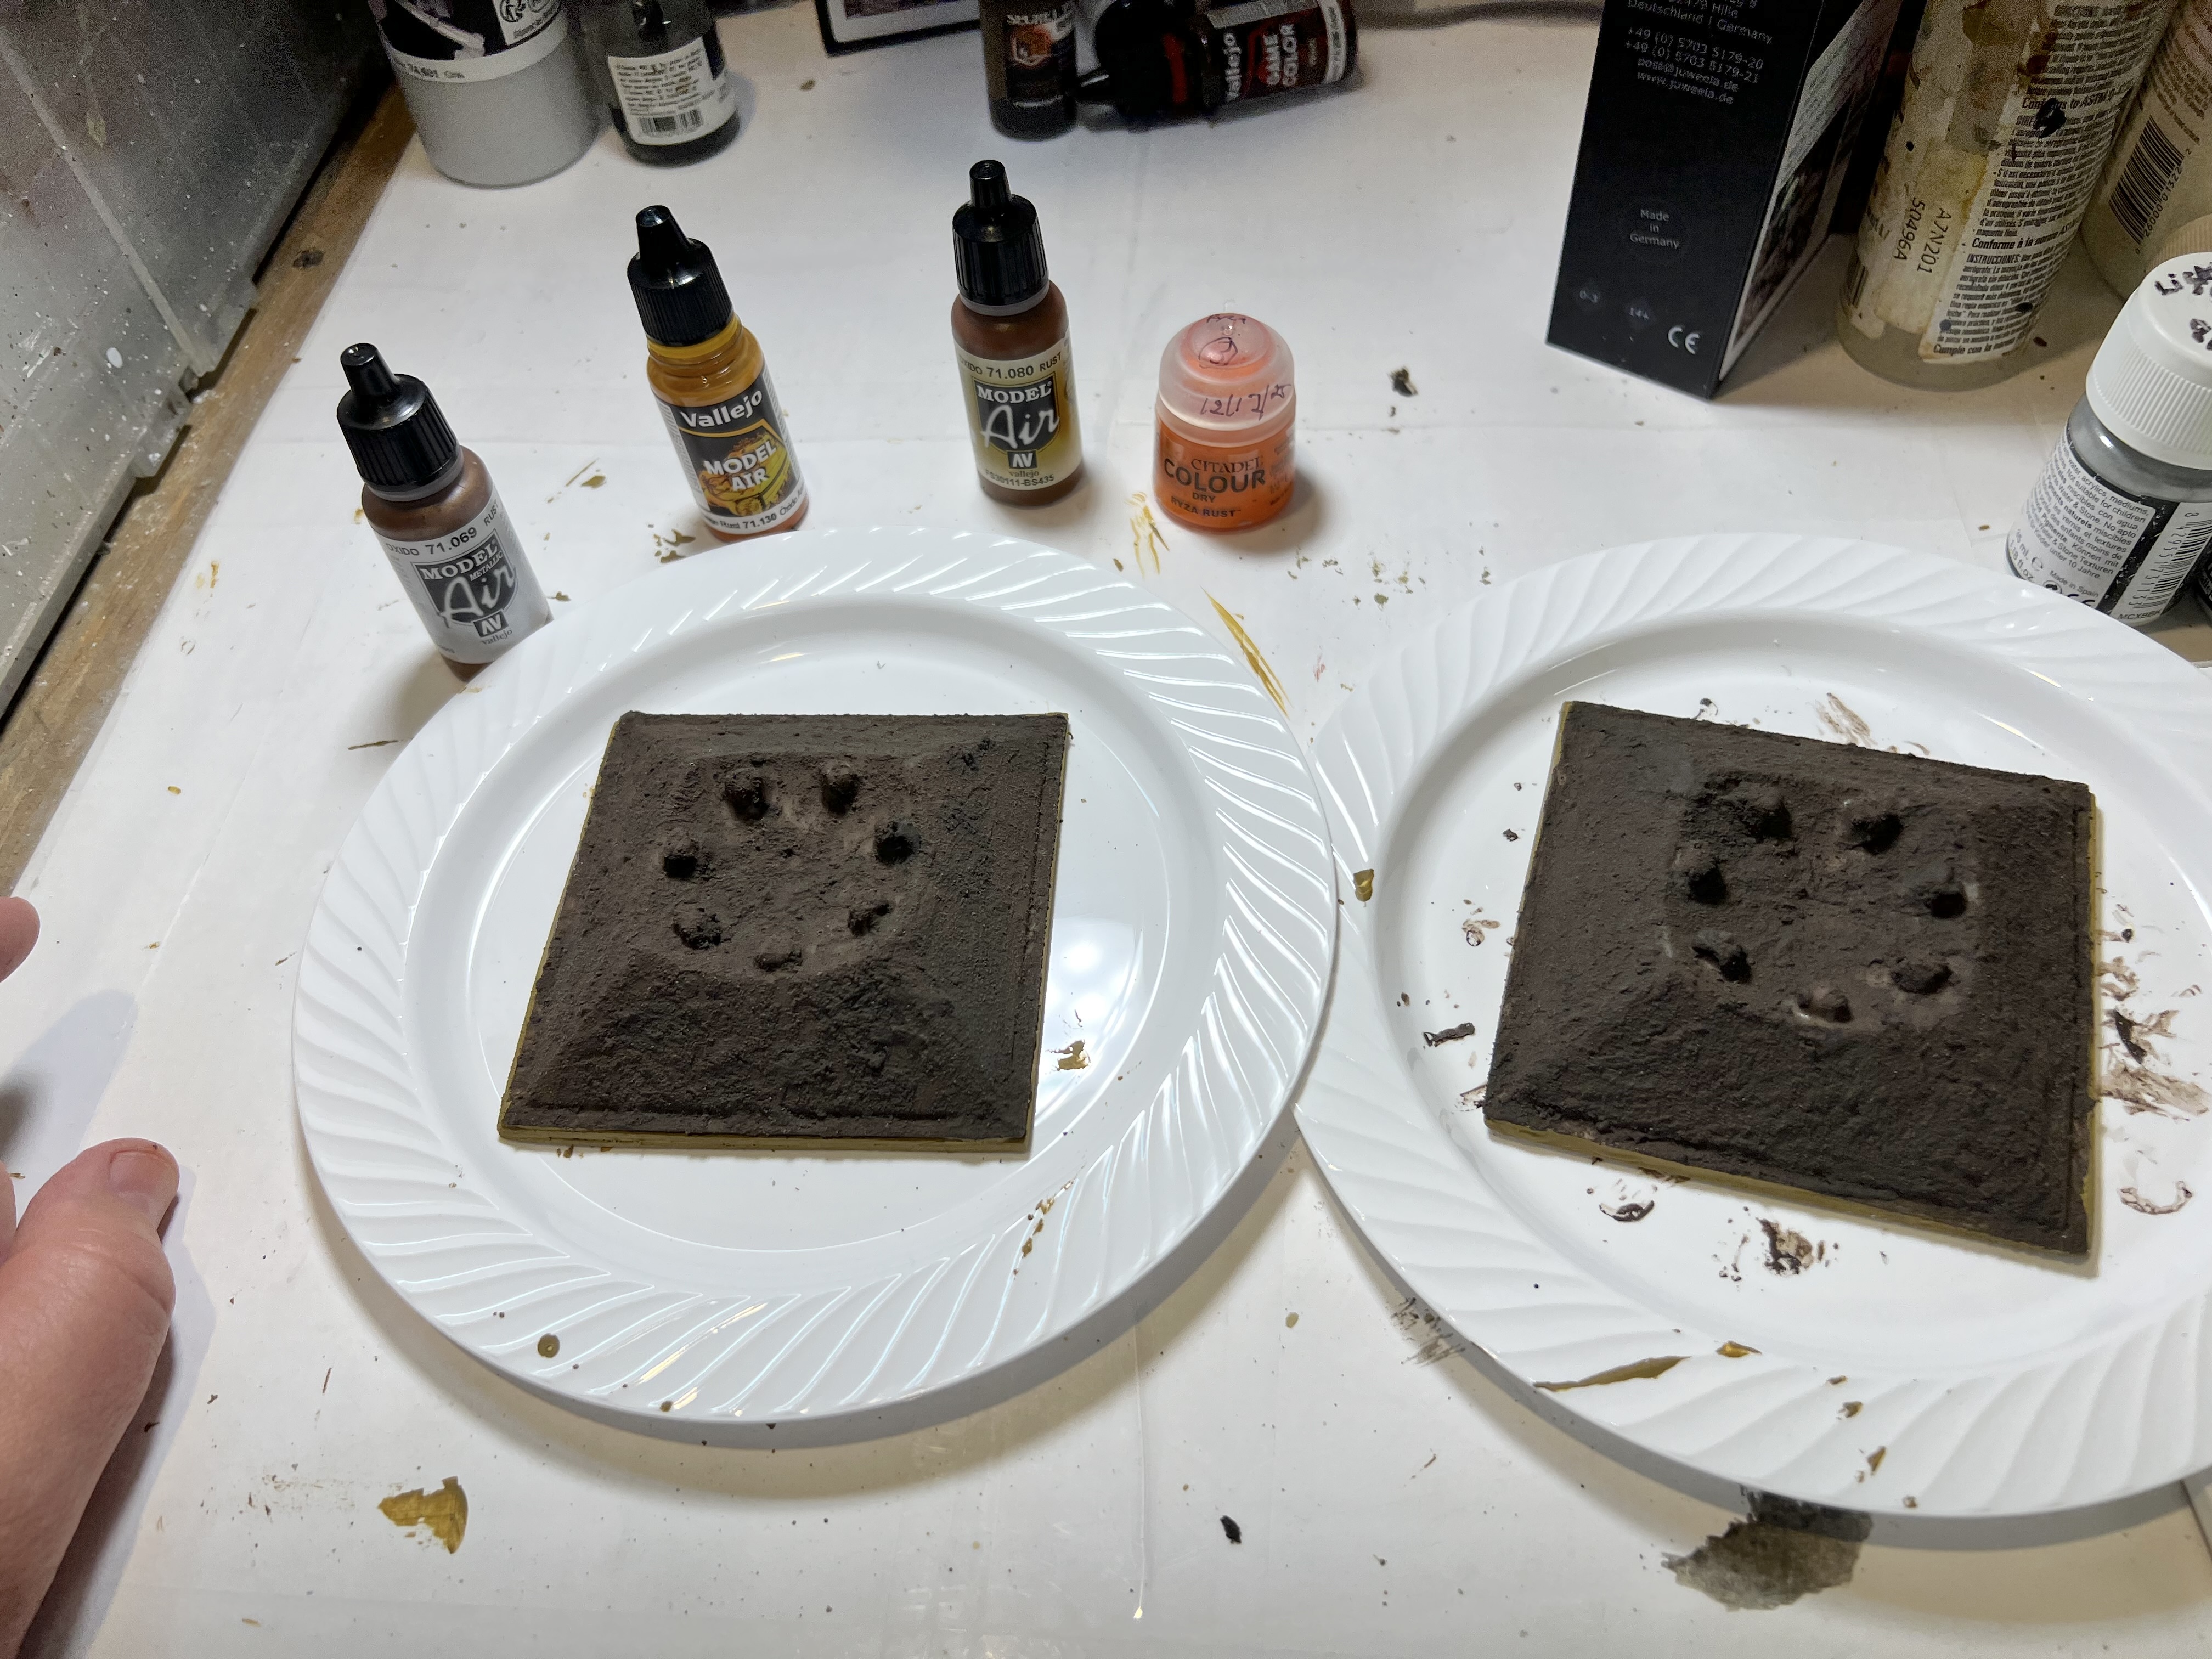
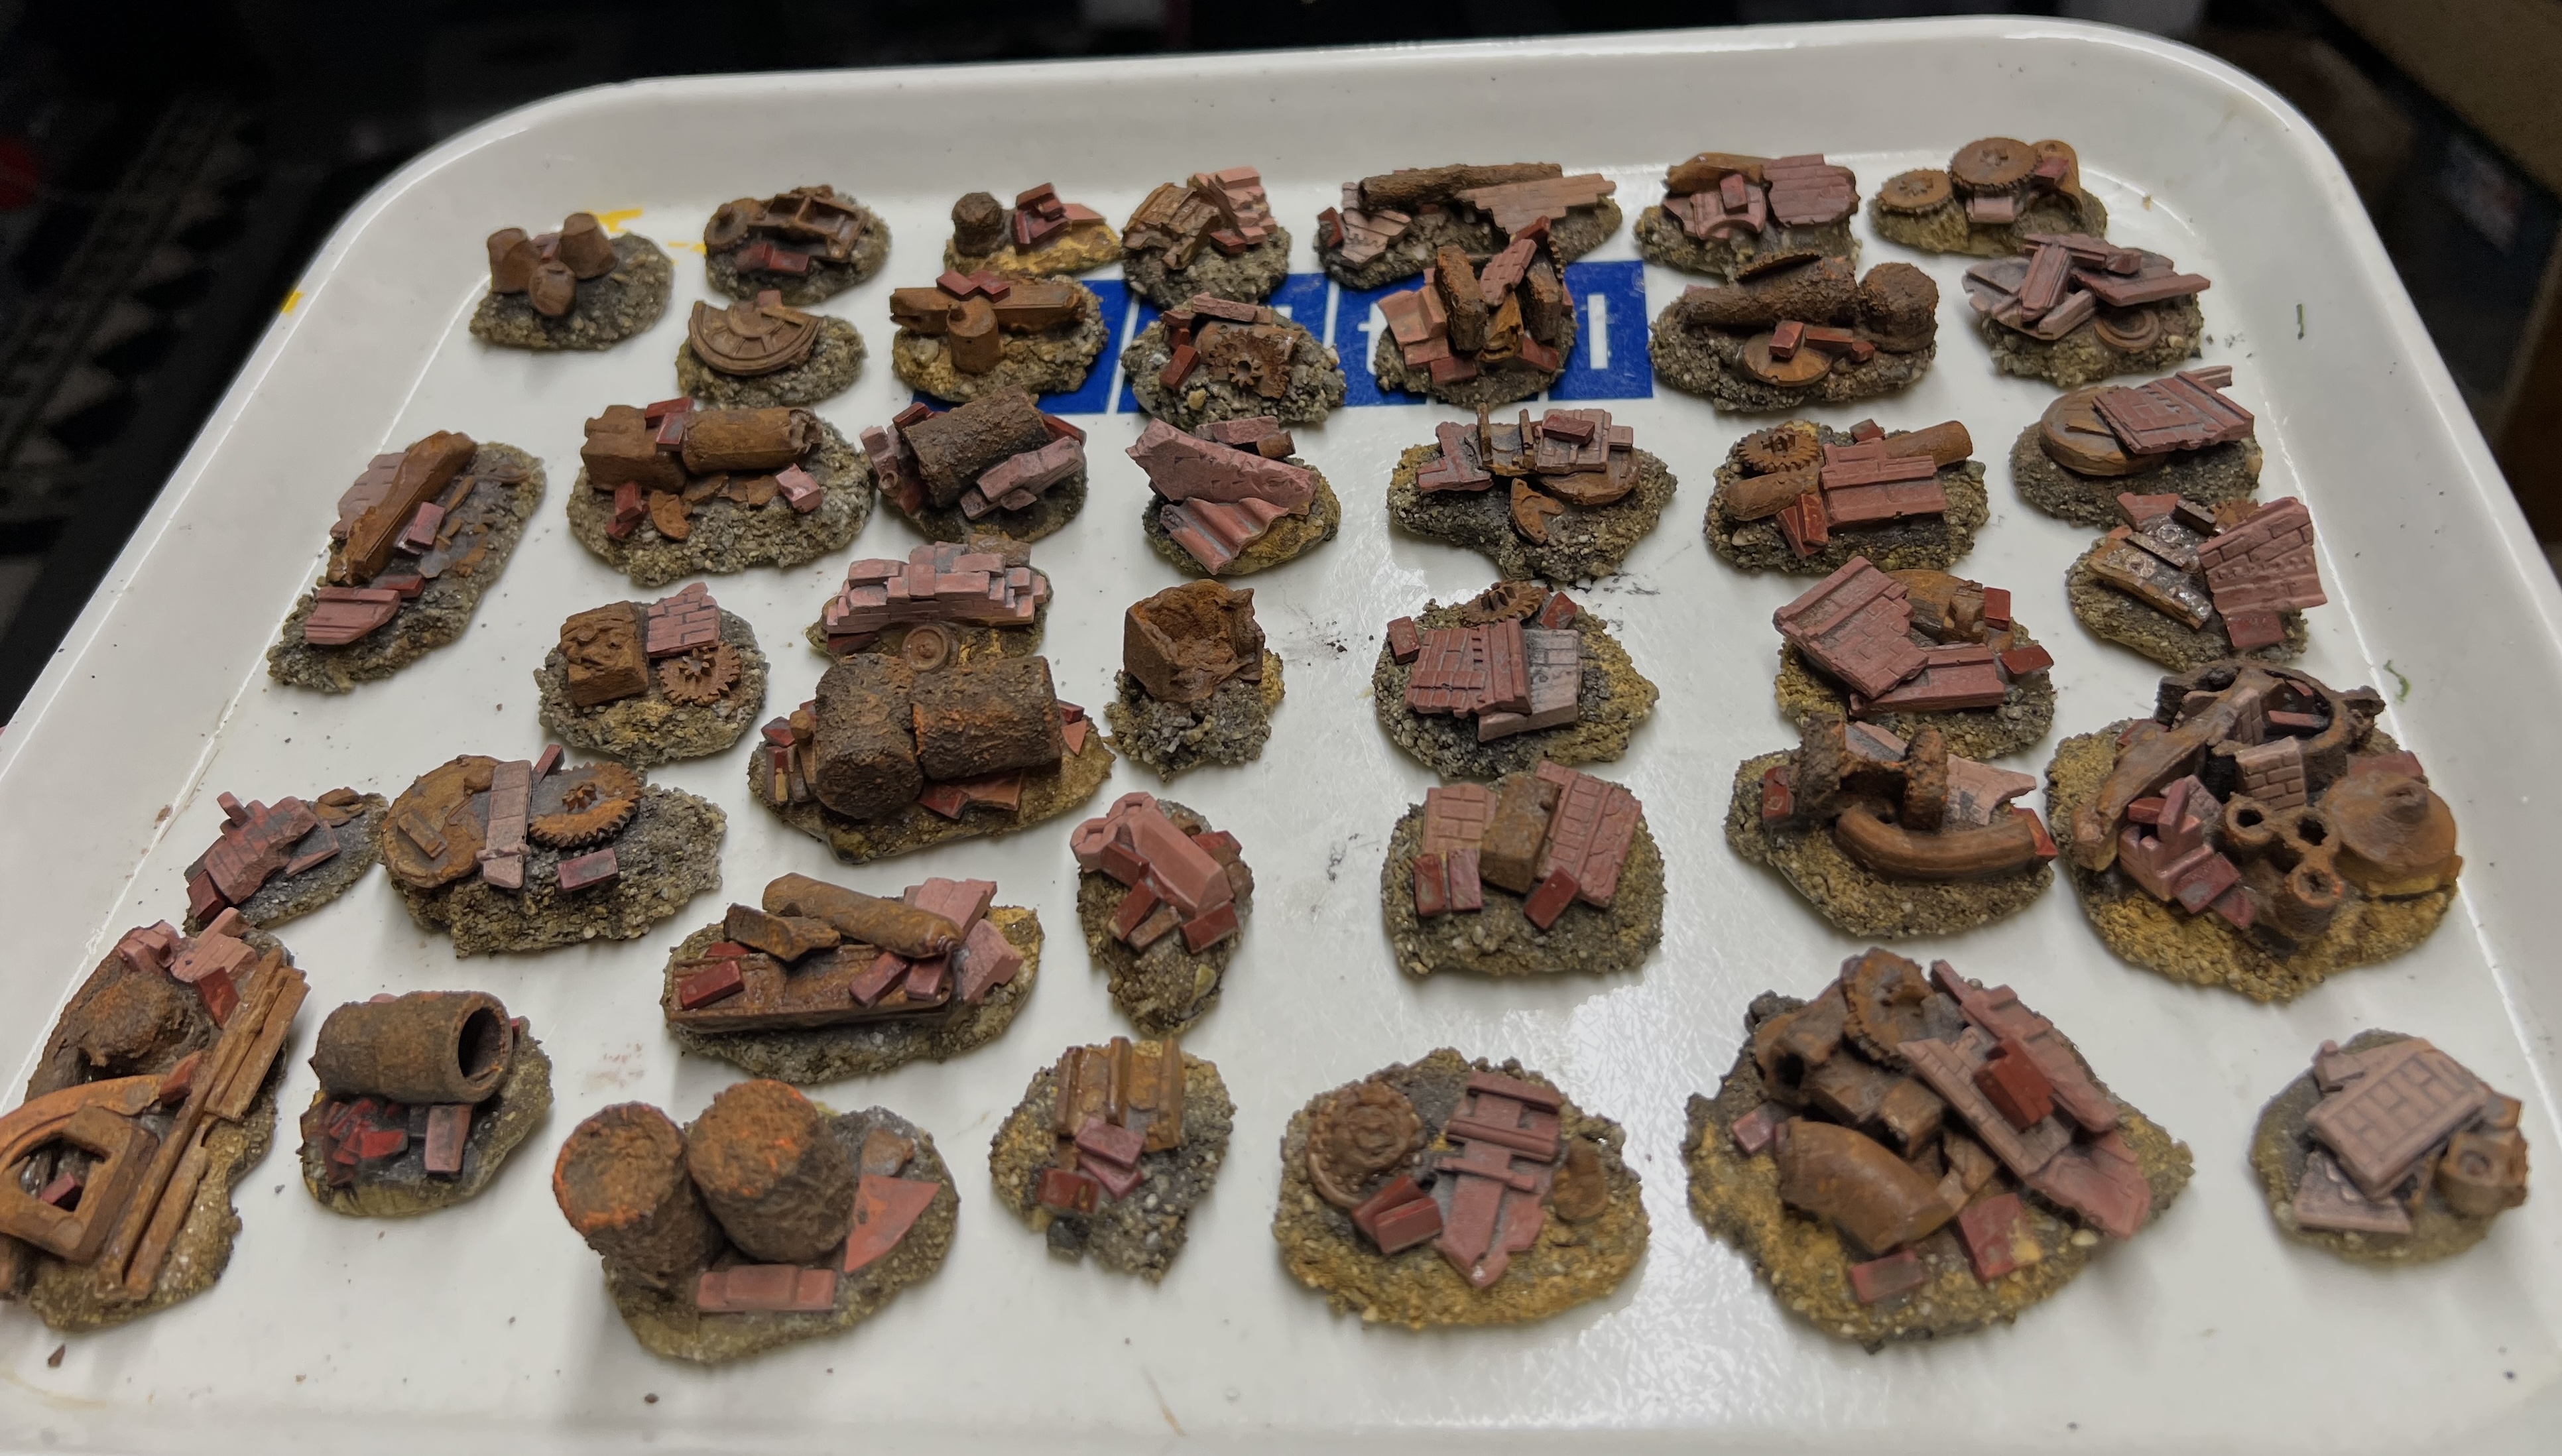
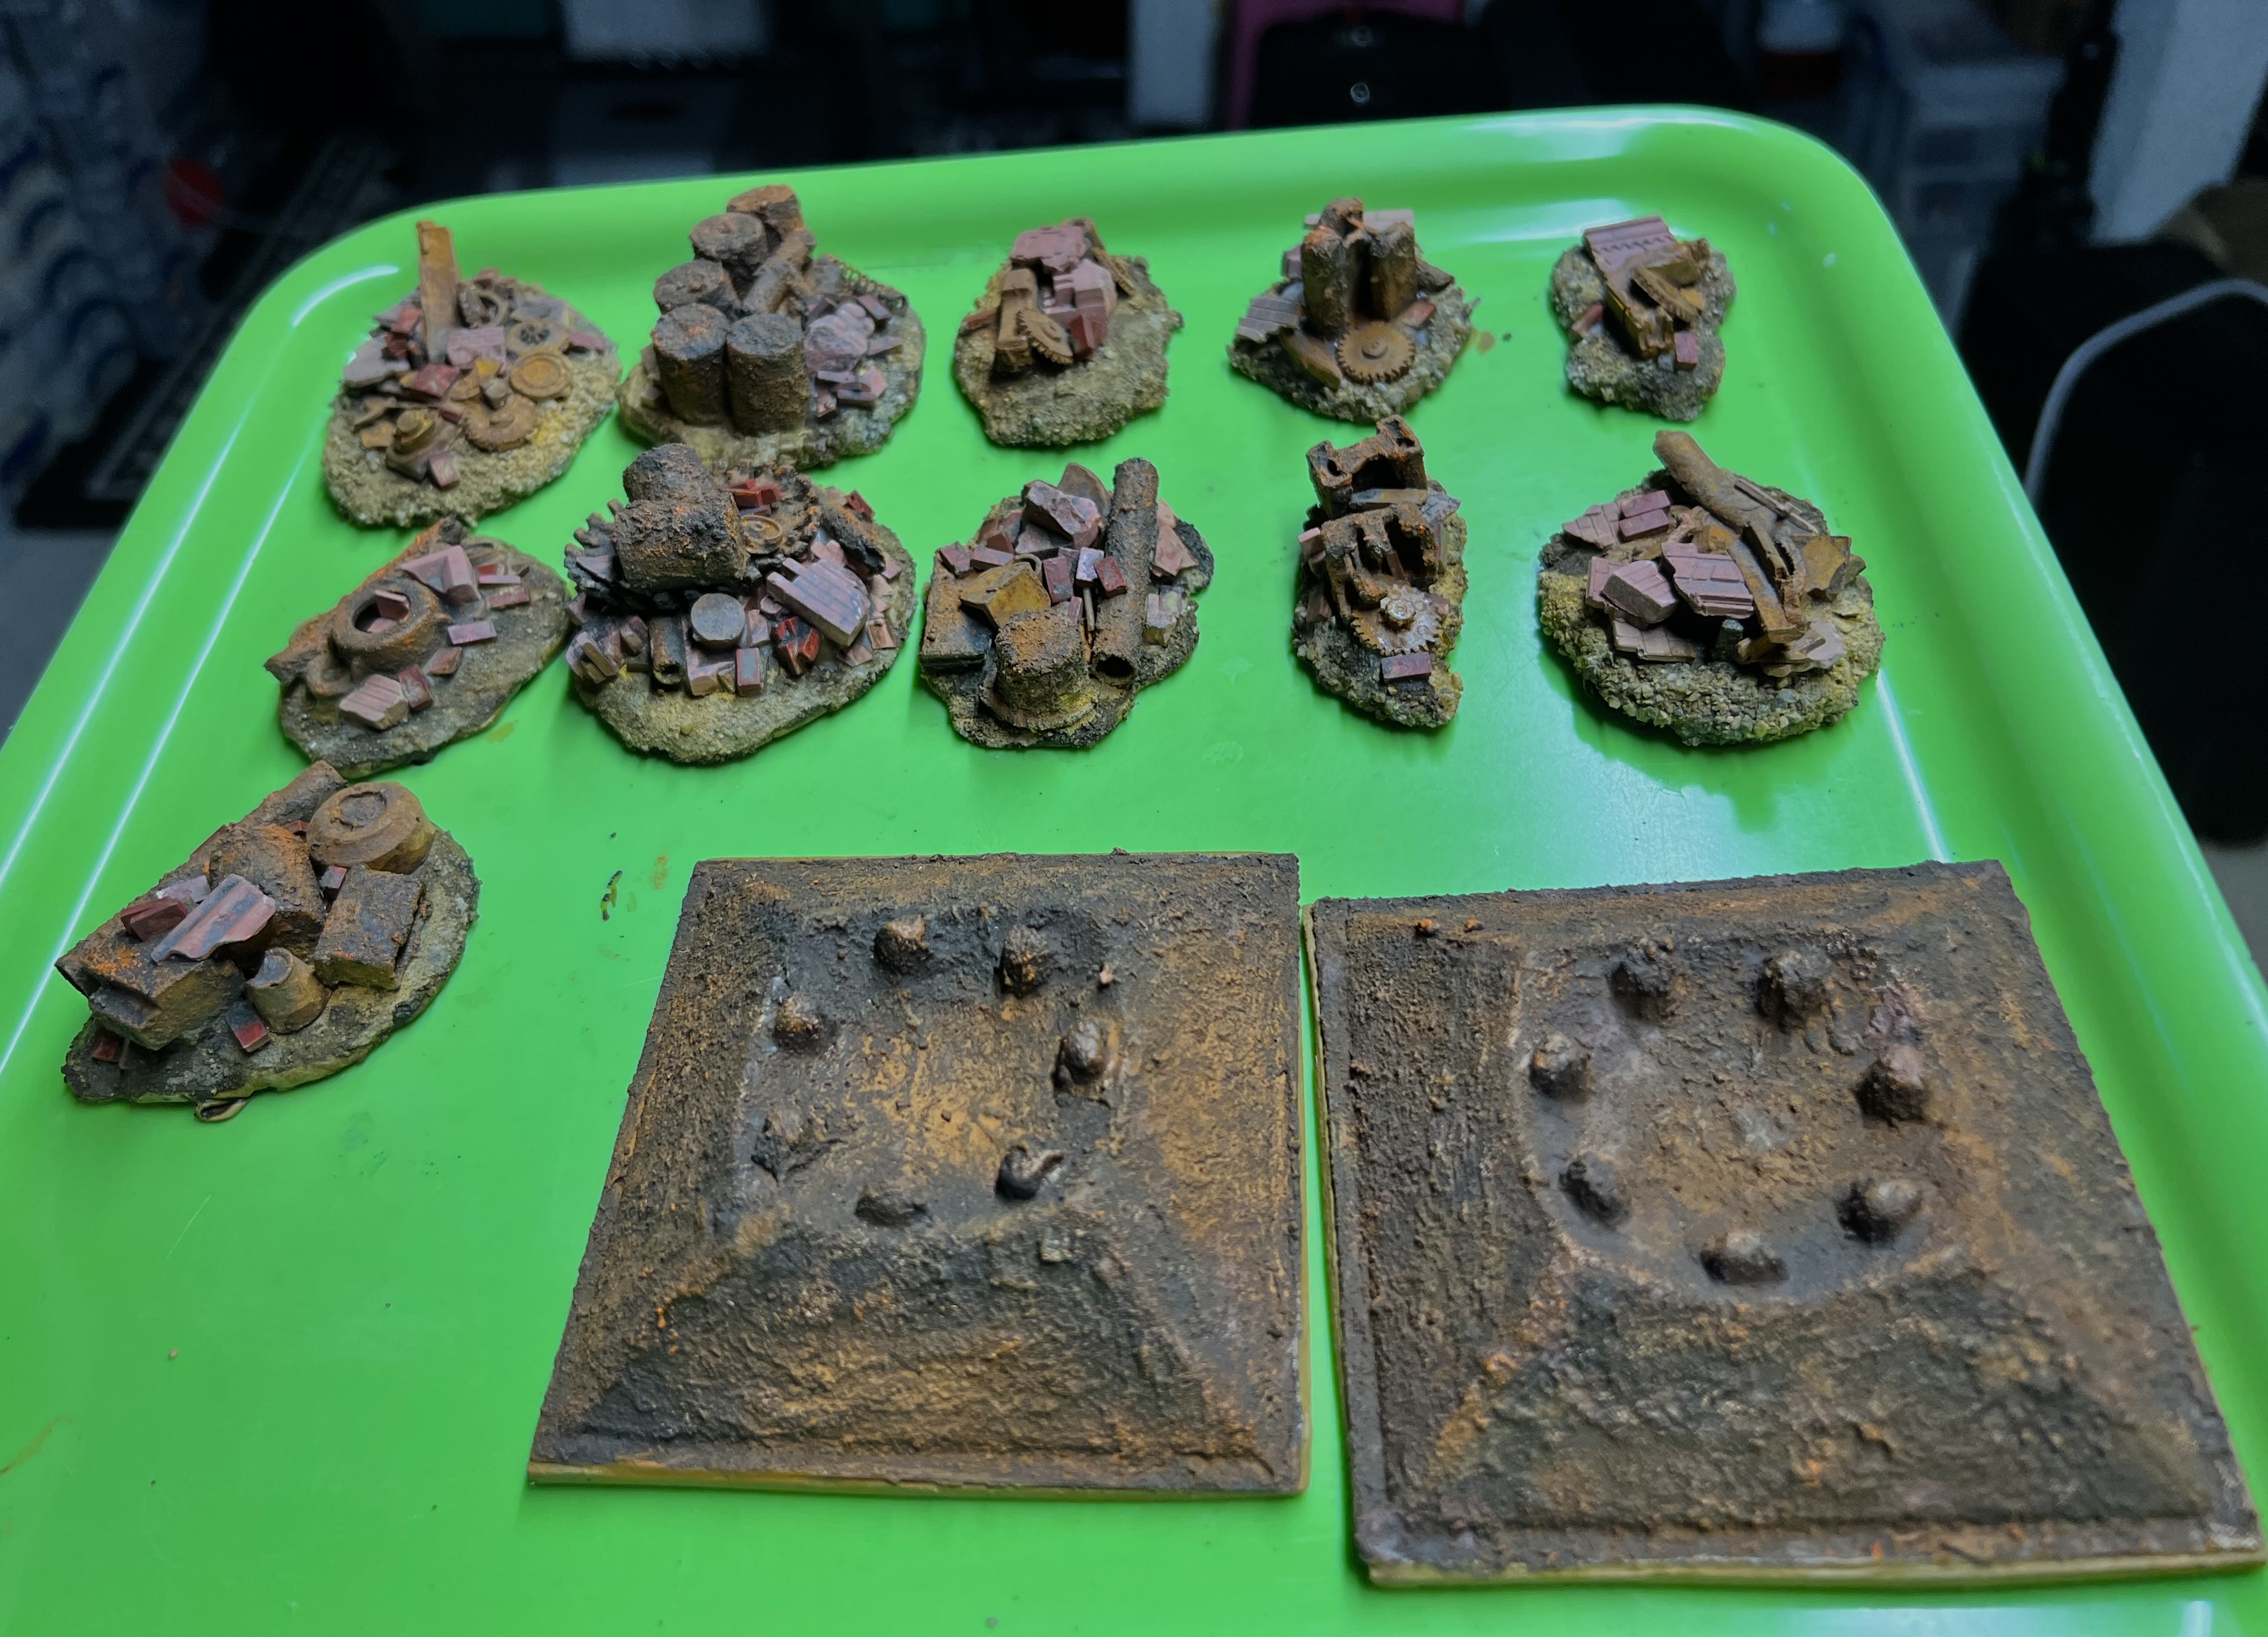
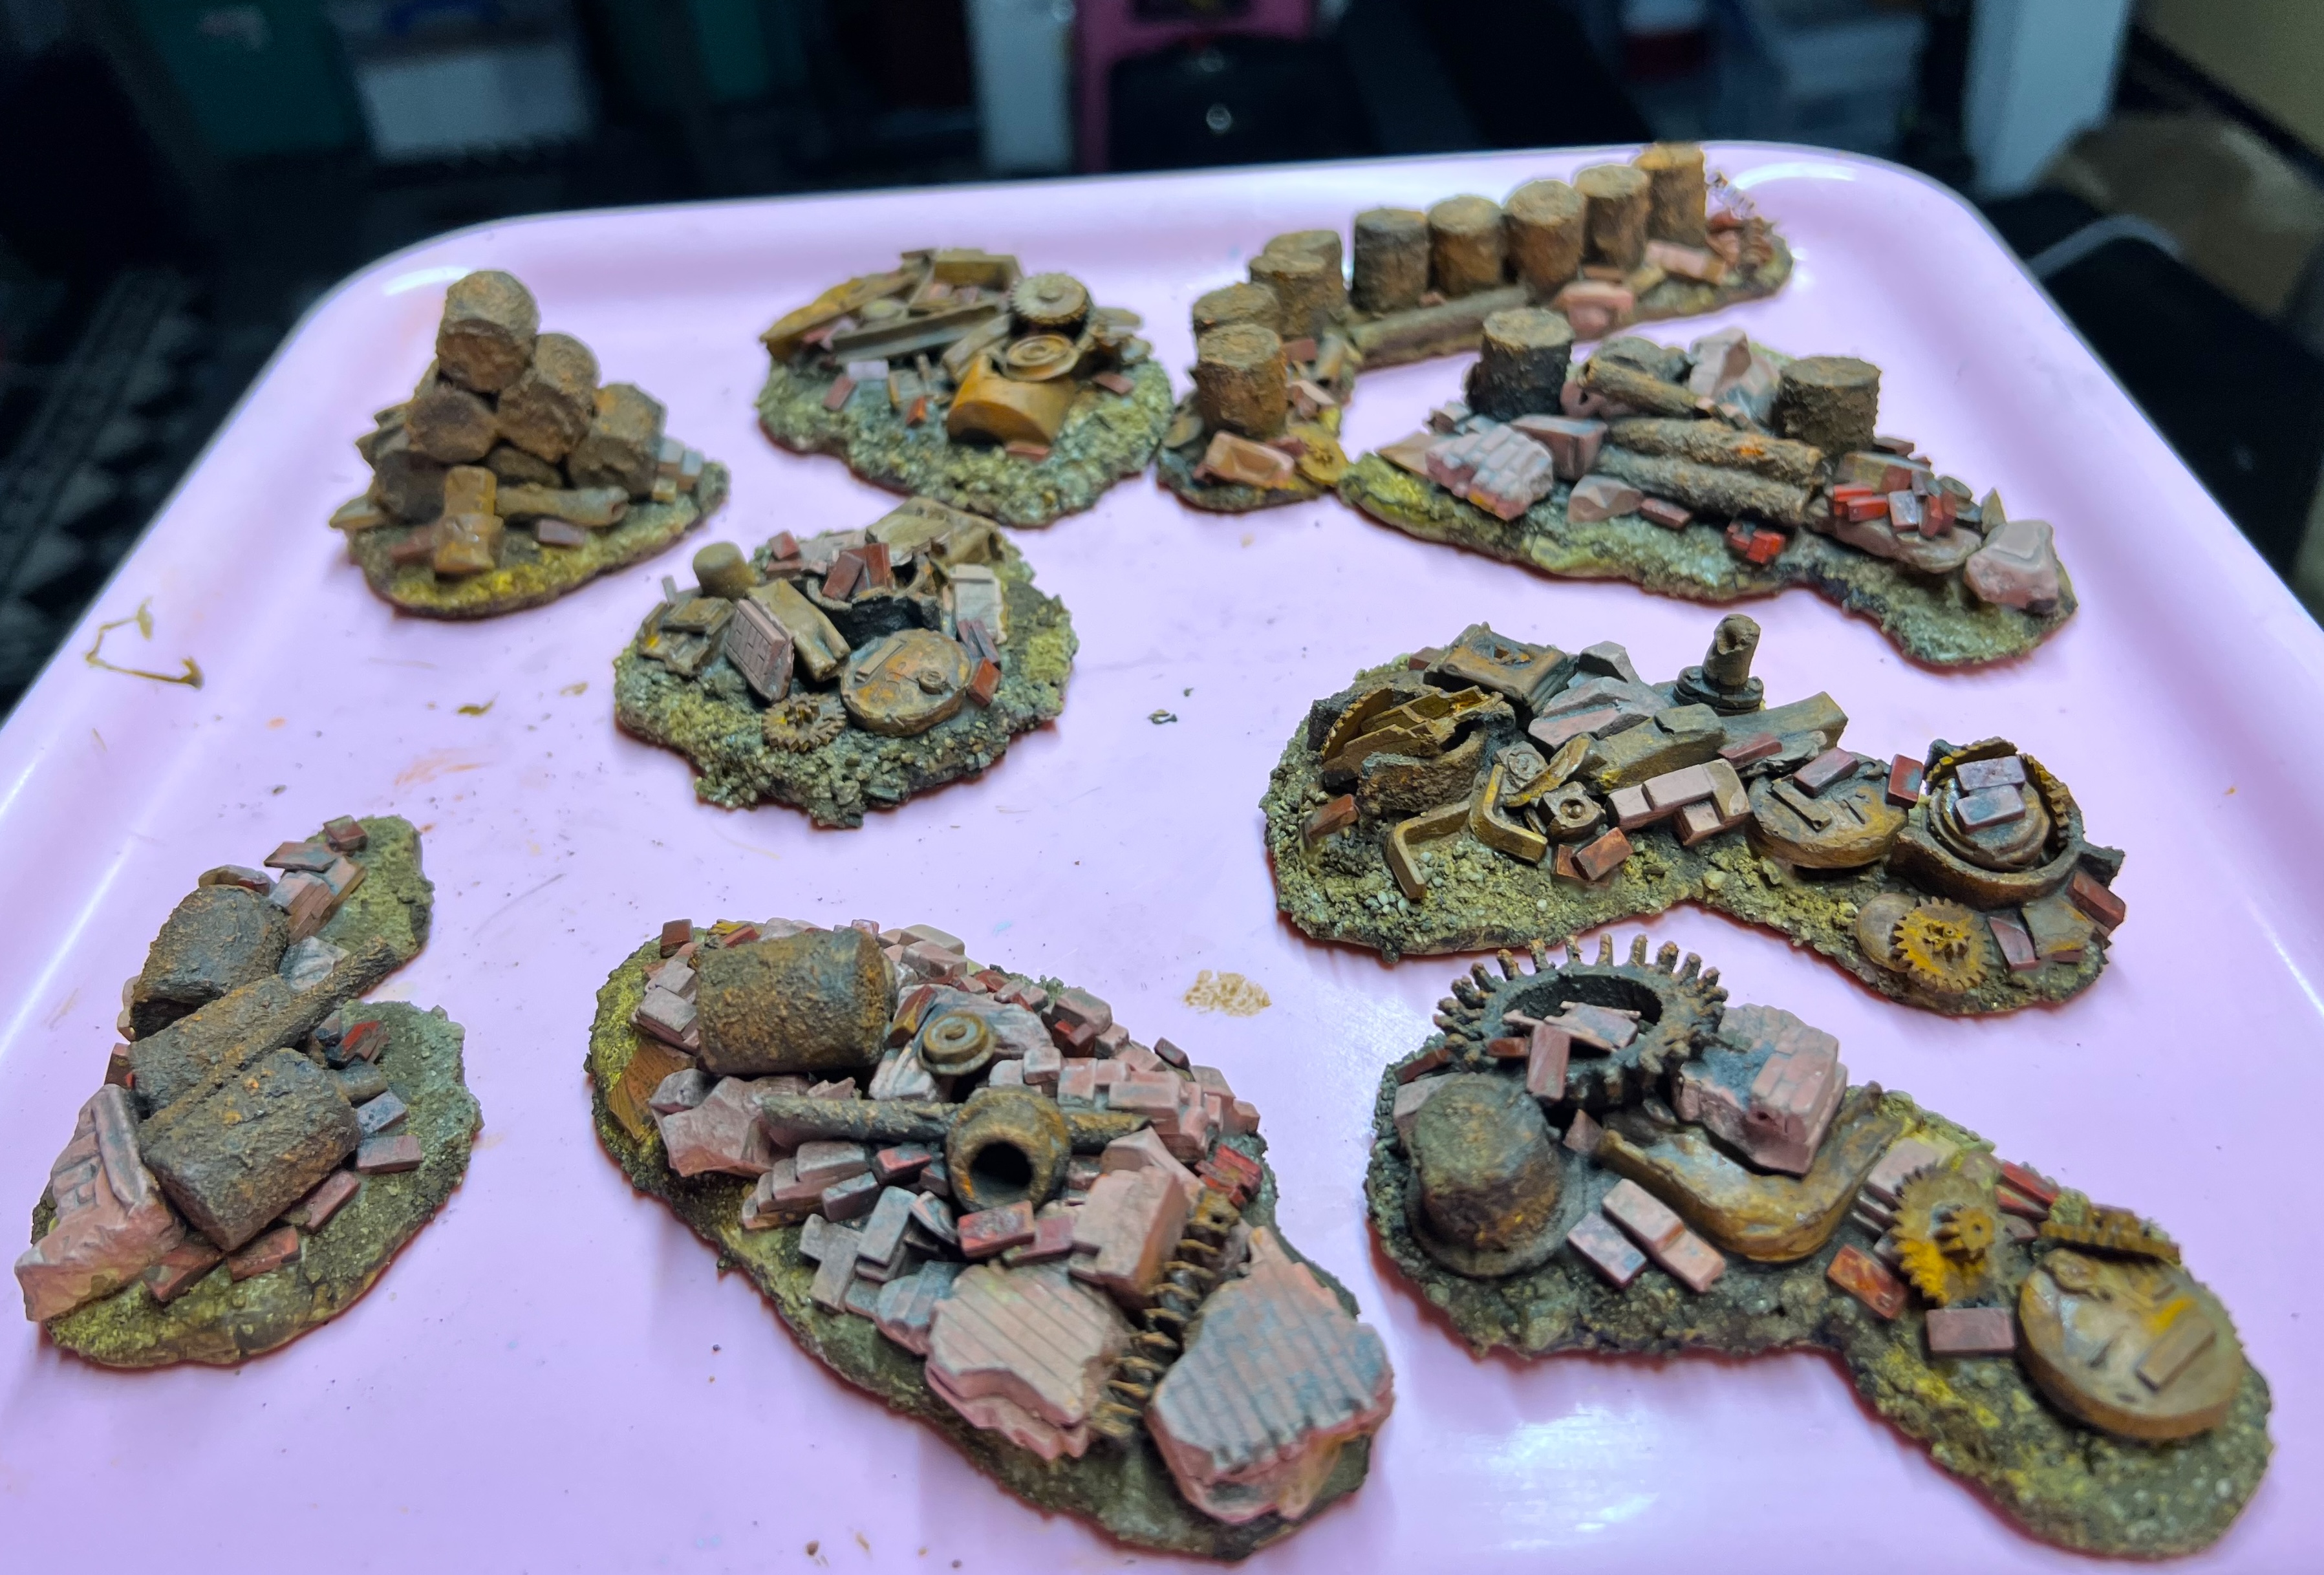
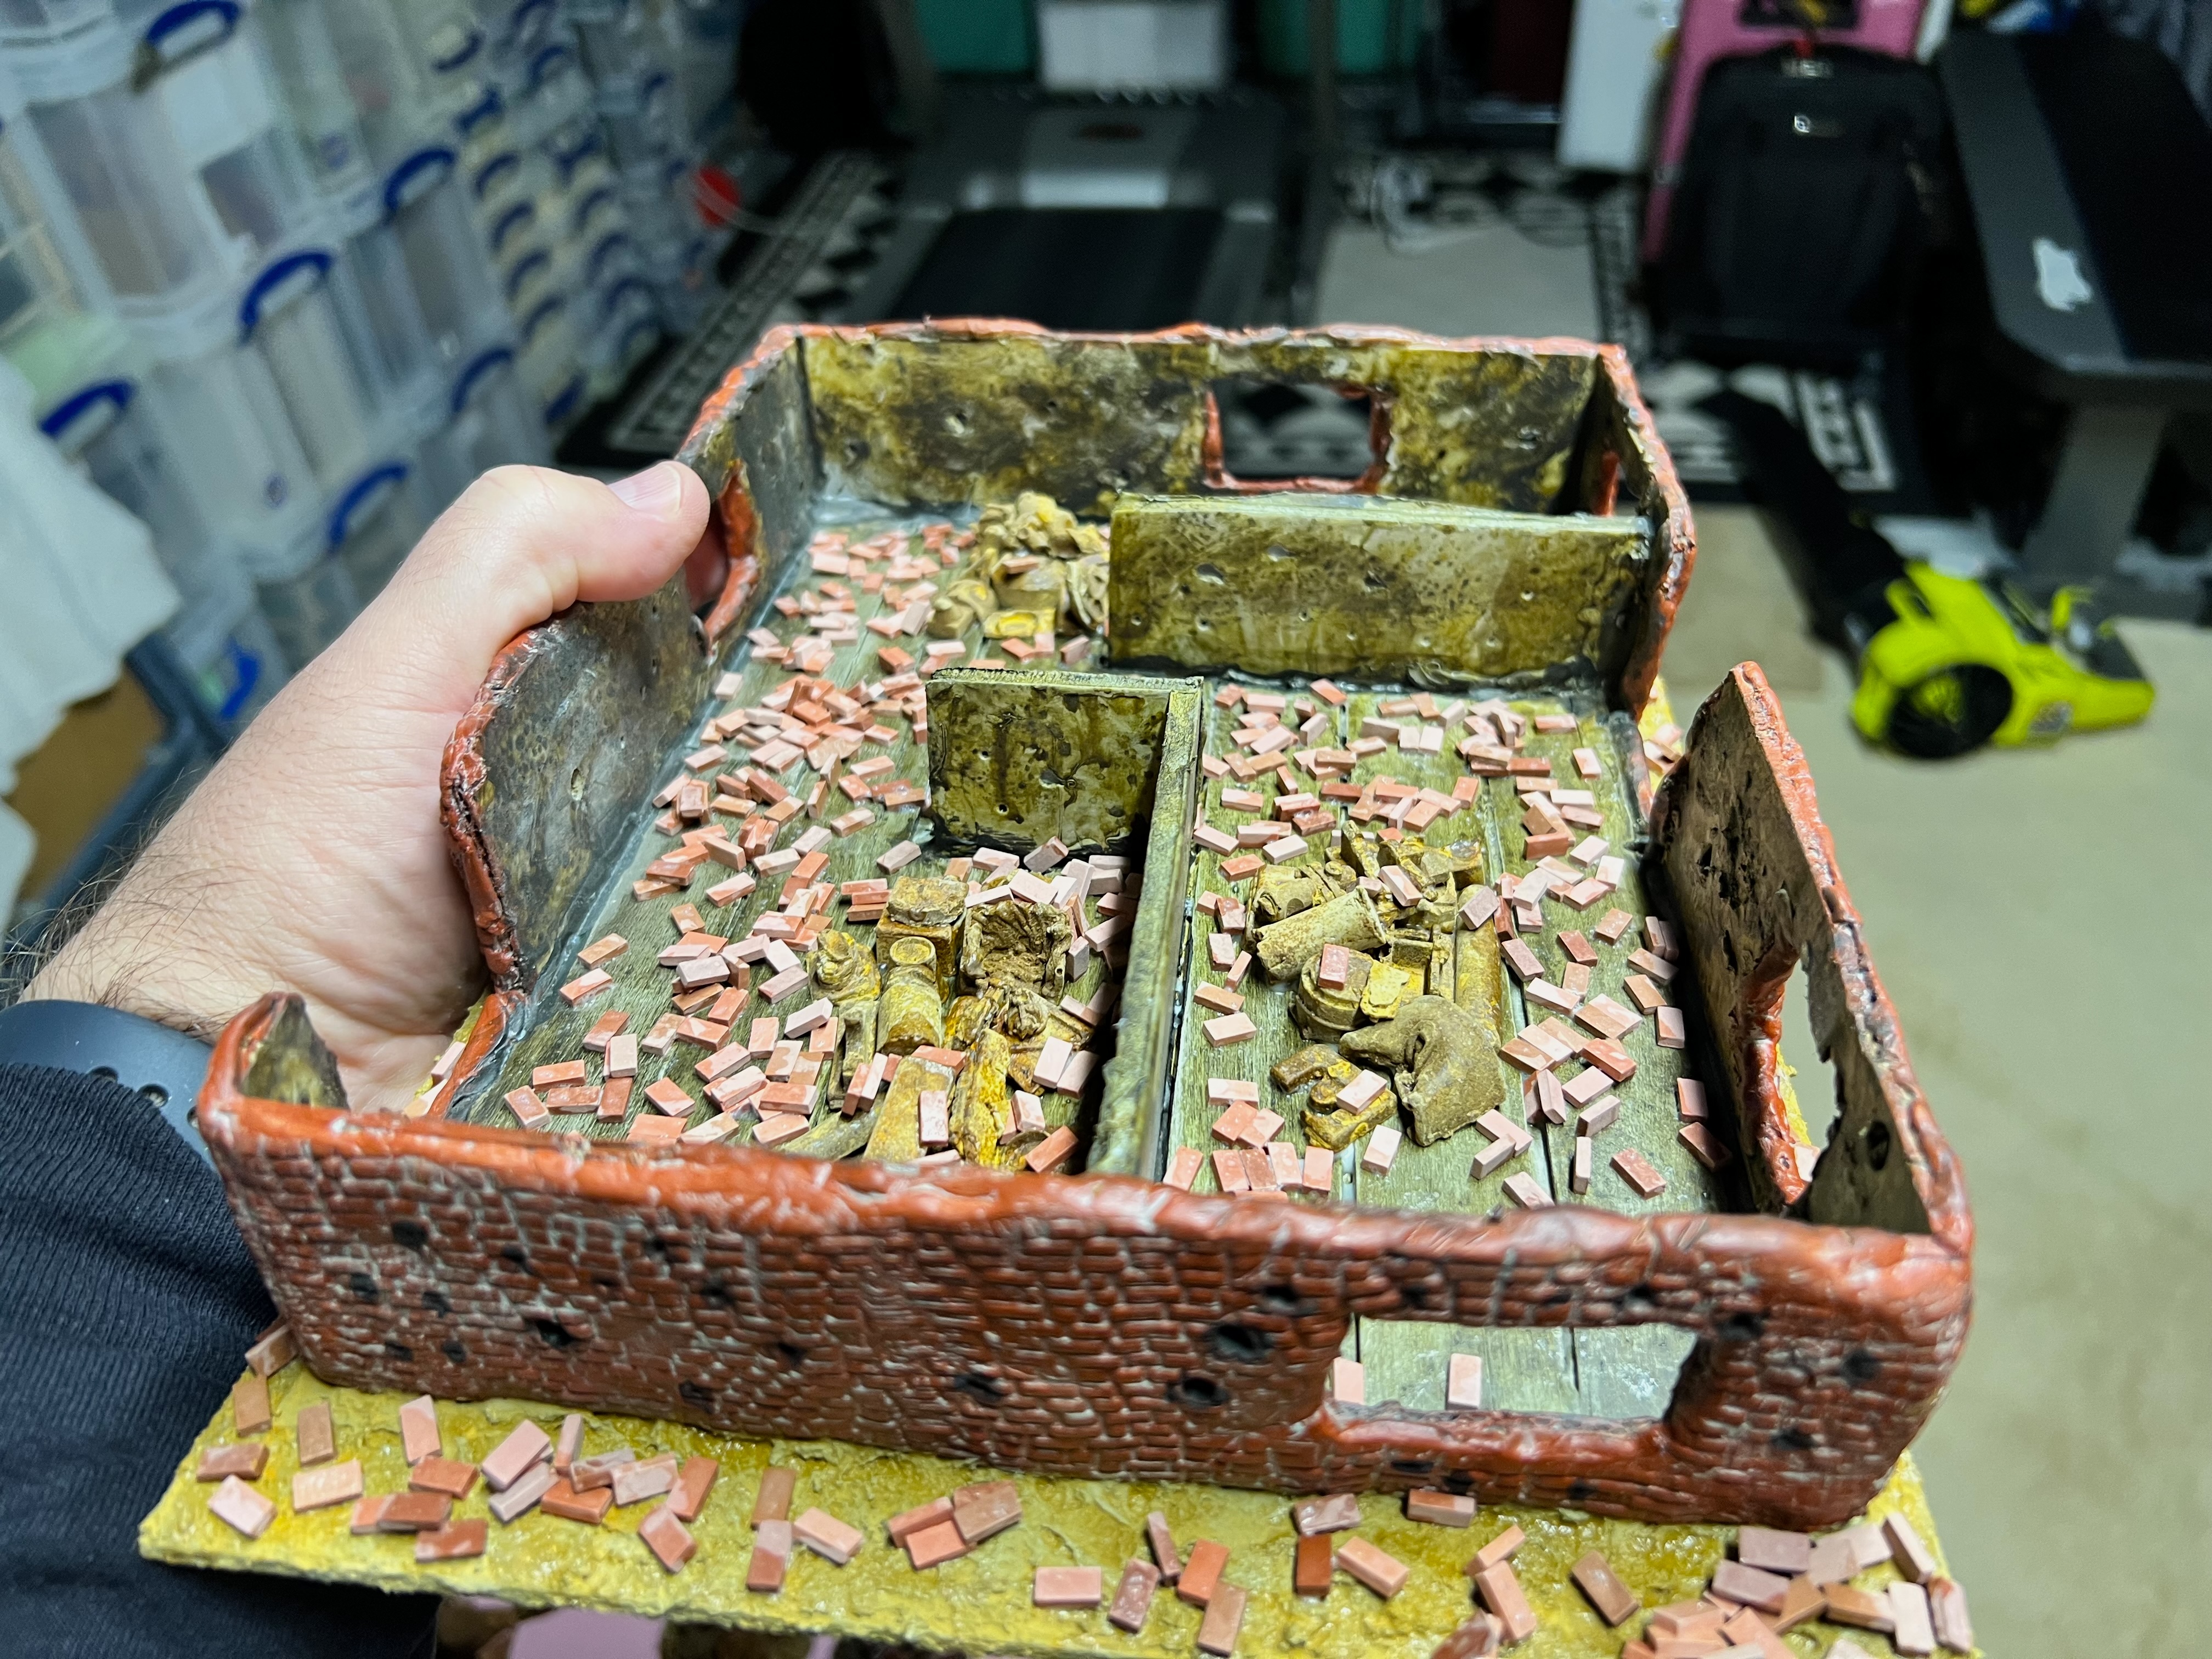
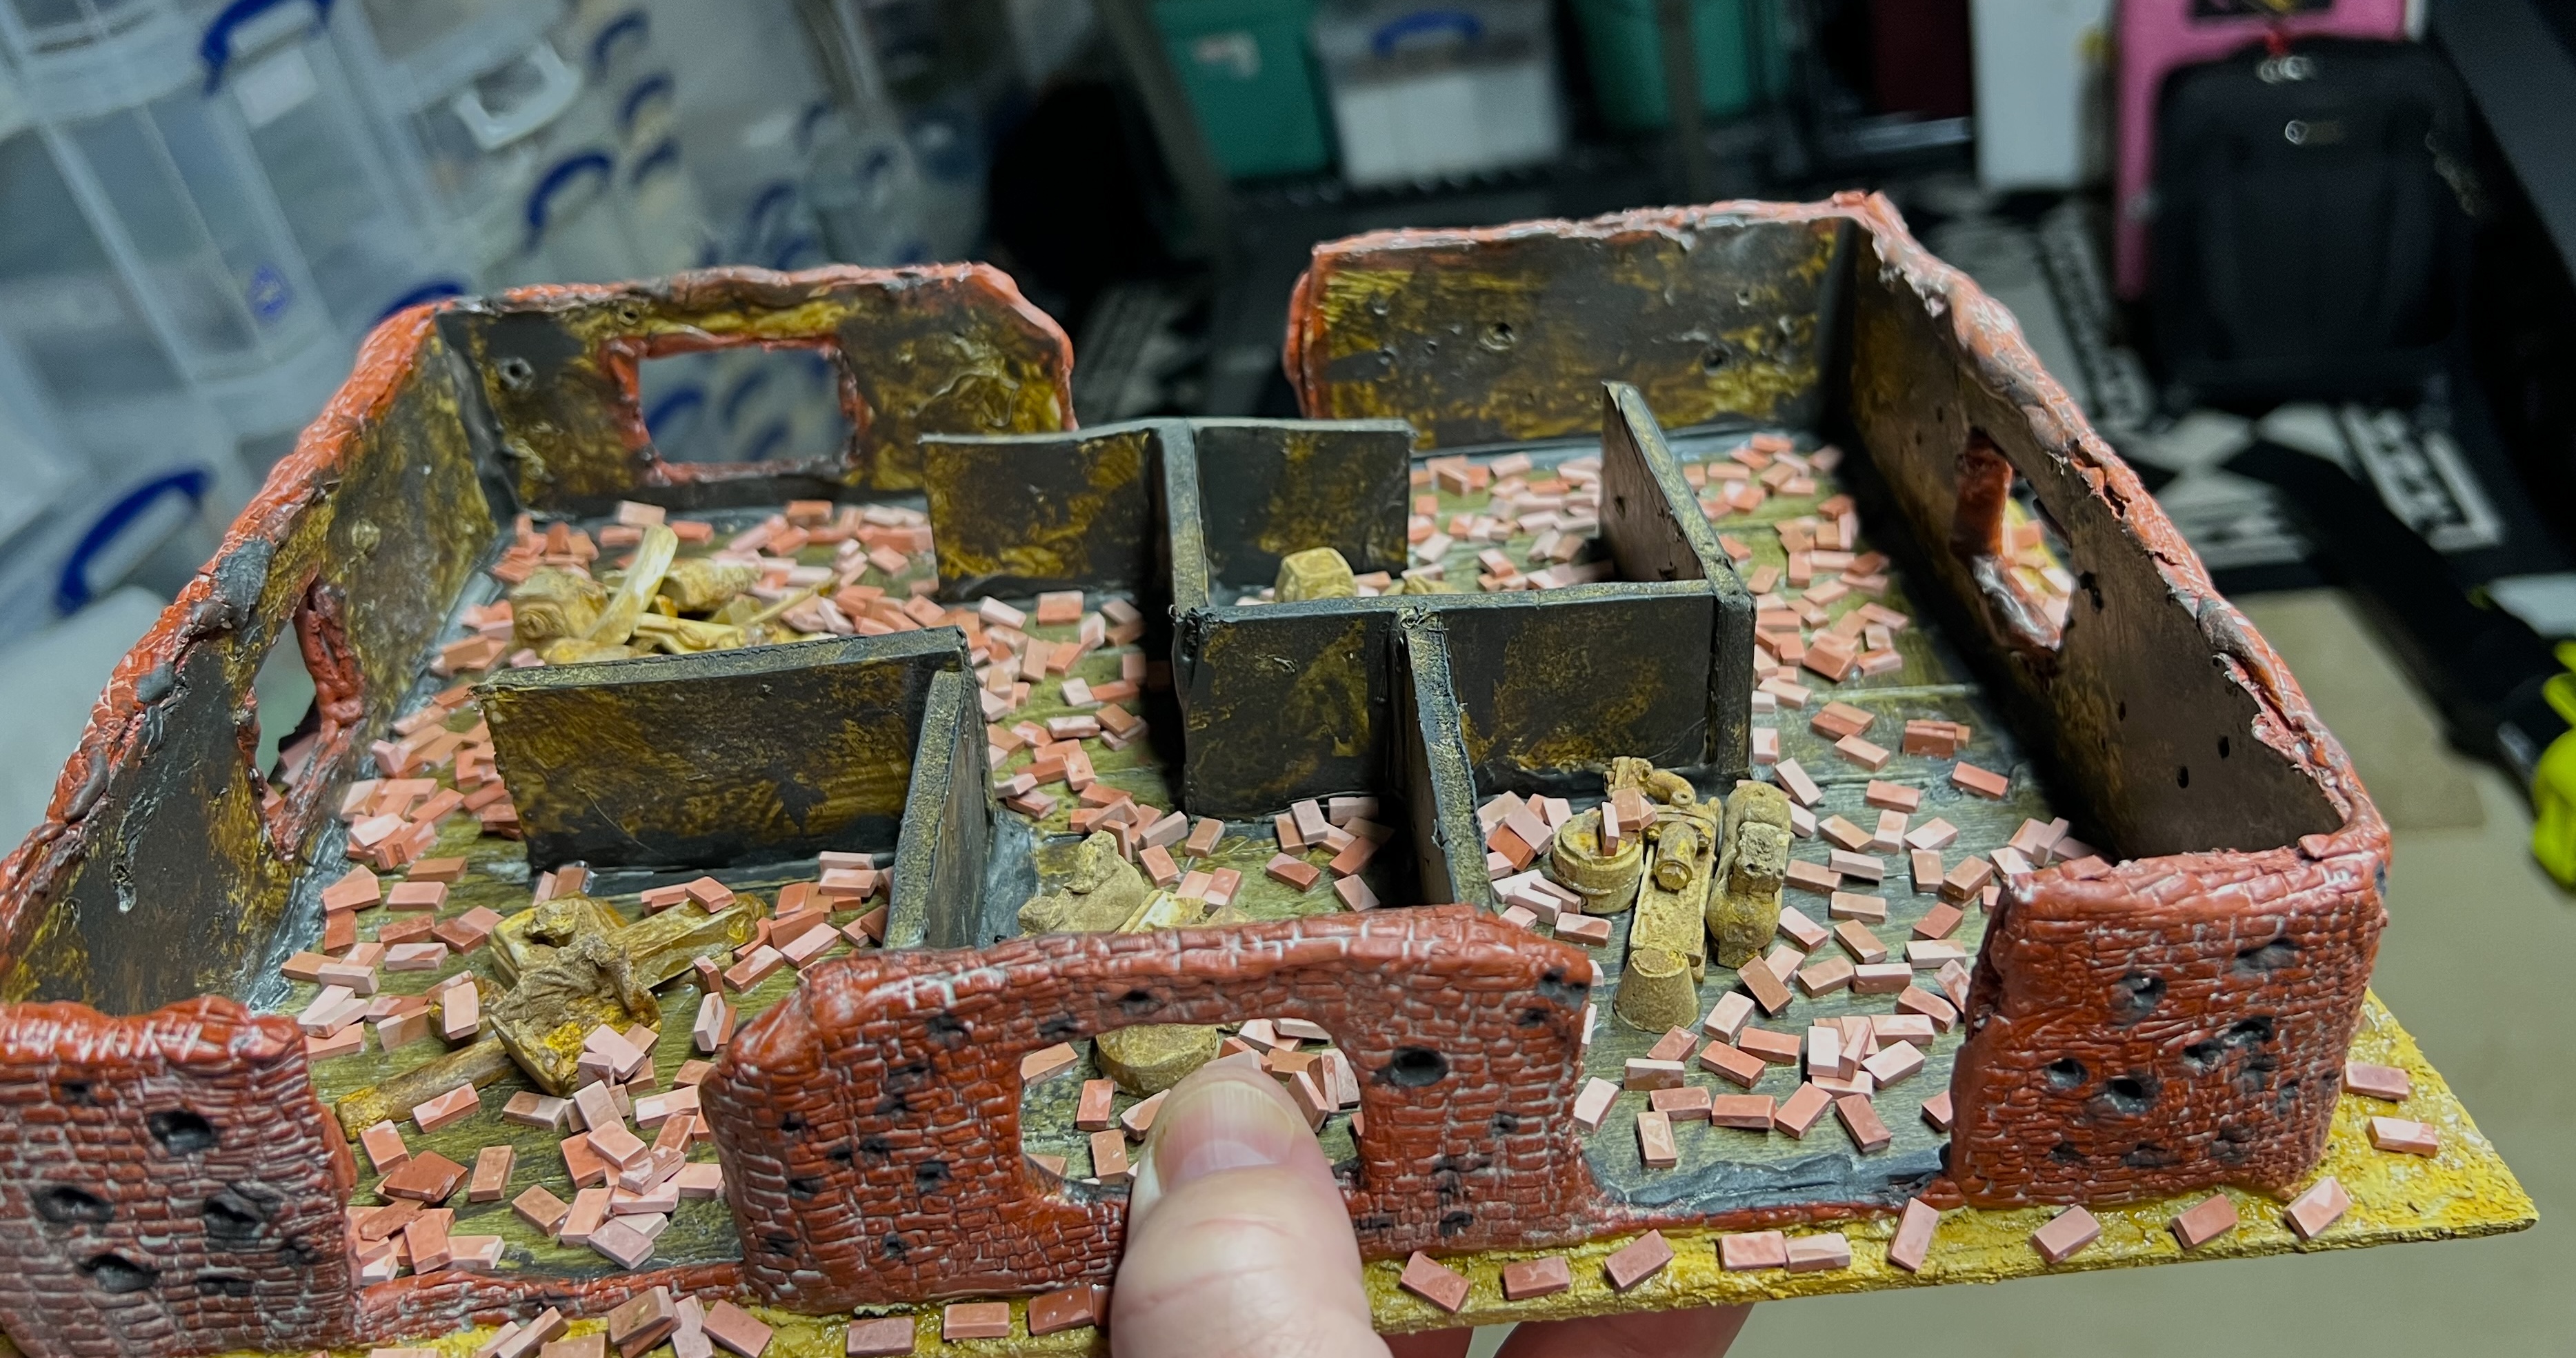
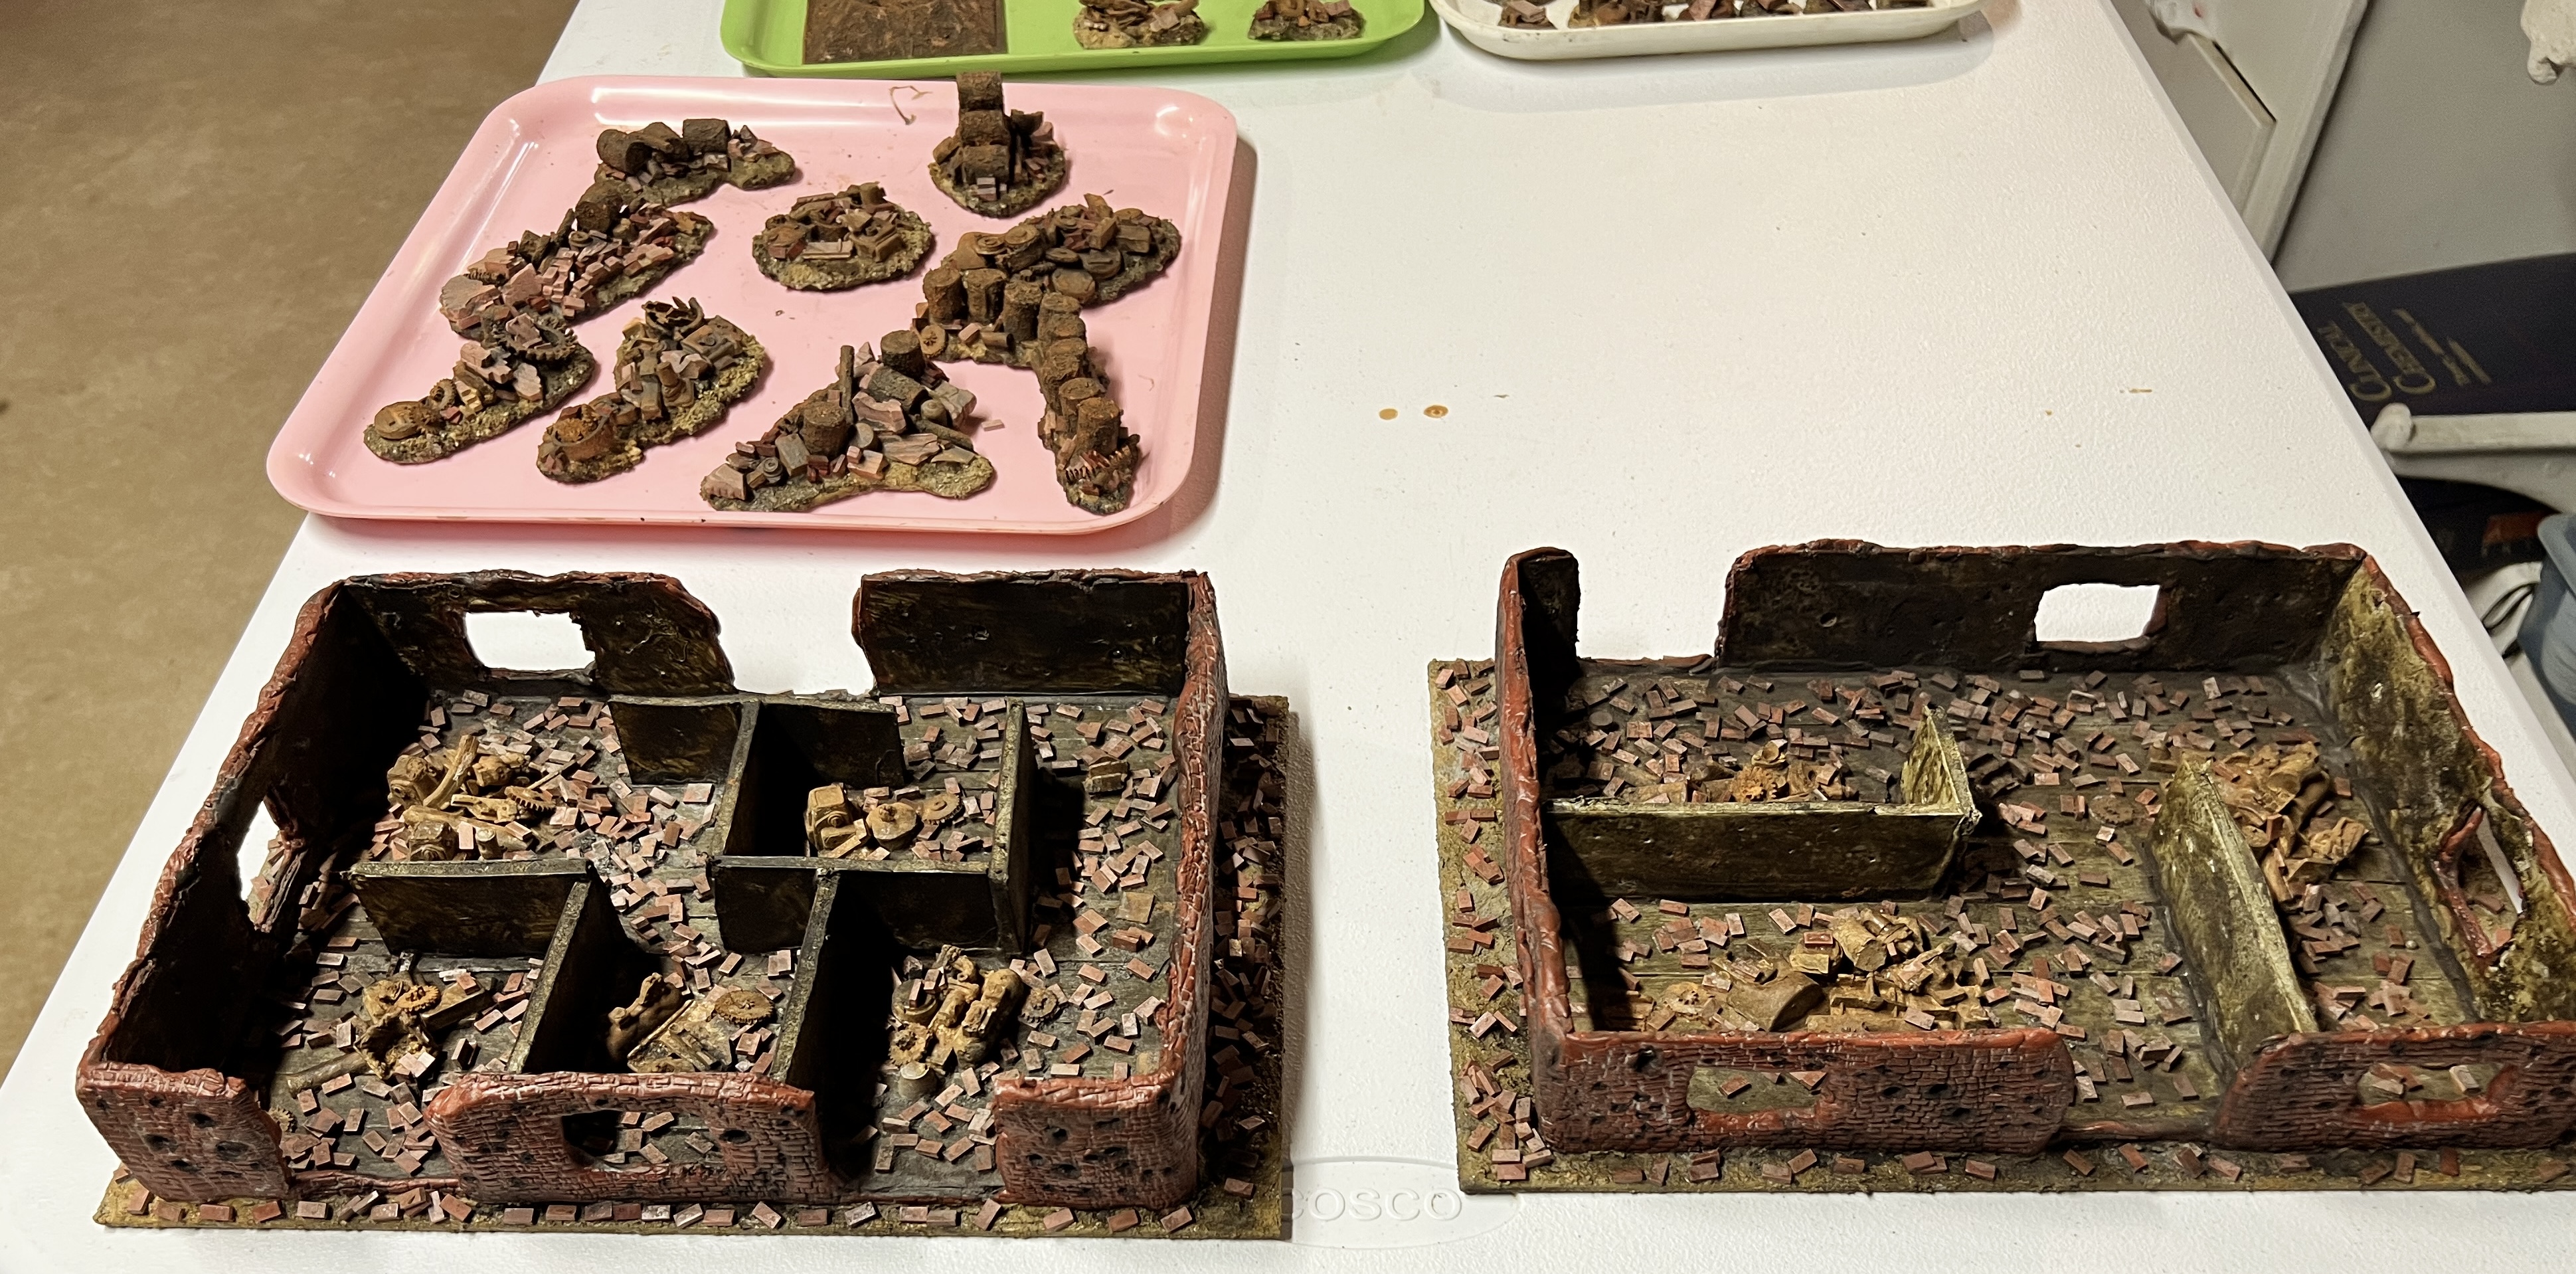
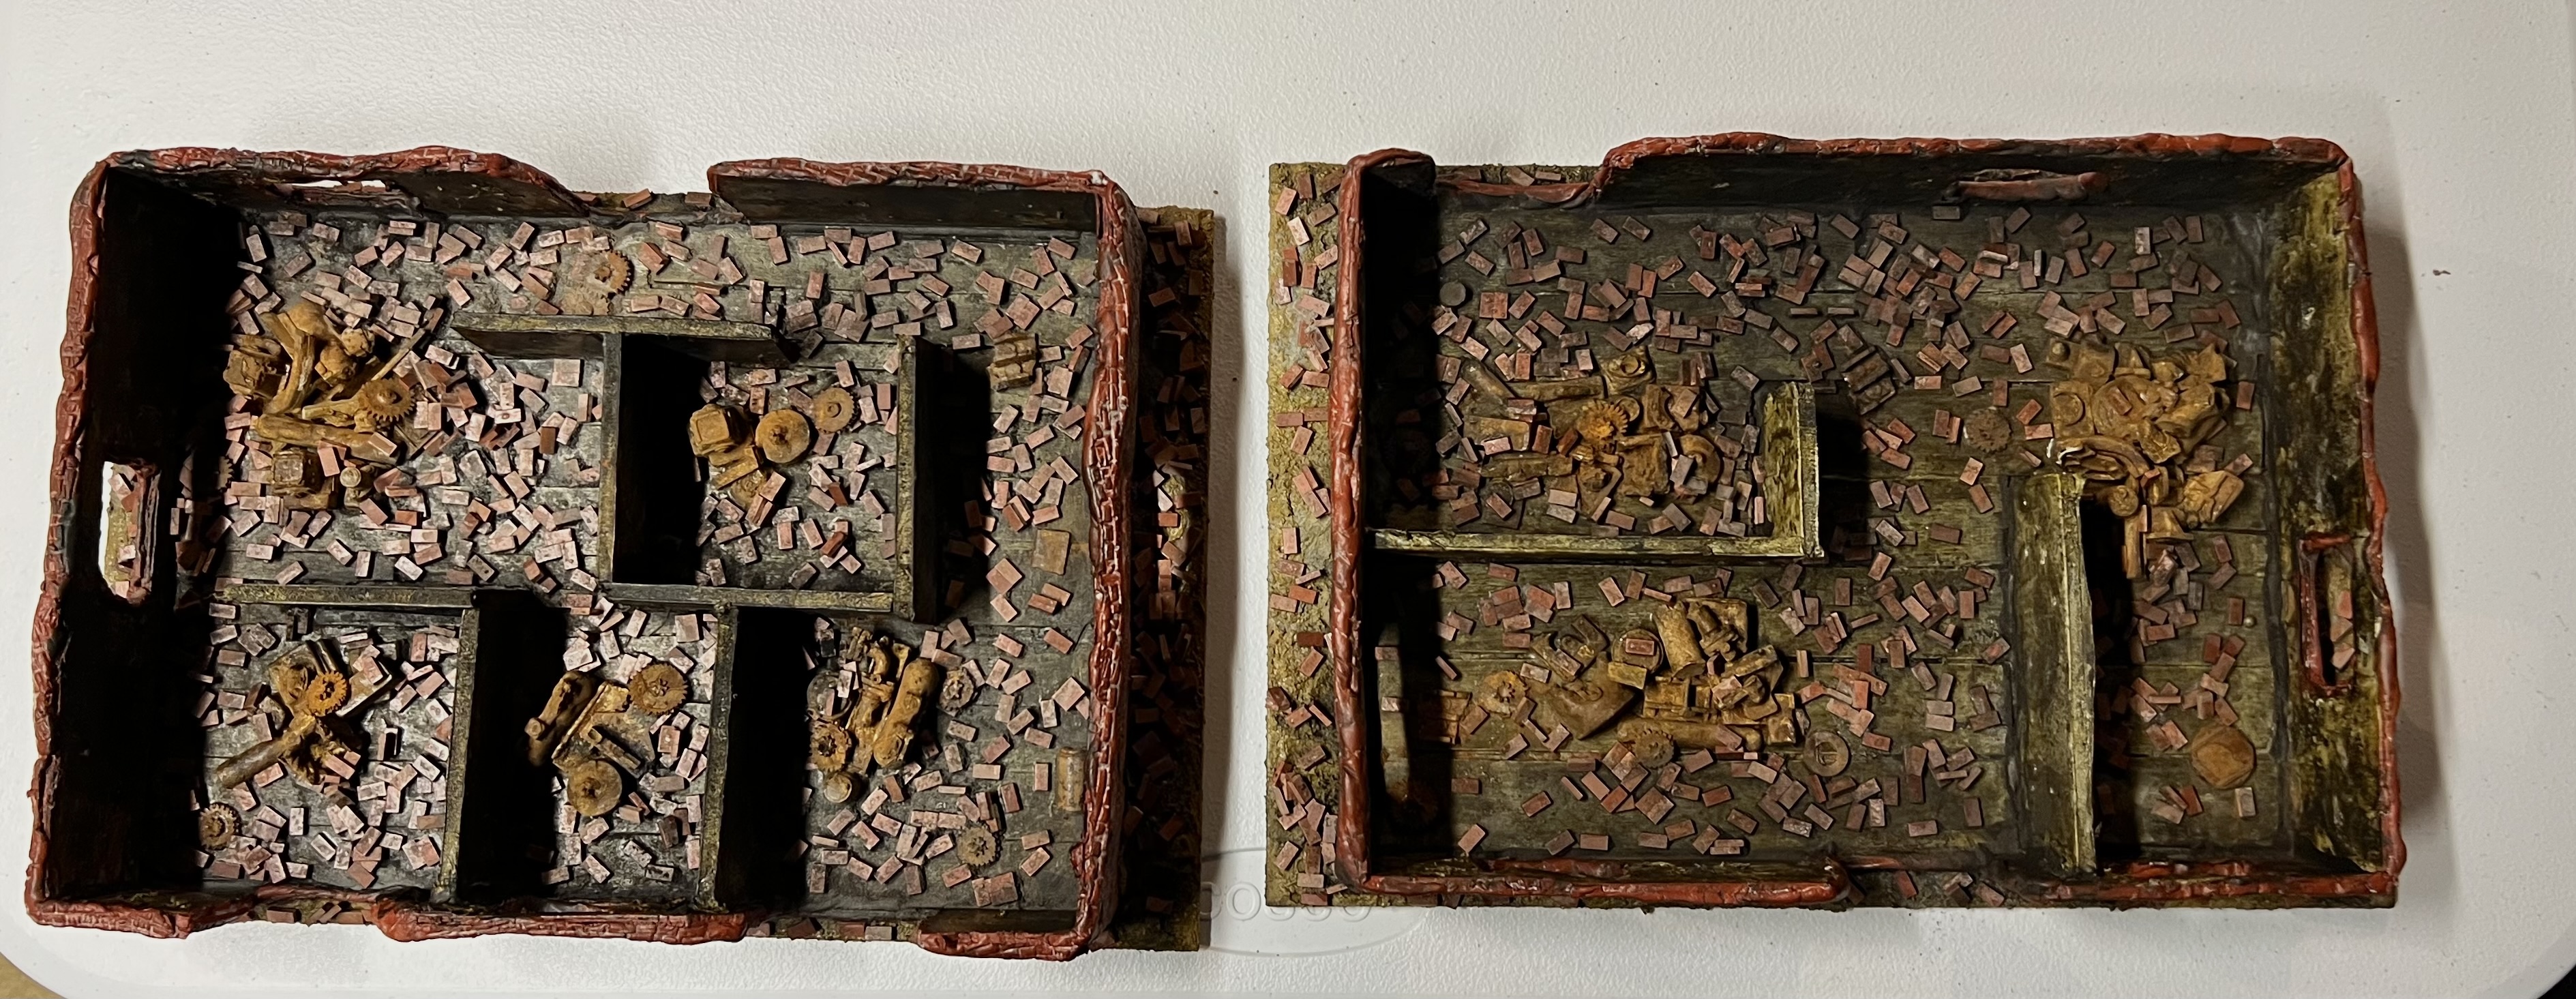
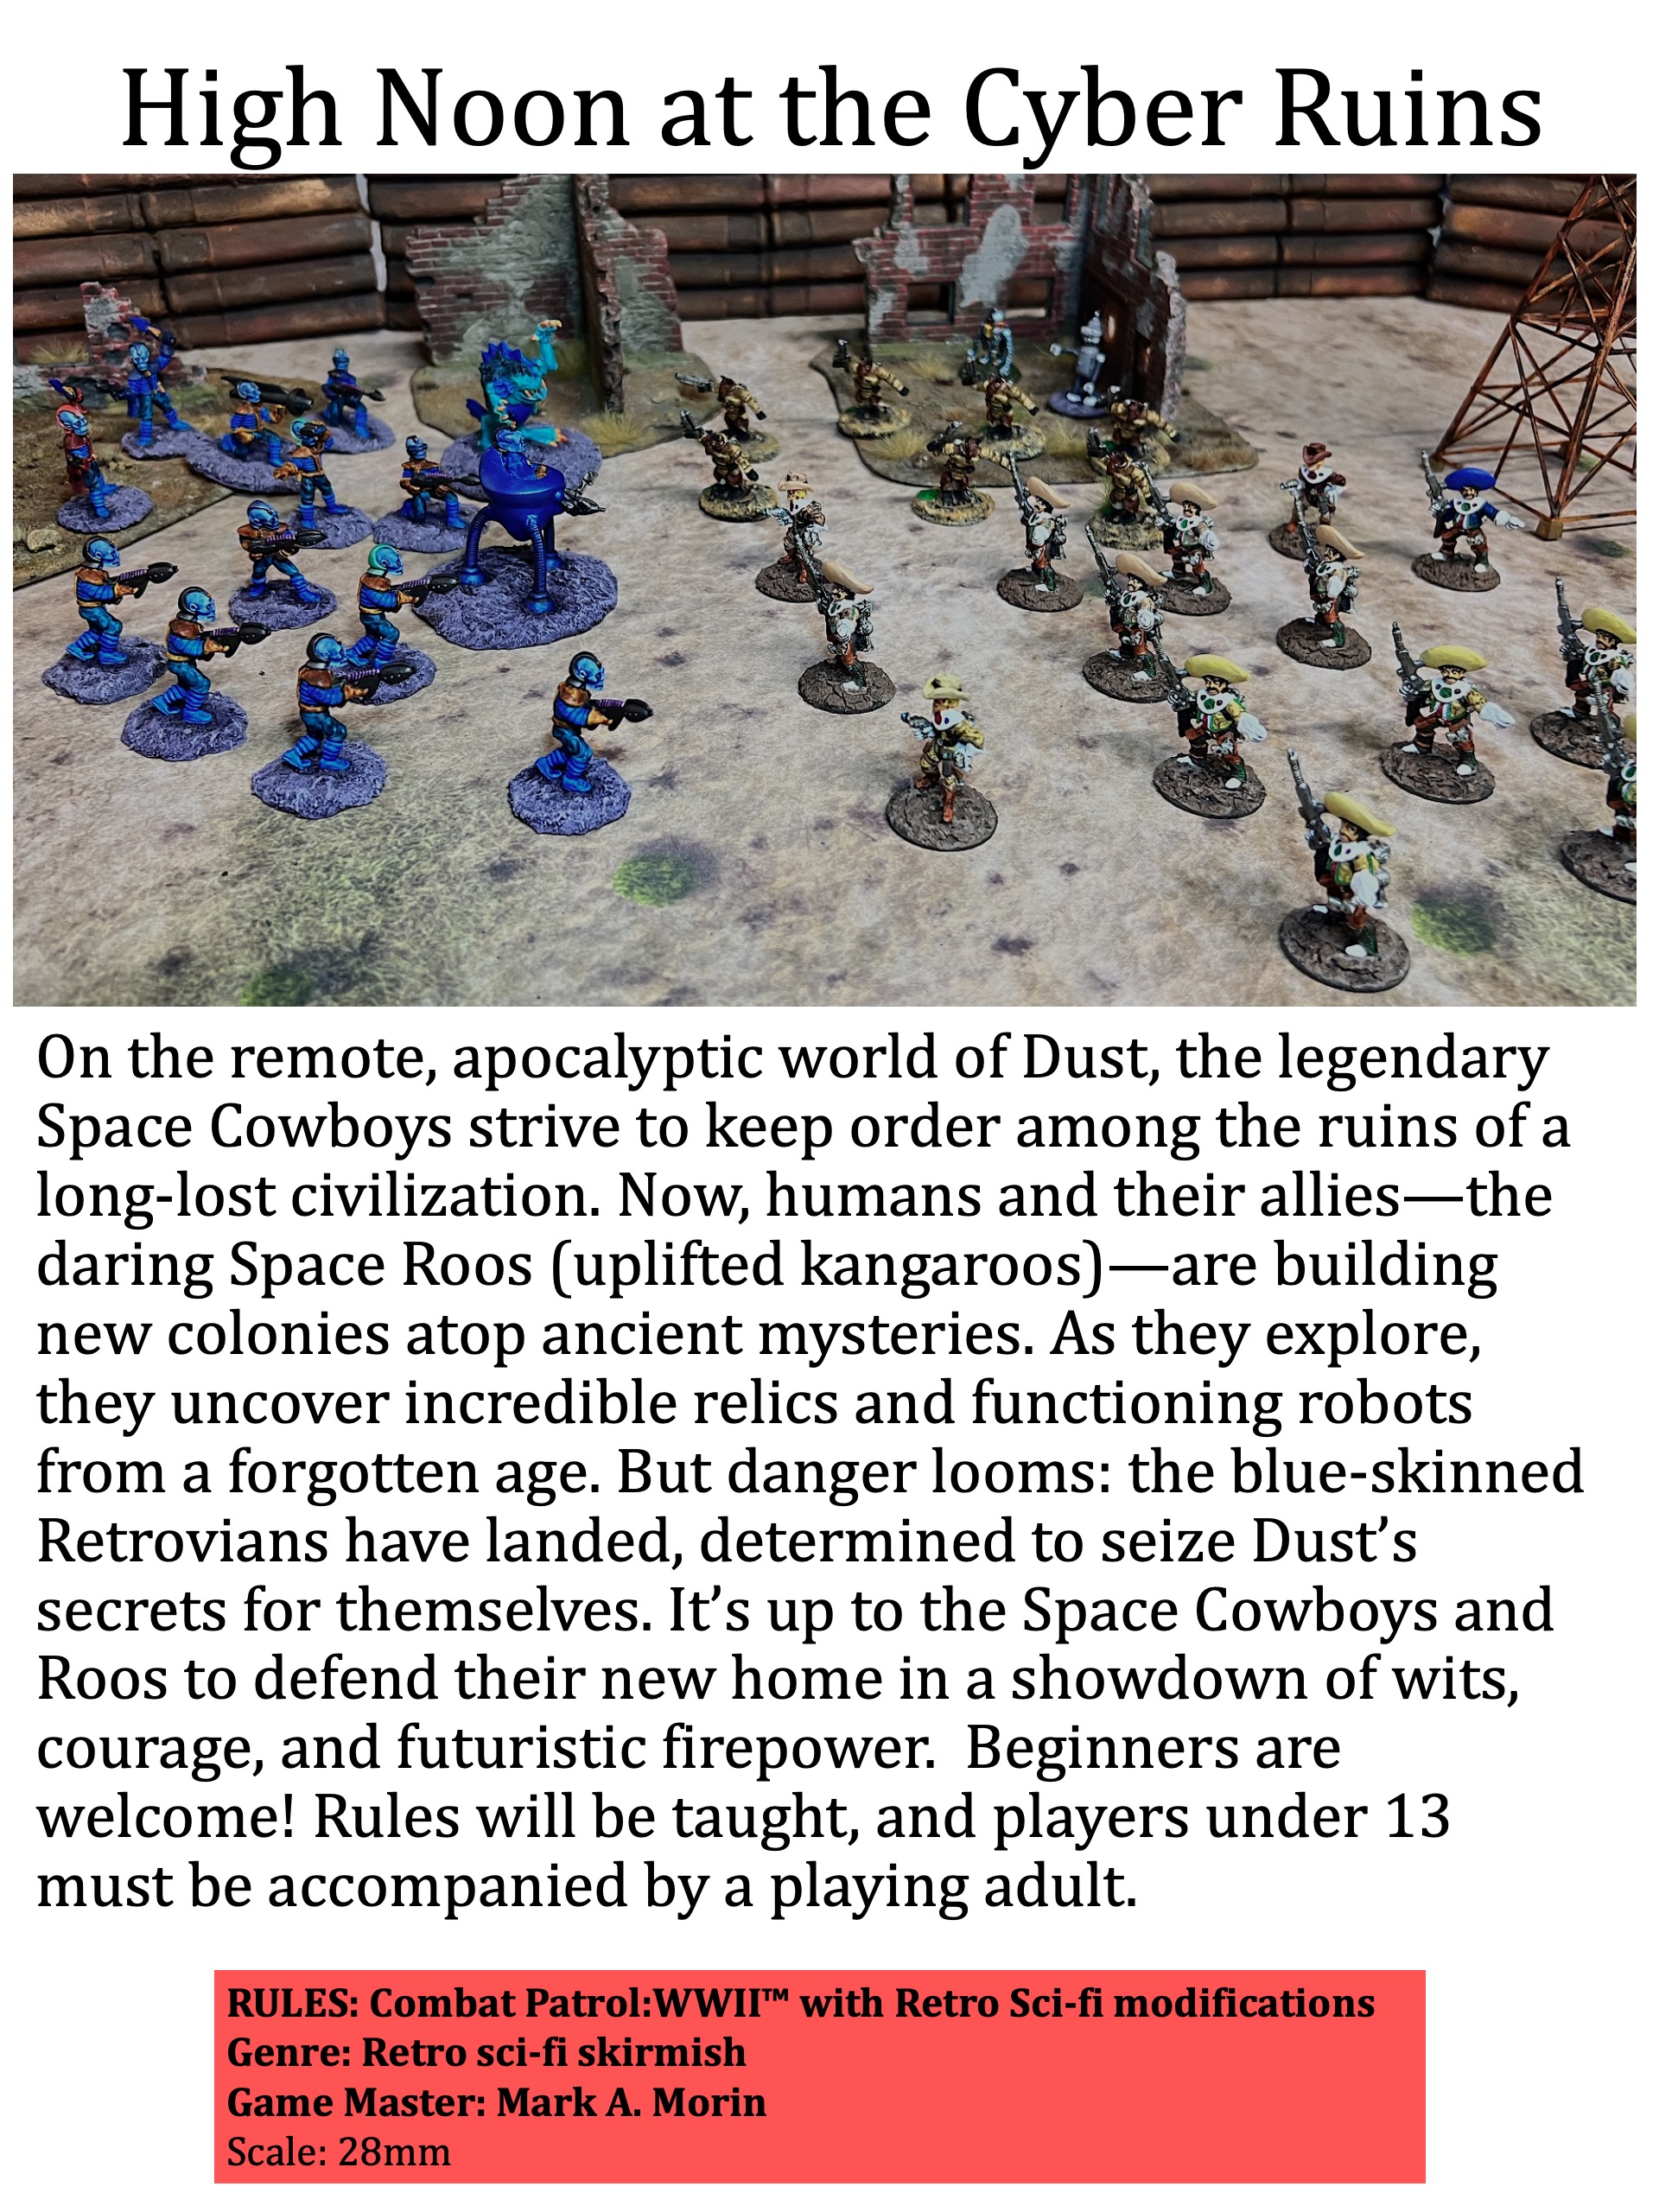

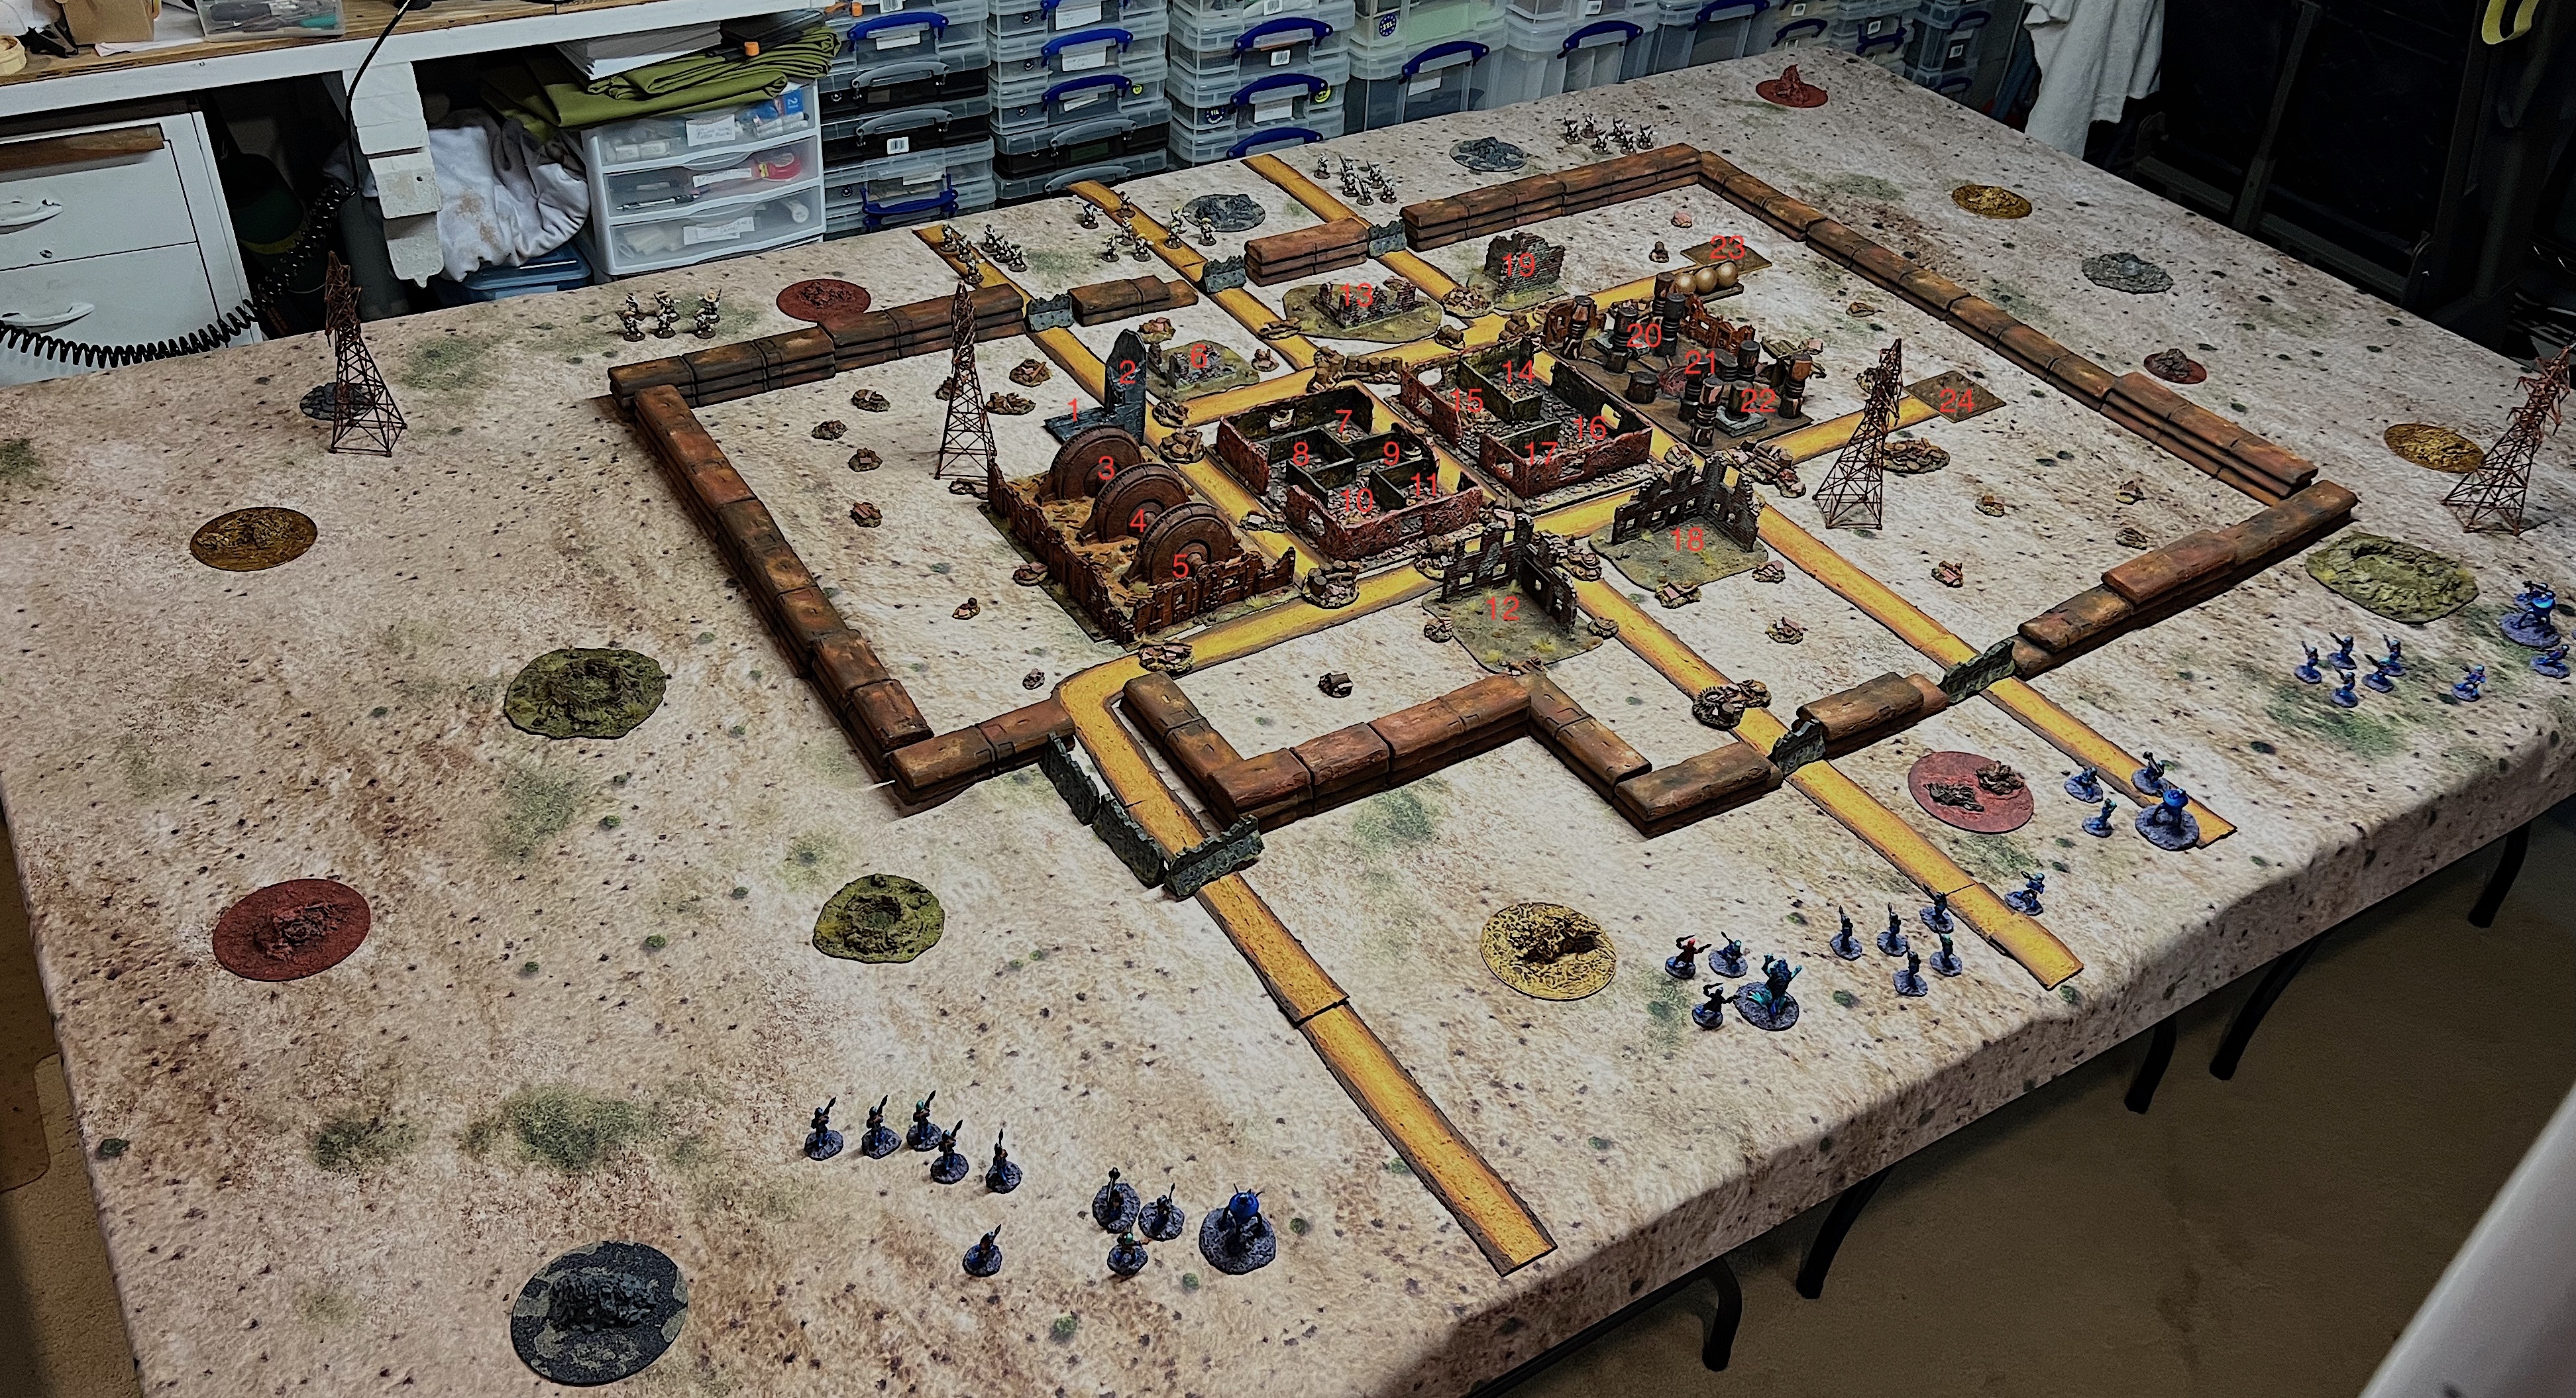
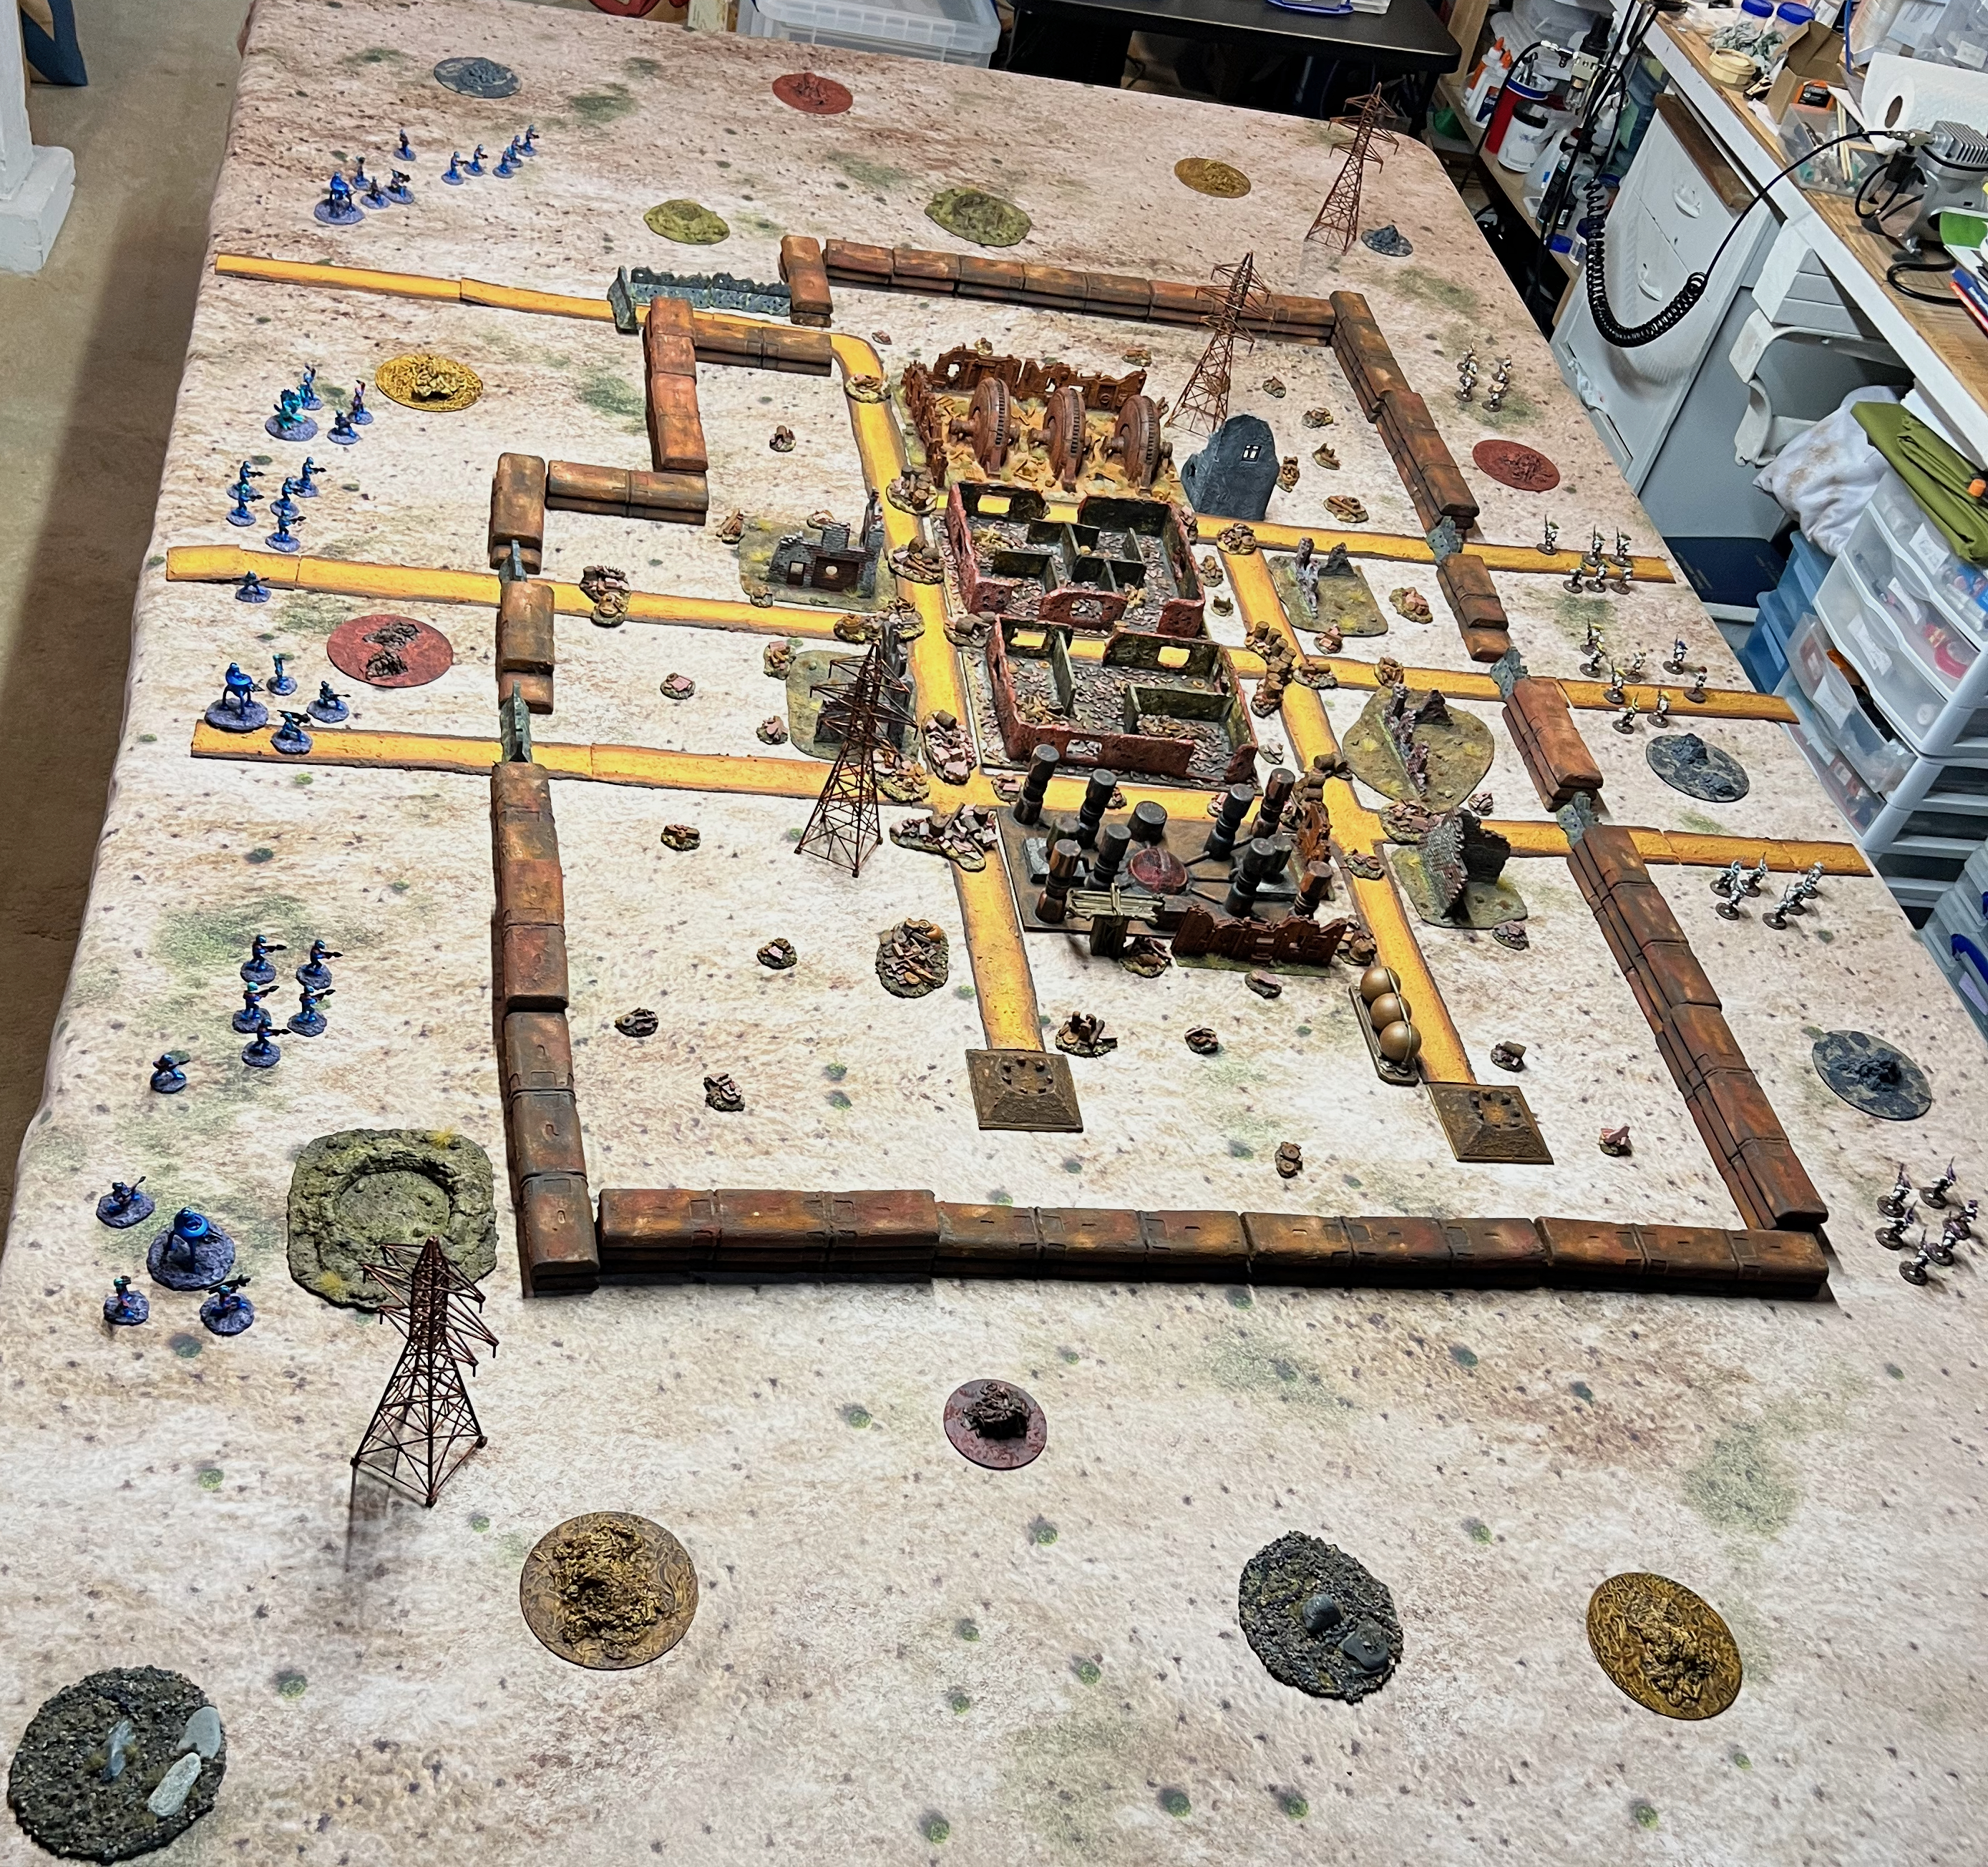
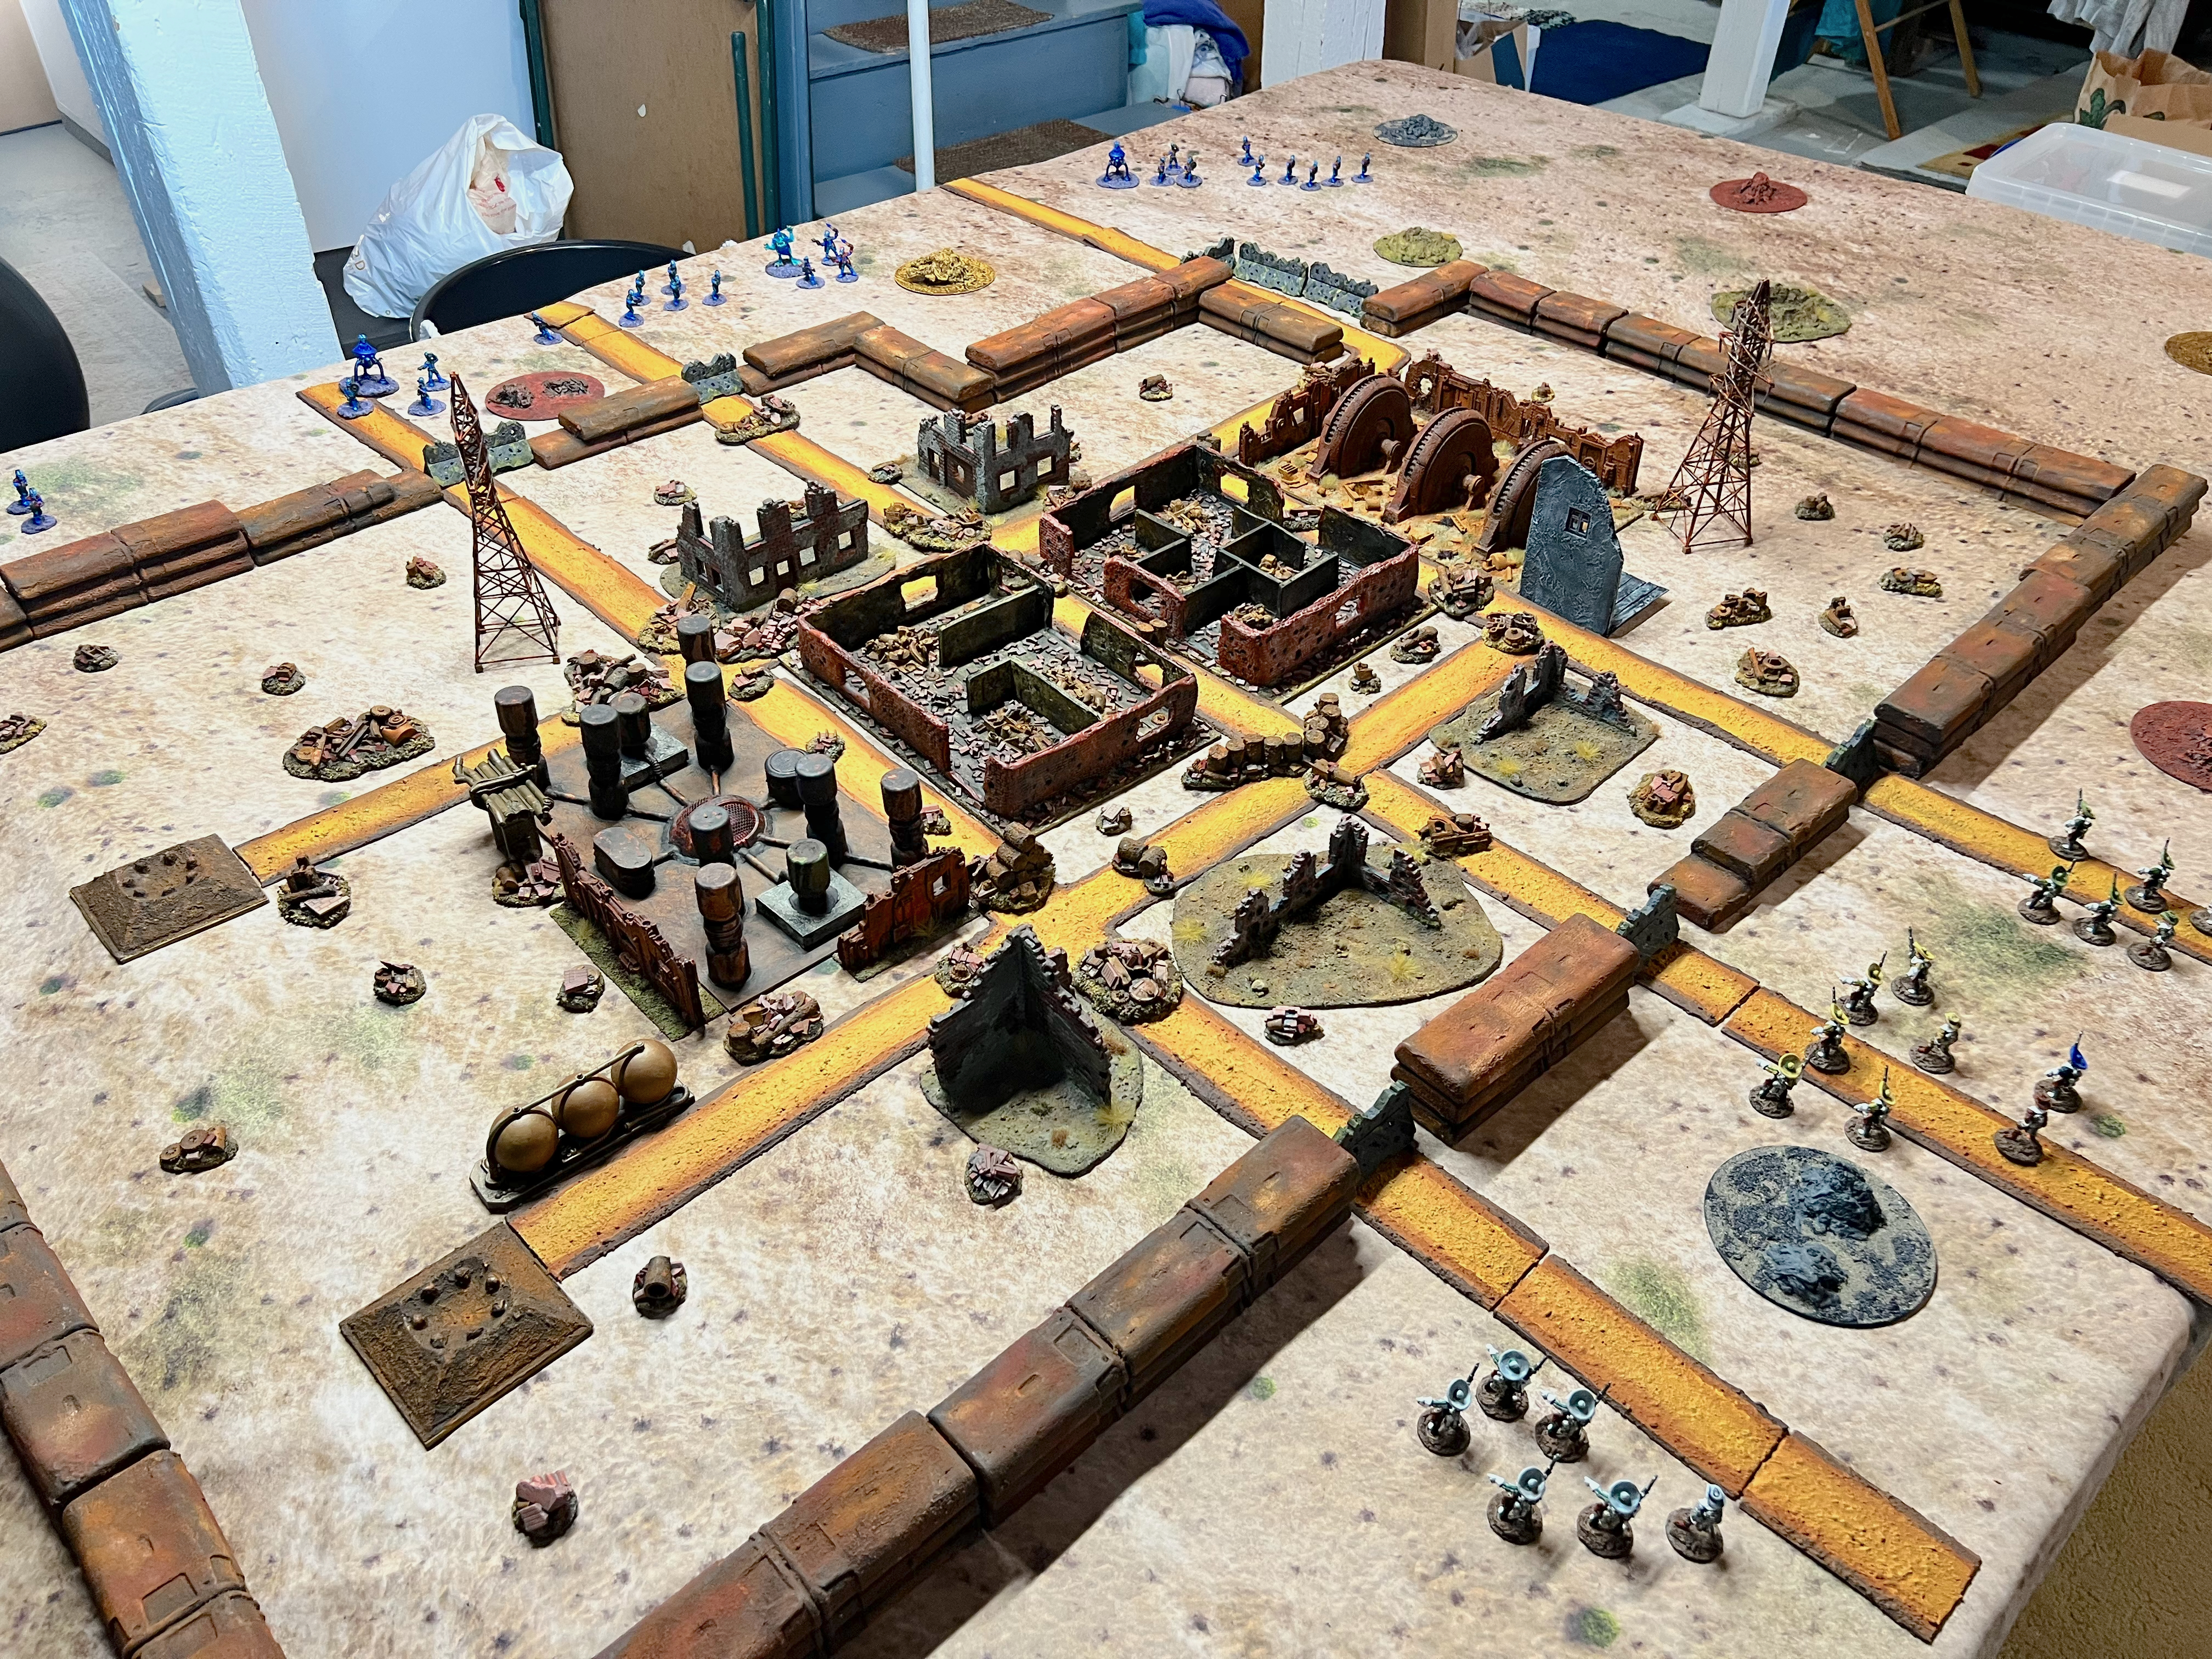

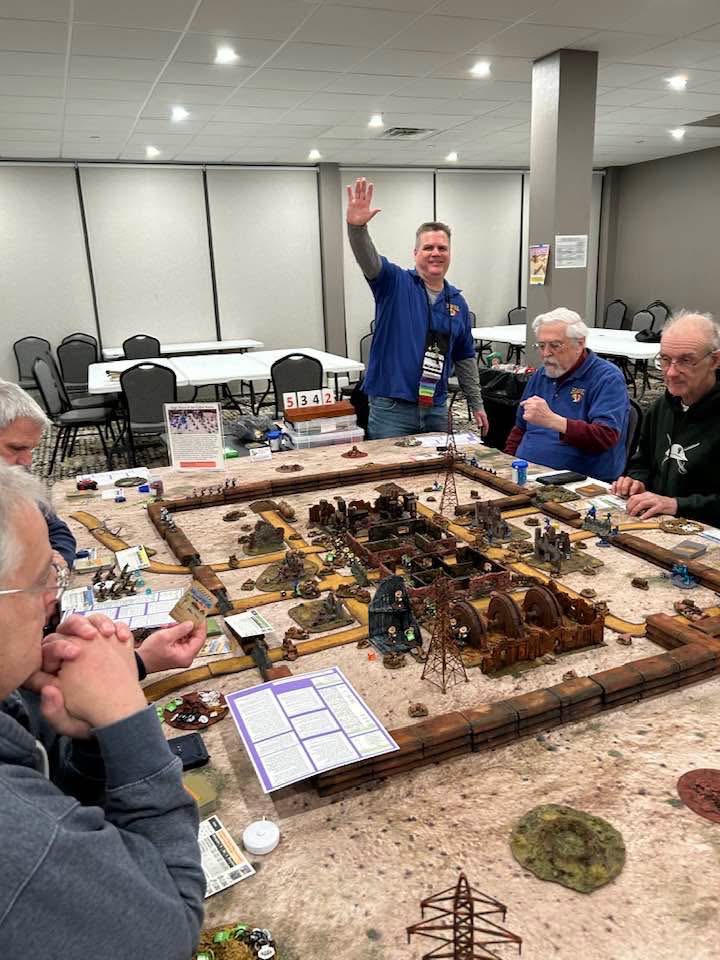
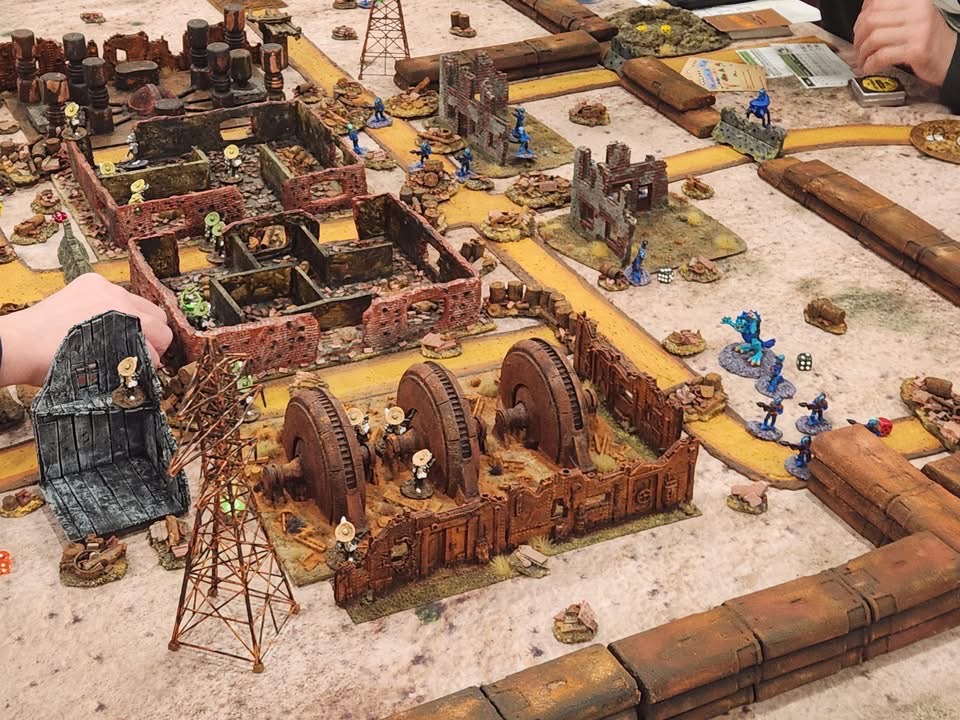
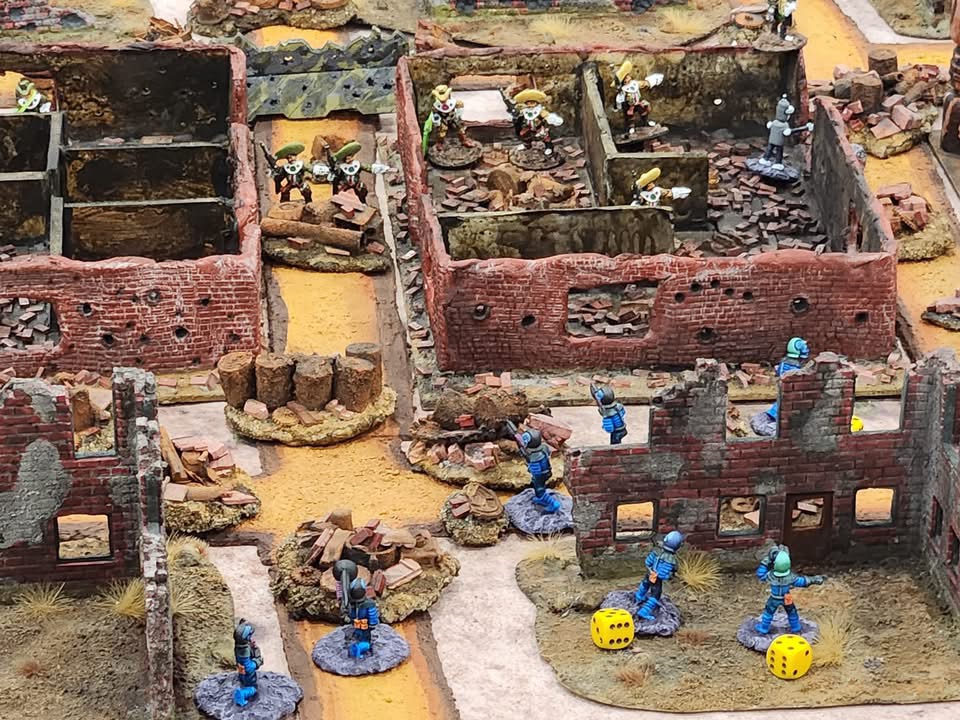
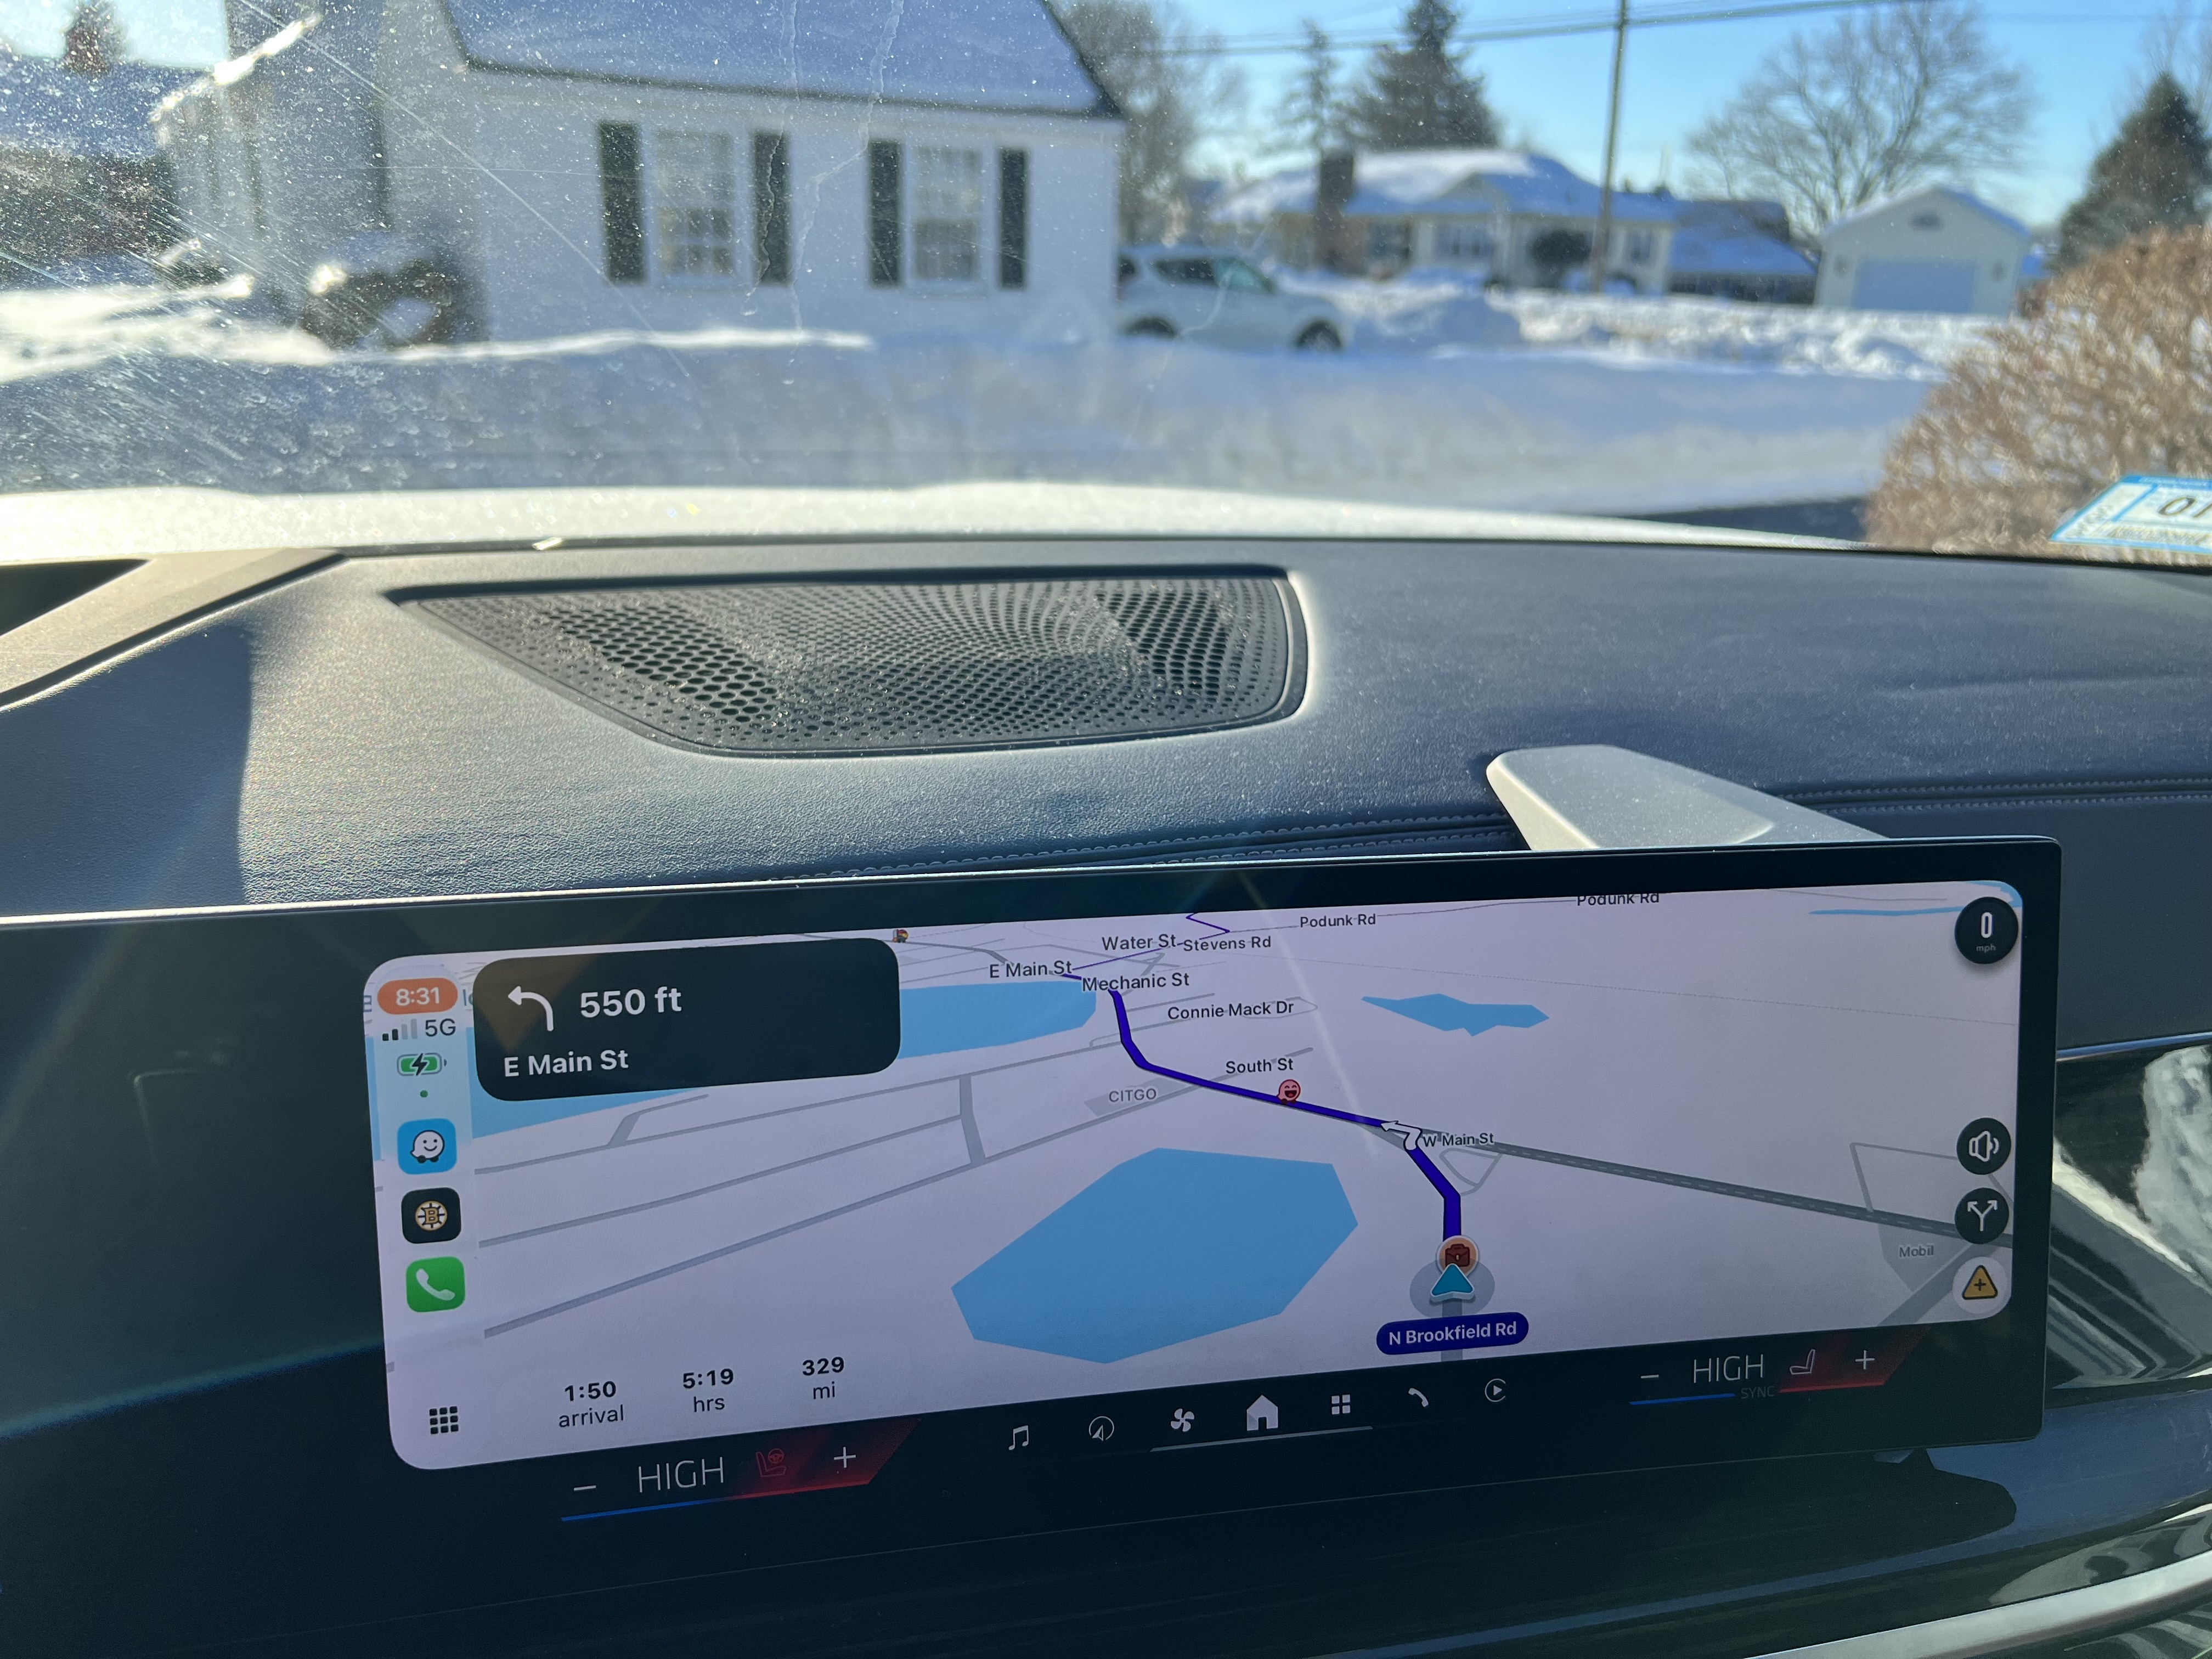
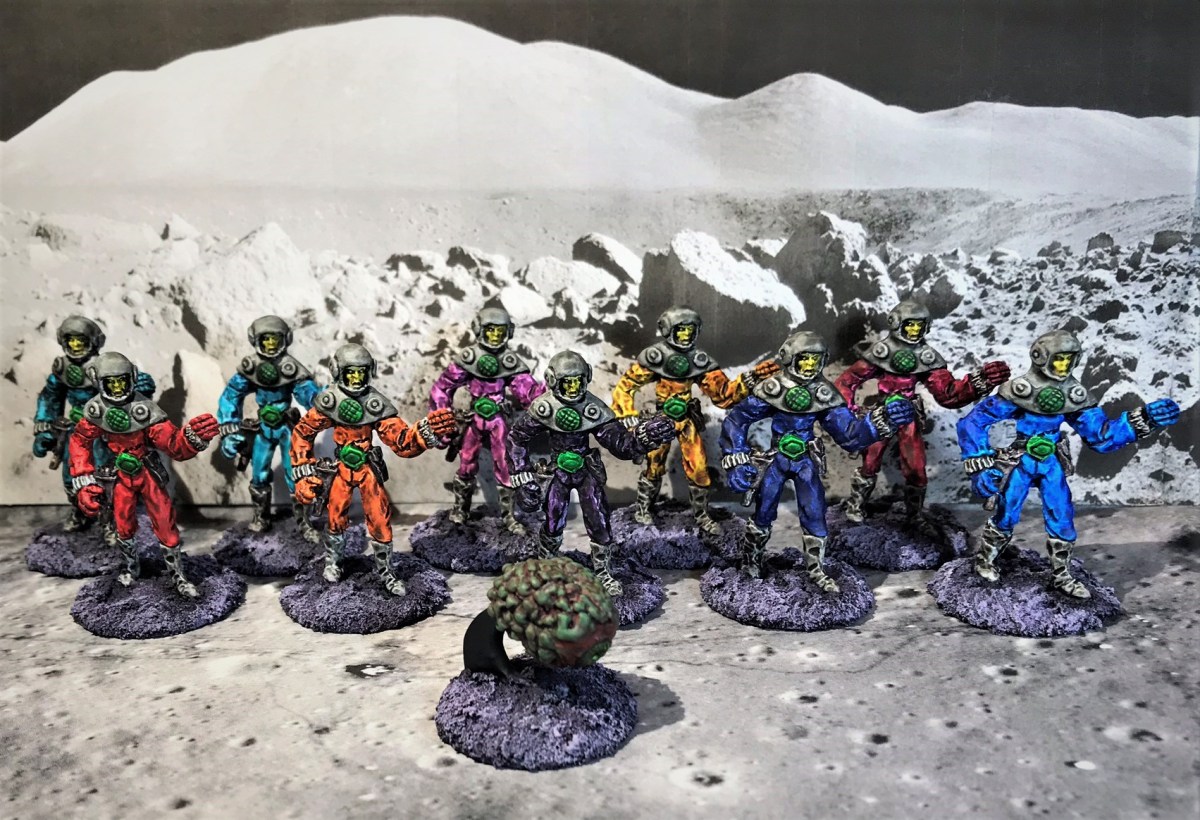
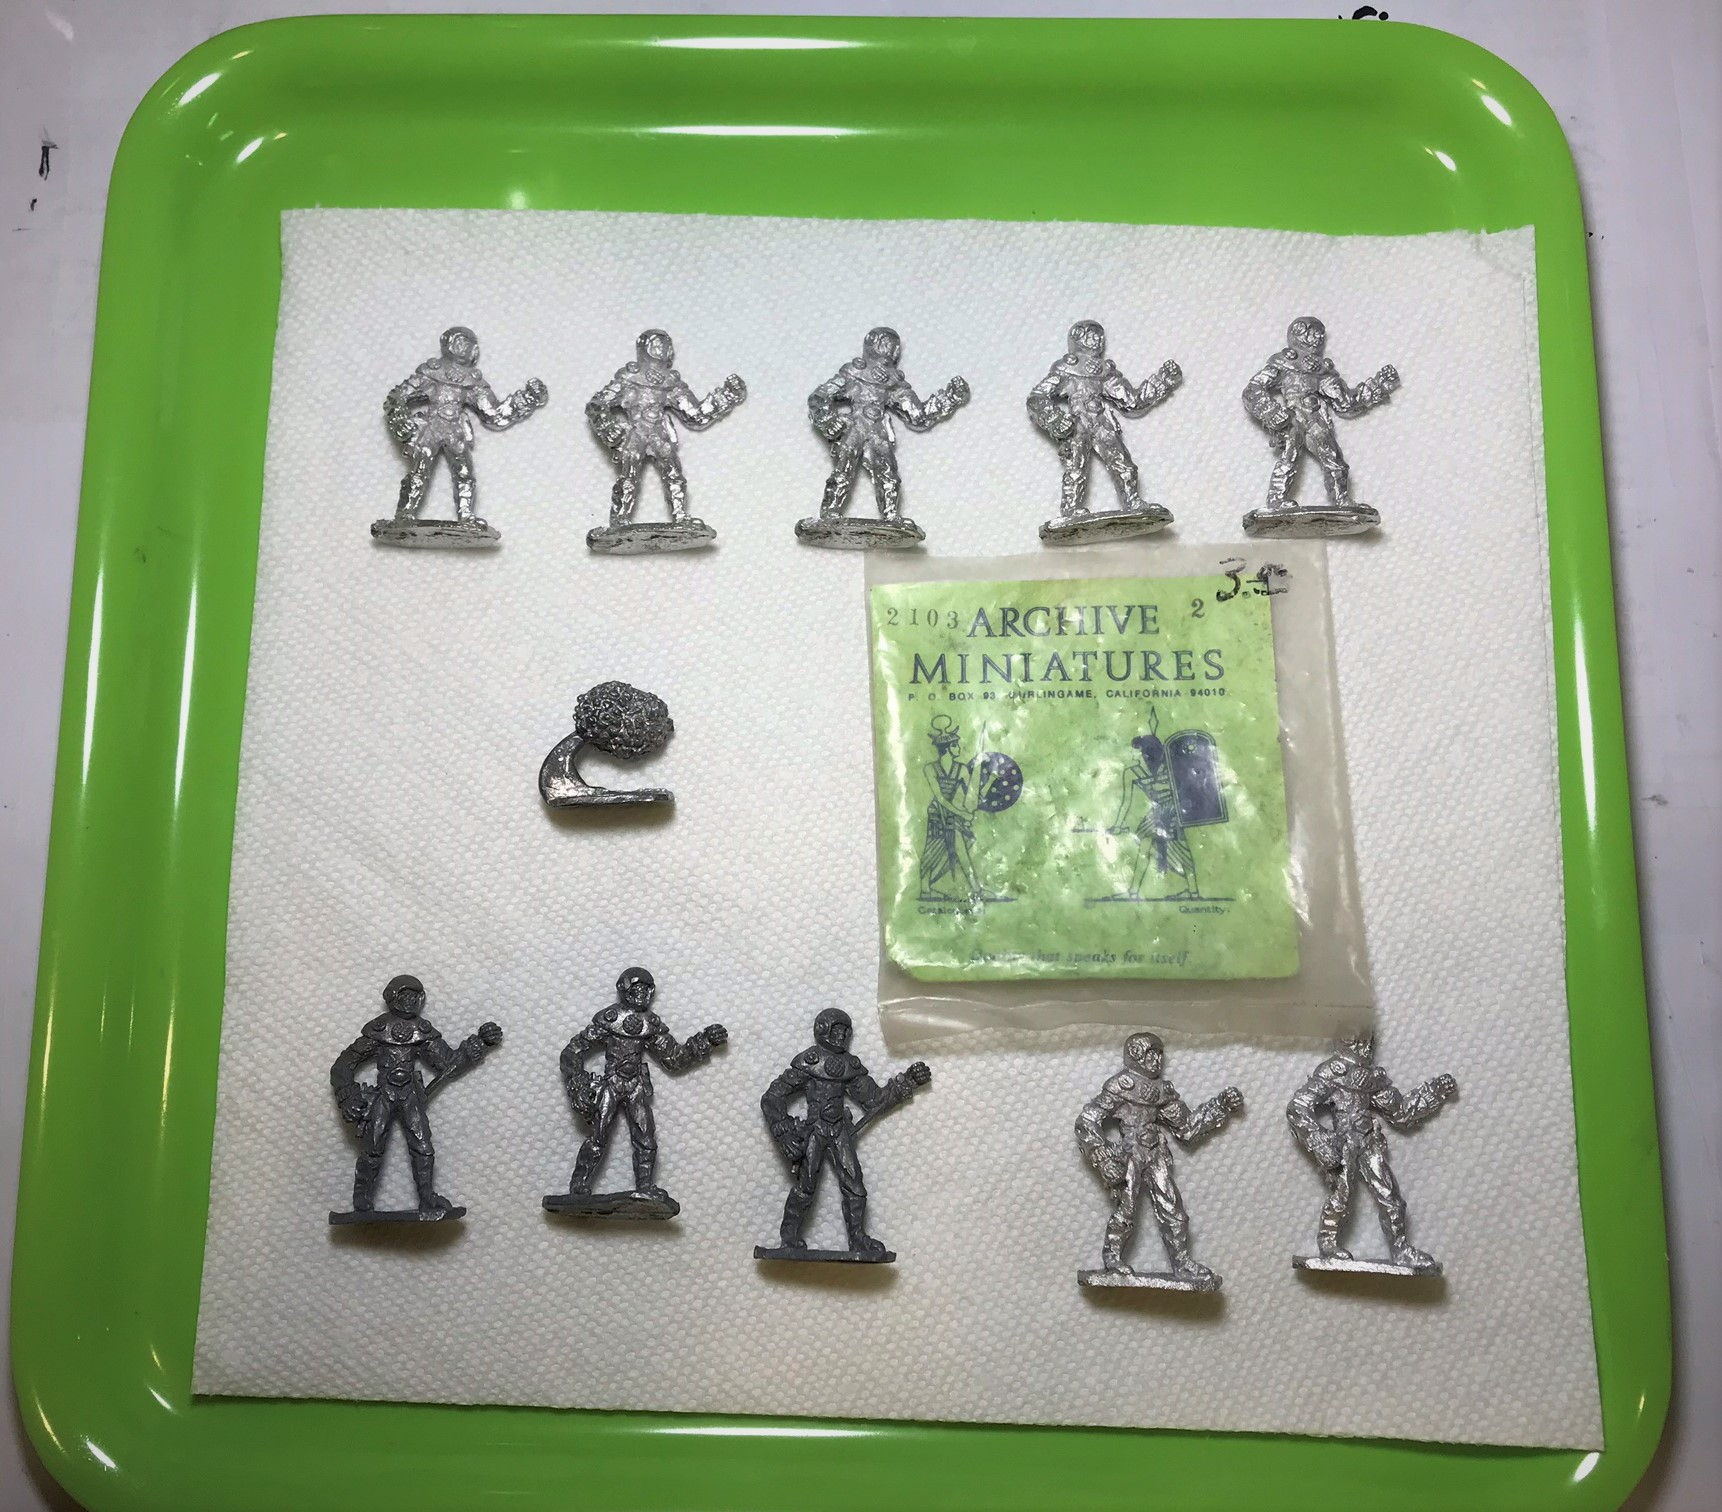
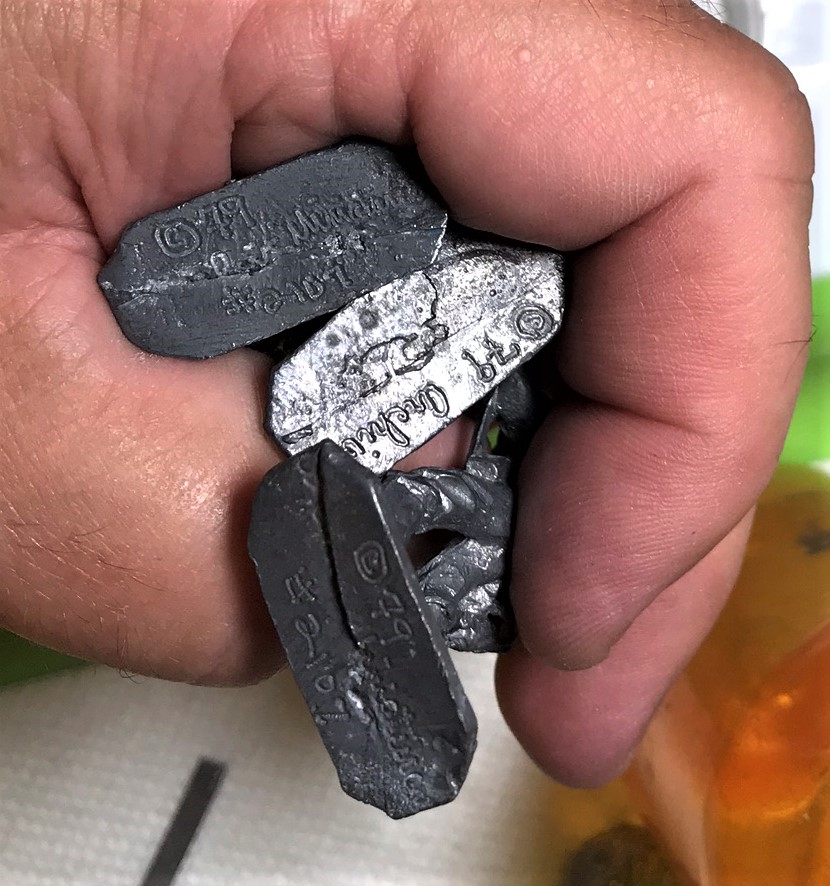

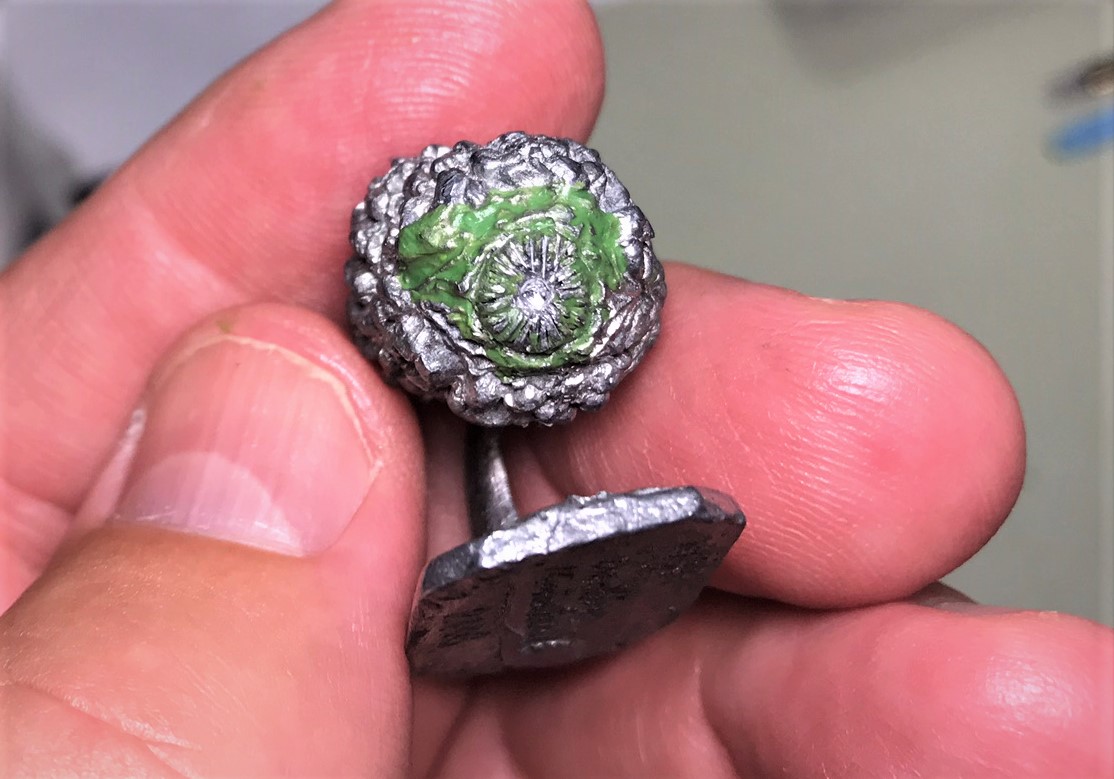
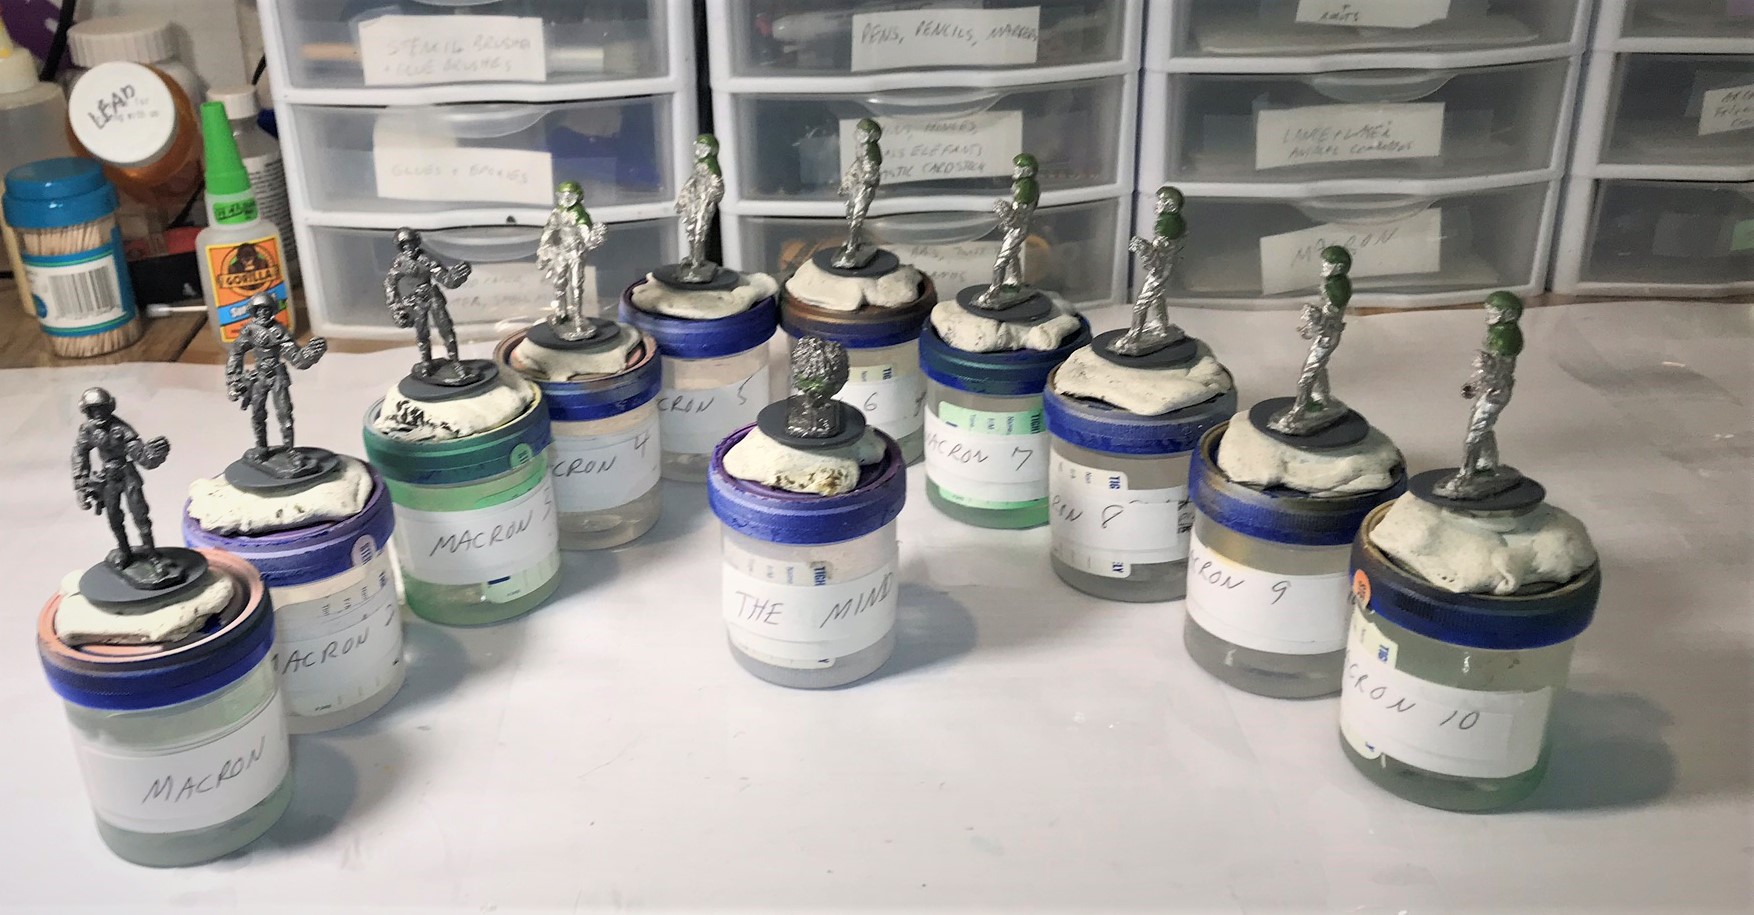
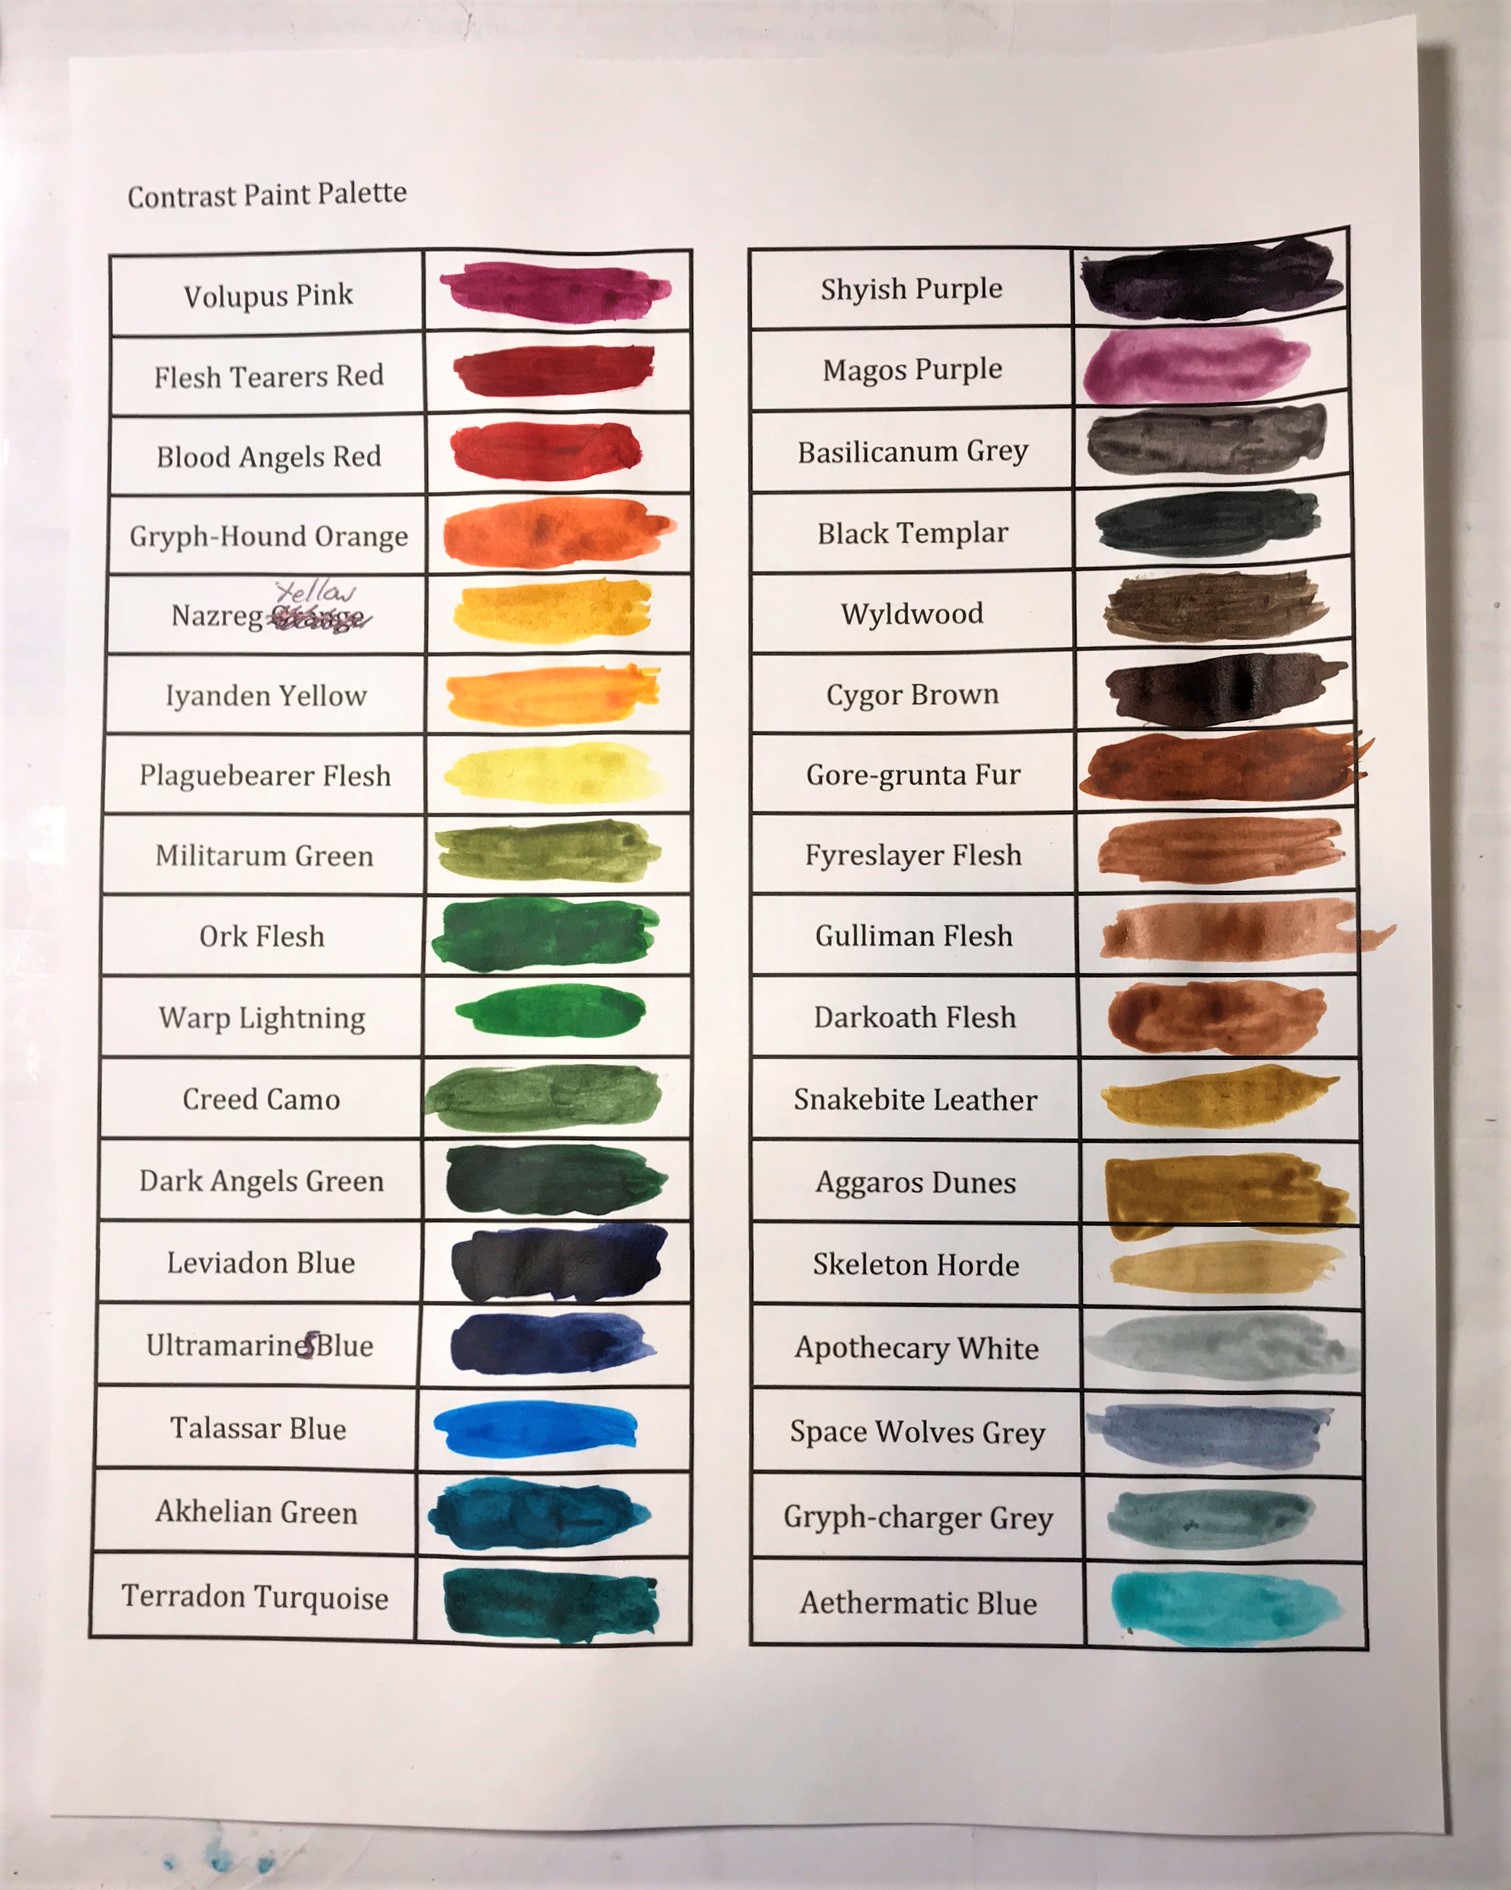
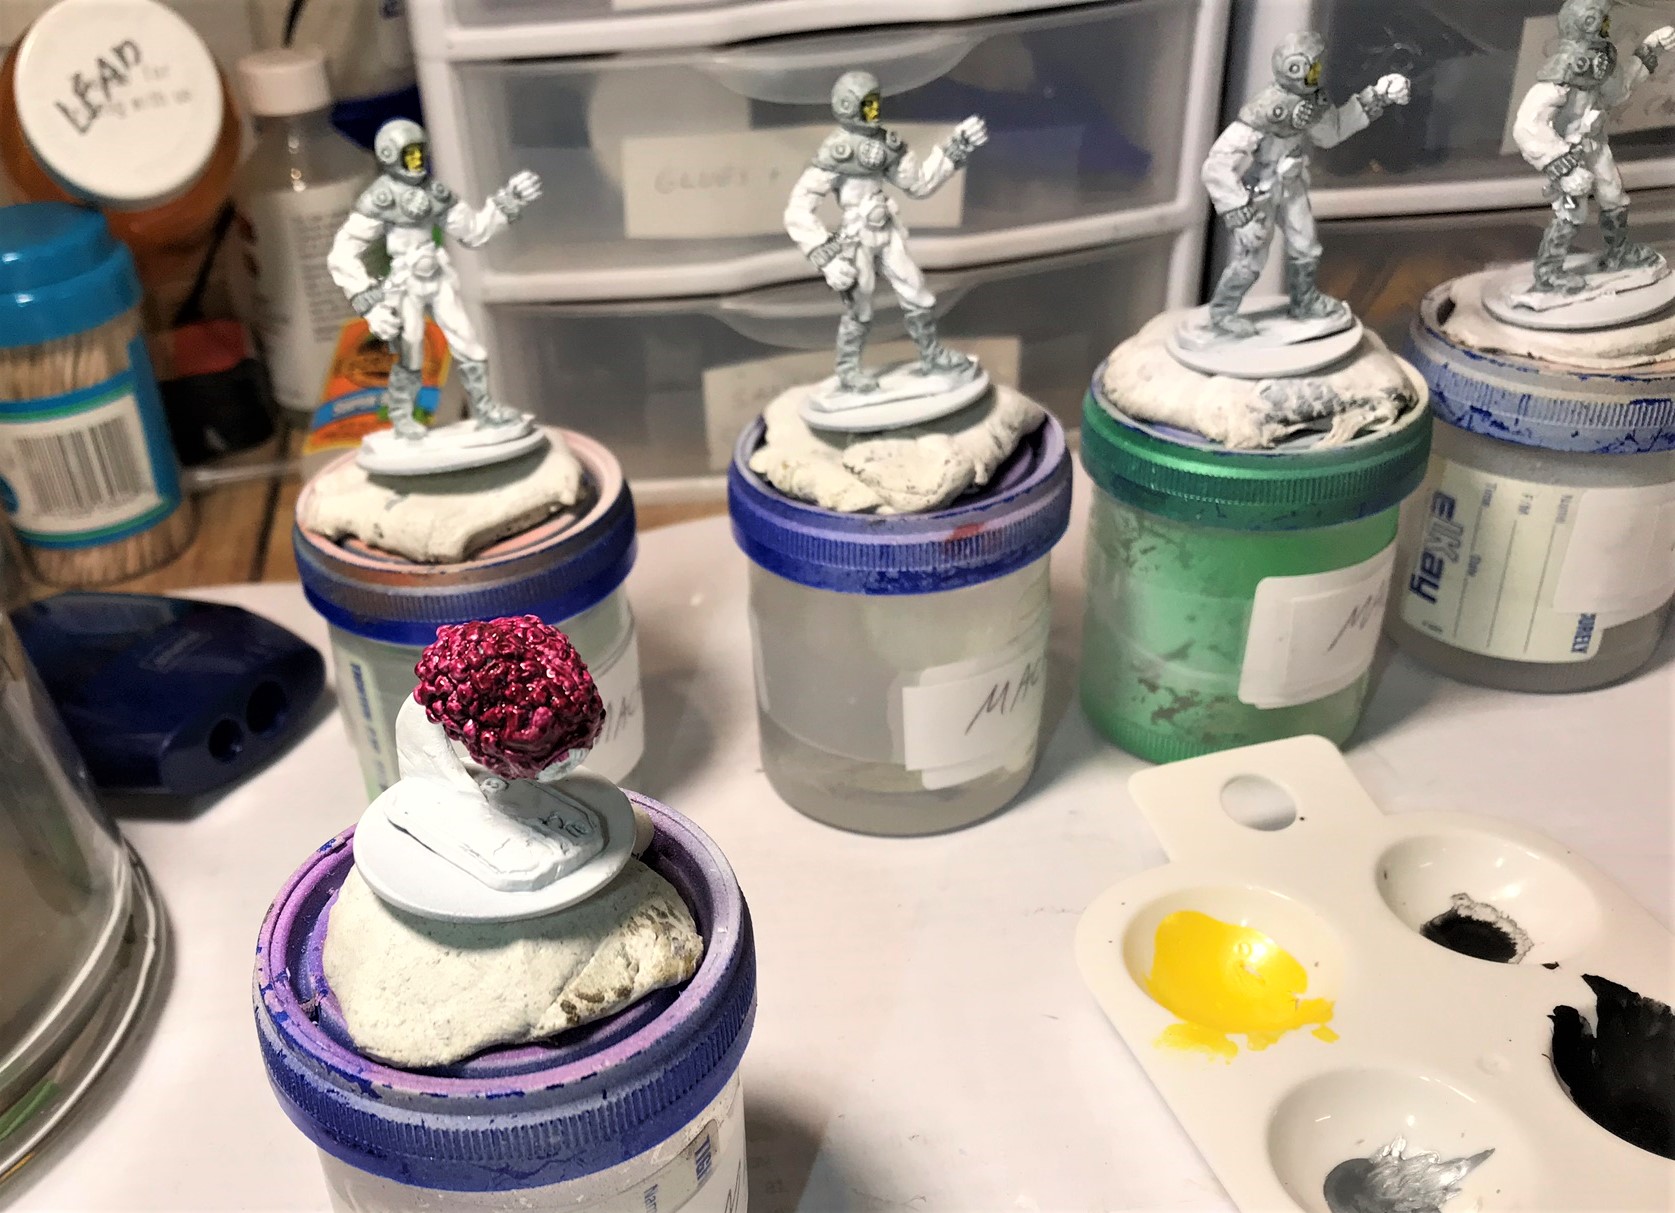
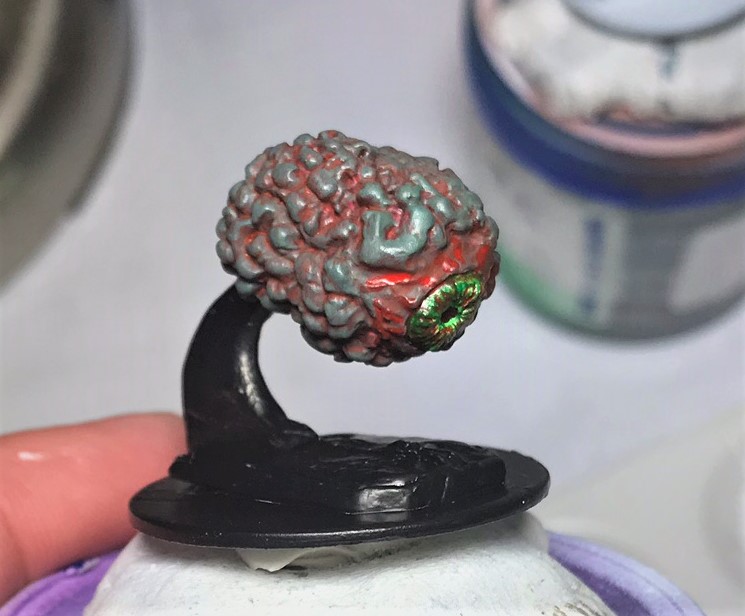

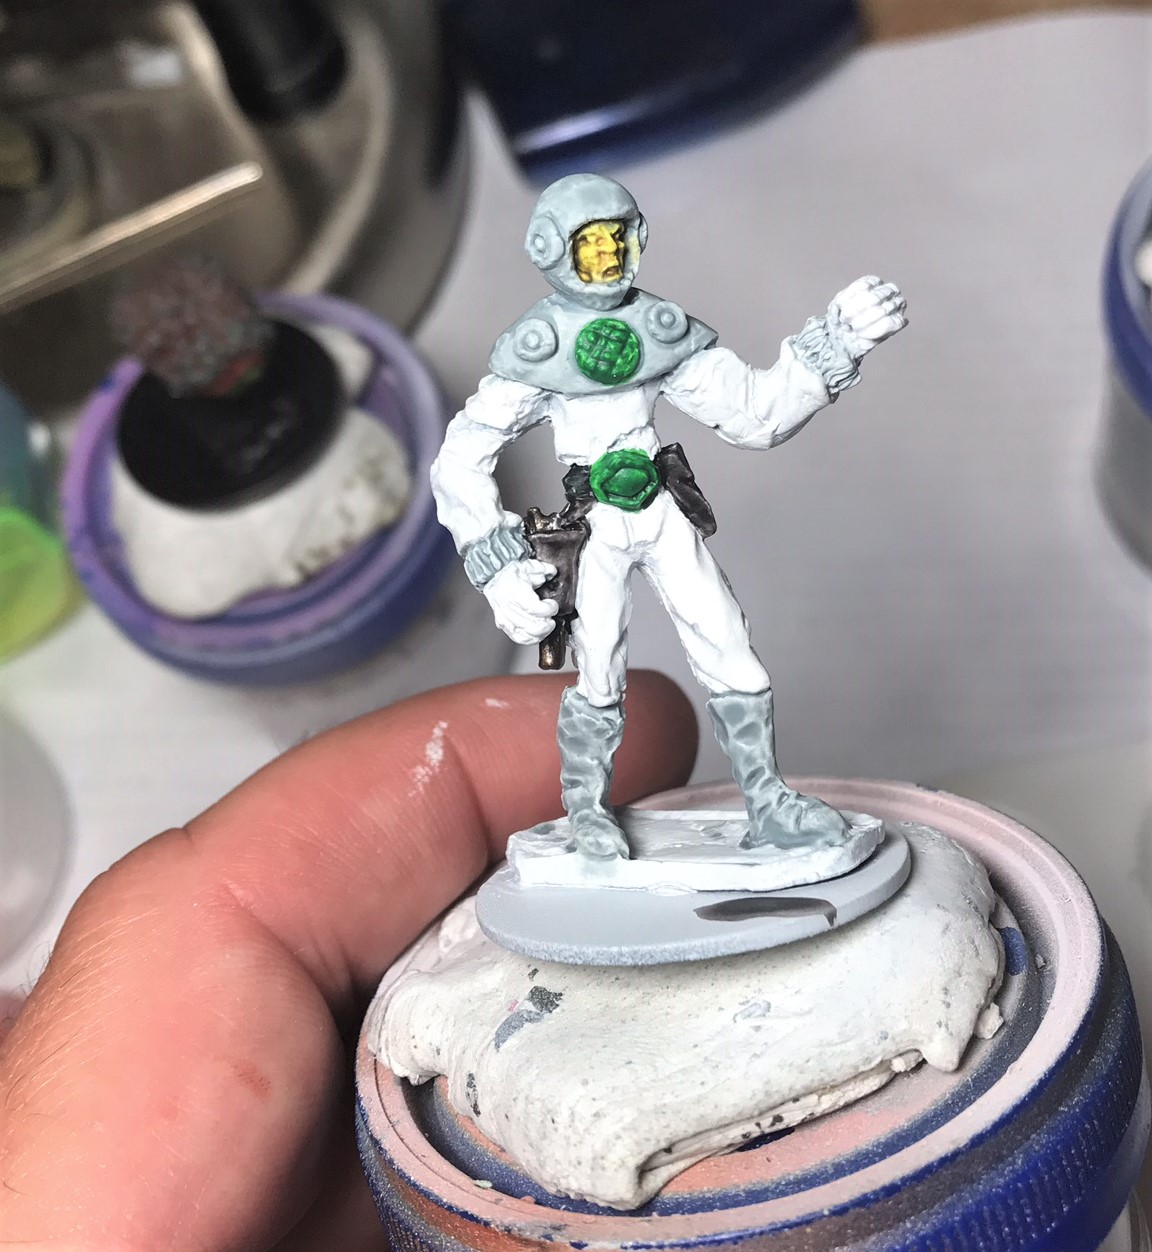
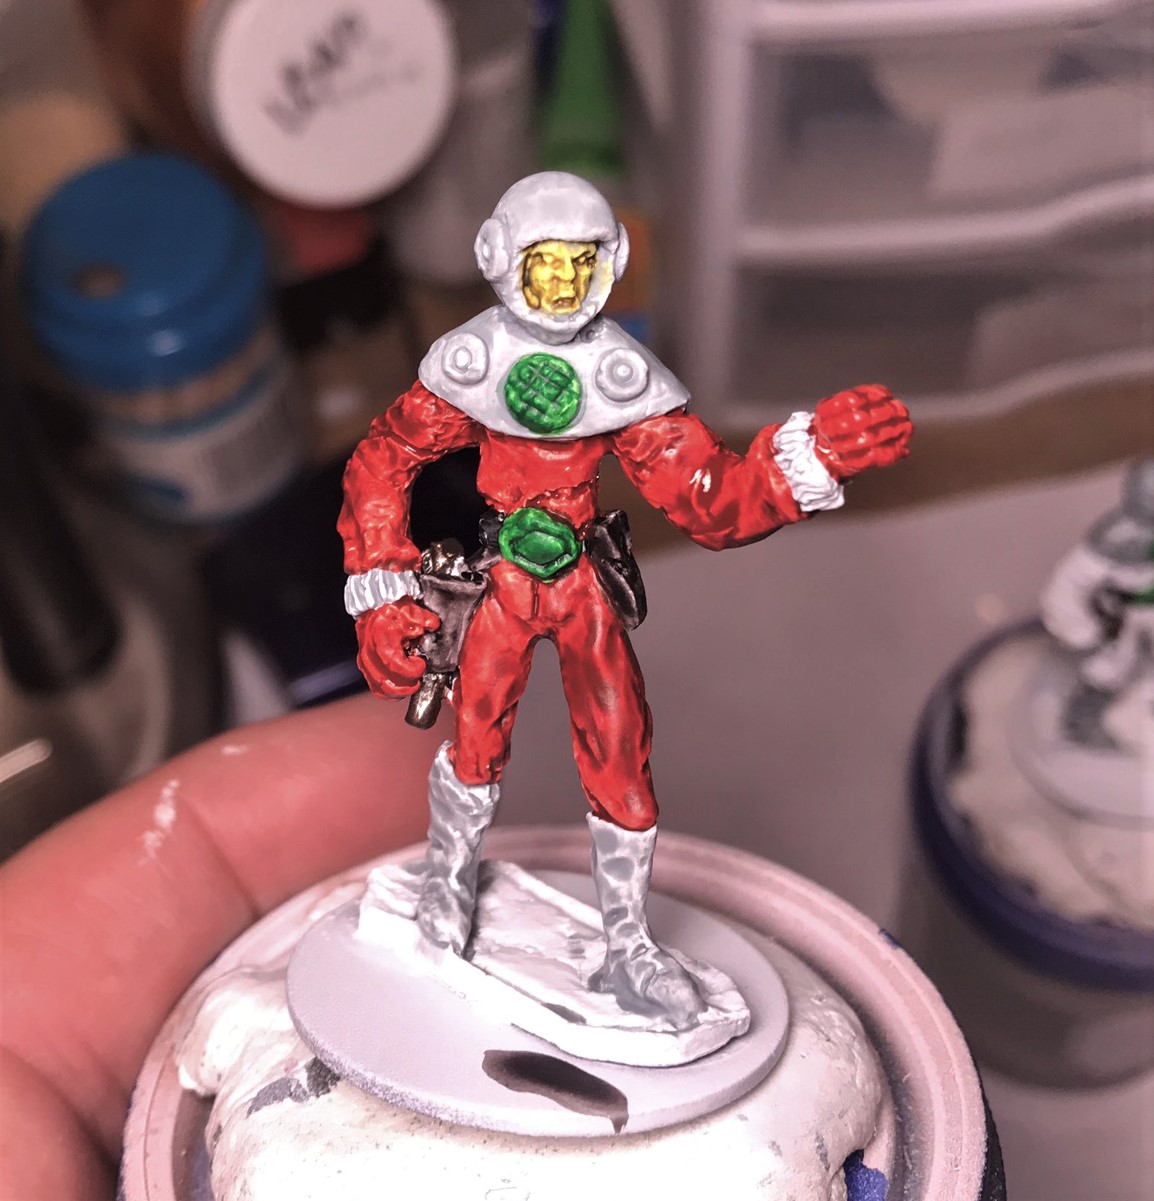
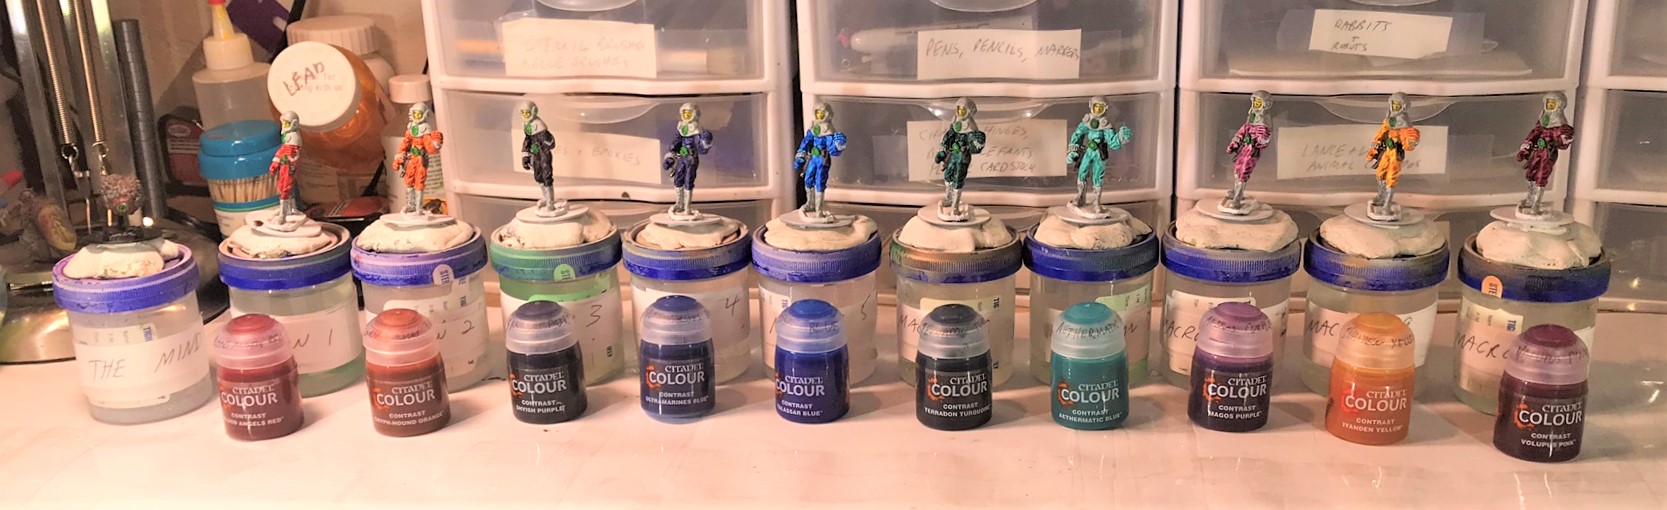
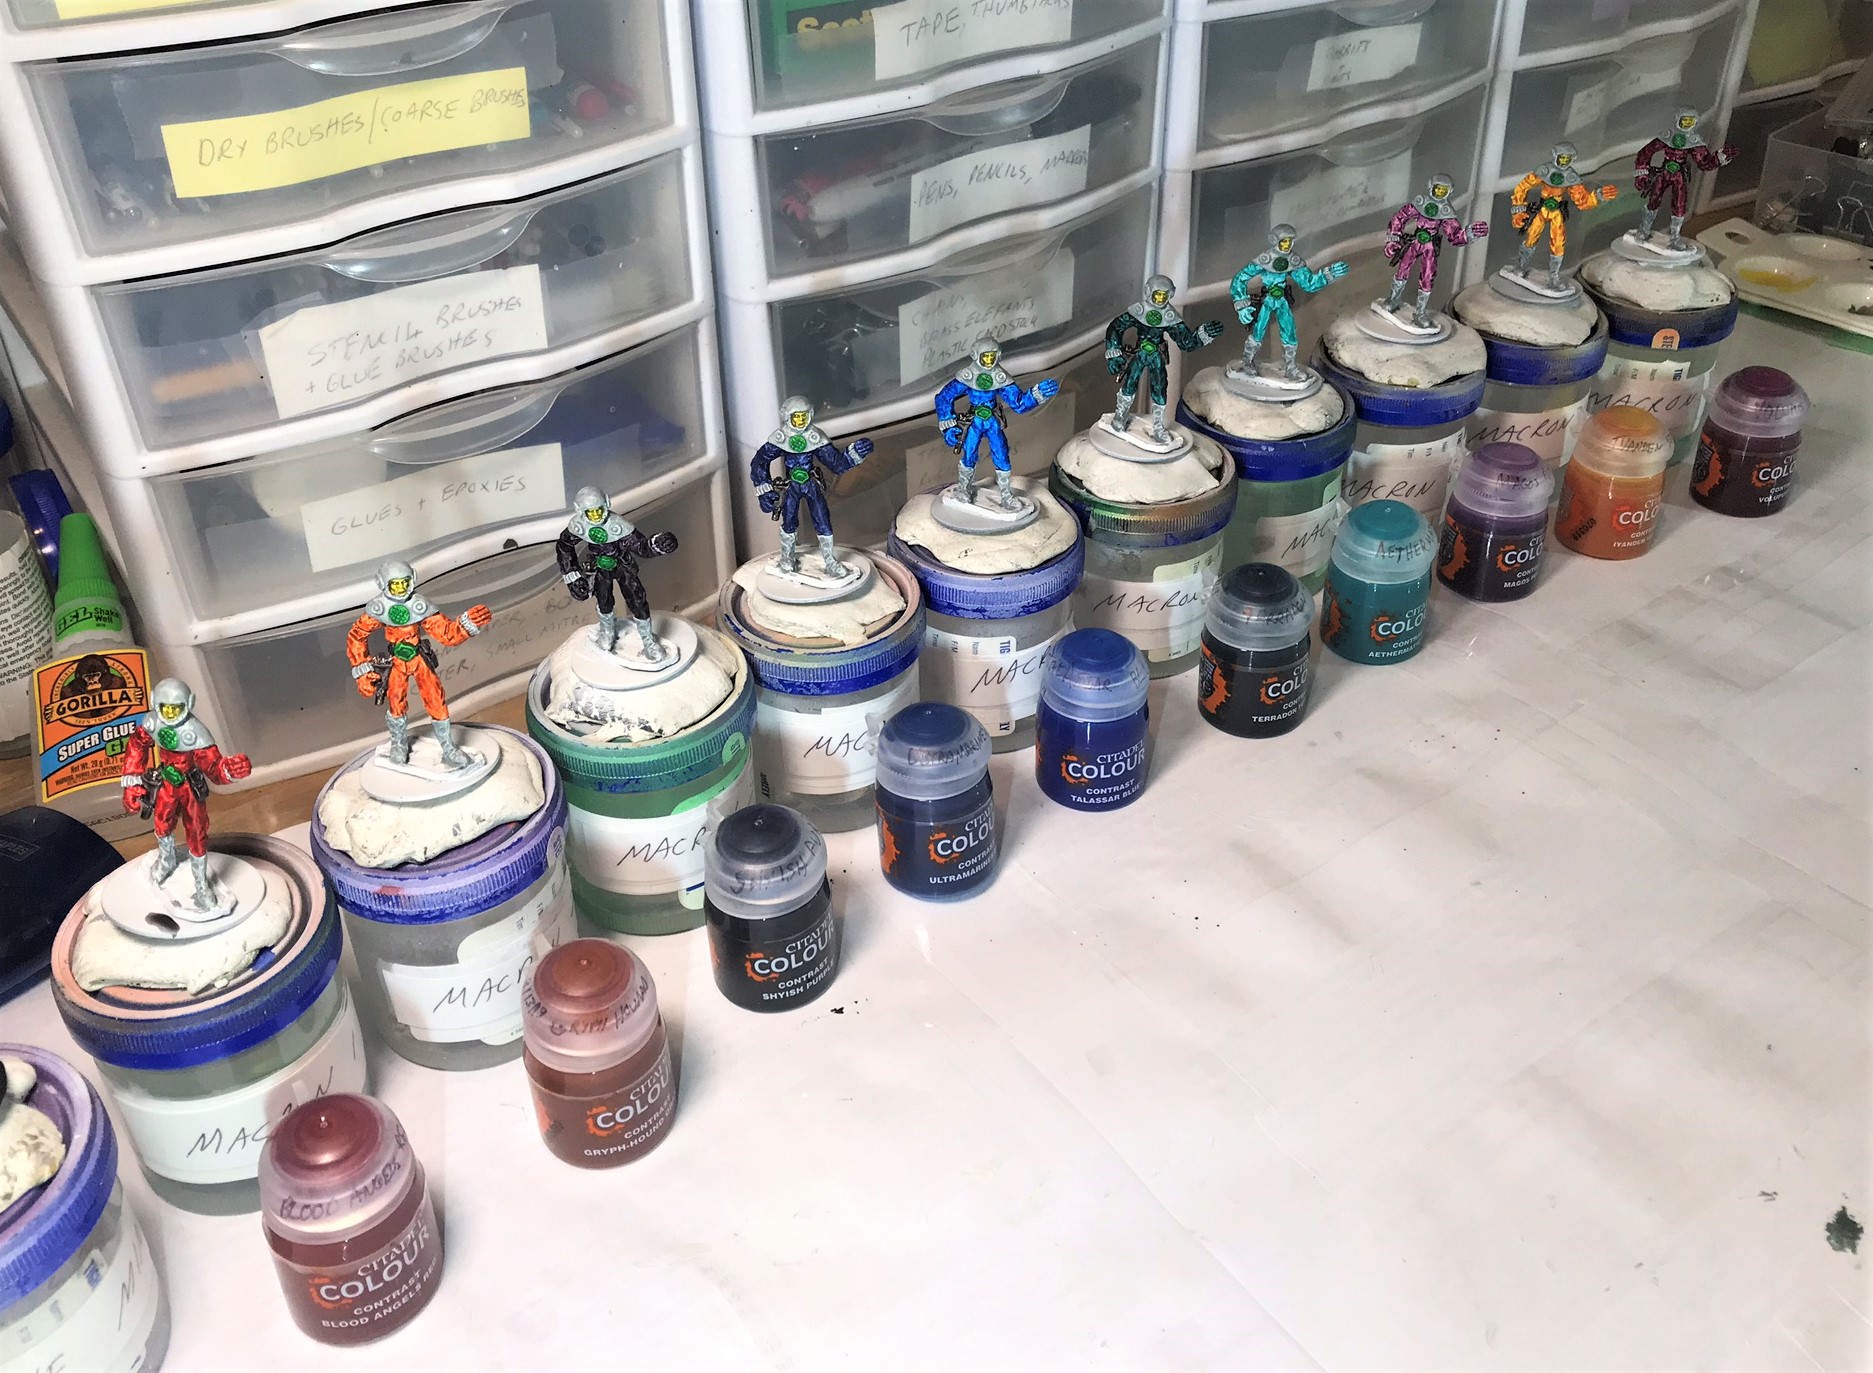
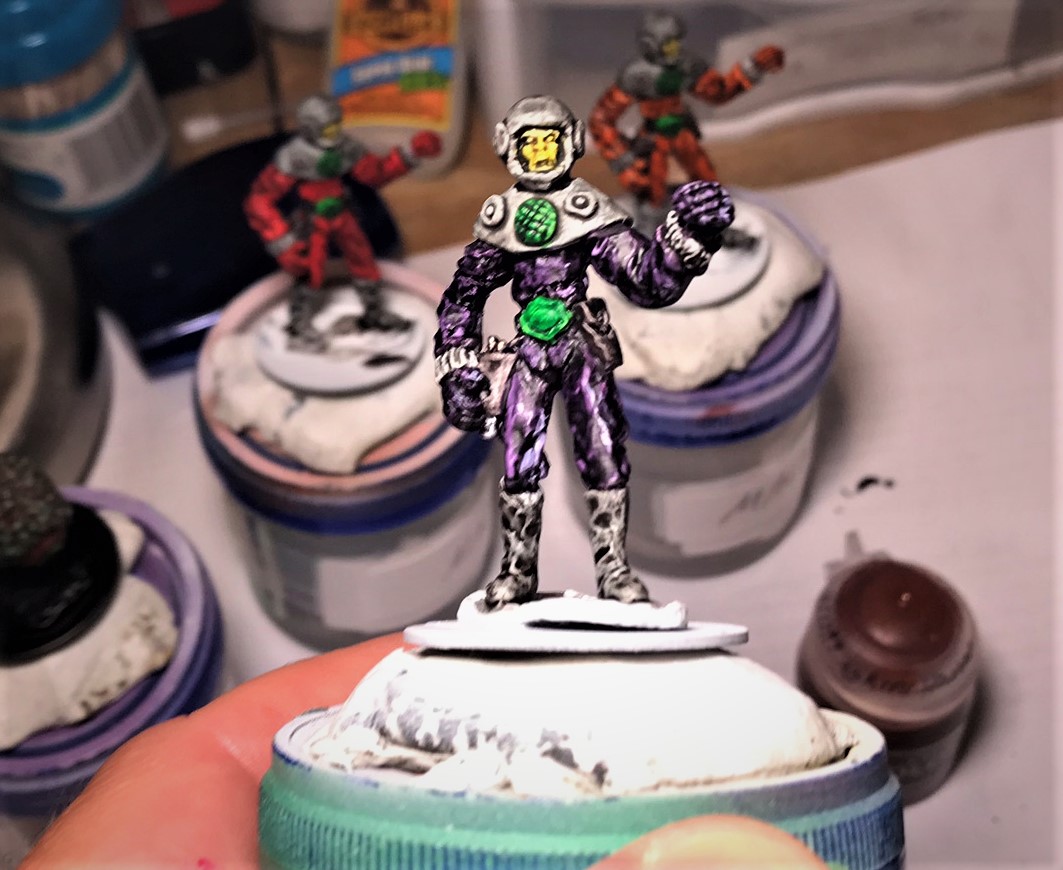
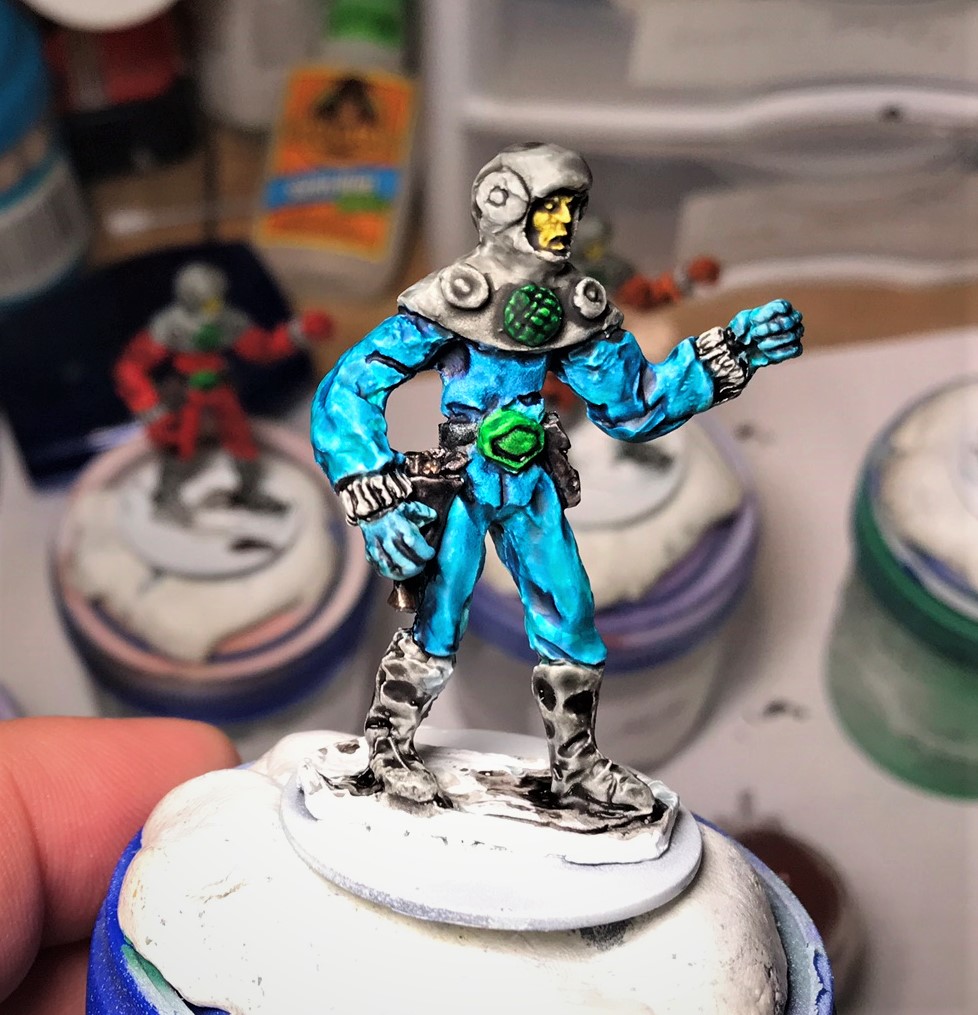
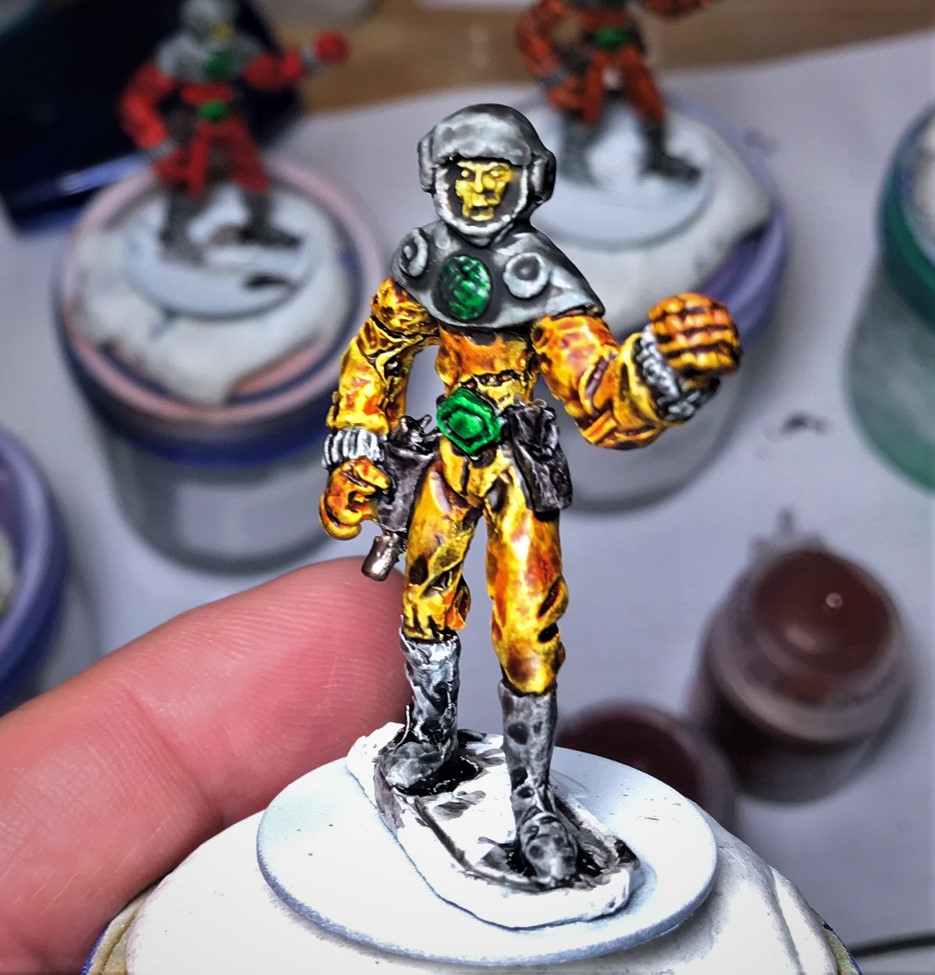
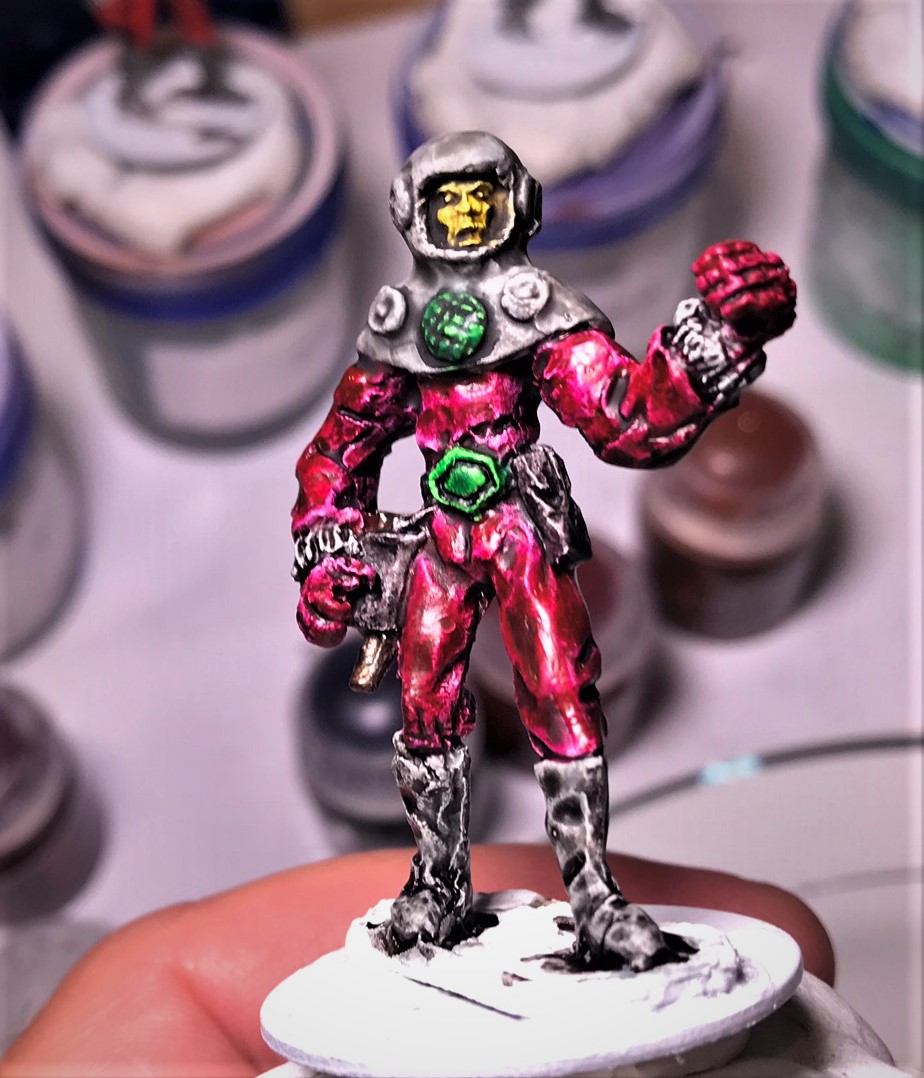
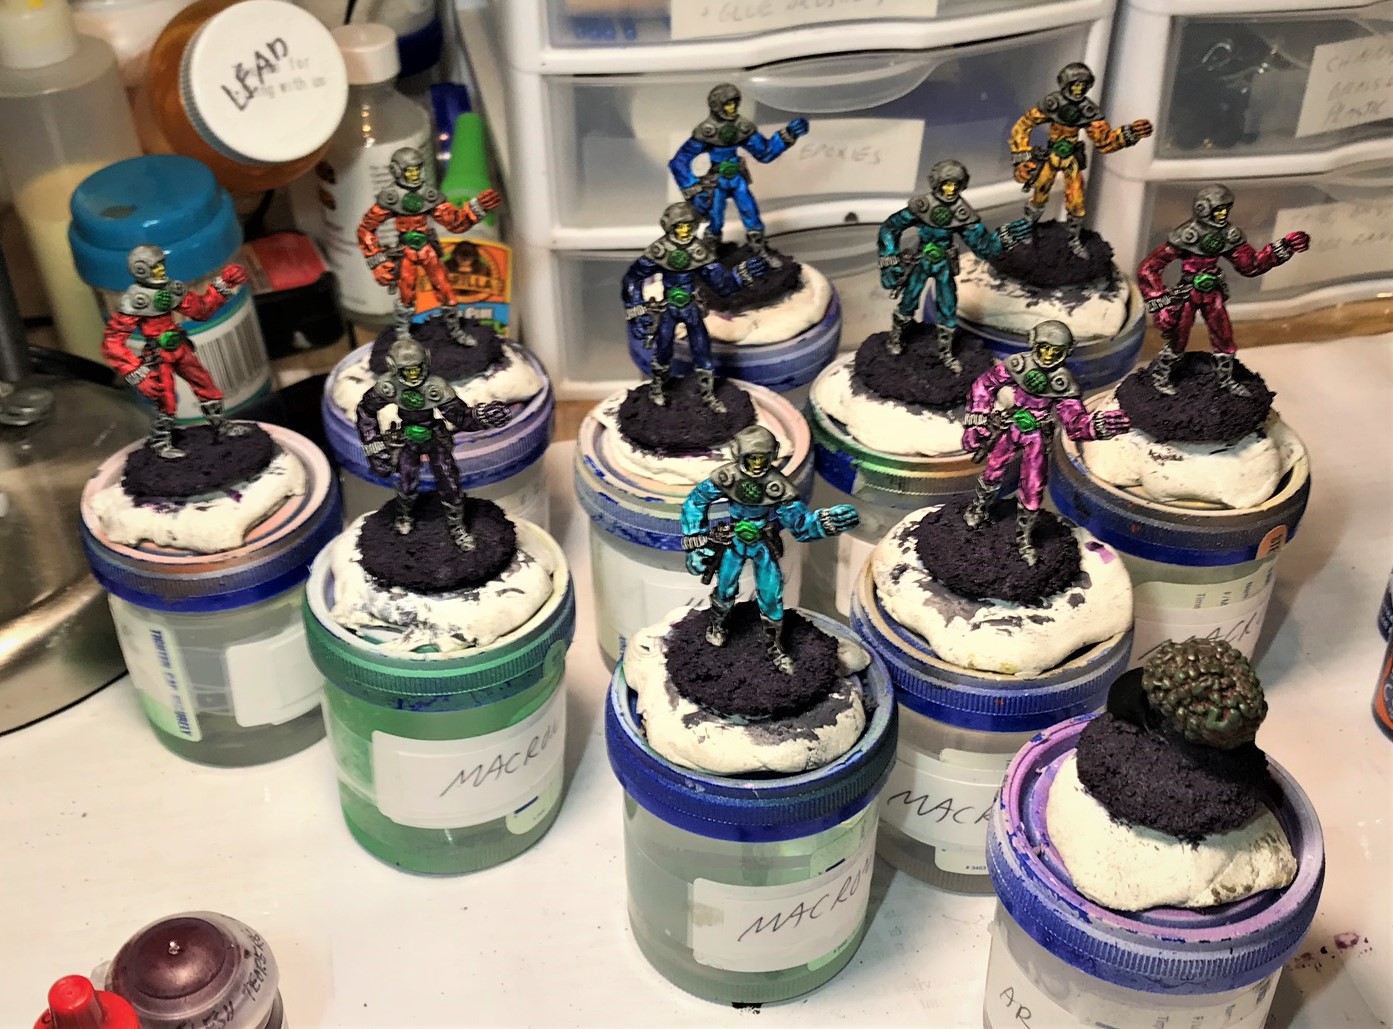
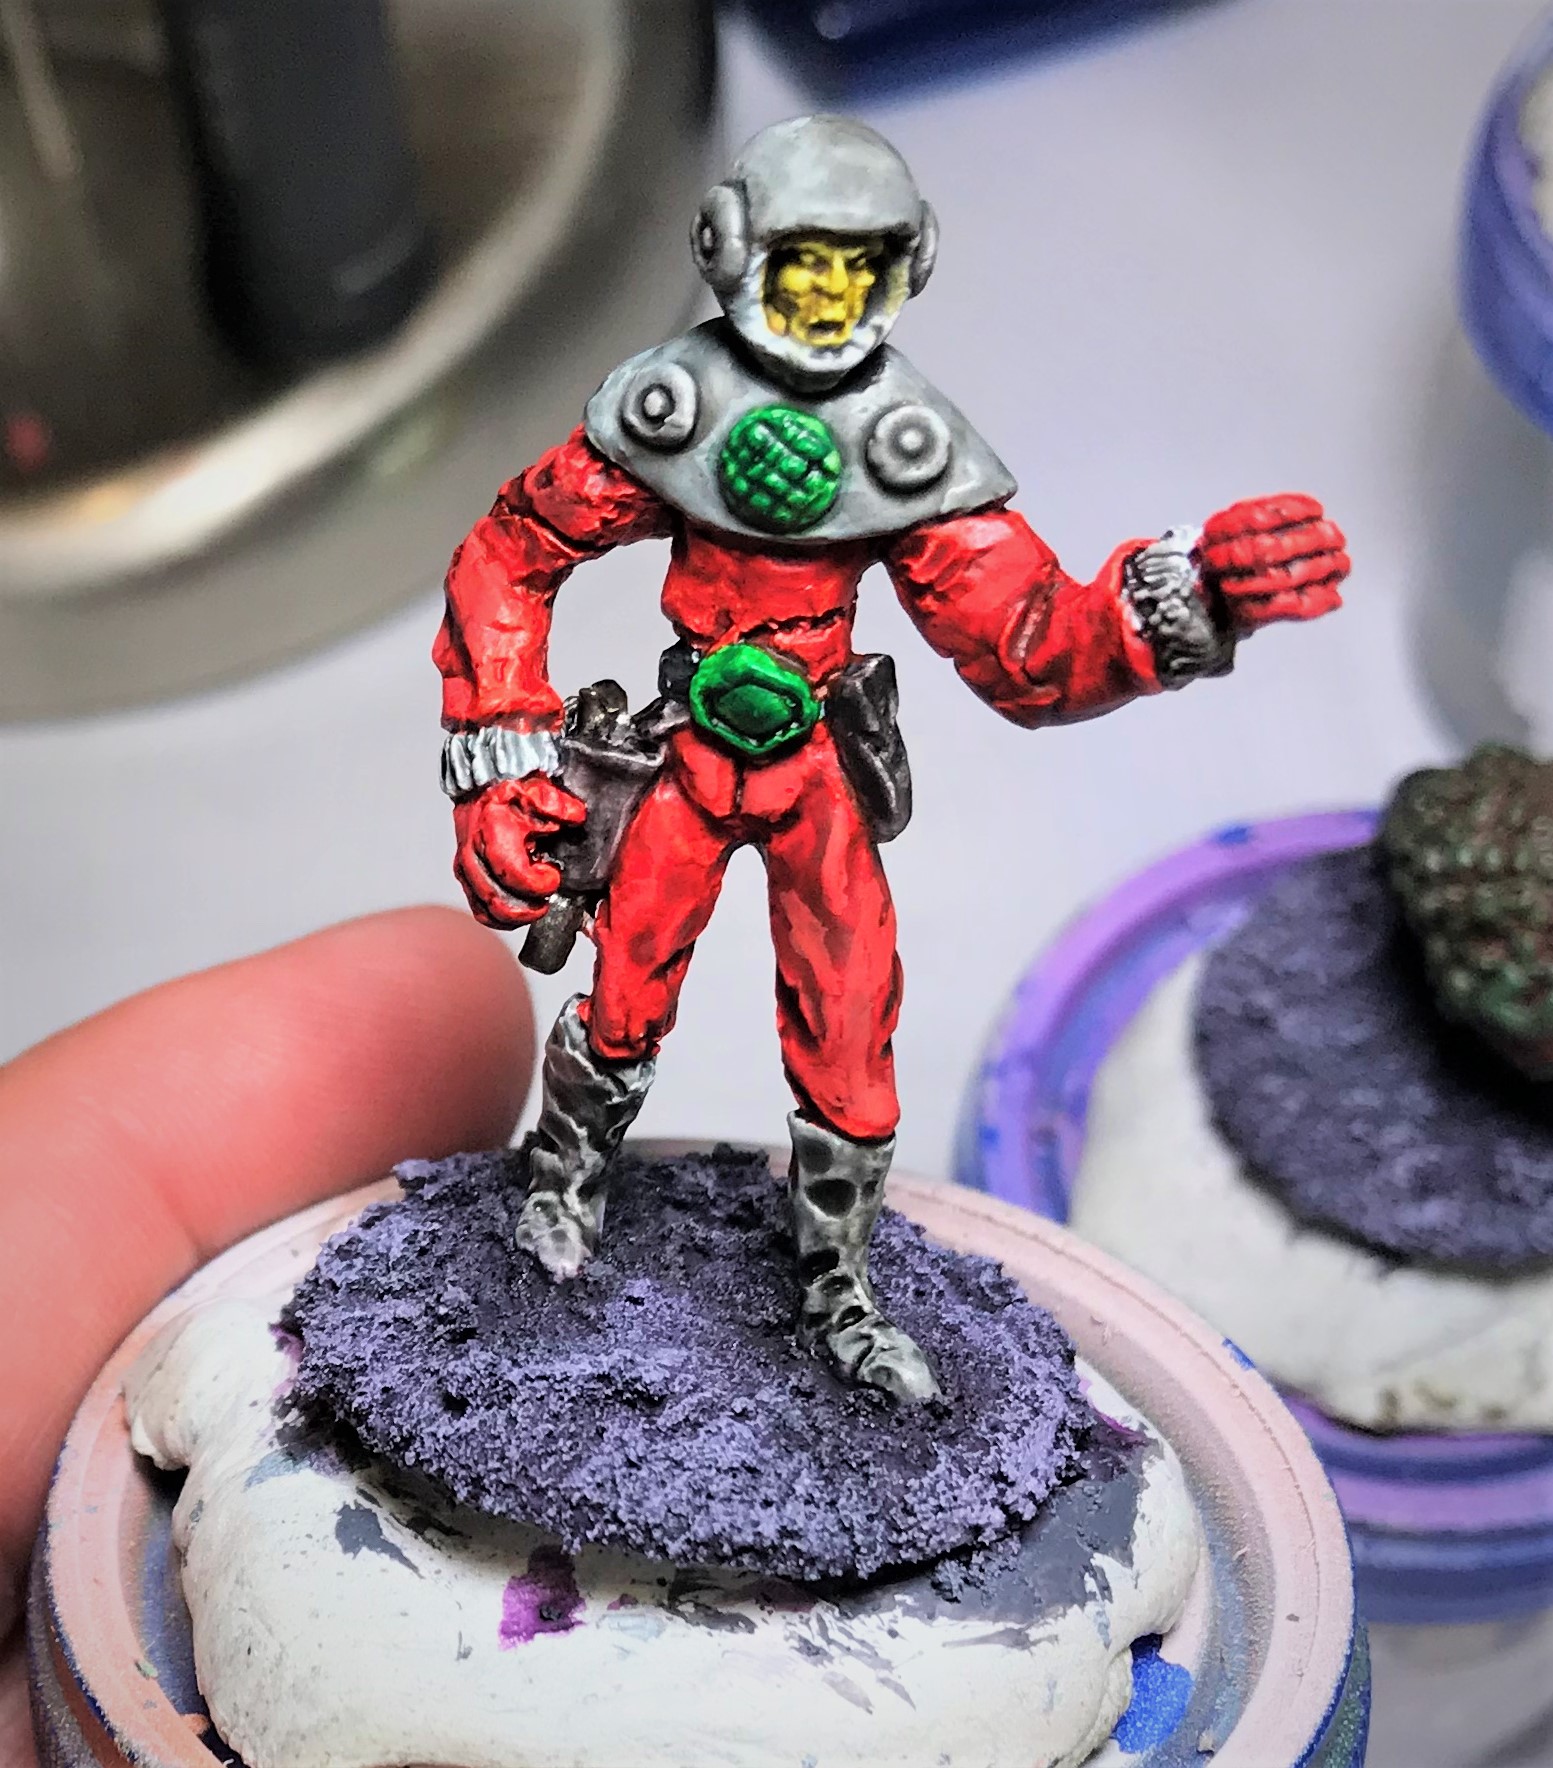
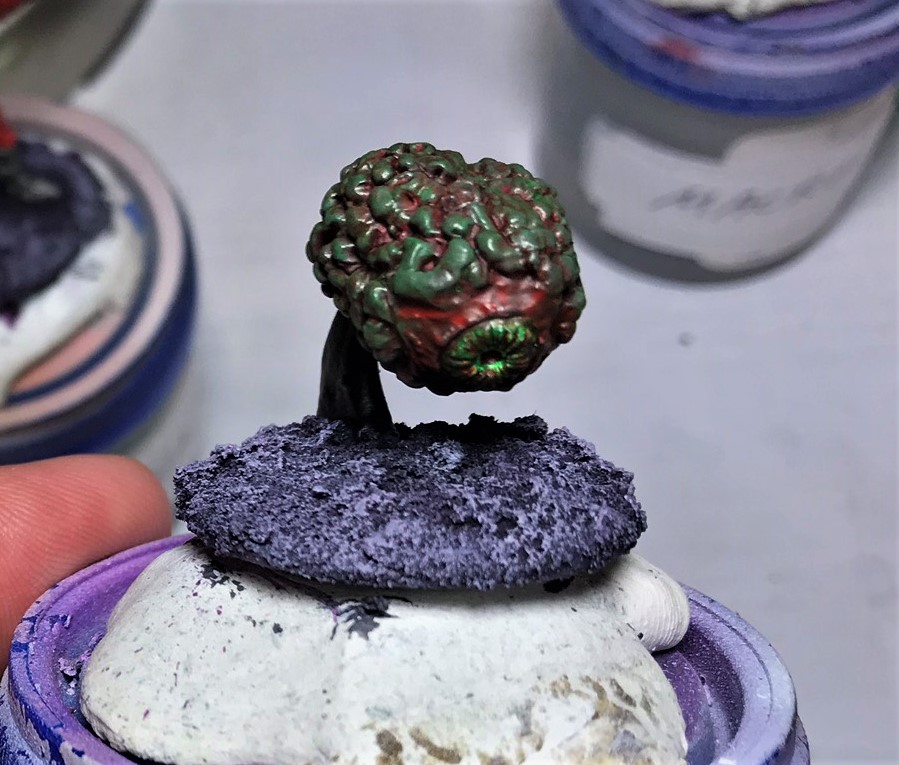

")


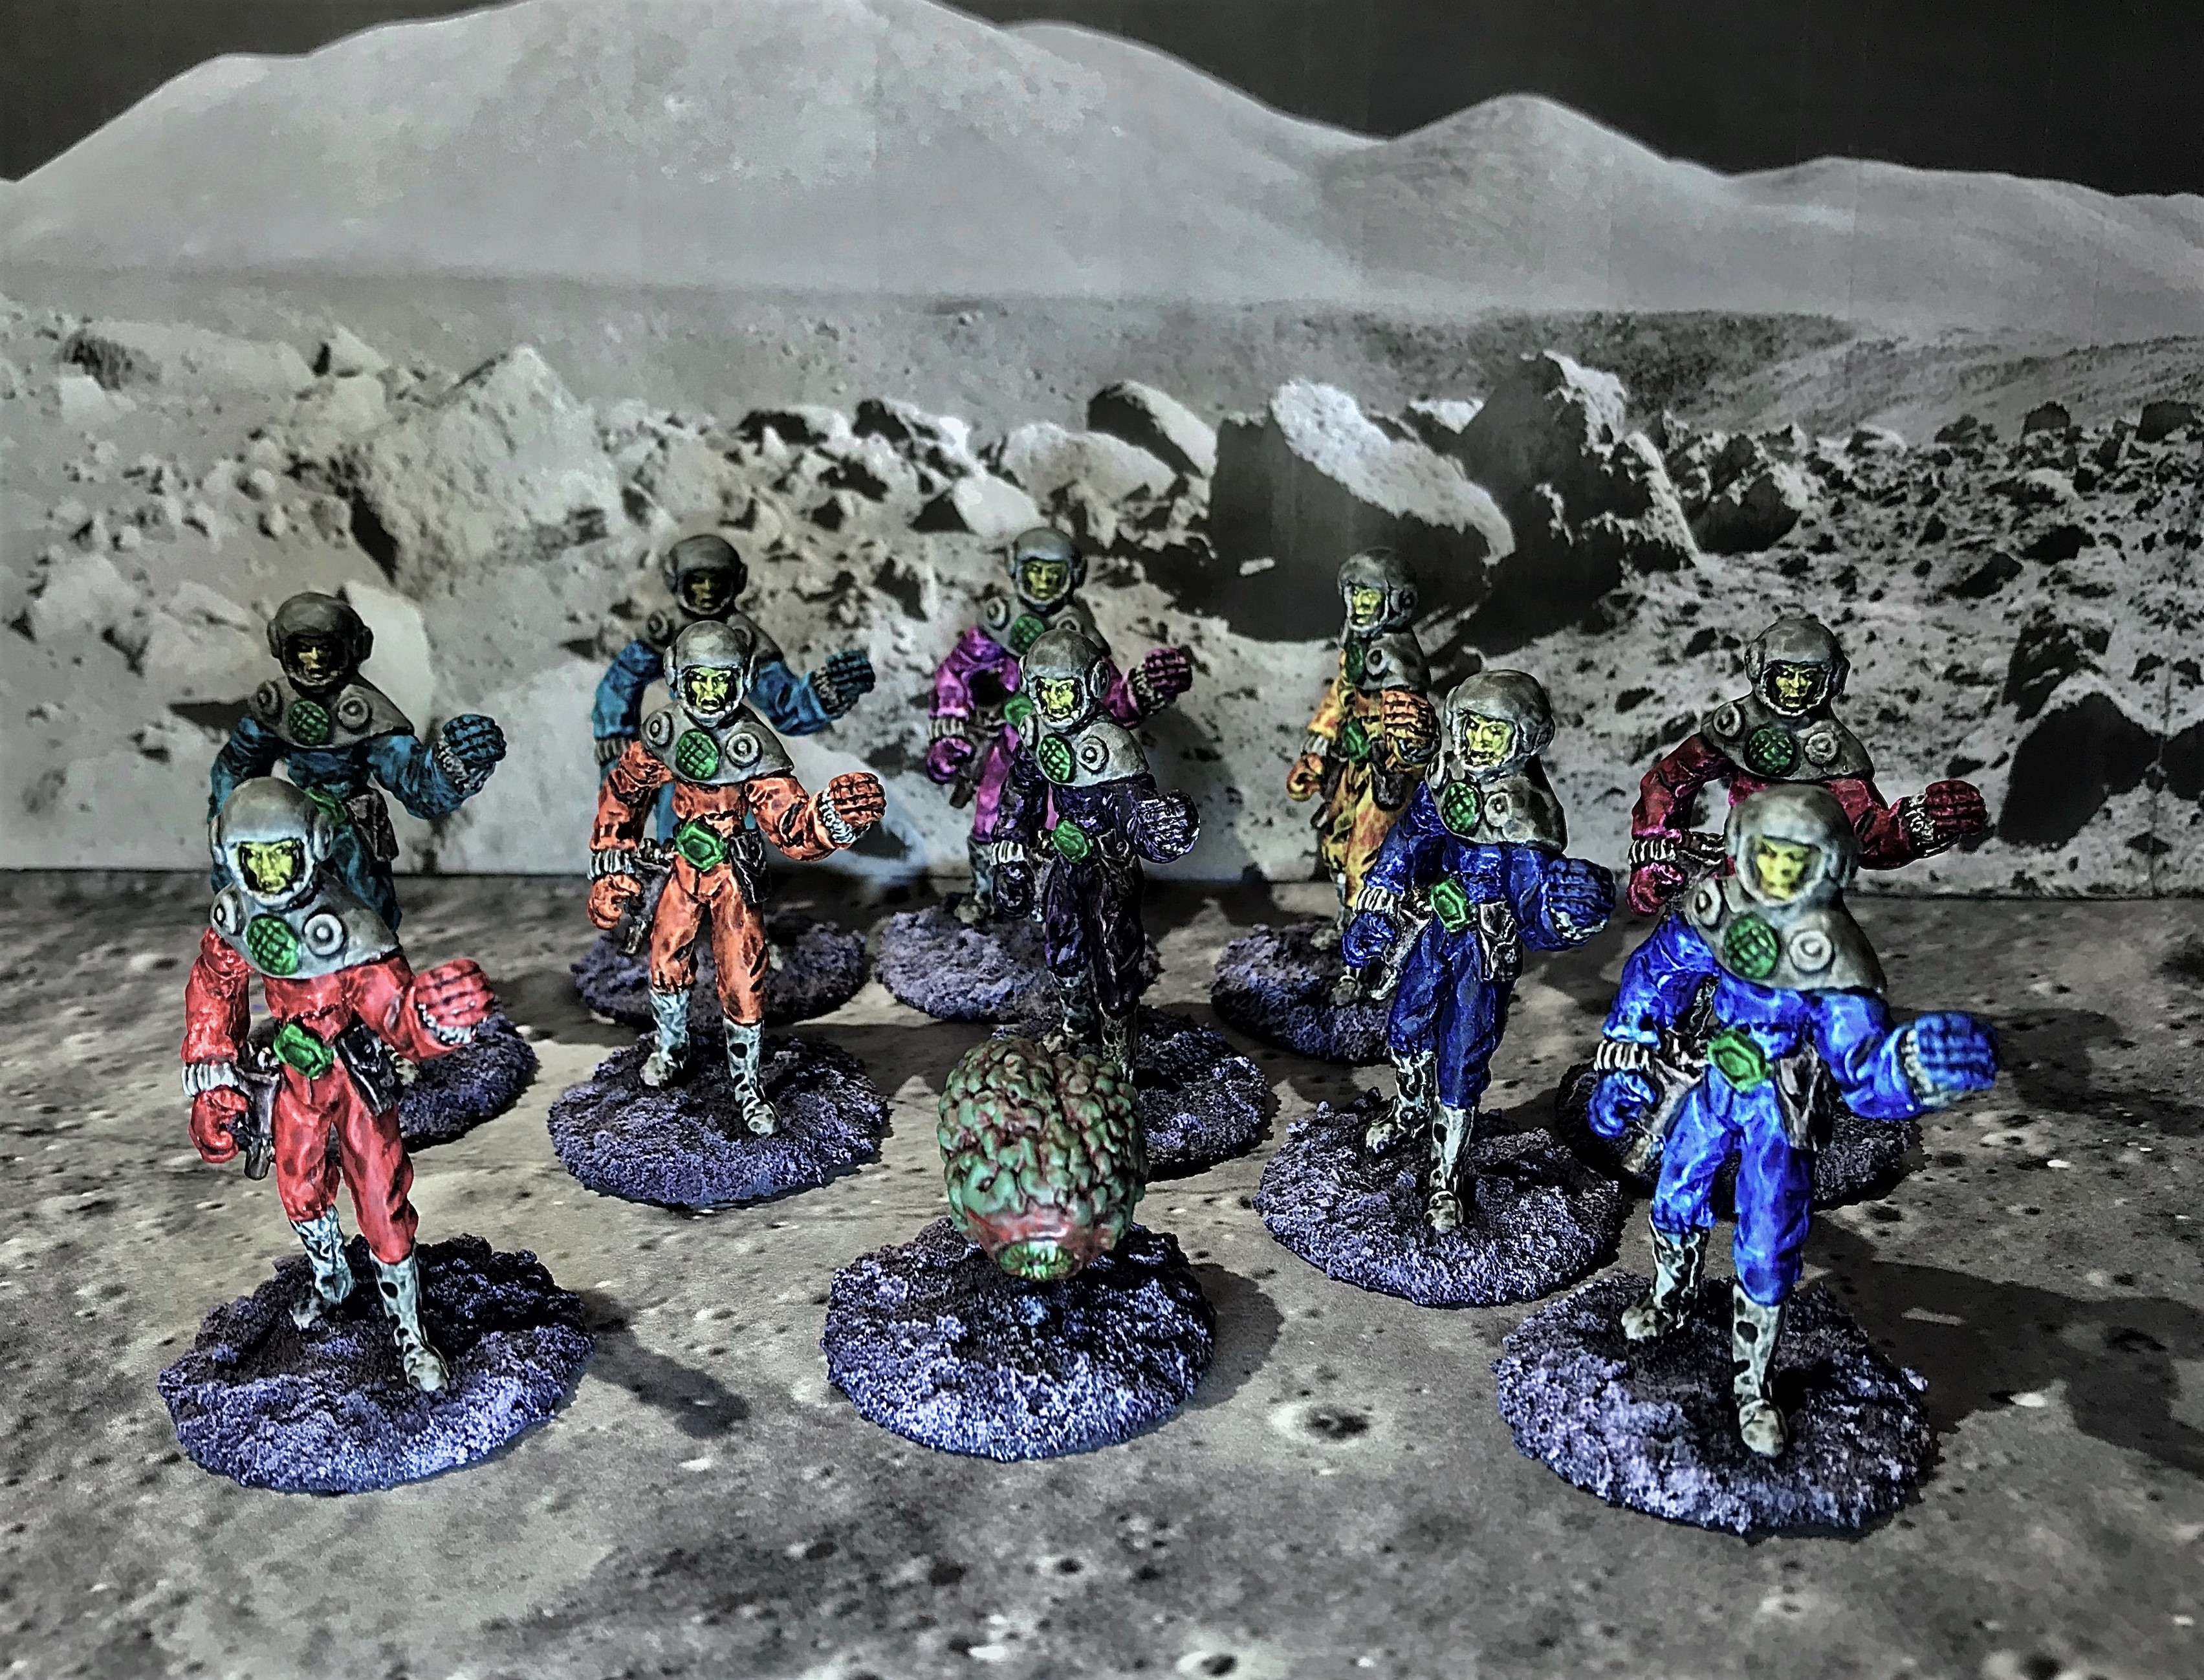

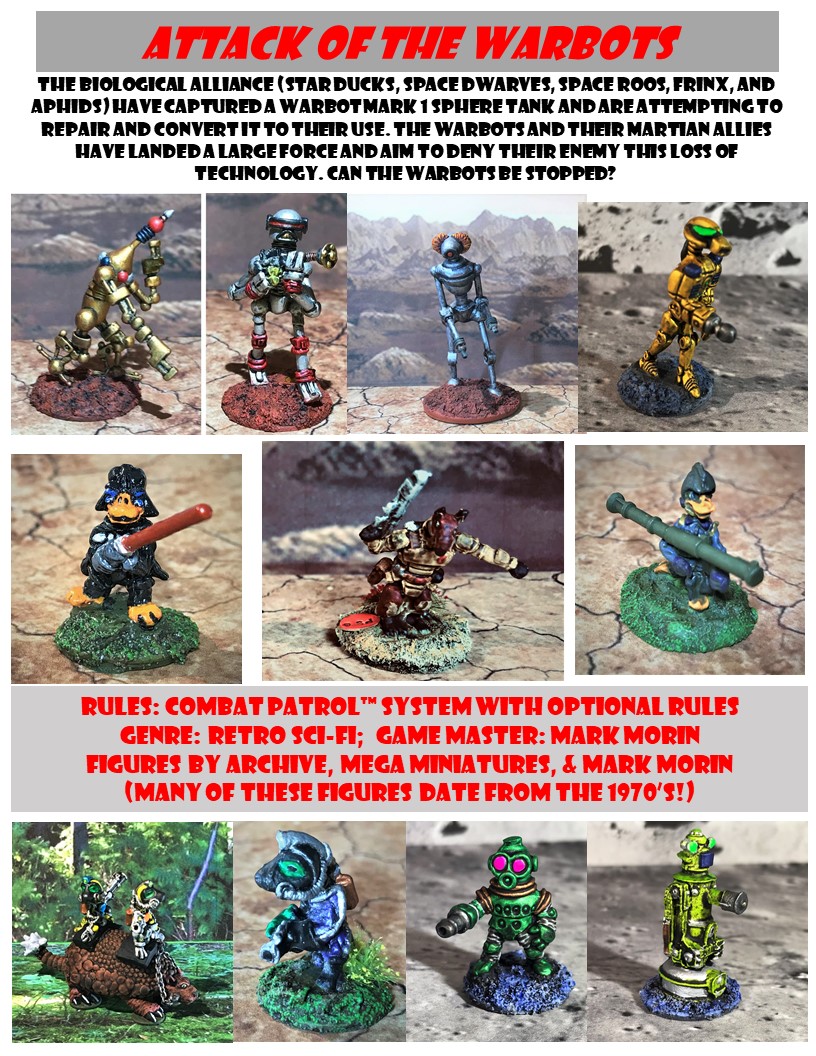

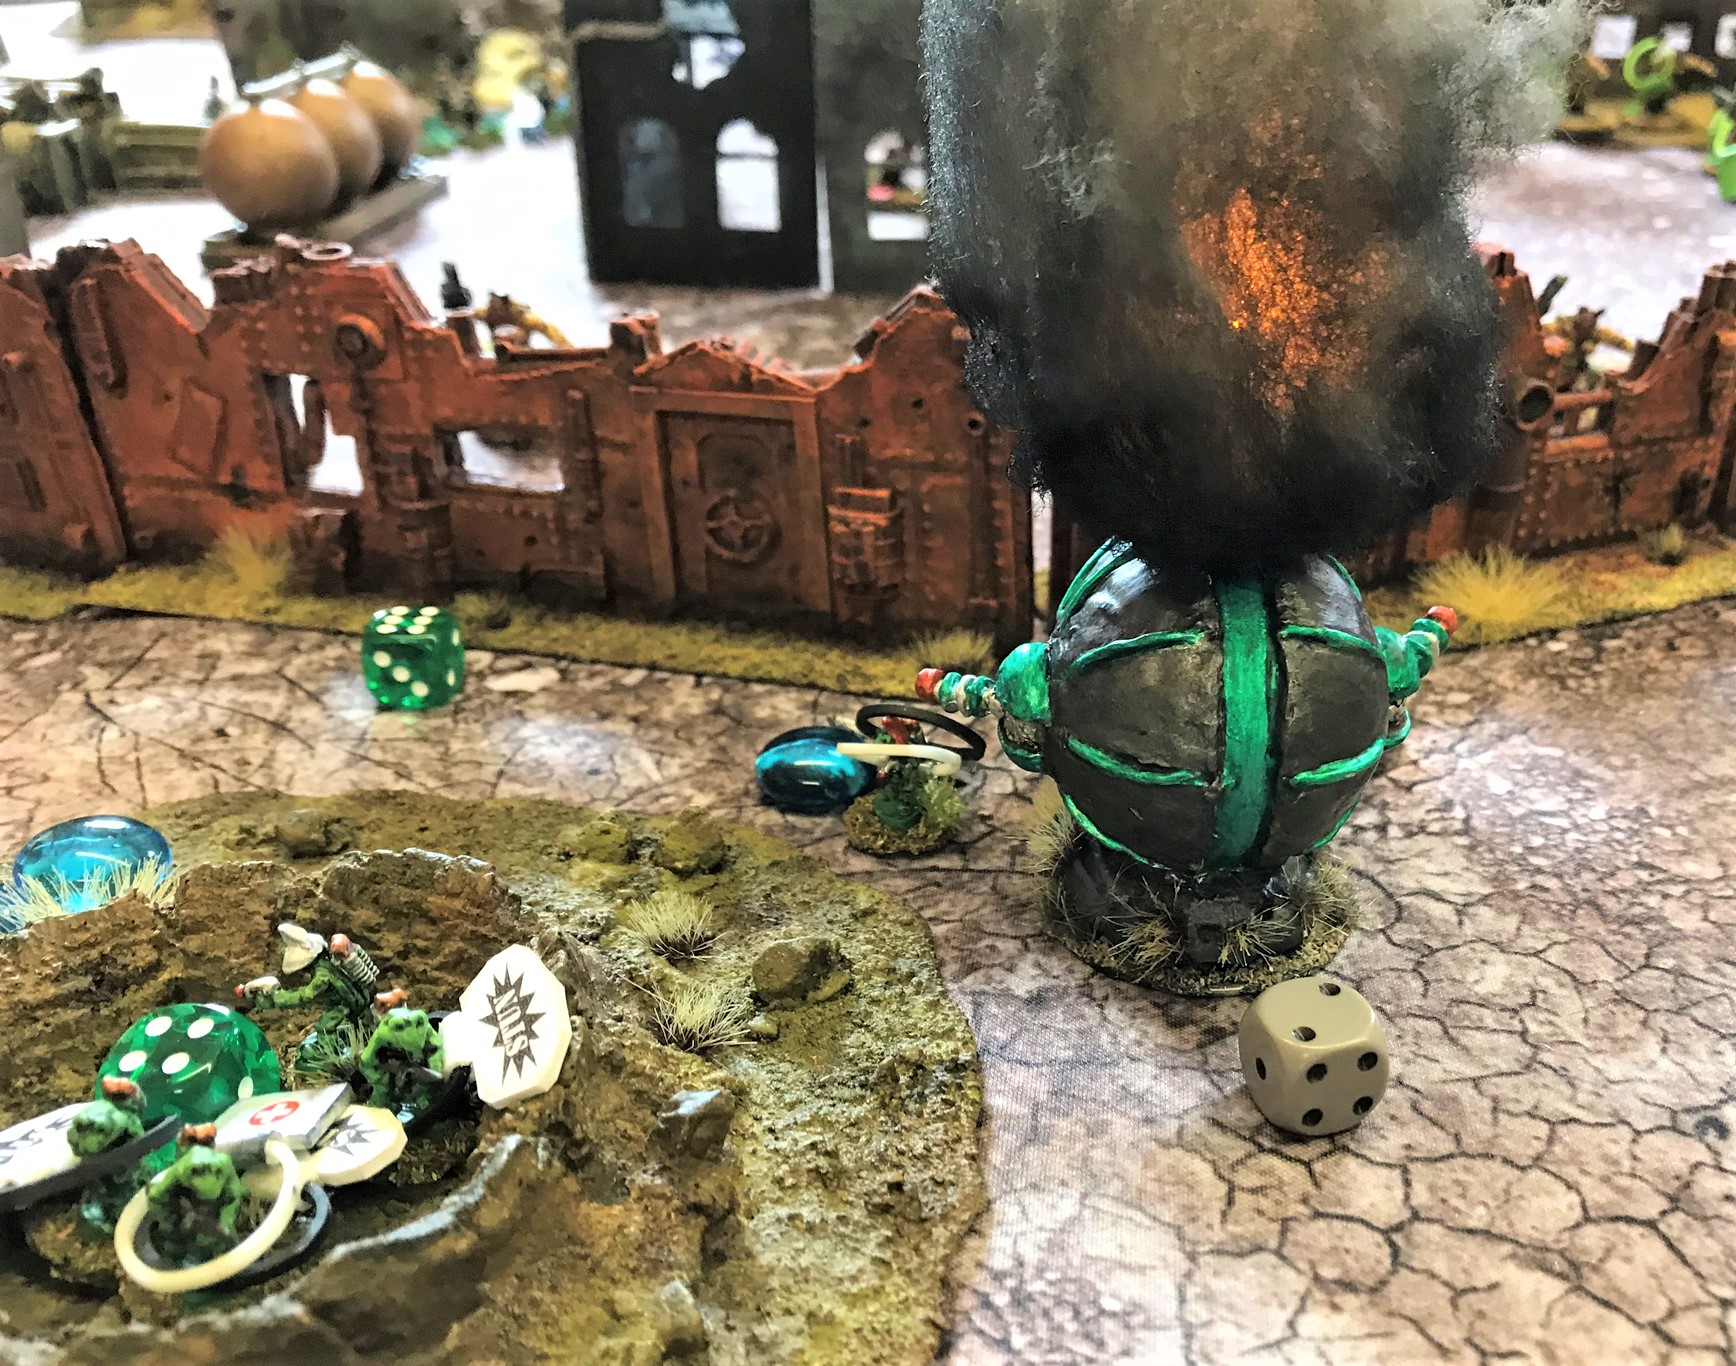
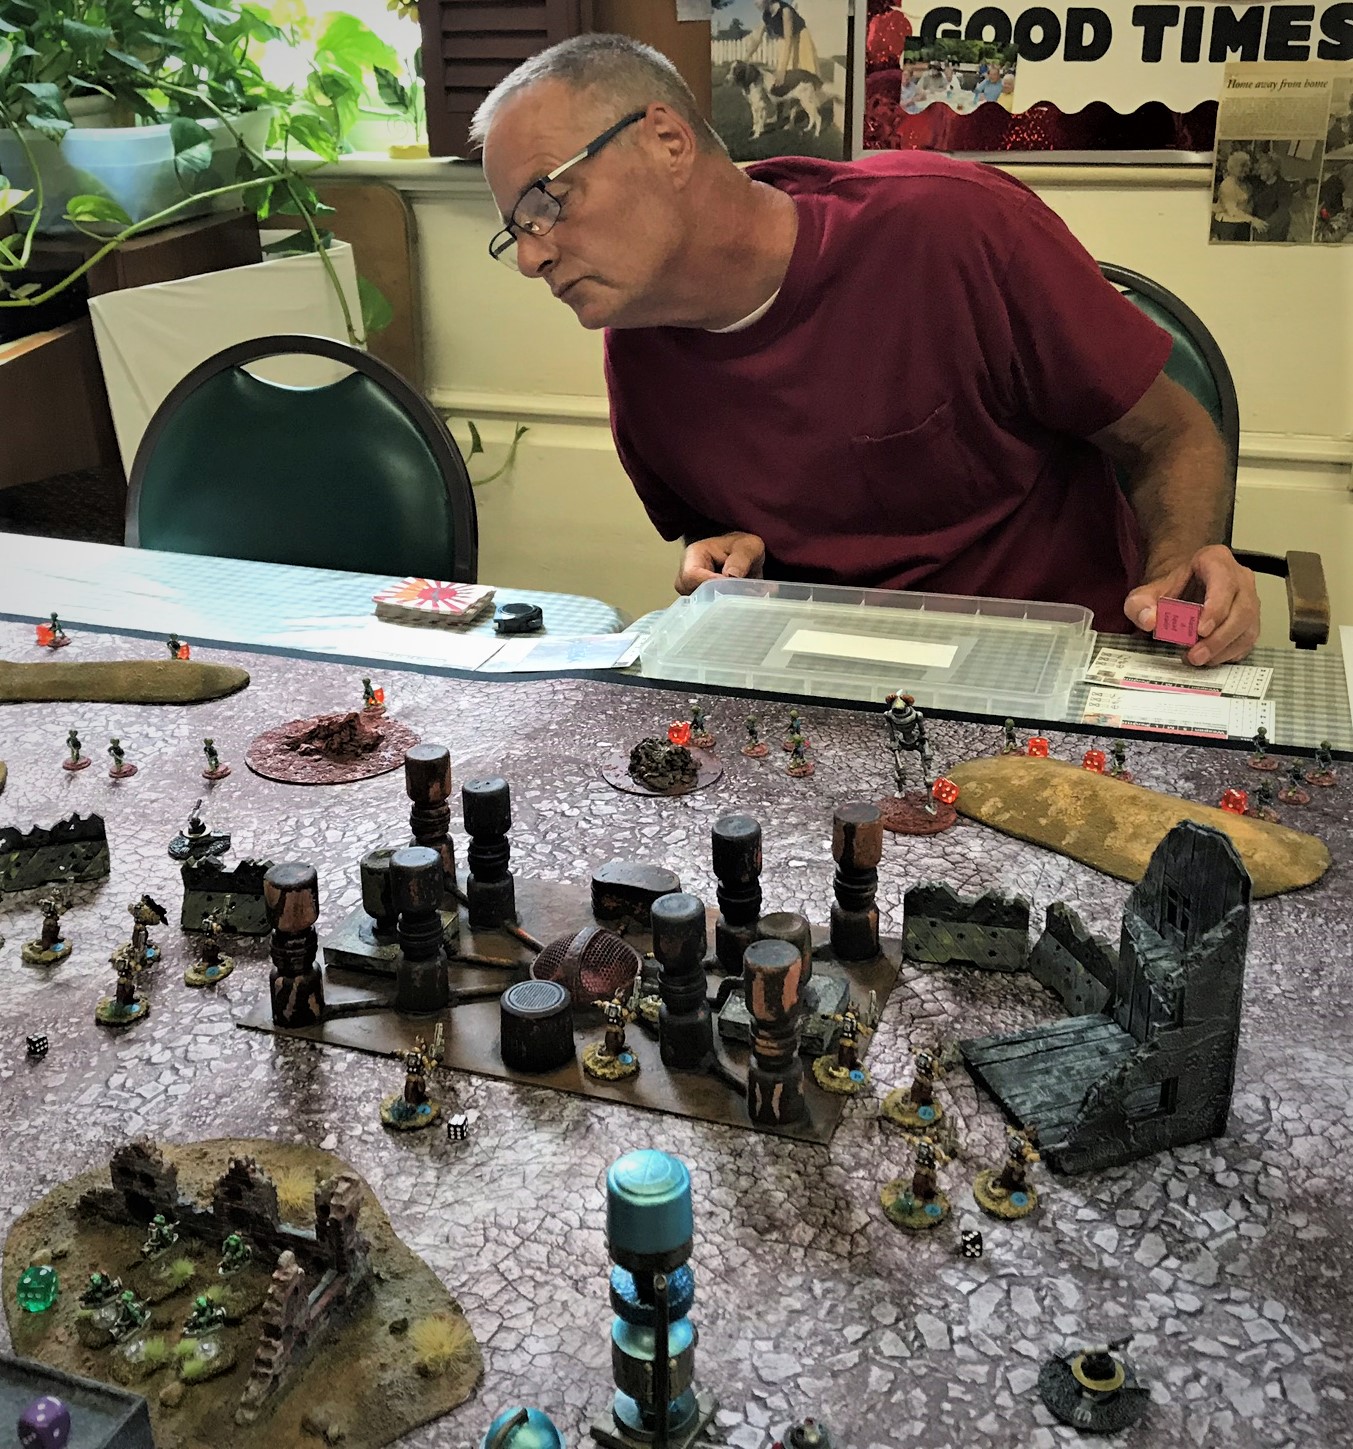
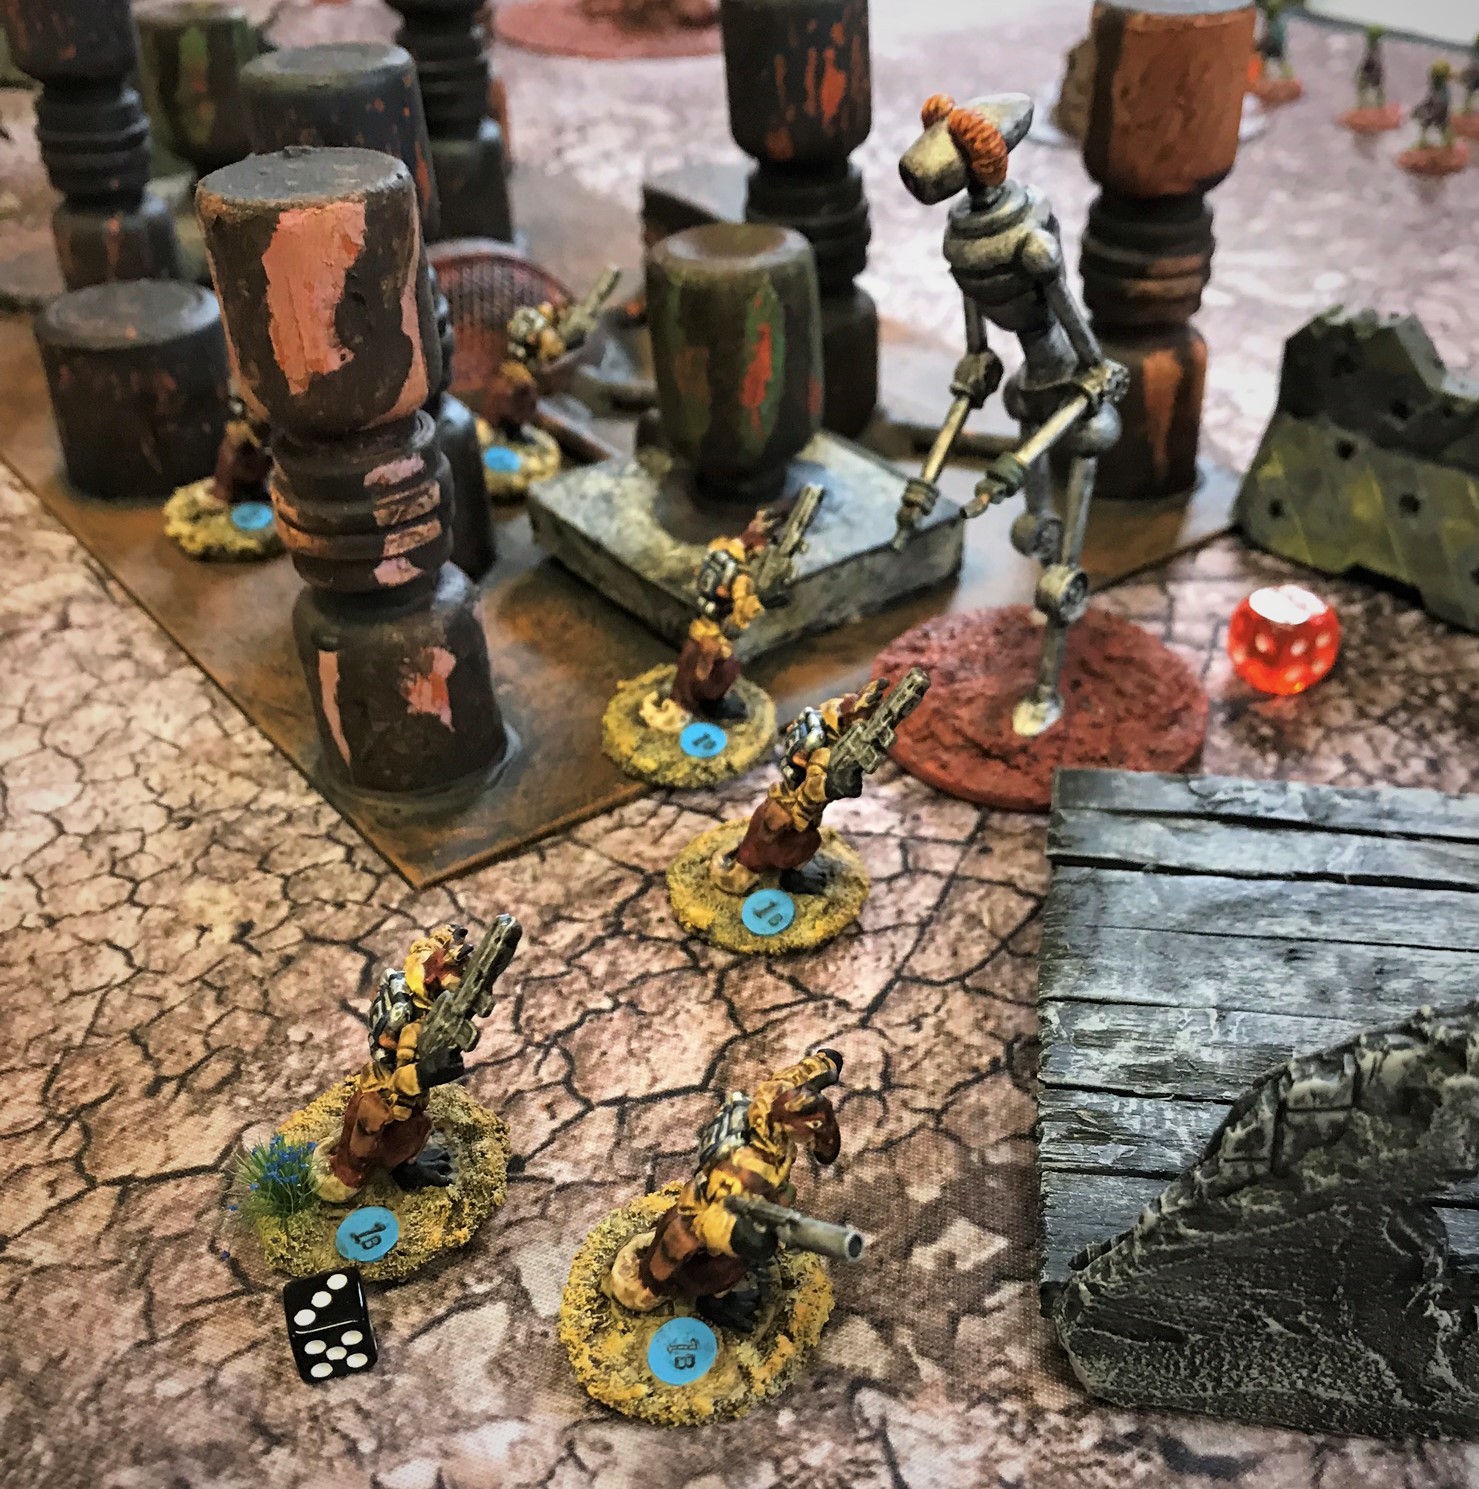
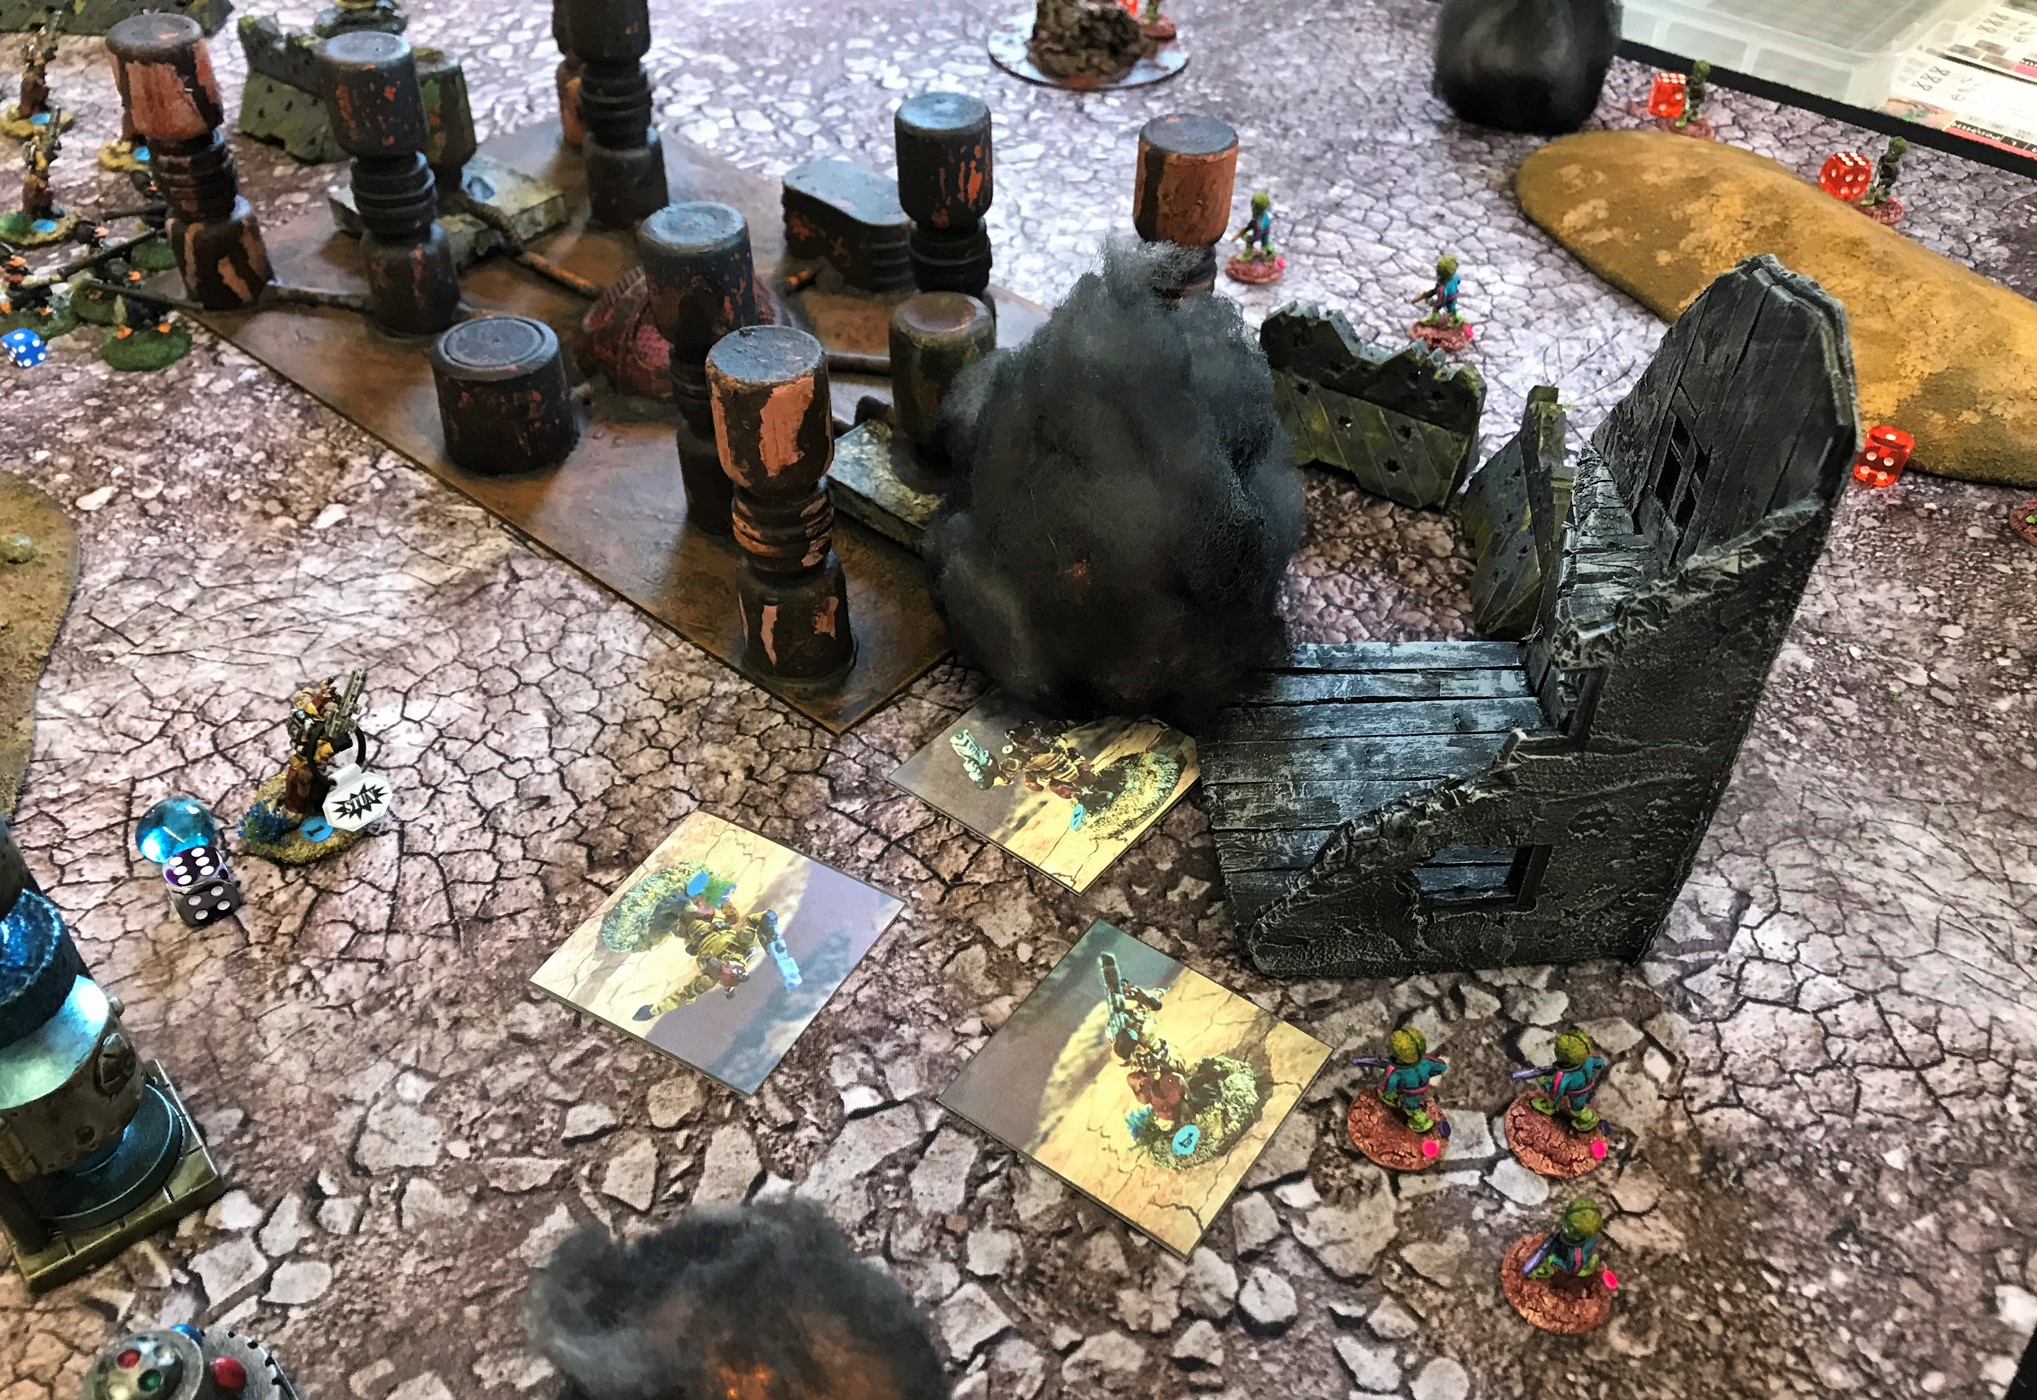

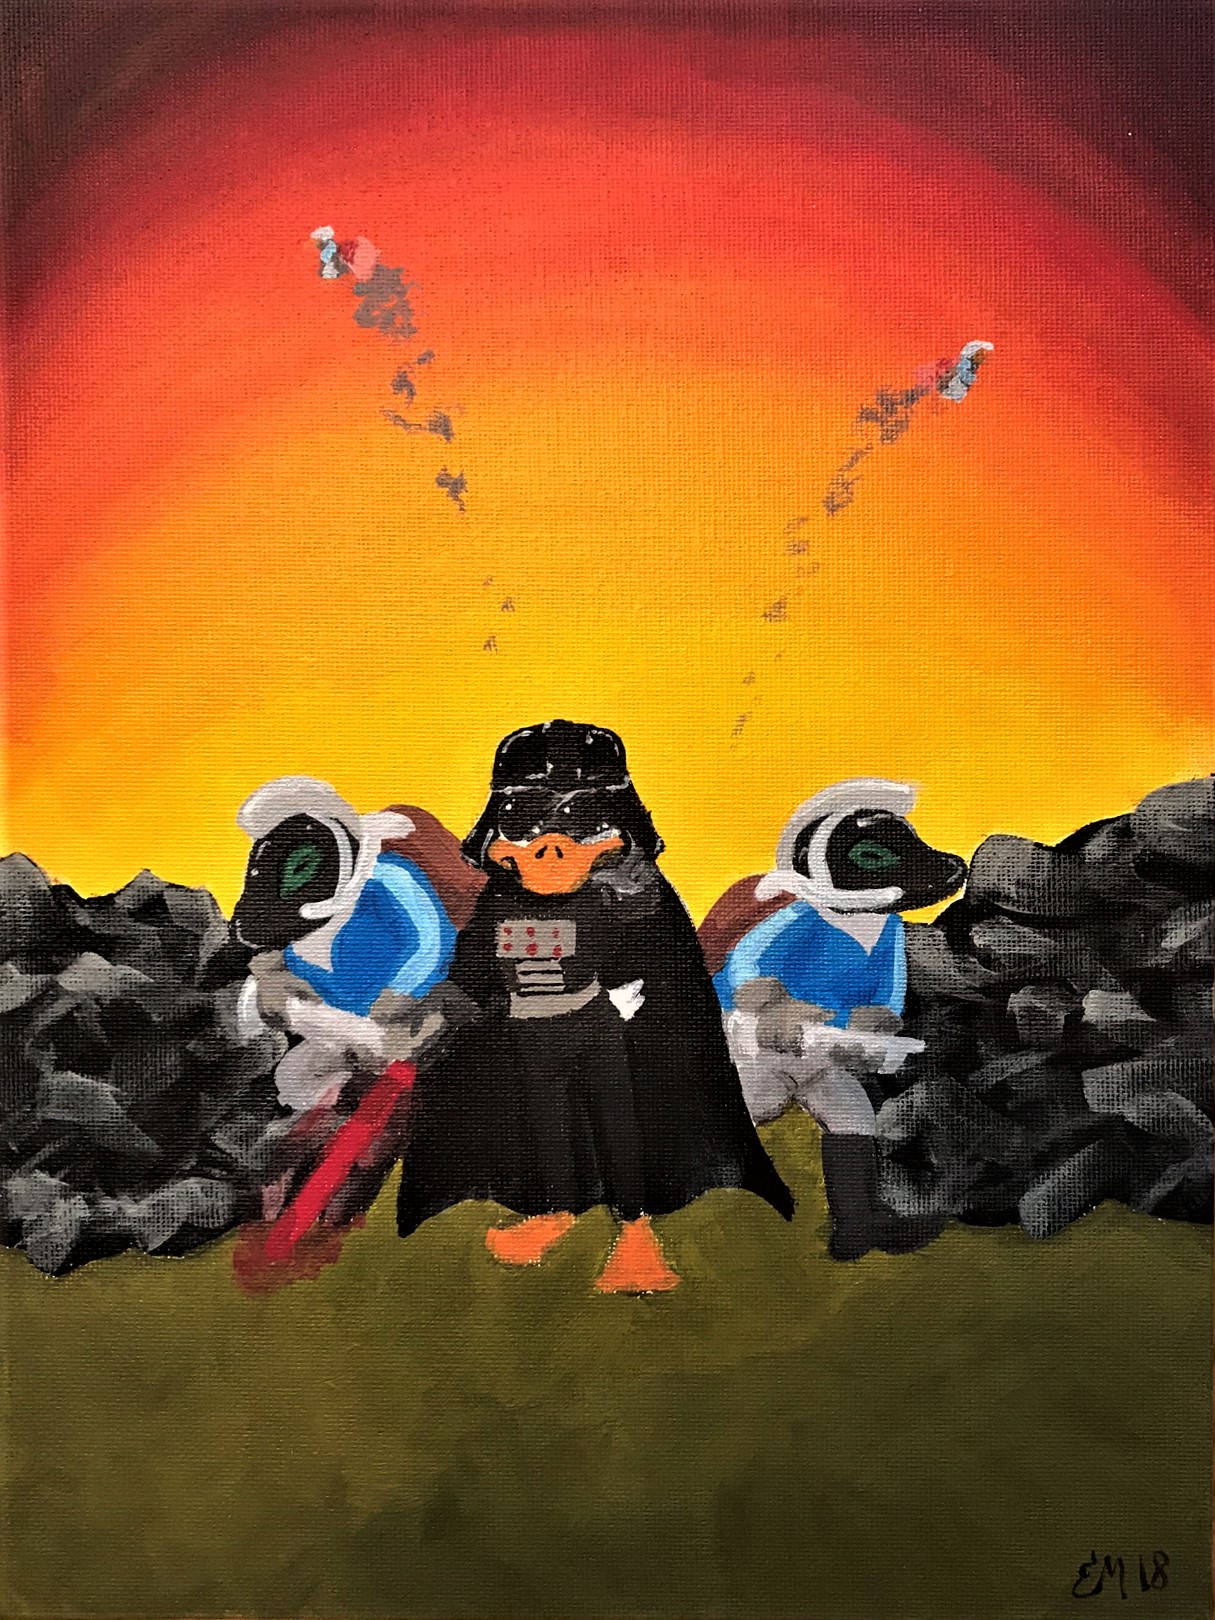

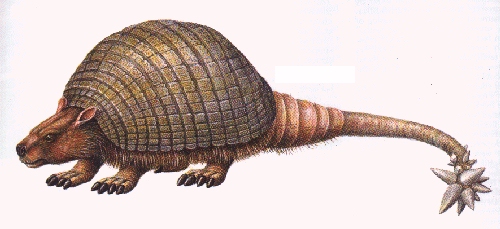
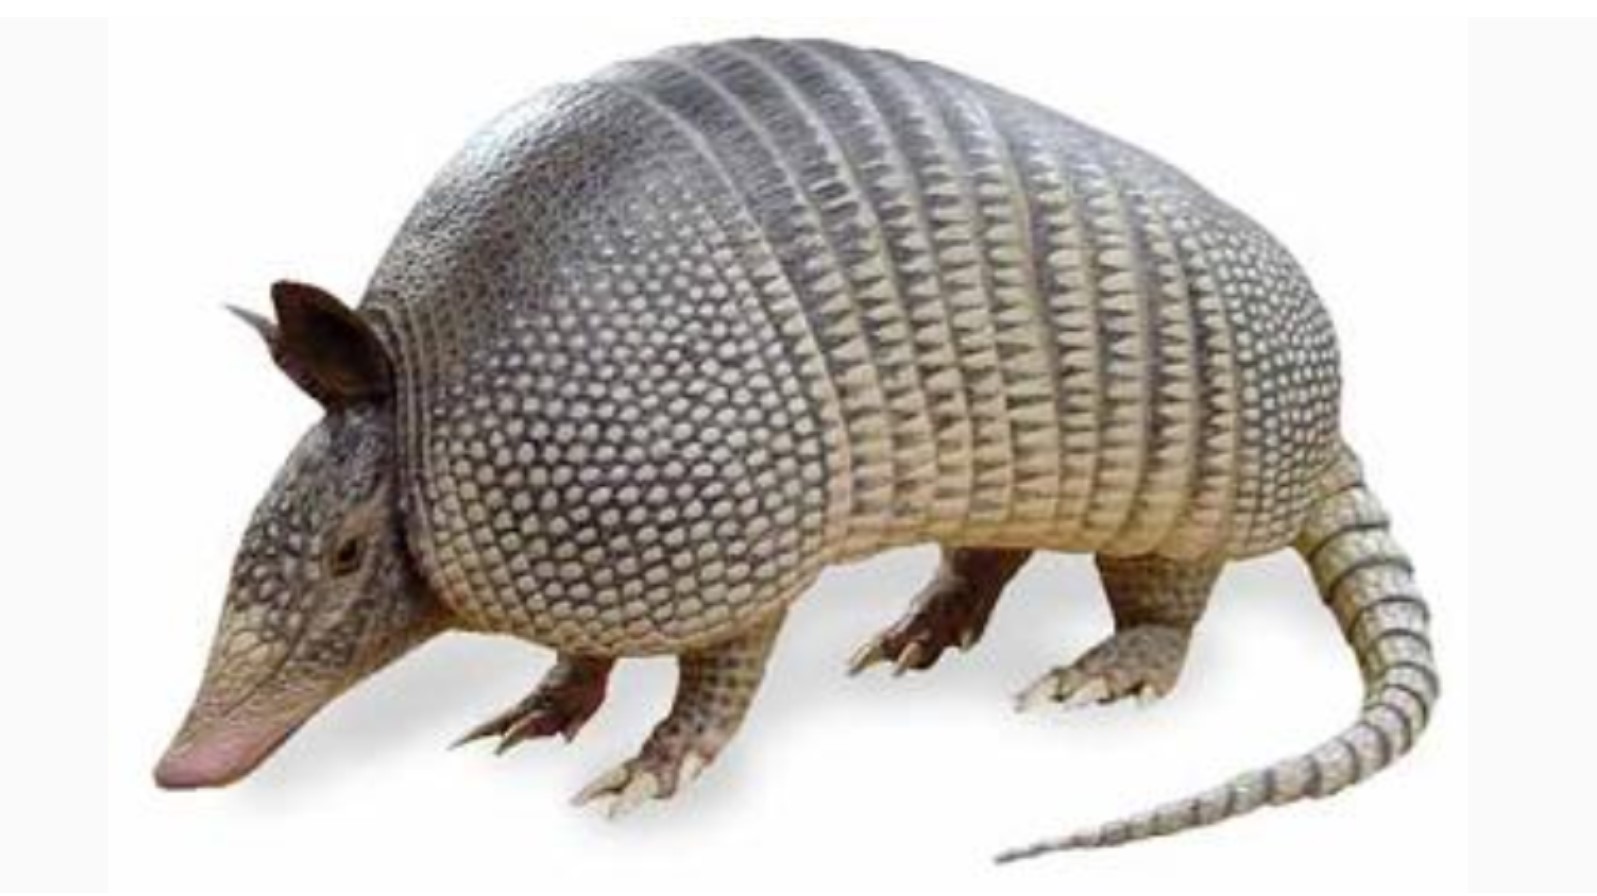
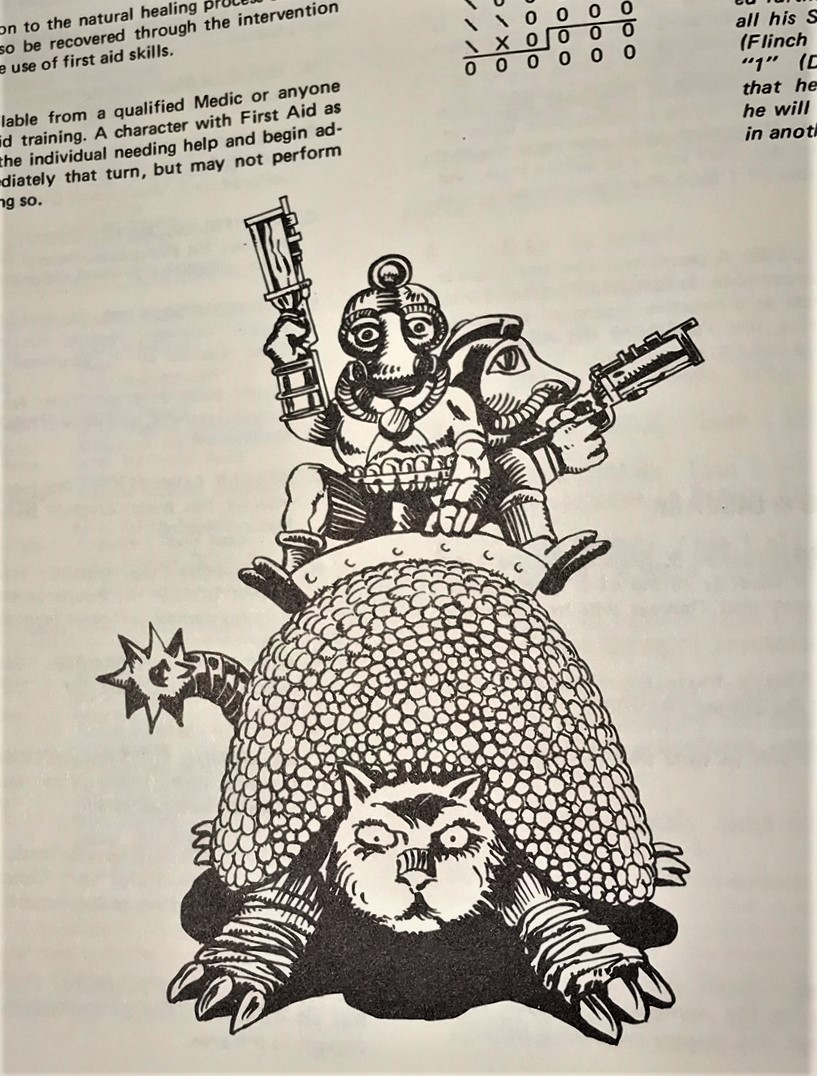
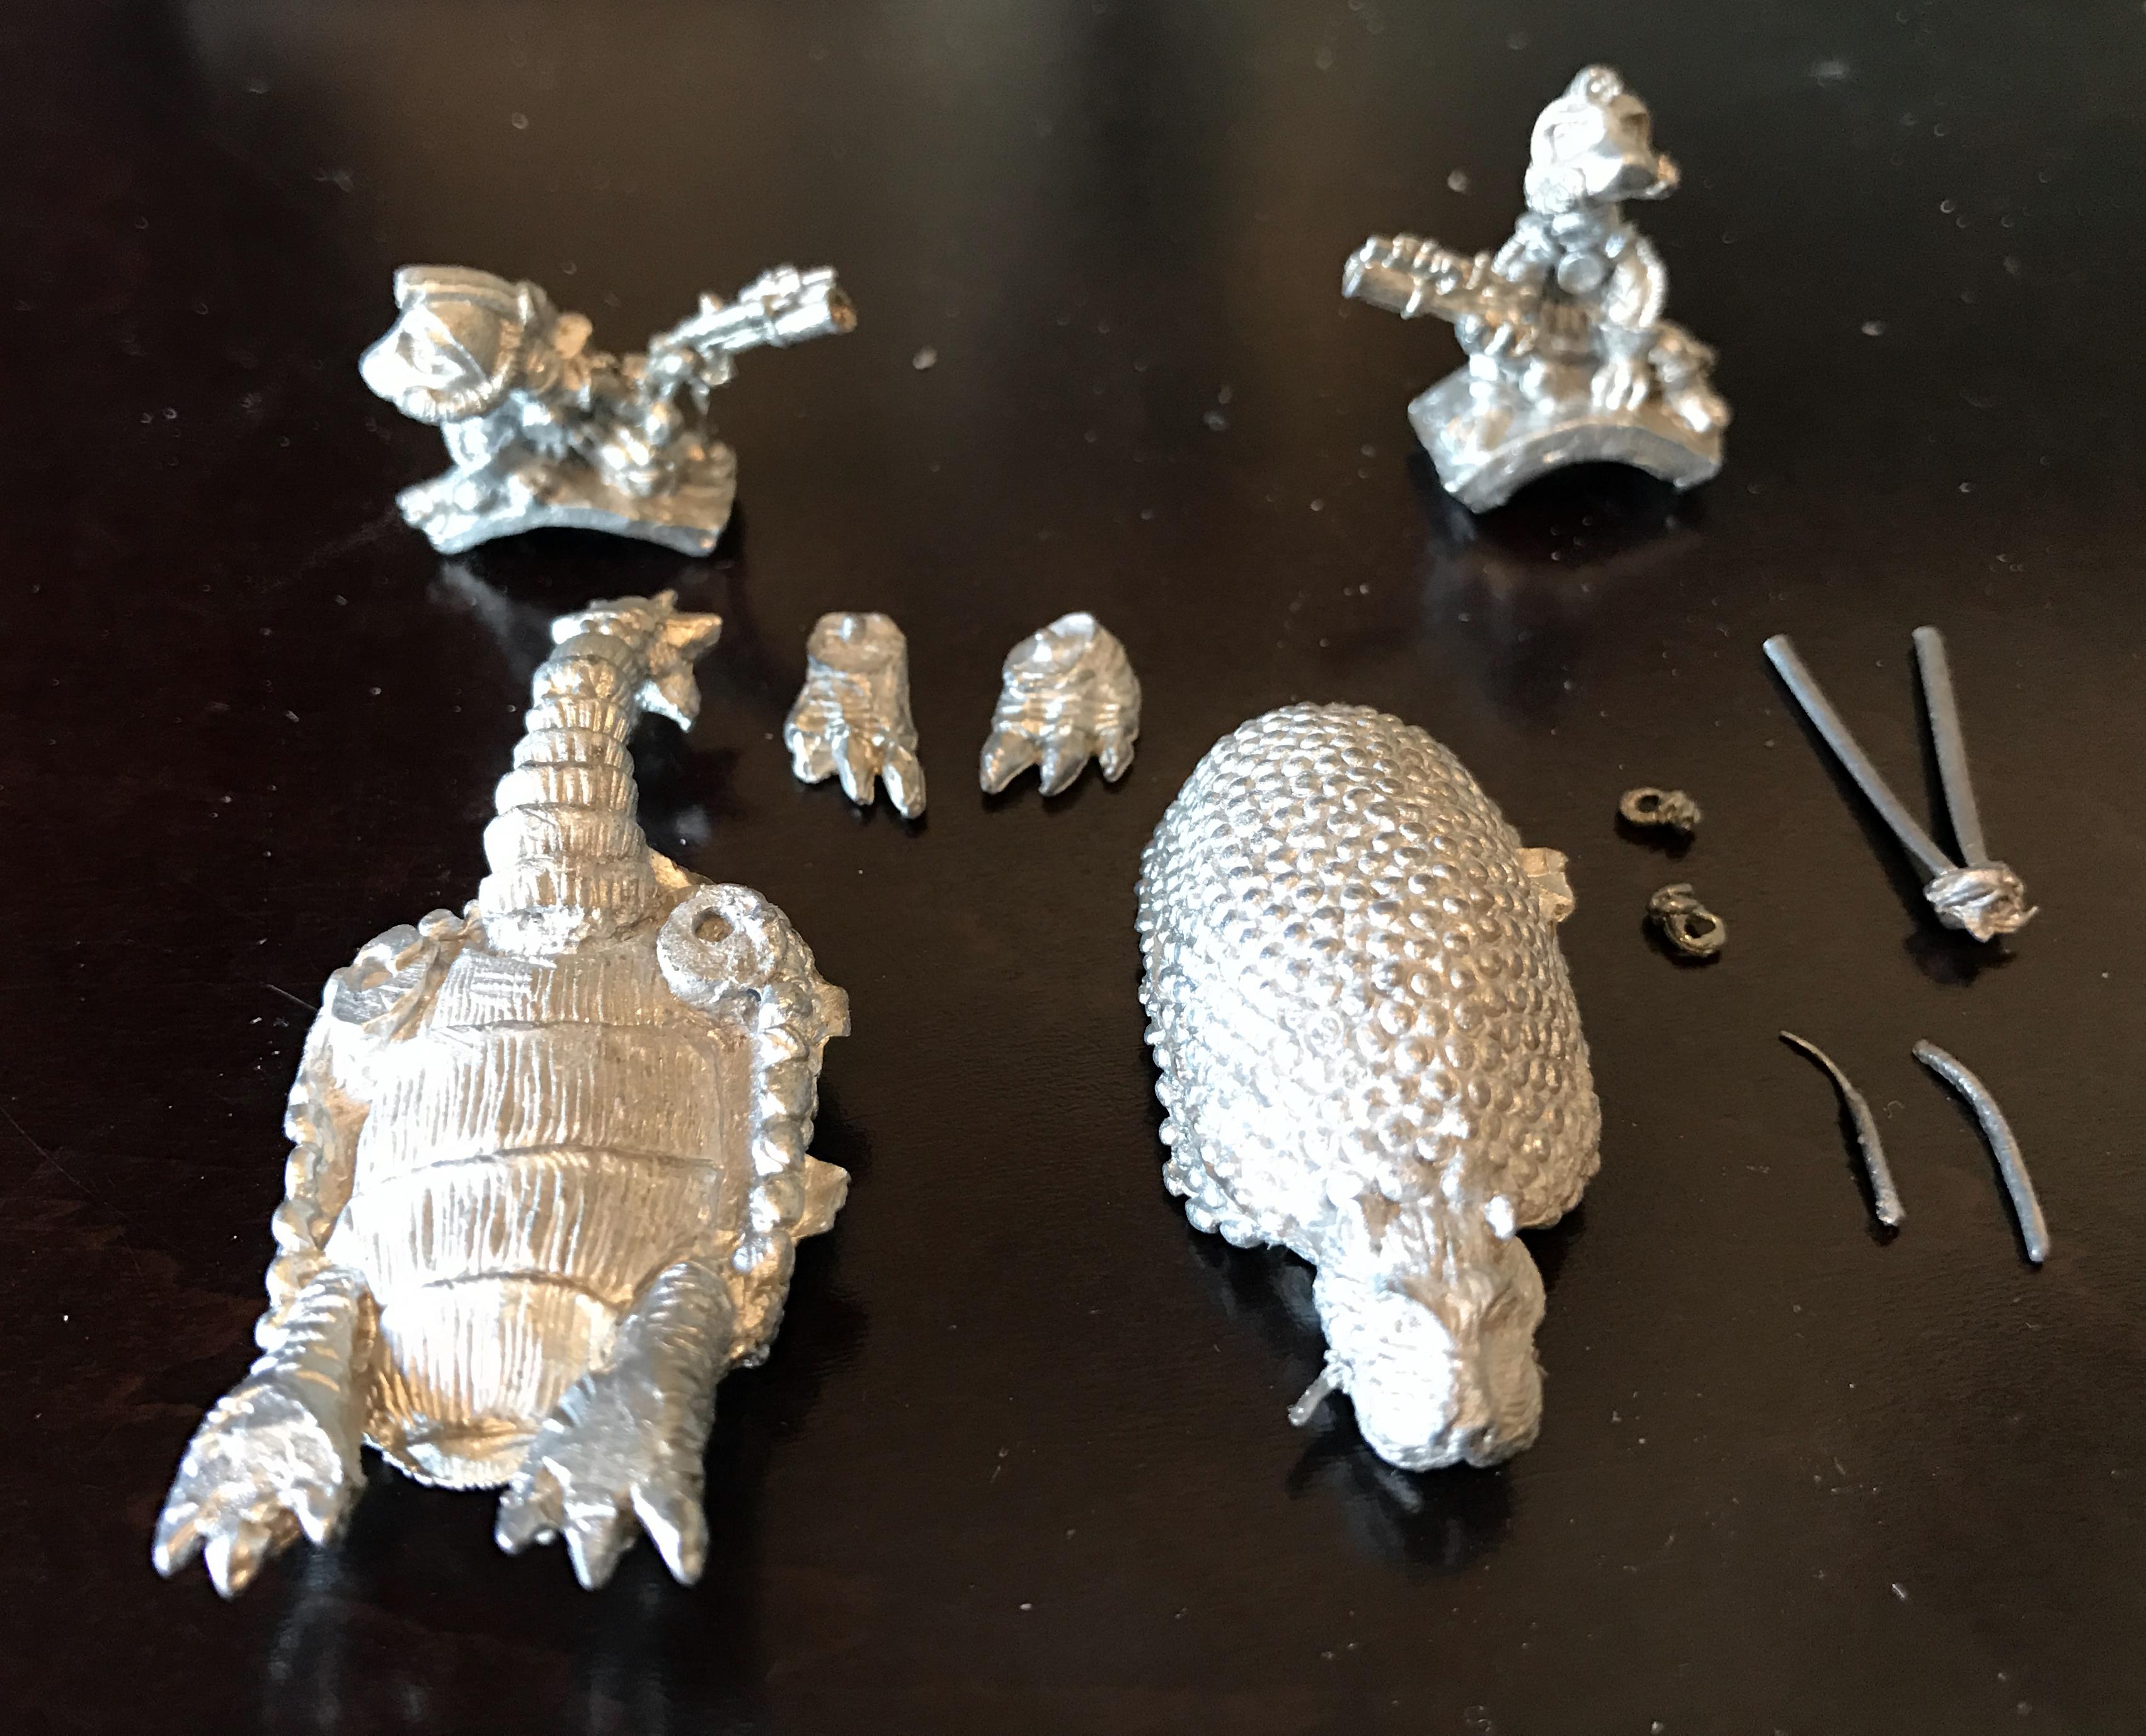
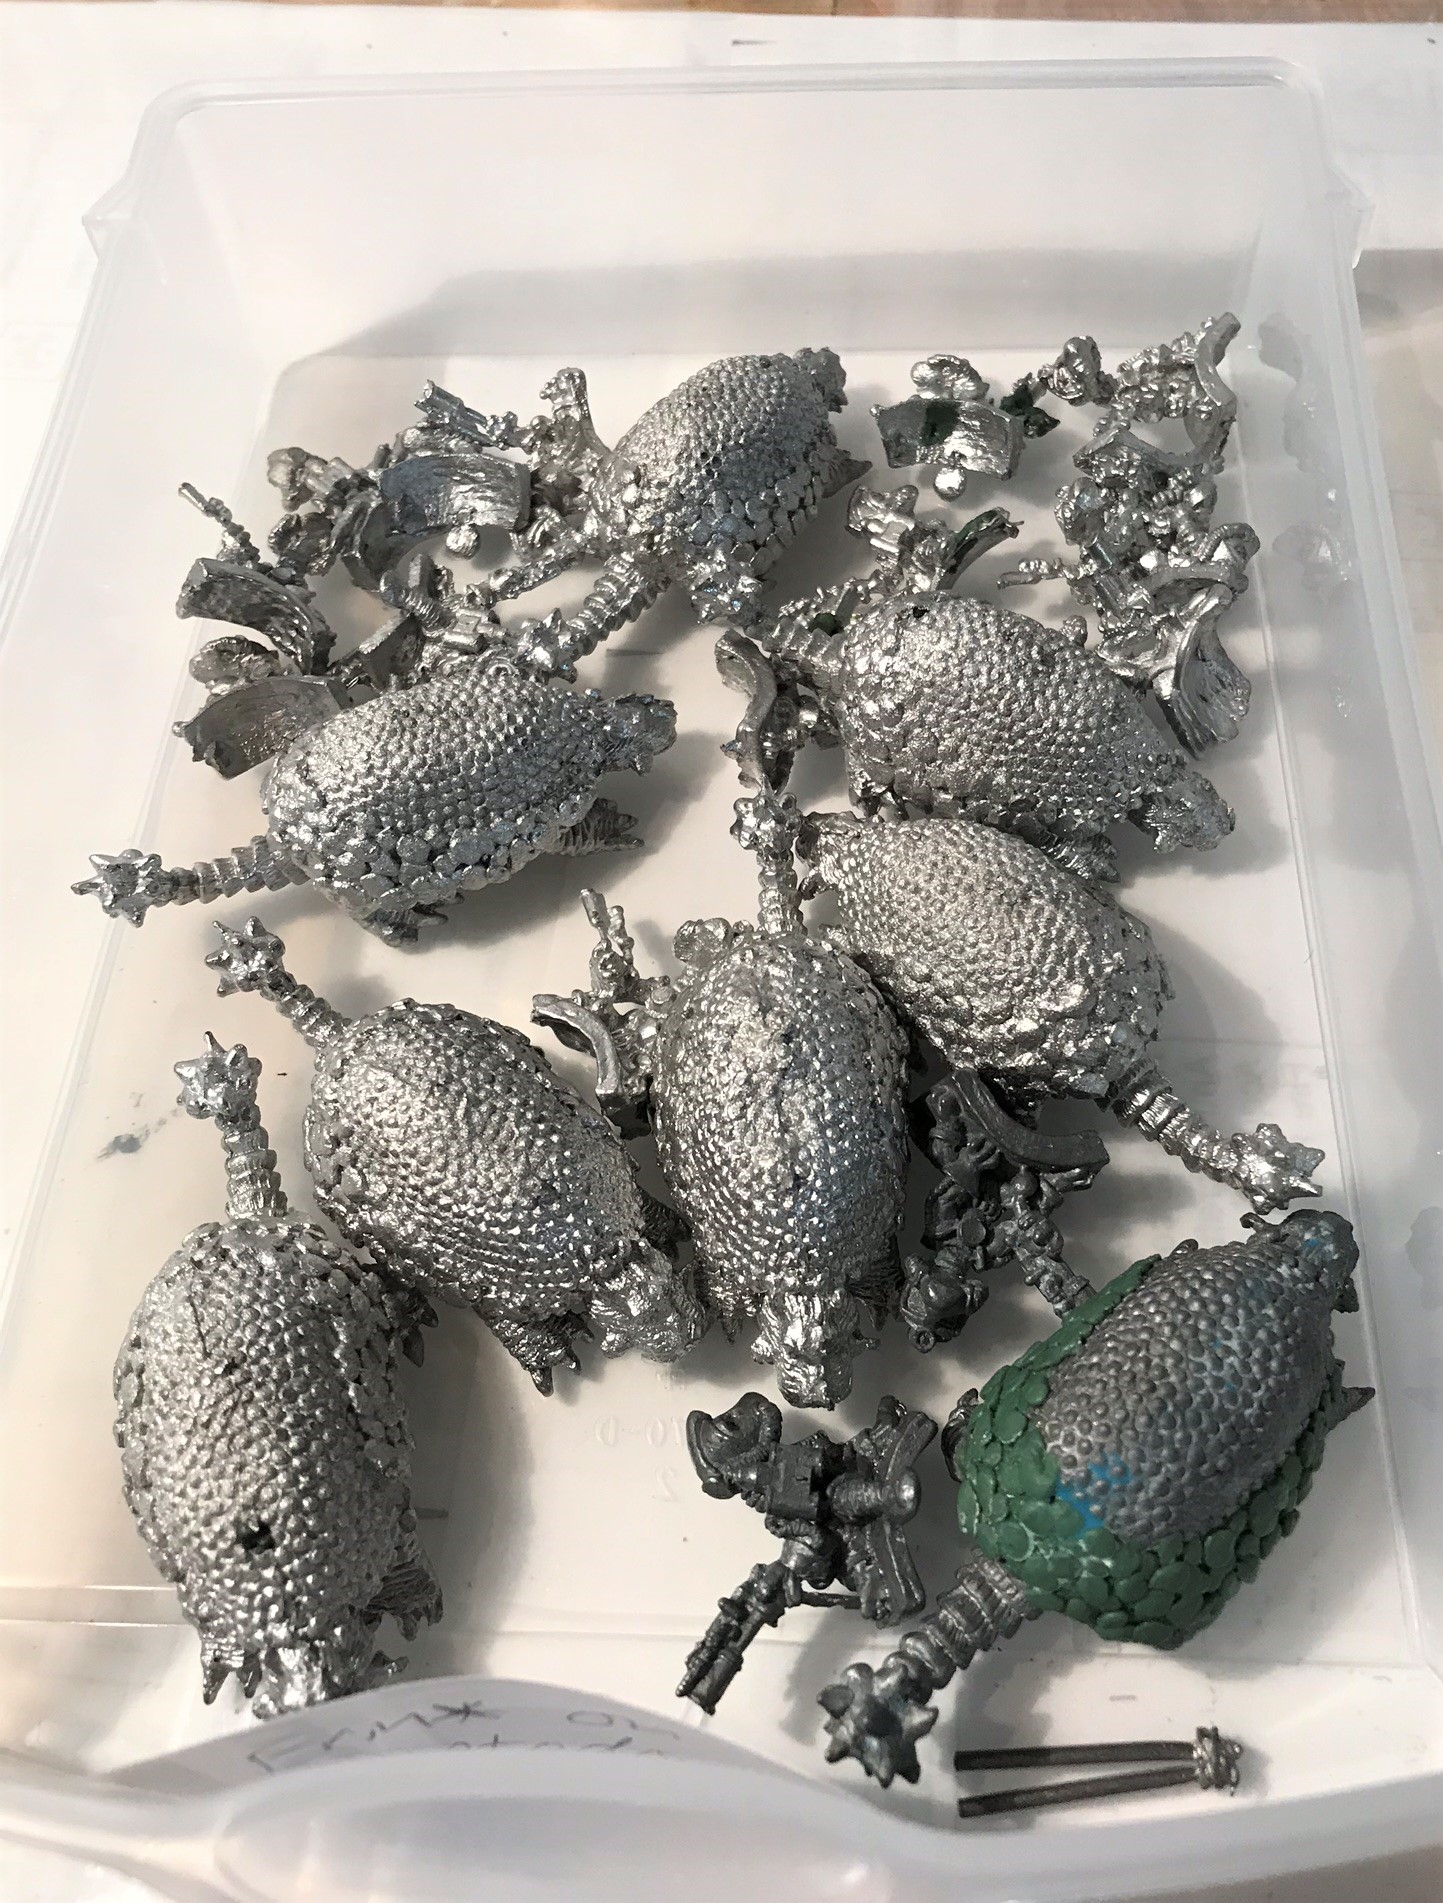
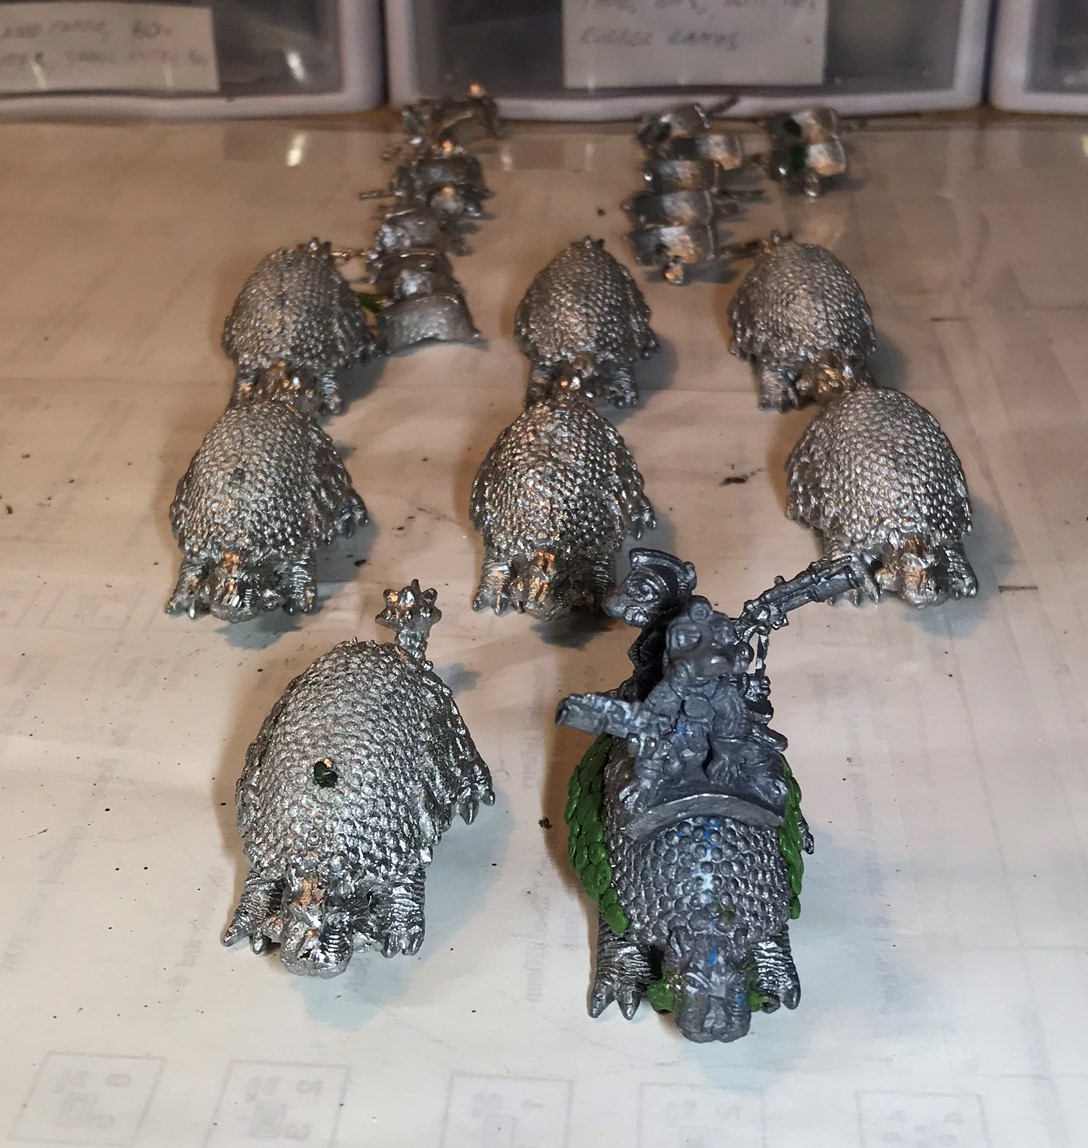
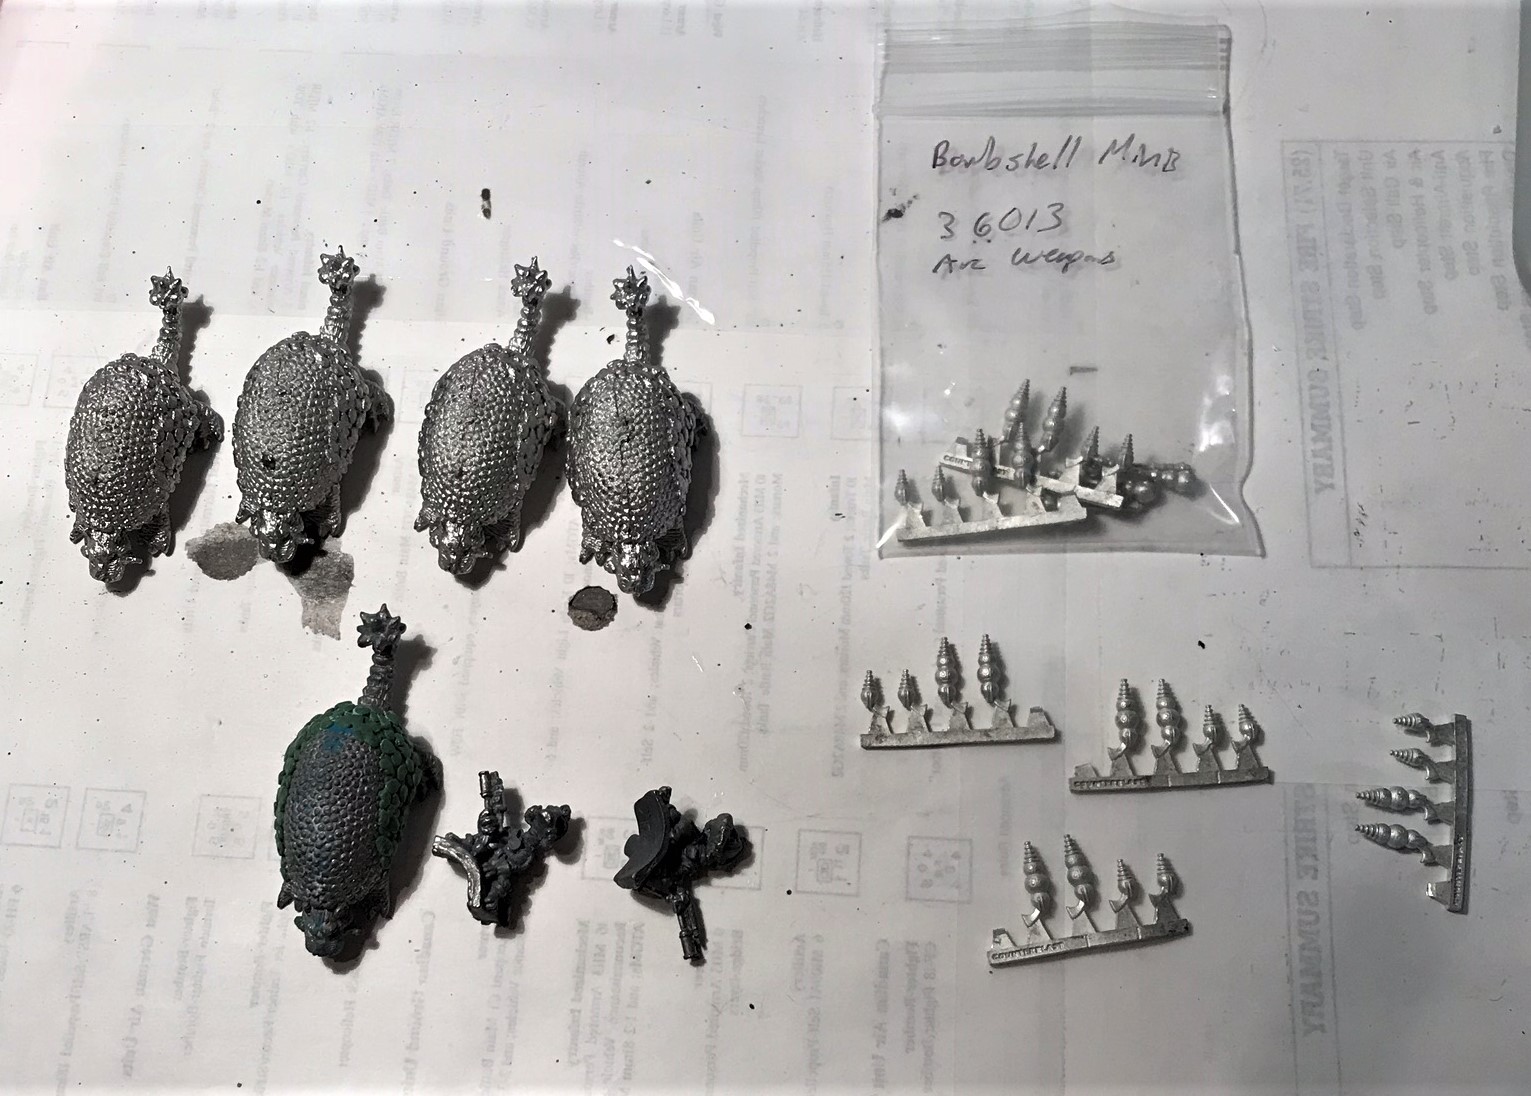
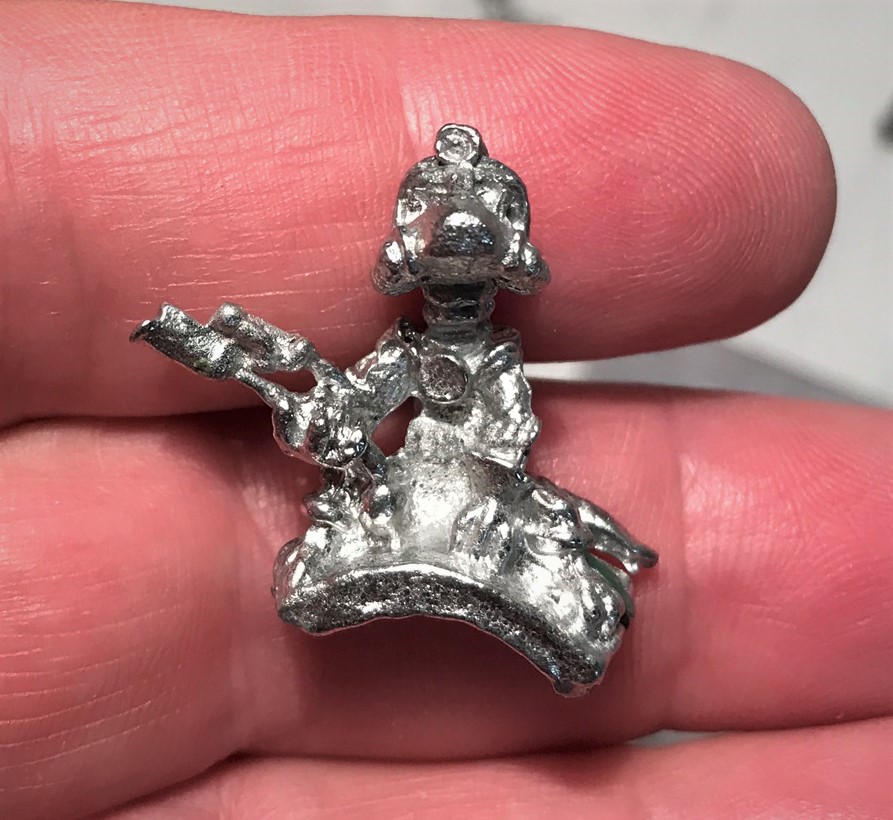
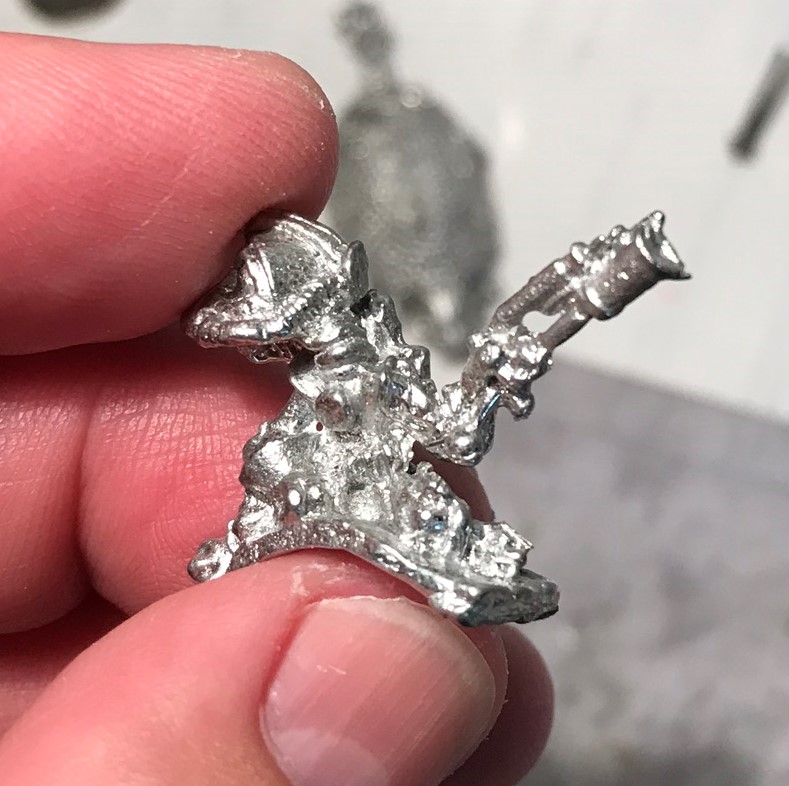
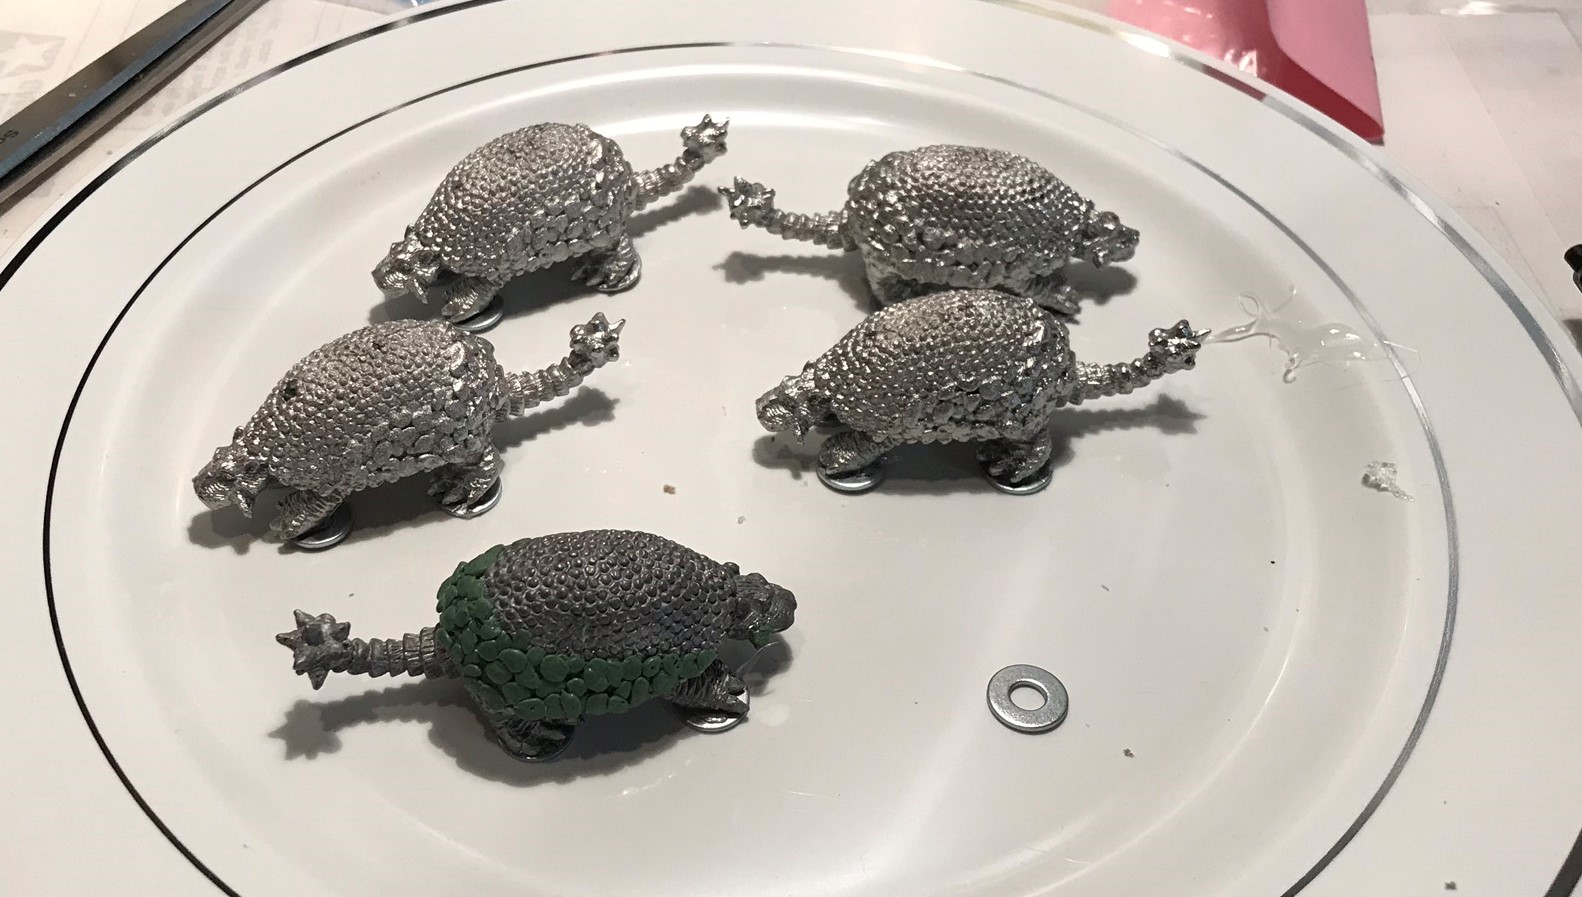
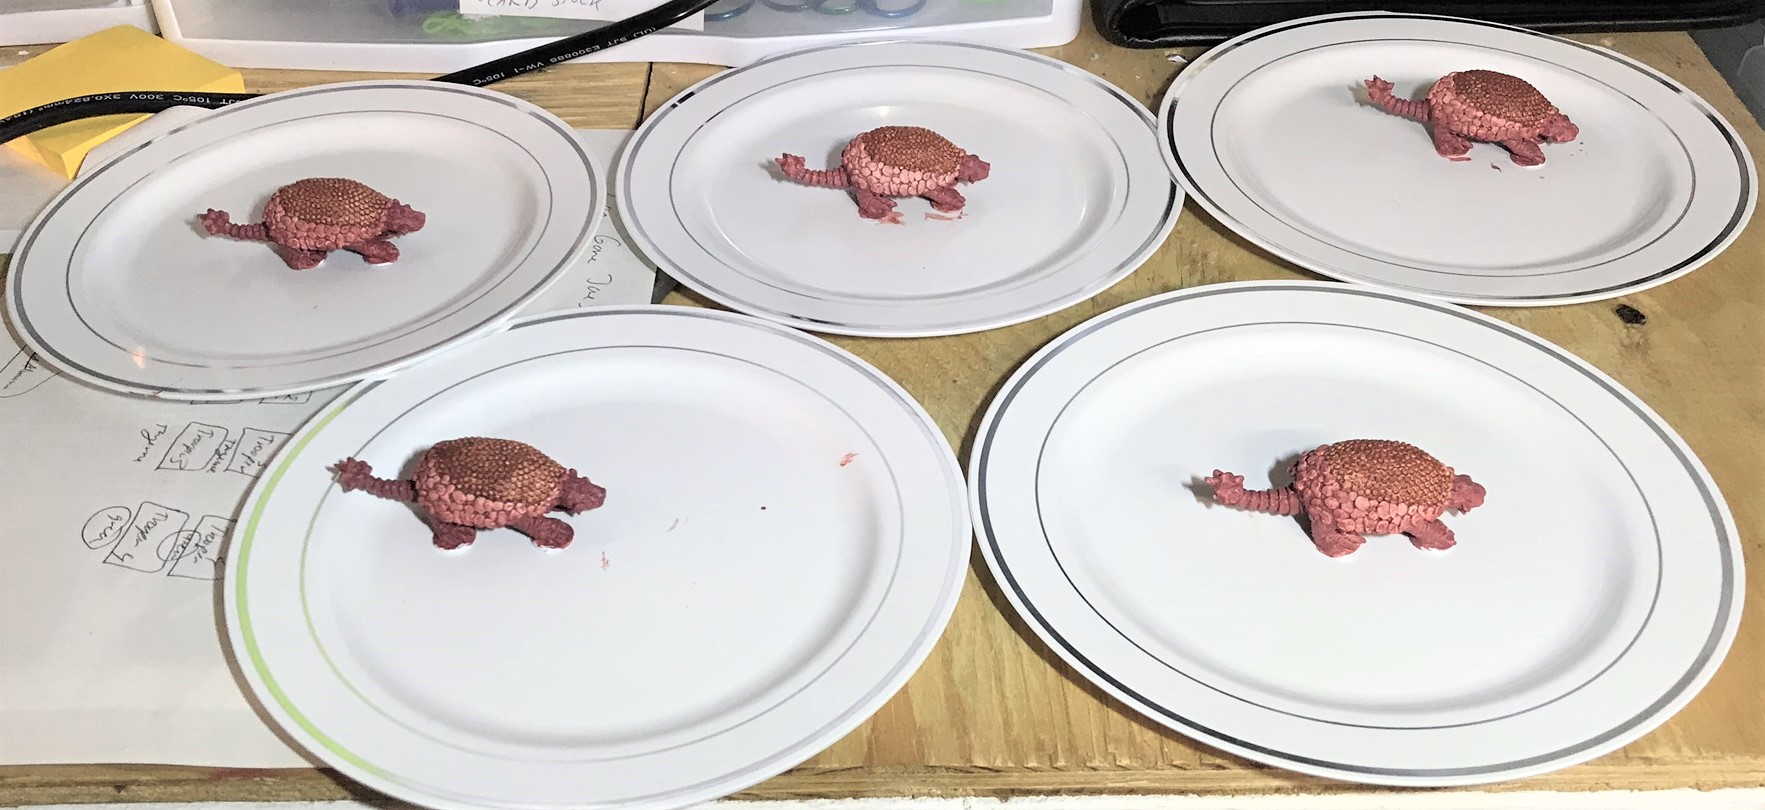
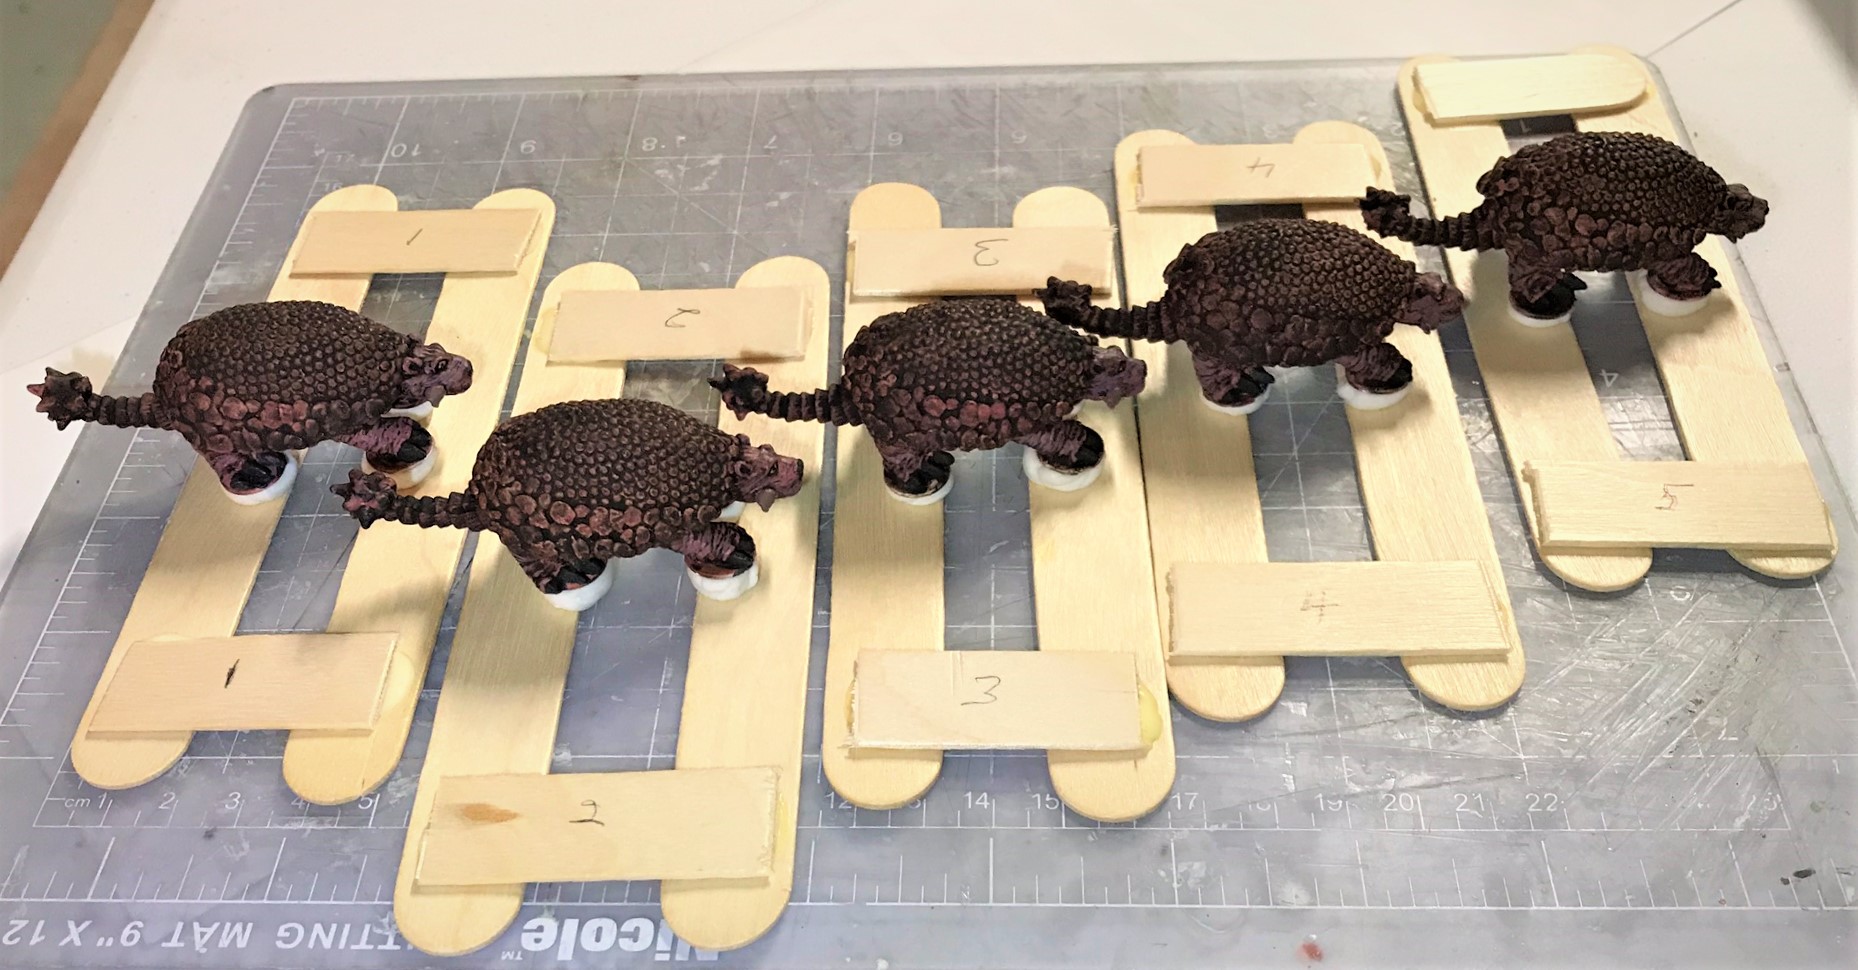
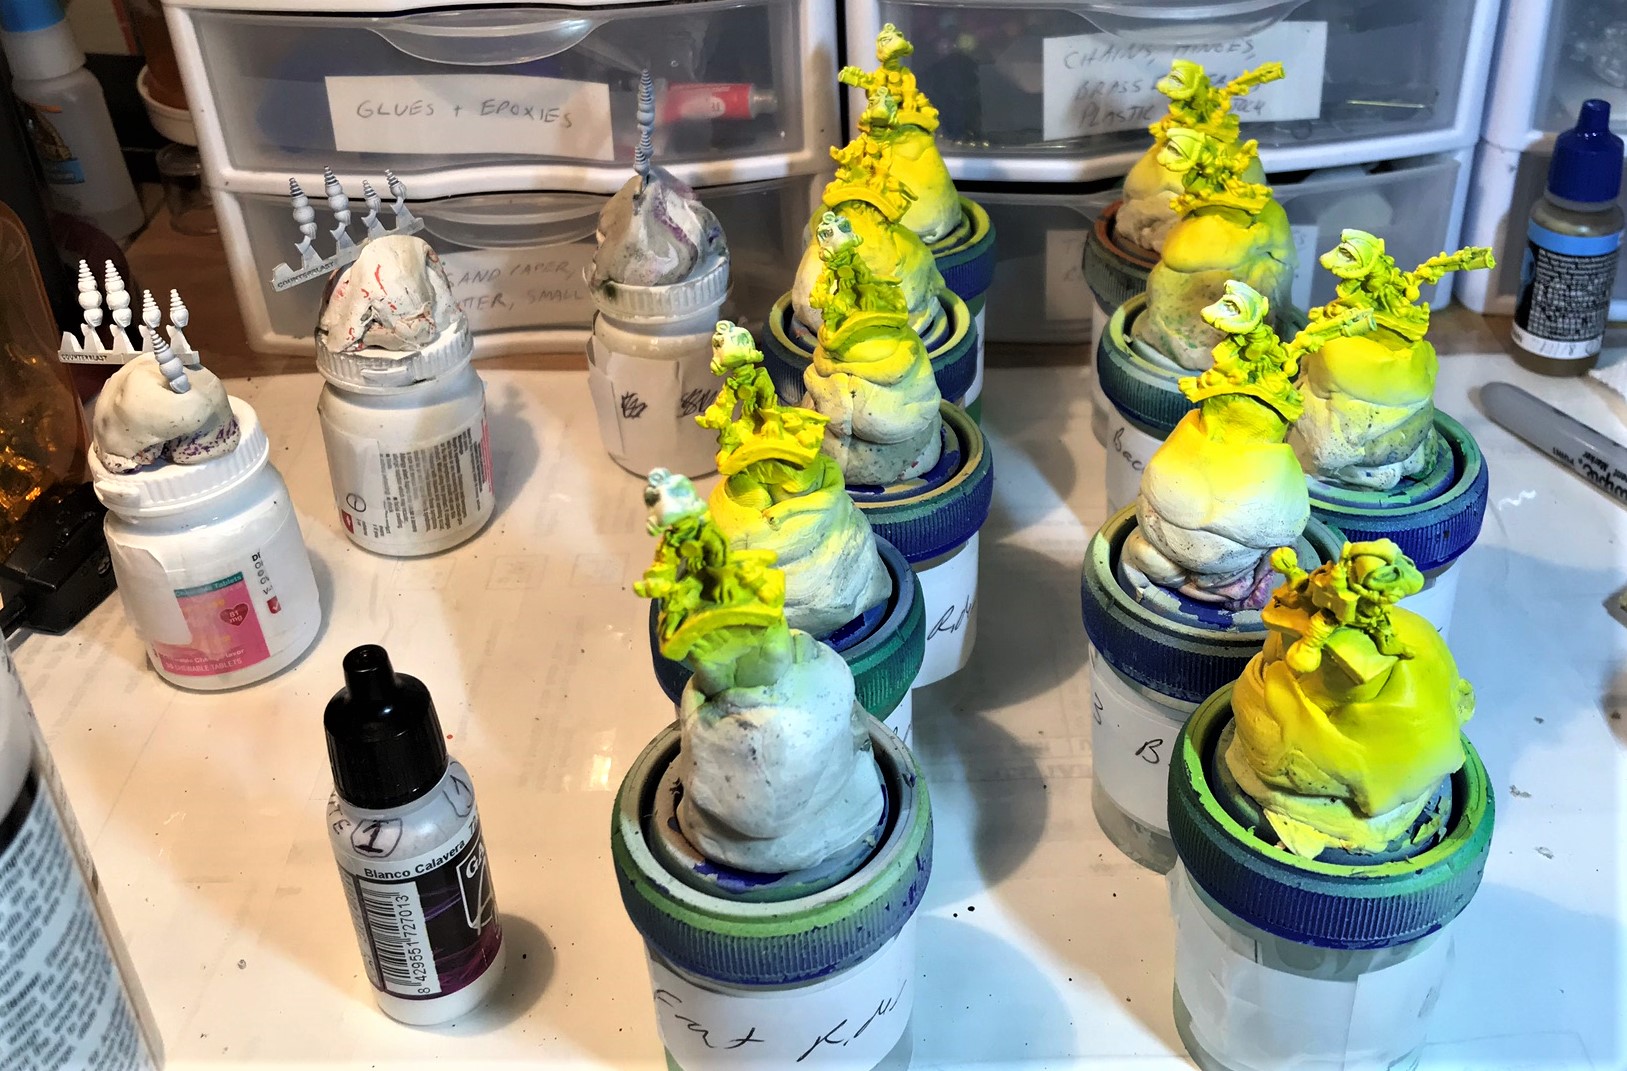
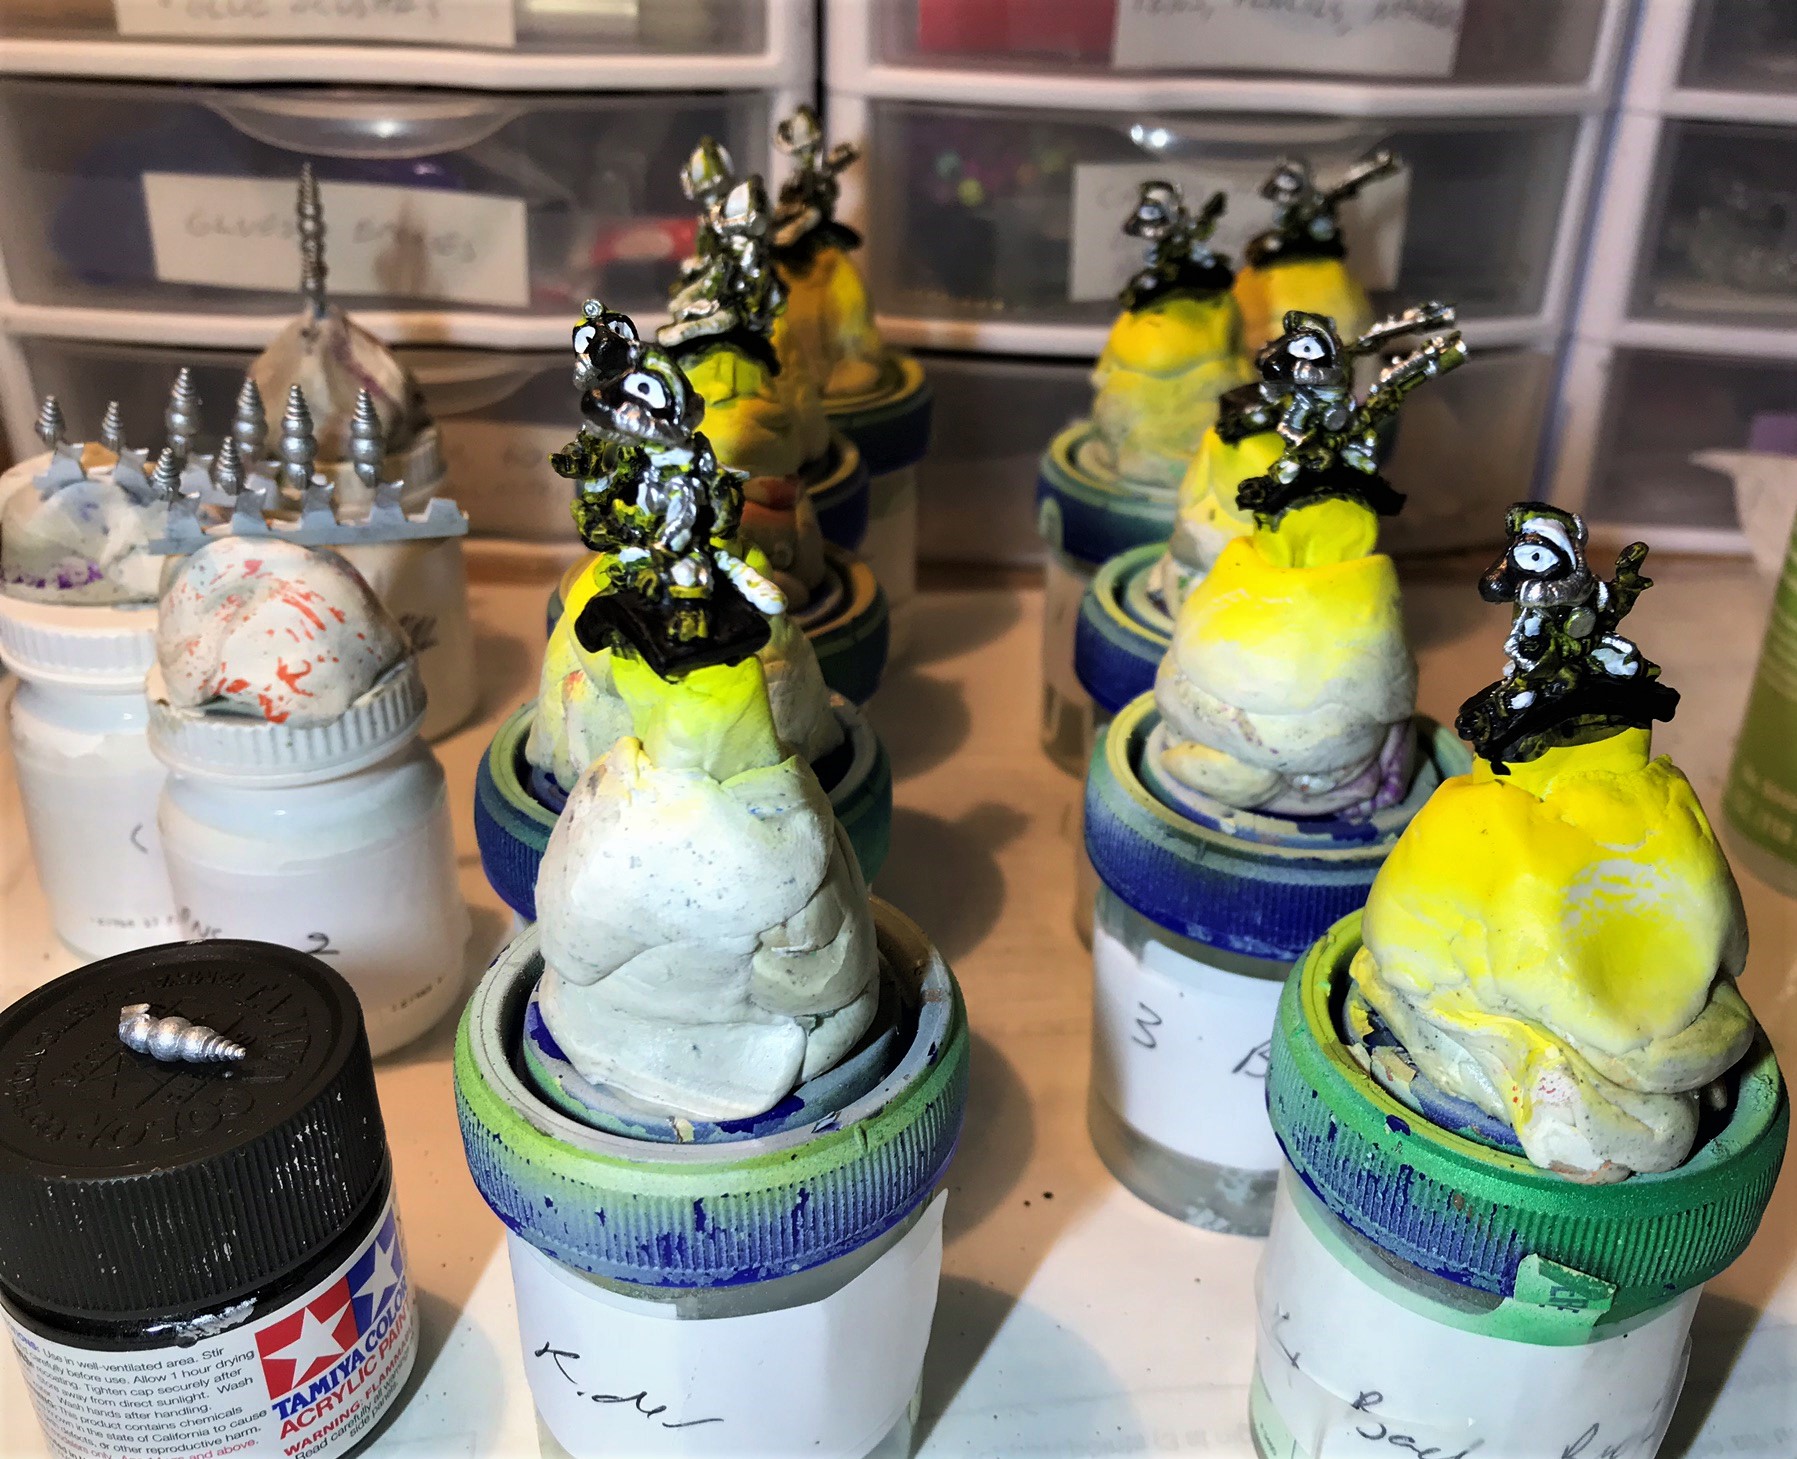
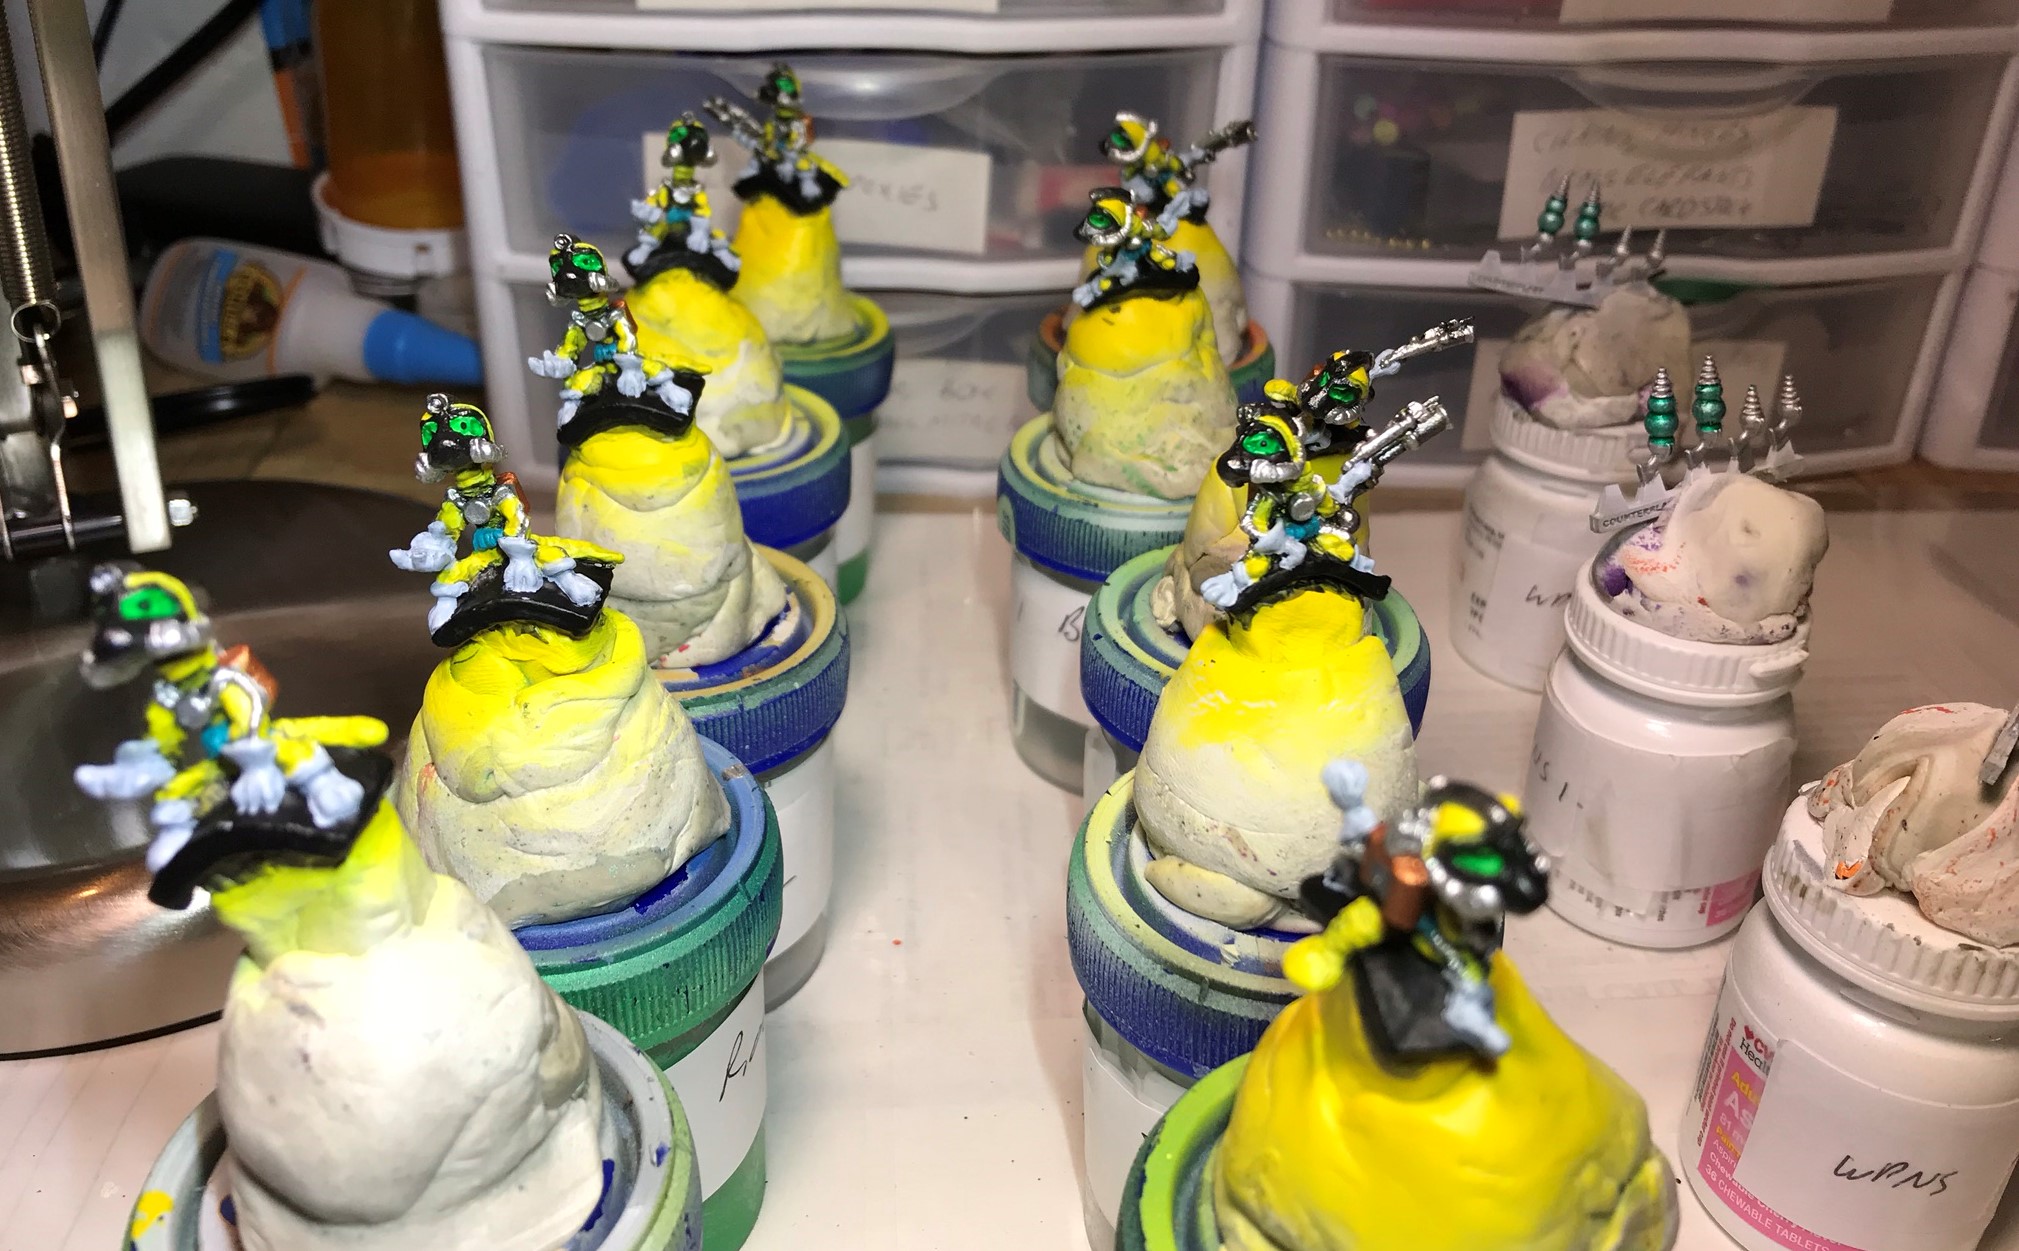
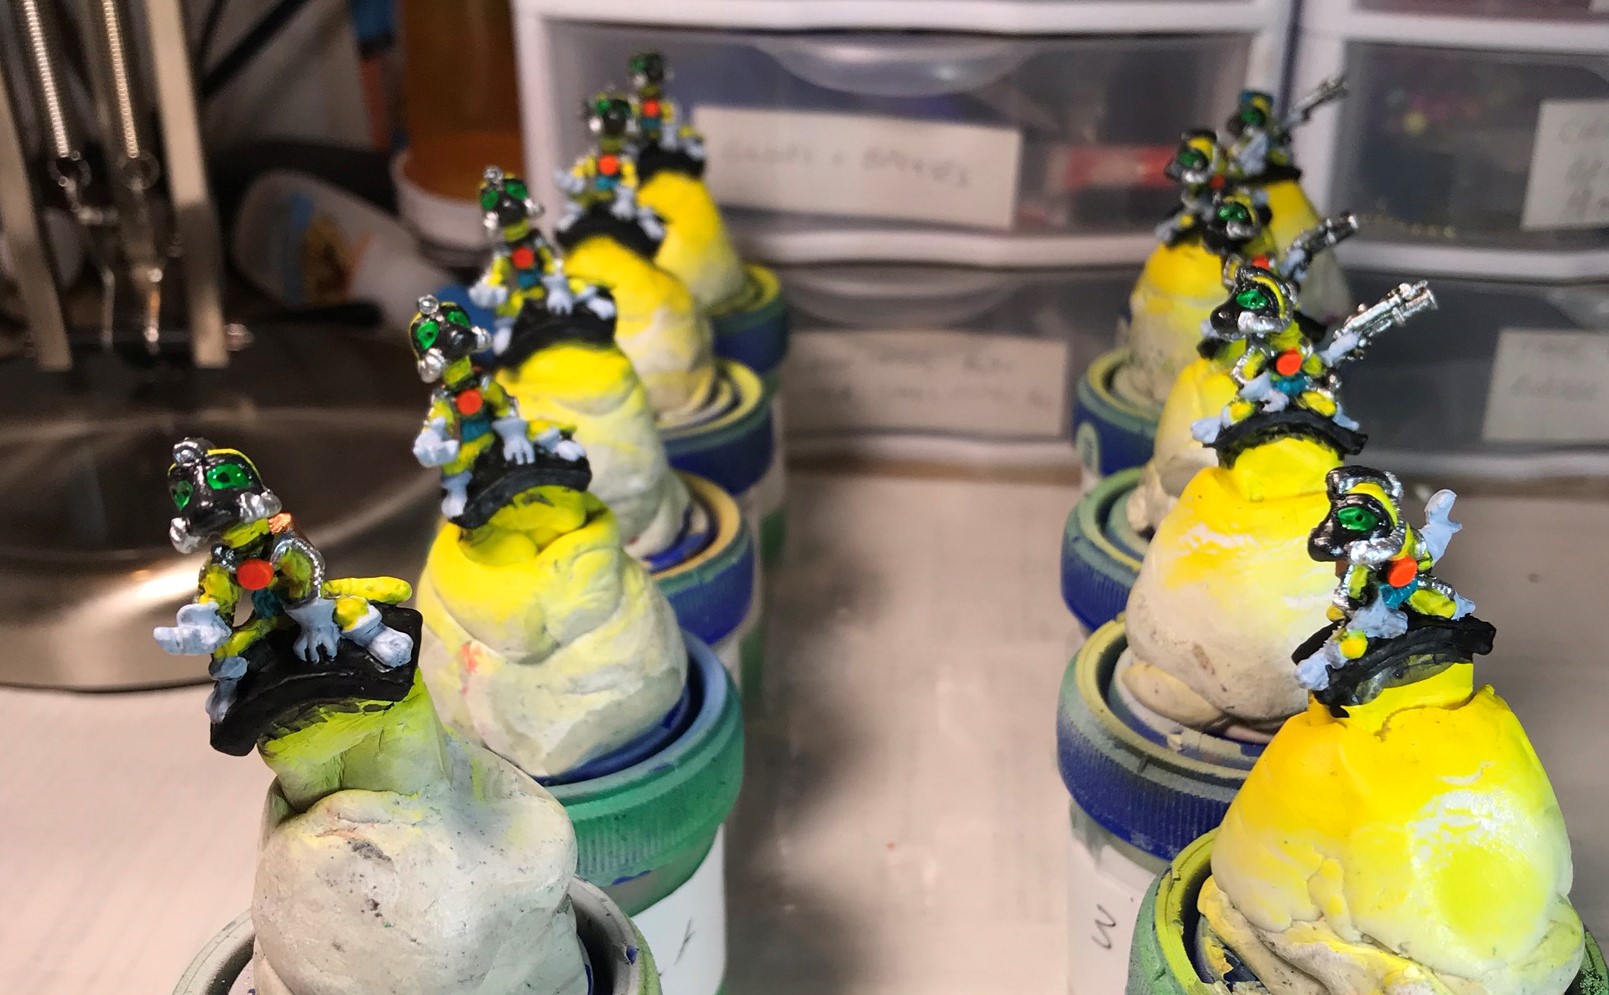
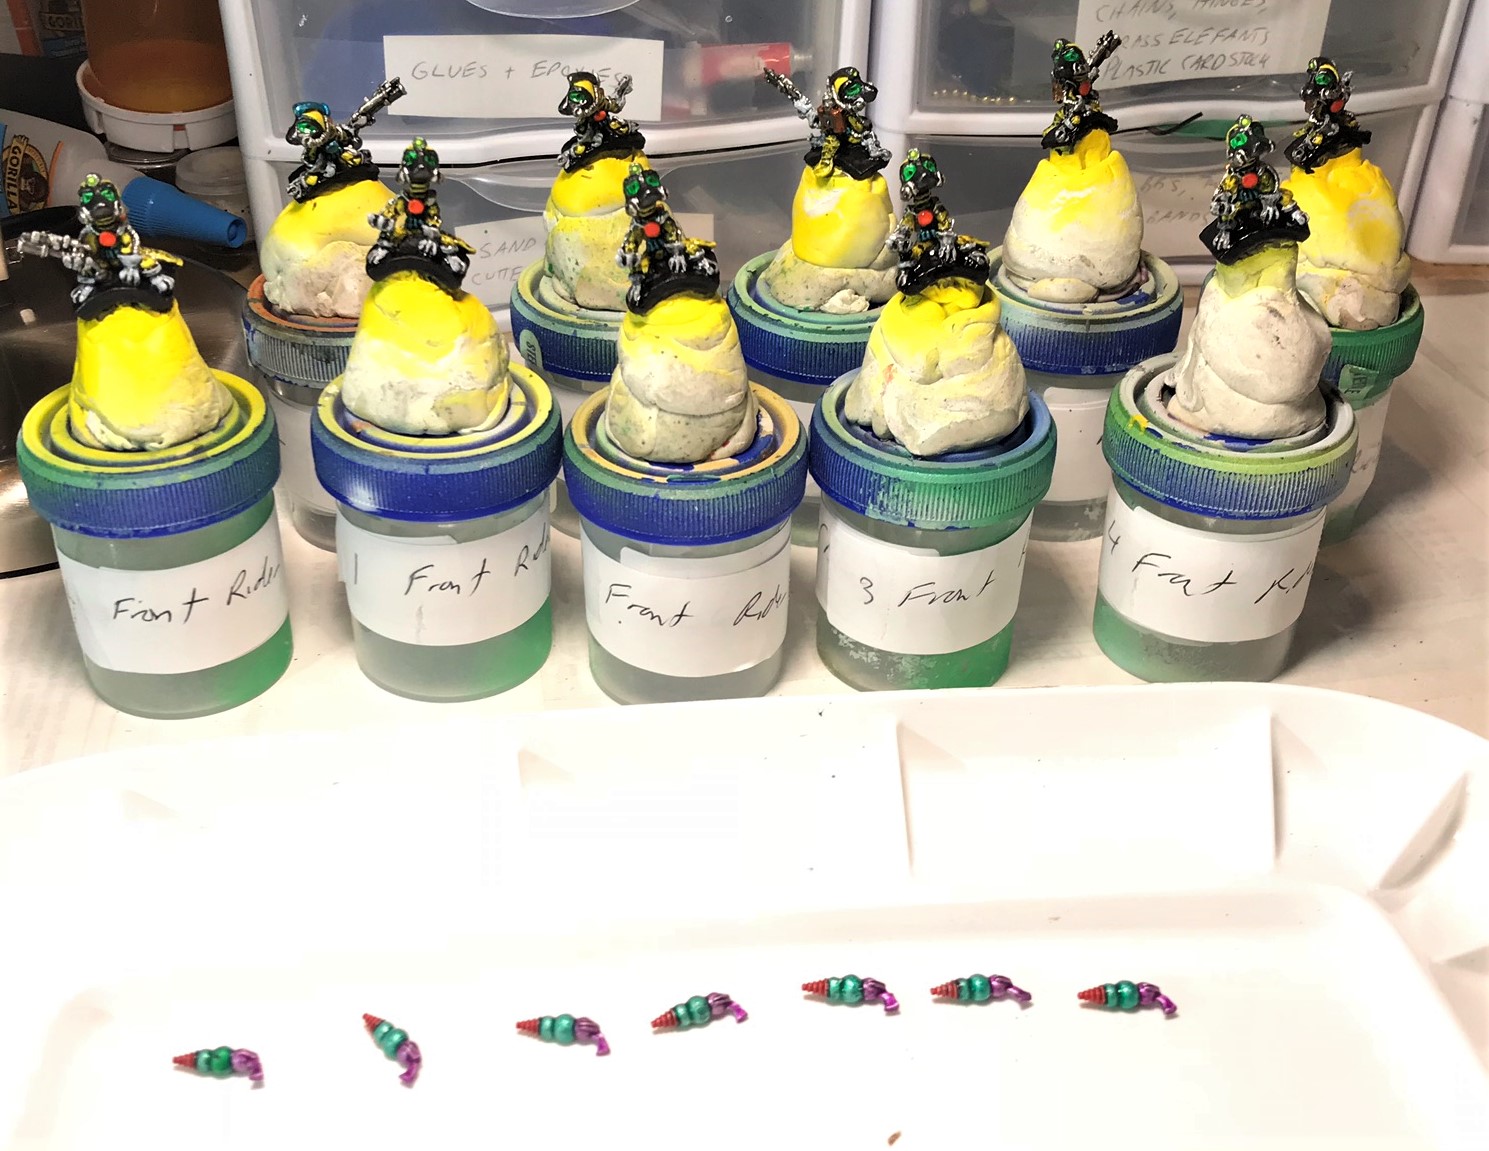
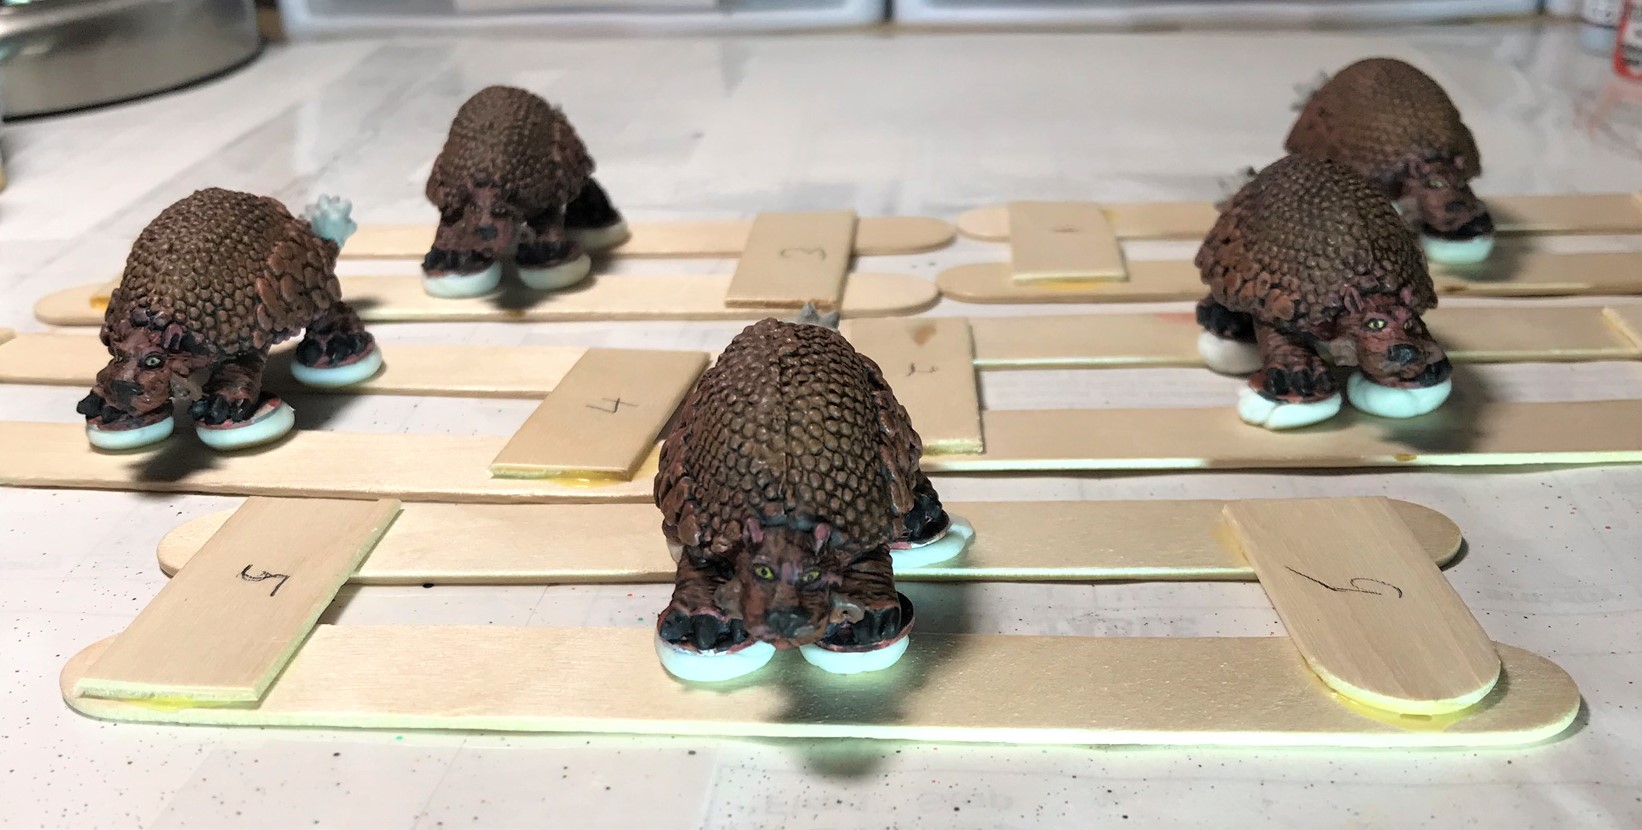
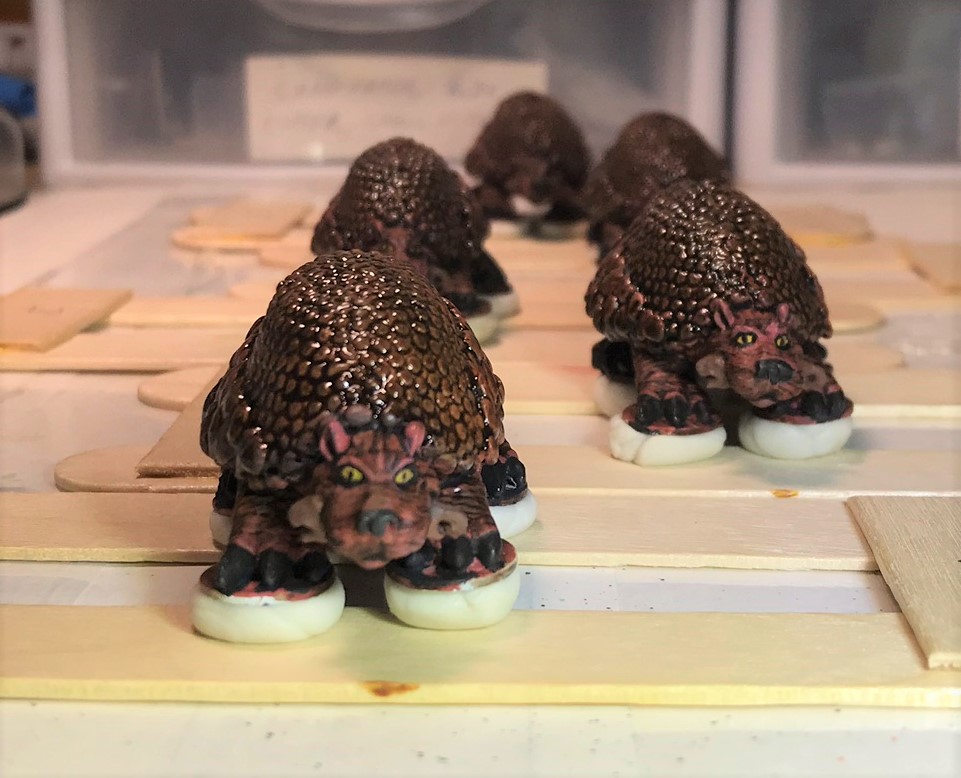
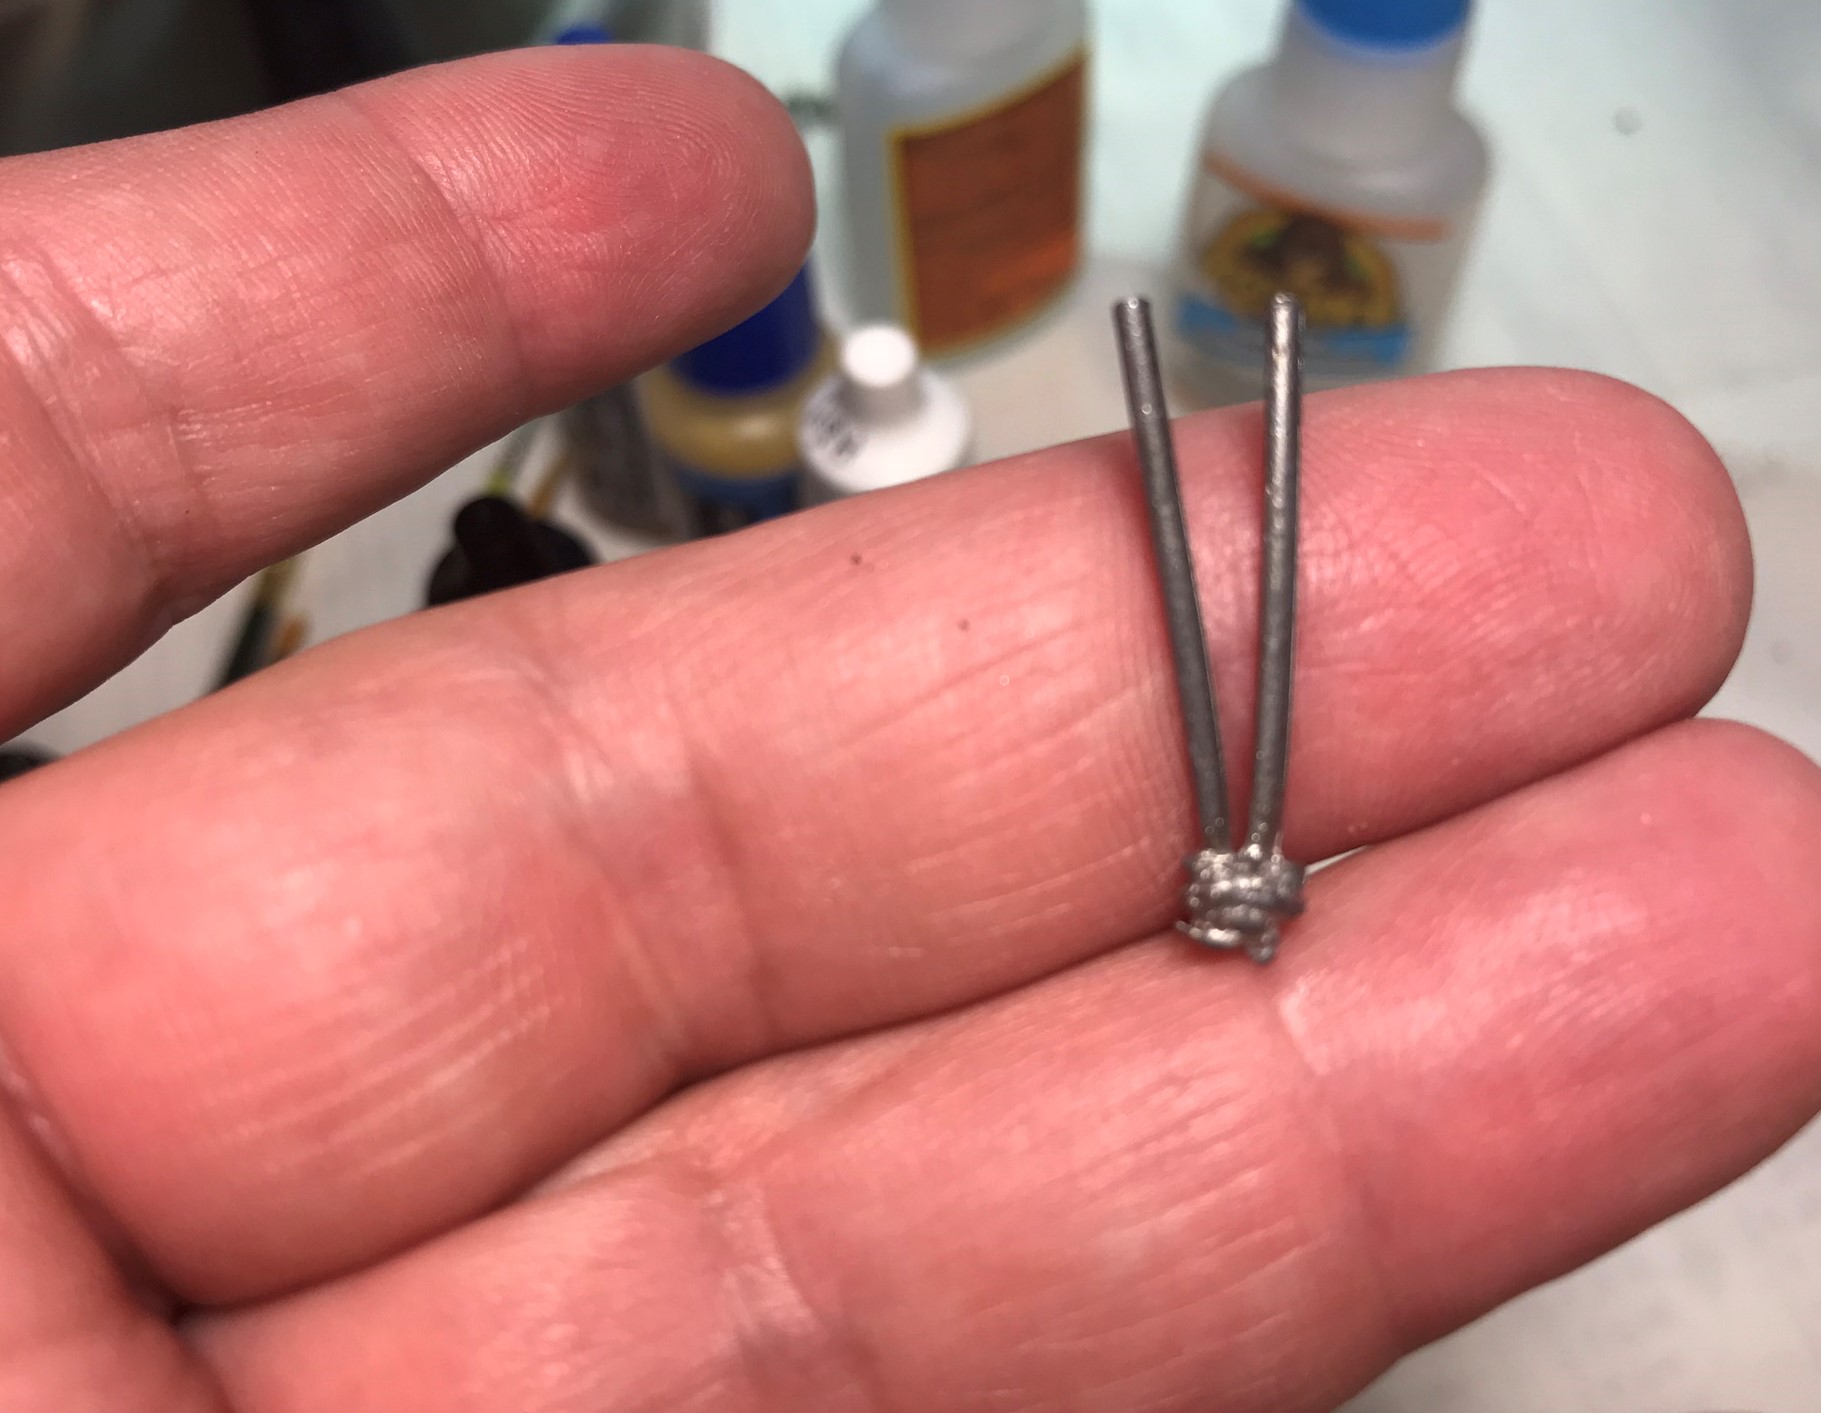
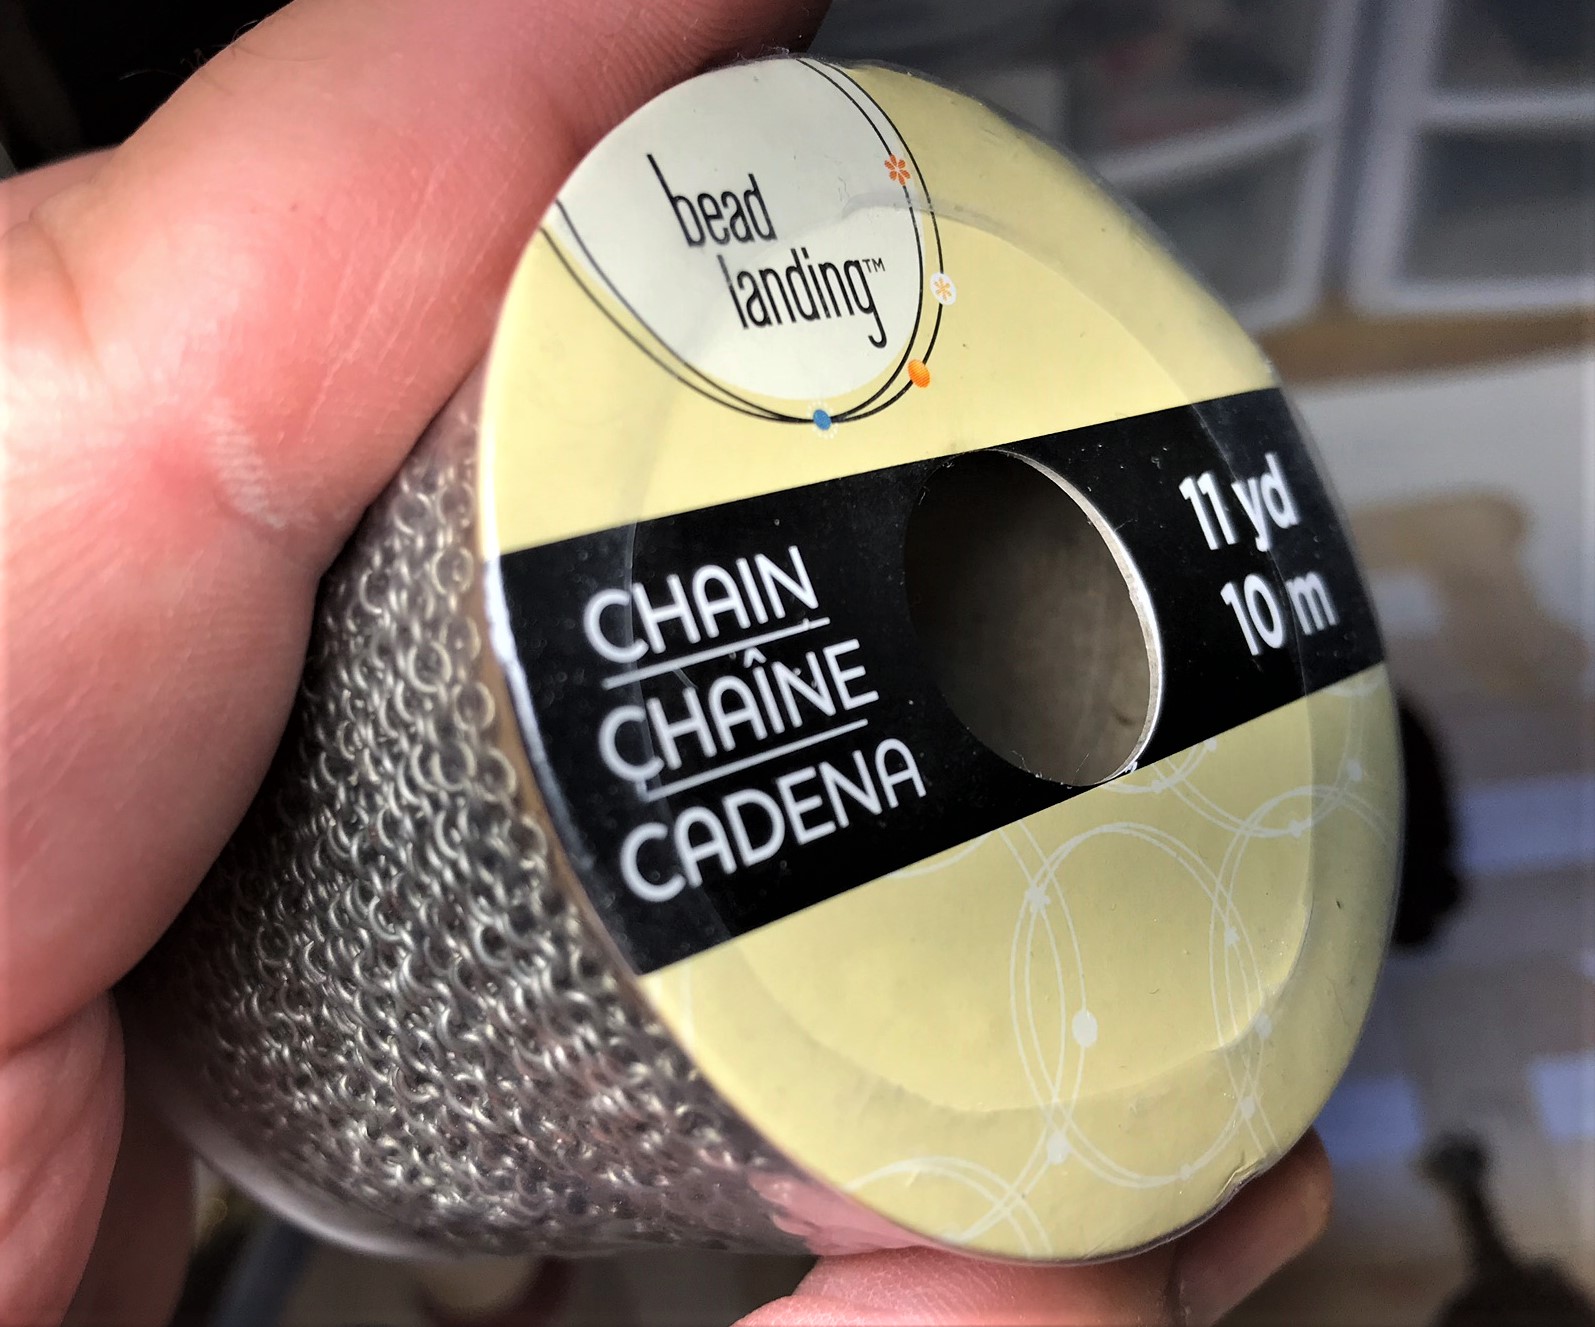
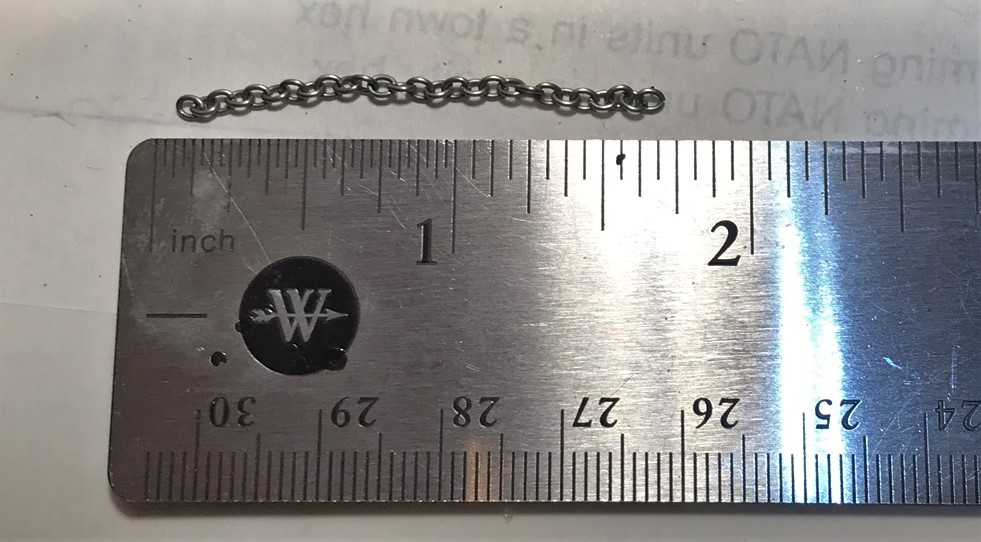
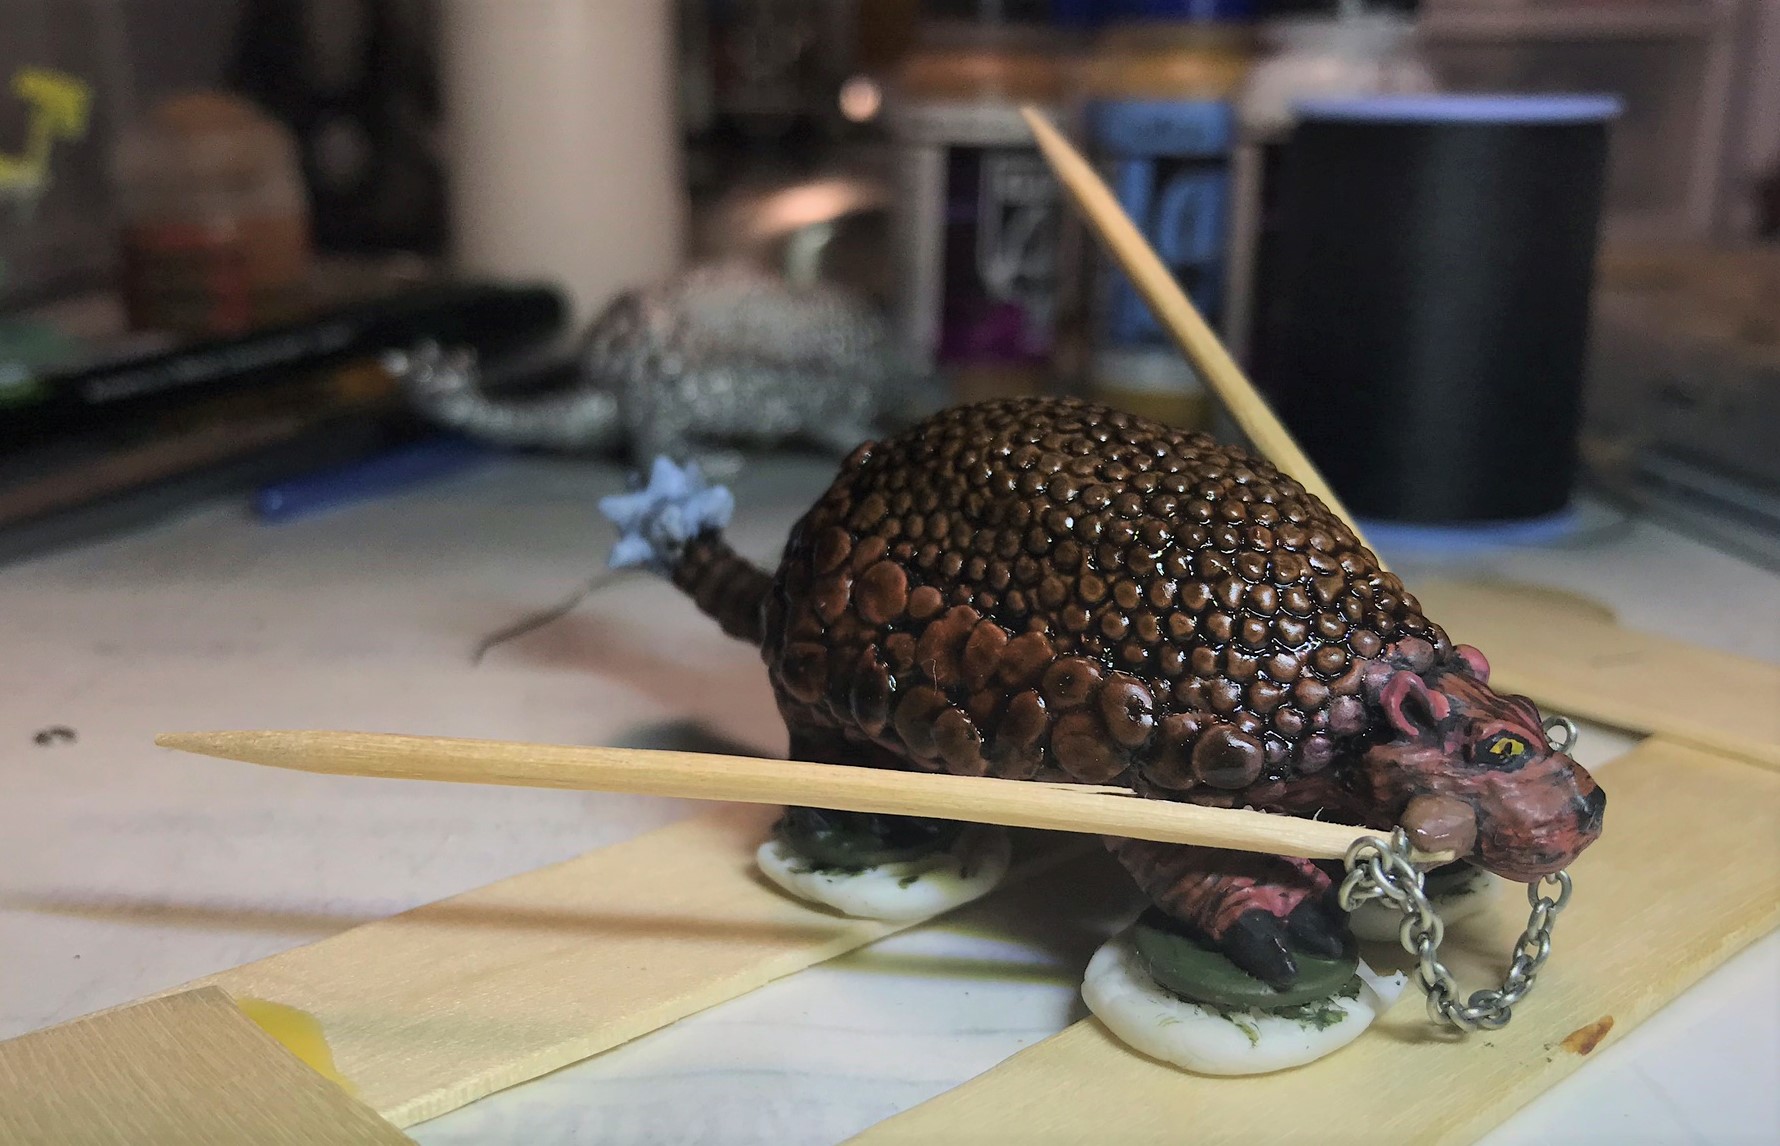
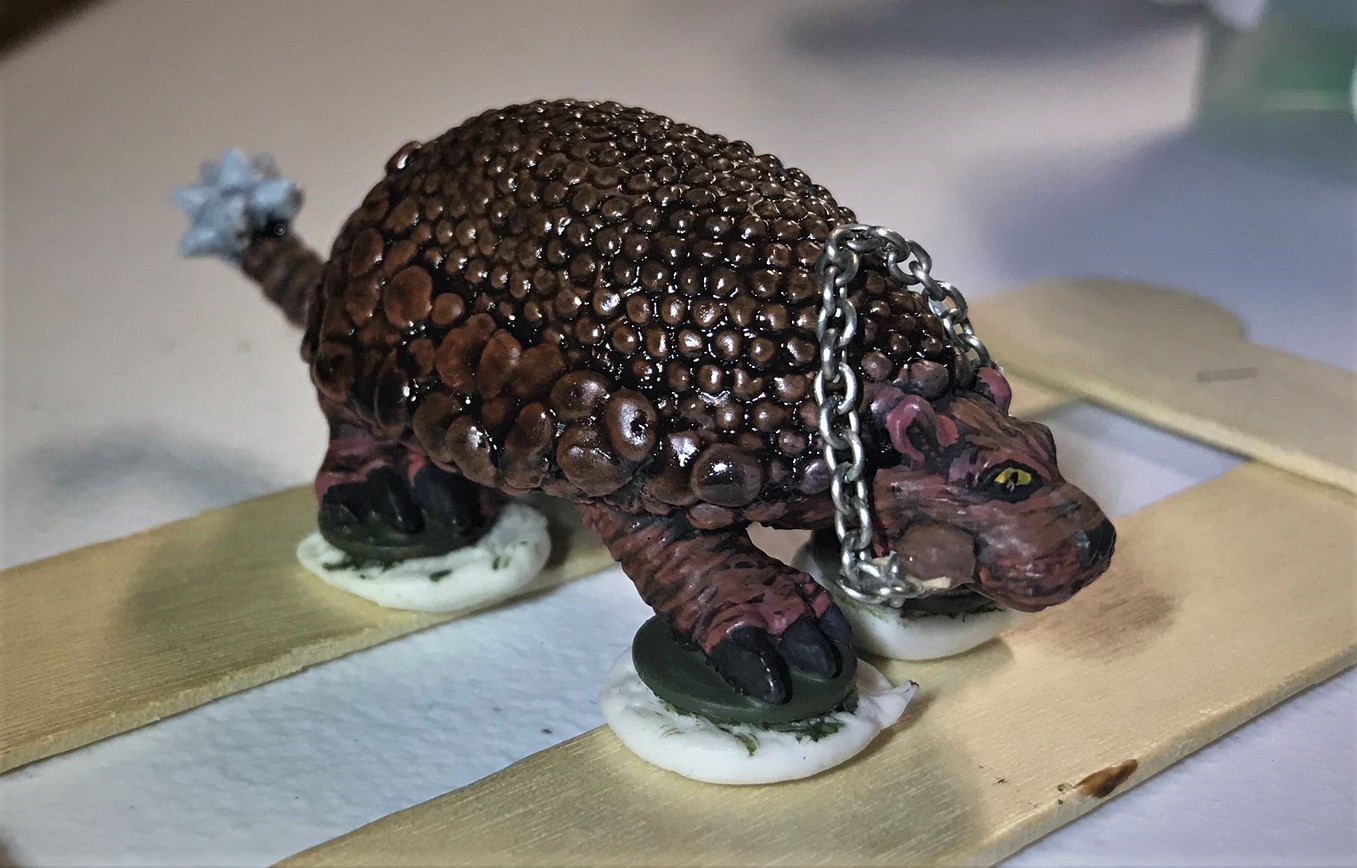
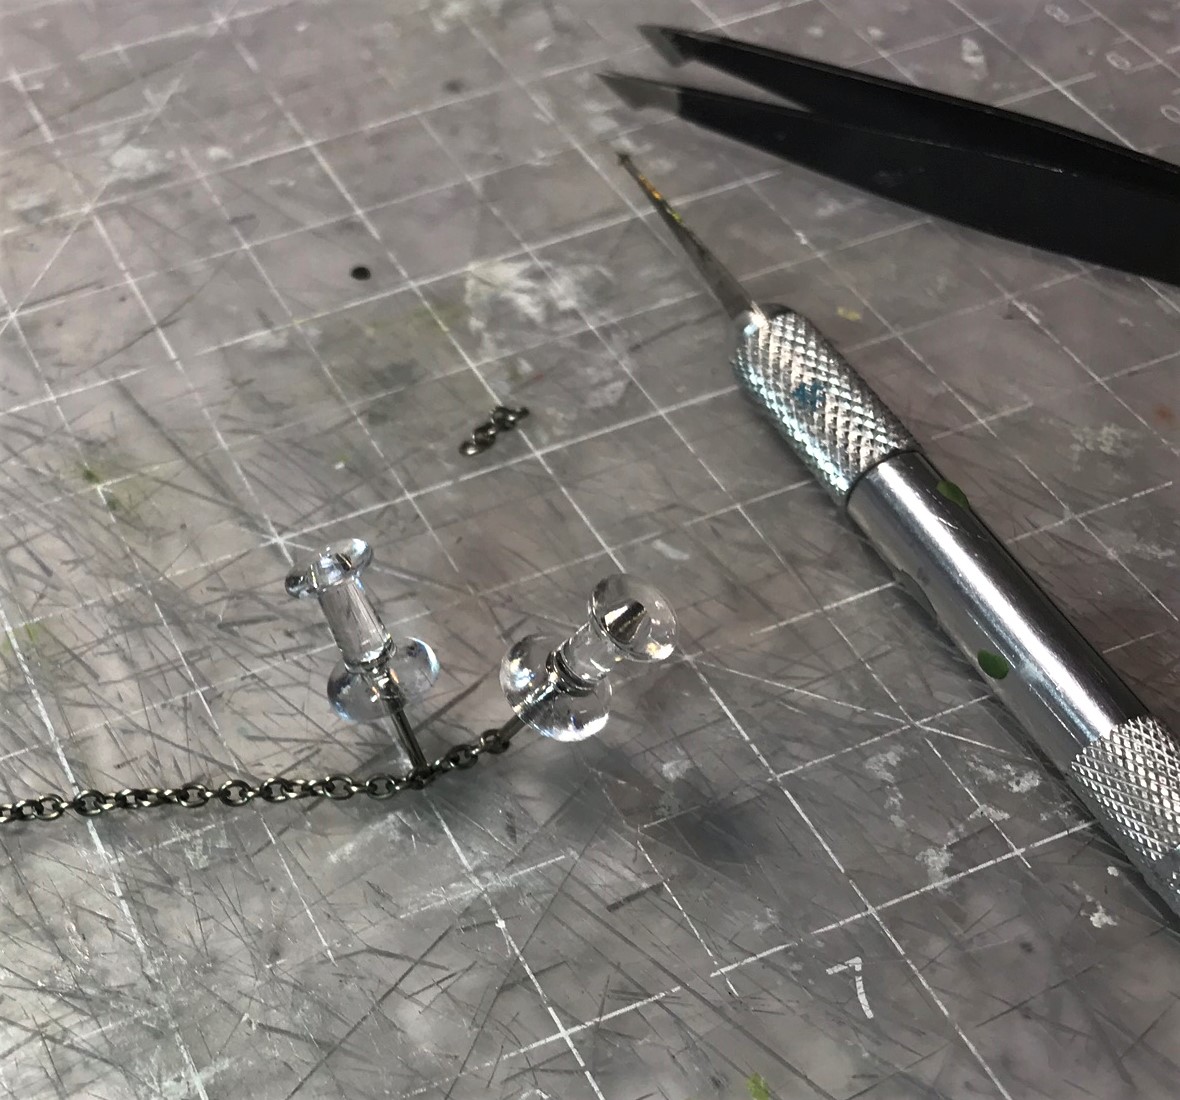
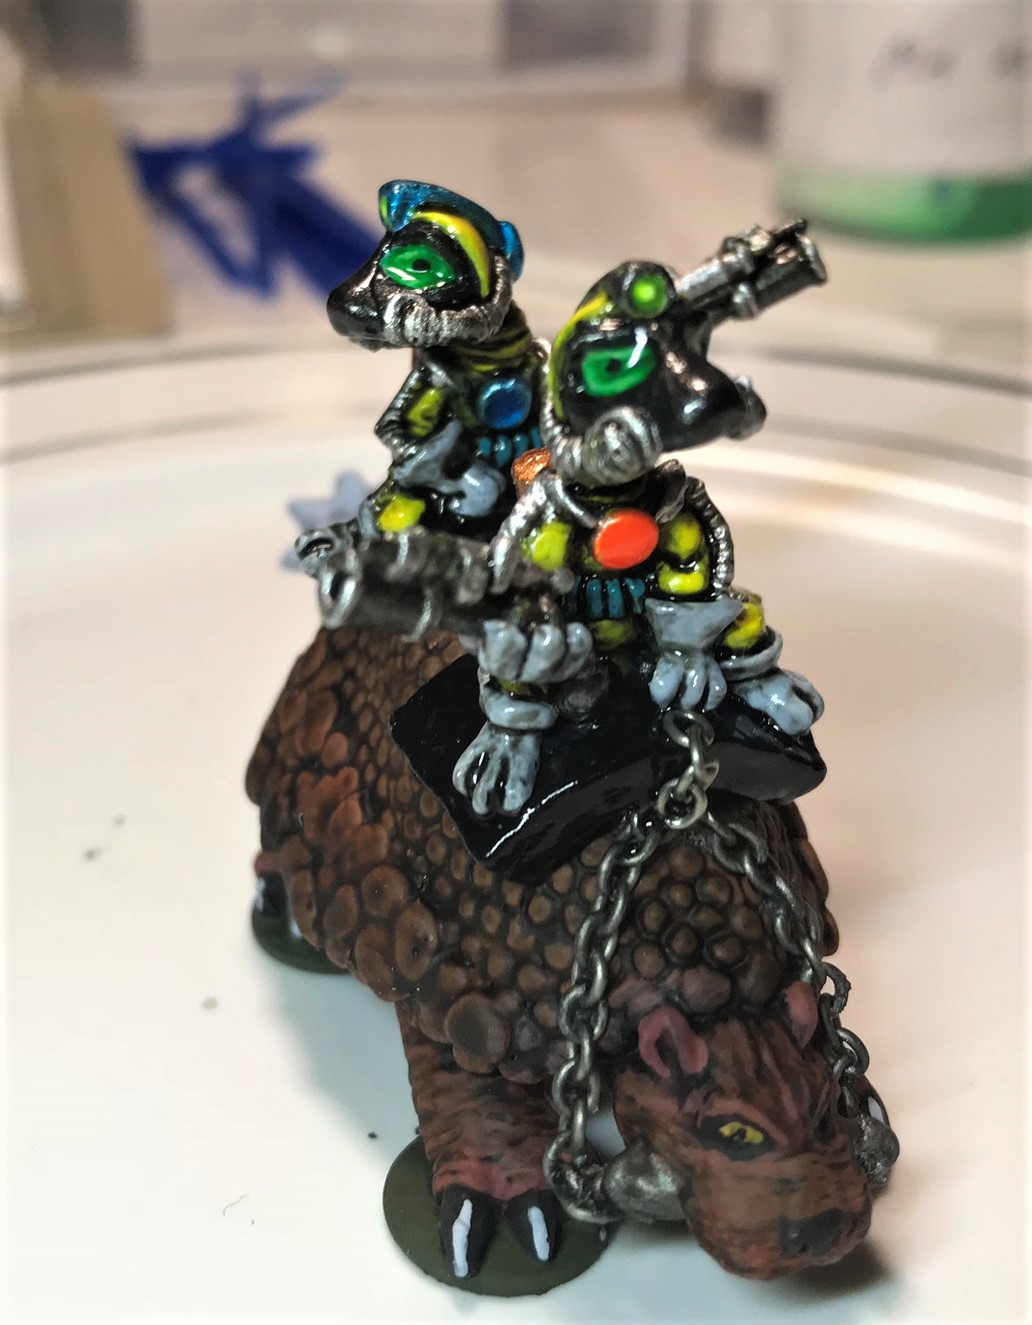
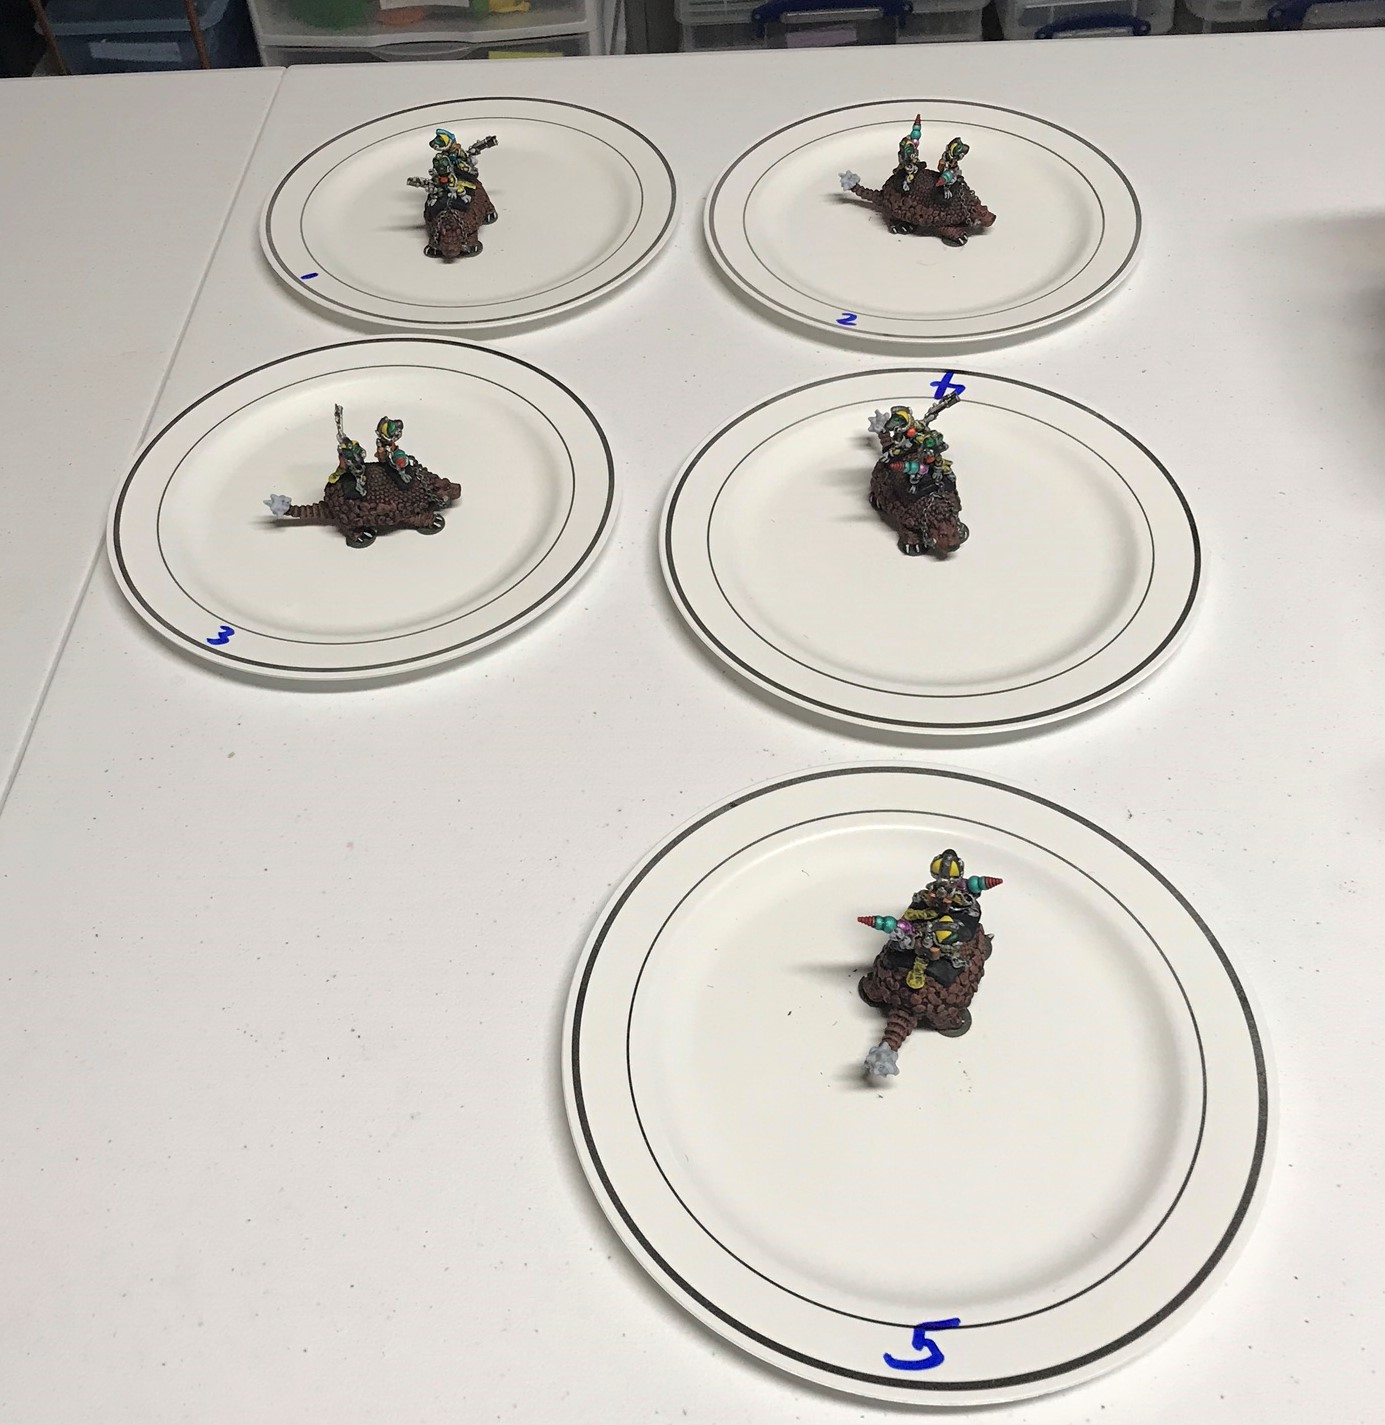
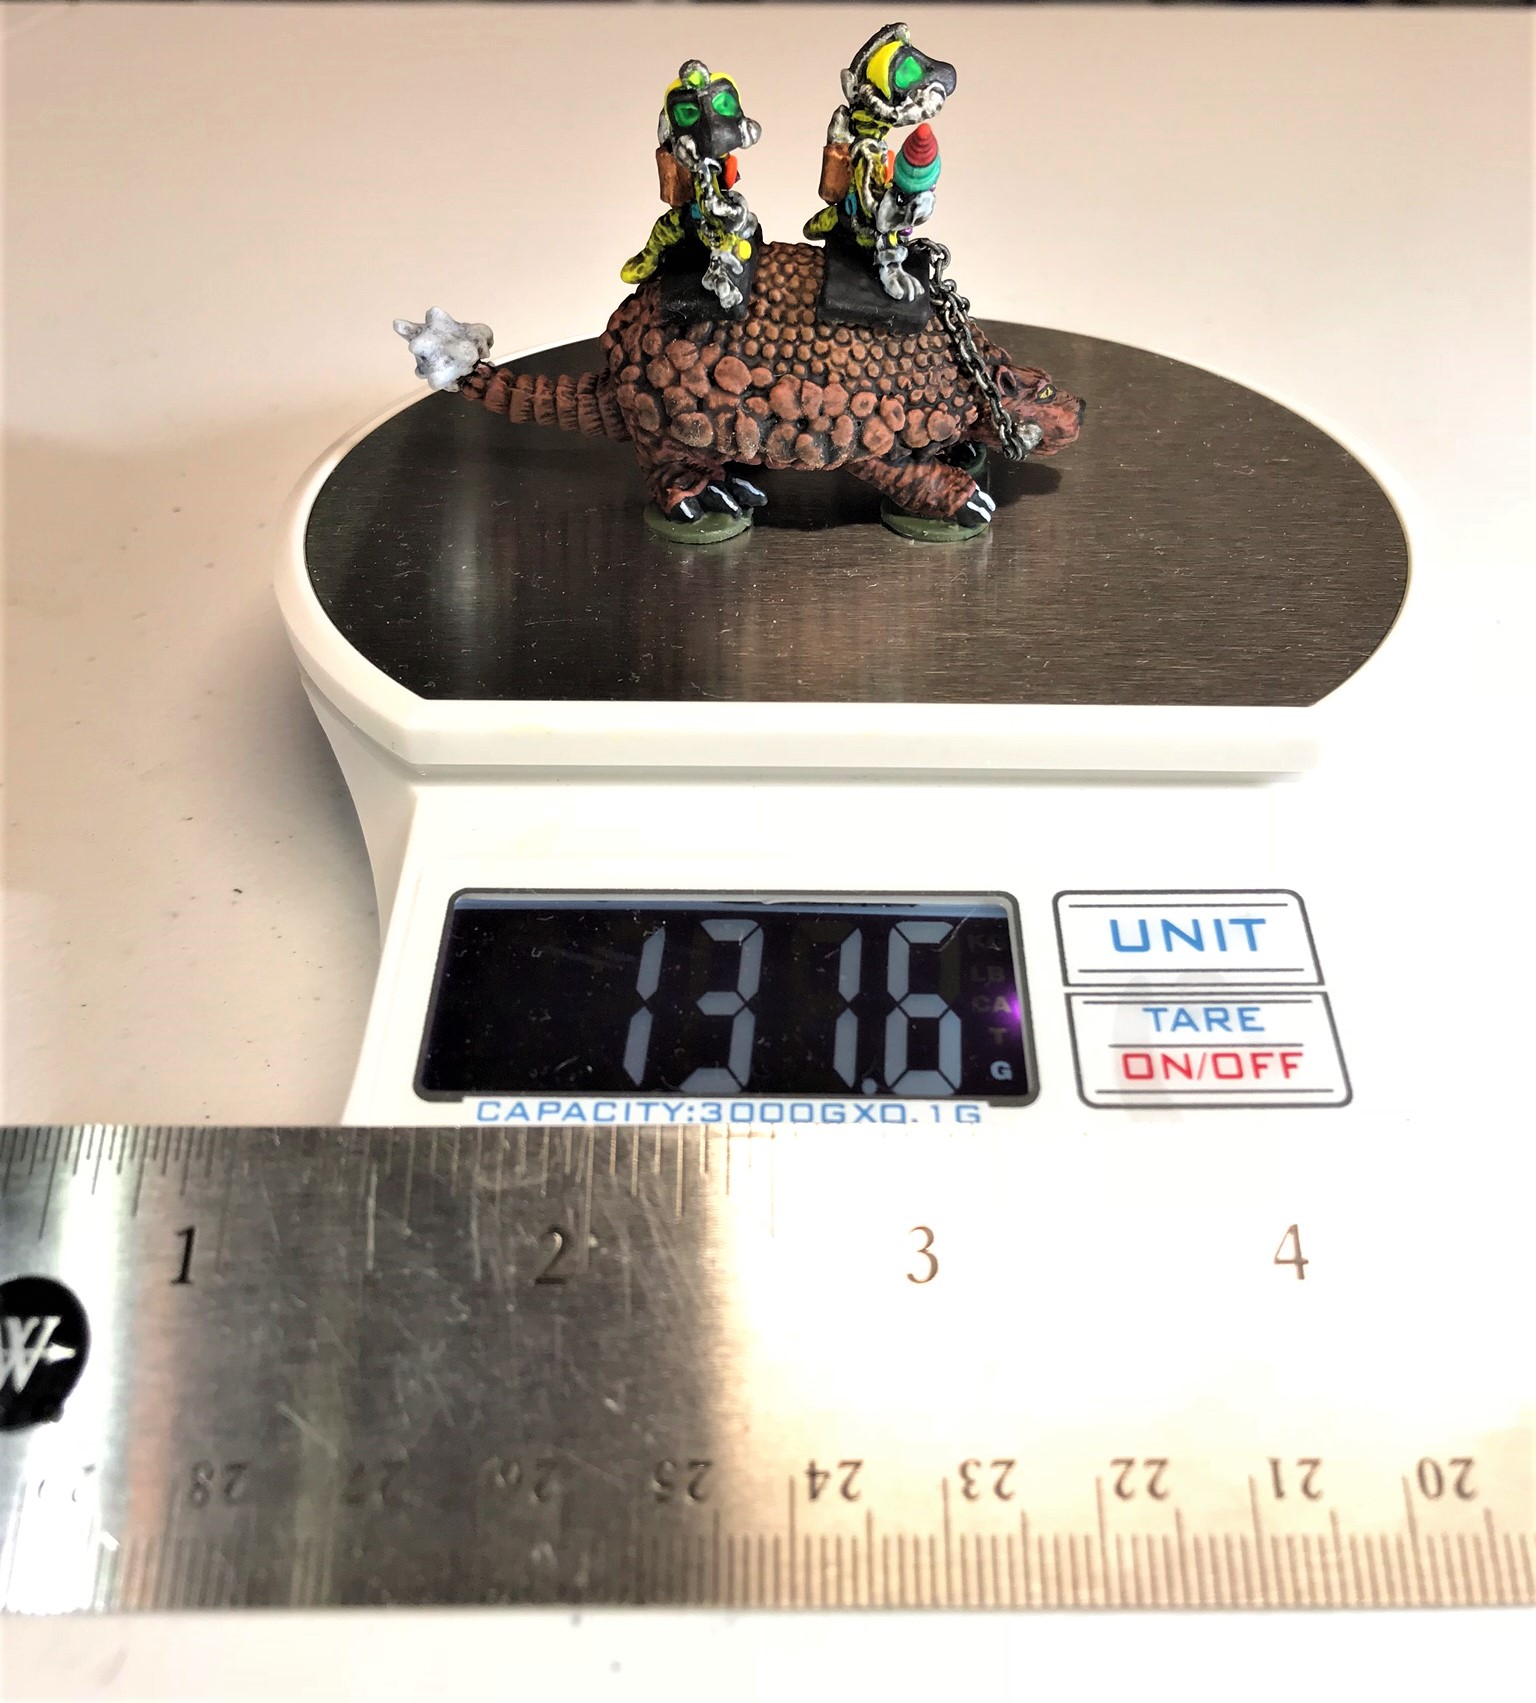
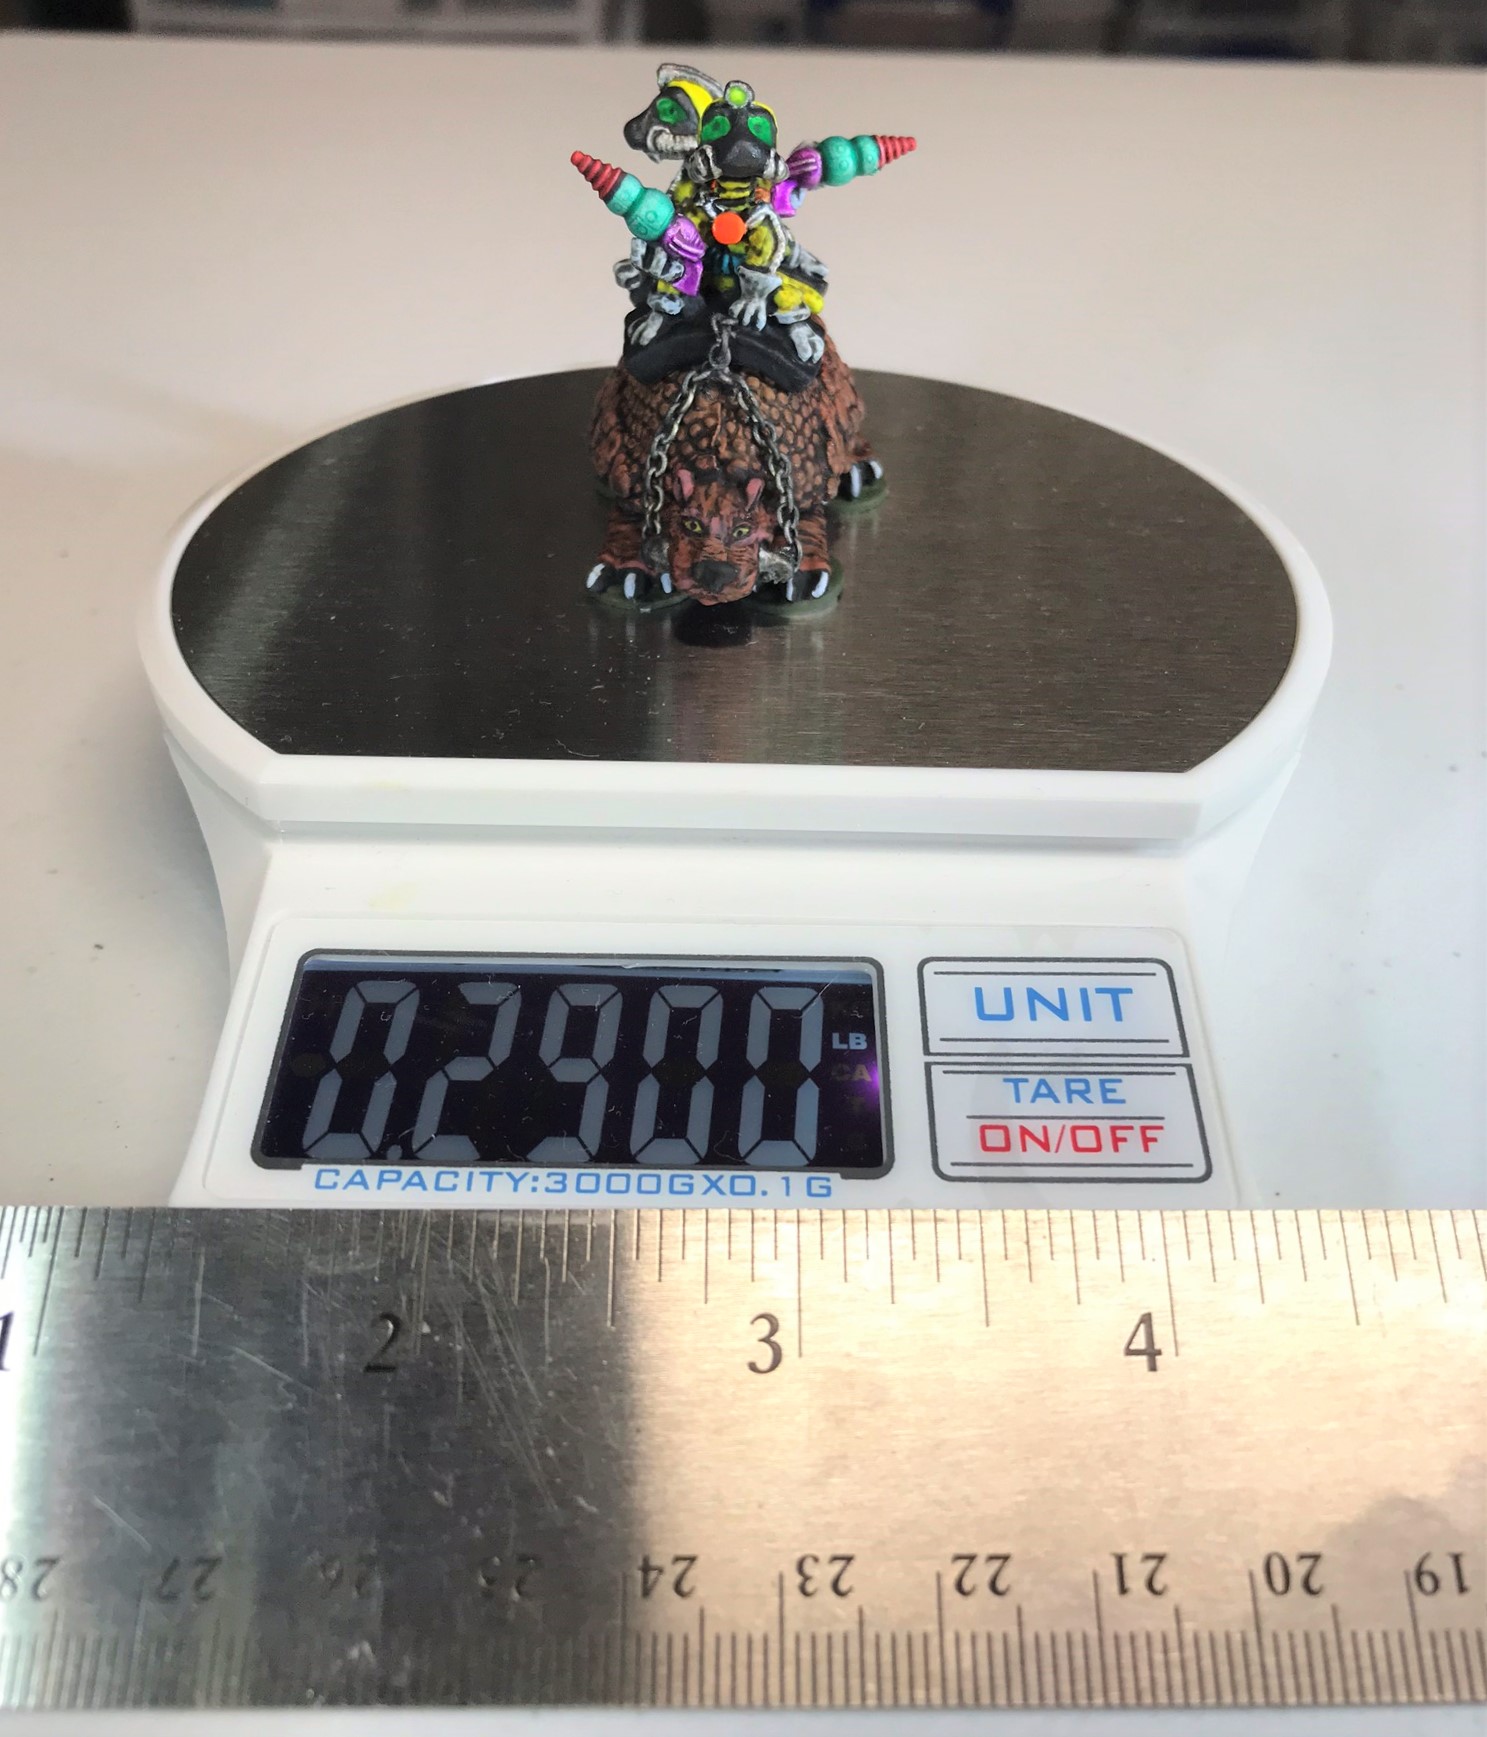
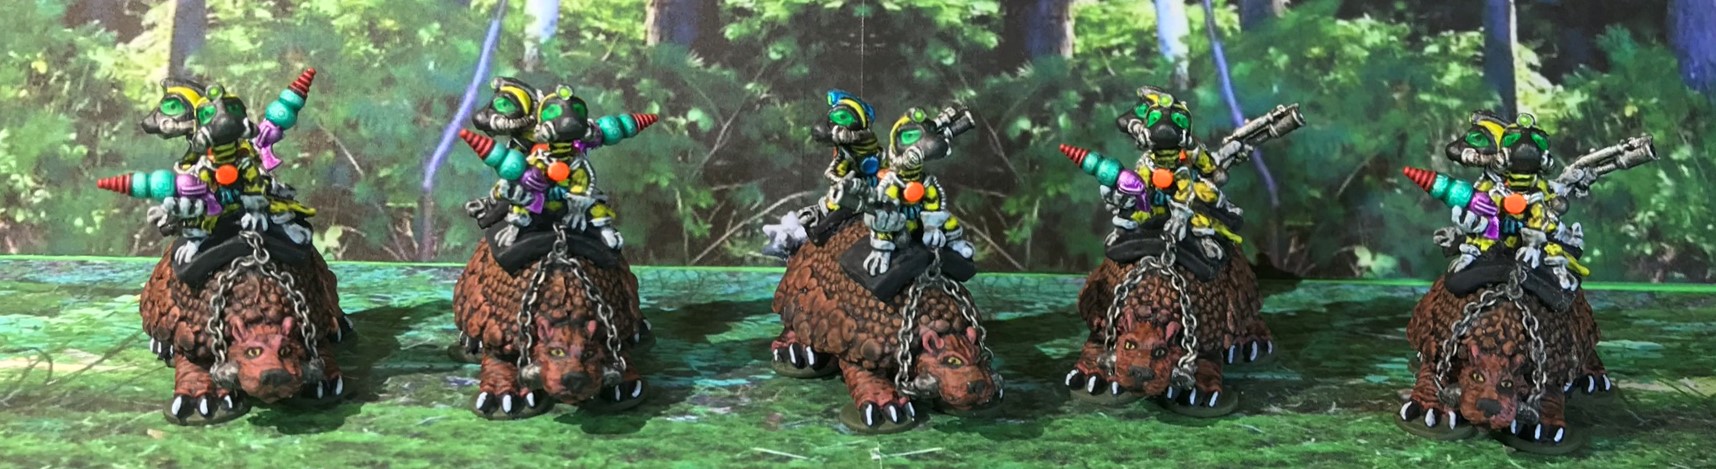
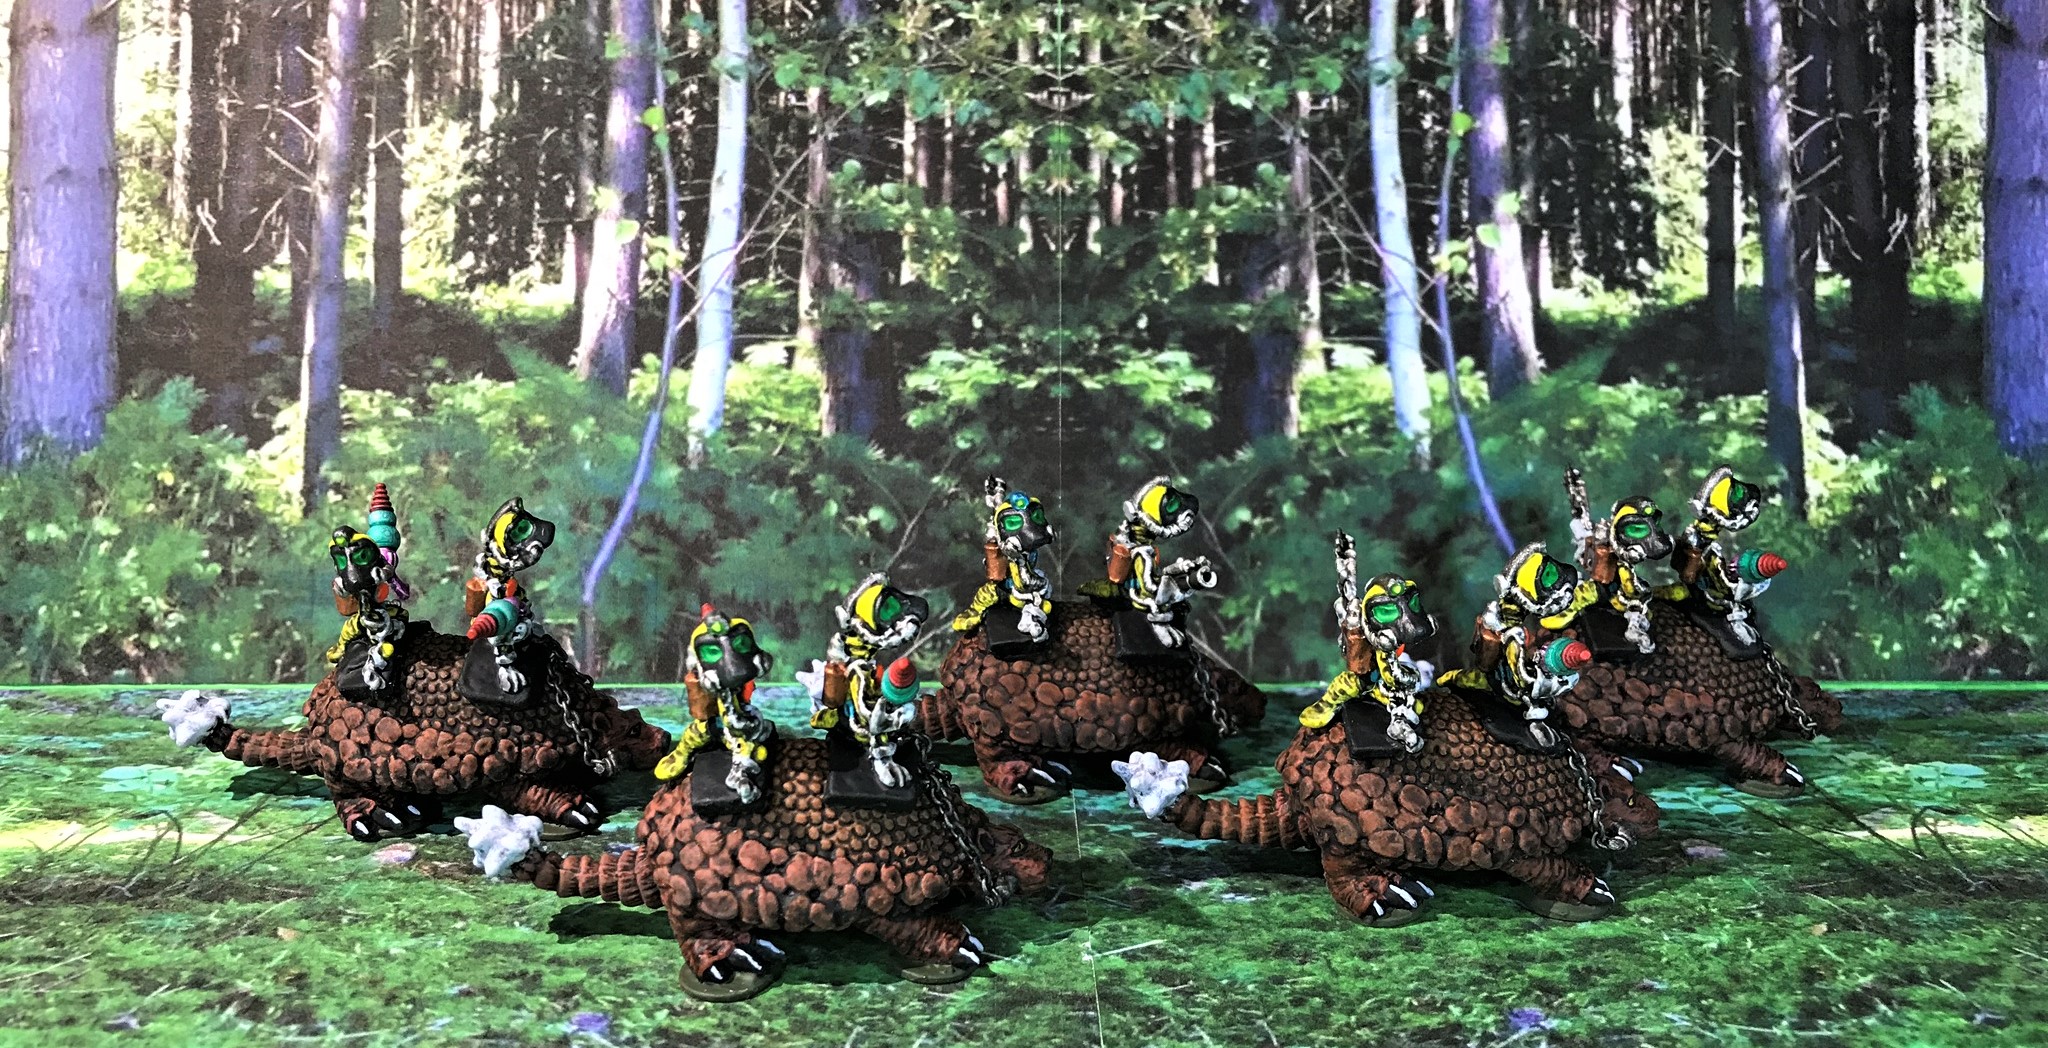
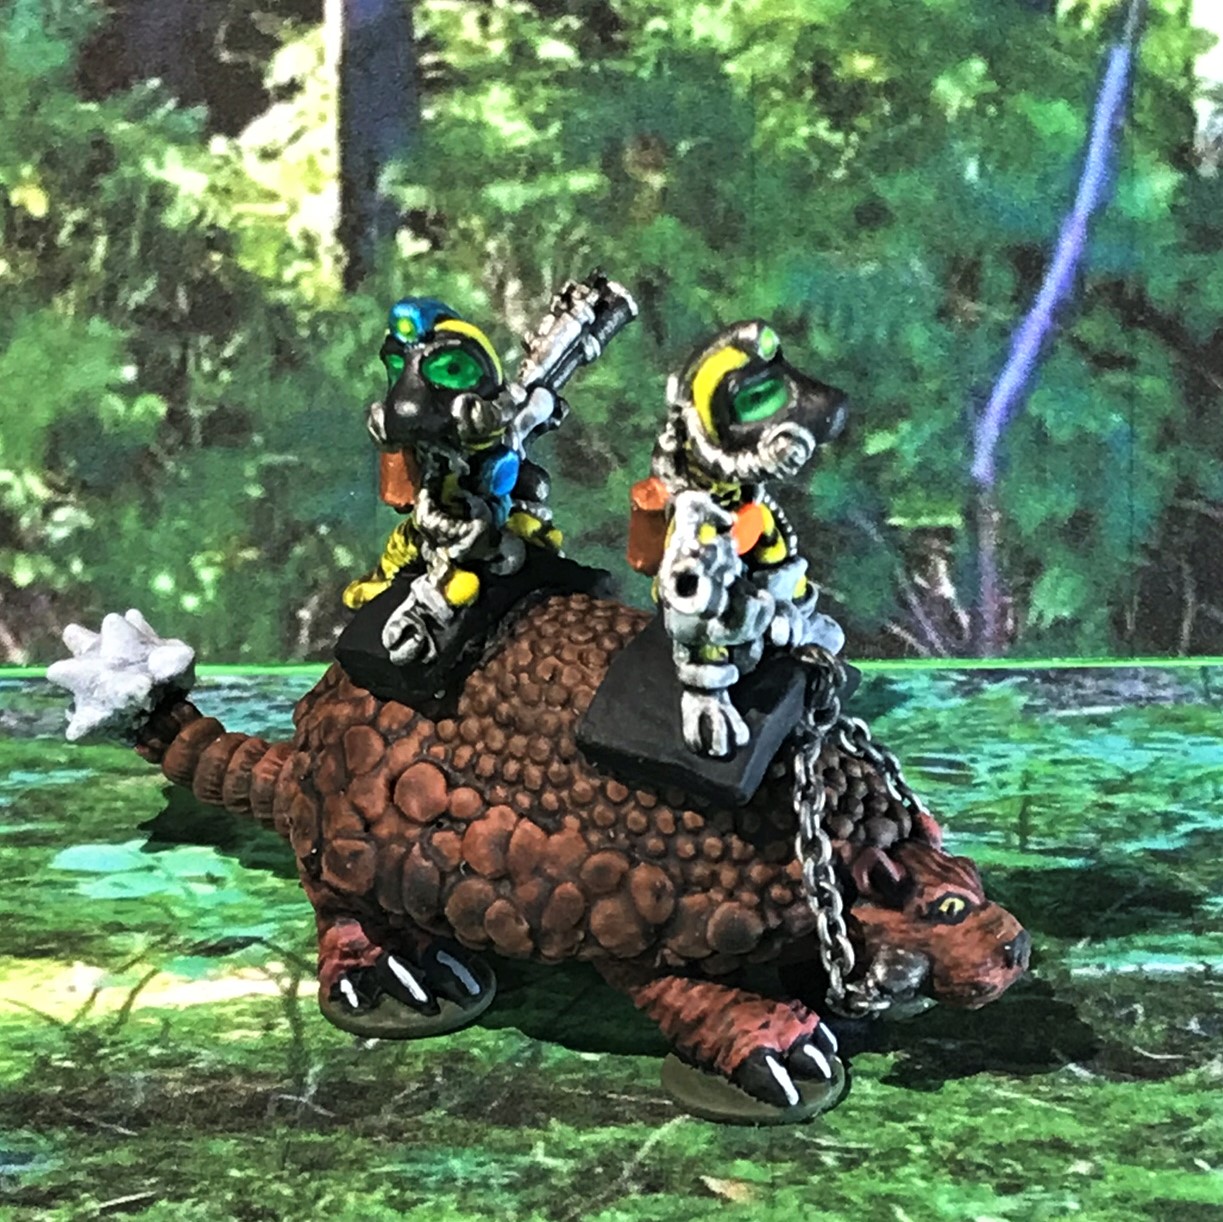
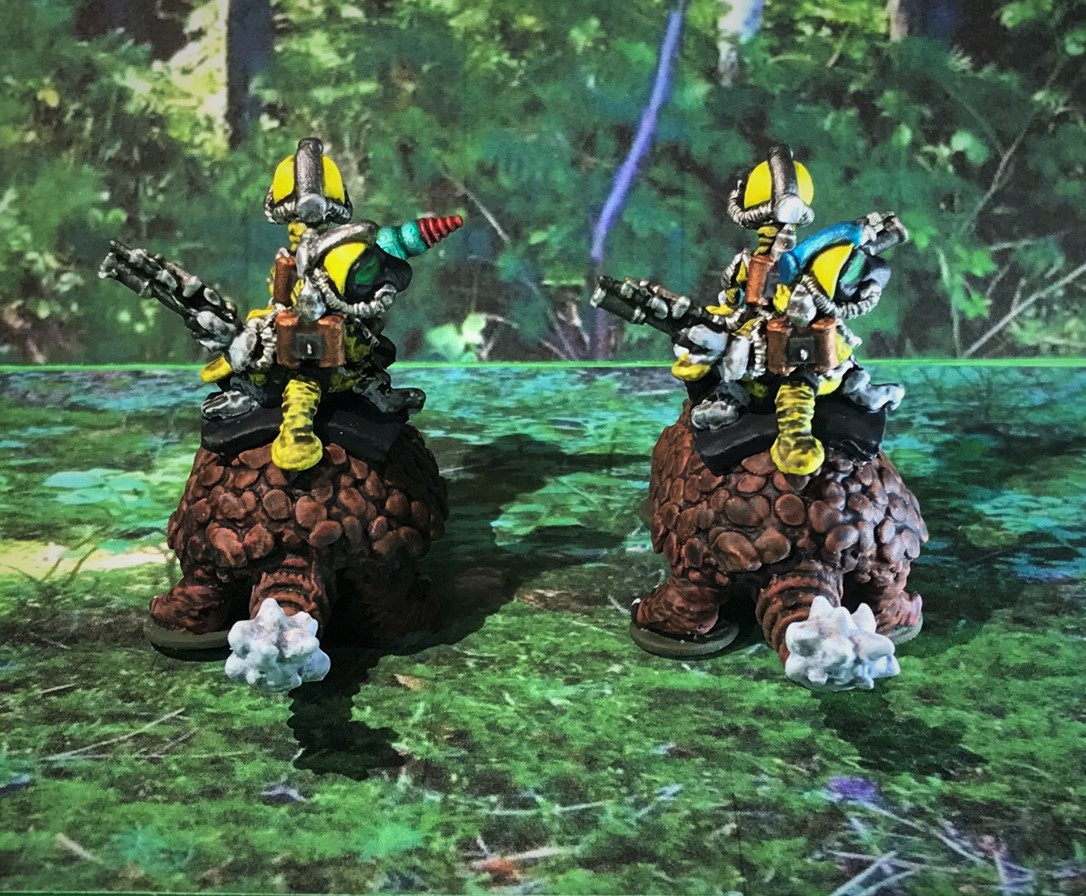
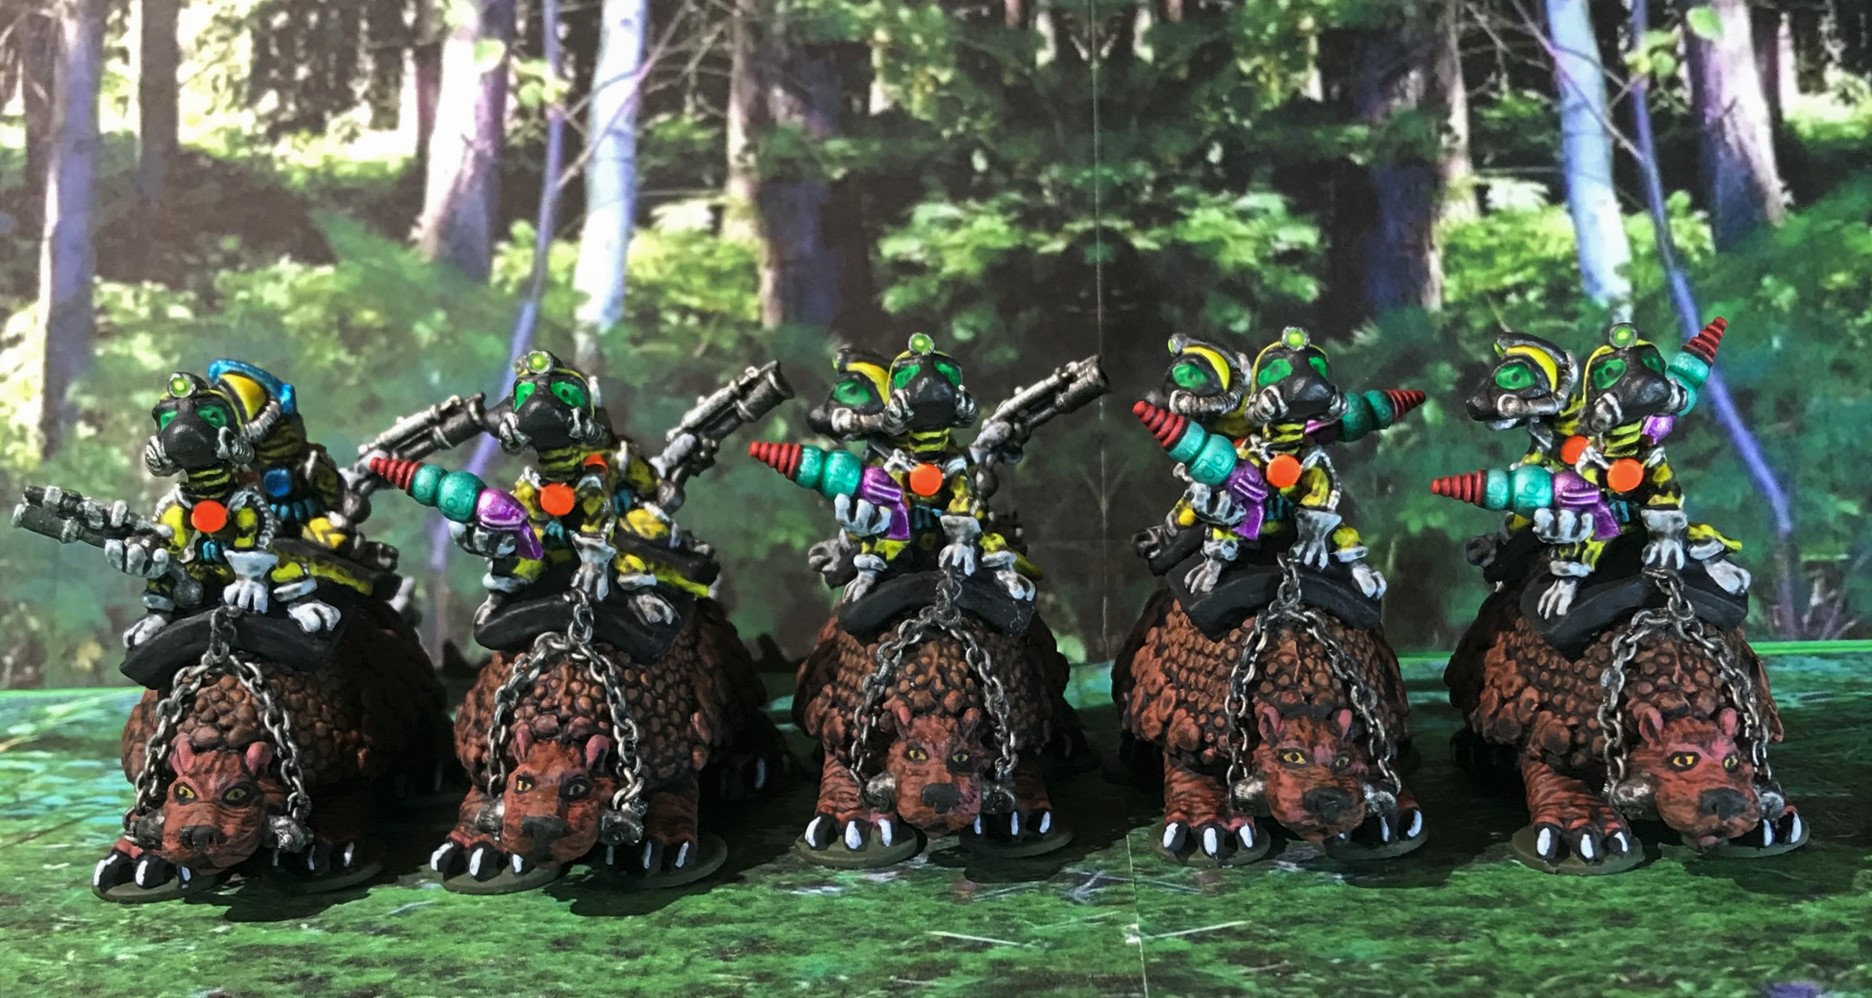
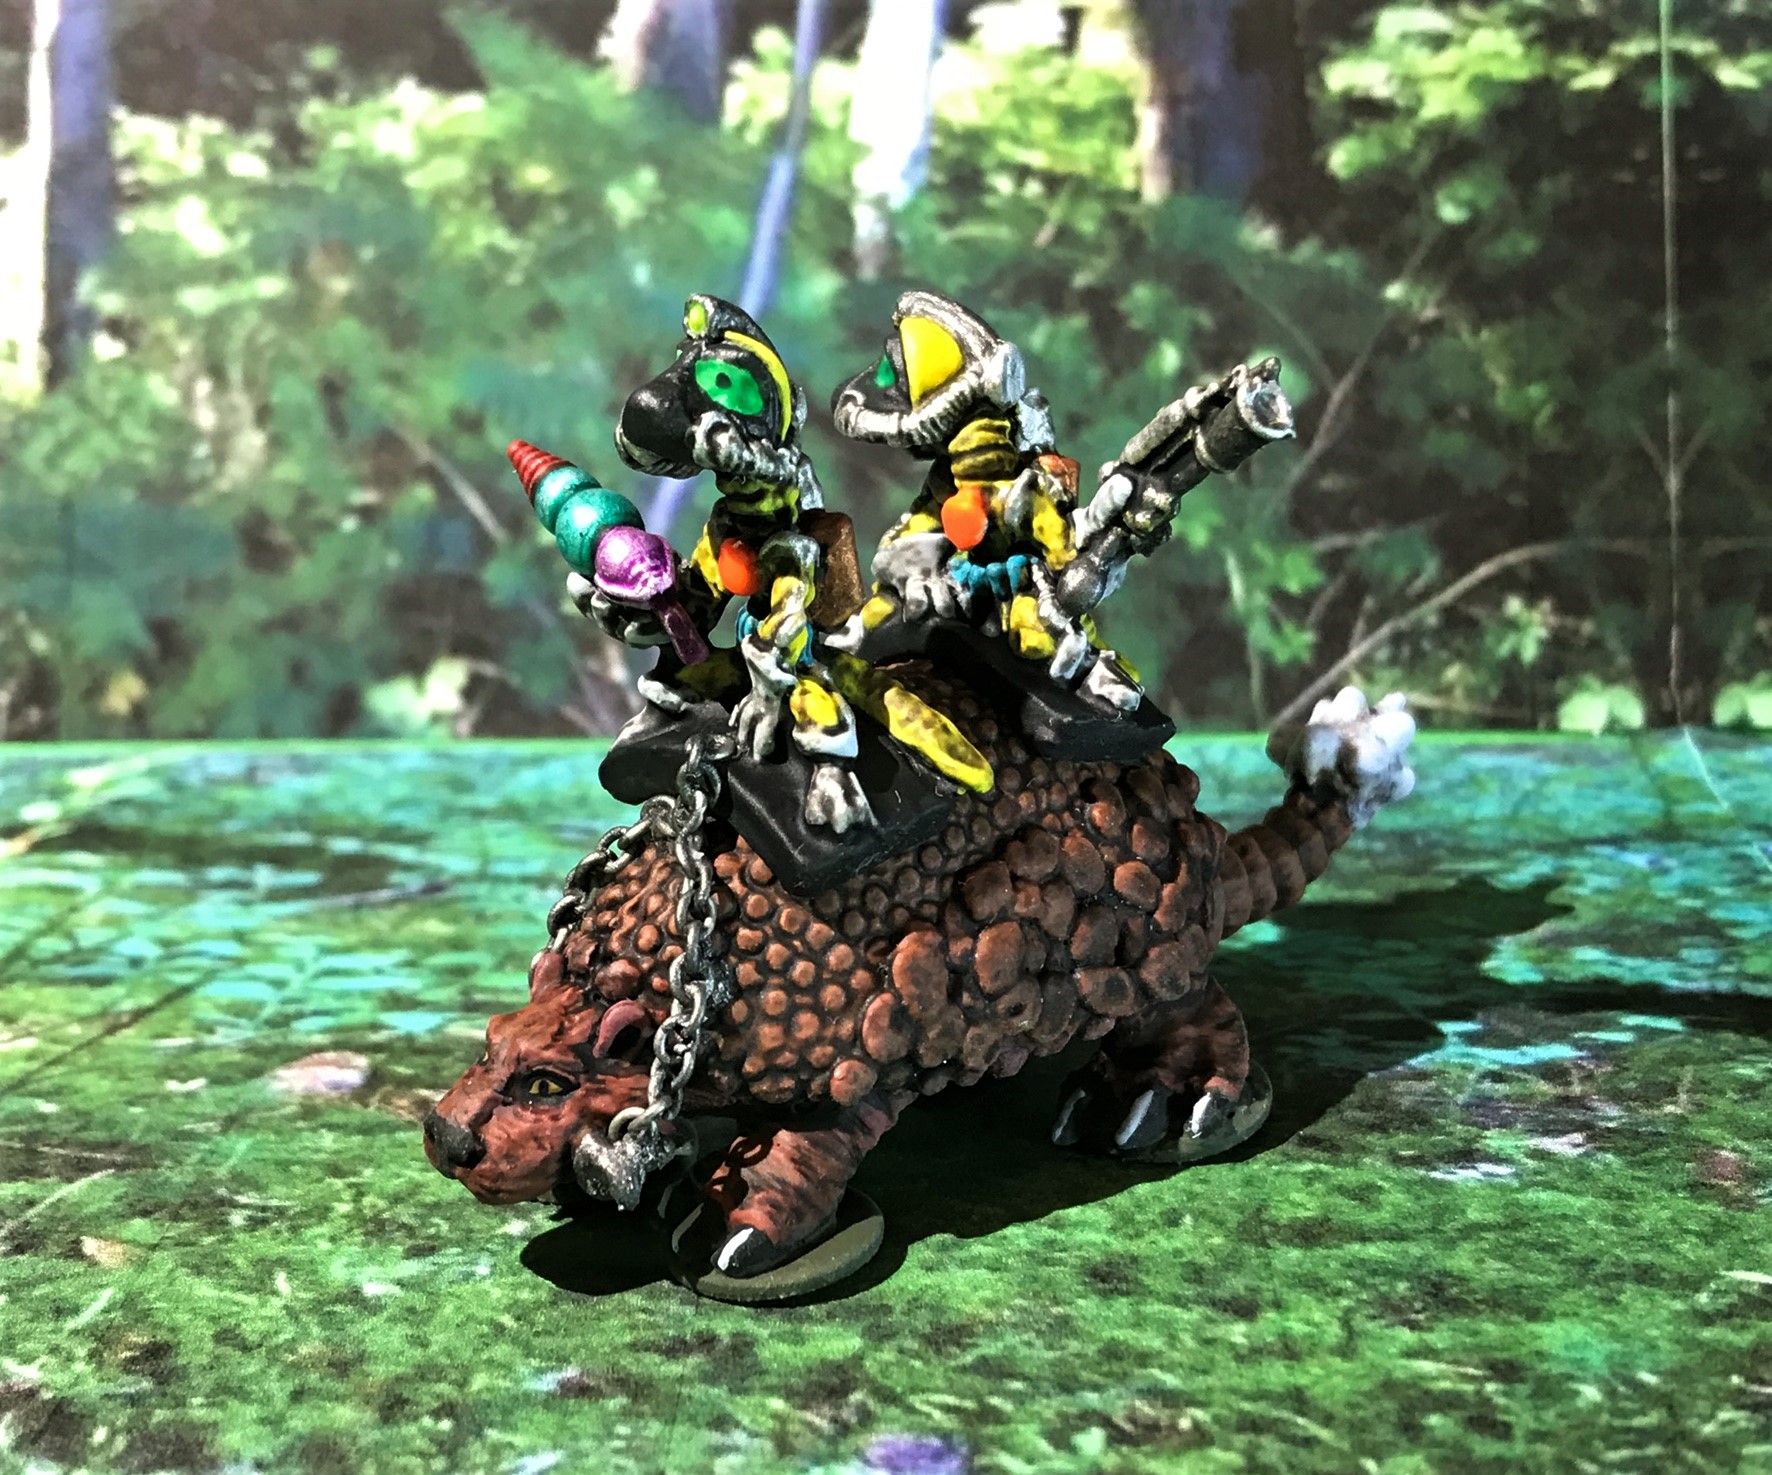
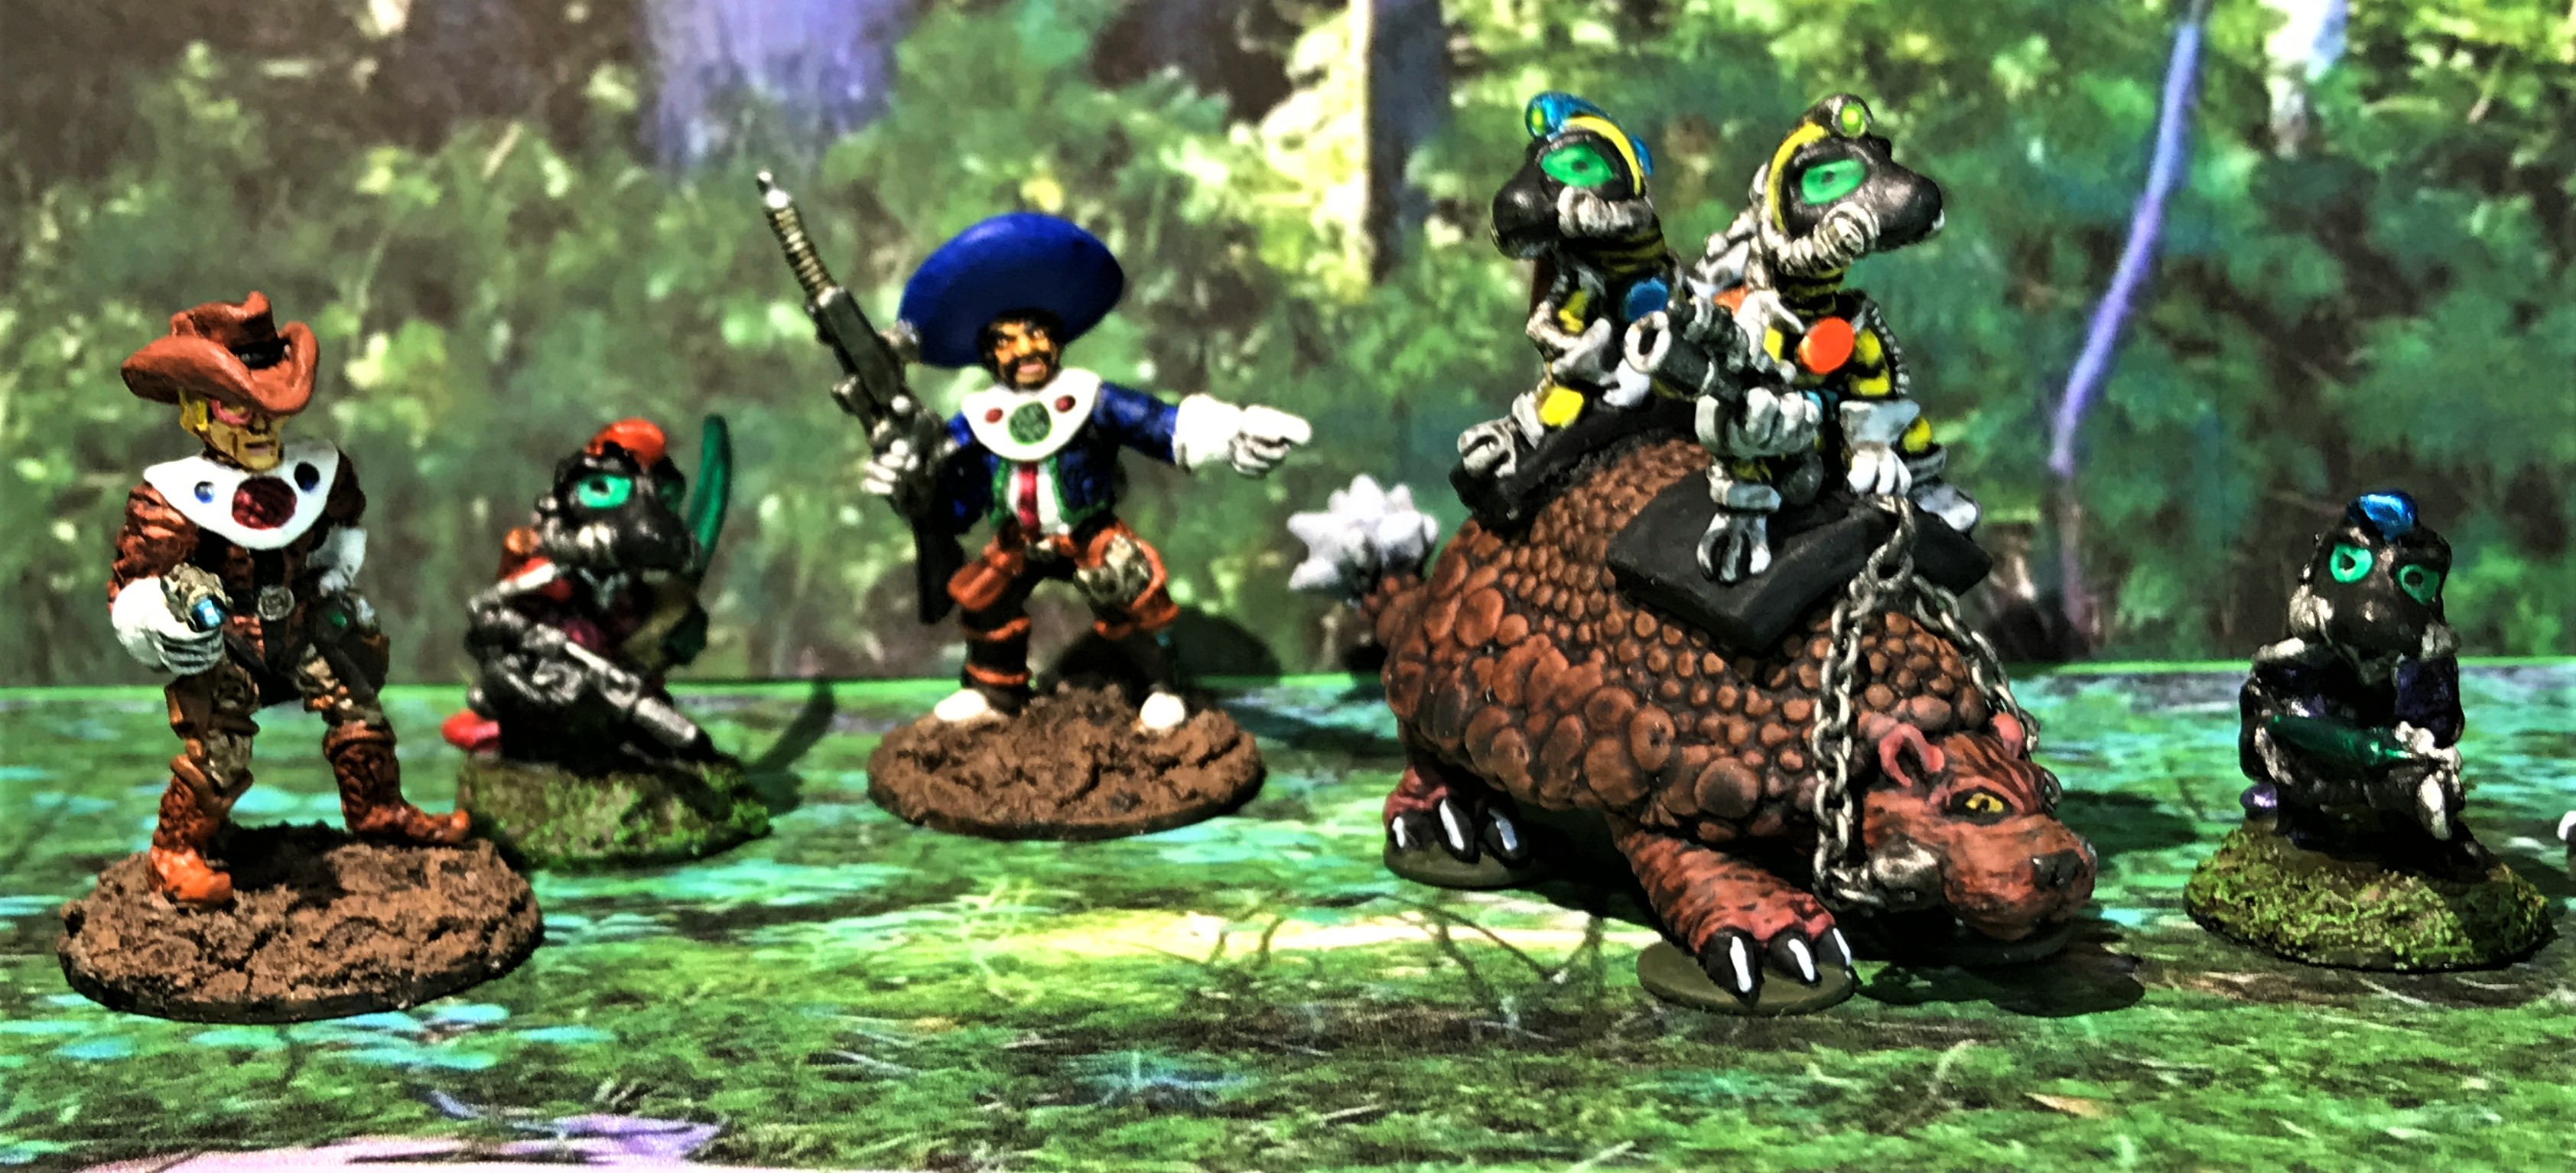
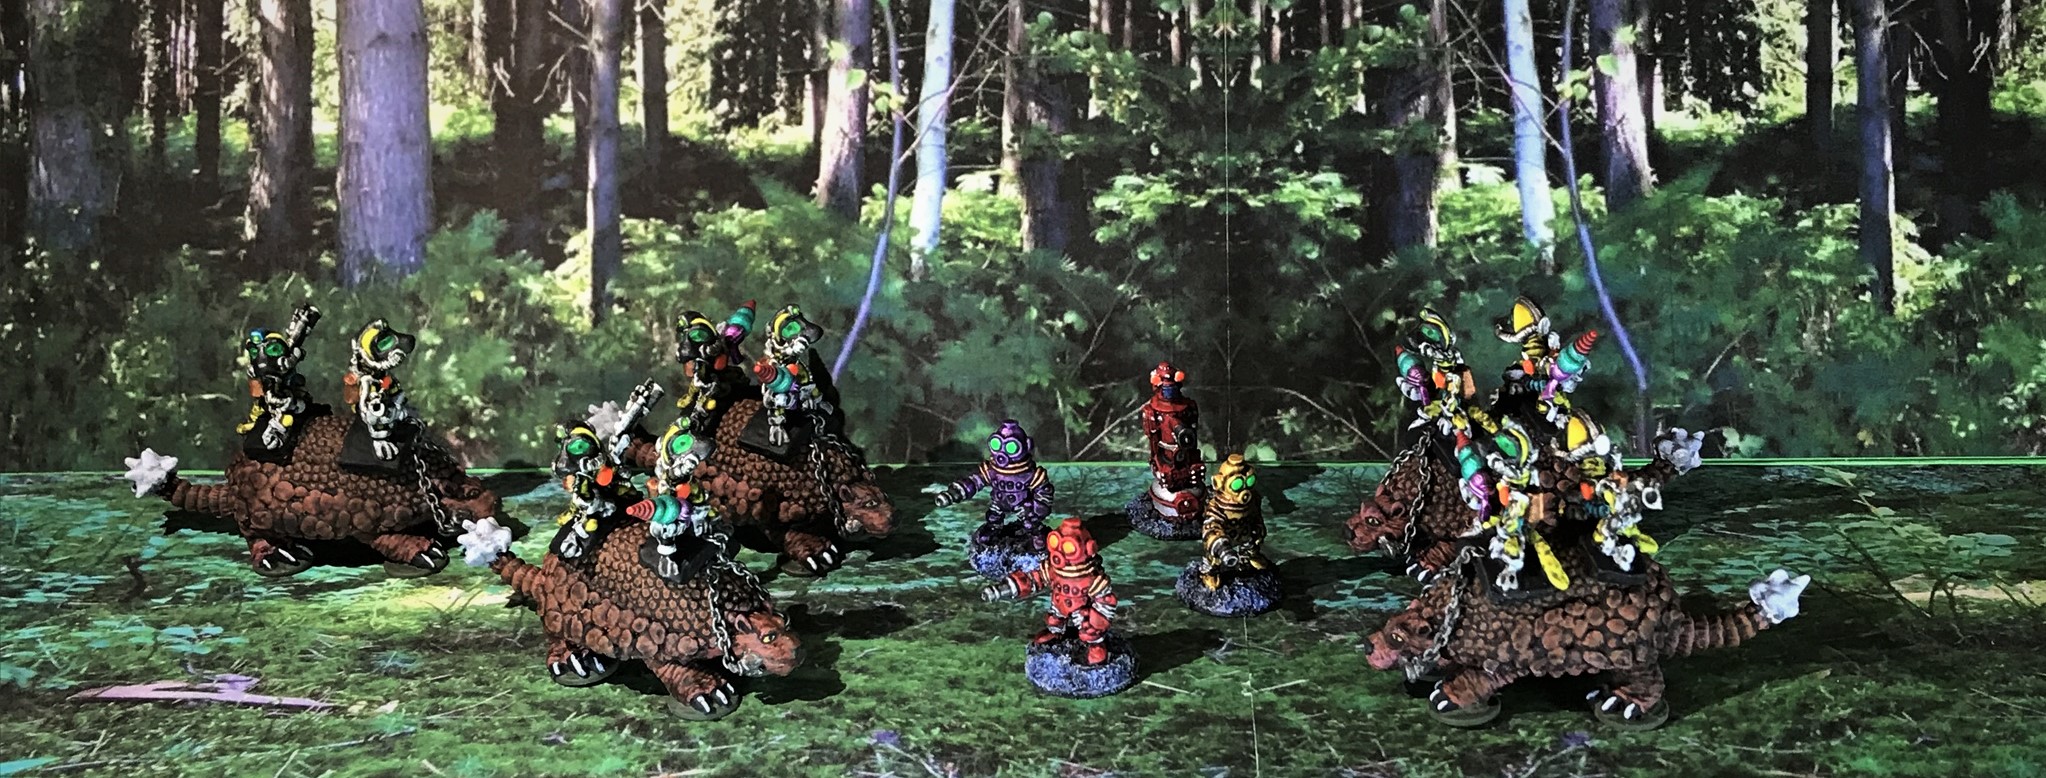
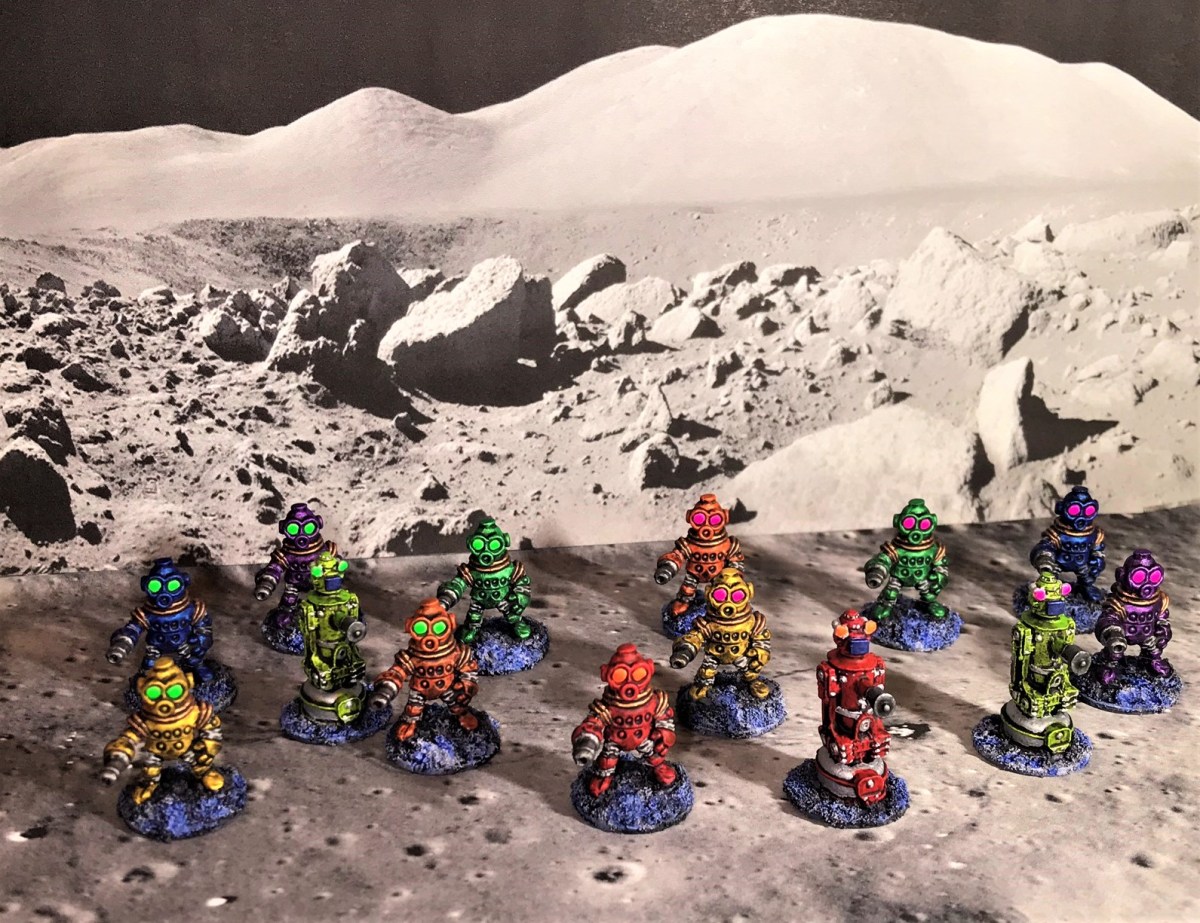
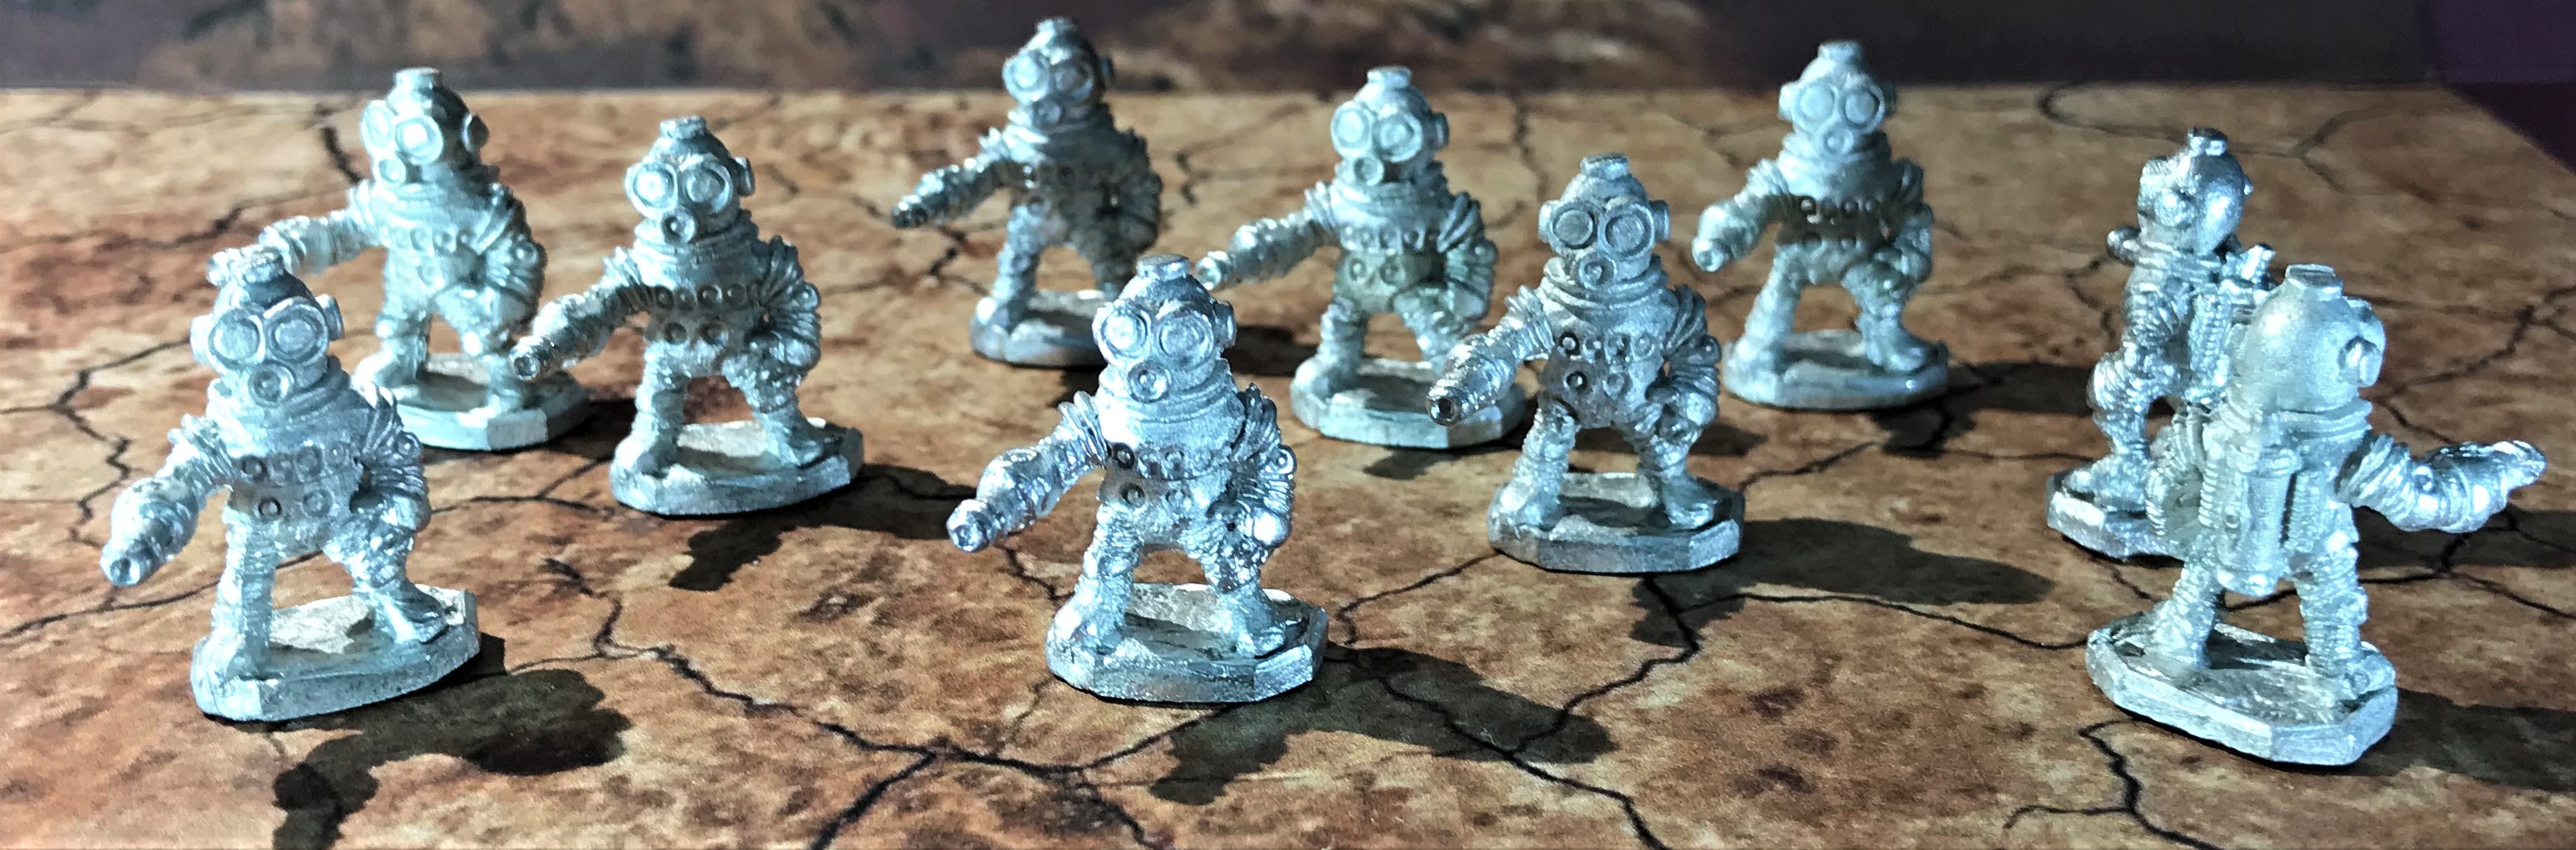
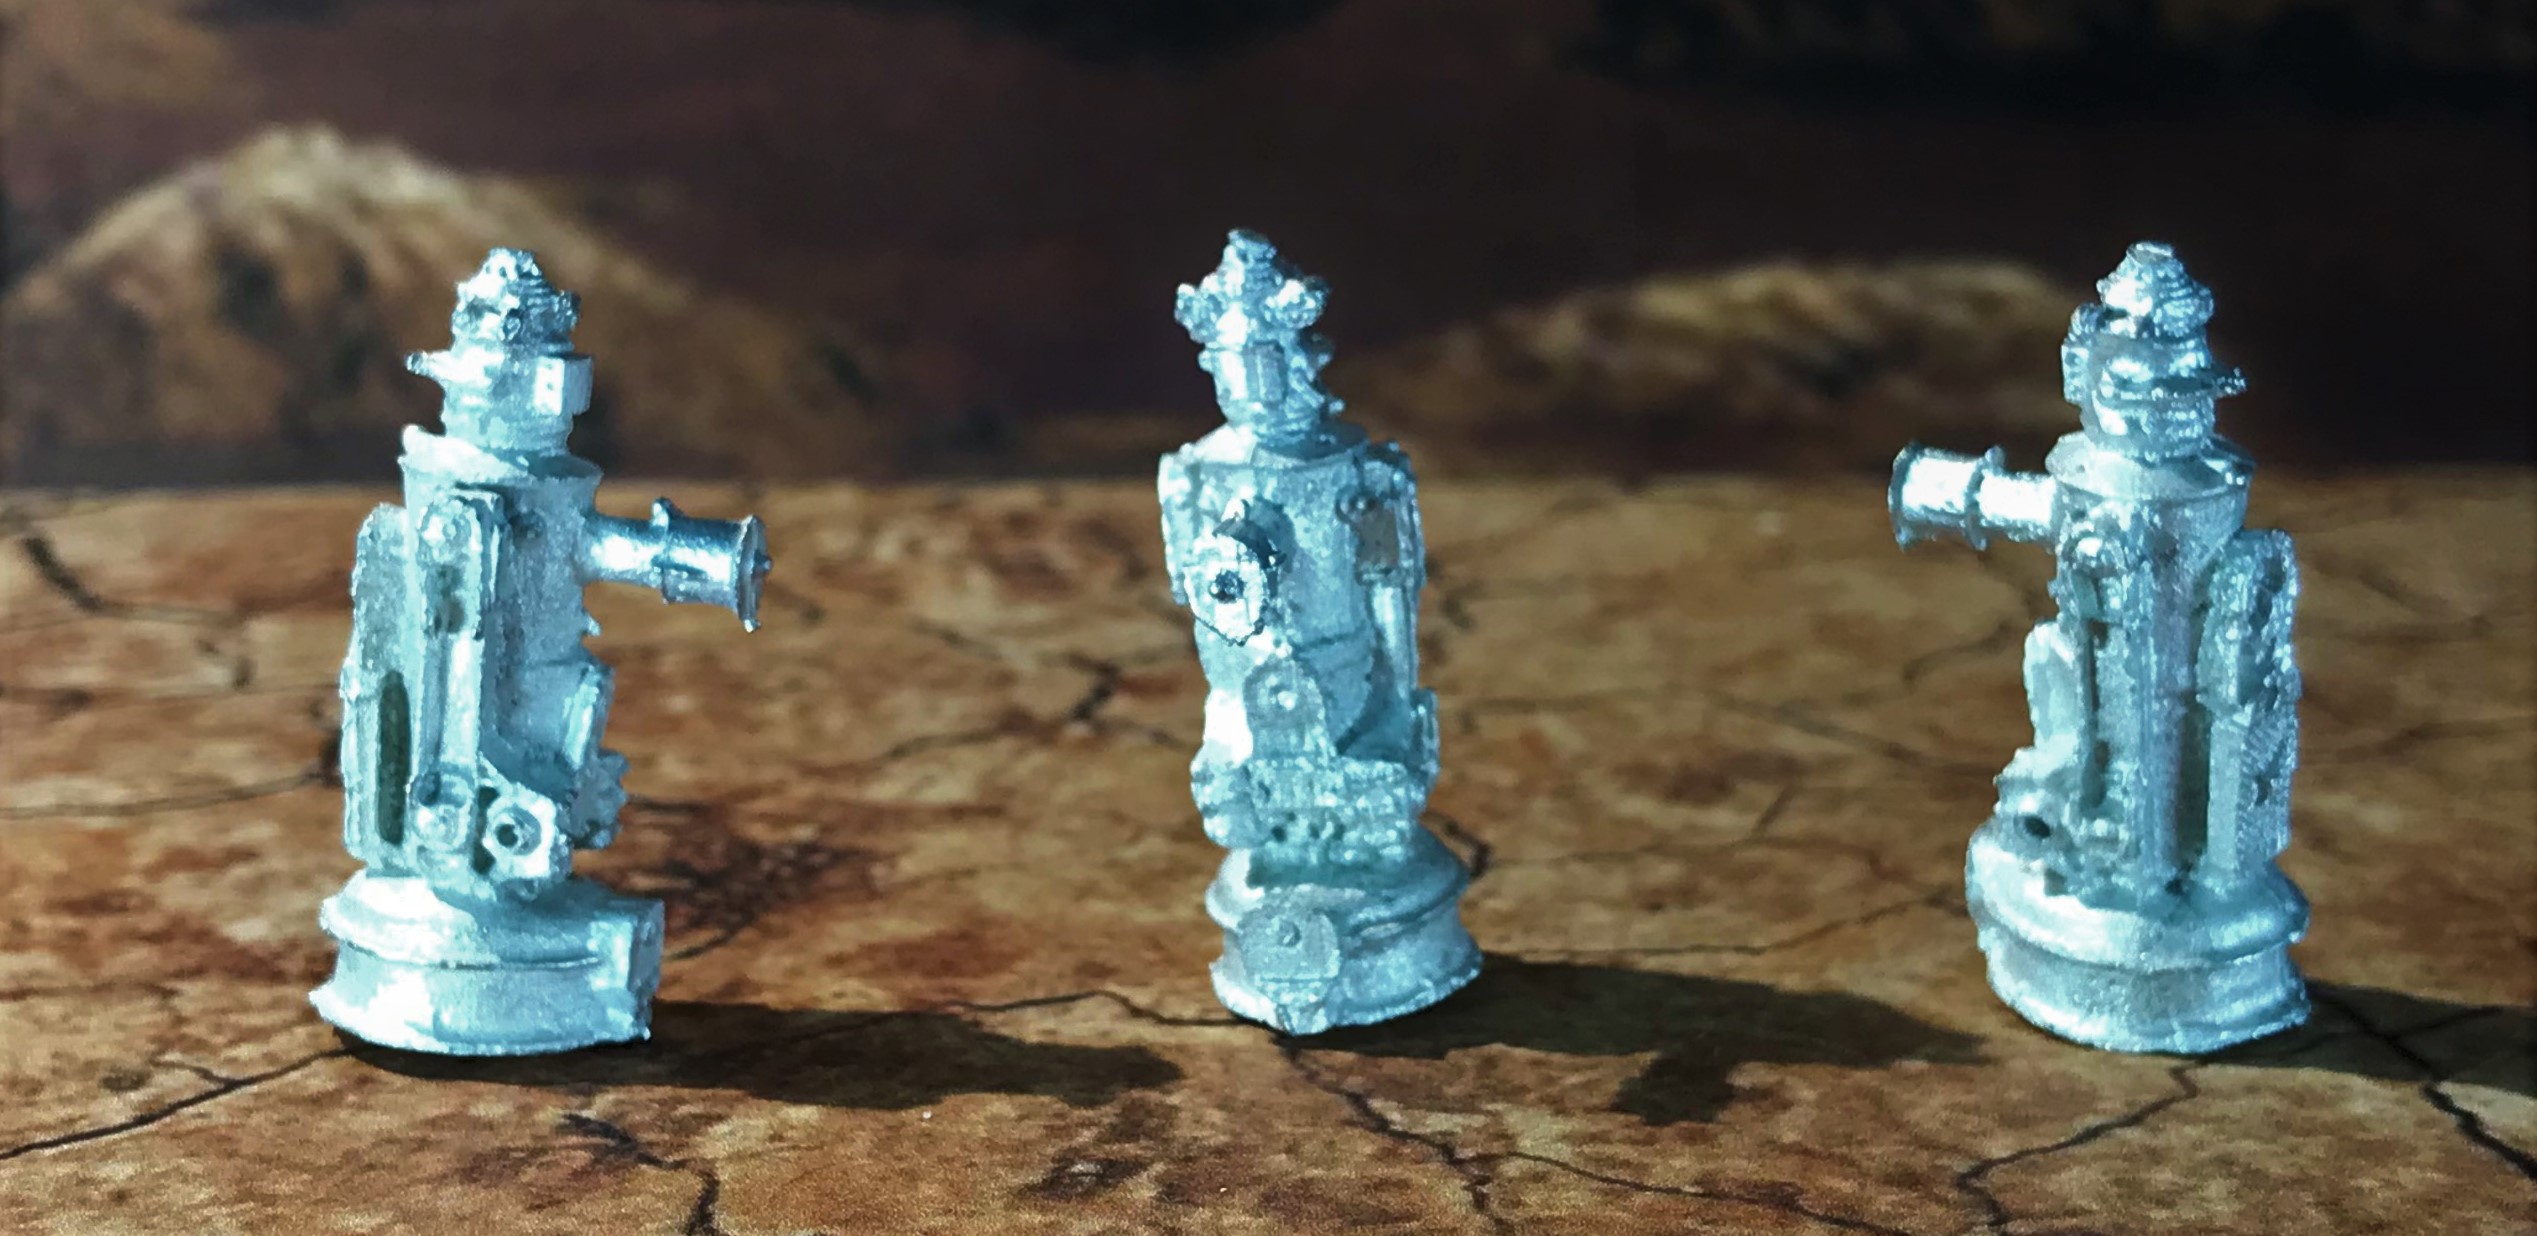
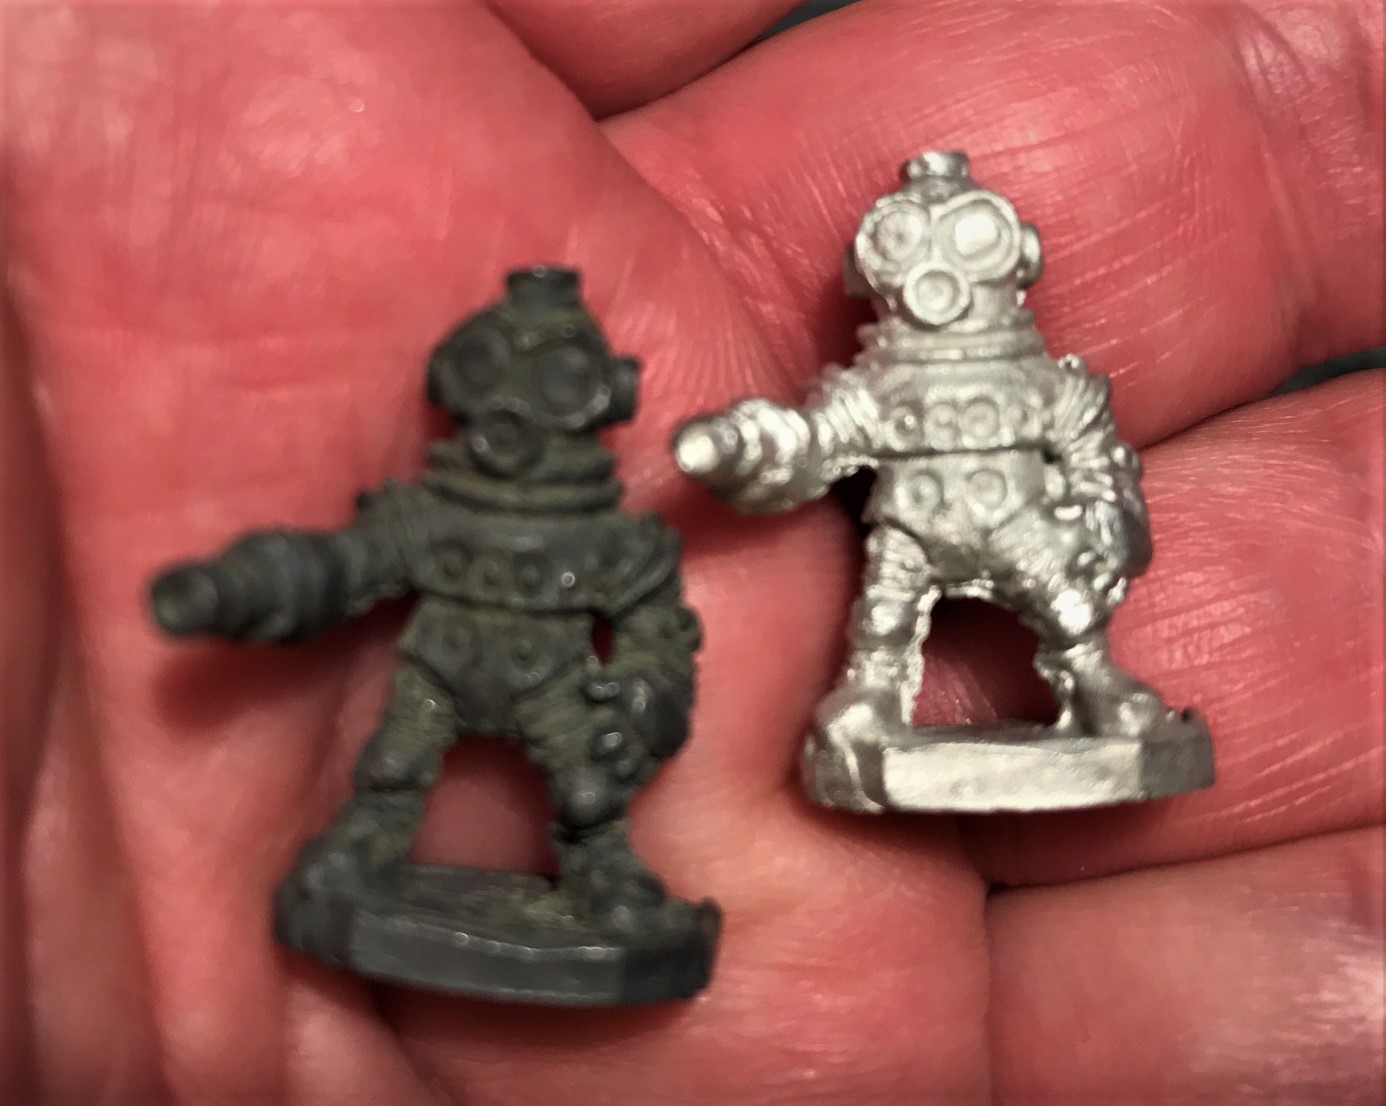
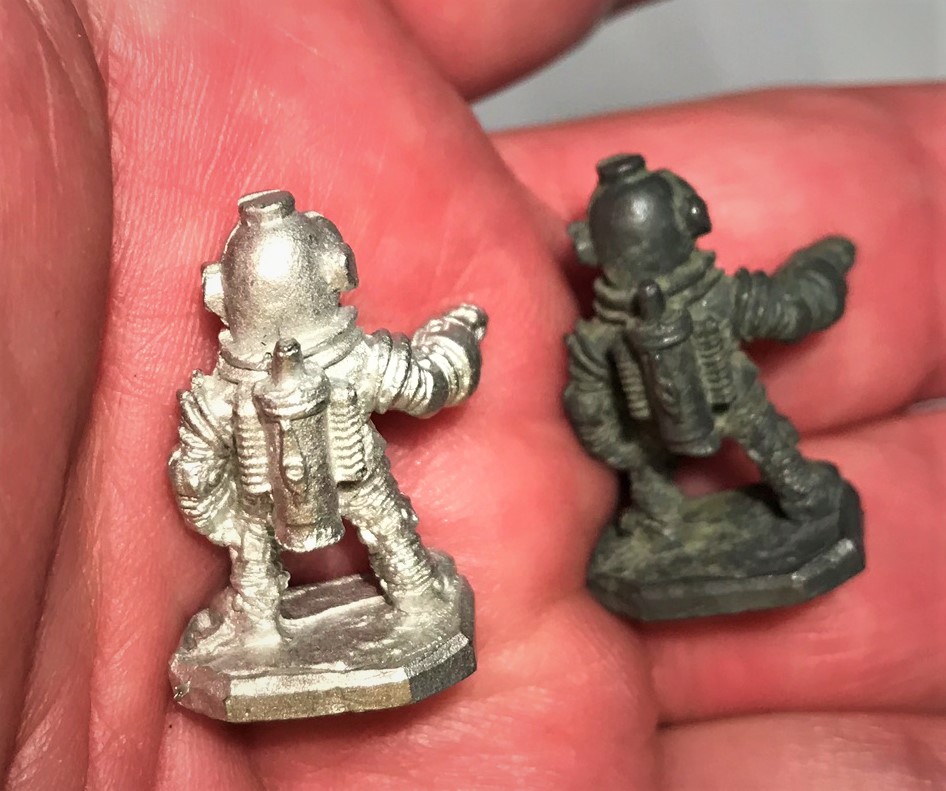
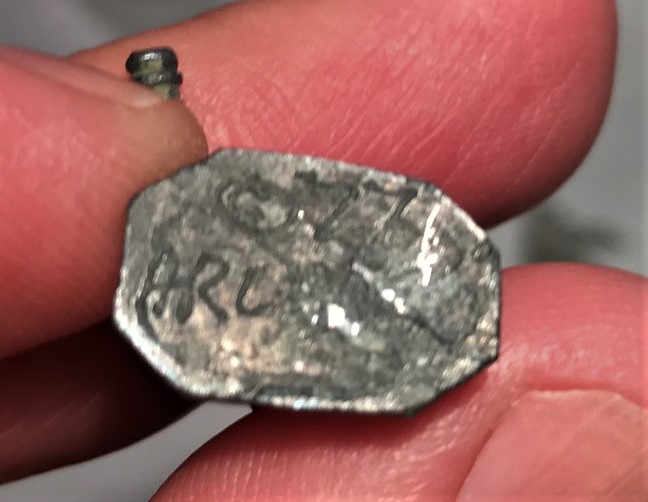
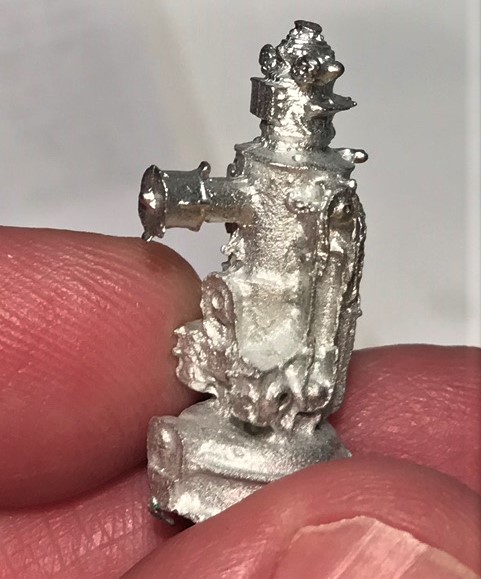
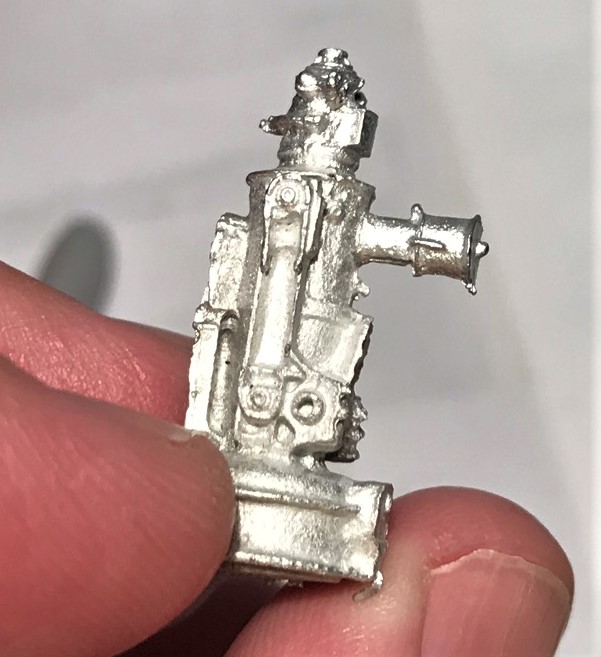
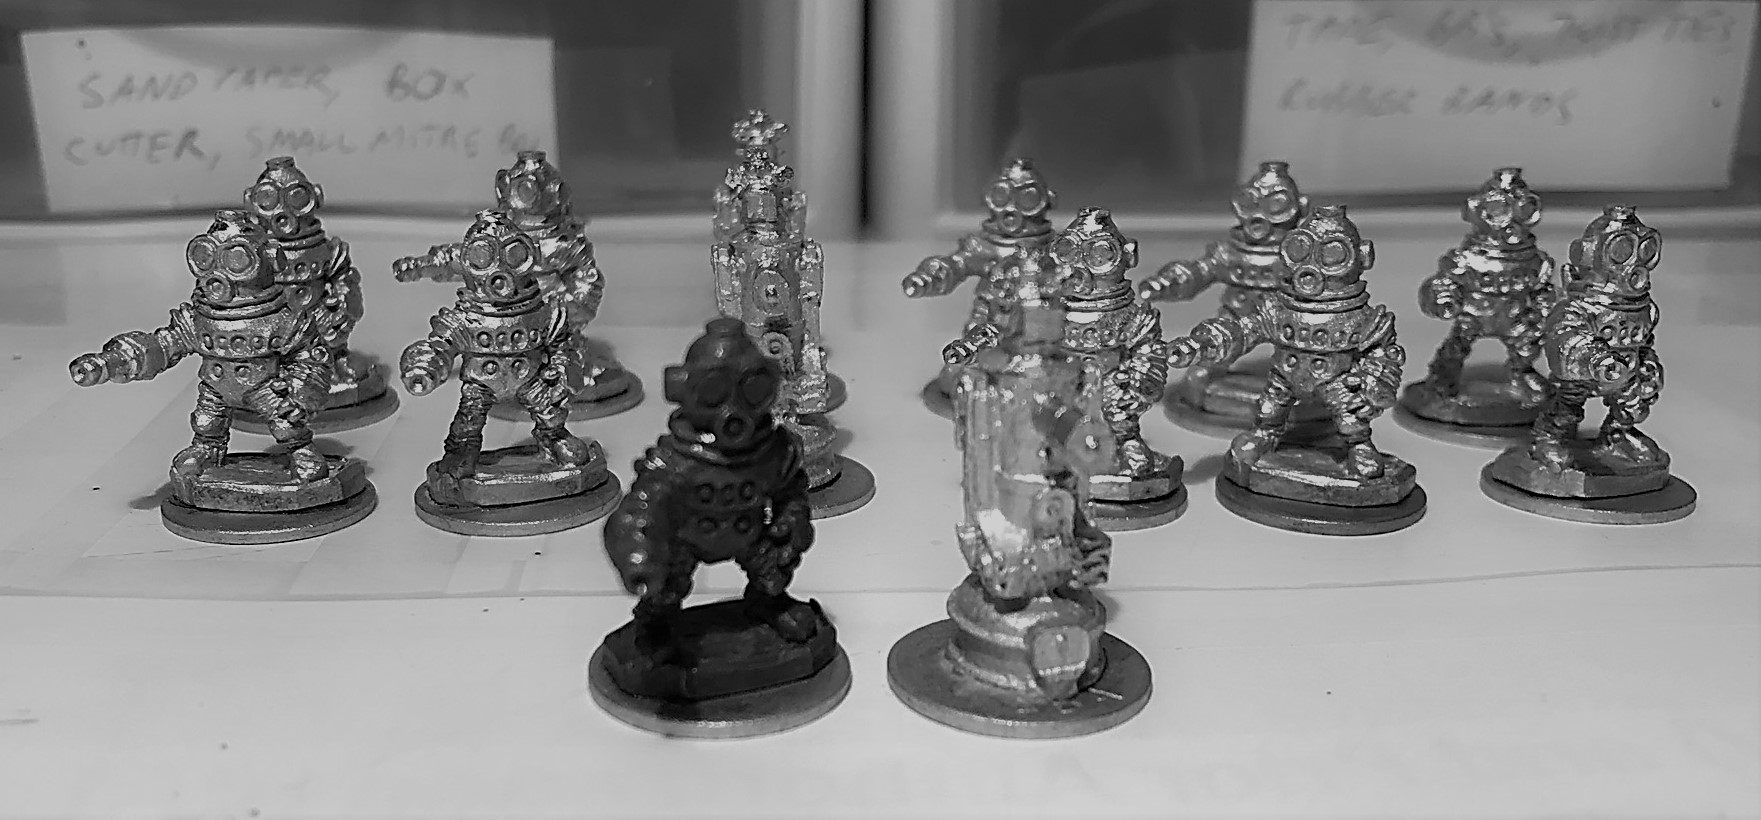
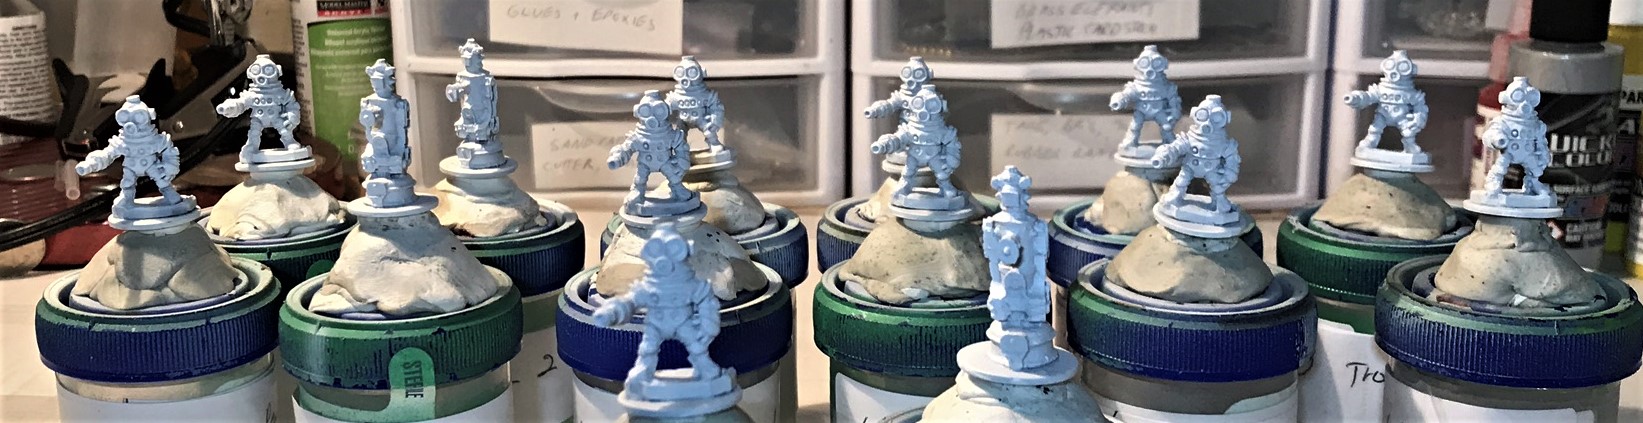
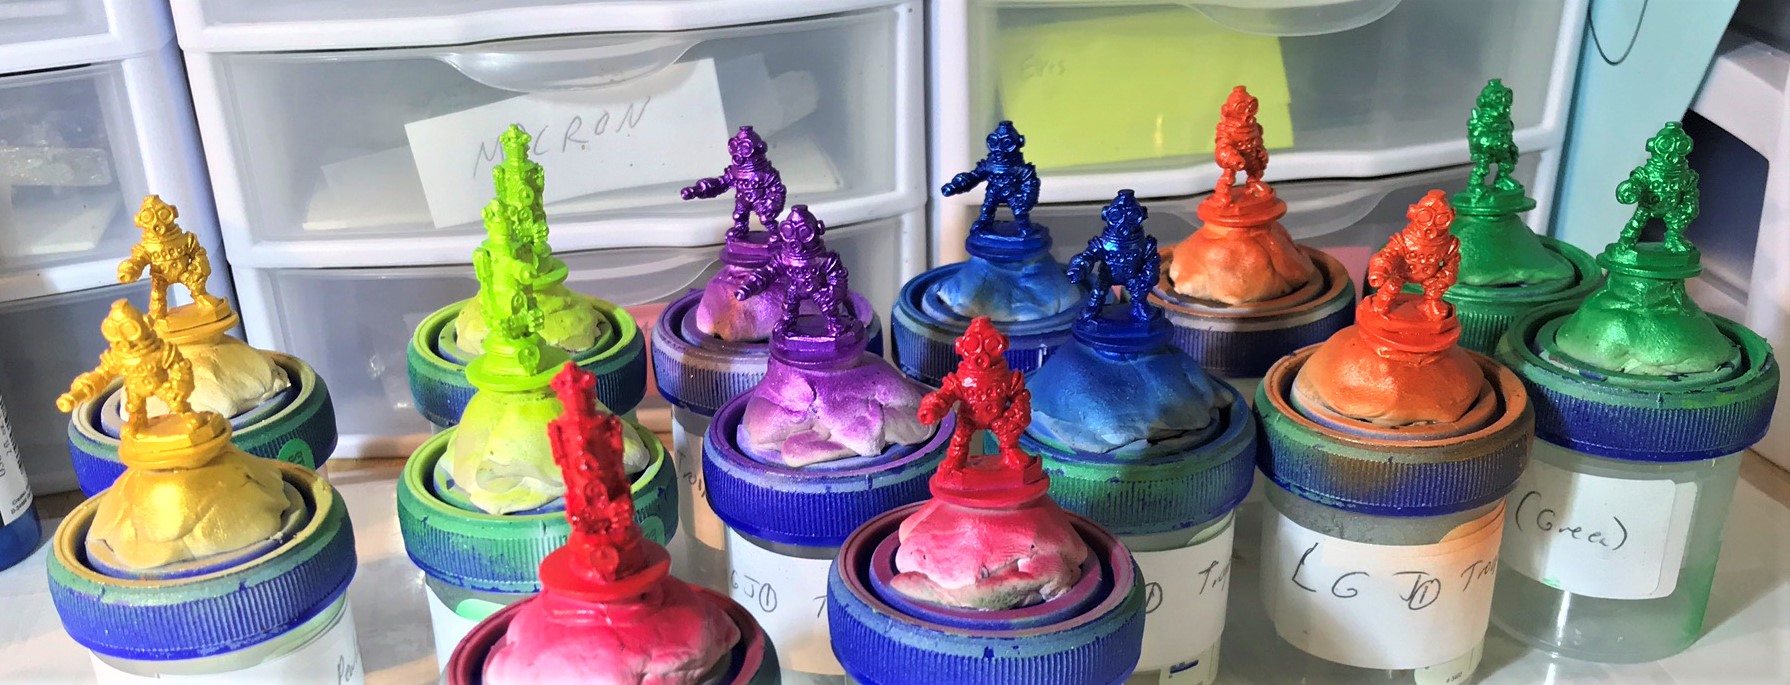
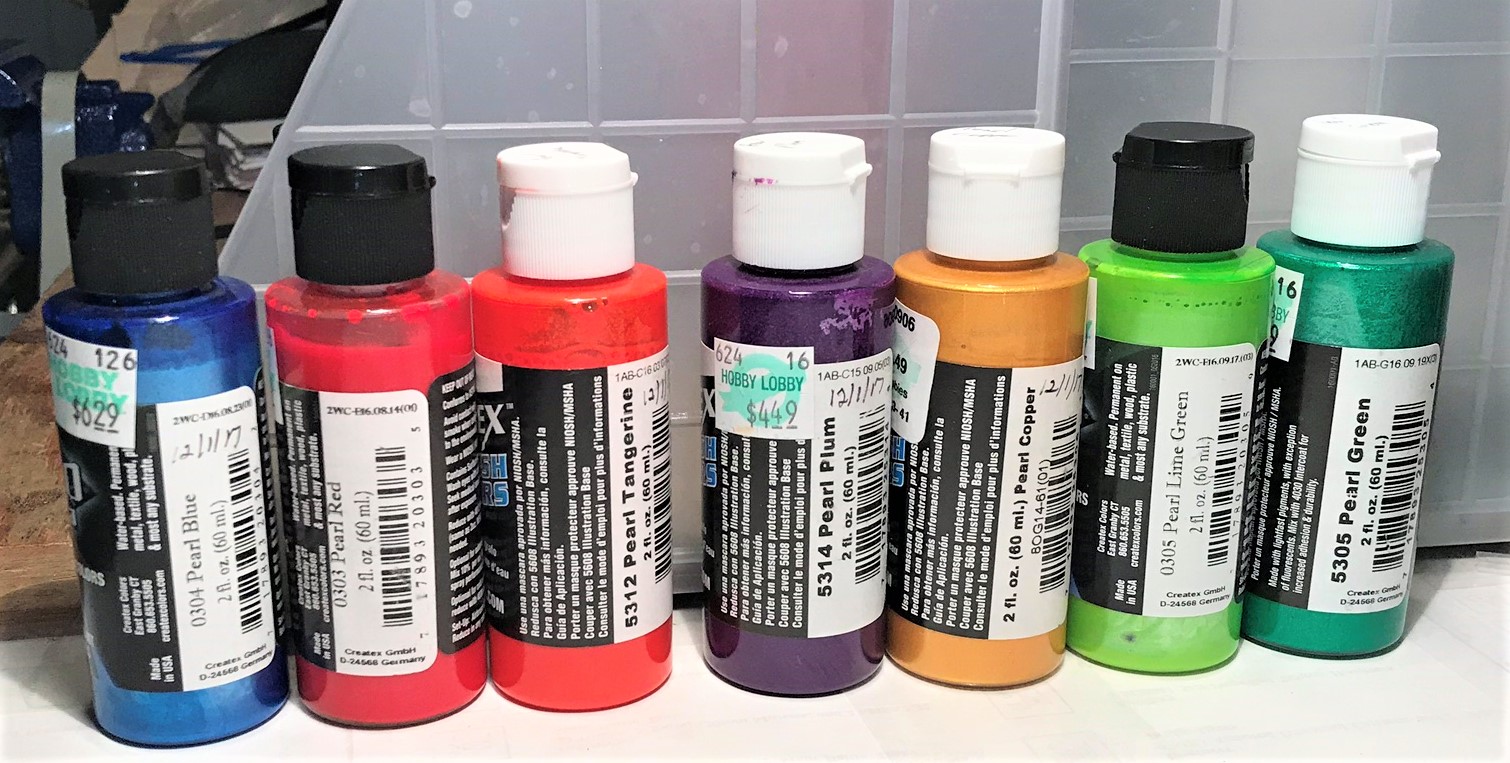
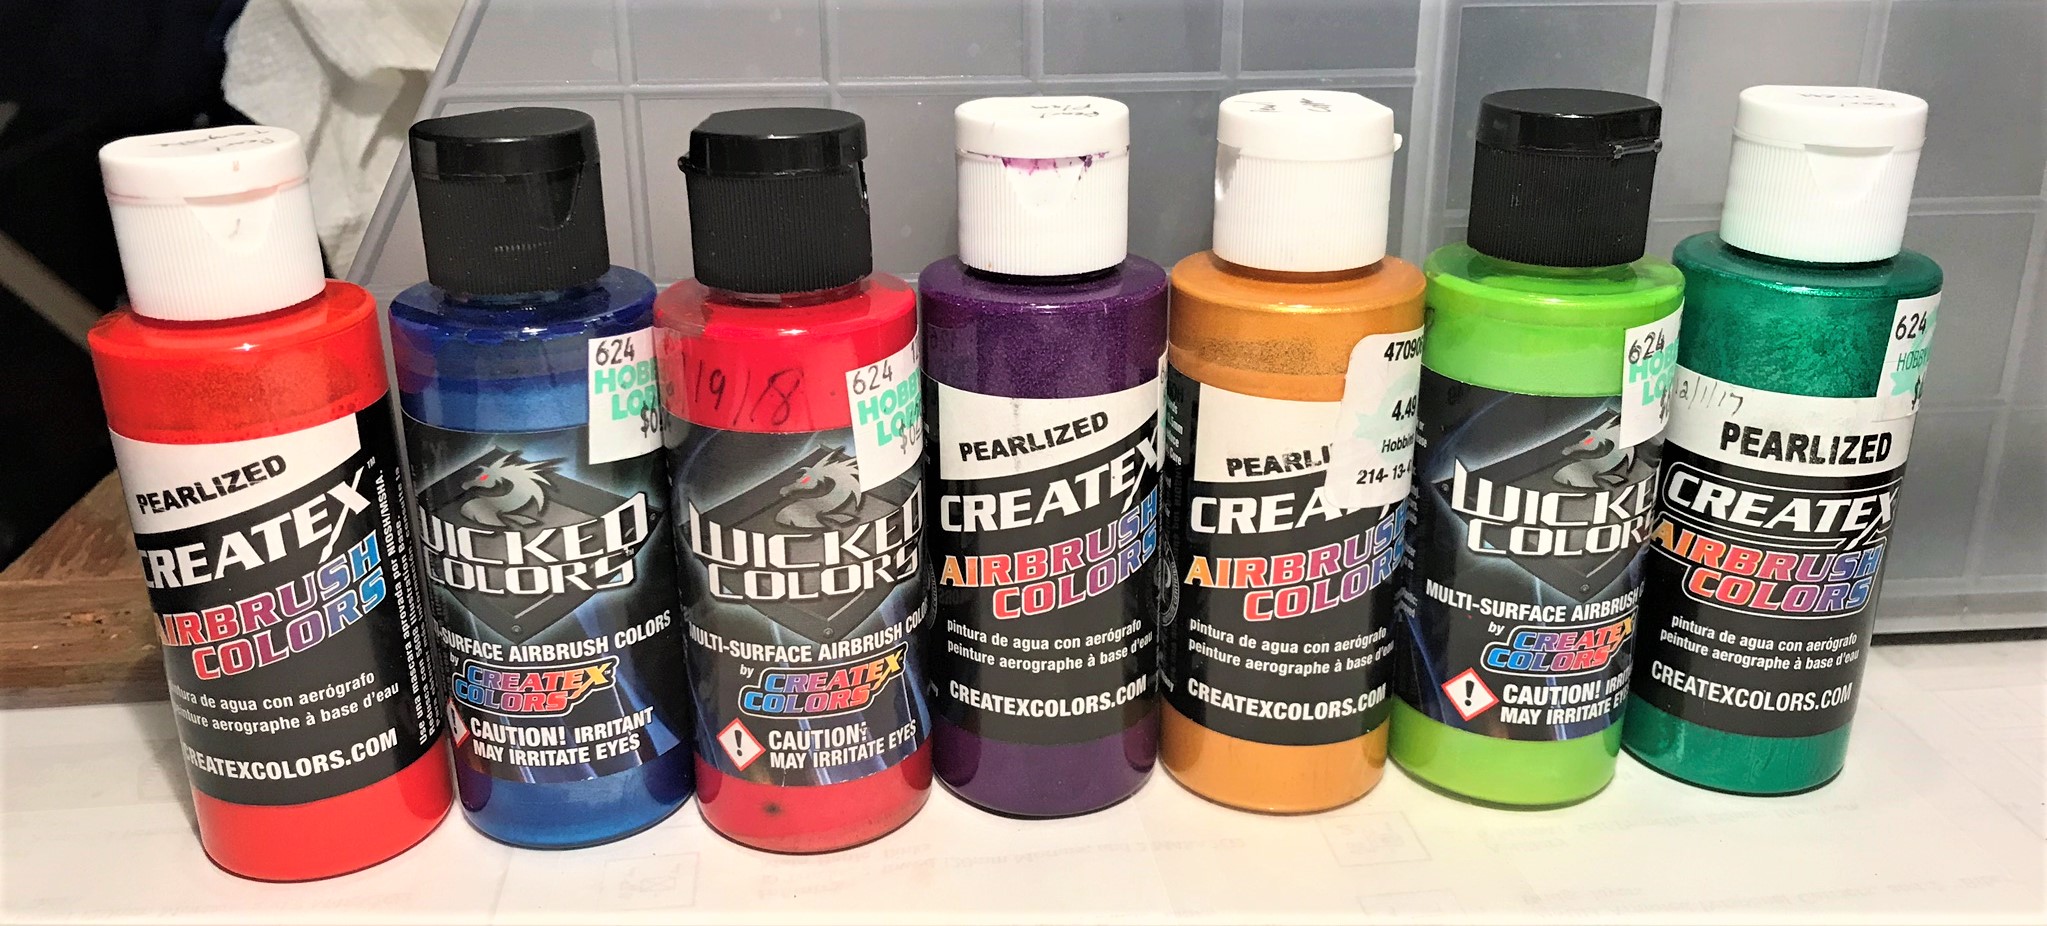
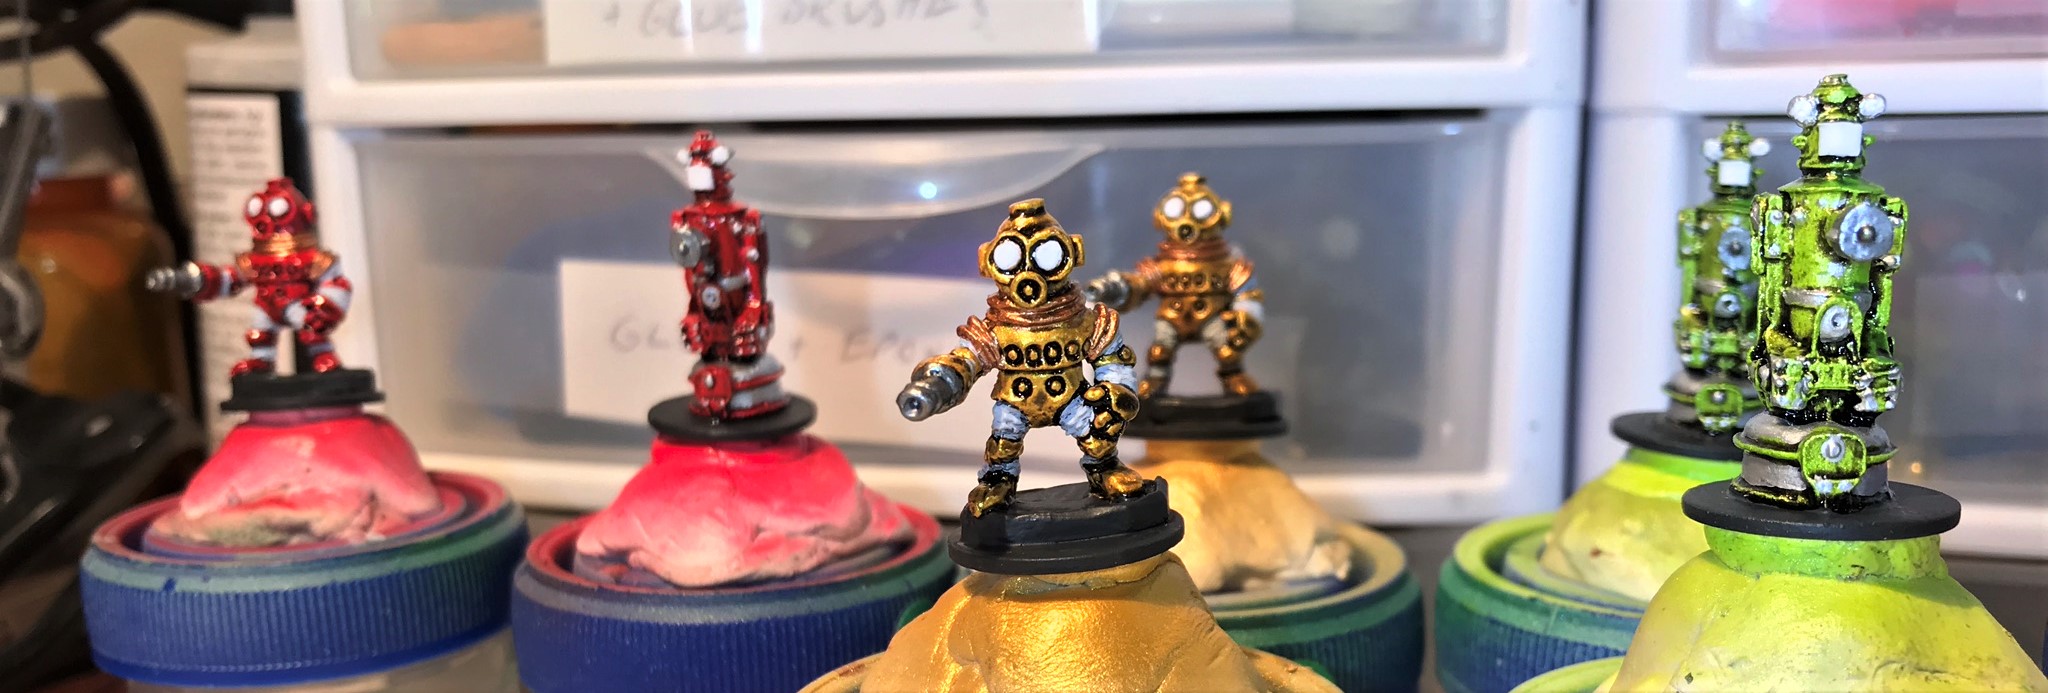
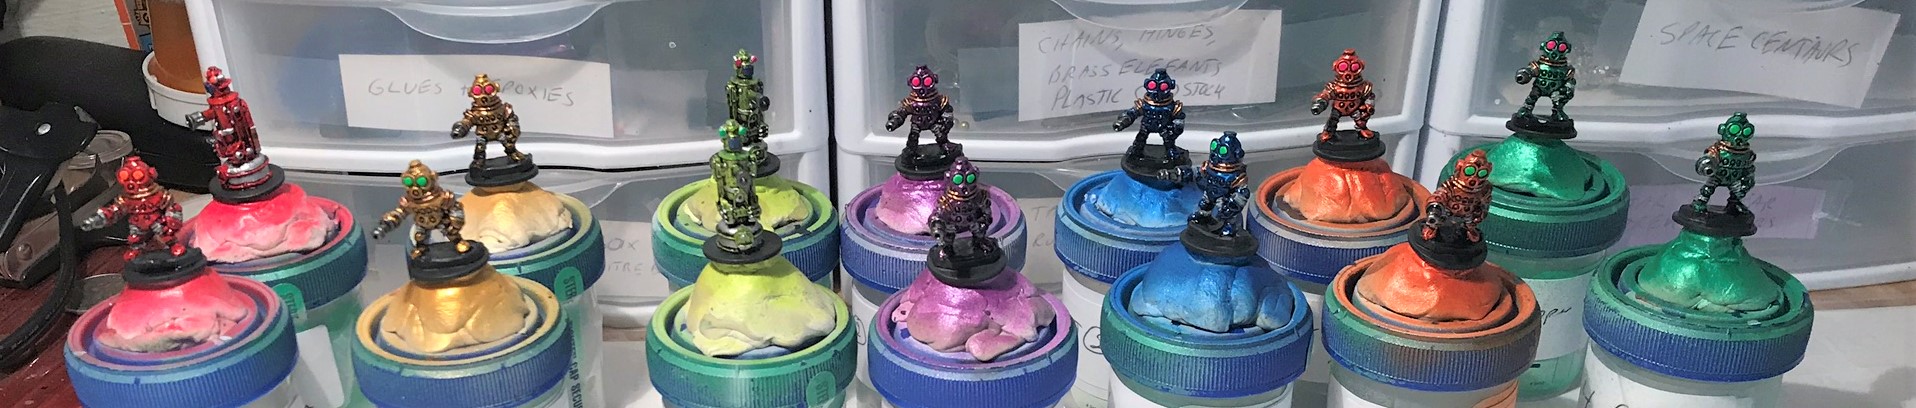

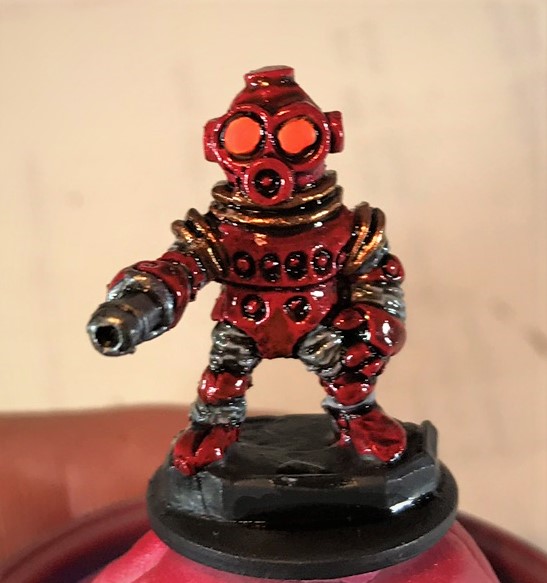
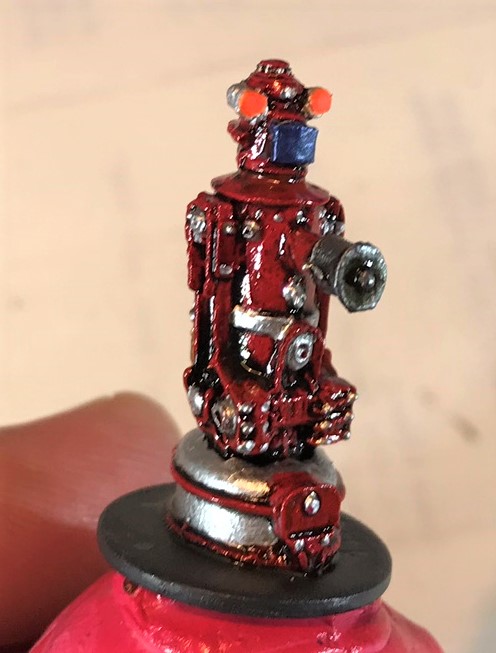
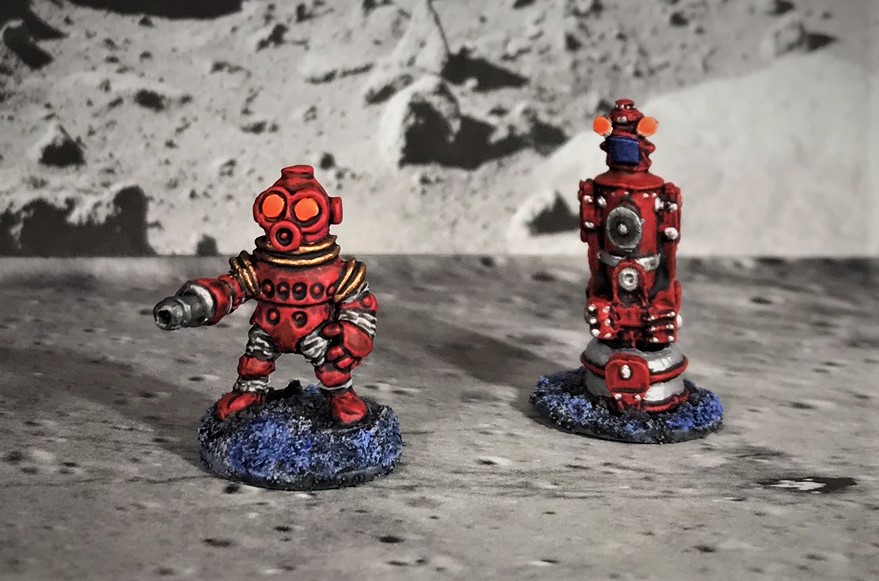
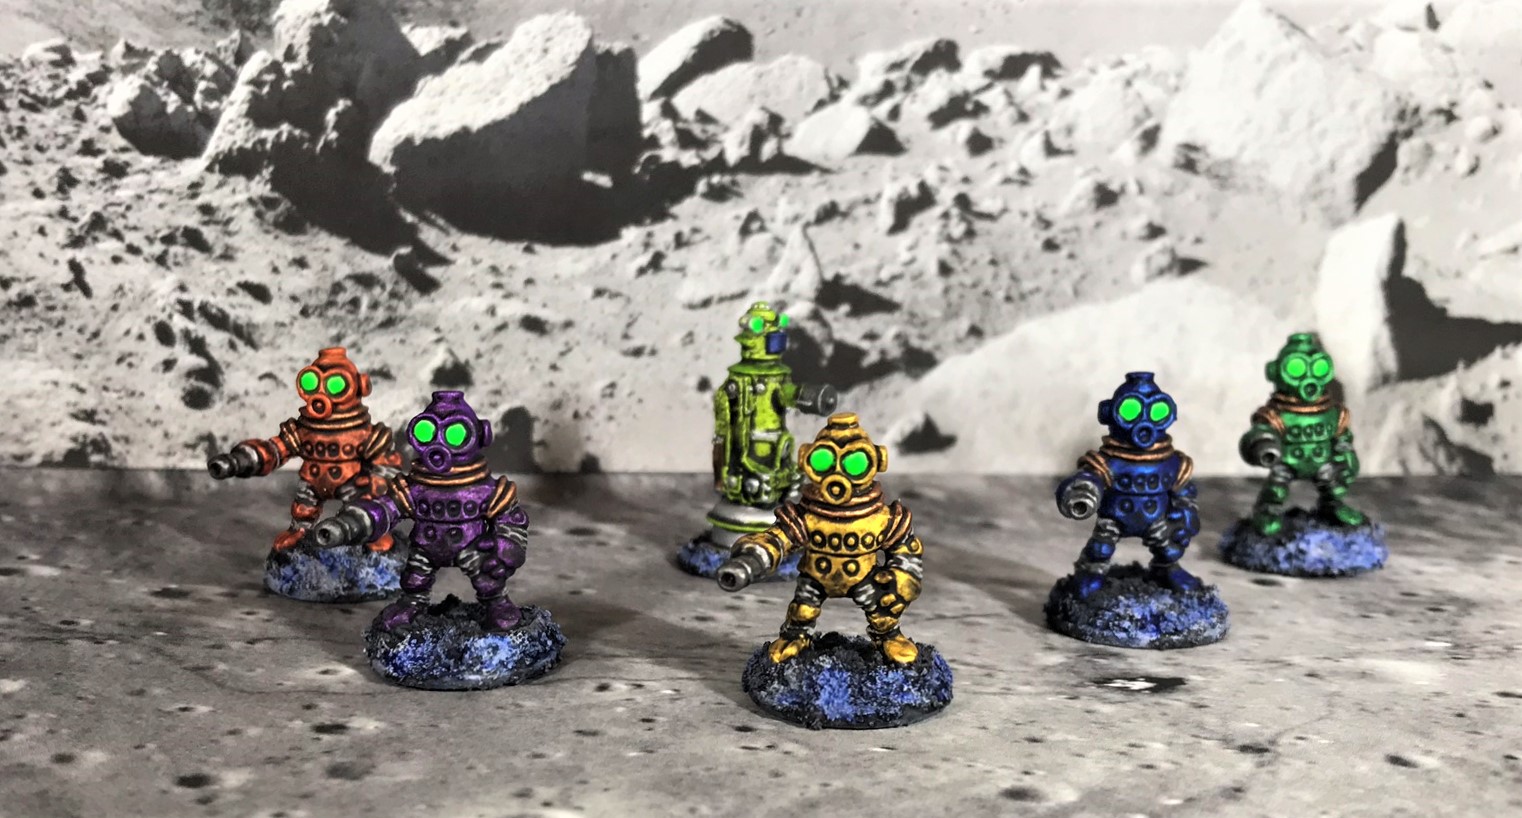
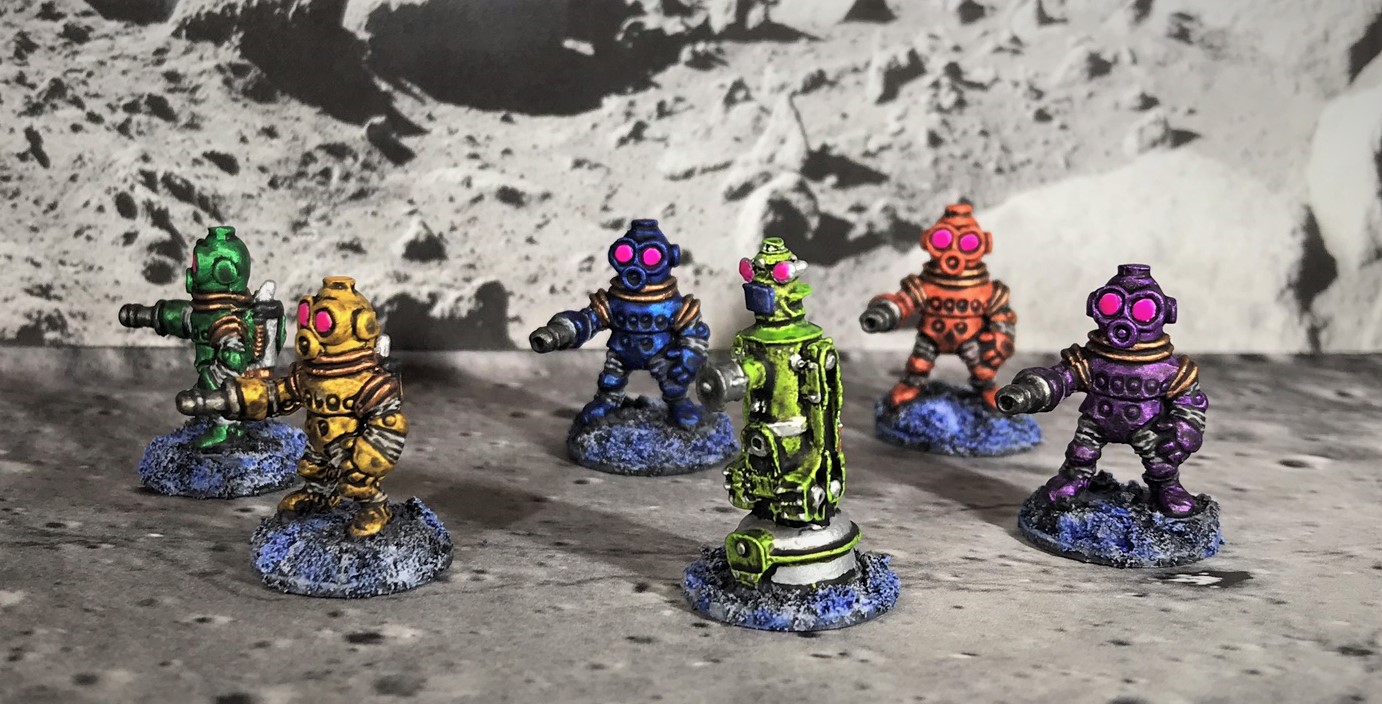
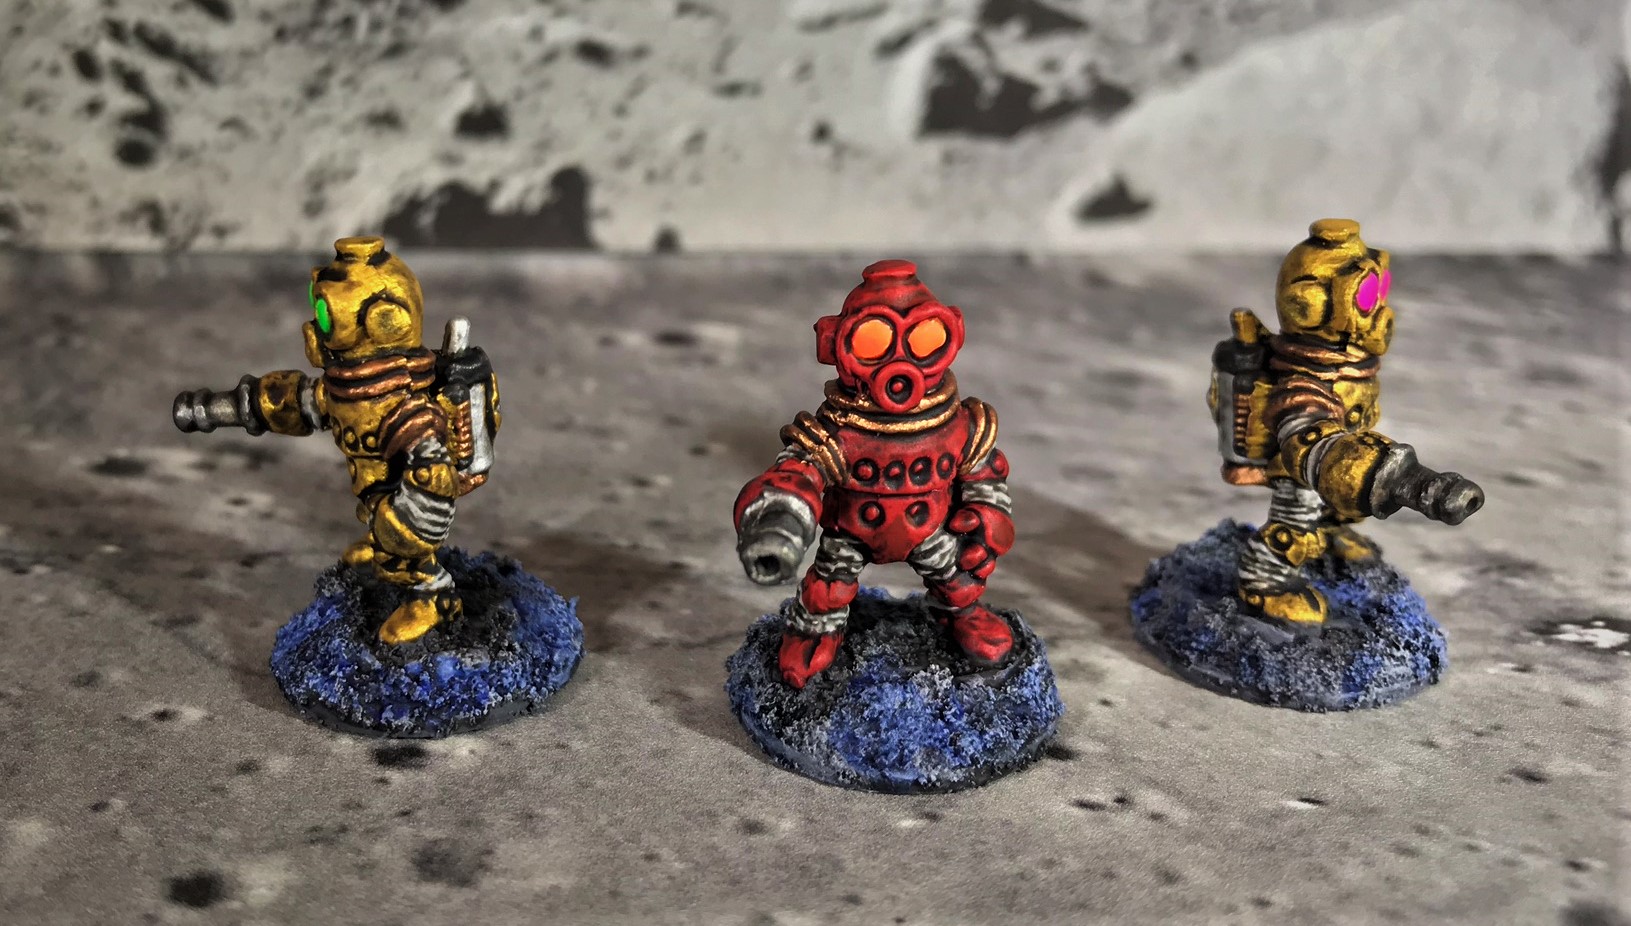
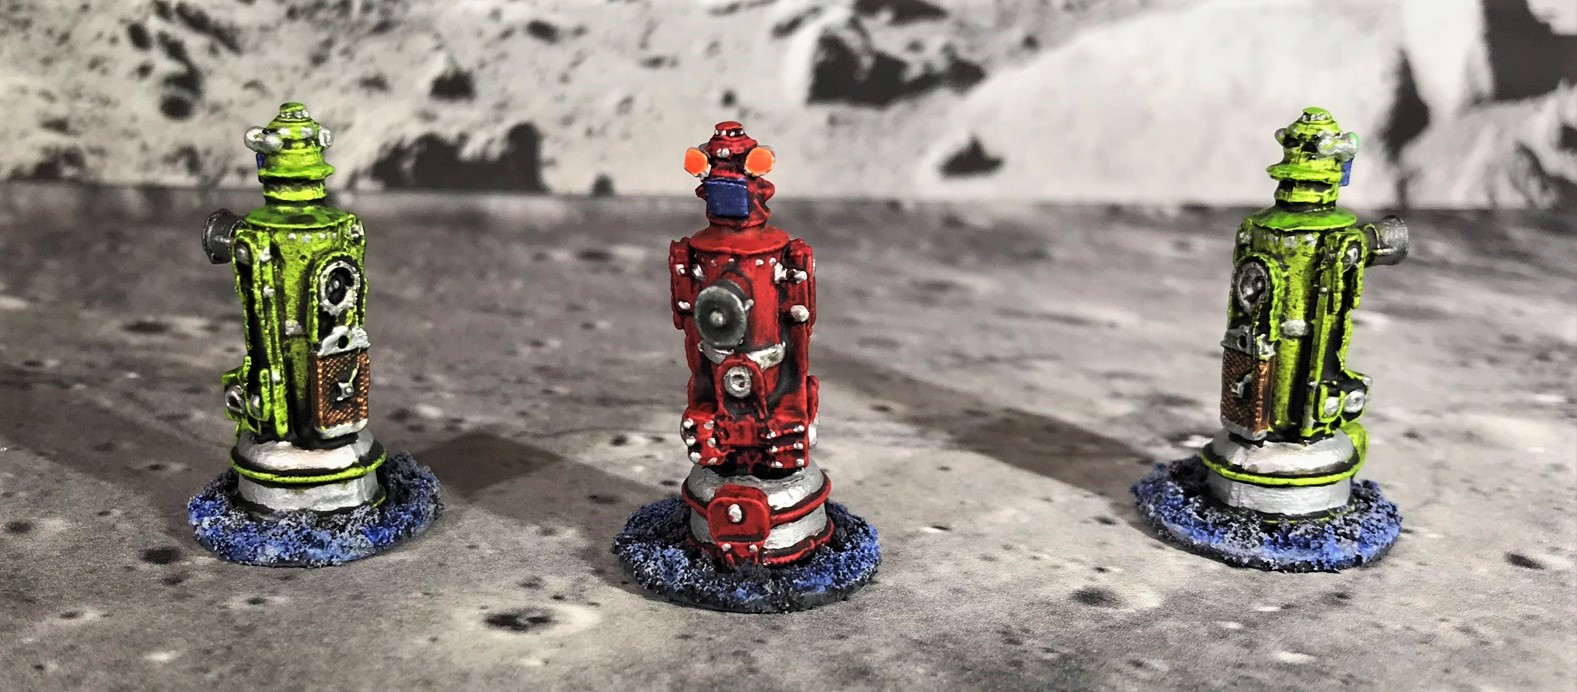
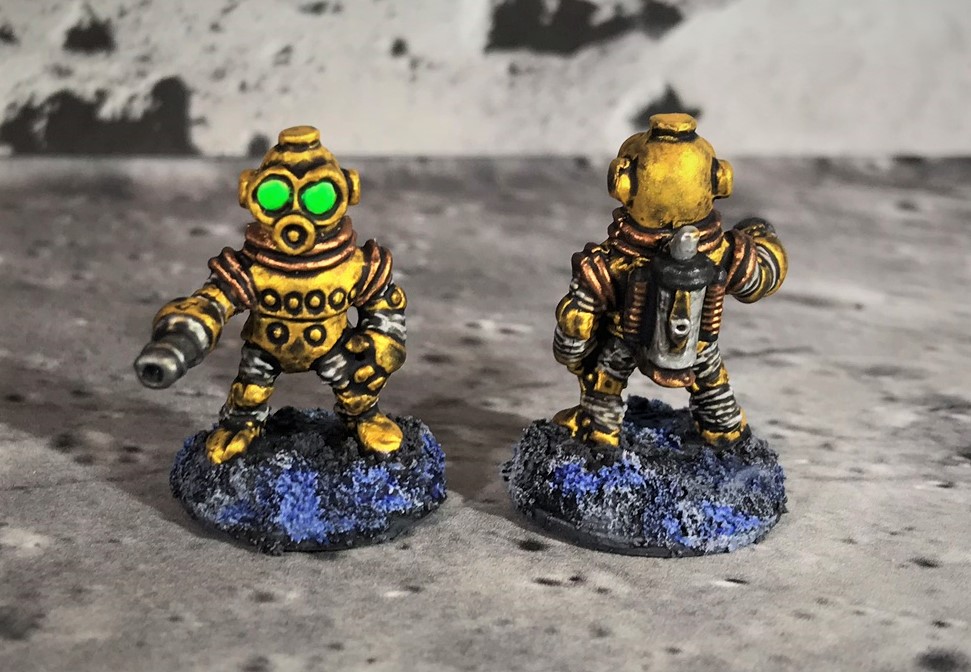
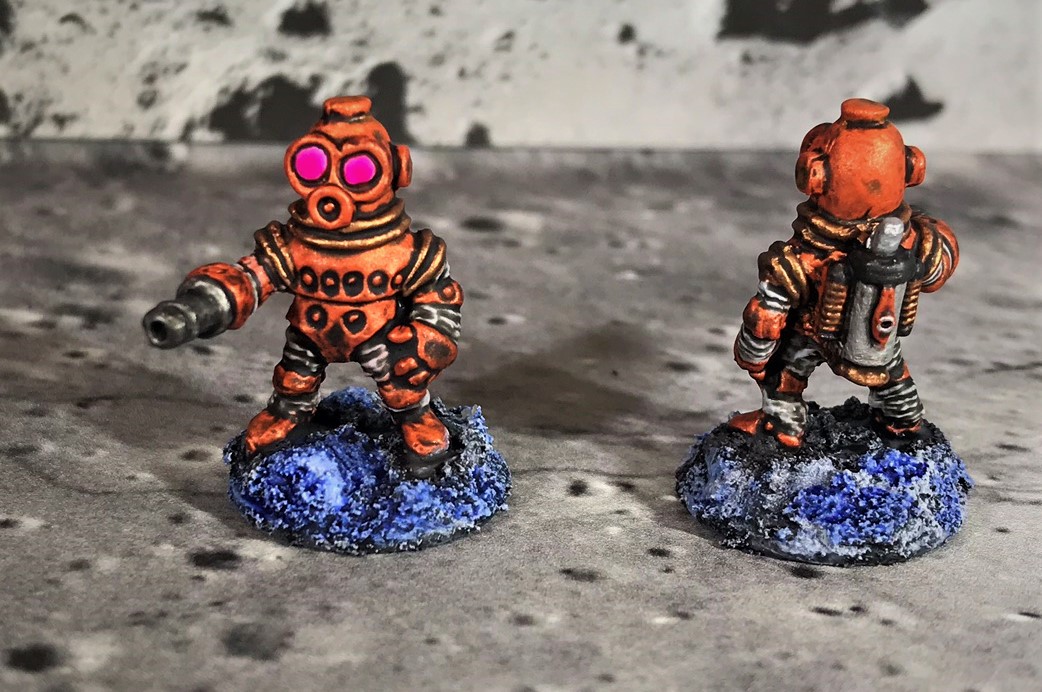
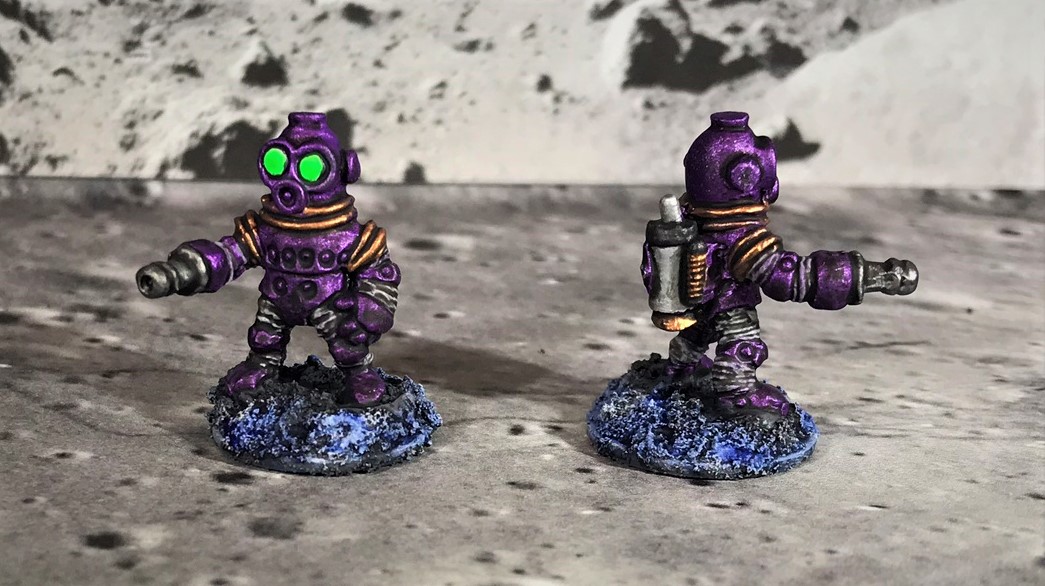
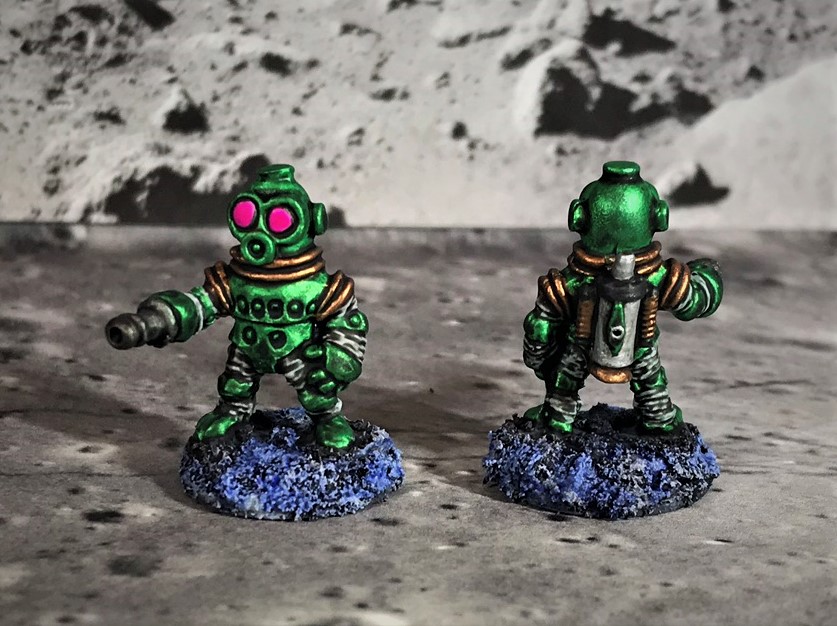
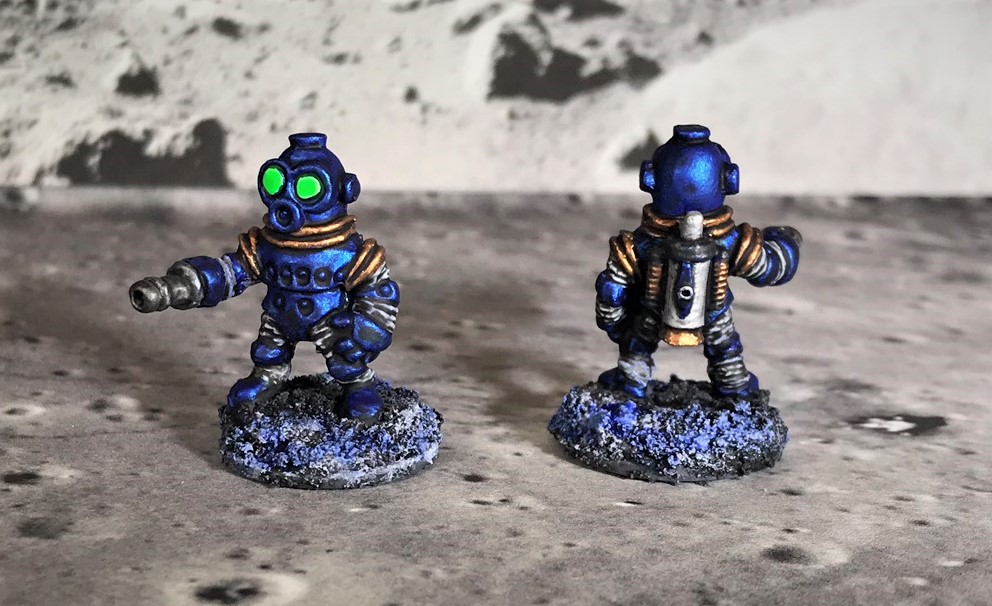
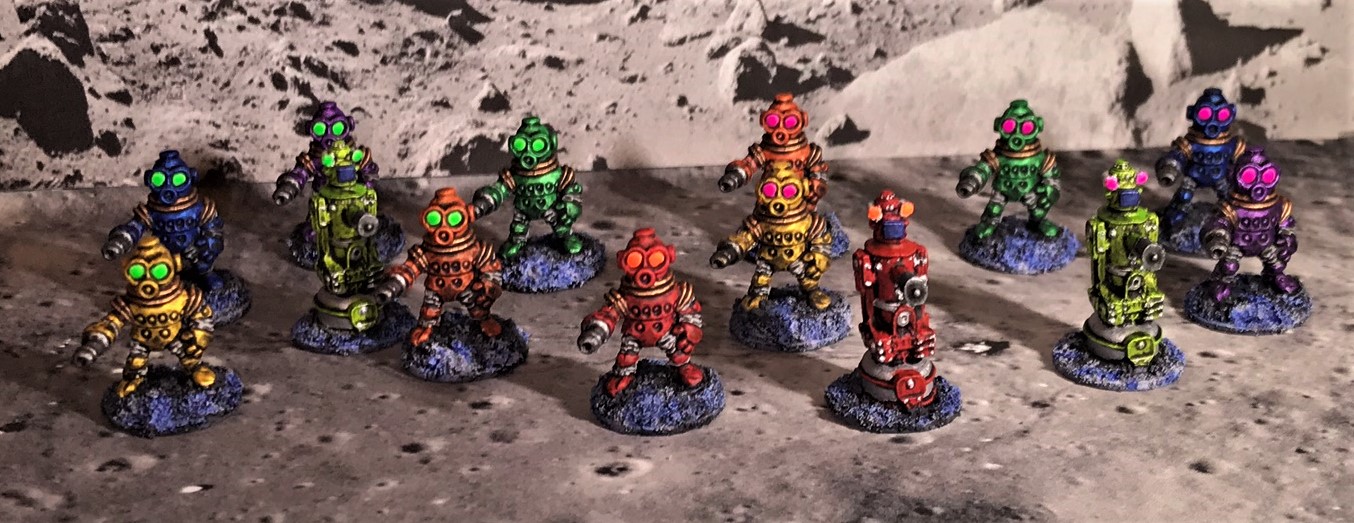

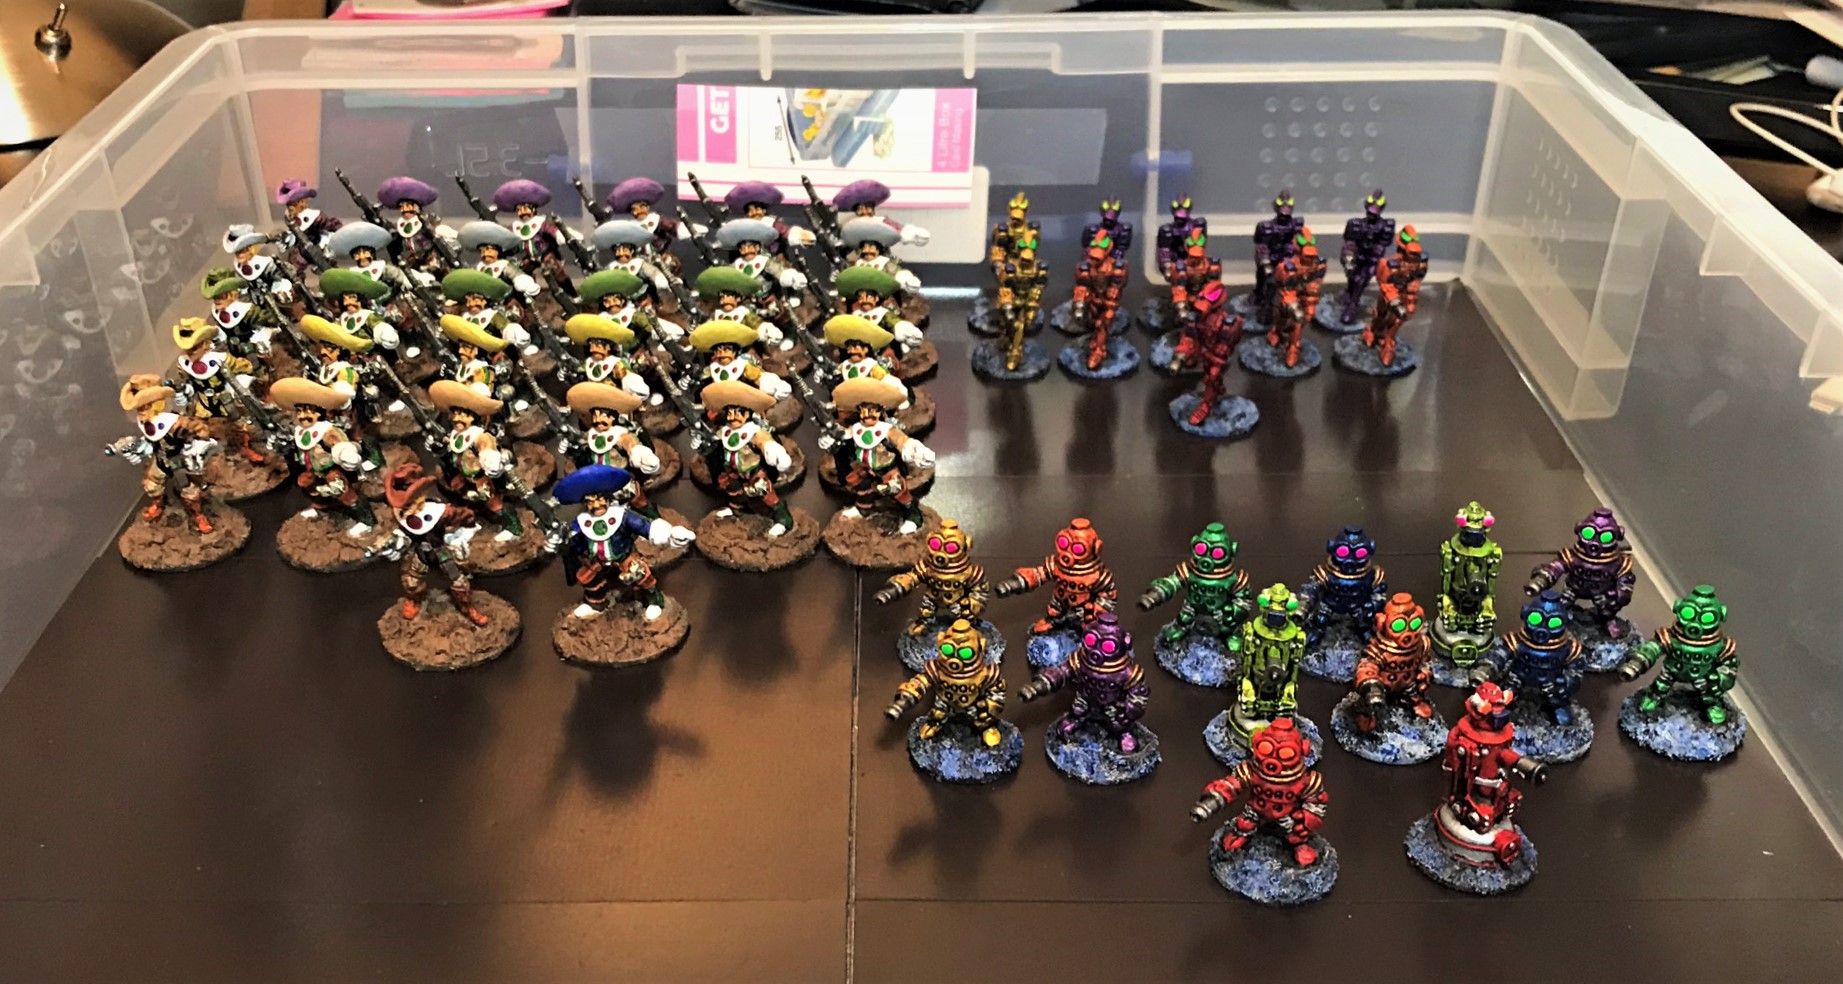


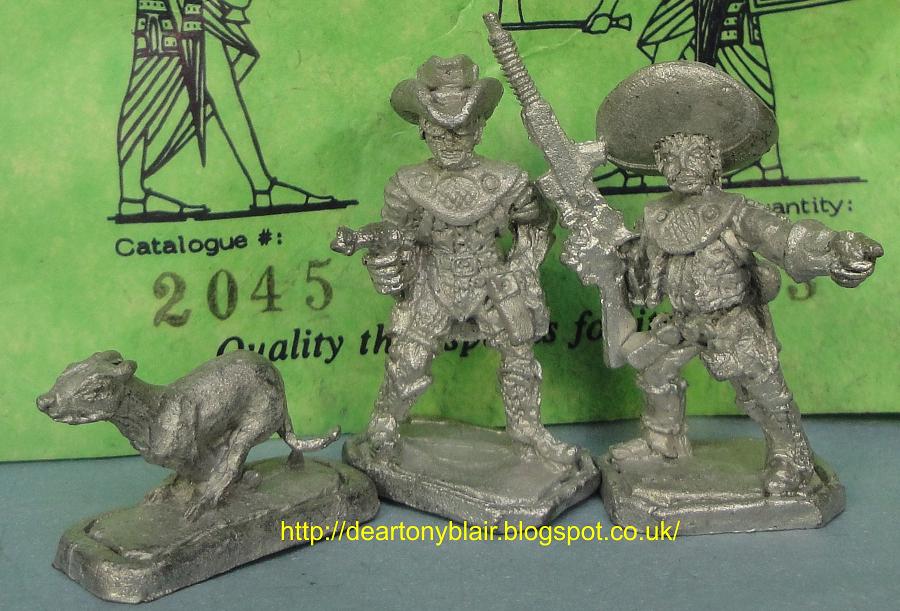
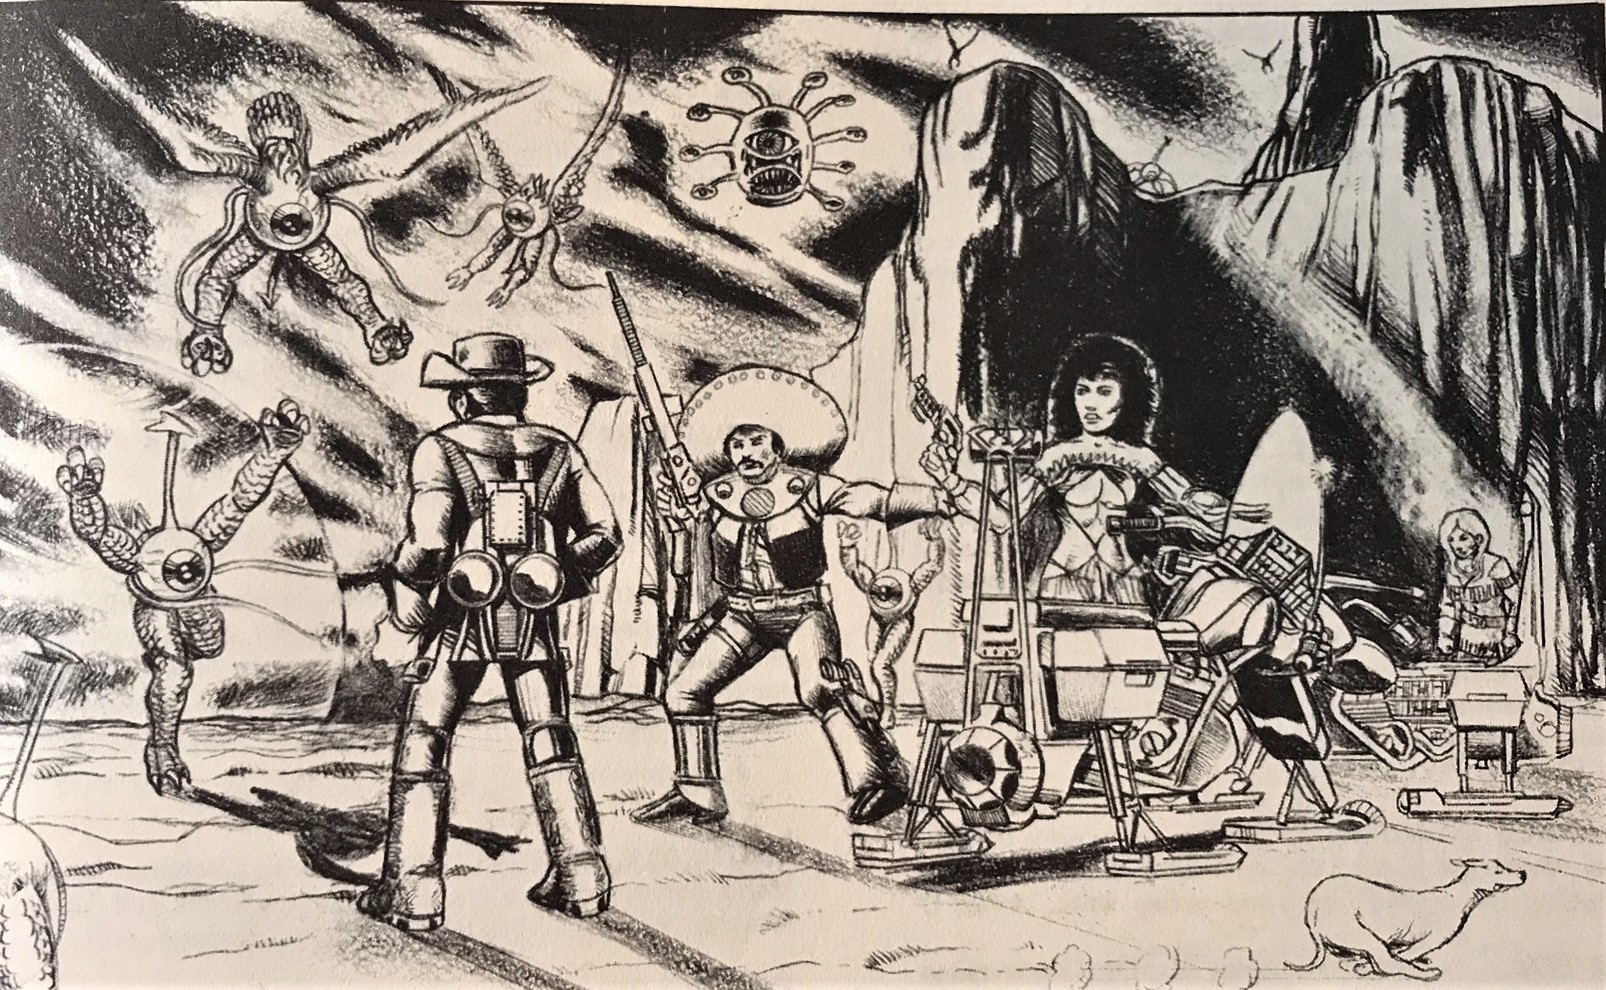
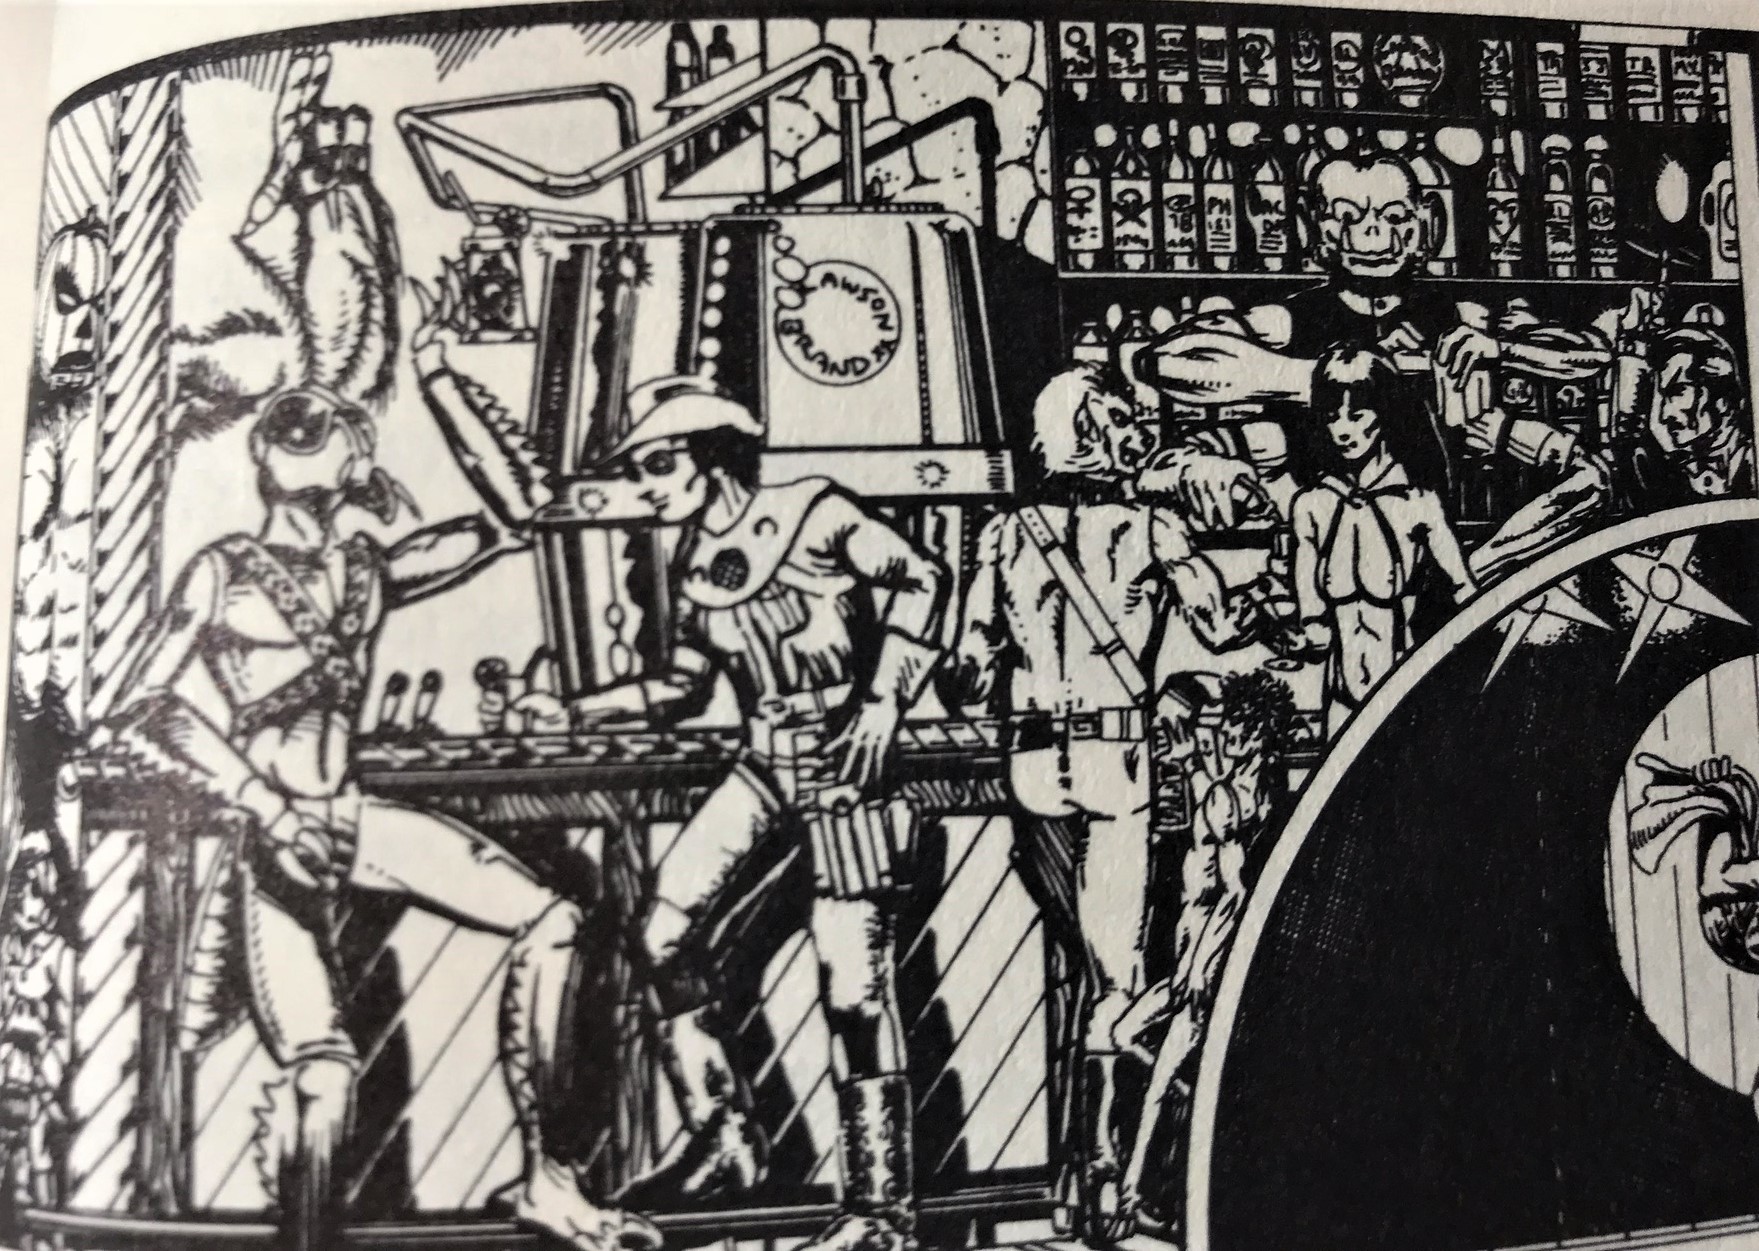
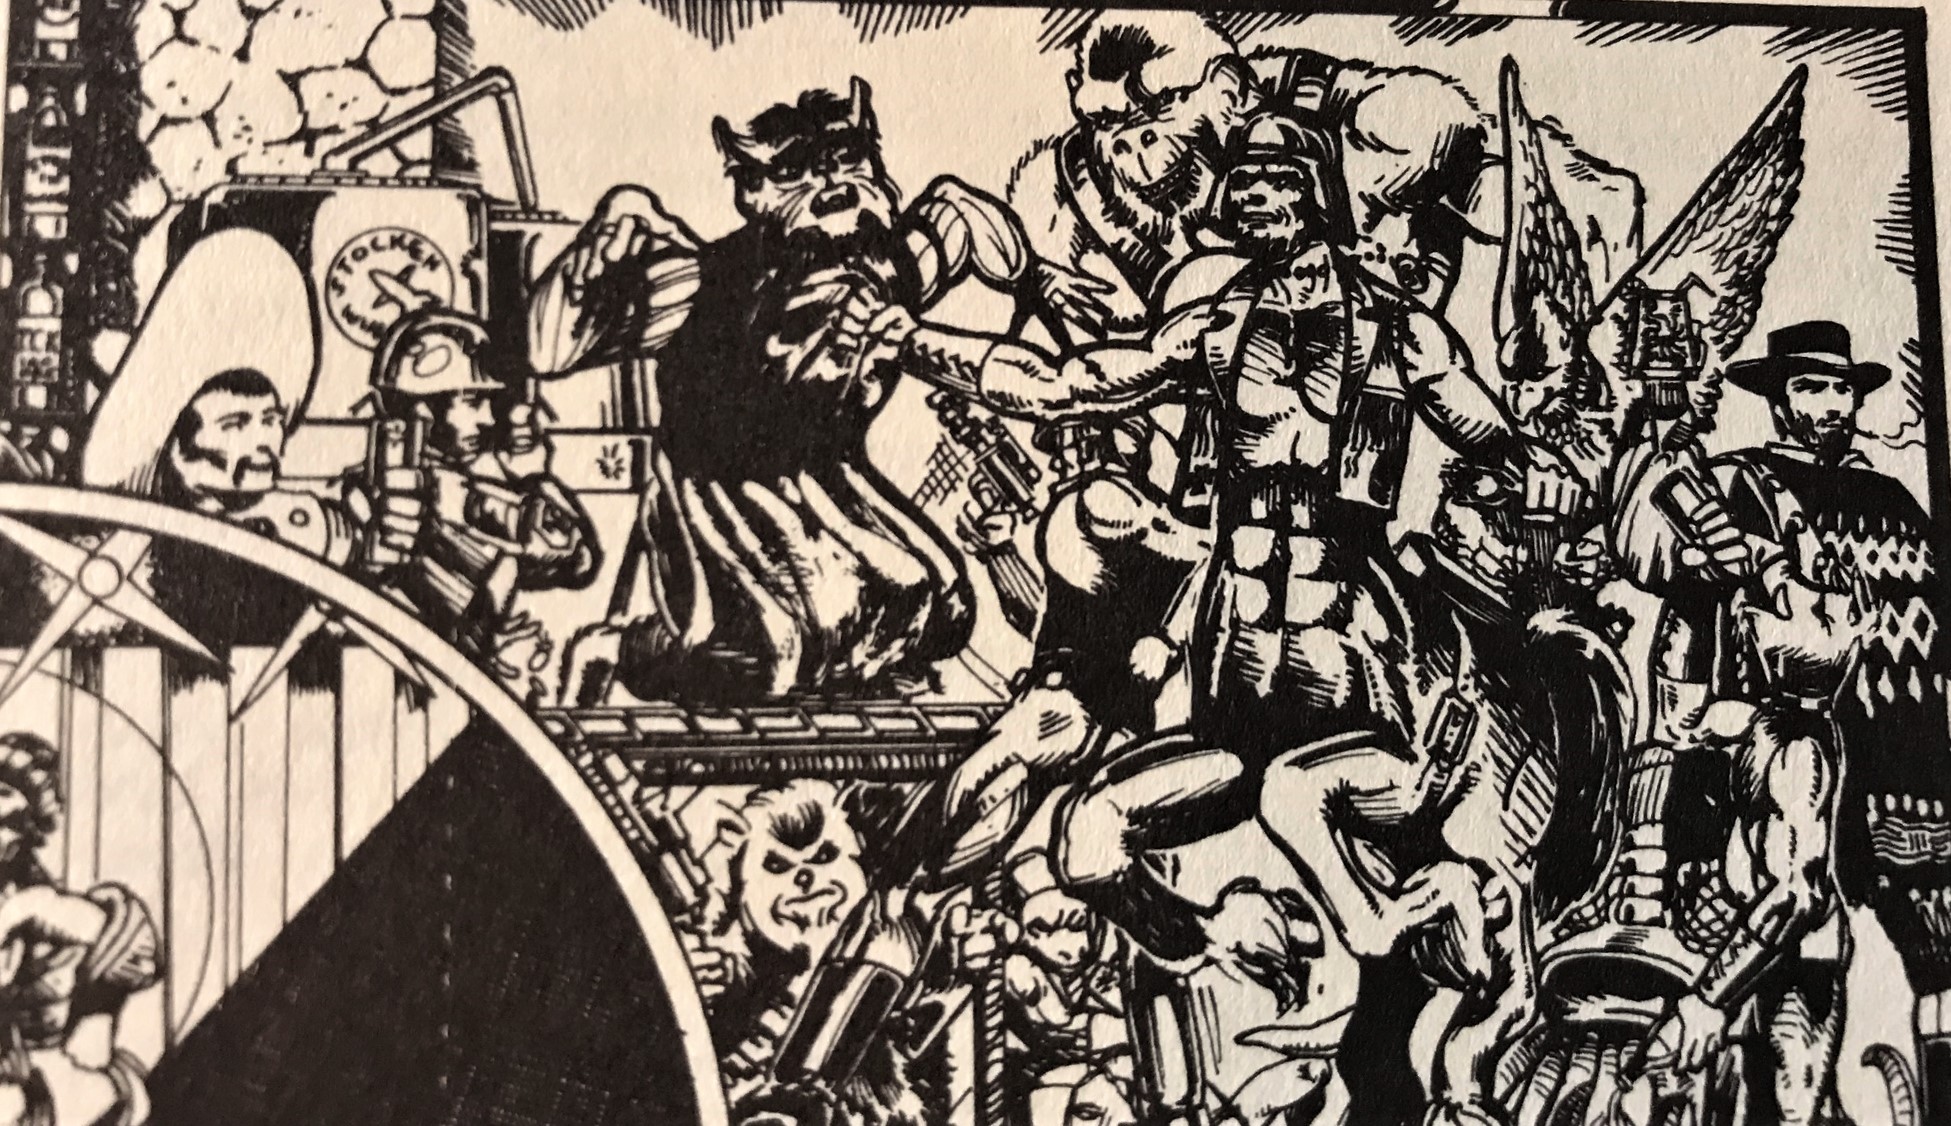
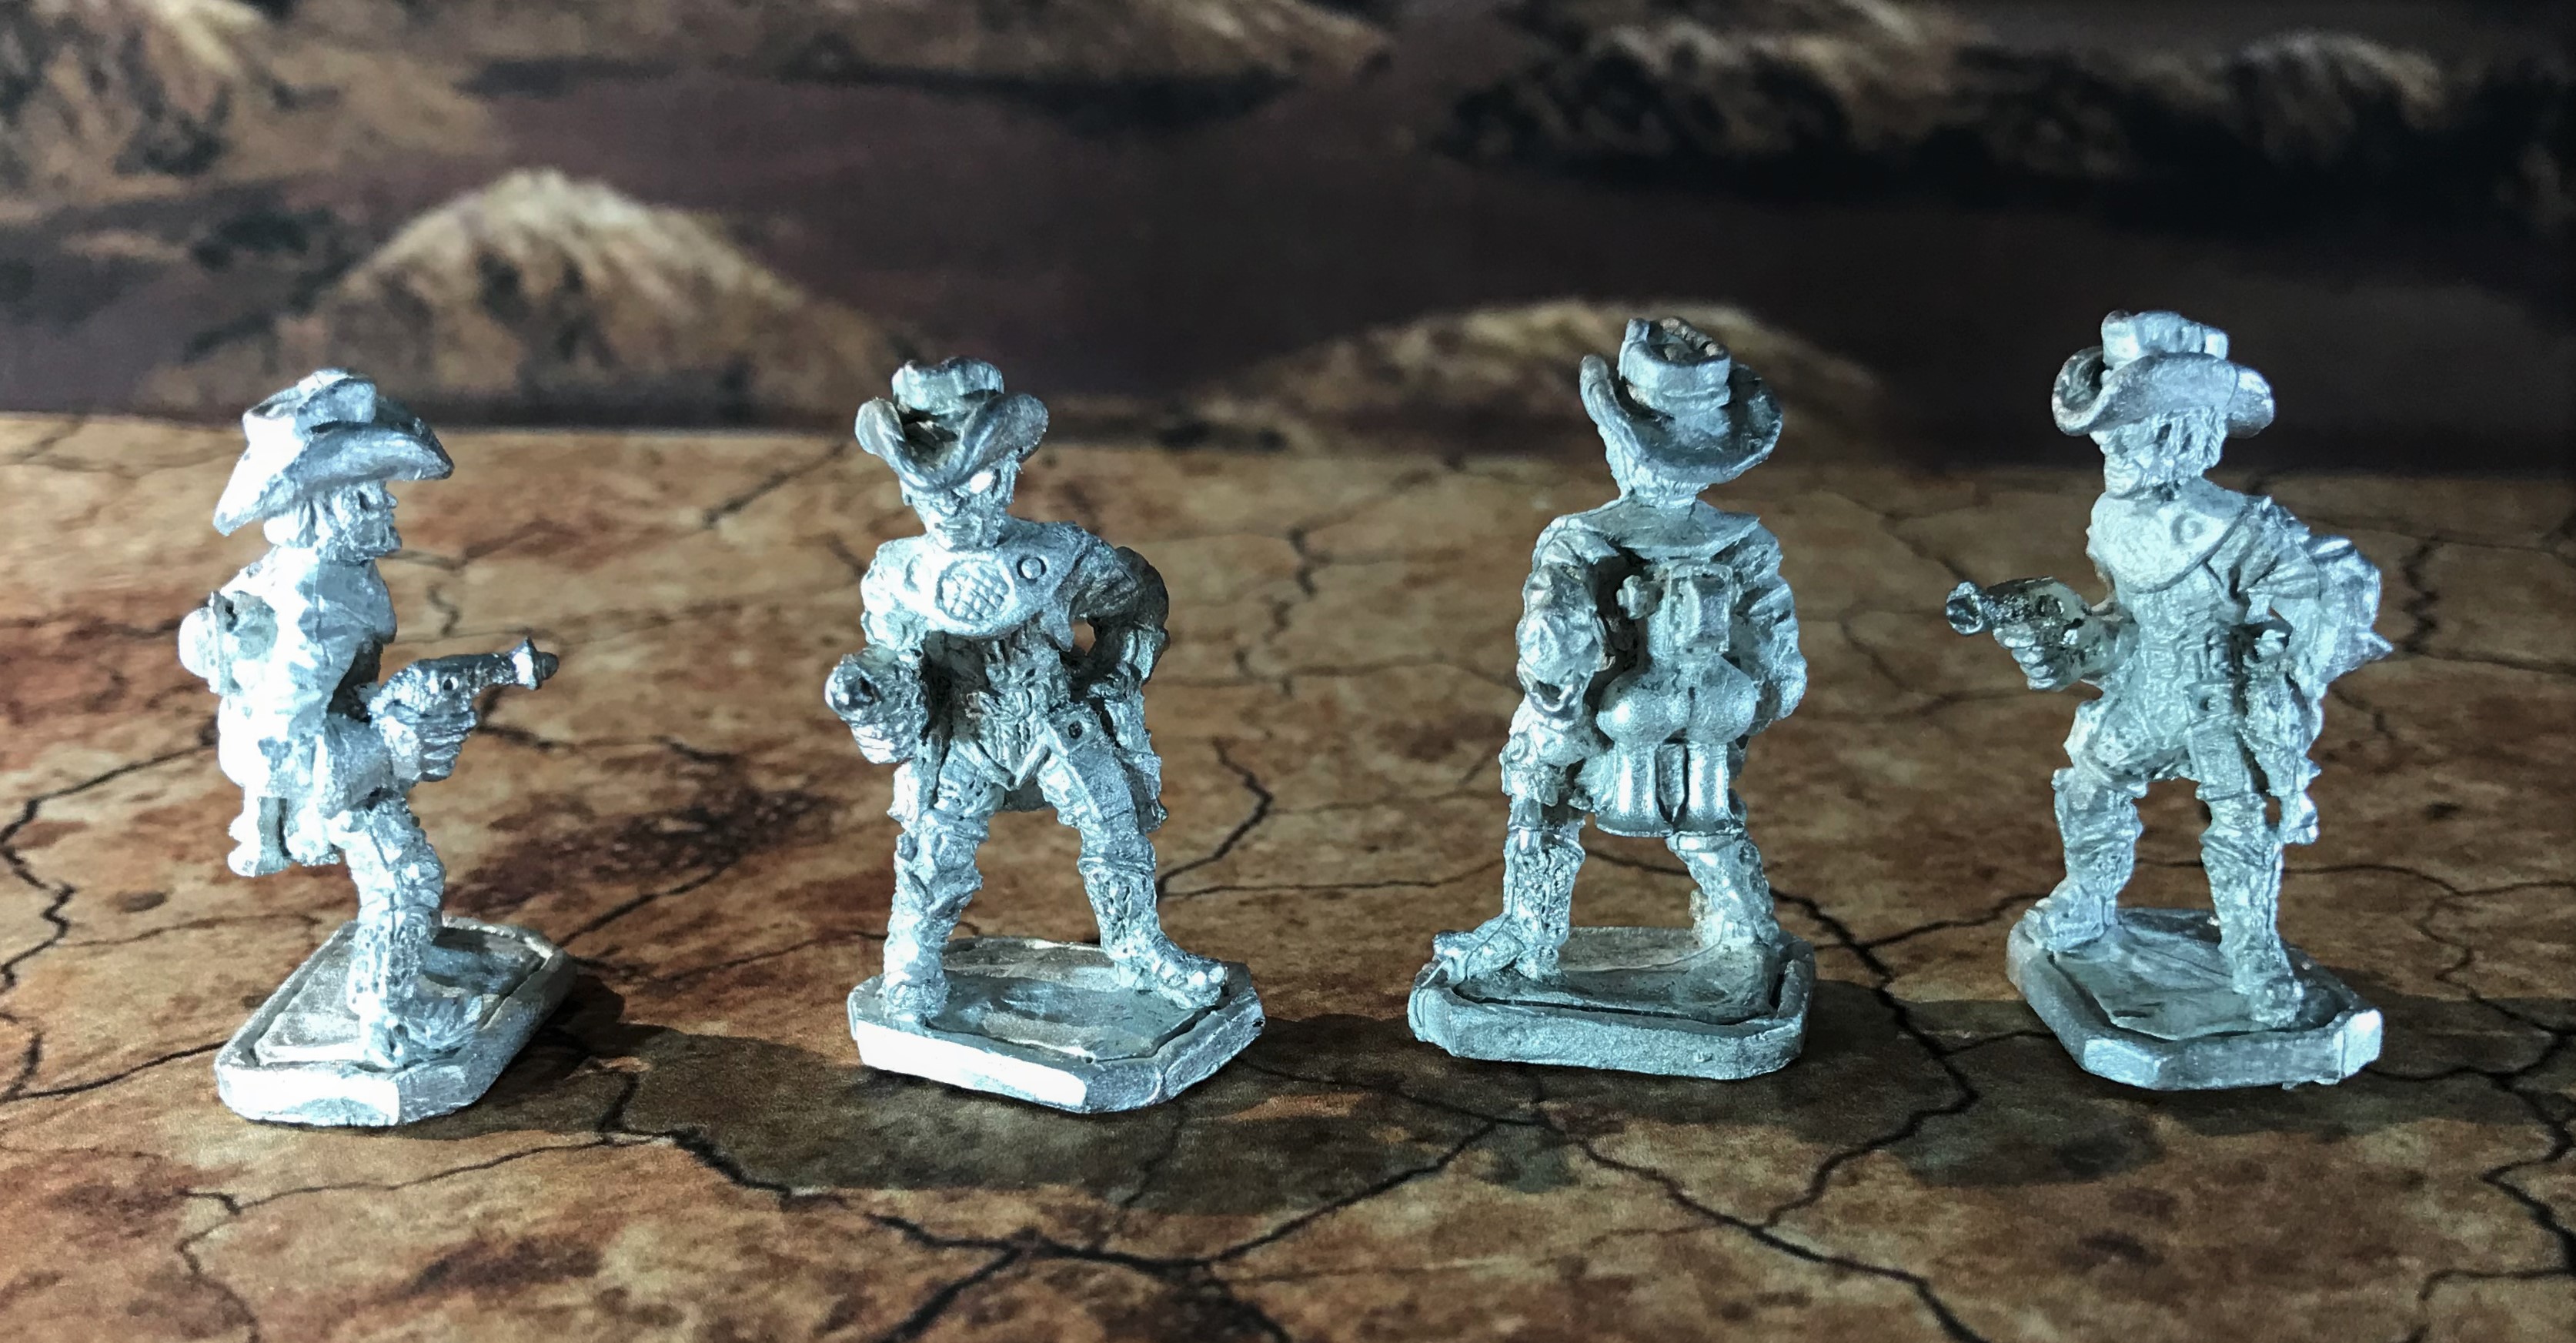
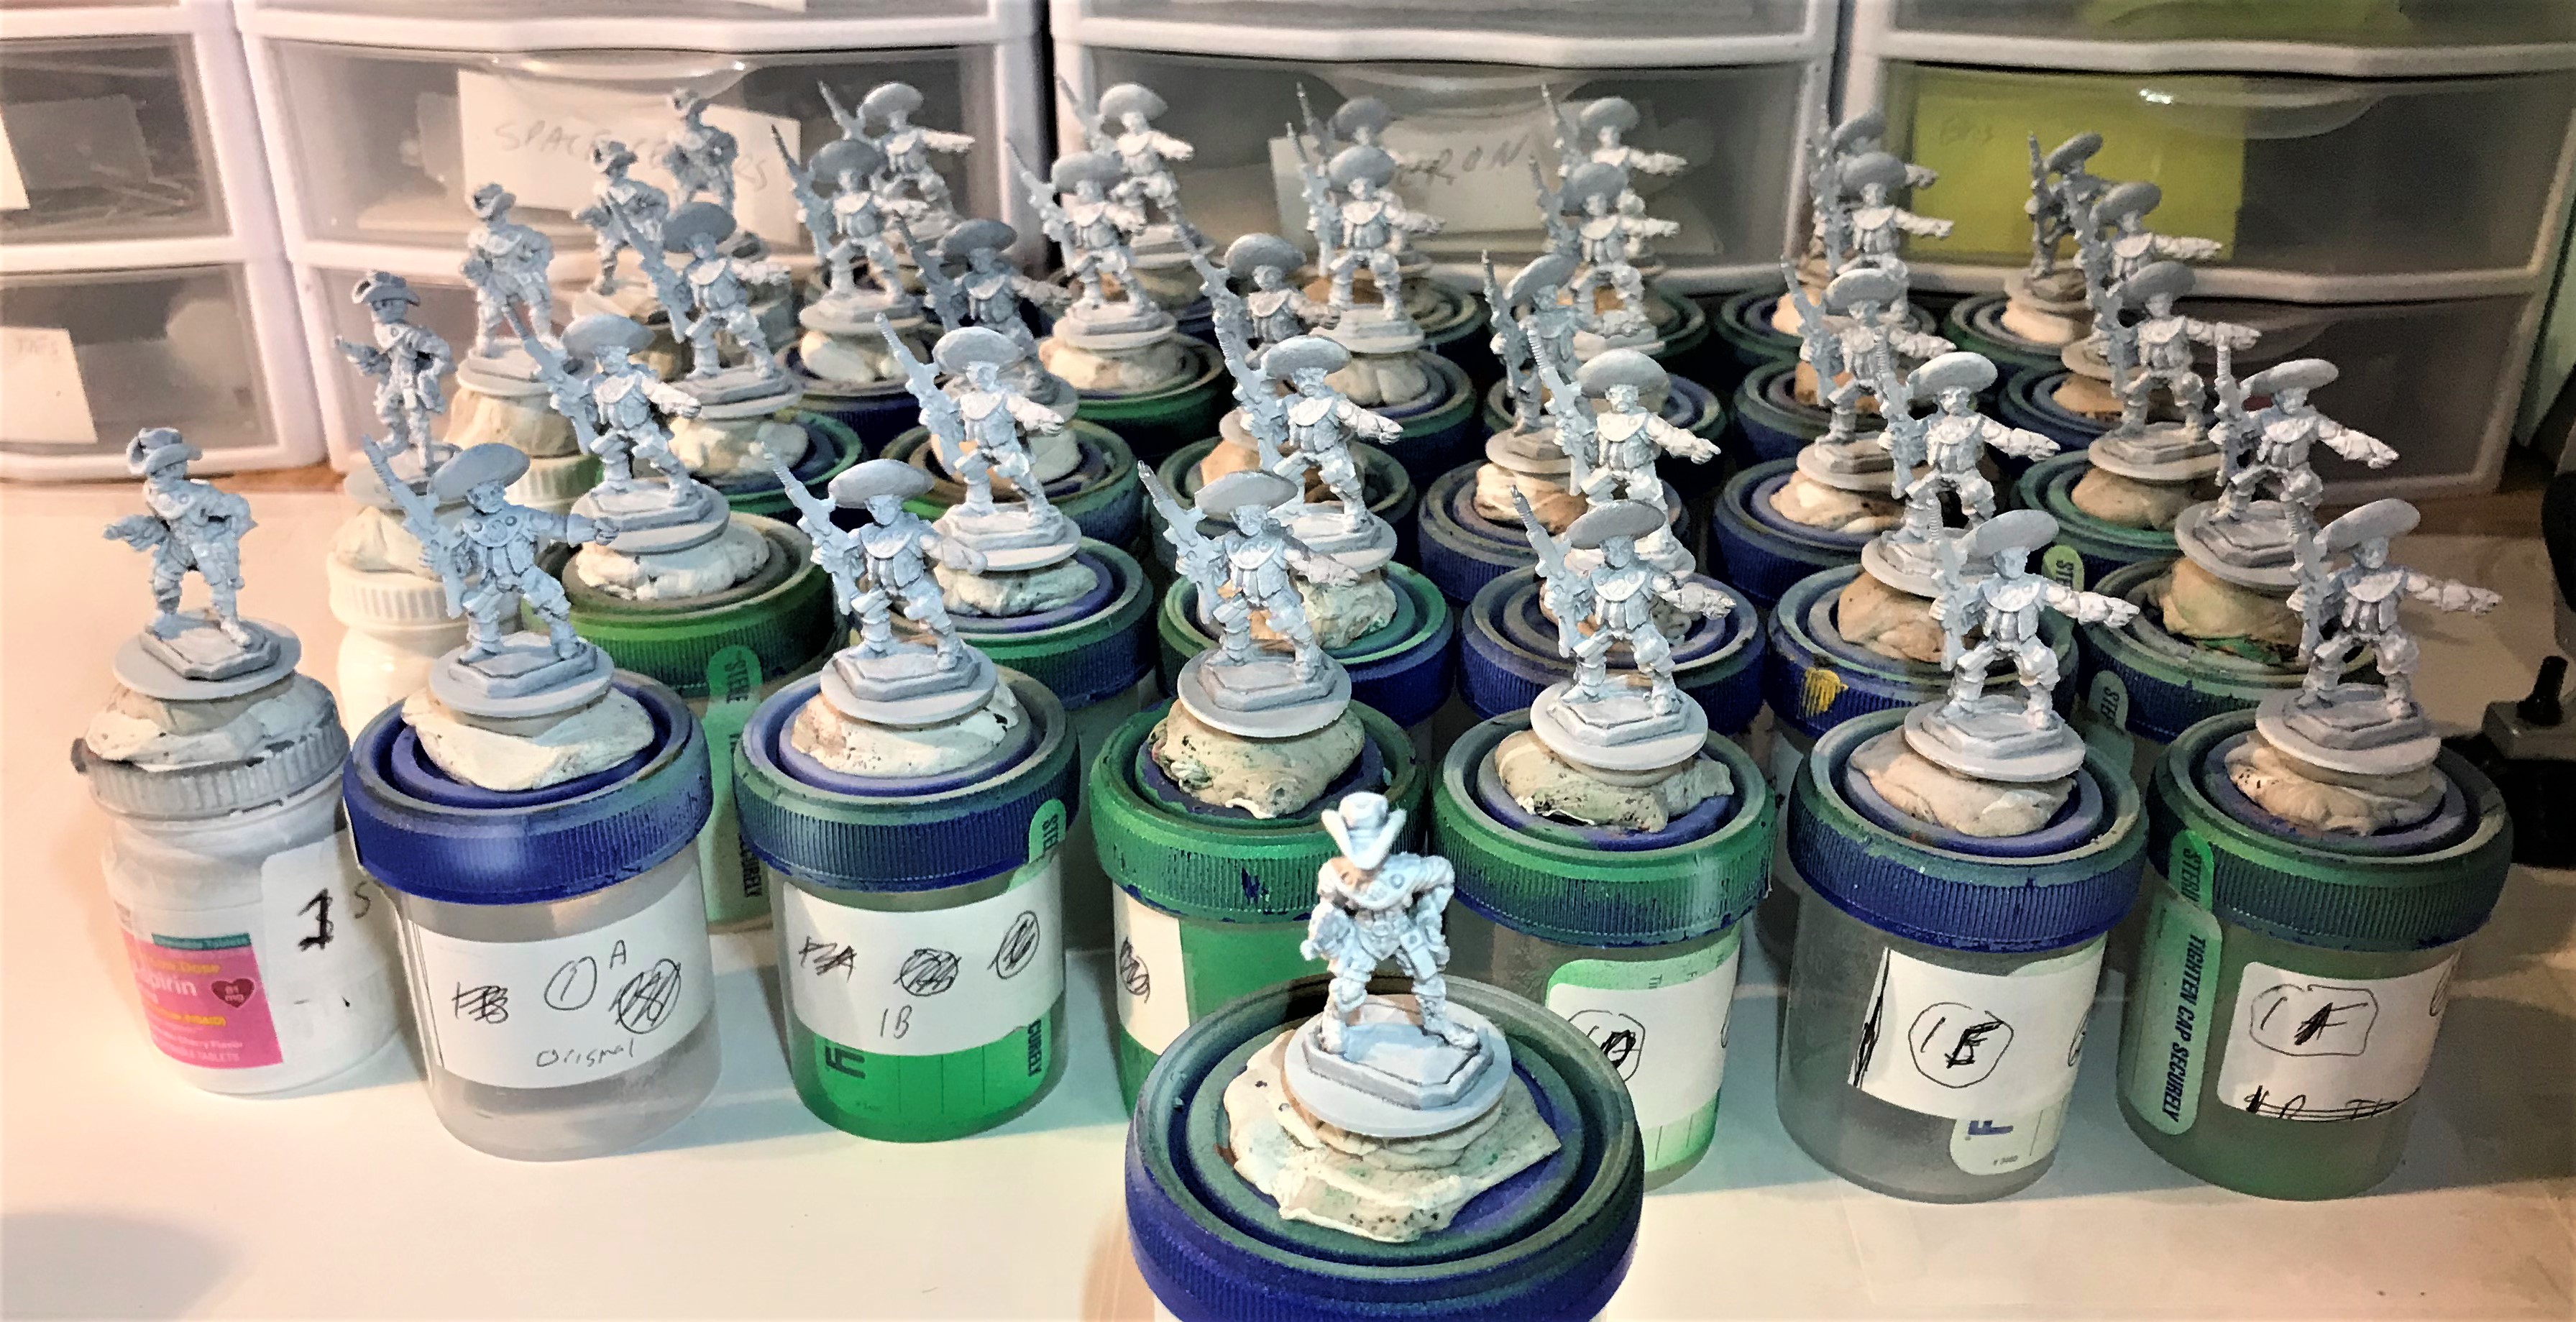
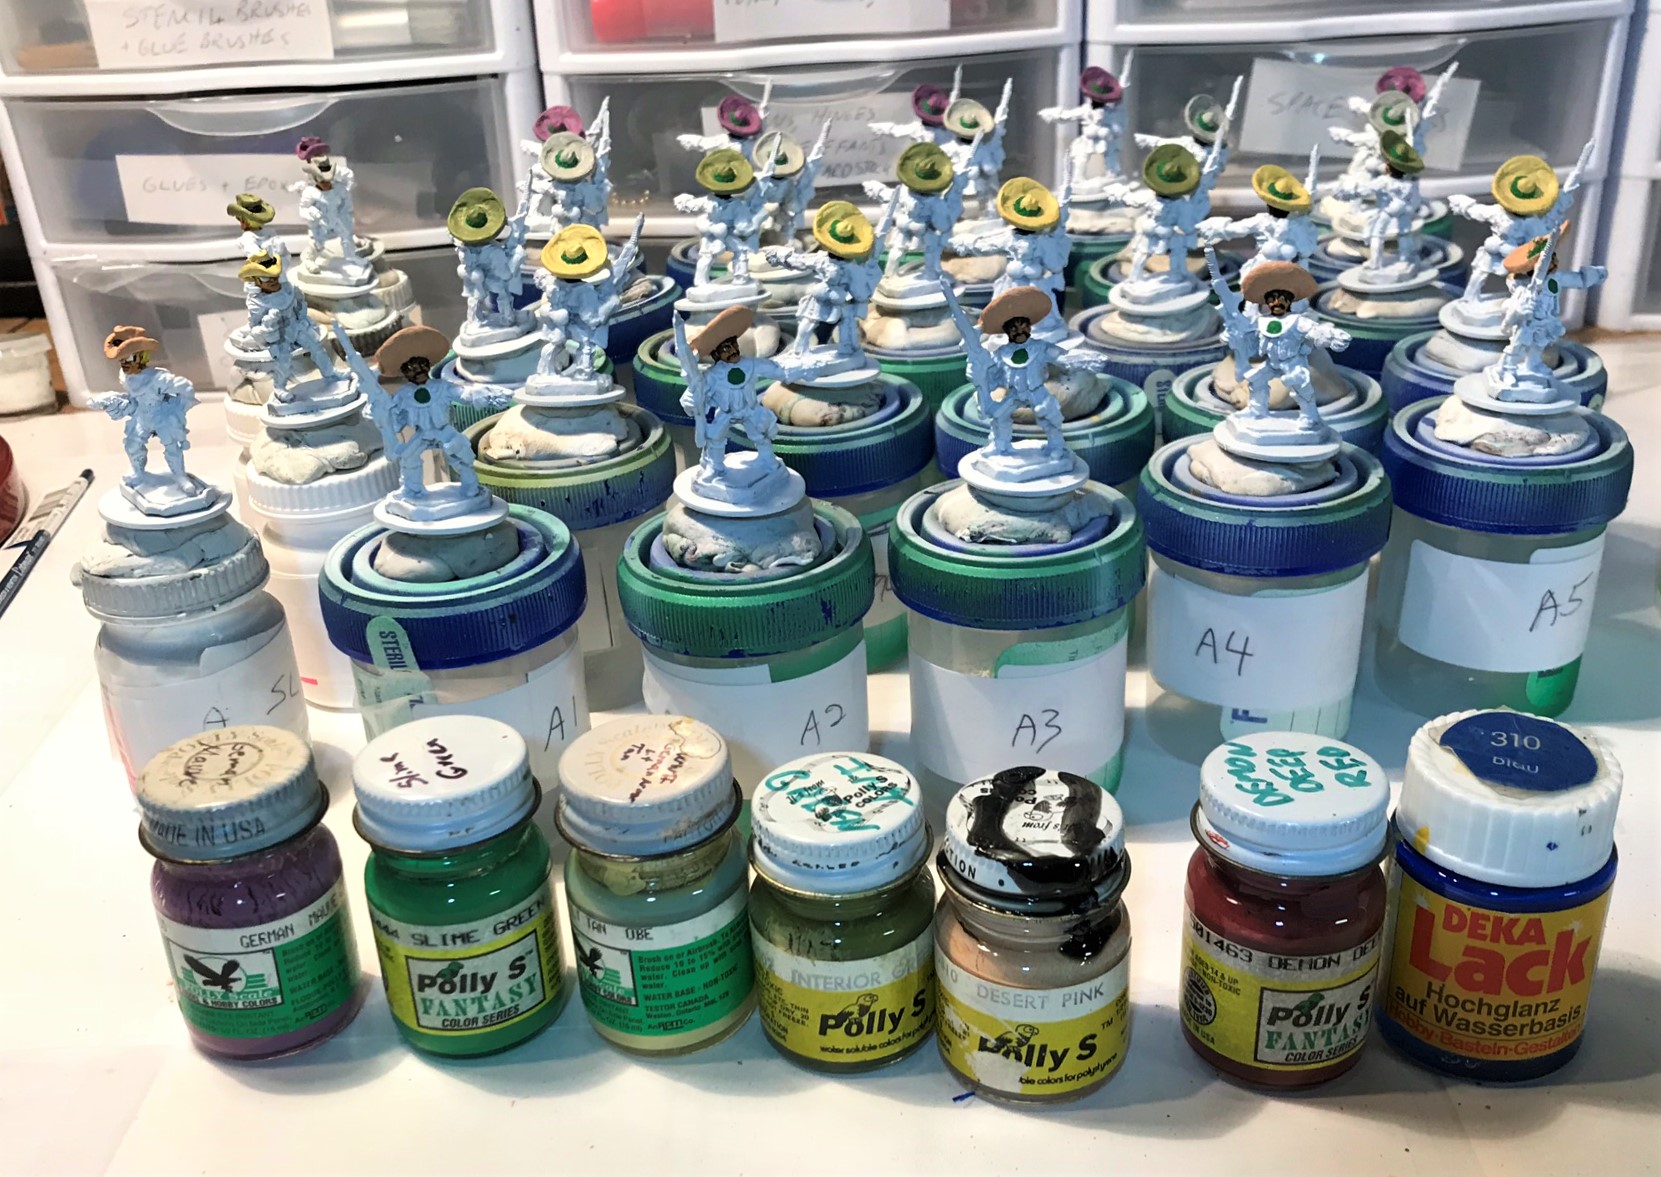
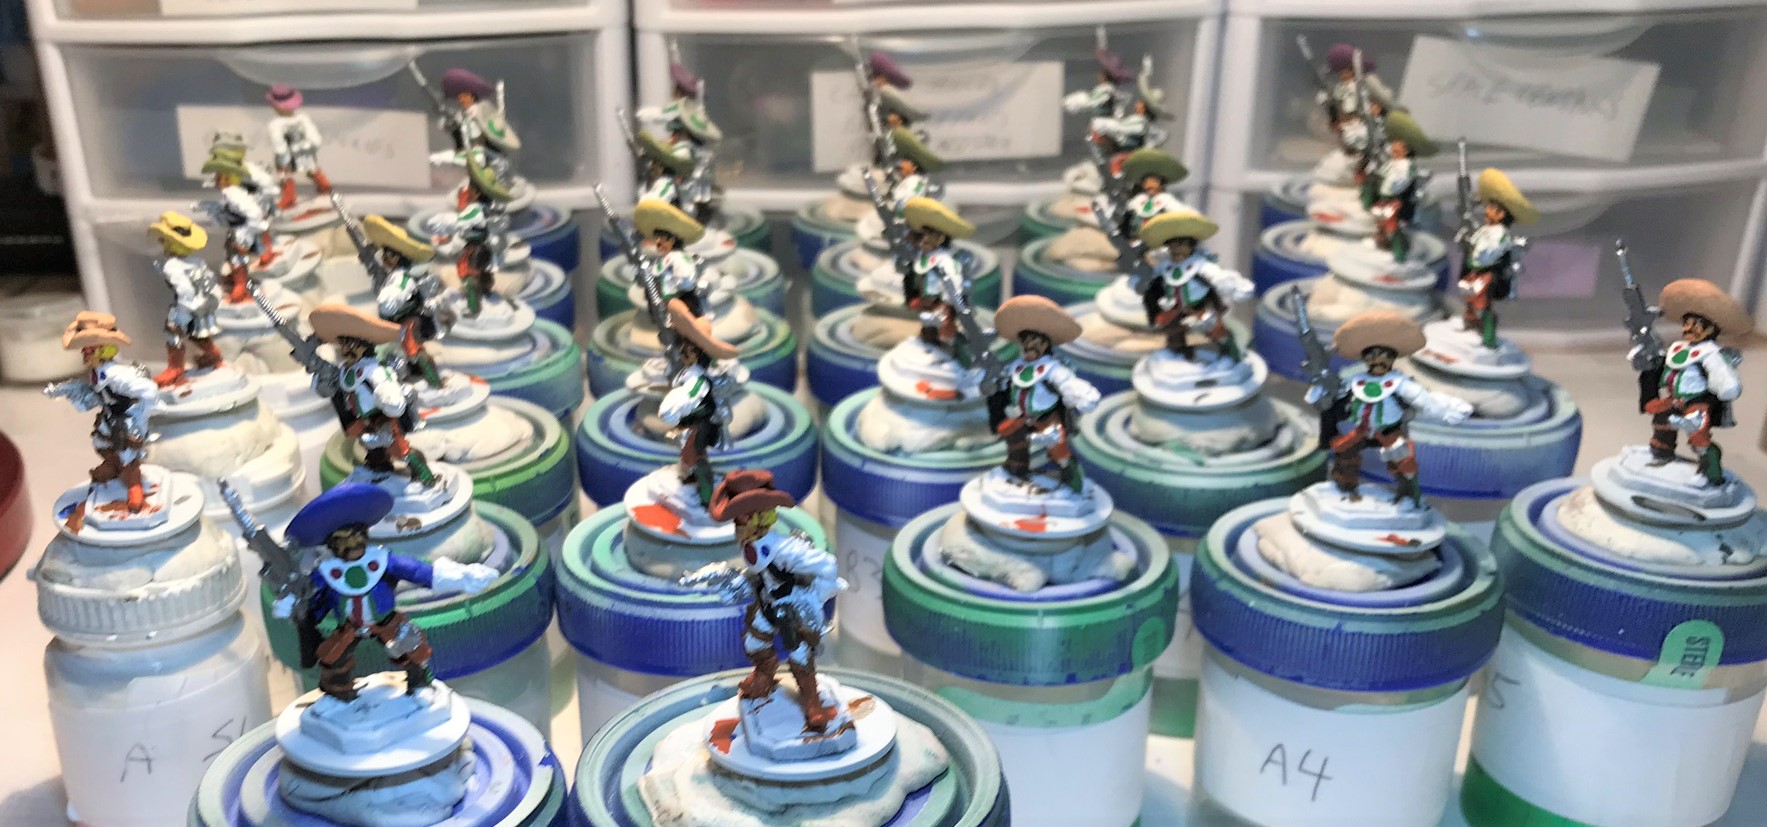
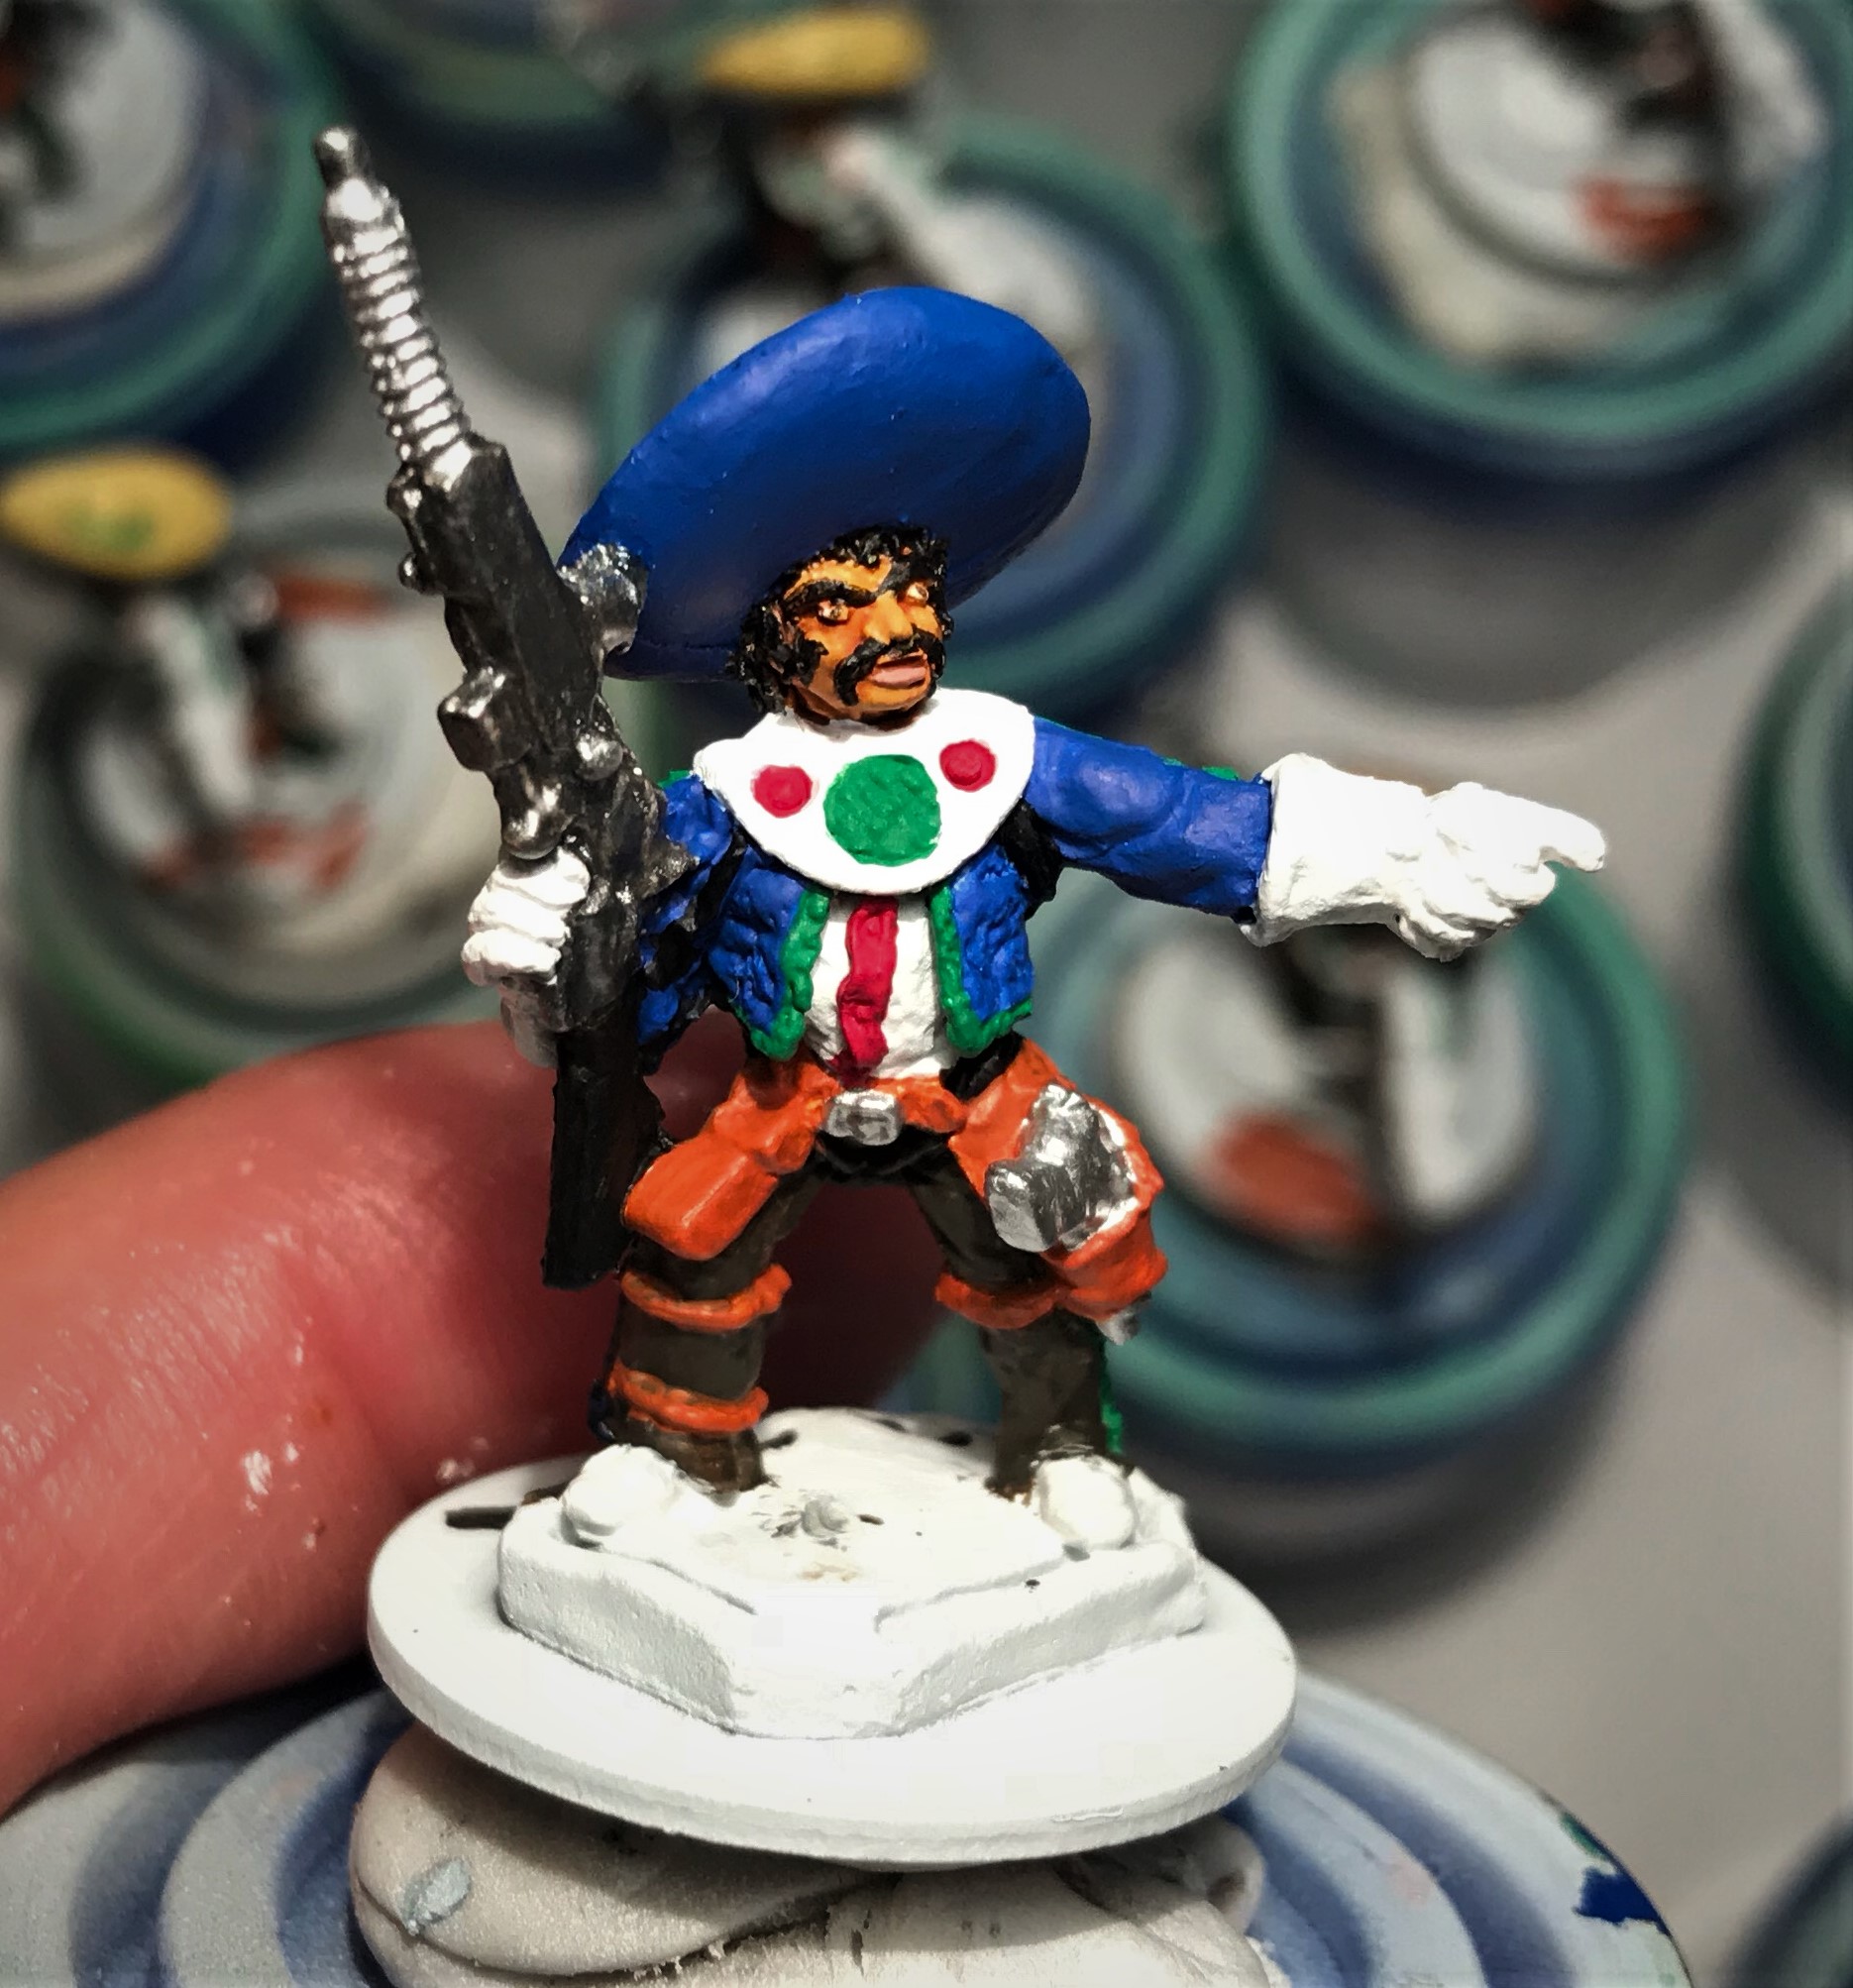
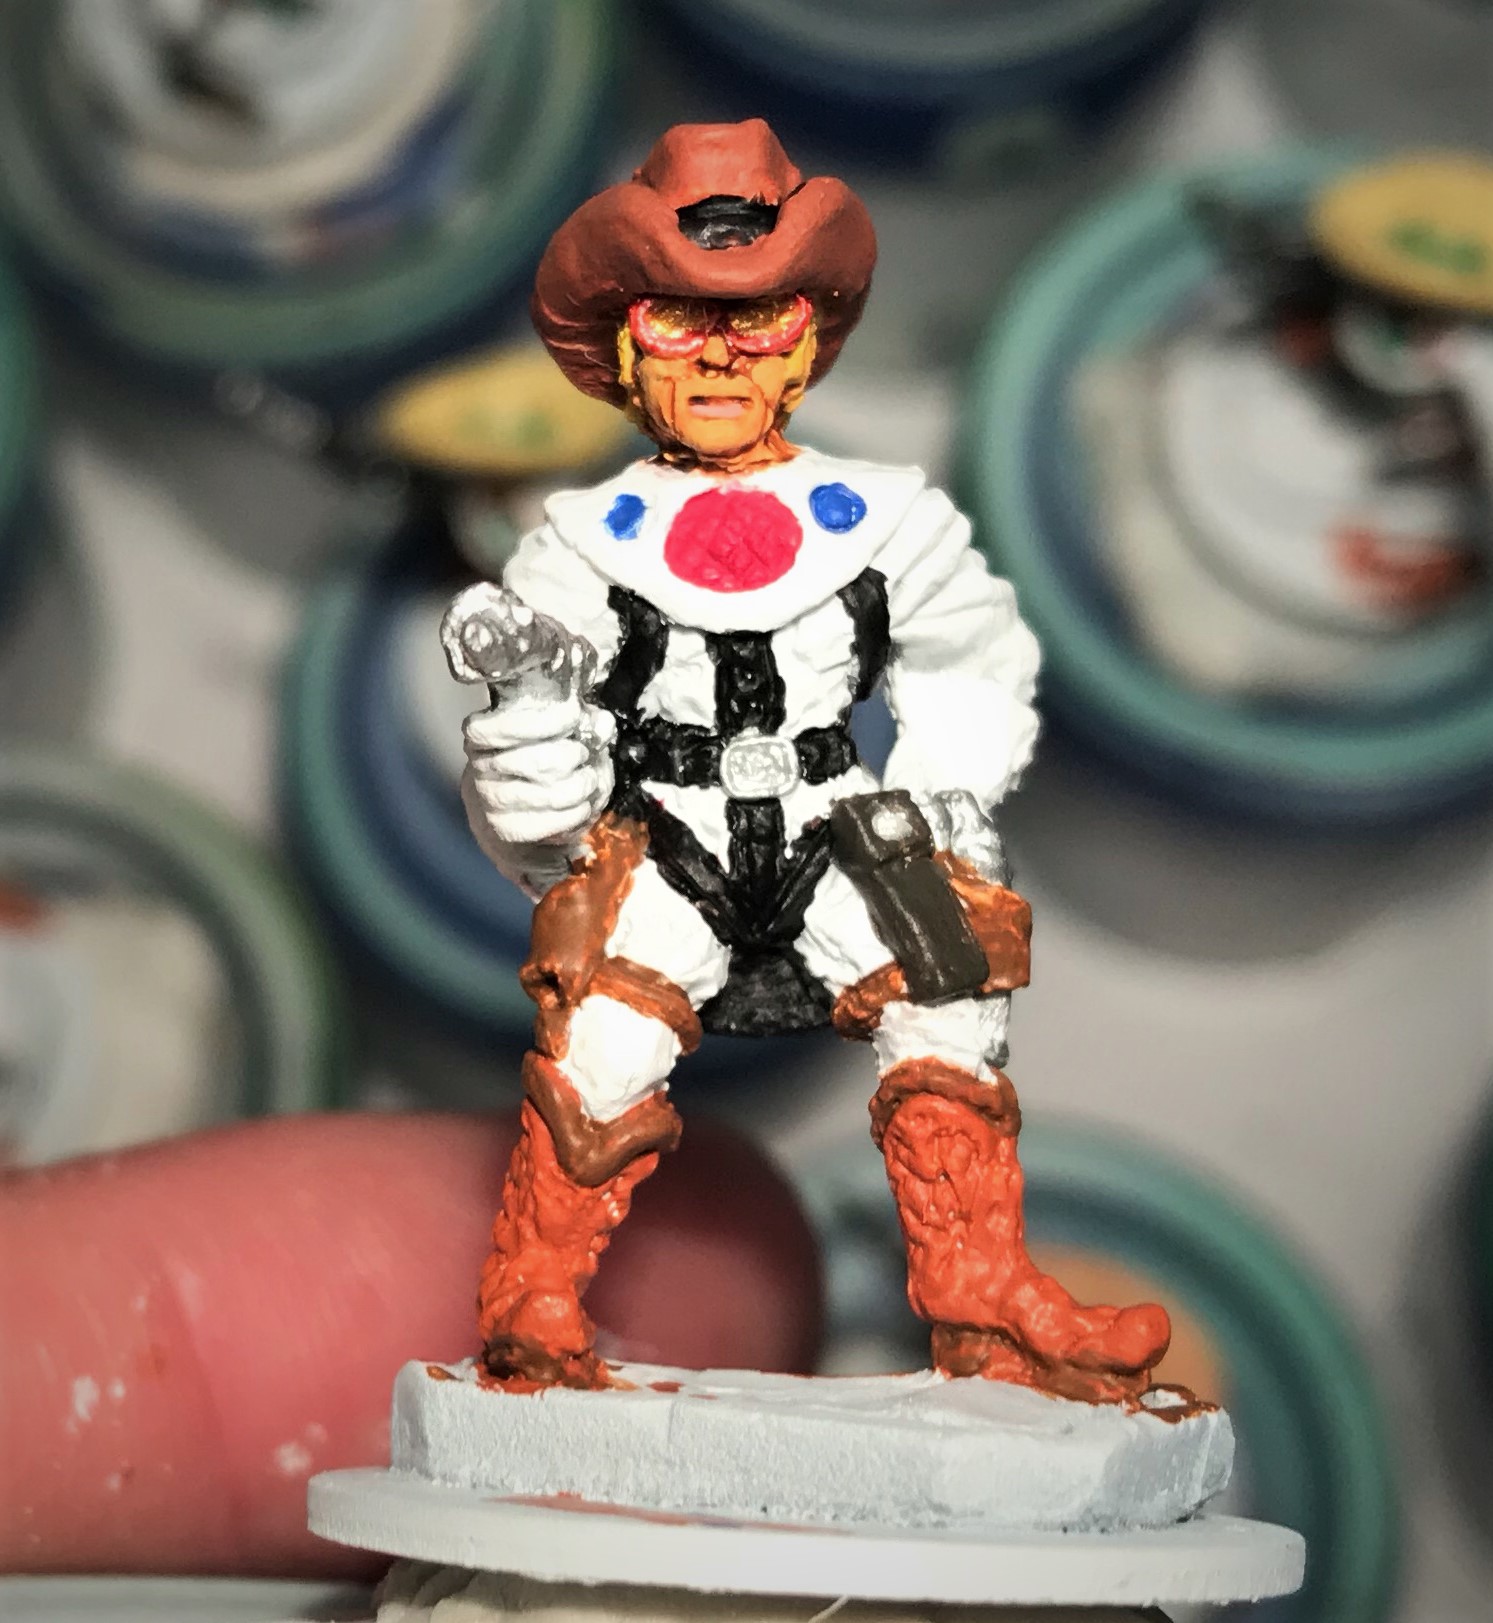
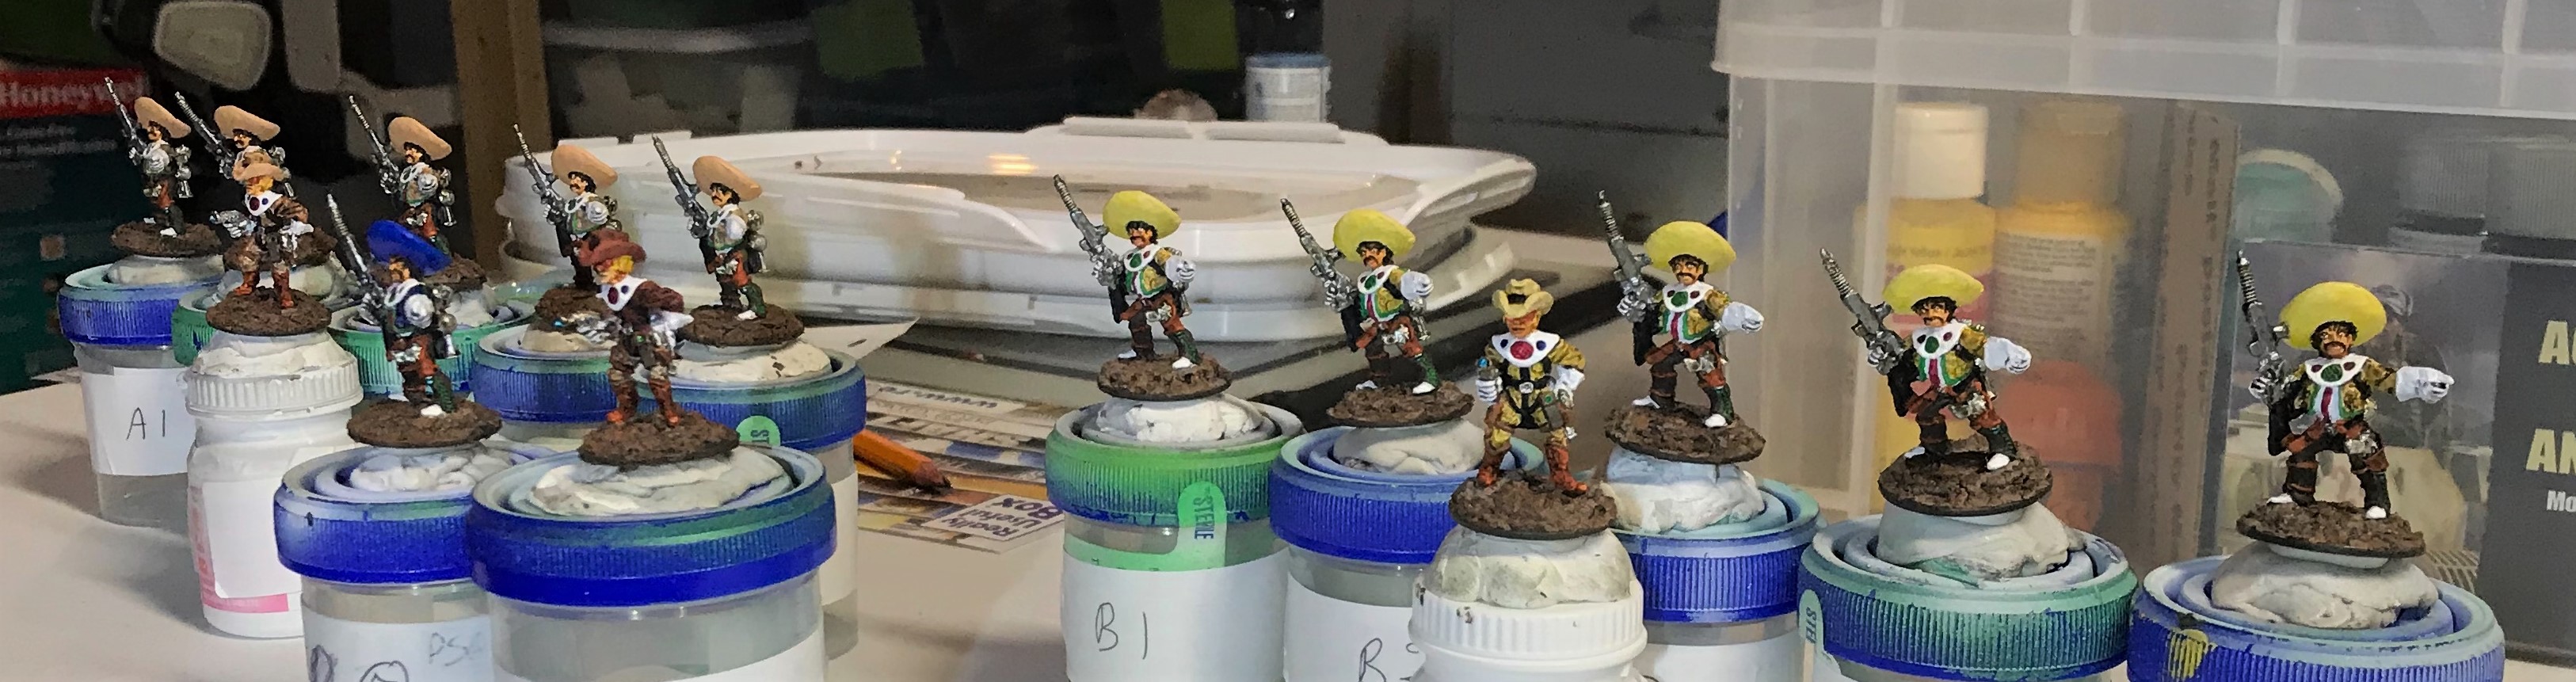


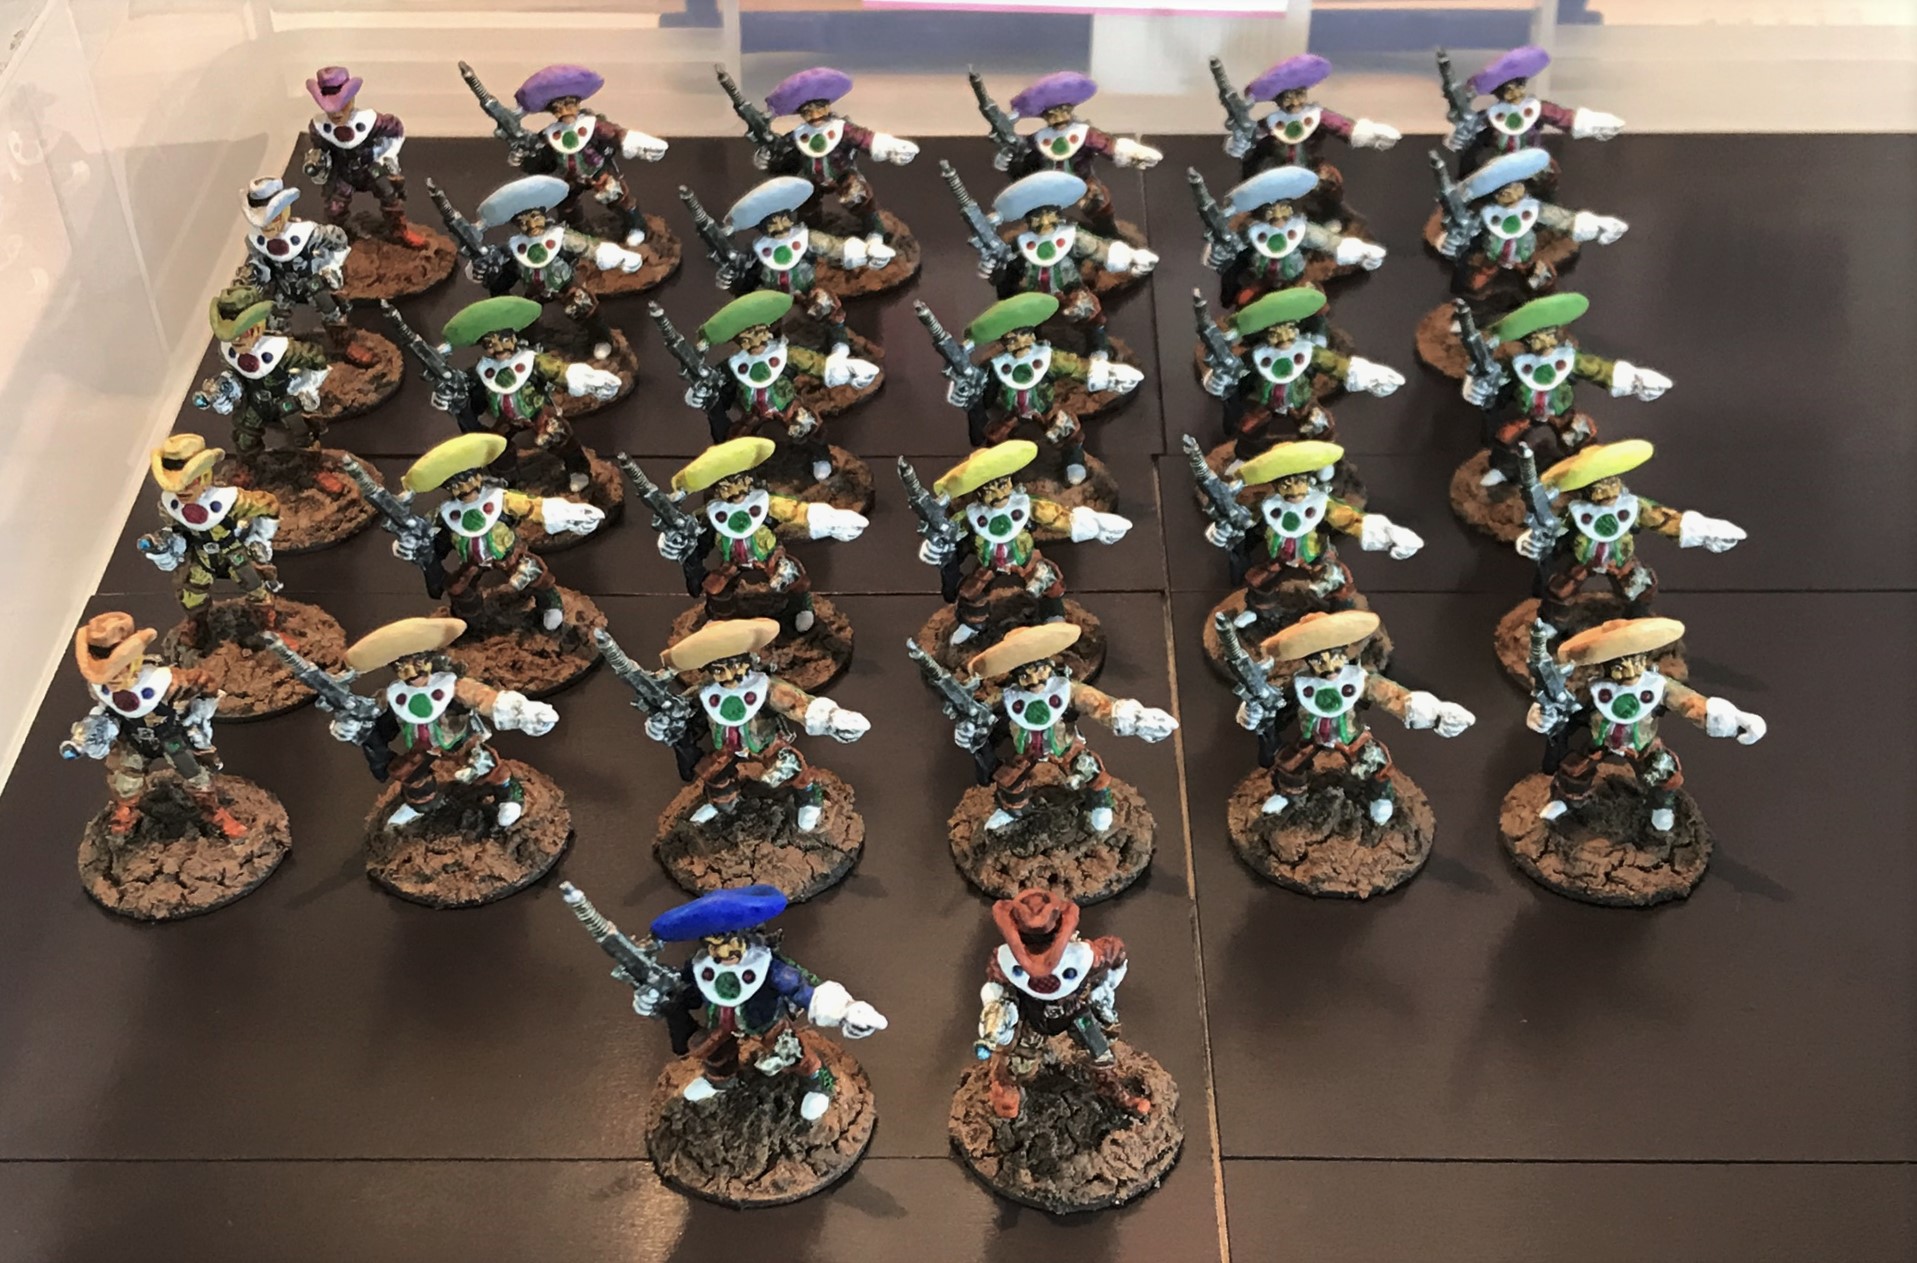
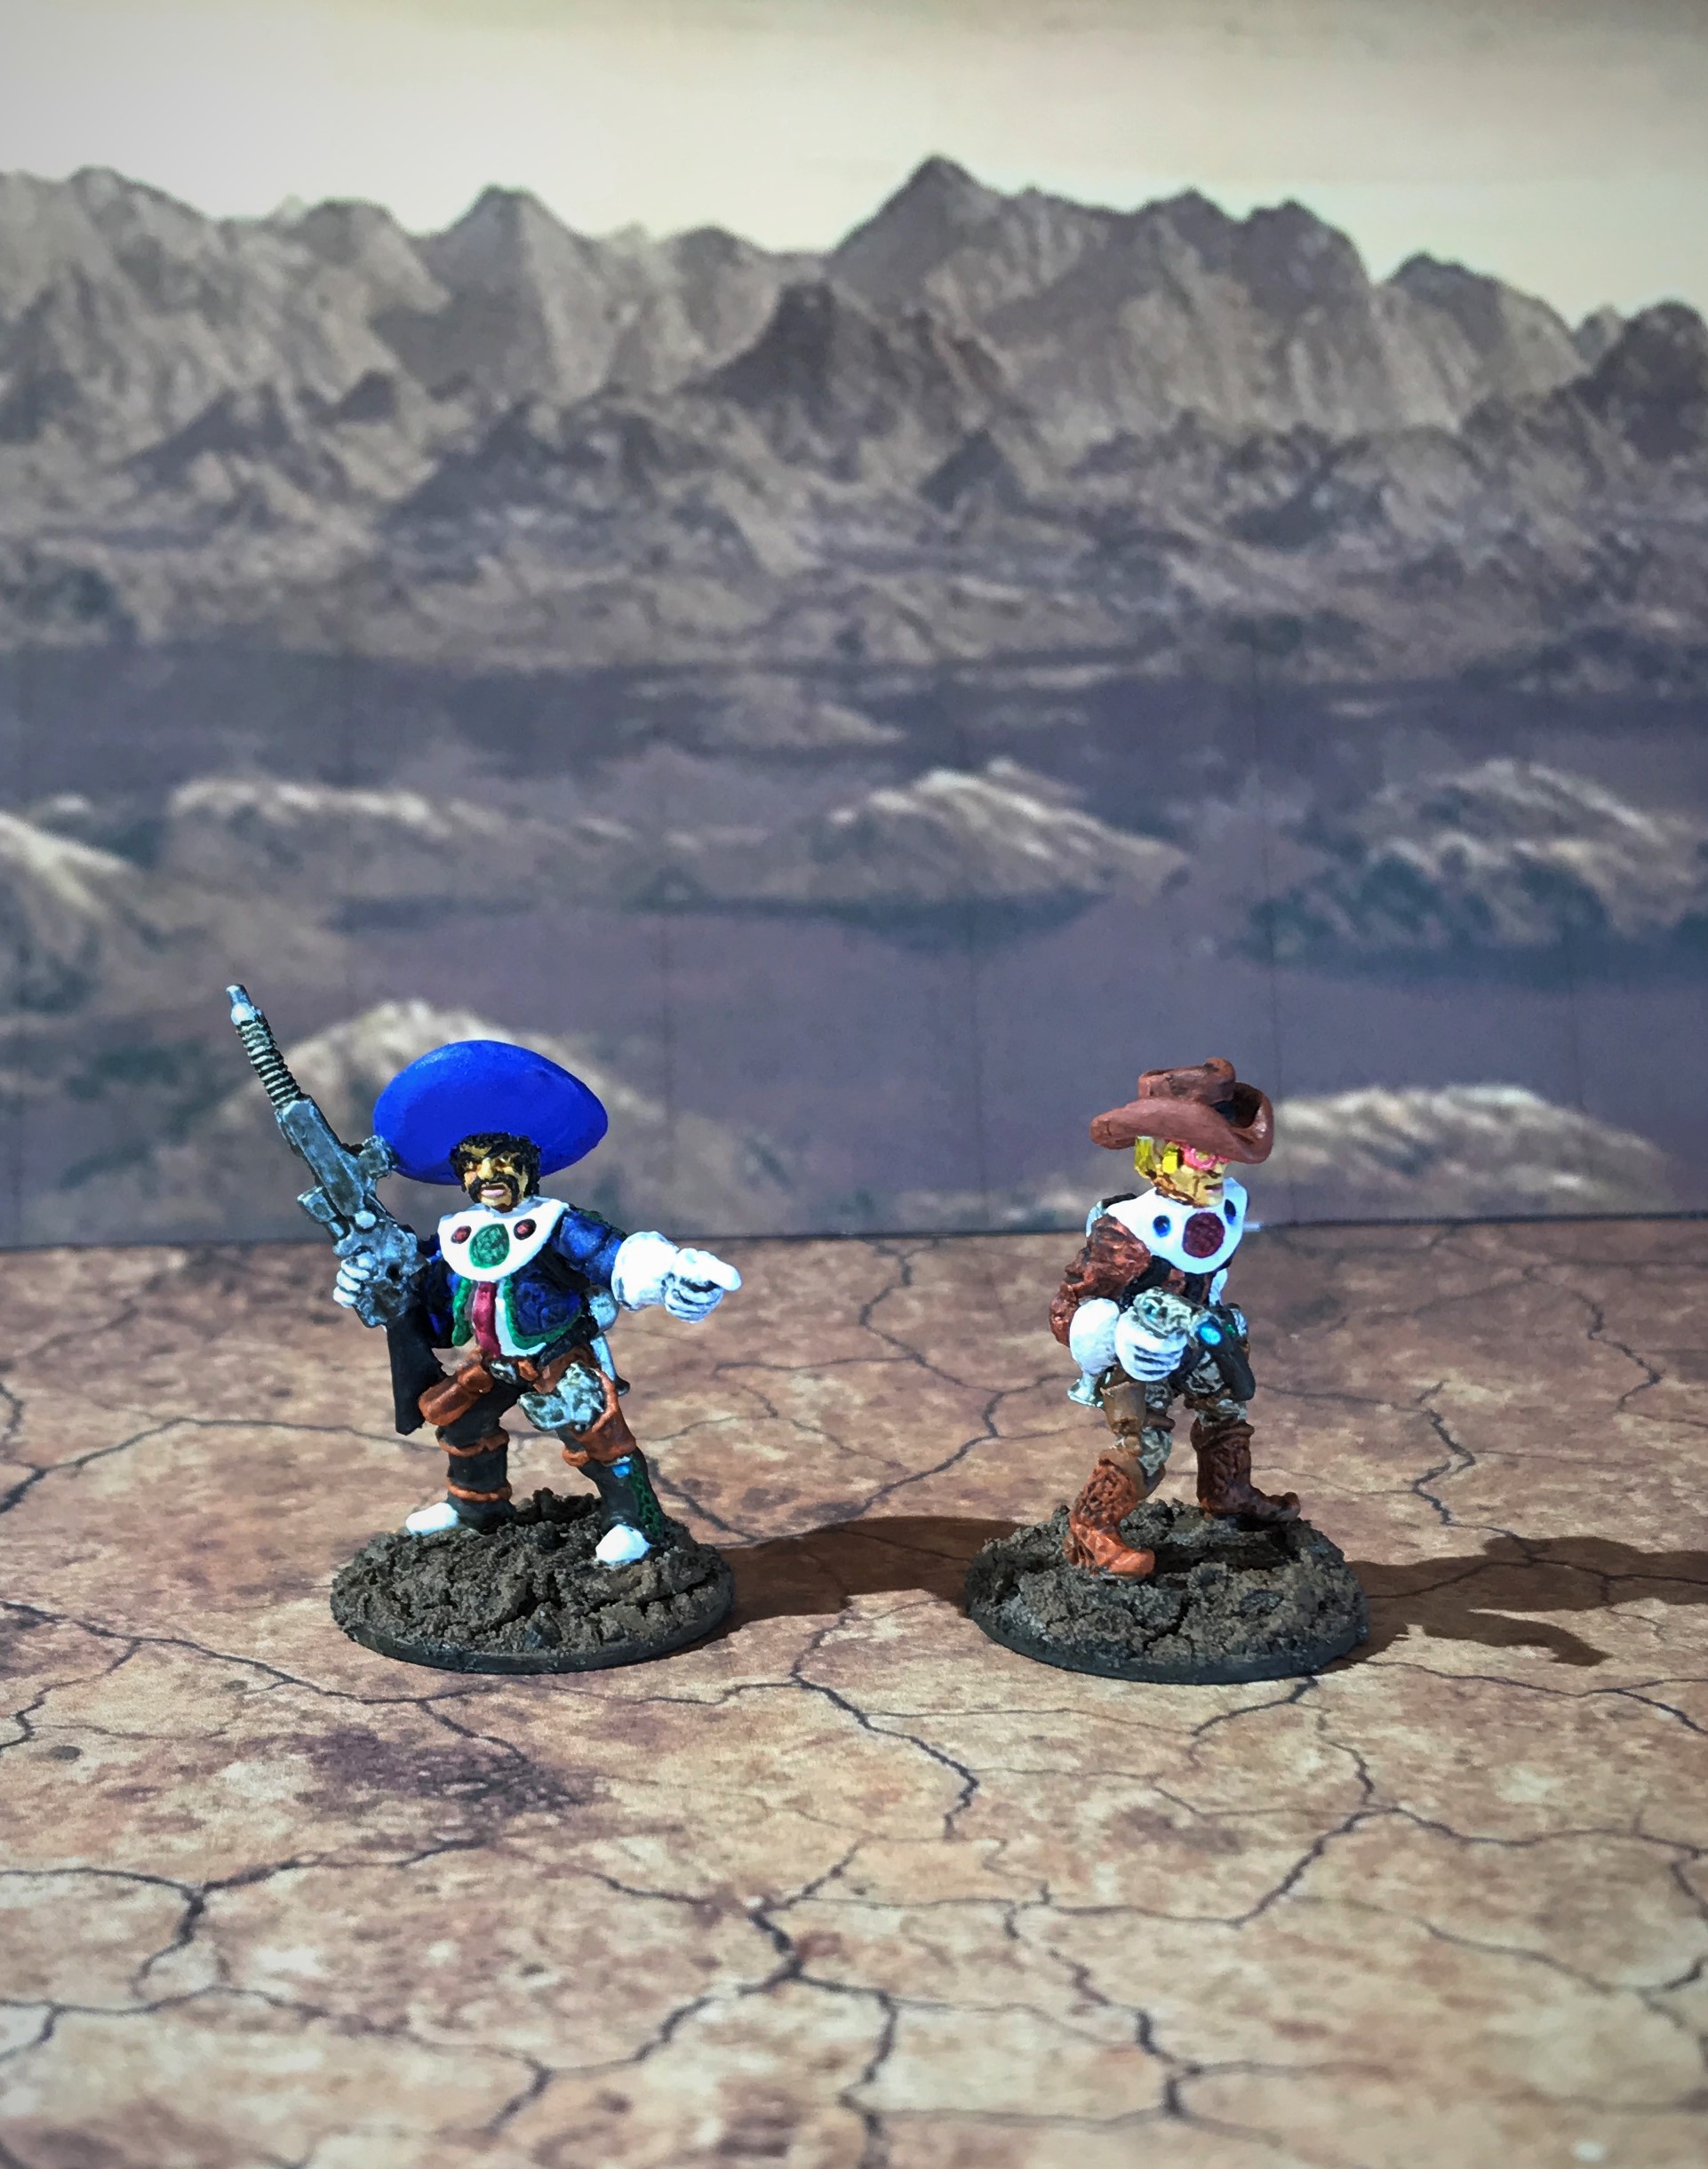
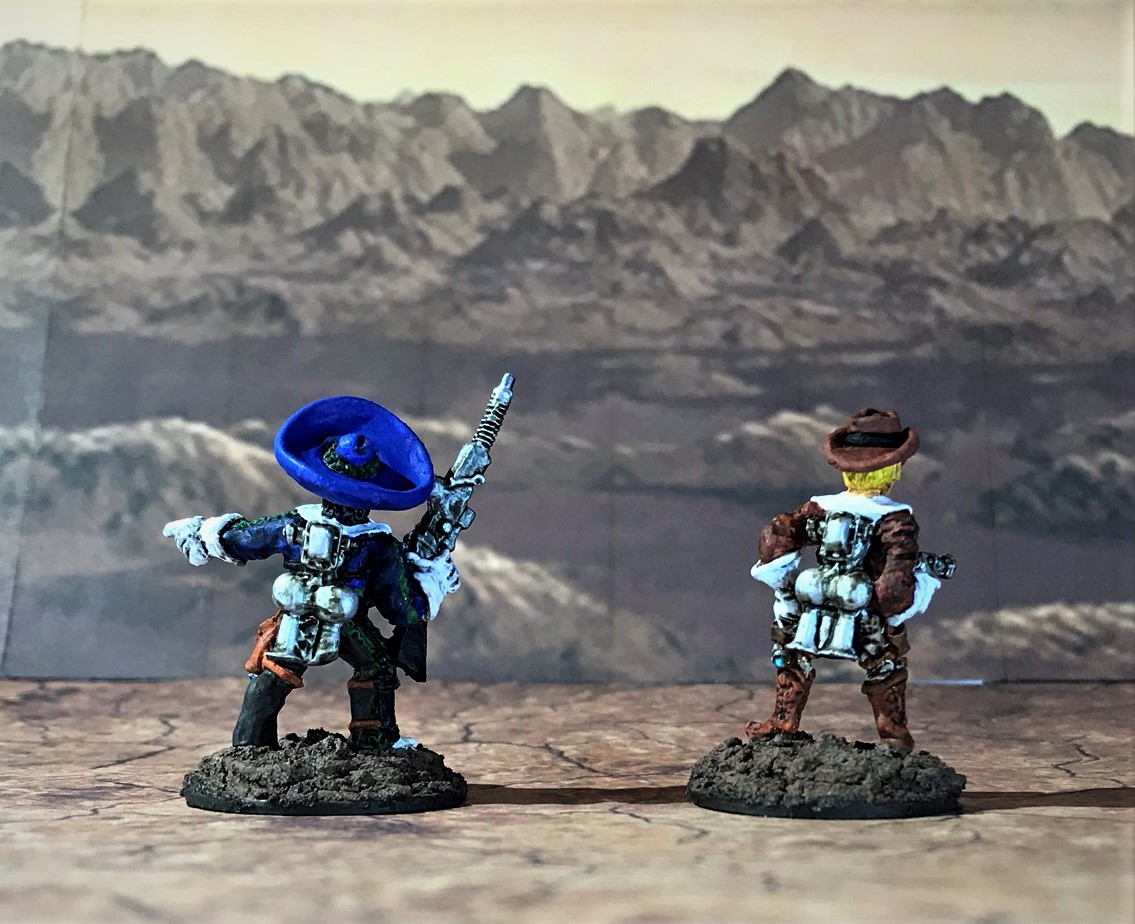
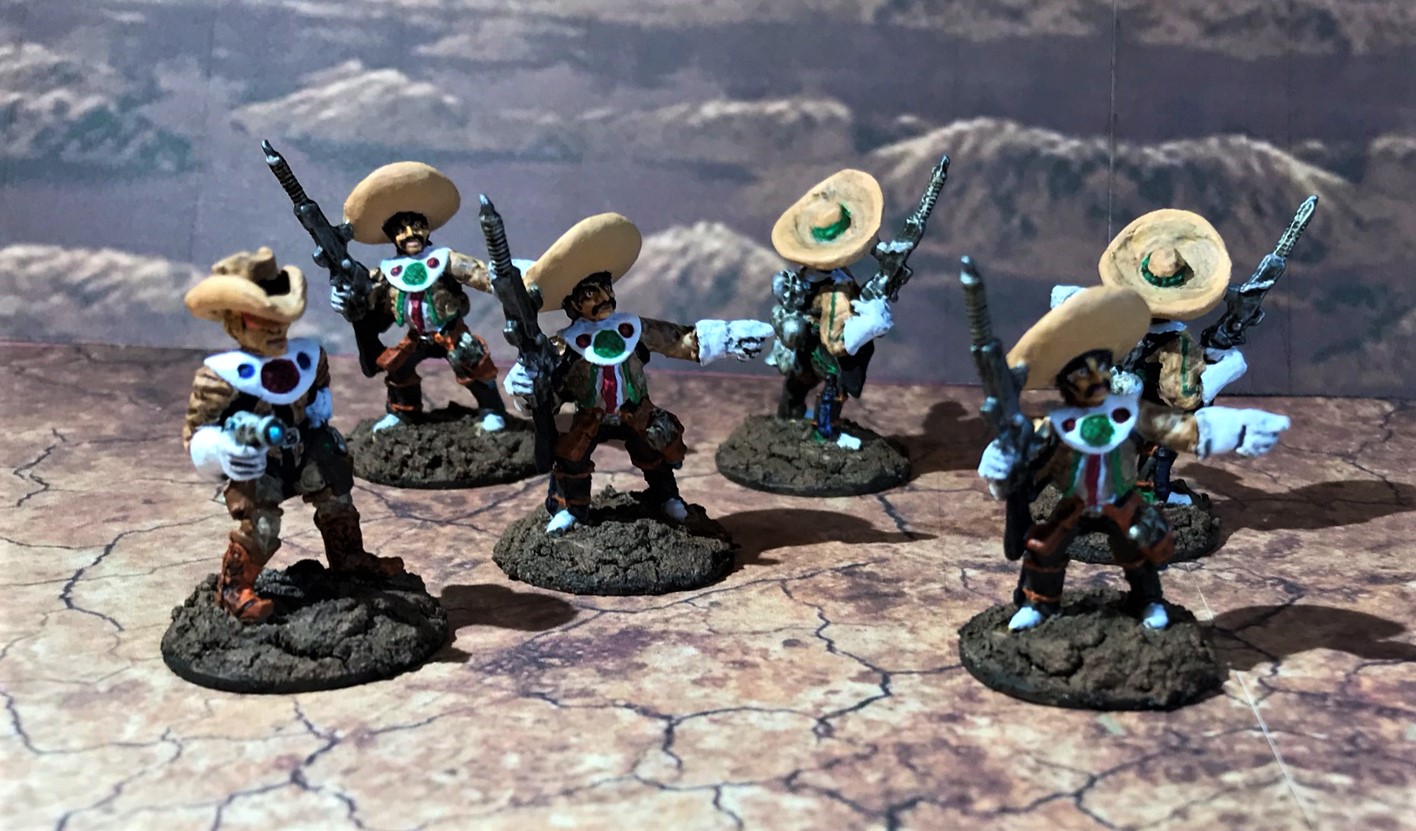
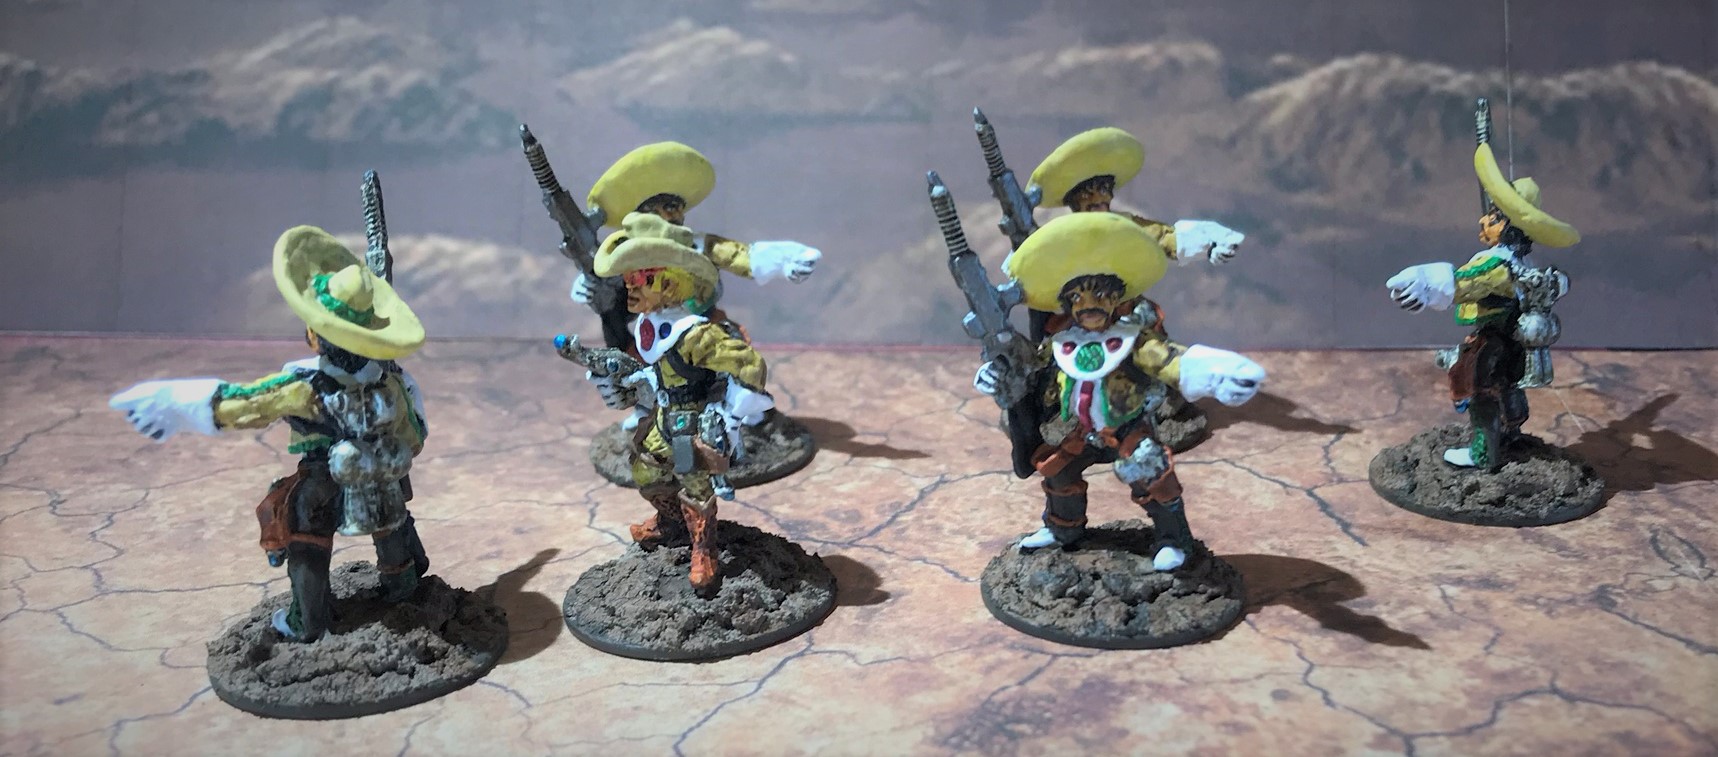
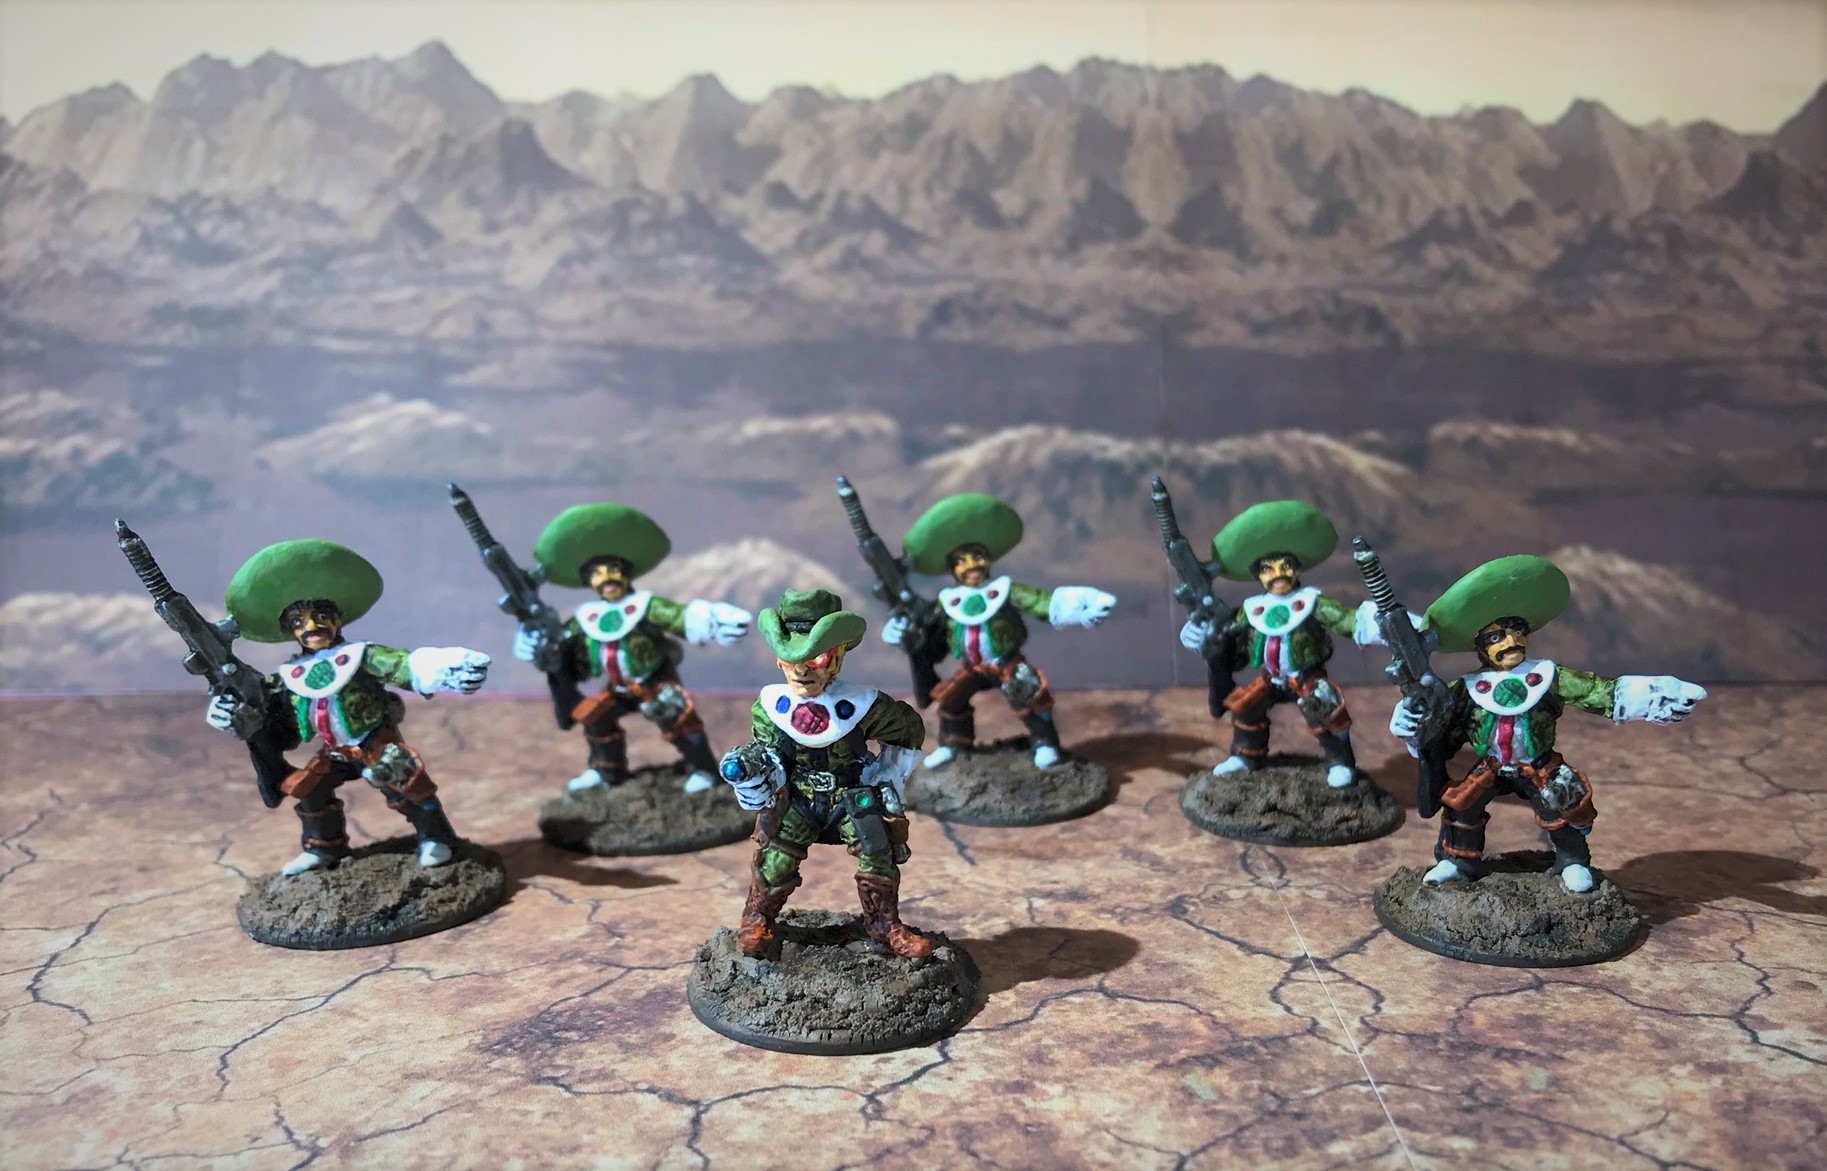
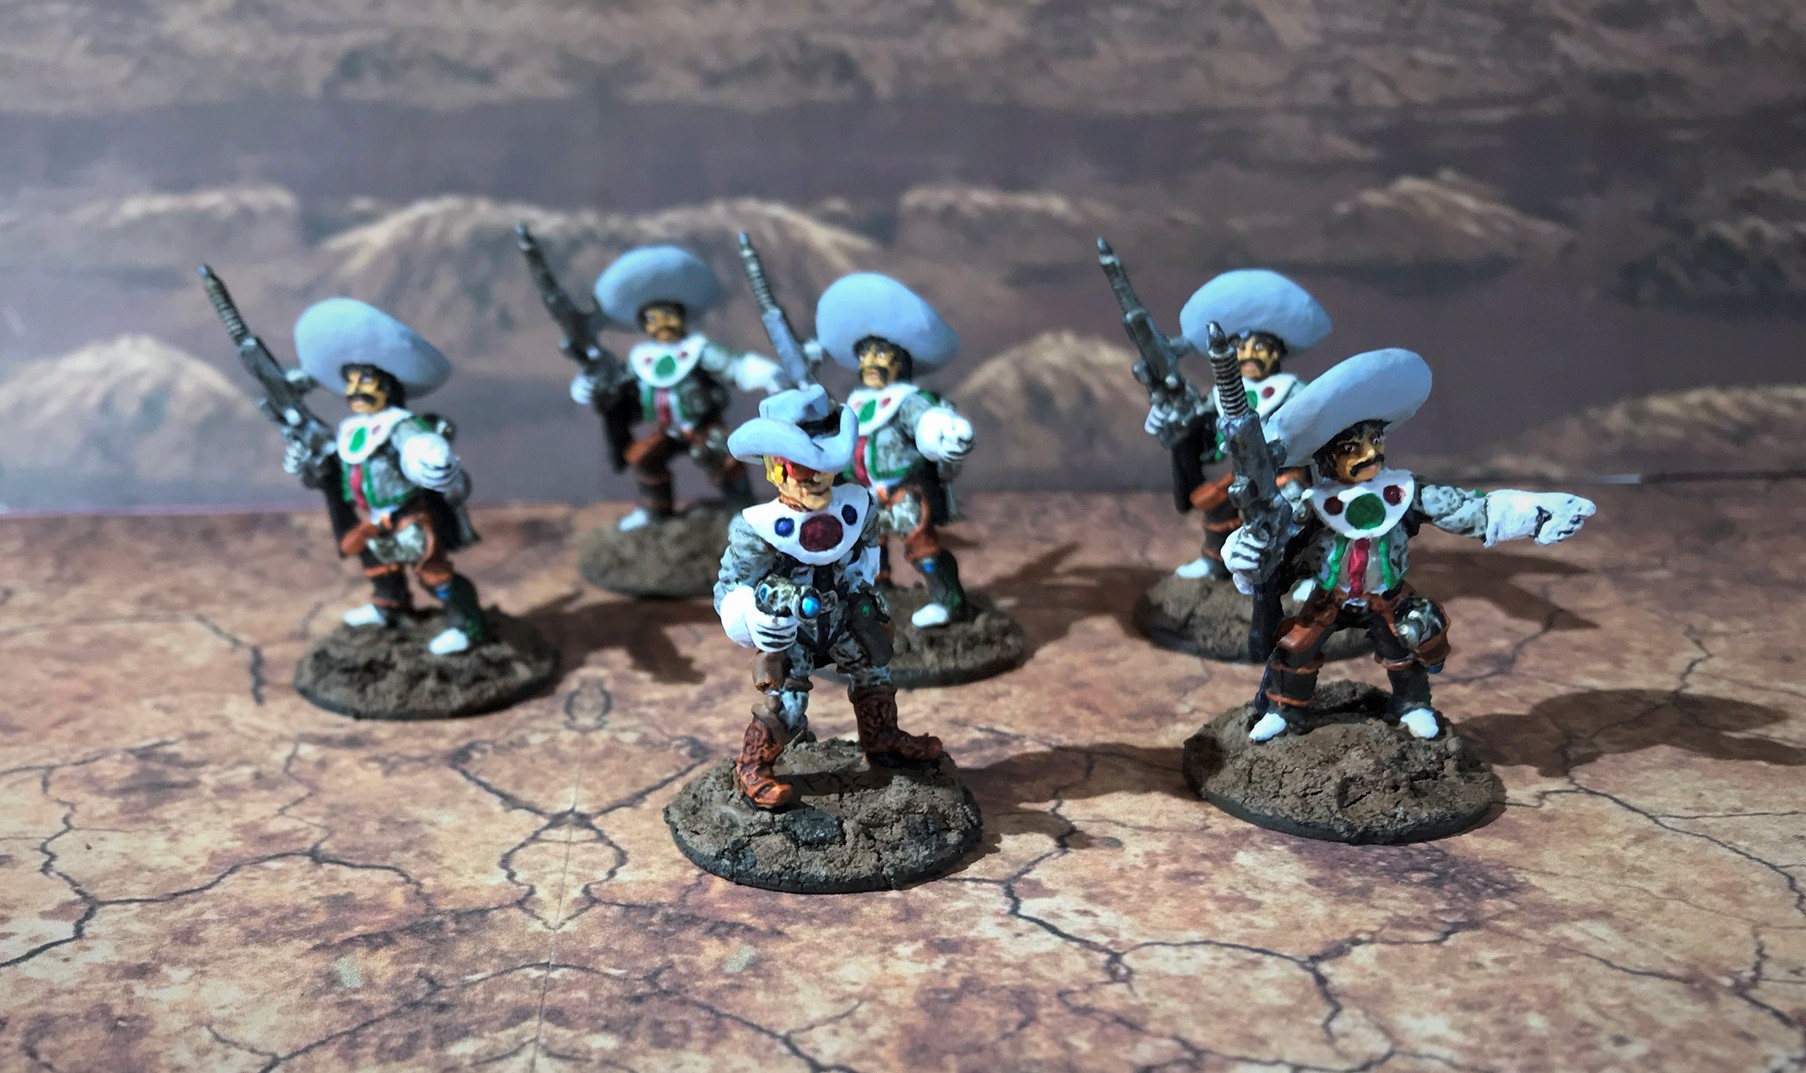
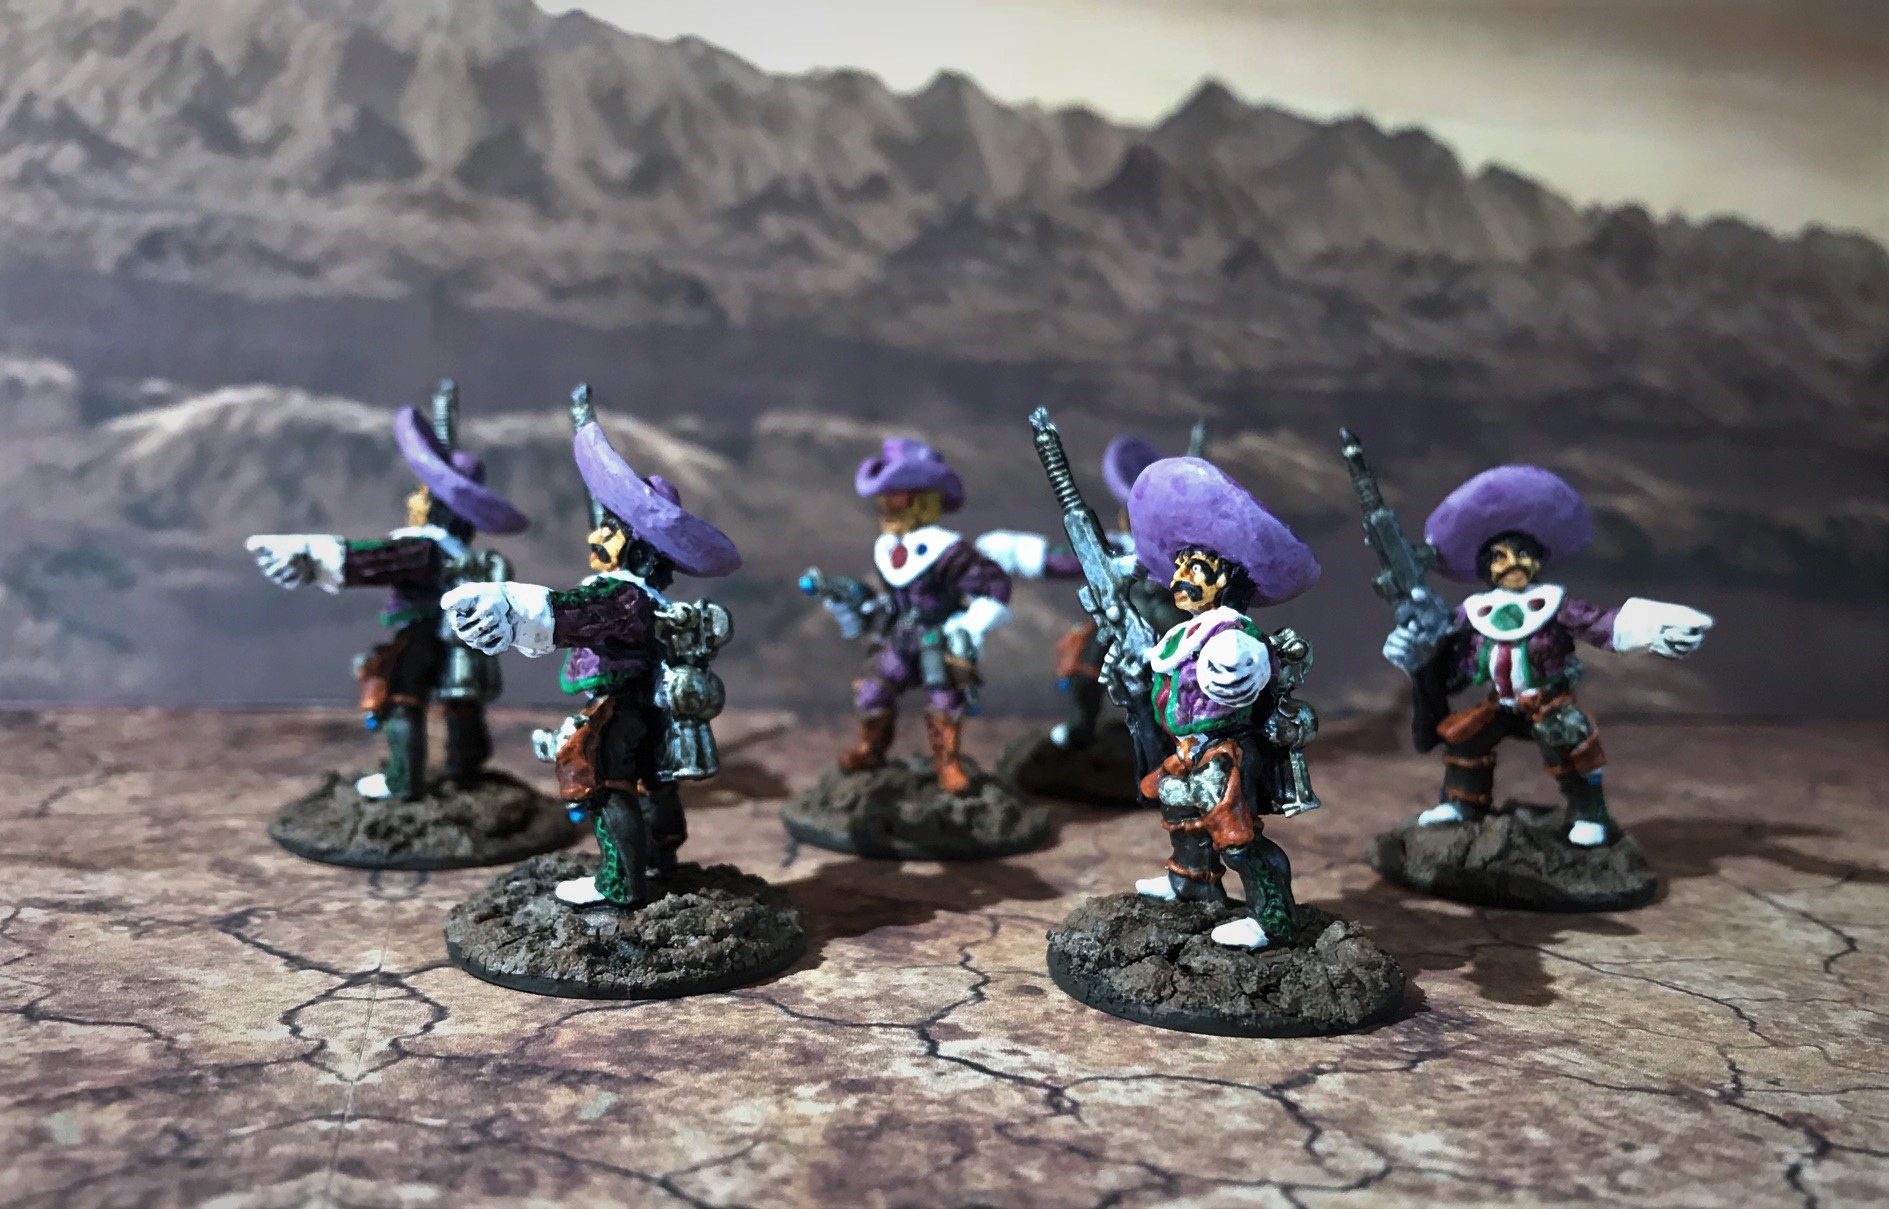
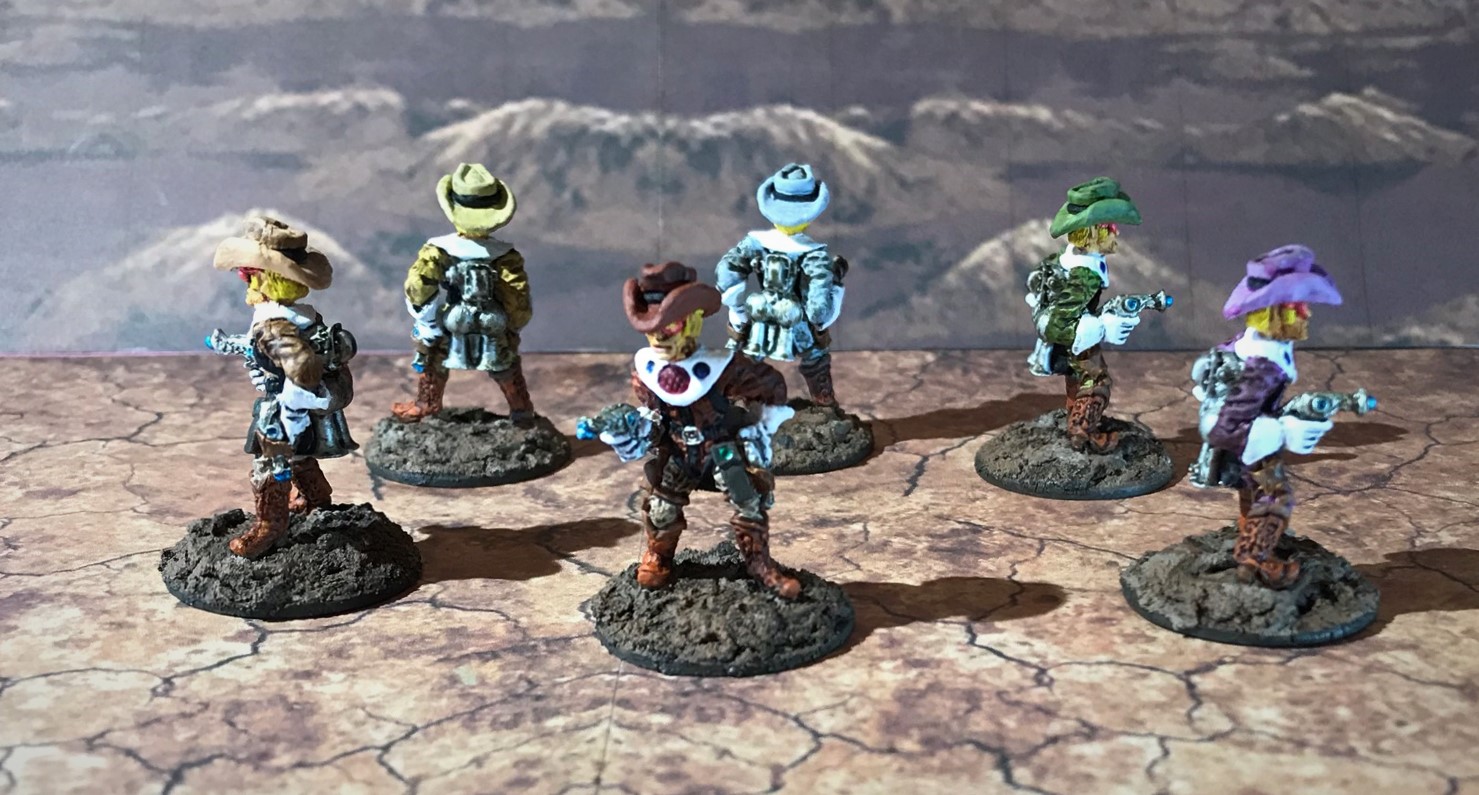
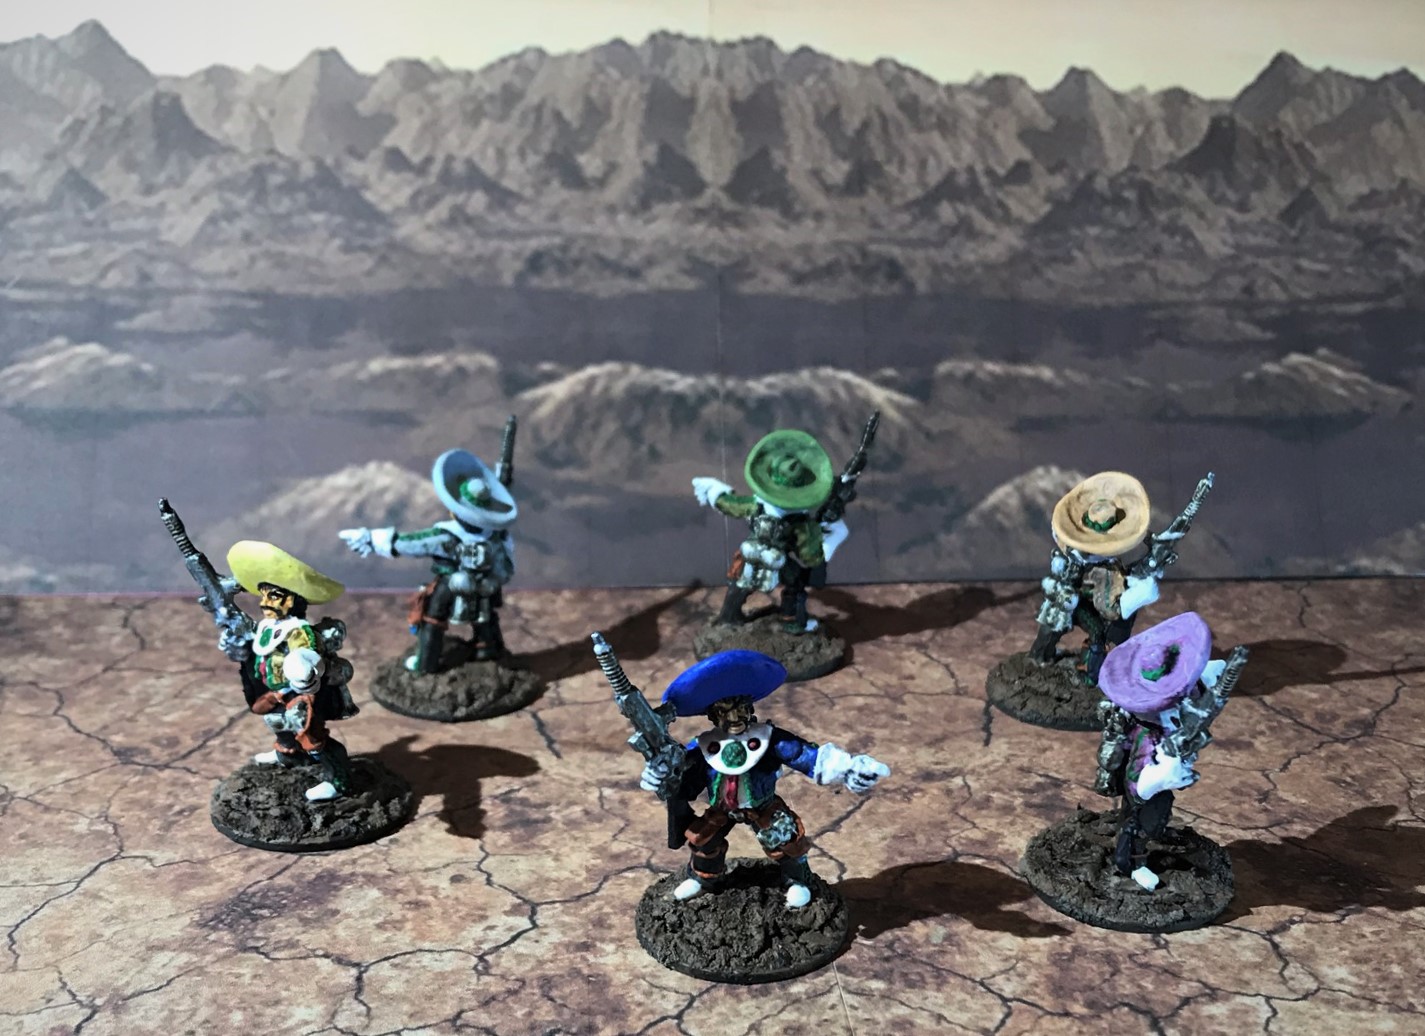
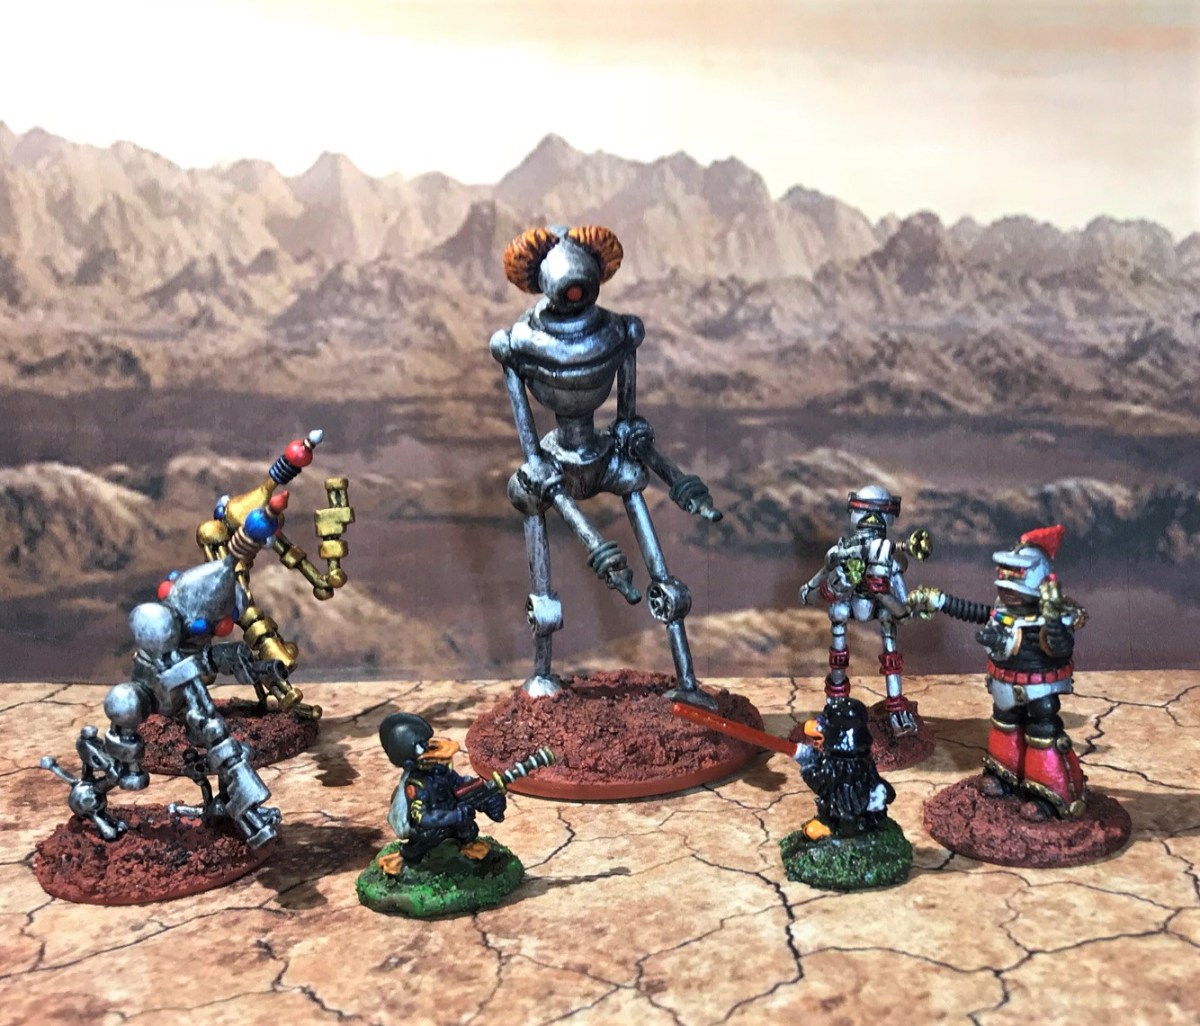
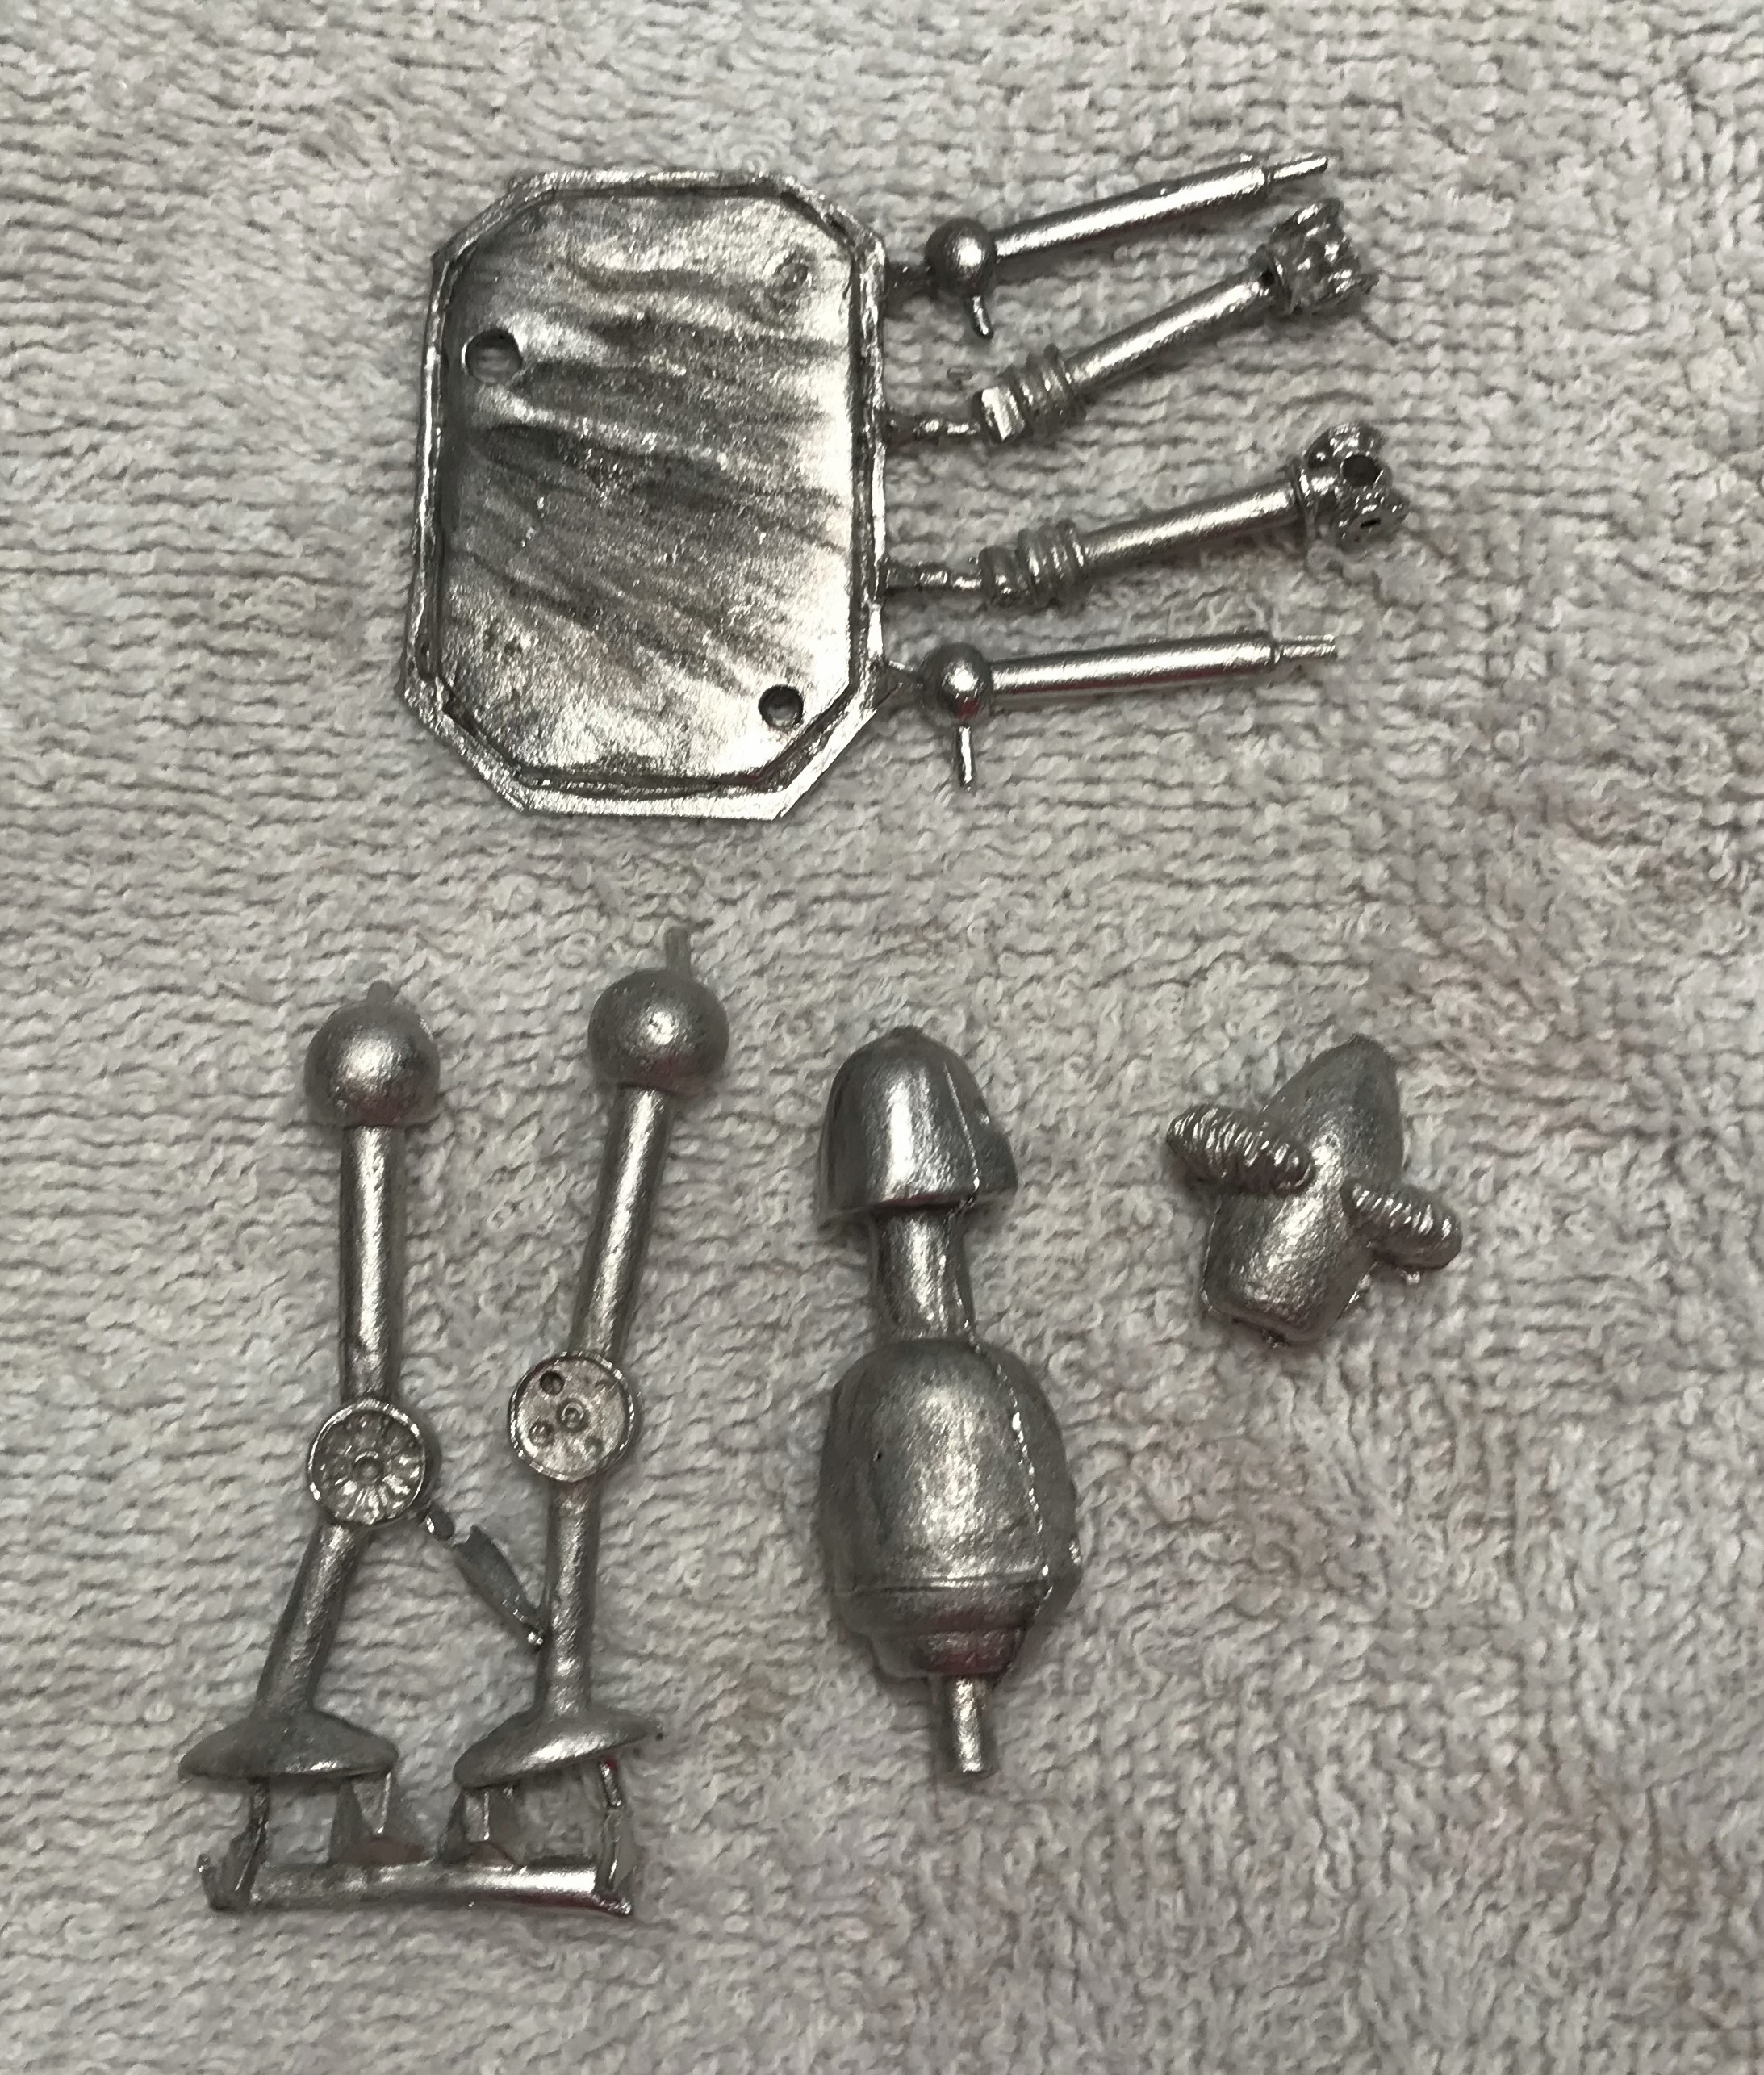
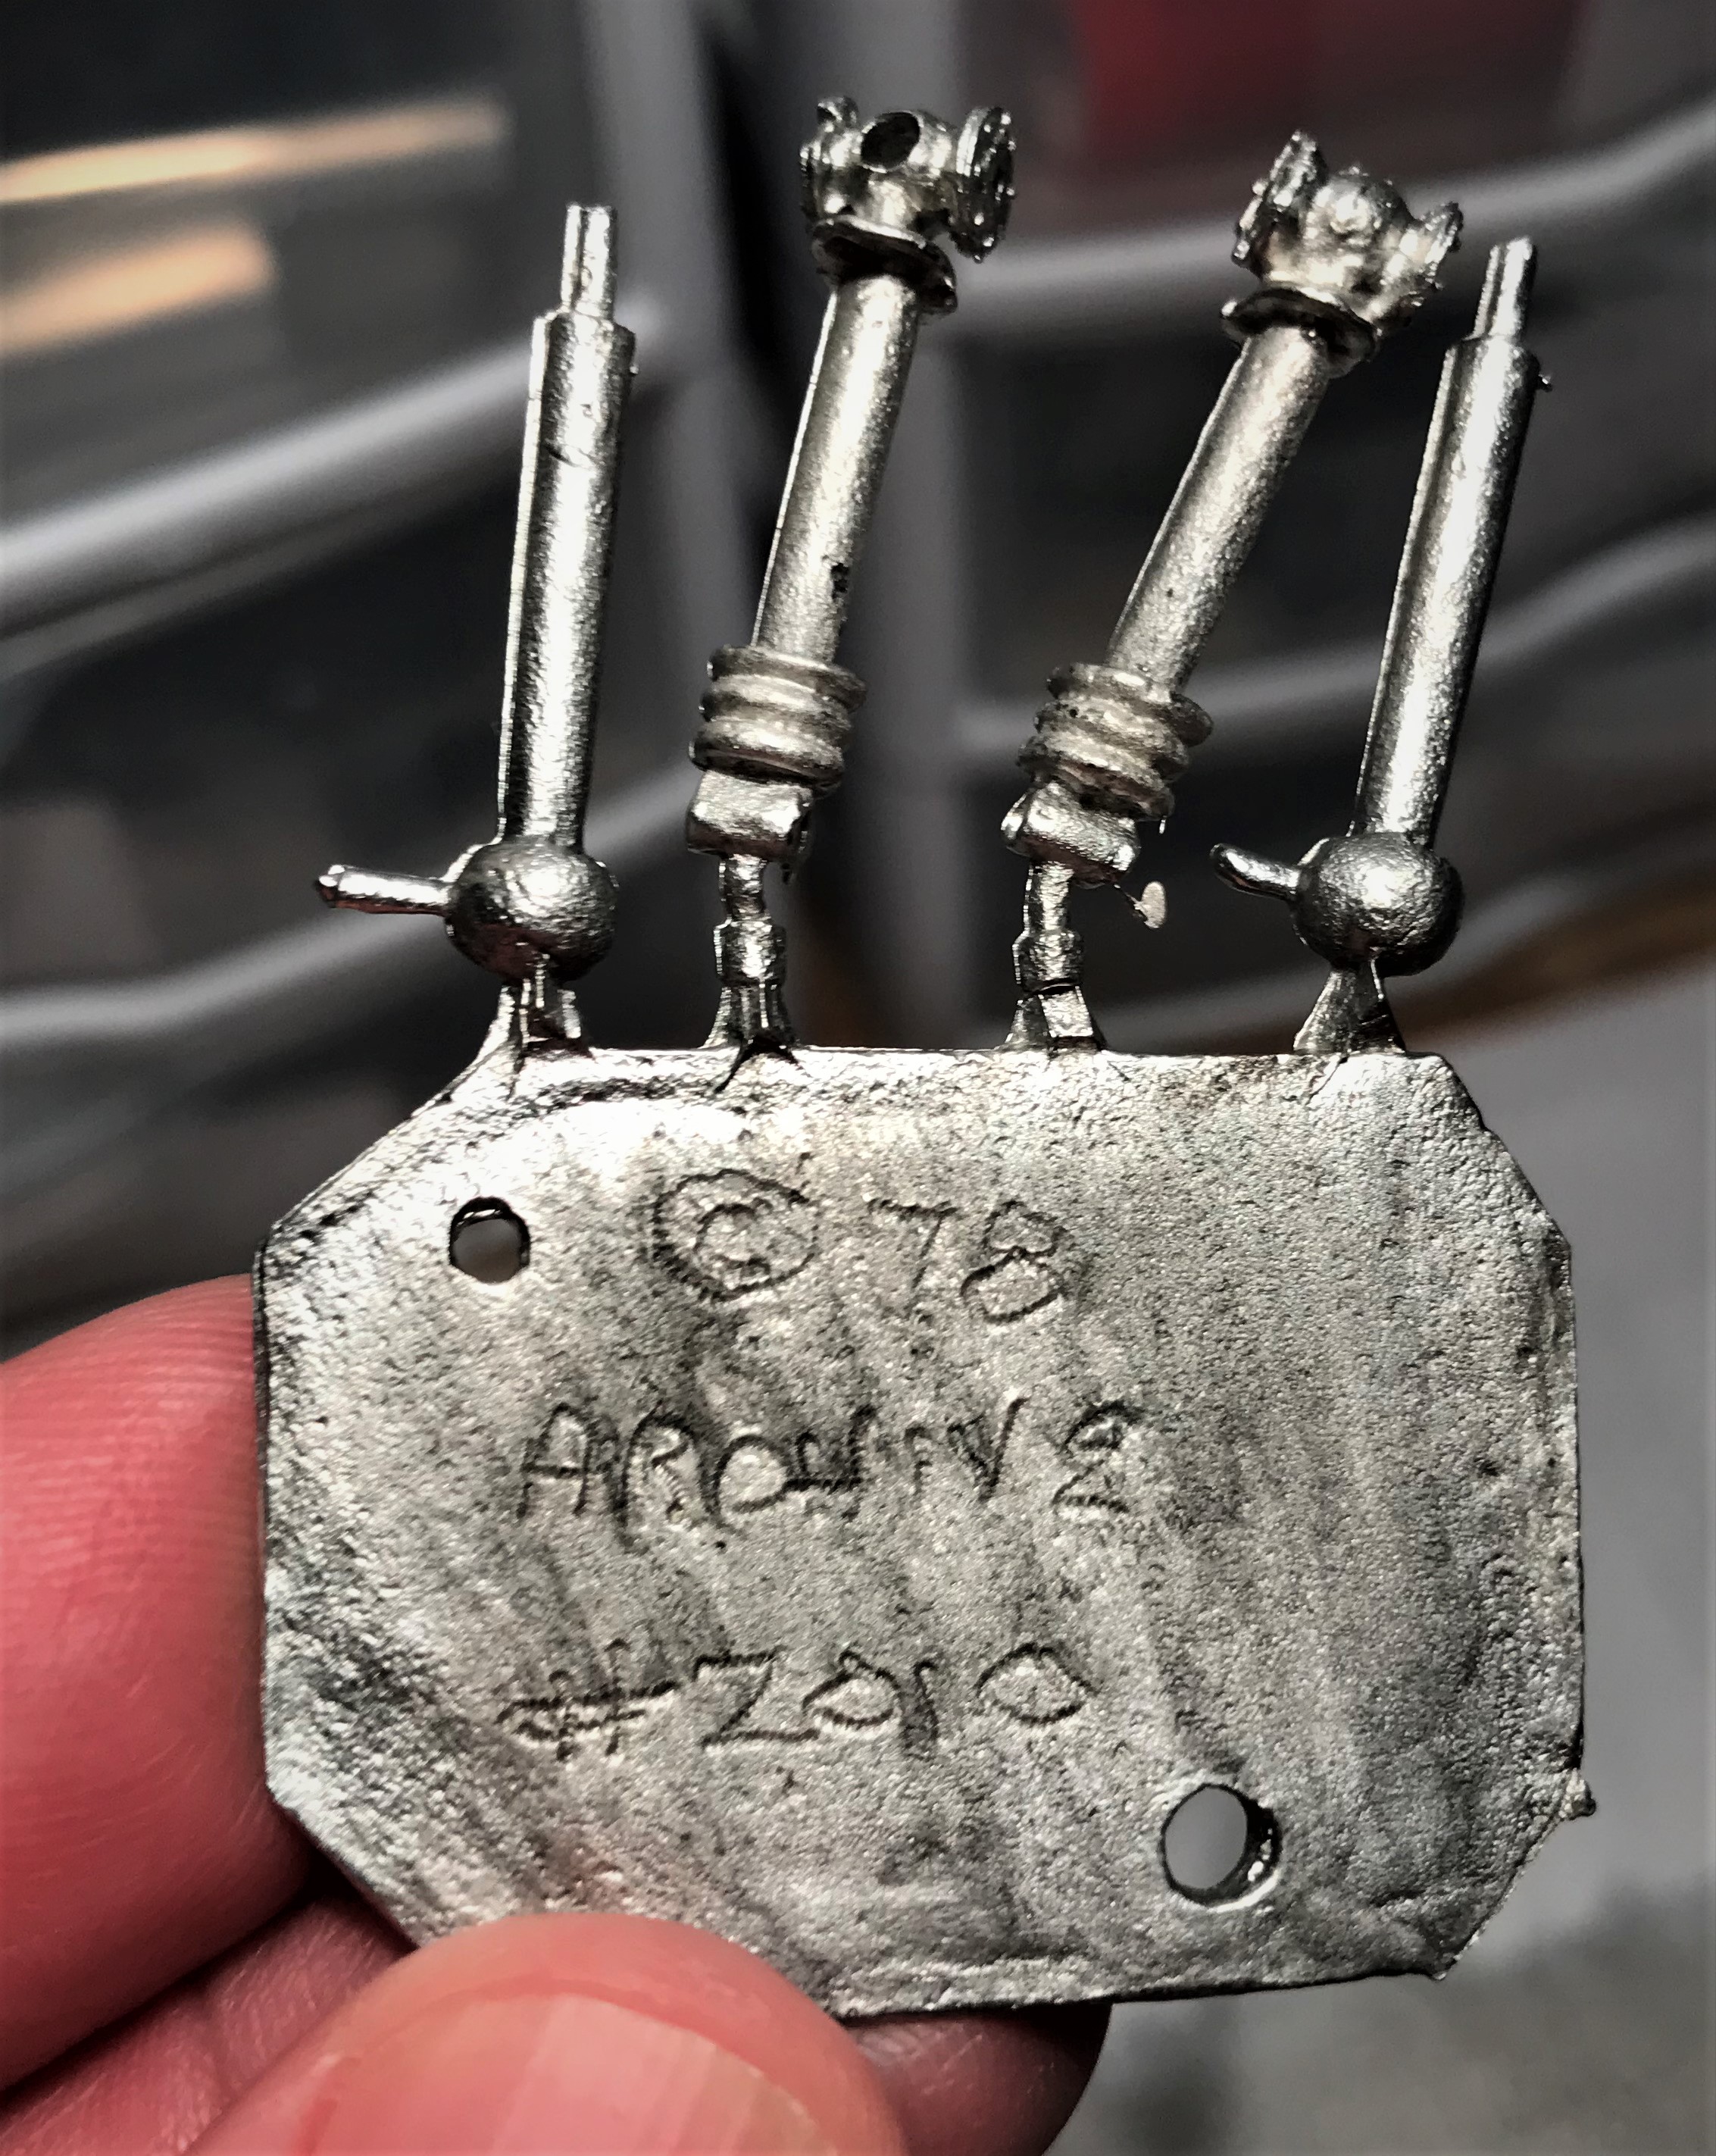
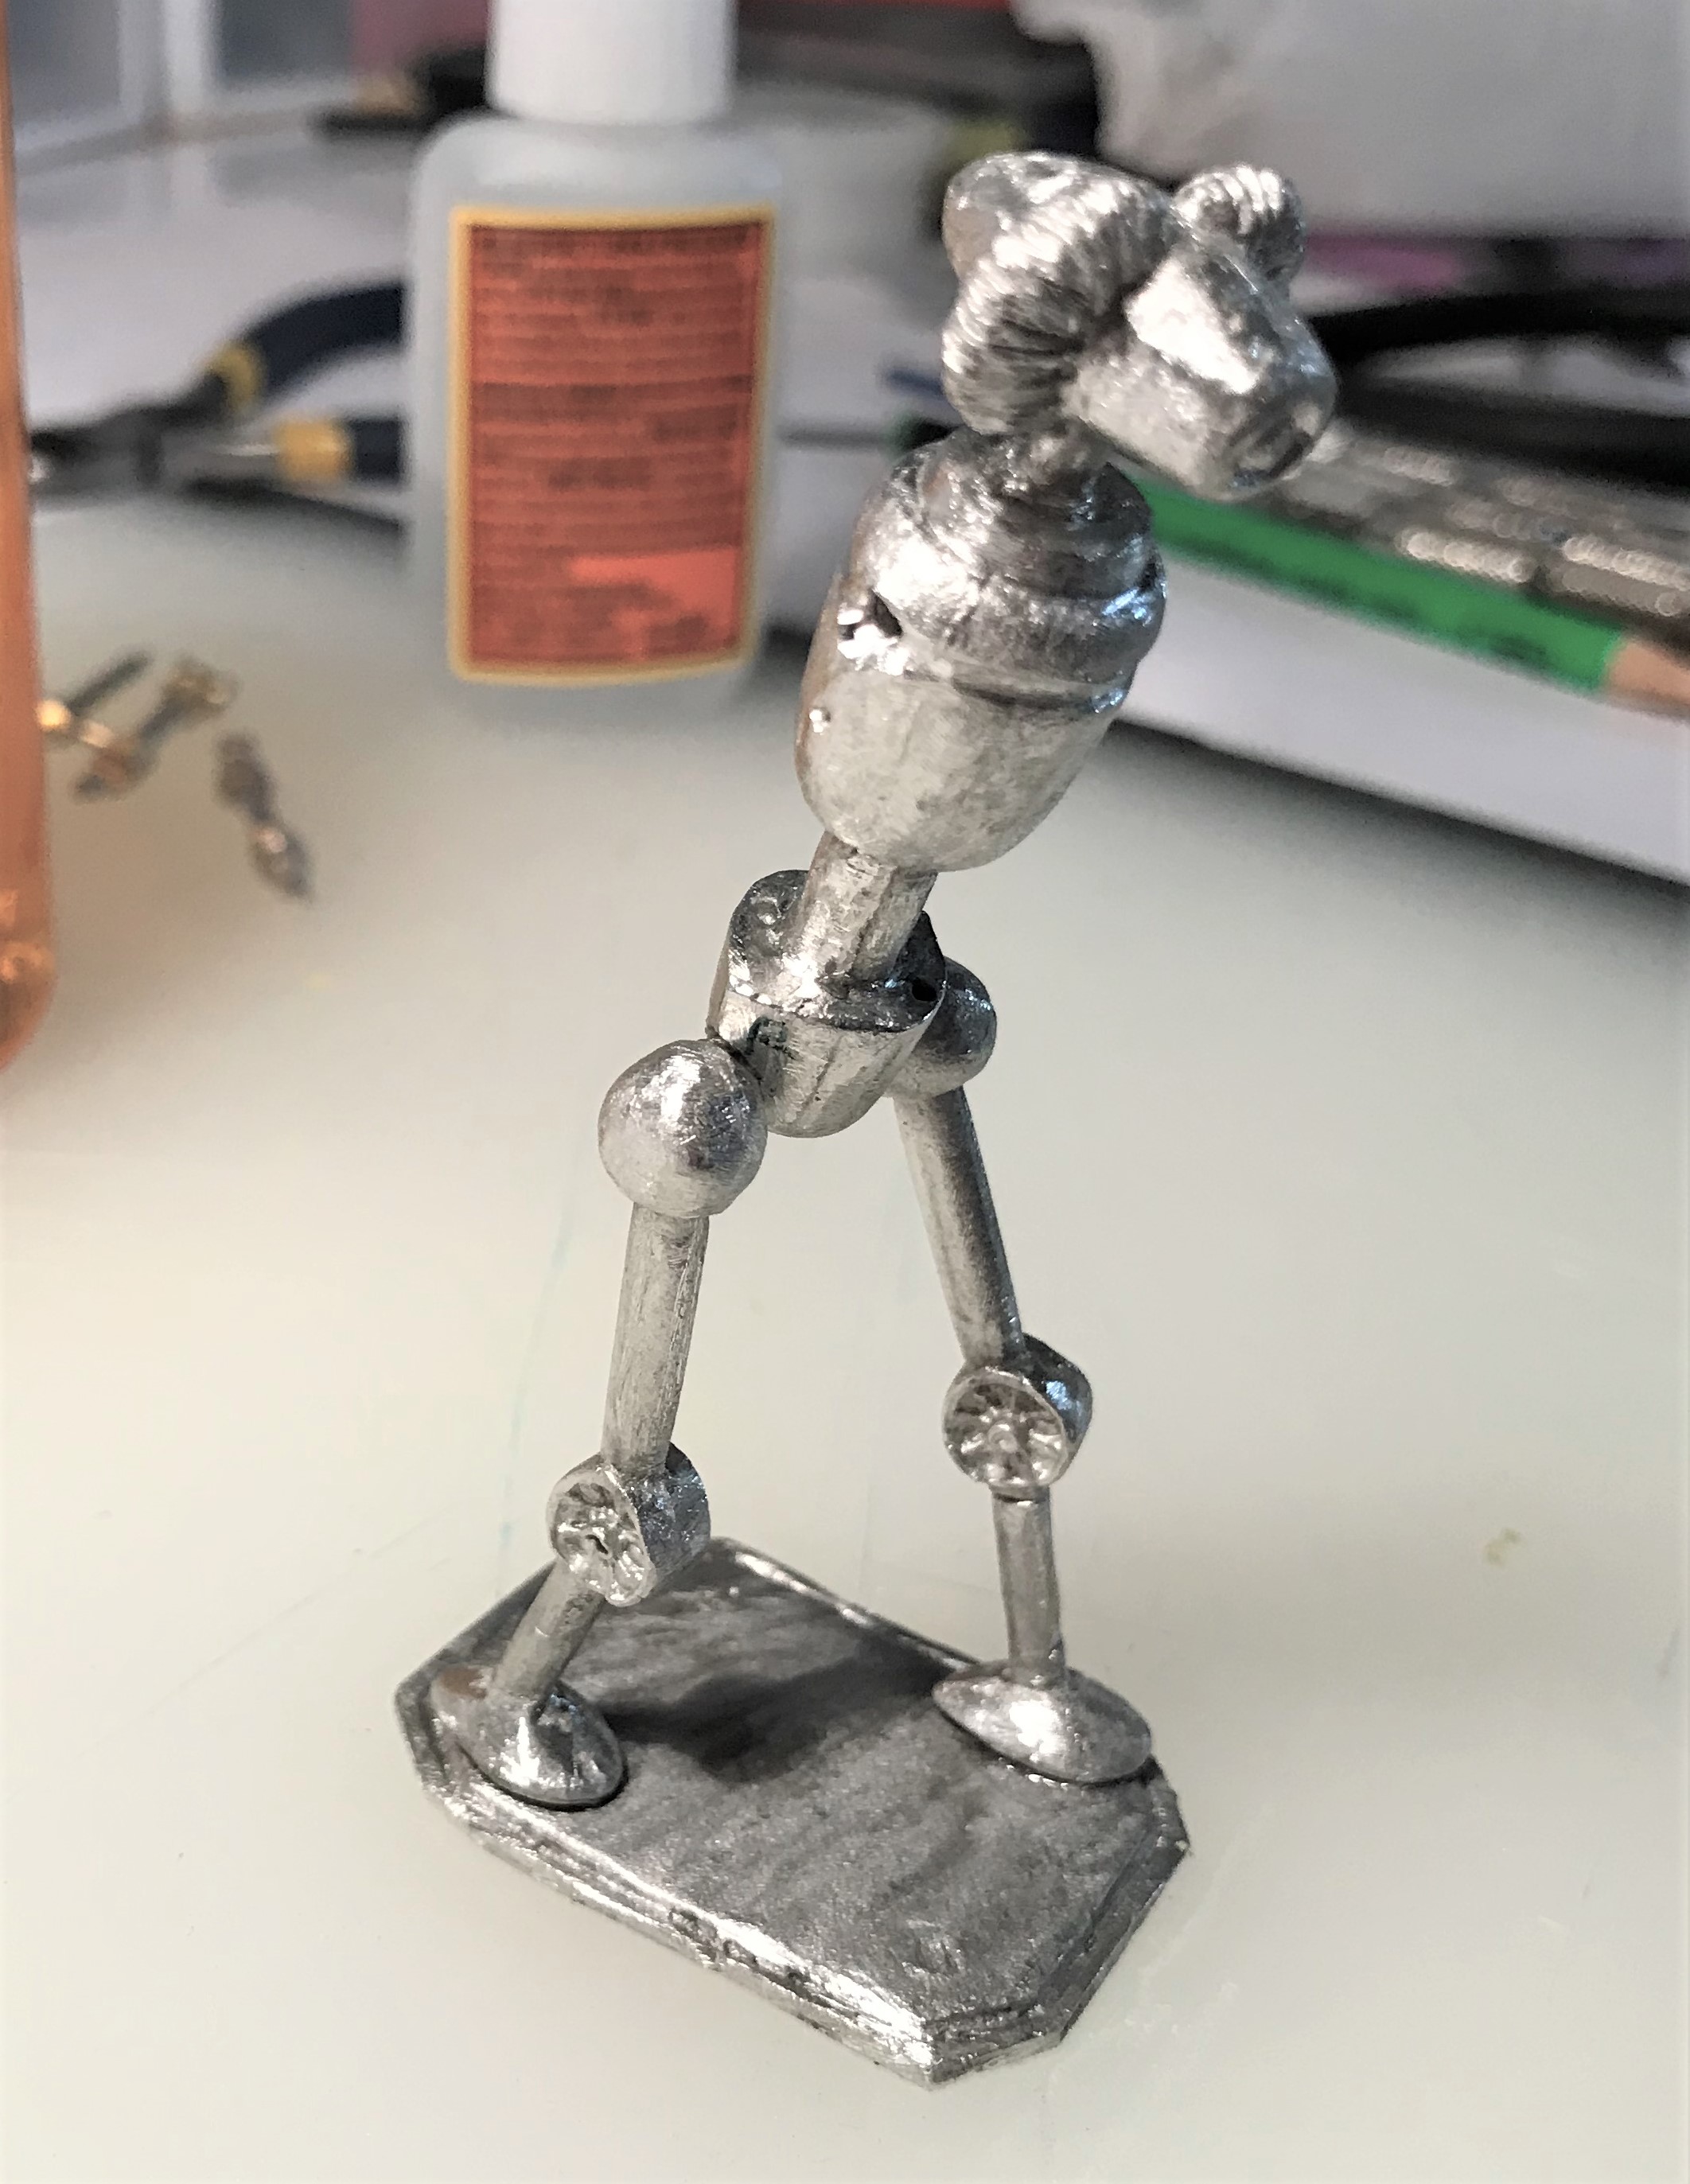

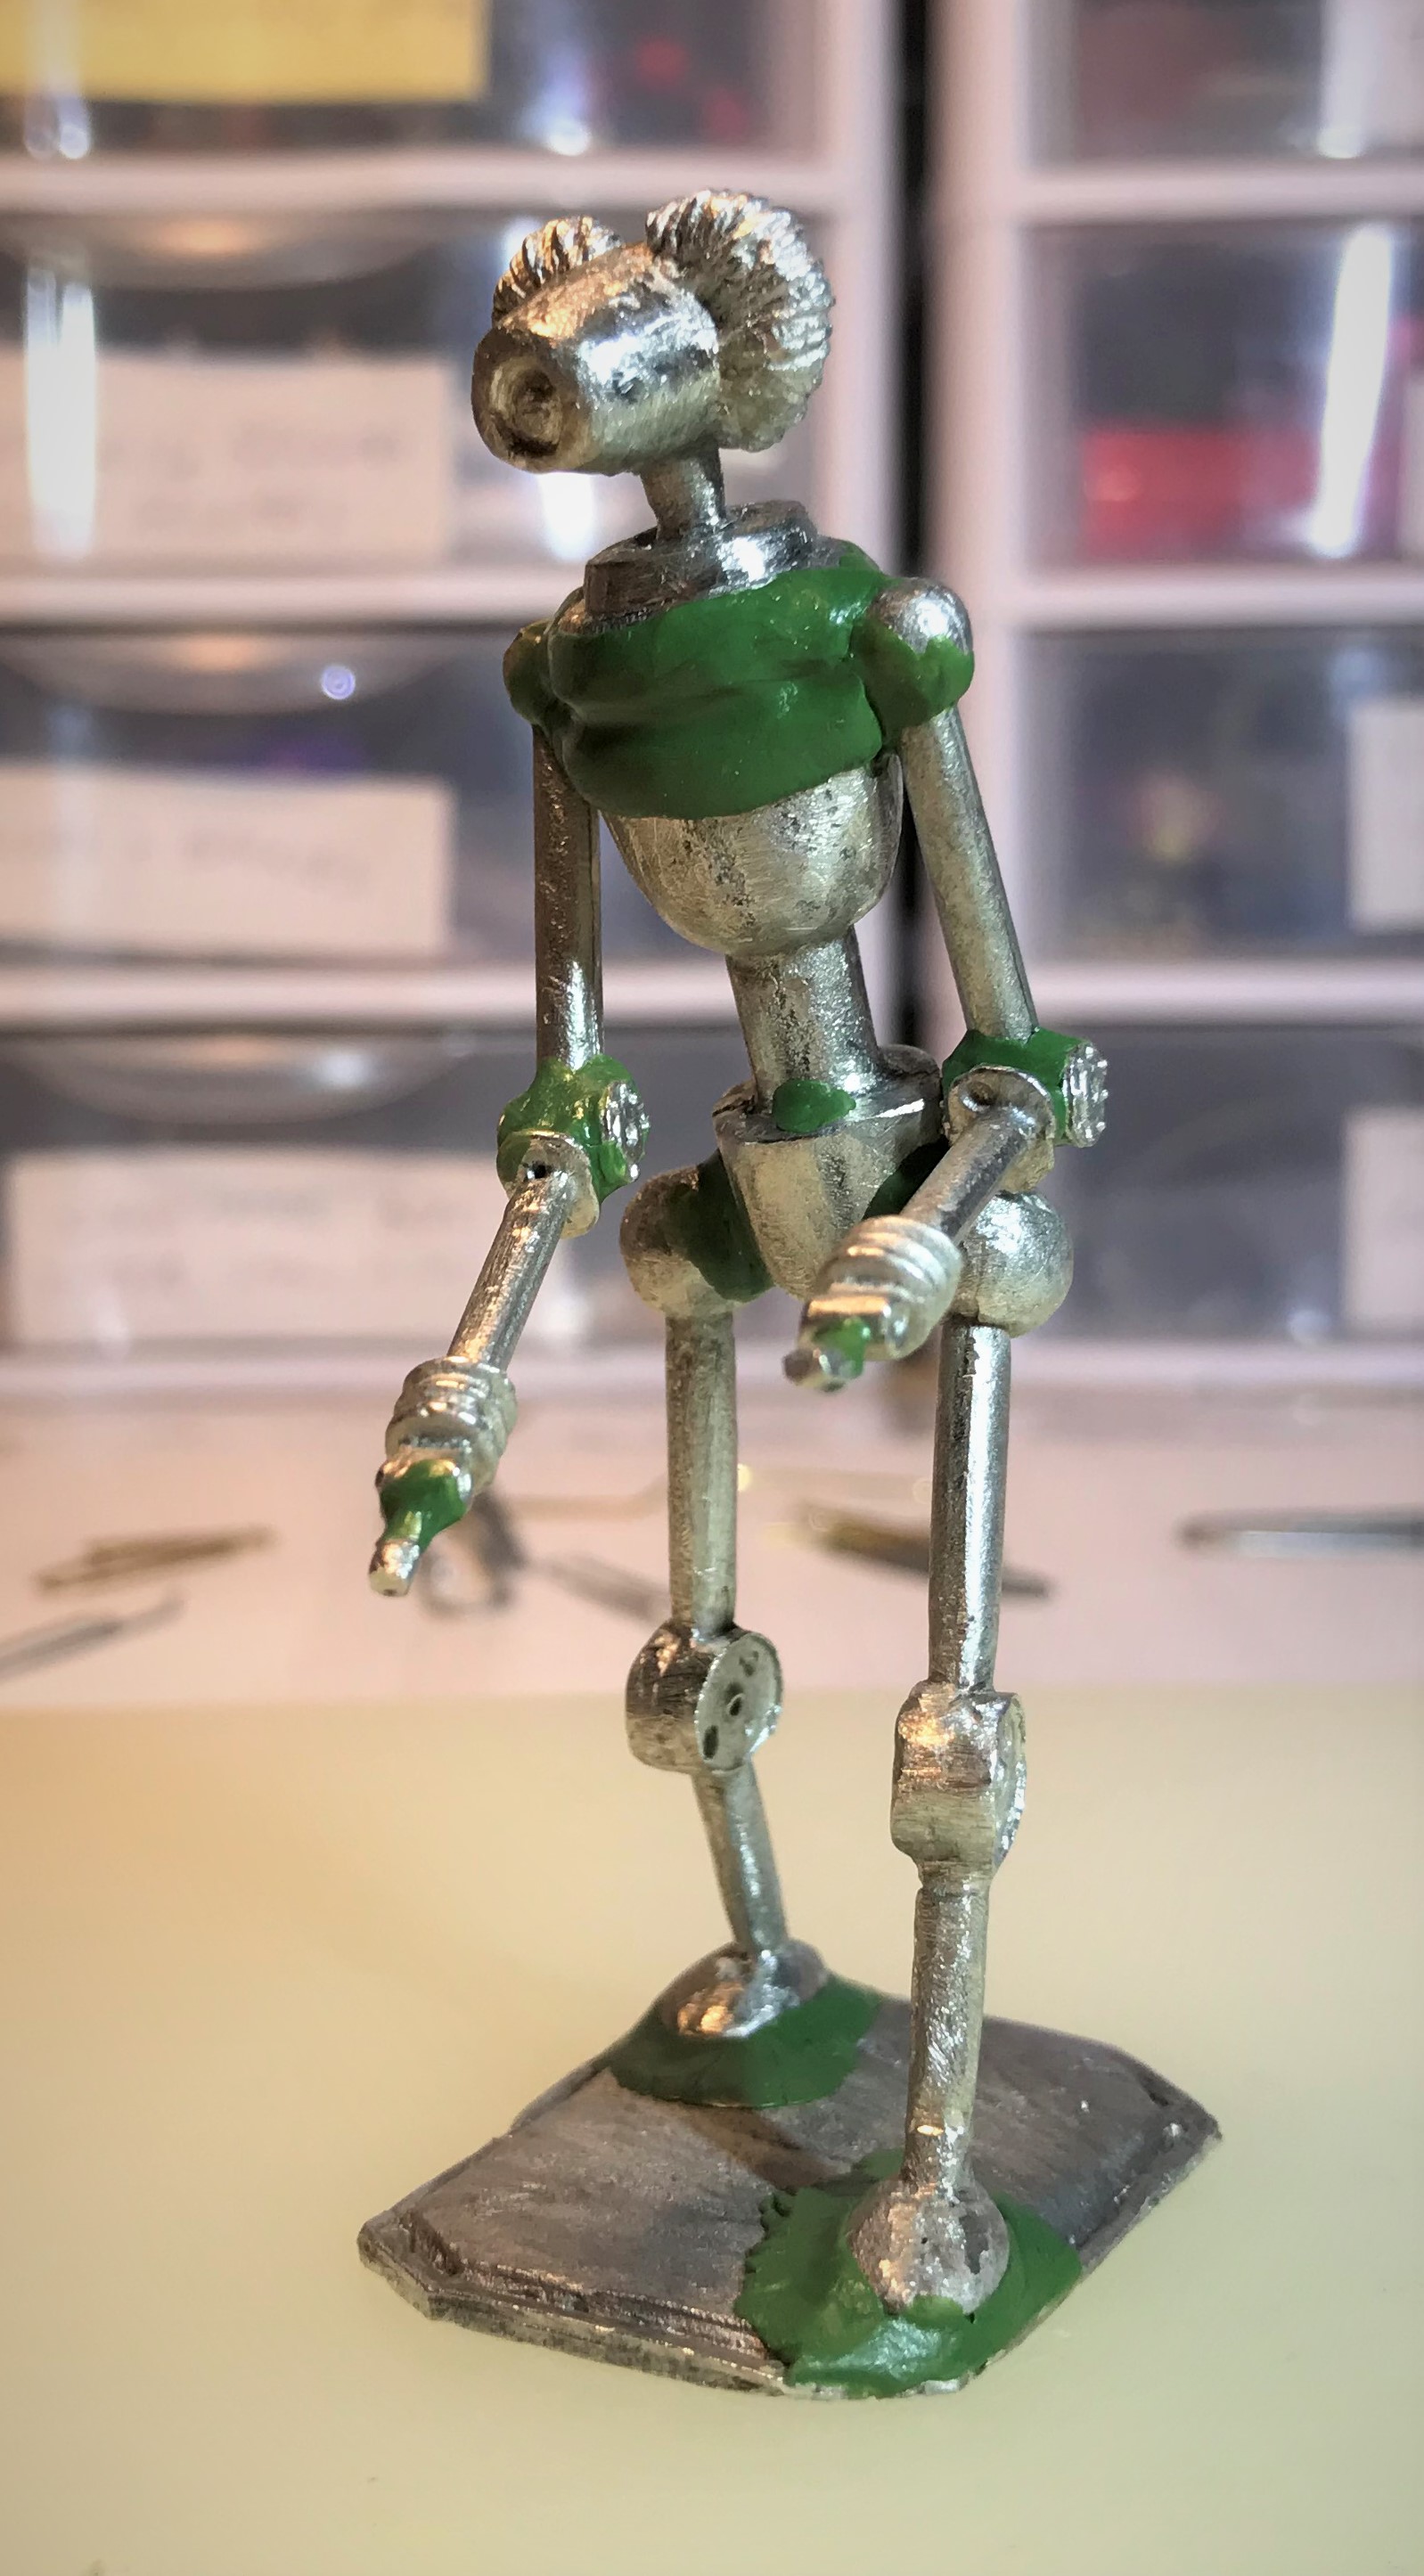
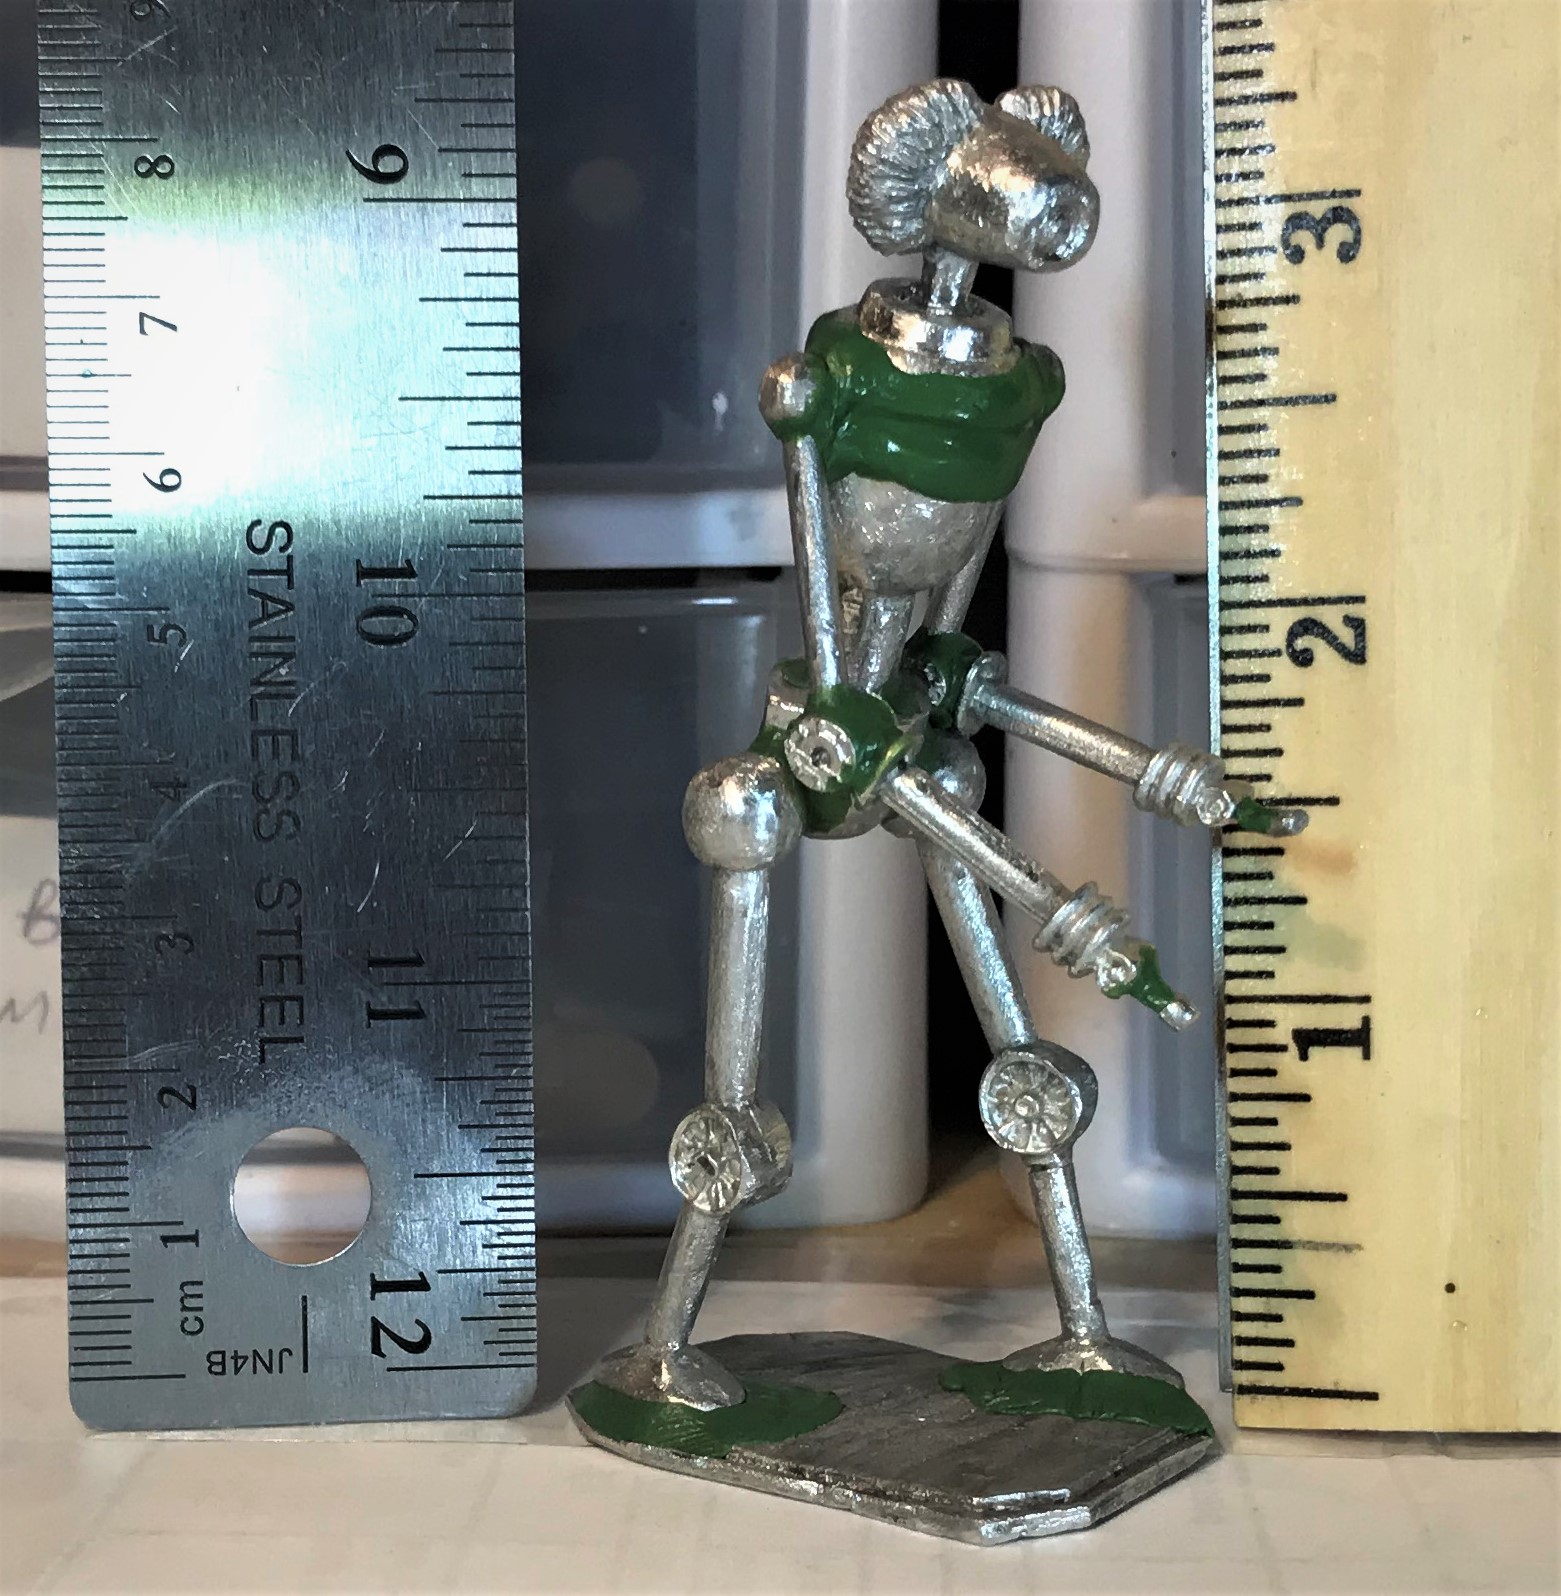
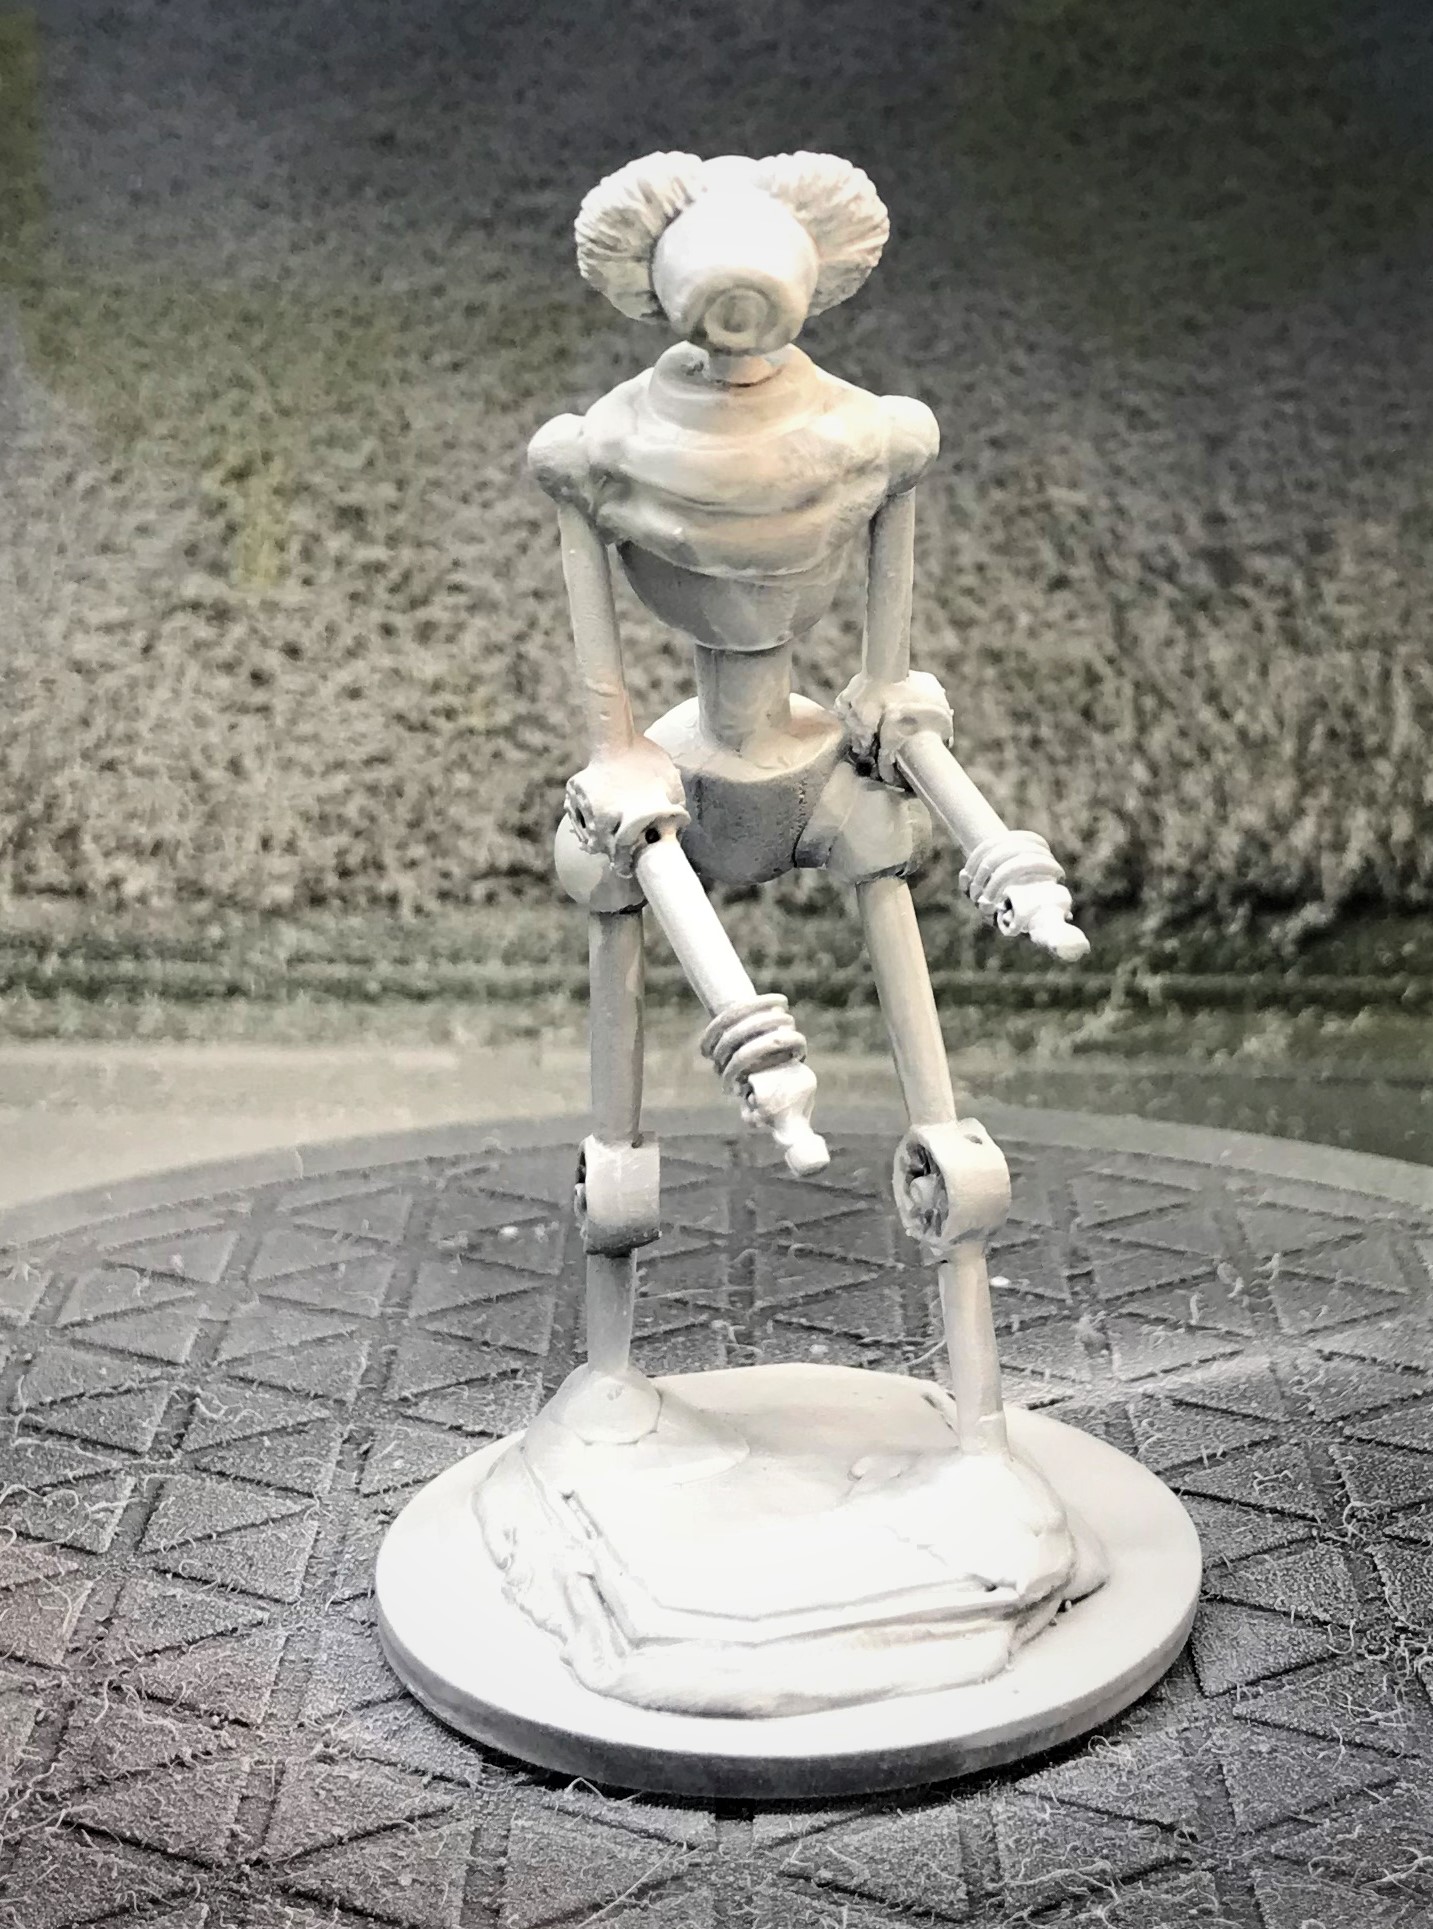
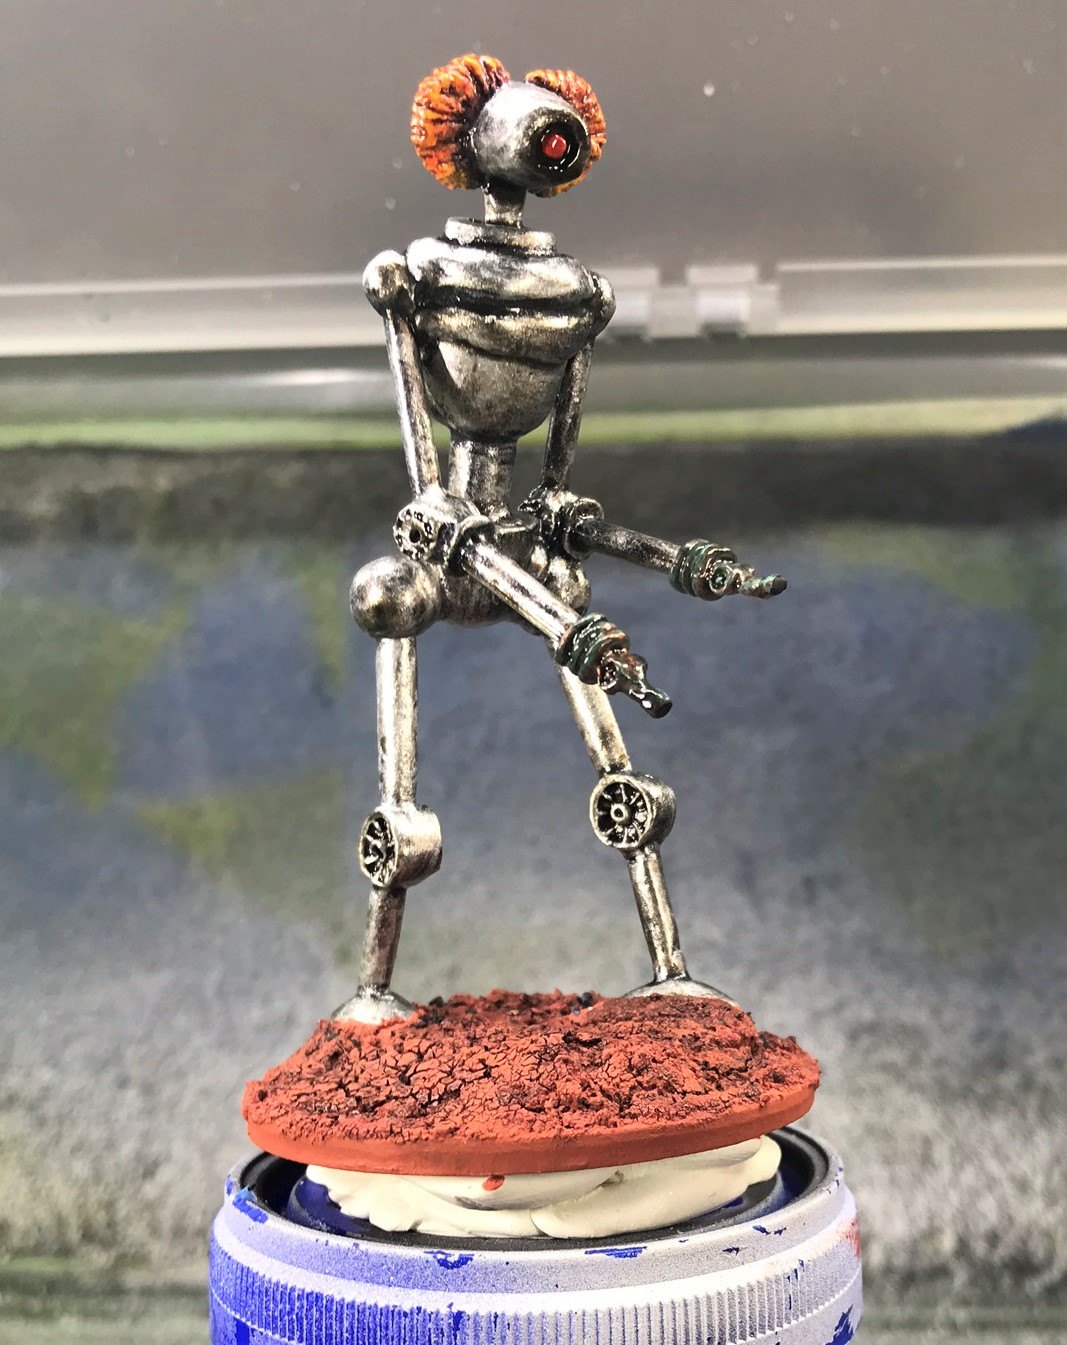
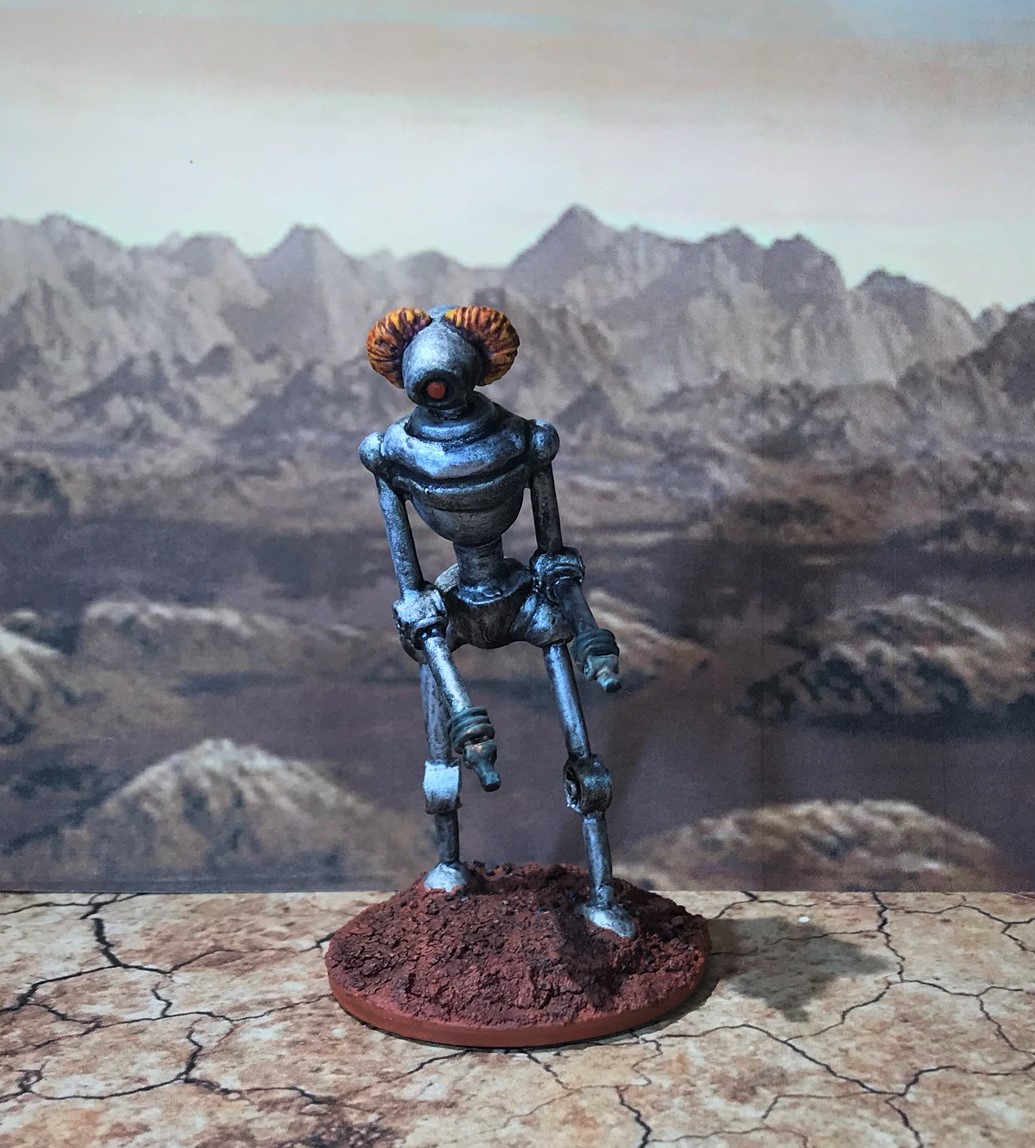
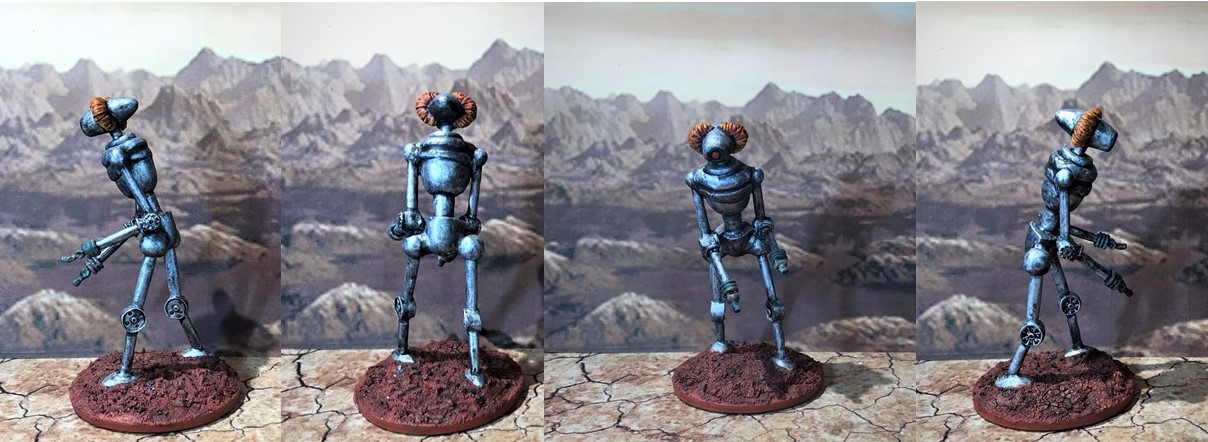
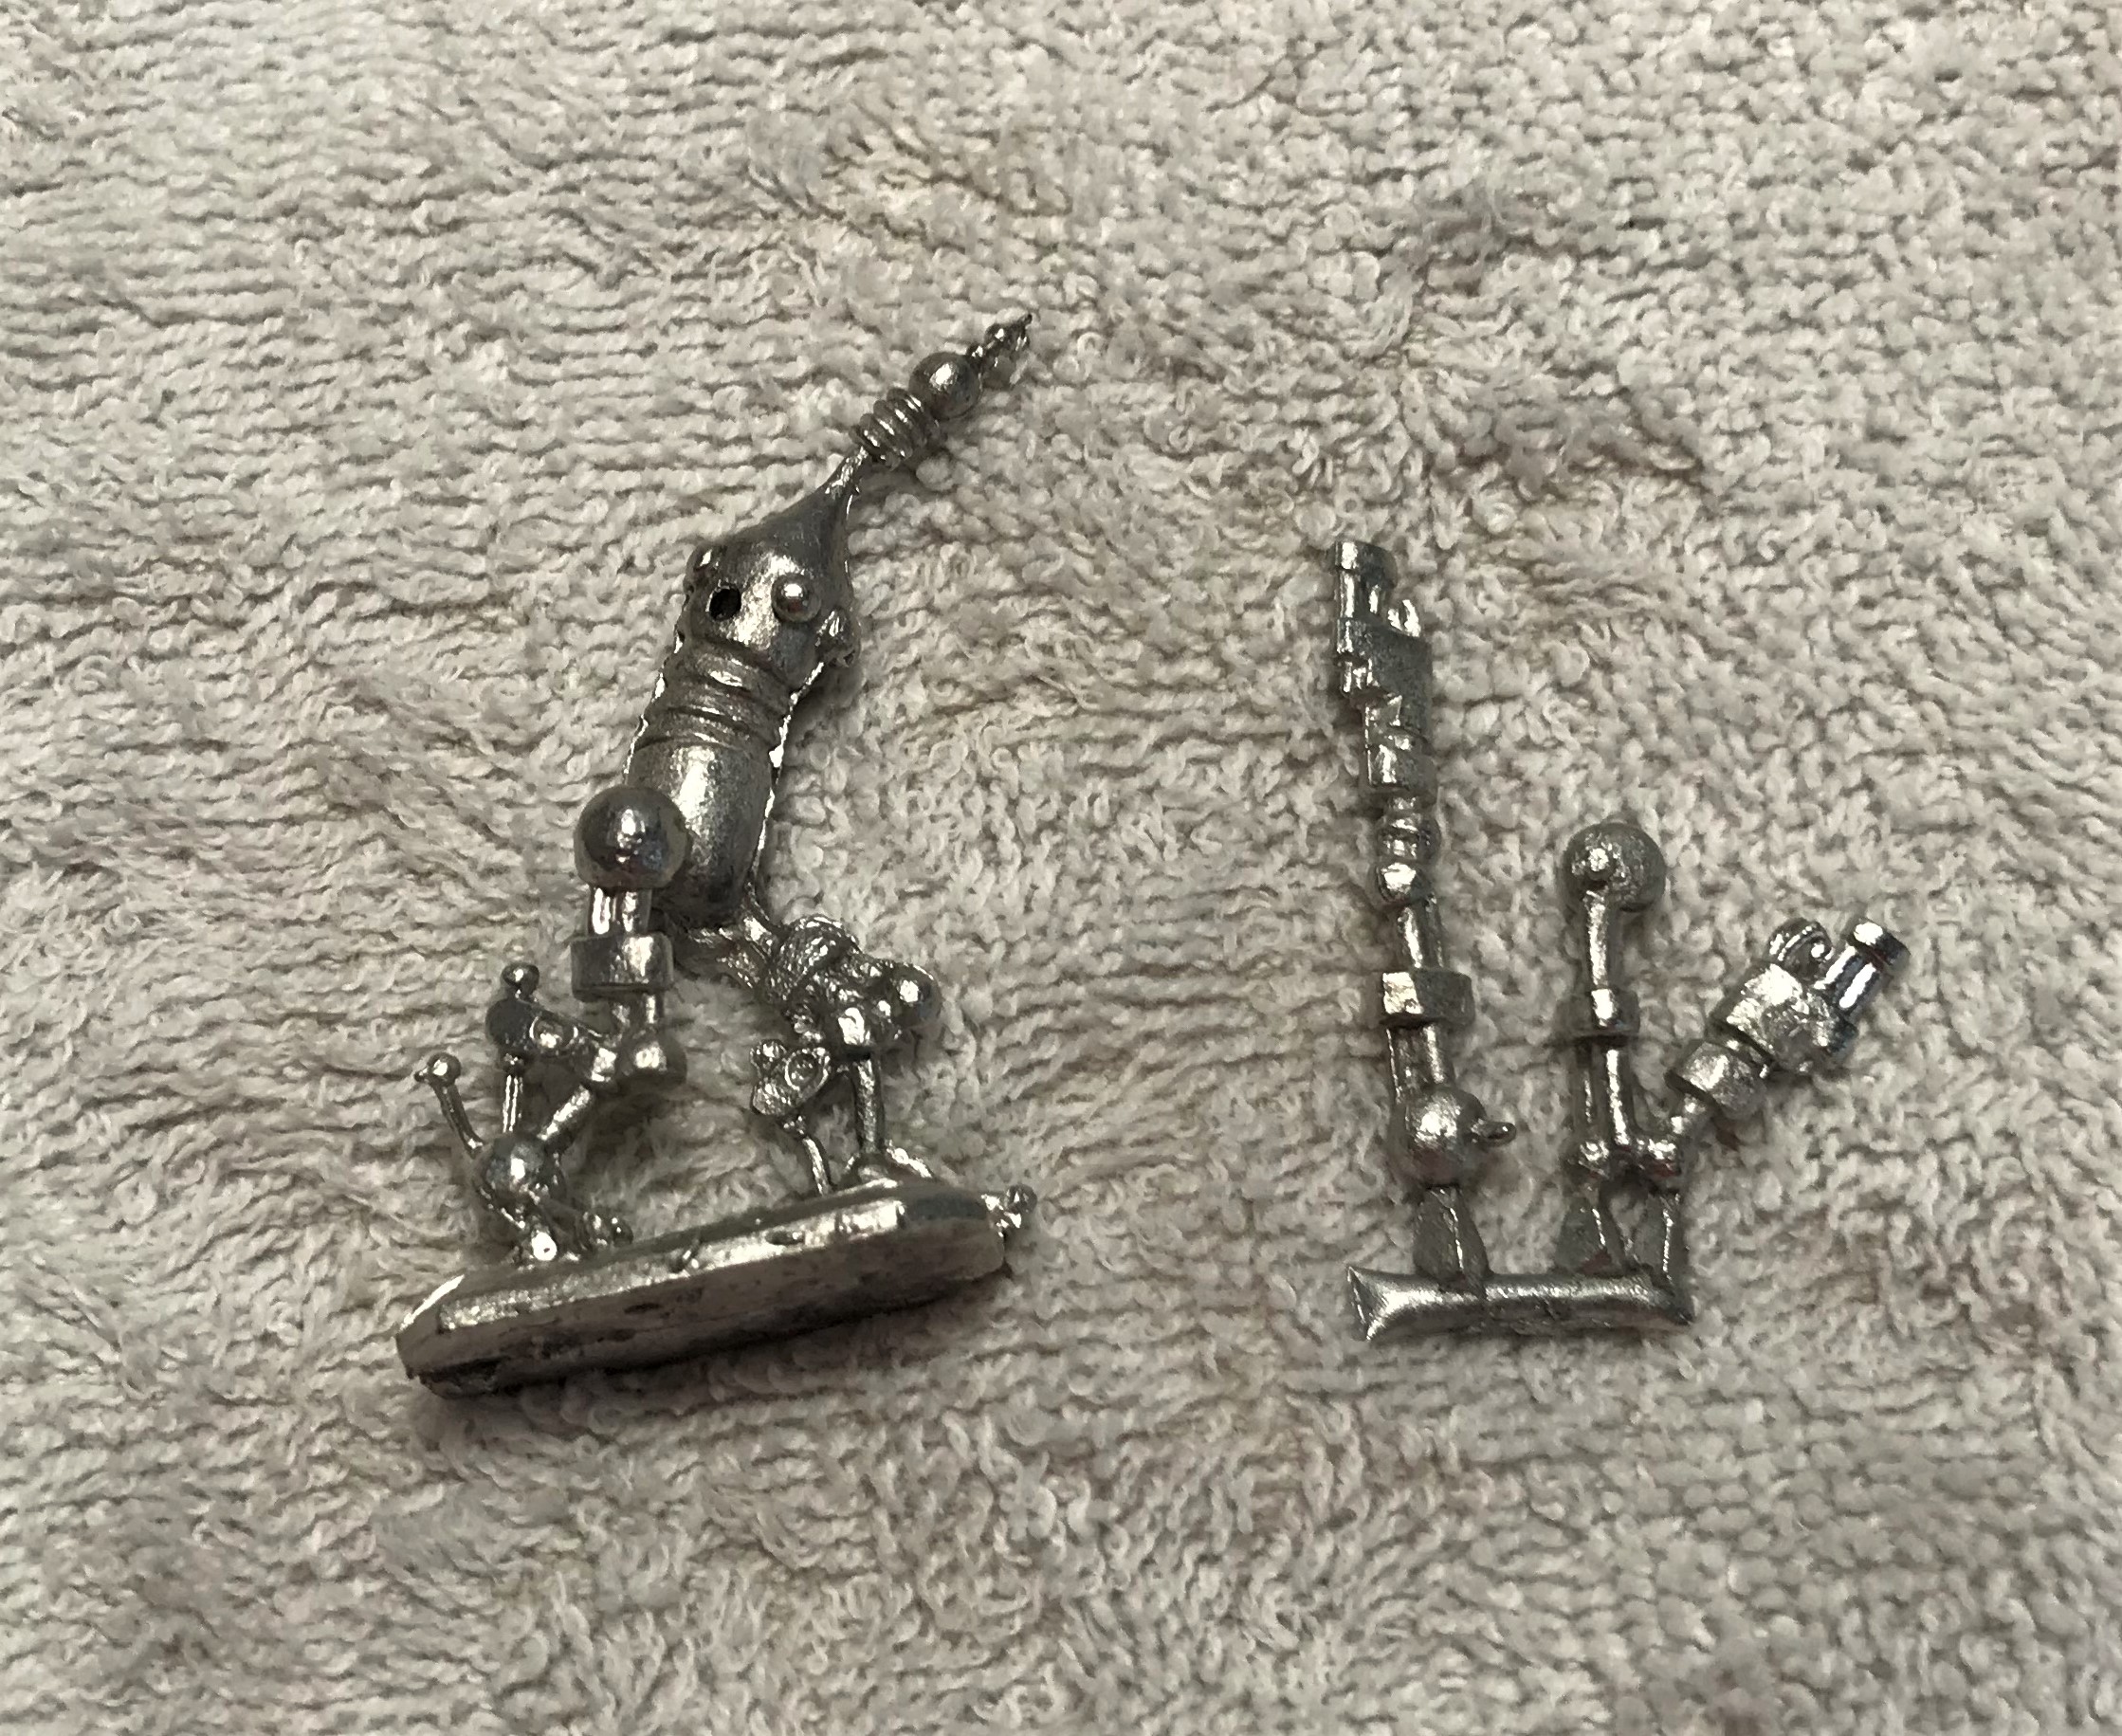
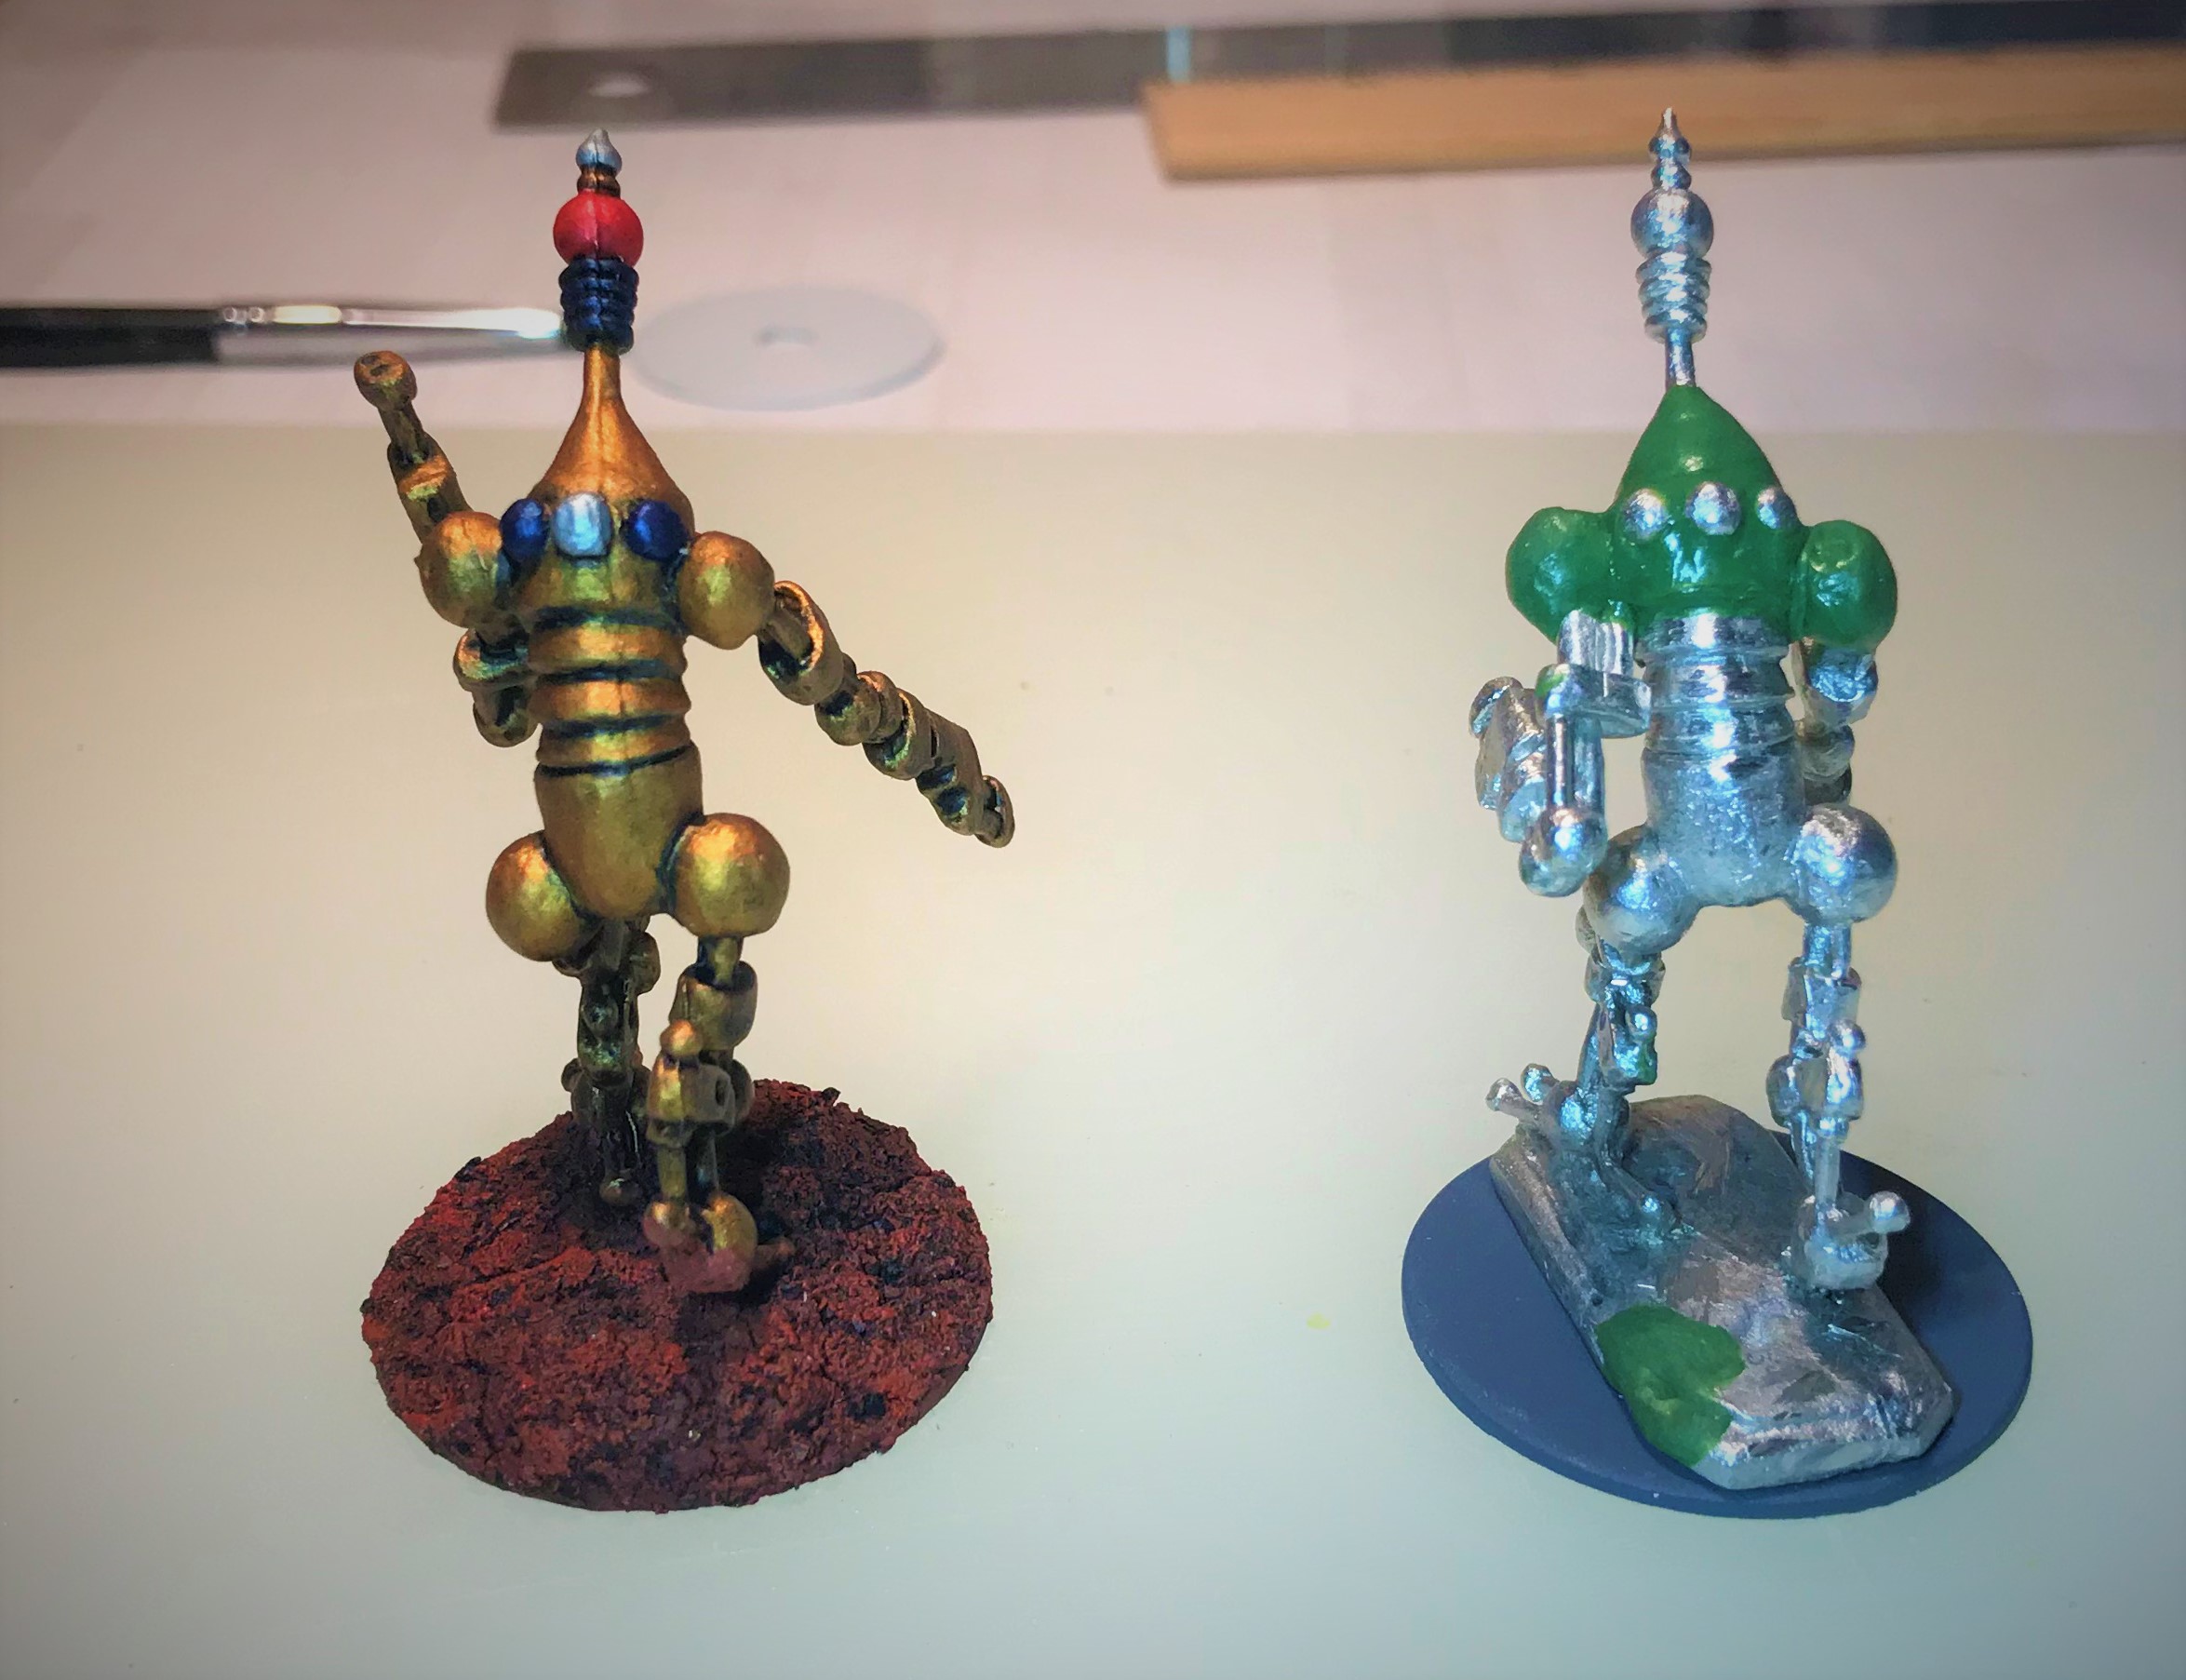
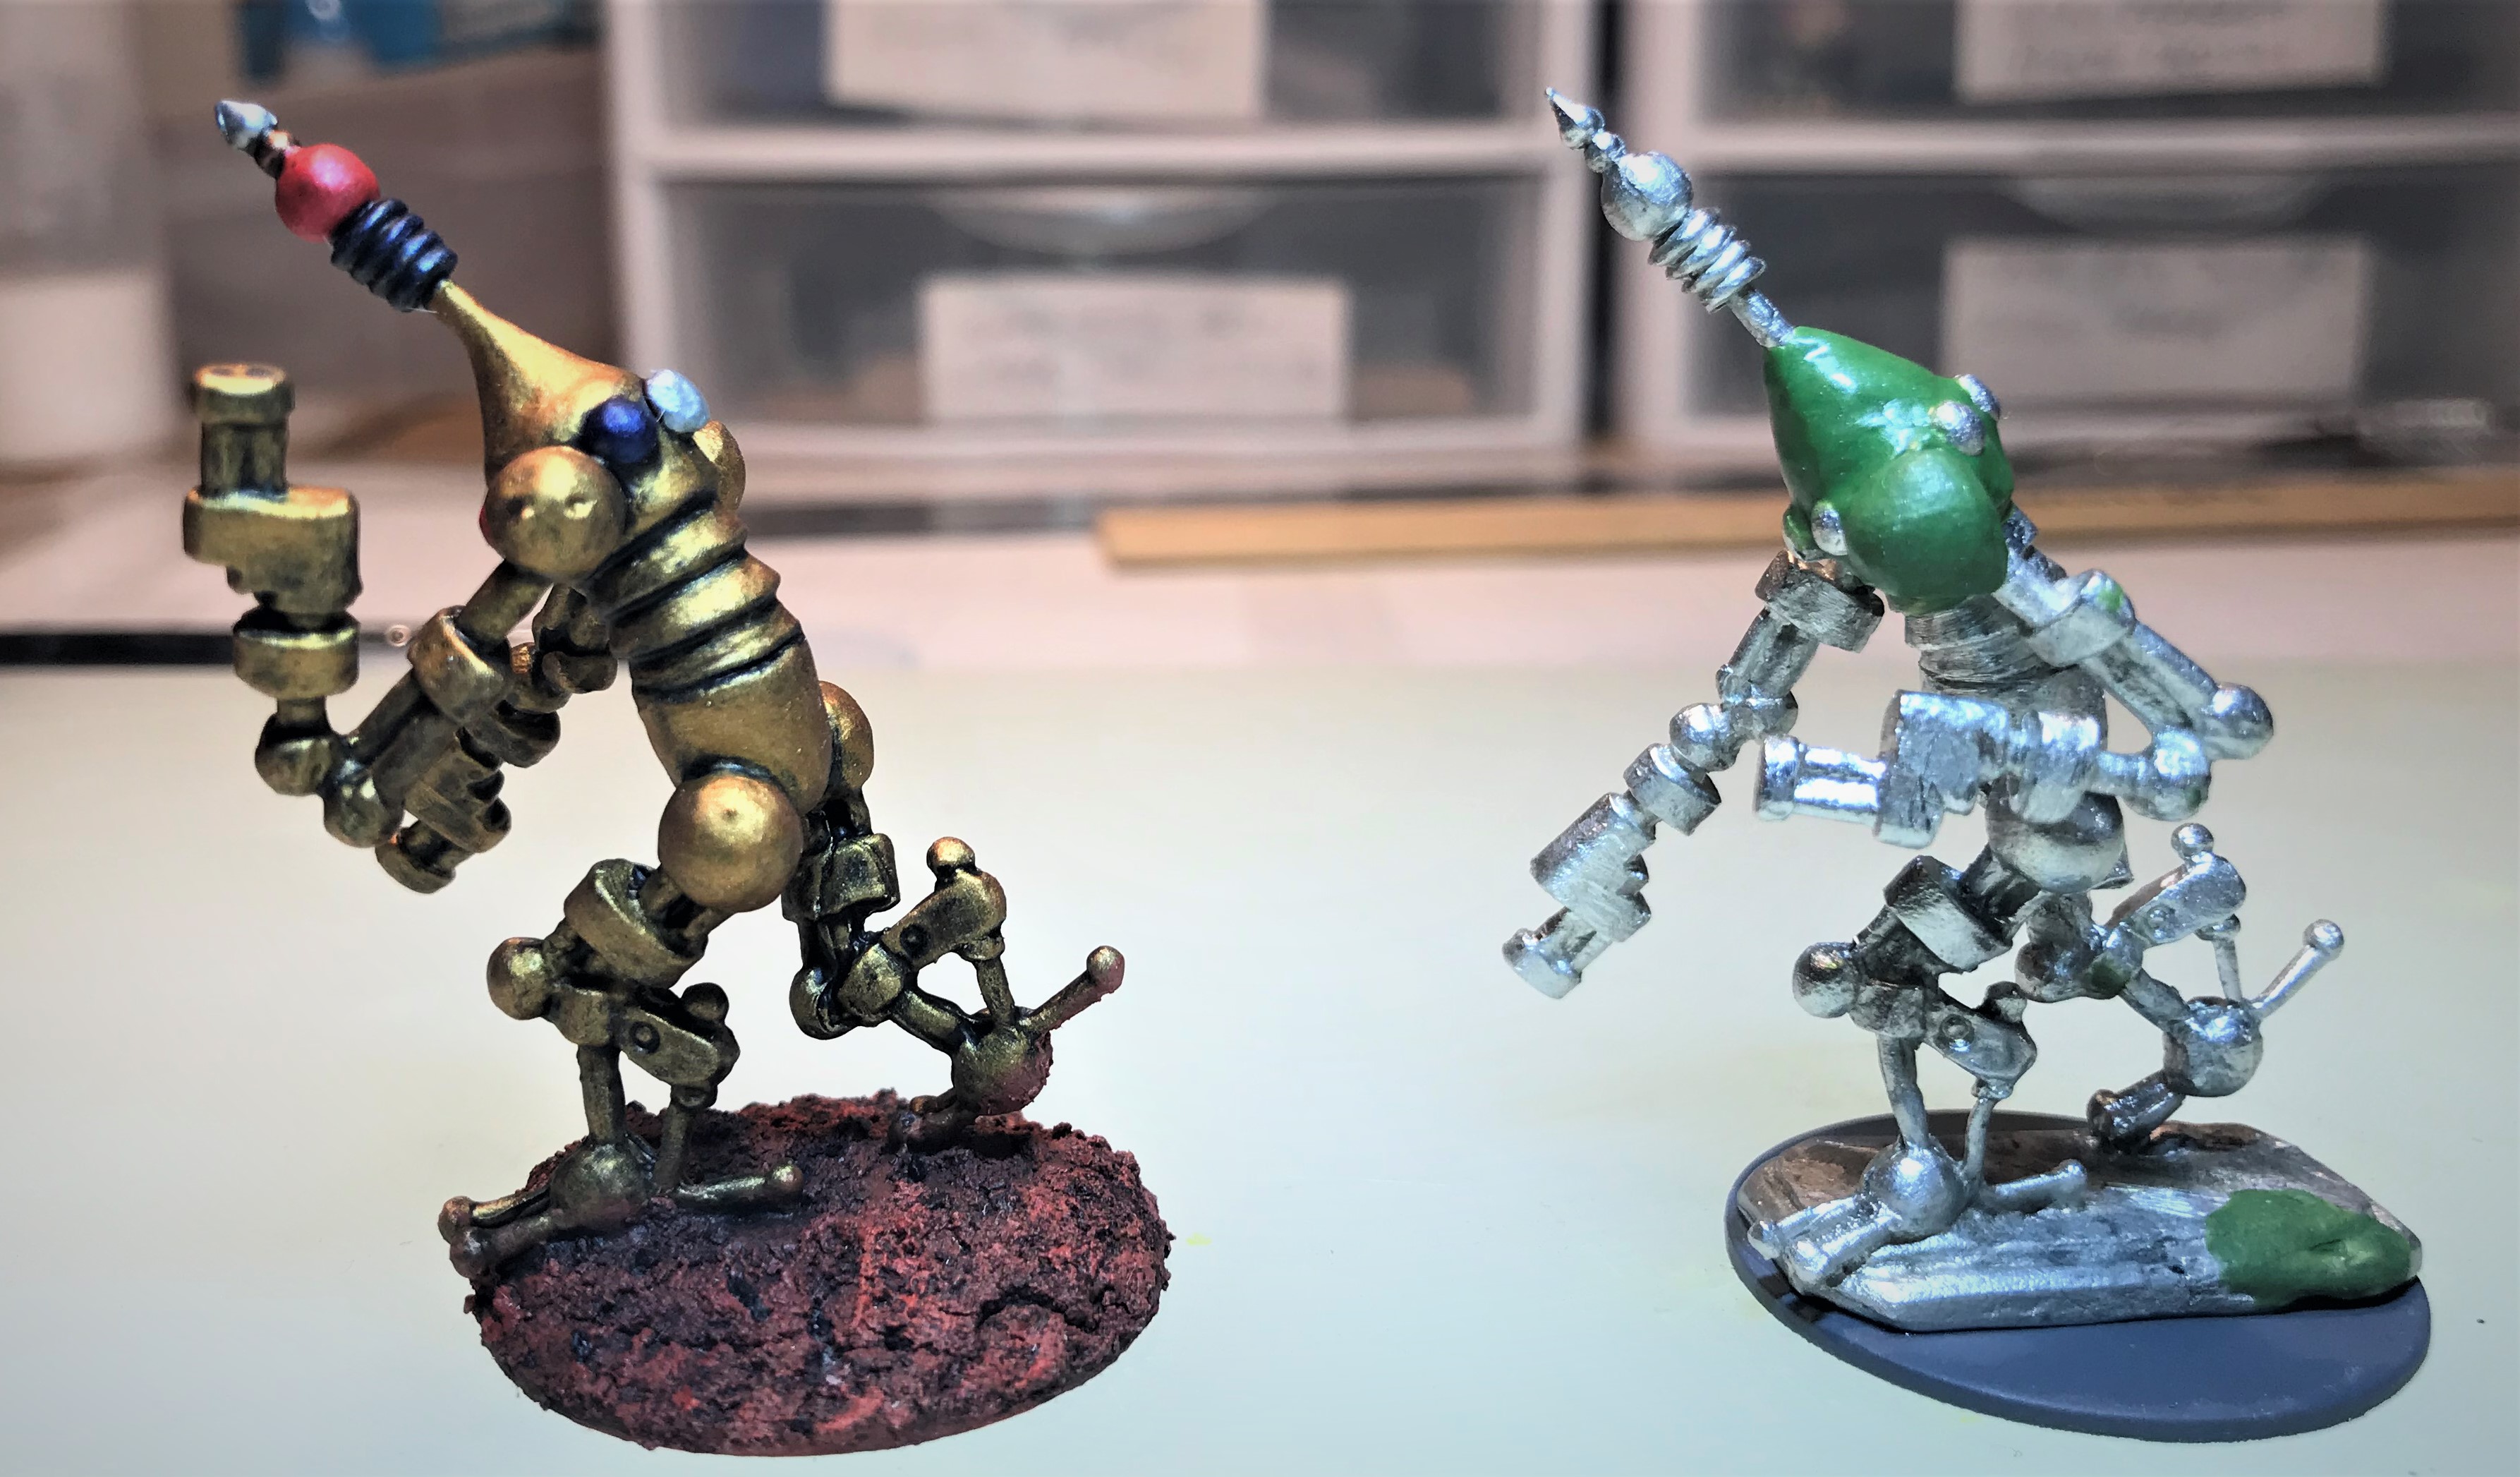
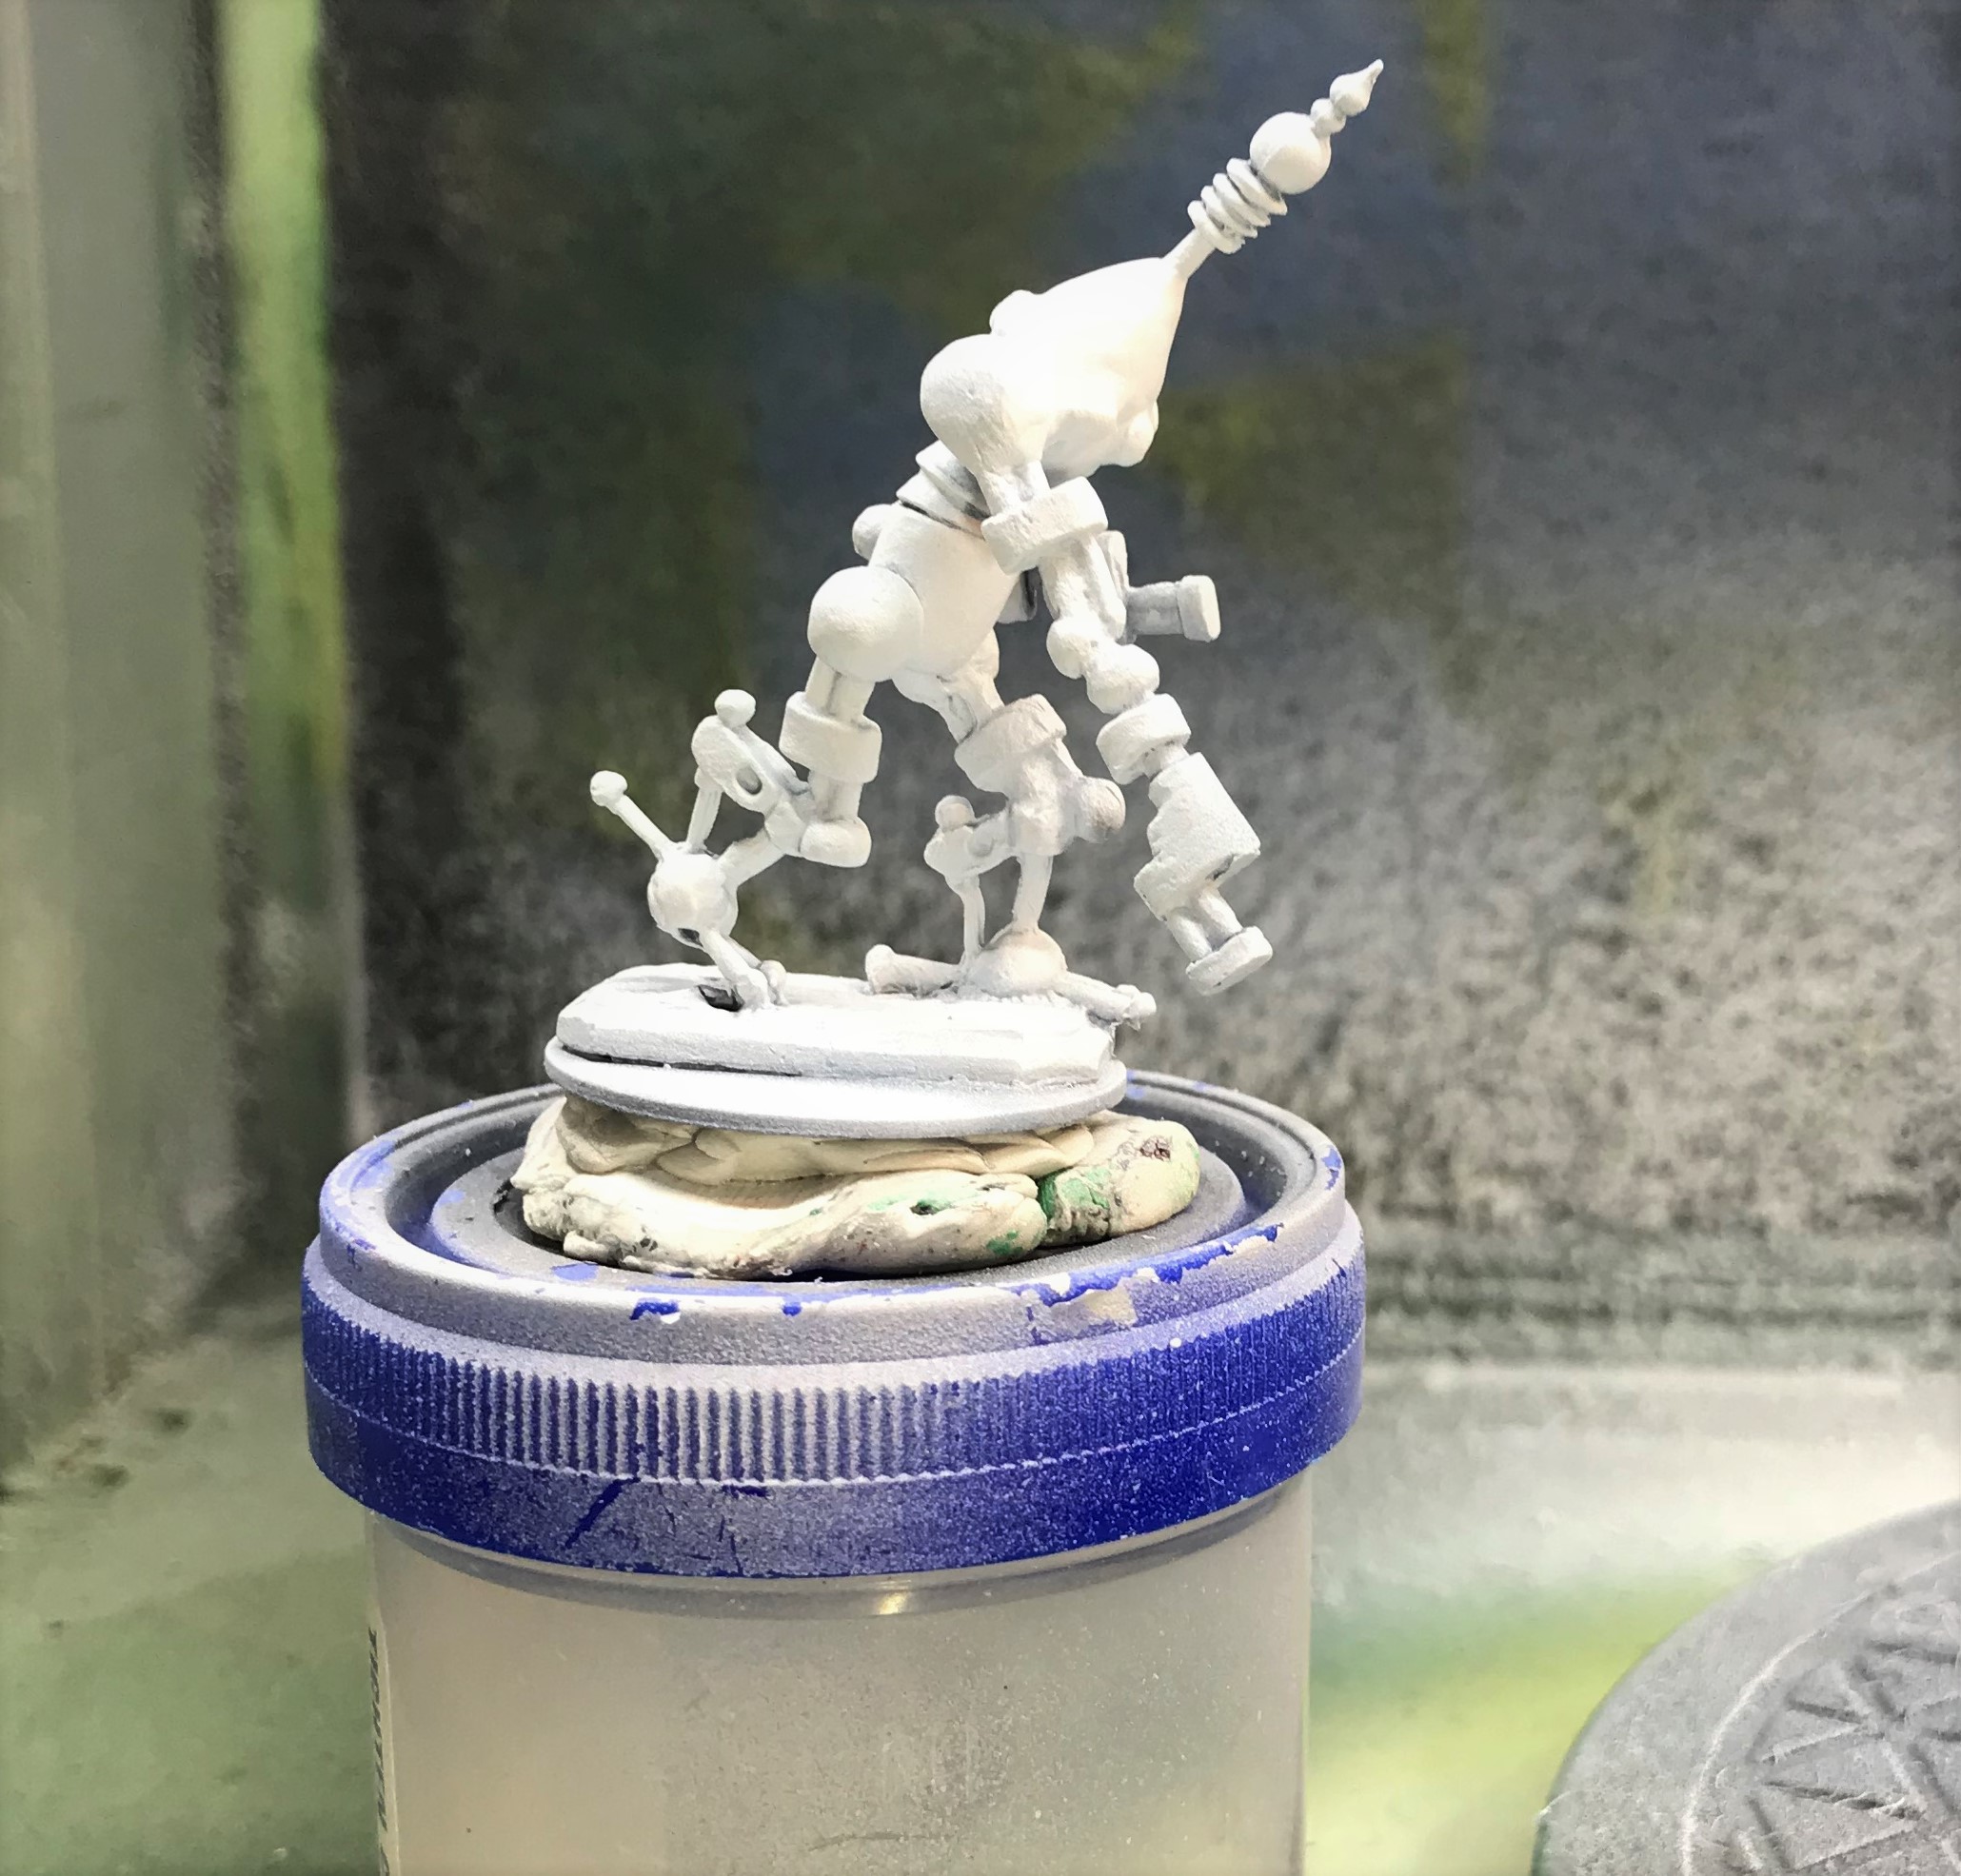
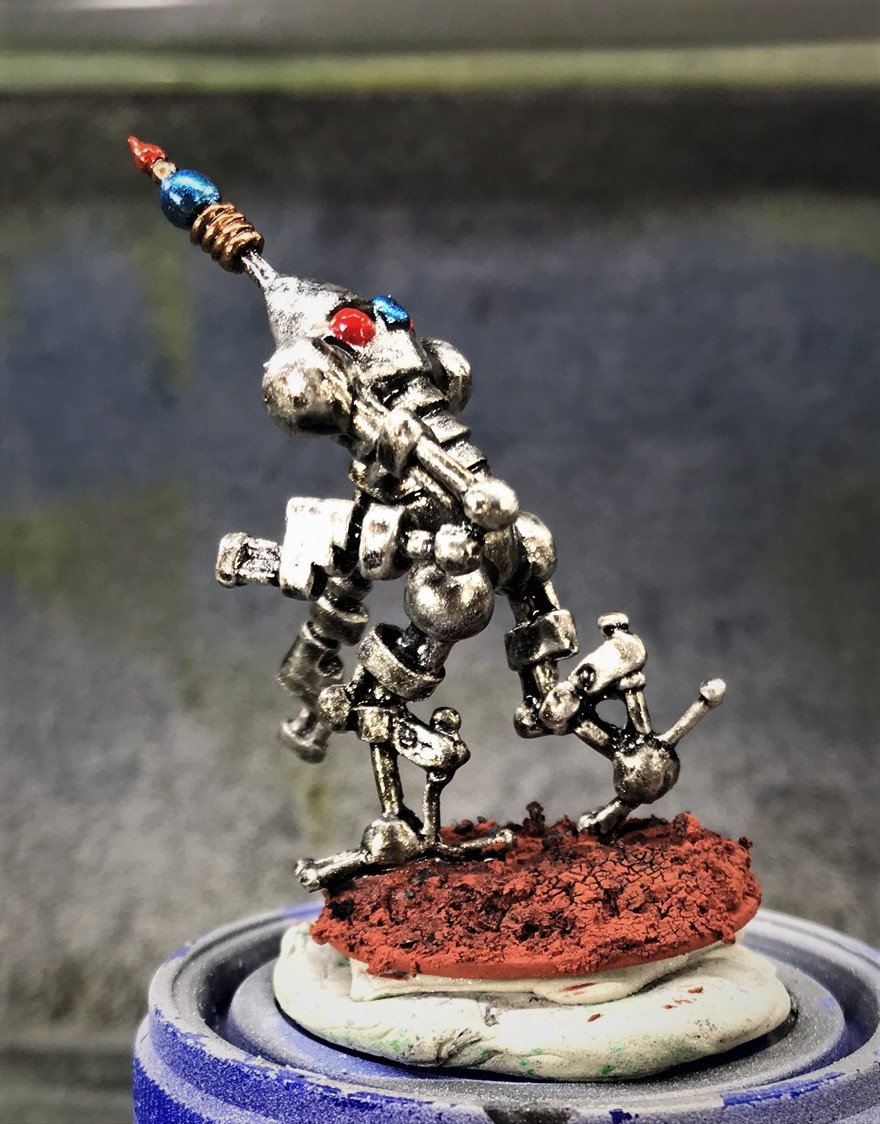
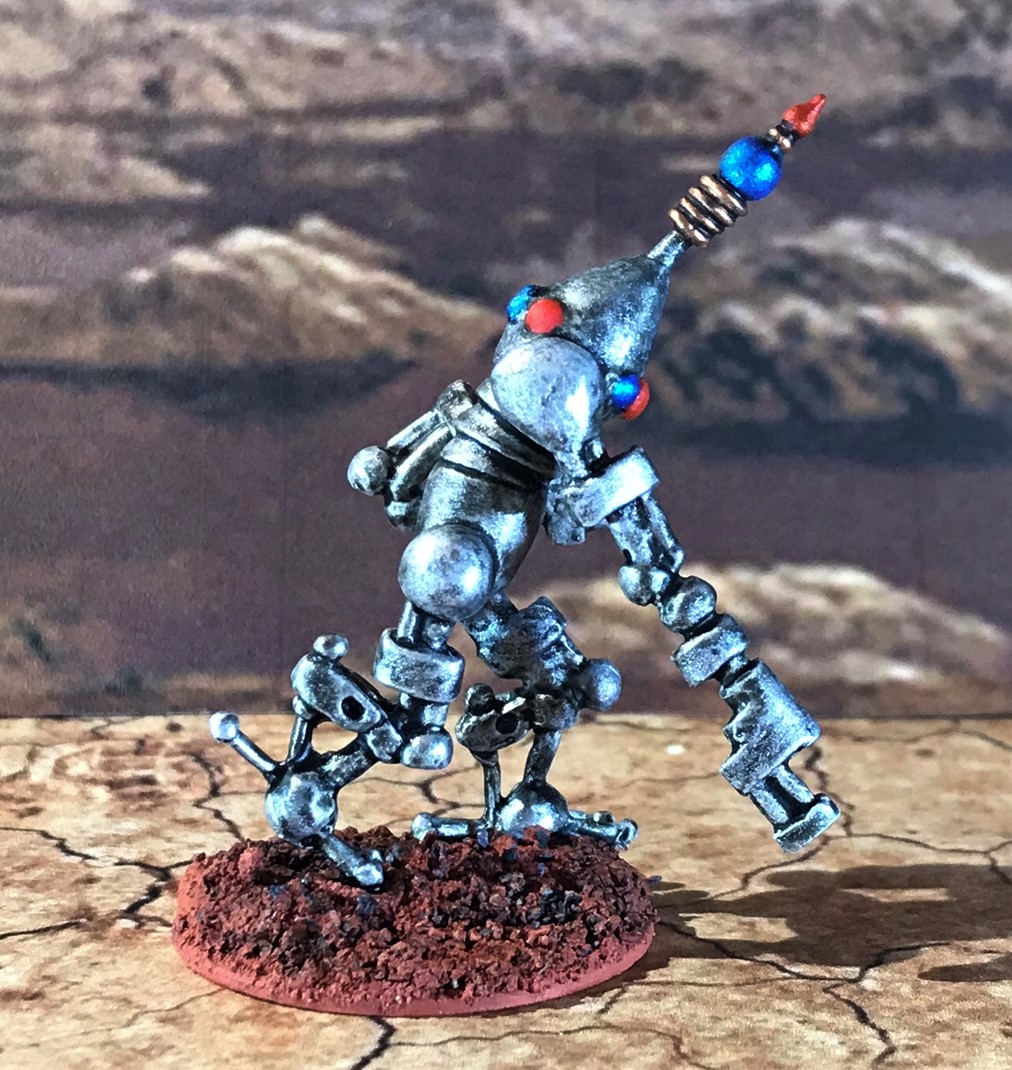
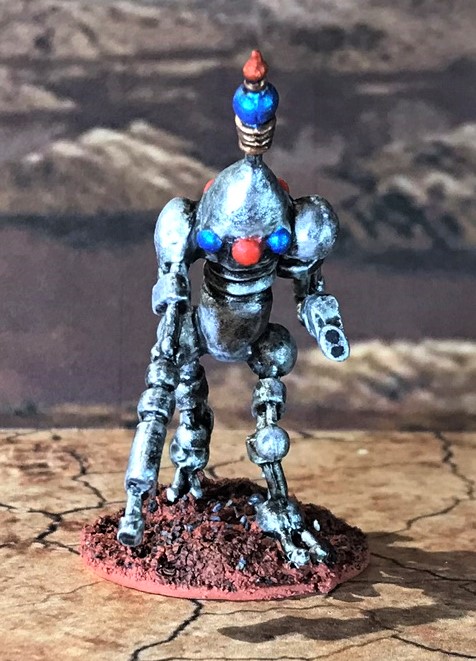
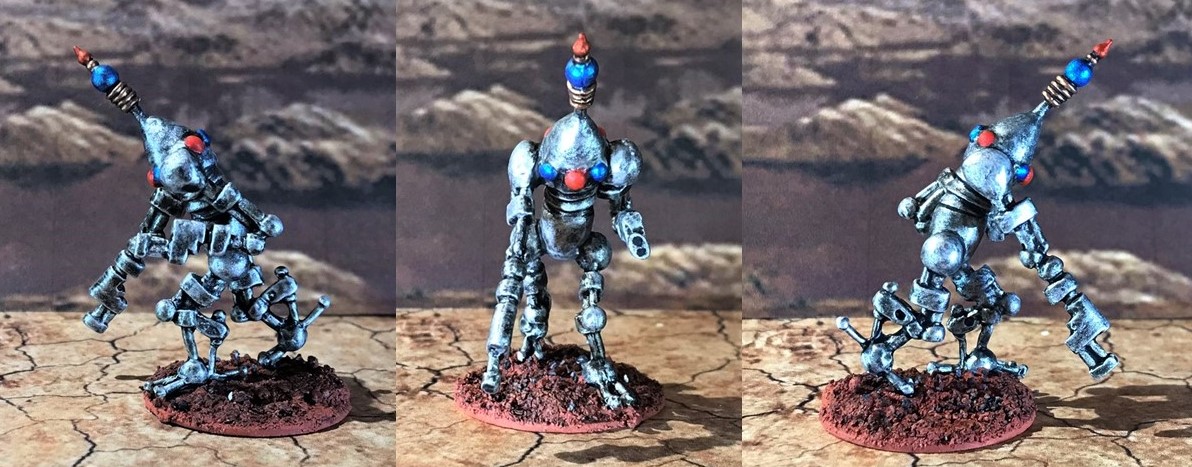
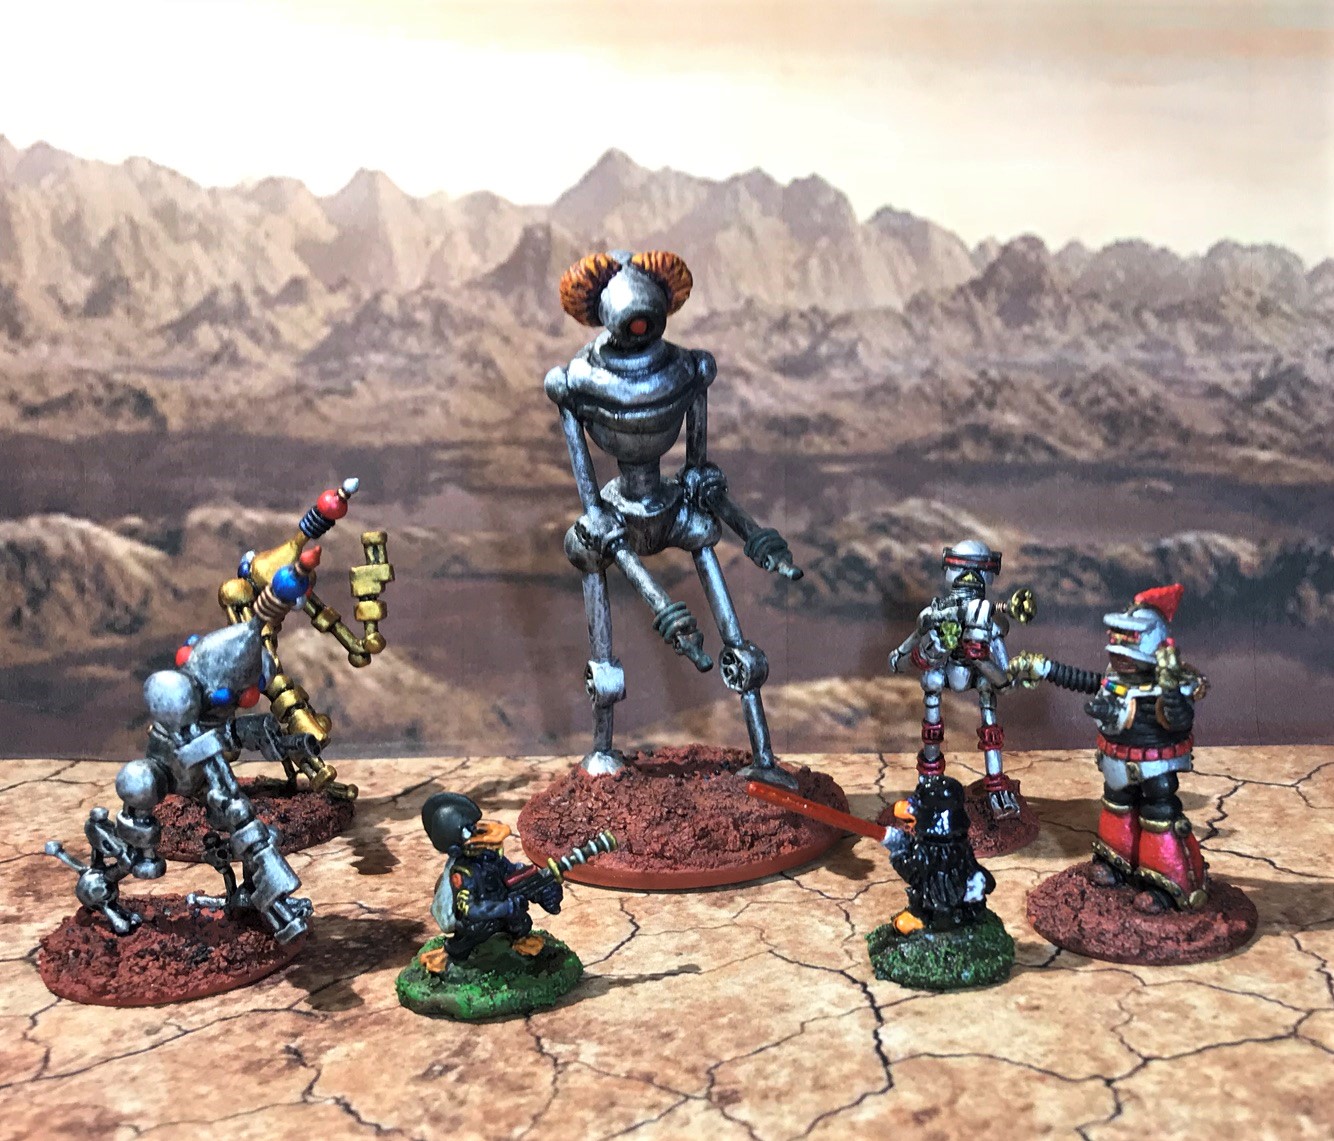
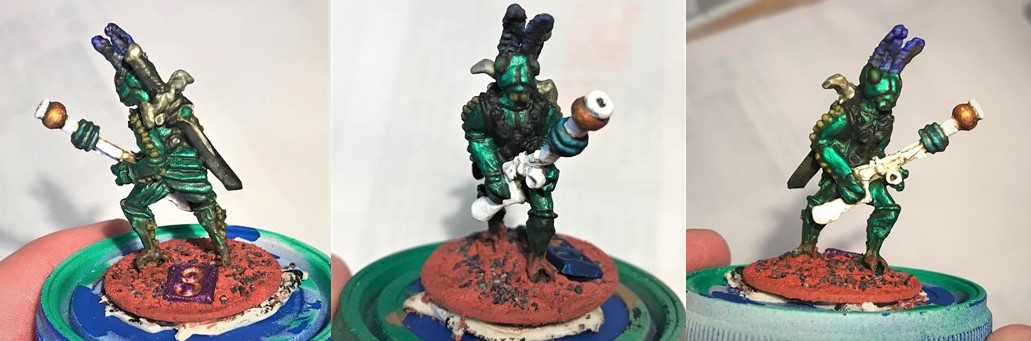


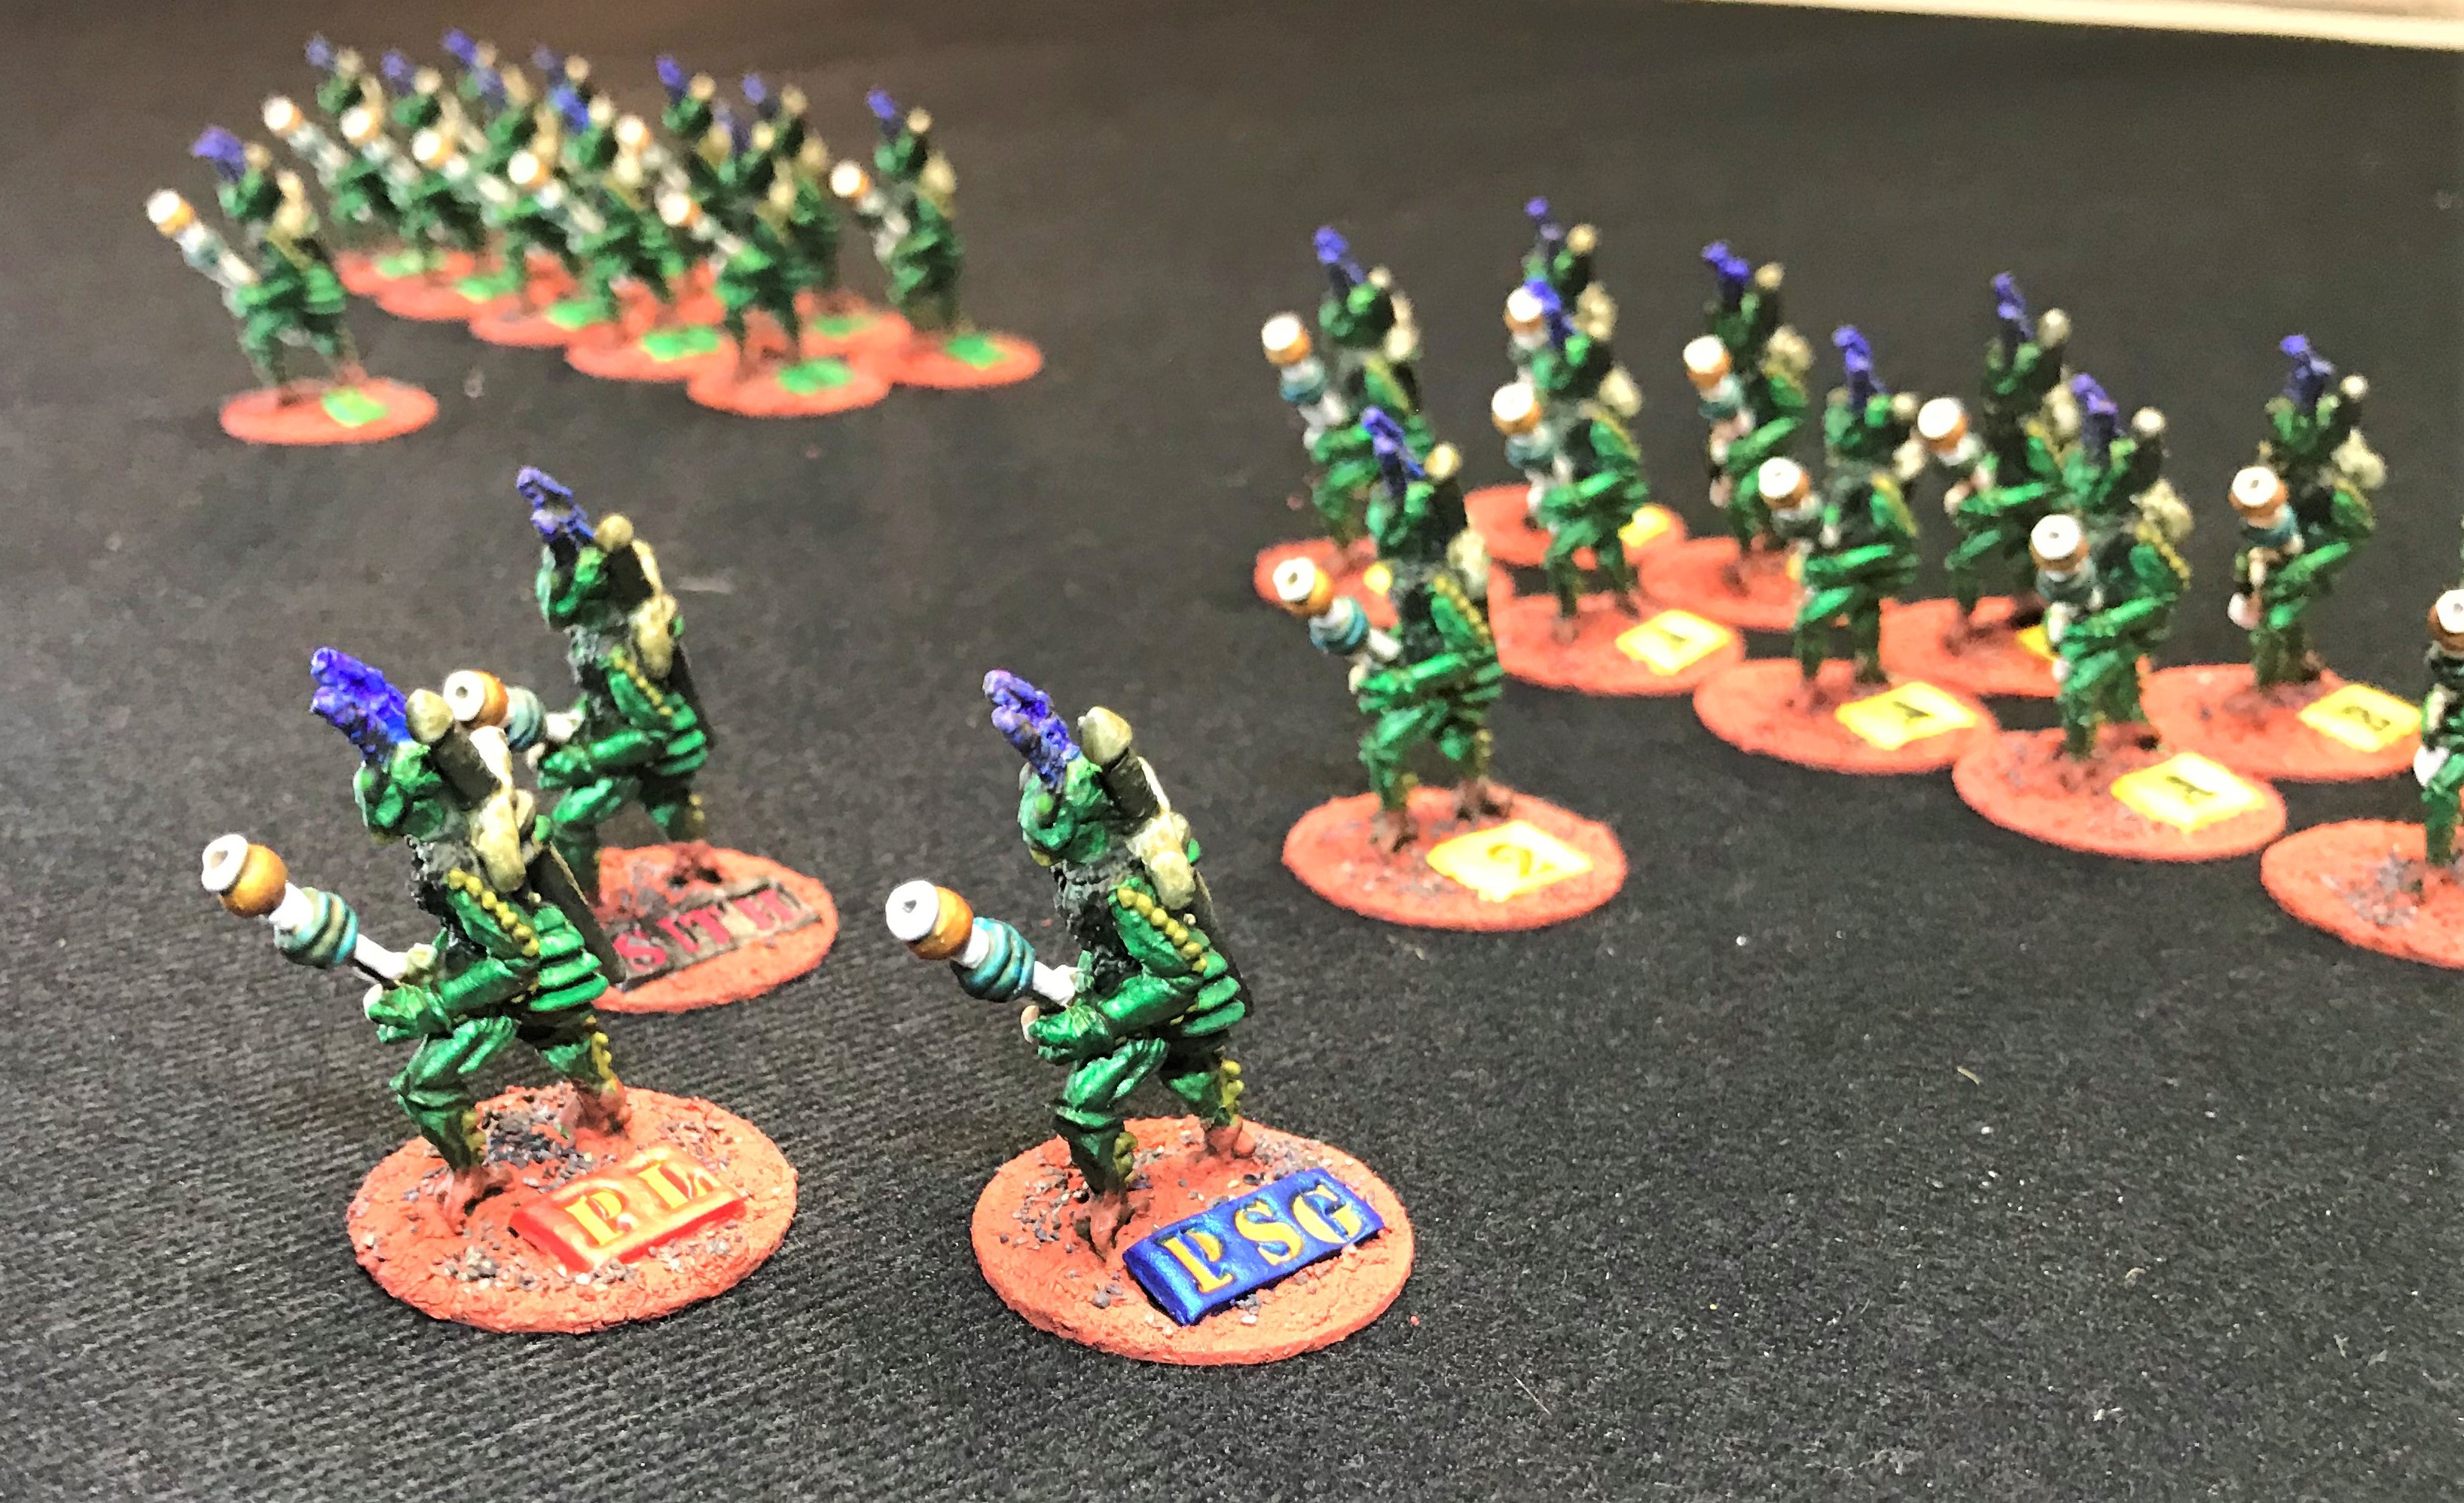

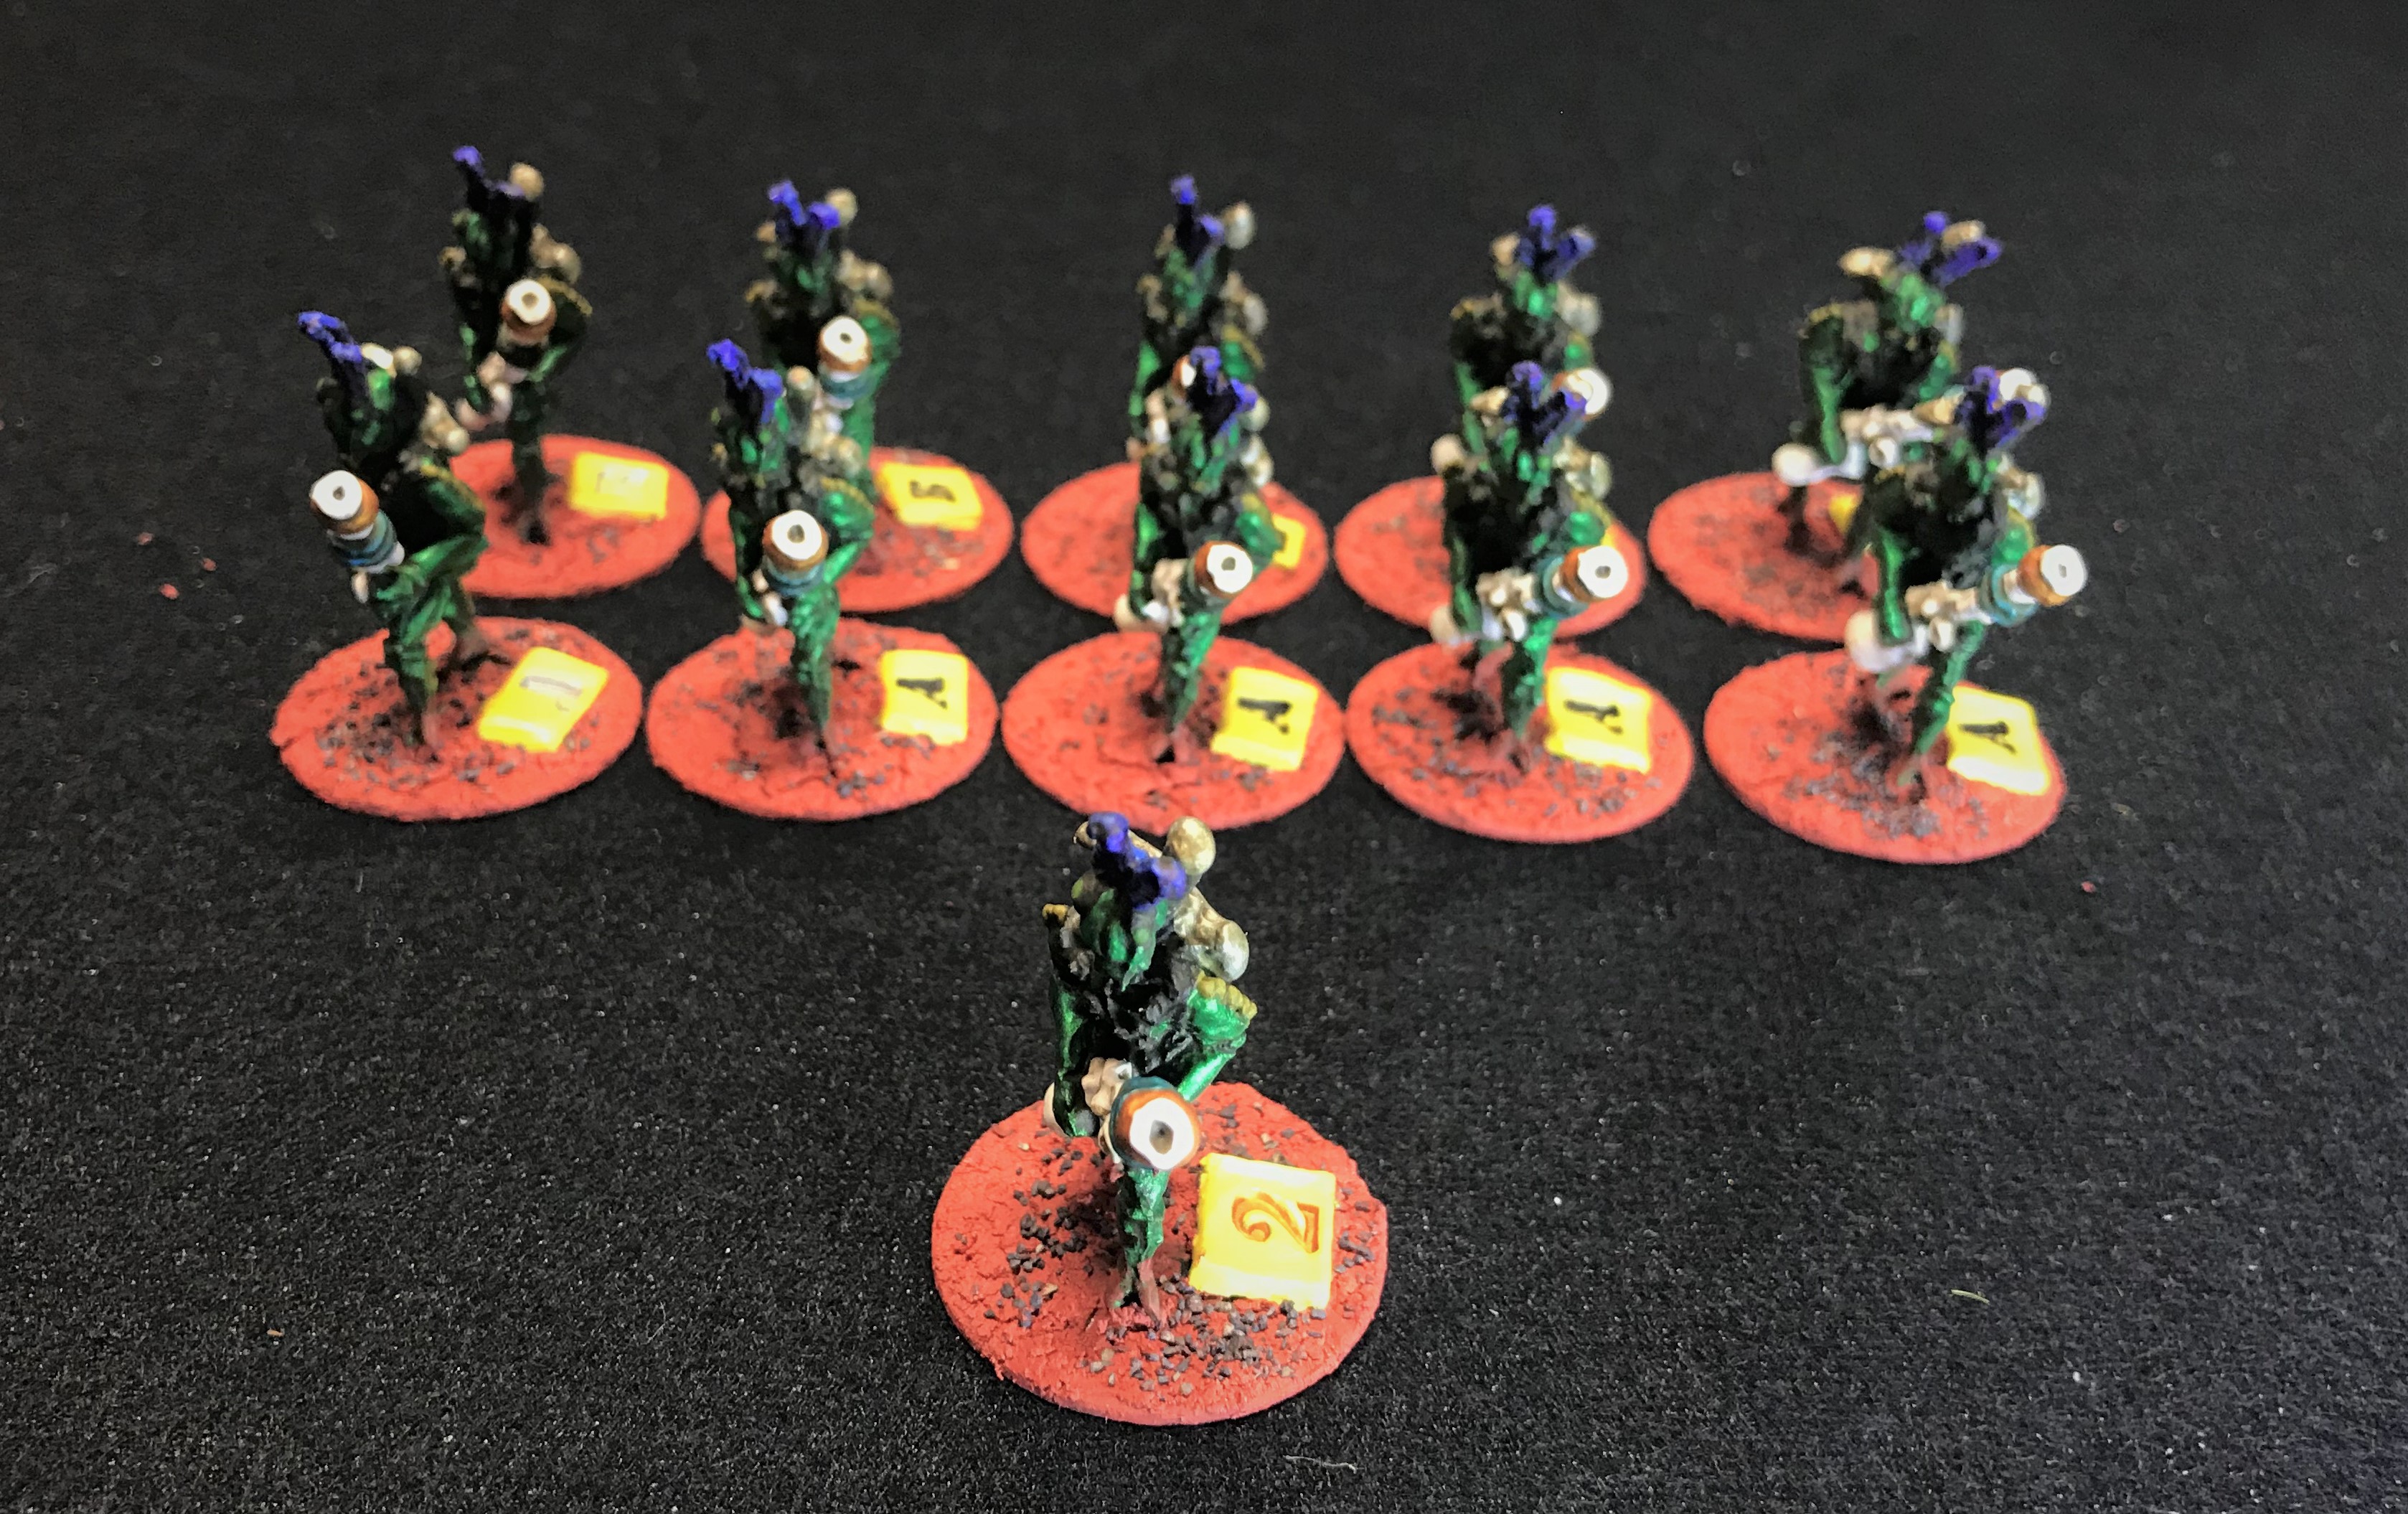


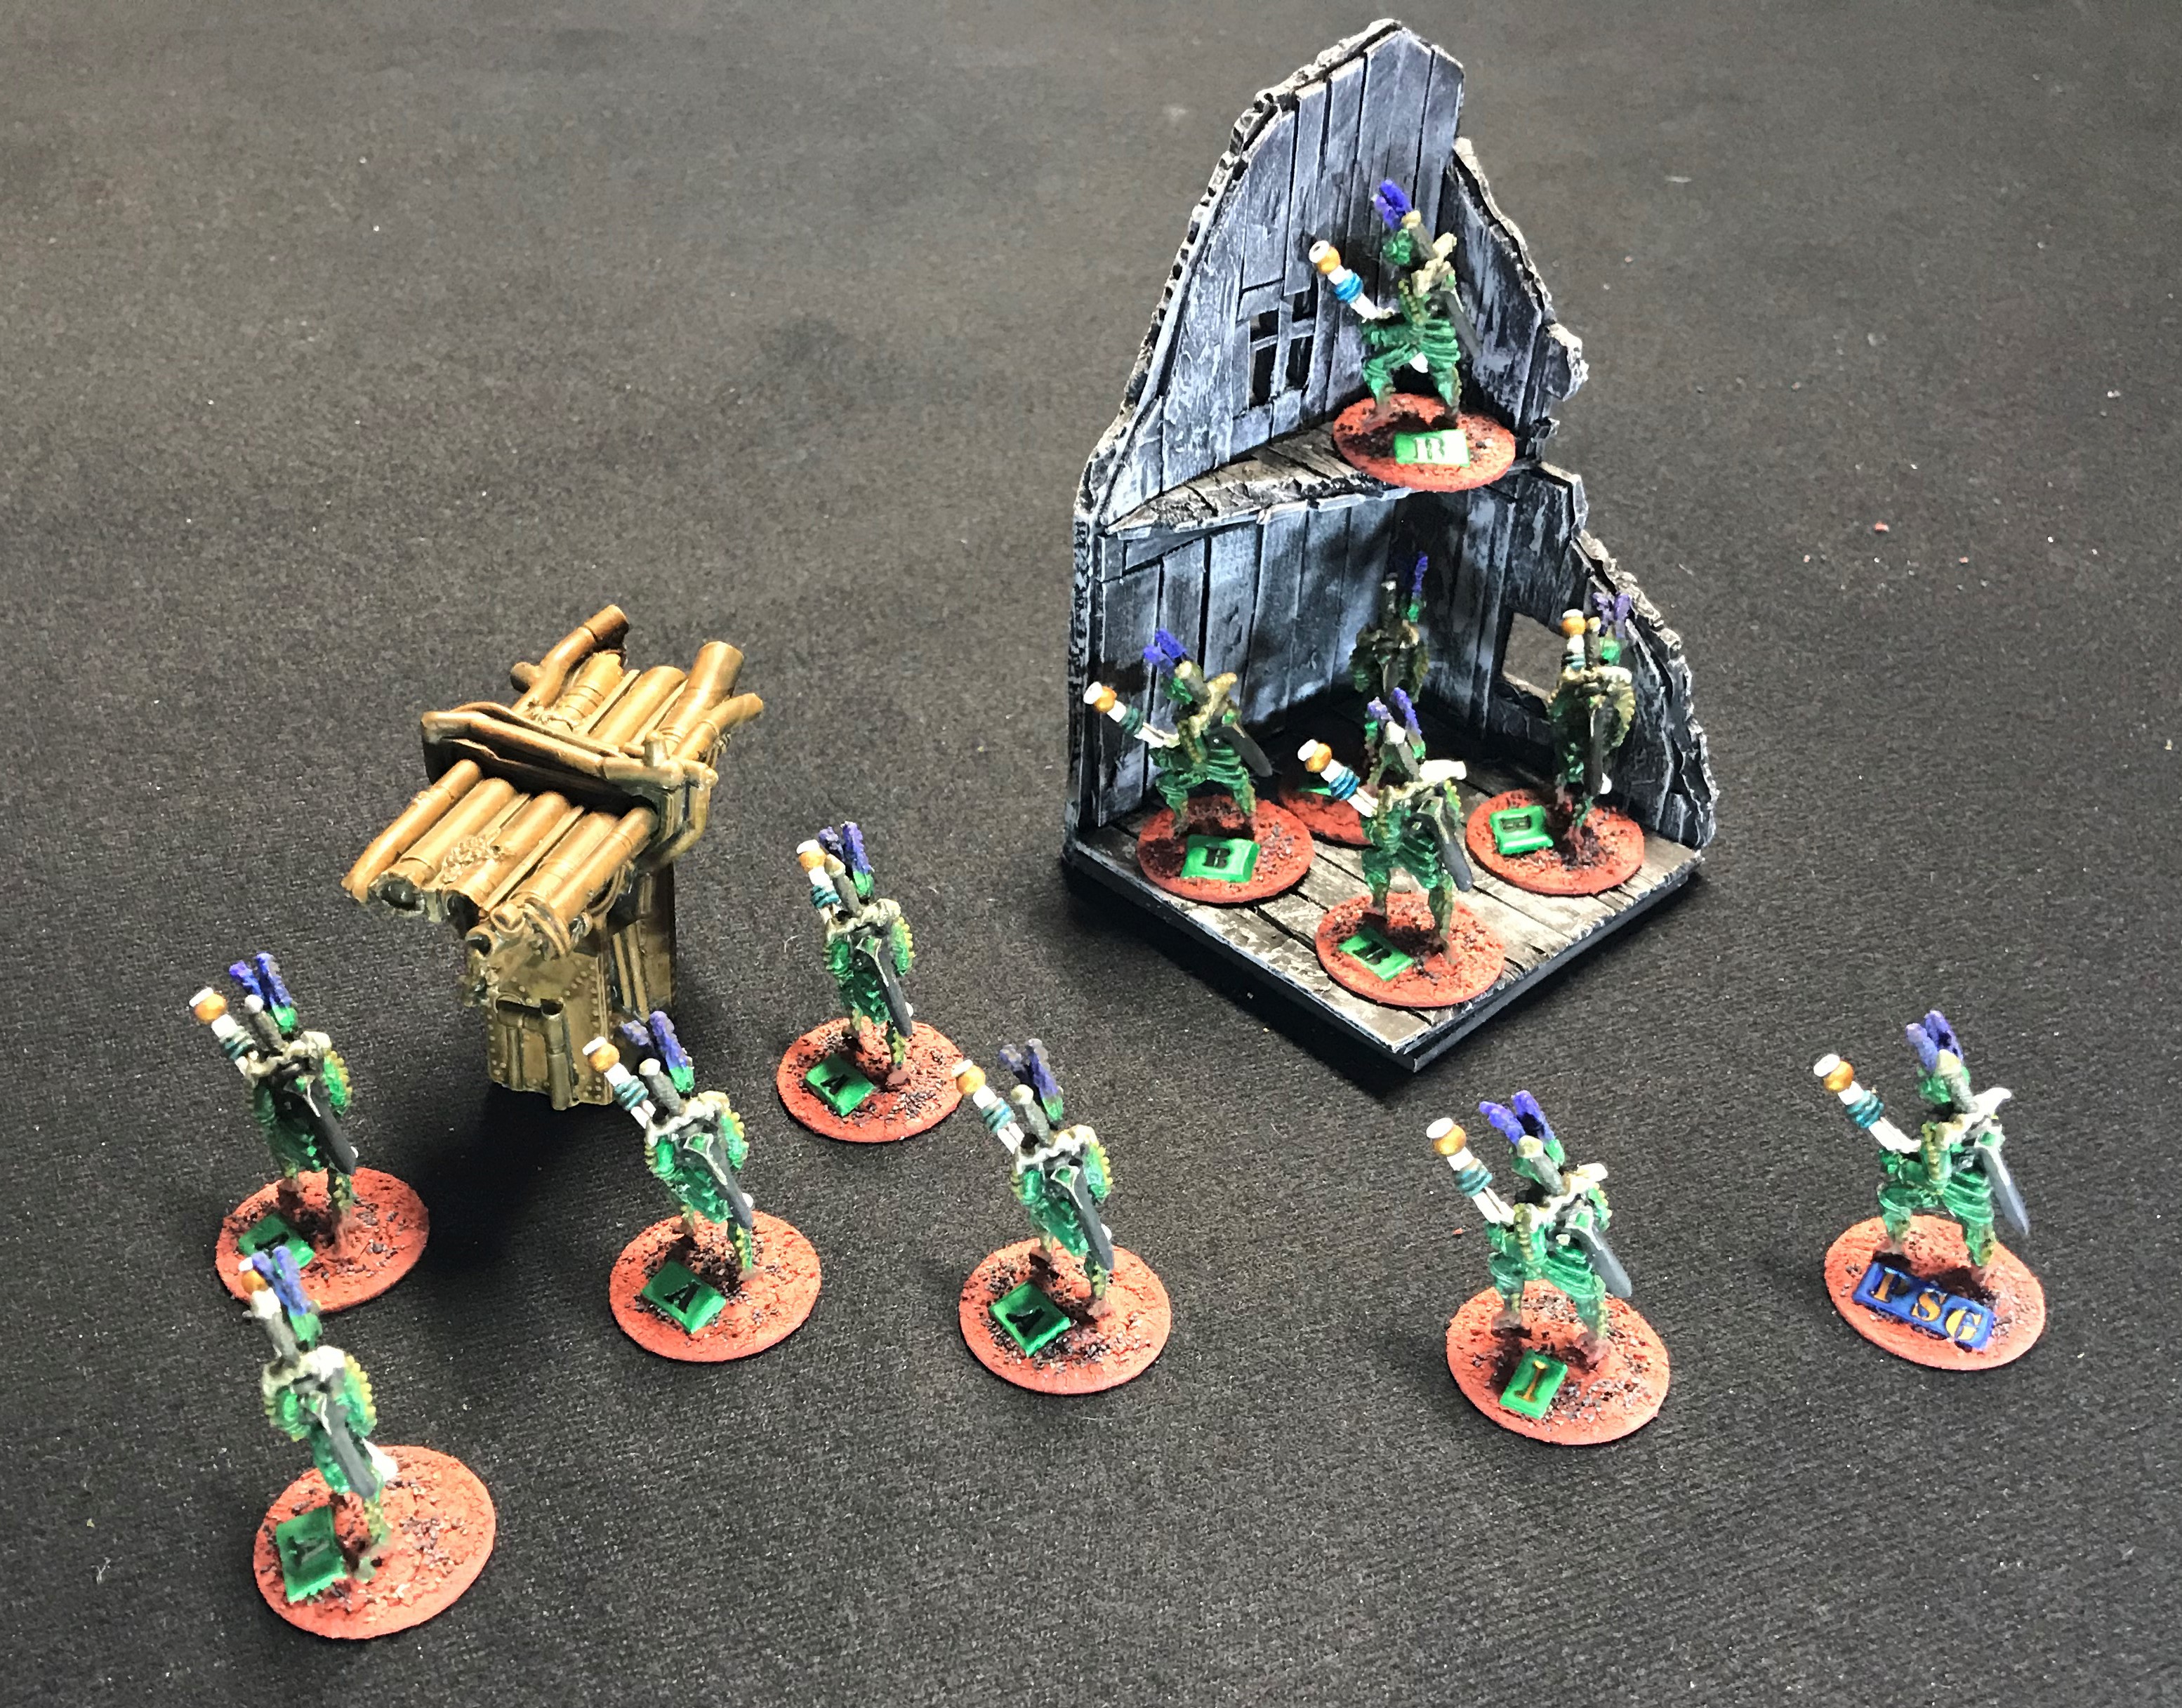
