Amazingly, this upcoming May-June 2020 will mark the 80th anniversary of the Battle of France. I am curious as to how it will be remembered – if at all. Certainly I would think that both the French and the Germans will likely shy away from commemorating the event for diametrically opposed reasons. Yet, it is definitely worth remembering it as a seminal event that without question fashioned all of the world’s history since.
I have studied this battle since my days at West Point. I was fortunate there to study with the then-USMA Department of History Chair COL Robert A. Doughty (now a retired Brigadier General). I was able to participate in a class (HI498 – a colloquium) with him and just one other cadet during my second semester senior year as part of my concentration of studies in French. A side note – my class – 1984 – was the last class not to have majors – we had concentrations. This meant we could choose 8 classes outside of the 44 classes in the core curriculum. As I love military history, especially French military history, this colloquium was a great opportunity. We studied Alistair Horne’s works among others.
BG Doughty has authored many books (just check out this list on Amazon), many that focus on France from WWI to WWII. I recently got two excellent books on the subject that he published after I graduated that I have not read: The Seeds of Disaster: The Development of French Army Doctrine, 1919-39, (which discusses how the French Army came to set themselves up for disaster) and The Breaking Point (dealing with the pivotal Sedan breakthrough in 1940). I also plan on rereading Alistair Horne’s To Lose a Battle: France 1940 as well.
Previously, I have built French and German tanks and run several France 1940 games described in this blog – but my 15mm/1:100 scale tank inventory was quite lacking in terms of the wide variety of vehicles used. I aim to remedy that. I am currently planning on running a game at TotalCon in February, and at HAVOC in April. I may do others as well, plus club gaming sessions. This blog post describes the first chapter of my preparation and force building upgrades for those events – four Hotchkiss light cavalry tanks (one H35 and three H39’s).
I will go over a bit of history of the Hotchkiss tanks and then show some WIP shots of the models. I will then share some eye-candy shots of the finished models. Lastly, as per usual, I will share the paints and materials used in this project.
The H35 tank was originally rejected by the infantry, who chose the R35 instead. It was intended to be a light cavalry tank, though it did equip some infantry tank units as well. Hotchkiss built around 1200 H35’s and H39’s, with the majority being H35’s. The Hotchkiss company was actually founded by an American from Connecticut, Benjamin Hotchkiss. He was a Union ordnance engineer at Colt and a munitions builder during the American Civil War. Finding no US business after that conflict, he moved to France and set up his own company.
The H35 and H39 both had the same 37mm SA18 gun that many French tanks had though the H39 had a longer barrel with better armor penetration (30mm vs 23mm of armor with the shorter barrel). Given that a Panzer IIIE of the time had 30mm of armor all around, this was not adequate to be sure. It had a crew of just two, which made it challenging to operate effectively in battle. Three out of four of the armored divisions’ tank regiments had Hotchkiss tanks (the other one had SOMUA S35’s). The armor was adequate, but with a range of only 80 miles and a top speed of 17 mph, it was not very cavalry-like. On top of it all, it was tough to drive and mechanically unreliable.
After France capitulated, both Germany and Italy got Hotchkiss tanks. Some of these Italian vehicles faced US Army Rangers in Sicily. After the war, some Hotchkiss tanks served on with the Israeli Defense Force until 1952.
I acquired a 3-vehicle packet from Battlefront Miniatures (#FR020) and one single H39 vehicle from Peter Pig (#PP33). The Battlefront ones could be either H35’s or H39’s. In the end, one of the H35 guns was unsatisfactory, so I ended up with one H35 and three H39’s. In the game, there are no differences statistically between the two types.
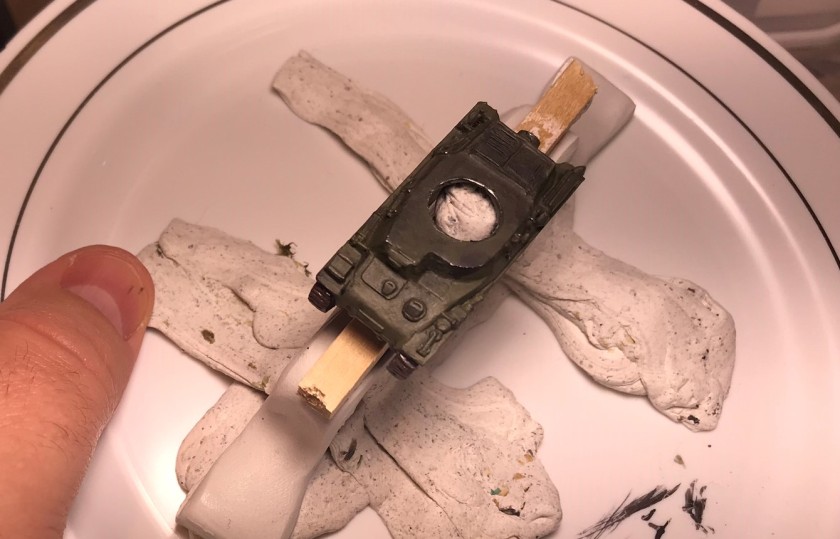
Here are the models – the Peter Pig one was all metal. The Battlefront ones had two different engine hatches depending on what version was to be built. These were relatively easy to assemble and prep for painting.Assembled and magnetized Hotchkiss tanks. From left to right, Peter Pig H39, Battlefront H35, and two Battlefront H39’s. The Battlefront H35 gun was drilled in and affixed with Gorilla Glue. Later, the drill holes were filled with kneadatite (green stuff).The bottom of the Peter Pig H39 model. For reinforcement of the tracks, I added green stuff under the chassis. I also added a magnet to the inside of the turret so my knocked out tank blast markers would stick to an otherwise non-magnetic model.H39 showing green stuff around the longer gun.My mounting arrangement for the tanks. I did paint and varnish the tracks first.Turrets ready to paint.This shows the H35 after the tracks were painted, washed, and lightly varnished.Then the models were mounted and primed. I had a challenge priming the exposed metal parts as you see here – I needed a few thin coats.The priming issue (exposed metal) was more difficult for the Peter Pig model as it was all metal.After priming, the H35 awaits set up for base coat painting. Protecting the already painted tracks with poster tack was the first step.I was not thrilled with the yellow, but I darkened it. Here, I applied more poster tack to apply a camouflage pattern.The H39’s got their base coats, and then I used an Iwata Micron airbrush to blend in some browns on the green. As I researched tanks of this era on the French side, I found that there was no standardization of tank painting schemes.The H35 under the poster tack for a camouflage scheme. The Peter Pig H39 model showing the added brown color airbrushed across the tank.After removing the poster tack from the H35, this was the result. I then washed the vehicles with Army Painter Military Shader. All that was left was adding decals, weathering, and final varnishing.Battlefront decals – so tiny. I still do not understand why the roundels are two piece decals.
Now, I would like to share the finished vehicles – eye candy (at least I hope you find them nice to look at).
Battlefront H35
Right side view, Battlefront H35Front view, Battlefront H35Left side view of the H35. The number is helpful for tabletop ID, but is historically correct. The unit insignia is from the 4eme regiment de cuirassiers, part of the 1st Light Mechanized Division (DLM).The roundel on the back right. How I planned the paint job – I am hoping to get better tan/yellow tan paint for future French use, but after washing/shading, I think this is fine. Do you?
Battlefront H39’s (two)
Battlefront H39 “#8” left side. Battlefront H39 “#8” left front side.Battlefront H39 “#8” rear view.Battlefront H39 “#8” right side.My plan for the “#8”.Battlefront H39 “#64” left side. This was the only Hotchkiss tank I built with a number on the right side of the turret. Again, markings were definitely not standardized.Battlefront H39 “#64” right front side.Battlefront H39 “#64” right side.Battlefront H39 “#64” rear view.How I modeled the vehicle.
Peter Pig H39
Peter Pig H39 “#21” front left view.
Peter Pig H39 “#21” right side view. After weathering was added, the side looked similar to the Battlefront models.I did not have a #41!This is a side-by-side comparison of the Battlefront (left) and Peter Pig (right) H39’s. I like both – though my preference is for the Battlefront models – which are resin and metal. However, many of the models I need for this project are hard to find and not made by Battlefront, and sometimes with some manufacturers you need to buy up to five vehicles. With Peter Pig, I can just get one vehicle (QRF with metal models sells one at a time as well – and you’ll see some of their vehicles soon too). Old Glory usually sells 3 vehicles (all metal) in a pack.
Group Shots
This concludes my very last post of 2020 – and the beginning of this project. (I will be doing a 2019 round up of course – but that will be coming later this week).
More Battle of France vehicles (French and German) will be coming and I hope that you will find them interesting. If you have any feedback, good, bad or otherwise, let me know in the comments section – I do appreciate knowing what you think.
Thanks for looking and Happy 2020!
PAINTS, INKS, GLAZES, SHADES, WASHES, PIGMENTS, FLOCKING, GLUES AND MORE USED ON THESE VEHICLES:
Isopropyl Rubbing Alcohol 91%
Microscale Liquid Decal Film
1/8″ neodymium magnets
Green stuff (kneadatite)
Gorilla Glue
Poster tack and ¼” square wooden dowels on plastic plates
Back in March of 2017, I learned that the UK-based War Games Supply Dump Miniatures was closing after thirteen years of business. My problem at that time was that I had wanted to get more of their fun-looking retro-sci-fi figures. I had already very much enjoyed painting the Khang Robots I got from WSD for my Warbot platoon that serve as squad leaders in that unit. I had also seen many of WSD’s Dirk Garrison sci-fi line figures on Buck Surdu’s blog. I needed to get some while it was still possible to add to my forces for Combat Patrol™ retro-sci-fi games.
As time was limited (as was Roger’s remaining inventory) I placed a sizable order with Roger for several groups of 28mm scale figures that would be suitable for building platoons – including Khanopians, Valkyrie Space Pirates, and miscellaneous items such as Space Munchkins and my Robo-servo Guns that I posted about here previously. After finishing my Macron unit, I decided that it was time to get some of these languishing WSD projects painted, starting with the Retrovians.
By the way, many of you who follow this blog may recognize Roger as the author of the blog “Rantings from Under the Wargames Table” – a fun blog that unfortunately Roger ended in April of this year (you are indeed missed Roger!).
I was not able to order all of the Retrovian models, but a decent assortment of ones of different poses. I got the following 34 from Roger to build a Retrovian platoon:
3 DG-07 “The Bra’sheer” figures/three-legged vehicles
1 DG-11 “Garkkon” figure (Retrovian Monster)
2 DG-50 “Retrovian Captain w. Sword & Pistol” figures
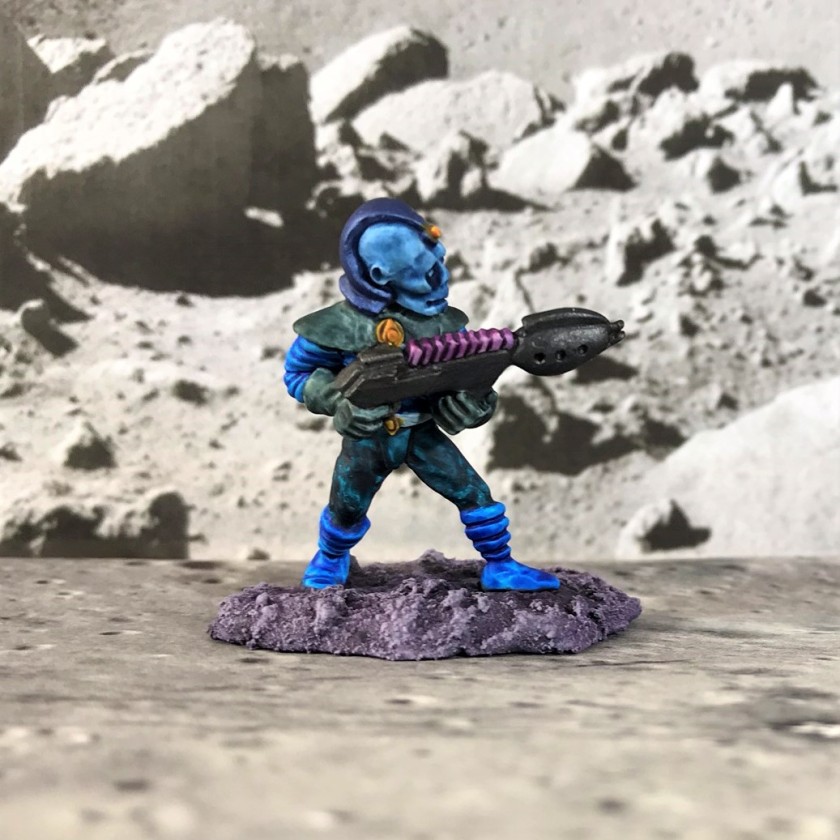
6 DG-56 “Retrovian Two Man Sonic Cannon Team” crew figures (one had a sonic cannon, one had a pair of sci-fi binoculars – 3 of each)
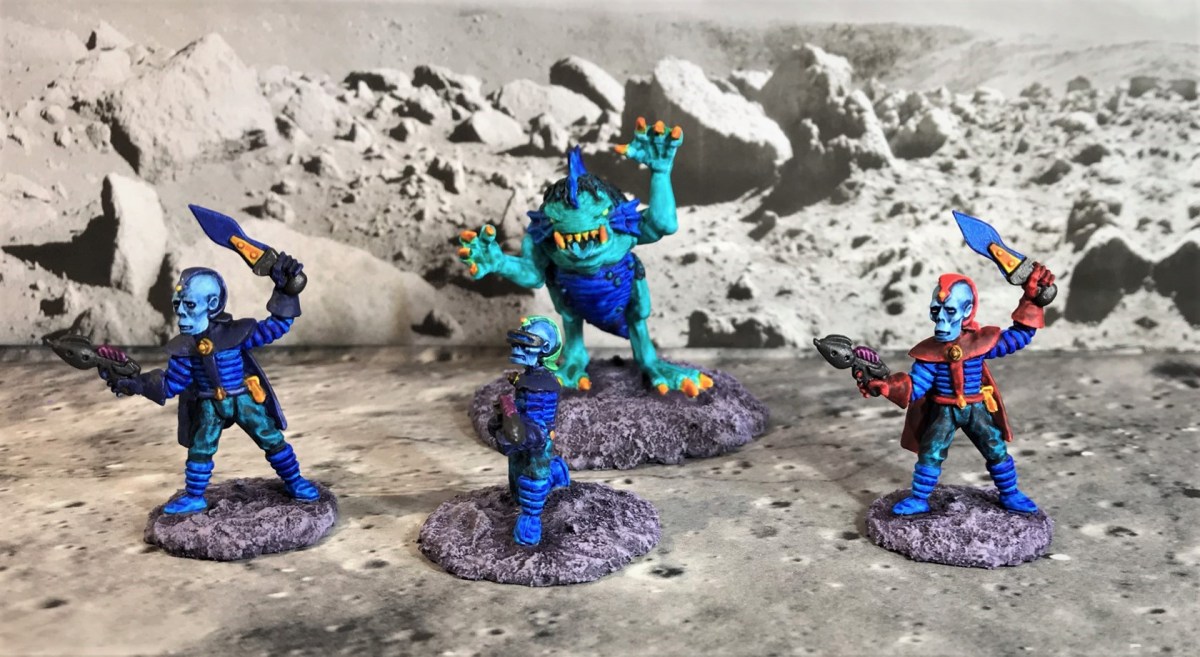
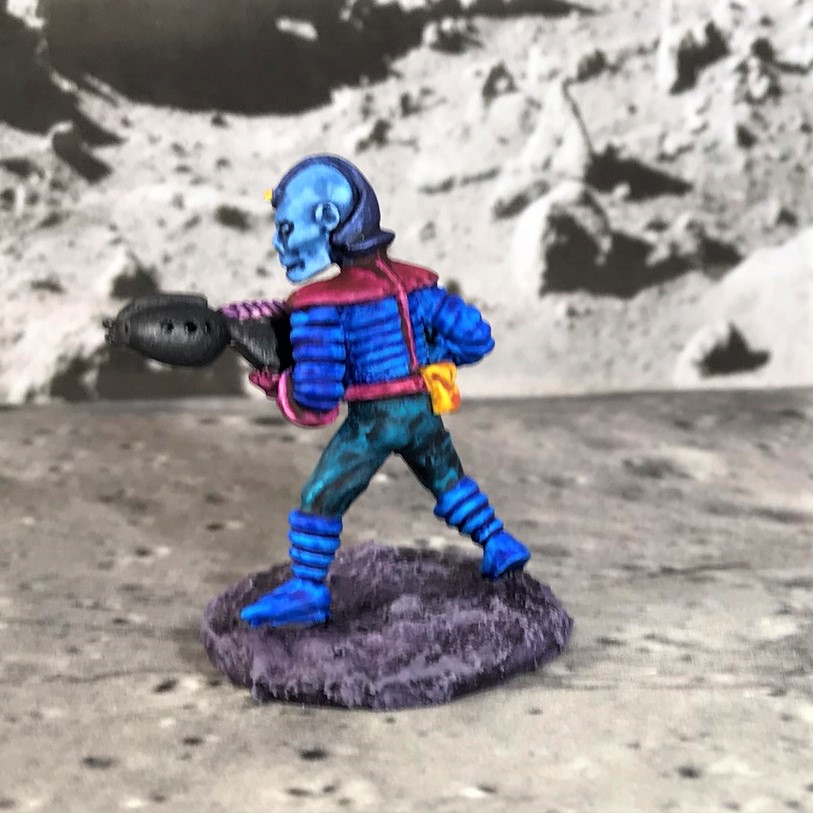
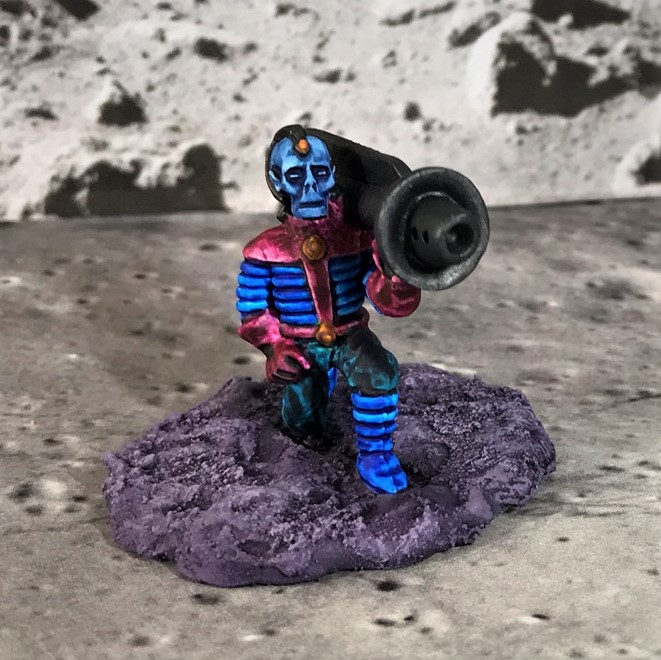
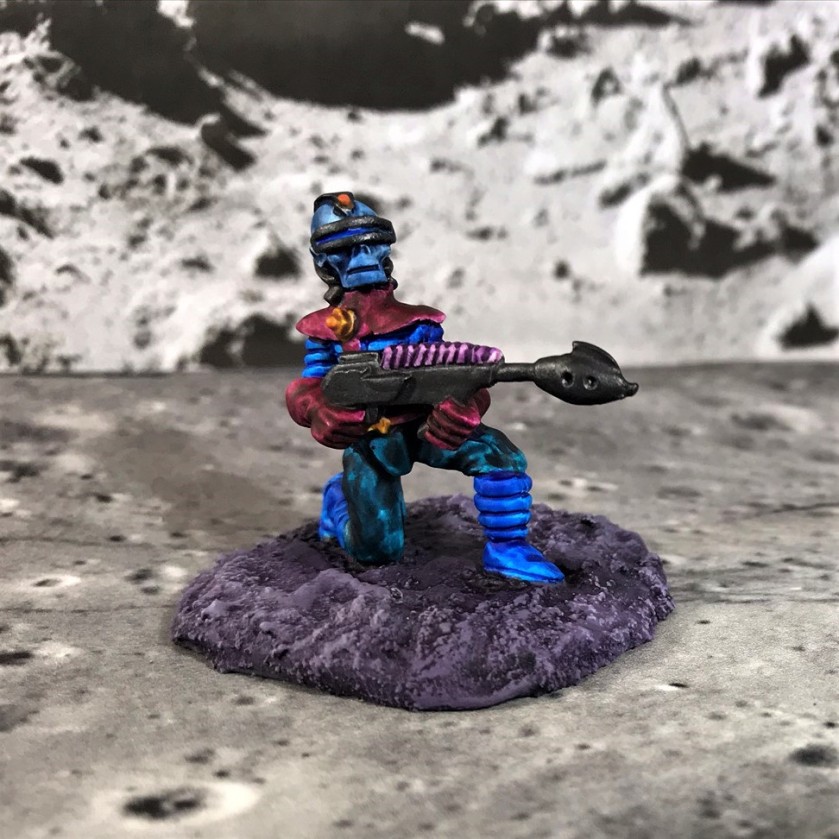
In deciding how to construct the platoon, I needed to consider how to build something that would be useful as a unit – and that would have some sense as to its build. I also have been watching a number of early 2000’s Star Trek “Enterprise” episodes (that I never saw when the series ran). I have become very fond of the Andorians – and Jeffrey Comb’s portrayal of Commander Shran. The Andorians had not been much seen in the Trek universe since the original 1960’s Star Trek. I decided that in homage the Retrovian platoon would be completed as blue skins and with some Andorian names.
I had these dudes – less antennae – as color inspiration.
As far as structure, I had enough to create three line squads of two teams. There would be 10 figures in a squad: a squad leader, an A team of a team leader and four troopers, a B team of a team leader (the binocular half of the Sonic Cannon team), a Sonic Cannon gunner, a marksman/sniper, and a Bra’sheer Assault Pod. The Bra’sheer I envisioned as having an automatic weapon and mechanical claws that could tear apart obstacles, walls, or enemies’ heads and limbs.
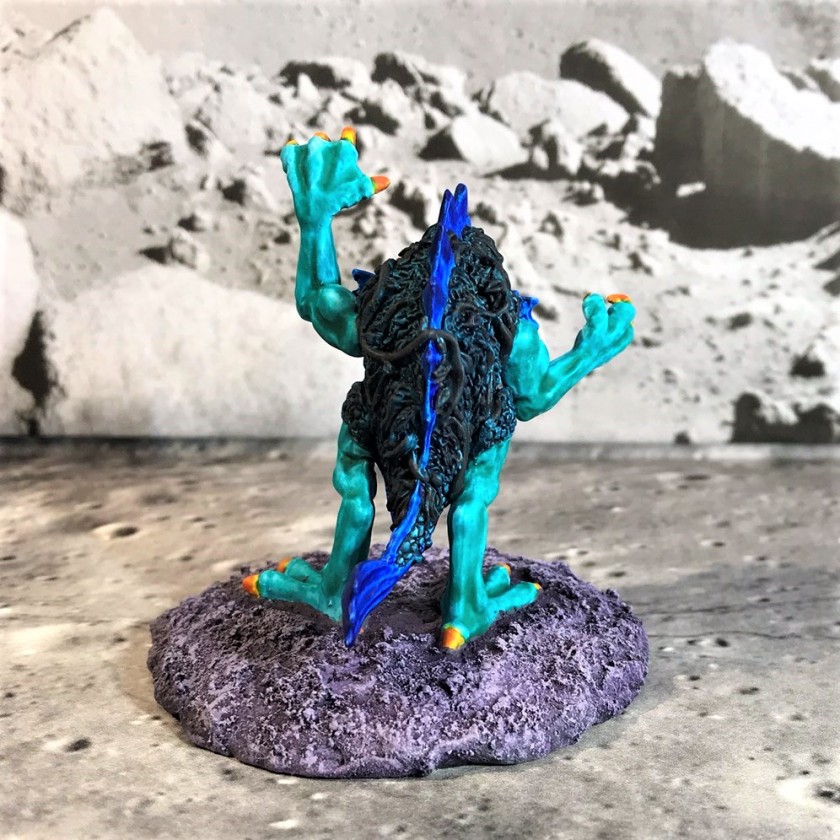
That left me with enough figures to make two other sections. The first is an HQ section (composed of a platoon leader and a platoon sergeant). The second is a Garkkon section (reporting to the platoon sergeant or platoon leader) with a marksman in control of a giant Garkkon monster suitable for melee. The Garkkon is a hybrid of a fish, a lizard, and a giant chicken – it’s quite amusing to look at.
The Retrovian Platoon organization. Each die represents an element that can be activated in a Combat Patrol game. The platoon therefore has 9 possible elements that could be activated.
I will share how I assembled and painted the Bra’sheer pods and the Garkkon, then go into the infantry. Then I’ll share some eye candy that I hope you will like, as well as a glimpse into some of the play aids I made (with help from Buck Surdu) for these in club or convention game play. Lastly, I will share a list of the paints and materials used in the making of this platoon for those interested.
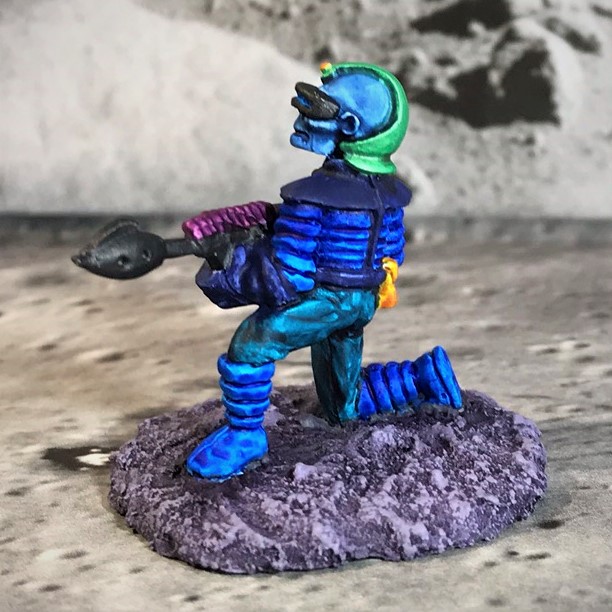
The Bra’sheer
I believe the Bra’sheer were sculpted by Brad Shier – given their names. The three Bra’sheer figures were, like all of these, great sculpts. As I had three, it made sense to assign one per each squad on the B teams. Assembly-wise, I did have a good amount of filing and filling with green stuff to do on these. Also, the process of assembly was a bit difficult as I wanted to get the legs in position such that the chassis were level. I ended up needing to affix one leg at a time and check if they were level.
The Bra’sheers in front of the 2″ steel fender washer bases – that also had 1.25″ steel fender washers, .5″ stainless steel fender washers, and polystyrene card as part of the base. The Garkkon is on the right (more on it later).Close up of the assembled Bra’sheerI took the multi-washer bases and scribed the leg positions on them in pencil. Then I added Apoxie Sculpt, and some Army Painter flocking (see materials list at end of this post). Once this had hardened overnight, I affixed the Bra’sheer with E6000 to the bases. Here, these look like bad cookies…Here you see a primed Bra’sheer with green stuff additions to the chassis and some poster tack on the crewman. I needed to add green stuff to fill in gaps and make the legs structurally strong. There were mold lines on the legs that short of obliterating the detail I could not get rid of – so I dealt with these later with painting. The poster tack was to protect the crewman from being painted with the pearlized blue paint I used on the chassis.After painting the legs and the chassis. The legs were heavily shaded after the pearlized paint was applied to mitigate the mold lines.The model is in the final stages here – I used multiple paints and products on the bases alone. The Bra’sheer were the only Retrovians with “veiny” heads
The Garkkon
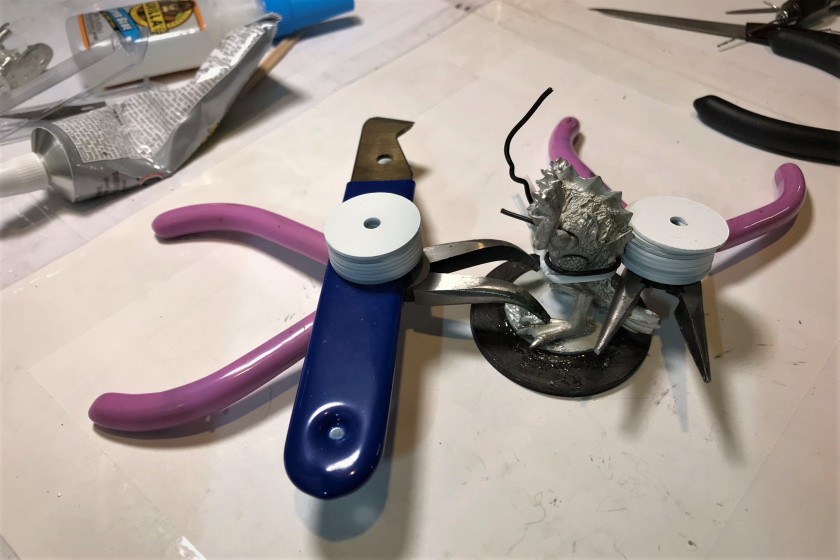
The Garkkon as received. I do not know why it came with an anchor, but I decided not to use it on the model. It, like the Bra’sheer, had similar assembly challenges.Here’s a better view of the base I used – it’s pretty heavy!Multiple drill holes and pinning were needed, plus green stuff to stiffen the structure.As the E6000 hardened overnight, I had this Rube Goldberg way of stabilizing the model.Garkkon assembled.I used green stuff here on the limbs and on the base. I chose to do the other bases with Apoxie Sculpt.This is early and fairly gaudy in the painting process – on purpose. My hope was to use contrast paints and let the light blue here to be the same color as the infantry flesh. As you will see, I needed to adjust my plans. I also wanted to adjust the yellows here.Side view of the previous stage picture.I added Aethermatic Blue Contrast Paint to the blue – and ended up with a look that was more green than blue. This is mid-painting to show the difference (the head has the contrast paint at this point). I ended up finishing the Garkkon blue with the contrast paint, and finding another path for the Retrovian infantry’s flesh color.This is after I finished the Garkkon’s initial flesh color.After some more shading, some highlighting, and some glazes, I moved on to the Garkkon base.
Retrovian Infantry
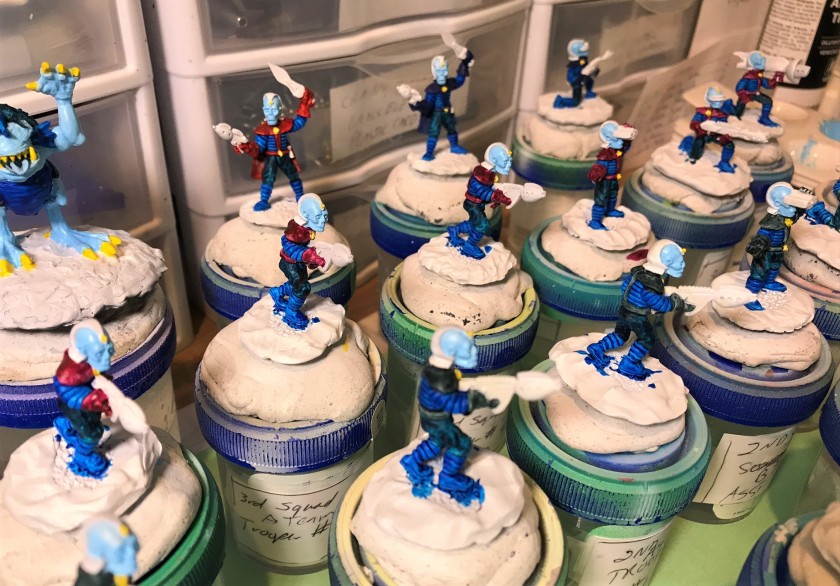
Getting organized…Initial mounting on fender washers after filing and cleaning. I used slightly larger bases for the Sonic Cannon Gunners and the Marksmen out of necessity.After I added Apoxie Sculpt on the bases and let it harden for a day.Here you see the platoon ready for priming and painted as mounted on the specimen jars with poster tack.I used Talassar Blue on the boots and the tunics.Then I used Akhelian green on the pants – and each squad got a different contrast paint color on the shoulder pads. Here, first squad had Nazdreg Yellow – which ended up looking leather-like.Similarly, 2nd squad and third squad got Gryph-Charger Grey and Volupus Pink respectively. The platoon leader (Commander Schran) got Blood Angels Red, while the platoon sergeant and the Garkkon controller got Ultramarines Blue. I found that these contrast paints needed a few thin coats to be useful.Commander Schran mid-stage.The Sonic Gunner from 3rd Squad’s B team mid-stage.For ease of play on the tabletop, in addition to the different shoulder pad colors, the leaders had different colors on their helmets. Red indicates the platoon leader, blue indicates the platoon sergeant and squad leaders, and green indicated the team leaders. Others just got a metallic black helmet.As discussed above, the flesh color on the Garkkon was not what I wanted on these guys. The faces are very cool, and I ended up using Army Painter Quickshade Blue Tone over the light blue – and I was very pleased with the result. This is Commander Schran again, and I also wanted to make these swords special – so I brush painted them with the same metallic blue as the Bra’sheer chassis – and called them “Frostblades” – giving them a minor anti-armor capability.Close to the finish with the bases remaining to be done.Ready to dry brush the bases!A 3rd Squad trooper with base complete and ready for varnish .Completed platoon in the transport box!
Eye Candy of painted Retrovian Platoon and Combat Patrol™ Game Aids
Platoon HQ:
Commander Shran, front viewCommander Shran, rear view
Platoon Sergeant, SFC Thelev
Garkkon Section:
SSG Ushaan-Tor, Garkkon ControllerGarkkon frontGarkkon back viewGarkkon SectionUnit Data Card for the Garkkon Section
1st Squad:
1st Squad Leader, SSG Kumari
1st Squad, A Team Leader
1st Squad, B Team Leader
1st Squad Trooper (A Team)1st Squad Sonic Cannon Gunner (B Team)1st Squad Marksman/Sniper (B Team)1st Squad Bra’sheerBra’sheer Vehicle Data Card. The numbers in red circles refer to armor factors. These would be the same for each pod.1st Squad
3rd Squad Trooper (Team A)3rd Squad Sonic Gunner (Team B)3rd Squad Marksman/Sniper (Team B)Unit data card example – 3rd Squad3rd Squad Bra’sheer (Team B)3rd Squad
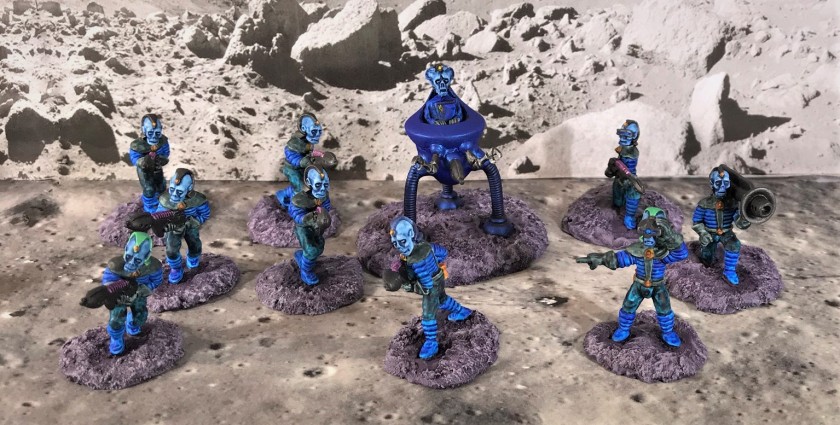
Retrovian Platoon (group shots):
Command and Garkkon SectionAll three Bra’sheersRetrovian Platoon!Retrovian Platoon (top view)
This project took a bit longer than I expected it to – about 3-4 weeks – but it was rewarding. I do hope that you found it interesting and fun to look at – so let me know in the comments section – good or bad. Did you pick up on any Andorian references here?
Thanks again for looking – and until next time, all the best to you and yours!
PAINTS, INKS, GLAZES, SHADES, WASHES, PIGMENTS, FLOCKING, GLUES AND MORE USED ON THESE FIGURES:
Gorilla Glue
E6000 epoxy
Small paper clip wire
2″ Everbilt steel fender washers ( bases for Garkkon and Bra’sheers)
1¼” Everbilt steel fender washers (added to Garkkon and Bra’sheers on 2″ steel fender washers; used as bases for Retrovian Marksmen/Snipers and Sonic Cannon Gunners)
½” stainless steel fender washers as fillers in bottom of 2″ steel fender washer holes (Garkkon and Bra’sheers)
Evergreen polystyrene #9020 card (0.020″ thick) on top of 2″ steel washer holes (Garkkon and Bra’sheers)
Green stuff (kneadatite)
1″ steel fender washers (used as bases for remaining Retrovian infantry figures)
Apoxie Sculpt
Army Painter “Battlefield Rocks” flocking (put into Apoxie Sculpt on Bra’sheer bases)
Army Painter “Black Battlefields” flocking (put into Apoxie Sculpt on Bra’sheer bases)
Poster tack to mount figures to specimen jars for painting
Vallejo “Surface Primer – Black” (on exposed steel and polystyrene on bases)
Vallejo “Surface Primer – White”
Vallejo “Flow Improver”
Vallejo “Airbrush Thinner”
Citadel “Contrast Paint – Talassar Blue”
Citadel “Contrast Paint – Akhelian Green” (except for Bra’sheers)
Vallejo Game Air “White Grey”
Vallejo Mecha Color “Fluorescent Yellow” (Garkkon eyes)
Vallejo Game Air “Moon Yellow” (Garkkon claws and teeth)
During the Battle of France (May-June 1940), there was an amazing variety of vehicles on both the German and the French sides. At this same time last year, I began putting together a collection of period 15mm/1:100 scale vehicles for this period. These were discussed here. I have previously posted about a couple of games (December 2018 and January 2019) that I ran using the What a Tanker™ rules from the UK’s Too Fat Lardies. I have been hoping to return to this period and add more vehicles to both armies. I am starting this augmentation by adding 3 FCM 36 light tanks to my fleet.
The FCM stands for Société Nouvelle des Forges et Chantiers de la Méditerranée, a shipbuilder in Toulon who manufactured this 1936 design – and delivered about 100 to the French Army up through 1938. Cost and industrial manufacturing concerns limited further purchases. They were a little more than 12 tons, with a crew of two. The armor was fairly good – welded, and very sloped for tanks of the day. It also had a diesel engine and reasonable range unlike many other contemporary French tanks. However, like many other French tanks, it was armed with the weak Puteaux SA 18 37mm gun which definitely had challenges fighting German armor. Notably, two battalions of FCM 36’s tried to repel the bridgehead that the Heinz Guderian had established across the Meuse, but they were too little and too late. After the surrender of France, some of the FCM 36 chassis were converted to Marder I’s or self-propelled artillery. Some of these conversions were involved in the Normandy Campaign of 1944. Today, only one FCM 36 survives at Saumur.
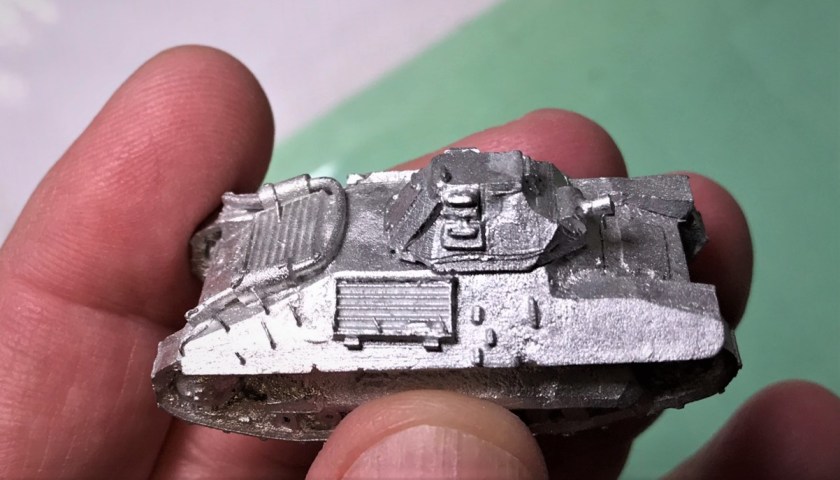
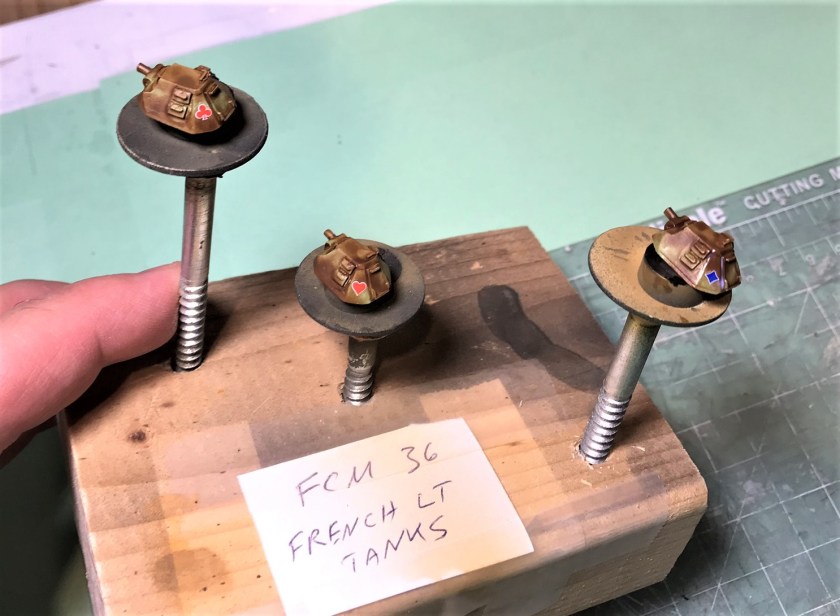
I thought these would be a good addition to my French early-war tank collection. In What a Tanker™, these are the cheapest tanks to buy point-wise. The only source I found for these models was Old Glory. They are metal, and quite small of course.
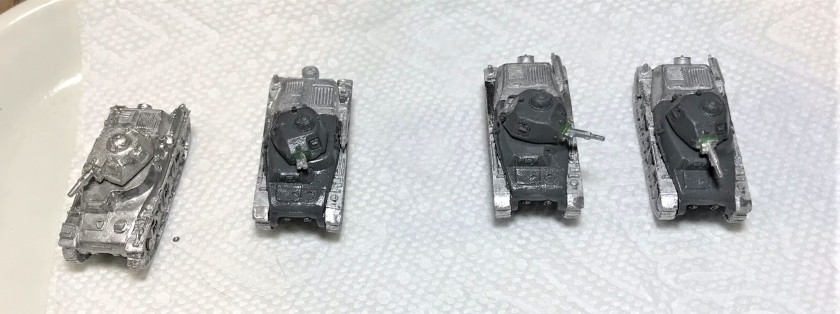
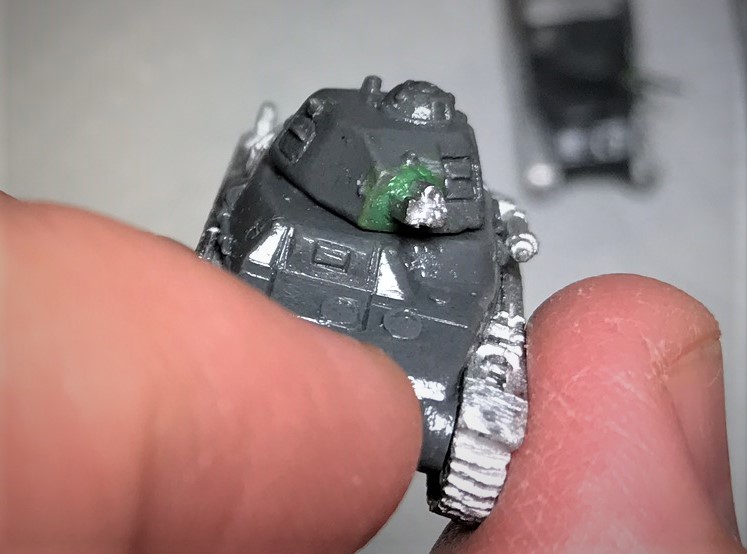
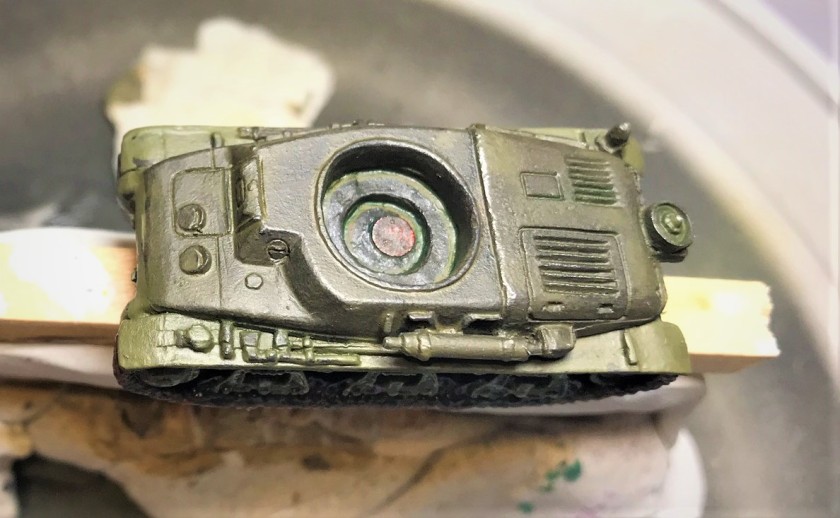
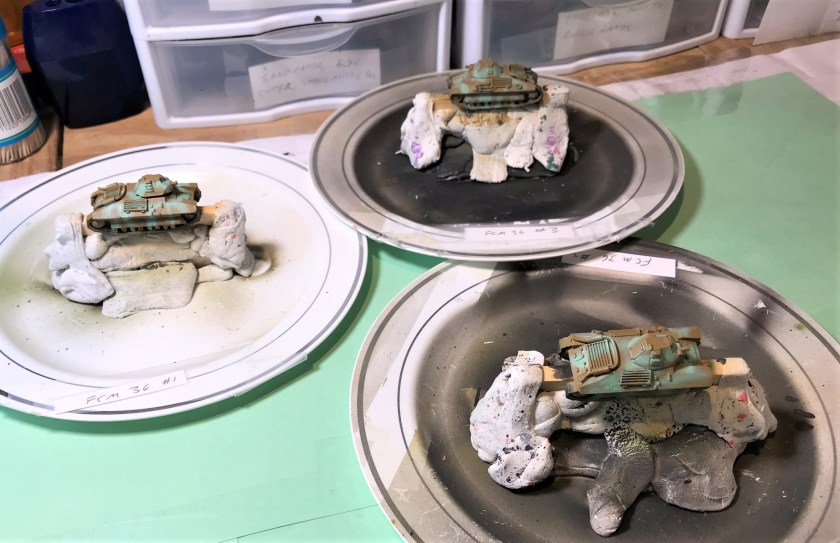
The 3 FCM 36’s in the baggie.I did need to do a bit of filing and cleanup of extraneous molding material and molding lines as you see here. Yes, these are small!The turrets had a small molded pin for mounting on the molded hole on the chassis. I needed to slightly elevate the turret or the underlying paint on the chassis would be worn off, even with a good varnishing. I decided to drill out the pins and the holes with a 1/8″ drill bit. I then used green stuff to fill in underneath the hollow chassis between the tracks and provide a “floor” for the magnets. The magnets were put in place with Gorilla Glue in the chassis and the turrets.You can see here my hodge-podge mounting scheme of the FCM 36’s for painting. I used a 1/4″ square dowel and poster tack to mount the chassis for painting. I primed these, and the used a German green-brown as a base coat. This shot here is after the first camouflage color (blue green) was applied with my Iwata Micron airbrush. Also, I only put the turrets on a tank when I am painting camouflage patterns.Next, I applied the third color (brown) to the camouflage pattern.When I paint turrets, I find this helpful (as the magnets in the turrets hold the turrets to the magnets on the washers). Also, I can easily apply the decals this way, and airbrush on the final two coats of matte varnish.
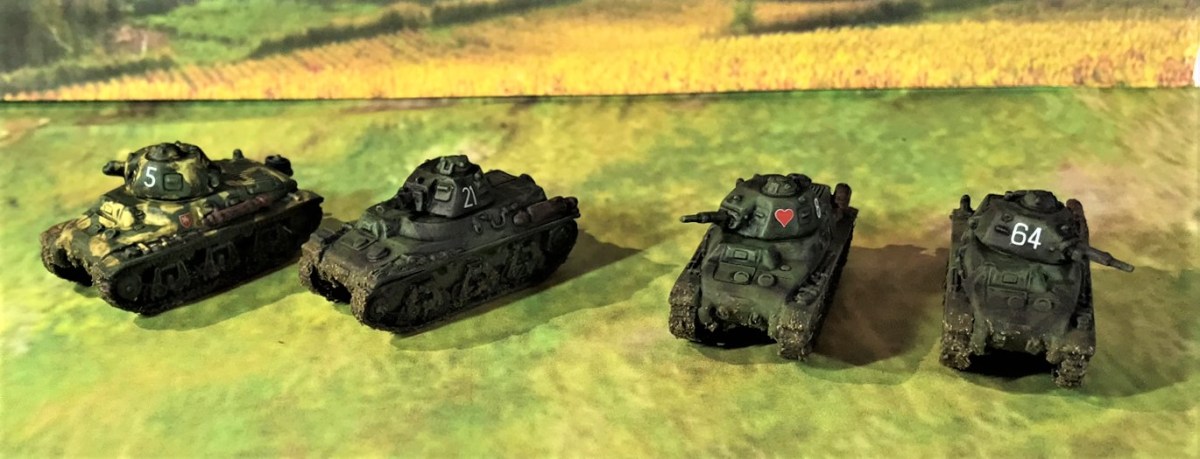
Lastly, I thought I’d share some group and individual shots and a bit about their debut on the tabletop the day after they were completed.
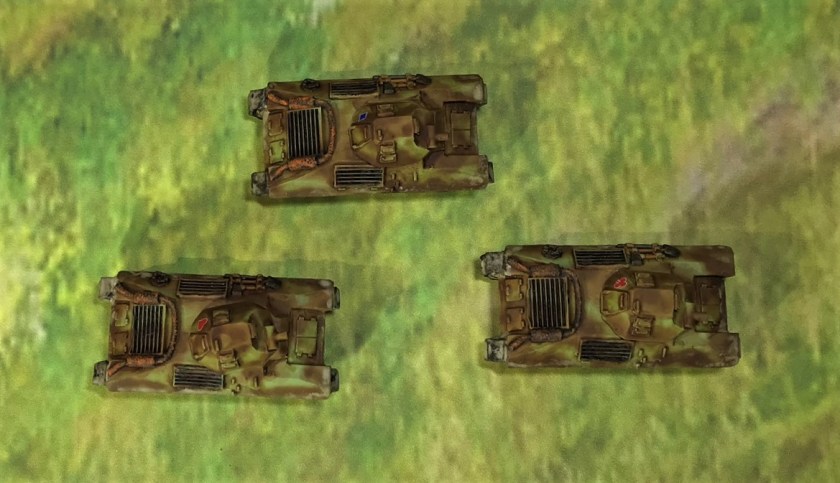
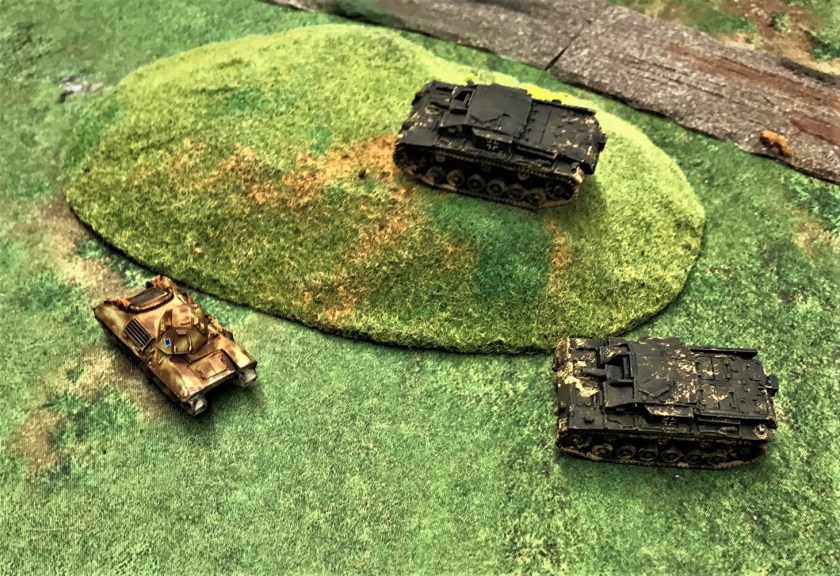
Top view showing the sloped octagonal turrets.
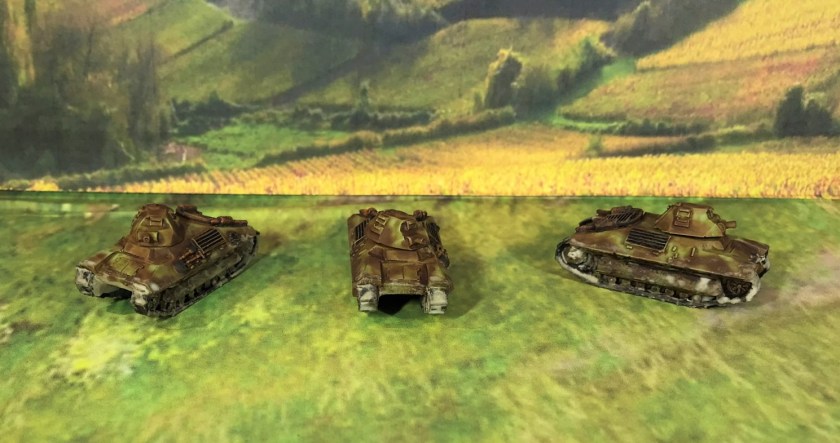
Left side of the FCM 36’s.Frontal view.
I used a blue diamond, a red heart, and a red club as decals which would also help identify these as different individual tanks on the tabletop. From my research, FCM’s did not seem to have as many markings historically as other French tanks.
As stated above, these made their game debut this weekend at the December session of the Mass Pikemen Gaming Club.
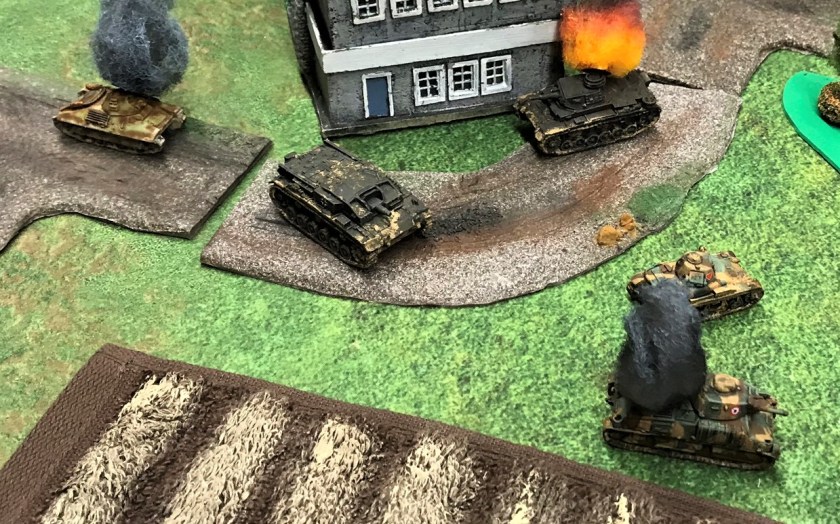
My buddy Mike Morgan was on the French side, and chose the blue diamond FCM 36 as his tank. He then rolled a perfect roll of 6 sixes! The odds on that were 0.01286%!Mike’s FCM 36 moves on the road.His FCM 36 was stalked by a StuG A (player Chris), which kept missing it.Mike successfully maneuvered his tank to the German’s side, and shot point blank. The dice deserted him as the StuG A took only minor damage.Smelling an easy kill, the Germans (Chris’s teammate Christine) brought up a second StuG A in the hunt. It also missed the FCM 36. Note – as there were only 15 StuG A’s in the German invasion force across France, this would have been highly unlikely!Then the Germans brought up even more to the hunt with a Panzer IIIE…And Mike’s plucky FCM 36’s luck finally wore out with the Panzer IIIE (Christine) knocking it out.
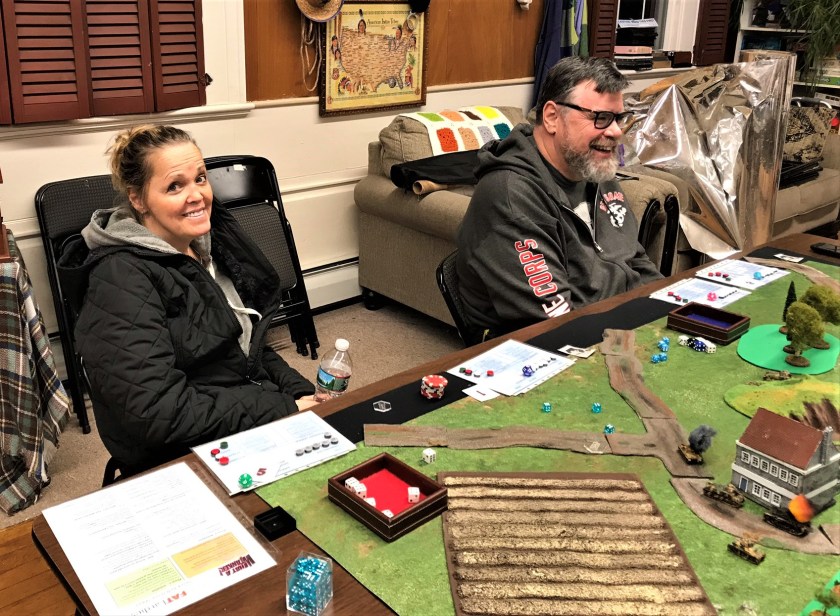
On the other side of the table, Mike’s teammate Tom managed to kill Christine’s Panzer 38(t) with a SOMUA S-35. Mike got another FCM 36, and that was killed by Christine’s teammate Chris’s StuG A (in the shot below on the left). Mike replaced his lost tank with an R35. Tom drove his SOMUA around the building but frustratingly could not take a point-blank shot at the Panzer IIIE (as his dice roll failed him). Mike had to leave, and my wife Lynn (no gamer just watching) took over the R35. Lynn drove the tank to the side of Christine’s Panzer IIIE, and rolled three critical hits – and Christine failed to block any. This knocked out the Panzer IIIE!
Lynn’s R35 avenges the burning FCM 36 (on right) by knocking out the Panzer IIIE.Happy wife, happy life! Tom and Lynn are all smiles here.In a final act, Christine maneuvered her remaining StuG A for a rear shot on Tom’s SOMUA S-35. She successfully knocked out the SOMUA.
That ended the game, with the French winning a very narrow victory 32-31. If Lynn had not rolled so well in killing the Panzer IIIE, the Germans would have won. Thanks to the players for a great and fun game!
I have plans for more French and German tanks for this scenario. I hope that you enjoyed this post, and feel free to share your thoughts and feedback with me in the comments section! I have been behind on my blogging efforts and hope that I can share more with you soon! Thanks for taking a look!