The World of Greyhawk 9, Cavemen, Cairn Hills (Minifigs) Circa 1980

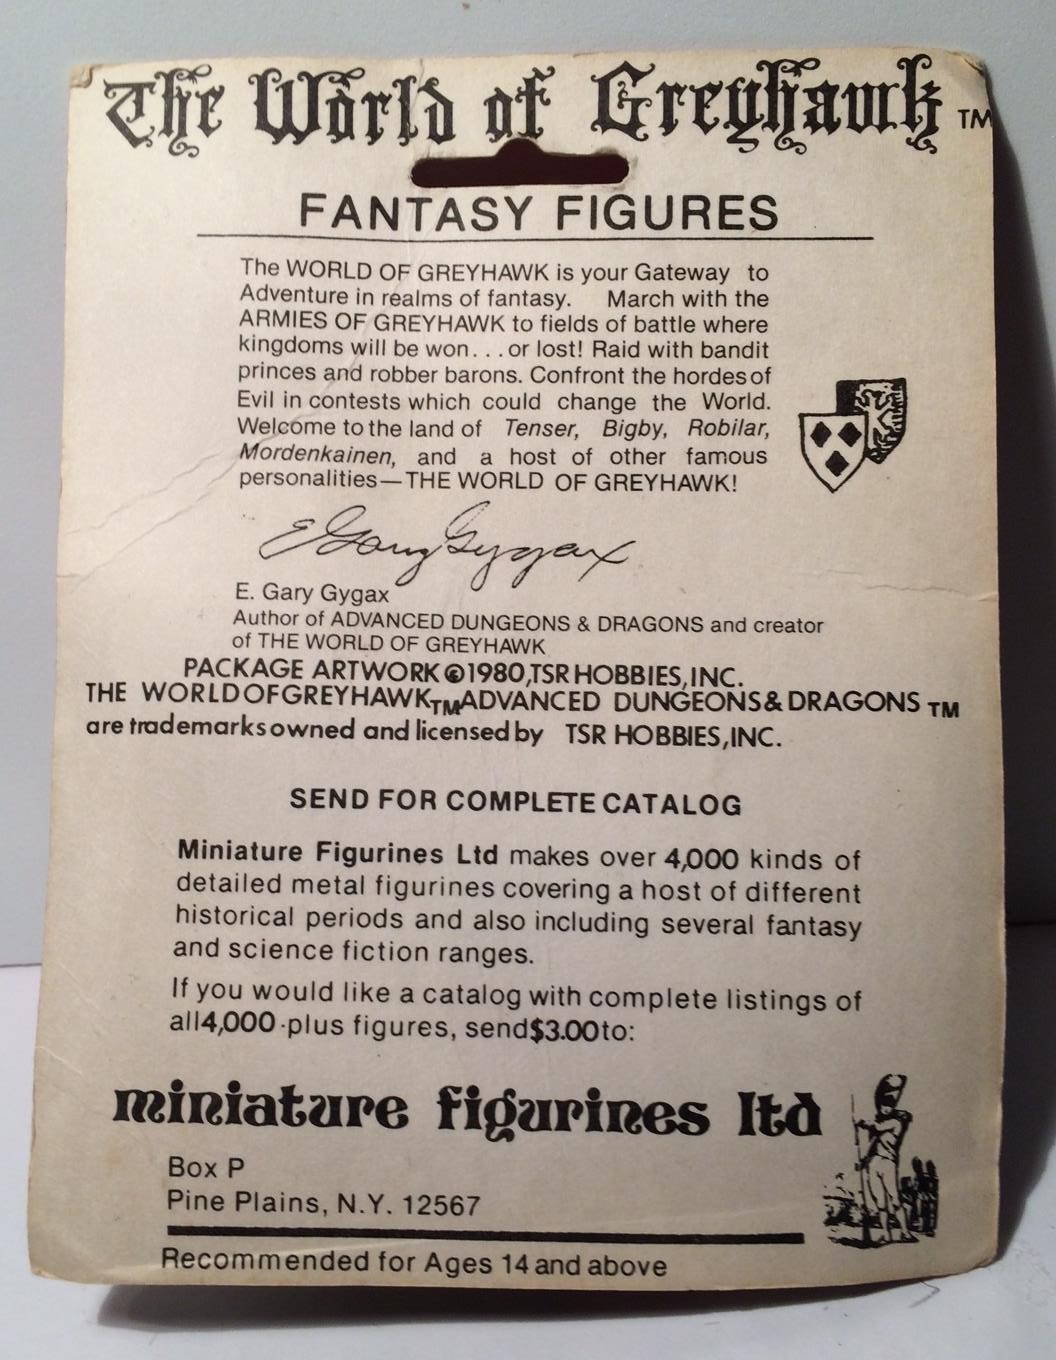
My latest reclamation project was a unit of 18 Cavemen that I purchased from Buck Surdu or Dave Wood back in 1983 or 1984 (not sure who).  These were from a line that Minifigs made around 1980 that was quite extensive.  Like my other projects, these have been sitting around for quite a long period – 30+ years since I acquired them and 35 years since their manufacture!  I thought that it would be interesting to have a large unit of Cavemen armed with Neolithic weapons.

The Cavemen Await Freedom from their Packages!
Close up of Single Package - a bargain at $3.98 in 1980!
Close up of Single Package – a bargain at $3.98 in 1980!
Back of Package Detail

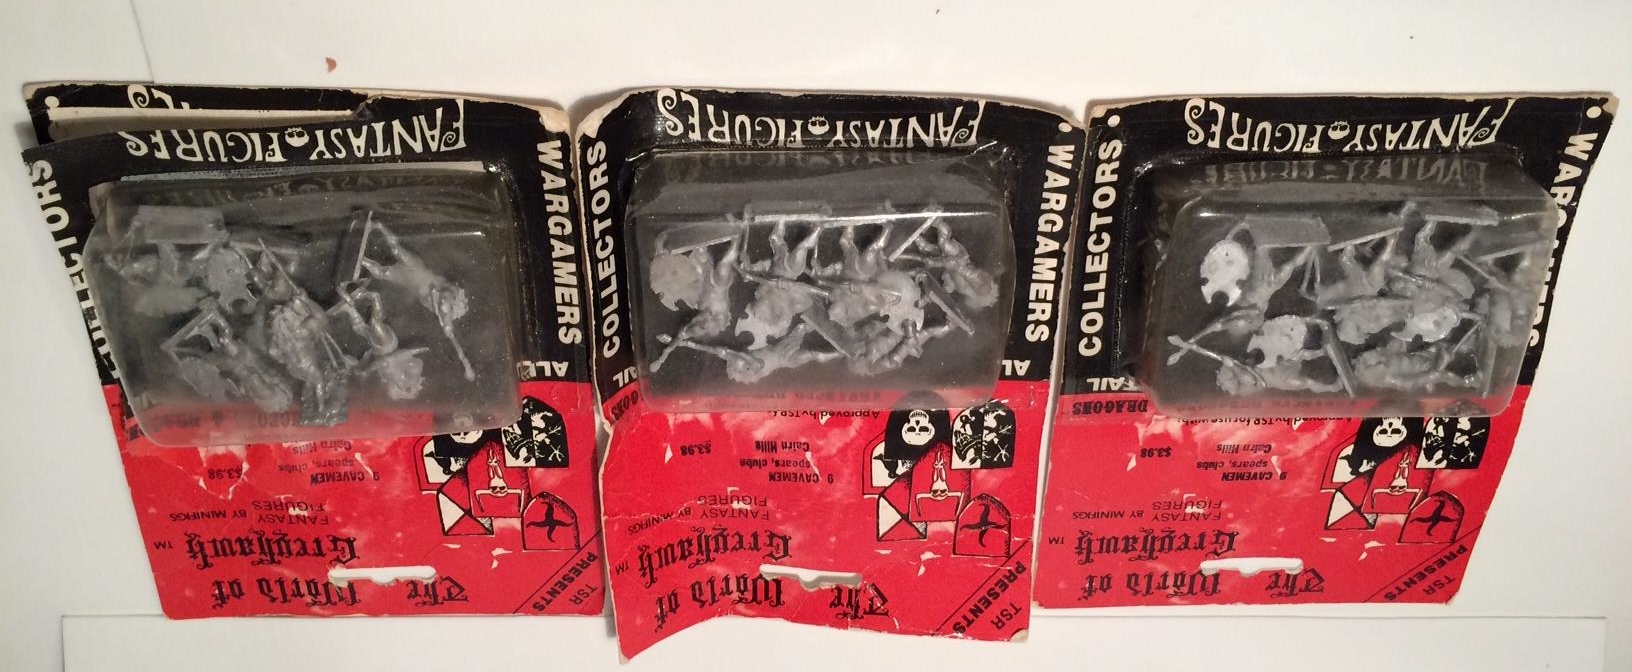
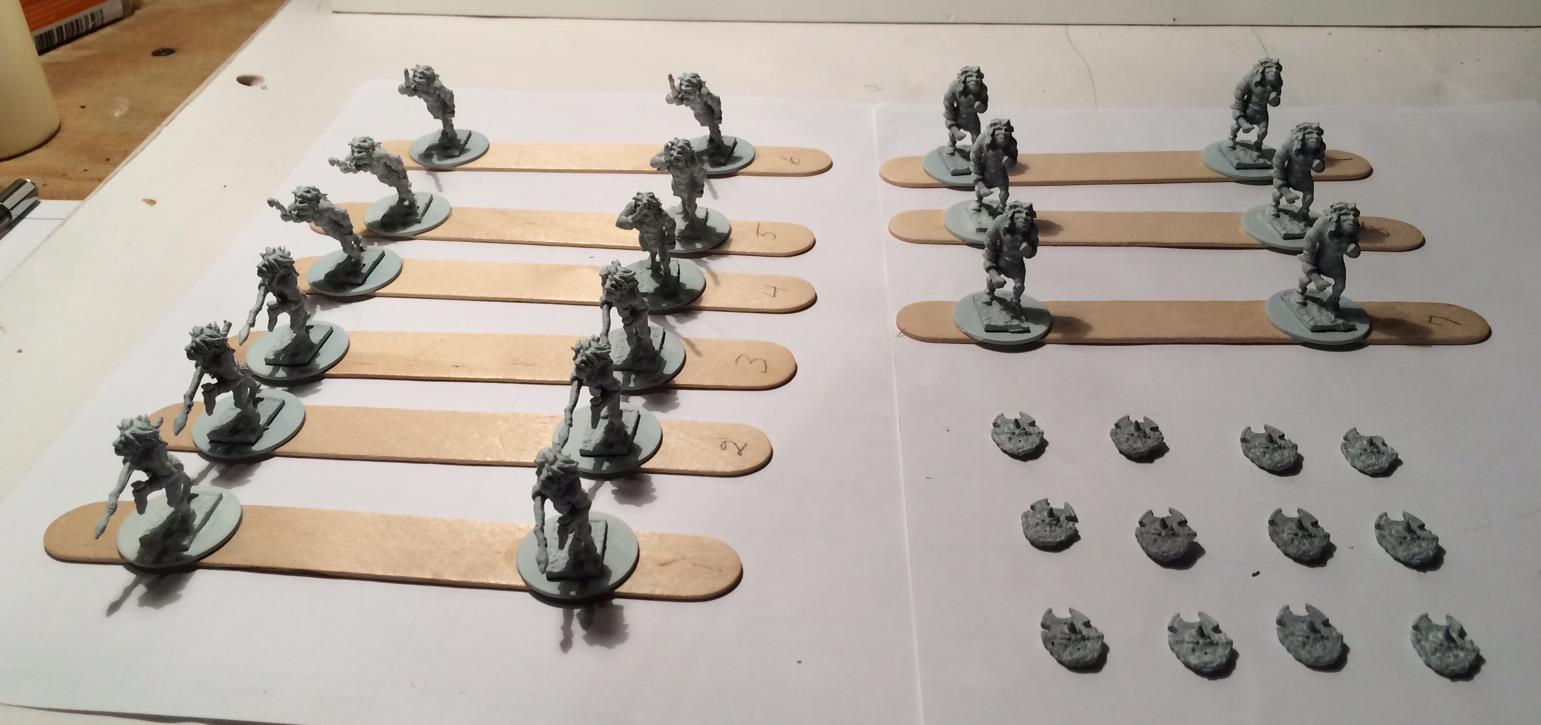
The individual figures did not look very special at first glance.  There were three types of cavemen in each package of six.  One was armed with a large bone and a shield, a second had a stone dagger and a Neolithic spear, and a third had a shield and a Neolithic spear.  There was much less detail than what you would find in later miniatures.  I found that there was a lot of flash which I cleaned off, filed down, and saved for future miniature molding.  The spears were very soft, and removing the flash felt like I was performing surgery to save the spears.  I straightened them out with needle nose pliers.  This was also true of the shields.  There were 12 shields.  I then used dishwashing liquid and a toothbrush to remove oxides and any other residue from everything.  Buck had suggested fender washers, so I bought a package of 1” fender washer at Home Depot, which I used as initial bases.  These washers were the smallest that Home Depot had, although later on I did find a source for ¾“ fender washers on eBay for future uses.  I mounted two figures each on numbered popsicle sticks.  Surprisingly, they cleaned up fairly well.  I then used Krylon white matte spray paint to prime them.

Caveman Prepped for Basecoat
Caveman and Shields Primed

As you can see above, the rectangular bases really stood out and I was not happy with this.  I thought that before I base coated the figures, I needed to address this and my final basing plan.  I used simple home vinyl spackle on the washers.  By simply putting small amounts of spackle in water and using clay modeling tools I was able to hide the sharp linear edges.  I let these dry overnight.

Now Ready for Base Coat - Note Figures Rough Detail
Now Ready for Base Coat – Note Figures Rough Detail

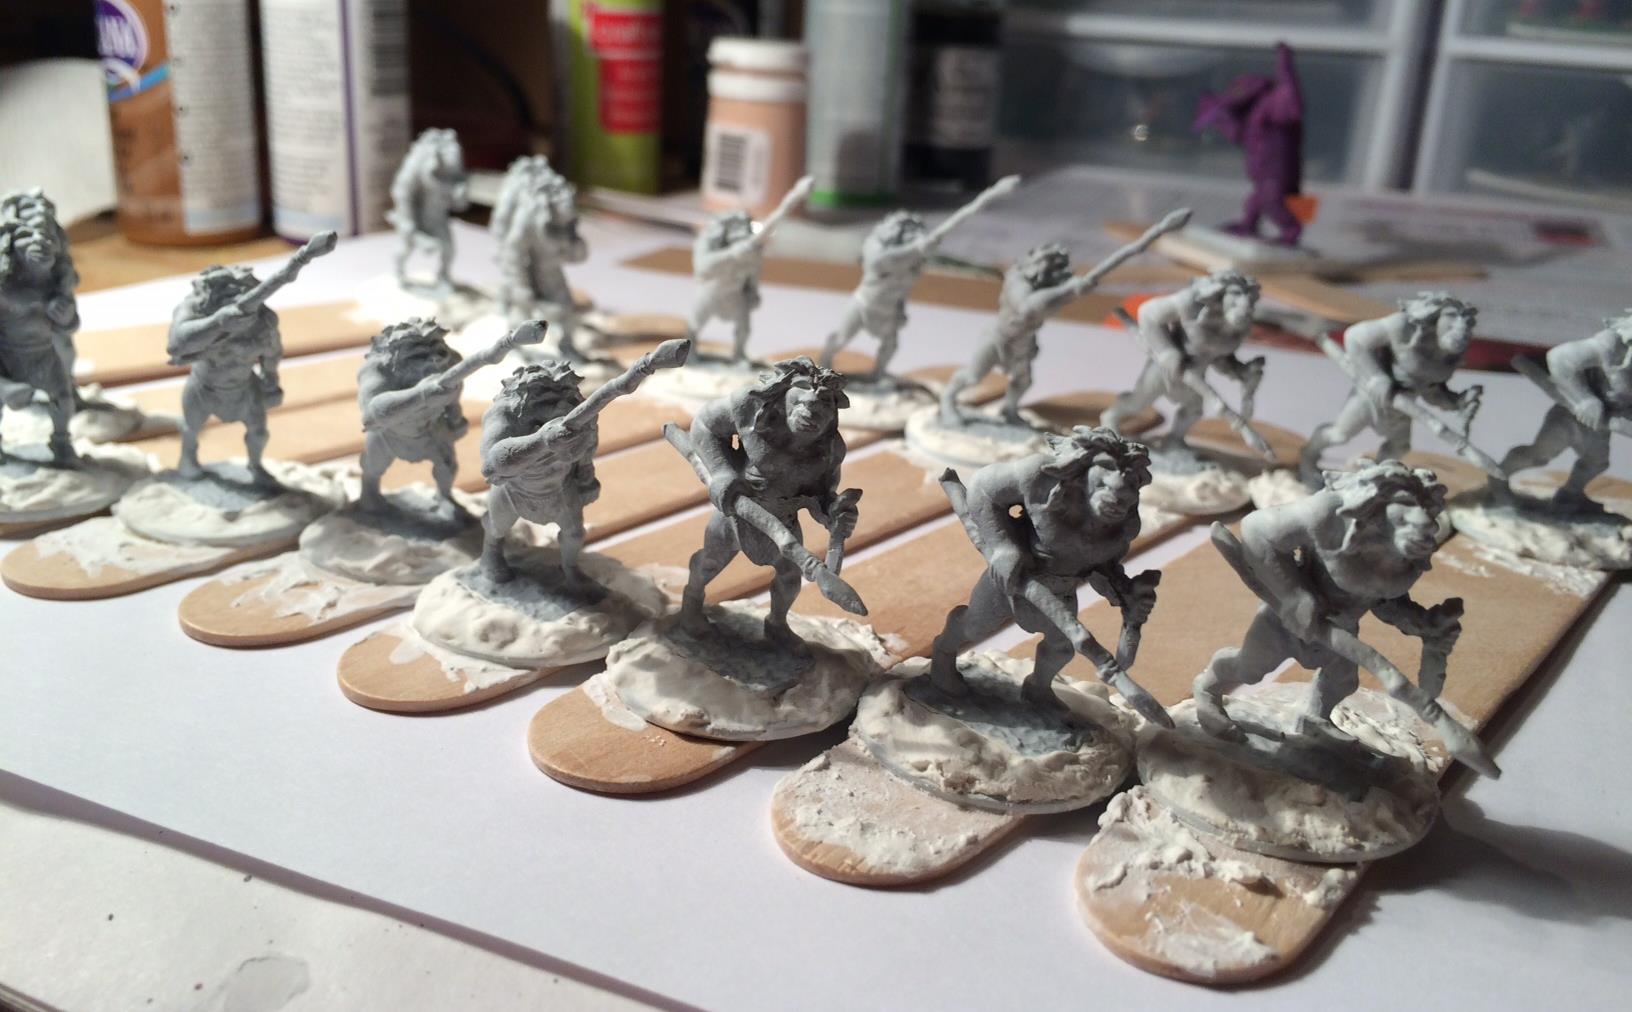
The other issue I had was how they were going to be based.  I saw that the spears were soft, so I did not want to see them bent or broken easily.  I additionally knew that this unit would fight in a mass formation.  In my quest to determine how best to take care of these two issues, I arrived at hexes.  I used my Skil scroll saw to cut ⅛” plywood into the shapes for the hex bases.  To get the hexes correct, I traced one from my Settlers of Catan game.  I then used other 1” fender washers to determine spacing – and ended up with six figures per base.

Plywood Hex Bases Primed

The painting went well as these figures were obviously mostly unclothed.  To get the skin looking swarthy, I used a combination of Raw Umber from Americana and Ryn Flesh from P3.  I then used Brown Ink from P3 as a dark shade on all the muscle recesses, darker areas, and where skin touched non-skin areas.  I also added definition to the figures’ chest areas and faces.  I lightened and highlighted high areas by making the base coat combination with more Ryn Flesh from P3.  The cavemen’s hair, loincloths, boots, and stone weapons were painted with Americana Ebony.  This was also the color for the eyes and eyebrows. Lastly, I used P3 flesh wash to add even more definition.  The shields were painted with a combination of Armory Musket Brown and Armory Leather Brown from 1996.  The shield edges were painted with Americana Ebony, and then darkened with Sewer Water wash from Secret Weapons Washes  I then affixed the shields with E6000 epoxy and applied a spray varnish with Krylon Matte varnish.

Cavemen and Shields Pre-varnish

I glued a series of six additional 1” fender washers to each hex base.  Sequentially, I then glued each figure to the washer that was affixed to the base.  I worked in Polyform Air Dry modeling clay around each figure to hide the washers and to make each base look like a continuous landscape.  This required that I glue a few figures, and then work in the clay, and then let the clay cure before moving to more figures being added.  This took a few days.

Cavemen Based and Ready for Final Flocking

The final base work was done with flocking by Army Painter.  I used three different types in random patterns – Ash, Green Grass, and Brown Battlefield.  I then used Army Painter Battlefield Rocks painted with Apple Barrel Pewter Gray and Americana Ebony in conjunction with Wilderness Tuft (also Army Painter).

Cavemen on the Move!
A Frontal View
A Frontal View
Class Picture with Packages

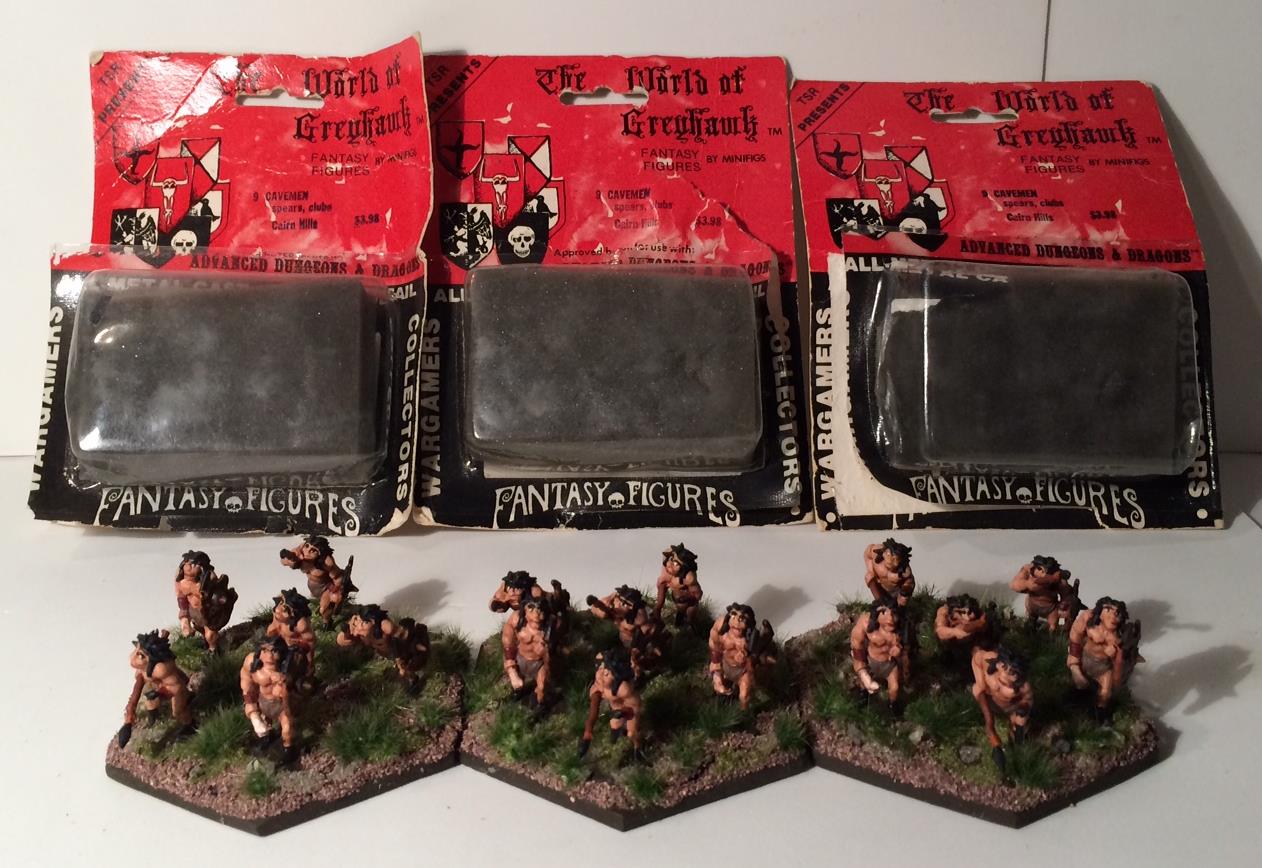
Overall, I am thrilled with how these came out.  They were a lot more work than I anticipated, but the bases are solid, heavy, and look great.  The figures speak for themselves and I look forward to the first game with them!  Basically, I learned that you can do a lot with any figures if you take the time to plan and execute on the details.

Ral Partha Umber Hulk 11-404

I never played D&D or AD&D.   I will confess to Buck Surdu’s introducing me to Tunnels and Trolls though (with fond memories)!  I also do know that I did from time to time look at the AD&D Monster Manuals to get ideas for T&T, or units for Fantasy Miniatures.  One of these ideas was the character of the Umber Hulk.  It was a fast-burrowing creature with four eyes and huge mandibles.  If you saw all four eyes, you would get confused while fighting it, and likely become lunch.  It can burrow through solid rock and even faster through soil.  It is intelligent as well.

1980's Umber Hulk from Web
1980’s Umber Hulk from Web

I remember buying one made by Ral Partha in the late 1980’s (not sure where), probably while I was at Fort Belvoir in Virginia or in California while I was at Presidio of Monterey.  Looked cool, but was to remain in limbo until this year.

Umber Hulk in Package - $3.75 - now on eBay for $32 in same condition!
Umber Hulk in Package – $3.75 – now on eBay for $32 in same condition!
Umber Hulk back of package
Back of Package

Back to the word “umber” – I knew it was a color (remember Crayola), but I was unsure if it was brown or dark brown.  Turns out there is umber and burnt umber, both of which are shades of brown.  I could not see this figure in those colors.  He reminded me of a June bug, so that is the direction in which I went.

I used primed the figure and mounted him on a small piece of 1/8″ plywood.  I then mounted that on a popsicle stick a la Buck Surdu.  I ended up needing a second popsicle stick as he was heavy and not balanced well on only one stick.  I used three shades of purple from Americana – Purple, Dioxazine Purple, and Vivid Violet.  I dry brushed and highlighted as I went.  The eyes were a satin Americana Apple Green, and really shone.  The result is below, and looks more like Jack Nicholson in Batman or Prince in Purple Rain.

I know I came from the '80's, but do I have to look like Prince?
I know I came from the ’80’s, but do I have to look like Prince?

This was on purpose, as I wanted to darken it.  I used two washes sequentially from Secret Weapons Washes.  First, Sewer Waster, then Purple, then Sewer Water again.  It did the trick.  The base was finished with the end of the 1996 Armory Flat Black.

Umber Hulk Ready for Action!

I then varnished the figure with Krylon Matte varnish.  I did work on this at the same time as my Cavemen unit – which will be a subject of another post, as these took up a lot of March and April!

I'm Free!!!!
I’m Free!!!!

Ral Partha Wizards 01-333

It’s about time I updated this blog with some miniature photos and some details.  This will be about the Ral Partha Mage wizard package left over from the 1980’s.  As you can see below, I got it at the PX!

Gandalf, Goldenknob, and Waldo - note the AAFES price!
Gandalf, Goldenknob, and Waldo – note the AAFES price!

The interesting thing is that Lynn painted two wizards – subsequently named Waldo (in purple) and Goldenknob (in blue).  She wanted to try it, so that was her start.  It also was her finish as she says it’s too much detail for her!  Still, I think she did a nice job and these are now in my collection!

The Three Mages
The Three Mages

As far as the one I painted I really thought he looked like Gandalf.  I used Armory Prussian Gray (from 1996) as a base coat for his cloak and Americana Snow for his beard.  I darkened some Armory Leather Brown with Musket Brown for the boots and pouches.  I then experimented with Citadel’s Gulliman Blue Glaze around the cloak where the runes were as well as the sash on the hat.  I used several coats for the effect.

I darkened his staff with Secret Weapons Washes Sewer Water wash, and used P3 flesh wash for the hands and face.

Card 74, Gandalf (Wizard)
Gandalf Up Close

I mounted him on a left over washer from the 80’s (which was too small).  In the end, I decided to leave him as it worked.

I varnished the three figures with Krylon Matte Varnish, and now the three are done.

Opening Day of Golf – at Raceway GC in Thompson, CT – Fun but not Pretty!

After an awful winter that saw us get 119.1″ of snow (the most in the country for the season), it was nice to get out on the course on April 12th.

I went with perennial golf buddies Bob Tilton, Jerry Dufresne, and Dave Faugno.  Of course, to fuel up, we needed to hit the Cracker Barrel in Sturbridge.  Lynn joined Bob and I for breakfast of champions.

04112015 with Bob Tilton Cracker Barrel 2
Bob & Mark attack Uncle Herschel’s at Cracker Barrel

The opening day for golf was fun!  The teams were Bob & myself vs. Jerry & Dave, with Bob playing the forward tees due to him being 82!  I let Bob down with my play which was terrible (I shot 101 – my worst score in 4 years).   Thankfully while we lost the front  3-2, we tied the back 1-1 mitigating the losses.  I won’t cite the others’ scores (all better than mine), but suffice it to say that mud, swing rust, and unfamiliar greens added up to a lot of strokes for all.

It was $27 to walk for me and the rest rode at a pricey $53 (a surprise).  The course was packed as everyone wanted to get winter over with once and for all!

Dave drives the 2nd
Dave drives the 2nd
Jerry drives the 2nd (and looks at his divot)
Mark's approach into 16 would hit the bunker
Mark’s approach into 16 would hit the bunker (saved a Bogey)
The ice was not yet gone!

Bob & I paid our debt, and then hit the restaurant for lunch.  With stock car races next door, the sound of engines mixed with the Masters broadcast!

Frank Tank Rants

musings of a fat old bloke on tanks and wargames

Dragons of Lancasm

Games, miniatures, painting, books and more games

Tiny Painted Heroes

The Adventures of a lifelong Tabletop Gamer, Game Design hobbyist, and full-time Software Engineer

Home of the Grumpy Gnome

Tinkering with Artwork and Ideas

Steve's Paint Brush

Grimdark model making and mini painting

Wargamesculptors Blog

Life, Golf, Miniatures, & Other Distractions

Dead Dick's Tavern and Temporary Lodging

Life, Golf, Miniatures, & Other Distractions

Guru PIGS Blog

Guru's thoughts on wargaming, life, and the universe!

Wisely lead... without a head!

History, Miniatures and Wargaming

Kuribo's Painting

Fallout, MESBG, and Hellboy Painting, Terrain, Dioramas, and Battle Reports

Don't Give Greg Ideas

Seriously, just don't

War Across the Ages, and other dark horrors

A discussion of miniatures collecting, painting and gaming.

Classic Warhammer 40K

Painting diary focused on Warhammer 40K 2nd ed., 5th ed. WHFB, related GW games, and miscellaneous whimsy

Colonel Mustard

WW2 Modelling in 1/72 Scale

Bogenwald

Random painting and terrain making.

Pat's 1:72 Military Diorama's

Scale diorama tips and ideas

Arcade Dreams

Building the Arcade Dream

P.B.Eye-Candy

Phil's 20th century wargame pages

SP's Projects Blog

A futile fight against entropy or 'Every man should have a hobby'? Either way it is a blog on tabletop wargames, board games and megagames

30mmdave

Wargaming Plausible reality?

Faith&Steel

dave's gaming adventures: faithandsteel.wordpress.com

The Imperfect Modeller

Miniature Figure Painting and Diorama Modelling

Double Down Dice

Painting miniatures and rolling dice!

Just Needs Varnish!

My ongoing wargames projects!

miniaturepopcorns

Sculpting some worlds

Despertaferres

Wargaming with the ability of a dull nine year old

Dawn of the Lead

Miniature wargaming and the occasional zombie

Rantings from under the Wargames table

Wargames, Figures, Sculpting and Converting Miniatures

Simple as War

Miniatures & Terrains

Buck's Blog

Life, Golf, Miniatures, & Other Distractions

IRO aka Imperial Rebel Ork

- I model - therefore I am -

Azazel's Bitz Box.

Painting, Modelling, Miniatures, 1:6, Games... Whatever else I find interesting.

diggingforvictoryblog

Smallholding and Wargaming.......not always at the same time!

Shamutantis

Nørdblog numero uno

Harry Heckel

Writer/Game Designer