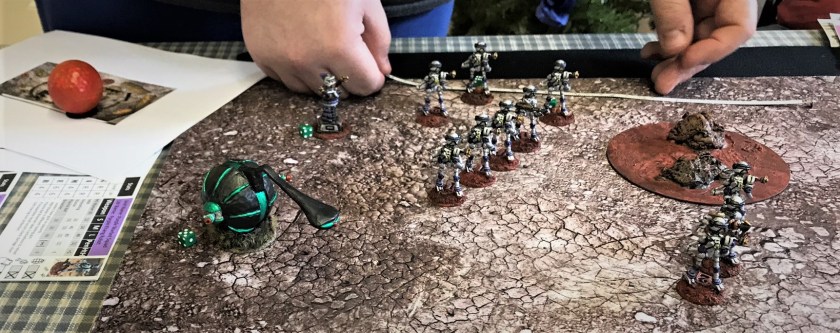
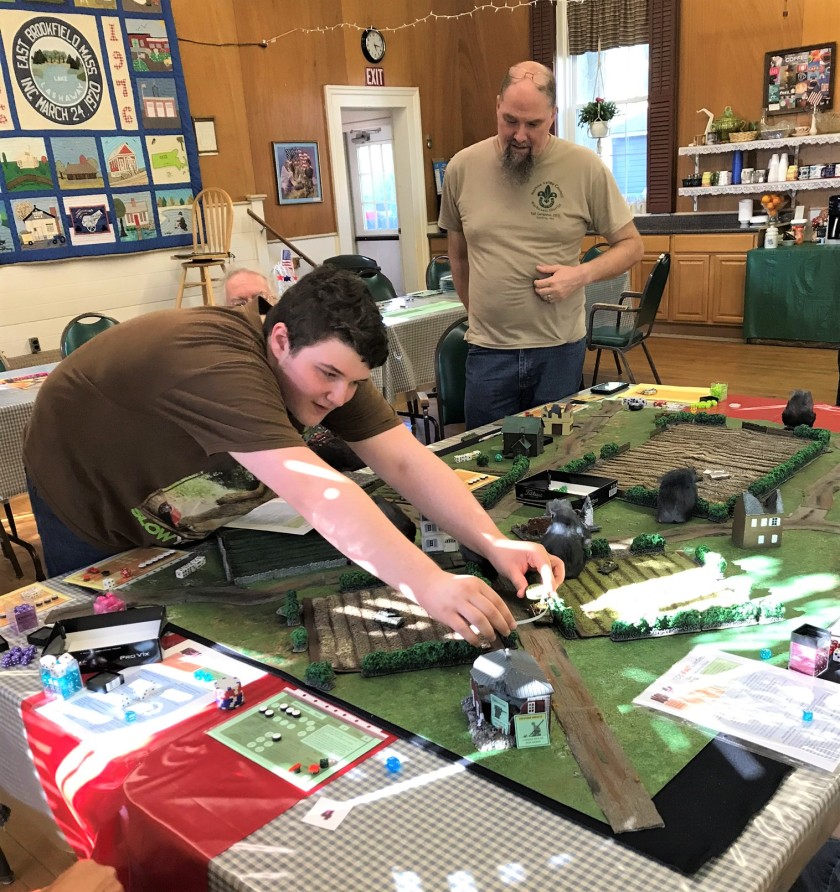
On Saturday, July 27th, the Mass Pikemen met for our monthly gaming session – this time it was another go at “Attack of the Warbots“. This game uses the Combat Patrol™ rules system, and the figures are Archive (from the late 1970’s/early 1980’s), Mega Miniatures (late 1990’s/early 2000’s), Wargames Supply Dump (now OOP), or my own creations. The links below for each can tell you more about them if you’re interested.
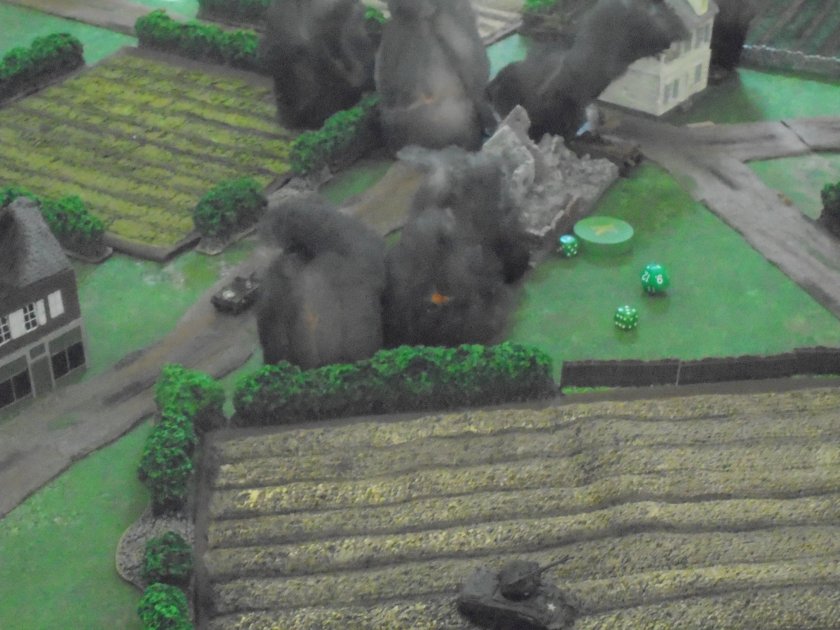
On the other end of the table, their Martian allies and a Roberker were attacking through some barriers and a ruined chemical plant as the Space Roos and Star Ducks responded. Meanwhile, inside the compound, there was RT-22 (commanding some Robo-Servo guns that were around the compound) and helping a Space Dwarf Assault Squad to repair the captured Mark 1. These were desperately attempting to repair a captured Mark 1 tank before the enemy stormed their repair facility.
The game went quickly once it started.
Randy advances his Warbots. His Mark 1 did not get to activate.
On the first turn, the Mark 1 above did not get to activate as no “5” came up. The Warbots chose not to pay one of their bonus chits to get a “5”. This allowed Leif to jet pack up a Space Roo with an RPG – who got a lucky hit and destroyed the tank.
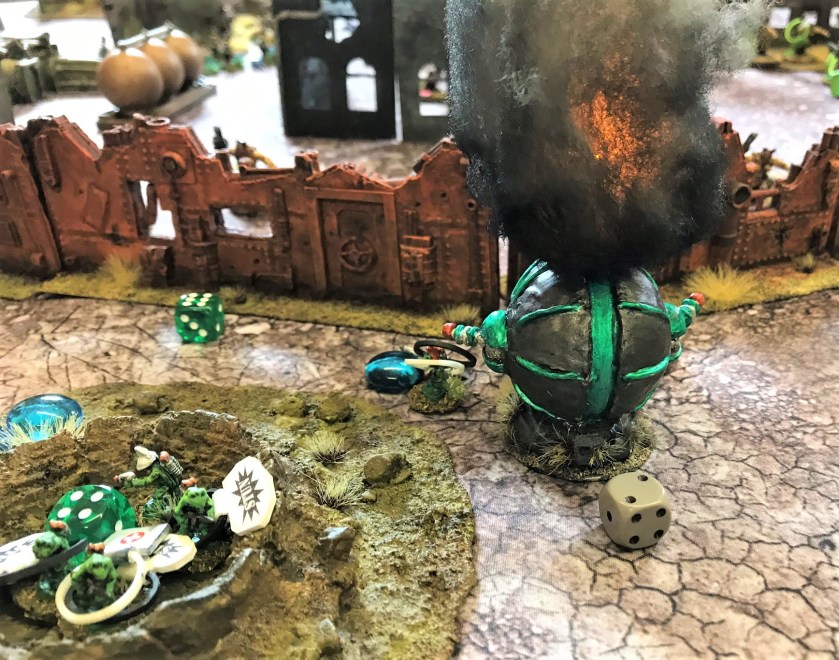
Christine’s Aphids meanwhile took heavy fire from the Warbots and Juggerbots, and were in danger of being wiped out. The remaining Mark 1 approached the wall. Leif jet-packed a lone heroic Space Roo over the wall to attack the tank with a satchel charge, only to stun it. The Aphid Platoon Leader, Lt. Hemipteran, valiantly attacked the other side of the tank with a satchel charge, and the remaining Mark 1 brewed up from the explosion.
The last Warbot controlled Mark 1 burns from the Aphid leader’s attack.
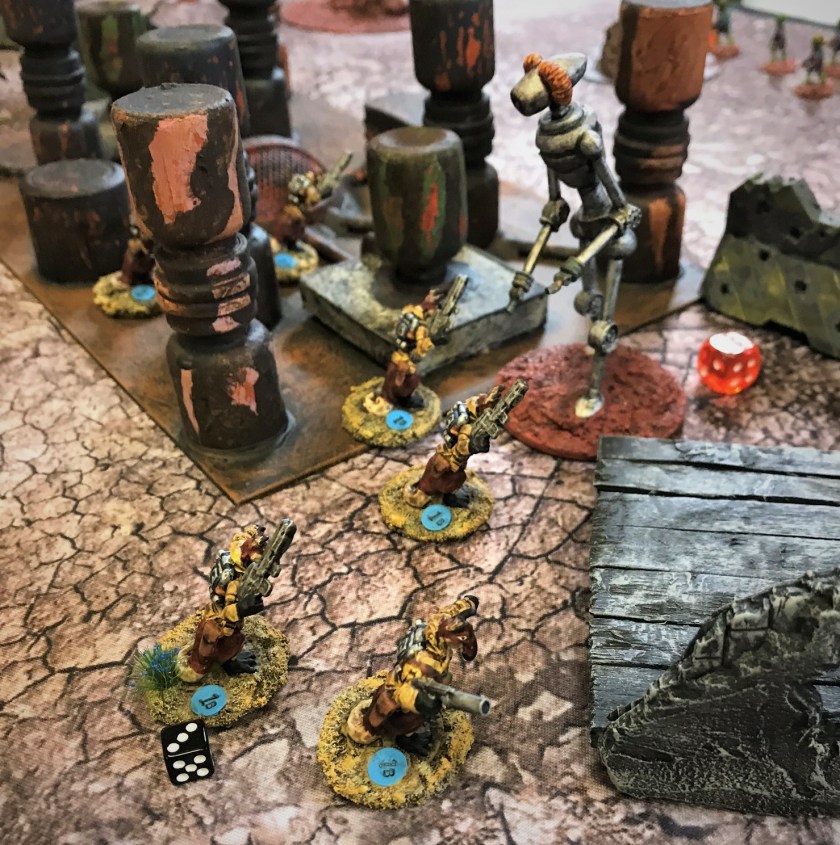
Meanwhile, on the other end of the board, Mike was making good progress with his Martians and his Roberker. Unfortunately for Roberker, a lucky Space Roo bullet hit his CPU, causing him to go rogue. In the game, a rogue robot attacks whatever he can see. Luckily for the attackers, he went rogue at the enemy Space Roos (commanded by Leif), who were eventually able to put him down with rifle fire and some of Christine’s Mortar duck supporting fire (called down ON TOP OF the Space Roos position). This was done with Leif’s approval – his Roos were valiant. Of course, several Roos bought the farm here.
Mike moves up his Martians.Roos assault by the chemical plant right before Roberker goes rogue.The Martians move up and shred the remaining Roos as Roberker burns. The cards indicate casualties.
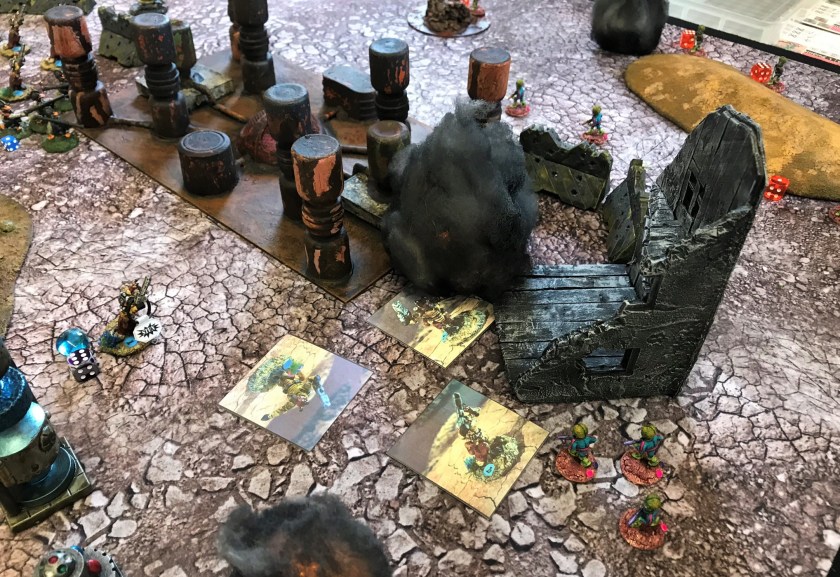
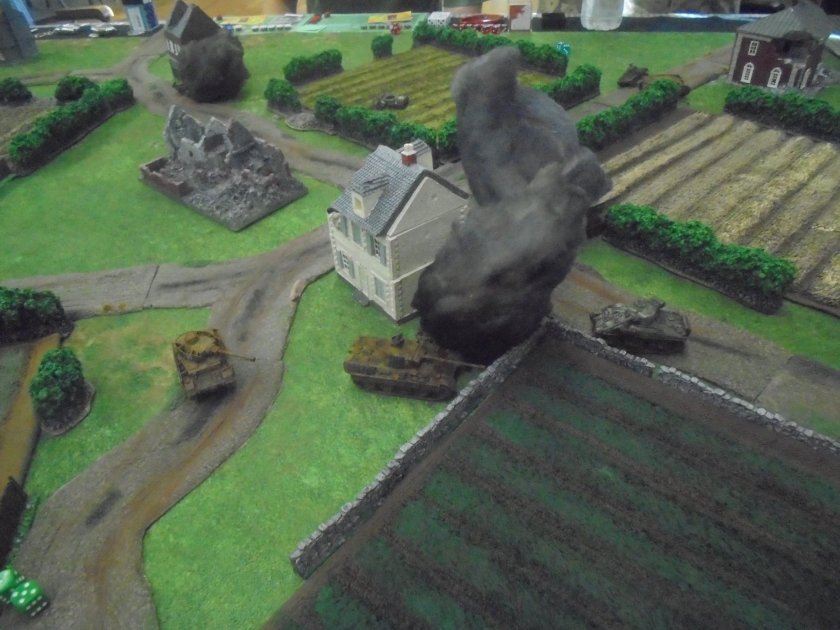
Meanwhile, the Warbots on the other end managed to fire a plasma arc weapon and breach the wall such that one of Chris’ Warbot figures could go through at a time. Simultaneously, Leif successfully pulled some high cards and luckily repaired the captured Mark 1!
At this point, the game was called with a marginal victory for the Biological Alliance. They would have had to get the tank off the table, and there were Warbot reinforcements coming. My new ruined chemical plant had a lot of action!
Sometimes you need to try new materials, new techniques, and change up your hobby projects to keep fresh. My tabletop battlefield for my Attack of the Warbots game scenario (using the Combat Patrol™ rules system) needed some more ruined industrial terrain. I also wanted to try some new painting techniques with chipping medium, as well as using some crackle paint. The goal was to make something ruined, rusty, with some degree of verticality that would complement my tabletop.
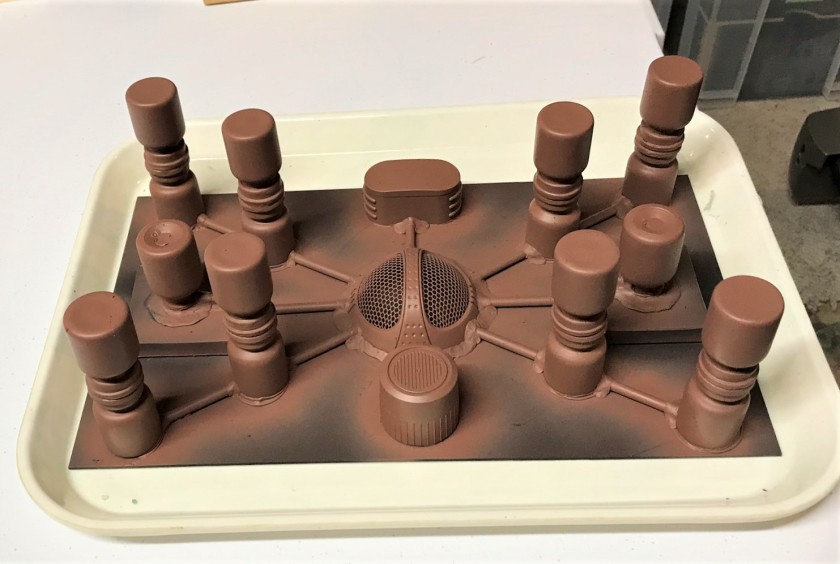
As far as building materials, I had been saving different bits and pieces of this and that for a few years in anticipation of scratch-building something to meet that need. I say saving, my wife says hoarding – (it’s not hoarding if the stuff is organized, labelled, and put away out of sight in drawers dear😁). A previous employer had supplied us with kits that contained dummy vials (empty) that we could use to teach the process of reconstitution of the real thing. At one point years ago, because the FDA drug labeling had changed, and the packaging that the kits had on them was no longer valid, we were ordered to throw them away. I did, but threw the vials into a drawer. I also had some oddly-shaped caps from body sprays, and a purloined cover from my wife’s blow dryer. To be fair, the cover no longer stayed attached, so that was fair game. I also had bits of polystyrene sheets and tubes, and leftover foam rubber pads (packing material) from something I no longer remember. So basically, I had a lot of trash to work with.
As the community painting challenge (run by Azazel) that I participate in for July was “The Jewel of July ’19 Community Painting Challenge”, I thought I’d switch up from doing tanks and make a scenery piece. The scenery qualifications were:
“It’s for the more impressive scenery pieces. A desert oasis or a (ruined?) temple or a bunker complex or a single bunker or a skyscraper or a Ferratonic Incinerator or a Kwik-E-Mart. A forest worth of trees or a jungle worth of plants.”
So, dear reader, you can be the judge of this project as a “jewel”, or not. It will have some good points and some not – I hope that if you have some feedback (good, bad, or otherwise) that you share it so that I and others can learn.
Construction and Planning
I assembled the assorted junk, and made a plan. The glass vials I decided would work well glued together top-to-top as chemical tanks. I had two vials that were plastic that I scuffed up, and I removed any paper labeling from all of them. The blow dryer screen would be the centerpiece. Using a leftover piece of polystyrene sheet (Evergreen #9060 – .06″ thick), I plotted out a chemical plant symmetrically. I made two elevated concrete pads for the shorter vials with thinner polystyrene (Evergreen #9020 – 0.02″ thick) and the foam pads, and Plastruct Bondene. For the vials, my epoxy of choice was E6000, though that did leave a lot of glue strings to clean up later. The tubing was Evergreen 3/16″ #226, complemented by cut plastic straws. Applying E6000 to the strws made them relatively solid. I used green stuff as the piping joints. The plan for the vials was to sequentially prime, apply rust paints, apply chipping medium, apply metallic paints, chip, and rust. The bases were to be done using AK crackle paints, with washing and dry brushing.
The missing cover came from here.The assembled terrain piece, unpainted.A side view of the unpainted piece. The smaller vials were plastic and held old normal saline. All were ordered to be discarded. This is how I did that.
Painting
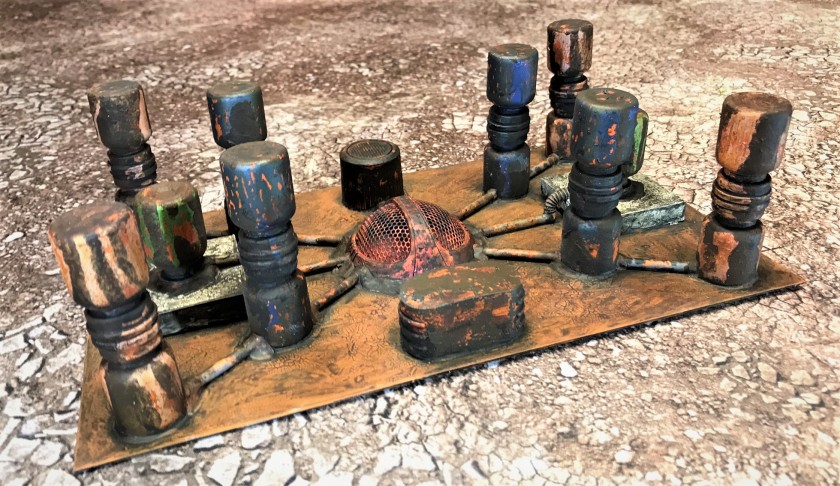
I airbrush primed the piece with Vallejo Black primer, allowing 24 hours to dry. Then I airbrushed it with Vallejo Model Air “Rust” (#71.080).
Airbrushed with a rust base.
I then applied a liberal coat of Citadel “Ryza Rust” and a different Vallejo “Rust” (#71.069) that I hoped would show a nice rust effect under the final color coats. Then, I applied Vallejo “Chipping Medium” over the rust. I was very unsure of the amount to use here, or the pressure with which apply it with the air brush. Add to that the dry time, which I gave 24 hours – too much? I don’t know. Due to the terrain piece’s layout, it was also hard to get into all the areas with the chipping medium.
The rust on one side…
…and the other.
I then chose the final metallic colors for the vials, the pipes, the caps, and the screen. Those, and the other materials, you can see listed at the end of this post. I applied a caot of gloss black to the base to assist later “crackling”.
After applying the colors onto the vials.
At this point, I applied water with a stiff toothbrush to the vials, and that was supposed to cause the chipping. It did some places, but not everywhere. I had to resort to a toothpick in a lot of places, and that pulled ALL of the paint off. As repair, I used Citadel “Typhus Corrosion” trying to simulate rusted leaking tanks. I washed the vials with a light rust wash, and that turned the purple tanks pink/orange! I went back to the Typhus corrosion and tried to compensate.
After the chipping work.After the chipping work – I tried to make it look pretty contaminated and old.
Then, I needed to add the two different crackle paints, along with washes and highlights. Before that, I applied a gloss varnish to help the crackling effect and to help protect the chipping effects. I knew I could use a matte varnish later to dull it up.
Crackle paints drying in sun on the base. Glossy vials…for now anyways.After the crackle paint got a glossy wash.Close up – definitely need to remove the gloss. But first, some dry brushing of the crackle paint was in order.I sequentially dry brushed, washed, dry brushed, and washed the piece.
Finally, I airbrushed the piece with Vallejo Mecha Varnish “Matt Varnish”. As I had foam rubber part of the piece, I needed to avoid any use of rattle cans to prevent a real chemical meltdown!
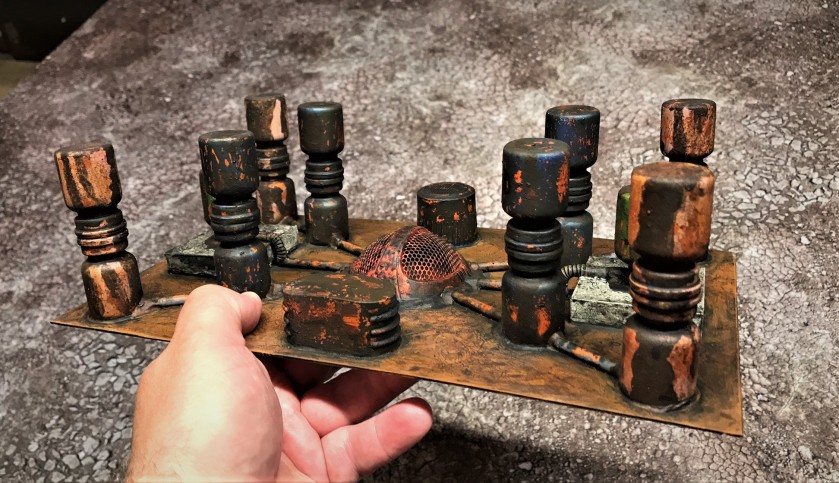
Using the heat of my driveway to dry the piece.Complete and drying in the 90 degree sun.On the gaming mat.Close up of the crackling effect and the screen.Corroded tanks.Corroded tanks, opposite side.The smaller tank and its pad.
Space Roos reconnoiter in the plant.Space Roos are surprised by Martians in the plant.Well, at least it is done.
So, do I have a “Jewel of July” here. Maybe at least a garnet anyways. I think this is OK for the tabletop, given that it was basically made of trash. It hits the game tabletop today!
If you want to see a real “Jewel” – check out Alex’s piece here. THAT is impressive!
Back to my project, I was somewhat disappointed at the Vallejo “Chipping Medium”. I could not find much information on its use, and a lot of that was negative. The AK crackle paints are very good in my opinion, and I will look to see if they have a chipping product.
Any feedback – especially any thoughts on my process and the product – is always appreciated. As always, hope you enjoyed this post.
PAINTS, INKS, GLAZES, SHADES, WASHES, PIGMENTS, FLOCKING, GLUES AND MORE USED ON THIS PROJECT:
Quote of the day – ” An eighth of an inch can get ya killed in this game”, Mike Morgan.
As the D-Day commemorative events have passed, its important to remember that there was also a hell of a fight for the Allies to break out of Normandy after the landings in the weeks after June 6th, 1944. D-Day is iconic, and deservedly so. I wanted to honor the Allied struggle in the Normandy Campaign.
Create an interesting scenario that incorporates the appropriate German, US, and British armor that was involved.
Make the scenario easy enough for new players to pick up and challenging enough for experienced gamers to also enjoy..
Maintain the feel of individual tank command in the game, but add other combat forces differentially to each side to increase the historic reality and game action.
Add elements of reconnaissance and enemy force location uncertainty to the game.
Add elements of infantry, combat engineers, anti-tank guns, and artillery (HE and smoke) to the game.
Provide the Allies with naval gunfire support and air support, while the Germans get only a rare case of Luftwaffe support.
Add an element of communications breakdown.
Make the scenario one where each side faces various risk/reward choices that have ramifications to victory in the scenario.
On June 29th, the Mass Pikemen gathered to play this scenario in East Brookfield, MA. The tabletop set up was as shown here in the next two photos:
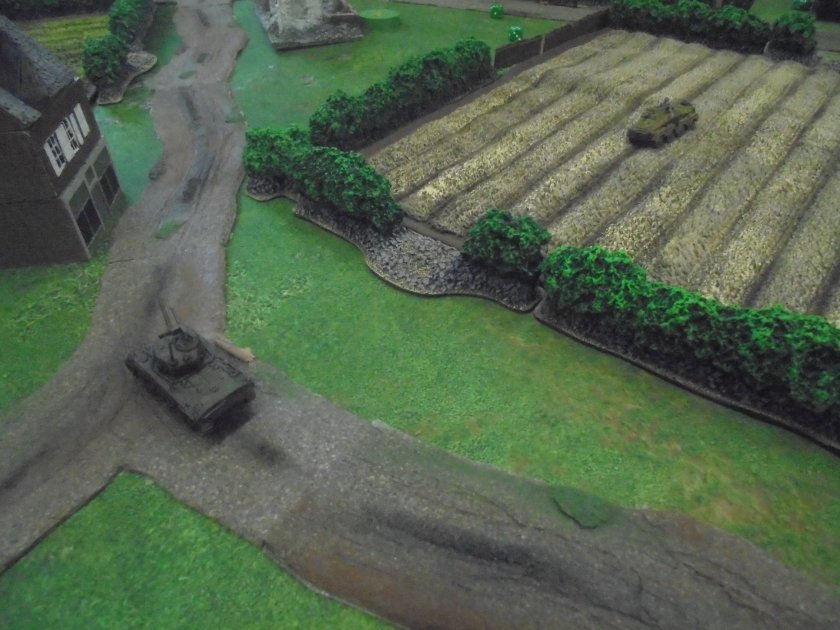
Allies move on from the bottom edge. Their mission is to cross to the other side. Once the Allies cross, they score points and get a new tank to try to do it again.Same map – Allies move on from the left.
6’s are WILD, and can be converted to any other die.
There is much more to the game, but this is the main action engine. Certain tanks have special features/characteristics, like being “Fast”, which allows them to “convert” die to a “1”, or being “Low Profile”, which makes them more difficult to acquire by an enemy. There are several vehicles that have features like these – and there are many others.
Here are my modifications to the rules for this scenario:
To keep the game moving, any vehicle touching a road could additionally convert one of its command dice to a “1” (a MOVE die).
I keep score in the game using poker chips. Each side starts with 100 or 150 chips, depending on the number of players. At end of game, high chip total wins.
Both sides choose their vehicles from a menu, and is charged chips equal to the value of each vehicle. The starting vehicles must be chosen from different categories, such as “scout car”, “medium tank”, “tank destroyer”, “heavy tank destroyer”, or “heavy tank”. See examples below of the menus.
Chips can be gained by:
Successful recon of potential enemy positions (gains two chips).
Destruction of enemy vehicles (gains point value of destroyed vehicle in chips).
Successful crossing of the battlefield (breaking out) by the Allies (gains chip value of vehicle that successfully crosses tabletop).
Chips can be spent to get:
Additional Bonus Attack Cards (cost two chips each).
New tanks or to get a better tank when you respawn a destroyed tank.
I added the category of “armored car” for machine-gun armed light reconnaissance vehicles such as the Daimler Dingo. This allows them (at their peril) to fire at a heavily-armored vehicle and force them to button up, or have a chance of damaging other lighter vehicles. There are no rules for armored cars in the original rules. Some armored cars did have some anti-tank punch, and that is reflected in how I treat their offensive capability.
For vehicles that would have been more likely involved in traditional armored cavalry/scouting/reconnaissance roles instead of tank-to-tank combat, I created the characteristic of “recon“. Recon vehicles could be armored cars, or light tanks like the M3/M5 Stuart. Recon vehicles get two advantages.
The first is defensive. To reflect the difficulty needed to acquire a well-hidden scout in cover, anyone trying to acquire a recon vehicle in any cover would need an additional “2” in addition to any other cover or vehicle feature benefit the target would get. This advantage is lost in the open.
The second is offensive, in that a recon vehicle can convert any command die to a “2” – so they can acquire targets more easily.
The third is also offensive, and involves the use of Bonus Attack Cards as described below. Each recon vehicle gets two Bonus Attack cards at the game start, and one free card per turn. A recon vehicle can use two Bonus Attack cards per turn.
To represent the need for and the value of reconnaissance (and the uncertainty of knowing the exact locations of enemy positions), I use 18 wooden discs across the gaming mat. These discs denote potential German positions. At the beginning of the game, the Germans would secretly choose each of their vehicles and a deployed location. This information is only known to the GM and the Germans. Next, the Allies would choose their vehicles and deploy them openly on the deployment side of the tabletop – at positions the Germans would not have known when they made their selections. German positions are only revealed if successfully reconned, or if the Germans move or fire their vehicles. The Germans still roll their Command Dice, and can acquire targets and use Bonus Attack cards without revealing their locations.
To represent the other combat arms, I made and use the Bonus Attack Cards. Each recon vehicle gets 2 cards to start the game and every other vehicle gets one. Each turn, a recon vehicle gets a free card, and extra cards can be bought for two chips each for any vehicle. A recon vehicle can use 2 Bonus Attack cards per turn, others just 1 per turn. The target must still be acquired, and hit by rolling a “6” with two dice added together. The decks for each side are different – and of course randomized when distributed. The decks are built as follows:
Hopefully the following photos make these changes clear.
The wooden discs I used for secret German vehicle placement.The Germans secretly write down their placements and share this with the GM.Examples of my Allied Bonus Attack Cards – all are 1.5″ x 1.5″.Examples of my German Bonus Attack cards – with some Deutsche thrown in for good measure.An example of the menu for the Germans. All of the players (on both sides) had to pick vehicles from different categories at the start. Later purchases and upgrades could be anything they wanted as long as they had the chips.The Allied vehicle menu. I hope to augment this list with Cromwell and Churchill tanks and Achilles tank destroyers for the British. The Americans will be getting an M18 Hellcat tank destroyer and some more Shermans.
Now I hope to share some photos of the game – and thanks to Mike Paine for sharing many of these. Mike is a gaming legend in New England and it was wonderful to have him attend!
We had 6 players – and the game was hard-fought. In the end, the Allies won 124-115. It was close and a lot of fun for the players.
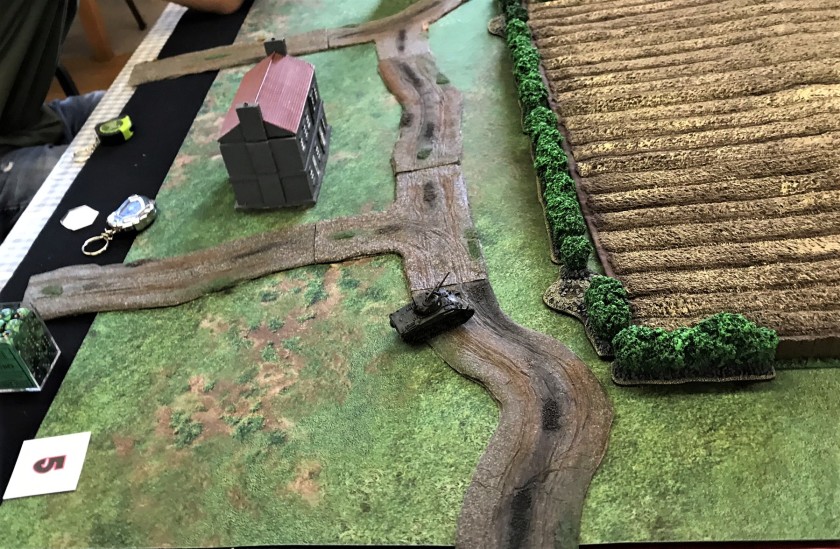
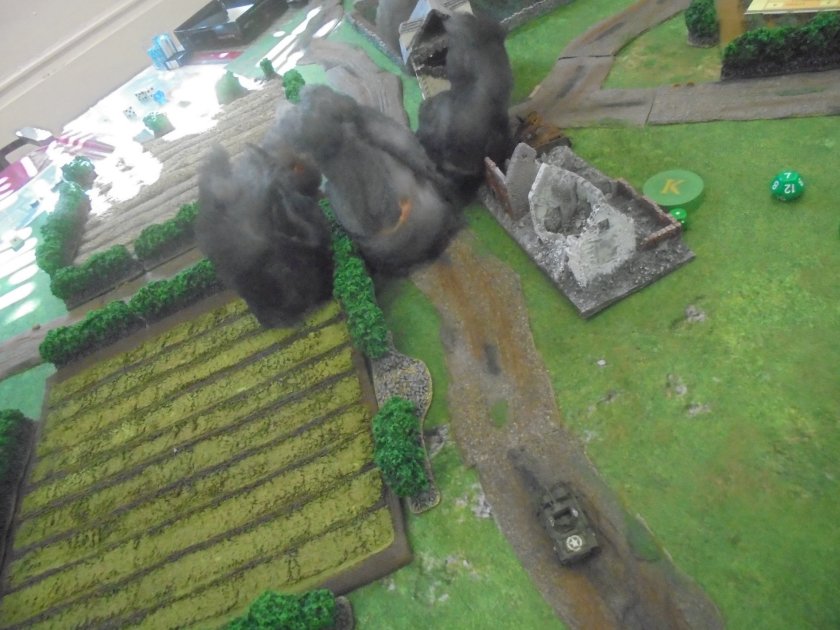
Mike Paine took this shot of my M10 and added the tag!The Daimler Dingo recons for German armor.Unfortunate for the Dingo, he found Scott Howland’s hidden Marder III while he was in the open.A lively game – Chris Burr makes a point to the GM (me).The gamers watch Scott Howland and I try to hold my clipboard so the Allies can’t see the German dispositions.Ethan Howland maneuvers his Panzer IVH to hunt the M10.Mike Paine’s Sherman is ambushed in the flank by Chris Burr’s SdKfz 233.Mike’s Sherman chases the SdKfz 233.The SdKfz hides along the hedgerow.Mike pursues, only to face Ethan’s Panzer IVH…Mike’s Sherman is attacked on two sides, and is knocked out (but the crew survived!).Mike Morgan took an M8 Greyhound after his Dingo got destroyed – and it tried to run by the Marder III.The Greyhound did not escape either. Note the undiscovered potential position “K”.Now the Marder III hunts an M5 Stuart.Crossroad of carnage and smoke.And then Ethan got a Tiger I.Allies dropped smoke rounds to try to save another Greyhound.After inflicting a lot of damage, the SdKfz 233 is hit and burns.A Firefly and Mike Paine’s new M10 attempt to cross the board.They both run into a Panzer IVH and a Panther D.This Firefly is attempting to gain an advantage on the Tiger I.It did not work – the Tiger dispatches the Firefly.The other Firefly knocks out the Panzer IVH.Lastly, a StuG IIIG took out Mike Paine’s damaged M10.
These shots are indicative that there was a LOT of action. I plan to run this game again with more vehicle choices, probably at least at BARRAGE. Thanks very much to the players!
The vehicles shown here were posted previously – if interested here are the posts:
I put some new edits to this post in blue! Mea culpa and read on please!
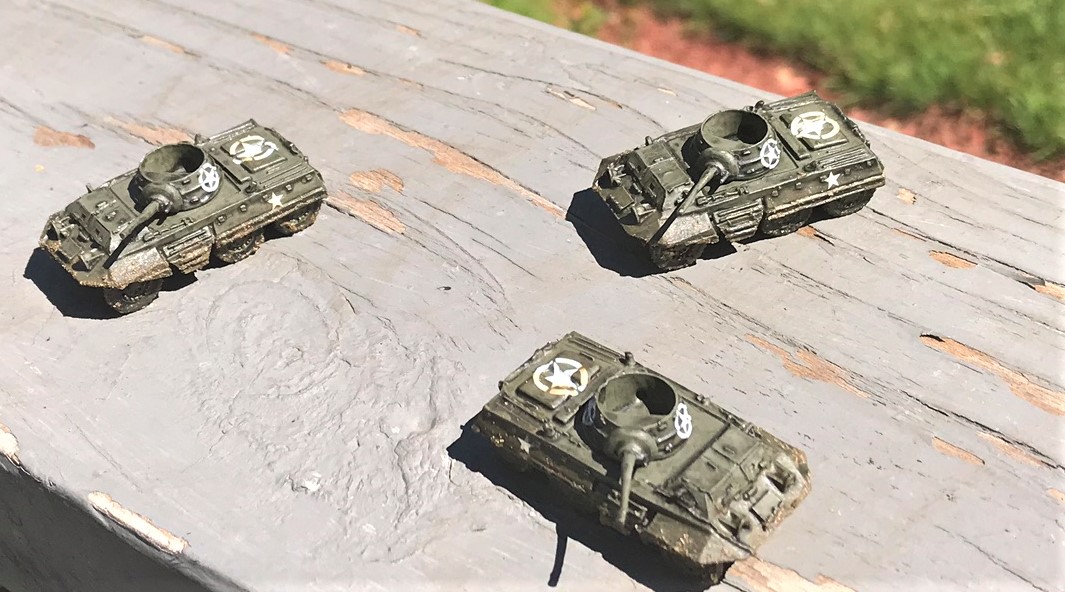
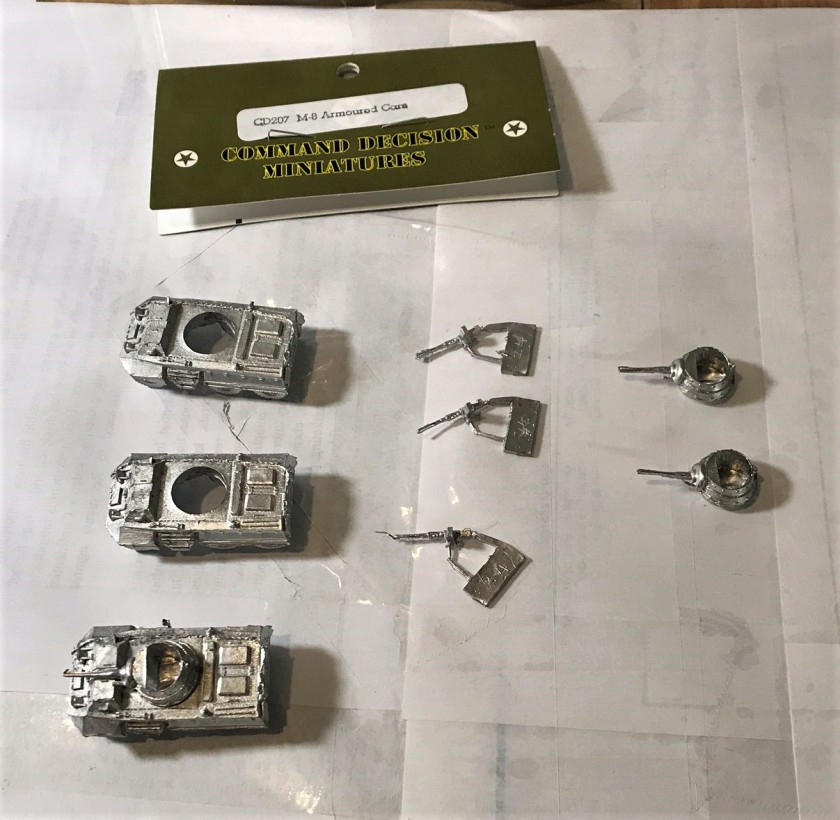
Back to gathering the models – I ended up with American M8 Greyhounds and Daimler Dingoes. It was difficult to find suitable 15mm/1:100 scale models. From Noble Knight Games, I found a couple of 3 Dingo blister packs of Battlefront Daimler Dingoes (#BR310 – now out-of-production). I got these a few days before I was scheduled to run the Normandy Breakout game – so time was not on my side. I built one pack for Normandy and will save the other one for North Africa. As for the M8 Greyhounds, I ended up buying a three-vehicle bag from Old Glory of Command Decision models (#CD207). All of these arrived the week of the game. Tick tock….
This Daimler Dingo blister is OOP.
The Dingo trio came with bendy metal machine guns to mount on top, but I did not see these surviving tabletop play – or even being easy to mount. I think the Dingoes work well as I completed them. If I ever get a few Daimler Armored Cars, or any Humber Scout Cars, they would be easy and fun to add to the British forces. The Dingoes’ crews of two were not very detailed, but I tried my best. The Old Glory M8 Greyhounds did not come with crew, and I saw afterwards that you can buy crew separately from them; however, by then it was too late for my schedule. The M8’s also had machine guns, but these models are all metal. The 37mm guns on the M8’s were spindly enough, so for the same reason as the Dingoes, I left off the large machine guns.
Dingo kit components – lots of wheels to mount.My M8 Greyhounds just out of the bag. One of the turrets has been placed on the bottom M8 for comparison.I decided to prime the components and then assemble, especially with 12 Dingo wheels. I used the Vallejo “Russian Green” primer – and that looked off. I eventually painted them the proper olive drab.
CORRECTION: I assembled the Dingoes incorrectly and fixed them – see notes in blue and at the end of this post!
I used some Battlefront decals for ease of tabletop identification on the Dingoes. I am unsure as to the units – but they are indeed British/Commonwealth and super small. All vehicles got some mud to weather them.
Normally, I set up my completed minis on a tabletop, but given that my game was coming up, I decided to take some shots of them in the sun on my deck railing (yes, the deck needs paint but will be replaced soon I hope!). This is after all Massachusetts – stuff weathers naturally!
The three M8 Greyhounds.The three Dingoes (now with crews in correct position).OK, the Dingoes have a stubby front!My crews originally faced this way – and went into tabletop combat for one game like this. To an American, this looked like the front, but it’s the back. I got fooled by the view ports in back and the long back of the vehicle that looked like a hood to me.Side view of a proper Daimler Dingo.Now this is better!All my Allied recon for Normandy in one shot. Except these have the crews in backwards!! Compare with previous shots.
The biggest challenge with these was their size, followed by the US stars on the M8’s for aircraft ID. It was different for sure.
My next post will detail these vehicles’ experiences in their little battle last Saturday! There was some action for sure.
Thanks for looking! Any favorites? Comments? Always appreciate your feedback in the comments section!
PAINTS, INKS, GLAZES, SHADES, WASHES, PIGMENTS, FLOCKING, GLUES AND MORE USED ON THESE VEHICLES:
Gorilla Glue
E6000 epoxy
Vallejo “Flow Improver”
Vallejo “Airbrush Thinner”
Vallejo “Surface Primer – Russian Green”
Vallejo “Surface Primer – Black”
Vallejo Model Air “US Olive Drab”
Battlefront”Black”
Army Painter “Military Shader” (wash)
Battlefront “European Skin”
Battlefront “Skin Shade” (wash)
Testors “Universal Acrylic Thinner”
Vallejo “Light Brown”
Vallejo Game Air “Satin” (varnish)
Battlefront “Battlefield Brown
Battlefront “Dark Gunmetal”
Appropriate decals from Battlefront
Microscale Micro-Set
Microscale Micro-Sol
Microscale Liquid Decal Film
Vallejo “Gloss Varnish”
Vallejo “European Mud” (Thick Mud)
Vallejo “European Slash Mud” (Splash Mud)
Vallejo Mecha Varnish “Matt Varnish
CORRECTIONS!
Well, I am a bit embarrassed to say that when I built my Dingoes I put the crews in backwards.
Yes, backwards.
We even played with them last weekend and none of us, being Americans, knew they were wrong. I should have paid better attention – but I was able to correct the problem – luckily I had used E6000 epoxy to mount the crews instead of Gorilla Glue so they were easier to remove. I did have to repaint them a bit and reapply varnish. I have changed the pics above to reflect that! My apologies to the British Army and the British Empire! It was not a 4th of July joke!