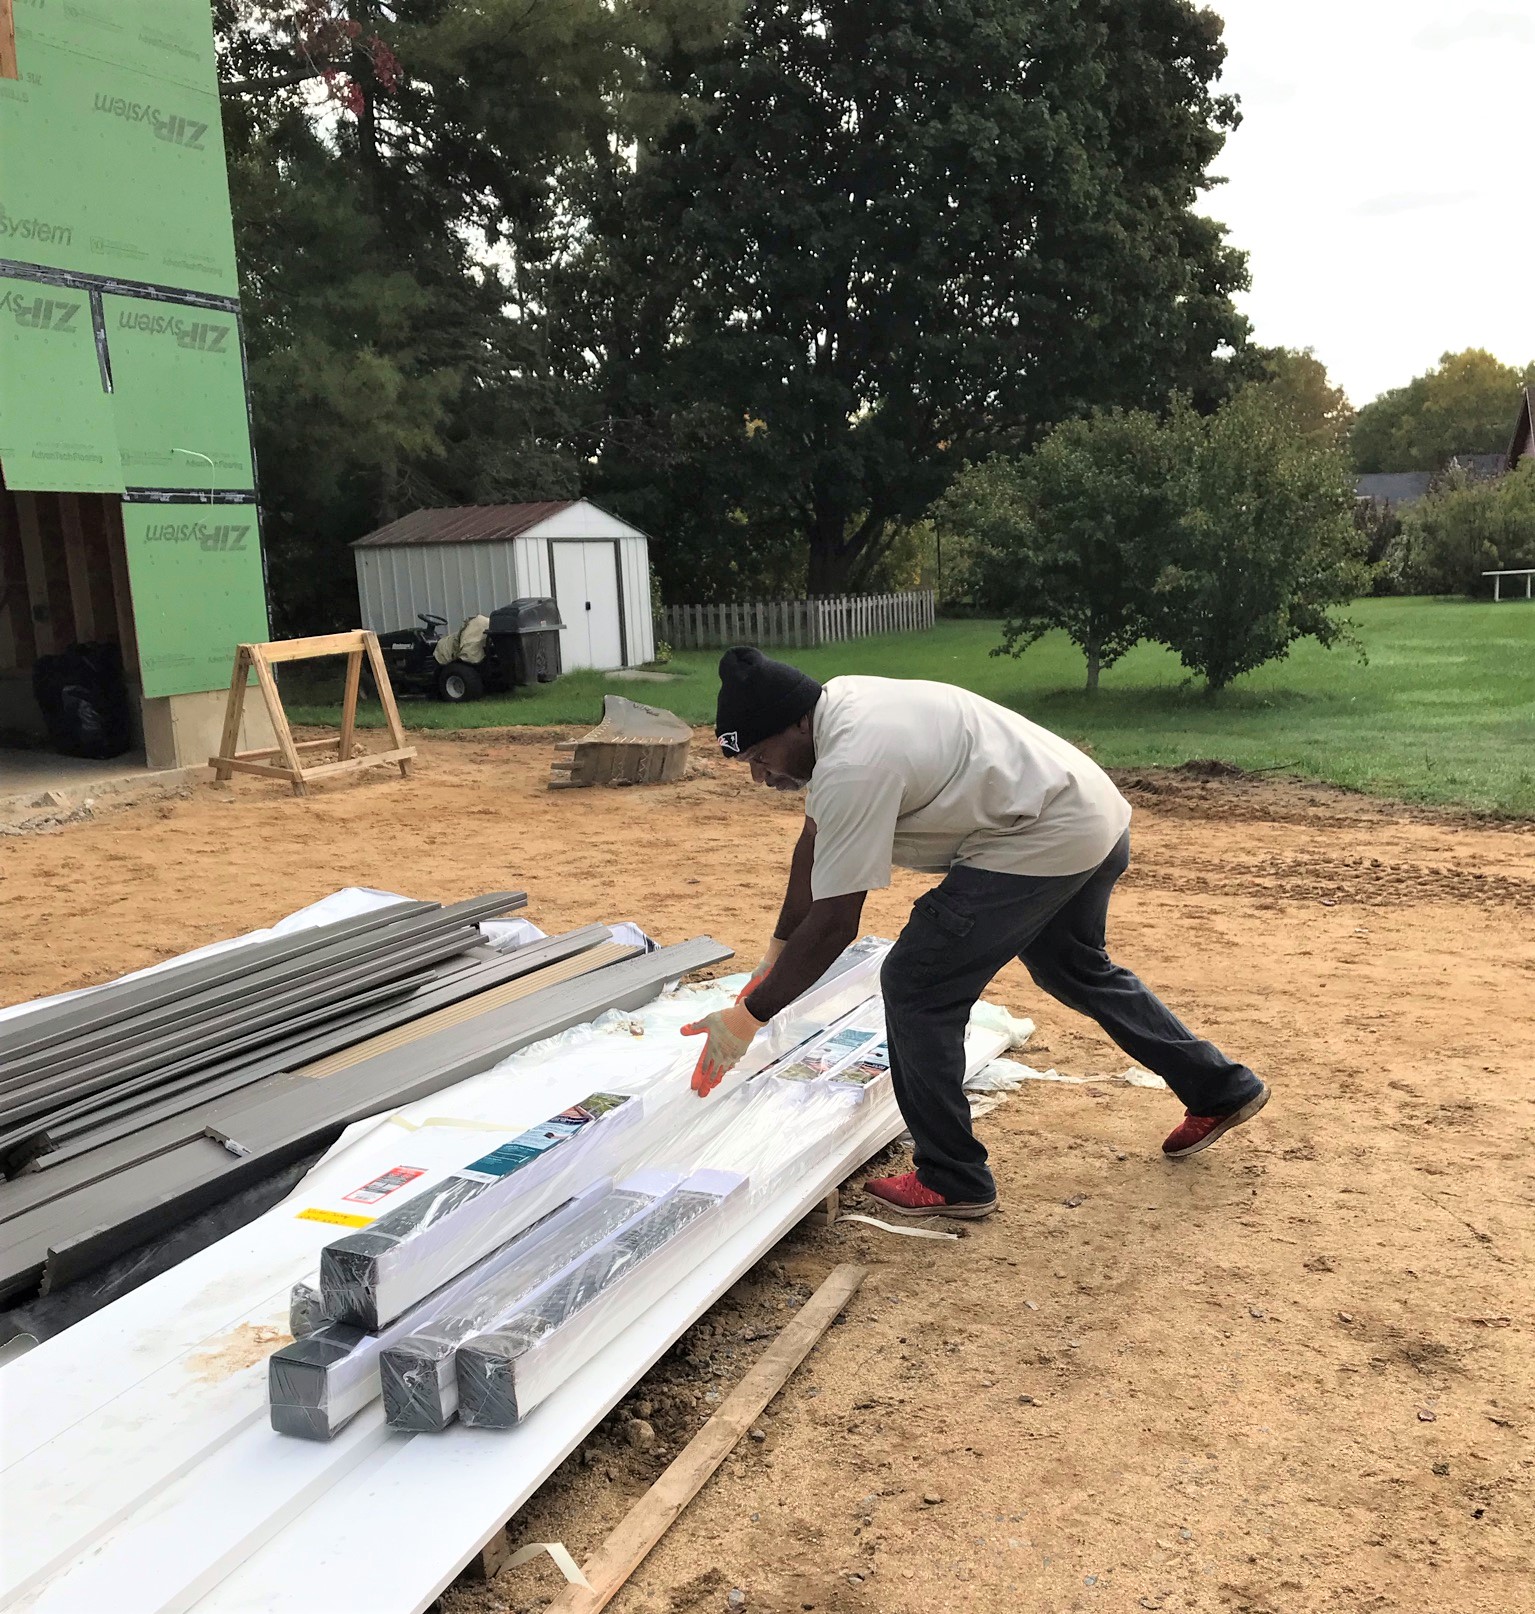
The work shifted this week (October 17-23) to the patio and fire pit – and that meant Evandro and his crew were front and center as Ready Installs awaits window and door deliveries – all delayed by COVID.
We had decided that we needed to upgrade our plan to include paving stone patios, walkways, a wall, and a gas fire pit. This post will focus primarily on those aspects. Evandro had previously roughly marked out where these new parts would go and link in with the new garage and the new house deck.
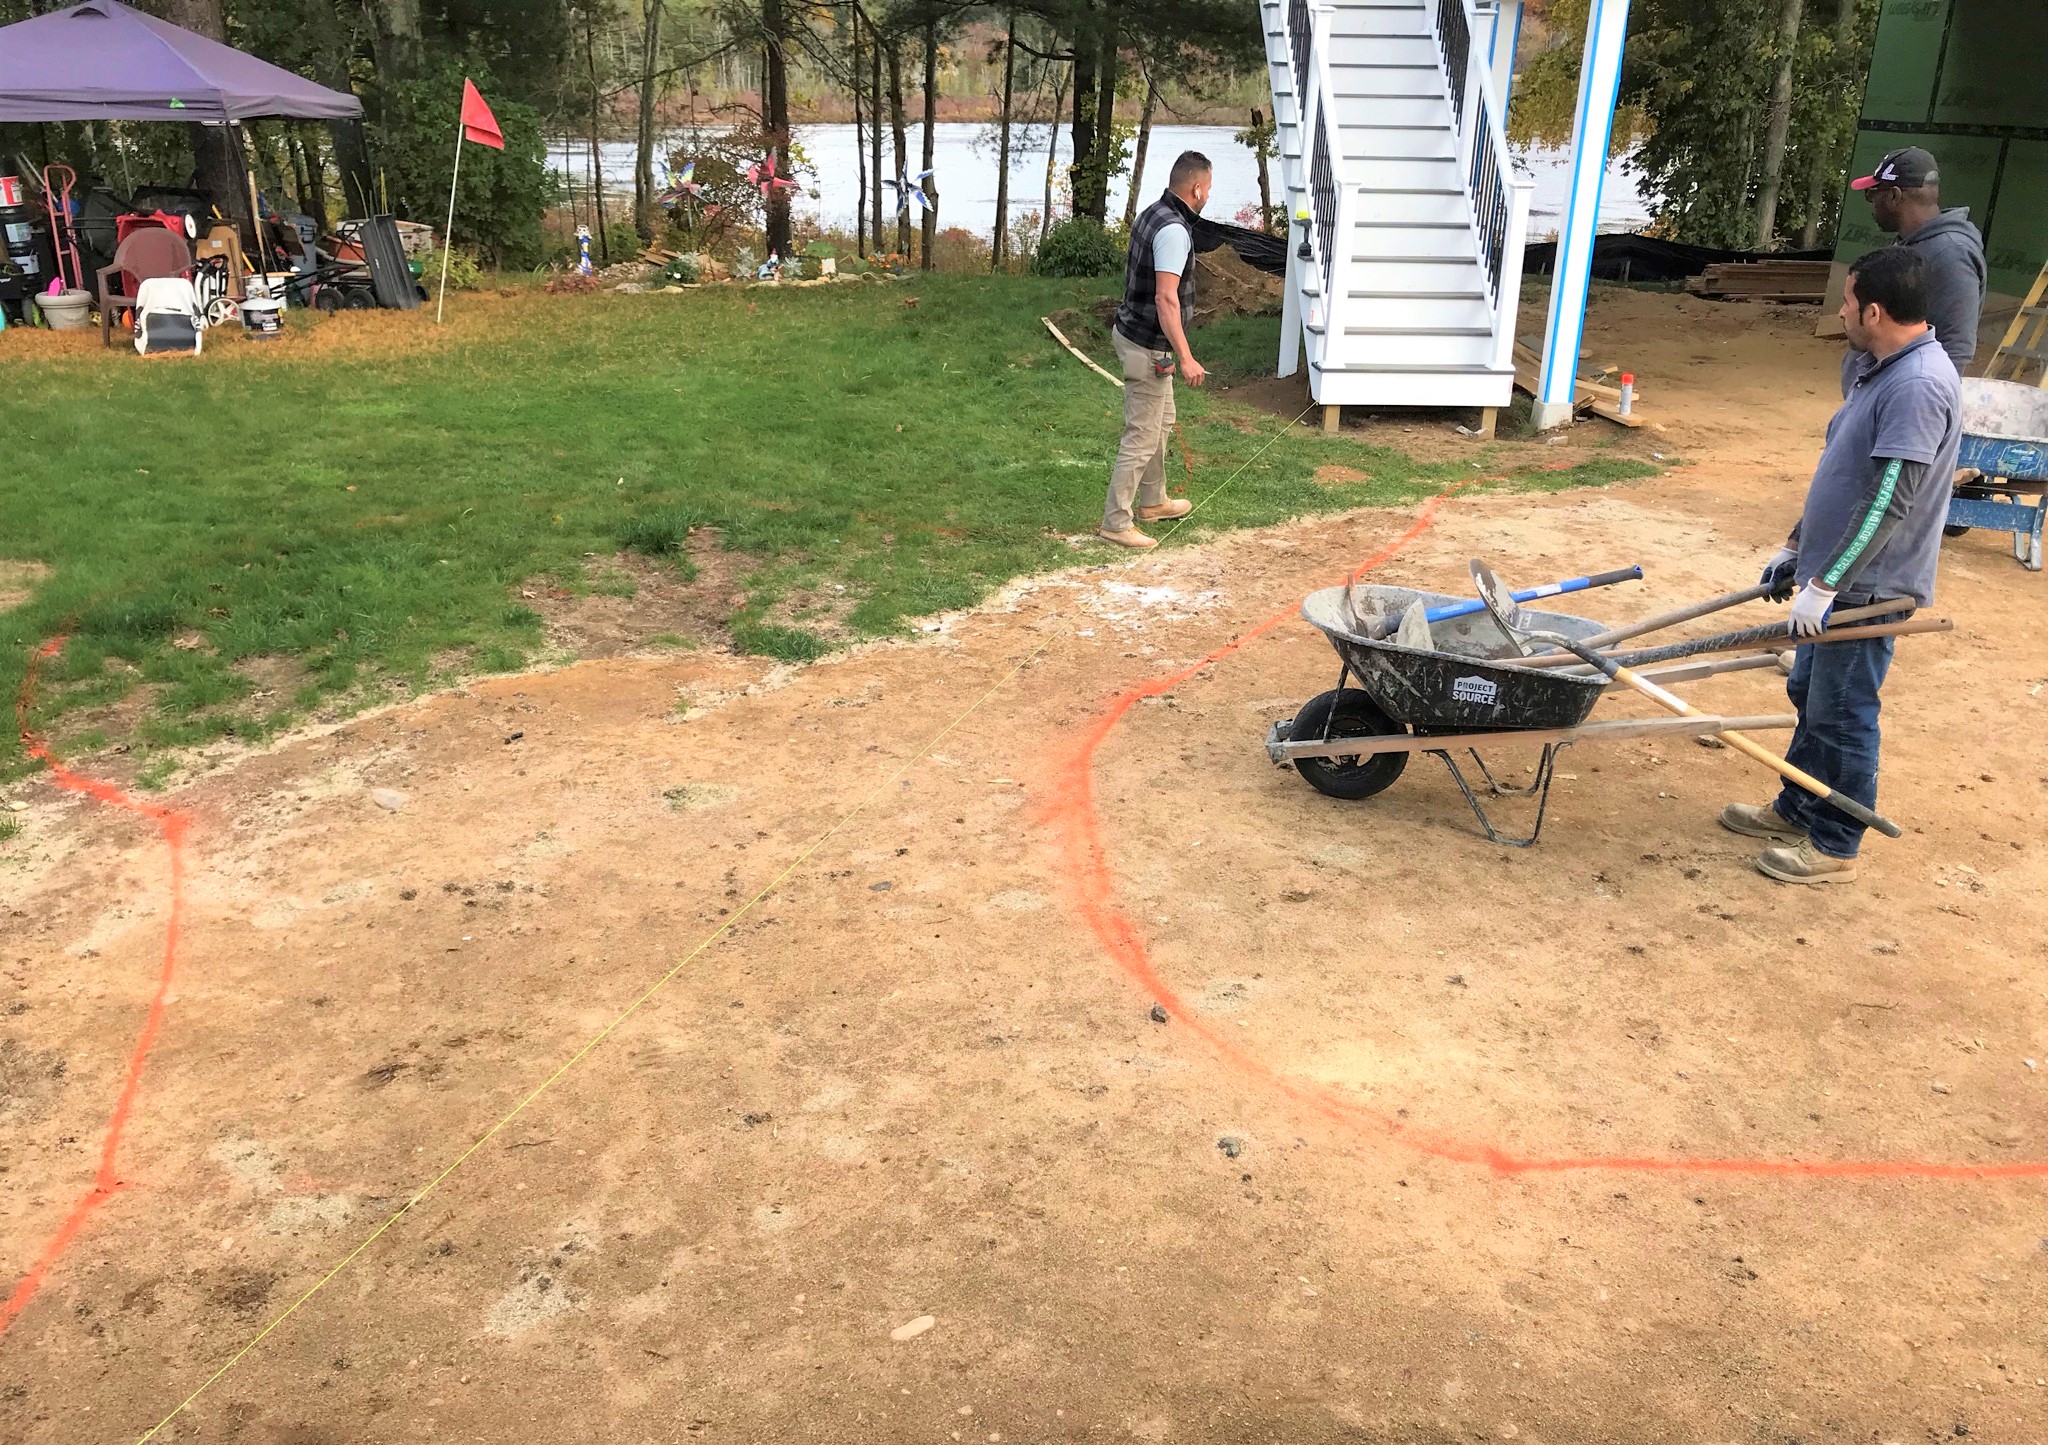
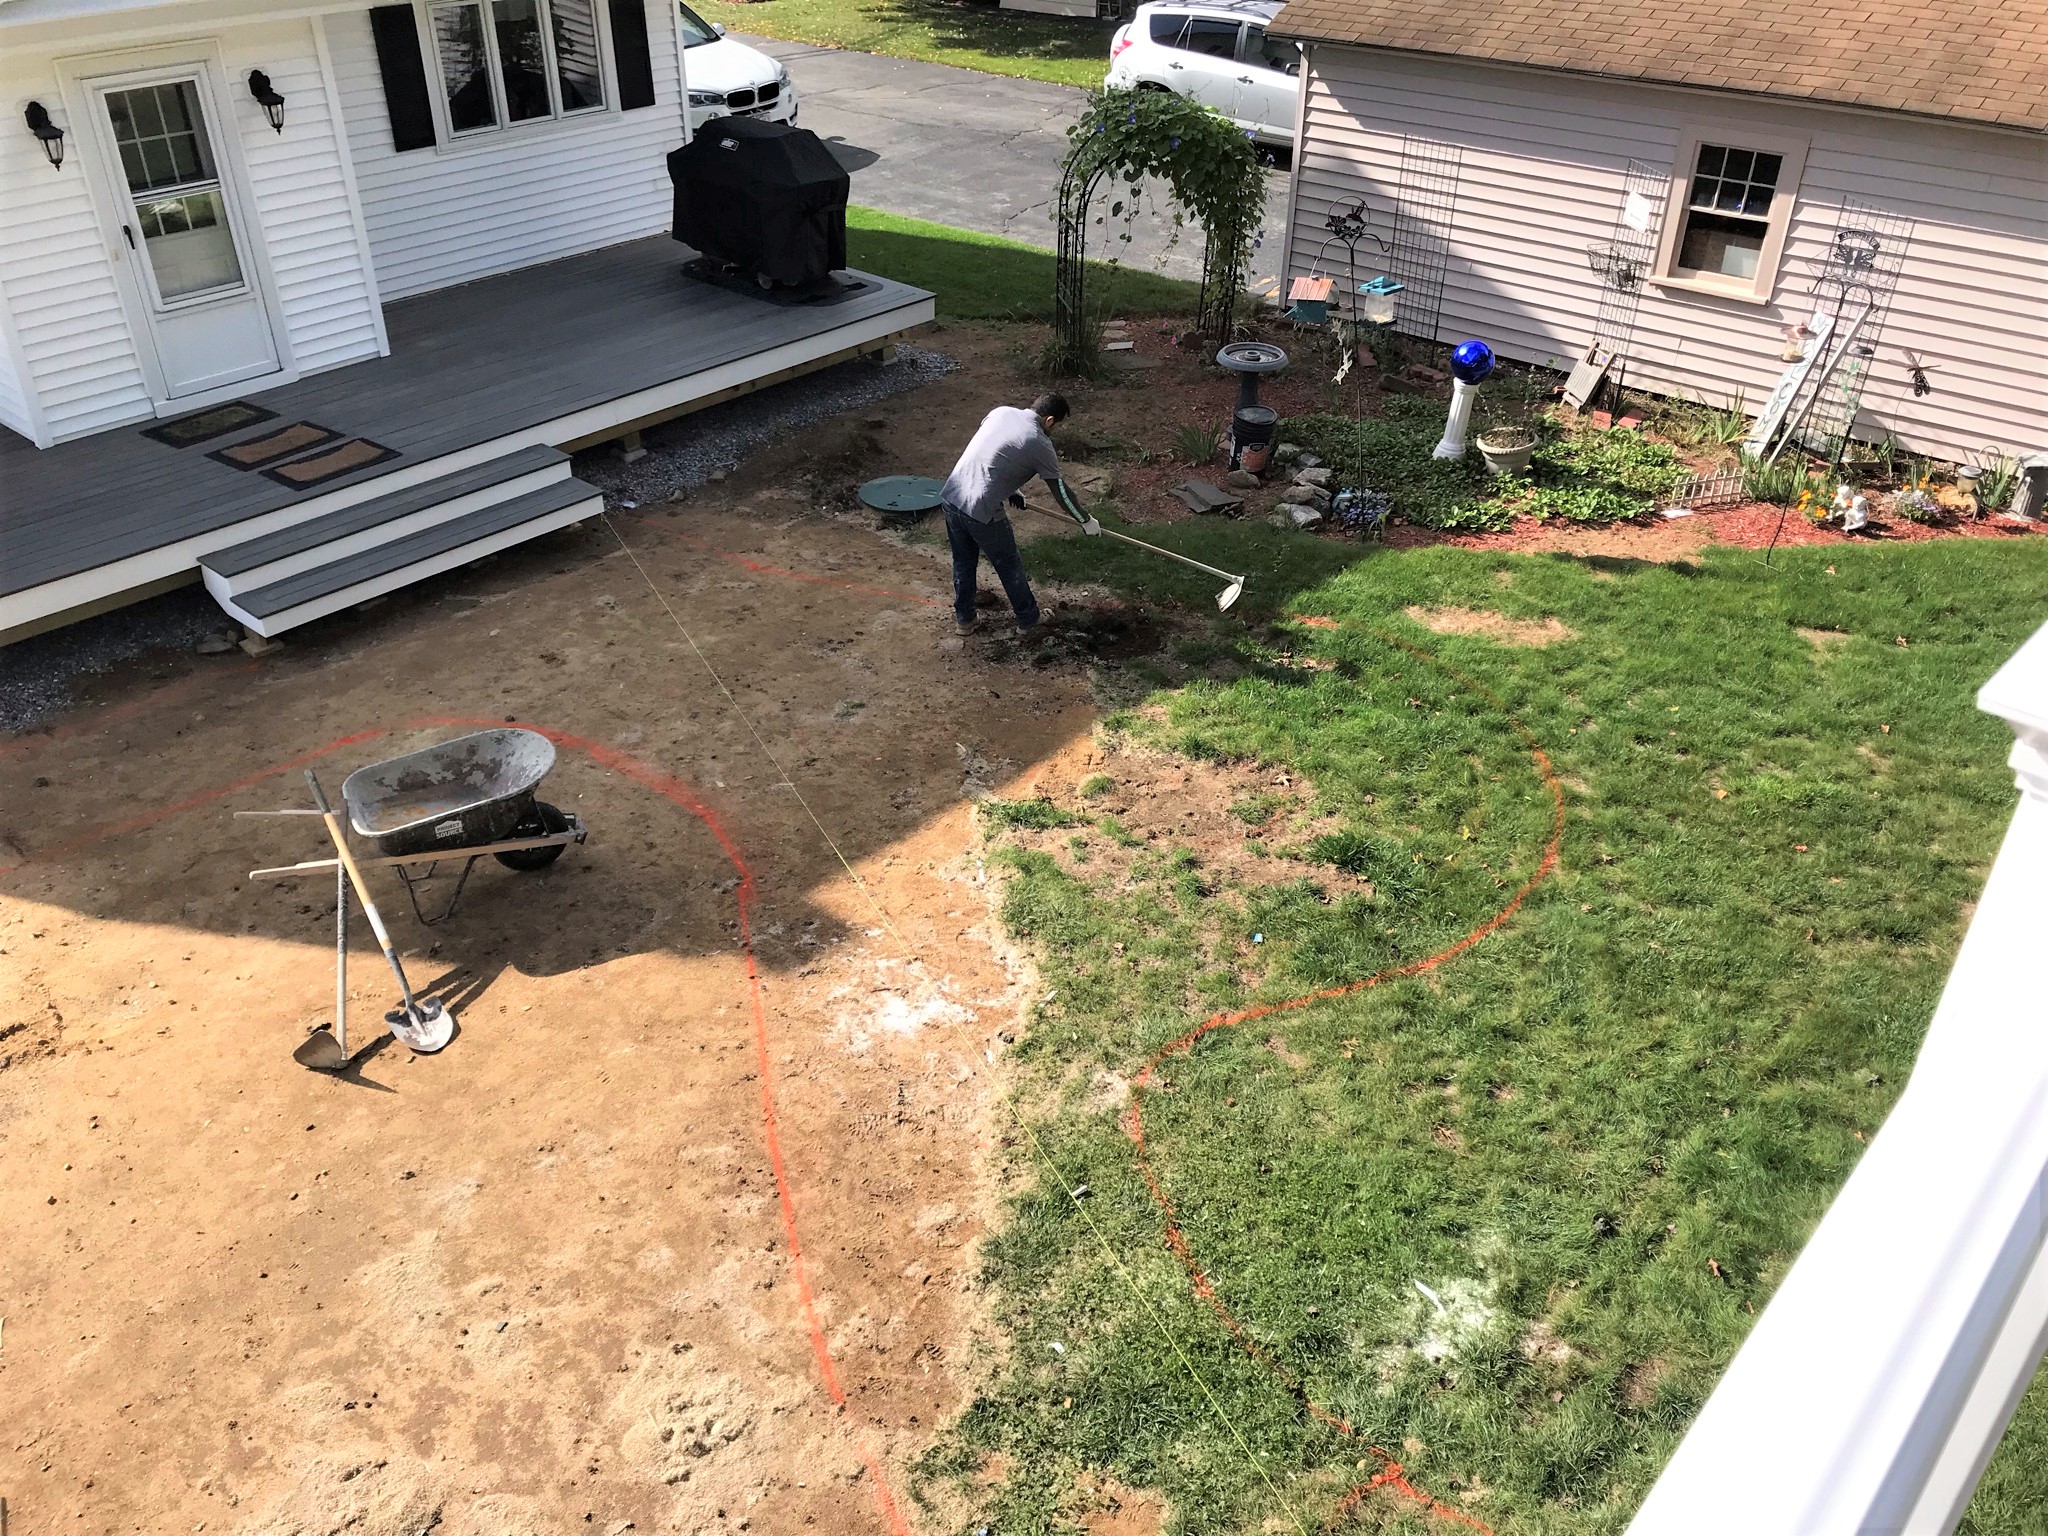
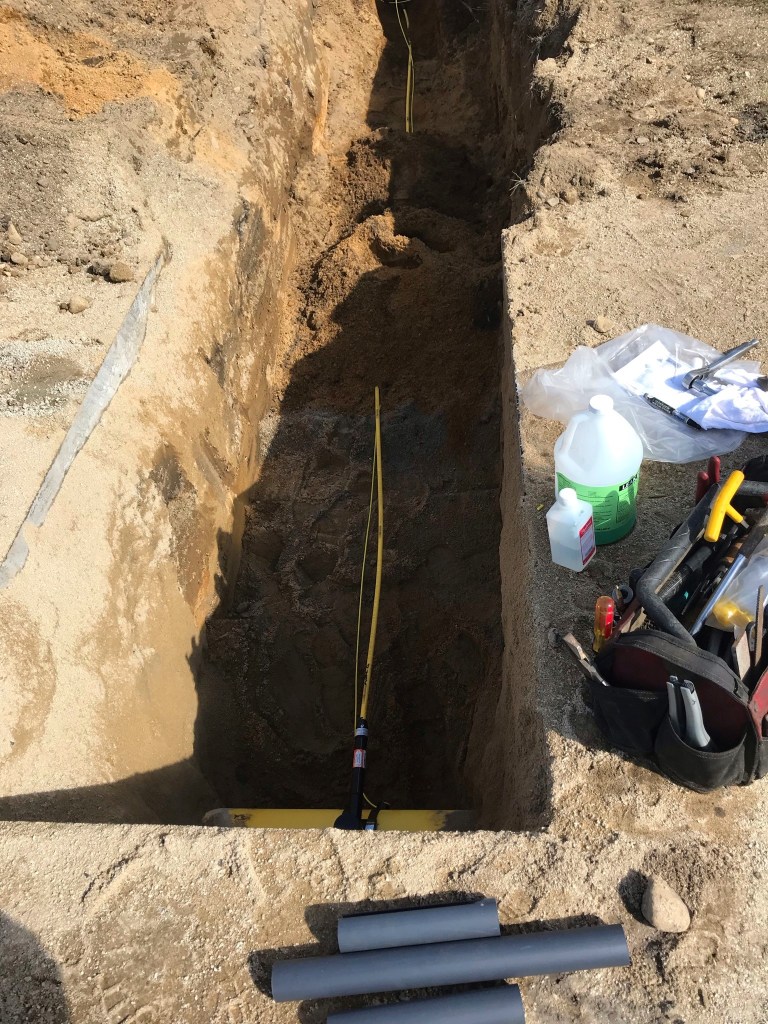
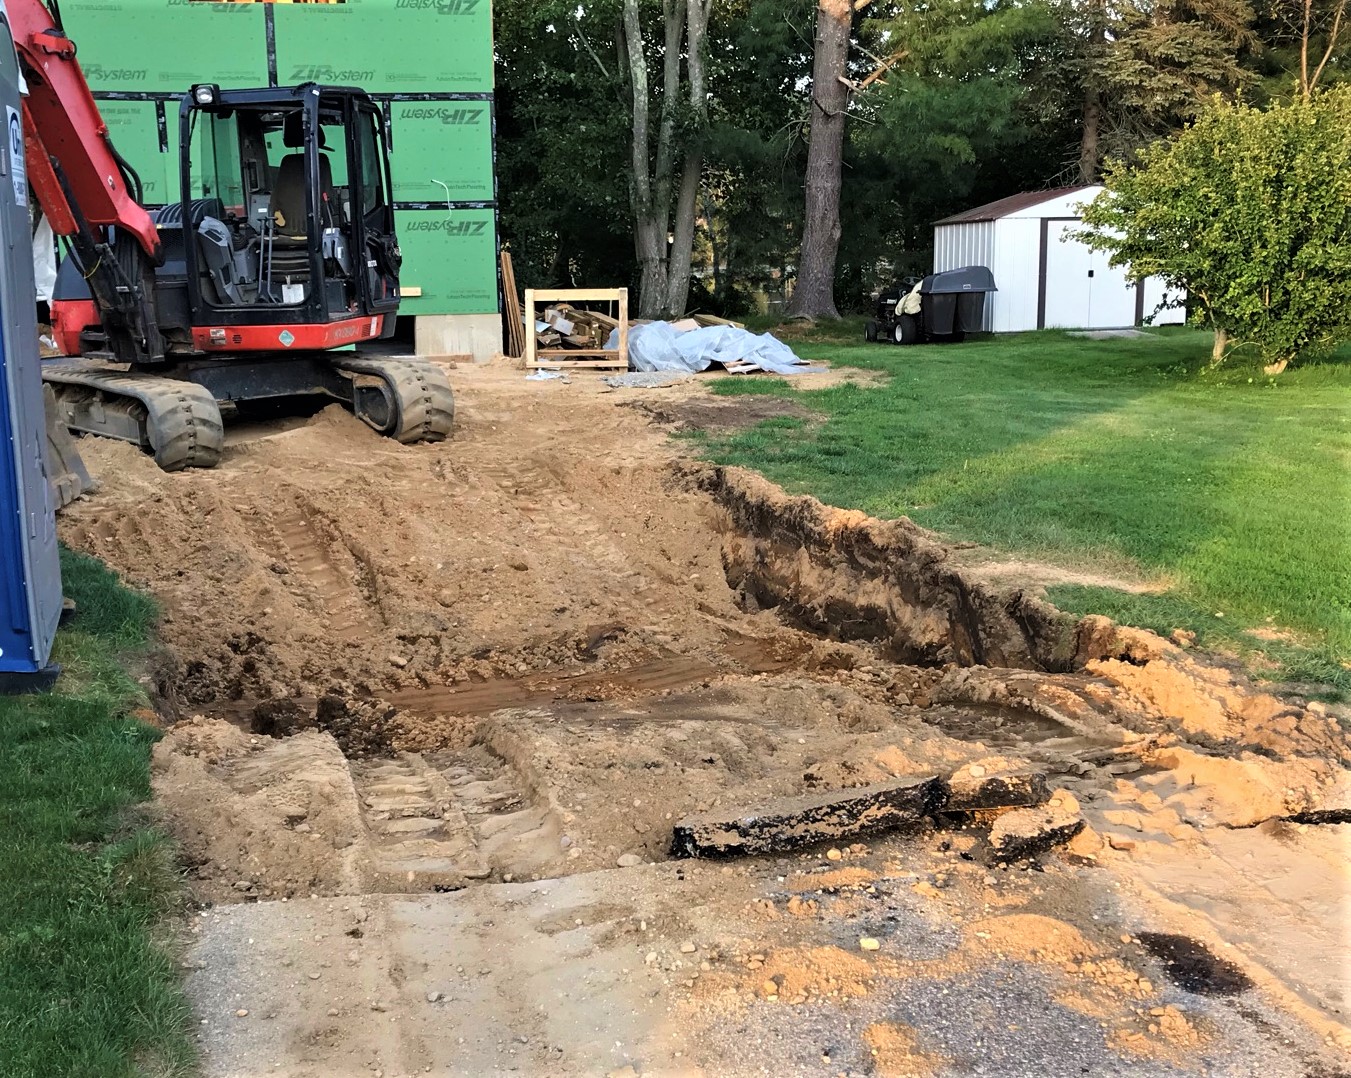
On Monday, Evandro verified his lines and excavation began.
Lines set and digging begins.Monday progress.
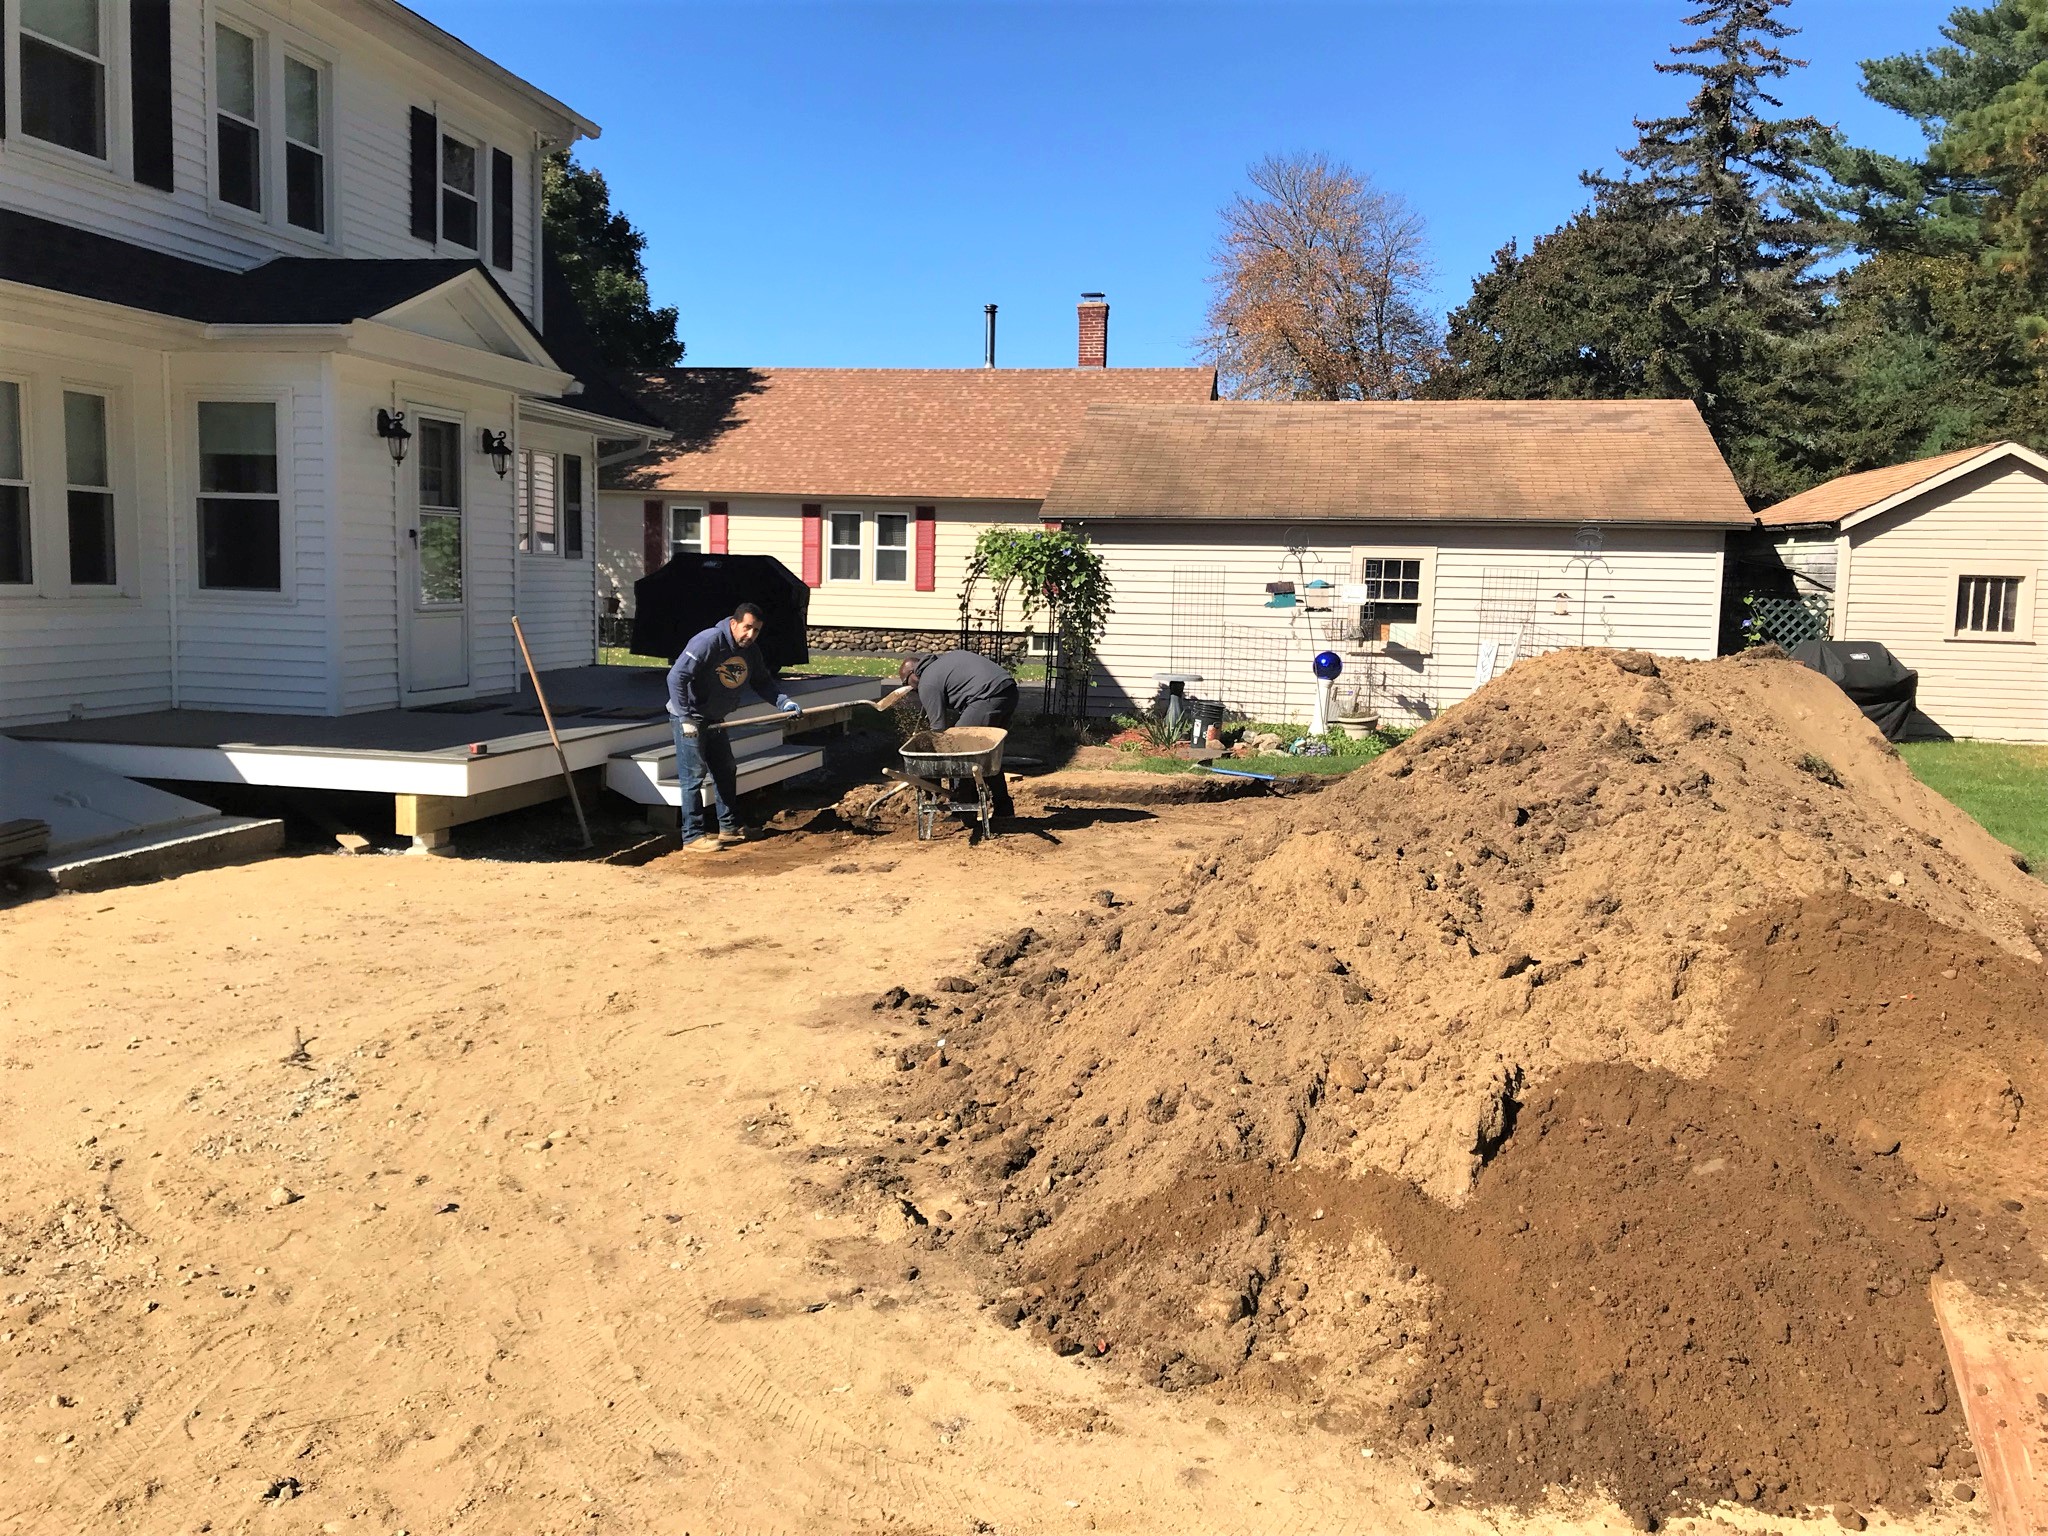
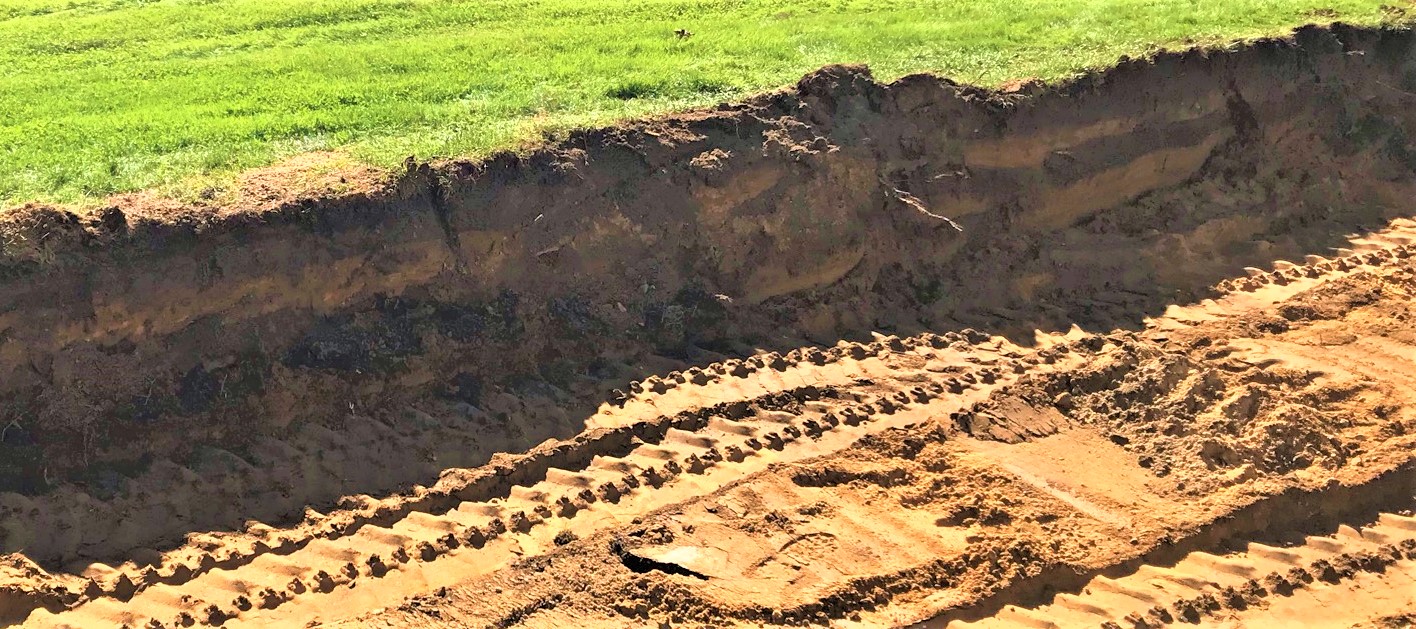
There was q lot of digging – and please note that this was done all by hand – no equipment other than hand tools.
Lots of digging by hand.Tuesday’s progress at seen at dawn on Wednesday.
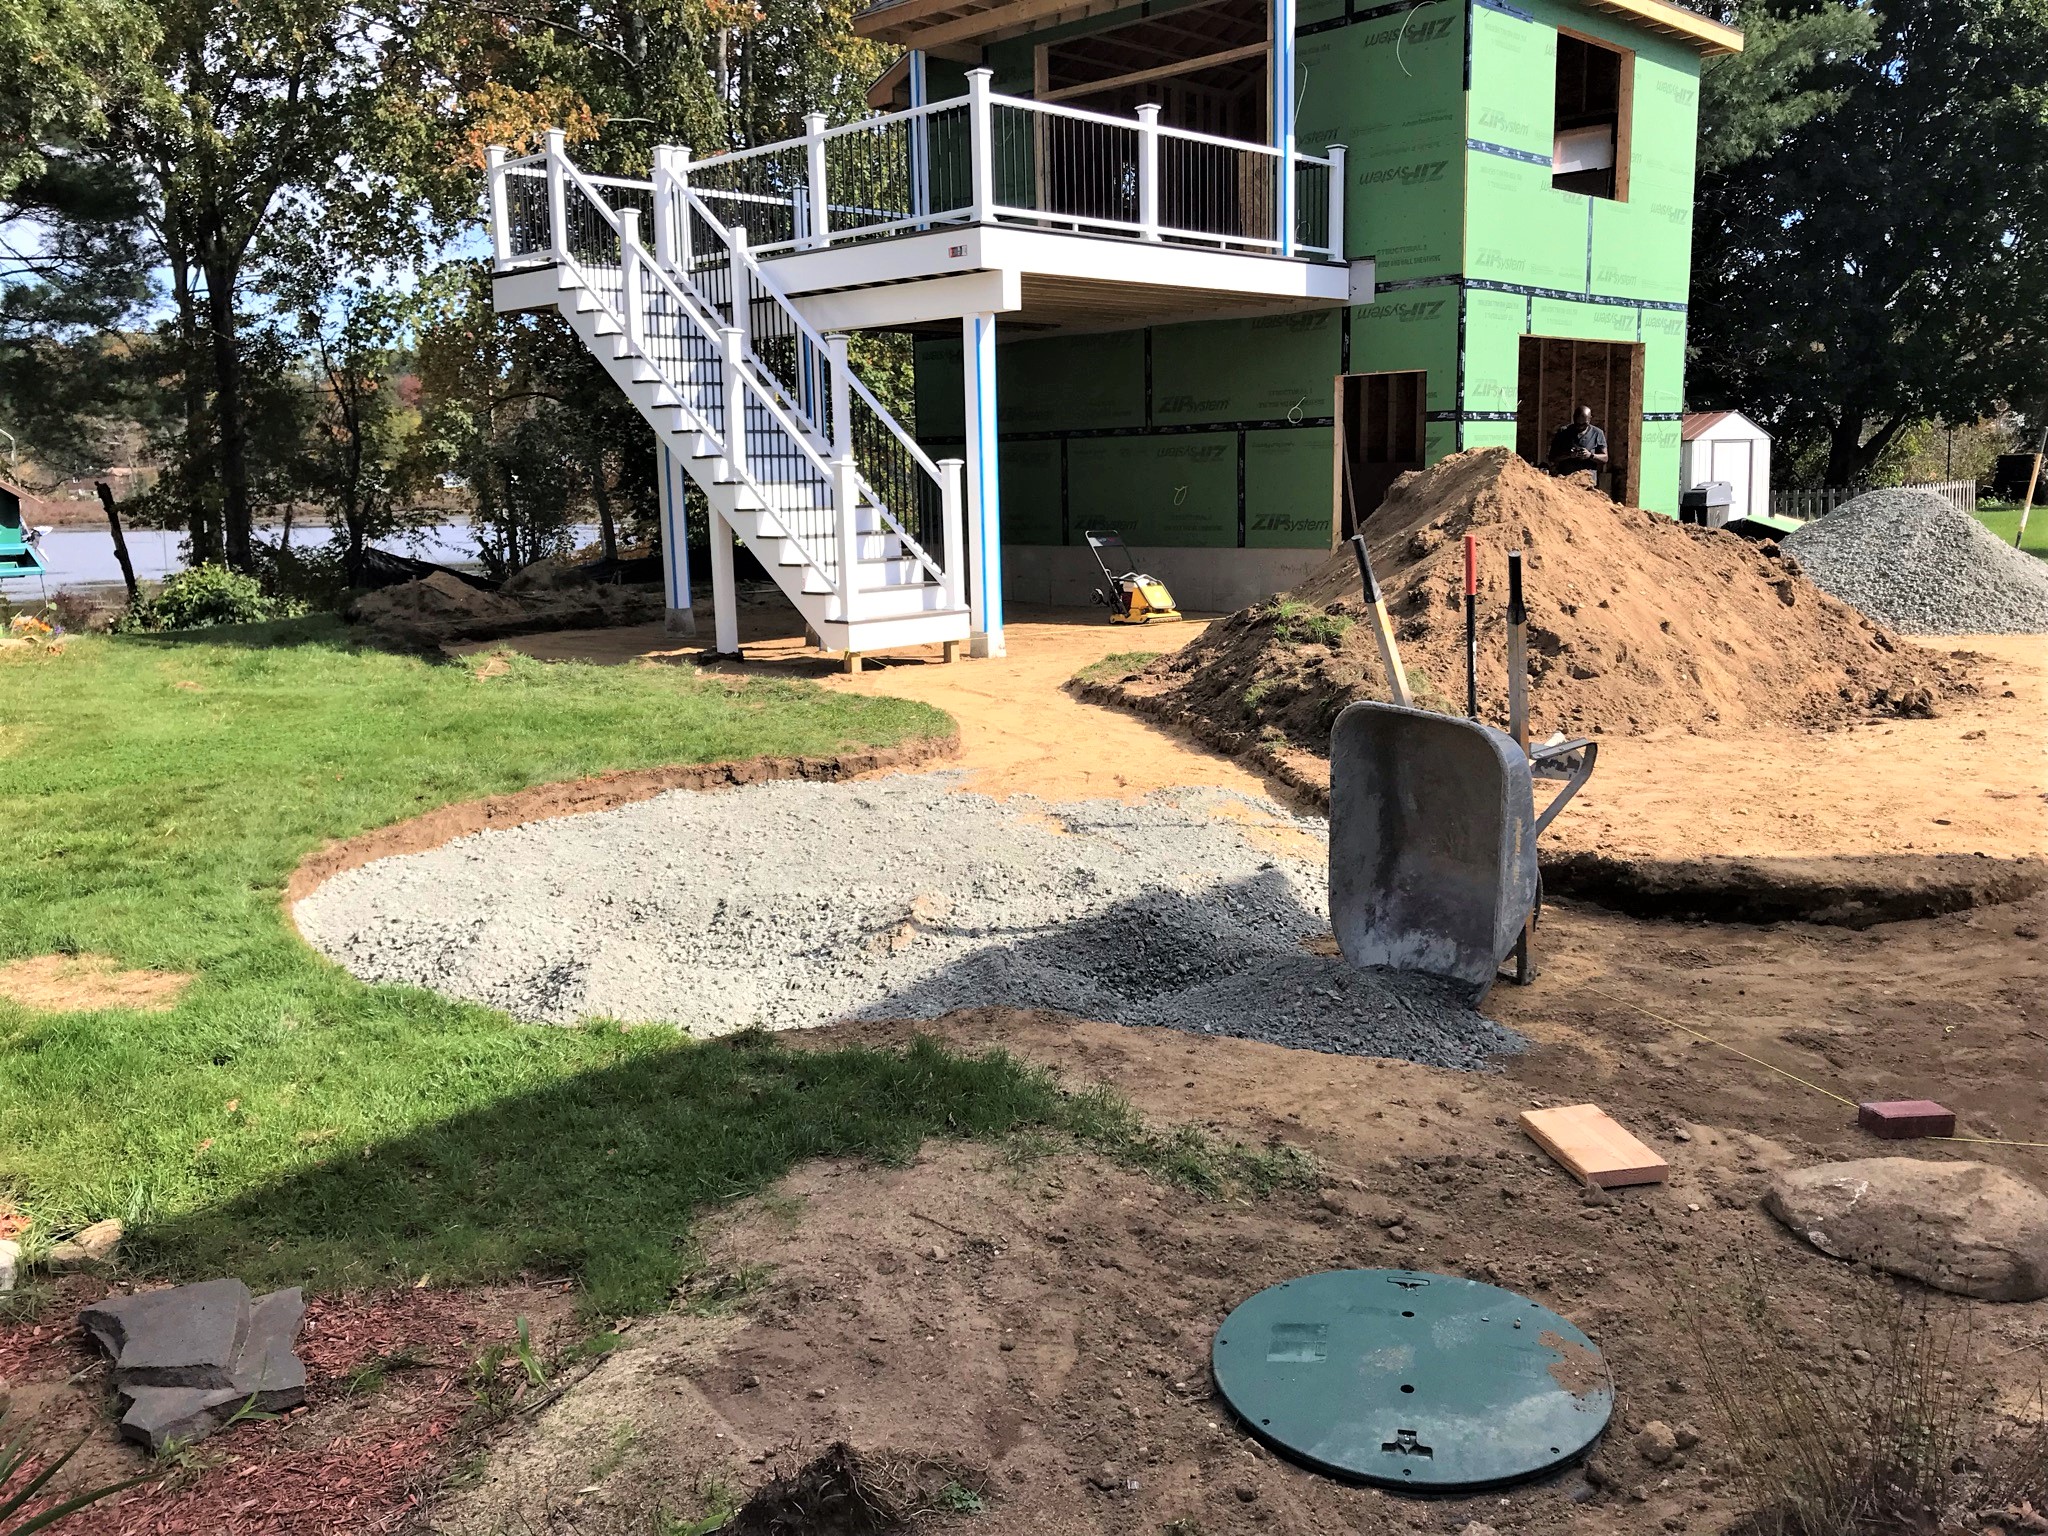
On Wednesday, it rained. Thursday things picked up again. Subbase compaction began – some by hand and some by machine depending on the leach field presence underneath. Then crushed stone started being brought in and spread.
Thursday work in progress.End of Thursday progress.
Friday saw a continuation of Thursday’s efforts.
Friday work.
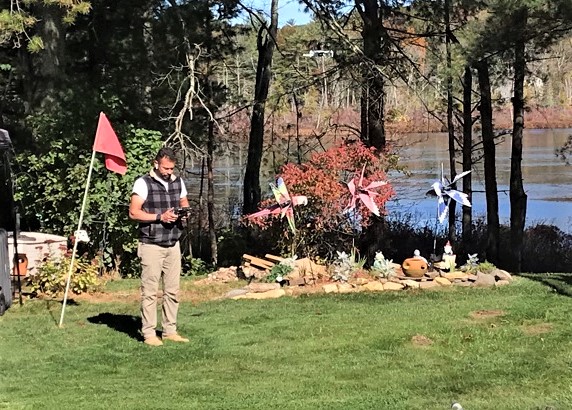
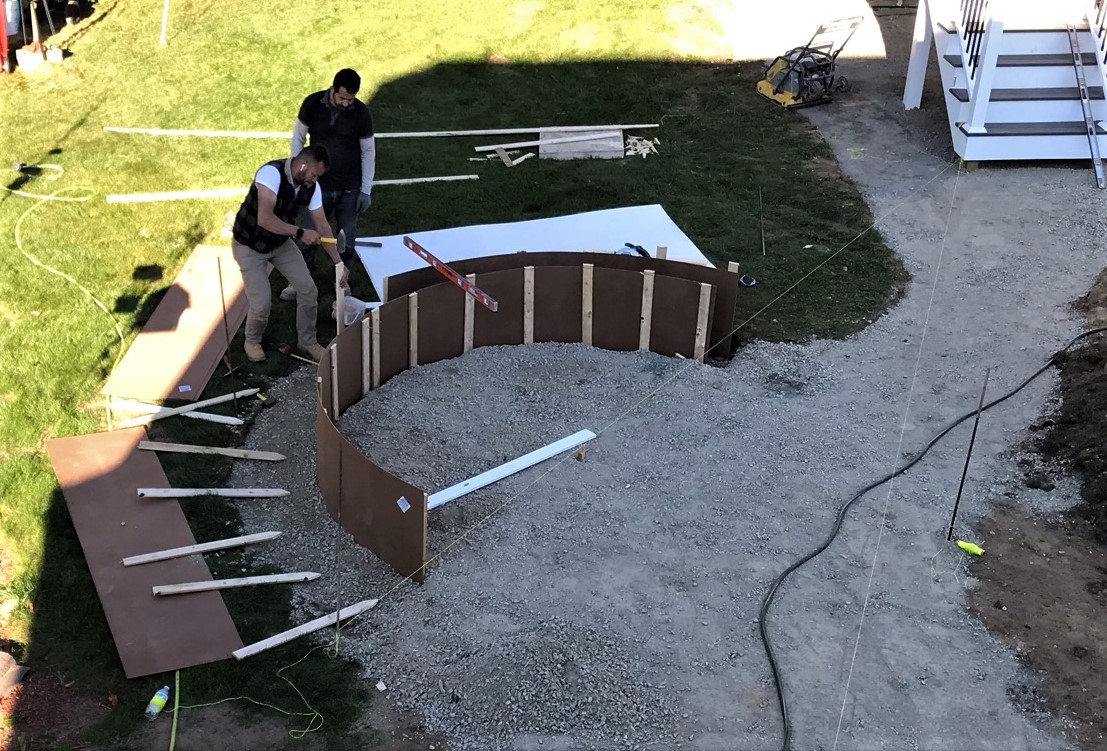
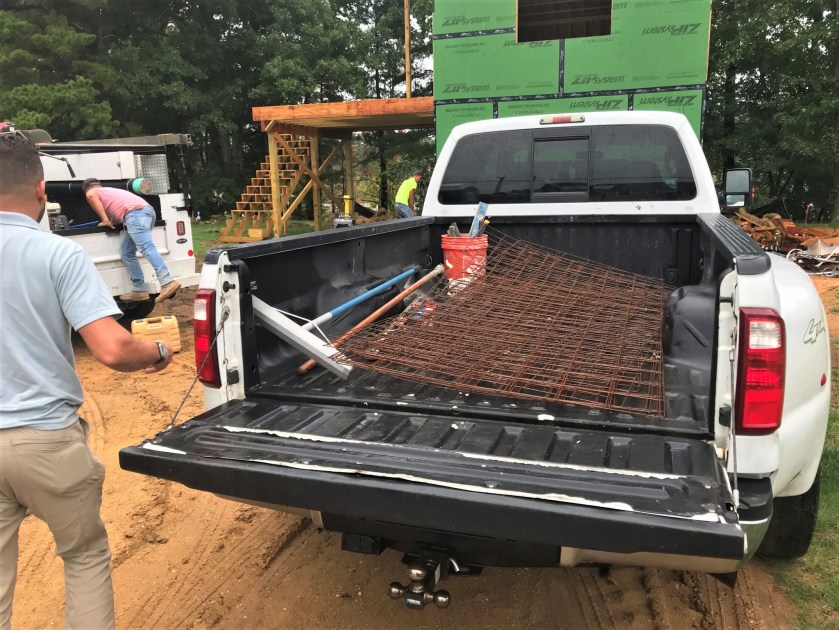
However, it became obvious that Evandro wanted to catch up for Wednesday, so work proceeded on Saturday as well. The work was focused on building concrete forms for the back wall and the fire pit, and lastly placement of hand-mixed concrete. Evandro had an amazing drone that he used to take some photos and videos that will eventually show his work start to finish – and I hope to share a link for that when its available. The drone was able to self-stabilize in the wind and could reach heights of 500 feet!
Evandro and his drone ( you can see it just above the midpoint of the two reddish bird windmills).
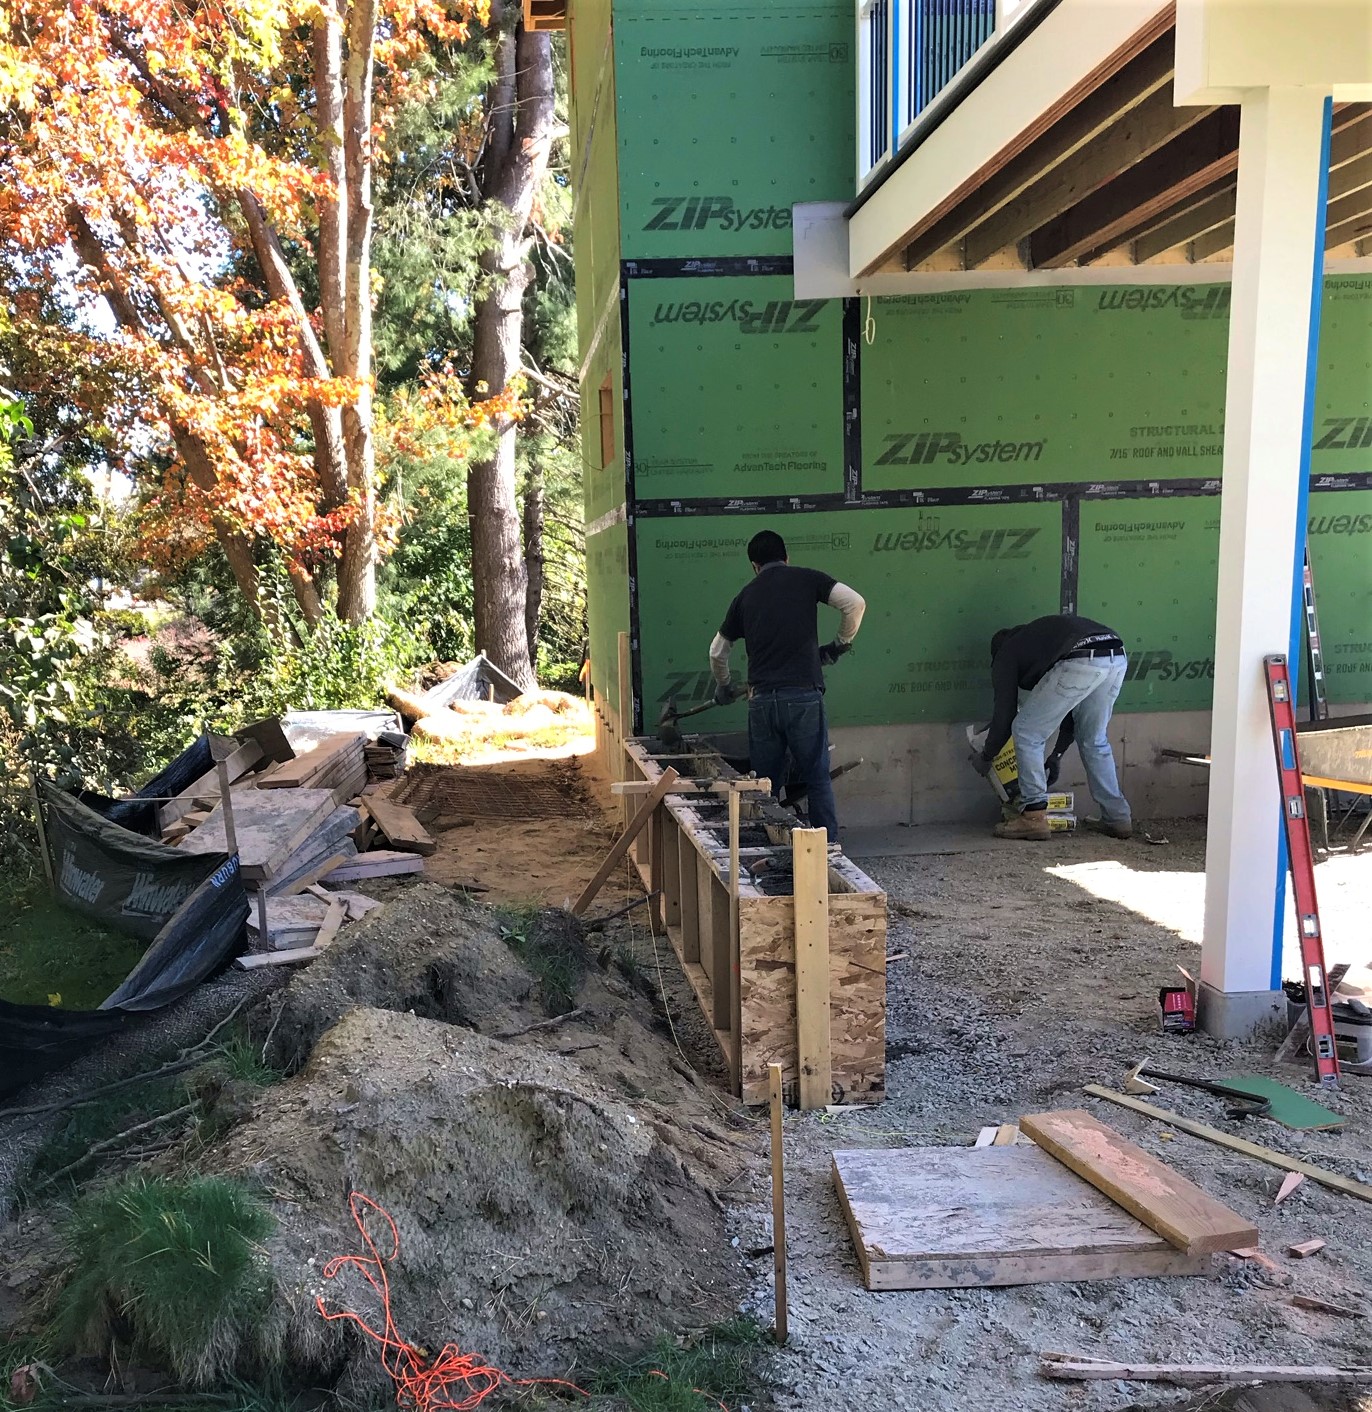
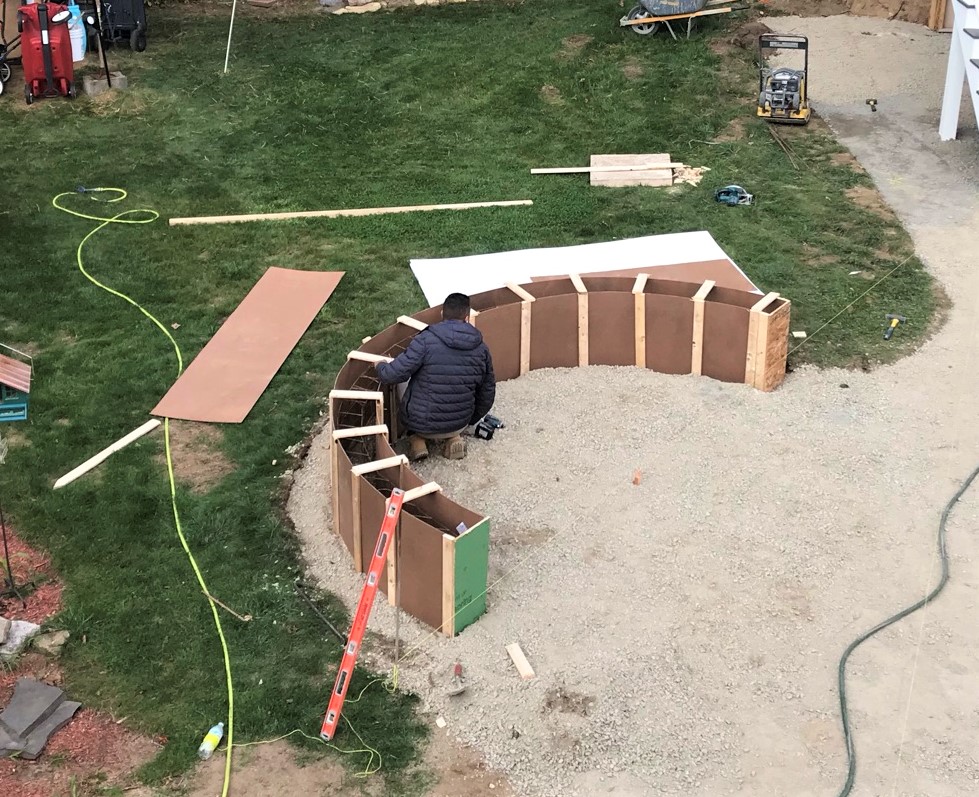
The back wall was formed and placed.
Back wall of patio under the deck.
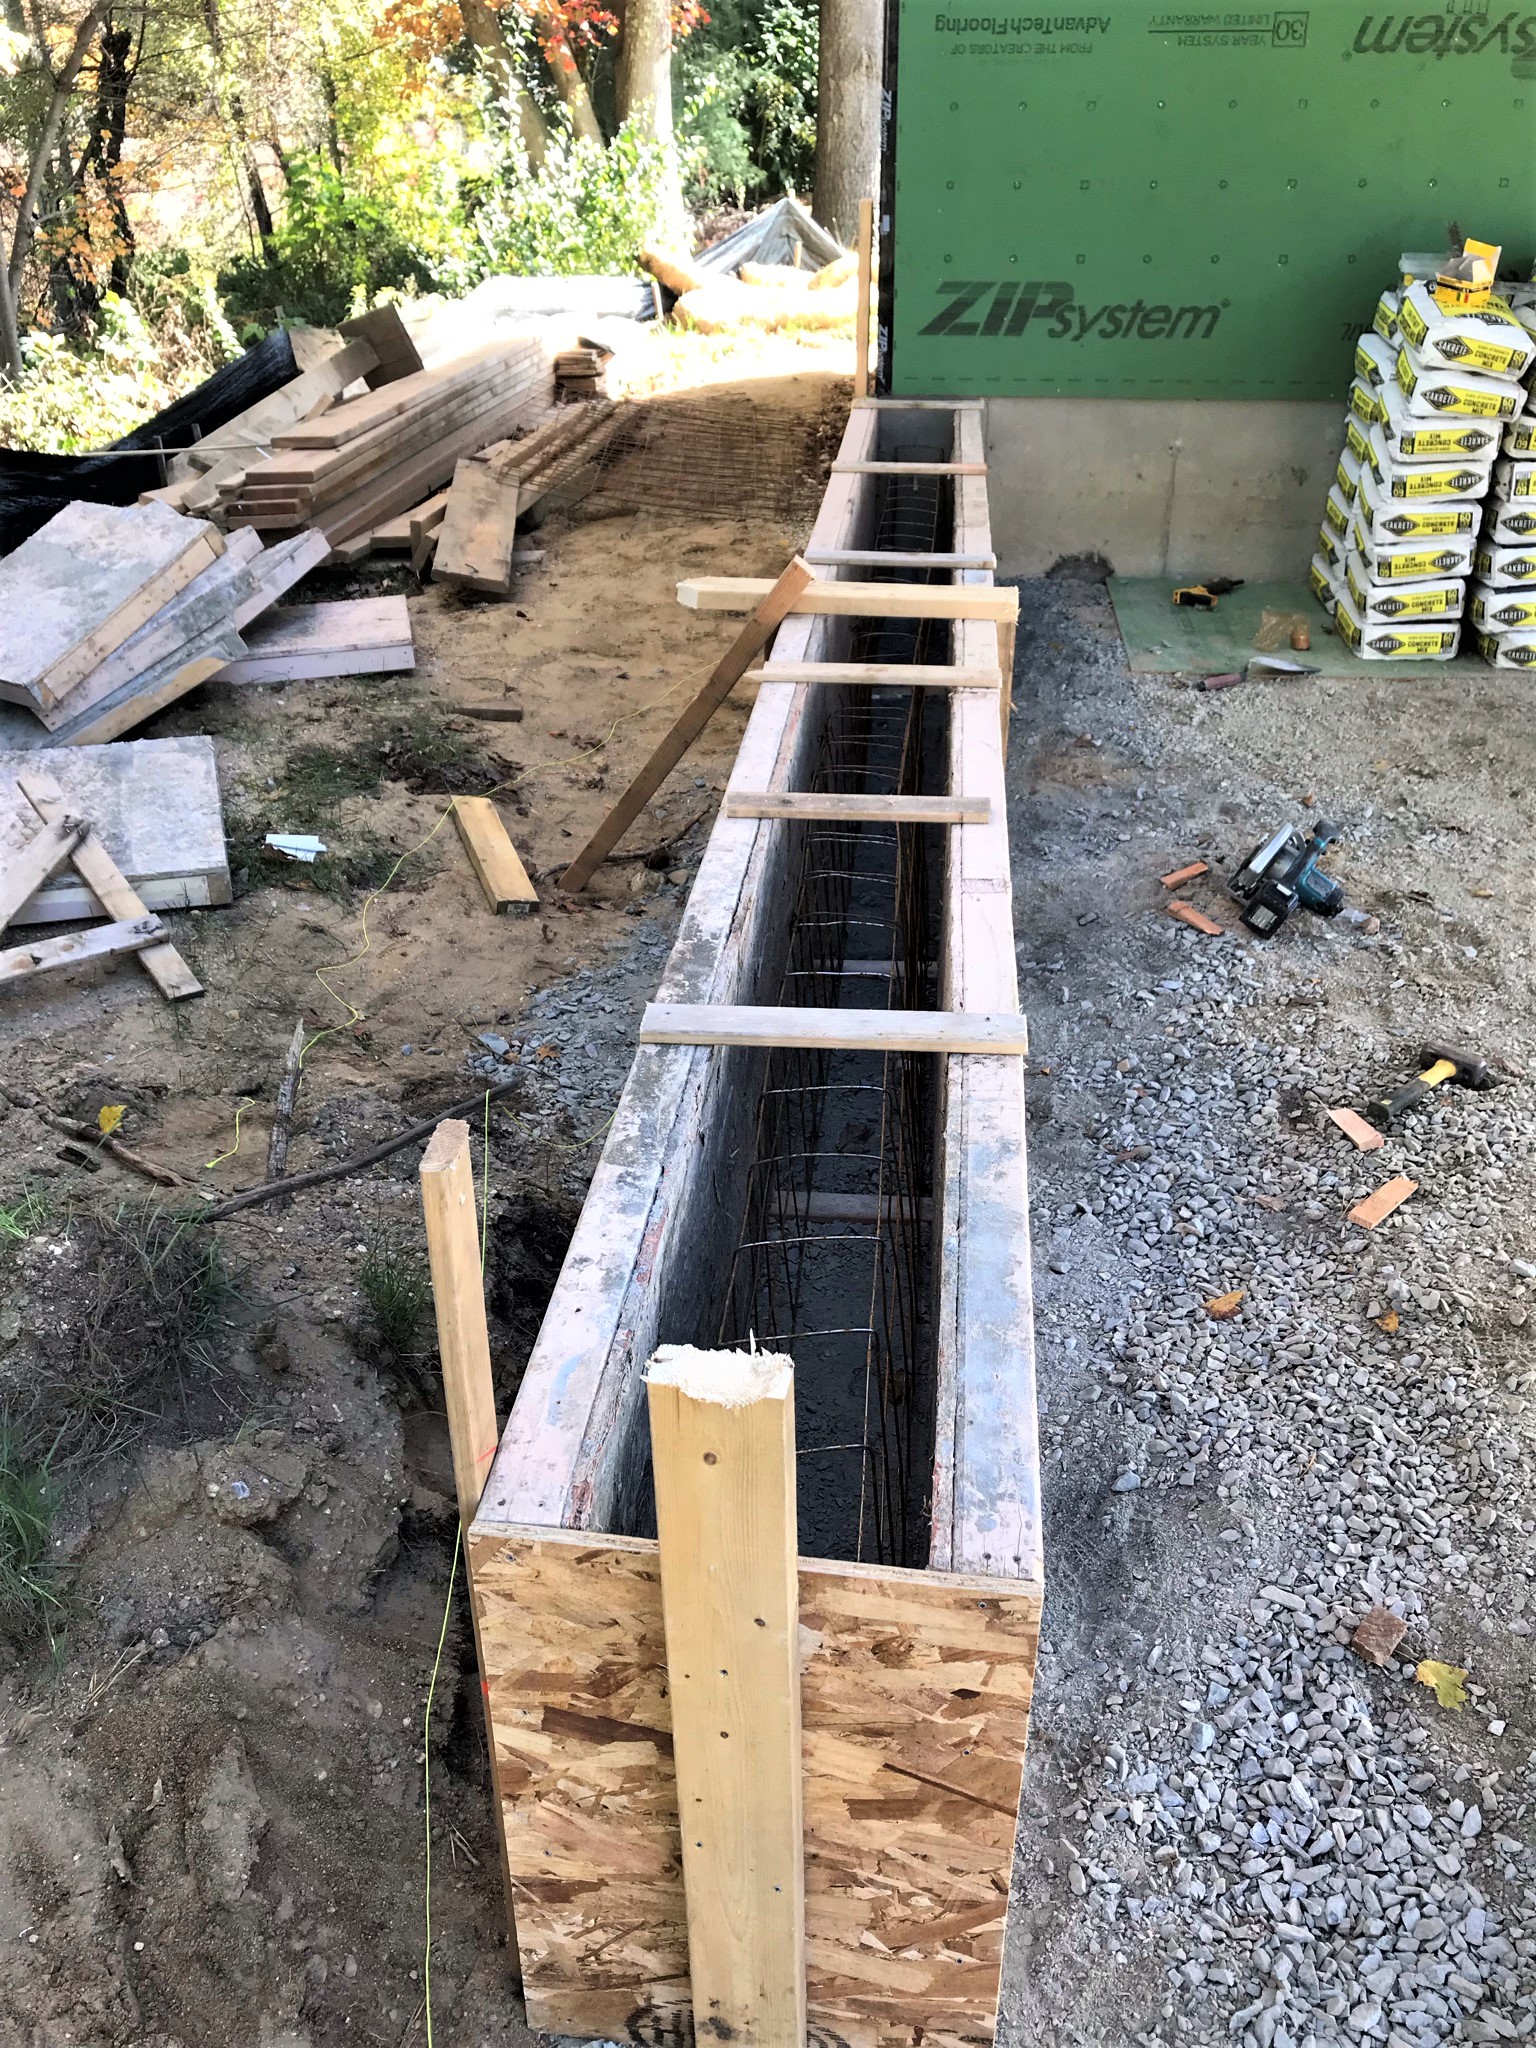
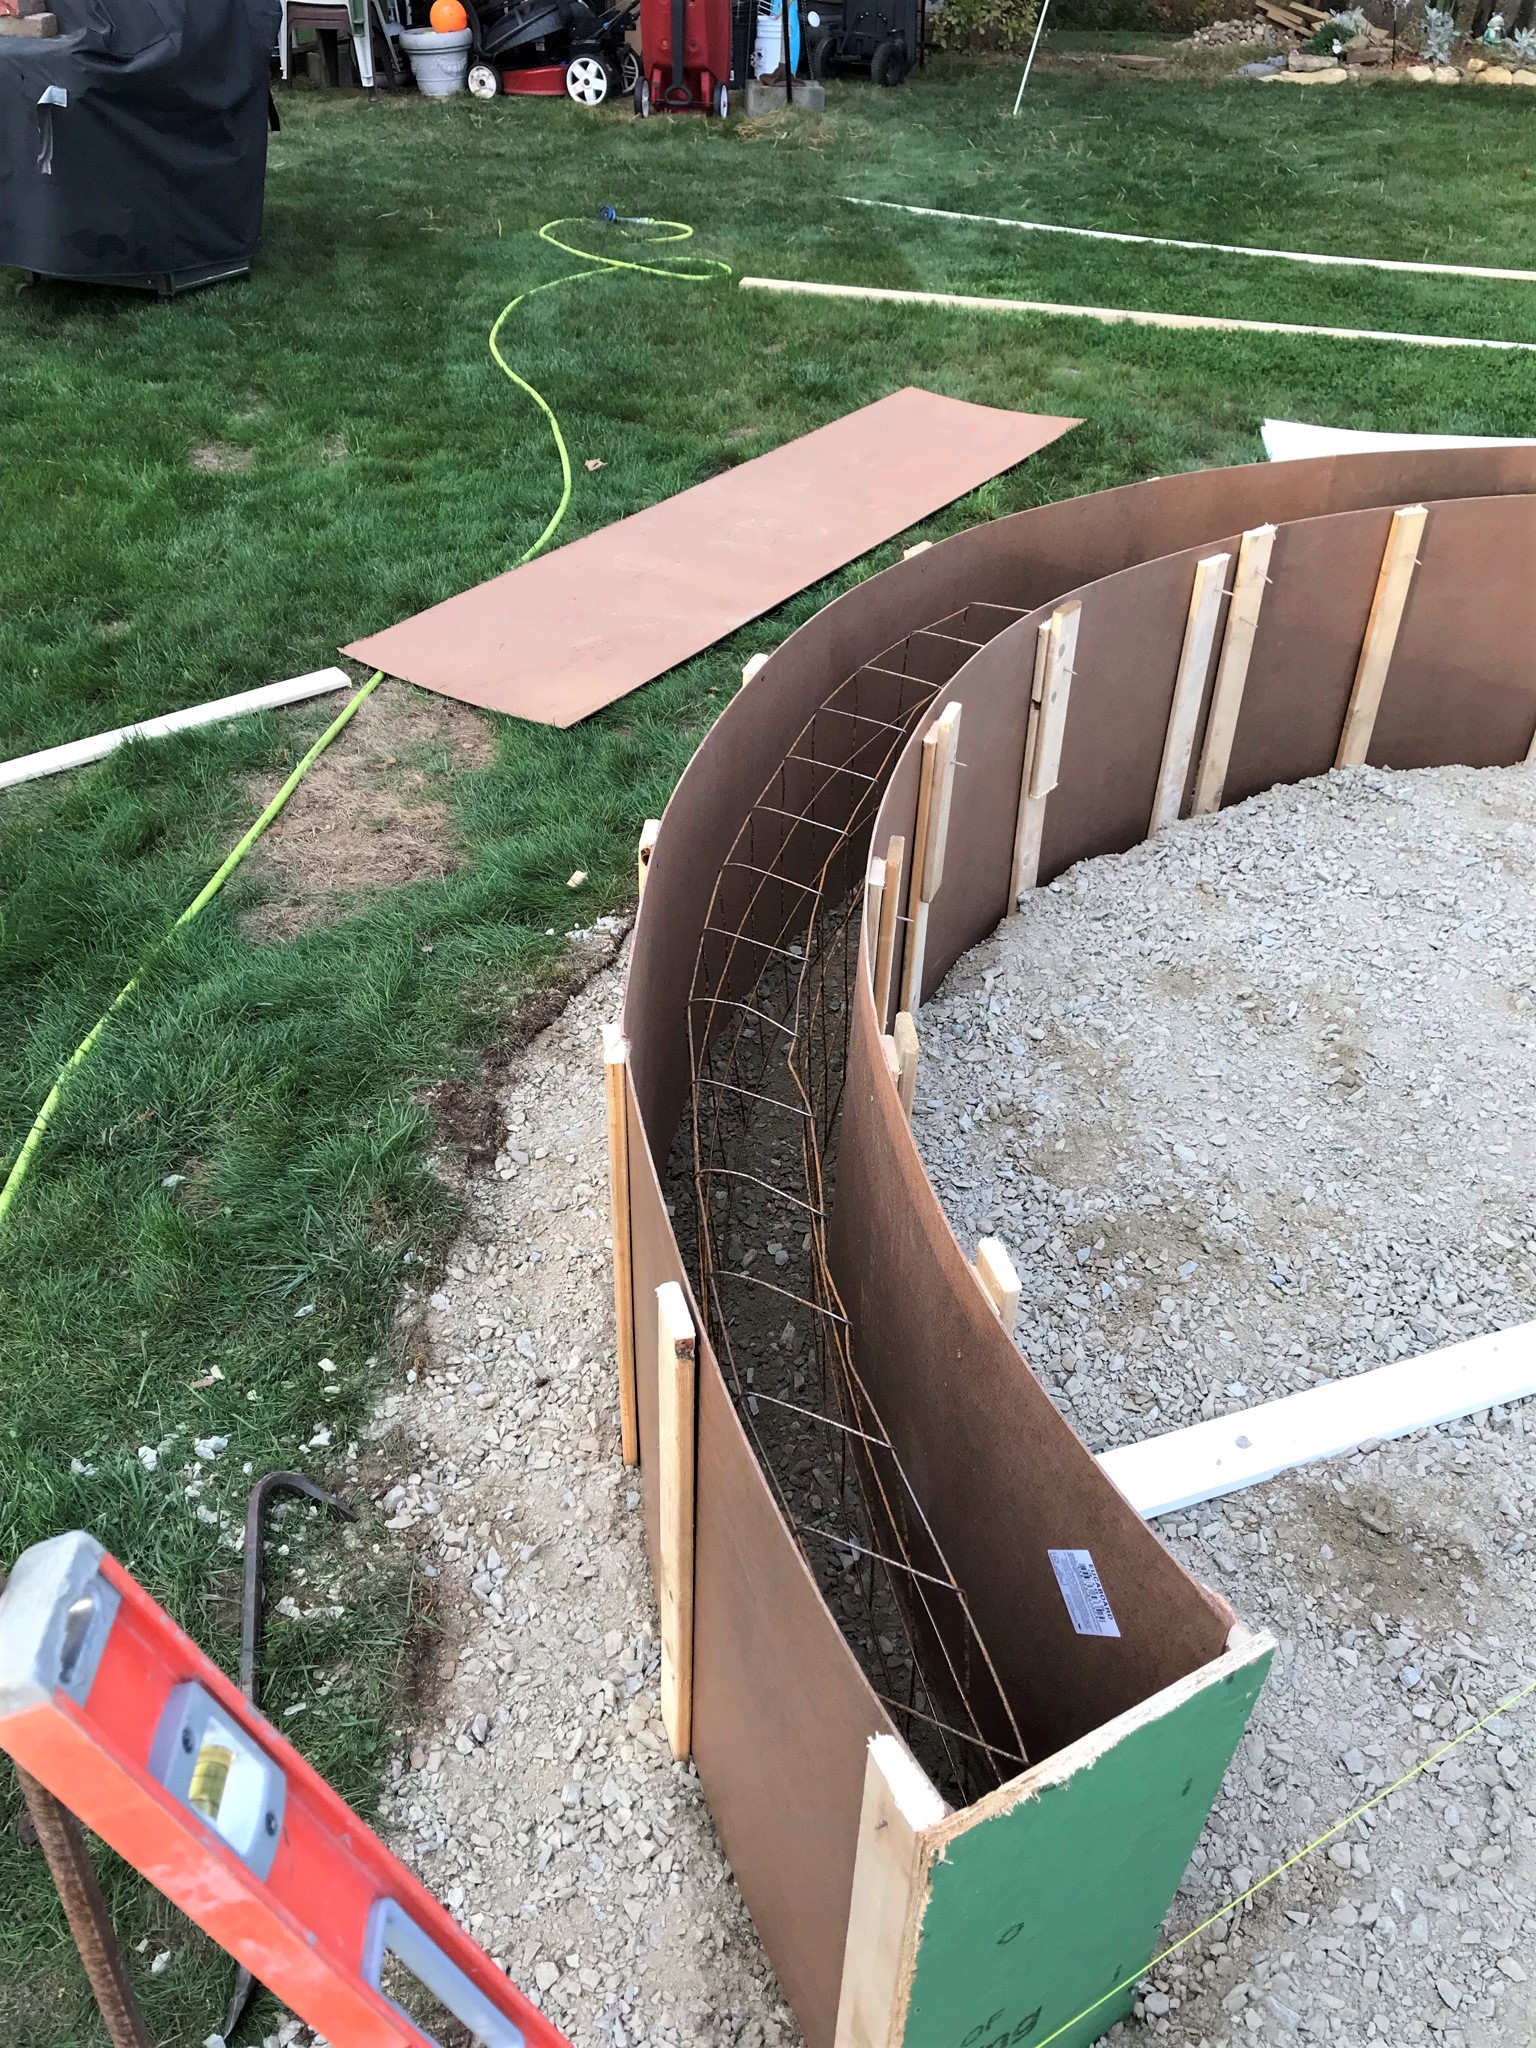
The fire pit wall was started.
Building the forms.
Staking the forms and bending and inserting the steel.
Steel in!
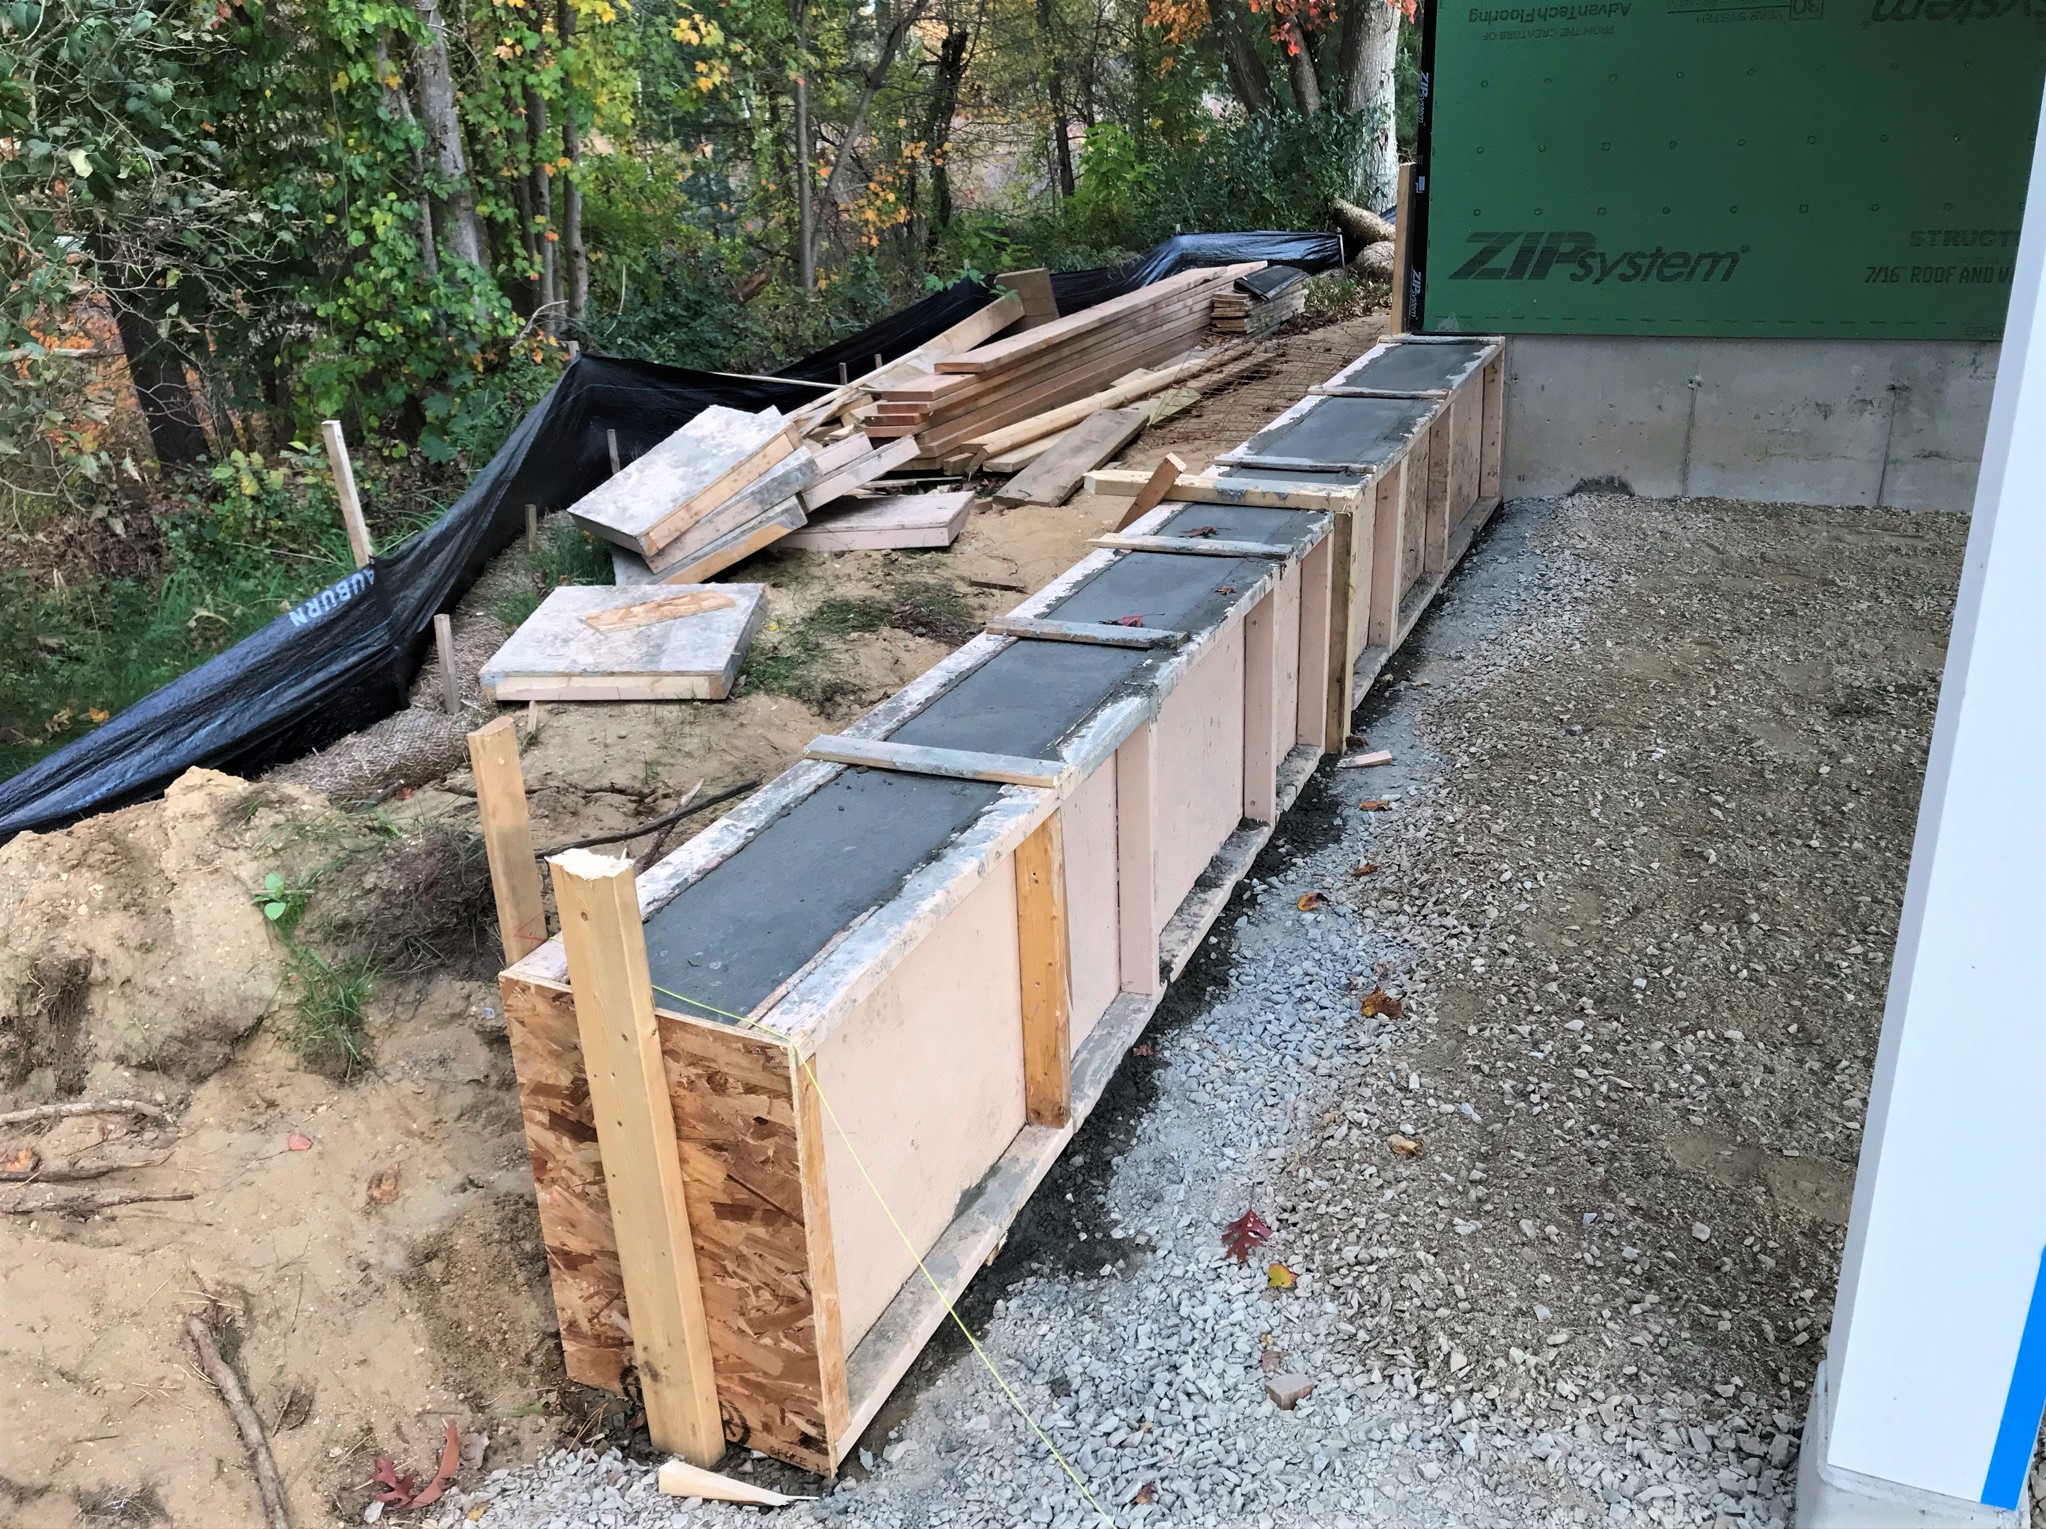
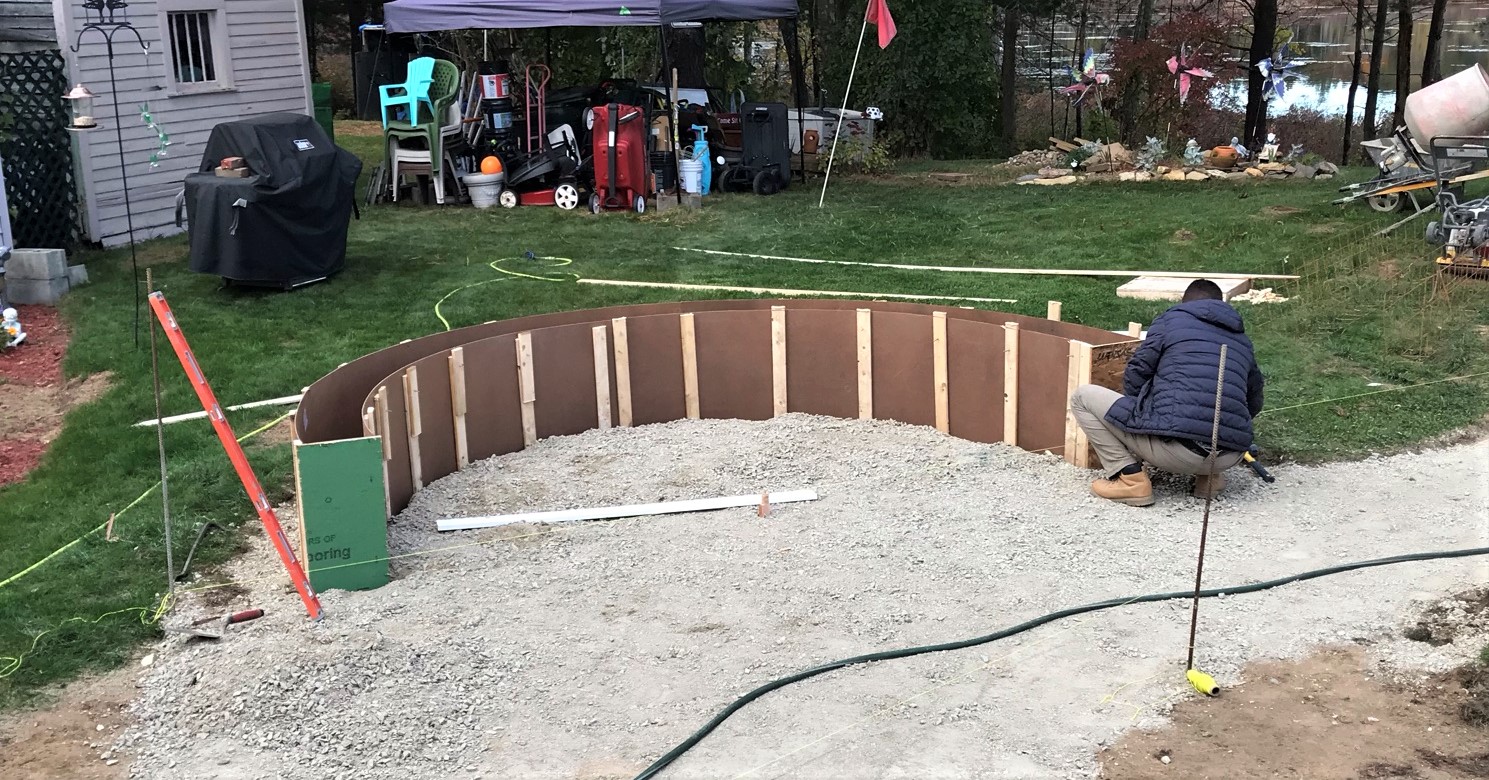
The crew worked past sunset on Saturday, and got good progress – though I had to wait until Sunday to have enough light to take a picture.
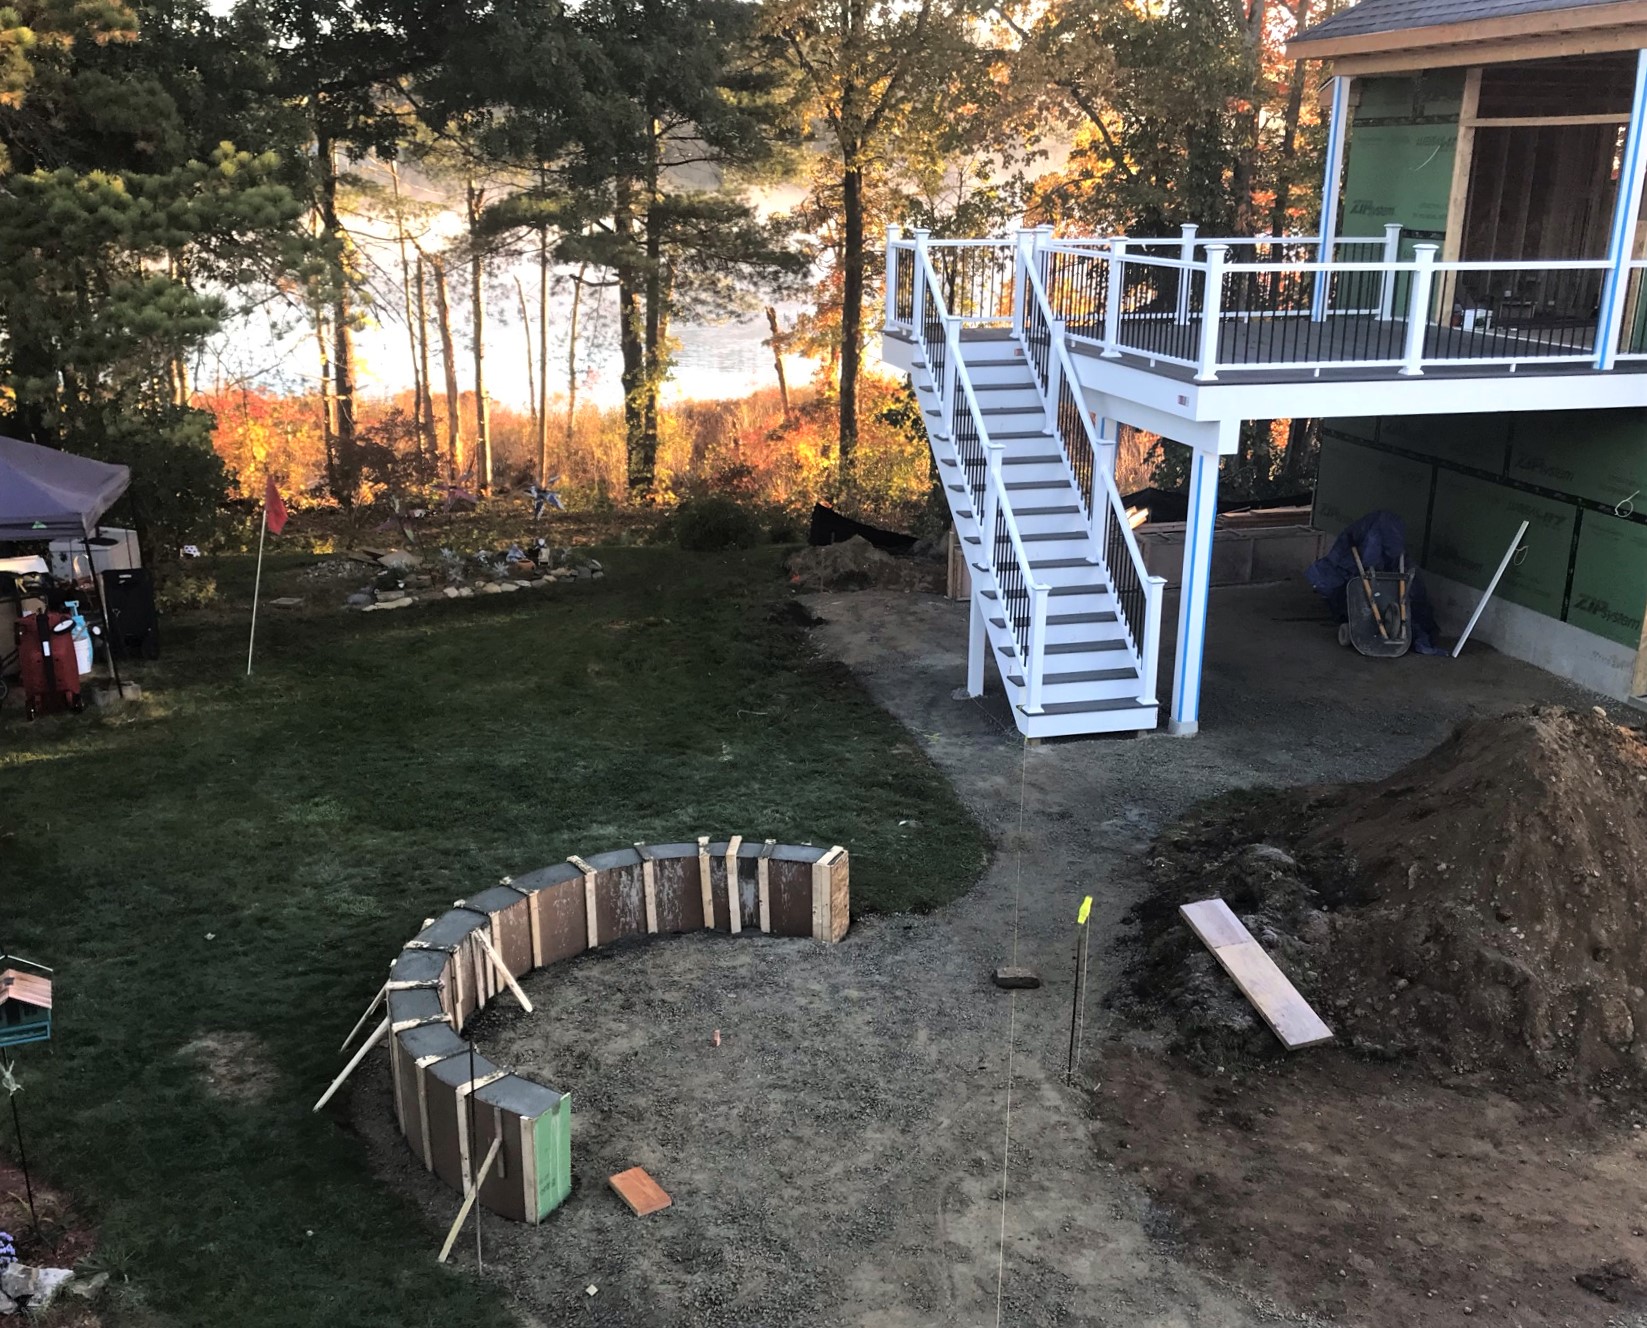
Week’s progress as seen at dawn on Sunday the 24th.
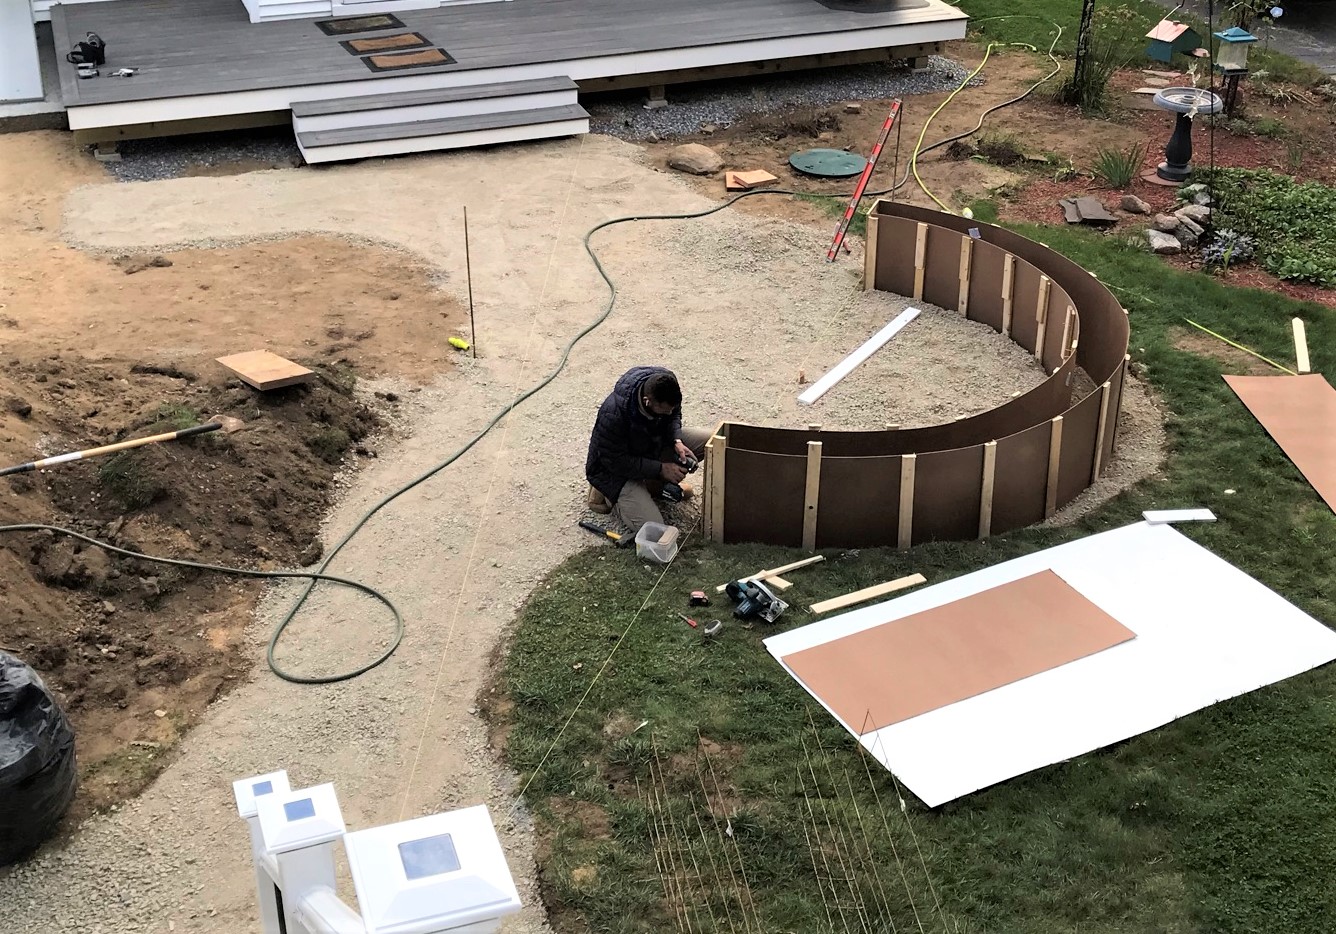
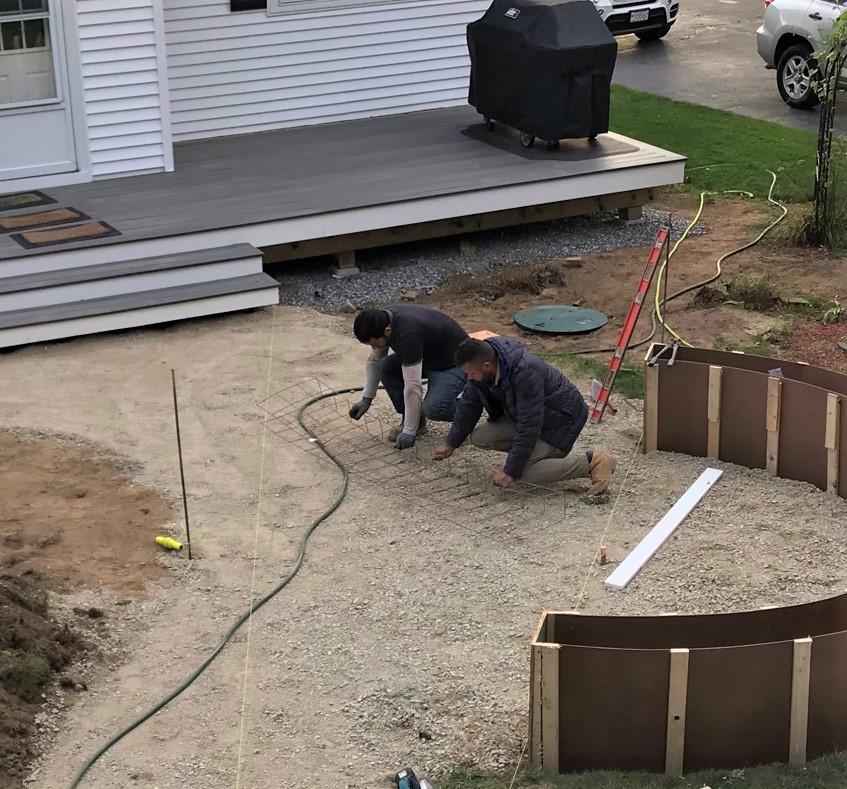
As I write this in week 15, it has been rainy and this is as far as we have gotten progress-wise. However, I bet Evandro hits the ground running when it dries up.
I hope this was enjoyable and thanks for taking a look. I may even do a hobby post shortly!
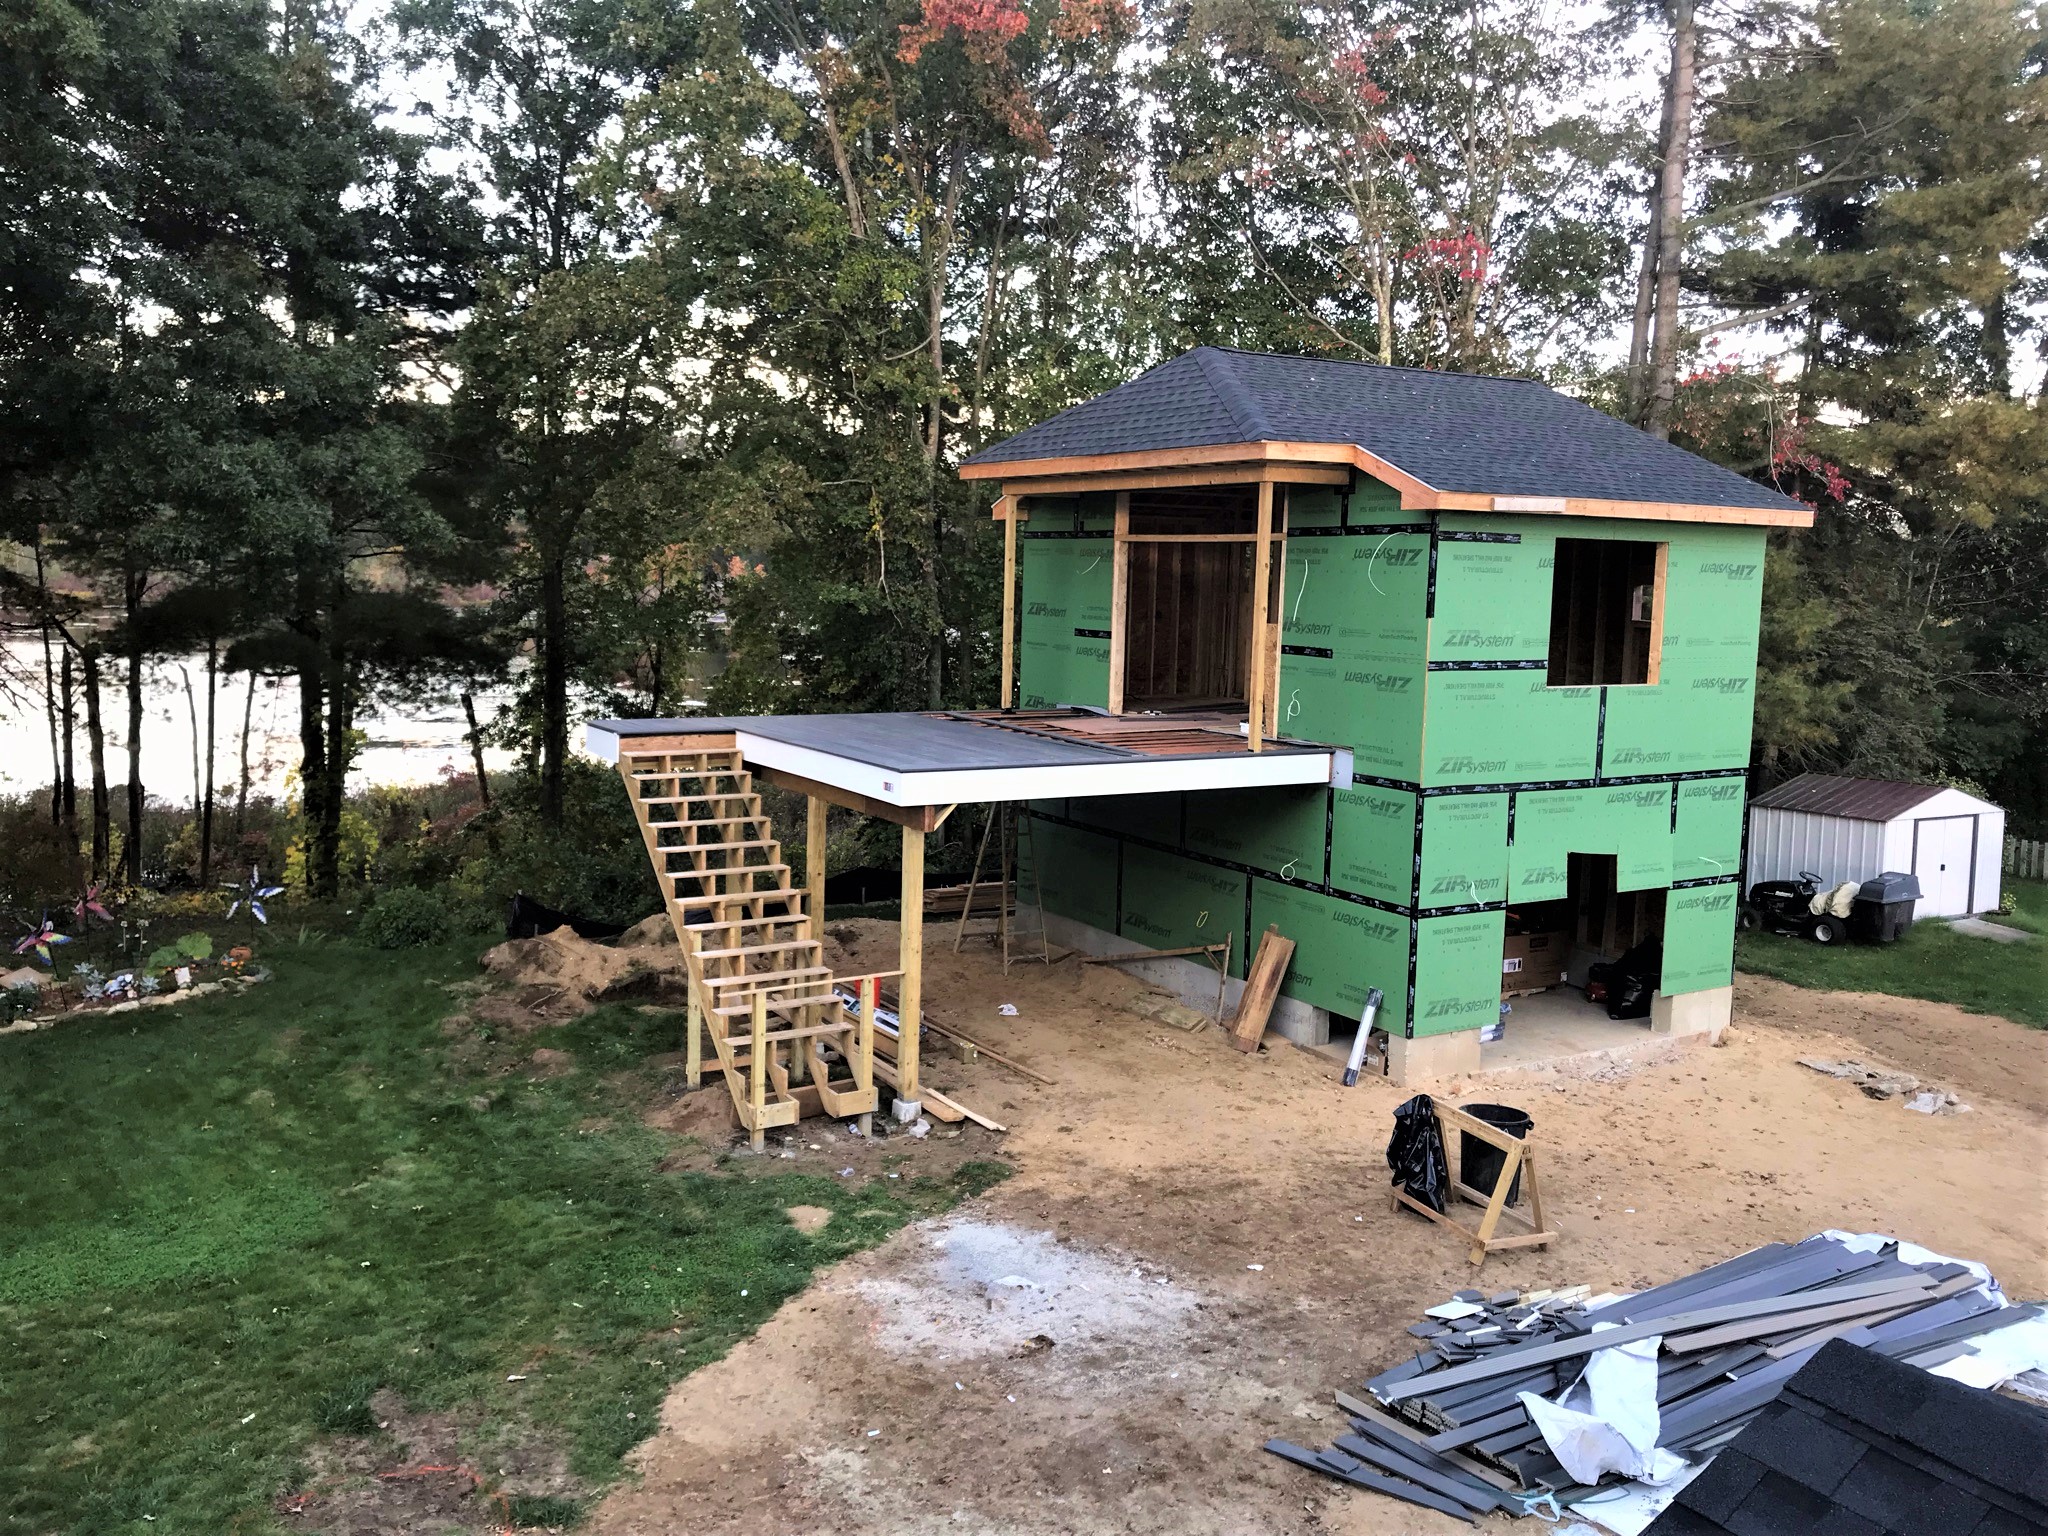
Lucky week 13 was October 10-16 on the project. Some really beautiful progress – though the delay in windows and doors has kept interior work from progressing. Therefore, for this post I have mostly deck updates plus a few hobby tidbits at the end for my dedicated hobby crowd.
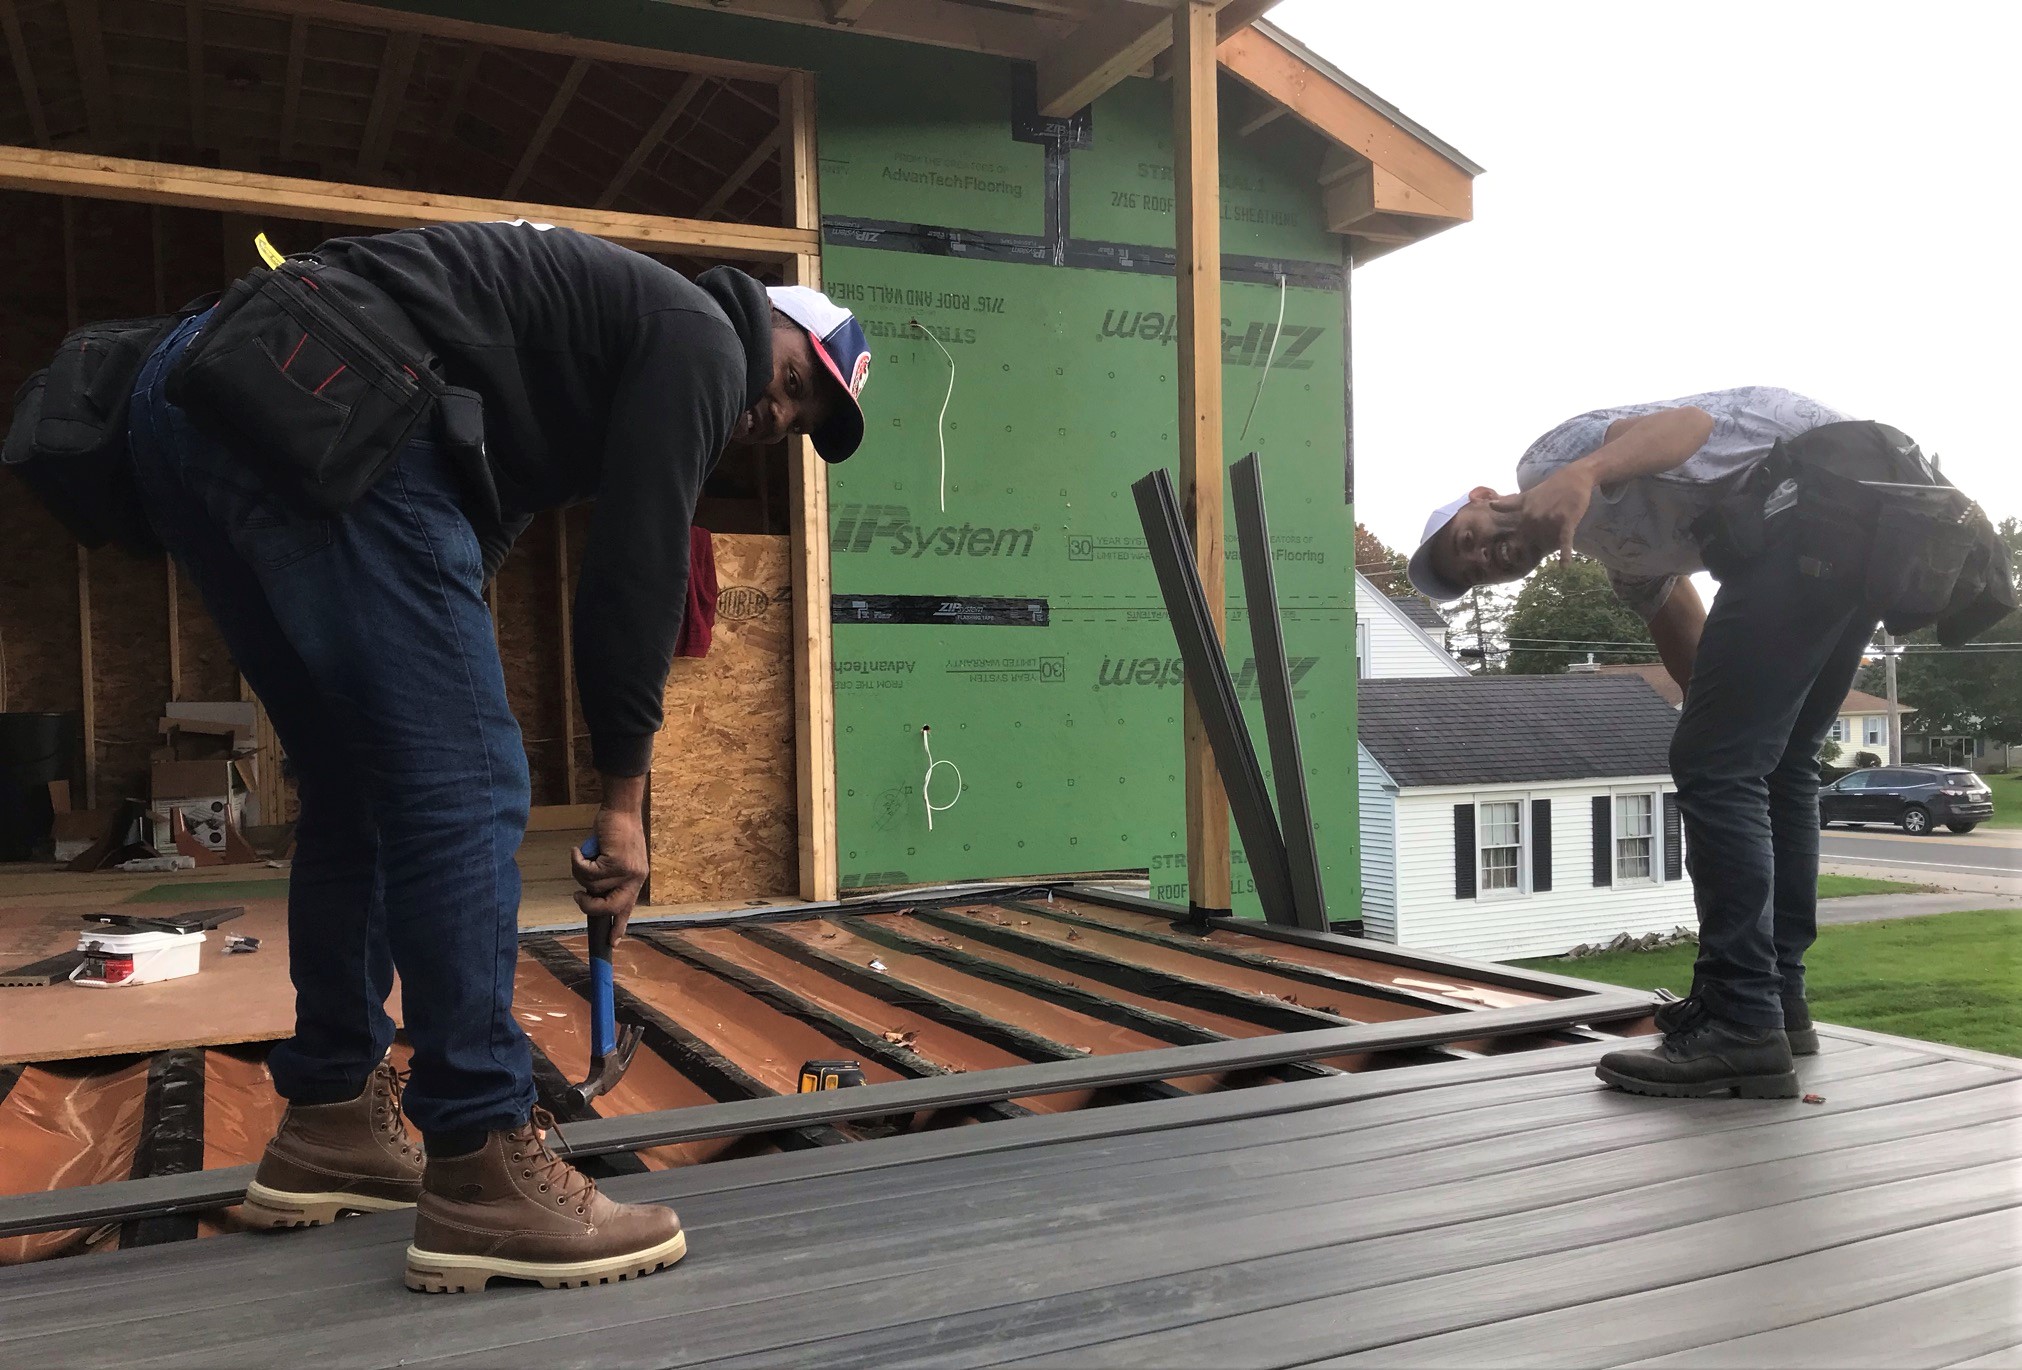
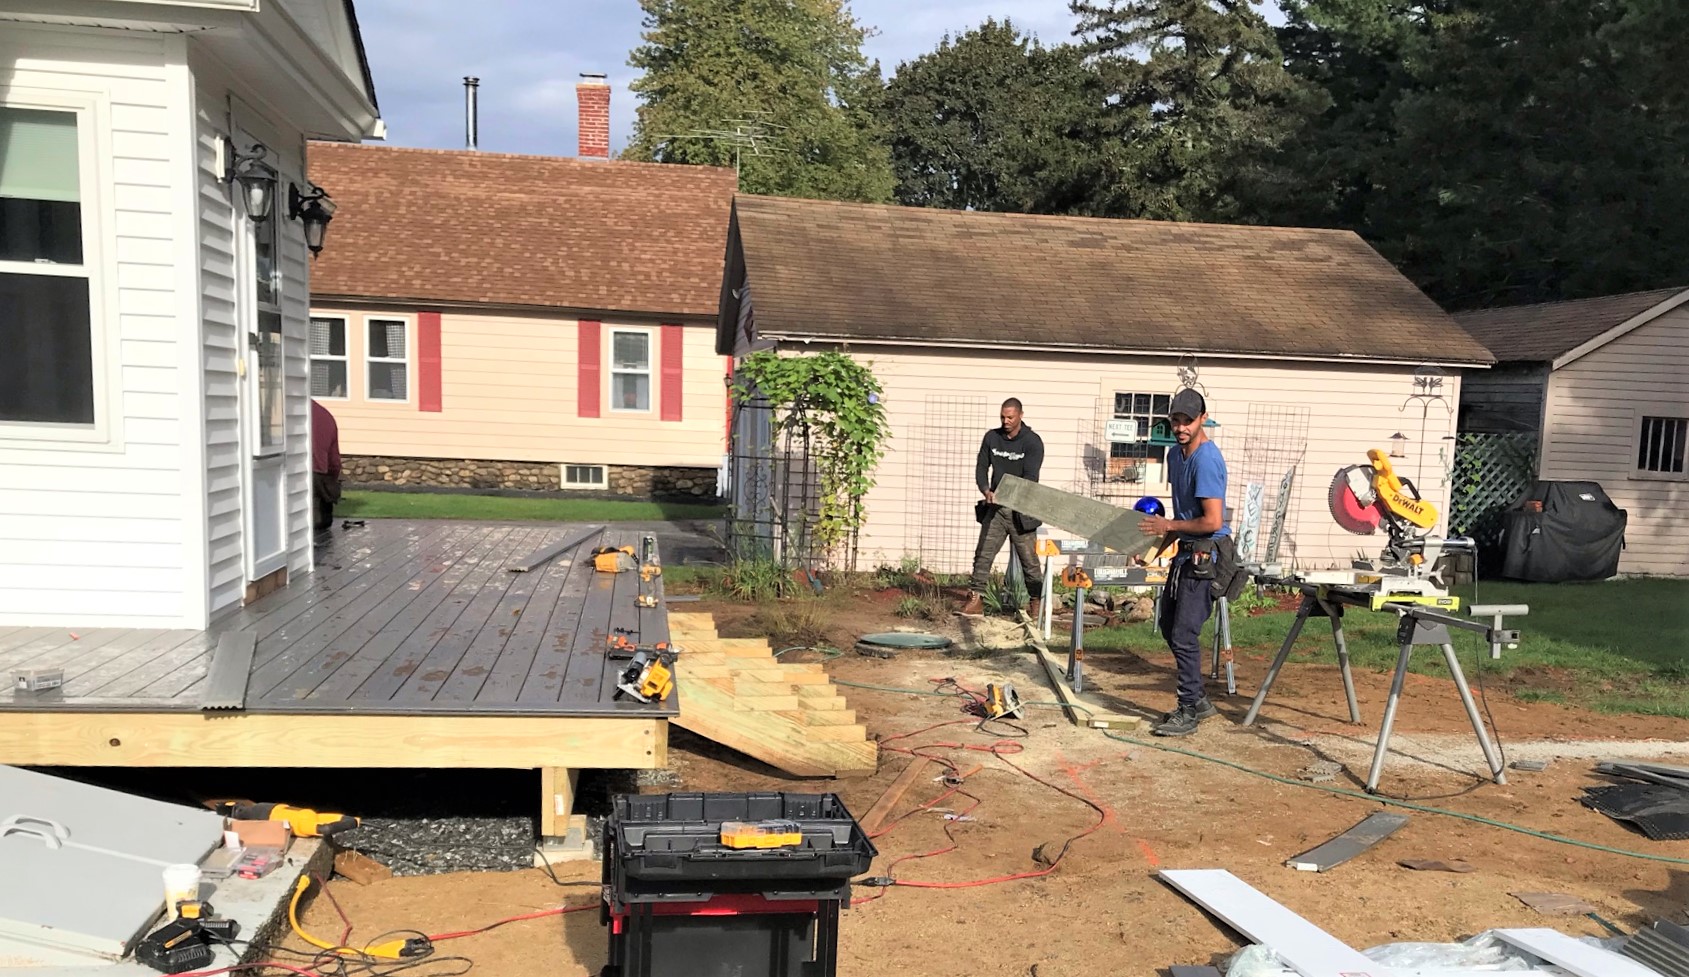
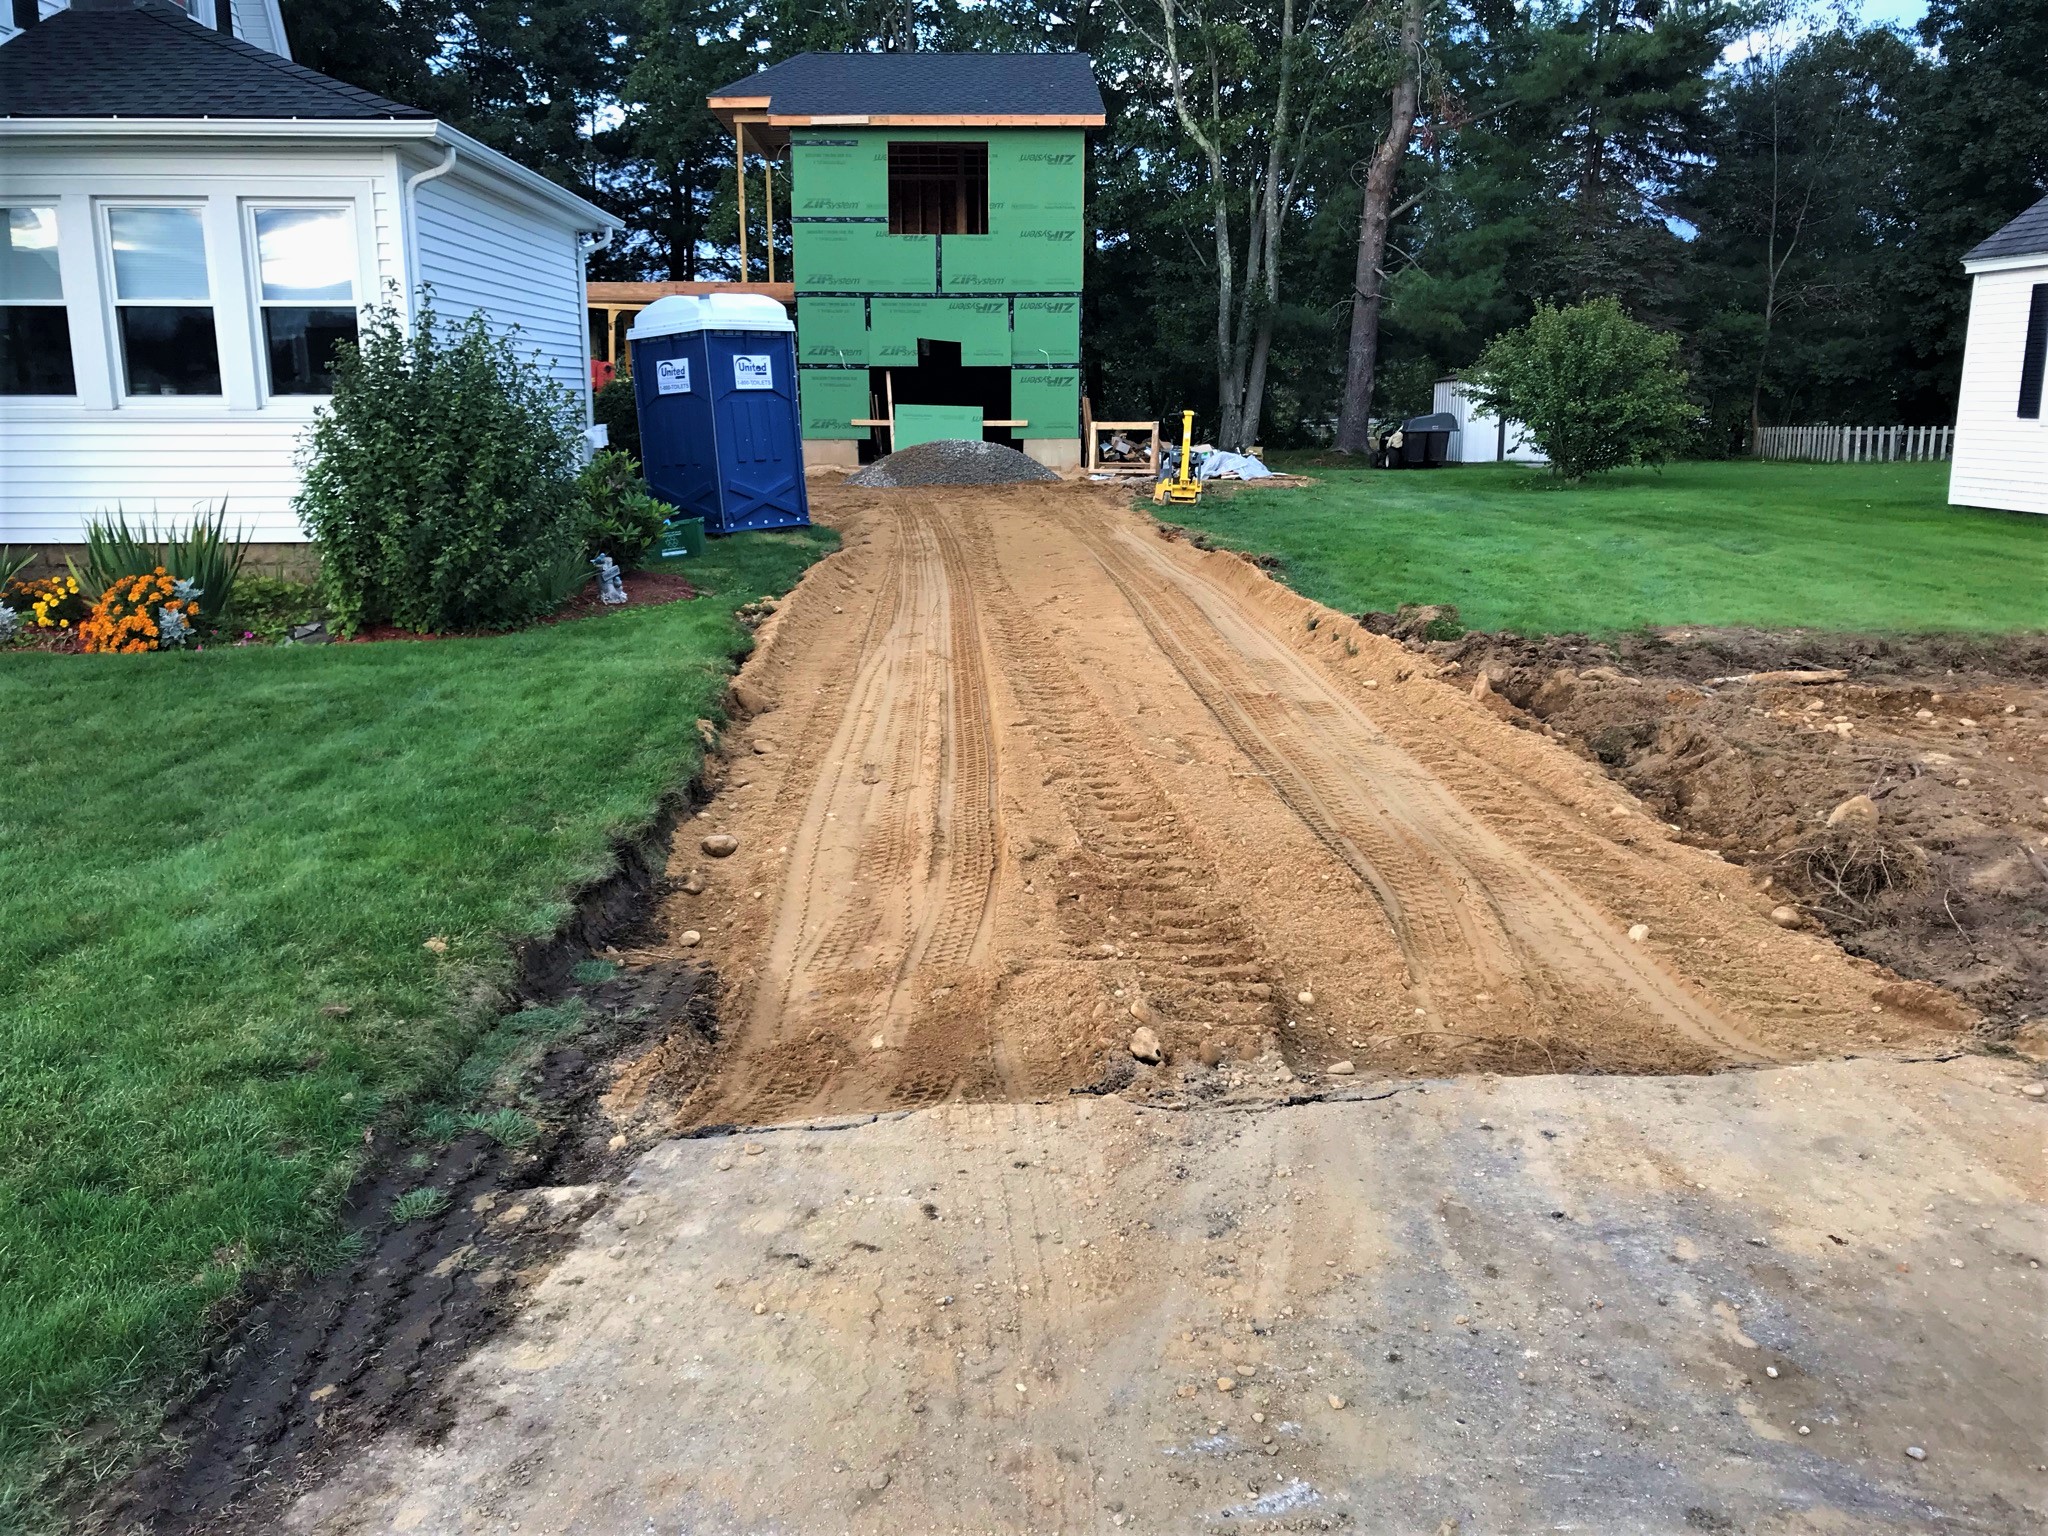
On Monday, deck proceeded on the deck stairs and fascia.
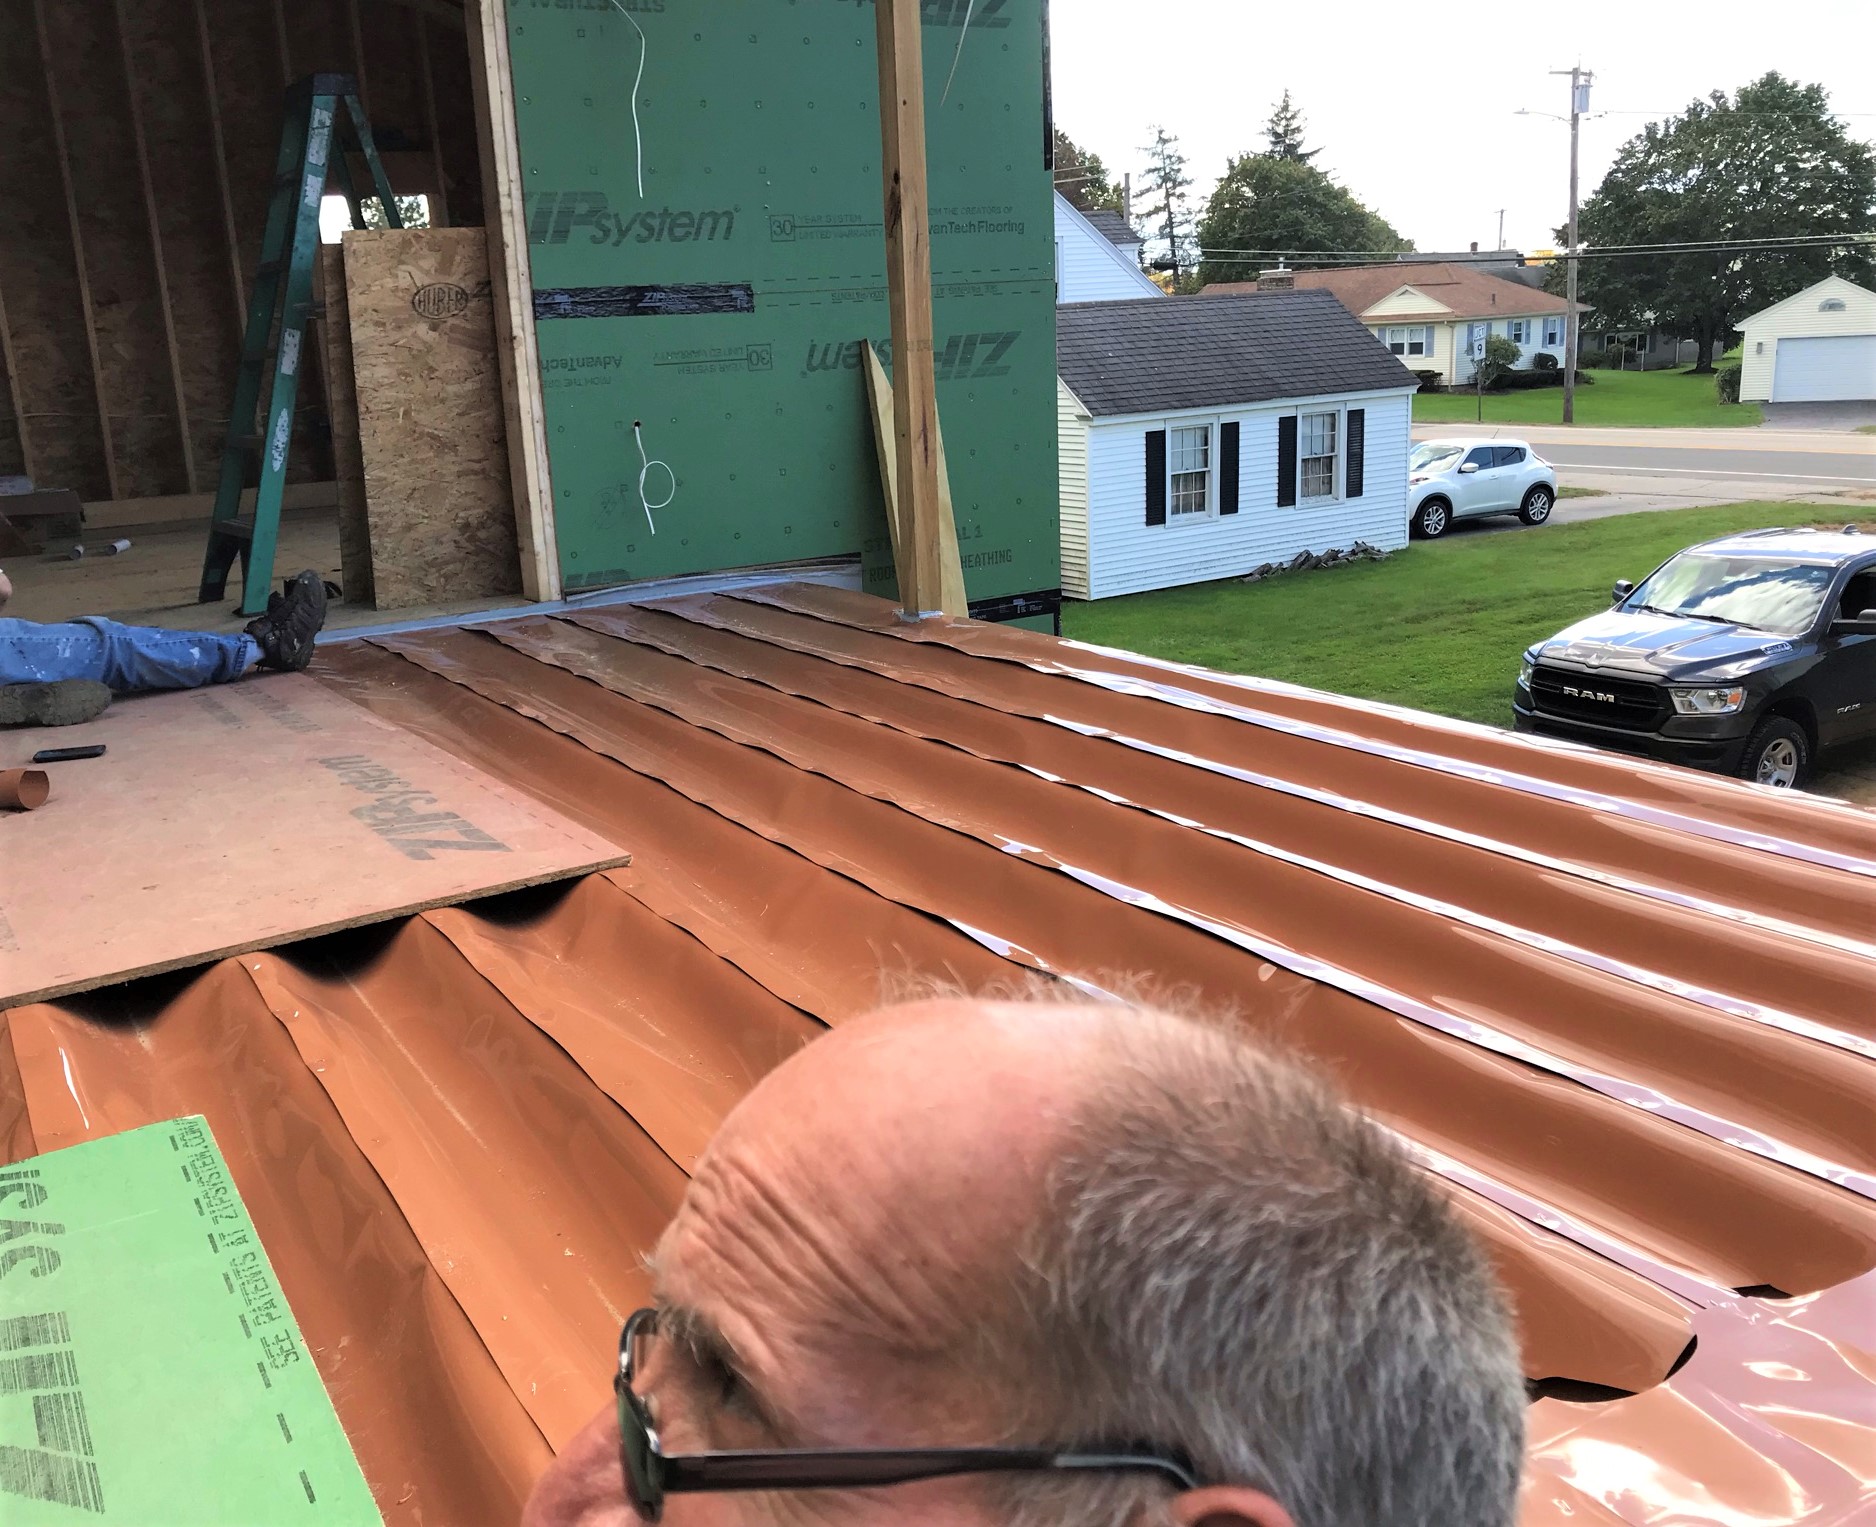
Cutting up and moving up PVC fascia for the garage deck. Decking being enthusiastically installed over the Trex rain gutter system you saw last week.Monday progress at the end of the day.
On Monday, our new Weber gas grill was delivered from Home Depot. It’s for natural gas so we can avoid the hassle of propane tanks in the future (though Lynn wants to use both). This is to be mounted on the new gas line on the back deck. We also got a nice drip mat and a cover for it. On Tuesday, Lynn and I put it together with the help of the manual and the Weber app. The process took us just under 4 hours (Weber says it should take 90 minutes – no way), and we worked well together to get it done. That means we are still happily married and no murders occurred or were even contemplated – which can be side effects of joint assembly! Of course, we can’t use it until the gas line is put in for it from the house.
Happy wife, happy life – and the new grill.
The rest of Tuesday saw work on the stairs to the garage deck and the deck itself.
Deck and stair work on Tuesday.End of day progress on Tuesday.
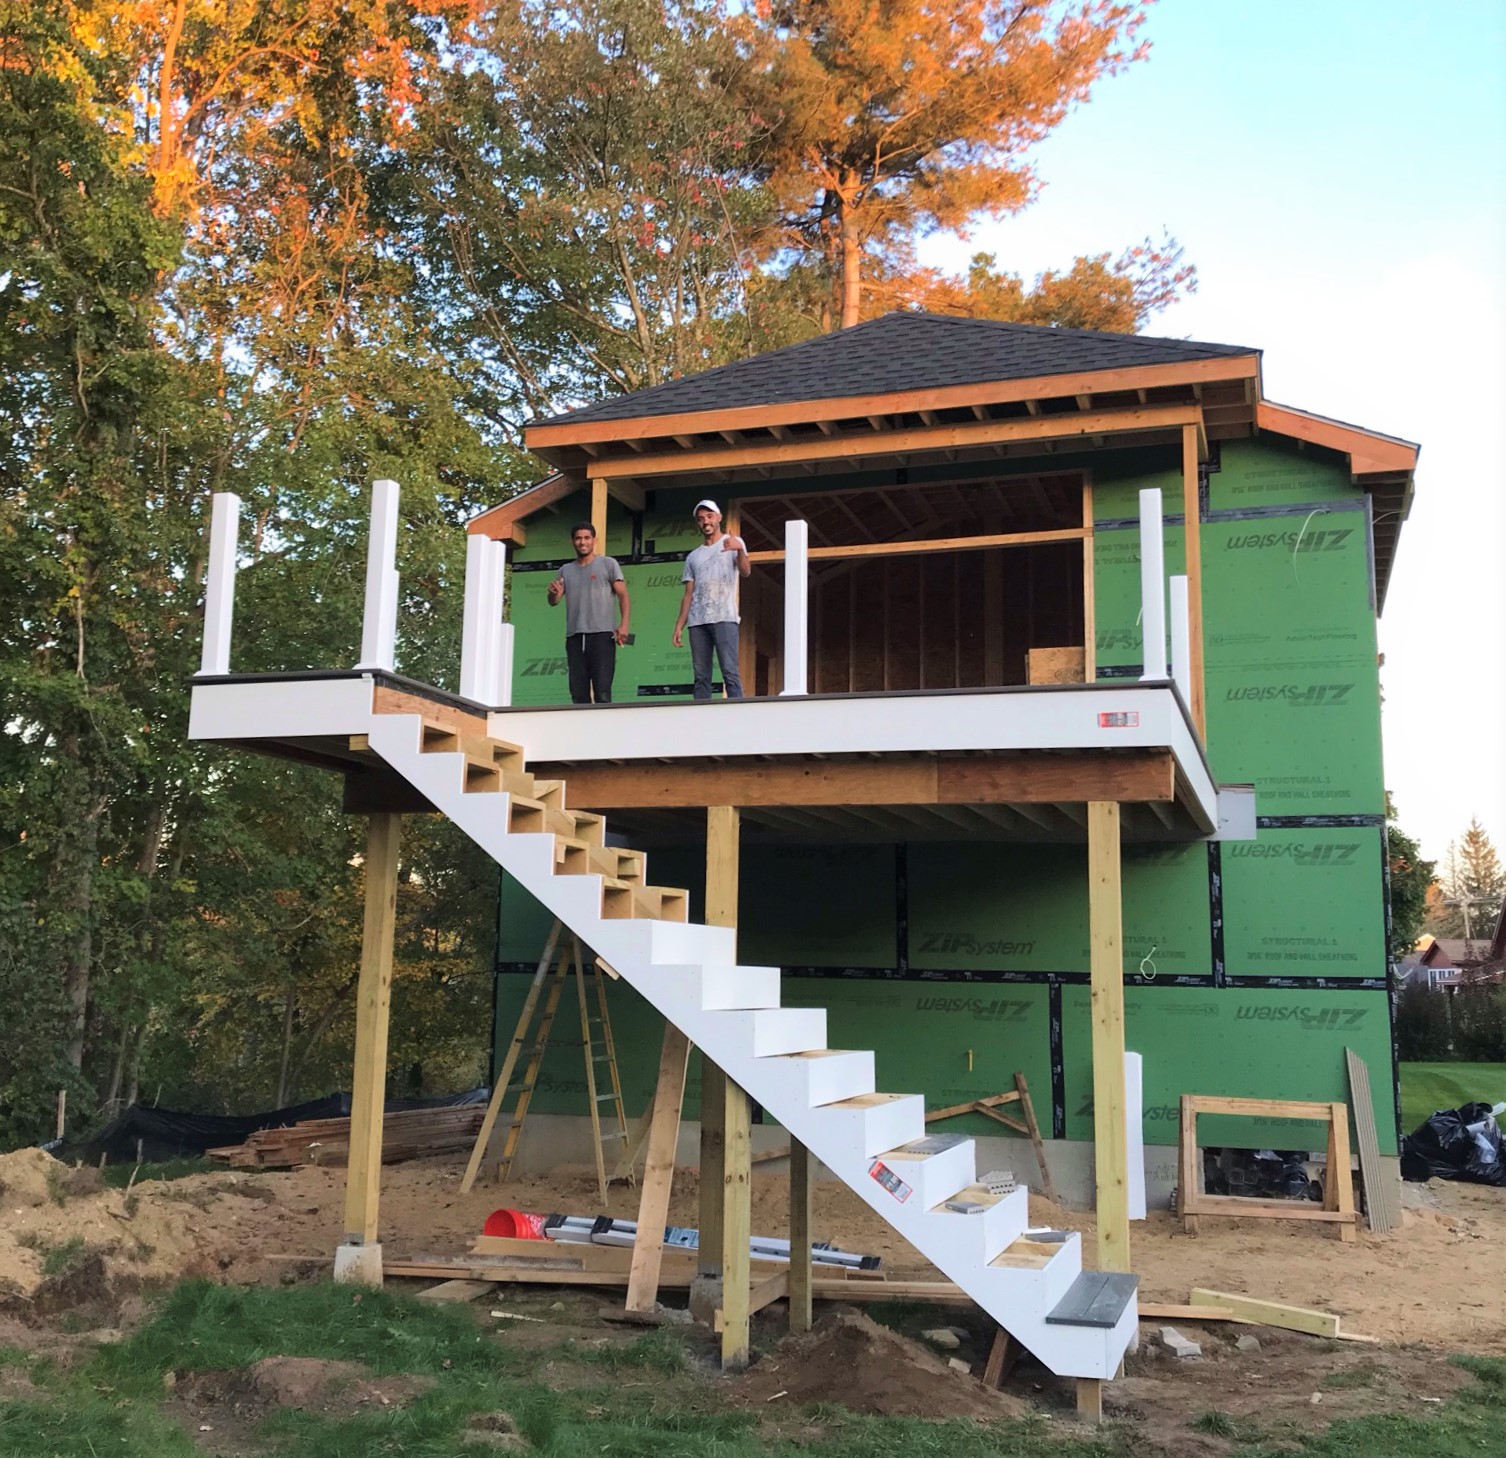
Wednesday saw more of the same.
Morning work Wednesday.Now we had stairs all the way up on Wednesday!
Thursday saw a couple of things happen. First, Jonny Victor got a boom truck in and all the blue board got delivered – though work on it can’t start until – yes – windows and doors are in. At least this saves time climbing the new stairs.
Boom truck delivery of blue board upstairs. Some went below as well.
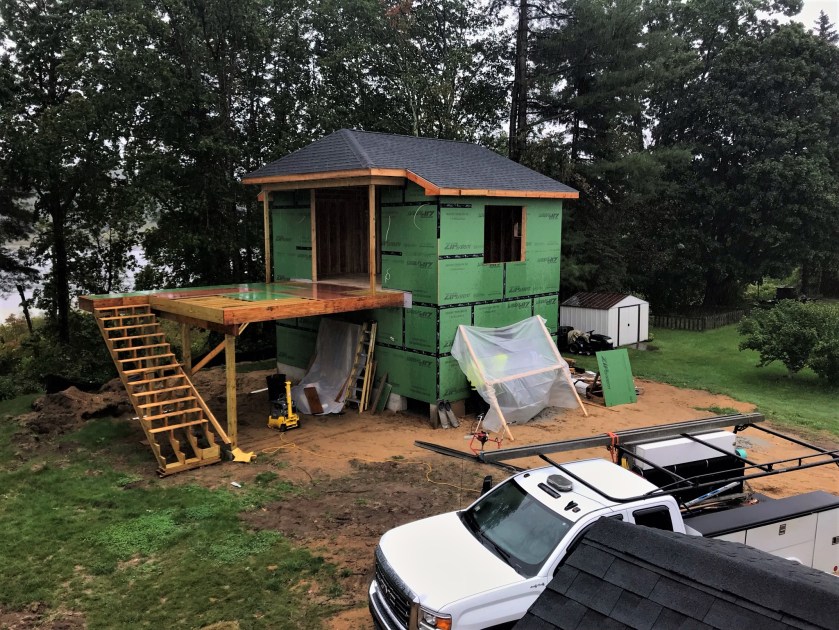
The deck and stairs just got more attractive as the week went on.
Work began on the columns sheathing.Different angle view, Thursday mid-day.View from the back mid-day Thursday.
It was too dark to get a good shot of the total work – but Friday came and the fog, but it looked like this below.
Happy Friday morning showing fog and Thursday progress.
National Grid showed up and added loam and seed to the gas line excavation of last week.
National Grid repairing over the gas line excavation to the garage.
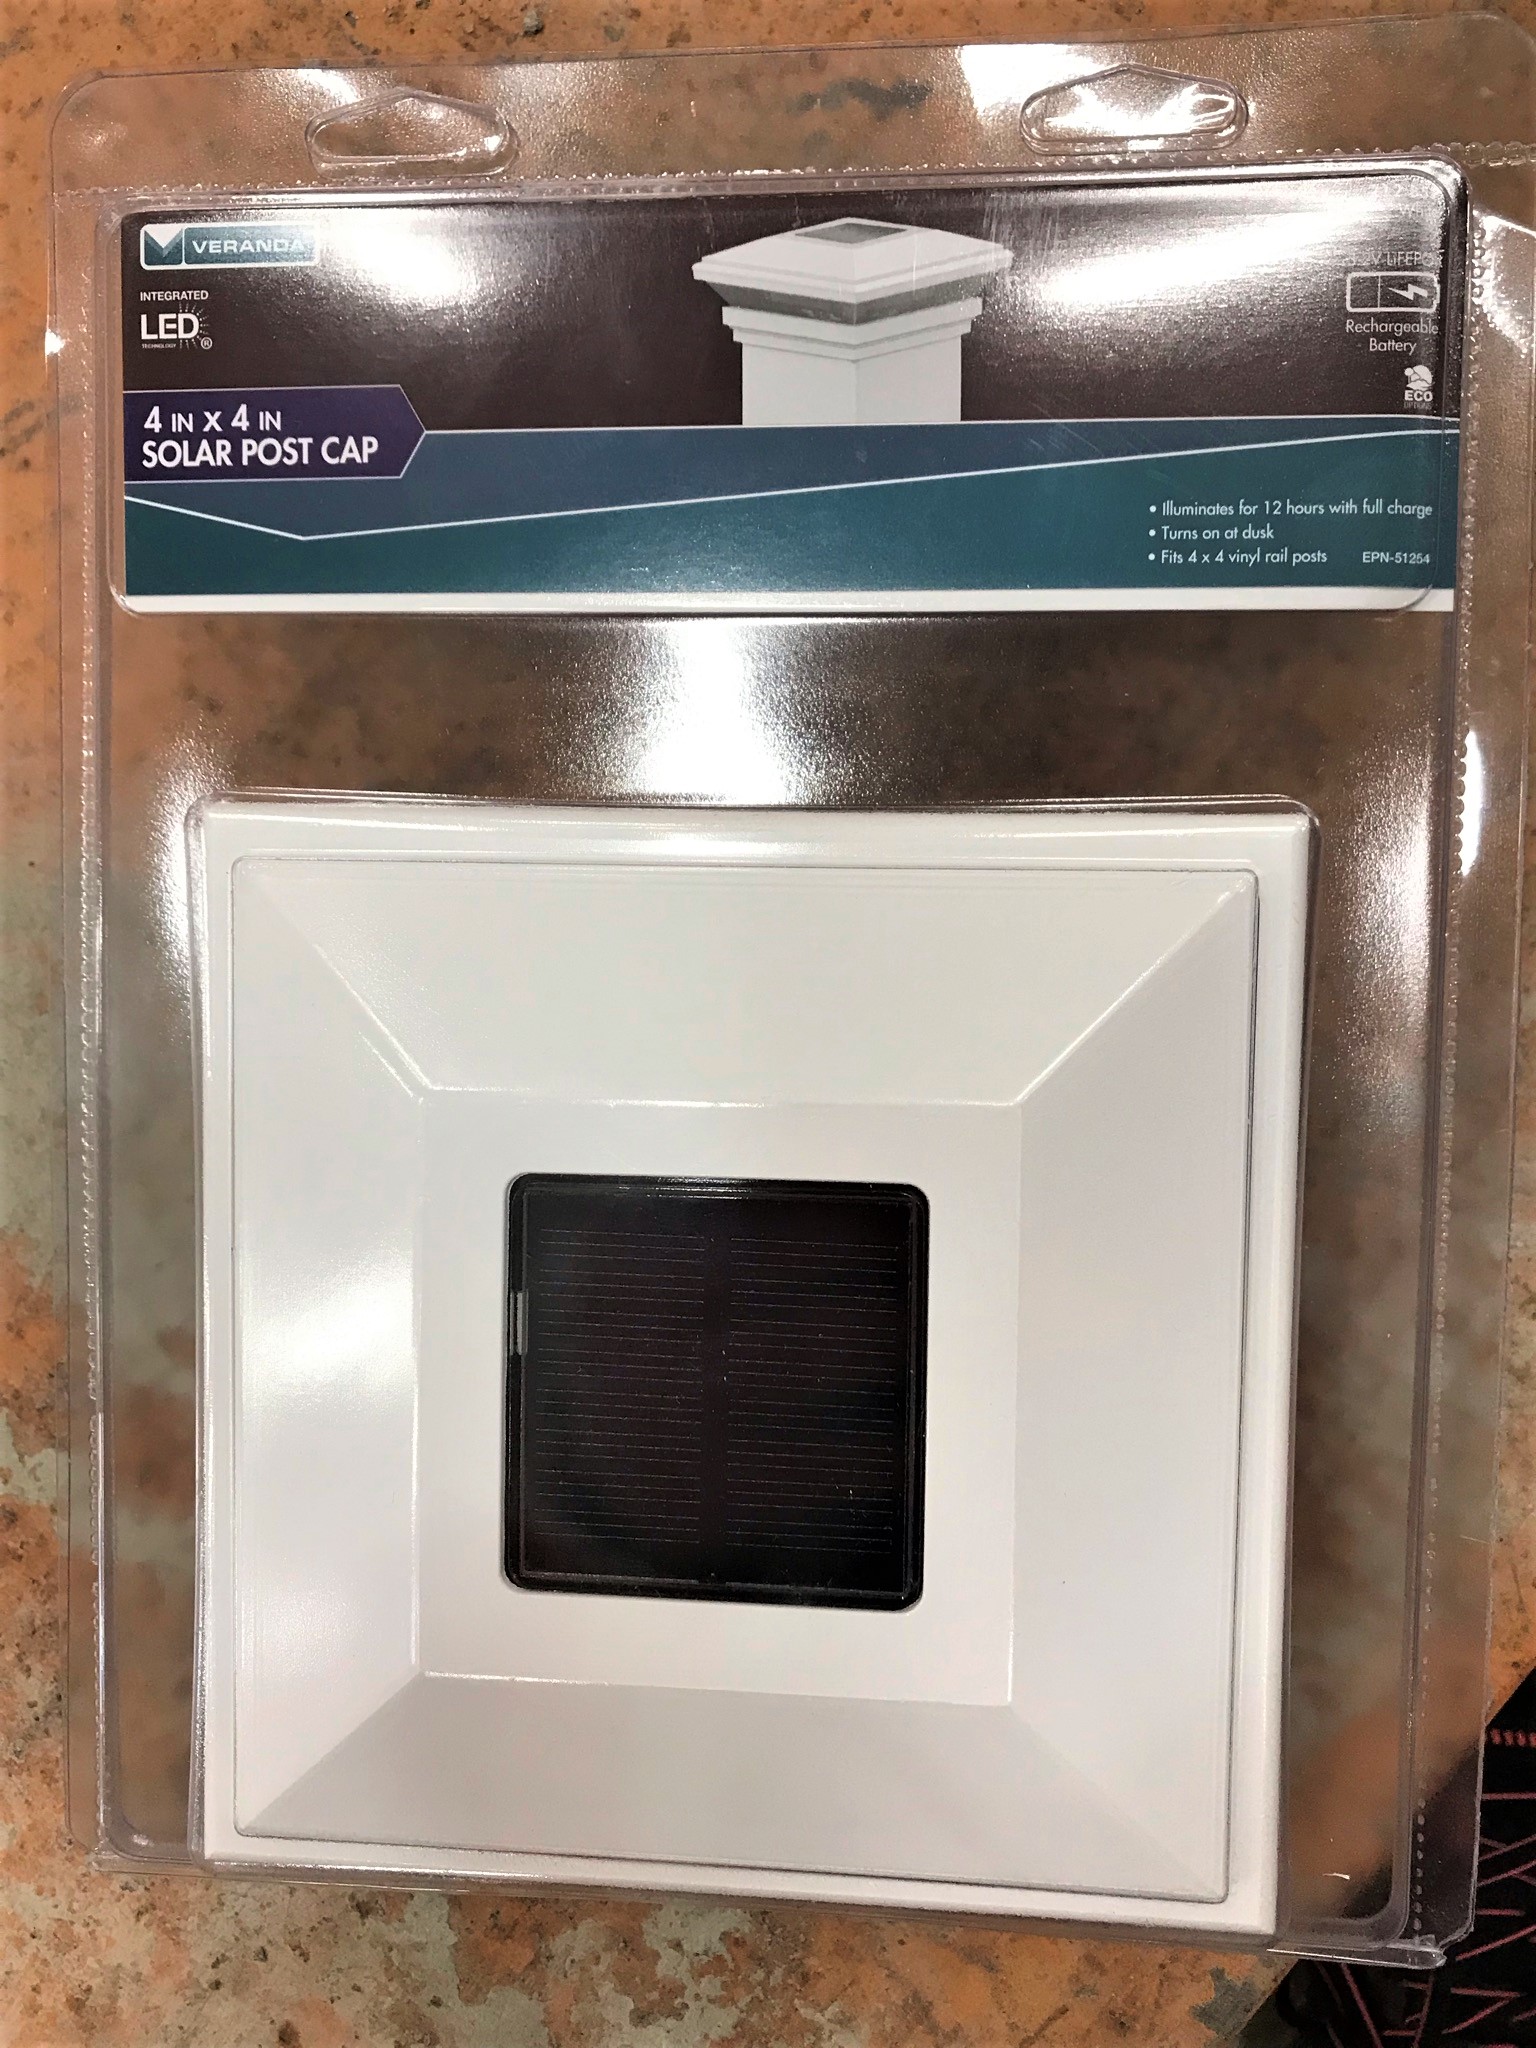
Our plumber was prepping to do some work, and asked about a vanity size. We also needed another solar cap for the deck posts (they are solar and are really cool at night – no pic yet as we needed 1 more). So, off to Home Depot for both and some more shelving for the cellar.
Before we left for Home Depot, this was the progress. You can also see the new grill on its new home.
More Home Depot shopping – last of the solar caps and the small vanity for the upstairs bathroom.
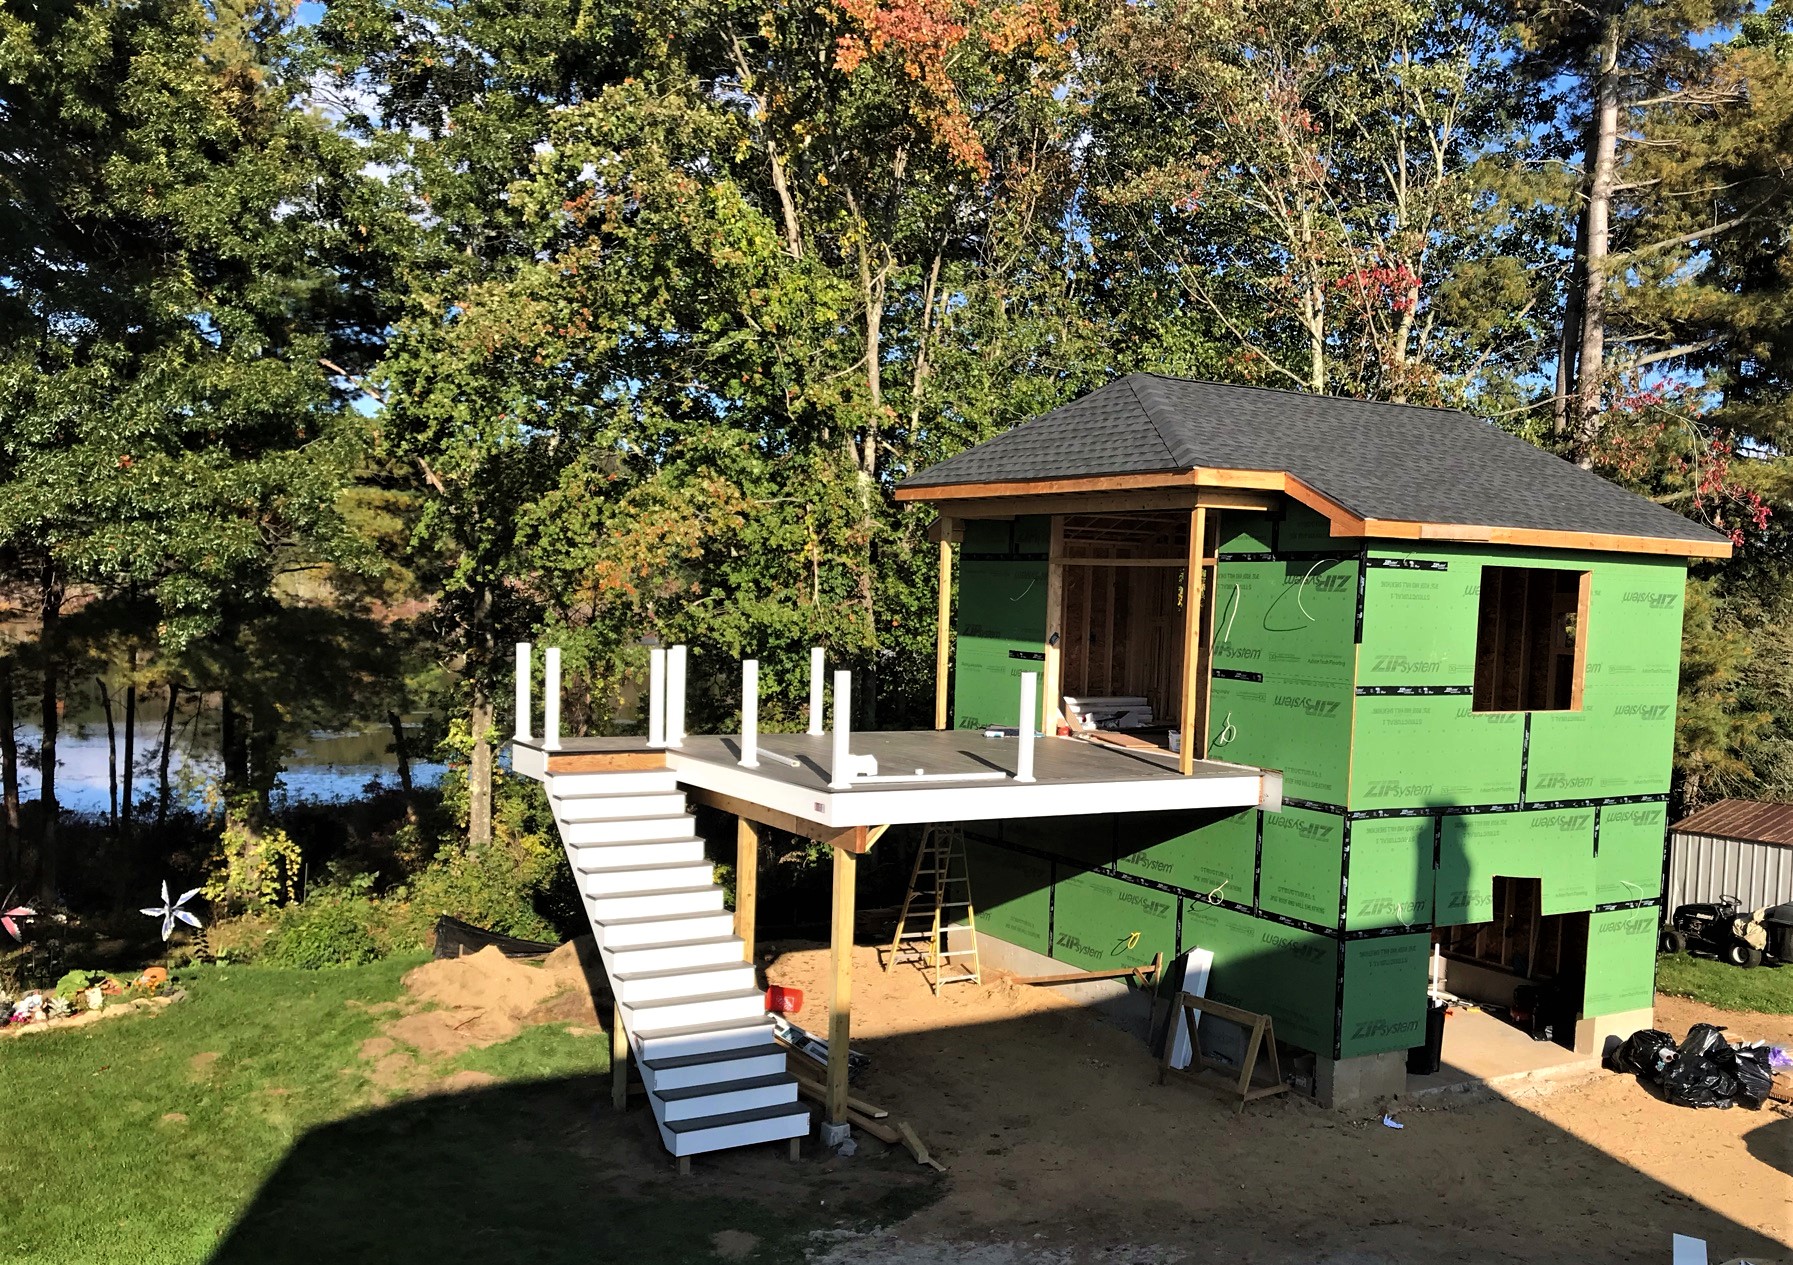
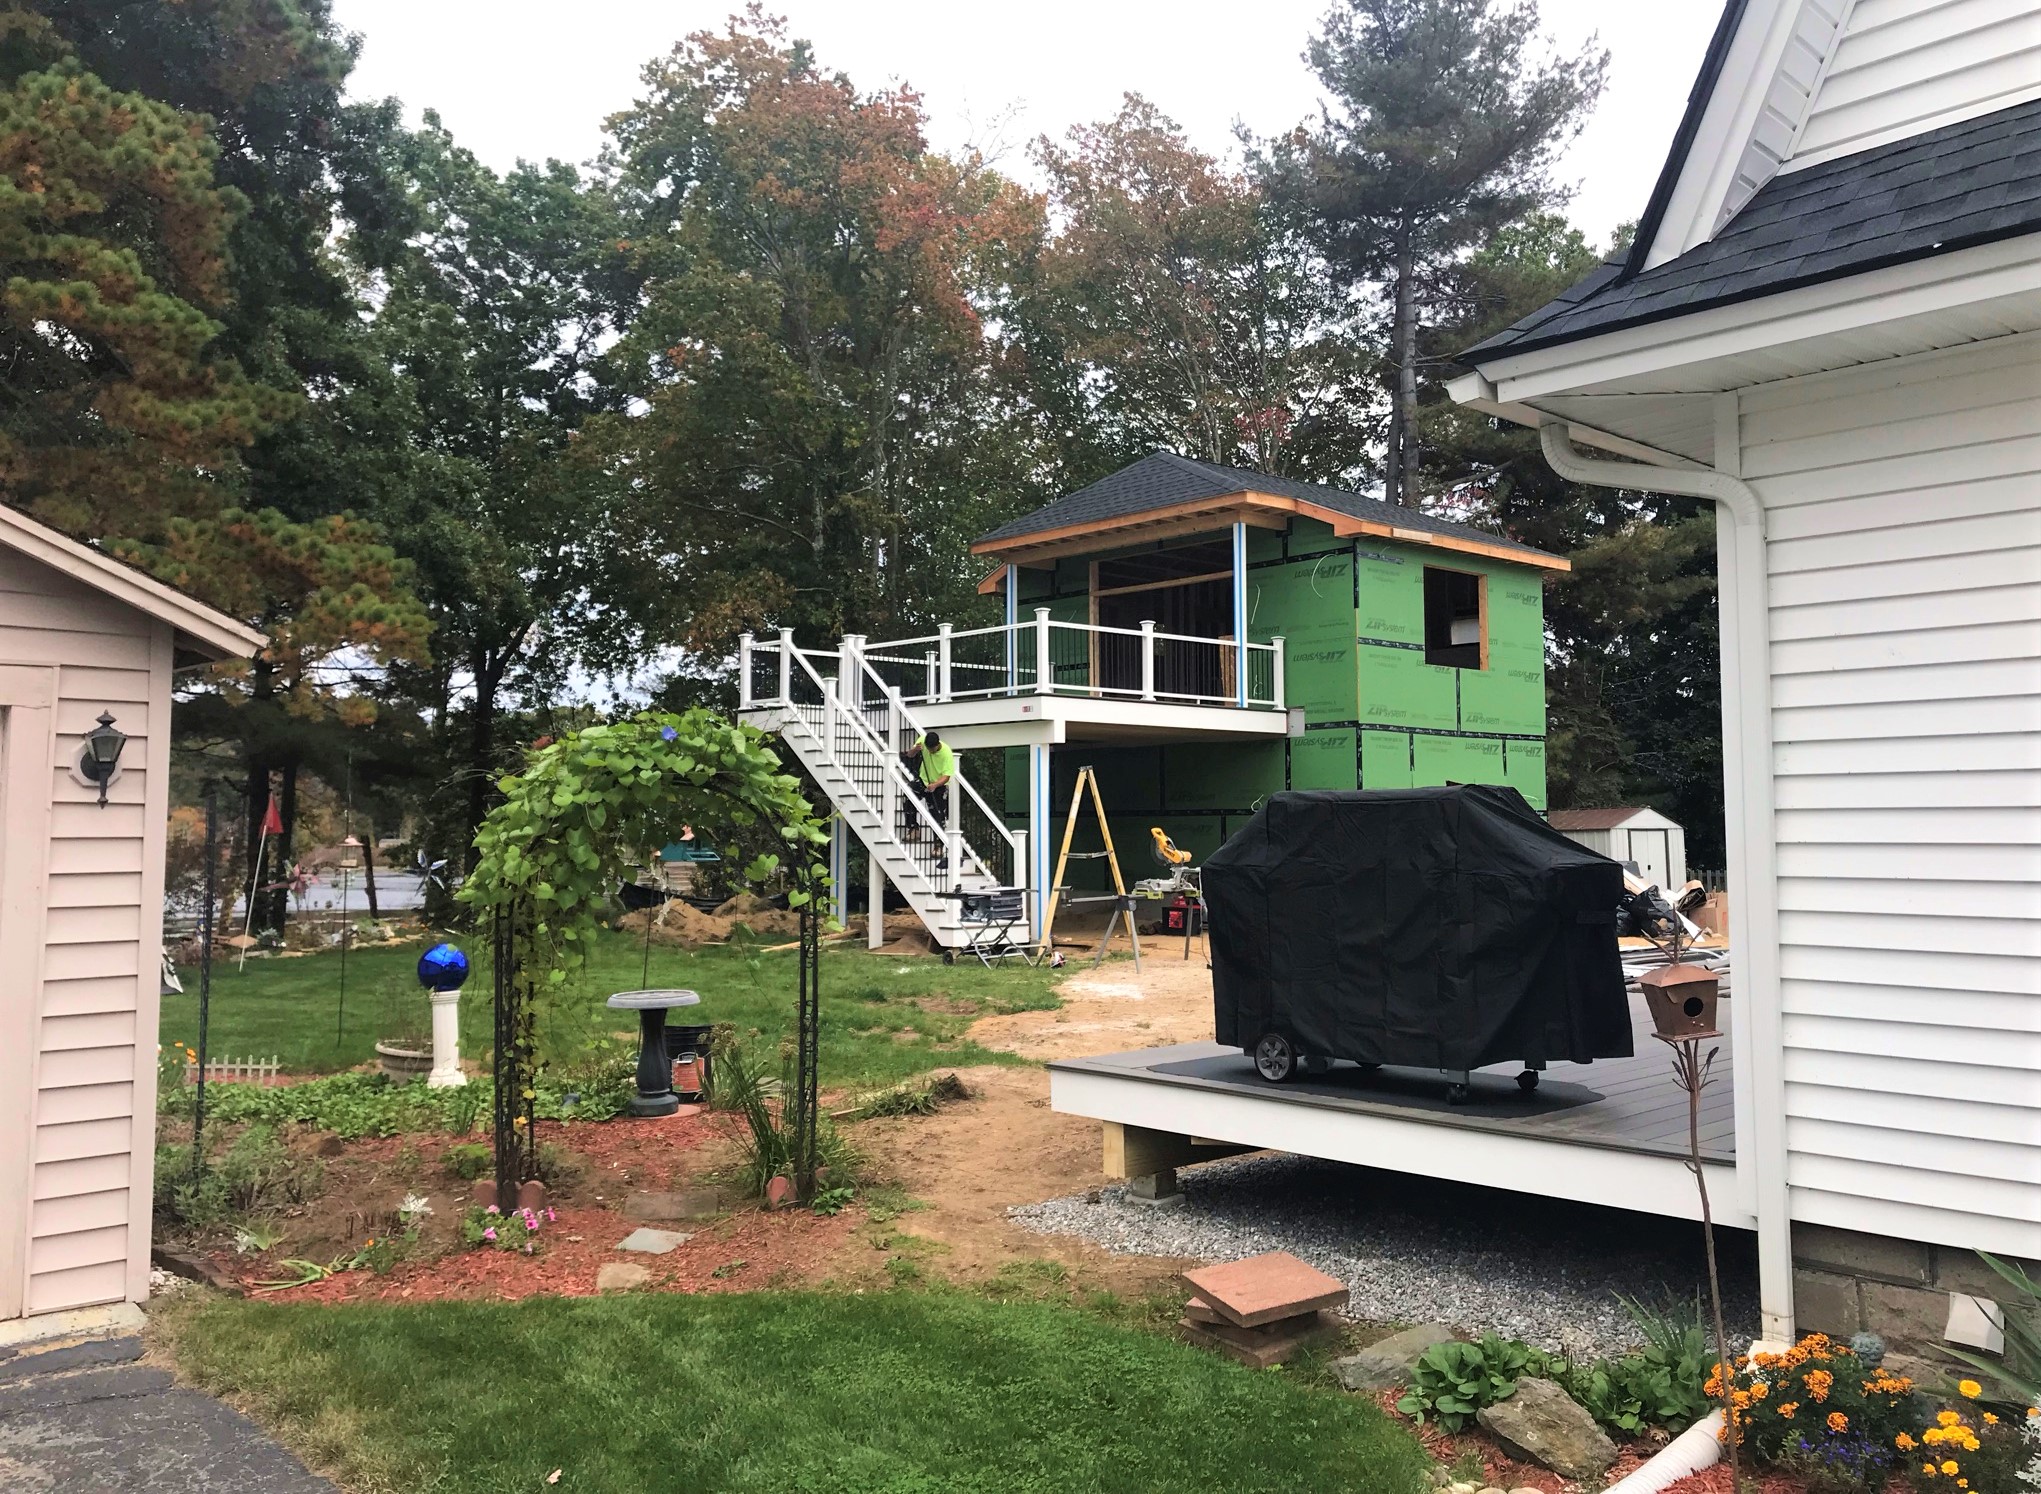
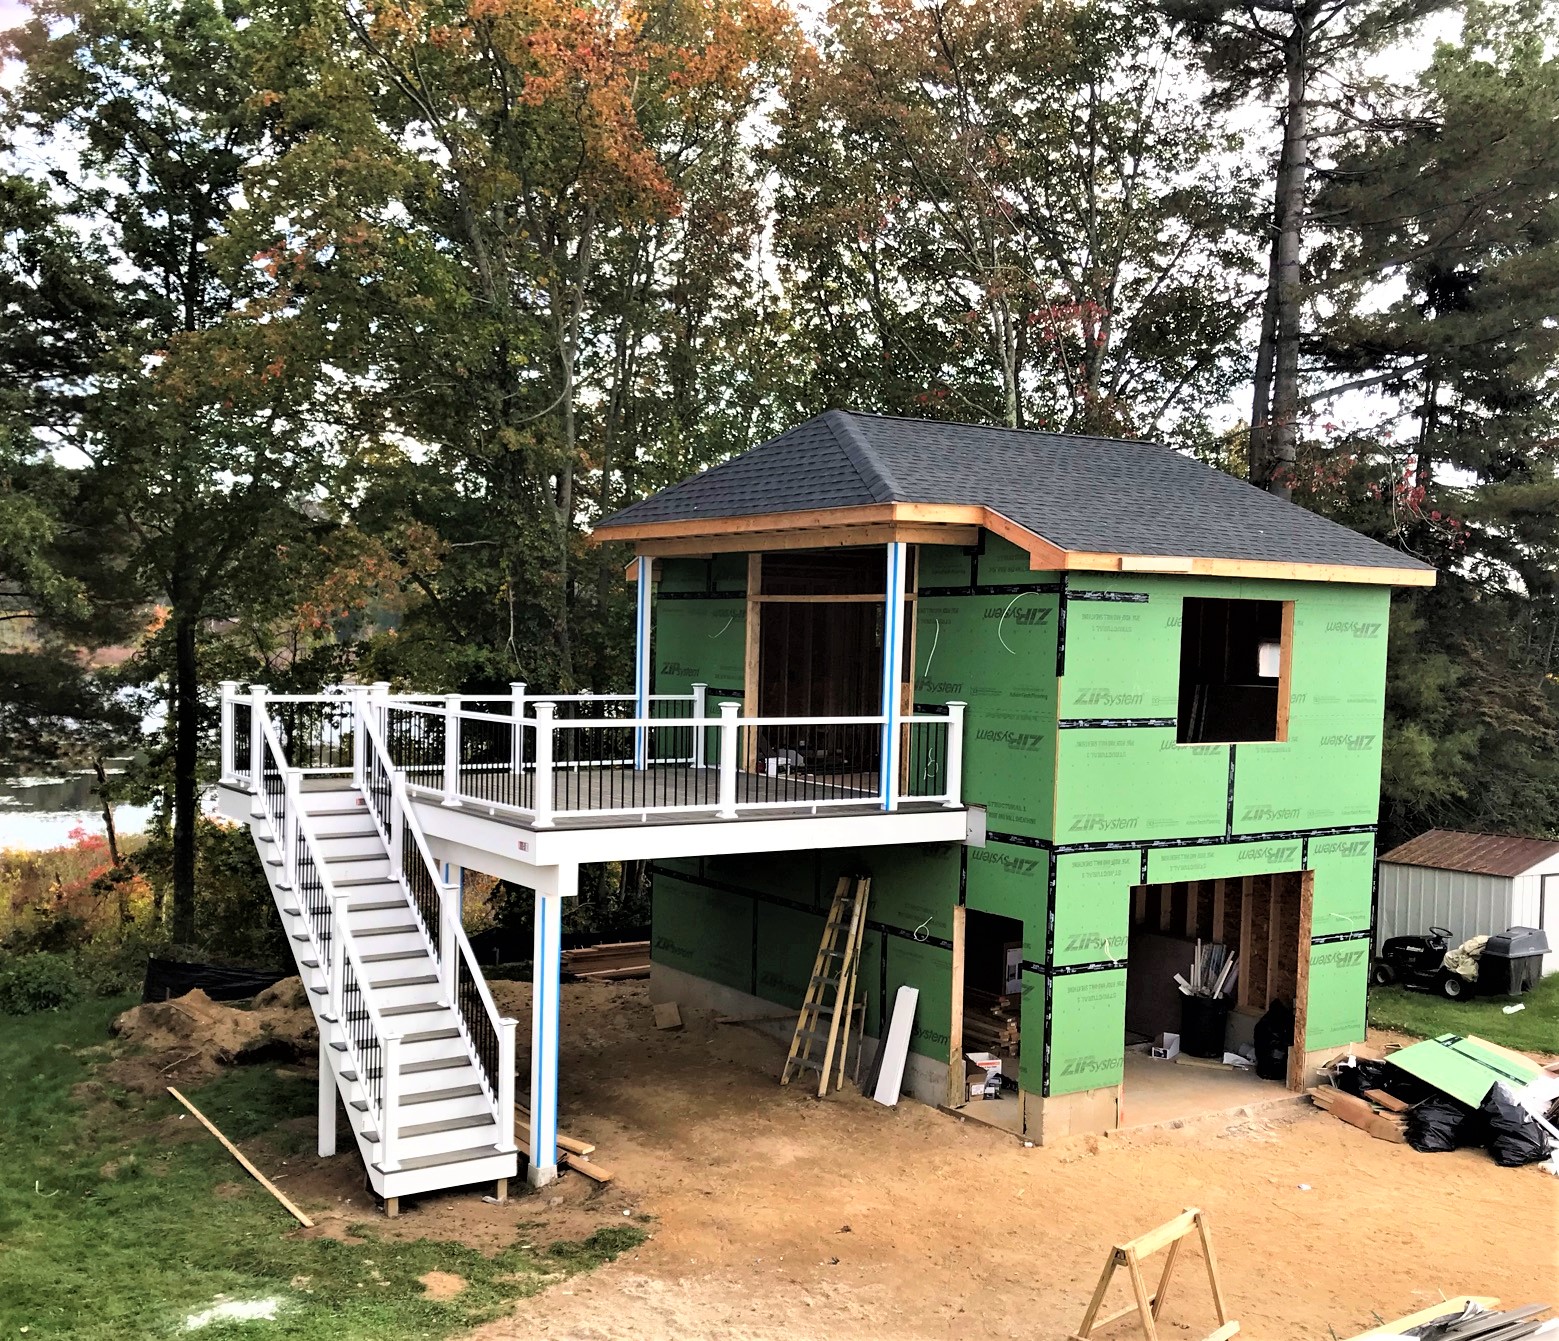
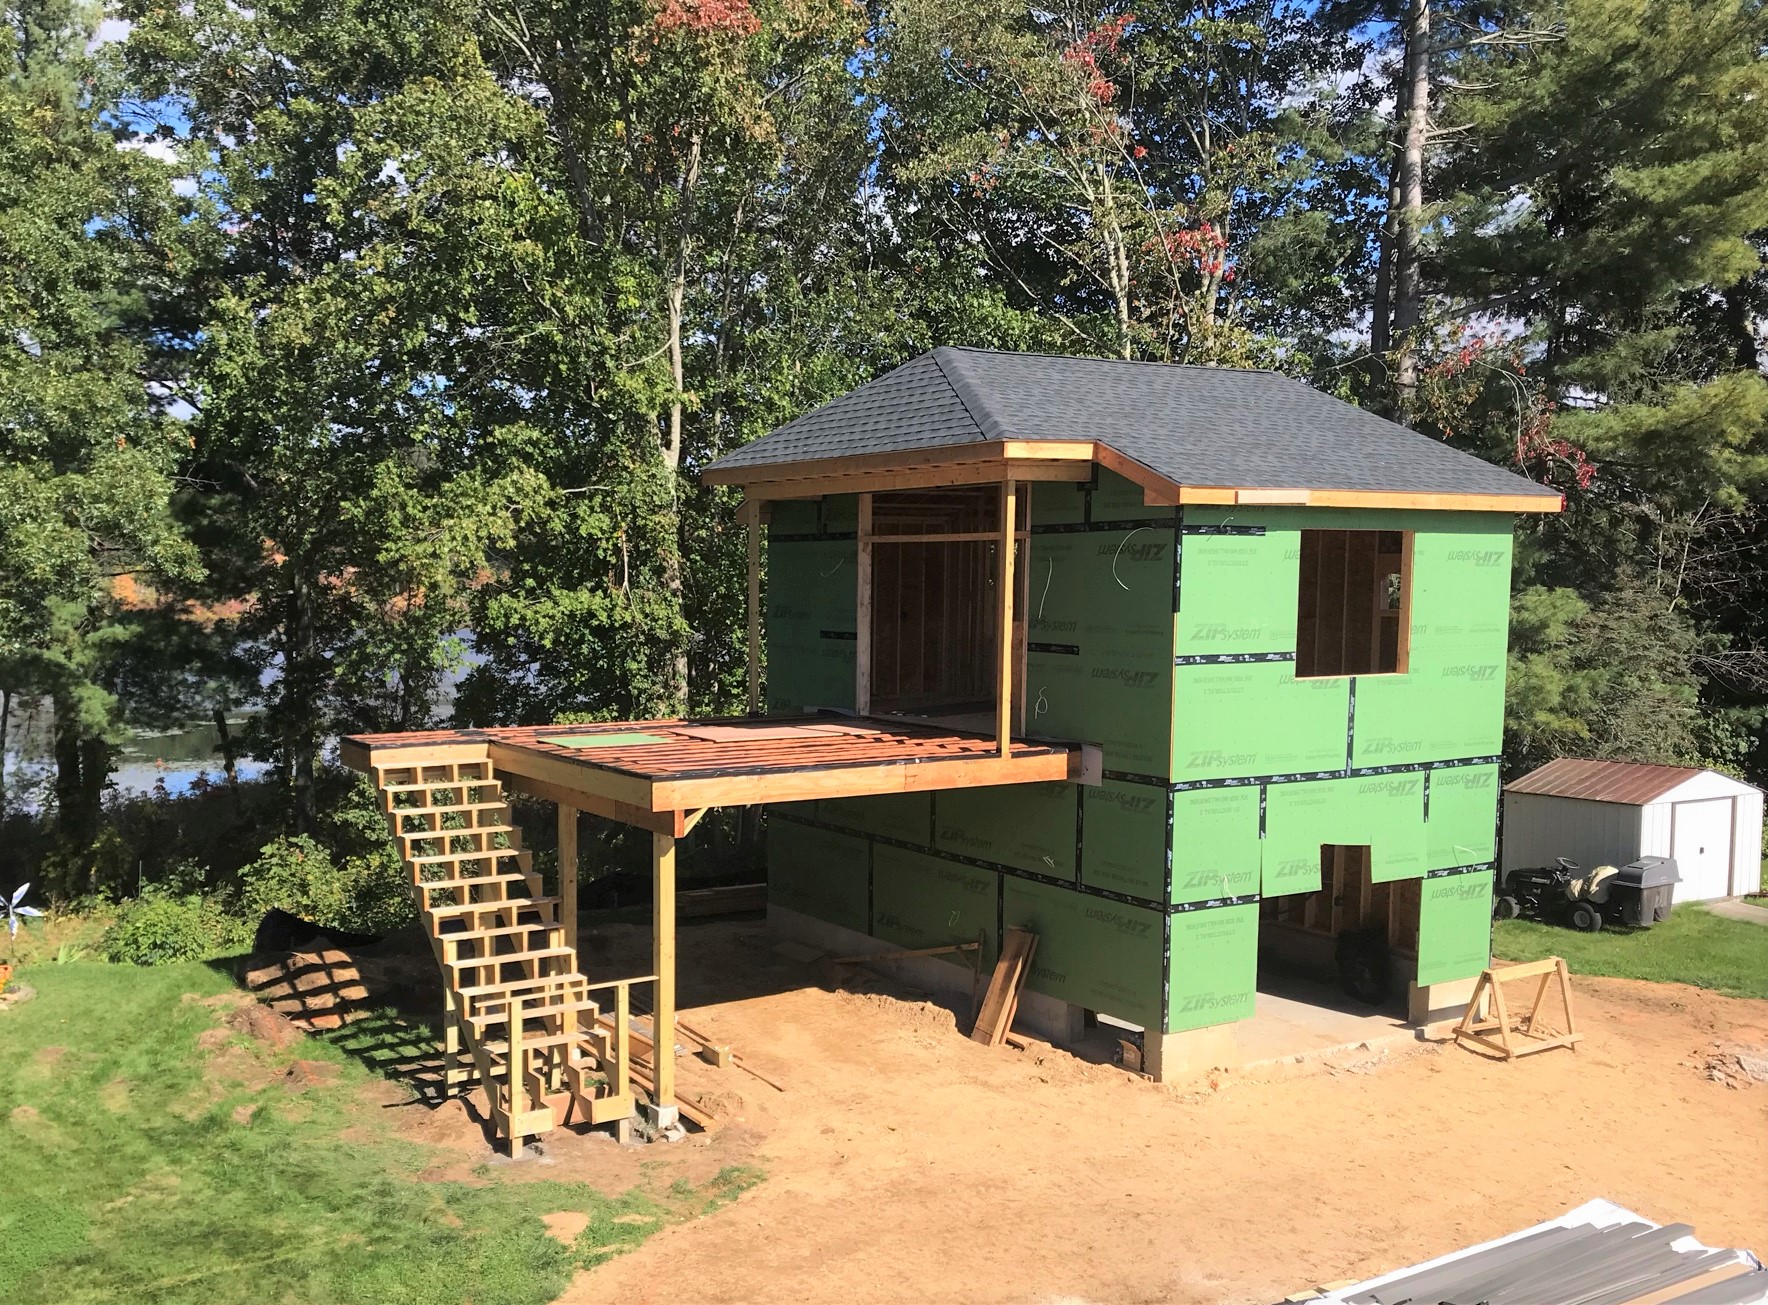
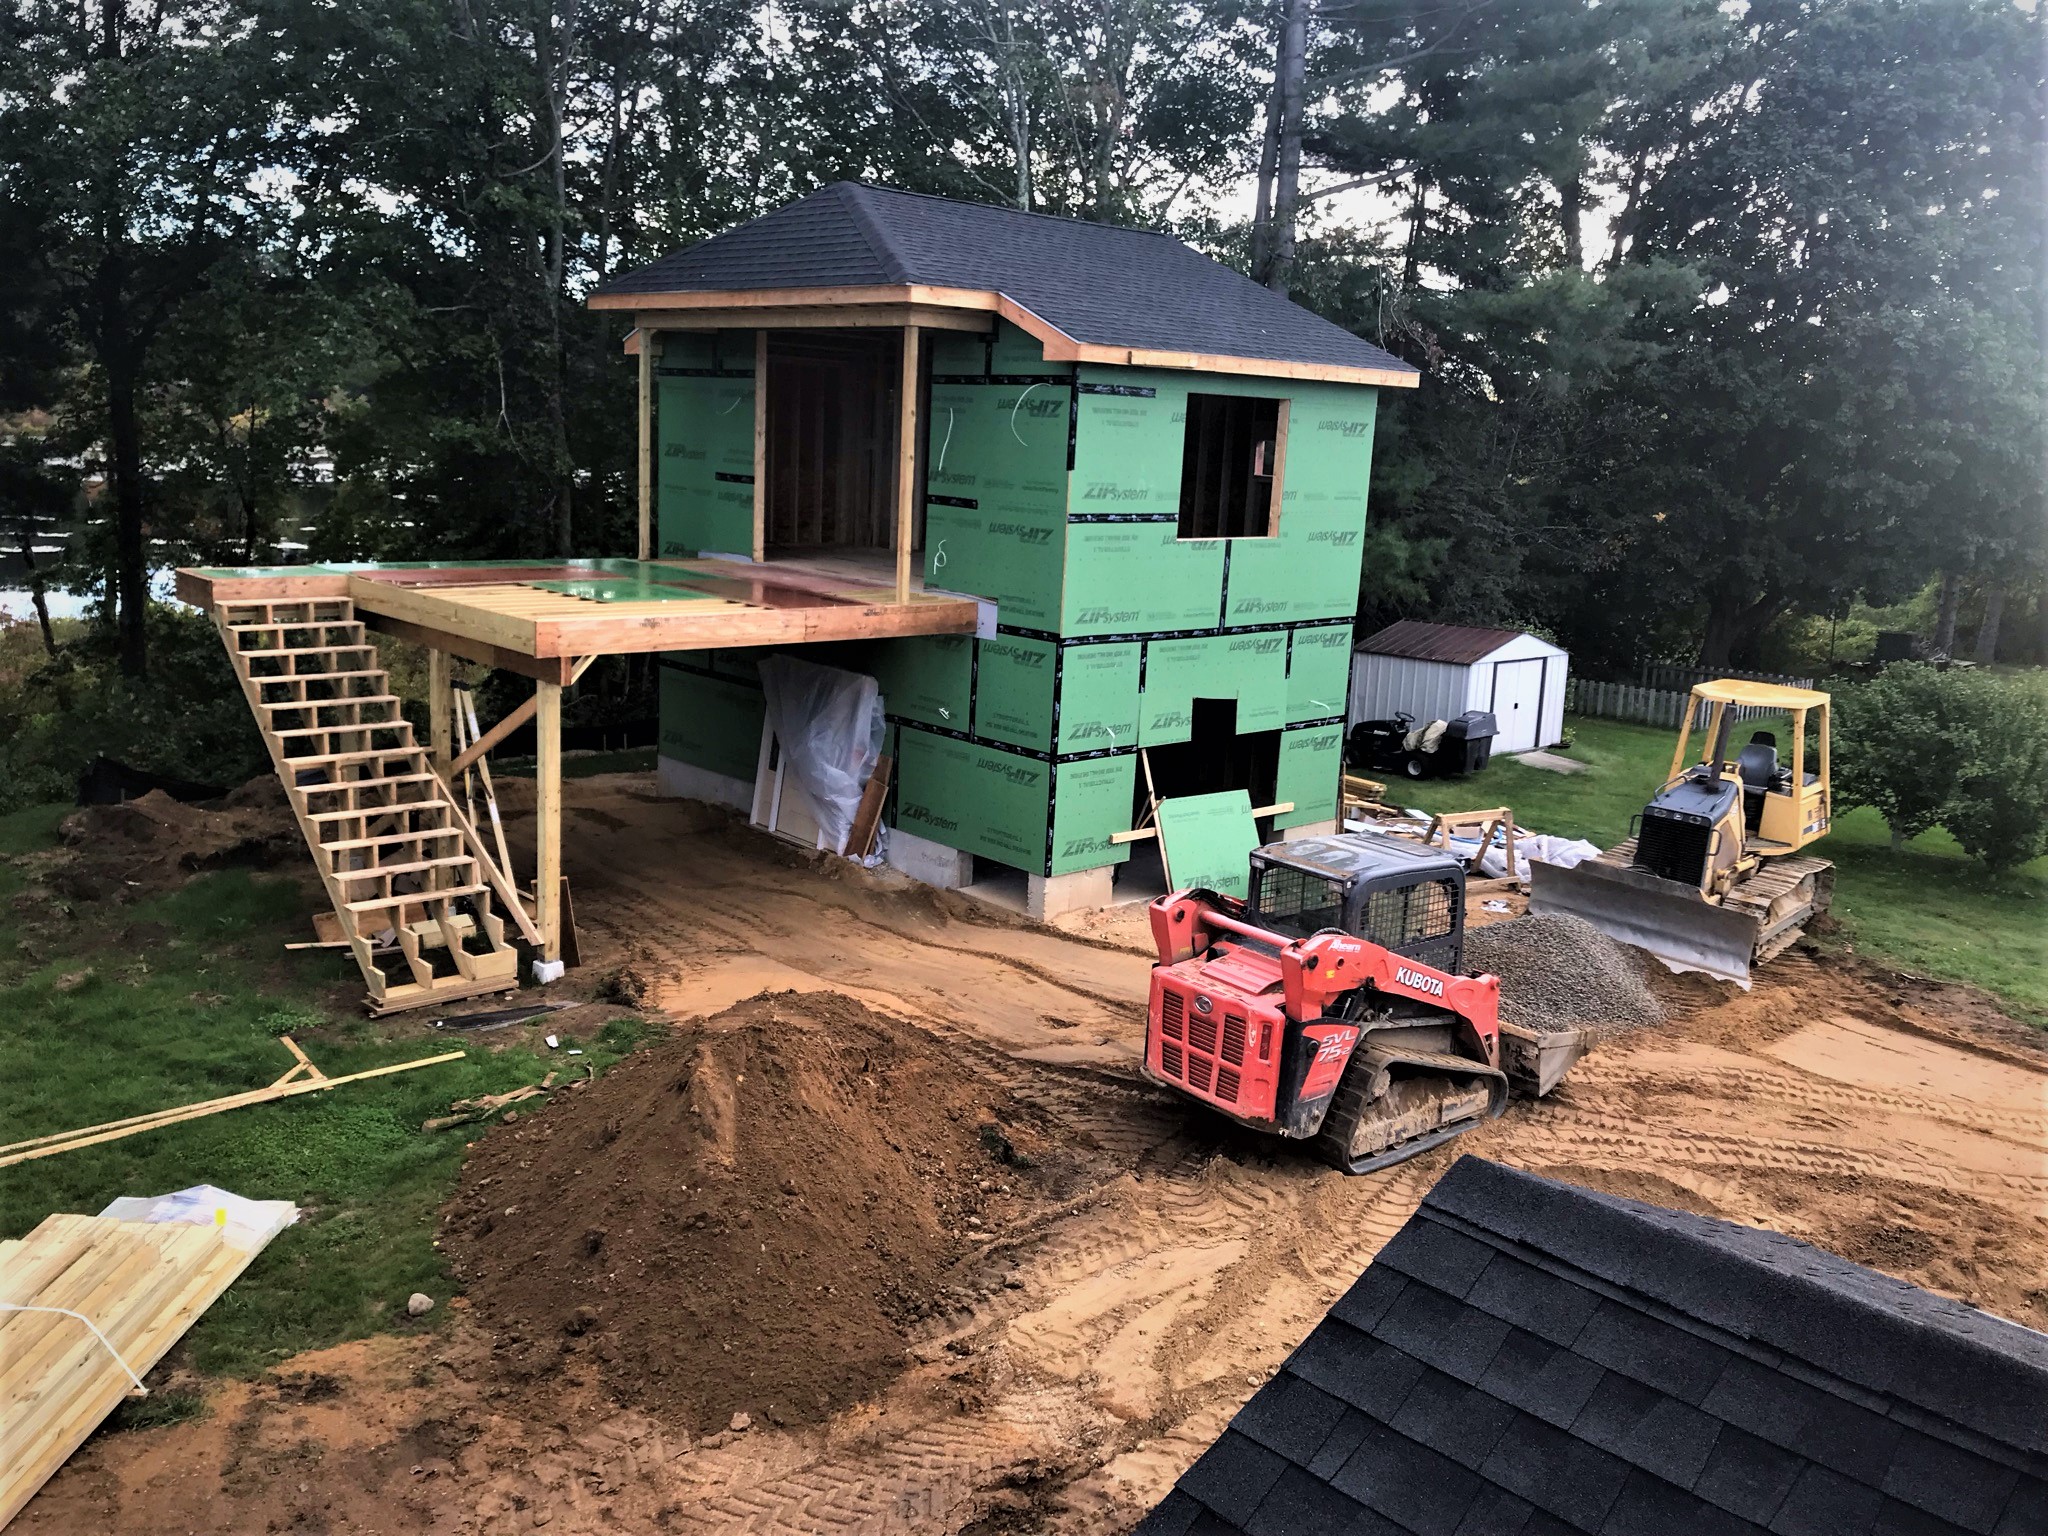
On Saturday, I got to get a shot of the completed work. Not only is it amazing, but the views from it are as well. The deck height is higher than our home’s second story windows.
Week end progress!
Now, I mentioned I would add a couple of hobby items. Well, I have a few – three to be exact.
First, I was able to finish writing the update to my Civilizations Collide supplement for Feudal PatrolTM. This is a way to wargame the Spanish Conquest and do it quite historically. I am working on a book of scenarios for that too. When either is available for download, I’ll share that.
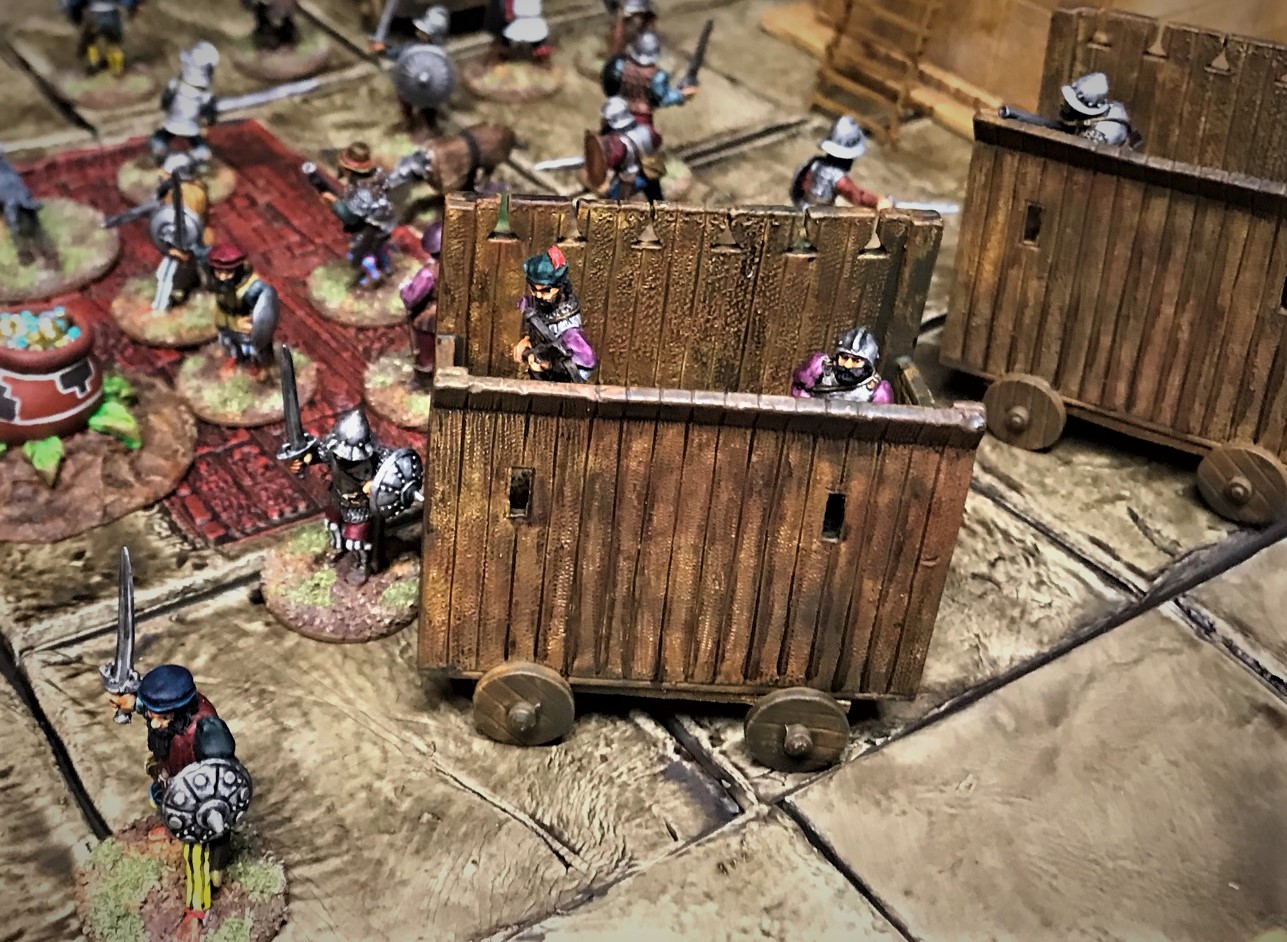
Second, as I was working on the supplement, it became clear that I needed to have a way of tracking damage on Cortes’ war wagons, as after enough Aztec slings and arrows and more have hit them, they would disintegrate into scrap lumber. I saw these nice Litko markers and got 4 for my war wagons.
Just in case you missed what a war wagon is!These markers count down from (or up to) 20 – which is the amount of damage each war wagon has before they got into combat in one game scenario.
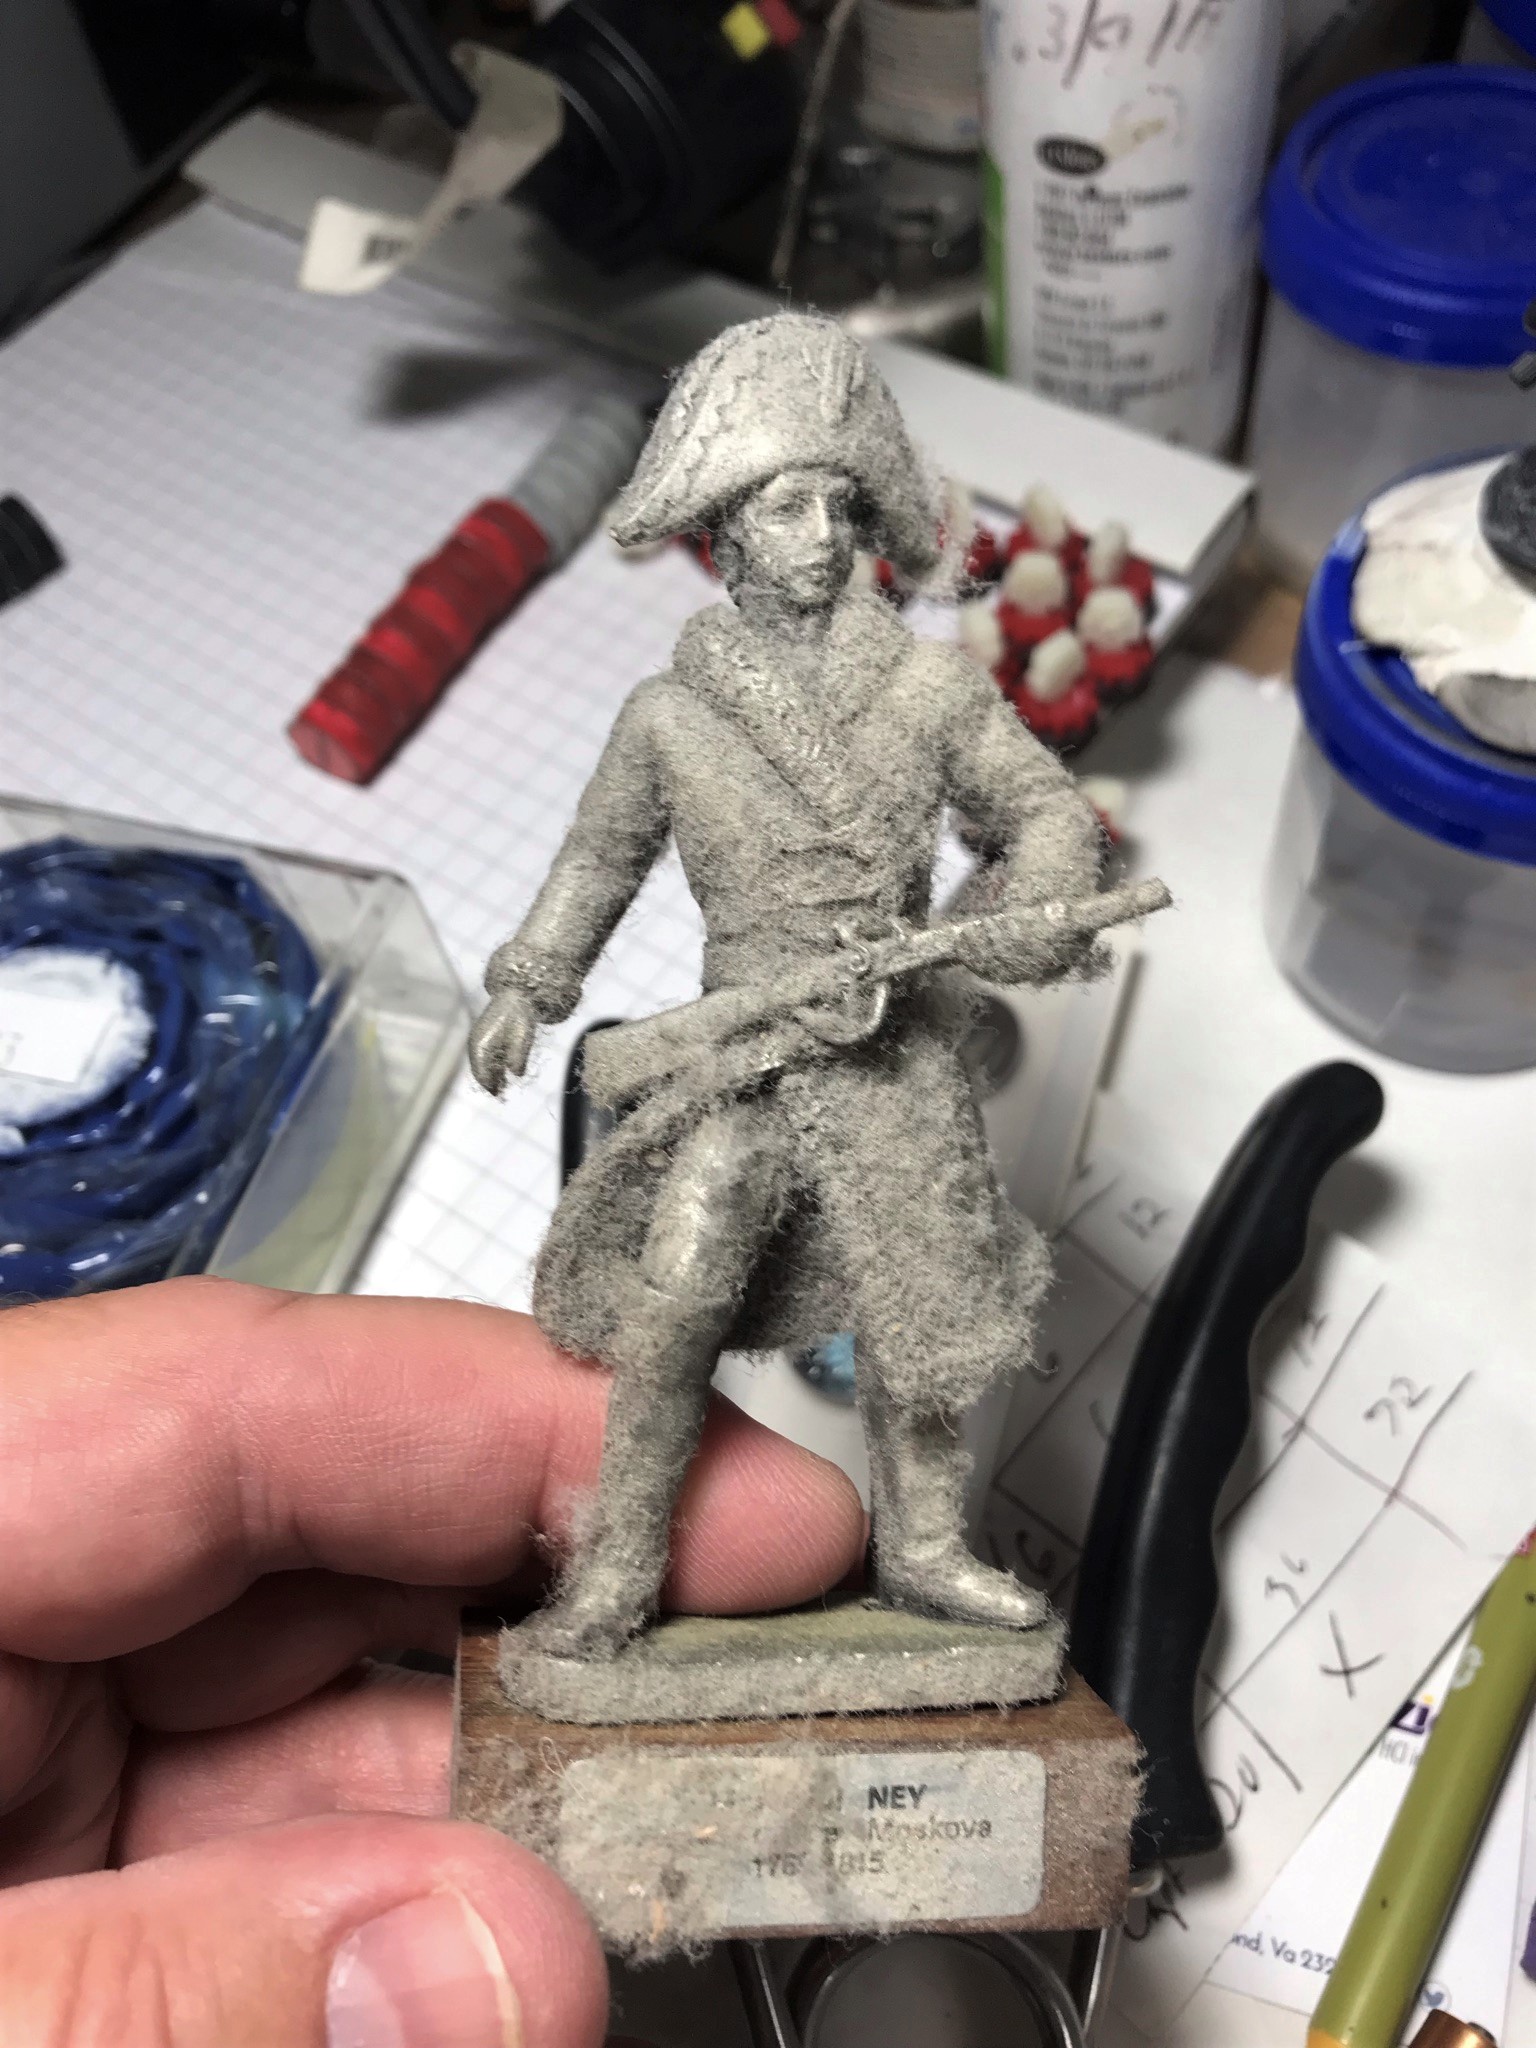
Lastly, I mentioned that we also have gotten shelving from Home Depot and have been assembling them and redoing storage in the cellar. We have put together 3 of these, 1 of these, and 1 of these. The last one replaced an old particle board printer stand that had been used for laundry soap, bleach, etc. It was messed up, and had a storage area under it. In the storage area were a couple of yearbooks from junior high I had not seen in a while, plus under the stand was a big lint-encrusted pewter figure of Marshal Michel Ney, the Bravest of the Brave, that I bought in France in the 1980’s! I was always fascinated by his story. However, I had zero idea how he ended up there.
Come, see how a Marshal of France can gather lint and dust!
Buck suggested that he would be a cool giant for a Wars of Ozz game, and Chris Palmer suggested that he could be a moss giant. I thought maybe a lint monster…but no, I’ll clean him up and put on a shelf as is.
Anyways, next week should have even more progress on the project – so thanks for looking and hope you found this interesting. Now I have blogs to read! (likely yours).
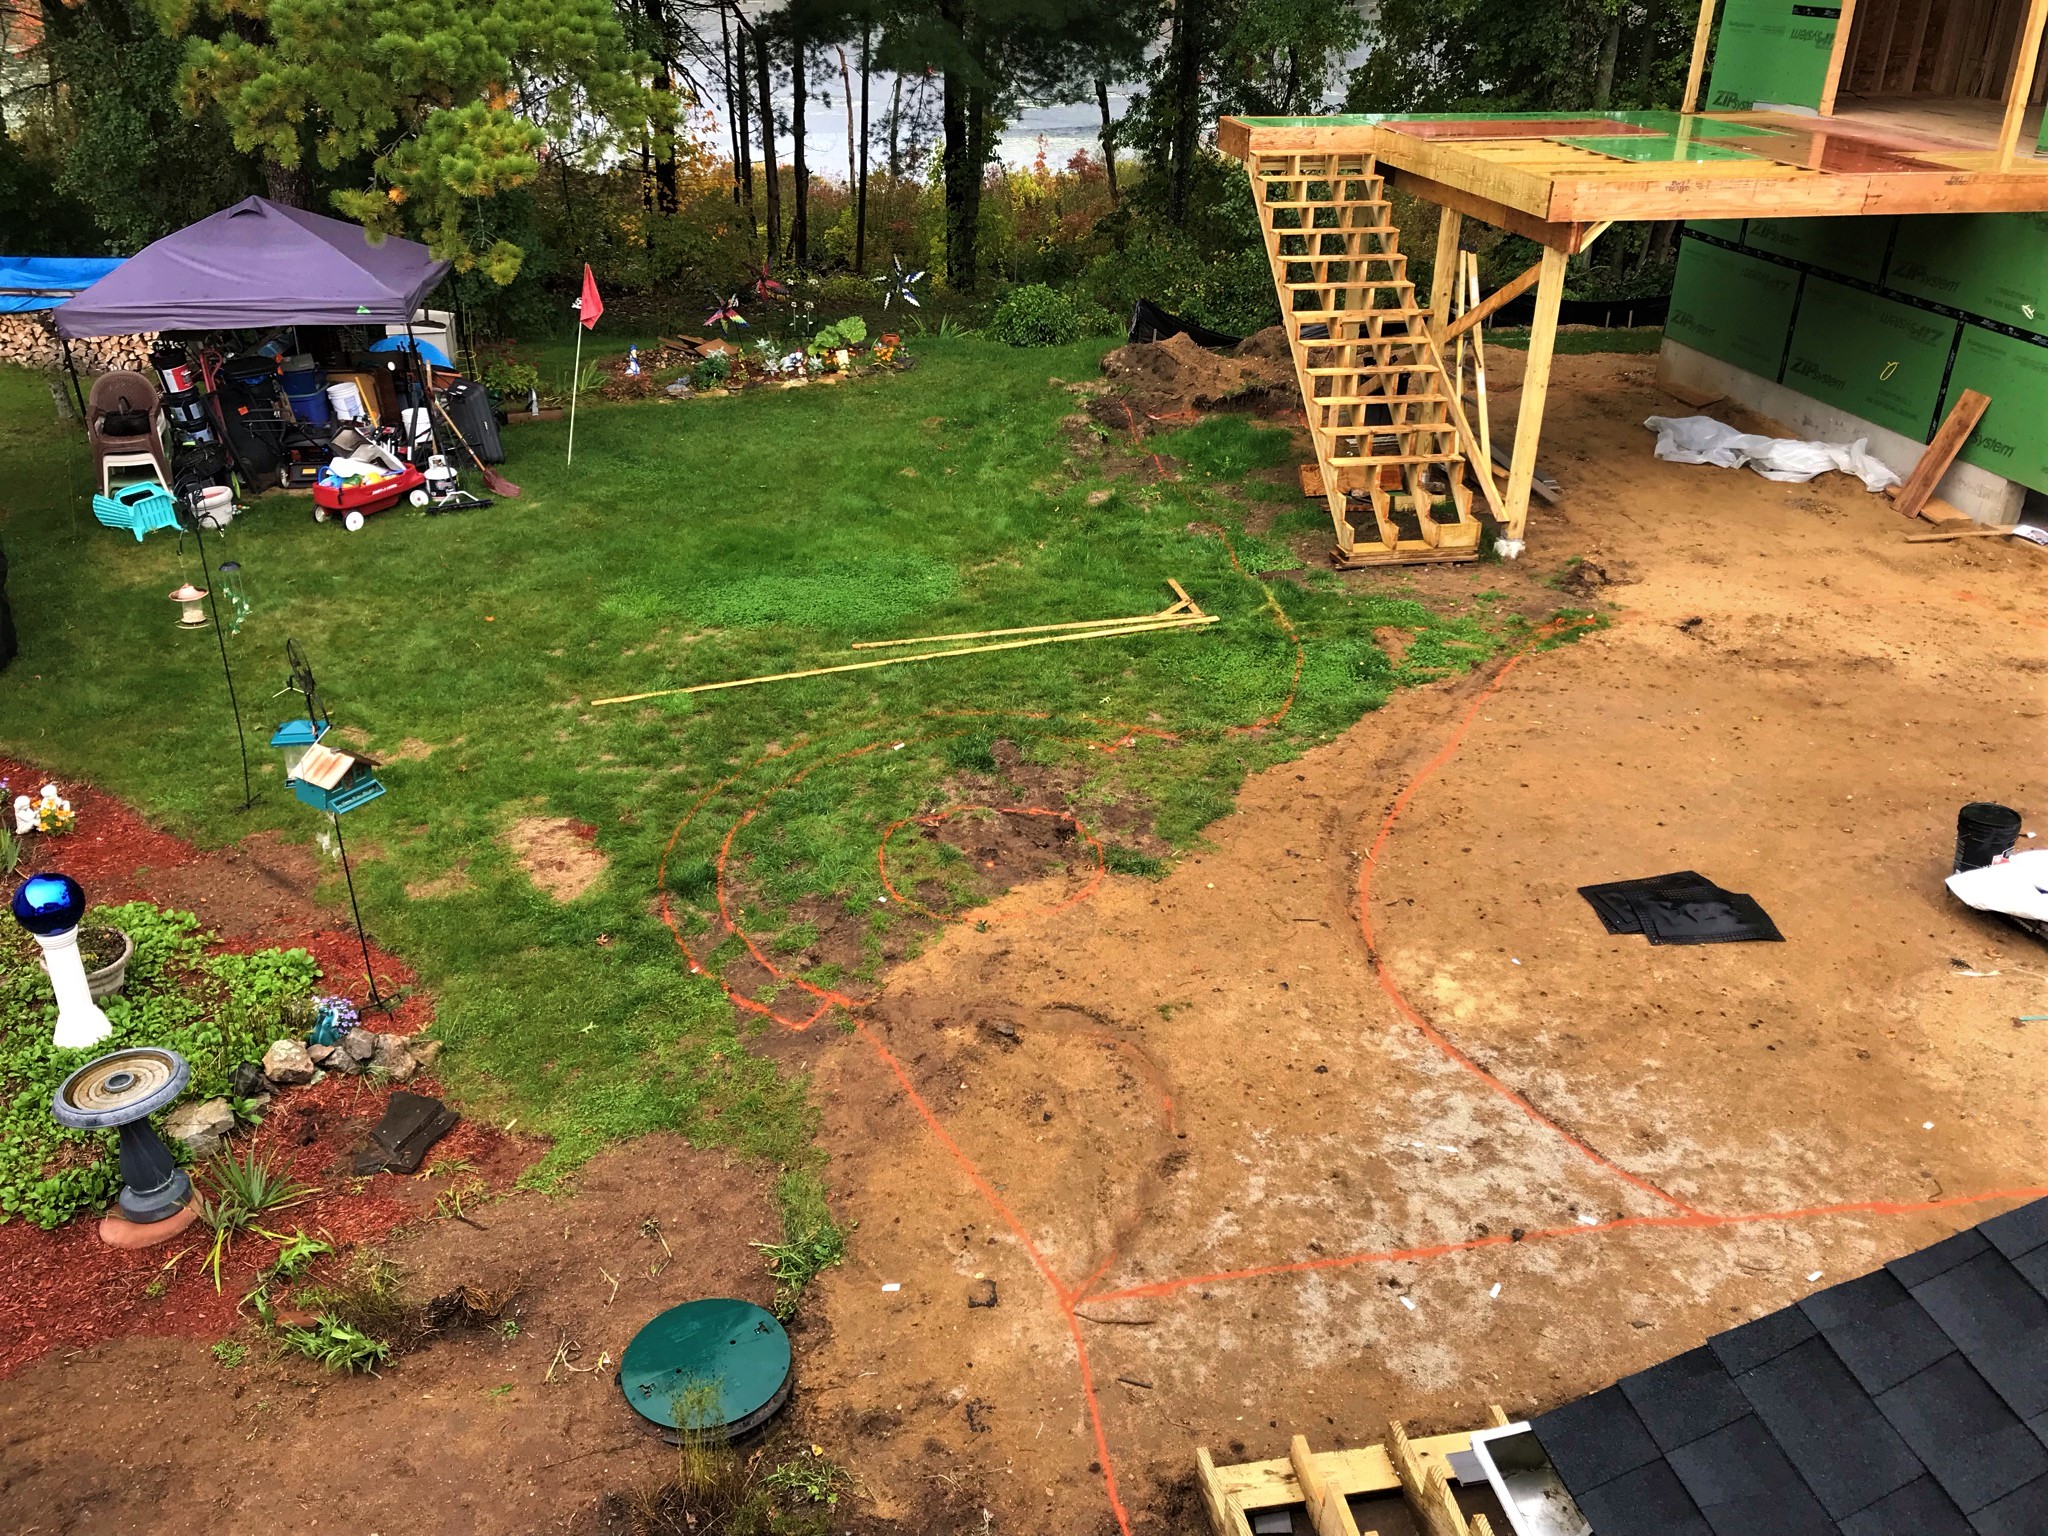
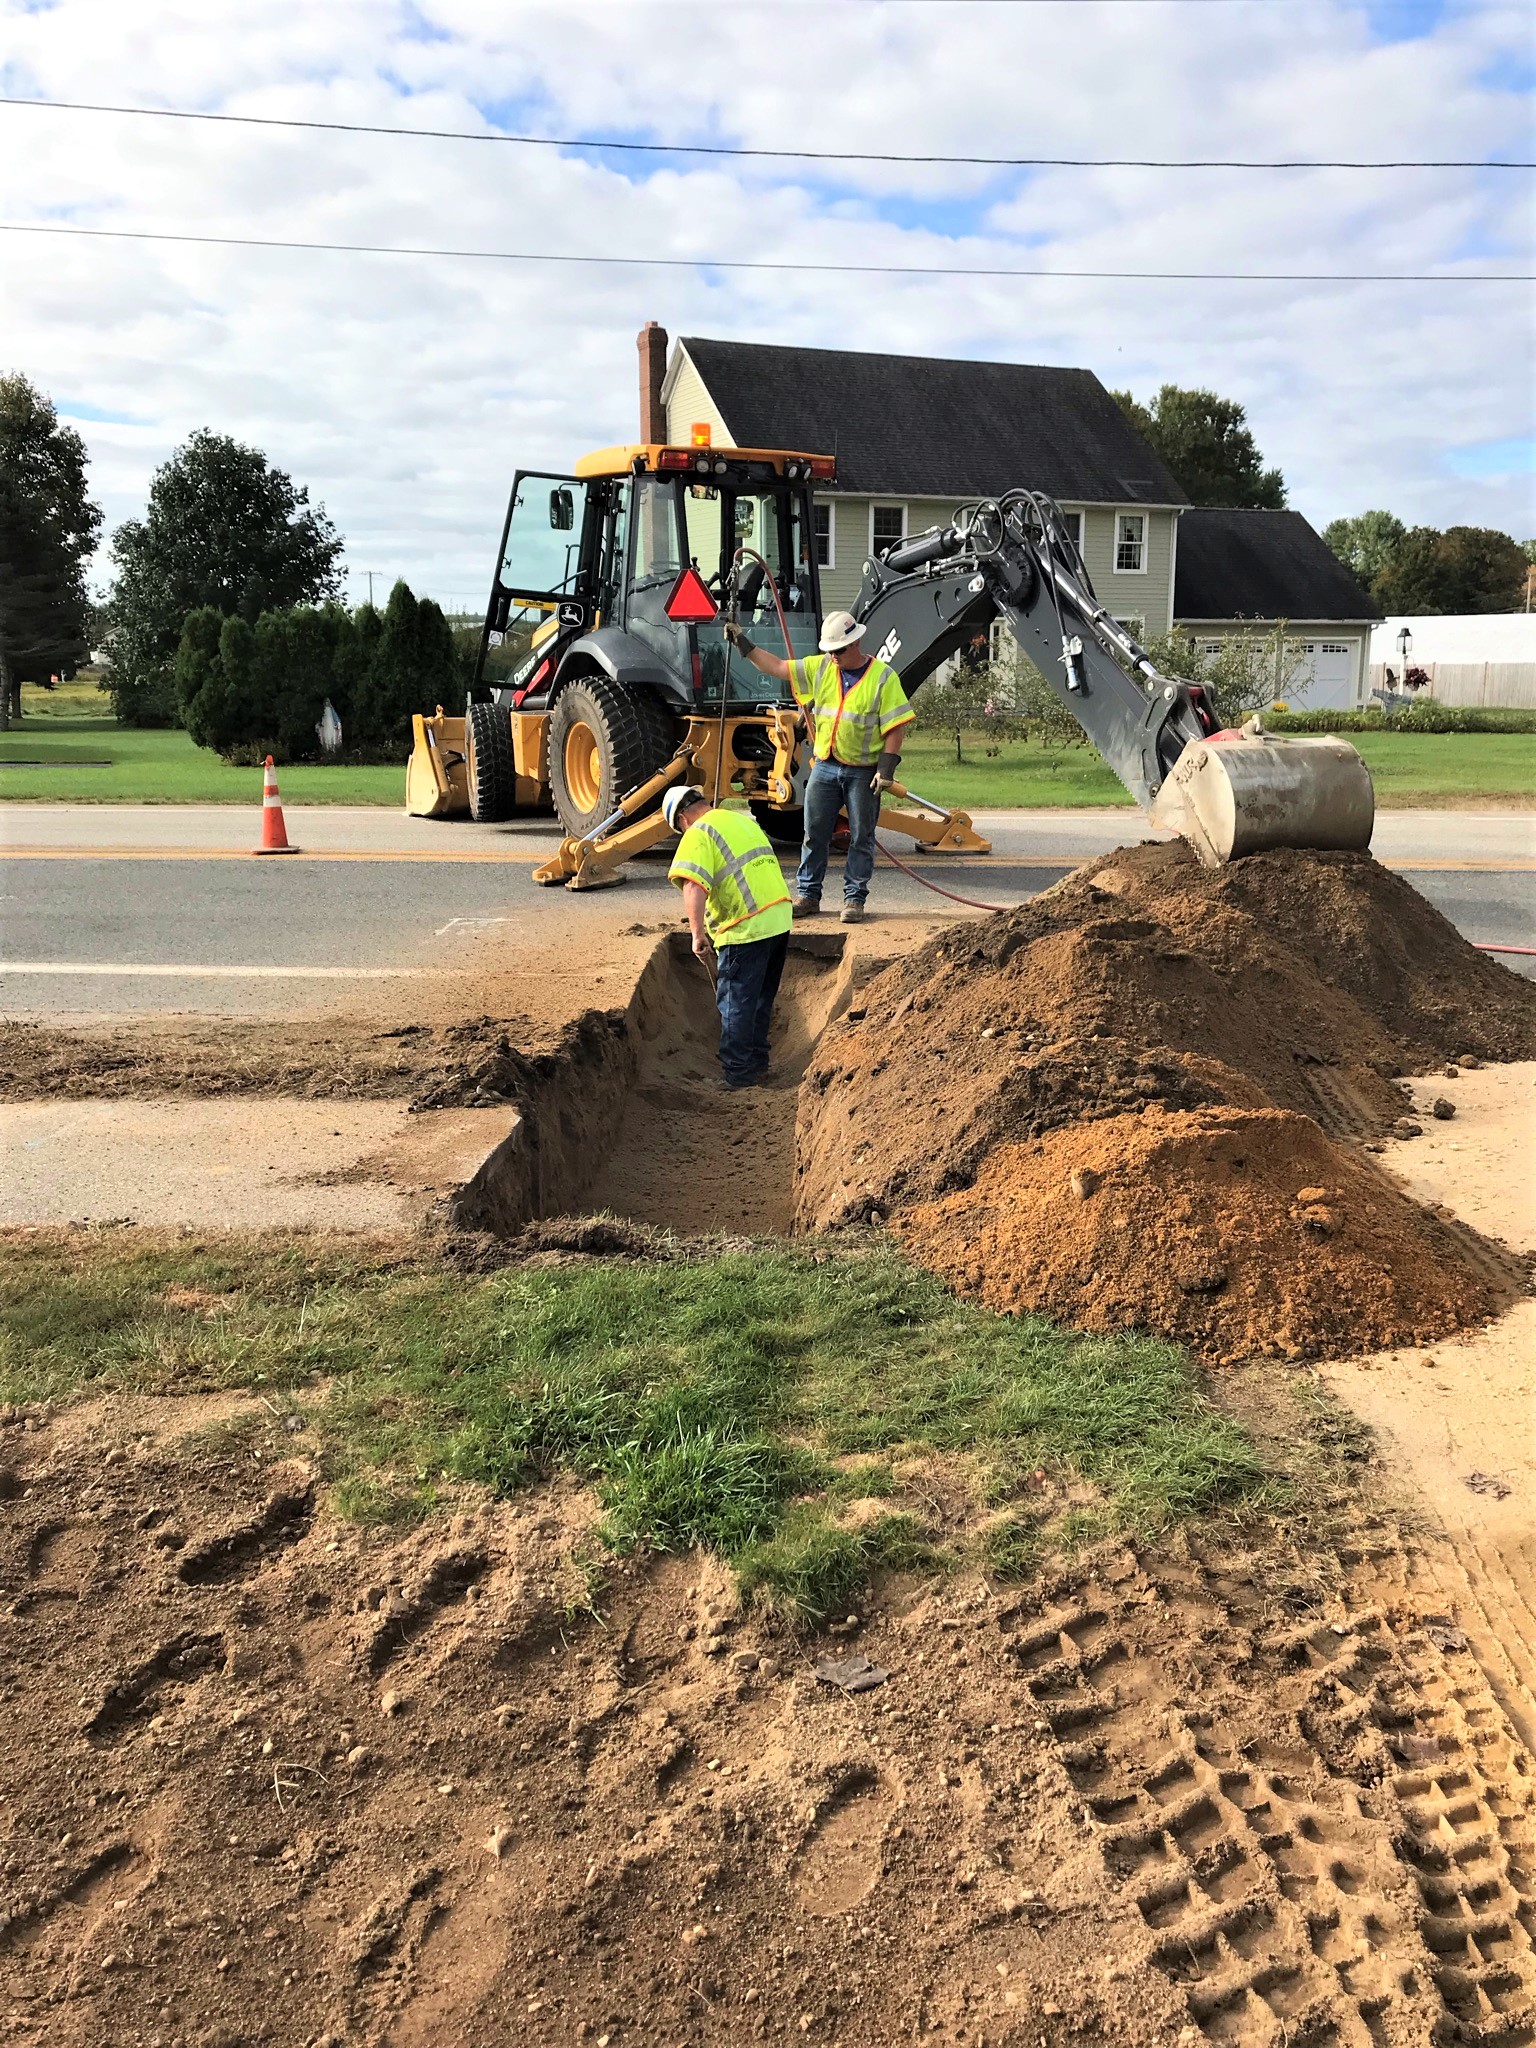
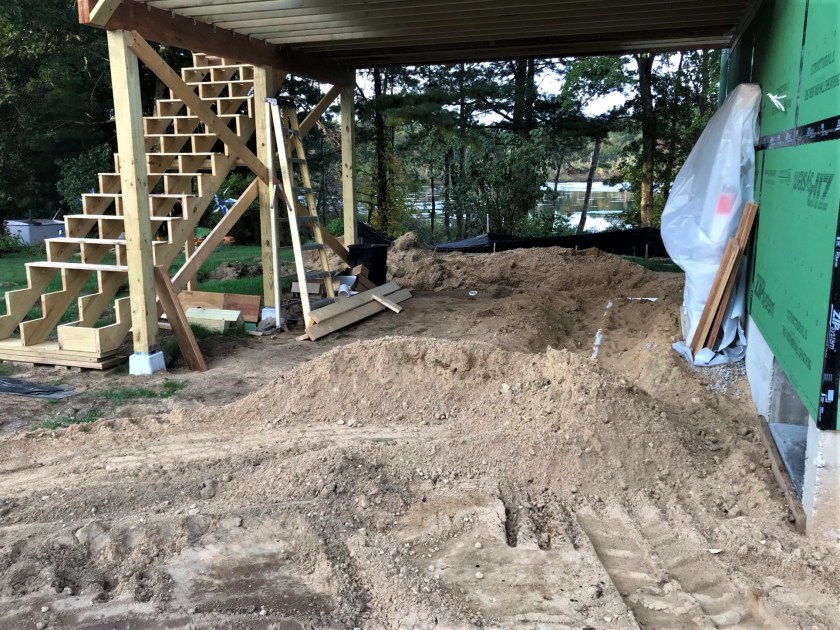
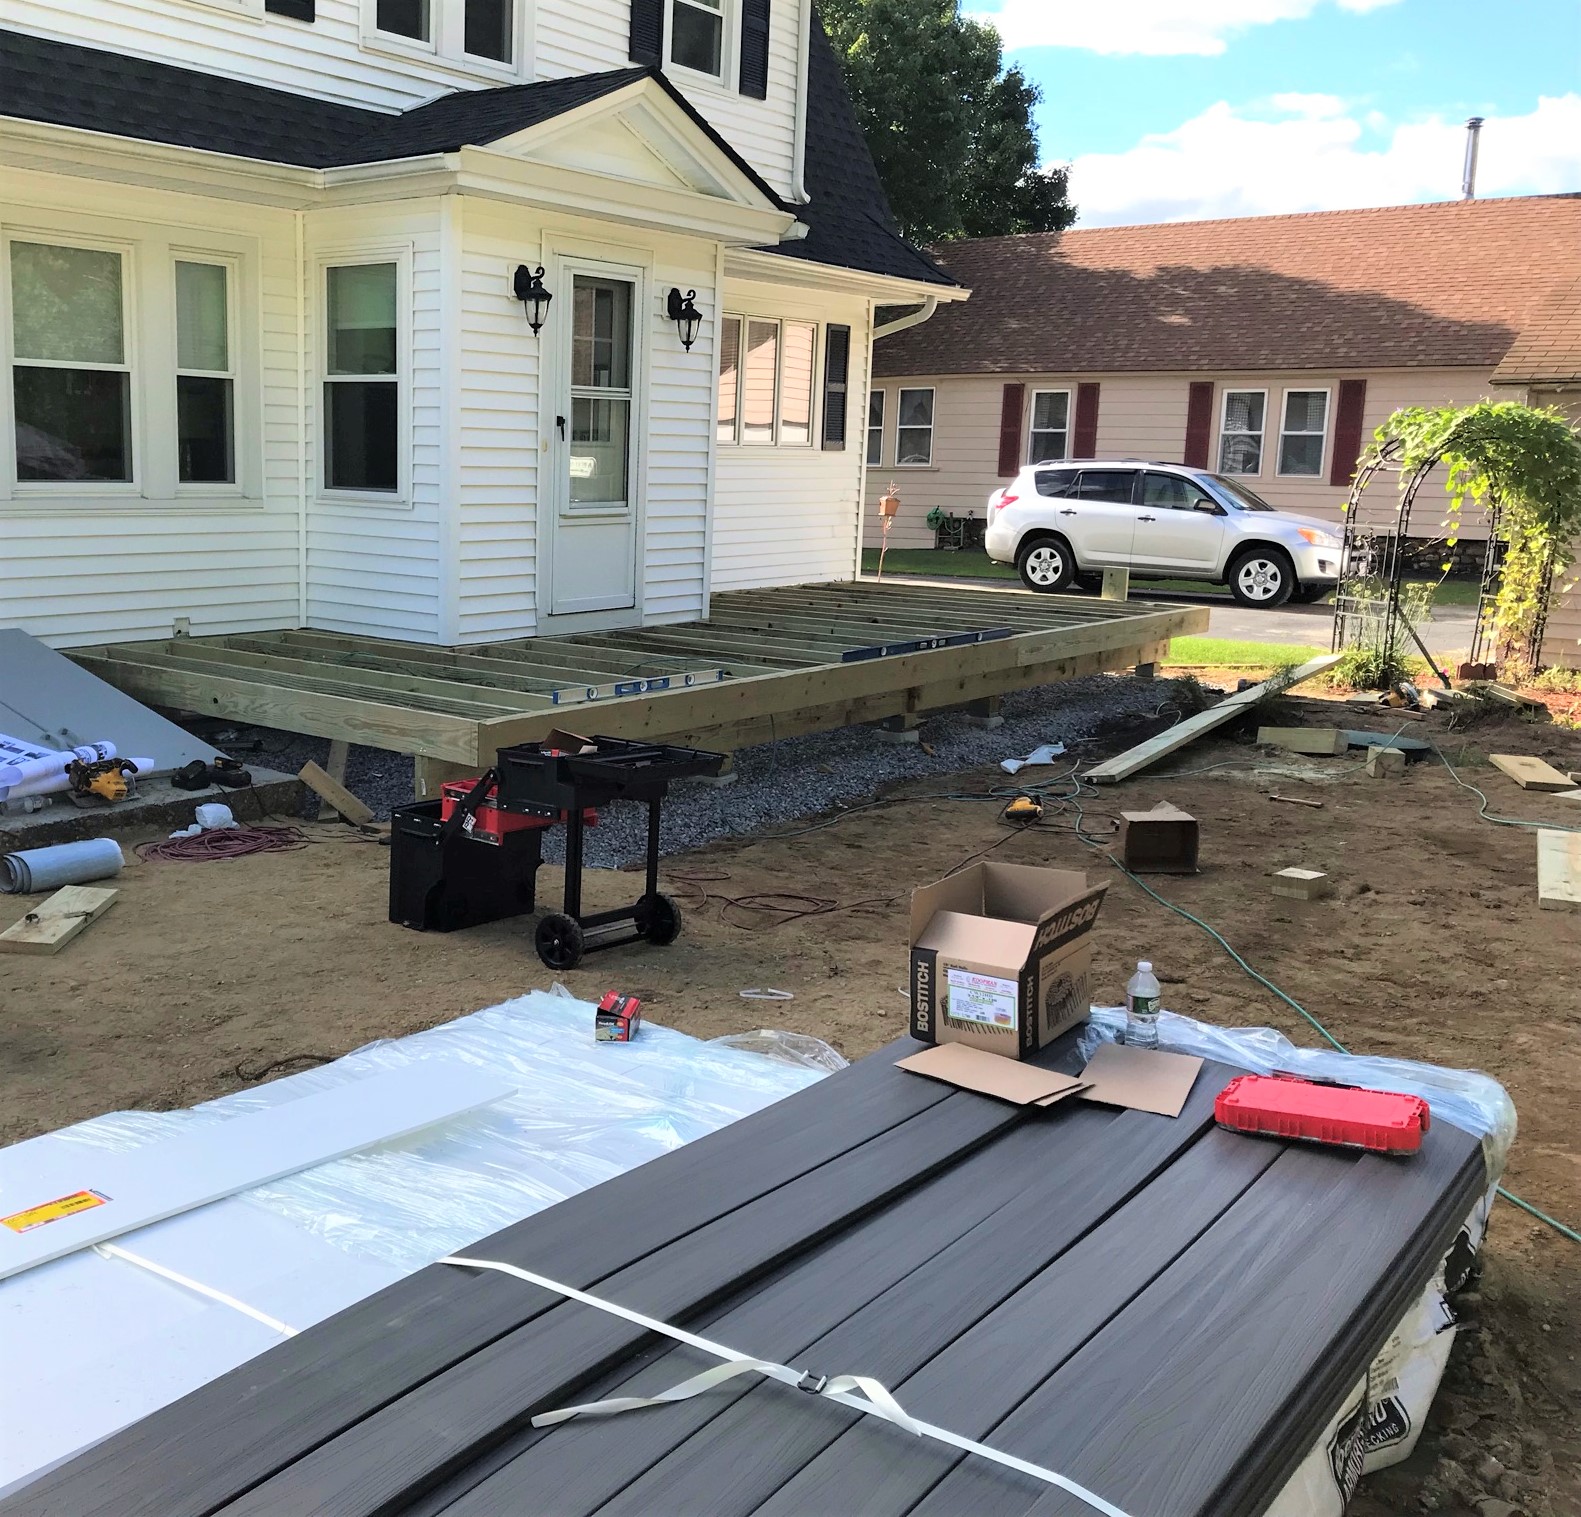
Week 12 saw work being done on both decks, and well as connection to the National Grid gas line. We also had Evandro Rodrigues from E&V Masonry (who works with Ready Installs) come out to lay out the paving stone areas and the proposed gas fire pit. They also placed the concrete floor in last week.
It’s a bit difficult to see, but the spray-painted orange lines designate the plan for paving stones. These patio stones will go under the garage deck and stairs, then connect to the house deck. The gas fireplace will be the round circle here.
Work continued on the house deck as you can see below.
The house deck in progress.
The garage stairs were stabilized and set up for decking.
The stairs being braced and supports added.Close up of previous shot.
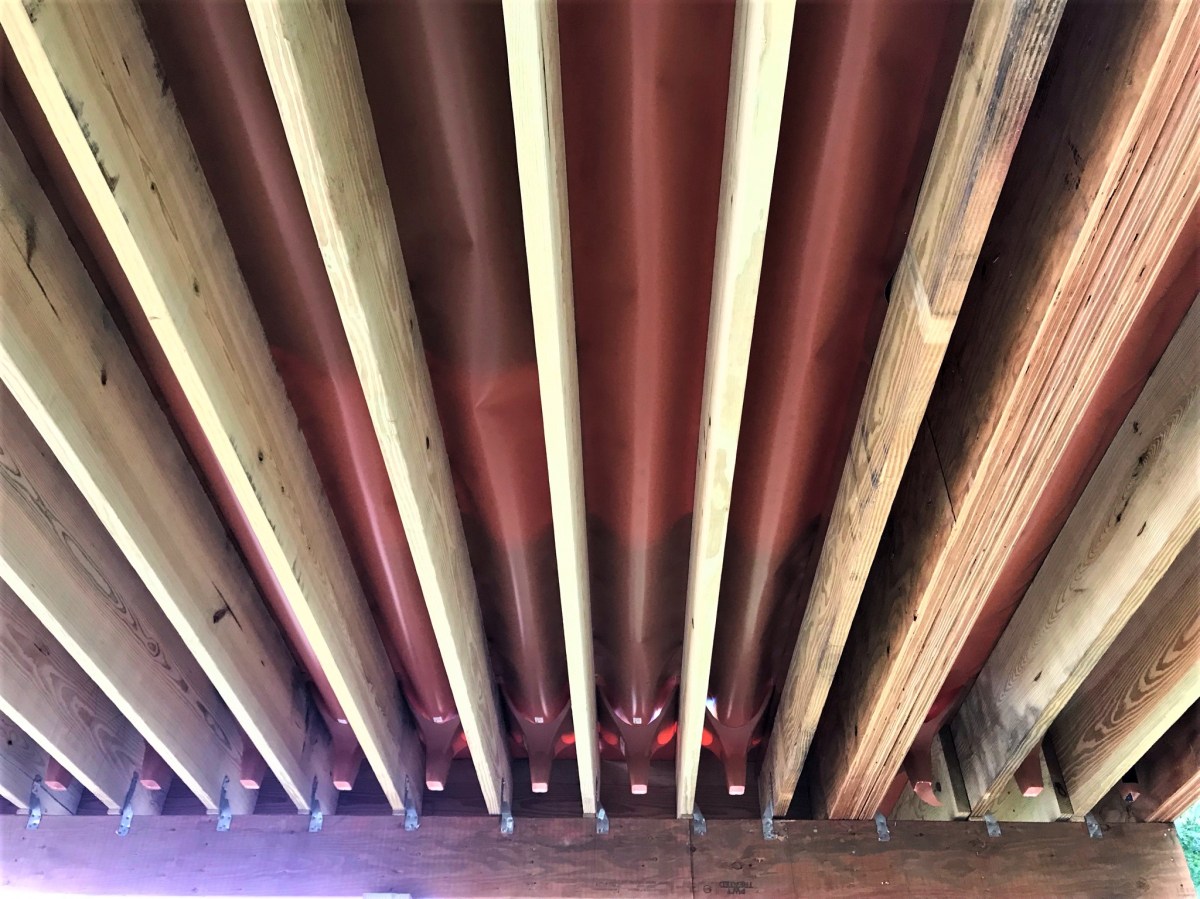
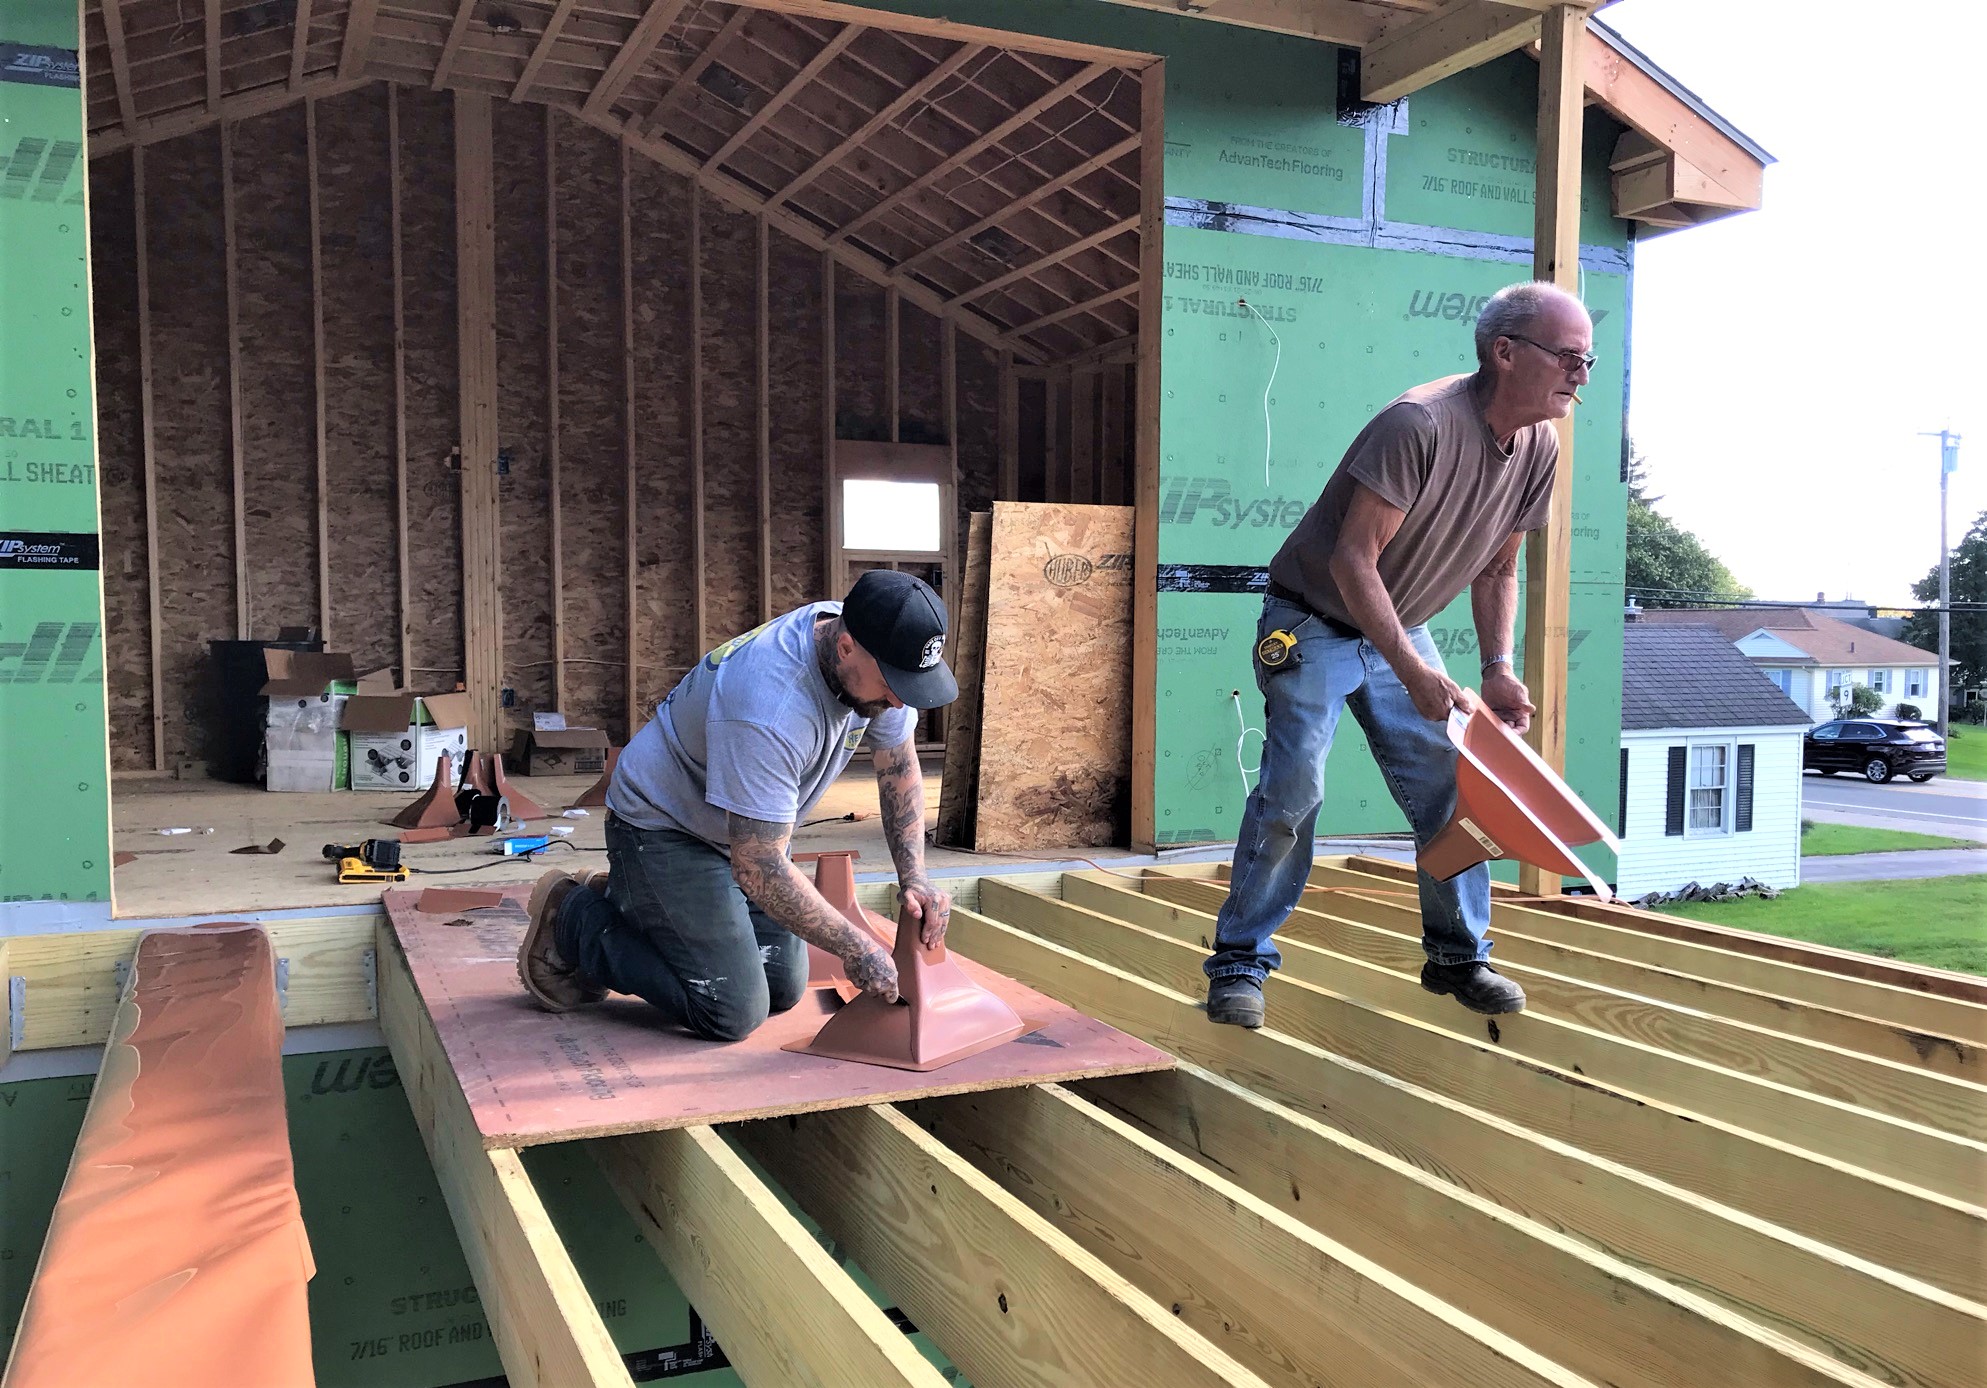
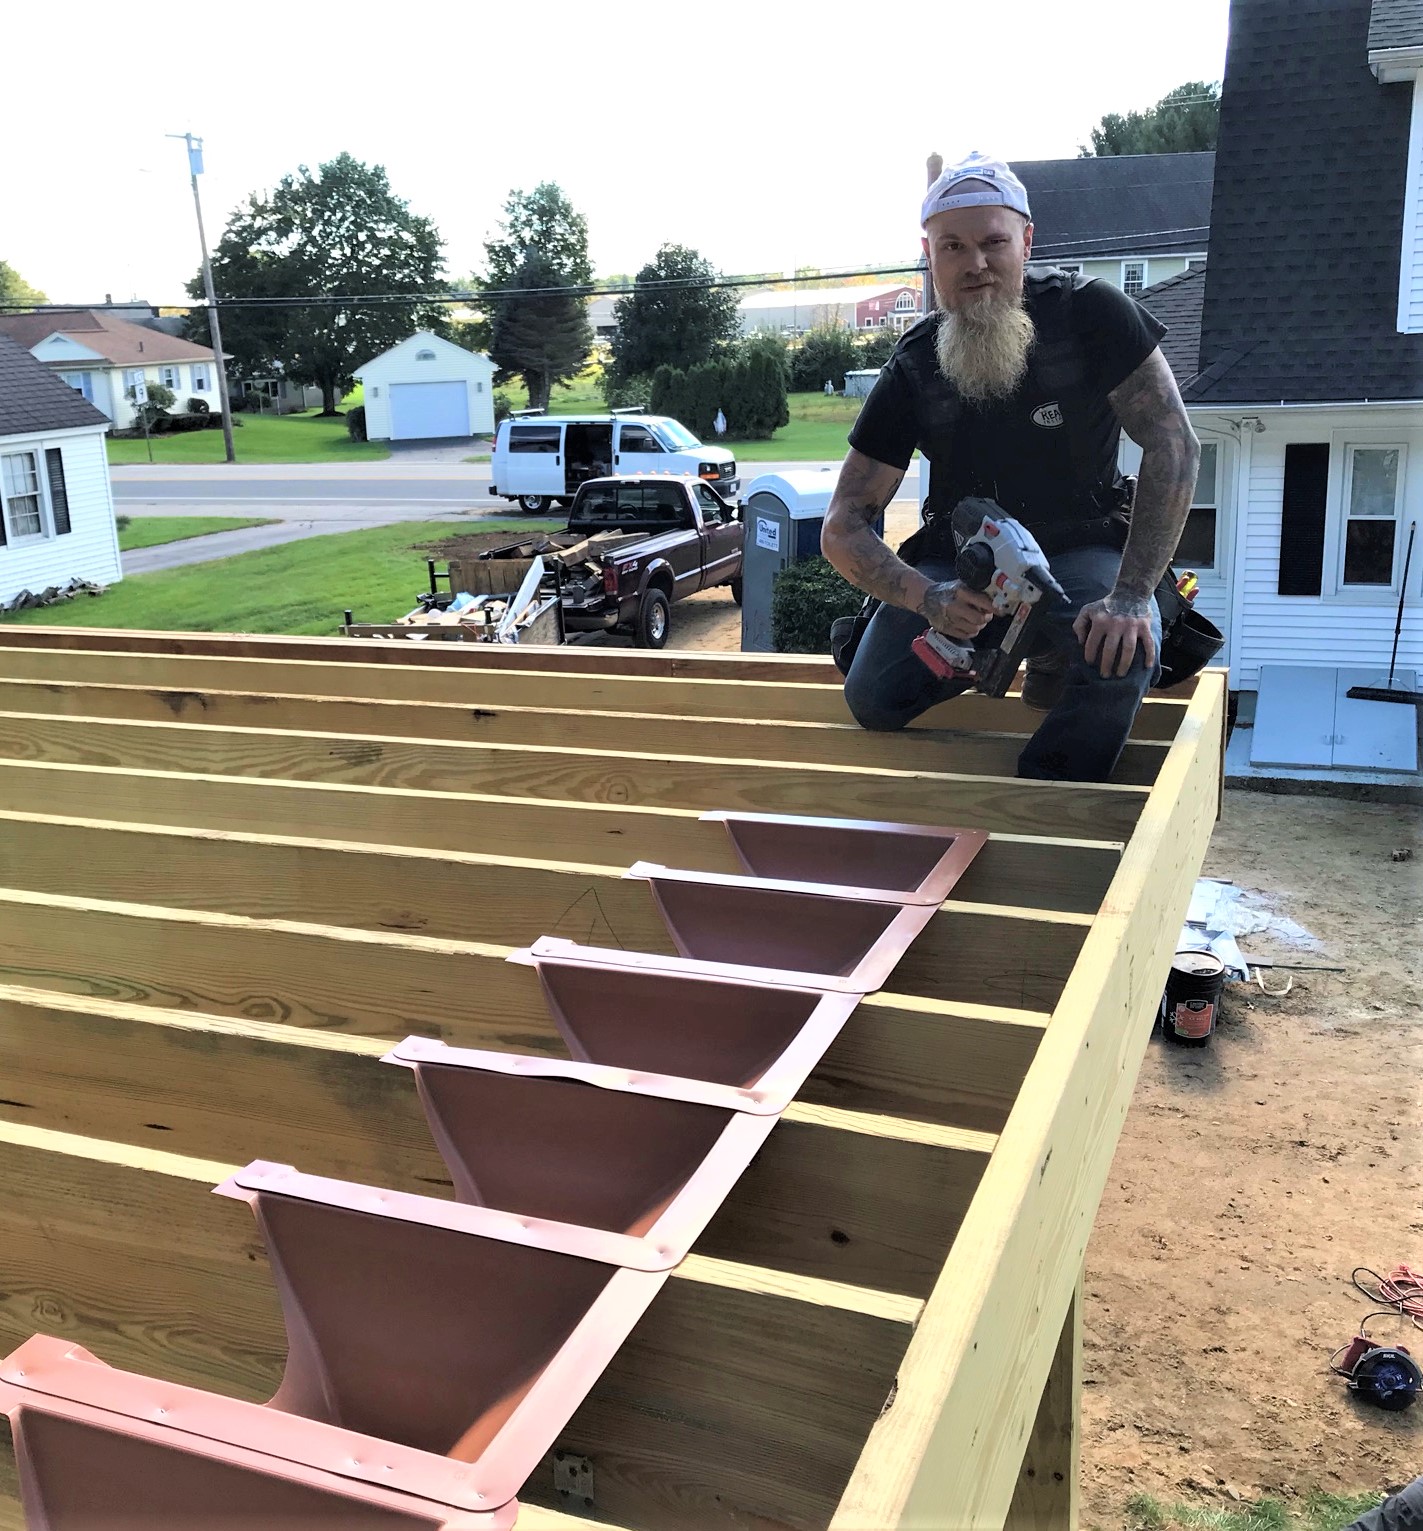
On the garage deck, the Trex rain gutter system was installed. This will keep the patio underneath dry. It will feed into a gutter under the downspouts.
The downspouts fit between the joists (with some help).Jon and Will prep the downspouts for Josh.Josh Victor stapling in the downspouts.
After the downspouts were in, the membrane that will carry the water to them is installed with the proper slope and sealed.
You can see the membrane here (and Will’s head).Top view of the deck.Underneath view.
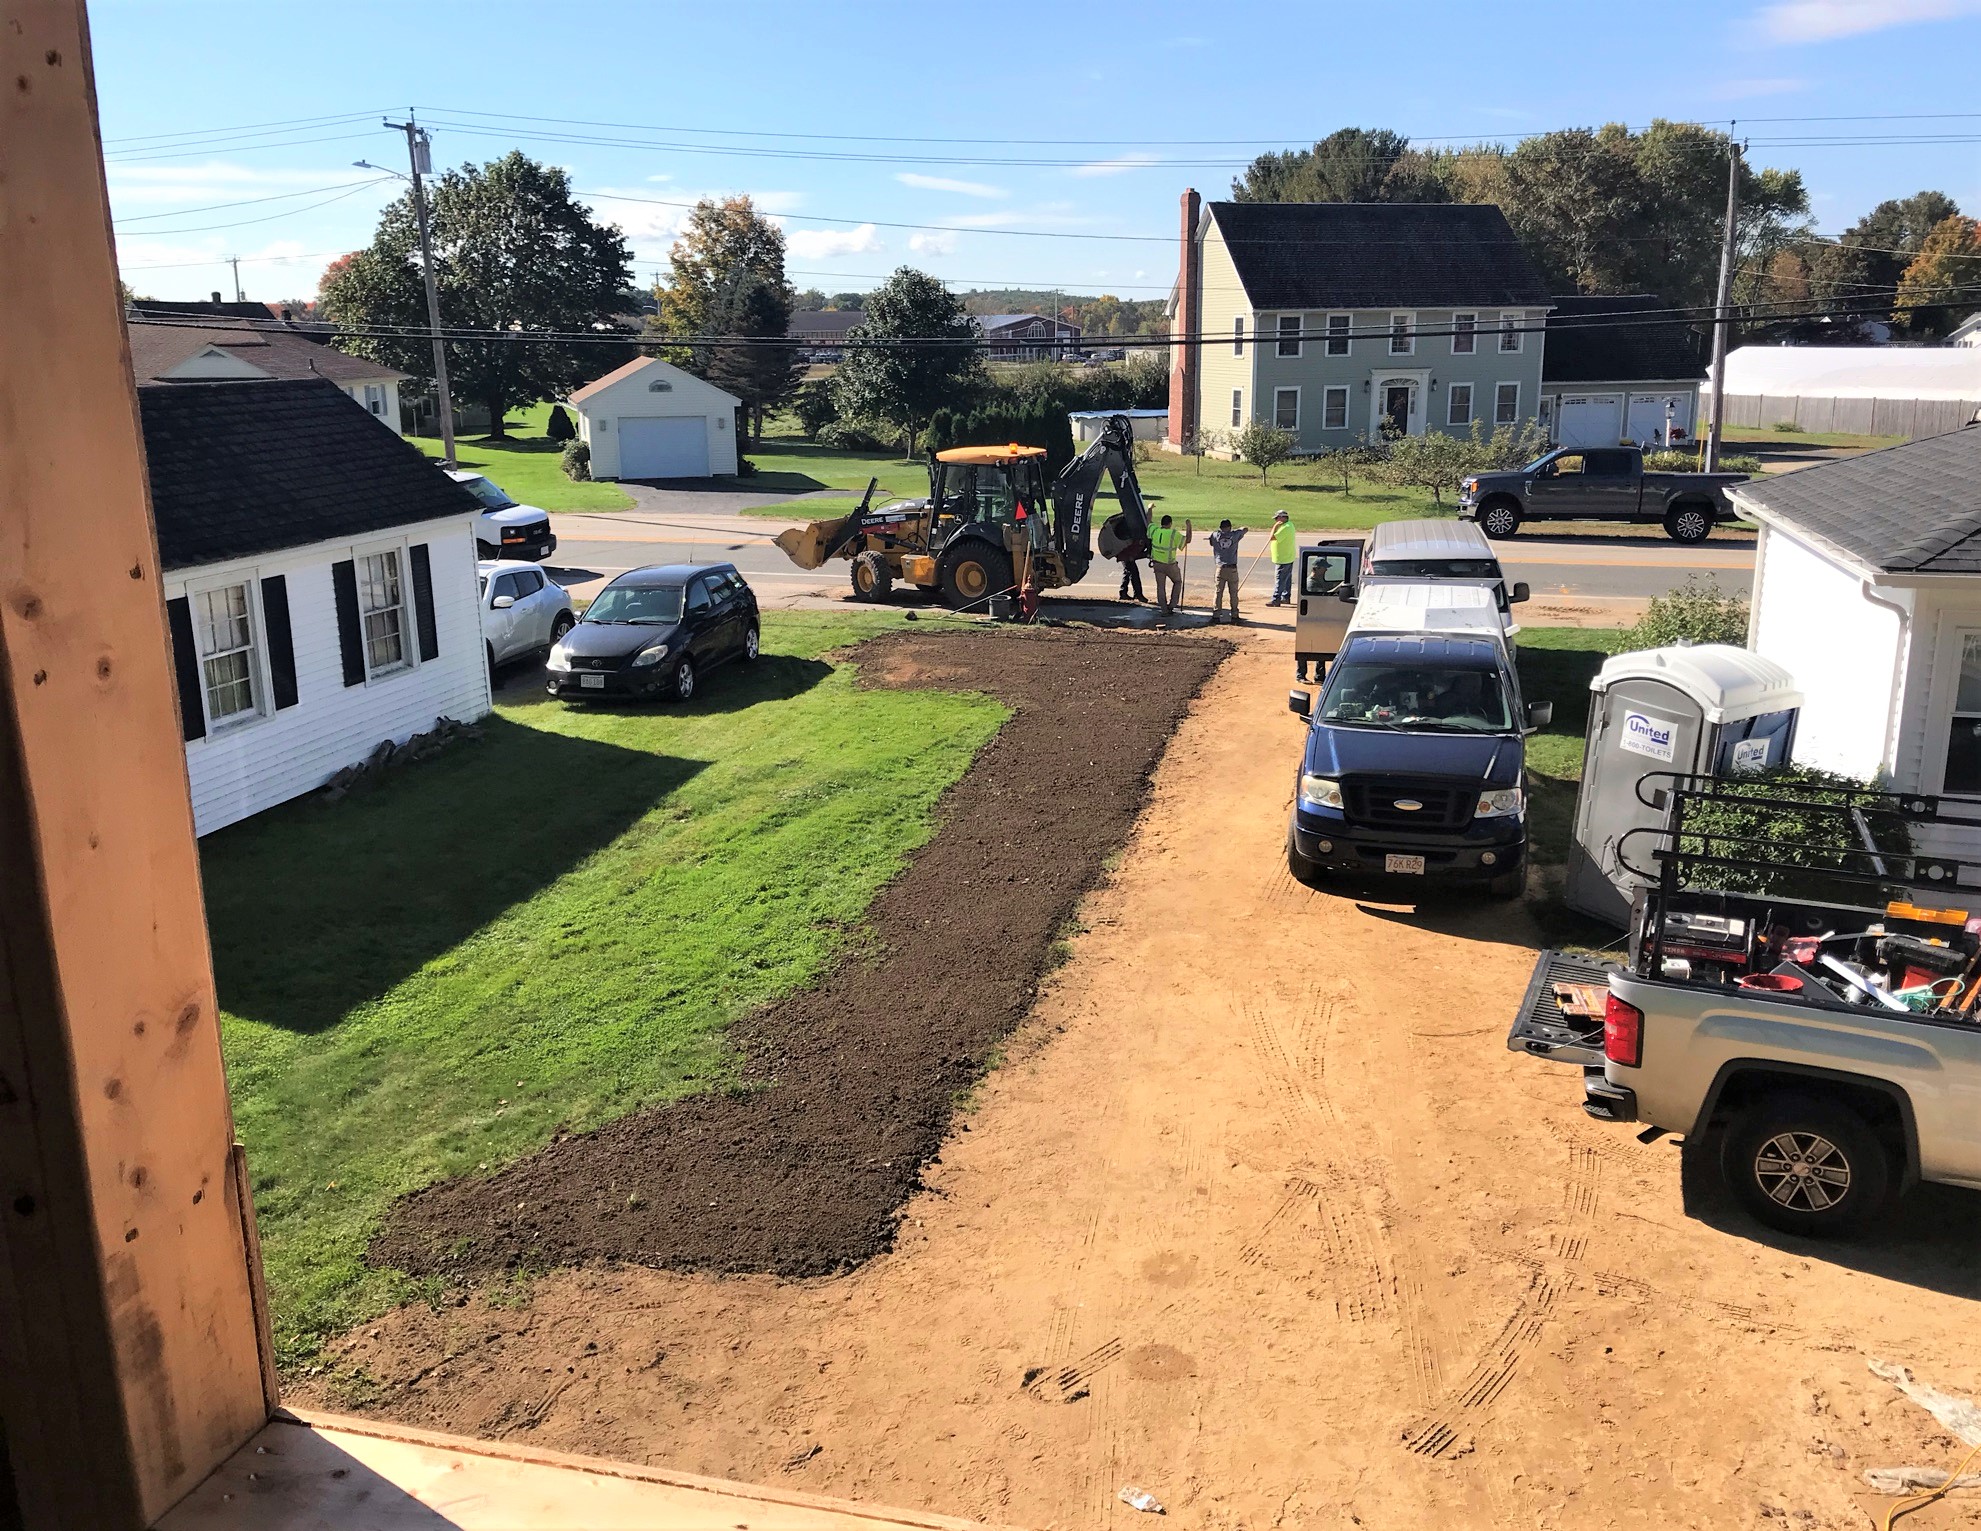
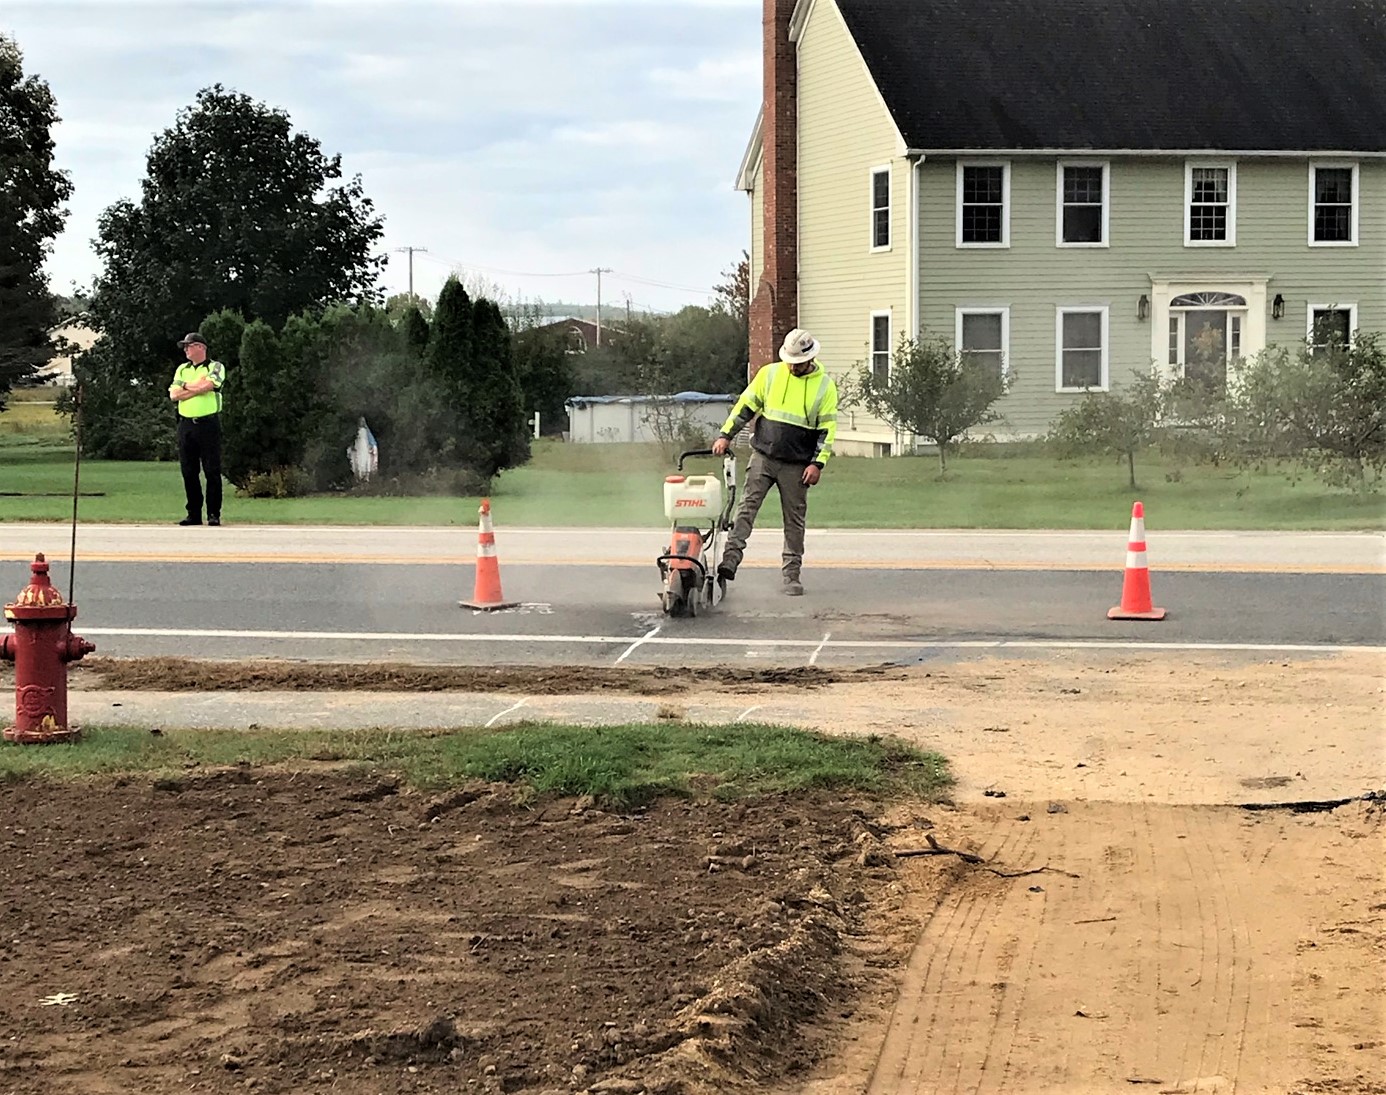
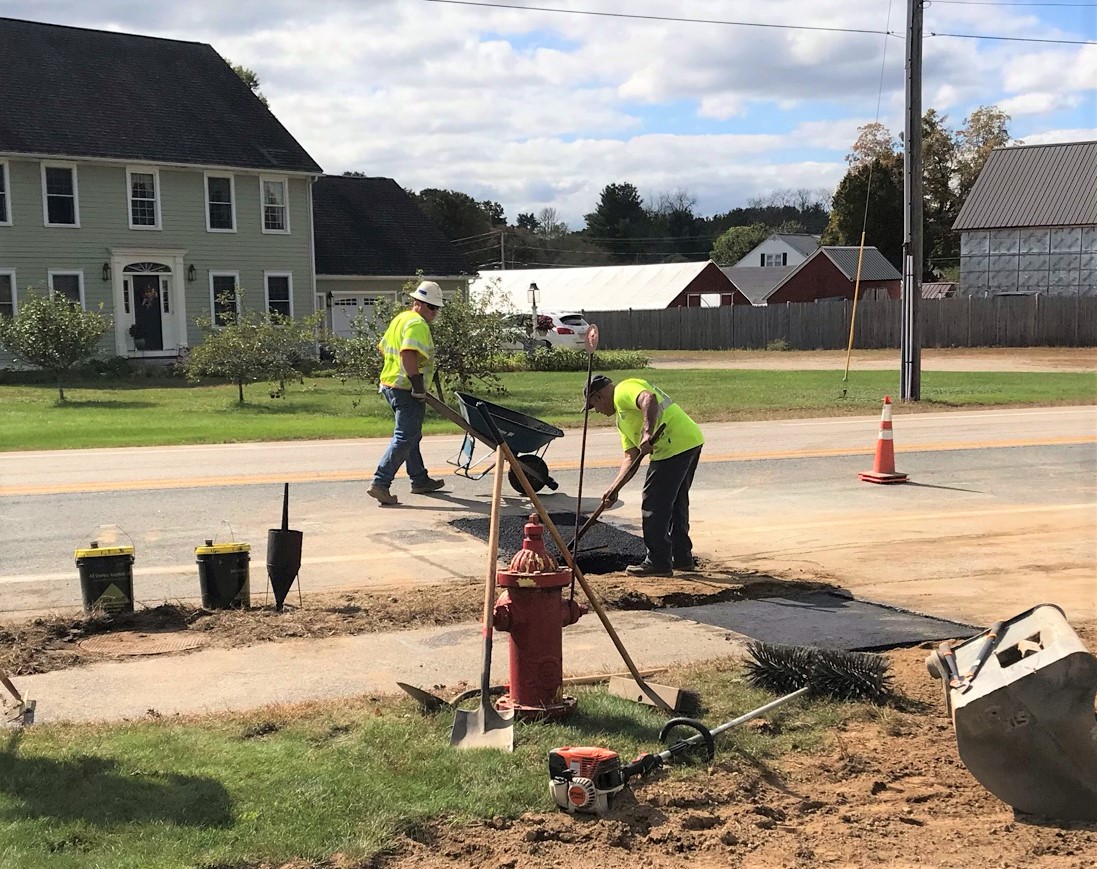
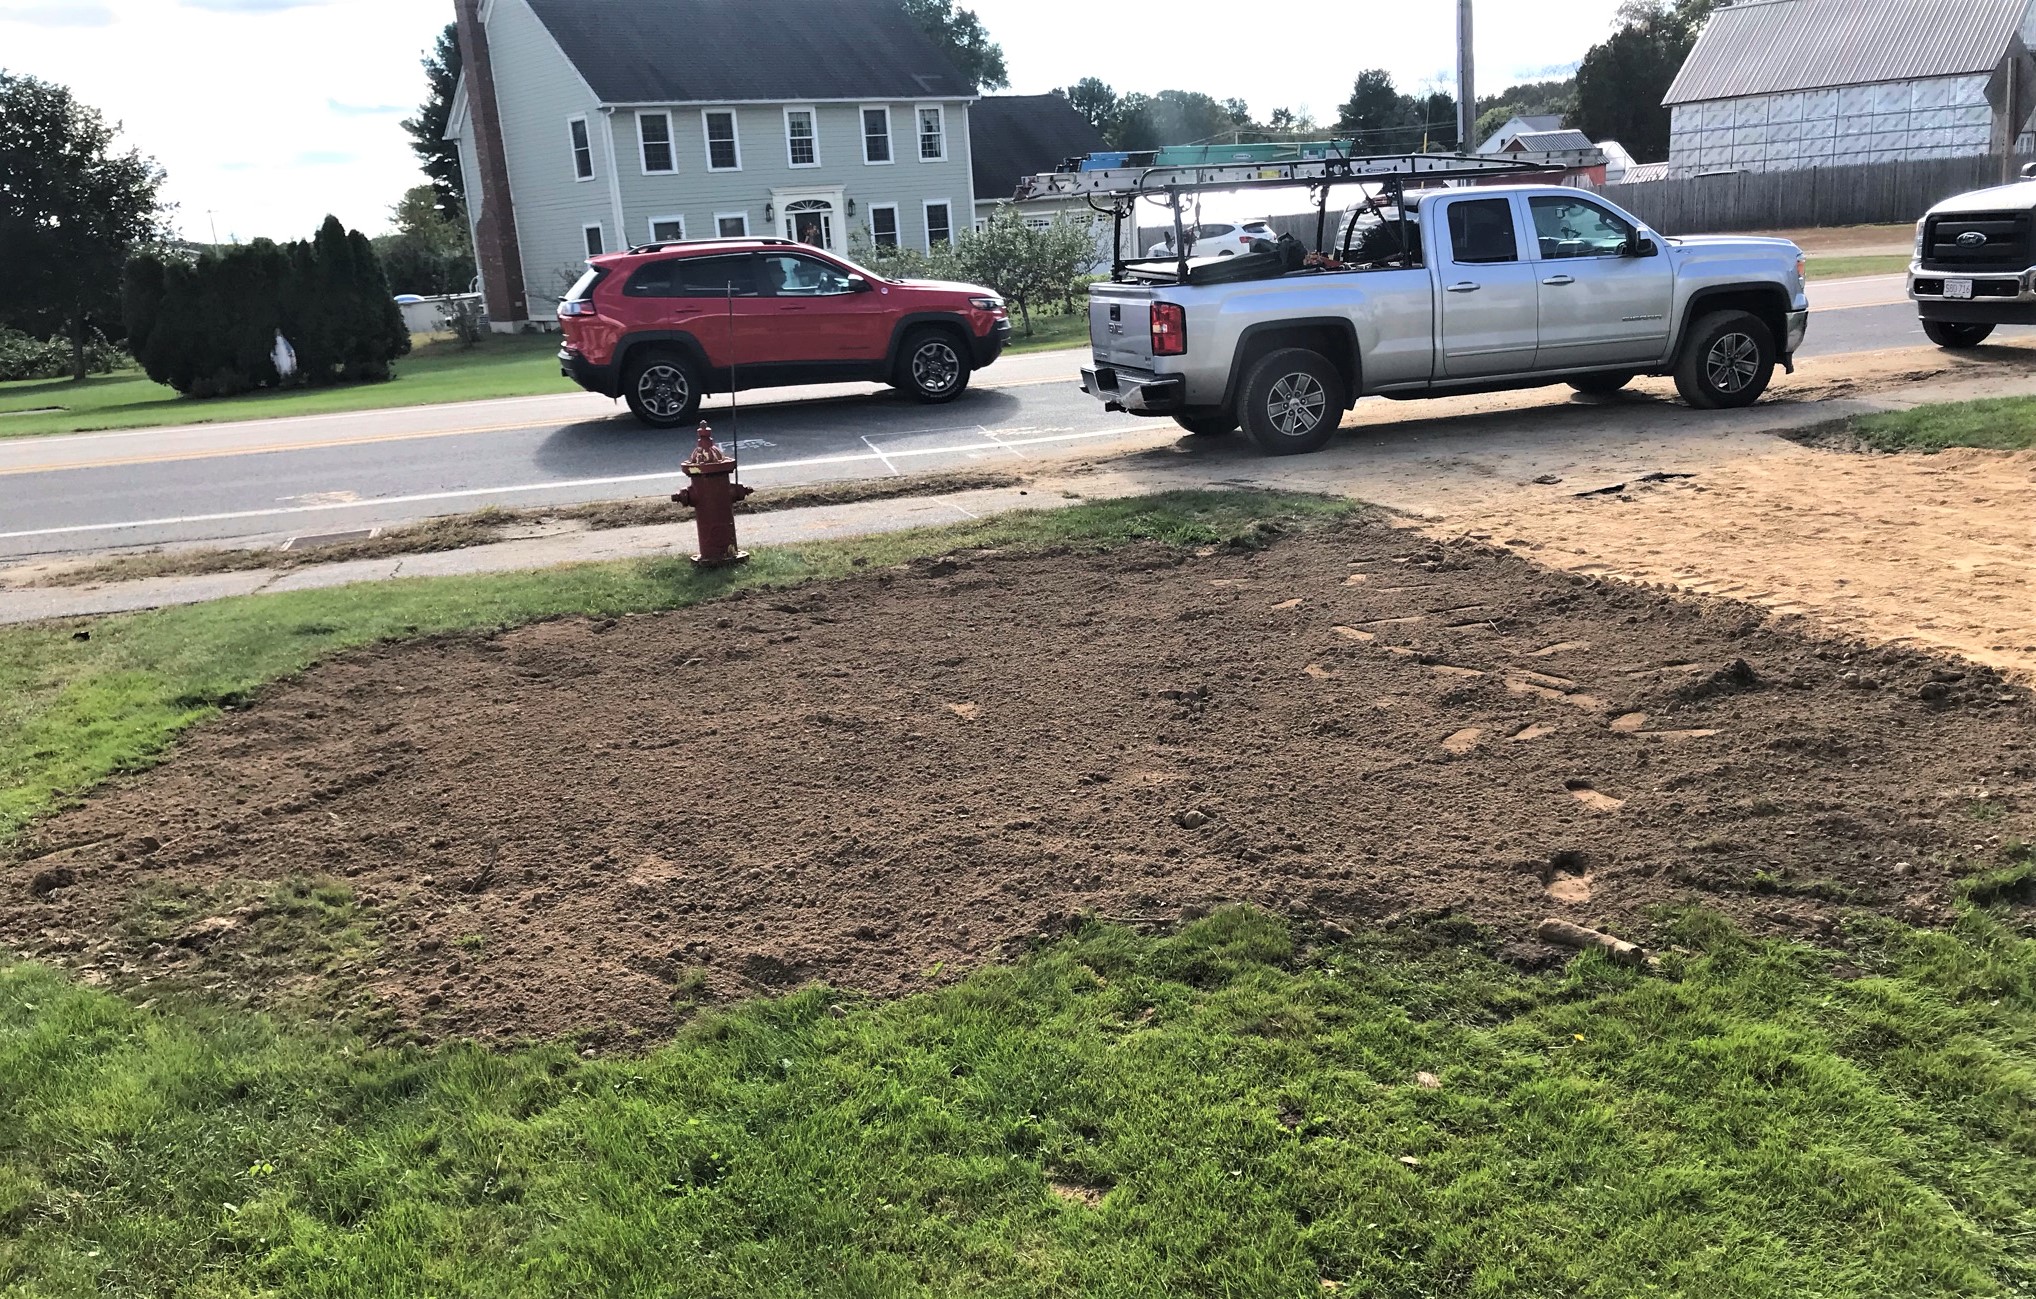
Friday was a very active day, as National Grid came in to excavate and place the gas line. We also had deliveries for the finishing of the garage deck and stairs.
National Grid begins cutting the street and sidewalk to excavate for the new gas line.Cut that asphalt!There’s a gas main here somewhere……found it!
The line went from the street to the back of the garage along the driveway. This will be a second line we will have, and will provide gas for the heating of the garage as well as the future fire pit. Below you’ll see some shots of the trenching, connecting, and the asphalt repair.
At the beginning of all this, Home Depot and Jonny Victor delivered a lot of the materials for the following week’s work – mainly for the garage deck and stairs.
Deck materials for week 13!
As a side note of interest (well I found it cute), I’ll add the following. My daughter works in a hospital as a radiation therapist with cancer patients – and has early hours two weeks a month. I help, as she drops my granddaughter Tabitha off with me at 6 AM (which for a 4 year old is pretty early). I get her breakfast and generally have good quality time with her before I bring her to preschool. While waiting to get dropped off at 8 AM, the following happened – watch my granddaughter here enthralled with her “sparkly pants”. I admit, she makes a good case for them…
Anyways, back to the project! There is still a lot of work to go, but this was a busy week indeed. Hopefully, I’ll be able to share an even more active week on my next update. Thanks for looking and feel free to throw in your two cents (or whatever the equivalent is in your currency) in the comments section.
And I hope you enjoy your fashion choices as much as Tabitha does!
The project continues! Although I was so late with Week 10 that I decided to combine weeks 10 and 11. As you will see from this post – a lot went on from September 19-October 2, 2021. Some of it involved construction, some not – as you will see. I’ll do my level best to make this interesting by including not only some construction photos, some other stuff, to include golf and a bit of hobbies!
There are a lot of pictures here – click on any of them for a bigger view.
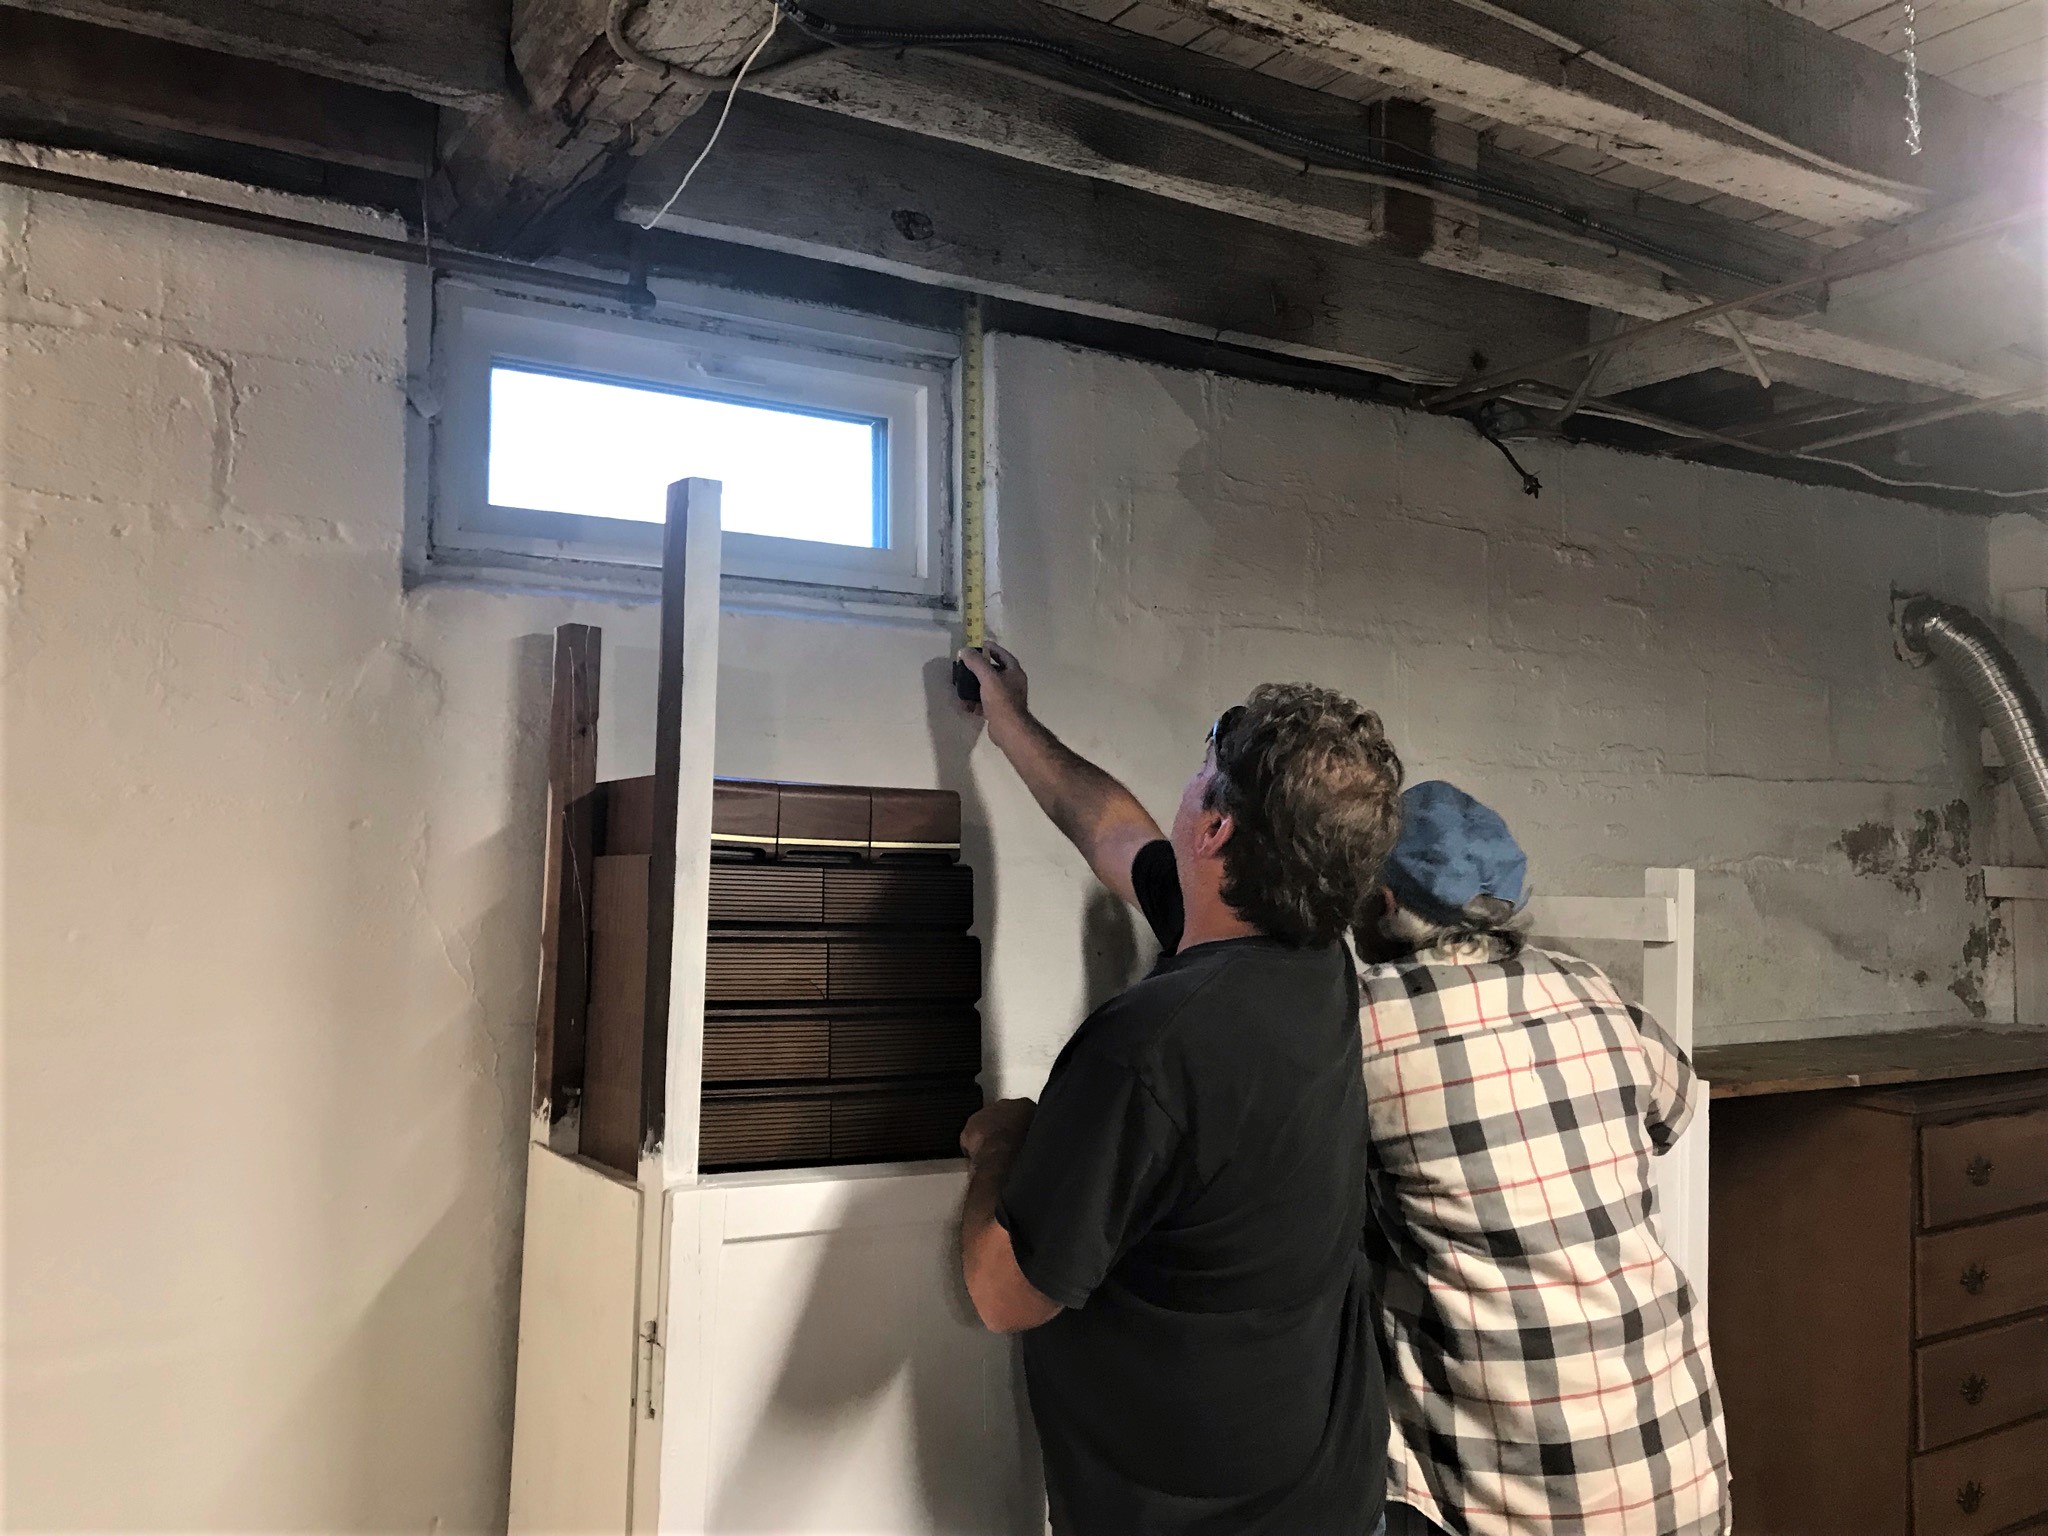
Let’s start with electrical work and some progress around the cellar. Wait, the cellar? Why there? Aren’t you building a new garage and house deck Mark? All valid questions that I am presupposing that you may be asking! So let me attempt clarification.
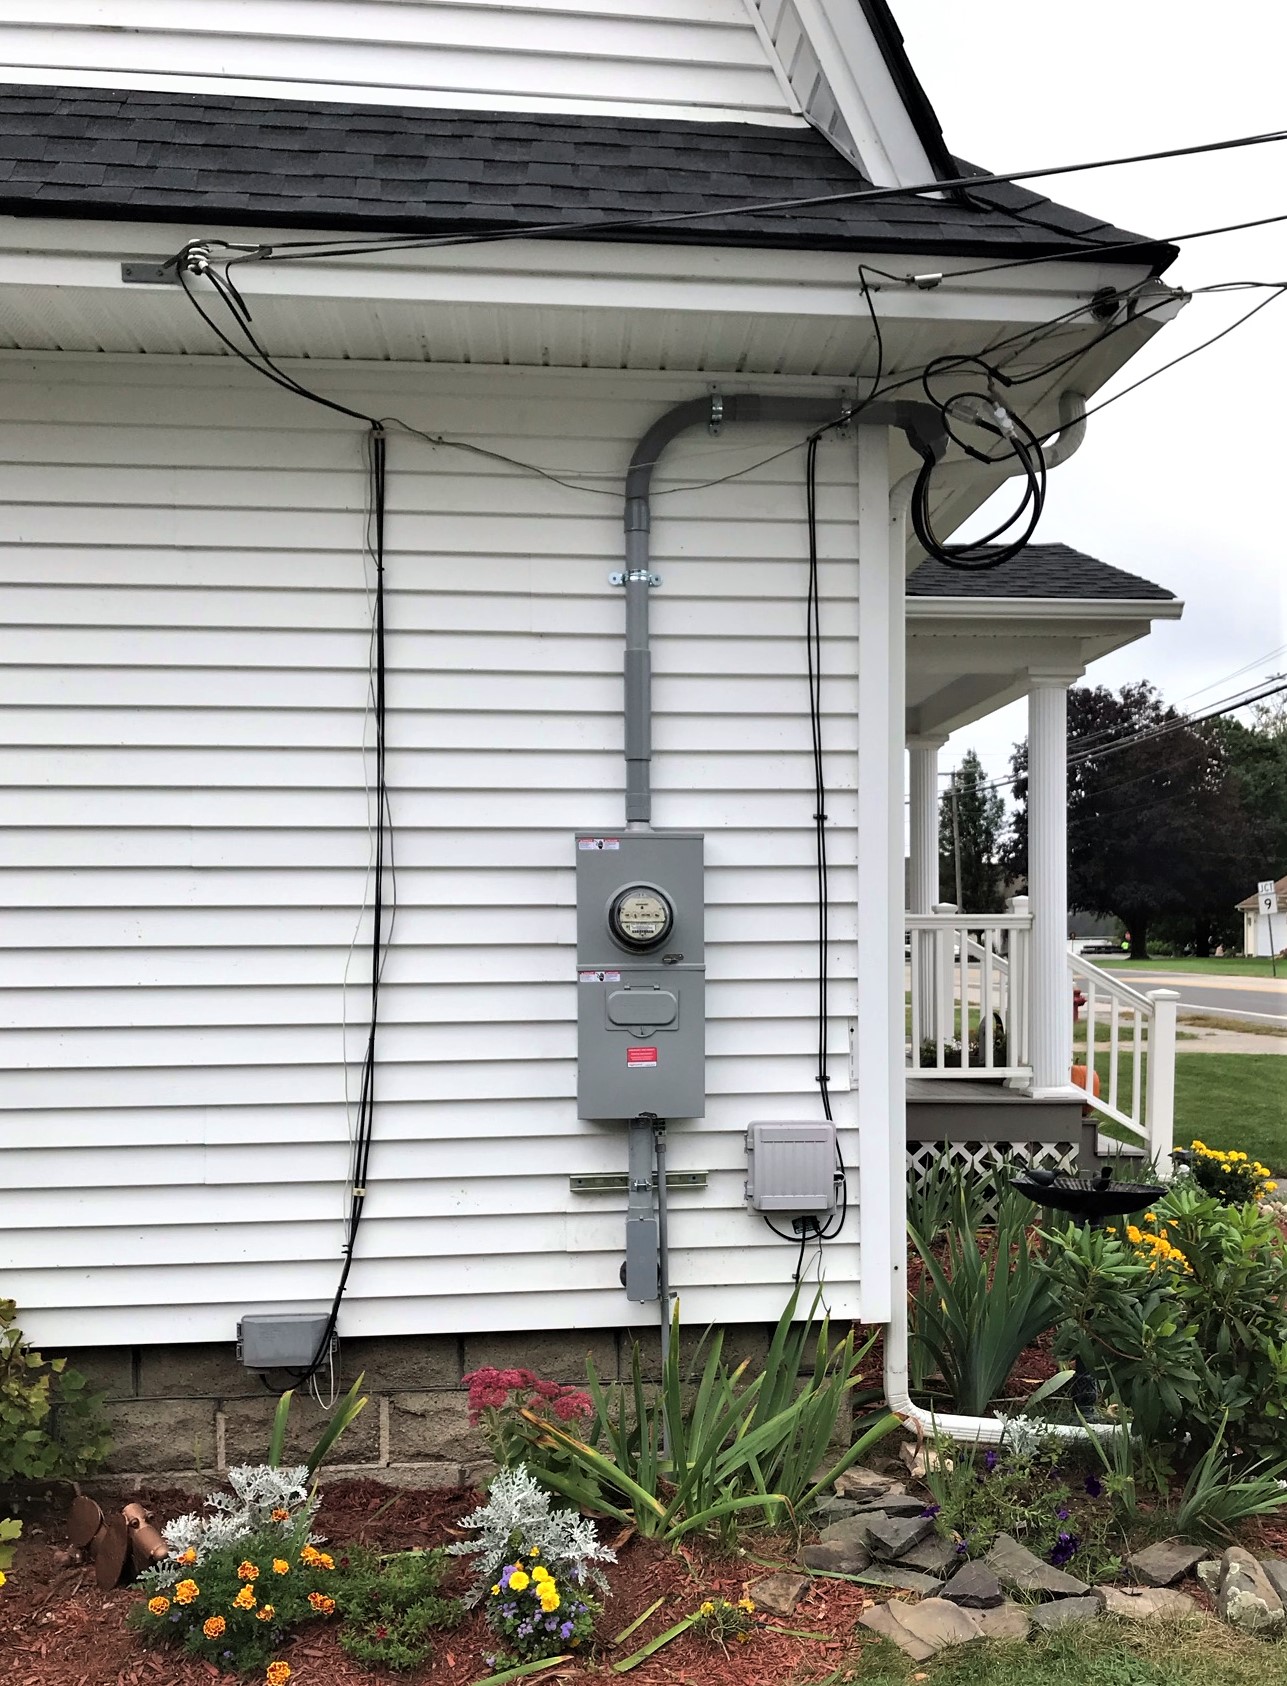
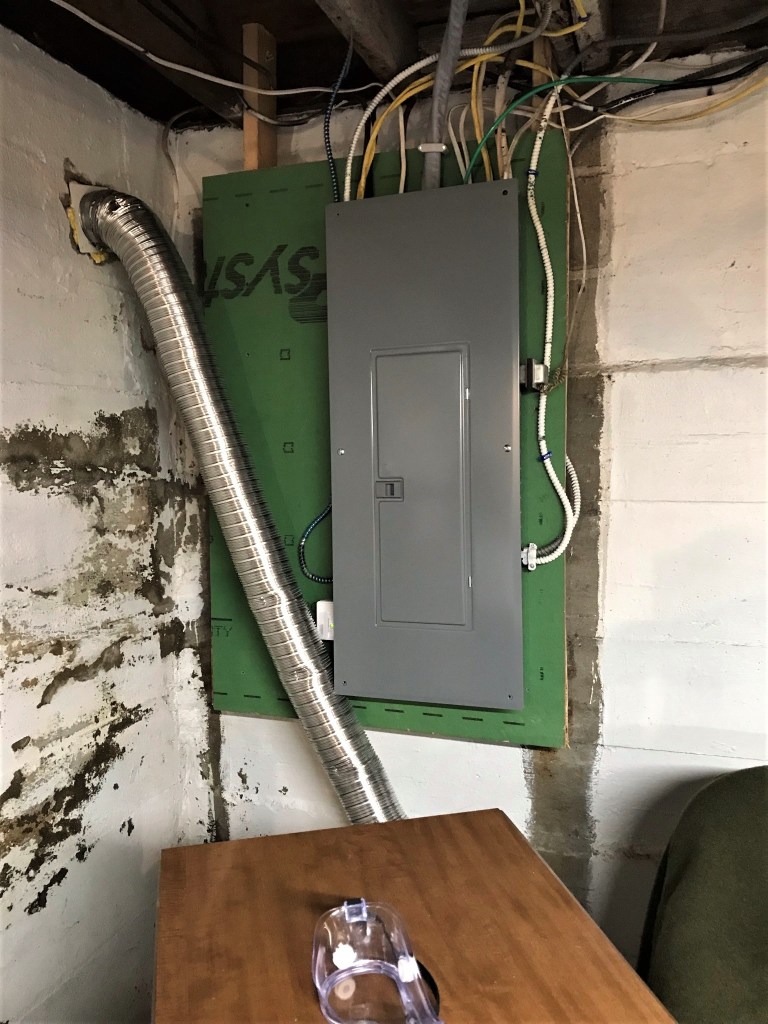
To power the new building, I needed to get the service upgraded from 100 amps to 200 amps. Our electrical service meter and box was in the back of the house over the old (now removed) house deck. Previously, electrical power came from the National Grid pole out front on the street to the house then went along the soffit and into the cellar at the back right-hand corner of the house if you will. The plan was to make this bigger and better by moving the meter and building a new box for it at the front left corner of the house. A new hole had to be drilled for the new power cable, and that needed to be run to a new replacement distribution box in the basement. This work occurred on September 21st.
Here you see he old distribution box mounted on whatever lumber the previous homeowner had available – back in the 50’s? 60’s? – to include a piece of trim! We had a series of shelves built by the previous owner long ago (probably 40+ years) along this wall. We had put an old bureau (left over from my childhood actually) under the shelf planking that was attached to the monstrosity that the distribution box was mounted on. The dryer vent snakes up to the wall as you see.Here you see the electricians (Mike and Paul) trying to determine the sill height to drill for the power cable by using the window as a reference for outside. The actual hole would be far to the left. The other end of the old shelving/cabinet that I referred to above is seen here on the wall under the cassette cases (future yard sale items).
Drilling the new sill access.
Heavy duty cable!
Drilling through the old sill was a bitch. The sill was quite thick – 13″ – and made of solid oak. The hole drilling destroyed two hole saw bits.
The view through the sill access hole from inside. This was 13″ of solid oak. Mike Astrella (electrician) can be seen here peering through the other side.
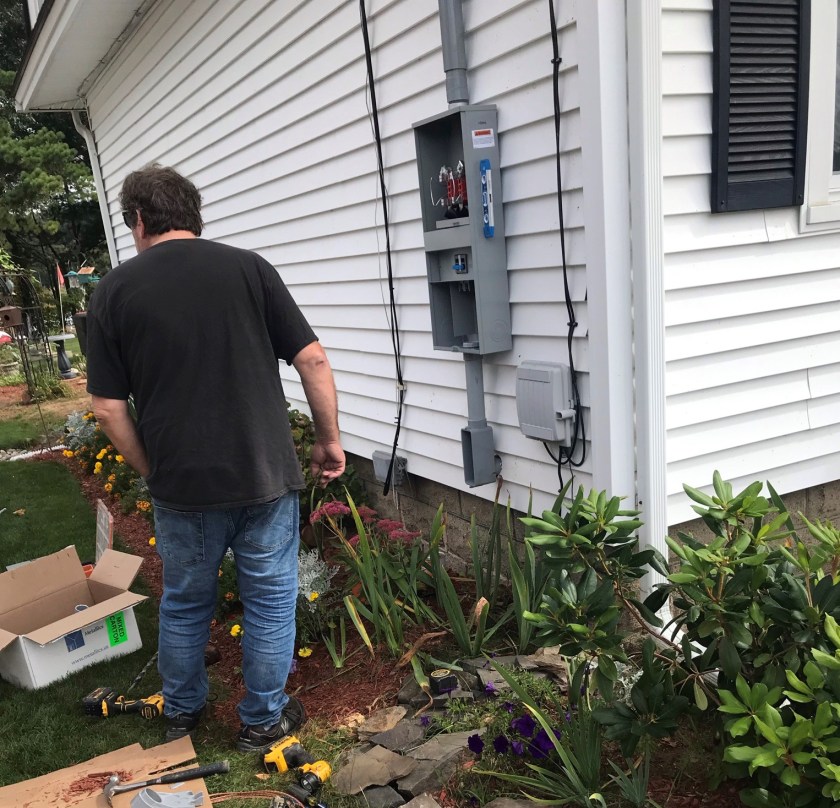
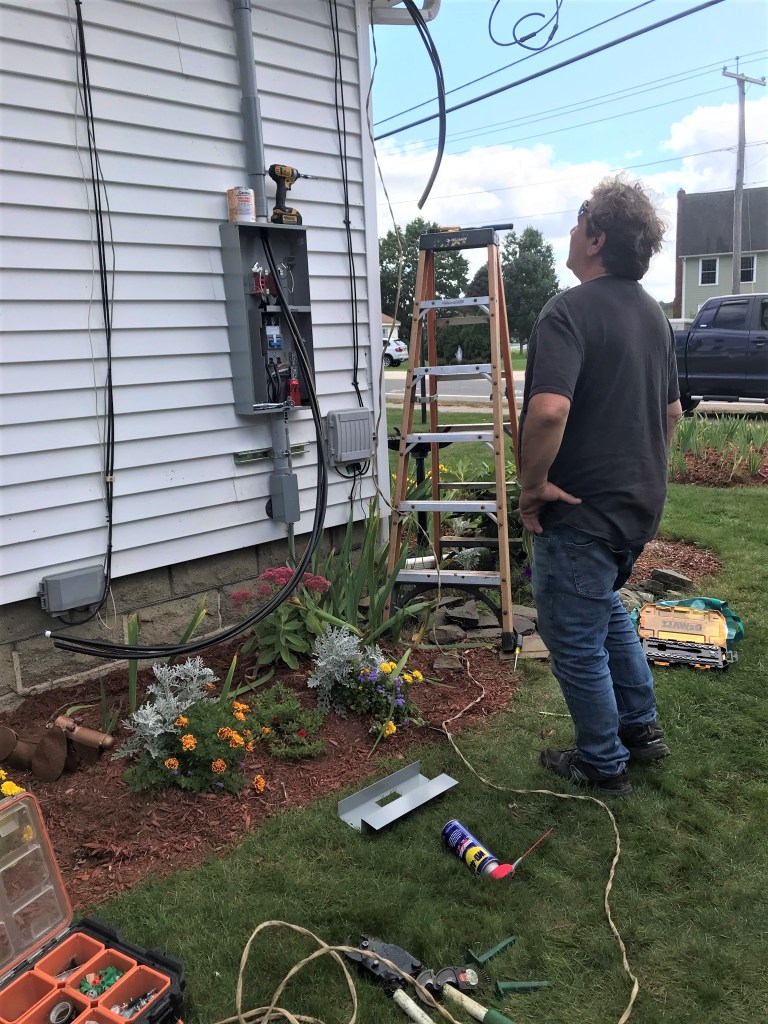
Outside, work went on the new meter box and running the cable and hooking it up to the power grid.
First the box was mounted and secured.
Power cable being pulled through.
Completed. The box on the left is an old Verizon landline box (now removed) and the one on the right is our Spectrum cable line.
Back in the cellar, the old distribution box mounting monstrosity was removed and a new sheet of plywood and some lumber from the garage build was used to build a suitable mount. The new configuration is bigger and we will need to move the dryer to the wall to the left of the distribution box so that the vent hose is not right next to it. But, as we were using the old the shelves I never got around to paint it as you can see – and it looked like hell.
New box.
New distribution box opened.
The inside electrical work . You can see how ugly the flaking paint was.
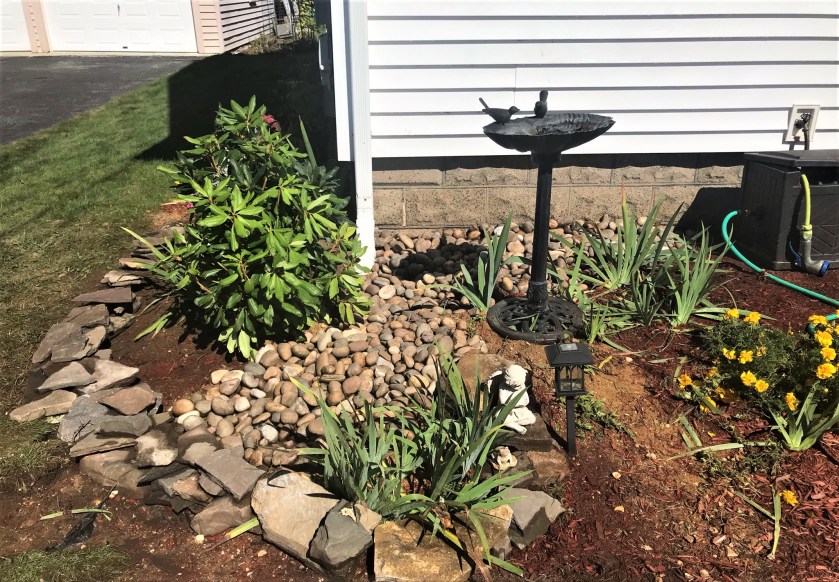
Also, I need to back up a bit. It had been necessary for me to clear a lane along the wall for the electricians to run the power cable prior to their starting work. After I did that, I got a good chance to look at the wall and the crappy homemade shelving/cabinet. I noticed a lot of old paint flaking on the wall near the dryer vent and some puckering where I had painted the corner in the front left of the house. The puckering was due to efflorescence, not water leaking, even with the excessive rain we have had this summer. An old dry well that I had built over a decade ago in the front left corner of the house was no longer doing its job, so the rain water outside the basement wall was not properly draining – leading to the efflorescence bubbling up behind the paint. We decided that the shelving cabinet needed to go and the wall repainted.
Before I did that, I rebuilt the drywell. When I originally built it, I had dug down about 3 feet and hit sand, so I had then assumed that the soil was free-draining. When I dug this time, I went a bit deeper, and to my surprise I found that there was yet another soil layer under the sand. This one was a loamy clay – that does not drain well. So, I dug down another 3 feet and backfilled it all with sand from the excavations in the backyard. I replaced the downspout extensions and doubled the length. The we covered the area with a filter fabric and then covered that with river stones.
Dry well excavation (would have been a good infantry fighting position)
Repaired dry well.
Dry well repair
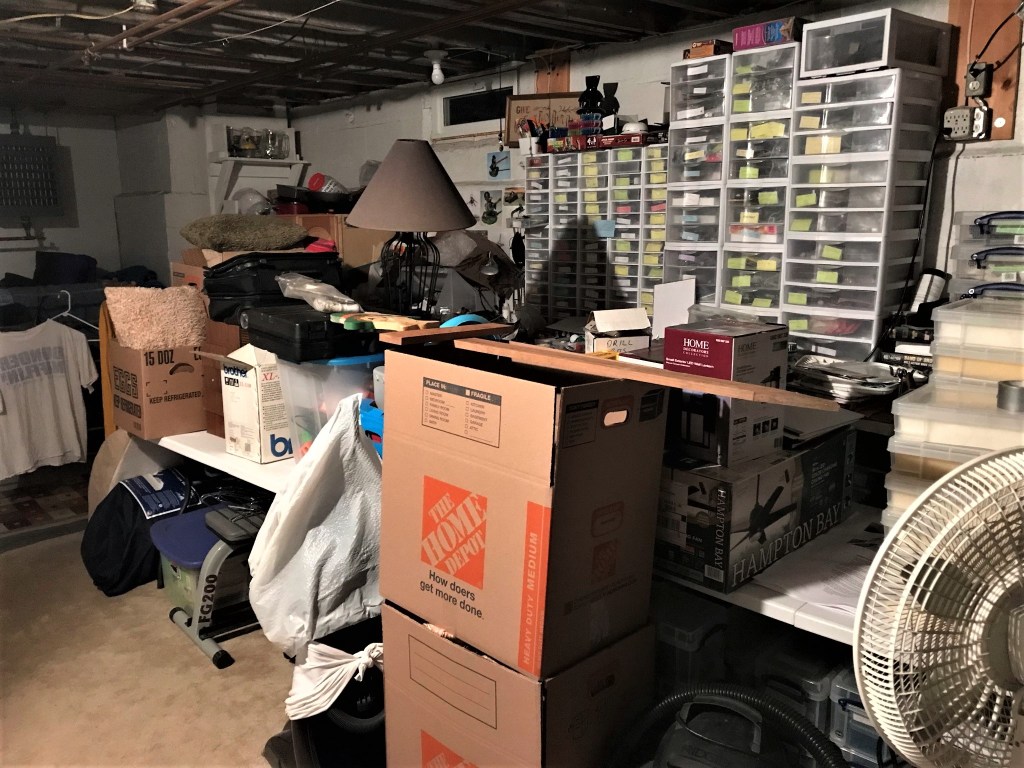
I then spent the time to take down the shelving/cabinet with my wife. She was able to recycle the doors as shelving in another section of the cellar. I scraped off any flaking paint and exposing any efflorescence. Then, I used a mildly acidic product, Drylok Etch, across the wall to clean and prep for painting with bright white Drylok Extreme (both from Home Depot). This took a while, but came out well. We are taking the opportunity to clear out some stuff and have a yard sale this weekend to get some new homes for some good stuff we don’t need anymore. Plus, I can’t do any hobbies as you can see below!
Wall done
Opposite angle on wall
Yard sale needed to get to my hobby bench!
Back in the garage, the septic line was stubbed up in the floor with a cleanout.
A very exciting septic line beginning…
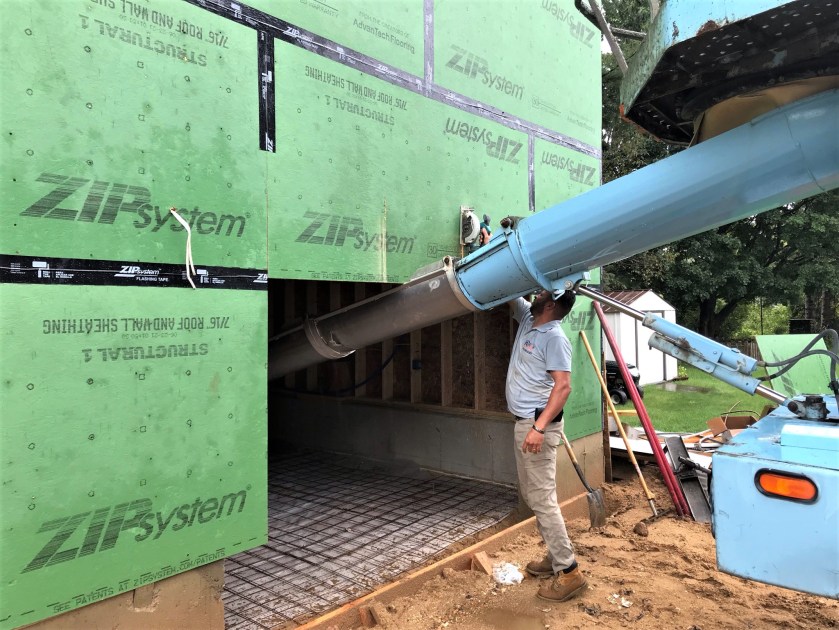
On the 24th, it was time to place the concrete floor in the garage. I say “place” and not “pour” because that was drilled into me in the US Army Corps of Engineers as the appropriate terminology – and that stuck.
Prepping the garage door entrance for concrete.
Steel!
The crew arrived early and was ready to go.
Installing the vapor barrier (ok a sheet of plastic over the compacted sand).
The plastic is secured, and the steel is wired together.
Placing steel on vapor barrier.…the concrete truck chute cannot extend far enough into the garage.
Evandro cuts a slot.
And on the other side..
…et voila, access!
Getting access for the concrete truck.
This was no problem as this plywood will be removed eventually when the door is installed.
Concrete truck delivering.
Working the concrete.
Then the sky opened up…
…necessitating a temporary rain cover.
Final finishing.
Concrete work.
Because of the many rain days, Andy Cormier arranged to get help to finish off the septic line installation.
Finding the tank!
Line ready for backfill
View towards the tank.
Septic line work.
Ready for backfill.
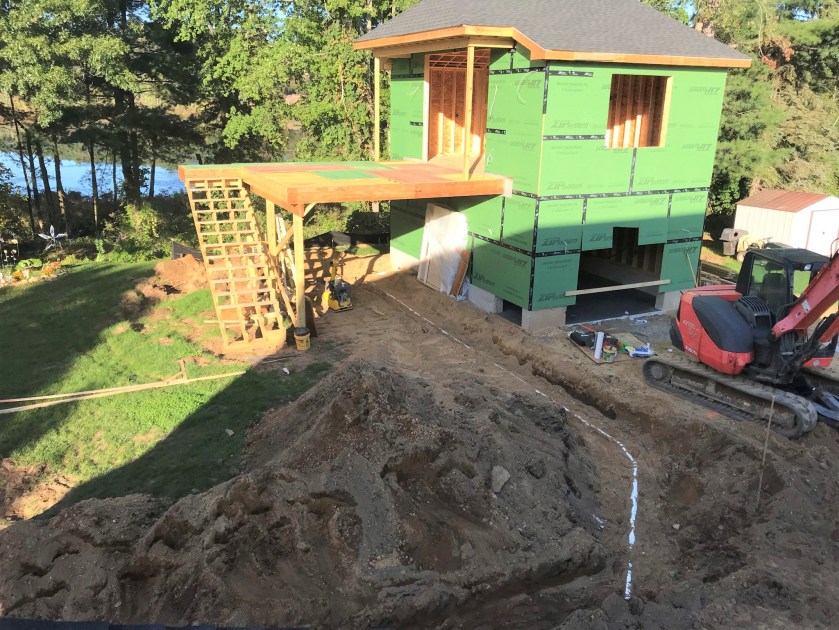
Having the septic line in the ground and attached to the septic tank allowed for its backfilling as well as work to proceed on the driveway excavation.
On Monday, September 27th, Lynn and I participated in the annual West Point Society of New England’s annual charity golf tournament, along with our friends, Lisa and Jim Kularski. This year, the beneficiary was Homes for our Troops. It was a nice break while construction work continued.
Me, Lynn, Lisa, and Jim. The sign is a hole sponsorship I did for the charity event.
When we returned home, there was a lot of dirt moved around. It turned out that the soil under the driveway had the same layering issue that I found in my dry well excavation – so a lot had to go, and be replaced with clean fill.
Excavation showing the soil cross sectionBetter view of the soil layers.
Most of the septic line was backfilled.
Of course, Tuesday the 28th brought yet more downpouring rain. Therefore, earthwork and any other work could not happen. We only got a delivery of deck material for the house deck.
Deck lumber delivery.
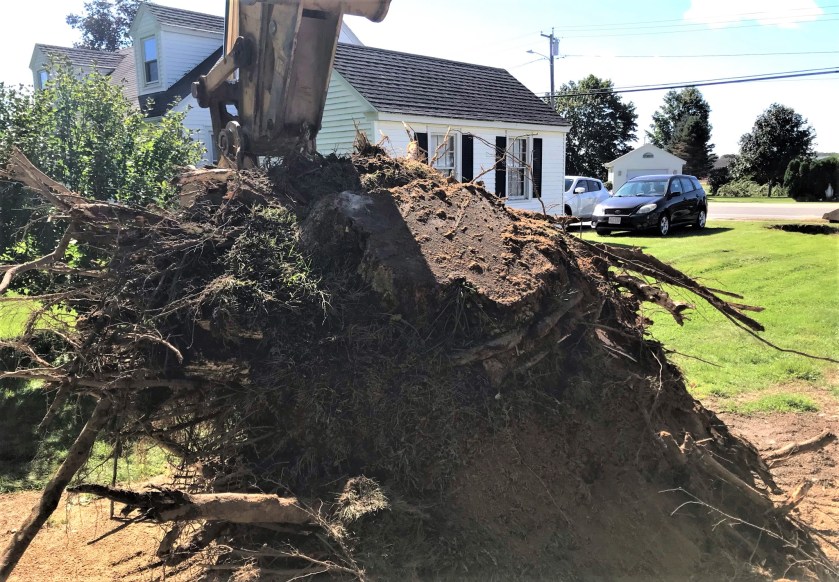
On Wednesday the 29th, the skies cleared and work could proceed. The driveway was excavated and brought to grade. Old asphalt, and interfering roots and stumps (including a 4-5 ton maple tree stump) were removed in this process.
Asphalt removal
Massive stump!
This was a huge stump with a lot of roots under the old driveway. Andy had to bring in a bigger machine to take care of it.
At the end of the day, the driveway was filled, and all the holes were filled in.
Driveway base in.Top view.No more stump.
The next work skipped a day (rain), and that involved the framing of the replacement house deck. This was October 1st. Jonny also got ready to install the rain gutter system for the garage deck.
Jonny prepping for the under-deck rain system installation.
House deck framing begins.
Deck framing on October 1st.
To make up lost time to rain, work continued on the deck on Saturday the 2nd. This weekend I had not one but two competitive golf tournaments. The first was on Saturday which was the Finals of the Tour of the Brookfields. If you are on Facebook, the group link is here. I am a member of the committee. My team was in the lowest division, but we did not come in the top three. Still, congrats to the winners!
Better luck next year.
After the tournament, I returned to see progress on the house deck.
Saturday progressDifferent angle view.
So, a lot of progress was made over the two weeks!
(Lastly, I previously mentioned a couple things that I need to circle back to – the first being the Sunday Founder’s tournament at Quail Hollow Golf and Country Club (where I am a member). This was an individual event and I played better, but not well enough to be the winner (only one male and one female winner out of dozens of players so no big deal). However, back during the annual club championship (a two-day 36-hole tournament of individual medal play from the back tees) on July 31-August 1st – I was able to play my best golf of the year (98/88 for a net 2 over par for the event) and win the D flight against 11 others. So Sunday, I got my reward.
In my office!
What you see here left to right is a comic statue that belonged to my grandfather Marcus (a WWII vet who gave me a love of golf), my unlucky conquistador “Franco”, my trophy, and as it’s October, my Halloween mini-diorama with Ral Partha 25mm figures of classic monsters from the 30’s Universal Studios movies.
Ah, but I digress – week 12 is well underway and I will have much more to share. I hope that you enjoyed this and thanks for looking!