For those of you who are modelers and or gamers, you know the feelings about your hobby work – to do a good job recreating a scene, a vehicle, terrain, or just a figure such that others enjoy it. I put this blog in the same category. I understand that for better or for worse, I am putting myself out there and my creativity to be judged up or down.
This blog post will be a bit different in that its admittedly somewhat self-indulgent. I am unsure as to how it will be received – but I hope that you enjoy it and that you can appreciate what this was for me and why I was doing this last weekend.
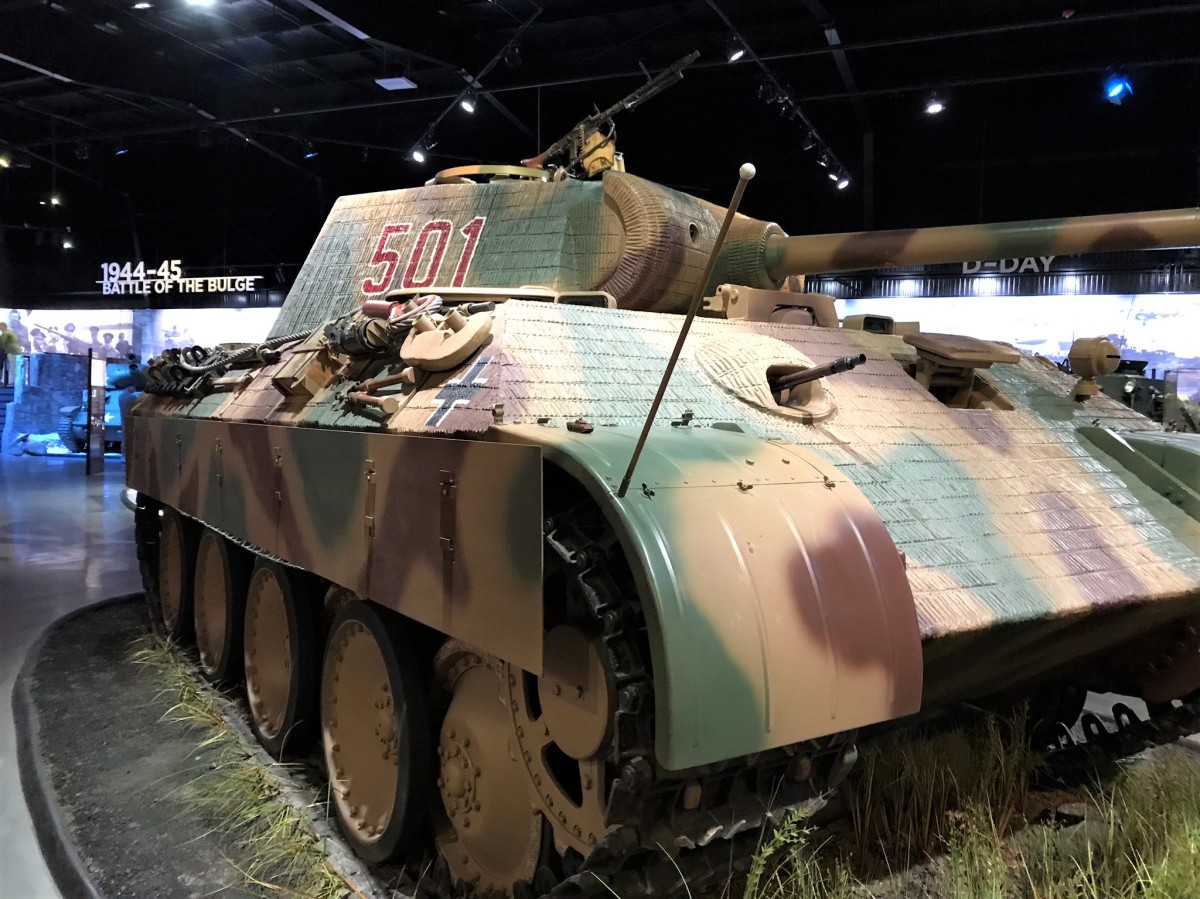
Last Saturday, the Historical Gaming Club of Uxbridge, MA, sponsored a road trip to the American Heritage Museum in Hudson, MA. I have posted about this museum last year (you can read about it here). It’s really great. I unfortunately also signed up for a golf tournament an hour away and was disappointed in my planning. I was however able to leave the tournament (my team lost by one stroke) after I was done and drive to meet the others (about 10 of us) at the museum. And I brought two “friends”…
Followers of this blog know that I have been somewhat tank-heavy in hobby activities and gaming since last fall. I thought that it would be cool to have the real Panther at the museum meet my 15mm/1:100 scale Panther. And as my late grandfather Marcus C. Delaney drove an M24 Chaffee light tank in WWII, I wanted to hook up one of my M24’s with a real one too.
I just thought it would be a cool thing to do – and to give my models a connection to the real deal. Of course, you can be the judge.
First stop was the Panther.
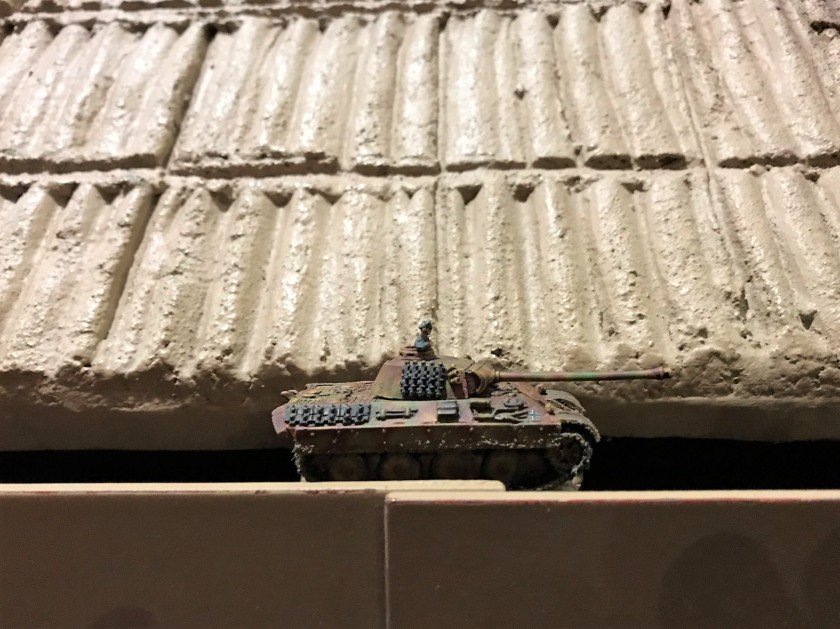
A real Panther and my model – can you see it?There it is!Impishly placing my Panther on the right fender.Both Panthers are now aiming at a T-34…but I don’t think mine has the needed gun velocity!
Then I moved over to the M24 Chaffee.
Where is my model?There it is!On the M24 frontal armor.Trust me, we are all smiling. Even my grandfather from above.
It felt good to do this, and I’m glad I did. Now when these are in a game, I can say that they have been with the real thing, and in actual contact.
Would you do this? Let me know in the comments section, and thanks for looking!
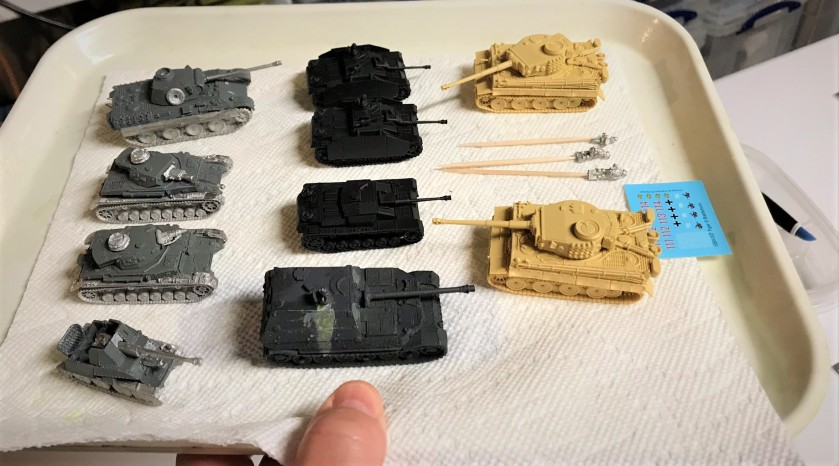
My plastic kits – all bought from The Plastic Soldier Company.
The tanks were all single models, while the PSC kit allowed you to build either SdKfz 231, 232, 233, or 263 8-rad scout cars. While I liked the idea of having a 232 or 263 with their iconic roof antennae, I decided not to build them as such for a couple of reasons. First, the spindly plastic antennae did not look survivable as tabletop figures. Secondly, if I built the antennae, the turrets would not work. In the end, I built three SdKfz 231 (with the same 20mm autocannon as the Panzer II) and two turretless and open-topped SdKfz 233 (with the same 75mm gun as the Panzer IVD). Two SdKfz 231’s would be for North Africa, with the remaining 231 and both 233’s being built for Normandy. These scout cars, and the other tanks and tank destroyers here all could reasonably be used on either the Western or Eastern Fronts. I will cover each type in order, and then some “eye candy “shots of the finished models. I will also share a listing of the paints and other materials I used in the projects for those interested.
SdKfz 231’s and SdKfz 233’s (8-rad scout cars)
These are all 8-wheeled scout cars, and I plan on using them to add some recon aspects to my games. They are very light, and as I was concerned that they would be knocked around very easily. I added Daisy BB-gun BB’s to the 231’s, but the 233’s were open topped and that was not an option. The 233’s did have crew that needed to be painted and mounted.
SdKfz 231 showing my use of BB’s as ballast.The group of 5, assembled, less crews for the 233’s.One of the crews. I drilled, ahem, their seat areas, with a pin vise, and mounted them on toothpicks for ease of painting. I removed most of the toothpick tips before mounting the crewmen and painted over their posteriors. You can’t see them, but forever these will have a stick up their asses…
233 mid-project
231 mid project
As you see above, my Iwata Micron-B was a wonderful tool to achieve the three-tone camouflage patterns. I applied decals, weathered the vehicles, and varnished them. The sun finally came out so I took a couple of shots on the deck.
Completed SdKfz 233 shot outside.All three for Normandy catching some rays.
For the North Africa/DAK 231 models, I just washed and dry-brushed them to achieve a weathered look. I did not give the DAK 233’s because I did not want to paint another 15mm crew! These will work just fine.
Das Afrika Korps now has reconnaissance.
Jagdpanther
The lines on this tank destroyer are practically beautiful. Though if I was in a Sherman seeing one, my opinion would certainly be different! Only 415 of these were ever built.
The Jagdpanther model was the easiest to assemble of the three. The boxes say you don’t need glue, but I recommend using modeling cement for sure. It certainly helps to close gaps. I also weighted the tanks and tank destroyers down with BB’s in their hulls.
Assembled JagdpantherMid-project.Before final weathering and varnish was applied.
Jagdtiger
This monster was quite impractical – yet one tough AFV. It weighed nearly 72 tons, and had a number of mechanical challenges. However, its 128 mm gun was more than enough to dispatch any other vehicle on the planet. Between 70 and 88 were built – so they were rare.
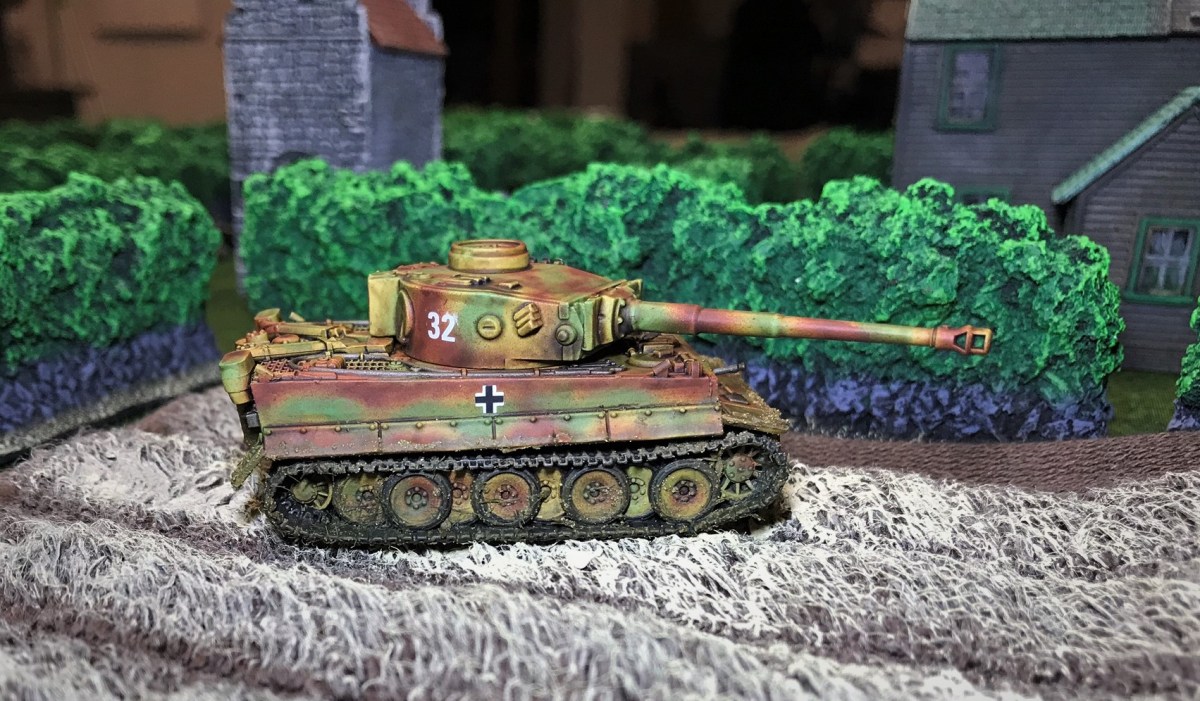
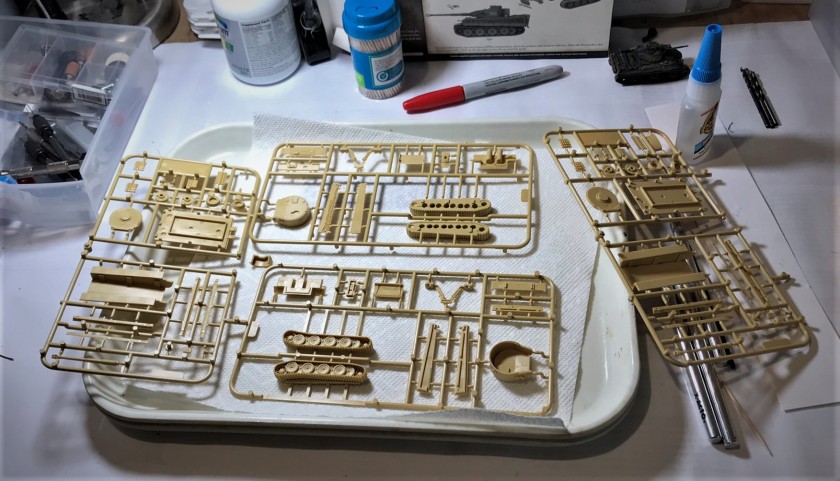
If the Tiger was iconic, the second generation version Tiger II is a step up even higher. Only 492 of these 68-ton behemoths were ever built, but they first saw action in Normandy. This one has the Henschel turret (a few rarities had a Porsche turret). Early Tiger II versions also had reliability issues, but these improved quickly.
Assembled model of the Tiger II.After initial camouflage applied. Note the droopy bow machine gun. I used liquid decal film to “firm” it up.
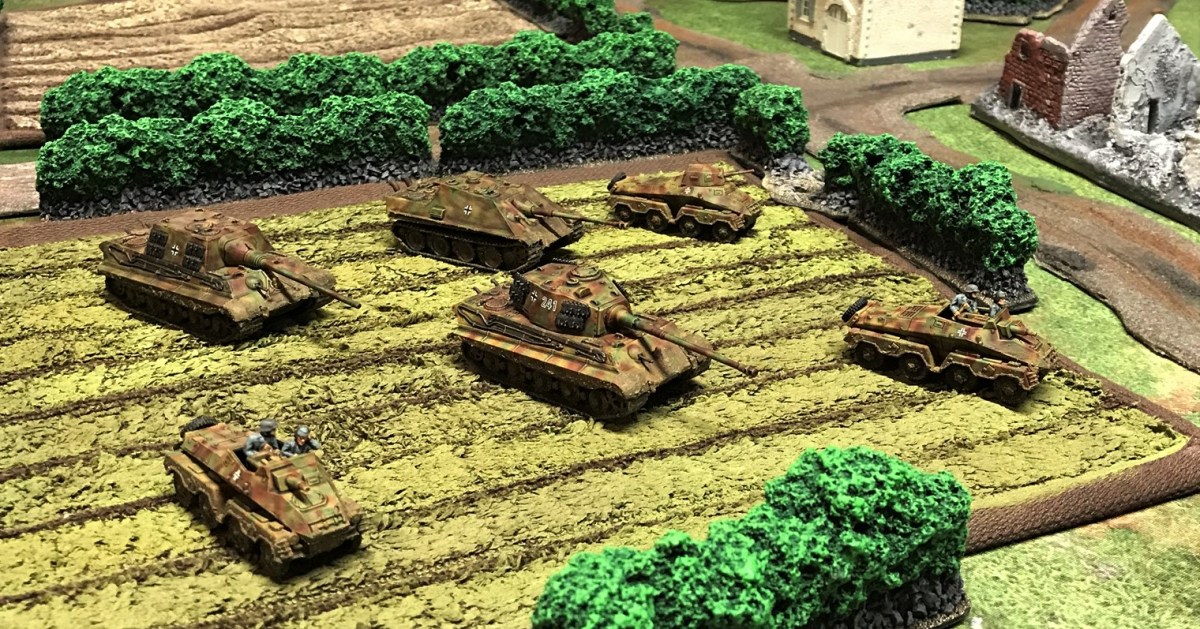
Of course, these are all part of my planned Normandy breakout scenario – so I will now share some eye candy of these German models on that planned tabletop battlefield.
Eye Candy
I thought I’d first share this – this is my painting area with the images I used to guide my painting. The vehicles are below.
Here is the battlefield and a first play test of the scenario that I ran at the Historical Gaming Club of Uxbridge, MA. The Americans can be seen here.
First play test of the scenario. Note the cards on the table – those represent possible German vehicle positions – which the Americans and British had to recon as they attempted their breakout through hedgerow country. I appreciate the gamers’ feedback here – it was helpful, and the scenario was close – it went 91-89 in favor of the Germans. You can learn about the club here.
I modified the previous tabletop, and my current set up is below.
Allies move on from the left.
Allies move on from this side.
So now some shots of the vehicles on the new tabletop set up!
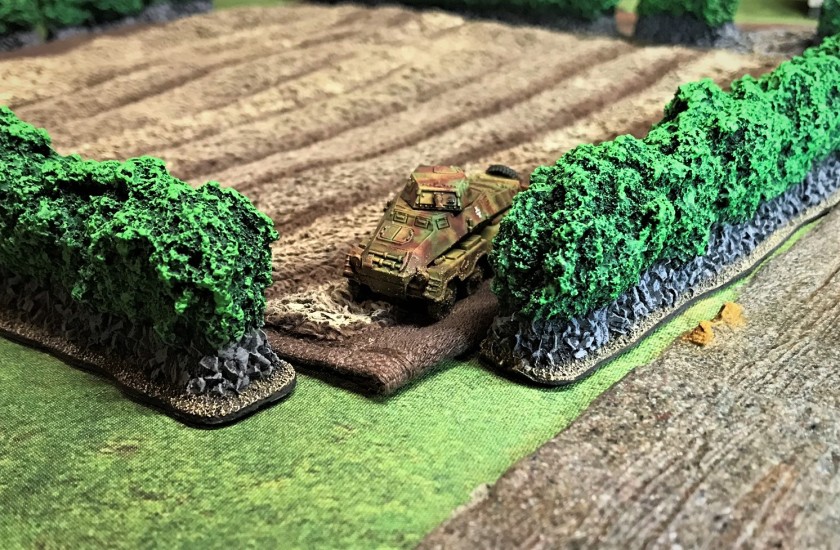
An SdKfz 231 recons.Right side of SdKfz 231.Two SdKfz 233’s recon past a destroyed building.Jagdpanther advances down a French road.
Right side of the Jagdtiger at a Normandy crossroads.
Left side of the Jagdtiger as it crosses a field.Rear shot of the Jagdtiger. For all of these I tried Citadel’s “Typhus Corrosion” paint on the mufflers. It’s a bit shiny in this shot due to lighting, but I think it worked well.Right side of my Tiger II by a hedgerow.Not great lighting – the turret is not “shiny” – but this shot shows the Tiger II from the rear.Moving out! Schnell! (sustained road speed was 24 mph!)Nice front shot of the Tiger II in a field showing the weathering/mud. Also, the machine gun is “up” and no longer droopy.The best shot I have of the Tiger II.
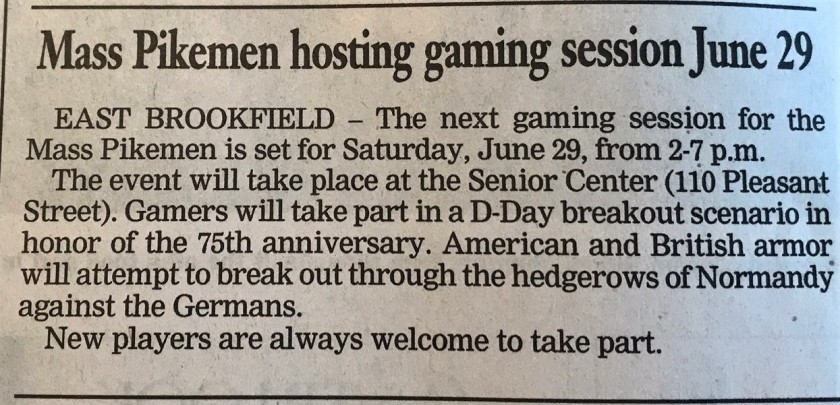
If you want to get in on the action, here’s our announcement for our next gaming session on June 29th. Or visit our Facebook page (and join if you’d like here).
Thanks for looking! Always appreciate your feedback in the comments section!
PAINTS, INKS, GLAZES, SHADES, WASHES, PIGMENTS, FLOCKING, GLUES AND MORE USED ON THESE VEHICLES:
Gorilla Glue
Testors Plastic Cement
Daisy BB-Gun BB’s
E6000 epoxy
Aleene’s poster tack
1/8″ rare earth neodymium magnets
Vallejo “Flow Improver”
Vallejo “Airbrush Thinner”
Vallejo “Surface Primer – Black”
Testors “Universal Acrylic Thinner”
Battlefront “European Skin”
Battlefront “Skin Shade” (wash)
Vallejo Game Air “Moon Yellow”
Vallejo Model Air “Bright Brass”
Battlefront”Black”
Vallejo Mecha Color “Grey Green”
Vallejo “Black Grey”
Vallejo “Neutral Grey”
Battlefront “Oxide Red”
DecoArt “White Pearl”
Army Painter “Military Shader” (wash)
Vallejo Model Air “Dark Yellow”
Vallejo Model Air “US Olive Drab”
Vallejo Model Air “German Red Brown”
Battlefront “Dark Gunmetal”
Vallejo Model Air “Rust (71.080)”
Microscale Liquid Decal Film
Vallejo Model Air “Wood”
Citadel “Typhus Corrosion”
Vallejo Mecha Weathering “Oil Stains”
Appropriate decals from Battlefront
Appropriate decals from Armorcast
Microscale Micro-Set
Microscale Micro-Sol
Vallejo Mecha Varnish “Matt Varnish”
P3 “Bootstrap Leather”
Vallejo Game Air “Black”
Army Painter “Mid-Brown” (wash – desert models only)
The 10th running of the HUZZAH! wargaming convention was held last month from May 17th-19th in Portland, Maine. It was ably run by the Maine Historical Wargamers Association. There were a lot of games, including some run by friends from both the Maryland -based H.A.W.K.’s (Harford Area Weekly Kriegspielers) and the Historical Gaming Club of Uxbridge (Massachusetts). Several members of the Mass Pikemen were also in attendance. I missed the sign up to run a game, but I was nevertheless happy to make the trek to Maine, attend and play.
As I am catching up on my blogging, and as I did not get a chance to take many pictures of games that I was not involved in, this post will focus on the five games that I did participate in at the convention. It will hopefully give a flavor of the games, and my experience – however slim compared with all the events that were run there.
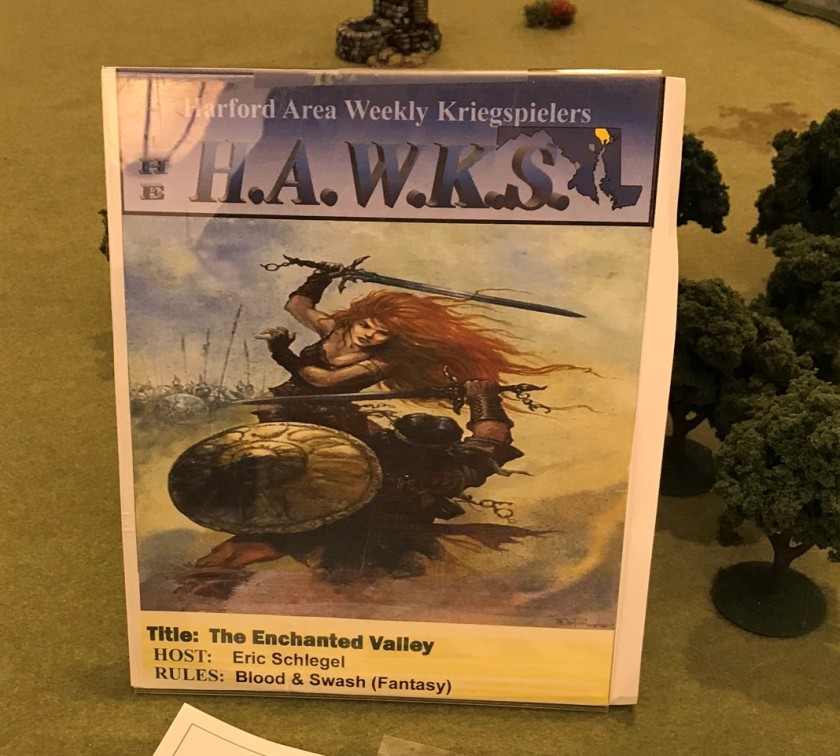
Game 1 – “The Enchanted Valley; Rules – Blood & Swash/Thunder & Plunder
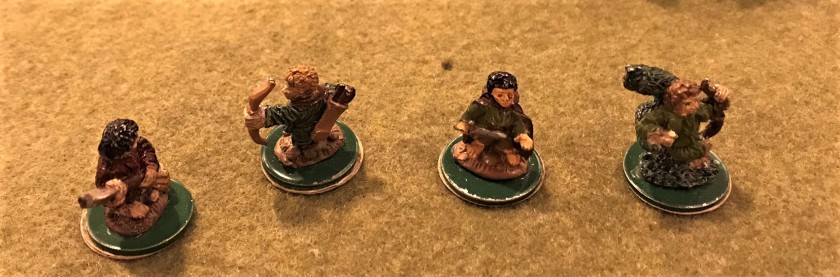
The first game was run by Eric Schlegel from the H.A.W.K.’s. The scenario was “The Enchanted Valley” – a fantasy game in which you had a small squad, and you had to battle GM-run bad guys for treasure and points. In my case, I had a squad of halflings (hobbits), and the figures were old Grenadier ones from the 1980’s. I spent the game battling giant armed frogs and goblins, while other players were similarly battling other creatures. The rules were Blood & Swash/Thunder & Plunder written by two friends of mine, Buck Surdu and Chris Palmer, and were the basis for their later set of rules – G.A.S.L.I.G.H.T. You can read about these and other rules here (just scroll down).
Eric and Vickie await the start of the gameMy squad – these are Grenadier halflings from the boxed set Halflings – which was issued in 1980 by Grenadier. You can read about them here.My squad stats.Nice view of the board and some of the players, including Bruce Carson on the left and another H.A.W.K. Duncan Adams on the right.The frogs I battled.My hobbit leader dispatched a goblin leader and a few giant ticks.
I fared OK, but did not come out on top. I think that there were close to 8 or 9 players. I think that Eric and Vickie ran the game well and it was quite fun.
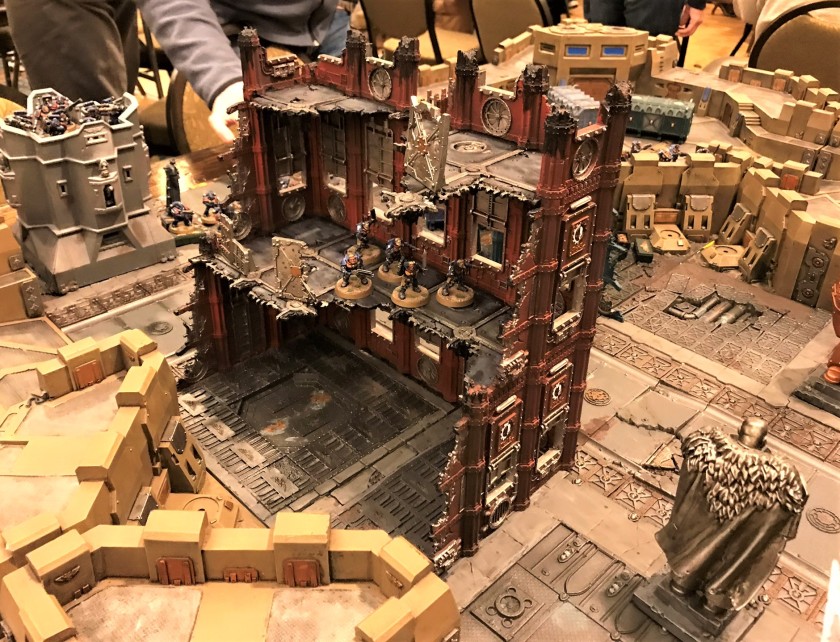
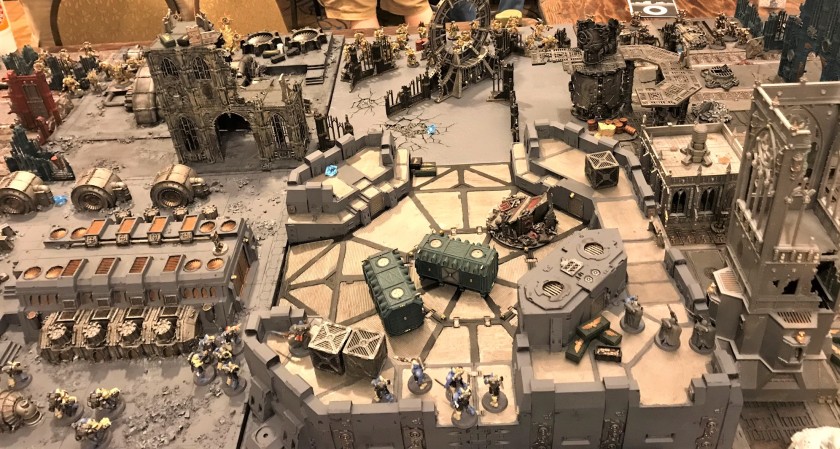
Game 2 – “Mortwald Under Siege: Zero Hour”; Rules – Warhammer 40K
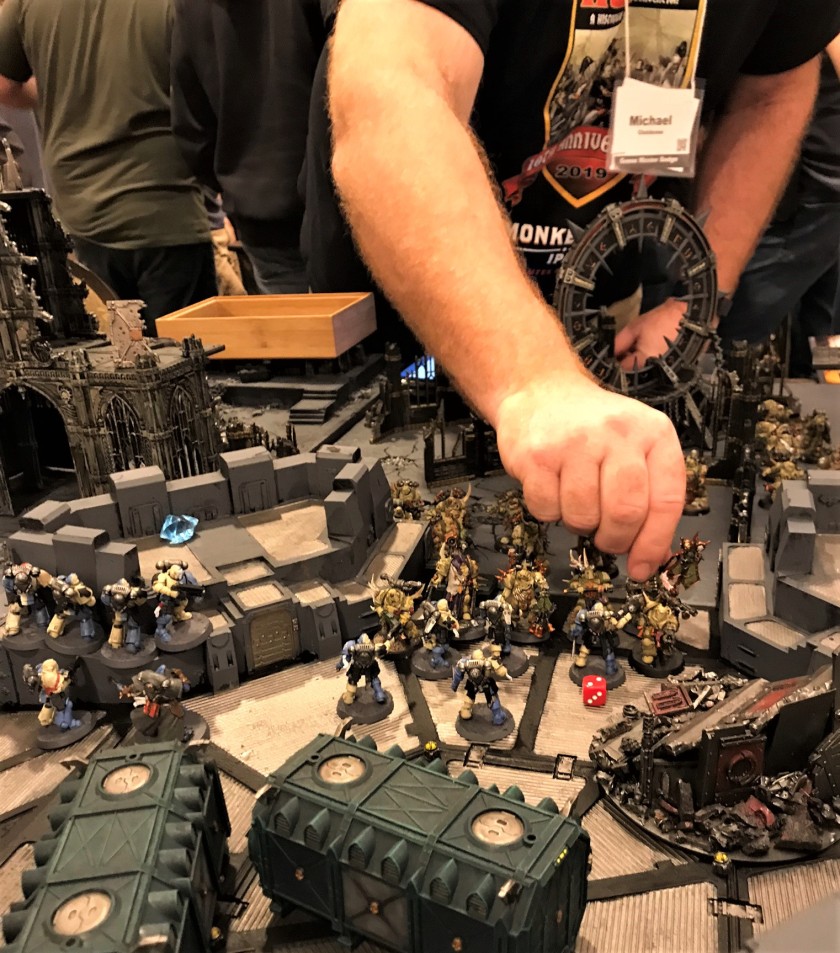
Many of you who follow this blog are avid 40K players and GW miniature painters. The minis that you assemble, convert, and paint are truly a sight to see. Additionally, the terrain is very eye-catching. Of course, I missed that whole era/genre of wargaming when it launched and as it grew. I wanted to give this 40K game a shot, and I will likely give the game another shot at some time in the future. But before I go on, I want to say that the following is not an attack on anyone who loves 40K – it’s just my experience with it at the HUZZAH! convention.
It was the absolute worst gaming experience that I have ever had. Sorry, but it was.
The terrain was gorgeous, and the figures were well-painted. The game scenario, unfortunately, had no story or reason as to why anything was there in terms of terrain or figures. There were two tables next to each other, and mine had several newbies and some experienced players. A couple of the GM’s were subbing (and admirably trying I will say) for another GM who could not attend. But hurting their efforts was the fact that there were hardly any cheat sheets or charts available, and those that were were microscopic in font size. Much of the game was spent figuring out the stats of the different space marine factions by either looking at the rule books or some players using a GW app on their iPads or iPhones.
The players on my side with whom I played also had a similarly negative experience. What I remember about the game was that a large number of Plague Marines moved in, and over us (whoever we were – the figs were blue and some kind of space marine) with seemingly no way of effectively stopping them. I don’t remember many strategic of tactical gaming choices we made except to move and take up defensive positions and try to shoot. Was it balanced or play tested? Who knows. My memory of the game includes spending a lot of time looking at other people consulting rule books and devices, interspersed with being overrun by gloppy plague marines. Oh yeah, there was the conversations on my side with teammates asking WTF multiple times. I was told by someone I trust that this game was not typical – and that perhaps Kill Team is better. Again, I’ll keep an open mind, but for beginners this game was definitely was not! I also want the GM’s to know that we did not hold the experience against them at all – at least I did not. It’s not easy to be a GM.
One of the two tables – not the one I played on.
Table 1Table 1Table 2 – we were defending this side.We came, we were confused about the rules, the scenario…then plague marines wiped us out.
Just to be clear again, I follow several blogs whose authors do a great job on GW stuff. I mainly tried to play because I have been inspired by their projects. If you want to see some of their excellent painting and conversions of GW stuff, check out any of the following sites:
These guys give me hope to try 40K again…sometime. This game finished off Friday at HUZZAH! for me.
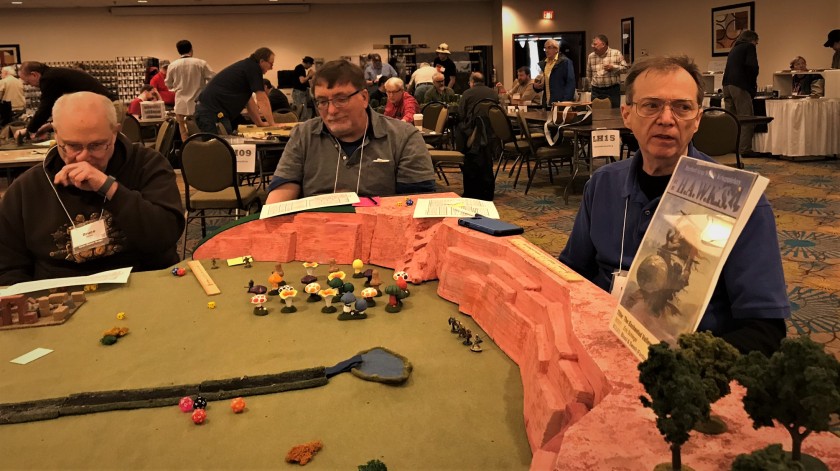
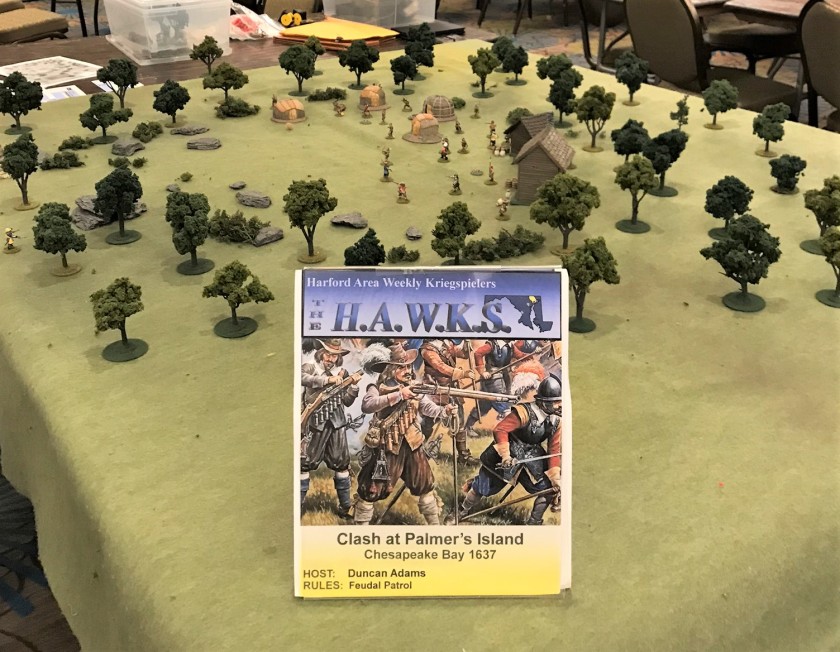
Game 3 – “Clash at Palmer’s Island, Chesapeake Bay 1637”; Rules – Feudal Patrol™ (as of yet unpublished)
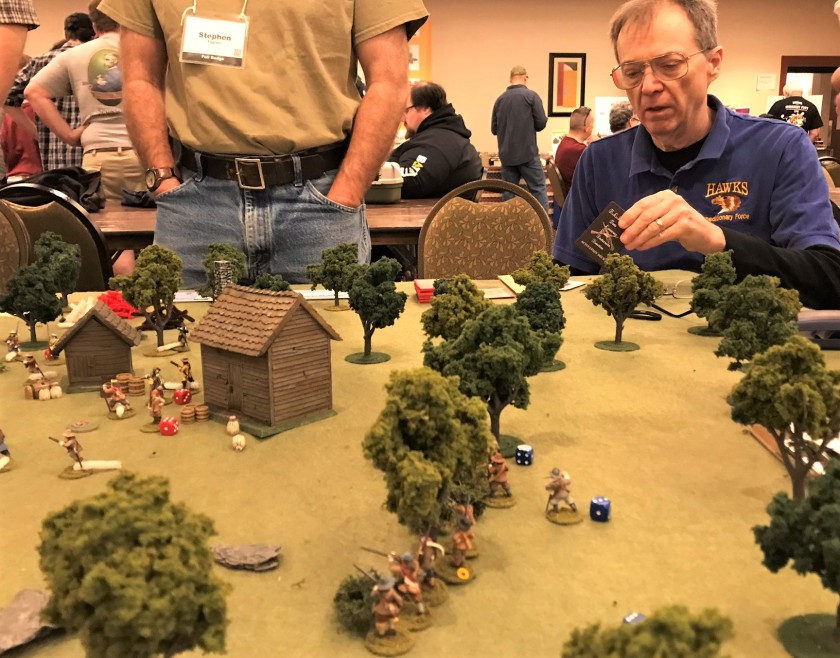
Duncan Adams of the H.A.W.K.’s ran this scenario on Saturday morning. It featured Marylanders (my side) contesting the “illegal” occupation of Palmer’s Island by Virginians and some Indian allies. The rules used were Buck Surdu’s soon to be published Feudal Patrol™, a card-based system similar to Combat Patrol™, but for eras/genres with more swords and arrows and matchlocks than modern warfare. As a huge fan of Combat Patrol™, I was really looking forward to trying the system. Here, it was a skirmish action.
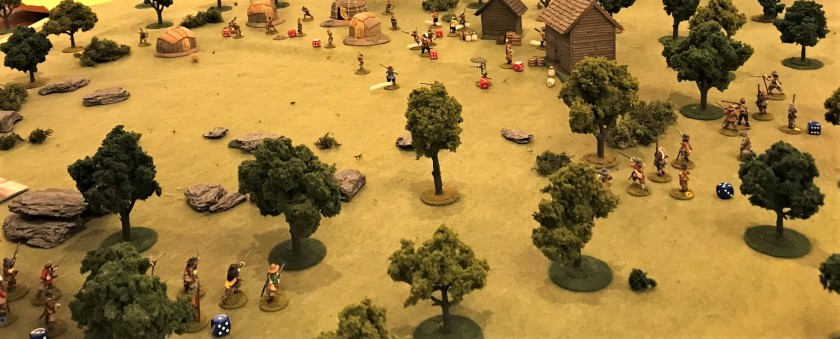
The game went very well, with the players grasping the game’s concepts very quickly. Also, I liked the changes on the cards for melee and missile weapons. Our team’s matchlocks (and troop maneuver) held the day with a major victory.
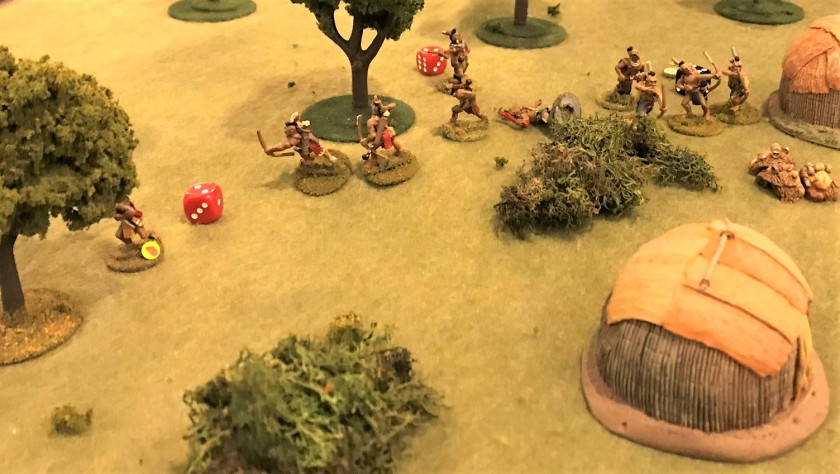
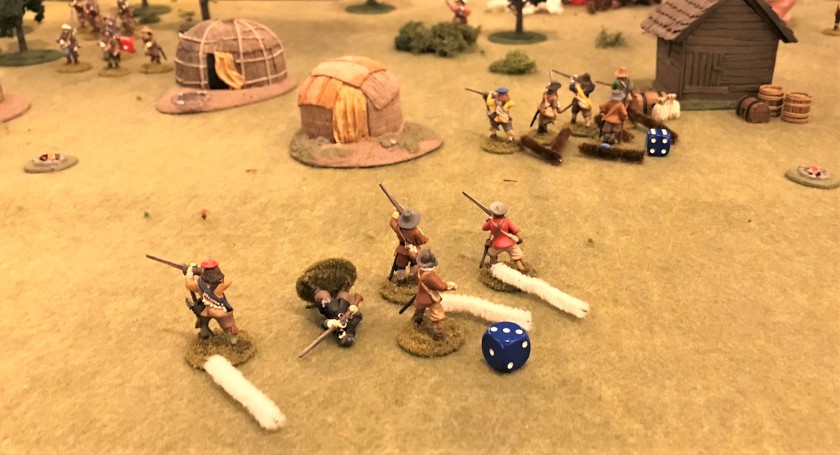
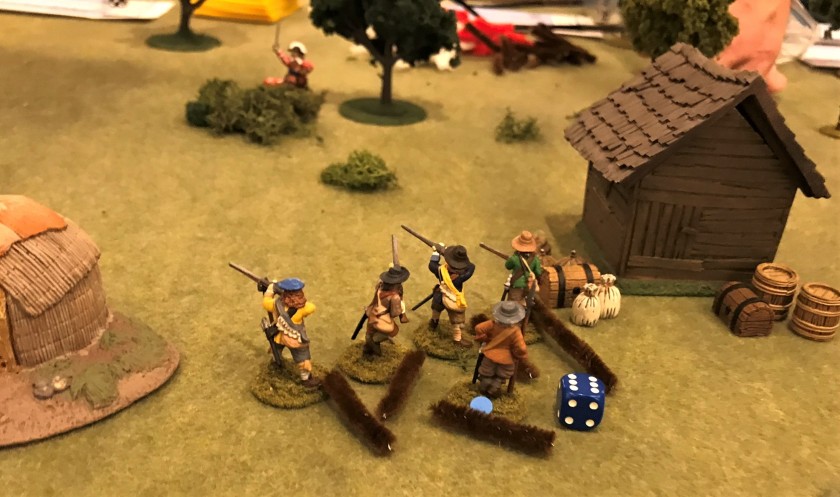
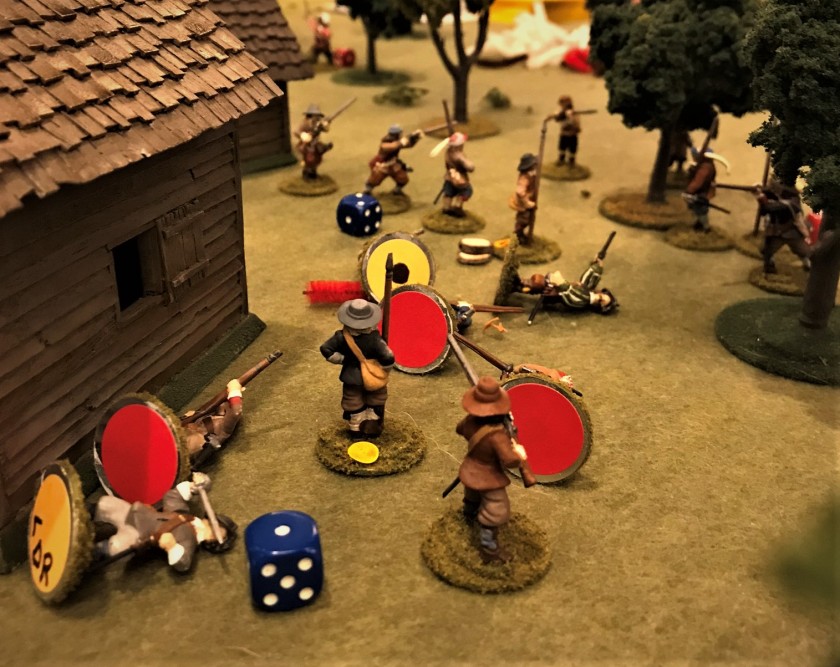
Game set up.Maryland militia move in for the assault.Duncan Adams ably ran this fun game.Virginia had Indian allies – shown here attempting to flank our attack through the woods. A relief column of Virginians (upper right) kills one Marylander (forefront). The Virginians are then taken quickly under matchlock fire as they exit the woods.Marylanders take out the Virginian leader as he less than bravely hid in the brush.This became a bit of a scrum afterwards, with casualties mounting and the Marylanders prevailing.Close up of some of the figures and terrain.The Indians made a flanking charge from the woods, but were beaten back.
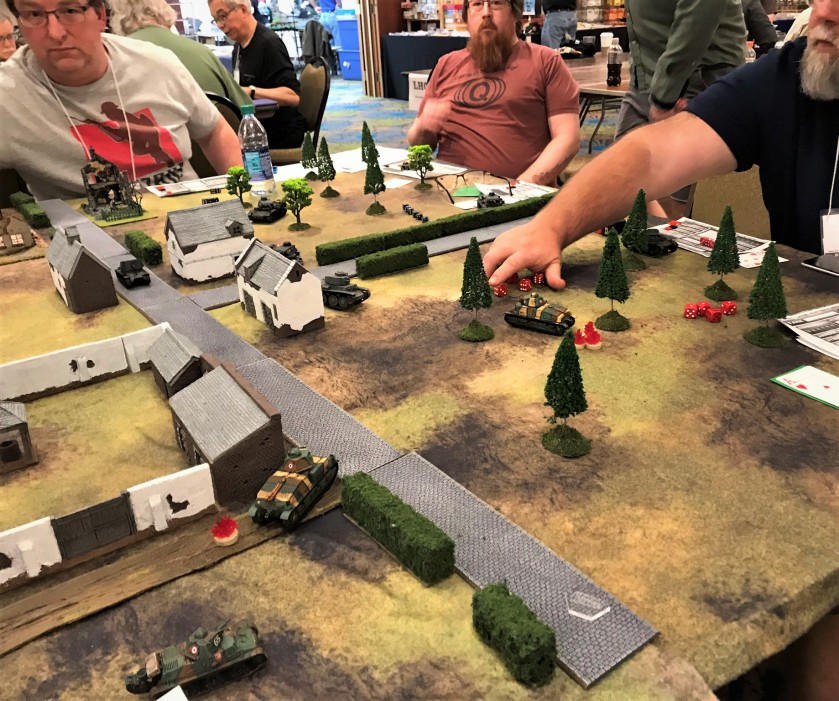
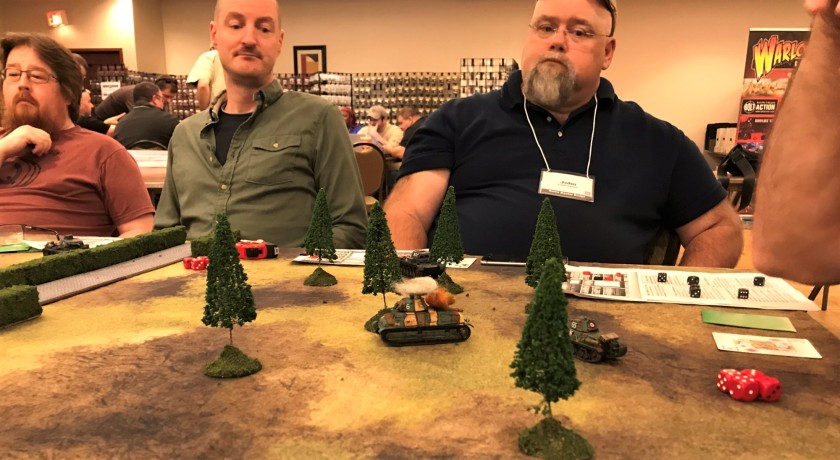
Game 4 – “Battle of Hannut” with 28 mm tanks; Rules – What a Tanker
Interestingly, Christopher had a few changes he made for the game. First, for activation, he used a card-based system. Second, he had everyone roll all of their Command Dice at the same time at the beginning of the turn. Lastly, he allowed you to turn in all your dice for one you wanted if your roll was bad. The card system was interesting, but really not too different than rolling dice, except that “banking” a six from the previous turn got you an additional card for activation that could be better than what you would have gotten. I’m not sure I like all players rolling all the Command Dice at the beginning – it allows you to see what your adversary can do before you take your turn. You also get to choose which Command Dice you lose if you take damage. The house rule on converting all your dice into one desired action was interesting, but I would not add that as it helps damaged tanks too much. It was different, but consistent for all players.
My SOMUA moved up quickly and was the target for no less than four German Panzers. My armor absorbed the hits, but eventually my tank was knocked out – with the crew surviving. I respawned as a new SOMUA, and rammed a Panzerjager 1. The game ended there. We achieved a minor victory for the French. Thanks to Christopher for running a superb and fun game.
The Battle of Hannut set up.My SOMUA attracts a lot of German attention (upper right).Eventually, my SOMUA was knocked out.Late in the game, I got to ram a Panzerjager I with my second SOMUA, doing minor damage to the German. Christopher Boynton used the flame markers as “ACQUIRED” markers.
Game 5 – “Test of Honour Returns to Hanghai”; Rules – Test of Honour
The last game for Saturday was “Test of Honor Returns to Hanghai” using Mike Paine’s wonderful and extensive Hanghai tabletop. Ted Salonich and Ryan MacRae split GM responsibilities as Chris Rett was unable to attend. They did a marvelous job running the Test of Honour rules by Grey for Now Games.
I also finally got to game with Mike Paine, a true legend in the New England gaming community. We were teams of three, and Mike faced off with us. We had a back and forth, but in the last couple of turns we were beaten back soundly.
Thanks again to Ted and Ryan for running a fun game.
Ryan (standing on the left) getting set up, while Mike Paine and his team wait for the game to start on Mike’s table.Mike Paine’s board is so much fun.Final scrum on the island – we were soon pushed back.
Game 6 – “Returning to Hanghai”; Rules – Mike Paine’s home brew rules
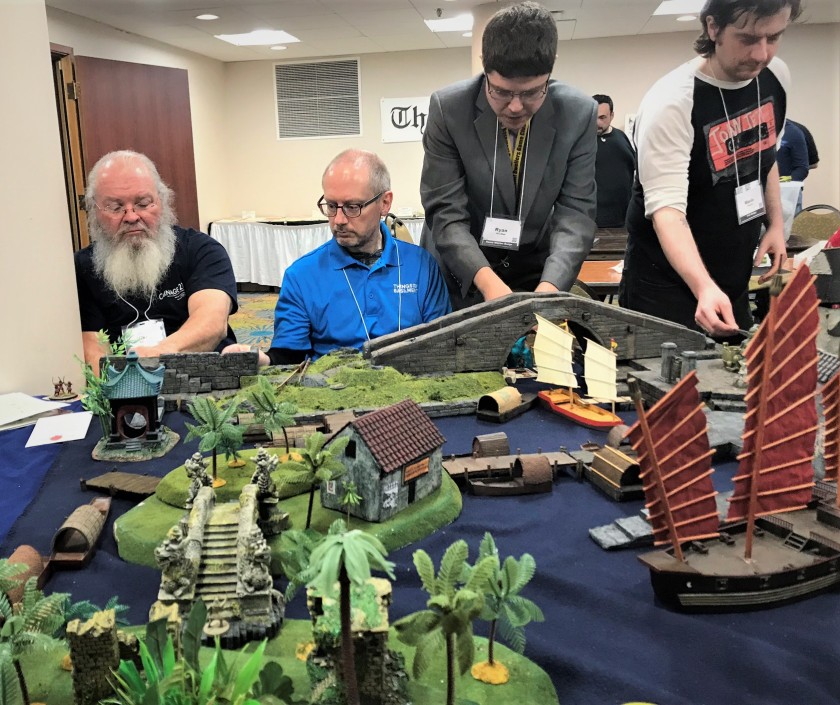
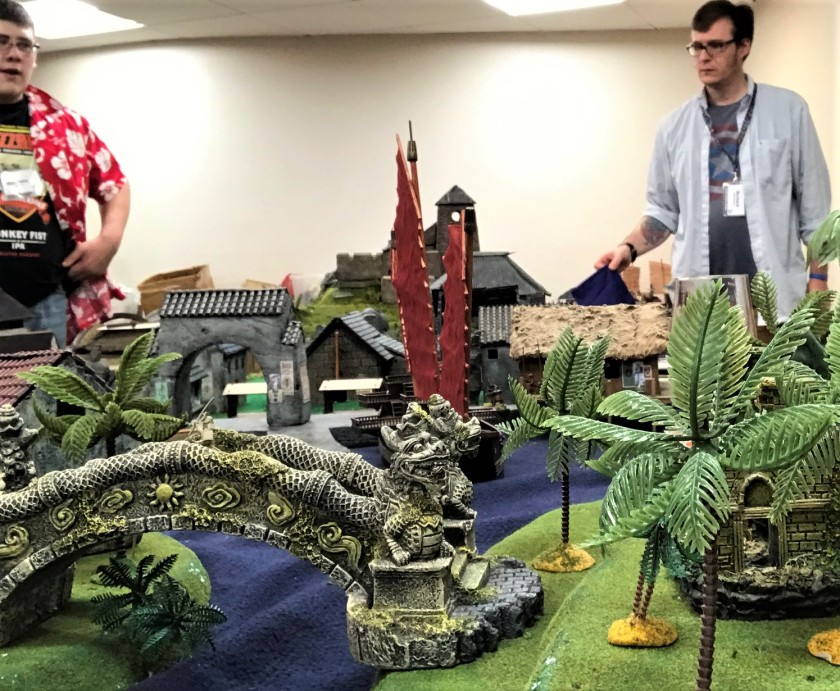
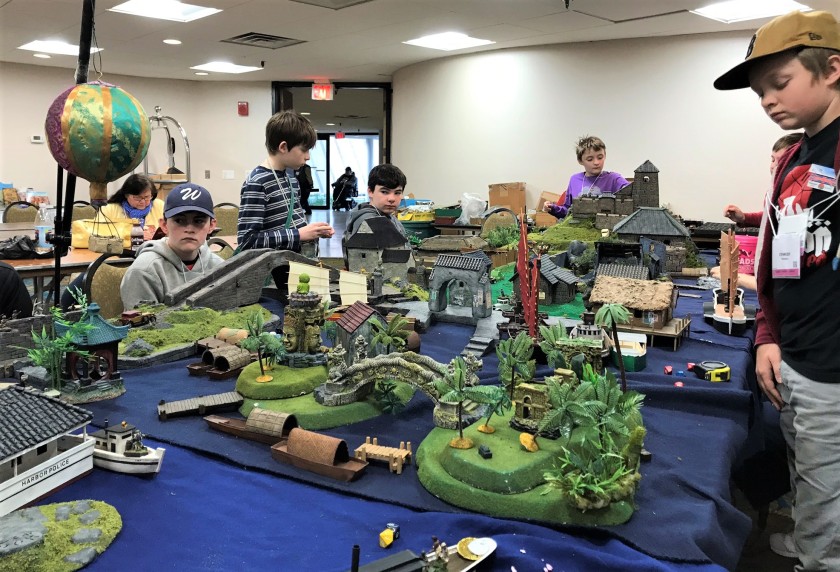
On Sunday morning, I had the chance to finally try Mike Paine’s Hanghai game. It is a 1920’s pulp game, and it is a big hit at a convention with both young and old. It was pretty much the same table as what we played Saturday night, but there were ships and planes and many other cool things all scattered everywhere. The amount of work that went into the table is staggering. You have to see it to appreciate it.
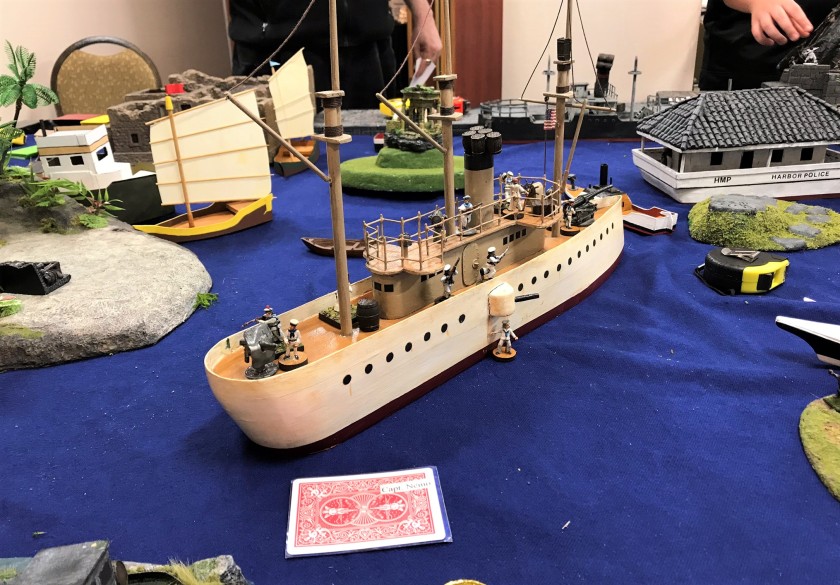
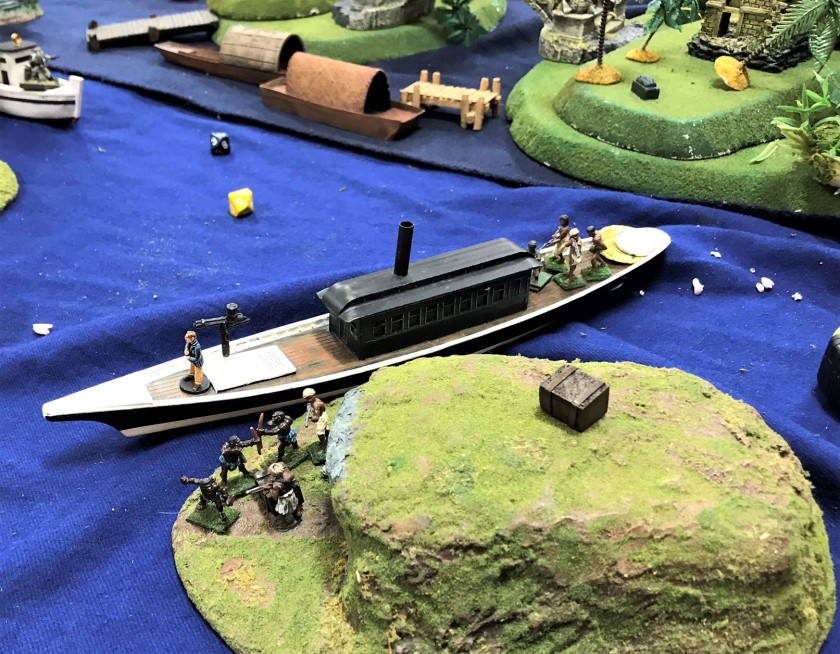
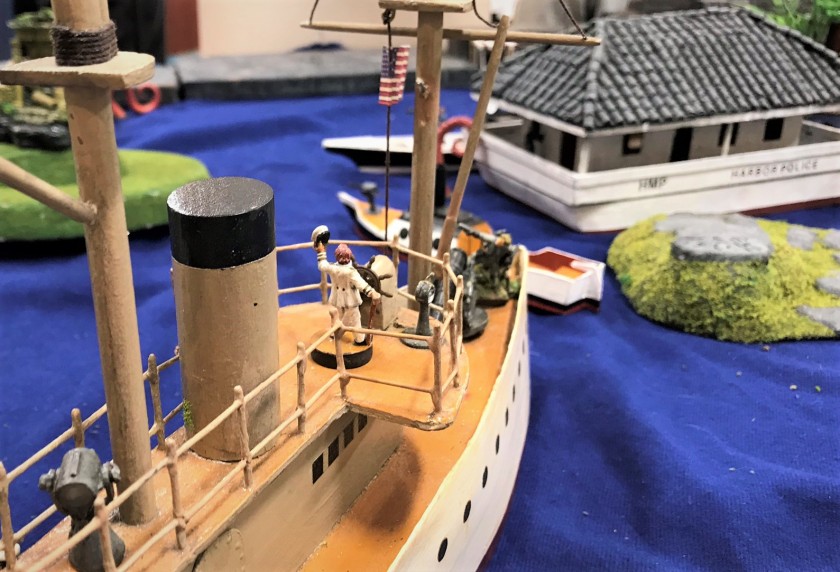
I took a naval crew in a gunboat – and I had a submarine. My leader was Captain Nemo. The goal of the game was to grab treasures and key items. I was playing next to Eric Schlegel, and I decided to try to eliminate the competition, which led to counter-fire, with Eric getting the better of the exchange. I ended up with only a submarine and one sailor, so with a long drive back home, I surrendered my sub to Eric with Mike Paine’s blessing.
Truly an epic game to try! Thanks to Mike Paine!
My crew and gunboat.Eric Schlegel’s forces return fire on me.Mike Paine – master of Hanghai game.The game attracted a lot of players, young and old. The amount of terrain is unbelievable.View of the harbor.My gunboat and Captain Nemo – before Eric shot them all.
This was my first HUZZAH! but hopefully not my last. By my count there were 117 games over the three day weekend, so this is a very small sample. Thanks to the folks of the Maine Historical Wargamers Association for running a classy convention!
If you have any thoughts or feedback, please let me know below. Thanks for looking!
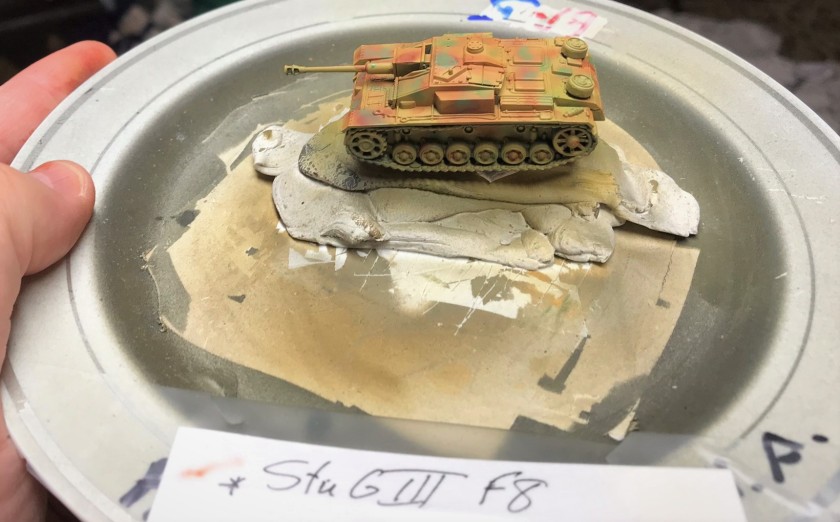
As for the Germans, last year I had bought and assembled a 5-vehicle Plastic Soldier Company StuG III kit that could be completed as either F8 or G variants. I assembled and primed them, but put them aside, as they did not fit in with either my France 1940 or North Africa scenarios. From Battlefront Miniatures, I had bought several resin and plastic models to include a Marder III, 7 Panzer IV’s (E, F2, and H’s), 2 Tiger I’s, and a Panther D. Additionally, I was able to acquire a Battlefront Ferdinand/Elefant from Chris Rett in my gaming club – which was fortunate as this model is now out of production. This made 17 tanks/tank destroyers available to assemble and paint, but too big a force for just a Normandy scenario. Plus, from my research, the StuG F8 was more of an Eastern Front vehicle. So, I decided to proceed to complete these 17 for two different scenarios, some for the Eastern Front and some for the Normandy scenario.
Researching the camouflage patterns for these two groups showed me very different patterns of painting – and in each case I would need to expand my skills and tools to be able to achieve a good historical representation of each vehicle. In particular, I needed an airbrush that could do the finest lines and make these tiny tanks look appropriate. I found a solution in an Iwata Micron B airbrush. This was not inexpensive, but in the end turned out to live up fully to my expectations. As an aside, I had been struggling to have enough time to finish all of these tanks in May. Work this month had been hectic, I attended HUZZAH in Maine (more to come on that in a future post), Memorial Day ceremonies, and the Boston Bruins have been in the Stanley Cup playoffs (and now the finals!!) so my hobby time has been constrained somewhat, Unfortunately I got a bit more time as I was unexpectedly laid off this week! I am sure that if I did not have a job, I would not have bought the new Micron B airbrush, but who knew that would happen? Not me, but at least I was able to finish these in time to be my second entry in Azazel’s“Mechanismo May” community painting challenge.
Given that I was so busy, I took fewer WIP photos than normal – so I decided that this post I will go through some points on assembly, then share in turn the Eastern Front vehicles, the Normandy vehicles, and lastly the paints and materials that I used. This means the eye-candy shots will be interspersed this time throughout the blog. As always, let me know your thoughts and feedback – and which one you like the most, if you are so inclined of course! There are links on the headers and elsewhere if you want more background, albeit from Wikipedia.
Notes on Assembly
Resin models
Plastic Tiger I’s
Plastic Panzer IVH’s
Tiger I kit innardsI wanted more heft in my tanks – so I added steel washers to the Tiger’s. I filled the hulls afterwards with PVA glue.I remembered that I had some ball bearings from Jeff Smith and some BB’s – so the Panzer IV’s got these and PVA glue on top as ballast.Some of the tanks, some primed, some not yet. The Elefant in front had been given an Elefant trunk and ears with green stuff by Chris Rett’s daughter. I did my best to remove the excess kneadatite before repriming.
Eastern Front
Here are the vehicles I built for a future Eastern Front scenario.
StuG IIIF8 base coatedI made three F8’s for the Easter front. Two had the two-toned reddish/brownish camouflage.The third F8 I experimented with the Iwata Micron B to make a three-toned camouflage pattern.The three StuG IIIF8’s completed deployed in a wheat field.Left side view of the StuG IIIF8’sRear view of the F8’s. I used the Vallejo “Thick Brown Mud” on my Eastern Front vehicles to simulate the effects of Mother Russia.
Panzer IVH turrets – three would be for the Eastern Front.
I painted one Panzer IVH in a reddish/brown two-tone, and the other two in a two-tone yellow/green pattern. Here they are with different decals. I tried Armorcast decals in addition to my Battlefront ones – and the sizes of theirs (crosses) work better for small areas like you see here. Give them a look if interested.Patrolling a field.Left side of the Panzer IVF2’s. I also varied adding crew or leaving the tank buttoned up to make it easier for tabletop identification and play – in addition to the different decal numbers.
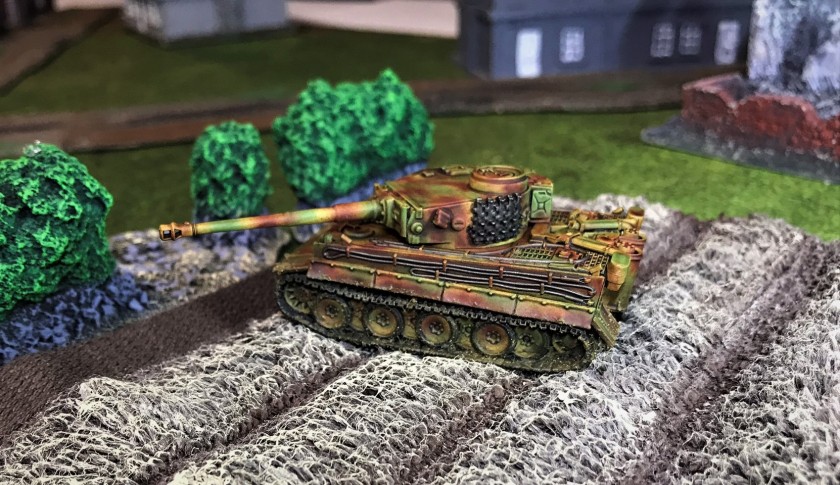
Eastern Front Tiger I, left side, crossing a wheat field.This was a fun model – and the weathering products worked well.Acquiring a Soviet target.Right side shot.Rear angle on the Tiger I.
These are going to be fun to use and see used in future games. I previously had built a Battlefront resin Tiger I for North Africa, and I must say that the plastic ones are really nice models too (less weighty of course – which is why I added ballast). Of course, I was primarily focused on getting ready for the 75th Anniversary of D-Day. So let’s get to those AFV’s!
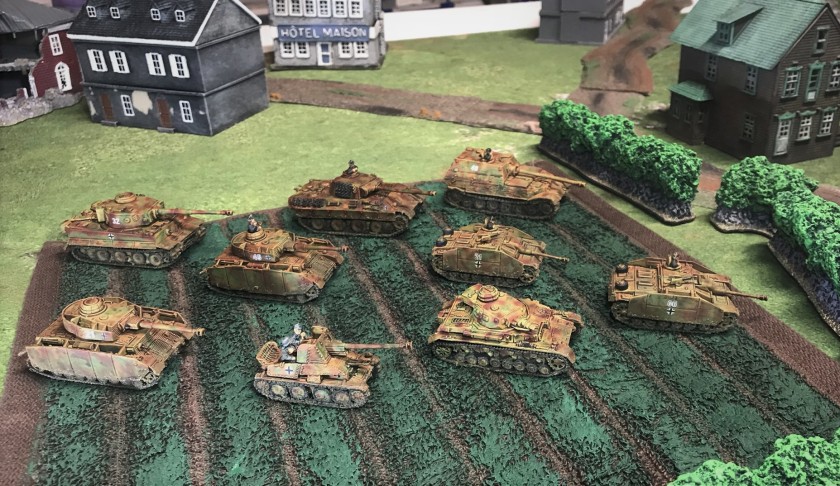
Group Shots
Here are some group shots all of the German AFV’s for Eastern Front scenarios that I did this month.
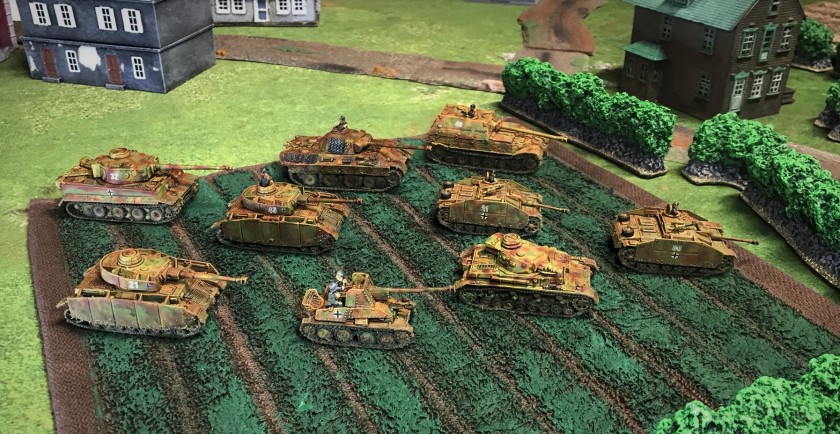
Normandy Campaign
Here are the Normandy Campaign tanks and tank destroyers I built this month. These all have three-toned camouflage pattern, though I tried to be true to the examples I found in my research.
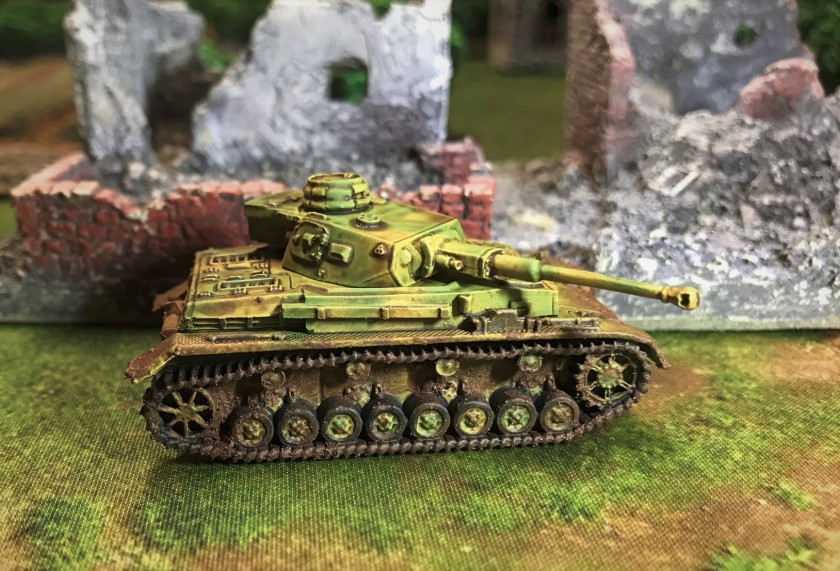
This model is the least powerful of the Panzer IV’s I built for Normandy, but it was deployed in Normandy and in good numbers.
As base coated.
The camouflage pattern here was a bit different.
The Panzer IVE by a building near a Panzer IVH – the Vallejo “Crushed Grass” worked well along with the “European Thick Mud” and the European “Splash Mud” for weathering.
I built two plastic Panzer IVH’s for Normandy. The side armor (schürzen) were not easy to affix, and made painting a challenge on both these and the previous Eastern Front versions. Their camouflage patterns were slightly different.
The two Panzer IVH’s and the Panzer IVE (for comparison) on the right in the hedgerows.Frontal view of the Panzer IVH’s for Normandy.Patrolling the ruined village.
I really enjoyed bringing this monster tank destroyer model back to the tabletop. It is out of production, so I was very happy that Chris sold it to me for a song.
Base coated Elefant
The Iwata Micron B really helped here.
Towards the end of building.
Elefant right side. Nice view of the front – the crewman was already mounted when I got this model. I prefer to paint them separately, but this worked out fine – they are just so tiny.Good look at the rear of the vehicle – I liked that it had the zimmerit on it too.
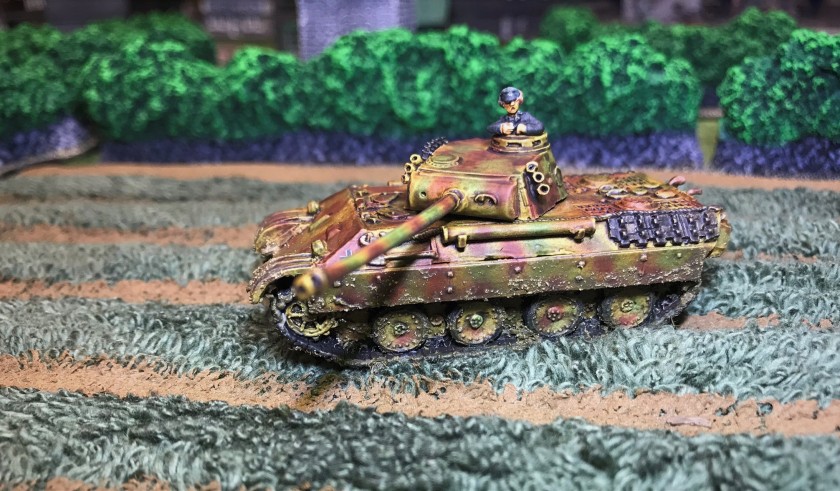
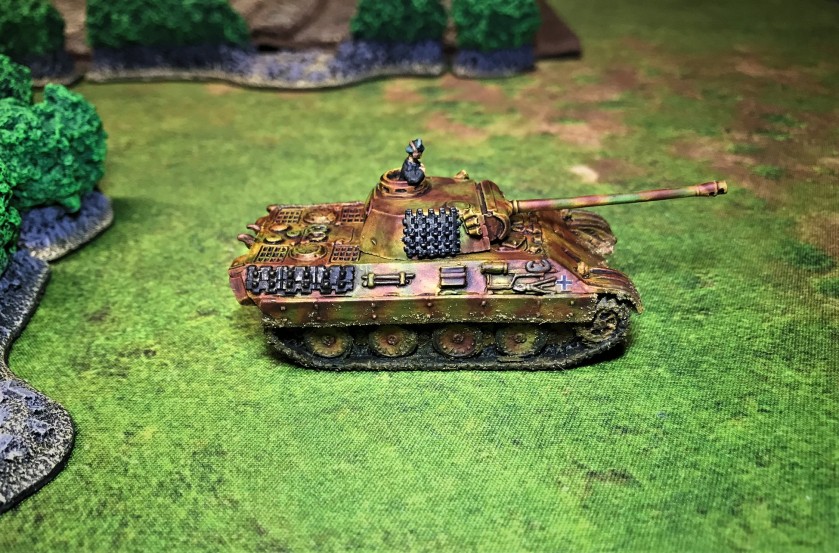
Mine is a Panther D, and it was a resin/metal model.
Base coated Panther hull
After applying camouflage pattern.
Note the road wheel on the turret. It came in the kit, and I put it there as there was a nub to hang it. Unfortunately, it interfered with the turret being flush on the hull. Luckily, I was able to remove the road wheel. As I had an extra track section, I was able to affix it over that space on the turret. The model was also missing on of the two exhaust pipes – an iconic part of a Panther. I was able to drill the resin hull and build a replacement with a cut-down paper clip.
Panther crossing an open field.Nice left side view showing the muddy tracks.Right side view with track section on the turret.Target spotted! Schnell! Feuer!