Buck I returned from holiday in England and then spent a week at work, including the weekend, finishing up a proposal. This weekend was our club night and a comparative play test of some post-apocalyptic rules sets. I didn’t have a chance to start a new project, so I just finished some partially-completed figures that […]
This post is about another group of miniatures that I acquired in March from the recently closed Wargames Supply Dump (thanks so much Roger!).
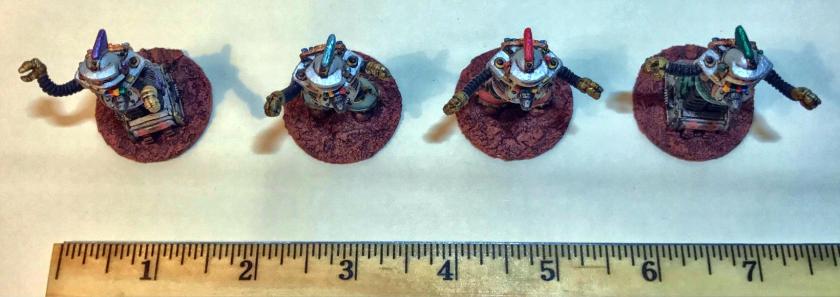
These are DG-08 and DG-09, Khang Robots. One model is tracked, the other has legs. I purchased 2 kits of each type of robot.
I’m currently planning on building out a series of different squads and platoons for use in retro-sci-fi skirmish games using the Combat Patrol™ system of rules. I have described previously here in this blog my casting work on making a platoon of Archive Miniatures Mark III Warbots. I thought these Khang Robots would be great as leaders for that platoon. They look so very retro! The tracked version really evokes the old “B9” from the 1960’s TV series Lost in Space.
Additionally, I eventually will be painting up a unit of WSD Khang troopers, and I can use these four robots to augment those forces as well.
The kits arrived, and I washed them with a light scrub with soap and water, and let them dry. Once dry, I assembled them with super glue. I tried to glue each robots’ arms so that they would each have a different position for better aesthetics. After they were together, I affixed them to 1¼” steel washers using Loctite glue for ease of eventual magnetic box storage. Then, I used poster tack to affix the models to popsicle sticks for ease of painting. This is now my new favorite tactic as it is very easy to remove after painting.
I then primed them (top and bottom) with Krylon “Ultra Flat” white matte spray paint. This allows me the option to write (with a fine-tipped Sharpie) on the washer bottoms with info that I’d like to have on them, such as the model’s name, the date of completion, my name, and any unit identification.
After the primer dried, I gave the models an aggressive wash with Citadel “Nuln Oil”.
The kits as they arrived
The Khang Robots unassembled and drying after cleaning
Assembled and based awaiting priming
After priming
I used Vallejo Model Air Metallics “Steel” as the primary base coat for the models’ helmets, shoulders, belt, and claws. I painted the waist/ribbed chest area with Citadel “Mechanicus Standard Gray”. Then, for a shiny rubber-like look on the ribs, boots, and legs, I applied a coat of Armory “Gloss Black”. For the front of the tracked bases and the chest-mounted cannons, I used Vallejo Model Air Metallics “Gun Metal”. Then I highlighted the shiny parts on the shoulders and helmets with Vallejo Model Air Metallics “Aluminum”. For the voice box (cannot really call it a mouth!) I added a light coat of Citadel “Spiritstone Red”.
Moving on to some of the details on the helmet, arm sockets, “ears”, and back components, I found a great solution with Vallejo Model Air Metallics “Copper”. There were several lights on the front and back of the robots, and for these I used a spotter brush with Citadel “Yriel Yellow”, Vallejo Model Air Metallics “Signal Red”, Craftsmart “Sapphire”, and DecoArt “Crystal Green” – varying the lights a bit in the front.
For the vents in the front of the tracked figures, I used “Gloss Black”, with “Steel” on the vents. I then extensively used Vallejo Model Air Metallics “Gold” and Craftsmart “Onyx” on bolt straps and bolts respectively throughout all the models. I also used “Onyx” to highlight the “Gloss Black” painted parts.
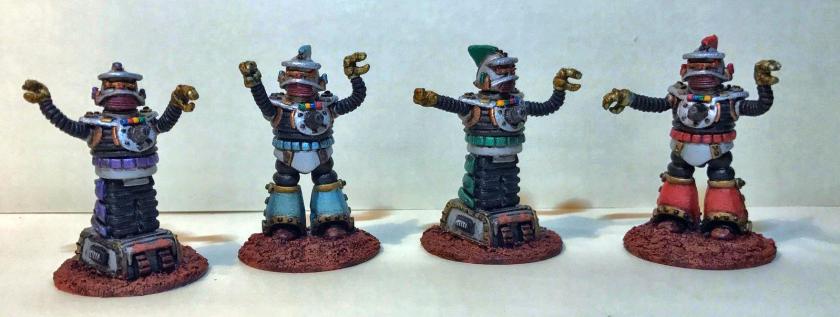
I then chose some bright-colored metallics to theme the robots and make them easier to identify on the gaming table. My four choices were: DecoArt “Crystal Green”, “Festive Red”, “Peacock Blue”, and Craftsmart “Amethyst”. I painted with these as you see below – as highlights on the robots’ helmet crests, “ears”, belts, boots, and backs of the lower chassis (all depending on the models). I did a lot of highlighting!
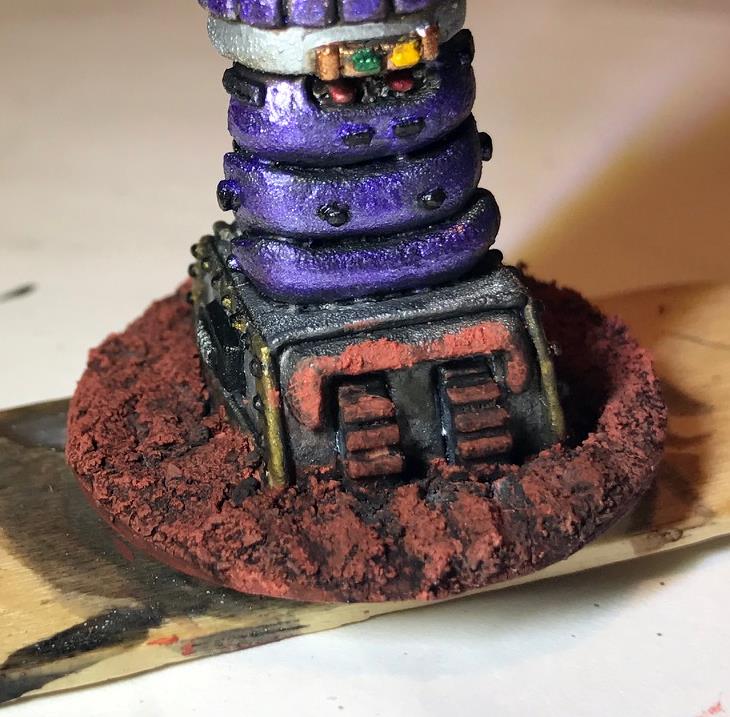
This completed my initial base coating and highlighting. For the bases, I thought I’d use Citadel “Martian Ironcrust”. This texture paint has a nice crackling effect if you use a blow dryer between applications (as I did) to dry the paint. I also added some Army Painter “Black Battlefield” into it when it was still moist – and this worked well to give a realistic texture. For the tracked models, I tried to make a track and chassis impression with the “Martian Ironcrust”. I also tried to show the accumulation of dust on the tracks and boots with this texture paint. I think it worked well enough.
Early base coating, front view
Early base coating, back view
I then moved on to serial washes with Citadel “Agrax Earthshade” on some lighter parts and “Nuln Oil” on others such as the ribs. For the robots’ claws, I found that Citadel “Seraphim Sepia” gave a unique metallic tone to the claws. On the bases, “Agrax Earthshade” really enhanced the cracks and gave a lot of depth to them. I used a lot of washes to give depth to the figures.
Ready for varnish
Close up of my attempt to create track and chassis marks, and accumulation of dirt
I then waited a day or so for the humidity to go down and for the temperature to be adequate for varnishing. I sprayed the models with one coat of Krylon “Clear Matte”, followed by two coats of Testors “Dullcoat”, allowing for adequate drying time between applications.
The Red Khang Robot
The Blue Khang Robot
The Green Khang Robot
The Purple Khang Robot
Nice view of the tops of the Khang Robots
Group shot!
These are pretty cool figures – and the downside is that pretty cool figures have a lot of details! The upside is they give the painter a tremendous opportunity to create a nice visual product. These are really fun retro sci-fi figures – and I hope that I did achieve success with these four. I really like them, and am motivated to get going on the Mark III Warbots to complete the platoon – and to use my new airbrush to prime, base coat, and varnish this my next project. Stay tuned, and let me know your thoughts in the comments section! Thanks!
I had the chance to see Philadelphia’s own Joe Ciccarone present at our sales meeting today. That’s our selfie above after his presentation.
He succinctly shared some great wisdom and frankly I was blown away! At 7 am on the last day of a meeting he drew a standing ovation – pretty damn cool talk!
Truly, he was superb. His talk was based on his life and what he has learned, and much of that he shares in his weekly blog. It really is a great read, and worth the time. He is a deep thinker, but writes with impact. Even if you are not in sales, its very apropos to life.
Thanks Joe for a truly motivational moment! You fired me up!
His latest entry follows:
“Get comfortable being uncomfortable. That’s how you break the plateau and reach the next level.” – Chalene Johnson How do you get to the next level? A mentor of mine told me I needed to become UNCOMFORTABLE. He said, “What do you think about that makes you uncomfortable? That’s the project you should be working […]
This is from Buck Surdu’s blog – nice addition to the Combat Patrol rules!
Announcing the Release of the South Pacific Supplement for Combat Patrol™: World War II. Like all the previous supplements for Combat Patrol™, this supplement is FREE to download as a .pdf. Why a South Pacific Supplement? Fighting in the South Pacific during World War II was unique compared to other theaters, even other parts of…
Back in March of 2017, I read that WSD (Wargames Supply Dump) in the U.K. was shutting down its website and its figures from the Dirk Garrison line would no longer be available. Very bad news! I had not yet had the chance to buy any of these, and their retro sci-fi look lured me in to try to get a few before it was too late.
I was able to get a few different sets, which I will be painting up and using in my retro sci-fi games using the card-based Combat Patrol™ system.
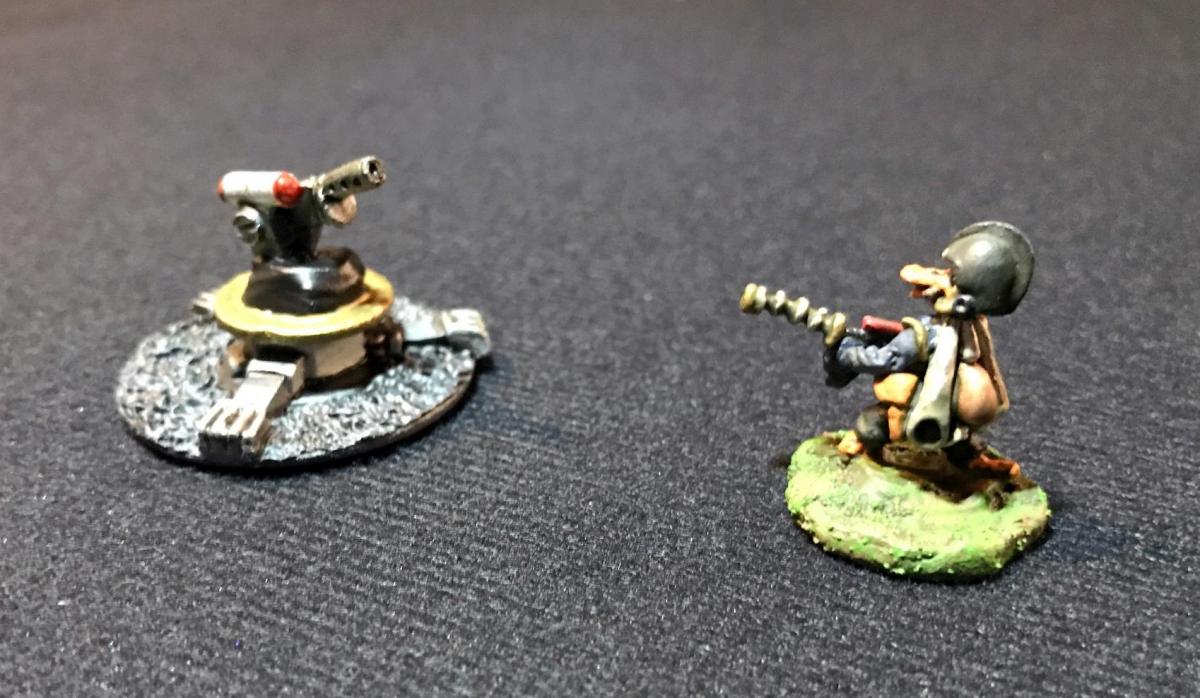
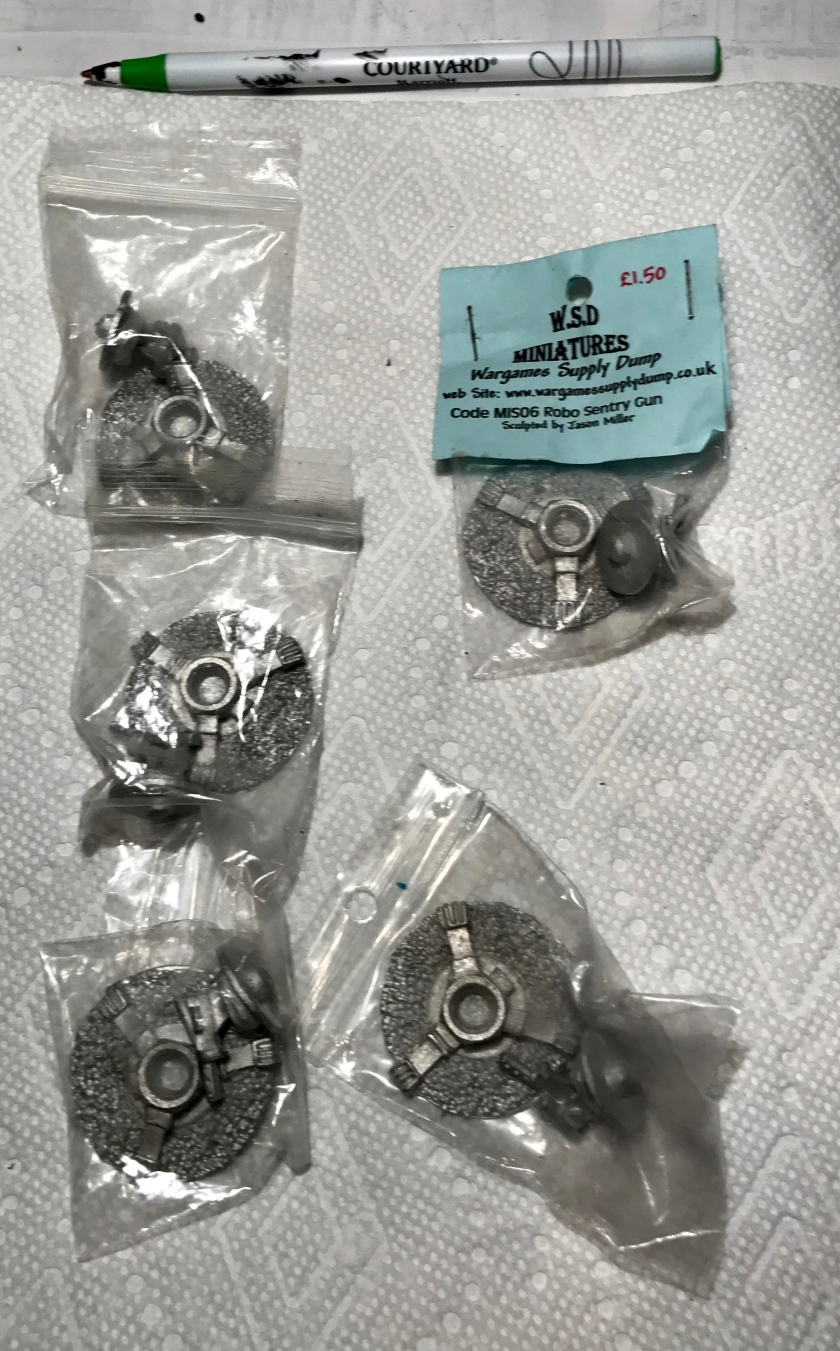
The first ones I started were MIS06 “Robo Sentry Guns“. These came in a two-pieces per kit. As you can see below, the models were not greatly detailed, but very nice for what I wanted – unmanned and immovable guns for attacking infantry (or vehicles) to deal with during a skirmish. They were sculpted by Jason Miller. I wanted to buy 10, but only 5 were left by the time I tried to buy them. I grabbed them as they were heavily discounted!
The Robo Sentry Guns as shipped
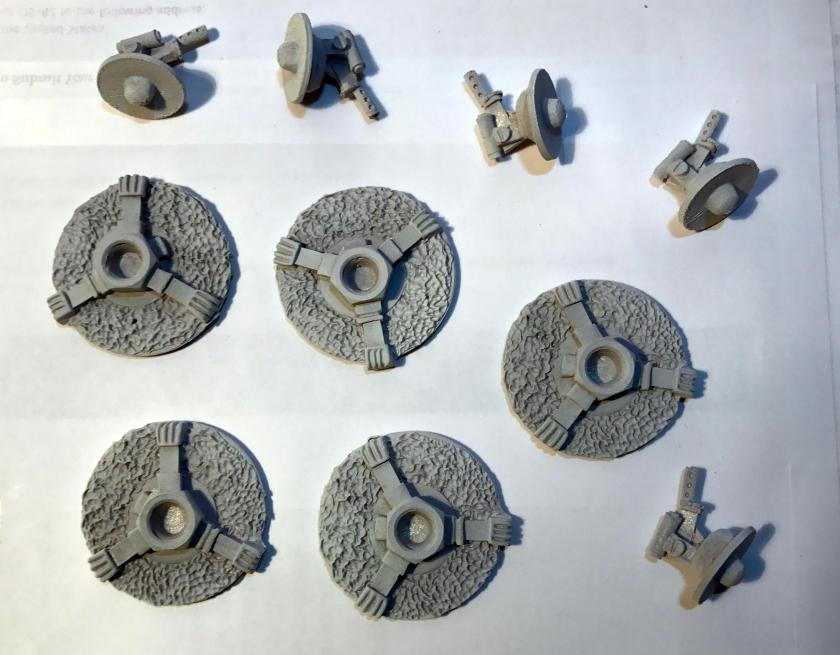
The Robo Sentry Guns primed
I affixed the bases to a 1¼” steel washer using Loctite glue. This tactic allows me to use magnetic sheets to easily store them in plastic boxes. I then primed them with Krylon “Ultra Flat” matte spray paint. I also made sure that I painted the bottoms white as well, as I find that leaves me the option to place information on the bottom that I’d like to have once the models are done, such as the model’s name, the date it was finished, and any unit identification, etc. I just use a fine-tipped Sharpie.
I decided to paint the two parts separately, base coat both, and then assemble the kit after that. I also made a change in my process in that I used 3M white poster tack from Michael’s to affix the bases to popsicle sticks for painting instead of white glue. This worked MUCH better – and the tack is reusable – so I was happy to discover this would work and so well. The models stayed affixed very well.
I started brushwork with a wash of Citadel “Nuln Oil” over both pieces. I followed this with a heavy dry brushing with Citadel “Mechanicus Standard Gray”. Then, I switched to Vallejo Model Air “Medium Gunship Gray” for the tripod legs (with a brush – no airbrushing was done on these models). For the tripod feet, and the center mount, I used Vallejo Model Air “Steel”. The gun itself was mounted on a rock-like structure on a washer disk. I thought the rock made little sense for a robo sentry gun, so I decided to obscure it with Armory “Gloss Black” (still good from 1996!). I then shaded the tripod base with “Nuln Oil”. I subsequently used Secret Weapons Washes “Heavy Body Black” on the base, followed by lightly dry brushing and stippling it with “Mechanicus Standard Gray”.
At this point, I glued the two pieces together with wood glue, and let the assembly dry overnight. To further obscure the rock, I used Vallejo Model Air “Gold” on the washer – with an eye towards mimicking the coloration of the lunar modules from the Apollo missions. I thought it worked well, though it took three coats to get it properly covered.
On the gun, I used Vallejo Model Air “Gun Metal”, with Vallejo “Aluminum” on the optics. On the optics I then painted the ends with “Gold” and Citadel “Spiritstone Red”. I finished the gun with Secret Weapons Washes “Armor Wash”, with some light highlighting with “Gun Metal”. Once dry, I applied two coats of Testors “Dullcoat”, allowing for adequate drying between coats.
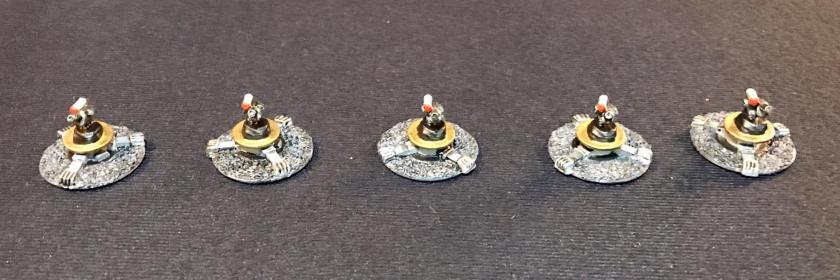
Robo Sentry Guns facing forward
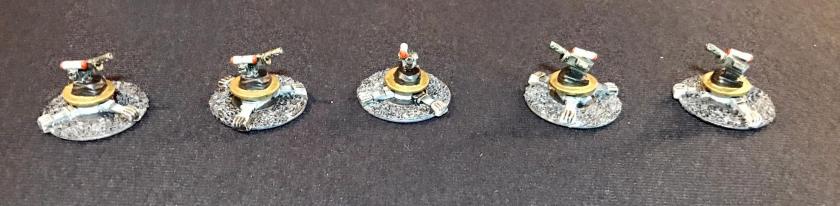
Robo Sentry Guns in different poses
Close up of Robo Sentry GunShowdown with SFC Mallard
I think these will be a nice addition to my Combat Patrol™ games, as I can use these in multiple situations as a GM. I like the retro sci-fi look, and as I move into building a Robot army, these will fit in nicely (more to come on those in future blog posts). I also added a photo to the Lost Minis Wiki on the model, as there was none there. Still, sad to see that WSD will no longer produce these cool minis.