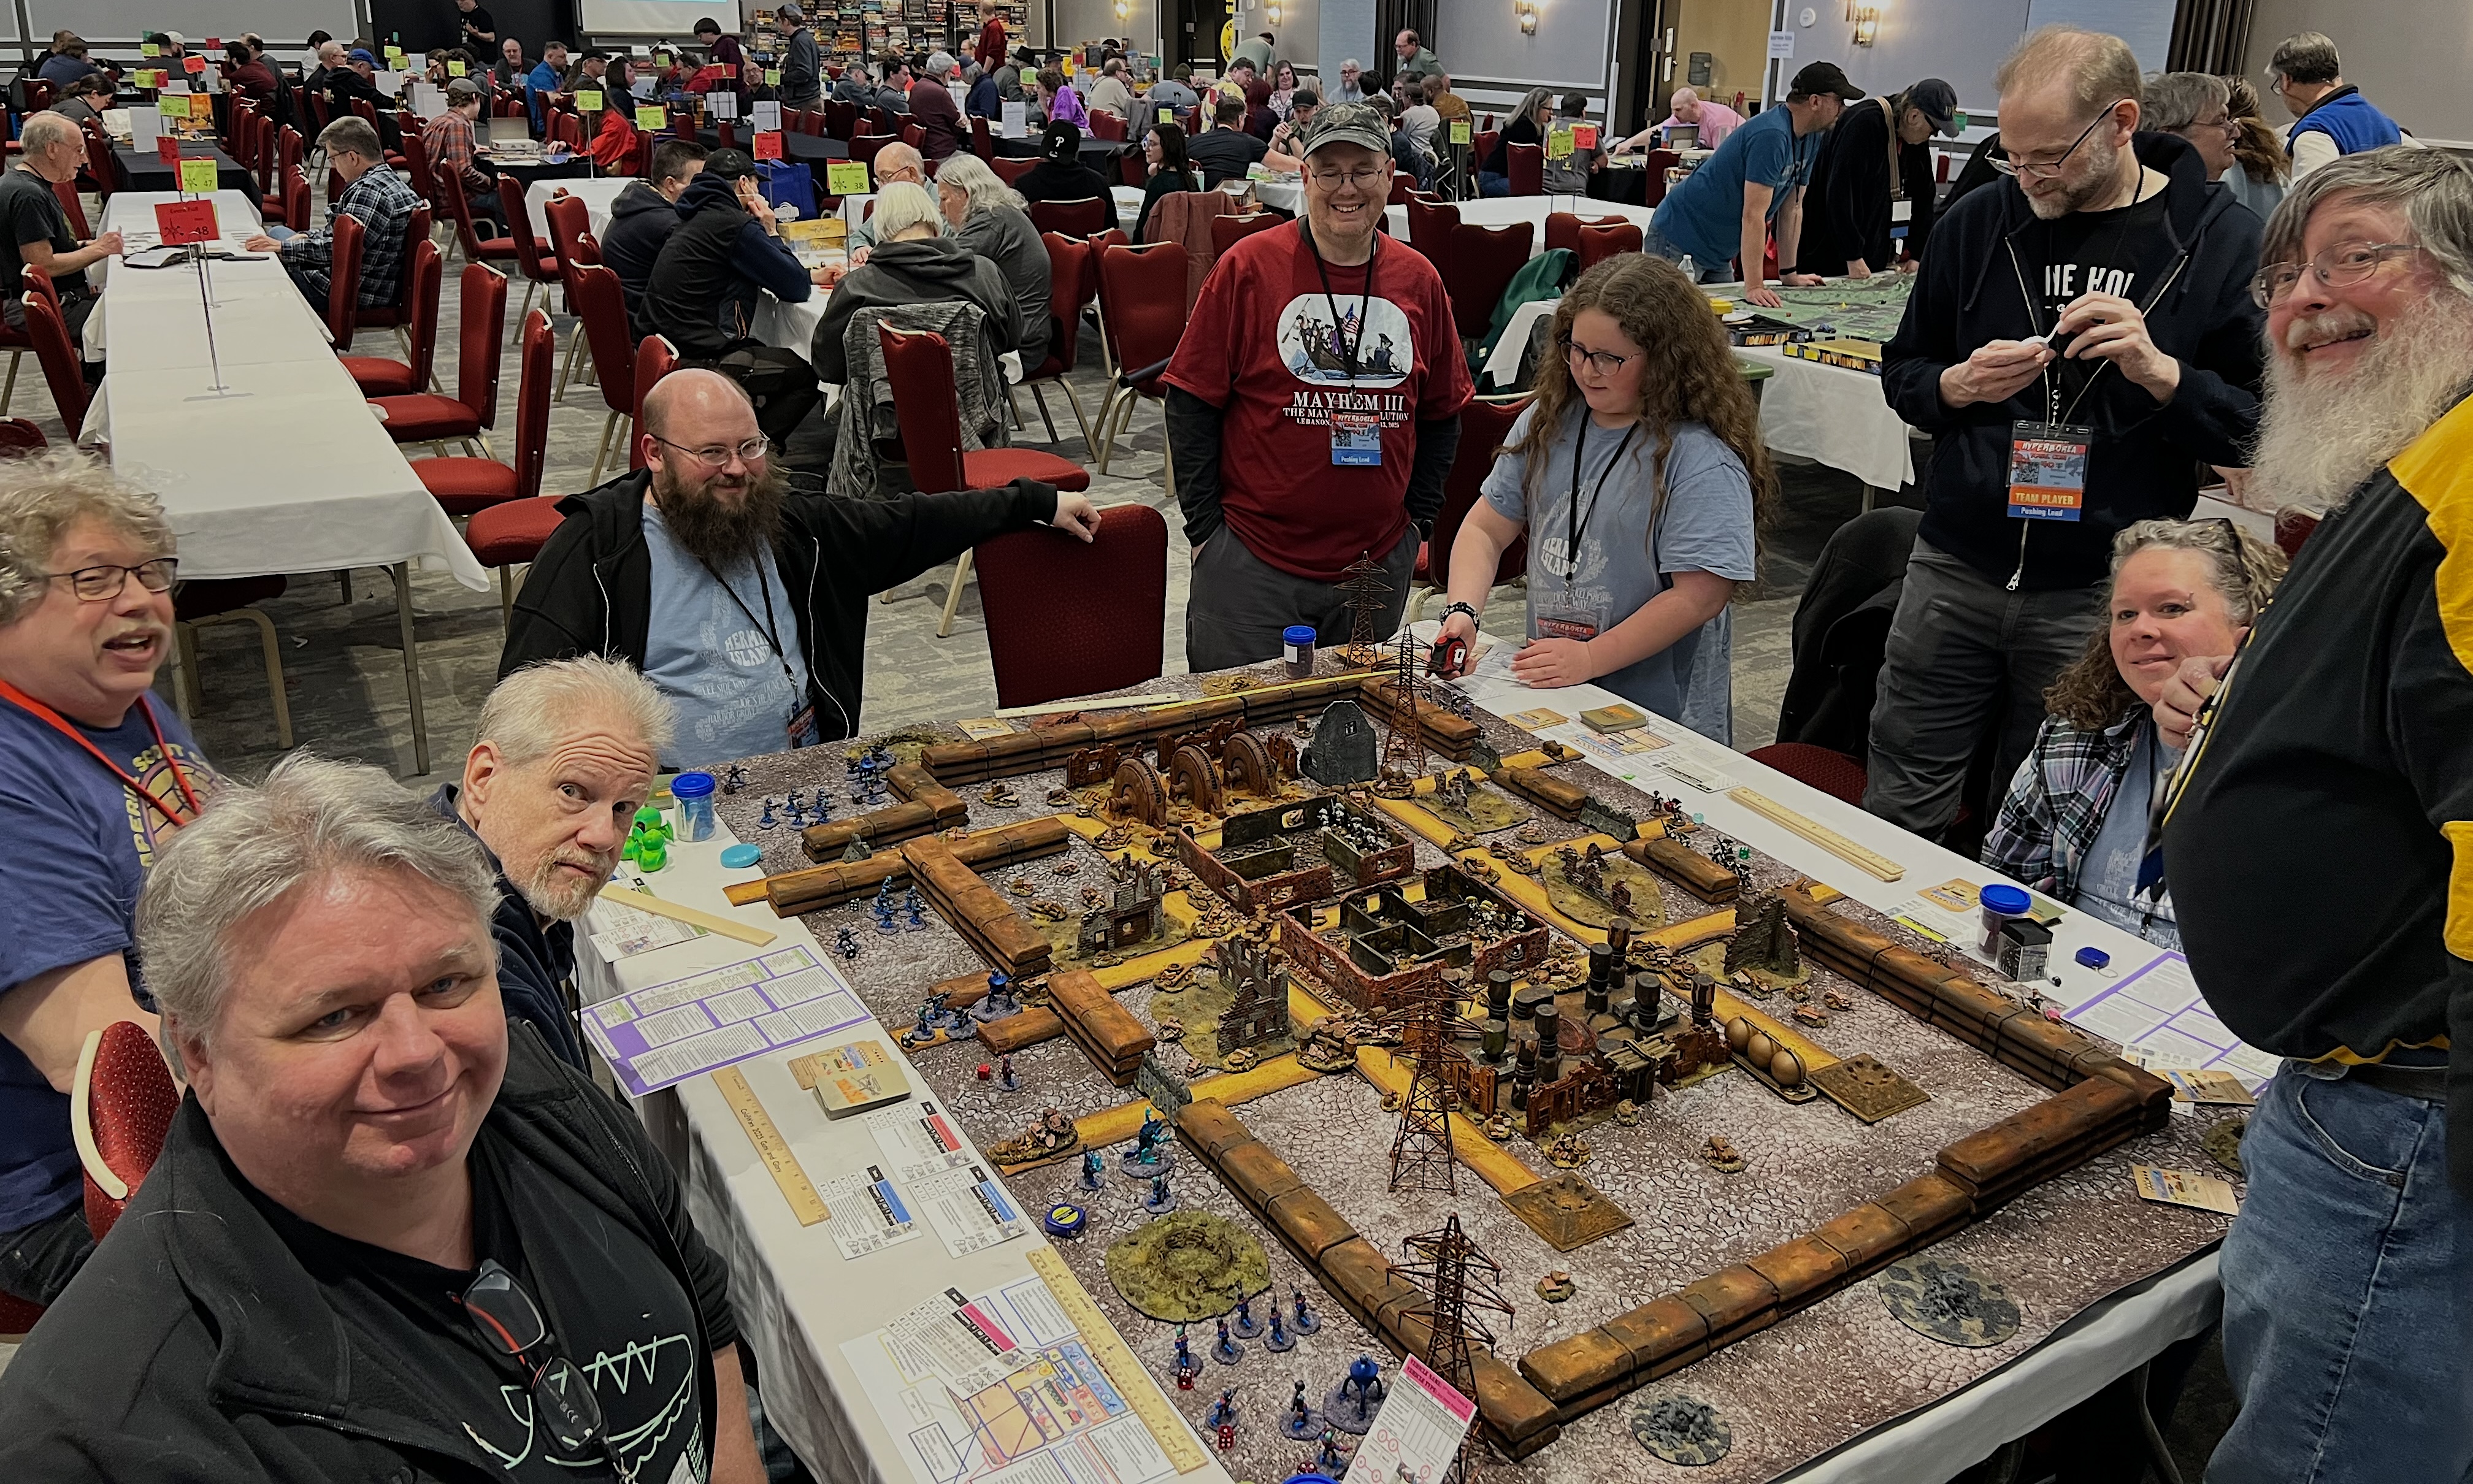
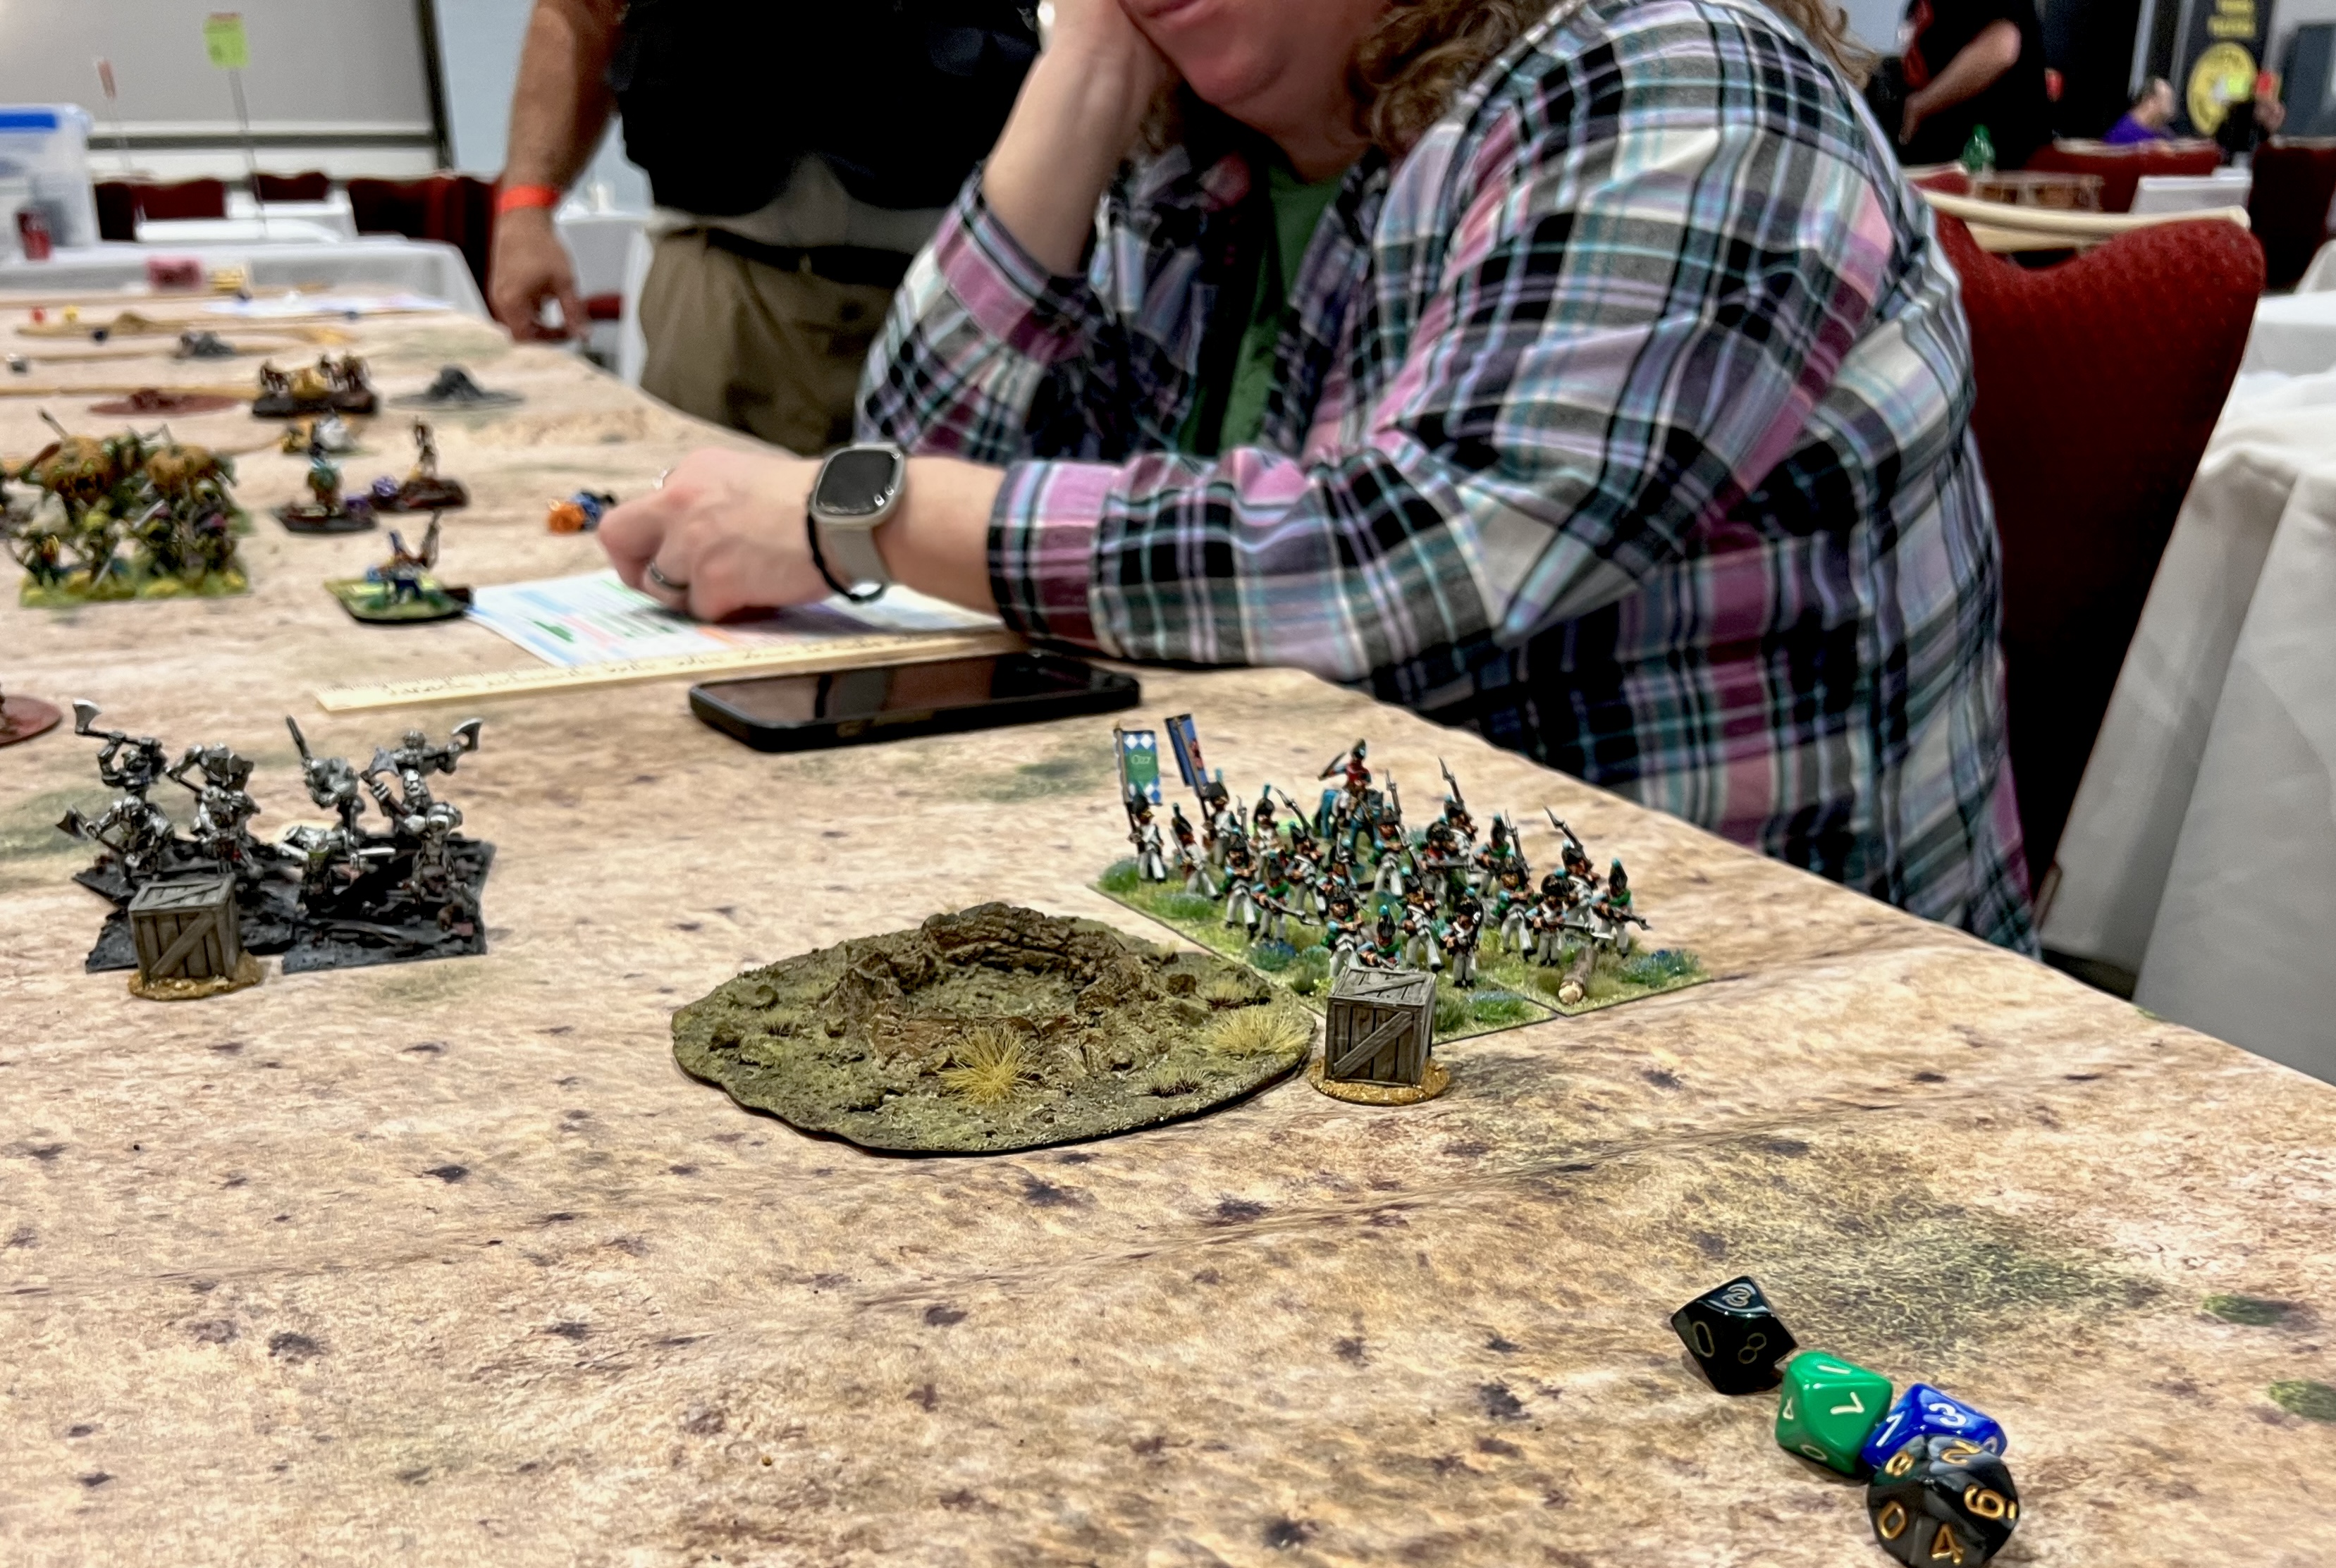
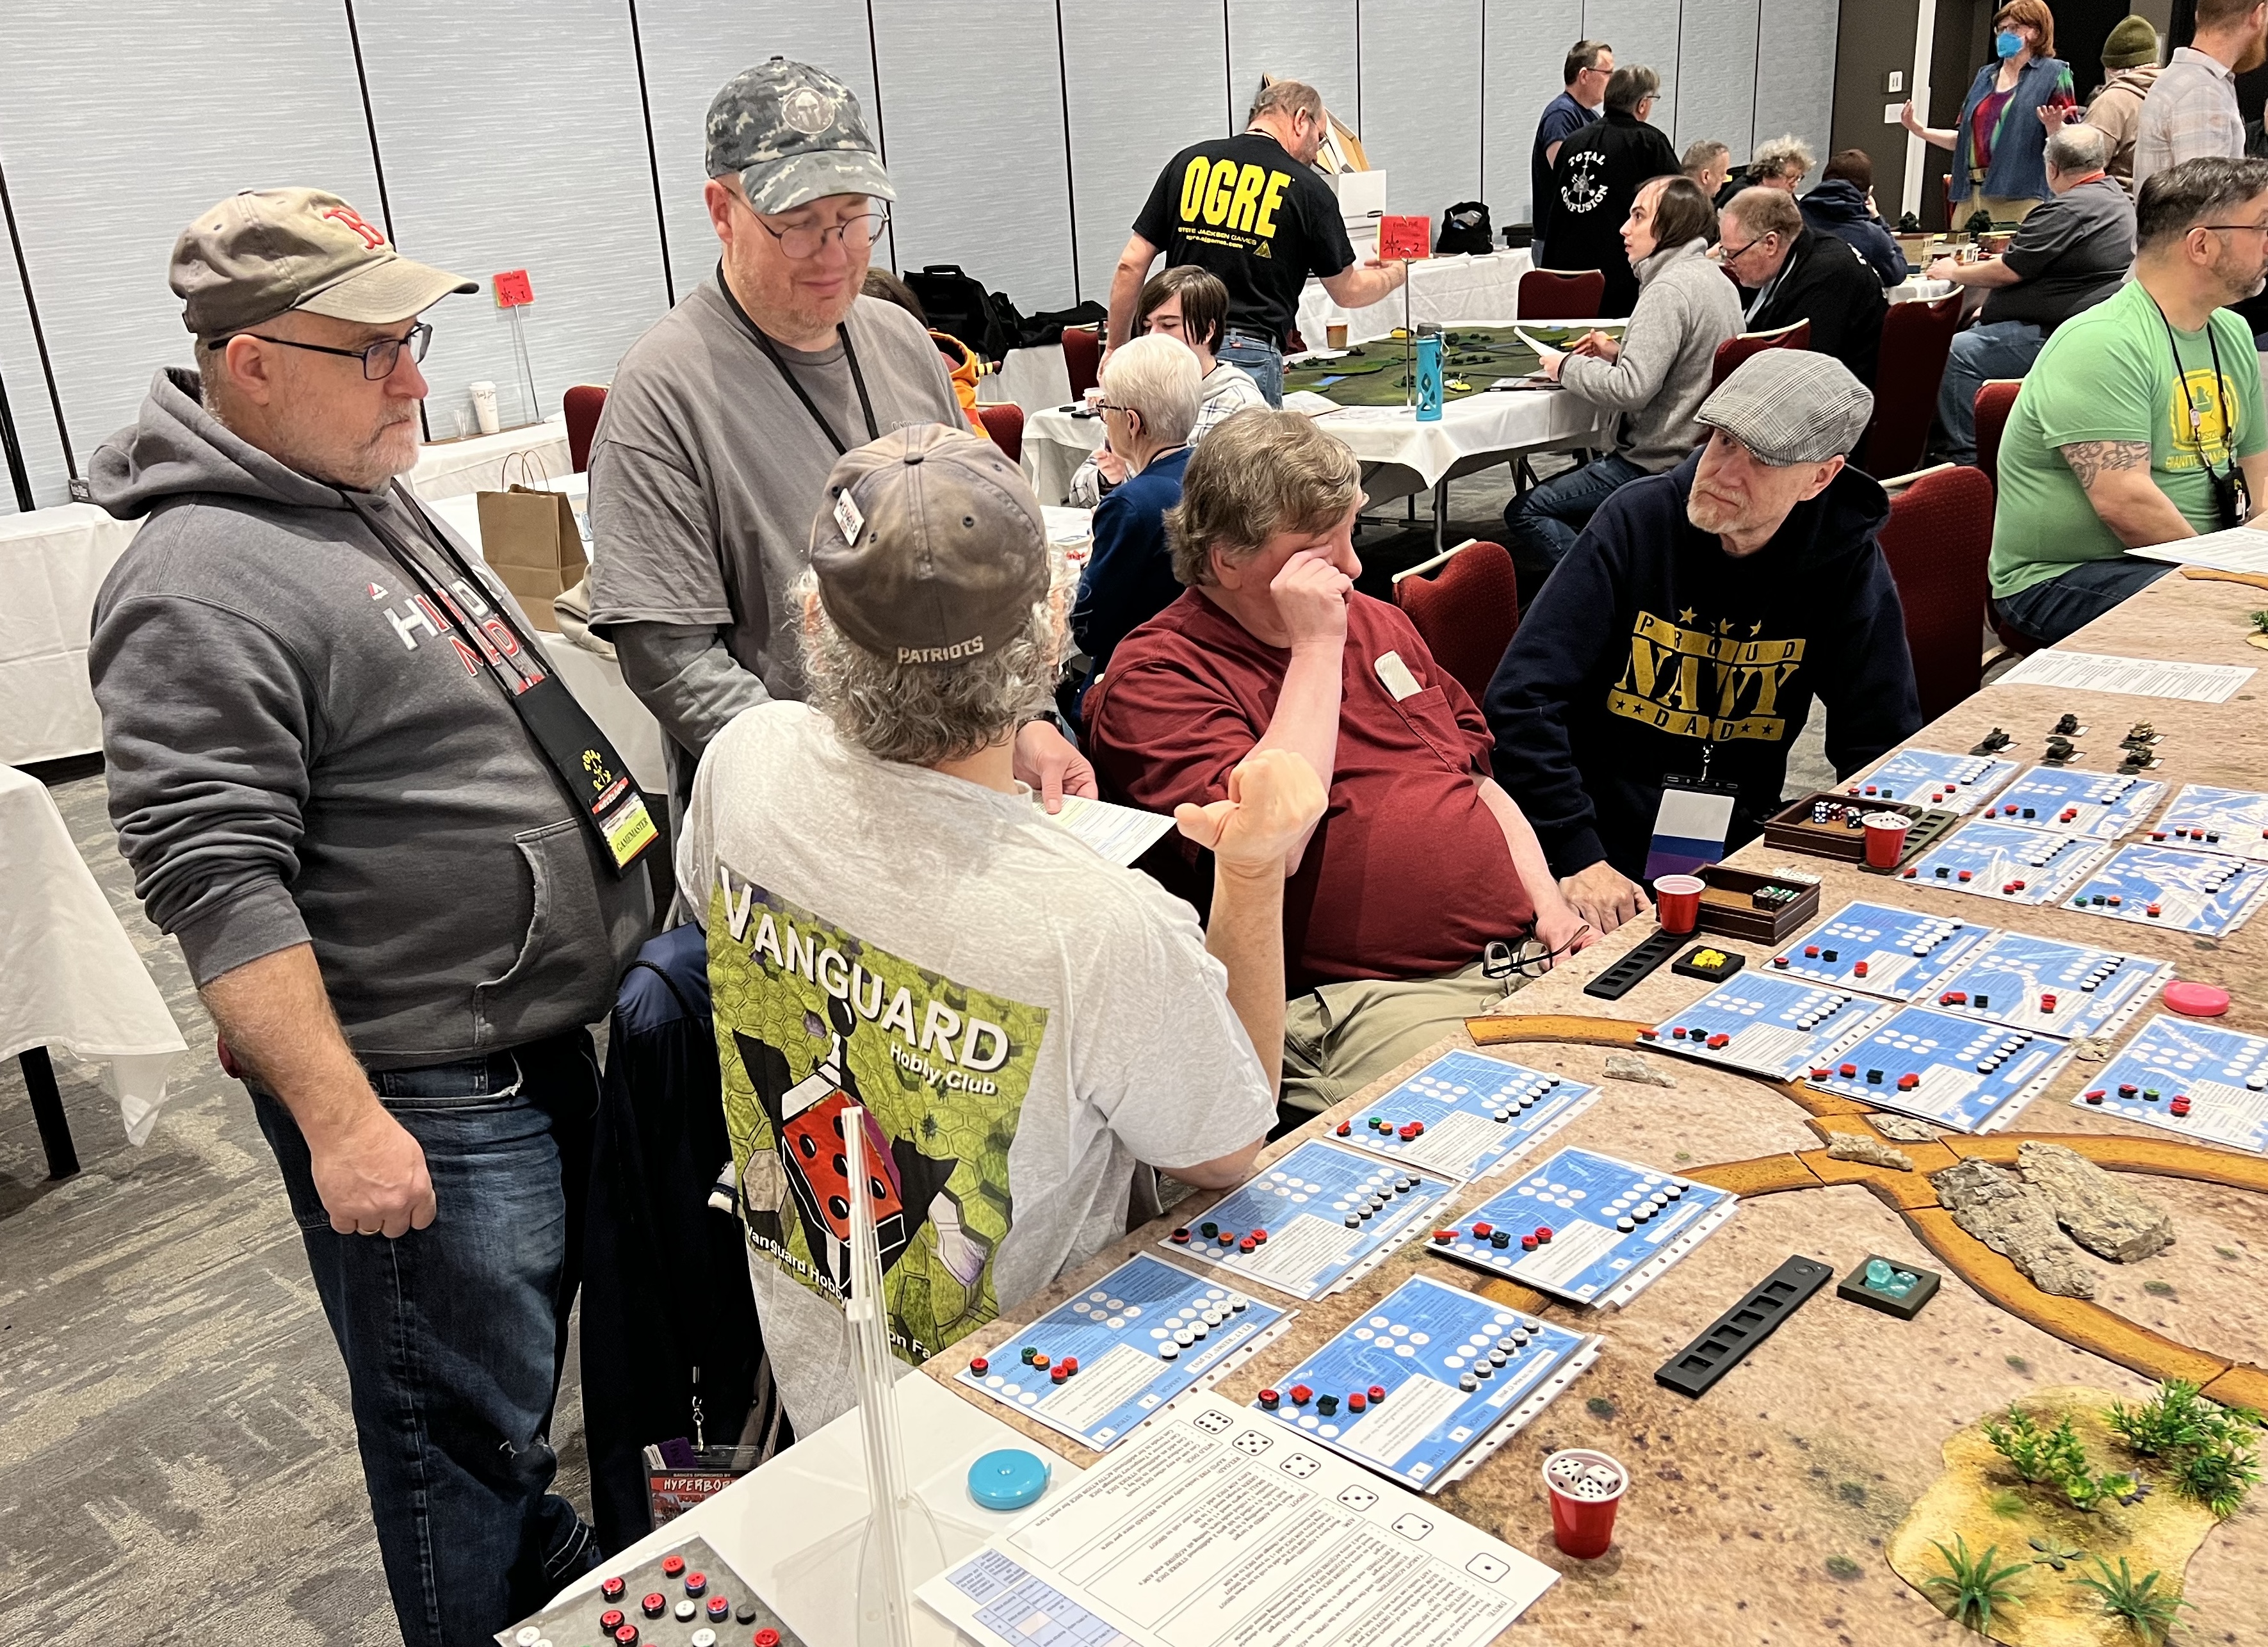
TotalCon 40 is an annual gaming convention that is held in Marlborough, MA at the Best Western Conference Center. There are events for miniature games, board games, RPG’s, and much more. Attendance is well over 1,000.
This year it was held between February 19th and 22nd of 2026. I usually run several tabletop miniatures games there. This year was no exception. I ran eight 4-hour games across the 4 days.
Several players who participated in my games are eager to see some game shots. Not to disappoint, his post will be picture heavy and text light!
On Thursday of every TotalCon, there is a large flea market in an adjoining room to the main hall. From Friday to Sunday, I get a very big table in that room. Because of the flea market’s need for space, I settle for a smaller footprint on Thursday. That smaller table was fine for two games (afternoon and evening).
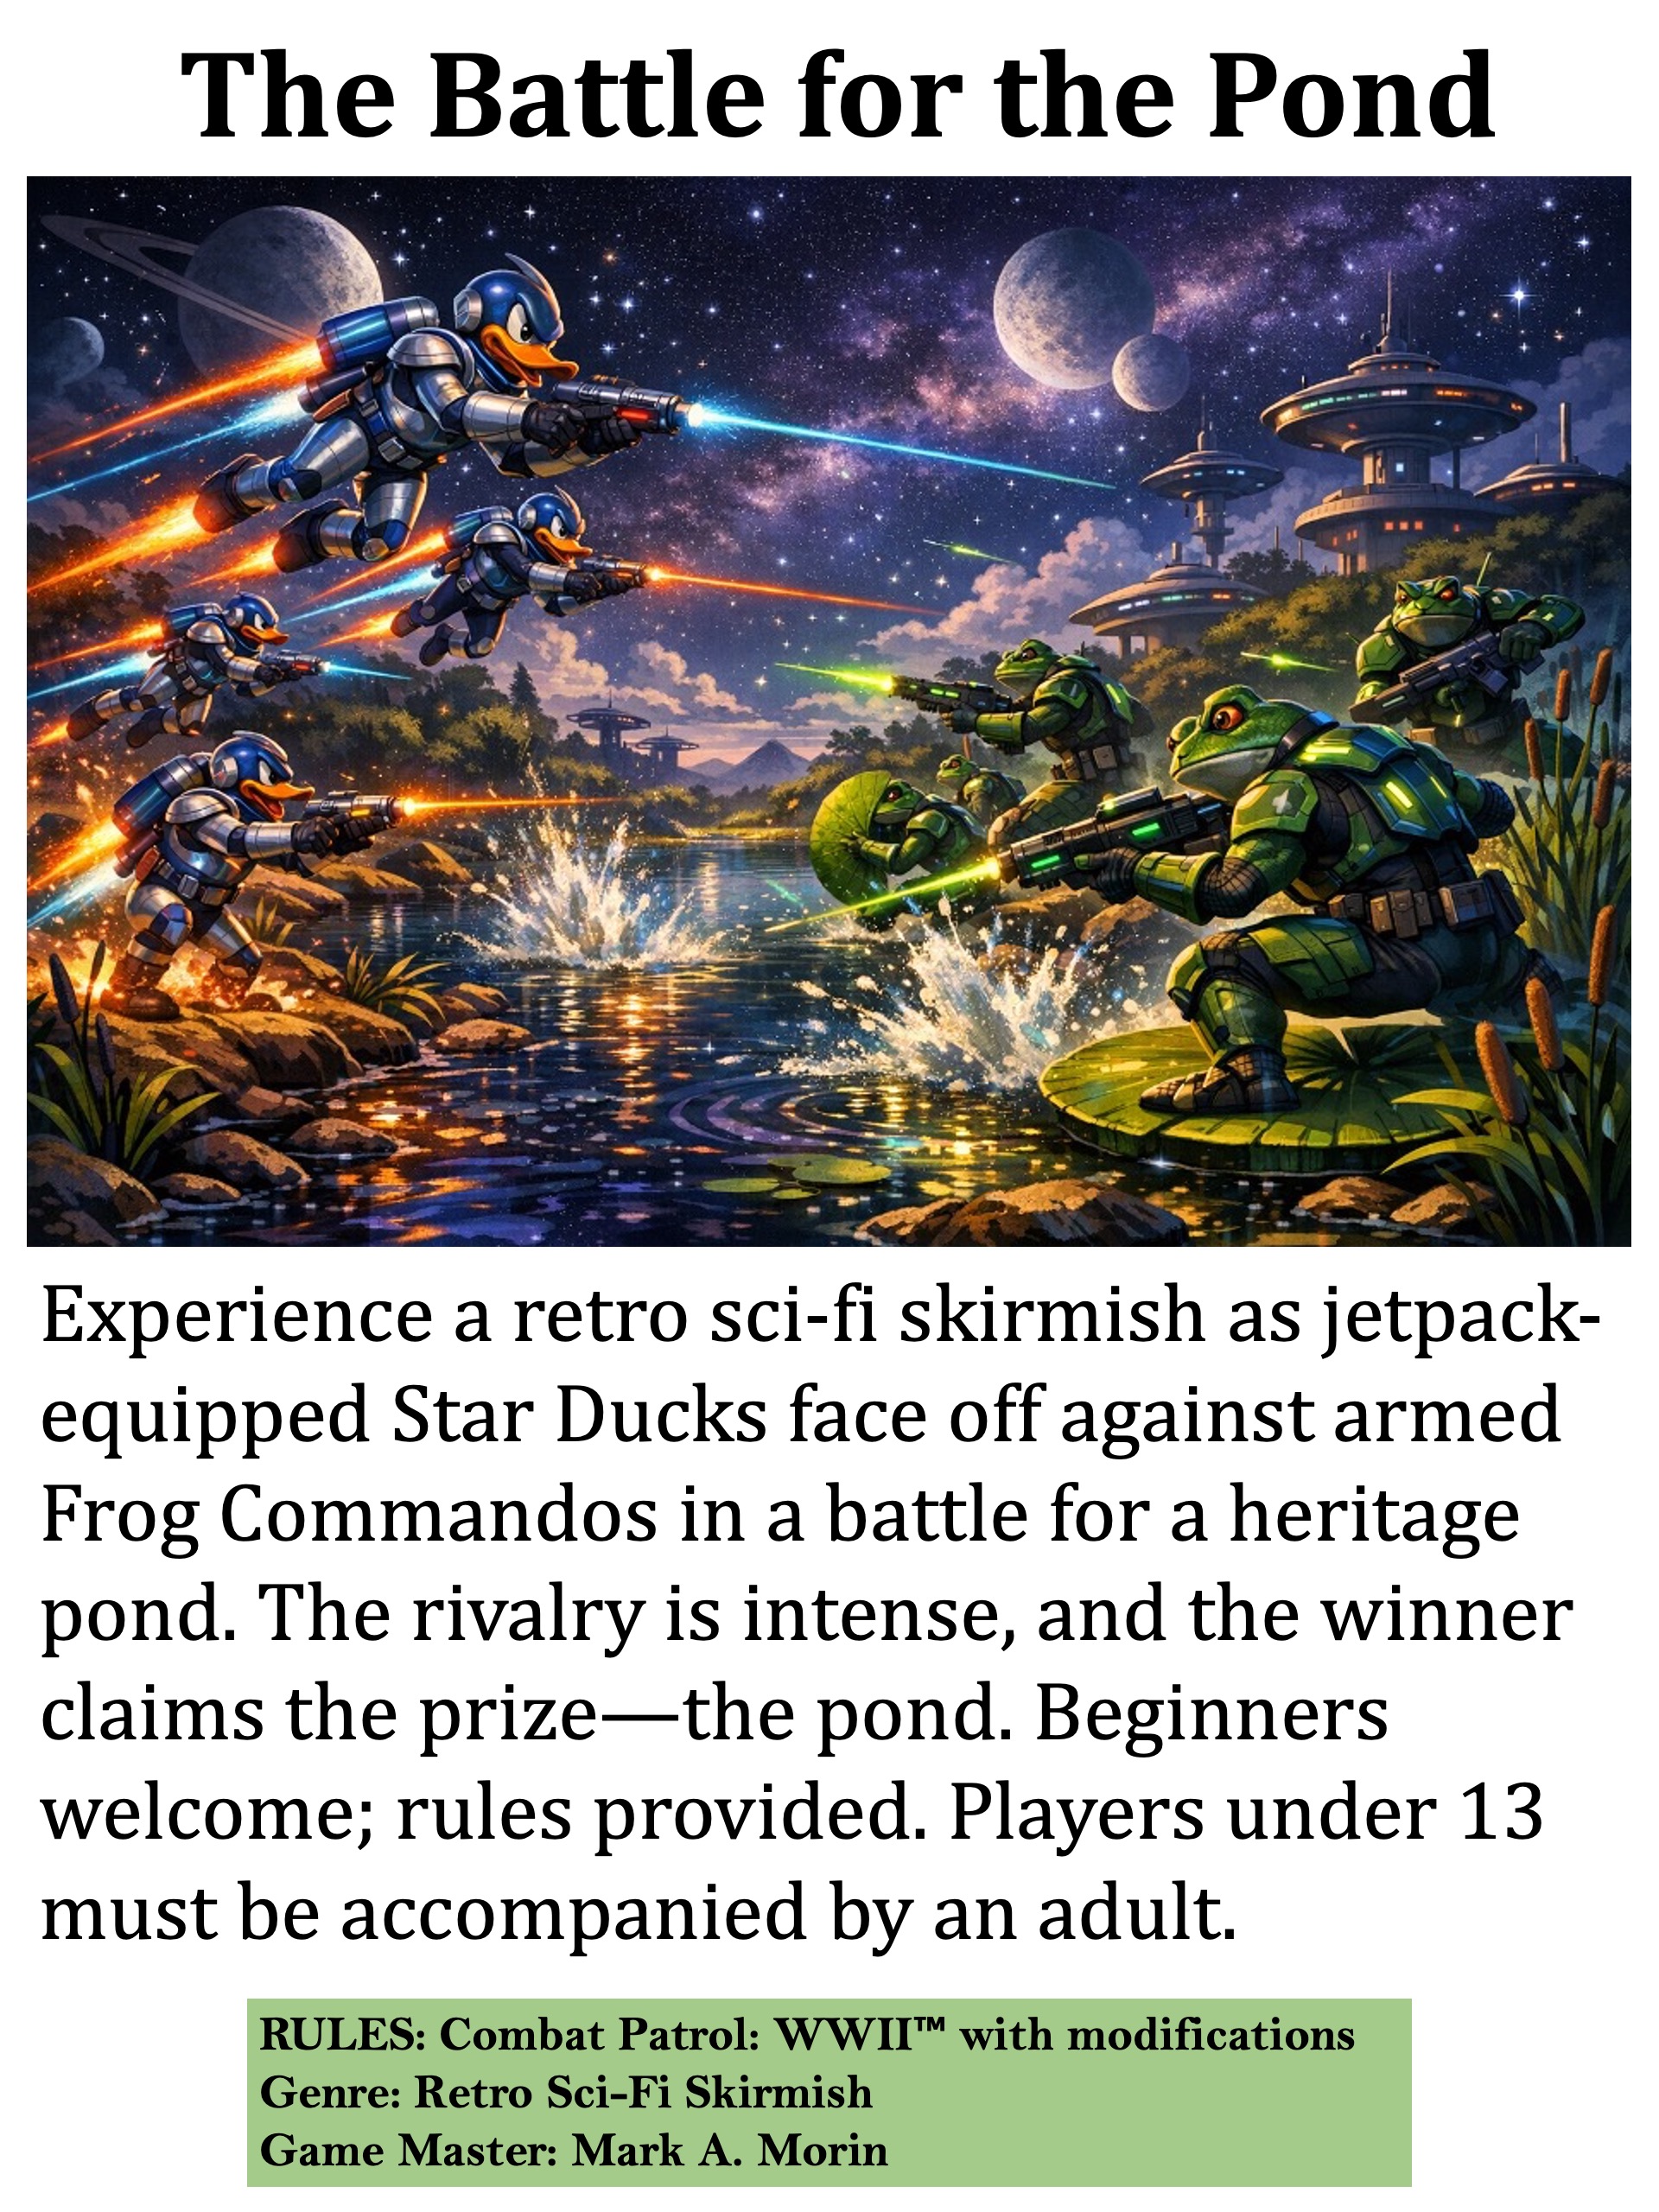
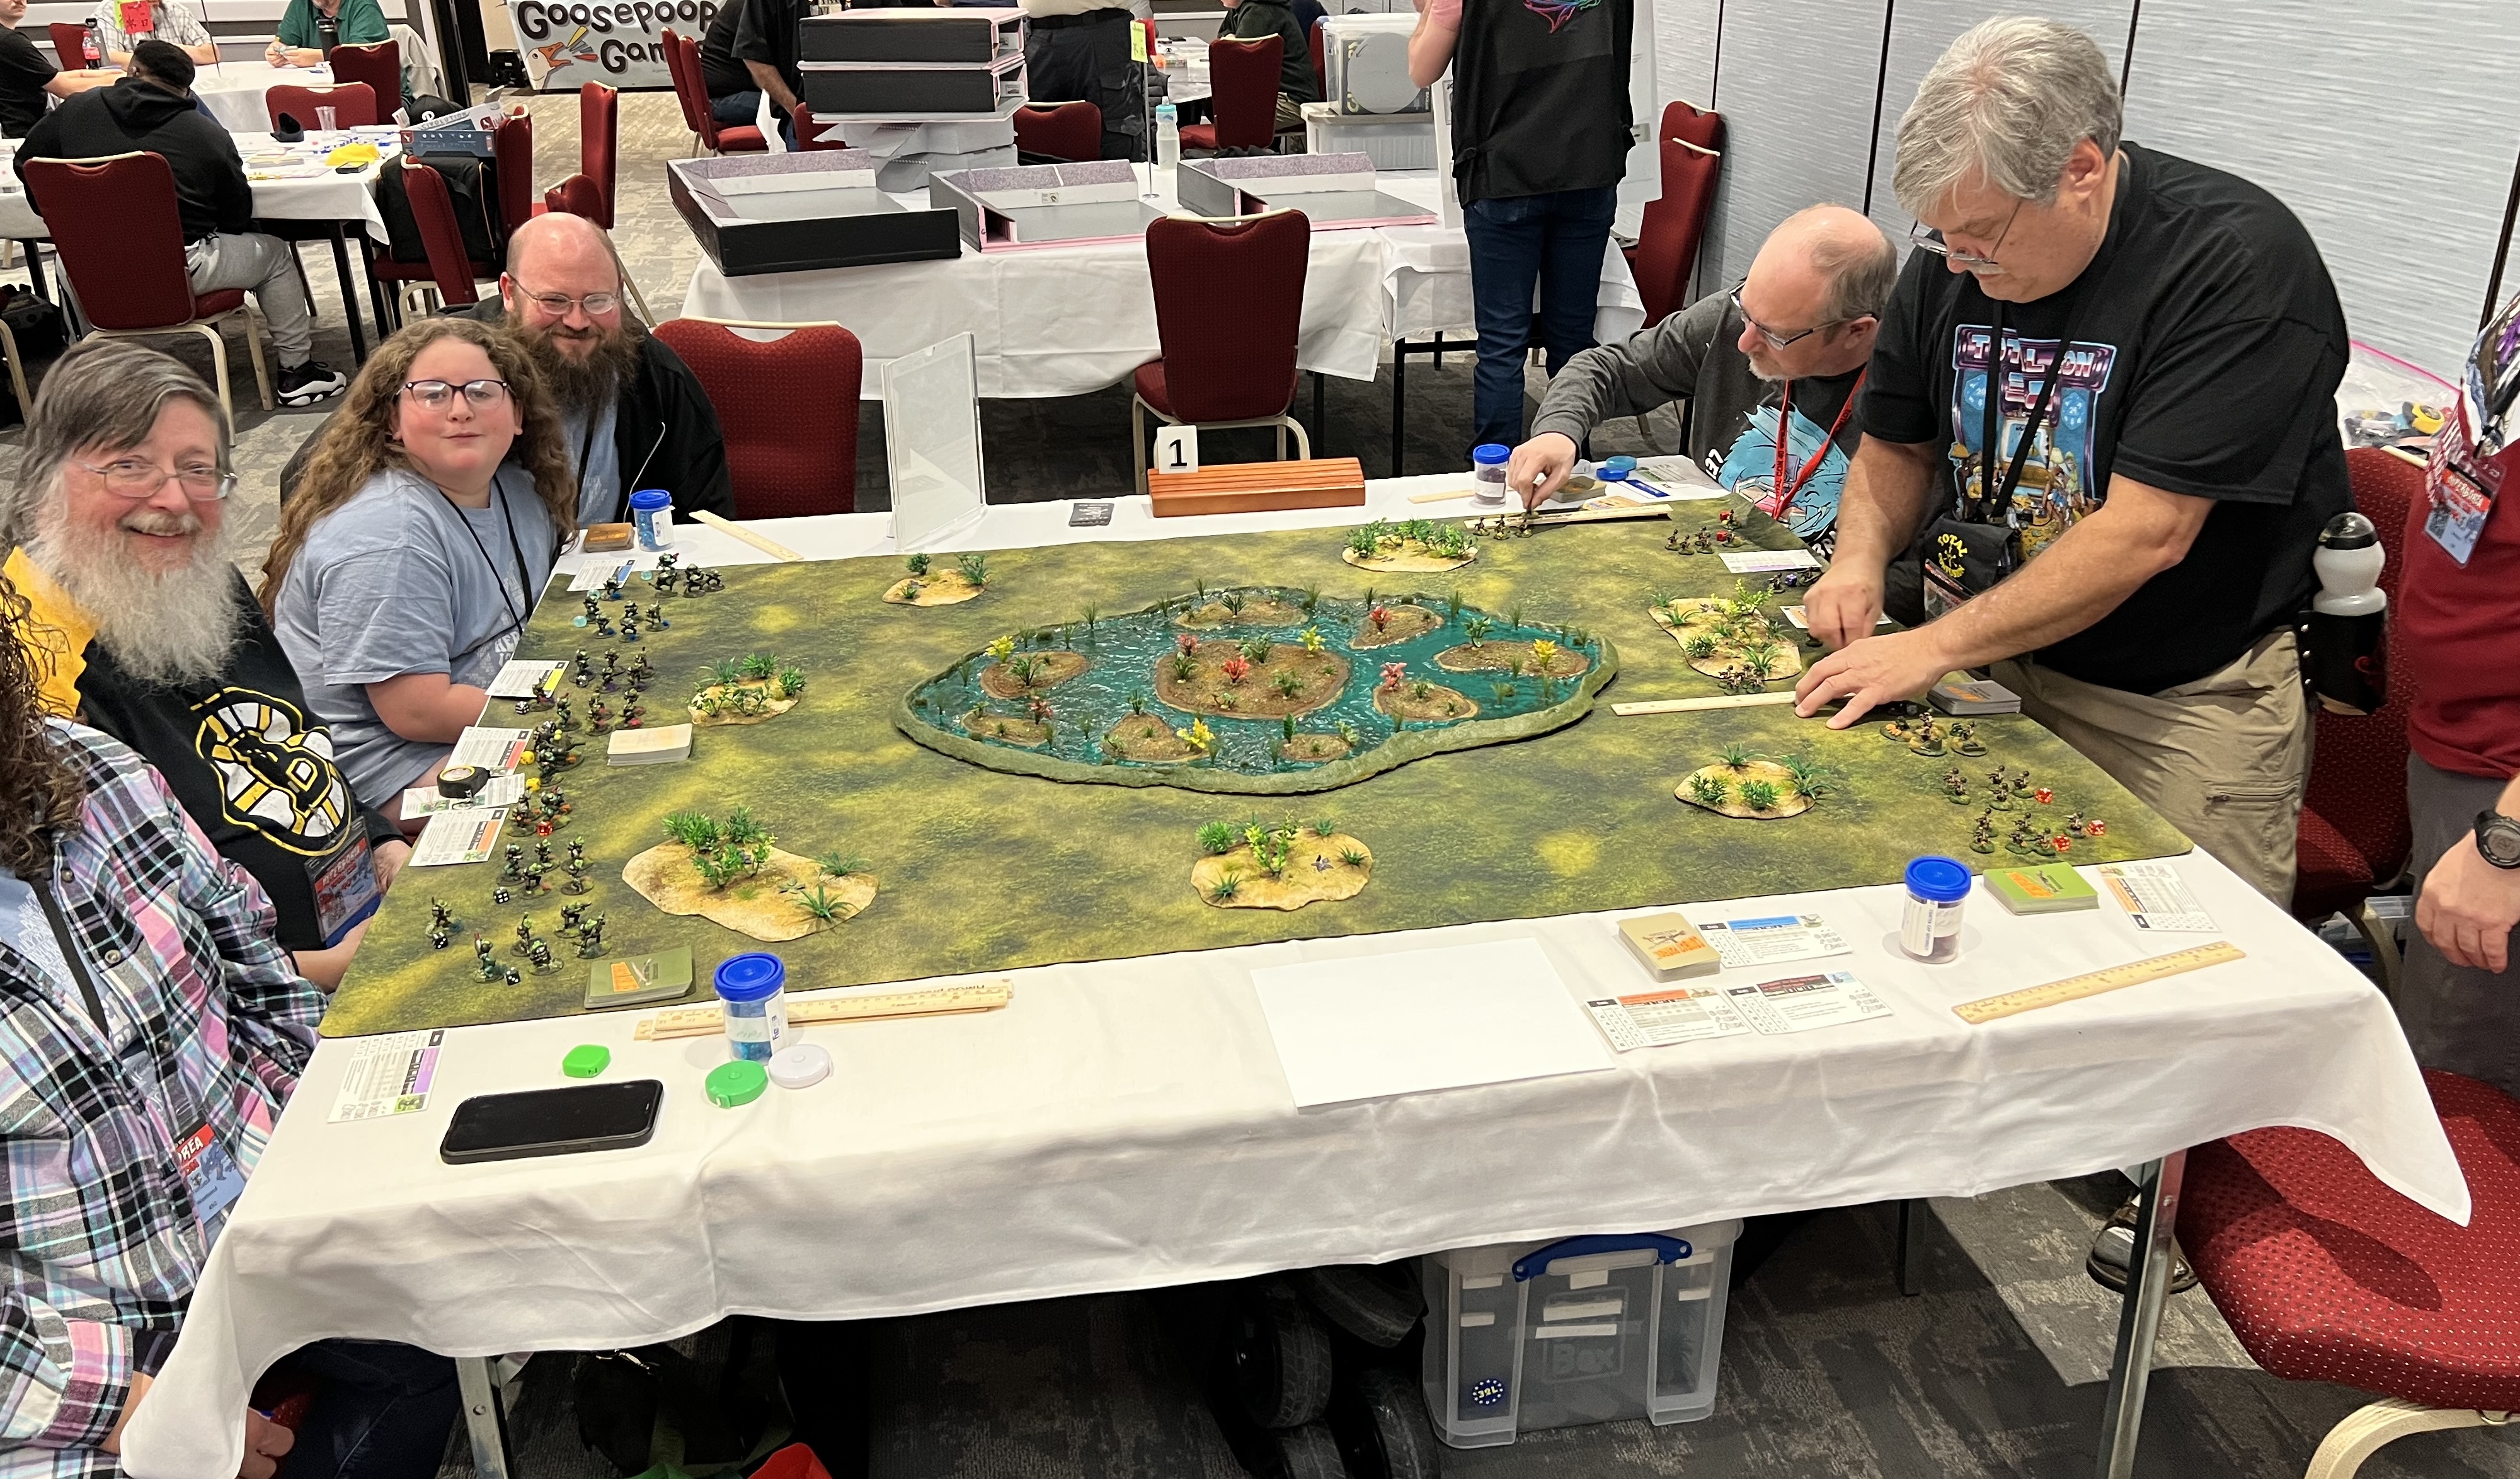
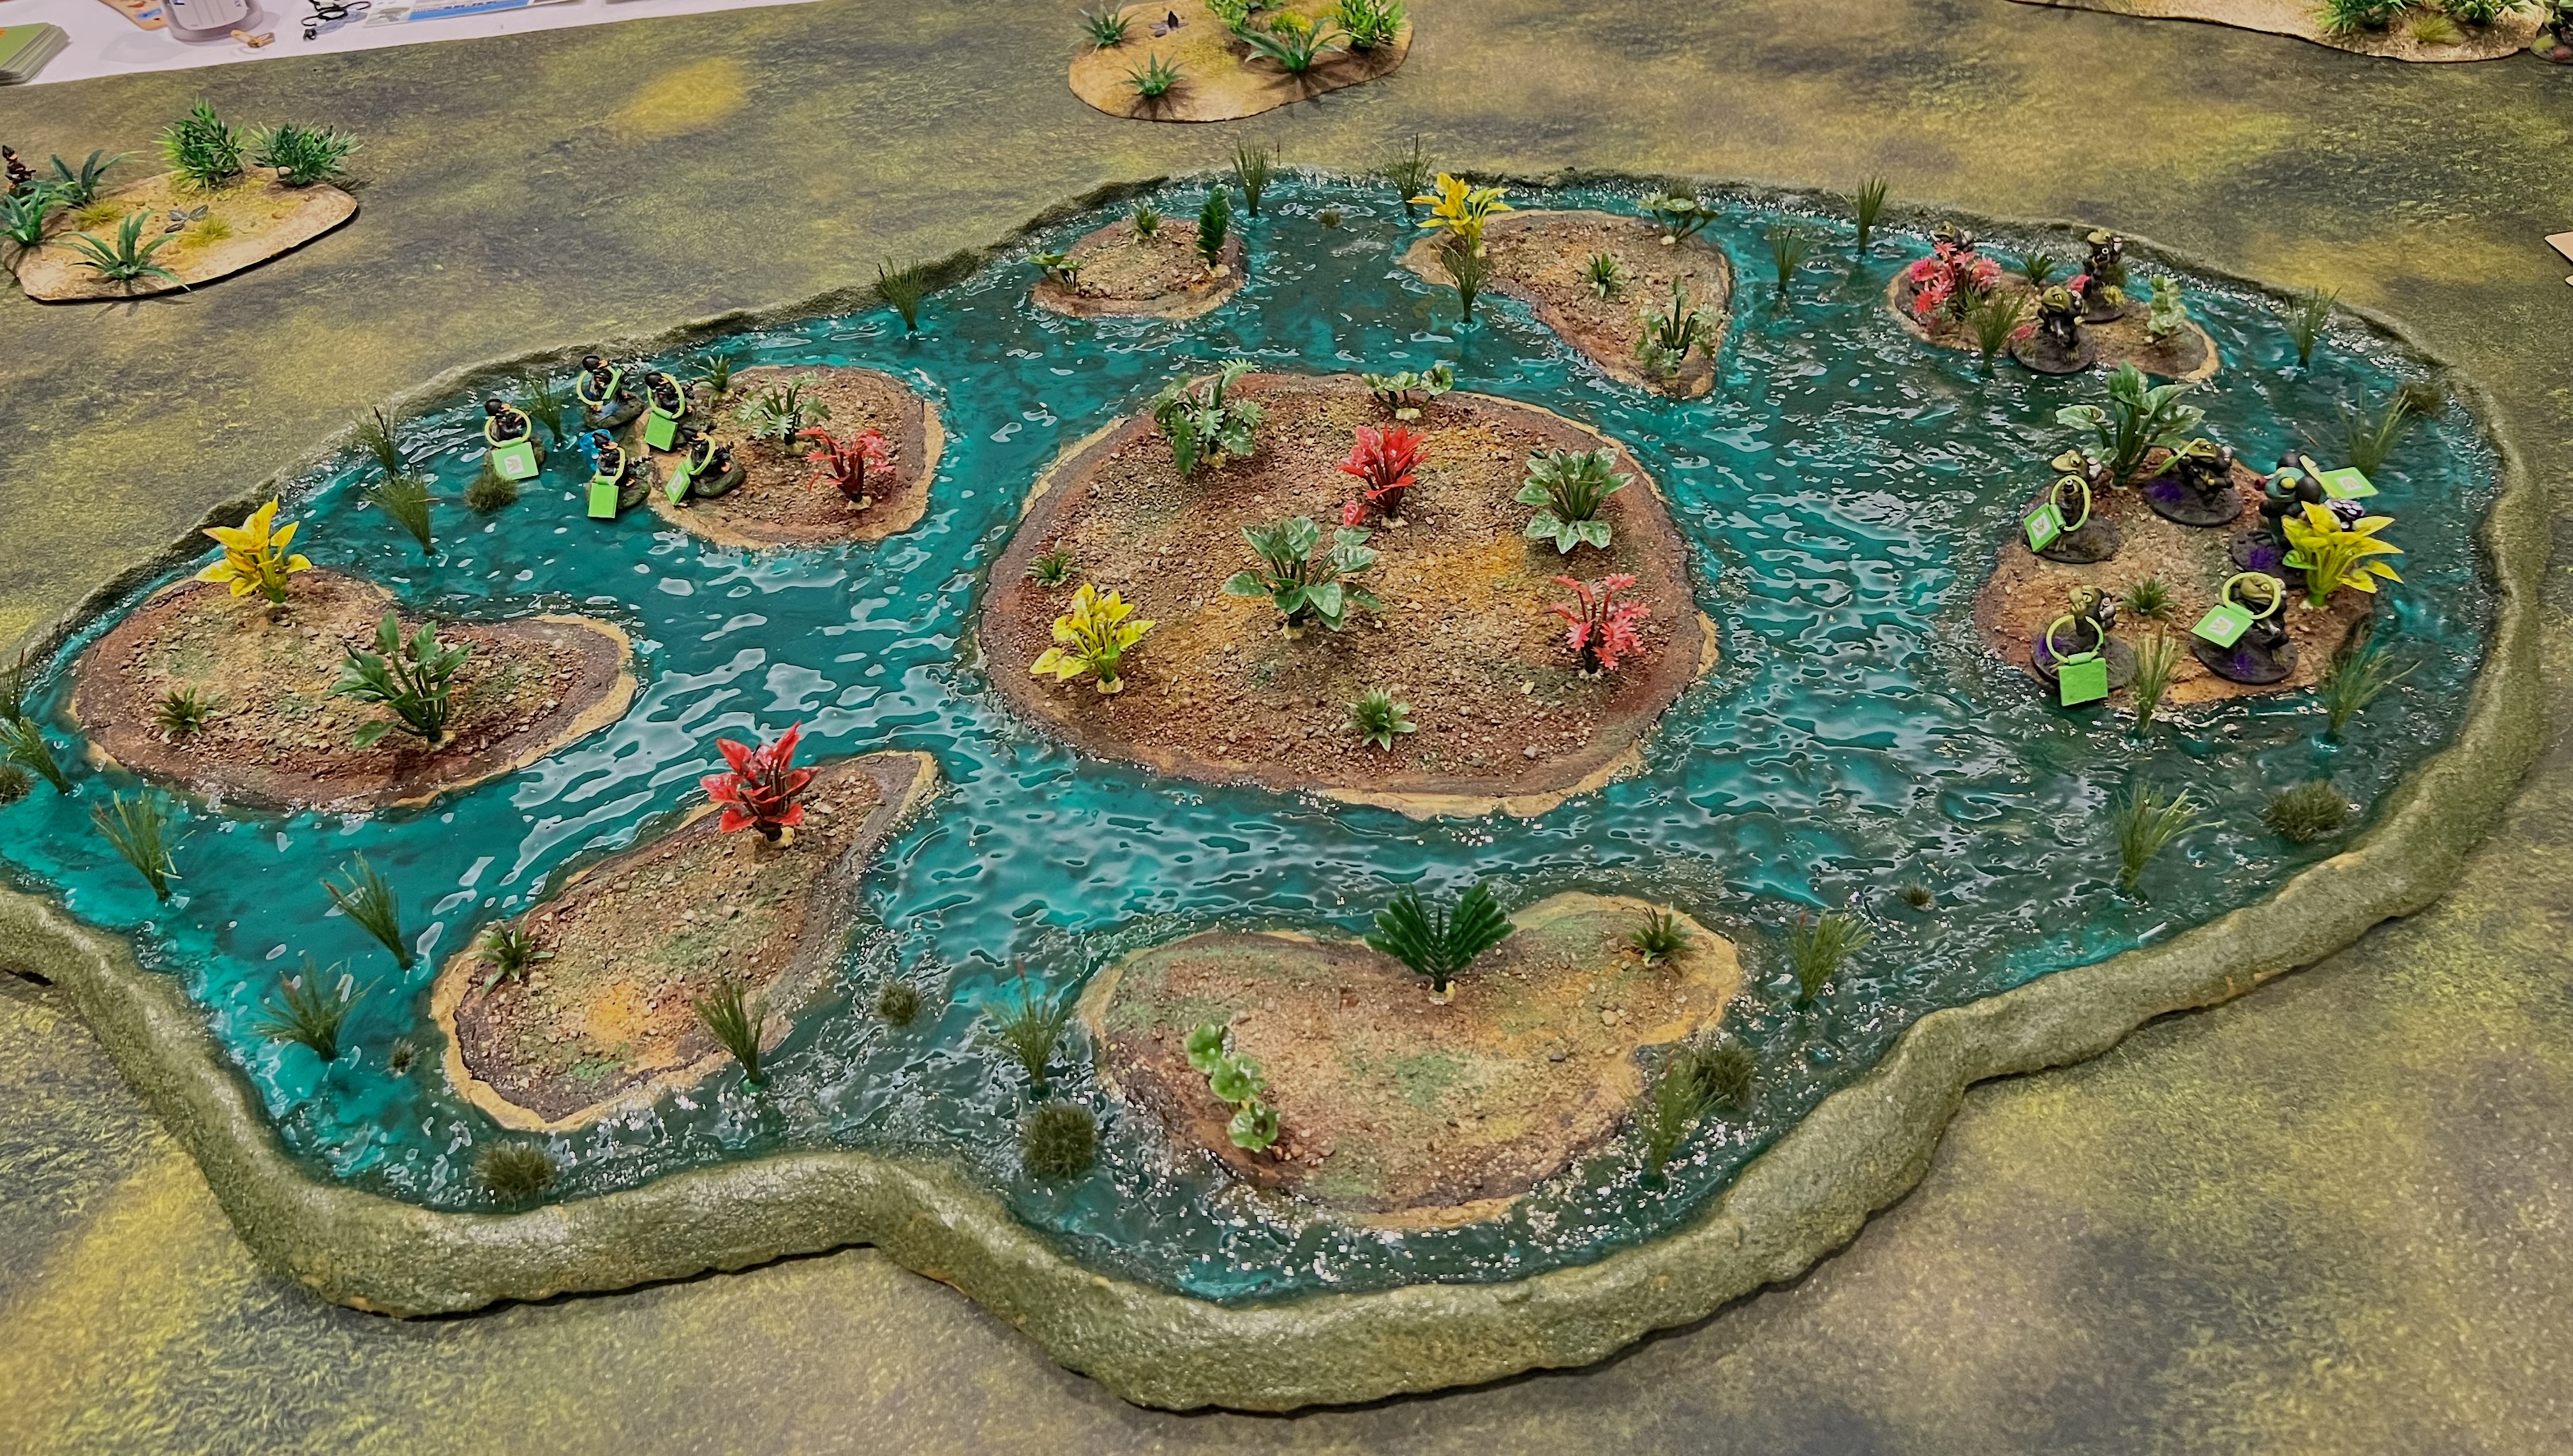
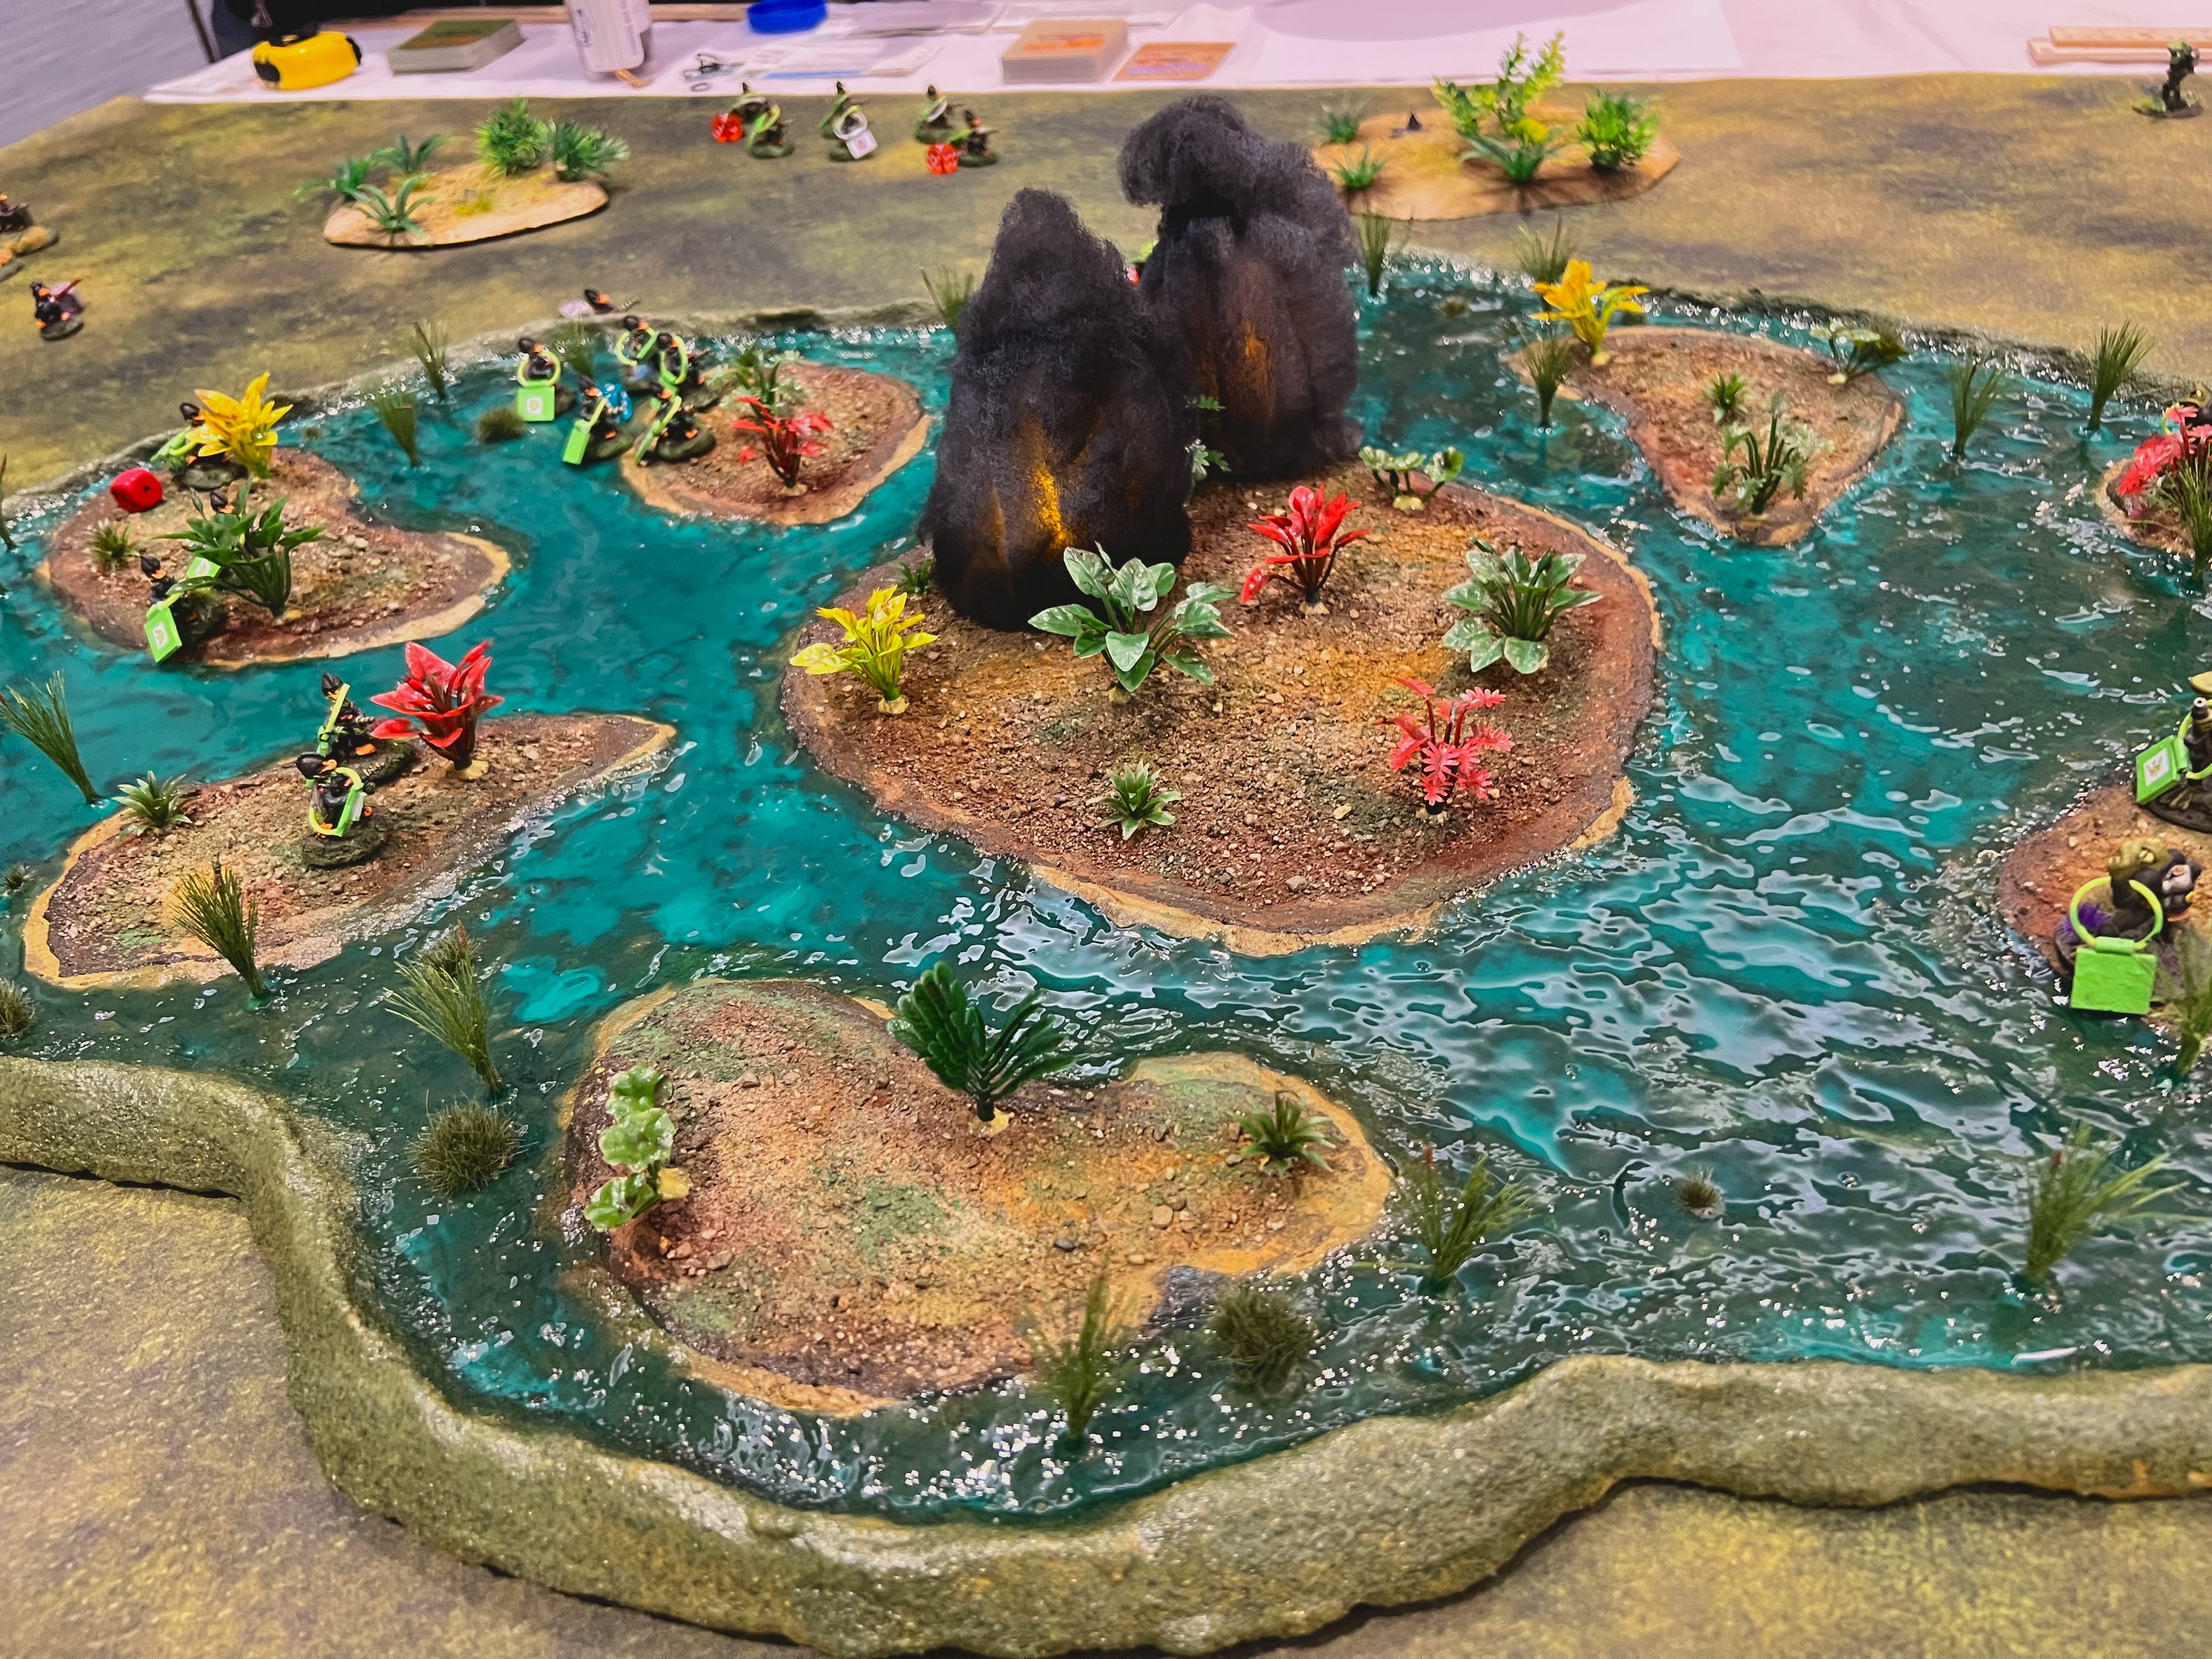
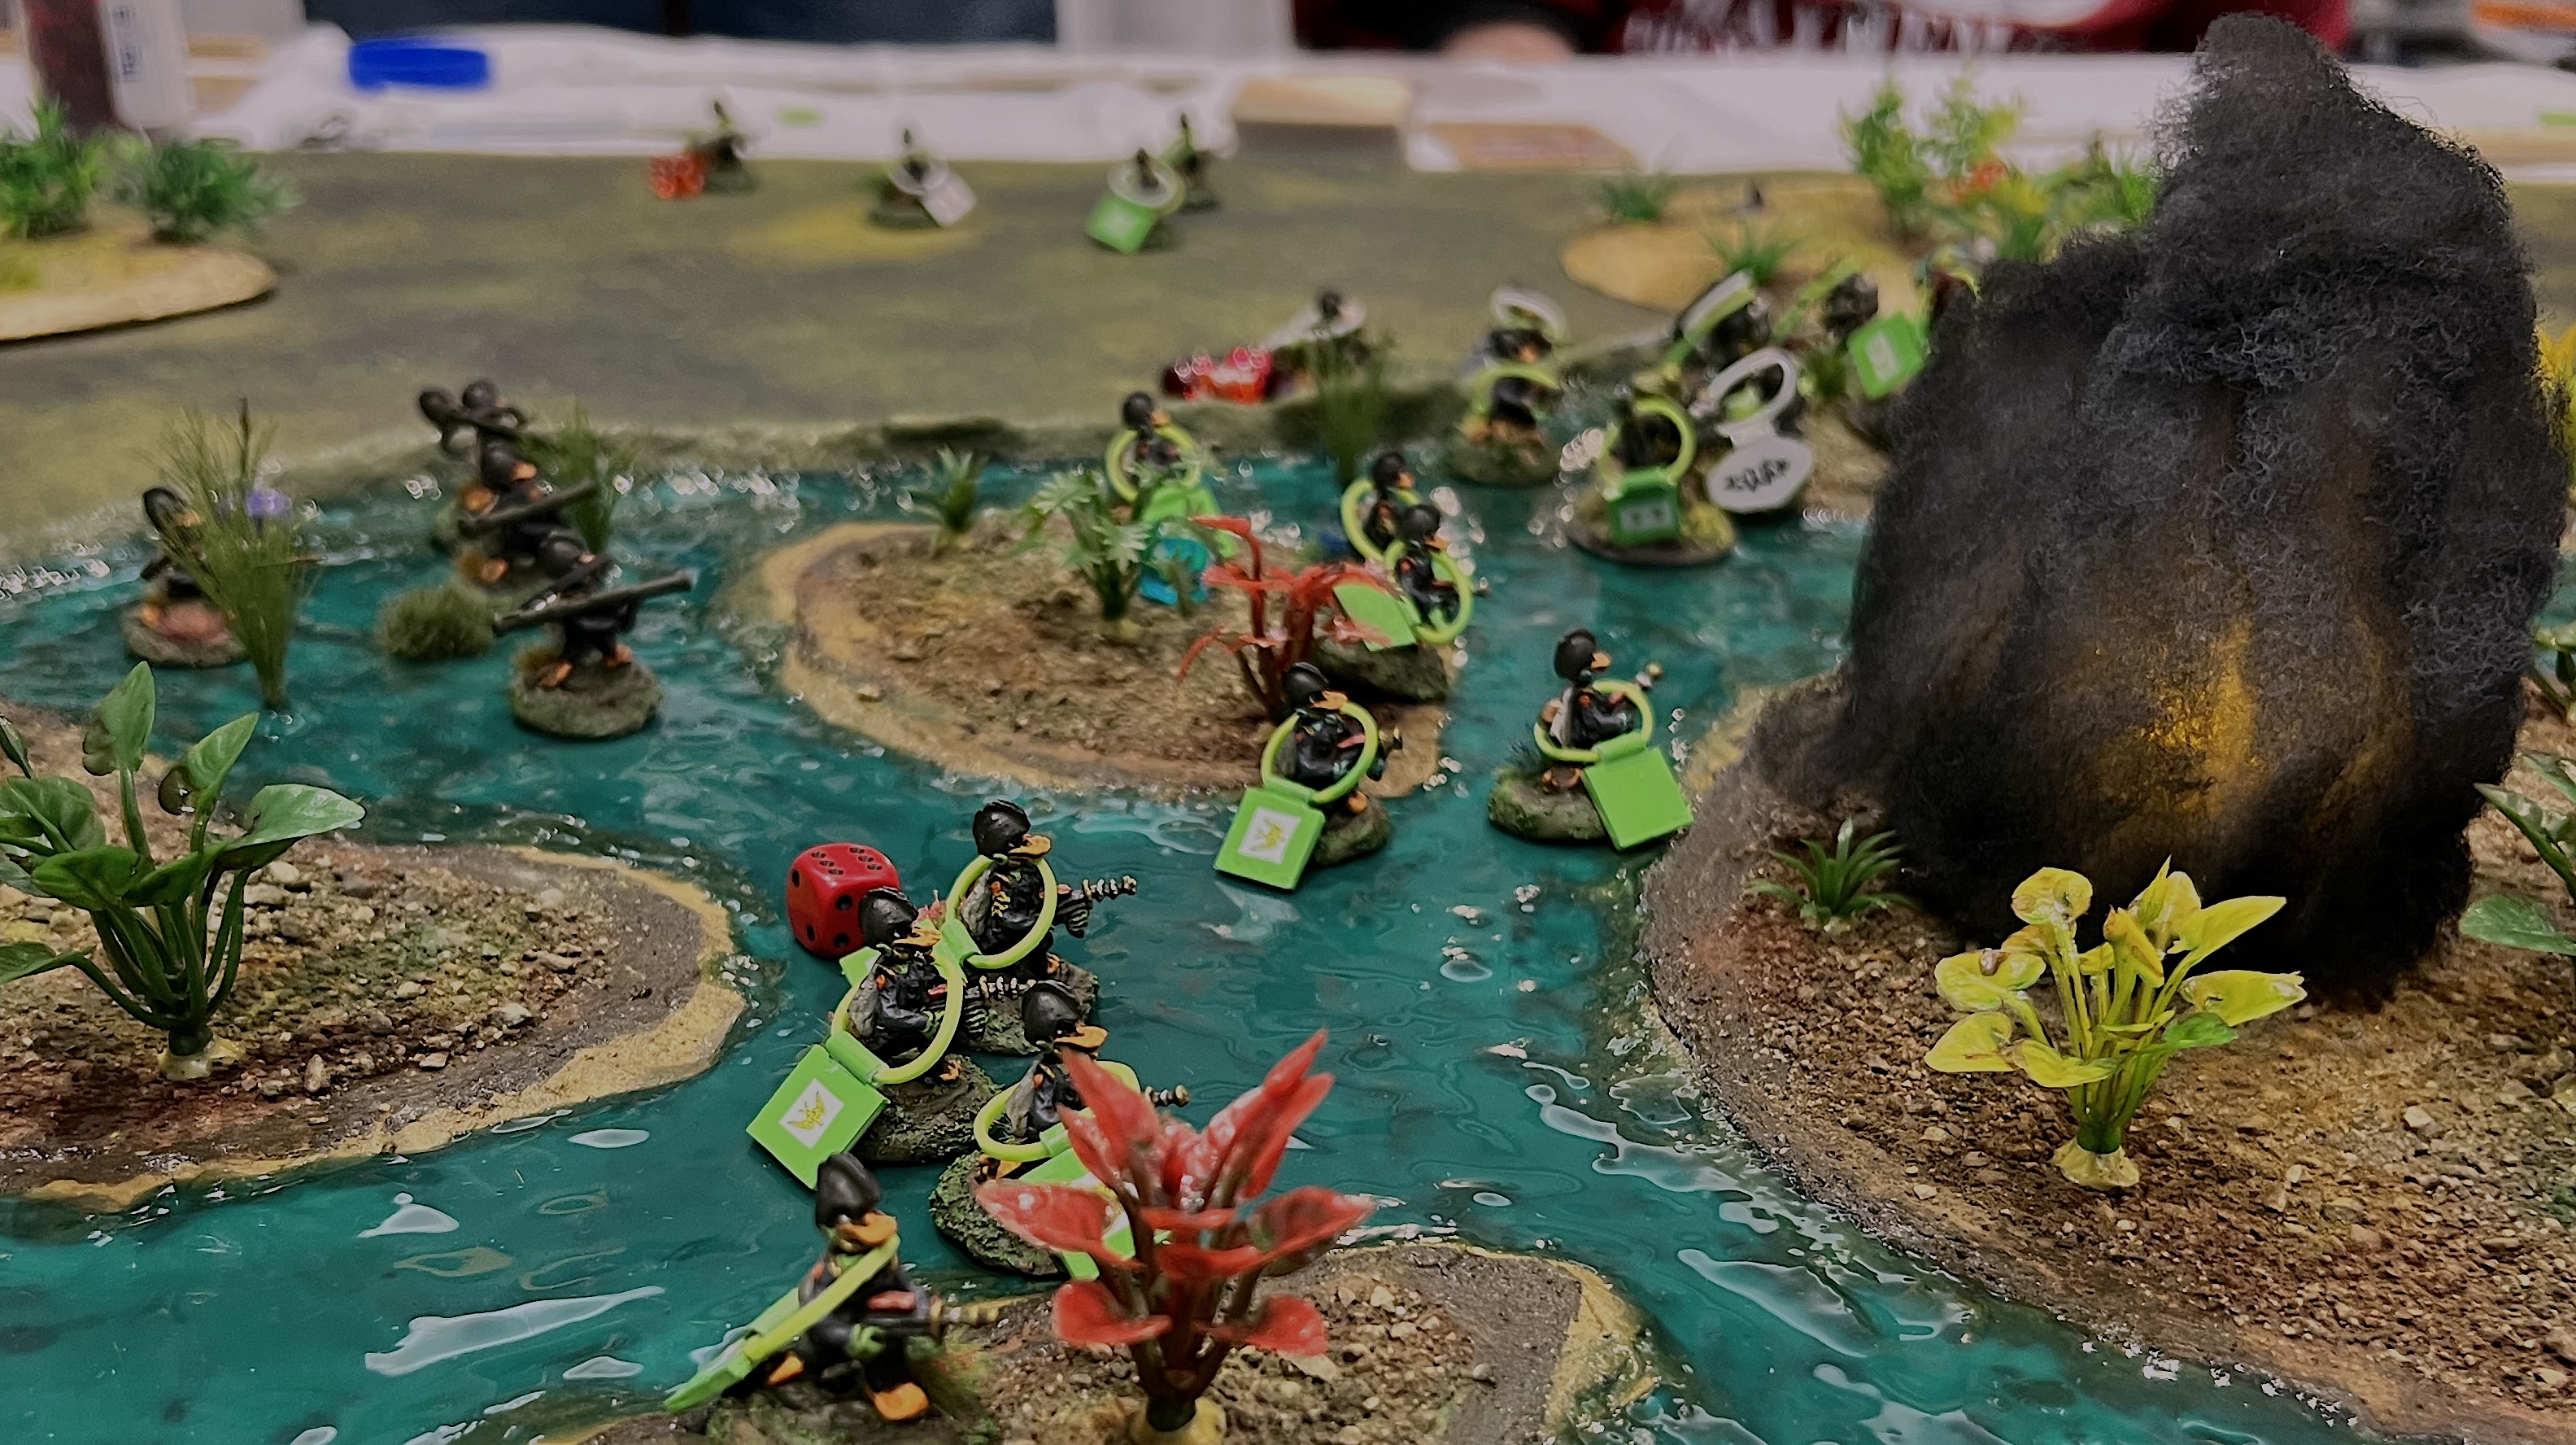
Battle for the Pond
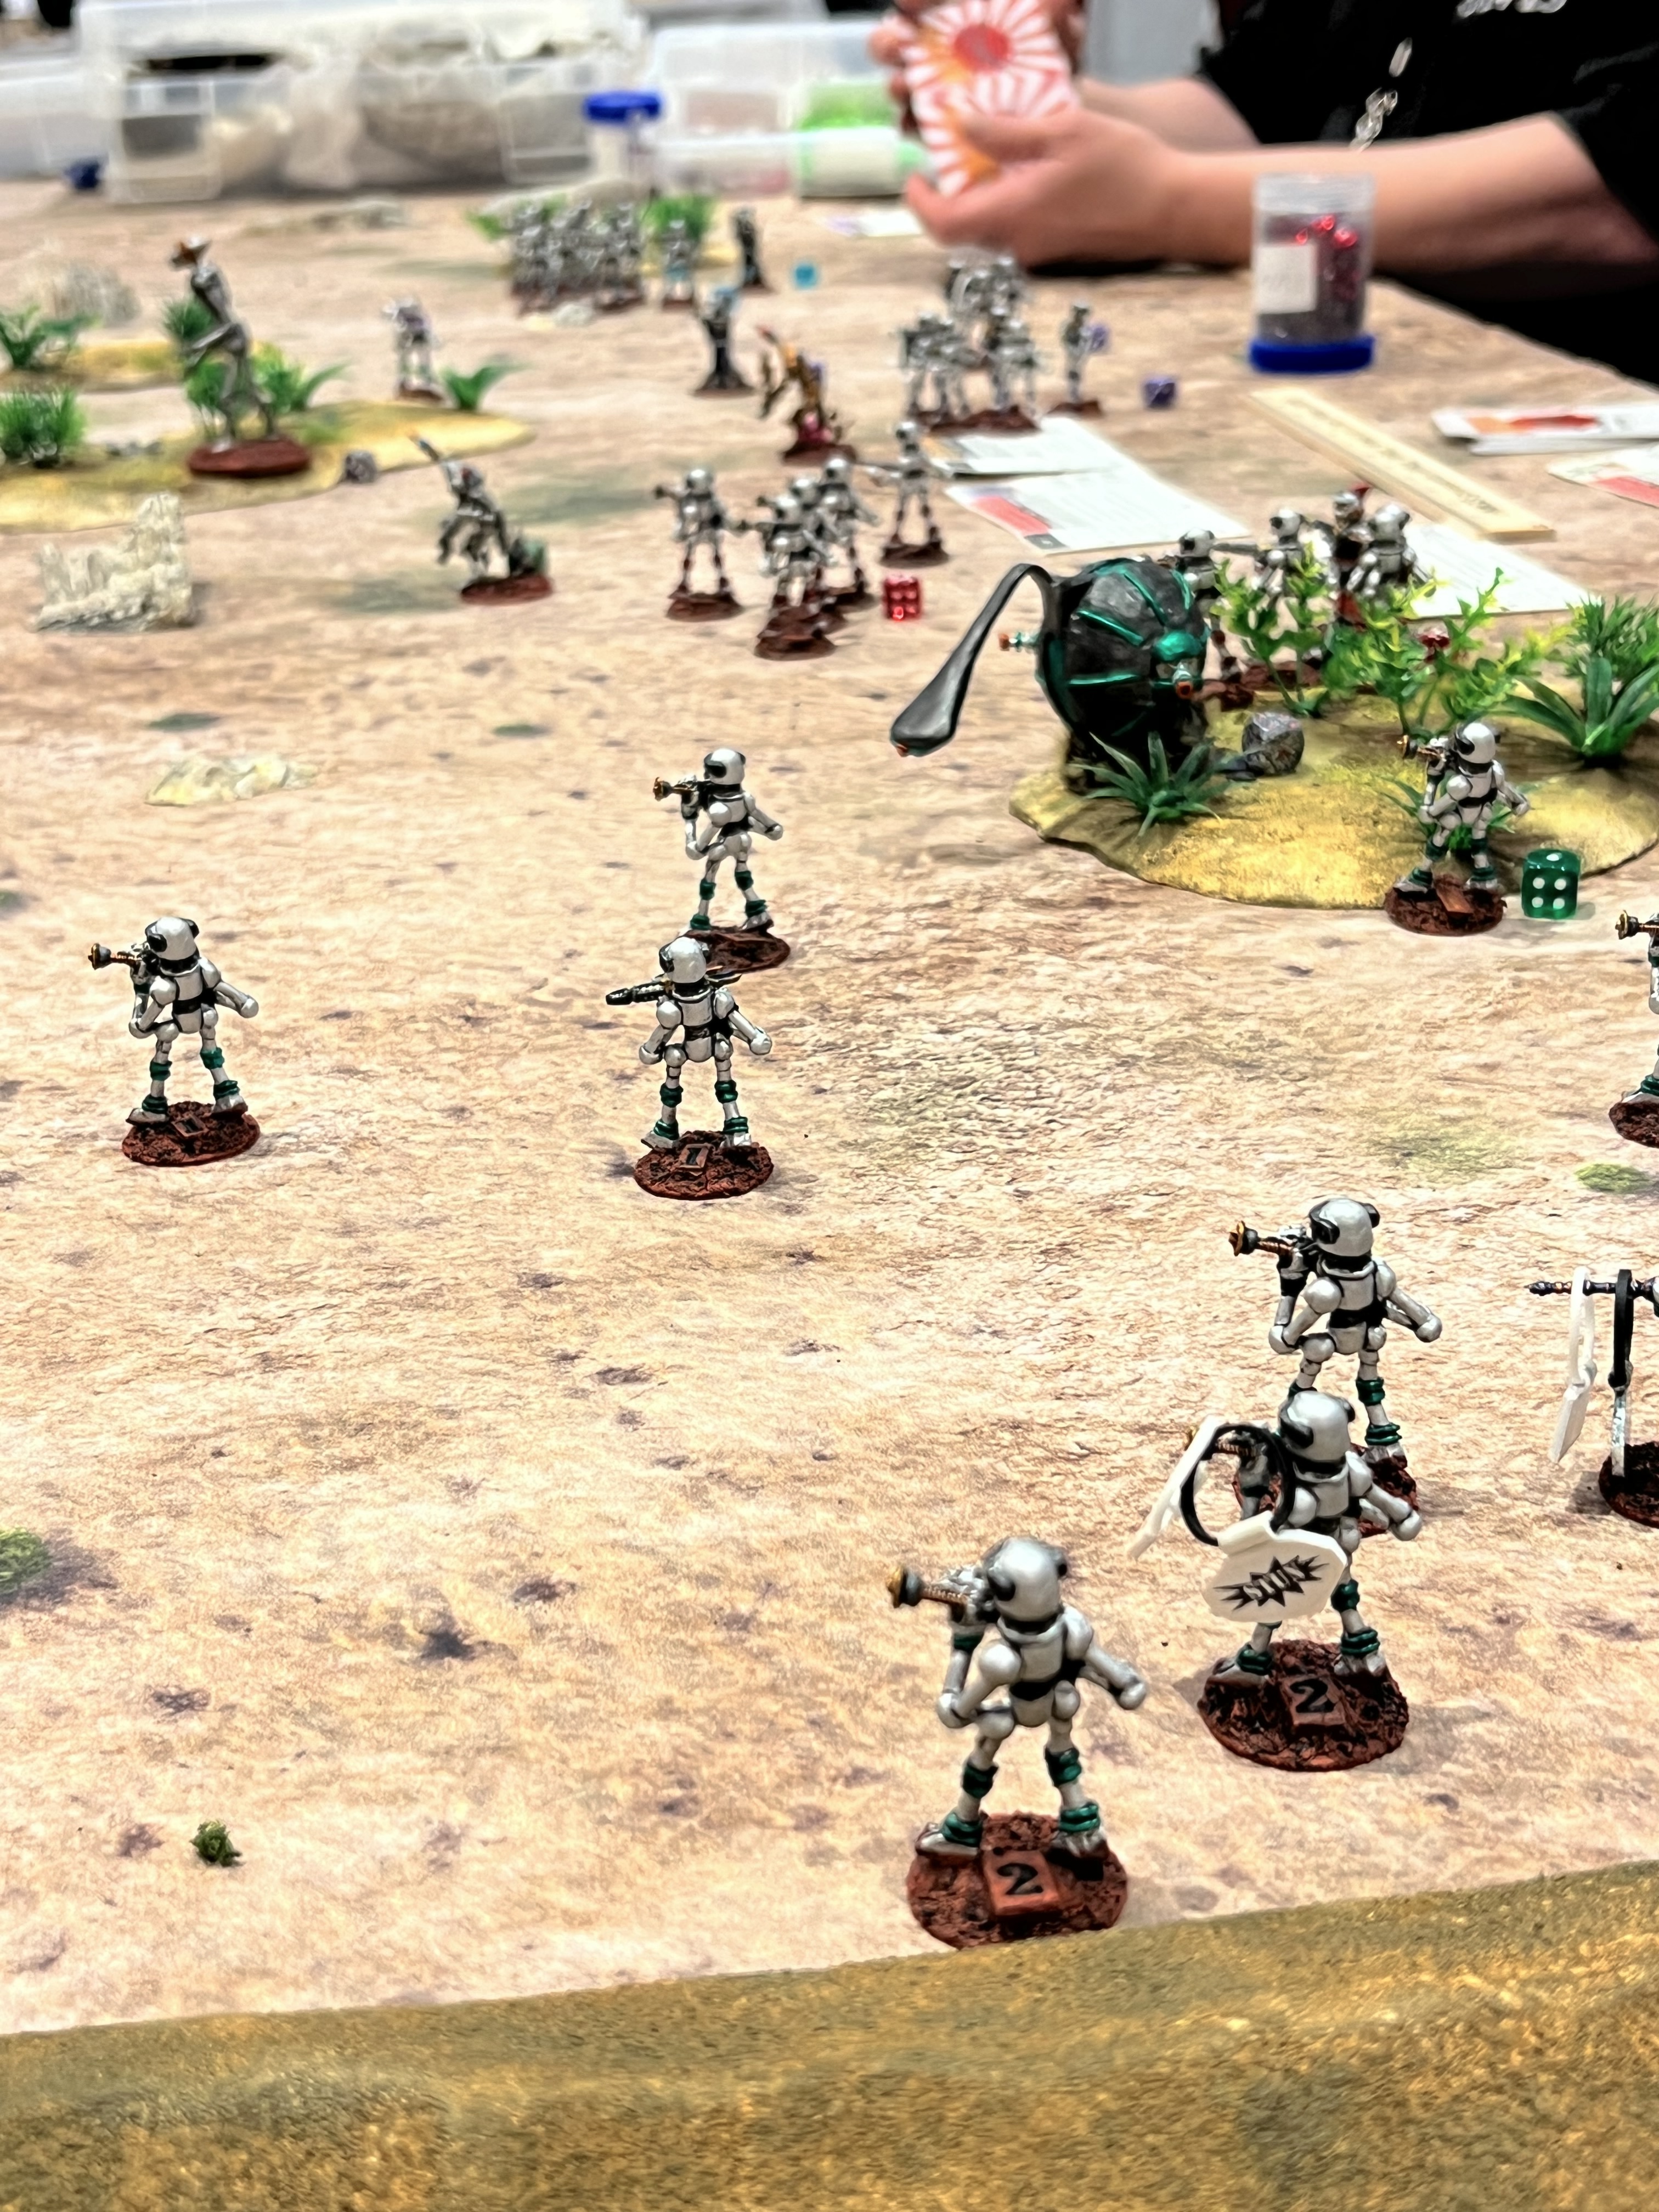
This was a Combat Patrol:WWII retro sci-fi game using the pond that I described in my last post.
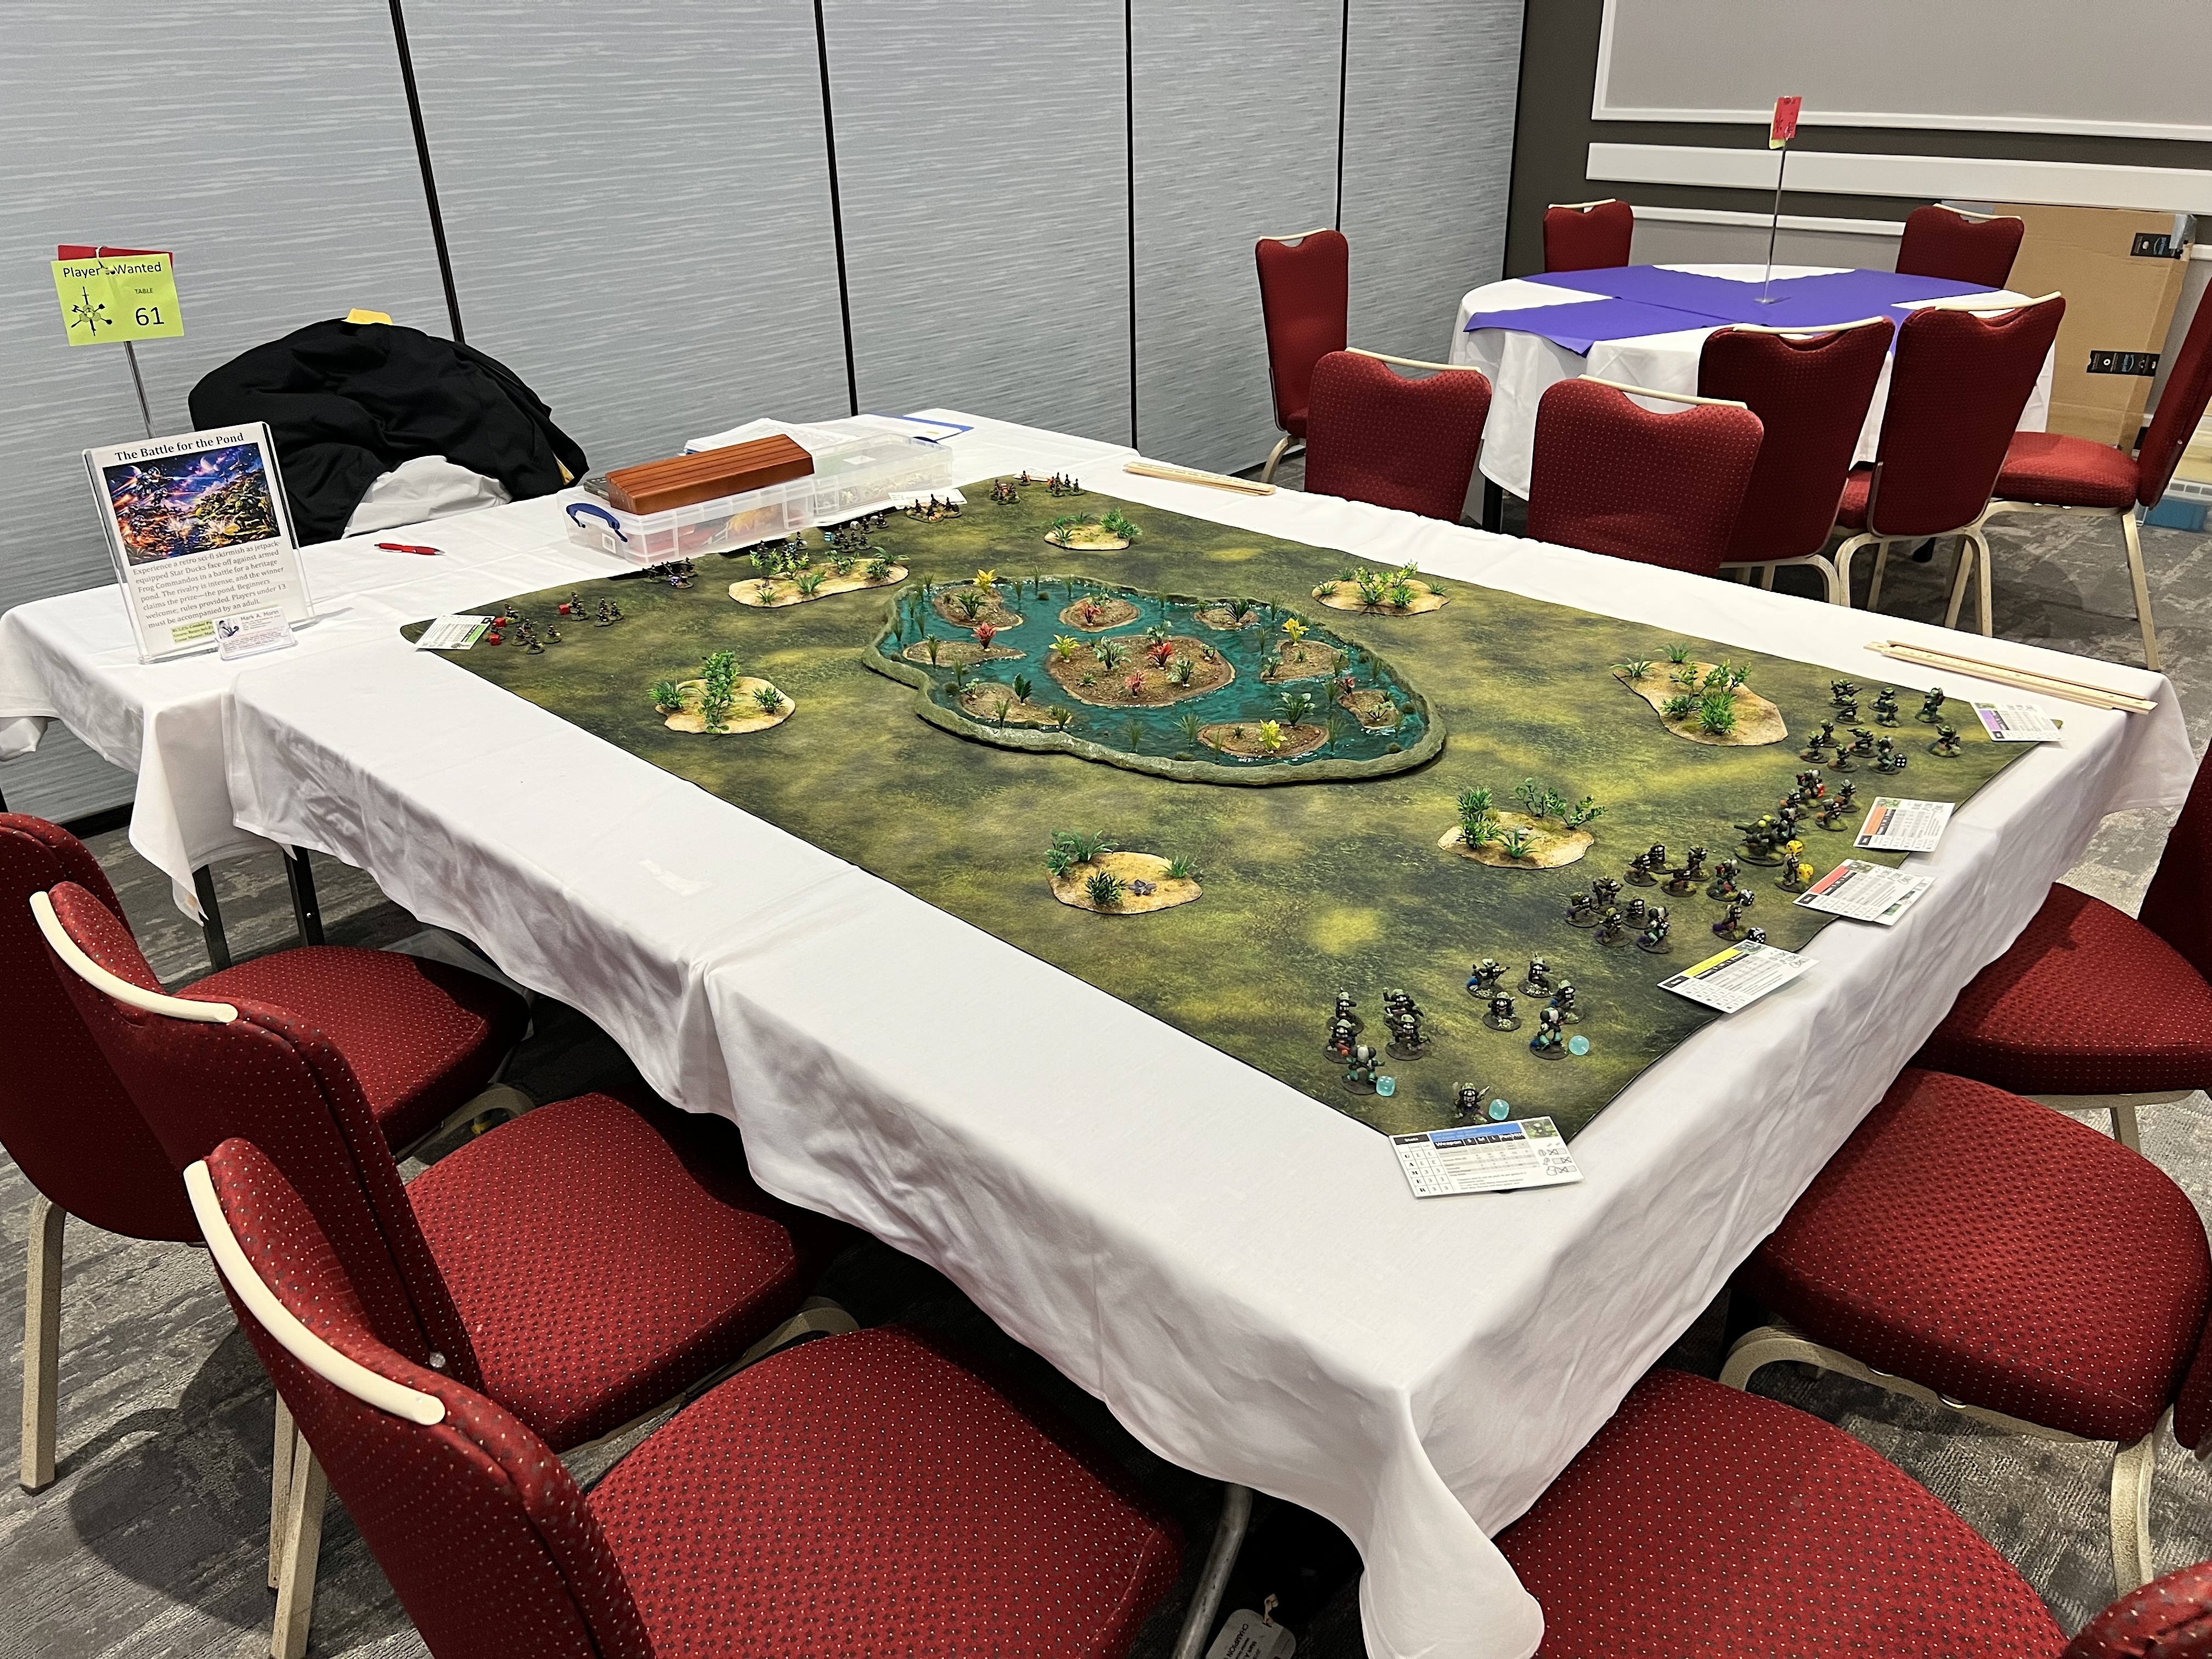
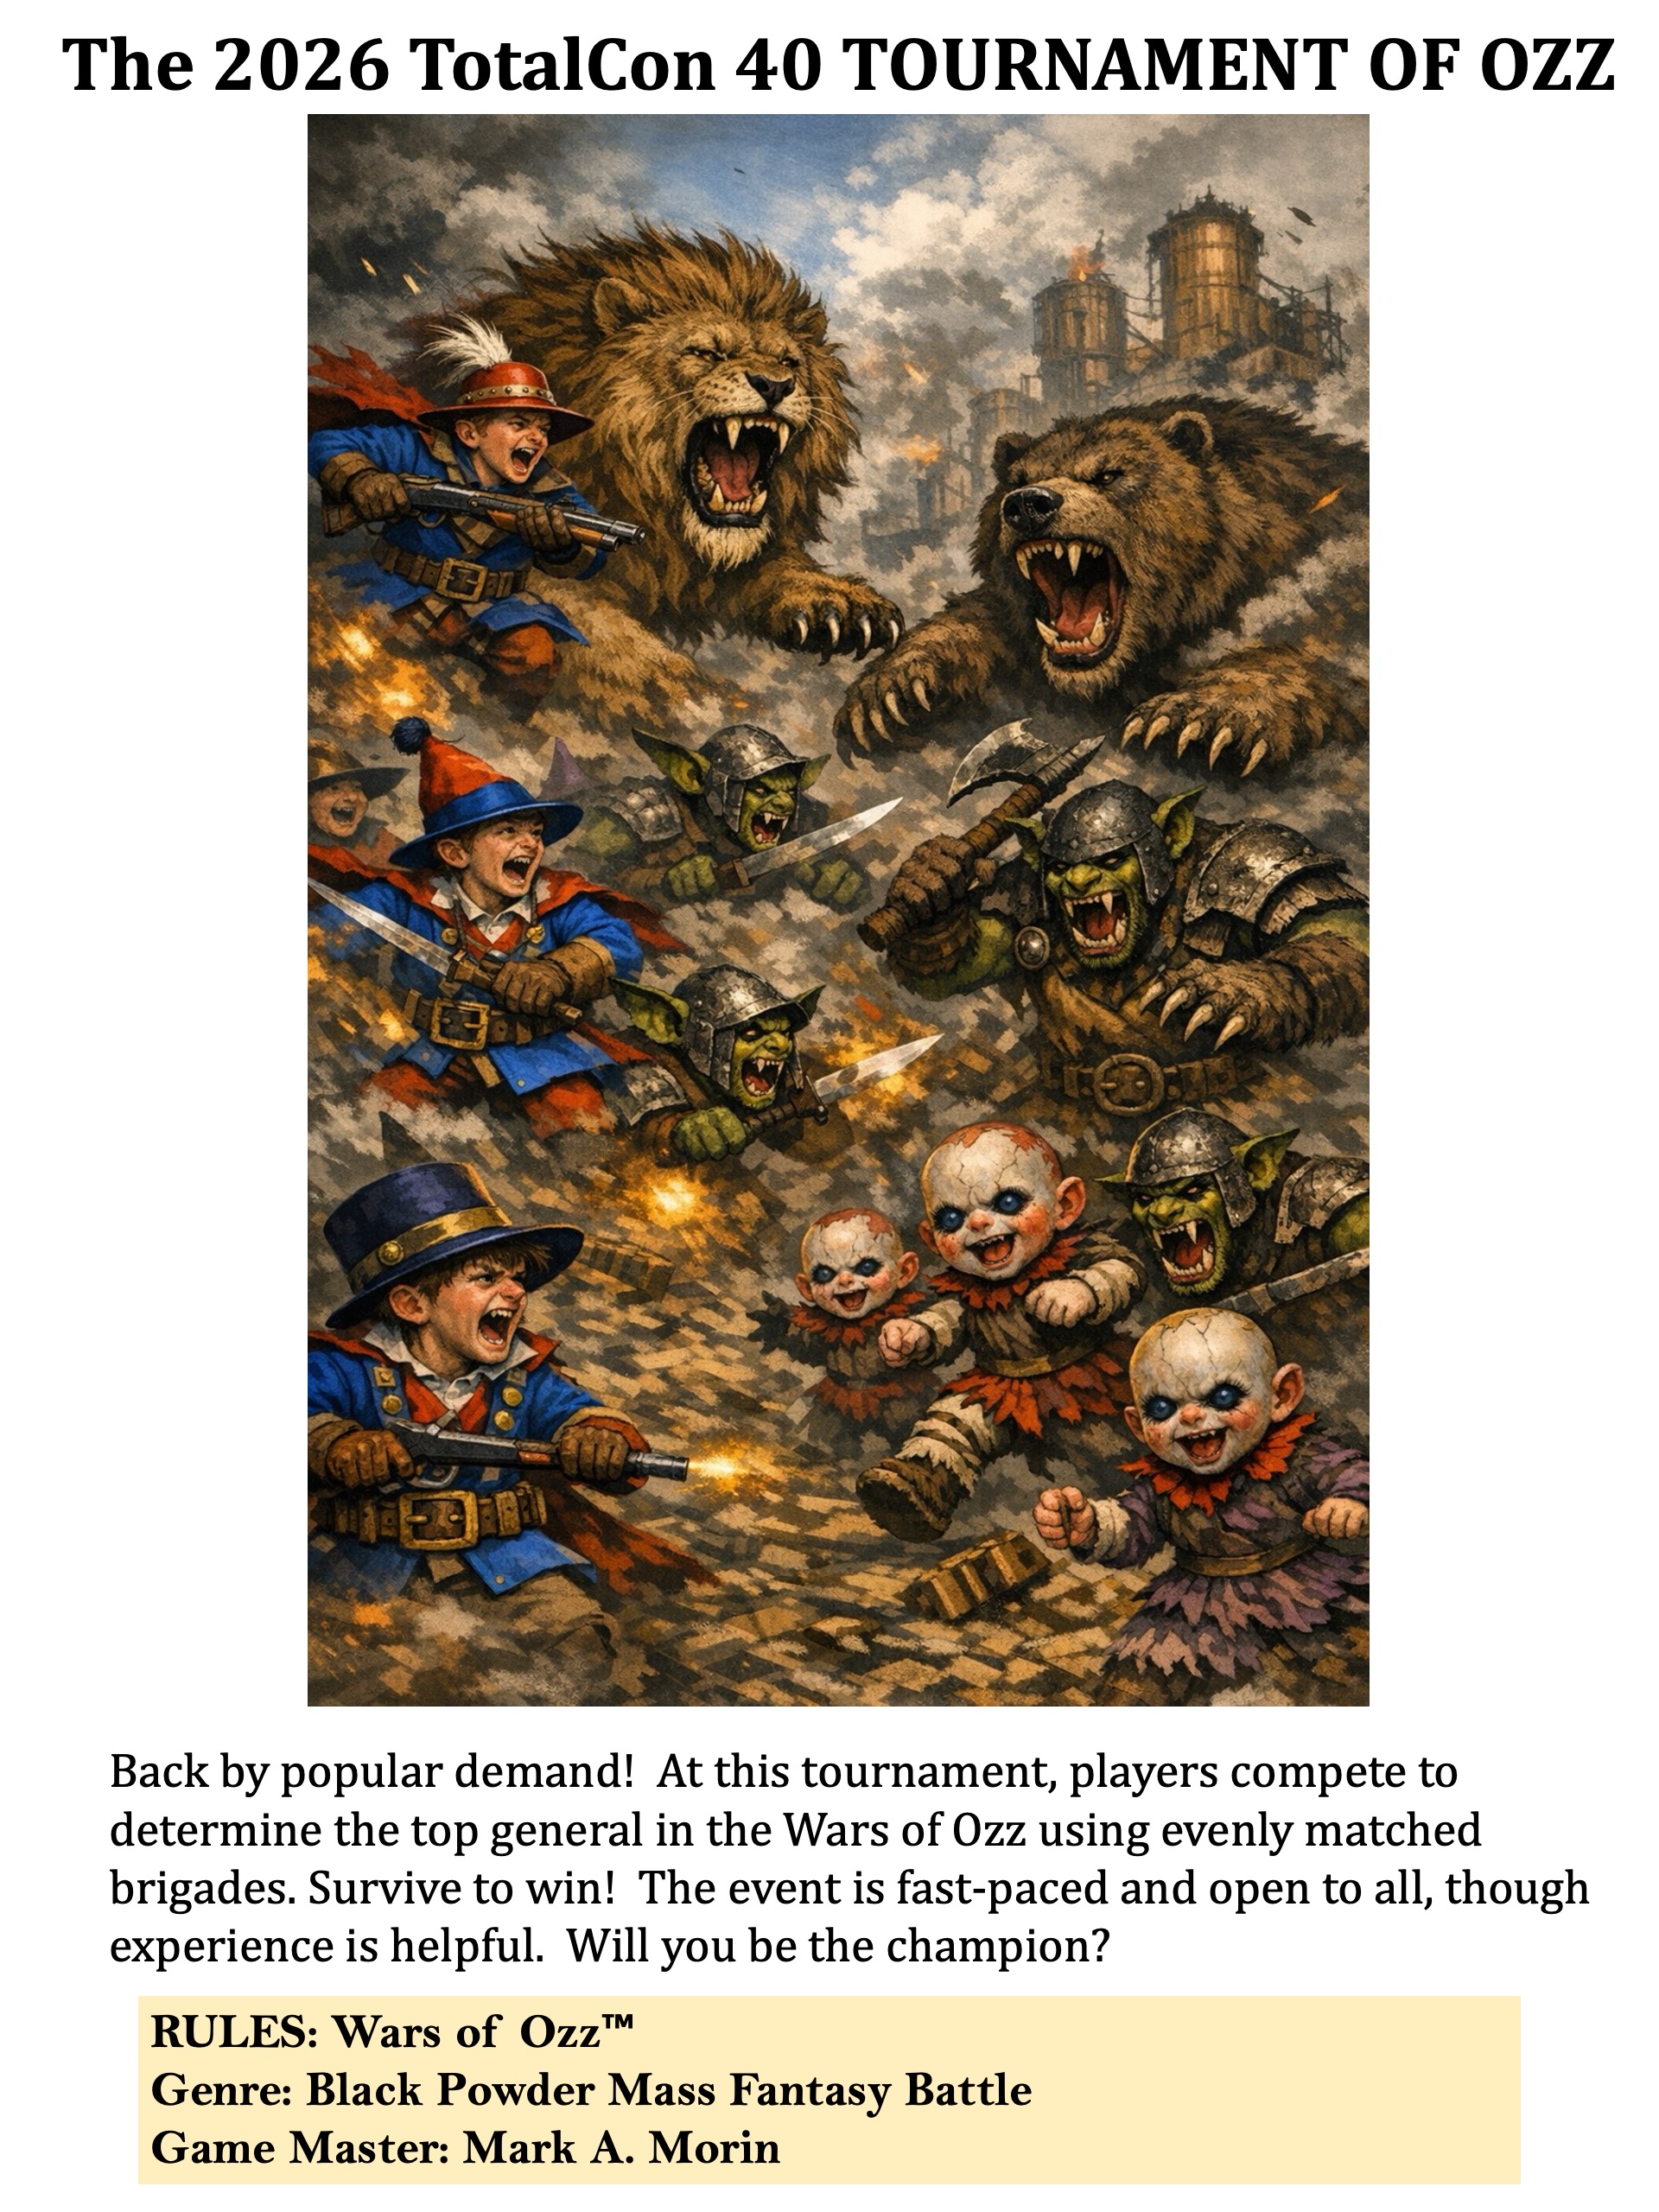
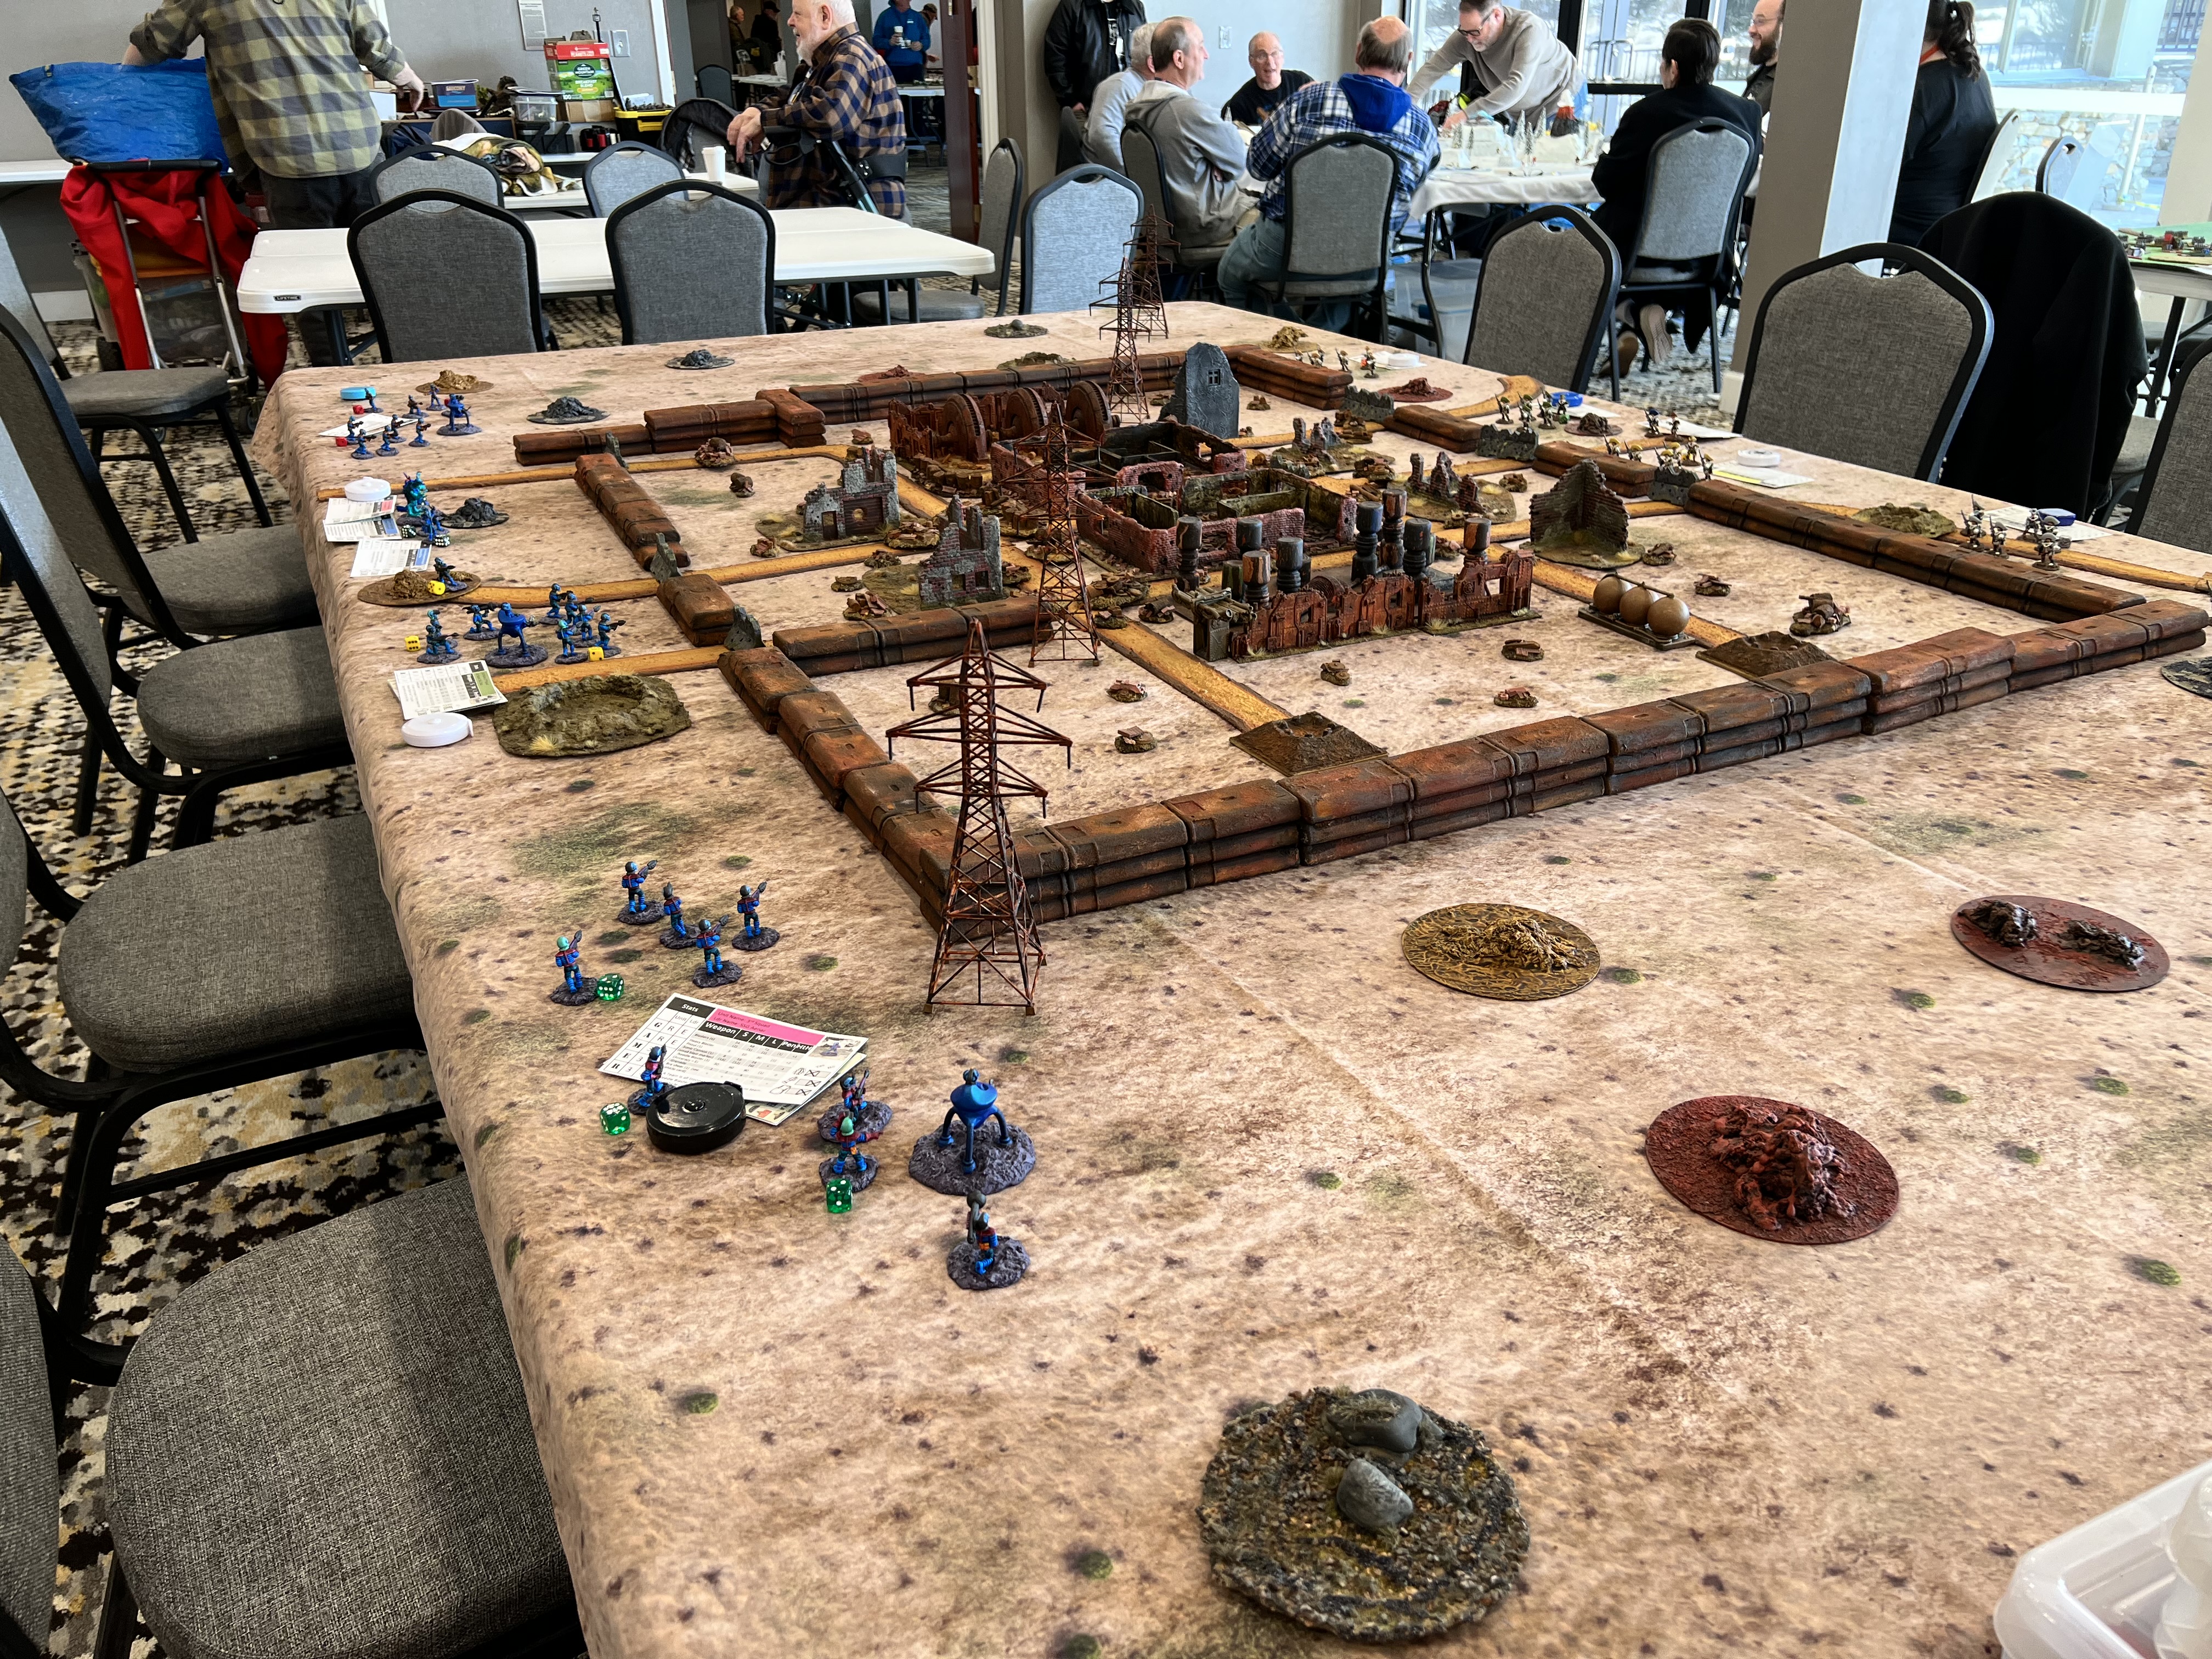
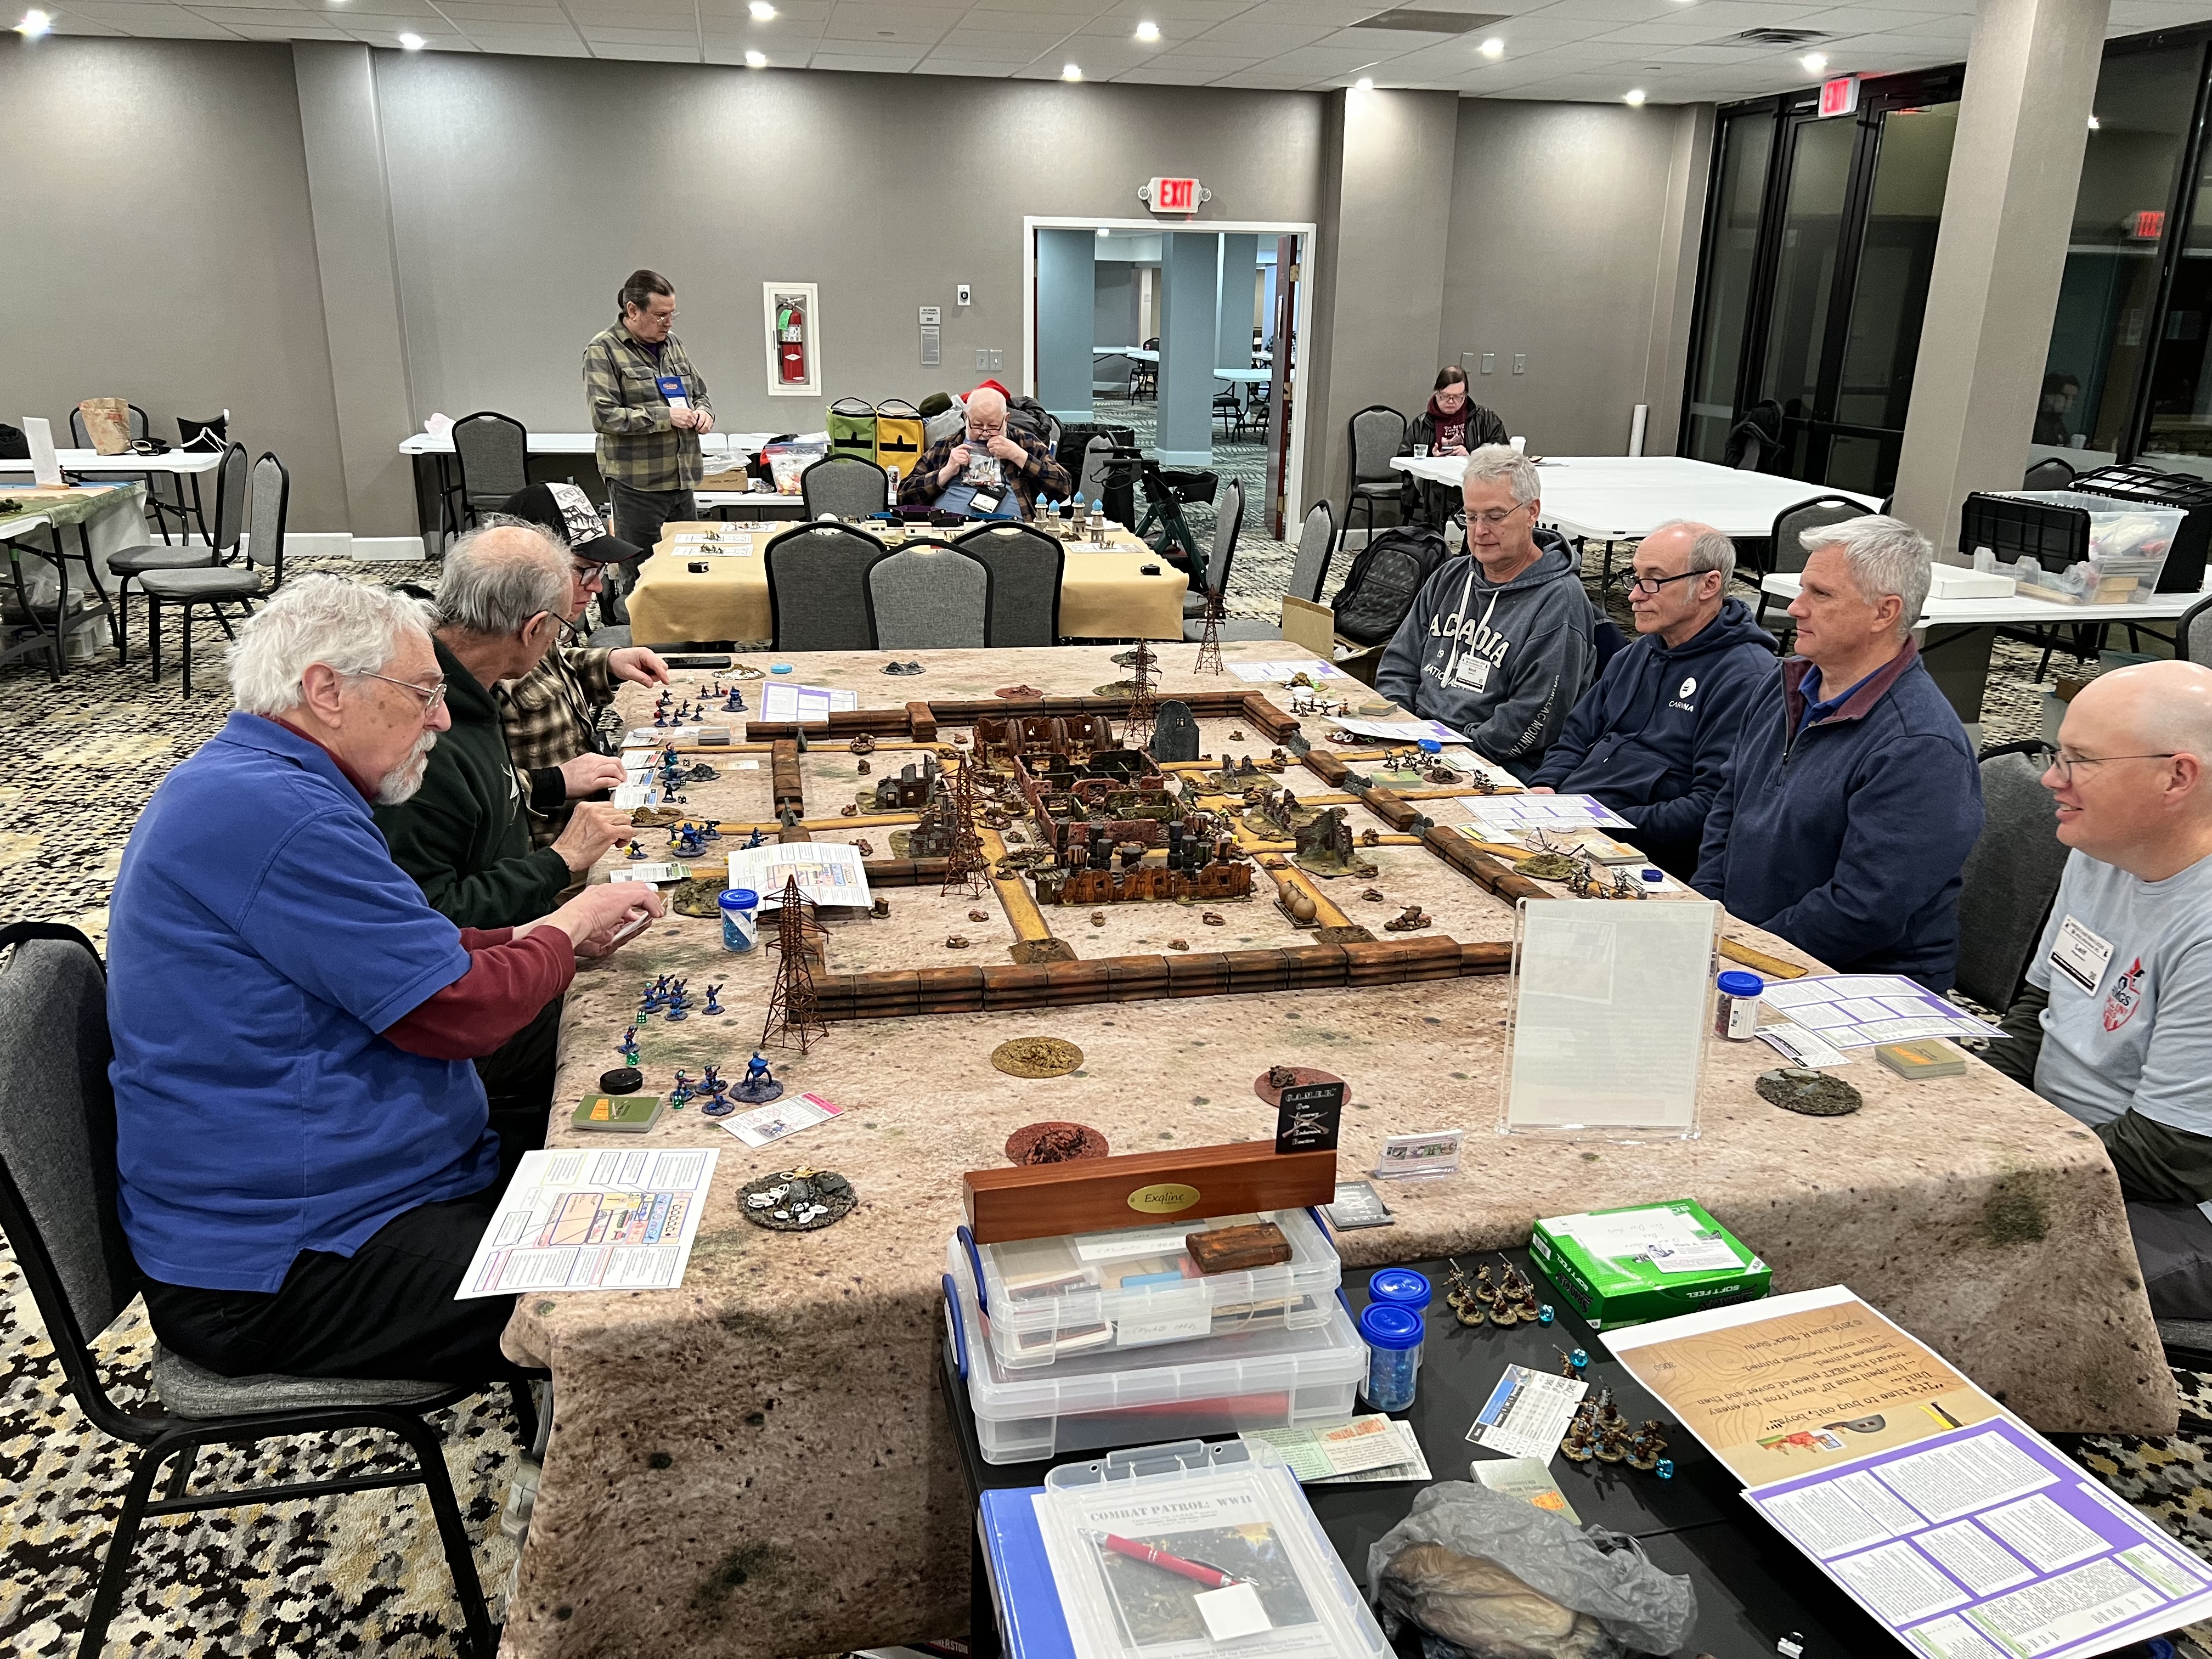
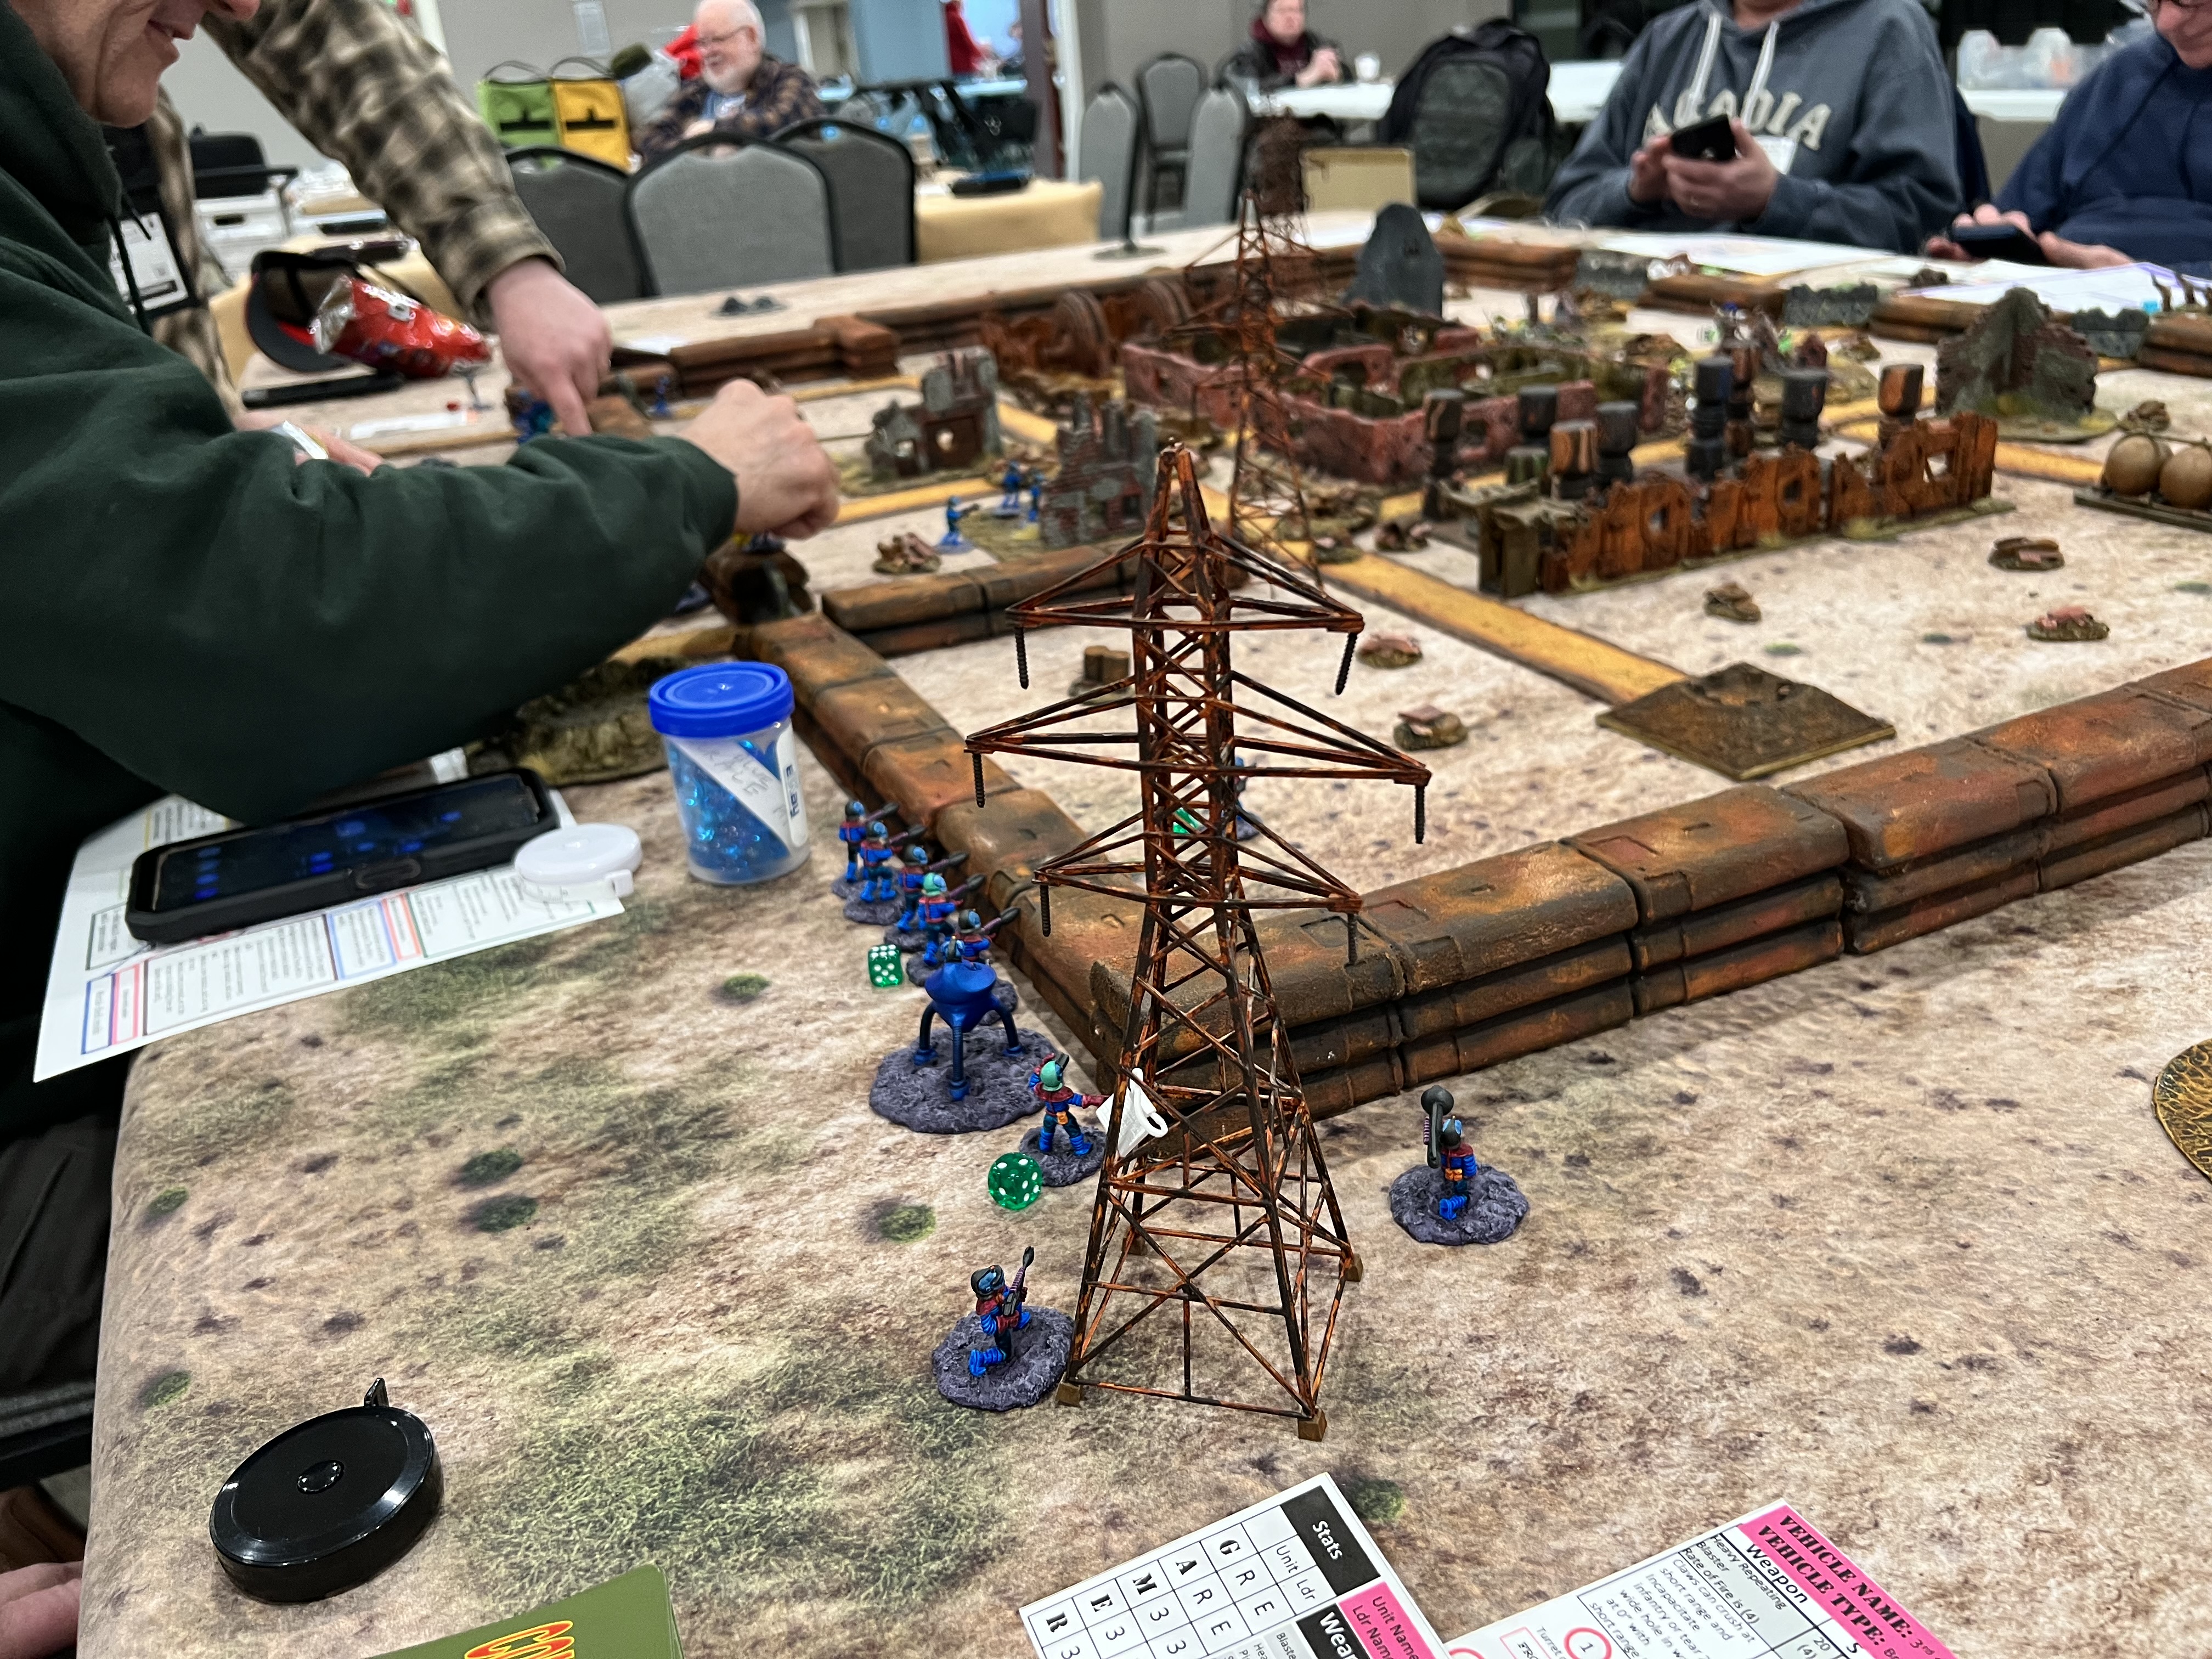
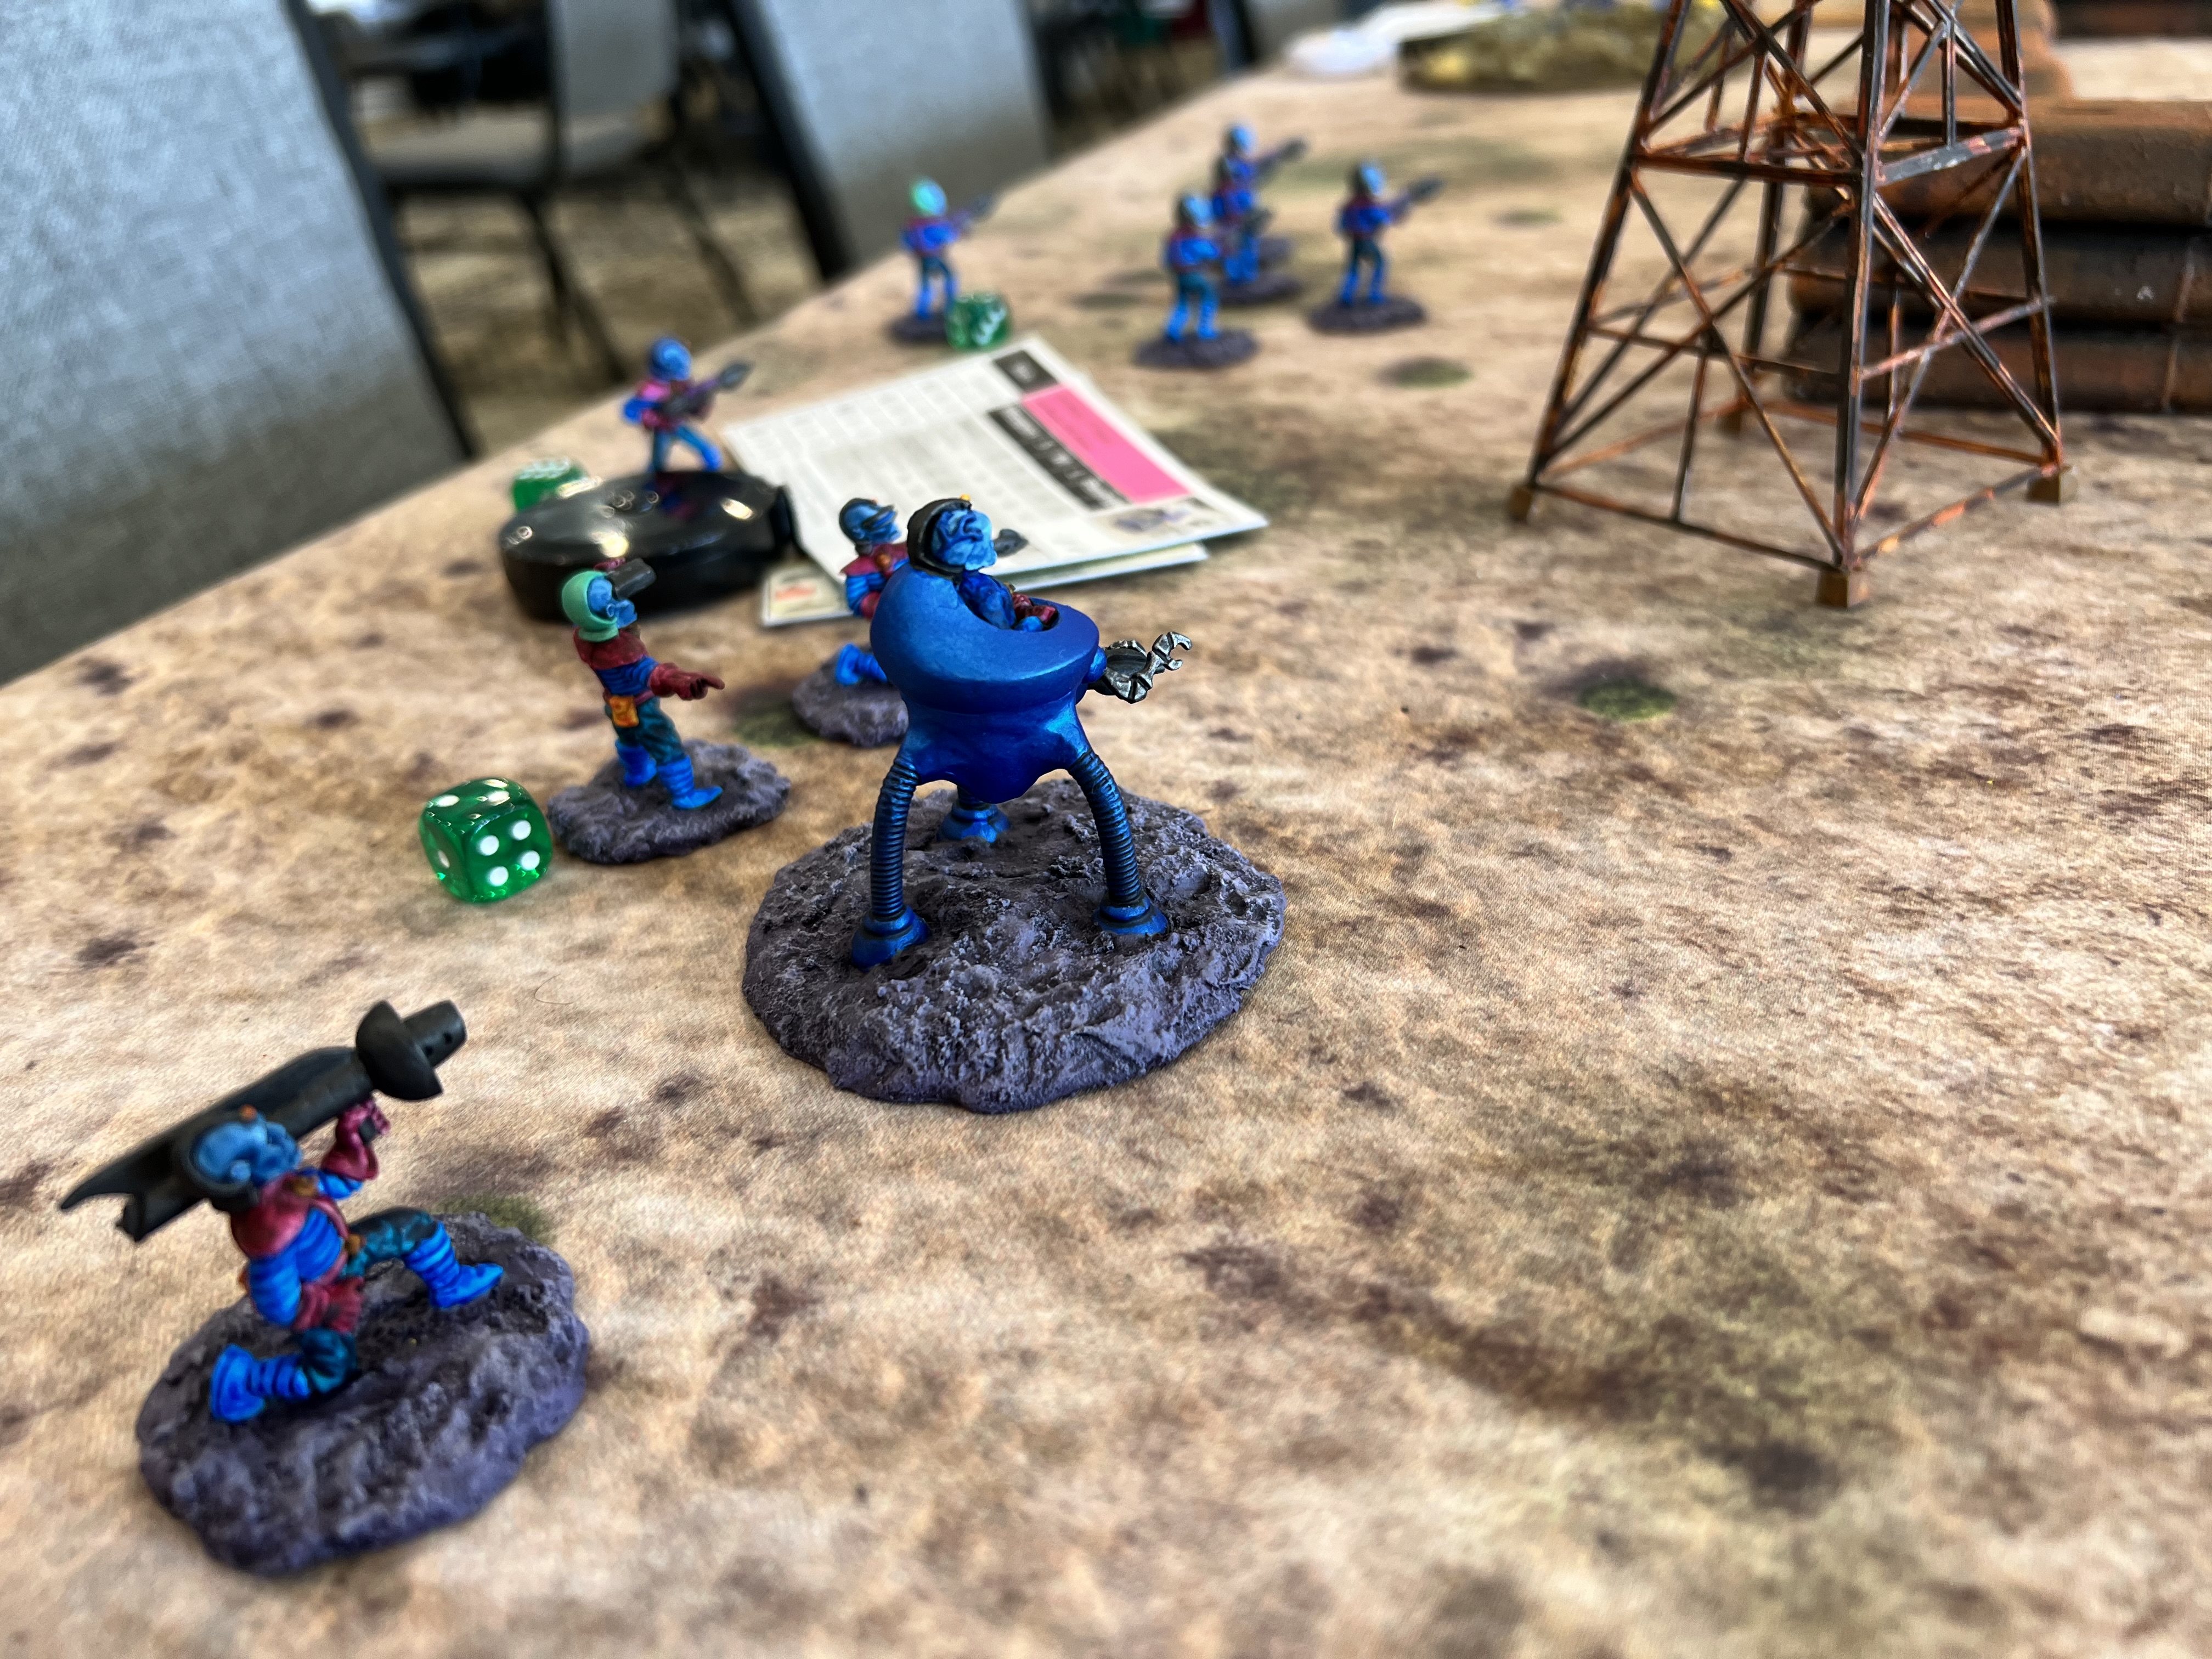
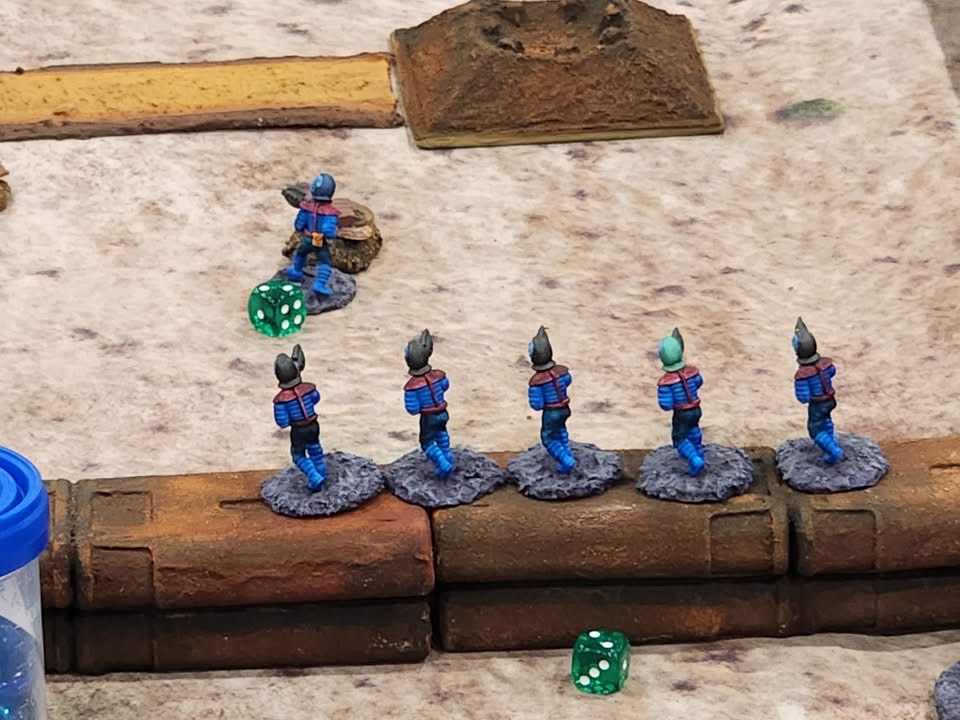
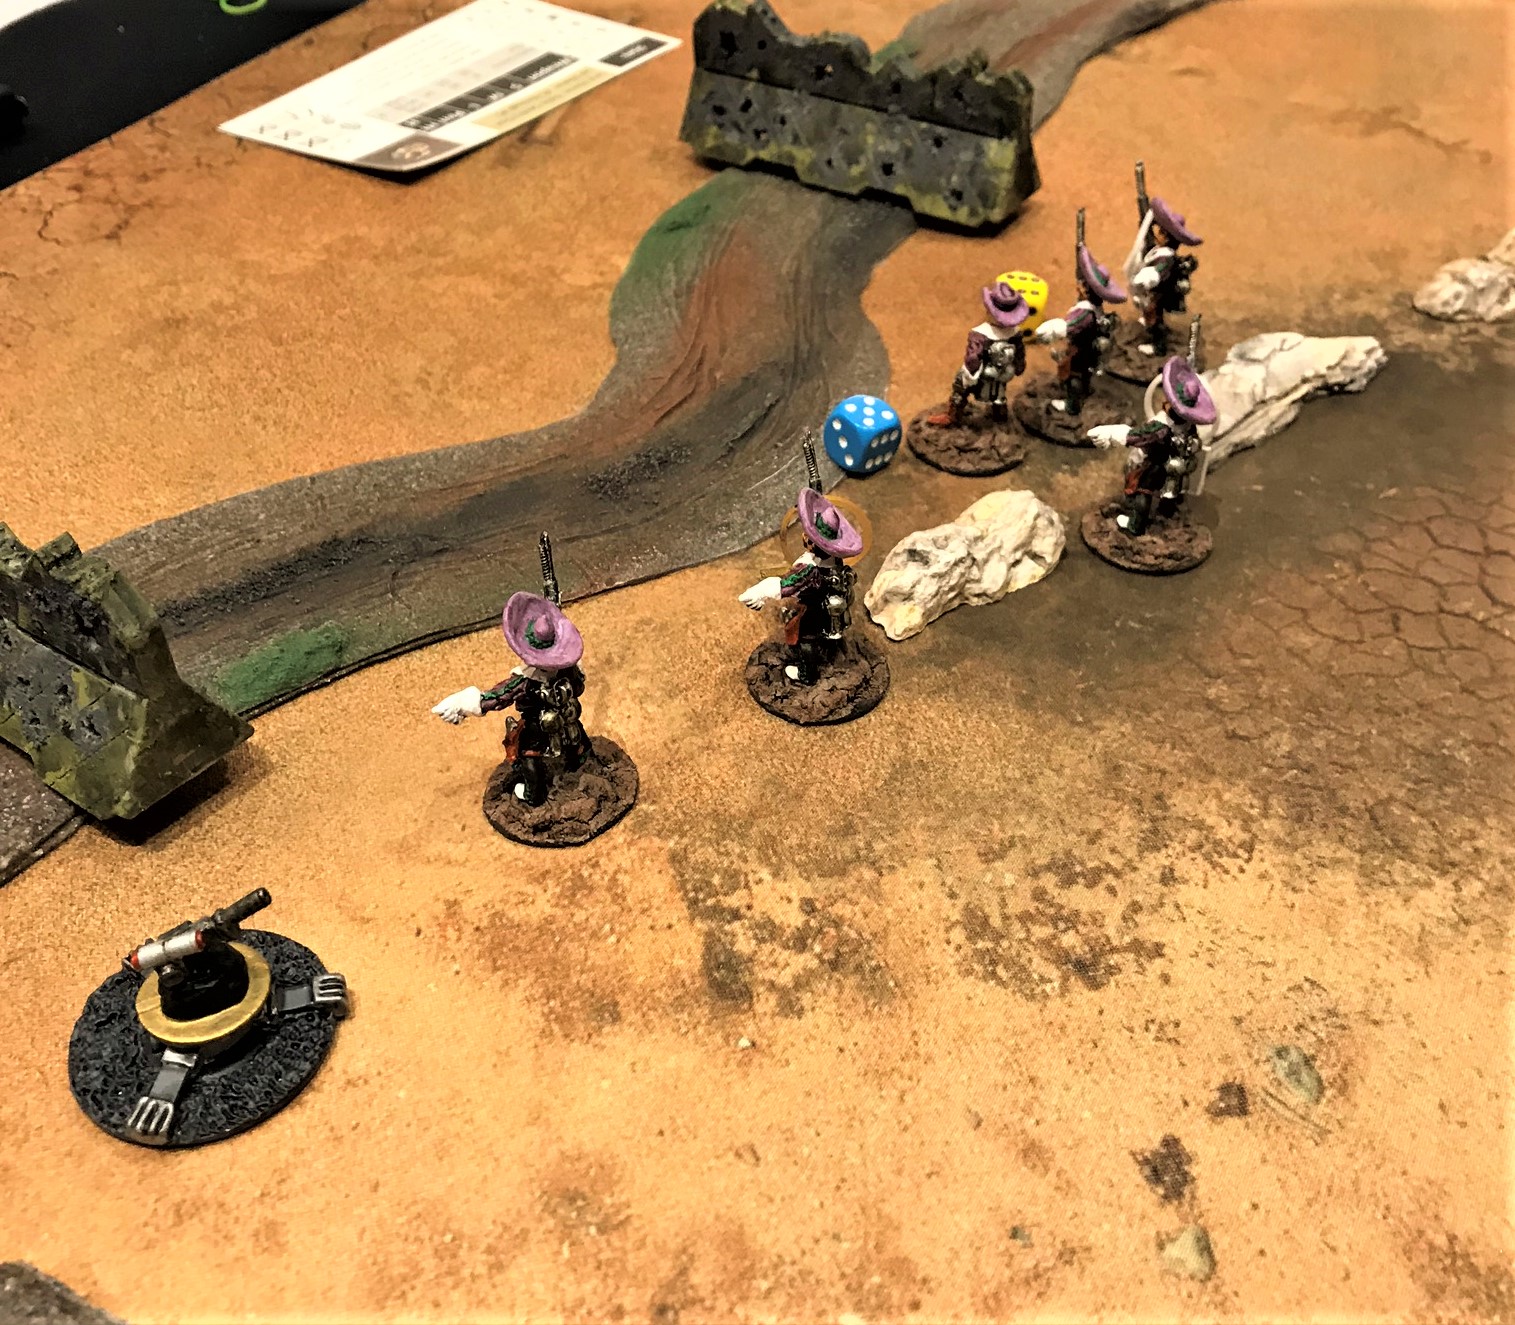
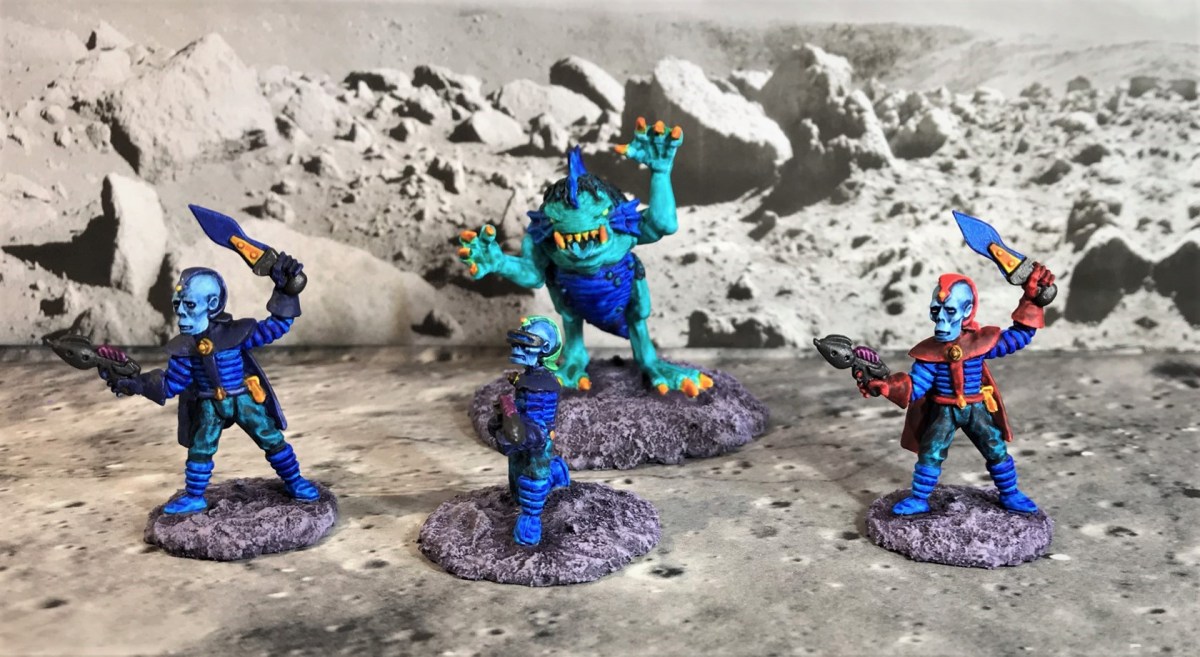
My game flyer.The tabletop set up for action. The F.R.O.G. Commandos are on the near side, with the Star Ducks on the far end. The Star Ducks are Archive Miniatures Star Rovers figures from the late ’70’s/early 80’s. The Frogs are Critter Commandos figures from the early 1990’s.The Star Duck players move up.The Star Ducks use one of their two jet pack moves to occupy islands. In the game, control of the smaller islands was worth 5 points. Controlling the largest island earned players 10 points.The Frogs were also jet packing. The Star Ducks used mortars to lay down a protective smoke screen against their automatic weapons fire.In the end, the luck of the cards deserted the Frogs, with almost every island in Star Duck control.
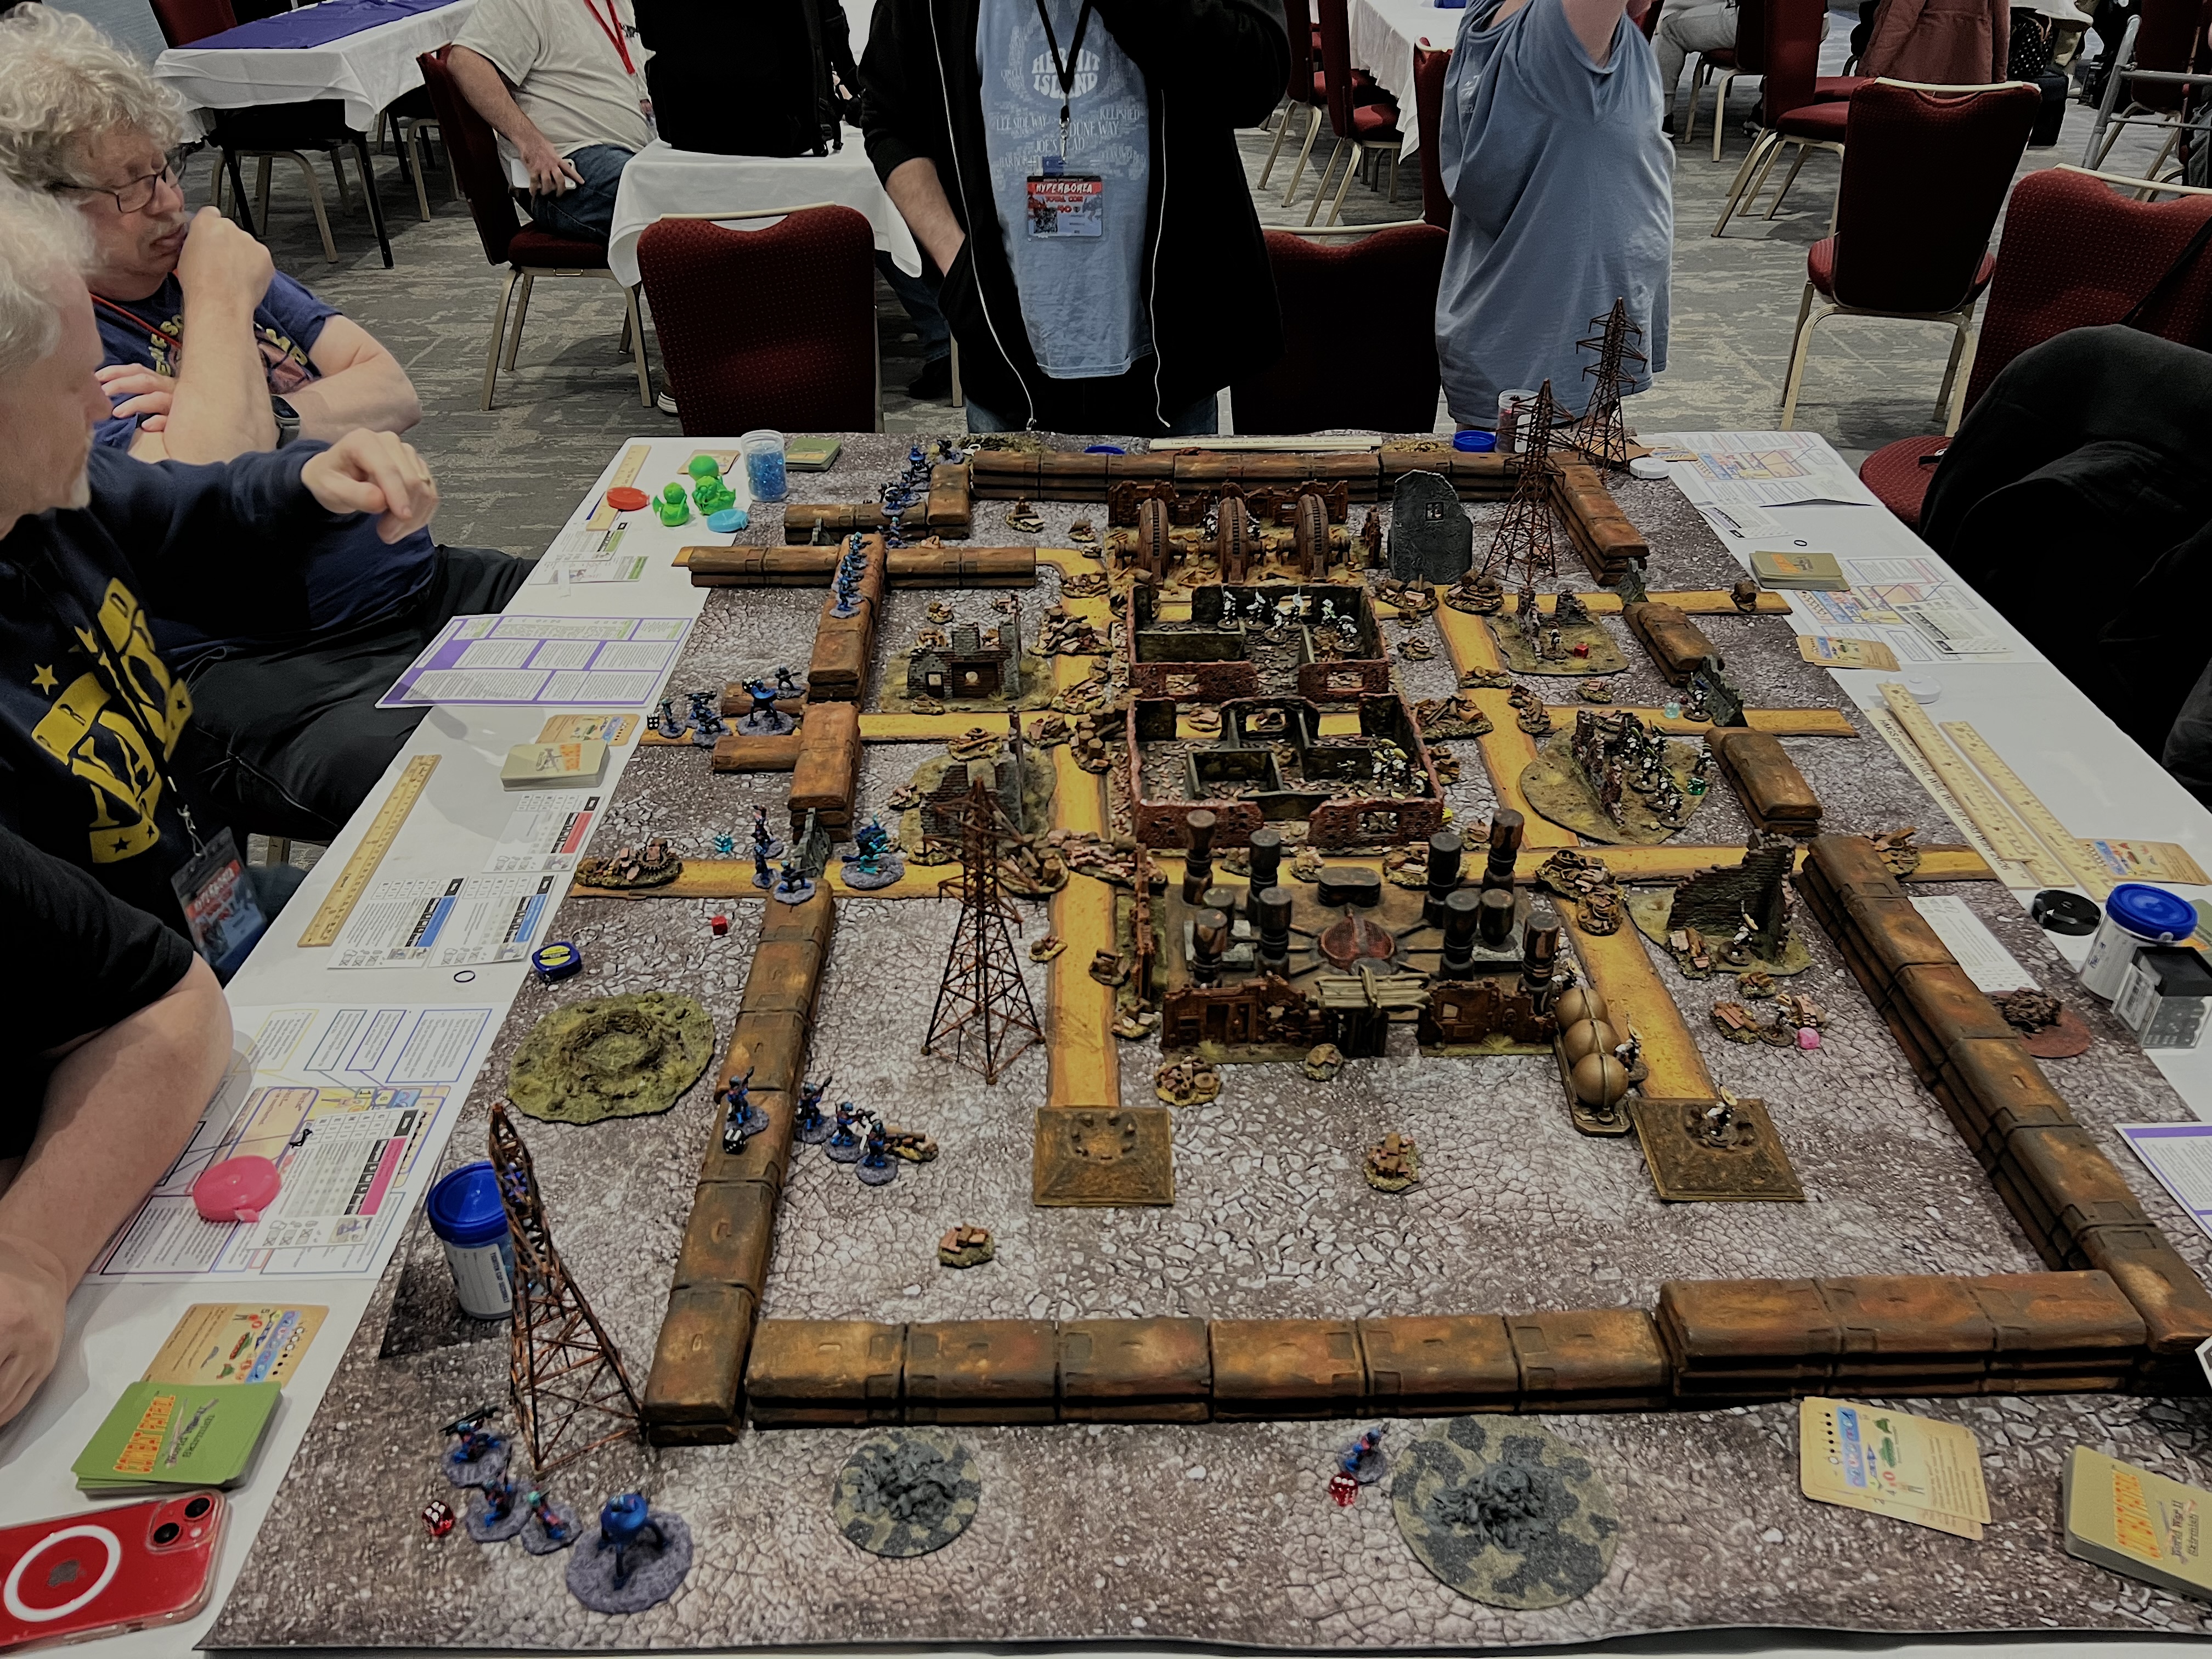
High Noon at the Cyber Ruins
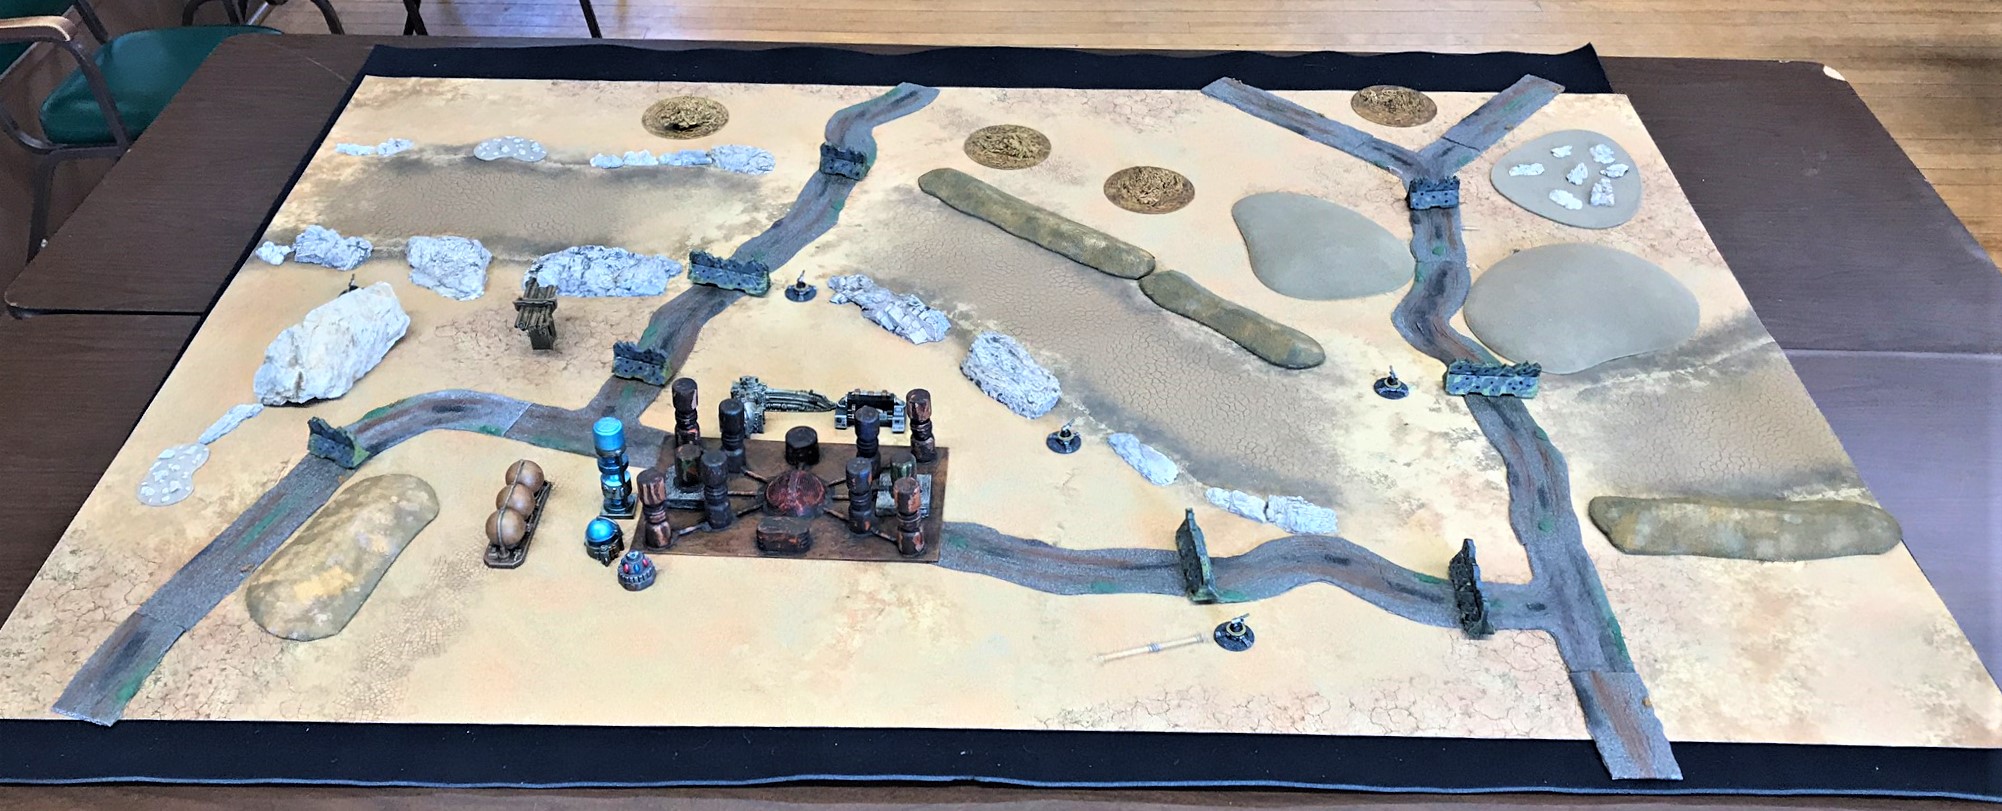
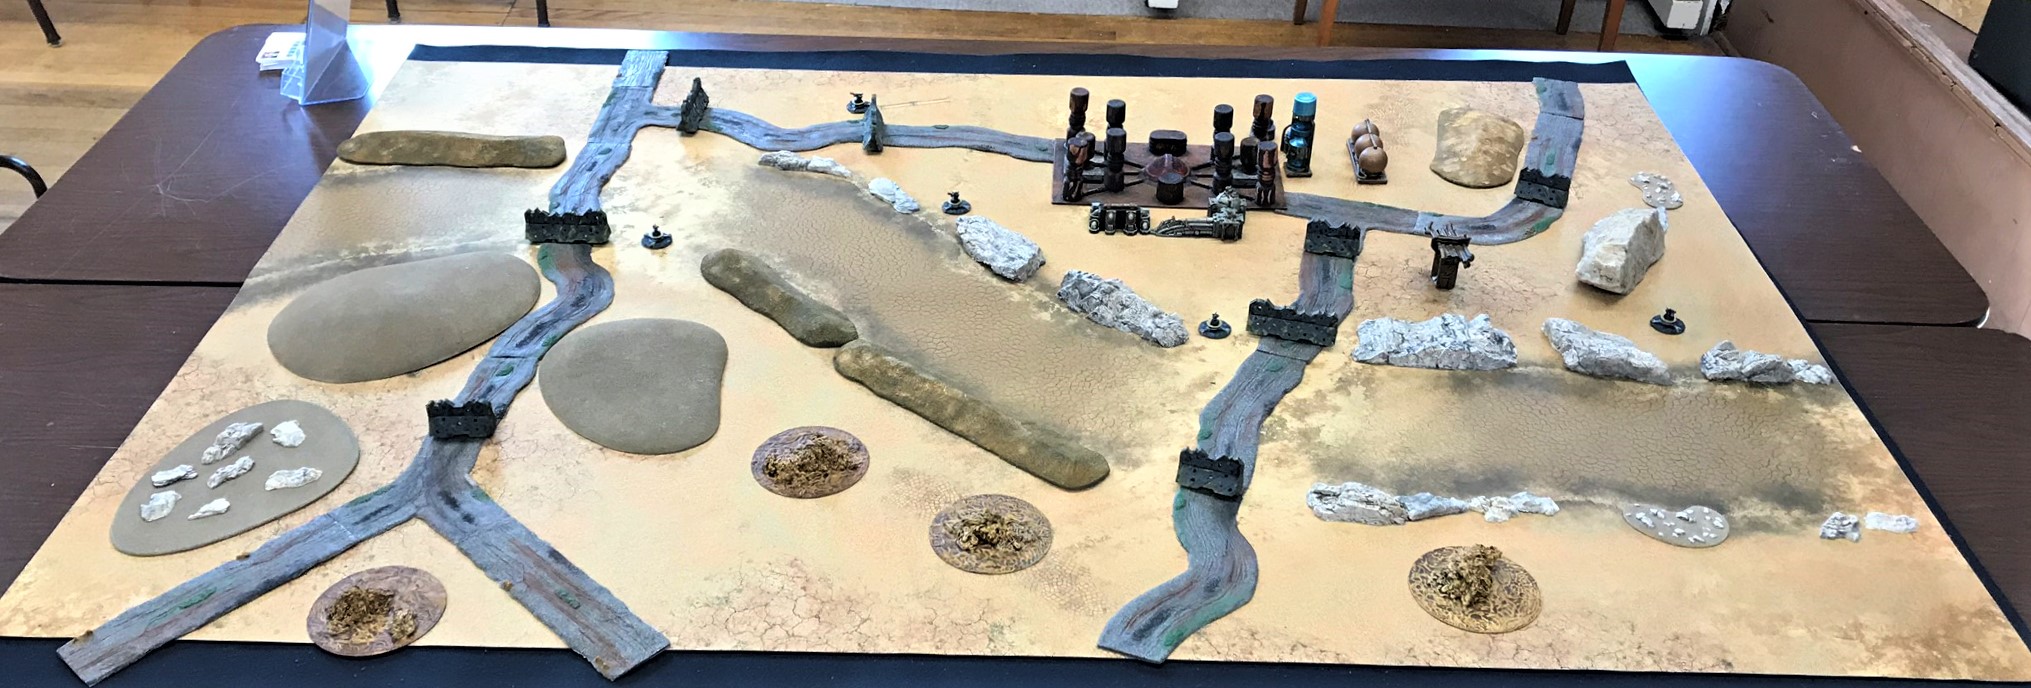
I ran this Combat Patrol retro sci-fi game at Cold Wars, but on a bigger table. I used a different mat and adapted the game to a smaller footprint.
Game flyer.
To win the game, both sides get credit (victory points) for inflicting enemy casualties and finding hidden ancient robots.
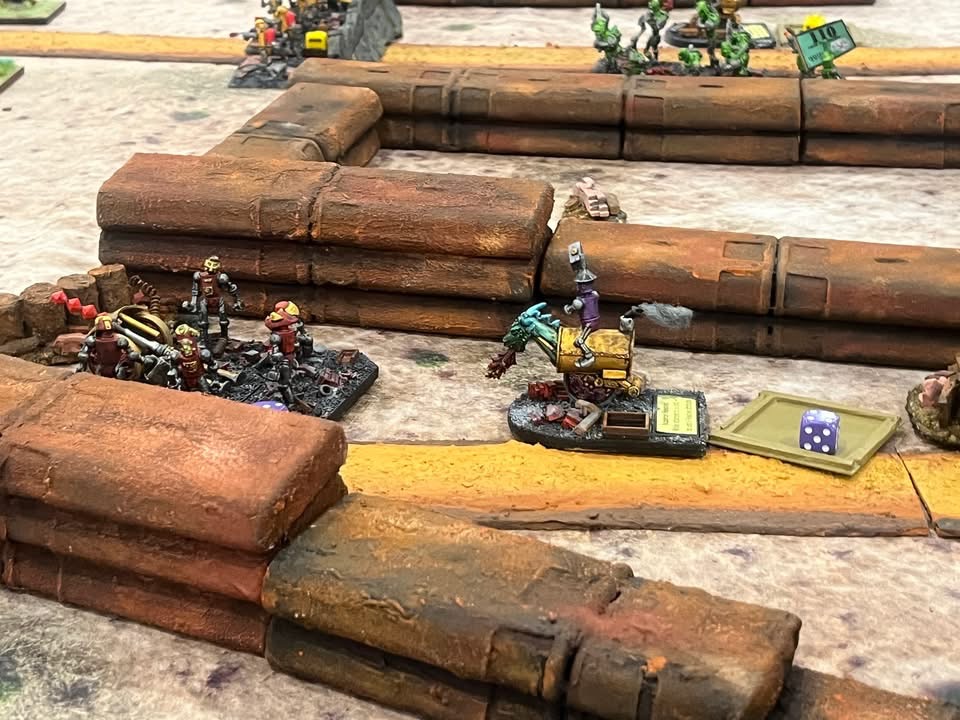
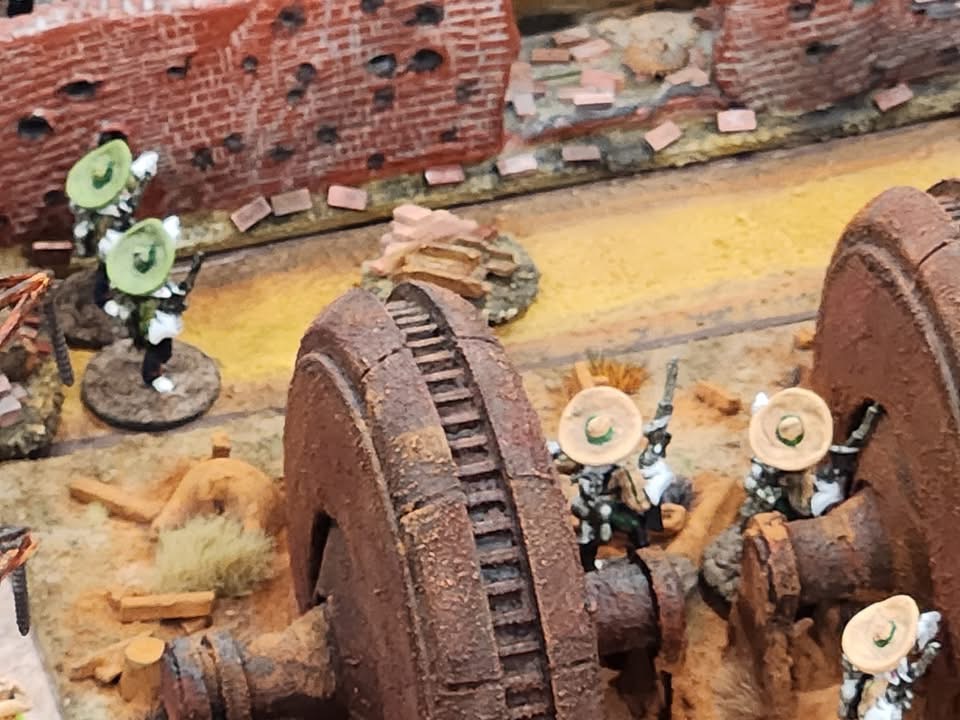
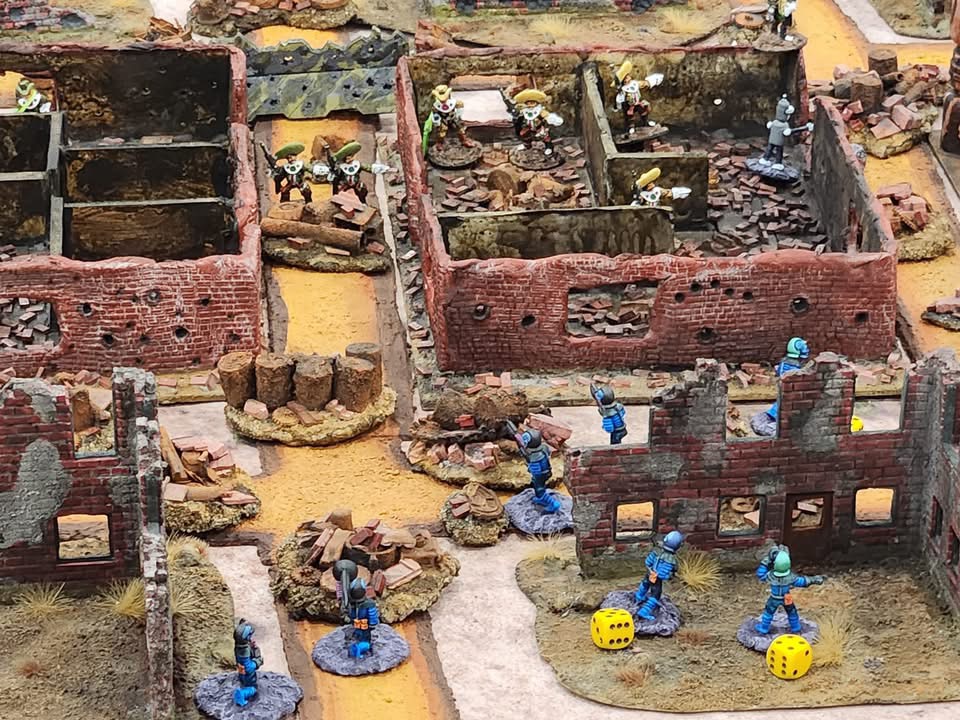
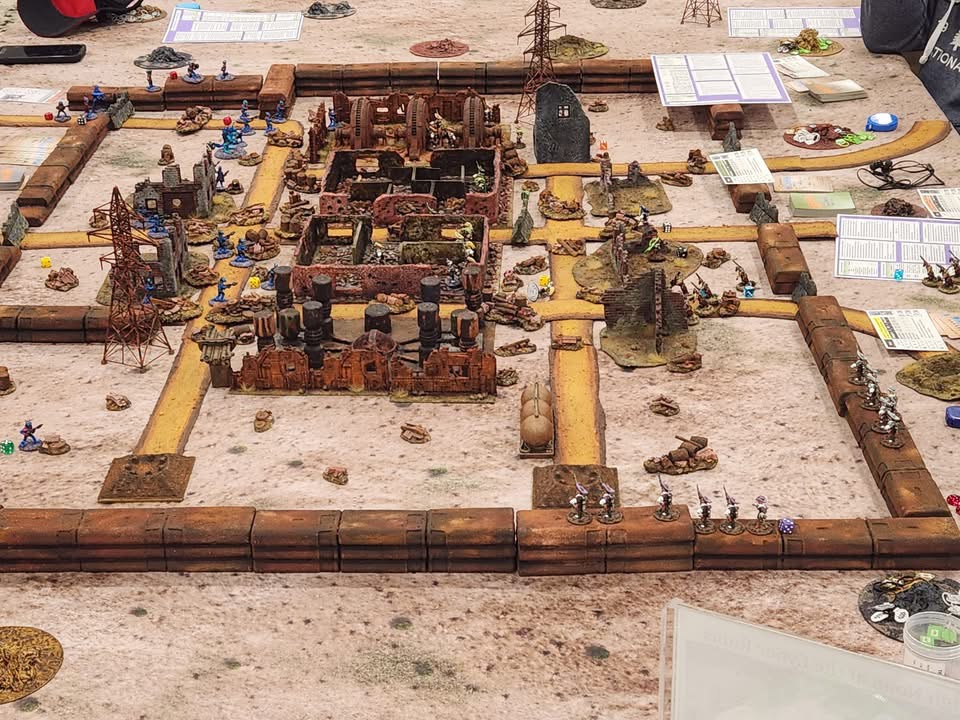
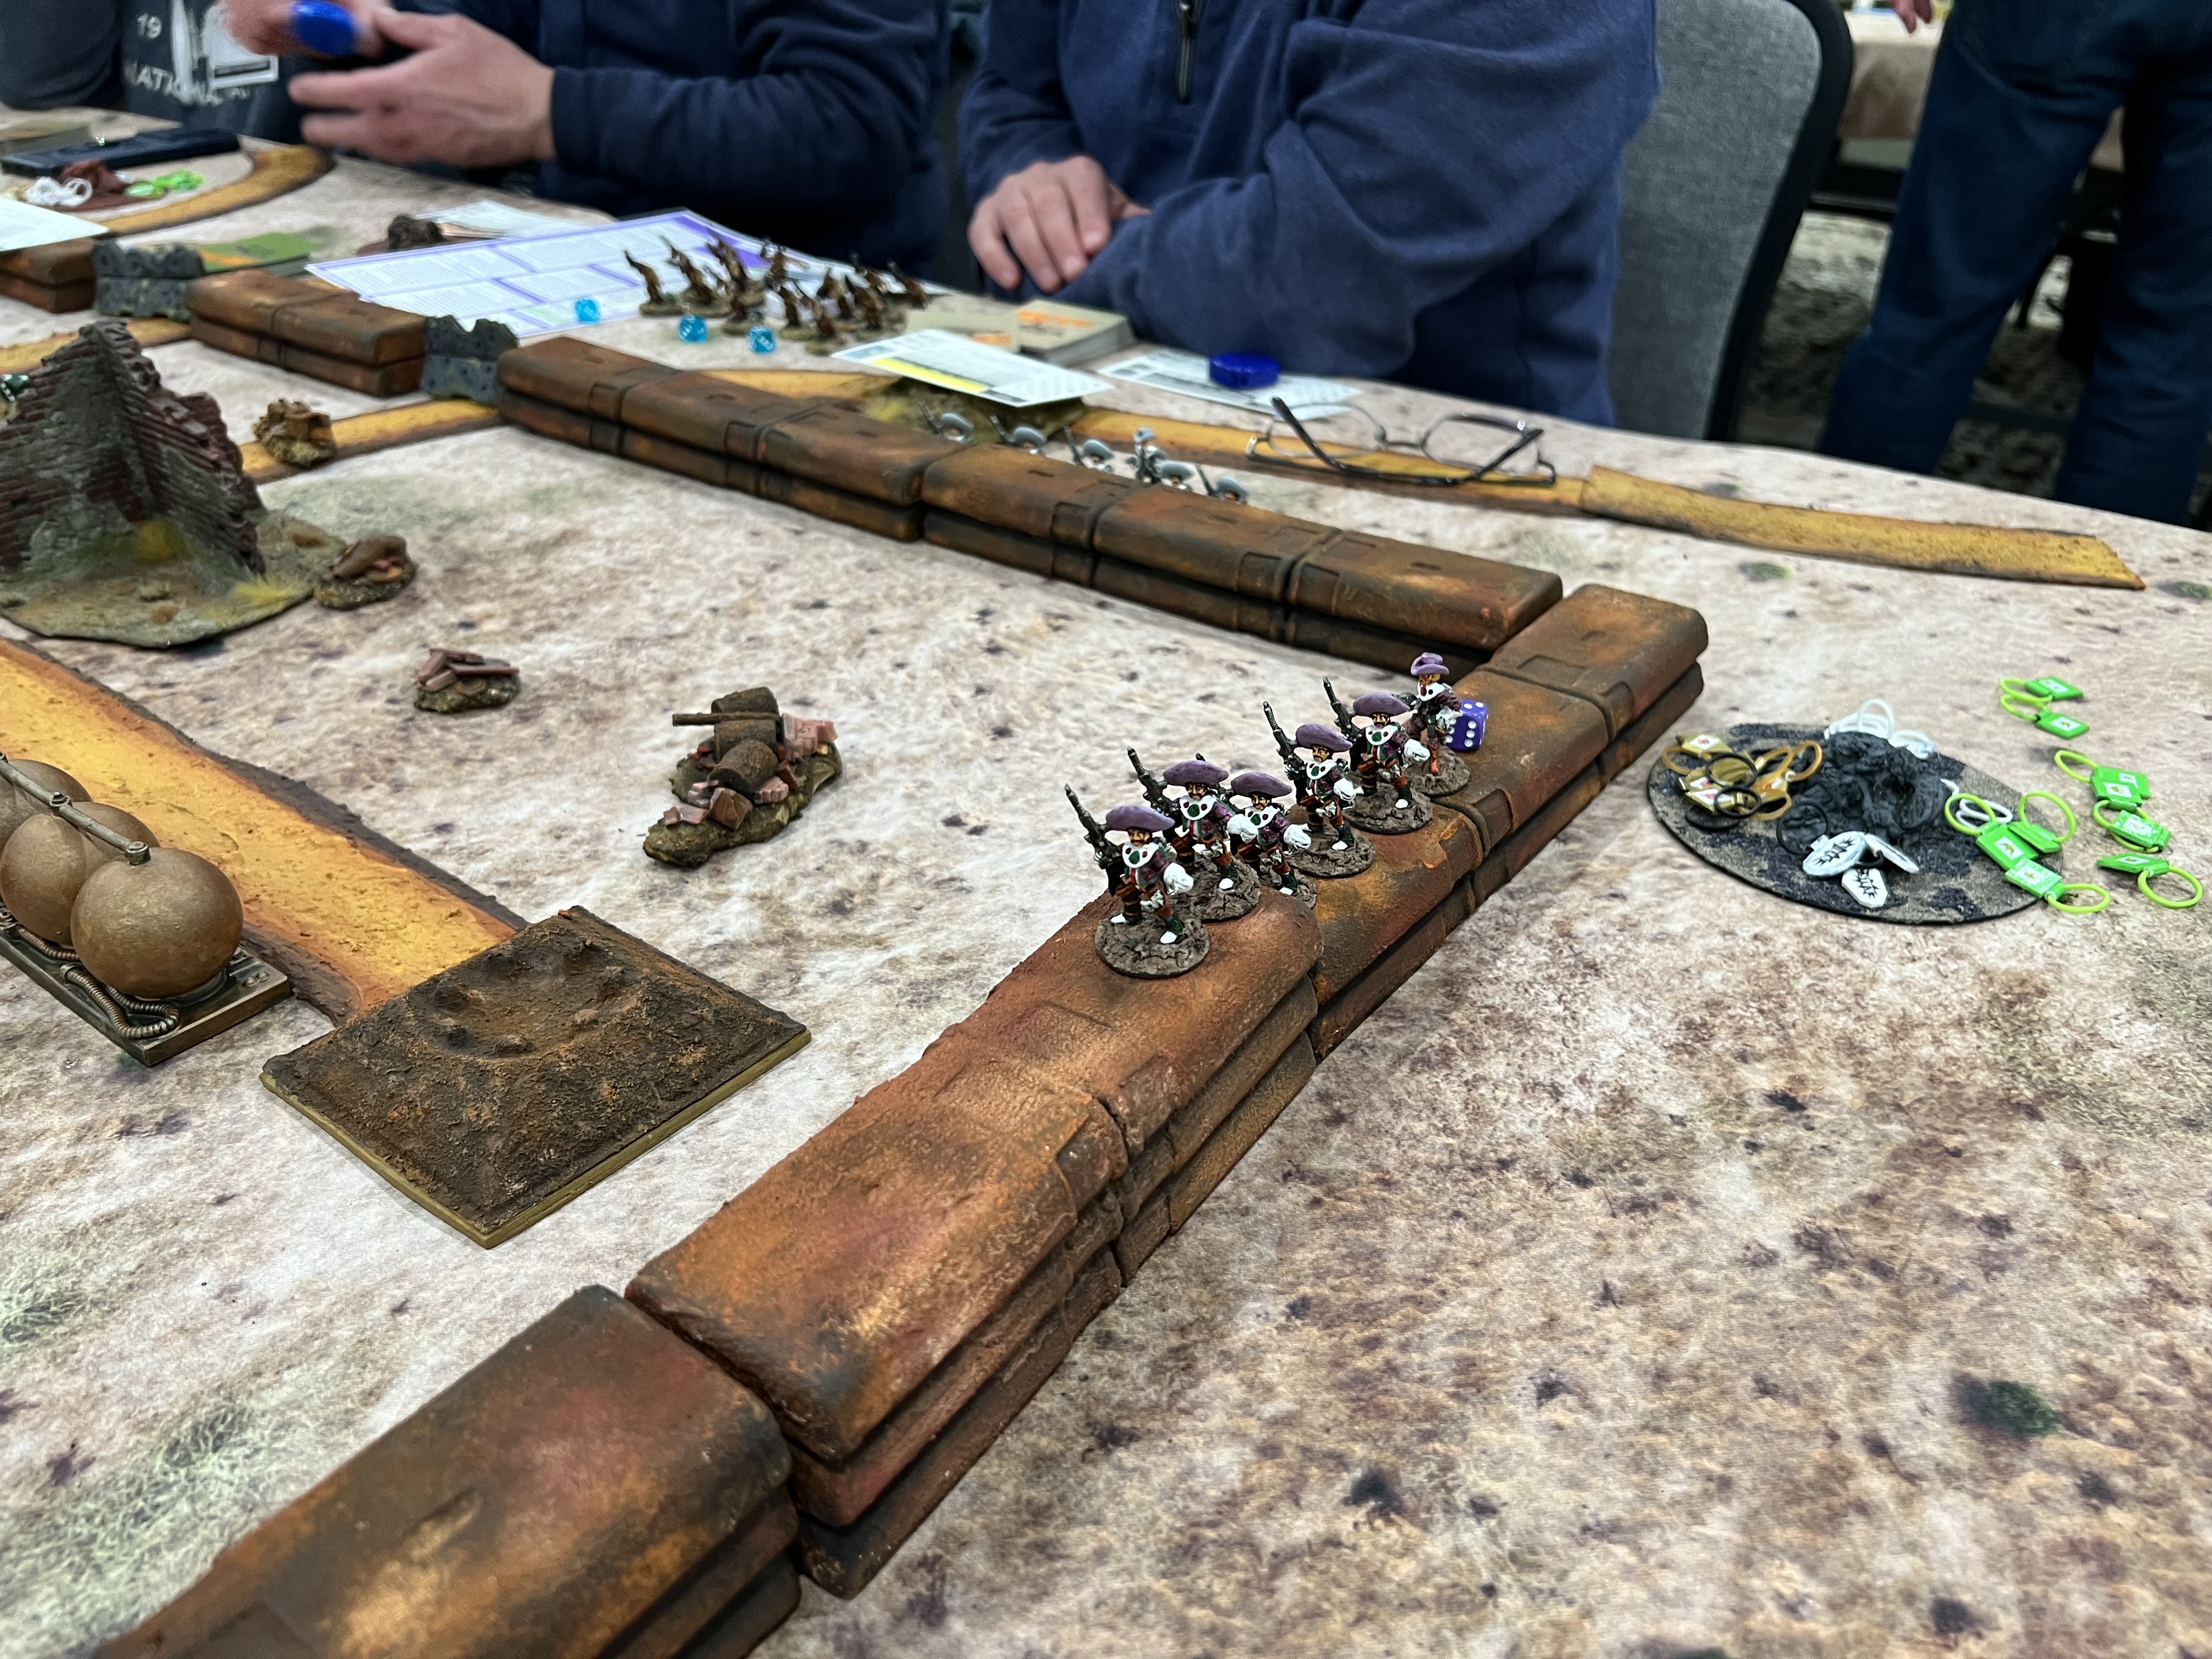
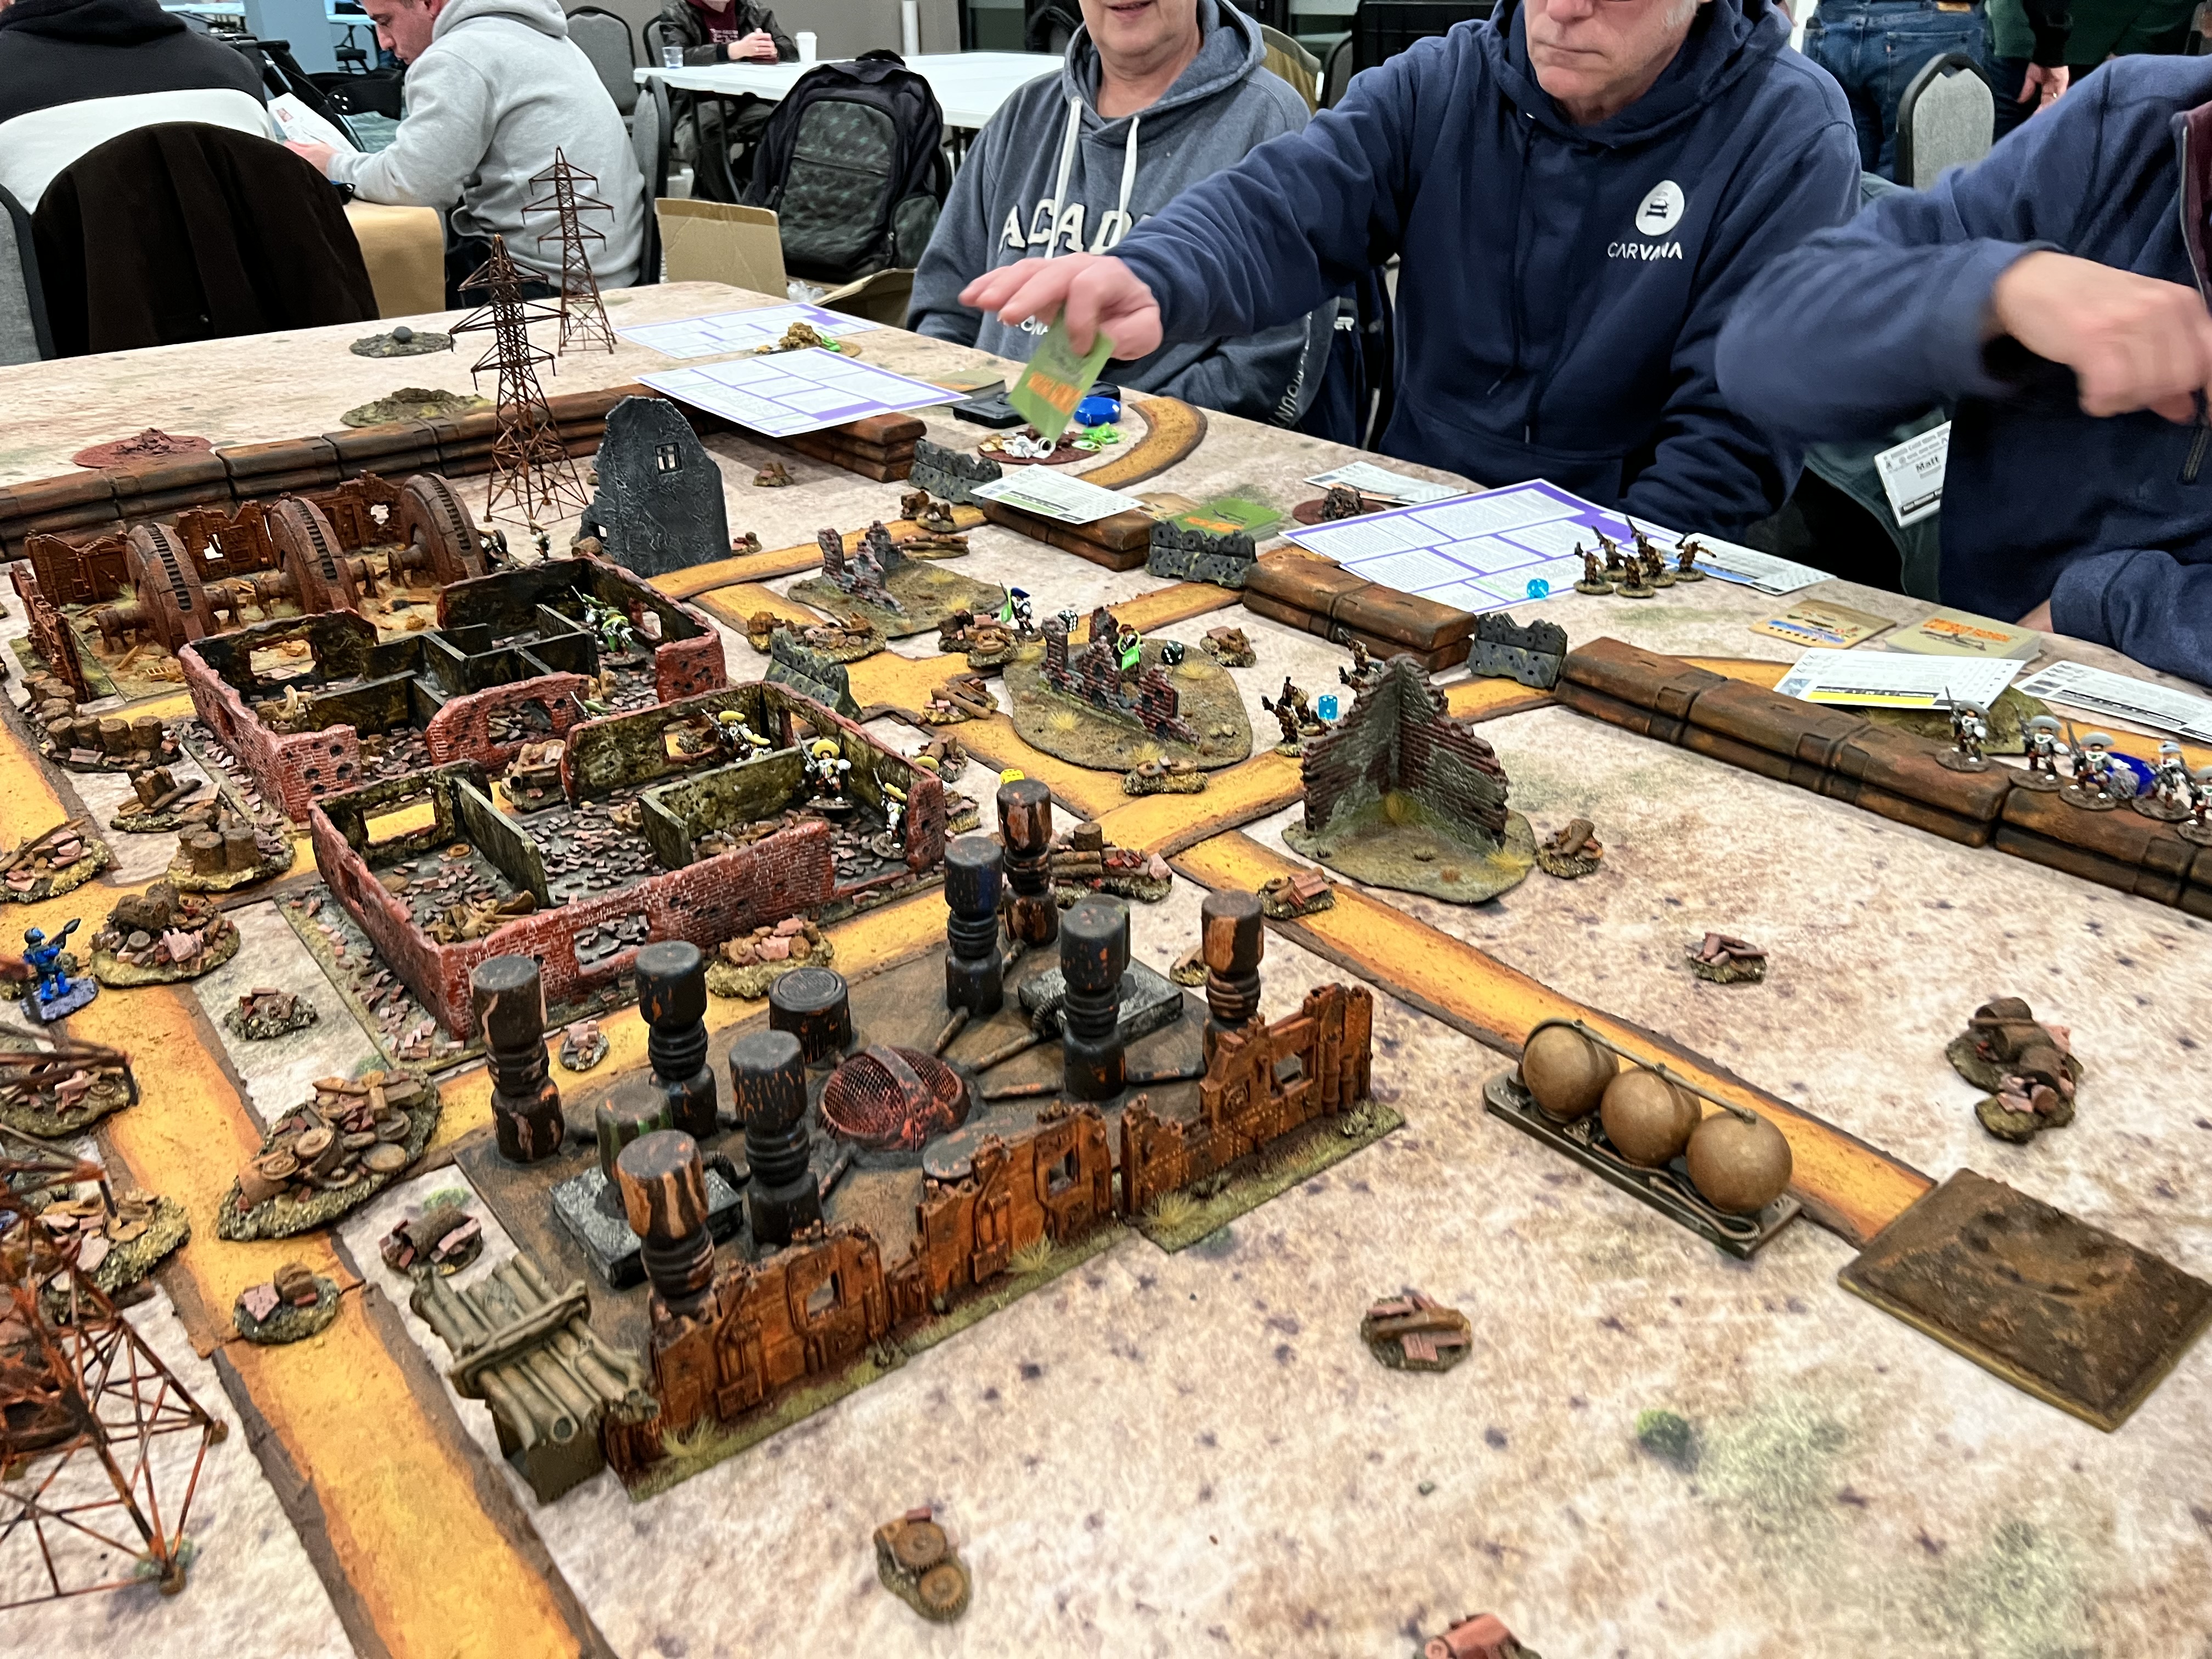
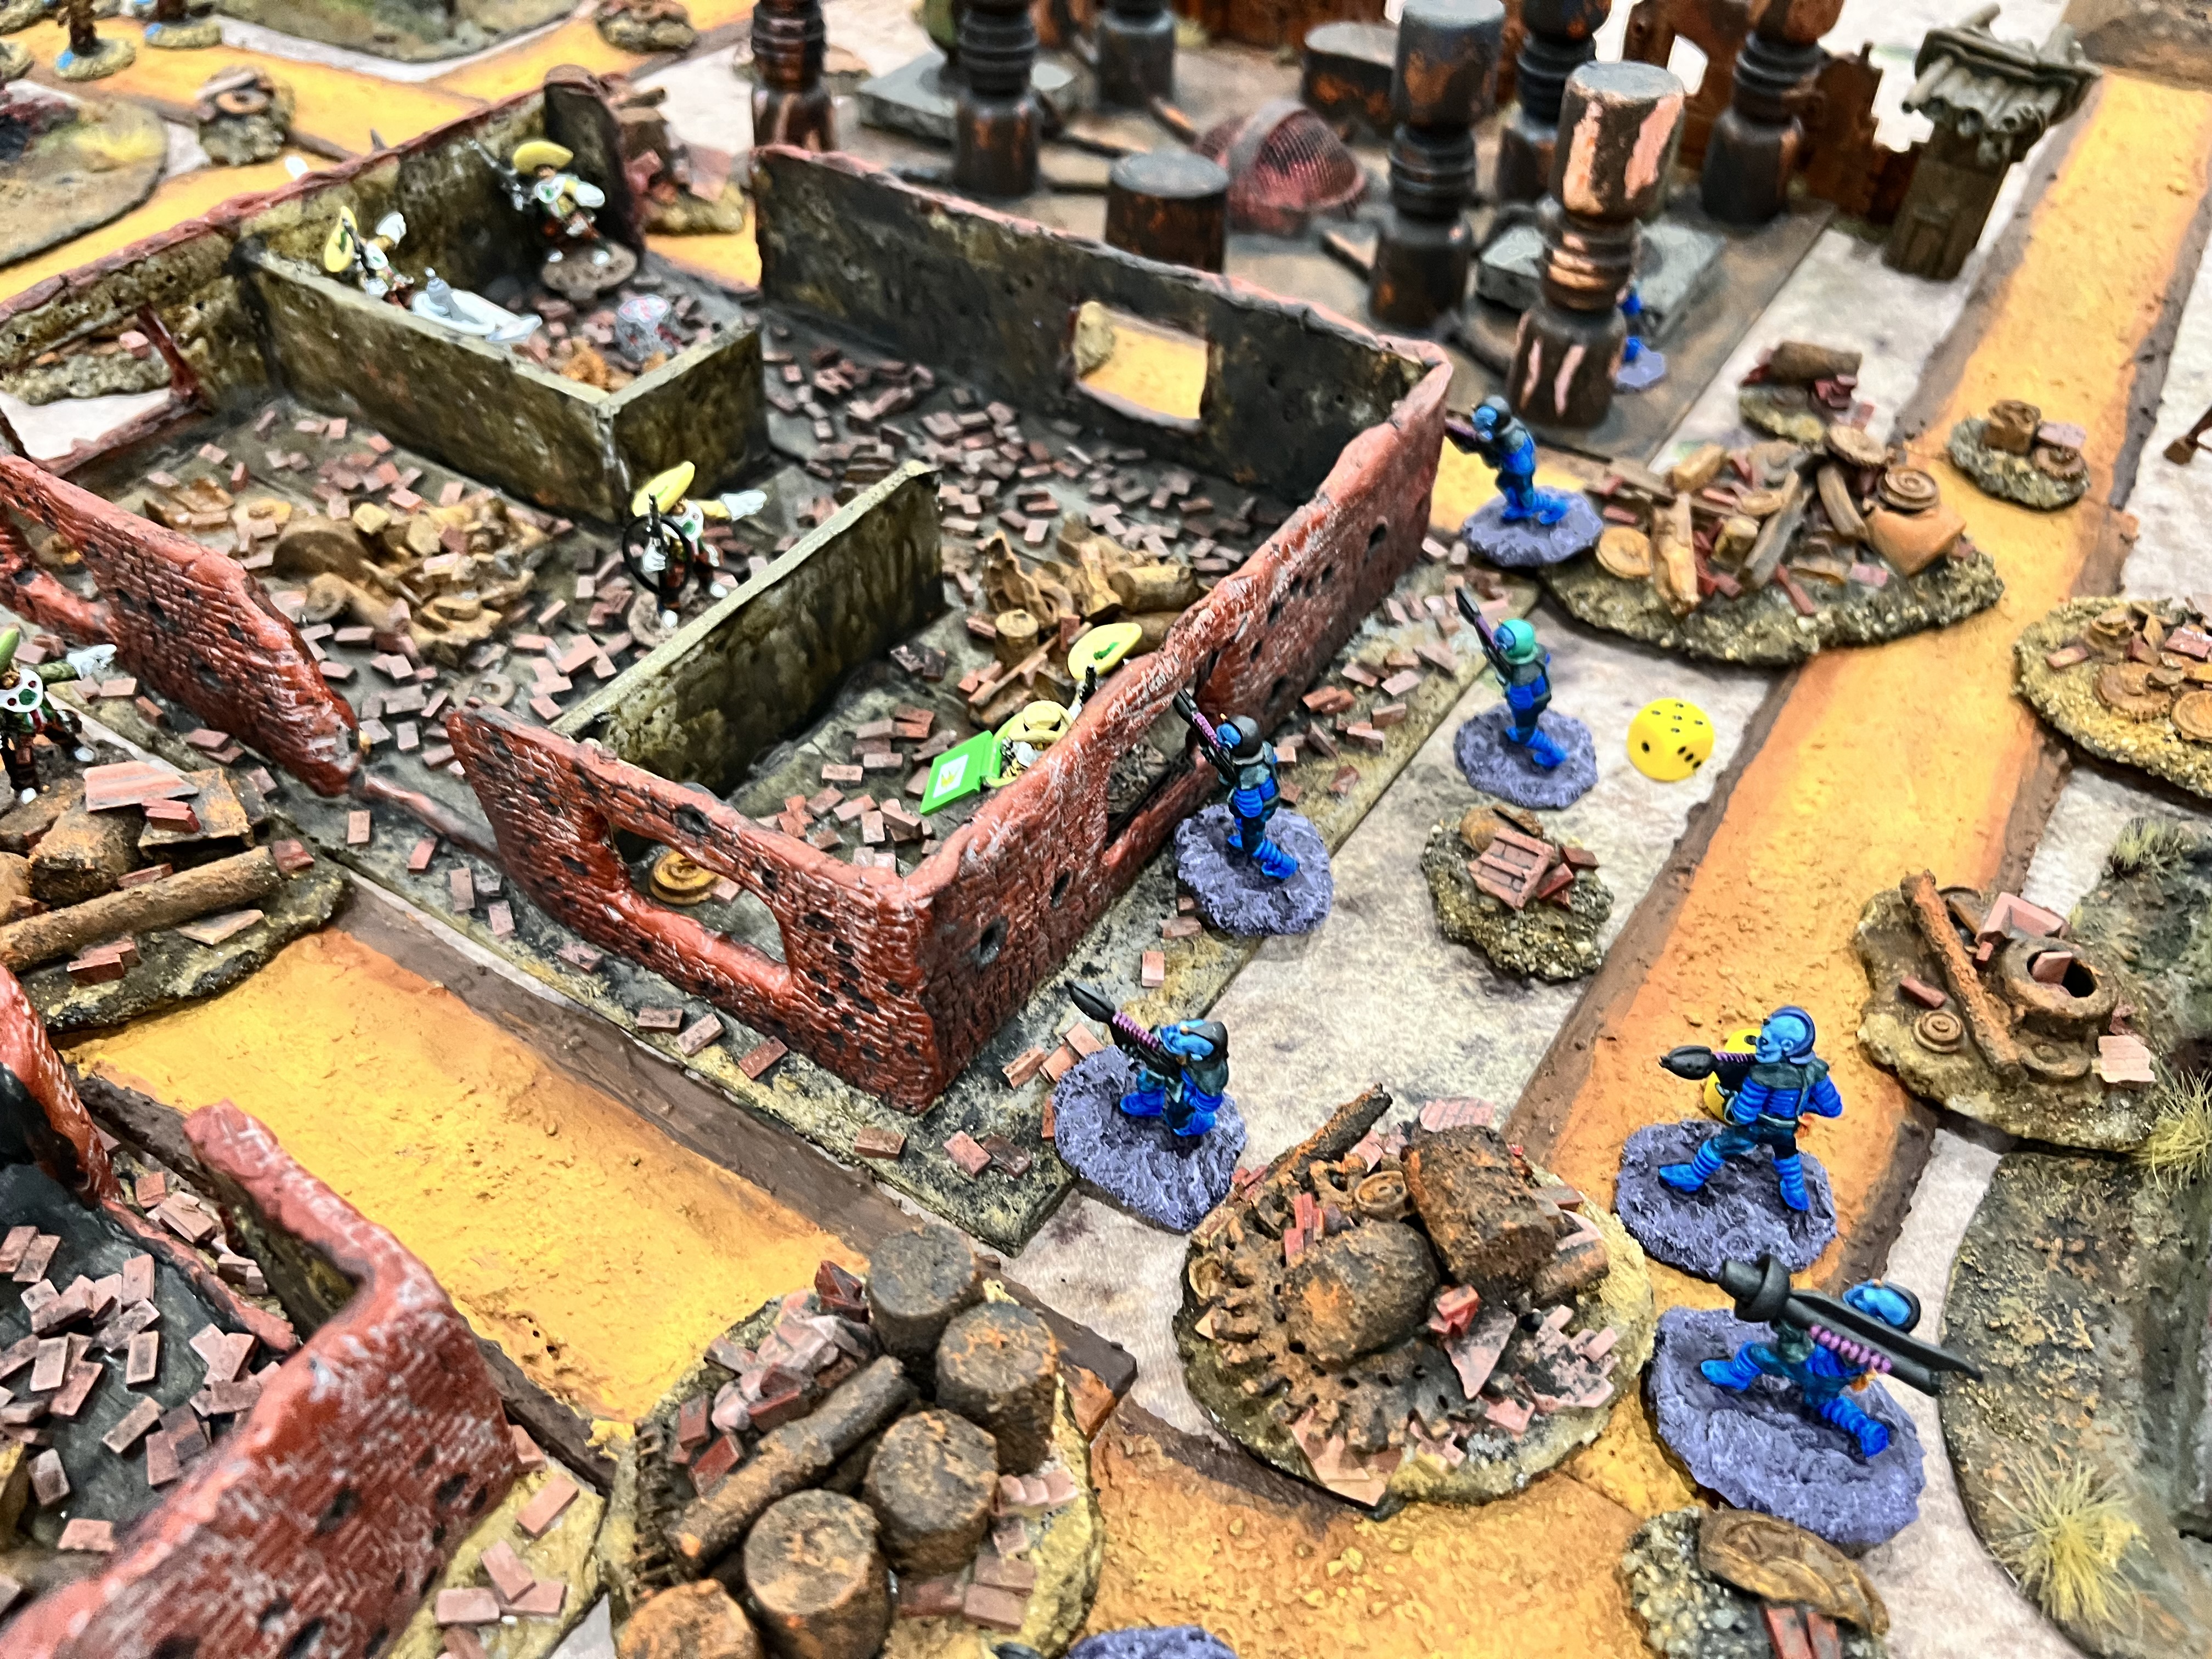
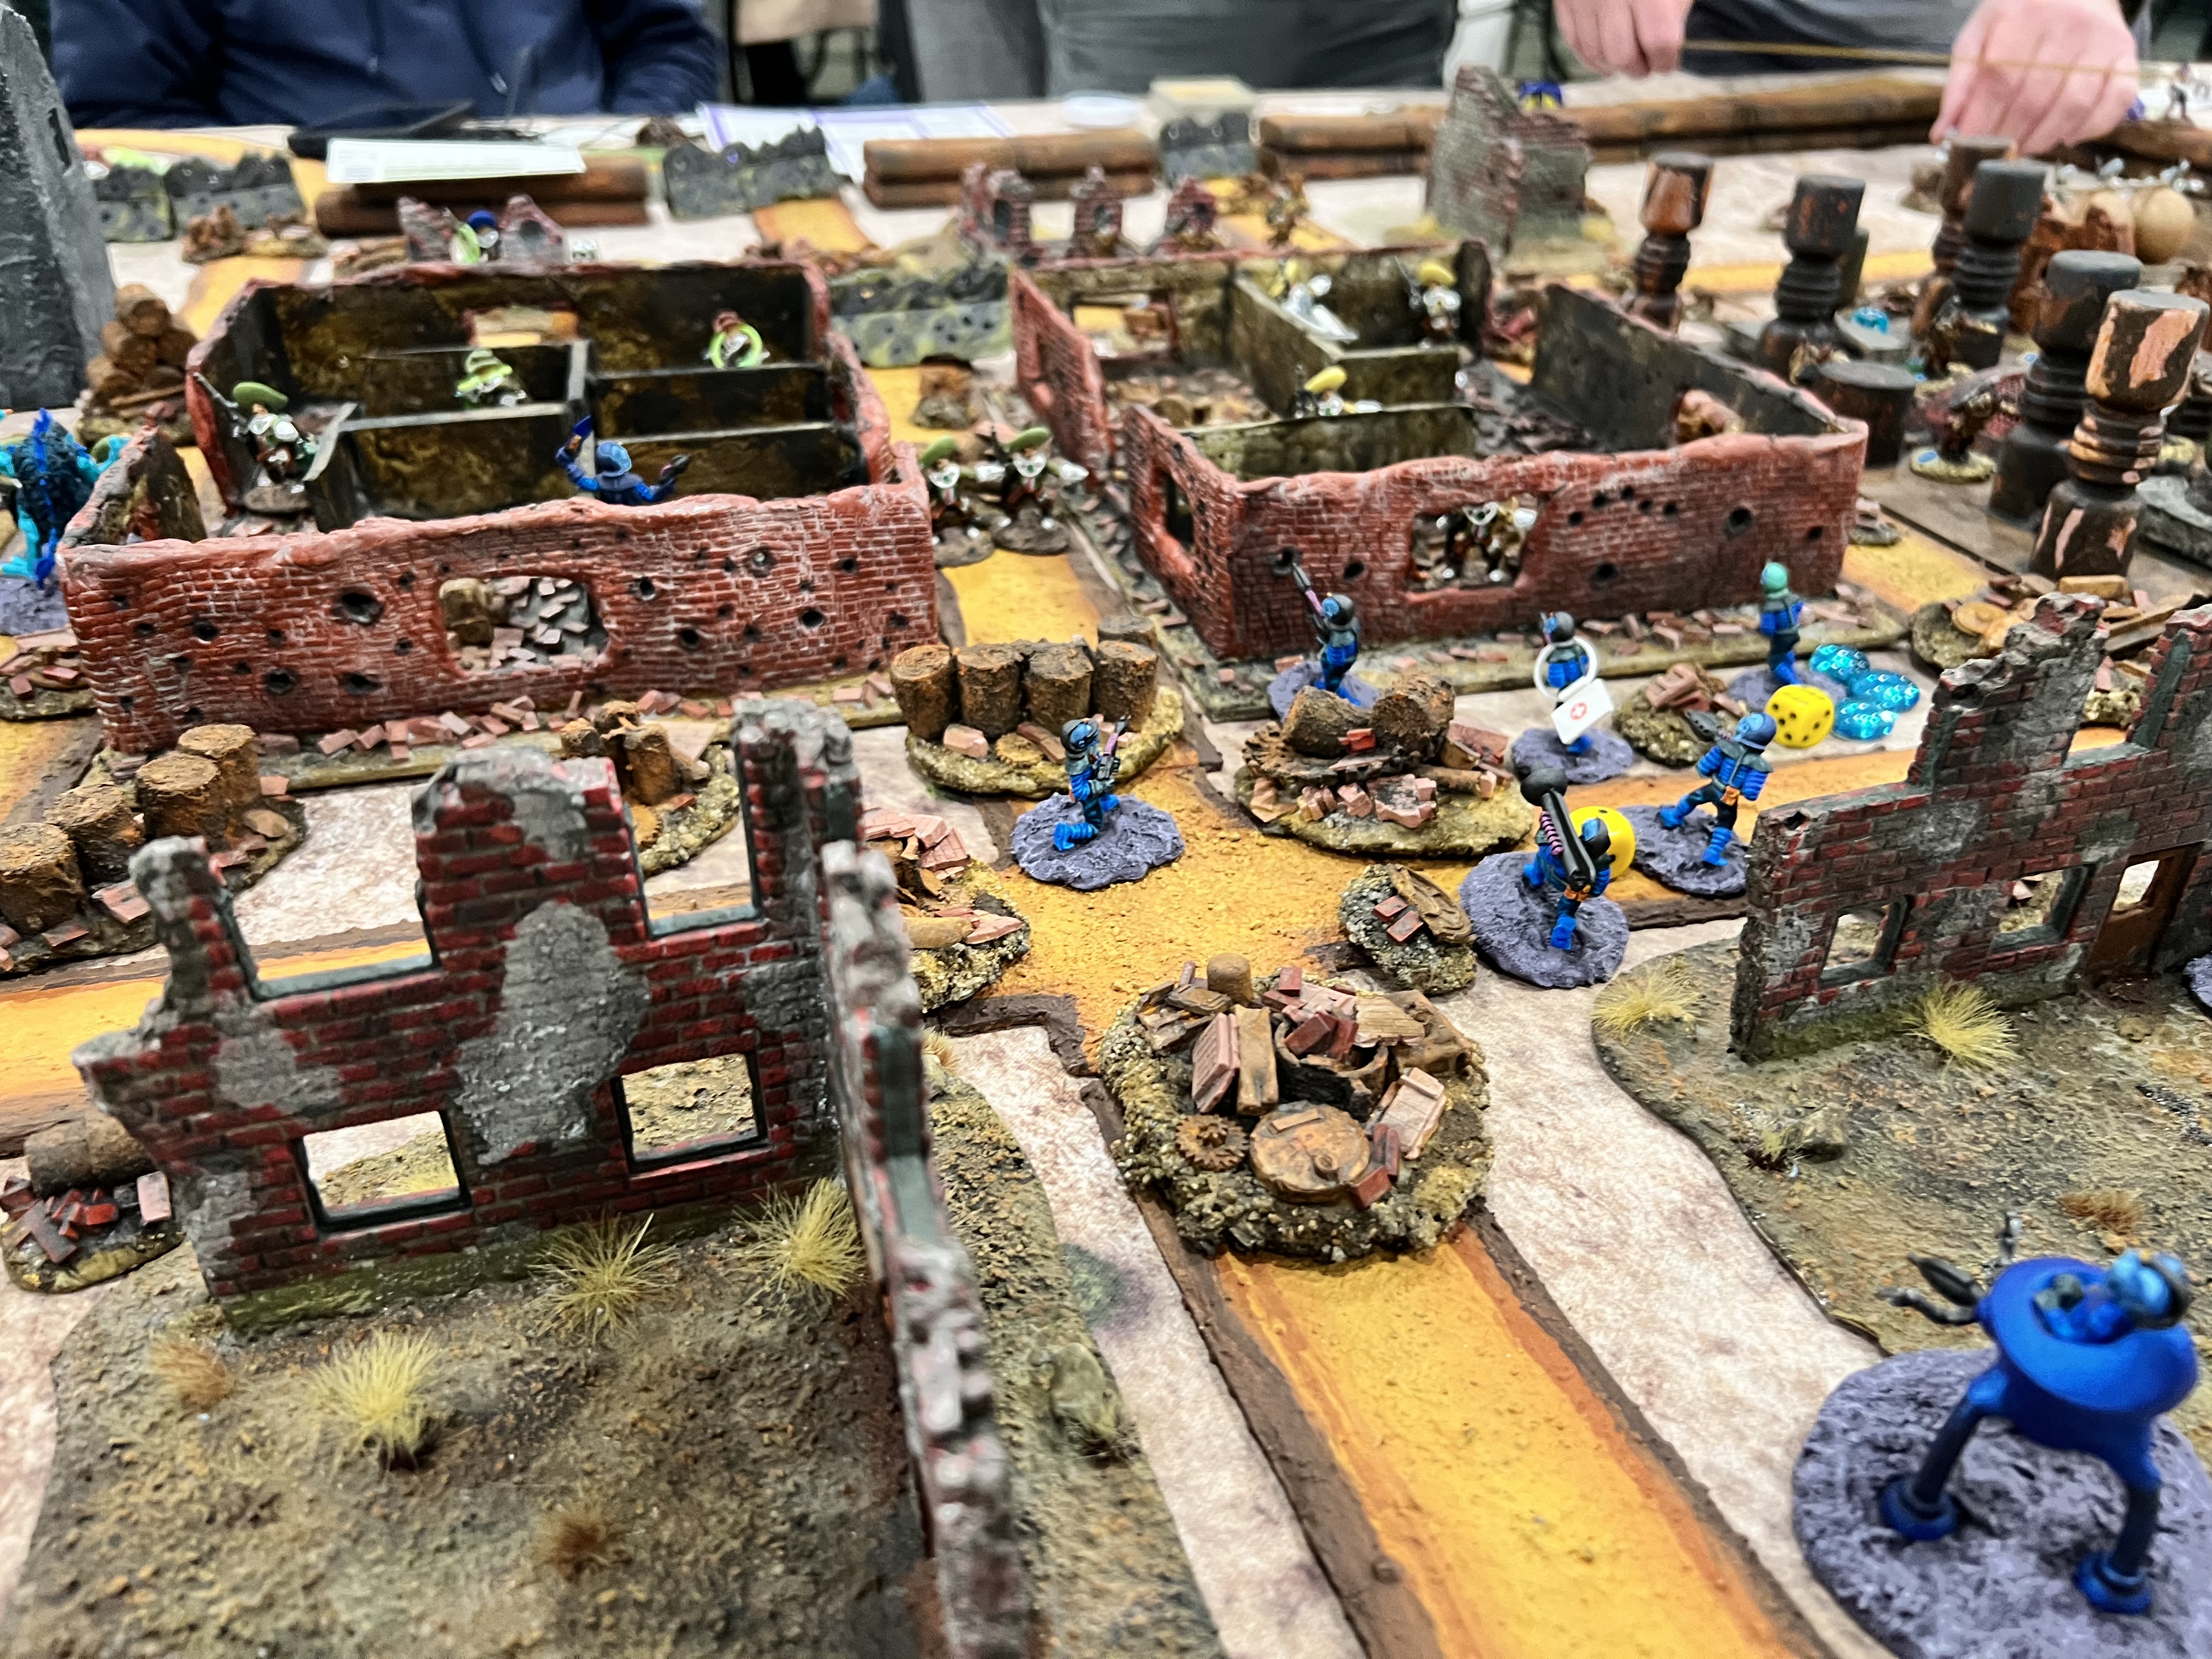
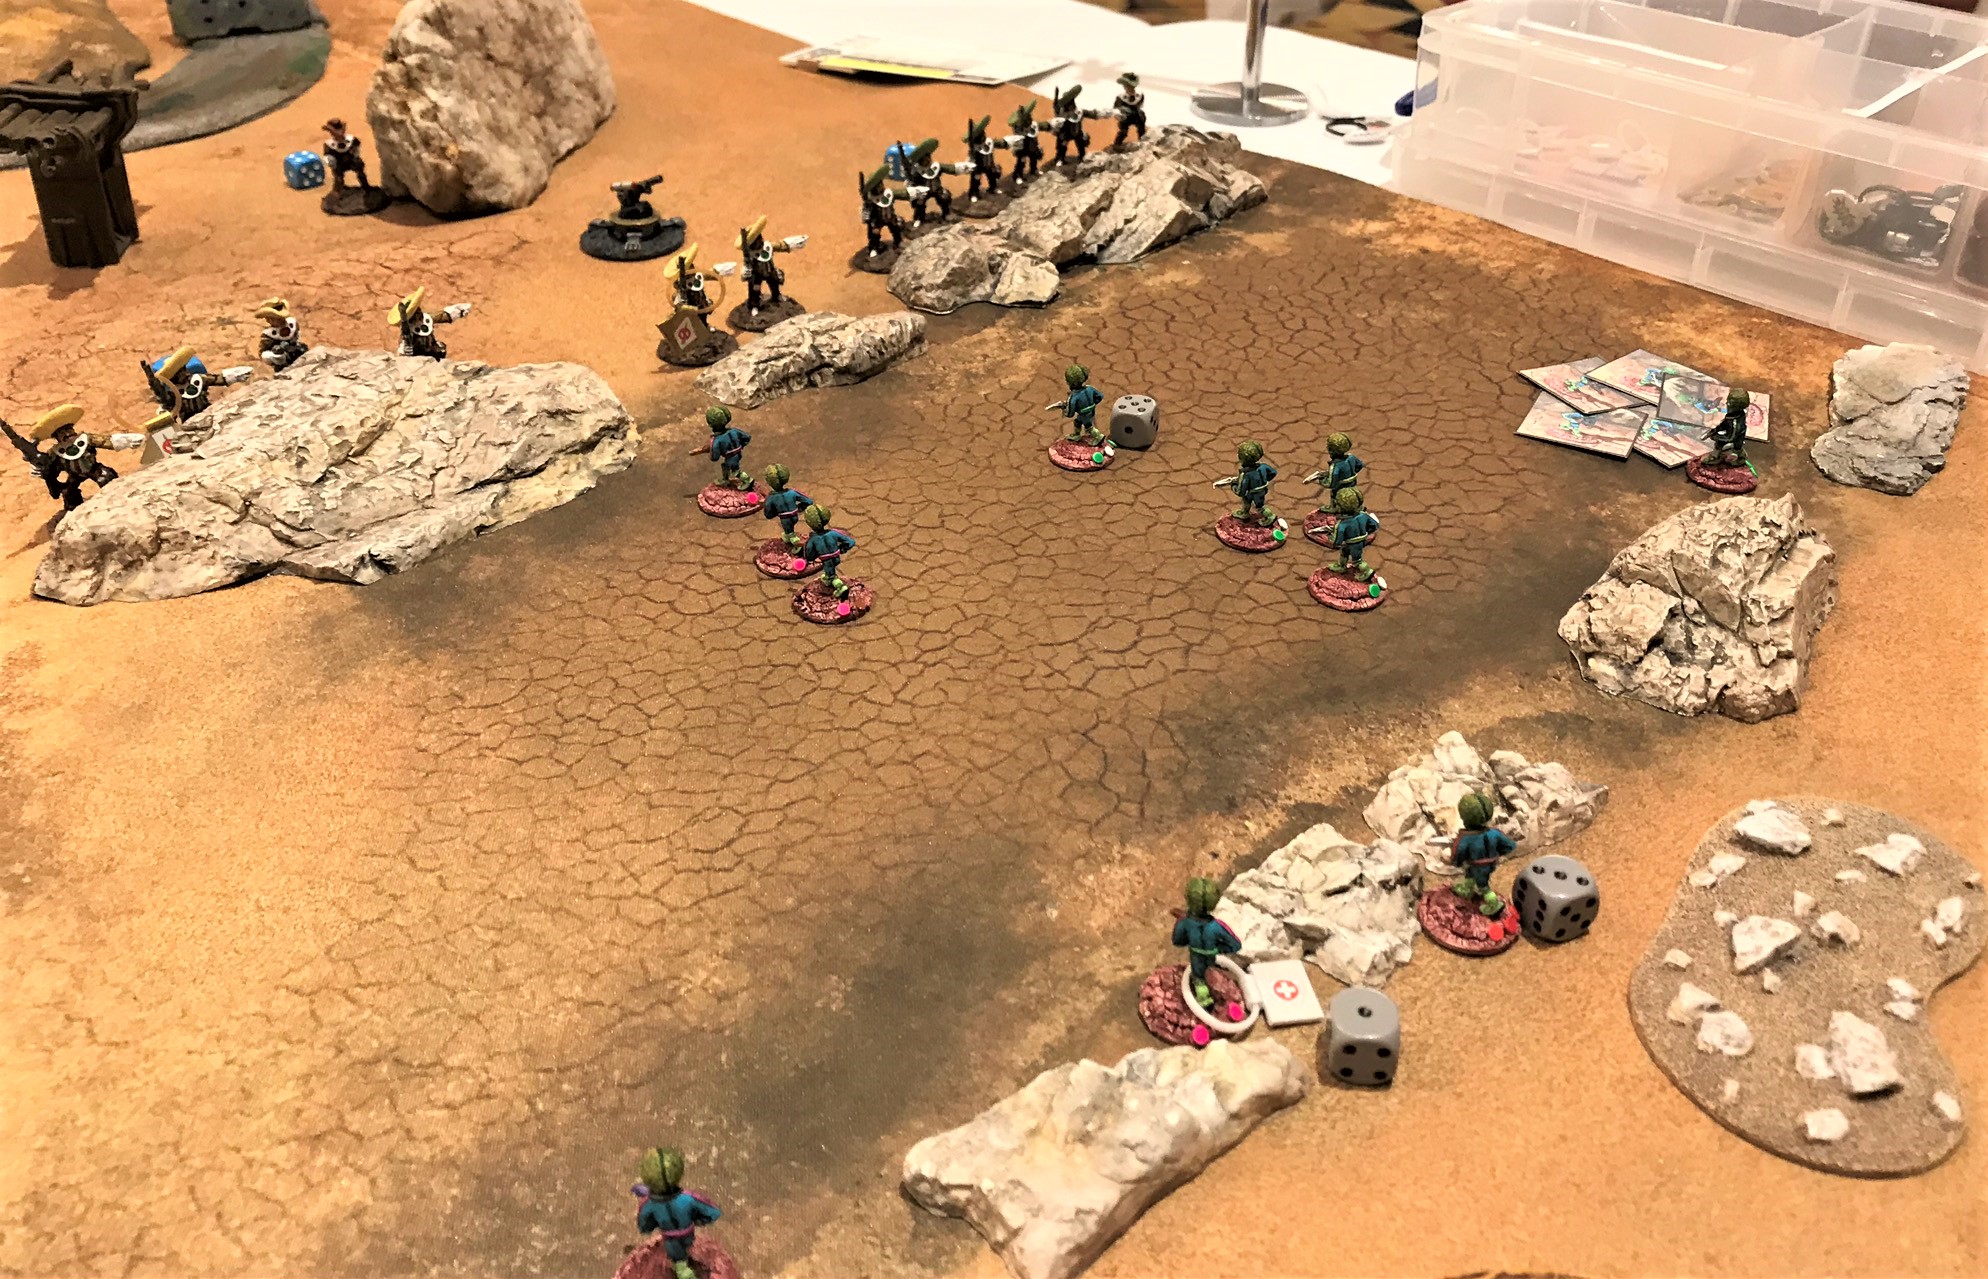
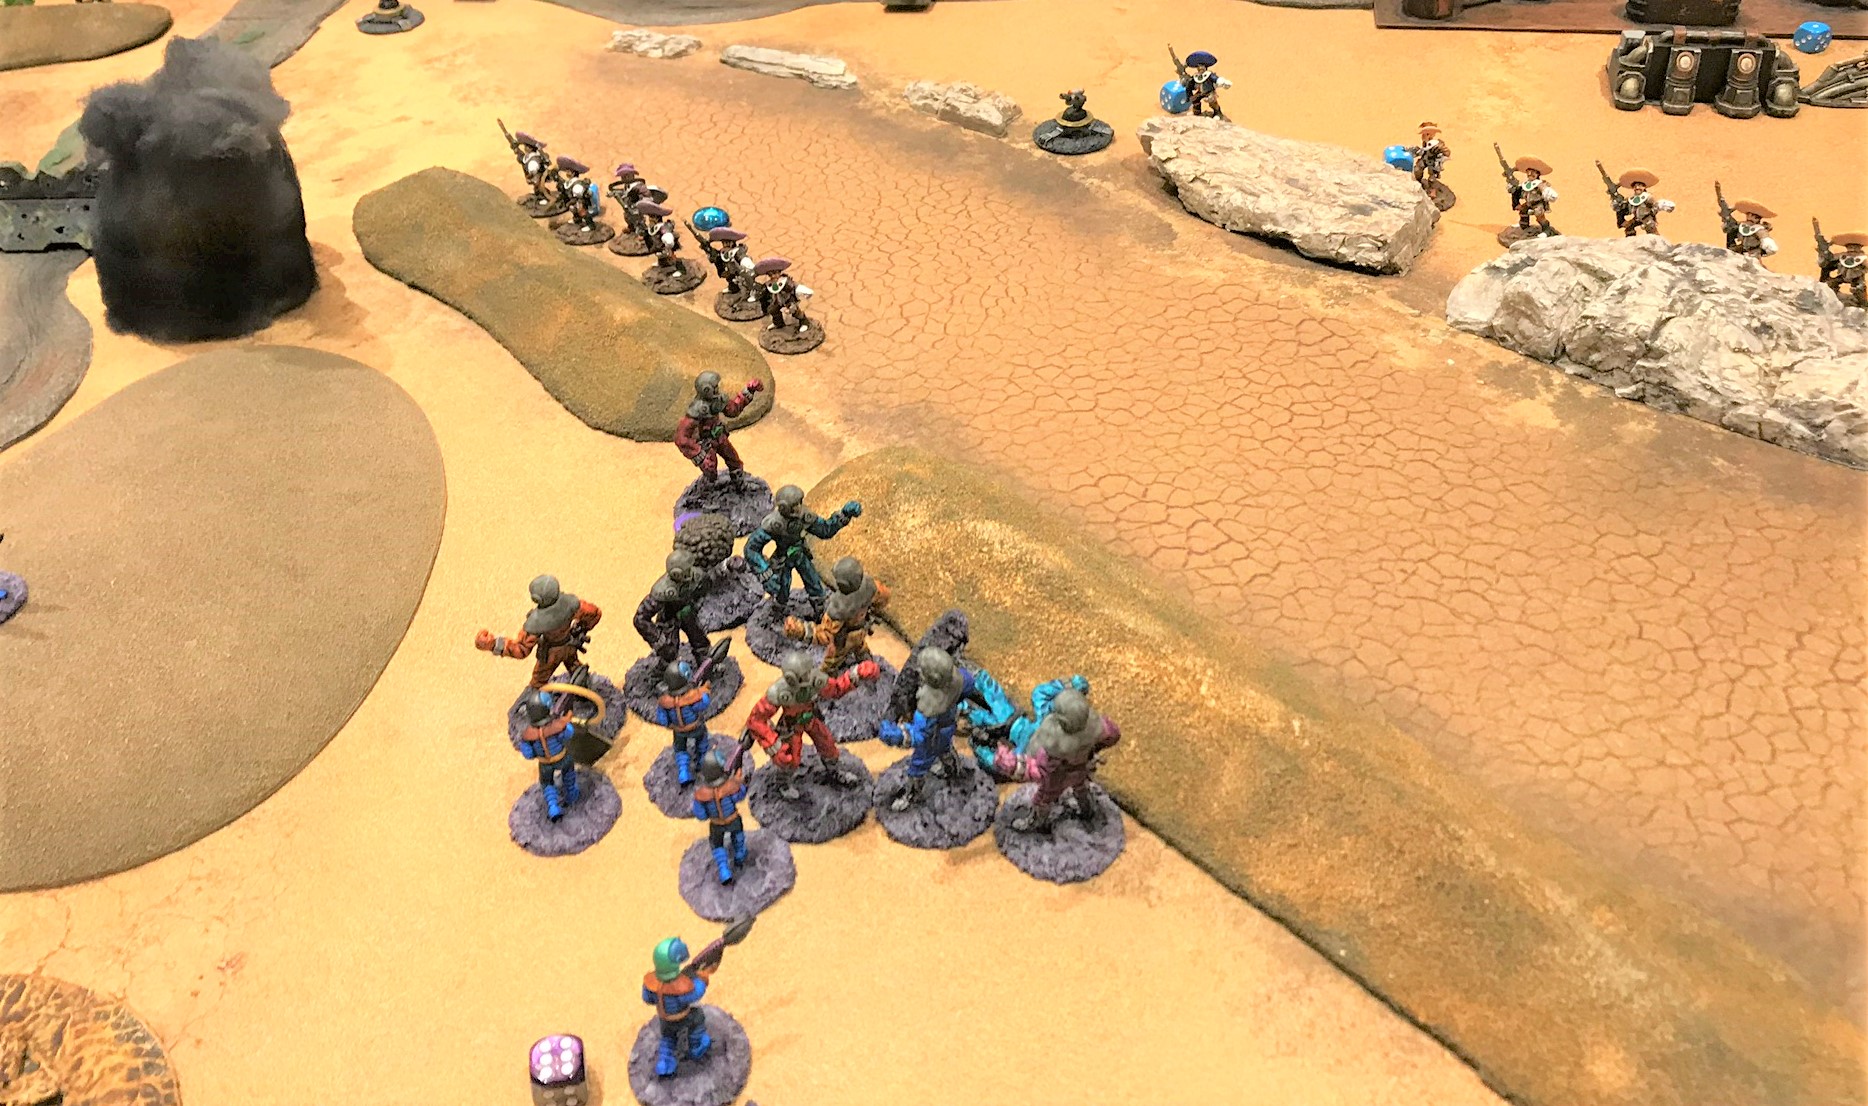
The game was definitely full!Retrovians and Space Cowboys move into the ruined city.The Space Cowboys find a robot (an Archive Robot Cook) and get it to join their side.Reinforcements arrive! Here come the Space Roos.Retrovians take cover under fire while trying to clear the walls.Retrovian infantry move into the city.
In the end, the casualties on both sides were high. But, the Space Cowboys possession of robots allowed them a narrow 15-10 victory. That wrapped up Thursday’s games.
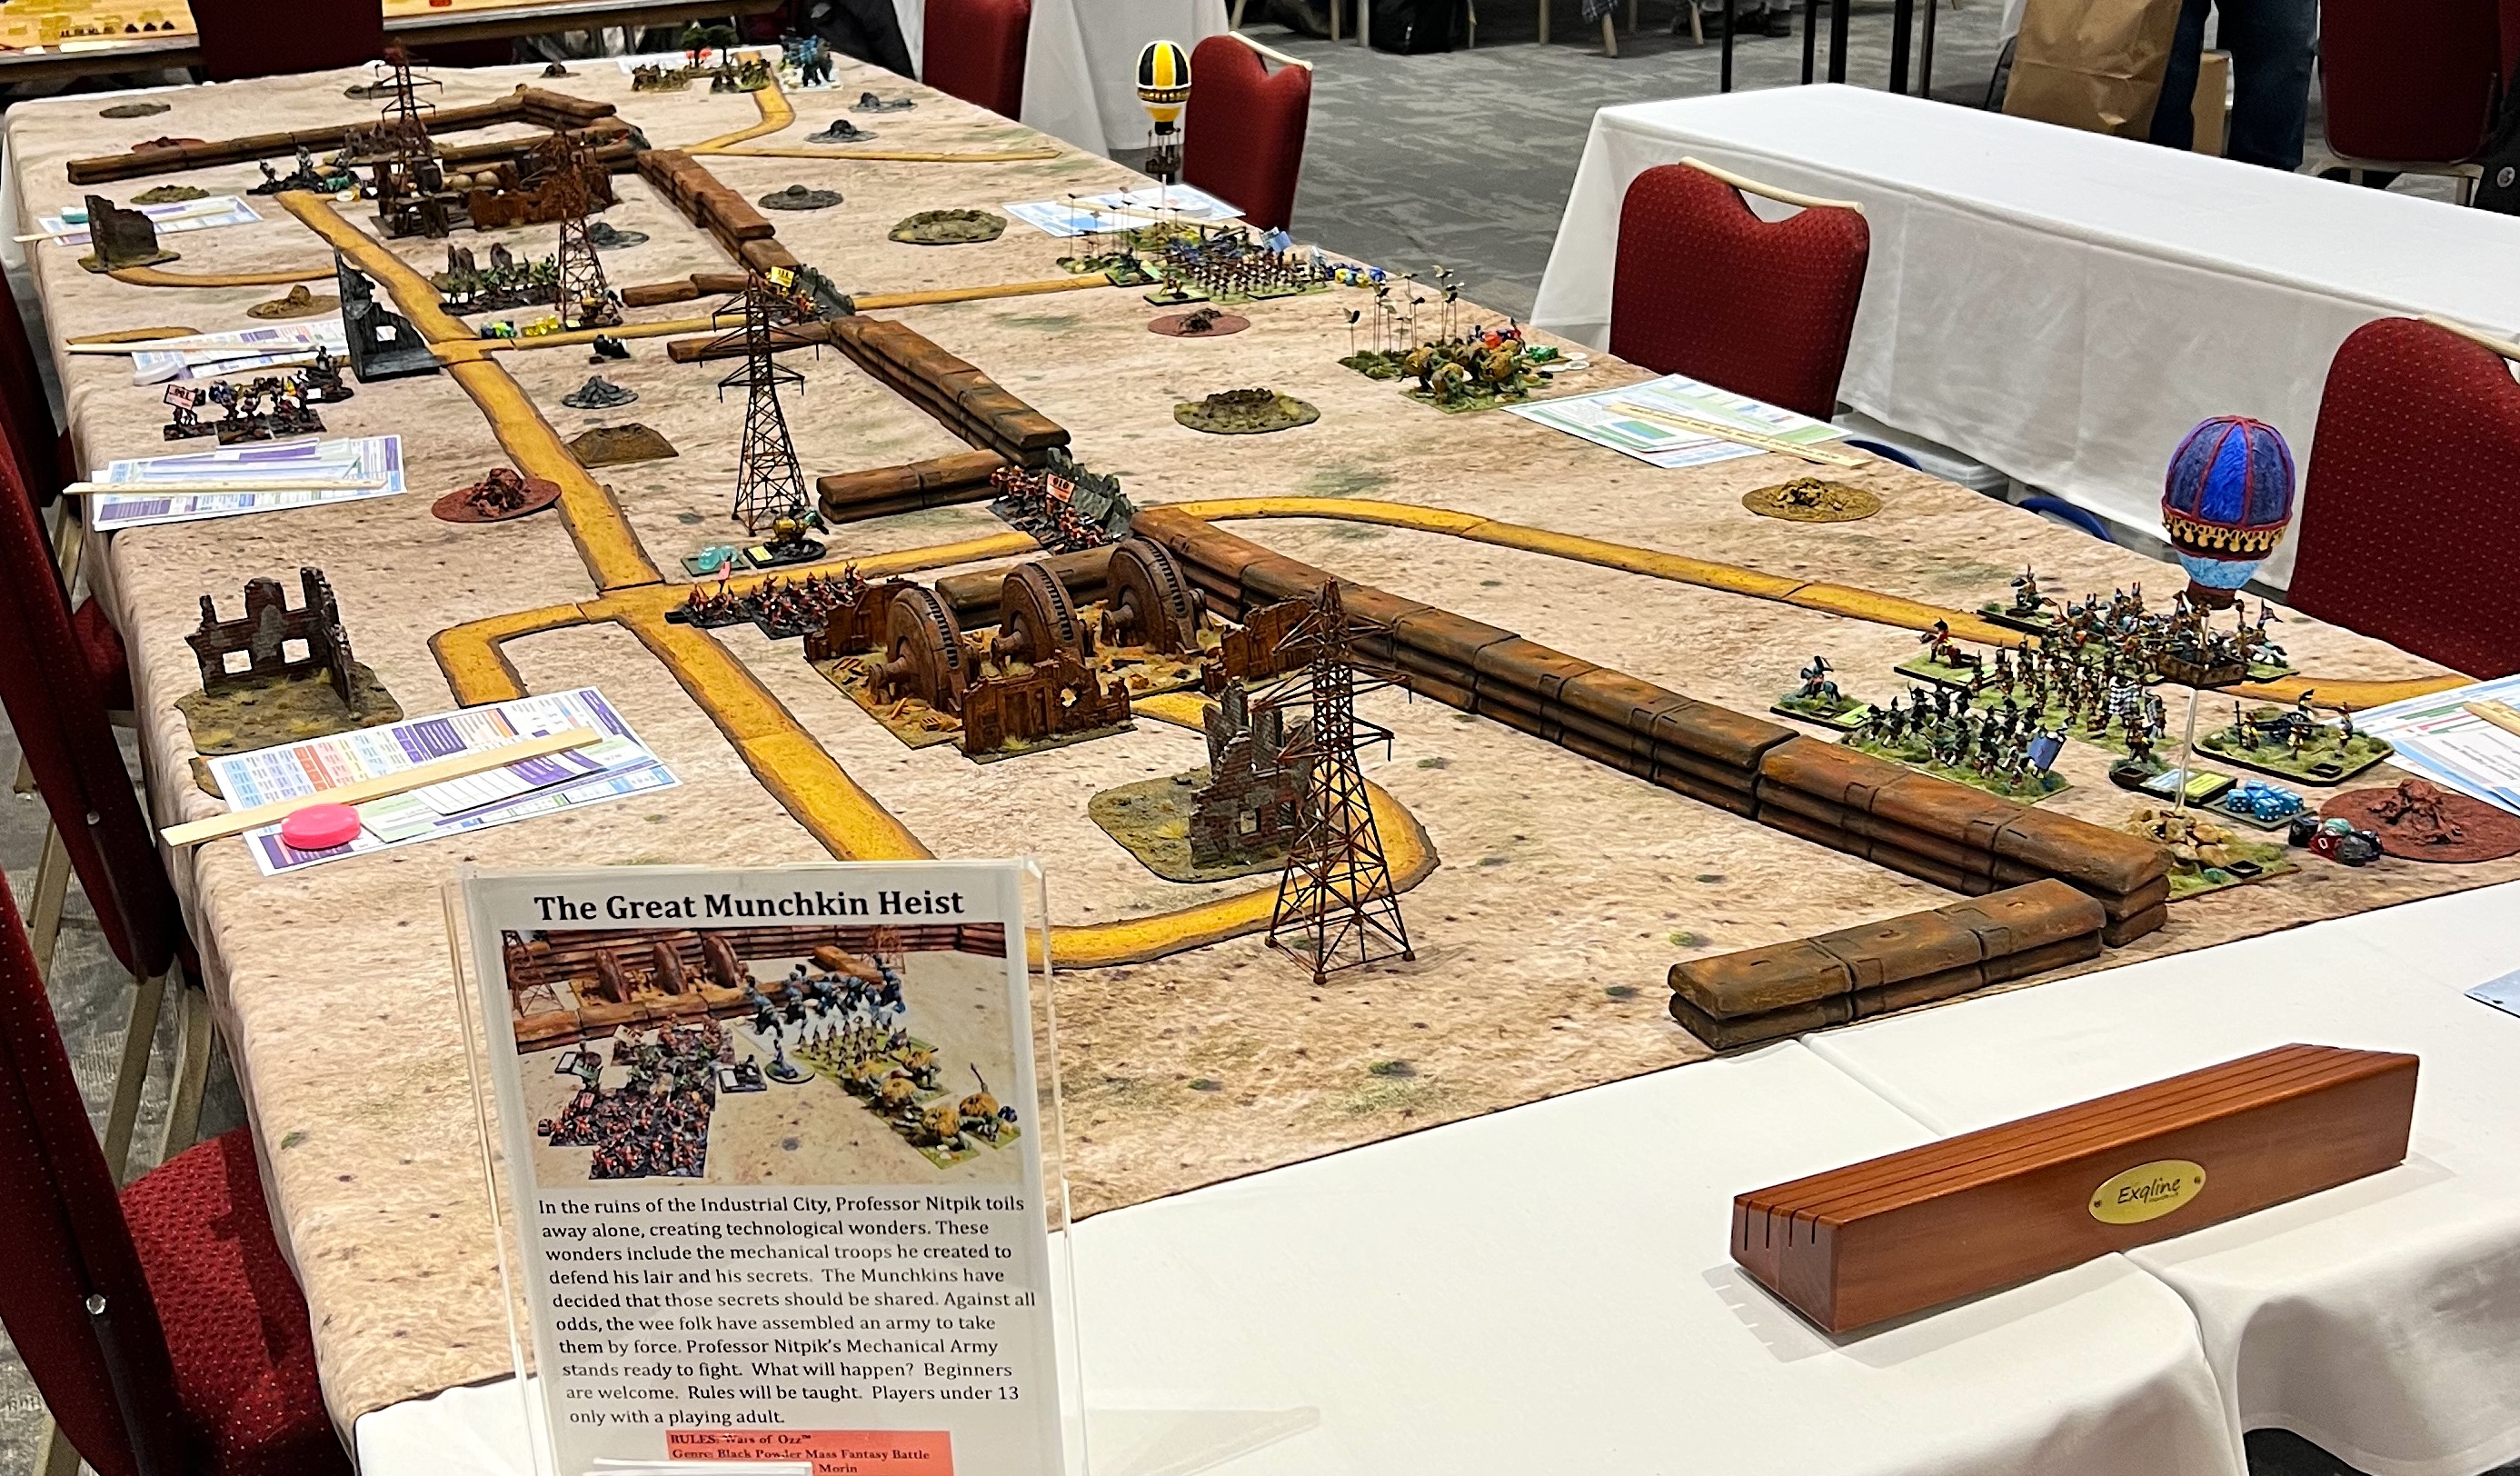
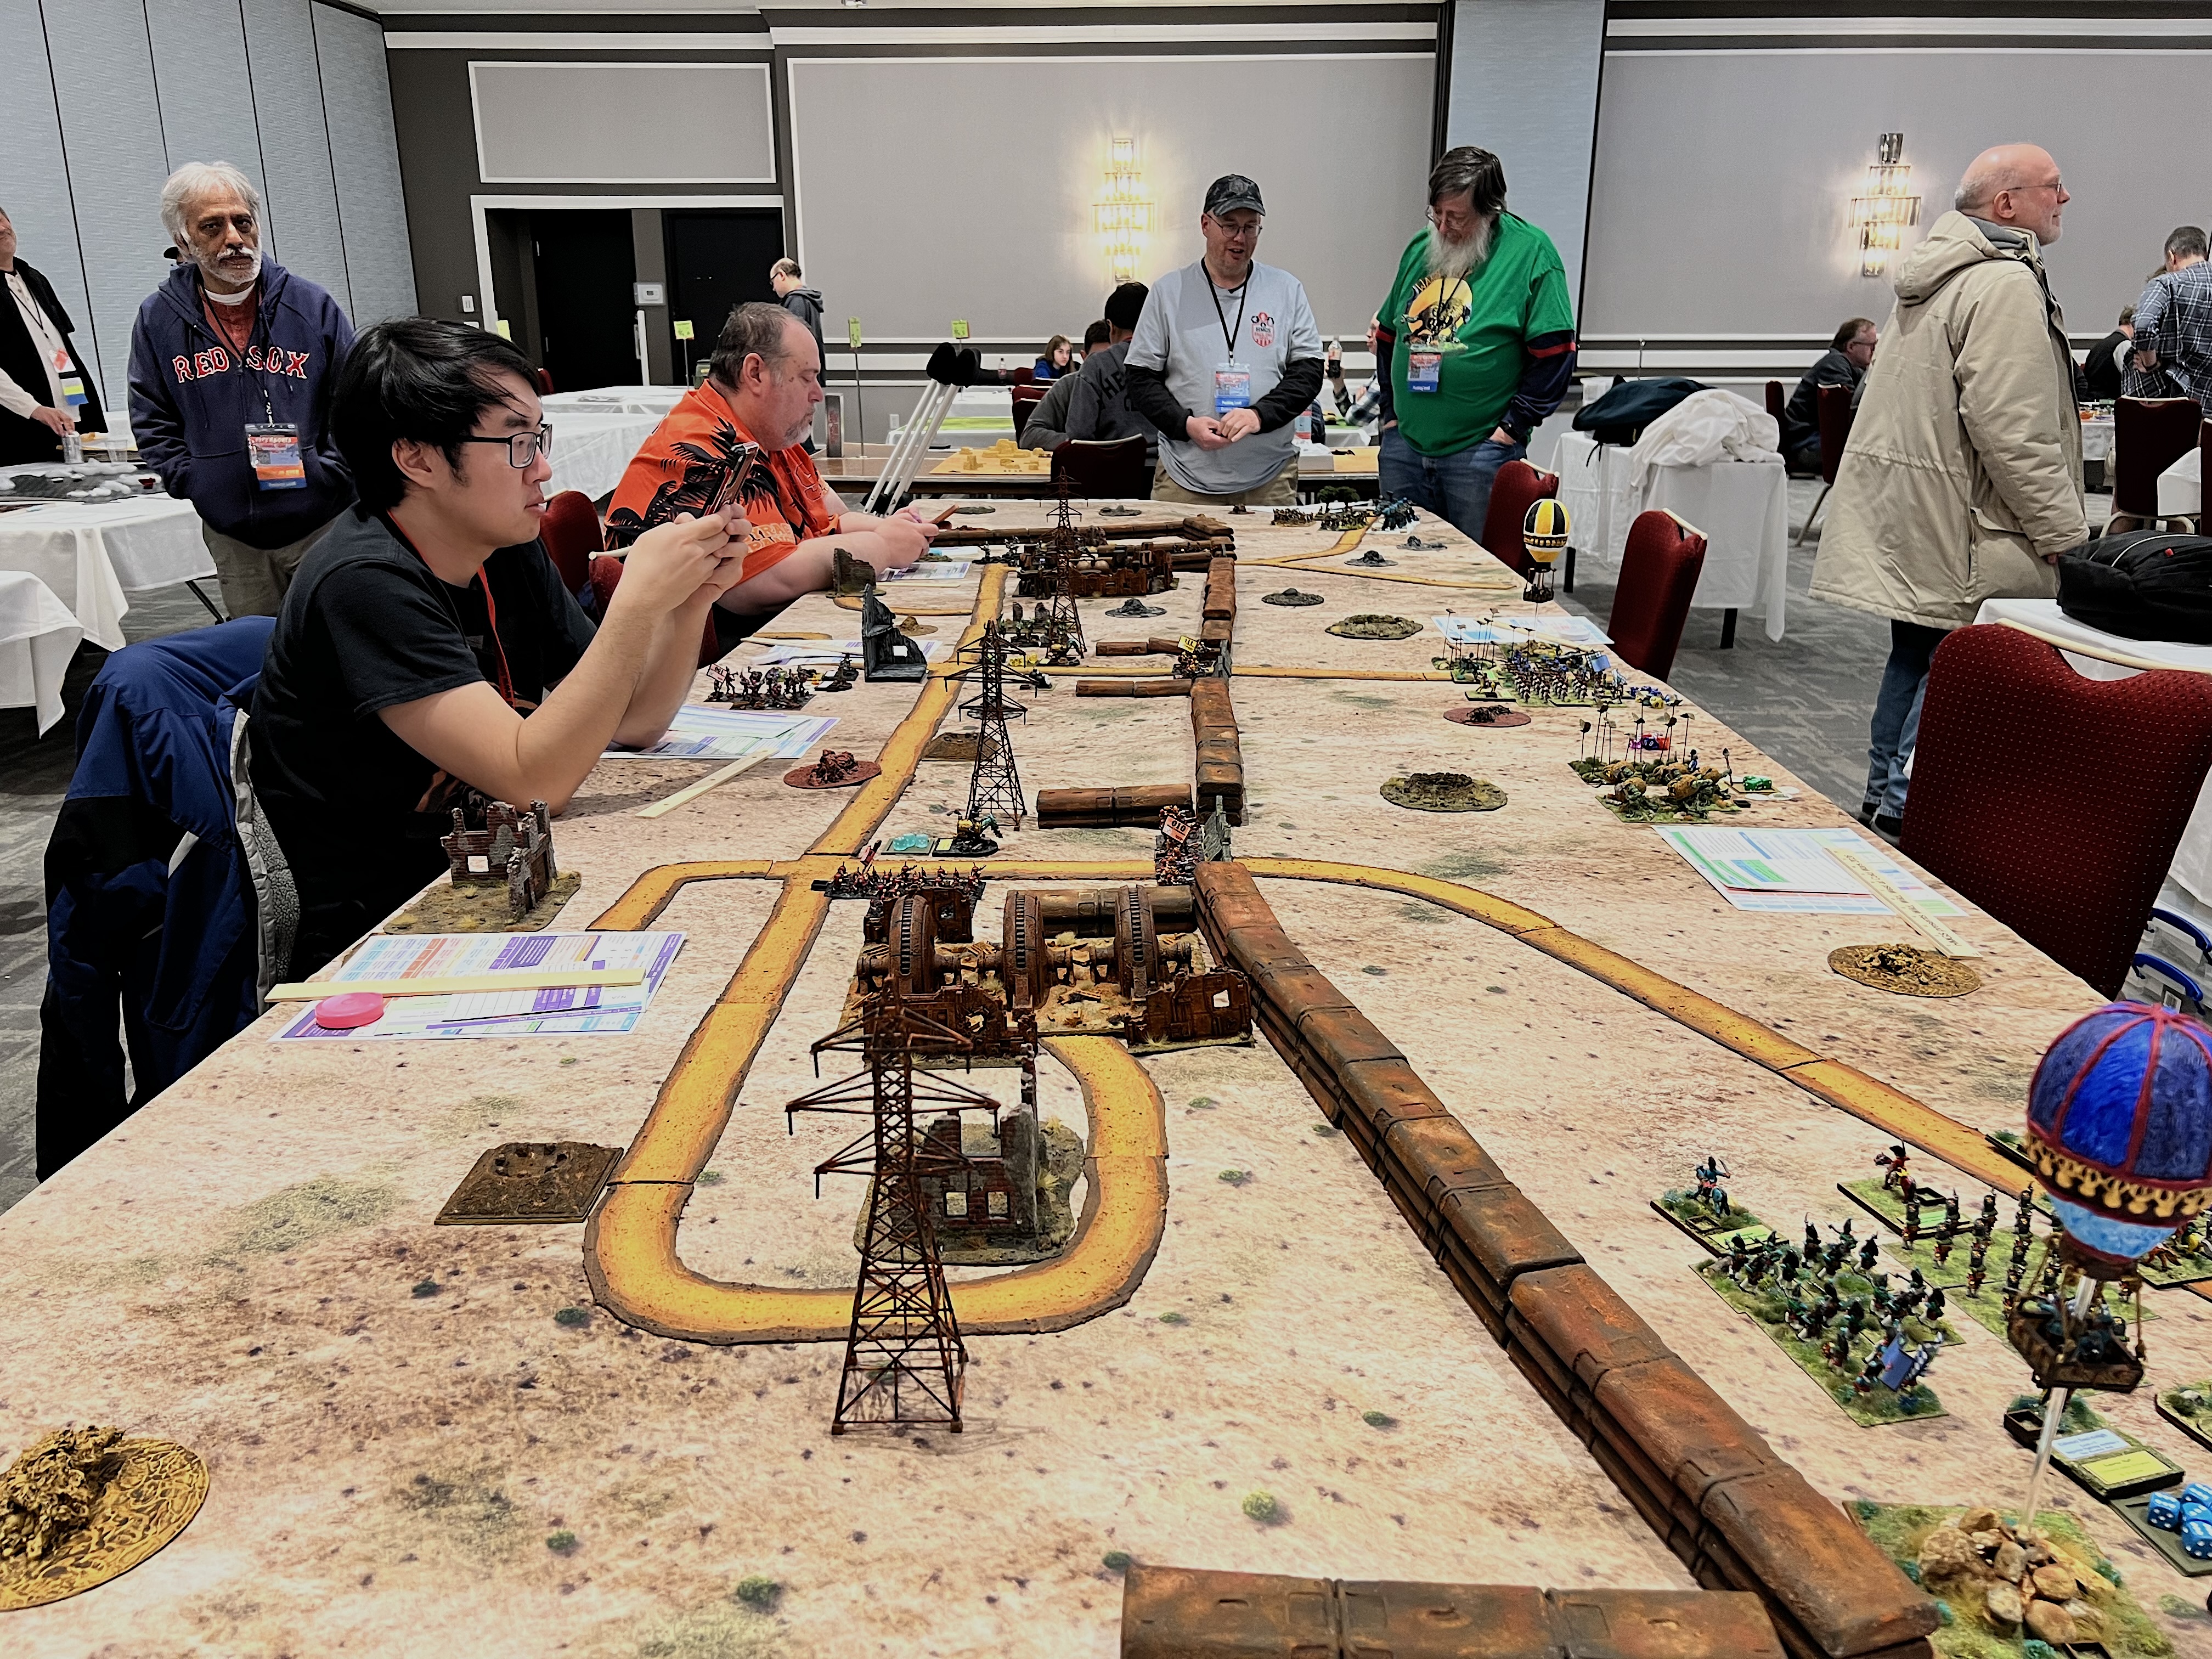
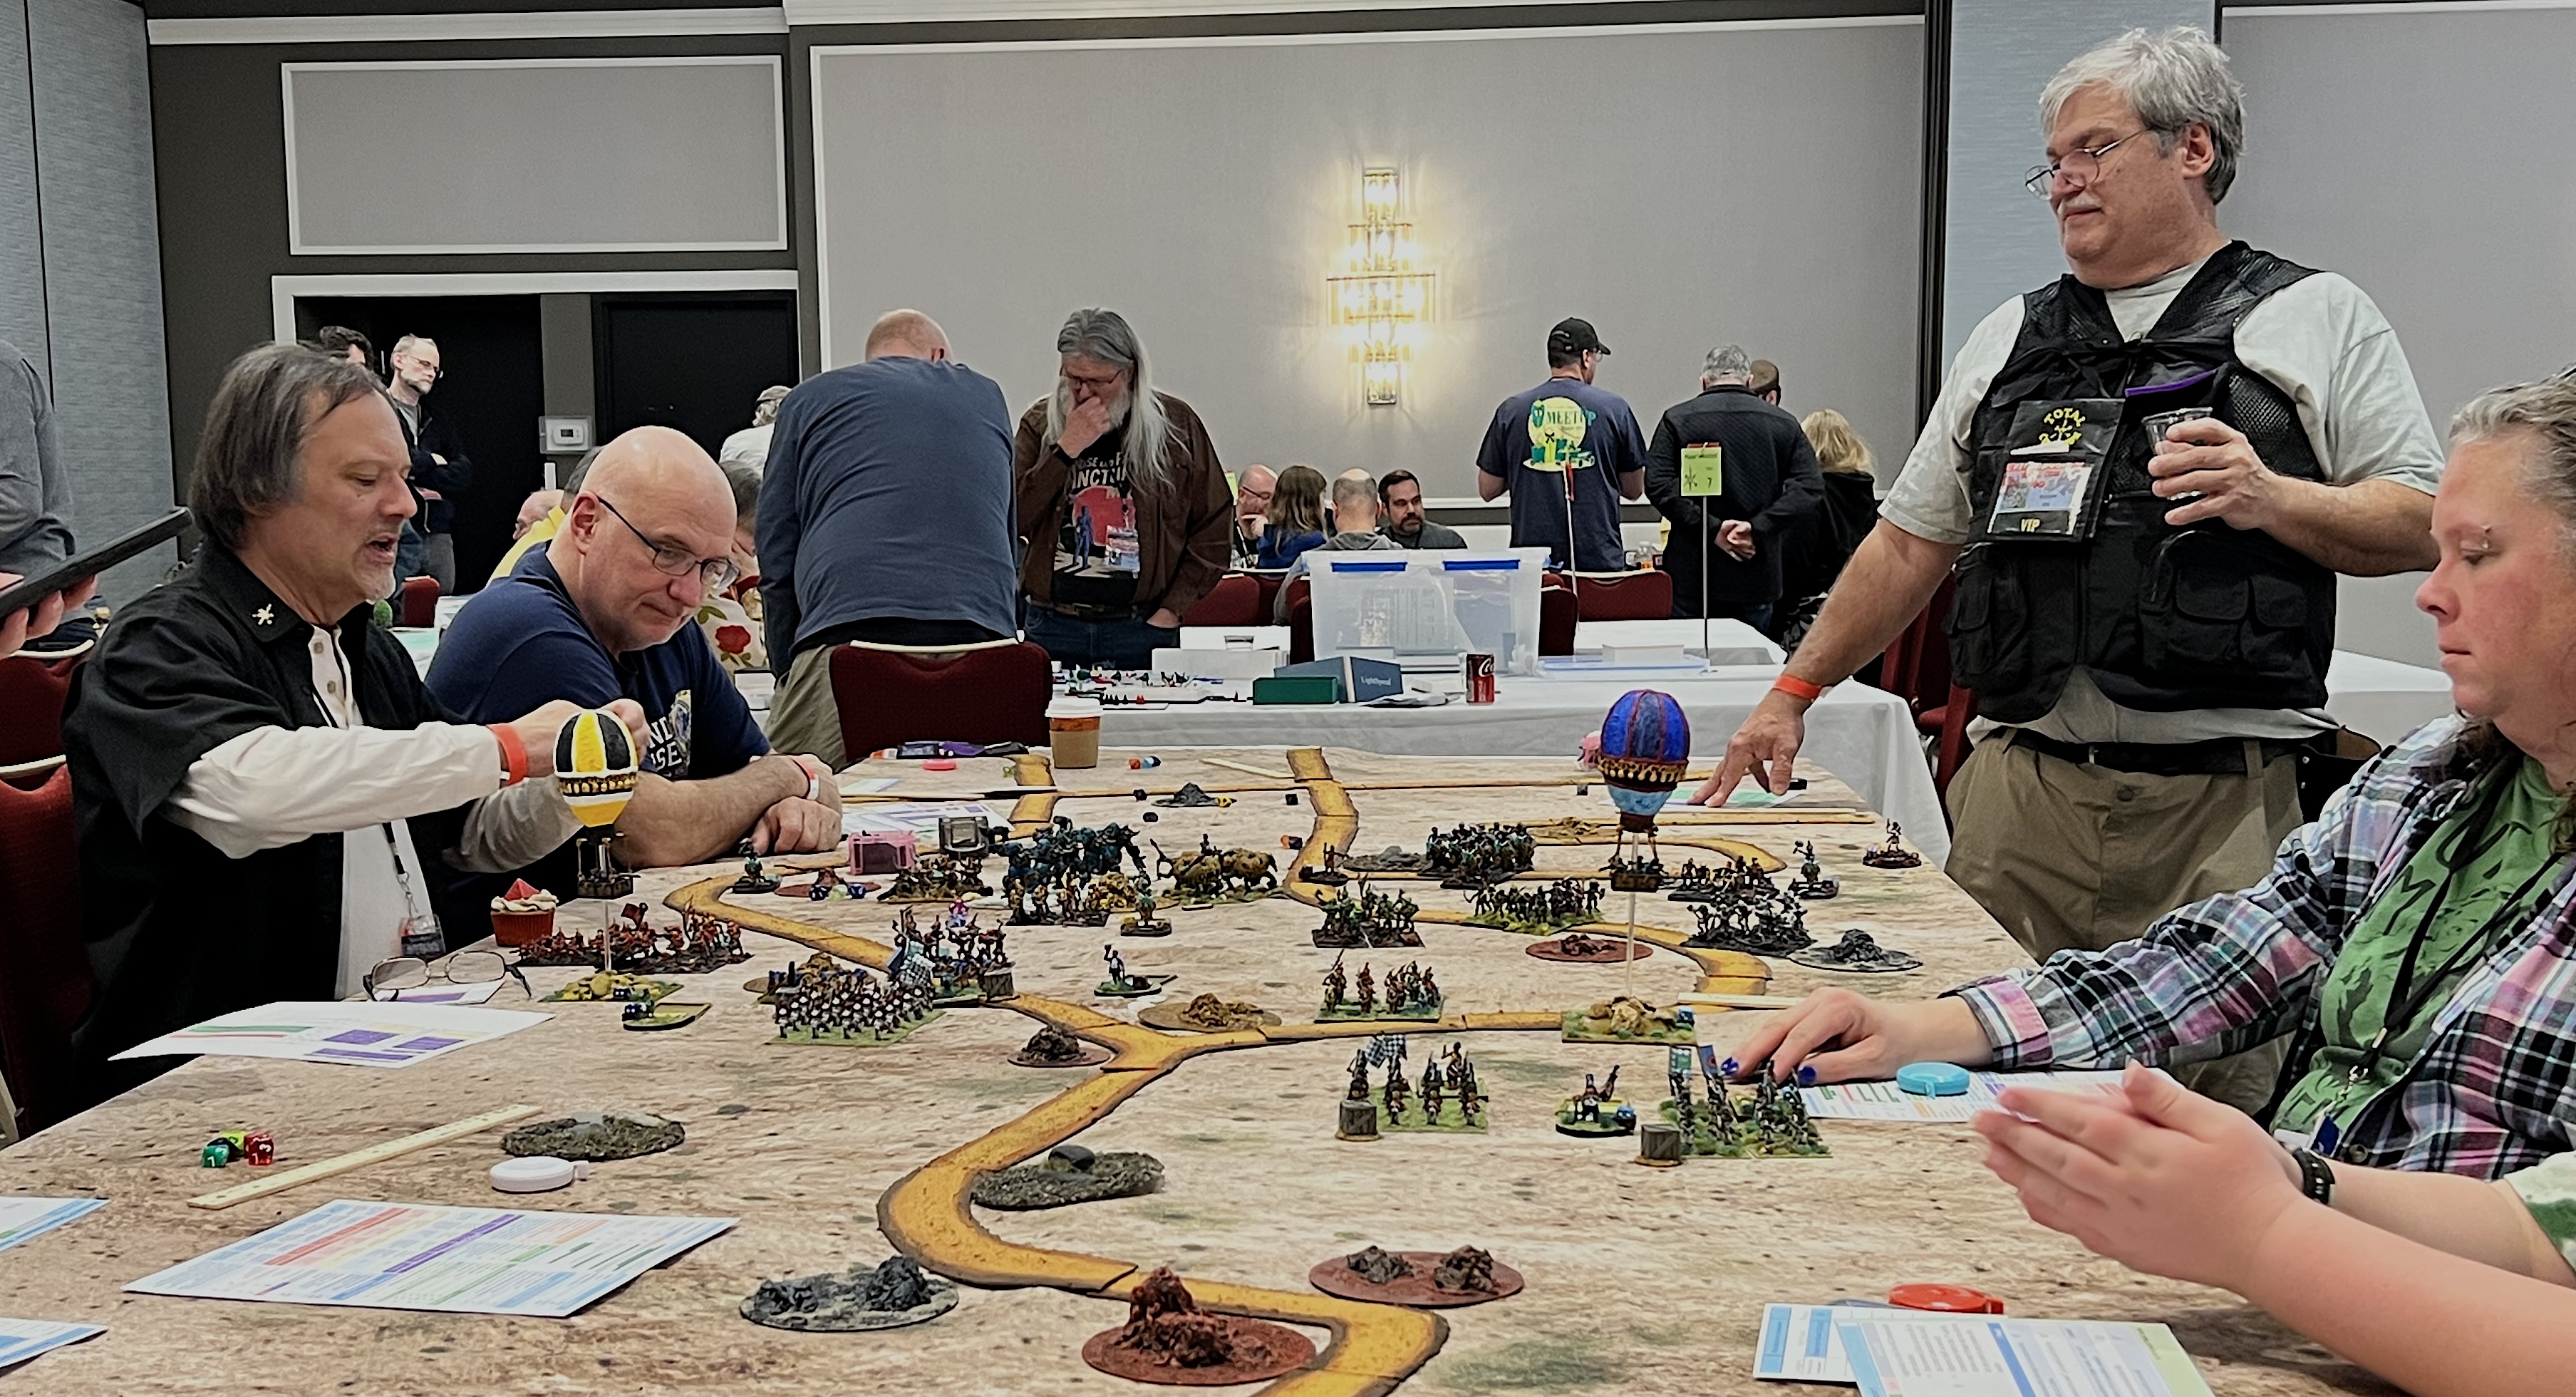
I decided not to run a Friday morning game this year. Last year, resetting the flea market room took too much time. It interfered with my morning game setup. Instead, I had plenty of time to move everything into the “big room” and set up on the “big table”. My first game was a Wars of Ozz game. It was titled “The Great Munchkin Heist”. I had also run it at Cold Wars. This time I had an even bigger table than I had there!
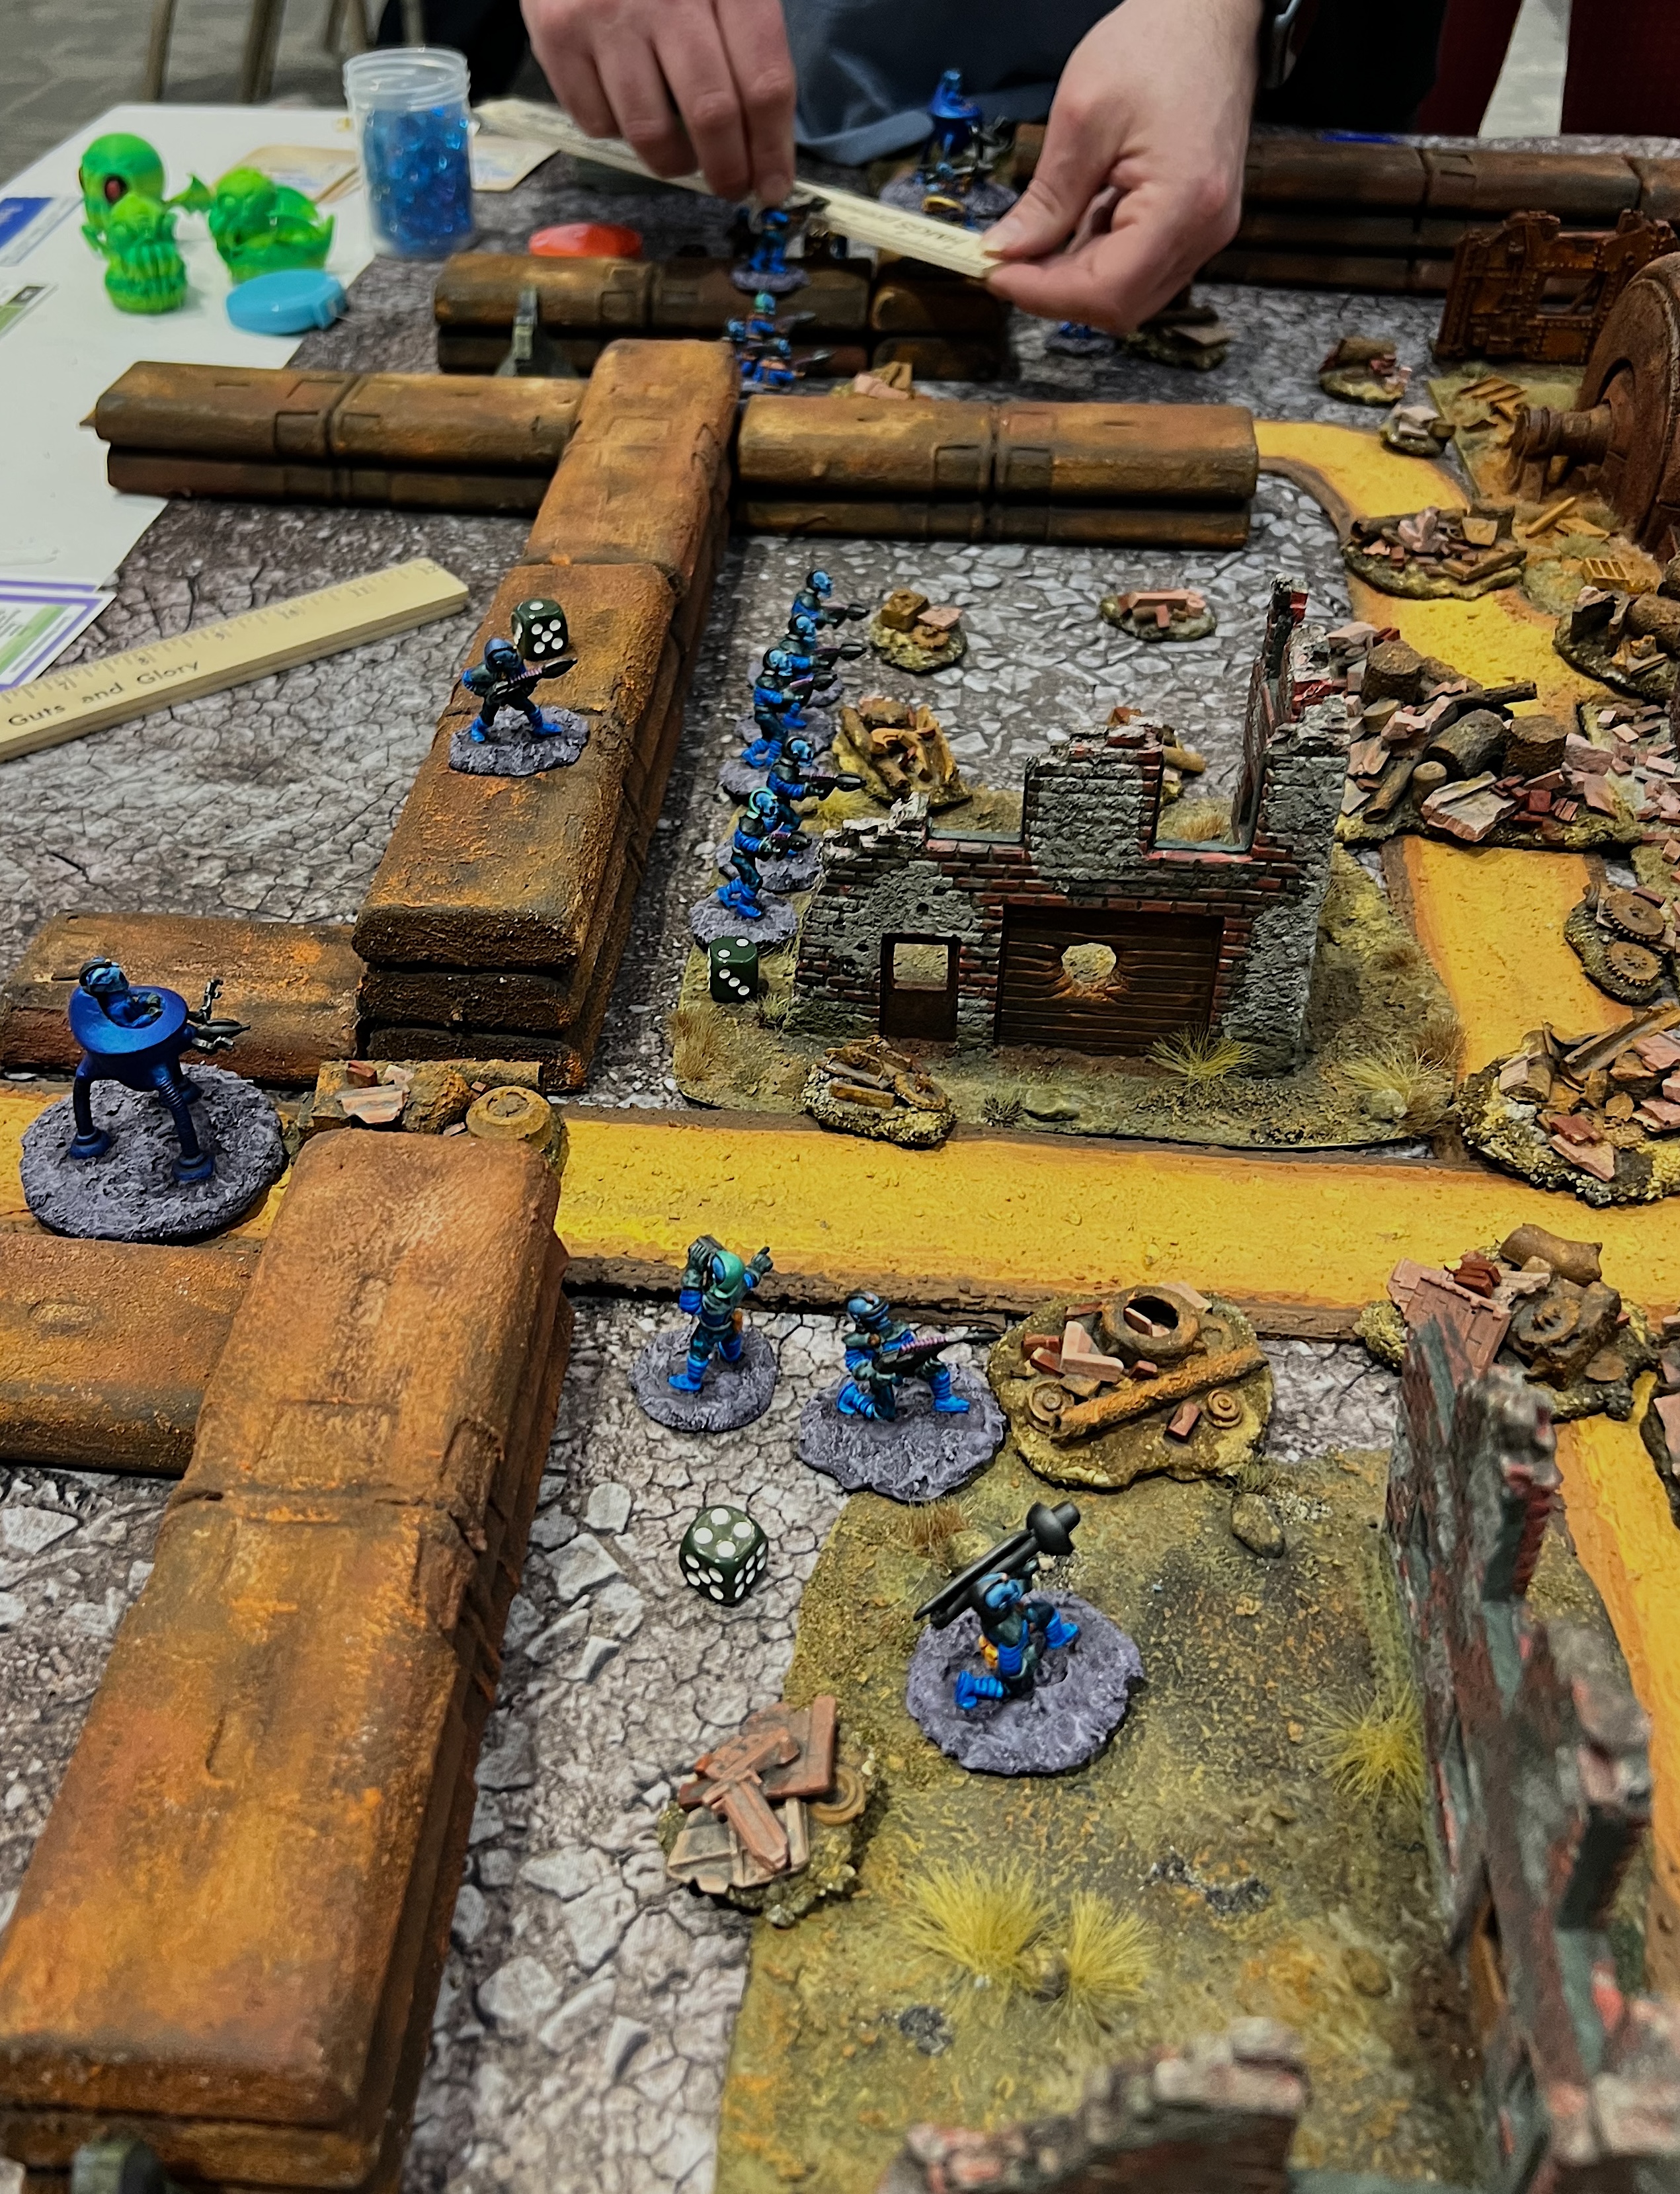
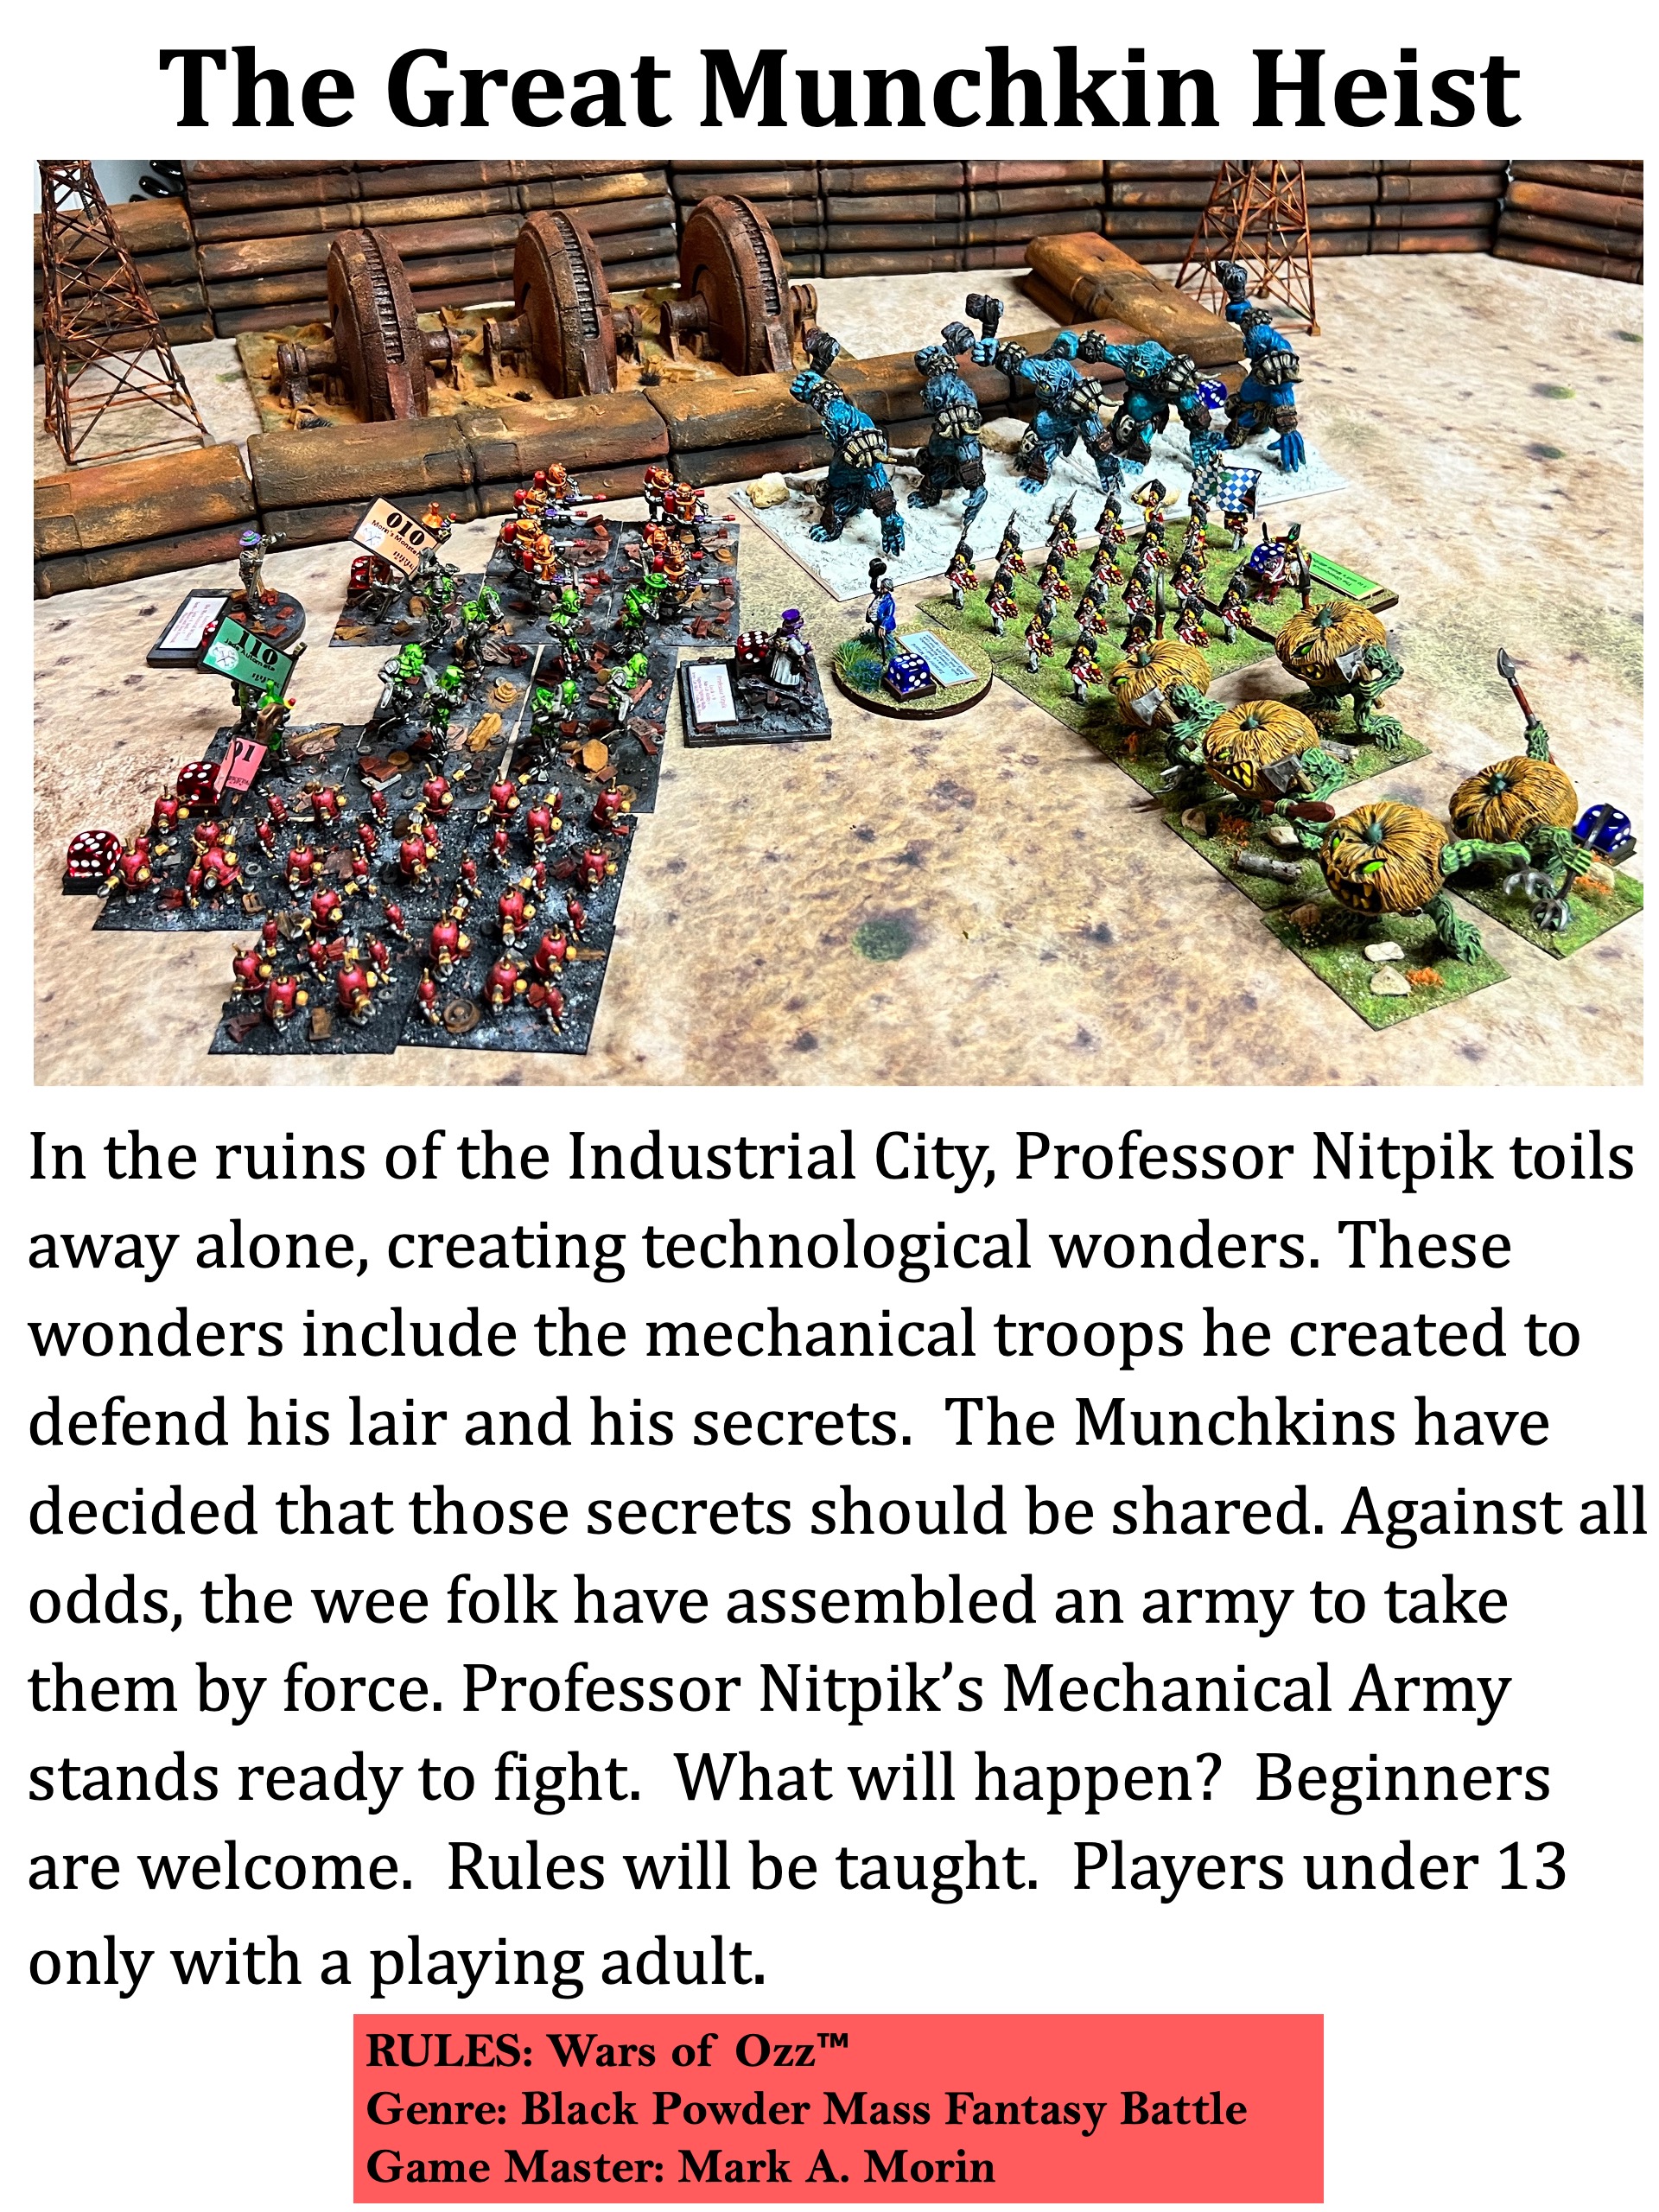
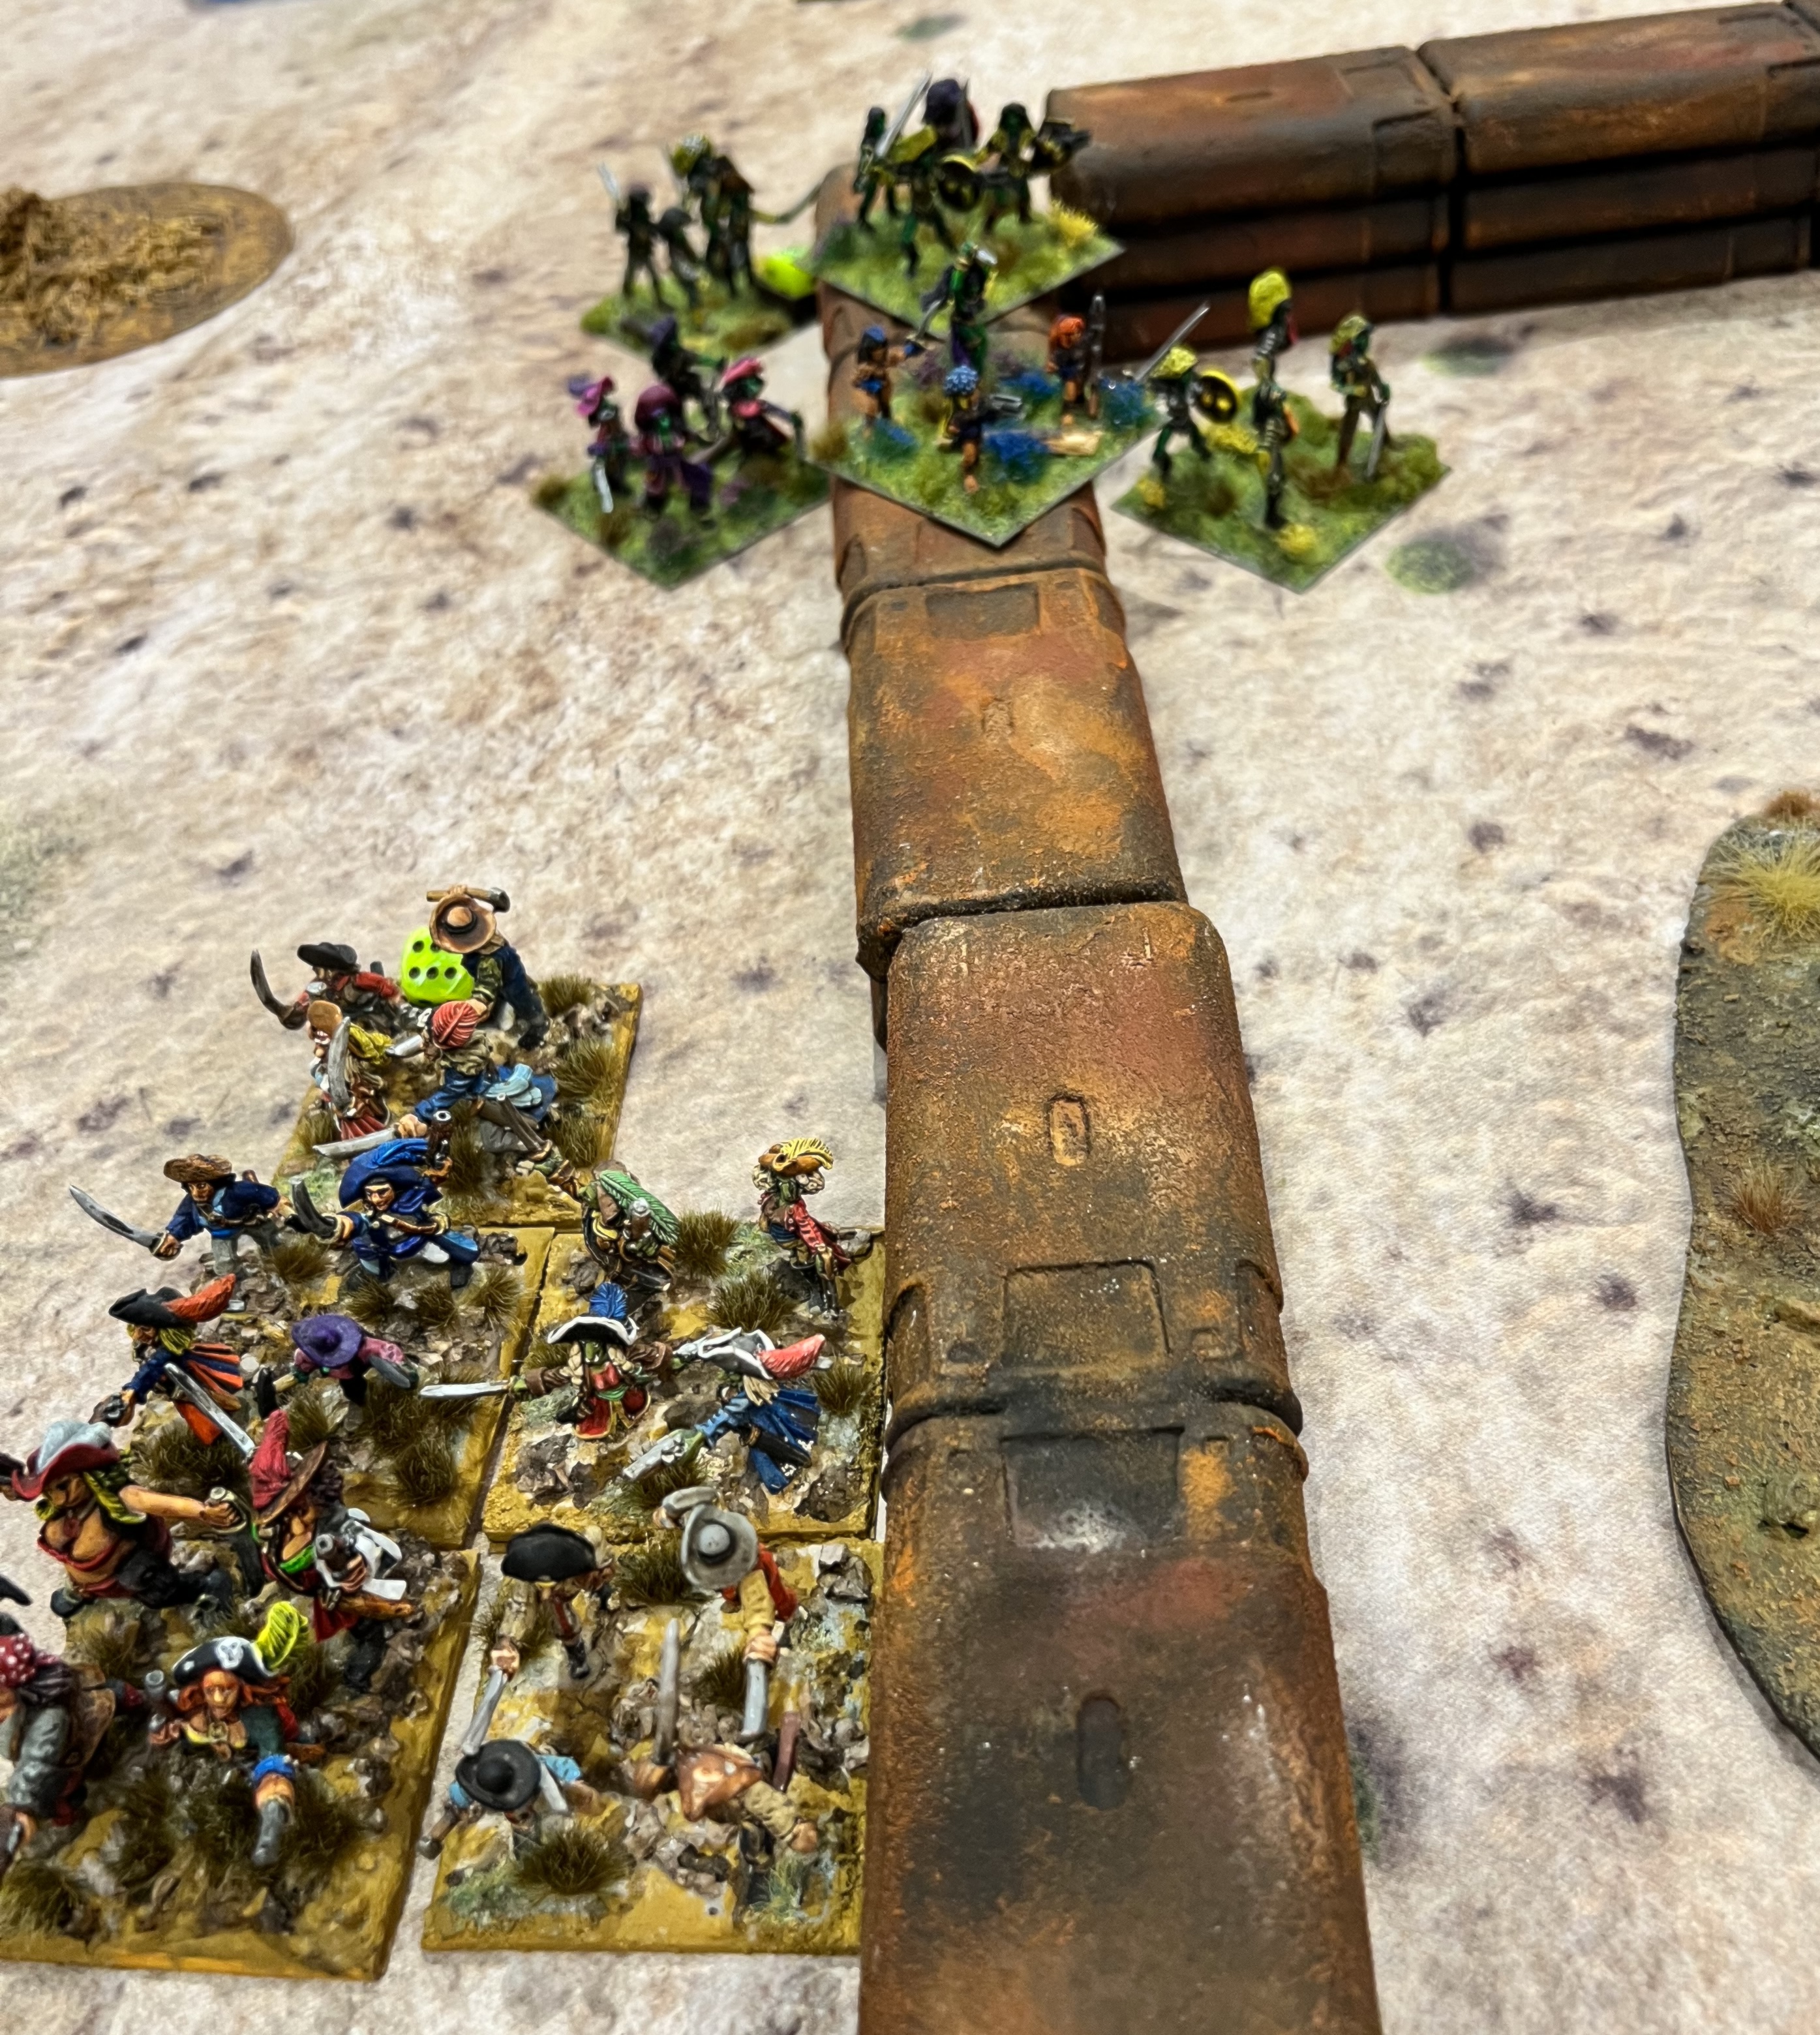
The Great Munchkin Heist
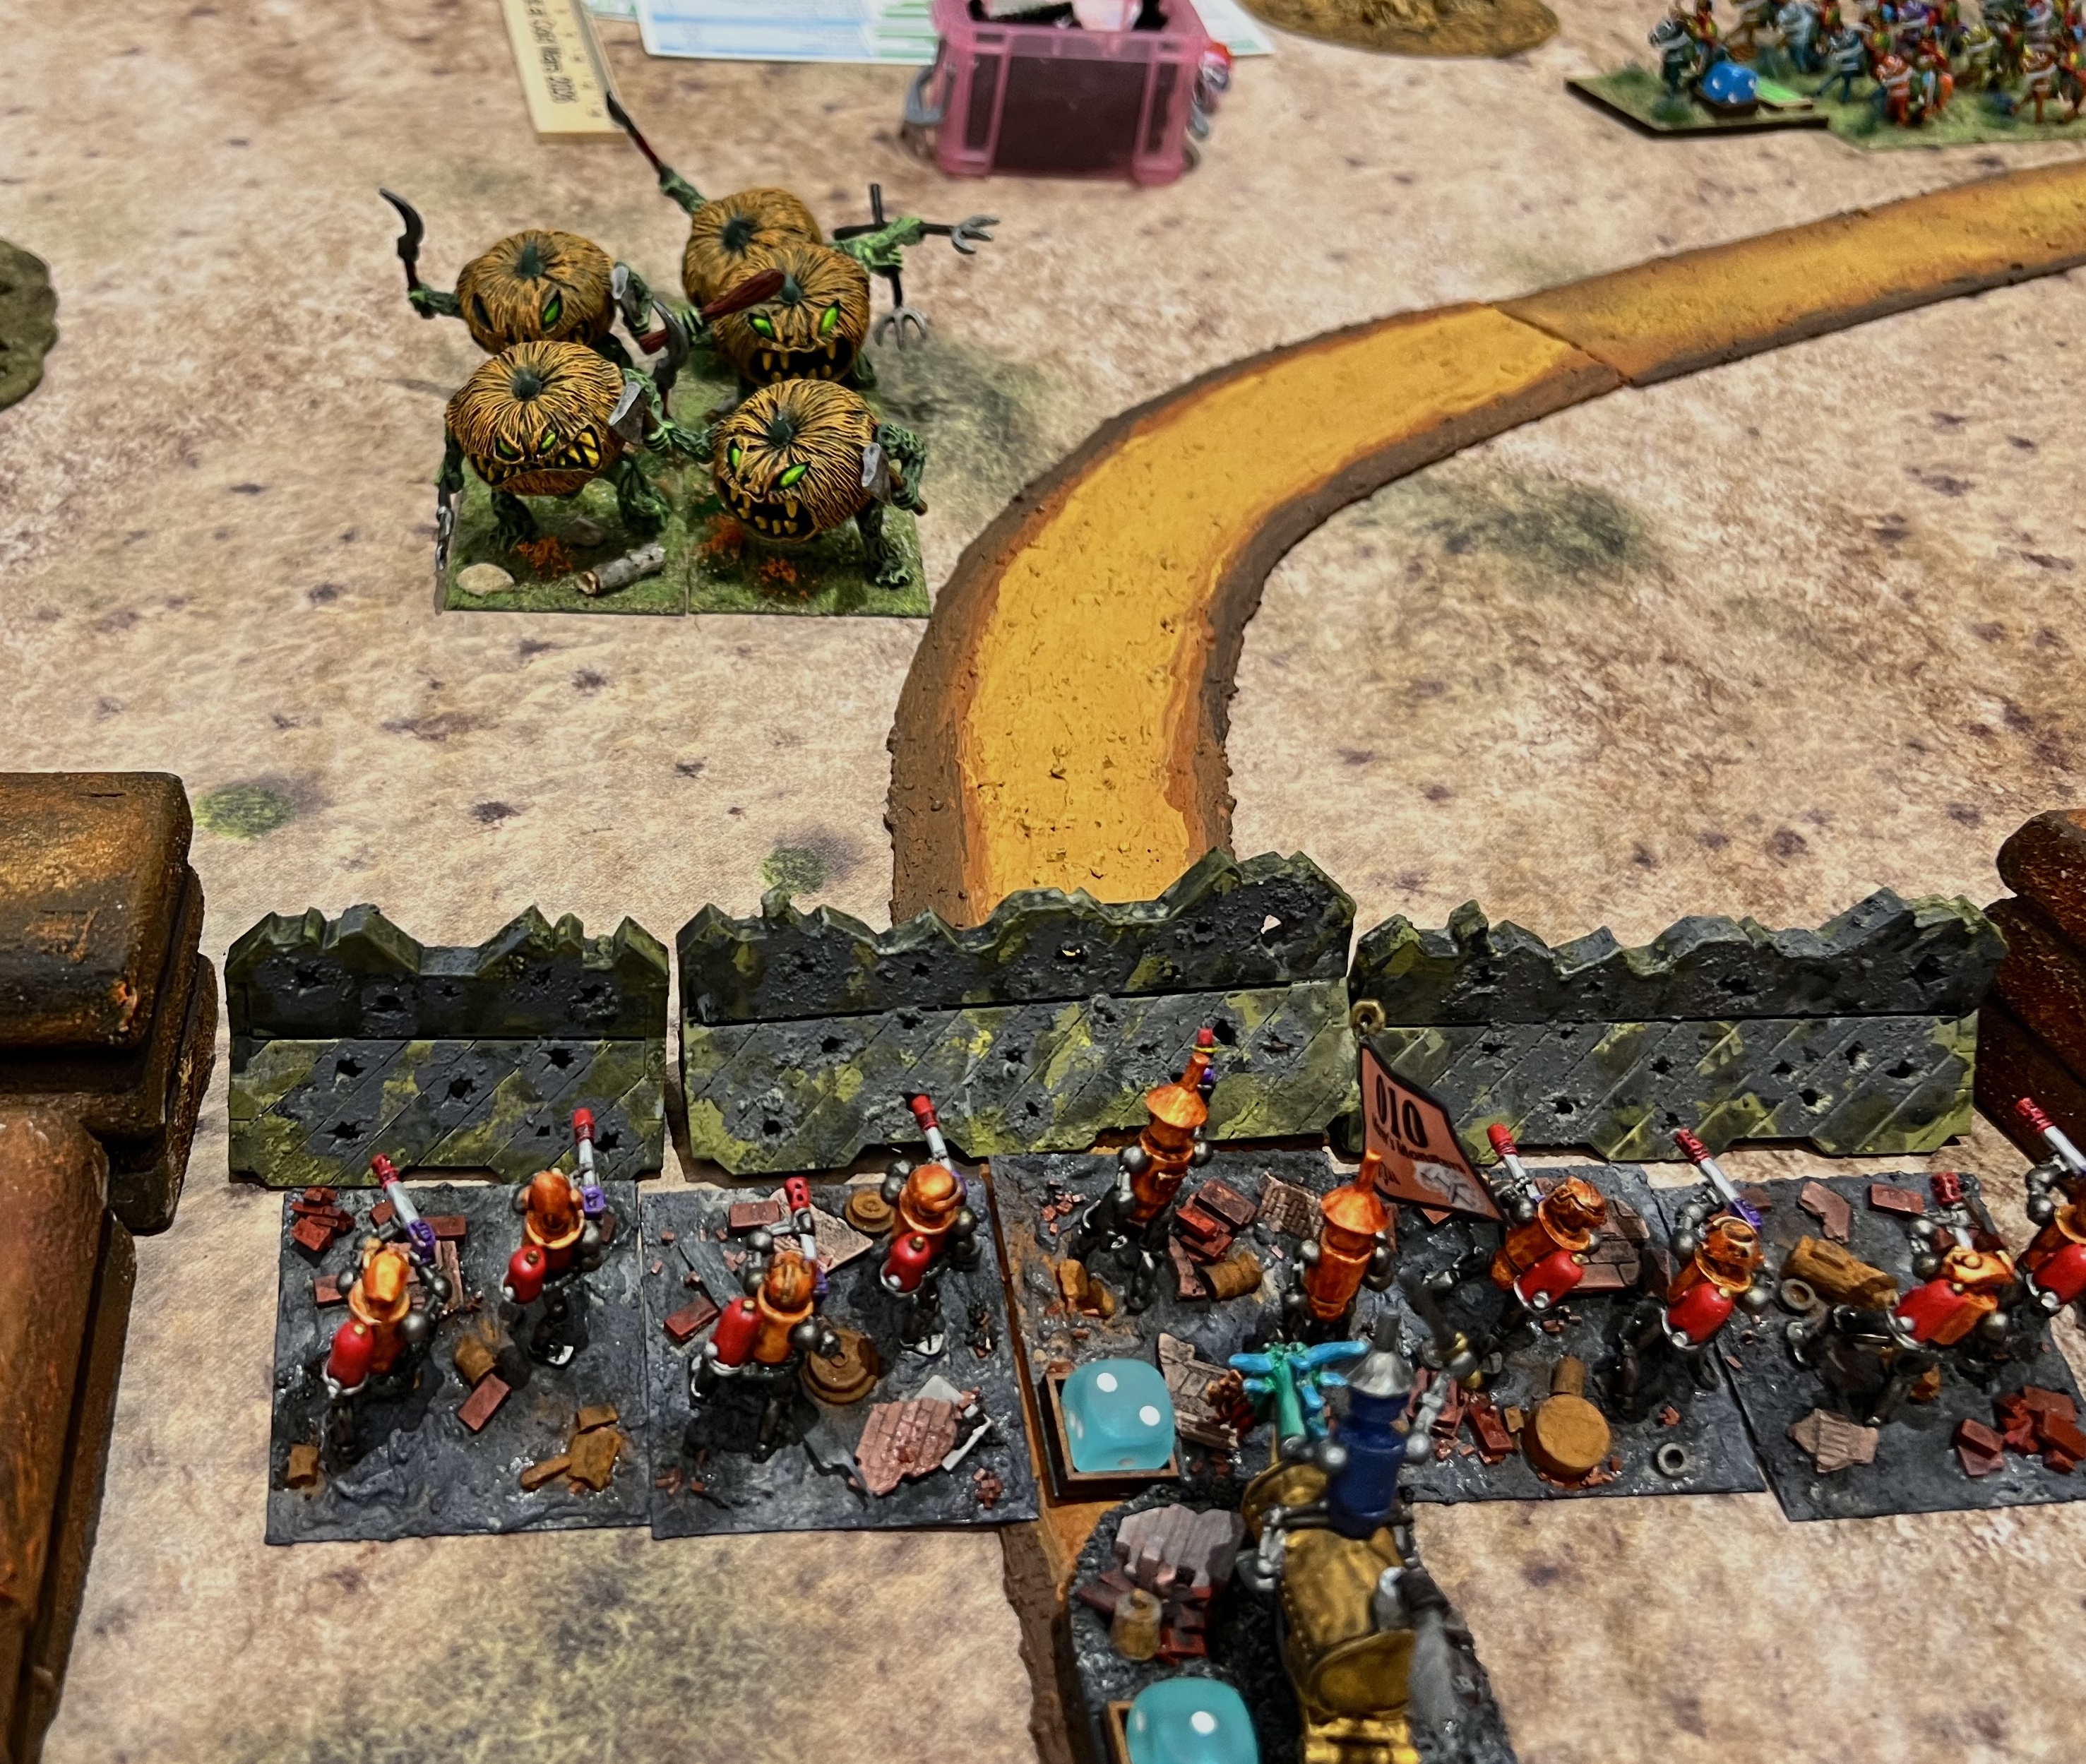
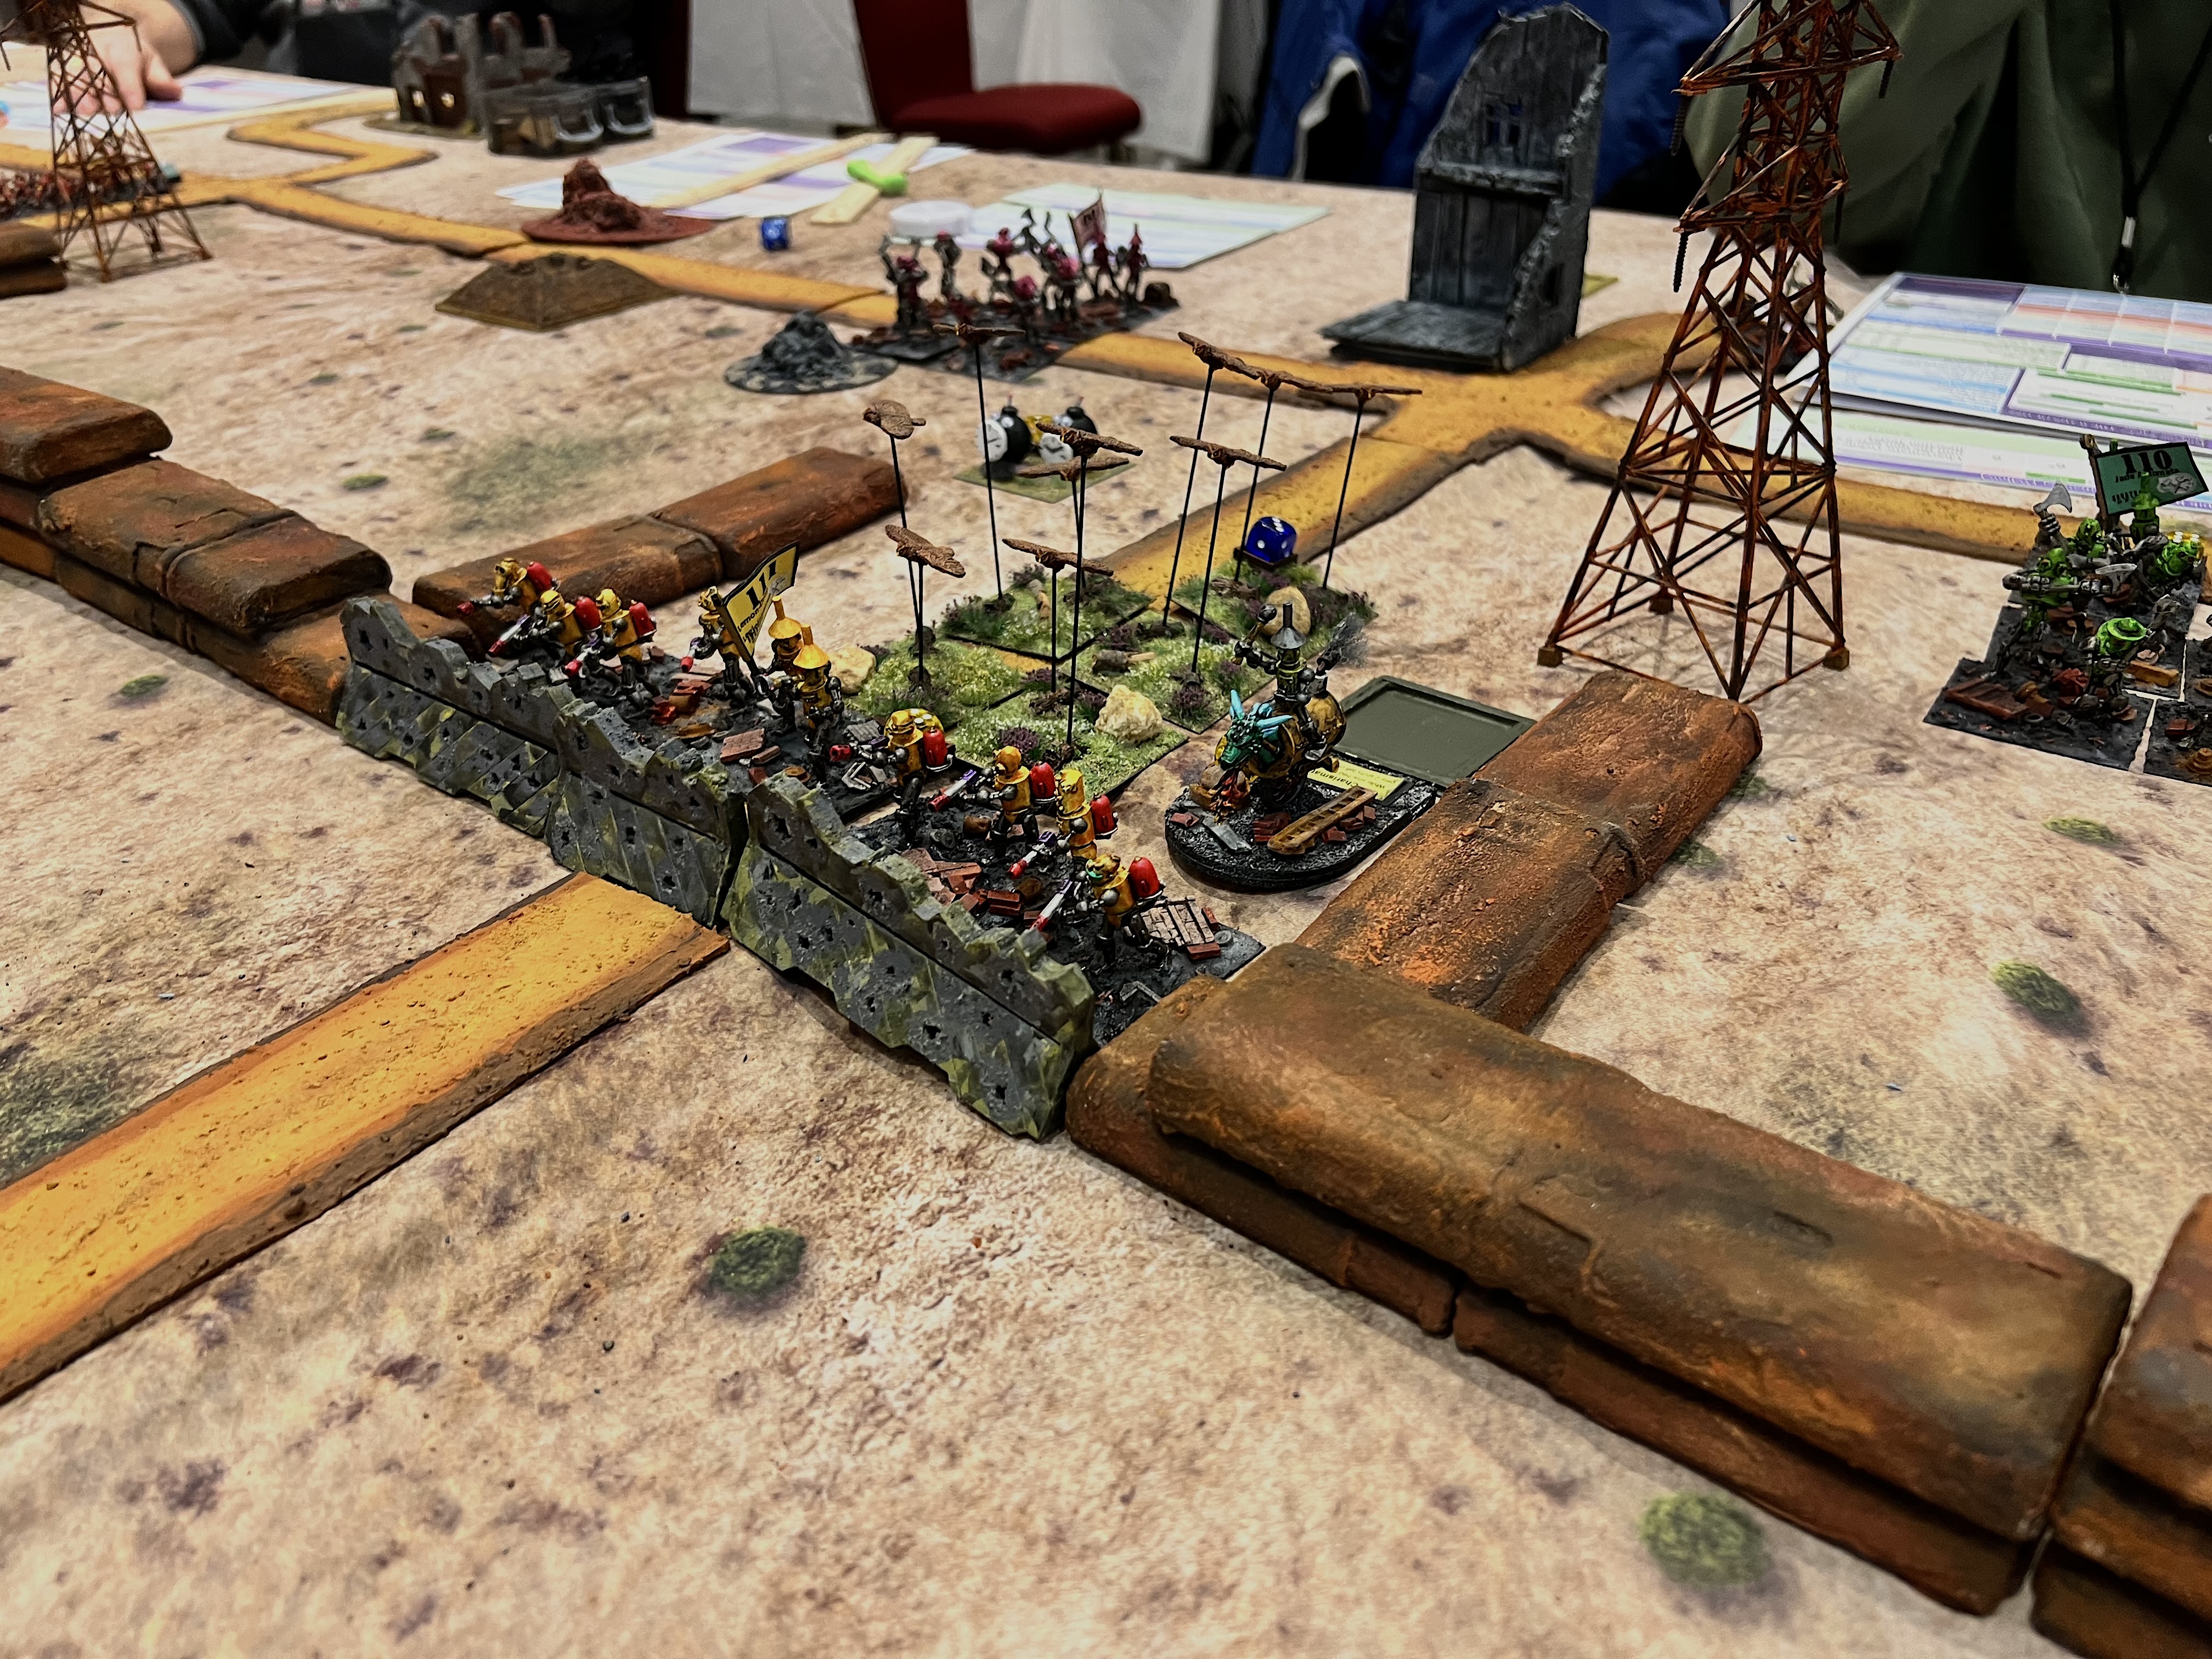
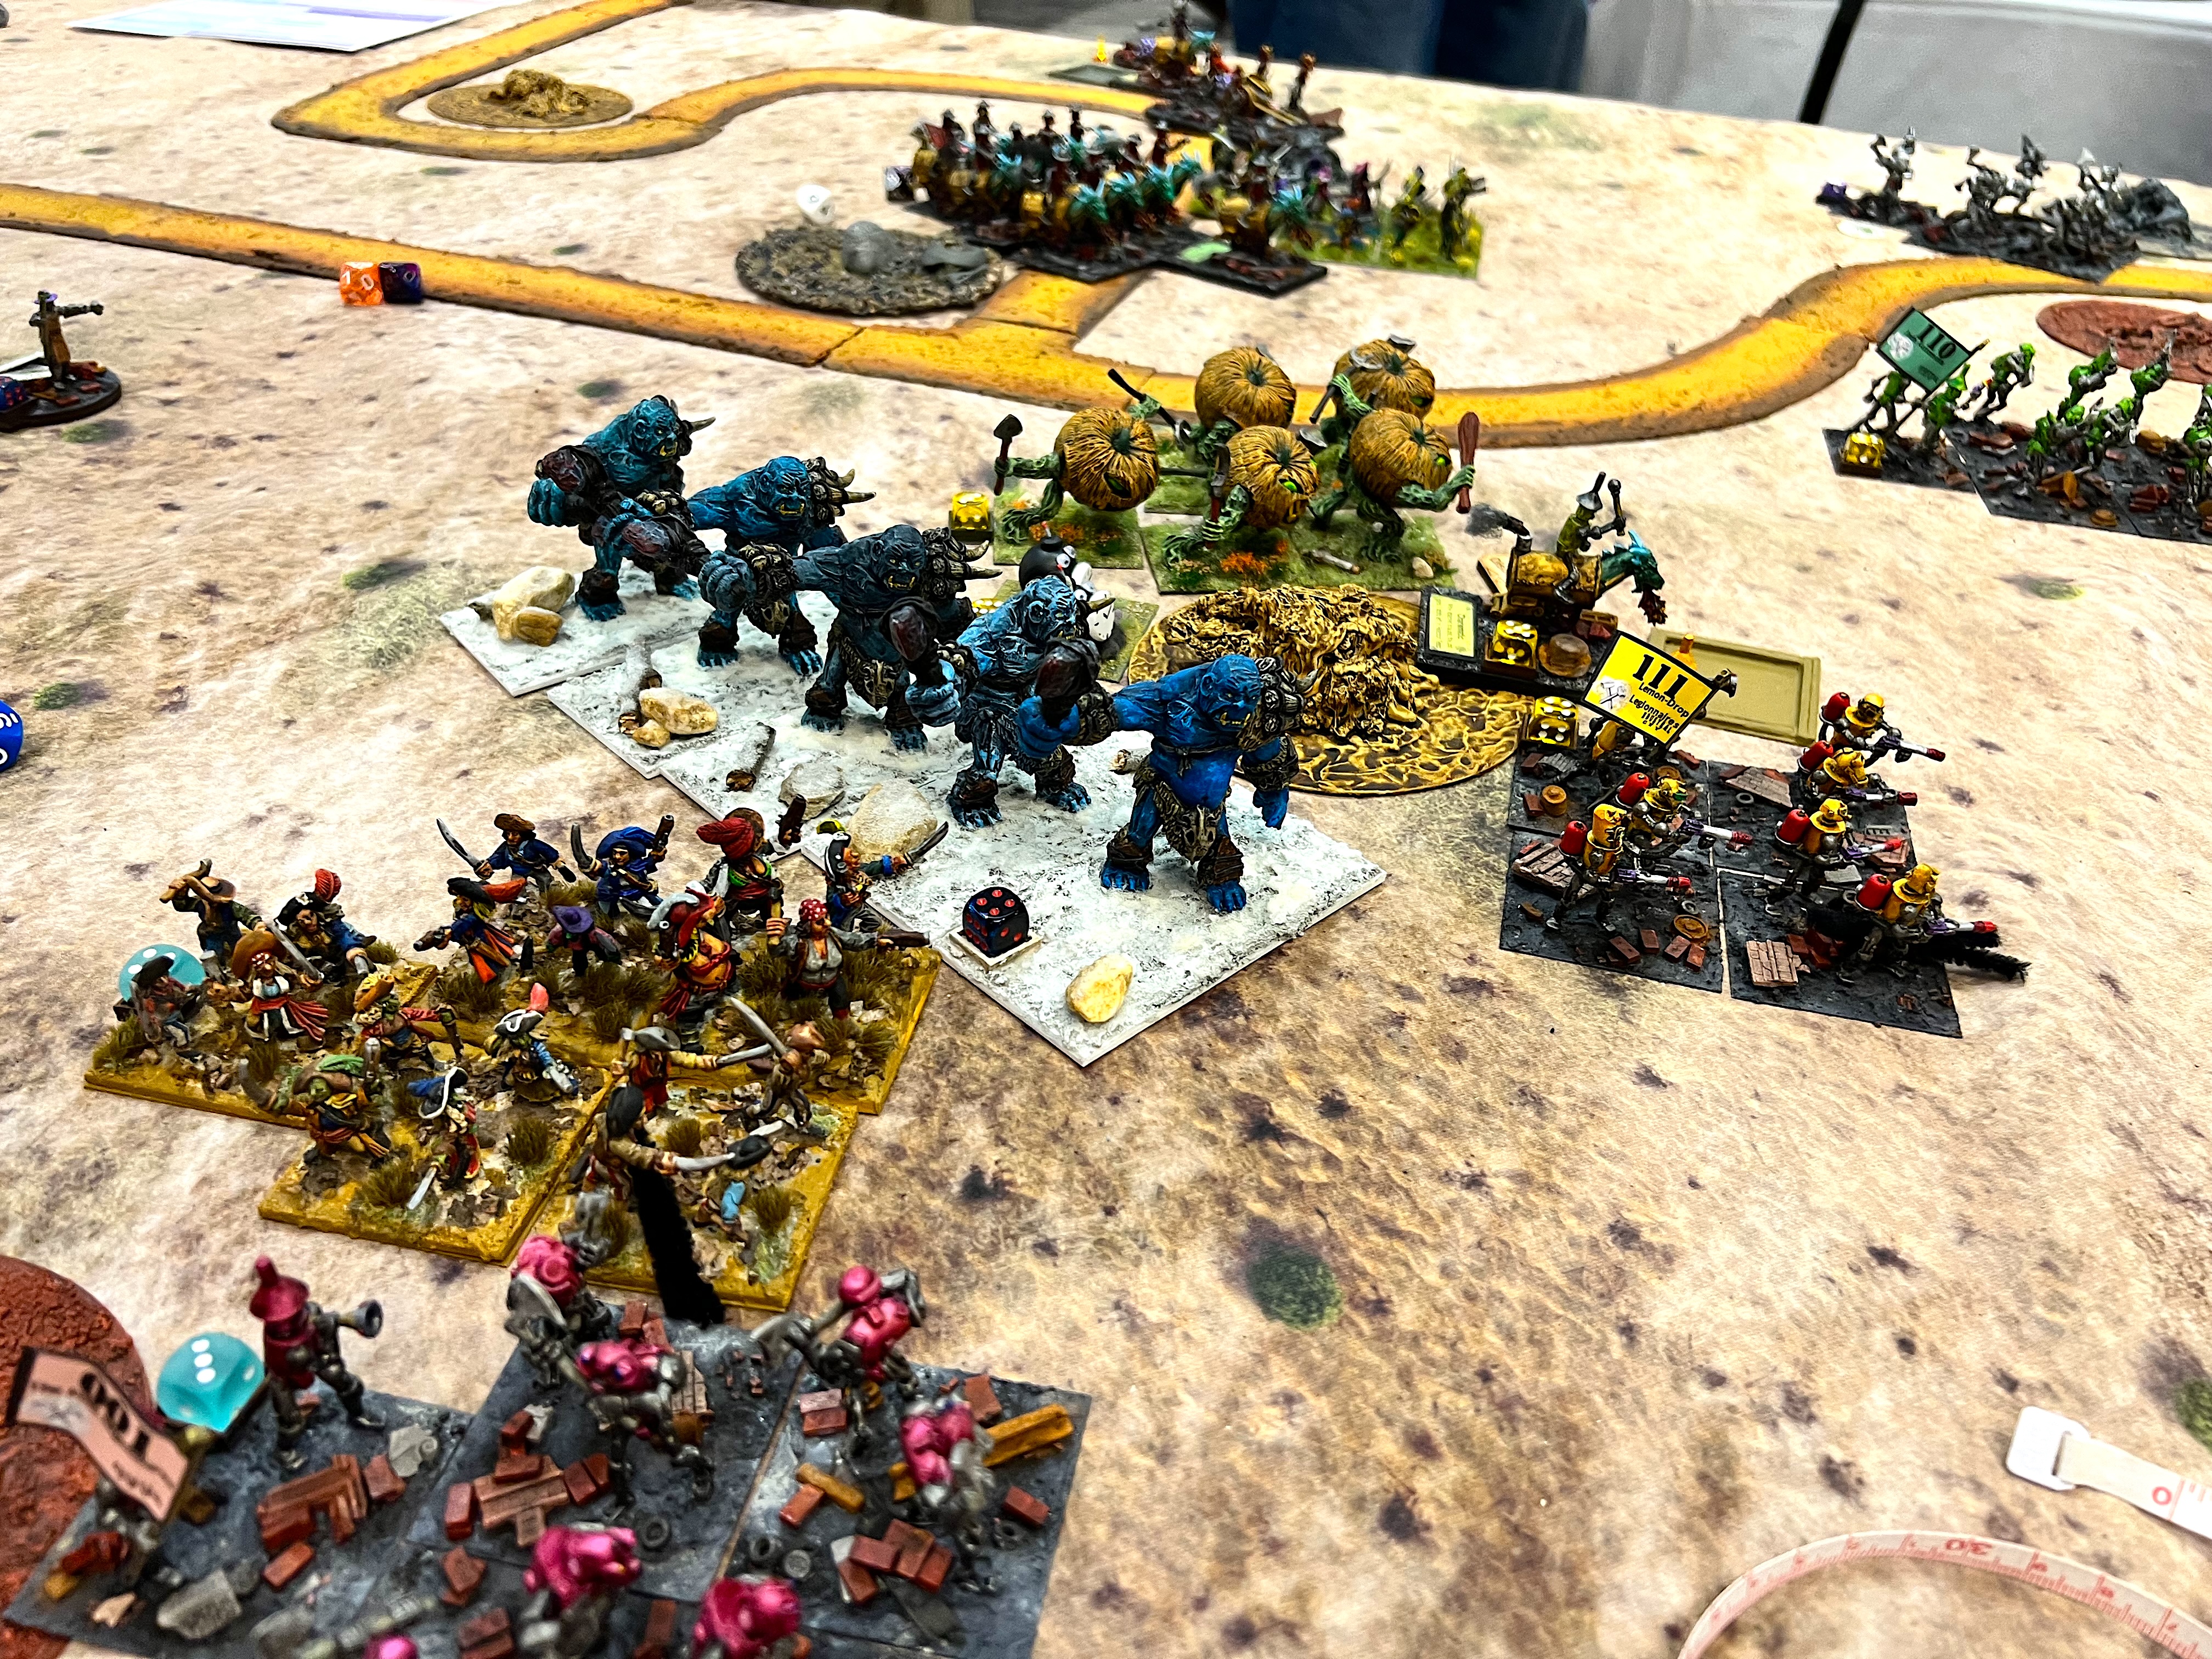
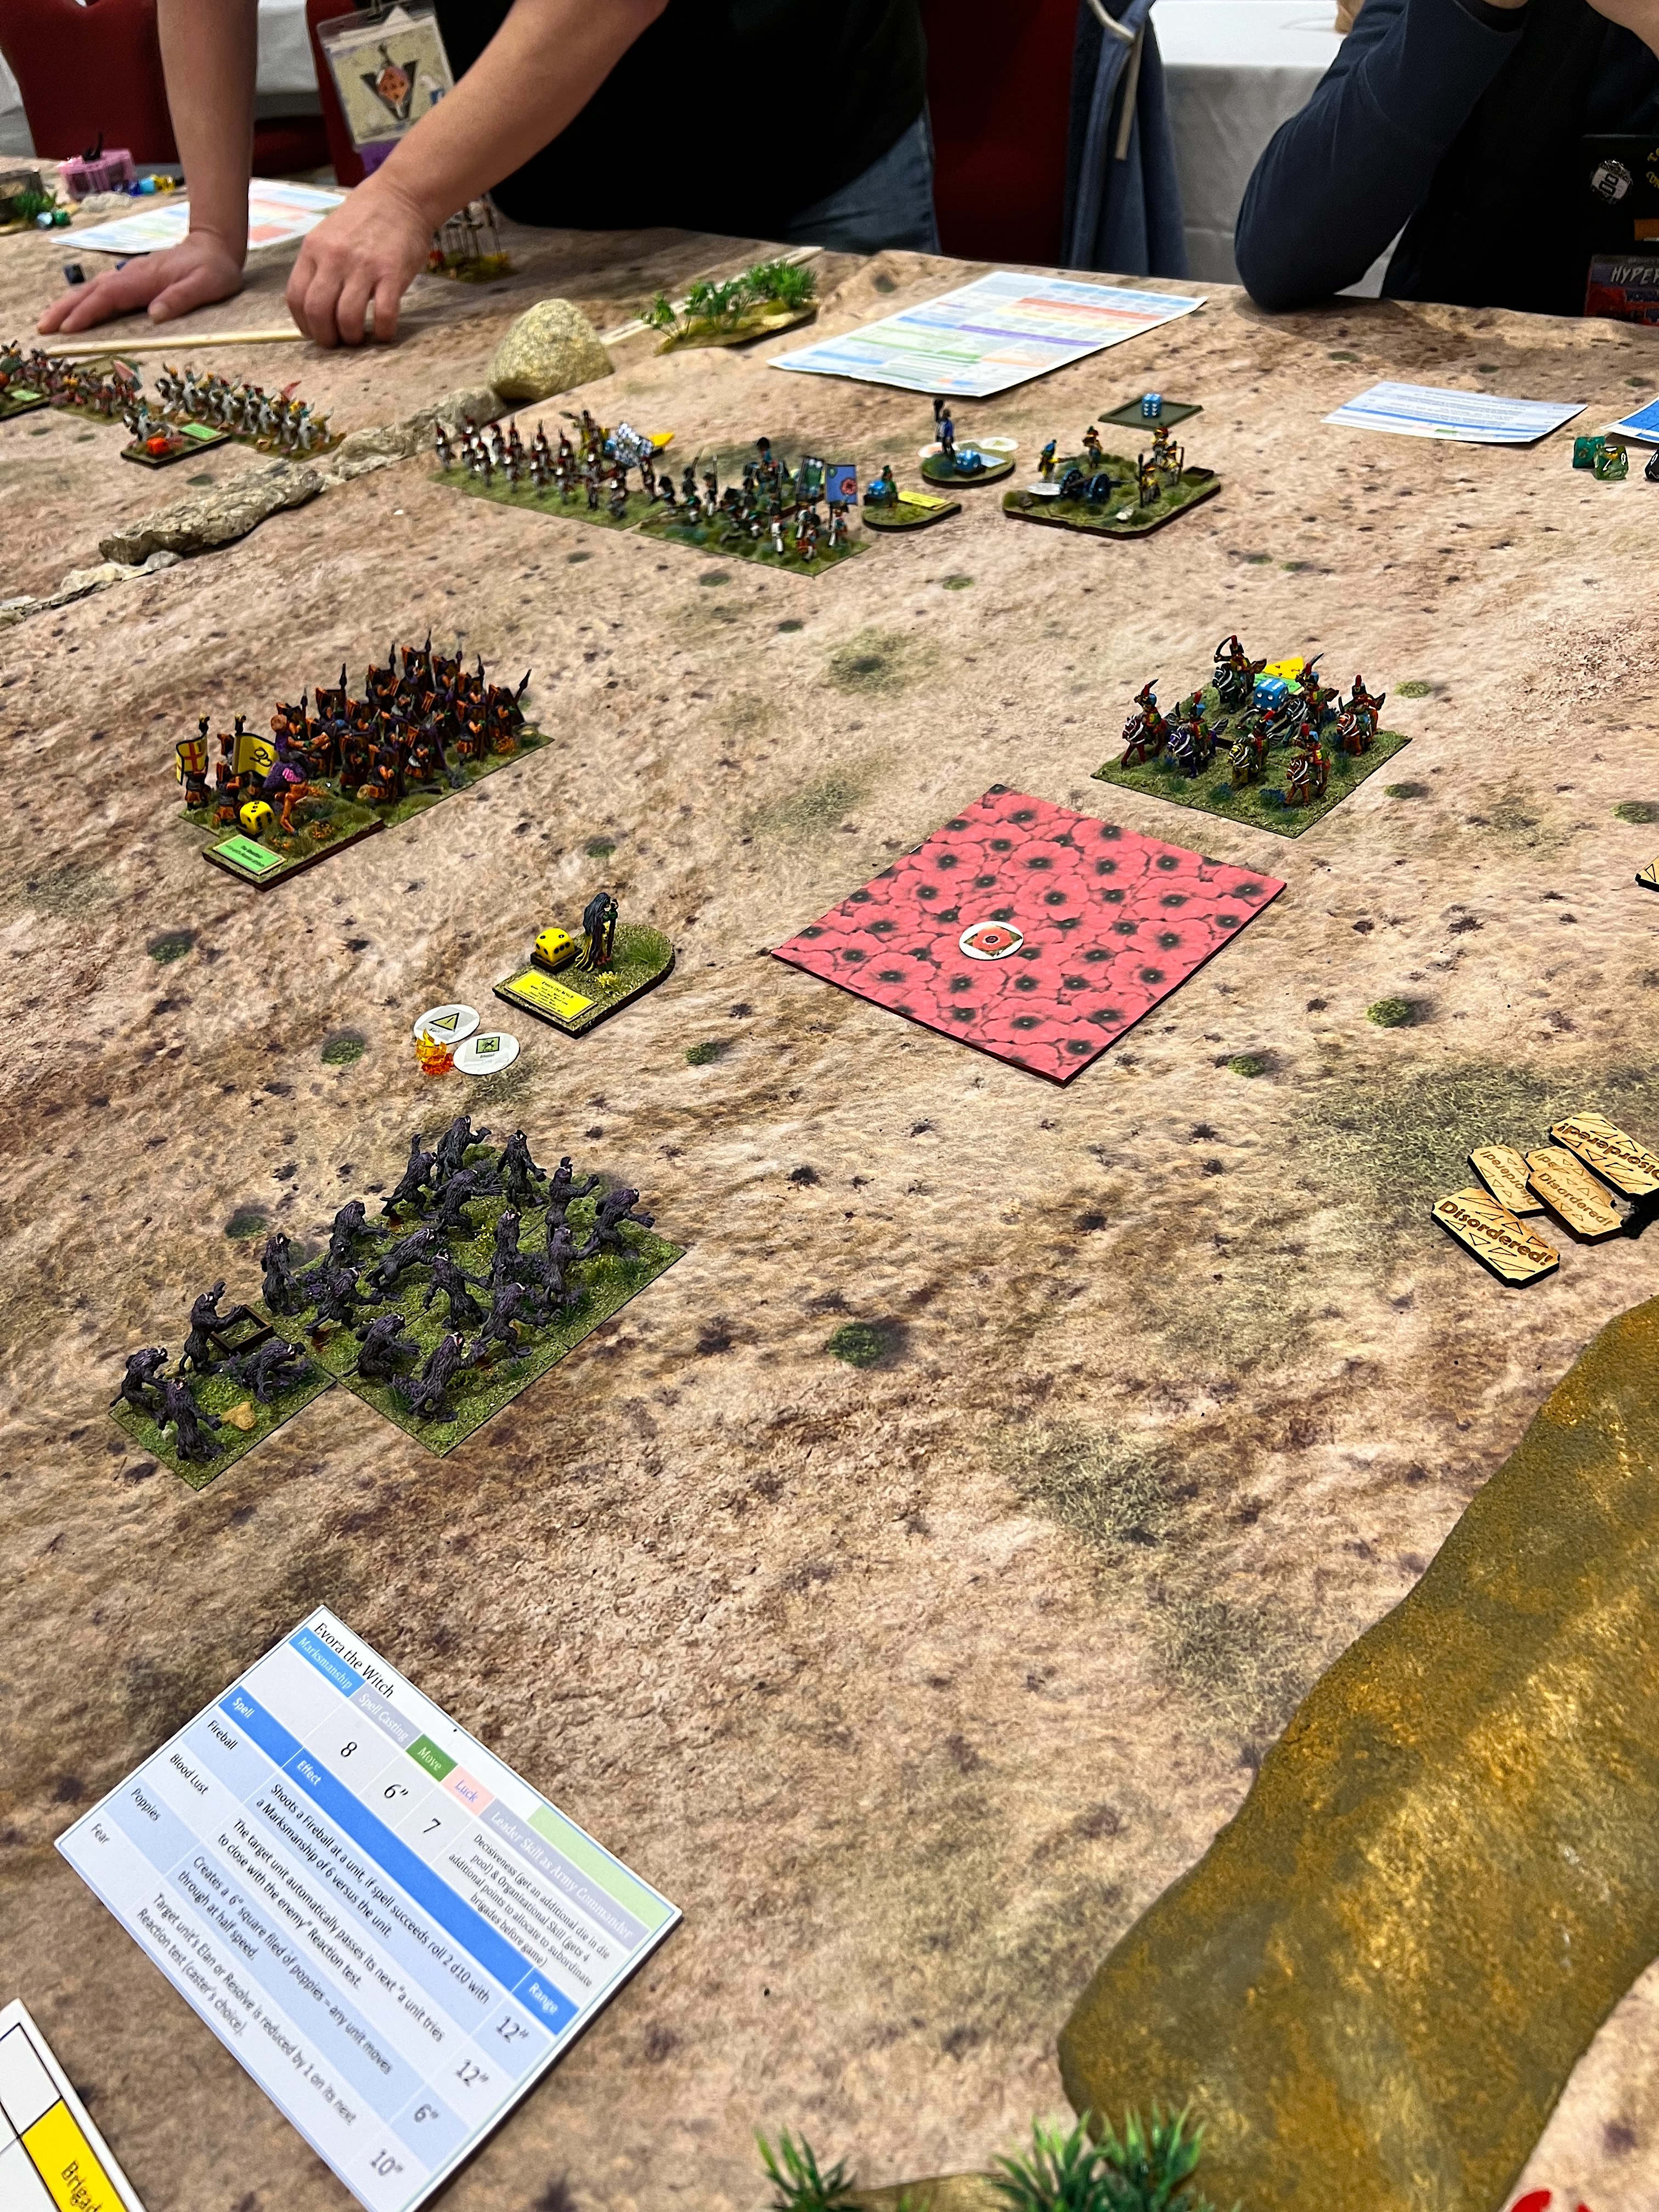
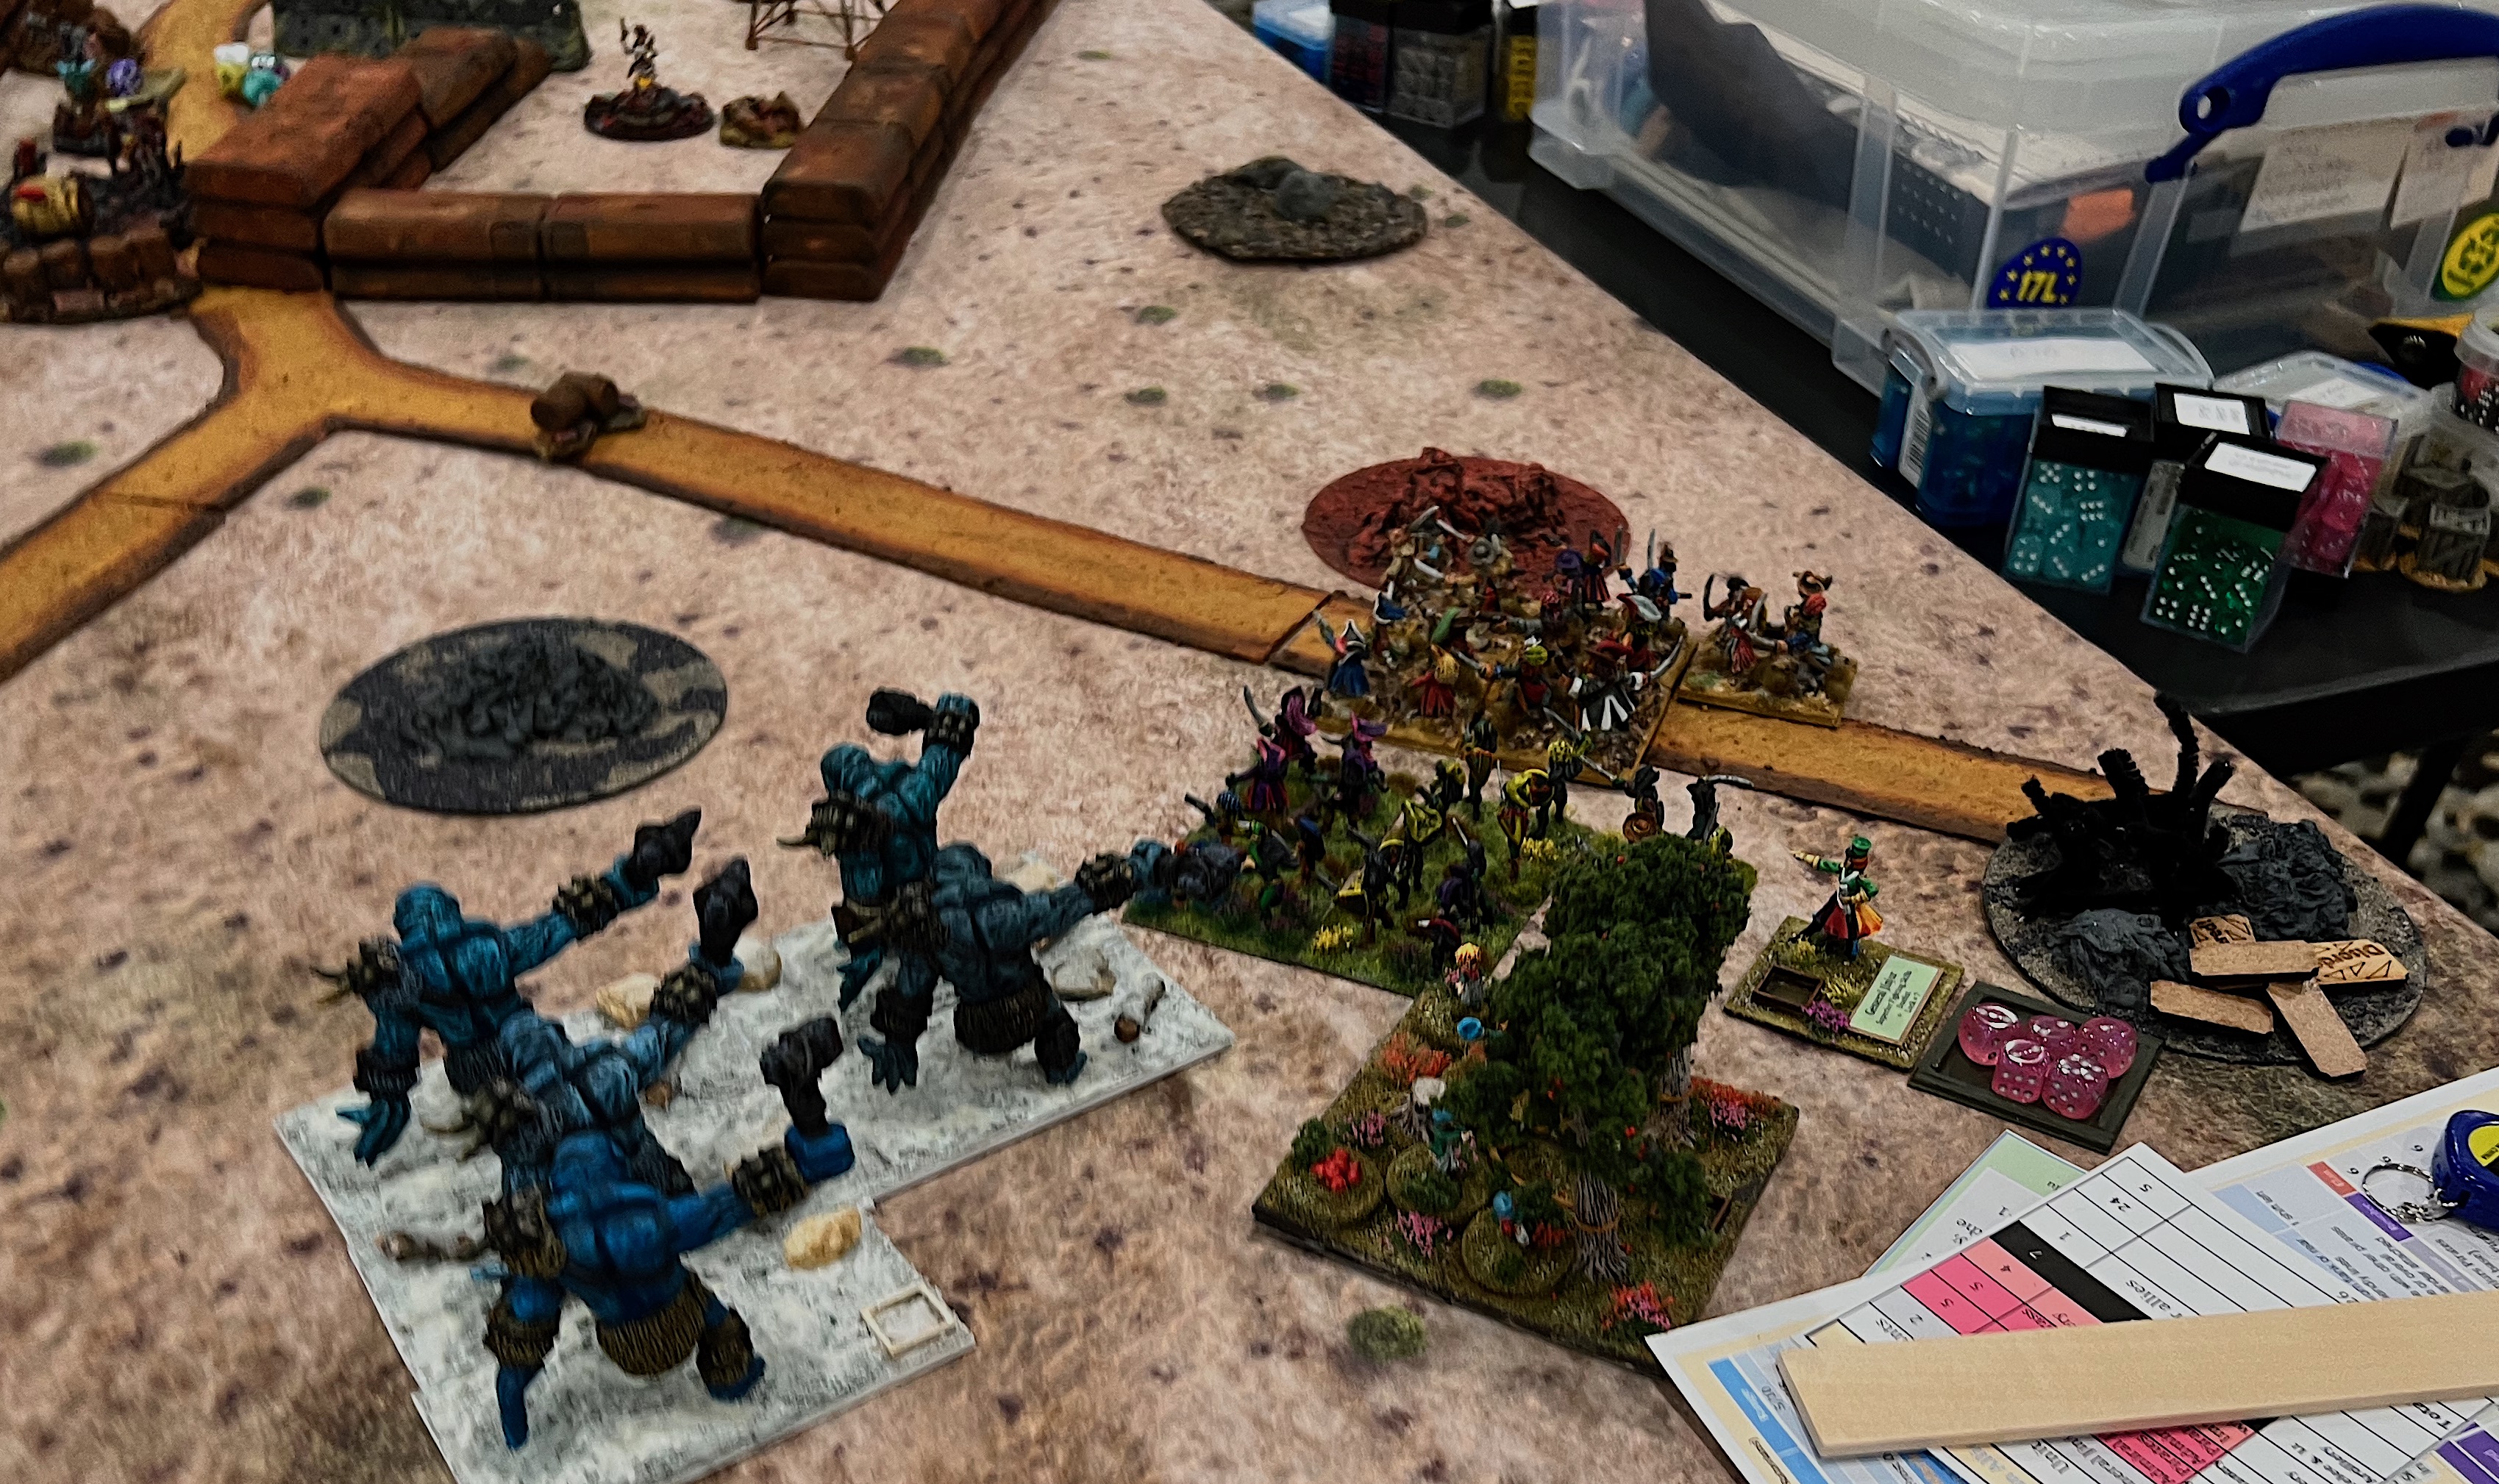
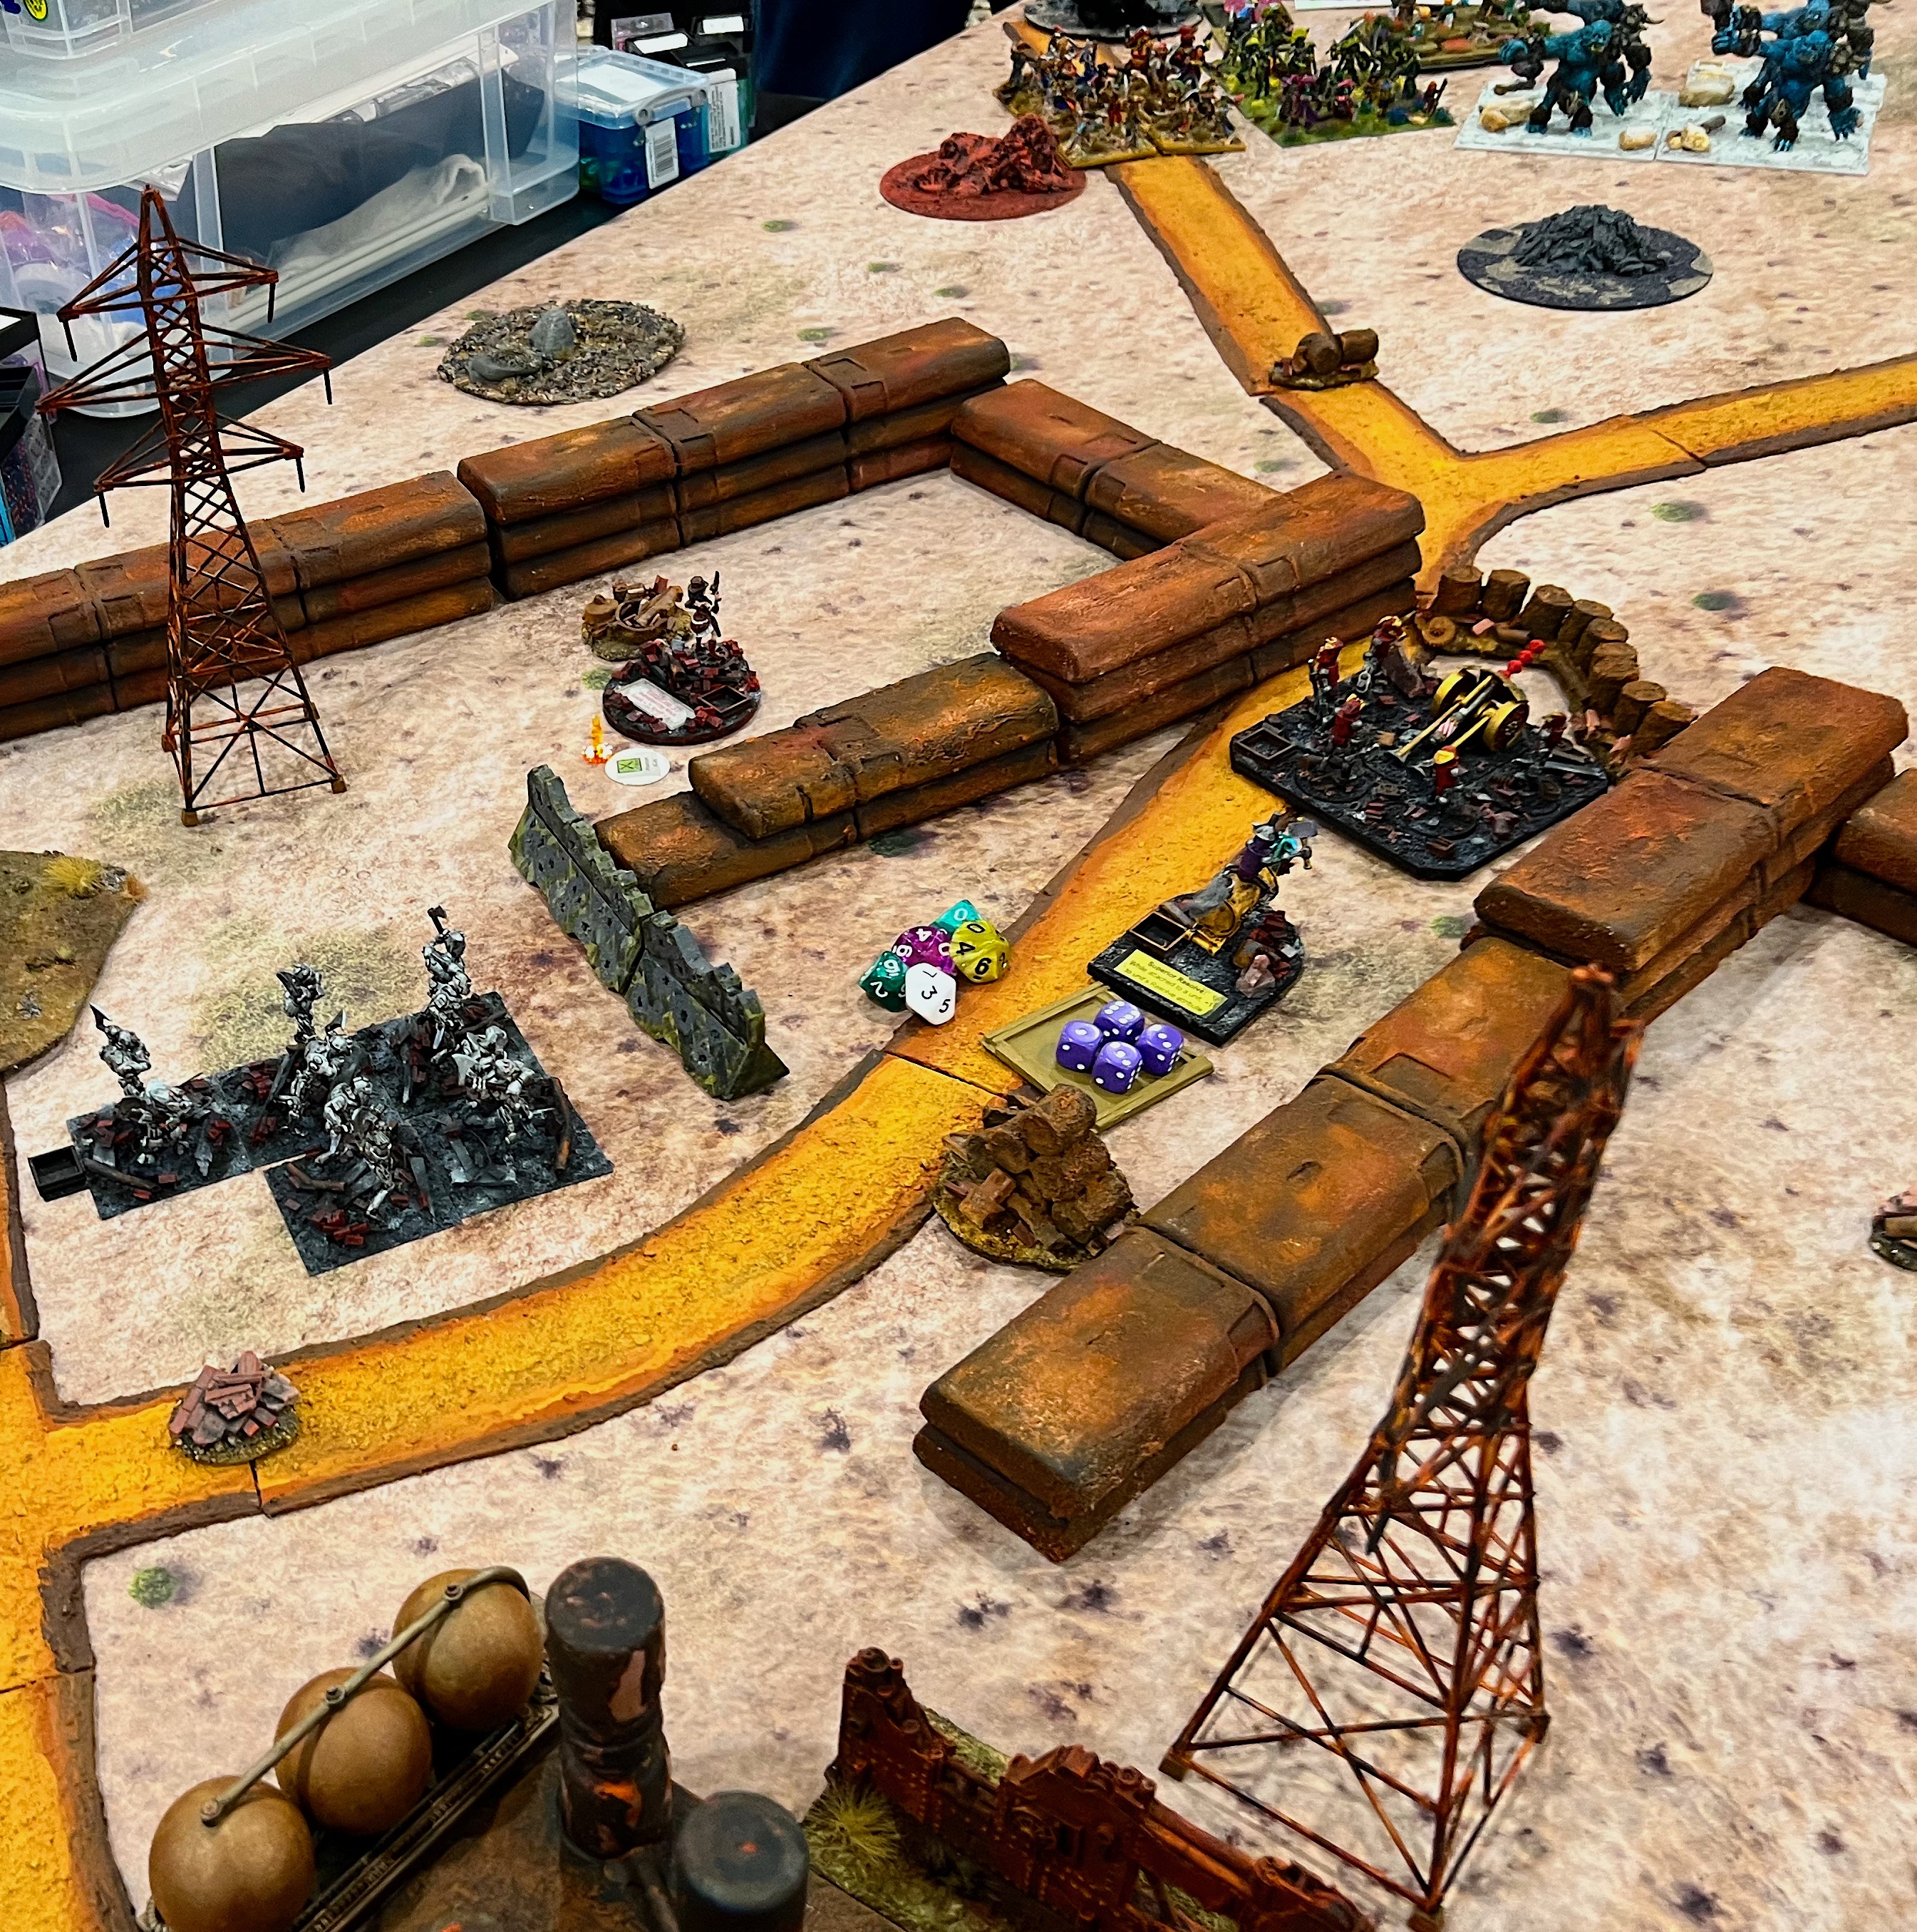
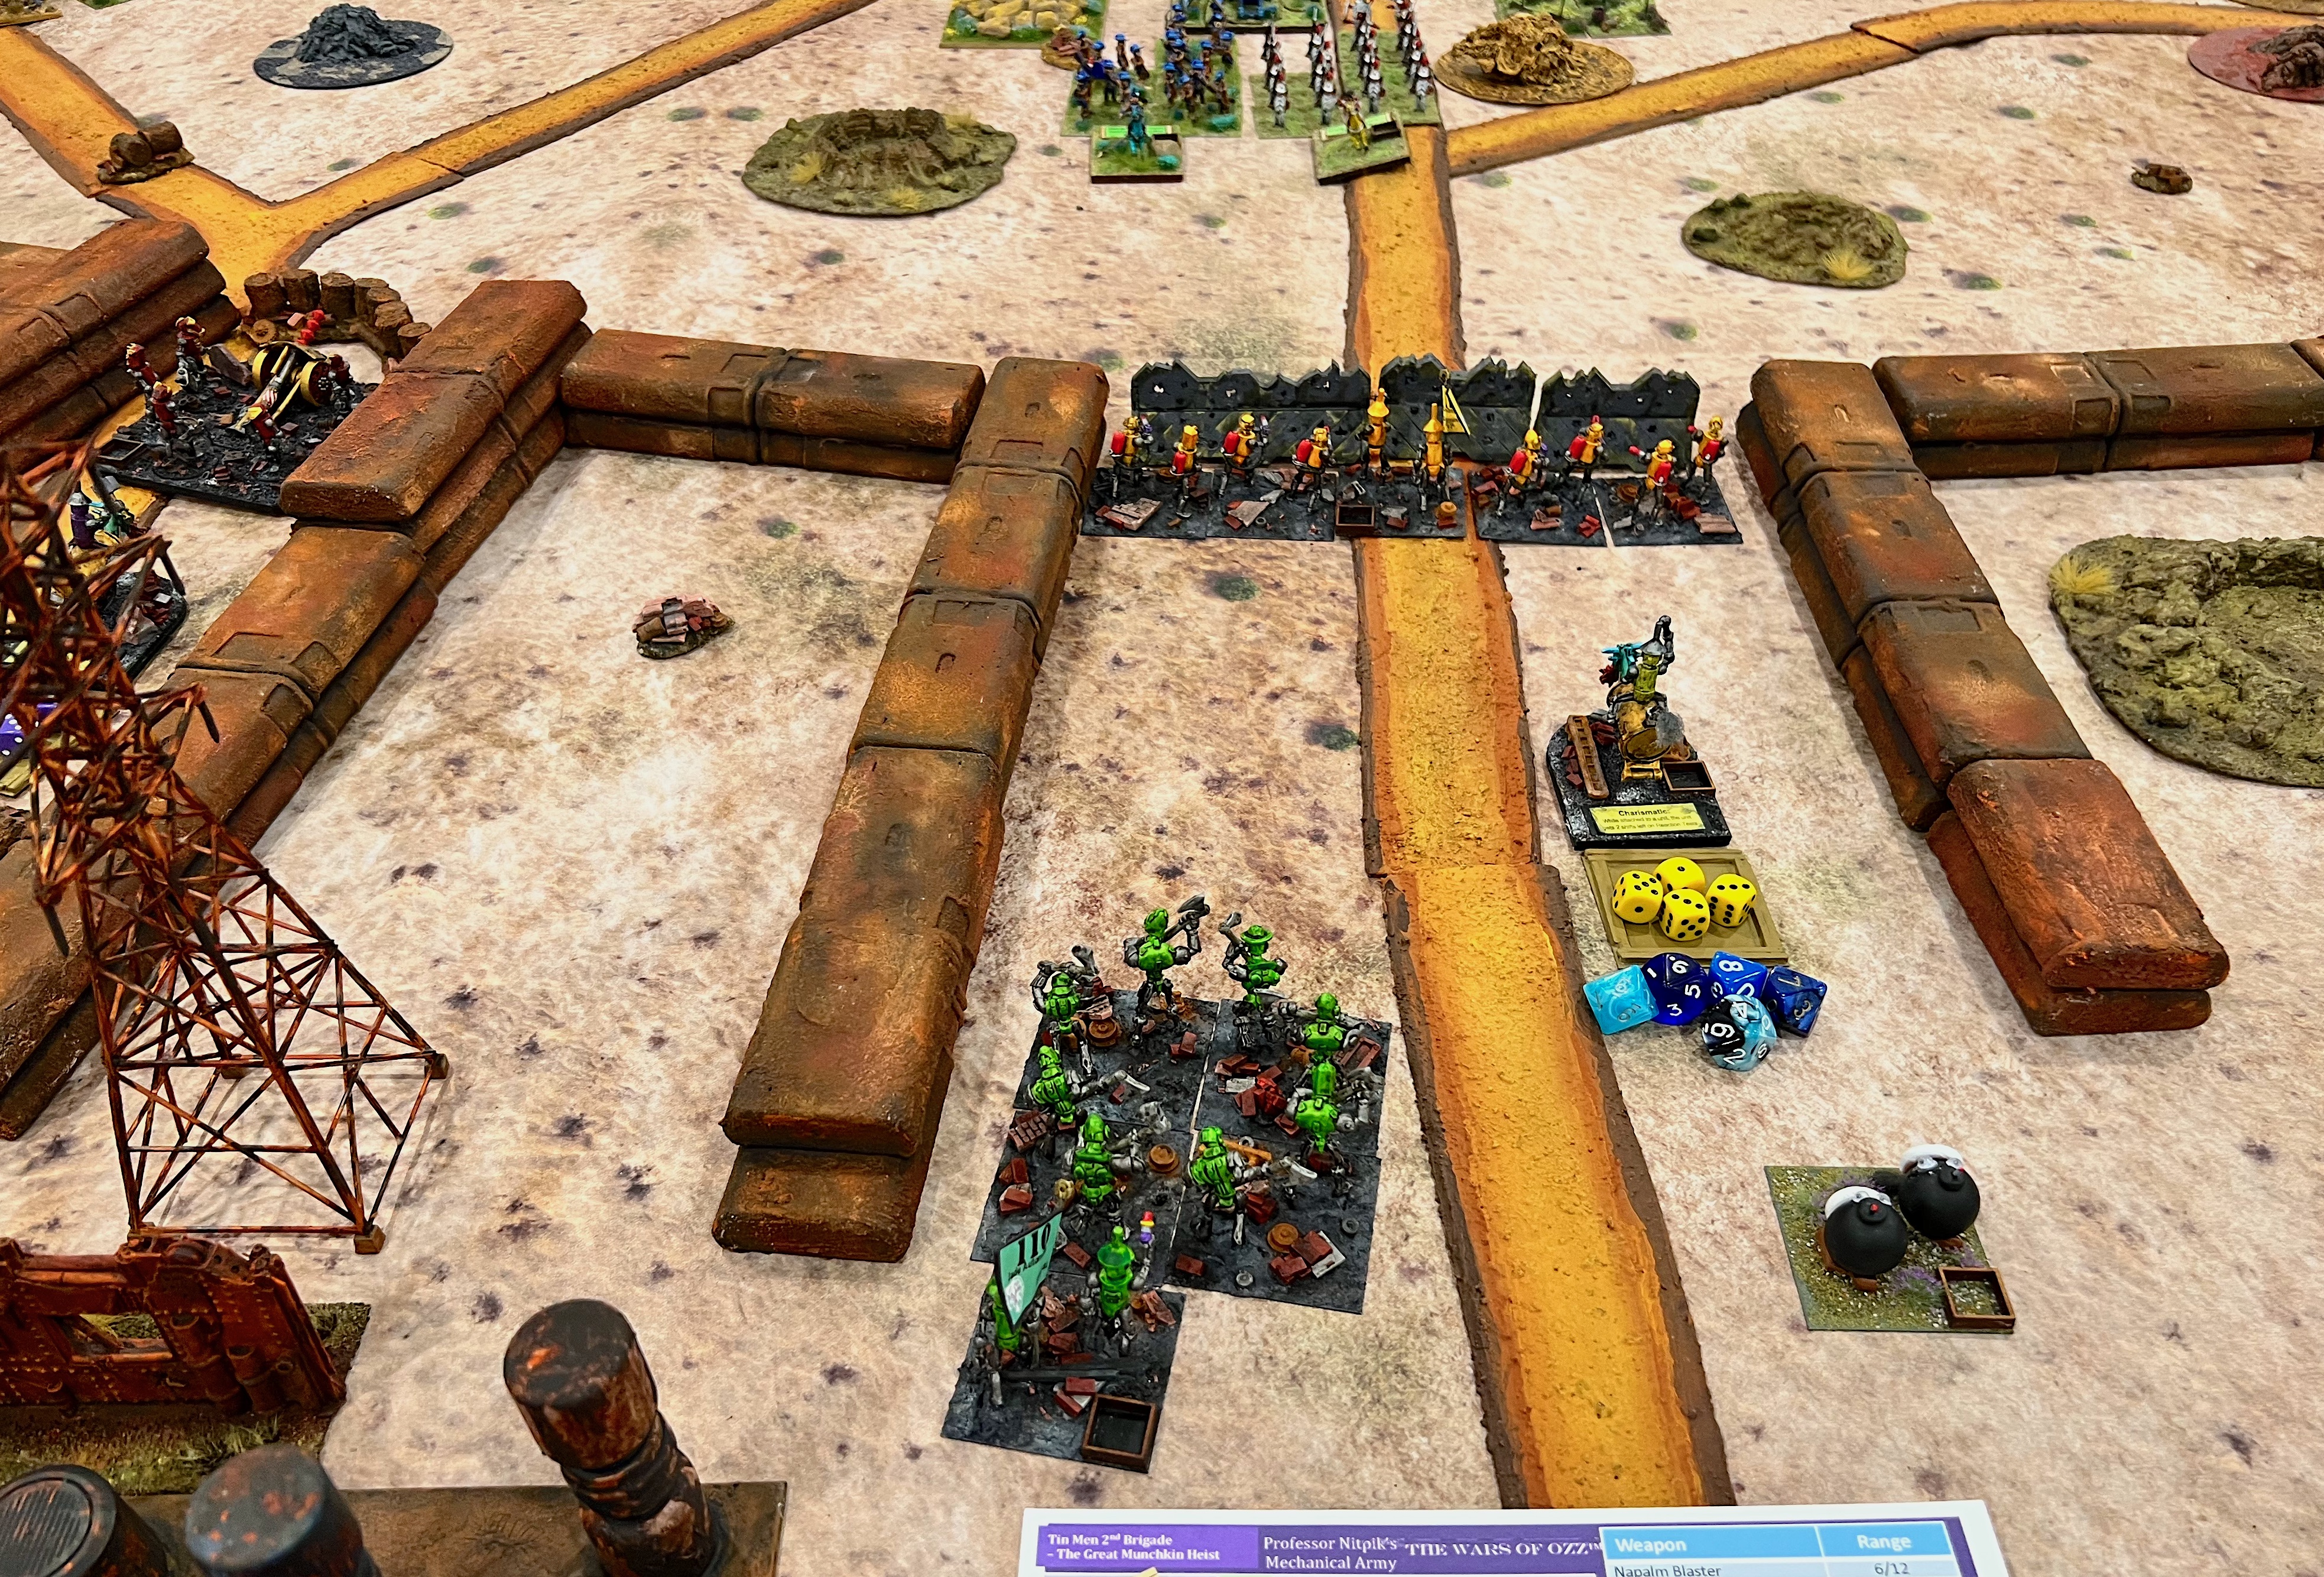
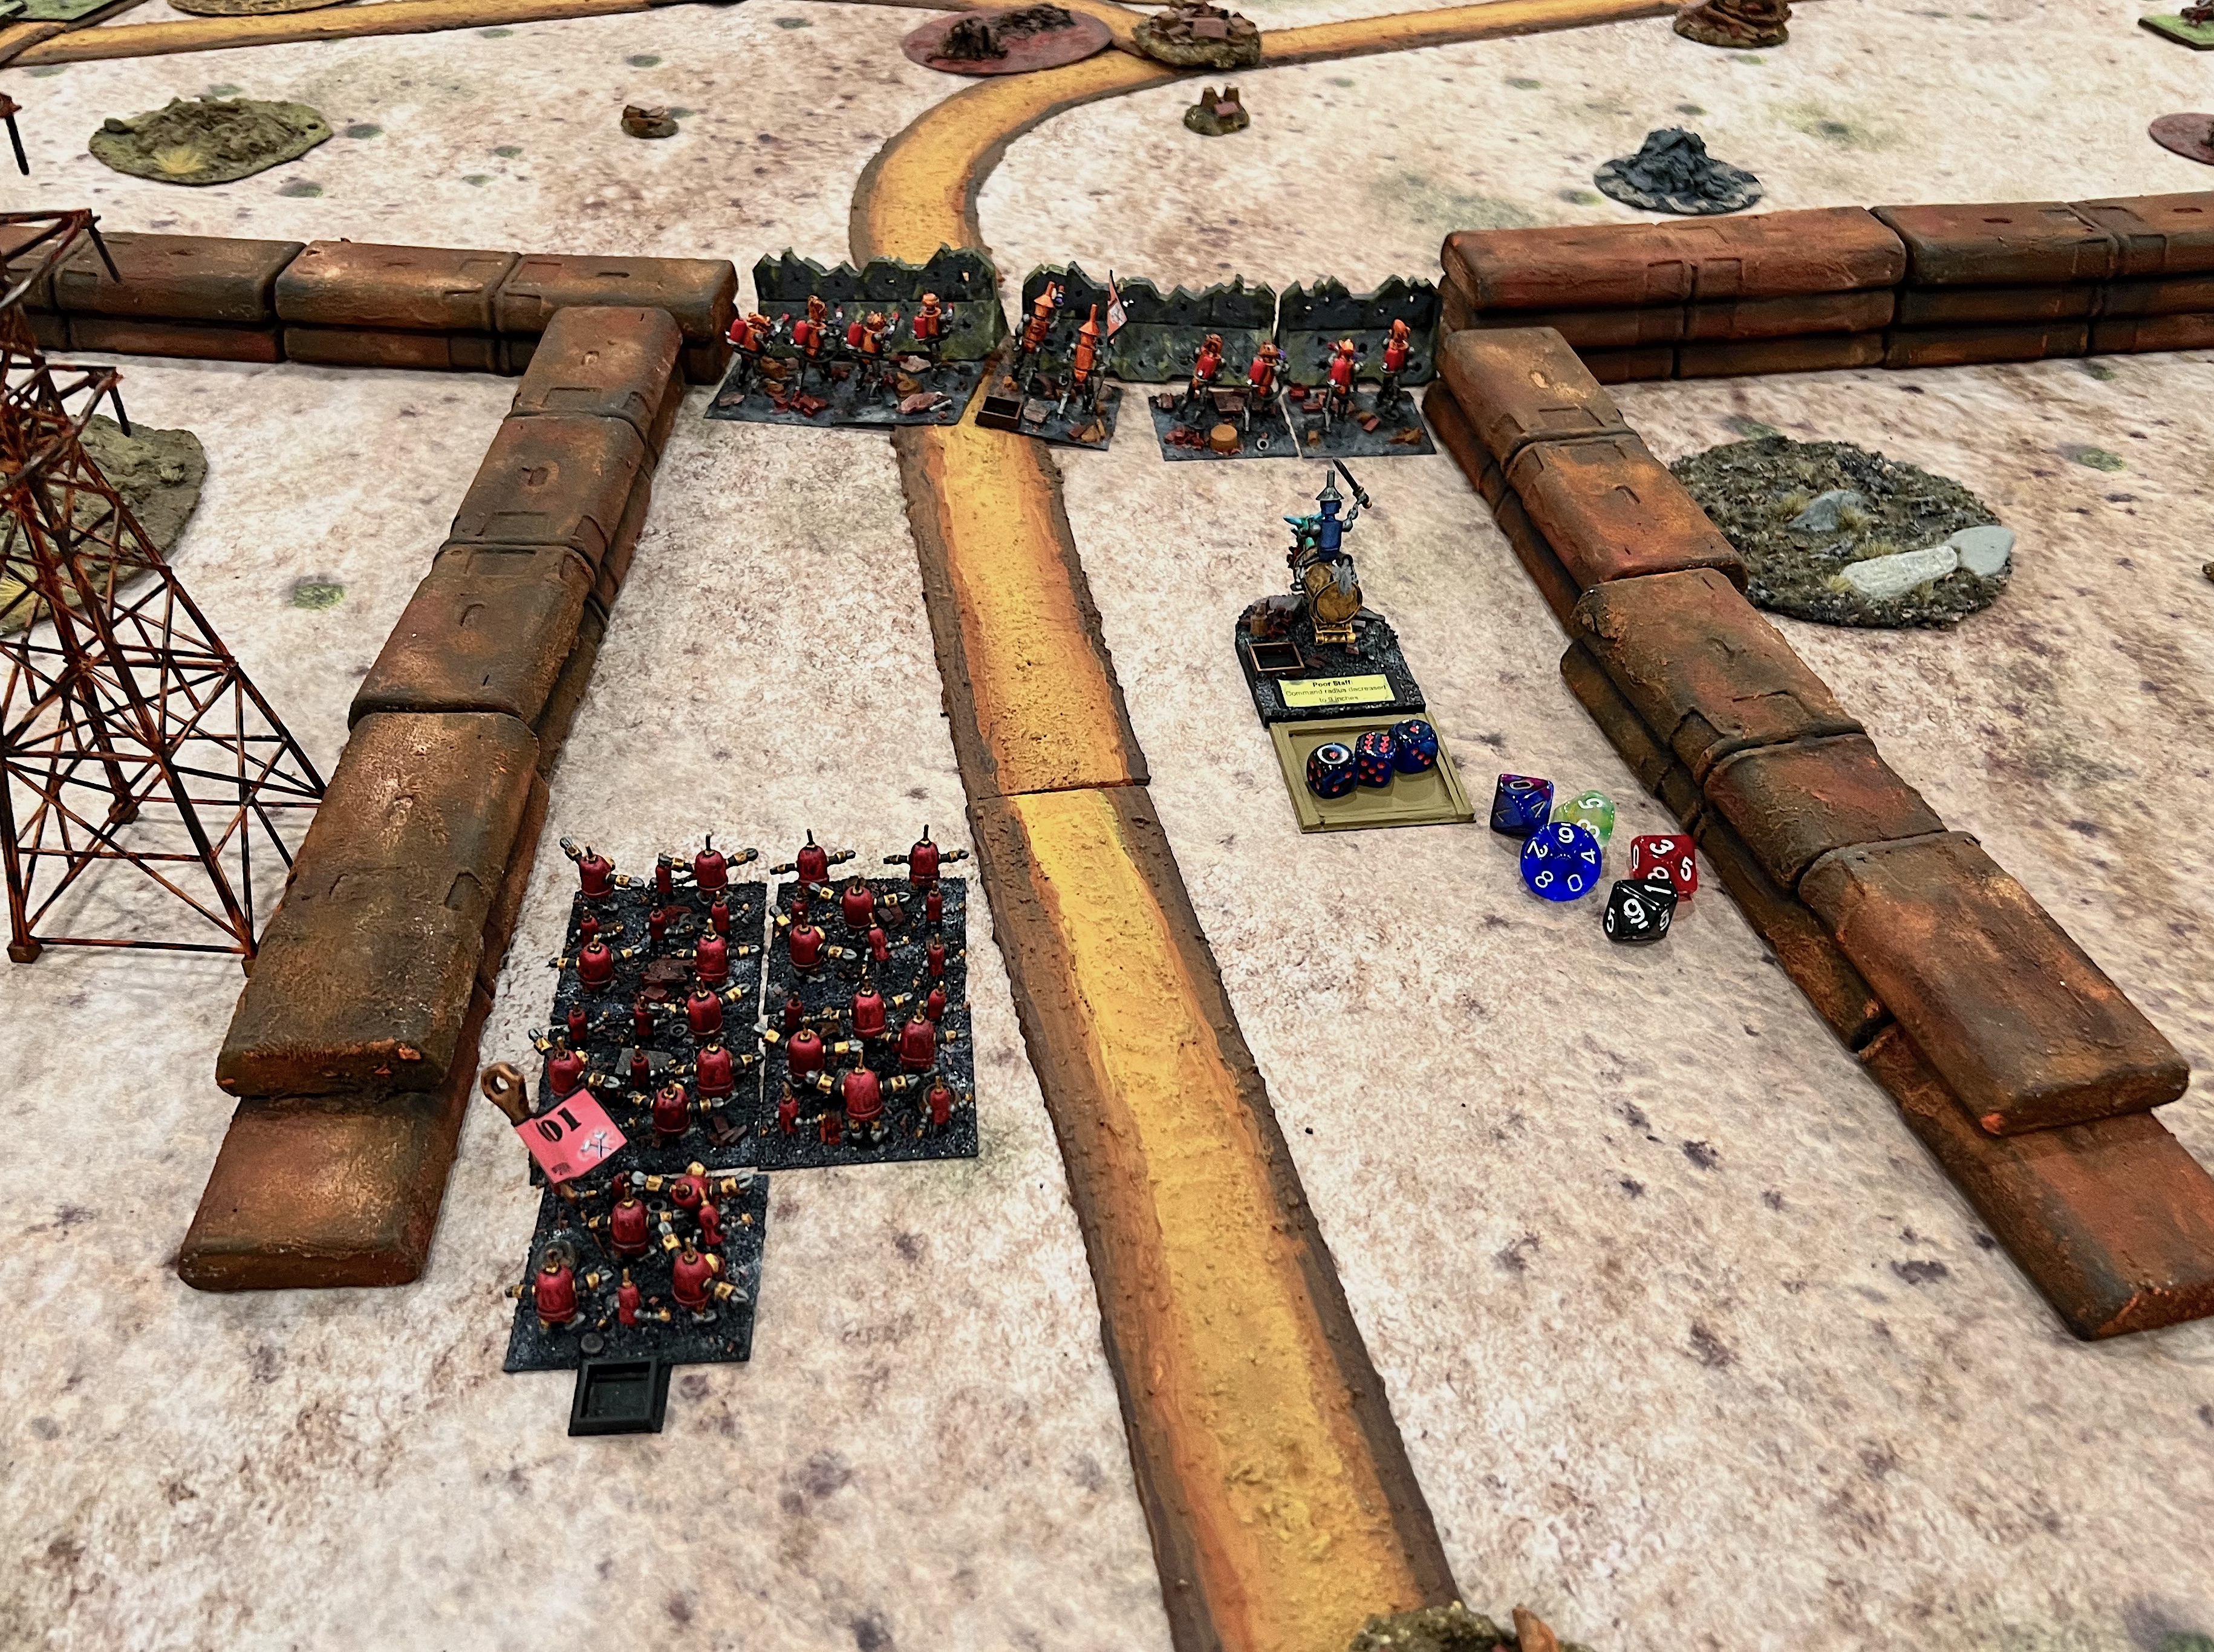
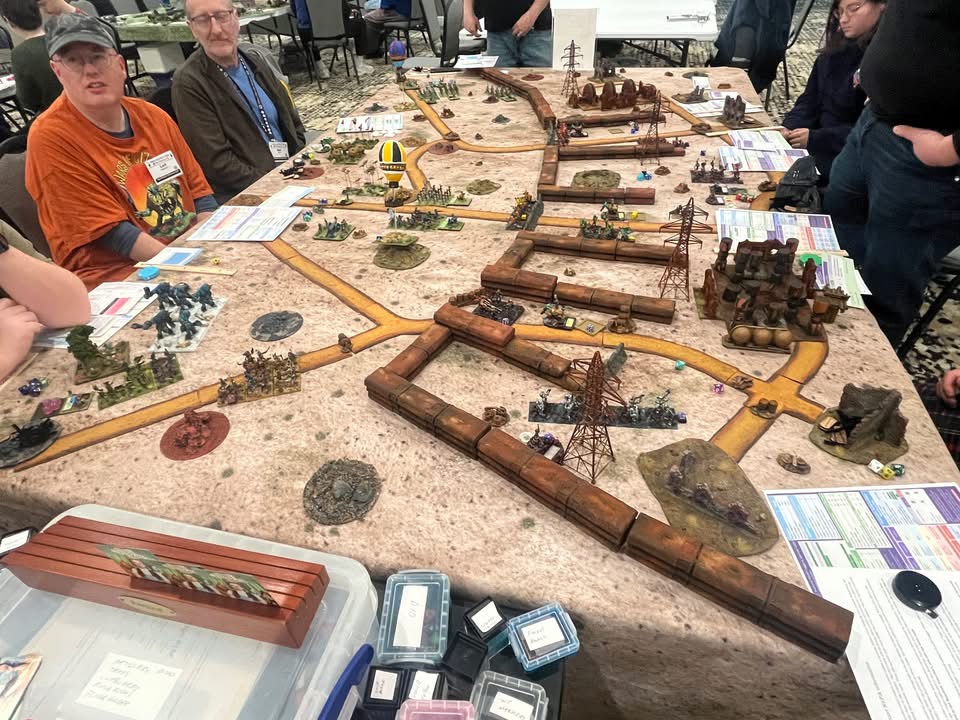
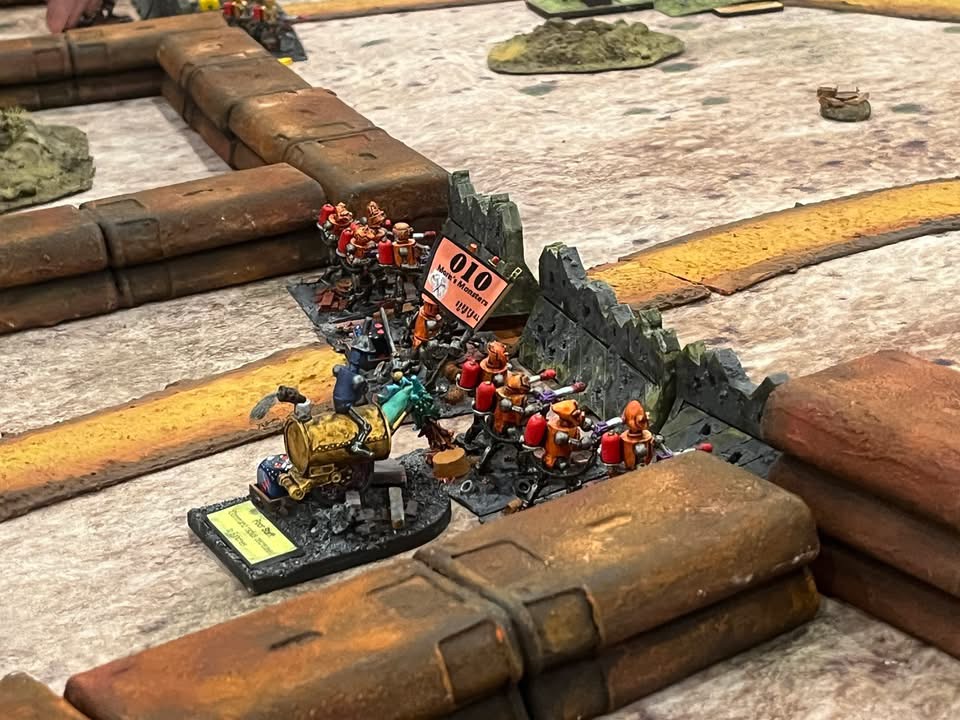
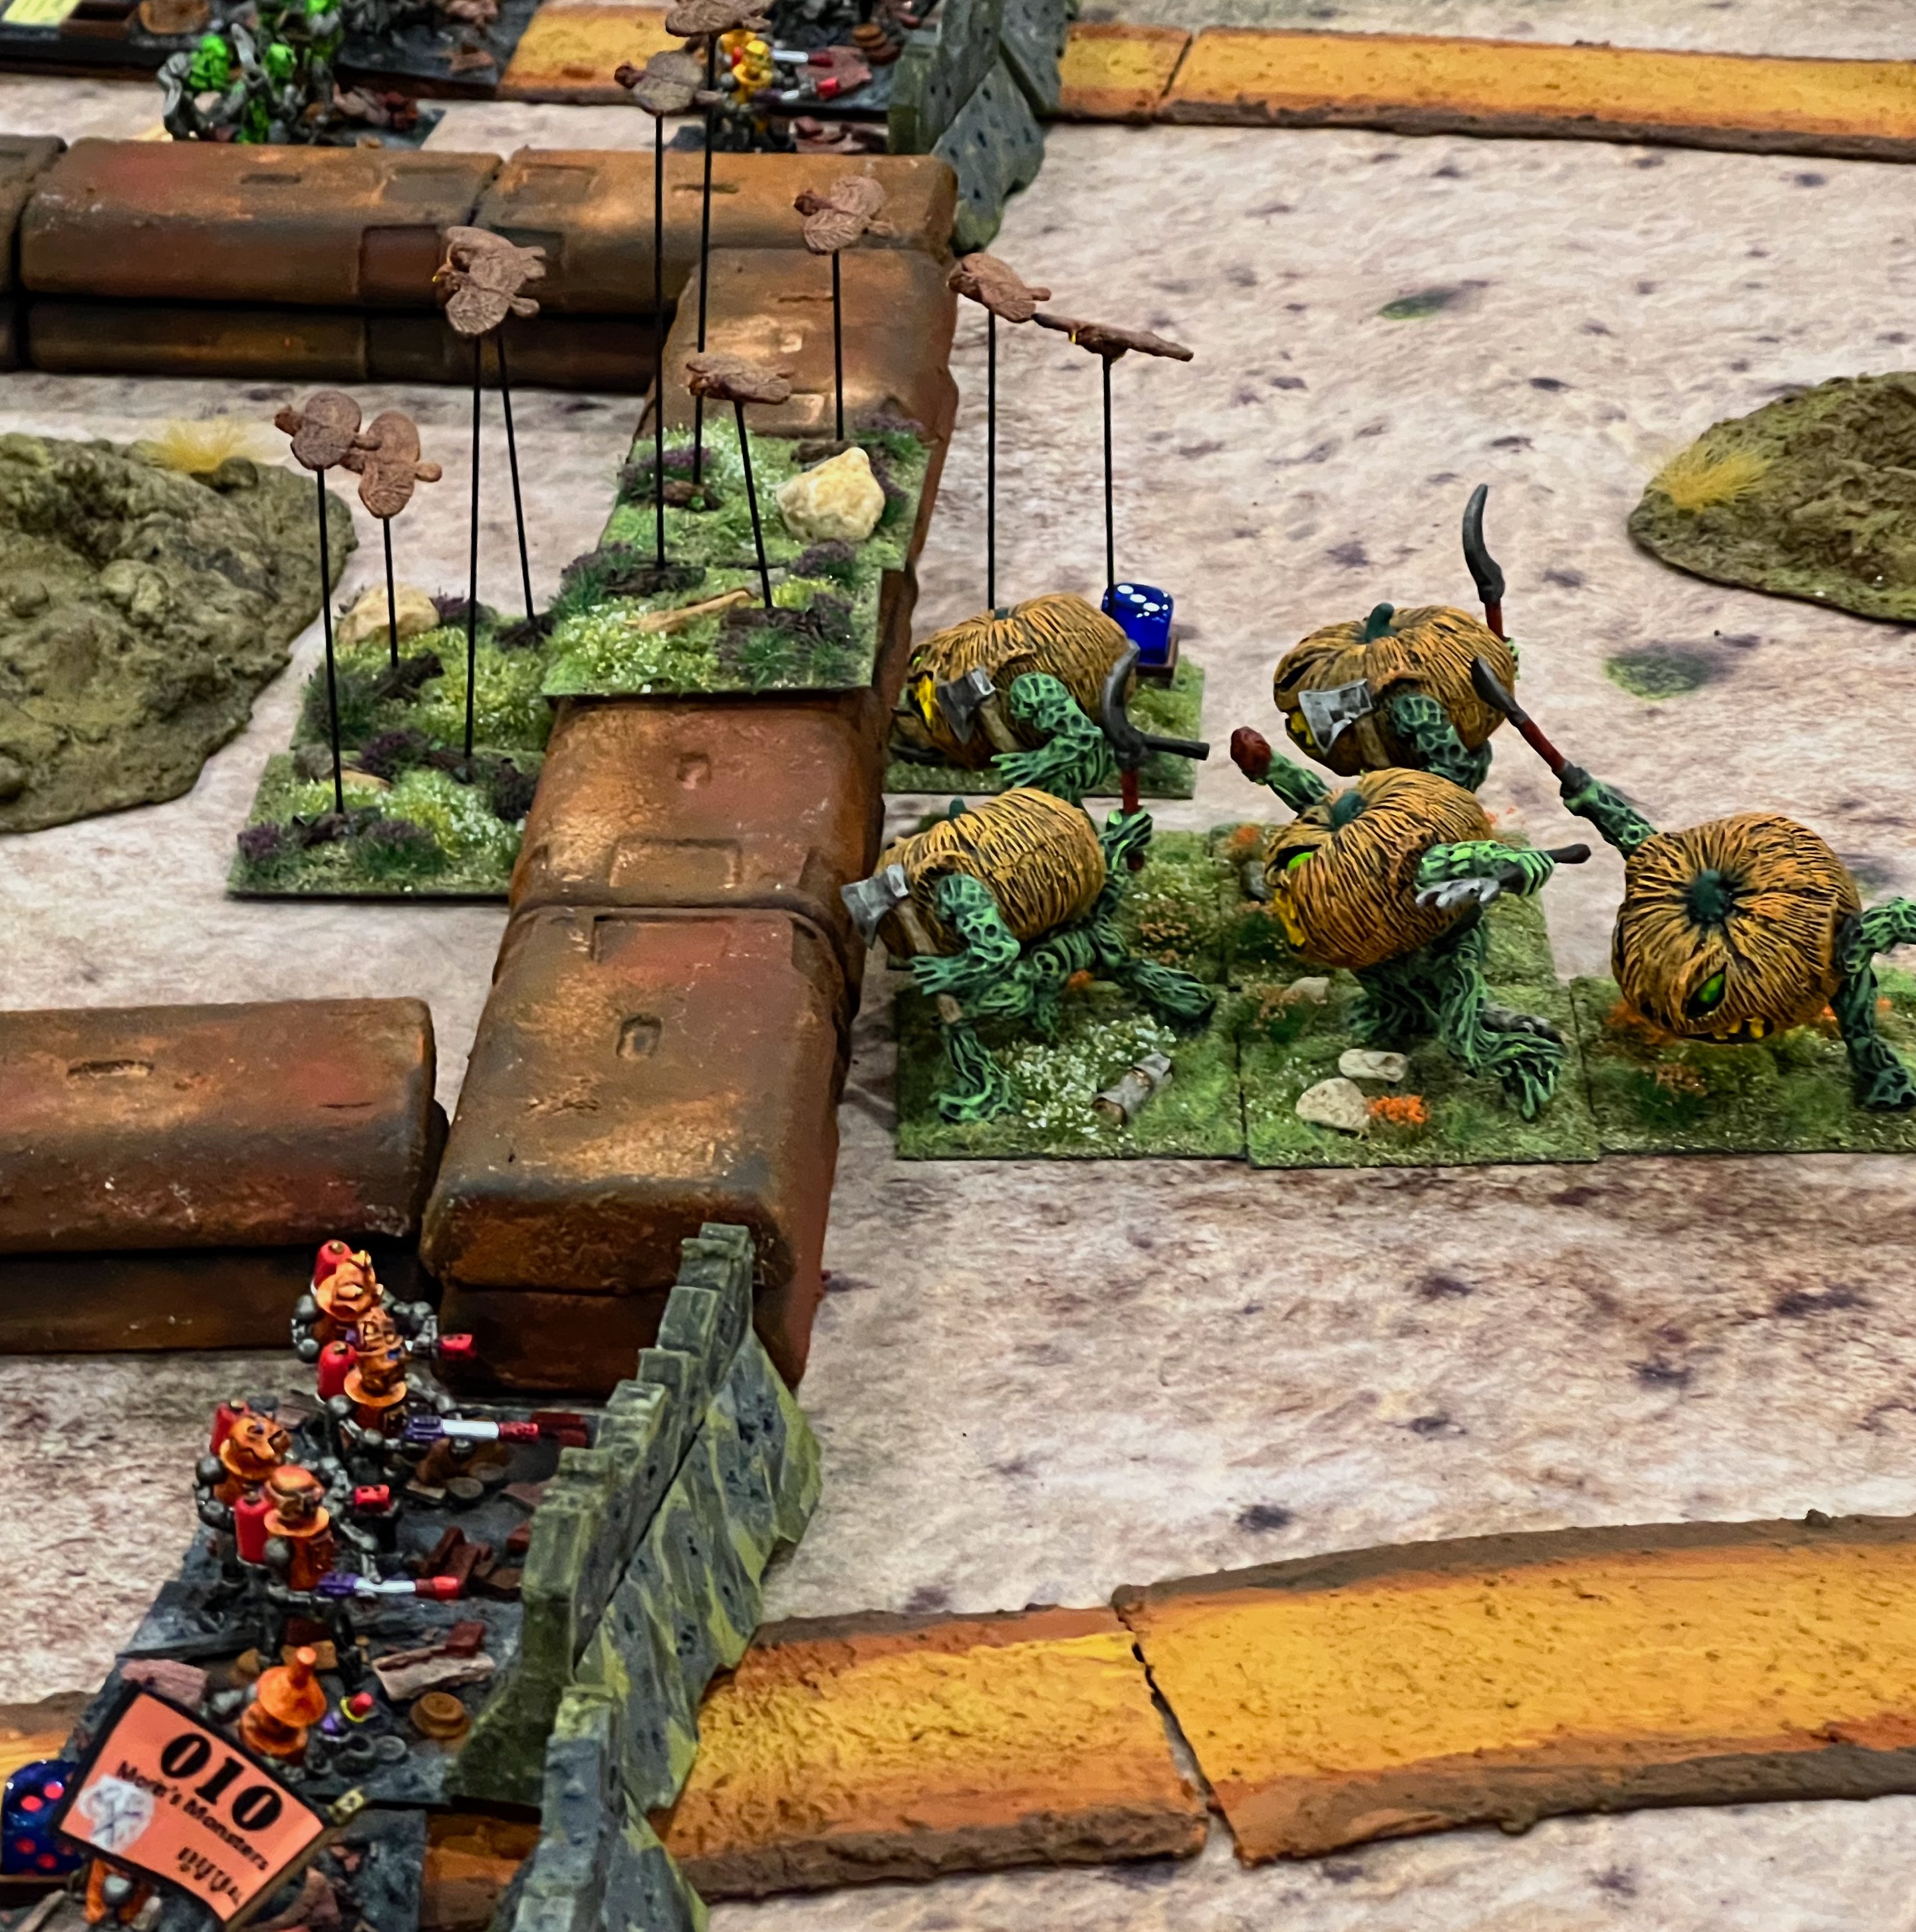
The game set up – I loved creating this panoramic expanse!Players arrive – once again demand to play was high!1st Munchkin Brigade set upThat’s a full game!Nitpik’s “Morin’s Monsters” armed with napalm blasters hope to cook up some Great Pumpkinheads.A regiment of Great Owls (Munchkin allies) overflies the Lemon Drop Legionnaires and hits them in the rear!Jinjur regiments (female pirates and Munchkin allies) breach the wall.The Munchkins breach the western gate and their light cavalry pours through to look for technological treasures.In the center, two axe-wielding Nitpik regiments have had enough of the Munchkins. The Jade Automata and the Pink Nightmare regiments charge over their defensive wall. Their counterattack wipes out the Munchkin artillery and drives two Munchkin infantry regiments from the game.Another view of that mechanical counterattack.Meanwhile, the cleaver Jinjur pirates locate some of Nitpik’s technological wonders in a wrecked building.
The game ended – in a dead tie 23-23! A real nail-biter to be sure!
The next game builds on this one. The Munchkins have found technology, but welshed on their agreement to share! Thus, they betrayed their allies. As a result, their former allies have jumped over to the Nitpik side. The Munchkins are fleeing to safety, with Nitpik in hot pursuit.
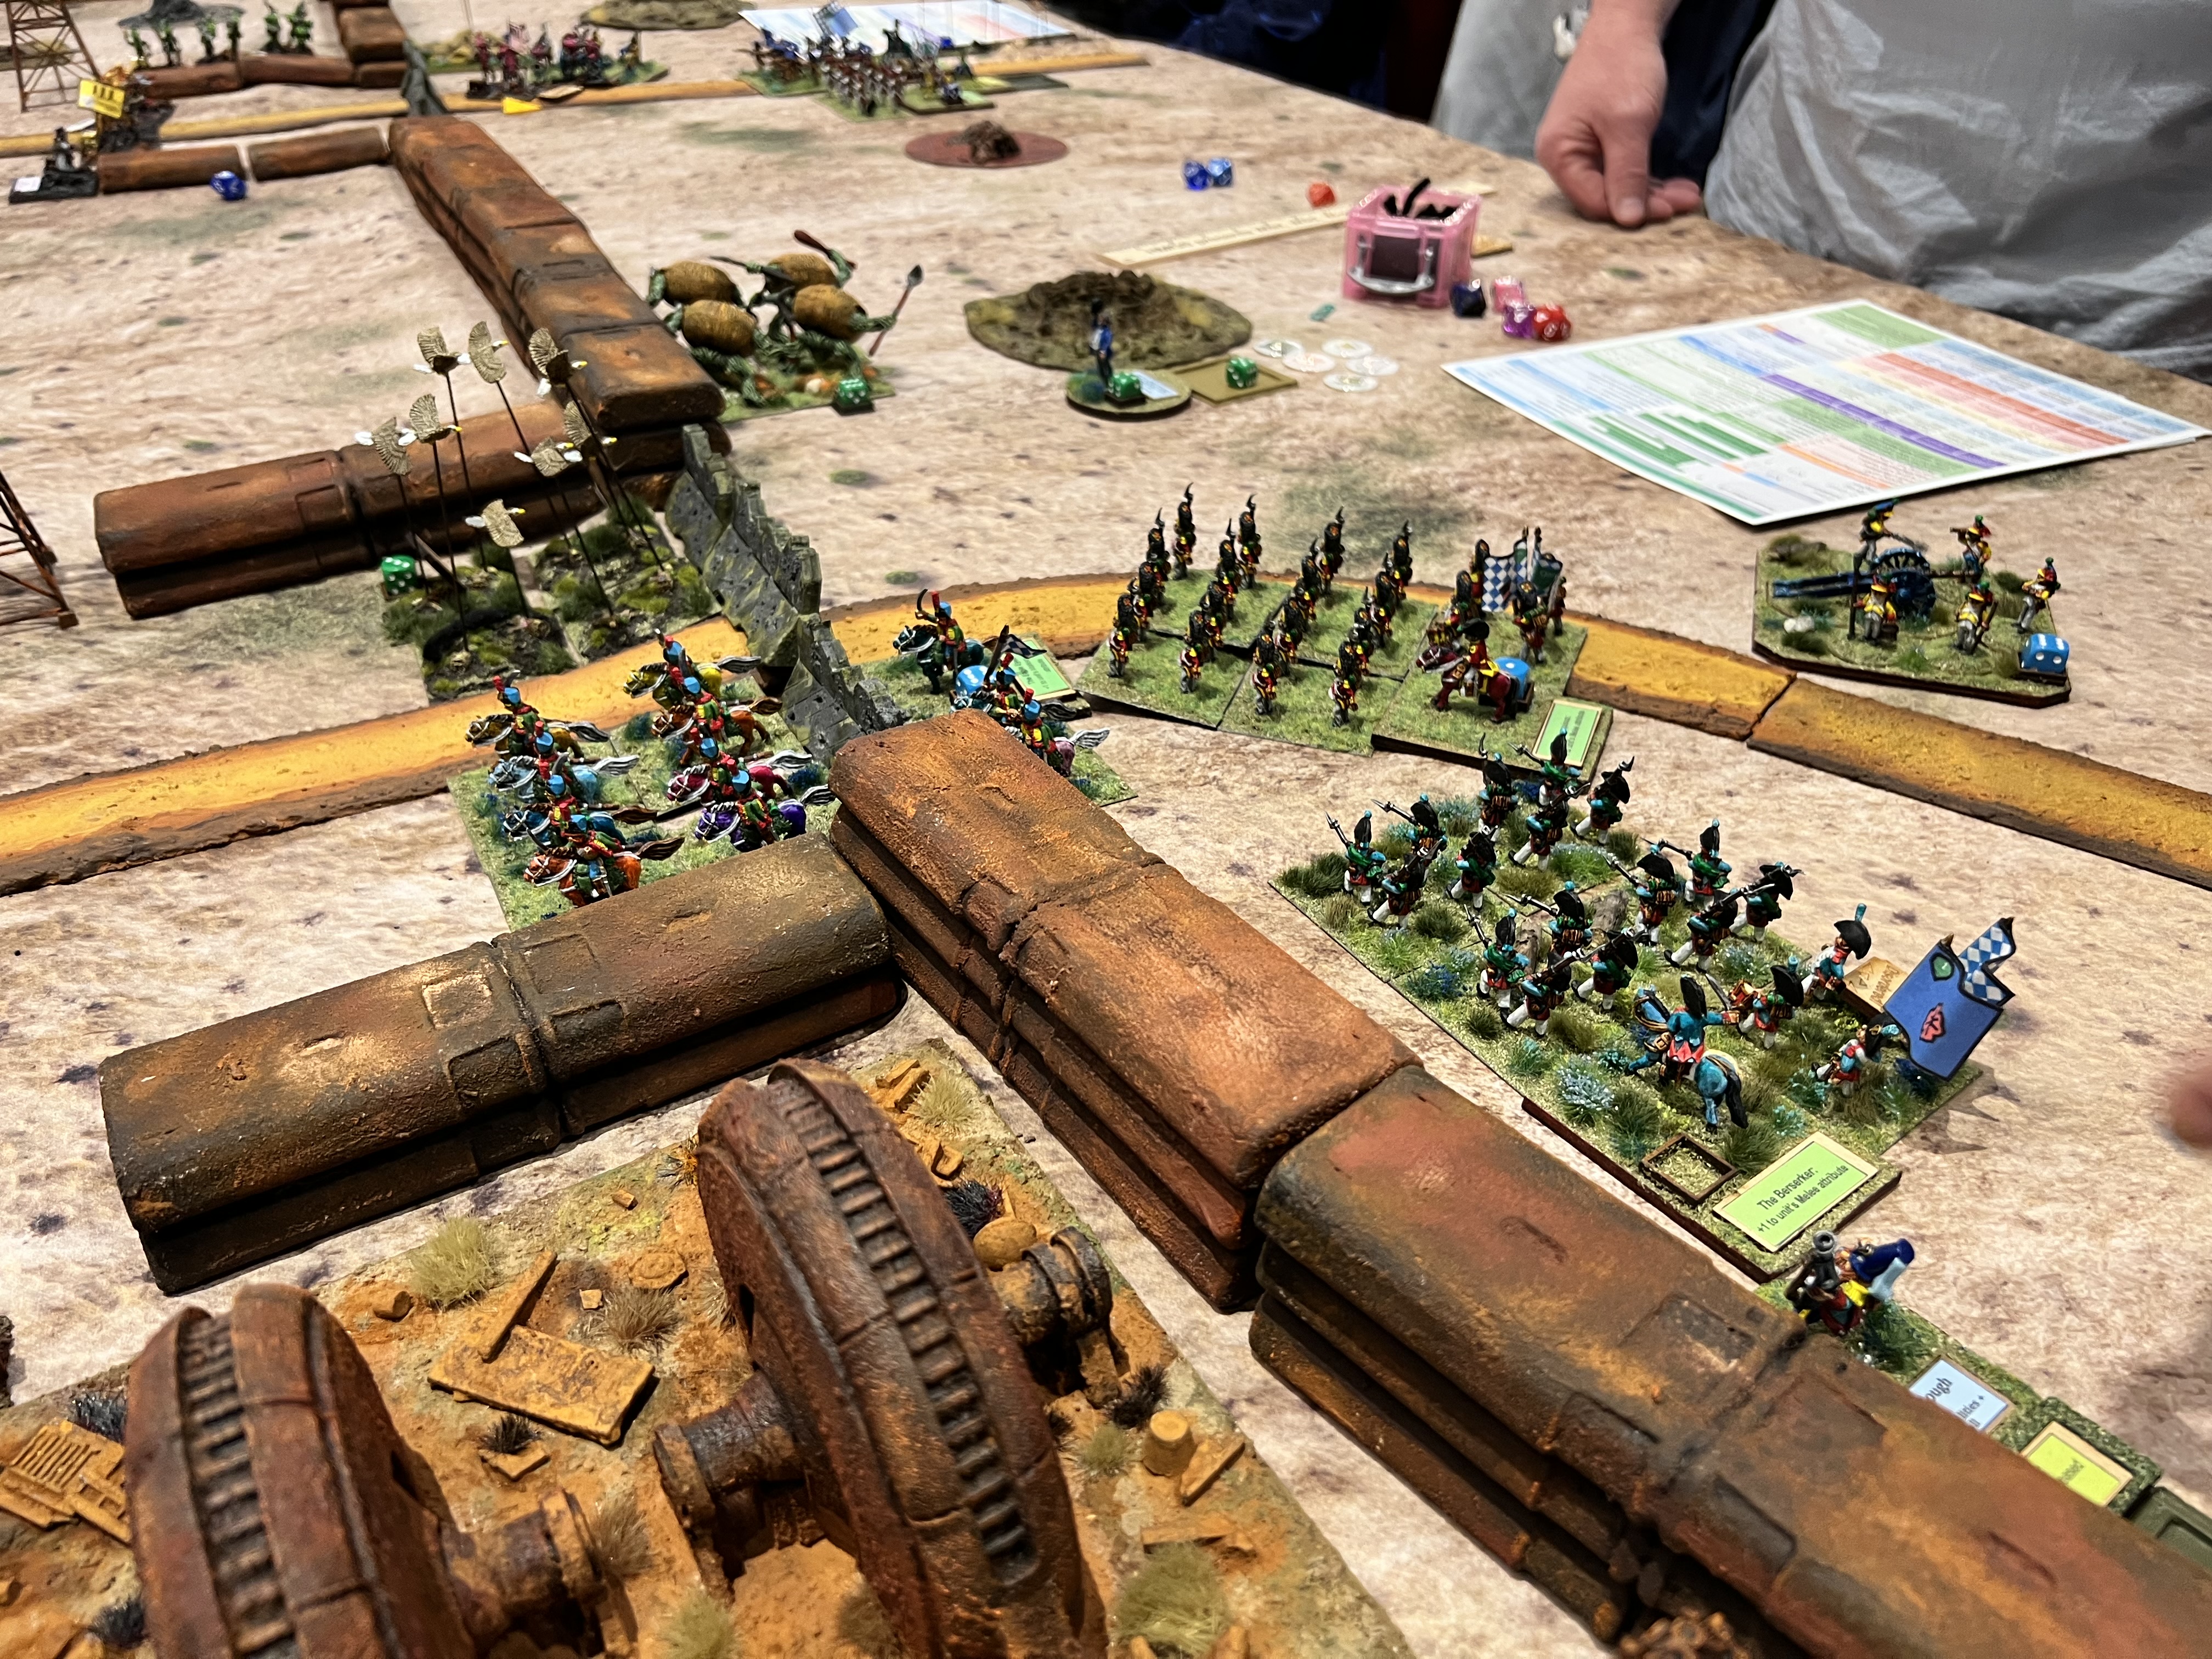
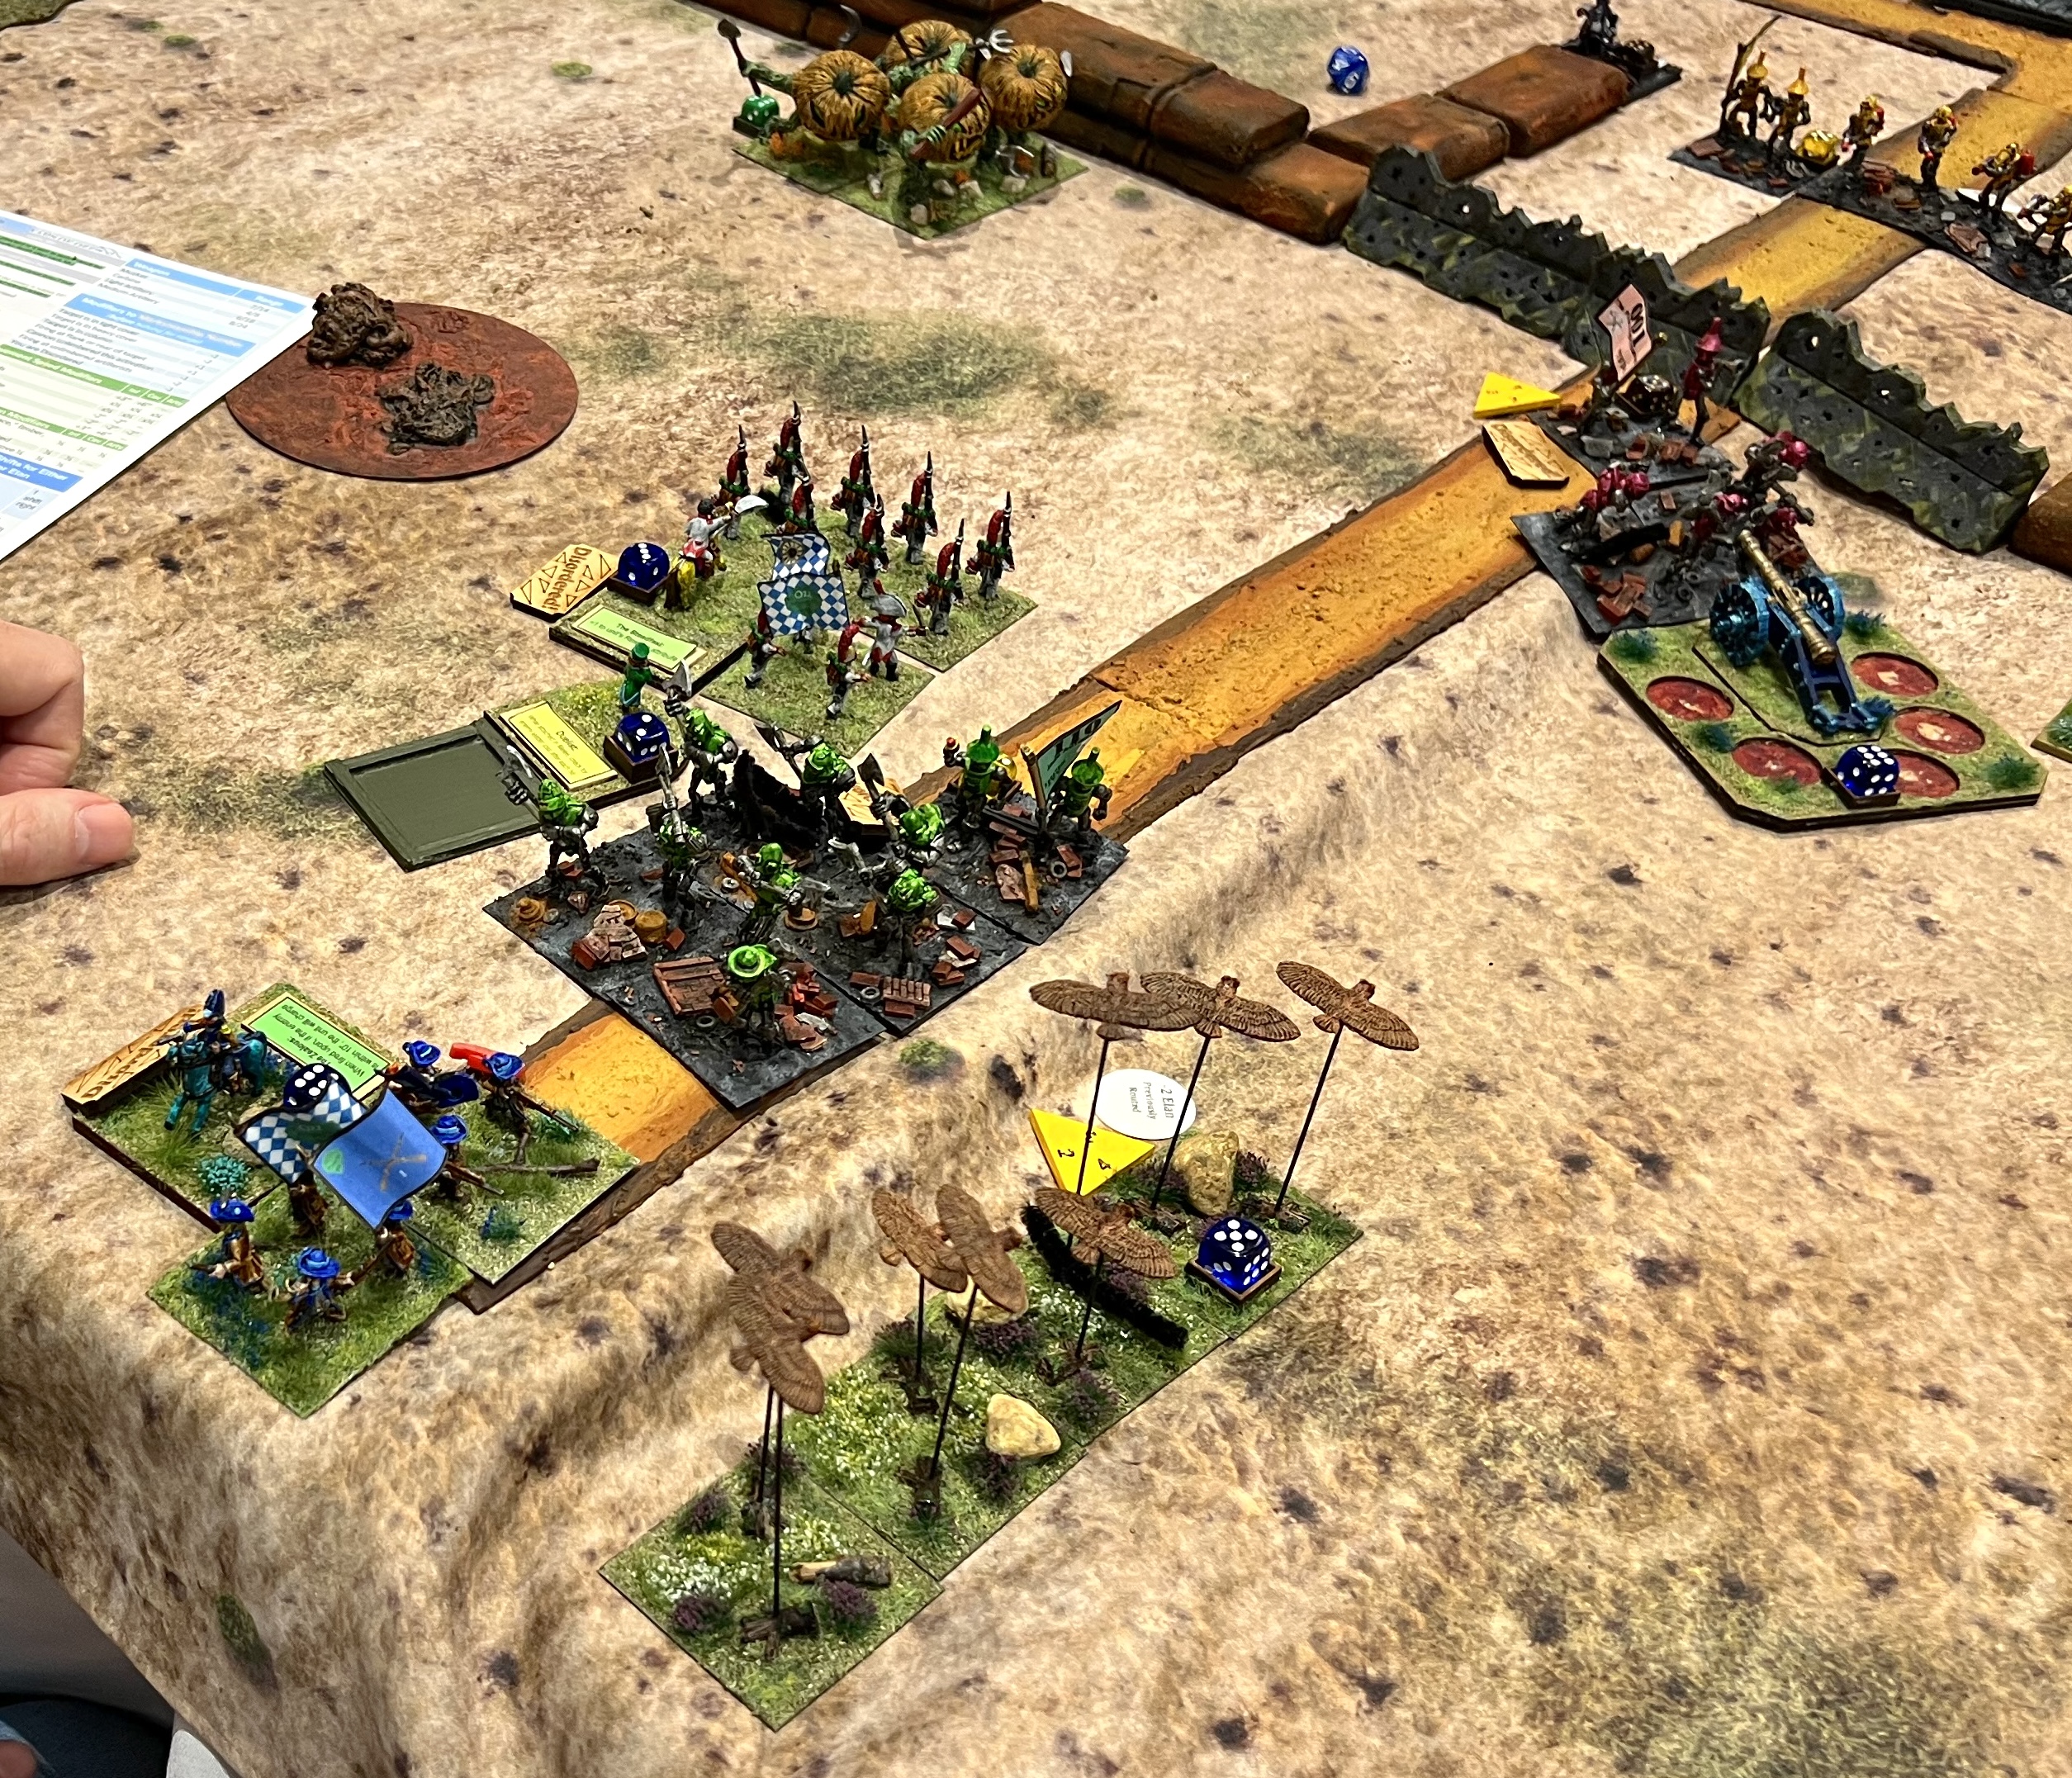
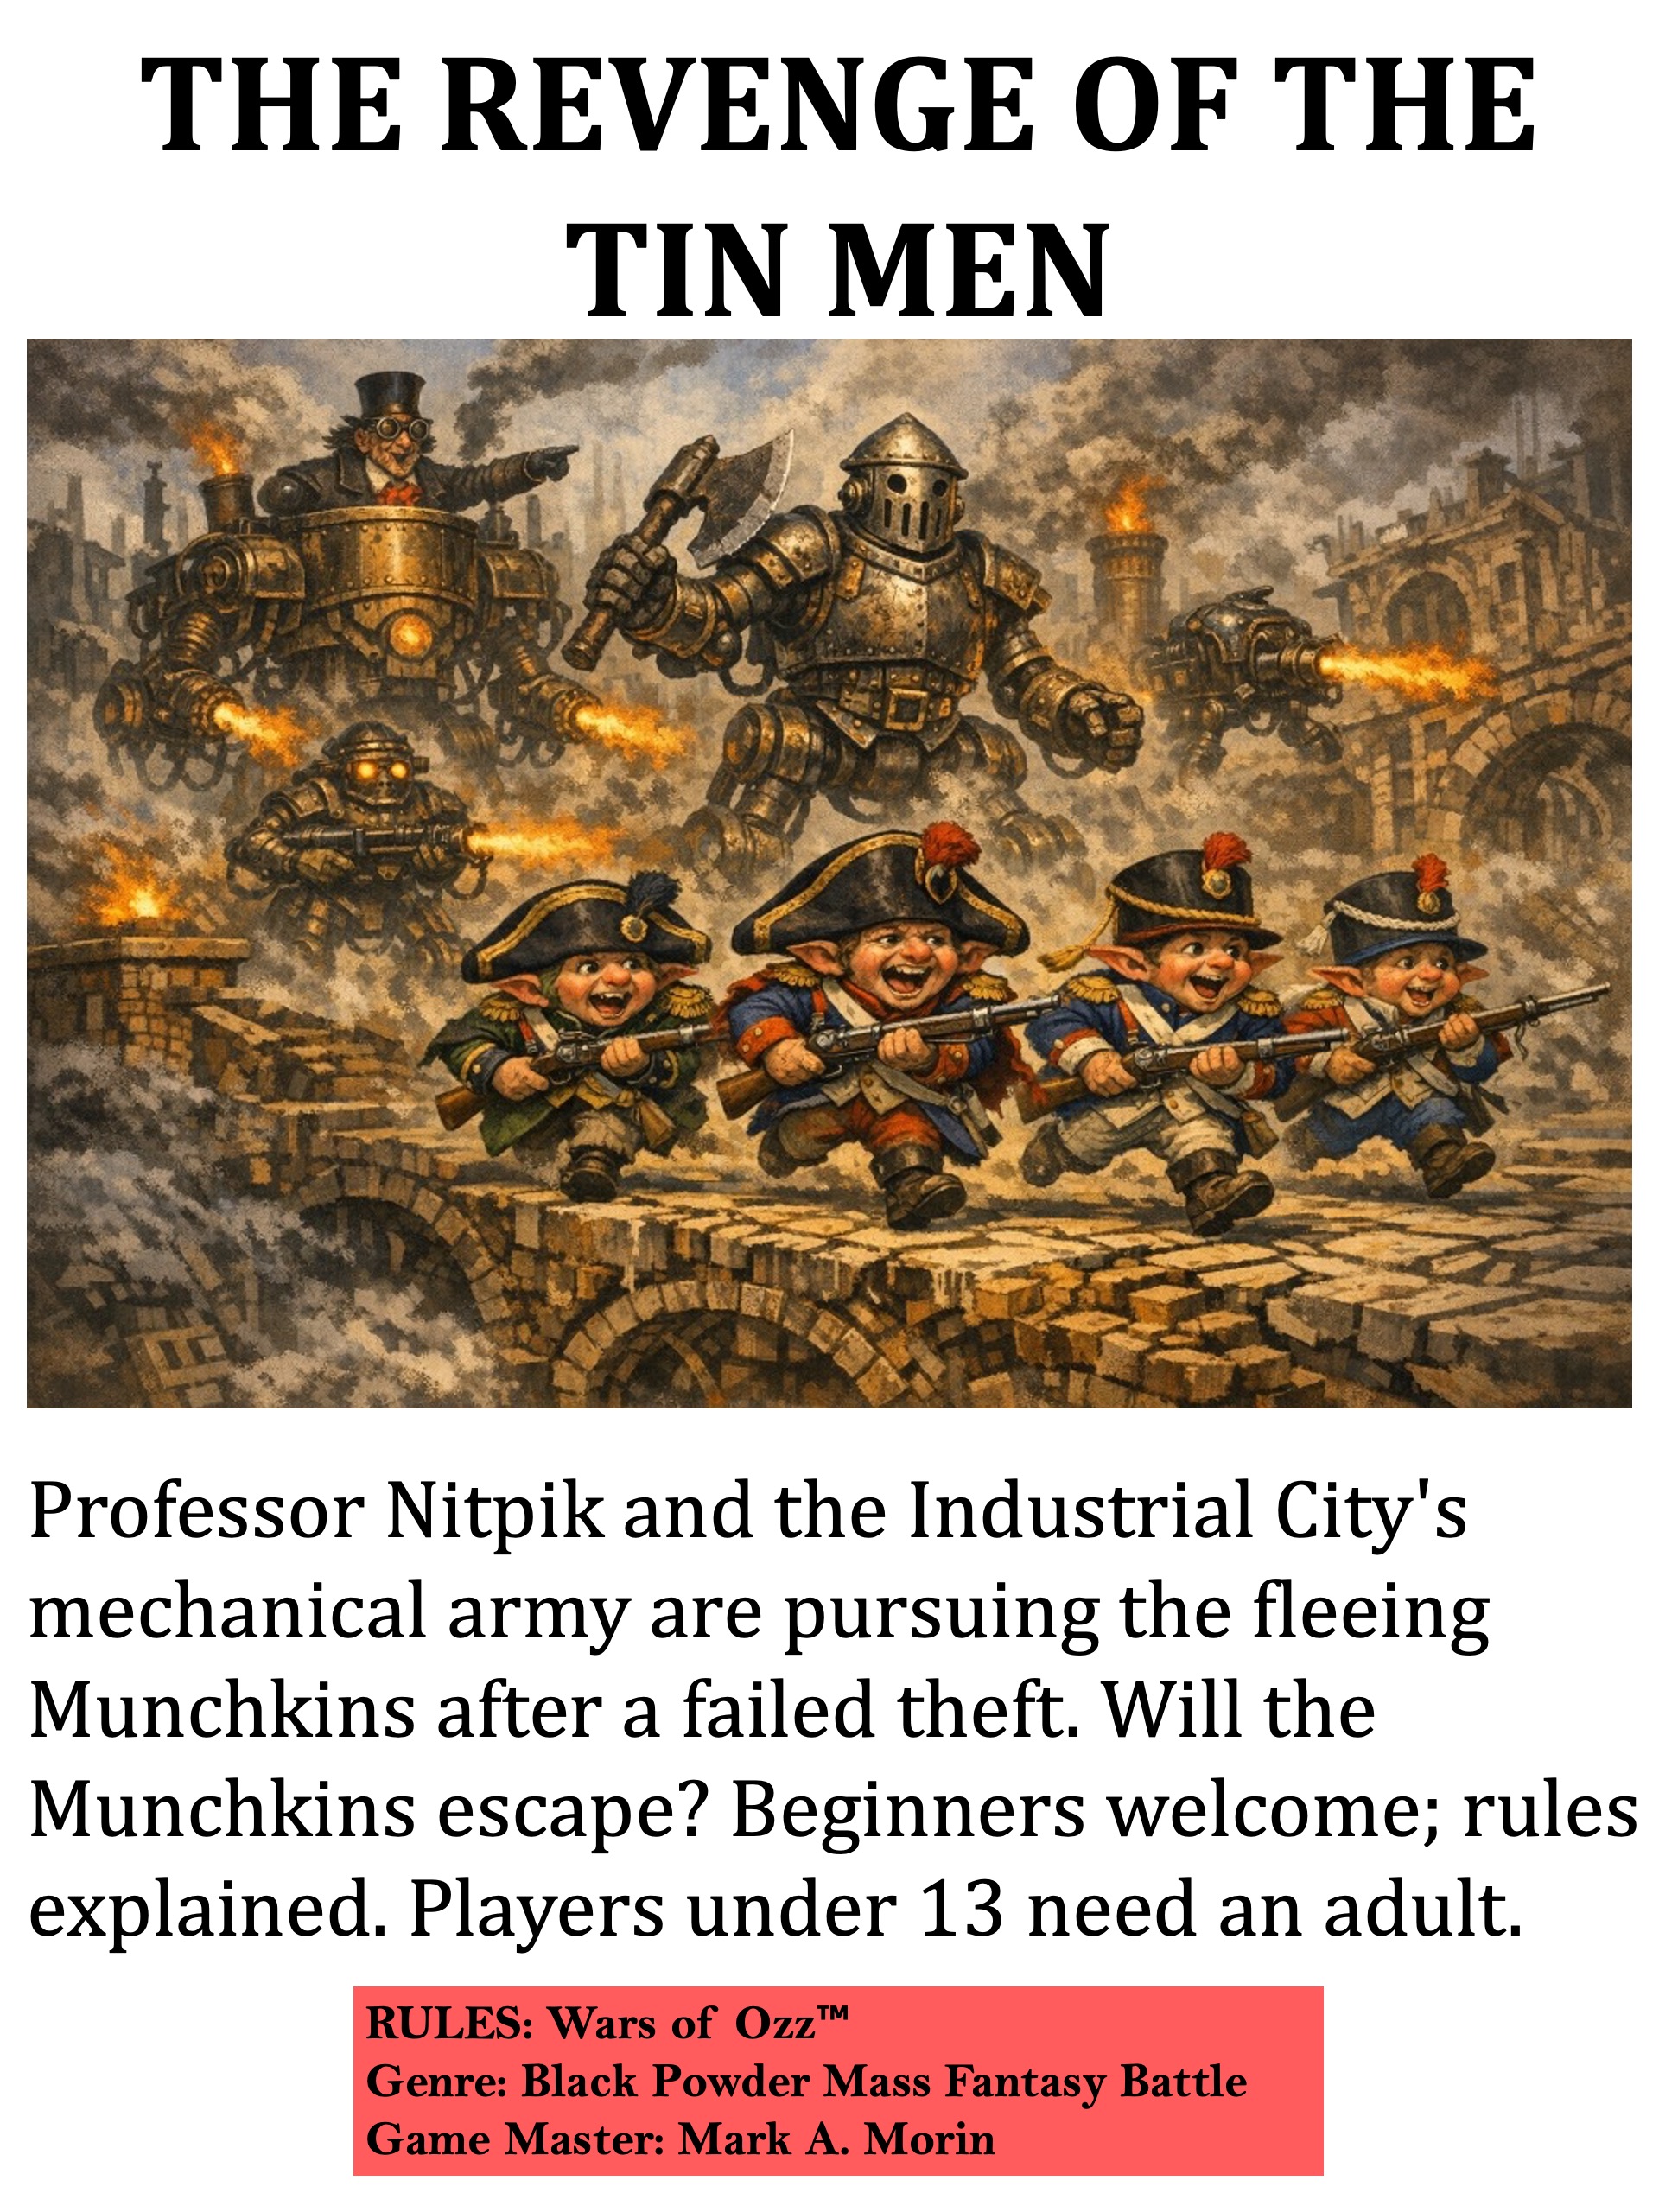
Revenge of the Tin Men
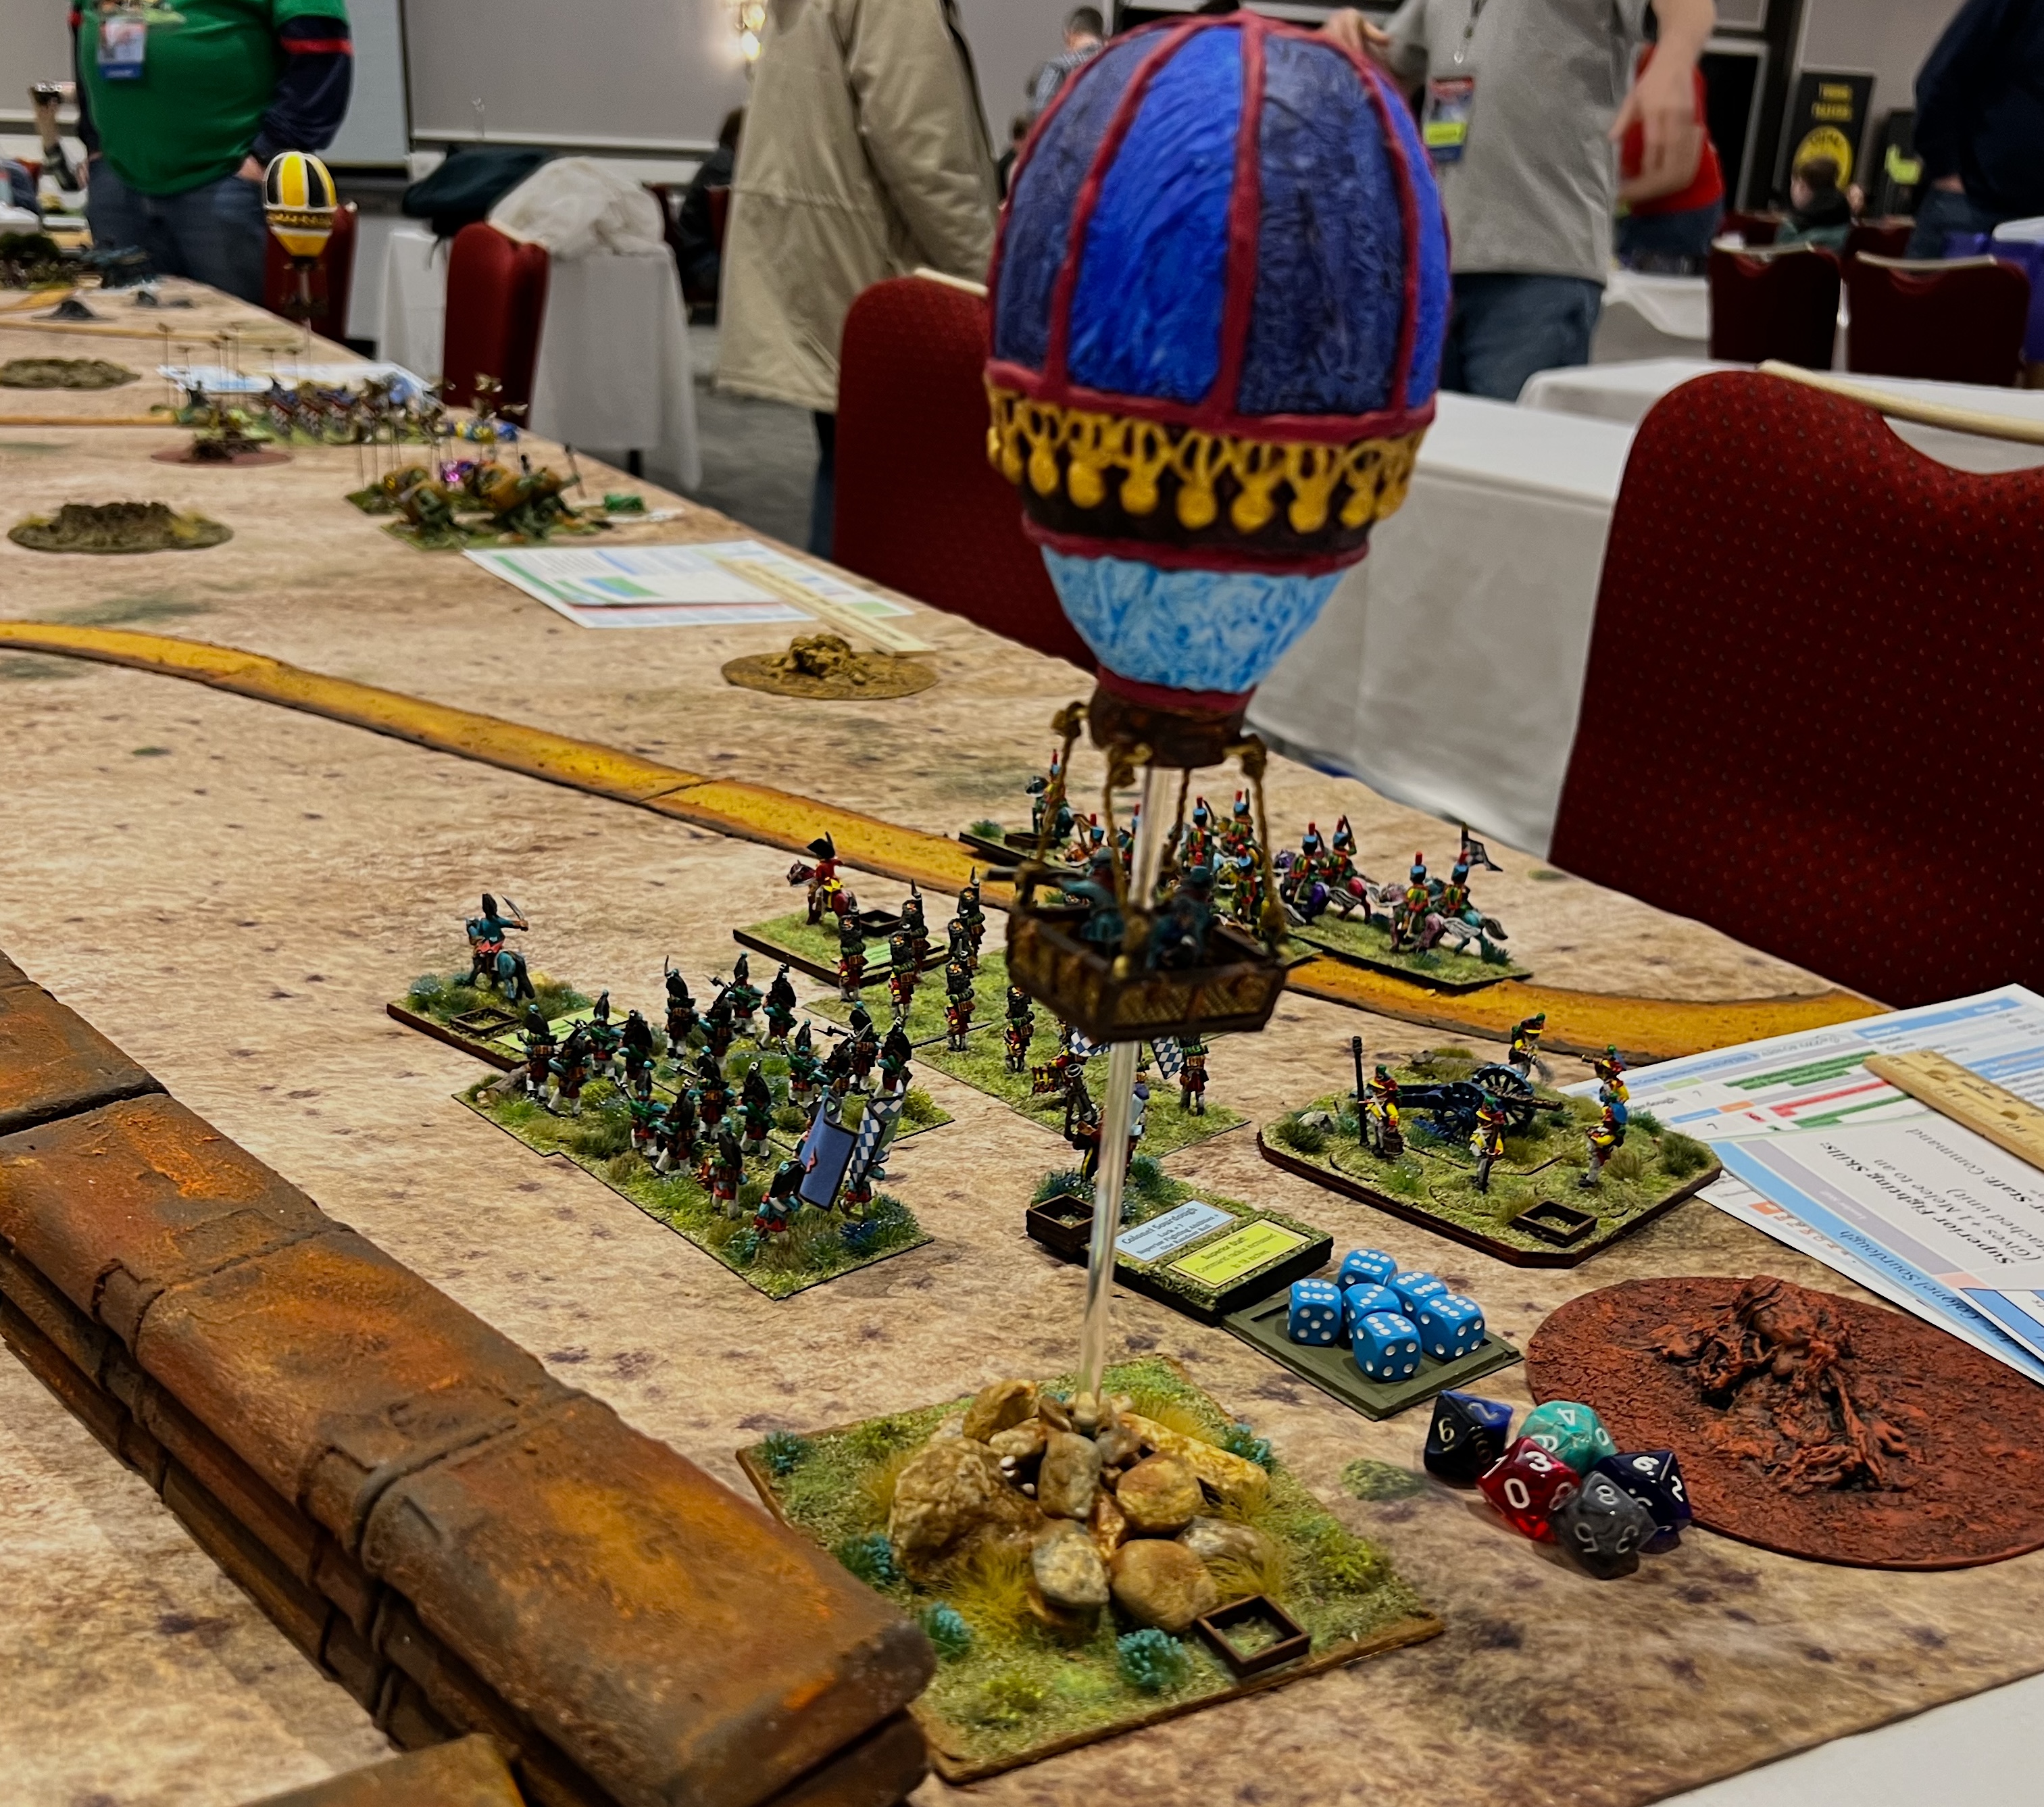
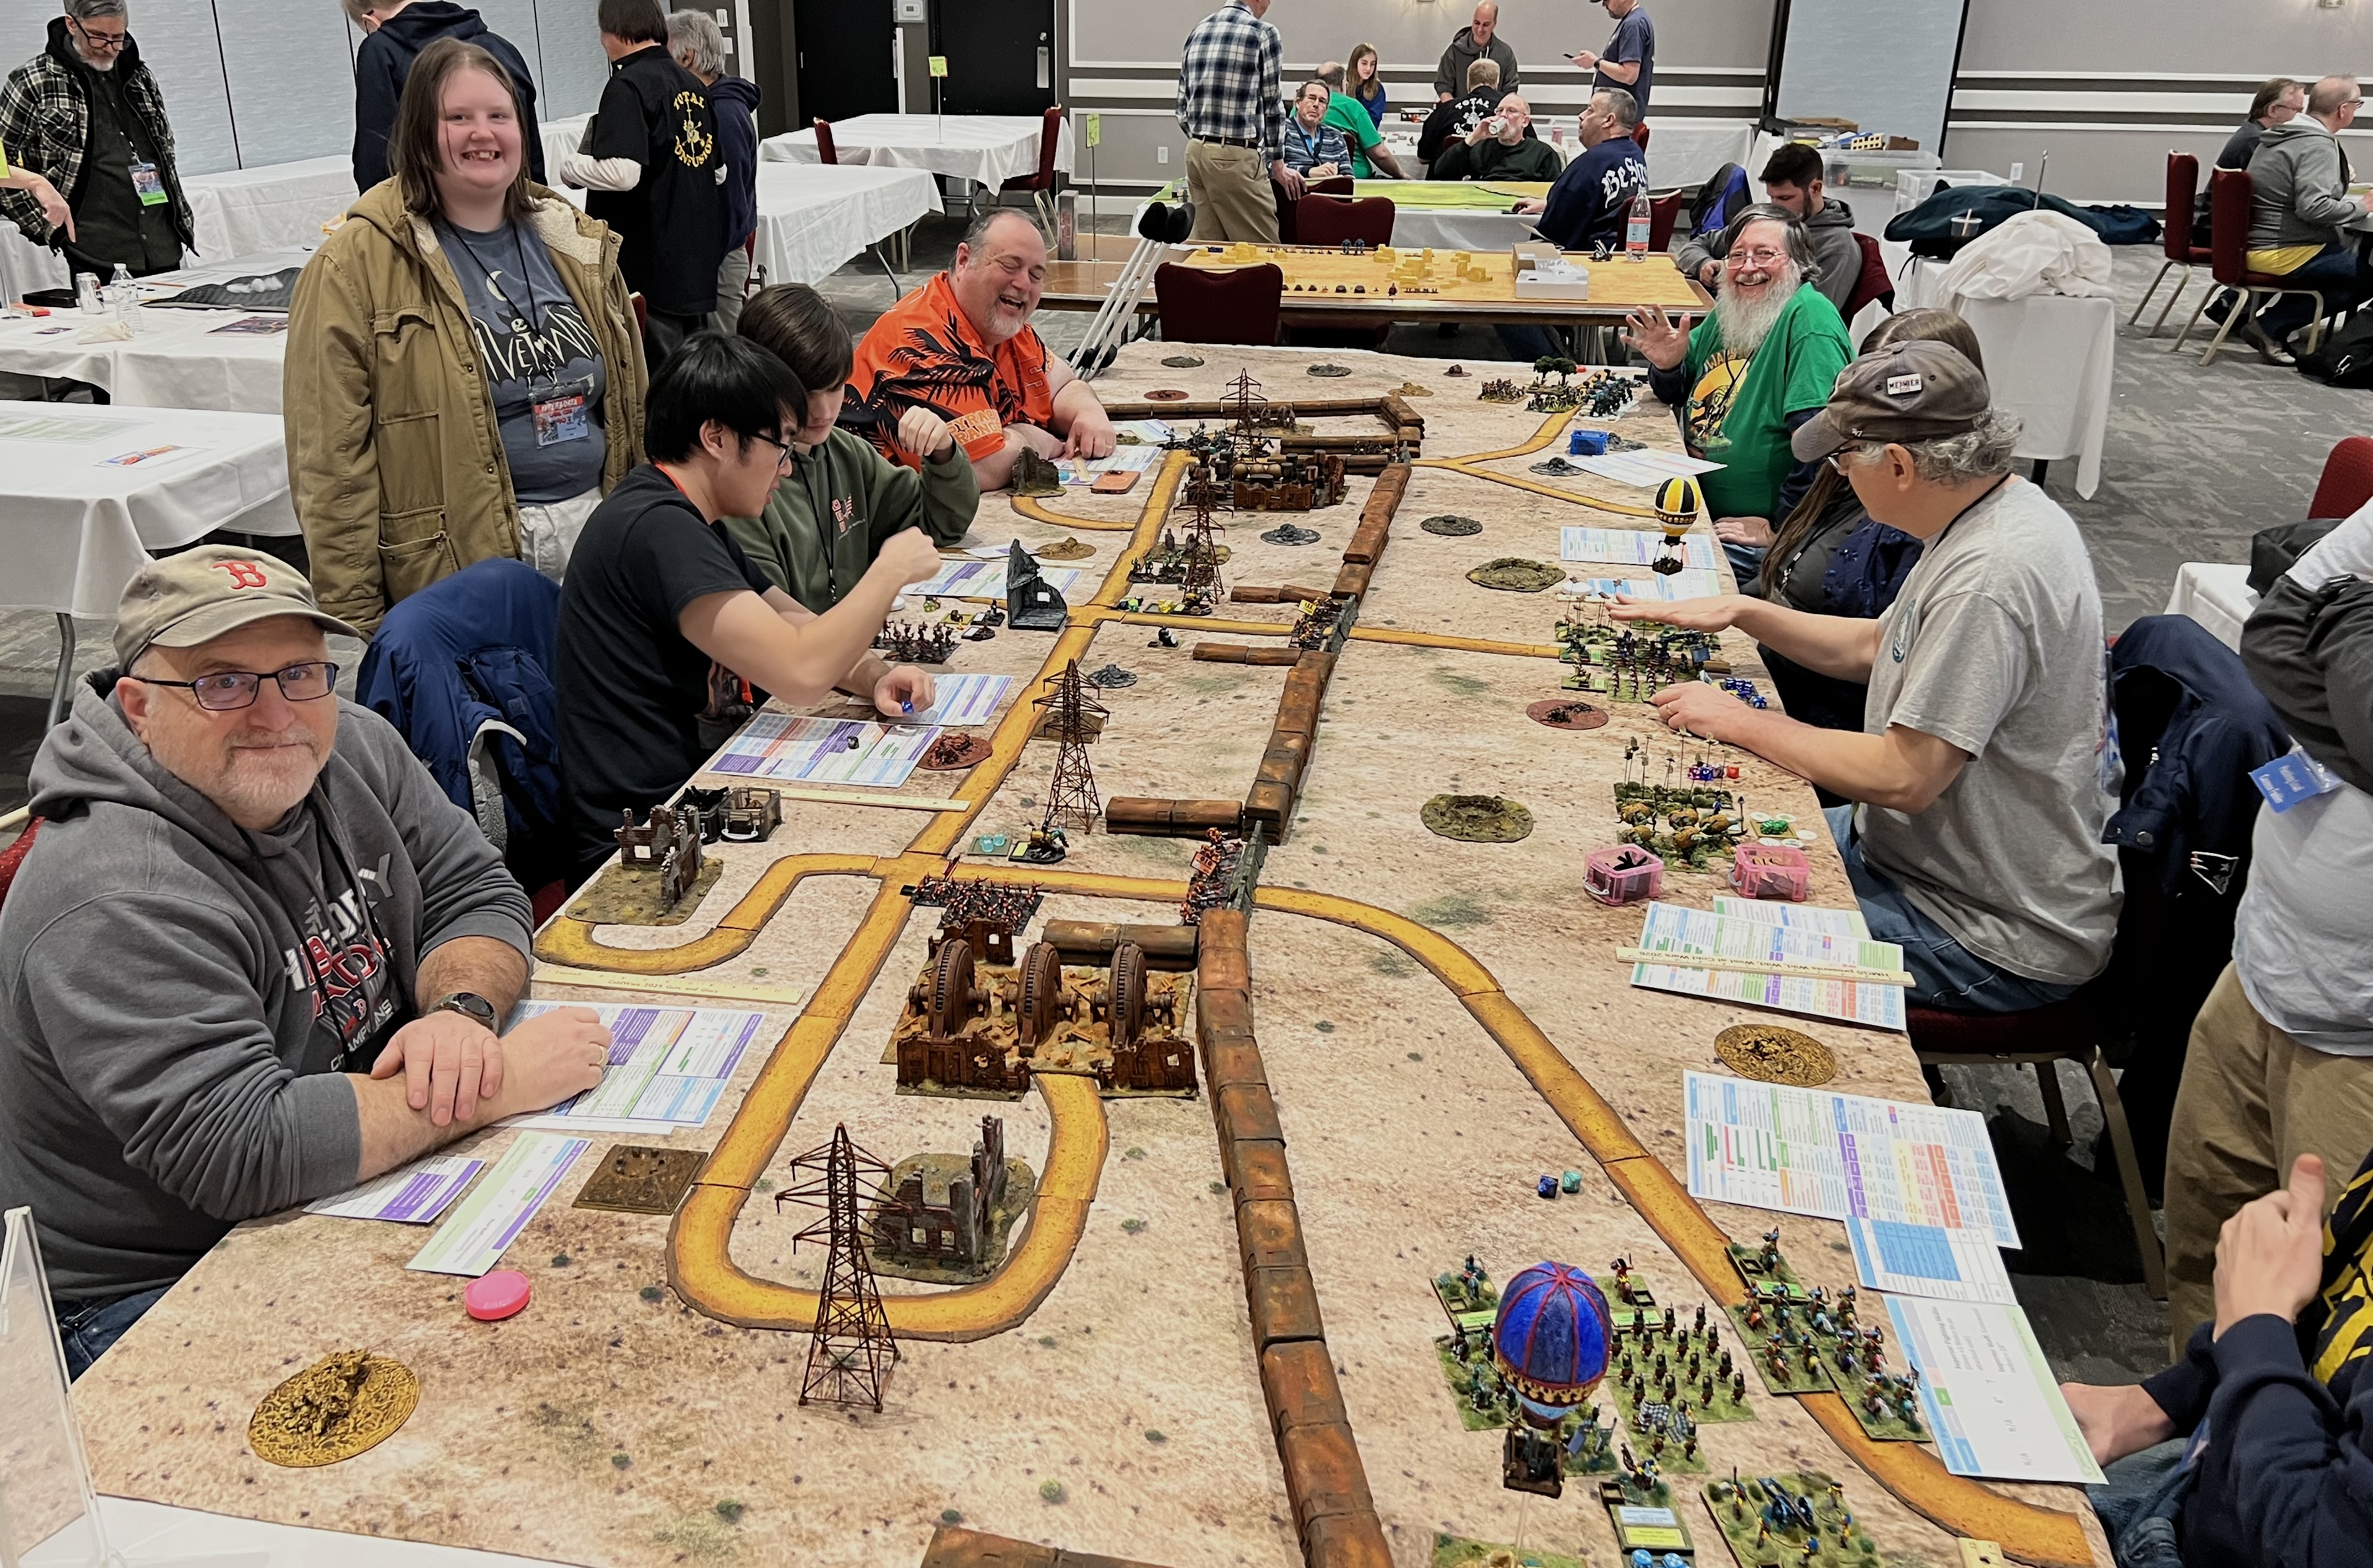
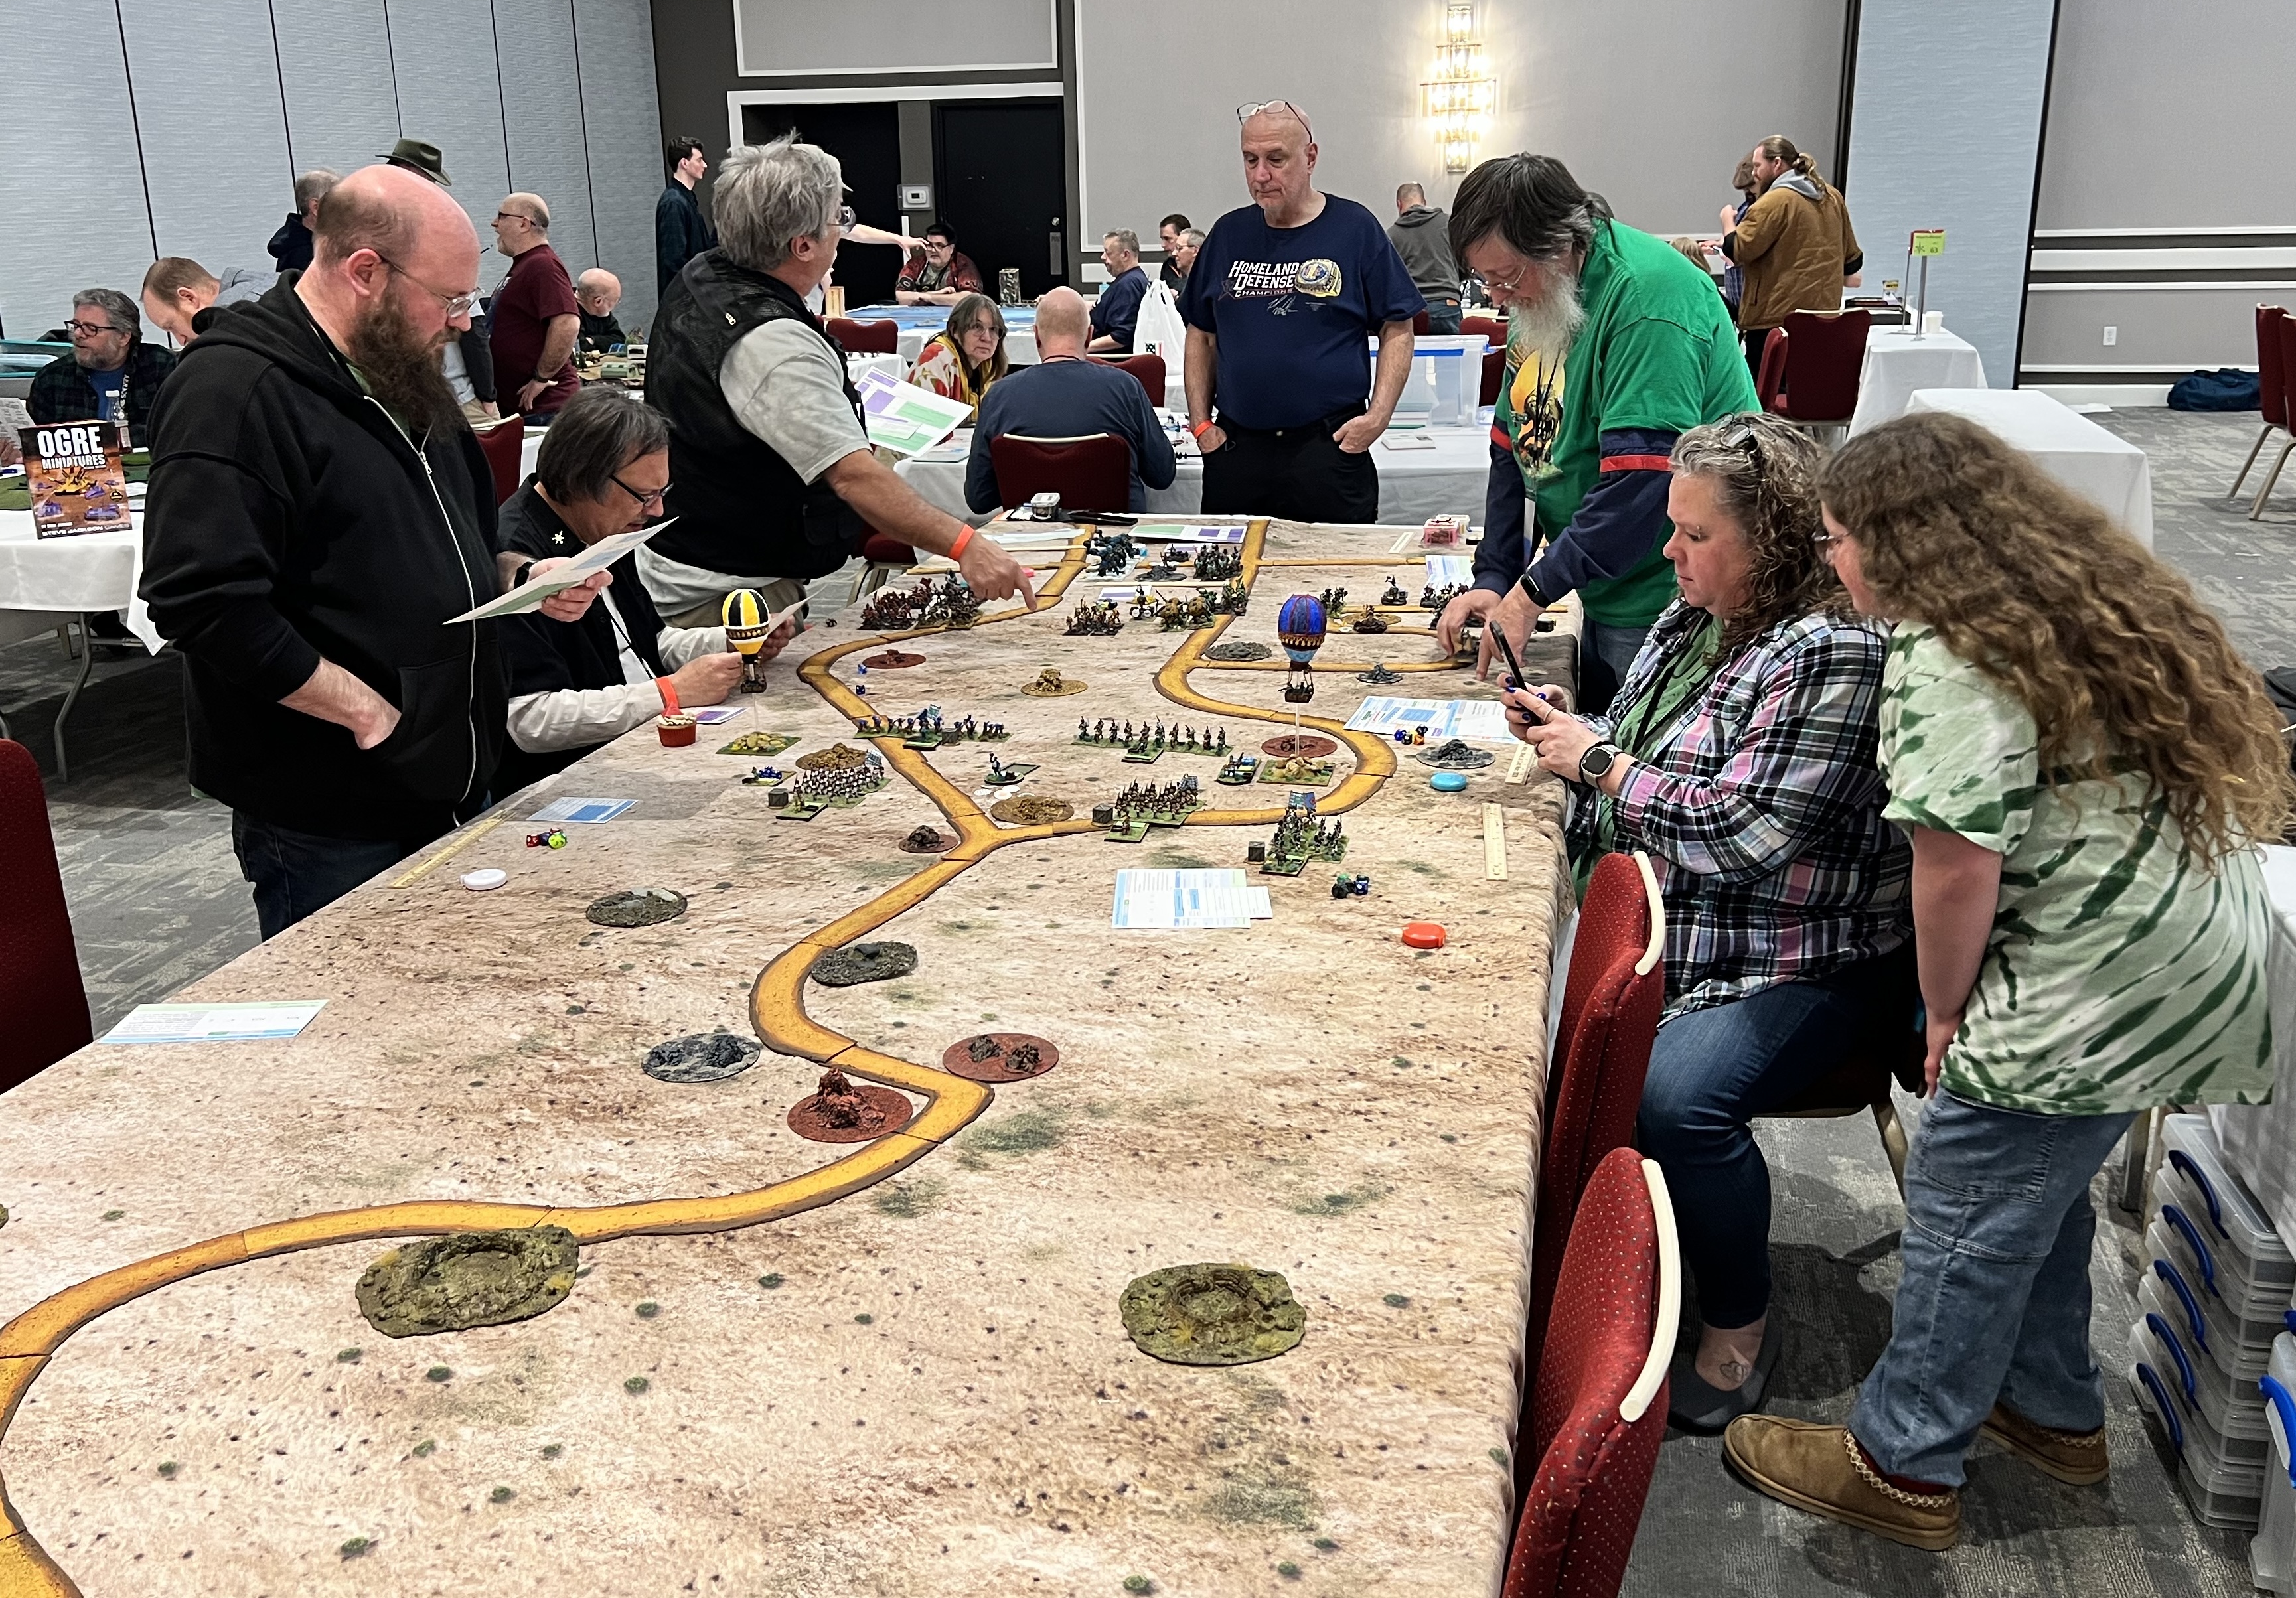
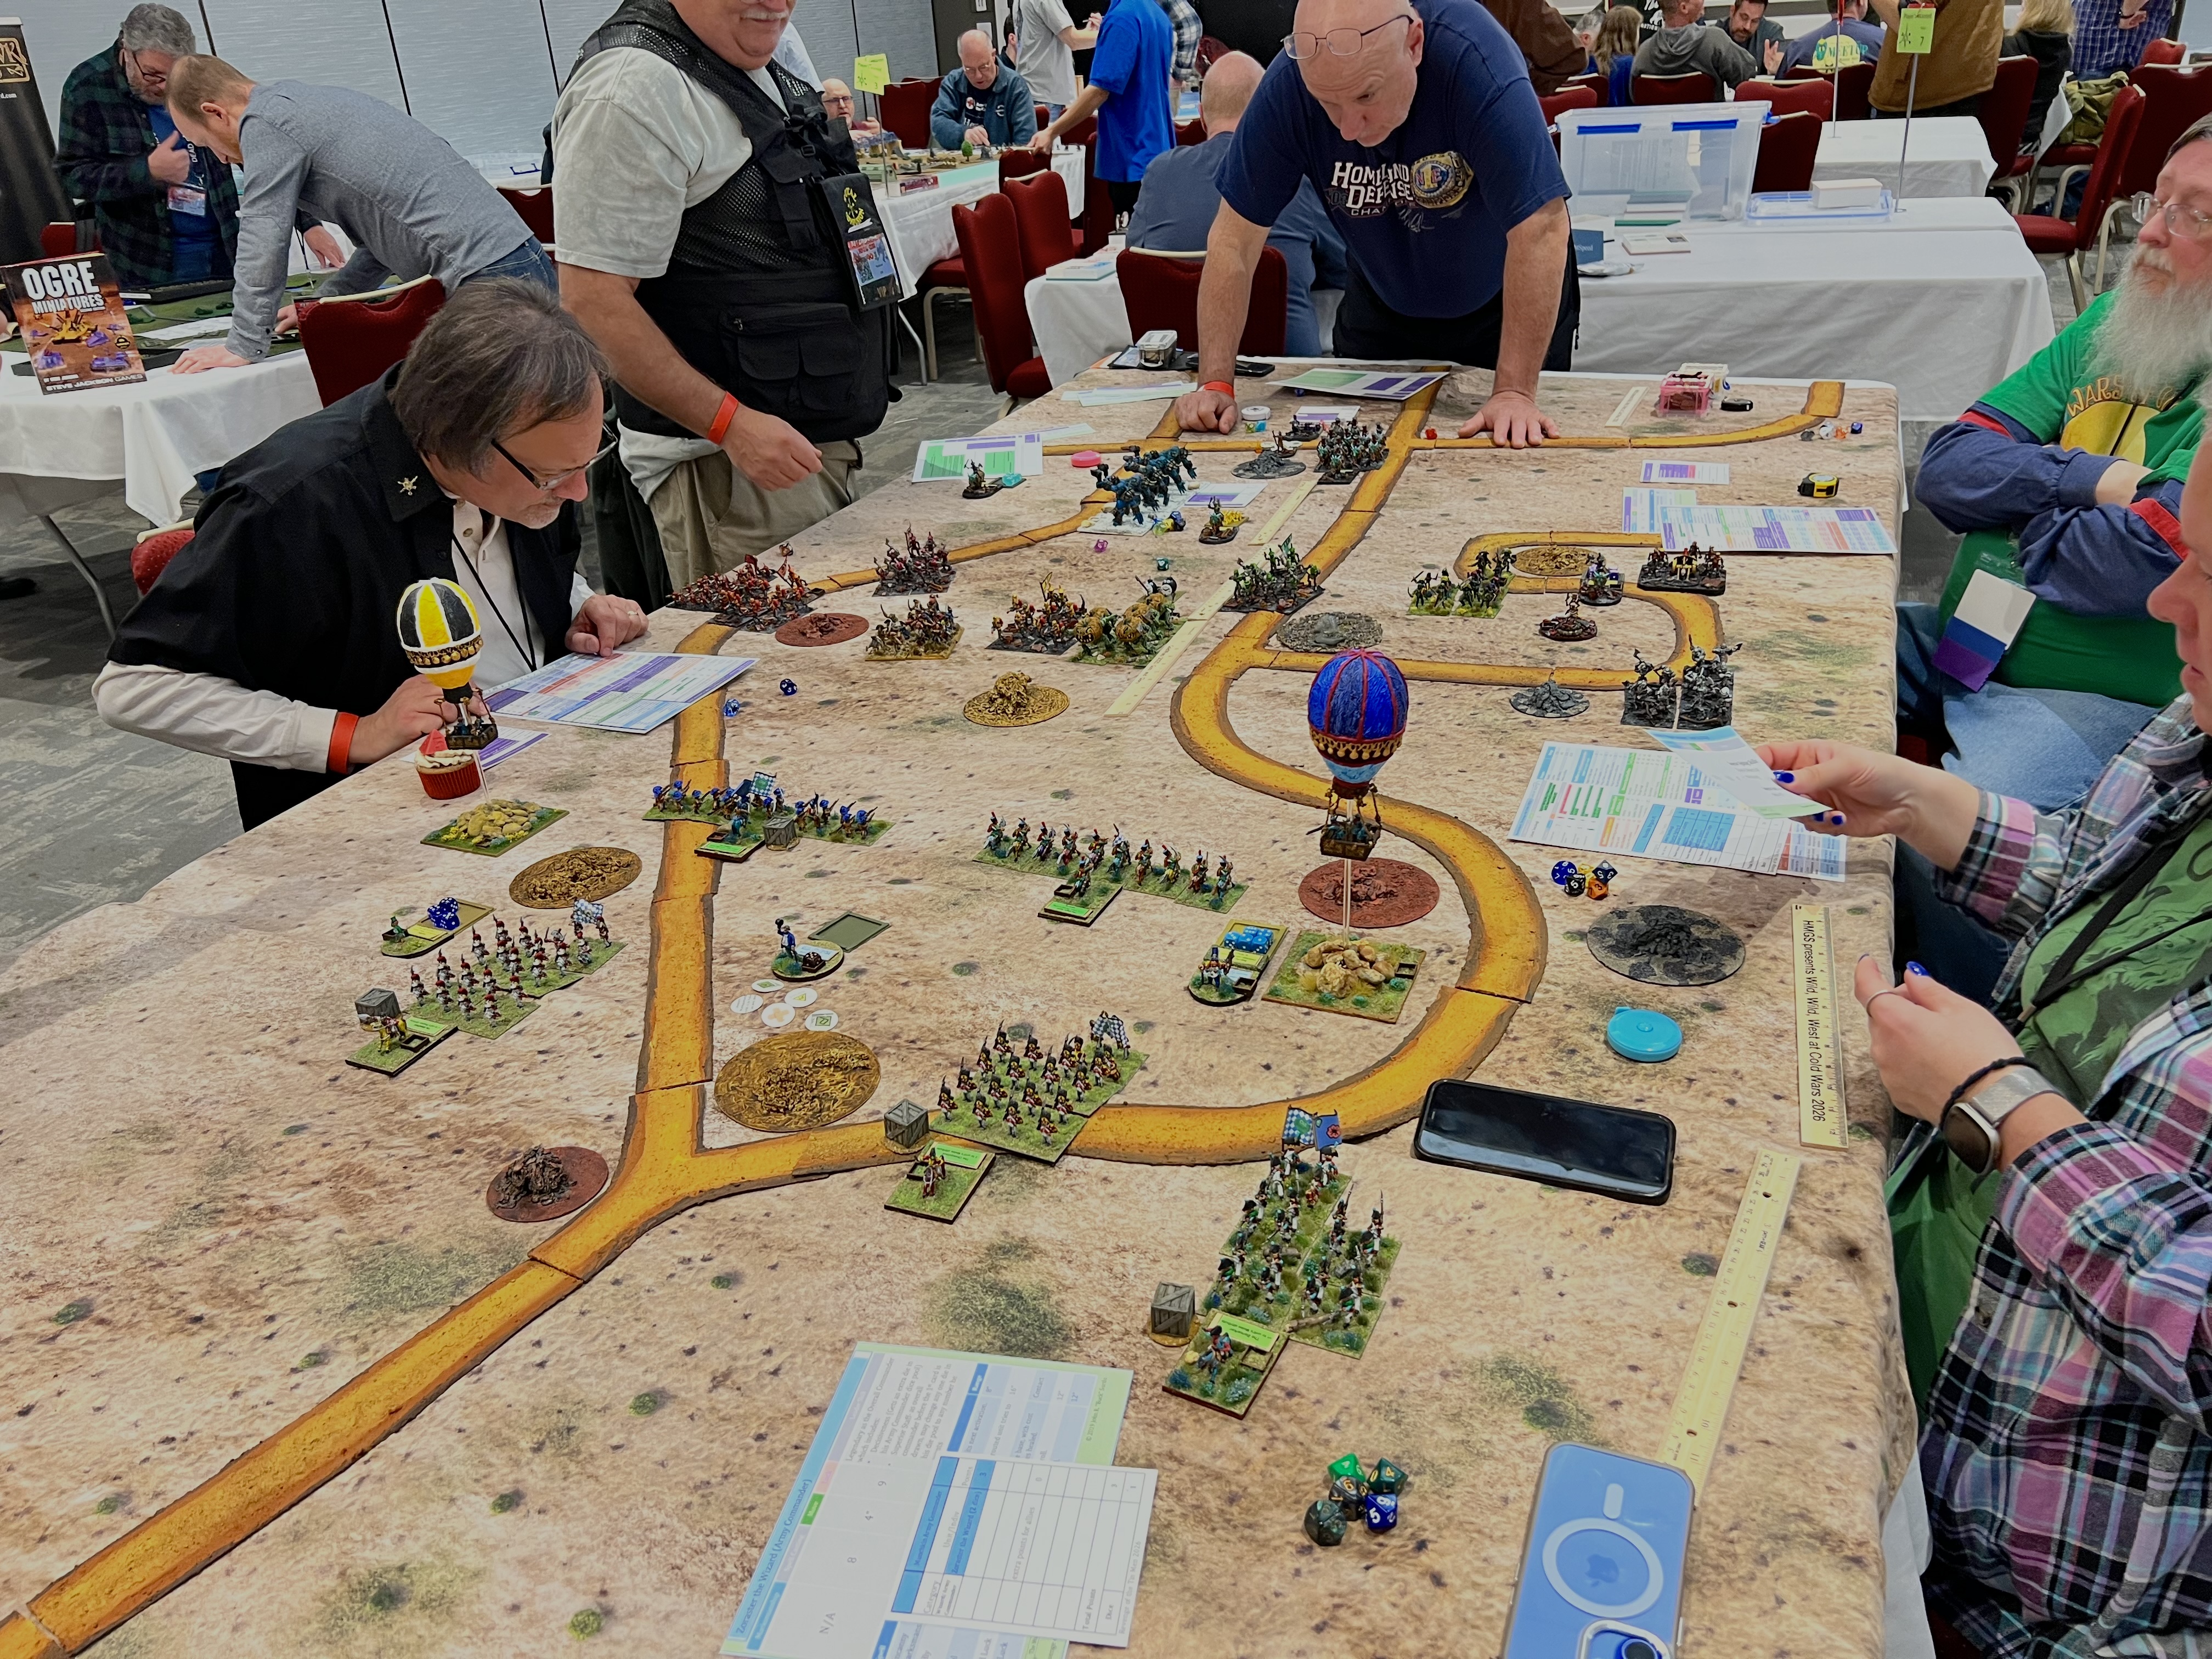
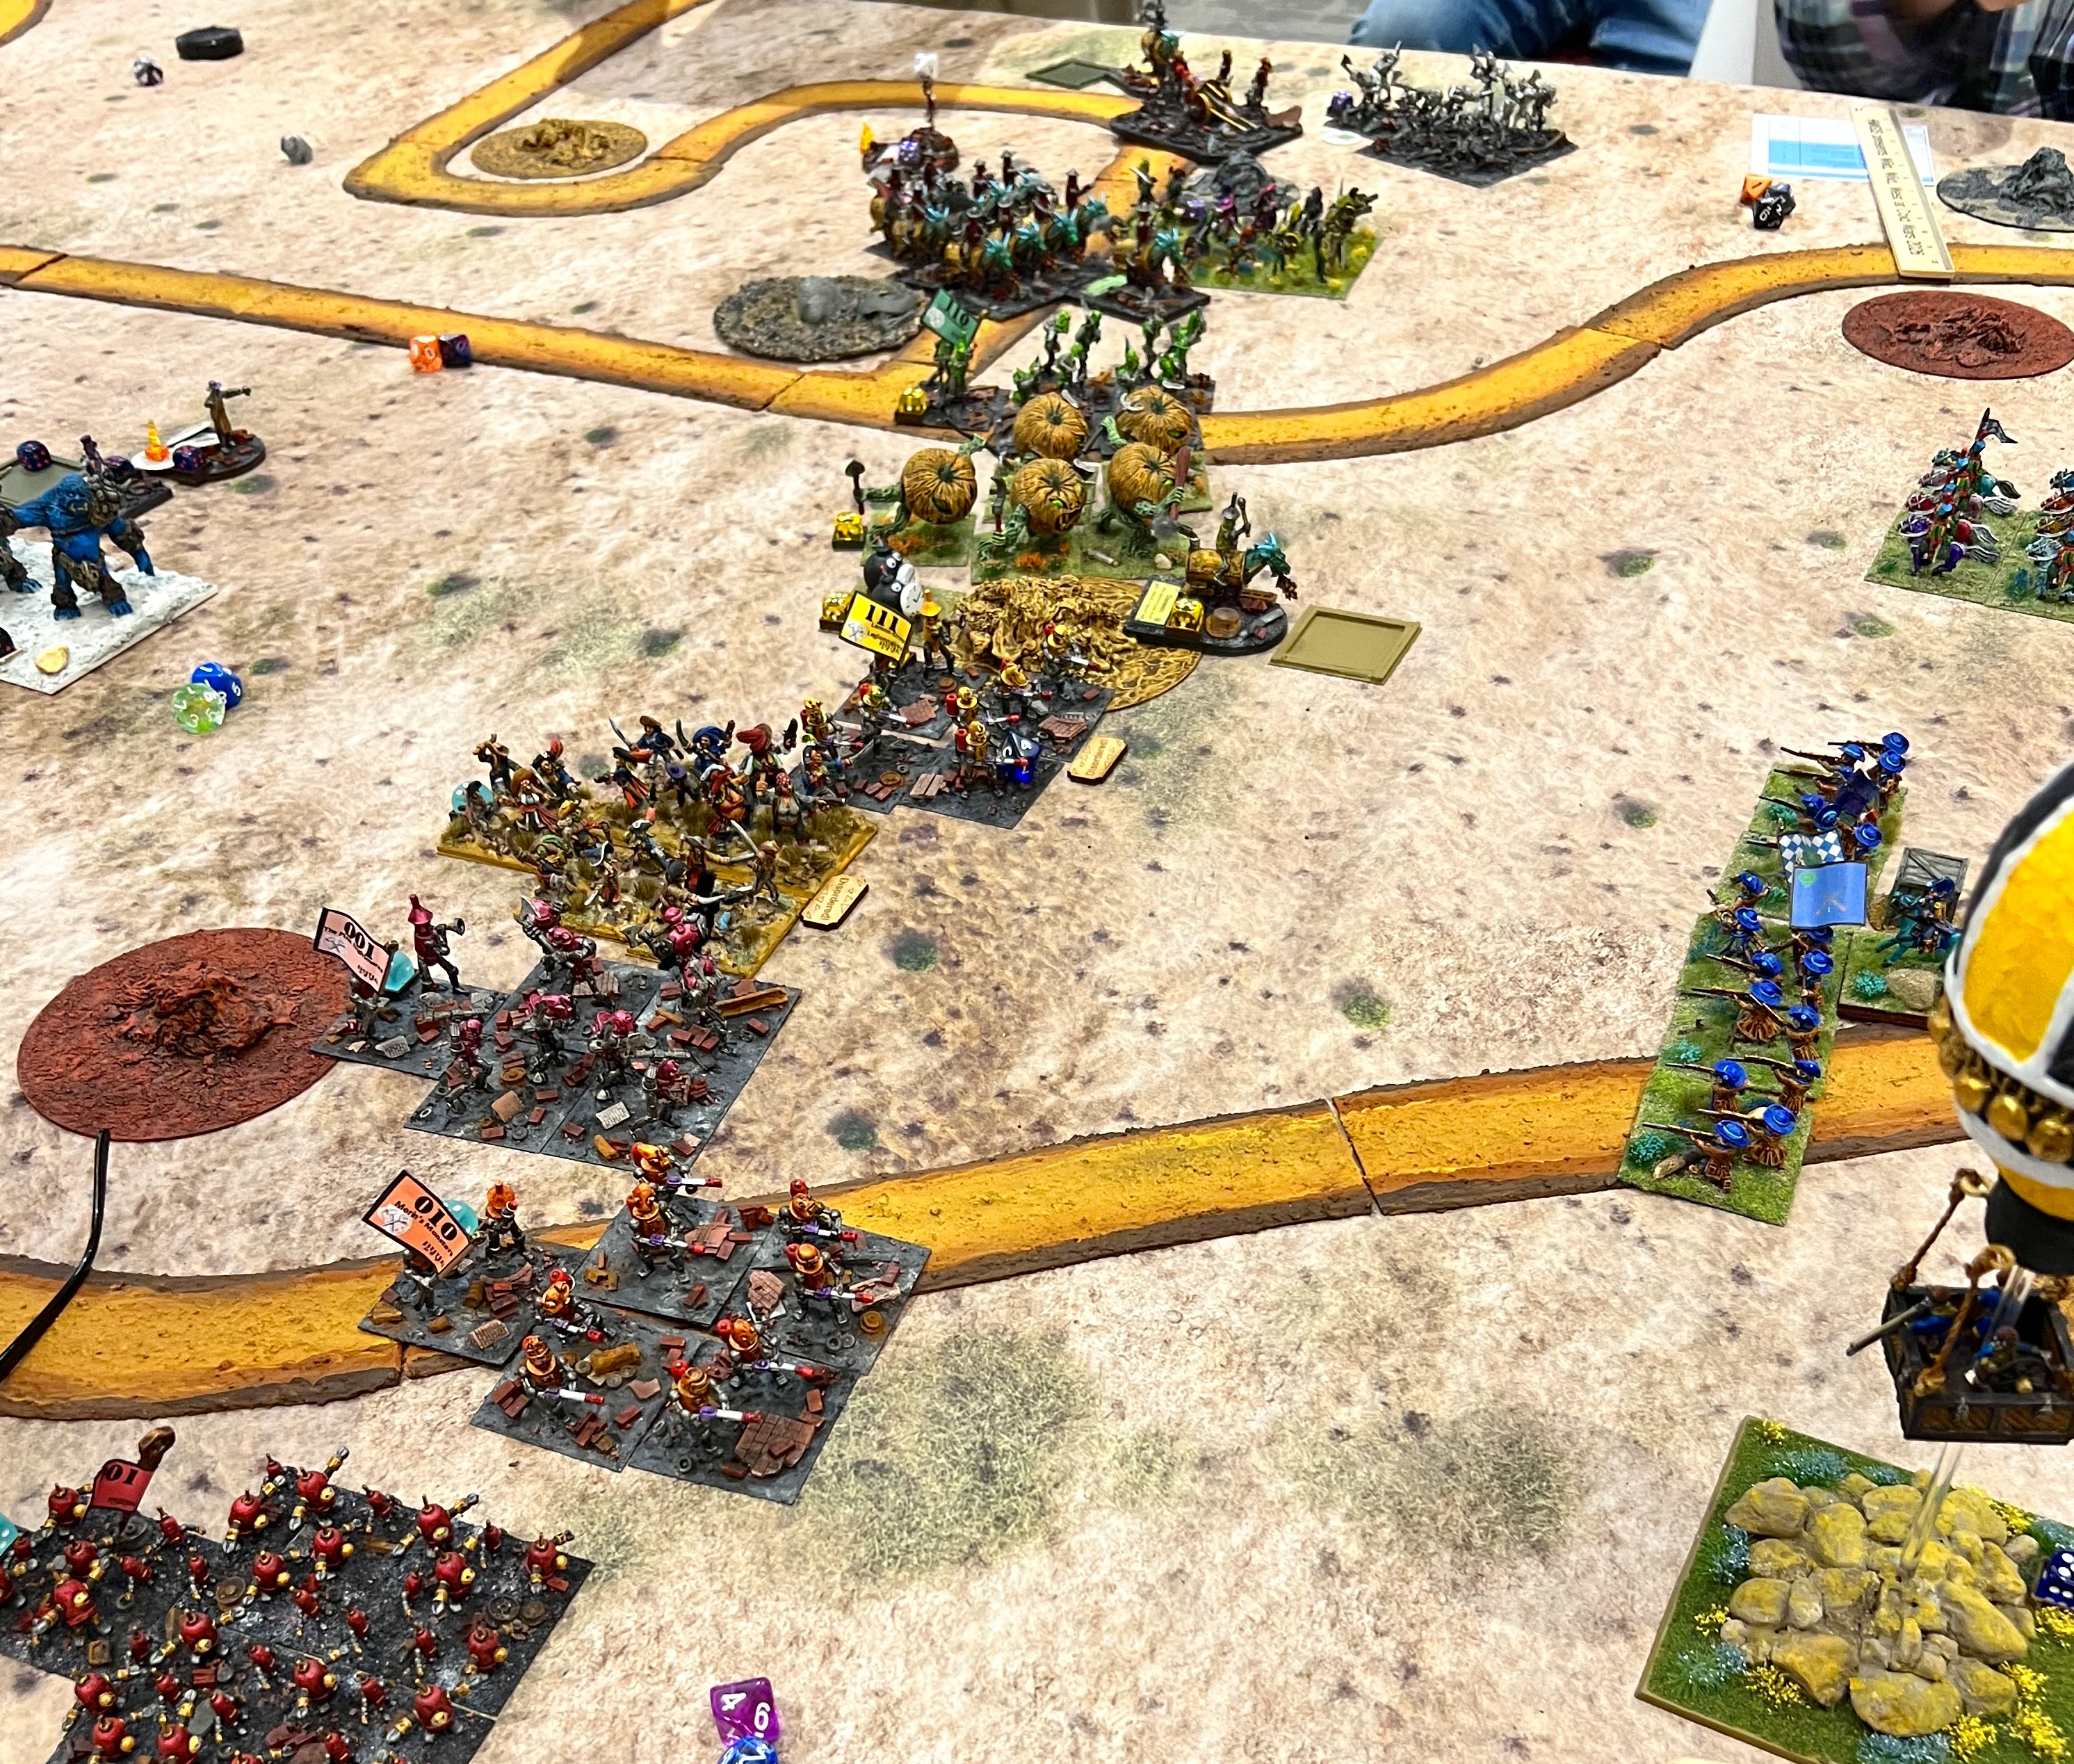
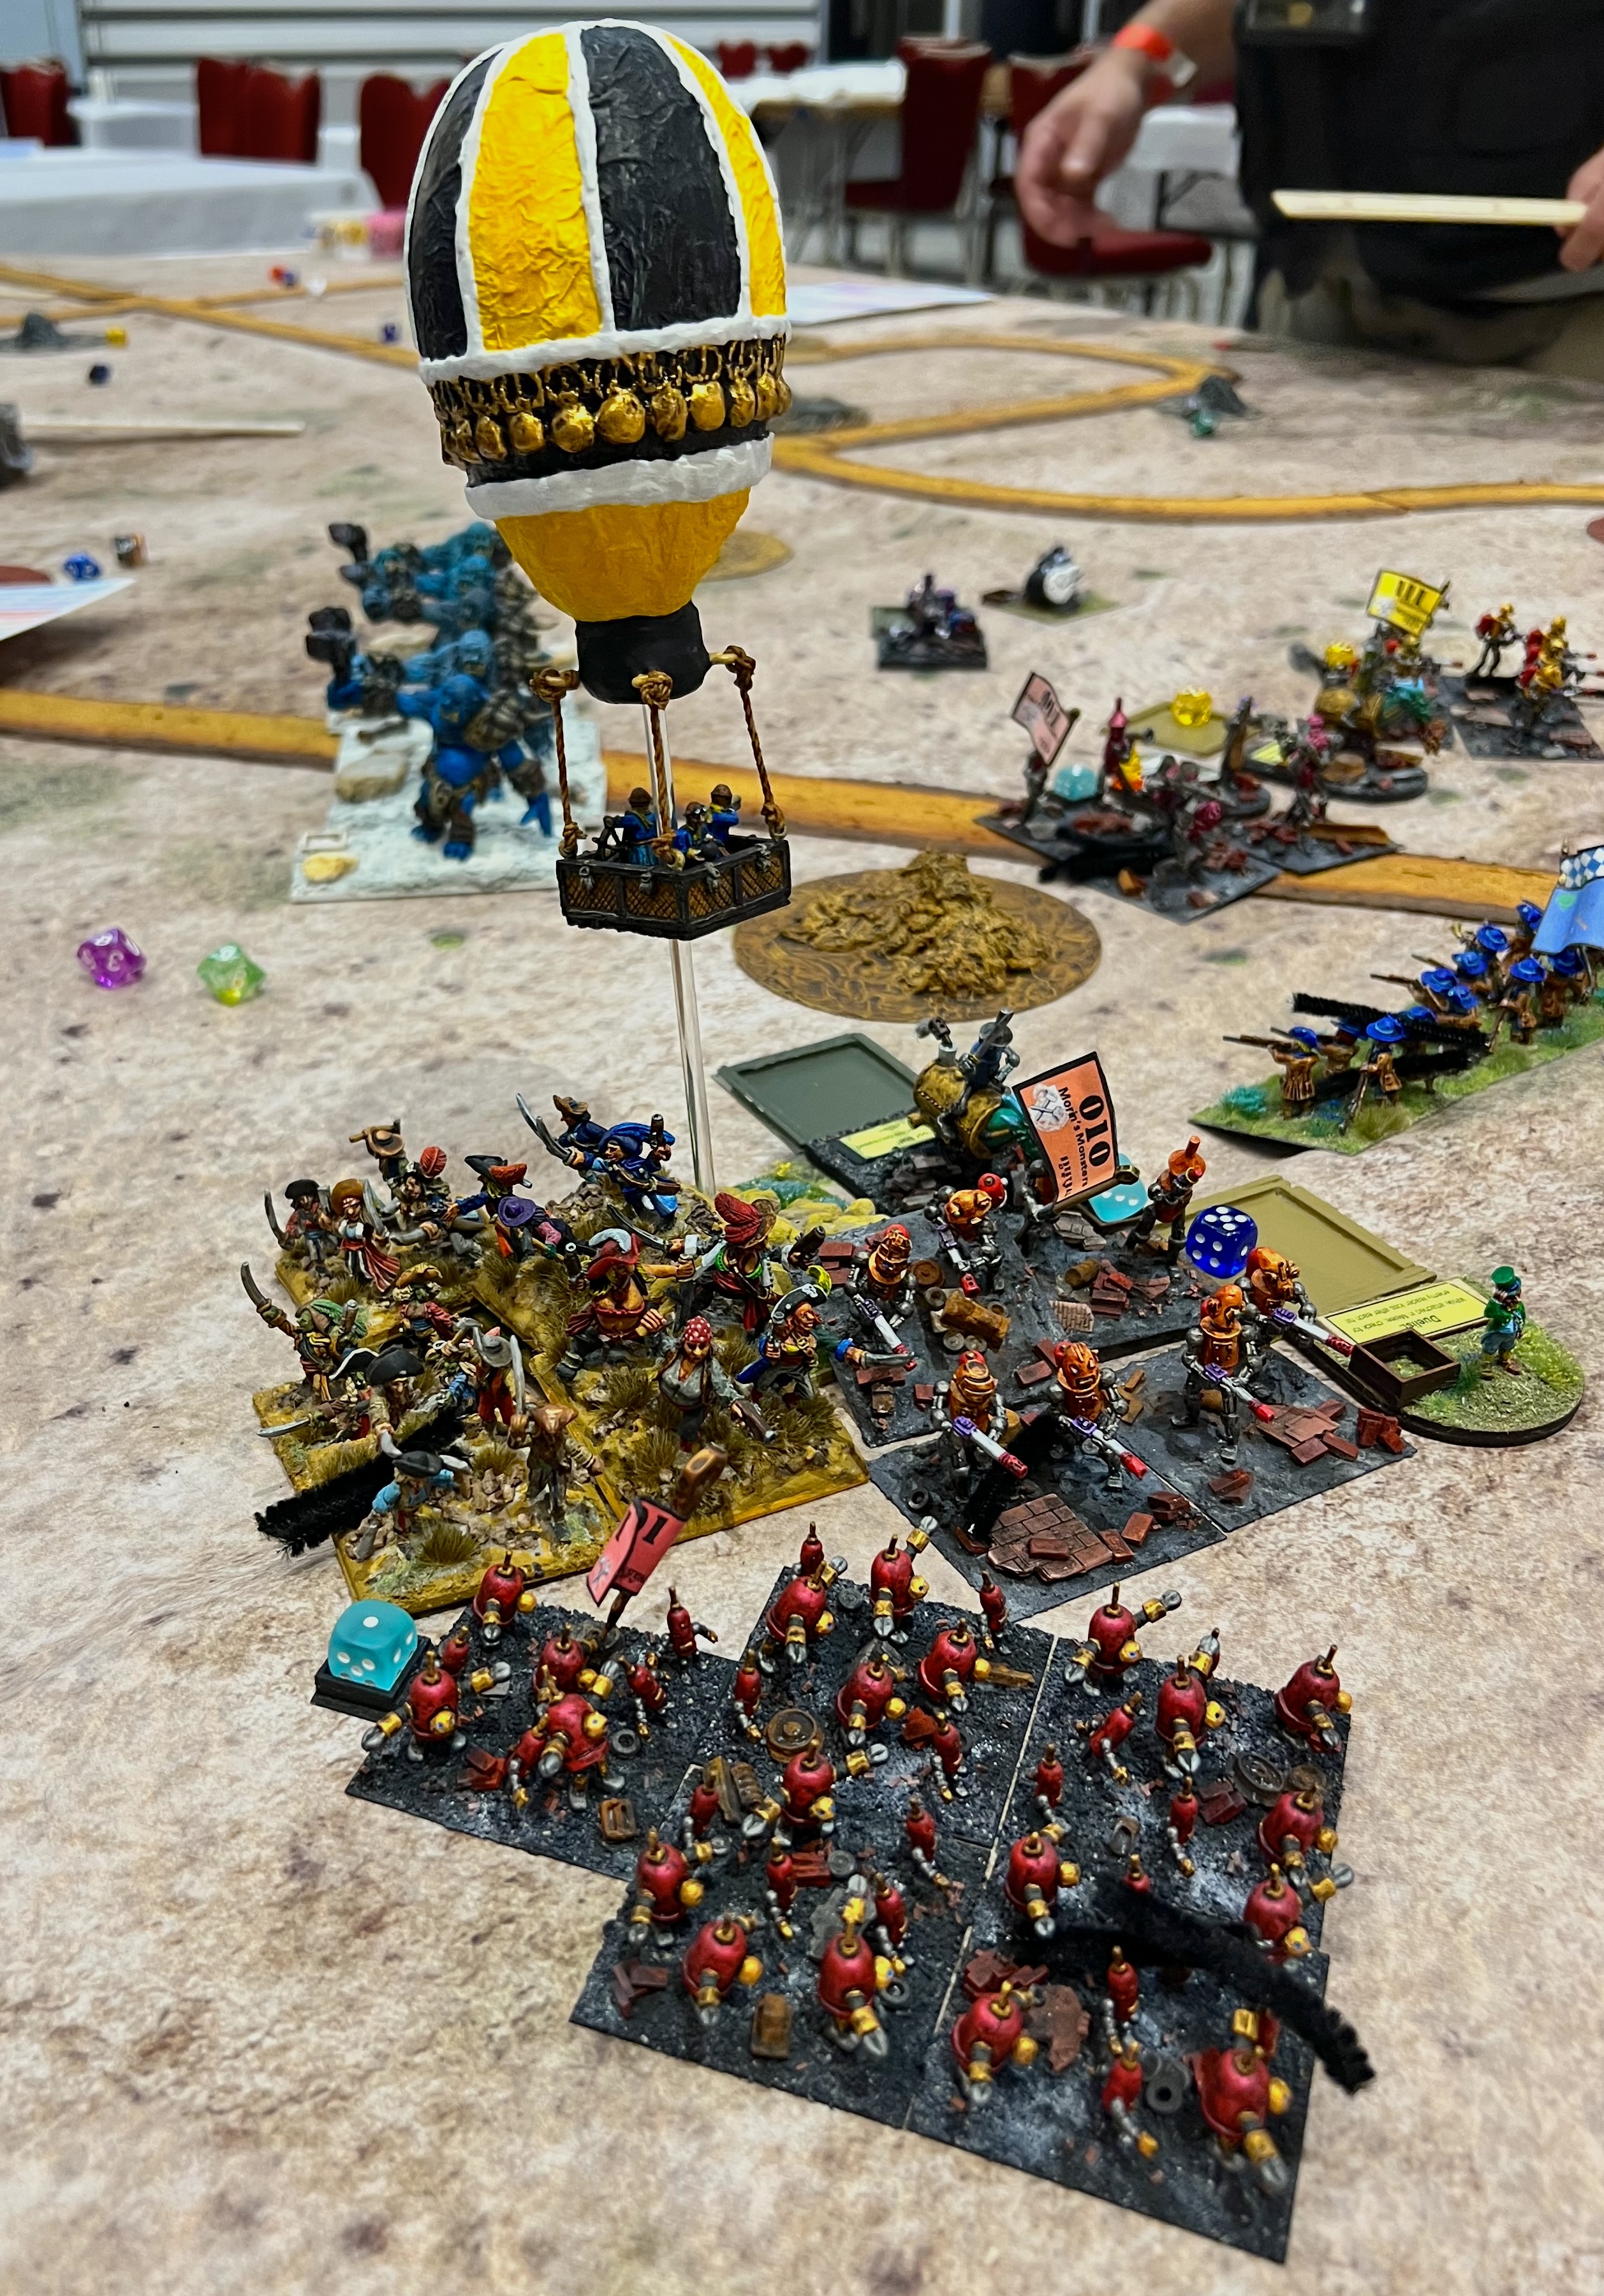
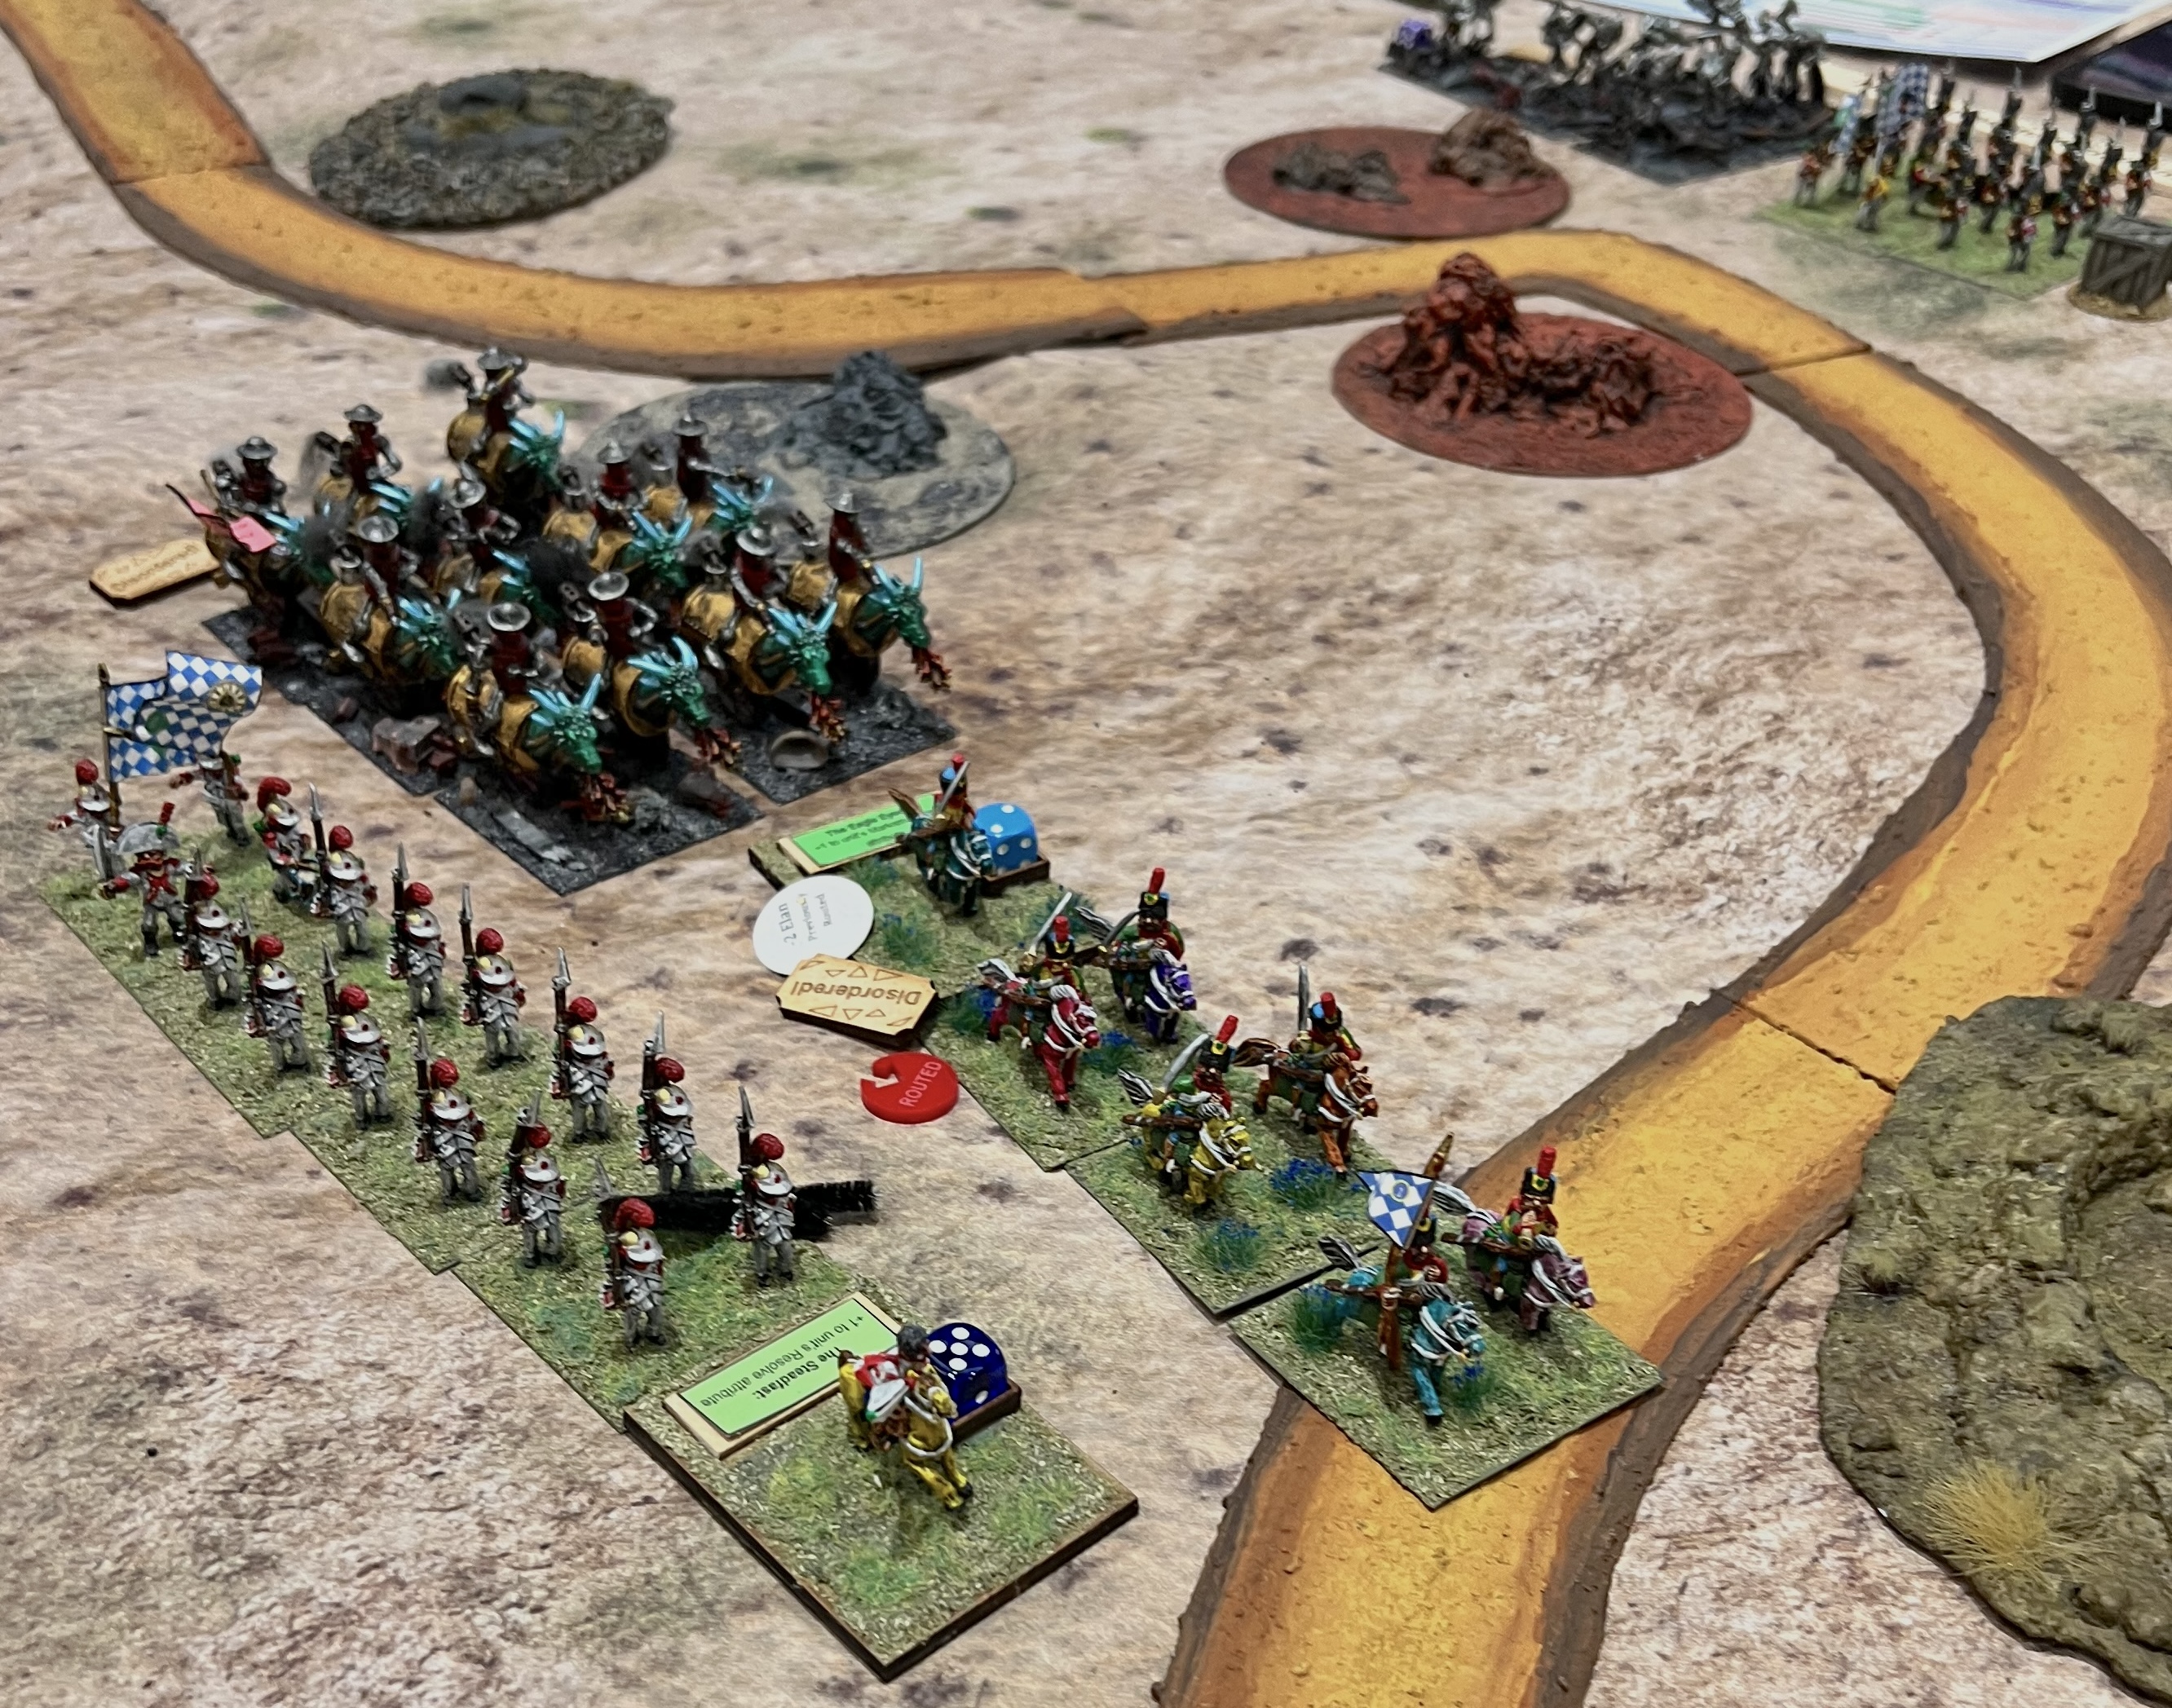
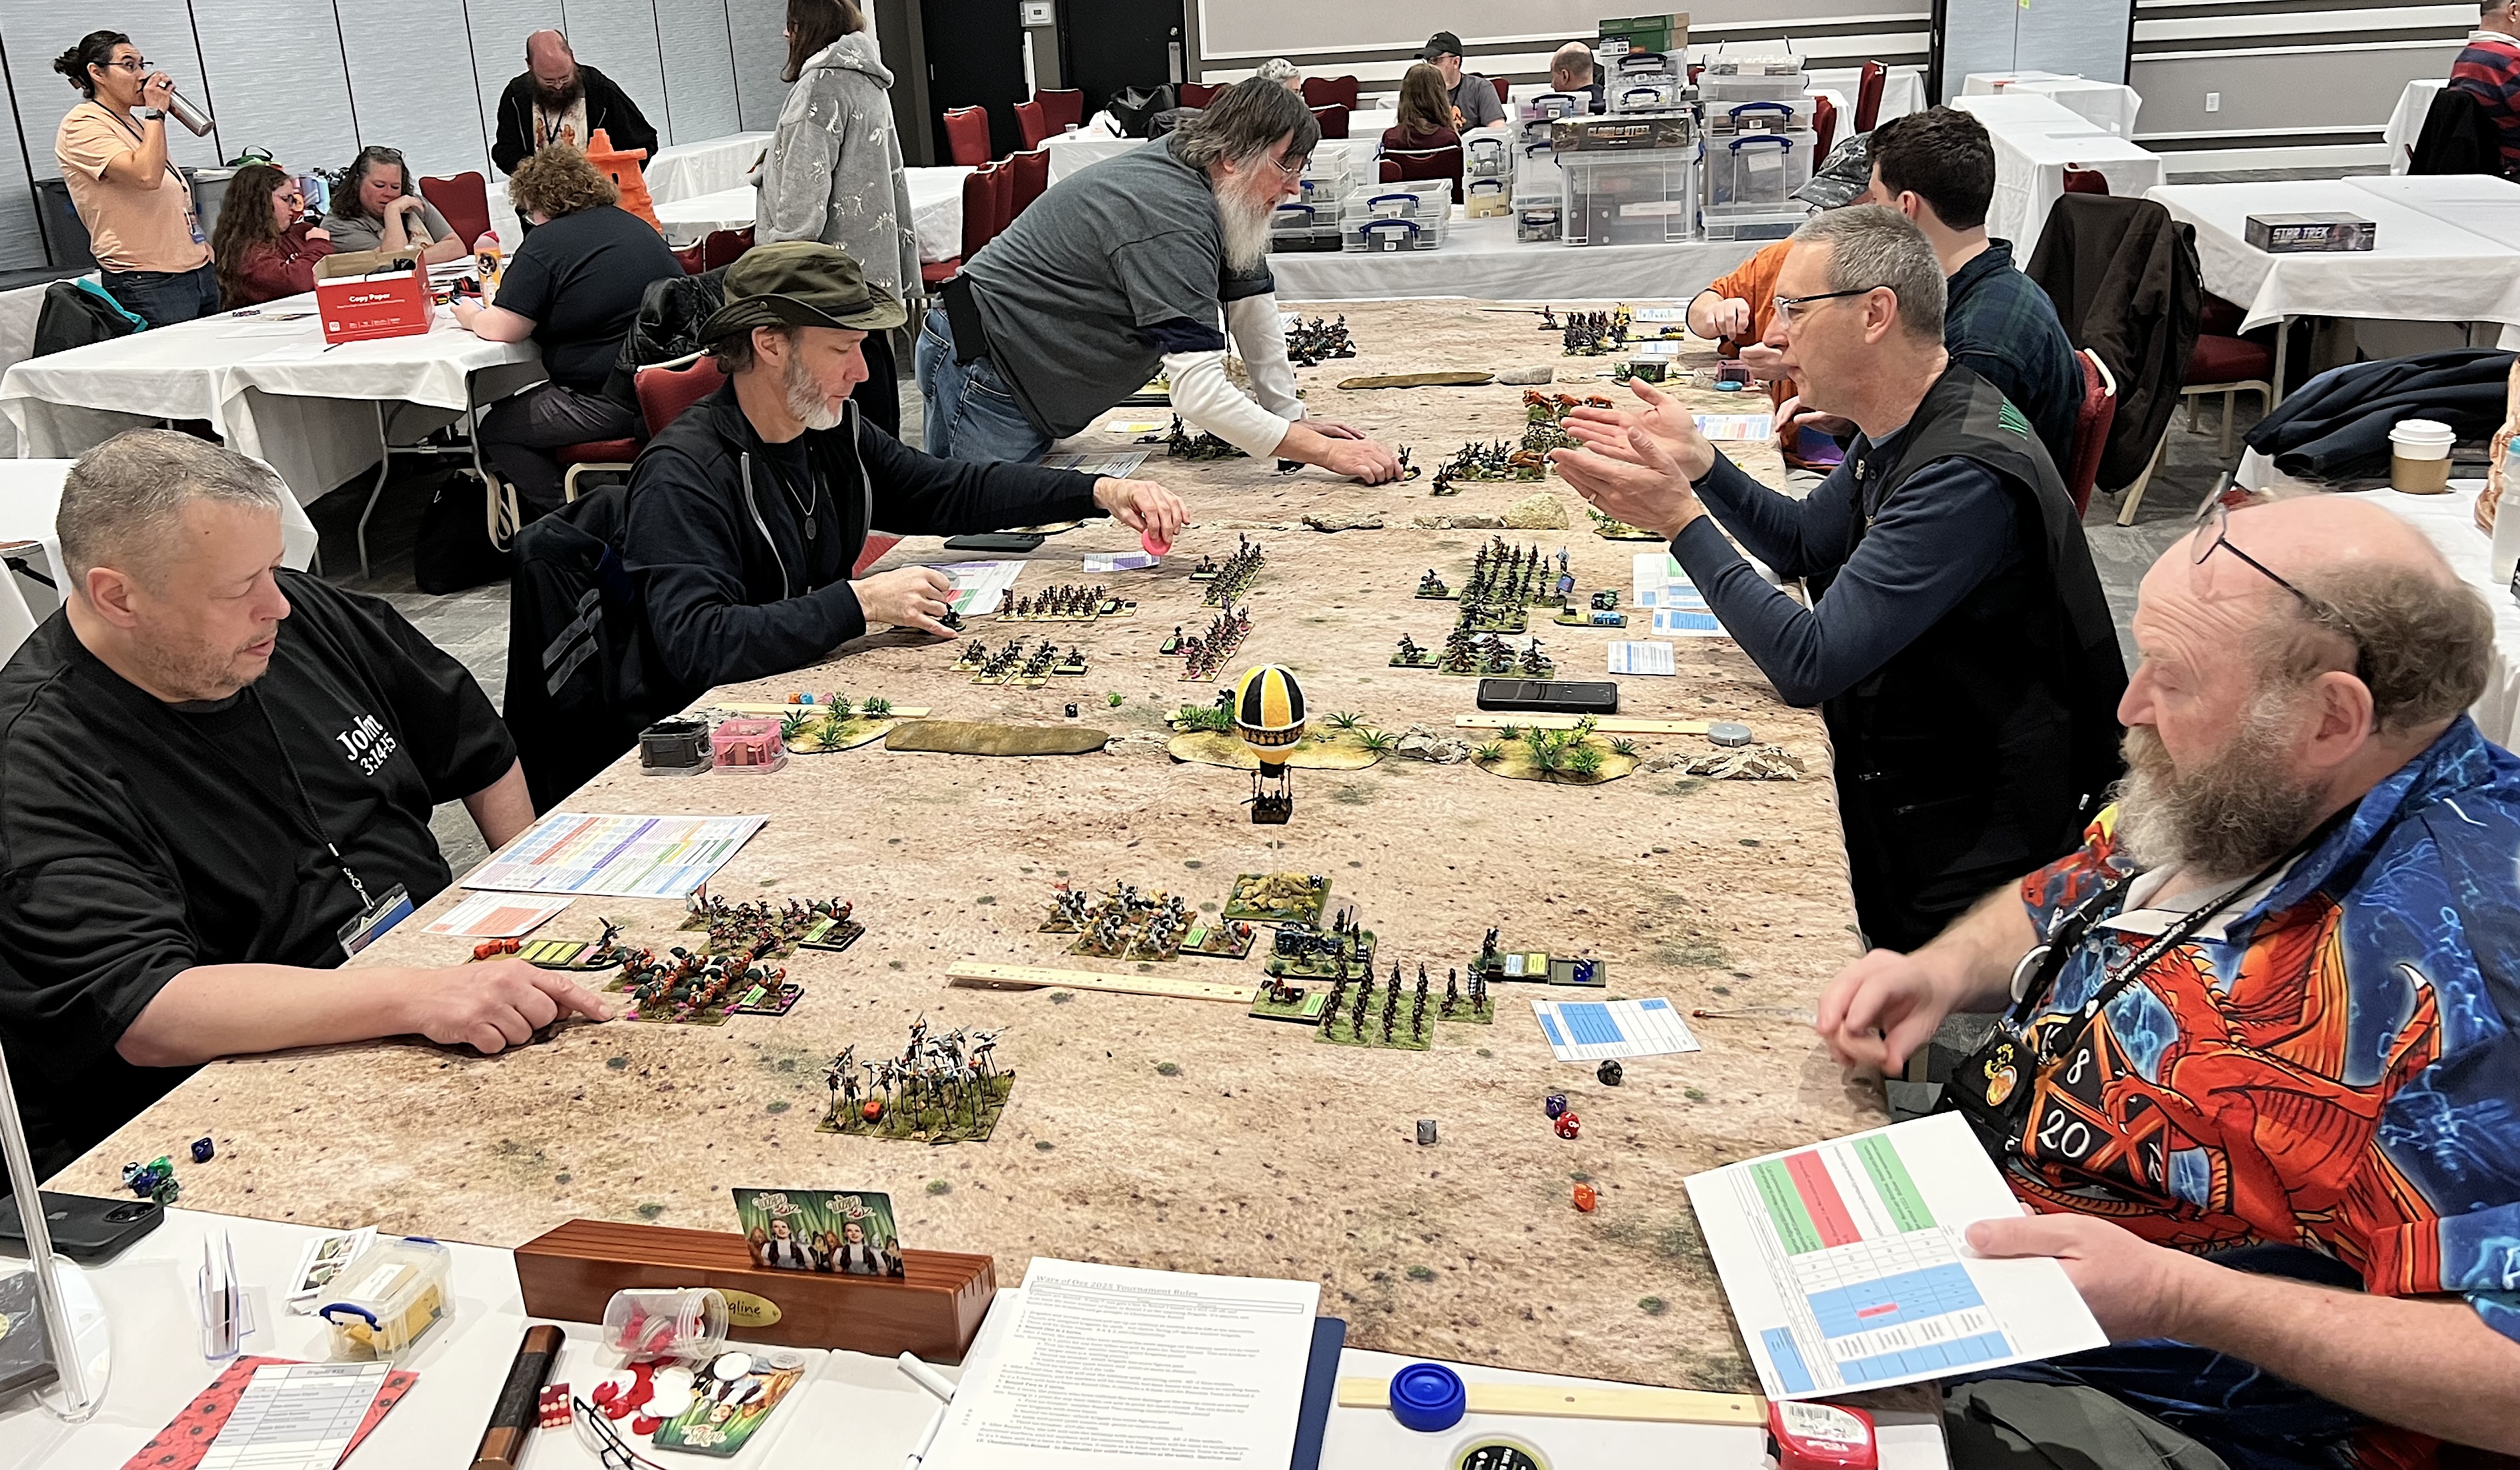
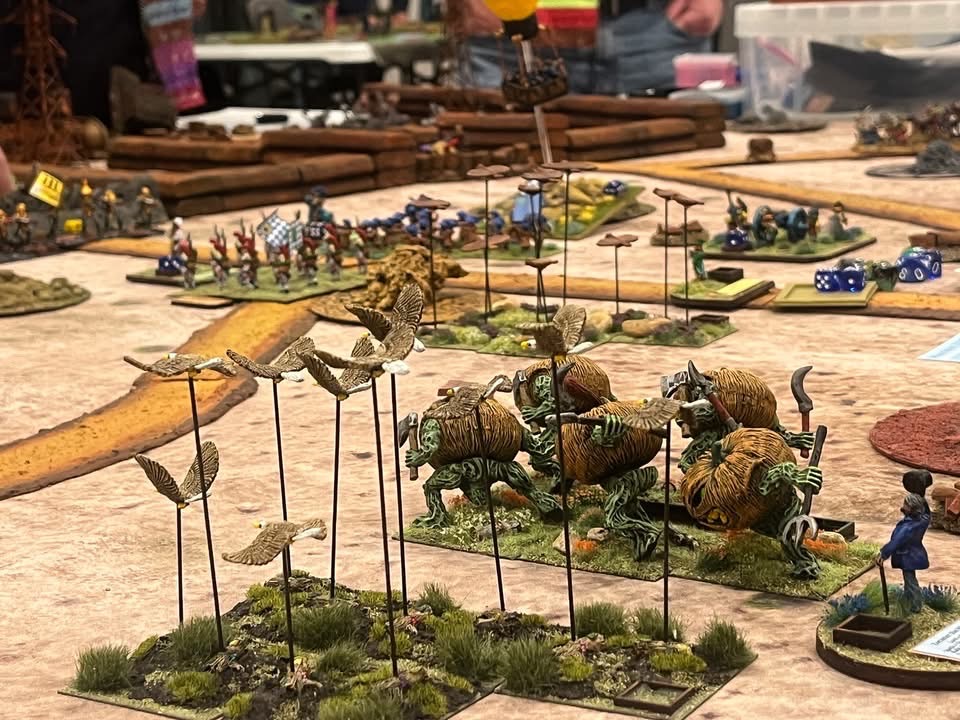
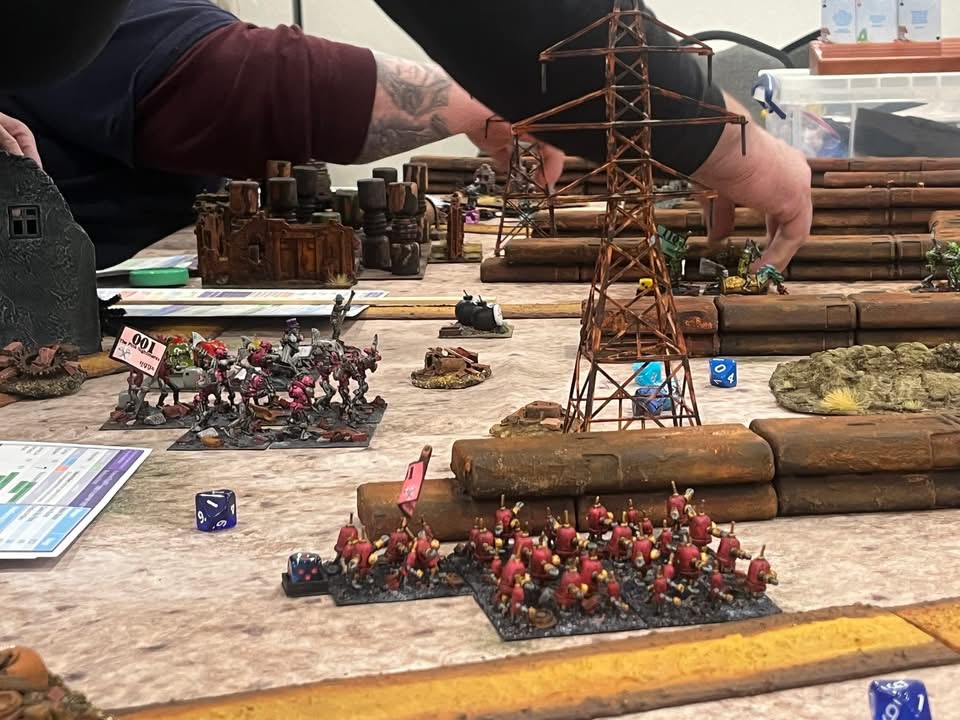
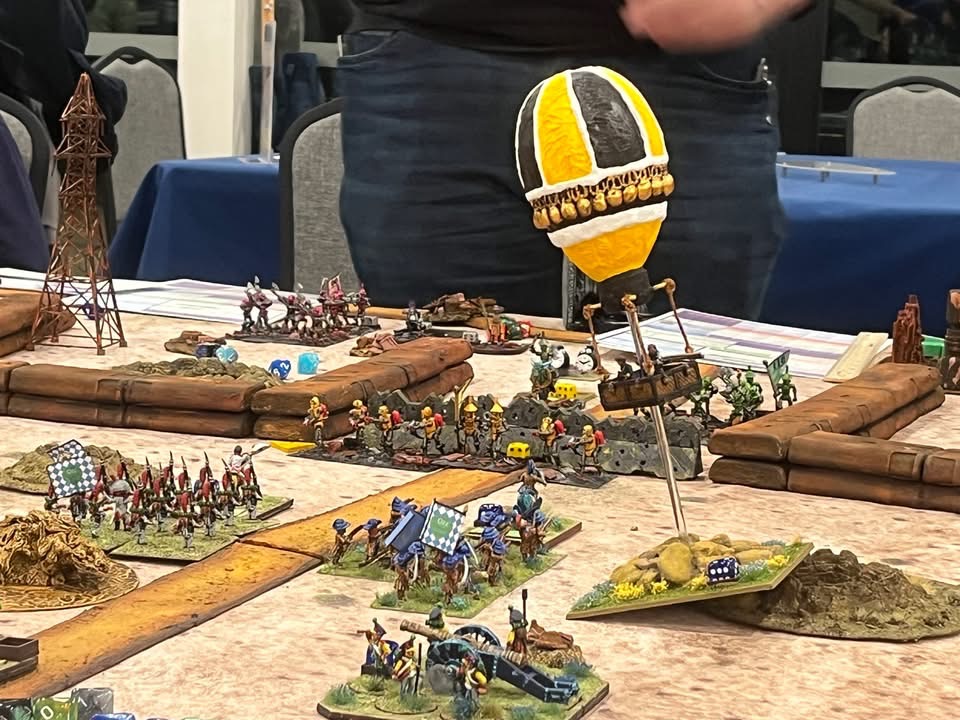
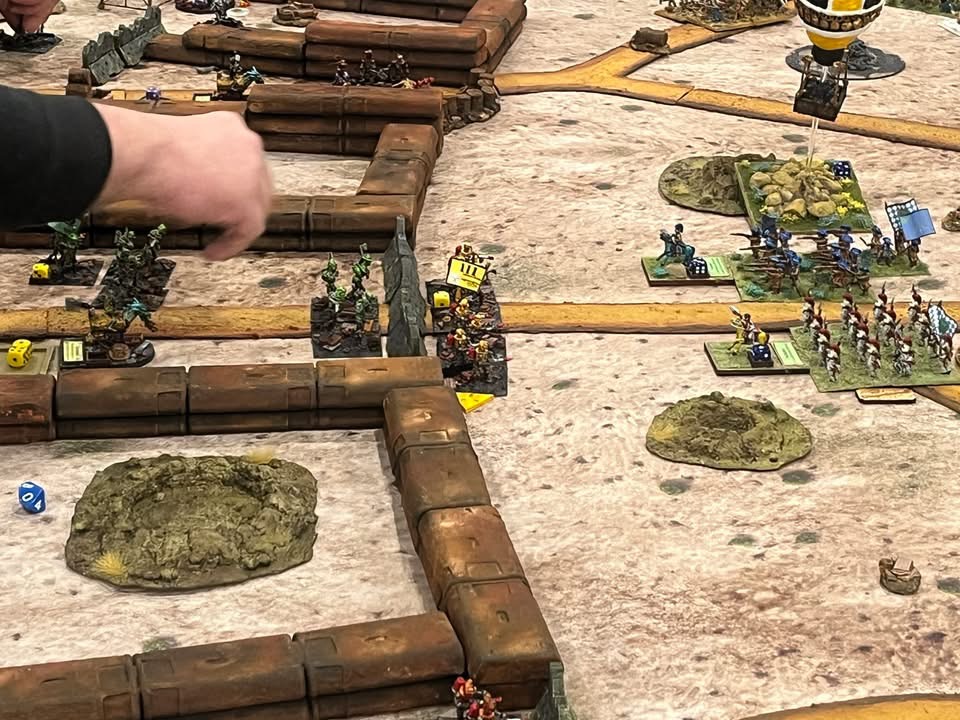
Another big game! The players plan.The Munchkins have 4 heavy crates of technology carried by 4 regiments. The crates slow down the Munchkins. The little folk need to cross a line with the crates safely to gain victory points. Additionally, each Munchkin base that escapes the Nitpik pursuers gets a point. Nitpik gets points for recovering crates and for eliminating Munchkin bases. The Munchkins have set up a delaying picket line of light cavalry and sharpshooters between the two balloons. This is to give those fleeing a chance to escape the Nitpik and allied horde.On the right, the Munchkin picket line. On the left, the pursuers!There were many Nitpik pursuers. This included those who switched alliances, like Frost Ogres, Great Pumpkinheads, and Jinjur pirates. Traffic control became a challenge as they tried to catch the Munchkins.The pursuers coordinate their movements.The Munchkin Aerostat frustrated several Nitpik regiments. As they tried to advance, the Aerostat laid down effective disruptive musketry on the mechanical men. Nitpik cavalry broke through and tried to run the Munchkins down. Several crates were lost as the Munchkins routed in disarray.The game ended with this scene showing Sam disappointed. The Munchkins nearly won the game. Her unit only needed 1 more inch to cross the line of the crater with the crate. So close! (well played though Sam!!) In the end, Nitpik won a VERY narrow 12-10 victory.
That wrapped up Friday night. The next game would happen Saturday morning set in North Africa.
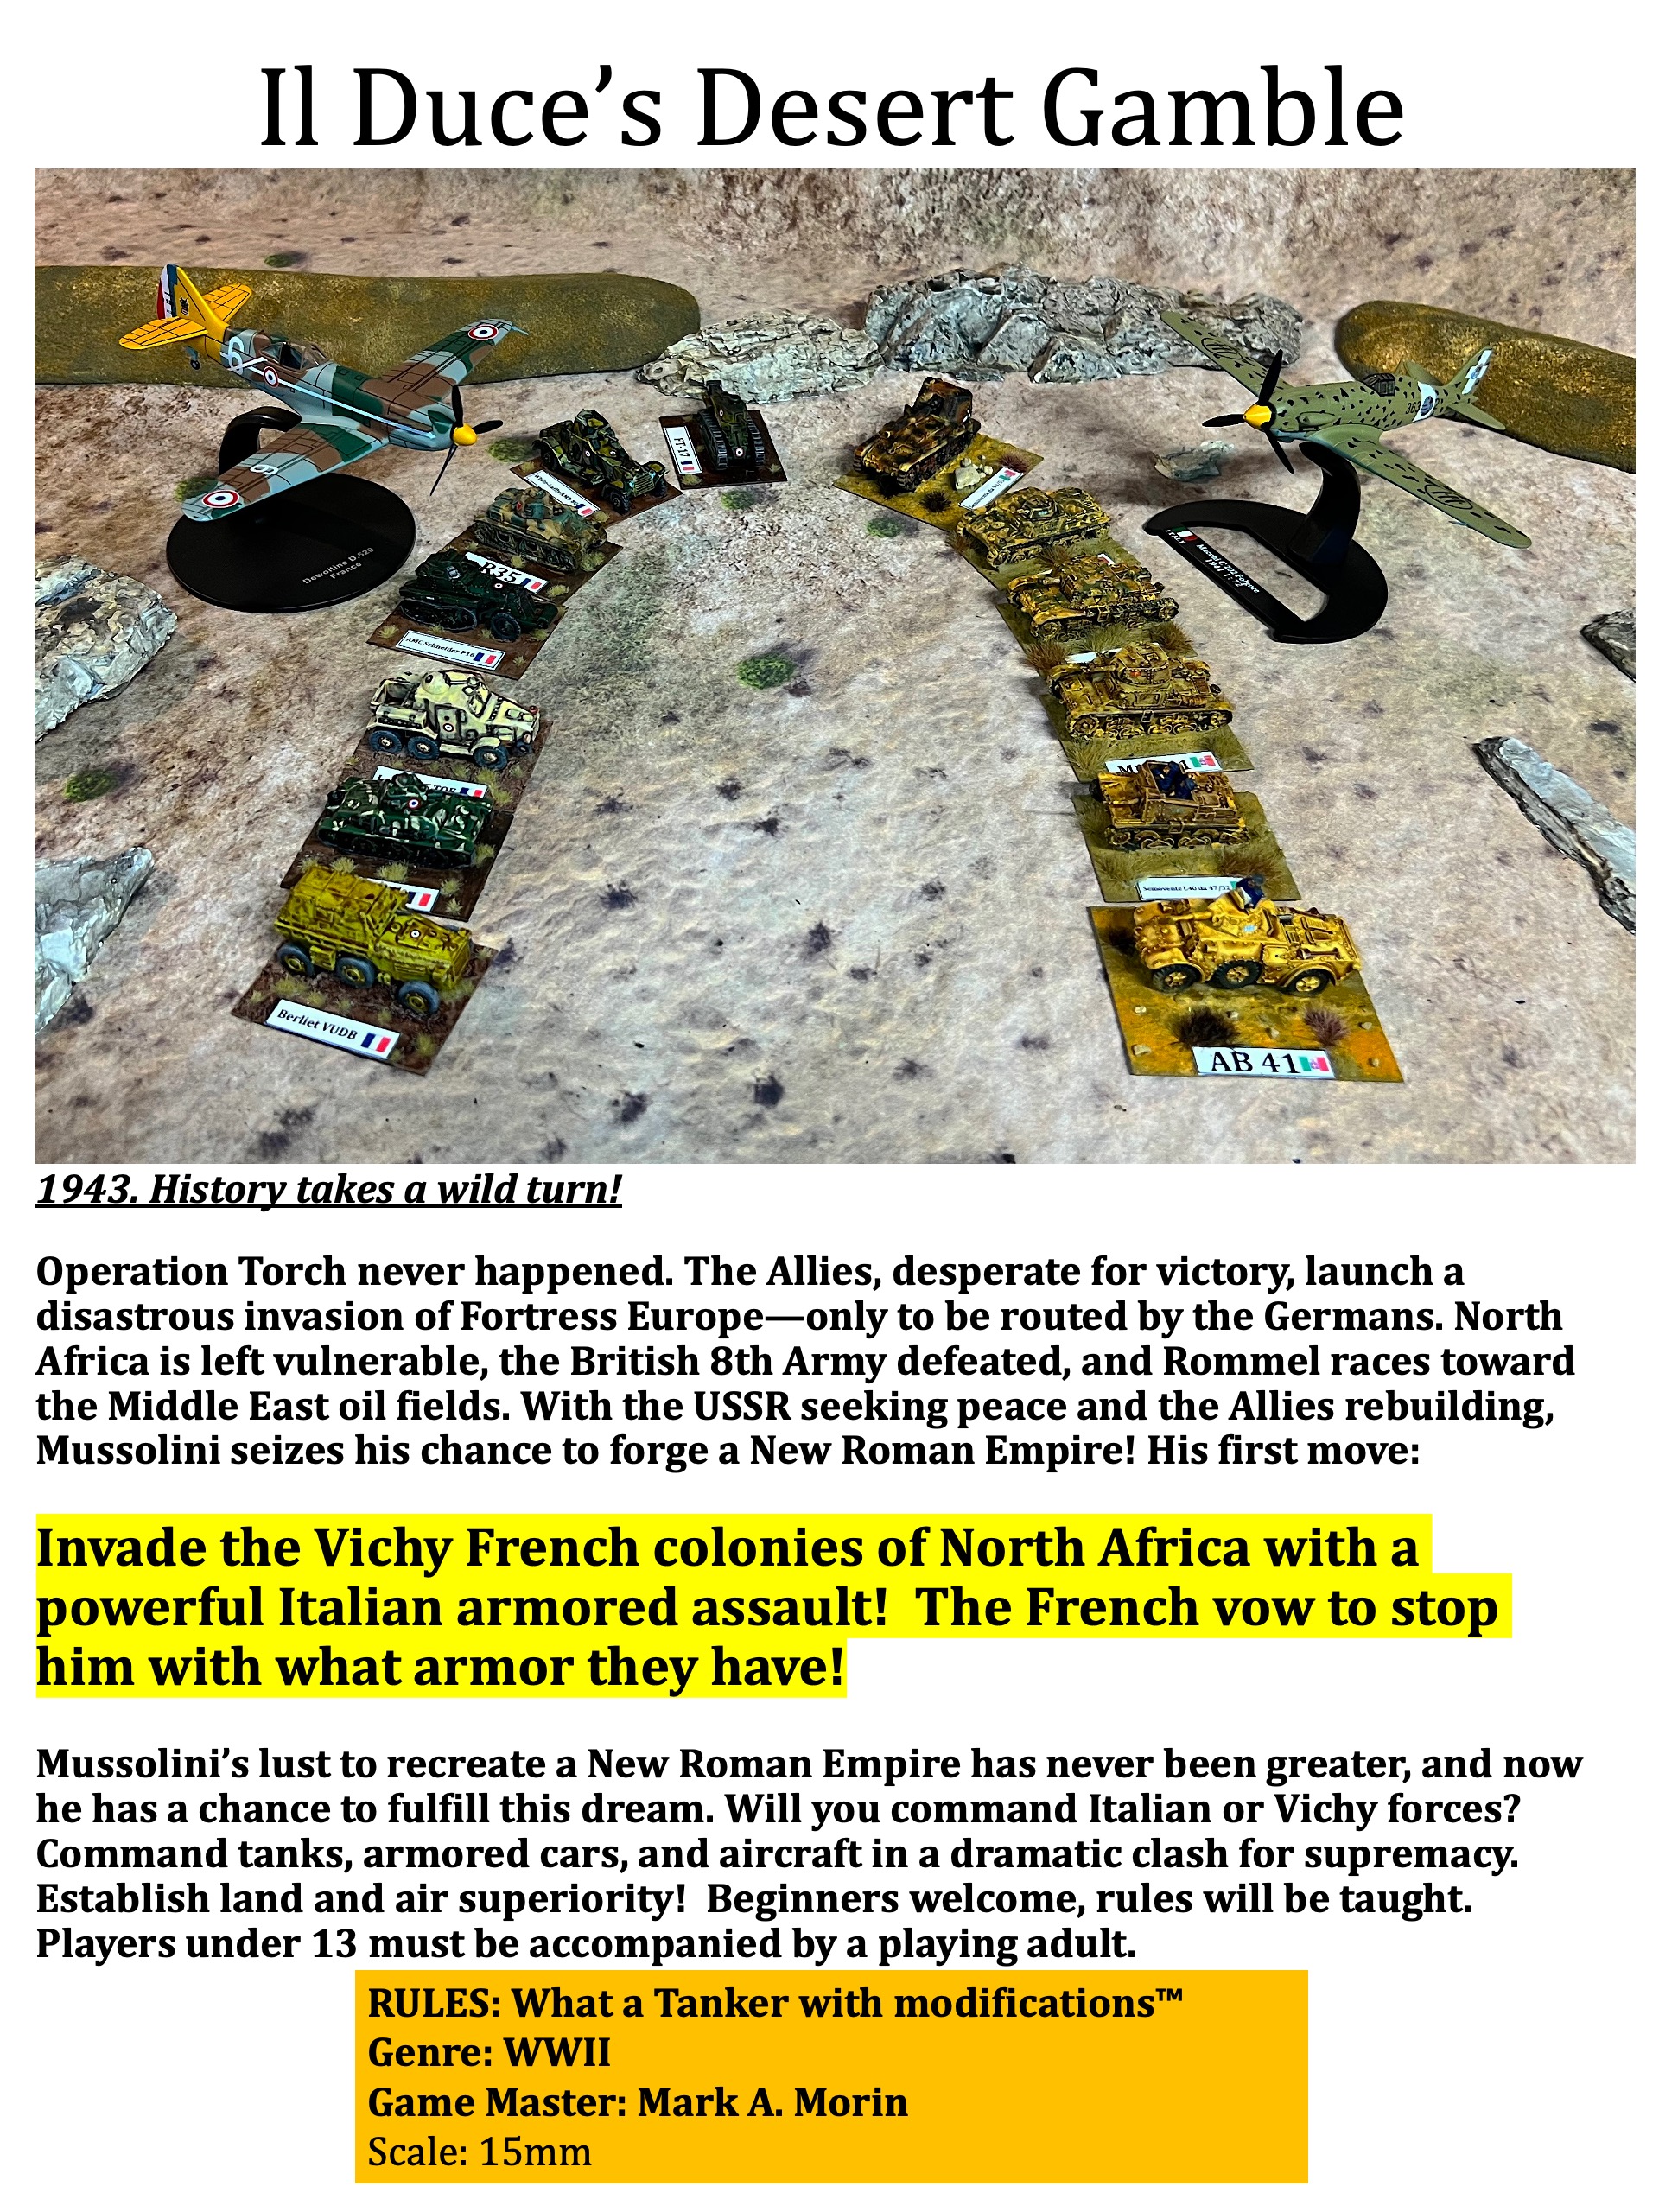
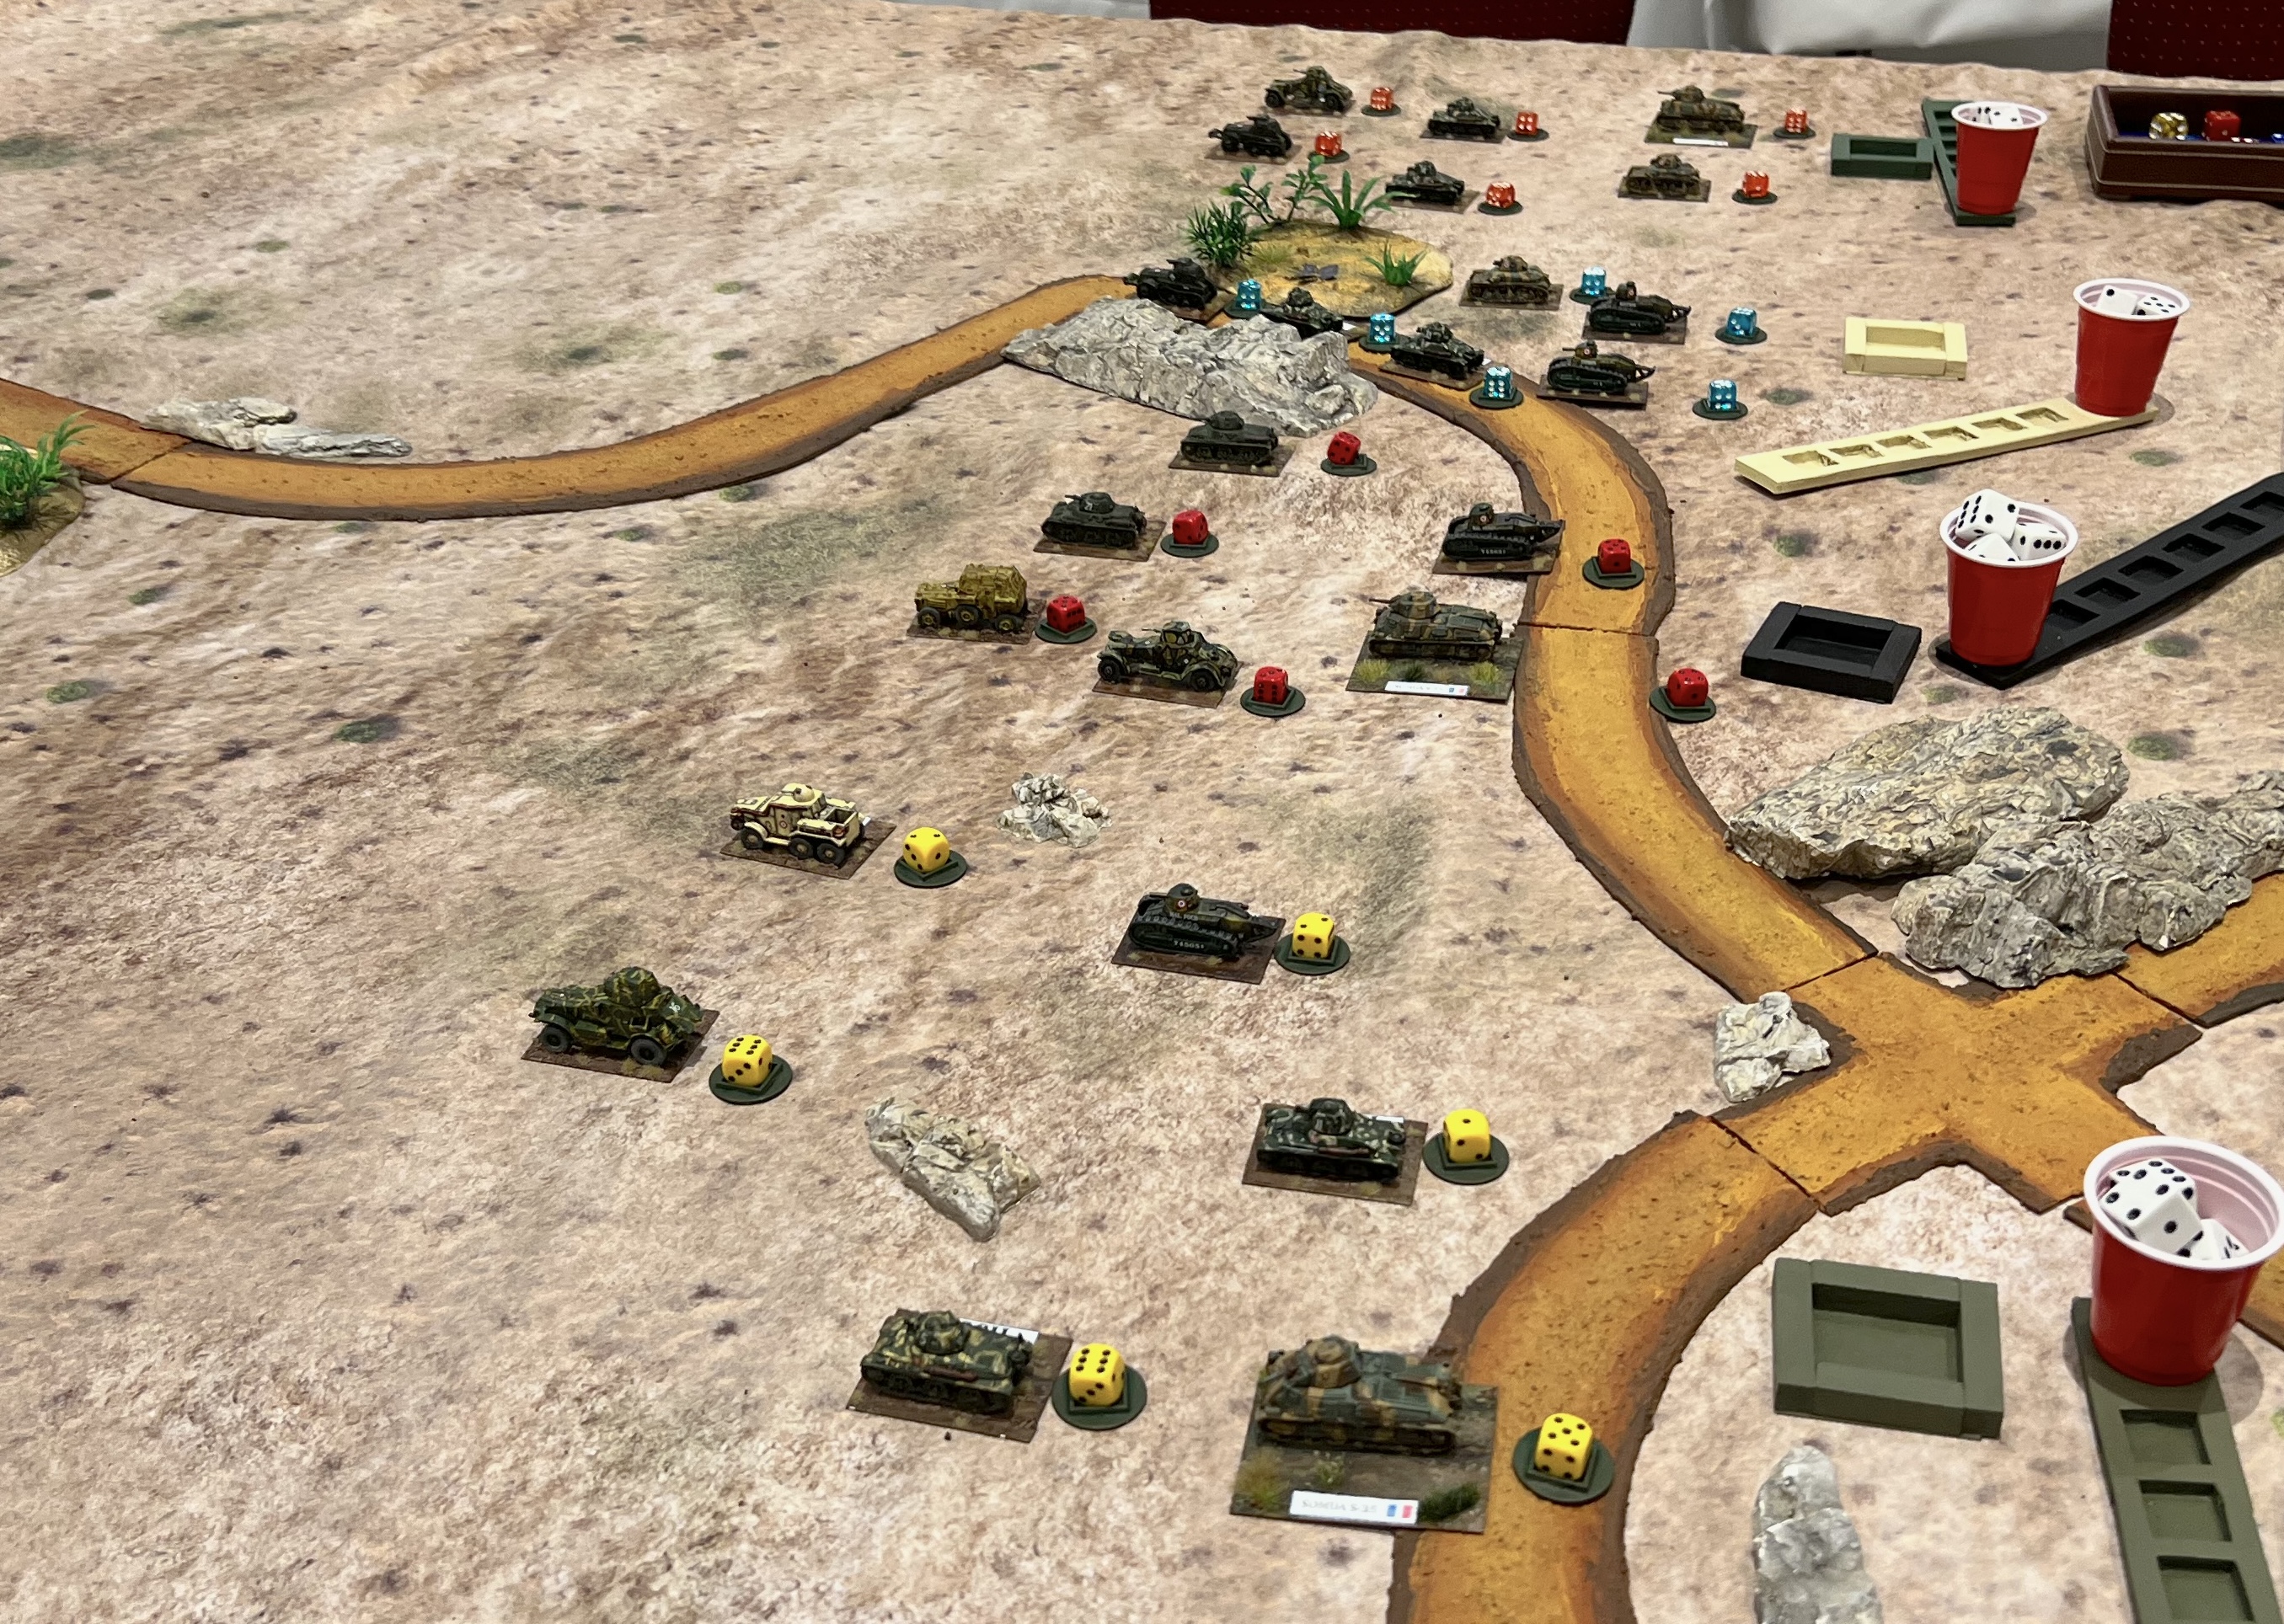
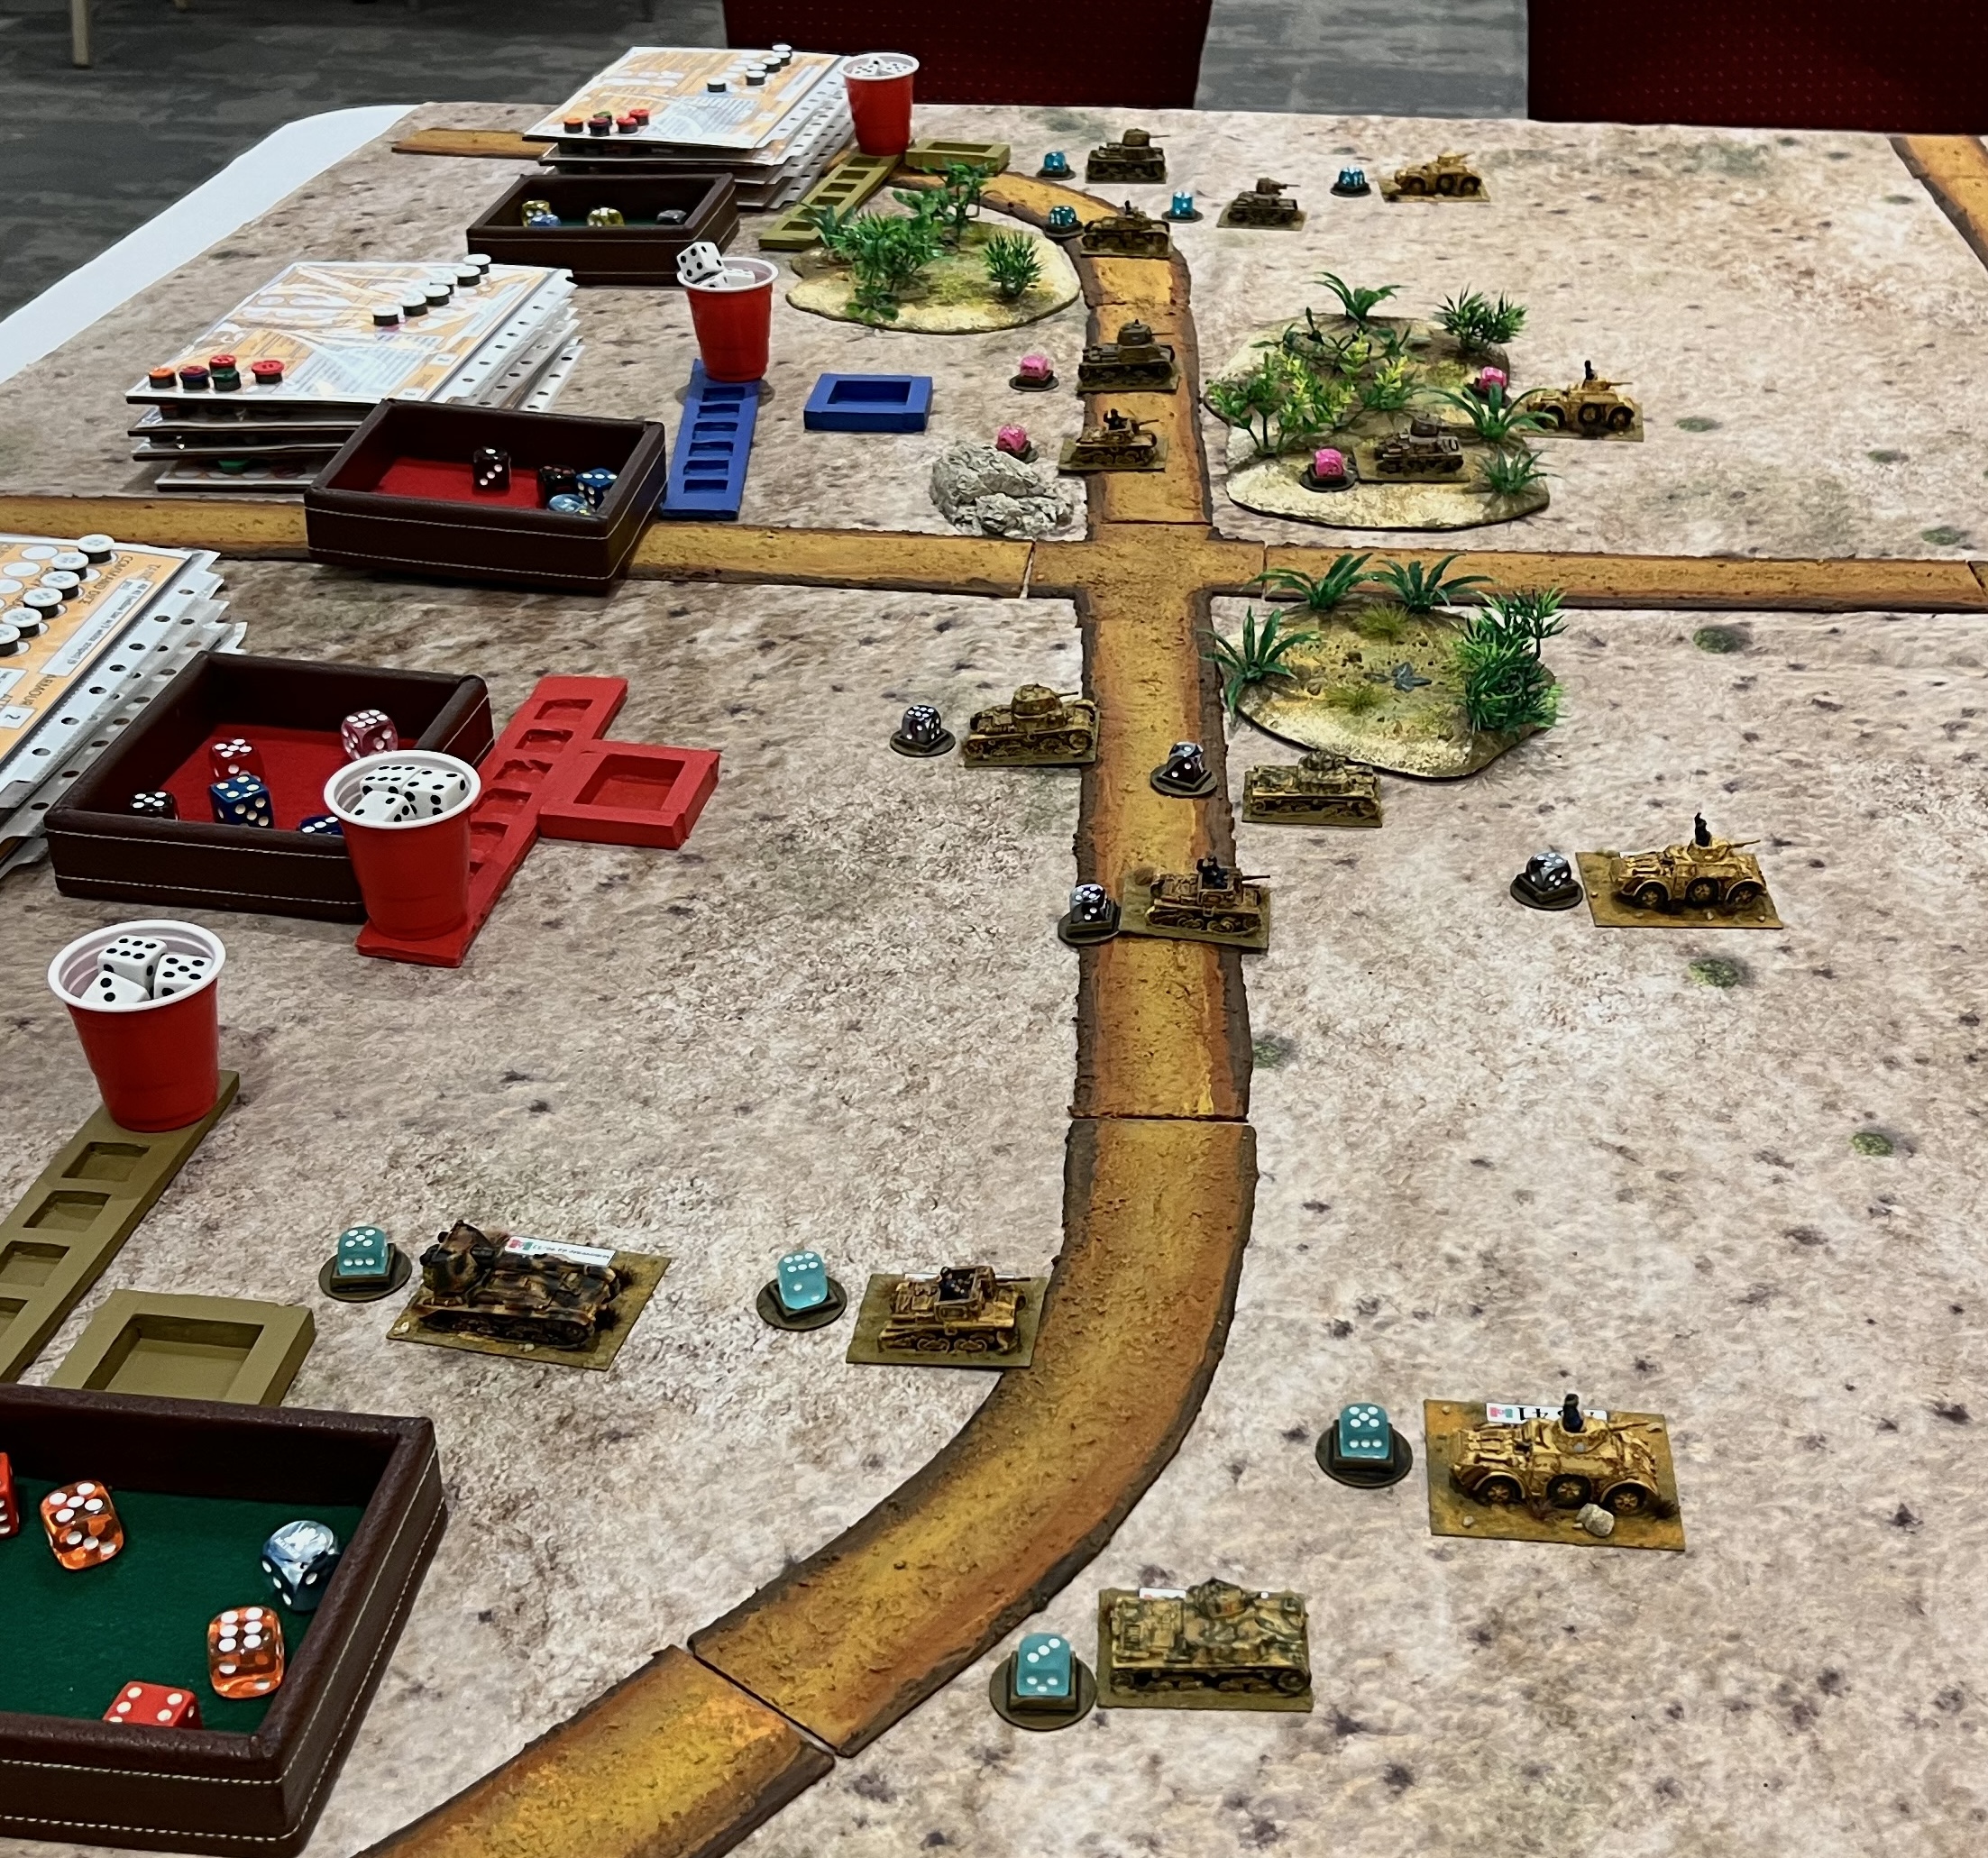
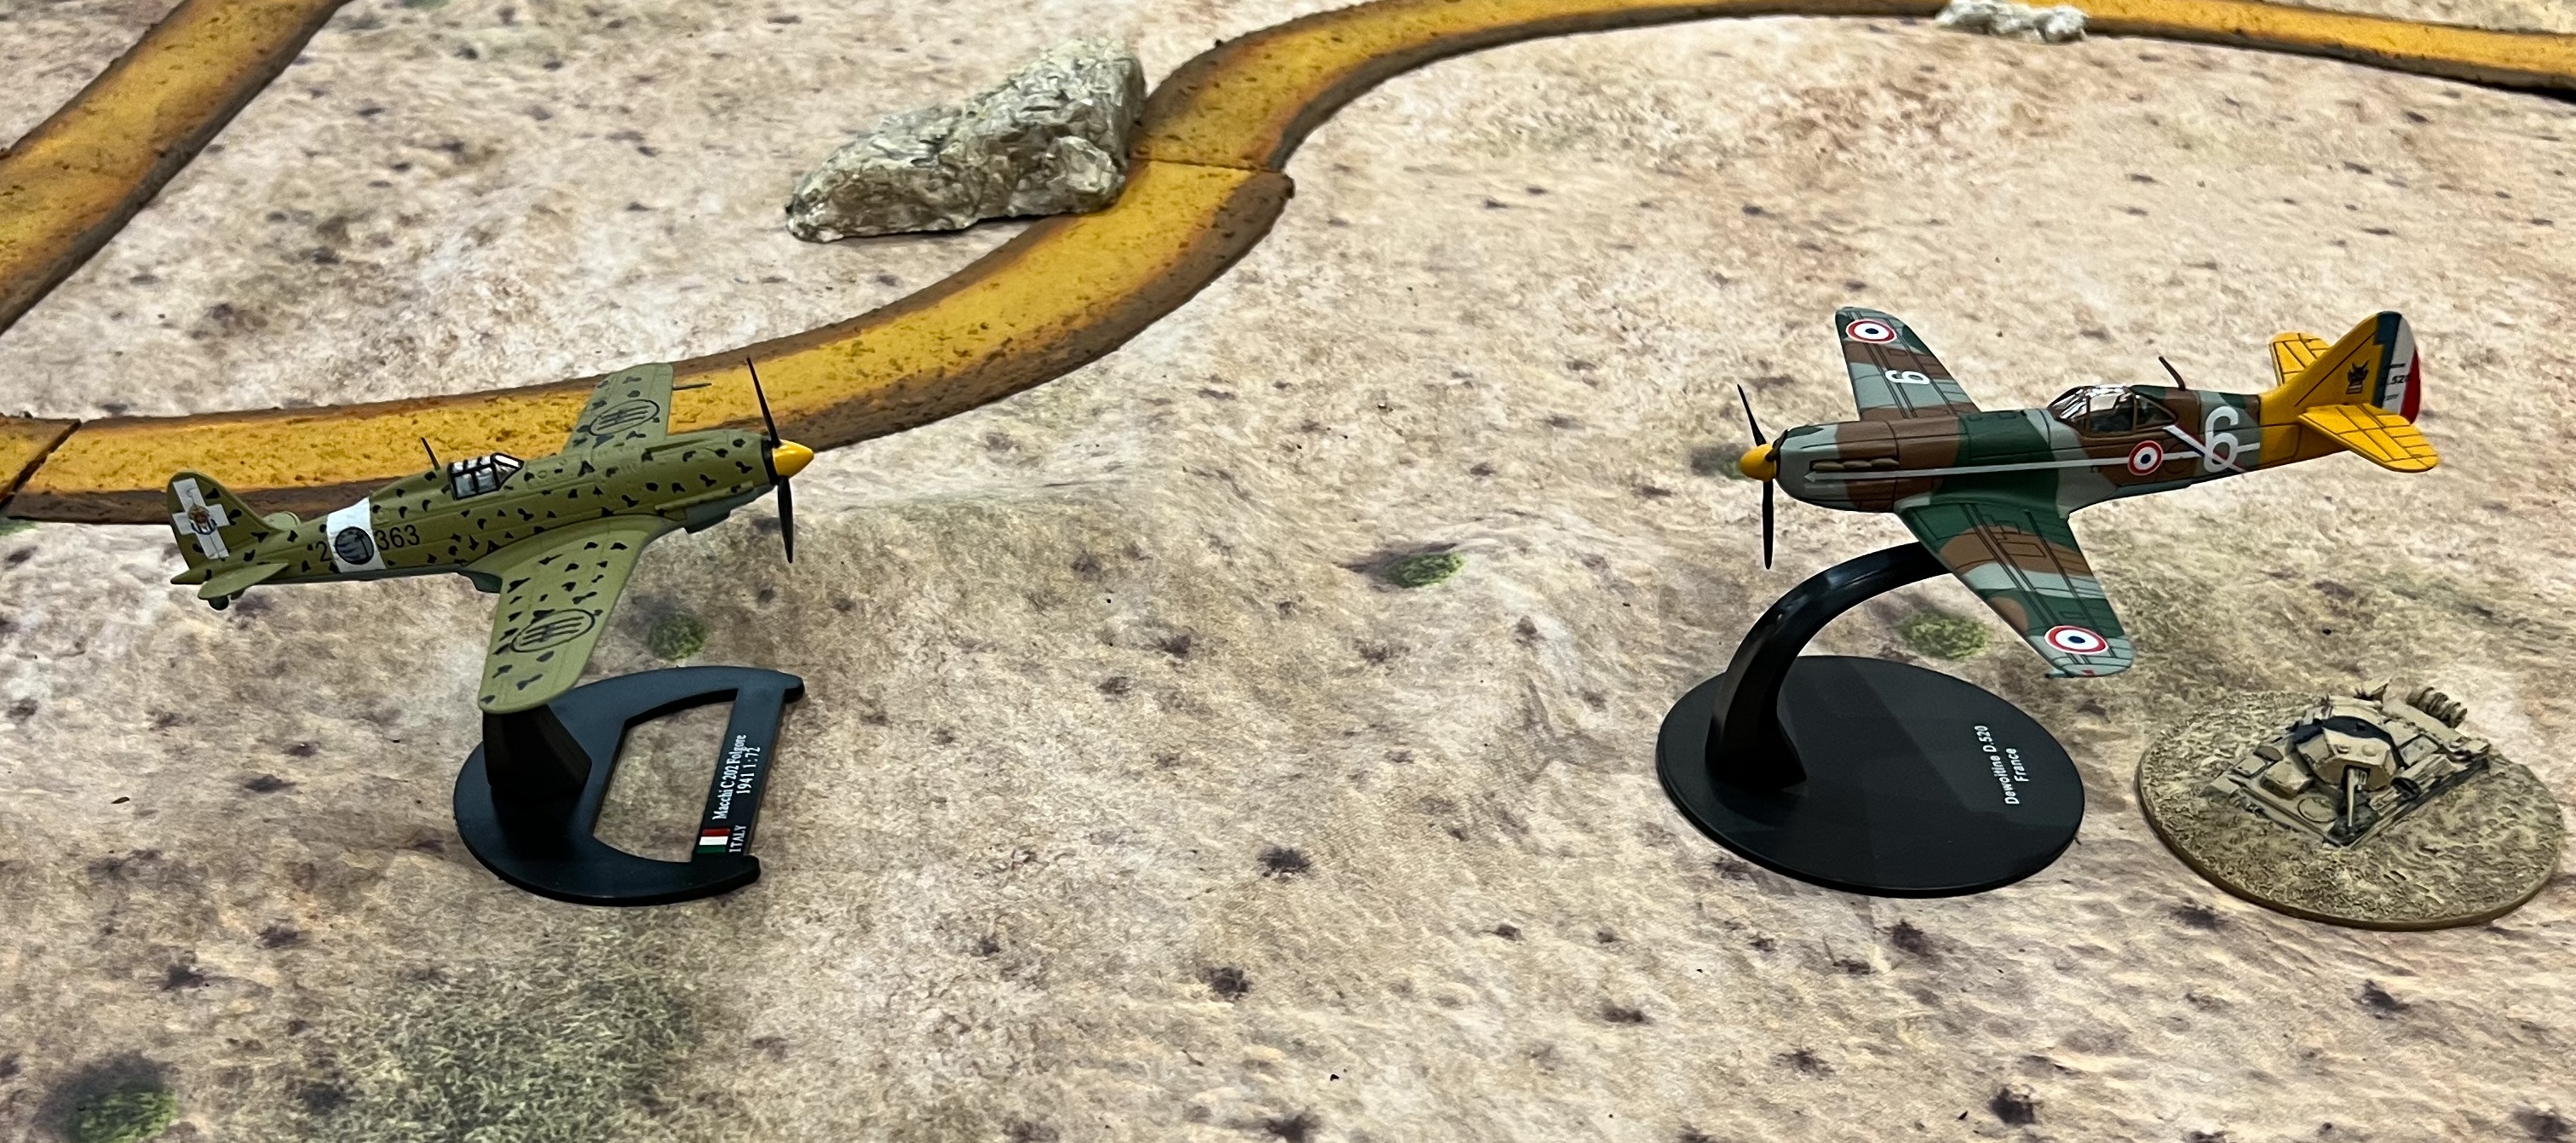
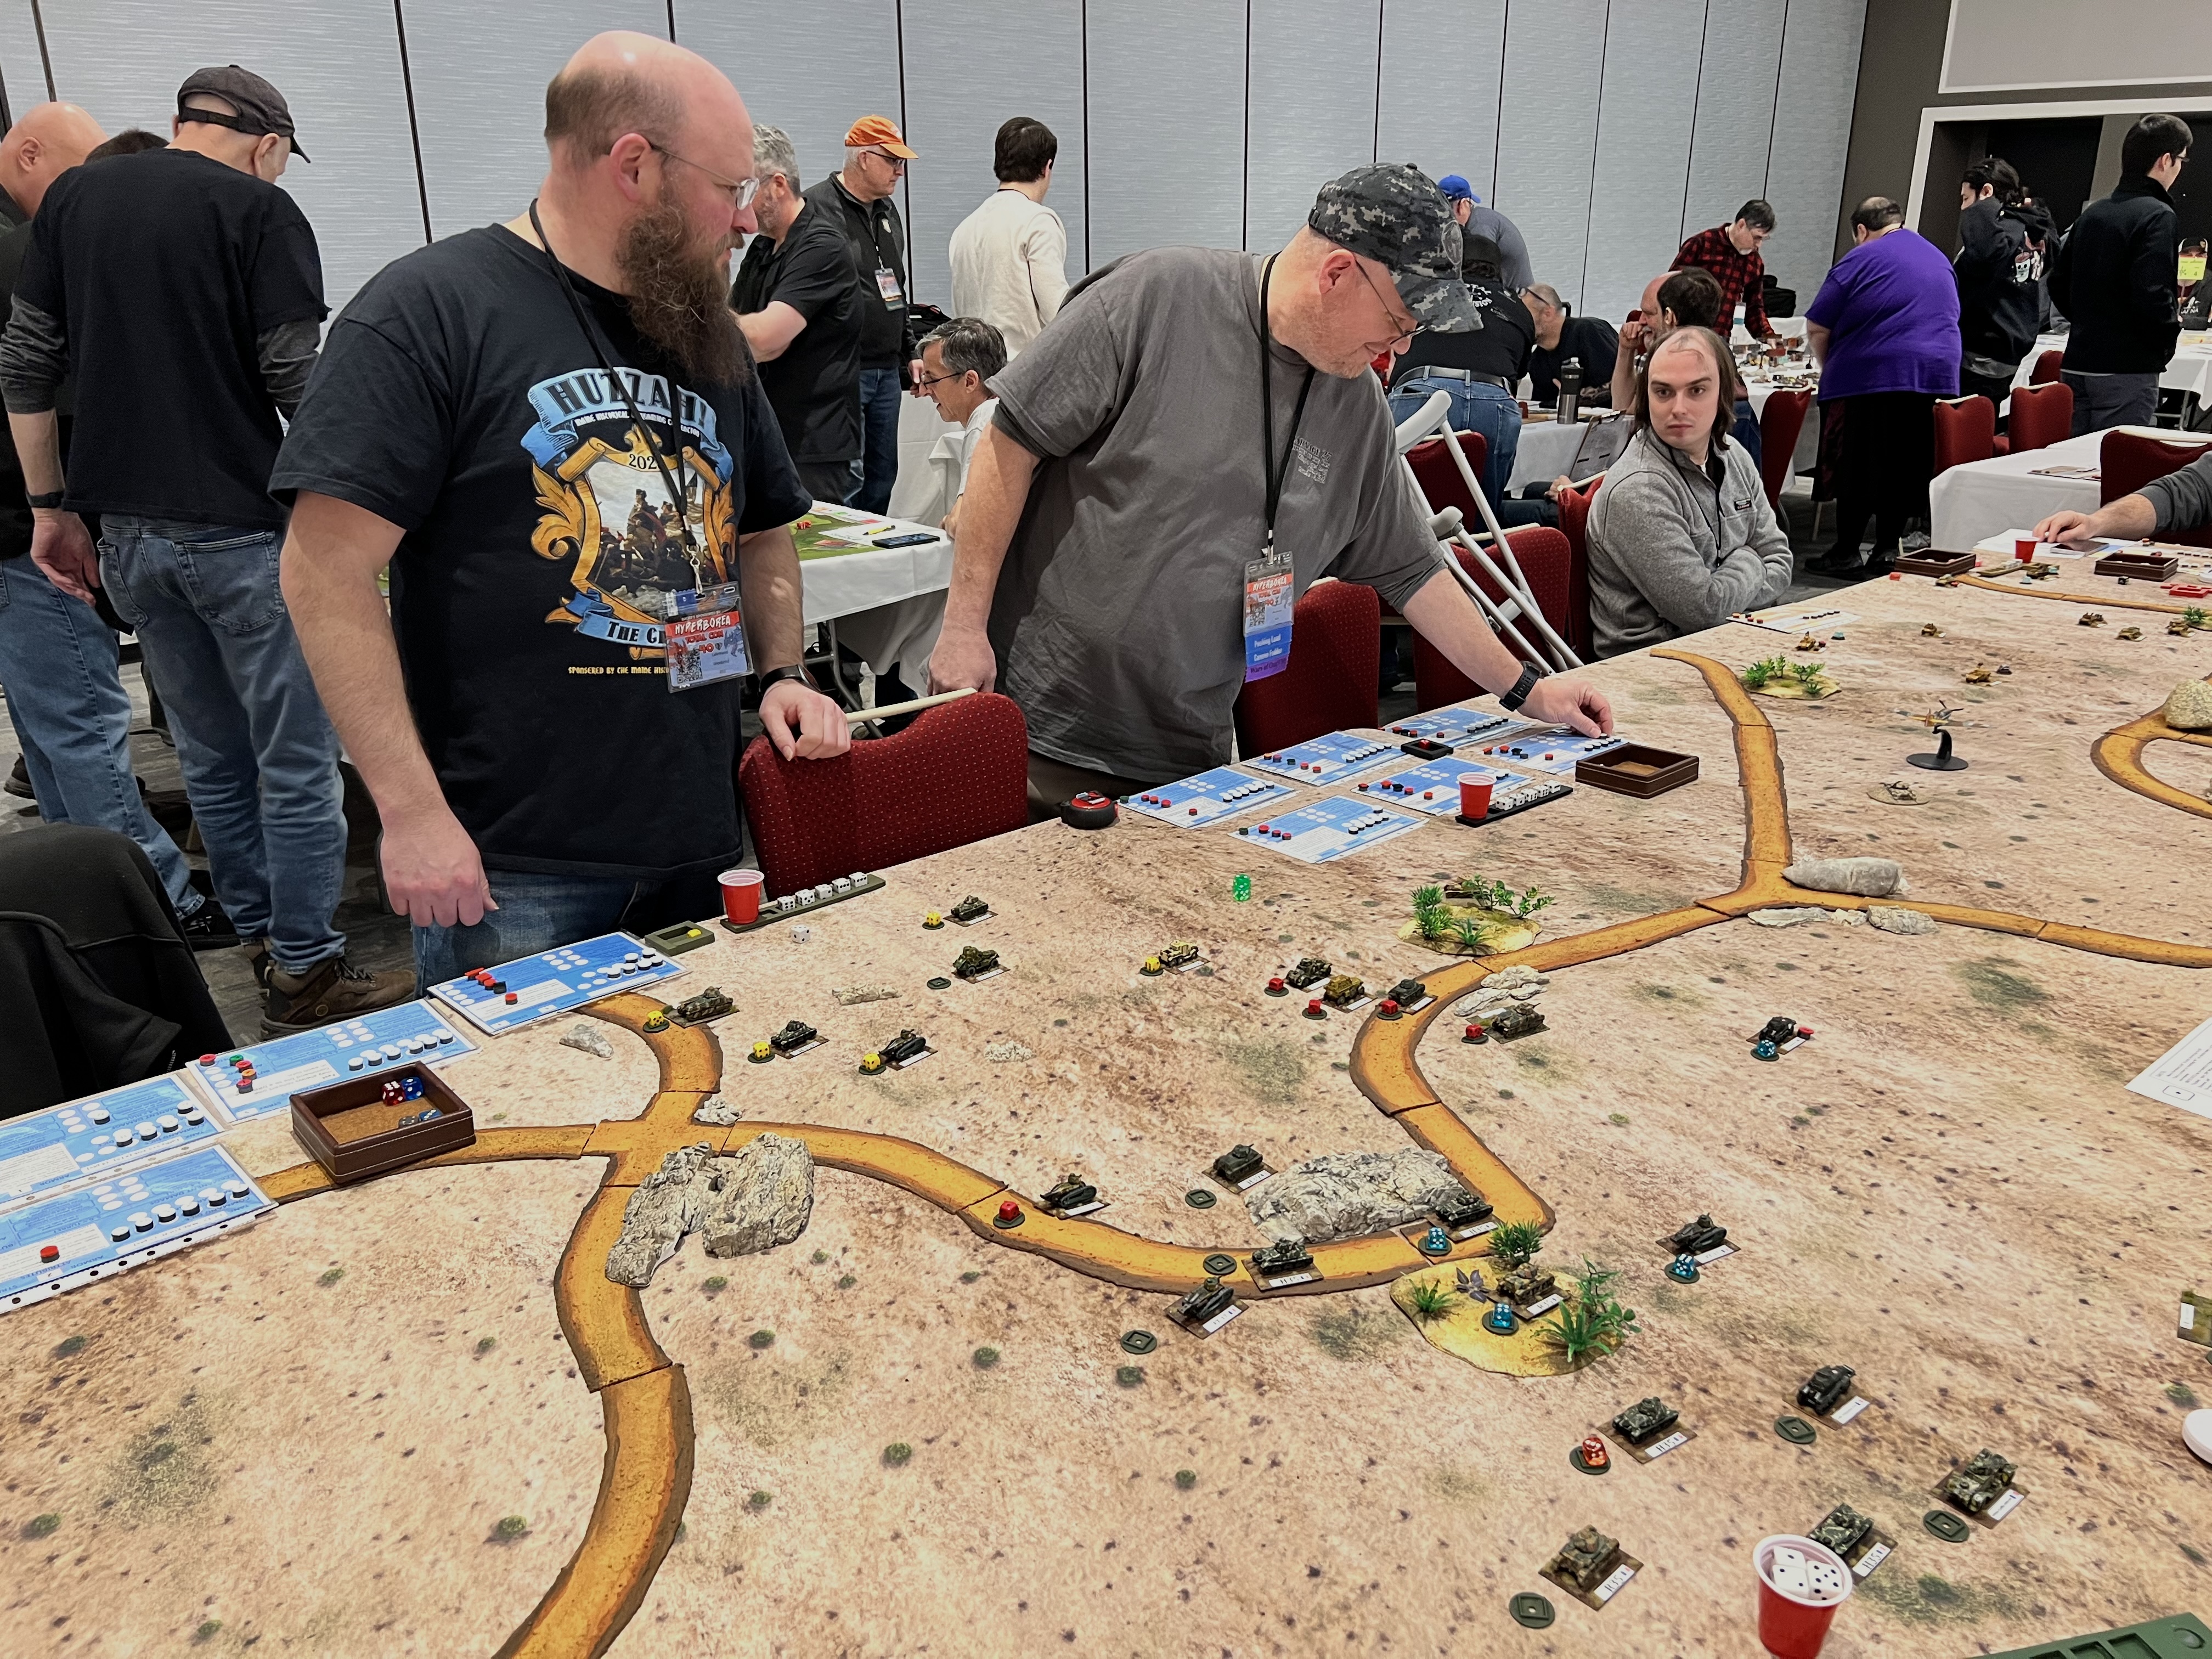
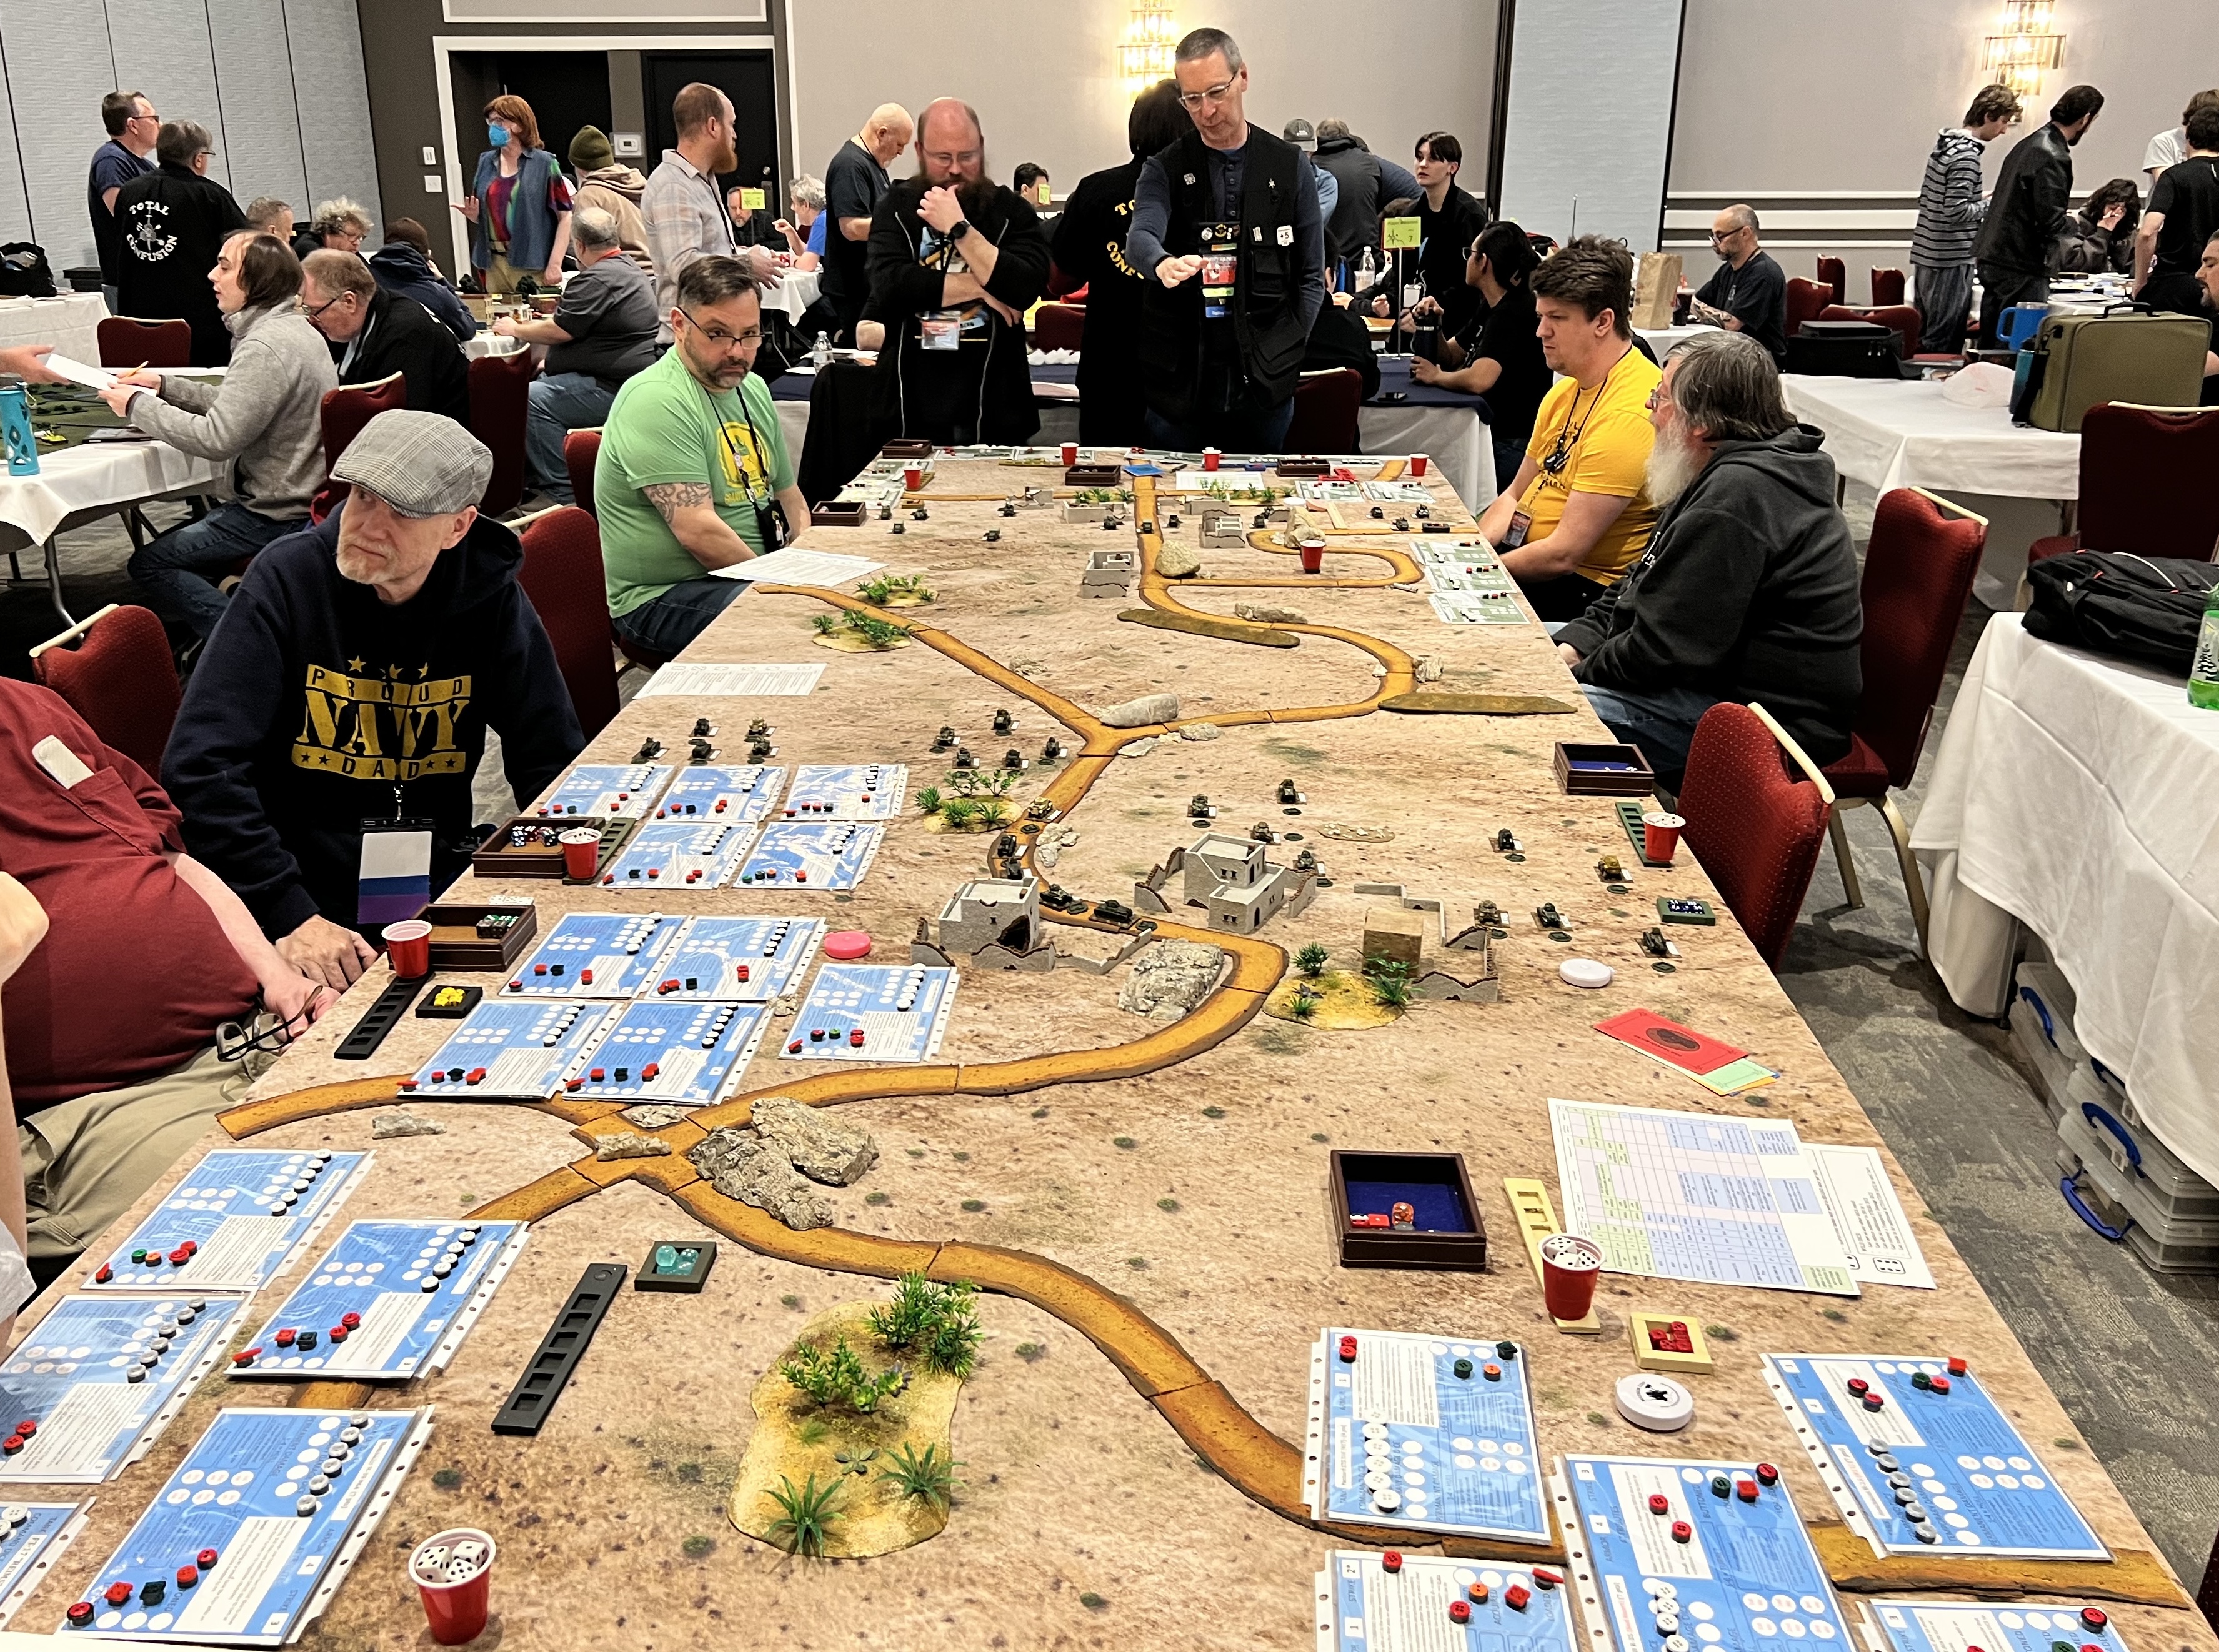
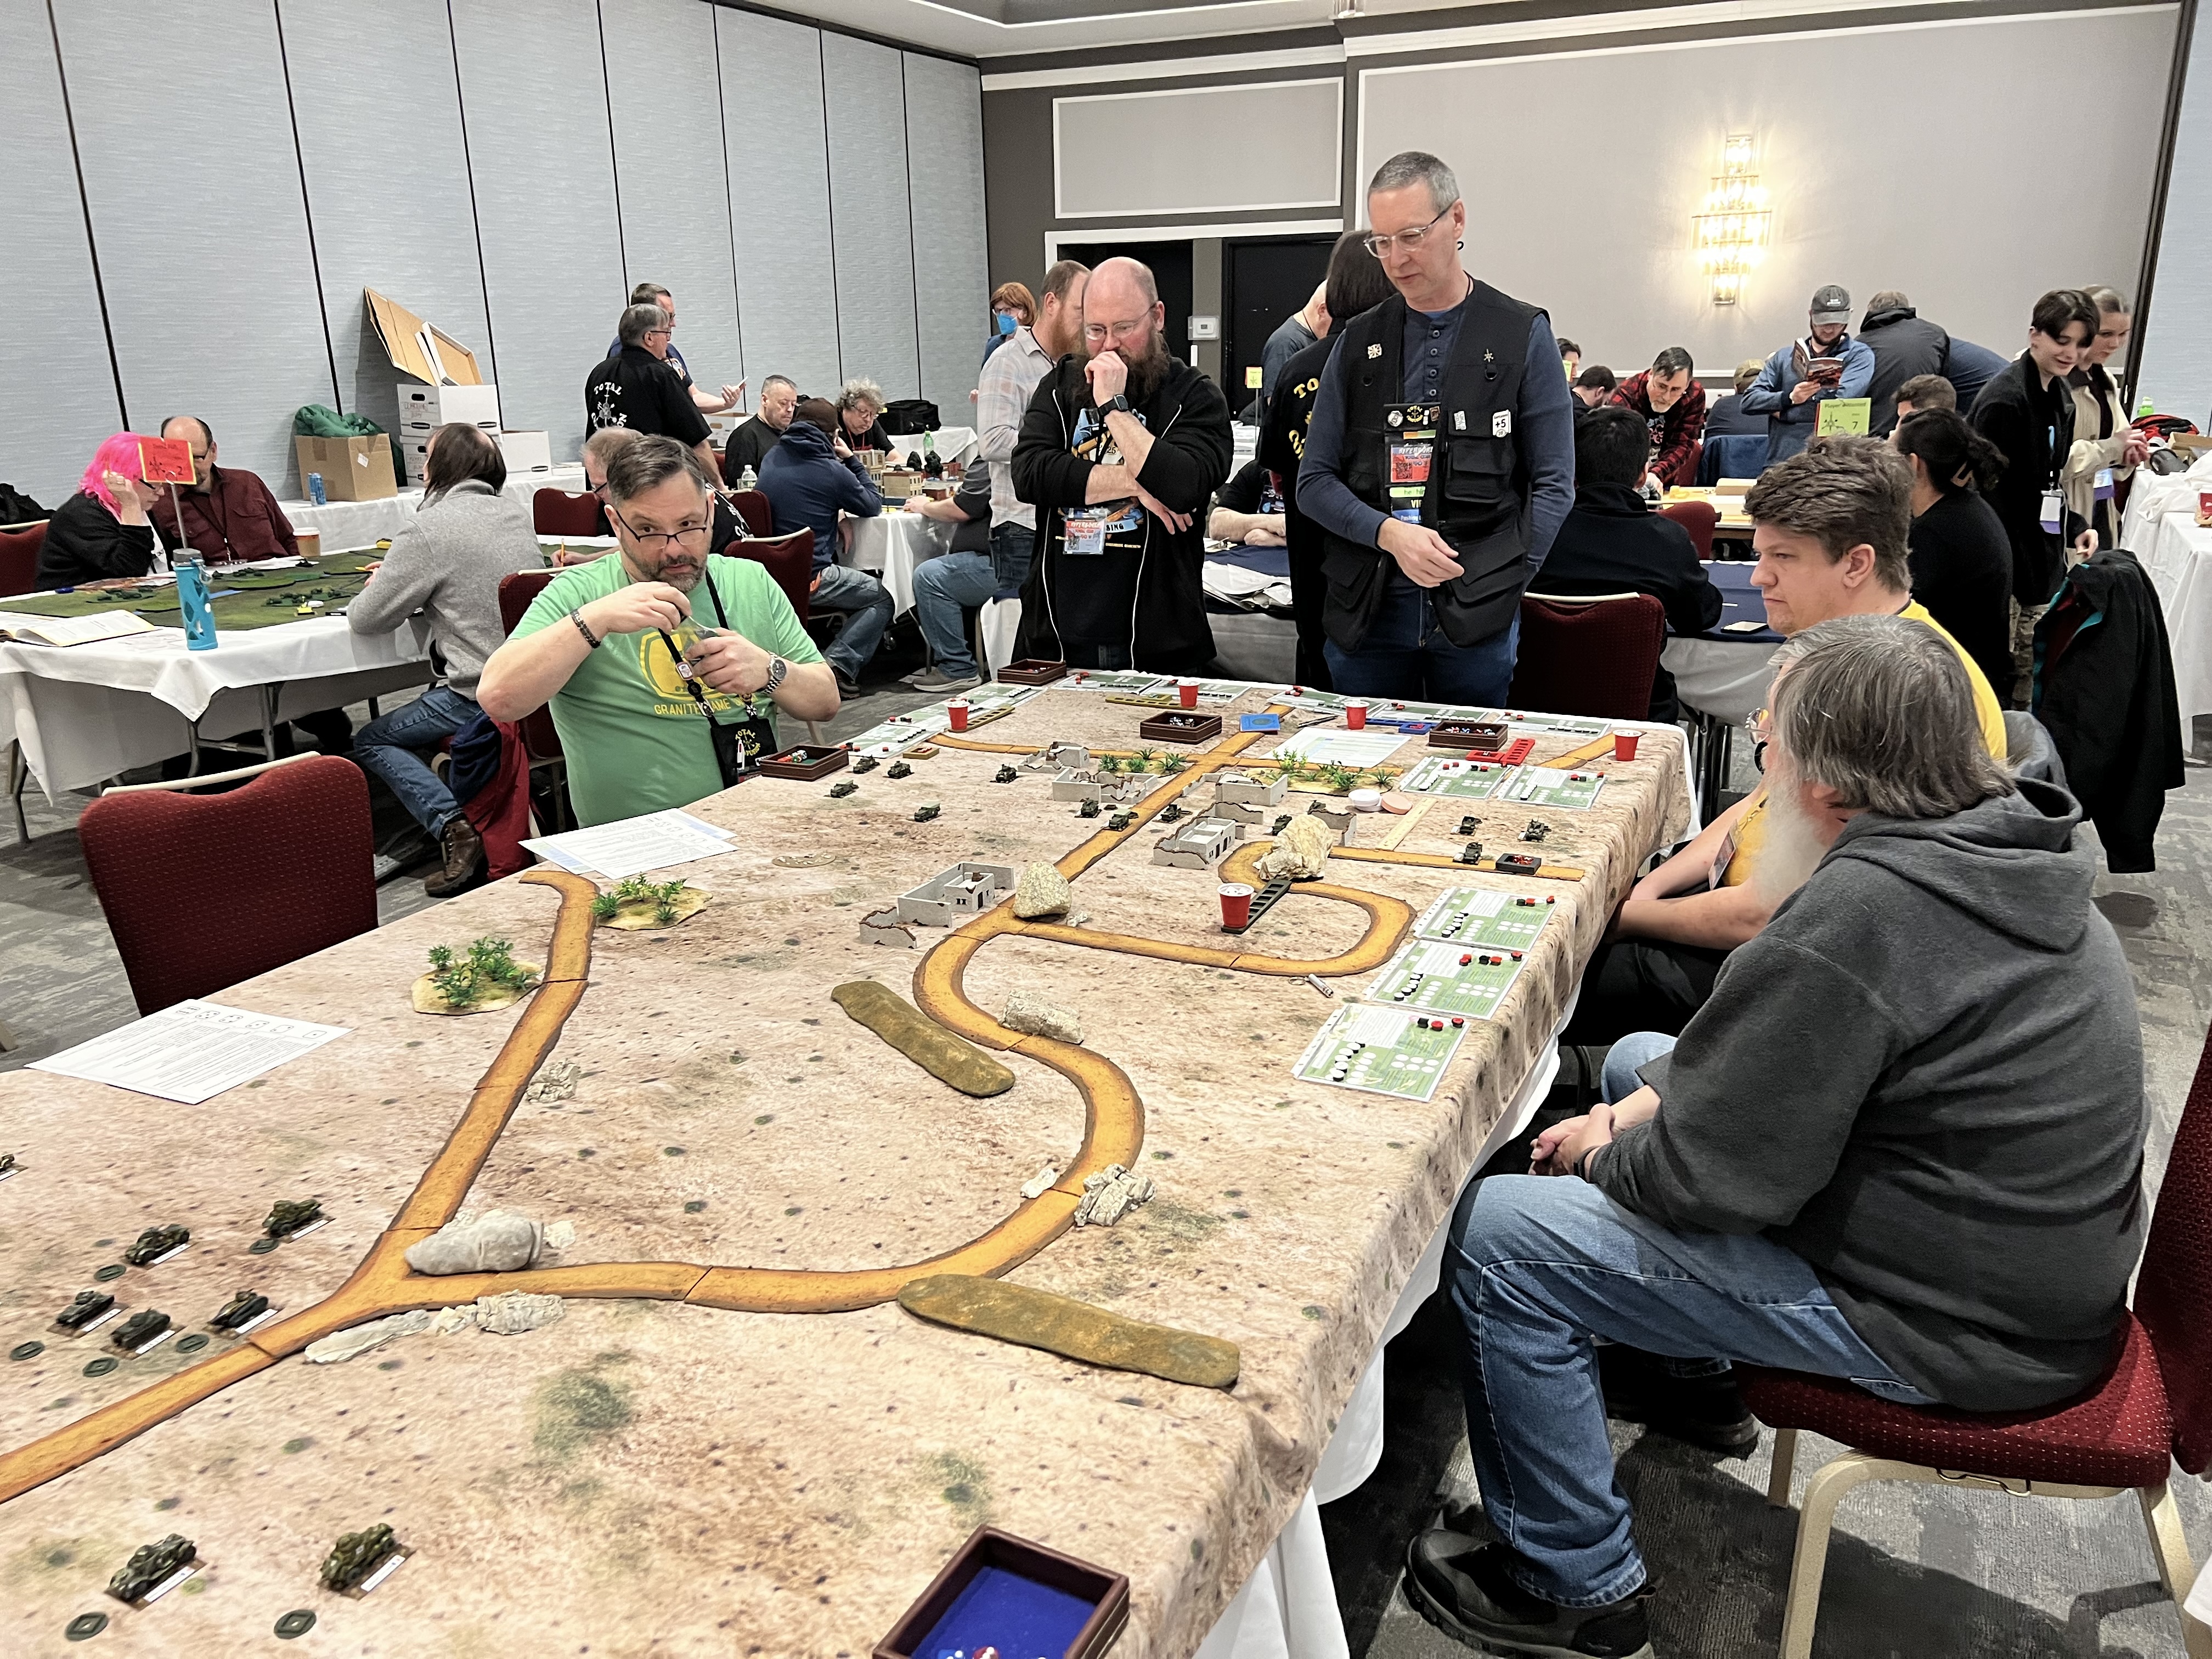
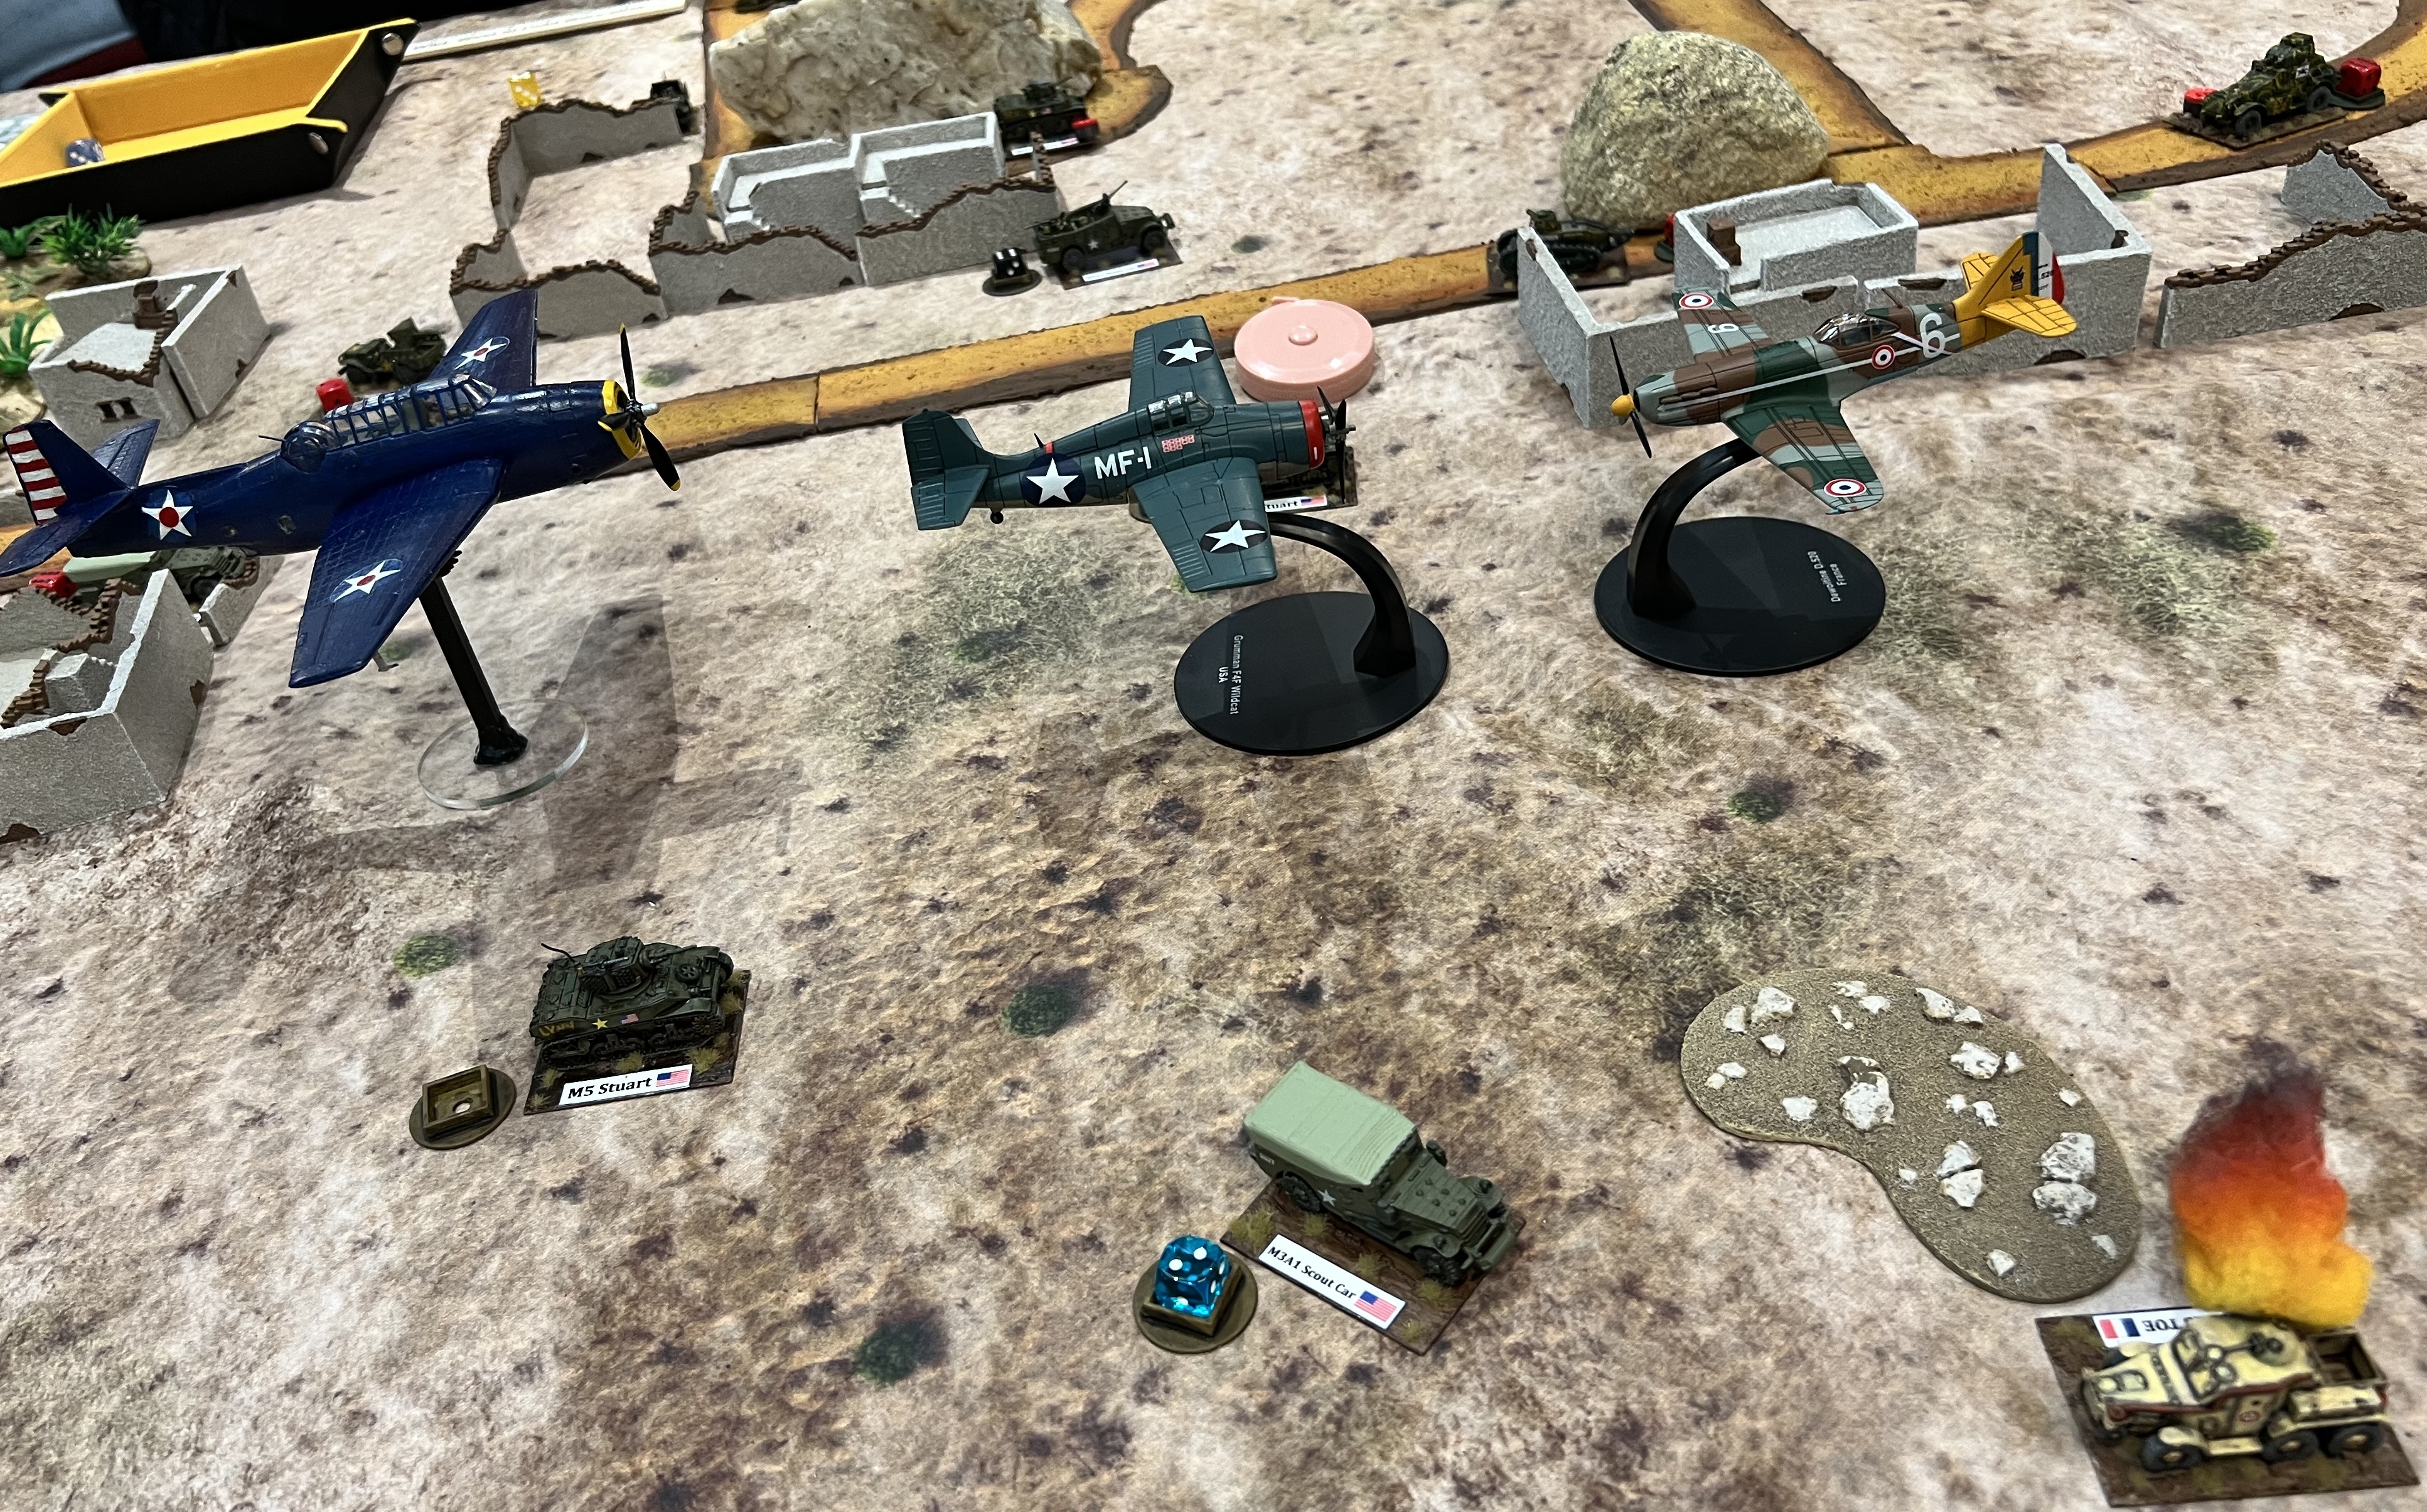
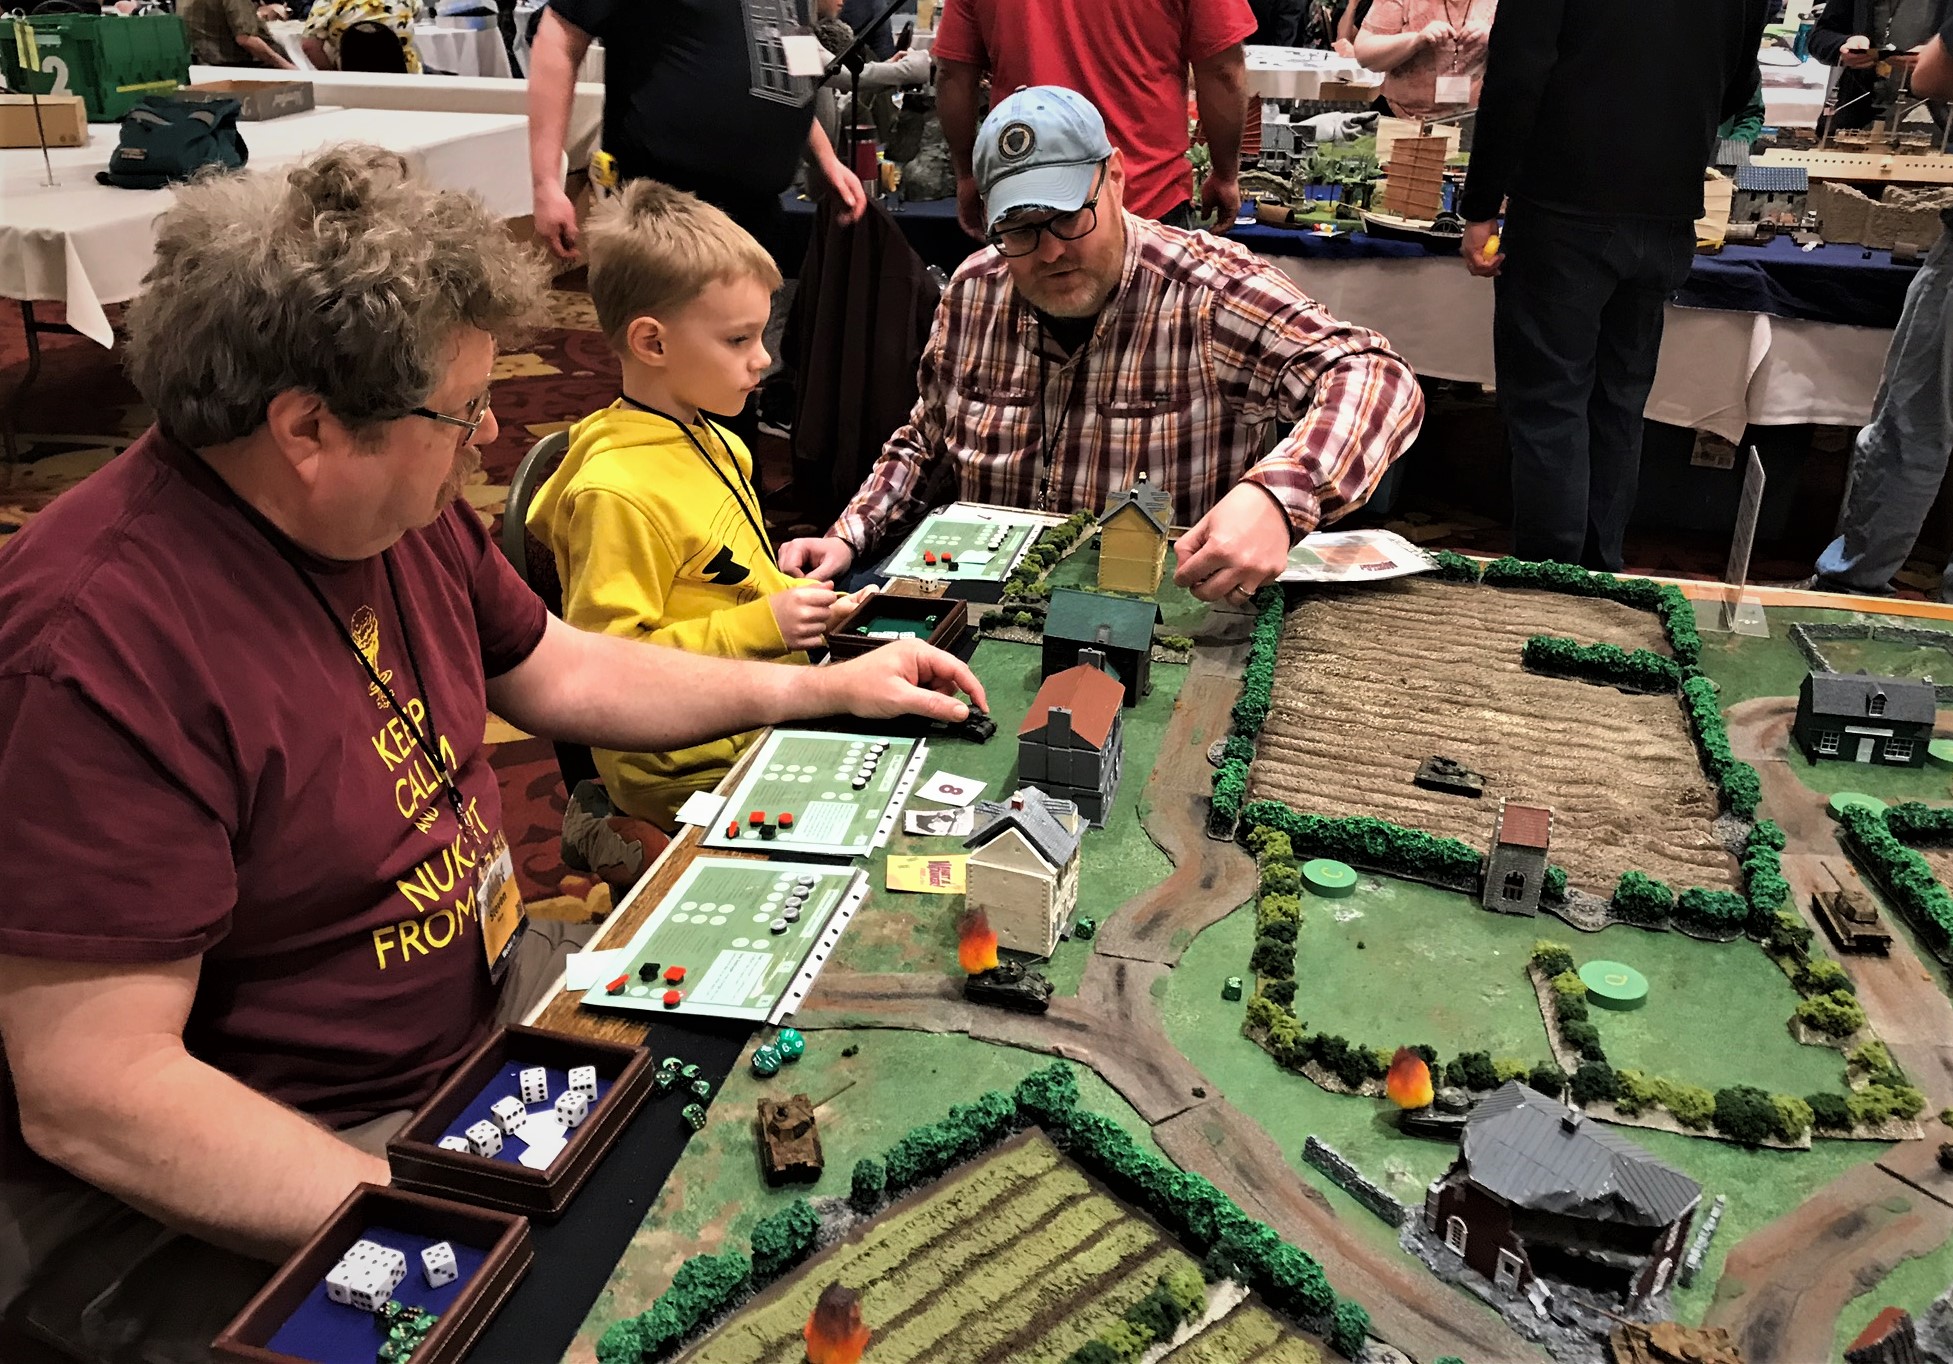
Il Duce’s Desert Gamble
This what-if modified What a Tanker scenario also filled up quickly as well.
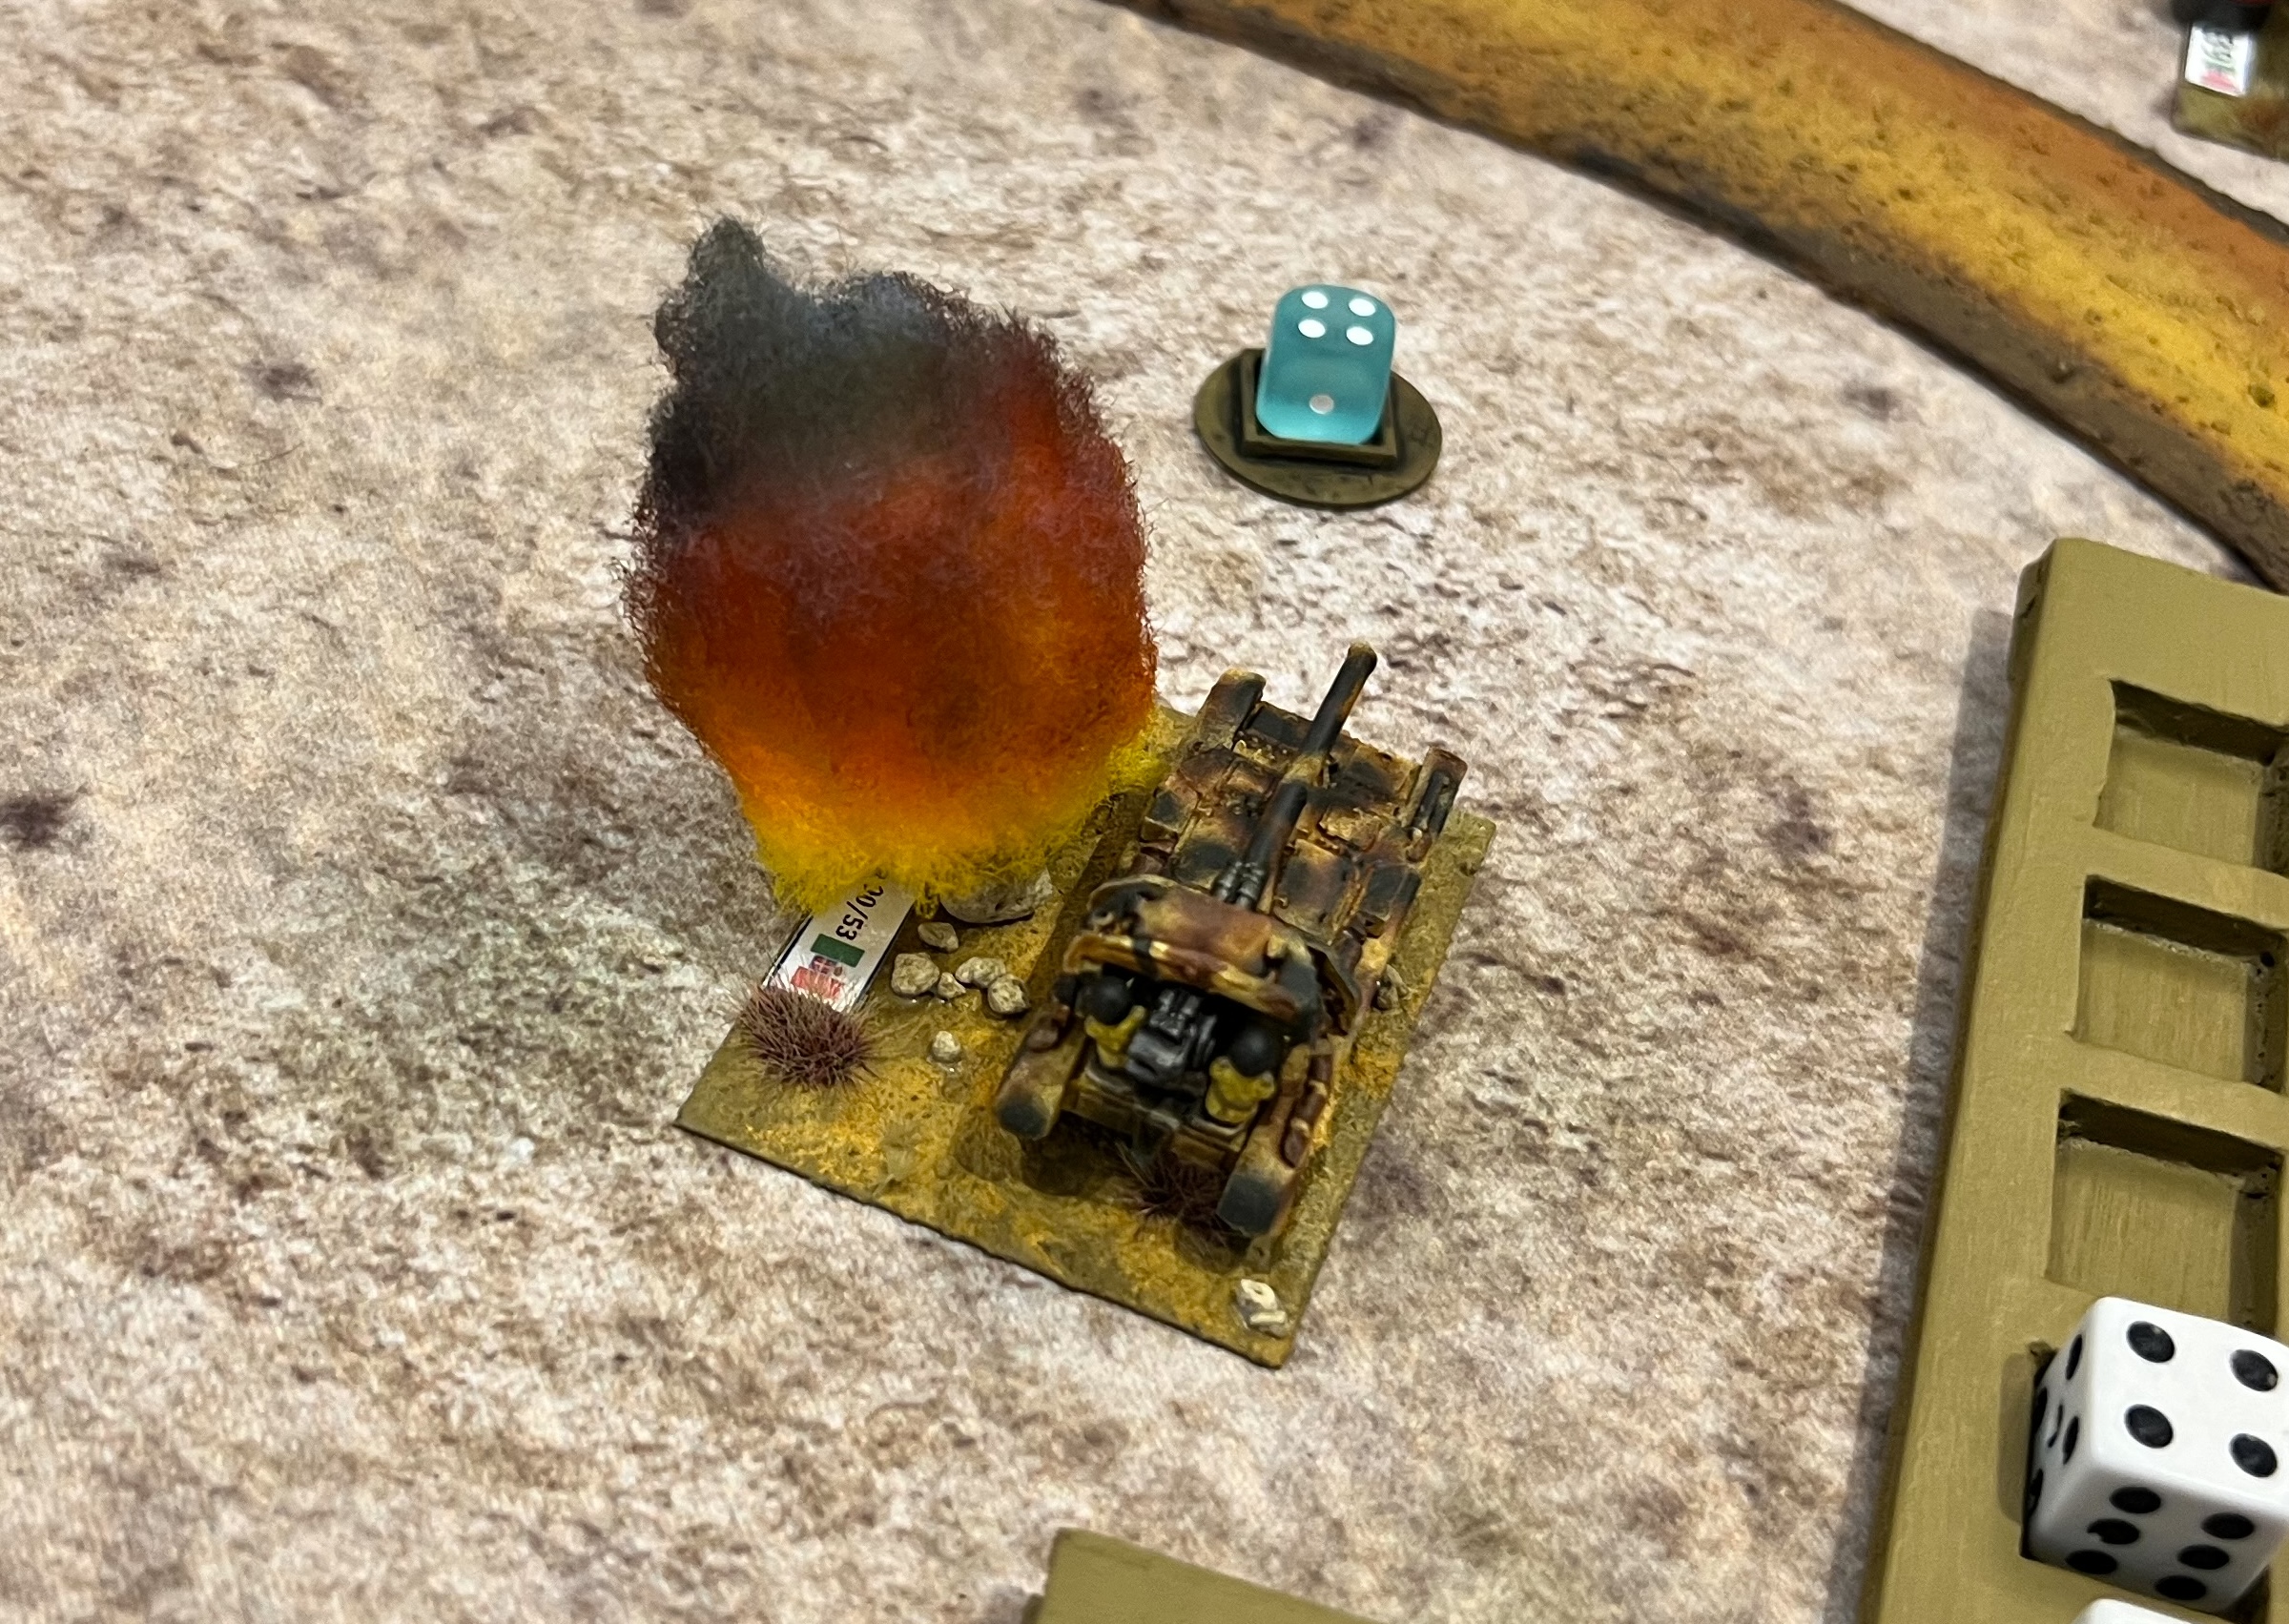
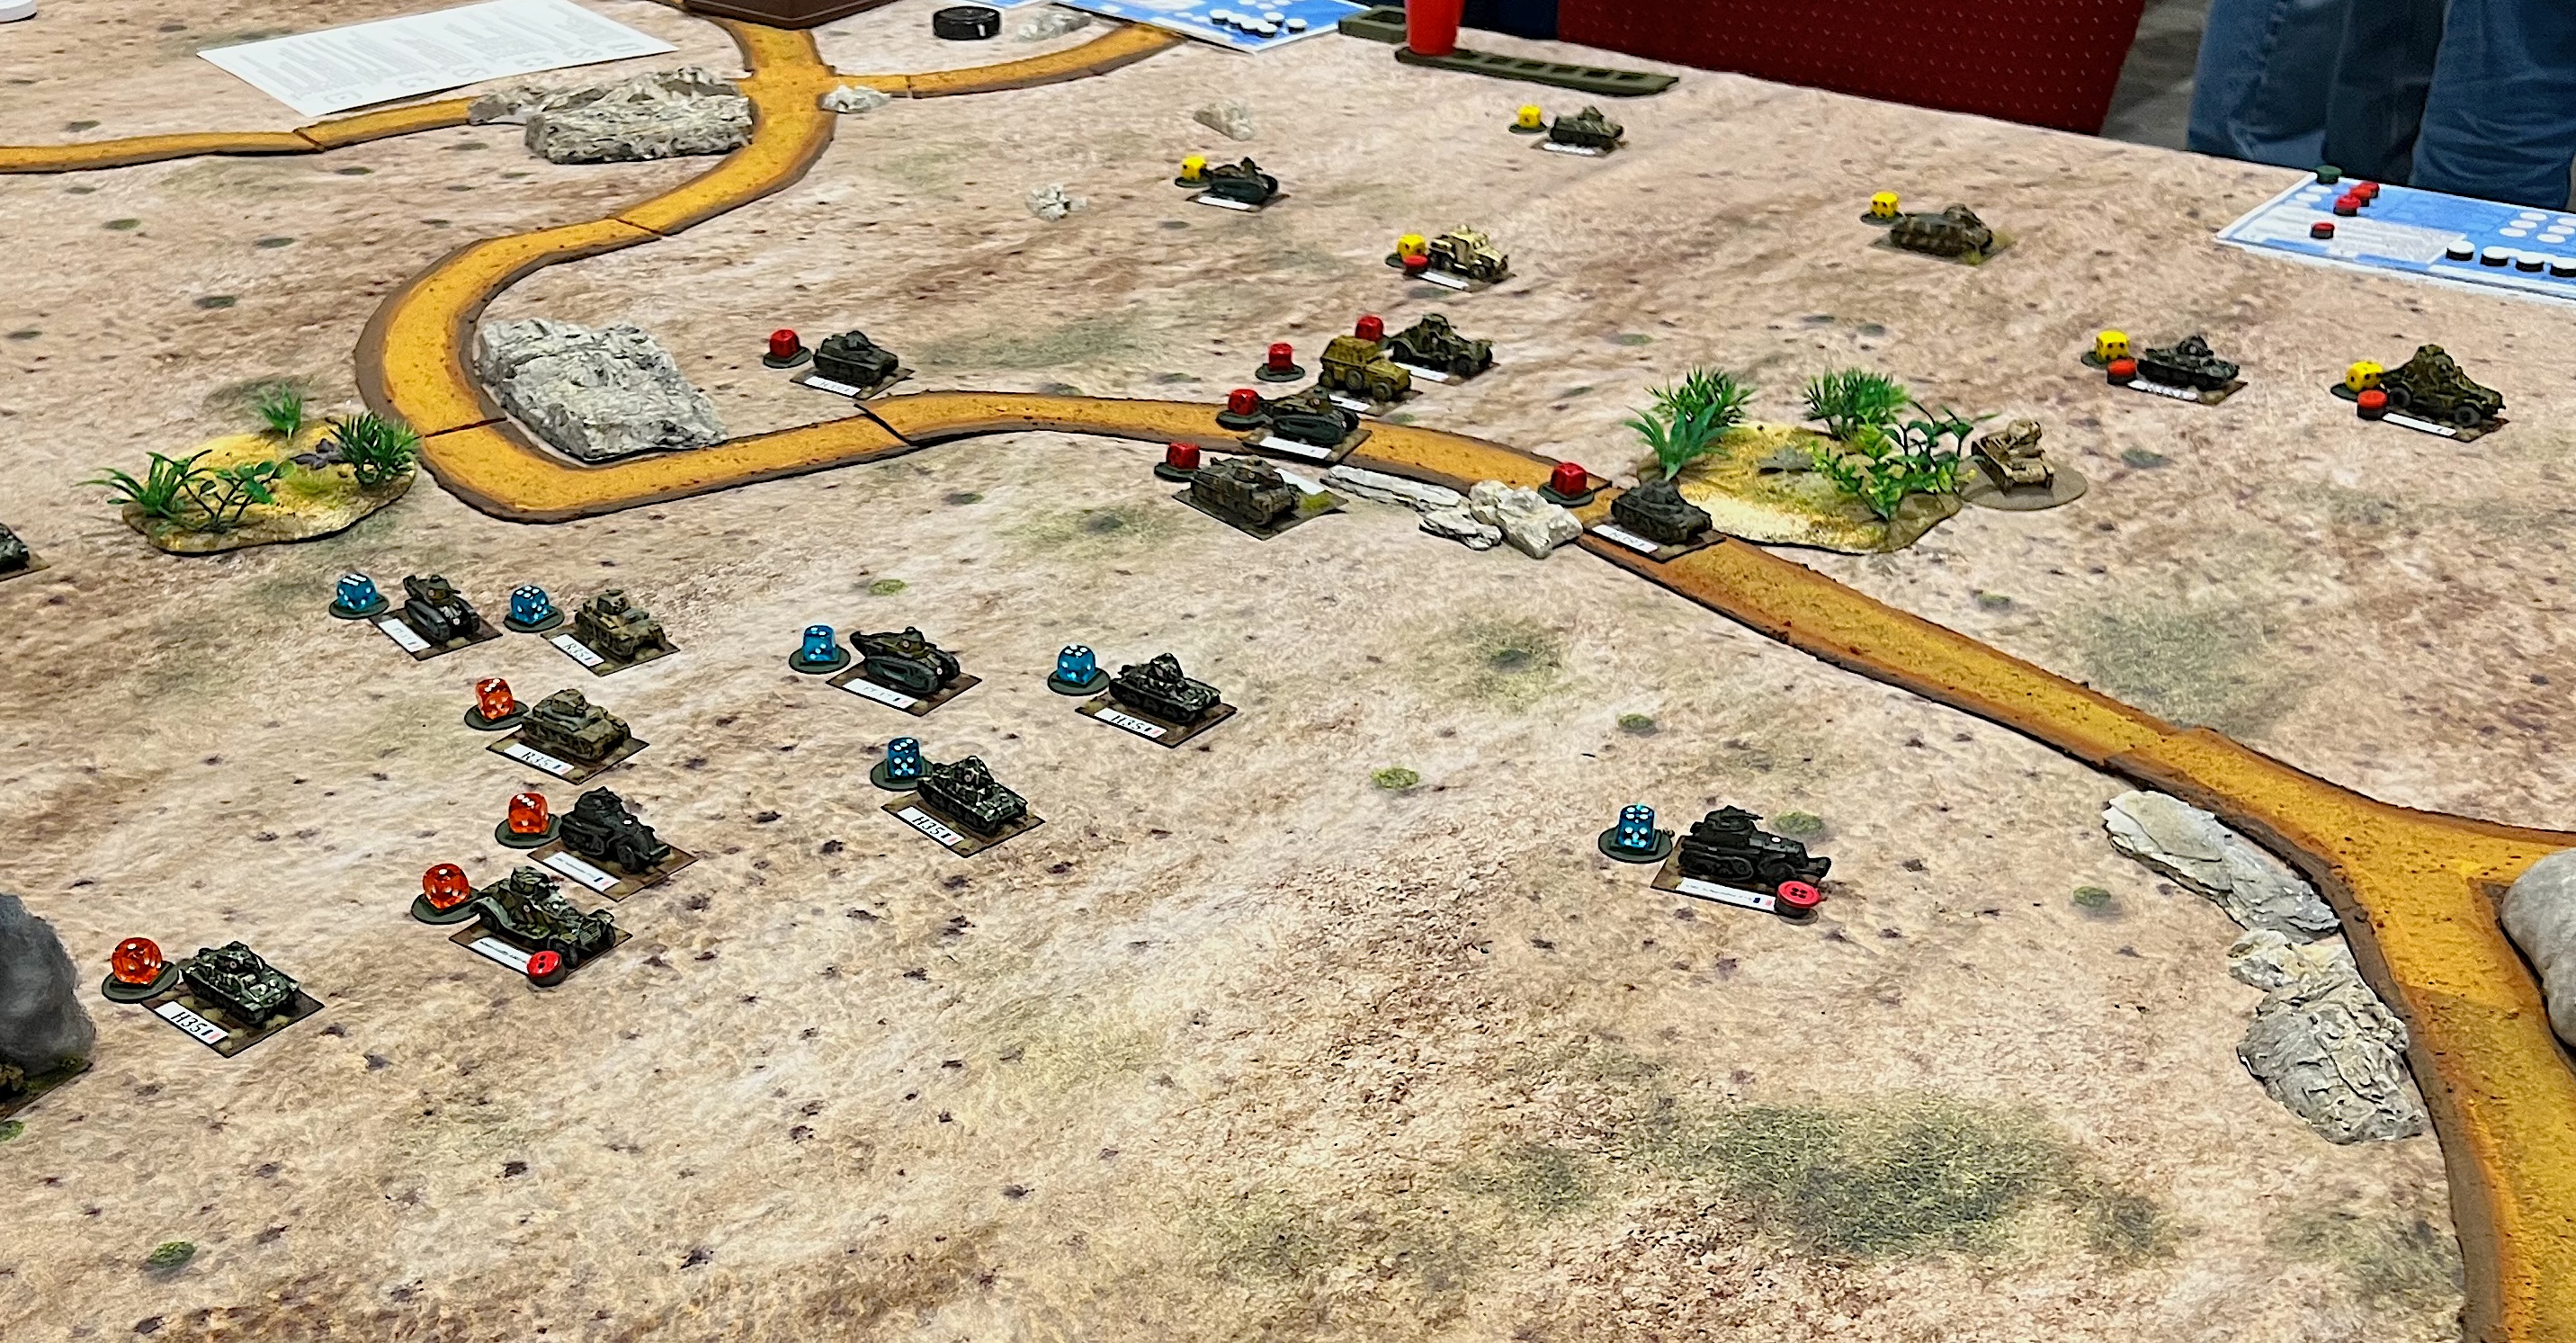
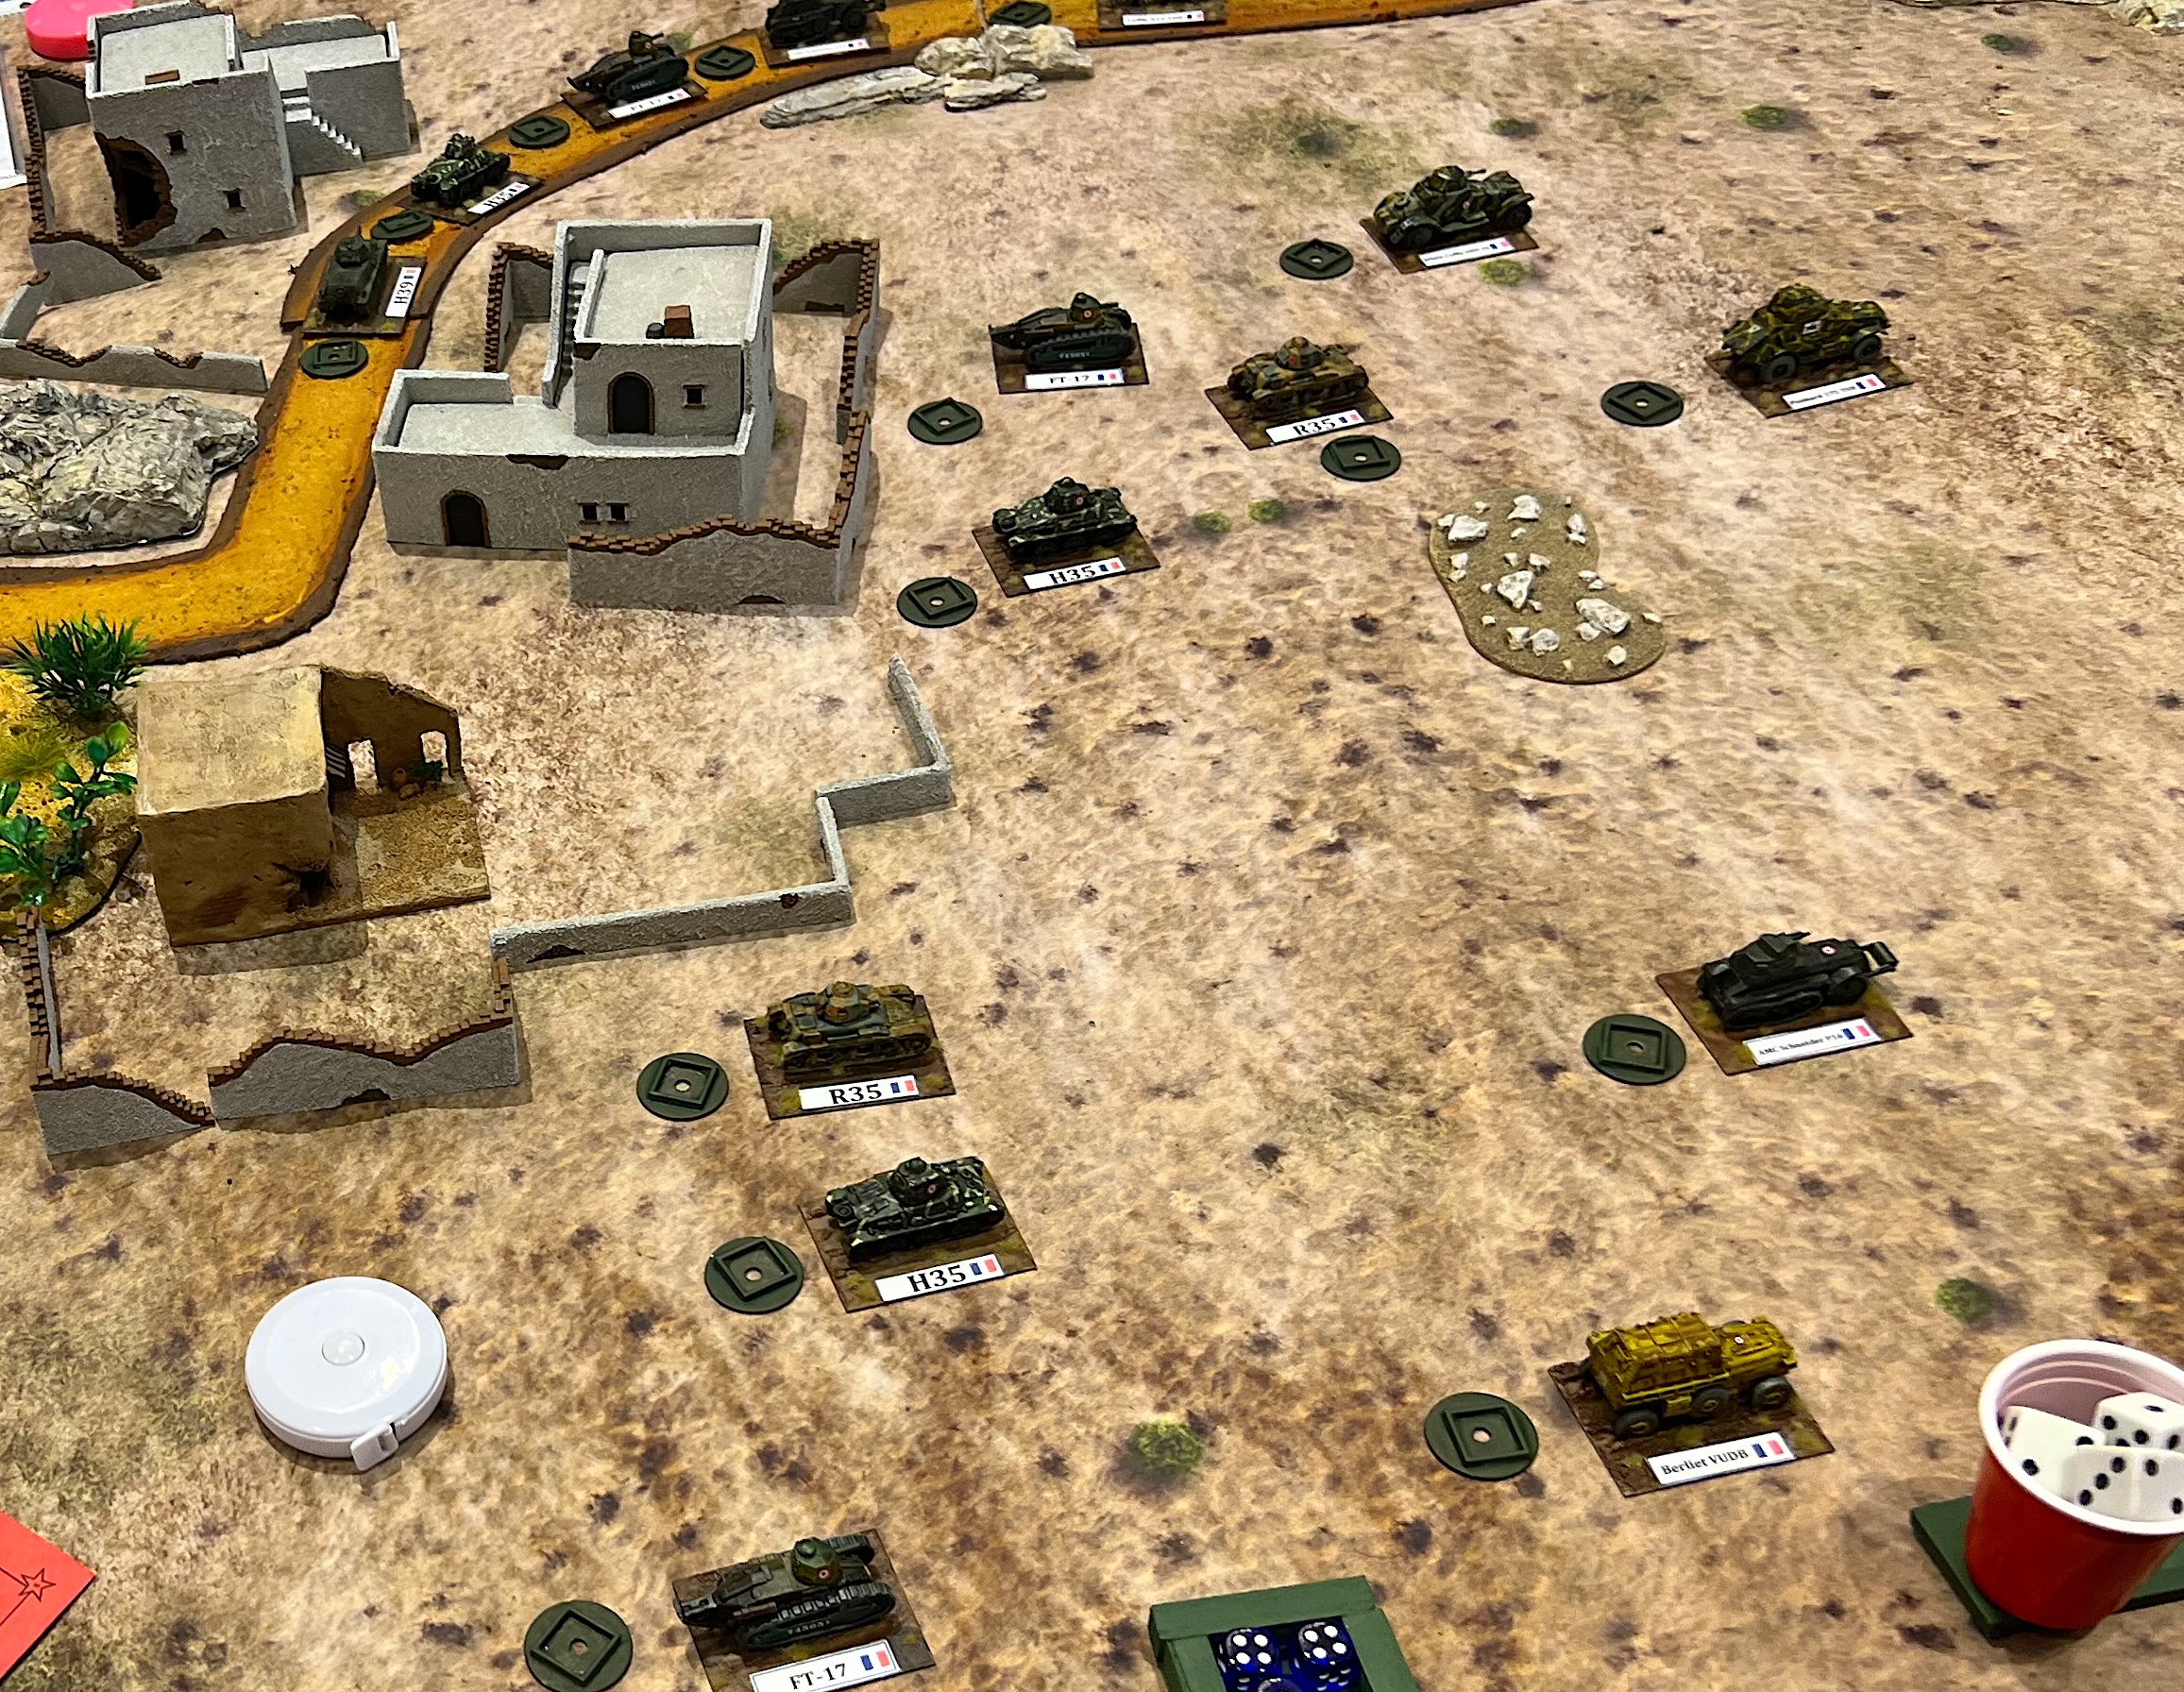
Vichy French armor facing the Italians.Royal Italian Army armor facing the French.The players plot their moves.An Italian Macchi C.202 Folgore (Italian “thunderbolt”) dogfights a Vichy Dewoitine D.520.Leif smiles as he records temporary damage on his tank. The damage was caused by Leif’s very bad dice rolling for a very old and worn out French FT-17!A Vichy SOMUA S35 knocks out an Italian Semovente 90/53.French forces advance.
The game ended with Vichy winning 540-440.
For Saturday afternoon, I ran Operation Torch: Vichy Mounts an Armored Counterattack. This was also a modified What a Tanker game.
Operation Torch: Vichy Mounts an Armored Counterattack
The Vichy players plan their assault.The American players are ready!The Americans watch as the Vichy French get closer. They have plans of getting air cover and naval gunfire on the French!Knowing this, the French spread out to avoid massing a big target.Mal considers his next move.Aircraft are deployed, but the US Navy rules the skies. This allows for the Avenger to call in naval gunfire from the USS Savannah. This destroys multiple Vichy vehicles.
The US air superiority and naval gunfire carried the day – with the US winning a significant victory.
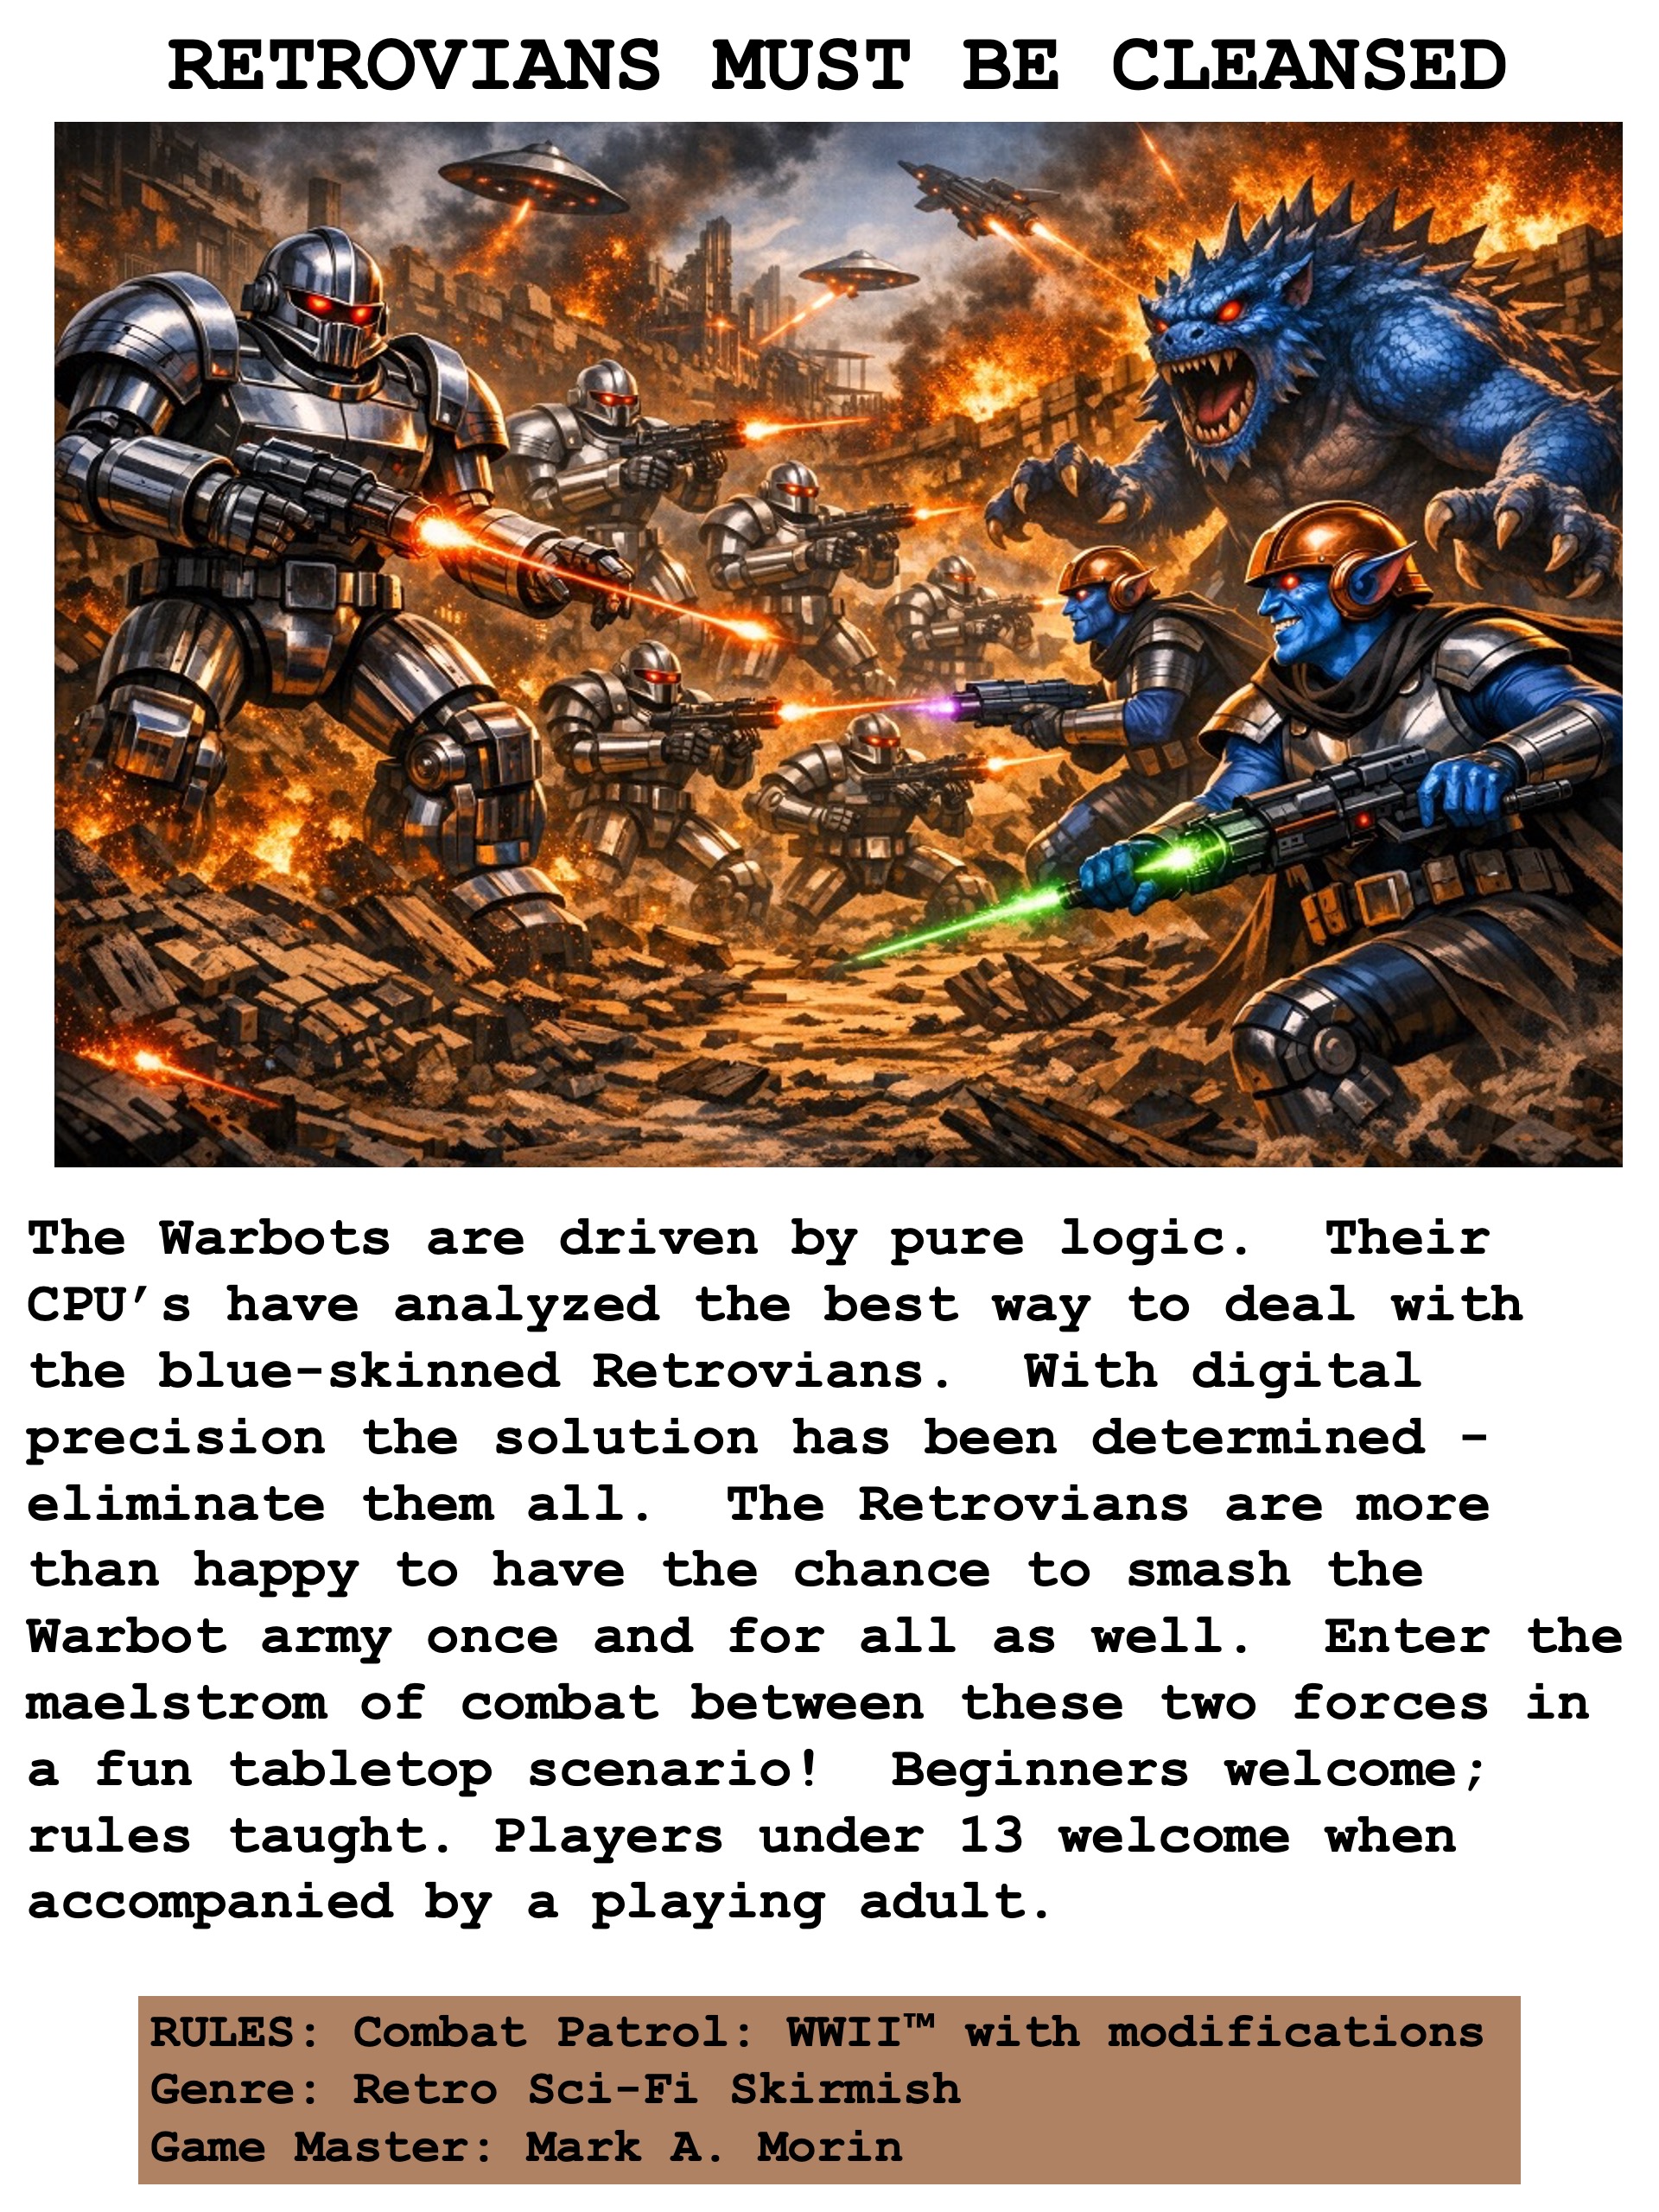
RETROVIANS MUST BE CLEANSED
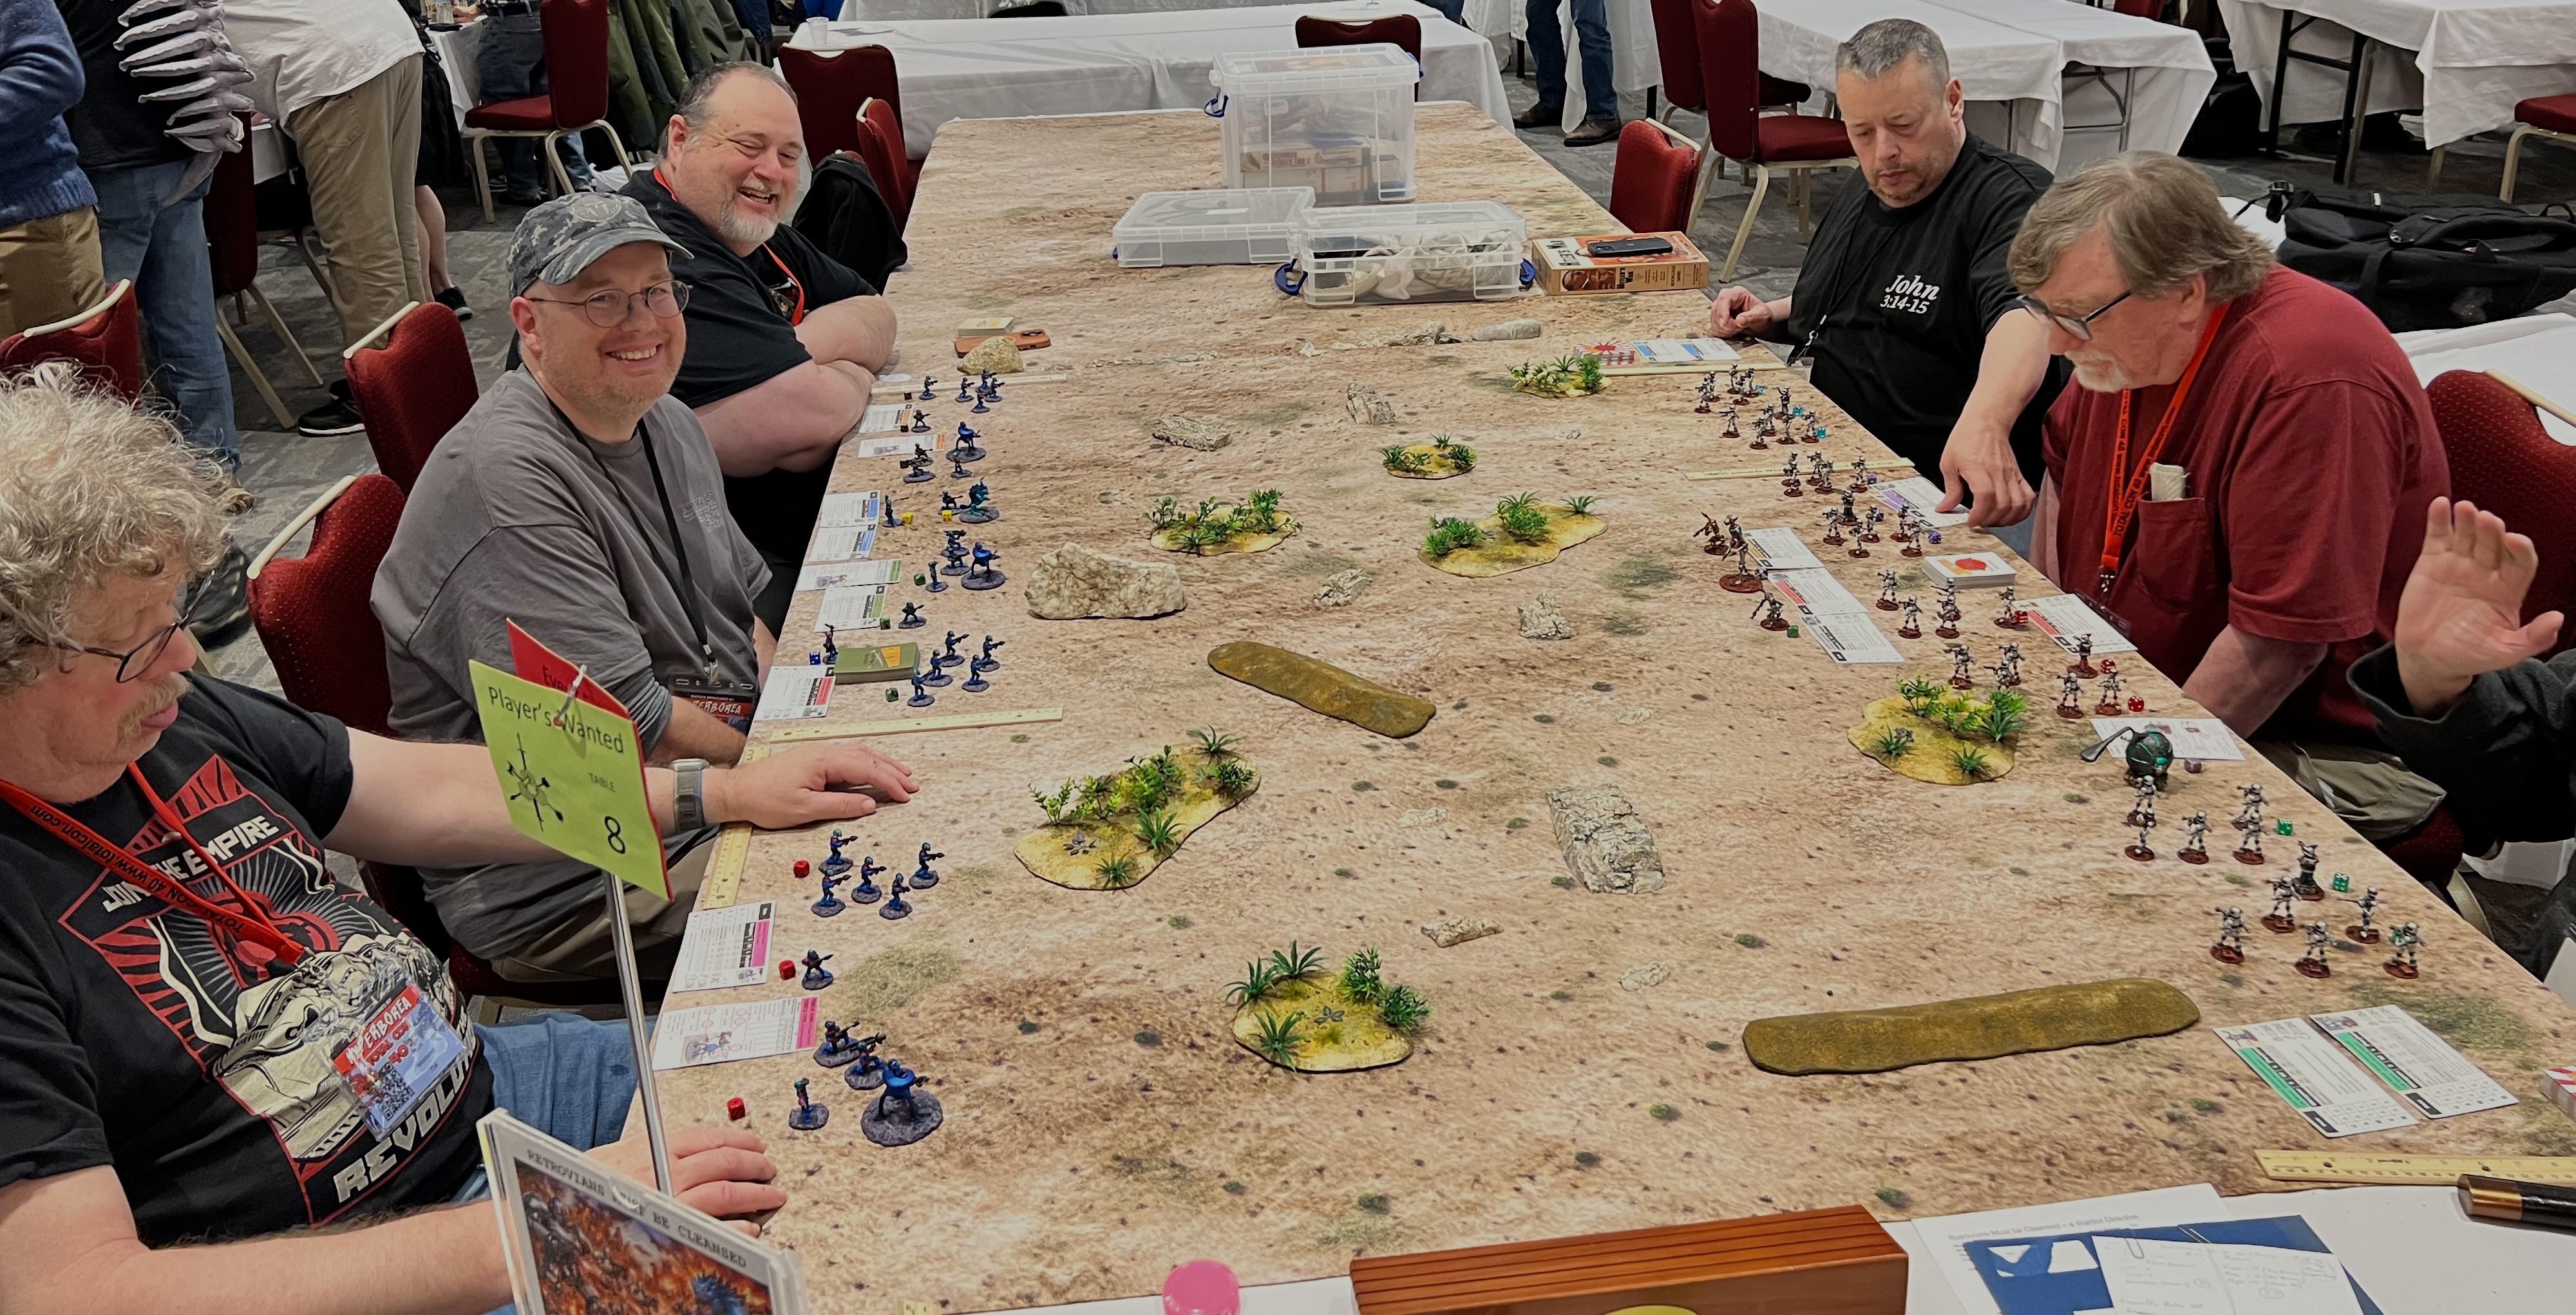
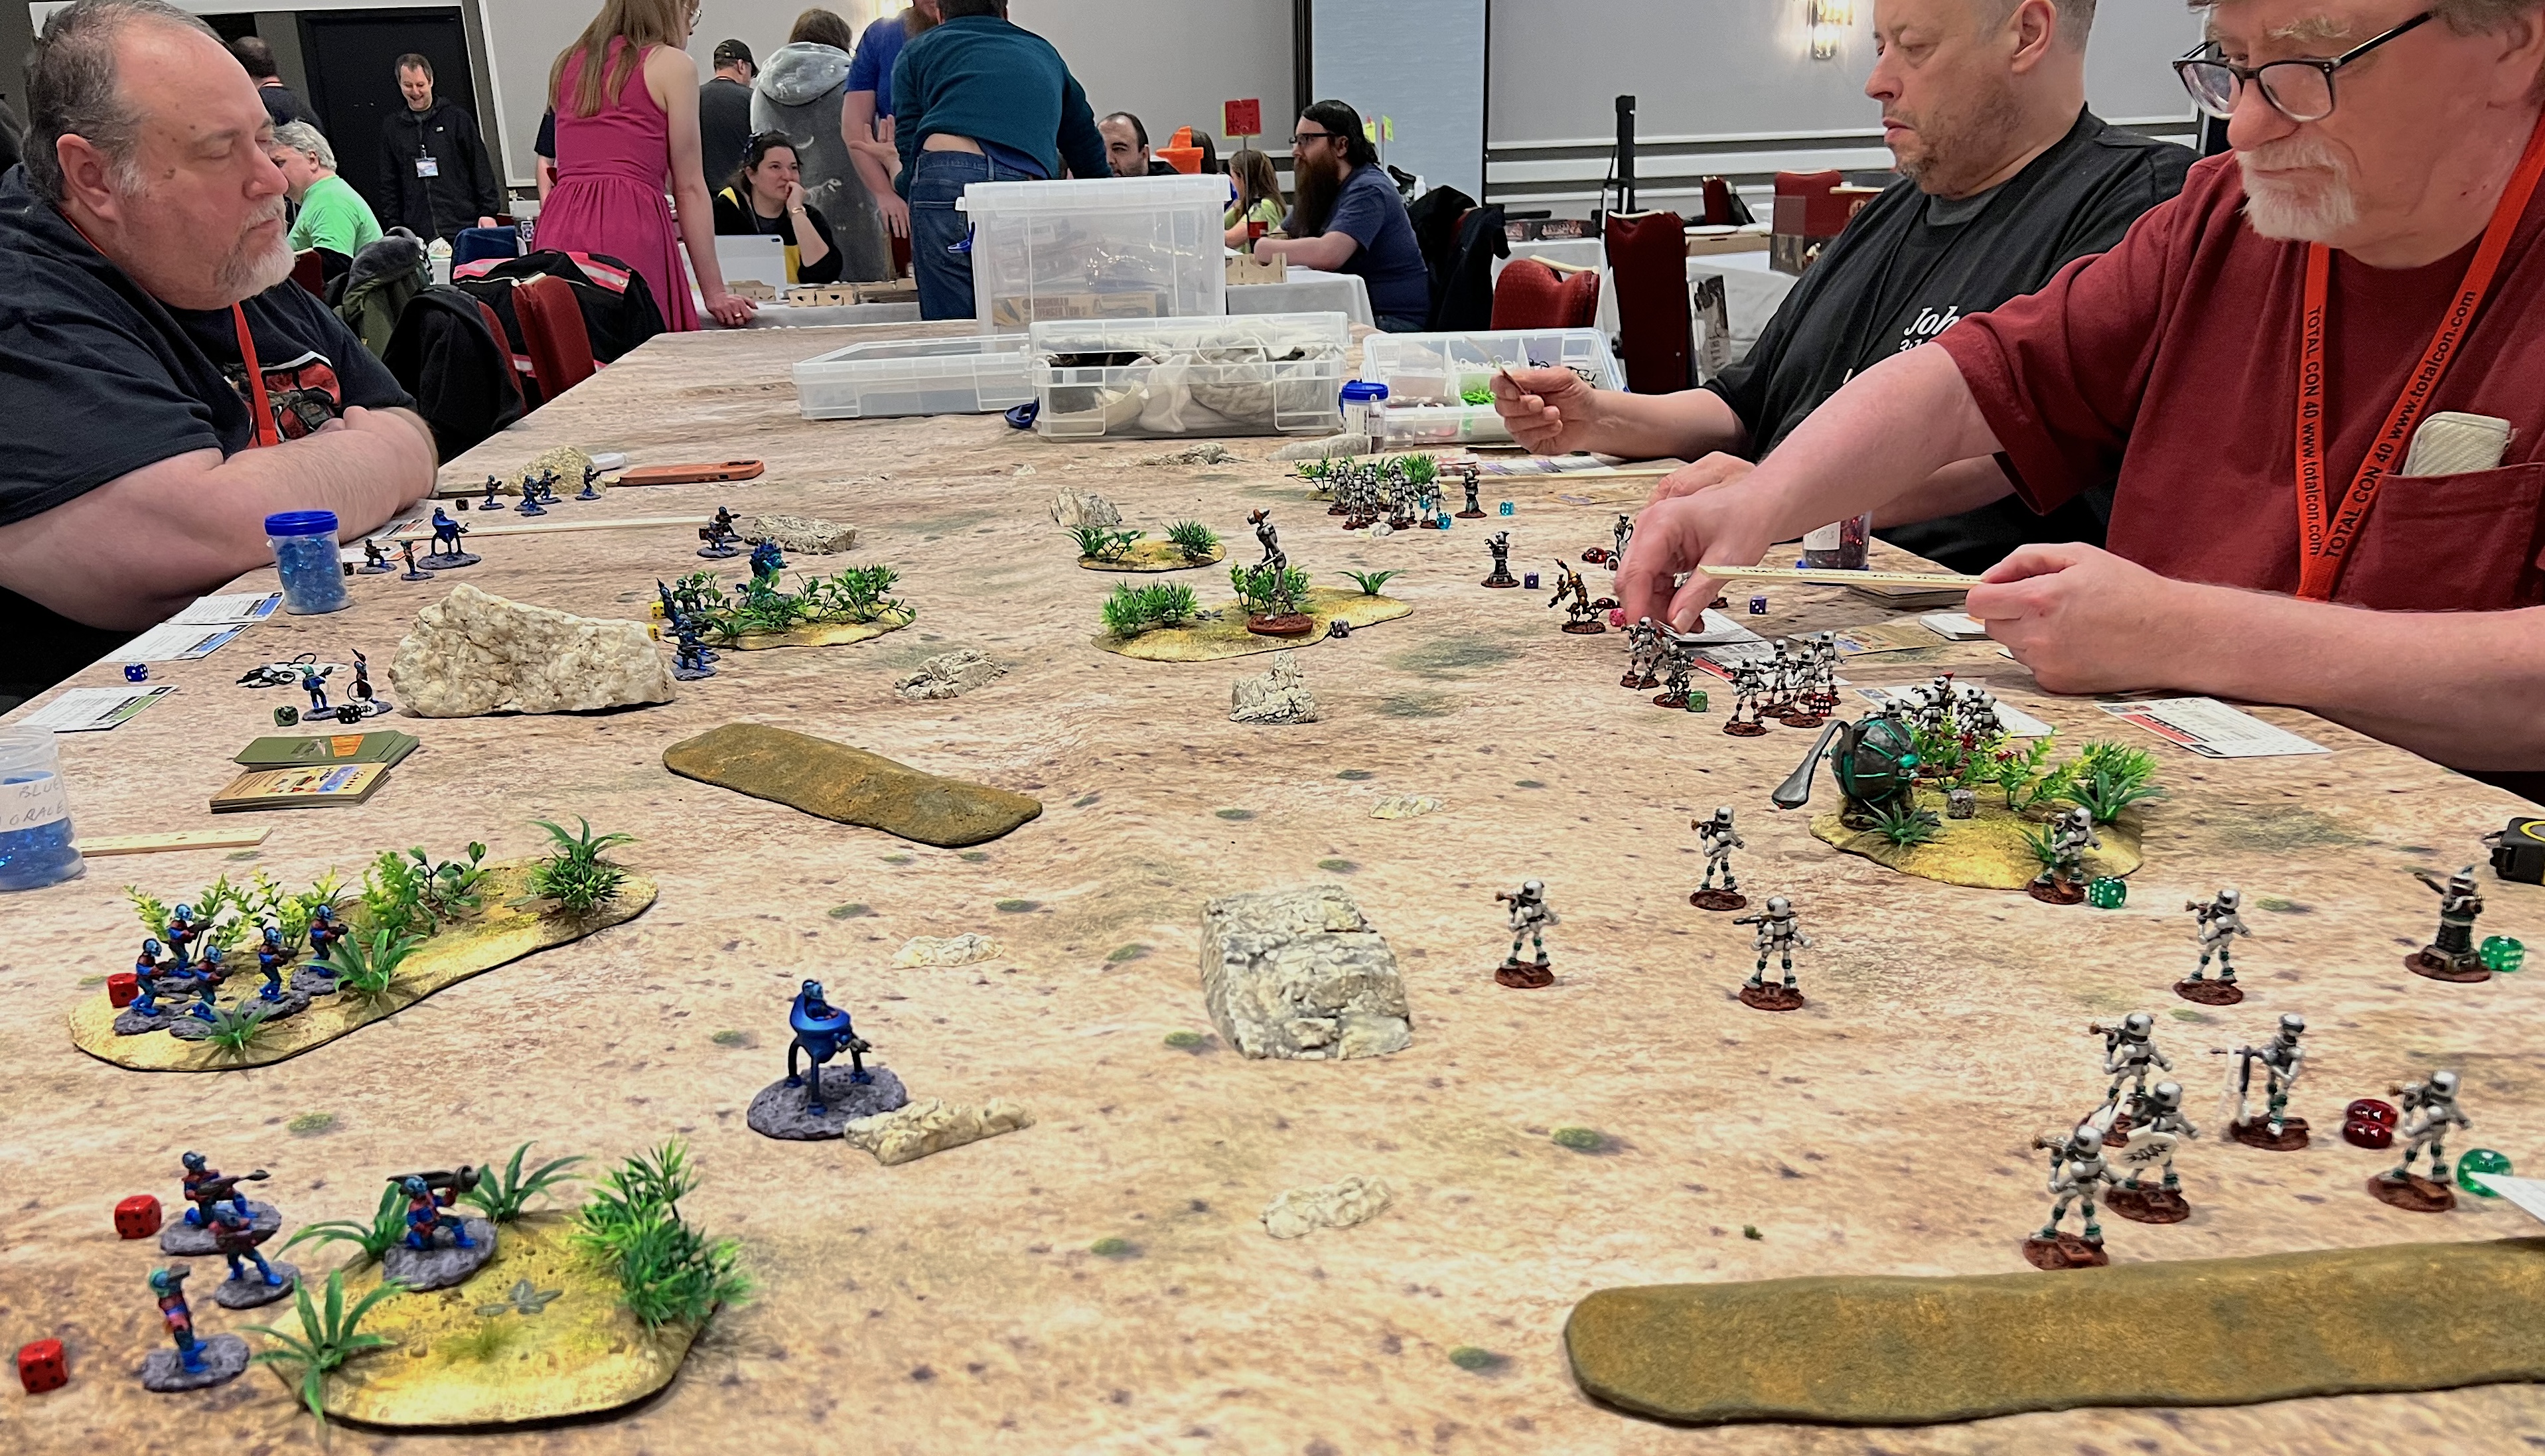
Saturday night’s game was upon me, and I had decided to run another Combat Patrol retro sci-fi game. This time, the Retrovians would face the Archive Star Rovers Warbots. They would also confront my own creation – the Mark 1 Sphere tank.
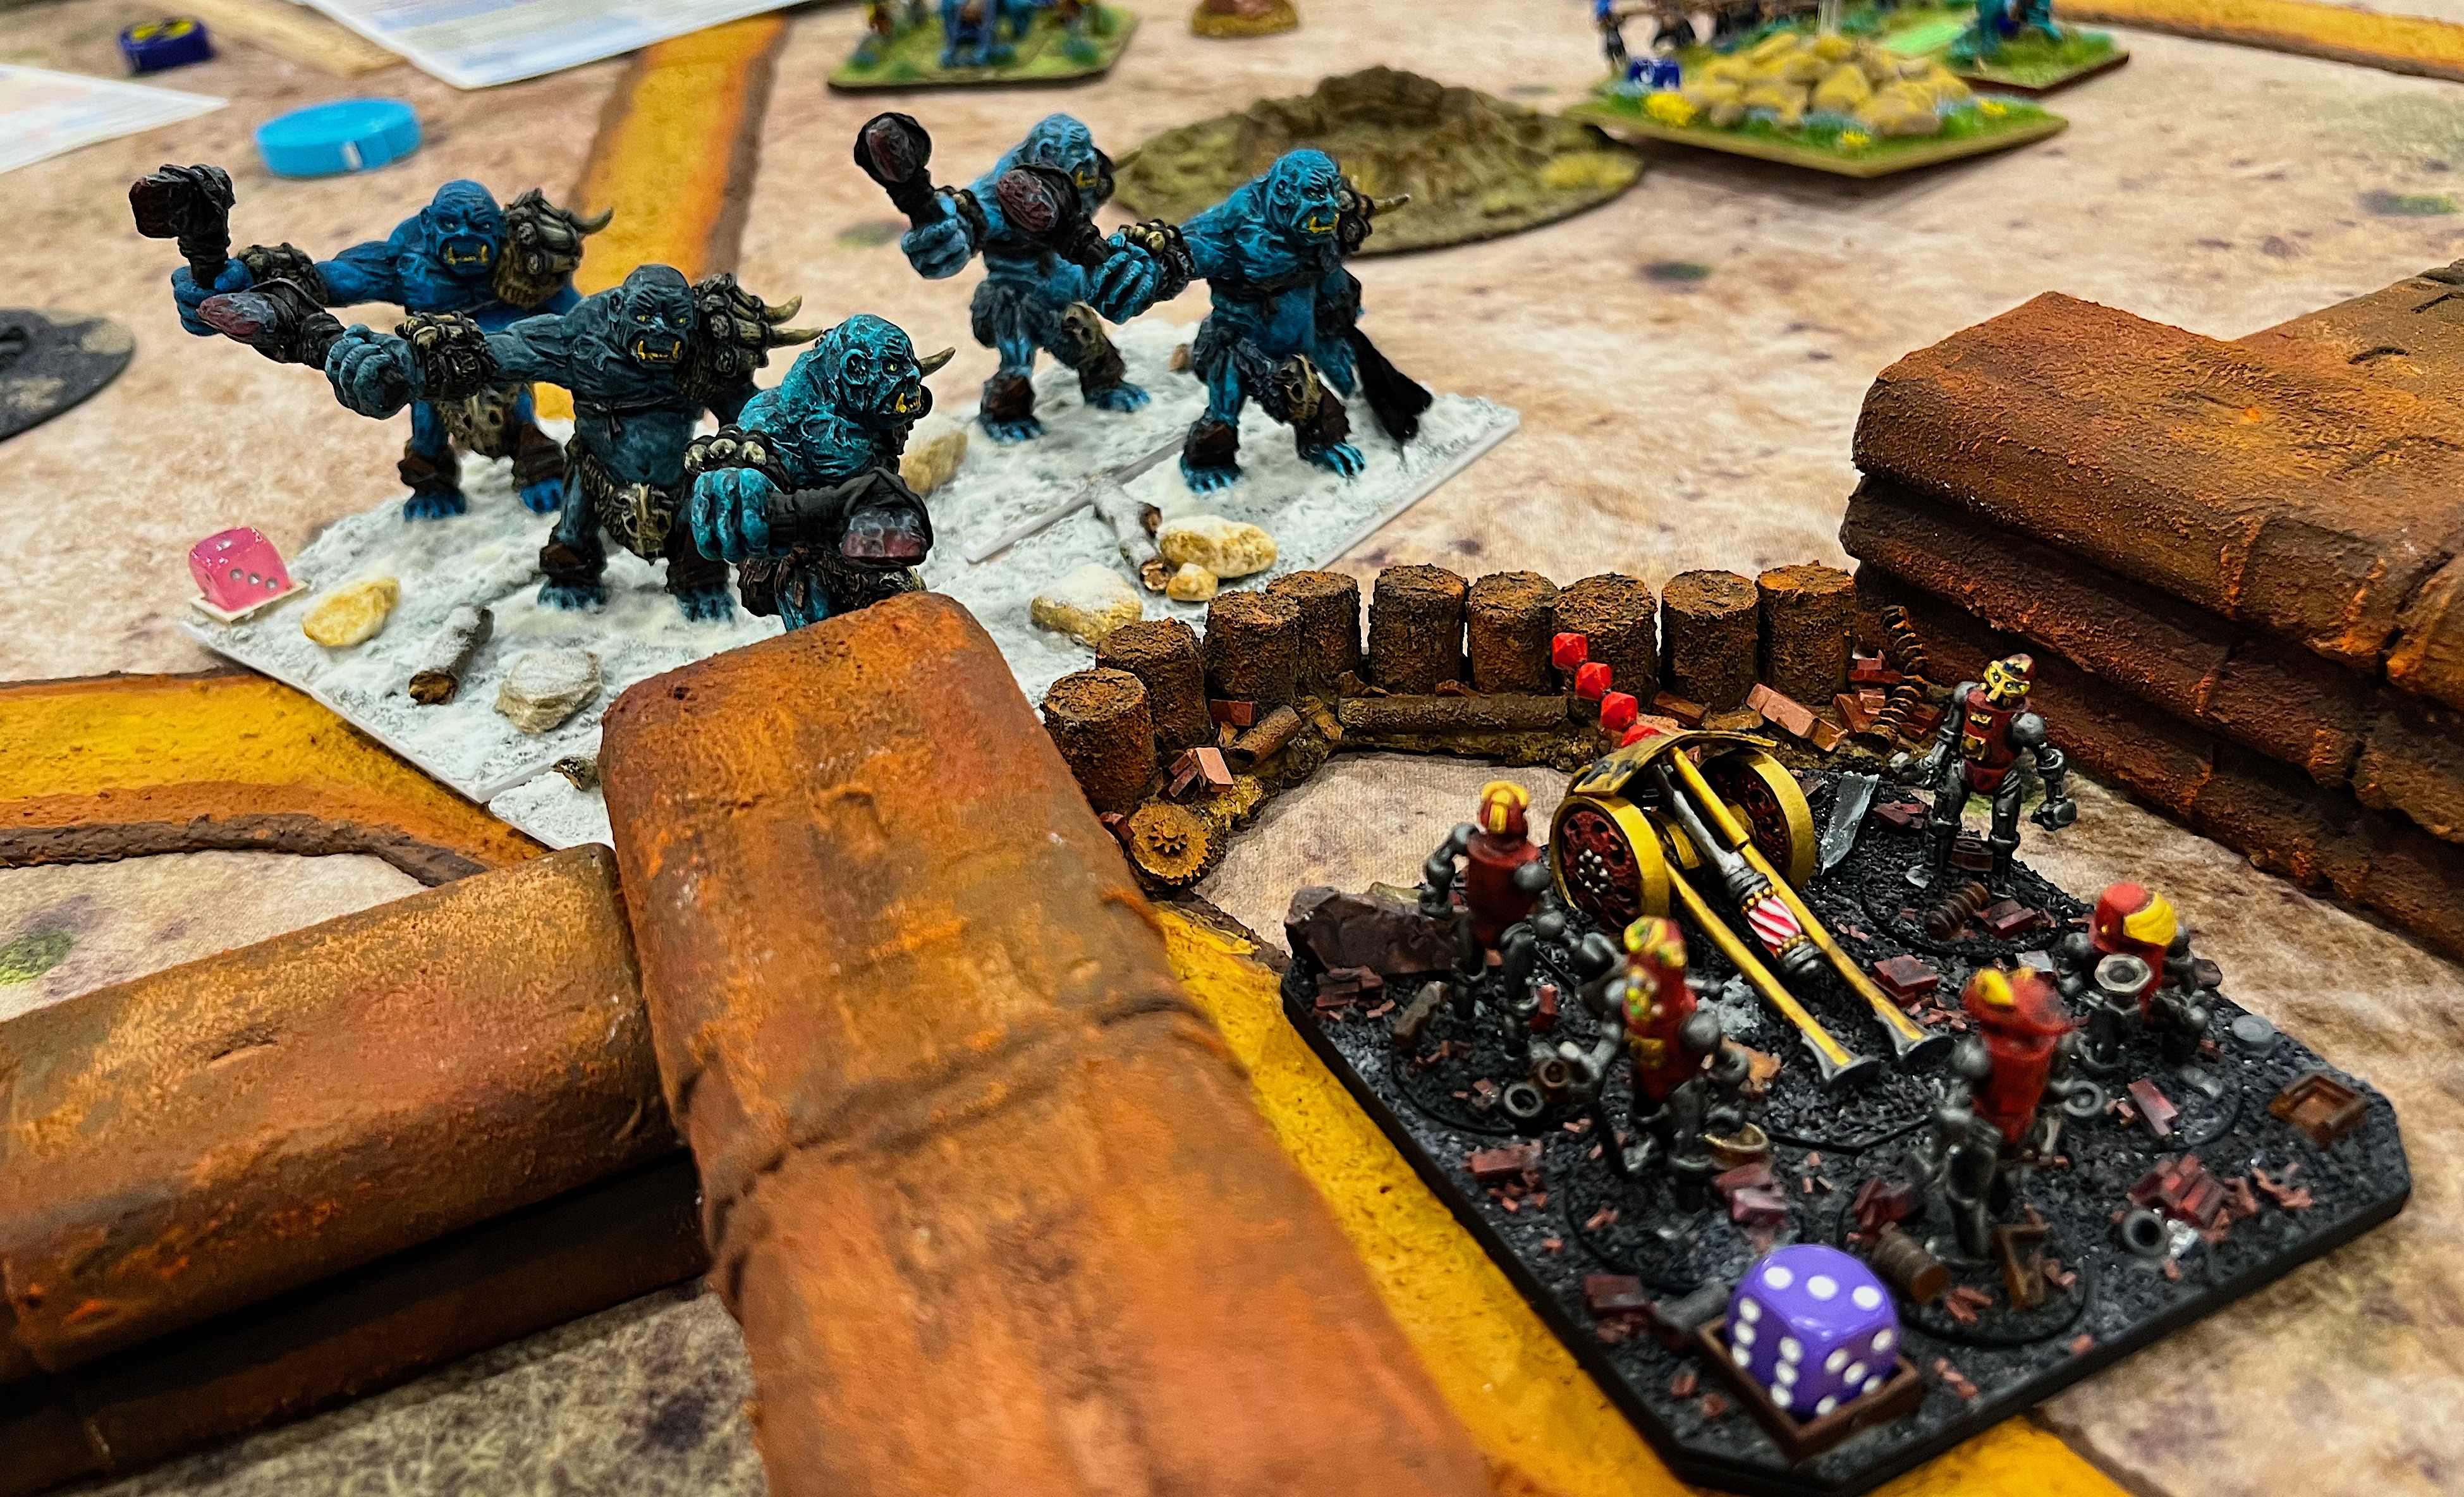
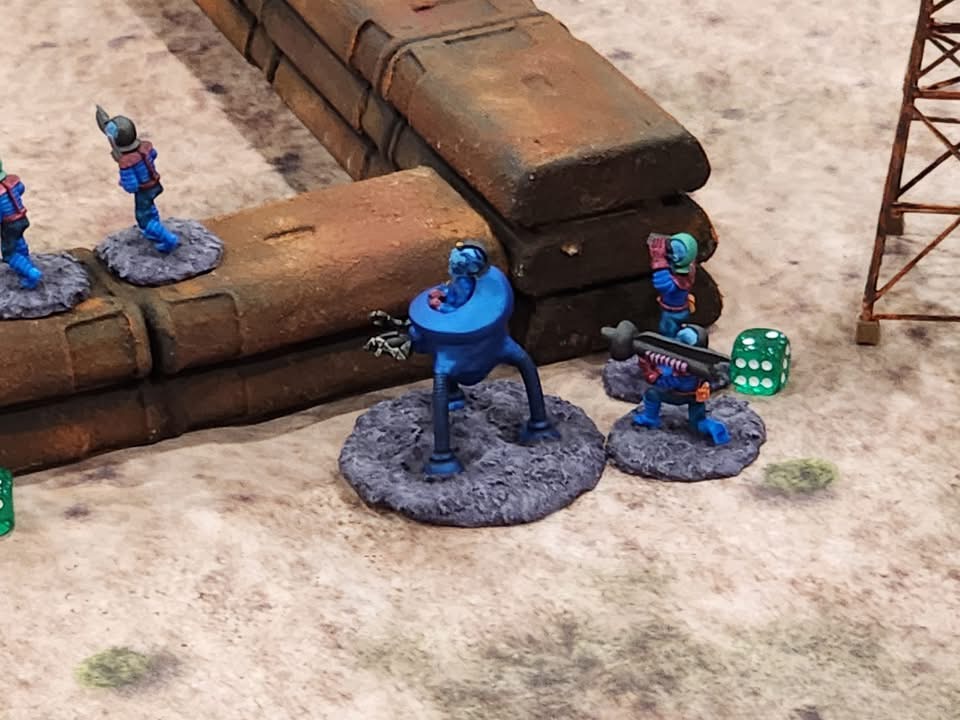
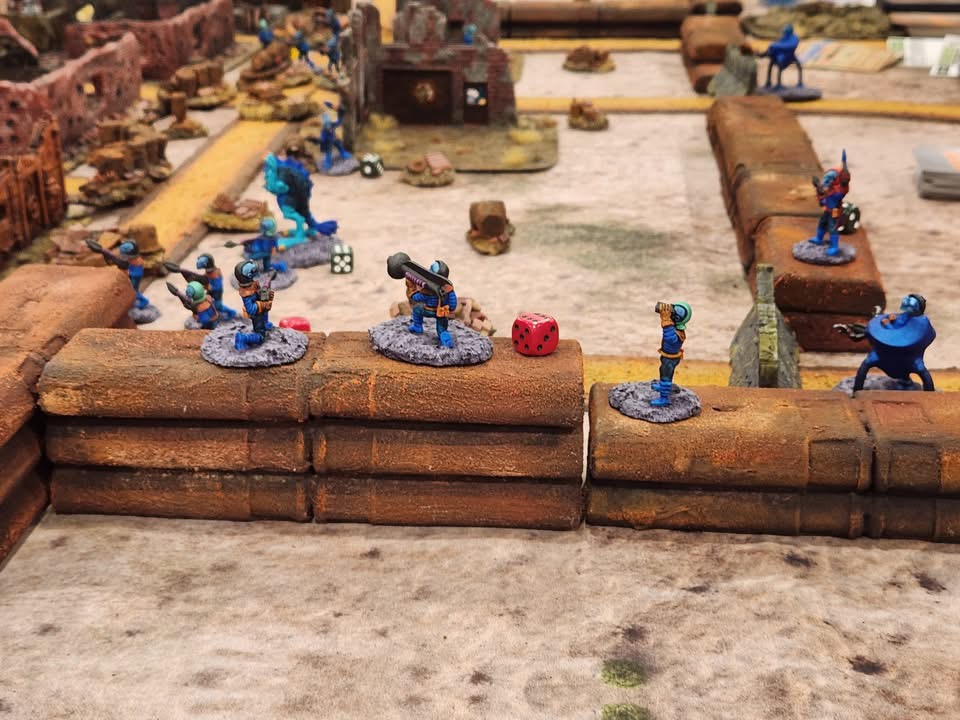
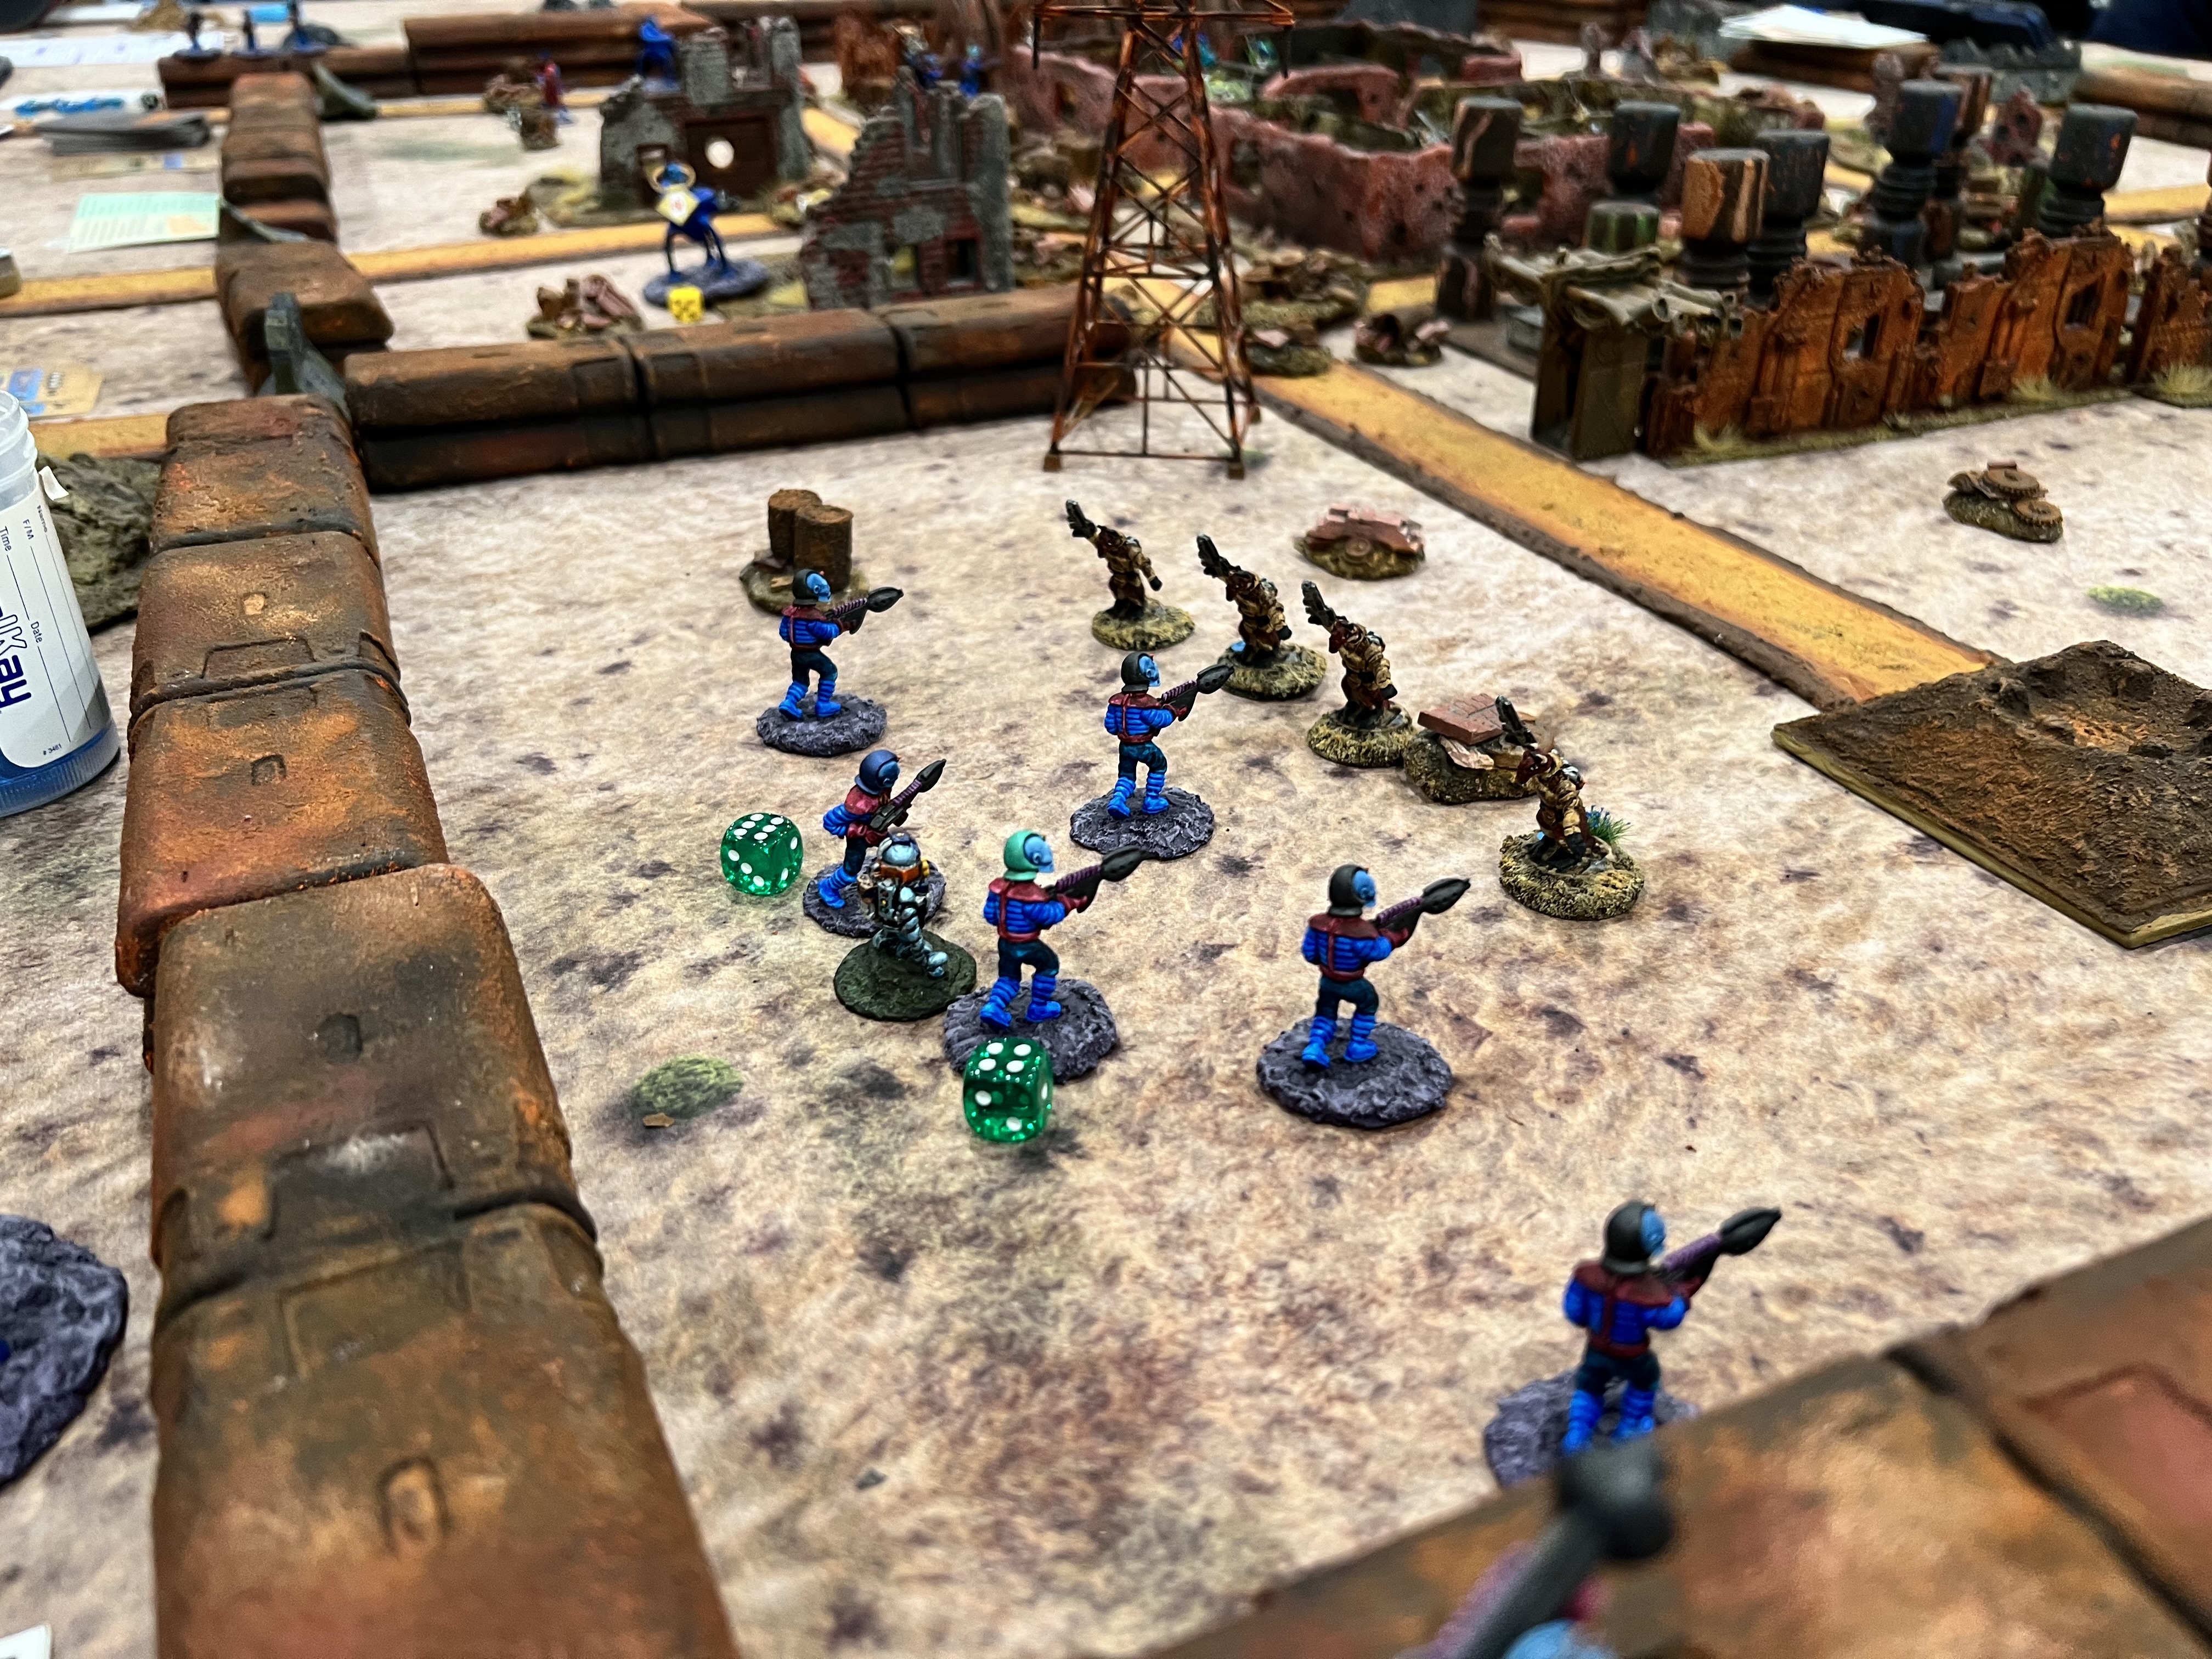
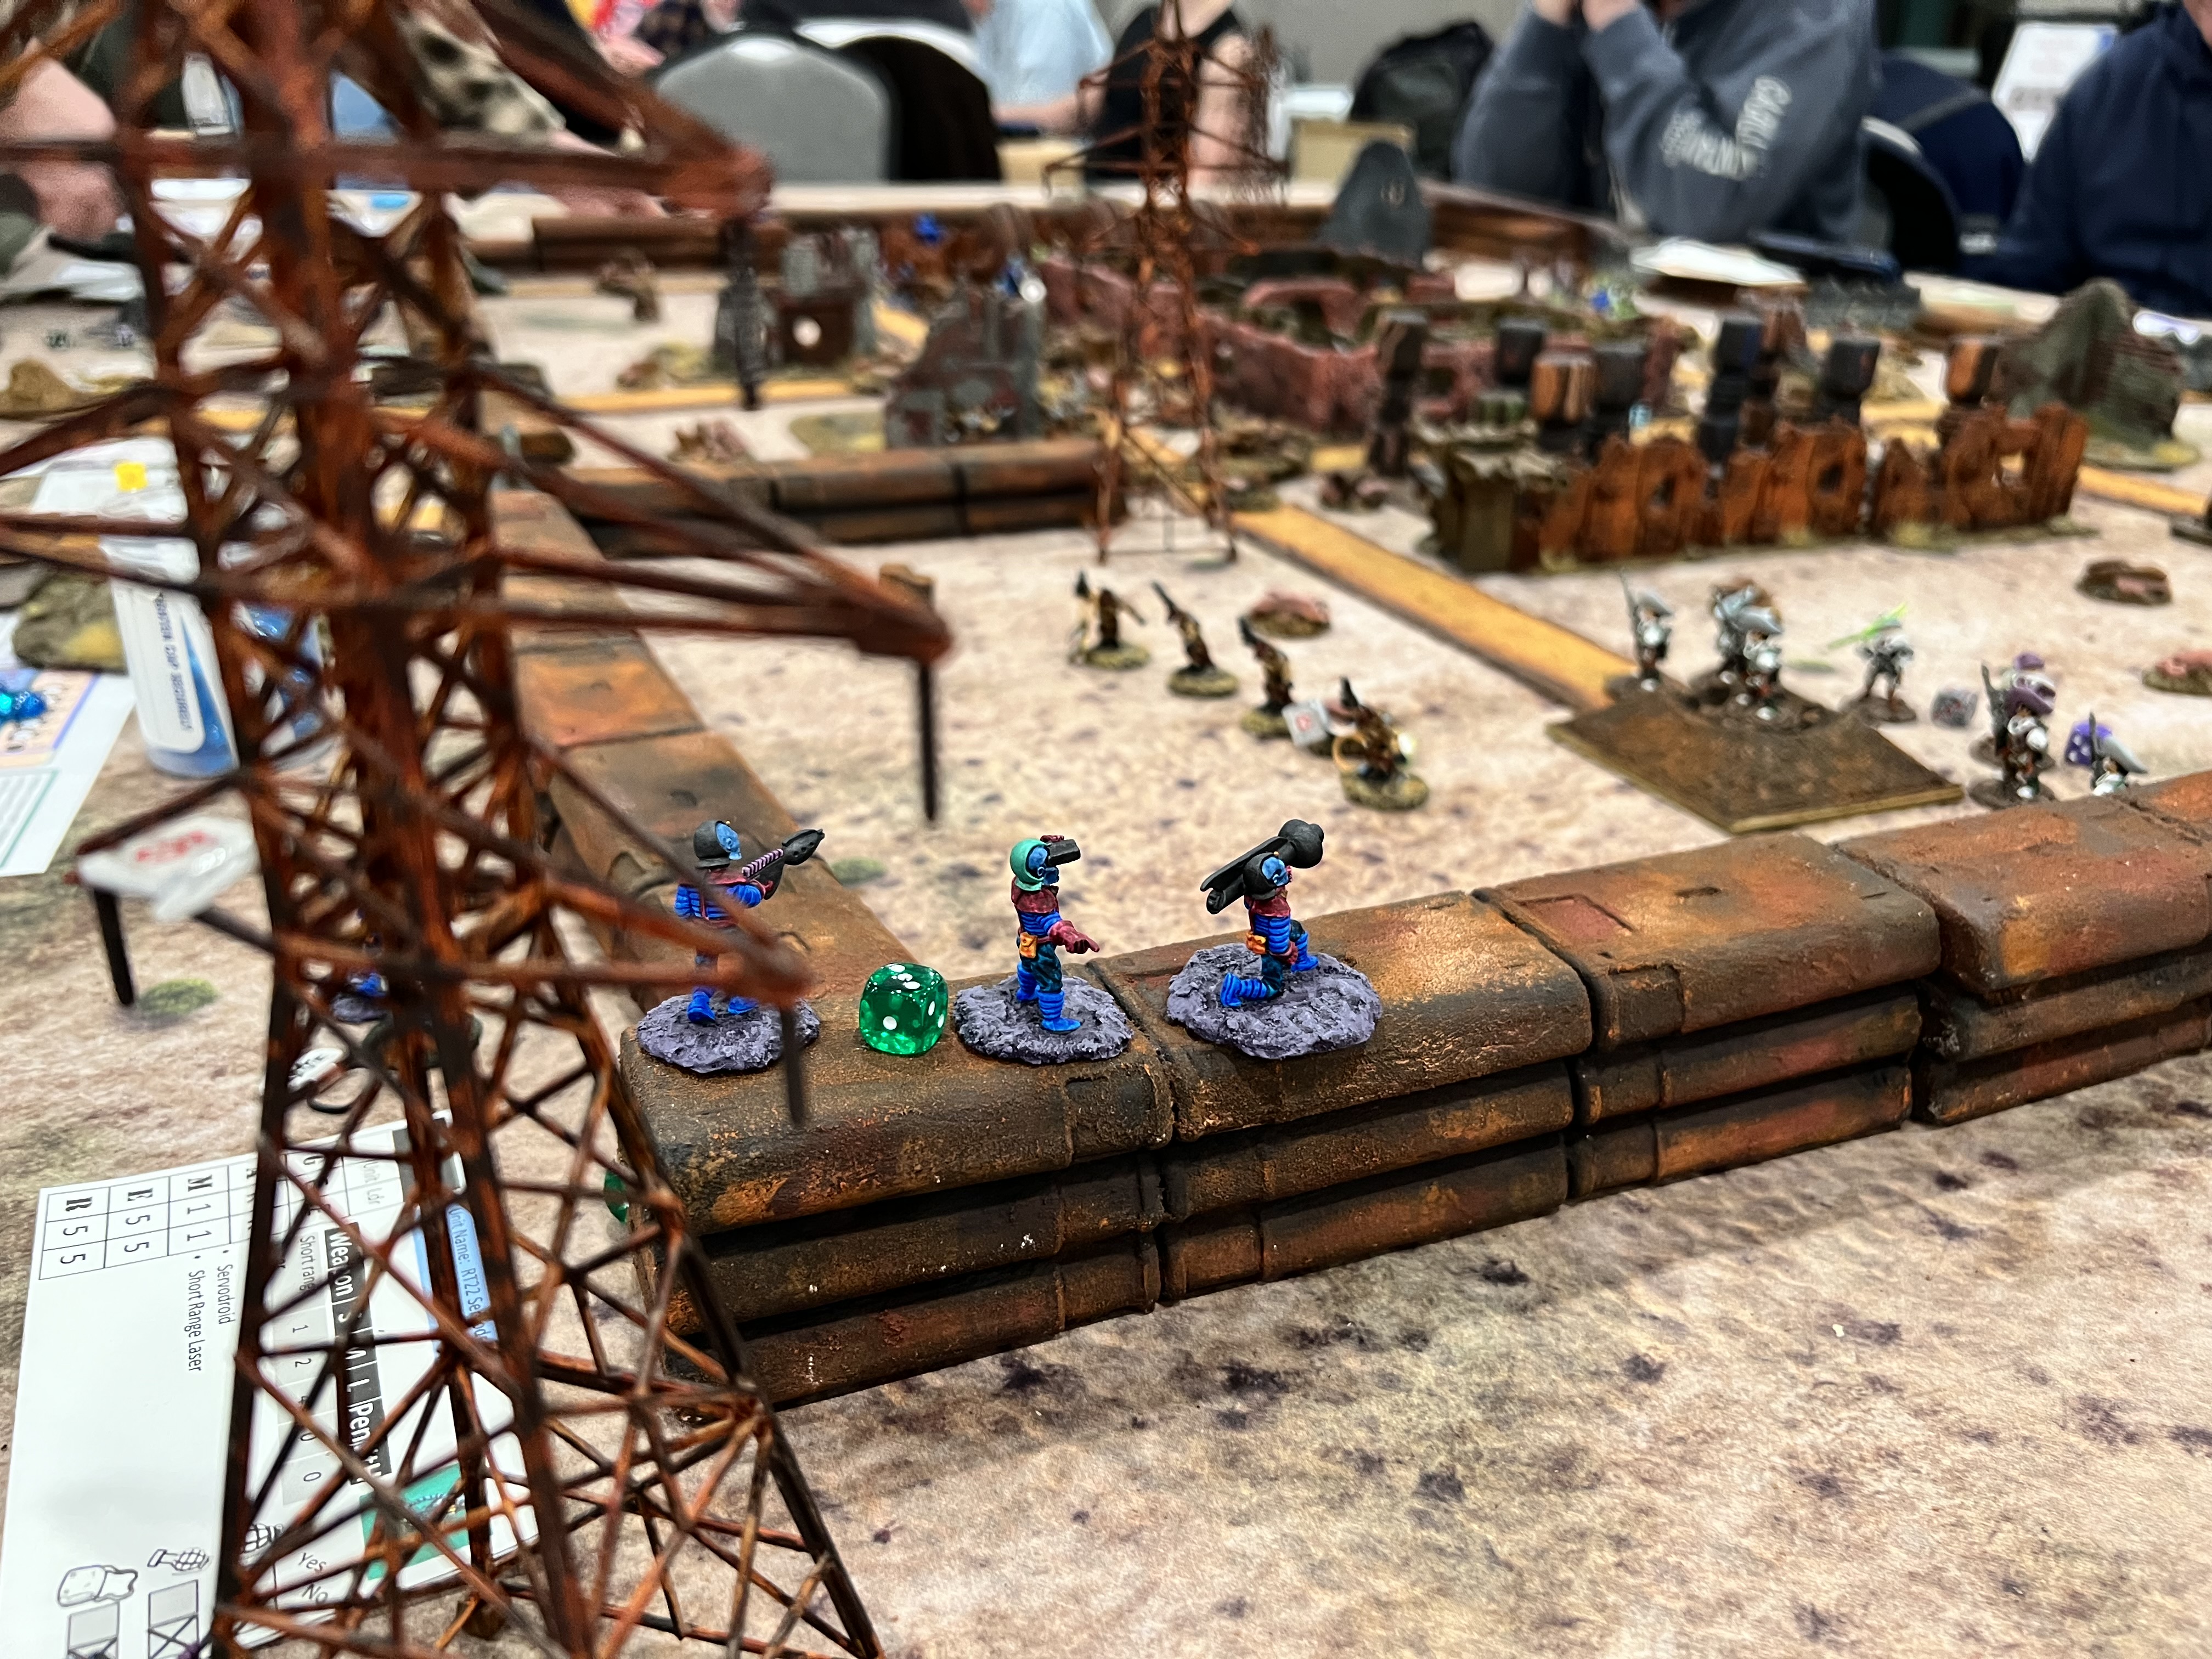
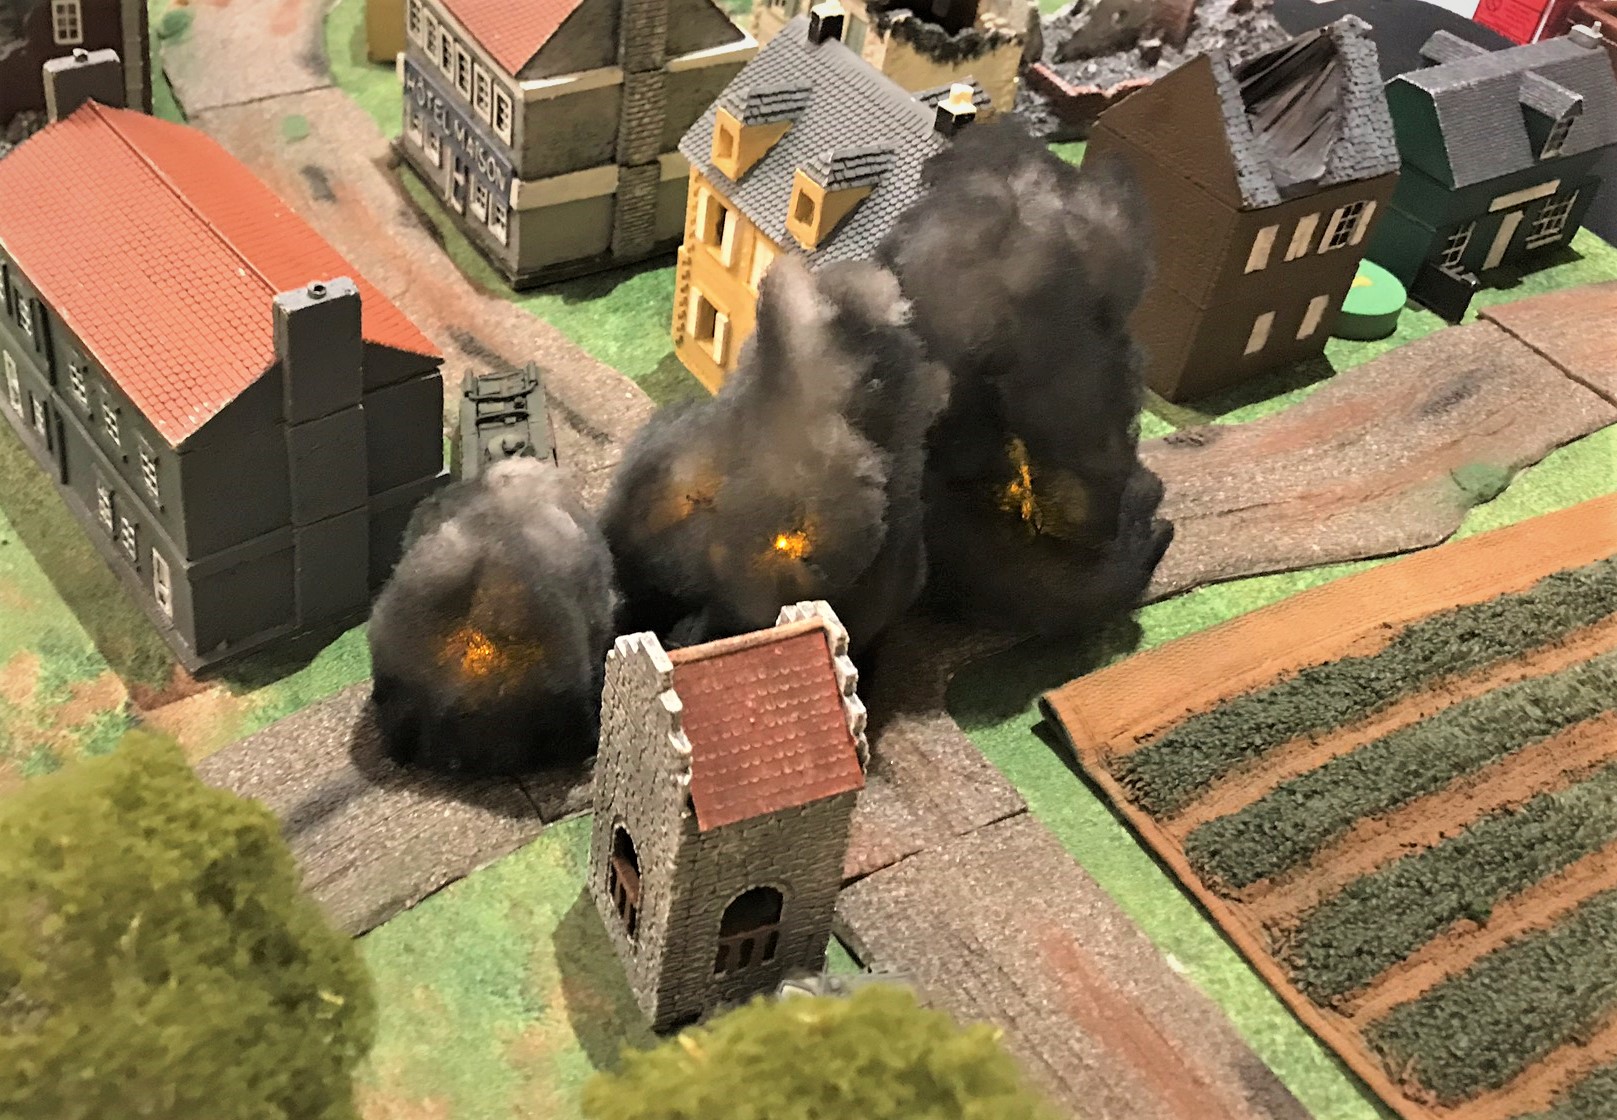
Happy Gamers at the start! Retrovians are on the left, Warbots on the right.A Retrovian Bra’sheer tripod moves out front of its infantry. The Mark 1 takes up a supporting position as the Warbots march forward to glory.The Mark 1 safely delivers machine gun fire from its sponsons. Meanwhile, the Warbots also take fire and are stunned.
I did not take many pictures of this game. I do believe that the Warbots wore down the Retrovians. Yes, they were “cleansed”. It was nice to see these figures back on the tabletop.
This was the penultimate game for me of TotalCon 2026. I headed off to my room. I was ready for the 2026 TotalCon “Tournament of Ozz” on Sunday morning.
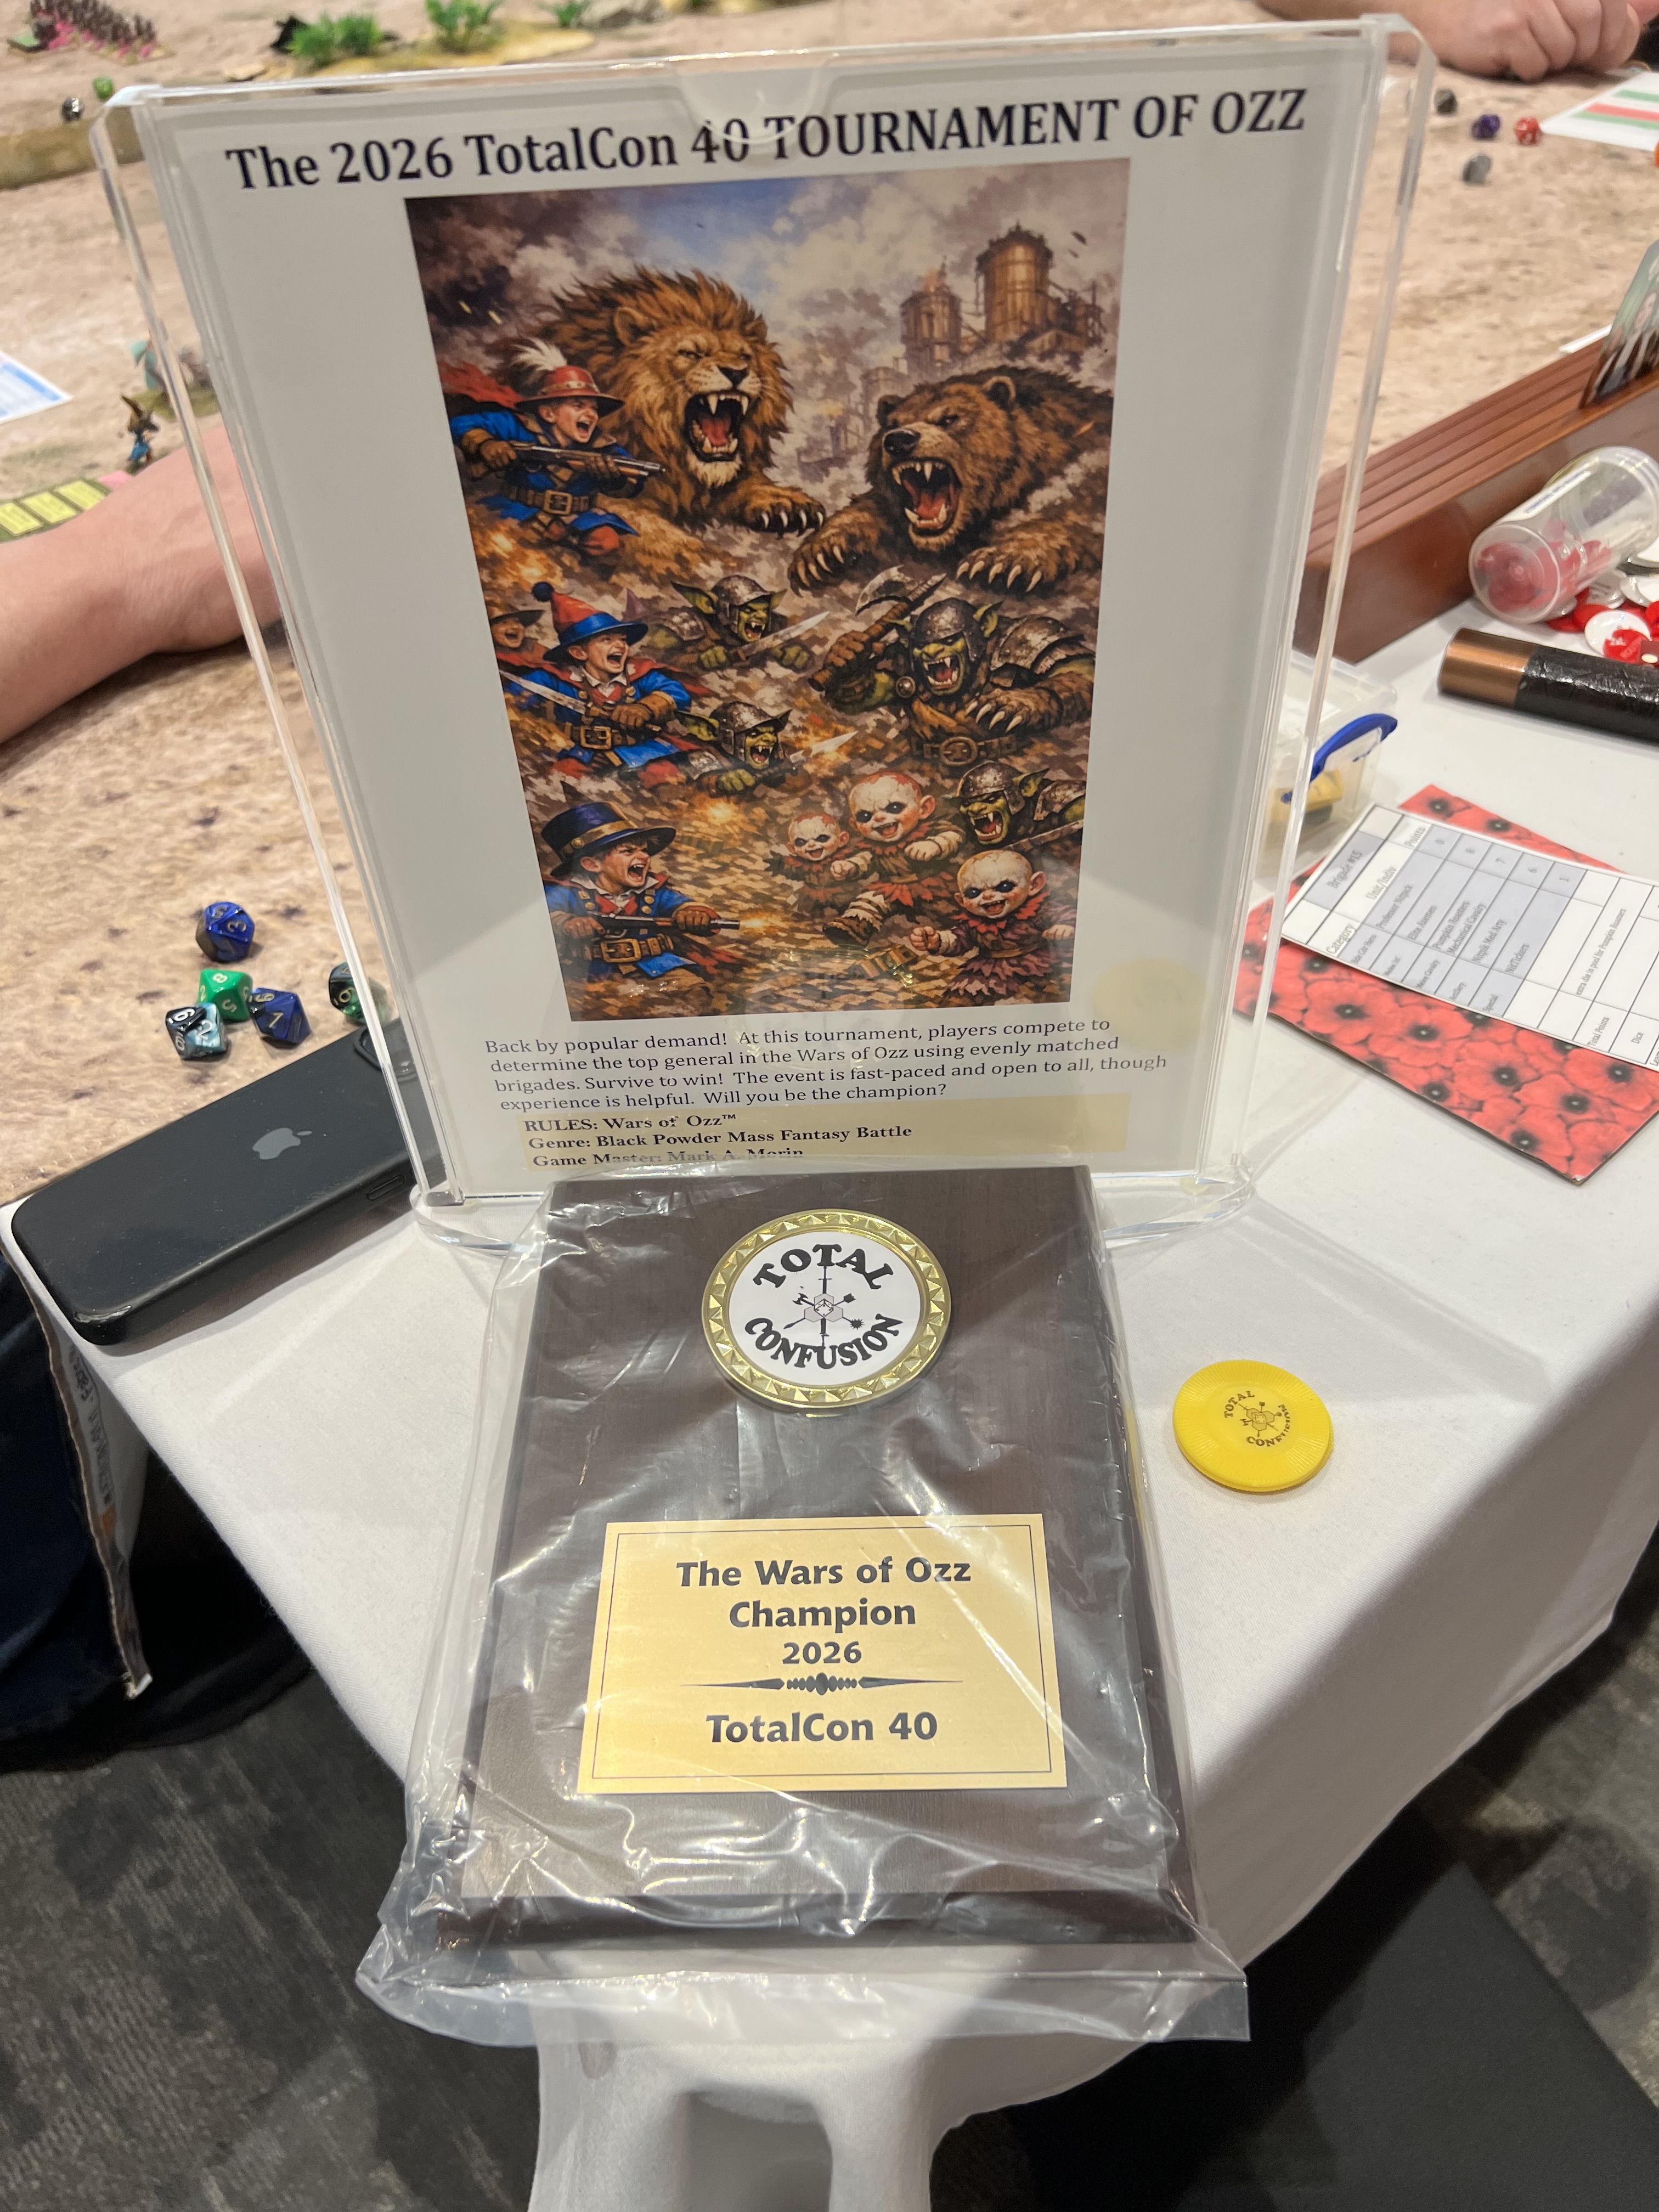
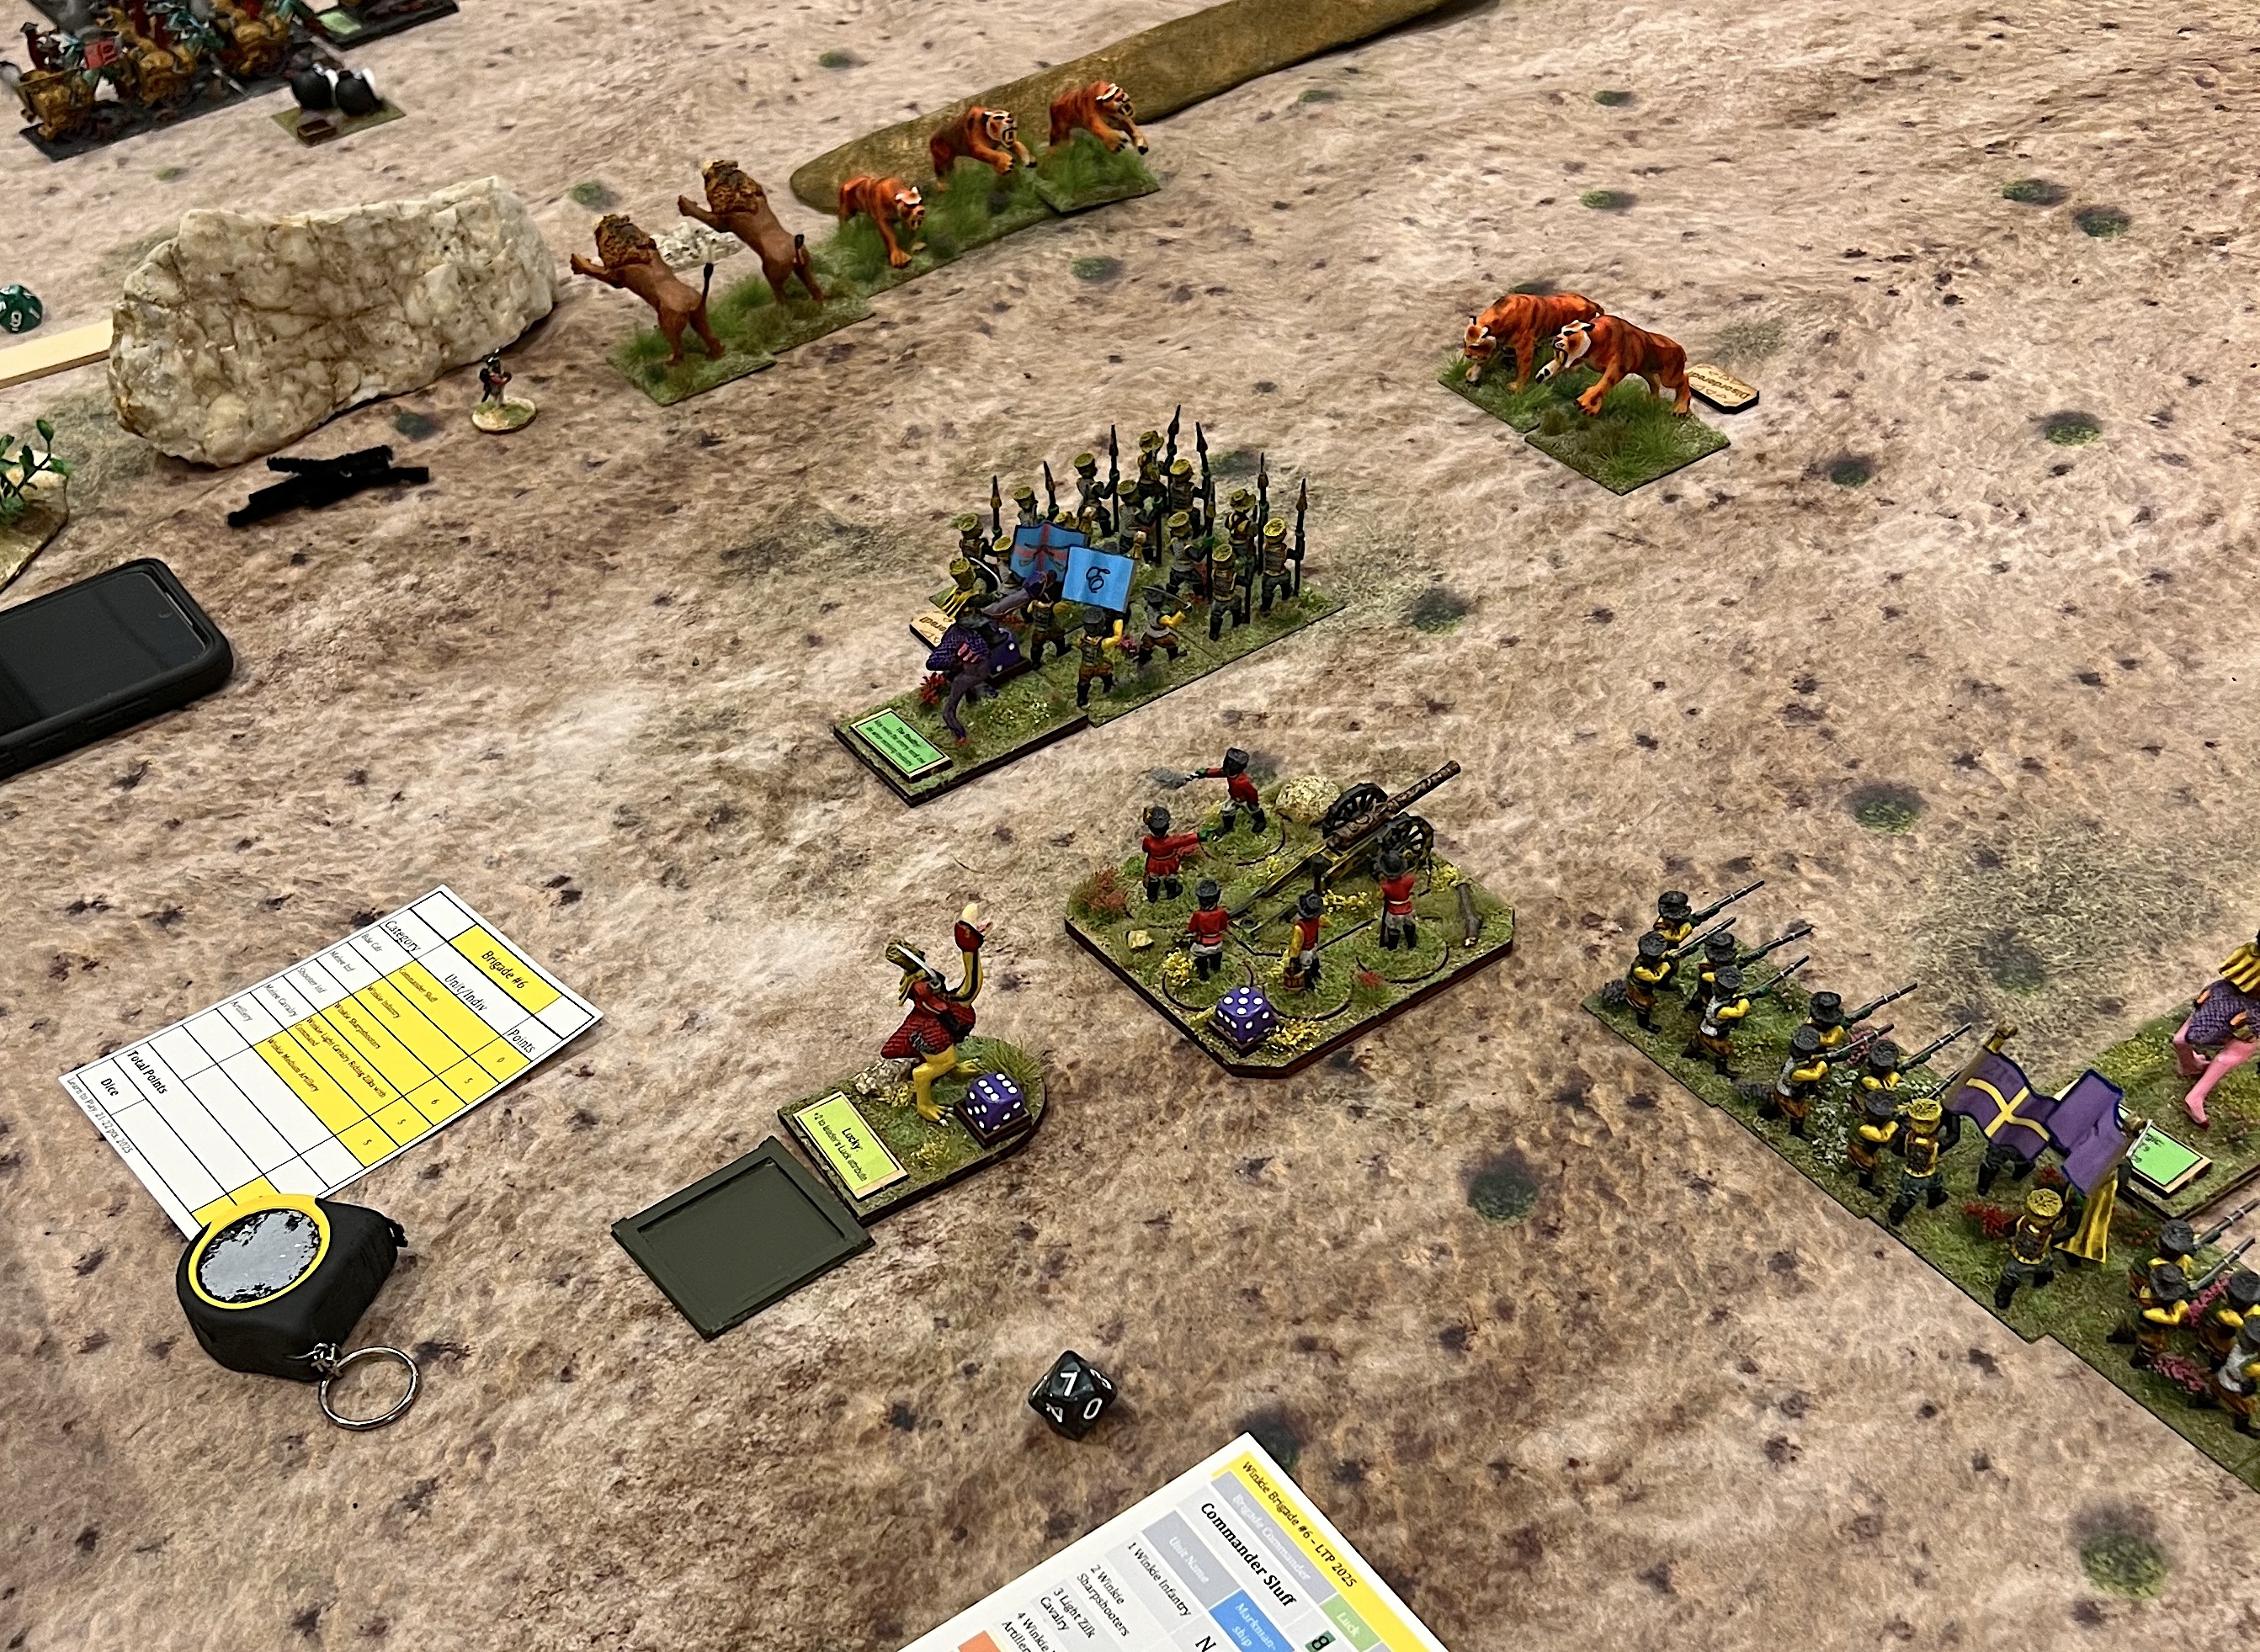
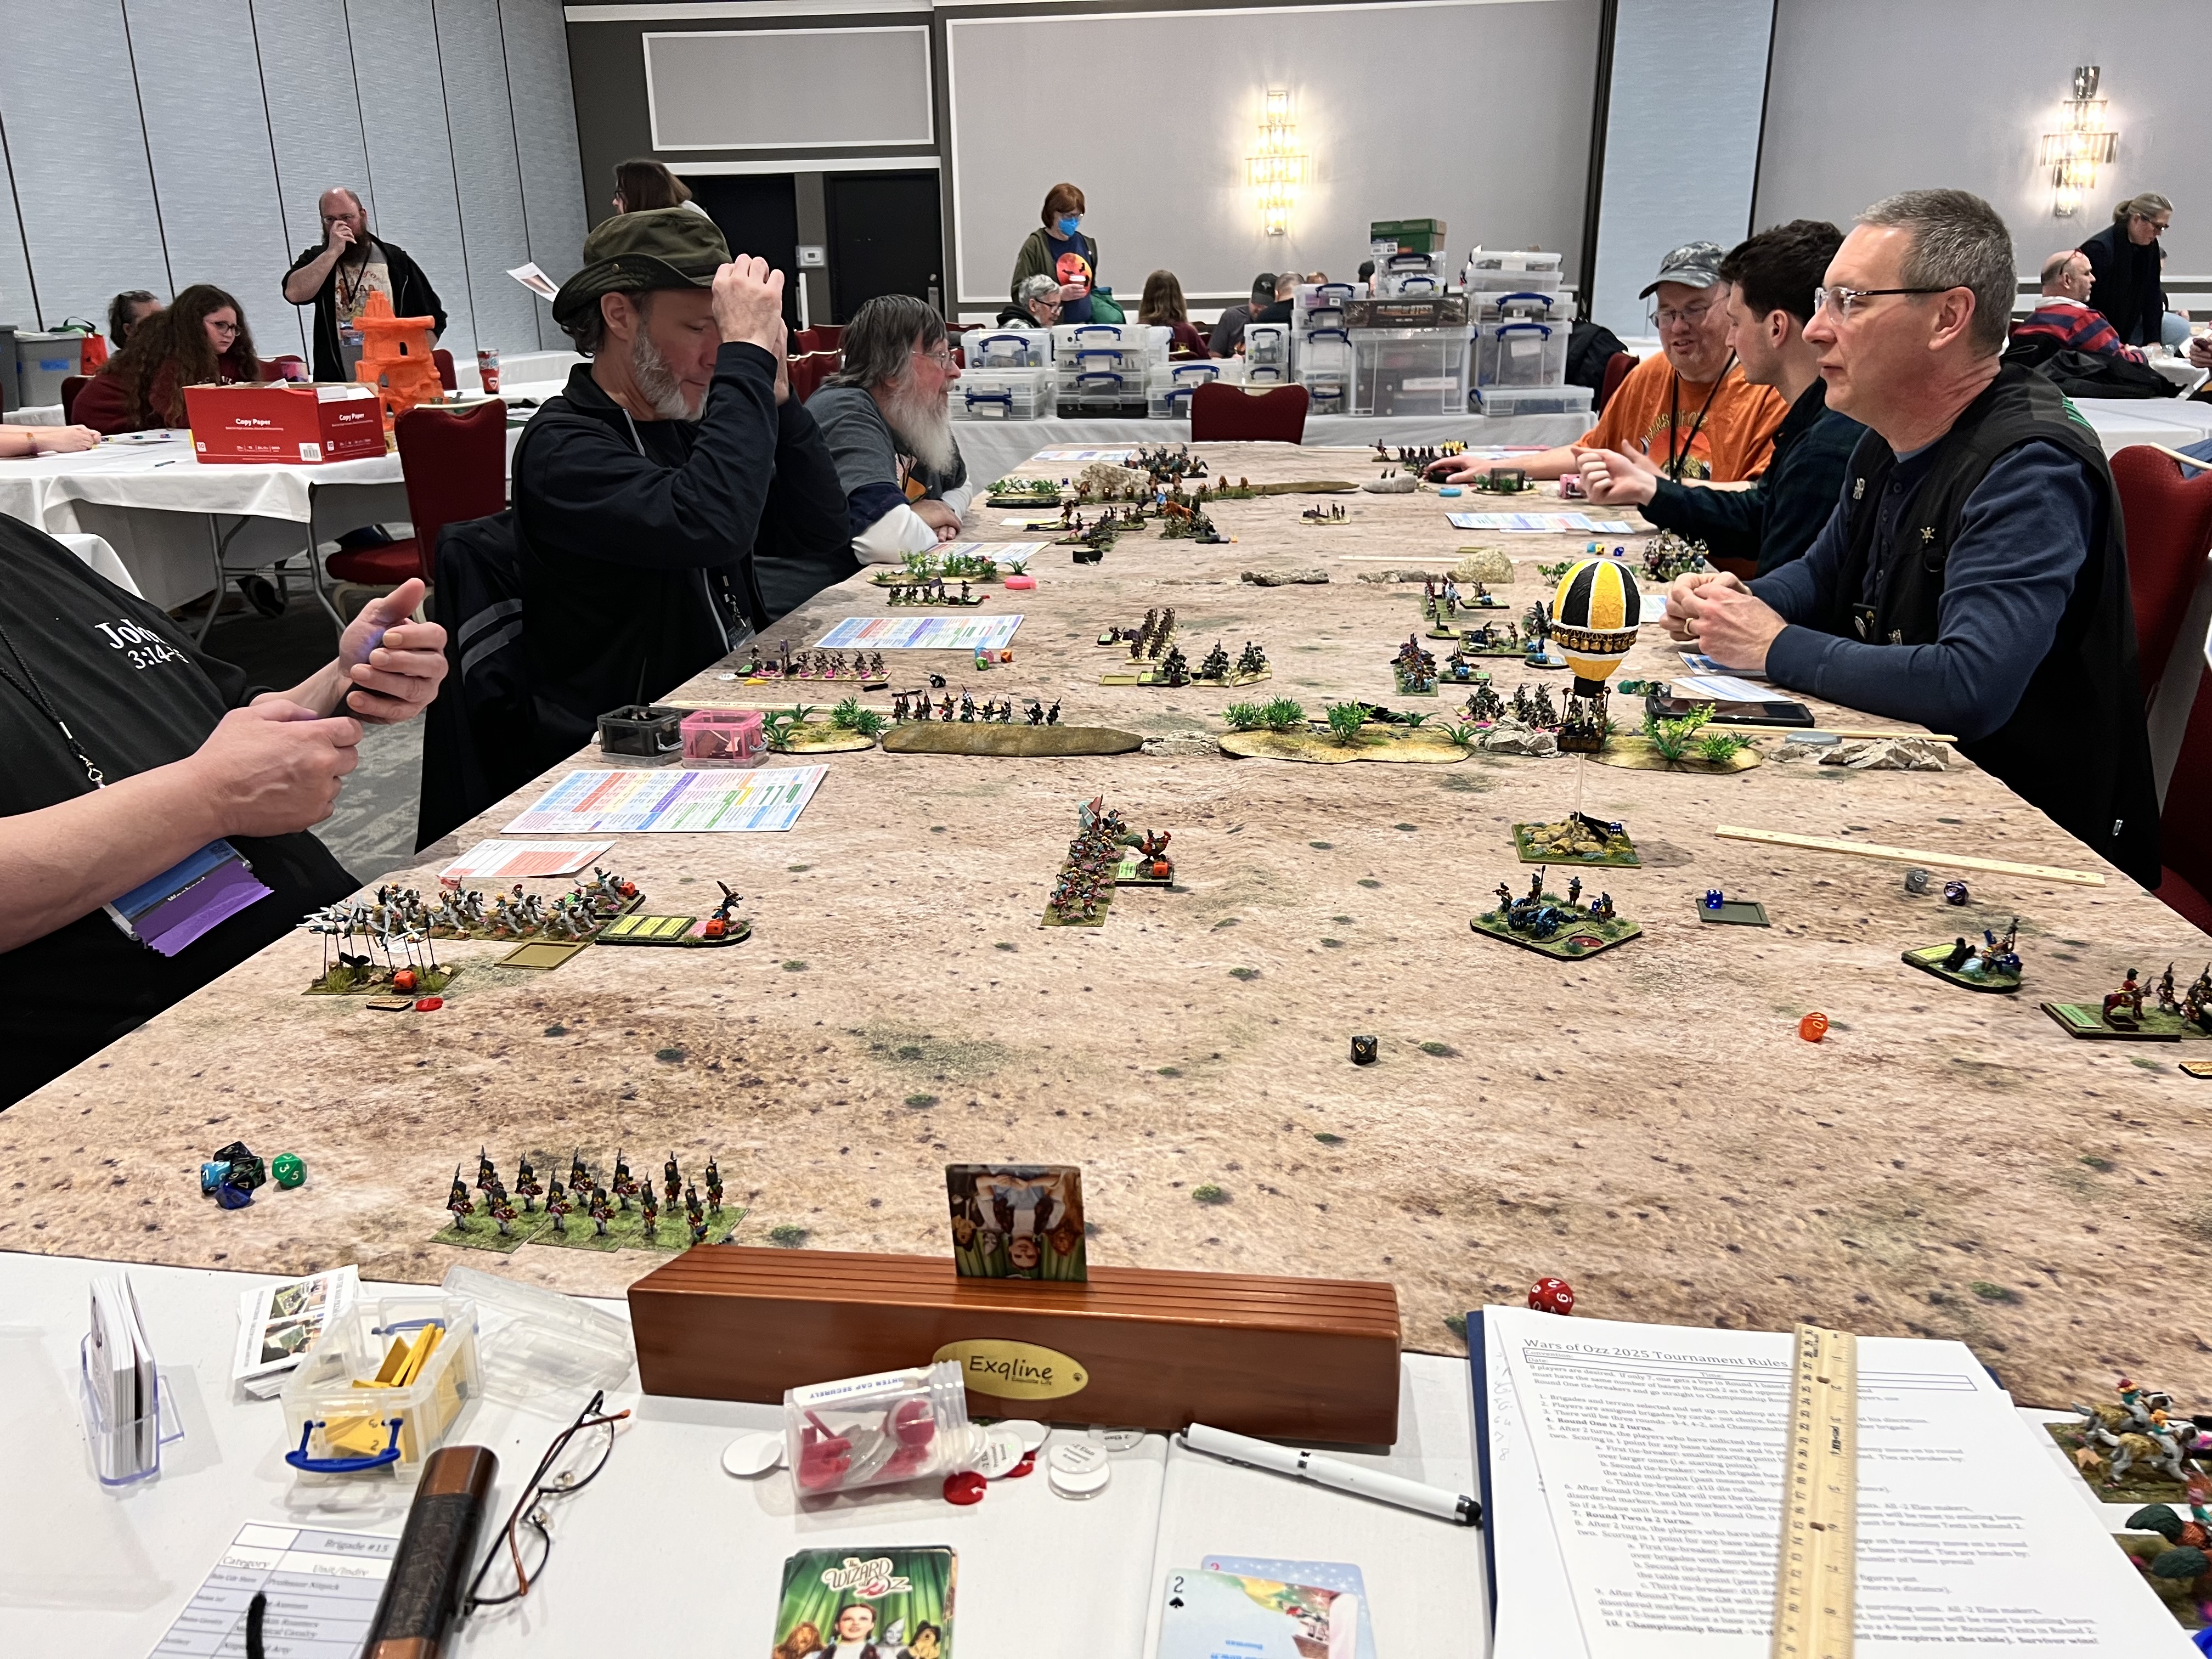
I had 7 out of a possible 8 players. At random, one player got a “bye” in round one. The match-ups were done at random and 7 different 21-point brigades were assigned at random. Inflicting the most damage on the enemy was the victory condition to move forward in the tournament. Tie breakers were also in play if that was needed.
Glory on the Line!
In Round 1 – the match ups were:
Impkins (Ken) versus Munchkins (Eric)
Munchkins (Bob) versus Gillikins (Dave)
Winkies (Brad) versus Gillikins (Jacob)
Winkies (Leif) got the round 1 bye
Round 1 begins!Brad’s Winkies devastate Jacob’s GillikinsBob’s Munchkins get into a shooting match with Dave’s Gillikins.Round 1 winds down.
The Round 1 results were:
Impkins (Ken) defeated Munchkins (Eric)
Munchkins (Bob) defeated Gillikins (Dave)
Winkies (Brad) defeated Gillikins (Jacob)
Winkies (Leif) got the round 1 bye
Yielding the semifinals as:
Impkins (Ken) versus Winkies (Brad)
Munchkins (Bob) versus Winkies (Leif)
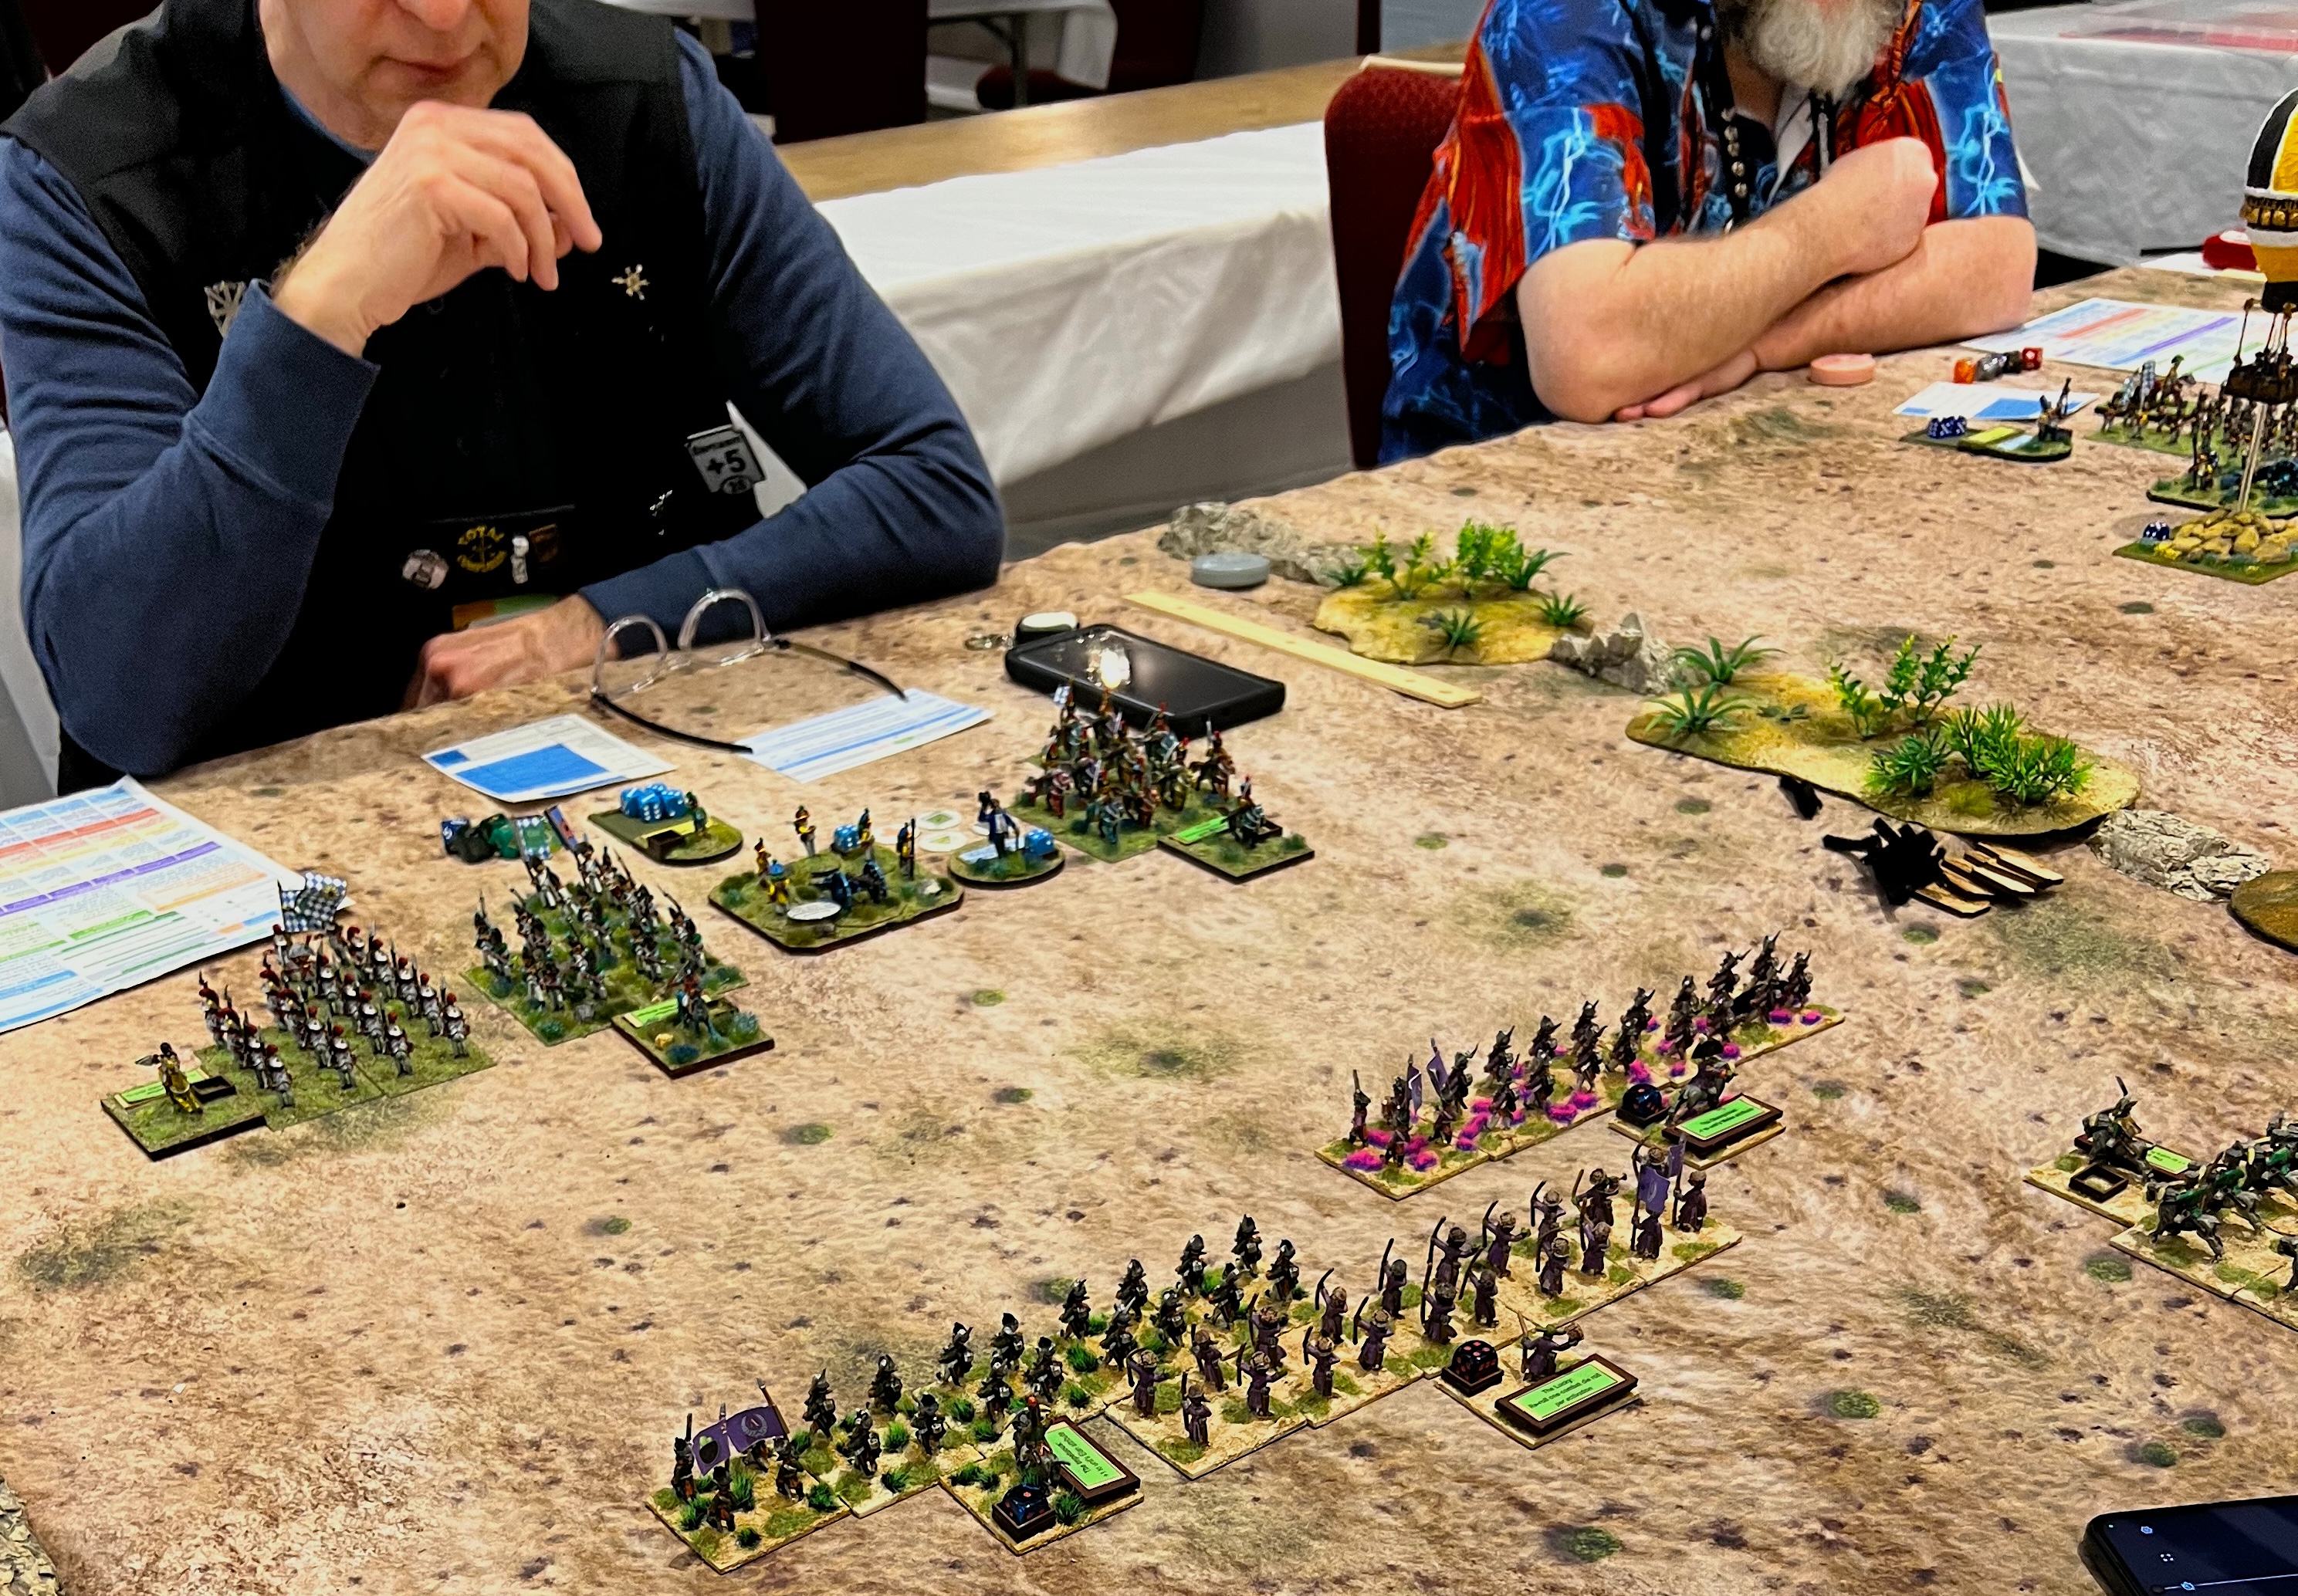
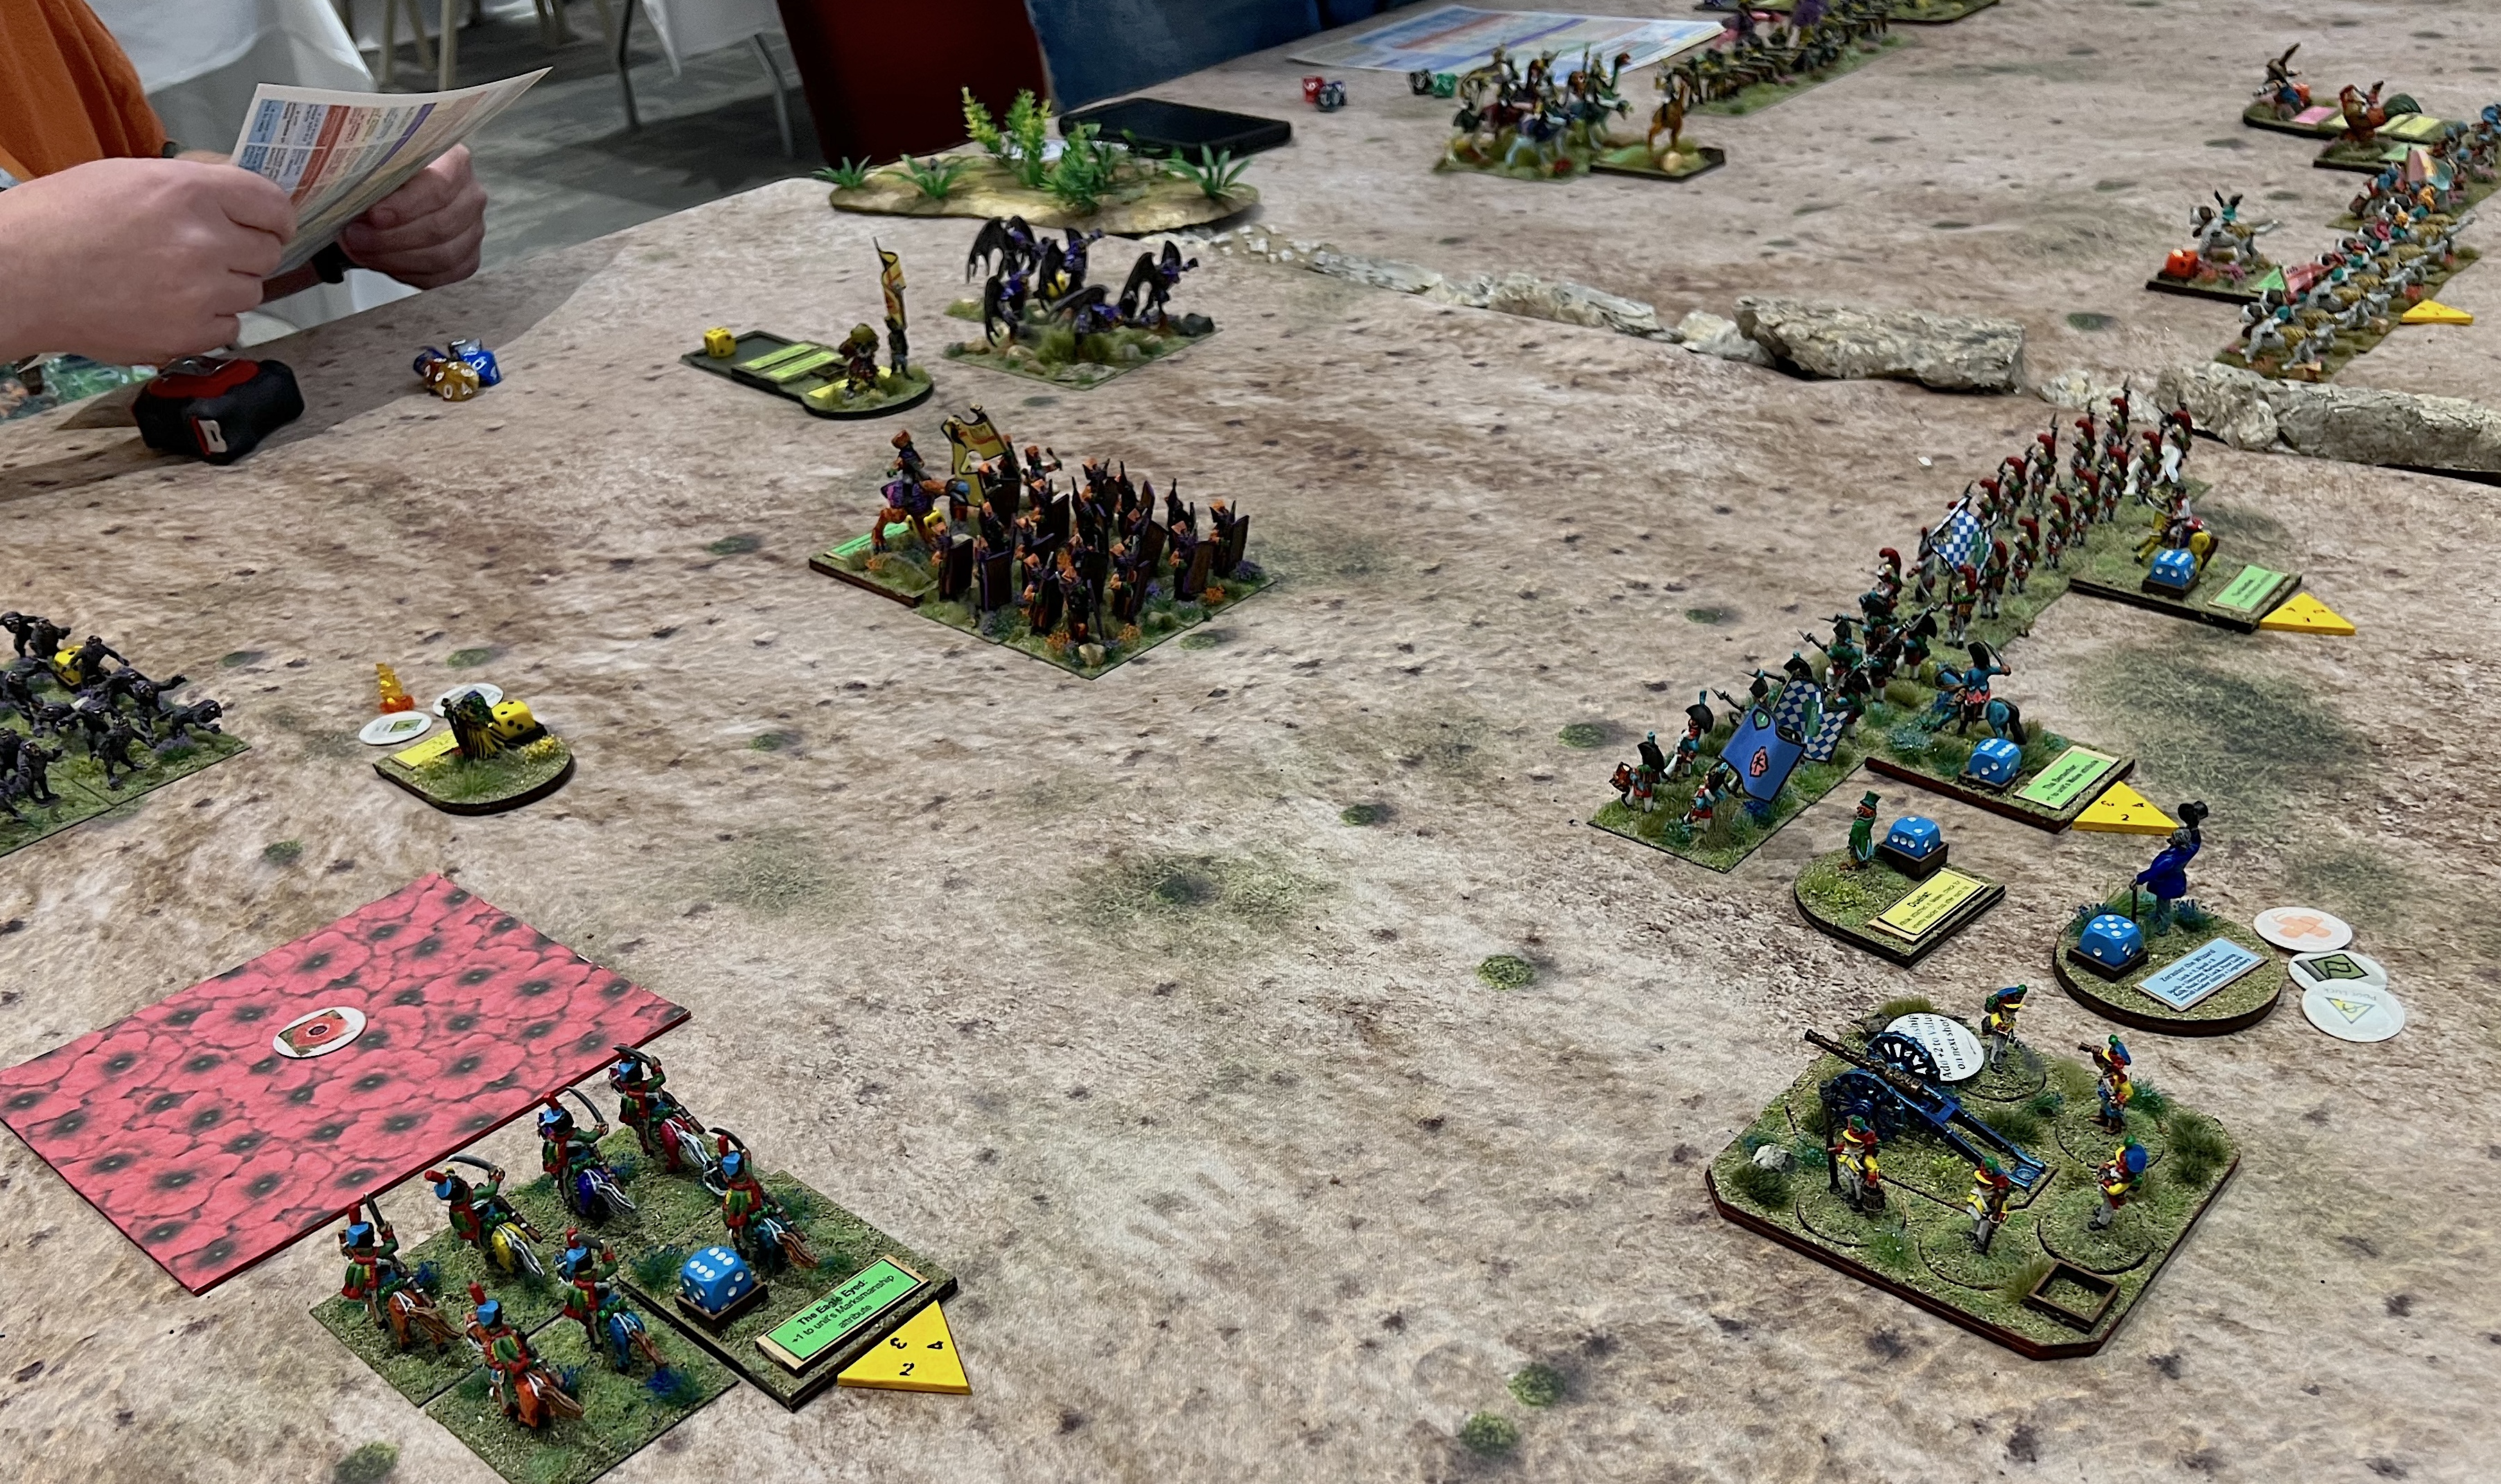
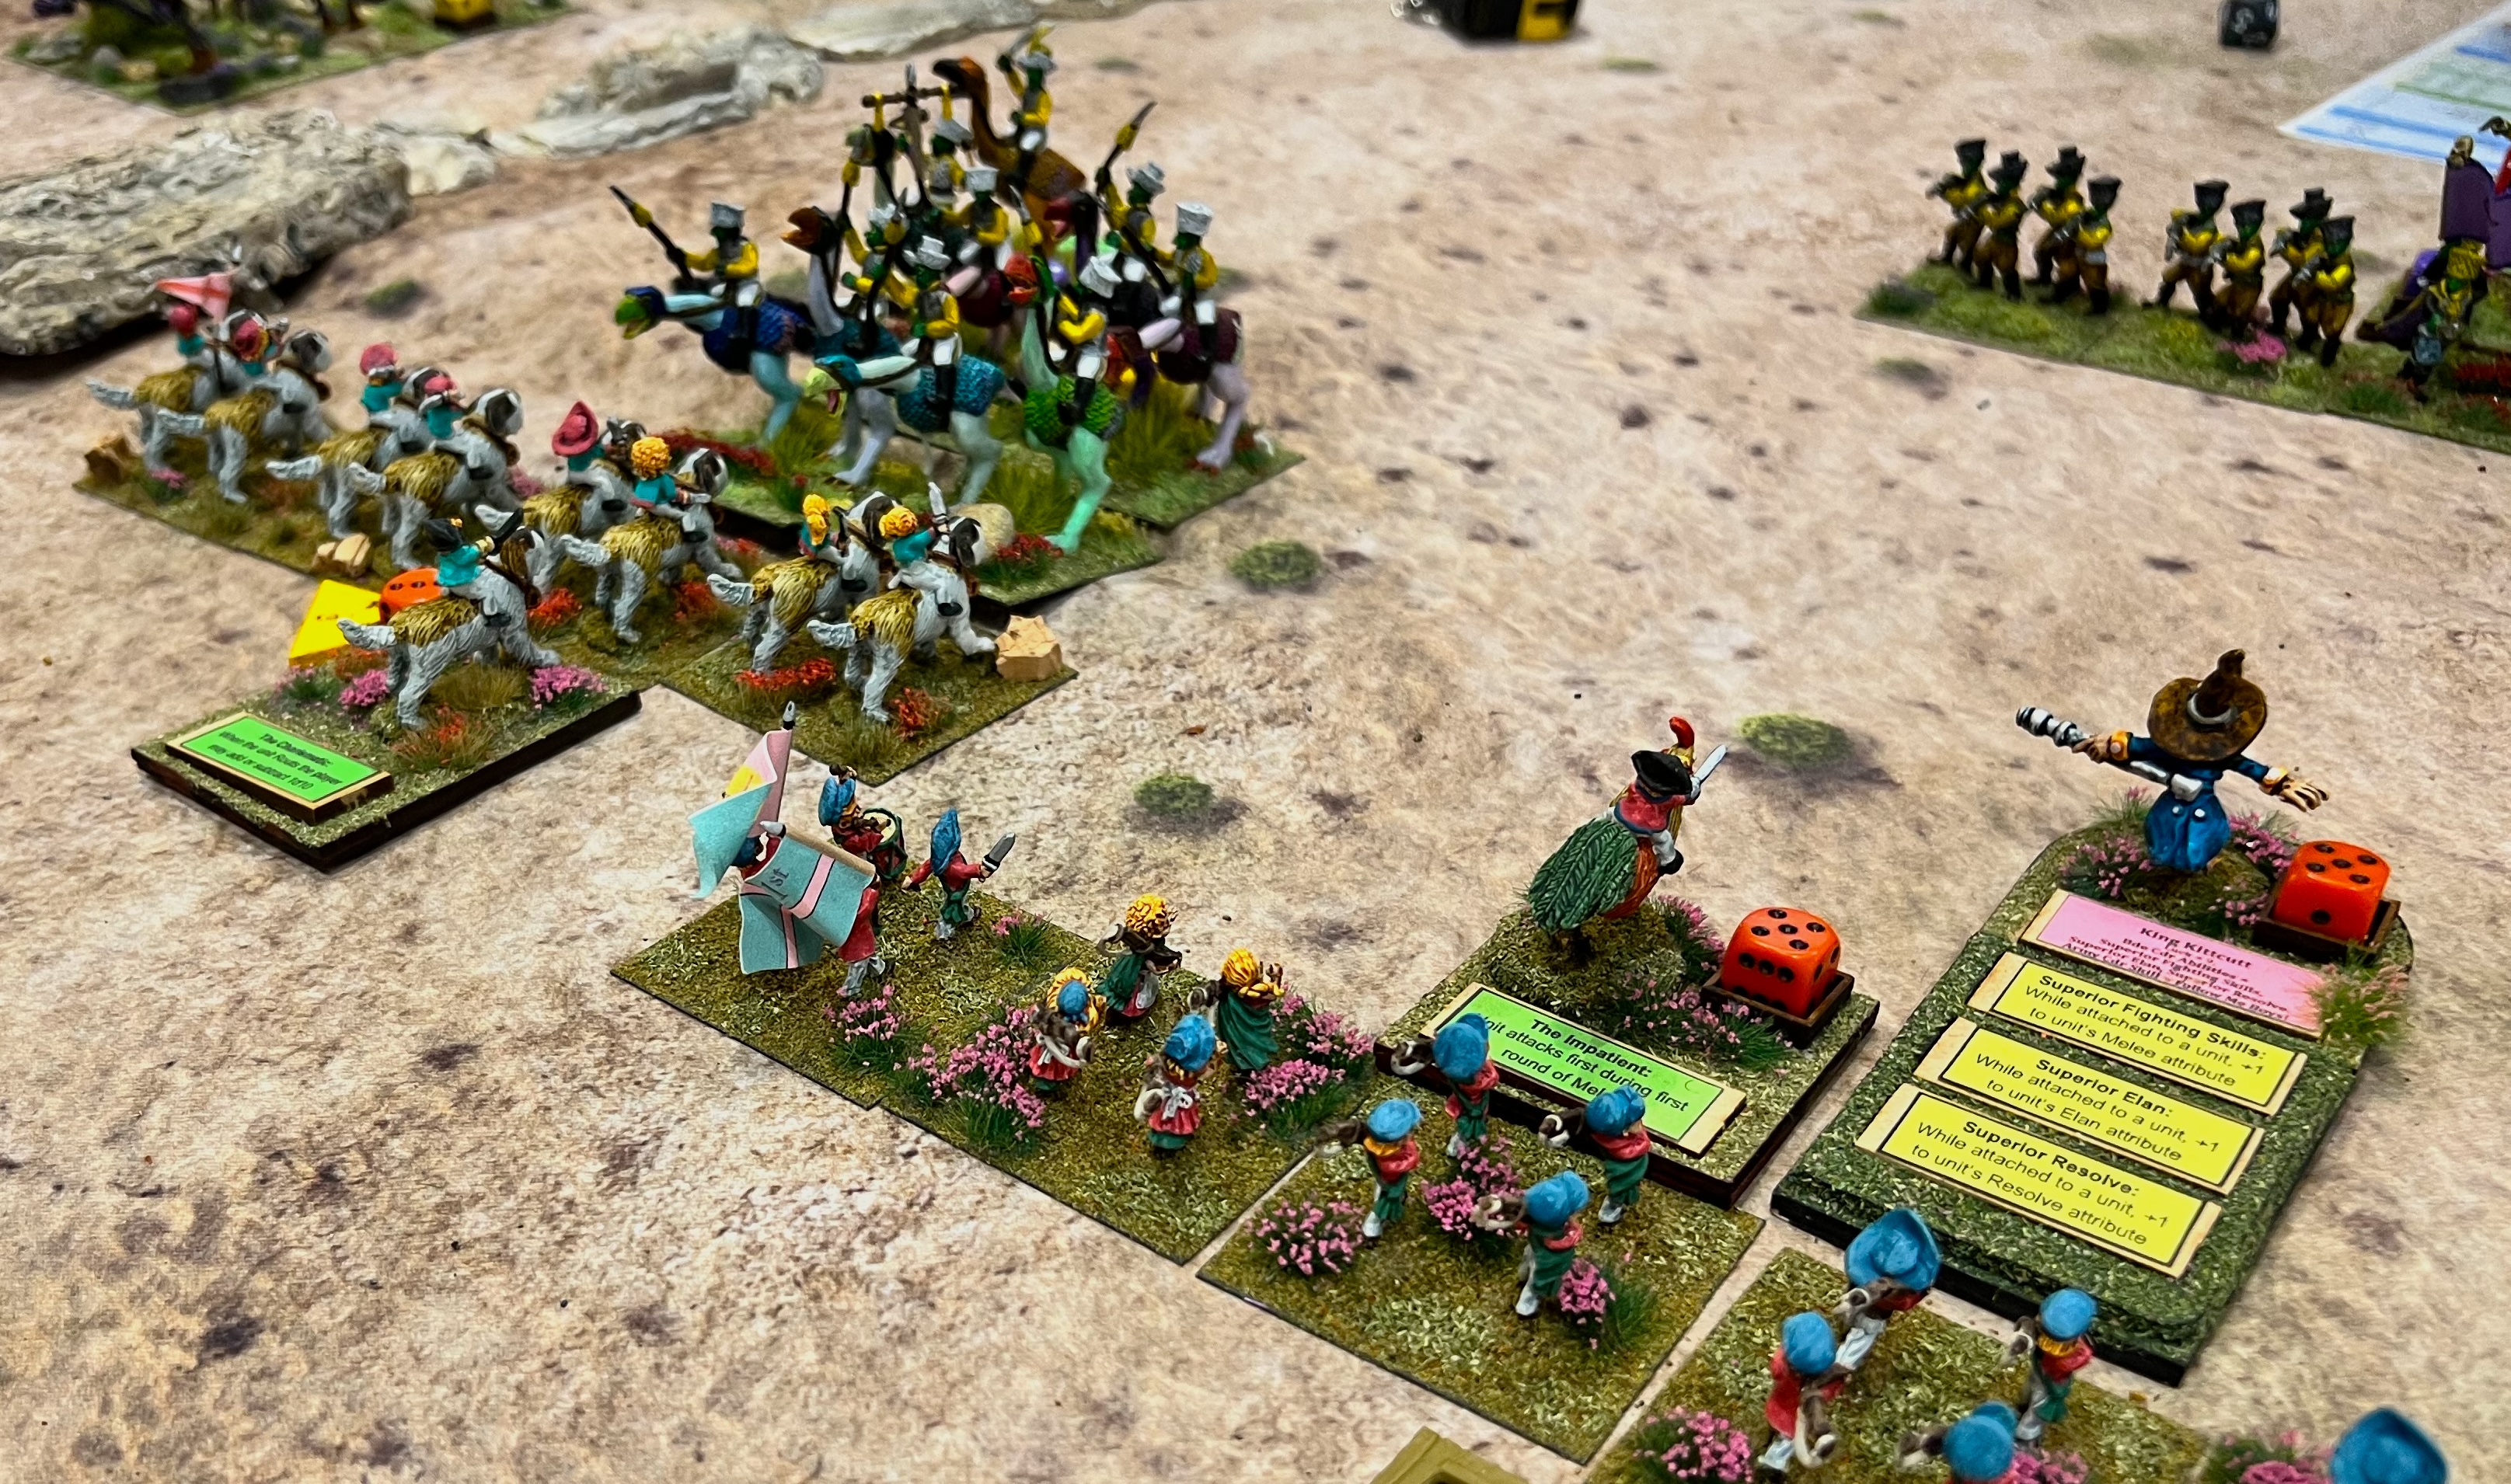
The semi-finalists!Leif casts a poppies spell to thwart Bob’s cavalry,Bob’s Munchkins prepare to unleash musketry on Leif’s Winkie Guard. They would rout!Meanwhile, Ken’s Impkins got hit hard by Brad’s Winkies.
The Round 2 (semifinals) results were:
Winkies (Brad) defeats Impkins (Ken)
Munchkins (Bob) defeats Winkies (Leif)
Yielding the FINALS as:
Munchkins (Bob) versus Winkies (Brad)
Brad and Bob get ready to rumble!
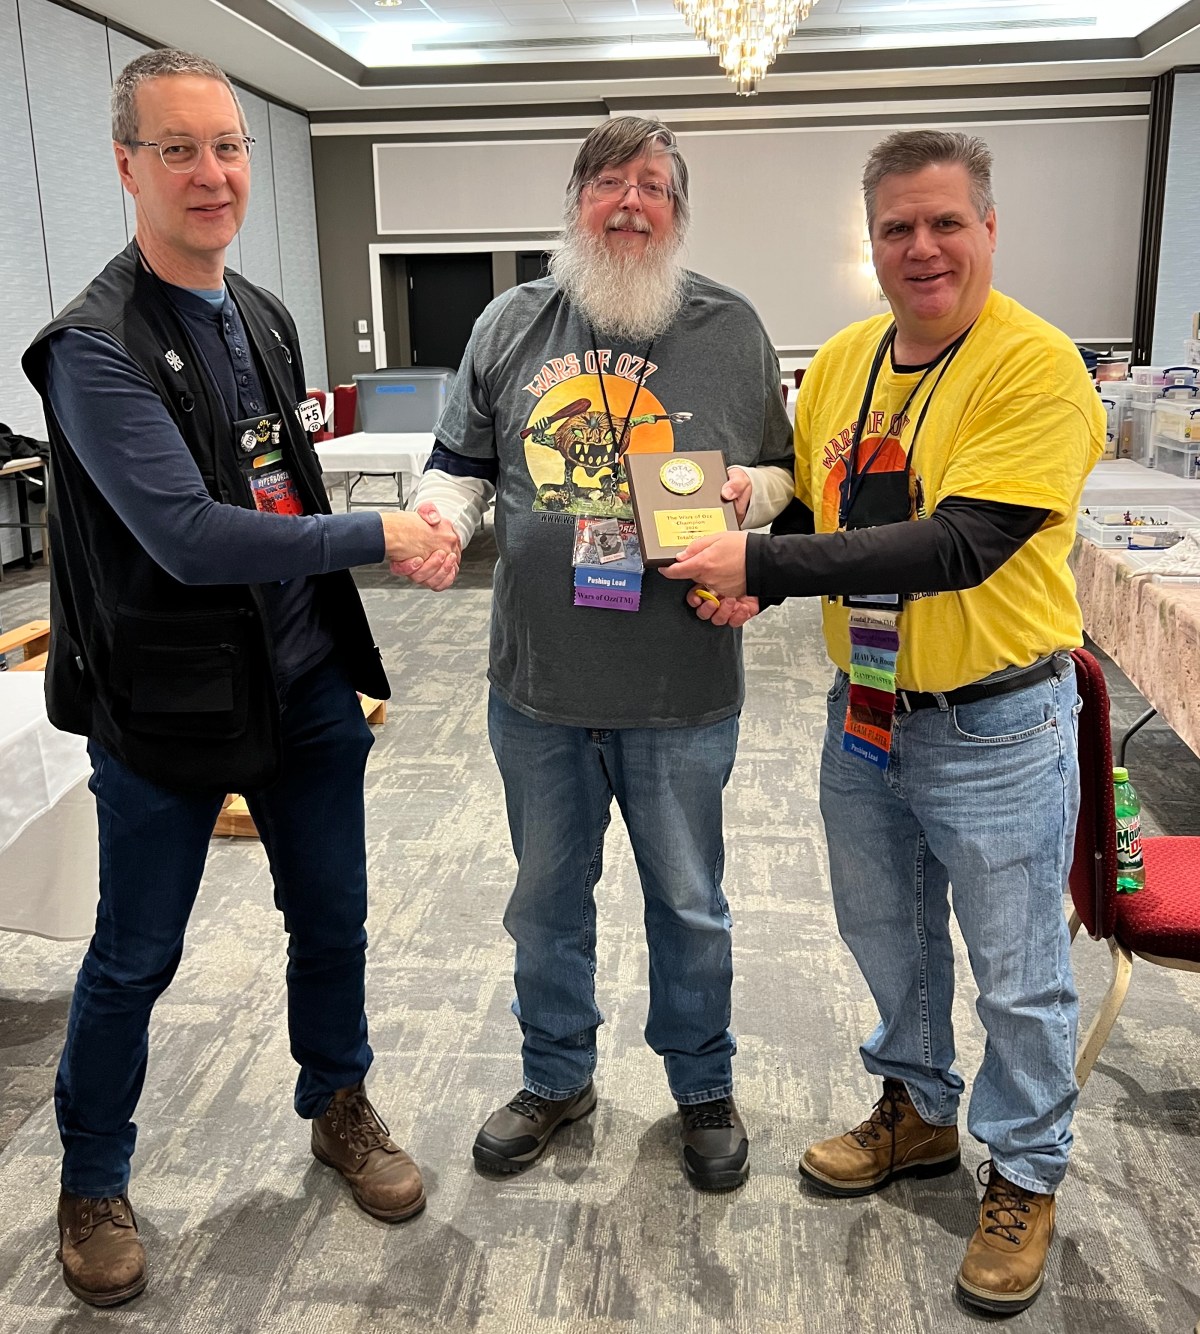
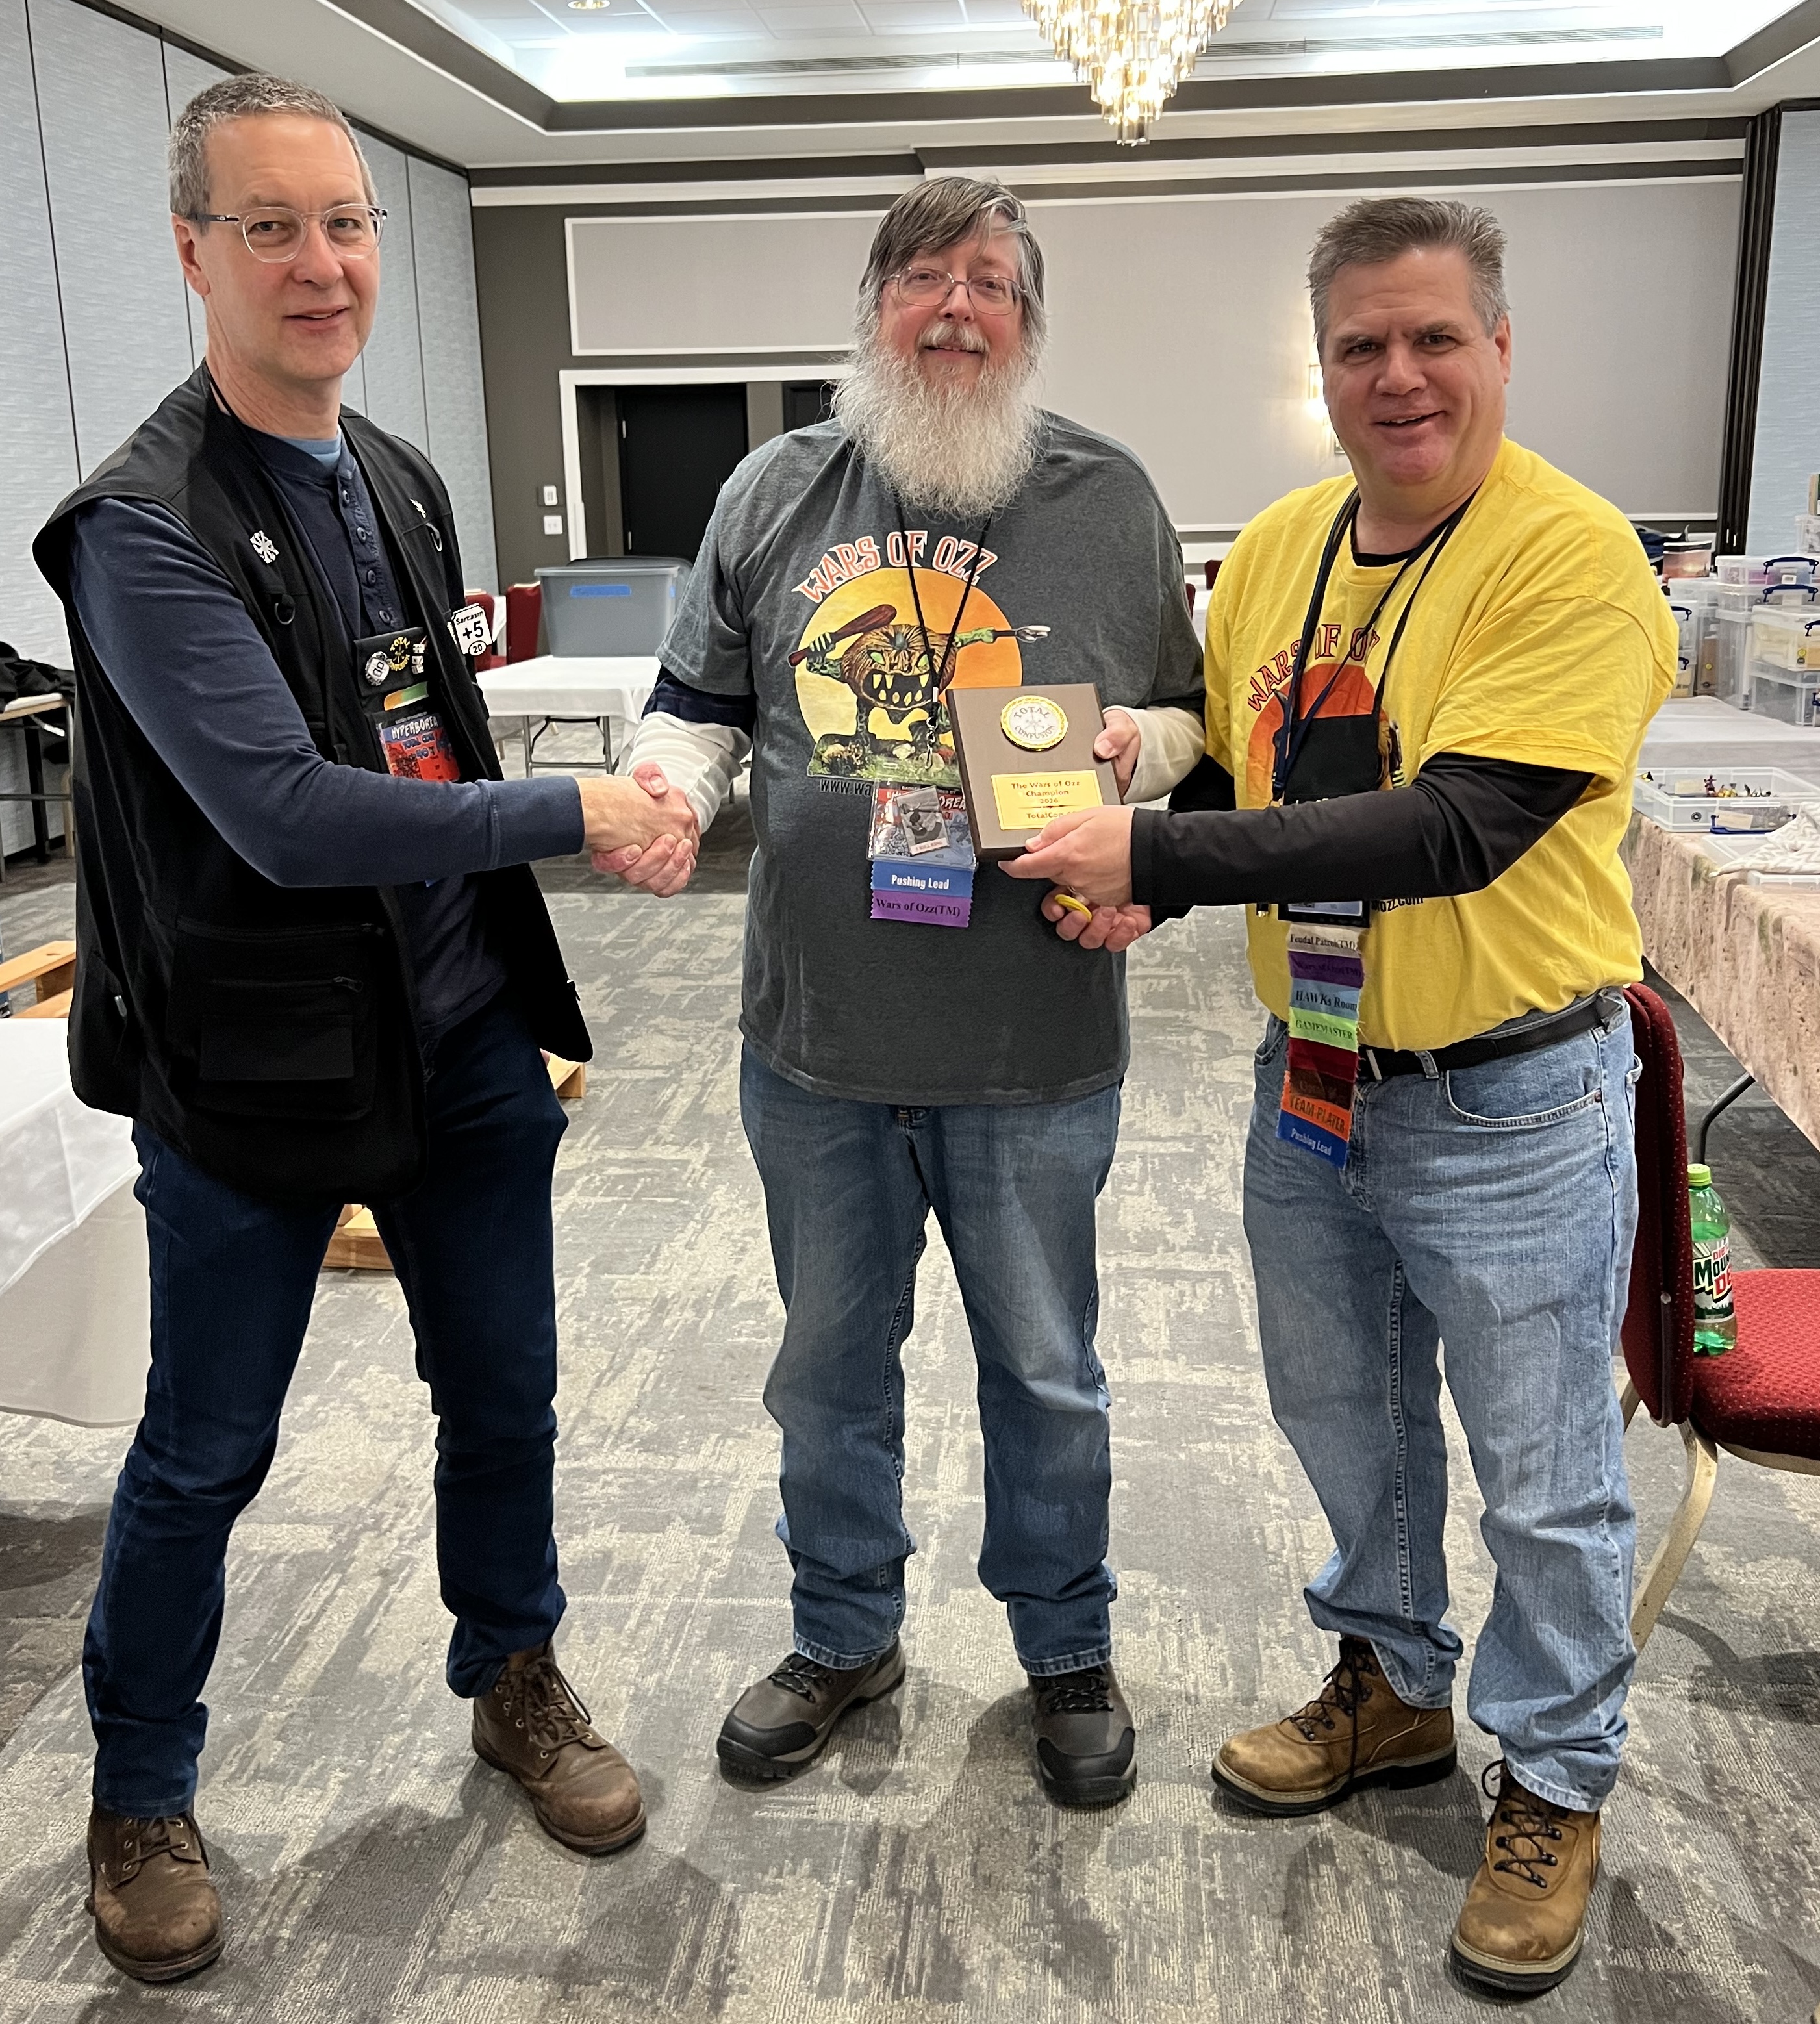
In the end, Brad outlasted Bob – though it was close! Congratulations to Brad as the 2026 TotalCon Wars of Ozz Champion! Congrats to Brad!
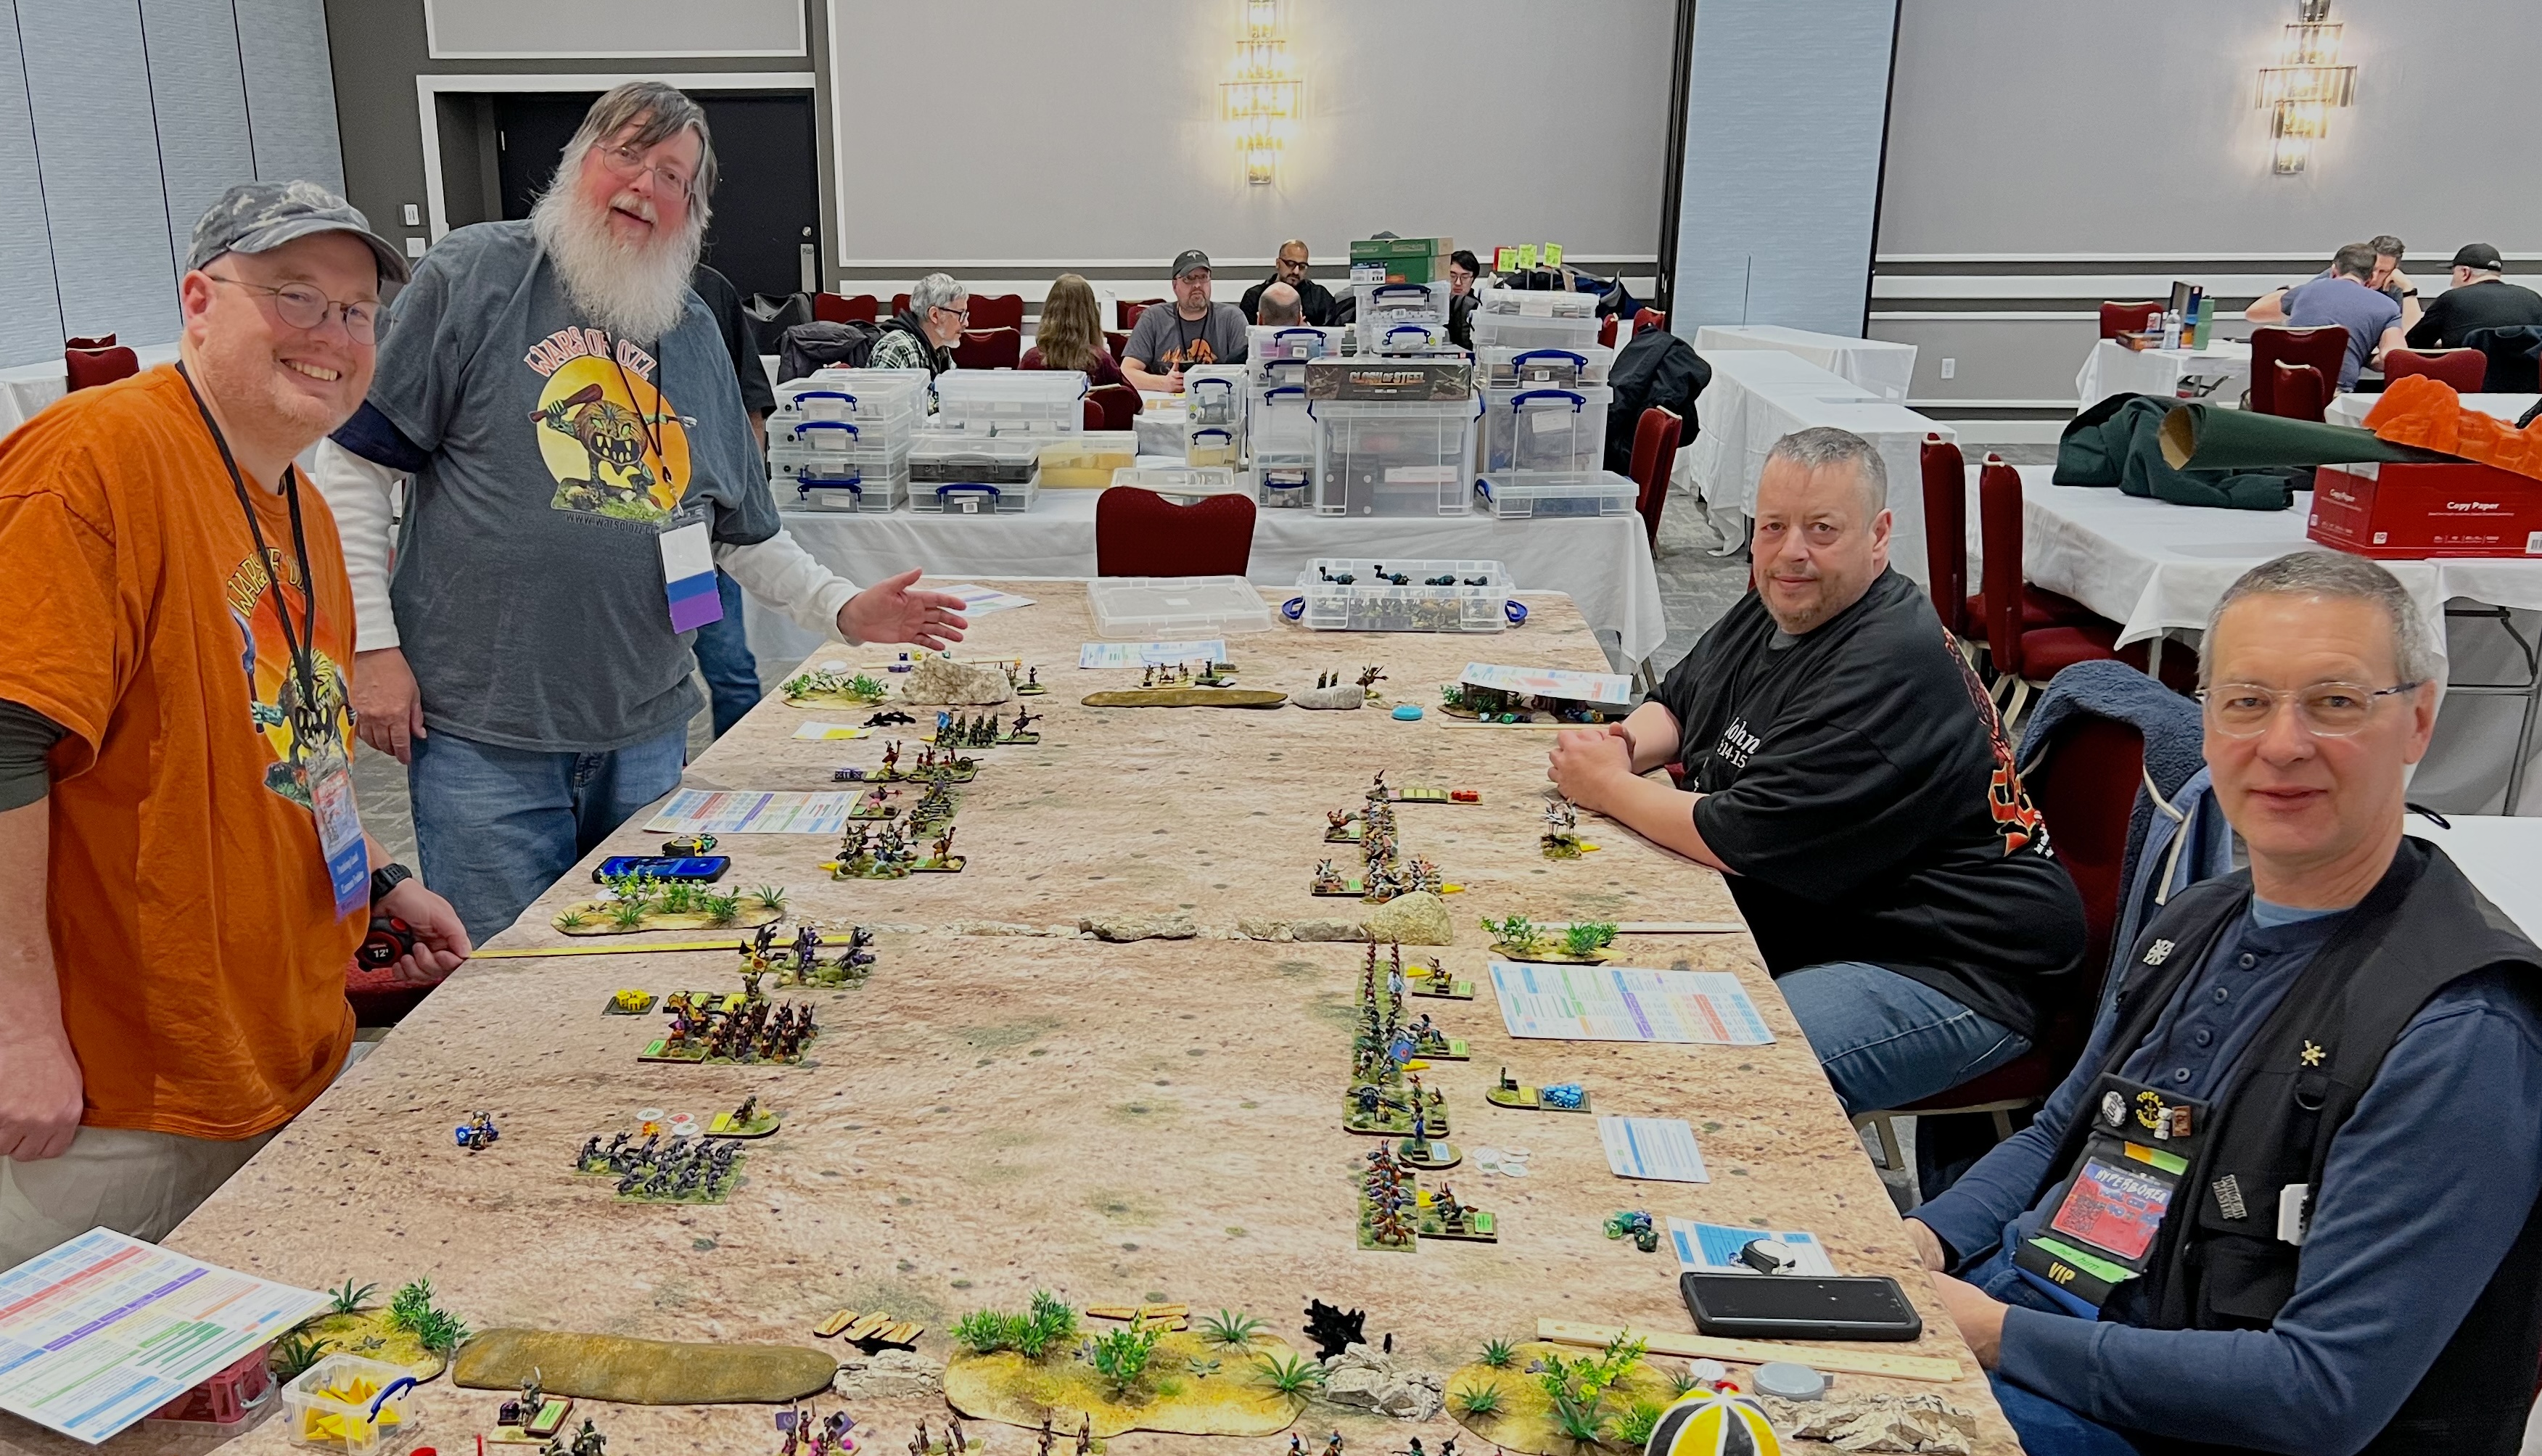
The 2026 runner up Bob, the 2026 champion Brad, and your happy GM.
Thank you to all who helped me at the convention. Special thanks to Leif and Brad.
I also want to extend a very special thanks to Bryan Clauss, Steve Parenteau, Kevin Baumann, and the entire TotalCon staff. They do a magnificent job running a great convention! BIG THANKS!!
Lastly, a few areas that you can check out if you dare:
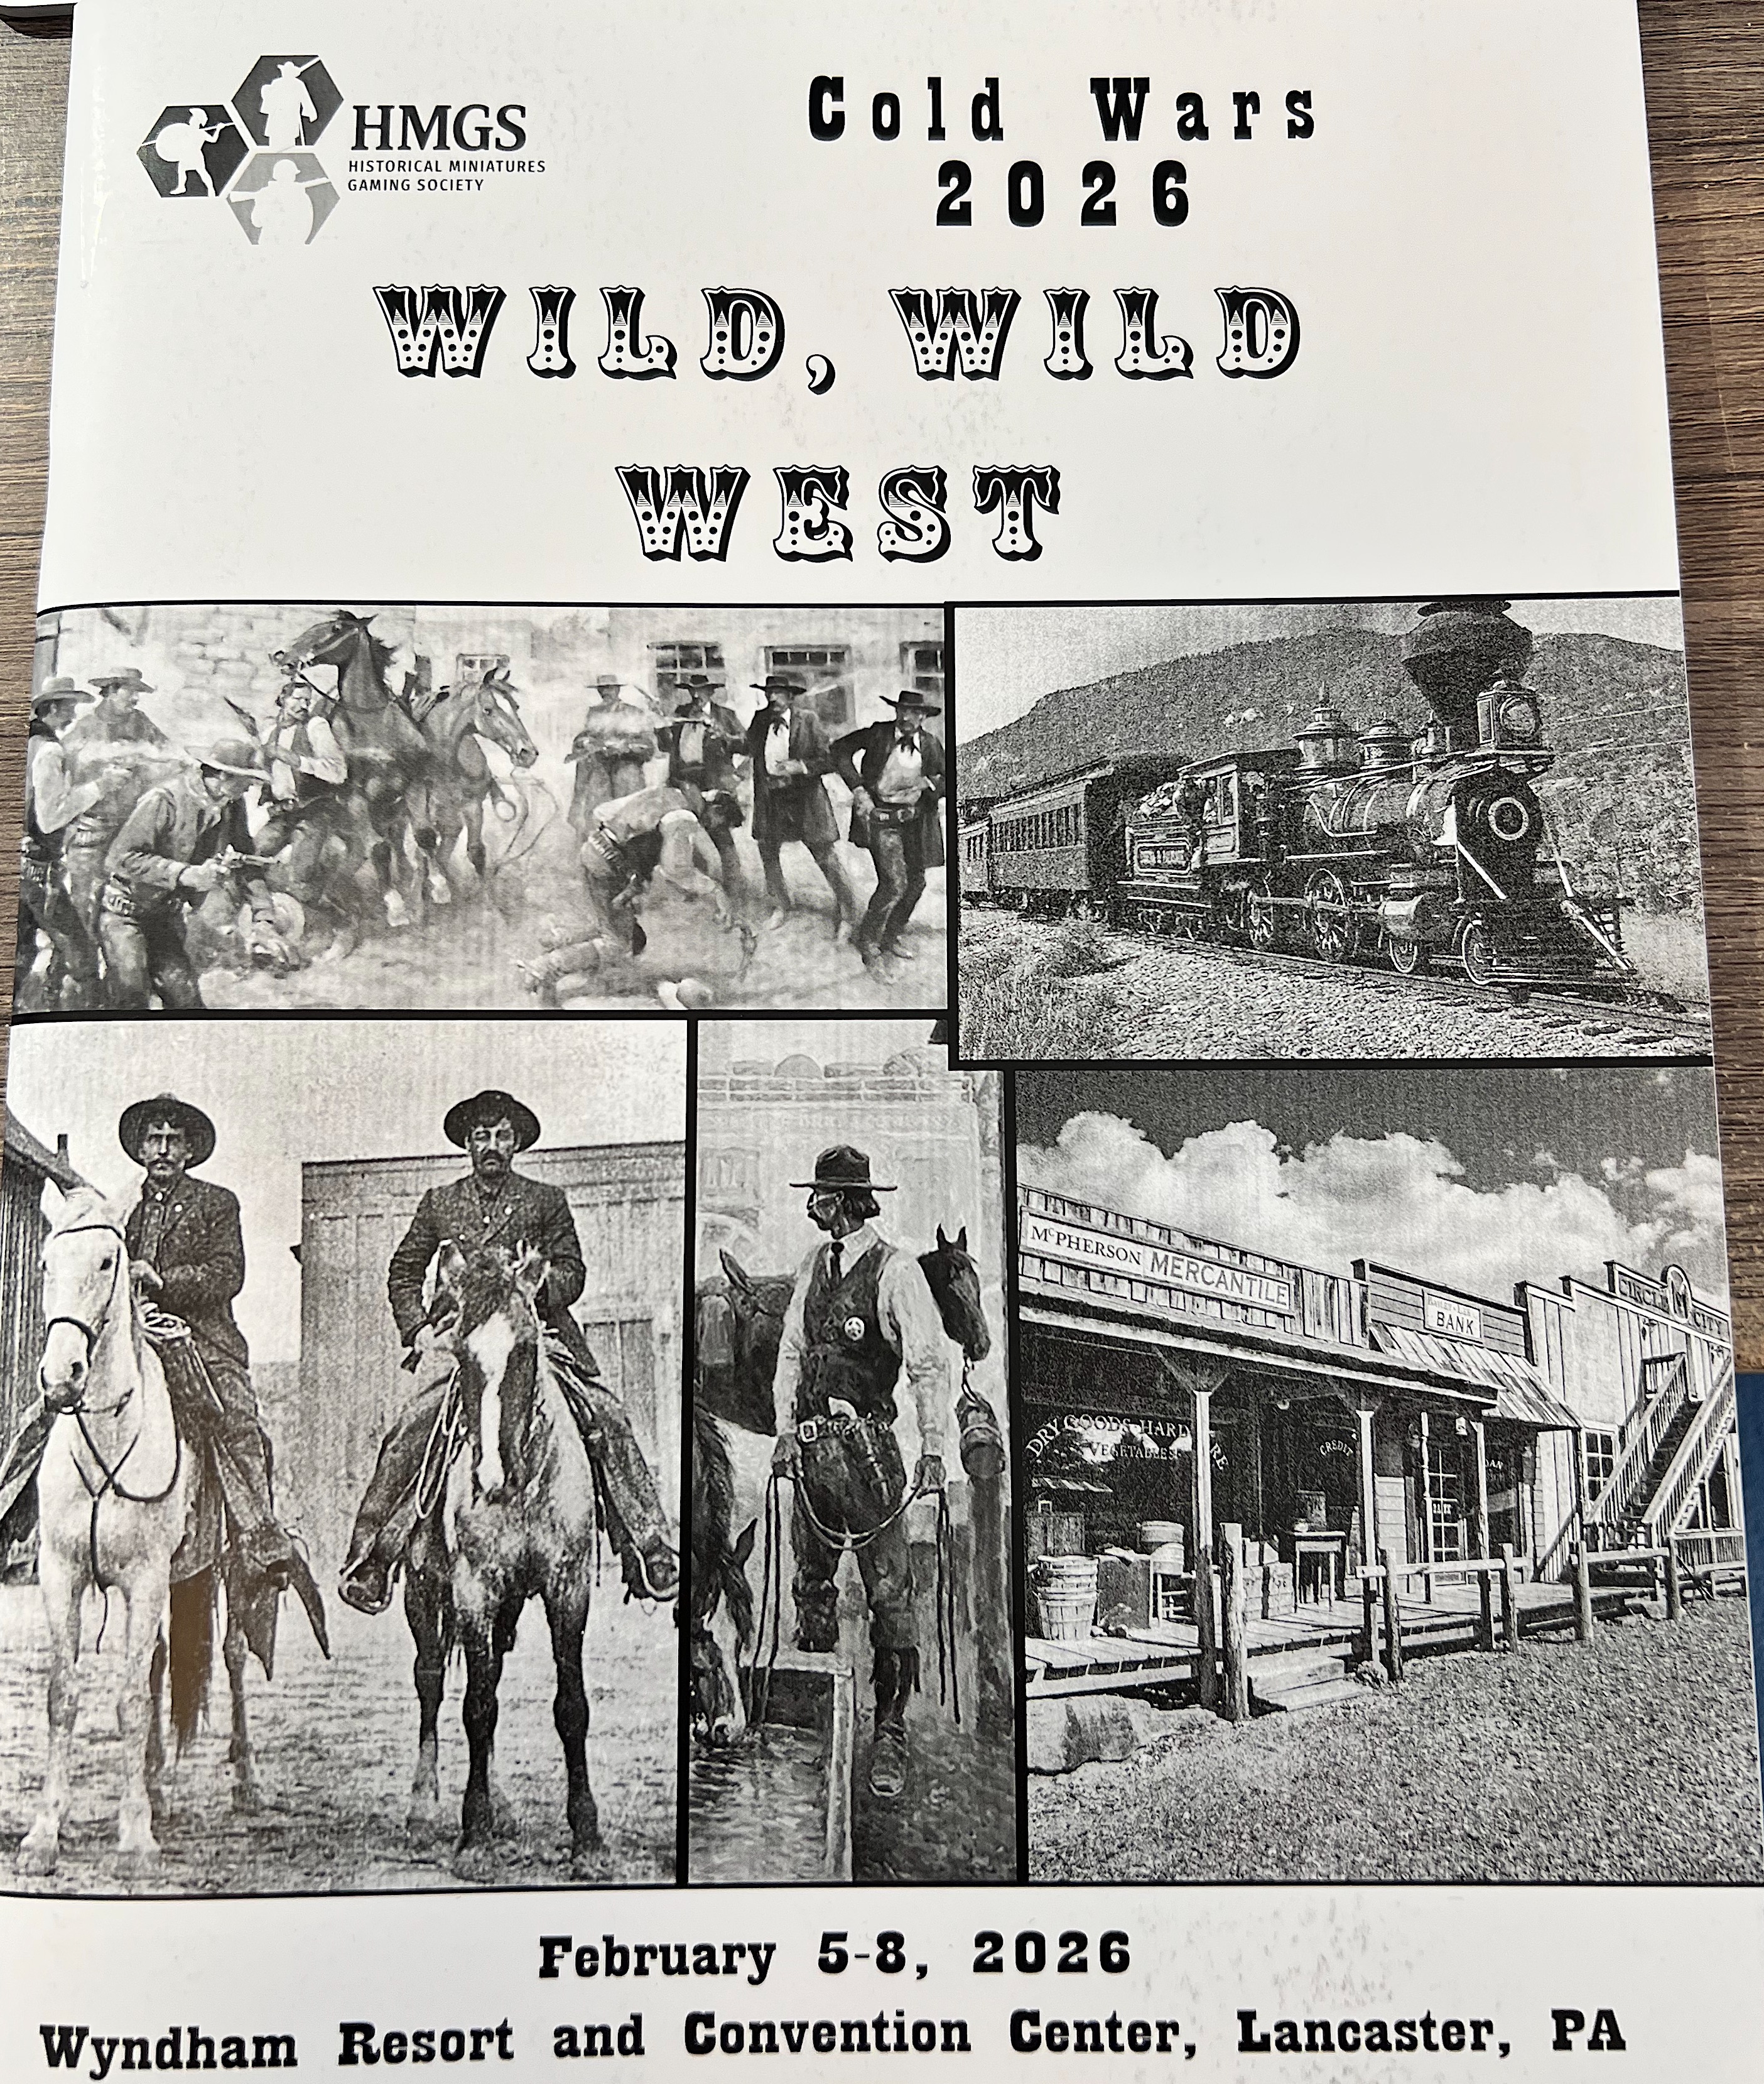
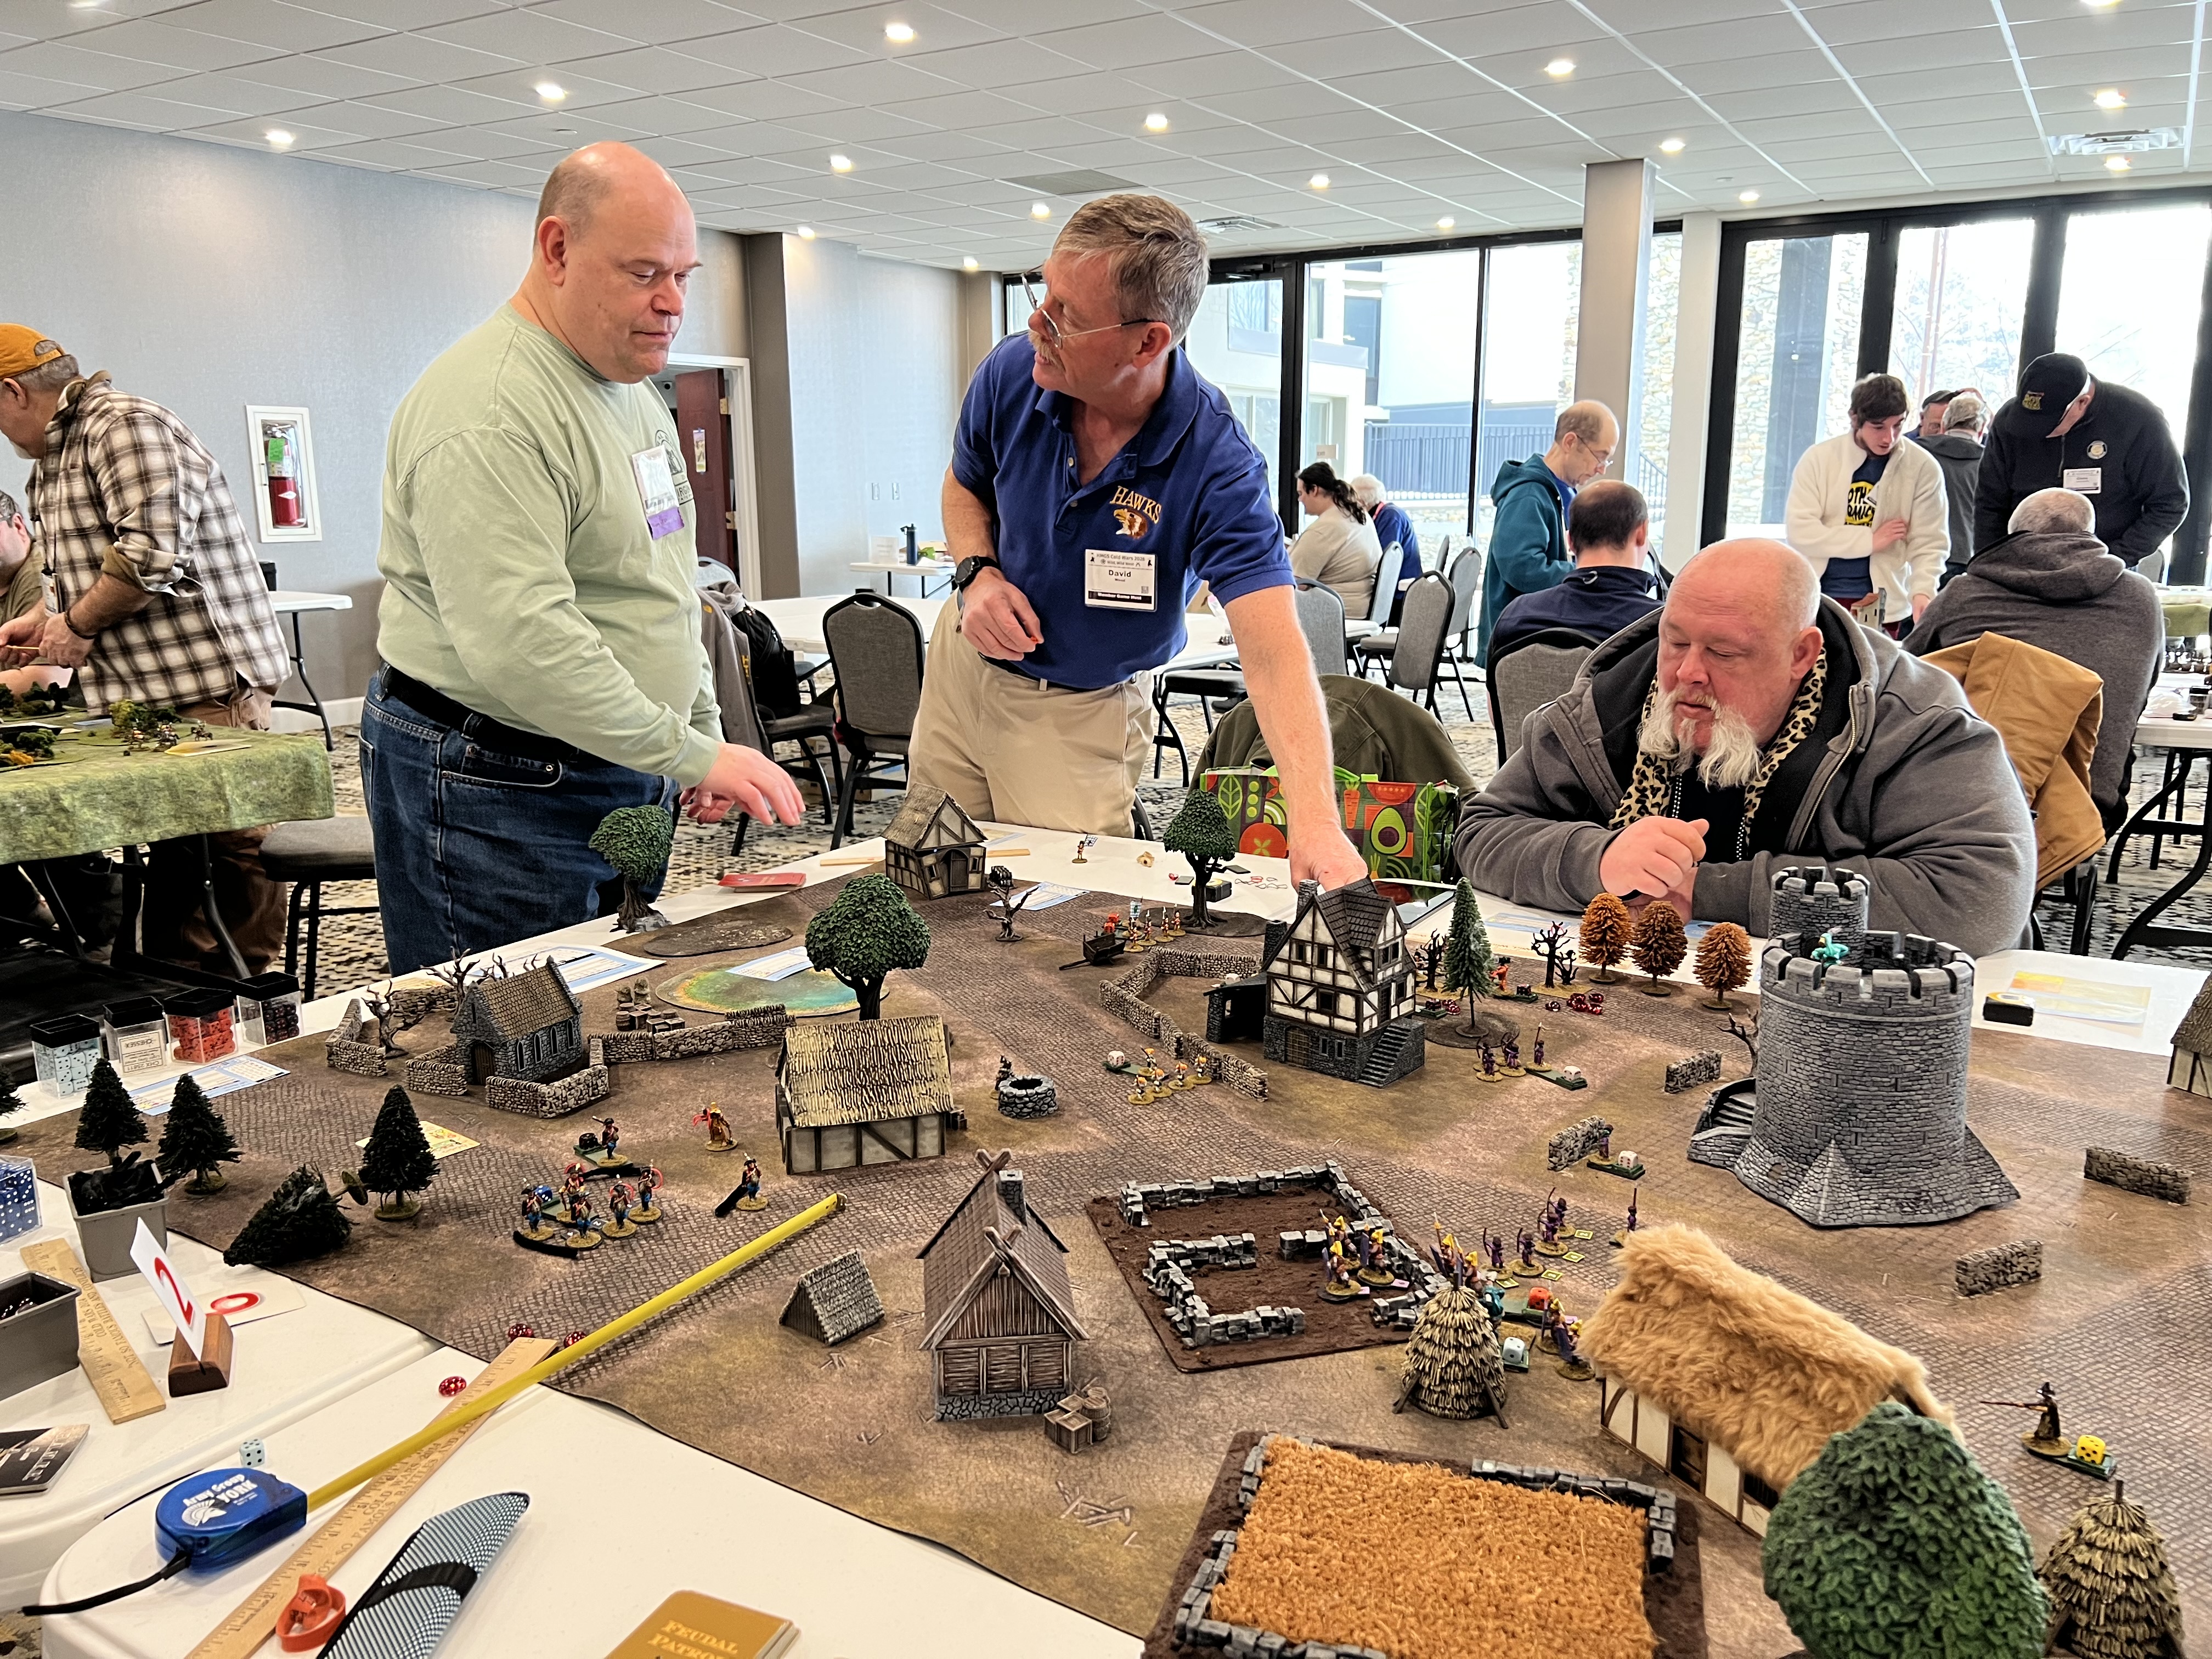
Back in early February, I attended the 2026 HMGS Cold Wars convention in Lancaster, PA. The theme was “Wild, Wild, West”. this is not one of my usual game themes, but as you’ll see shortly I adapted for one game anyways. As I write this now it is already mid-March, so I thought it was about time to finally got around to sharing some of the games I played in and ran in the H.A.W.K.’s room.
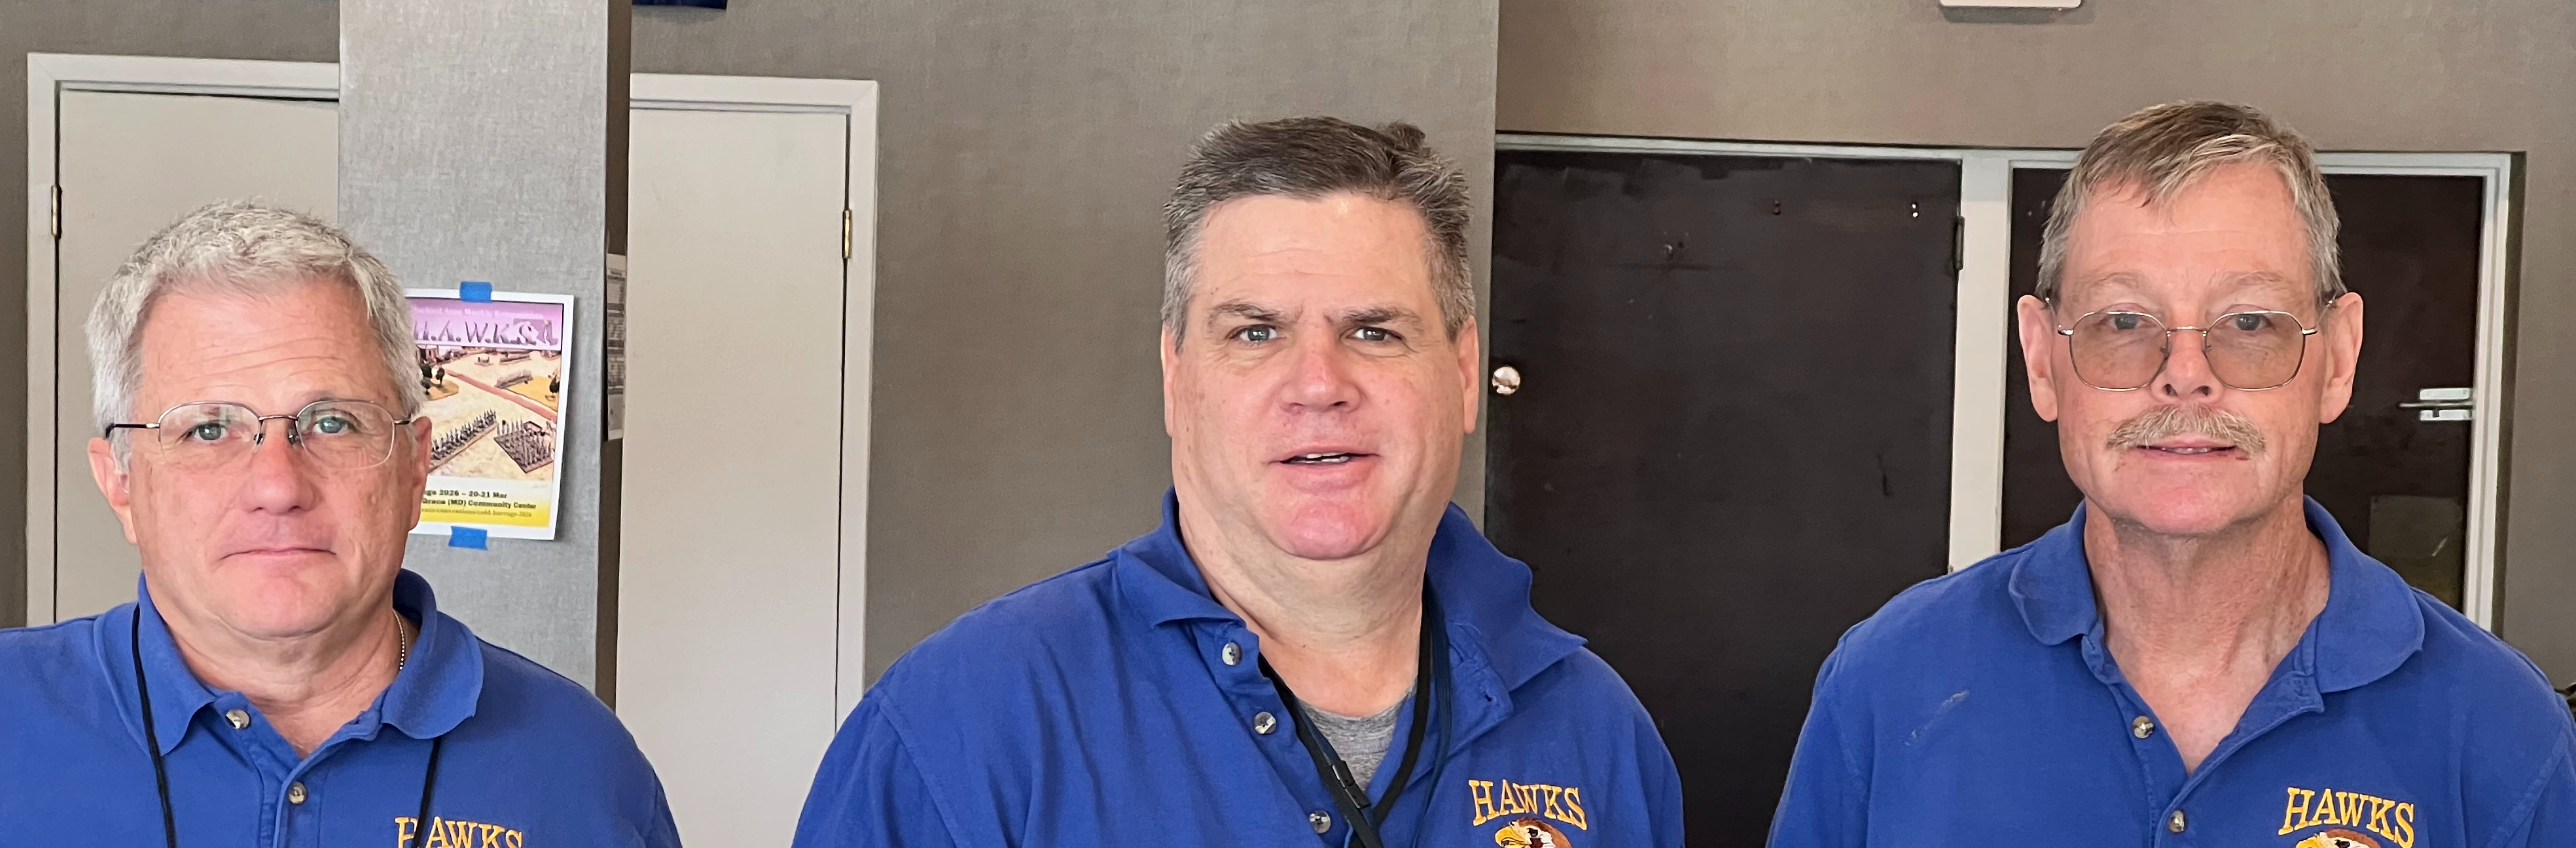
The H.A.W.K.’s are a great club from Harford County, Maryland. Two of my good West Point buddies (Buck Surdu USMA ’85 and Dave Wood fellow USMA ’84) have been members for years, and I have been fortunate enough to be their New England carpetbagging GM for a few years now.
Buck, yours truly, and Dave
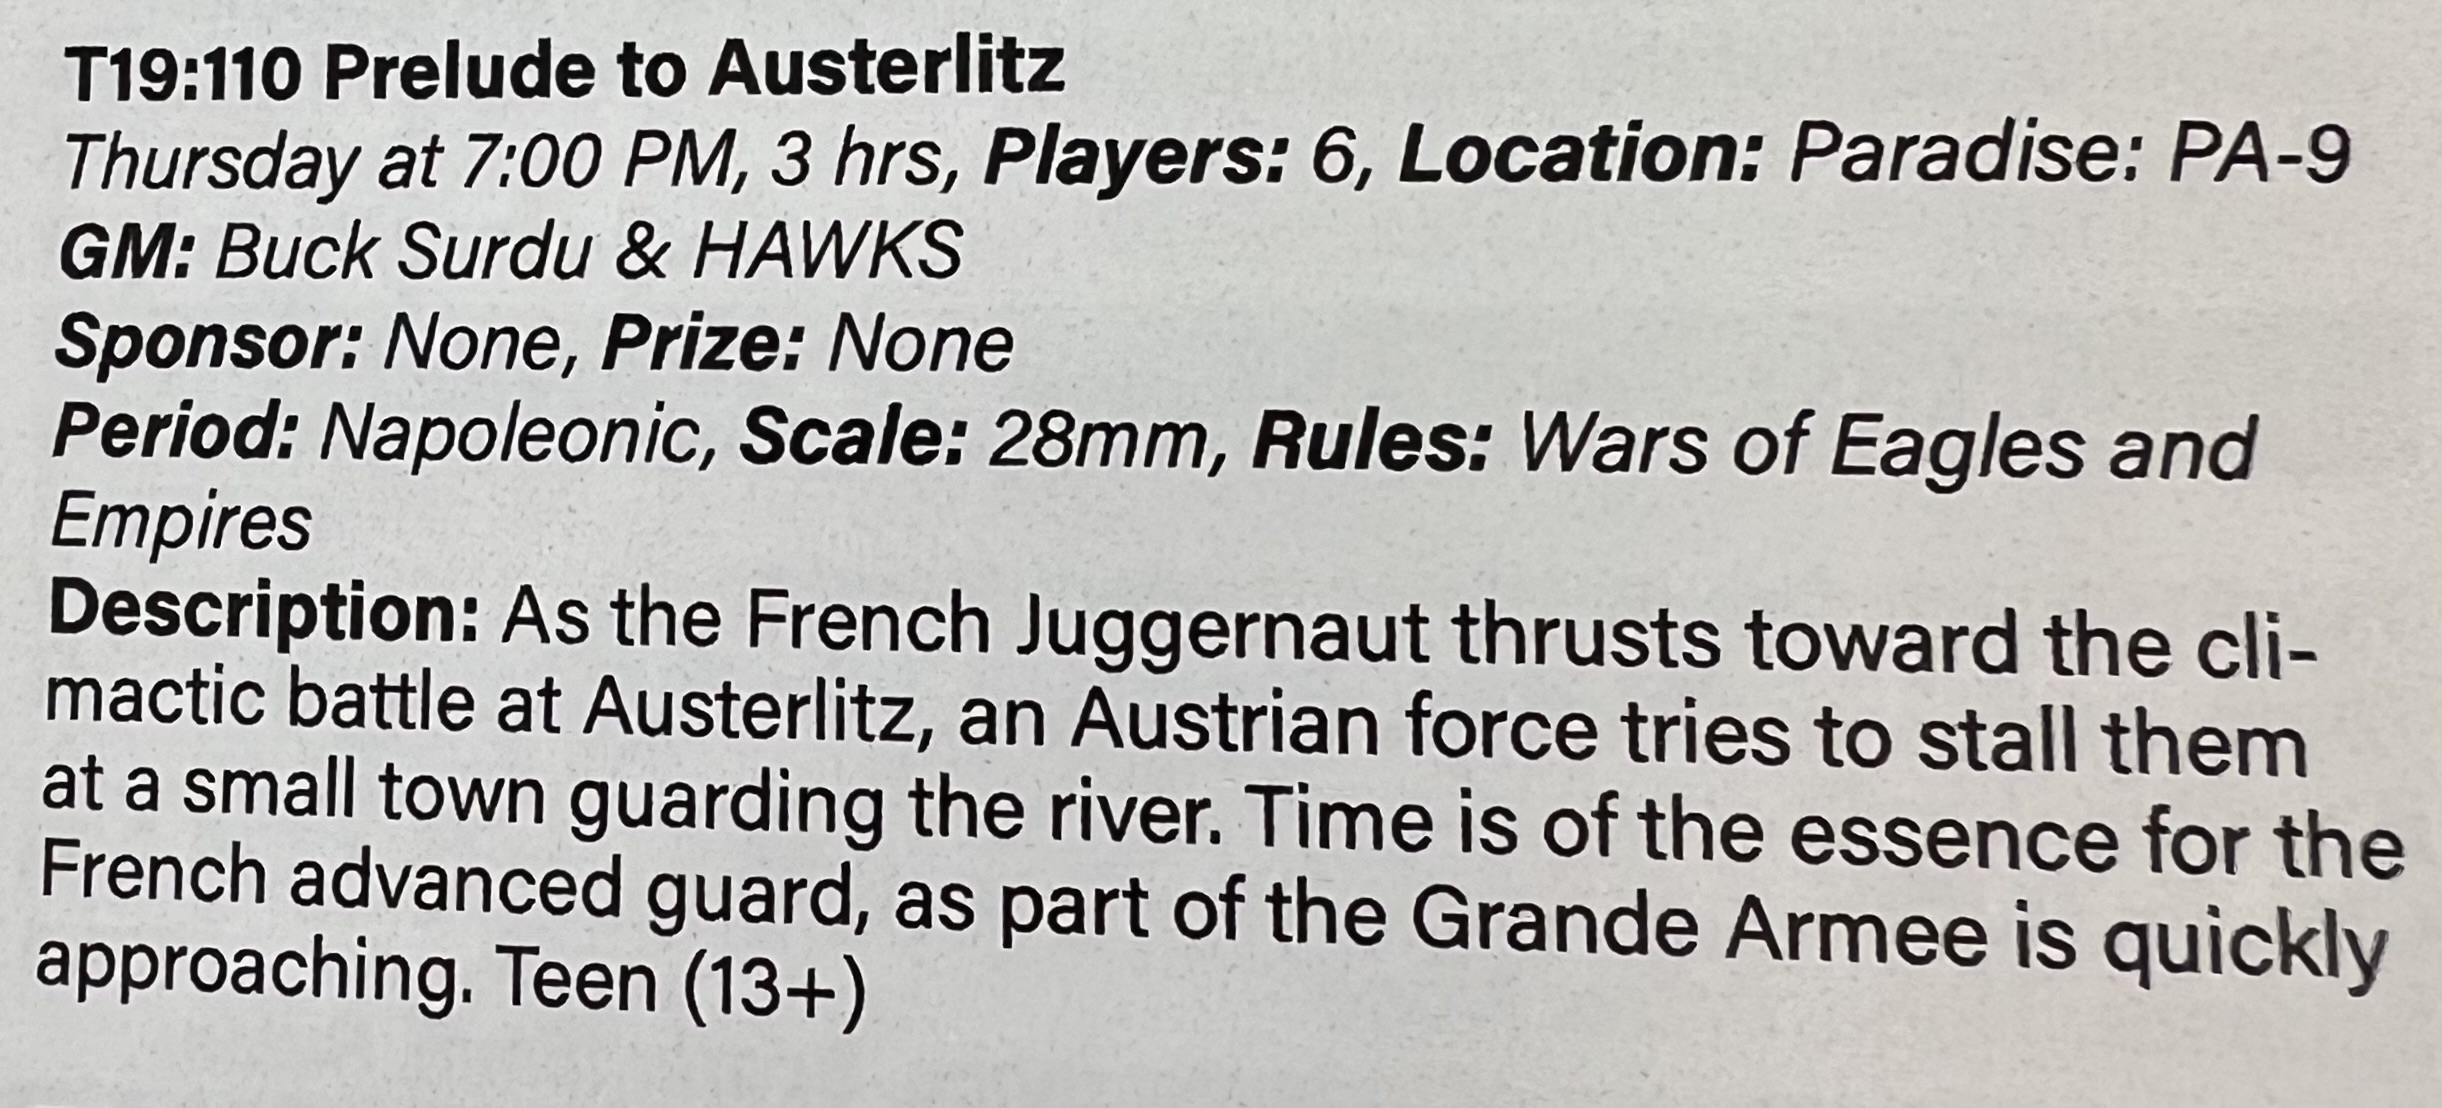
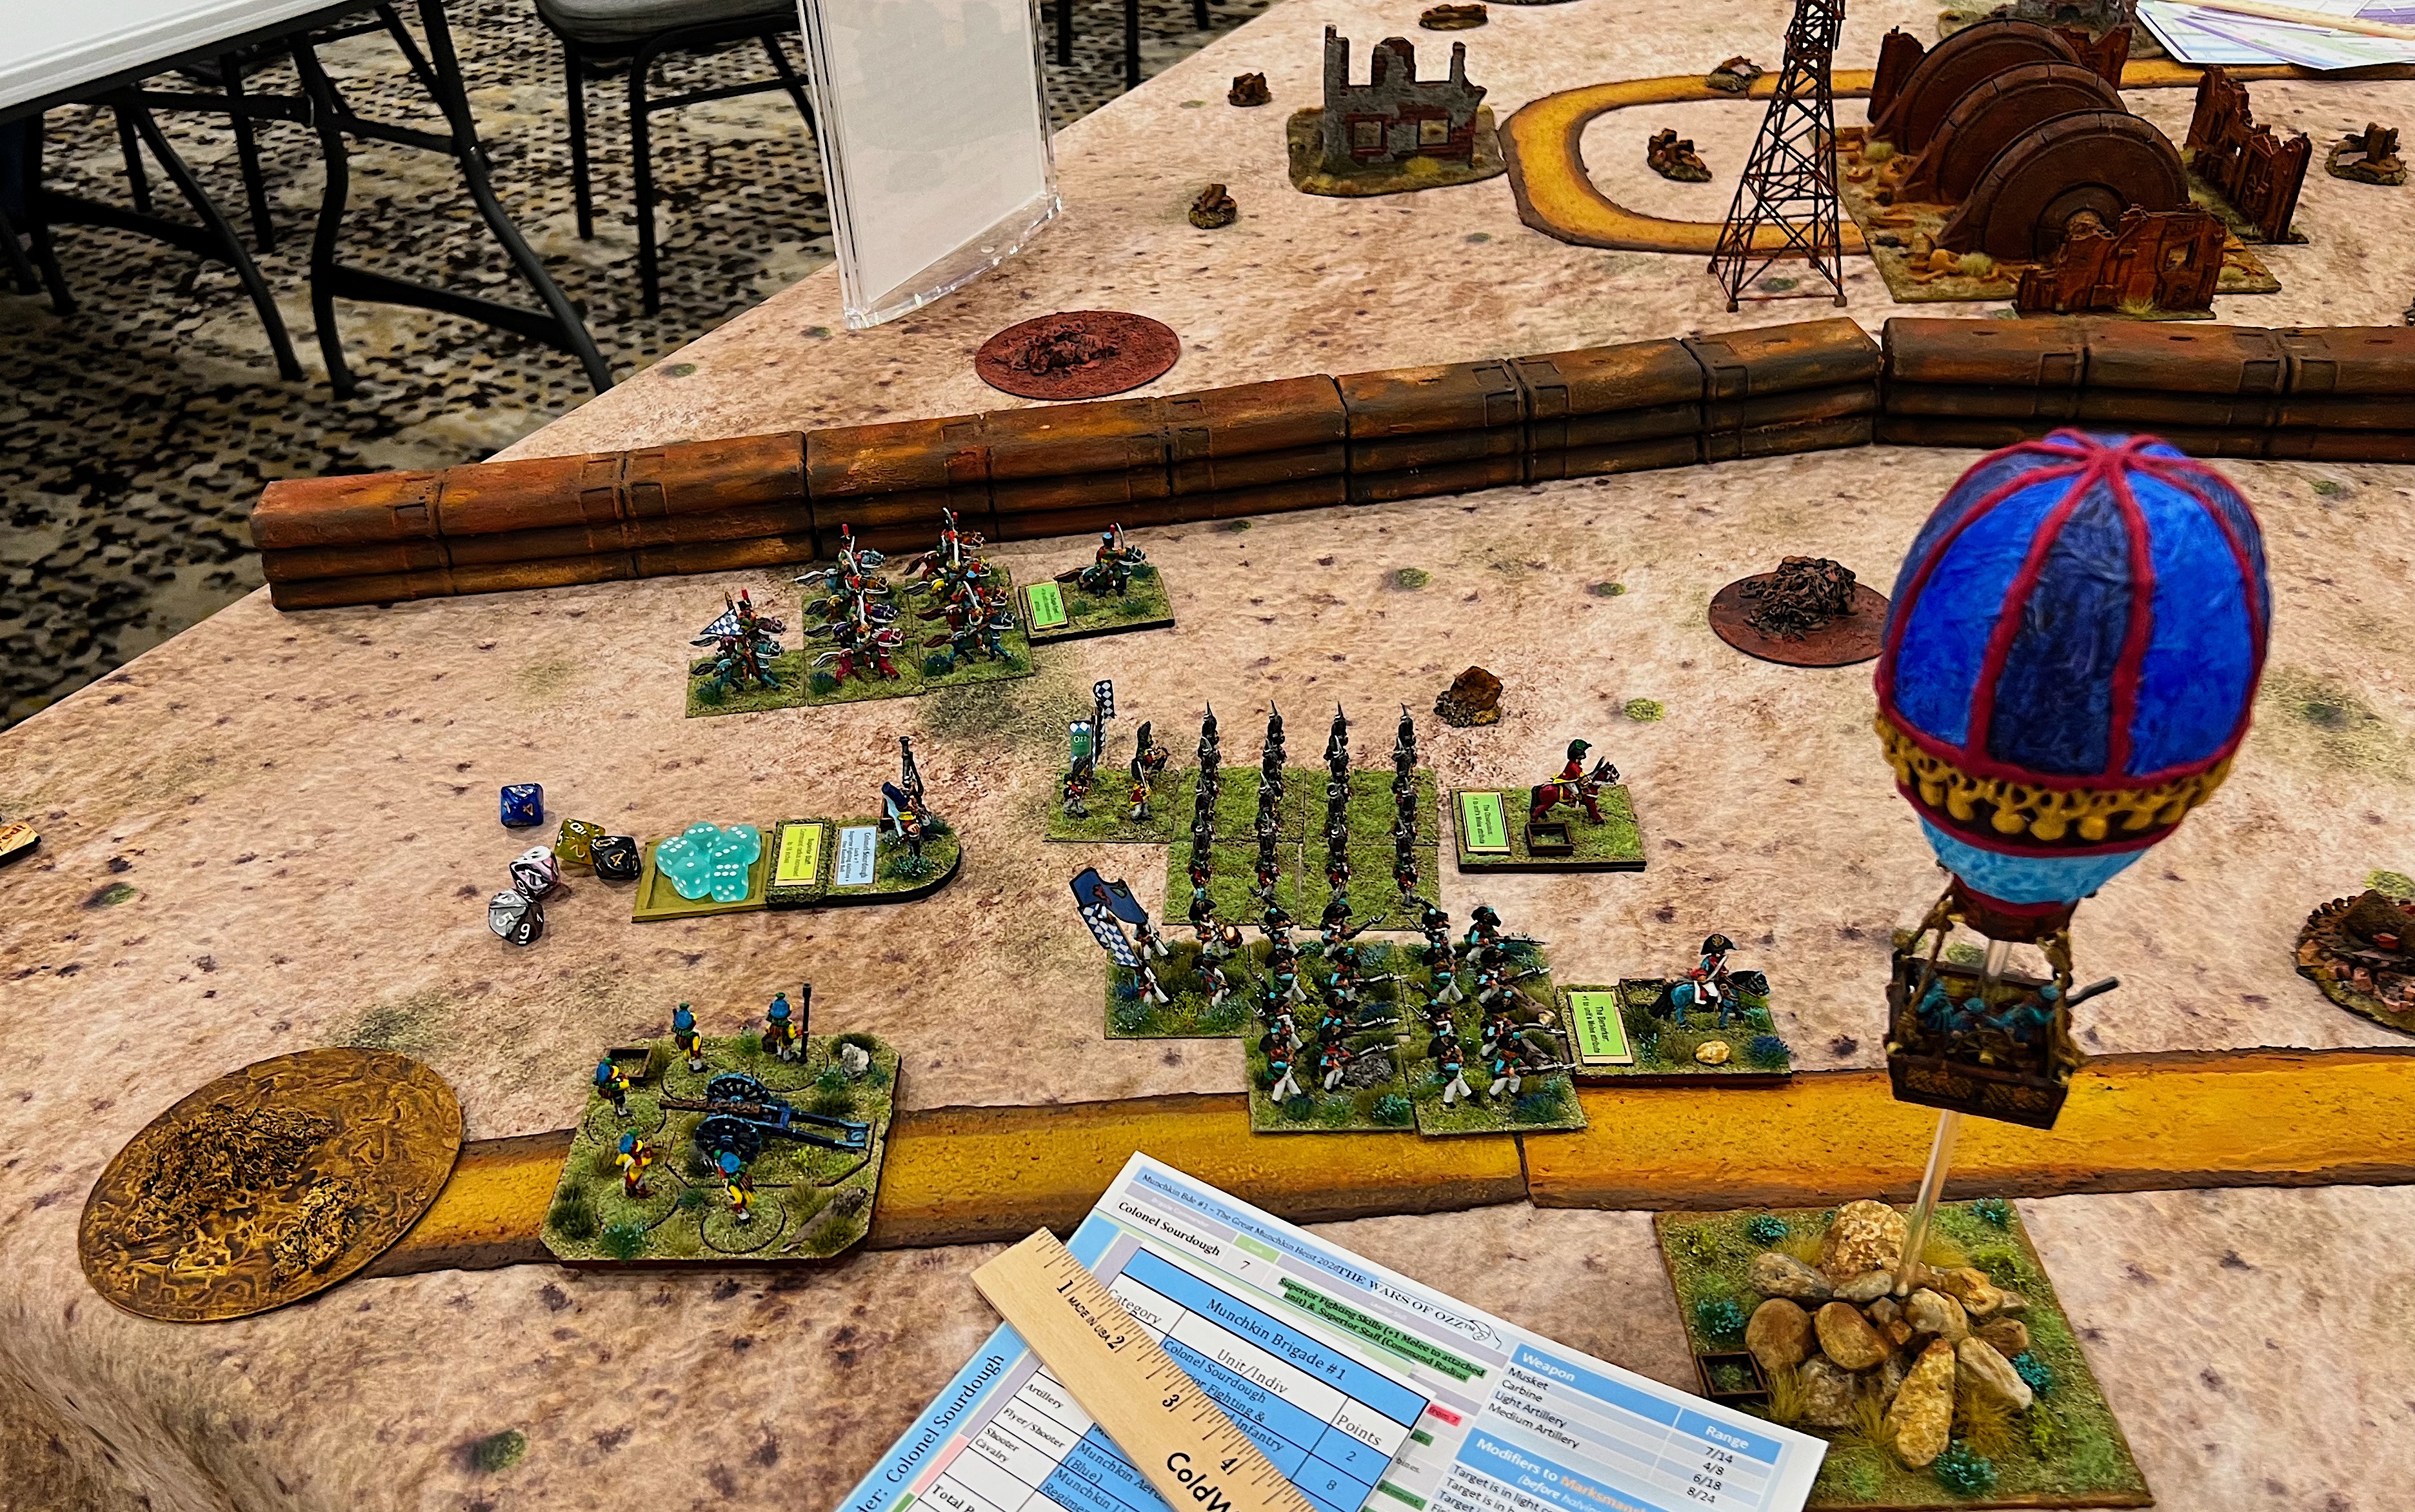
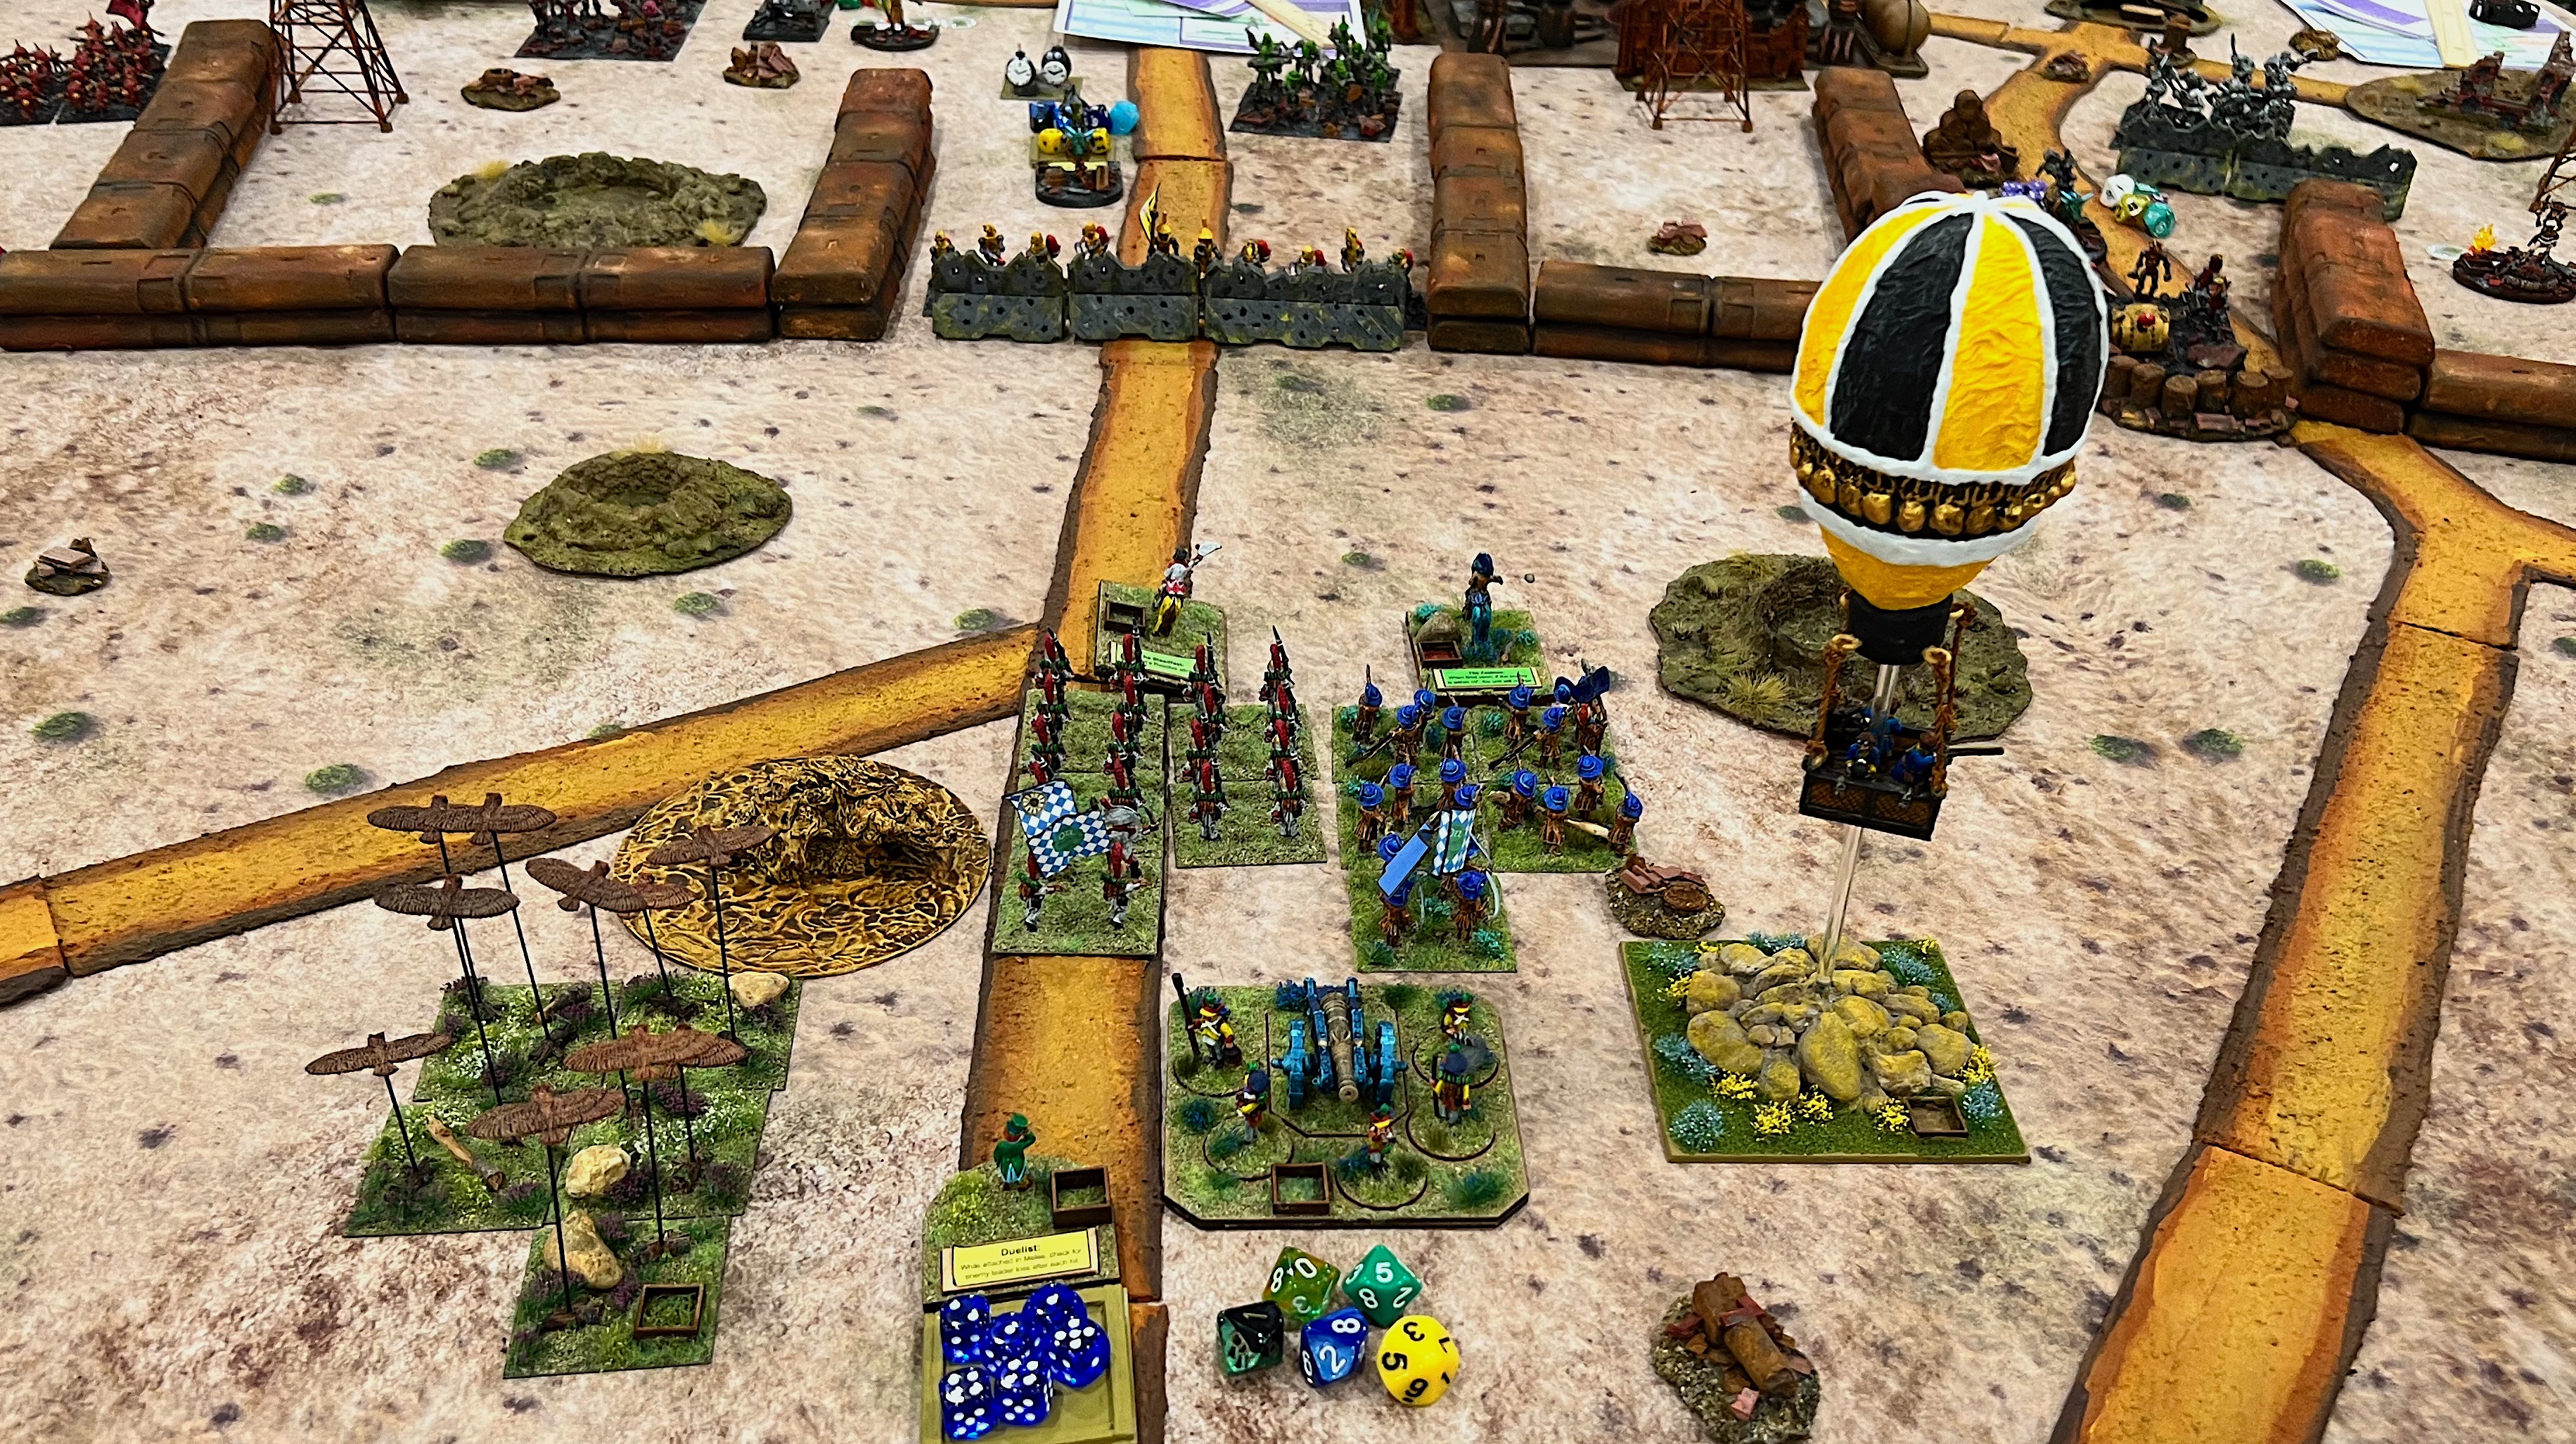
Prelude to Austerlitz (Wars of Eagles and Empires)
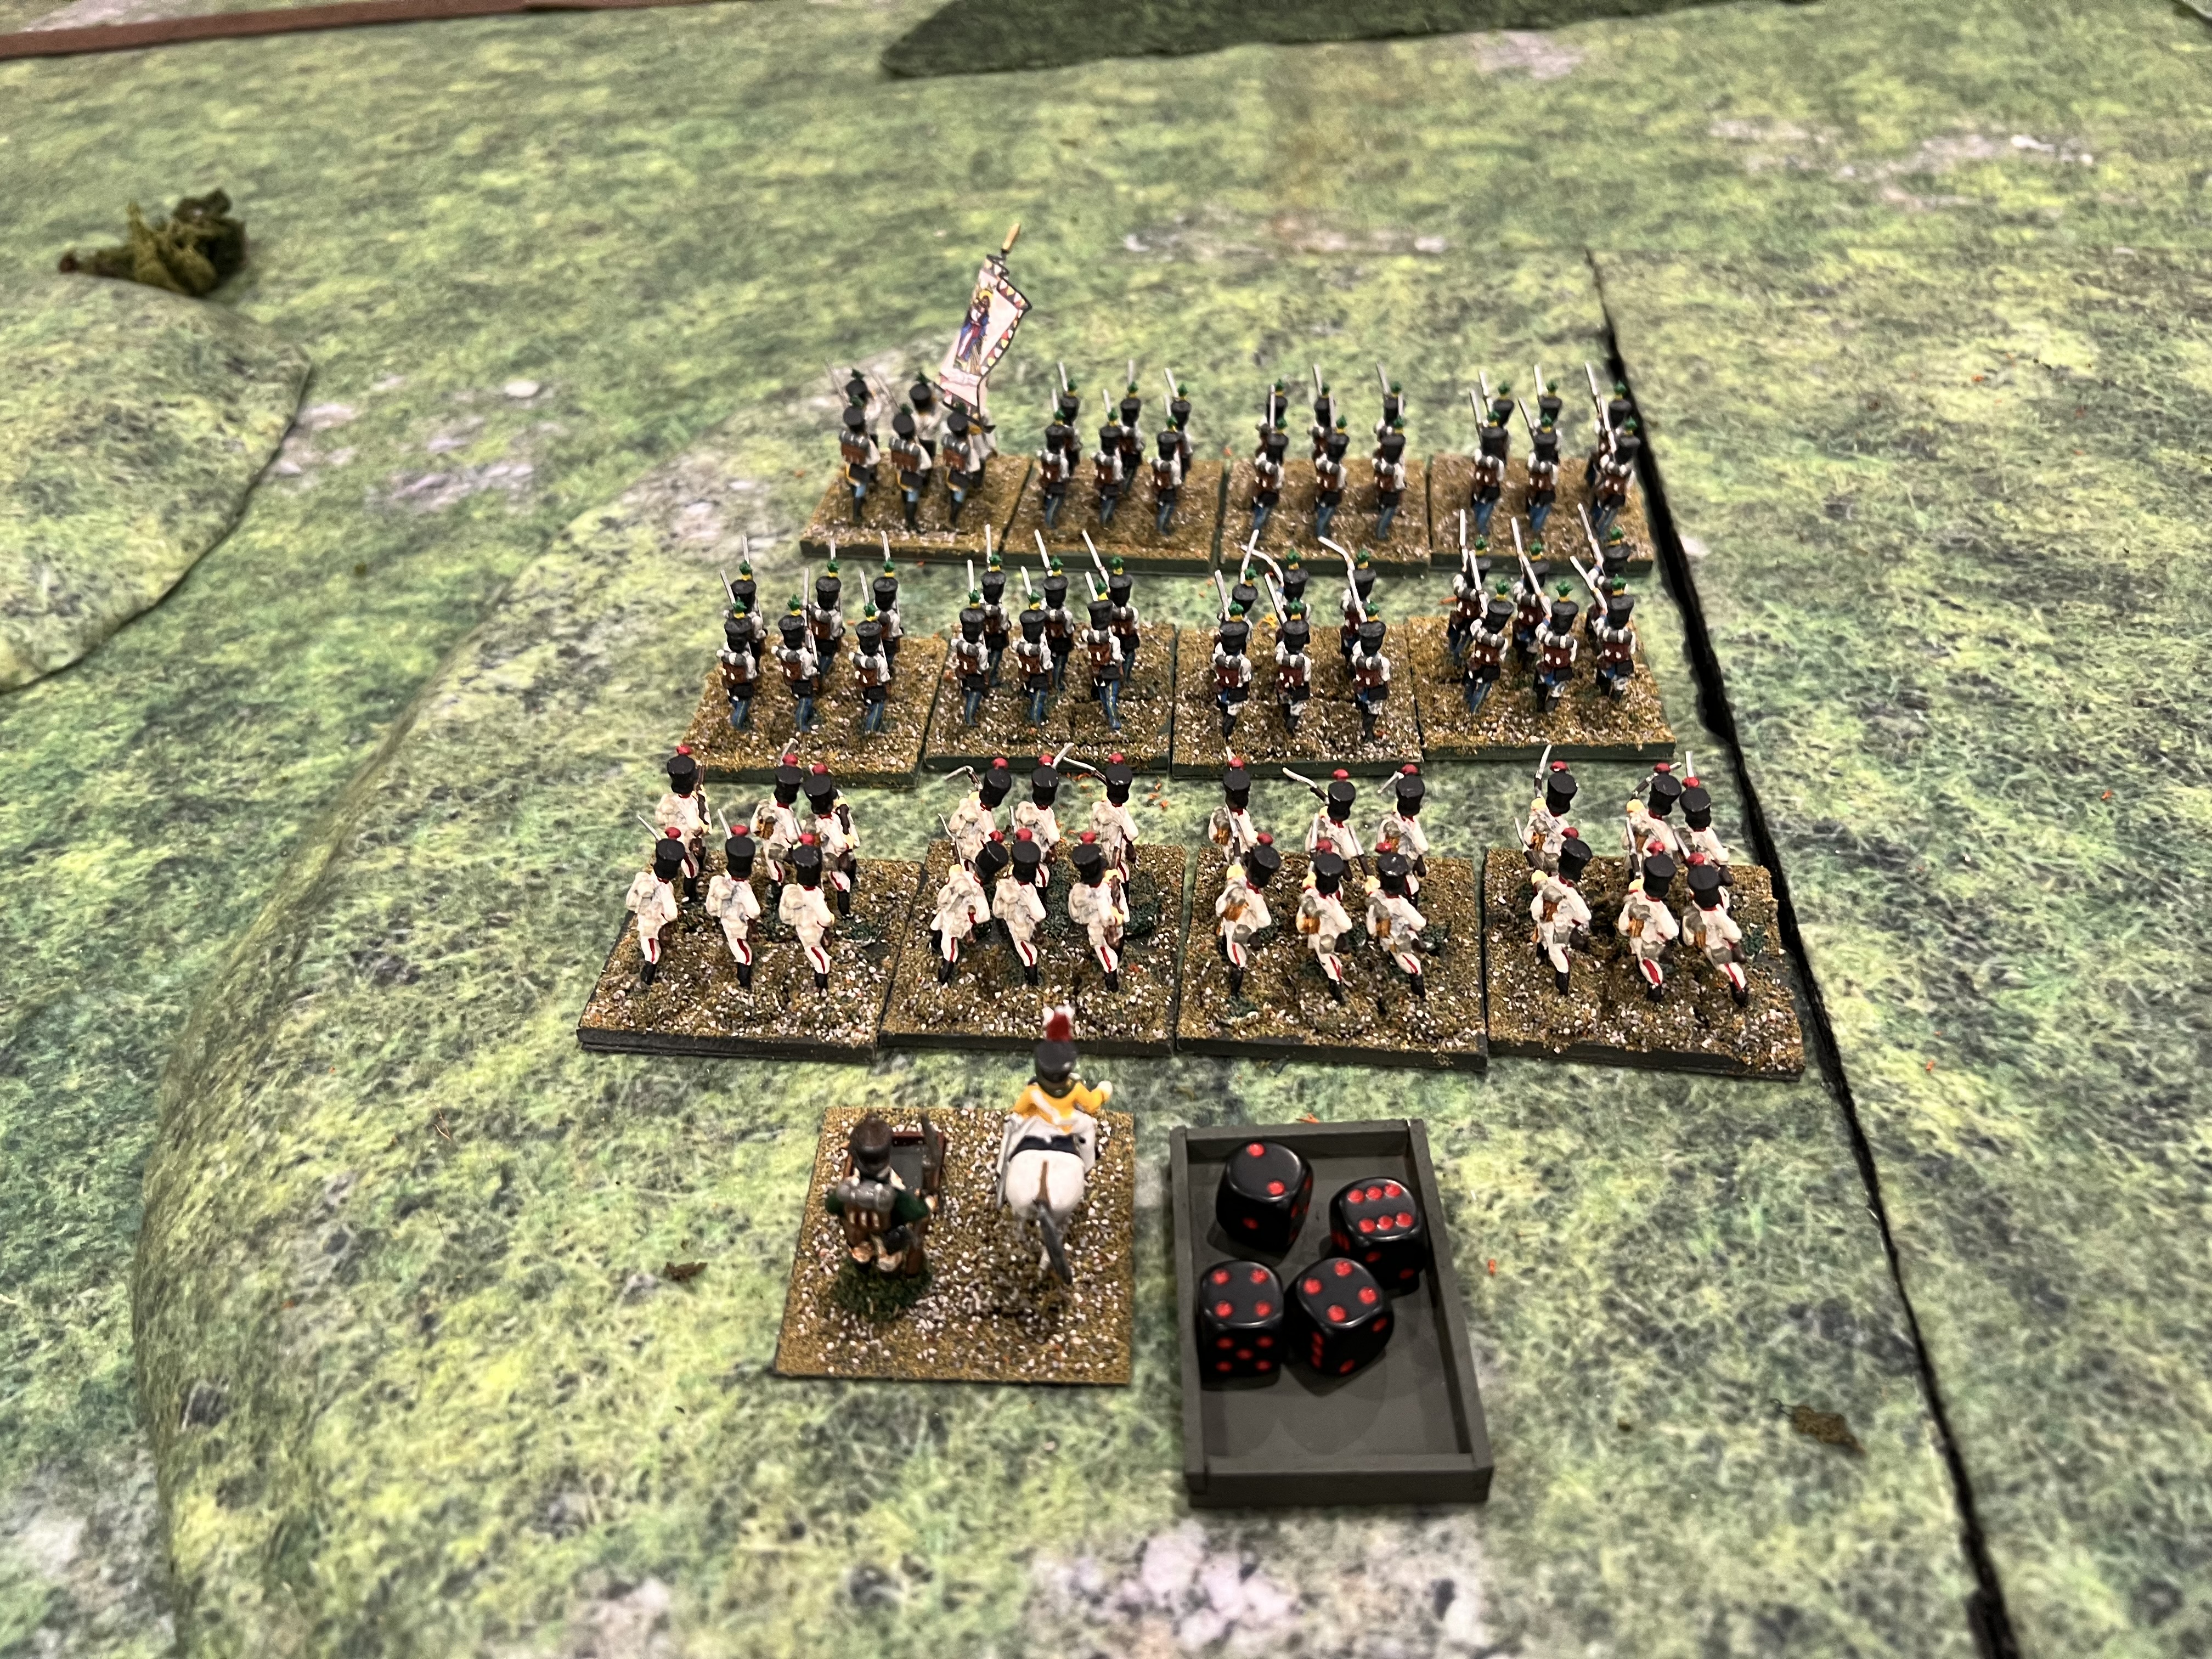
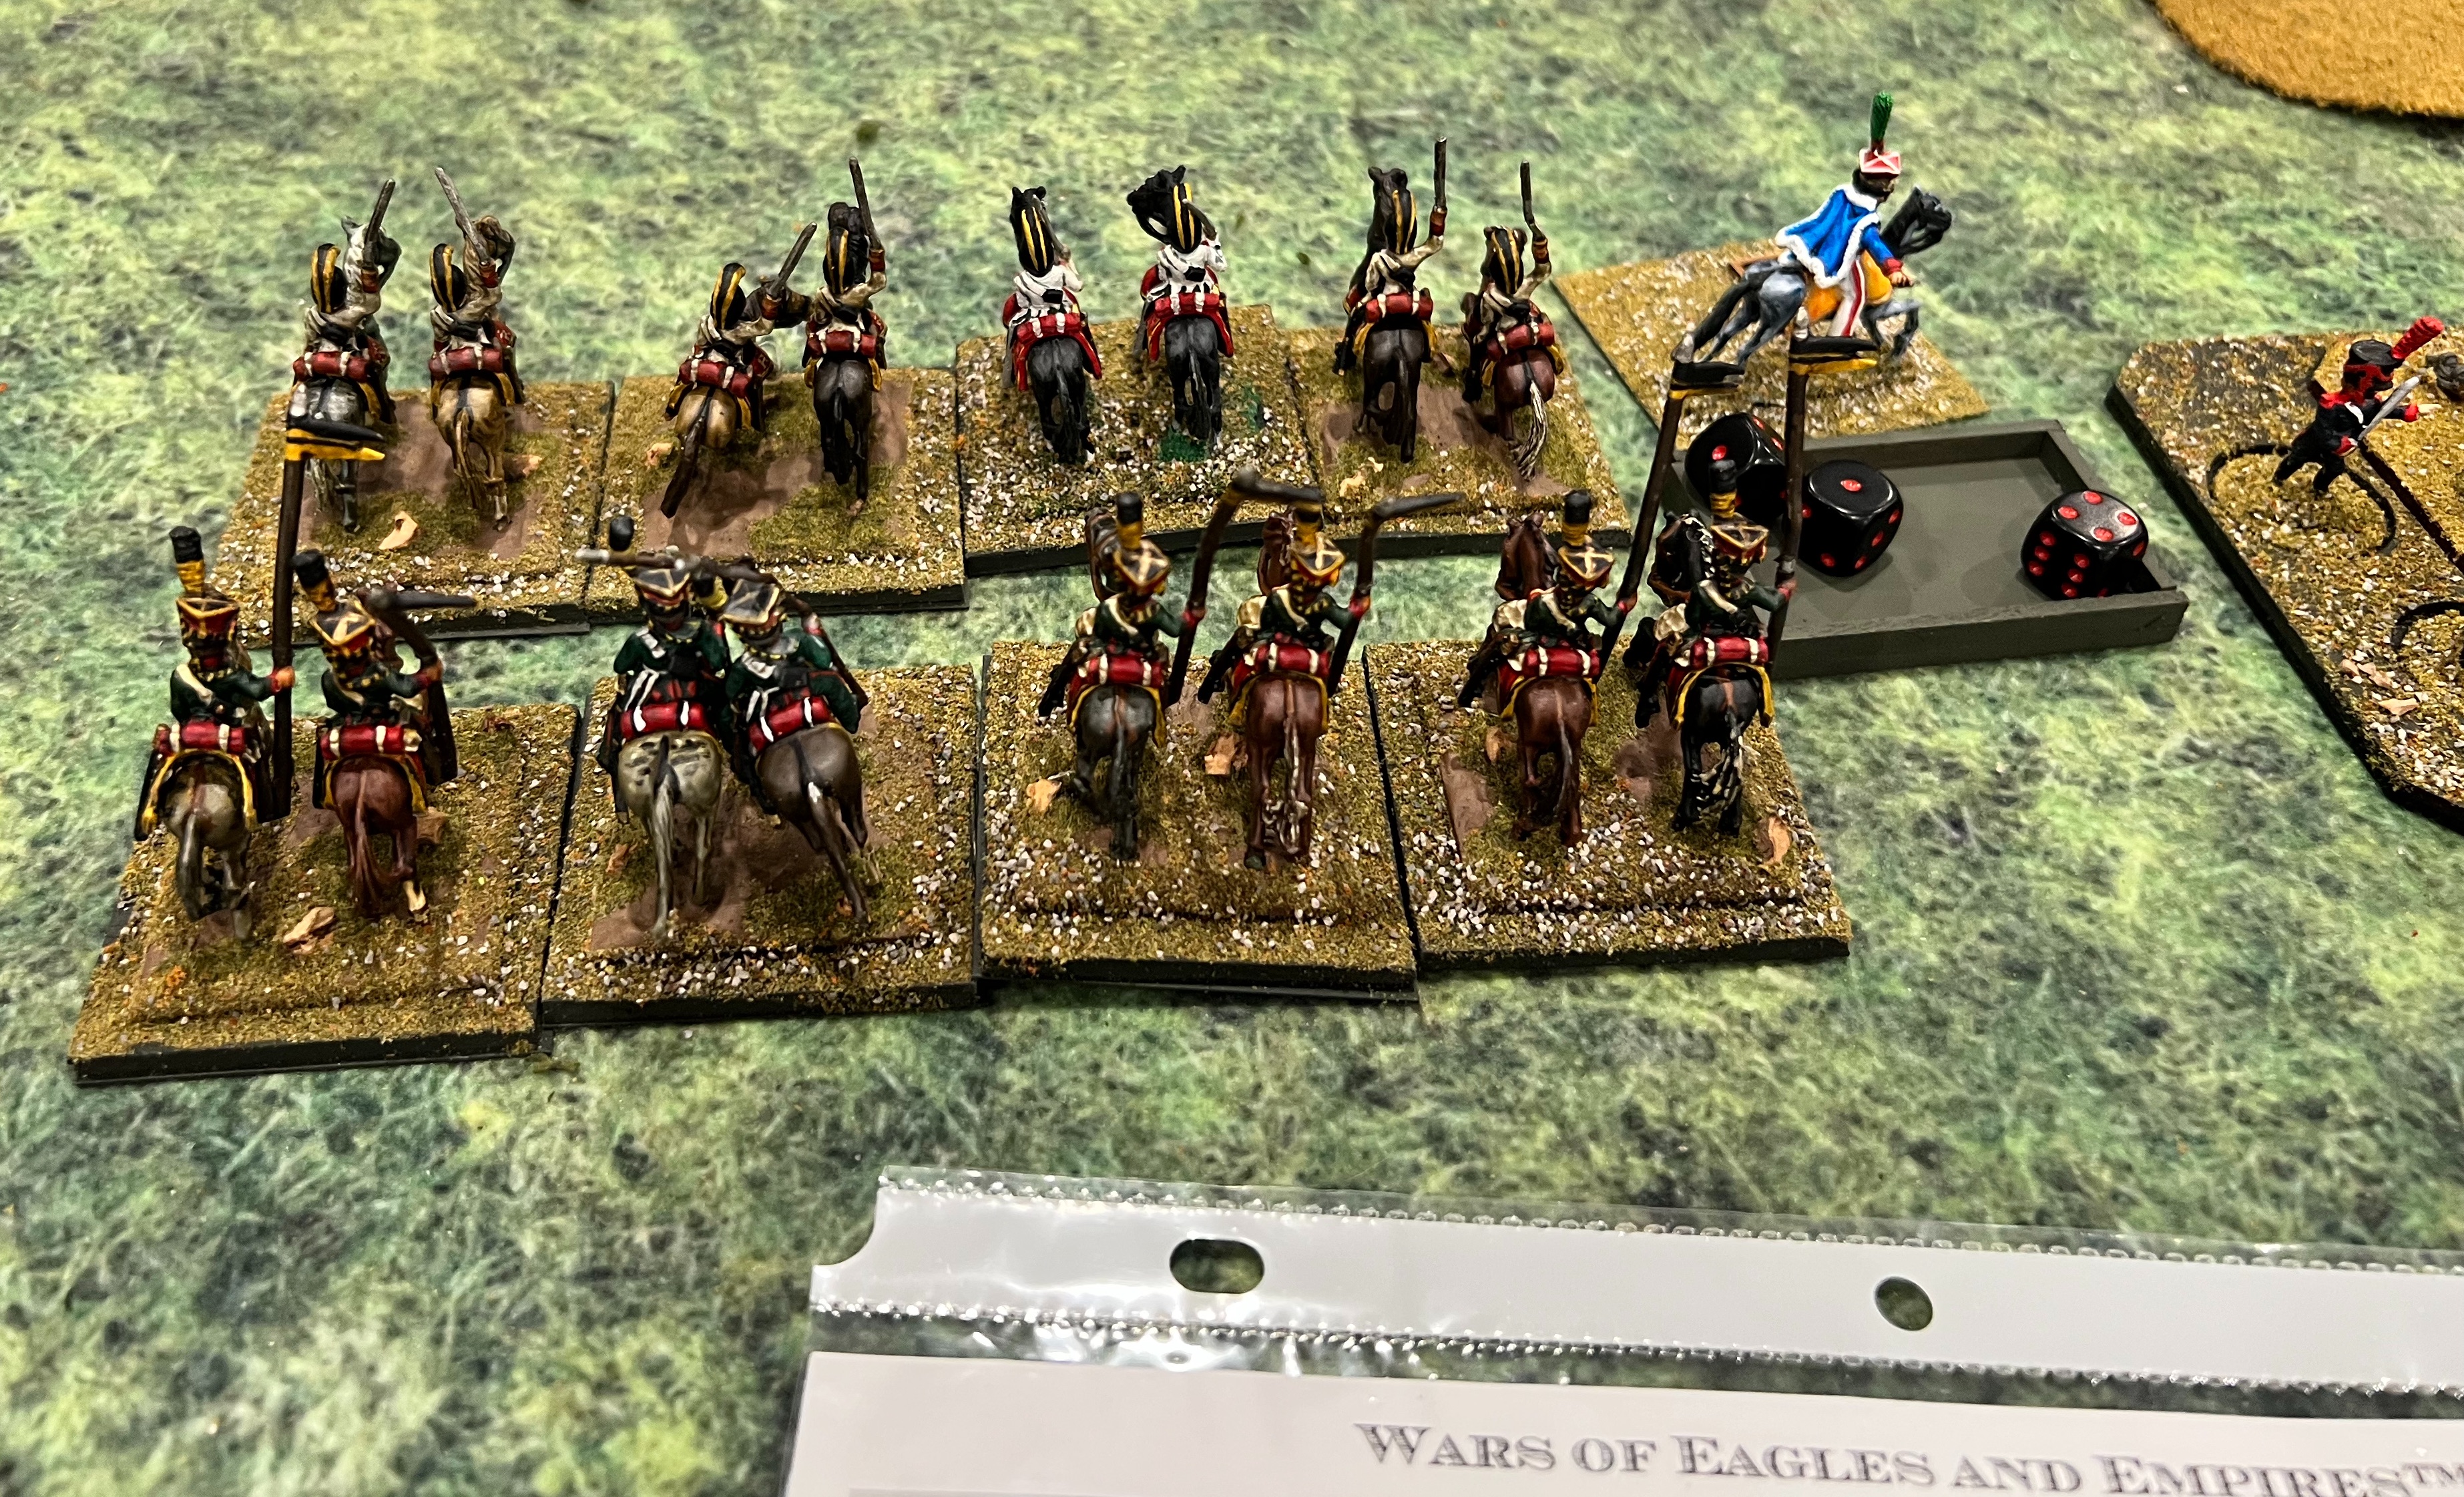
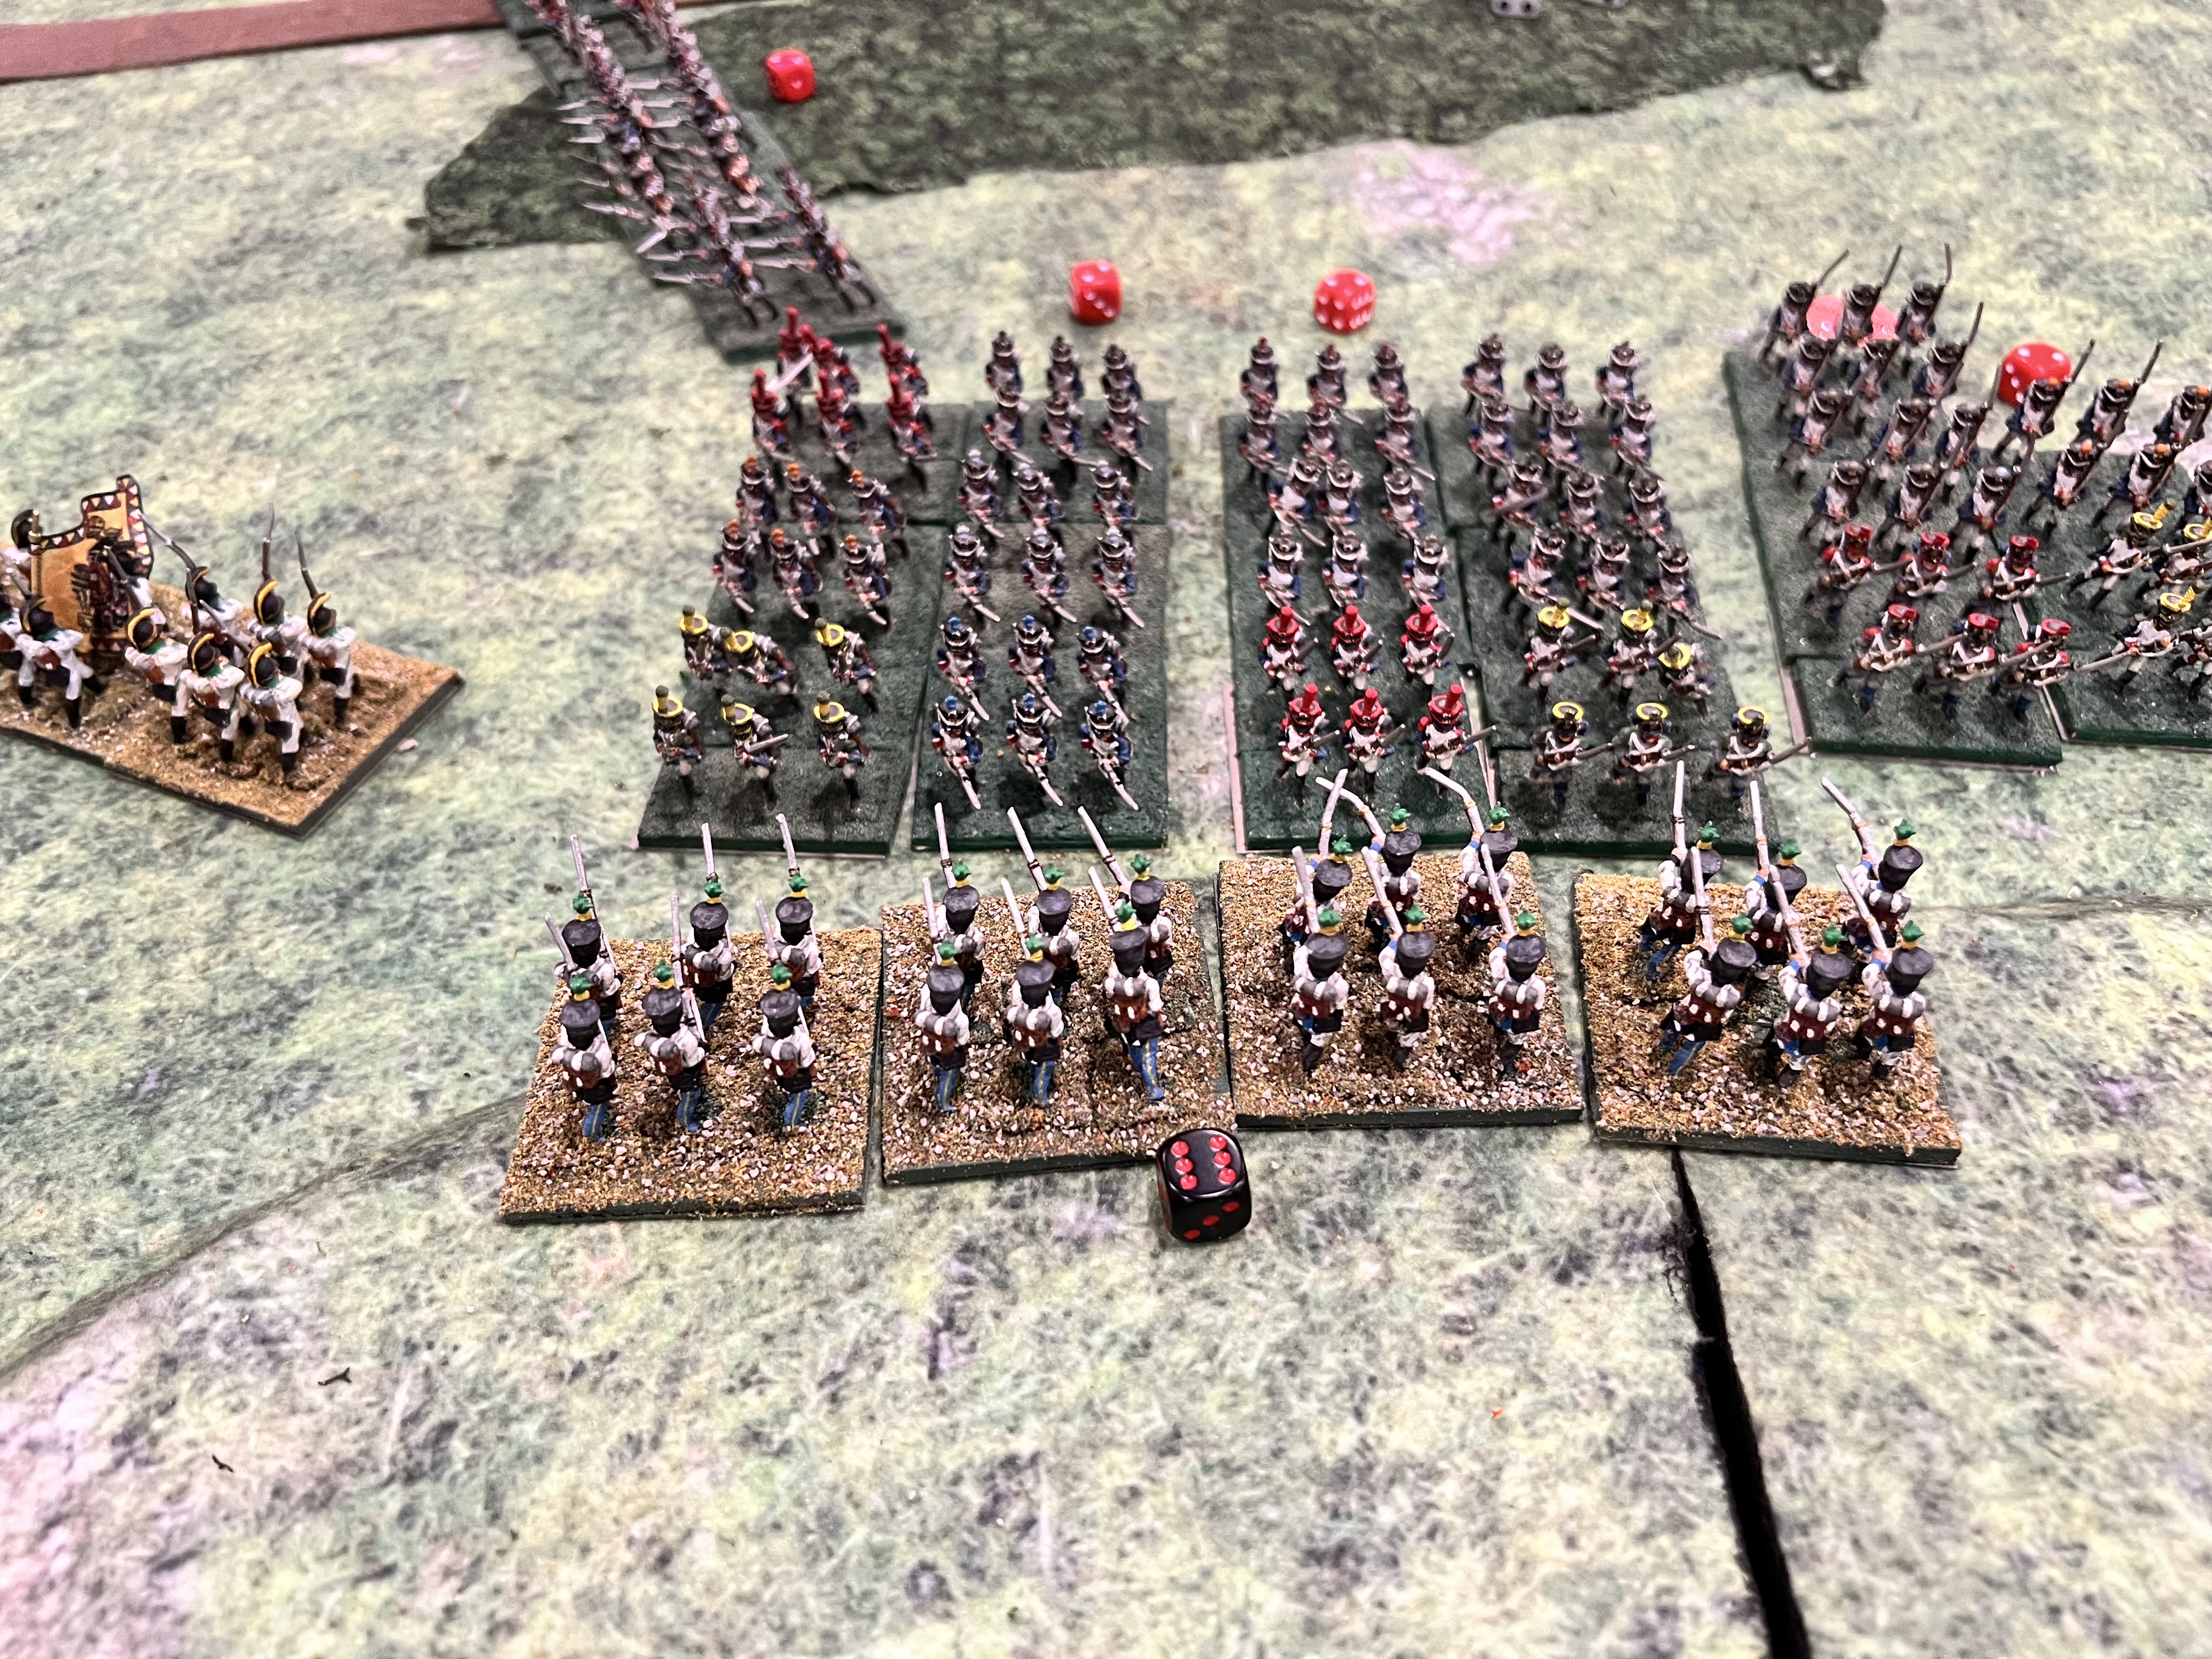
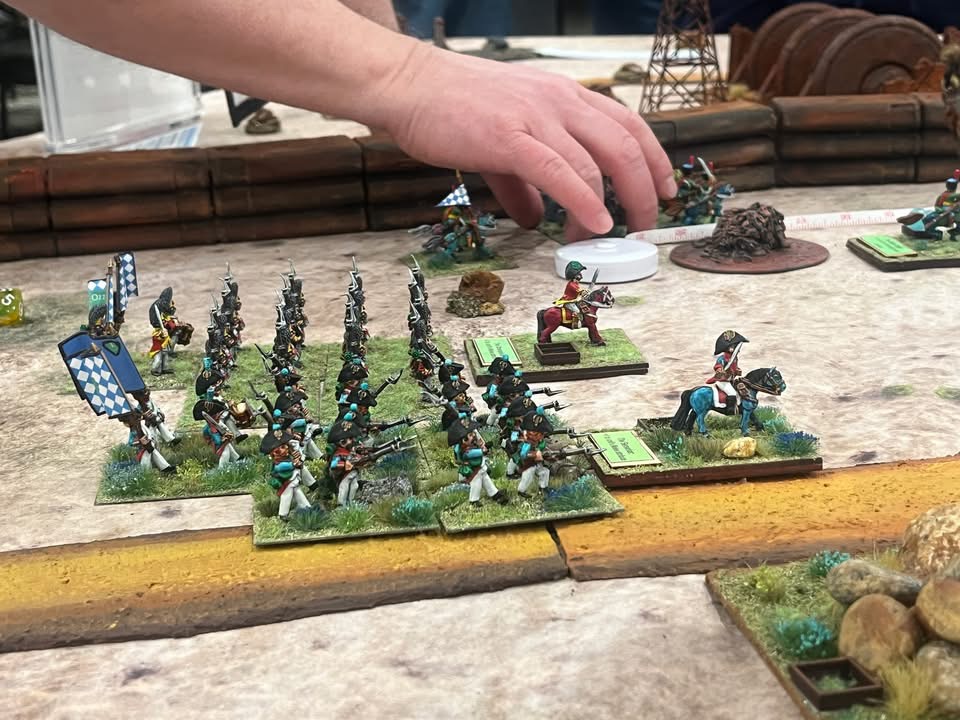
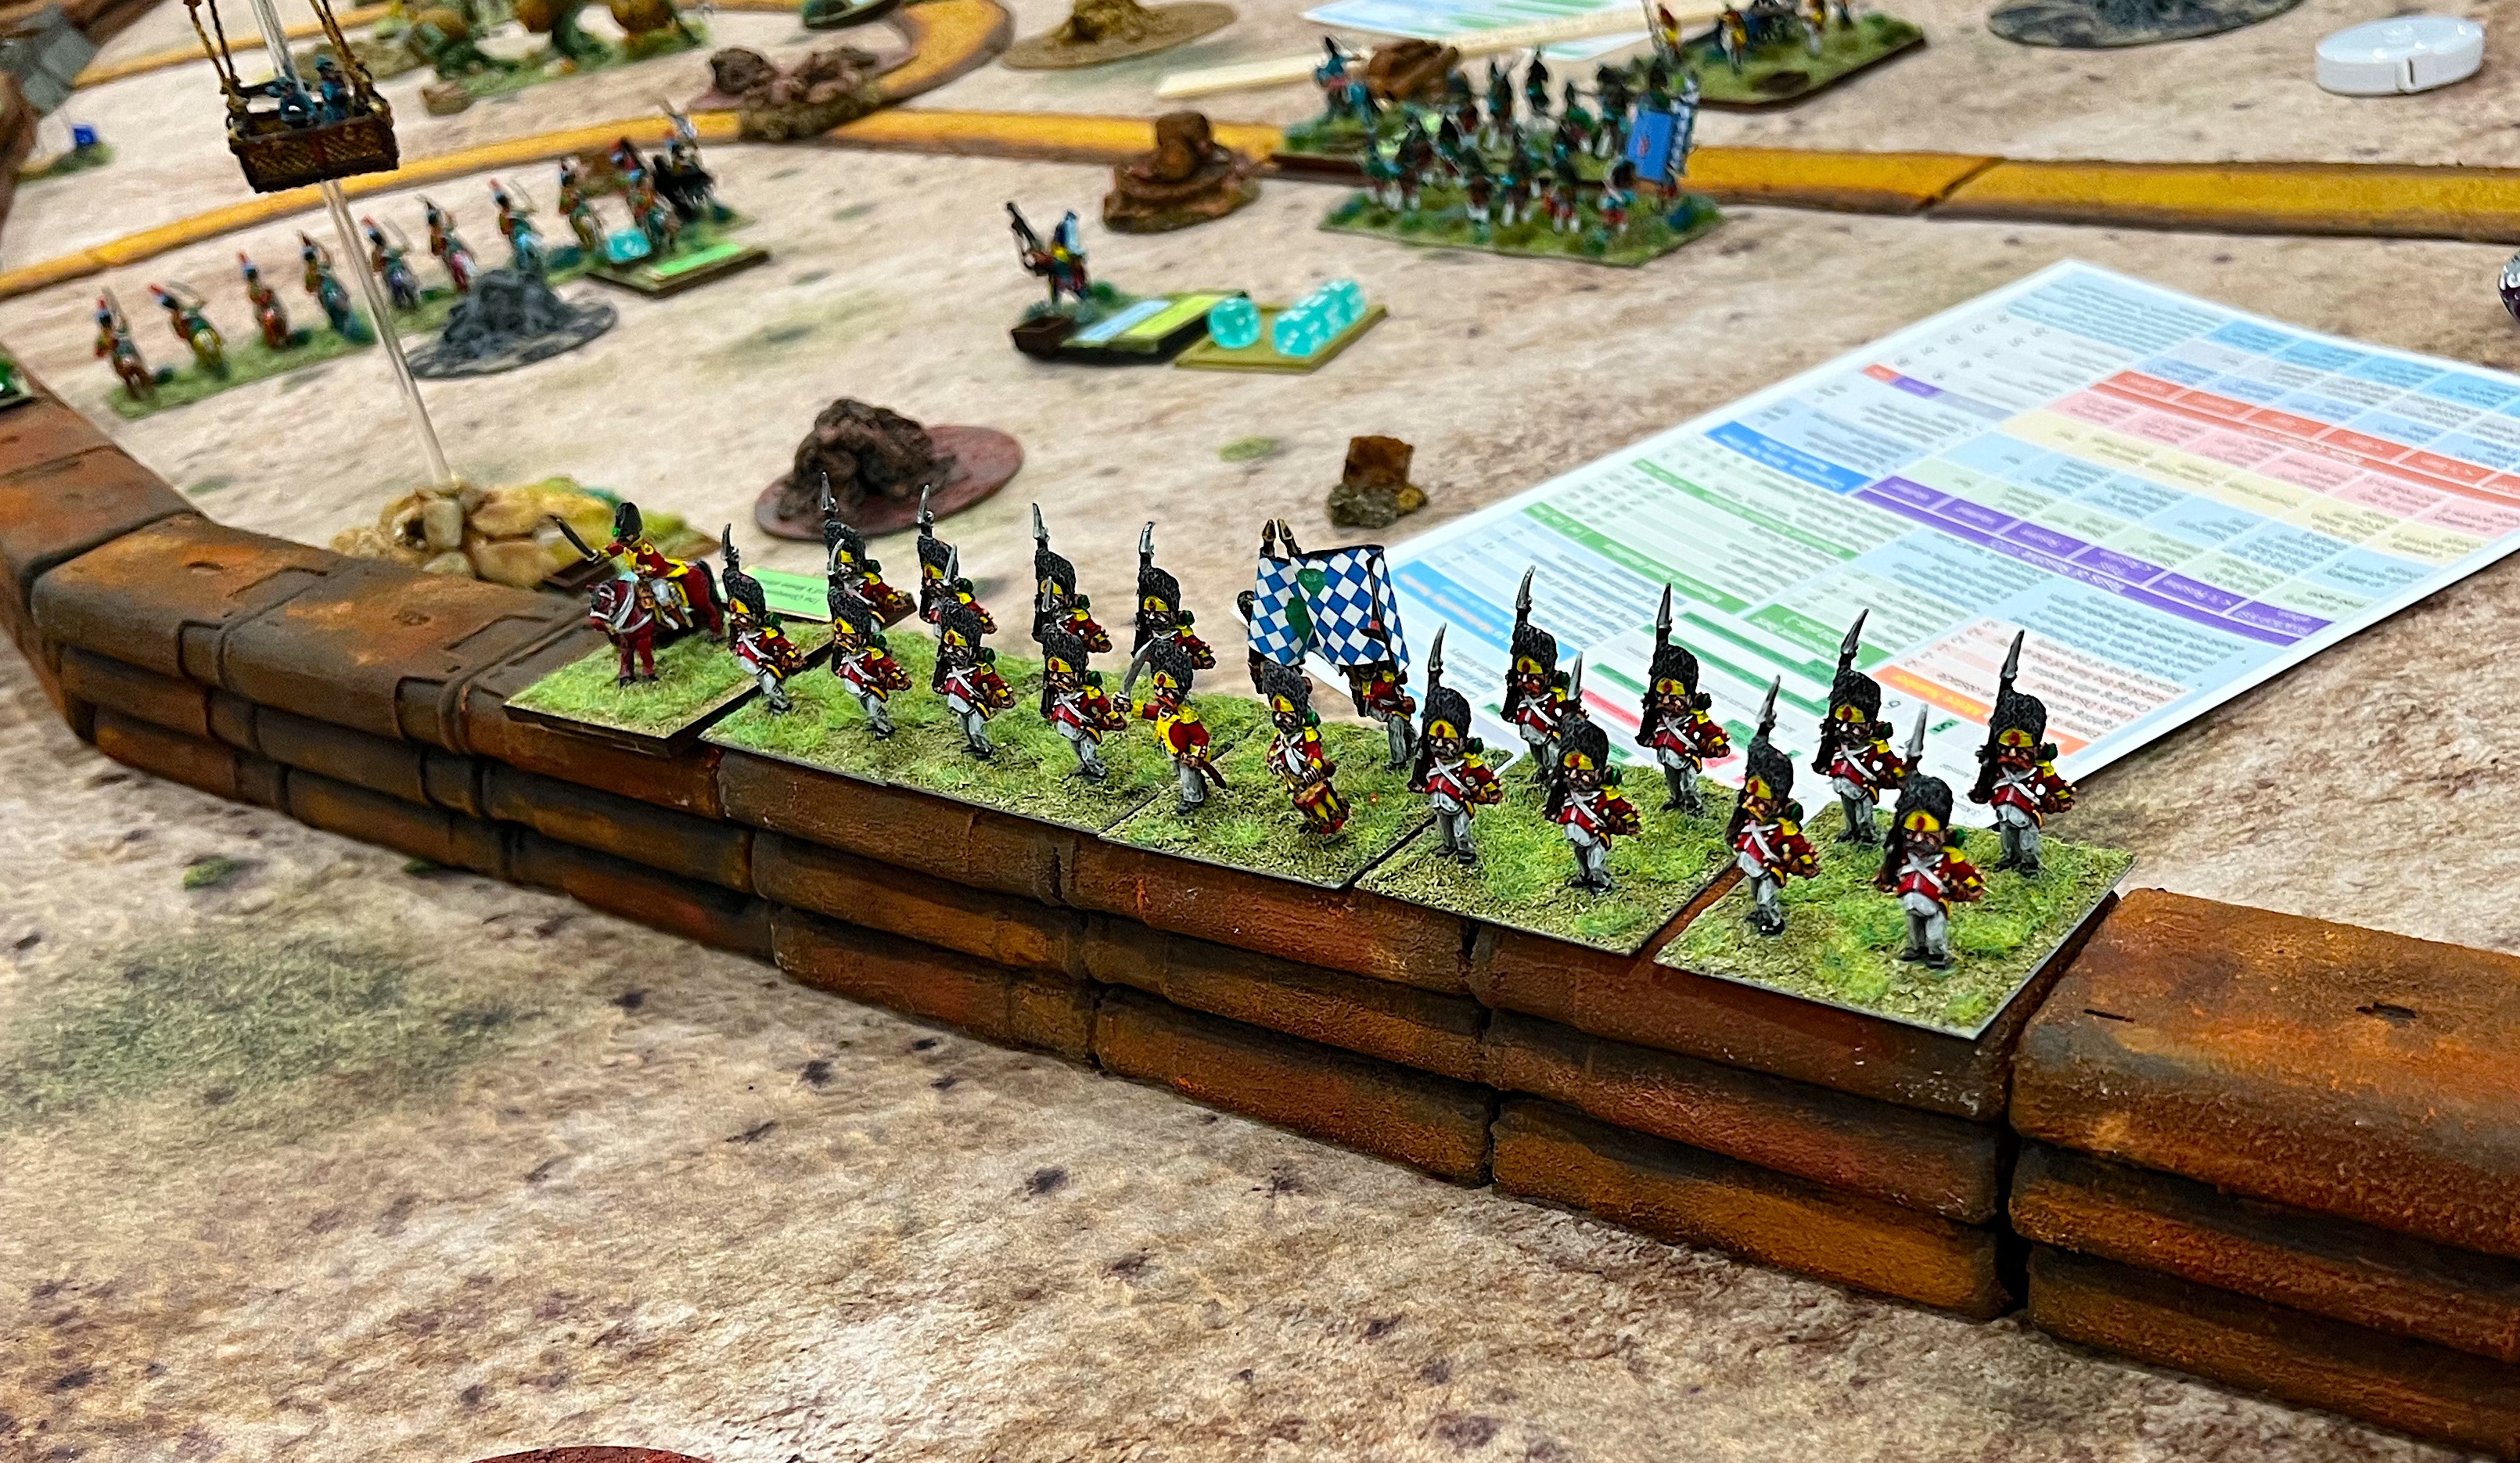
Thursday night I jumped into a Napoleonic 28mm game run by Buck, “Prelude to Austerlitz”. It used his Wars of Eagles and Empires rules.
It was a fun game and I was on the Austrian side with two other young players (they were young anyways). The French players were not as aggressive as they probably had wanted to be, which allowed us to successfully defend the town.
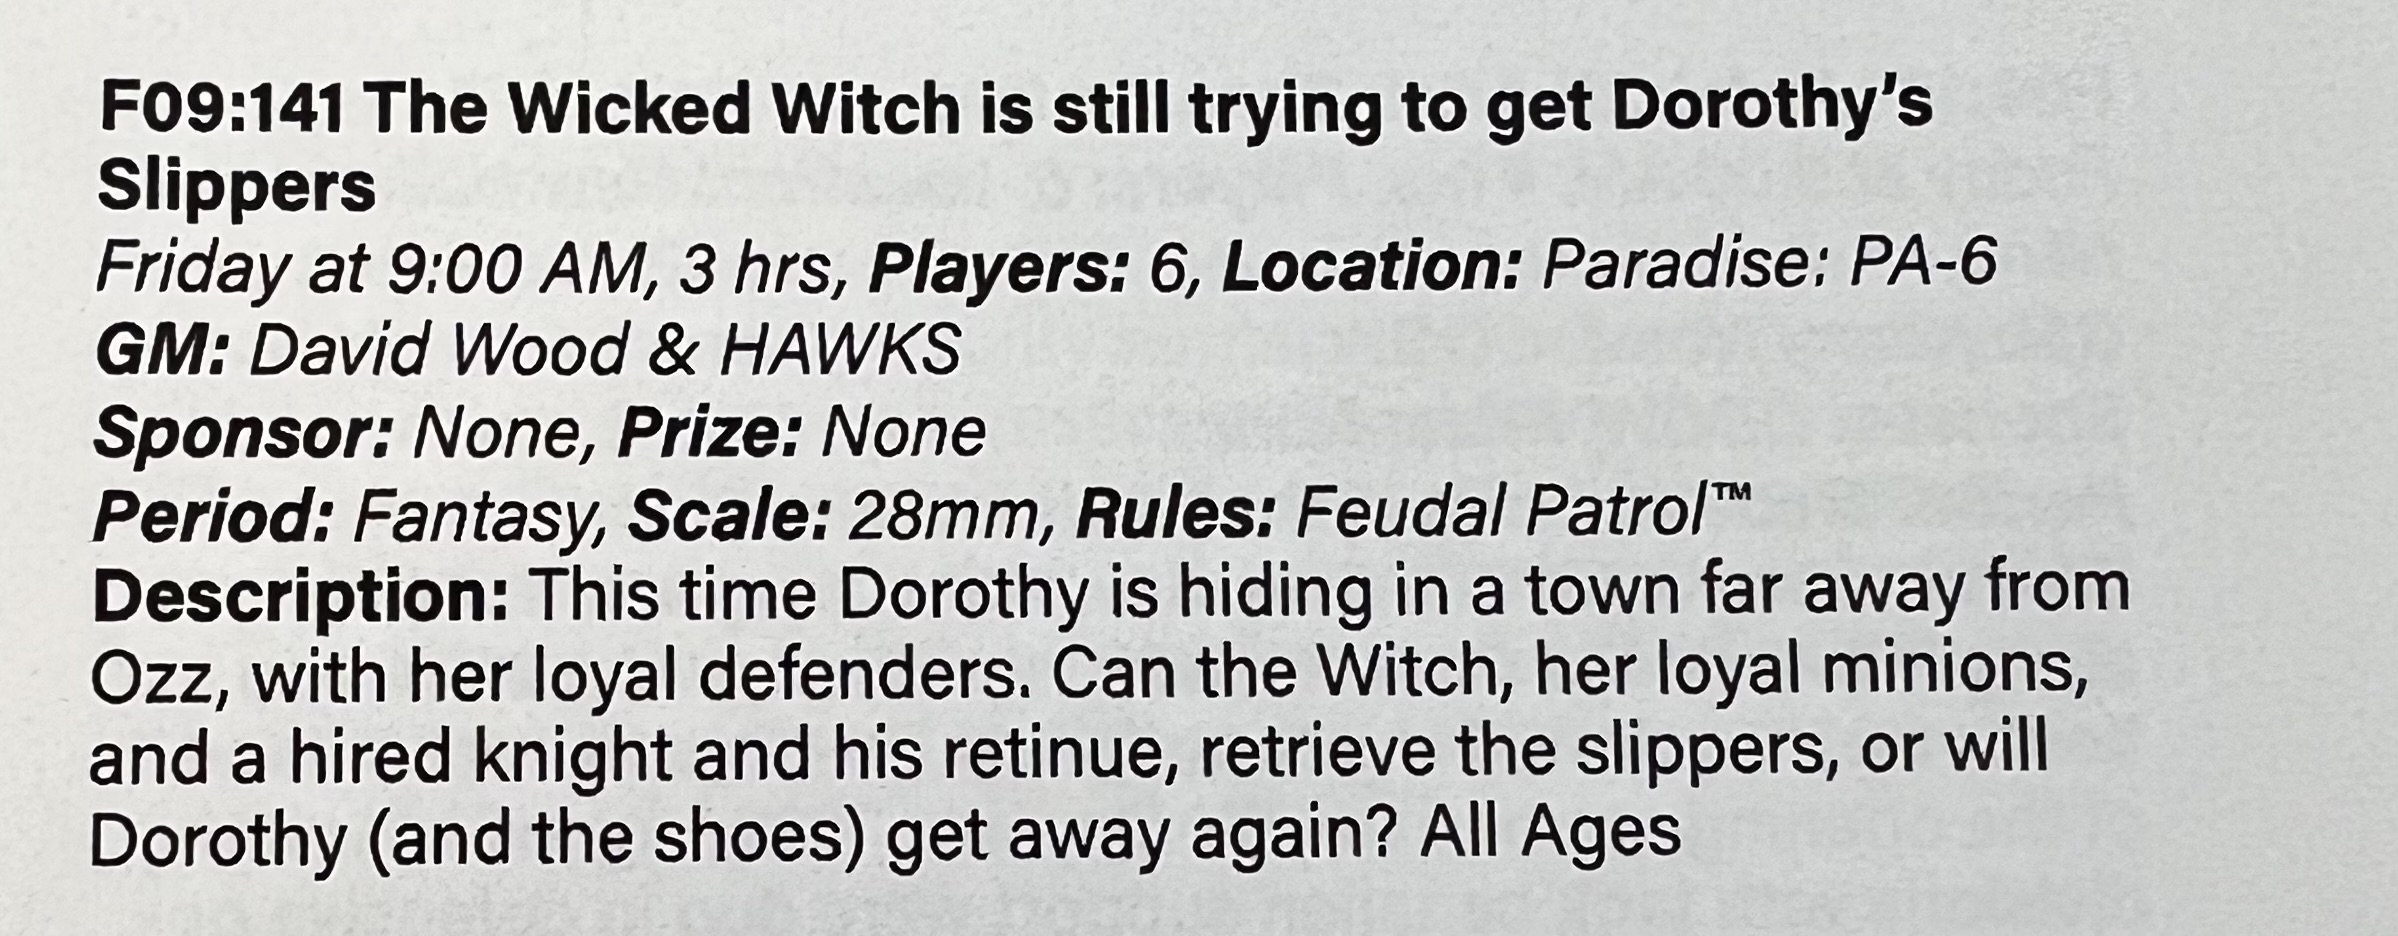
The Wicked Witch is Still Trying to Get Dorothy’s Slippers (Feudal Patrol using Wars of Ozz figures)
This was a fun opportunity to jump in a Feudal Patrol game with my old USMA roommate Dave. Dave does a great job as a GM and even won a PELA award at Cold Wars for his Zulu game. Dave uses 28mm Wars of Ozzfigures in a skirmish game using Feudal Patrol rules. I played on the Winkie side and we were able to take Dorothy down and get those valuable slippers!
Dave as GMMy Winkies advance
After this game, I hit the vendors hall and got some lunch. Then I took the rest of the afternoon time to set up my Friday evening Wars of Ozz game. – “The Great Munchkin Heist“.
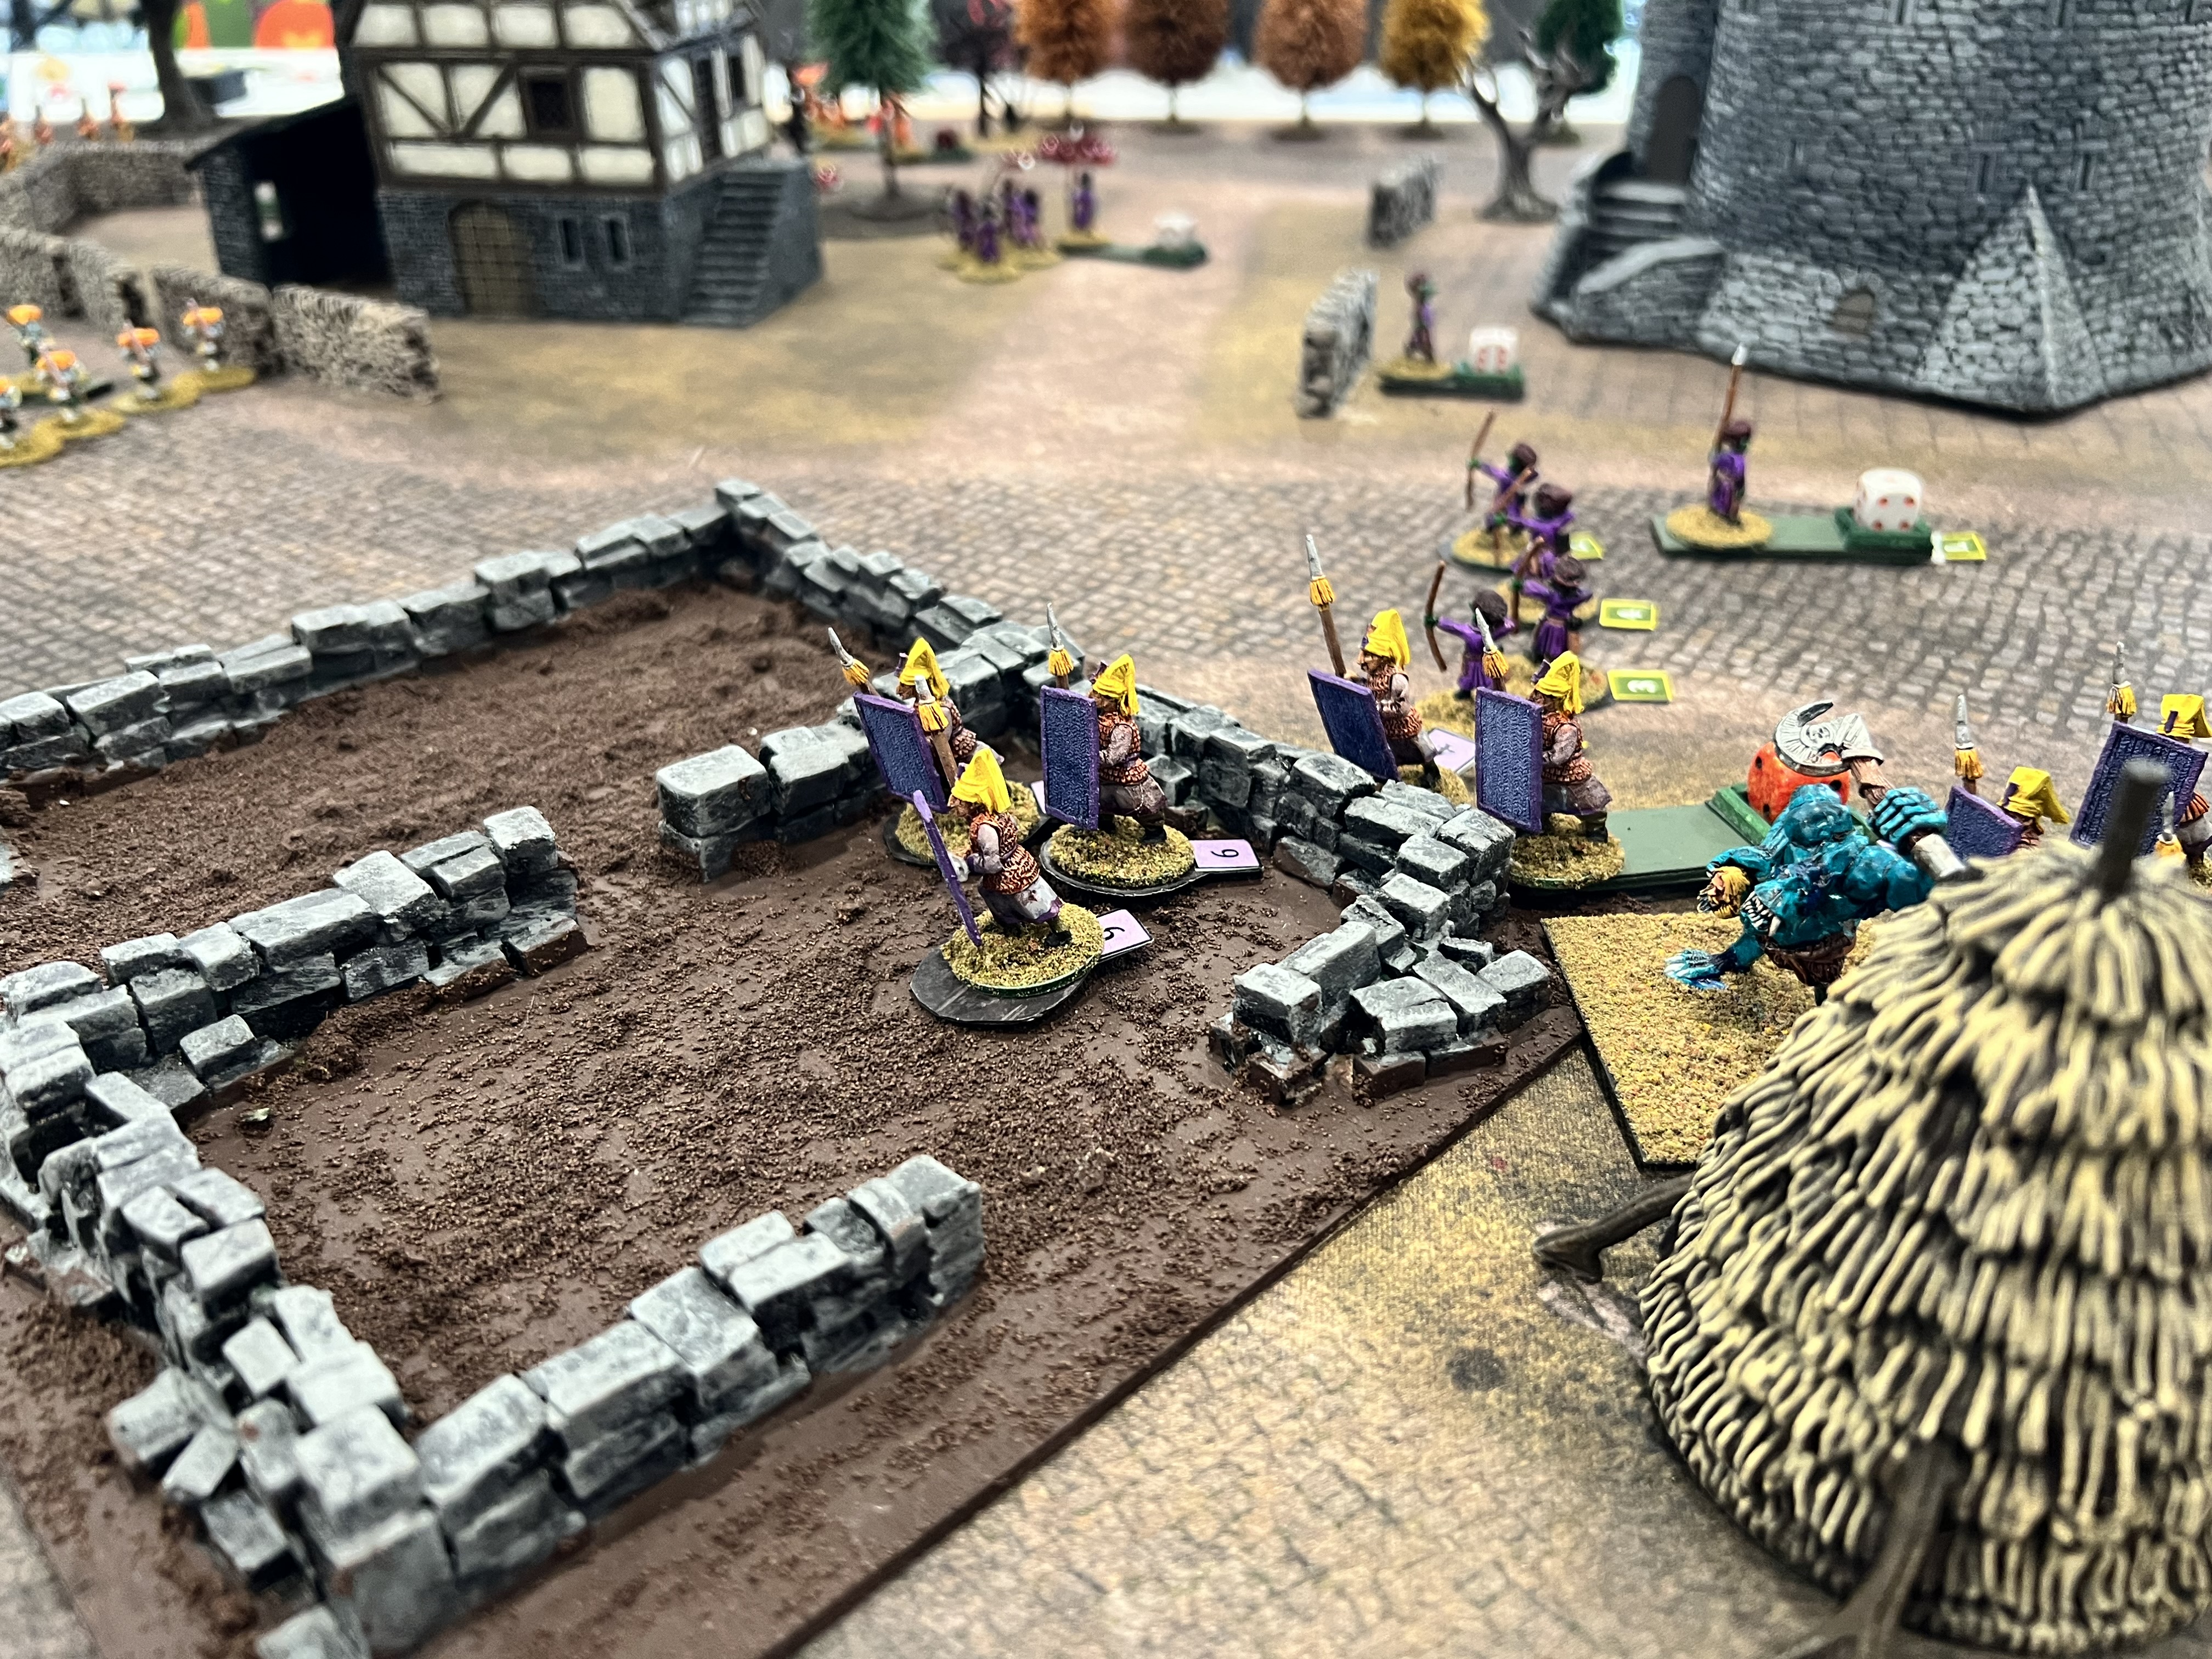
The Great Munchkin Heist (Wars of Ozz)
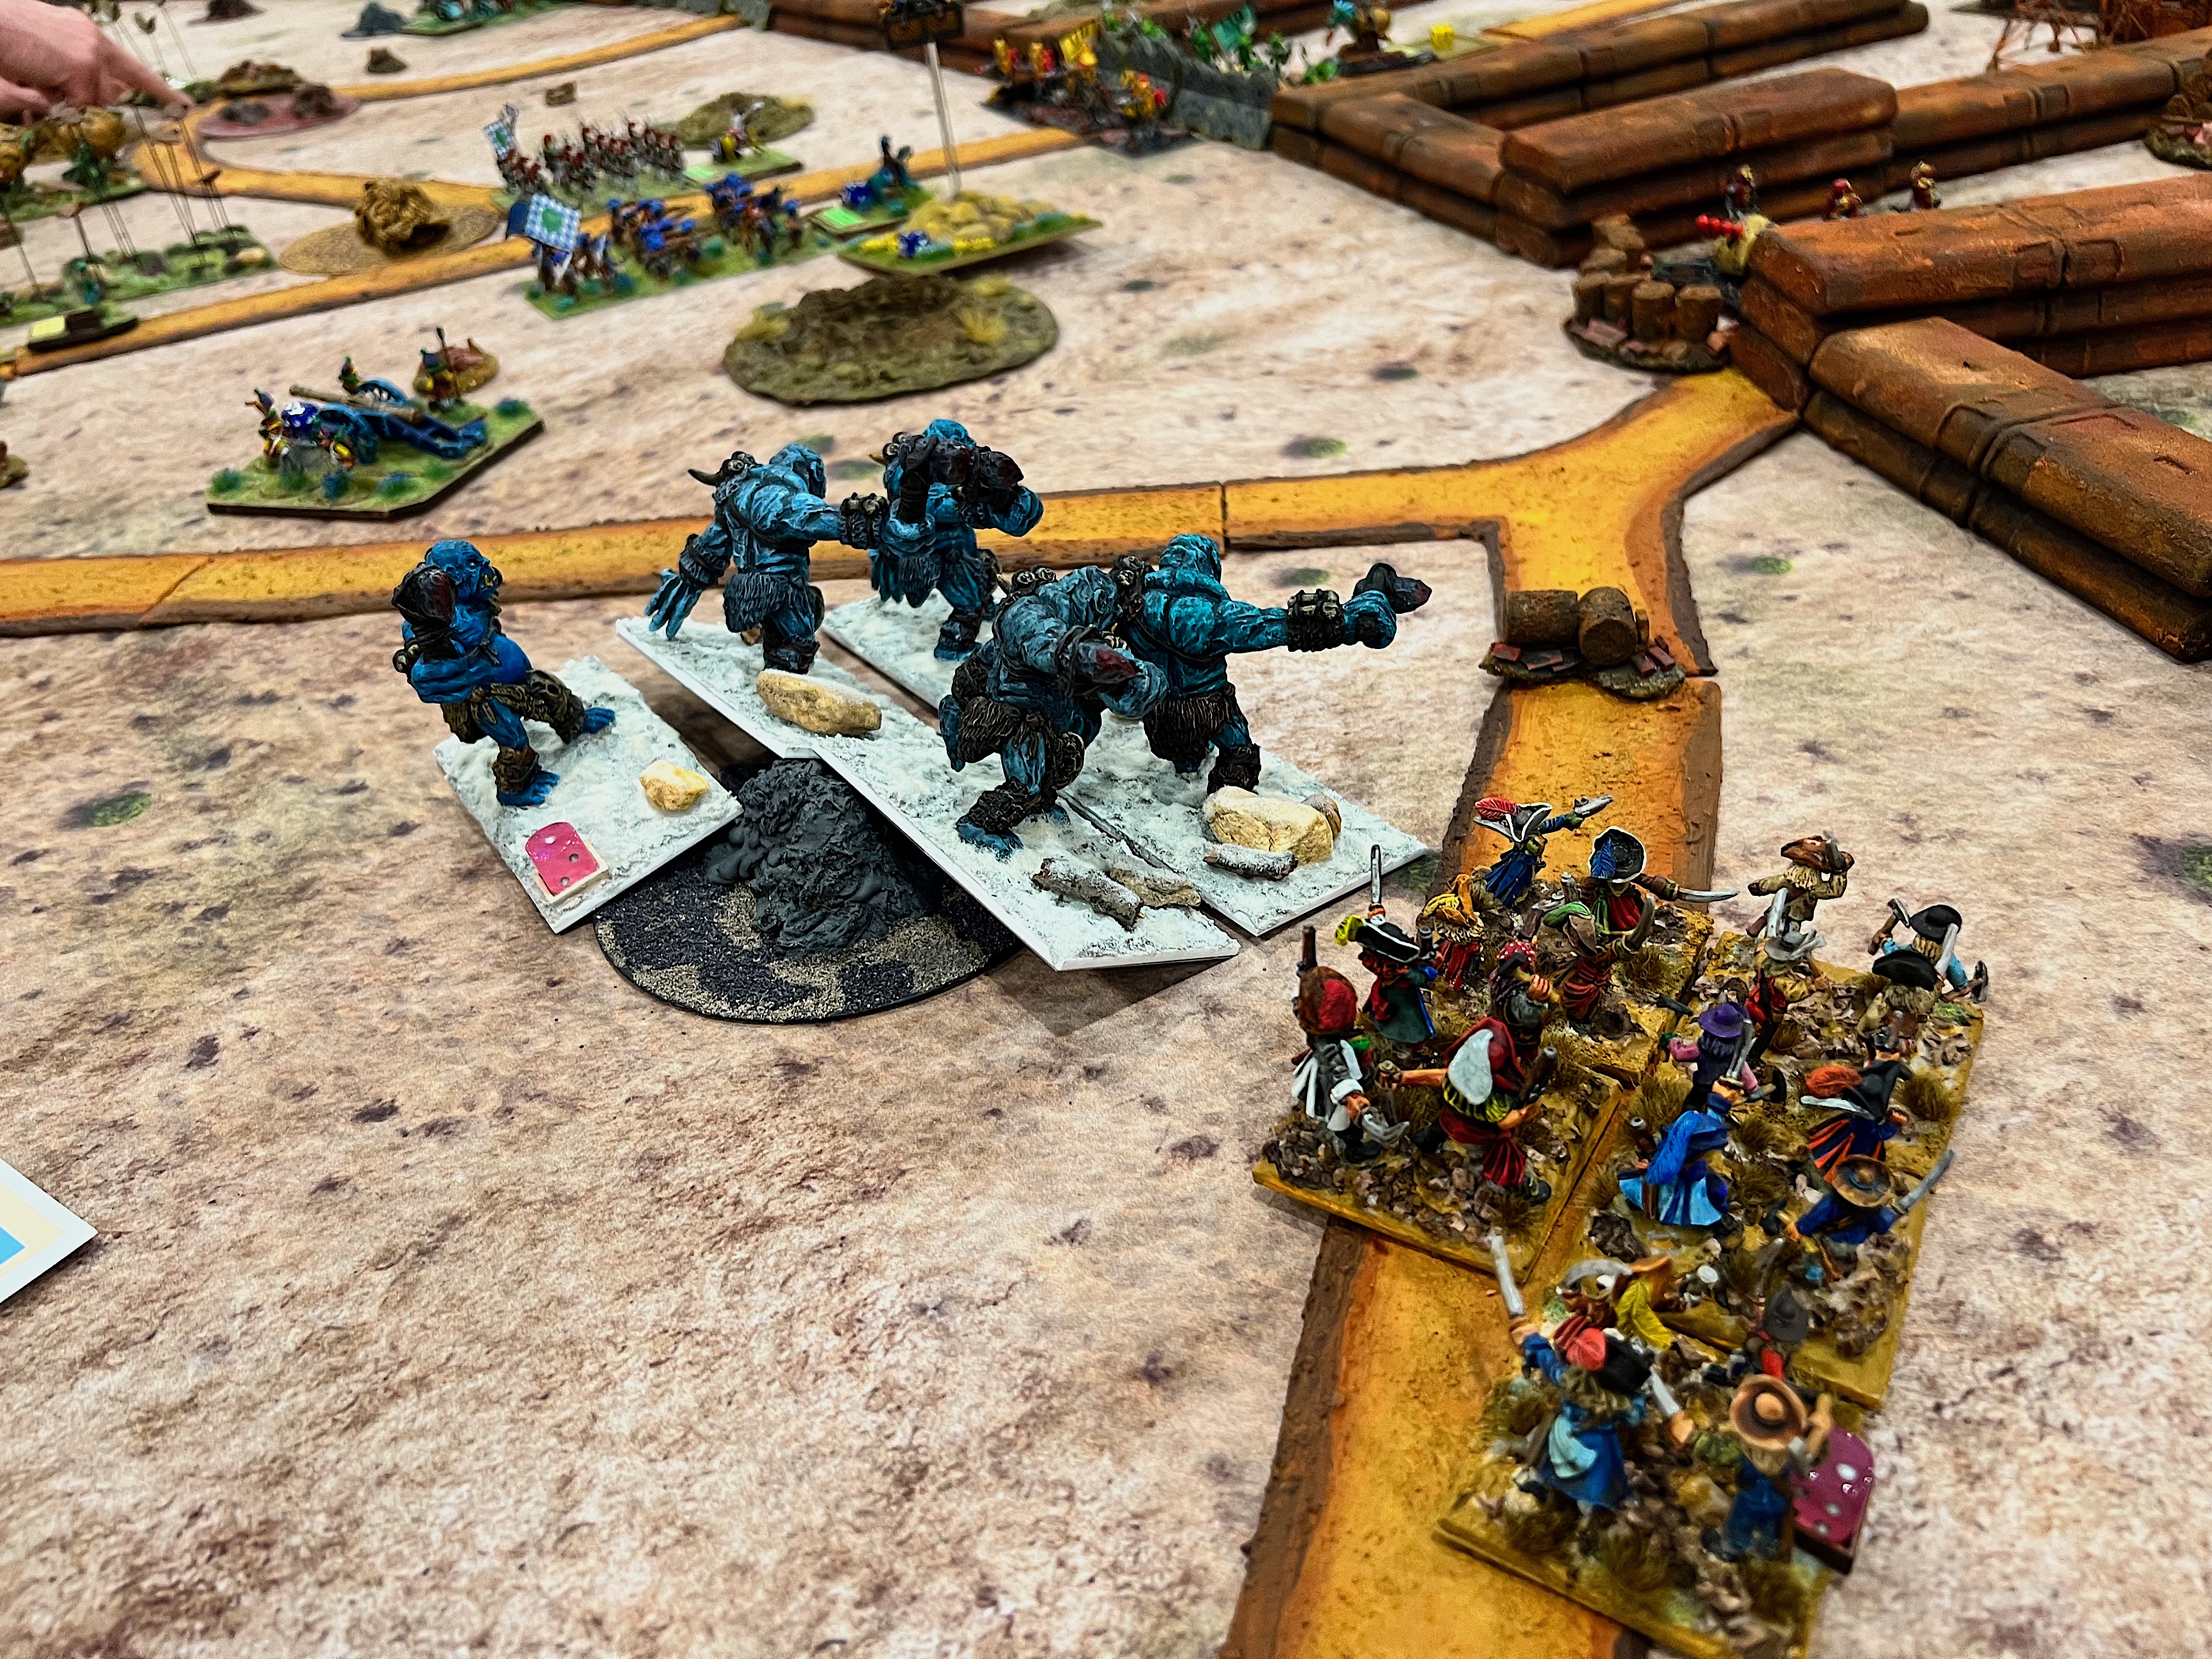
This was an epic back and forth Wars of Ozz battle, which really was great to see! Three brigades were on the attack (two Munchkin, one allied brigade, and an army reserve). The allied brigade was composed of two regiments of Jinjur female pirates, an Impkin slingshot battery, and a regiment of Frost Ogres (that Dave Stone will recognize!). The reserve came from the Land of Harvest – Great Pumpkinheads and regiments of eagles and owls. these allies hoped to share the loot with the Munchkins. Technological “secrets” were hidden in buildings throughout.
Three small but potent Nitpik mechanical men brigades and a small reserve force defended the formidable rusty steel walls of the Robotic Sanctum – a.k.a. the Industrial City. A small infantry reserve remained in the city, and there were rumors of a Nitpik relief force coming…
The Munchkin 1st Brigade advances on the left.The Munchkin 2nd Brigade advances in the center.The Allied Brigade ready for battle.In the center was the Munchkin Army Reserve of Harvest troops under the command of Zoraster the Wizard.The Nitpik Medium Artillery defends the left flank, with Elite Axemen behind ready to deal with any penetrations of the walls by the allied brigade.Defending the Nitpik center against the Munchkin 2nd Brigade was the Lemon Drop Legionnaires at the wall (also with napalm blasters) and the axe-wielding Jade Automata.Defending the Nitpik right was the 3rd Nitpik Brigade. They had Morin’s Monsters with napalm blasters and a mechanical mini-swarm.A side view of the start of the battle behind the Nitpik lines. The Mechanical mini-swarm is in the foreground, while the sole regiment in the Nitpik reserve – the Pink Nightmares – is in the back left.The battle begins. The Allied Brigade moves up on the right.The Nitpik Artillery prepares to fire at the Frost Ogres…….who take casualties and rout in the face of withering fire.Overzealous Lemon Drop Legionnaires take fire from the balloon and an unlucky reaction test causes them to jump over their protective walls towards the enemy!This unlucky reaction subjected the Lemon Drop Legionnaires to Munchkin musketry at short range.Morin’s Monsters hold the line.Munchkin Light Cavalry and Landwehr move up on the left flank..The Munchkin 1st Brigade moves towards the gate – somewhat stymied by the ominous rusty steel walls – their solution……climb the wall !! Assault Munchkins! (or Ranger Munchkins?)…they were soon in the town searching for technological secrets.The Munchkins commit the Great Pumpkinheads and Great Owls and bypass Morin’s Monsters.A female pirate regiment breaches the right wall and faces the Elite Axemen. The Munchkin Center is breached as well.
The Munchkins searched in vain for any technological secrets. They did manage to inflict slightly more casualties on Professor Nitpik’s forces, resulting in a narrow 18-15 point victory.
Little Wars TV actually showed a snippet this game on their Cold Wars video – you can see it at minute mark 12:31. My players look happy!
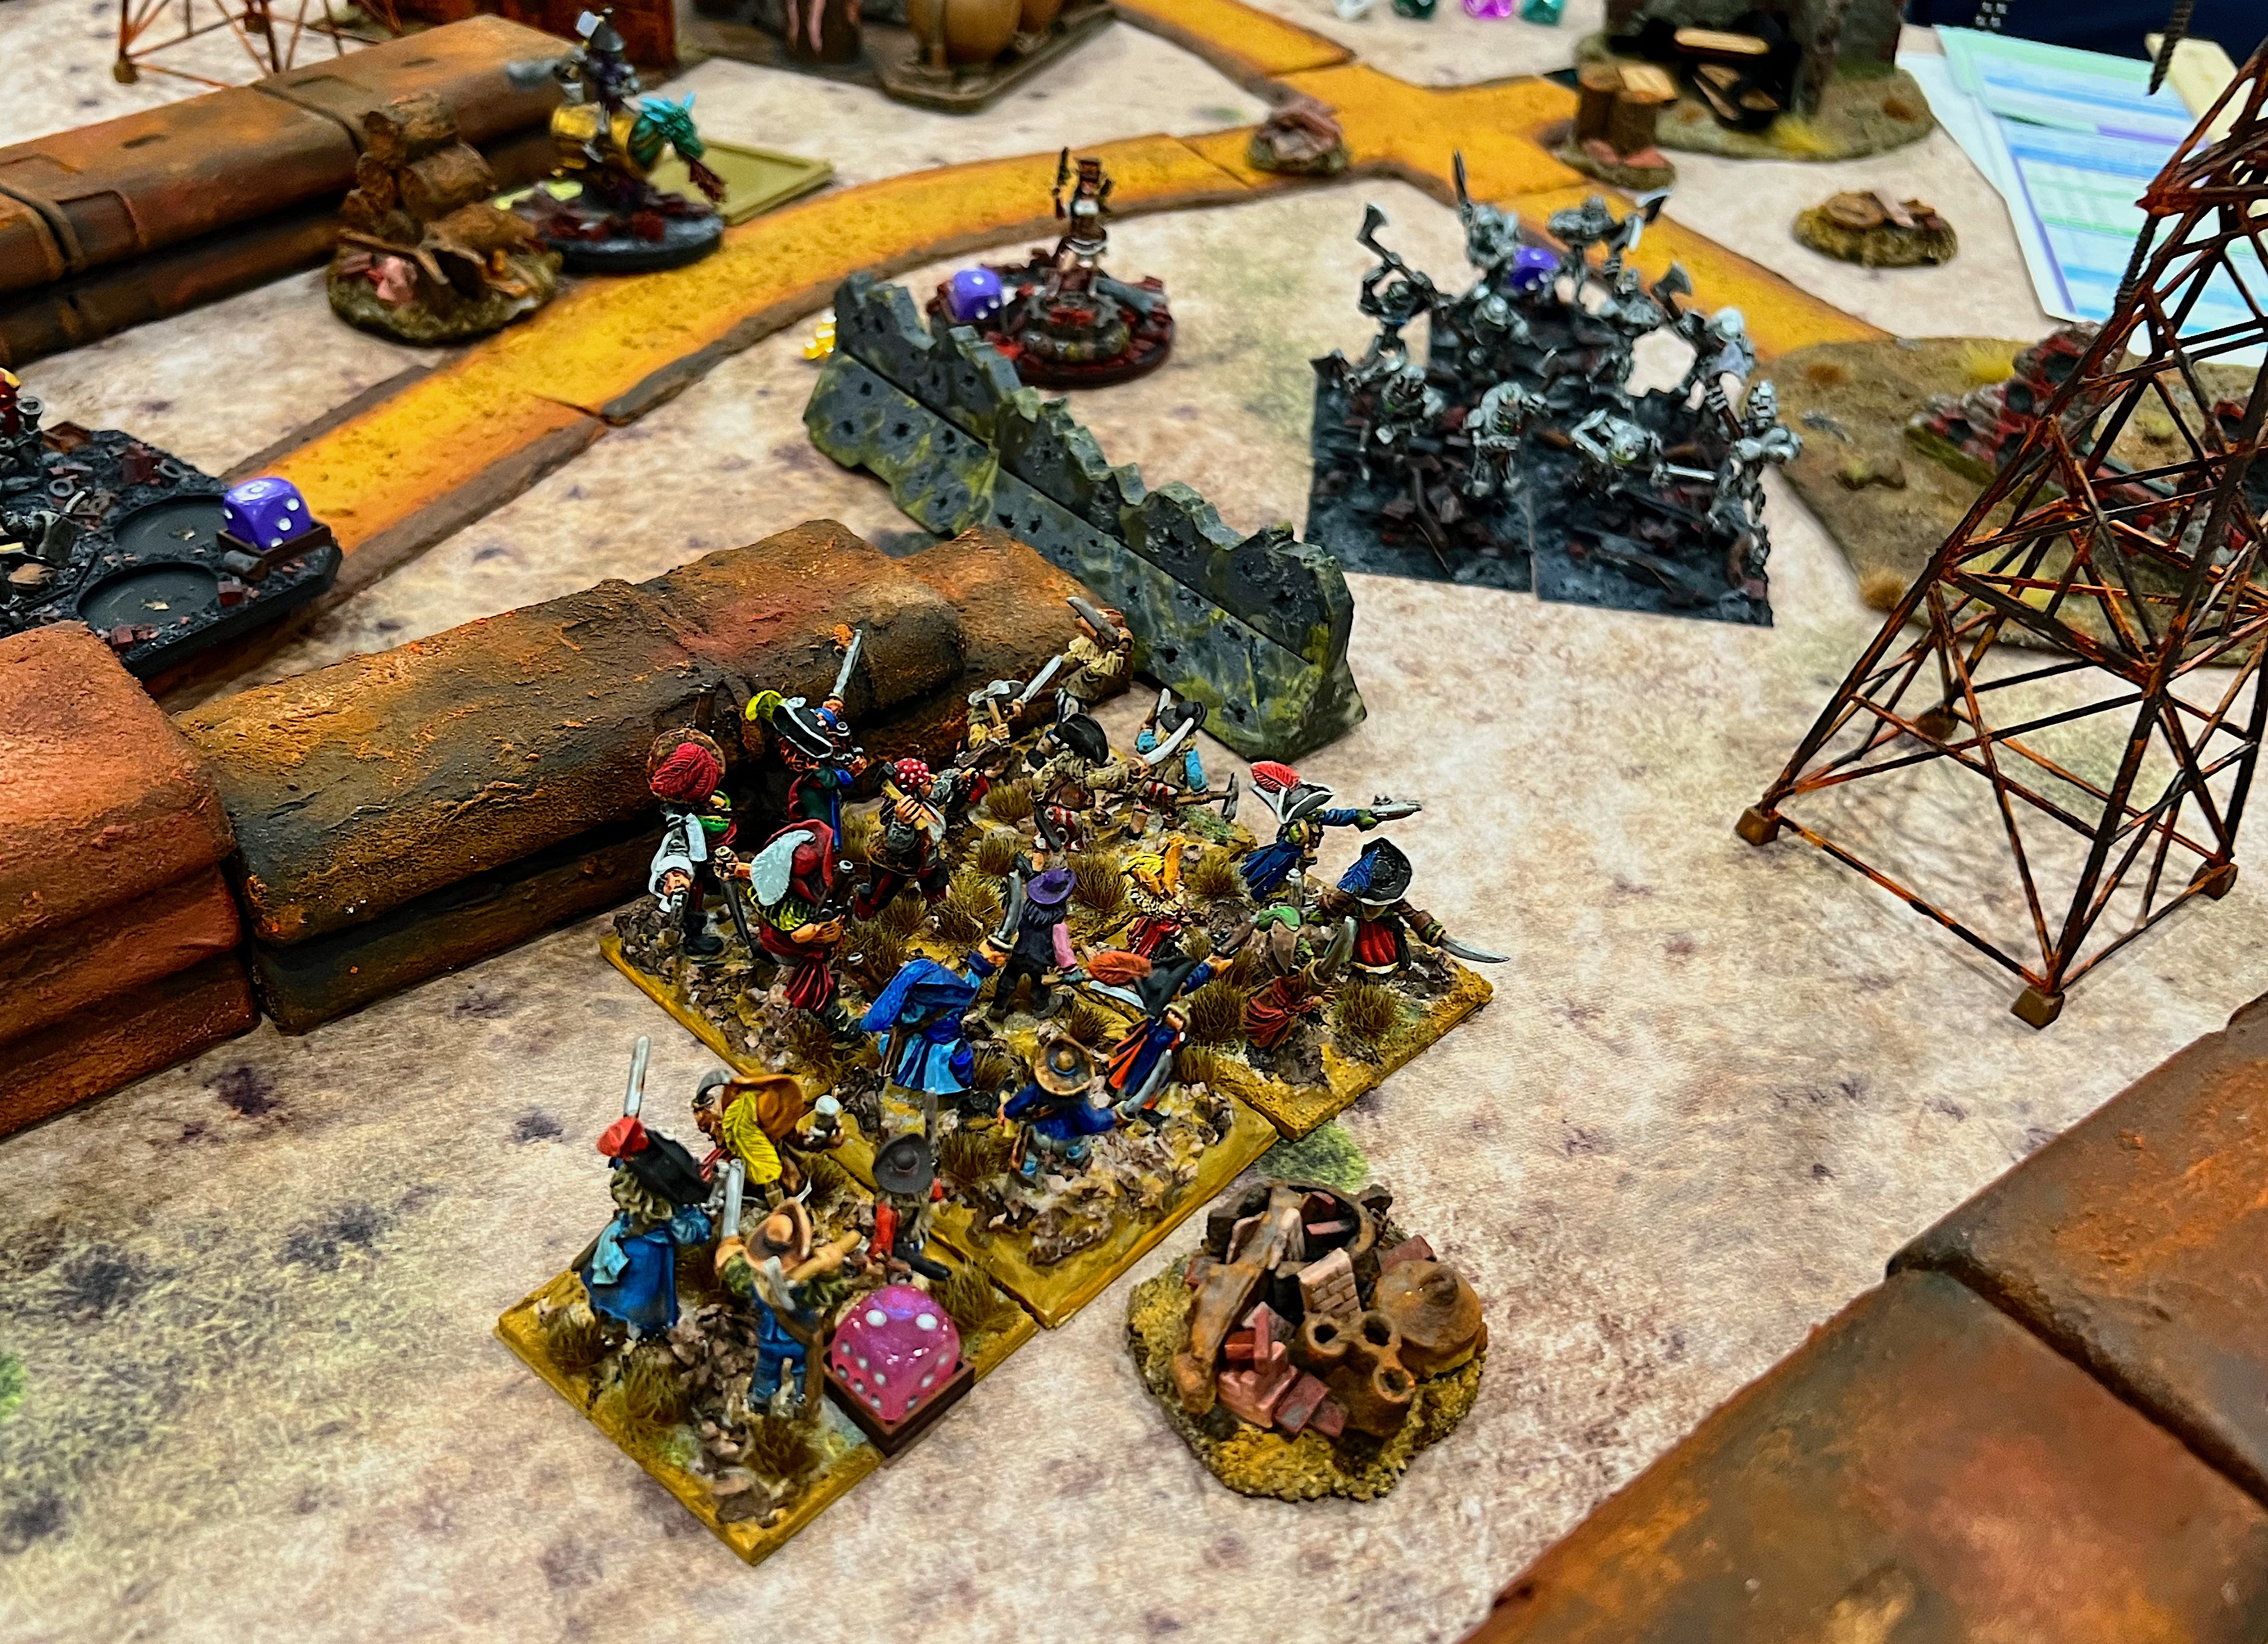
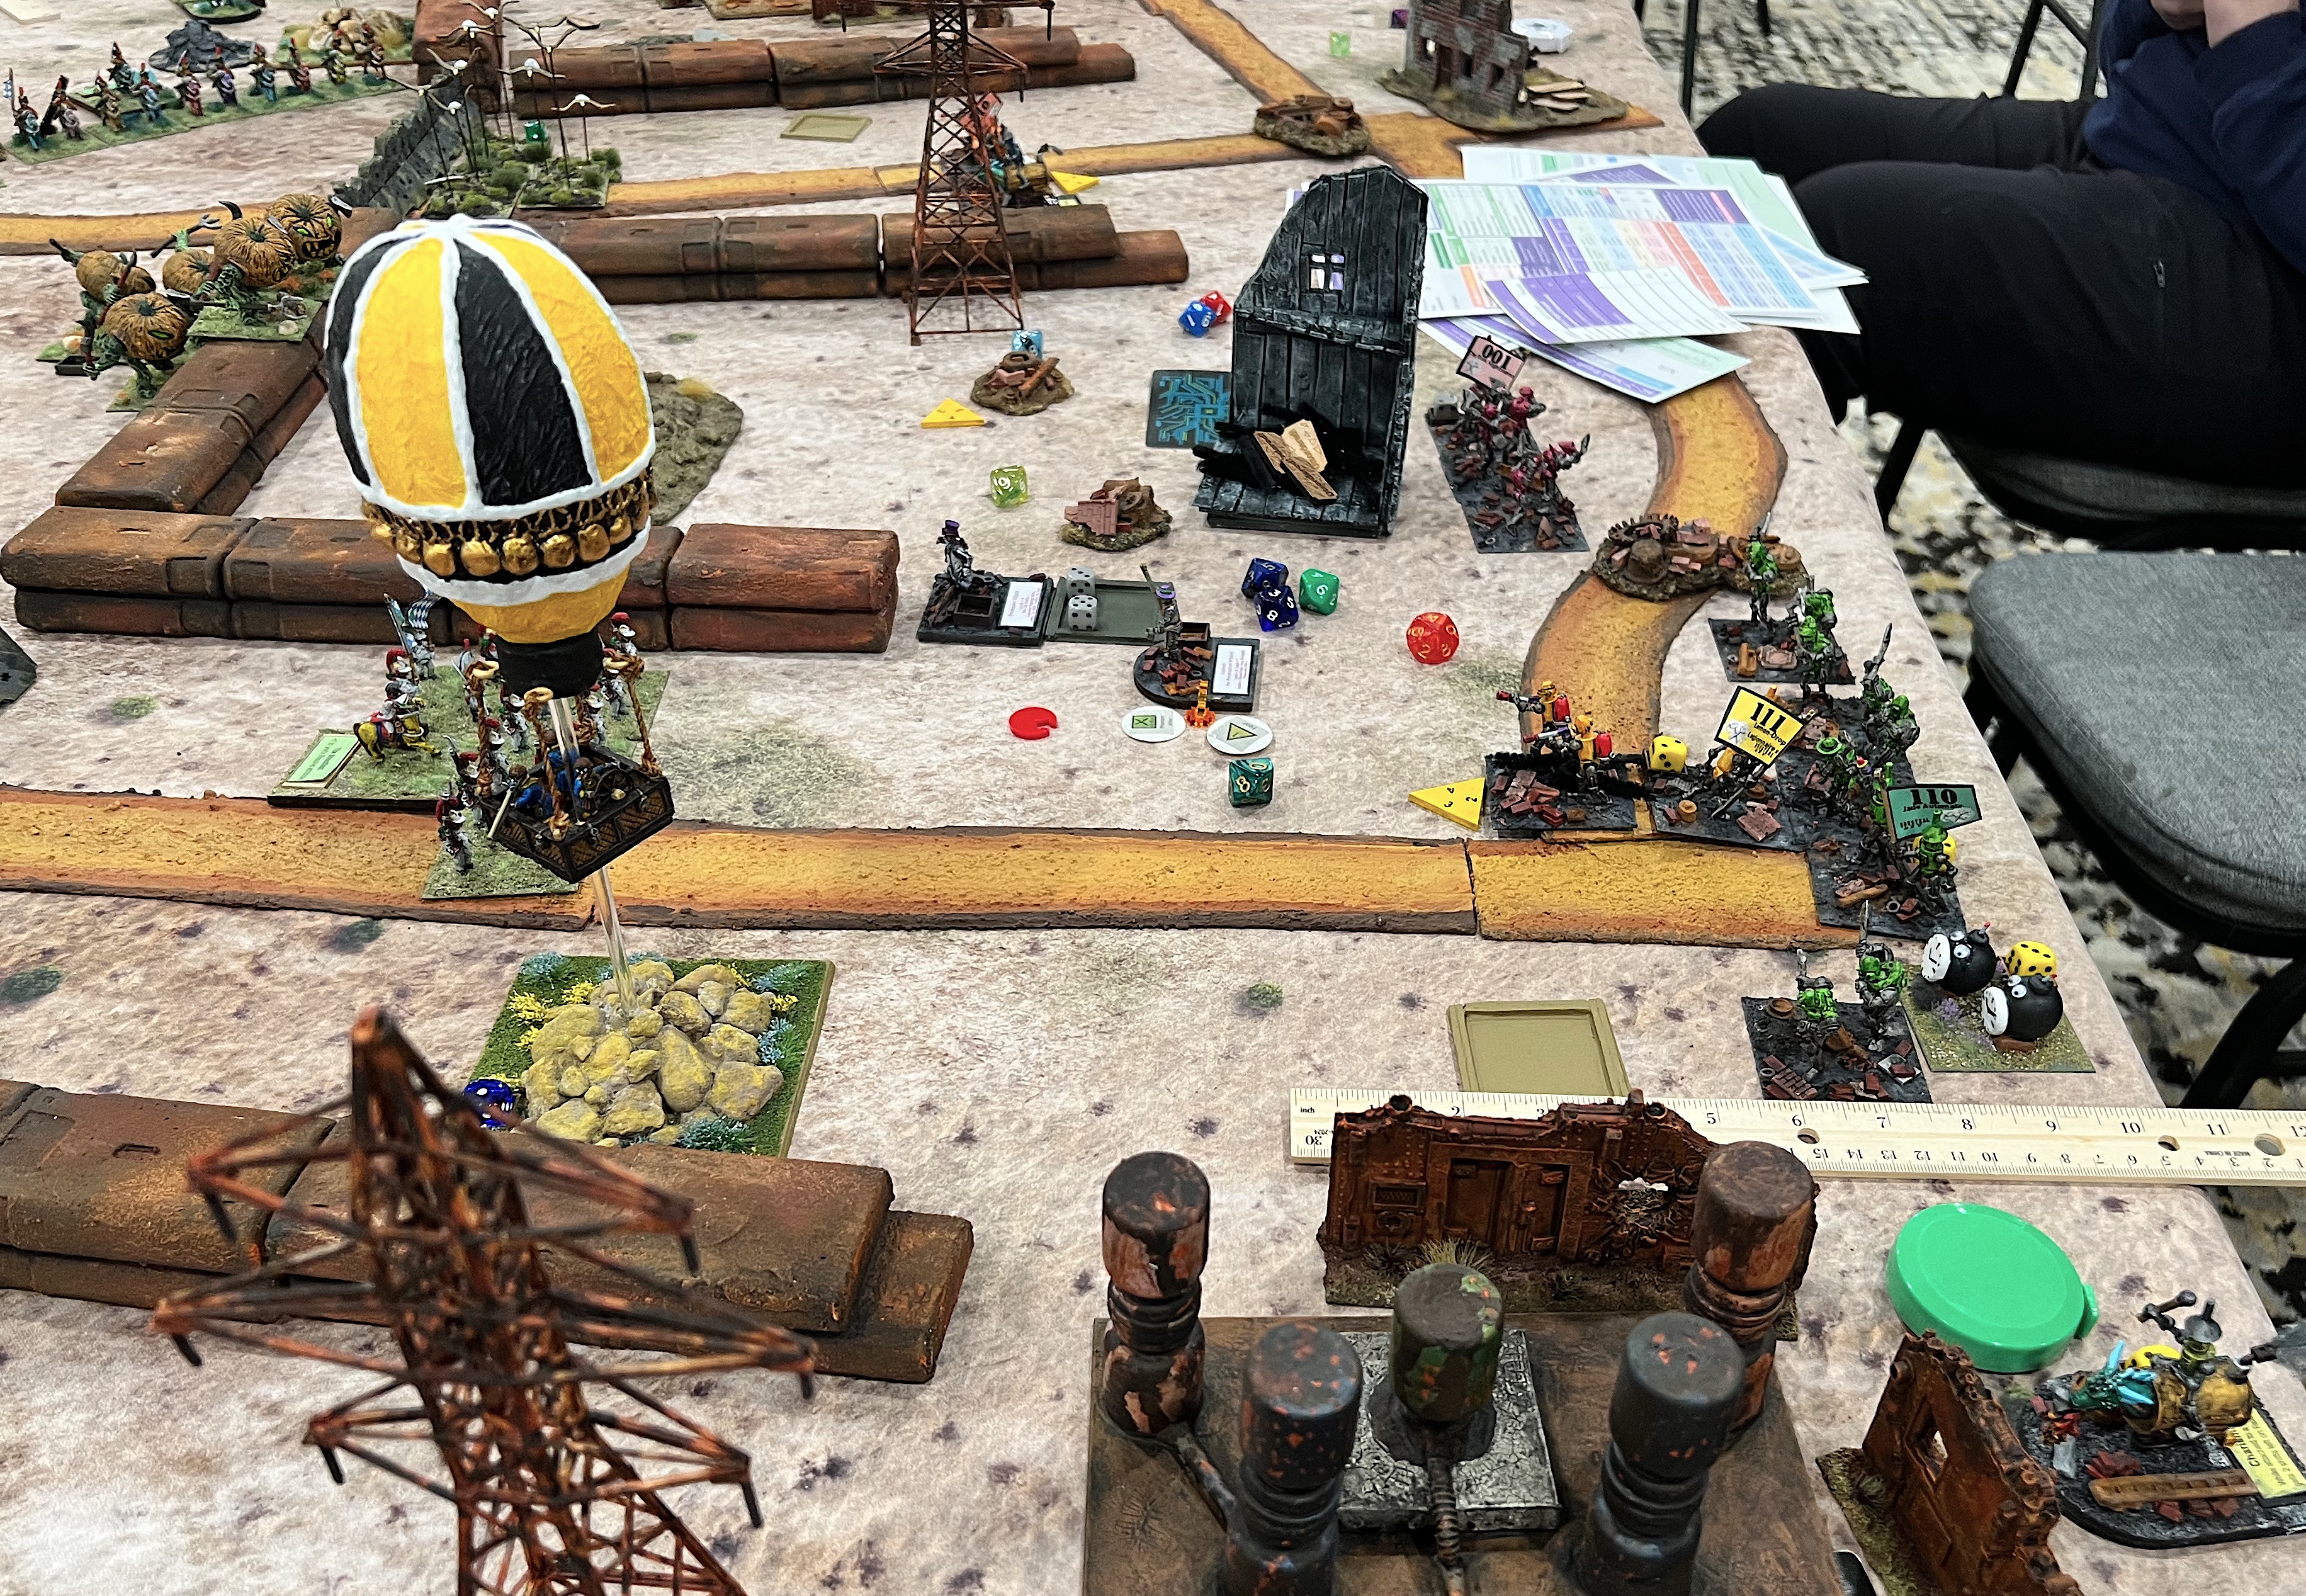
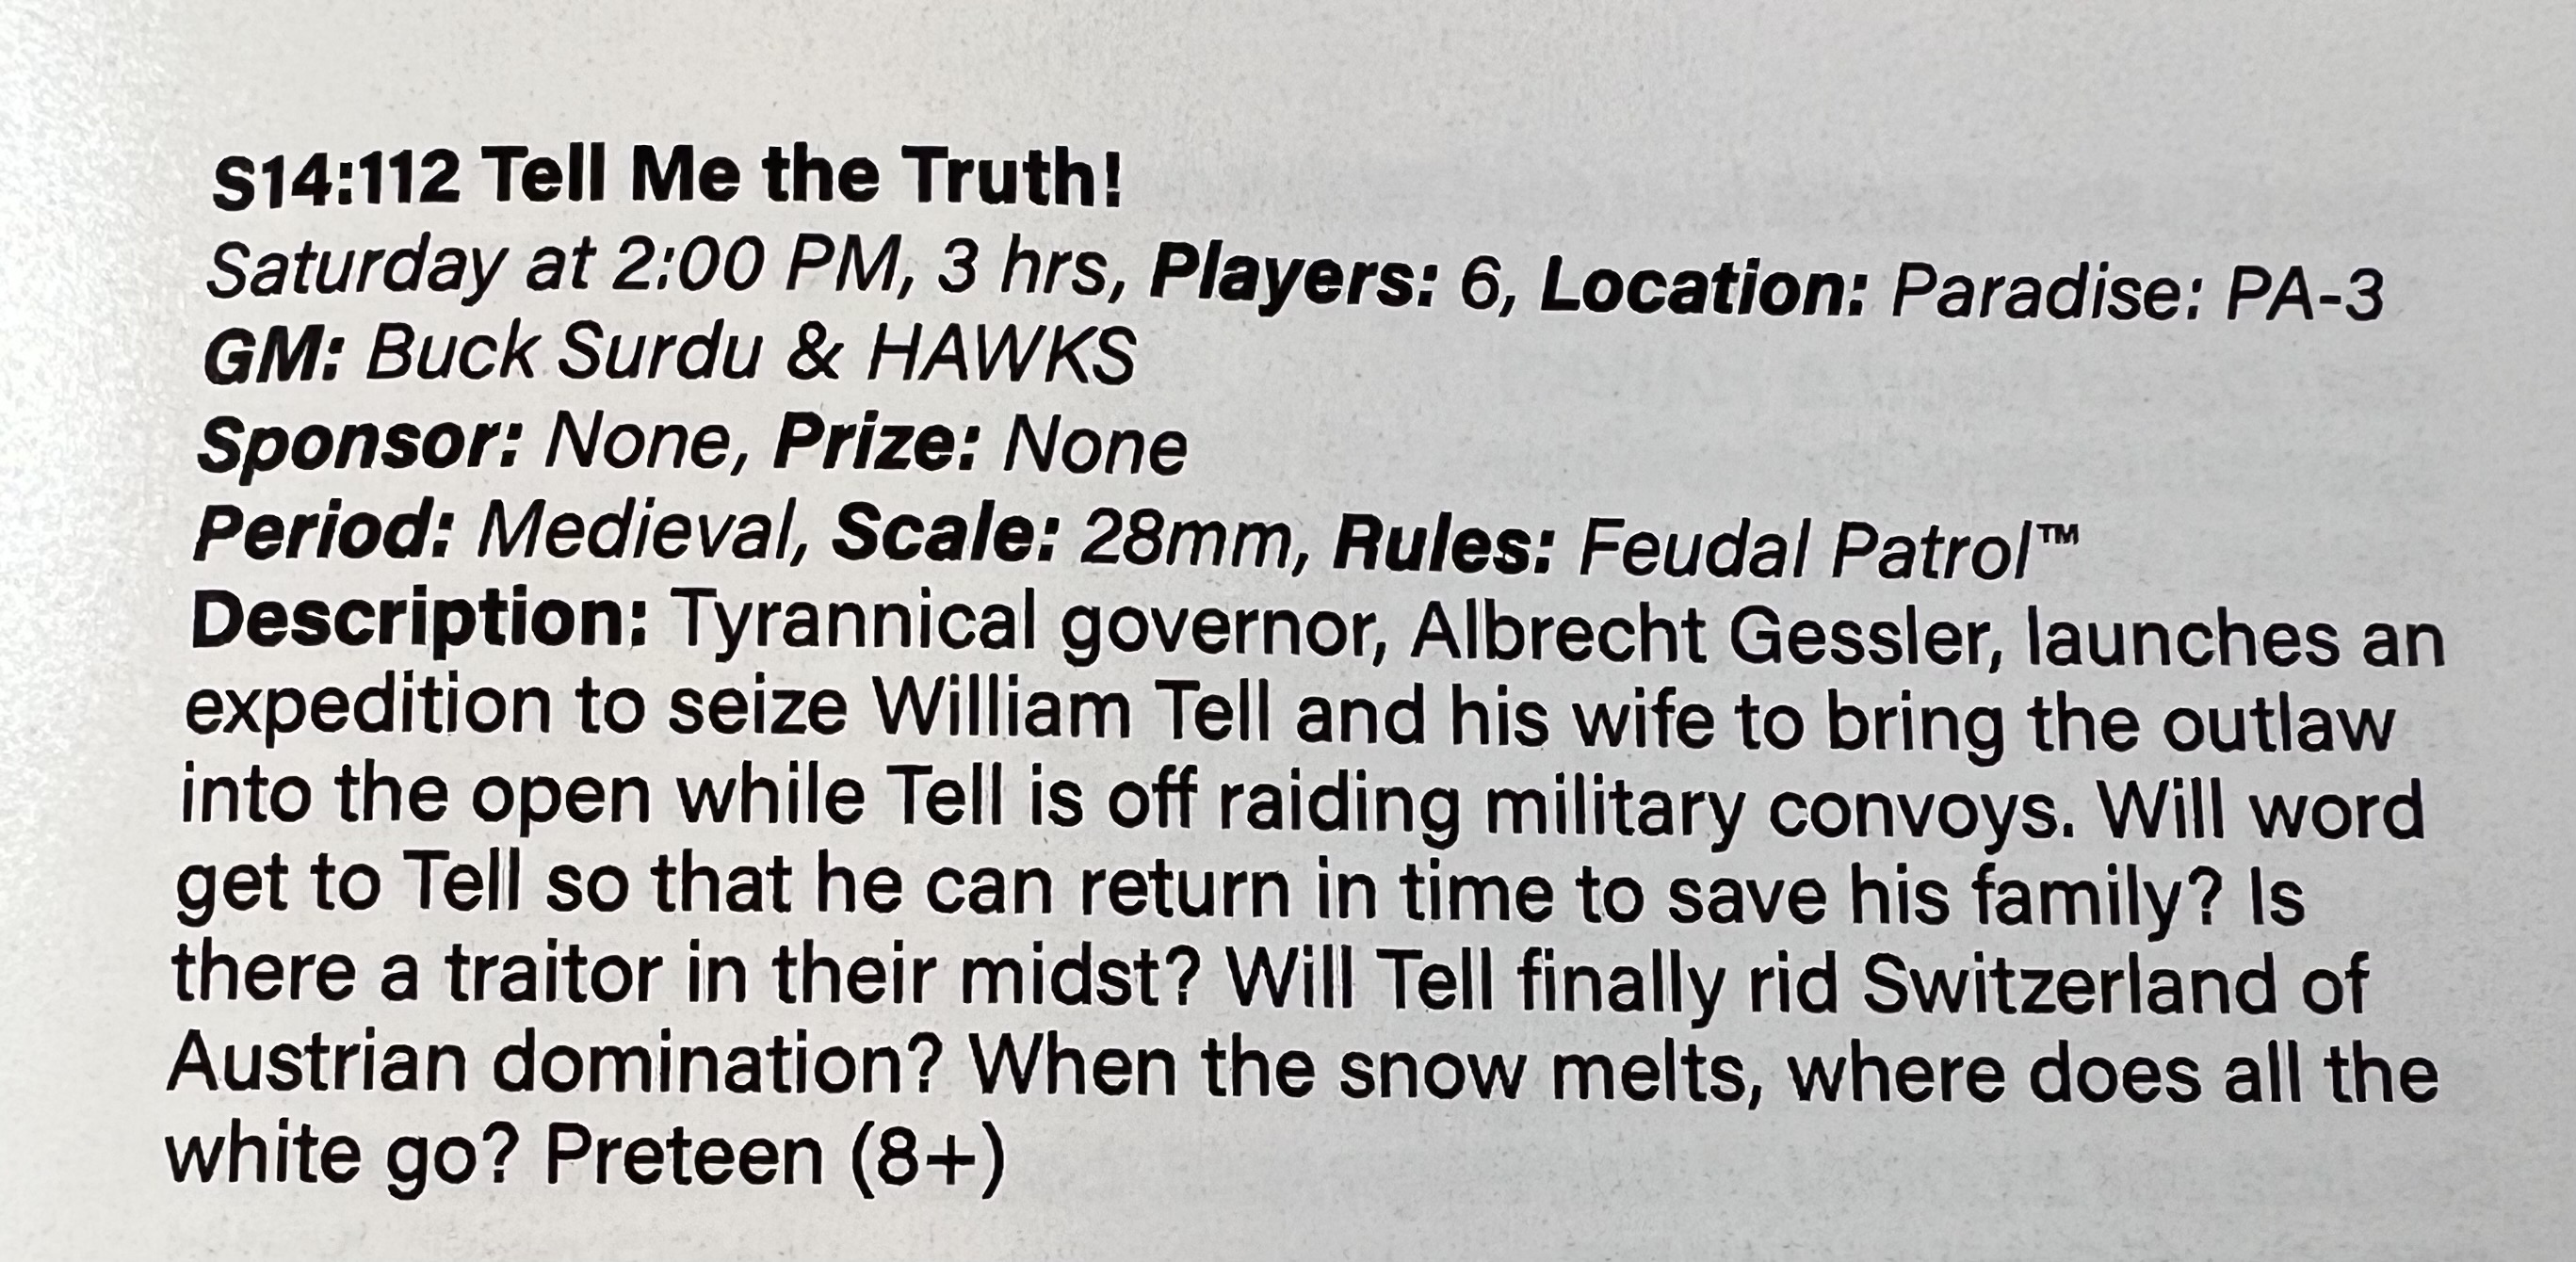
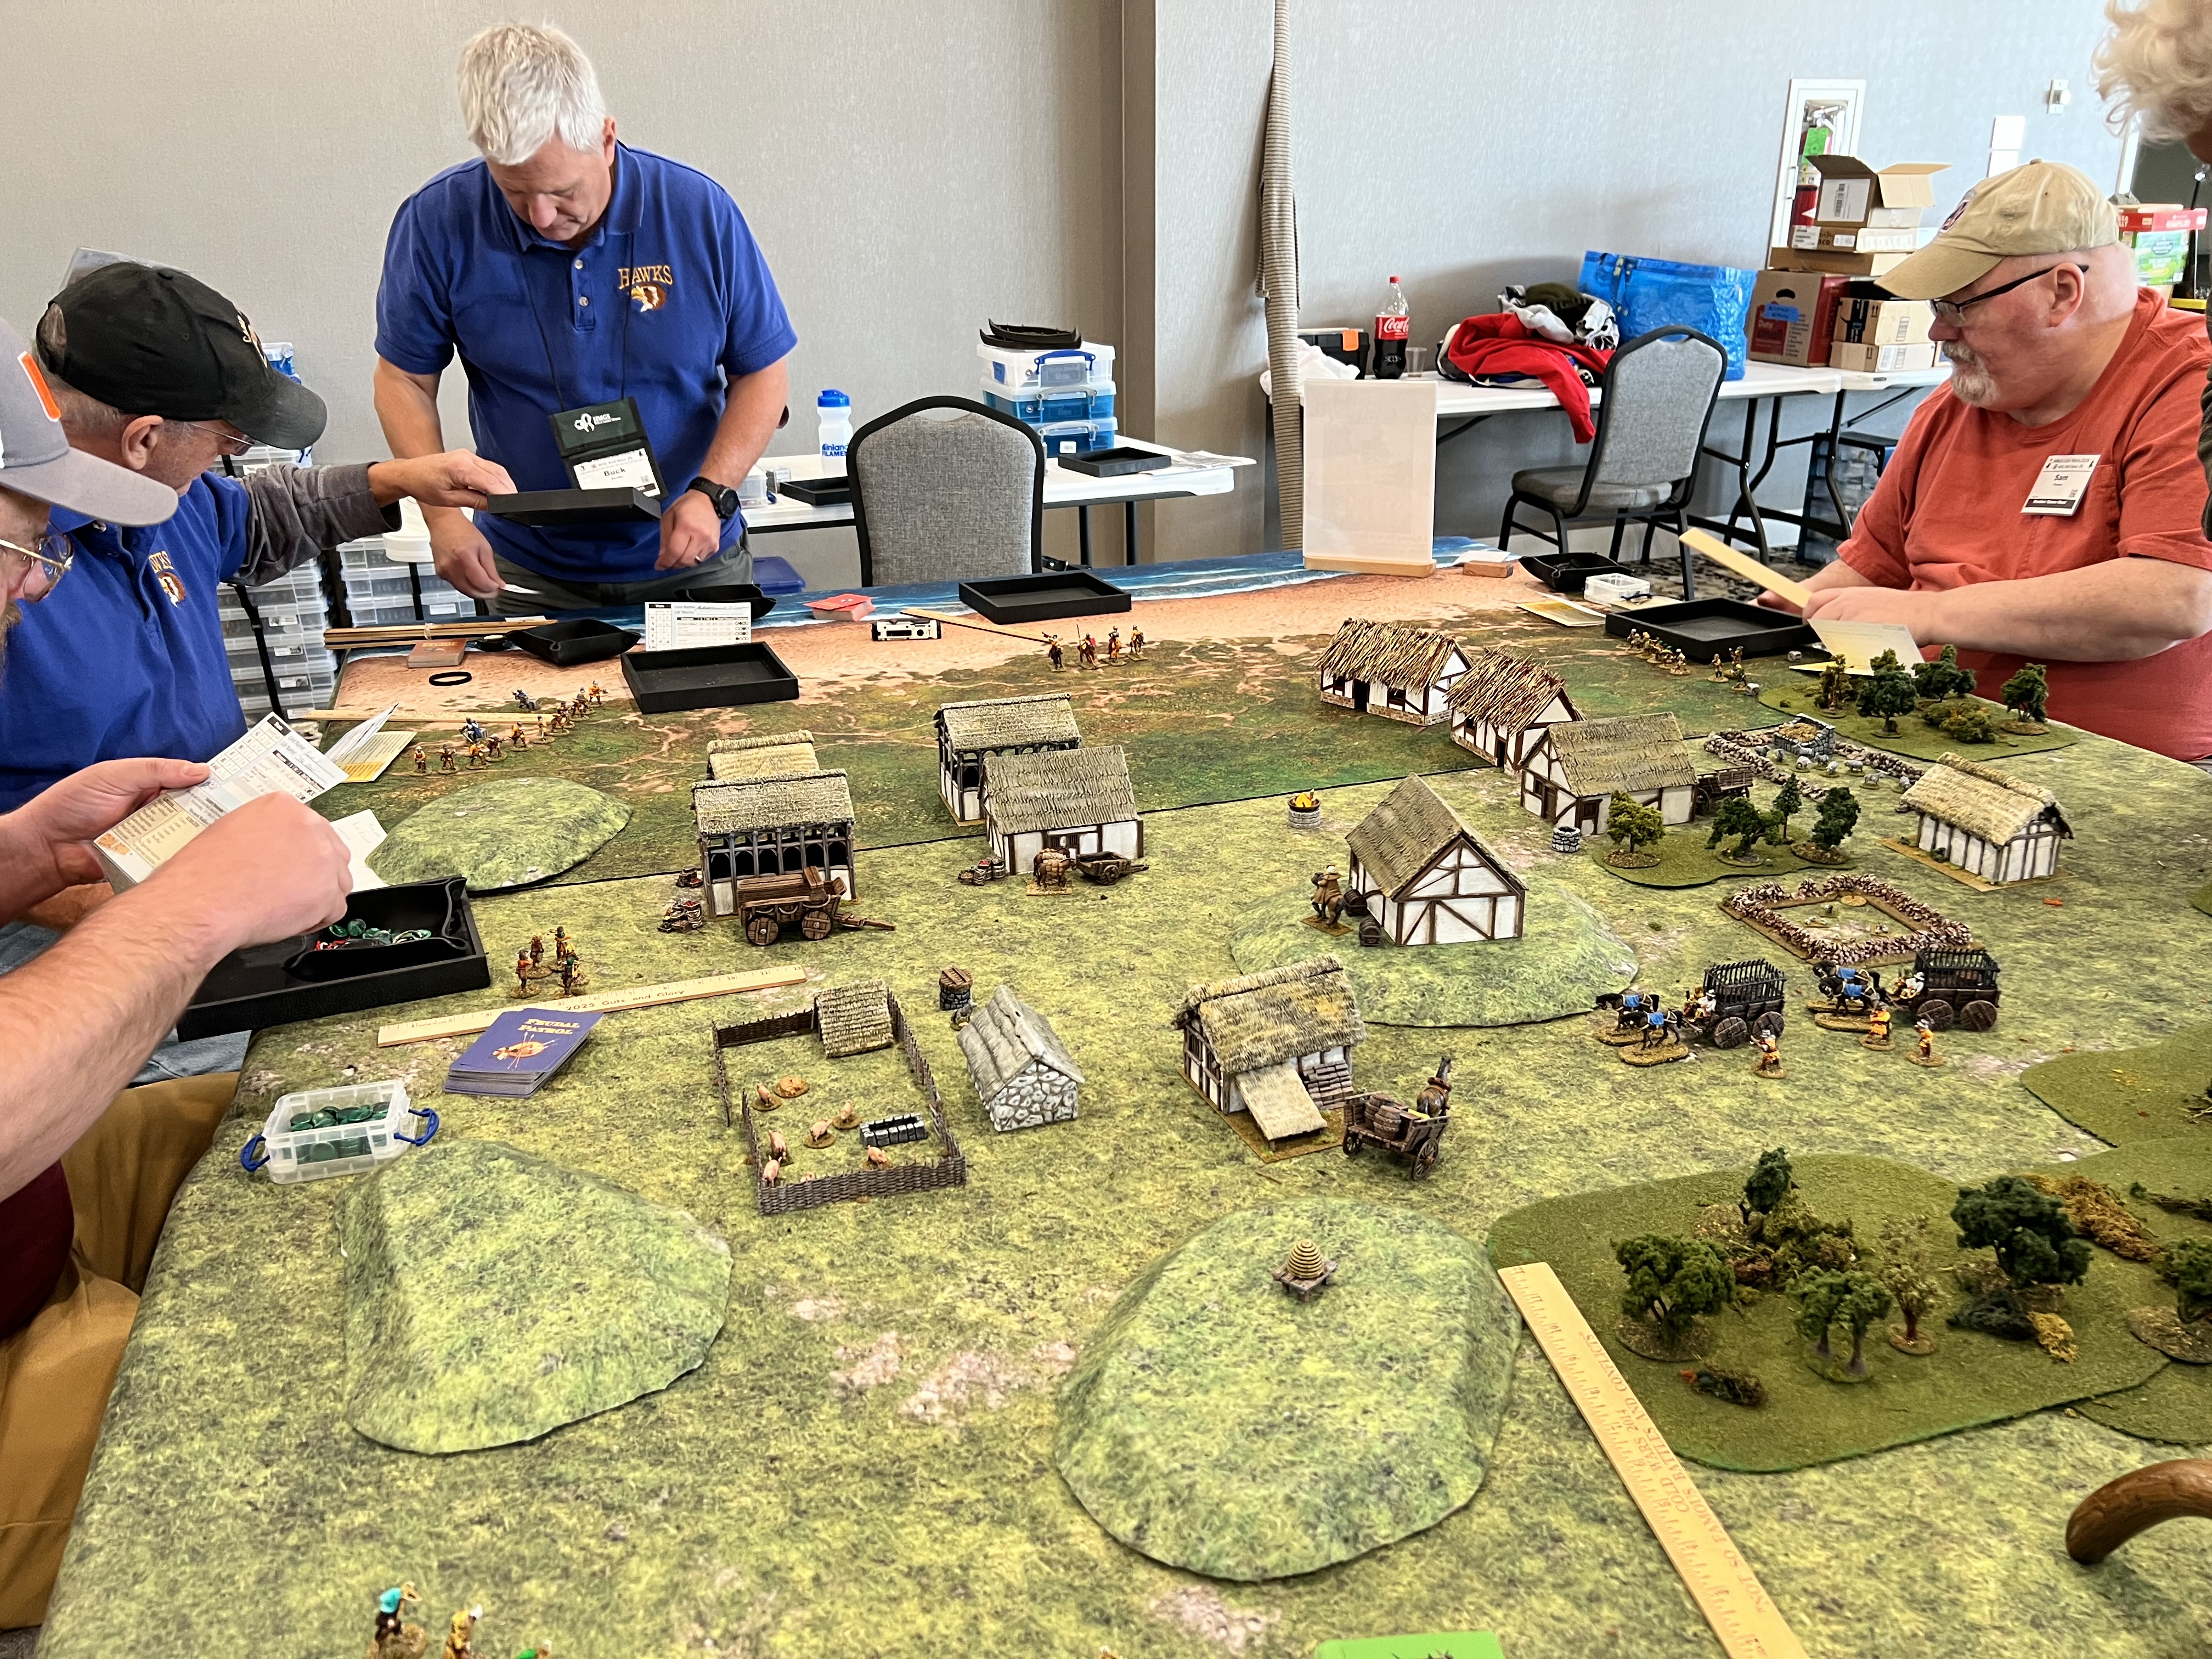
That wrapped up Friday – and Saturday I had two games scheduled. The first was a What a Tanker “what if” scenario between Vichy French and Italian armor. I had to cancel it due to lack of players. That allowed me more time to set up my evening game and to play in another Feudal Patrol game run by Buck. It was a scenario based on a William Tell TV show from the ’60’s that I have no memory of! It was fun, we freed the good guys from the Austrians, and had a good time.
Tell Me the Truth! (Feudal Patrol/William Tell)
Buck prepping at the game start. I spent a lot of time in the game moving that bee hive on the hill!
At last it was time for Saturday night’s game.
High Noon at the Cyber Ruins (Combat Patrol:WWII – modified for retro Sci-fi)
This was my “western-themed” game.
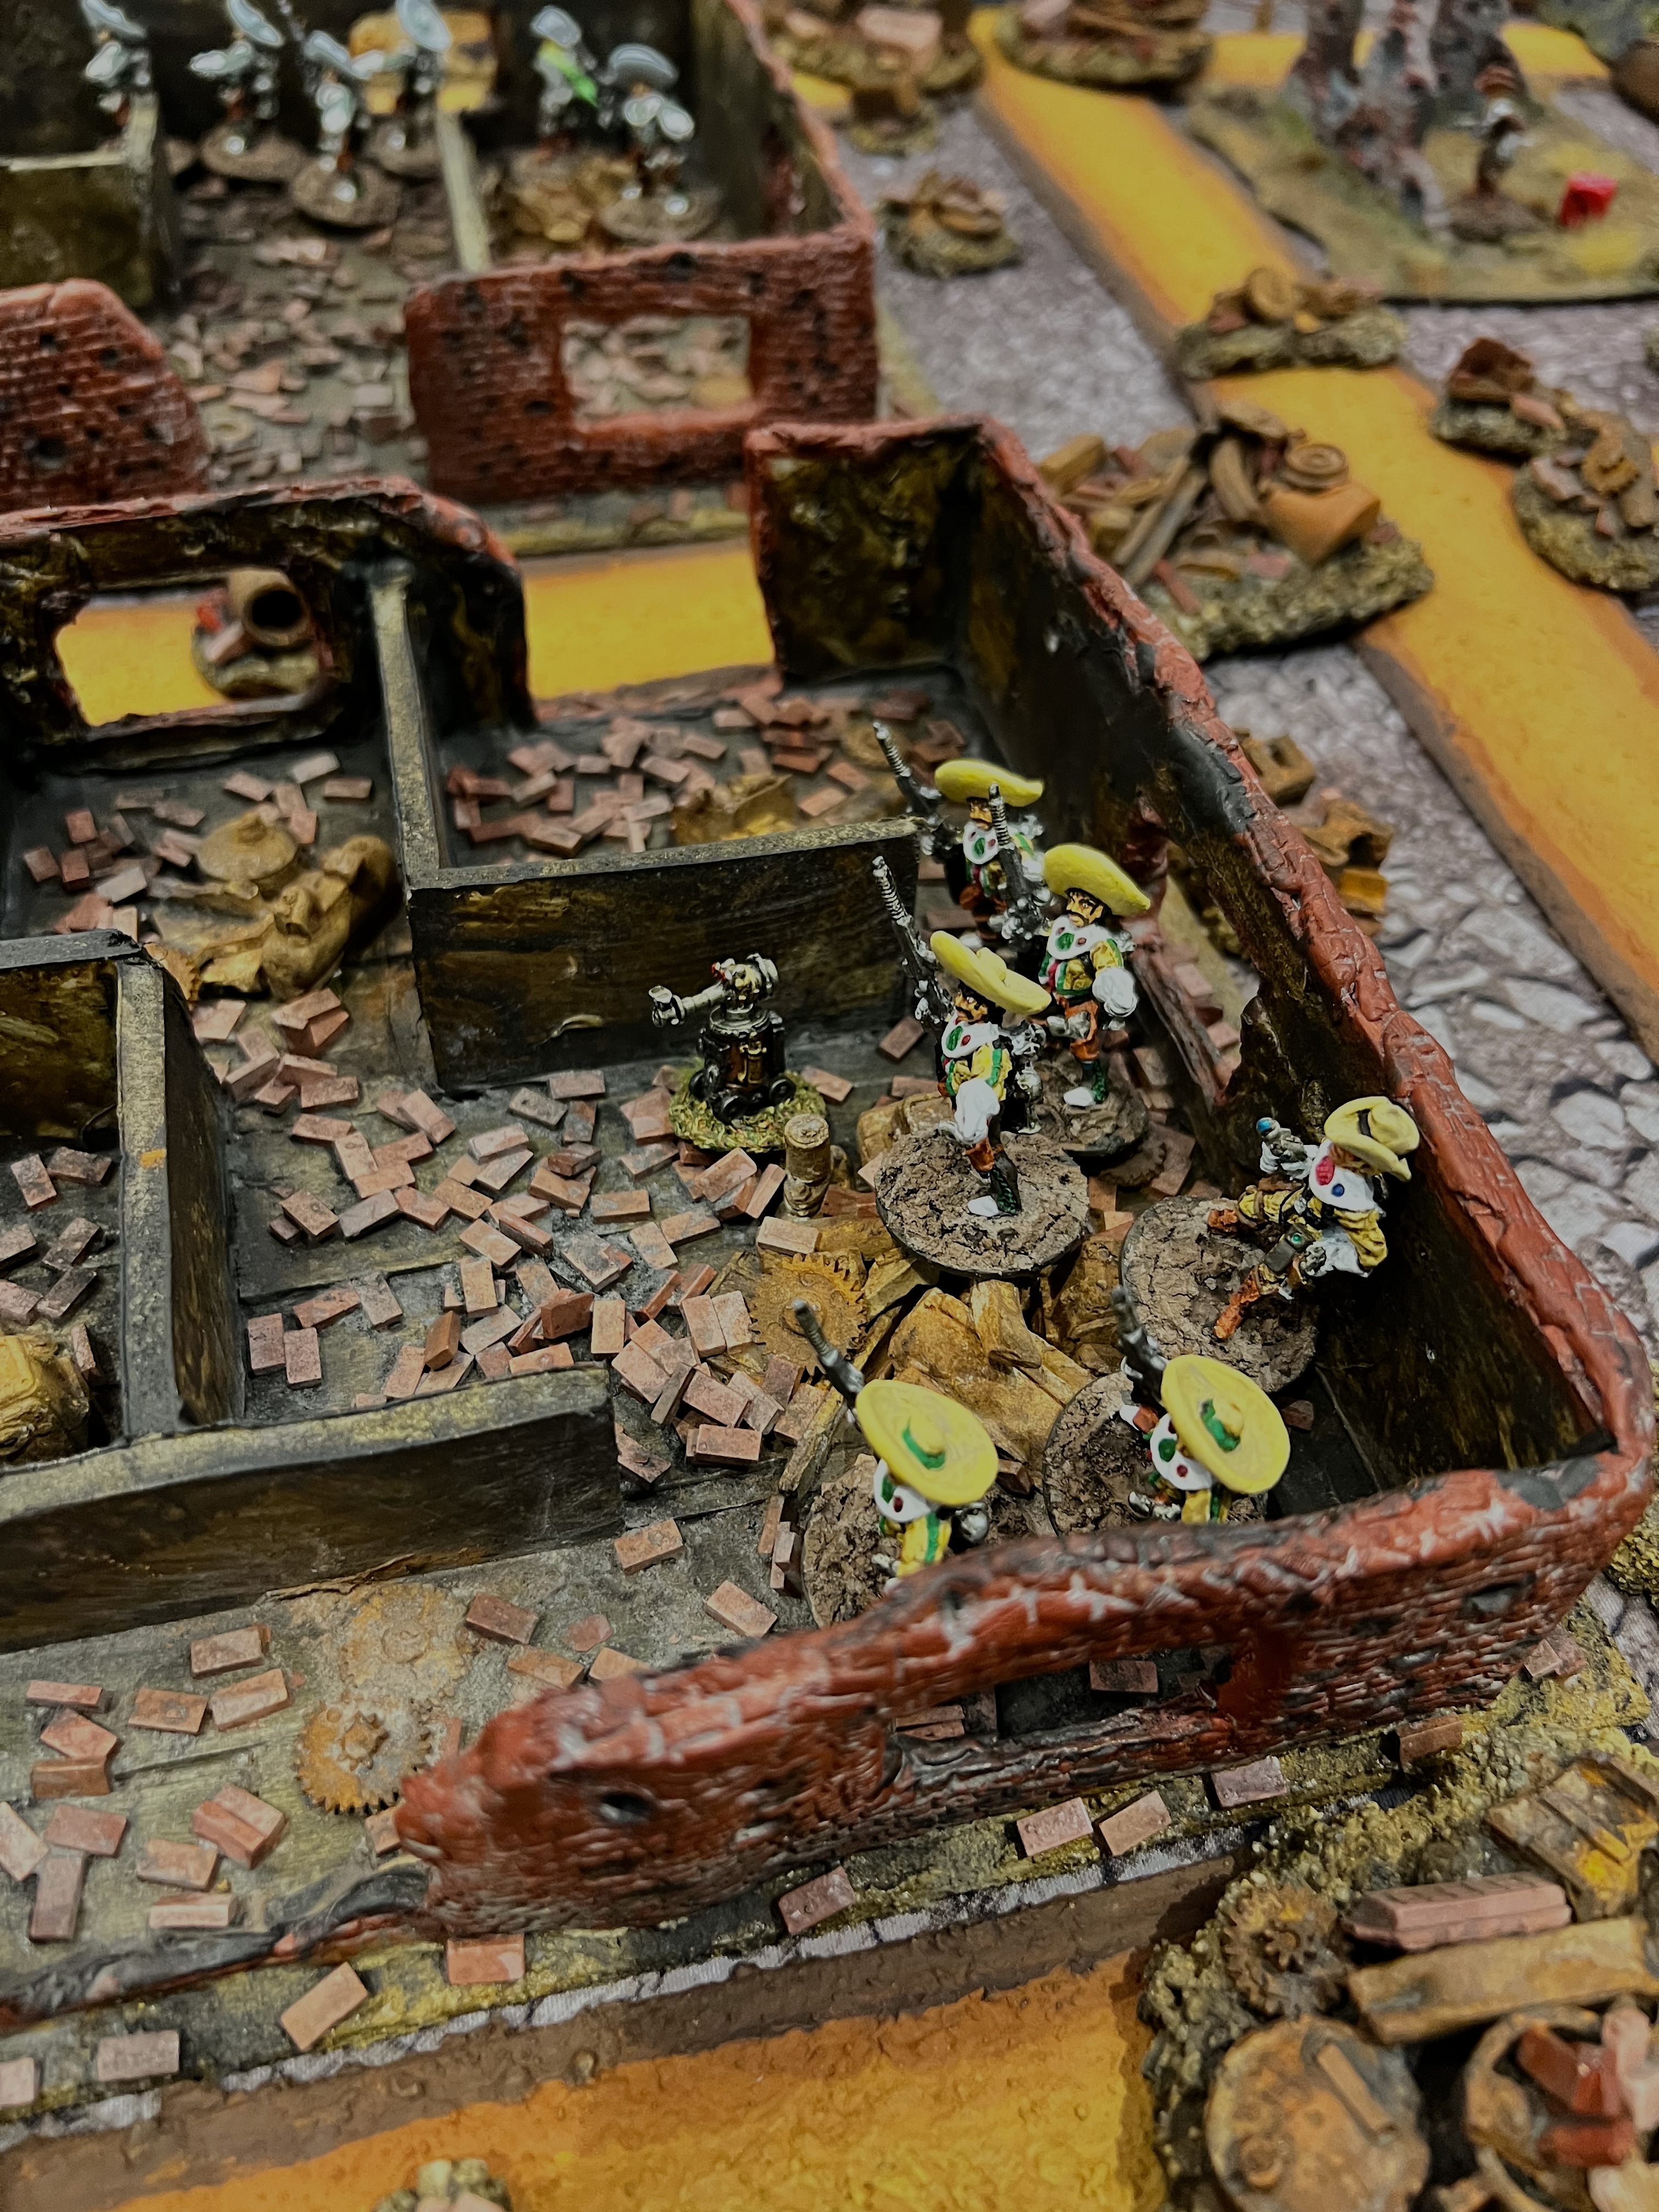
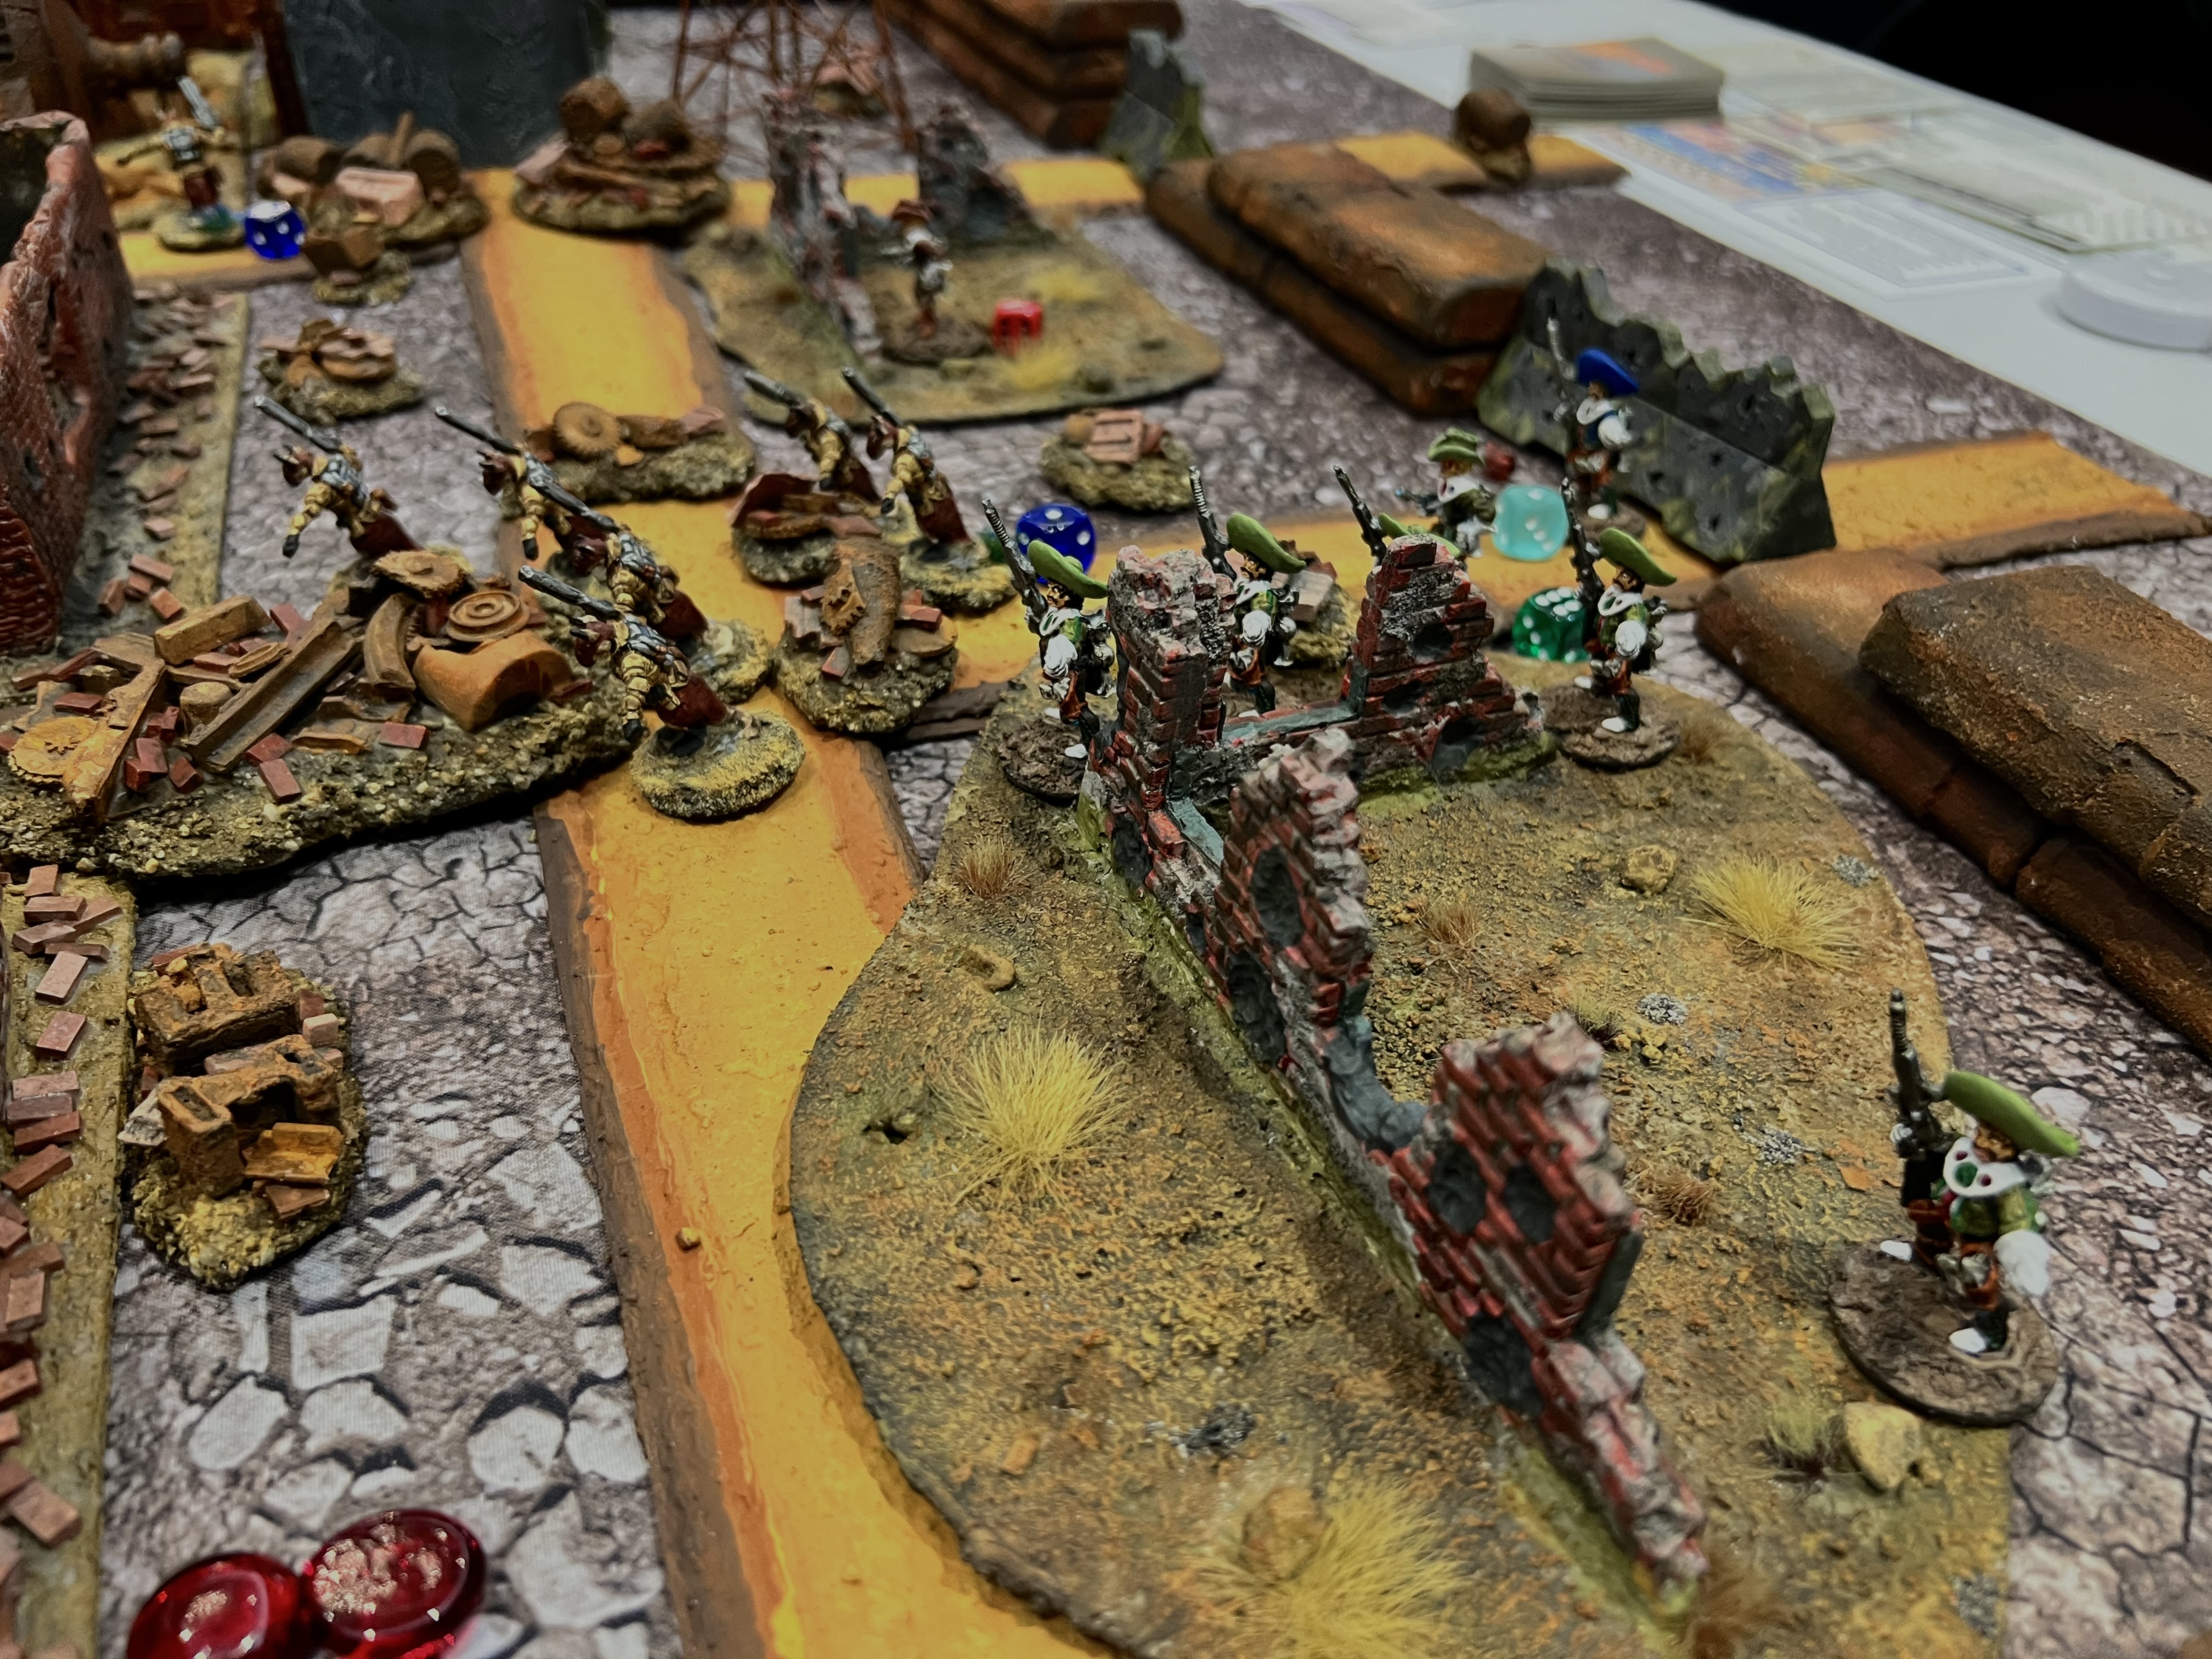
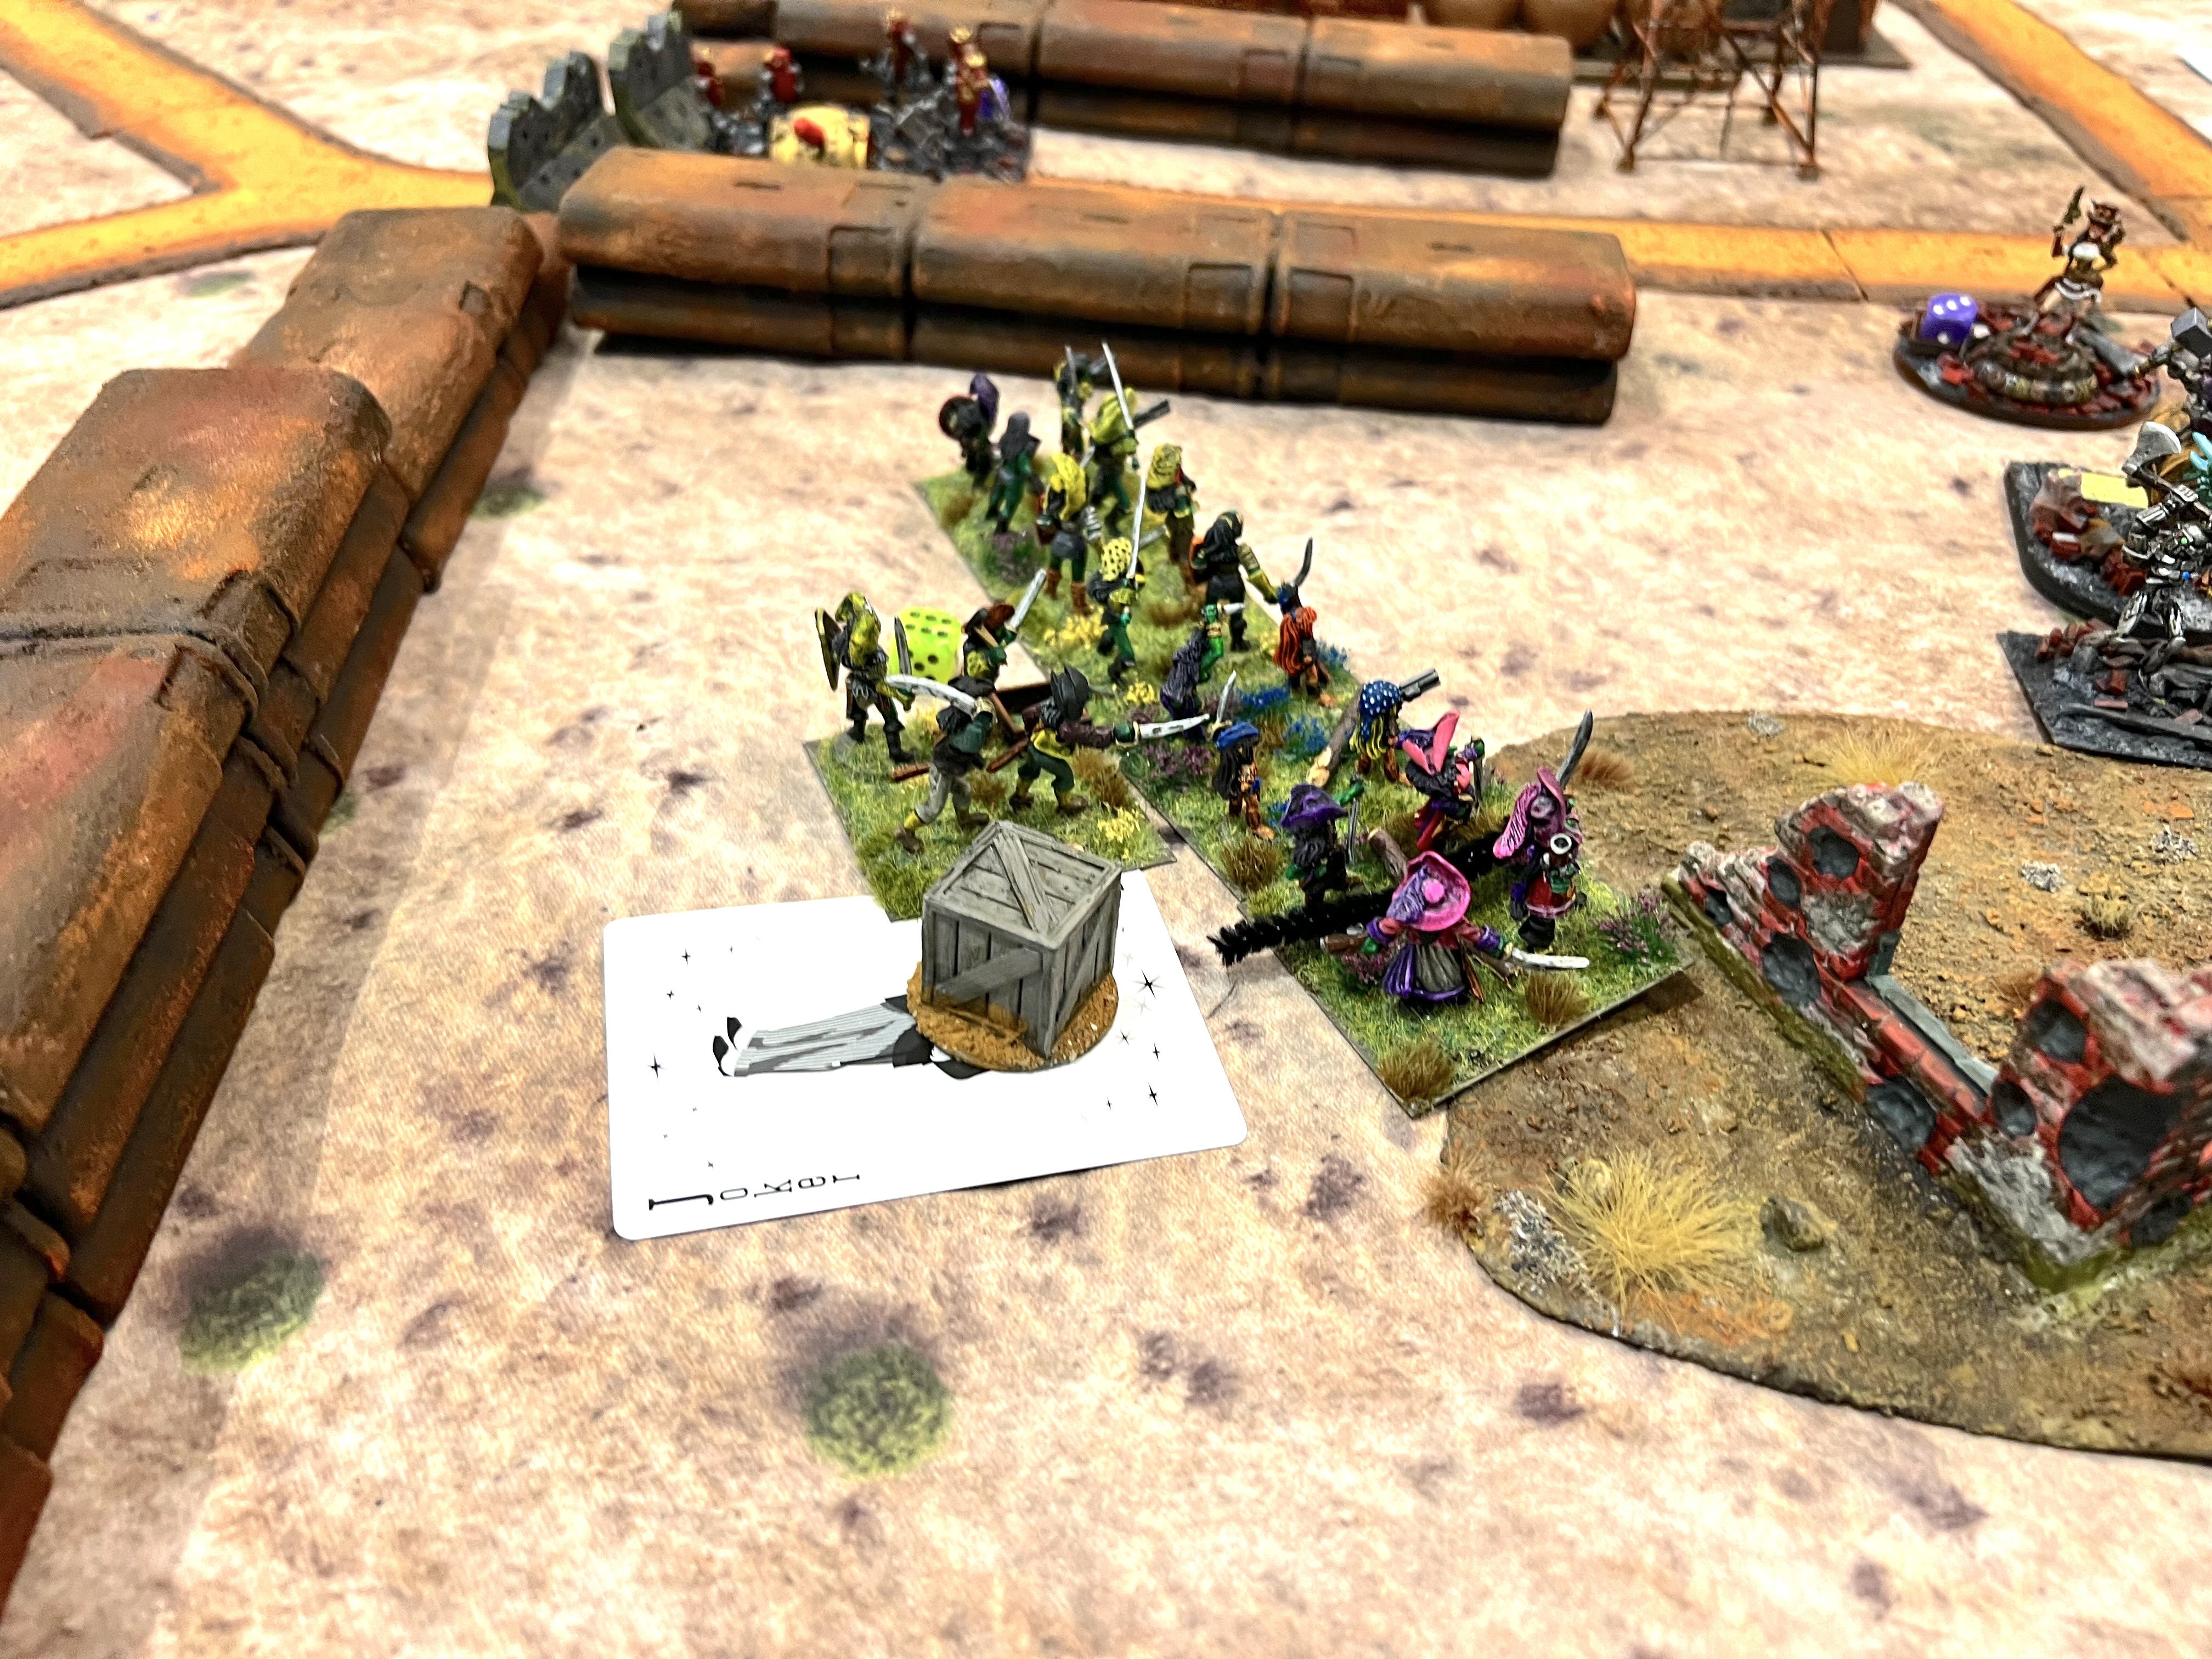
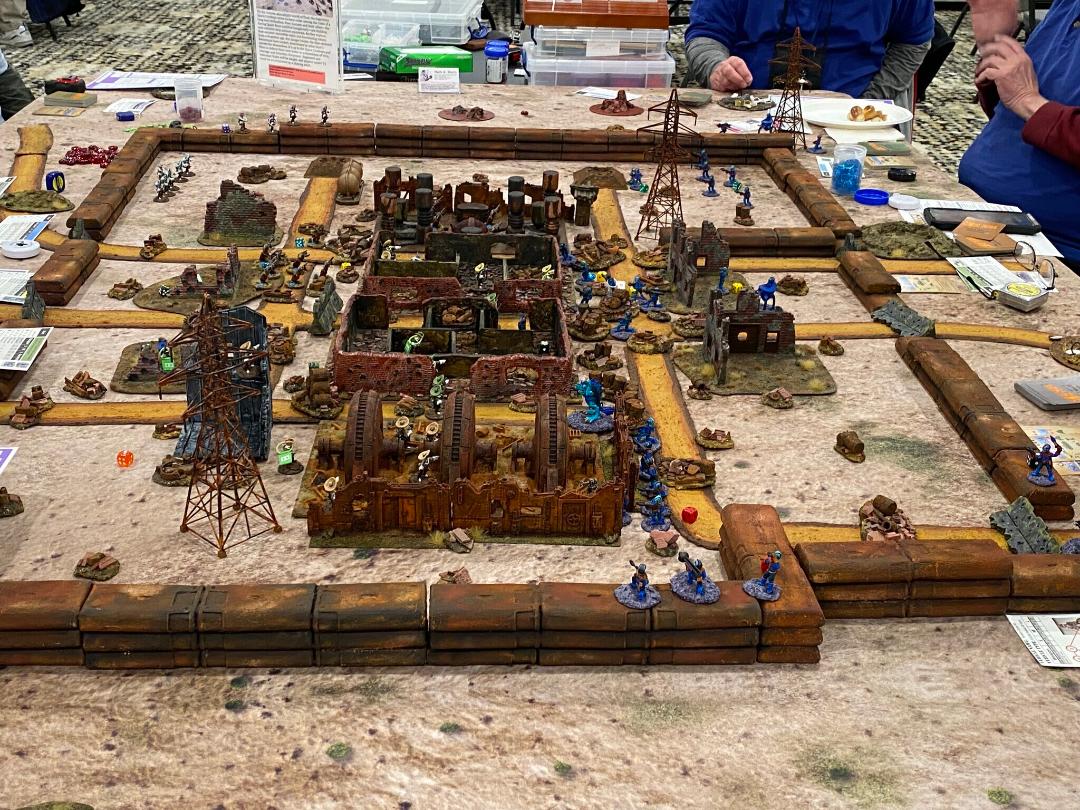
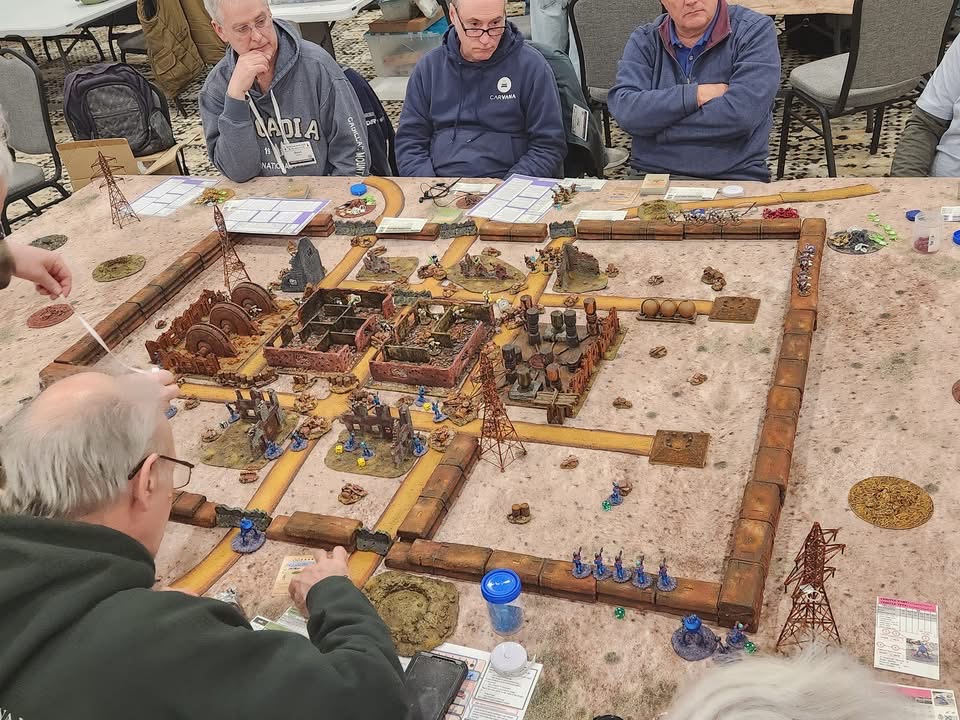
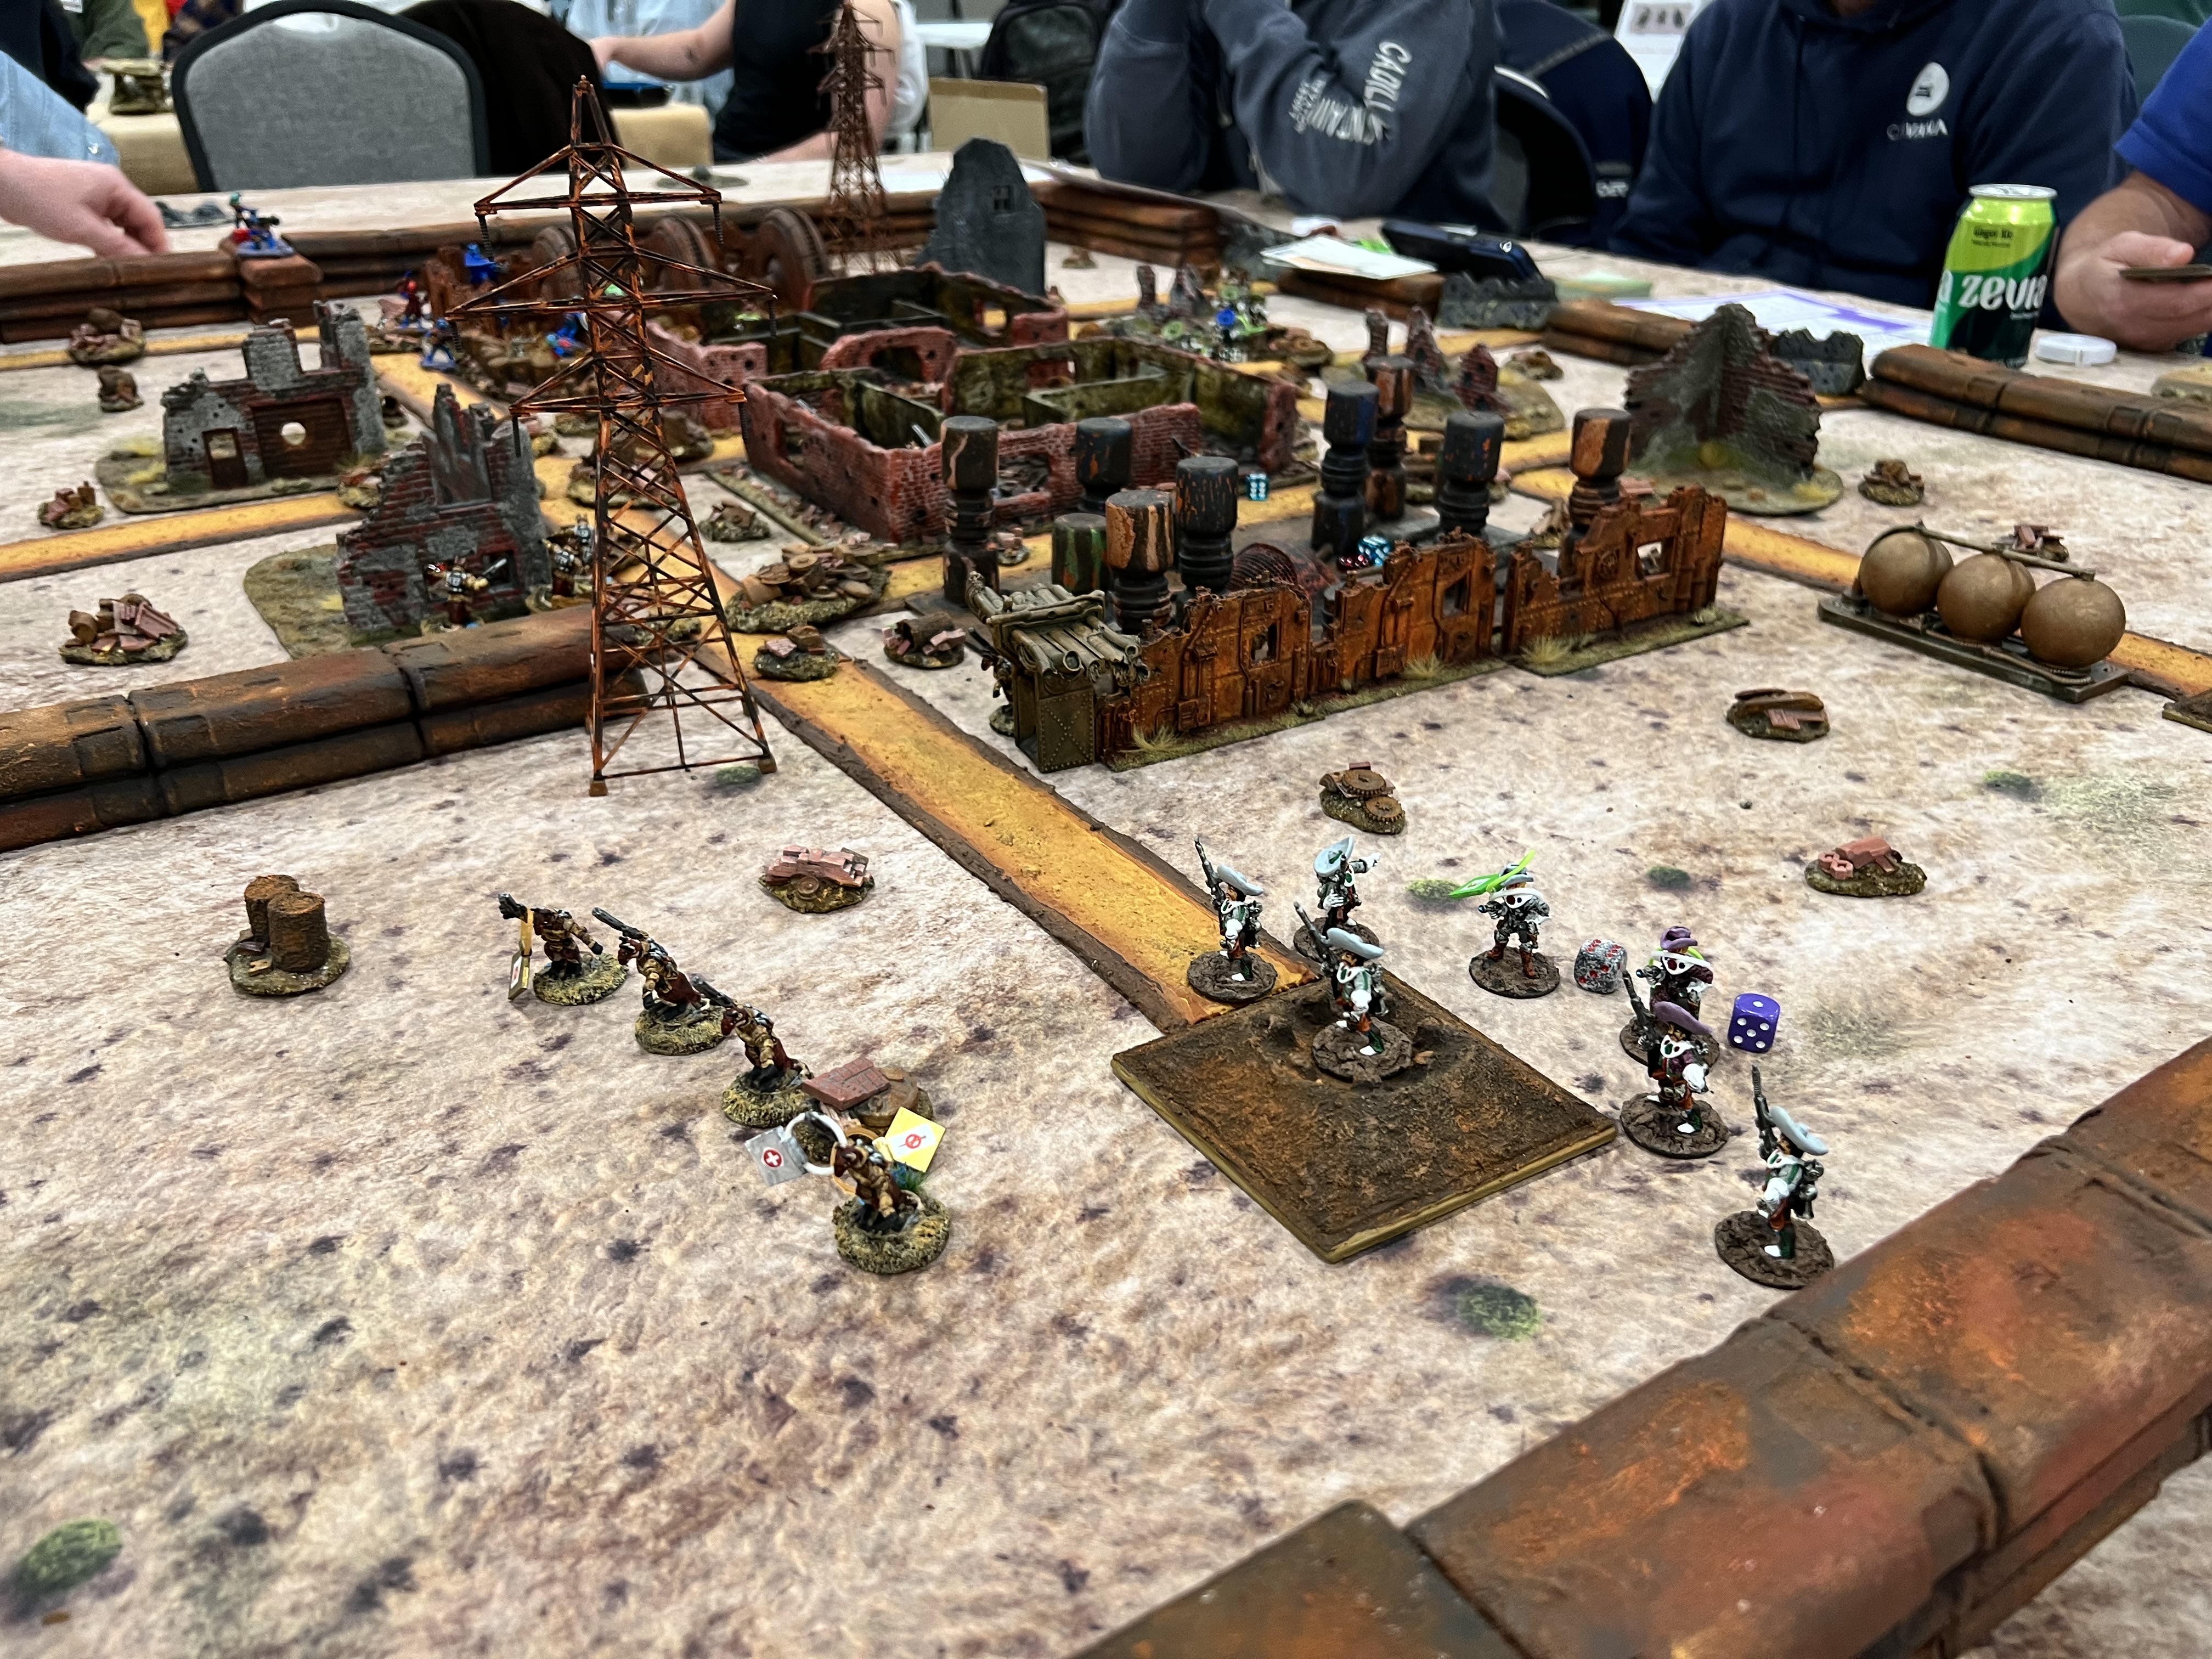
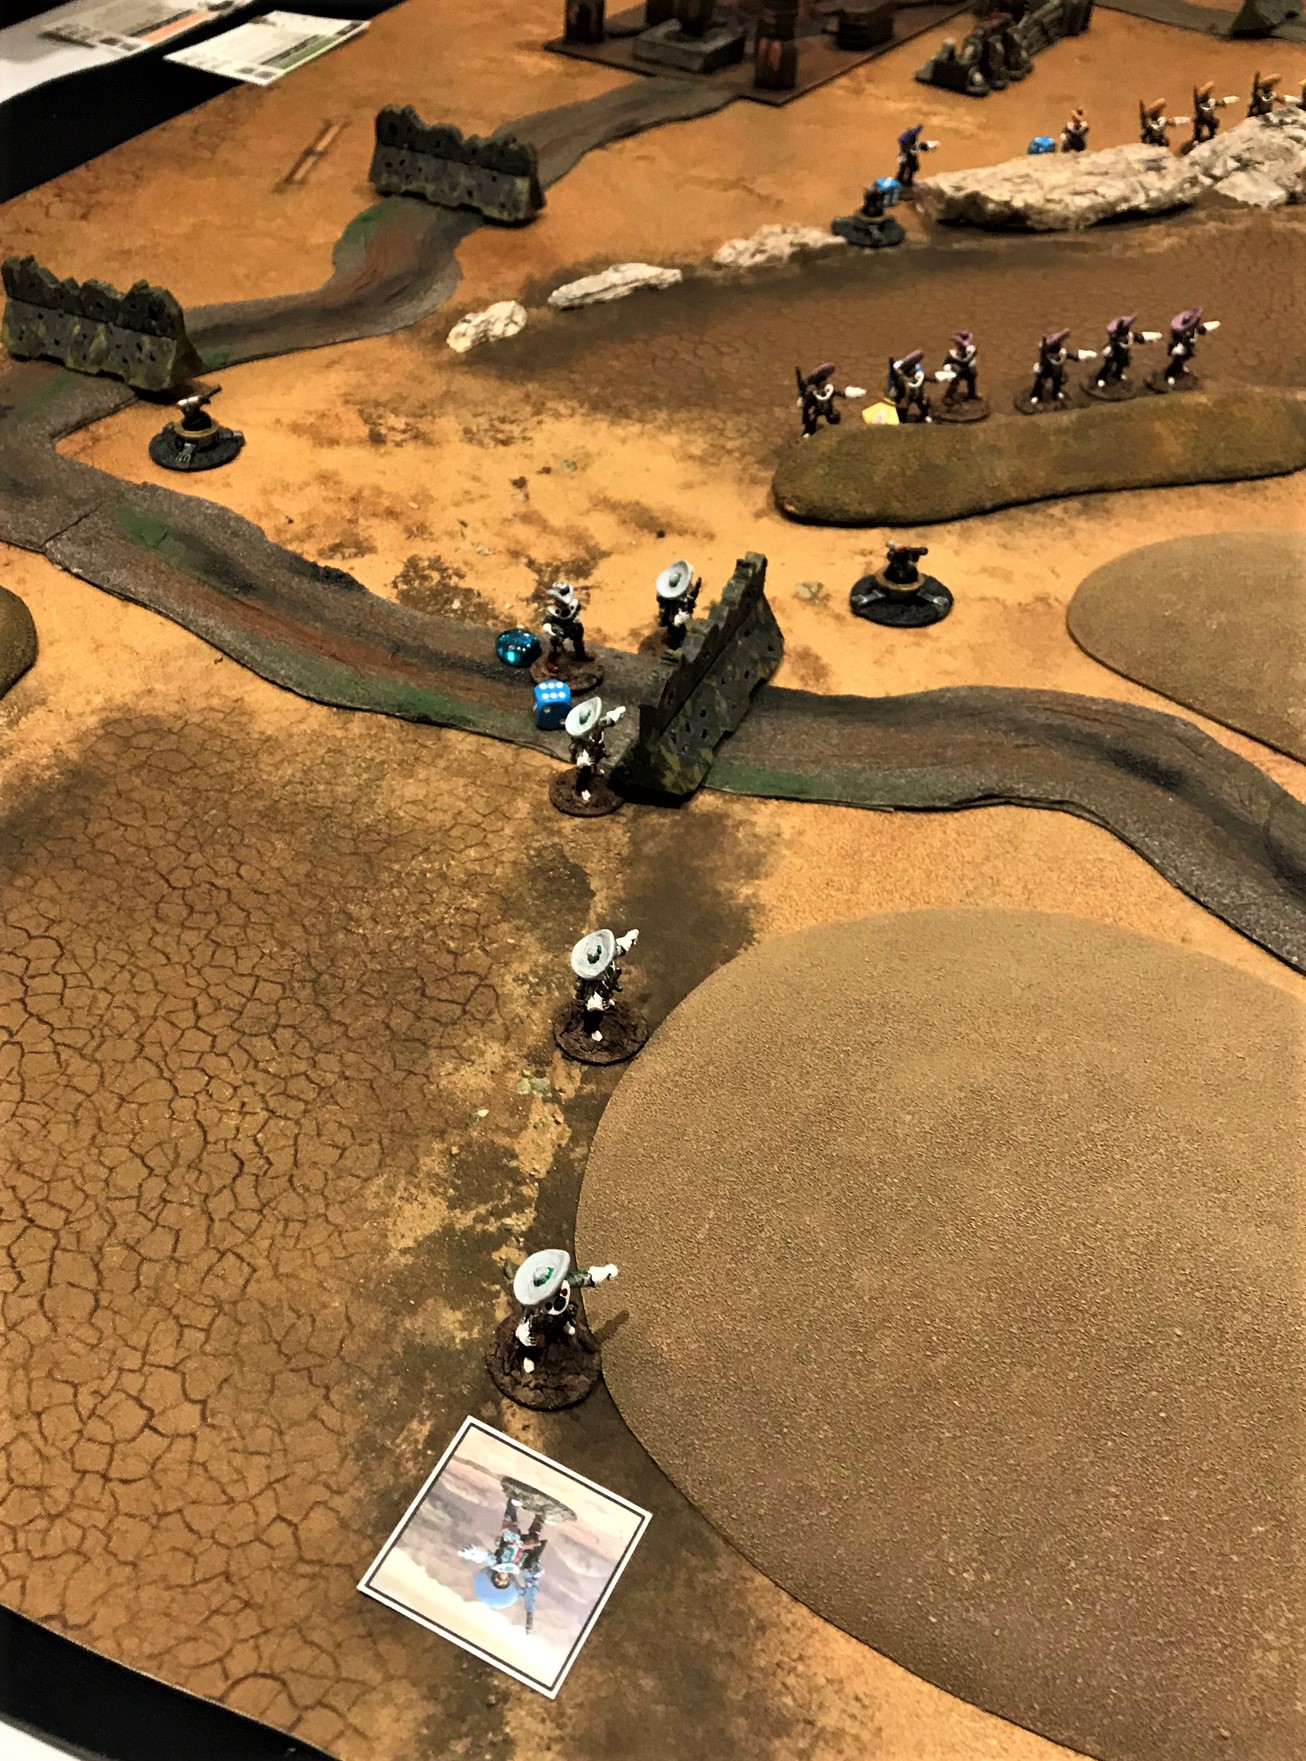
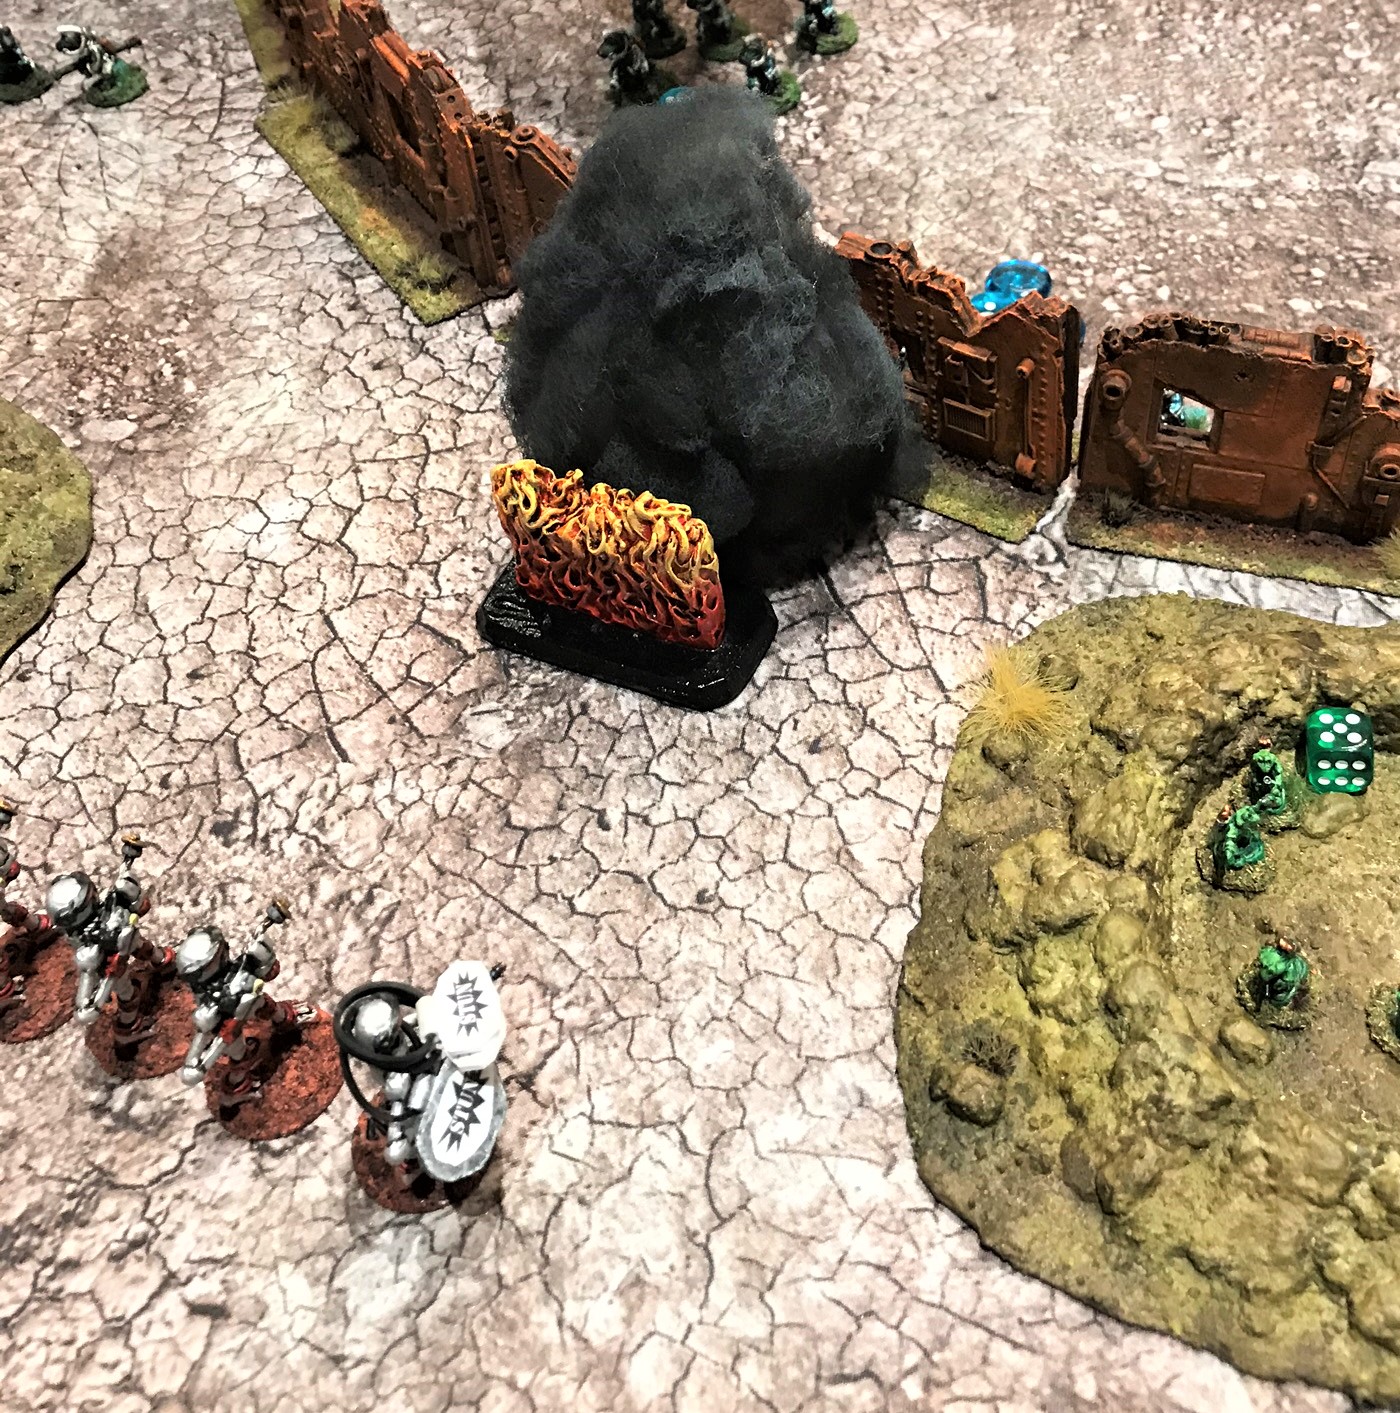
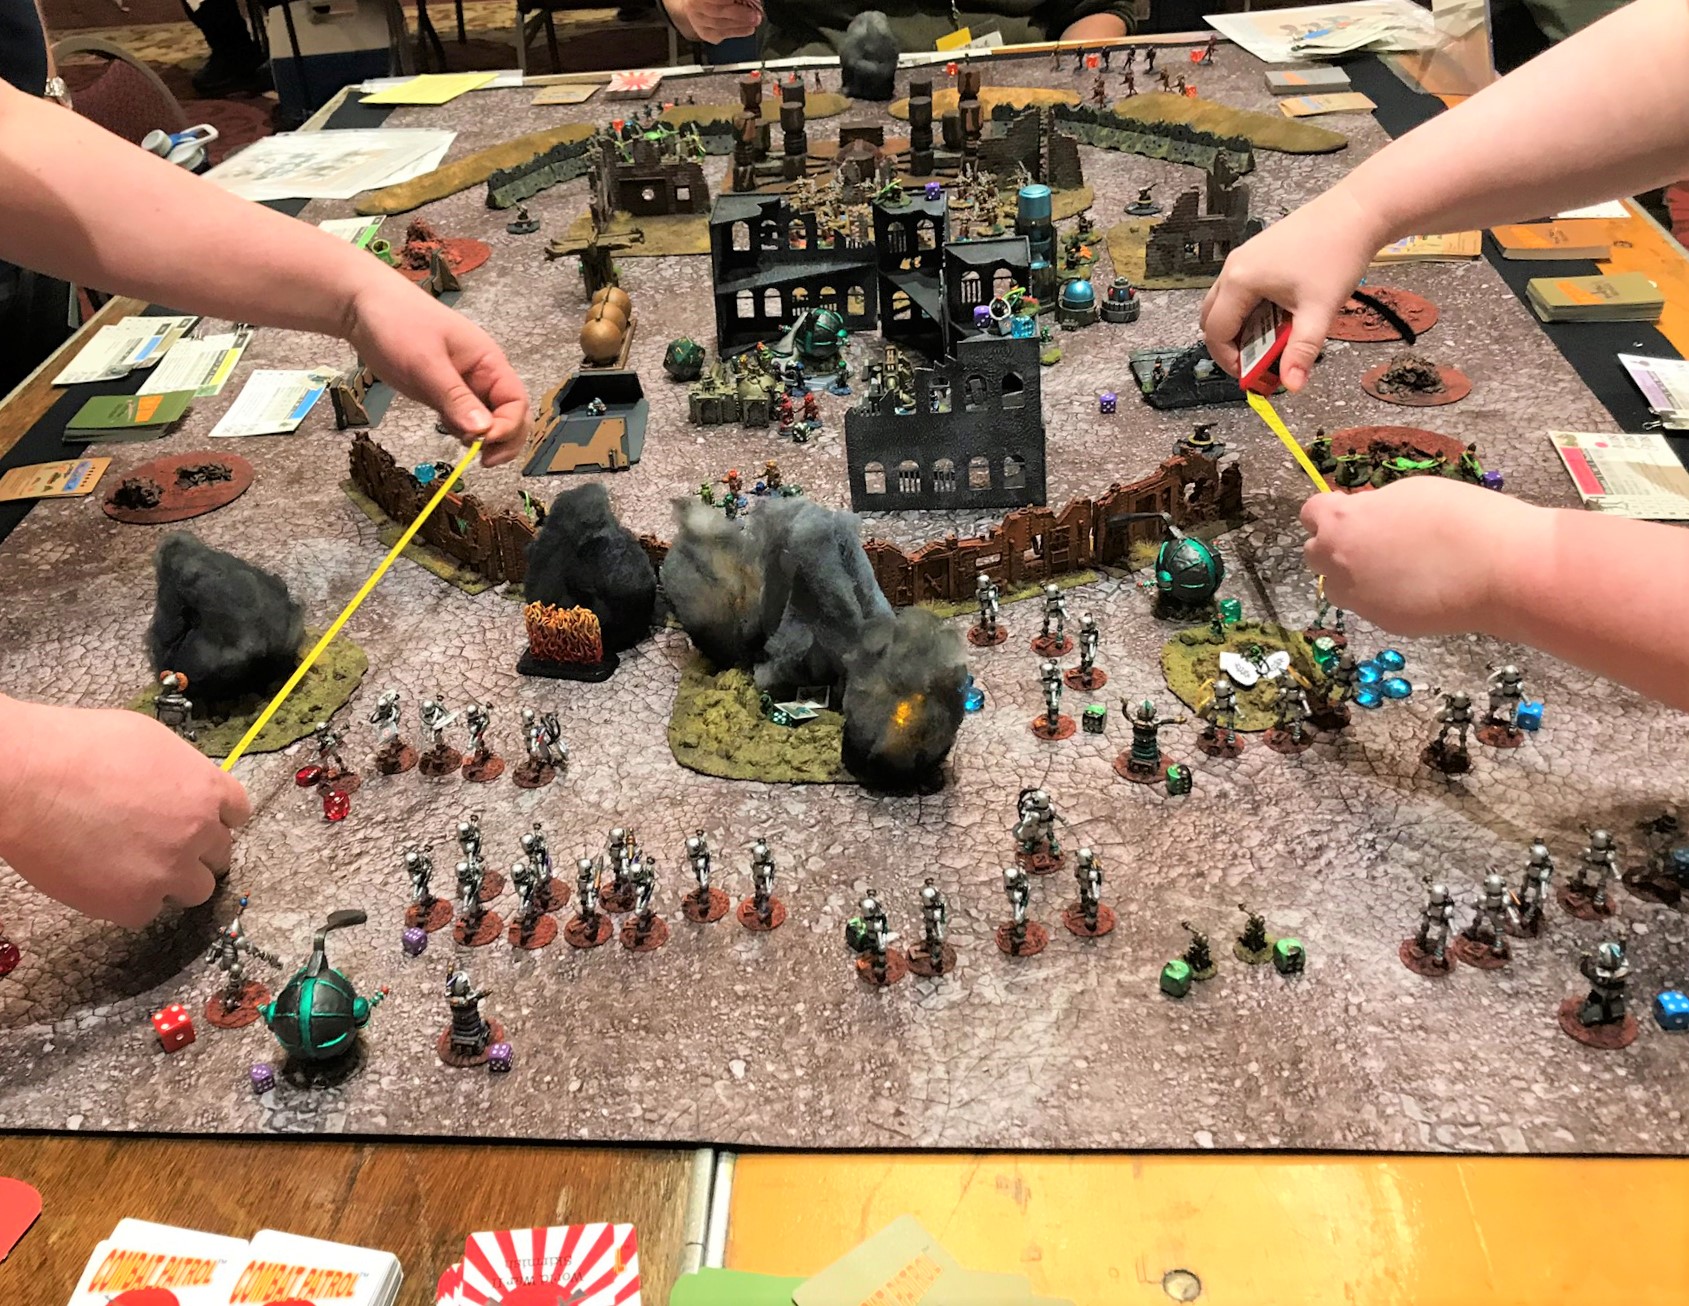
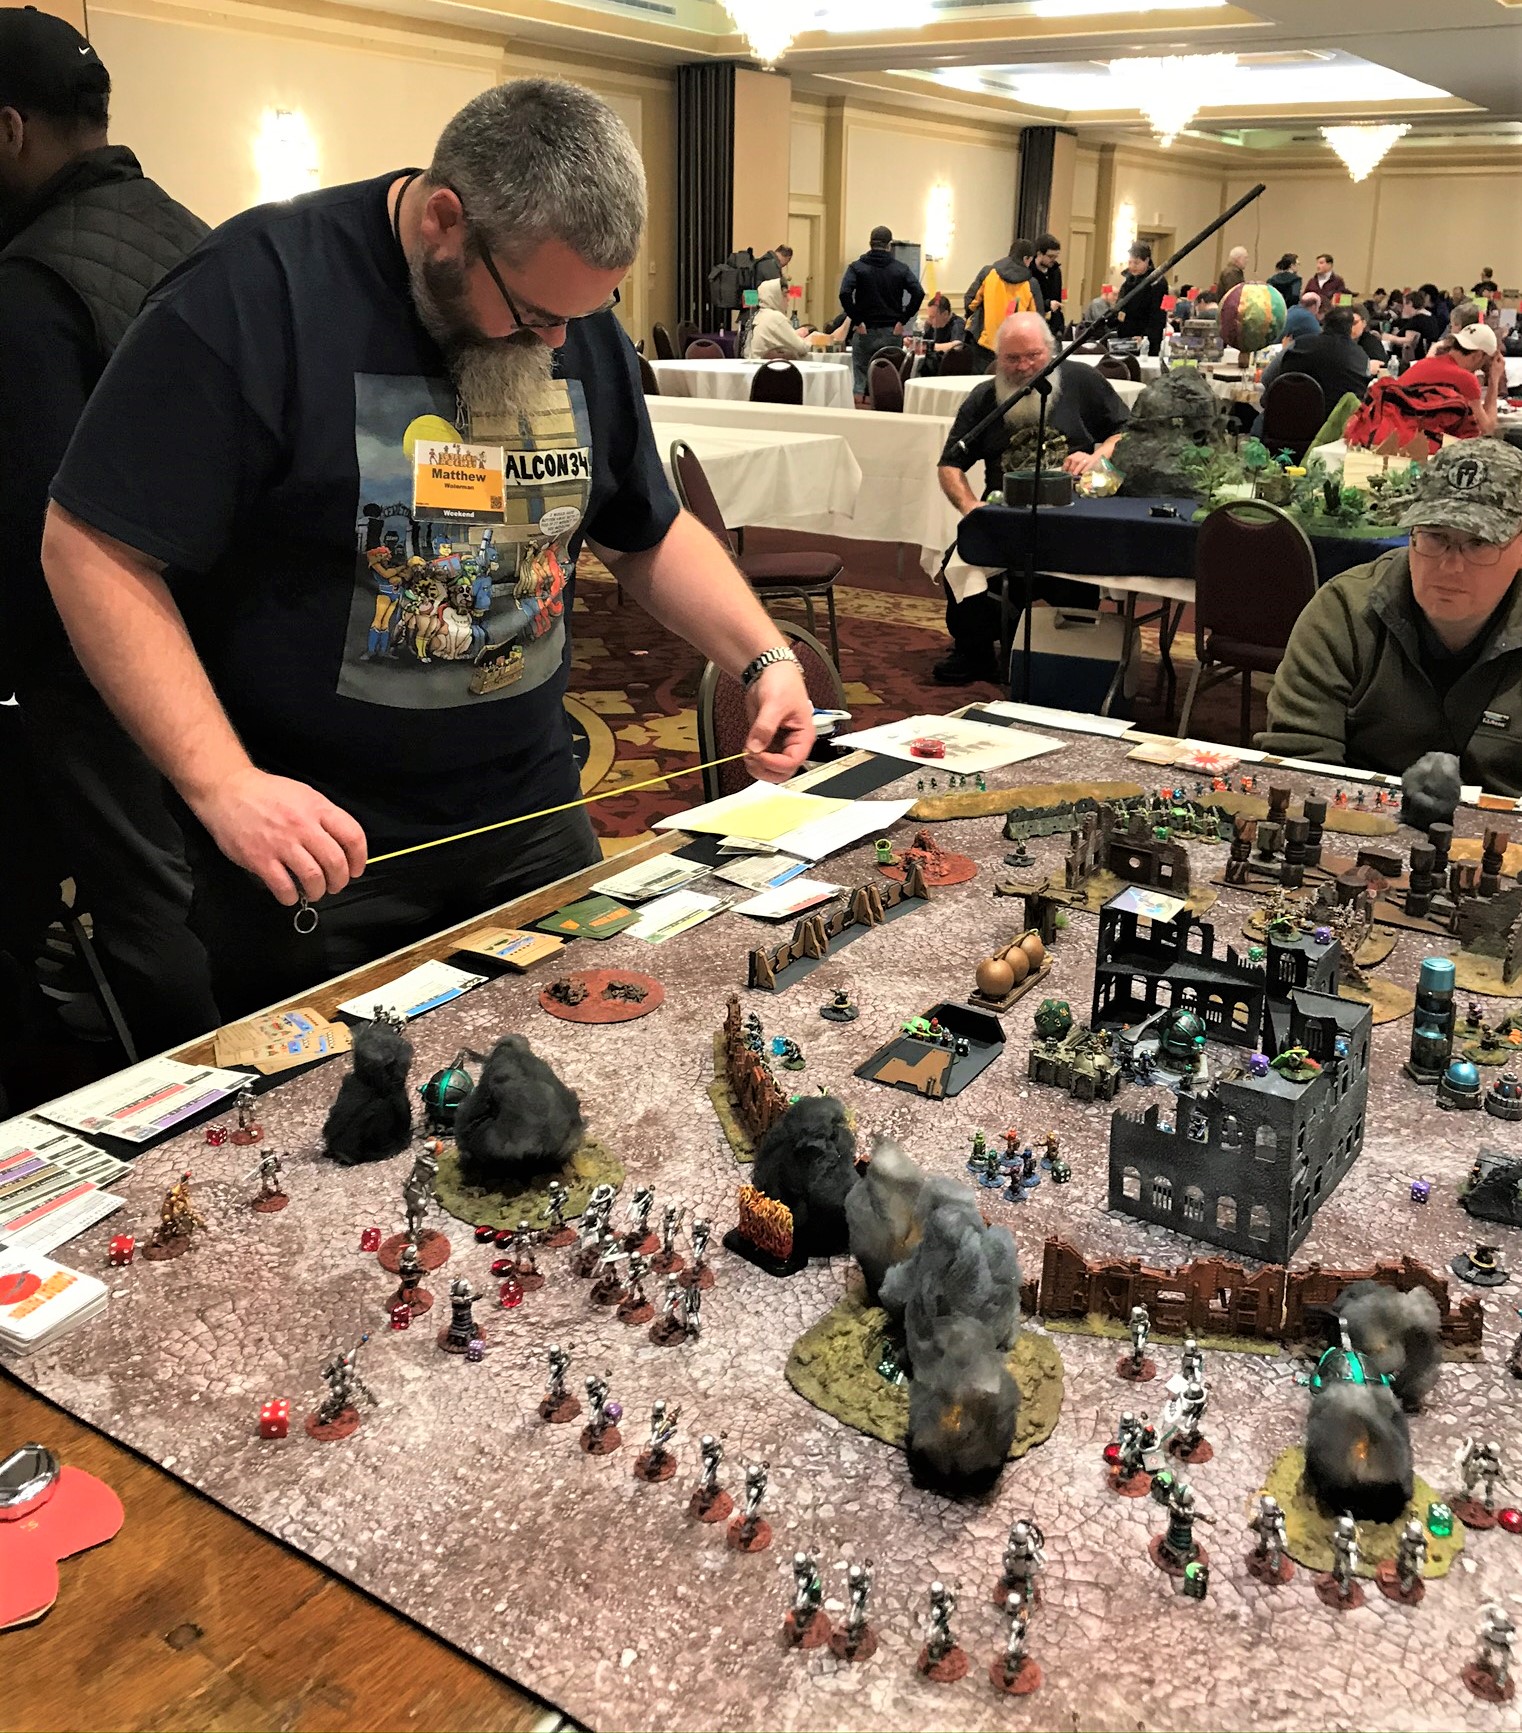
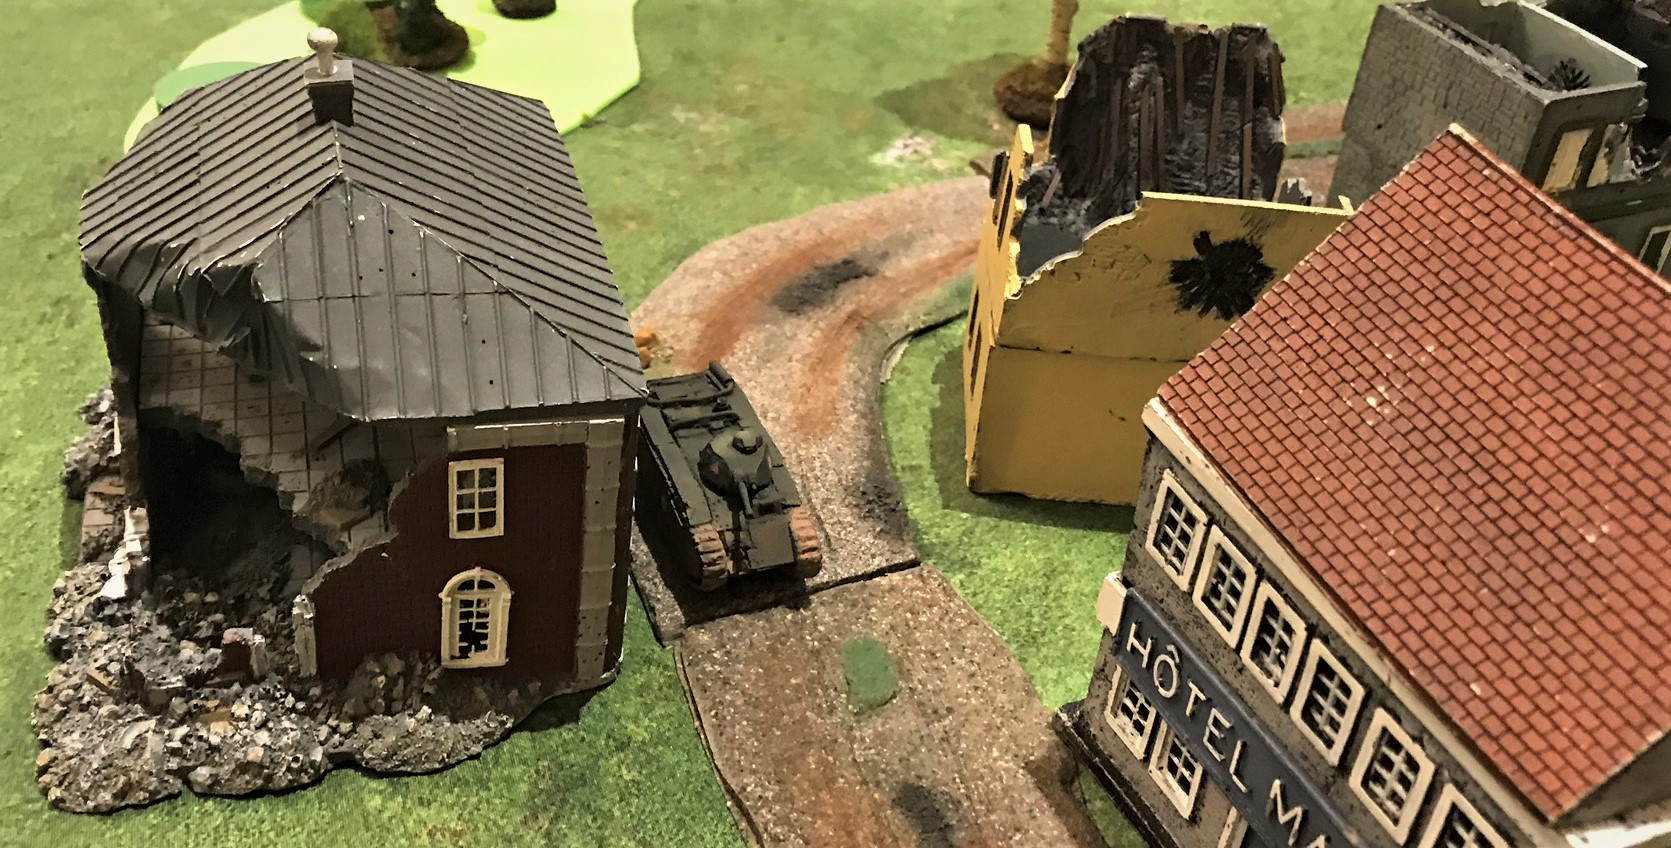
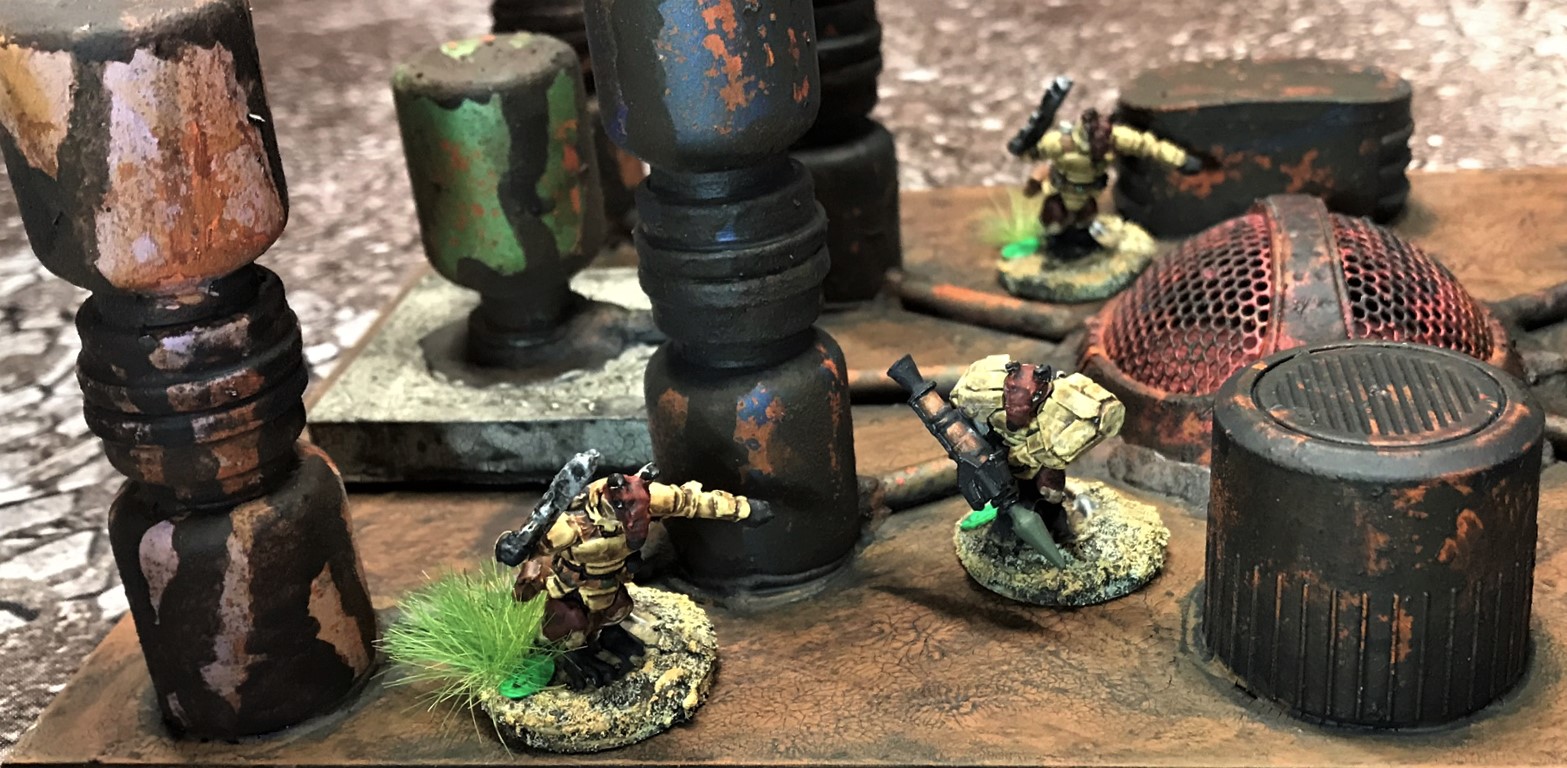
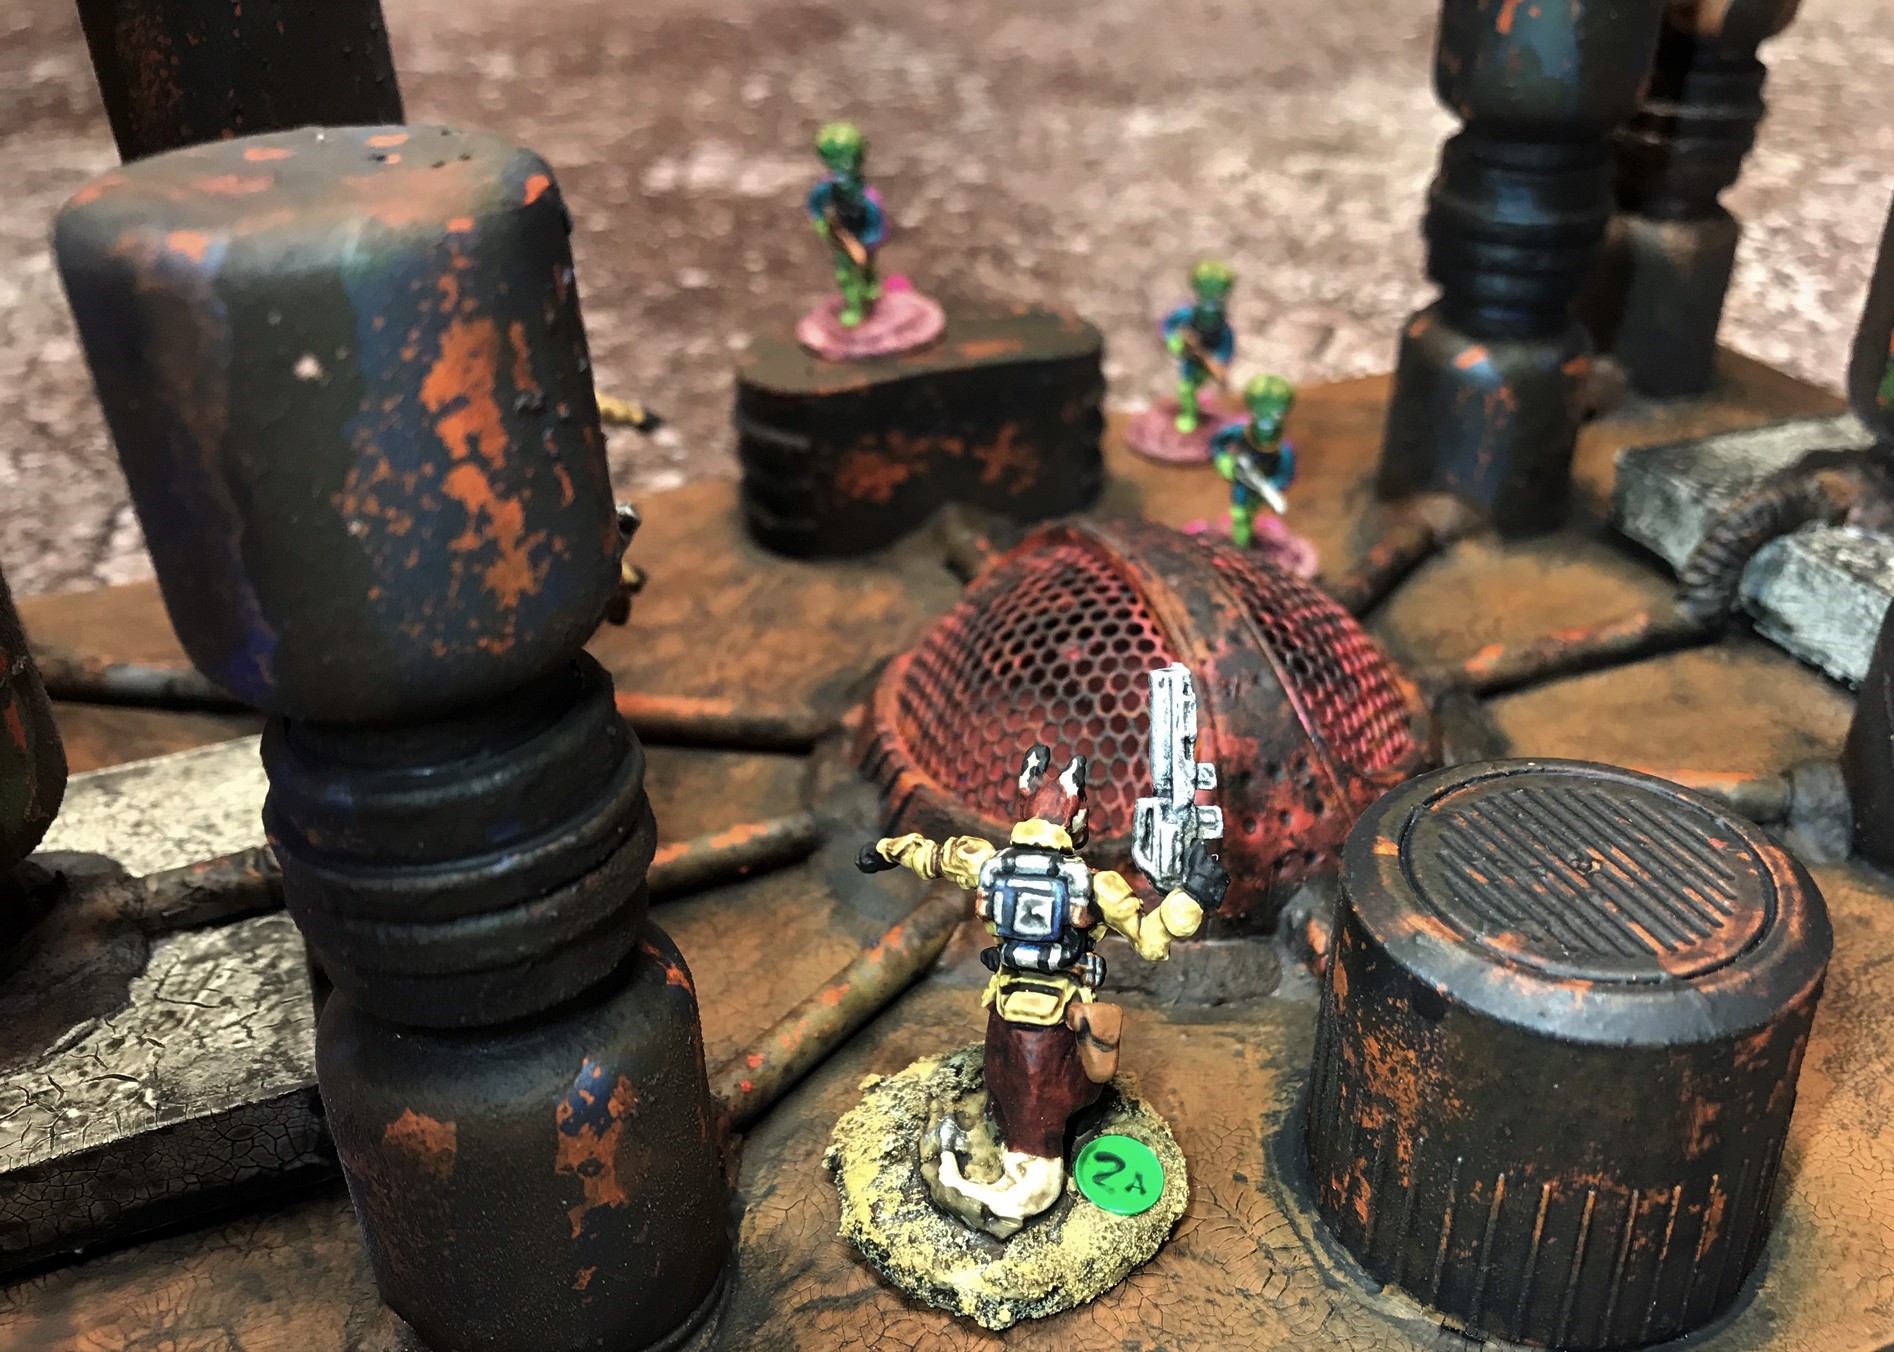
I was really looking forward to this one as I got to use all of my rusty wreckage and ruined buildings that I have posted about here in this blog. It did not disappoint. The battle was full of action, with jet-packing cowboys (Texican Space Rangers) and Space ‘Roos engaging the Retrovians (Roger’s own). (More about Roger here.) Ancient robots were found and lost, some even getting violent when found. Buck got to play and channeled his inner paratrooper in the attack.
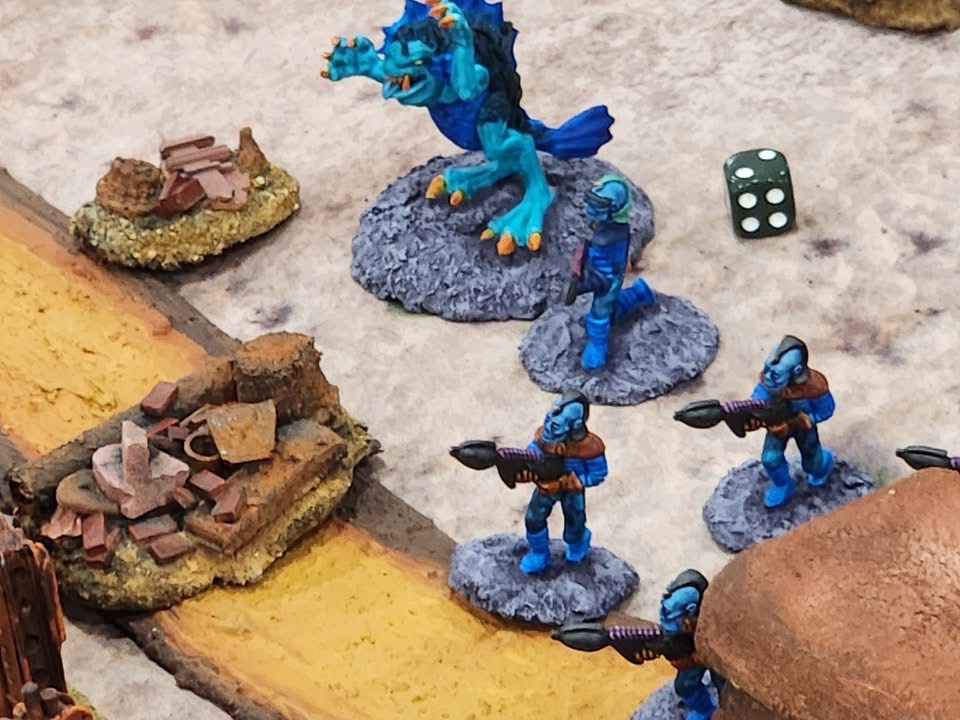
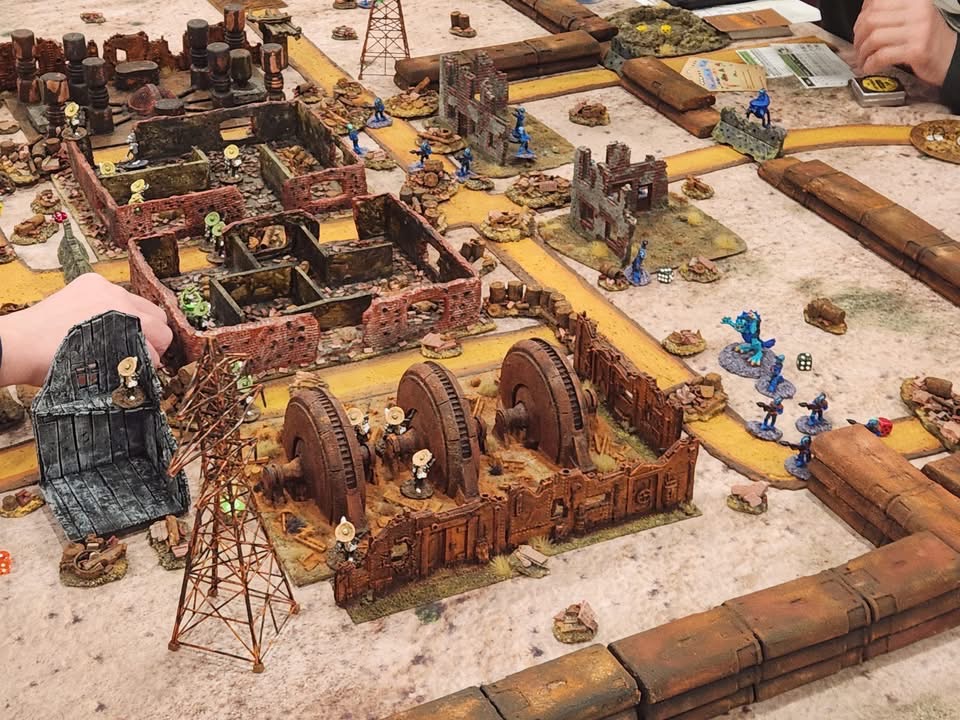
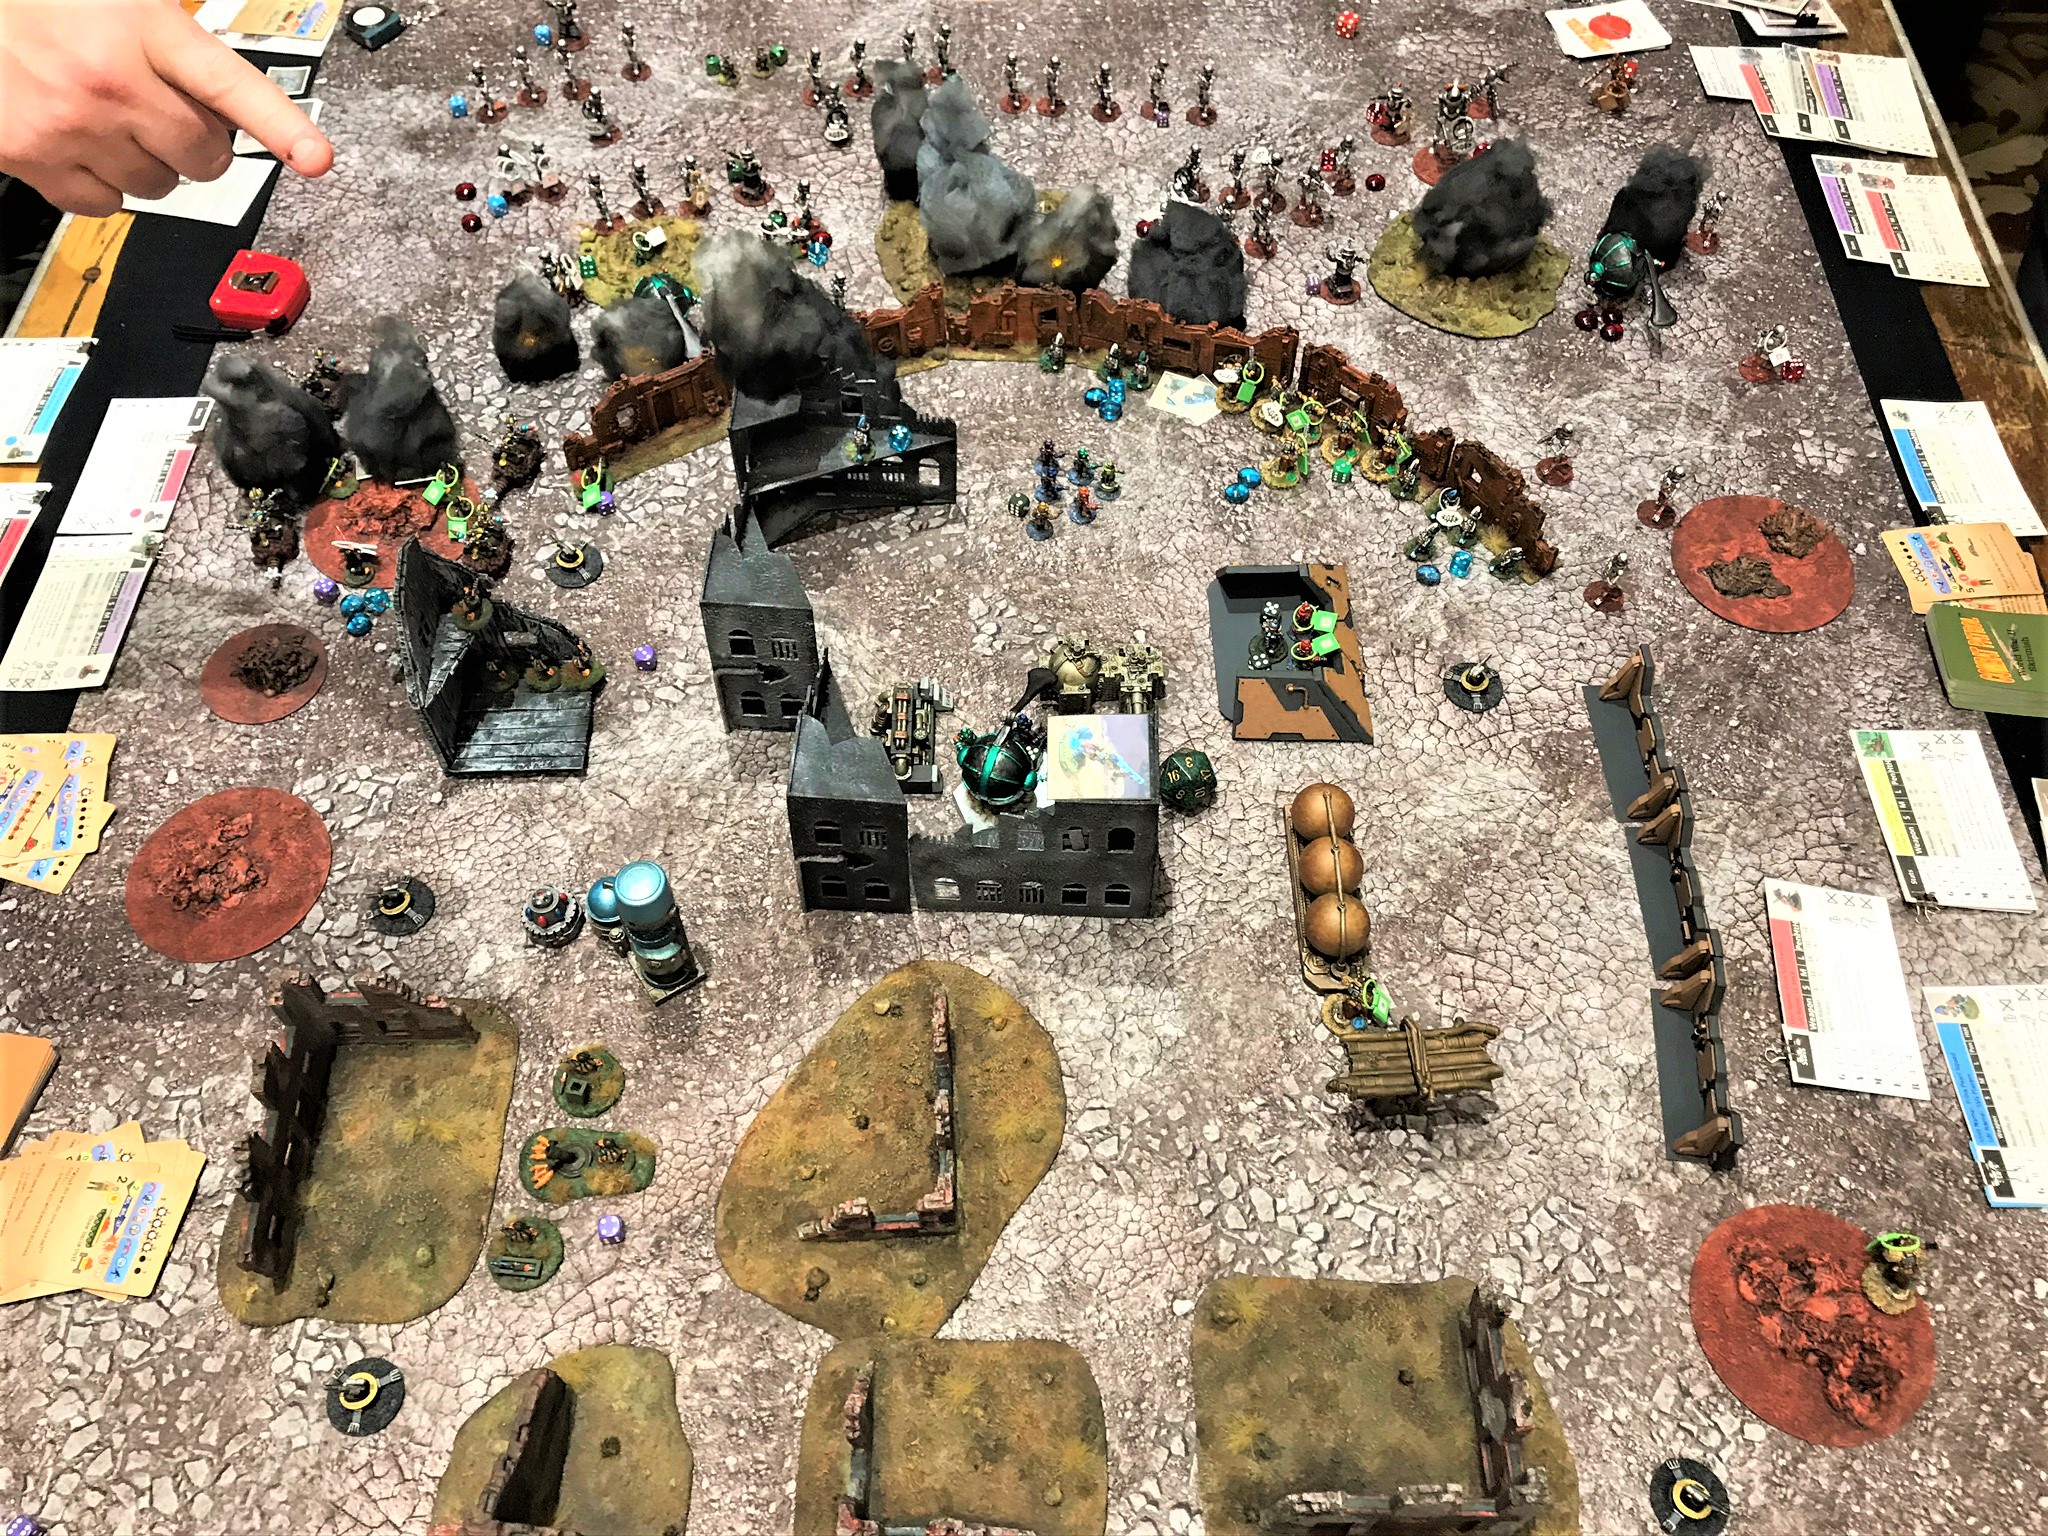
The game set up for action. Retrovians are moving into the ruined city from the left, and Space Cowboys from the opposite side. Space ‘Roos come in as reinforcements.Players ready for action.Skip maneuvers his troops in the background while Bruce deftly had his sniper climb the transmission tower. Obviously the figure would not stay, so we used a rubber band.Retrovian Heavy Weapons Squad.Movement into the city.My friend Ken Howe snapped this shot!Retrovian “Garkon” section.Moving into the city – what to do?Space Cowboys and Retrovians search for ancient robots.Retrovian fire team mounts the wall.Space Cowboys huddle in the wreckage from Retrovian fire.The tripod “Bra’sheers” had a difficult tome getting over the walls. They did at points and instantly decapitated a few Space Cowboys with their claws.A “Bender” robot was found – but was hostile and killed a cowboy and needed to be subdued. Some of Leif’s Space Cowboys got on the wall in a conga line only to take Bra’sheer machine gun fire.The conga line of death before machine gun fire…Retrovians getting into the city in any way they could.The battle rages.Urban fighting!Lots of combat in the city.Buck jet-packs his Space ‘Roos and ambushes Bruce’s Retrovians, wiping them out. He was practically giddy in this game with how successful his tactics were.Retrovians seek revenge with sonic cannon and sniper fire.Space Cowboys and Space ‘Roos continue the search.
In the end, the Space Cowboys and Space ‘Roos alliance found 3/4 robots and successfully held on to them. All casualties mounted. But the victory was clearly in the hands of the Space Cowboys and Space ‘Roos!
After the game, with help, I was able to pack the car for a Sunday morning drive home. The temperature was well below zero Fahrenheit! With the wind chill it was -13 degrees Fahrenheit (or -25 Celsius for you metric types!).
Thank you to all at HMGS who made Cold Wars possible!
That wraps up this post – I still have a few that are in the queue , and I hope they are of interest.
I will be running these games again so see you at the next convention!
Followers of this blog have seen several posts showing my “rusty” preparations. I have been getting ready for my numerous games at 2026 tabletop wargaming conventions. That preparation involves painting up figures and terrain for scenarios that involve a good amount of ruins and wreckage.
In a previous post, I shared how I built transmission towers and rusty walls for a Wars of OzzTM game involving Professor Nitpik’s Industrial City (the Robotic Sanctum). I ran that game at Cold Wars and will share more about that convention shortly. The theme for Cold Wars this year was “The Wild West”, so I also had planned to run a game involving Space Cowboys (technically Archive Texican Space Rangers” from Star Rovers).
I don’t run western games, but I could cobble together a retro sci-fi game using Buck Surdu’s Combat Patrol:WWIITM gaming system (with my modifications). In my game Archive “Space Cowboys”, and uplifted kangaroos (“Space ‘Roos” ) combat blue-skinned “Retrovians” (from War Games Supply Dump). Both armies are searching for hidden ancient robots in the apocalyptic ruins of a long-dead civilization on a newly-colonized world called Dust.
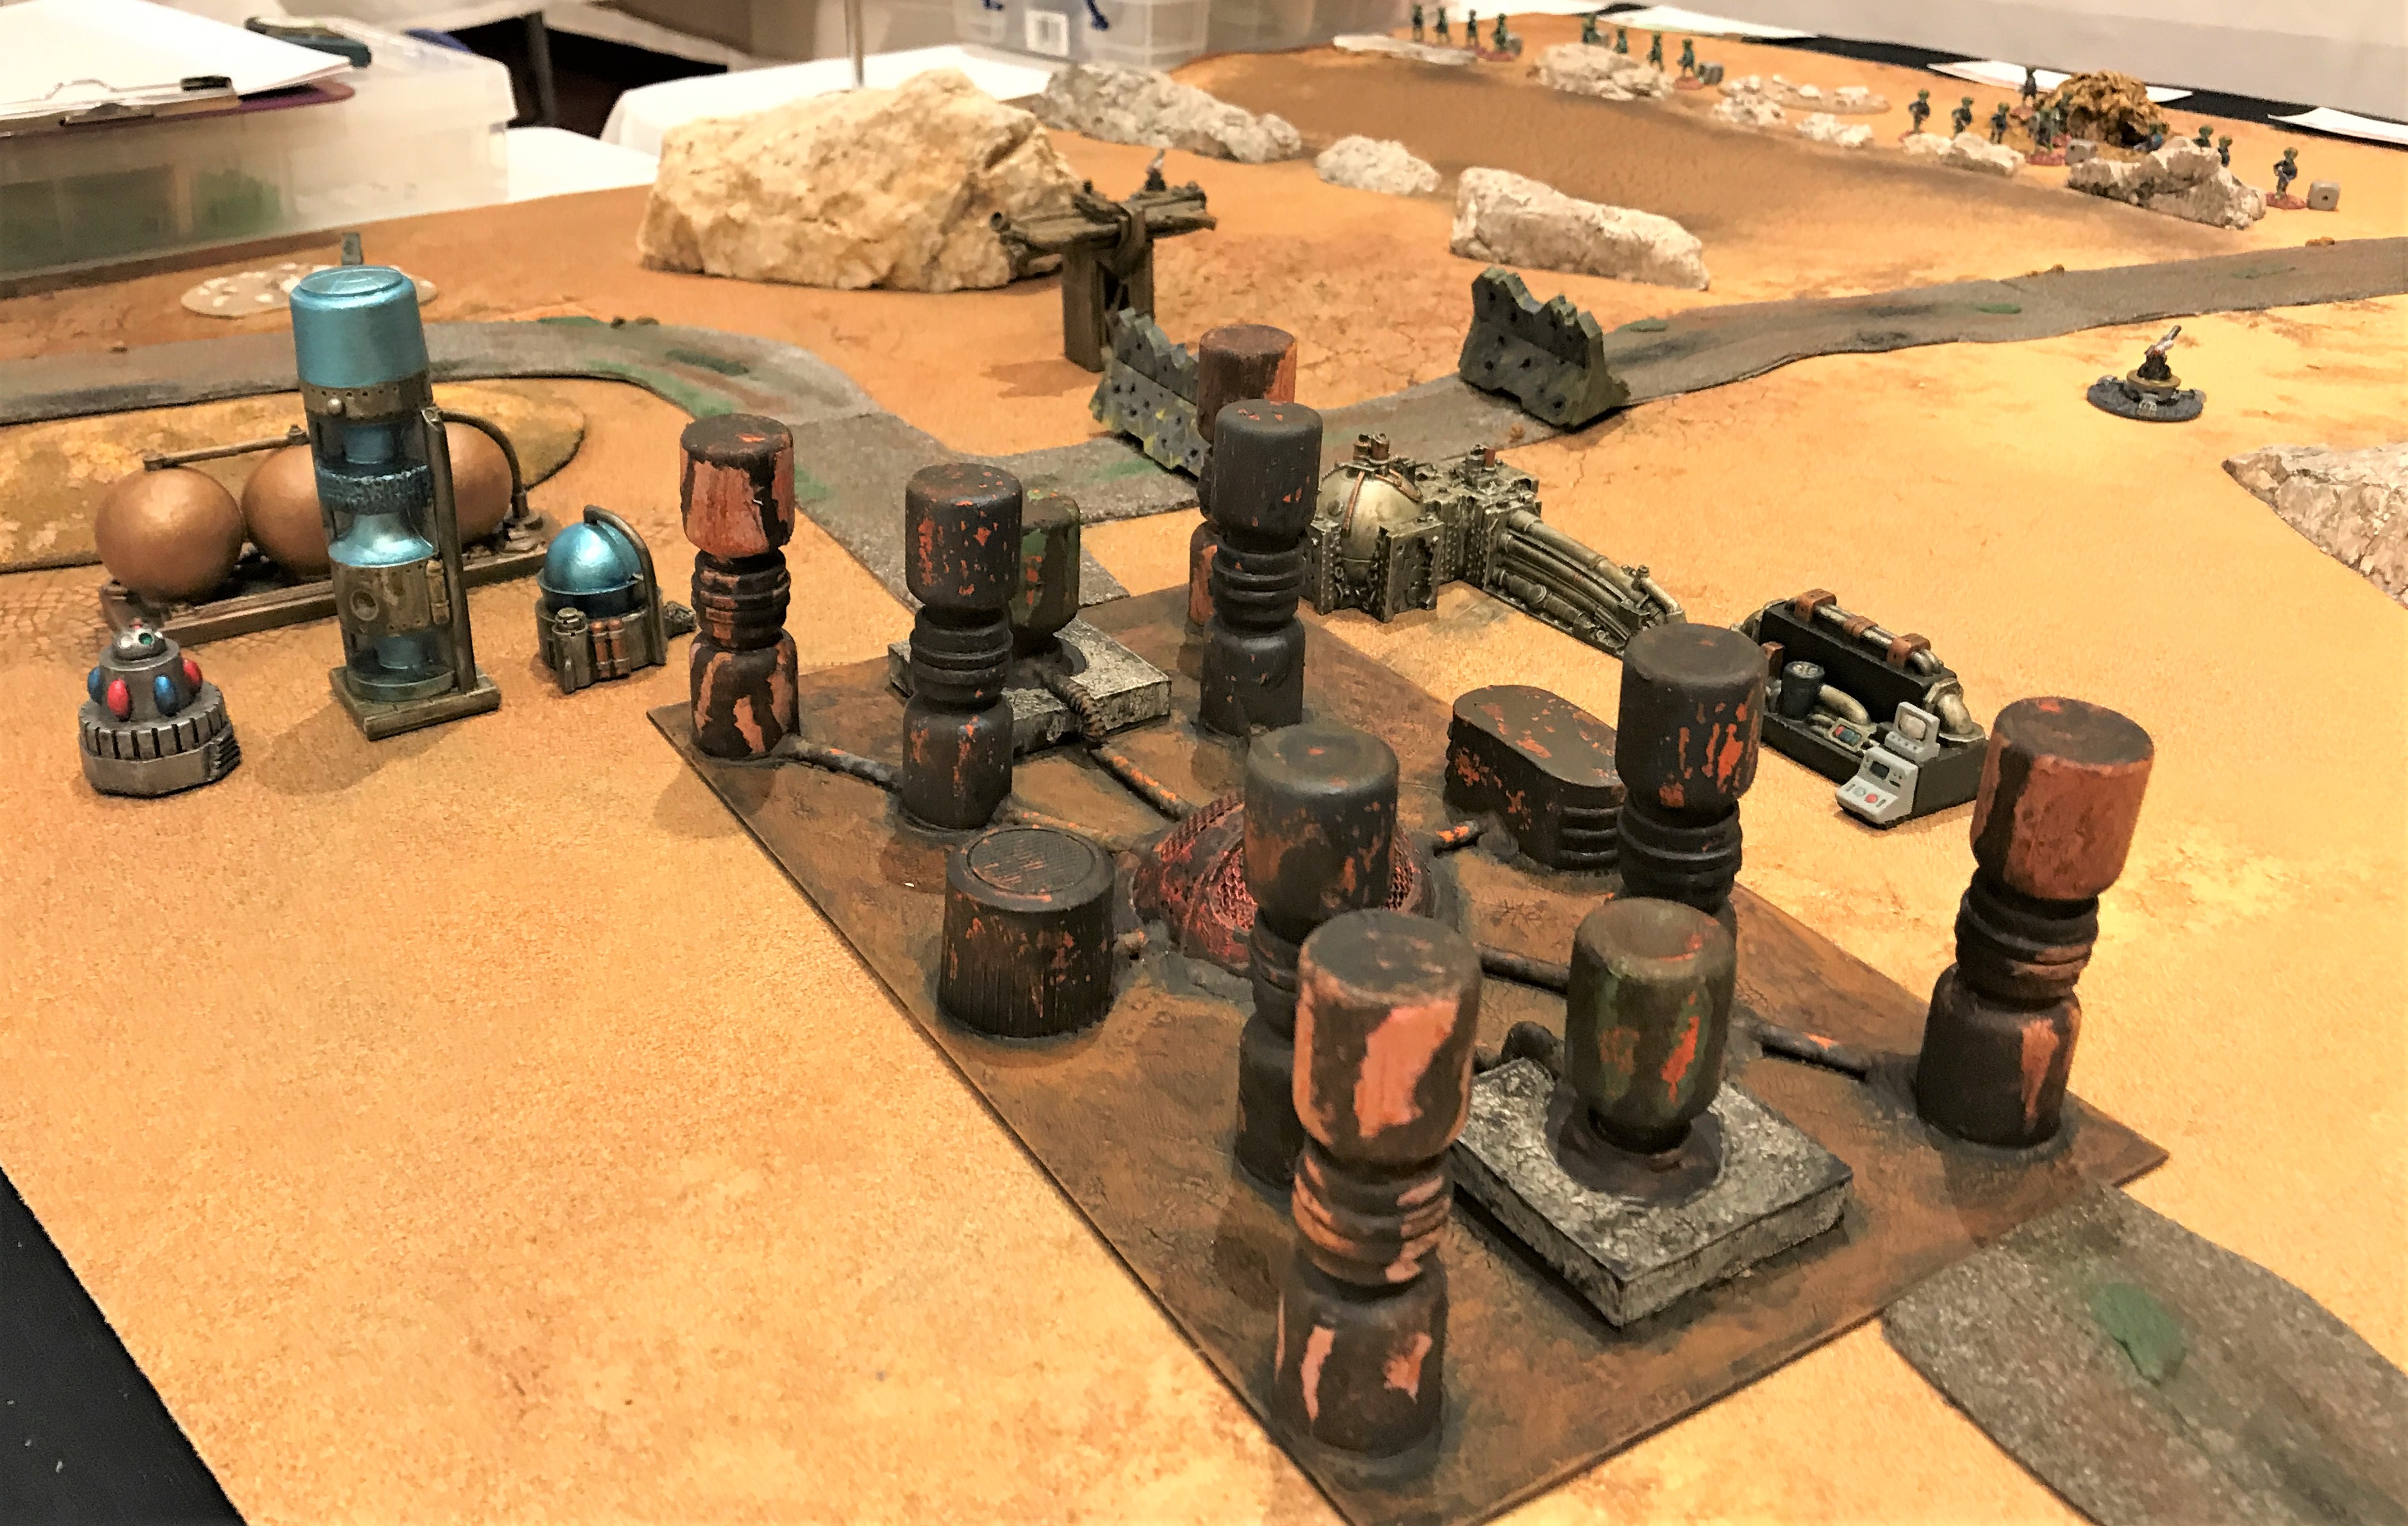
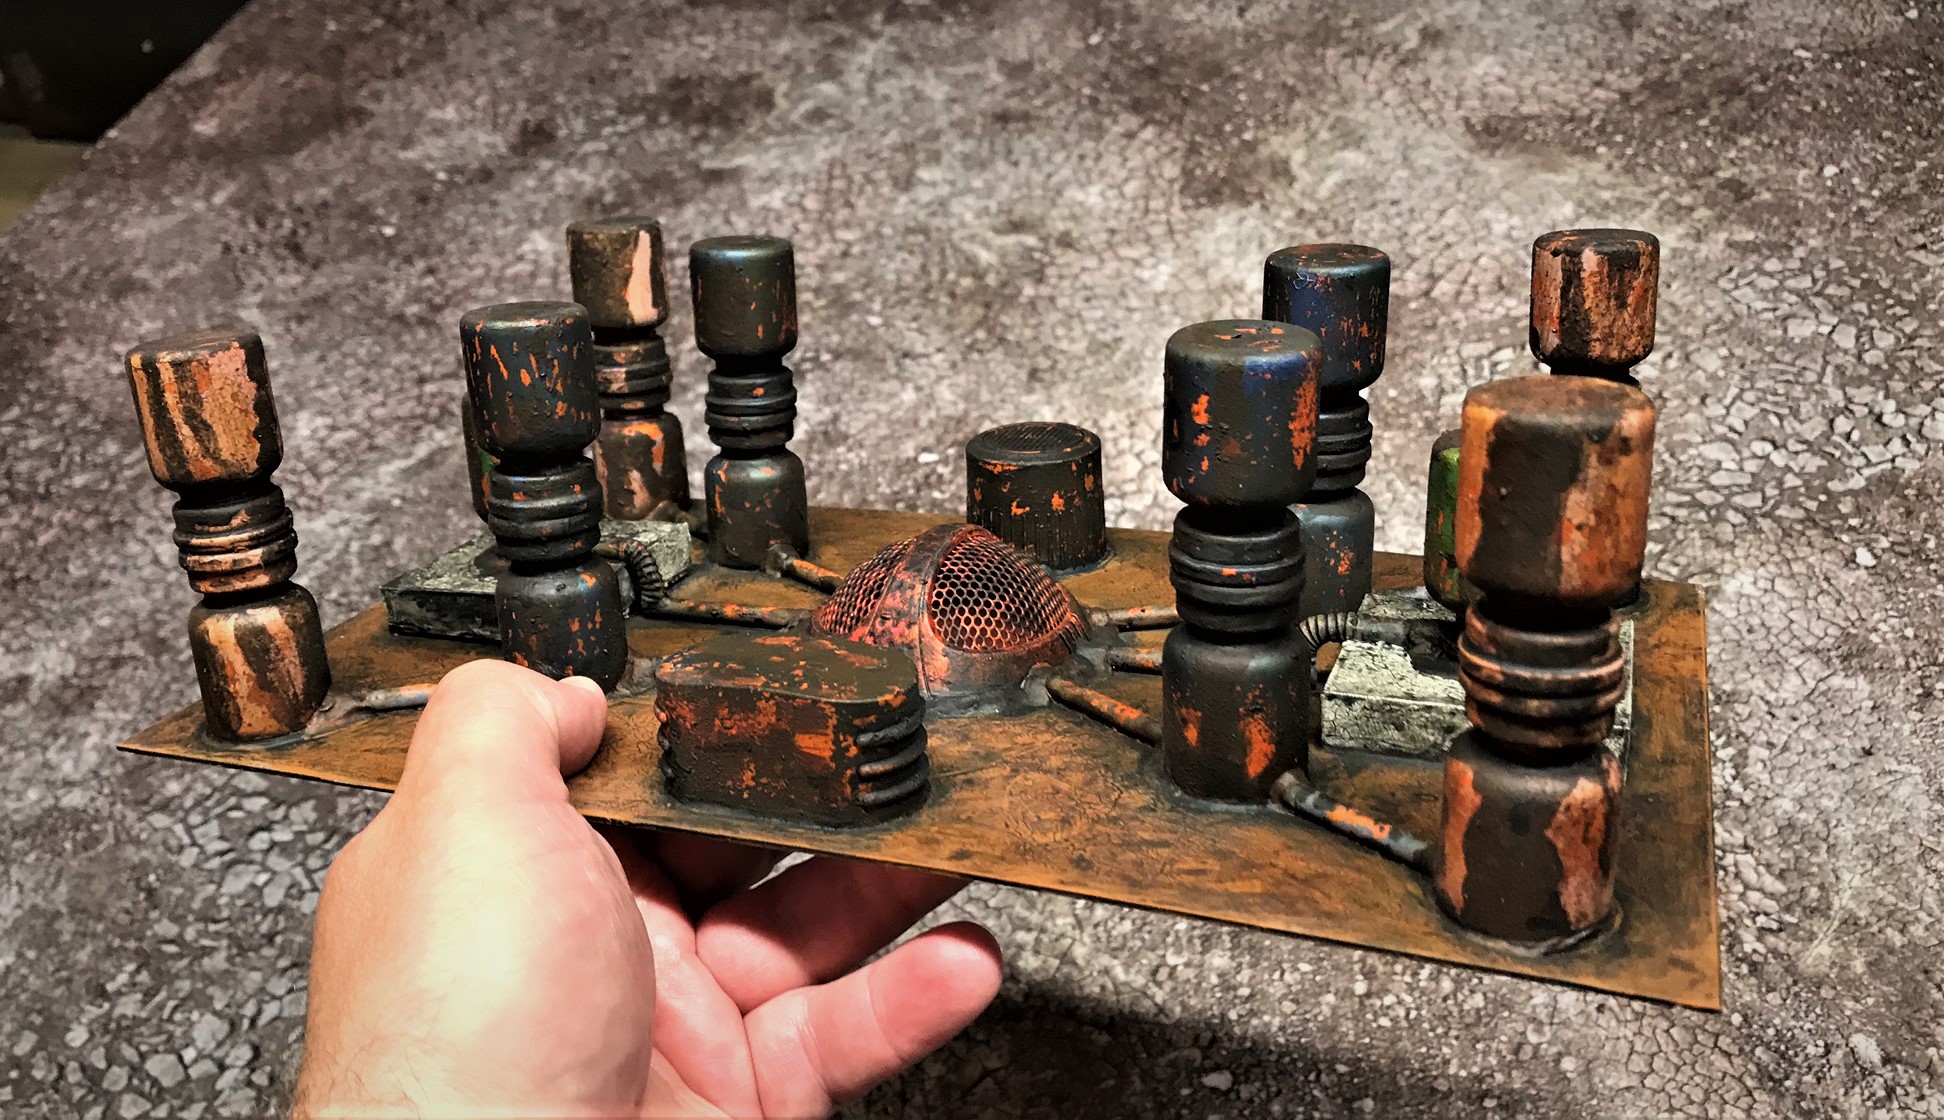
To really make the ancient ruined industrial panorama that I wanted, I needed more buildings and structures than just my transmission towers, rusty walls, rusty generators and ruined chemical plant. I also wanted a lot of wreckage strewn about as terrain.
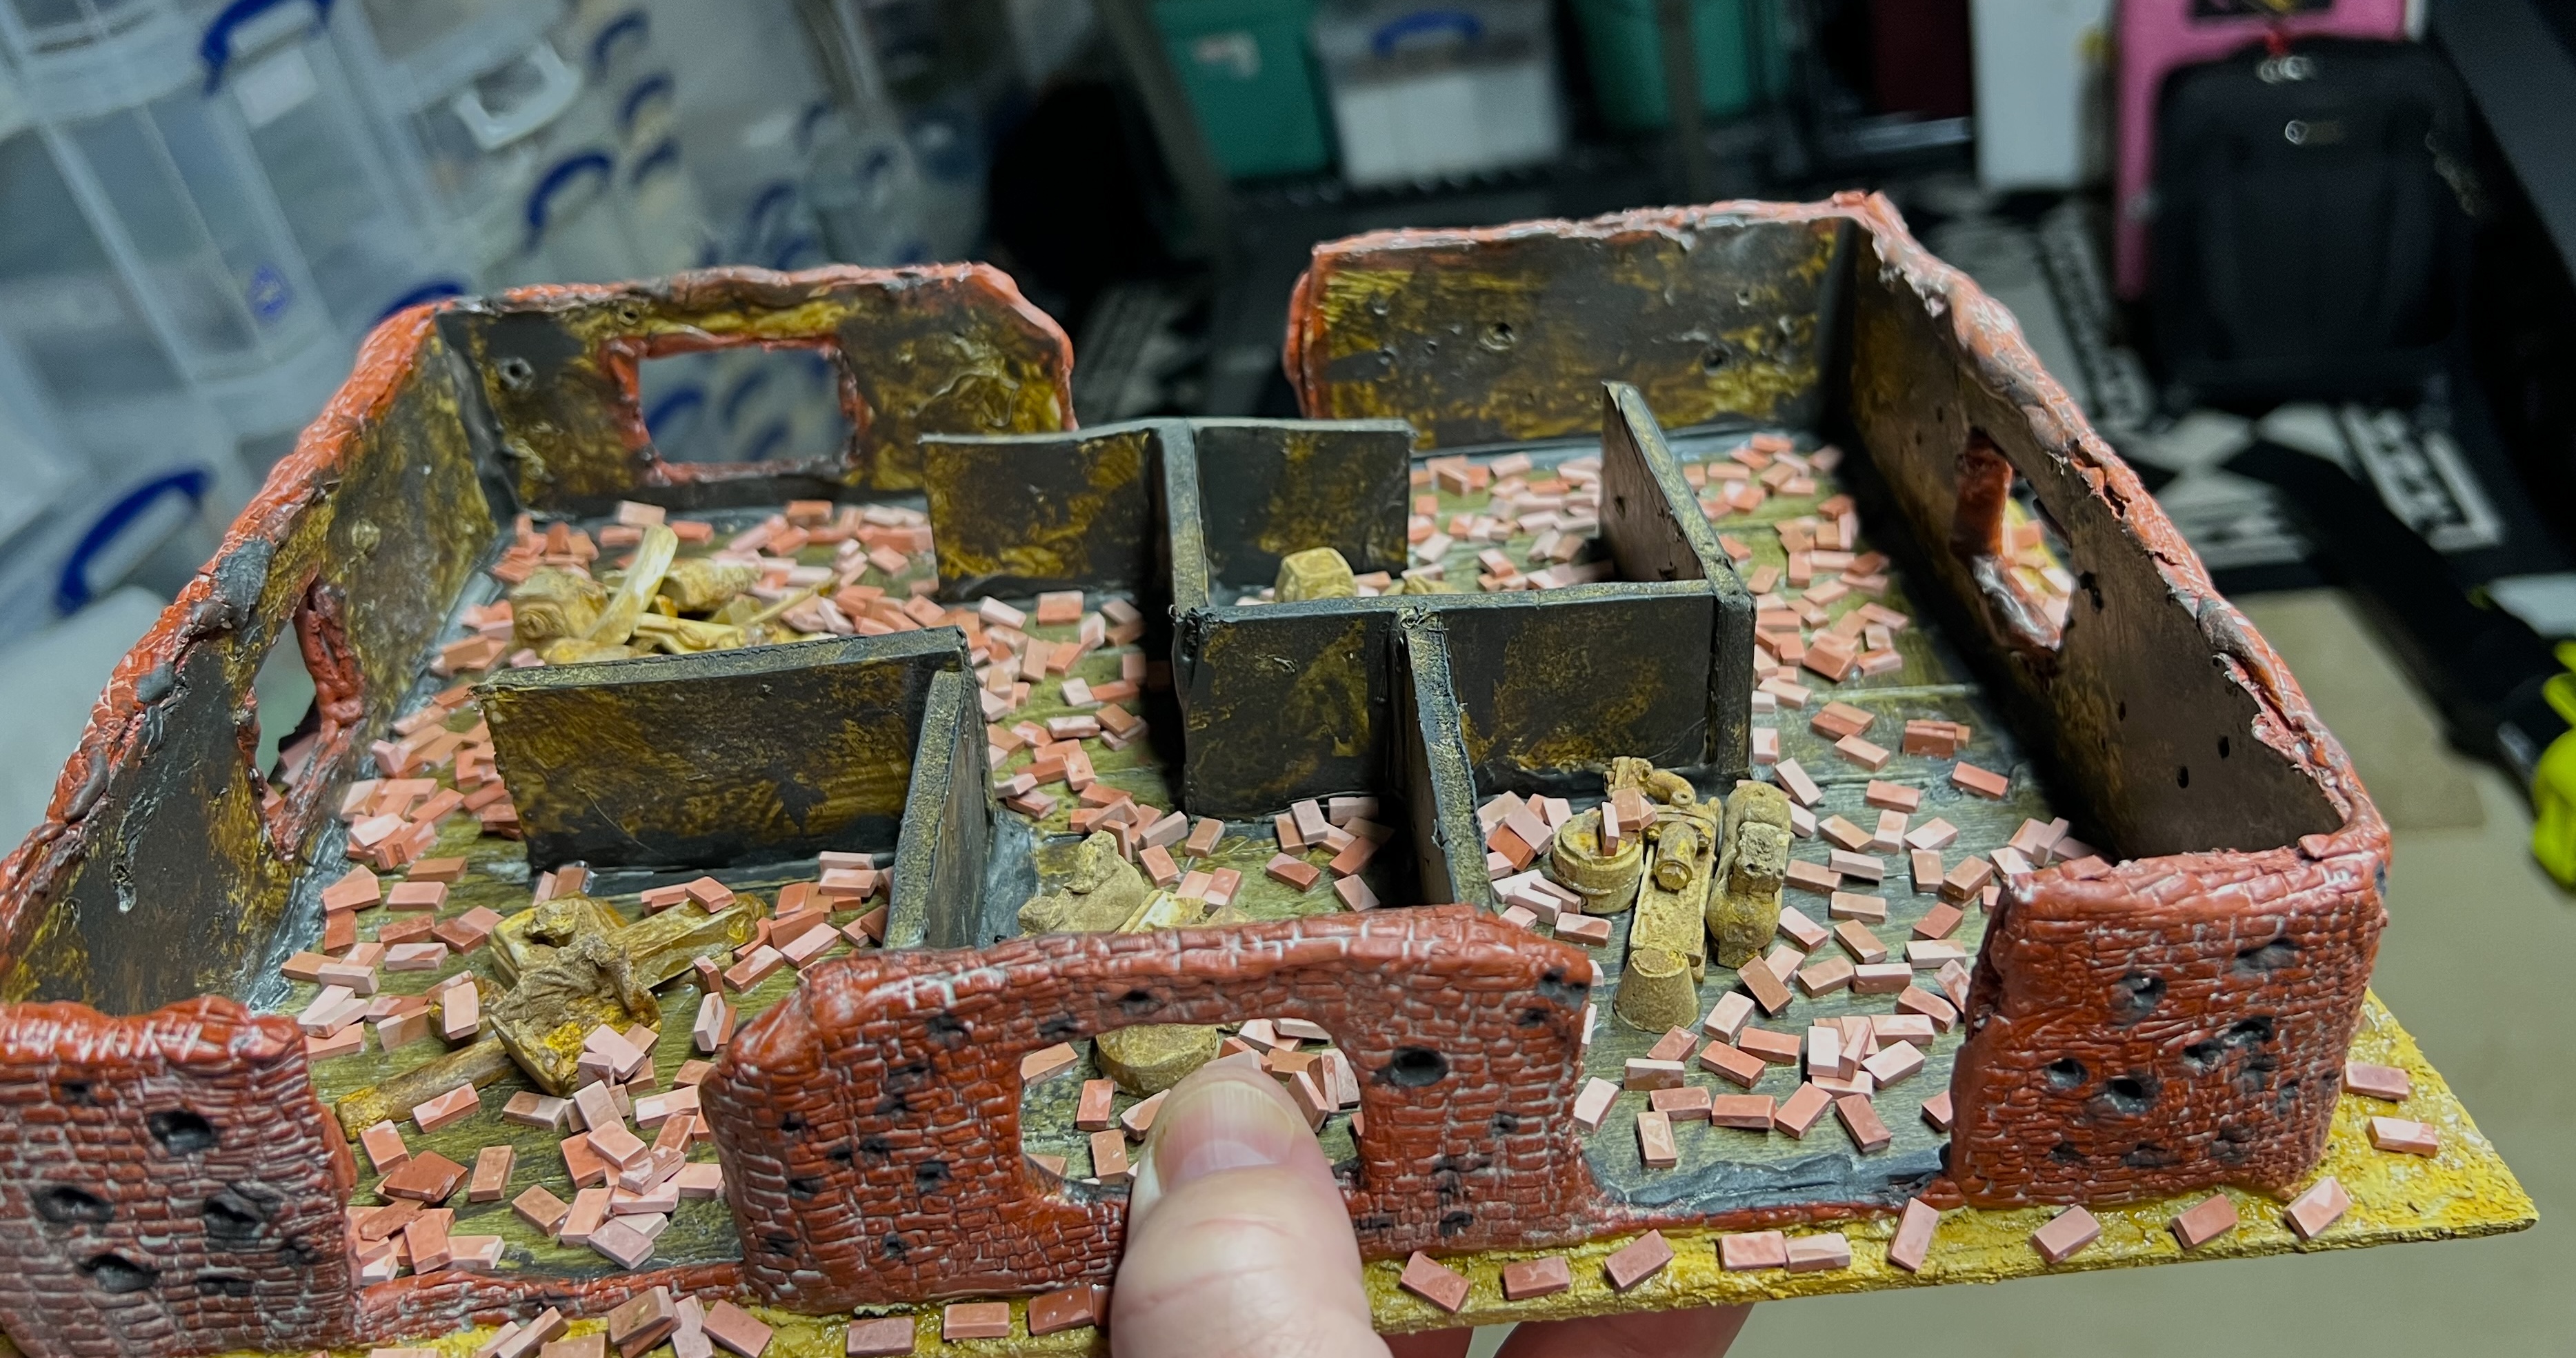
To those ends, I ended up making two ruined factory buildings, two industrial structures, and 61 scatter bases of industrial wreckage. These were all built at the same time. This enabled me to work around issues like drying and curing times as time was short. Oh yeah, and we had a few snow storms here in Massachusetts along the way that ate up some hobby time (not helpful at all).
I wanted to share my project and all its components here with you. As these were simultaneous efforts, you will see multiple project stages here. You may notice that I used a lot of repurposed bits of metal and plastic and Juweela products. The lists will be at the end of this post as is my habit. My concept was to achieve a Stalingrad-like look.
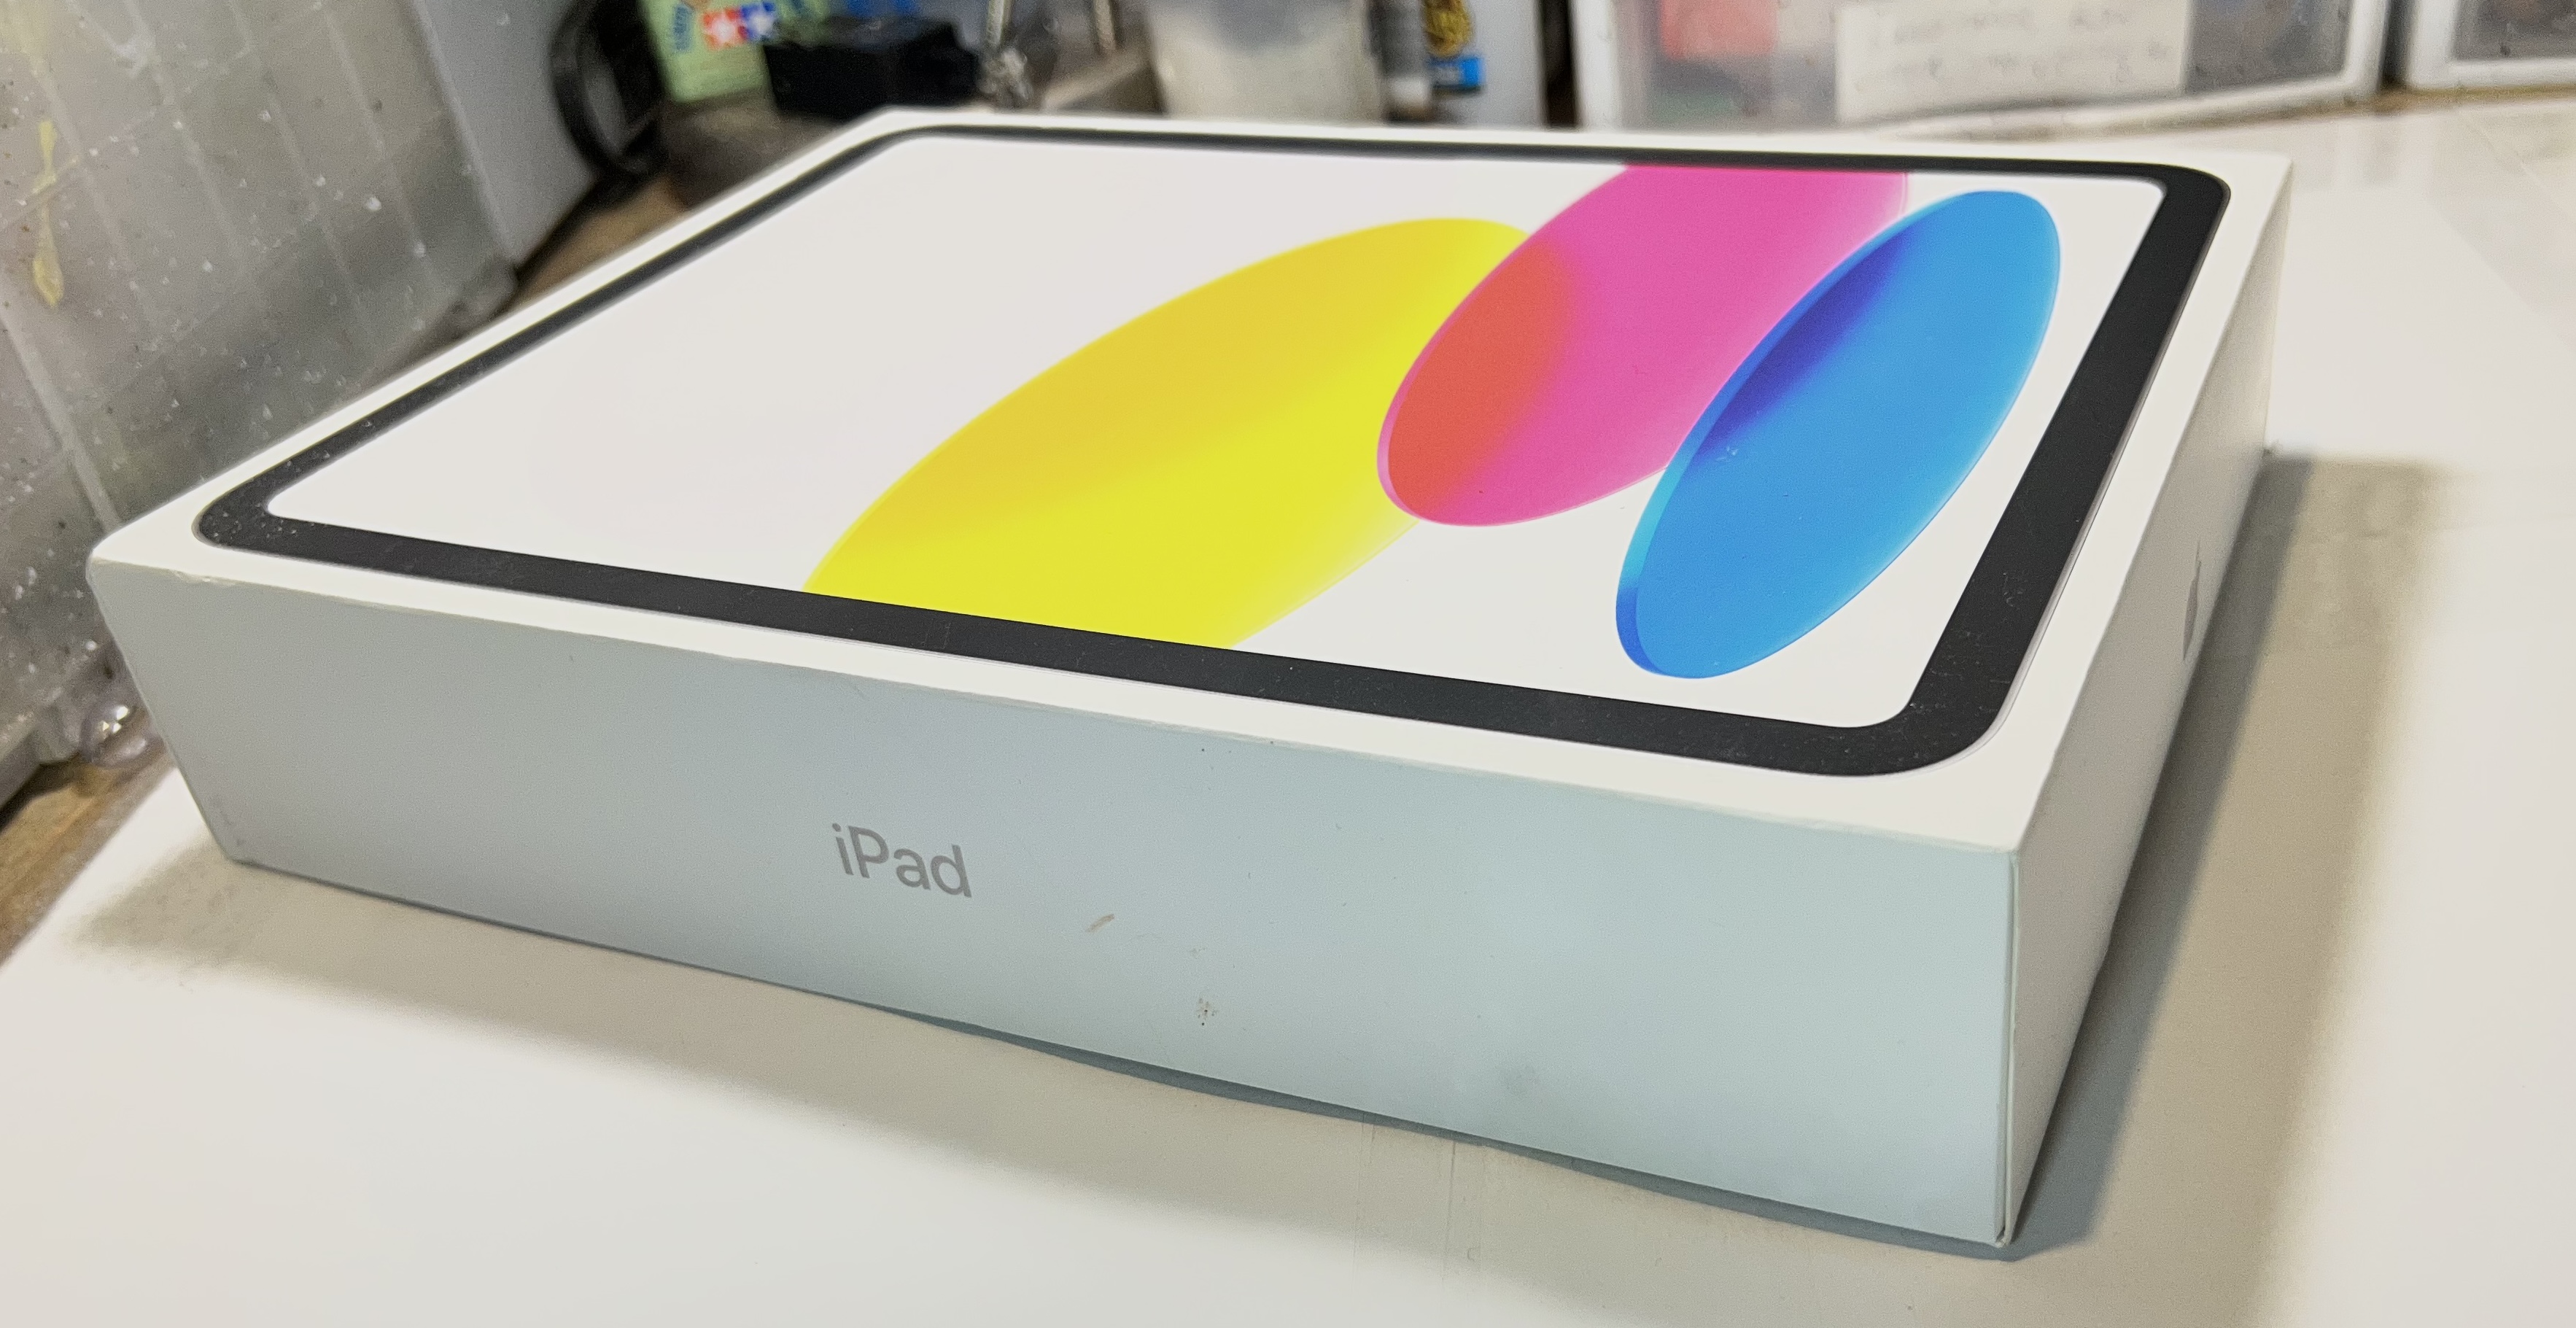
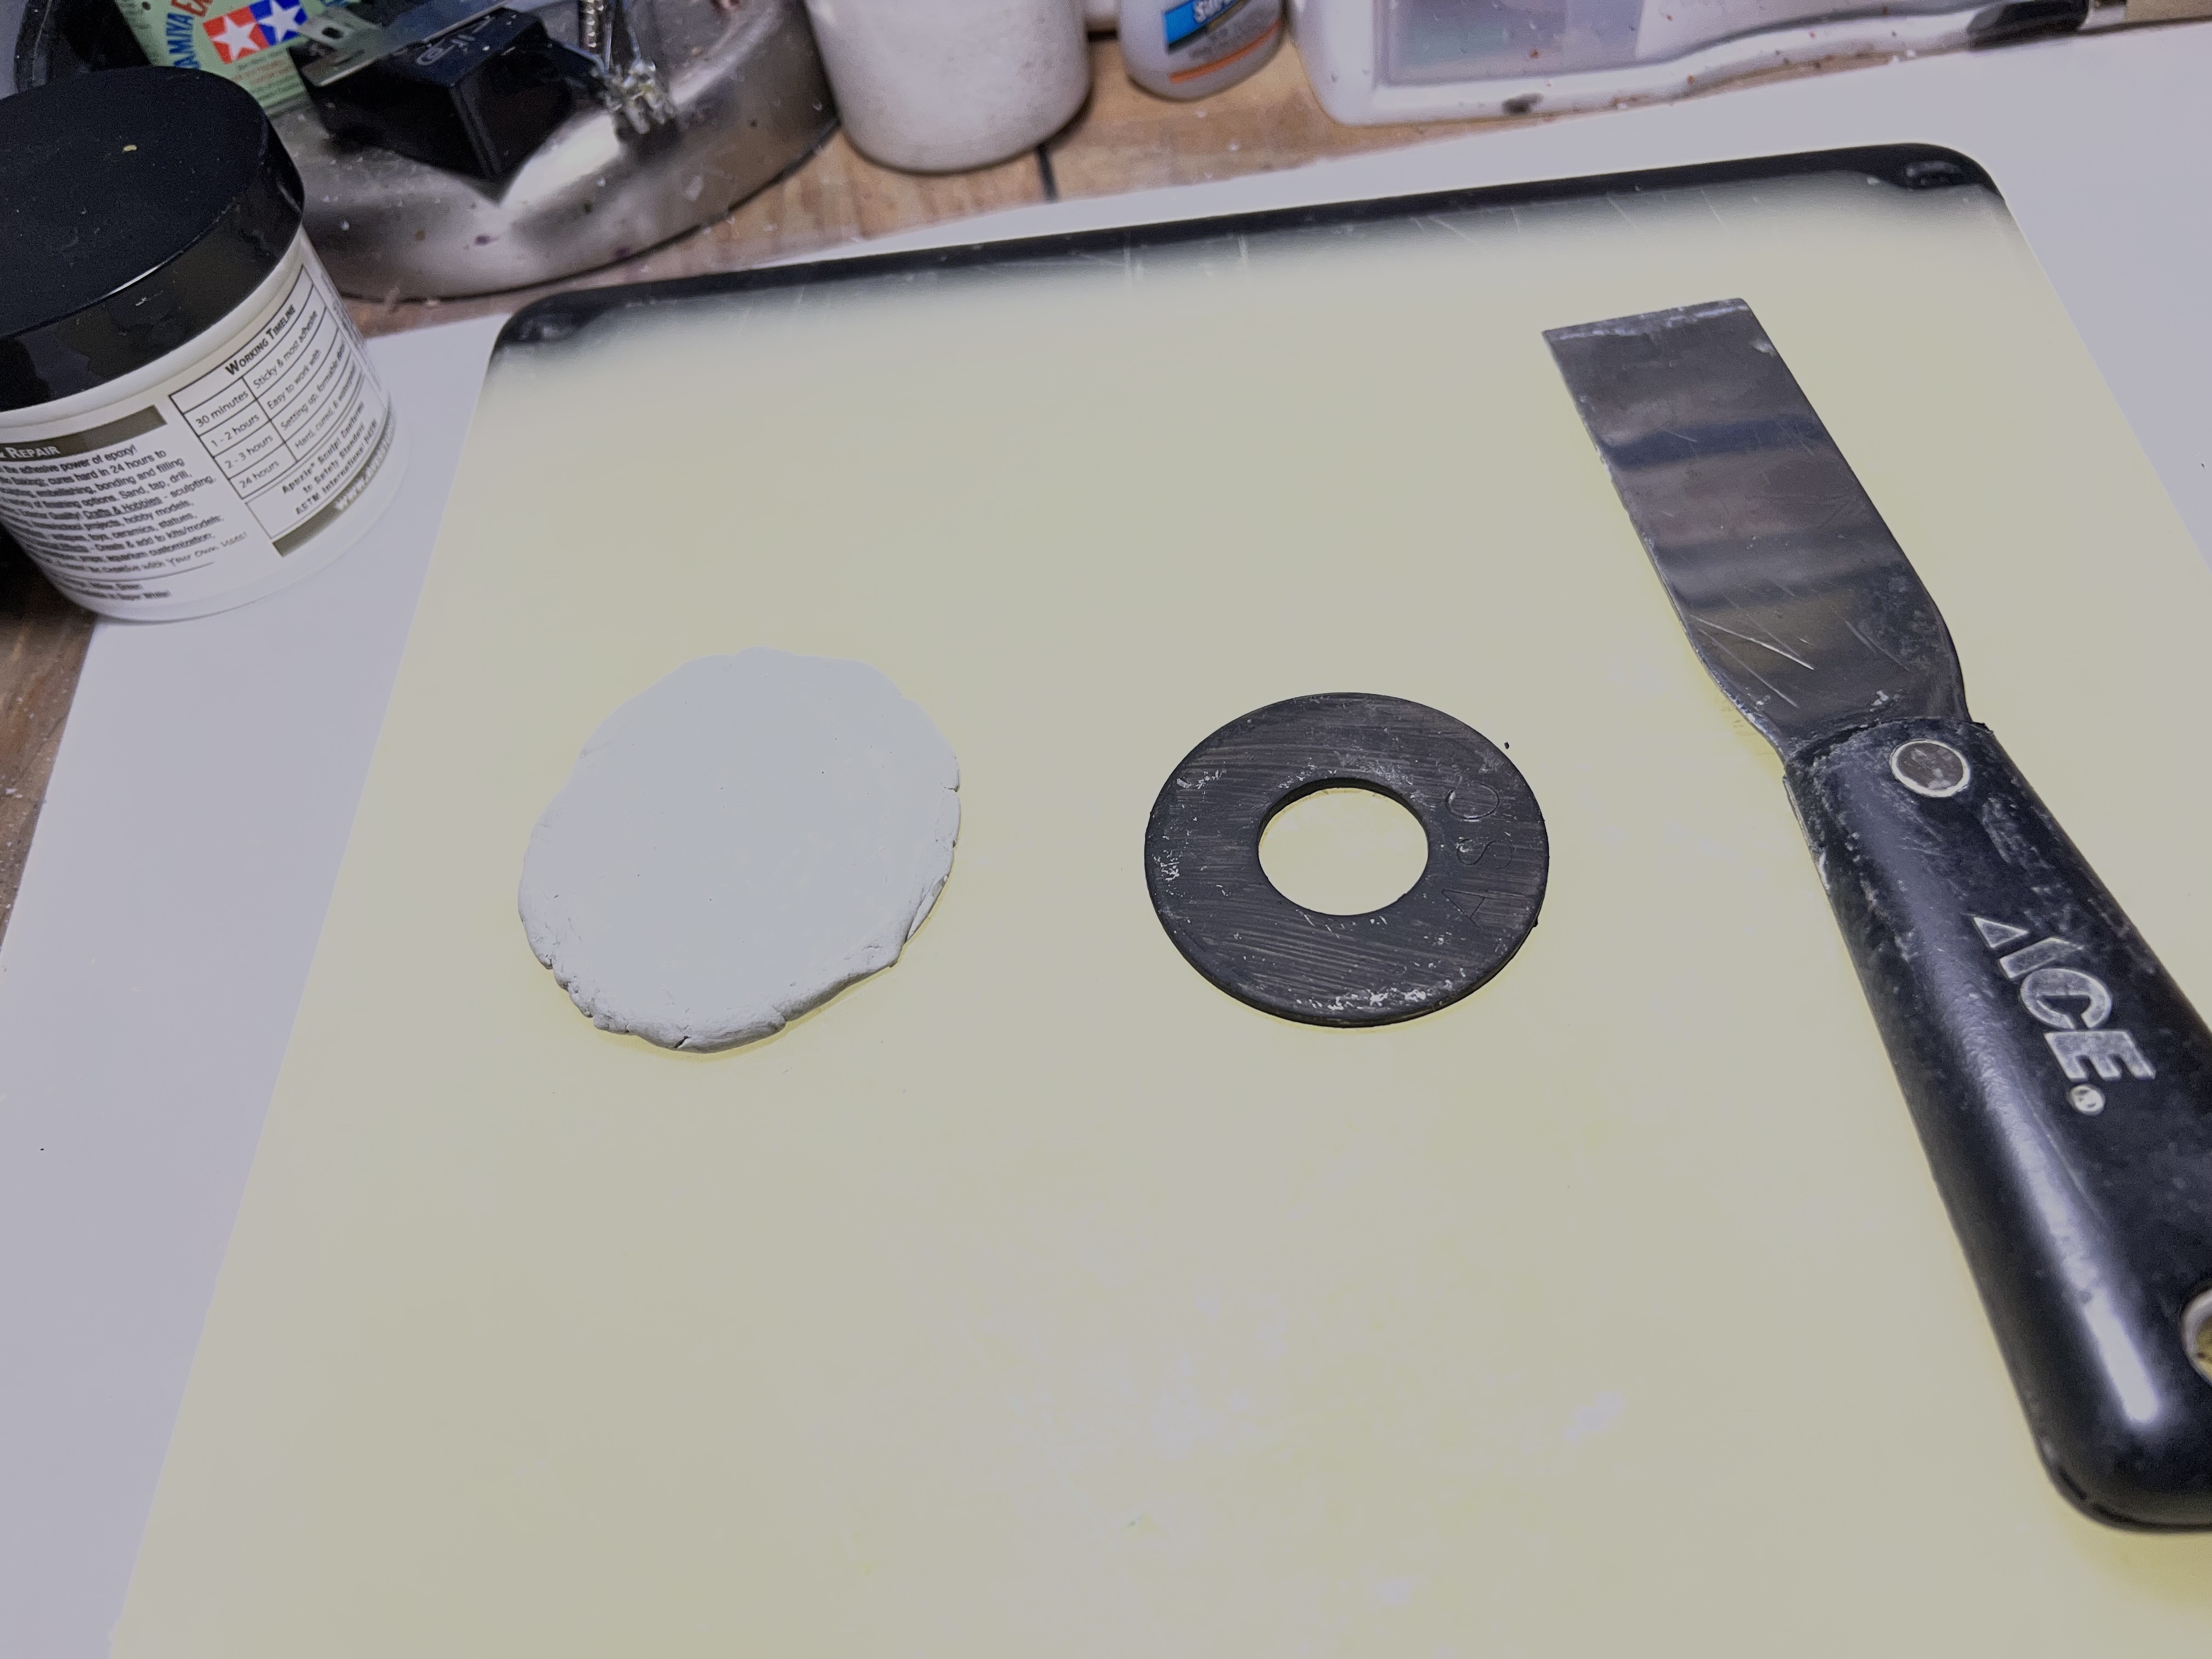
For the two buildings, I converted an iPad 16 box top and bottom. I used Apoxie Sculpt, steel washers, sand, multiple pieces of plastic, desiccant cylinders, and a lot of Juweela items to make the 61 scatter bases. And for two flat industrial structures, I reused two pieces of packing materials to repurpose them as flat rusted structures.
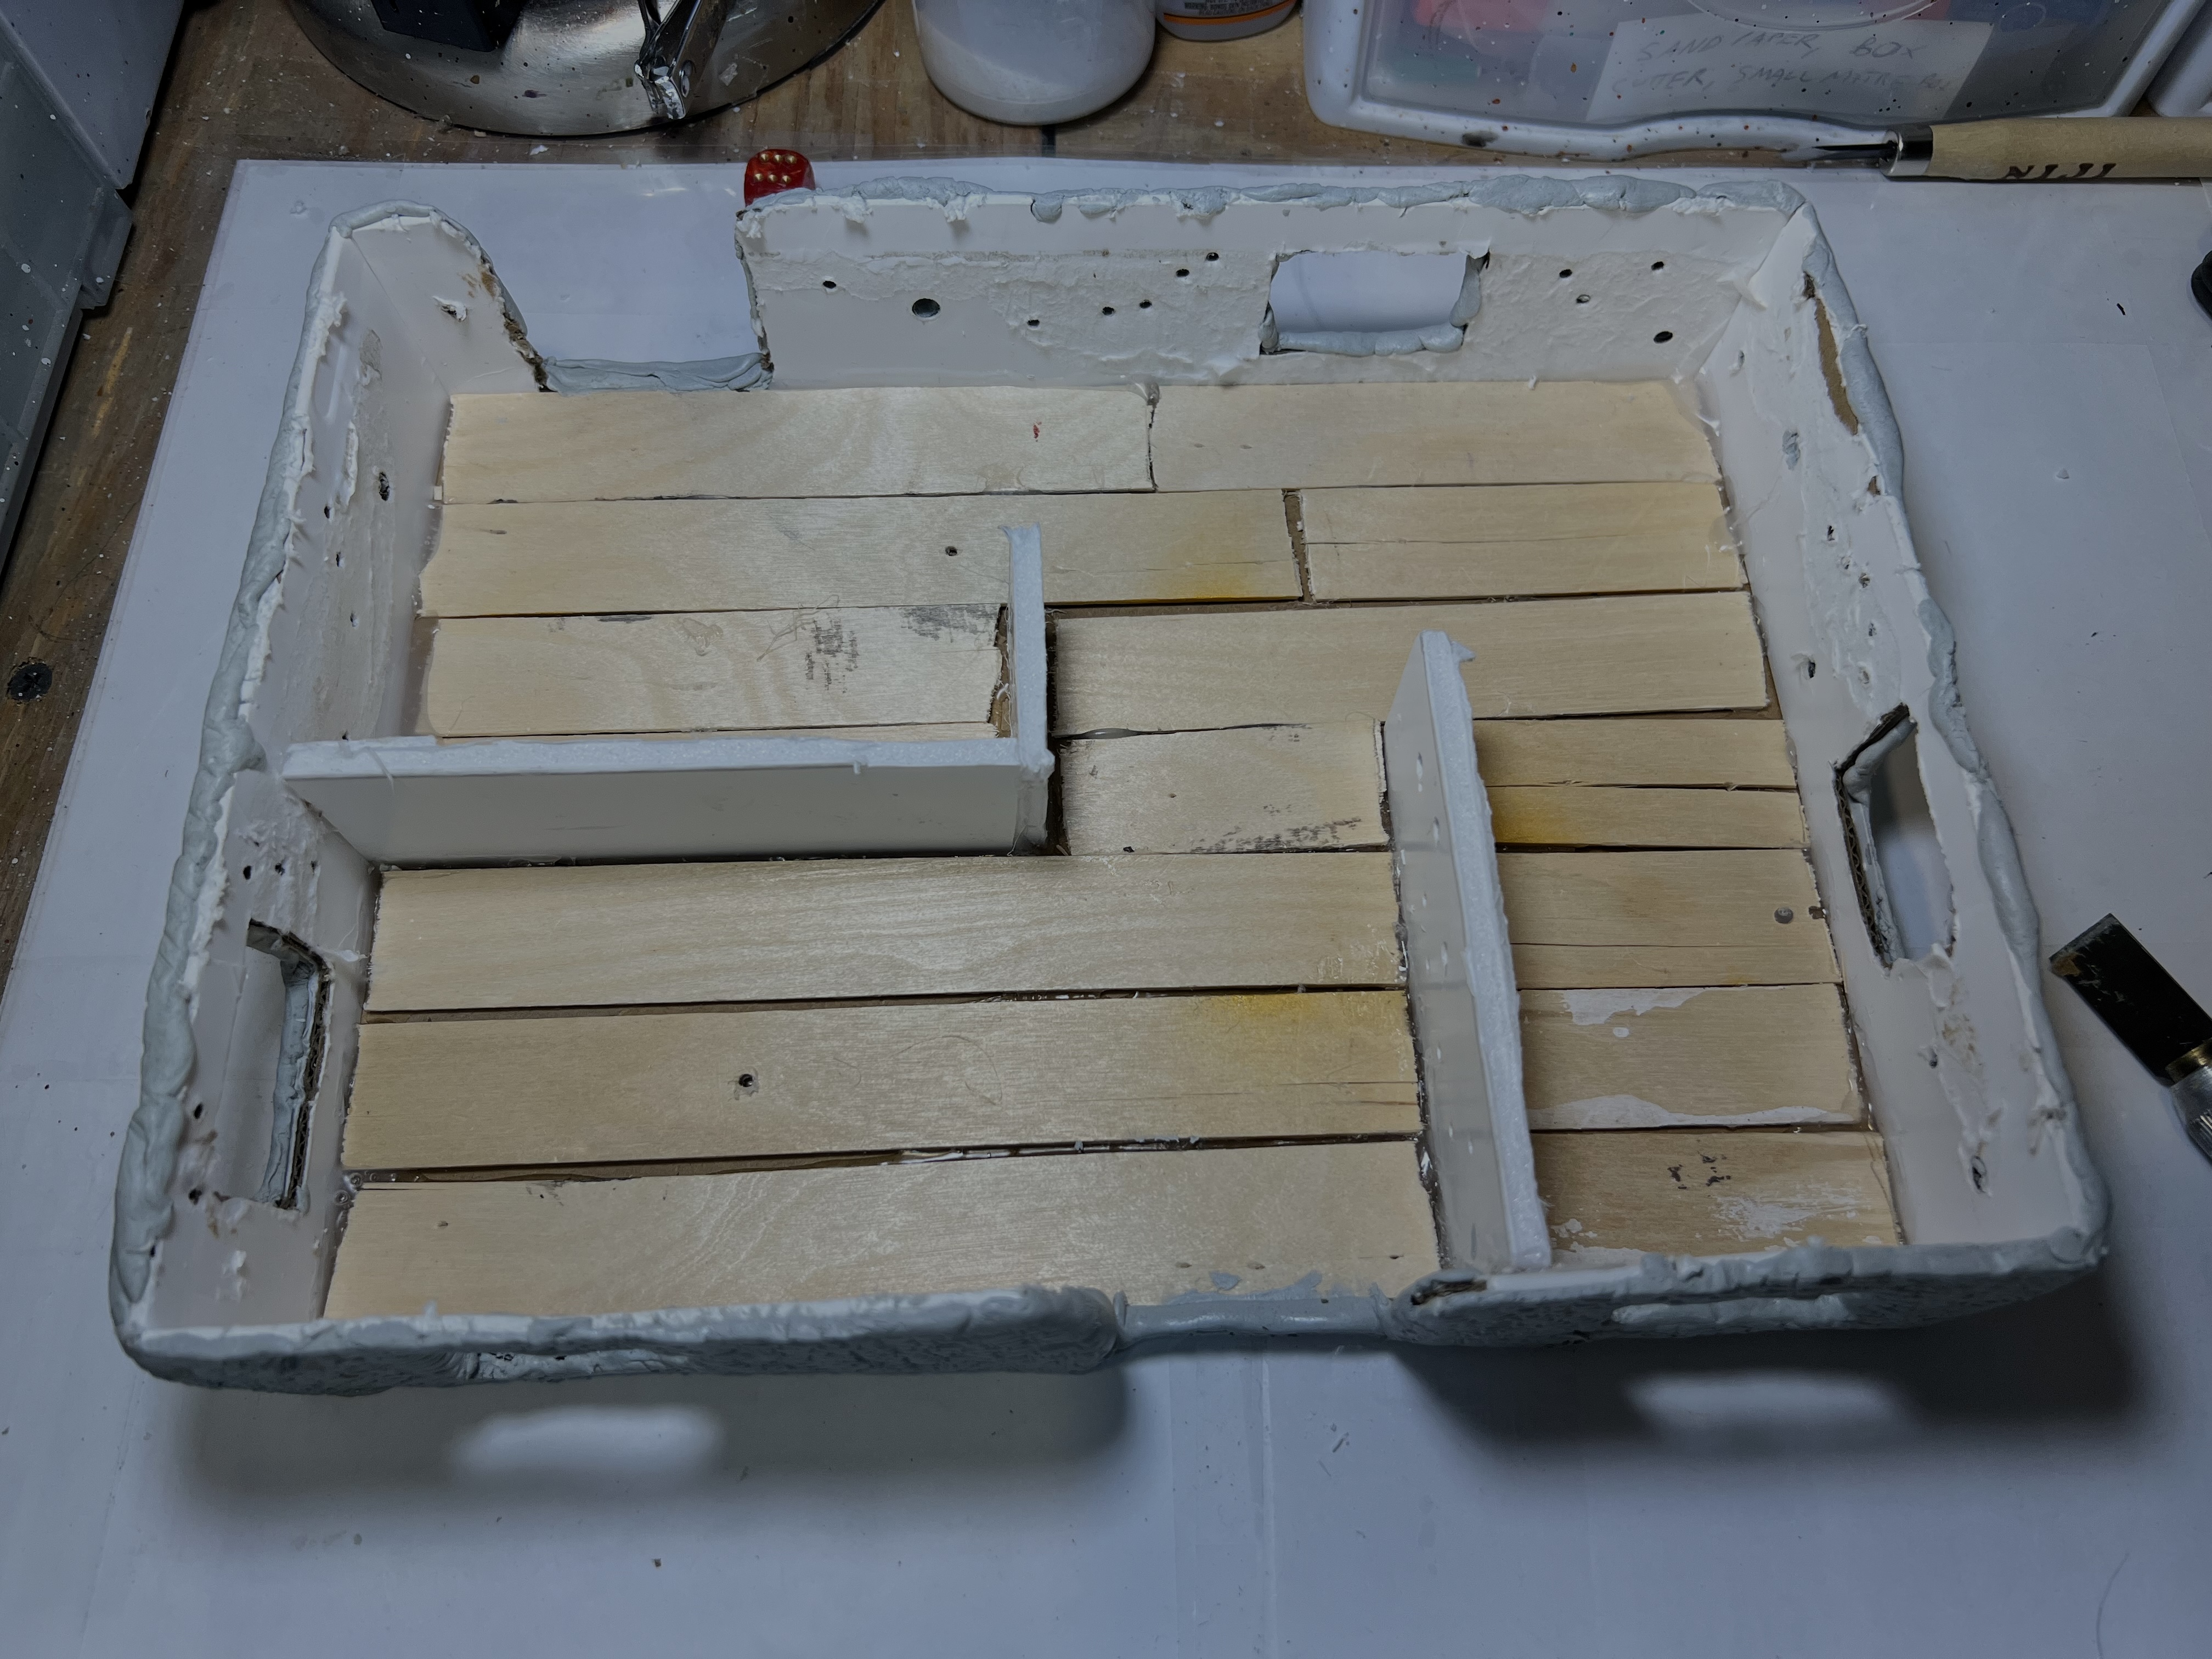
I started out with this iPad 16 box. I would use the top and bottom of this. It is plastic and cardboard.
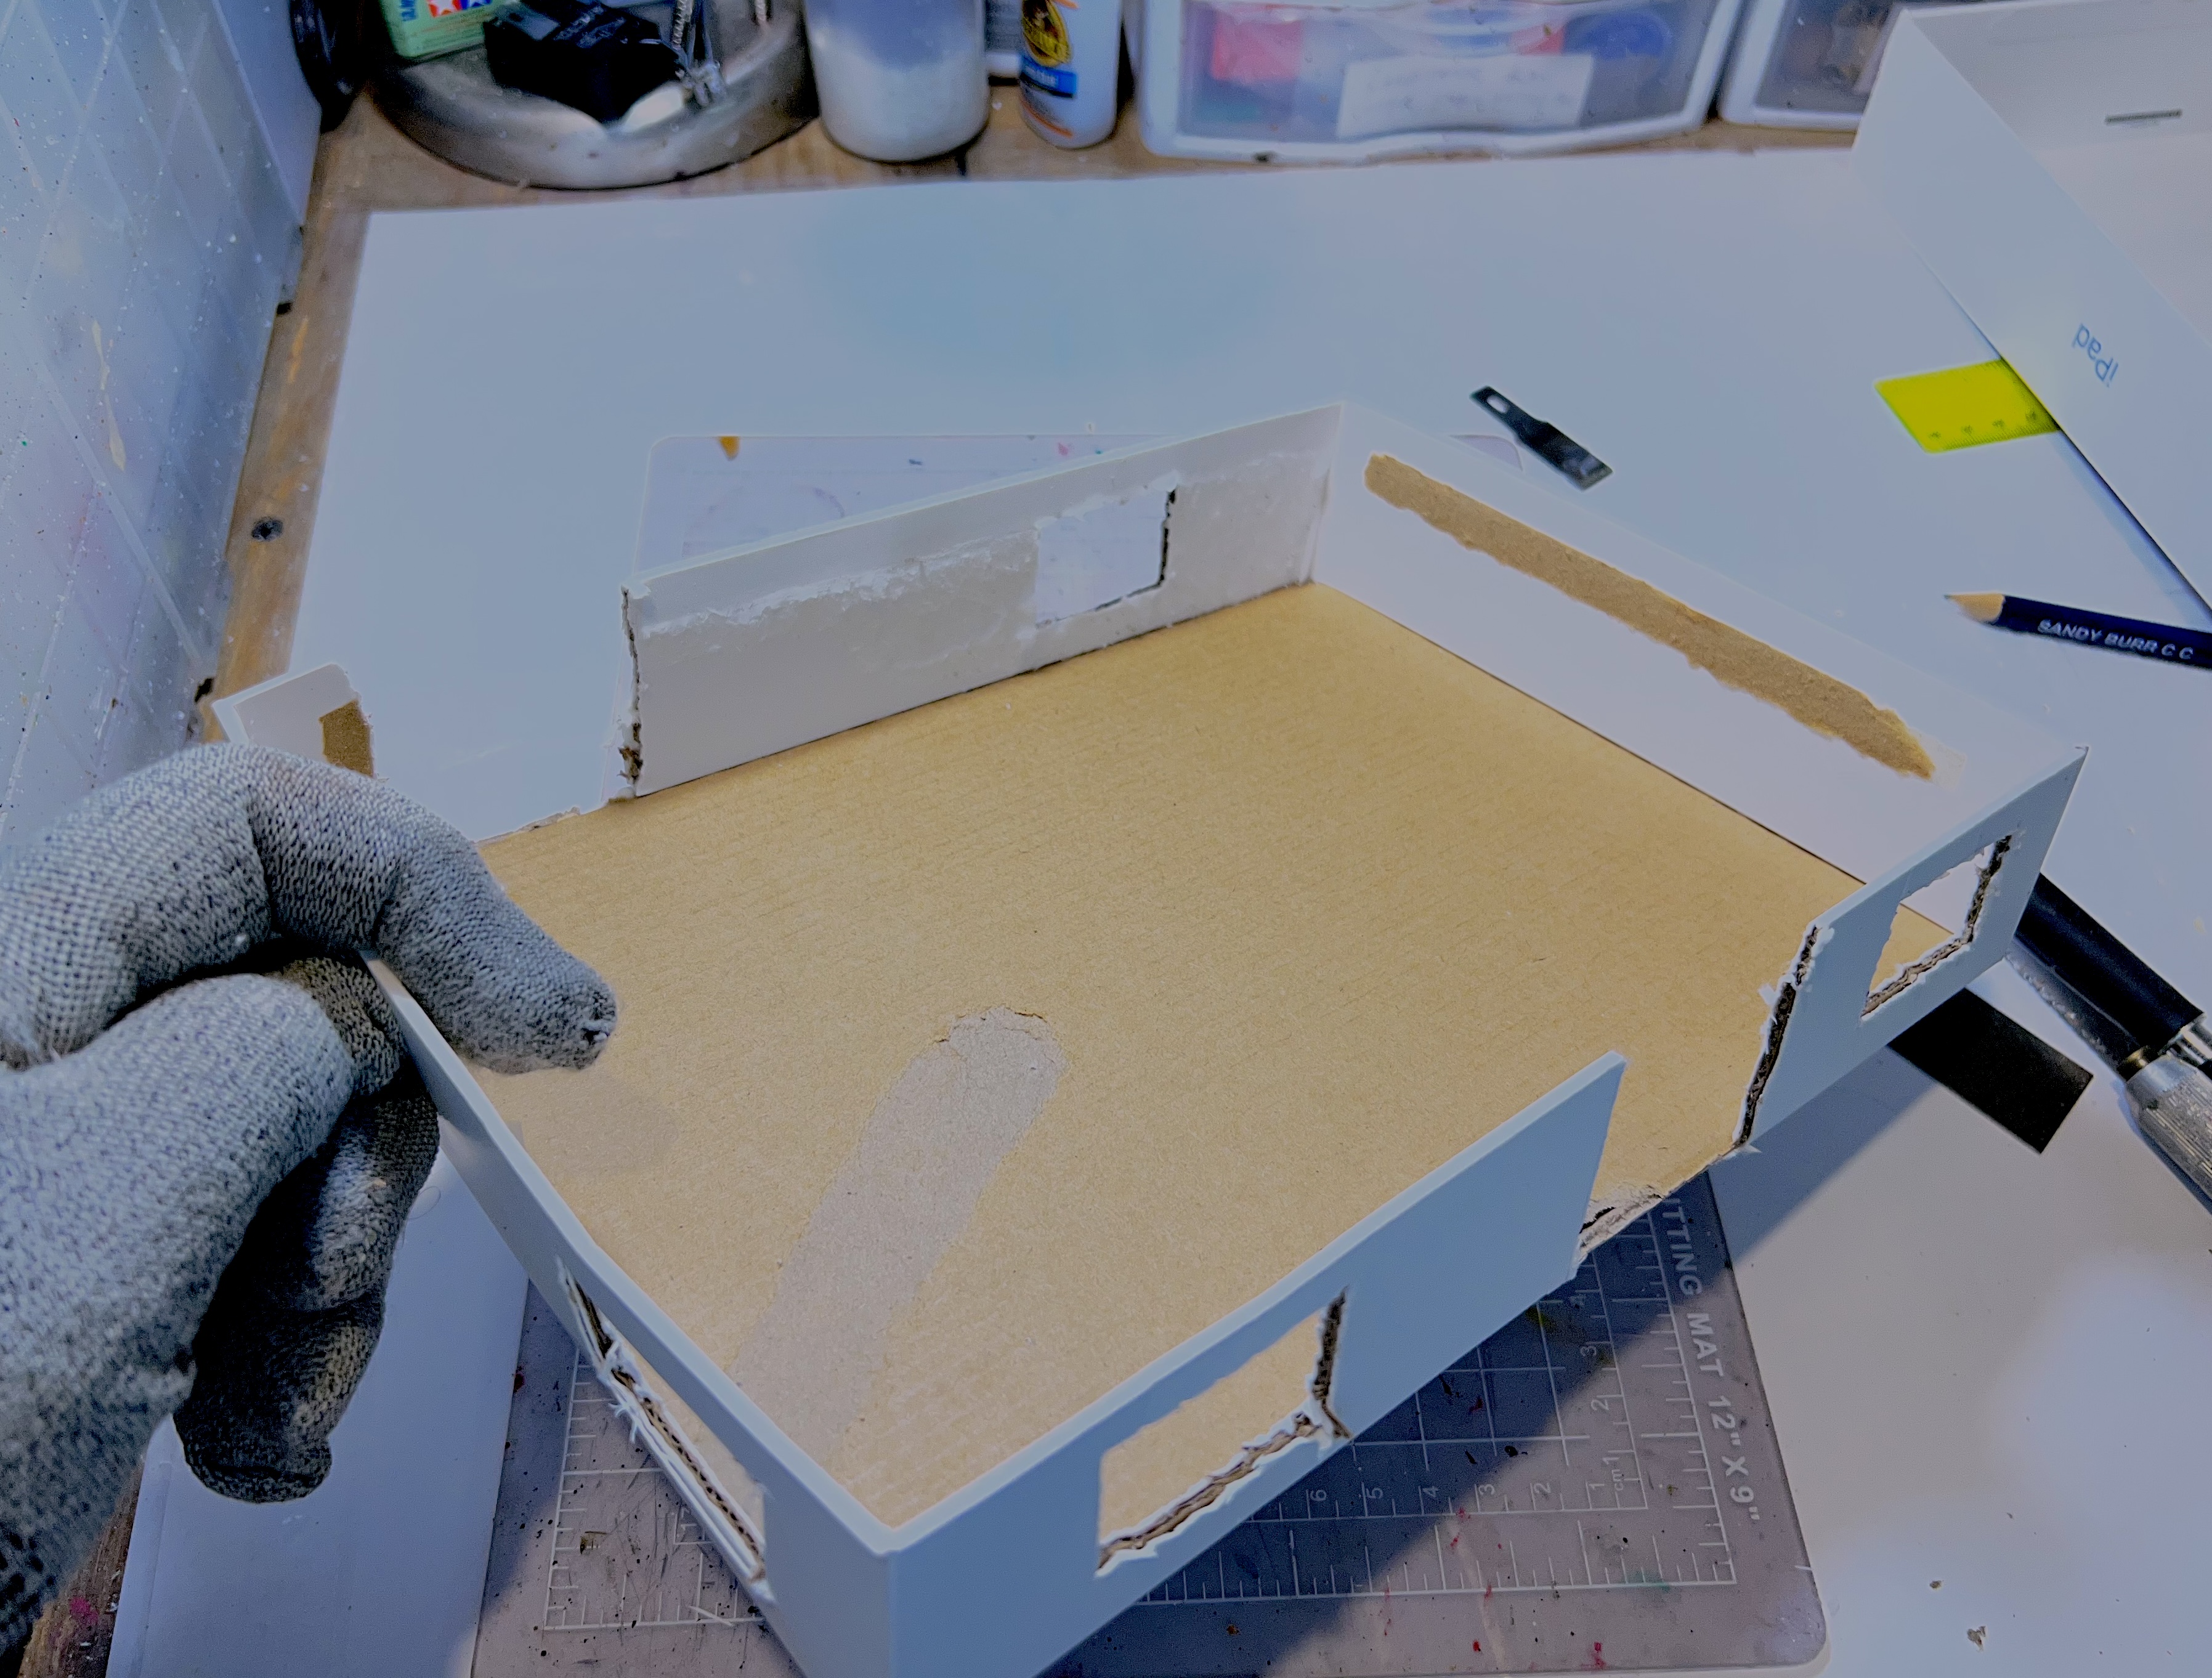
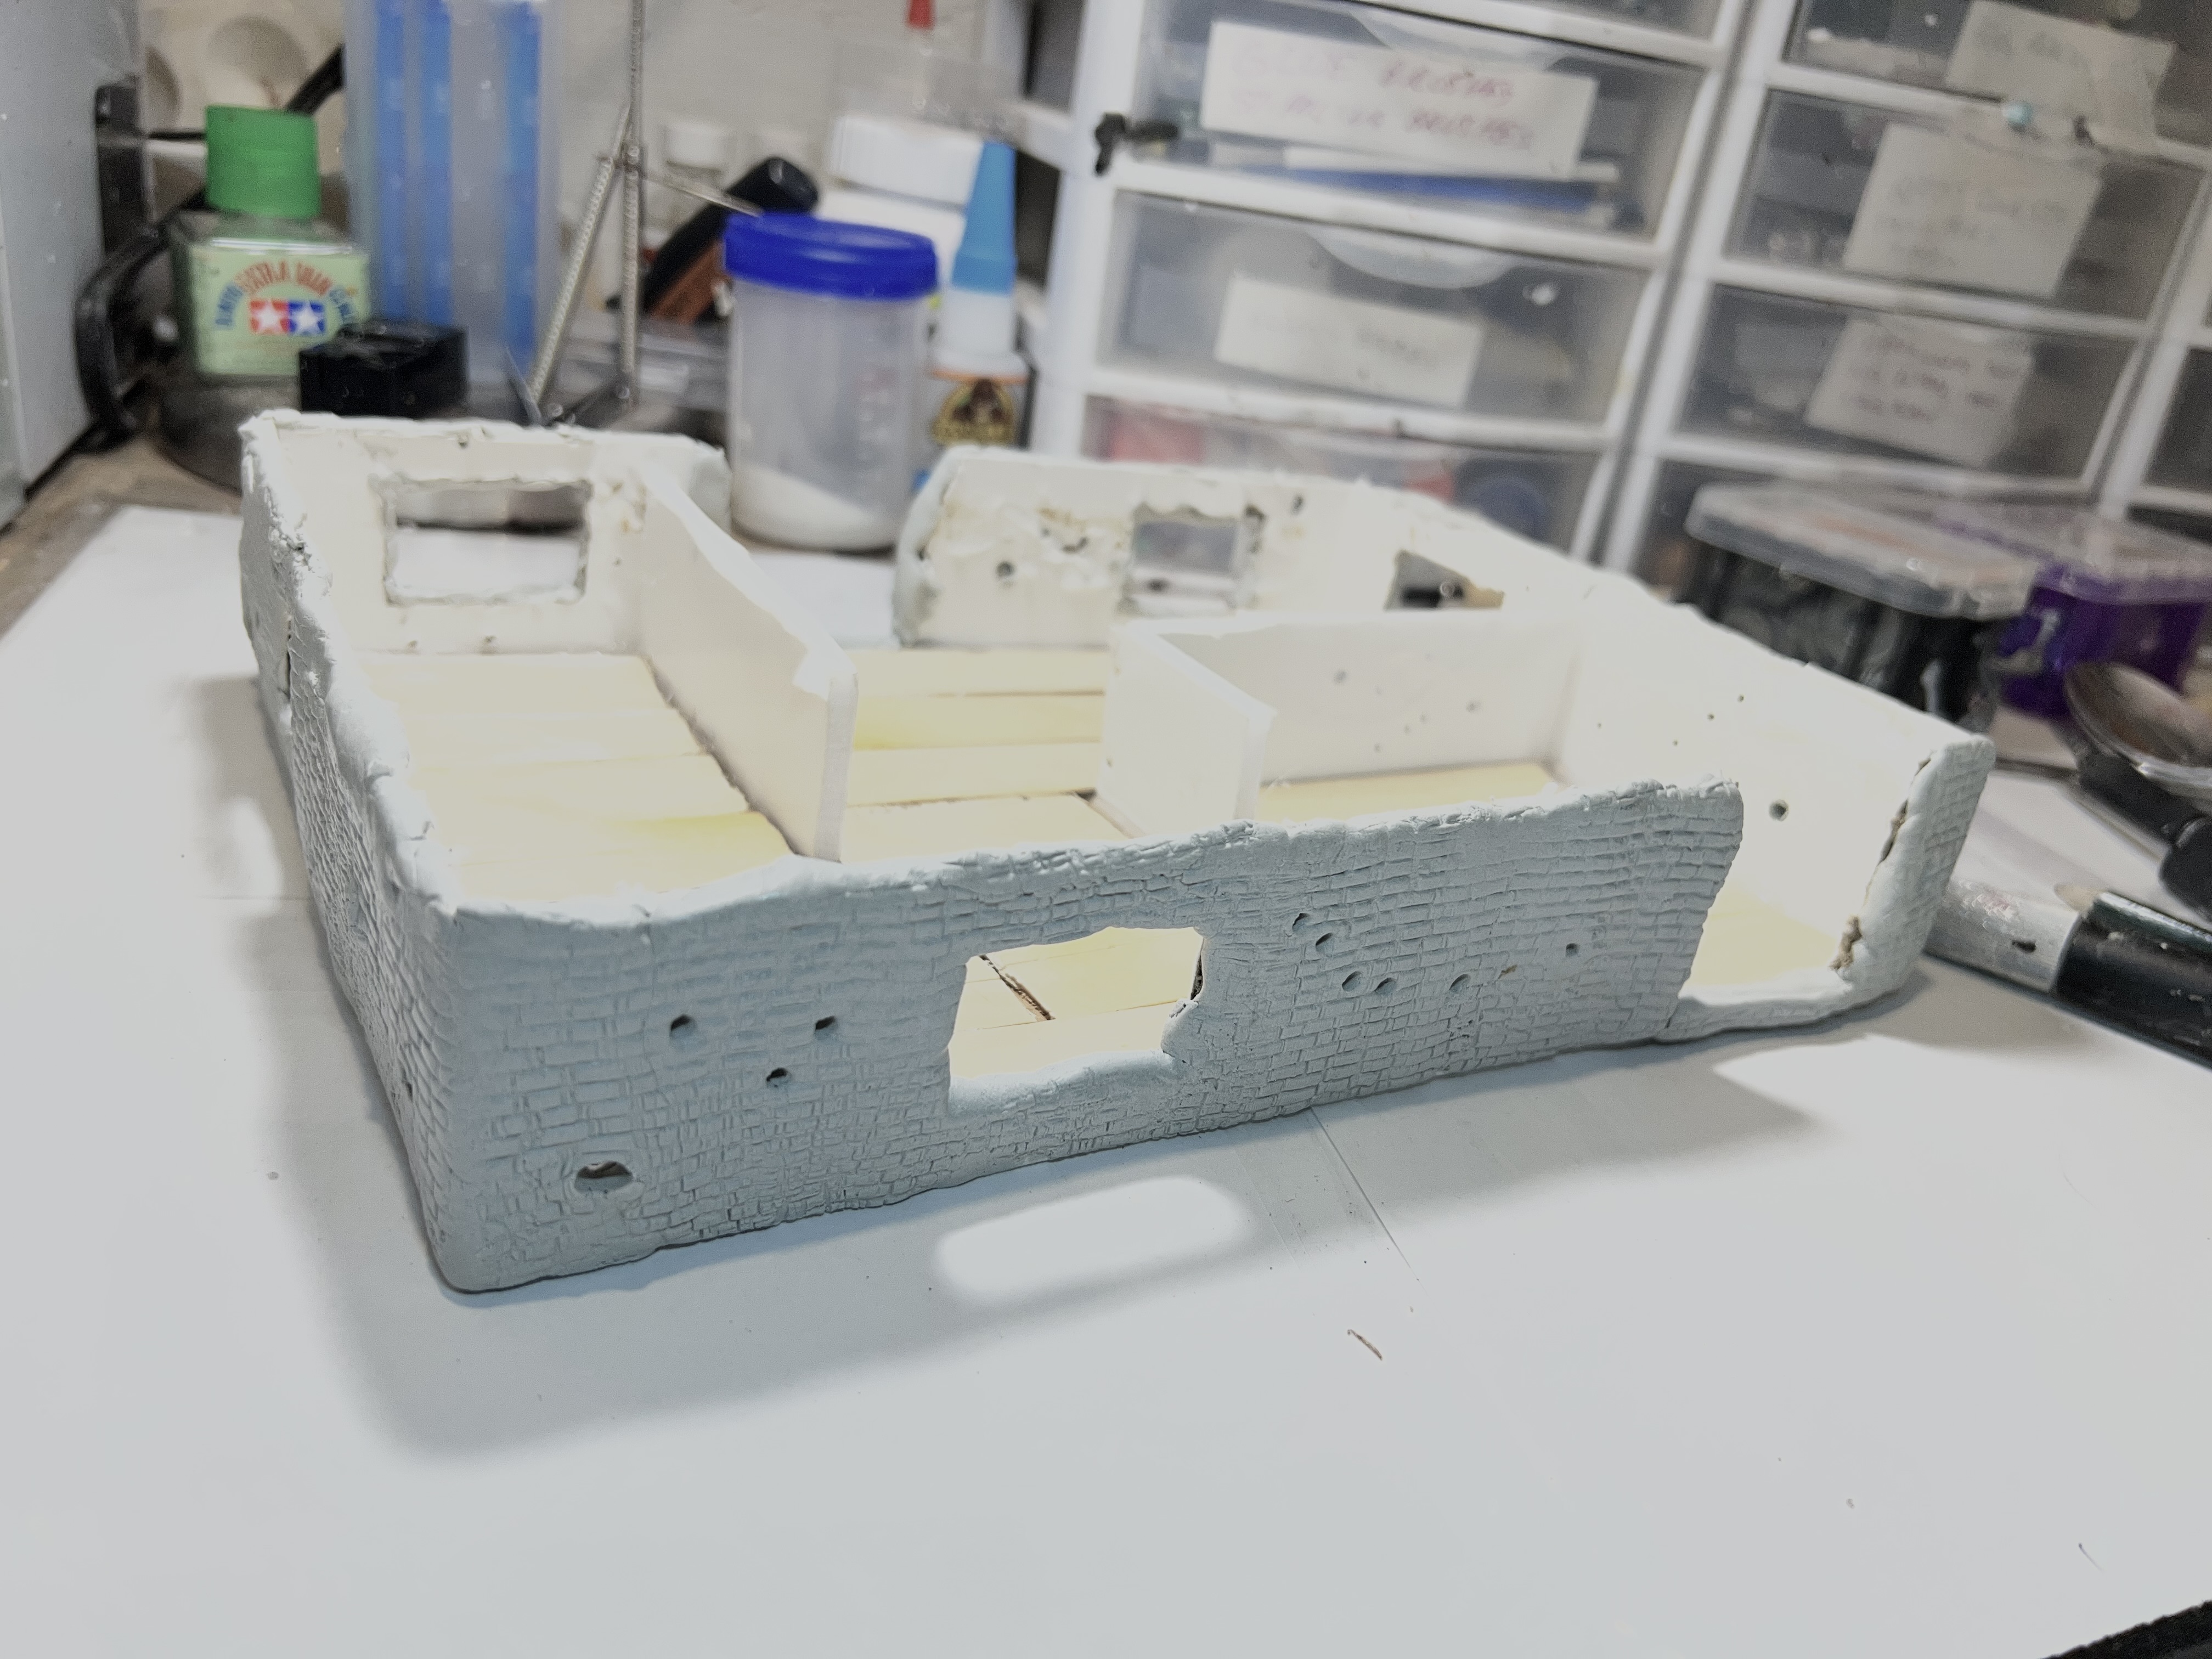
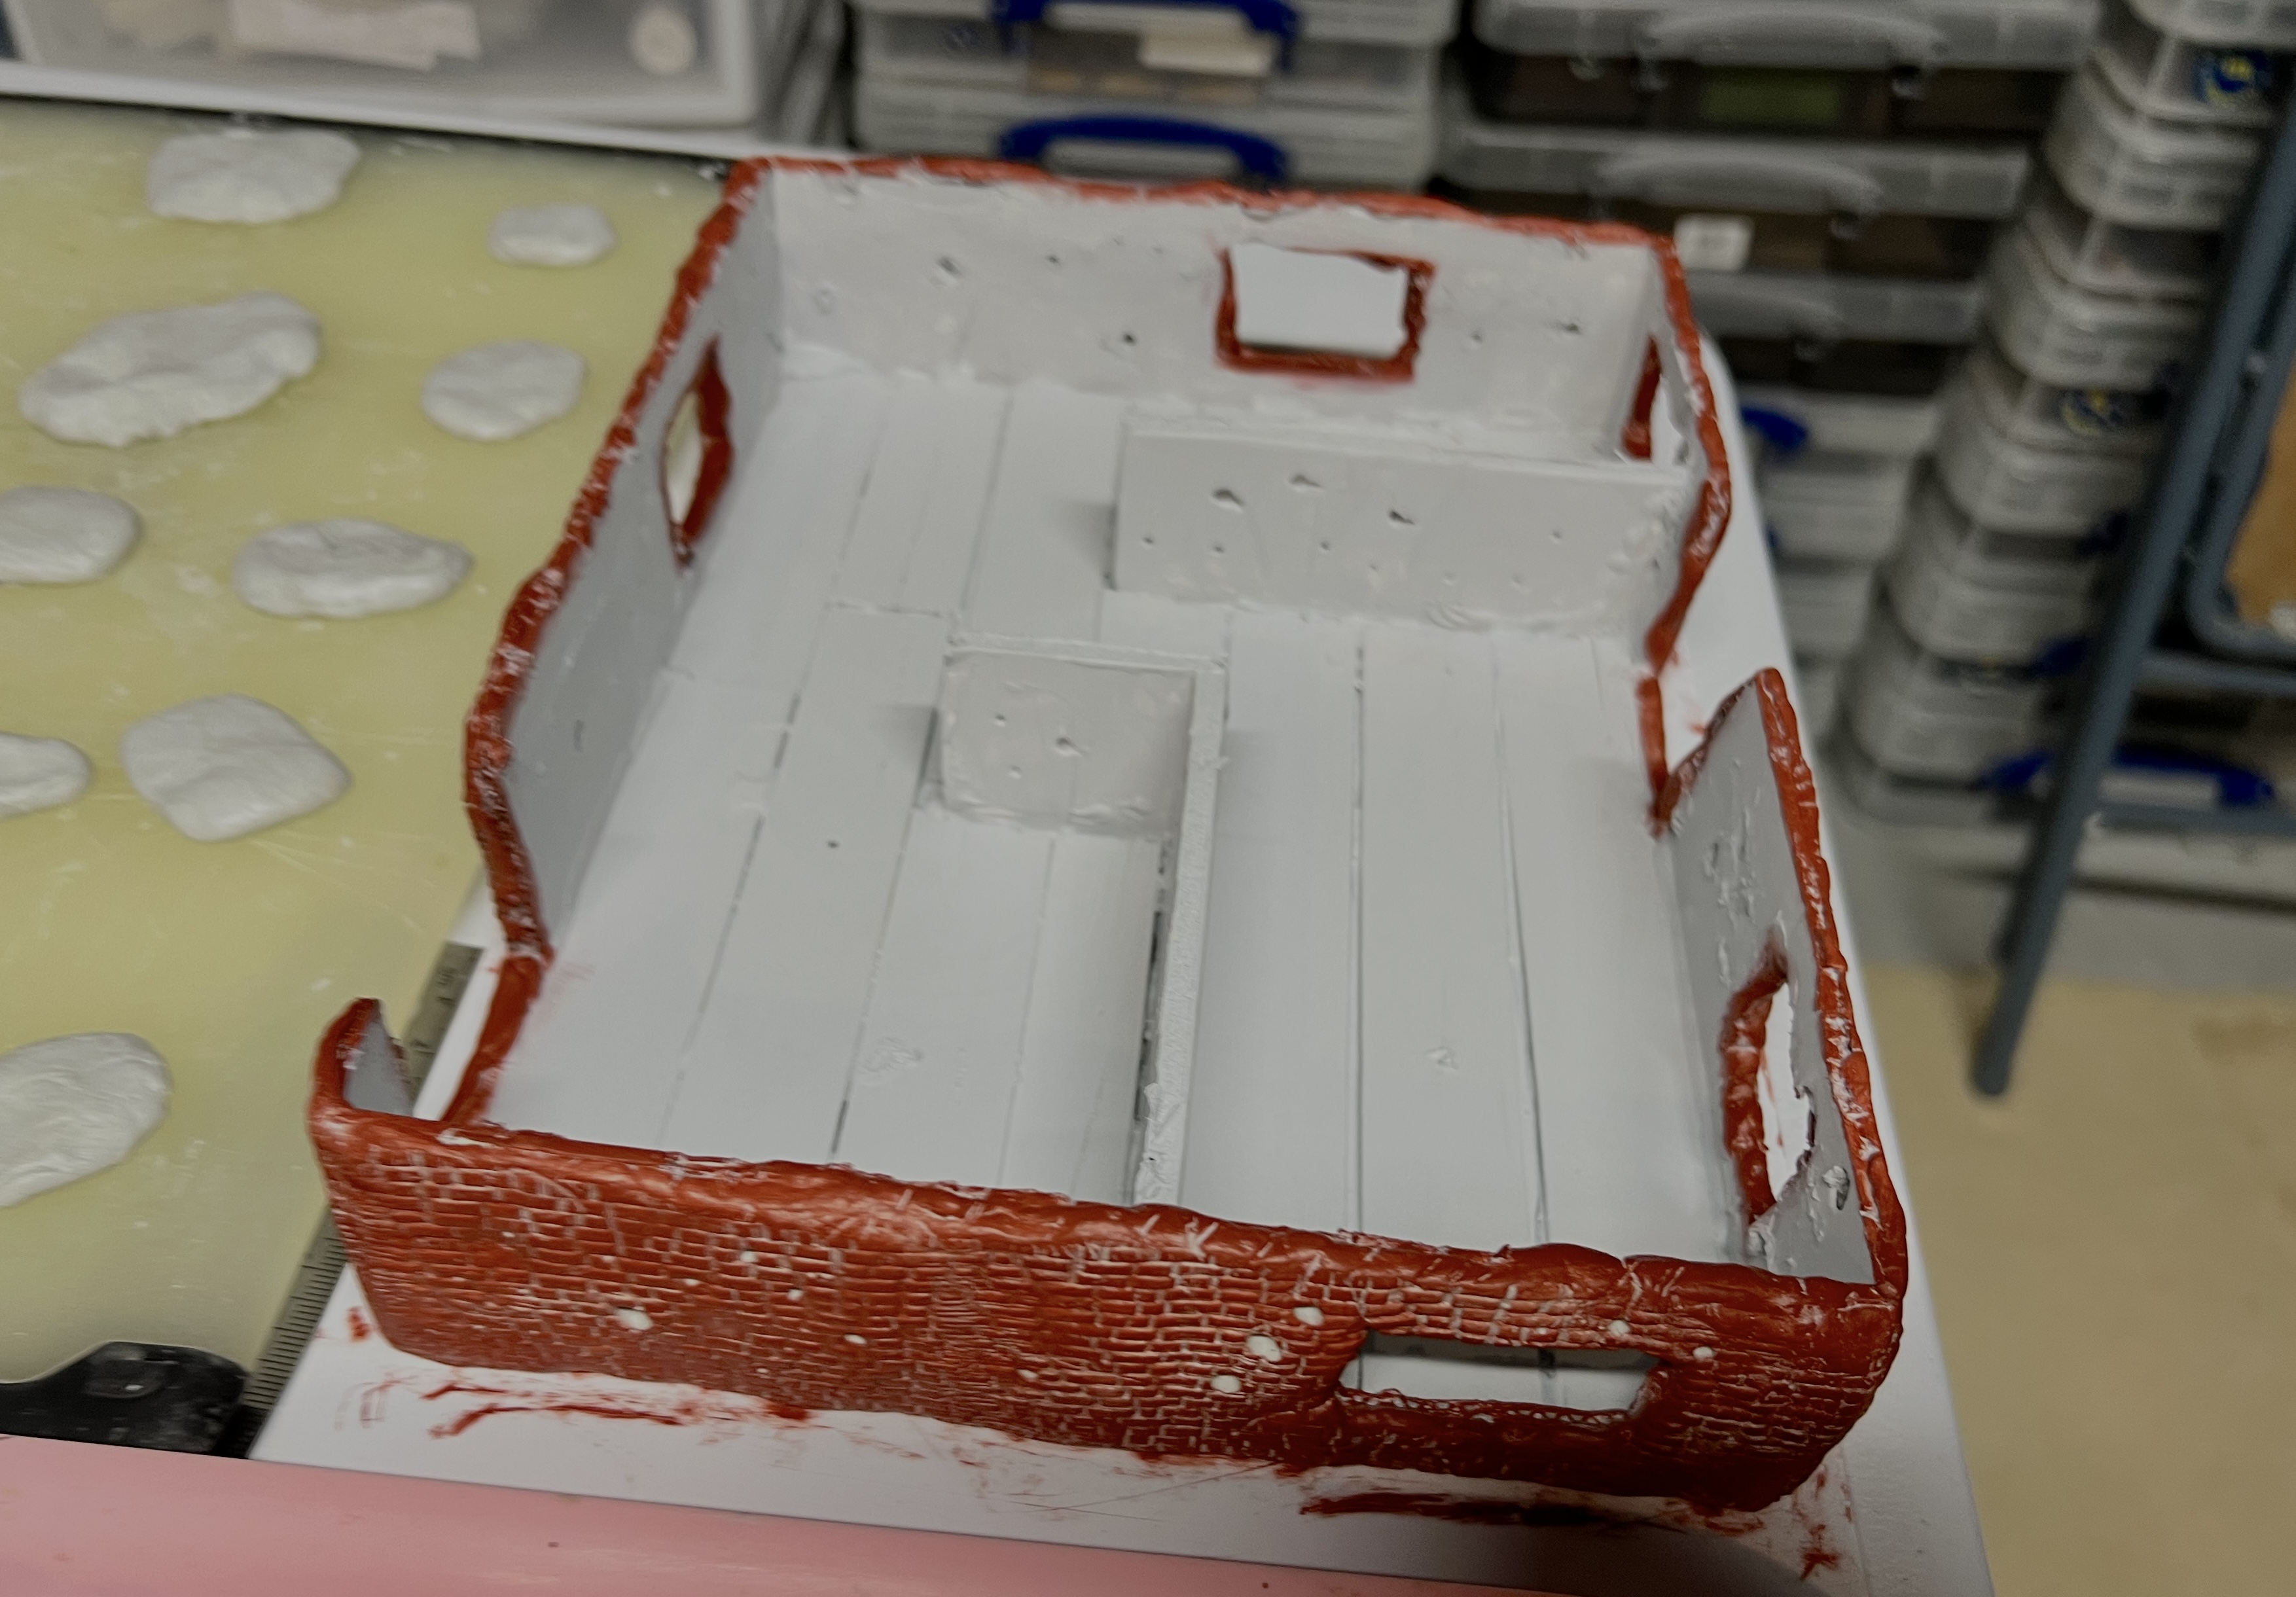
I sawed out windows and doors on both box pieces and made each a bit differently in terms of architectural arrangement. I then hot-glued foam board to make rooms. For flooring, I broke up old popsicle sticks. These I had used previously to mount figures for painting on other projects. Lastly, I drilled out holes in the walls to simulate old bullet holes.
Cutting out the windows and doors on the first building.Adding the walls, bullet holes, and flooring.
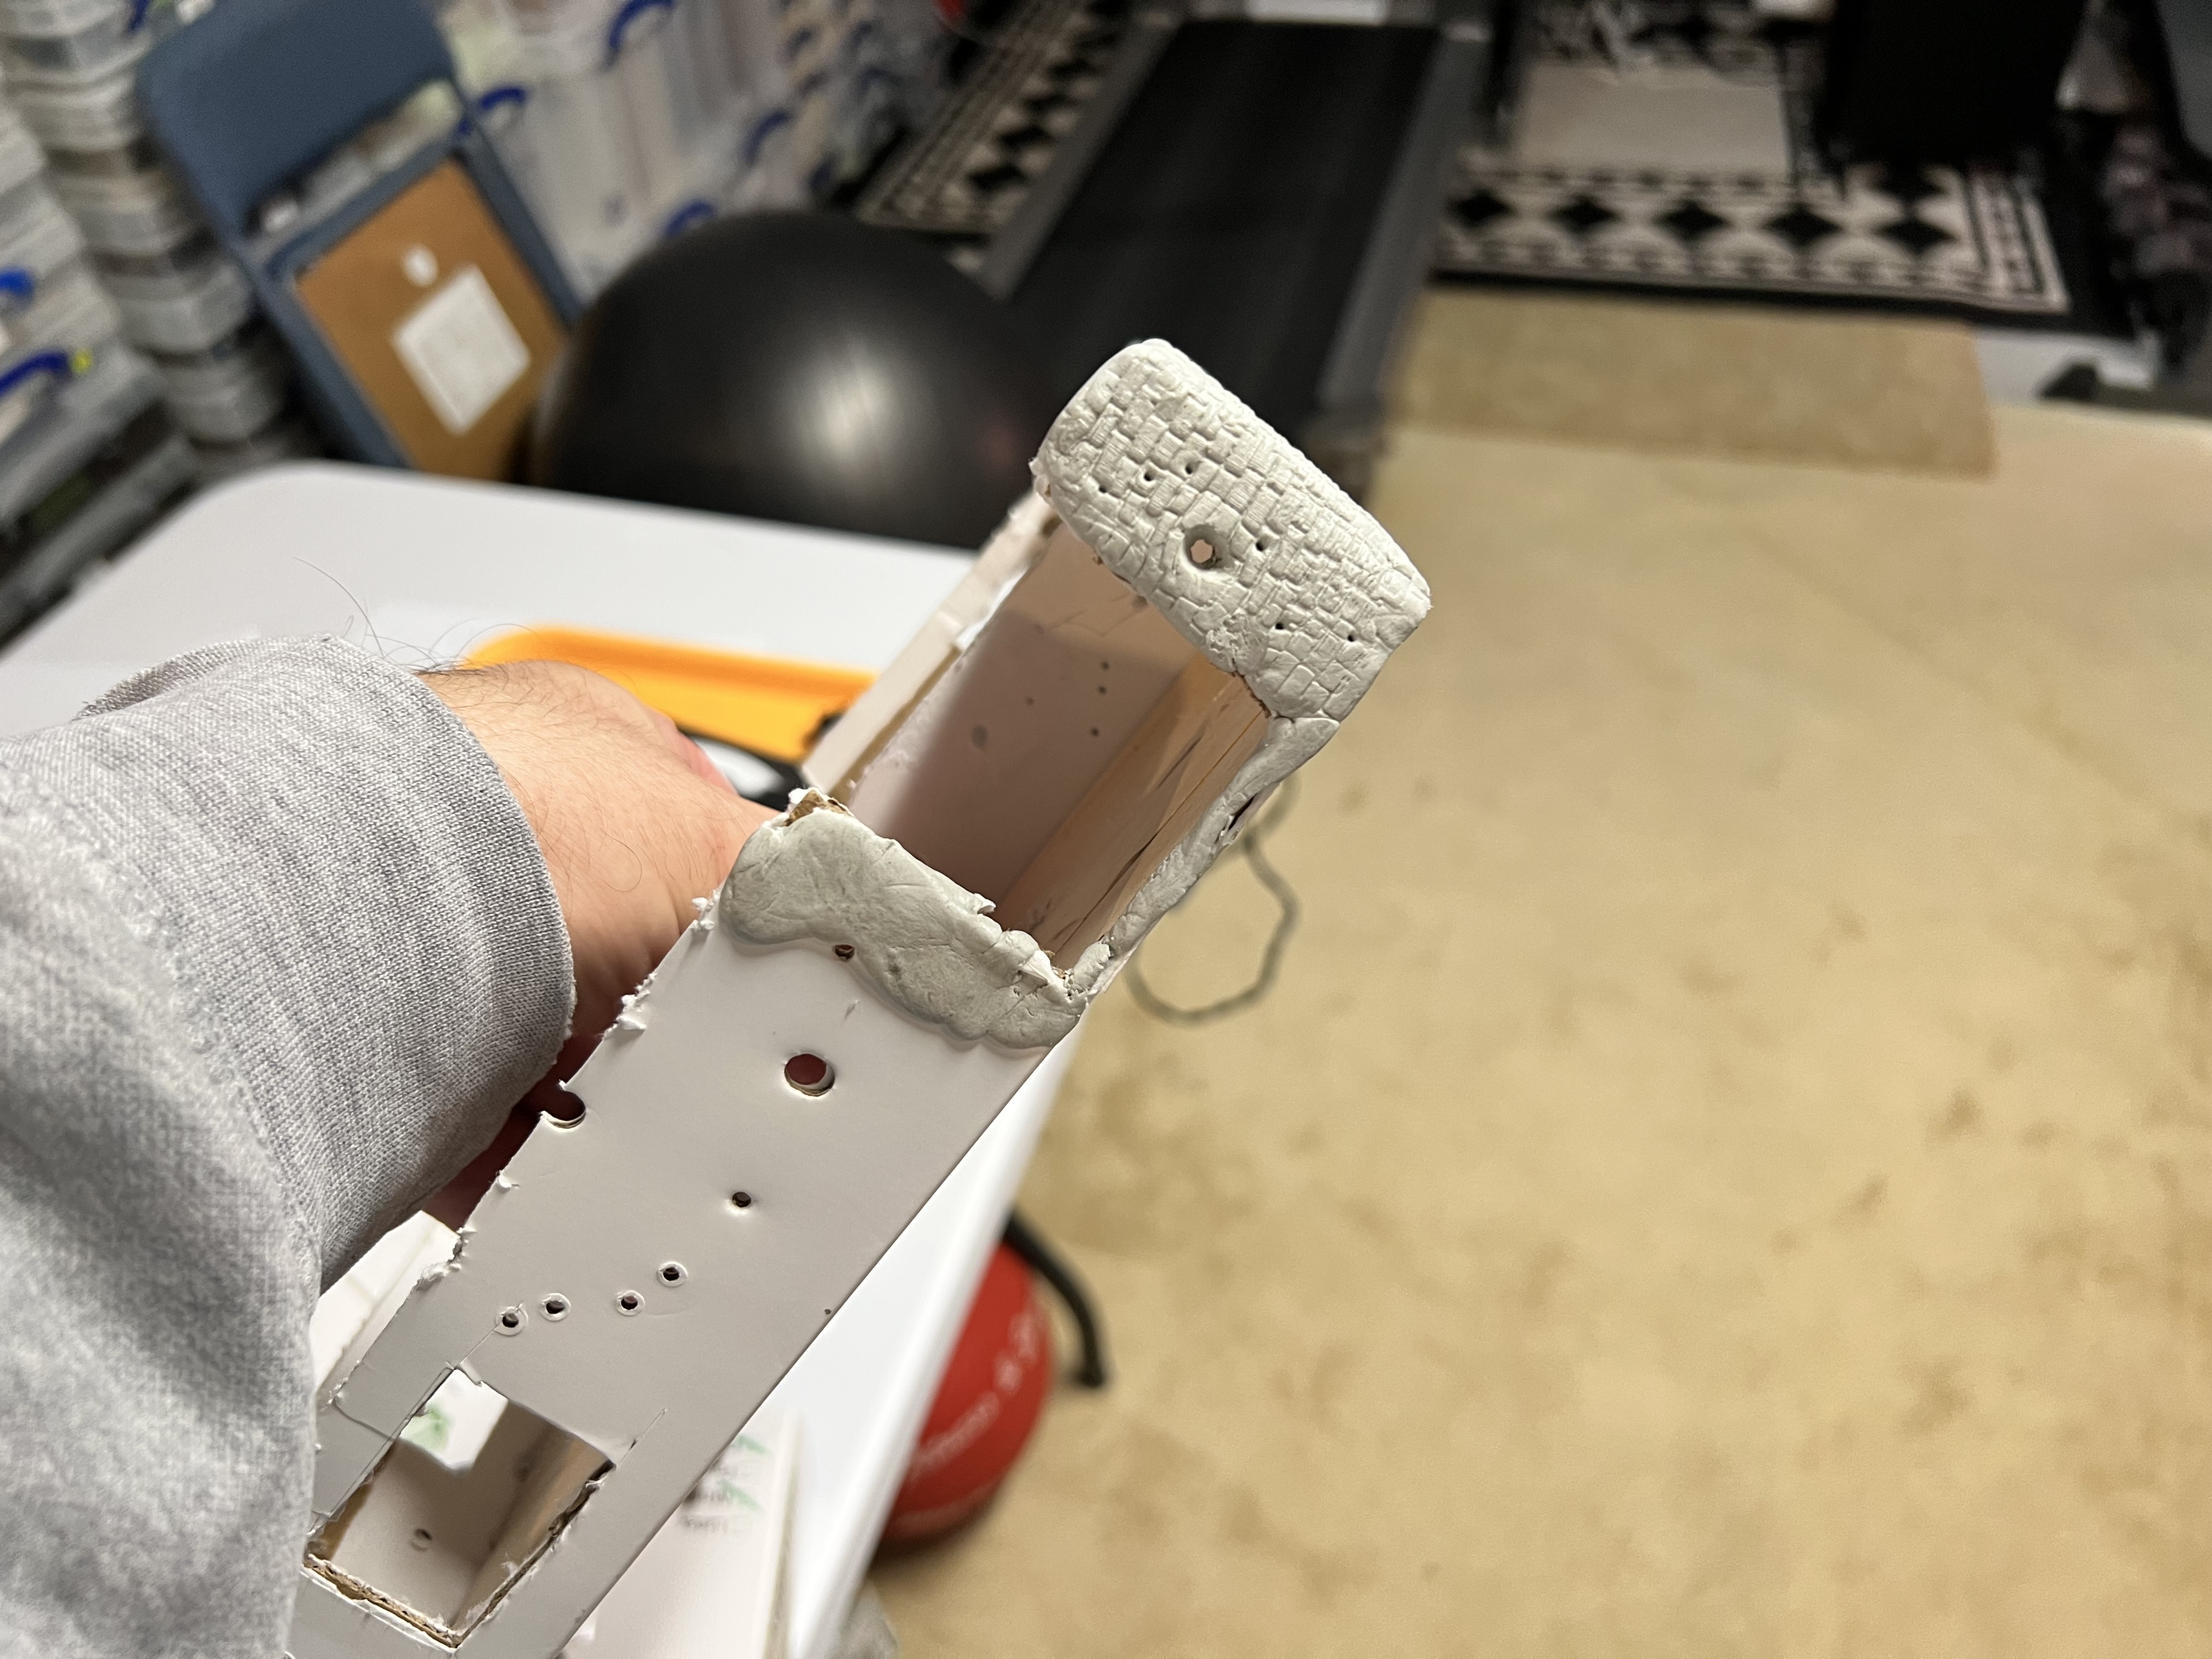
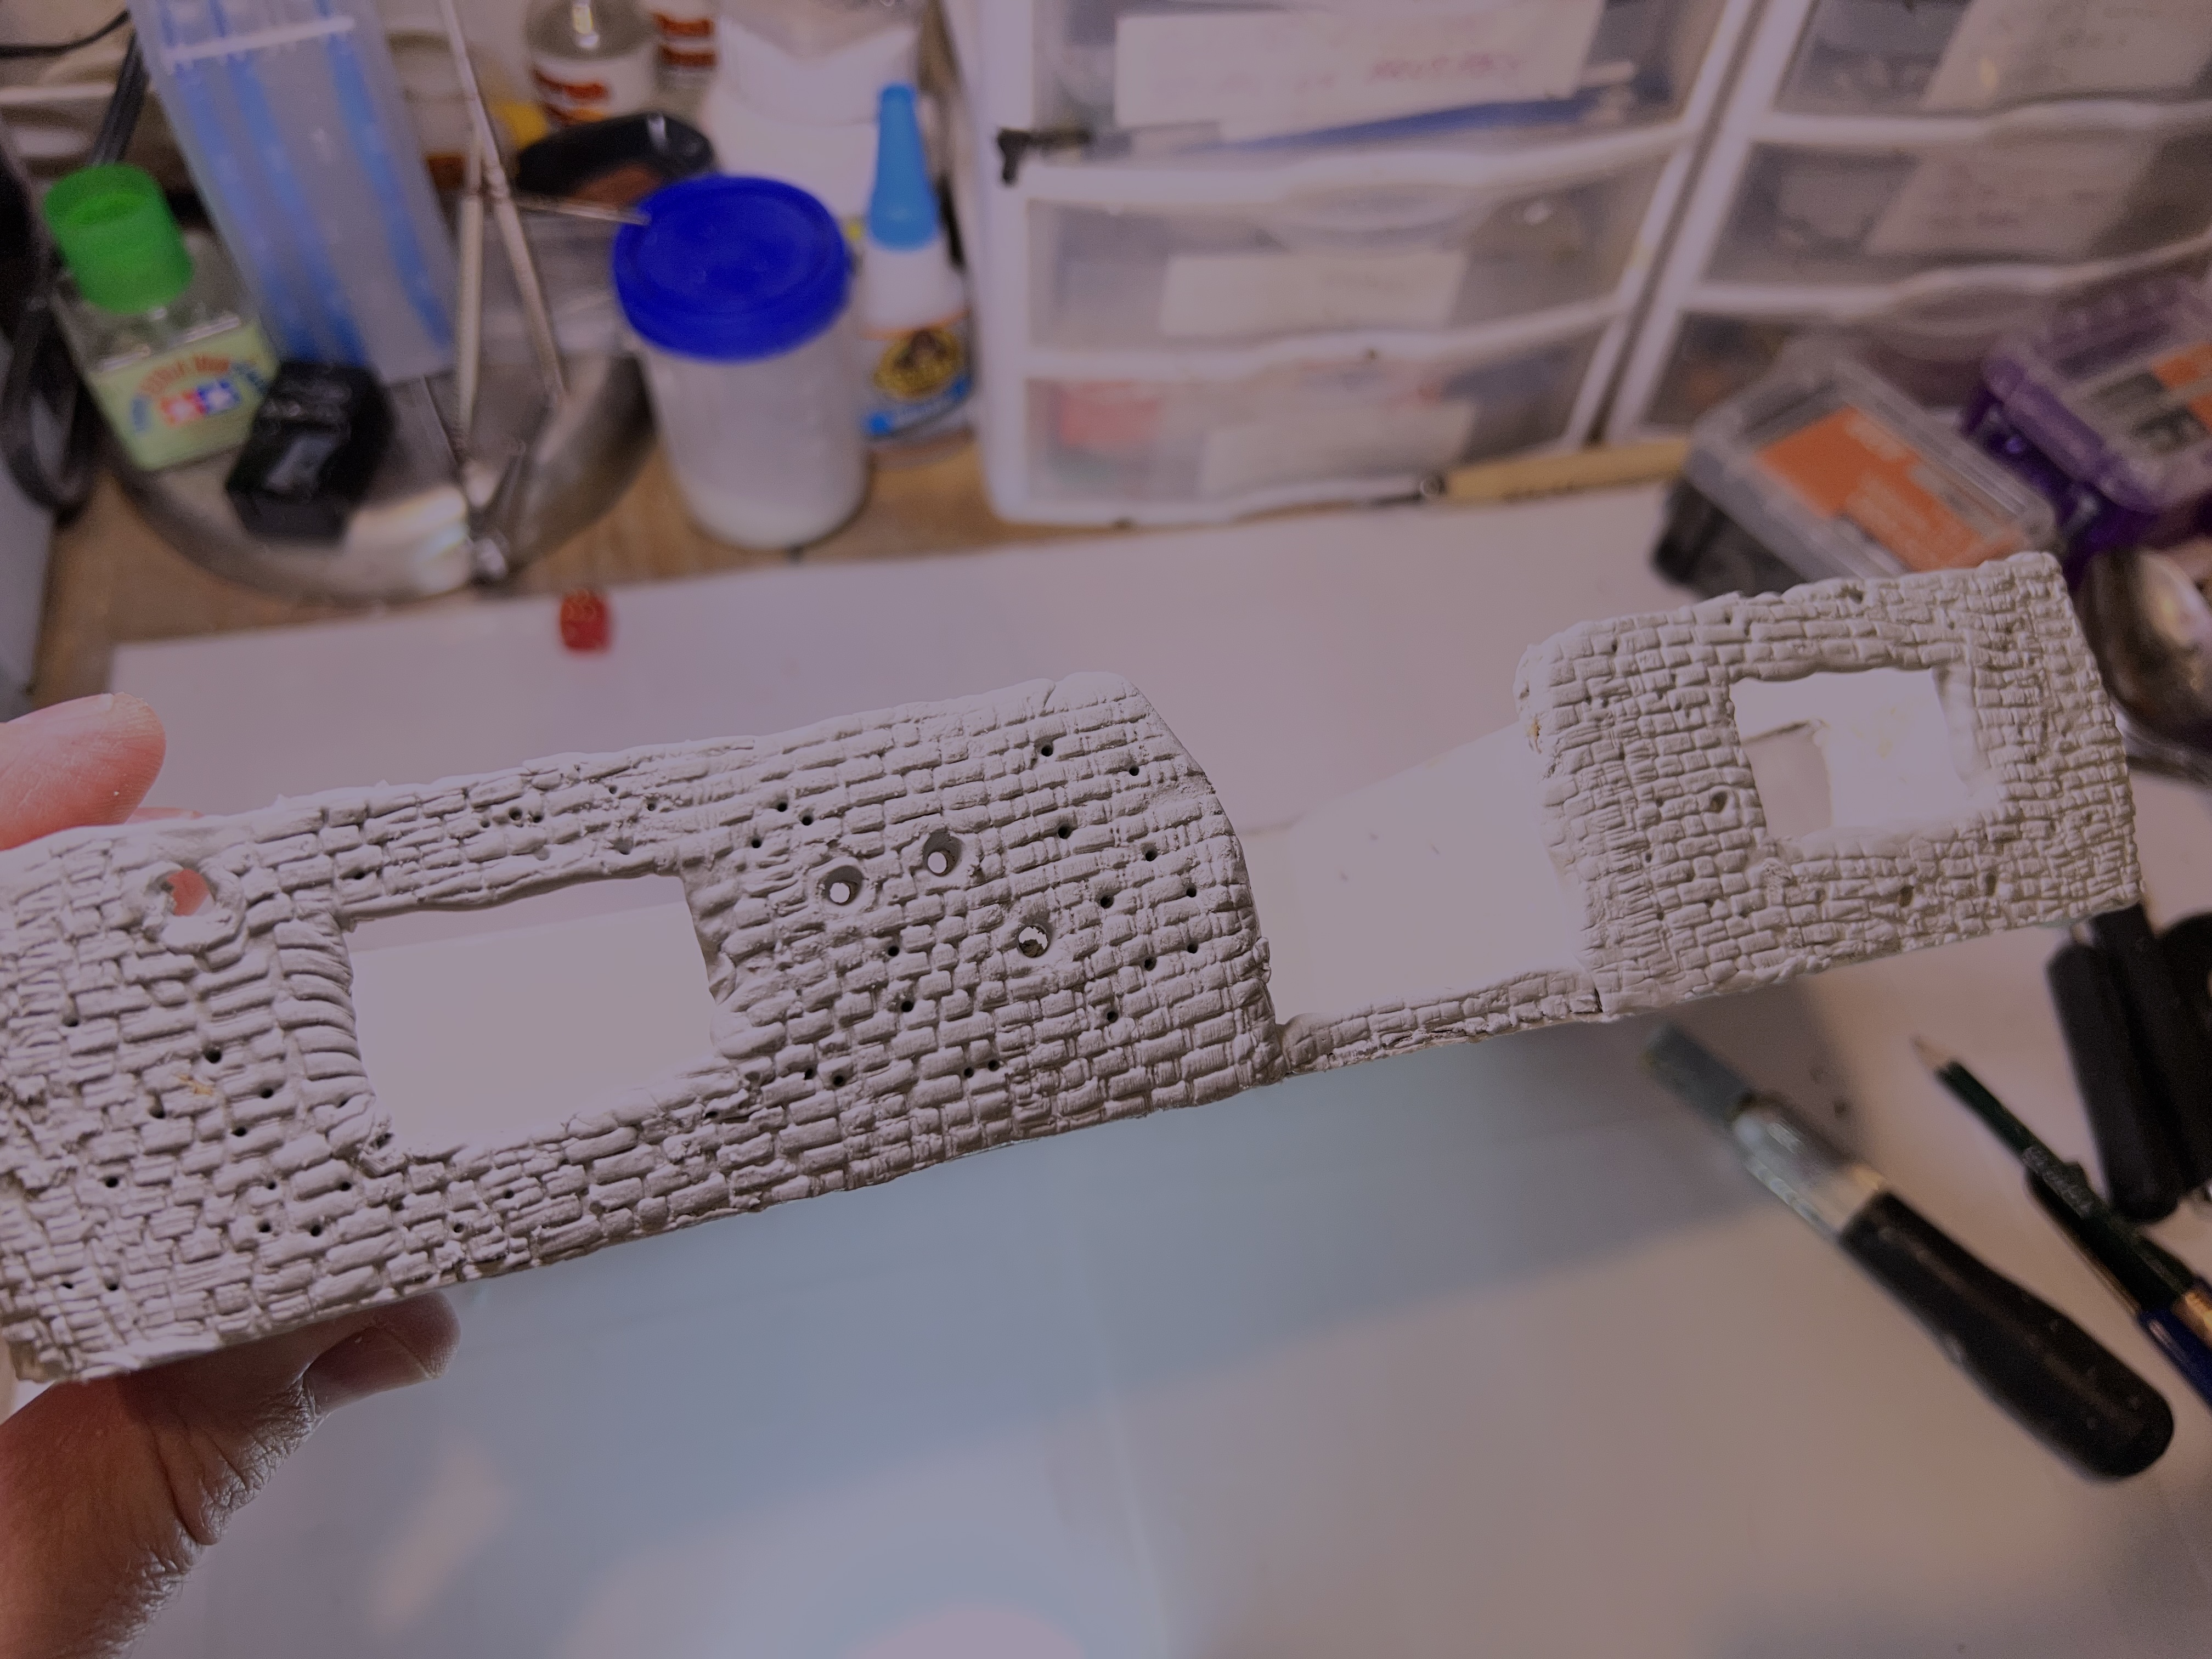
Then it was on to sculpting the outside walls. I did each building separately from here on so as to handle both curing times and to learn as I went as to best practices. Apoxie Sculpt and a Green Stuff World brick roller worked well.
Sculpting the walls. I used an awl to create and shape shell and bullet impacts on the outside.Using the windows as gripping spots made the sculpting easier. I did need to then wait for curing.
While the walls cured, I worked on the wreckage bases – also using Apoxie Sculpt. I made the bases differently in terms of both size and shape. It helped to use one or more steel washers underneath the base sculpts. Using different sizes helped to make the shapes varied.
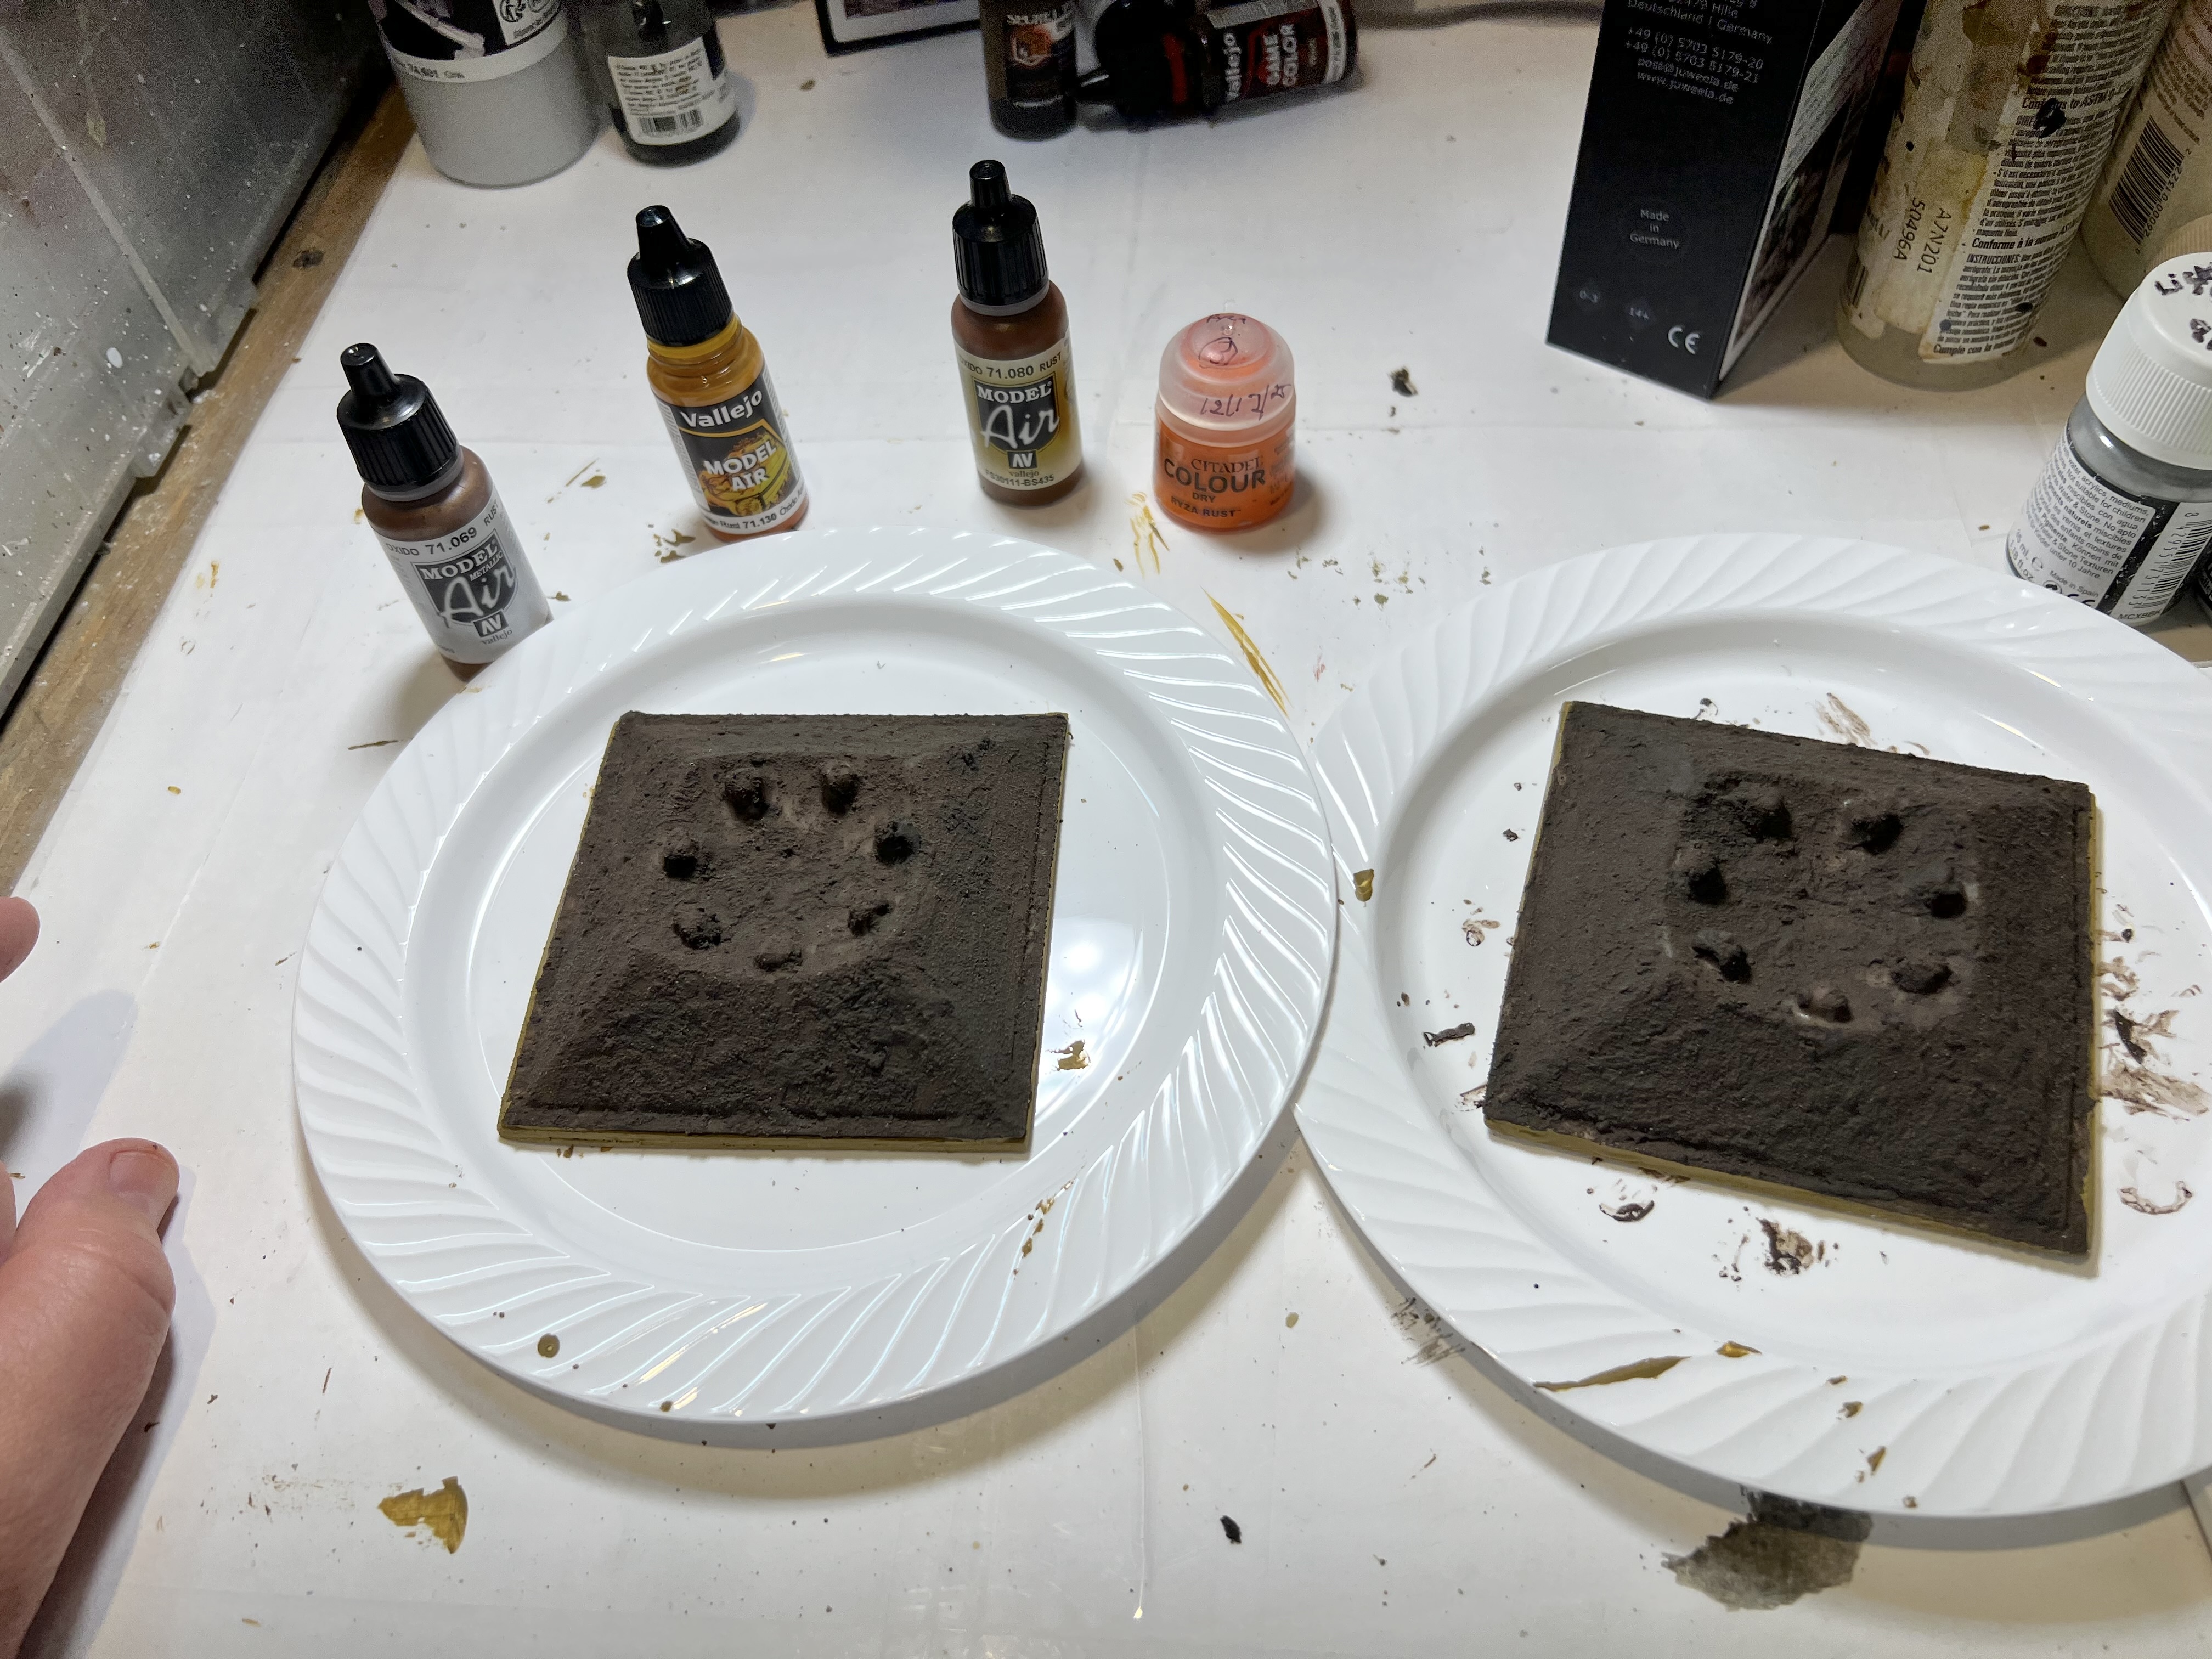
The biggest washer that I used and a base covered with Apoxie Sculpt.Examples of the other sizes and shapes – all with steel washers underneath.
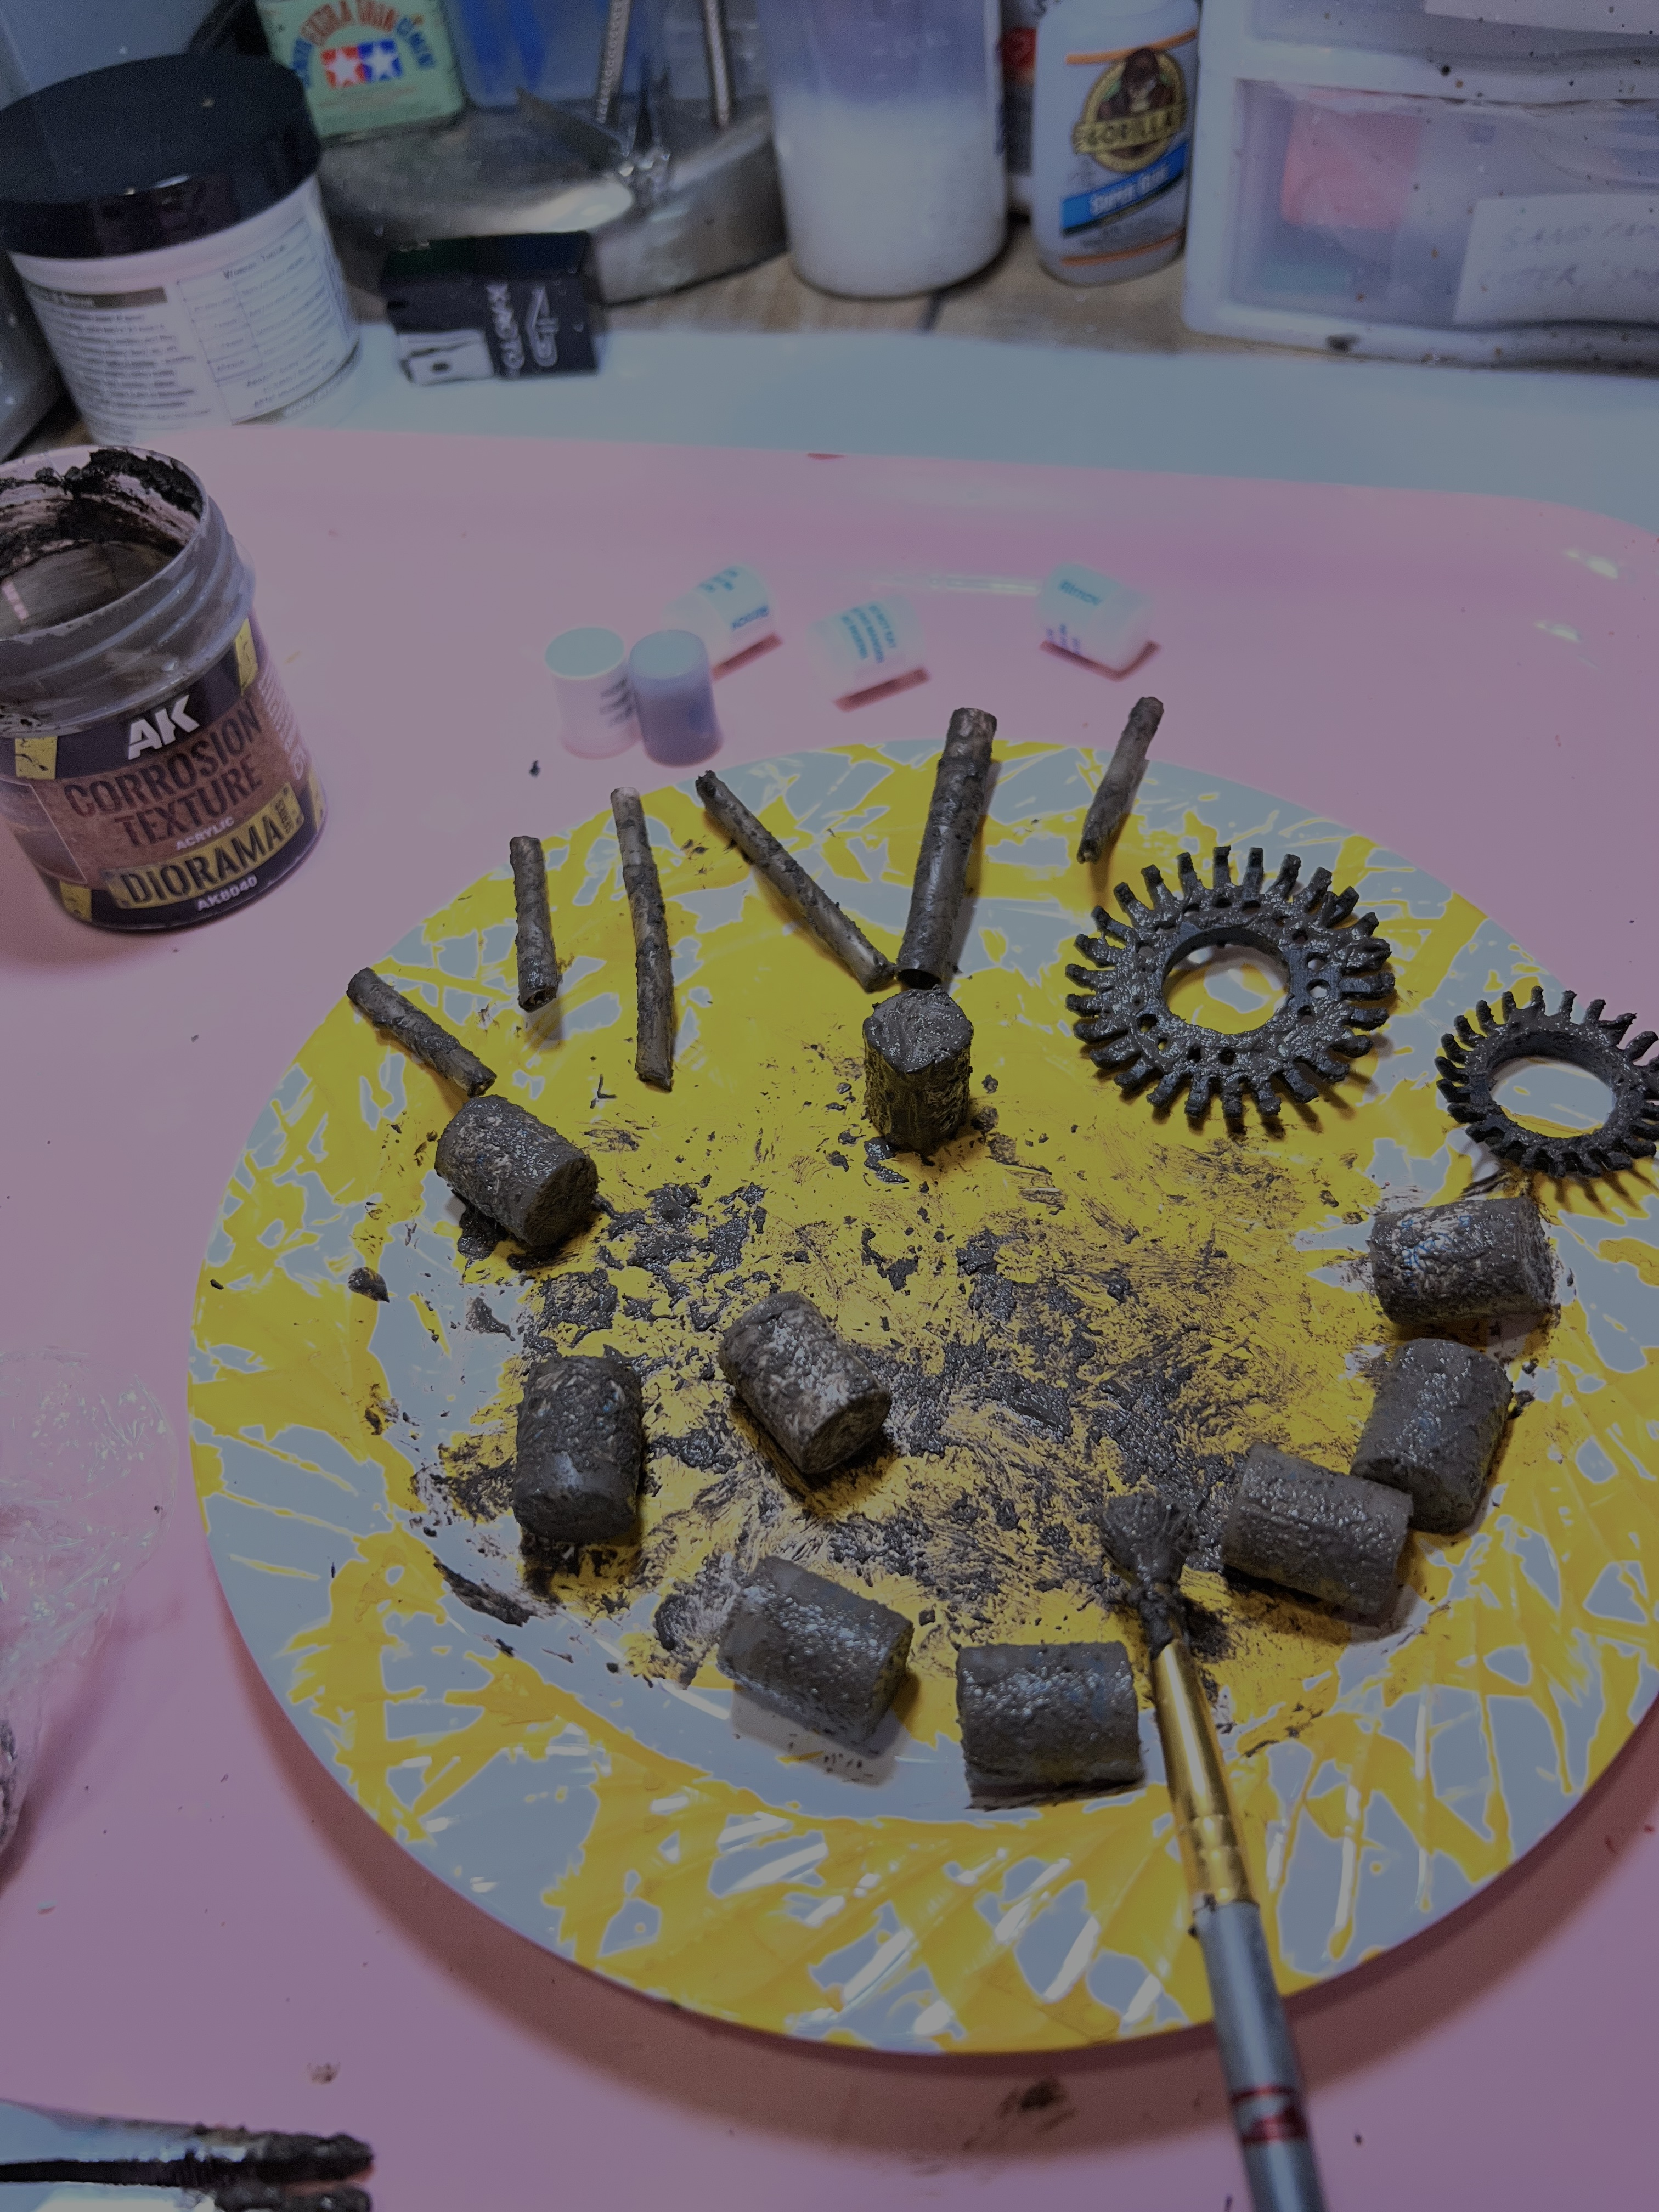
As the corrosion texture paint takes time to dry as well, I started adding that to various pieces of debris that I had saved up. I like to use a cheap old brush that could serve no other purpose – especially as it usually destroys it. The corrosion paint needed to dry and then got a second application.
Using the AK Corrosion Texture paint. Here I am using it on desiccant cylinders (from pill bottles), crushed plastic straw sections, and rubber inserts from a drain plug replacement.
After a day, the Apoxie Sculpt on the first building had cured. But I wanted there to be a small outside rim to it that could hold wreckage and brick debris. While a sheet of polystyrene was gluing to its bottom, I worked on the second building.
First building cured.Bottom view – I needed more here underneath…but before that I finished the second building’s outside.Second building outside sculpting…….and second building flooring installation.
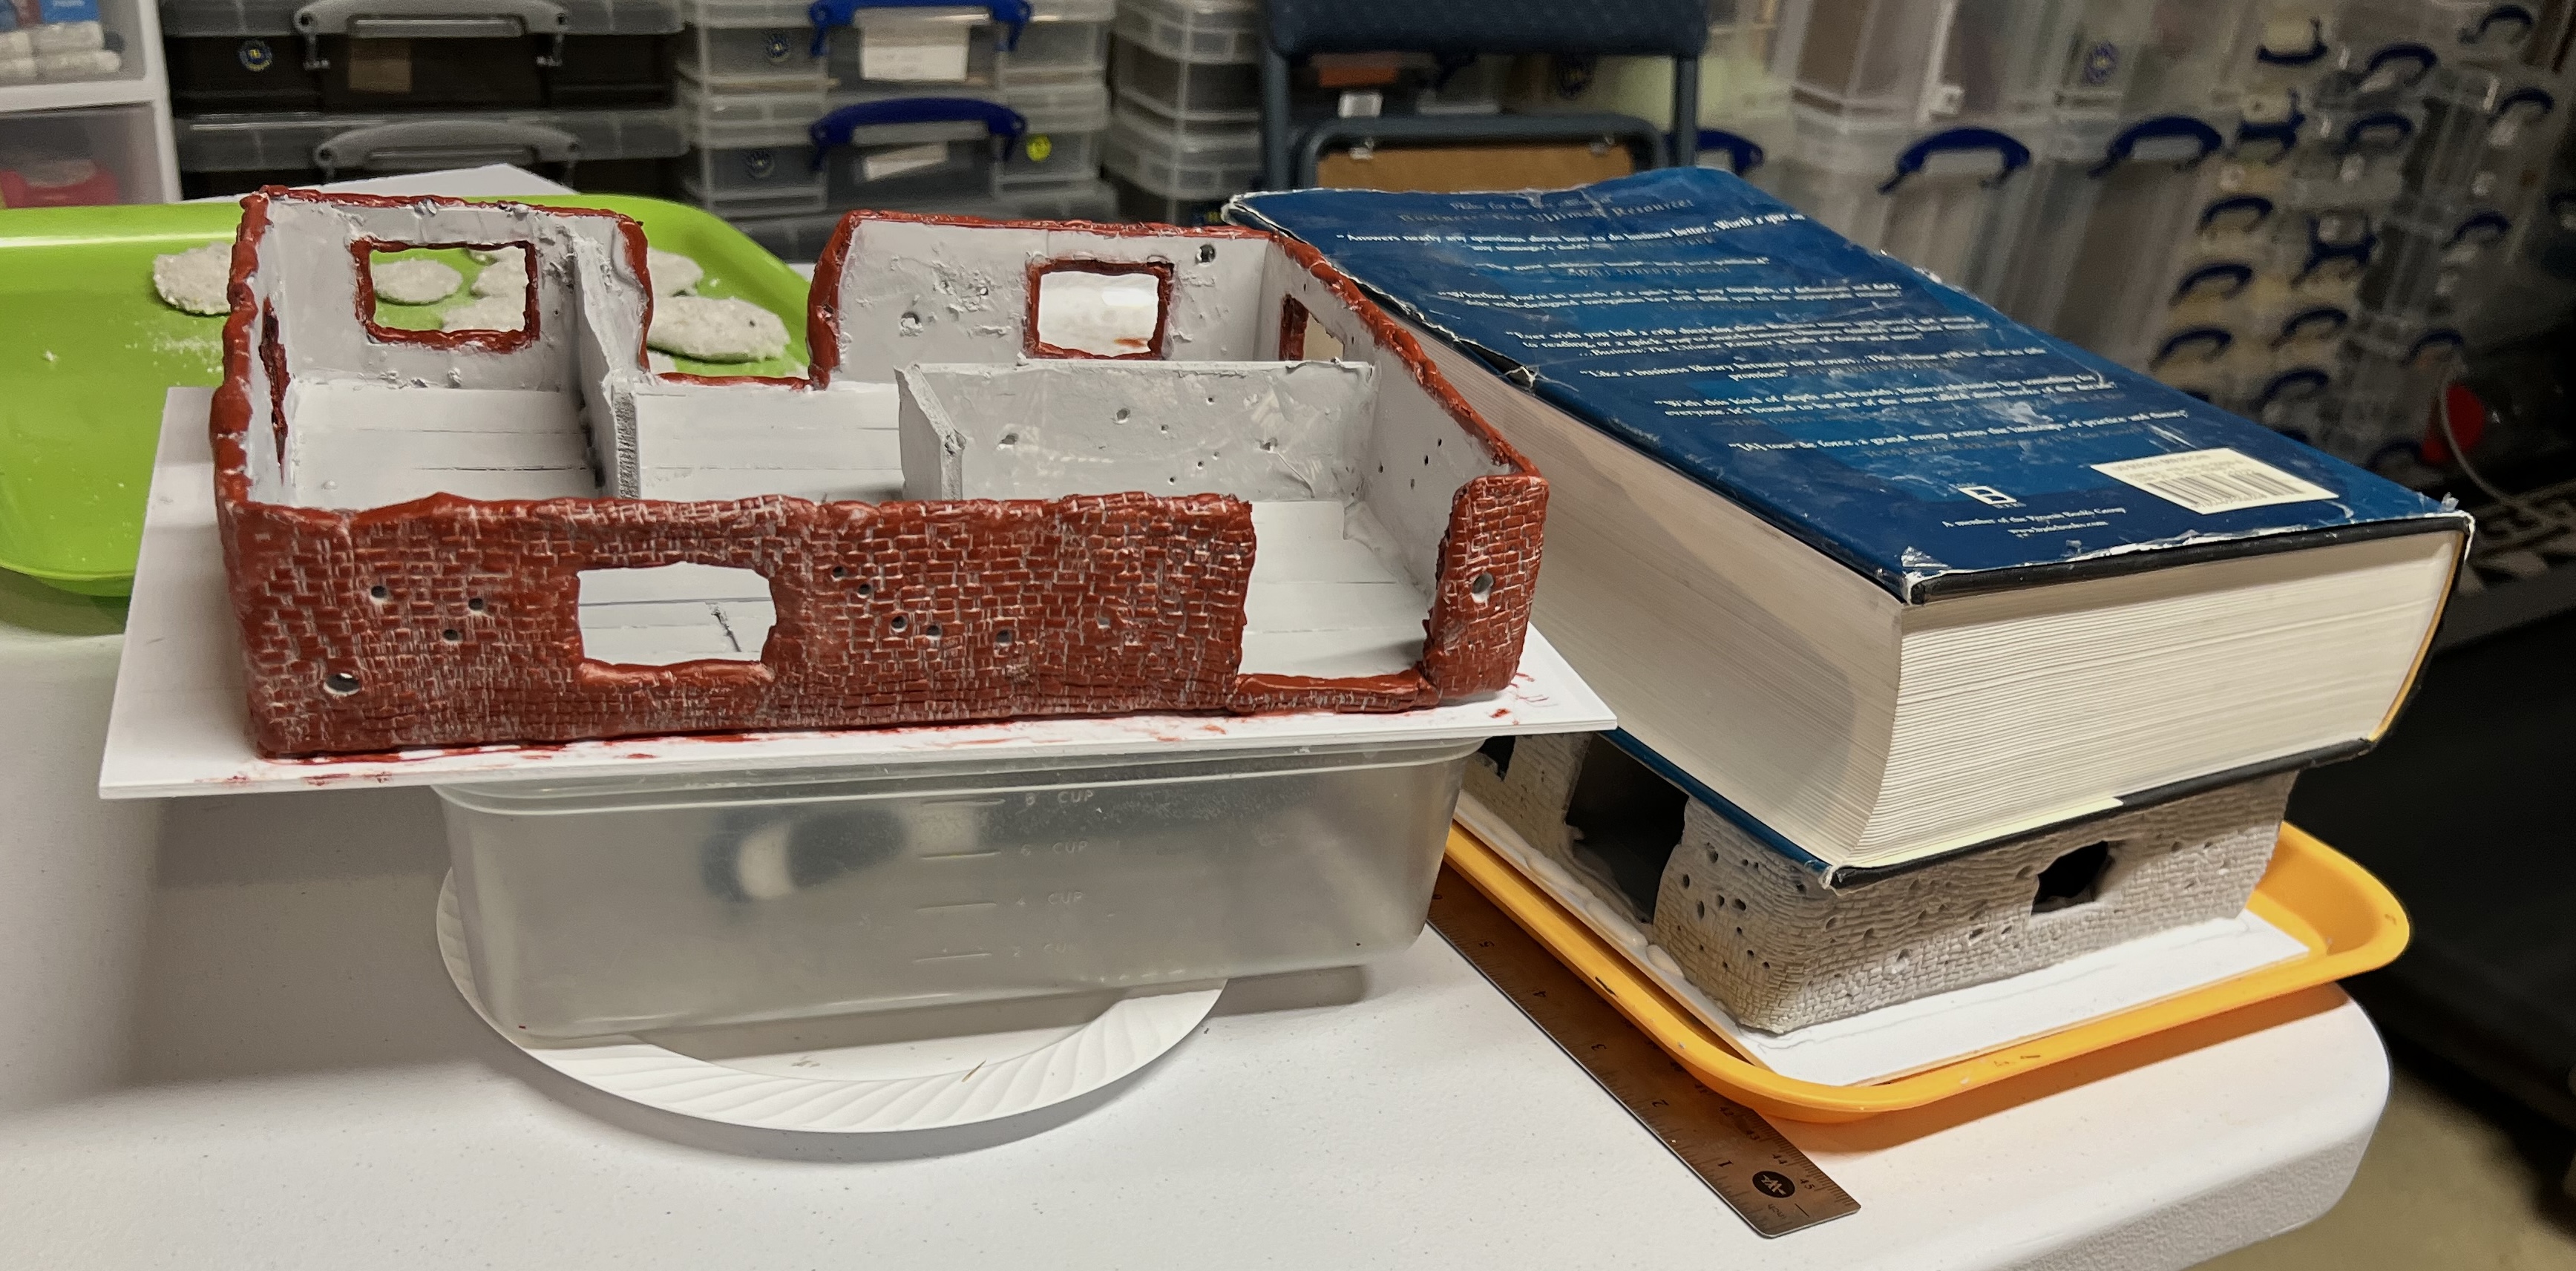
As the first building had cured, I started to paint it. Then I was able to glue a polystyrene base to building number 2.
Building number one with early paint work, and building number two being glued to the PS sheet under a heavy textbook.
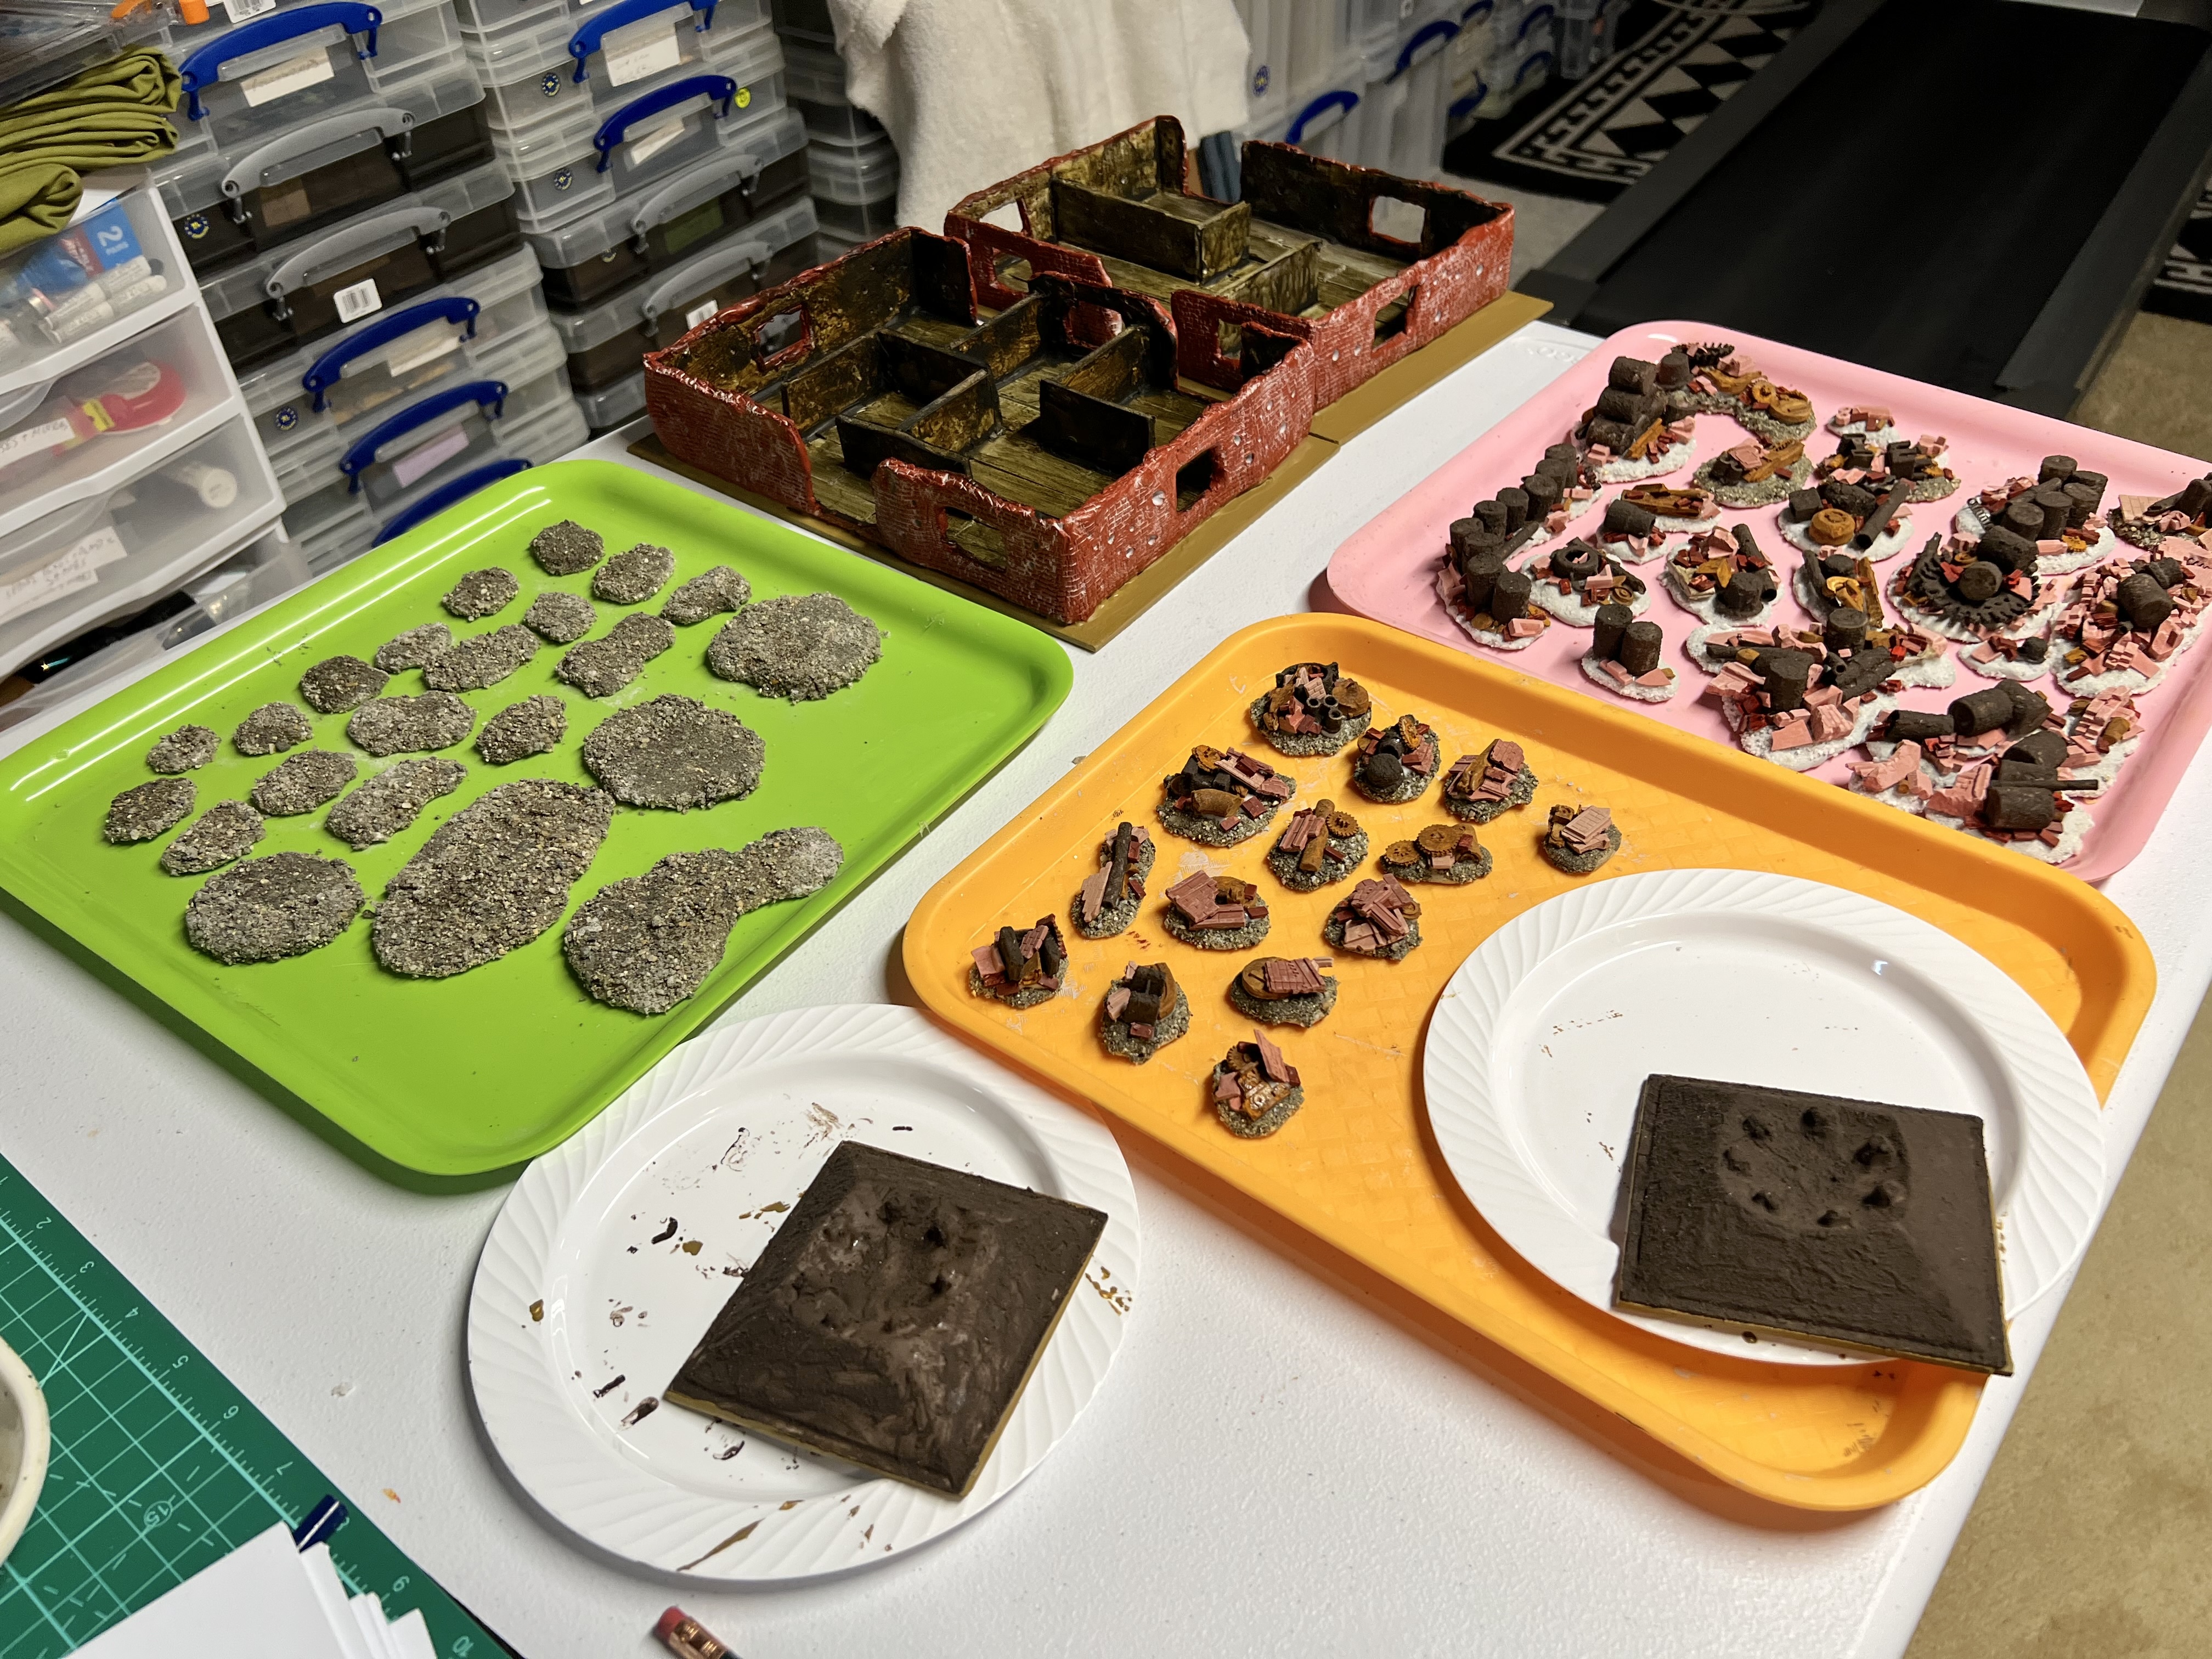
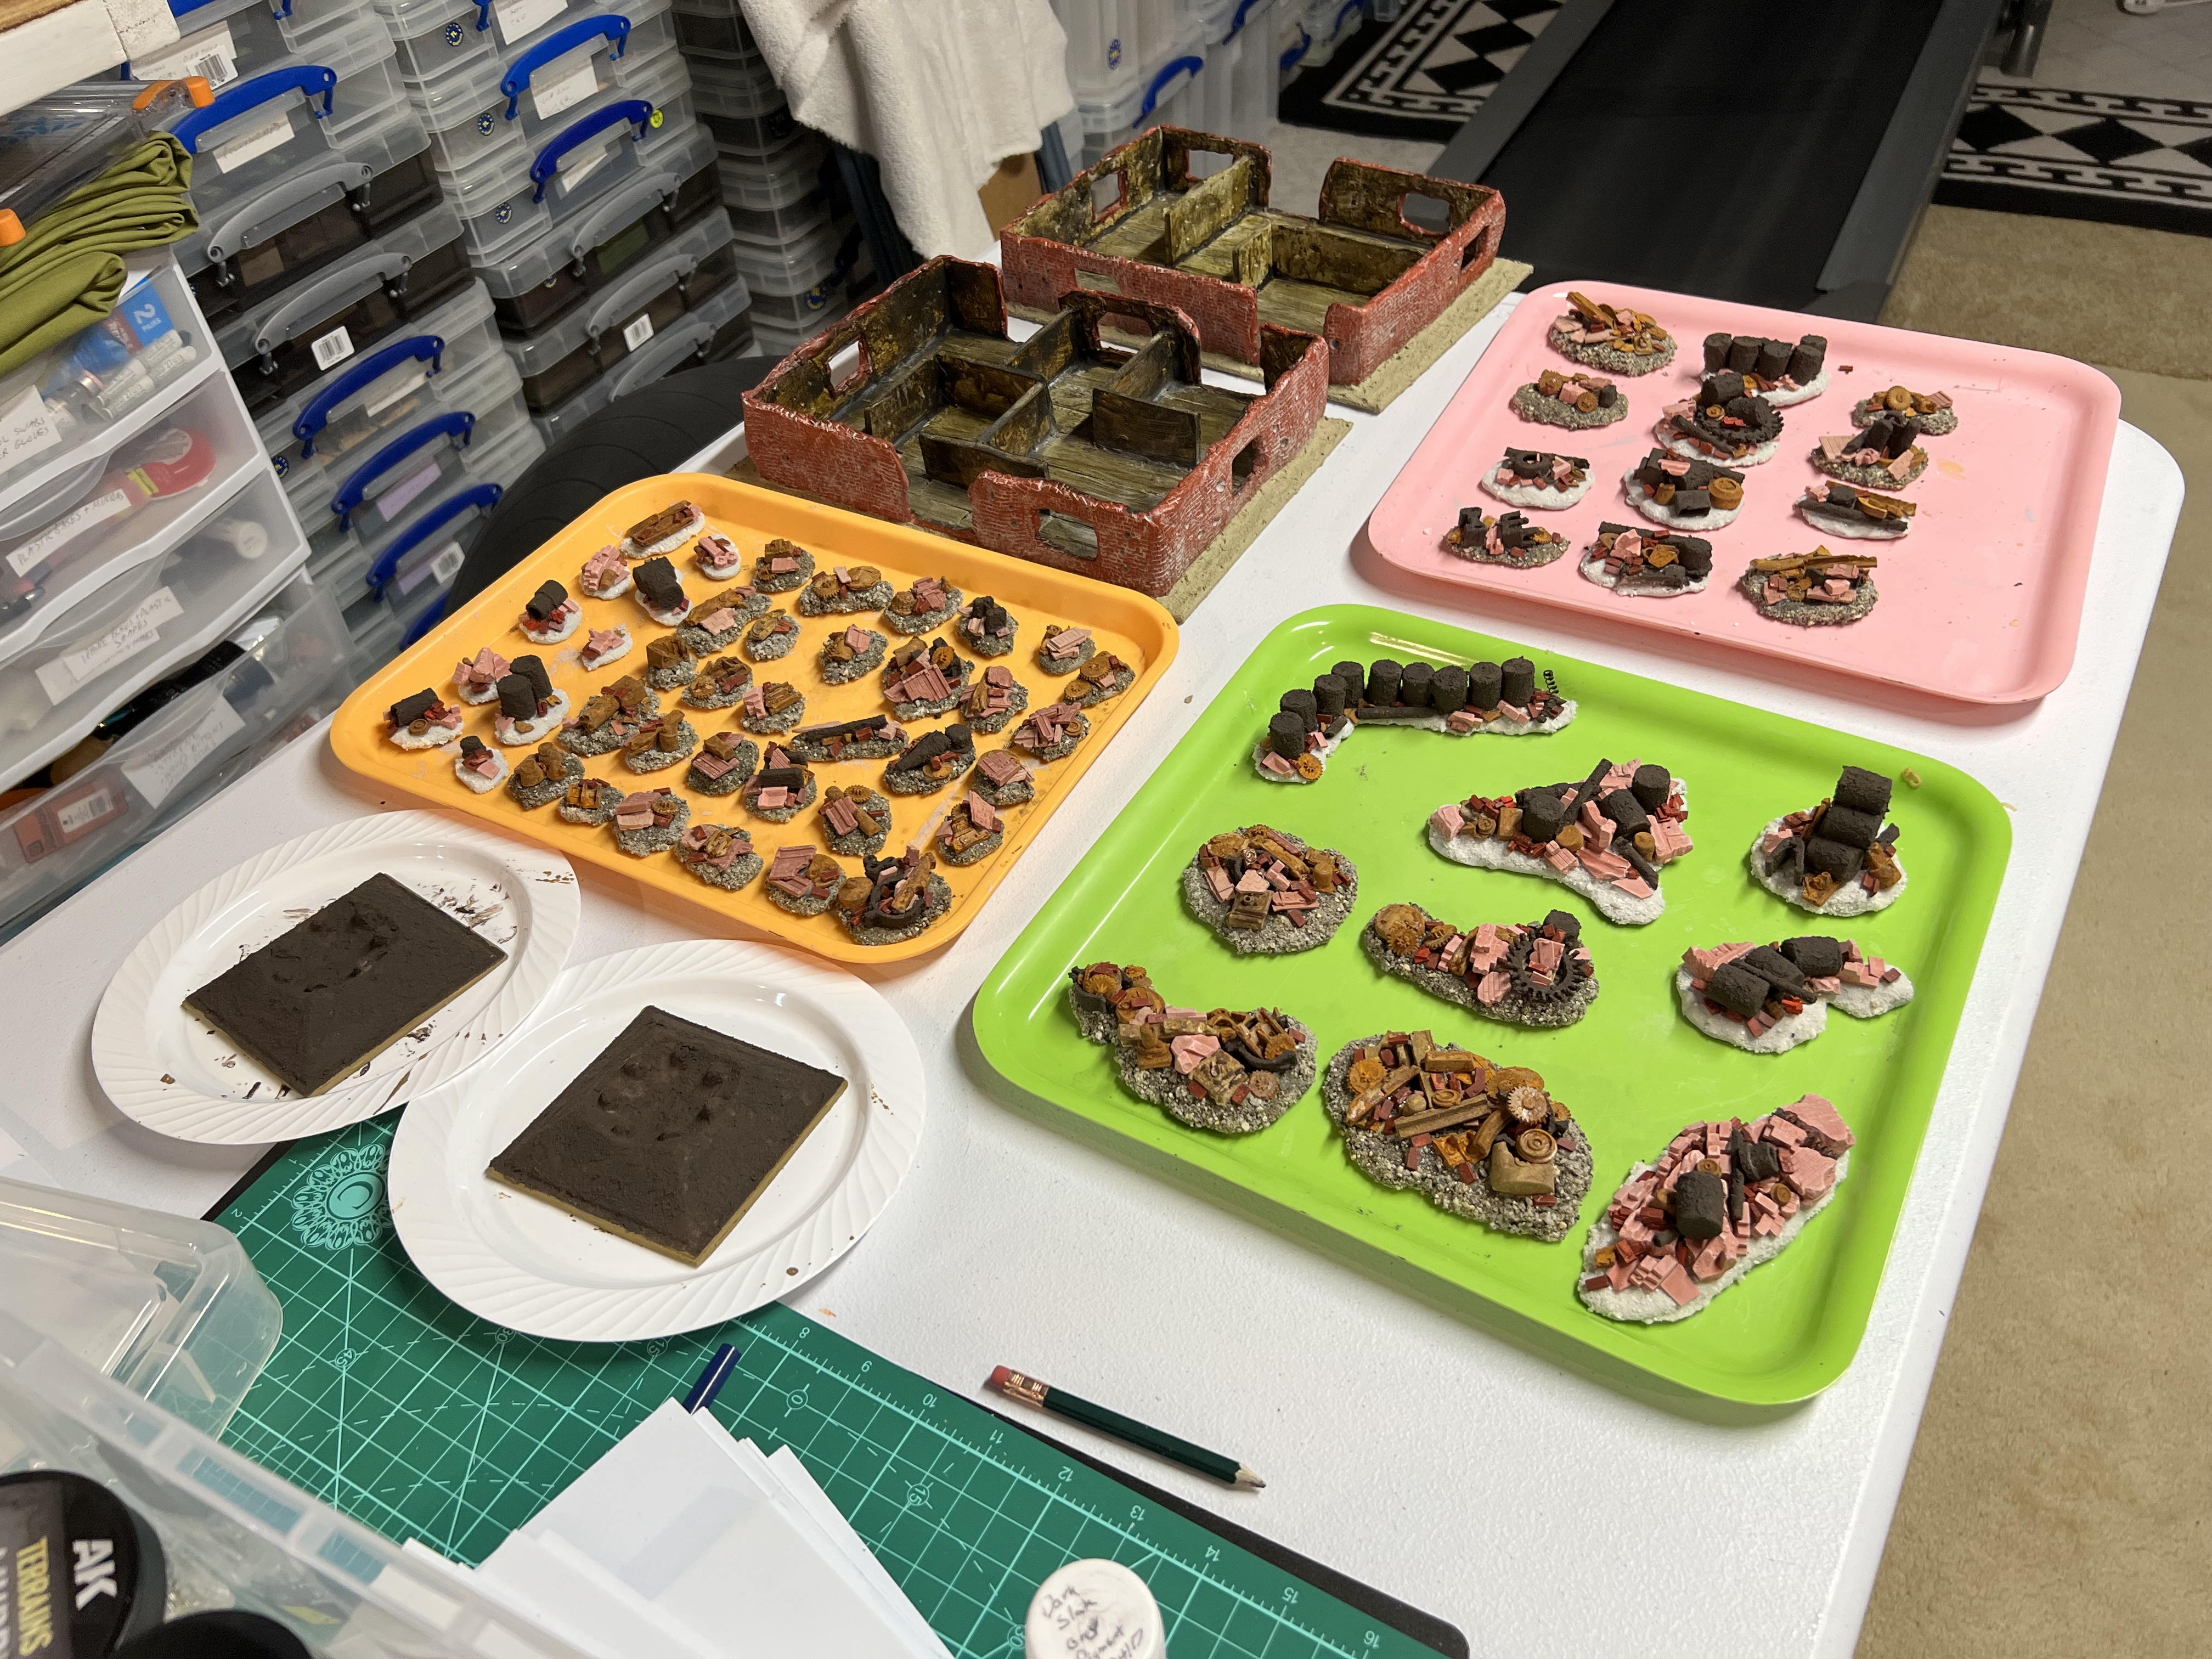
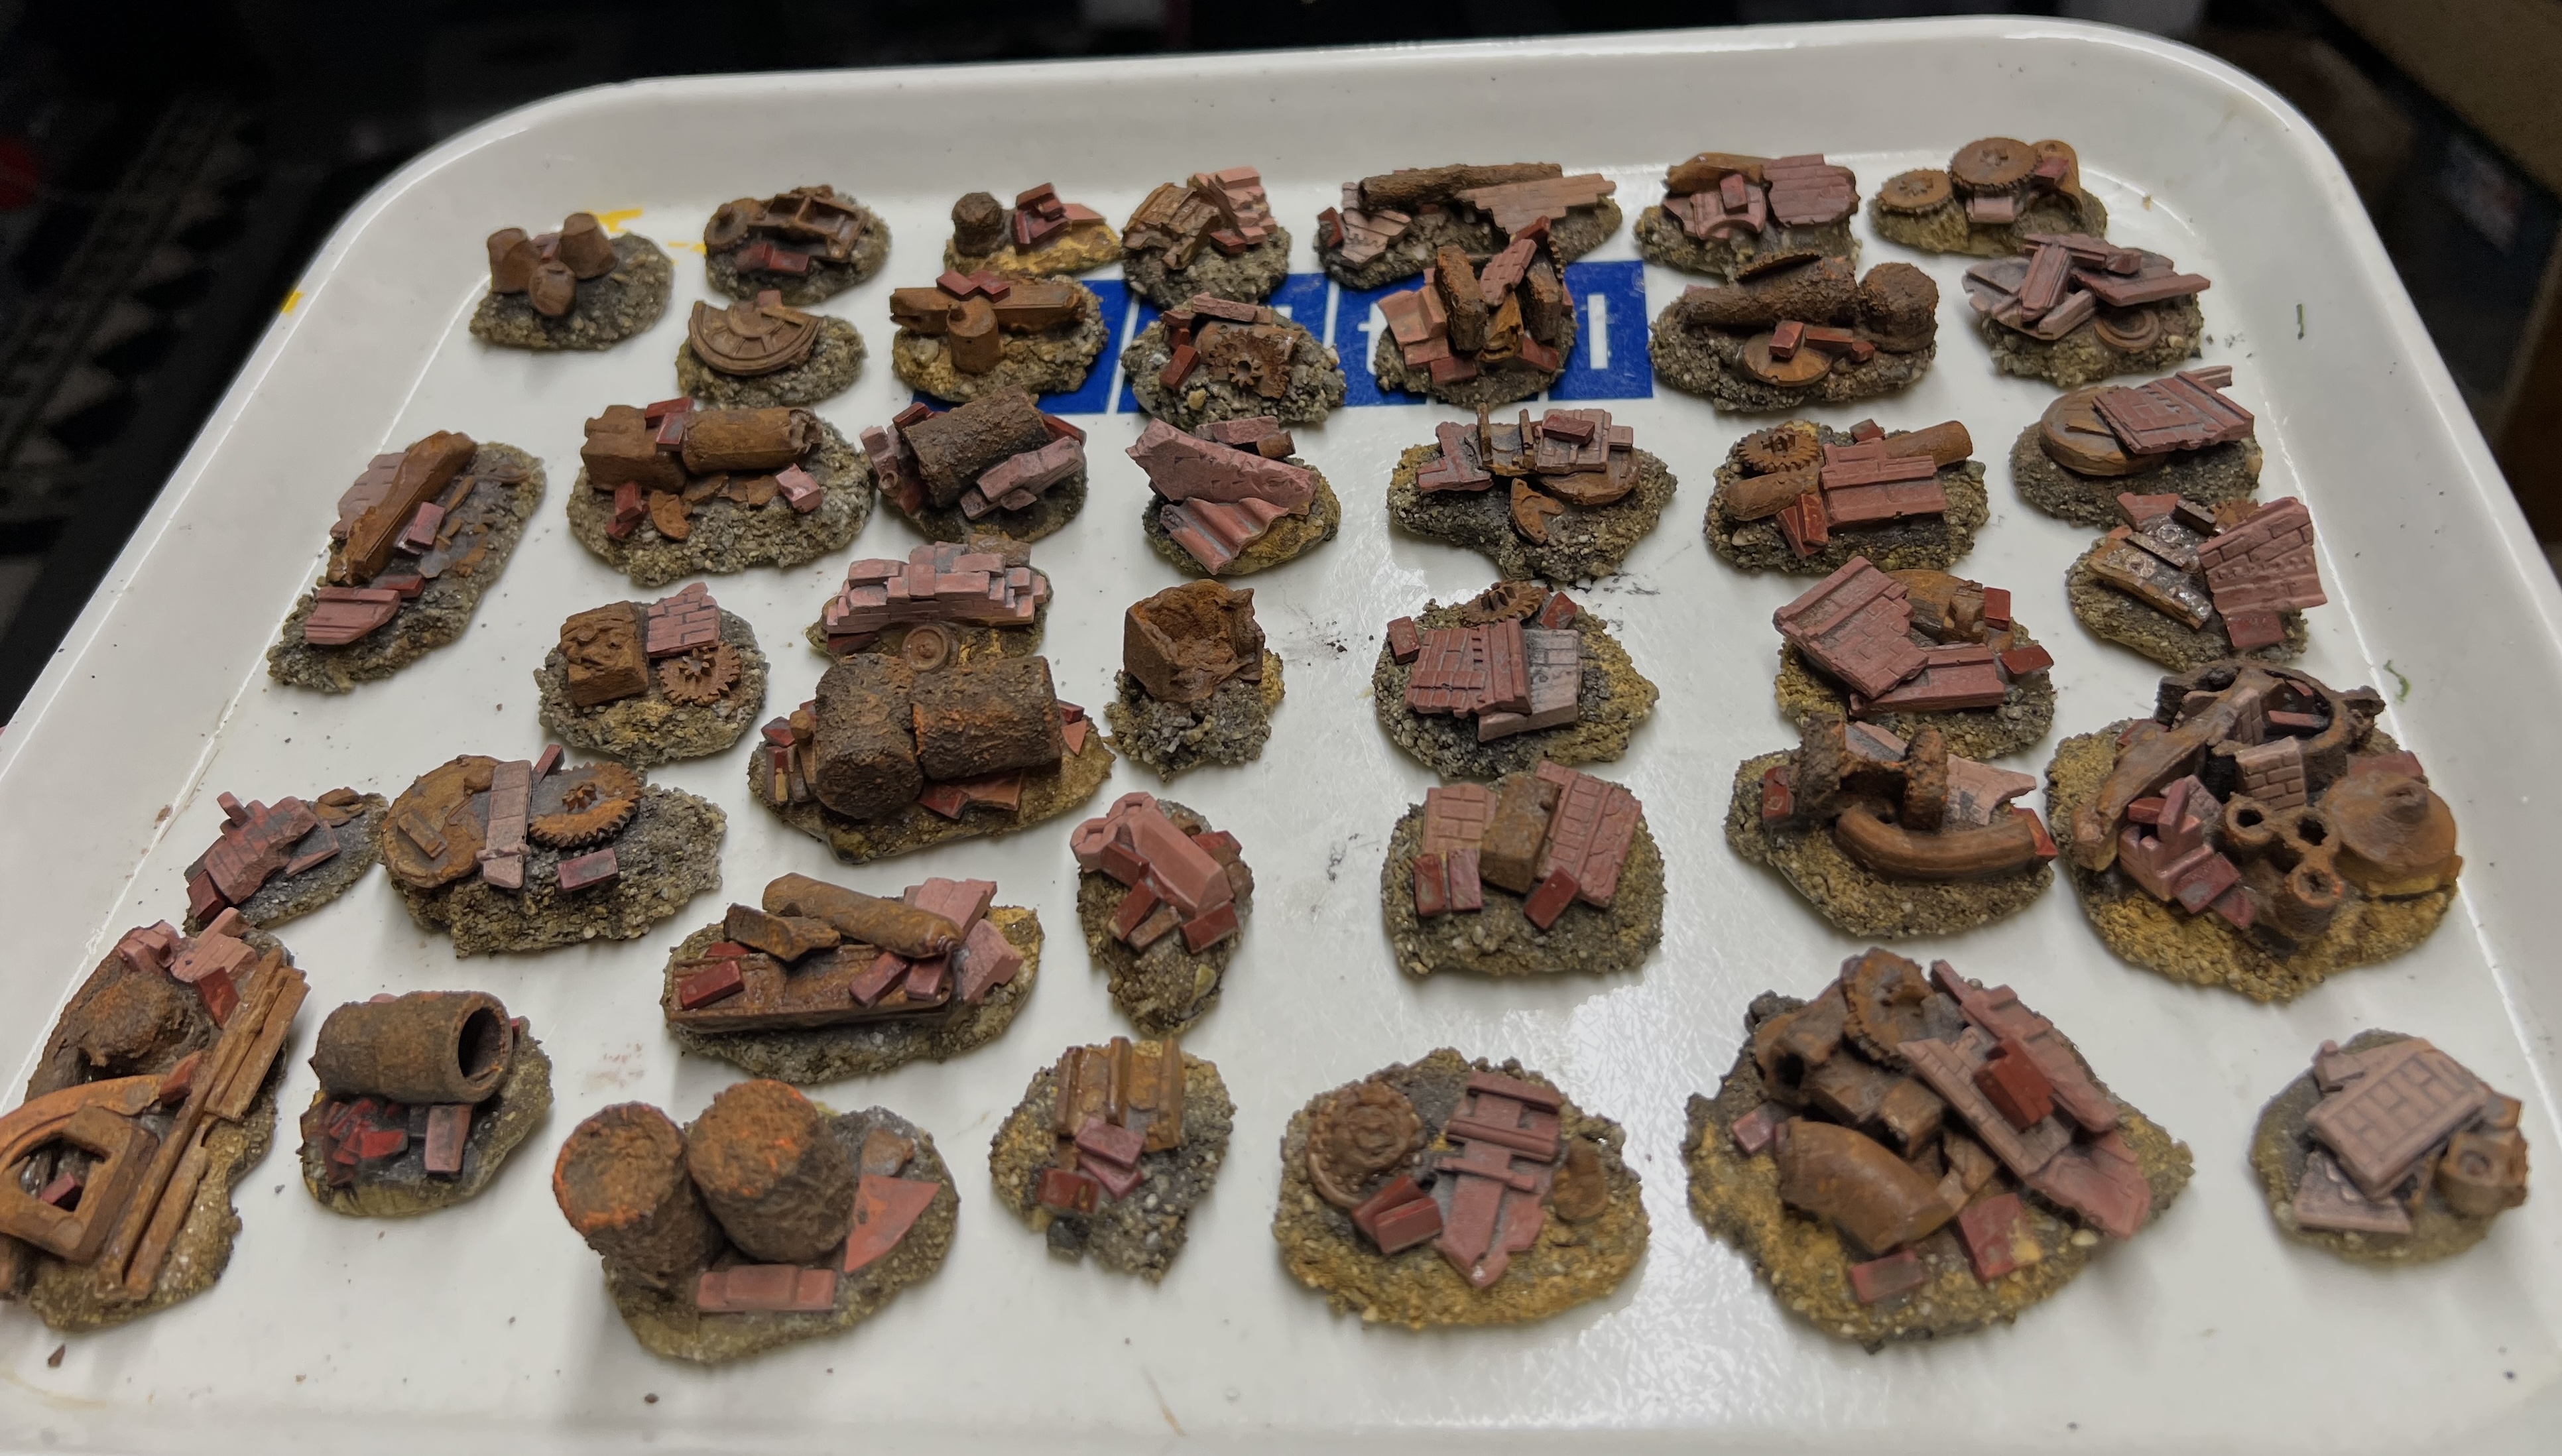
As I was again dealing with drying and curing times, I went back to work on the wreckage bases. I used up some white sand on the Apoxie Sculpt bases and applied with PVA. Once that had dried, I added as much wreckage as I could to each.
Wreckage bases – I started with the largest. The two buildings are shown in progress as are the next batch of sculpted bases curing.Close up shot of the larger wreckage bases in progress. Glue must dry…Close up of building one with insides primed.
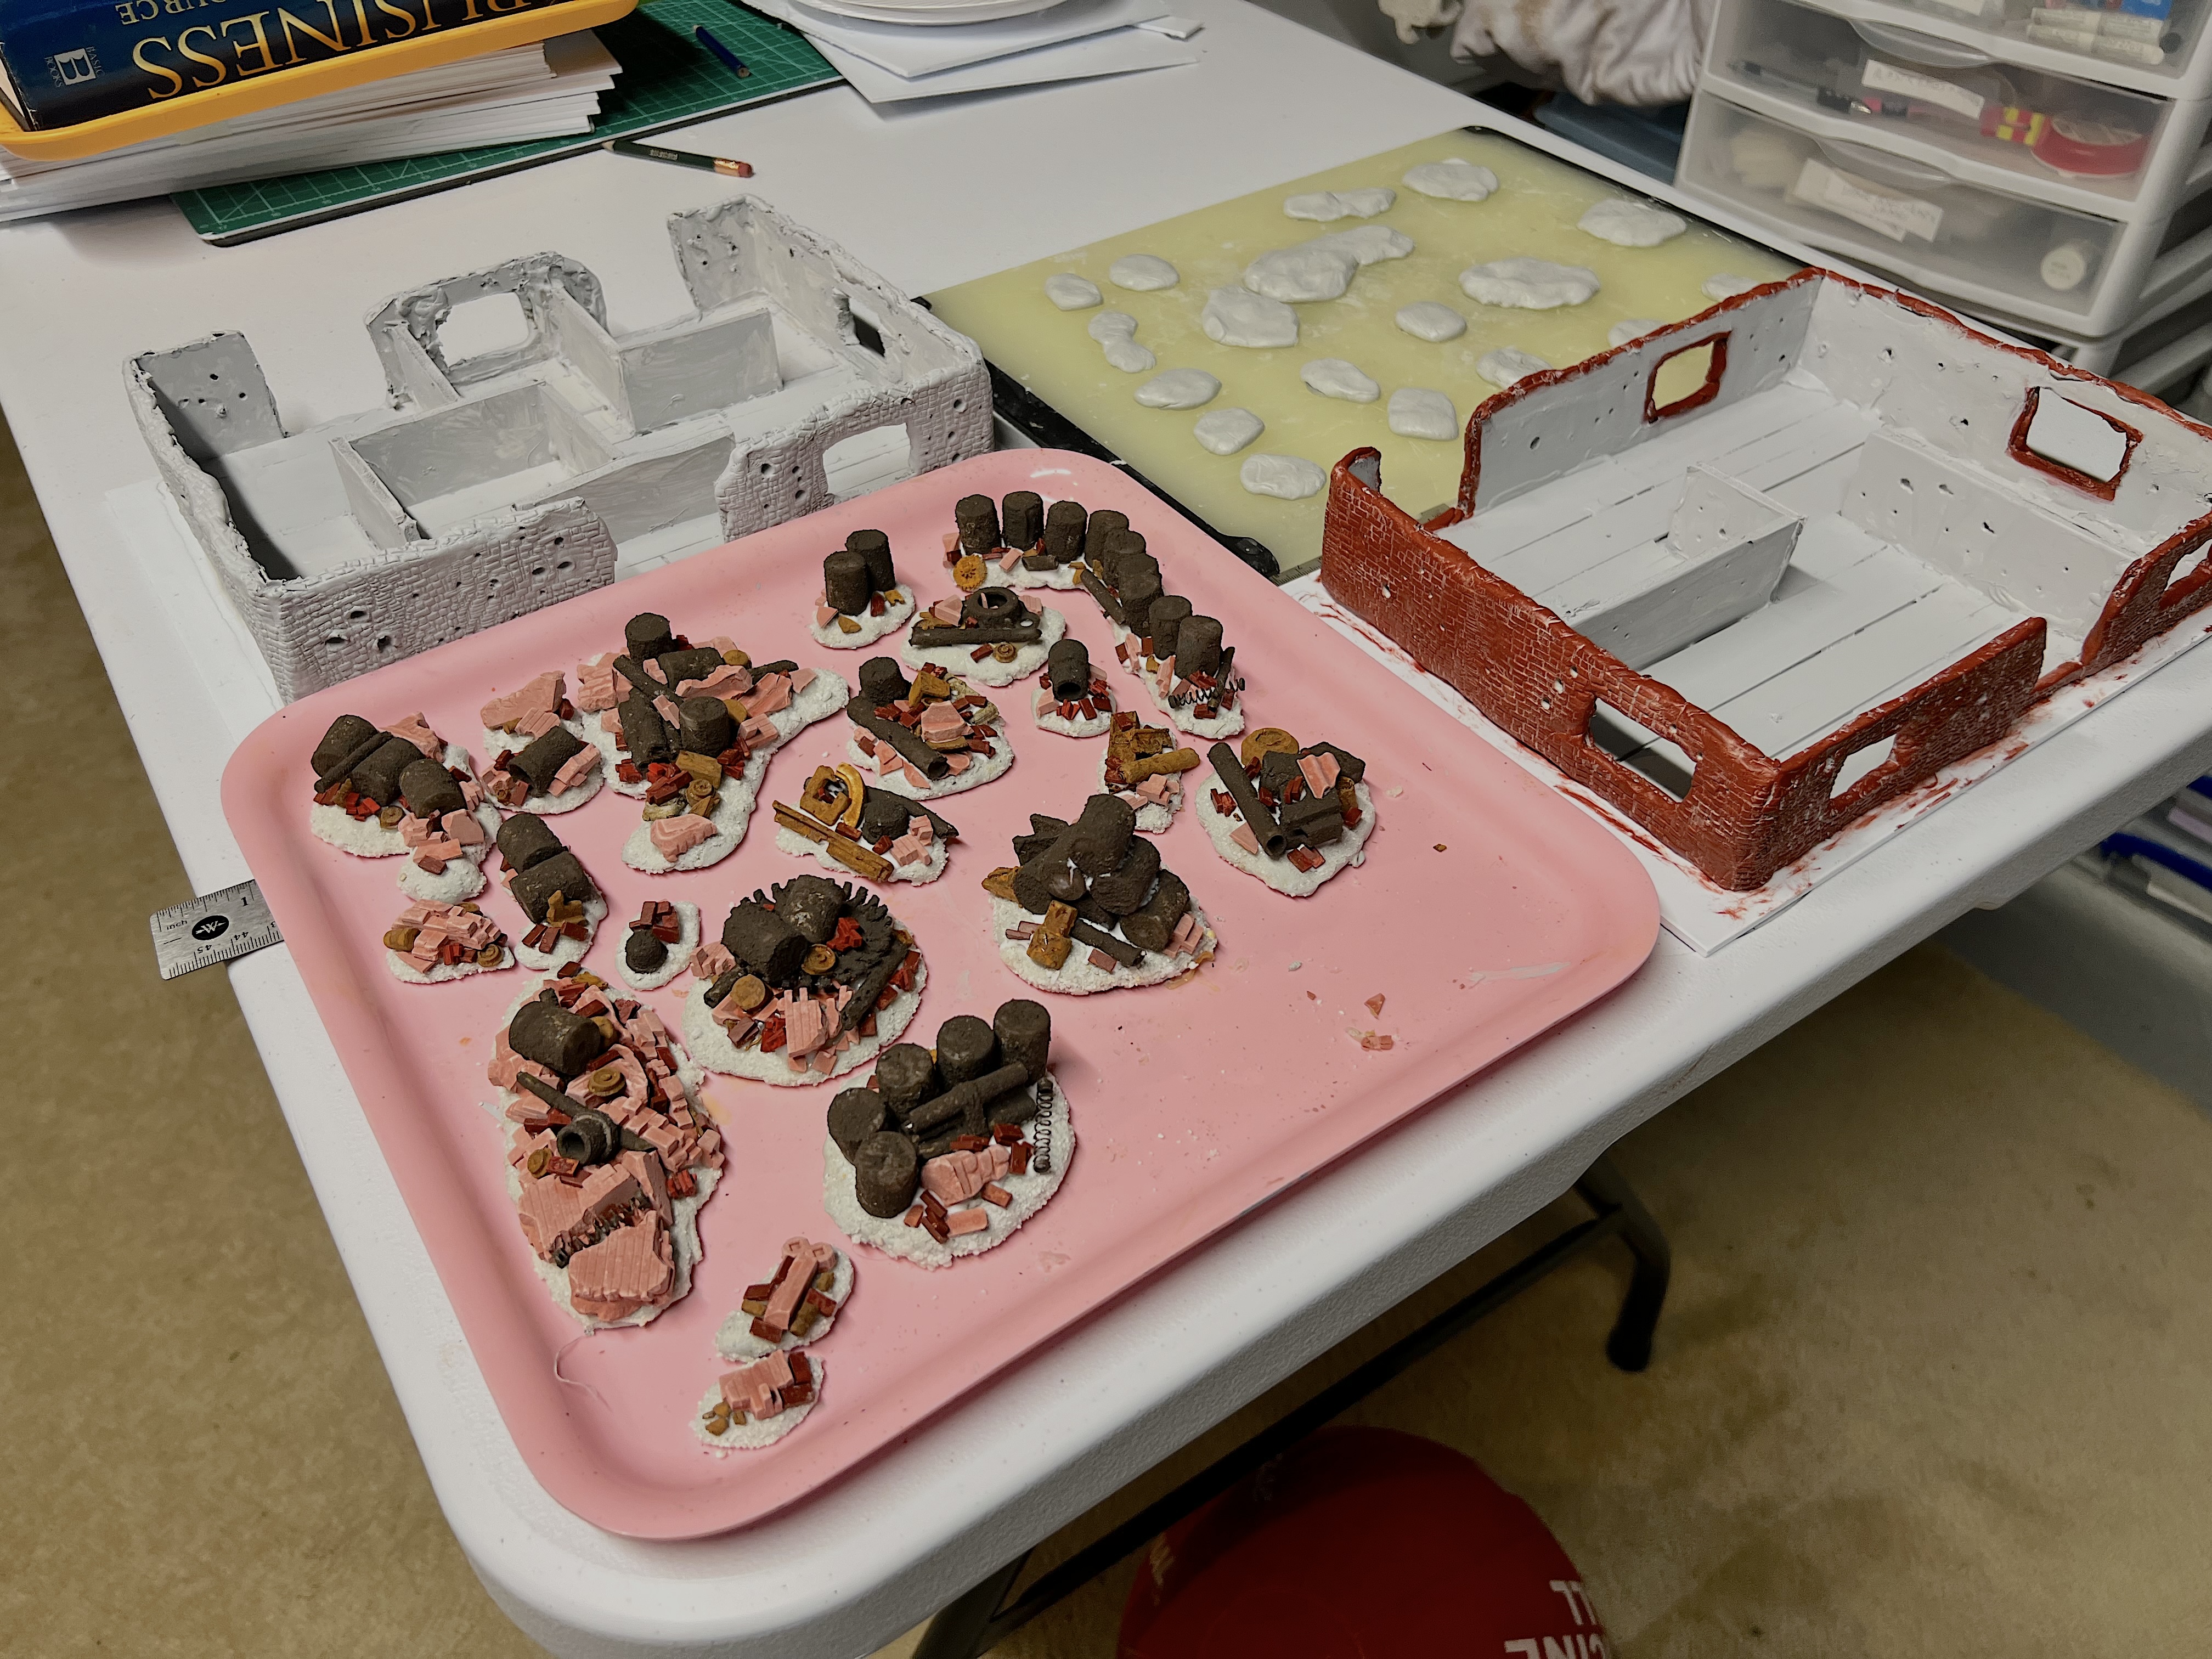
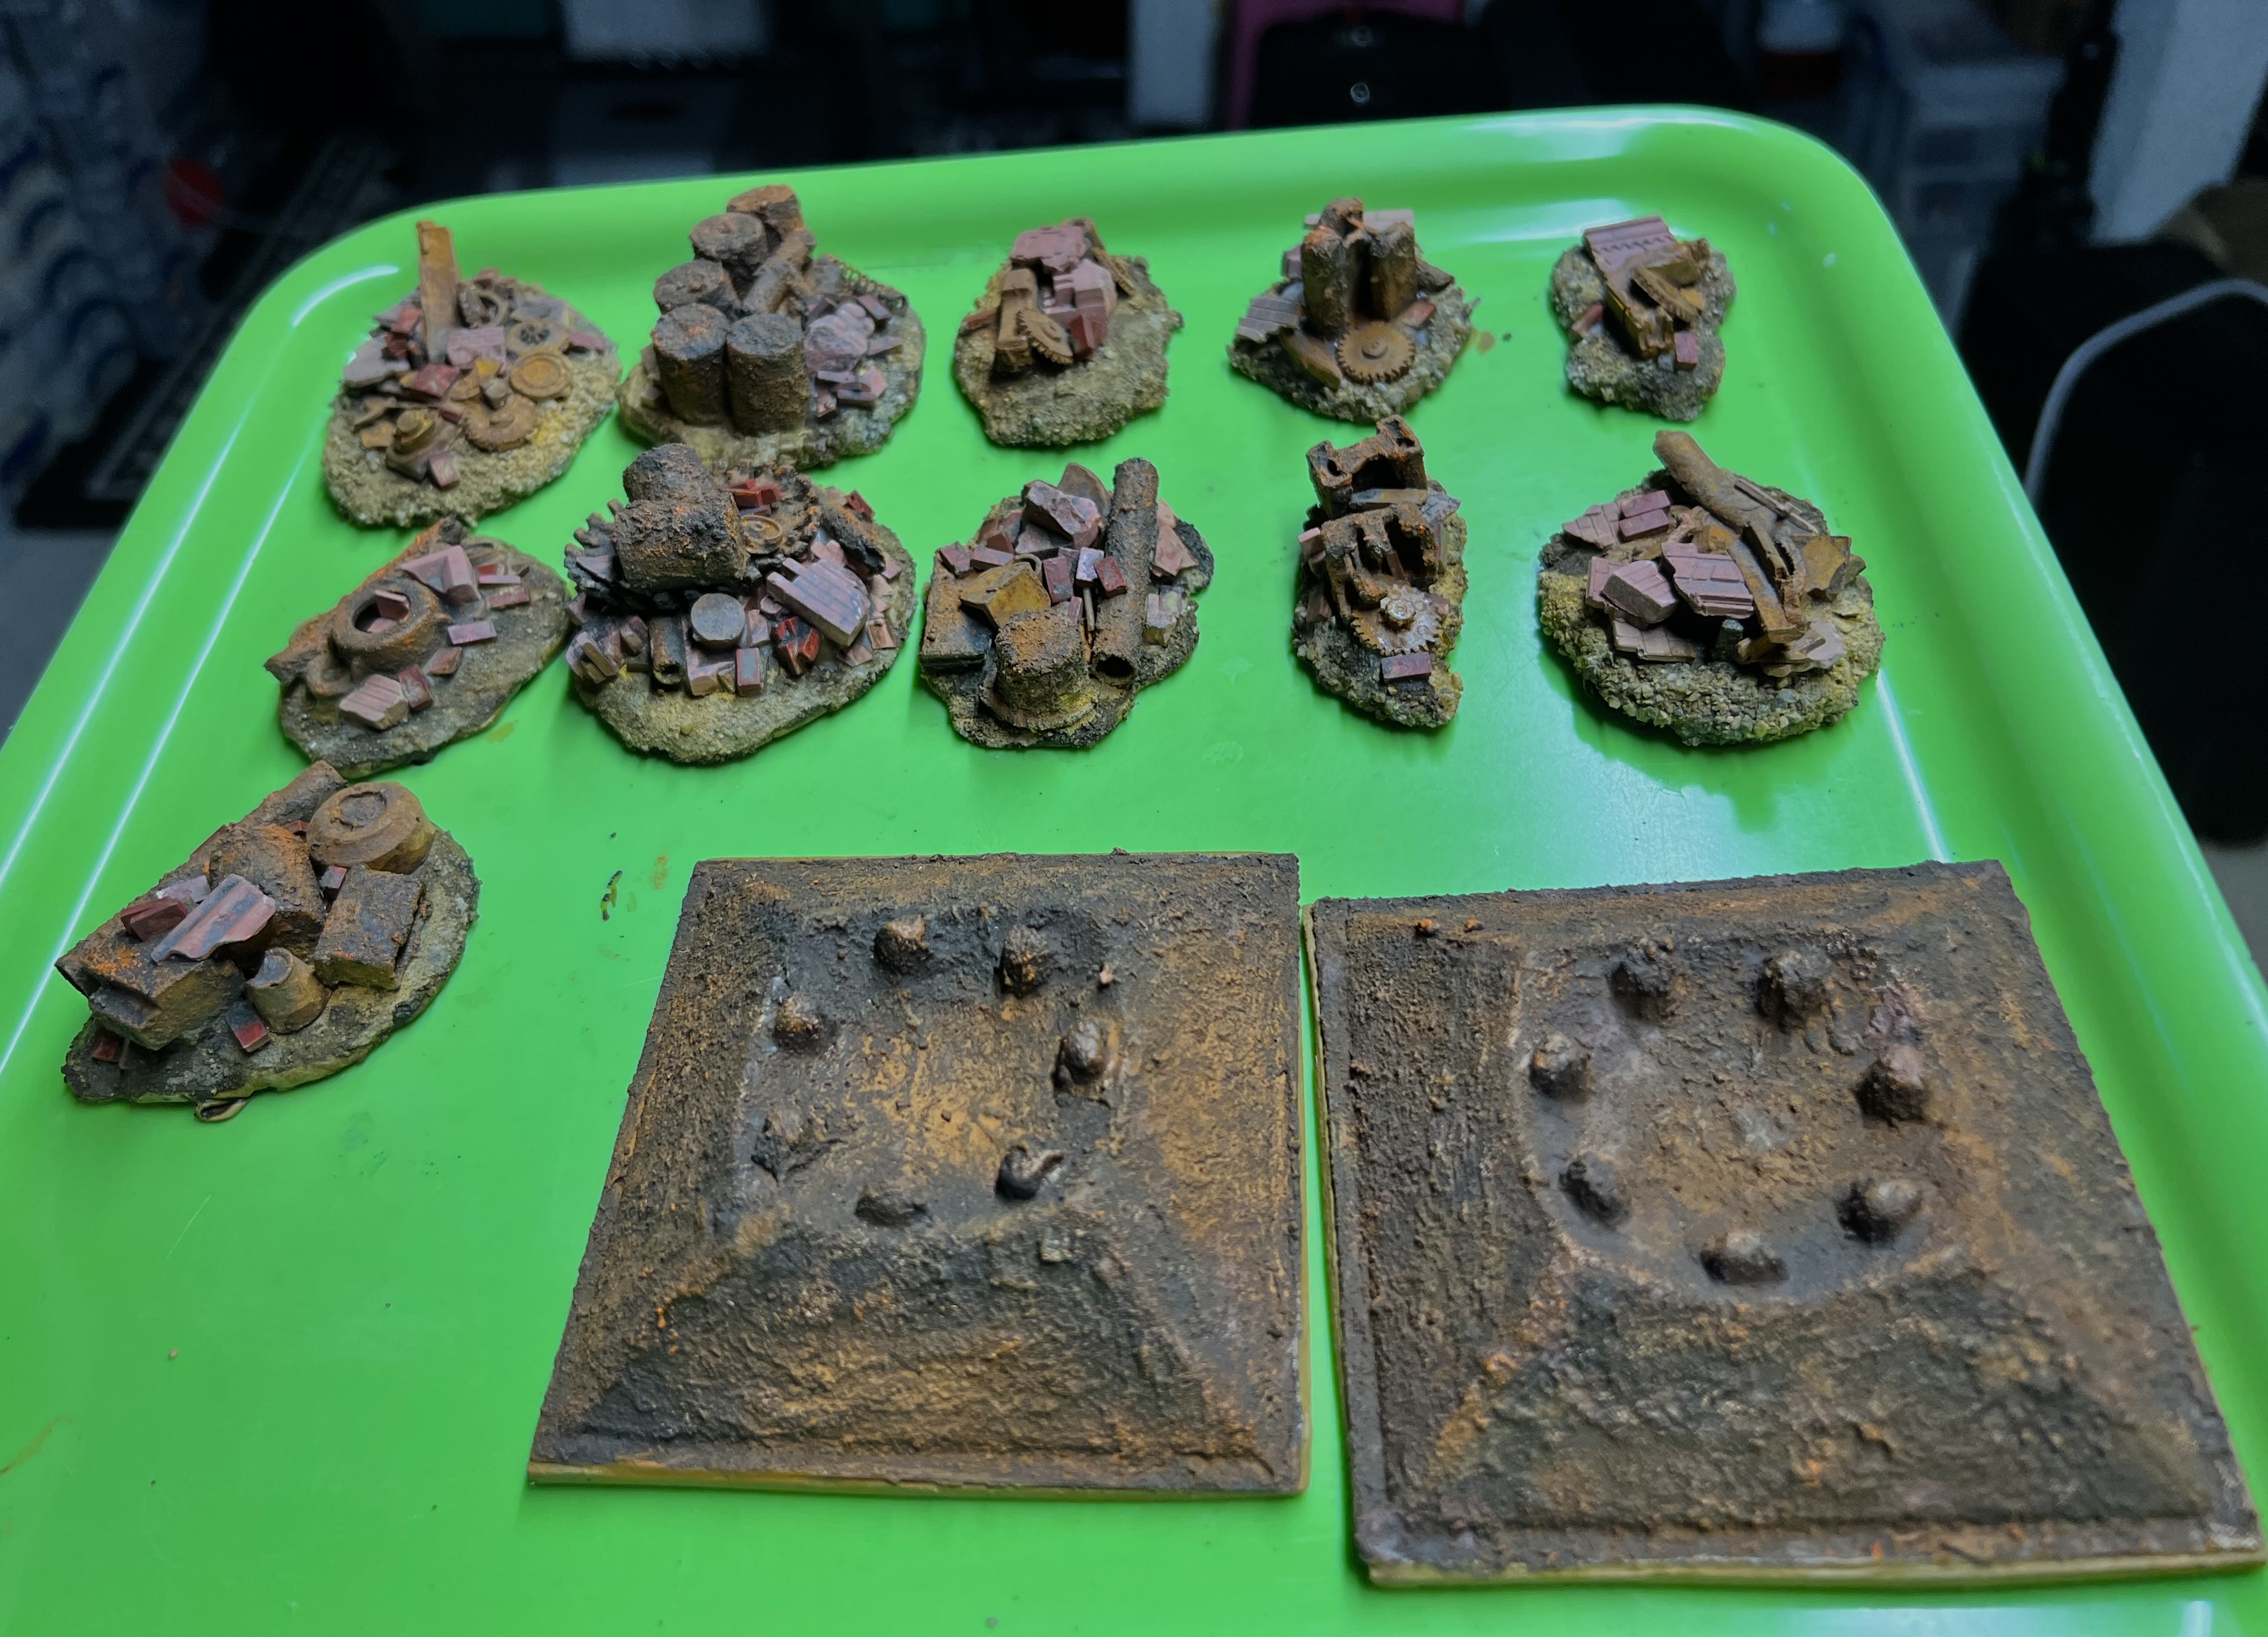
At this point, I added the flat clear plastic packing material to two square pieces of polystyrene by clamping and gluing them in preparation for corrosion texture. Then it was back to the wreckage bases. I had run out of white sand, so the next batch of wreckage bases got a PVA/grey sand application. As I used a lot pigments later, this made zero difference. At the same time, I also dirtied up the interior building walls and flooring using a sponge and various dark washes. The rim outside the buildings got a sandy texture paint covering.
The dark sand drying on the next wreckage bases, the flat structures with first application of corrosion texture, other bases in progress, and the buildings in the back.A second coat of corrosion paint has been applied to the flat structures here. I also sorted the wreckage bases by size before adding pigments.The flat structures and some other rusty paints I would add before augmenting with pigments.
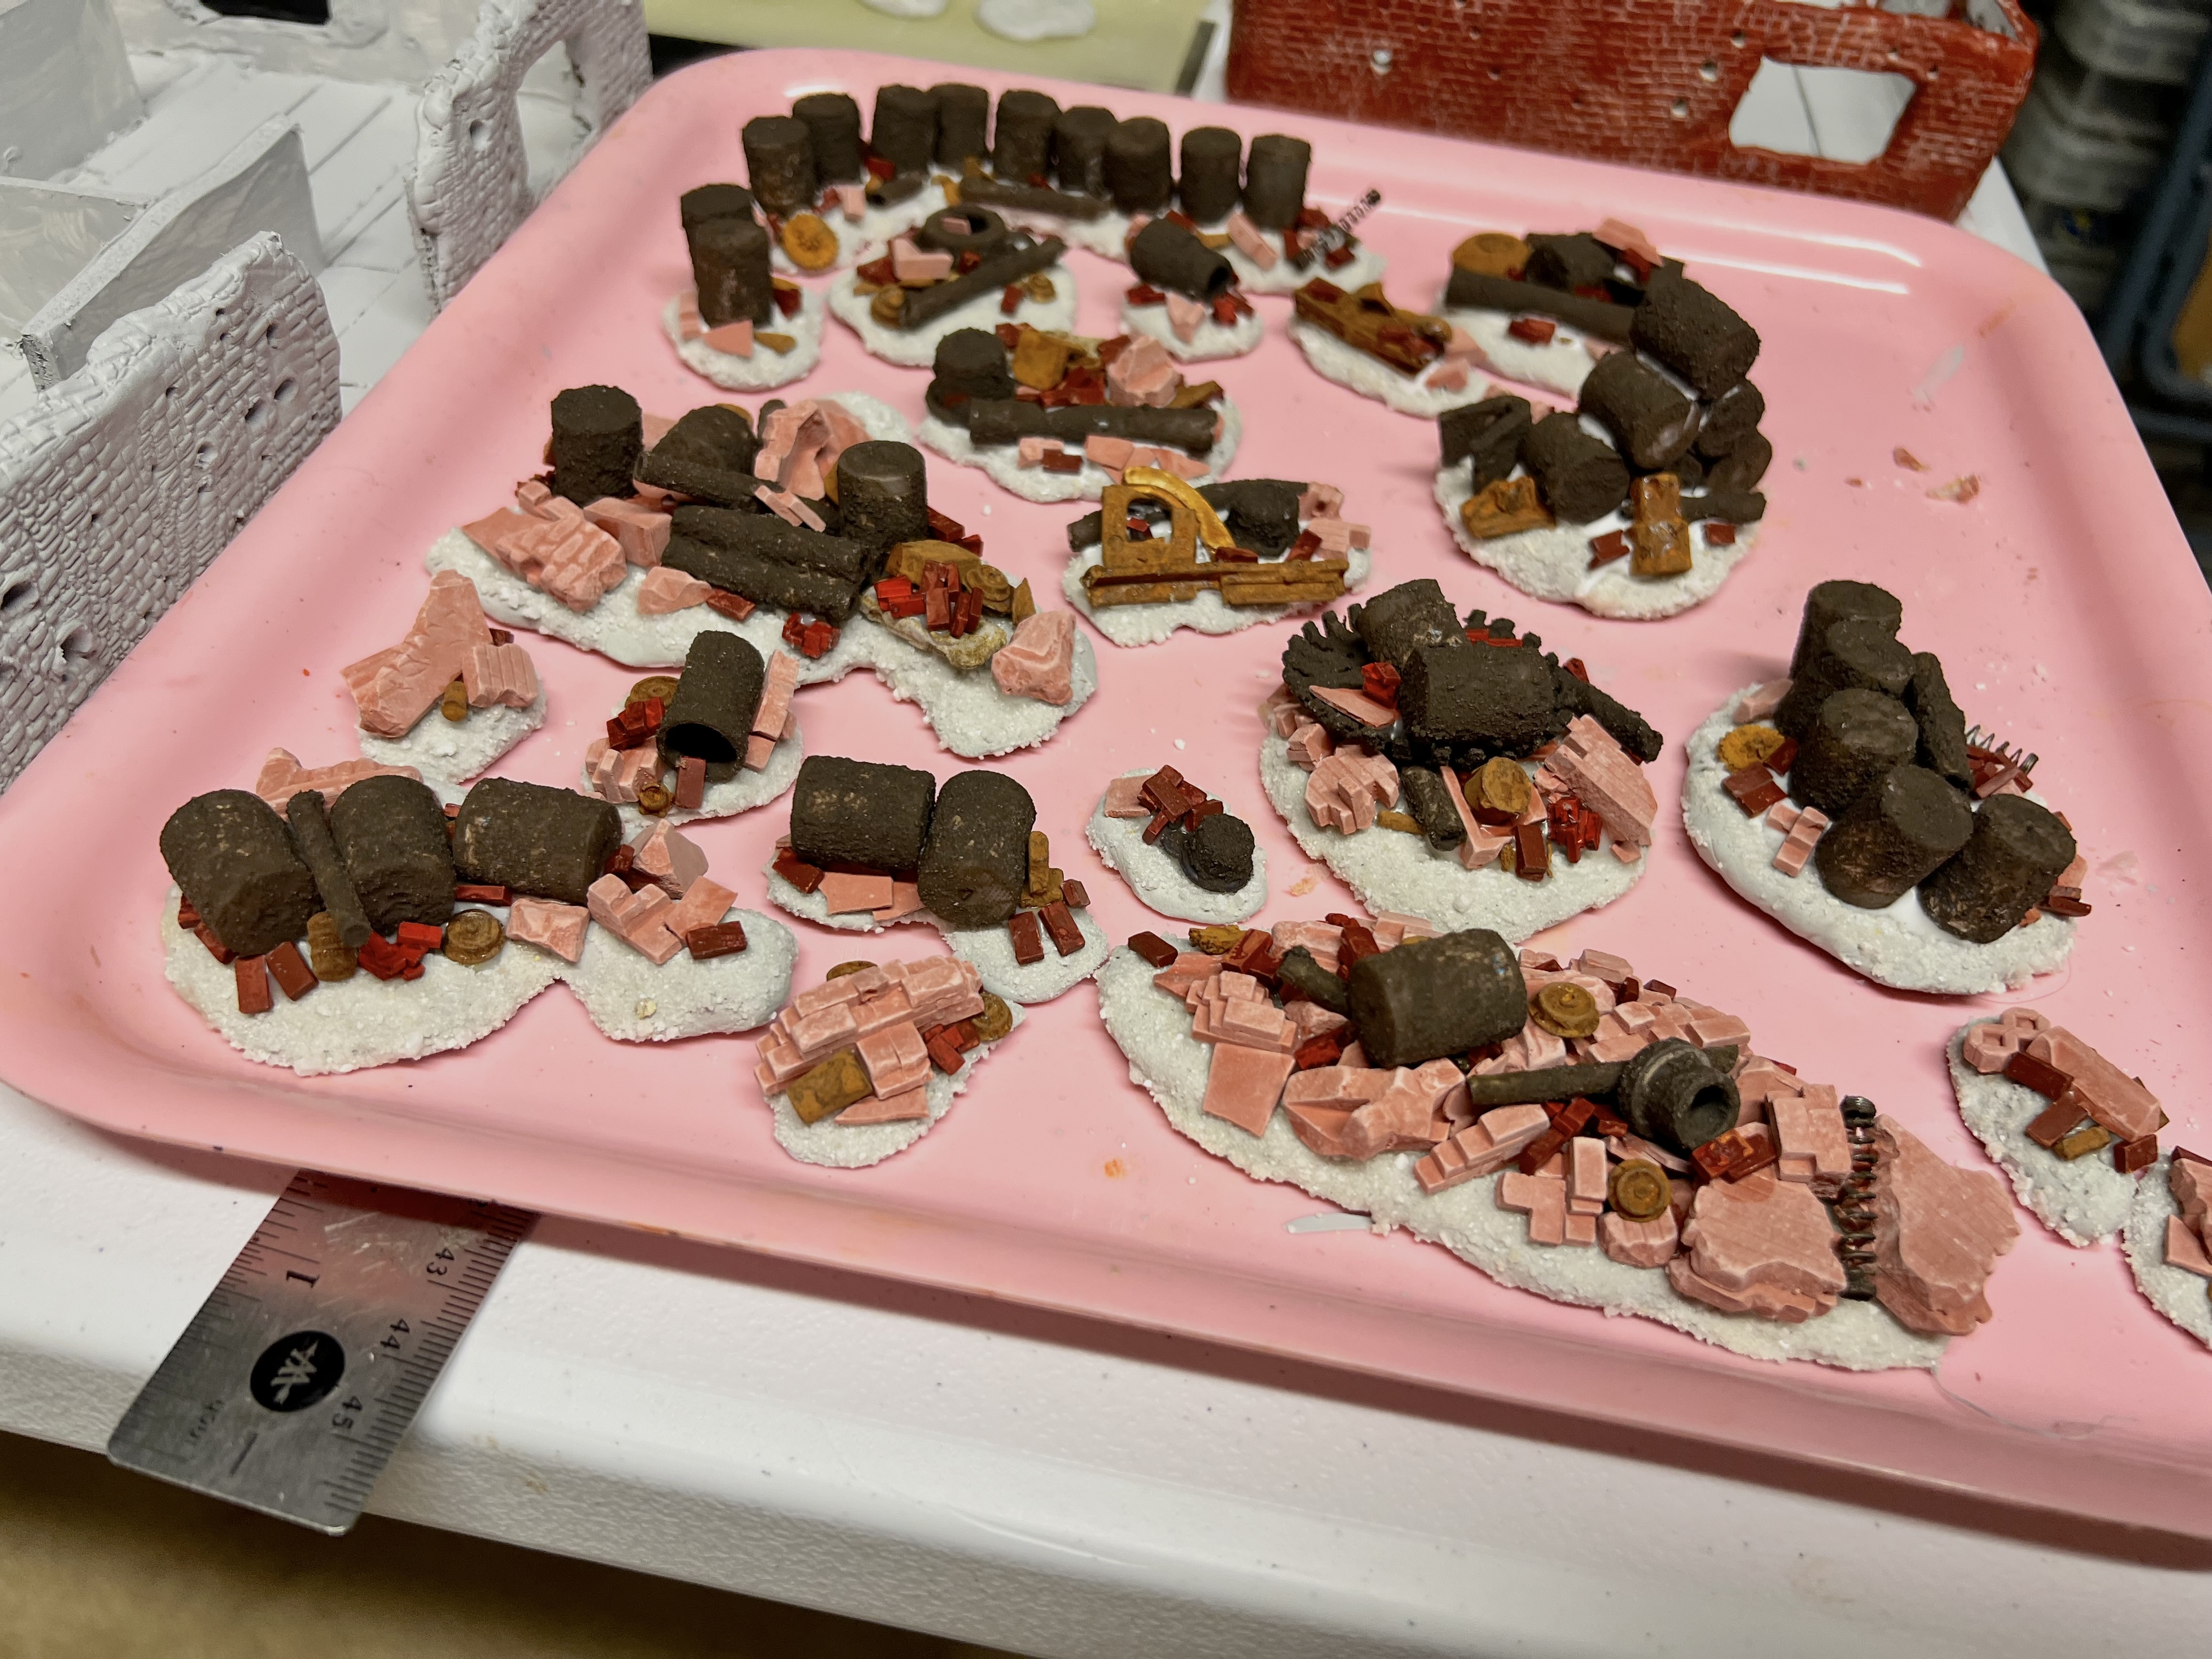
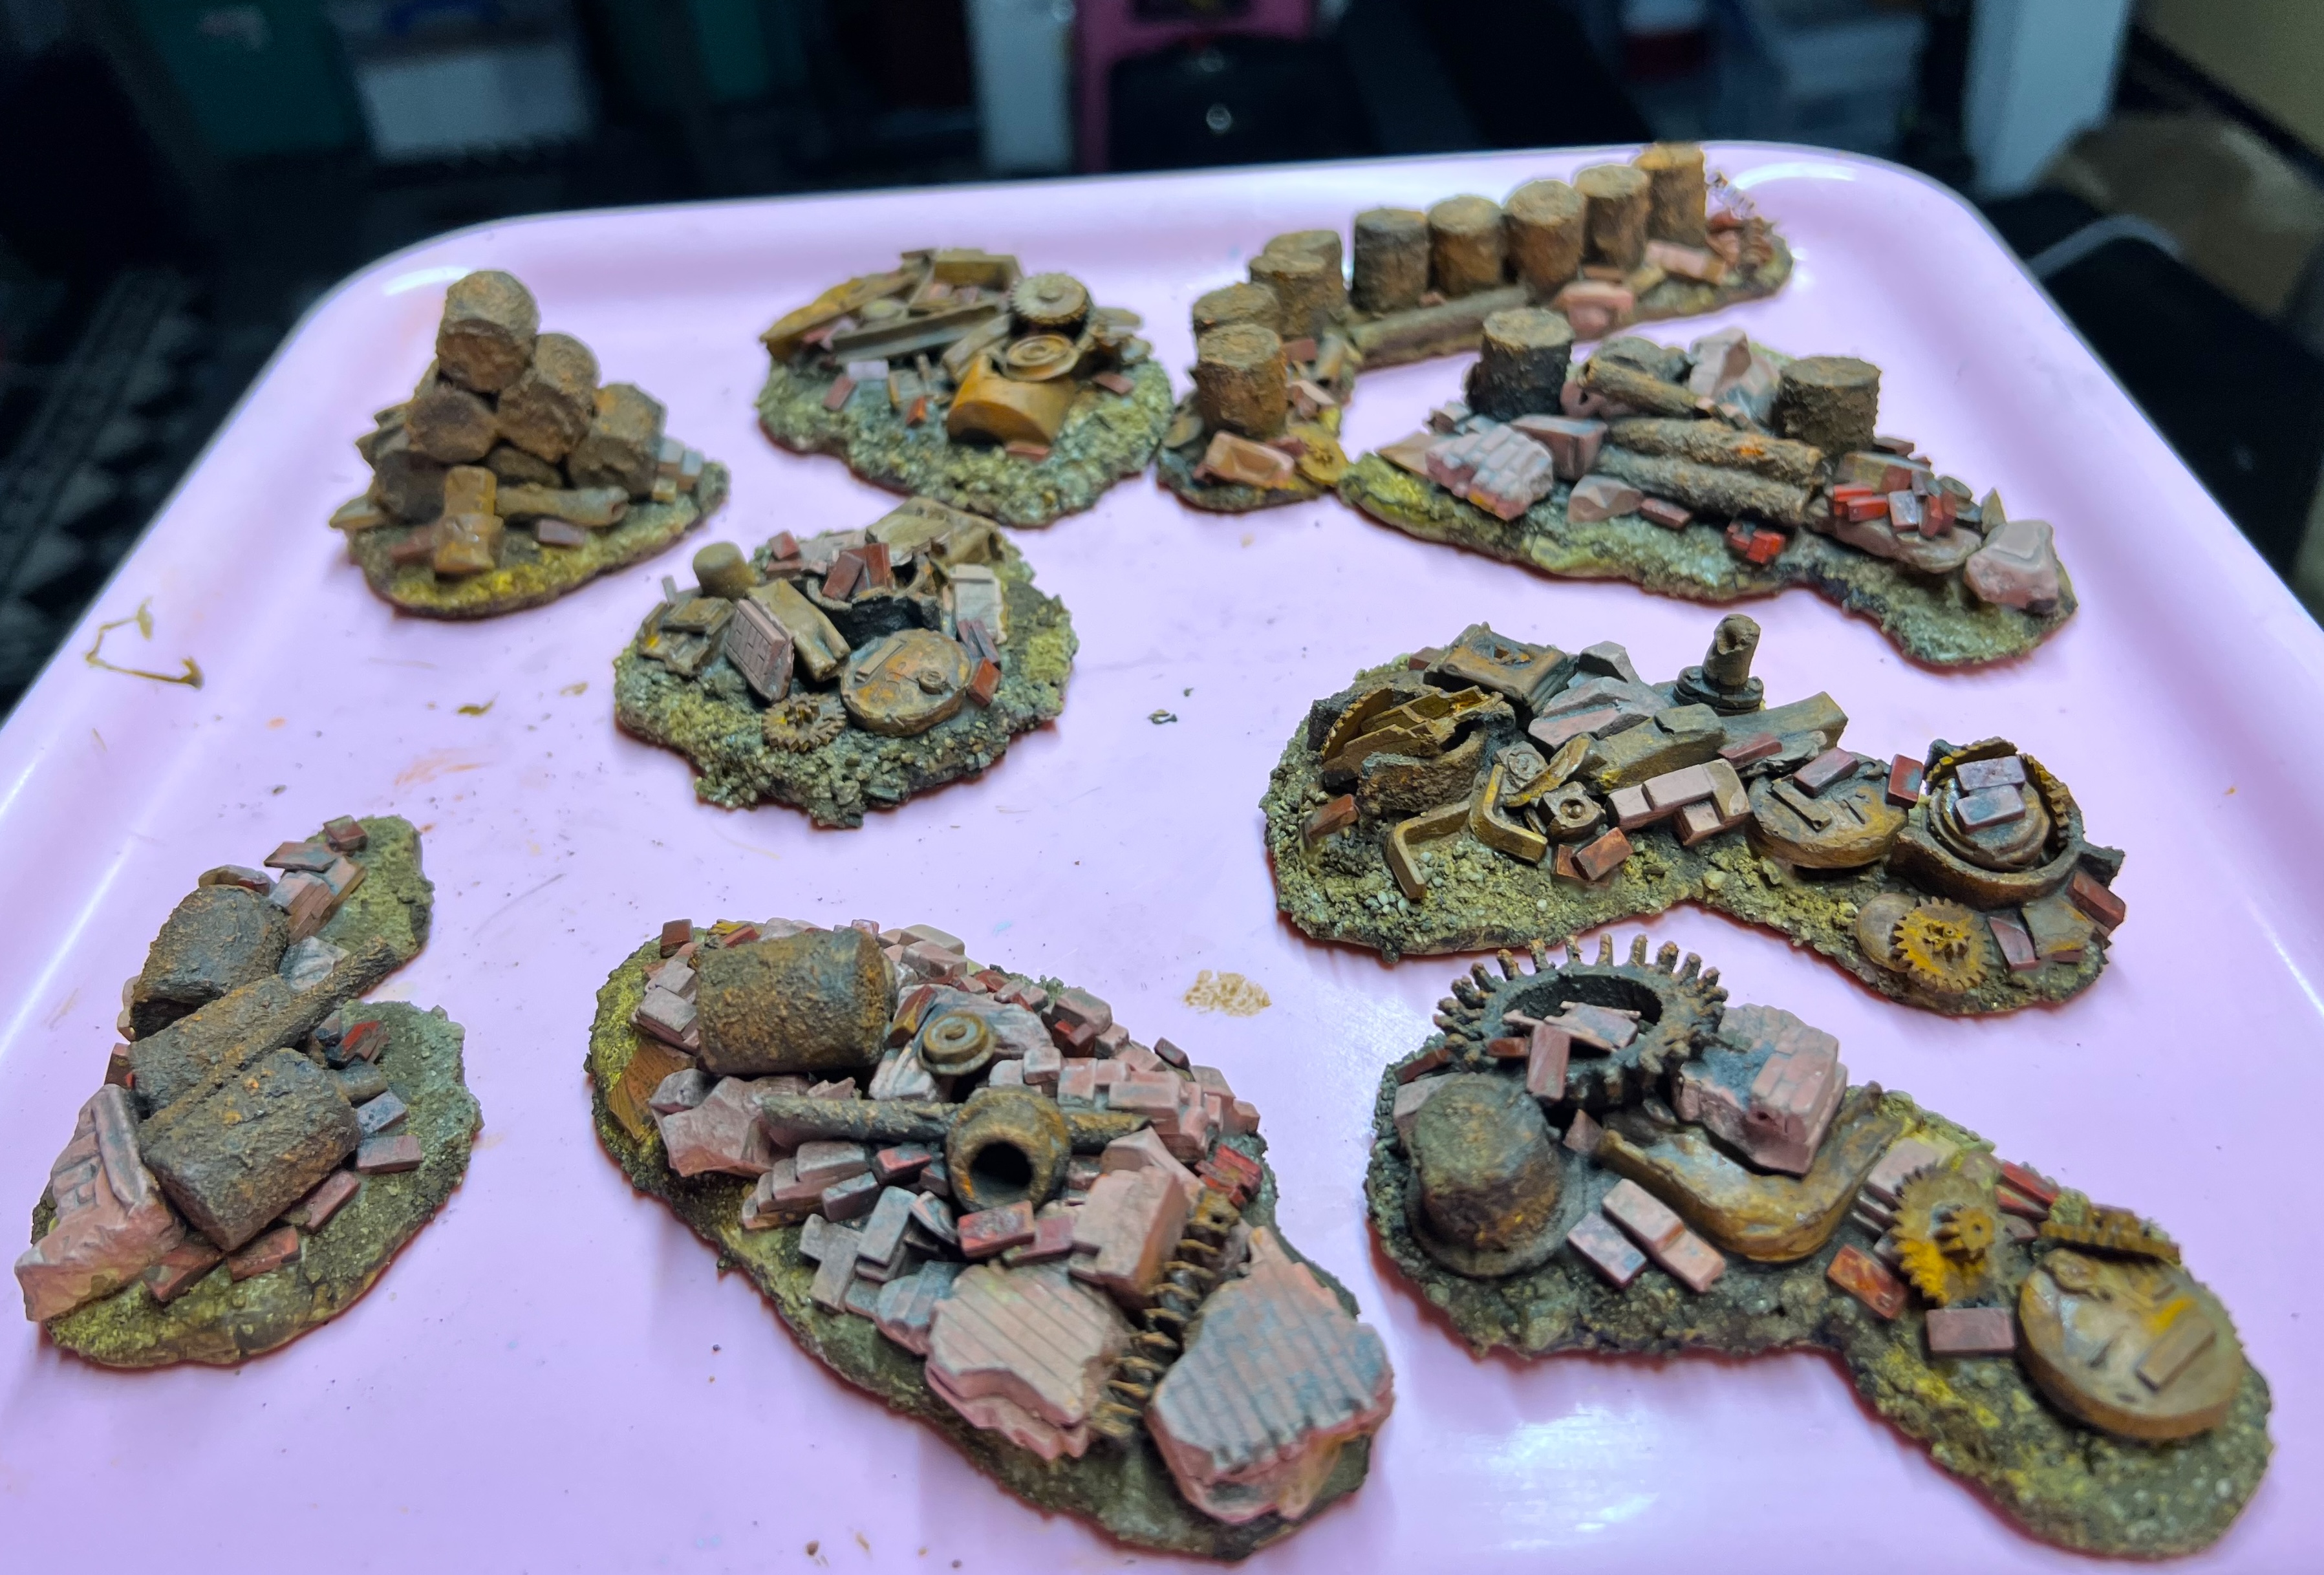
Below you can see the wreckage bases after I added pigments to them. I fixed the pigments with Vallejo Thinner applied with a spray from a lens cleaning bottle.
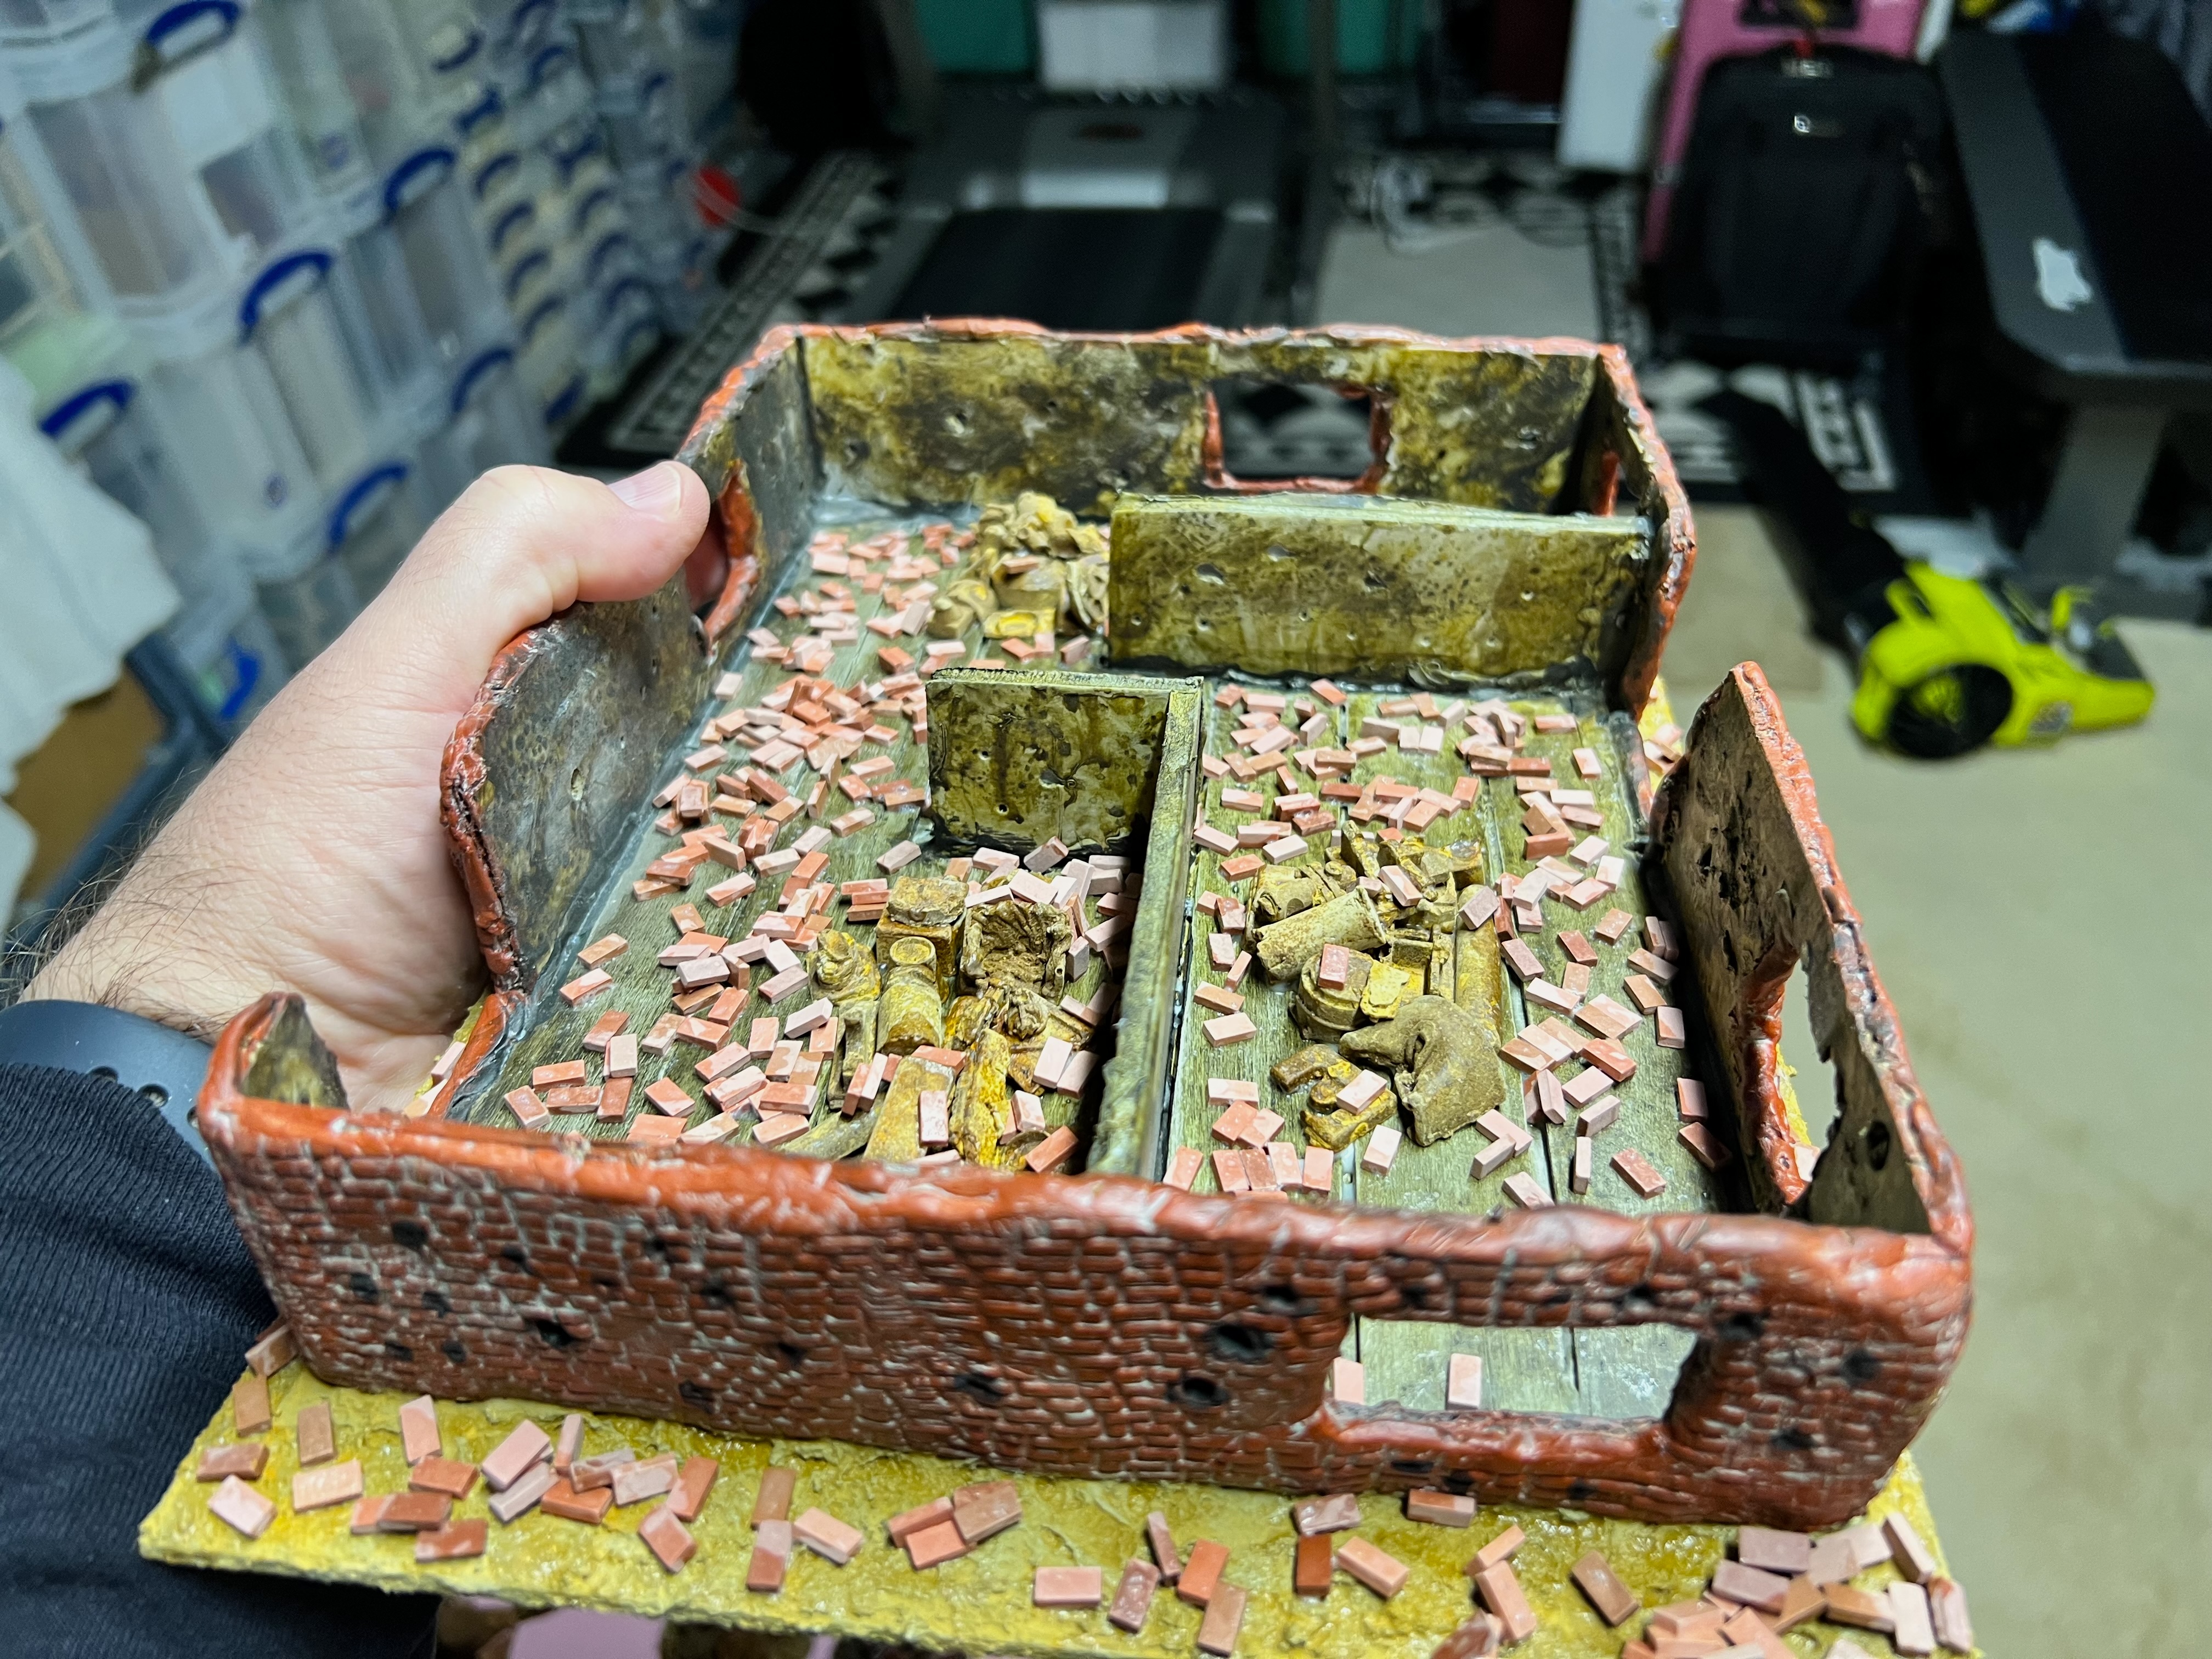
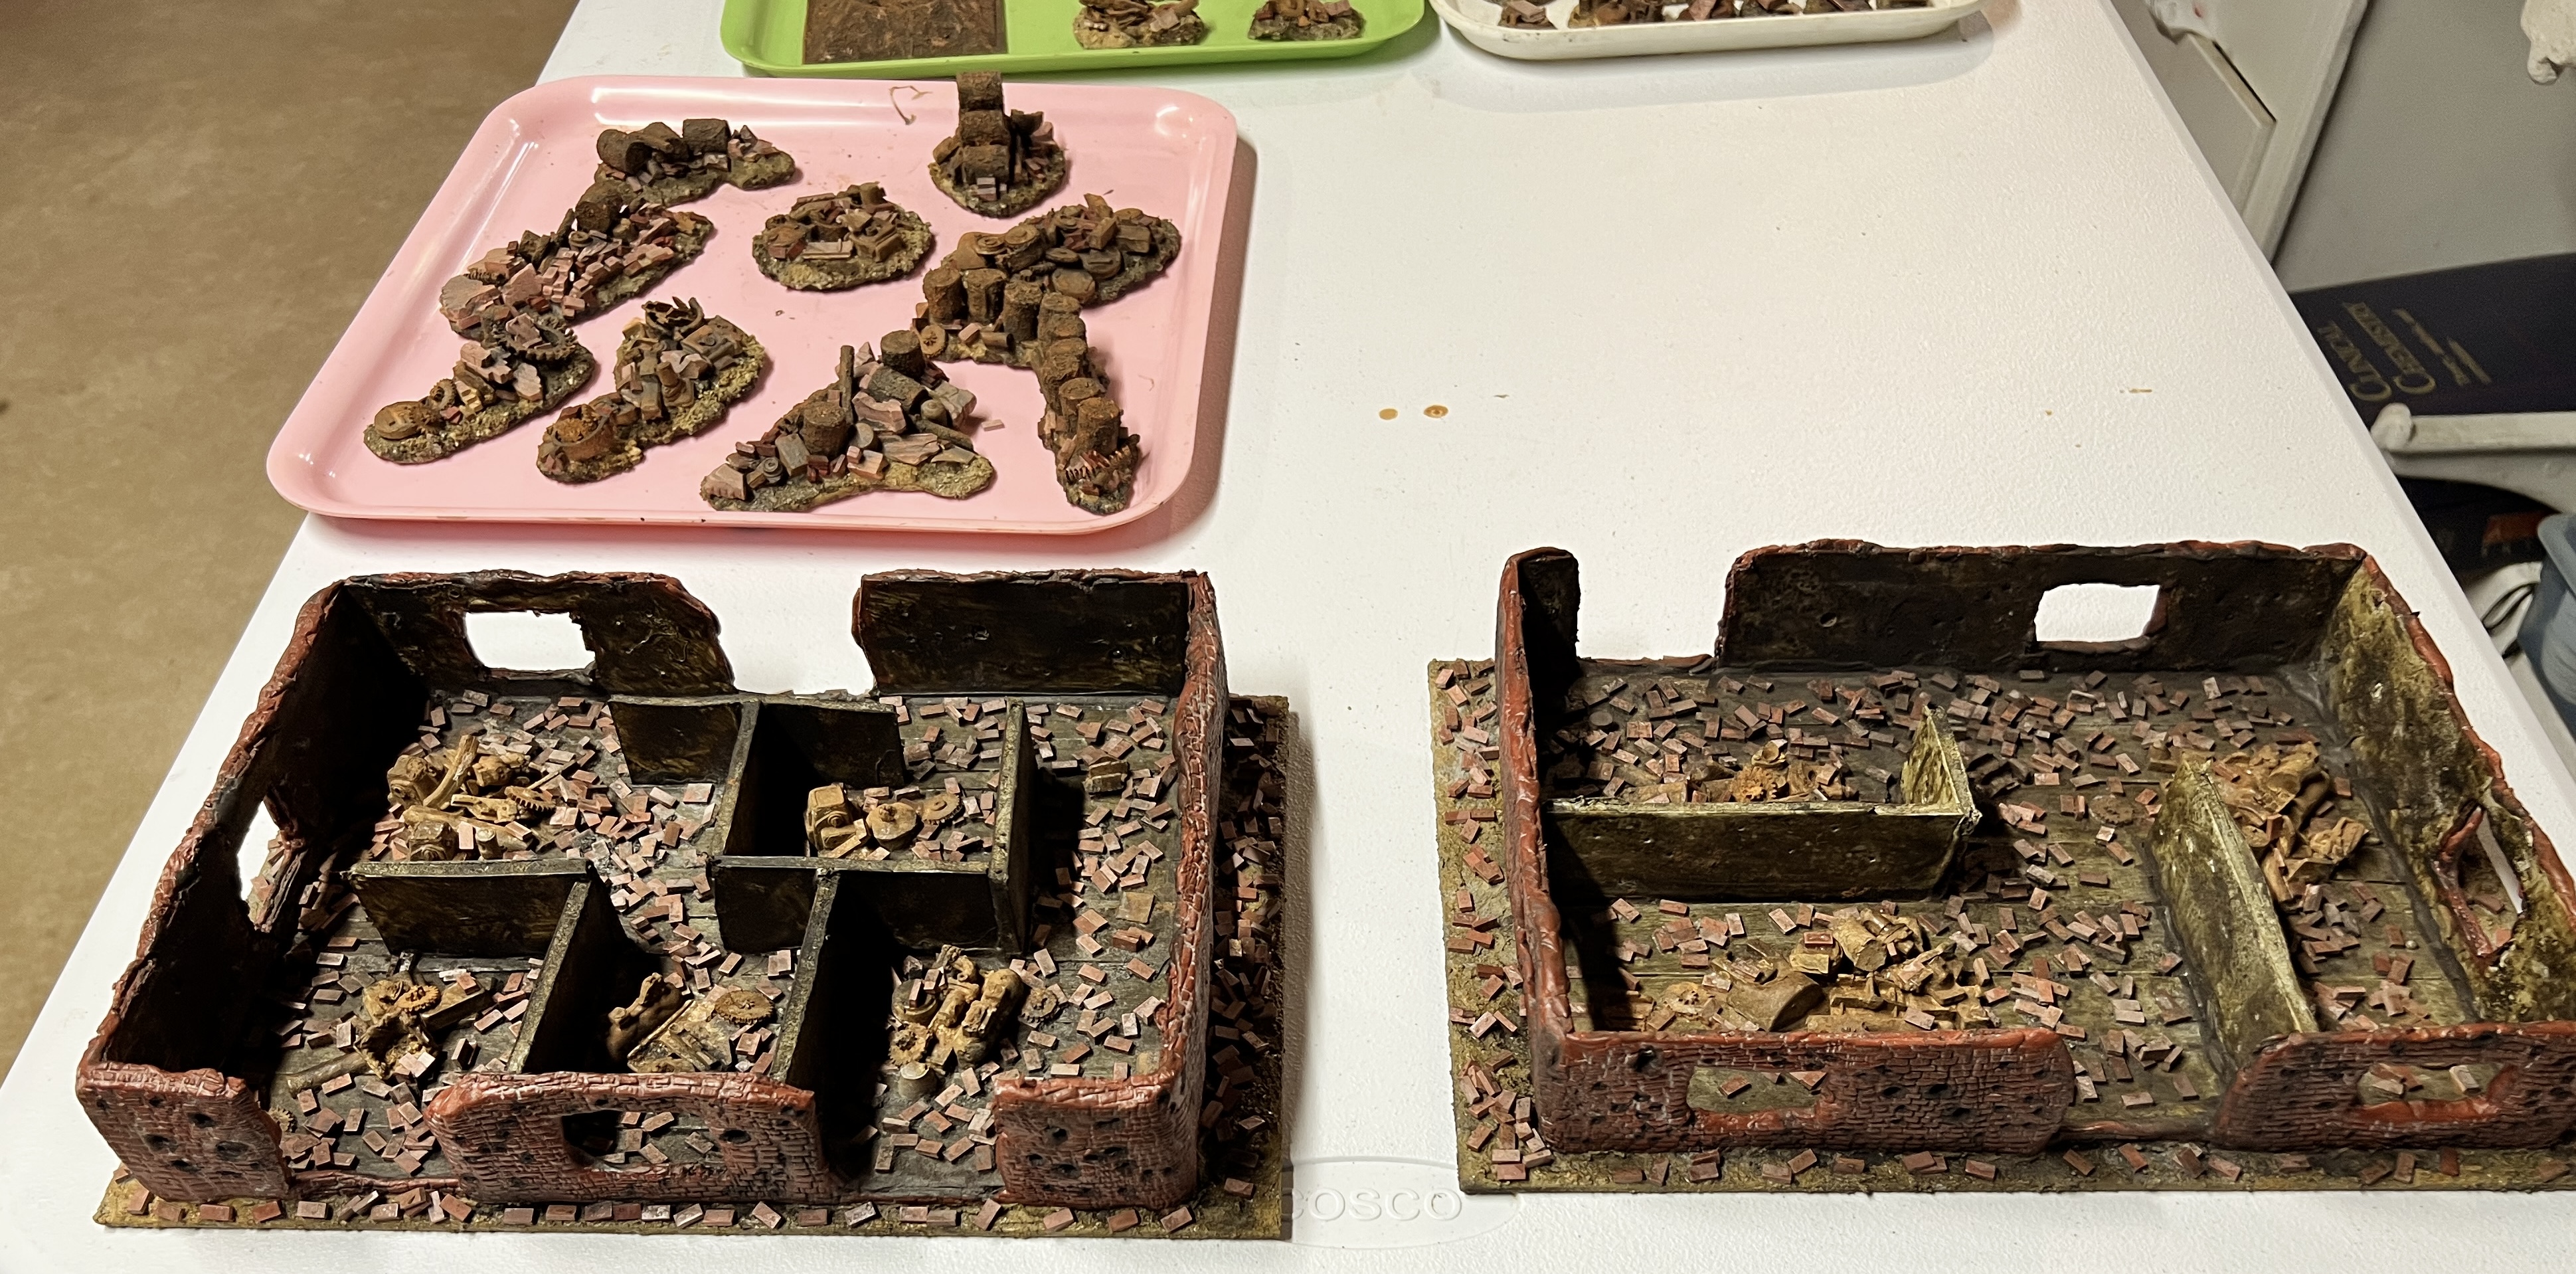
Next, I added rusty industrial wreckage and scattered bricks to the buildings’ interiors.
After adding industrial wreckage and bricks to building 1……and building 2.
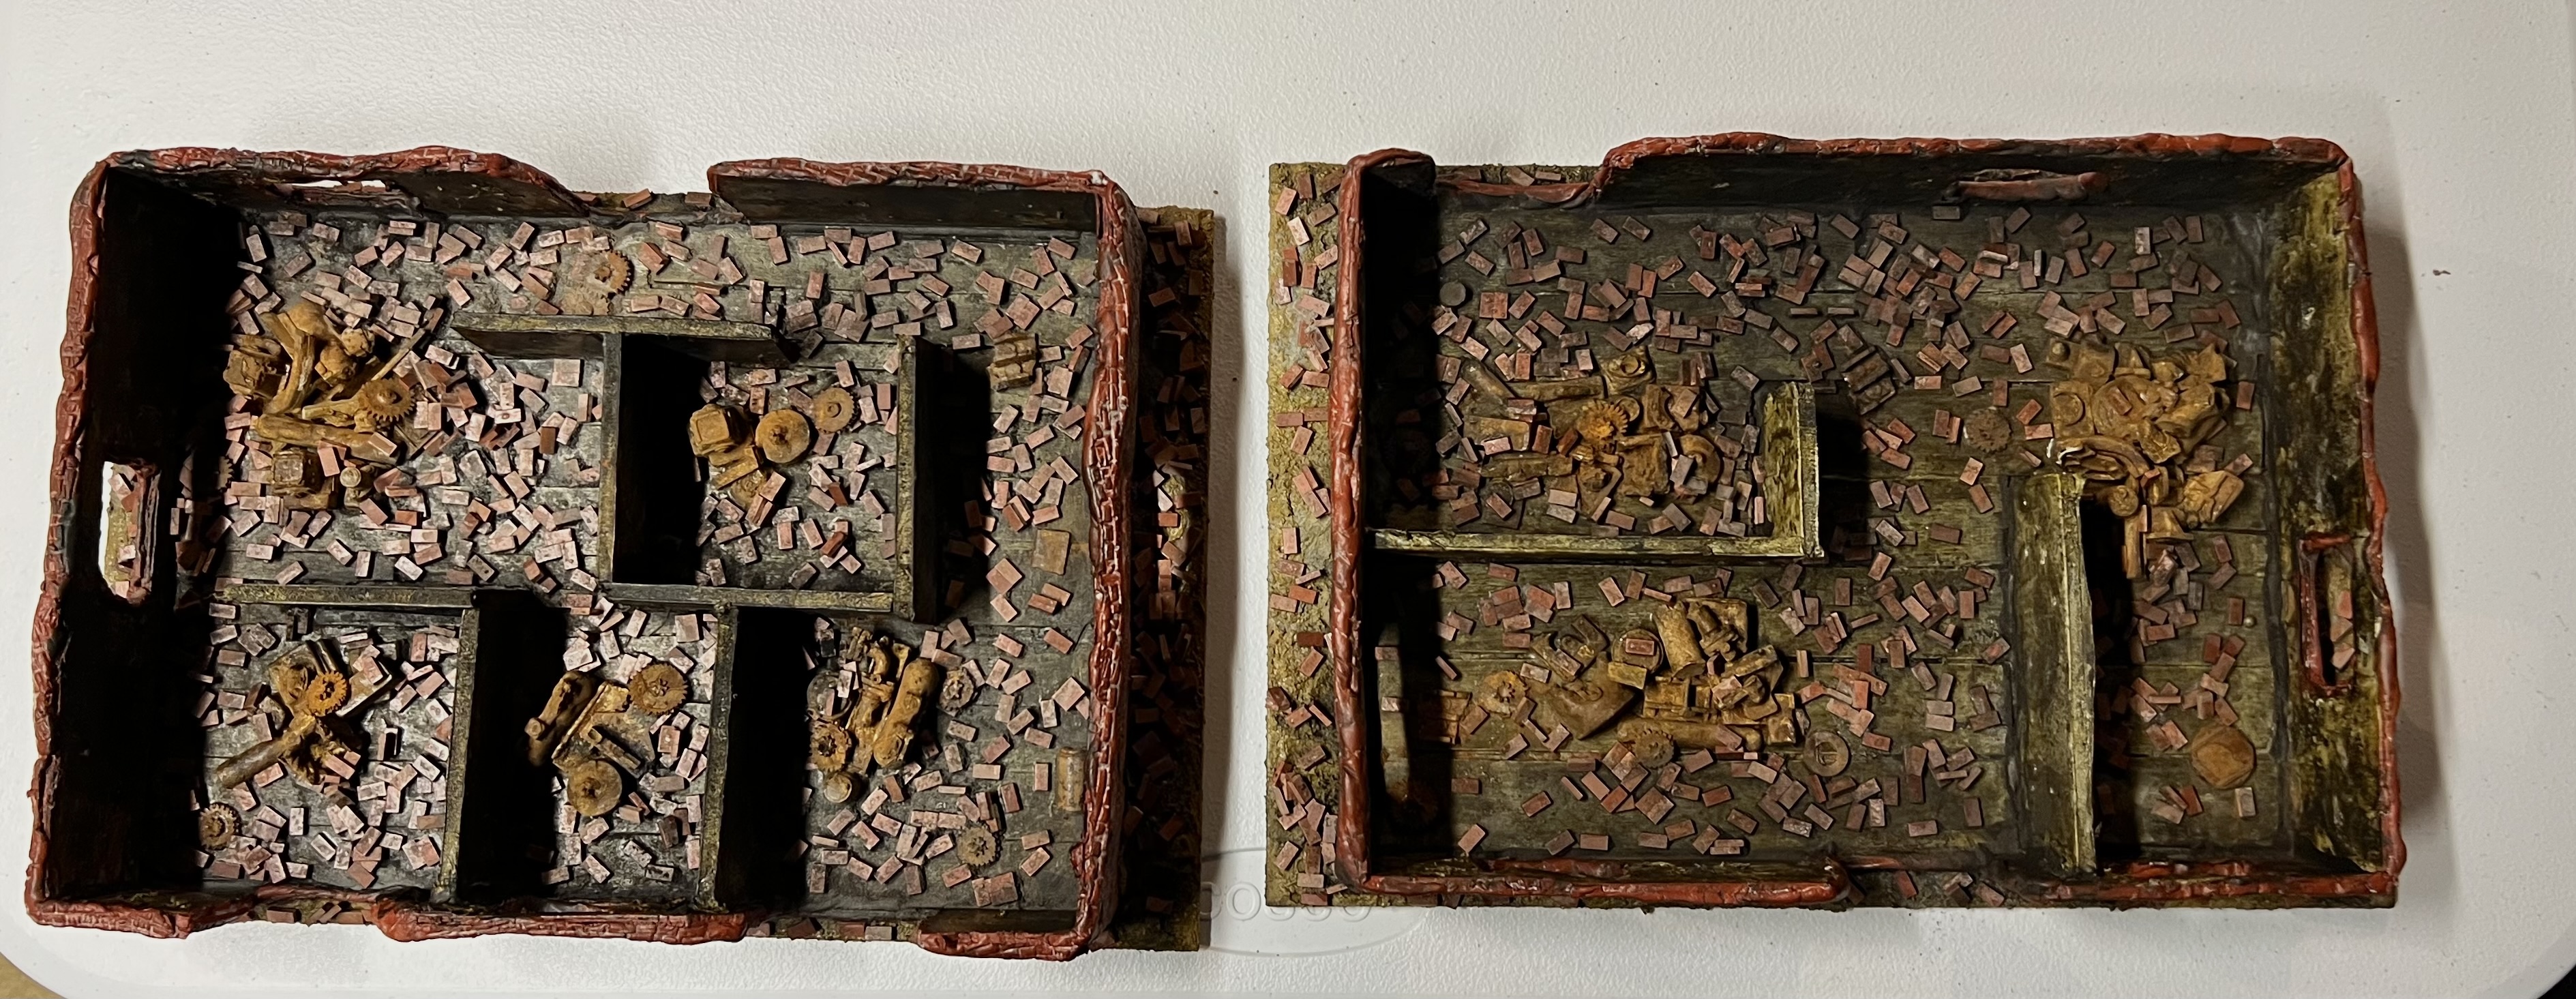
Clearly, pigments were needed at this point to make the bricks and wreckage look older and dirtier. More pigments and dark washes to the rescue!
The buildings after adding the pigments and washes to dirty and rust up everything.Top view of both buildings as completed.
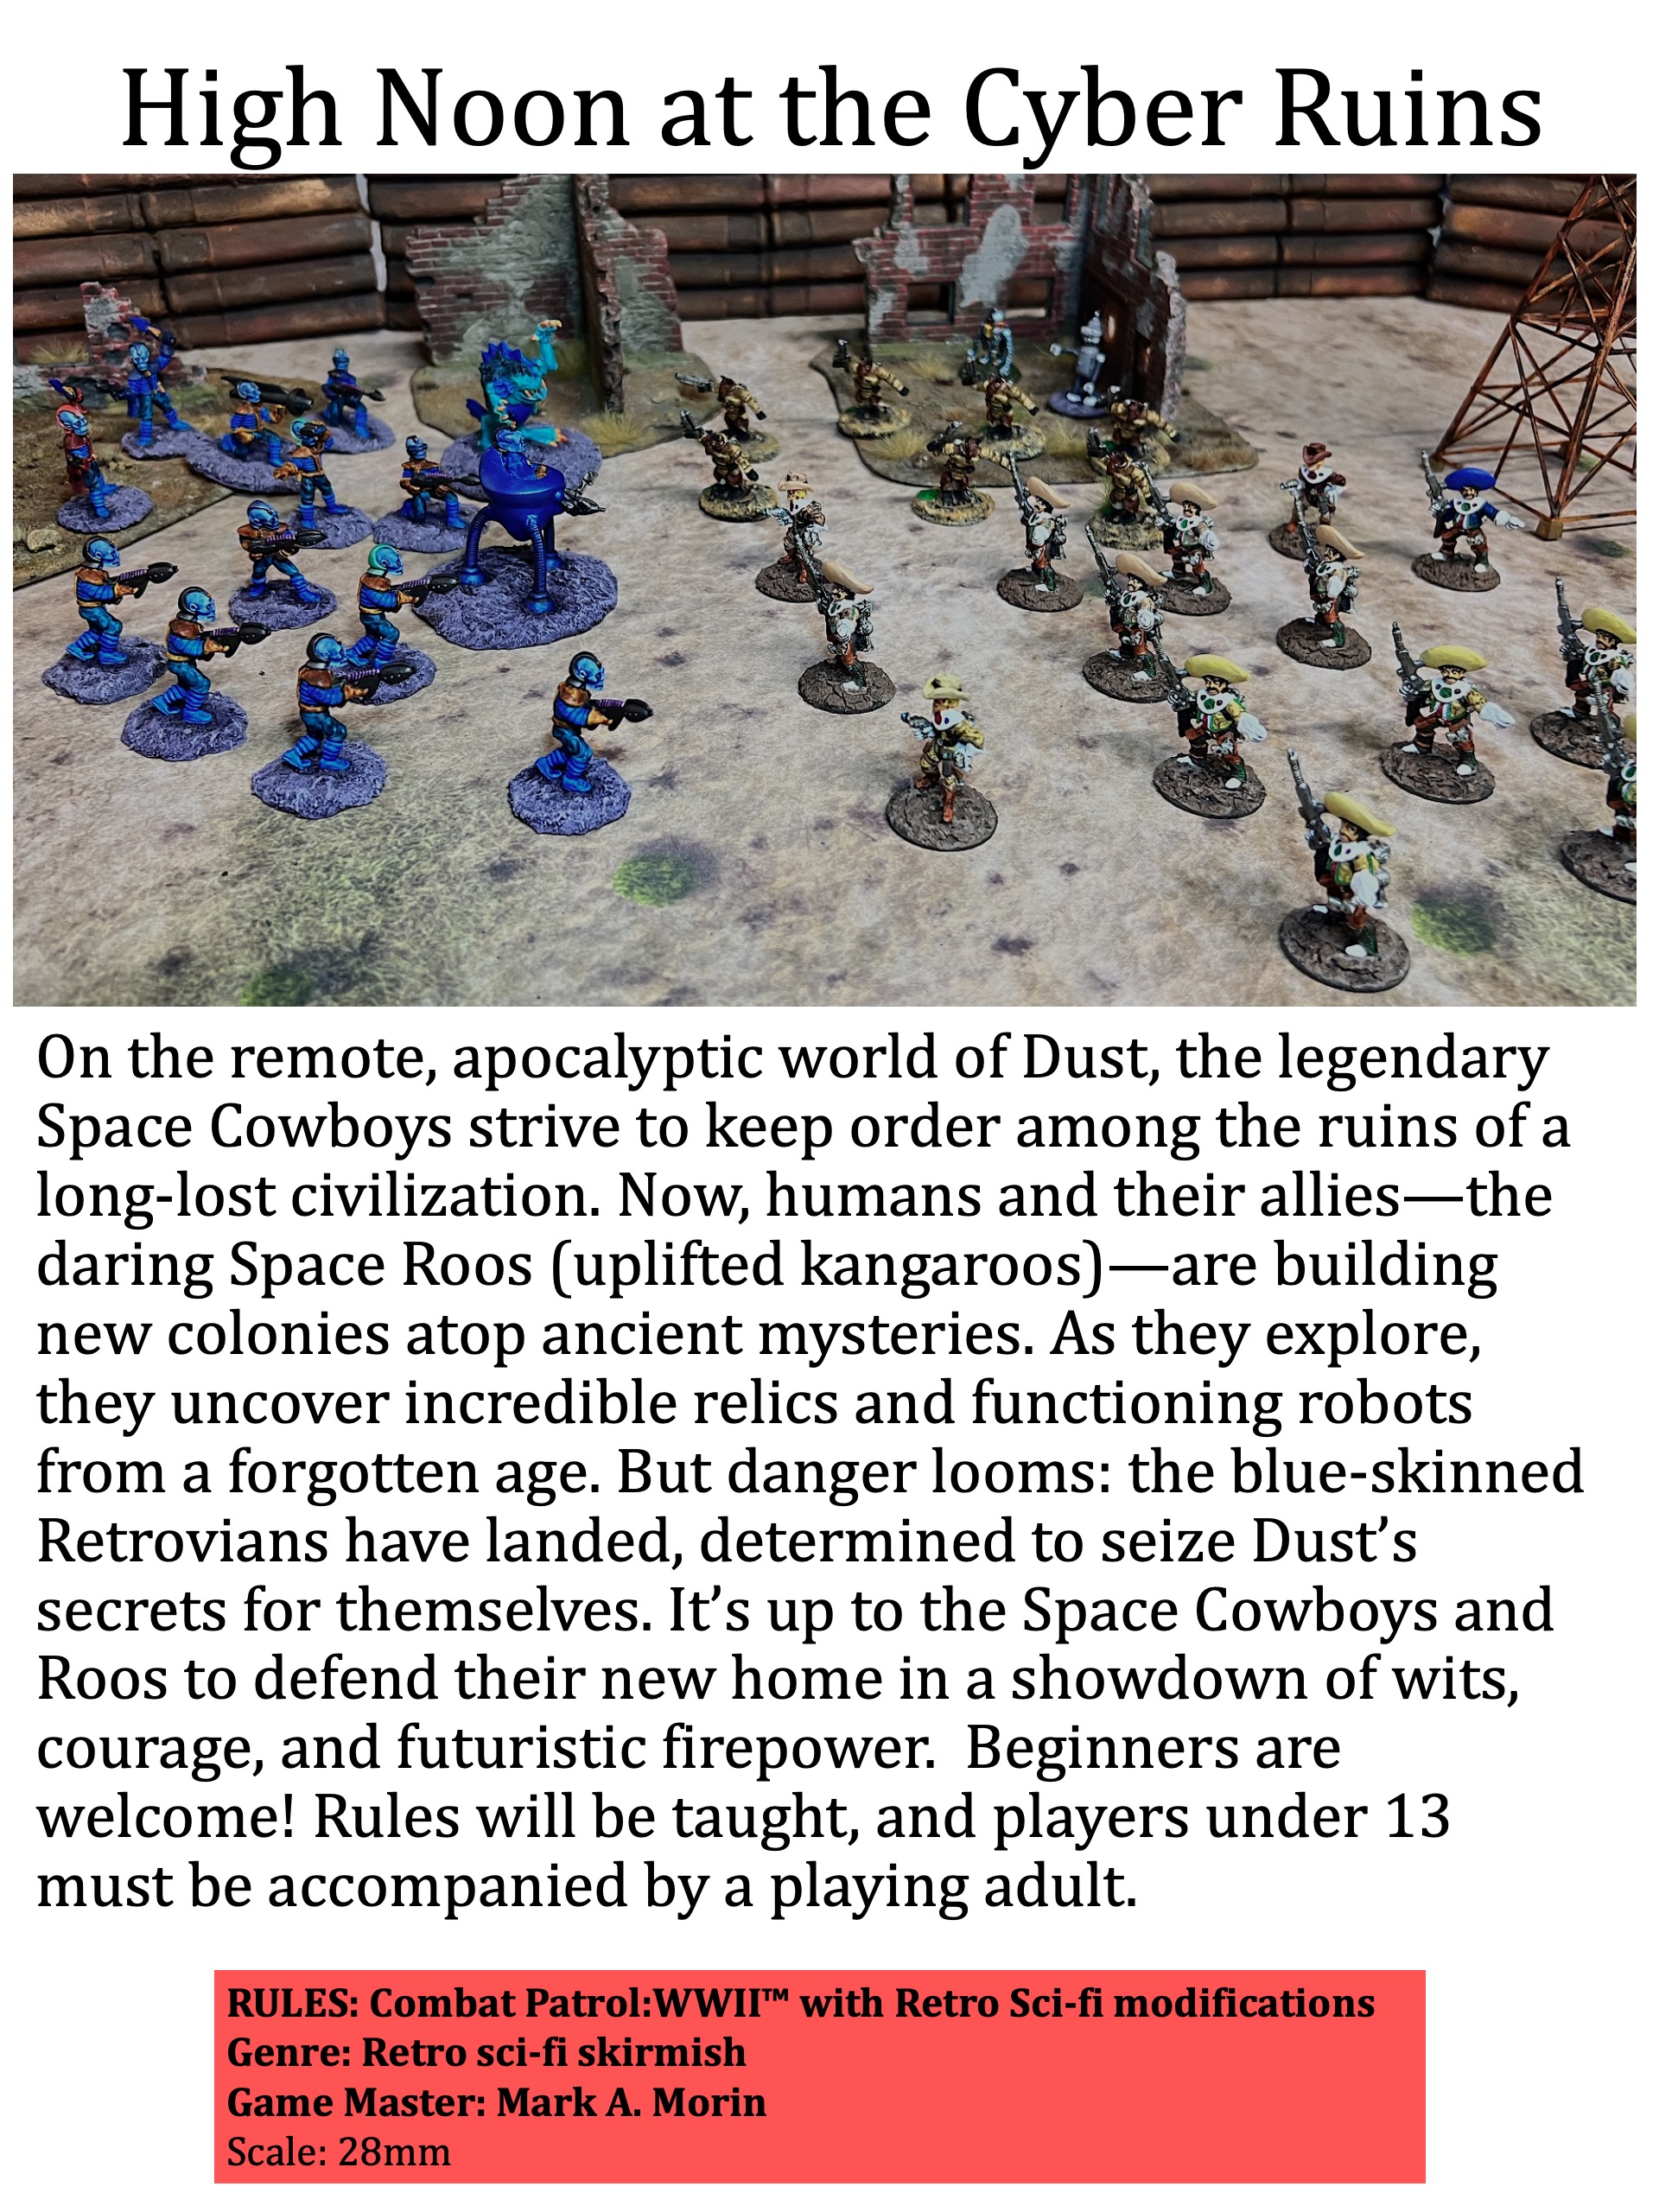
I was now ready to mock up the tabletop with everything! But first, the flyer for the game – which I finished before this project:
Game flyer.
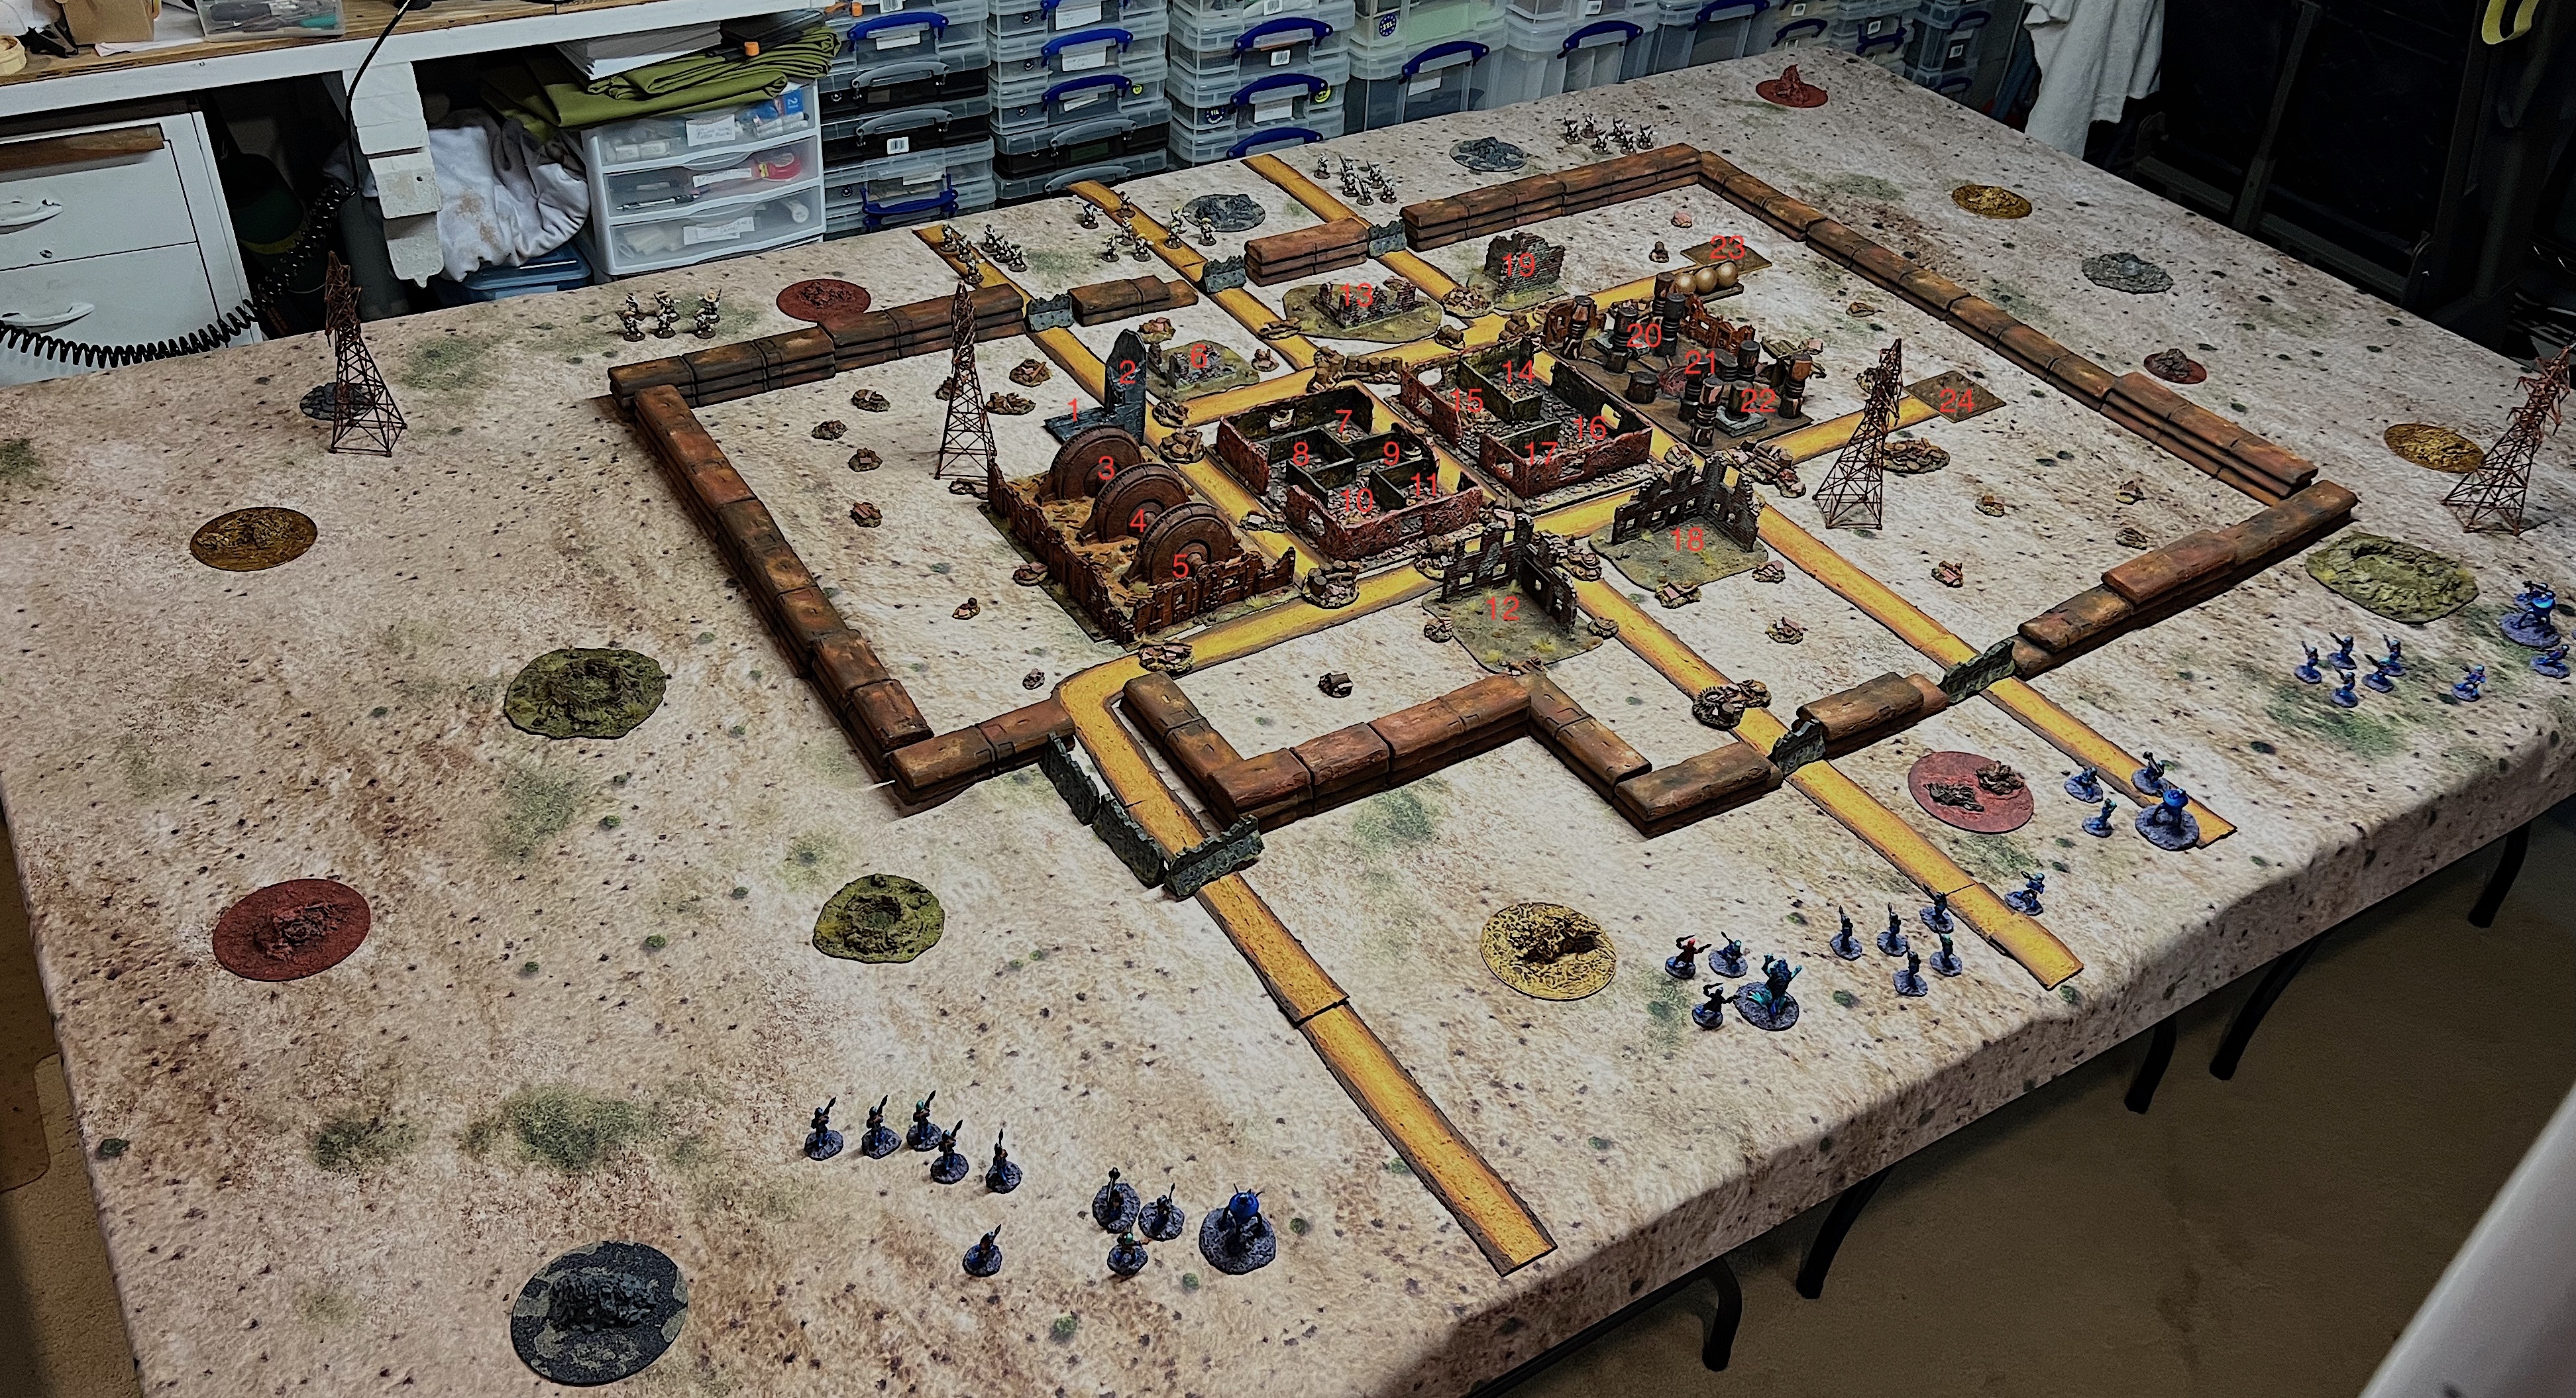
The wreckage (all 61 pieces and the buildings really helped complete my vision. There are 24 possible search locations for the 4 ancient robots, known only to the GM. The four ancient robots I used were: “Folder Bot 3000” (aka Bender) from Armorcast Terraform Terrain Ltd.’s “Robot Townies” collection; and “RT22” from old Archive miniatures Star Rovers line circa 1977; and two Archive Miniatures Robot Cooks also circa 1977 (also Star Rovers).
The four ancient robots! Folder Bot 3000, RT22, and the two Robot Cooks.
I randomly select the locations for the four robots (see numbers on the map below). My playtest worked well, and here are some shots of the mock-up tabletop.
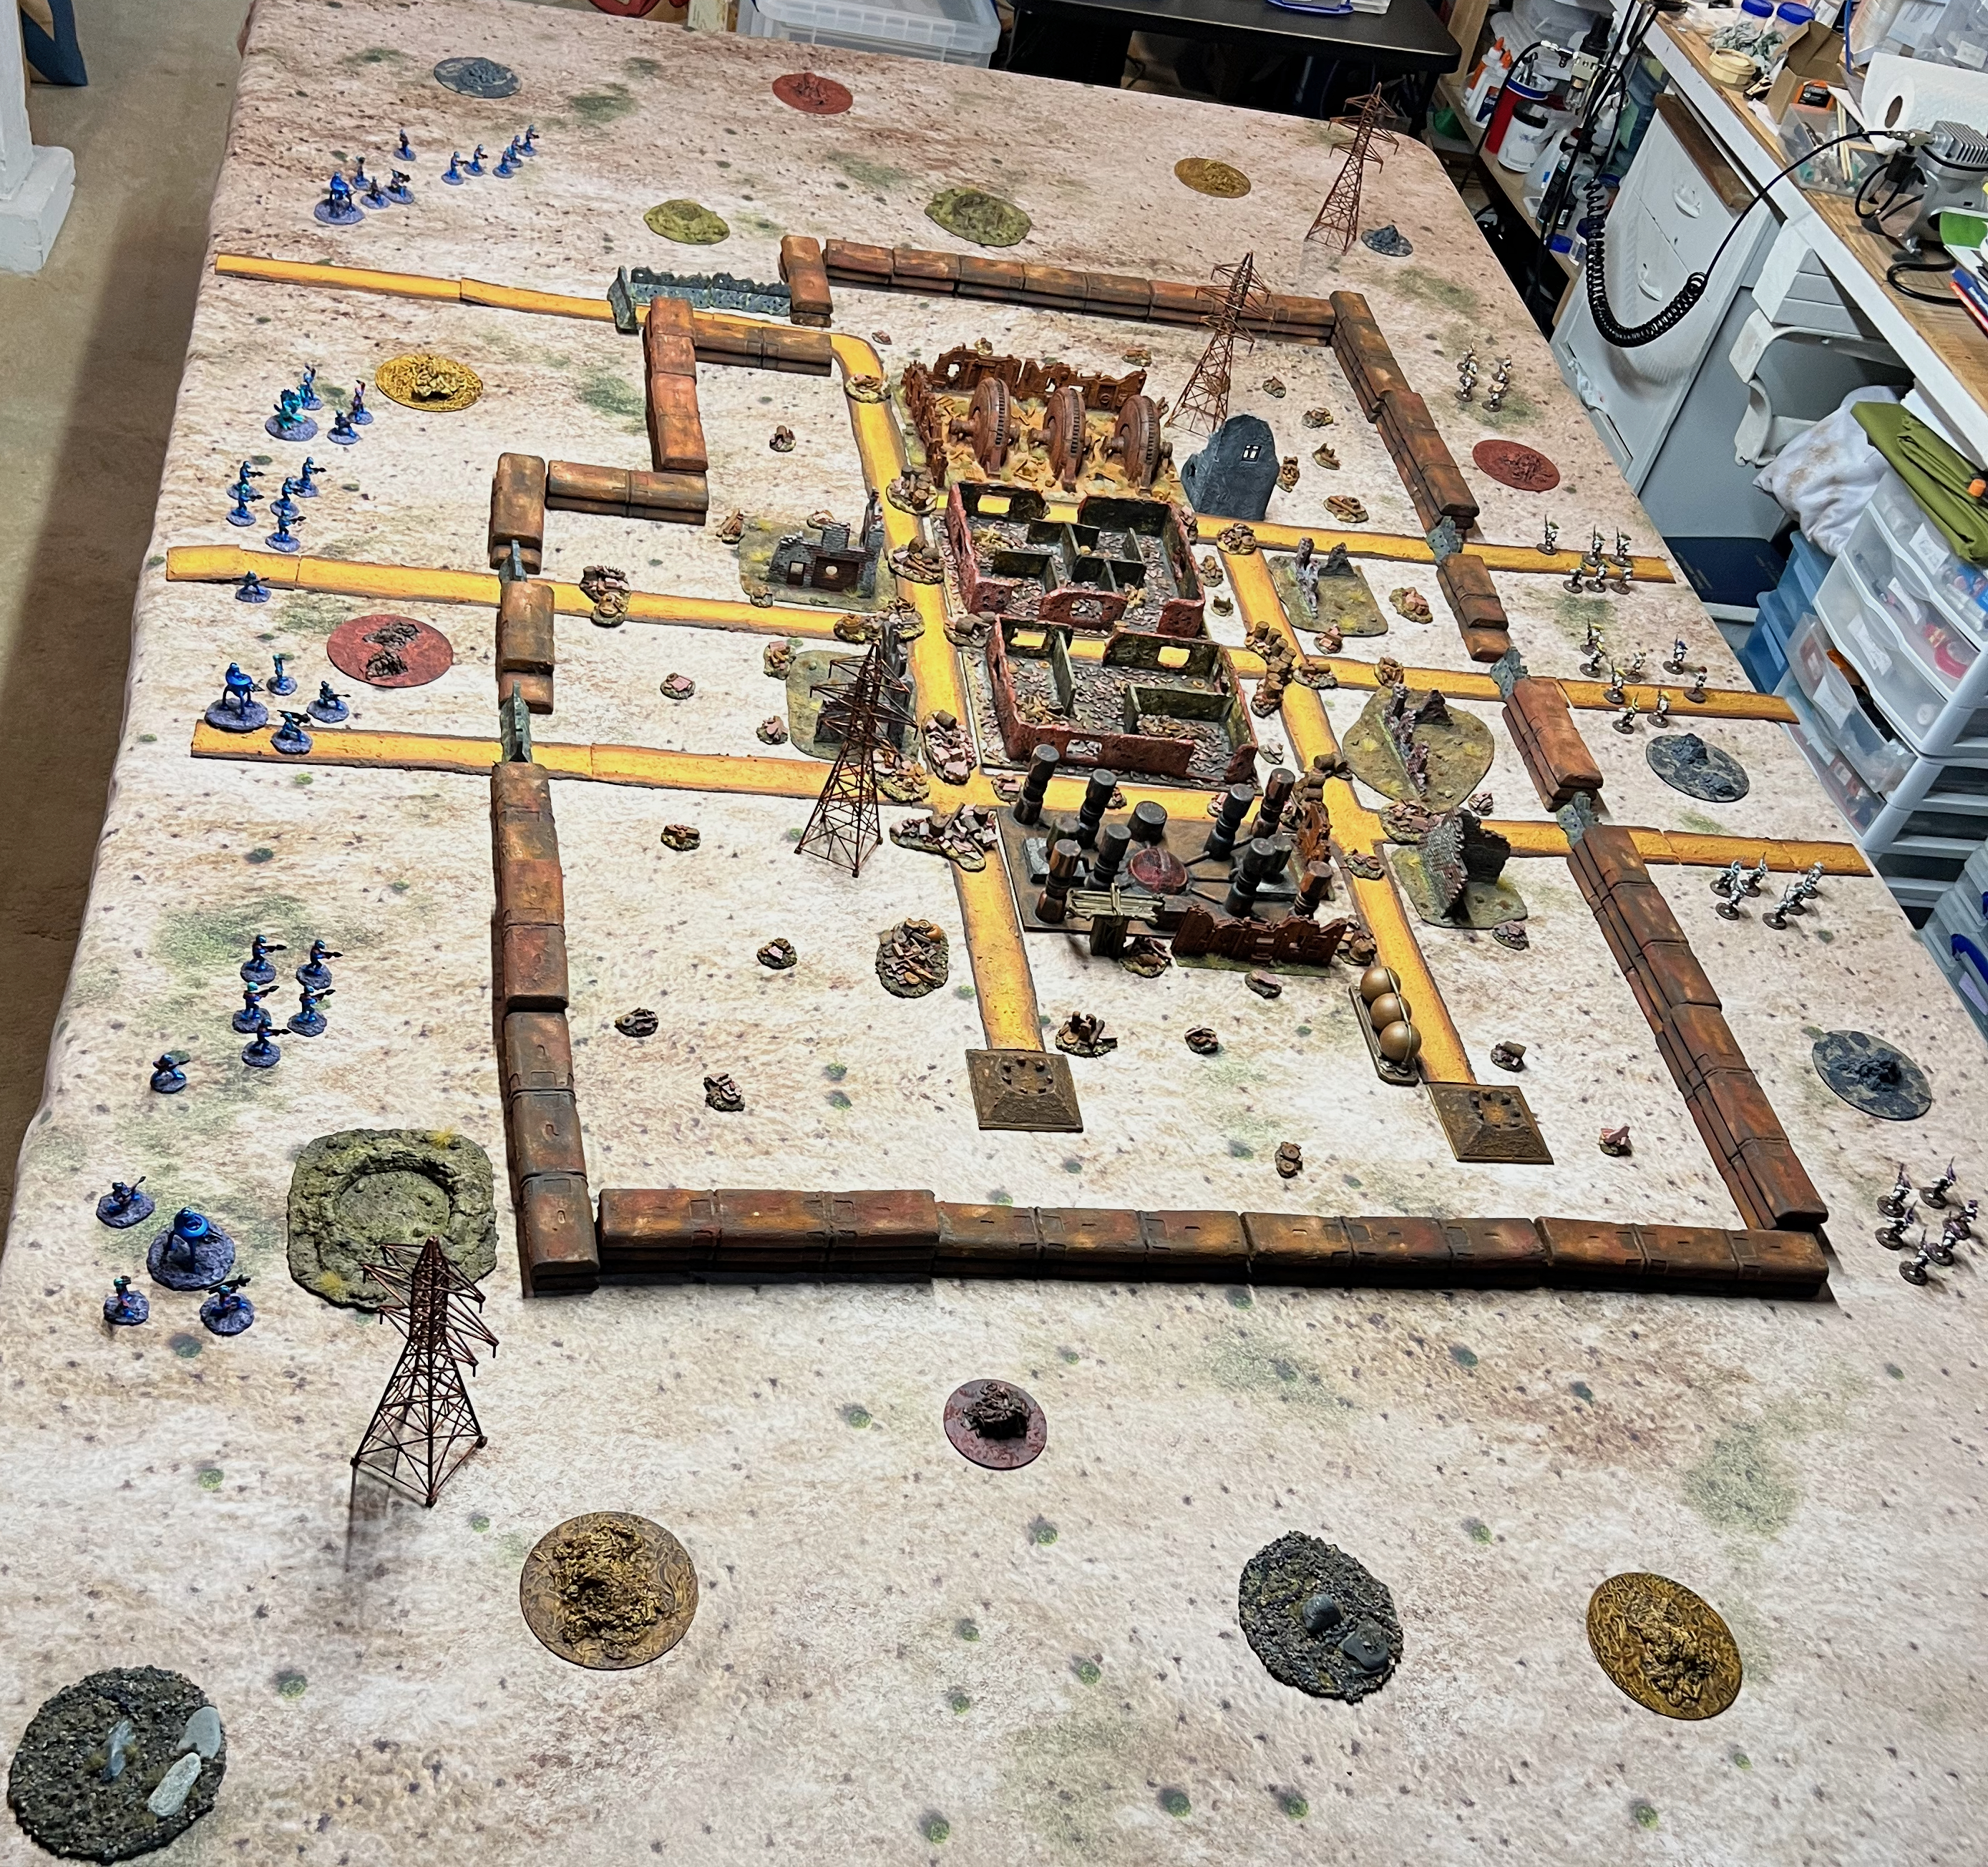
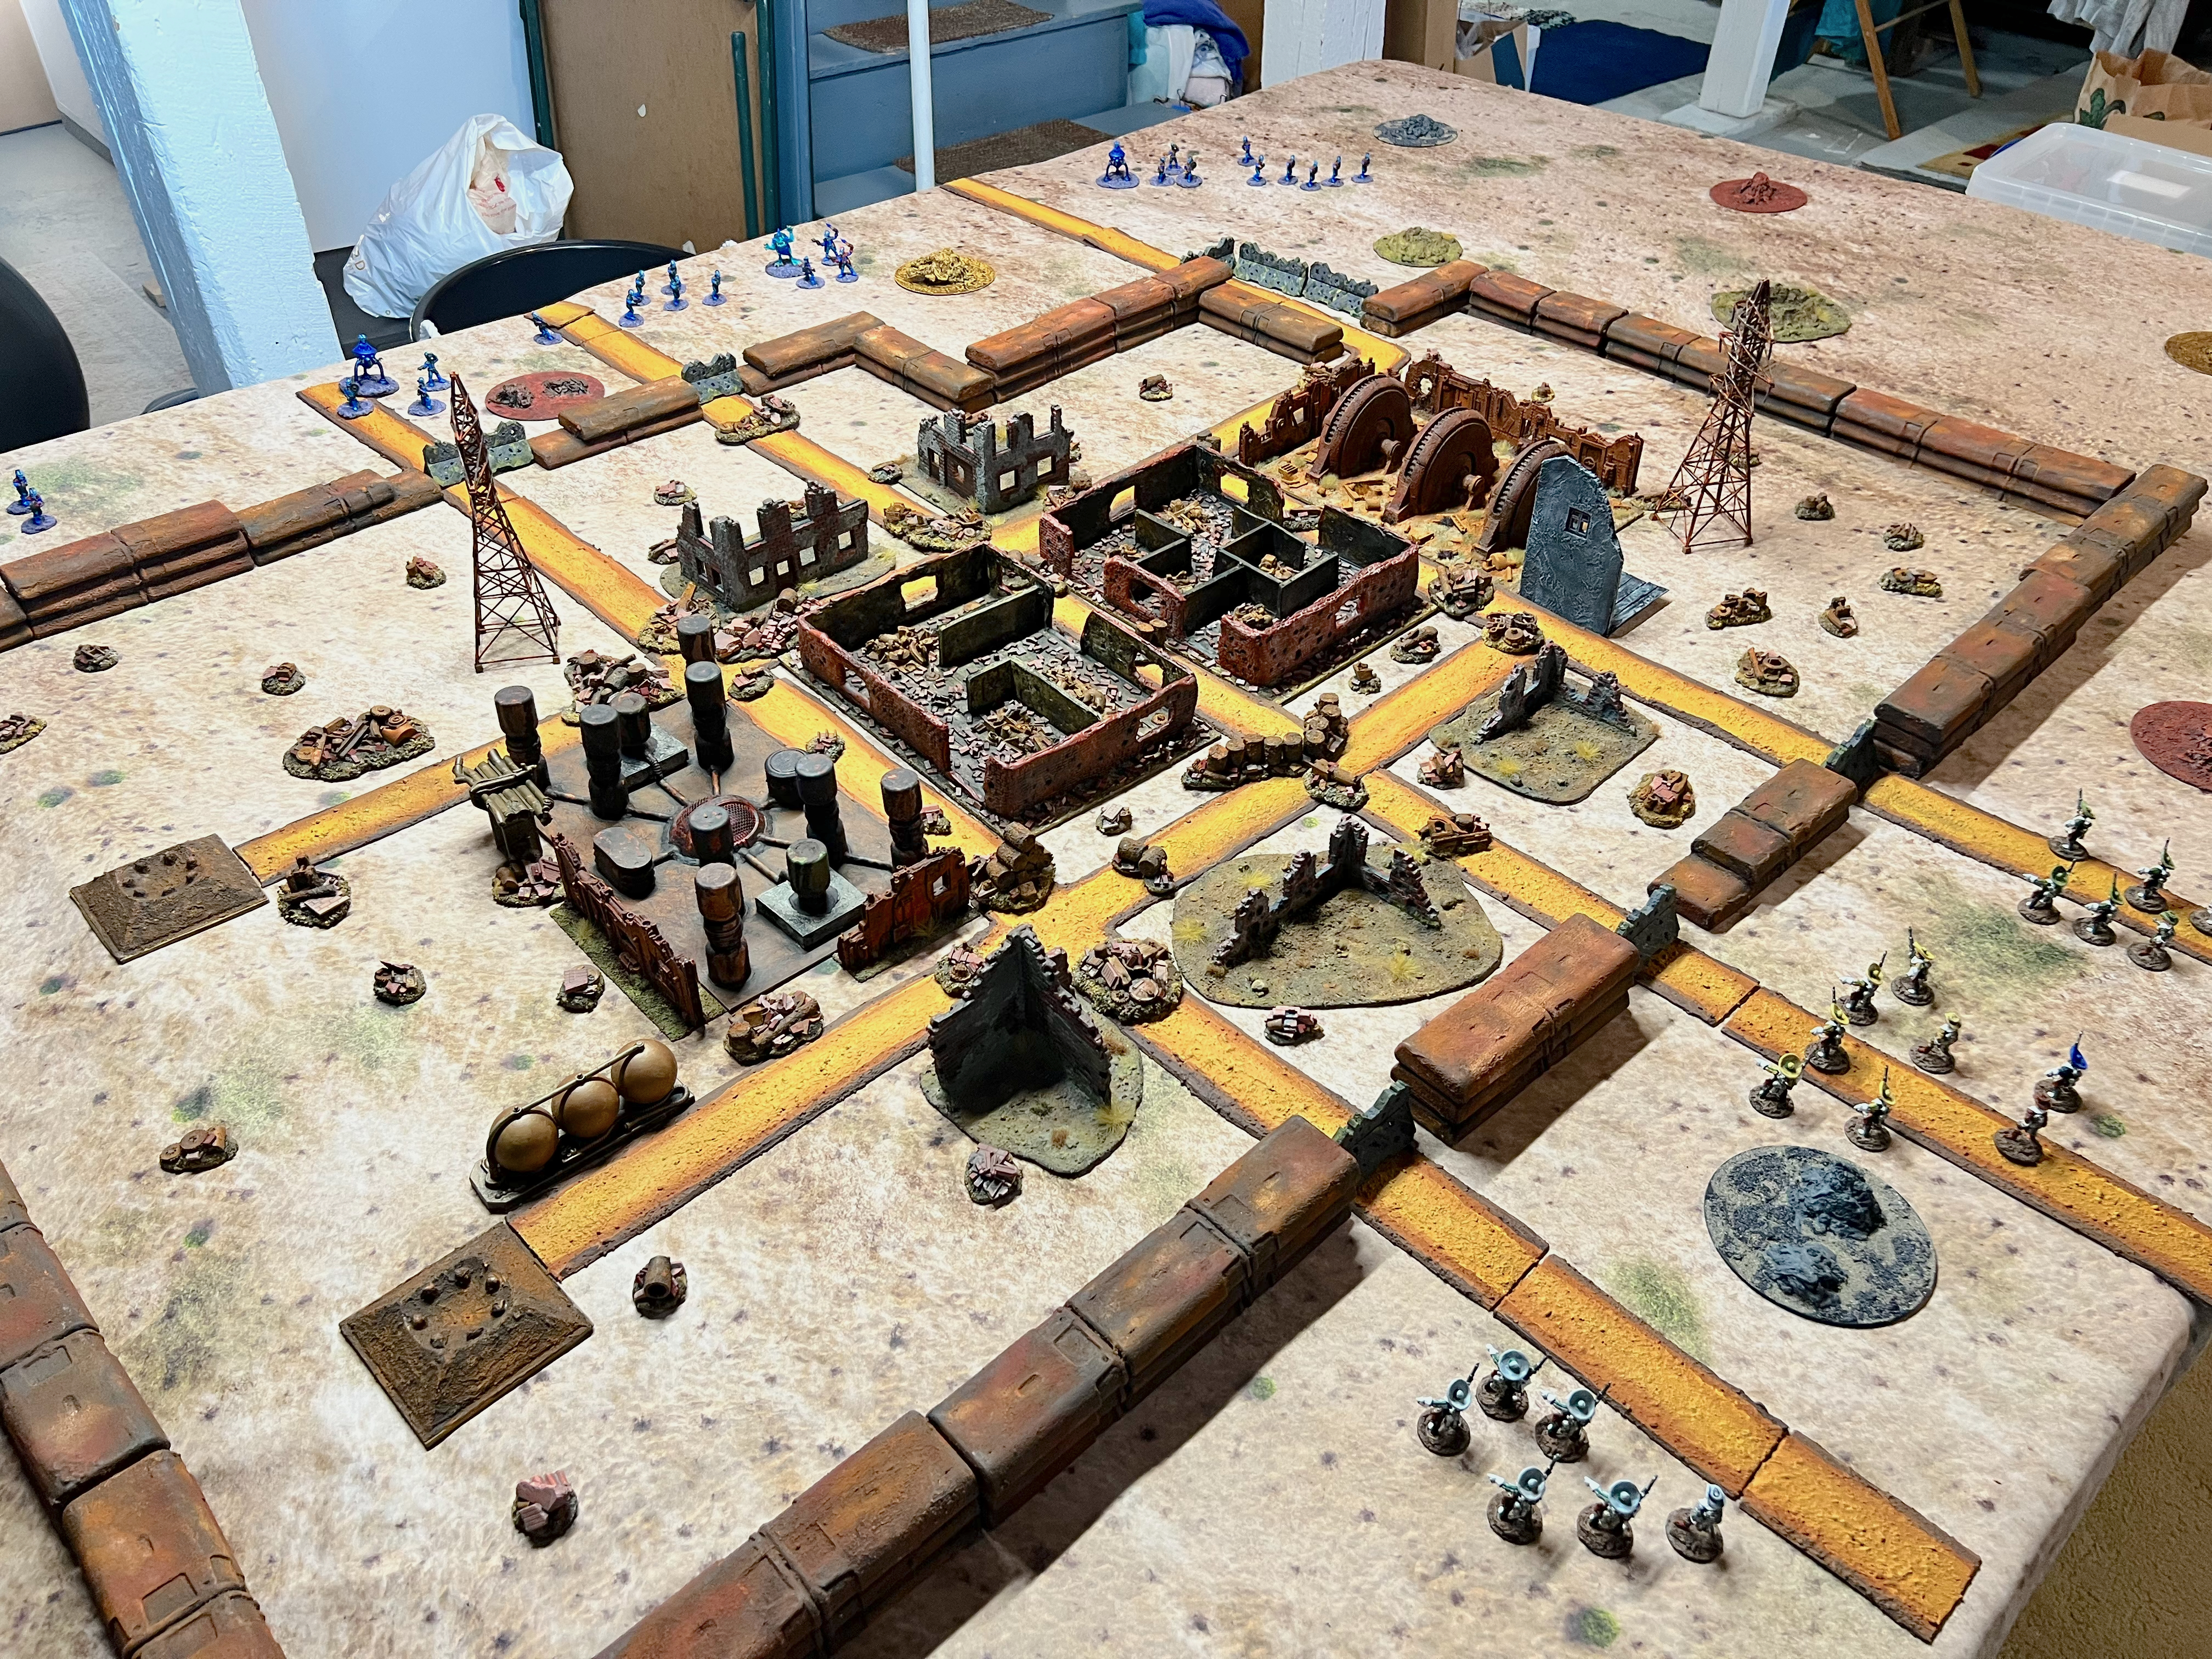
The mock up of the tabletop for the game. The Retrovians three squads and command group are in the forefront. The Space Cowboys are at the opposite side.A side view.View from the Space Cowboy’s side.Generator side view.
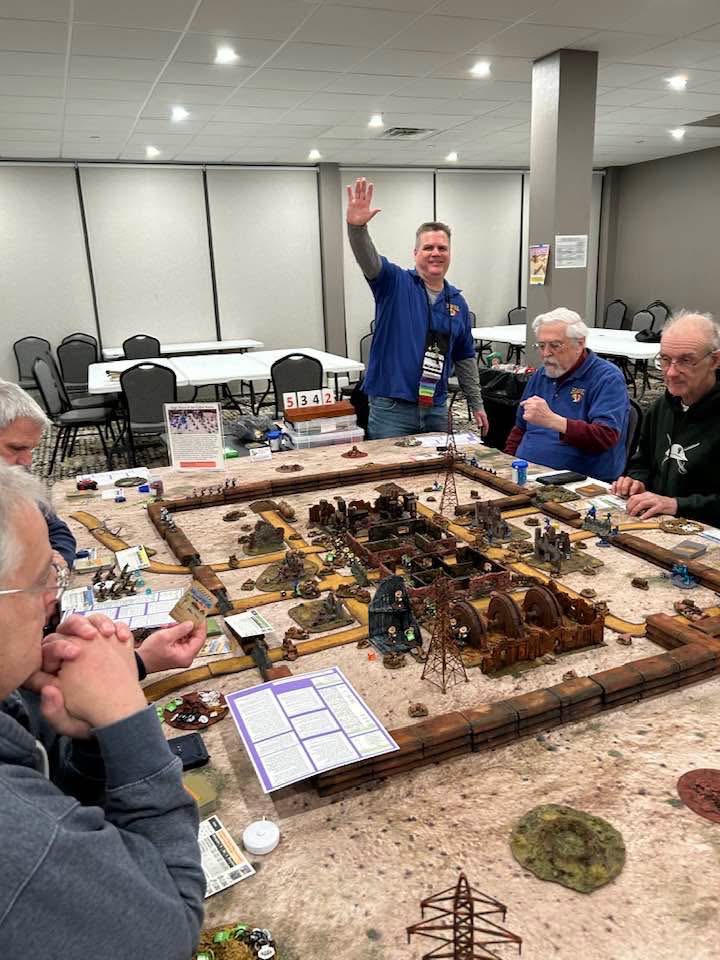
I did not use all of the wreckage in the mock-up. I will share a Cold Wars post soon. However, as a preview here are a couple of shots of the game set up at Cold Wars in all its glory:
Photo of the game in progress at Cold Wars with me as the GM. (photo courtesy of Ken Howe).Space Cowboys and Retrovians start searching for the robots.The shoot out starts – while one robot has been found in the upper right. This was Bender, and he was not happy to be found and attacked and killed a Space Cowboy.
More about Cold Wars soon in a future post.
I hope you enjoyed reading this and seeing my rusty panorama come to life – on the tabletop anyways. If this WIP post helps you in any way, that is great! I am including these terrain pieces in Dave Stone’s PAINT WHAT YOU GOT 2025/2026 Challenge as these were completed in early February. For now, that’s it, until next time!
329 miles to Lancaster, PA and Cold Wars!
The materials are listed below as a reference for me (and you maybe).
For all of my previous posts on terrain projects, please see this page. For all of my previous posts on sci-fi projects, please see this page…for any of my previous posts on scratch-building, see this page.
PAINTS, INKS, GLAZES, SHADES, WASHES, PIGMENTS, FLOCKING, GLUES AND MORE THAT I USED ON THE TWO RUINED BUILDINGS:
iPad 16 Box (top and bottom)
Hot glue
Foam Board
Toothpicks
Popsicle sticks
Apoxie sculpt
Vallejo Surface Primer “Grey”
SIBE AUTOMATION “White Polystyrene 8″ X 12″ X 1/8″ Plastic Sheet”
PVA
Huge Miniatures “Brick Red”
MSP “Brown Liner”
Vallejo Game Color “Sepia” (wash/shade)
Vallejo Wash FX “Dark Grey” (wash/shade)
Liquitex “Burnt Umber” (ink)
Secret Weapon Washes “Sewer Water”
Vallejo Thinner
Vallejo Surface Primer “German Green Brown”
Vallejo “Light Slate Grey” (pigment)
AK “Dry Ground” (texture)
Vallejo “Carbon Black” (pigment)
Juweela Metal Scrap Rusty Industry (23336)
Juweela Debris Assortment (23316)
Juweela Debris Brick Red (23315)
Juweela Debris Assortment (23315)
Juweela Bricks (23034)
Juweela Metal Scrap Rusty Gear Wheels (23317)
Army Painter “Red Tone” (wash)
Secret Weapon Washes “Red Black” (wash)
Secret Weapon Washes “Ruby” (wash)
P3 “Red Ink” (ink)
Vallejo Game Air “Red Terracotta”
PAINTS, INKS, GLAZES, SHADES, WASHES, PIGMENTS, FLOCKING, GLUES AND MORE THAT I USED ON THE 61 WRECKAGE BASES/PILES:
Play sand
Apoxie sculpt
PVA
Various scrap plastic pieces
Cylindrical desiccant holders
Rubber sink stopper rim
Juweela Metal Scrap Rusty Industry (23336)
Juweela Debris Assortment (23316)
Juweela Debris Brick Red (23315)
Juweela Debris Assortment (23315)
Juweela Bricks (23034)
Juweela Metal Scrap Rusty Gear Wheels (23317)
AK “Corrosion Texture” (texture)
Vallejo Model Air “Rust” (71.080)
Vallejo Model Air “Rust” (71.080)
Vallejo Model Air “Rust” (71.069)
Vallejo Model Air “Orange Rust”
Citadel “Ryza Rust” (dry)
Vallejo “Old Rust” (pigment)
Vallejo “Pigment Binder”
Vallejo Thinner
Vallejo “Dark Slate Grey” (pigment)
Vallejo “Dark Yellow Ochre” (pigment)
Vallejo Game Color “Sepia” (wash/shade)
Secret Weapon Washes “Sewer Water”
Army Painter “Red Tone” (wash)
Secret Weapon Washes “Red Black” (wash)
Secret Weapon Washes “Ruby” (wash)
P3 “Red Ink” (ink)
Vallejo Game Air “Red Terracotta”
PAINTS, INKS, GLAZES, SHADES, WASHES, PIGMENTS, FLOCKING, GLUES AND MORE THAT I USED ON THE 2 FLAT INDUSTRIAL STRUCTURES:
SIBE AUTOMATION “White Polystyrene 8″ X 12″ X 1/8″ Plastic Sheet”
Imagine an industrial cityscape – an apocalyptic one. One that shows that “something really terrible happened here”. Now add 300 years to it and an arid desolate climate with a lot of rust. Lastly, add mystery – “what am I looking at?”, and you are here.
These were the thoughts that I had last month as I prepared to create and build components for such a wasteland ruin. As my 2026 “convention season” was nearing, I needed to build terrain for my tabletop games. For games of Wars of OzzTM, my goal was to build terrain pieces for Professor Nitpik’s Industrial City (aka the Robotic Sanctum). I also wanted to get back into some retro sci-fi games using Buck Surdu’s Combat Patrol:WWIITM gaming system (with my modifications). One of the games I envisioned for that would be using Archive “Space Cowboys”, my converted “Space ‘Roos” defending against an invasion of blue-skinned “Retrovians”. Click those links to learn more about those forces – and more about them in a future post. For now, I needed more rust than just my rusty generators and my ruined chemical plant.
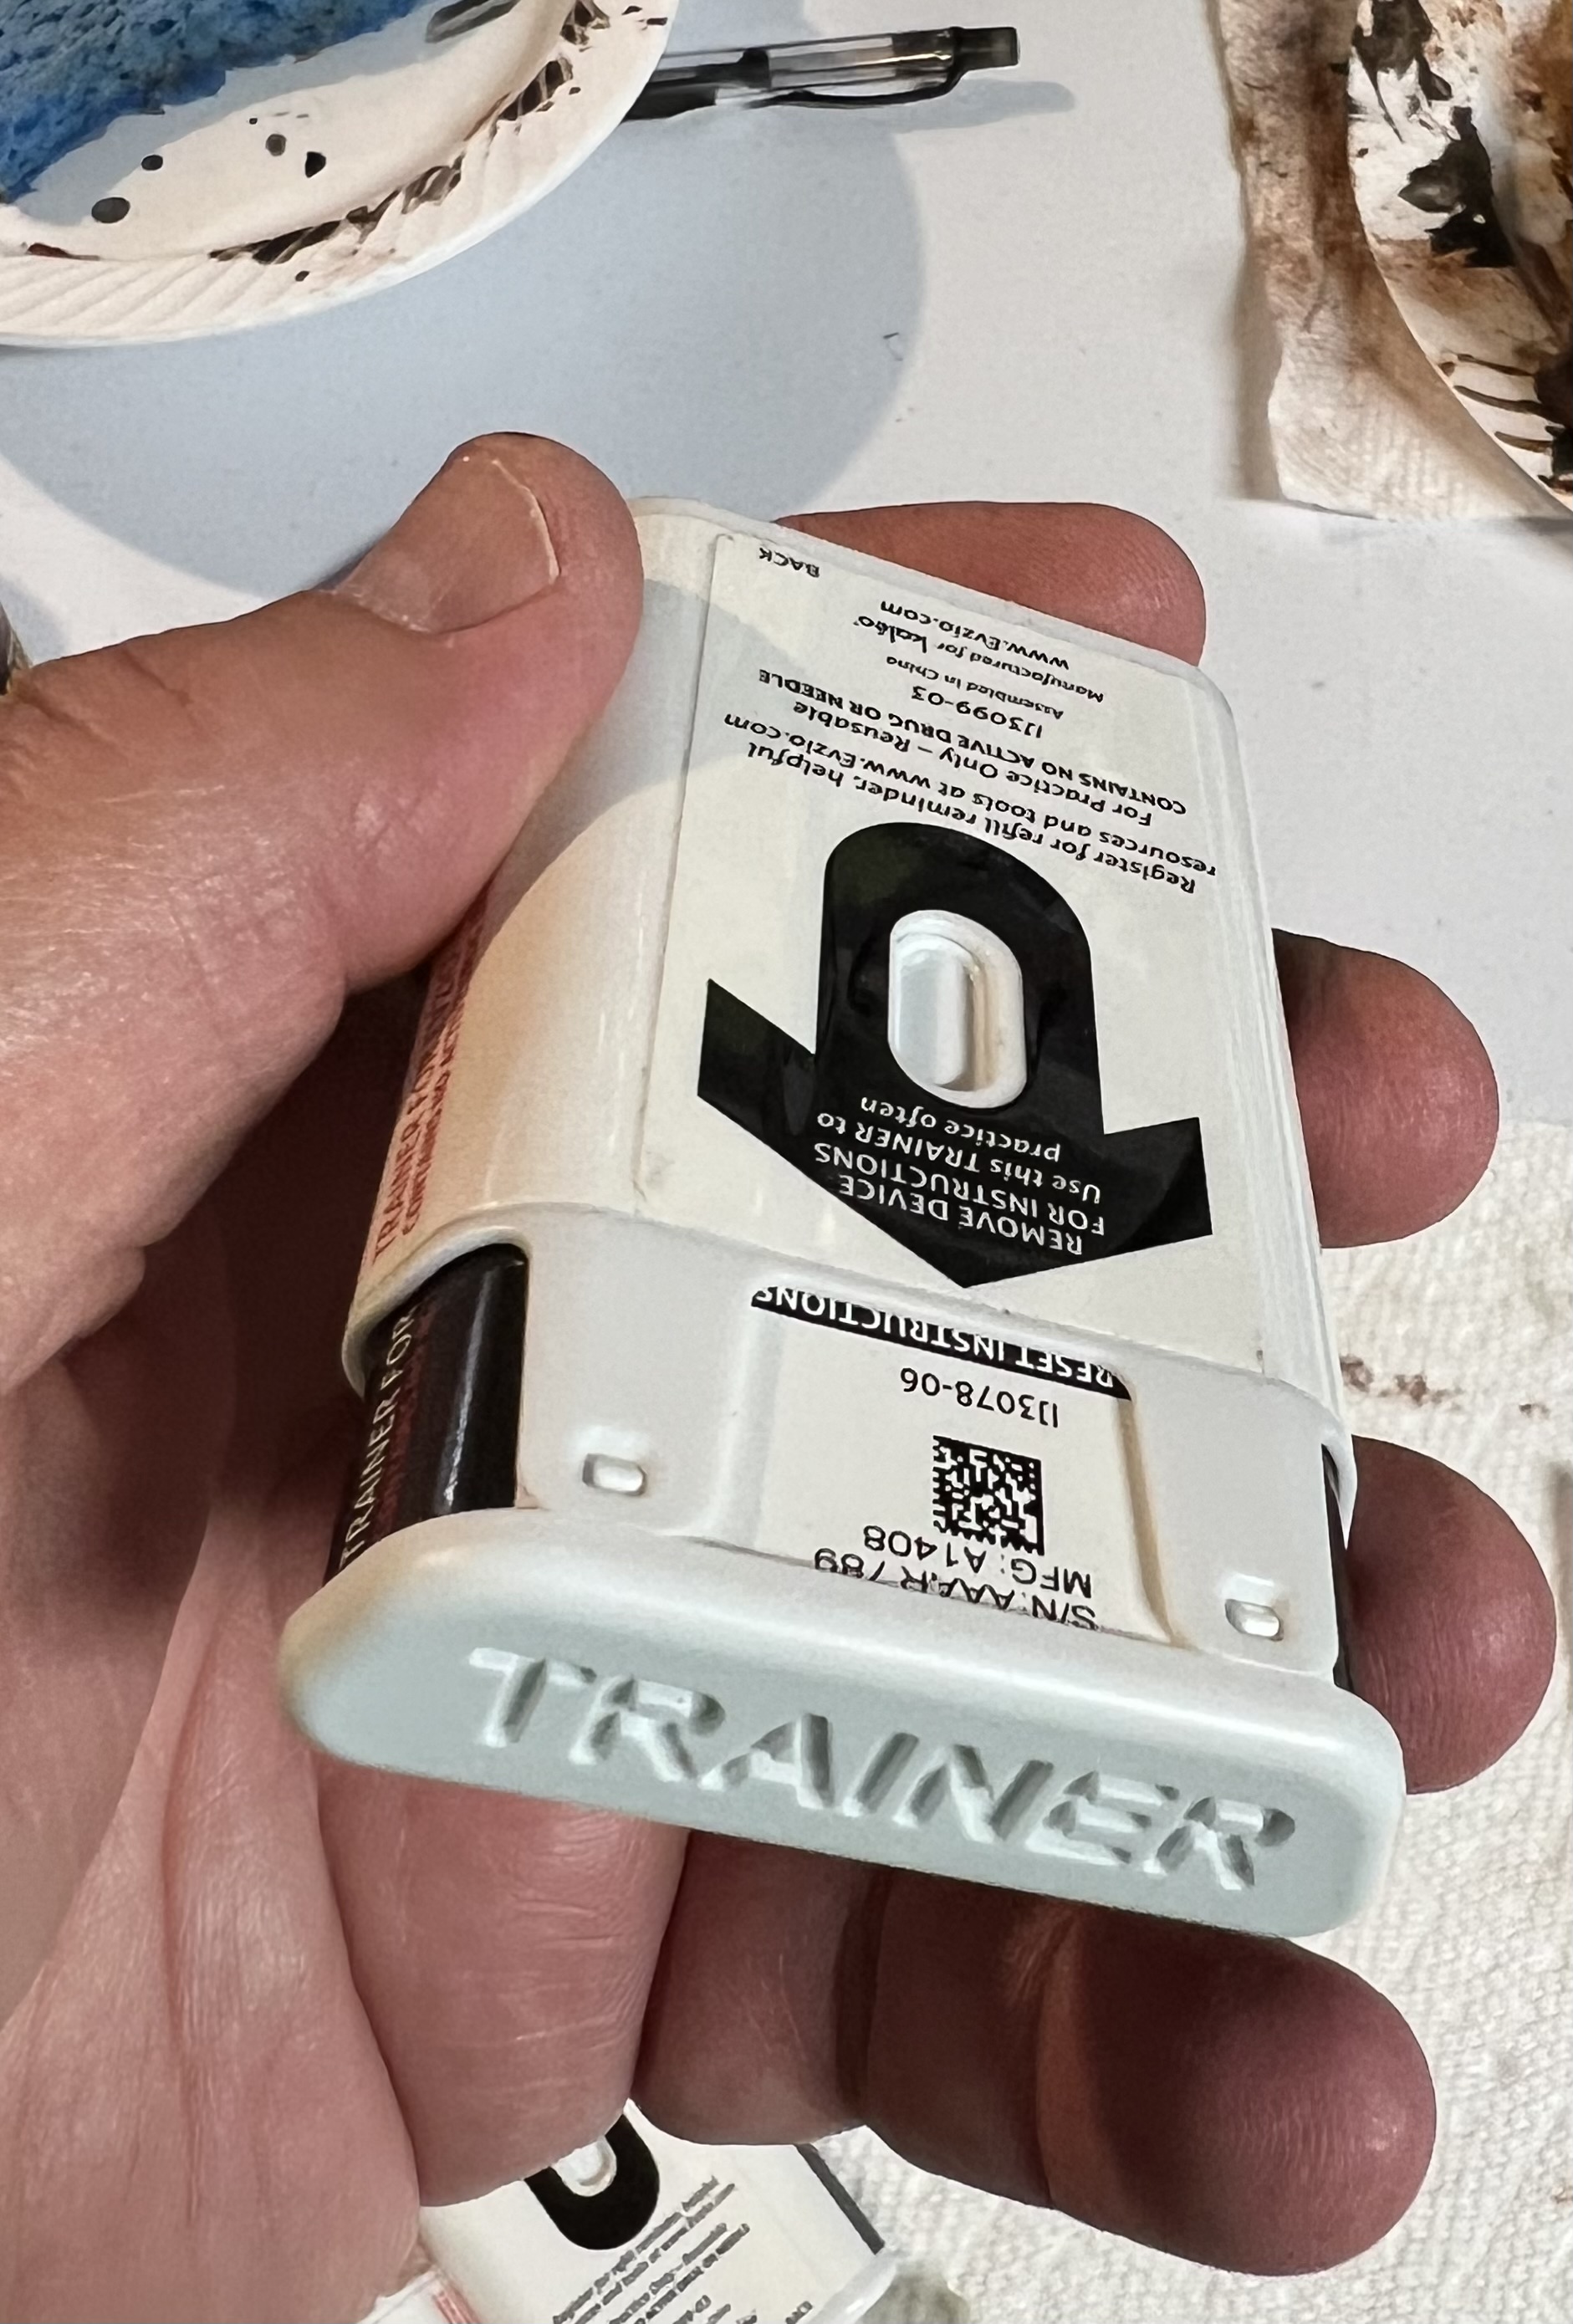
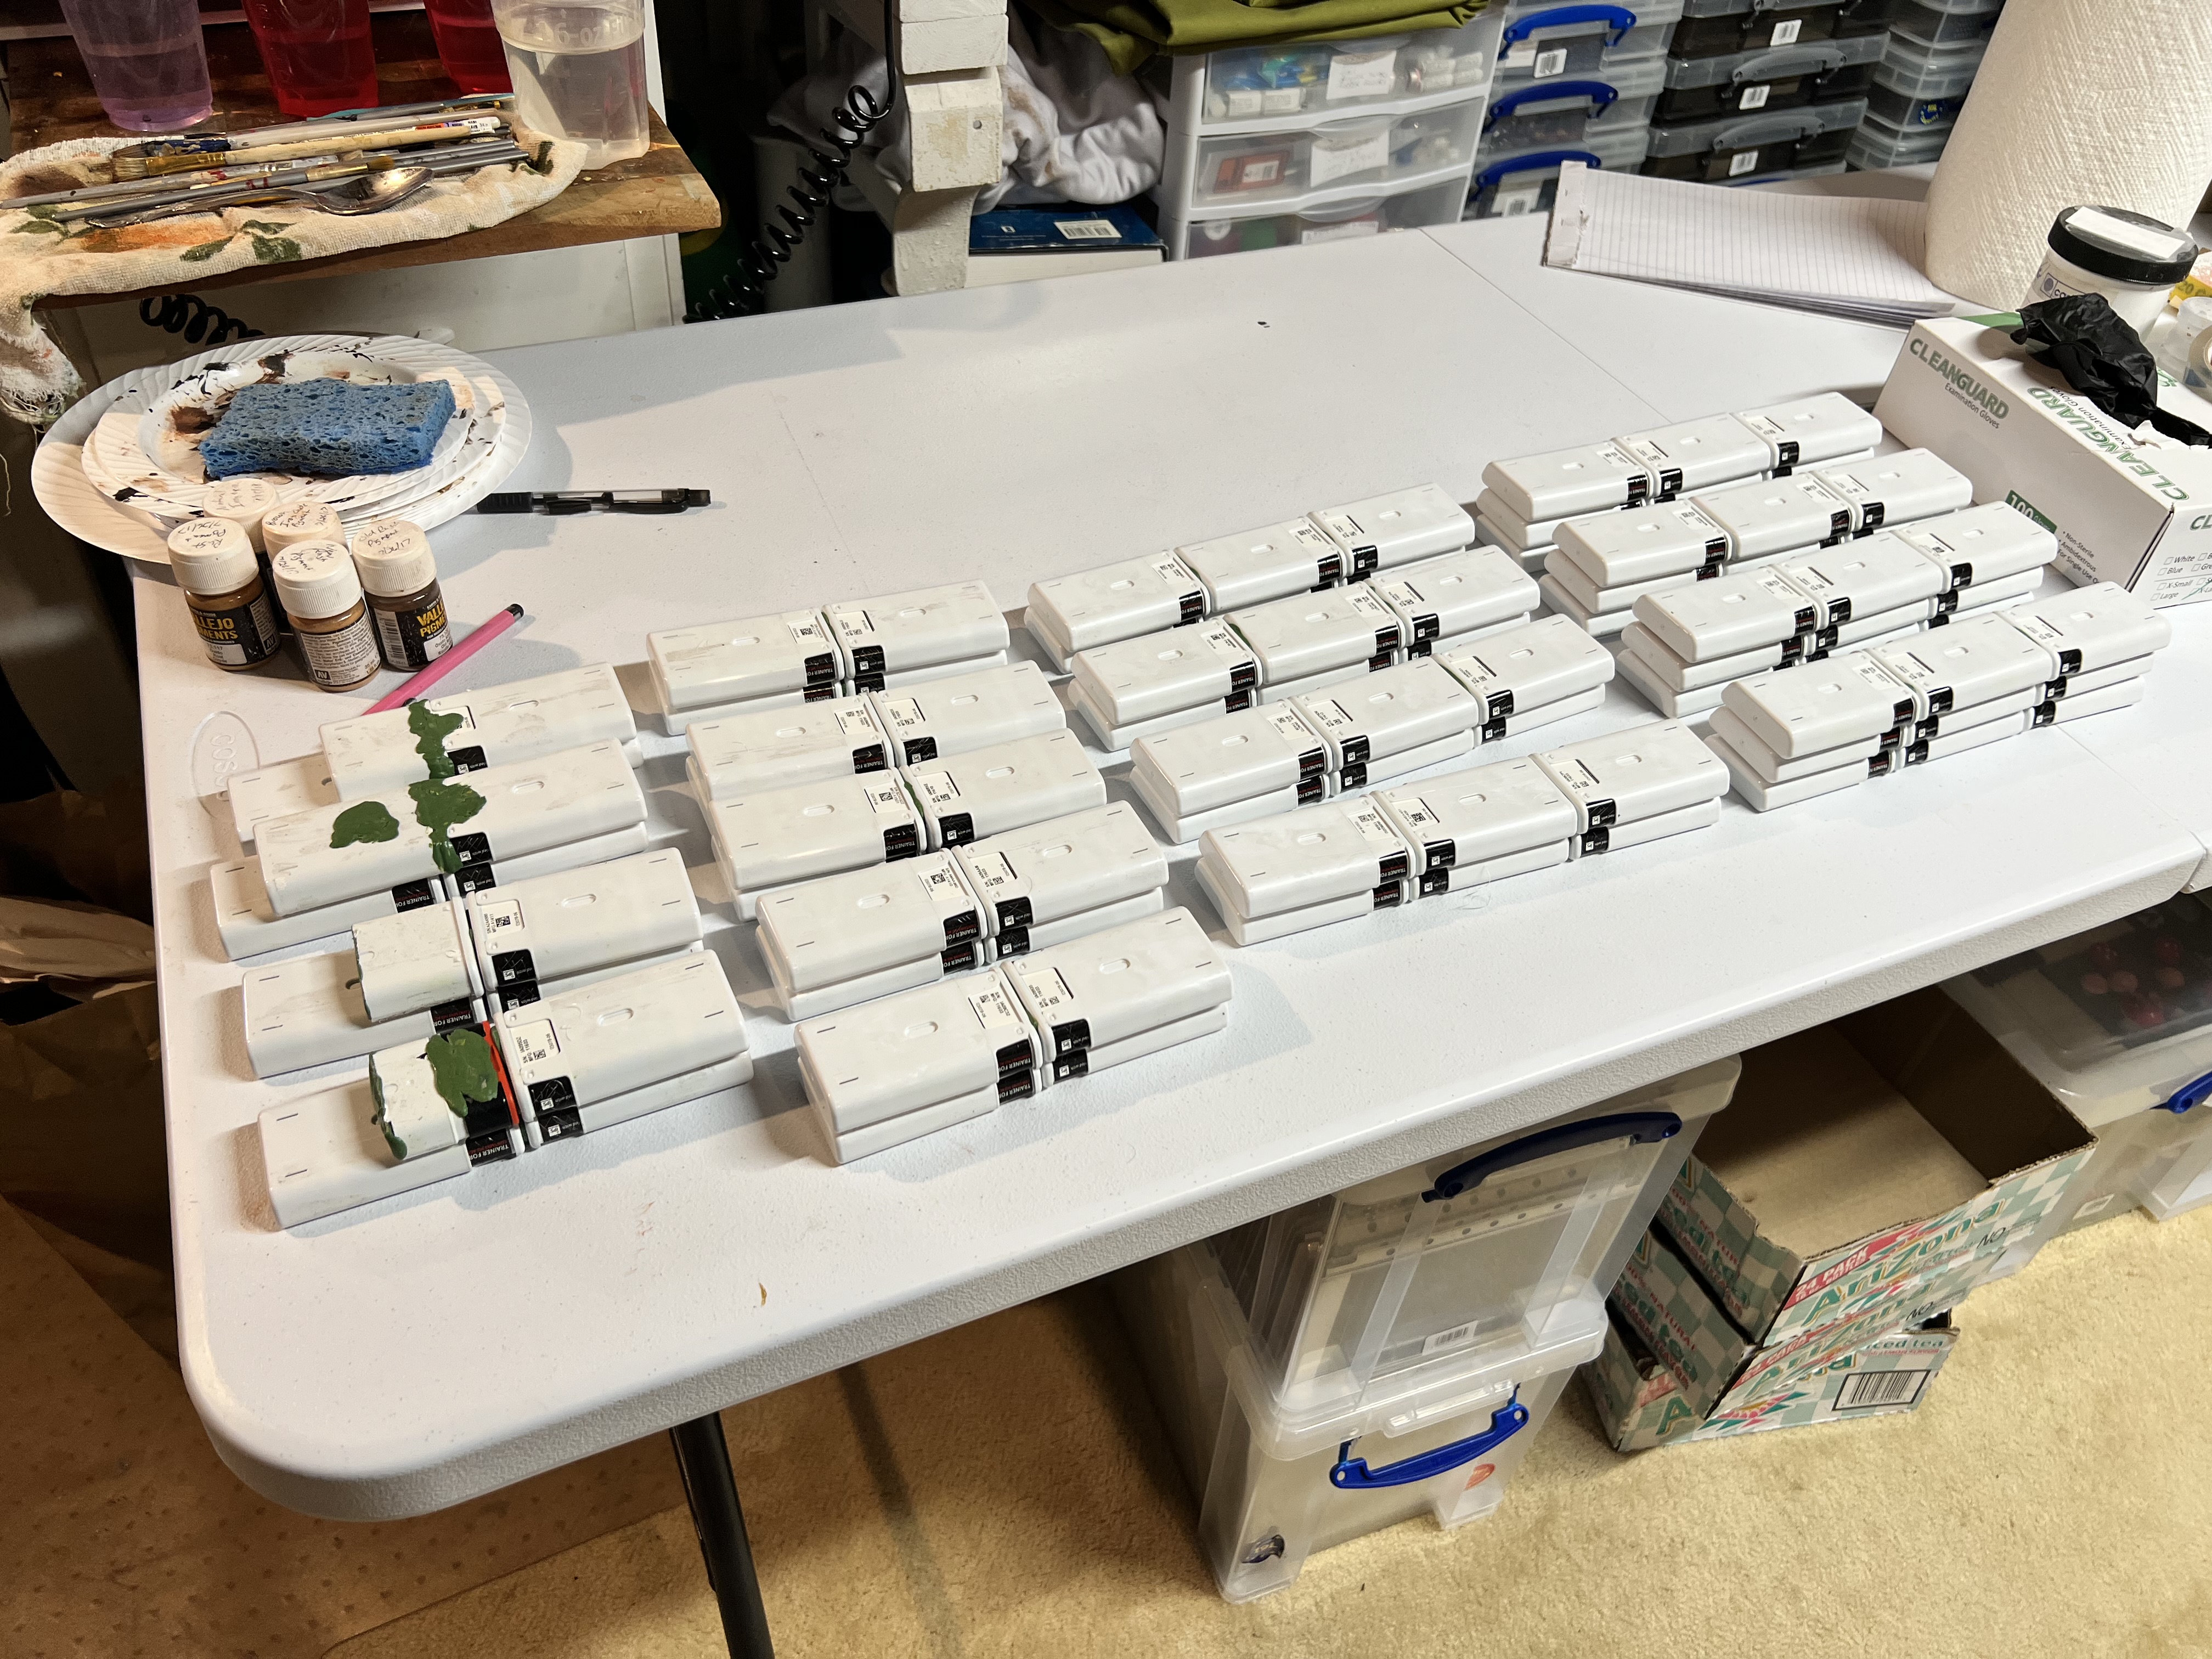
I’ve been retired now since 2019. I got laid off of my last job when the company I was working for pulled the product line off the market. Never found a replacement gig. Back to the product I was selling – it was a pharmaceutical autoinjector device. We had dozens of electronic trainer devices we handed out to potential customers. These trainers acted like the real thing except without any needles or drug inside. After the layoff happened, I had a bunch of them, and was told by my former employer to just throw them away. They had a unique shape, like a cross between a card deck and a tapered brick. The outer layer was plastic, with a label glued on to it. I was running retro sci-fi games, and thought these would be good for making walls. I saved them, and they waited to fulfill their destiny until December 2025!
An example of the trainer.
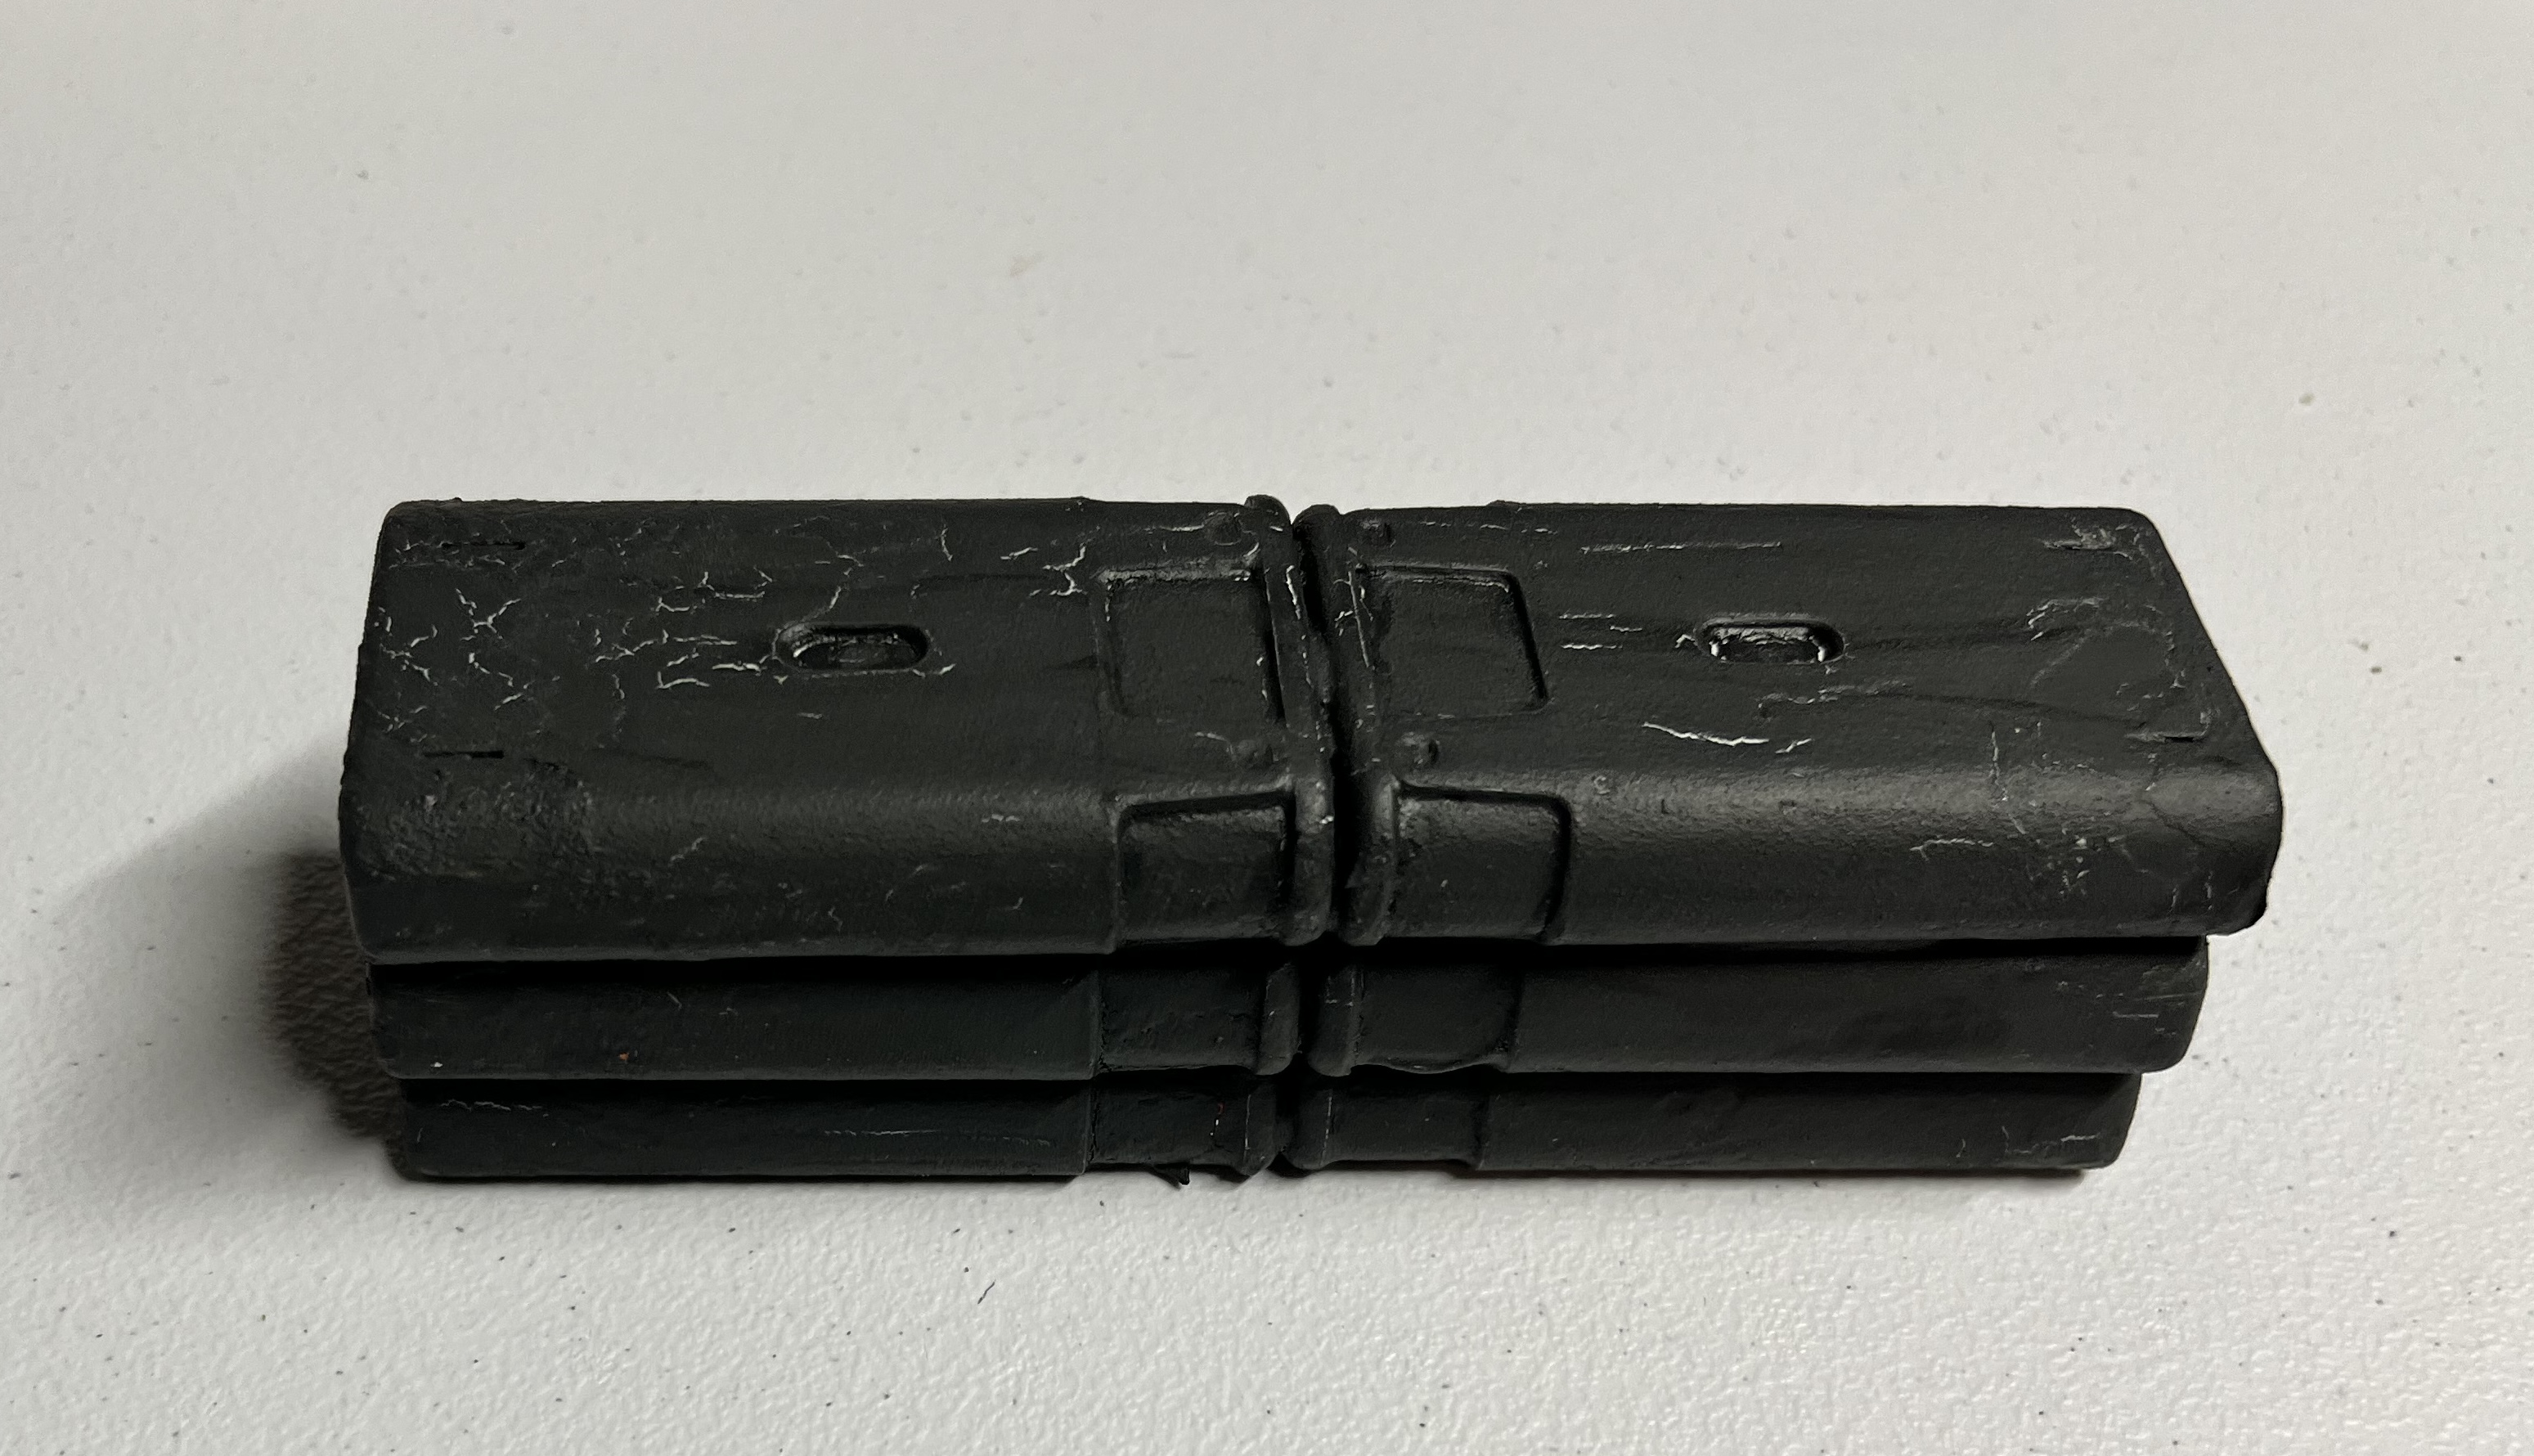
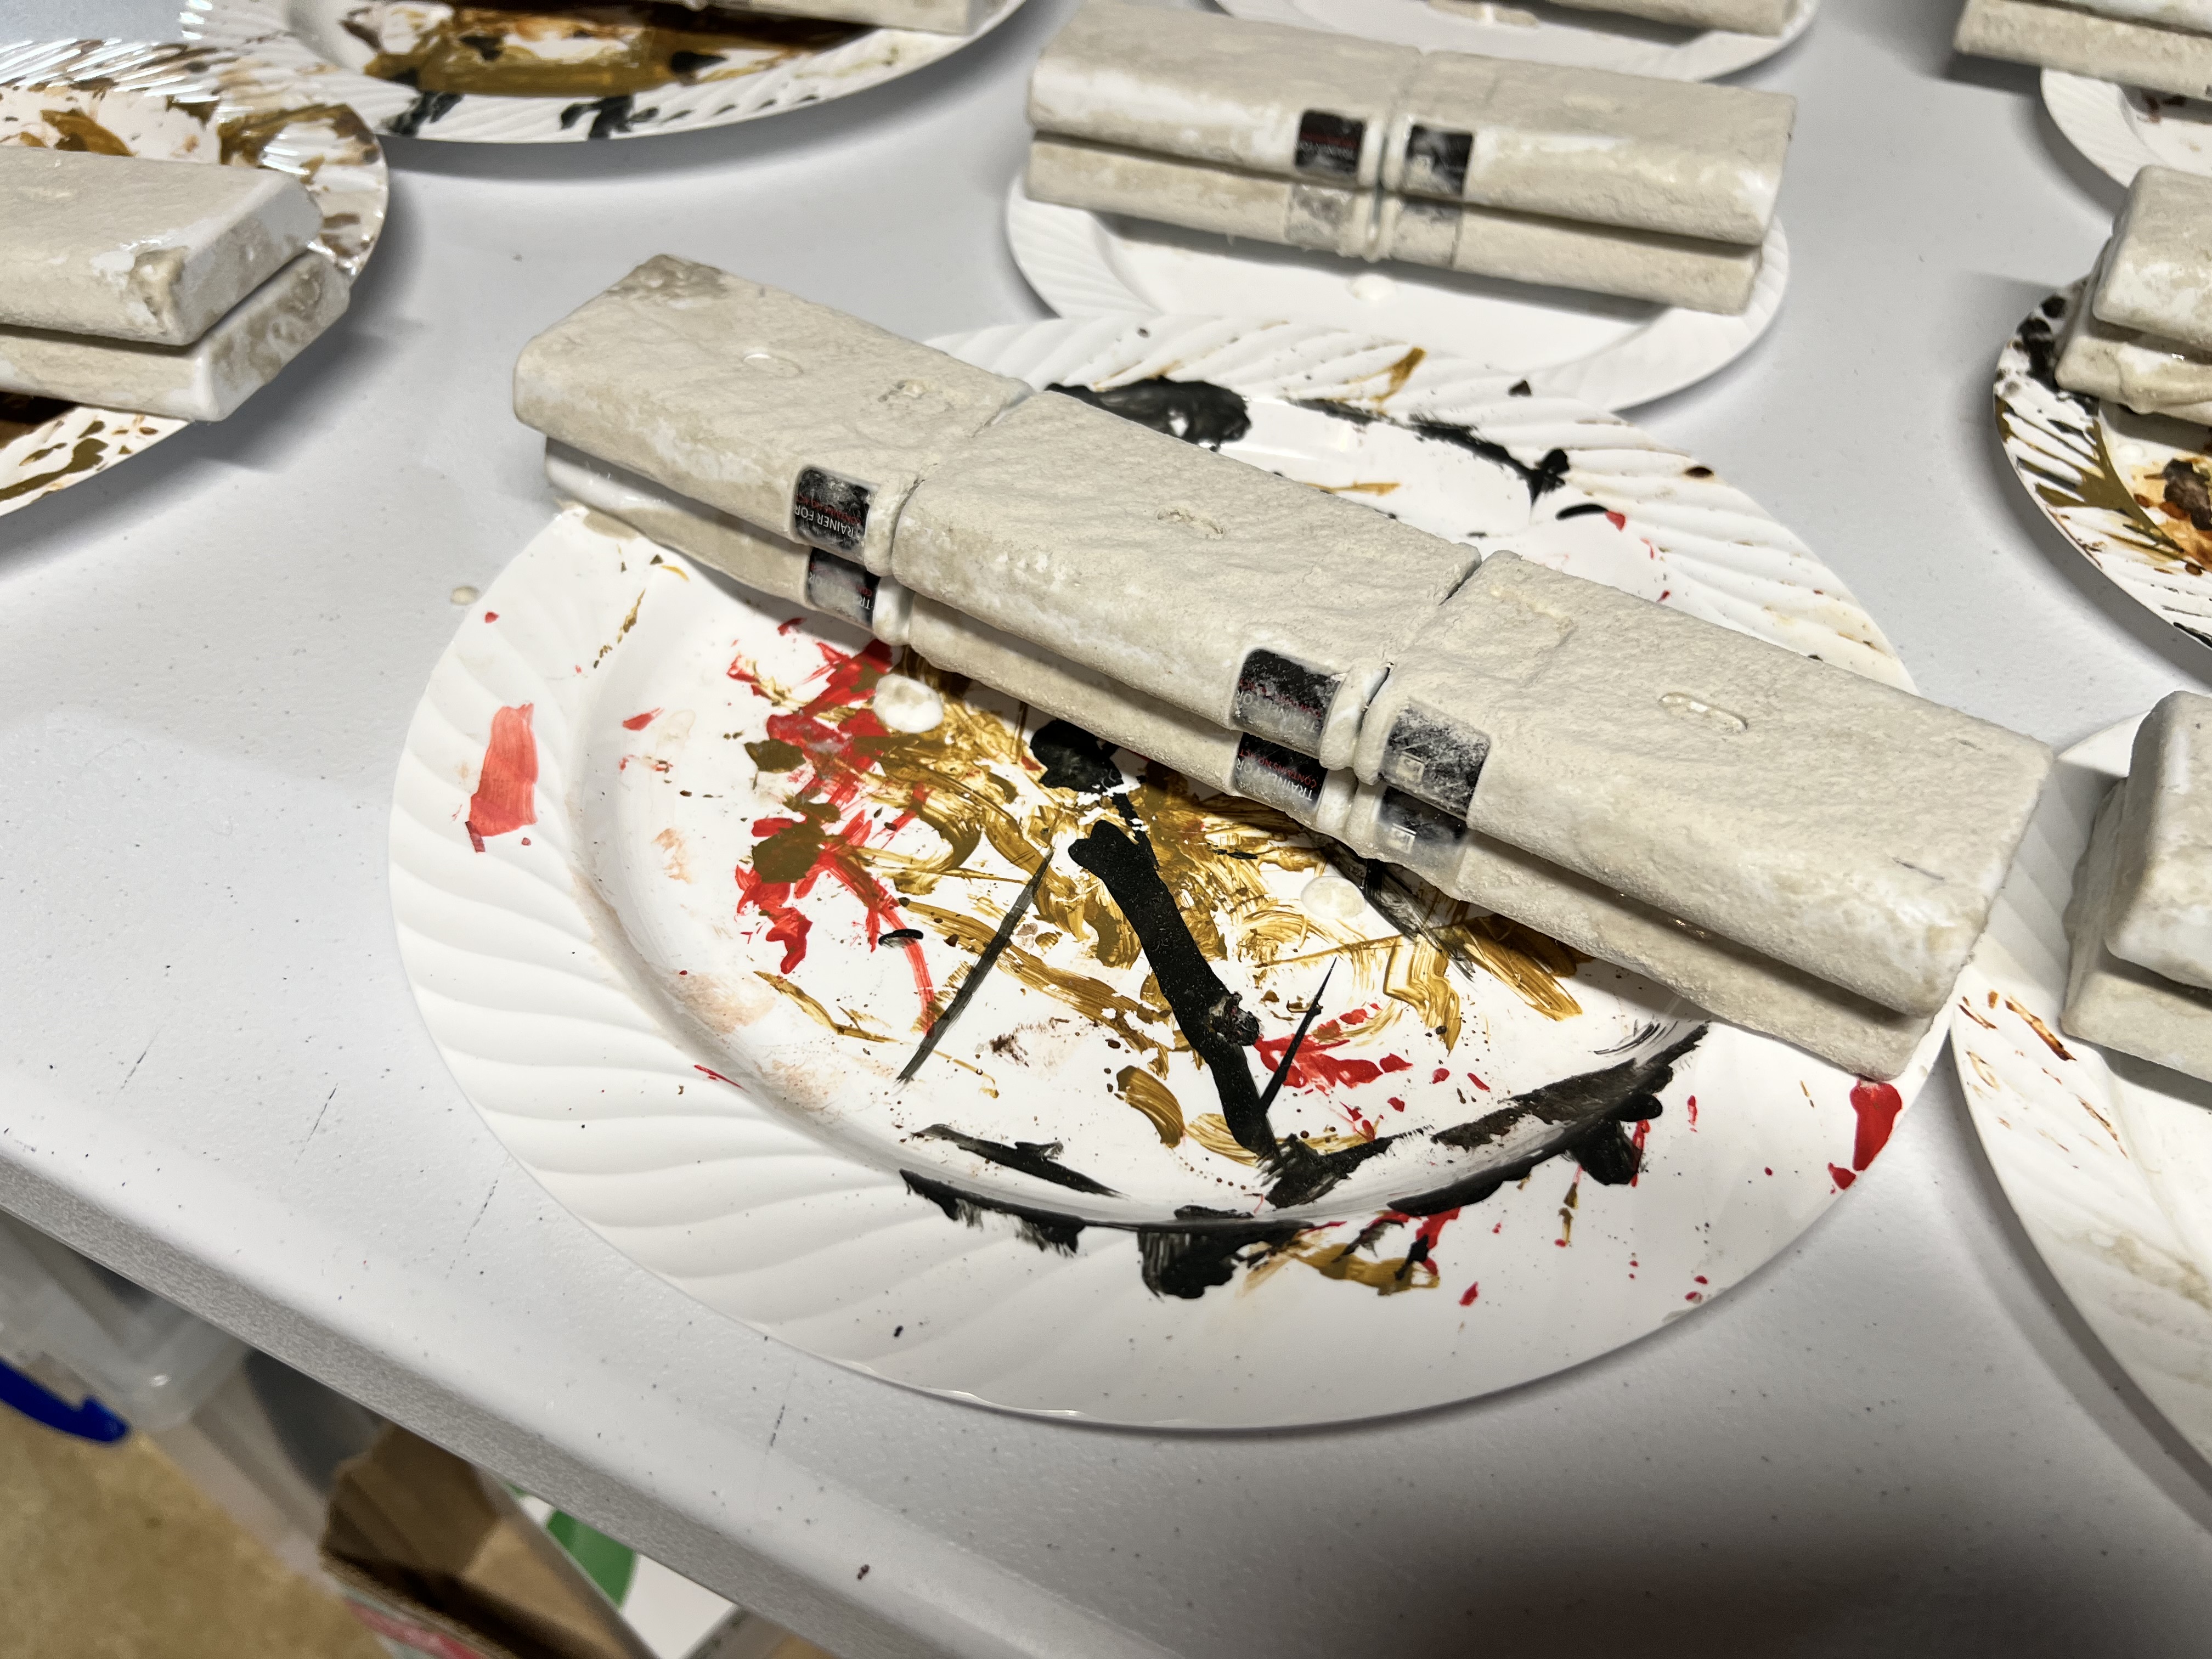
To make sure what I wanted to do would work (and to learn from any errors), I went with a prototype. I used an Exacto blade to remove the outer label. Then, I sanded the exterior to make it rough. To attach multiple units together, green stuff was the solution. After that hardened, I coated the outside of the attached trainers with PVA – followed by a dusting of chinchilla dust on the glue. When that combination had hardened, I primed the combinations with black primer.
First prototype primed.
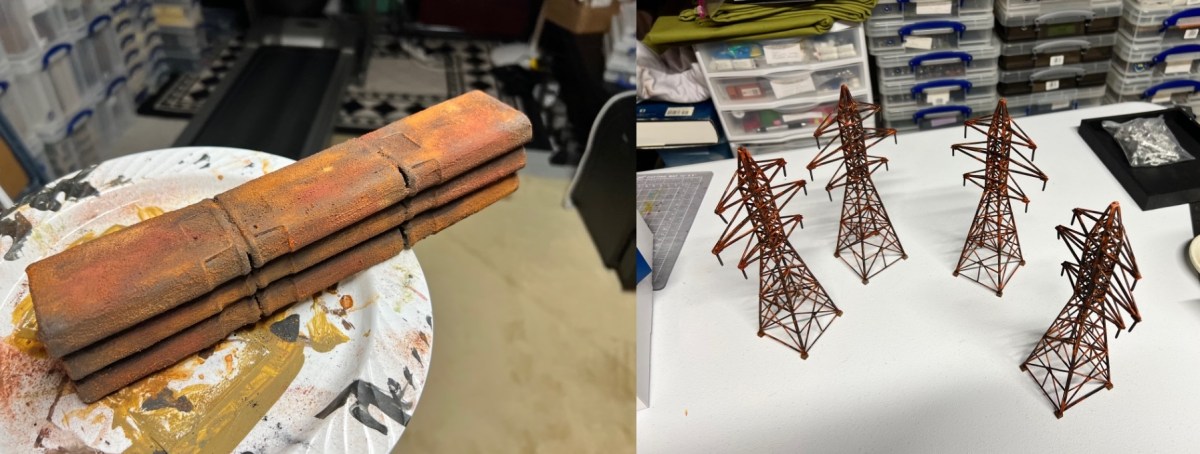
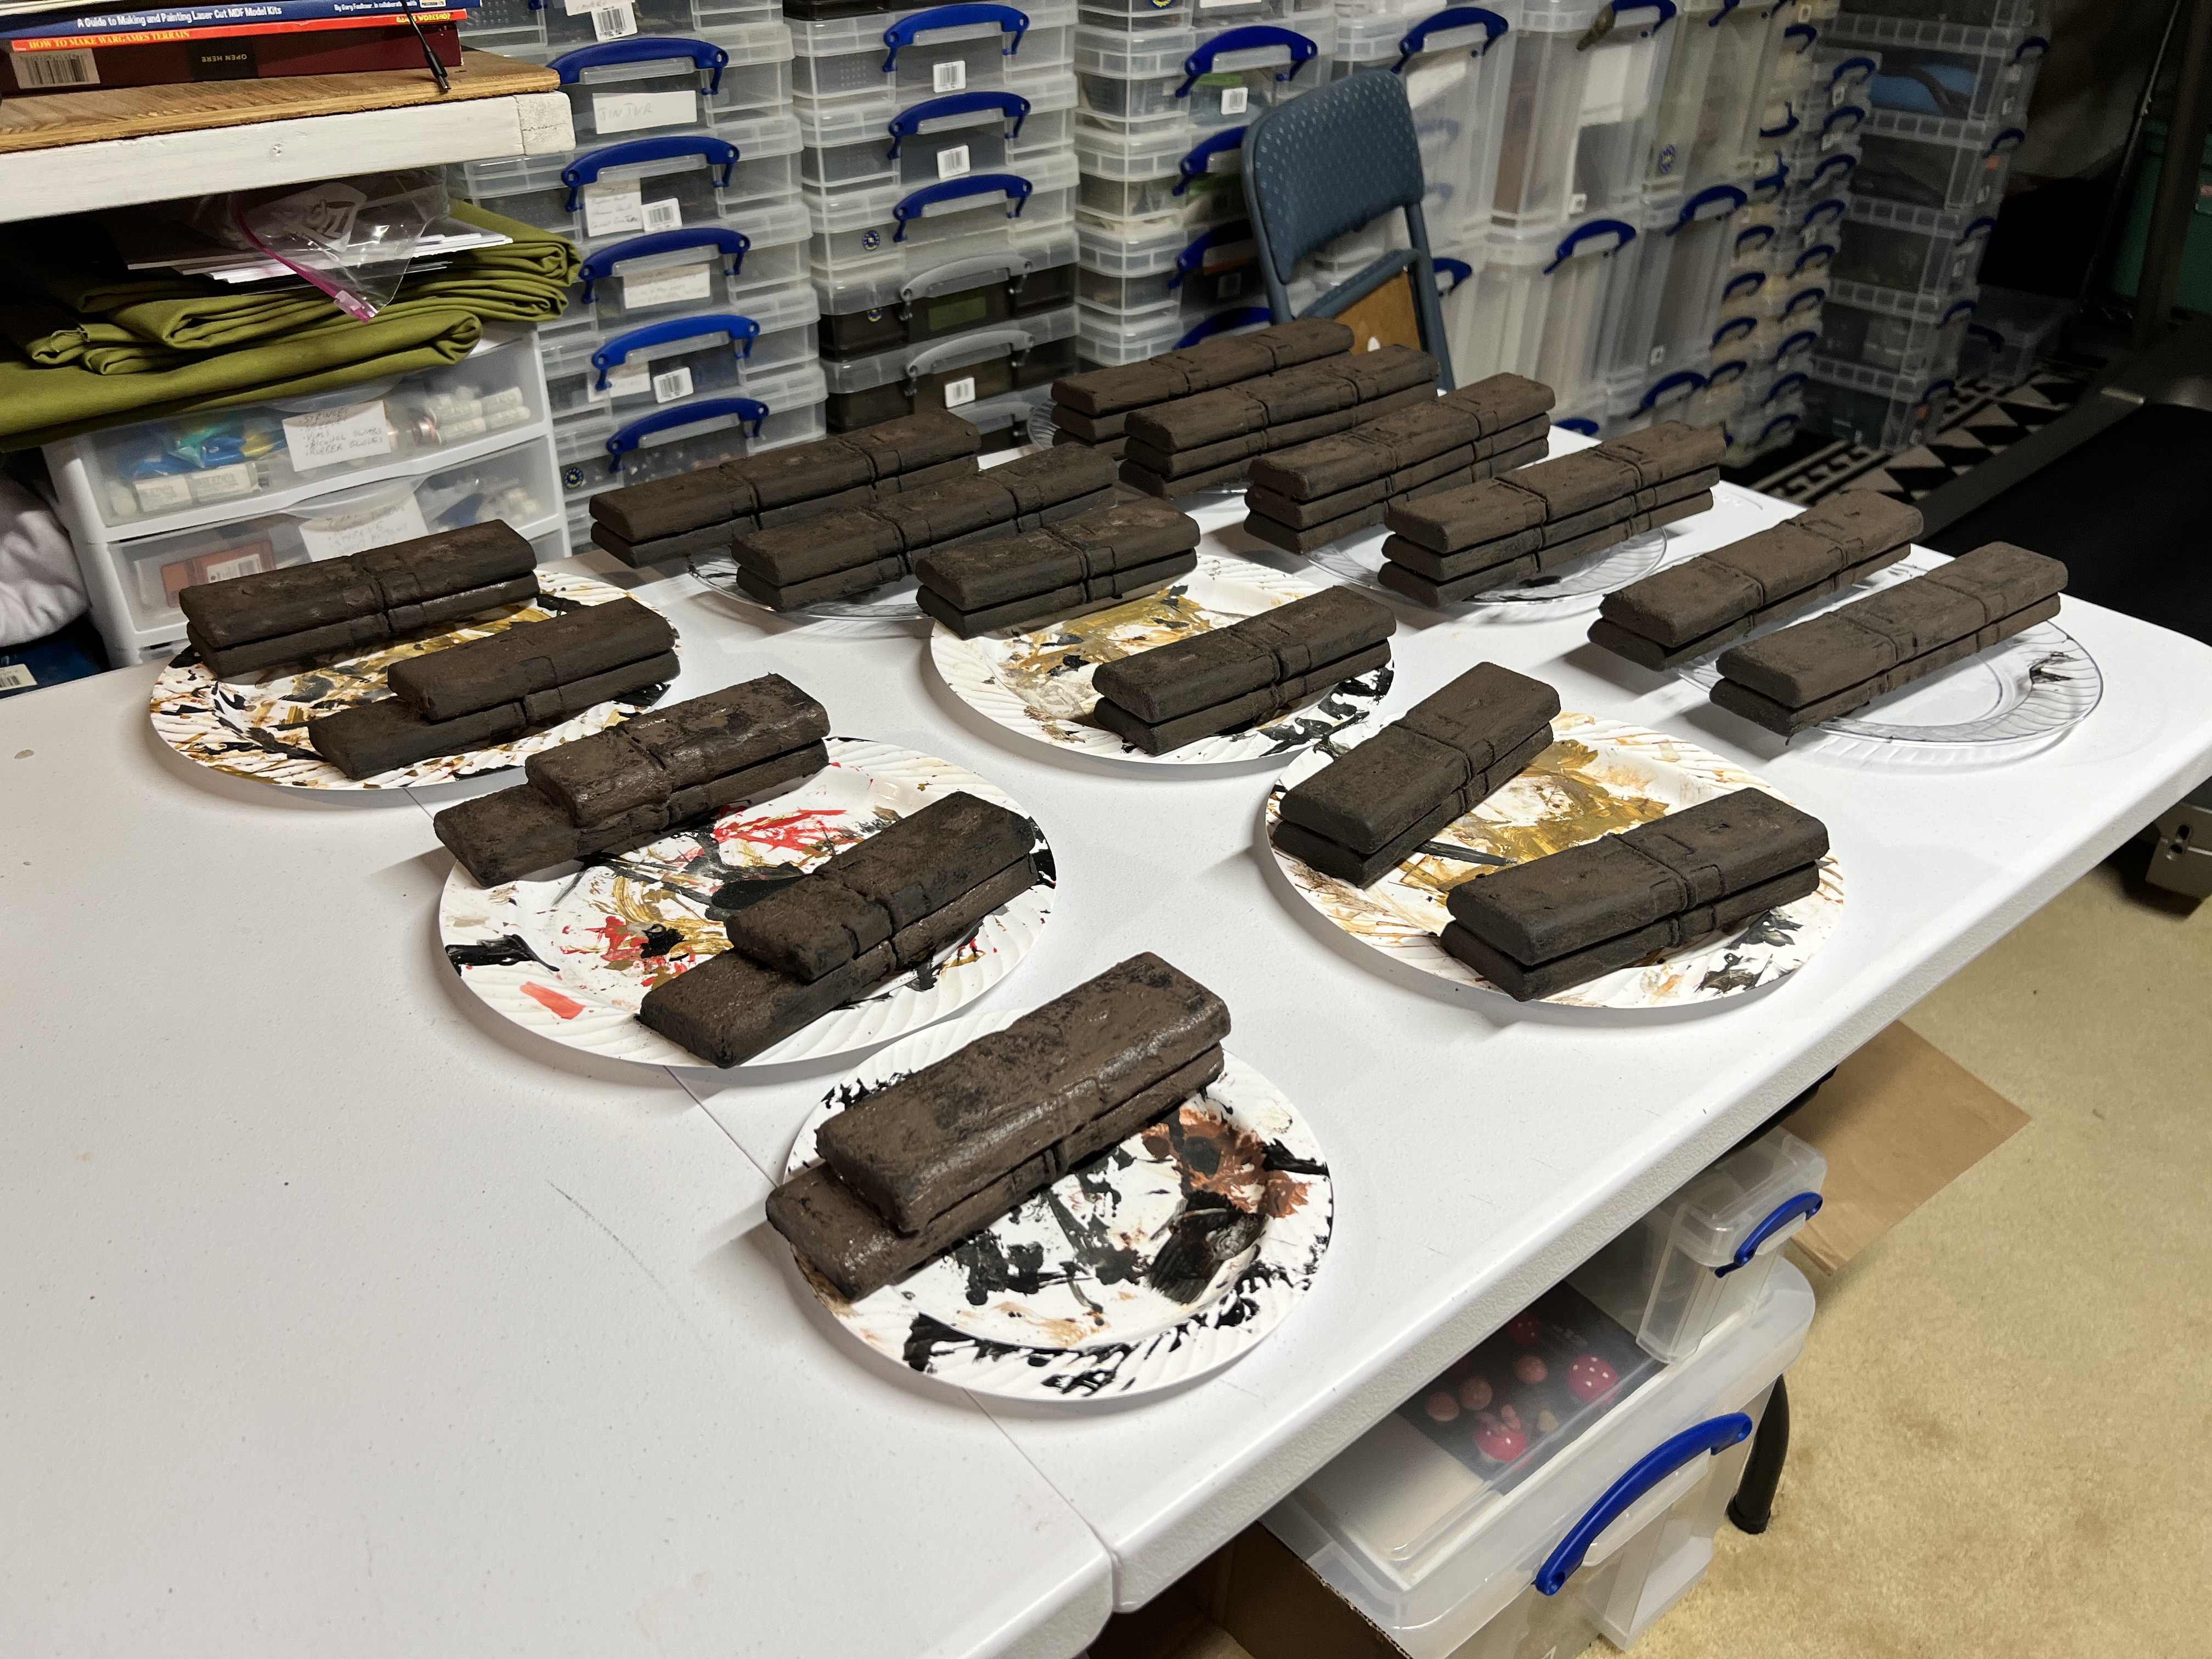
From this point, I used corrosion texture paint(let that harden), then used a number of rusting paints and pigments. I really liked the results and moved on to making two large batches of different combinations.
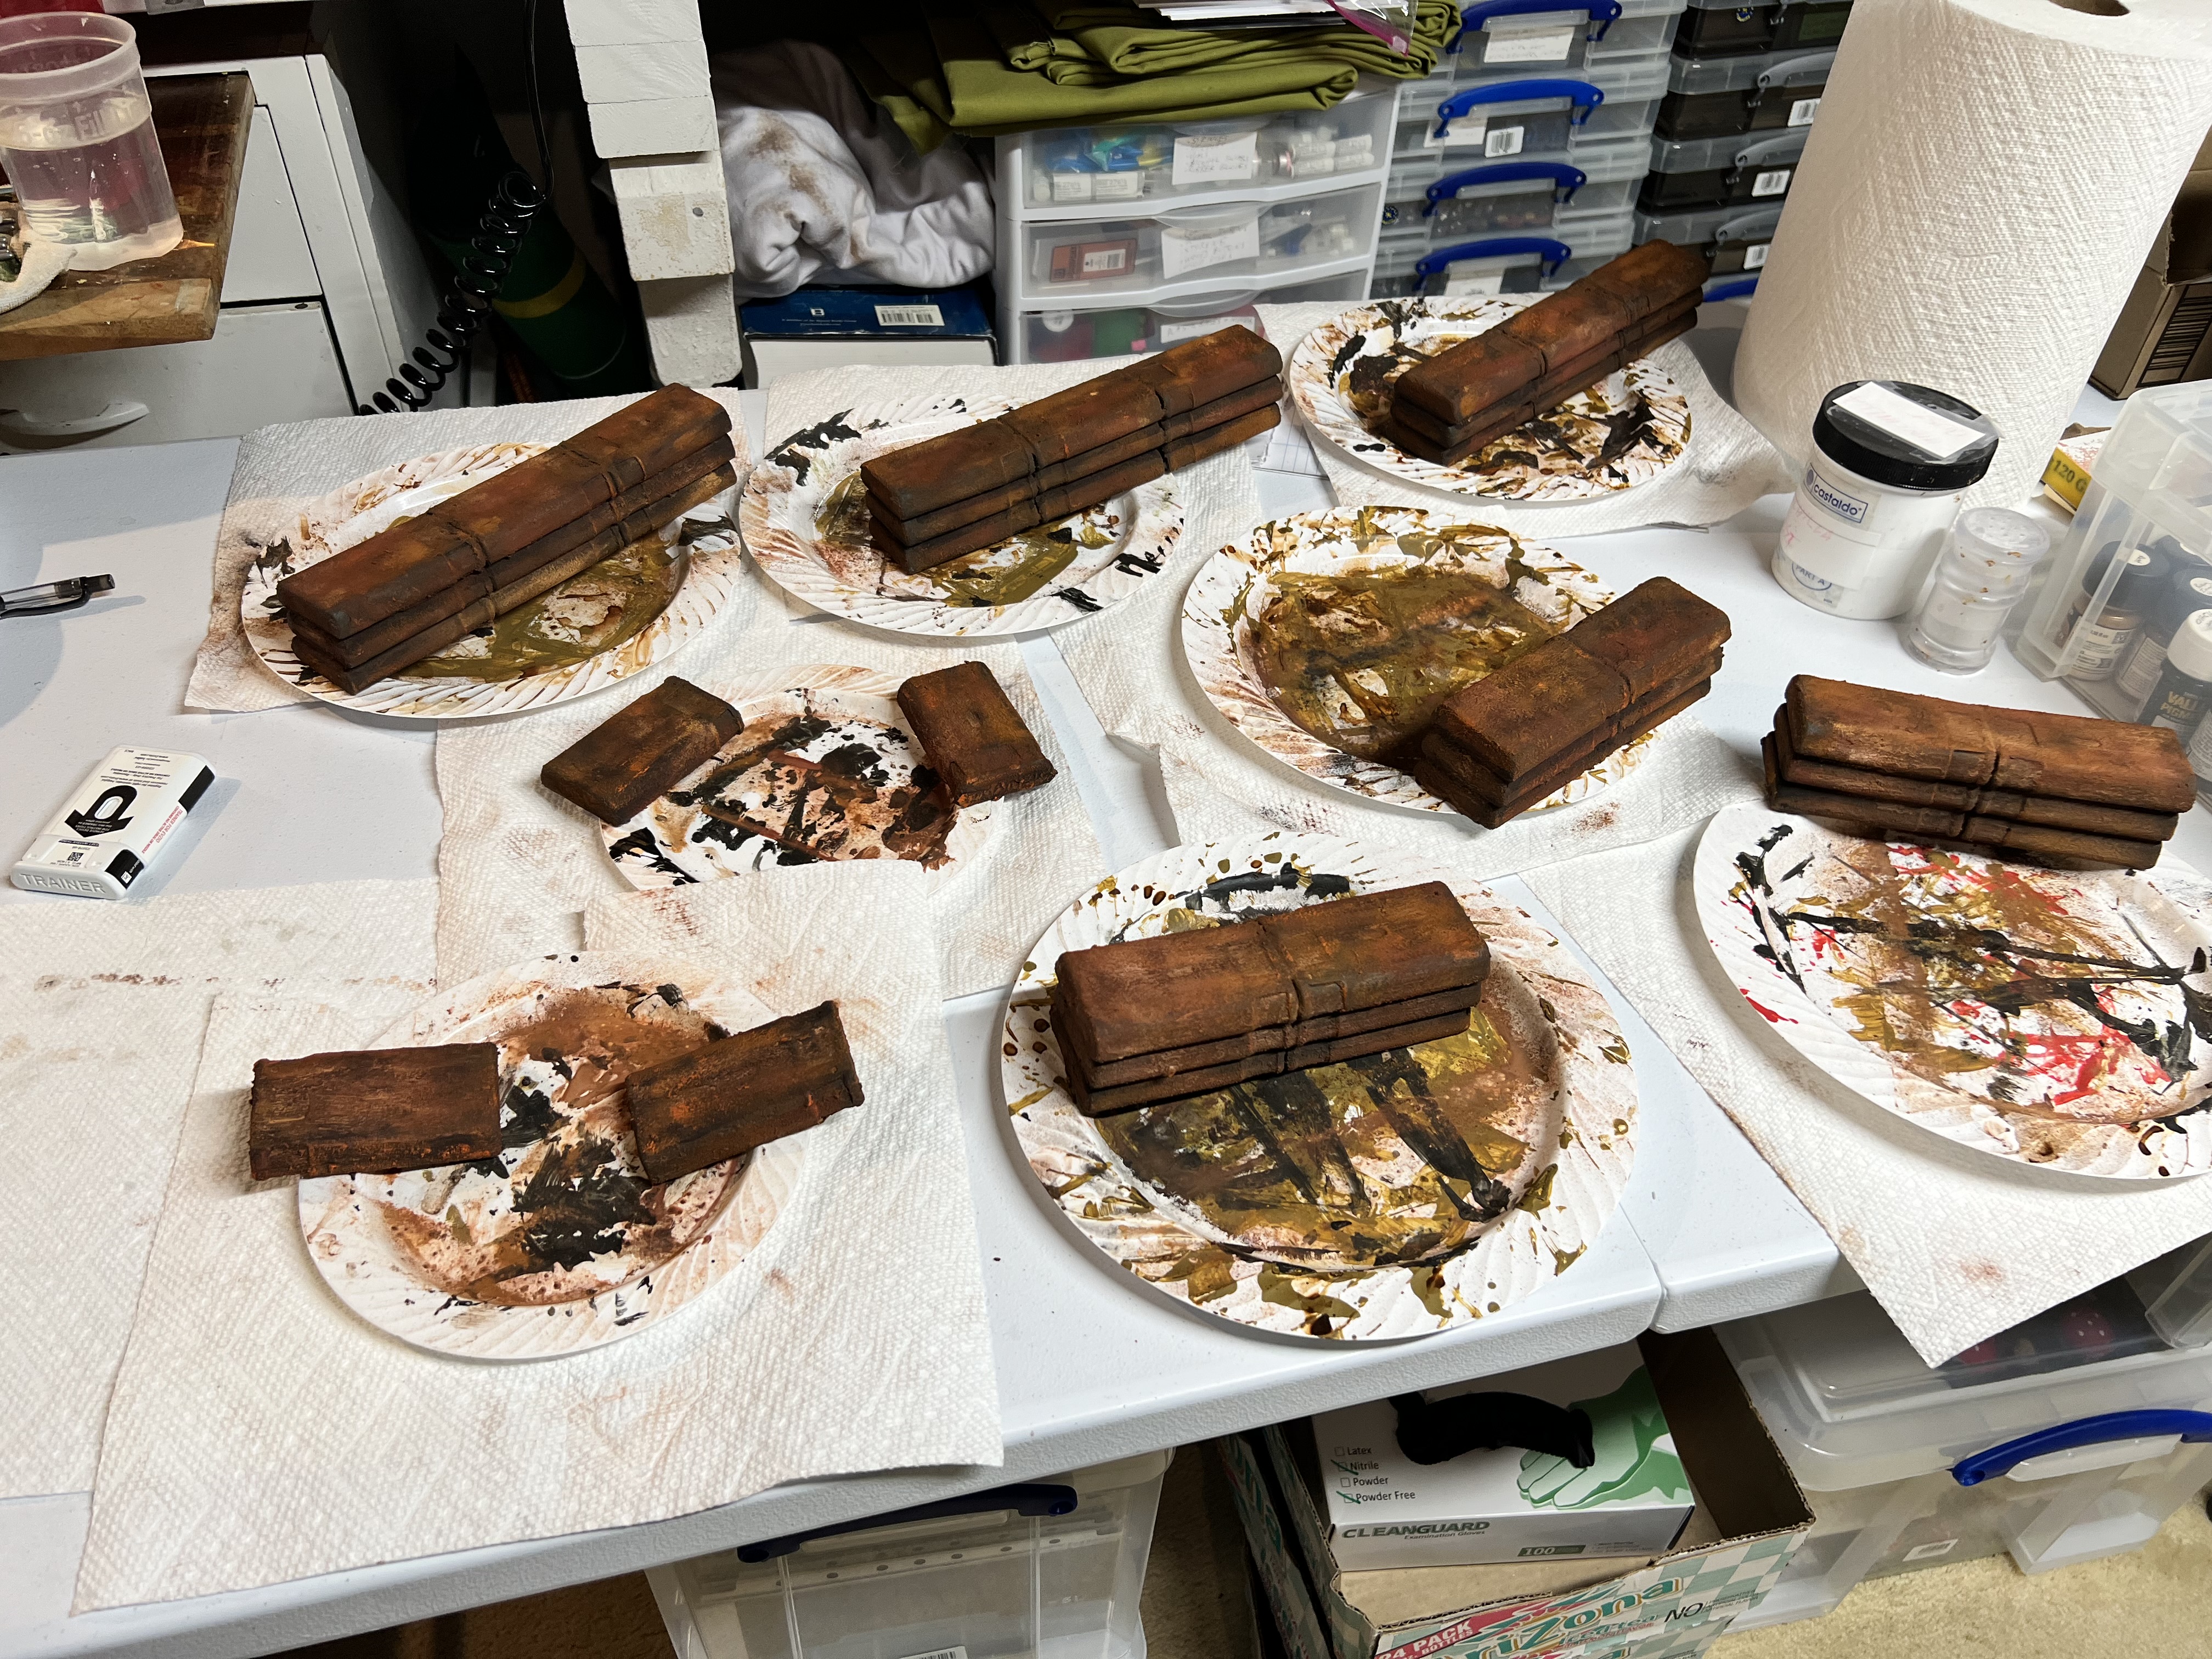
Walls after labels removed and sanded.PVA and chinchilla dust application.Corrosion texture paint applied and drying.First half-batch of walls after being rusted up.Close up shot of a 3×3 combination.Second half batch done.
I ended up with 27 sections = a total of 17.8′ worth of rusty wall.
And here they are in total finished up mid-December.:
27 sections of rusty walls!
With the walls done, it was time to get some verticality for the tabletop. And get them done BEFORE Christmas.
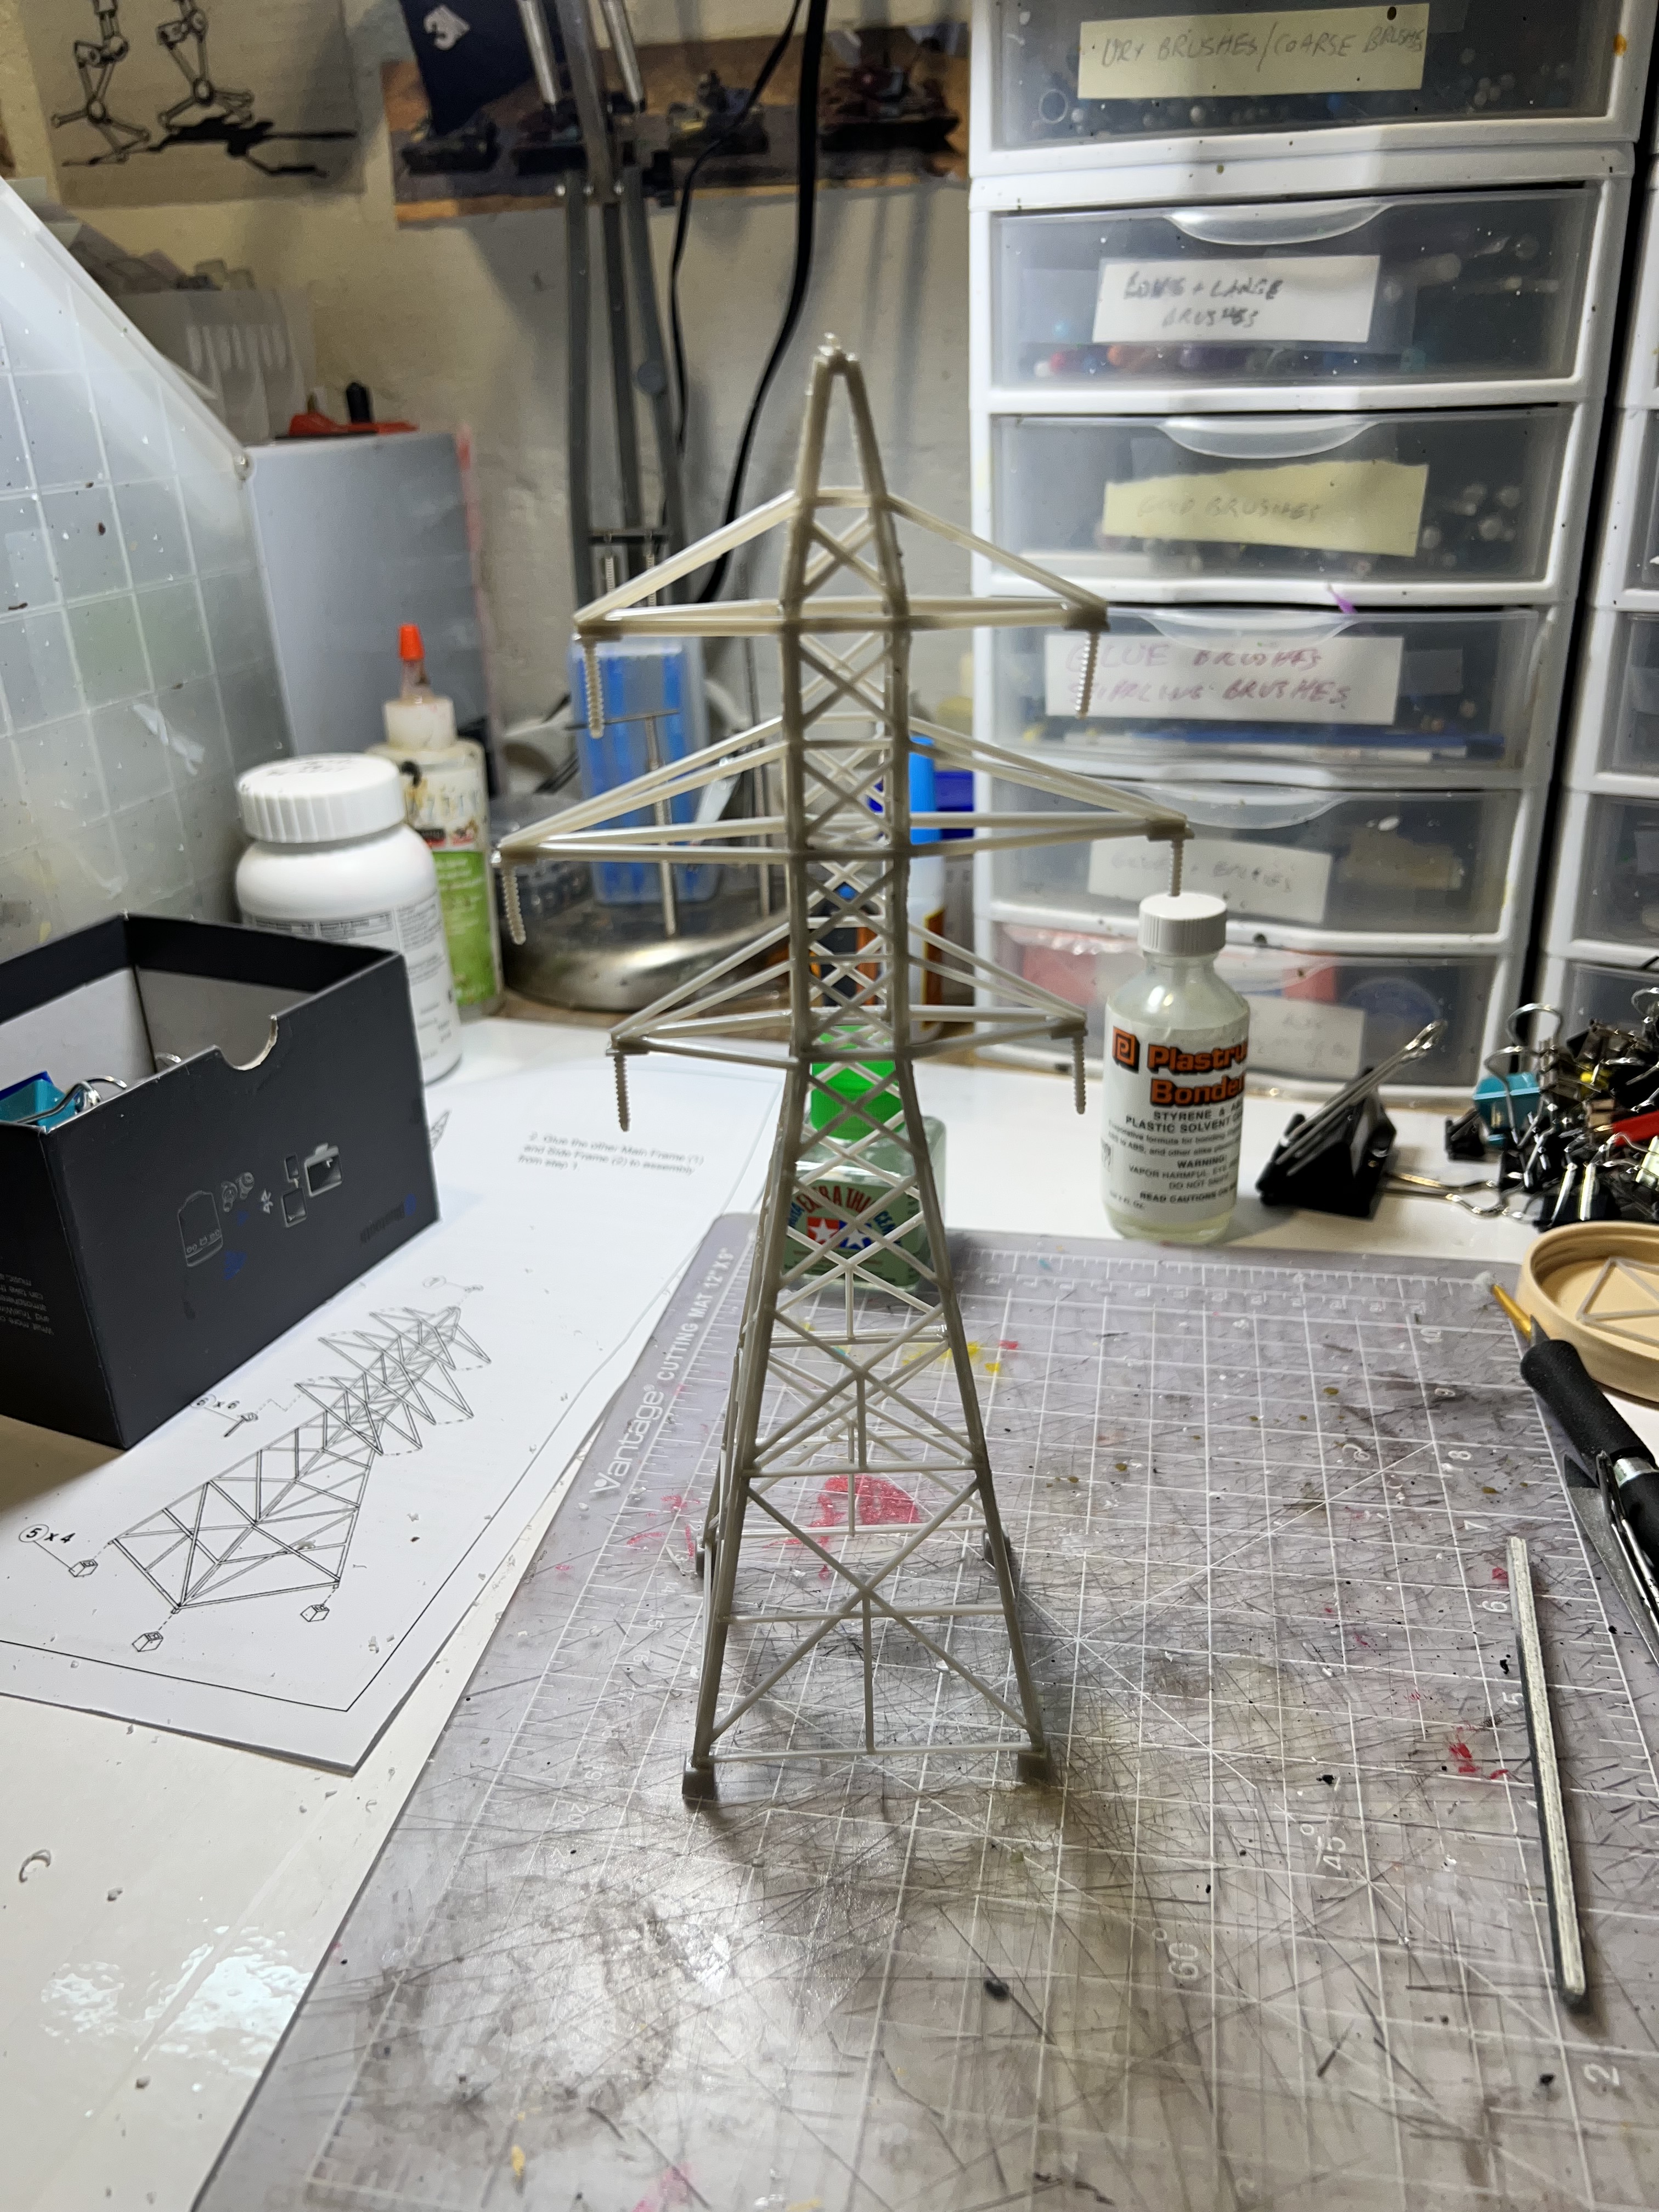
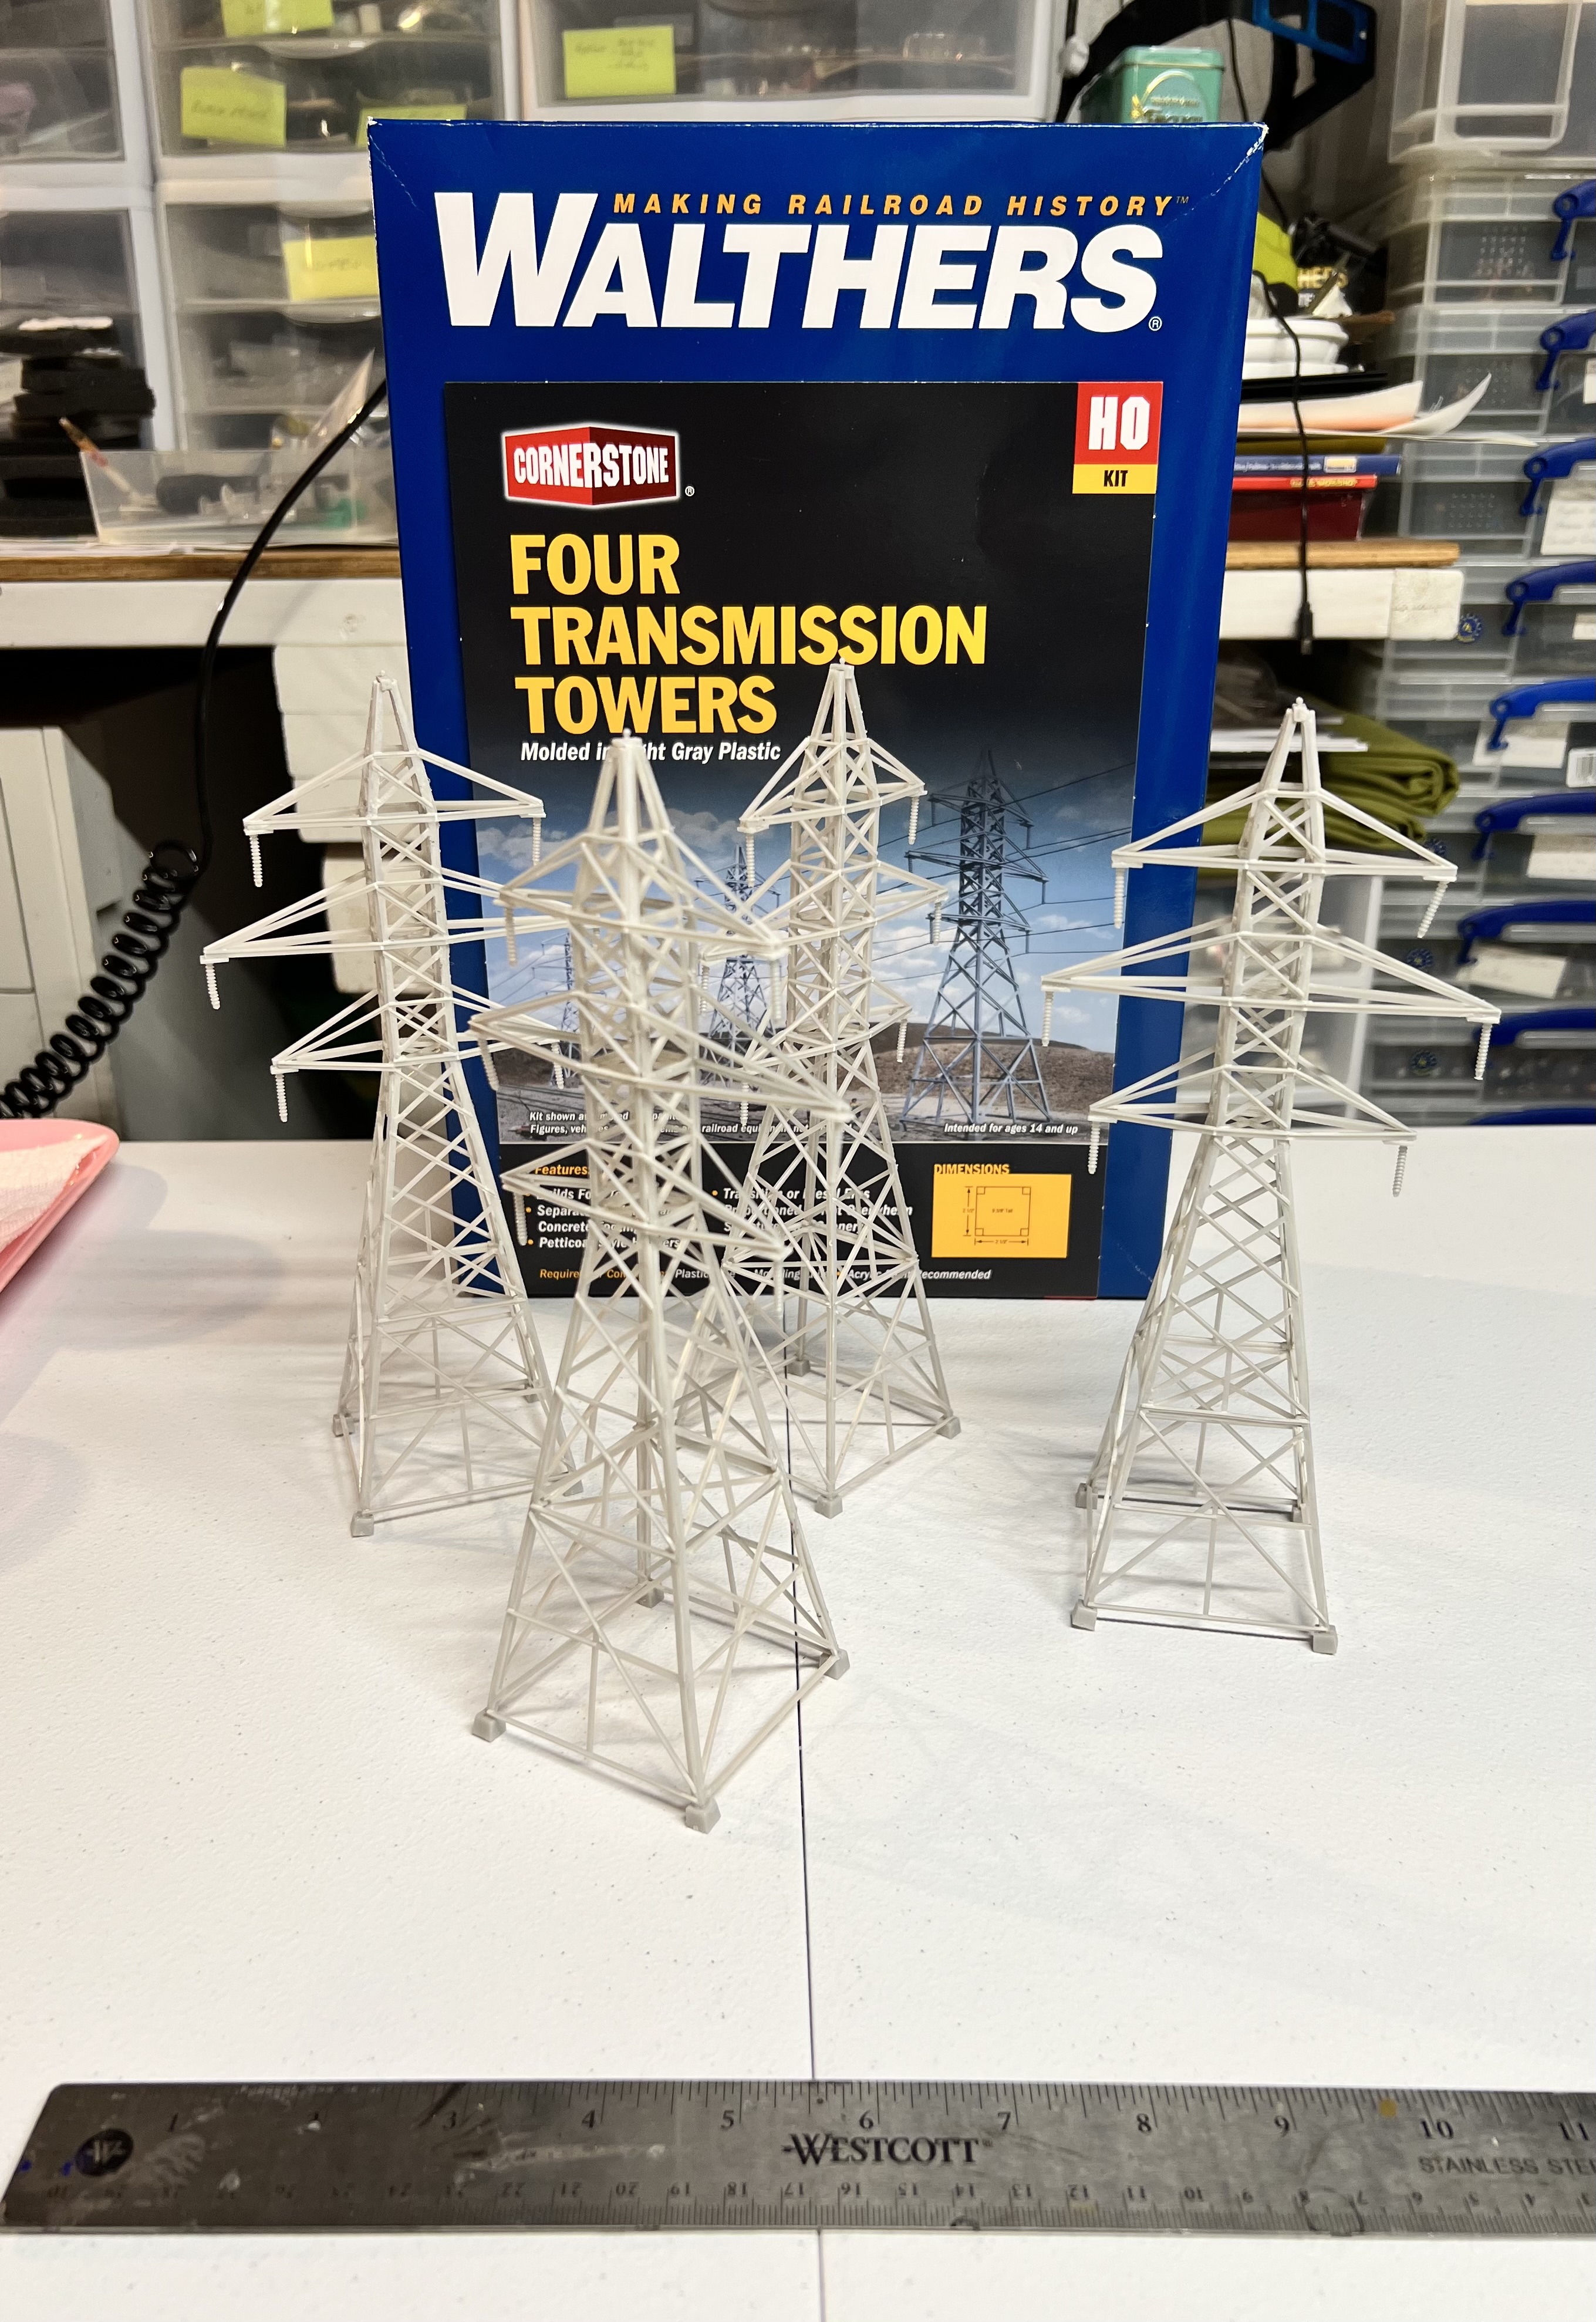
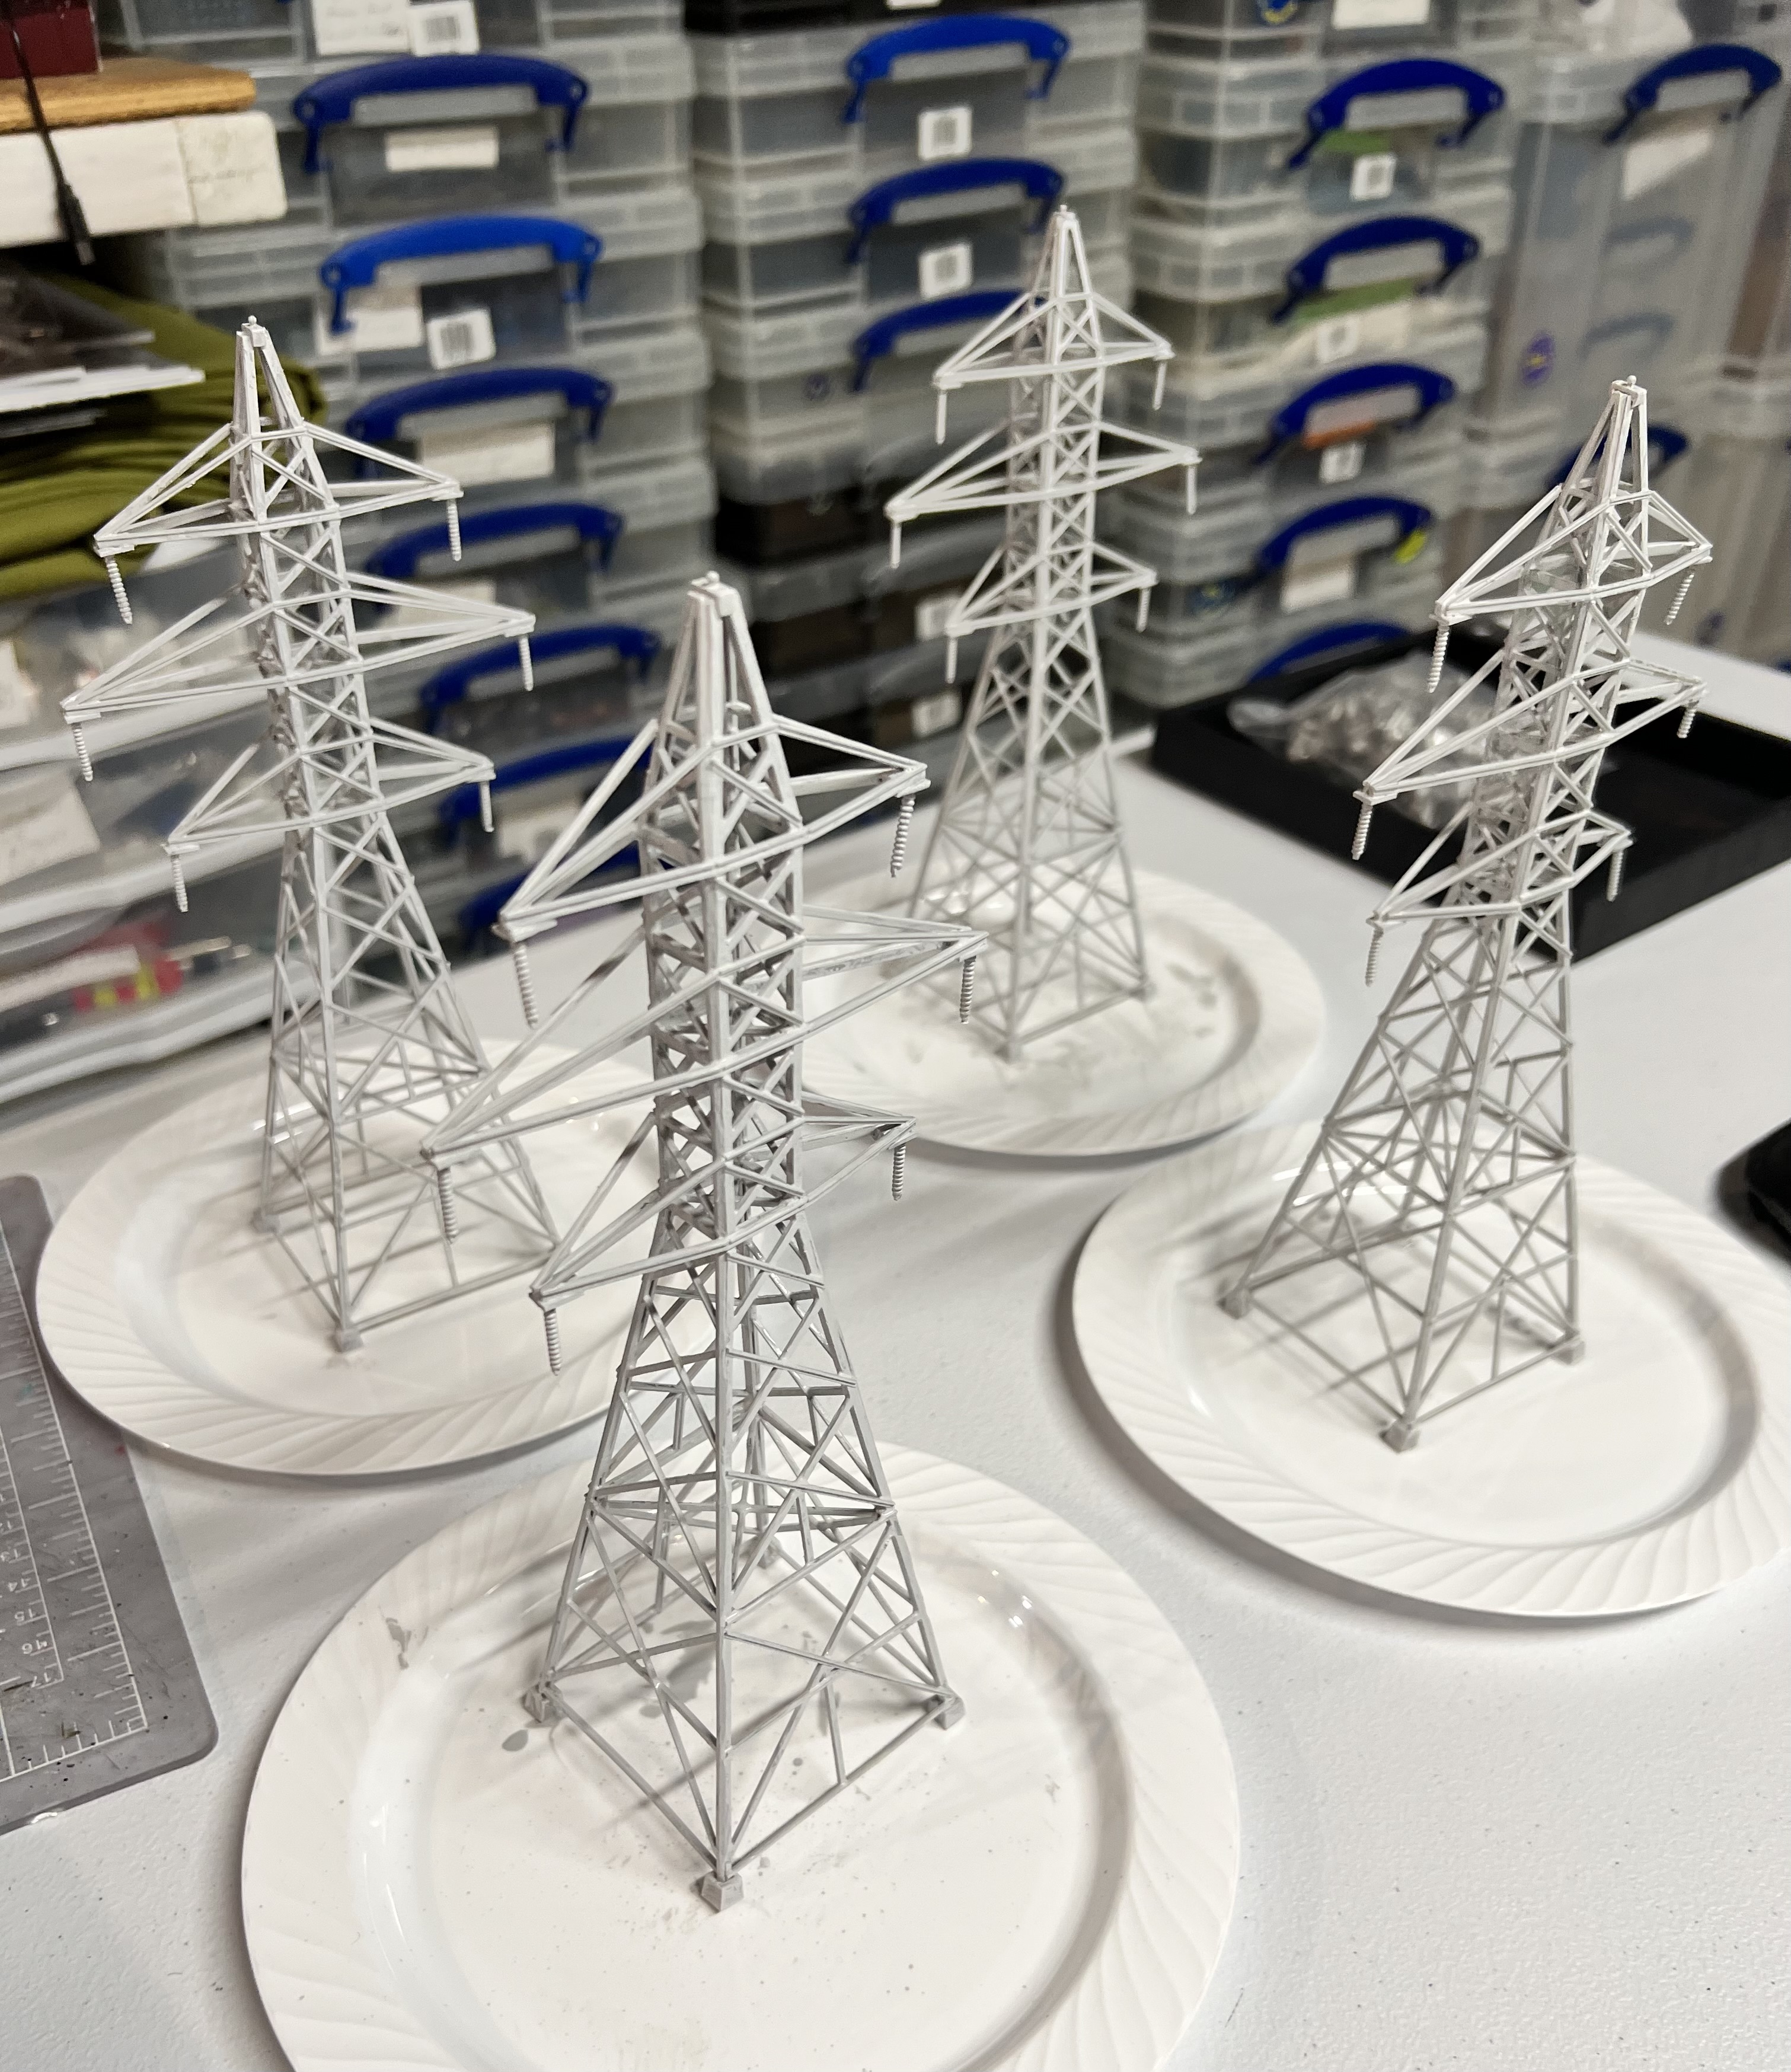
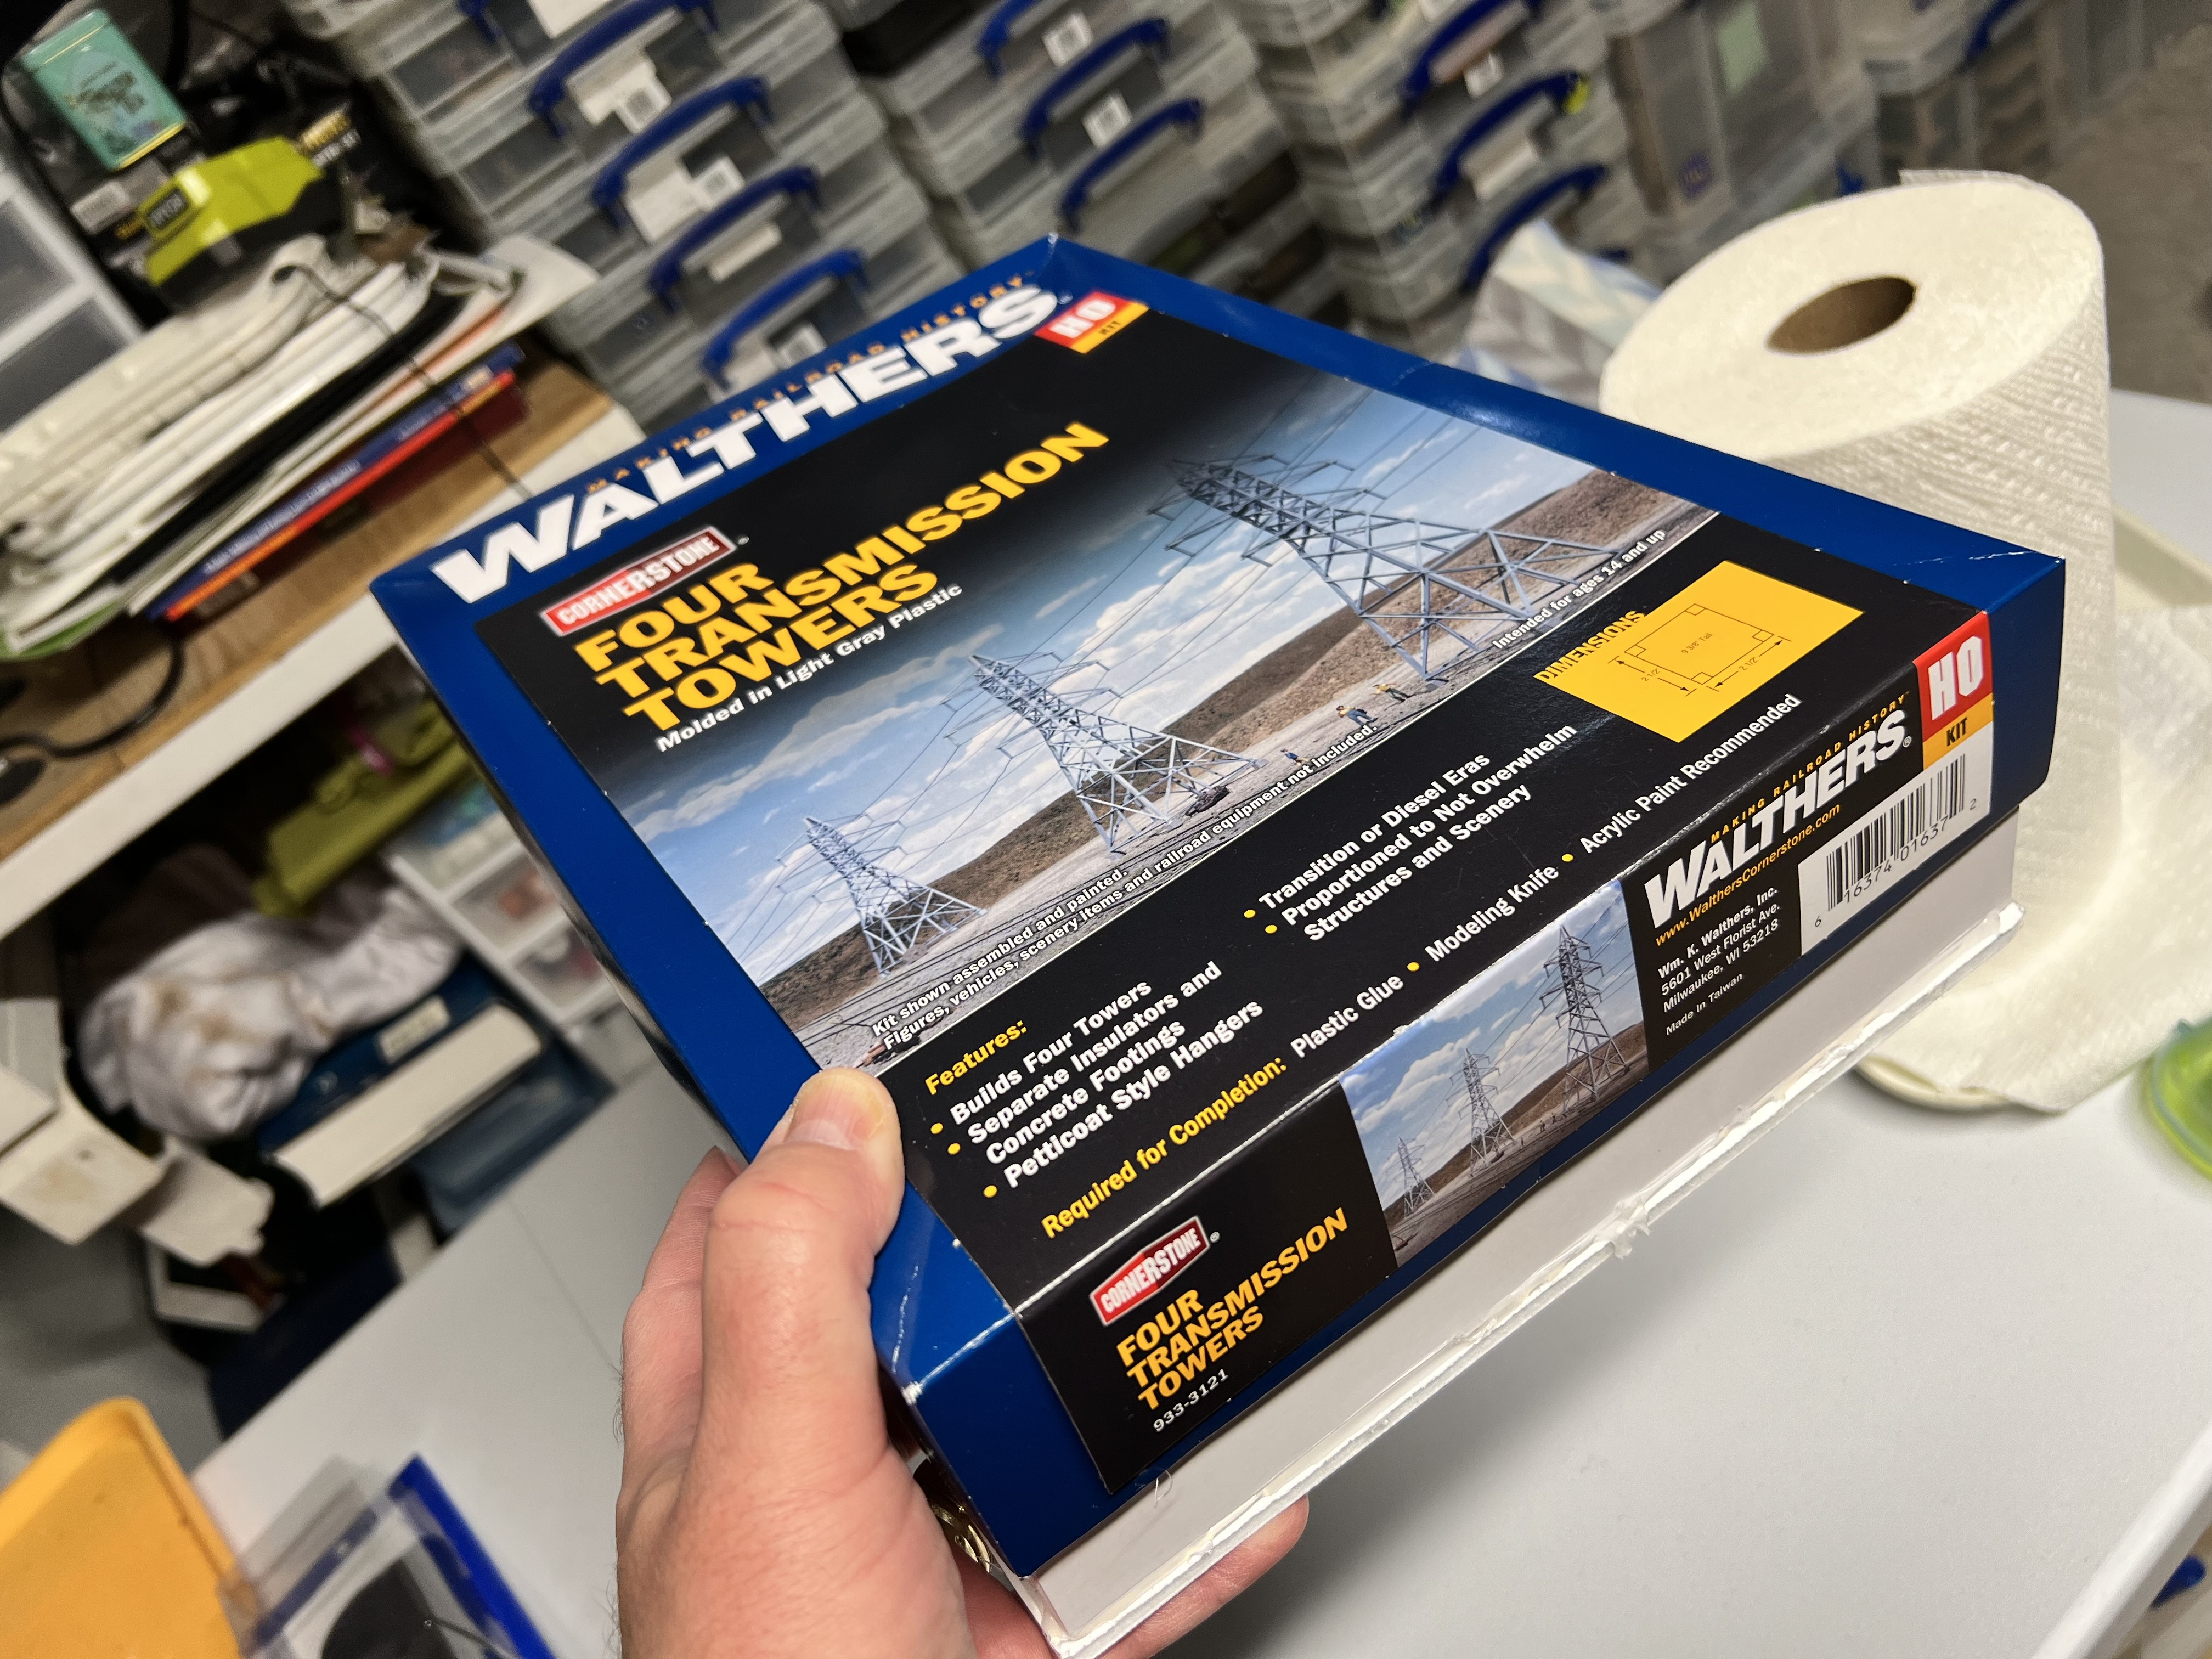
I thought transmission towers – rusty ones – would be great in that role. I found a railroad terrain kit on eBay. It was HO scale. It would go well with the other pieces of rusty fun. These were “Walther’s Cornerstone Four Transmission Towers”.
The transmission towers kit.
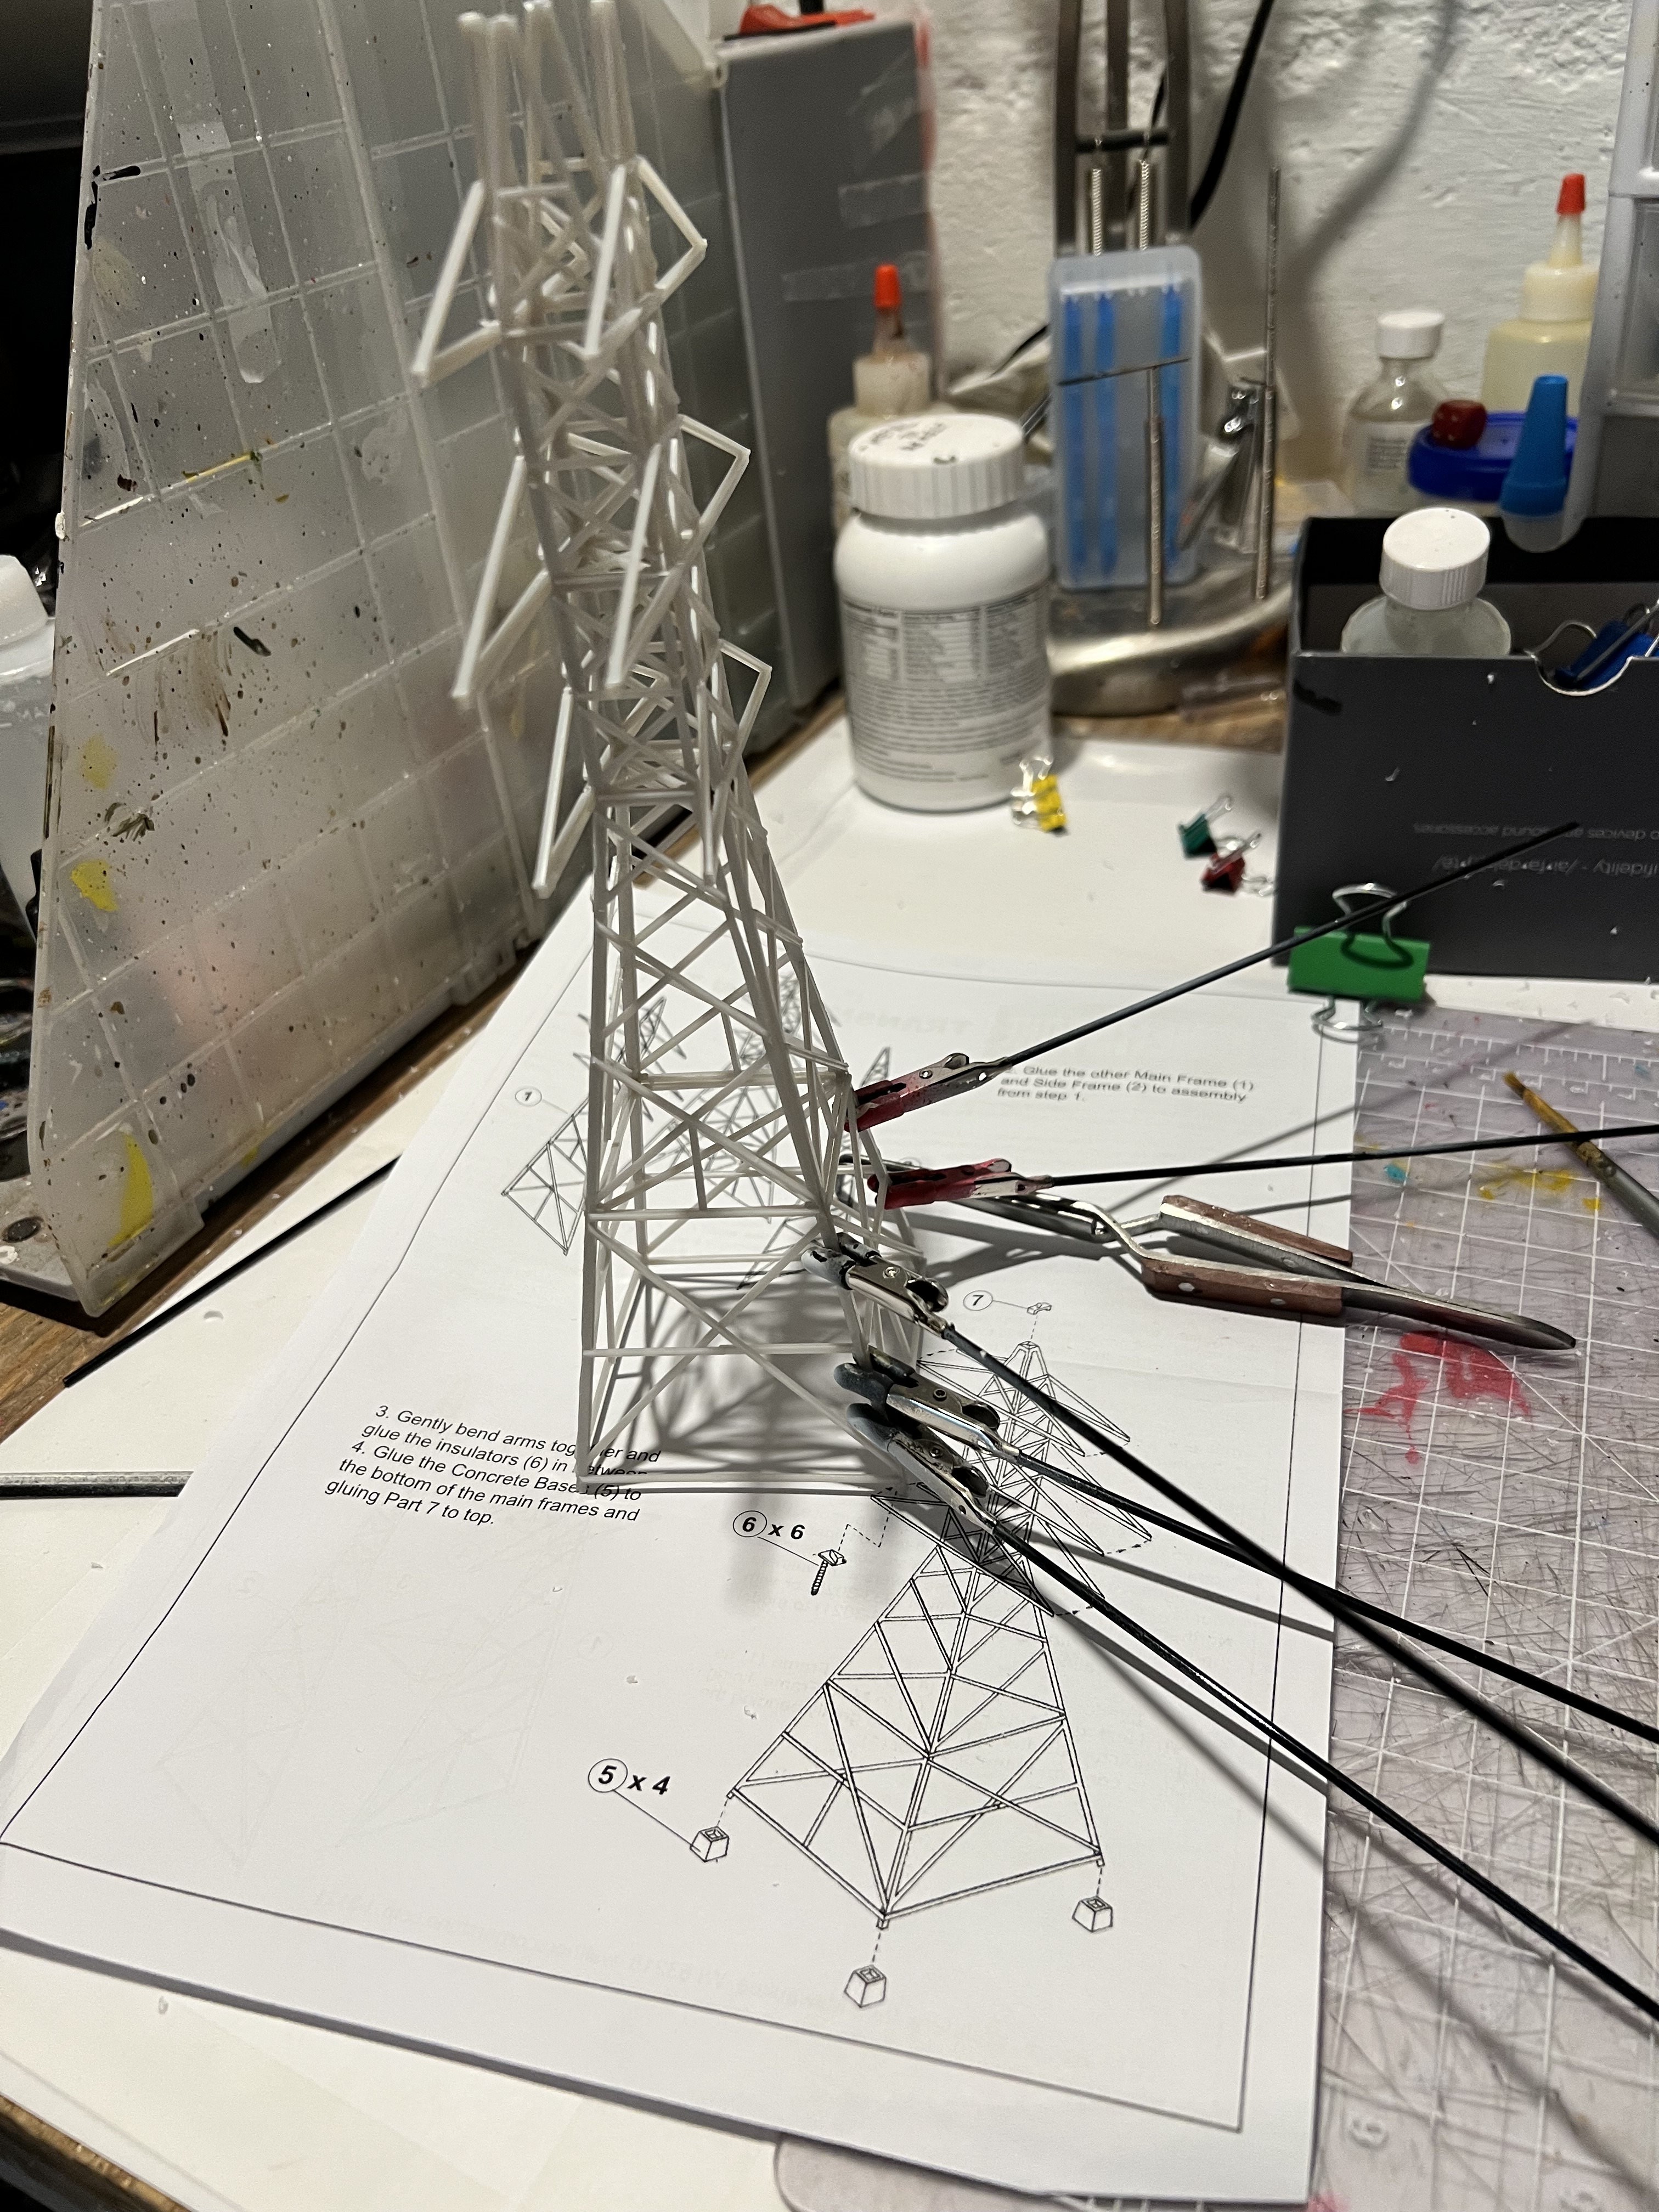
Assembly was a bit fiddly but manageable. It was not immediately clear to me which sides were front or back – but by the fourth iteration I got it down. Luckily, plastic cement covers any mistakes in assemble. I did find using rubber-shoed alligator clips to hold sections together while the cement set to be VERY helpful.
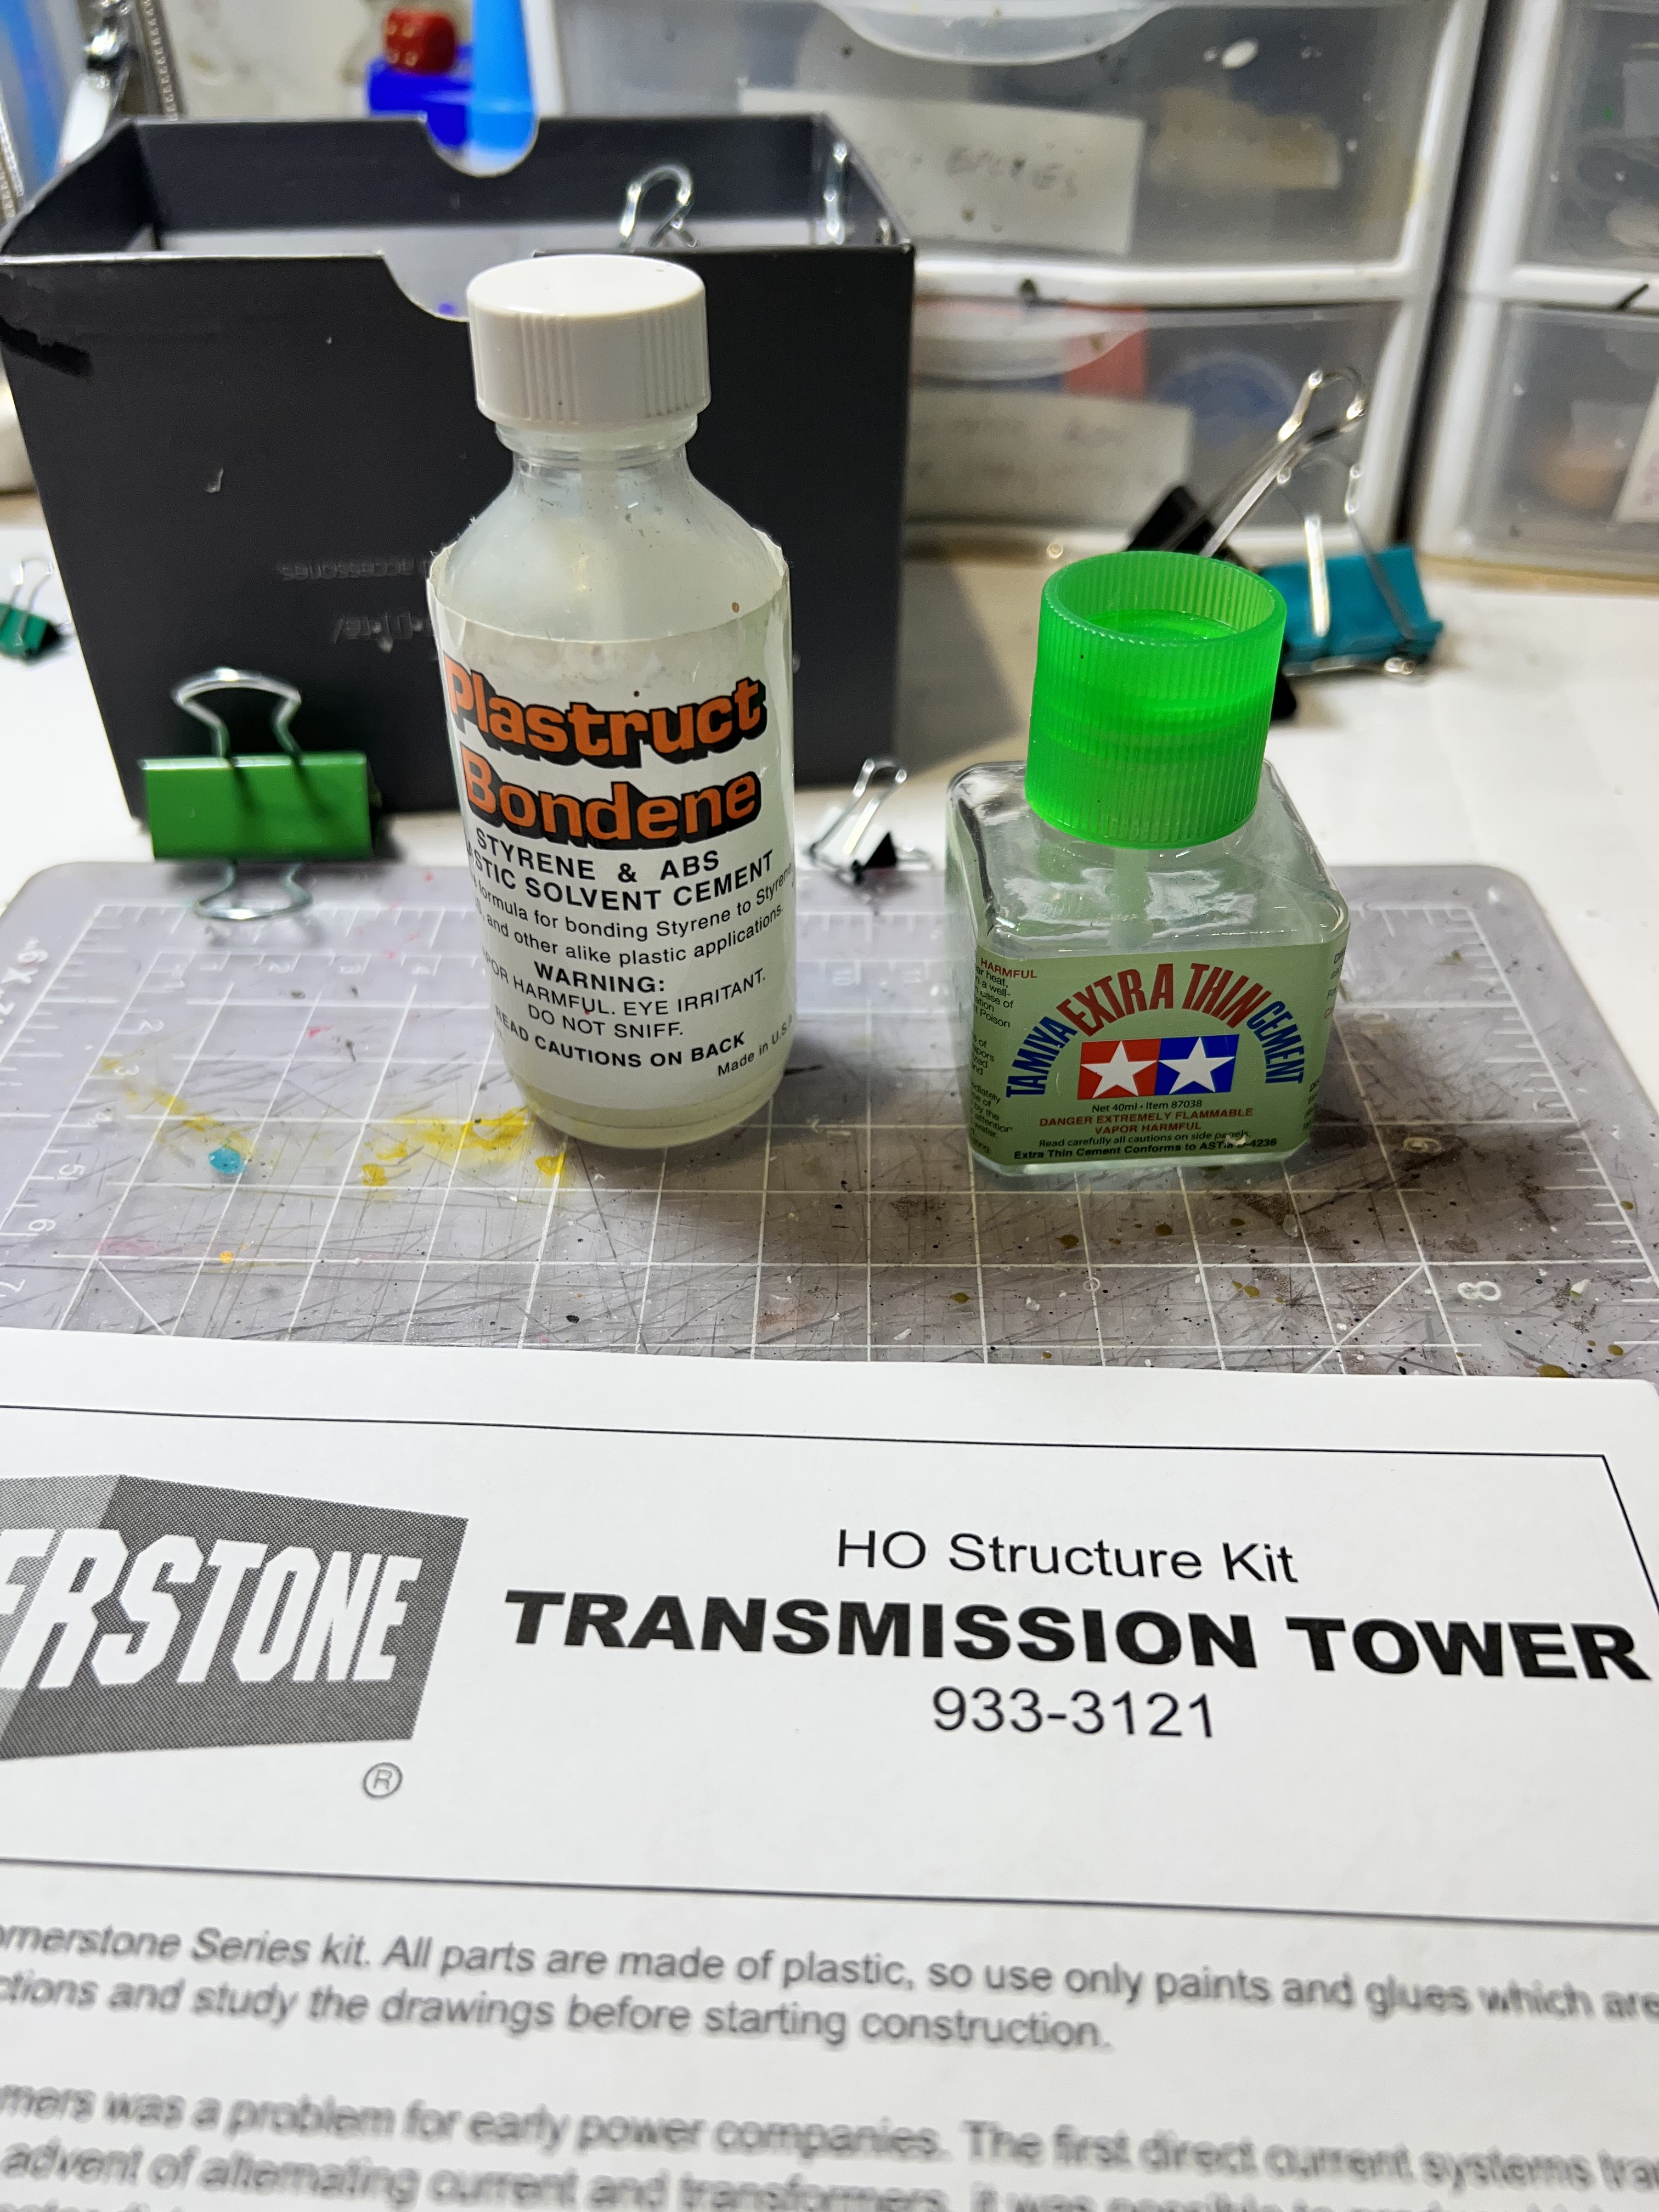
The first assembly went smoothly……the second was off (again figuring out which side went where was a bit confusing). Alligator clips to the rescue!All four assembled.The cements I used.The towers primed in grey.
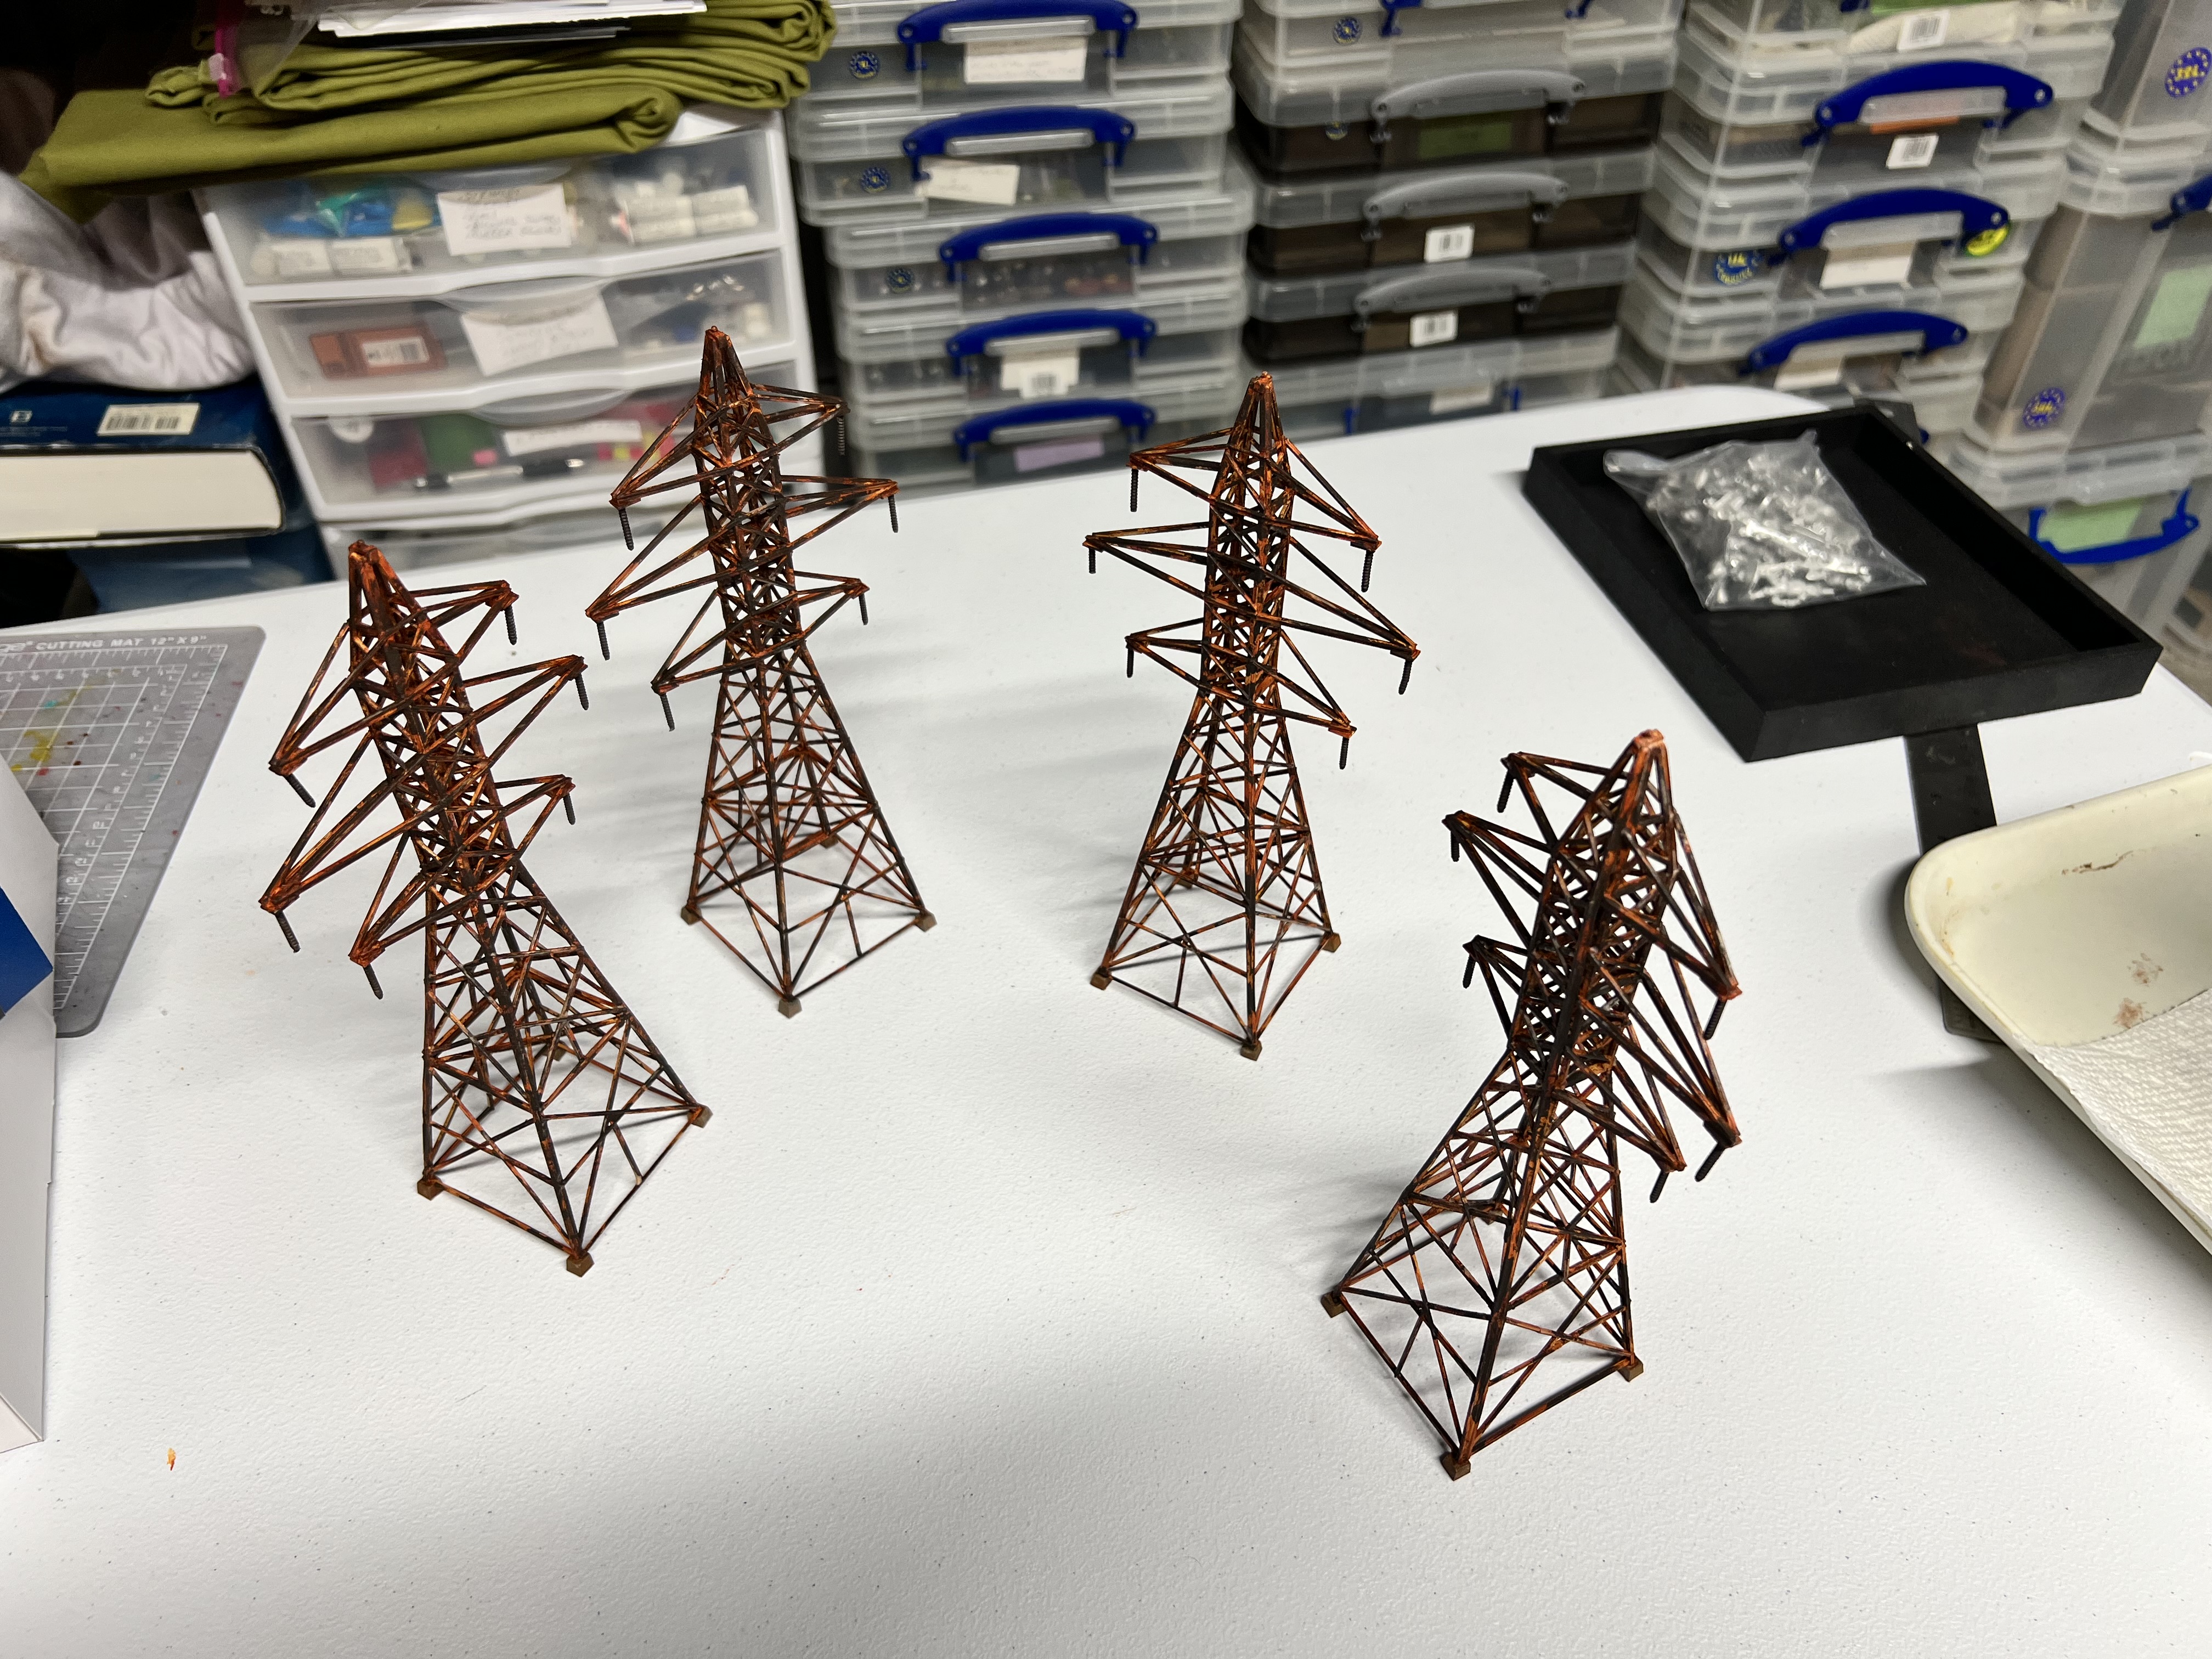
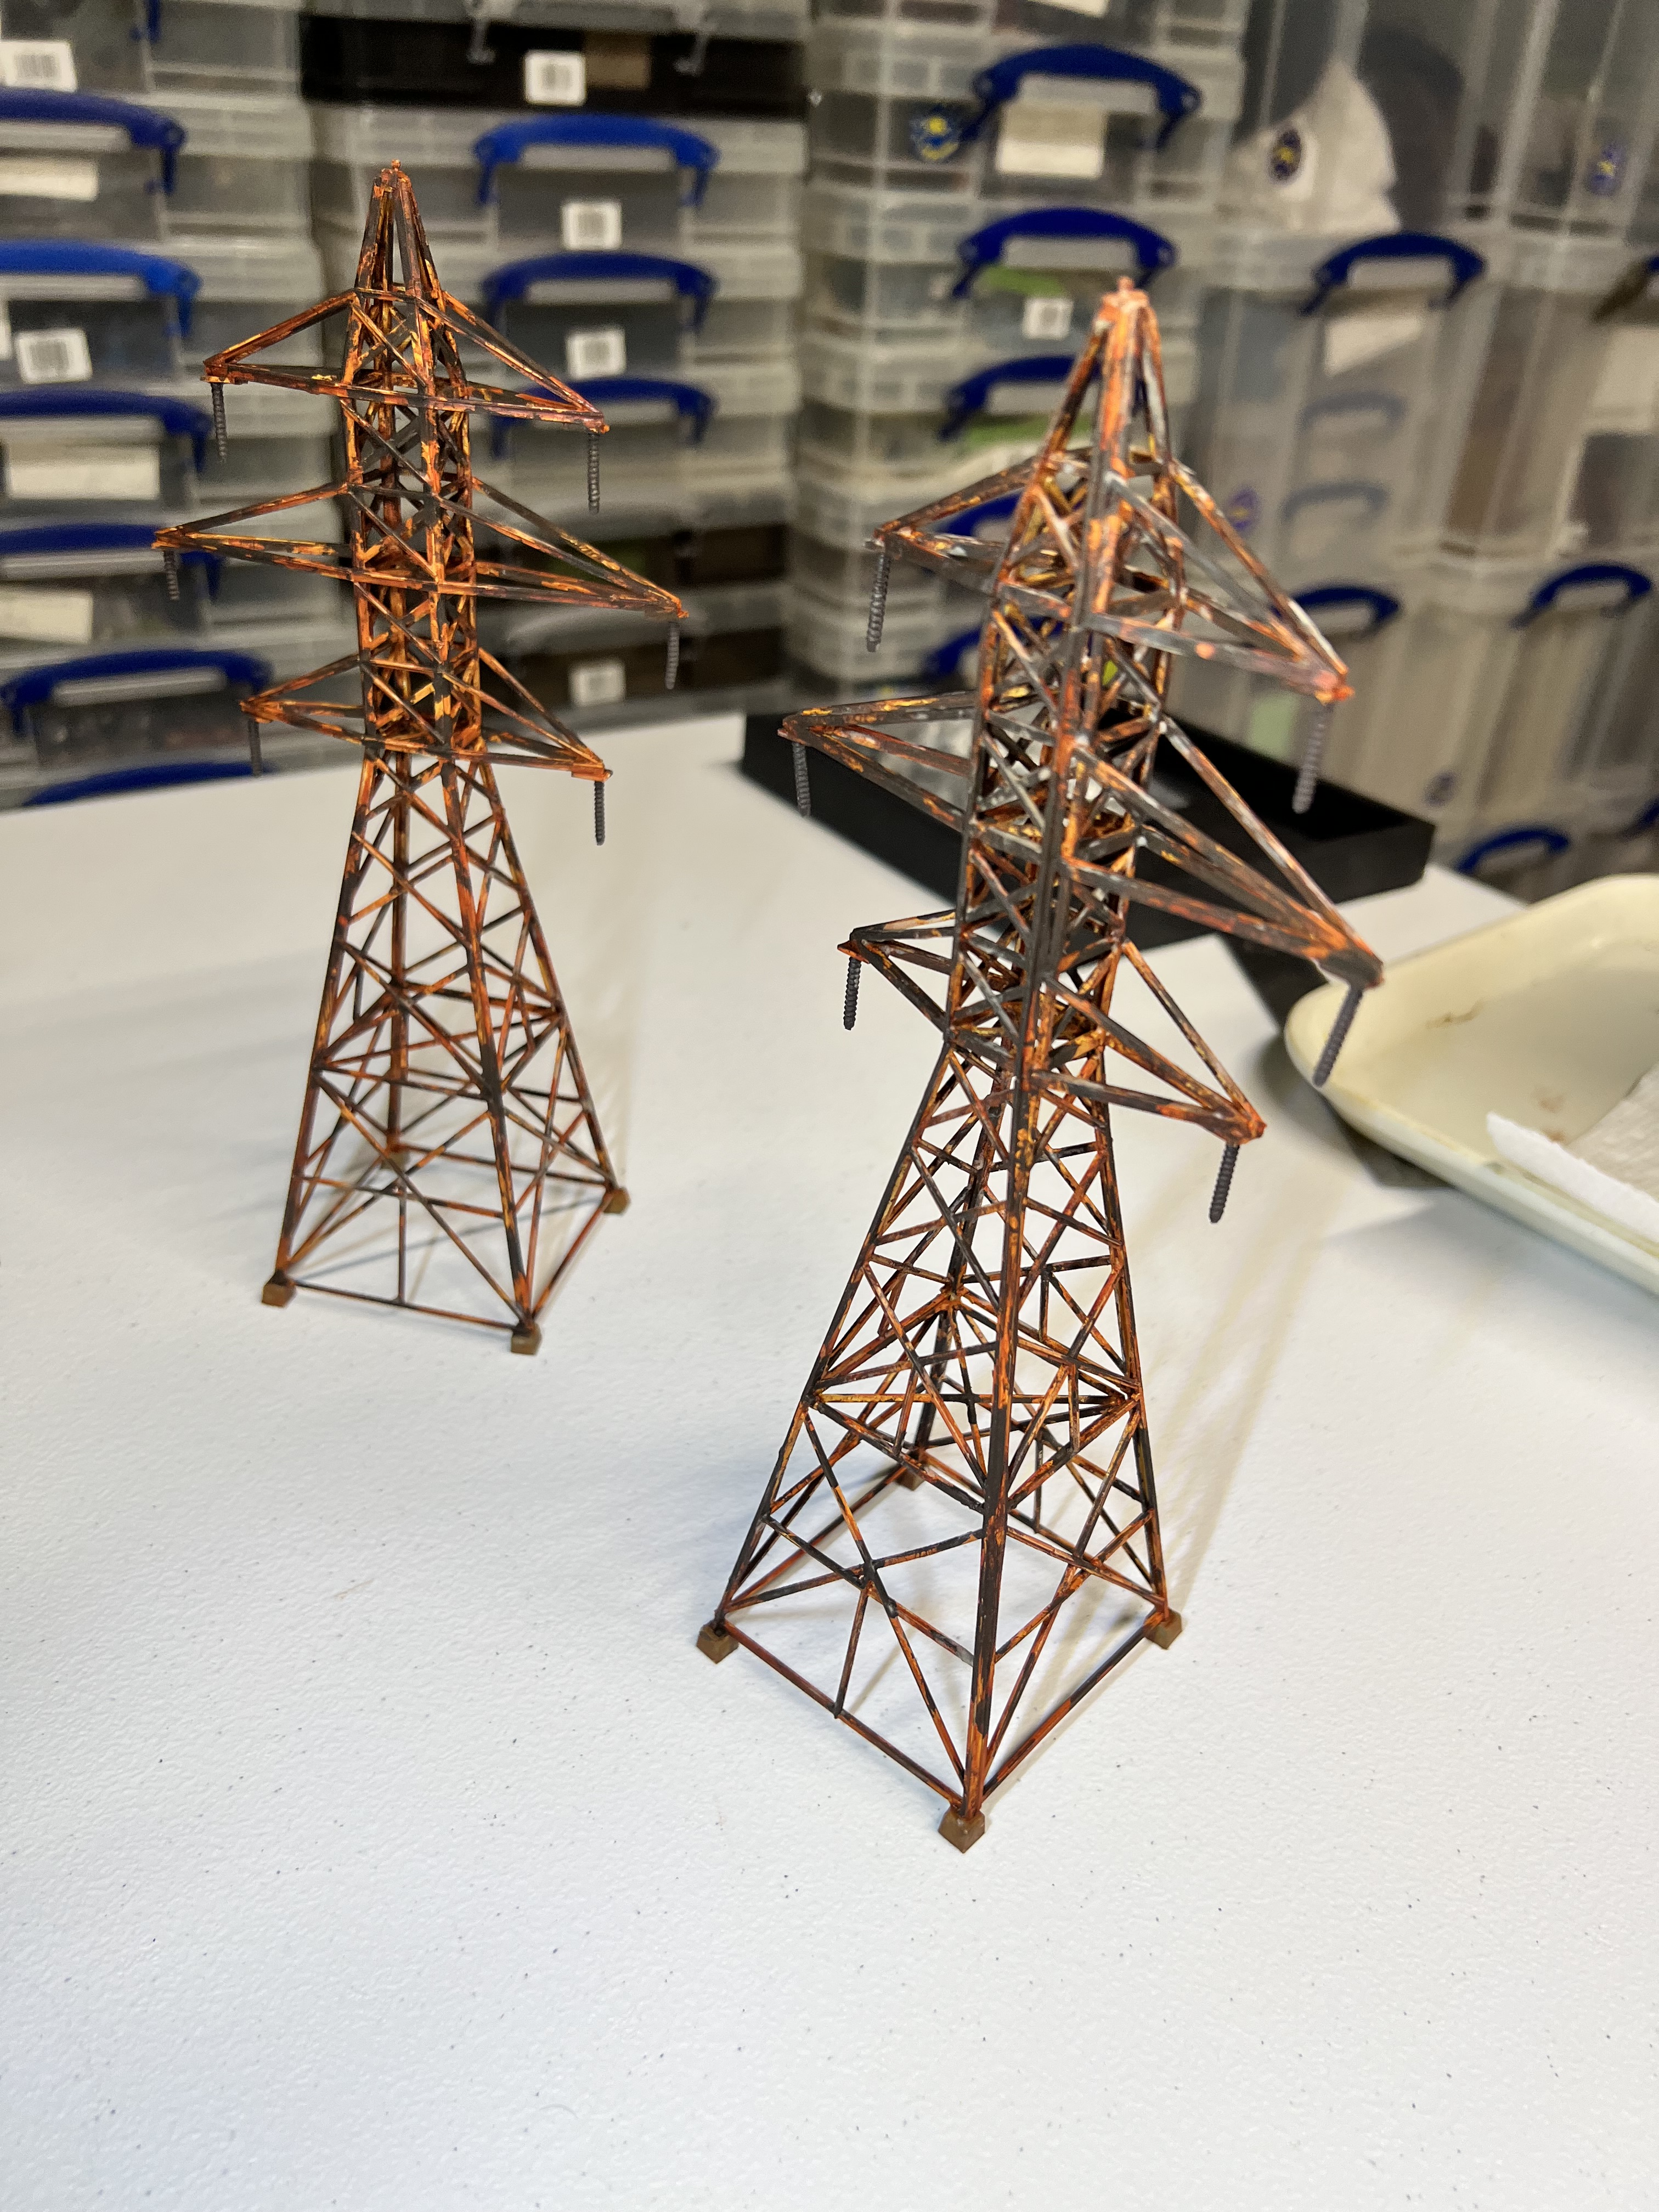
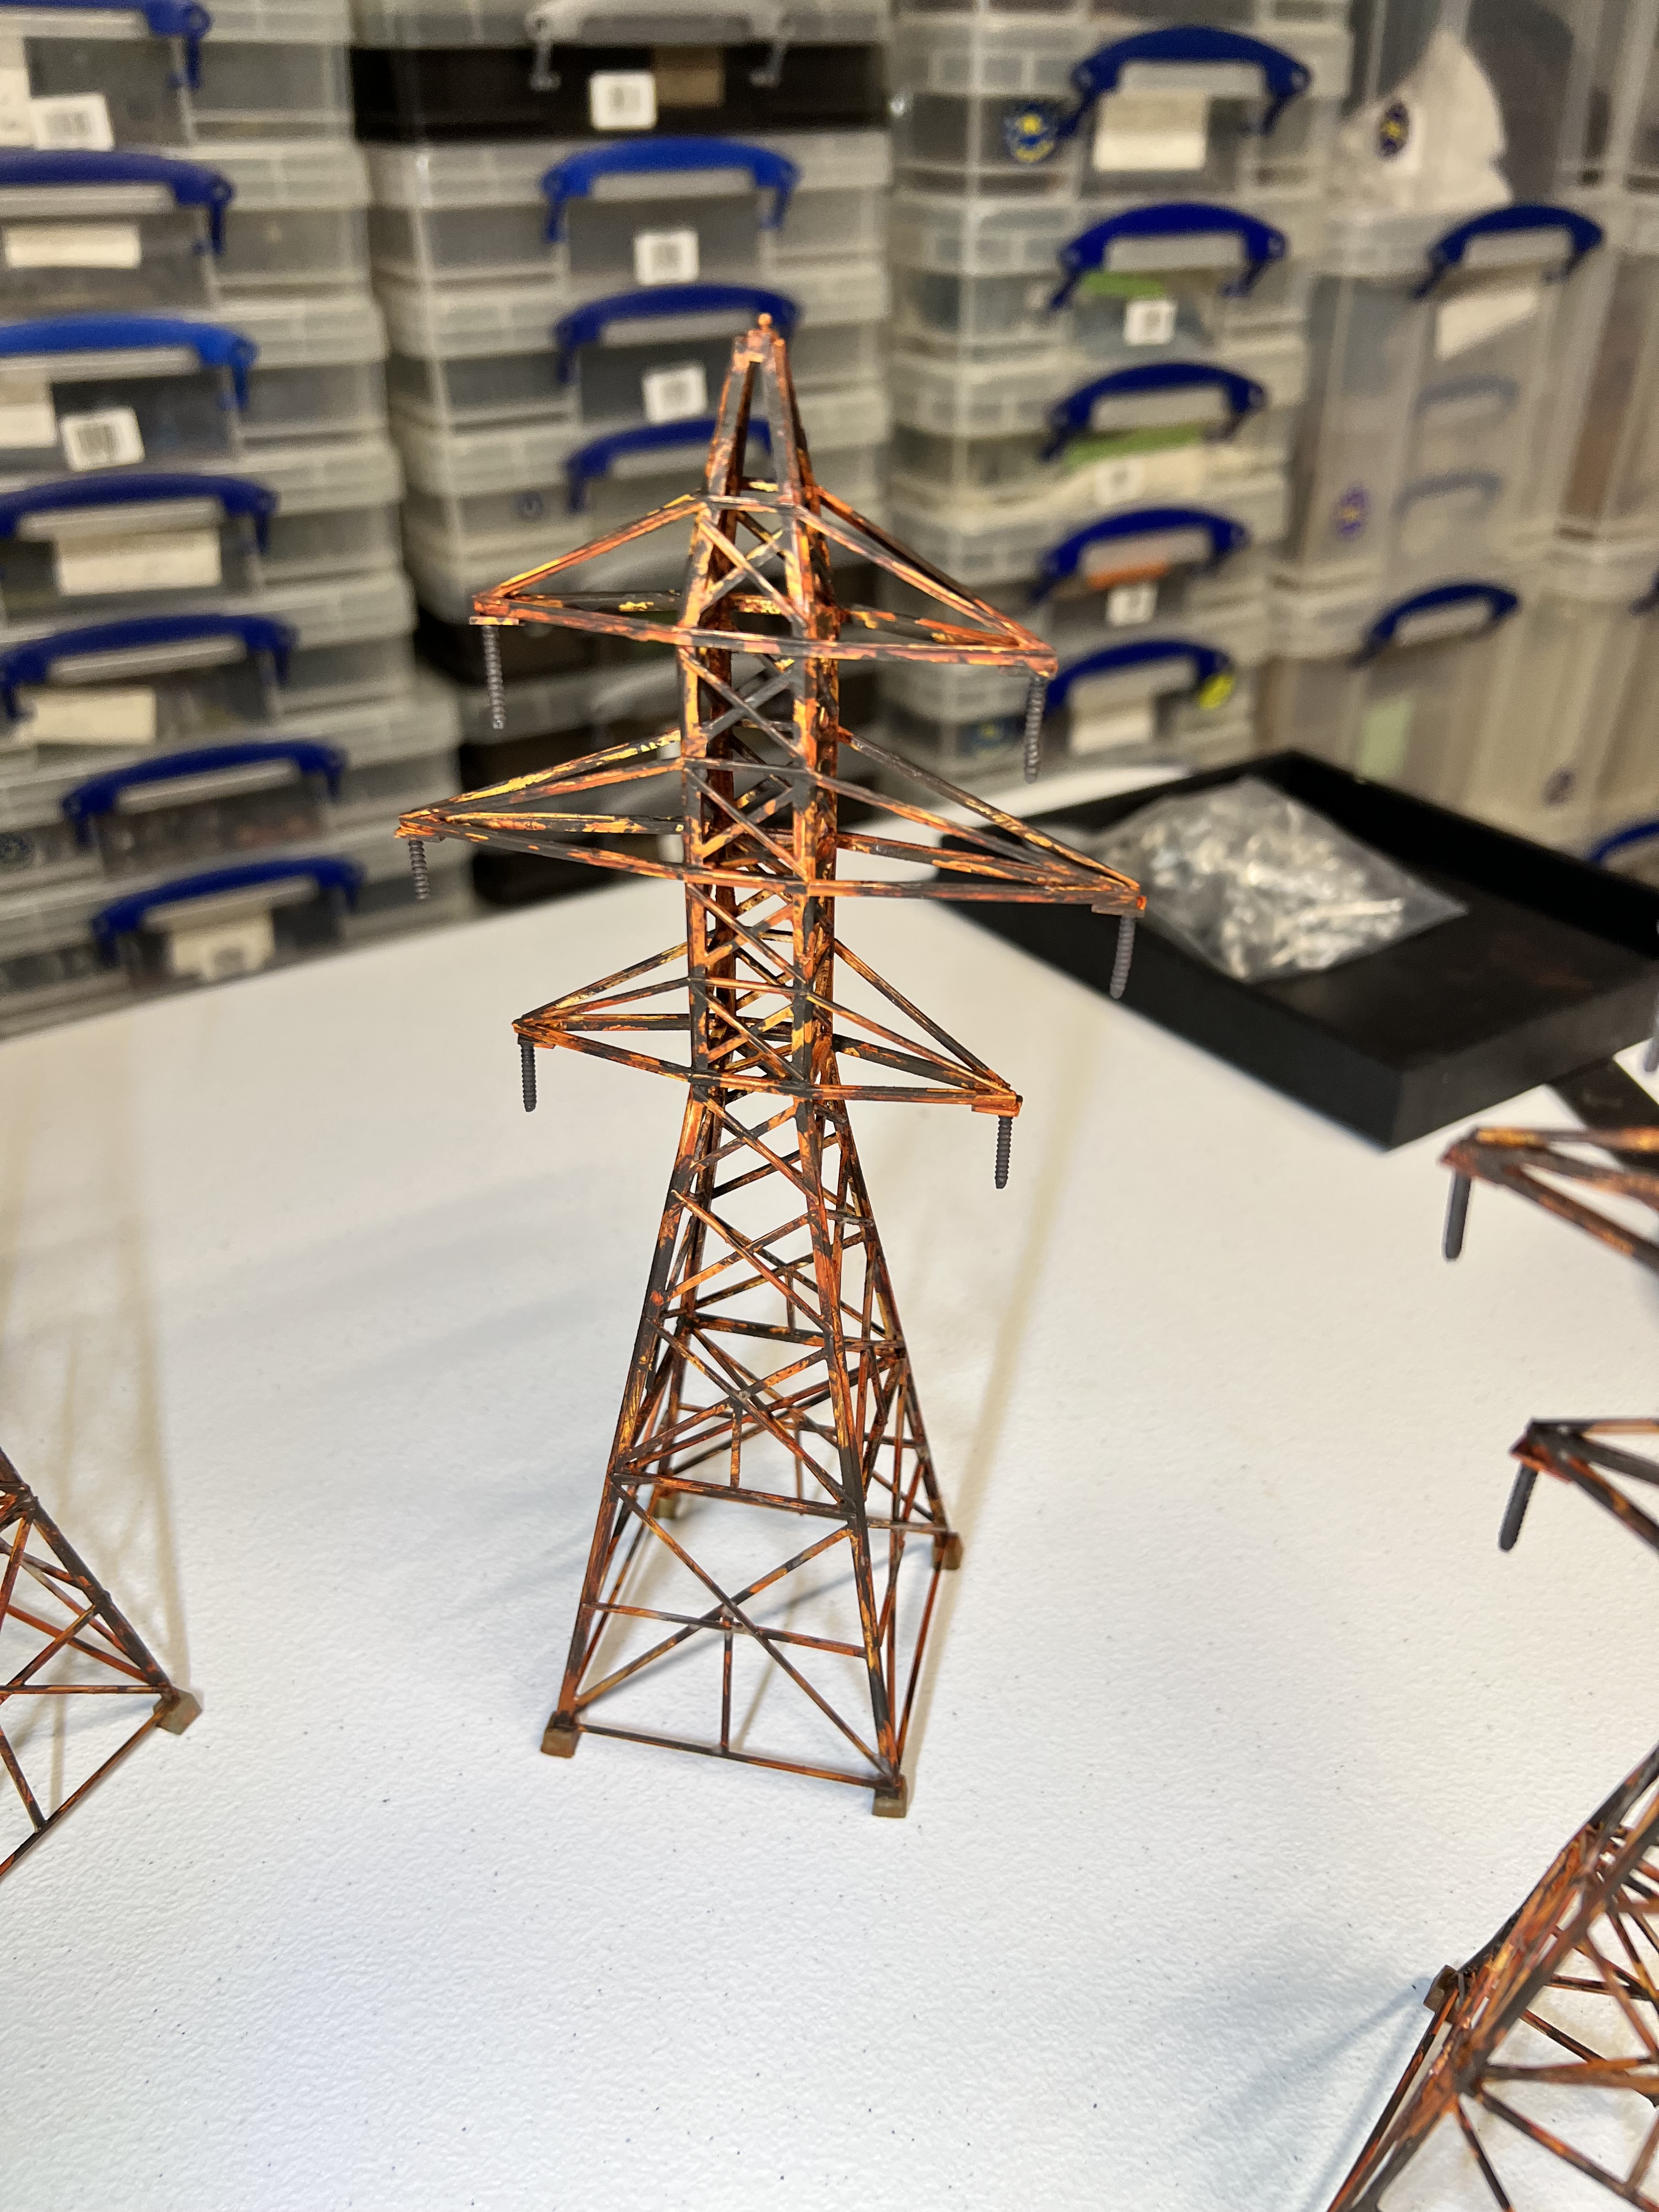
Rusting them up was similar to the walls – basically minus the use of the corrosion texture paint. The lists of what I used for these and the walls will be listed at the end of this post.
Rusted up!Close up shot of two.View of one from a slightly different angle.
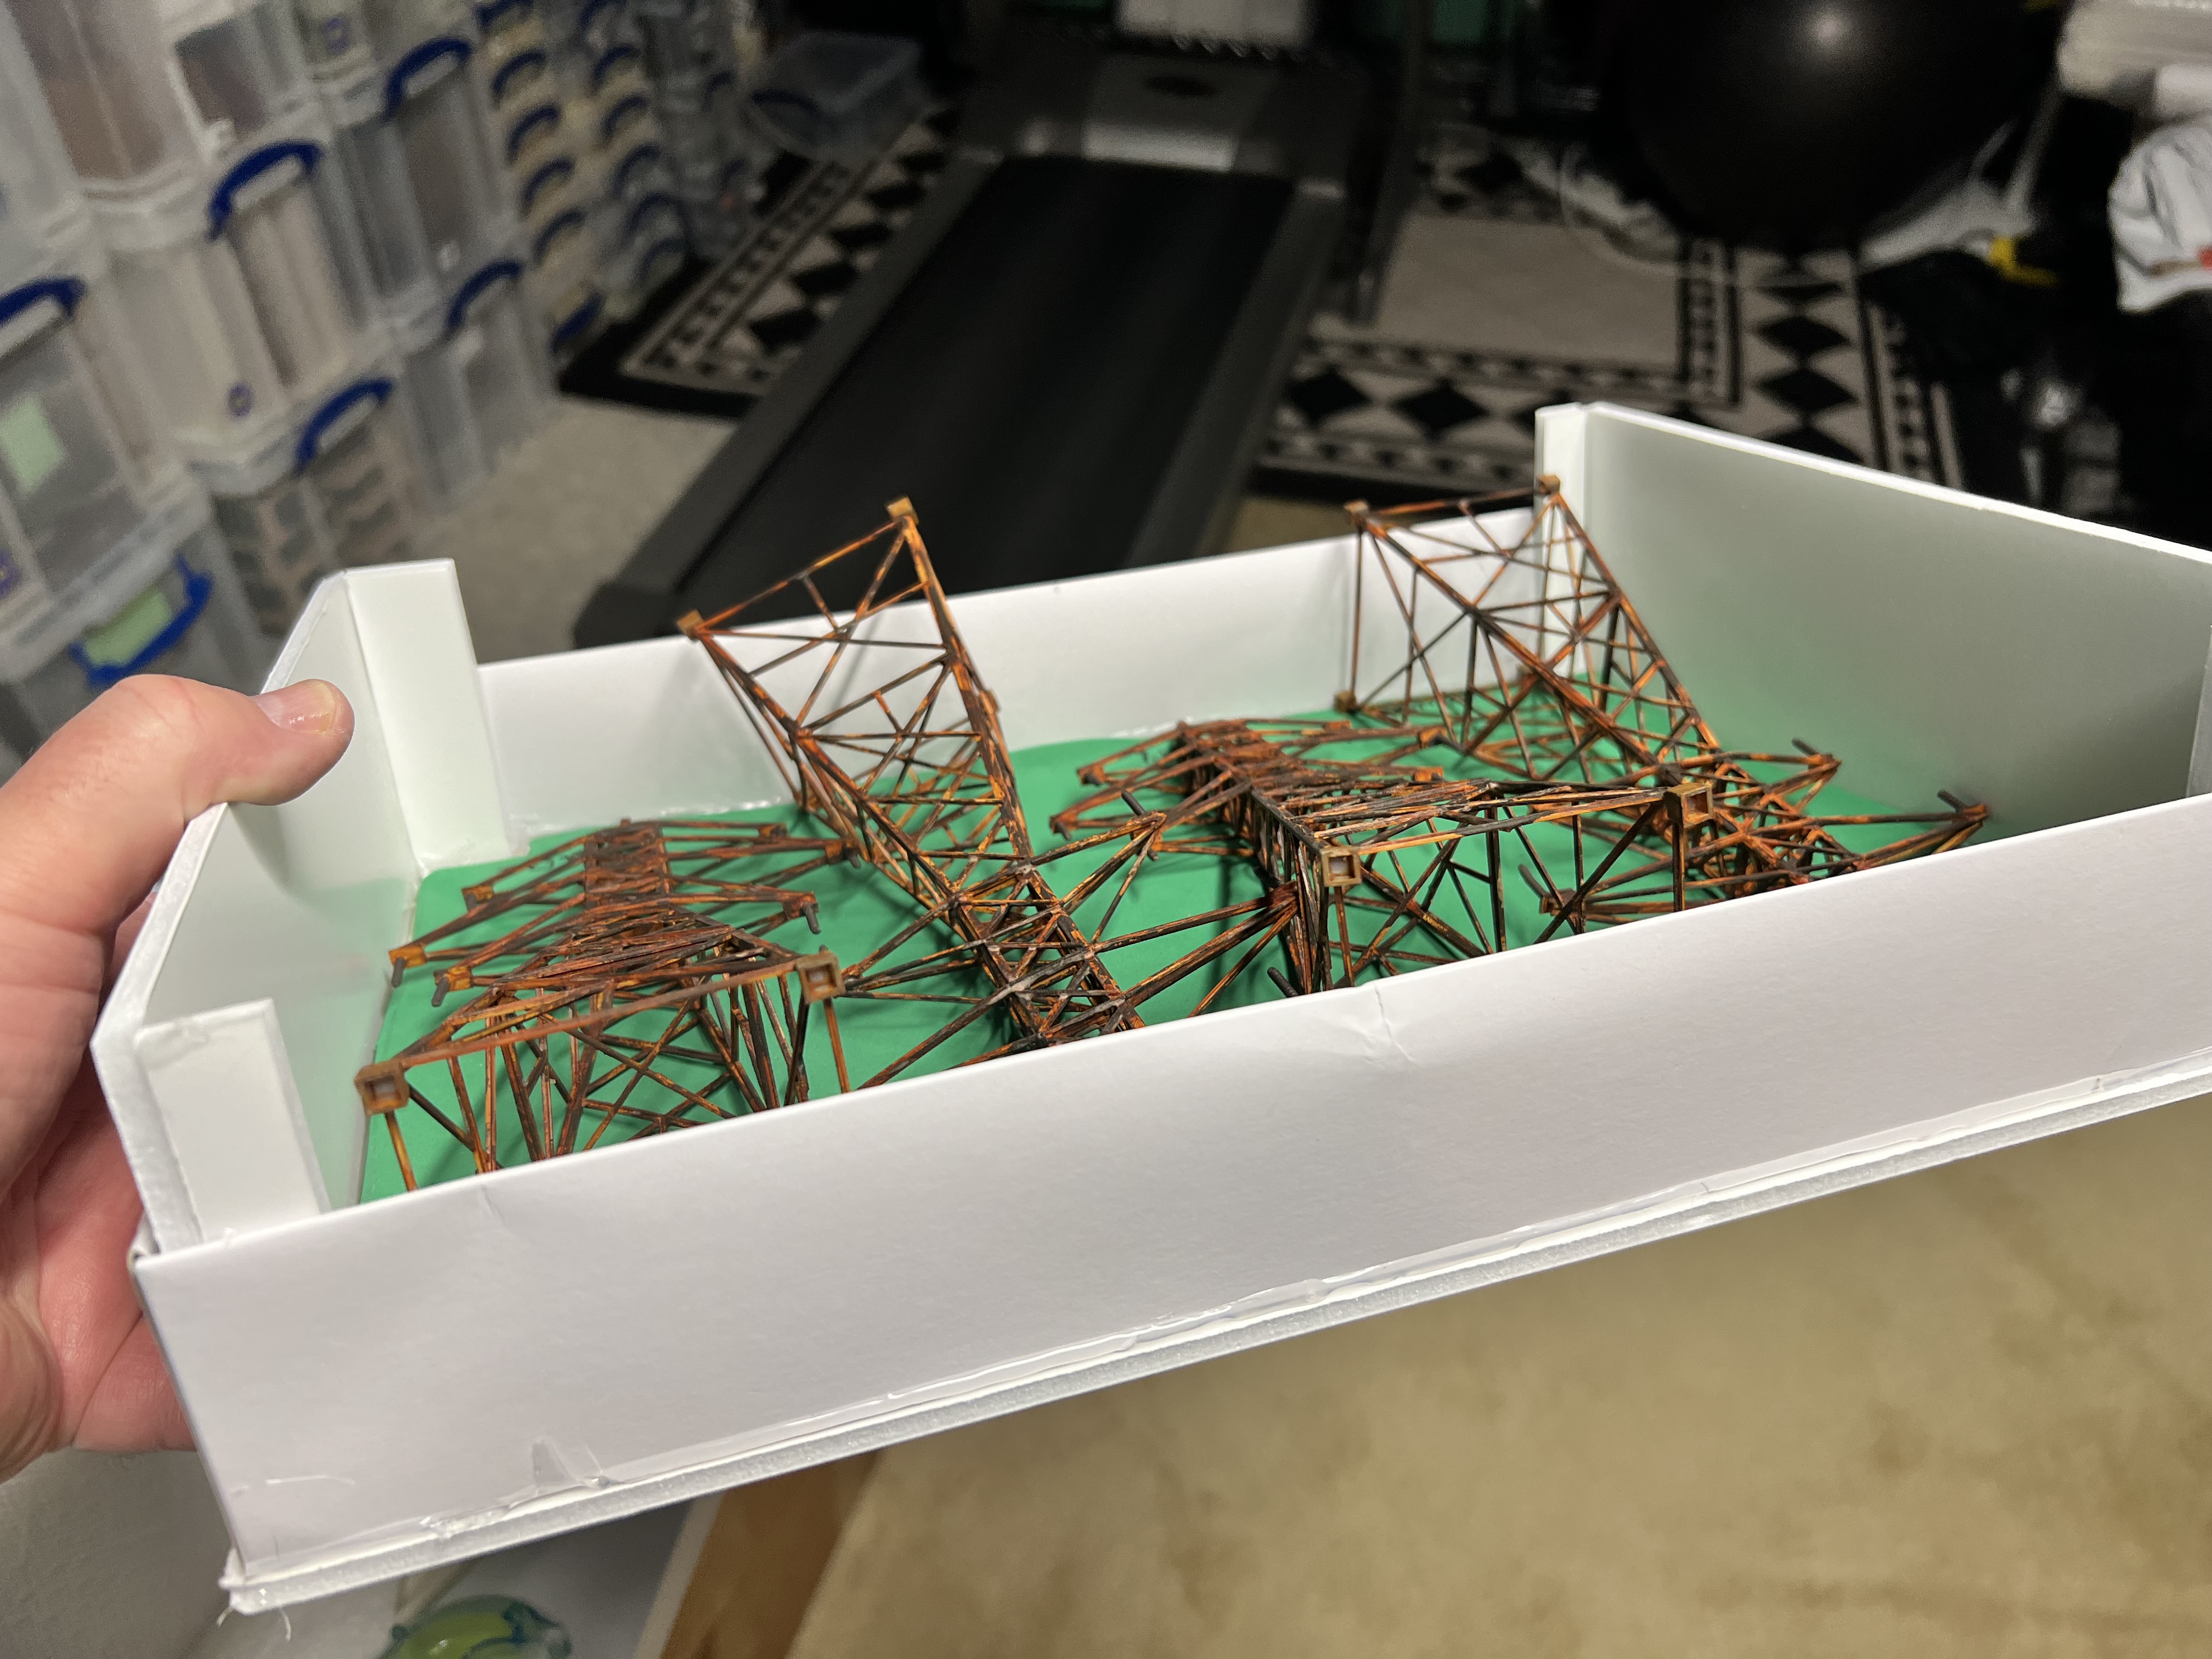
As you can see these are just plastic models and vulnerable to damage in transport! Unlike the walls, which went into a cardboard wine bottle box with some foam padding between levels, these needed a sturdy solution. They required something strong. I decided to modify the original box to accommodate the greater height needed when the models were lying down. I used more foam padding on the box bottom, and foam board to extend and strengthen the box as you see below:
Top view of the original box modifications with a sheet of green foam padding on the bottom. The sides and corners were reinforced by adding foam board set with hot glue on the insides.Side view – here you see the added height with the foam board.The original box top fit like a glove – and is significantly stronger than its original configuration.
That’s about it for this rusty old post. I hope it inspired you to rust up some stuff yourself!
As I teased, I will be sharing how these fit into both of the tabletop set ups for 2026. I’ll also be sharing some of the new 2026 units of mechanical tin men that will find these structures as part of their apocalyptic homes. Until next time.
For all of my previous posts on terrain projects, please see this page. For all of my previous posts on sci-fi projects, please see this page…for any of my previous posts on Wars of Ozz, see this page.
PAINTS, INKS, GLAZES, SHADES, WASHES, PIGMENTS, FLOCKING, GLUES AND MORE THAT I USED ON THE RUSTY WALLS PIECES:
Old autoinjector trainers
Green stuff
Chinchilla dust
PVA Glue
Vallejo Surface Primer “Grey”
AK “Corrosion Texture”
Citadel “Typhus Corrosion” (Technical)
Citadel “Ryza Rust” (Dry)
Vallejo “Old Rust” (pigment)
Vallejo “Brown Iron Oxide” (pigment)
Vallejo “Natural Iron Oxide” (pigment)
Vallejo Model Air “Rust 73.117” (pigment)
Vallejo Model Air “New Rust 73.118” (pigment)
Vallejo Thinner
Vallejo Model Color “Dark Rust”
Vallejo “Natural Umber” (pigment)
PAINTS, INKS, GLAZES, SHADES, WASHES, PIGMENTS, FLOCKING, GLUES AND MORE THAT I USED ON THE RUSTY TRANSMISSION TOWER MODELS:
Walther’s Cornerstone Four Transmission Towers (HO Scale)
My recent efforts on the hobby front have been focused on multiple projects. Some of these are figures and vehicles, others are terrain-oriented. These are all in support of the games I will run at multiple 2026 gaming conventions.
This year, I will be running Wars of Ozz and What a Tanker games. I am also getting back into retro sci-fi skirmish games with Combat Patrol:WWII. I have not run these games in a while and they were always a lot of fun. To that end, I decided to add more terrain to the mix.
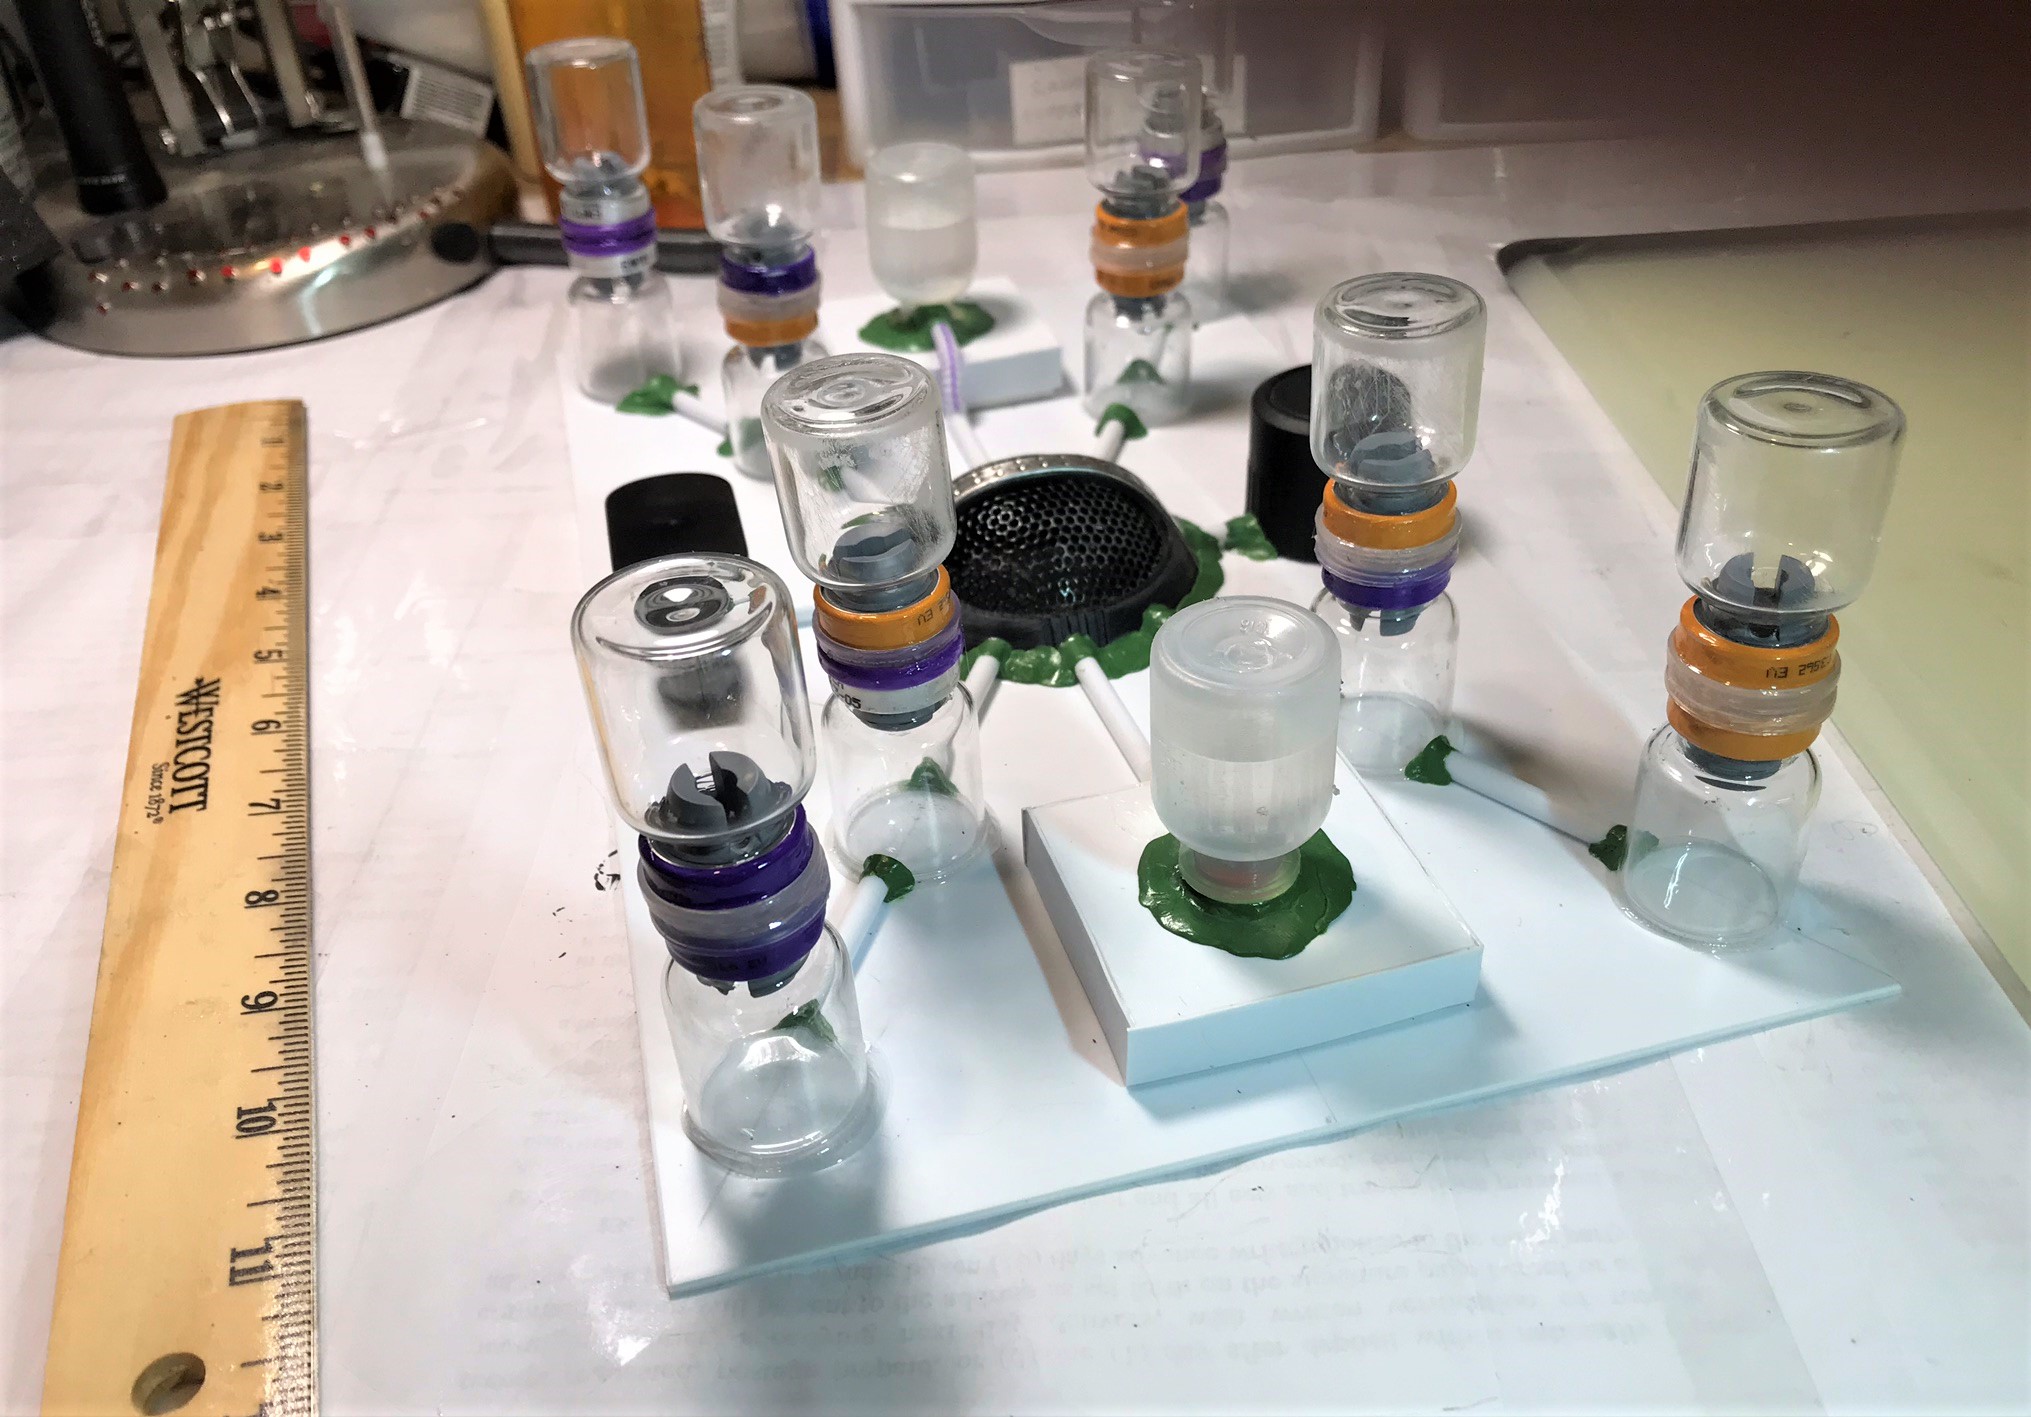
As background, a friend, Chris Rett, 3D-printed three excellent generators for me way back in 2018 (I think). These were great terrain pieces. At that point I was still immersed in retro sci-fi skirmish gaming with Combat Patrol:WWII as my preferred system. However, I was on the cusp of jumping my focus to WWII What a Tanker games. Thus, the generators took a back seat. My gaming then went in sequence to What a Tanker, then Feudal Patrol for the Spanish Conquest in Mesoamerica. Finally, I moved on to Wars of Ozz. Recently, I felt a need for a bit more variety as I mentioned – so terrain is what I hit first.
The three generators would be useful for retro sci-fi apocalyptic planet scenarios. They would also be useful for some Wars of Ozz scenarios. This includes any involving Professor Nitpik and the Industrial City. That city was wrecked over 300 years ago in the “Last Great War”. Plus I could use it as part of a “Space Cowboys” apocalyptic scenario.
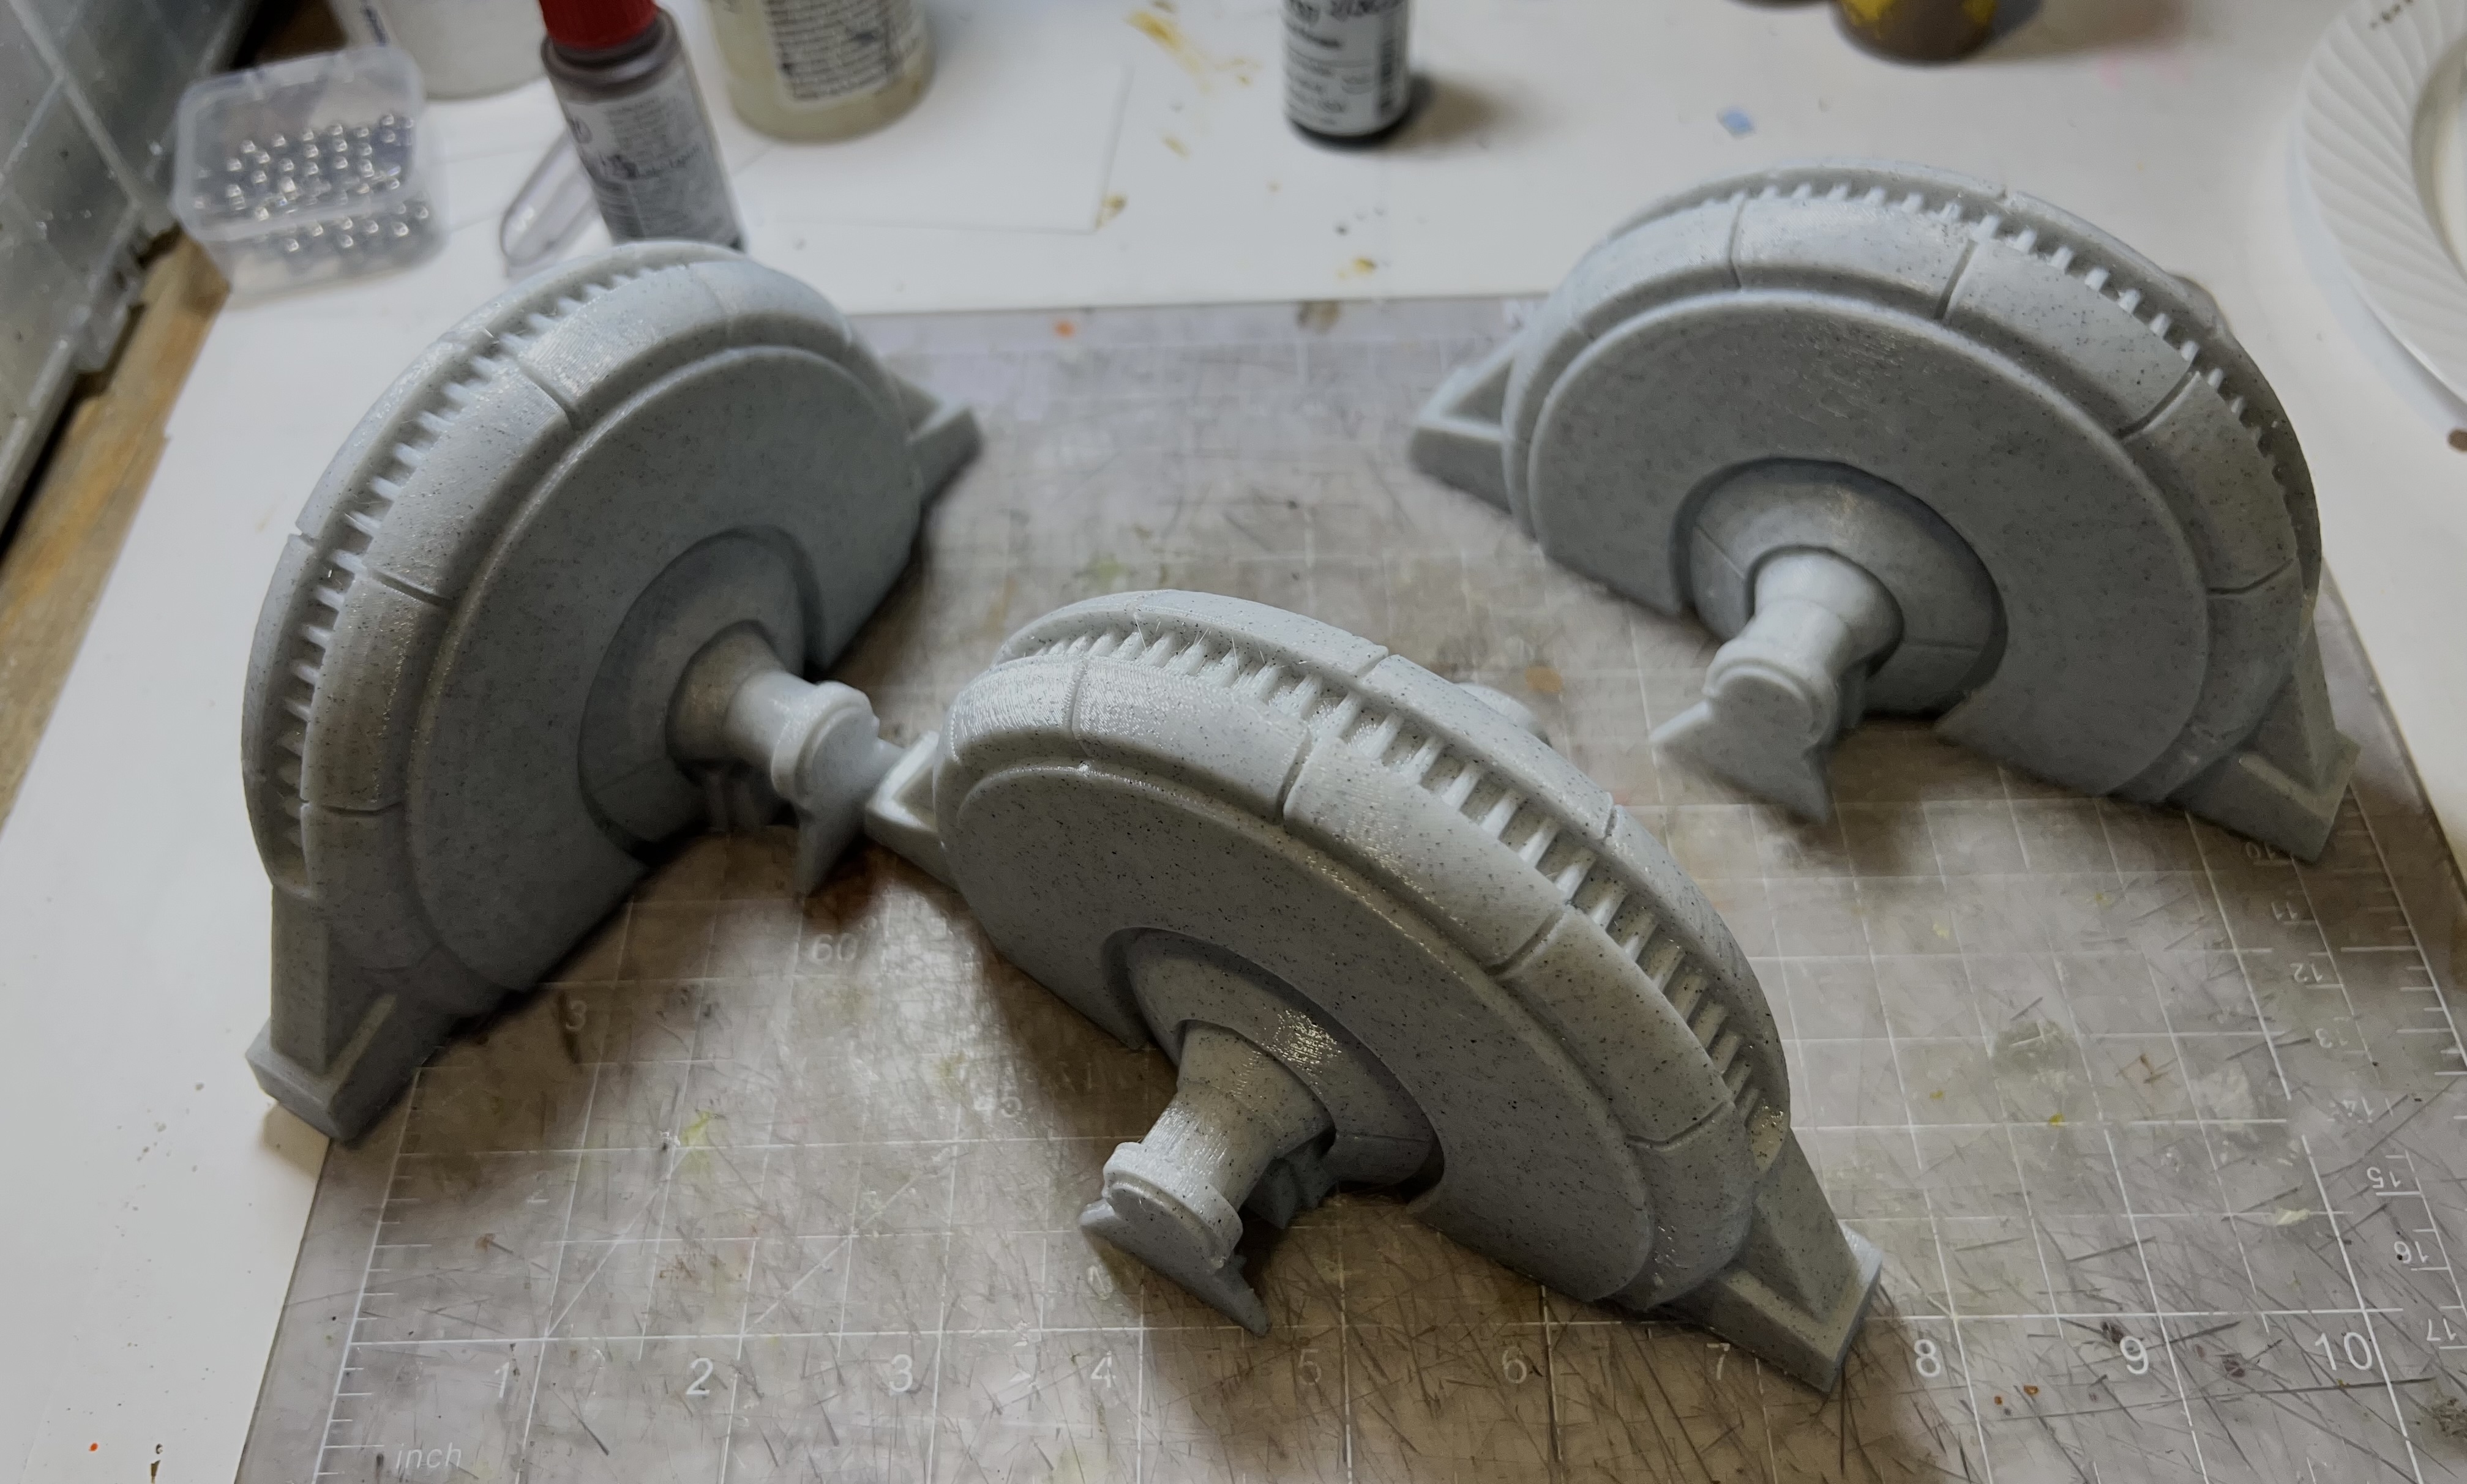
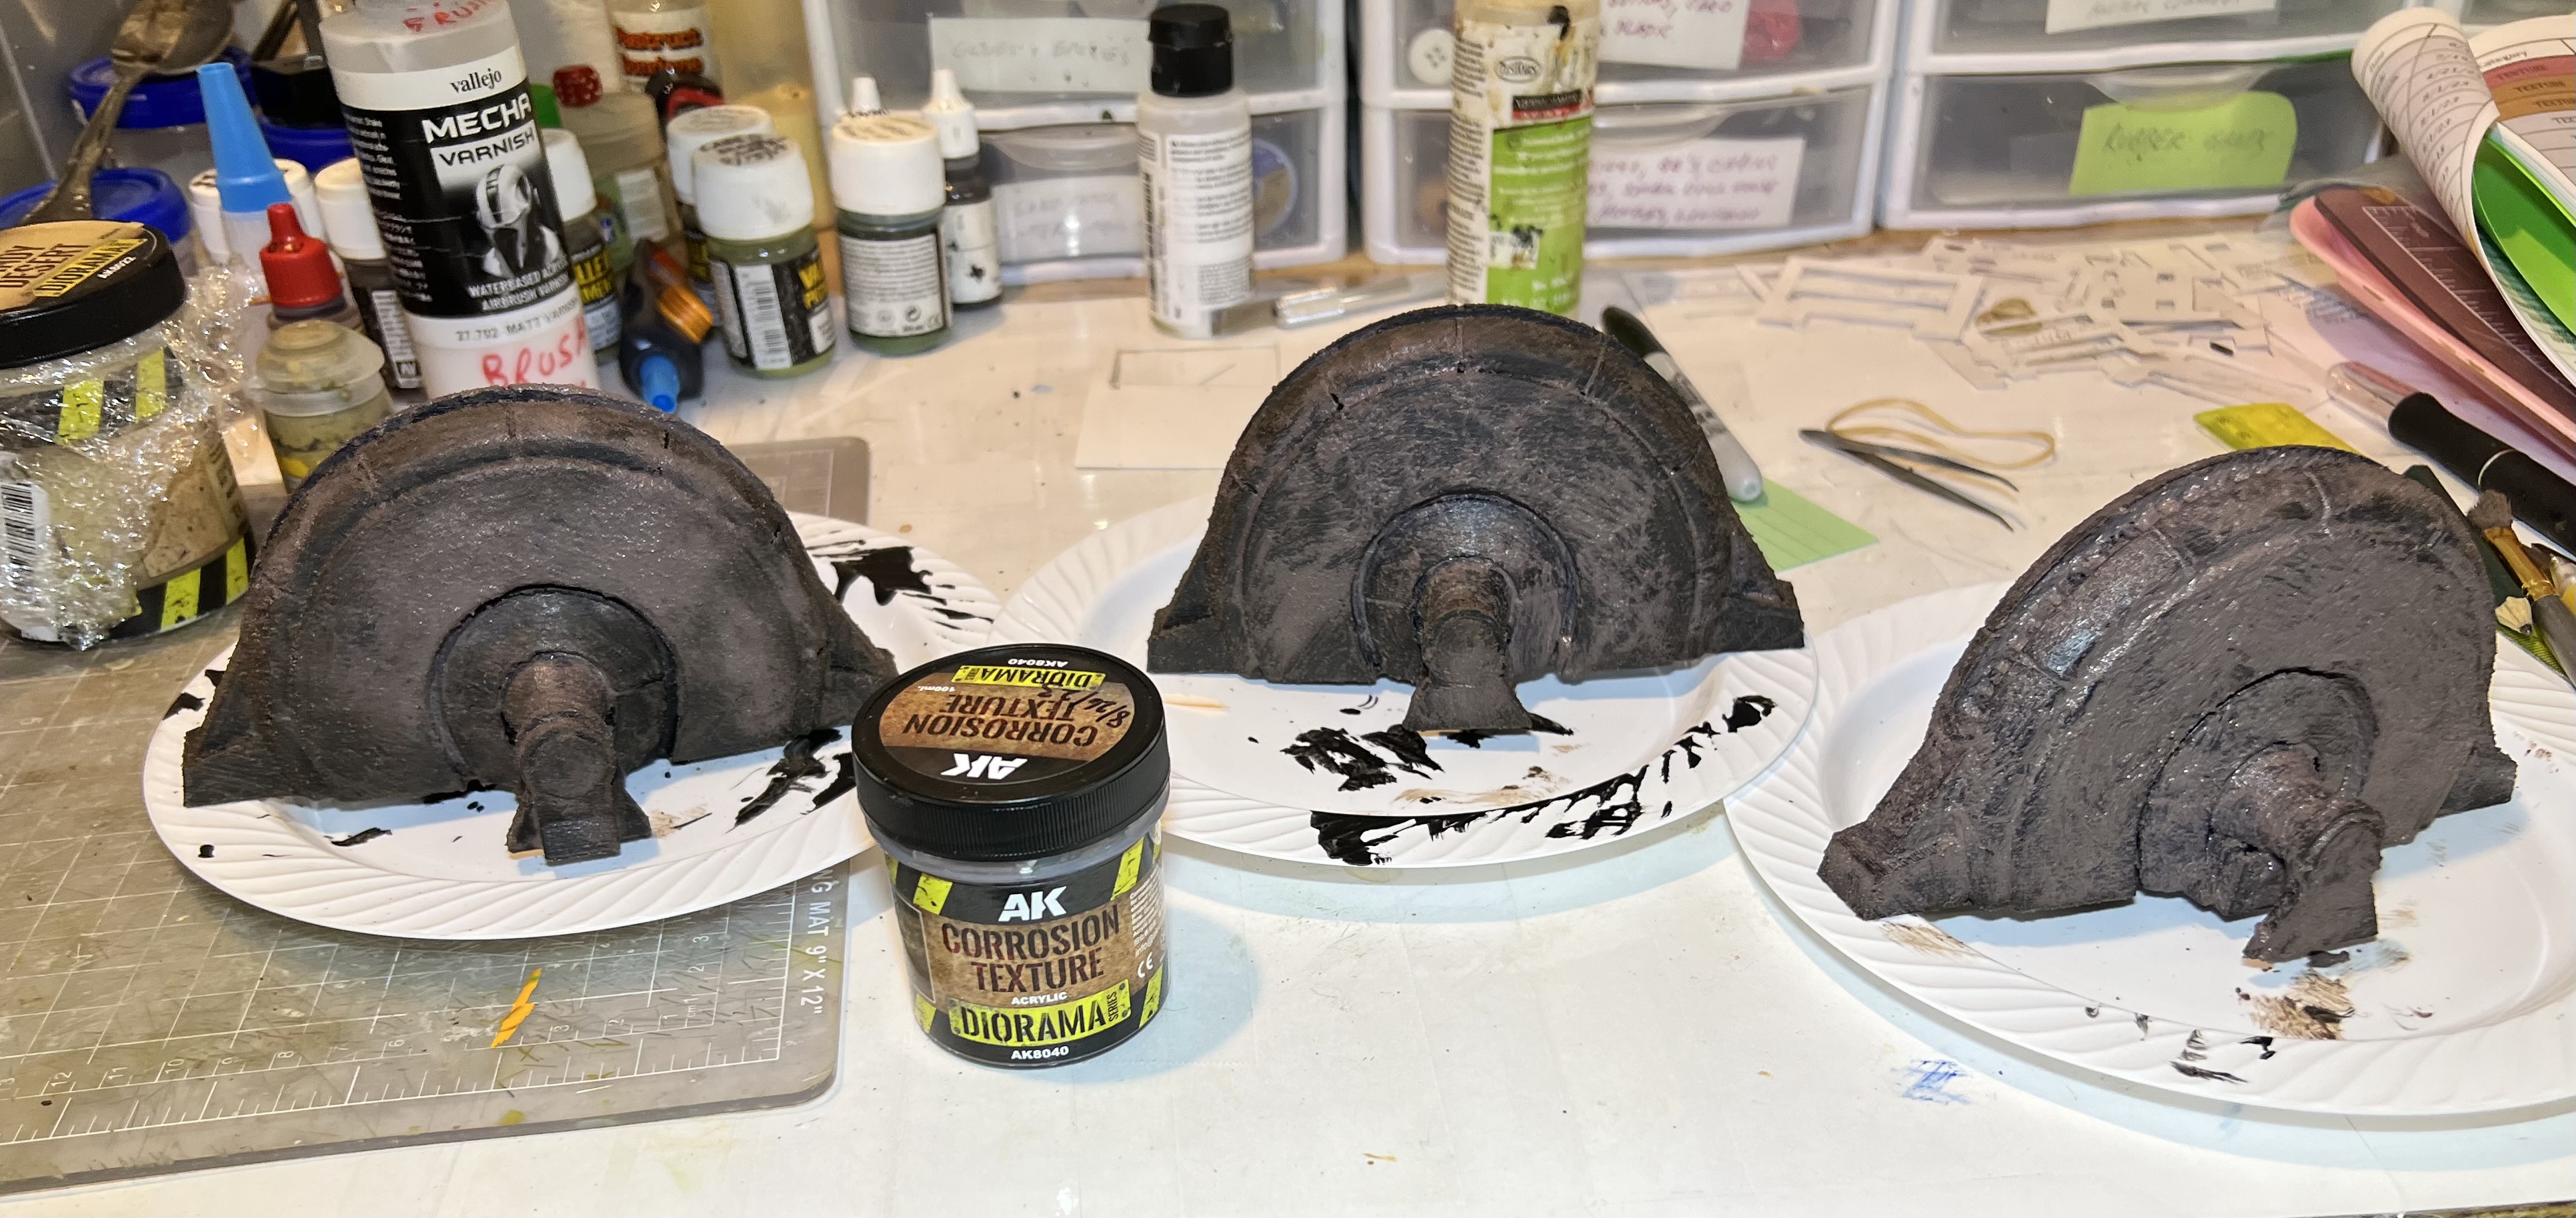
The generators at the start of the project.
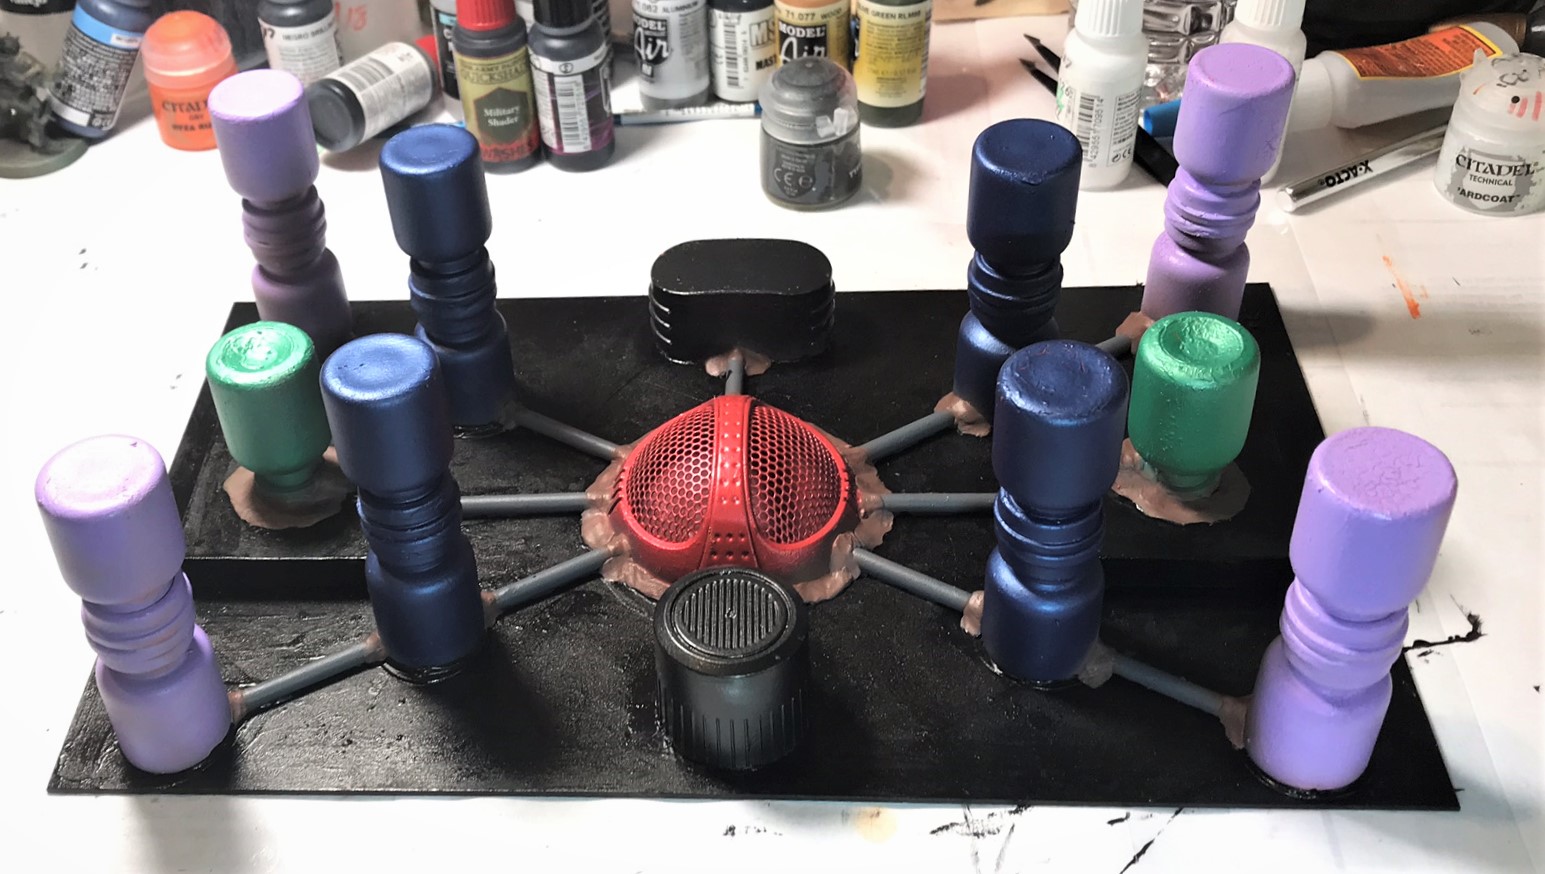
I primed the pieces. Then I used AK “Corrosion Texture” on it. This allowed me to use different rust pigments and paints on it.
Primed with corrosion texture added and drying here.
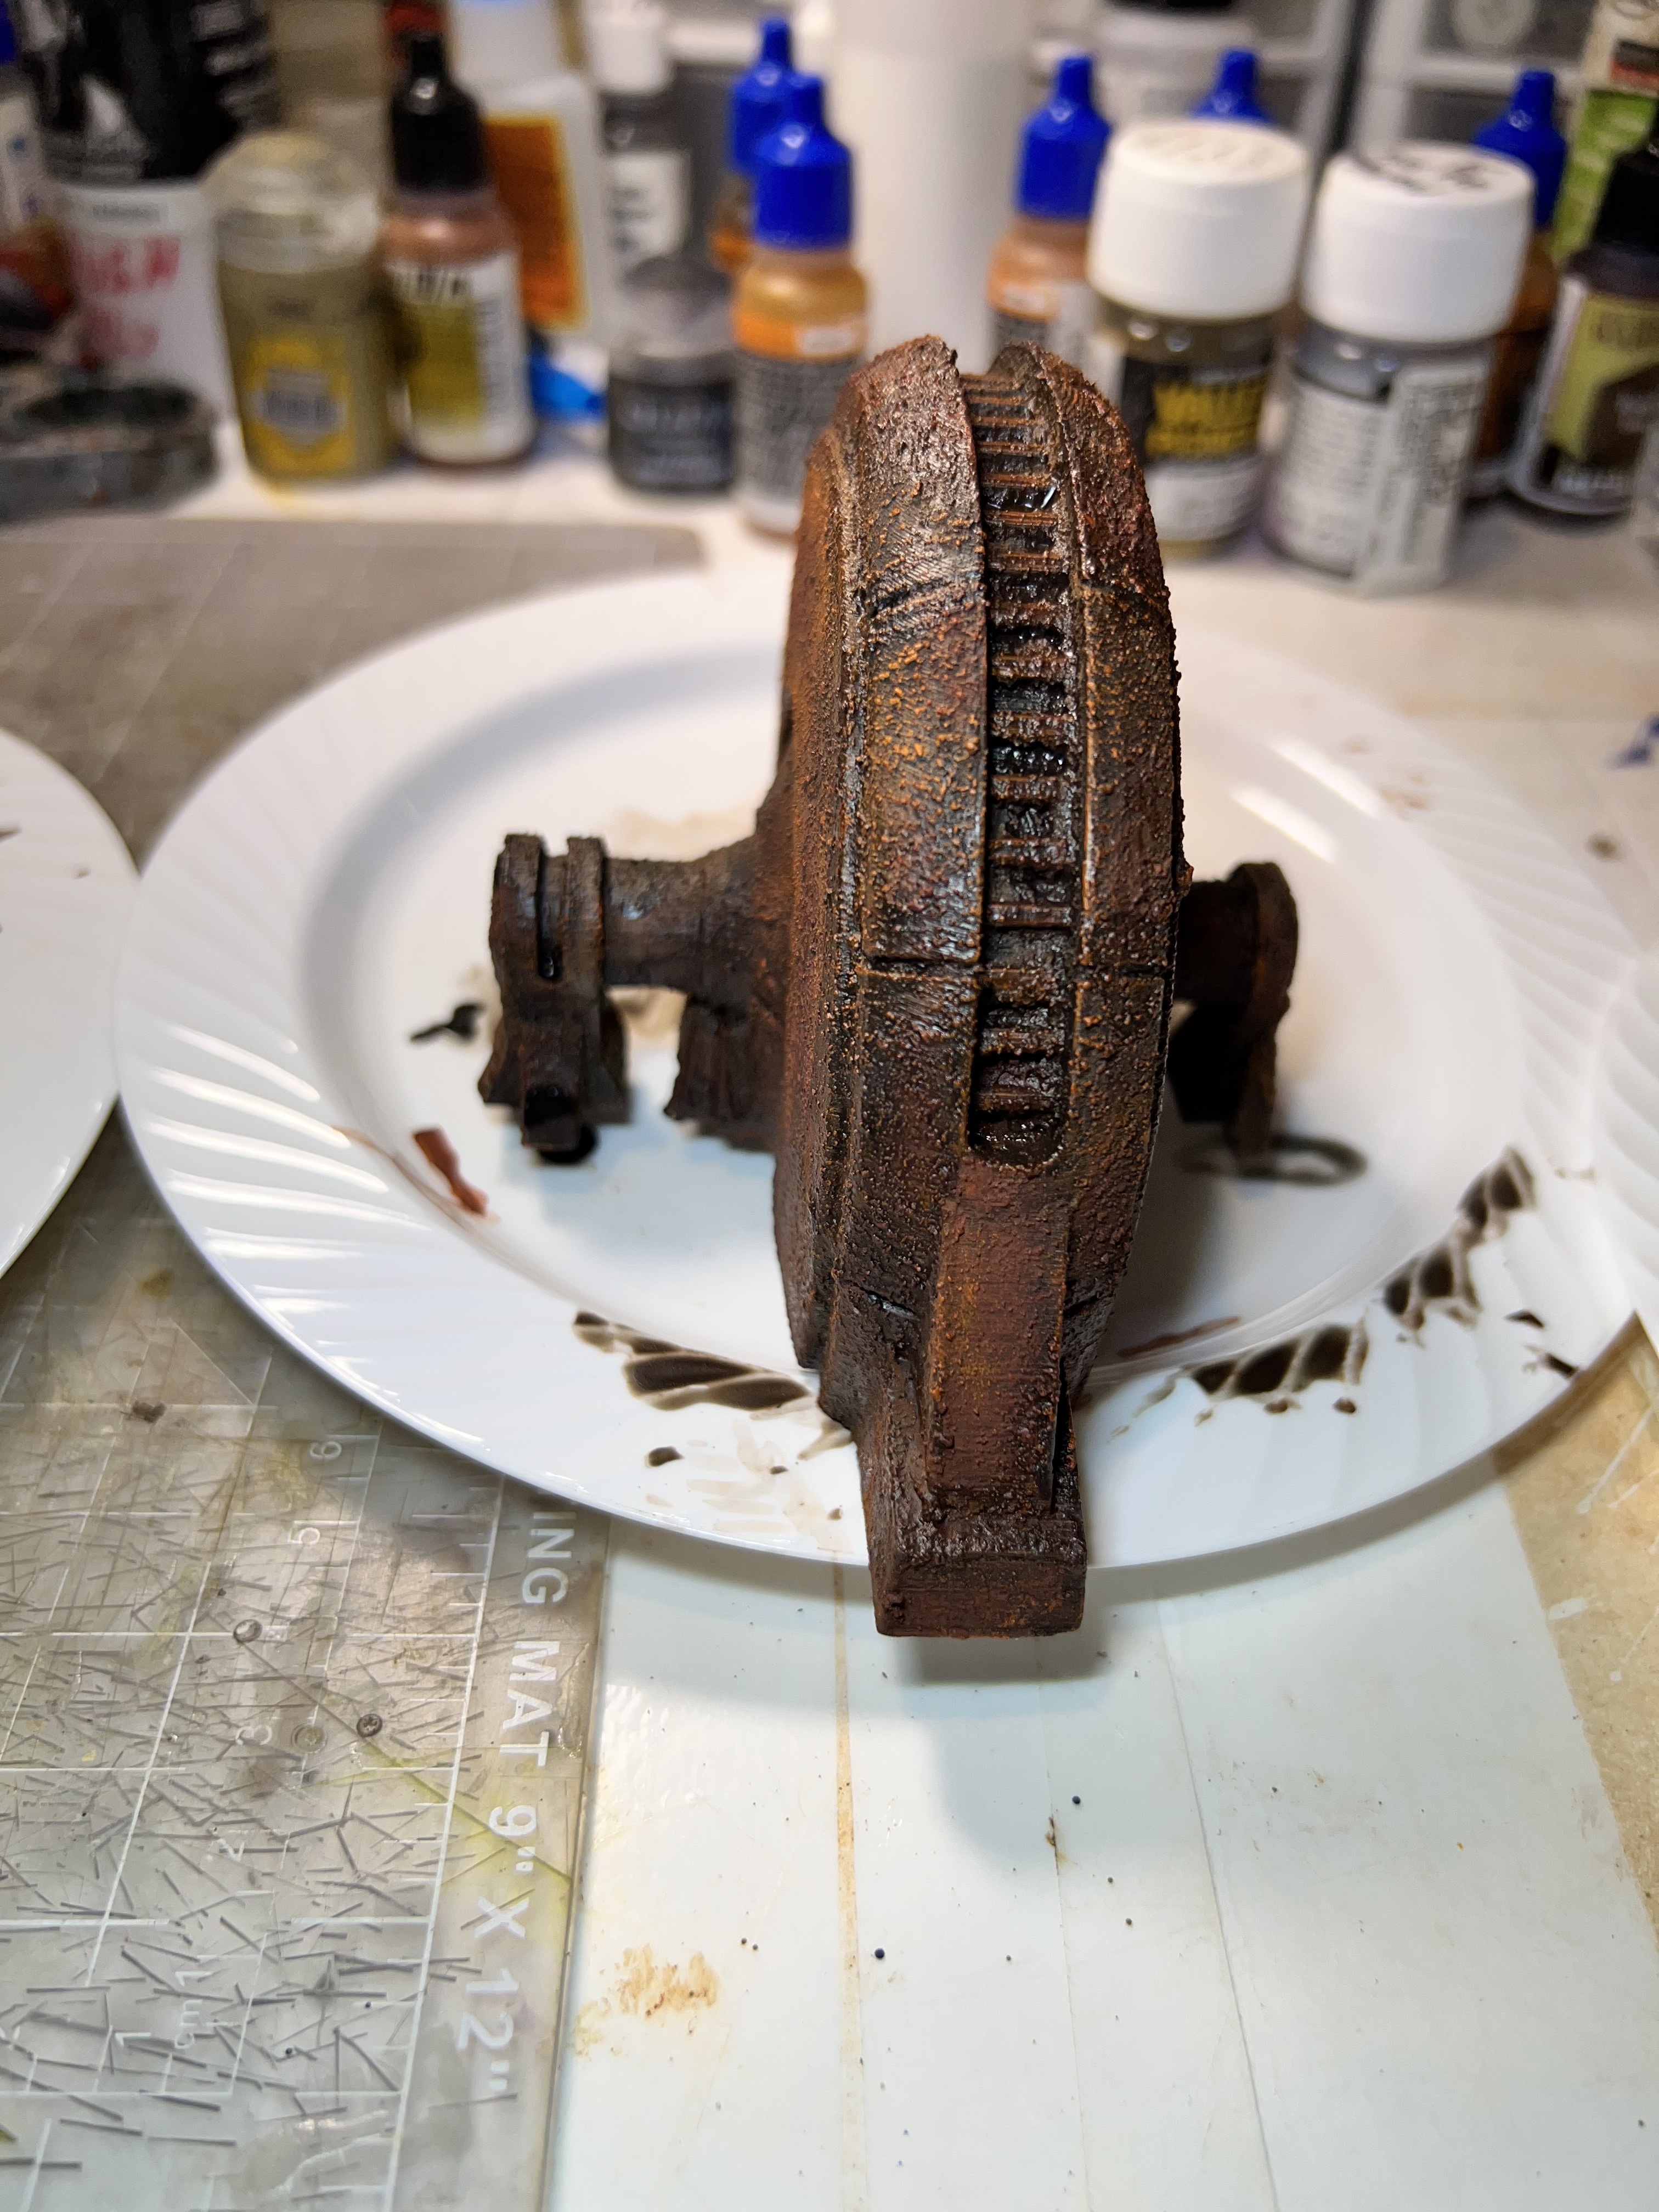
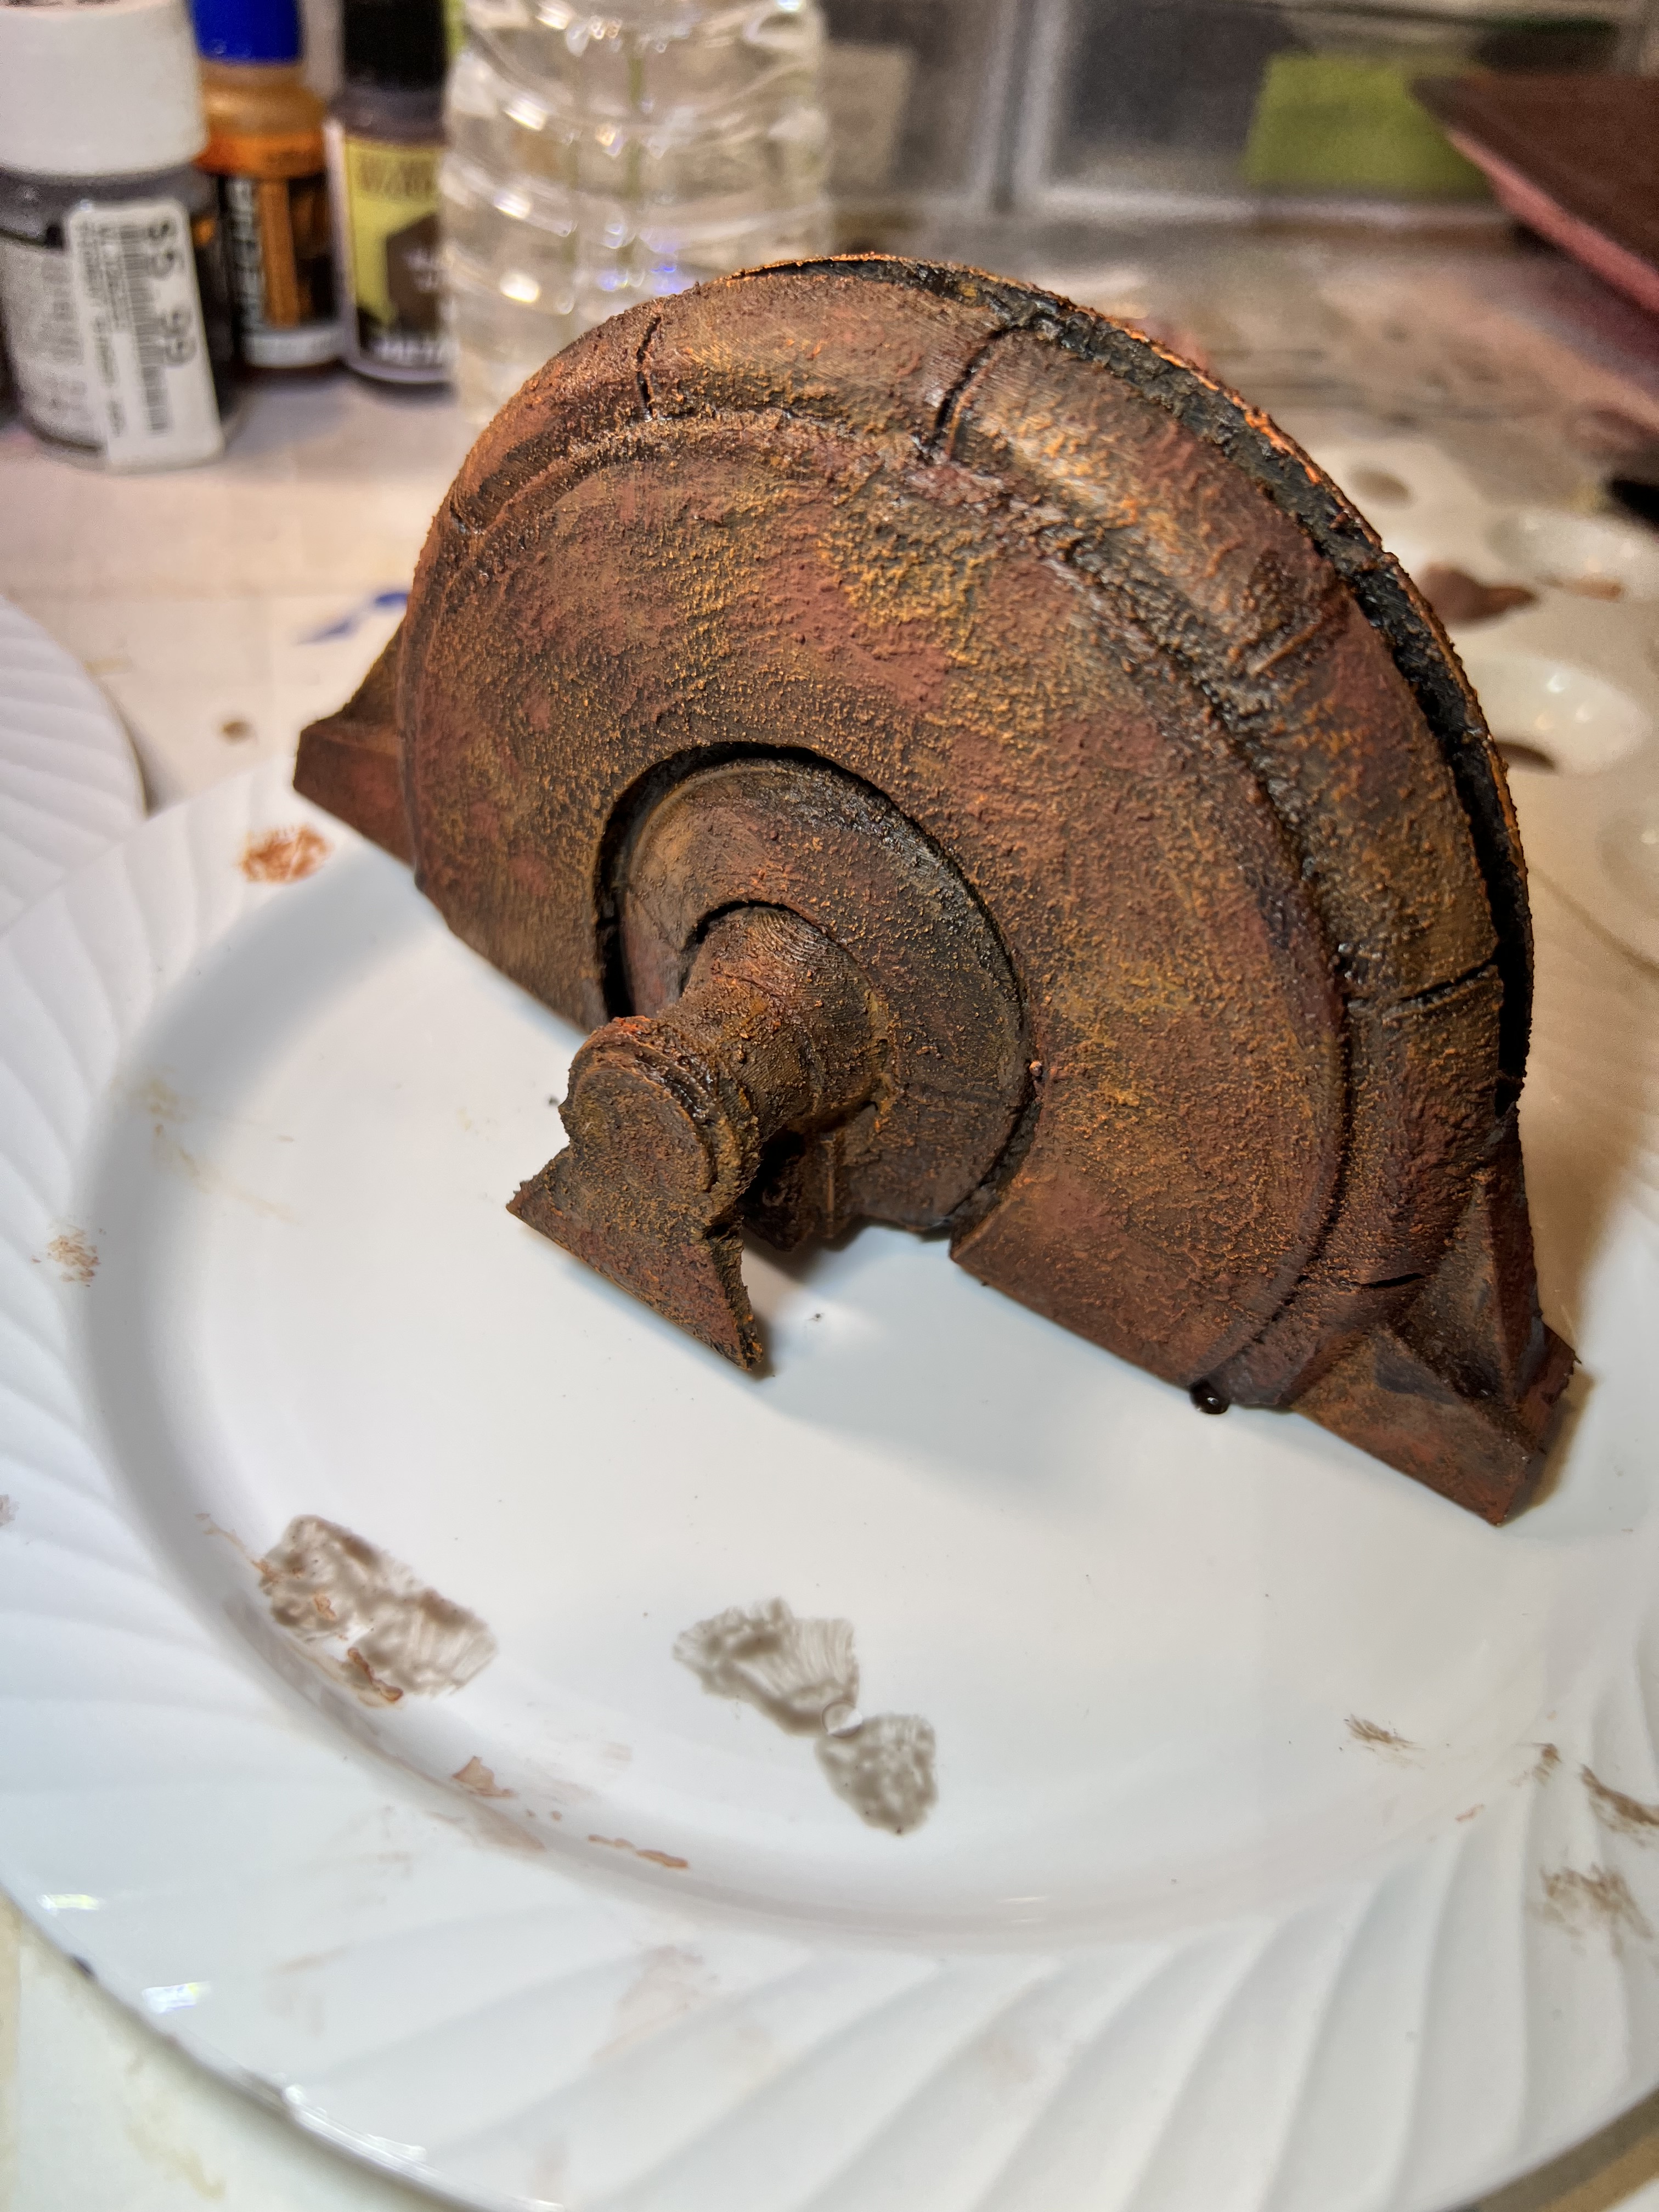
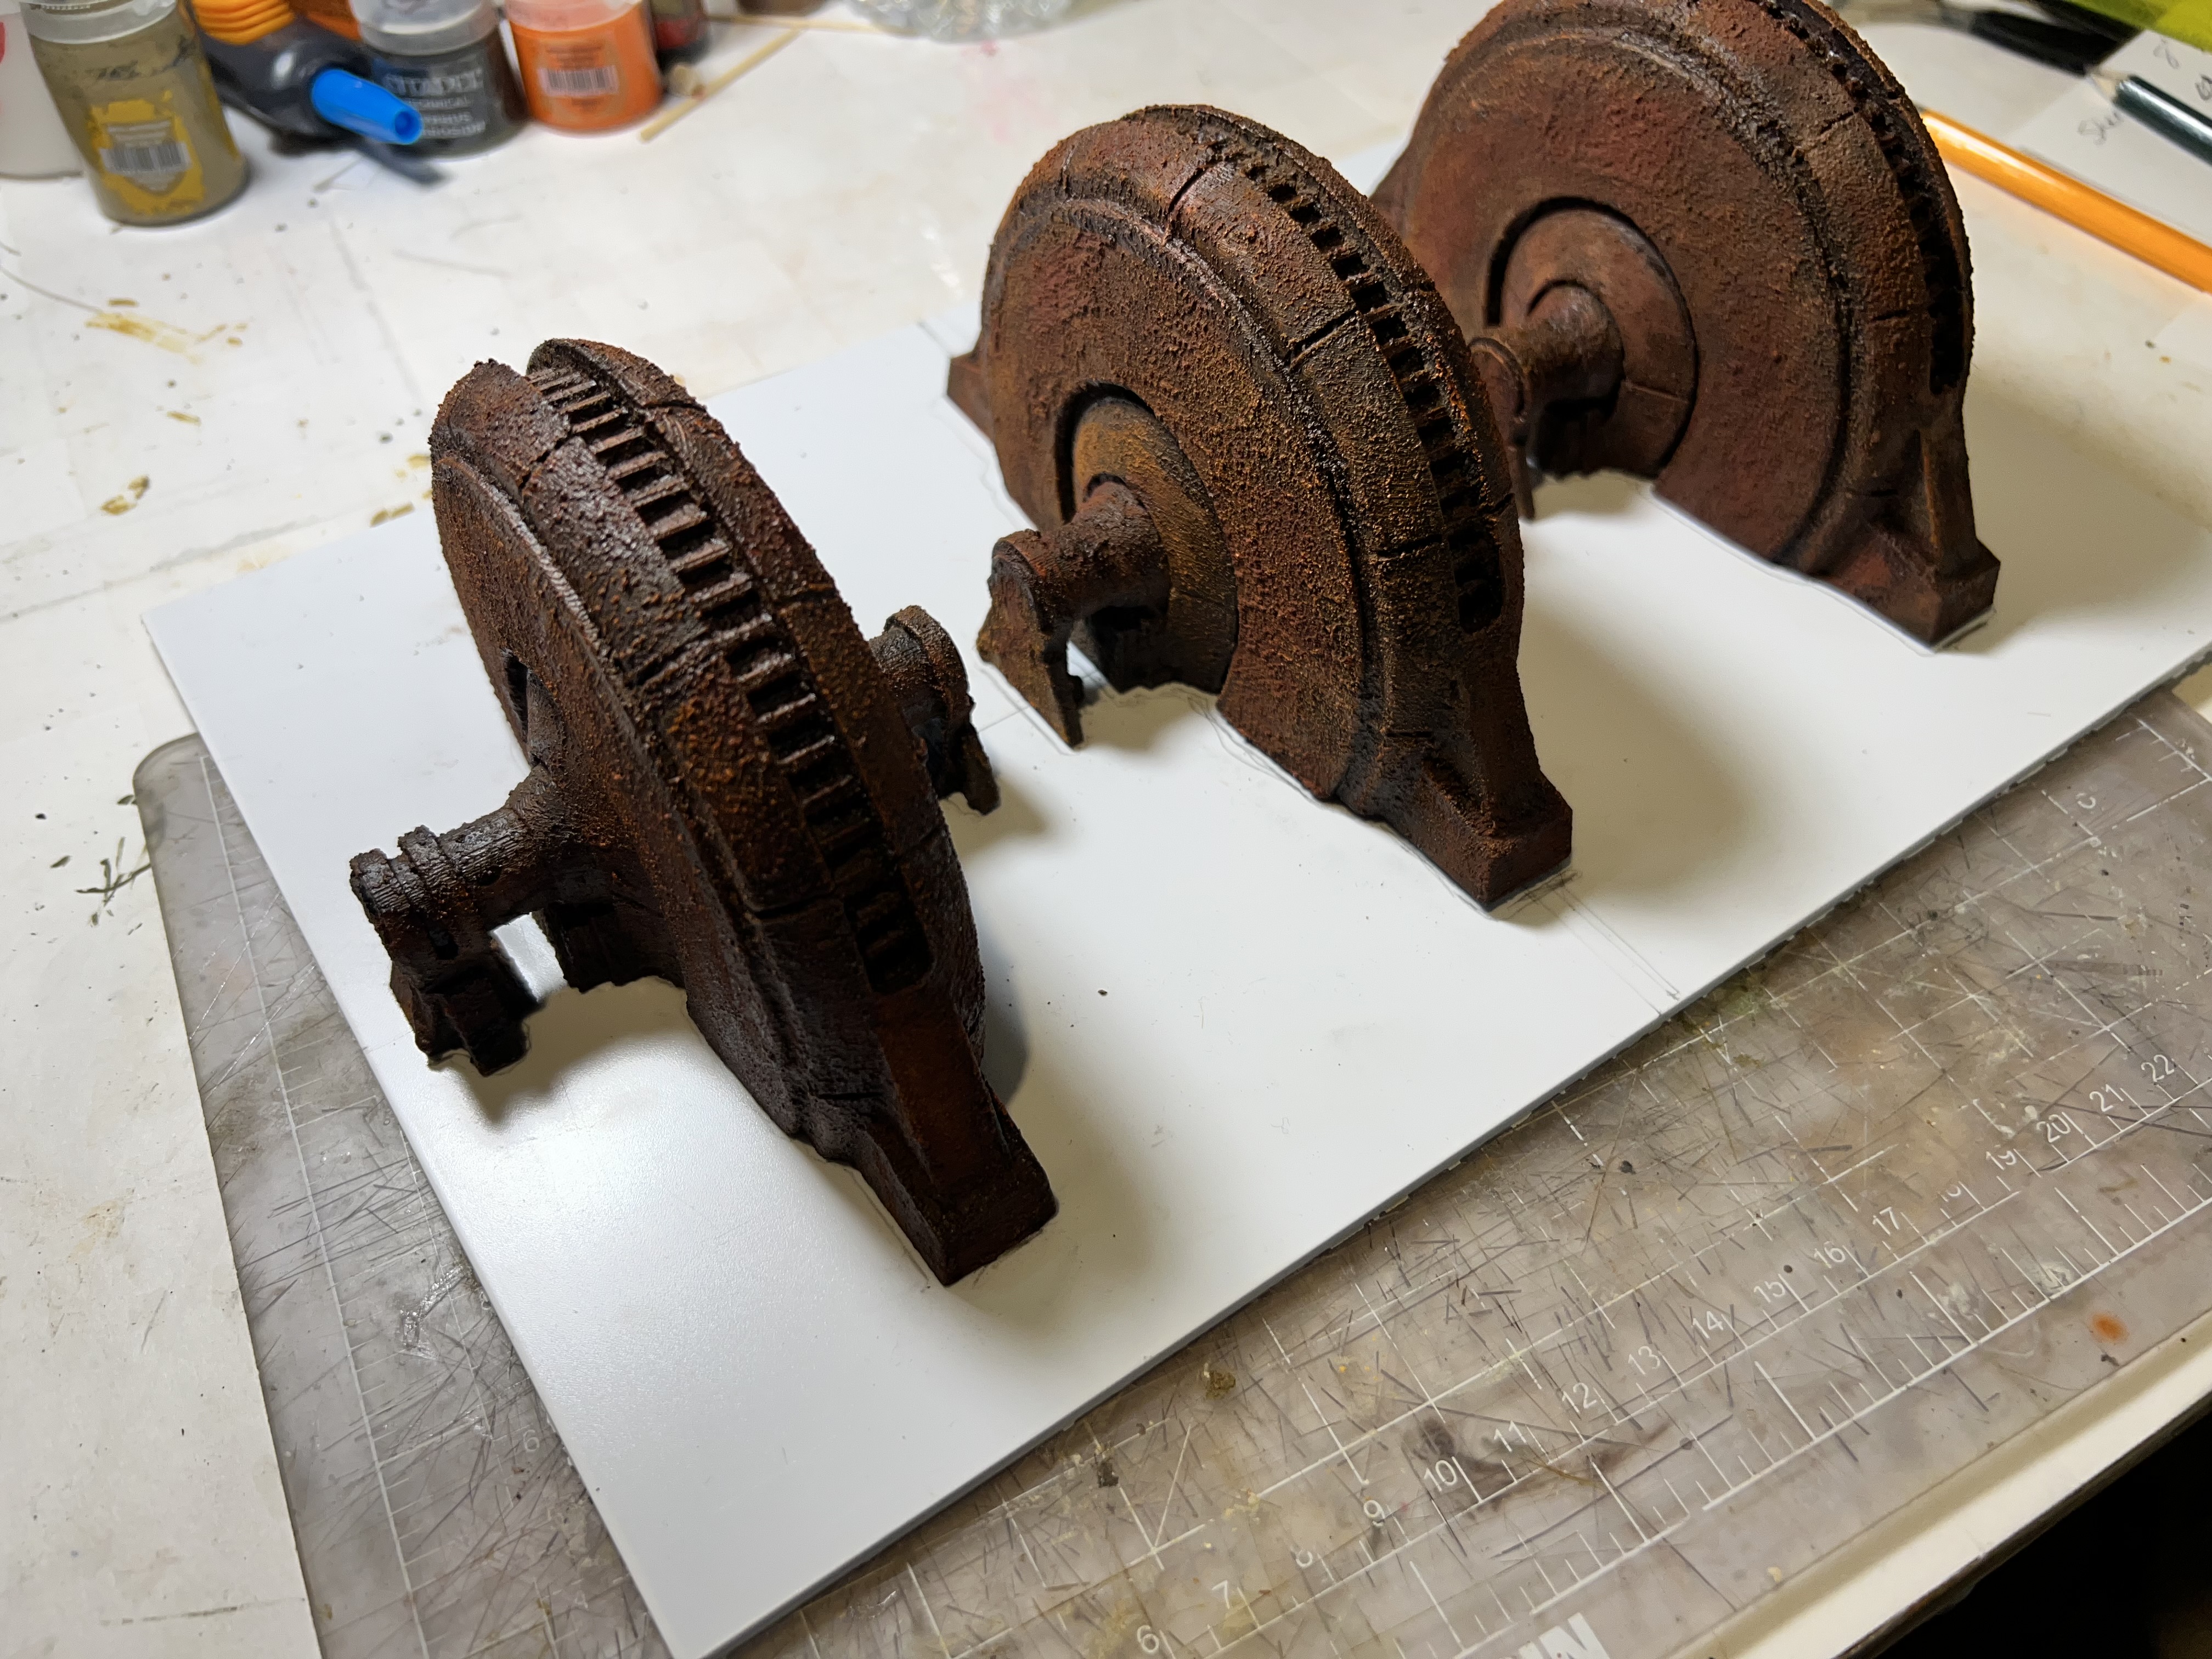
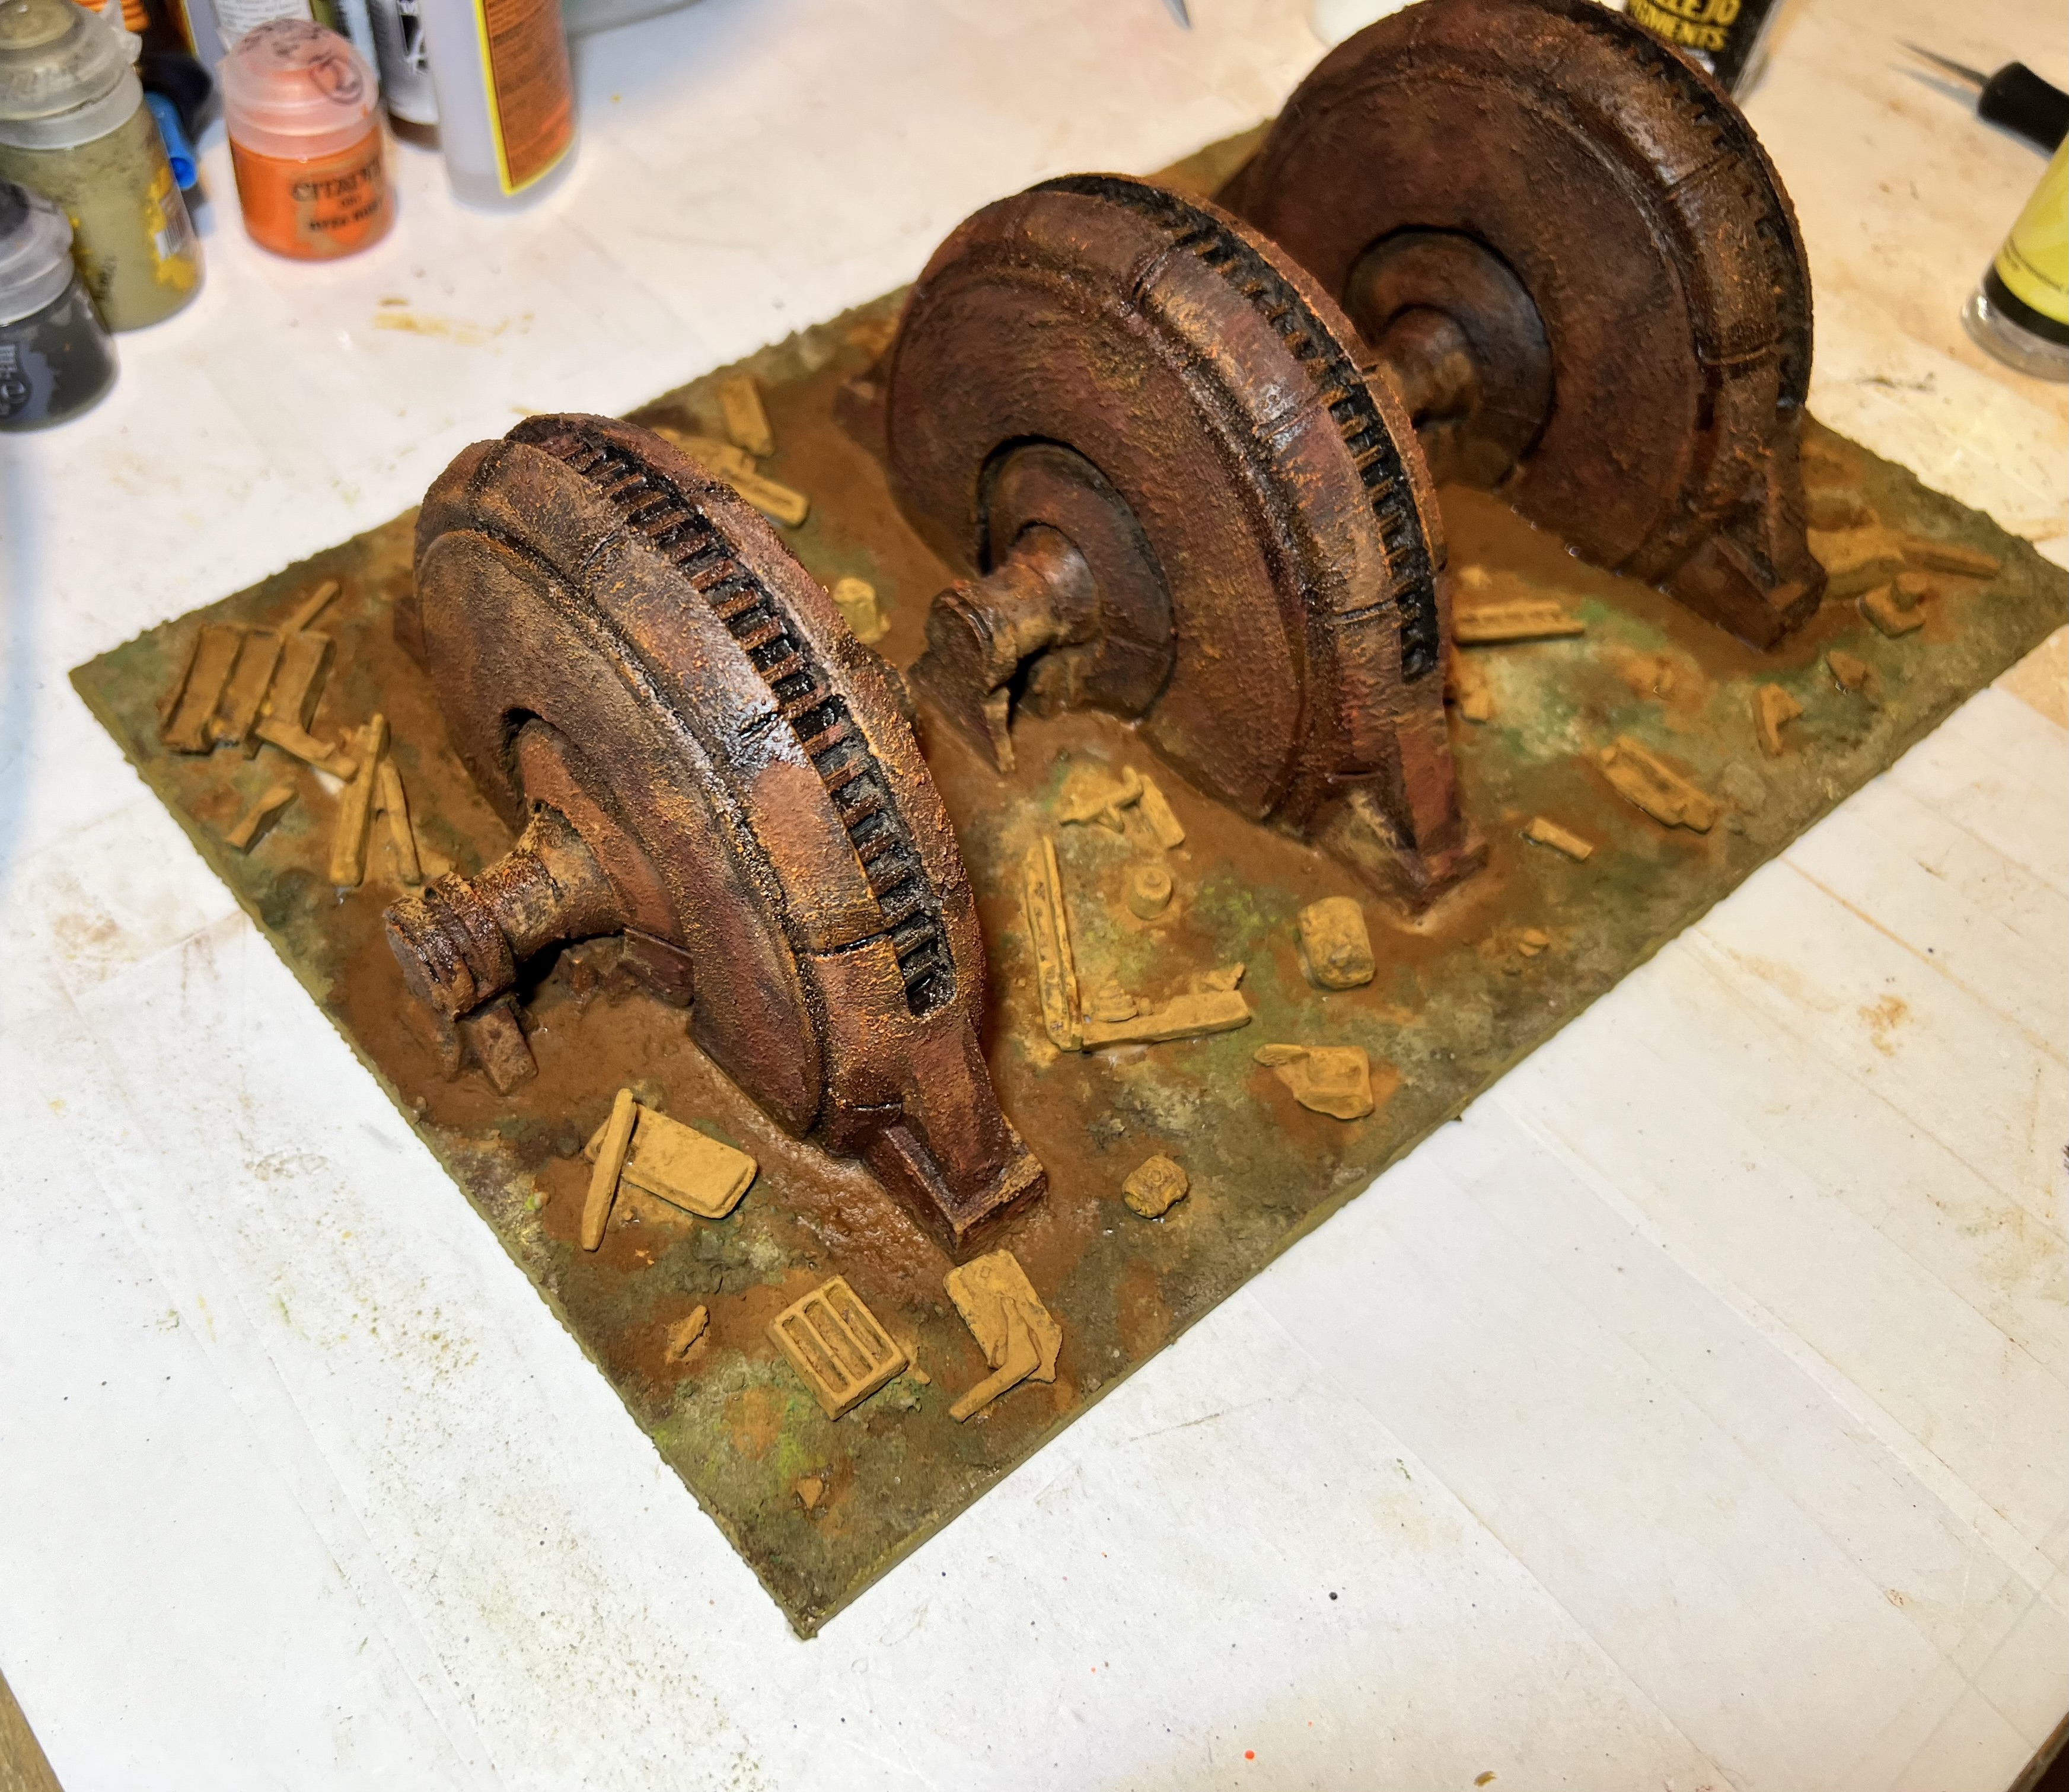
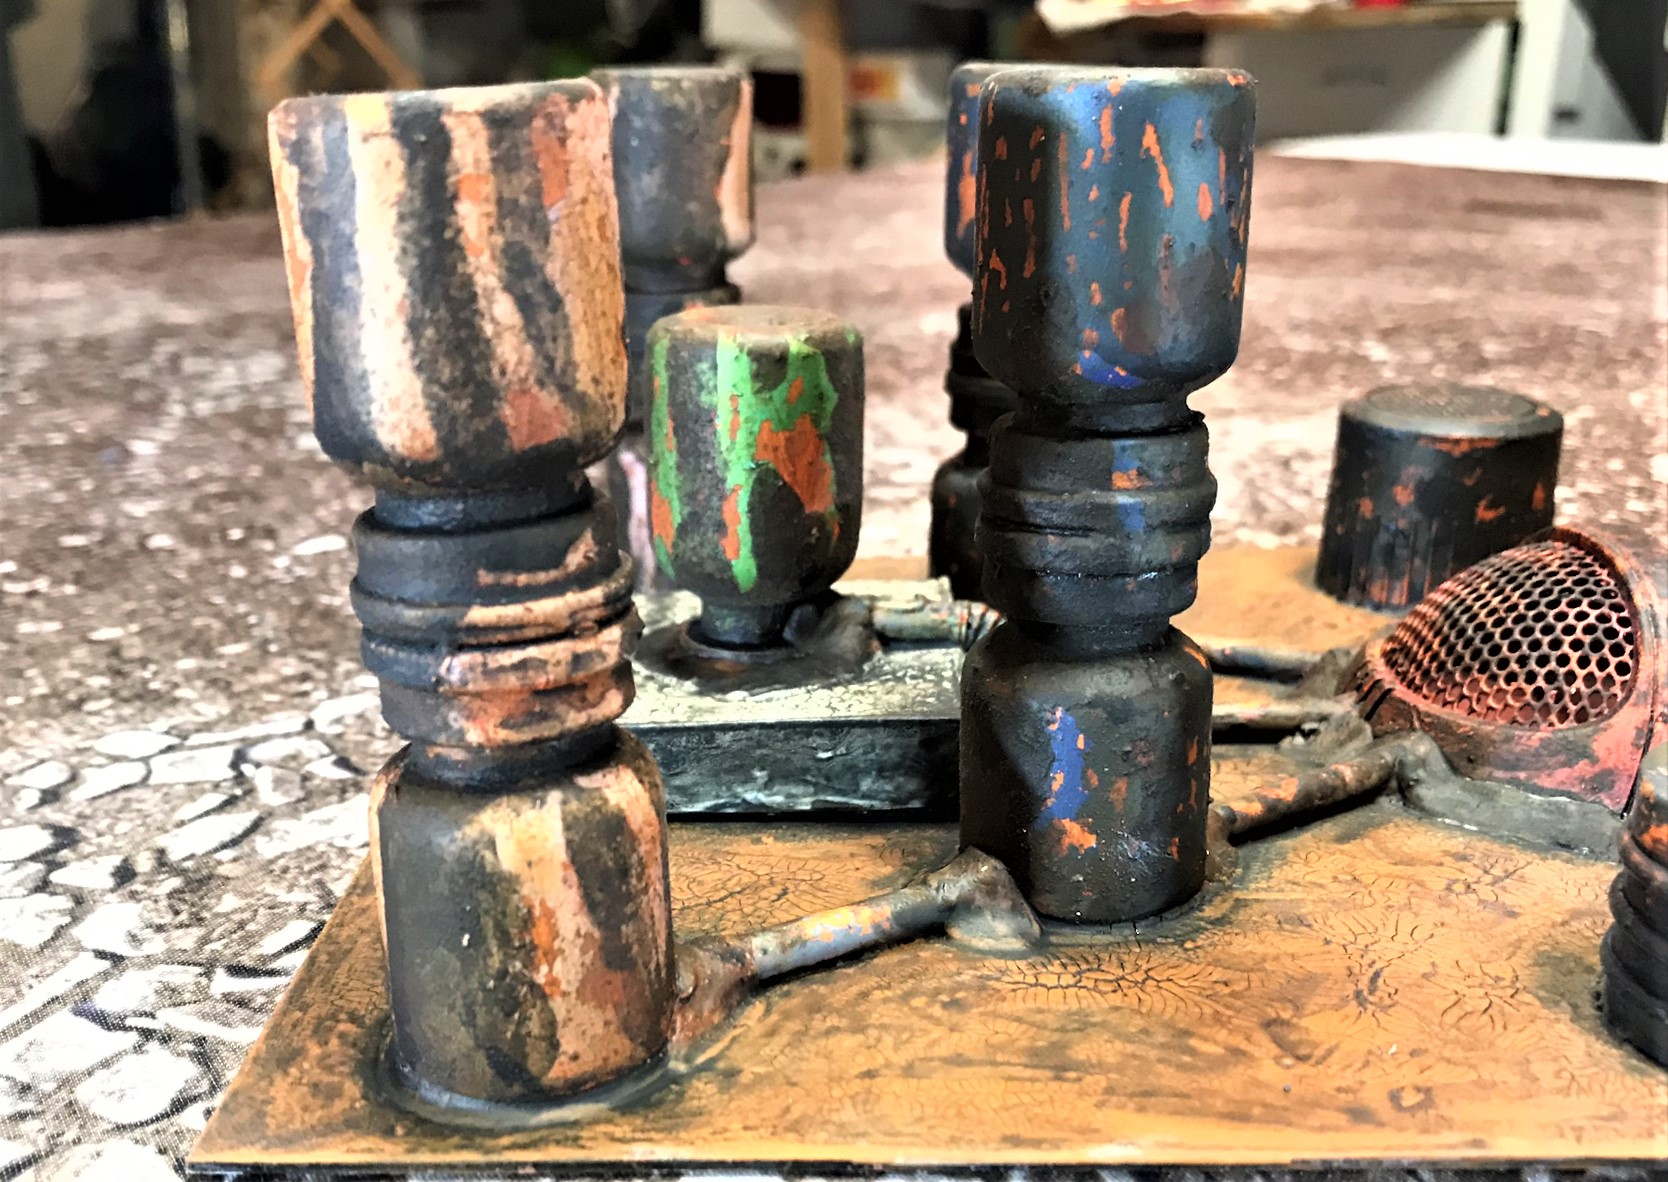
After the corrosion texture dried, I used the paints and pigments to “rust them up”.
All rusted up!
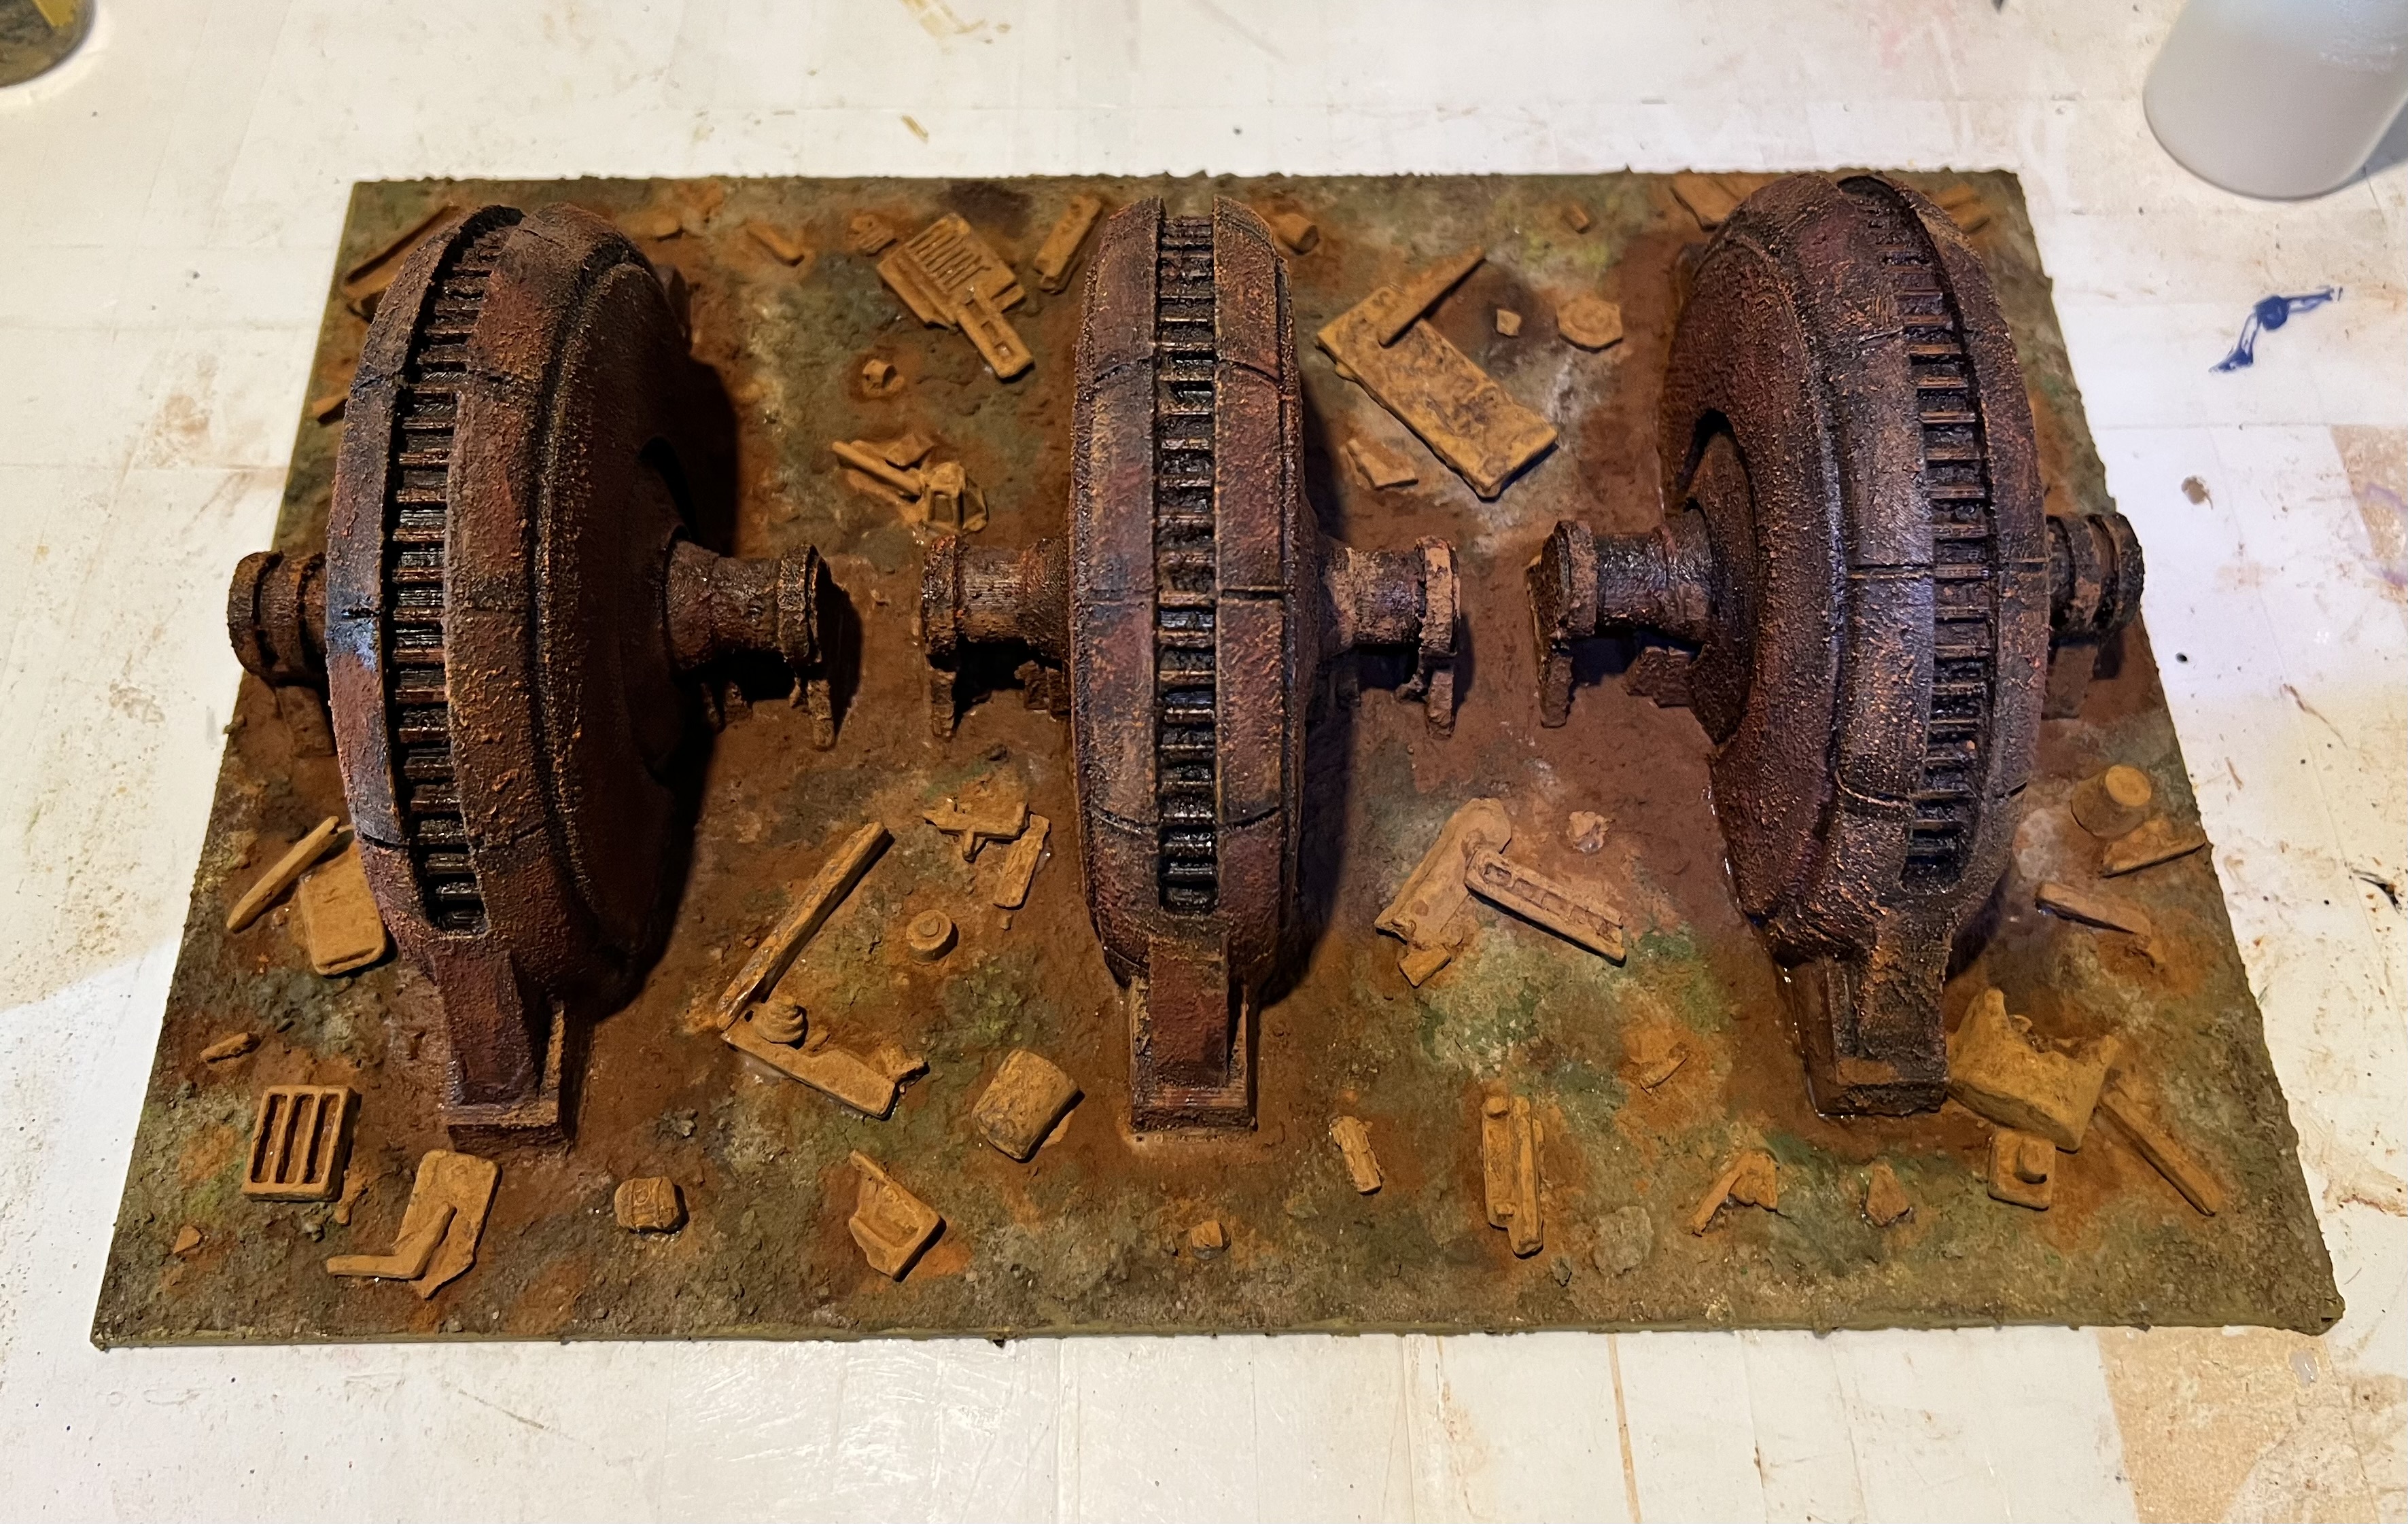
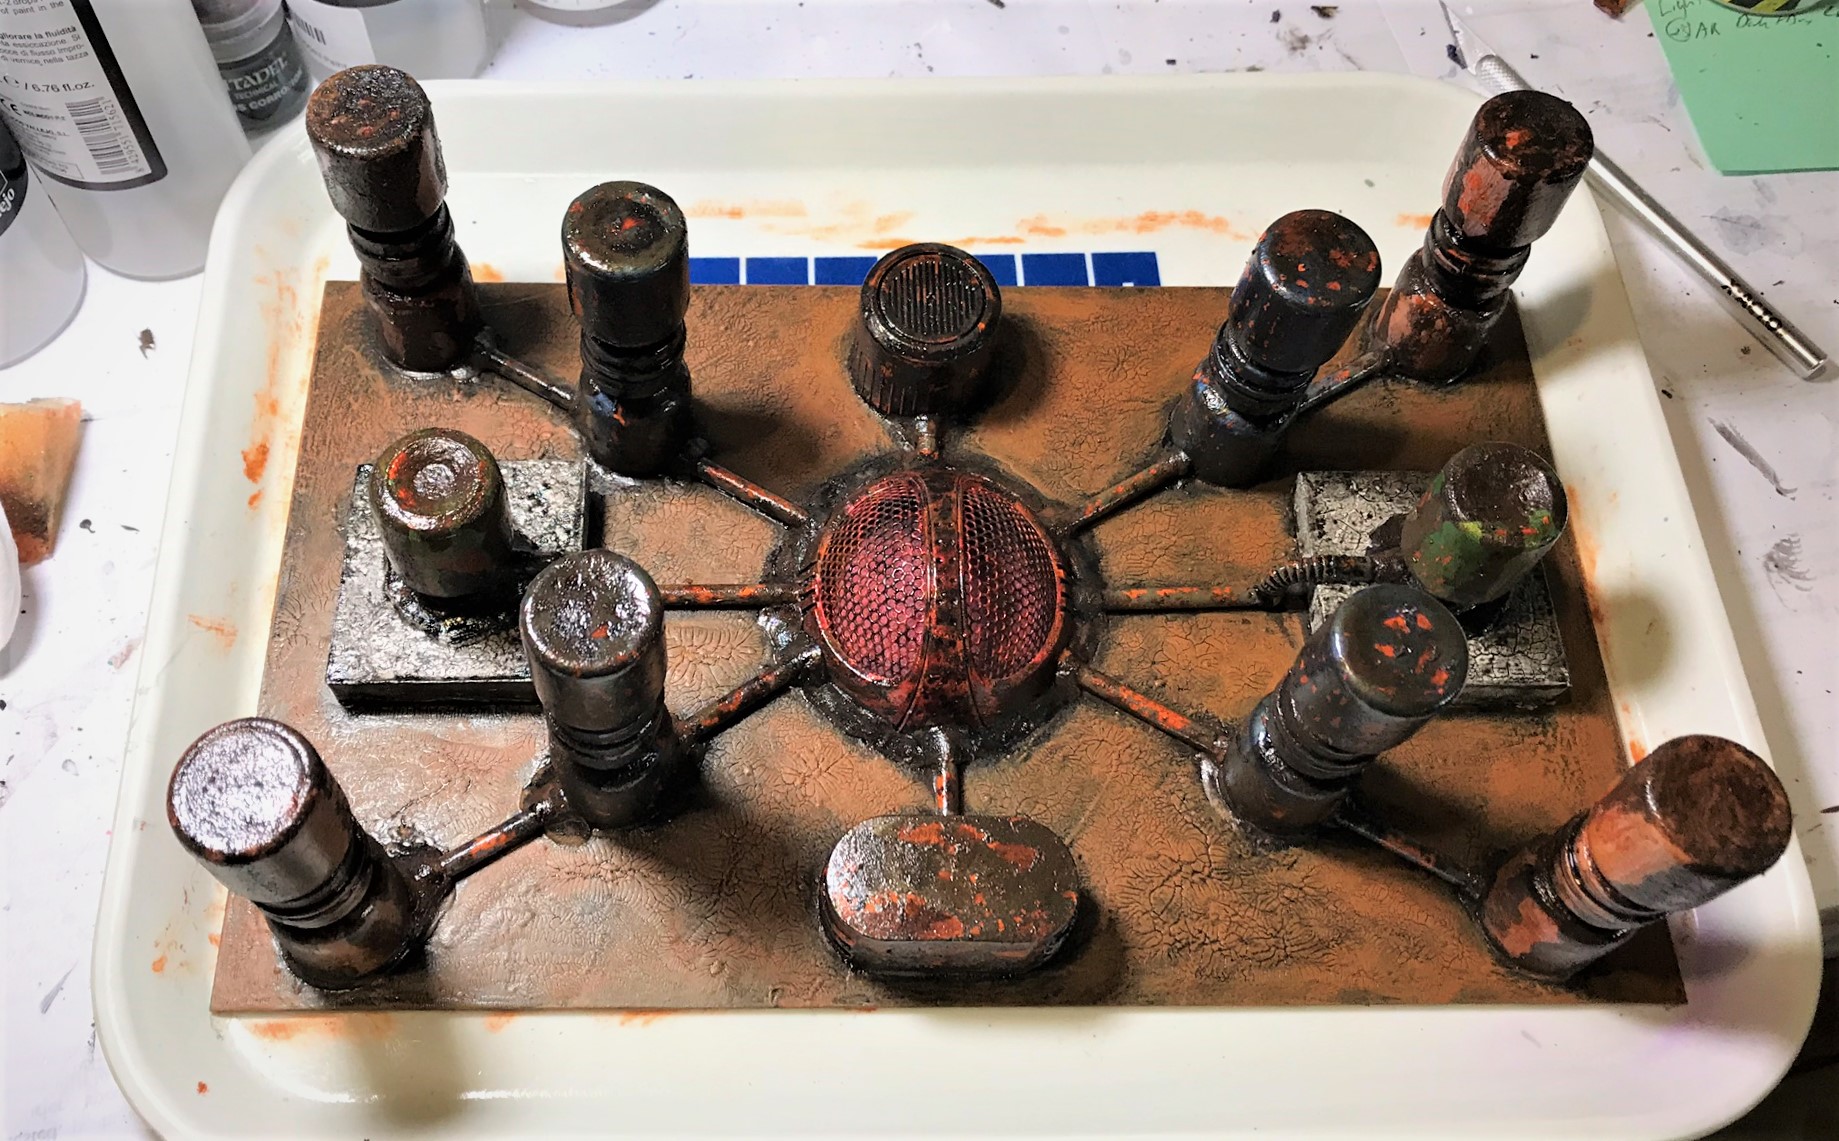
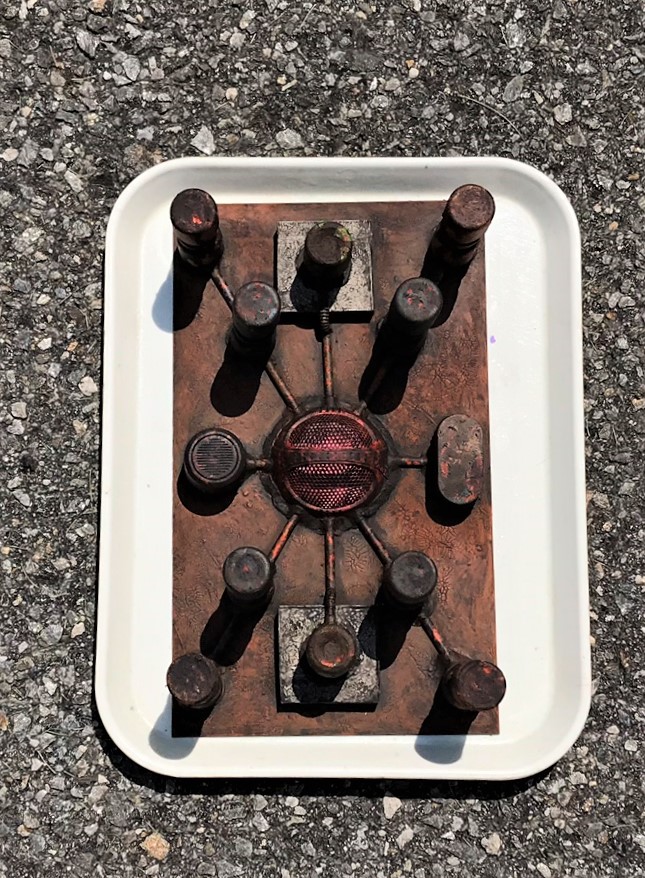
Two of the models were identical – so I planned on using them symmetrically on a polystyrene base. Using sand and PVA, I had a substrate for the rust pigments.
Here I measured carefully to align the three equidistantly on the base. Then, I traced out on the base where they would be glued. The one odd generator is in the center.Here you see the sand applied over the PVA. Note that where the generators would go is not covered with any glue/sand mixture.
Once the sand mix had hardened, I assembled the pigments as you see below. I fixed all the pigments with pigment binder, as I have found that other liquids can dissolve the PVA/sand bonds.
Ready for gluing down the generators. Then, adding pigments to the base. As is my habit, I list all the materials that I used at the end of this post. This practice served me well here as older posts I did on rusty walls had some pearls that I forgot.
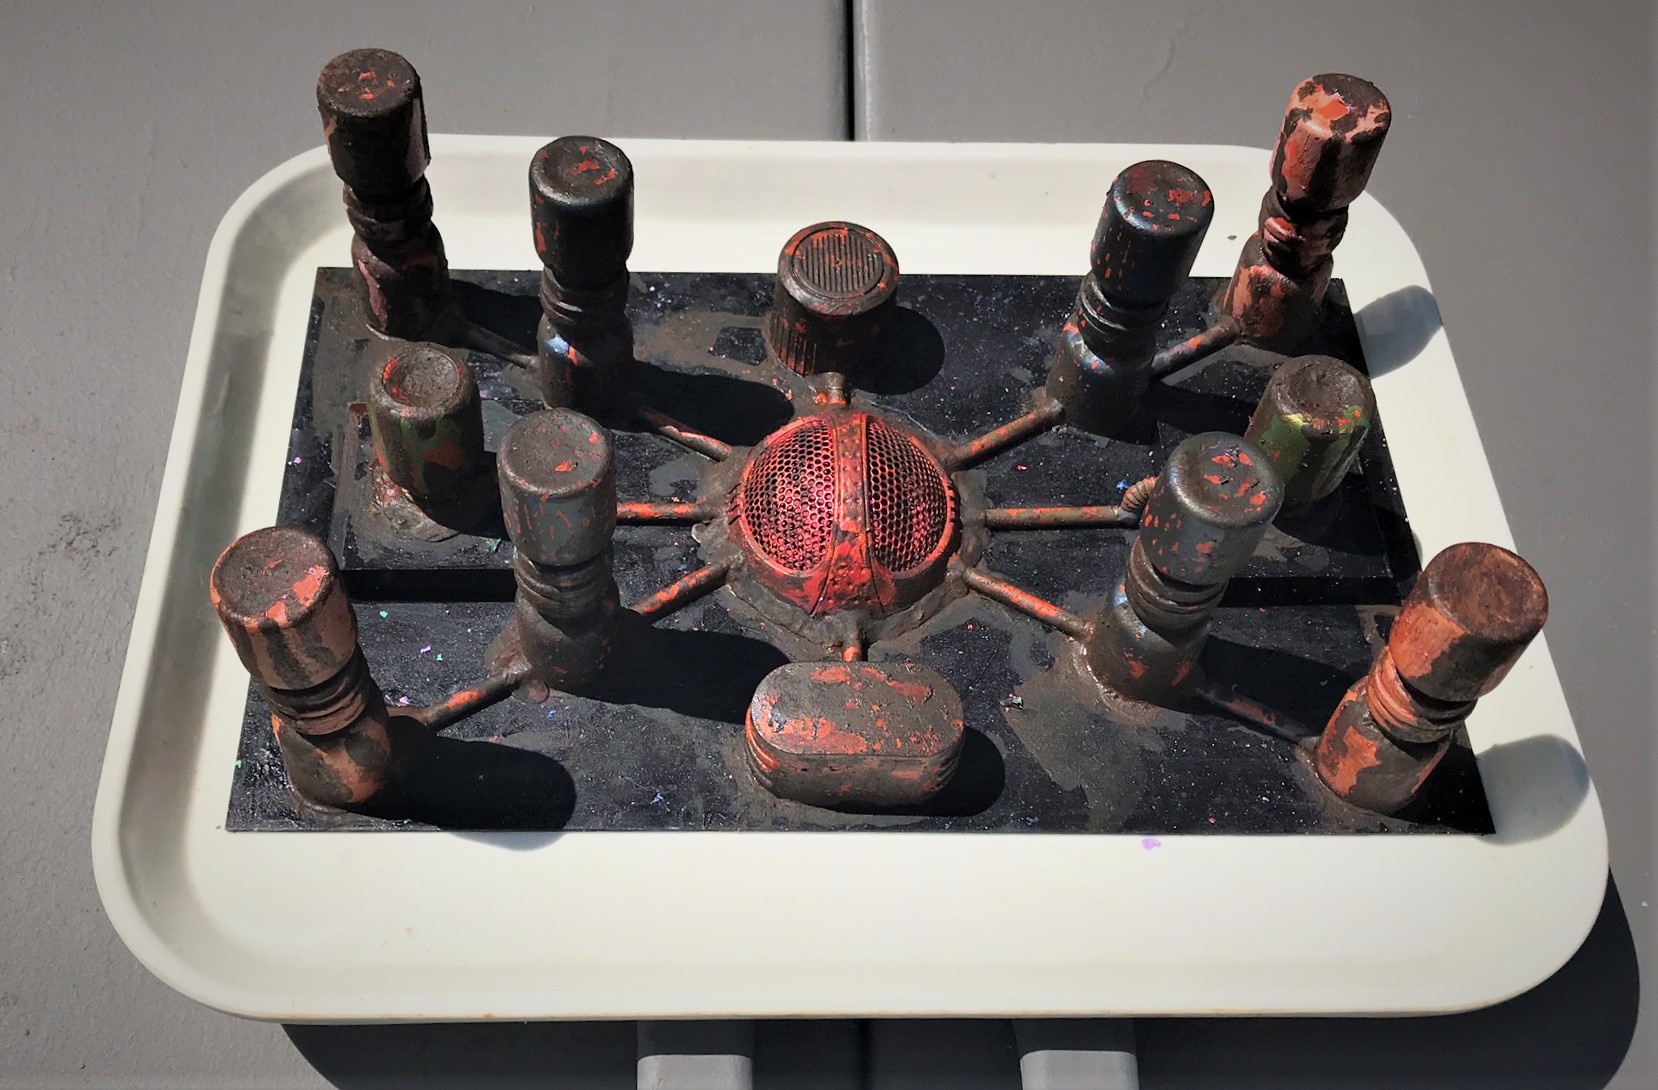
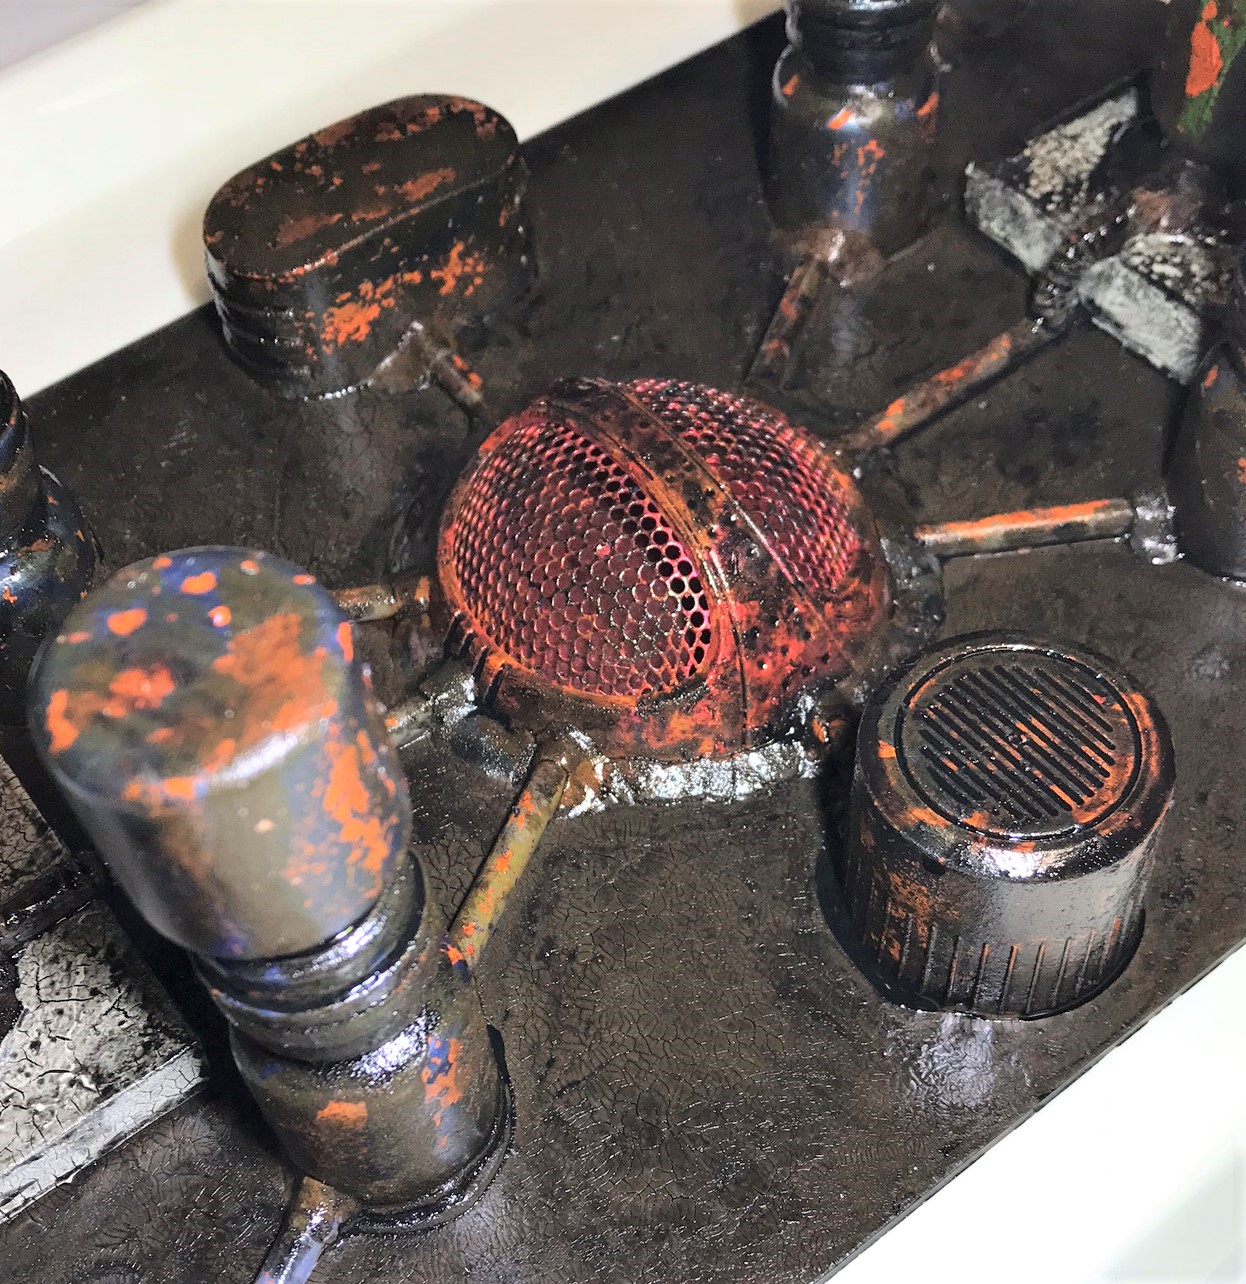
The generators were secured to the base by Gorilla Glue. Once that dried, I added the pigments to the base and fixed them with the binder. I then decided that there should be more detritus and wreckage here. I added some of my rusty Juweela scrap pieces. Then, I applied more rust pigments to them. These actions are shown in the gallery below.
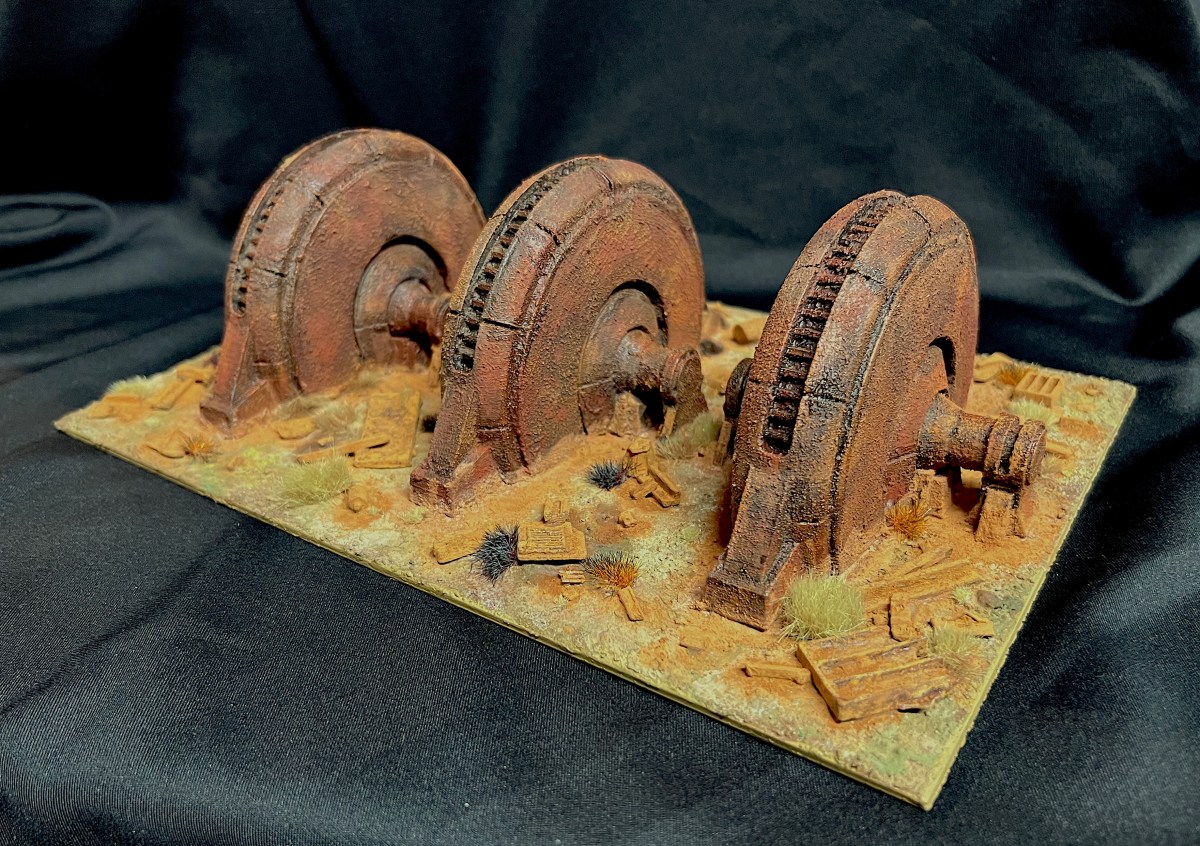
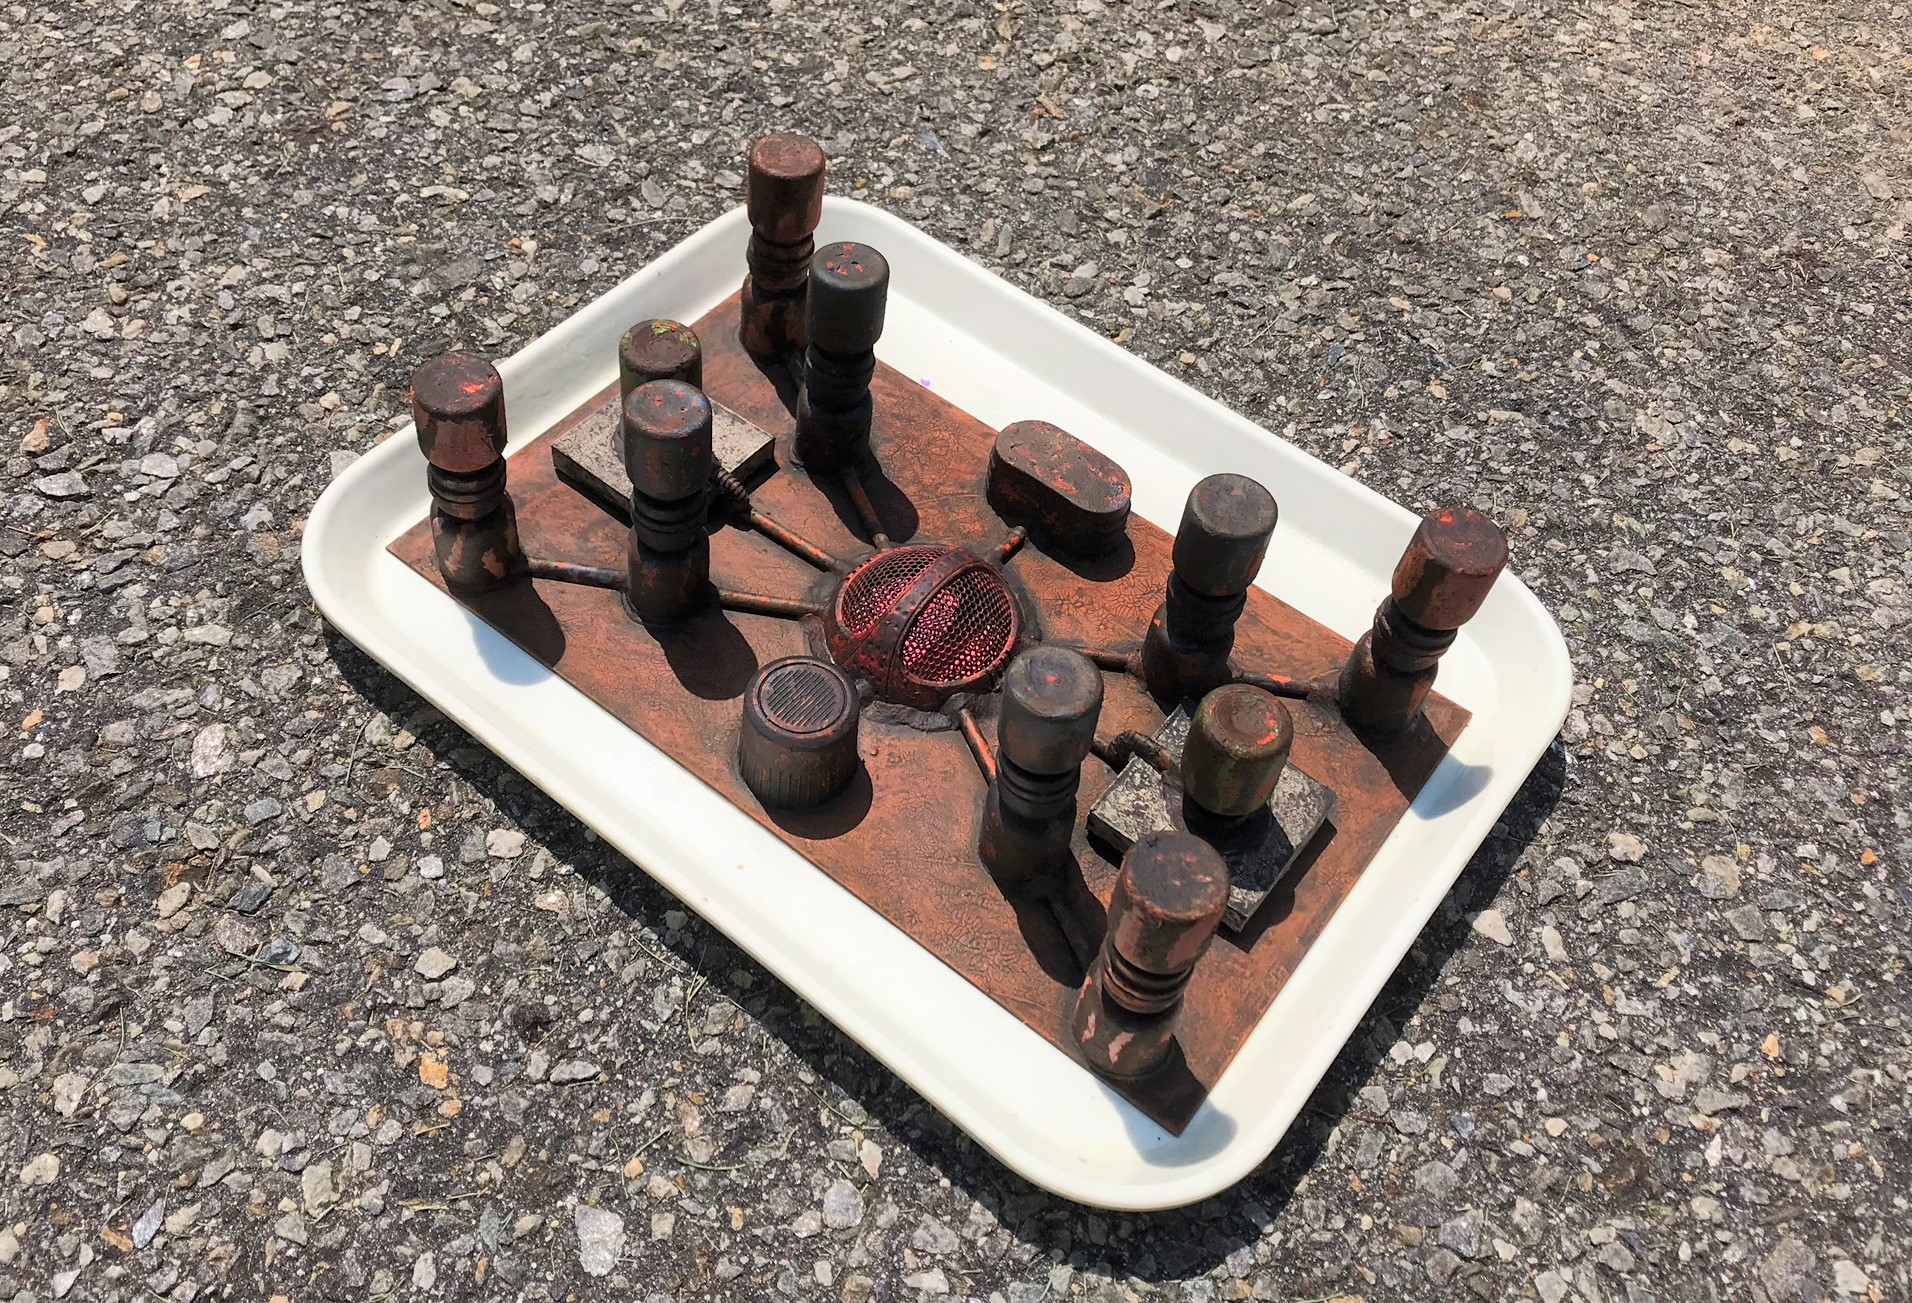
Finally, in an effort to add some wasteland life to the piece, I added multiple different flocking tufts. Here are some finished shots.
Thanks again to Chris Rett for this gift, and sorry it took me so long to finally complete it!
I’m looking forward to having this on the tabletop. It will be a companion piece to my rusty walls and ruined buildings. It will also complement my ruined chemical plant. I will be making other pieces soon. Stay tuned! I hope that you found this interesting or useful. Let me know in the comments section.
Until next time.
For all of my previous posts on terrain projects, please see this page.For all of my previous posts on sci-fi projects, please see this page..
PAINTS, INKS, GLAZES, SHADES, WASHES, PIGMENTS, FLOCKING, GLUES AND MORE THAT I USED ON THIS MODEL
This is a New Year’s Eve post from my Aussie buddy, IRO who can be found at https://imperialrebelork.wordpress.com/2020/12/31/sci-fi-pulp-retro-diorama/ and thought I’d share it. He incorporated one of my creations (my Mark 1 Sphere Tank) into a wonderful retro sci-fi diorama. Very cool, and thank you so much IRO!
Hello all, Well it’s 11:09pm on New Years Eve and I’m typing out a blog haha, I know how to party! I have a nicely aged Scotch beside with some Bob …
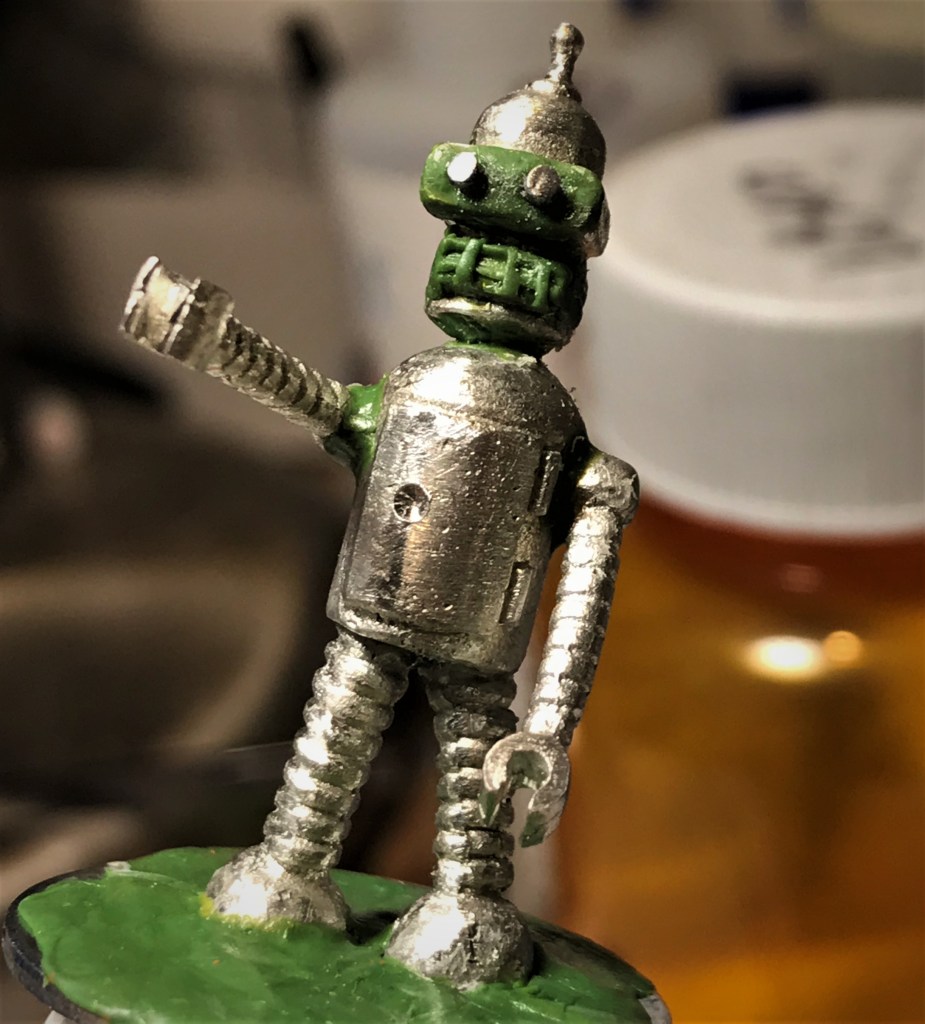
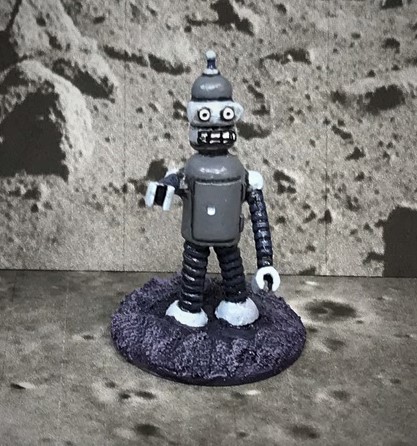
I decided that I needed a short break from building and painting Aztecs – for at least long enough to paint one miniature anyways. This one is called “Folder Bot 3000” from Armorcast Terraform Terrain Ltd.’s “Robot Townies” collection. There are a number of unusual robots and Futurama-inspired lookalikes there. I bought this Folder Bot 3000 on a lark when I got some other terrain stuff from Armorcast a few years back. I do like robots and I do like Futurama and Bender, so I got this one.
(Oh hell, its really supposed to be Bender Bending Rodriguez – aka Bender – so let’s call him that !).
The figure stayed on my painting desk in its baggie as I worked on many other projects. This is definitely not my usual practice as I really had no place to properly categorize and put him away for a future game. It was finally Bender’s time…
The figure differs from Bender a bit – his chest “door” hinges are on the right, while the cartoon version’s are on the left, but otherwise it’s similar enough.
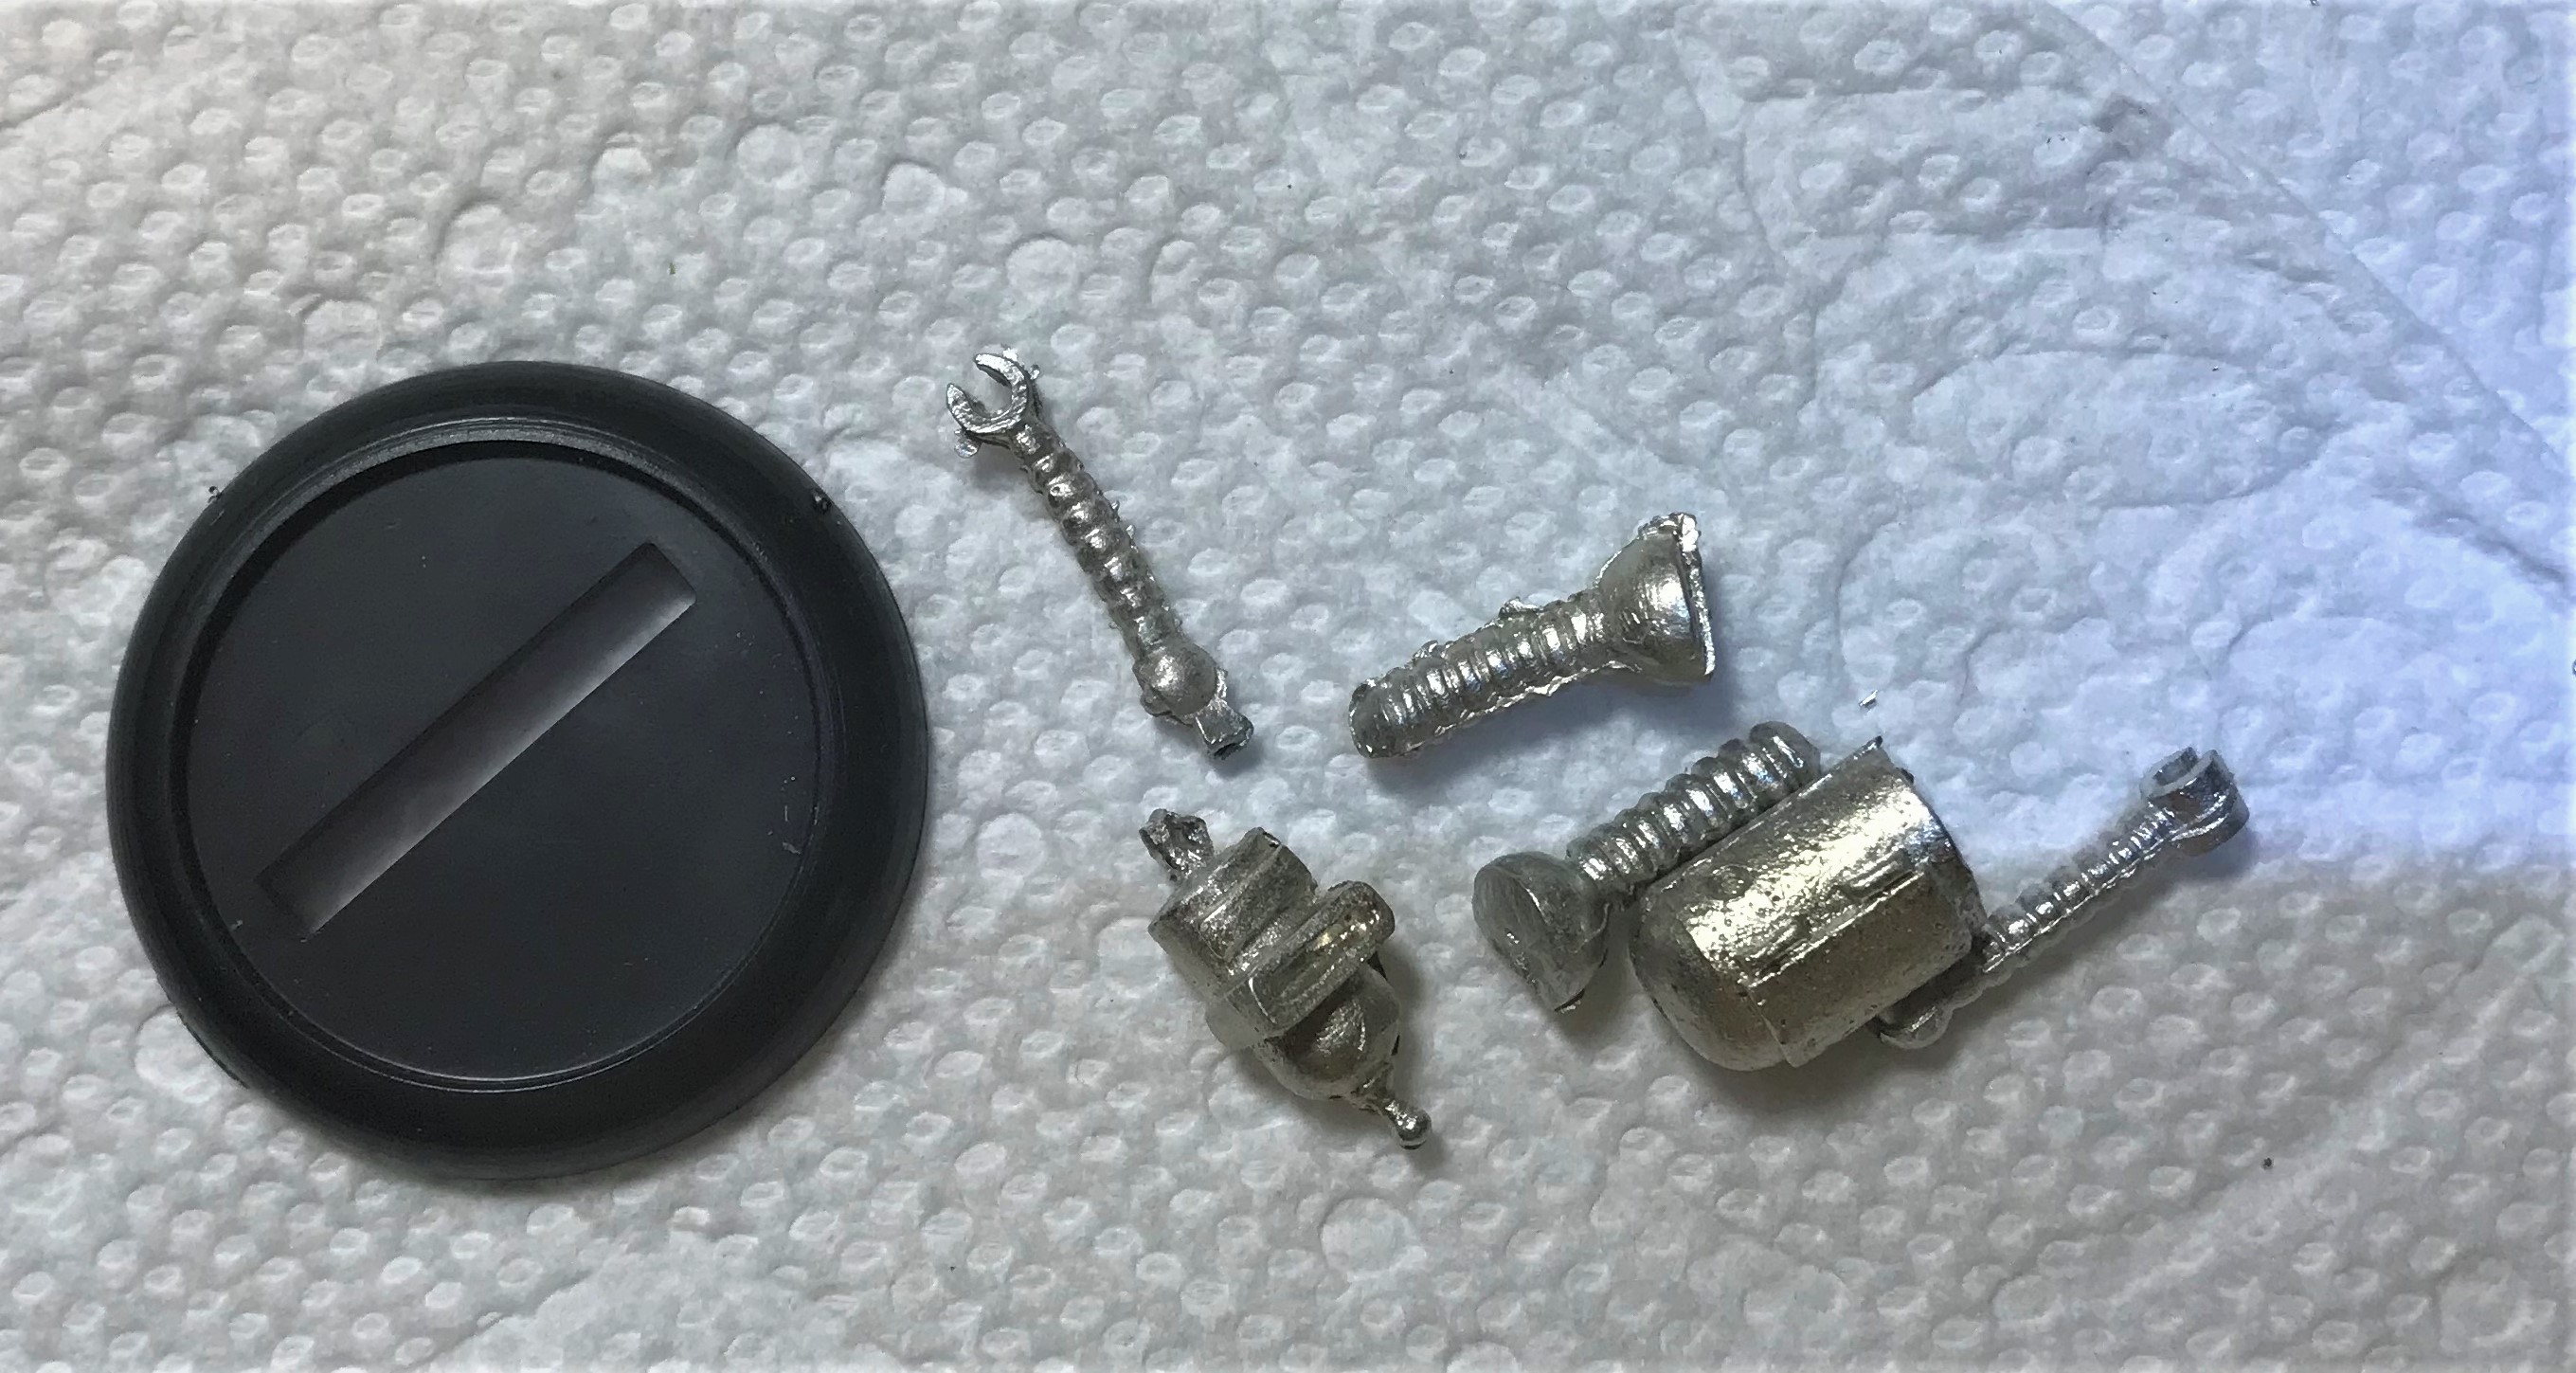
The Folder Bot 3000 figure as received. The casting quality was a bit off of what I had expected. For example the figure’s legs and arms did not line up perfectly during the casting process – leading to misalignments of the limbs’ rings. There was some flash and some pitting on the head, necessitating some filing and filling on top of the needed drilling and pinning of the arms, legs, and head.
The figure as assembled. I used E6000 epoxy as I wanted a strong bond on the components, but this proved to be a bit of a mess. I have a love/hate relationship with E6000 as it needs a day to cure properly and sometimes it goes where you don’t want it to go. Here, it needed to be removed from other robot surfaces that needed to be smooth. It does clean up with an Exacto blade and tweezers, but its a pain, and because its clear, you don’t always see it all.
I used a 1″ steel washer to mount the figure in lieu of the plastic base. After I assembled the figure, I saw that there were gaps under the arms and they were not fully affixed. There were also some pitting on the figure’s head and back, necessitating my using green stuff as a remedy. In retrospect, I should have just used green stuff to assemble him.
I also saw that the figure just had an empty slit for the “eyes”, and a tiny flat space for the “mouth”. Anyone familiar with Bender knows that he has very expressive “eyes” and a wavy three-lined electronic “mouth”. One of my goals in painting him was to make him as “cartoony” and 2-D as possible. There was no way that I was going to be able to paint the eyes in the slit effectively or to freehand paint the wavy mouth as the figure was then.
I decided to try to sculpt the eyes and the mouth with green stuff. I admire people like Roger at Rantings From Under the Wargame Table who are much better at sculpting with green stuff than I am (as shown by his efforts here). Undaunted, and inspired by Roger (but a little worried), I used green stuff to fill the slit, make eye holes, and to try to sculpt the “waves” on the mouth. The result I achieved is shown below.
Here is Bender after I had filled in the gaps on the limbs and head, smoothed/filled pits, and sculpted the eye holes and the mouth “waves”.
I was not happy with the “eye holes” and did not think that I could paint them as “expressive” like in the cartoon. I also did not think that the handle on his chest was big enough – so I used a pin vise to drill out all three. I then carefully cut and filed pieces of paper clip and glued them into the eye holes. This seemed better to me visually – and would be far easier to paint.
Bender after drilling out his chest and fixing his eyes.
As I mentioned, I wanted a cartoon-like miniature. This meant that I would by necessity be limiting any highlighting or excessive shading. Therefore, I also decided that this would be a good opportunity to try to use the Vallejo “Metal Medium” that I had bought to try over two years ago to mix with paints to create a metallic finish that would be in line with the cartoon. This would hopefully prevent me from needing to use any actual metal paints. he would have some shiny aspects, but hopefully not excessive.
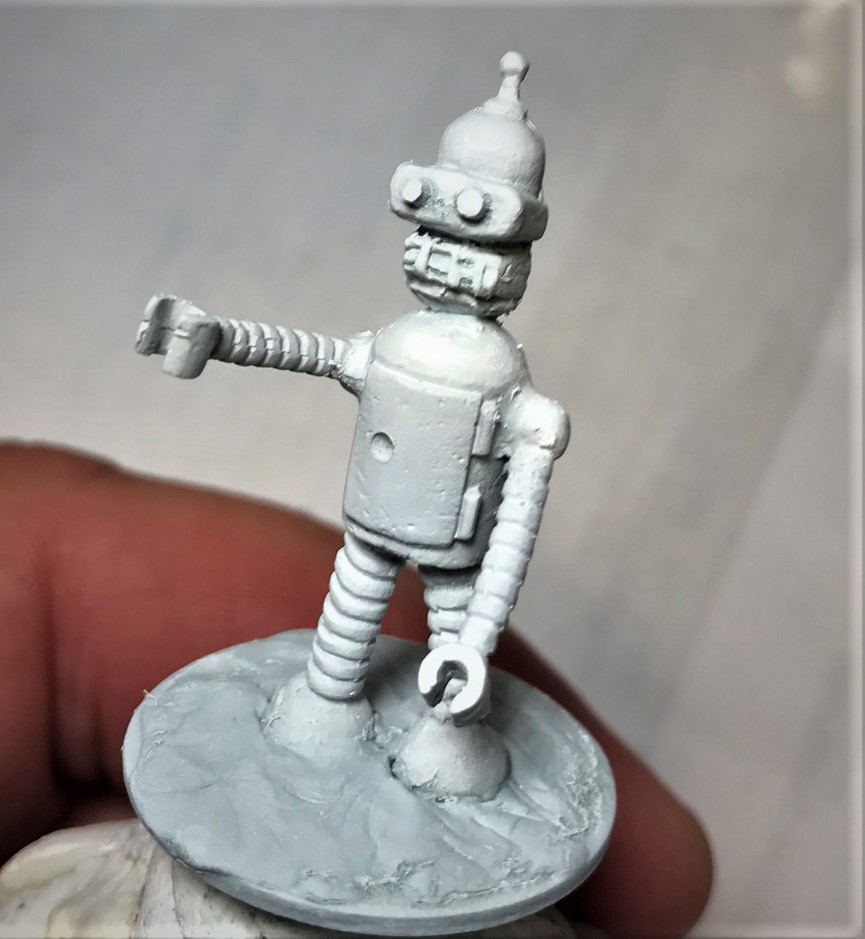
I was now ready to prime and paint old Bender.
Bender after priming.
In line with my painting approach, I decided to wash the primed figure with “Nuln Oil” to give myself a better idea of where to apply the paint/metal medium mixtures. The wash really showed the casting misalignments on the legs and arms, and where some of the errant E6000 had gone. No worries, as I knew that I could both remove the more egregious excess epoxy and hide the casting errors as I painted. I used three different shades of gray, adding the Vallejo “Metal Medium” in a 50/50 mix (all the paints used are listed at the end of the post for those interested).
Bender after the wash – you can see the misalignments and excess epoxy issues that I described.
The painting was fairly straightforward. I used the darker colors on the limbs to hide the misalignments. The mouth was just OK, given how I had to sculpt it. I used some “Nuln Oil GLOSS” on the limbs to accentuate their ring-like construction.
Bender painted but before final base work and varnish. At this point I found a bristle or hair embedded in the paint on the back of his head that required fixing (ugh).
Bender with the image I took from the internet as a general guide.
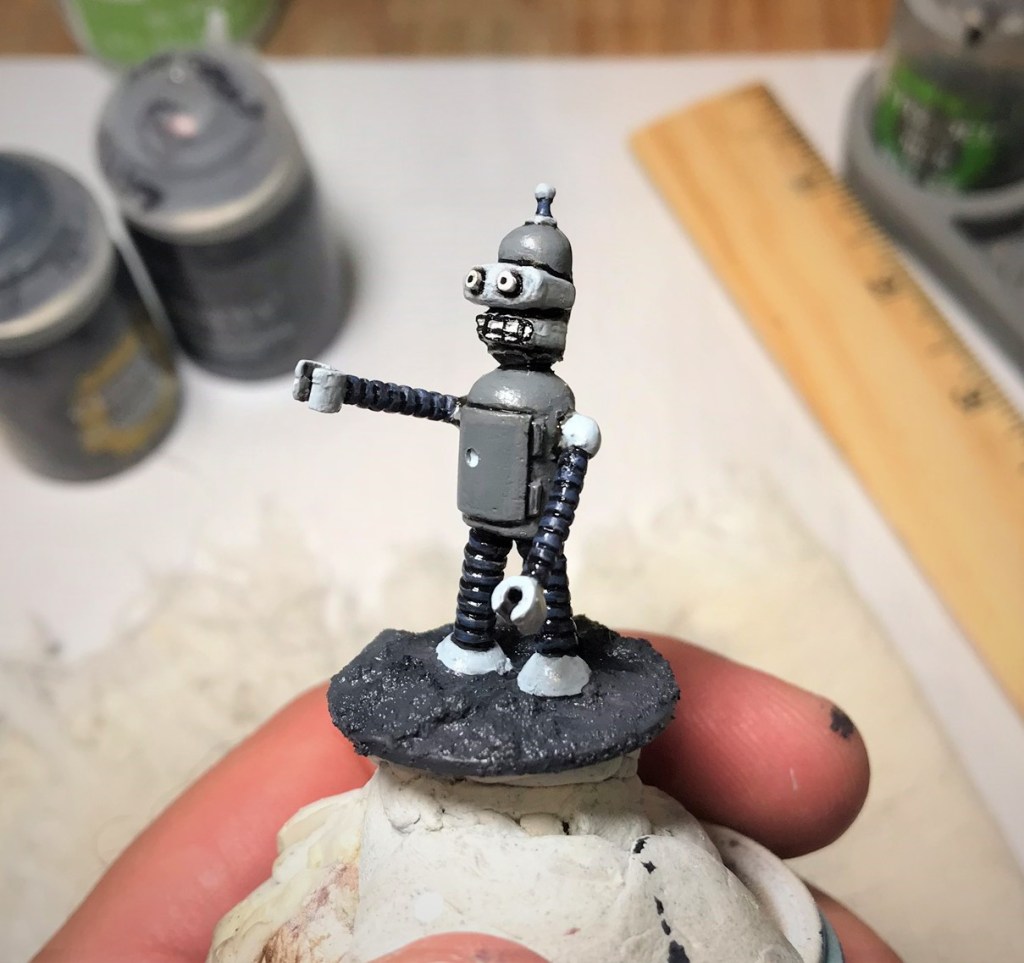
To finish him up, I used a Citadel texture paint (“Astrogranite debris”) on the base and the added a a few colors by dry brushing similar to what I did with my Retrovian platoon. Lastly, I added a satin varnish as I wanted his paint job protected but not too matte.
Bender completed.
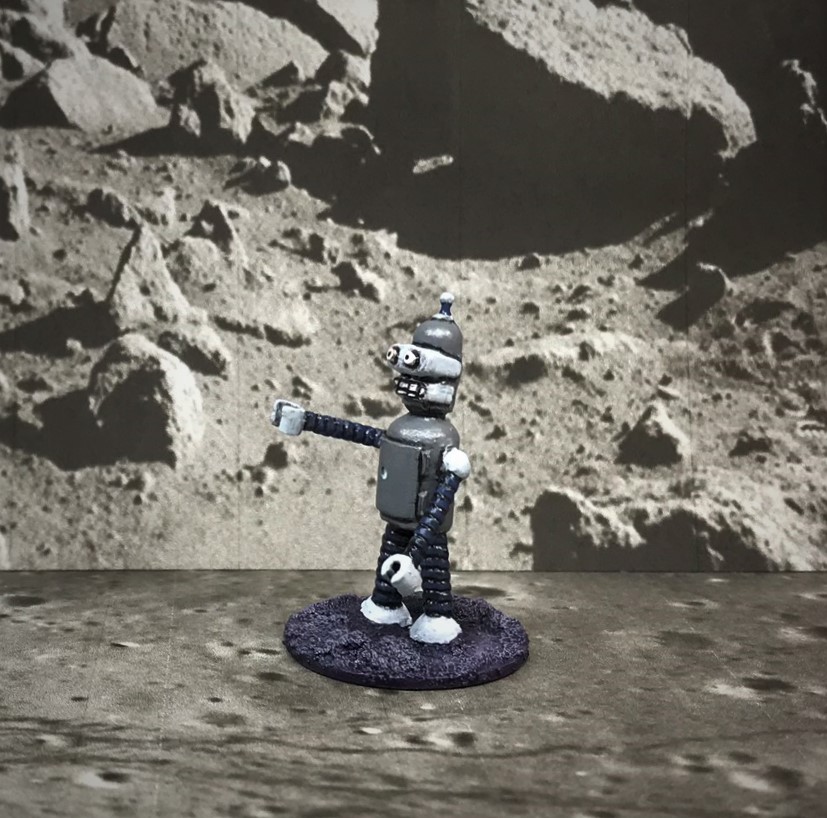
Right side
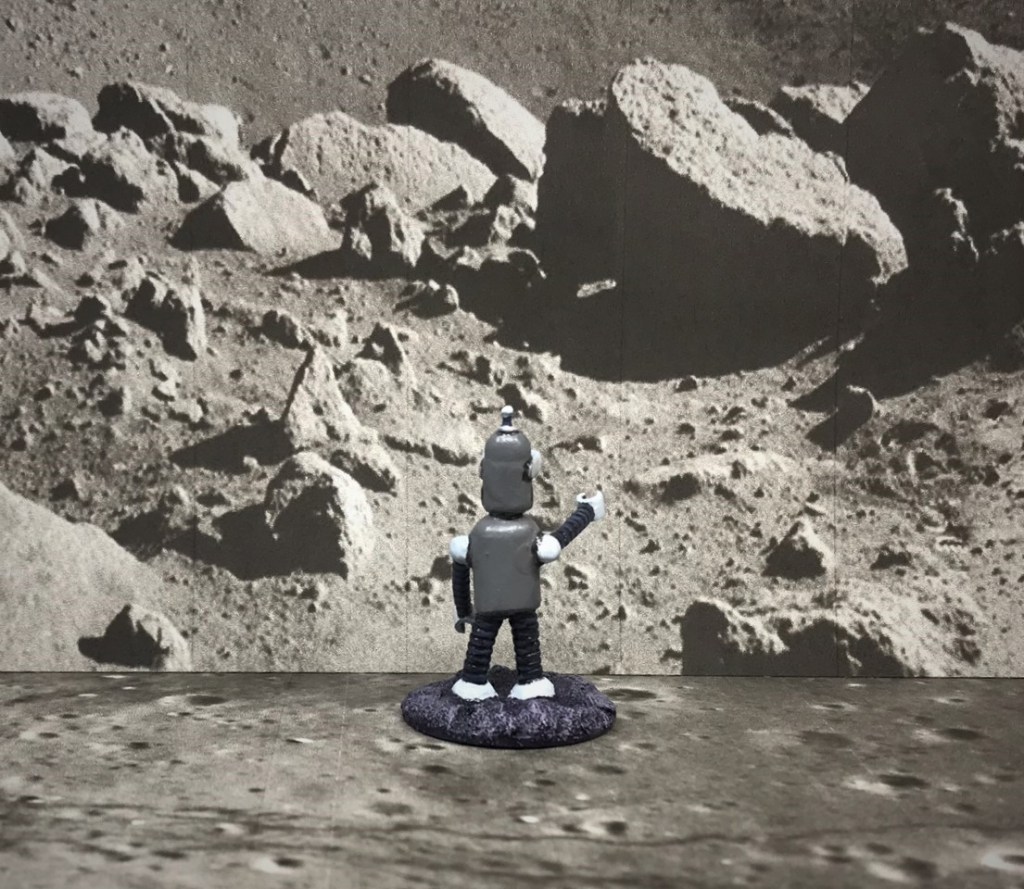
Back view
Left side
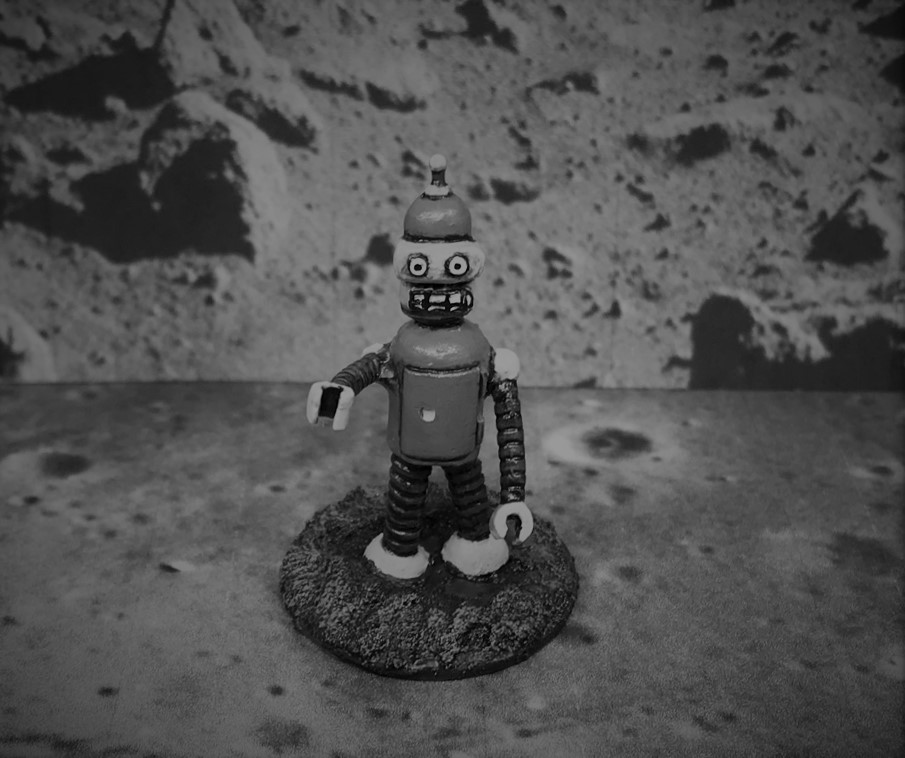
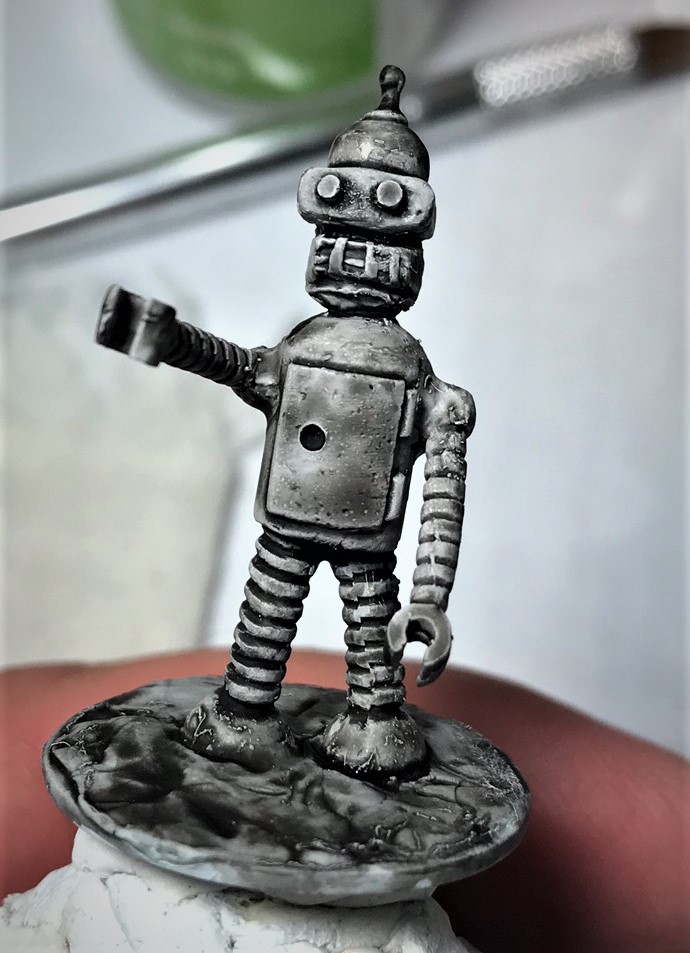
If there were no colors but grey, he’d look like this in an old movie serial!
This guy is not my best work, but not my worst. At tabletop distance he looks fine, and hopefully will put a smile on some gamer’s face. I just needed a change for a bit and the work on this little guy provided that for sure. I’ll probably use him in a retro sci-fi game of Combat PatrolTM at some point. I could have sculpted a cigar or a beer battle or two for old Bender, but I decided that was a bit too much for me.
And if Bender does not like that…
Thanks for looking – I am entering this small project into Azazel’s extended July/August community painting challenge in the “hero” category – cartoon robot division (I just made that last part up). Please feel free to comment below – always appreciated.
PAINTS, INKS, GLAZES, SHADES, WASHES, PIGMENTS, FLOCKING, GLUES AND MORE THAT I USED ON THE “FOLDER BOT 3000”:
It’s been about a month since the last gaming convention I attended, and my how the world has changed. I cannot see how a large convention could be held right now (though Cold Wars indeed happened in Pennsylvania this weekend). There are a few upcoming gaming cons in obvious risk – and for now I think it useful to blog and paint and reflect back until this COVID-19 crisis passes (and that it will). Best wishes for health and happiness to all my readers all over the world, from the US to Australia to the UK, All across Europe, and Africa and Asia. Now with everything at a lock down or a standstill due to the coronavirus crisis, I thought it was a good time to write a post about the games at my last convention as a distraction.
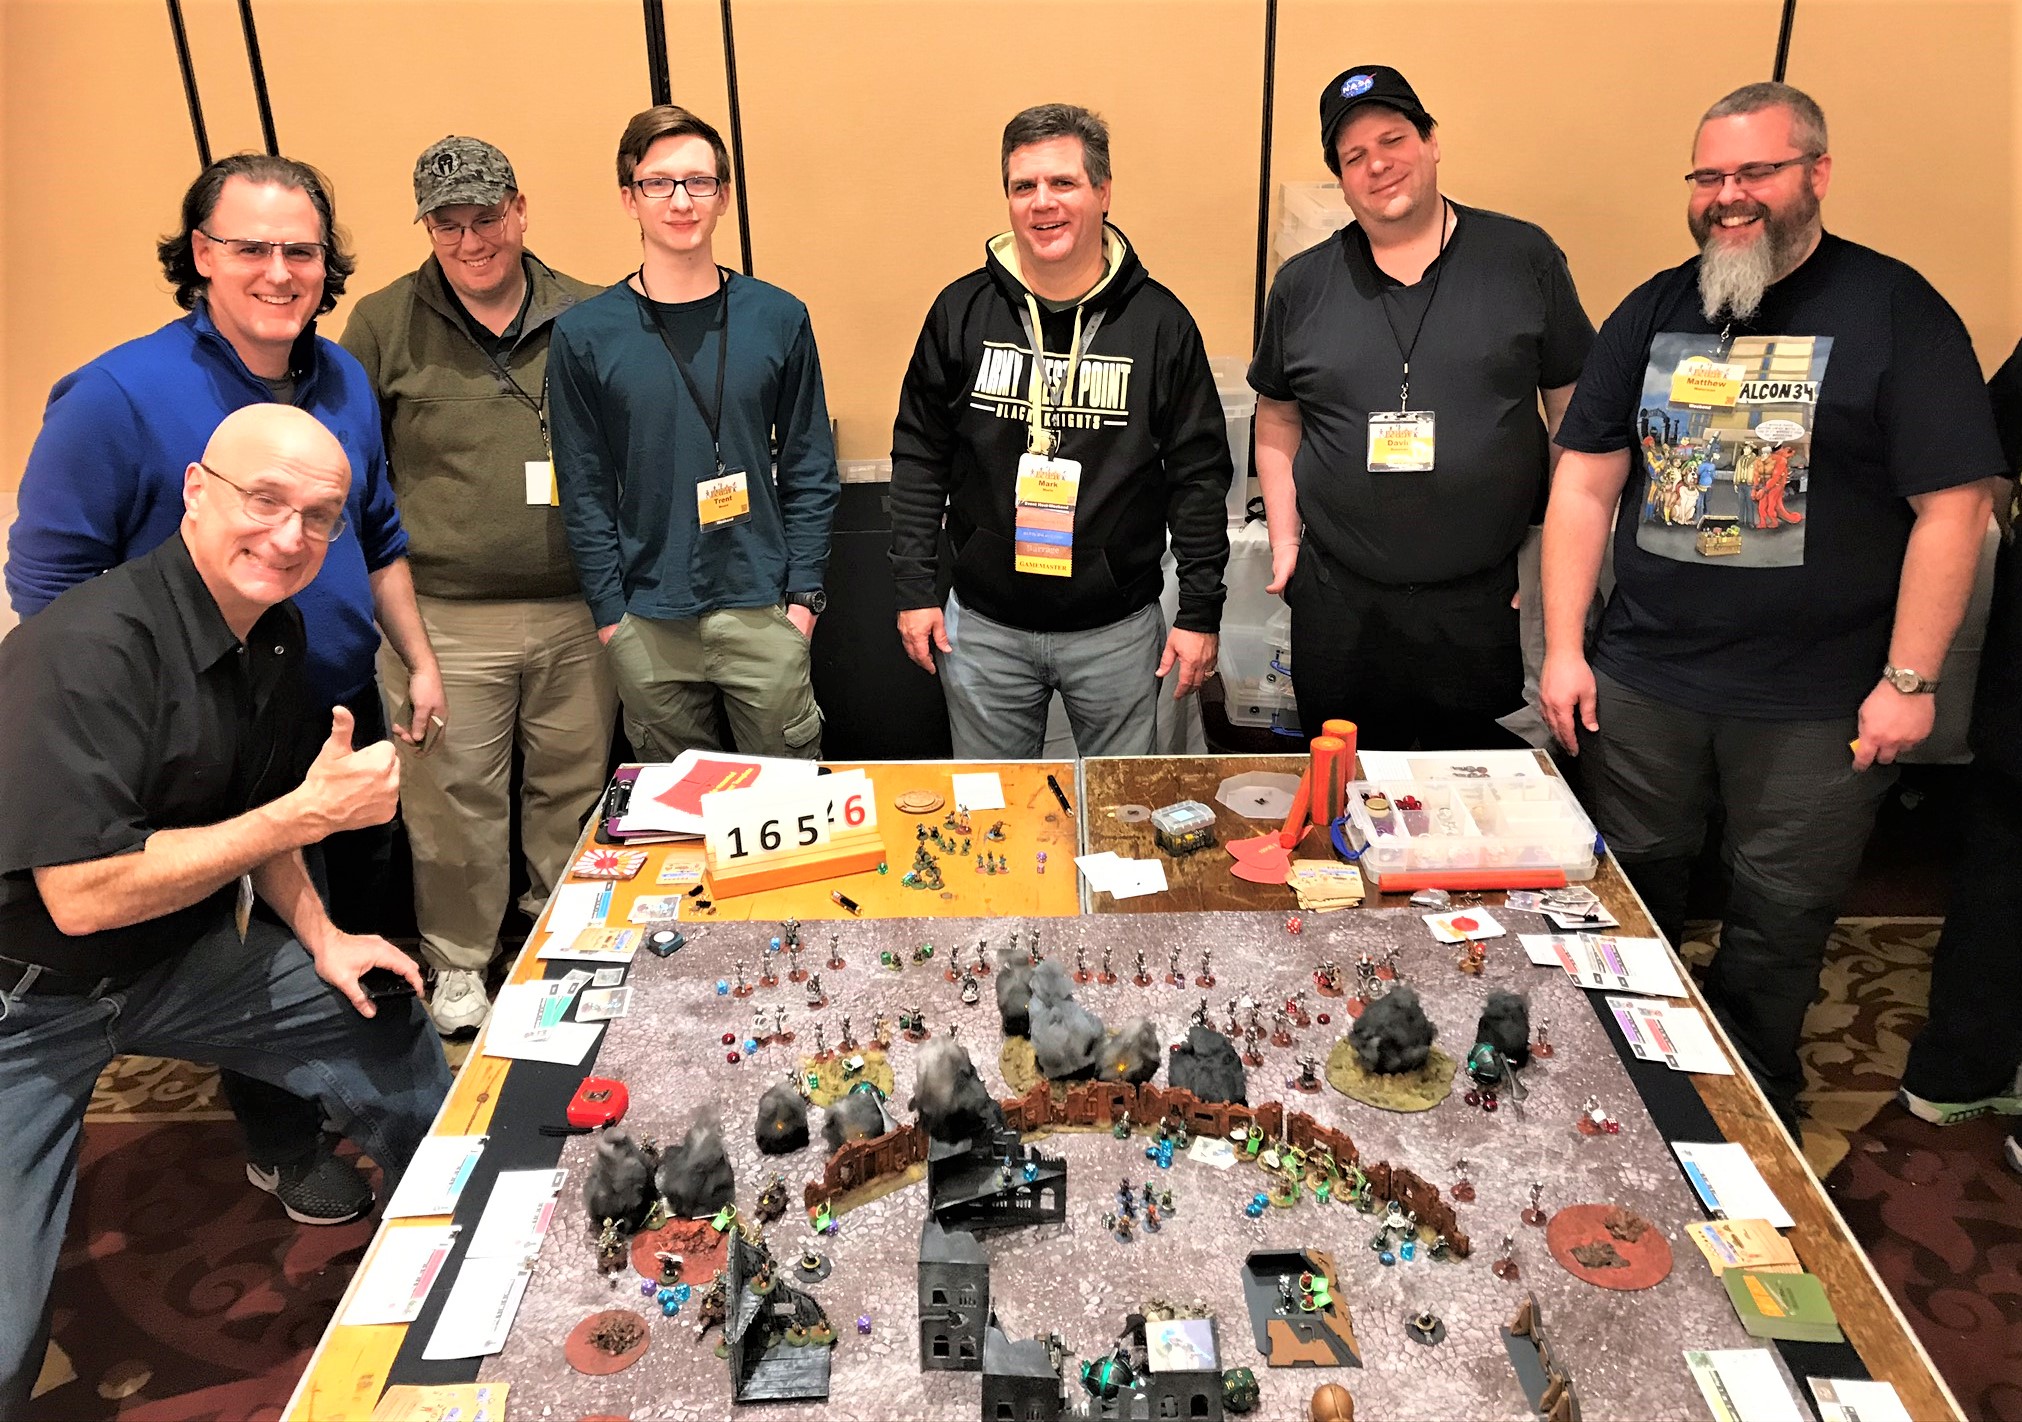
I had promised you great readers a few battle reports from TotalCon 34. It was a very large convention with around 600 attendees. Miniature games were a smaller offering there compared to RPG, LARP, board games – and a number of other offerings with which I was unfamiliar!
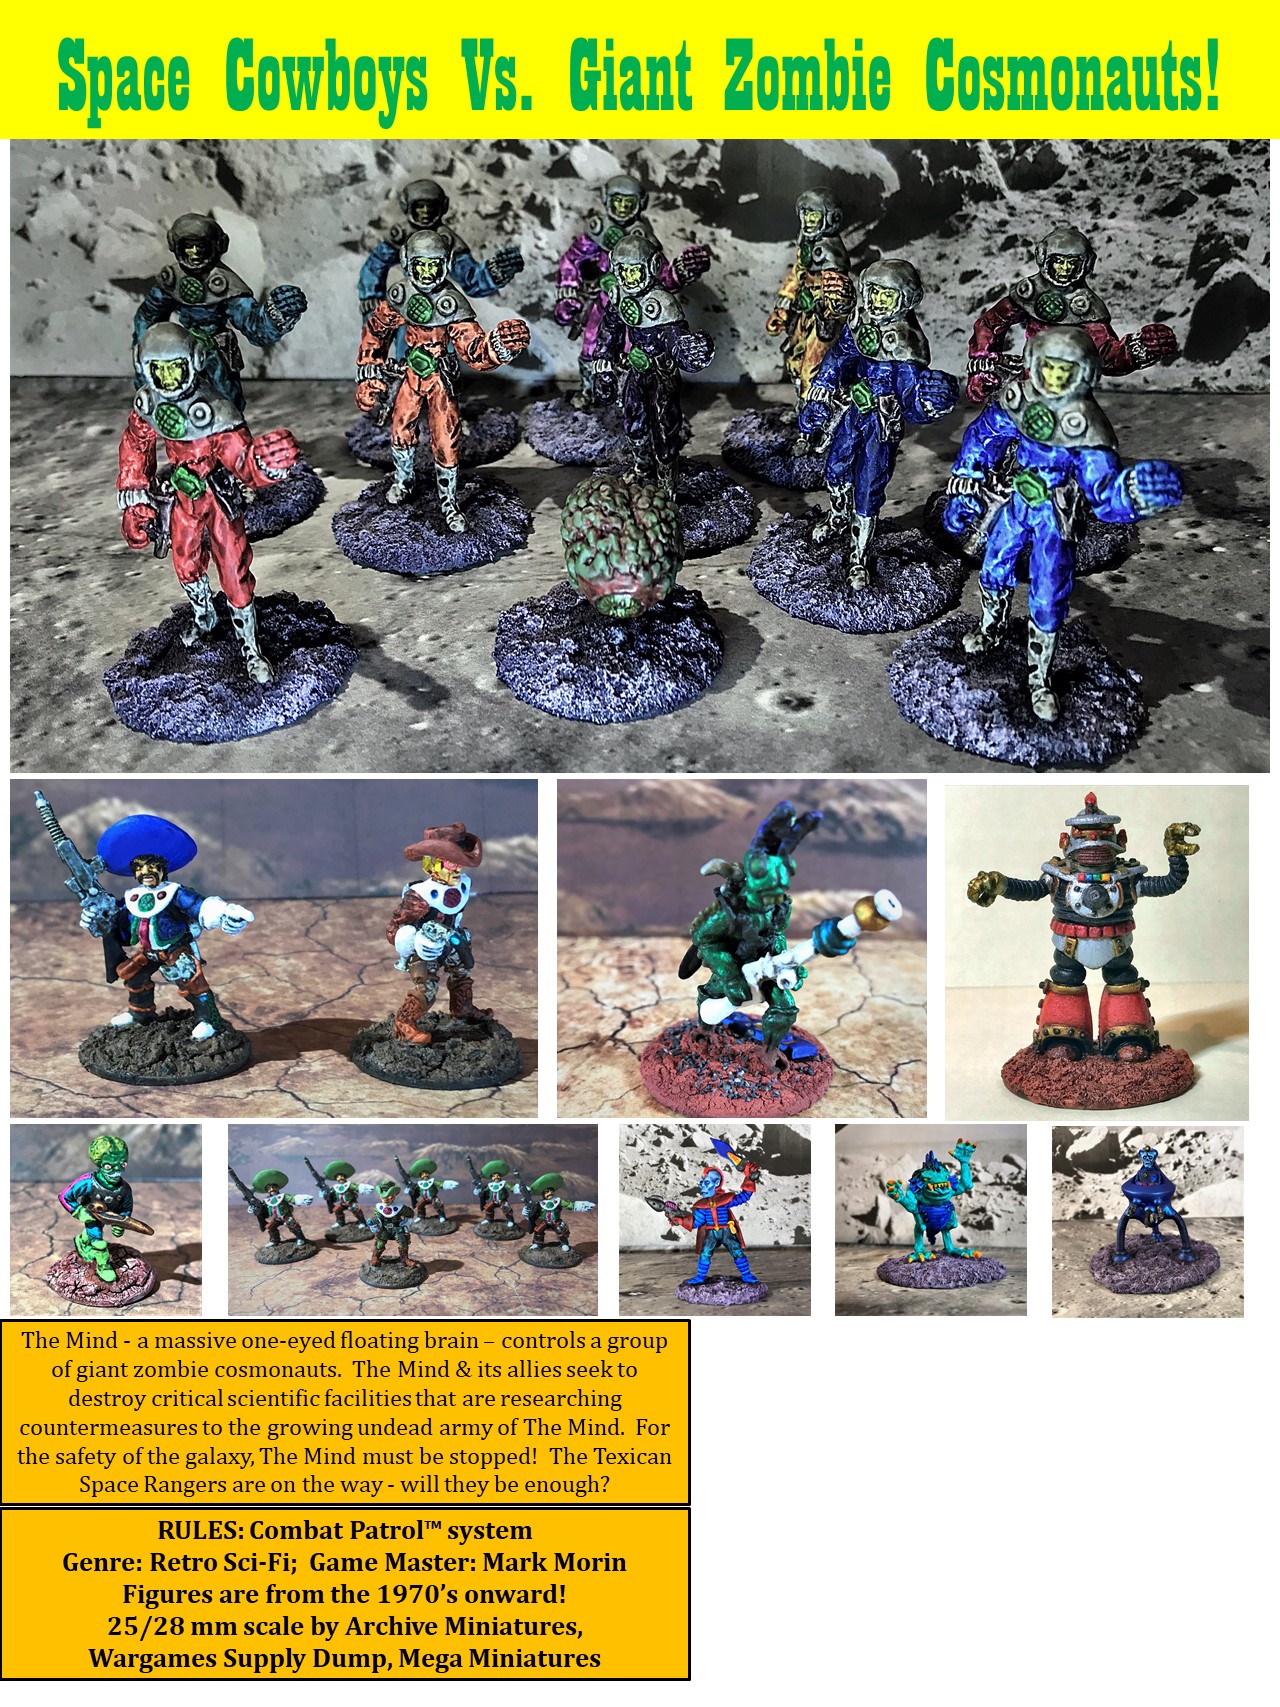
Running four different games in two days was a challenge (my vehicle was full of mats, terrain, and miniatures) but I pulled it off well enough I believe. I’ll share some photos and some descriptions of the action. I think the players had a good time. This post will be pretty photo-heavy.
The first game I ran was on Friday was “Space Cowboys versus Giant Zombie Cosmonauts“. I had four players (though I could have accommodated 9). It turned out that I had two seasoned gamers on the defending Space Cowboys side and two younger players on the attacking Giant Zombie Cosmonaut/Martian/Retrovian side.
My flyer for this game – the space on the right is for business cards to share information about my gaming club – the Mass Pikemen Gaming Club.
View from the defenders’ side. They must save the chemical plant from destruction or kill The Mind.
View from the attackers’ side. They must destroy the chemical plant in 10 turns or less.
The game set up at TotalCon 34.
Retrovians prepare to attack.
Close up of the chemical plant before the defenders deployed. I allow the defenders to deploy by any barrier or the chemical plant.
The attackers ponder their next move. The defenders moved and took up good defensive positions in and overlooking the wadi.
On the attackers’ left flank, Retrovian fire begins to take its toll on the defending Space Cowboys (aka Texican Space Rangers).
On the other side of the table, Martian infantry attempt to charge across the wadi. Effective rifle fire decimates the Martians in the open. The stack of cards on the right indicates a pile of Martian KIA that ran into a hail of cowboy lead.
The Mind and its Giant Zombie Cosmonauts get close to the wadi, while Retrovians provide supporting fire.
The Retrovian fire is too much for one squad of Space Cowboys, which fails a morale check and skedaddles for cover.
Carnage ensues. A Robo-Servo gun is destroyed (black smoke), while another gun destroys a Retrovian three-legged assault pod. The fleeing Space Cowboy squad from the previous shot is in the upper left. The Mind is breaking through in the top center, but many of its zombies have taken hits to legs and are falling away from the advance.
As the protecting zombies fall away, the platoon sergeant, Armando Garcia, jet packs next to The Mind in a desperate attack. The Mind had a 60% chance to react to the move and preemptively fry the Space Cowboy, but failed in the attempt. SFC Garcia fired his assault rifle and killed The Mind, ending the game.
The game was a blast. The defenders took up good positions but the attackers’ pressure was building to a decisive point. Unfortunately, The Mind became vulnerable and the defenders’ gambit worked this time. The players quickly got used to the Combat Patrol™ system.
The next game was later that night, when I ran “Attack of the Warbots”. I have run this game several times, and it always is a crowd pleaser.
My flyer for the game.
I had about 8 players for the game. The attacking Warbots made good progress initially in breaching the wall. However, the defenders jet-packed their bazooka-armed Star Ducks onto unprotected rooftops – and got pretty shot up.
The Biological Alliance is in an “Alamo” type of a defense, with a massive force of Warbots attacking from this side, and an allied Martian force (yup they showed up in this game too) from the opposite side.
The Warbot on the far right uses a plasma beam breacher (basically a long disintegrator ray) to piece the defenders rusty wall. This kicks up a lot of smoke from the vaporized material. The Warbot that did this uses a lot of energy in the effort and is stunned for three turns while recharging (hence the multiple “stun” placards).
More Warbot destruction ensues as they fire another plasma beam breacher through the Aphid position in the center.
Frinx cavalry (on glyptodons) armed with anti-robot arc weapons and blasters charge! They manage to stop a Mark 1 Sphere tank with a non-penetrating hit that stuns it at the walls edge.
On the left Warbot flank, a defending Space Roo player checks to see if his RPG-armed Space Roo can engage the other Warbot Mark 1 Sphere tank. It could, and at extreme range knocked out the other Warbot tank.
The end of the game found the captured Warbot tank repaired and capable of driving off of the board. Therefore, a Biological Alliance victory!
Happy gamers (and me) after the game are all smiles!
This scenario is as described on the flyer above, but to be clear, the Germans are in hidden positions across the board known only to them and the GM (me). Additionally, the exact force composition selections on both sides are done secretly, as each side buys vehicles and Bonus Attack cards with points. Each side starts with 200 points.
Points are earned by the Allies (US and UK) for successfully reconnoitering hidden positions (which could have either possible or actual Germans there), for knocking out Germans, and for crossing the board and breaking out. Germans earn points for unreconnoitered positions, knocking out Allied vehicles, and can get a game bonus for limiting Allied crossings to zero or no more than 1 vehicle. The Germans vehicles are more expensive, so their defensive benefits need to be offset by successful ambushes and an overall defense against any Allied breakout. I announce only who is winning at the beginning of each turn, but not the exact score – so as to keep the game feeling crew-focused.
I had between 4 and 6 players (some joined mid-game). The Germans went initially with two 8-wheeled scout cars (an Sd.Kfz. 231 and an Sd.Kfz. 233, a Panther D, and a Tiger I, all of which deployed secretly. They loaded up on Bonus Attack cards as well.
The US deployed on the left half of the board, and the UK/commonwealth on the right half. The US chose an M5 Stuart light tank (with recon abilities) and an M10 Wolverine tank destroyer to start, while the Brits took a Daimler Dingo scout car and an M4 Sherman. The Allies also maxed out their Bonus Attack cards possibilities.
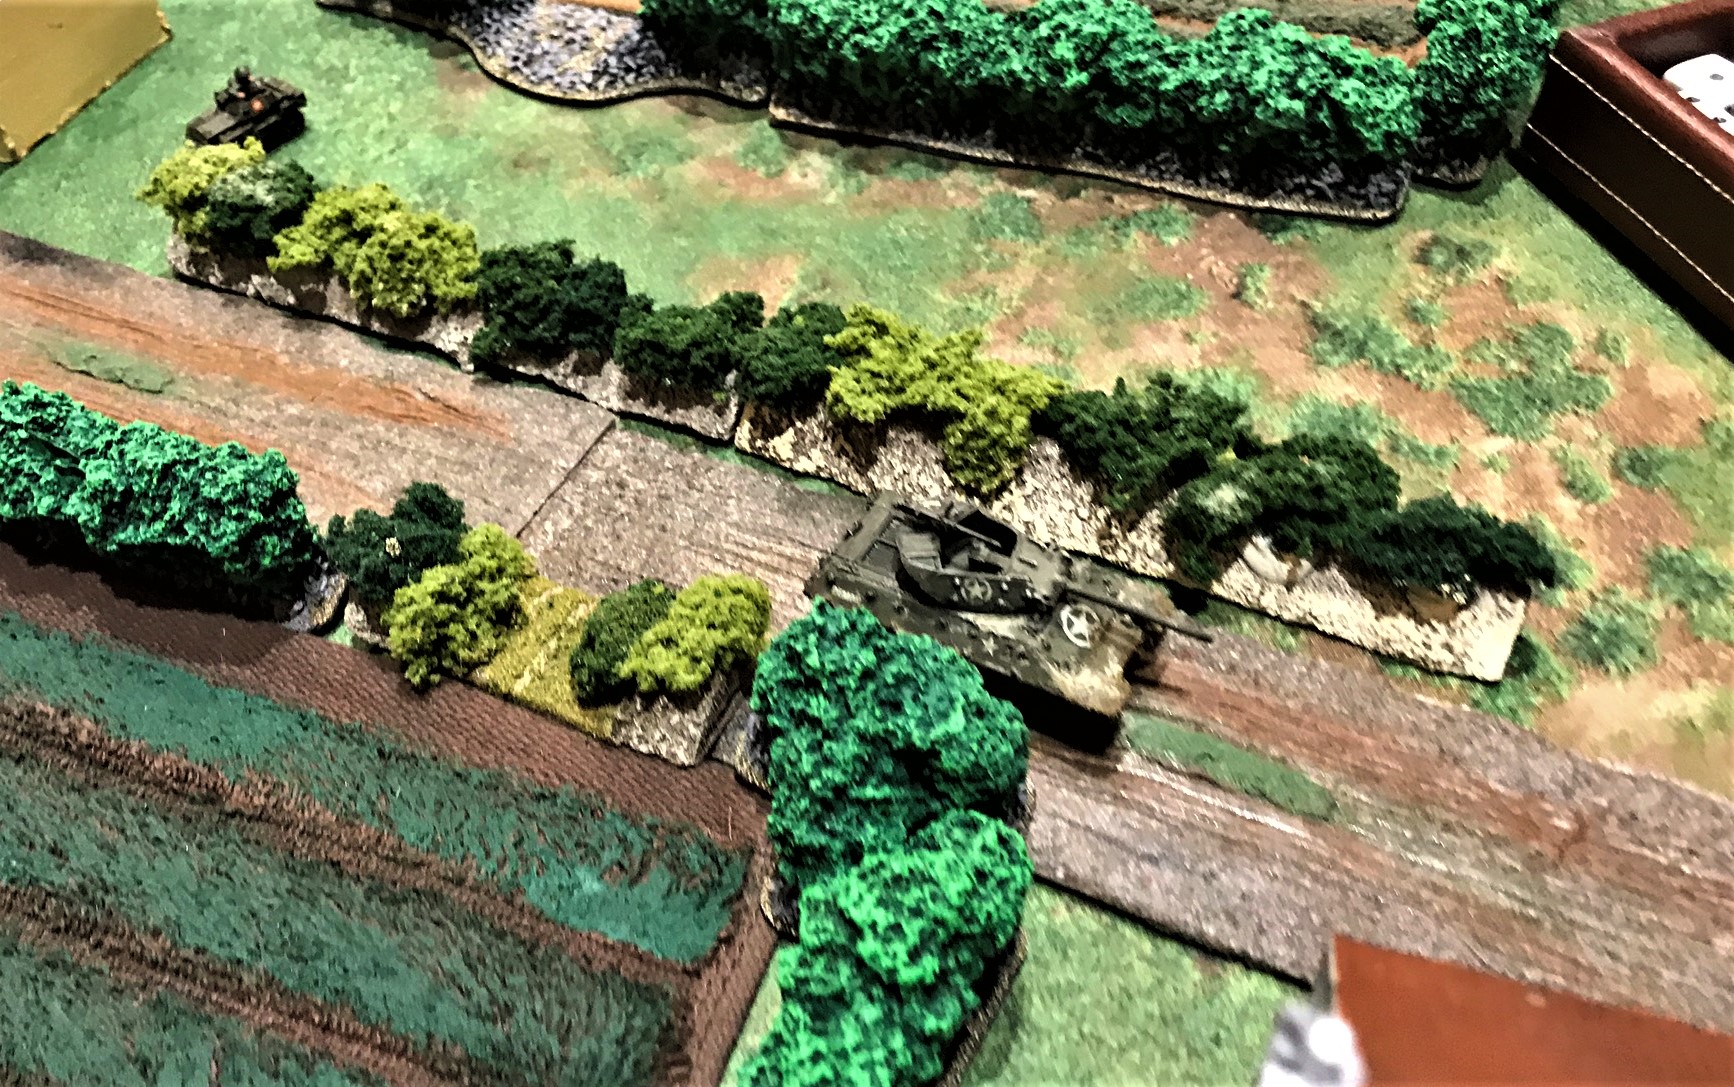
The Americans move up their M10 Wolverine “Demon”, while behind a British Daimler Dingo recons a field.
On turn 1, the Allies spent 71 points on vehicles and cards. They successfully reconned 5 positions at 2 points each for 10 points, leaving them with 139 points at the end of the turn. The Germans spent 88 points on vehicles and cards. The German Tiger I ambushed and knocked out the British M4 Sherman for 14 points. At the end of turn 1, it was close – 139 to 126 in favor of the Allies.
On turn 2, the Allies respawned another British M4 Sherman for the destroyed one, and bought 1 more Bonus Attack card. This new vehicle was at no cost as the replacement cost as much as the previous loss (the Germans did get more points for killing that previous Sherman on turn 1). The M10 Wolverine rolled a great movement, and was able to breakout successfully, gaining the Allies 16 points and taking away half of any potential German end-of-game bonus for preventing Allied vehicle crossings. On turn 1, the US M5 Stuart had been able to move into a field and successfully recon a position where an Sd.Kfz. 231 was hiding. On turn 2, the Stuart activated first, and destroyed the German scout car, gaining 11 more points for the kill. The Germans for their part bought two more Bonus Attack cards for 10 points. Overall, the Germans had a weak turn, and only recovered 2 points by activating their Sd.Kfz. 233 before the US could find it. The successful M10 “Demon” crossing widened the score at the end of turn 2 to 161-118 in favor of the Allies.
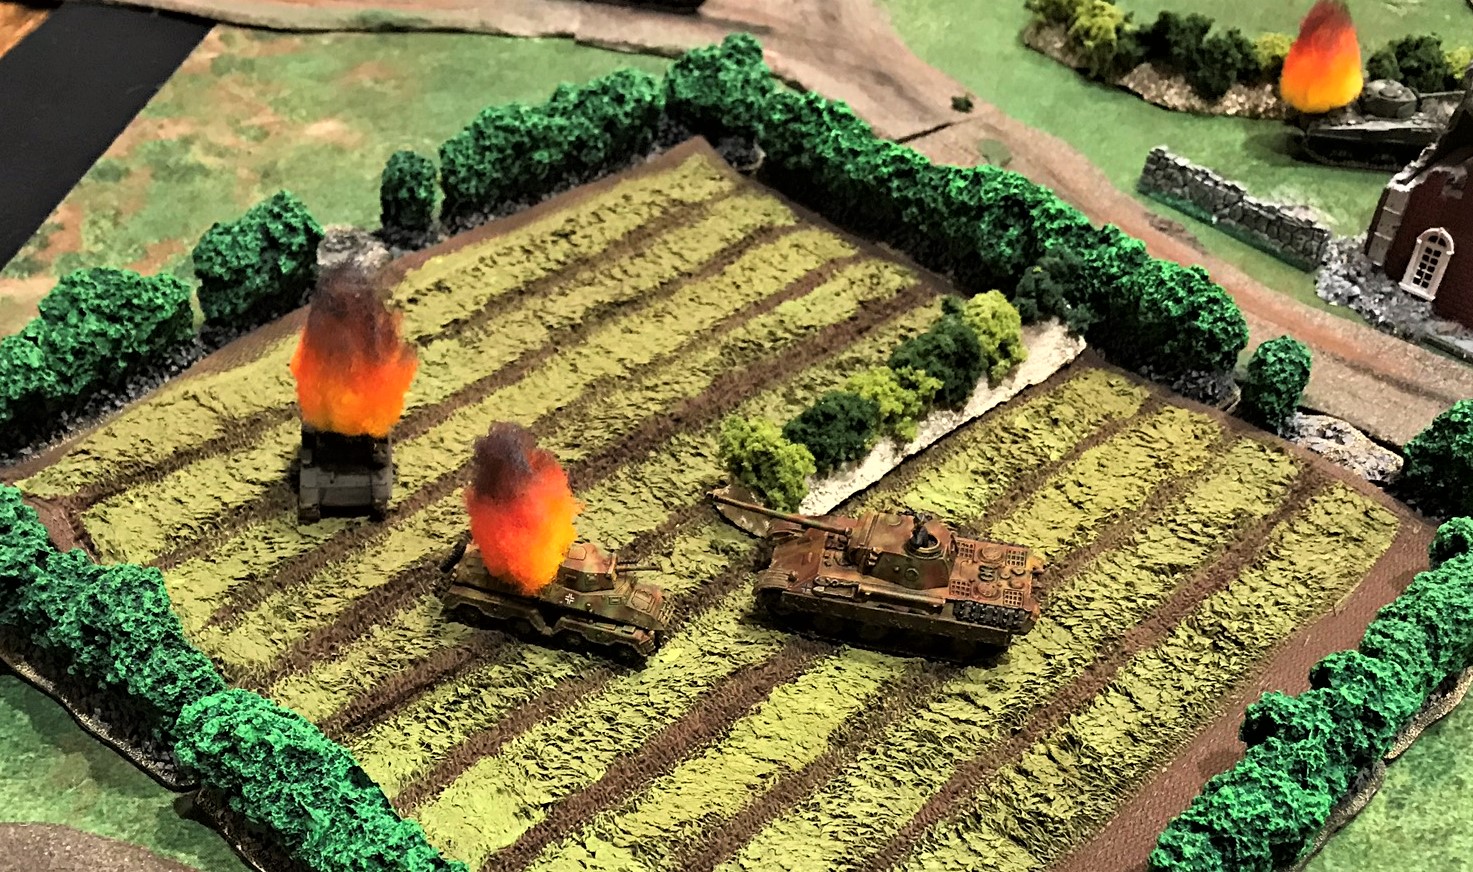
At the end of turn 1, the M5 Stuart chased down a German Sd.Kfz. 231 in a field. The M5 activated first in turn 2, and destroyed the German scout car.
On turn 3, the Germans knew that they were losing, but not by how much. They made a bold move and chose an expensive new tank for a respawn of their lost Sd.Kfz. 231 – a Tiger II. The net cost was 18 points after “credit” for the “trade-in” in lieu of a free respawn of another Sd.Kfz. 231. Adding another Bonus Attack card brought the German spend for turn 3 to 23 points. The US player got a free respawning replacement M10 for the one that crossed on turn 2, so the Allies spent no points at all on turn 3. They did earn 6 points for reconning German positions. The Germans got a bit of revenge as a Panther activated and took out the M5 that killed the Stuart for 12 points, and the Tiger I moved to a crossroads and took out a second British Sherman for 14 points. The score at the end of turn 3 was 167-123 in favor of the Allies.
Turn 3 action – the destroyed the German scout car is the left. The Tiger I has moved to an excellent position at the crossroads and has knocked out the second Brit Sherman. The Panther (not seen ) was hiding at position “F”, and activated.
The M5 Stuart was no match for the activated Panther.
On turn 4, the Allies decided to get three more vehicles. Two were respawning ones for turn 3 losses – the US got a “free” M5 to replace the one killed in turn 3, and the Brits “upgraded” its second lost M4 Sherman to an M10 Achilles tank destroyer “Tabitha”. They also bought another M4 Sherman for a new very young player that joined the game, and a couple of Bonus Attack cards. The Allied spend was 24 points. The Germans only bought 1 card, for 5 points.
During turn 4, the Daimler Dingo had a fun time. It successfully reconned the hidden position of the Tiger II! Then, scared for its survival, it and its crew sped off down the road to cross the other side – gaining 7 points for crossing and thereby nullifying any potential German end-of-game bonus.
The Brit side then flanked the Tiger I at the crossroads with the M10 Achilles “Tabitha”. It took a quick flank shot on the German, and did some damage. It then called in the RAF (with a Bonus Attack card) which destroyed the Tiger I for a big 25 points. The Allies successes widened the score at the end of turn 3 to 177-118 in their favor.
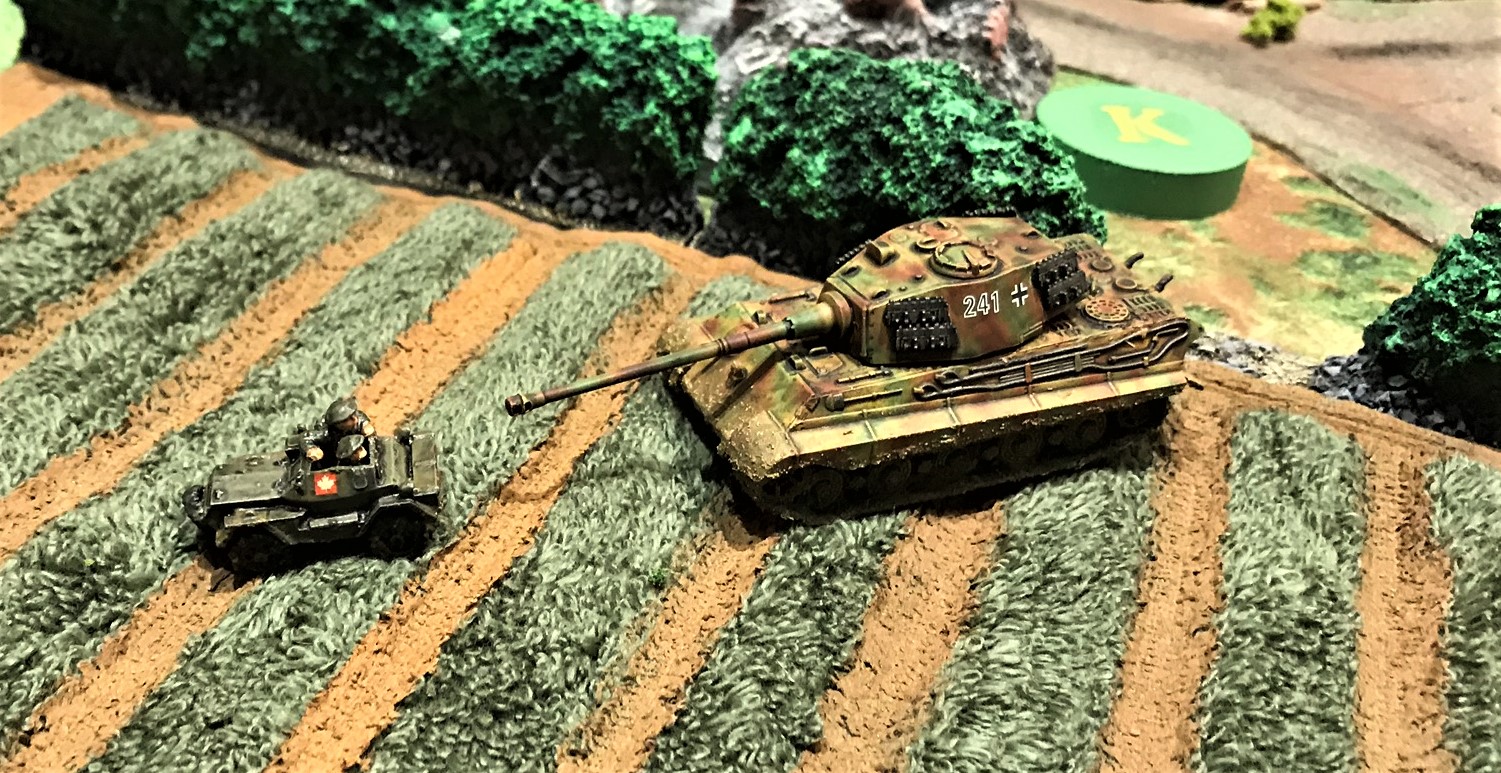
Surprise! Daimler Dingo finds a Tiger II and takes off before it can be destroyed.
A young player takes command of a Sherman for the US.
The Tiger I is destroyed in the crossroads by the RAF.
Turn 5 would be the last turn of the game. The Allies respawned another Daimler Dingo for the one that crossed in turn 4, and bought a couple more Bonus attack cards, spending only 10 points. The Germans were despondent, and decided to buy a Jagdpanther and a Bonus Attack card for 29 points.
The M10 Achilles “Tabitha” fresh off the combined arms kill of the Tiger I maneuvered for a rear shot on the Panther – and killed it for 22 points. The Germans tried to hunt down a fleeing M5 Stuart. It lined up a deadly point-blank rear shot on the Stuart – only to miss the shot. It was emblematic of the German sides day. After another position was reconned, the day belonged to the Allies. The final score was a lopsided 191-89 in favor of the Allies.
This was the biggest disparity in this game ever (and I have run it many times). In my opinion, the Germans did not keep their eyes on the objectives. They also did not effectively take advantage of their ambush positions, and left too many openings for the Allies, who maneuvered their lesser vehicles much better than their foes. With that said, all had a fun game.
Turn 5 – the M5 Stuart is missed by the Jadgpanther.
With some help from players, the tabletop was cleaned and it was time to take a break. I could have played a game but I decided to spend the next game slot relaxing as I felt a but tired.
I had originally 10 players signed up for this game, with 2 on a waiting list. I was disappointed that I only had 5 players show up – but it was fine. I had two German players and three French players.
Each side had 200 points at the start. Here again, the exact force composition selections on both sides are done secretly, as each side buys vehicles and Bonus Attack cards with points. Points here are earned by the Germans for successfully reconnoitering hidden positions (which could have either possible or actual French located there), for knocking out French vehicles, and for crossing the board and breaking out. The French earn points for unreconnoitered positions, knocking out German vehicles, and can get a point bonus for limiting German crossings to zero or no more than 1 vehicle. Similar to the Normandy Breakout! game, I announce only who is winning at the beginning of each turn, but not the exact score. This definitely keeps the game feeling crew-focused.
There are a couple more key additional nuances to this scenario. There are two bridges, and the French player can spend points to wire one, both or neither bridge for demolition. Any French attempts at demolition may be tried at any time, but are not guaranteed. They also get a “free” small minefield (that is not very effective) that is also secretly set at the beginning of the game. The French decided to wire the bridge on their right flank for demolition prior to the game, leaving the one on their left with the small minefield next to it. During the game (which I will discuss), the French did blow the bridge on the right, and were able to fool the Germans into believing that the other was wired as well. This rendered the minefield a non-factor in the game, but made the Germans attempt to ford the river.
The Germans decided to buy 2 6-wheeled Sd.Kfz. 231’s and a Panzer 38(t) on turn 1. They also maxed out on Bonus Attack cards for a total of 50 points spent. The French deployed in hidden positions (half the tabletop is designated as under the control of French cavalry tanks, and the other half (mainly the town area) is under the control of French infantry tanks. The French bought a Panhard 178 armored car, a Char B1 bis, and a SOMUA S35. Their initial purchases all had radios (some French tanks do not), so they were able to max out their Bonus Attack cards. The total initial French spend was 71 points, including the wiring of the right flank bridge.
During turn 1, the Germans drove one of their scout cars onto the right flank bridge, and the French successfully destroyed the bridge with the German on it, gaining 11 points. This also spooked the Germans to avoid the bridge as they feared it was also wired (and it was not!). After this the Germans were forced to use fords to attempt crossing the river. The Germans did successfully recon one possible hidden position for 2 points. The score at the end of turn 1 was 152-140 in favor of the Germans.
On turn 2, the Germans respawned a Panzer IVD for the lost Sd.Kfz. 231 at no net point cost. They also reconned a couple of French potential positions for 4 more points. The French bought an additional SOMUA S35 for the cavalry for 10 points, and uncovered three of their own positions in order to meet a table-crossing threat from the surviving Sd.Kfz. 231 and a Panzer 38(t). This gained them 6 points. The Panzer 38(t) is a fast light tank, and was able to ford the river, along with the other scout car. The French recognized this threat, and attempted to deal with it by activating its vehicles in the town. The Germans used a Bonus Attack card to bring down smoke and obscure their movements. The score at the end of turn 2 was 156-136 in favor of the Germans.
The Panzer 38(t) on the left and the Sd.Kfz. 231 (6-rad) on the right successfully ford the river, fearing that the bridge was wired for demolition (it wasn’t). They get ready to dash off the table into the vulnerable French rear.
The Germans get some excellent movement rolls.
The French react and send tanks such as their Char B1 bis to stop the penetration by the Germans.
The Germans foil the Char B1 with a smoke screen.
On turn 3, the French hurriedly bought a Renault R40 for 8 points and tried to use it to stop the crossings. The French also bought more Bonus Attack cards for 15 points. The Germans bought nothing. During the turn, the Germans successfully crossed the Panzer 38(t). This despite the fact that at first the Char B1 crossed the smoke and missed it, and then the R40 shot at and missed it. This crossing earned the Germans 8 points, and limited the French end-of-game bonus chances.
On the cavalry side of the table, the Germans tried another smoke screen to protect a Panzer IVD as it crossed a ford. one of the smoke rounds hit the river mud and did not ignite – leaving a hole in the smoke screen. The French cavalry S35 did manage to shoot and damage the Panzer IVD on the other side, just after it forded the river. This pushed it back into the river. The French SOMUA then called in and then destroyed it with an artillery barrage using a Bonus Attack card, earning 8 points as well (and blocking that ford). The Germans also reconned another of the hidden positions for 2 points. However, the Sd.Kfz. 231 made it to within 1″ of the other side of the table – and the R40 had a rear shot aimed at it at turn’s end. The score at the end of turn 3 was 166-124 in favor of the Germans.
The Char B1 crosses the smoke and takes aim at the Panzer 38(t) – and misses. An R40 activated and missed the Panzer 38(t) as well. The Panzer 38(t) then rolled well and was able to cross the table. The German Sd.Kfz. 231 almost made it off of the table and was in the R40’s sights as turn 3 ended.
The German smoke screen imperfectly covers the Panzer IVD after it fords the river…
The Panzer IVD is pushed back into the ford and destroyed by artillery and SOMUA fire. This blocks the ford (to the consternation of the following Panzer 38(t)!).
On turn 4, the Germans respawned the crossing Panzer 38(t) and the destroyed Panzer IVD for identical models, and added a Bonus Attack card for a total spend of only 5 points. The French bought 3 Bonus Attack cards in the hope of stopping the German scout car from crossing. The R40 activated first, and then missed the Sd.Kfz. 231. The German scout then crossed, ending any chance of a game bonus for the French and earning 11 points for the Germans. The score at the end of turn 4 was 172-109 in favor of the Germans.
I failed to get any more photos after turn 4 (I think I was getting tired!)
On turns 5 and 6, the French were getting desperate as they knew they had lost the game bonus. They bought an Hotchkiss H35, and a SOMUA S35 took out another Panzer IVD. The Germans bought a StuG III ausf. A. Both bought more Bonus Attack cards. The Luftwaffe was called in on the Char B1 bis and successfully destroyed it. That loss ended the game. The score at the end of the game was 159-89 in favor of the Germans.
Both sides played well, bu I have to say the dice abandoned the French at critical times. The Germans crossings sealed the fate of the game. It’s nice to see that both games results have differed each time and that no side has an advantage.
After this, I packed up with help (especially from Leif Magnuson – who was a BIG HELP THANK YOU!), and went home to sleep.
I hope you enjoyed these battle reports. Now that the COVID-19 is endangering lives, we’ll have to see if and when I get to run these games again soon. Let’s all hope for the best, and prepare accordingly.
Wishing all of you and your families safety and health!
Back in March of 2017, I learned that the UK-based War Games Supply Dump Miniatures was closing after thirteen years of business. My problem at that time was that I had wanted to get more of their fun-looking retro-sci-fi figures. I had already very much enjoyed painting the Khang Robots I got from WSD for my Warbot platoon that serve as squad leaders in that unit. I had also seen many of WSD’s Dirk Garrison sci-fi line figures on Buck Surdu’s blog. I needed to get some while it was still possible to add to my forces for Combat Patrol™ retro-sci-fi games.
As time was limited (as was Roger’s remaining inventory) I placed a sizable order with Roger for several groups of 28mm scale figures that would be suitable for building platoons – including Khanopians, Valkyrie Space Pirates, and miscellaneous items such as Space Munchkins and my Robo-servo Guns that I posted about here previously. After finishing my Macron unit, I decided that it was time to get some of these languishing WSD projects painted, starting with the Retrovians.
By the way, many of you who follow this blog may recognize Roger as the author of the blog “Rantings from Under the Wargames Table” – a fun blog that unfortunately Roger ended in April of this year (you are indeed missed Roger!).
I was not able to order all of the Retrovian models, but a decent assortment of ones of different poses. I got the following 34 from Roger to build a Retrovian platoon:
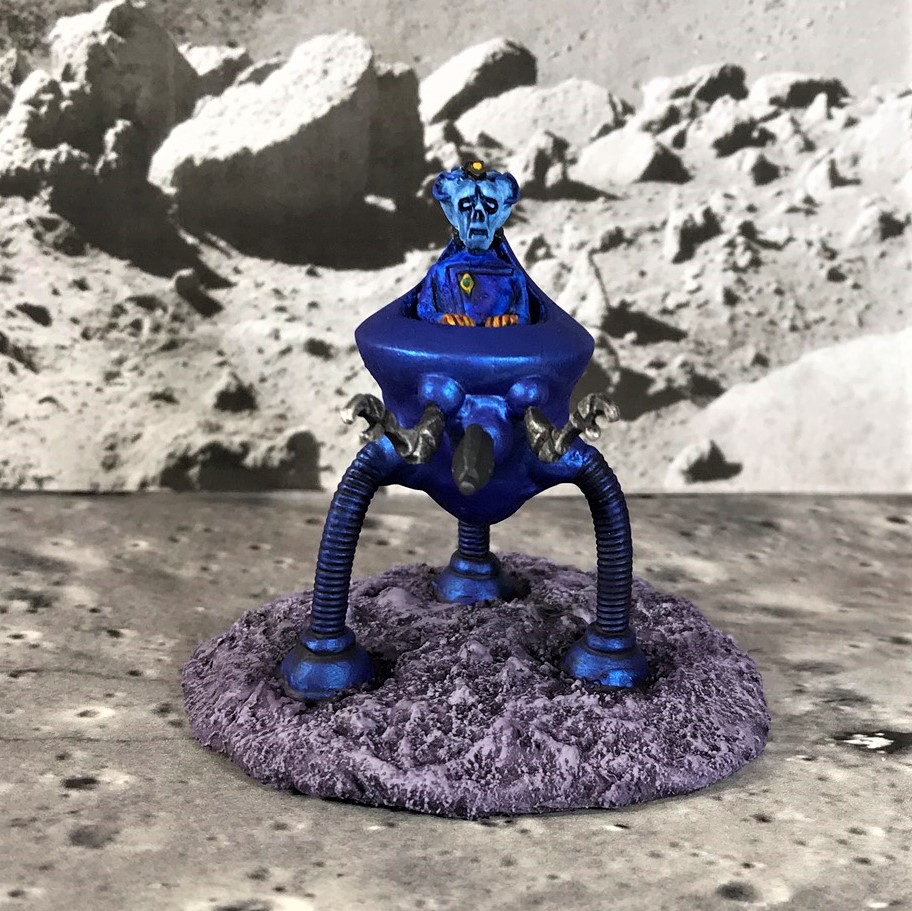
3 DG-07 “The Bra’sheer” figures/three-legged vehicles
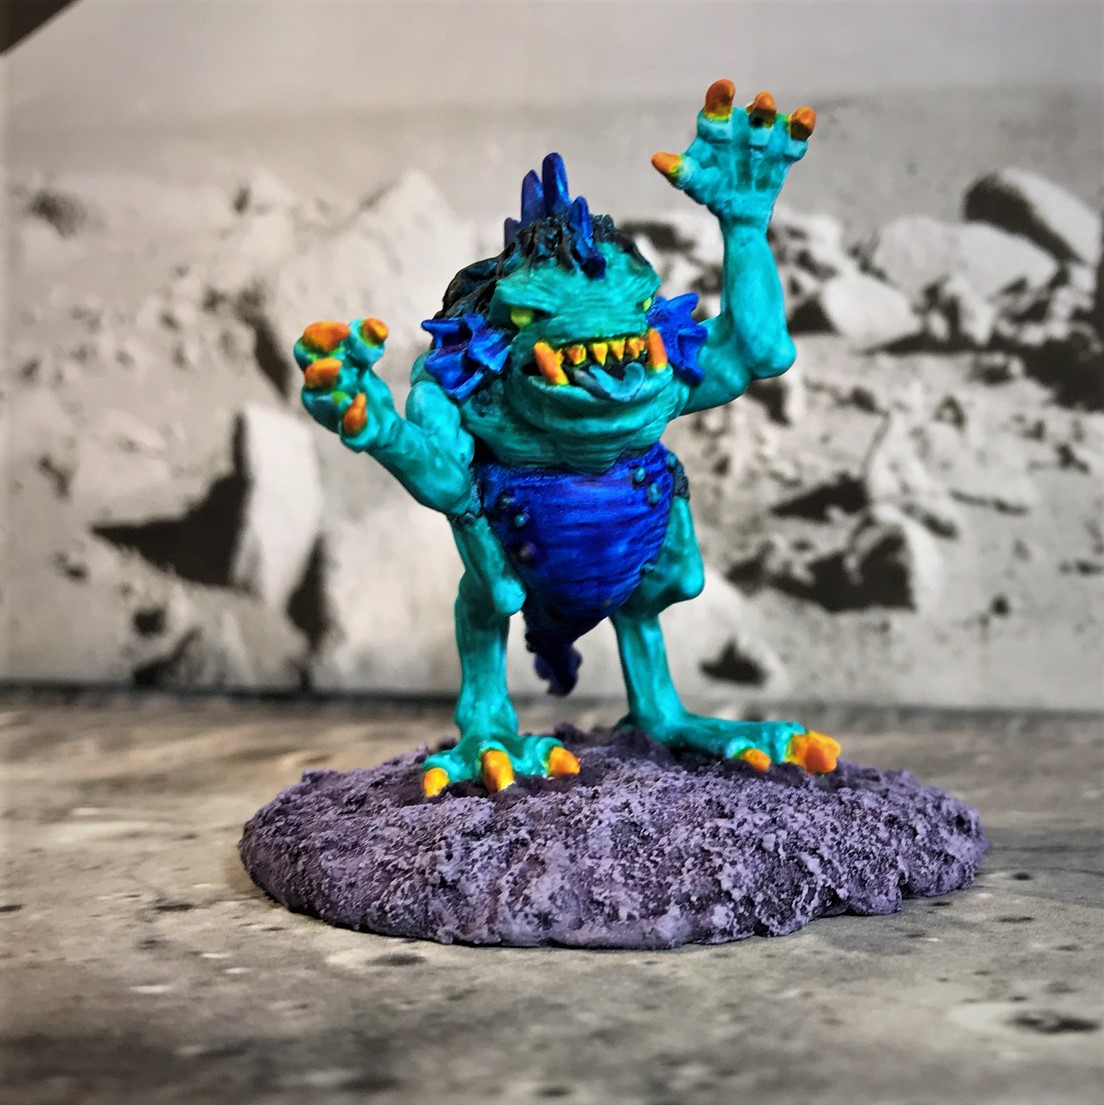
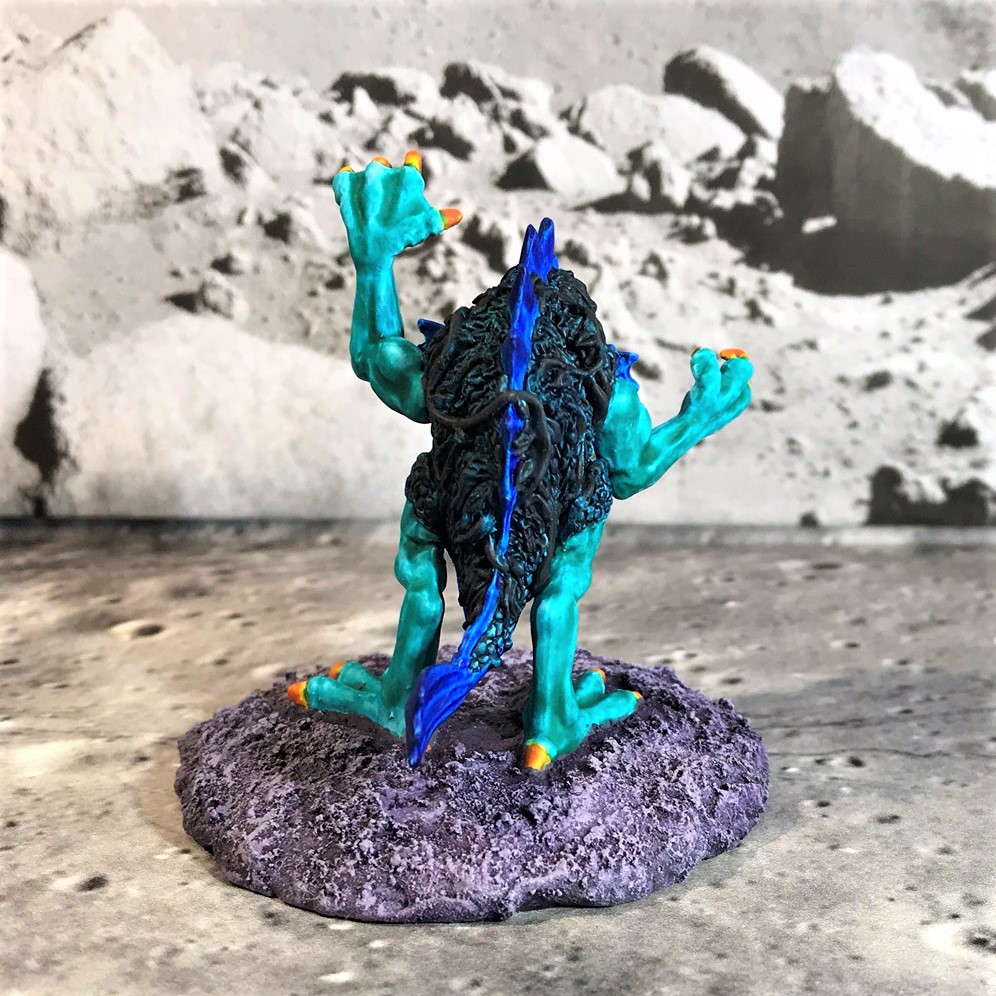
1 DG-11 “Garkkon” figure (Retrovian Monster)
2 DG-50 “Retrovian Captain w. Sword & Pistol” figures
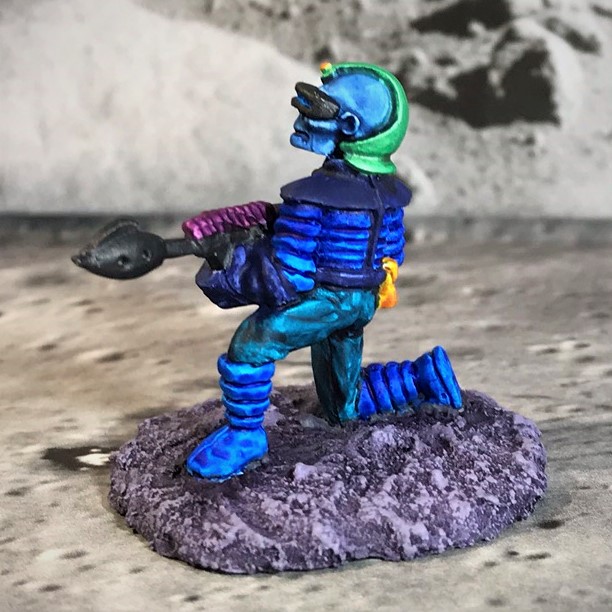
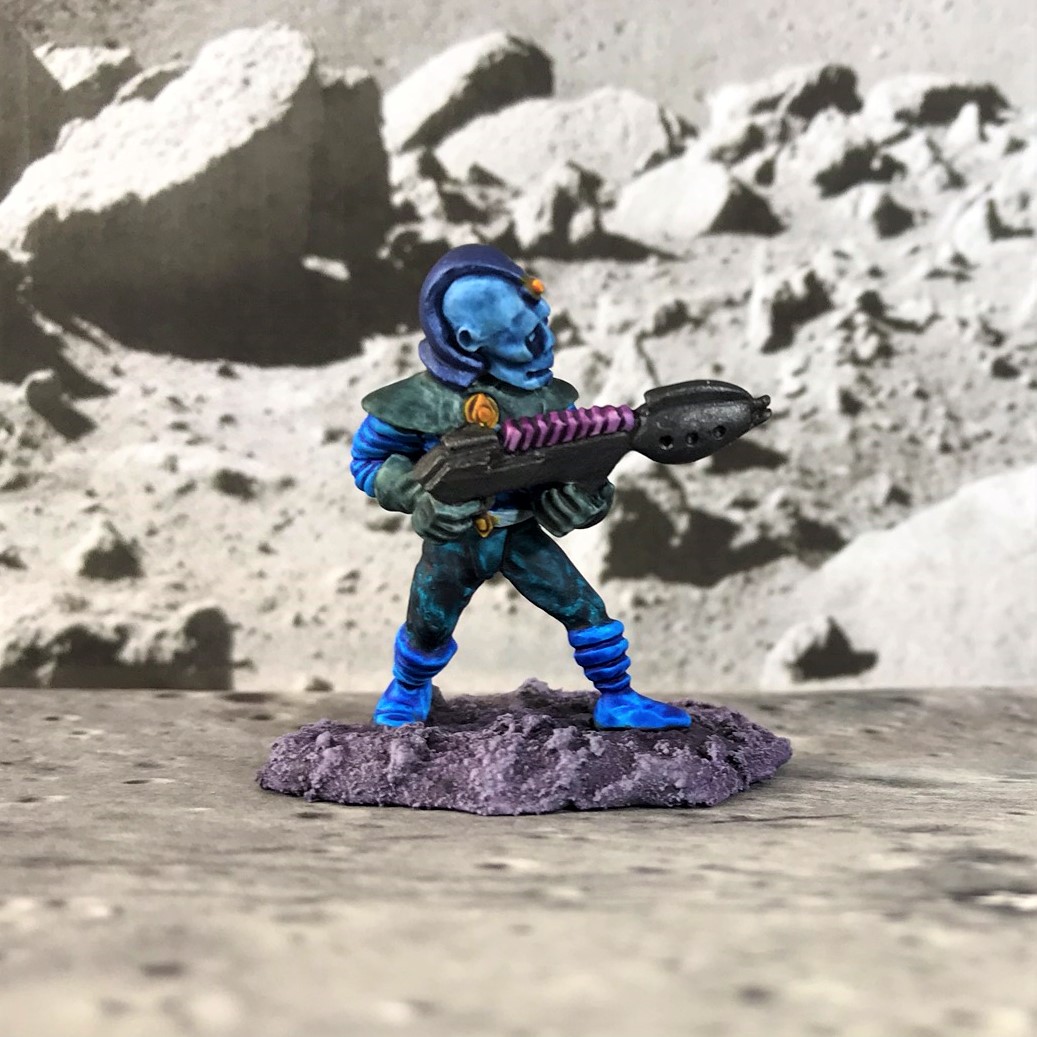
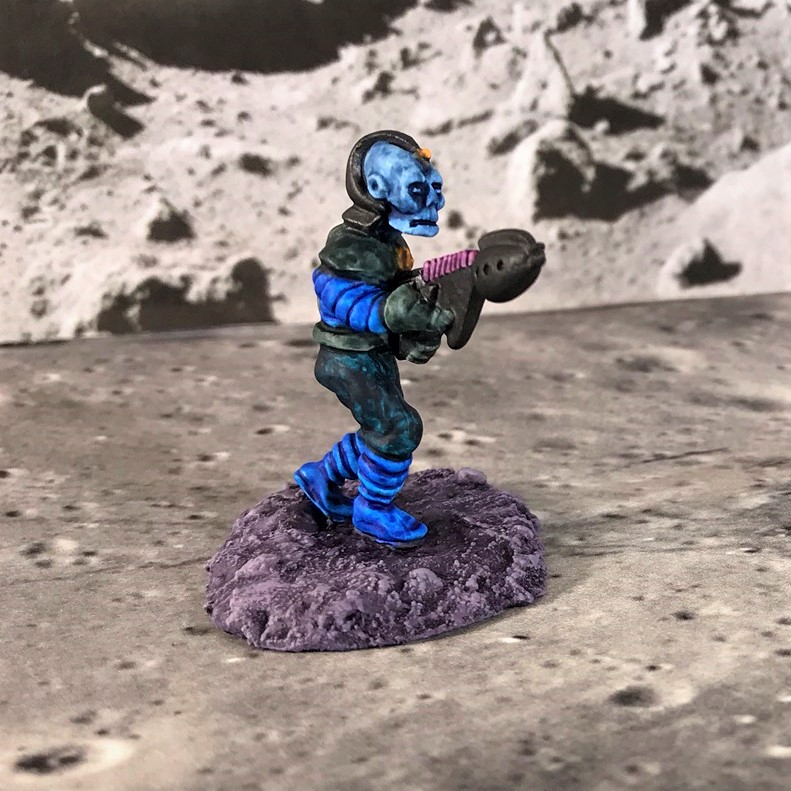
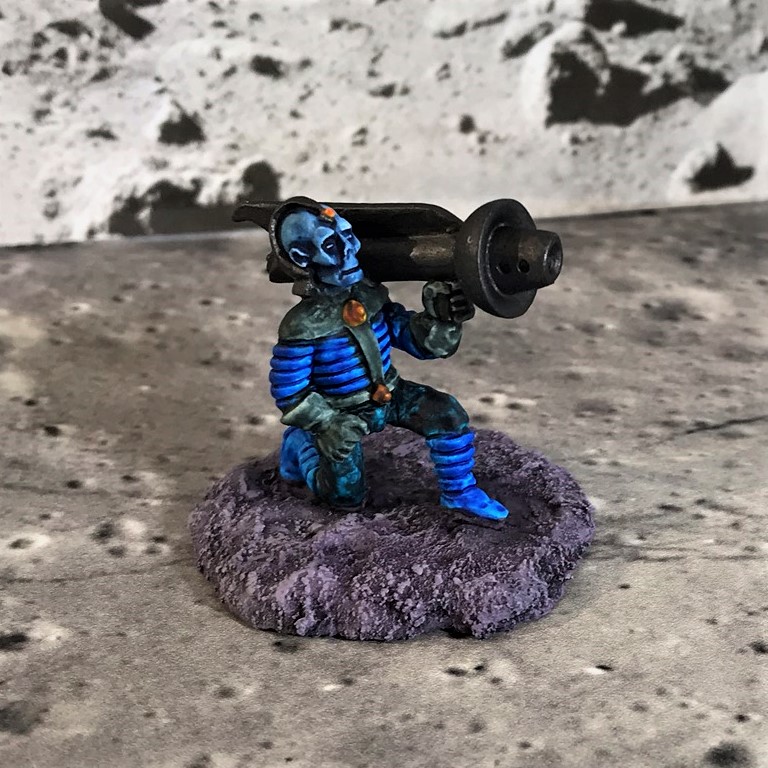
6 DG-56 “Retrovian Two Man Sonic Cannon Team” crew figures (one had a sonic cannon, one had a pair of sci-fi binoculars – 3 of each)
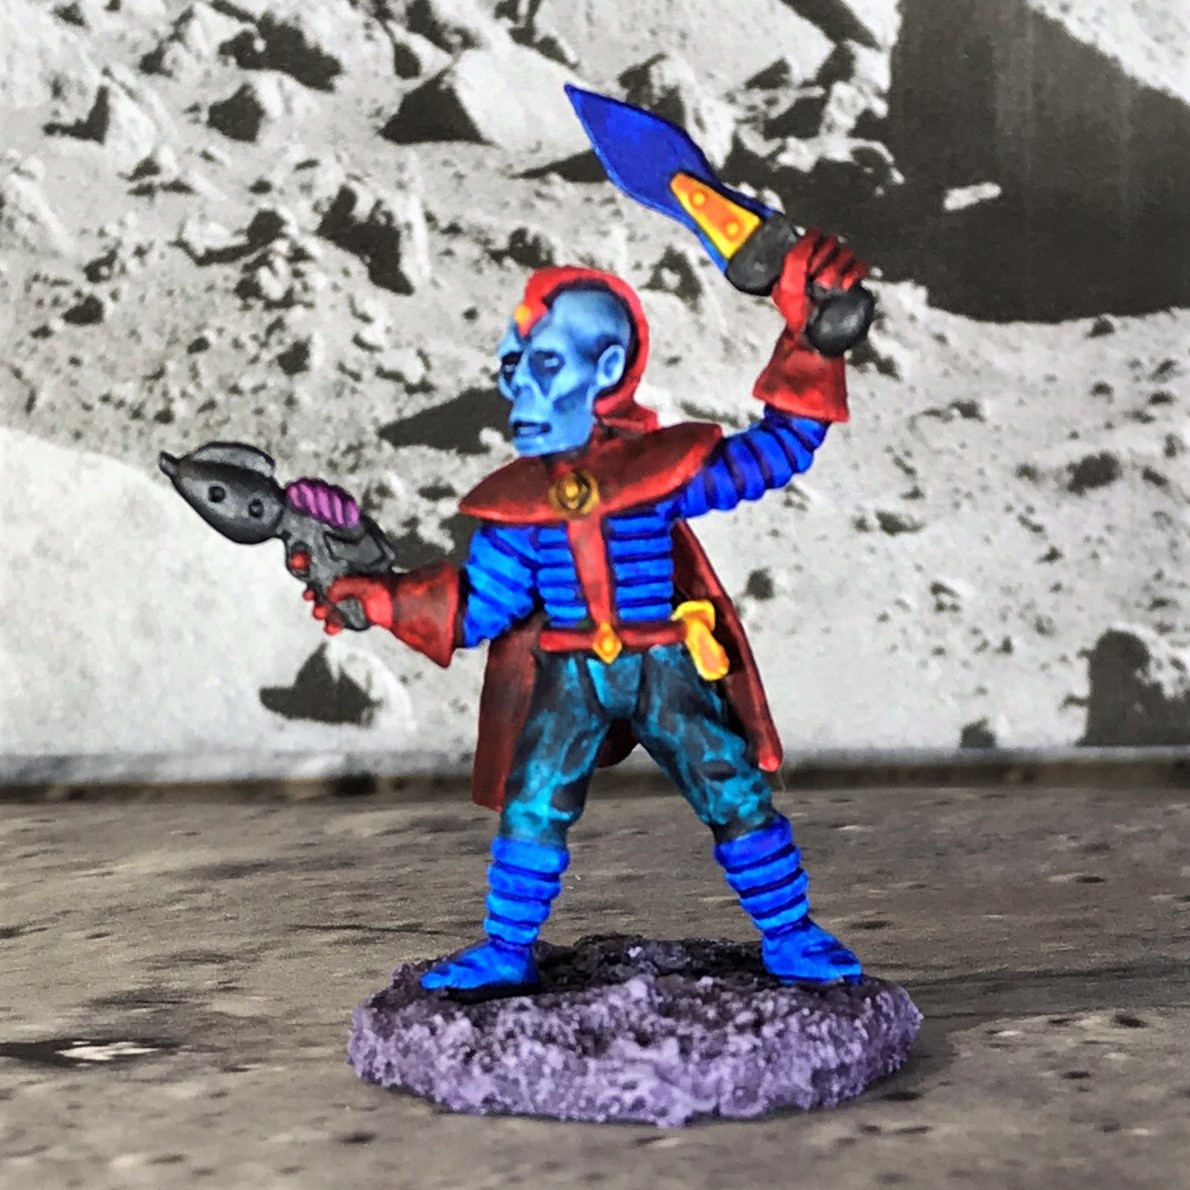
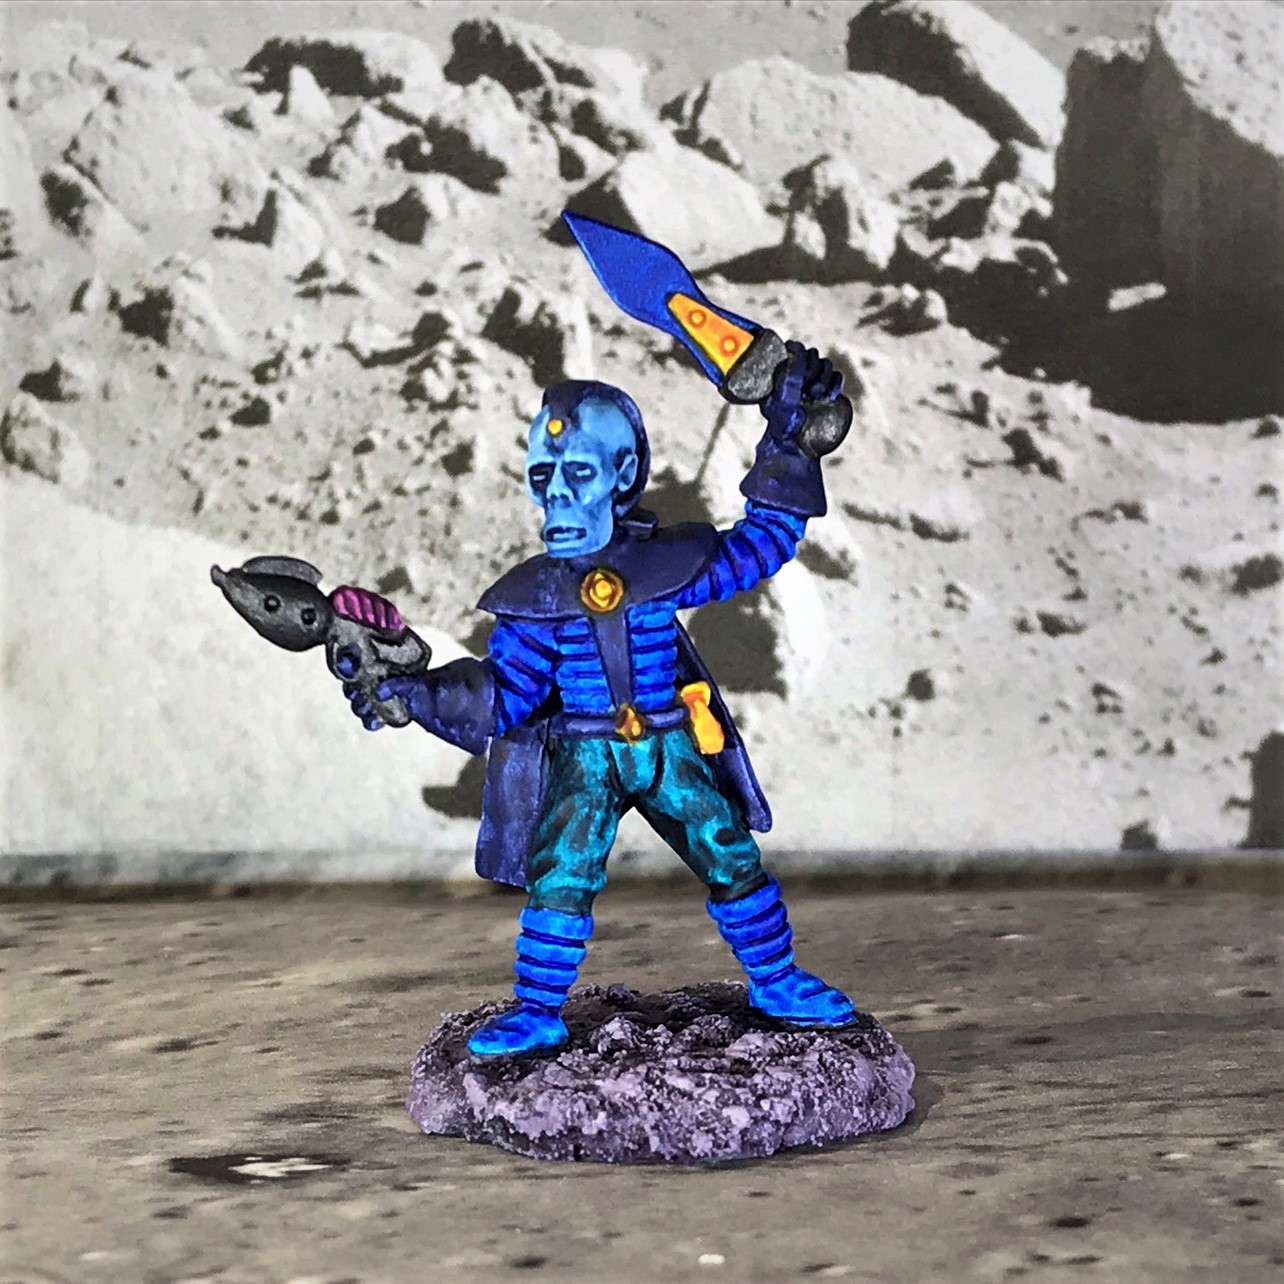
In deciding how to construct the platoon, I needed to consider how to build something that would be useful as a unit – and that would have some sense as to its build. I also have been watching a number of early 2000’s Star Trek “Enterprise” episodes (that I never saw when the series ran). I have become very fond of the Andorians – and Jeffrey Comb’s portrayal of Commander Shran. The Andorians had not been much seen in the Trek universe since the original 1960’s Star Trek. I decided that in homage the Retrovian platoon would be completed as blue skins and with some Andorian names.
I had these dudes – less antennae – as color inspiration.
As far as structure, I had enough to create three line squads of two teams. There would be 10 figures in a squad: a squad leader, an A team of a team leader and four troopers, a B team of a team leader (the binocular half of the Sonic Cannon team), a Sonic Cannon gunner, a marksman/sniper, and a Bra’sheer Assault Pod. The Bra’sheer I envisioned as having an automatic weapon and mechanical claws that could tear apart obstacles, walls, or enemies’ heads and limbs.
That left me with enough figures to make two other sections. The first is an HQ section (composed of a platoon leader and a platoon sergeant). The second is a Garkkon section (reporting to the platoon sergeant or platoon leader) with a marksman in control of a giant Garkkon monster suitable for melee. The Garkkon is a hybrid of a fish, a lizard, and a giant chicken – it’s quite amusing to look at.
The Retrovian Platoon organization. Each die represents an element that can be activated in a Combat Patrol game. The platoon therefore has 9 possible elements that could be activated.
I will share how I assembled and painted the Bra’sheer pods and the Garkkon, then go into the infantry. Then I’ll share some eye candy that I hope you will like, as well as a glimpse into some of the play aids I made (with help from Buck Surdu) for these in club or convention game play. Lastly, I will share a list of the paints and materials used in the making of this platoon for those interested.
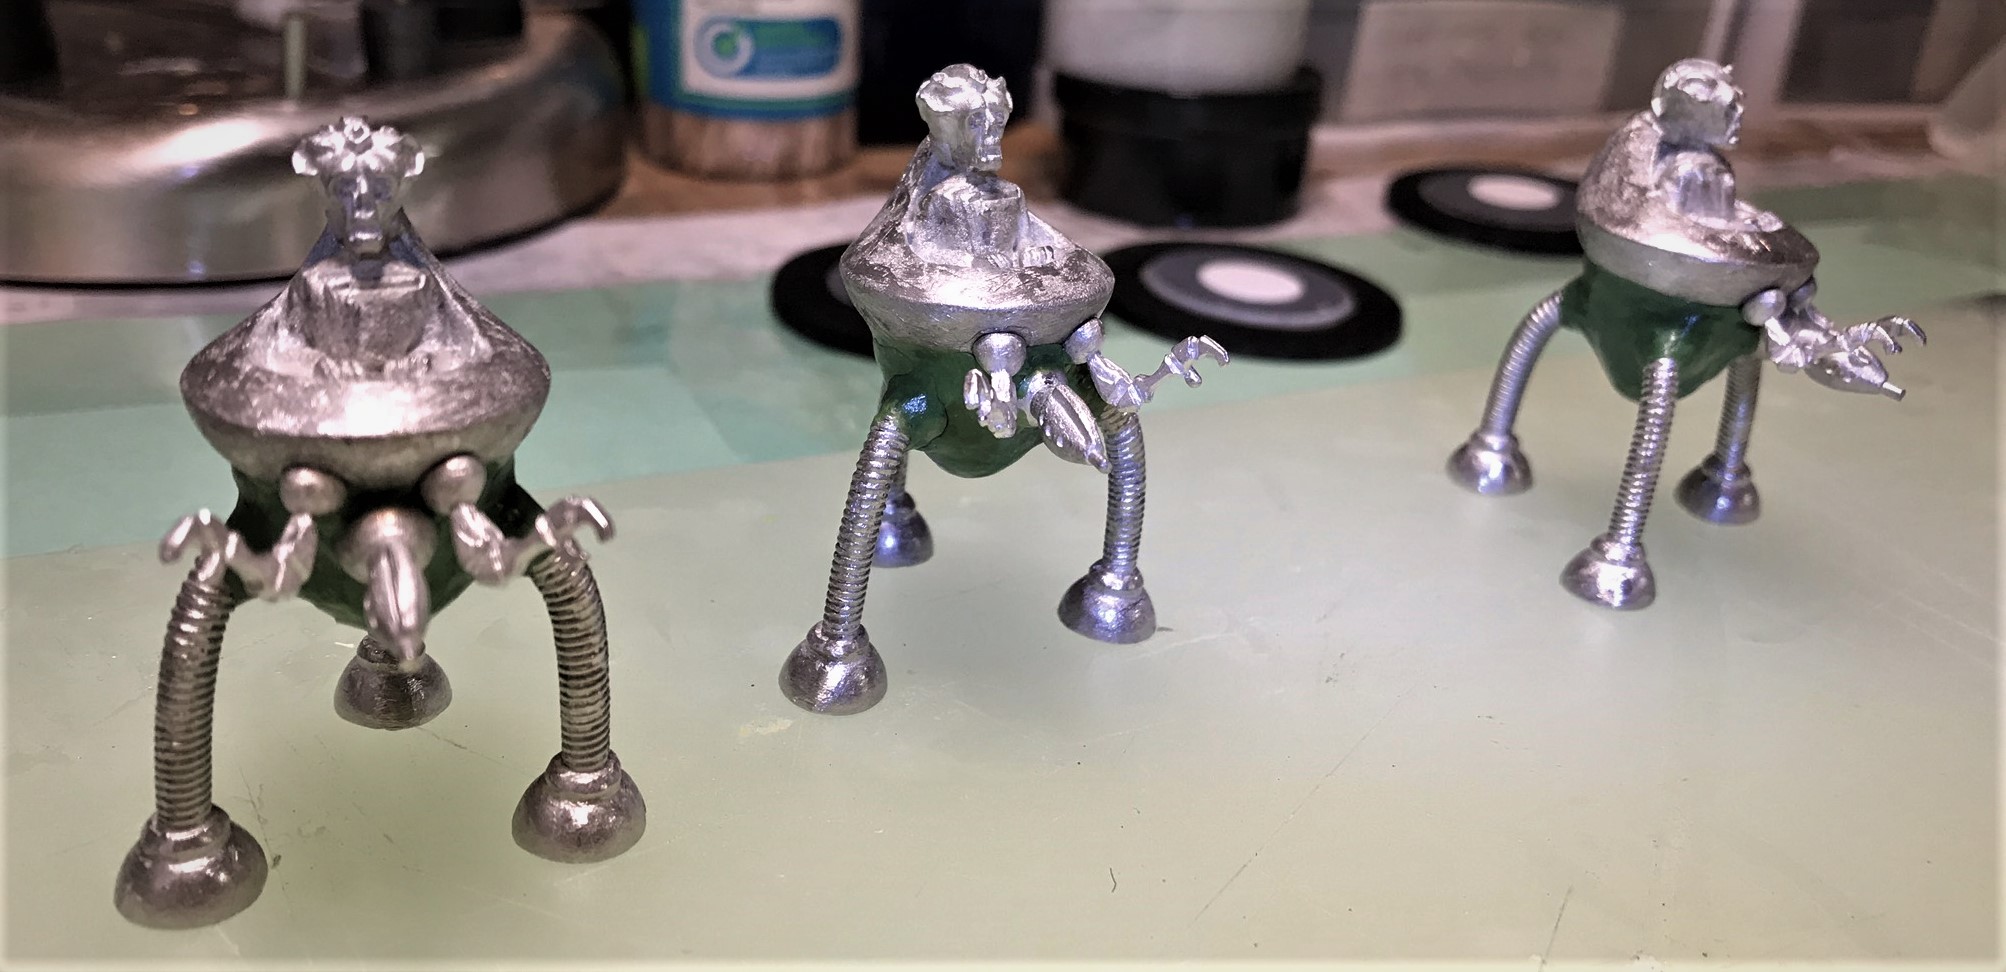
The Bra’sheer
I believe the Bra’sheer were sculpted by Brad Shier – given their names. The three Bra’sheer figures were, like all of these, great sculpts. As I had three, it made sense to assign one per each squad on the B teams. Assembly-wise, I did have a good amount of filing and filling with green stuff to do on these. Also, the process of assembly was a bit difficult as I wanted to get the legs in position such that the chassis were level. I ended up needing to affix one leg at a time and check if they were level.
The Bra’sheers in front of the 2″ steel fender washer bases – that also had 1.25″ steel fender washers, .5″ stainless steel fender washers, and polystyrene card as part of the base. The Garkkon is on the right (more on it later).
Close up of the assembled Bra’sheer
I took the multi-washer bases and scribed the leg positions on them in pencil. Then I added Apoxie Sculpt, and some Army Painter flocking (see materials list at end of this post). Once this had hardened overnight, I affixed the Bra’sheer with E6000 to the bases. Here, these look like bad cookies…
Here you see a primed Bra’sheer with green stuff additions to the chassis and some poster tack on the crewman. I needed to add green stuff to fill in gaps and make the legs structurally strong. There were mold lines on the legs that short of obliterating the detail I could not get rid of – so I dealt with these later with painting. The poster tack was to protect the crewman from being painted with the pearlized blue paint I used on the chassis.
After painting the legs and the chassis. The legs were heavily shaded after the pearlized paint was applied to mitigate the mold lines.
The model is in the final stages here – I used multiple paints and products on the bases alone. The Bra’sheer were the only Retrovians with “veiny” heads
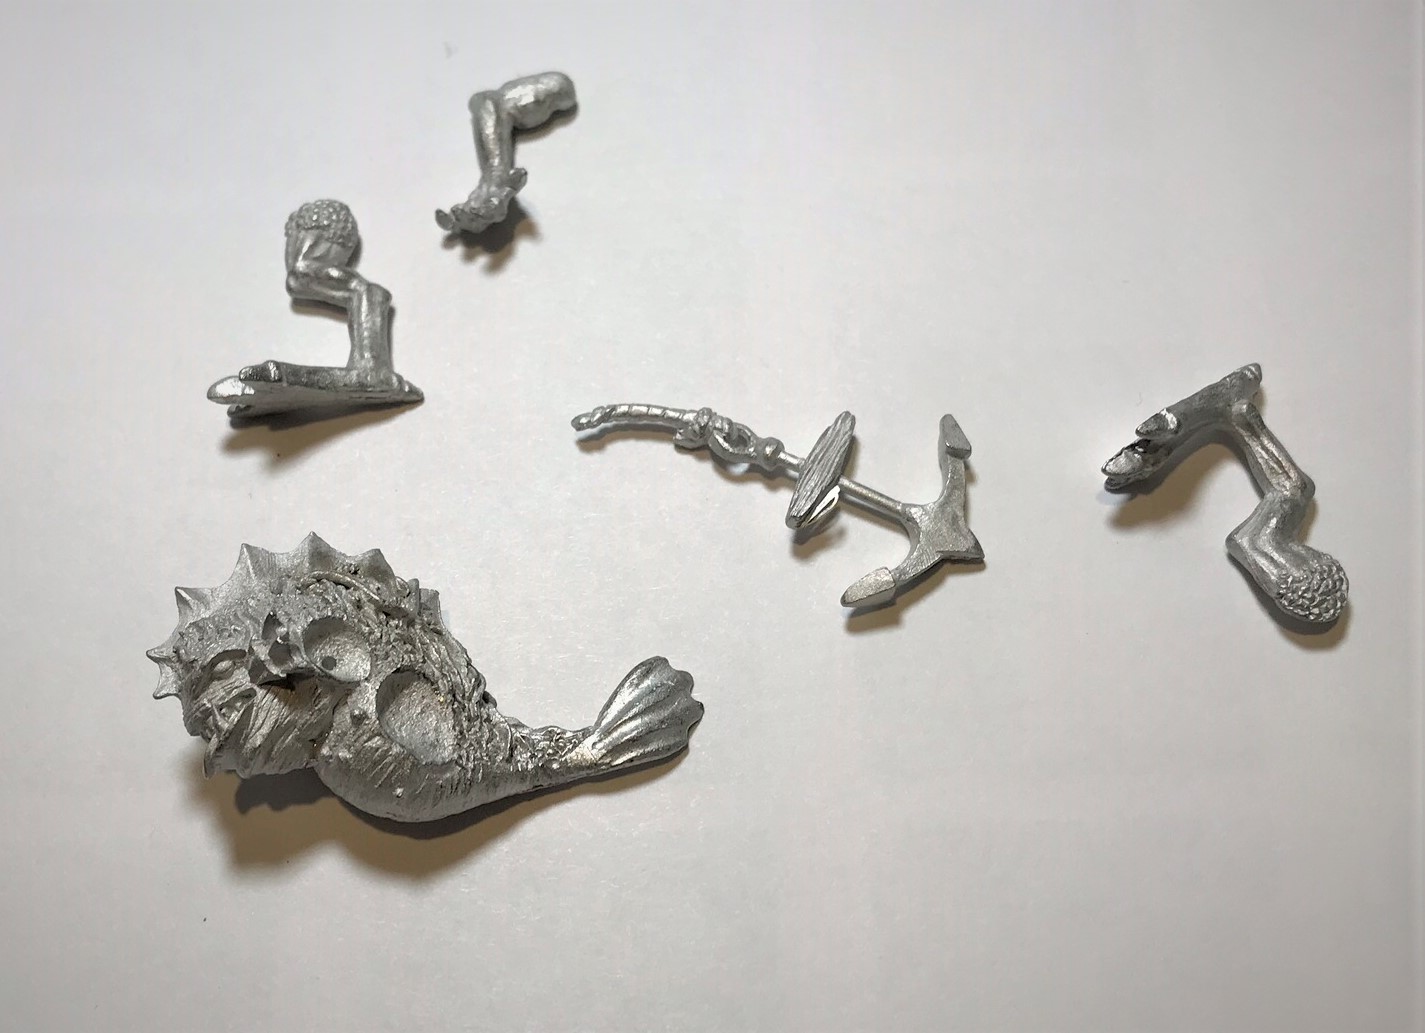
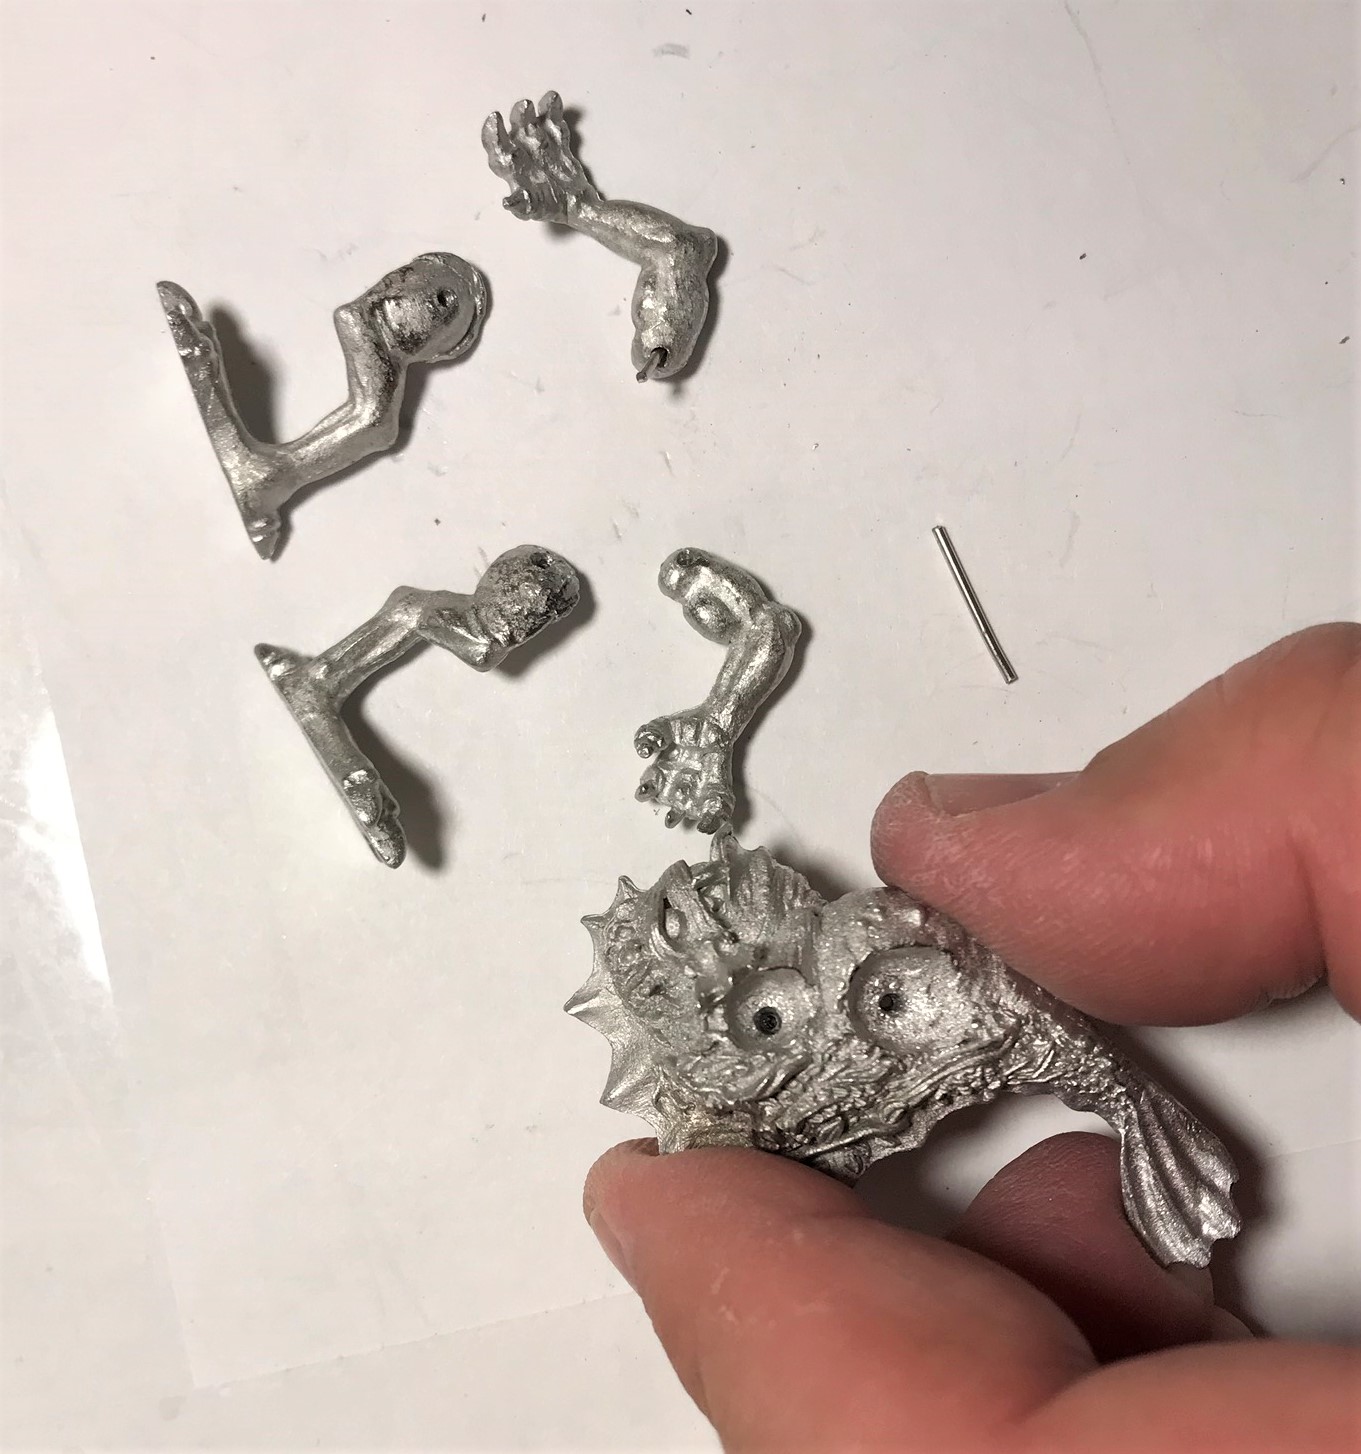
The Garkkon
The Garkkon as received. I do not know why it came with an anchor, but I decided not to use it on the model. It, like the Bra’sheer, had similar assembly challenges.
Here’s a better view of the base I used – it’s pretty heavy!
Multiple drill holes and pinning were needed, plus green stuff to stiffen the structure.
As the E6000 hardened overnight, I had this Rube Goldberg way of stabilizing the model.
Garkkon assembled.
I used green stuff here on the limbs and on the base. I chose to do the other bases with Apoxie Sculpt.
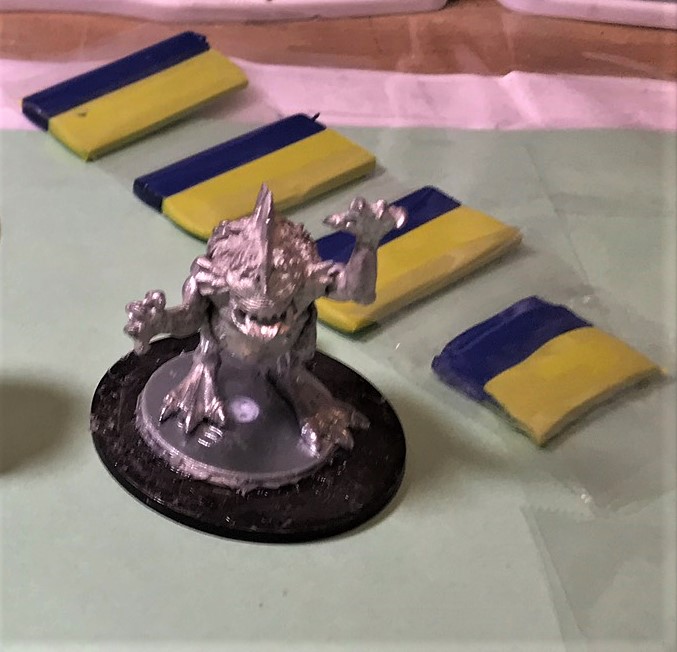
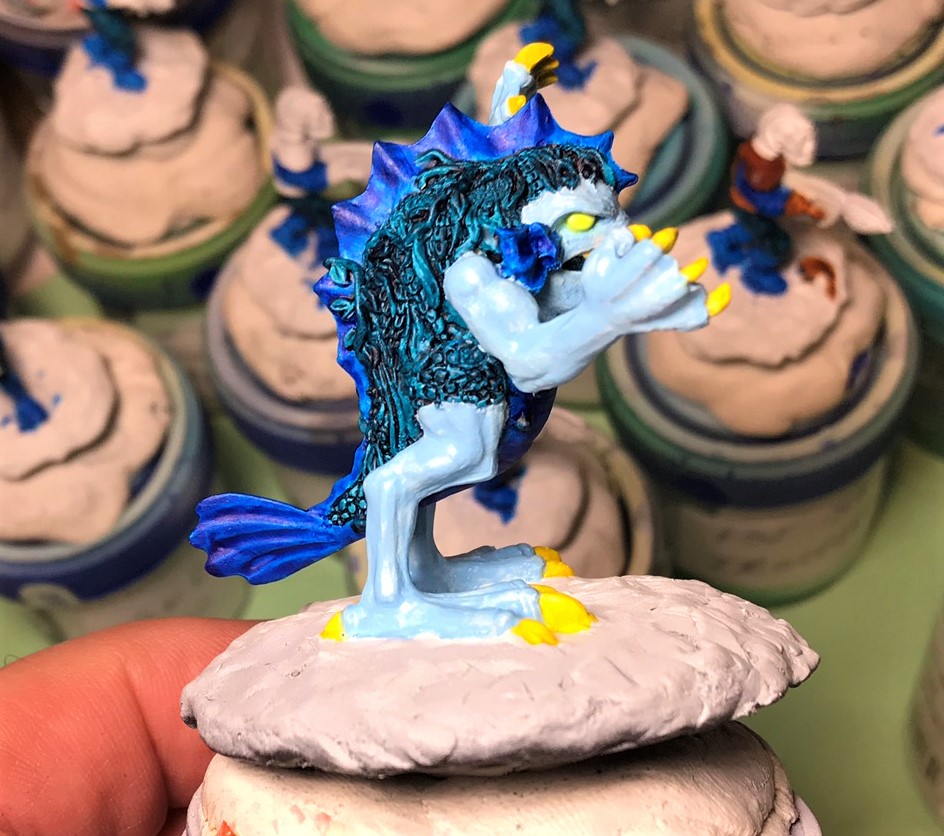
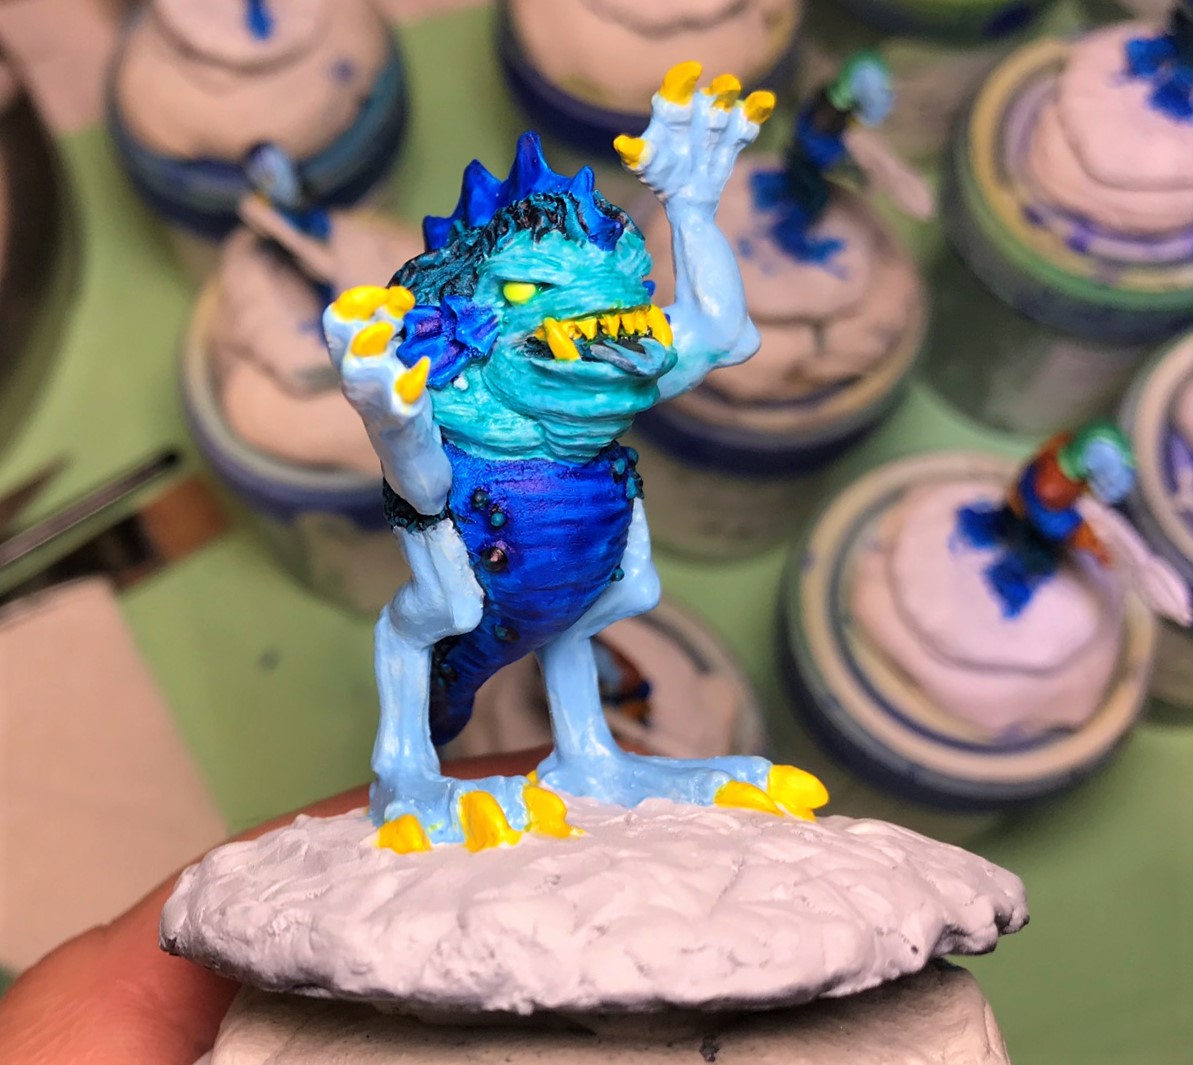
This is early and fairly gaudy in the painting process – on purpose. My hope was to use contrast paints and let the light blue here to be the same color as the infantry flesh. As you will see, I needed to adjust my plans. I also wanted to adjust the yellows here.
Side view of the previous stage picture.
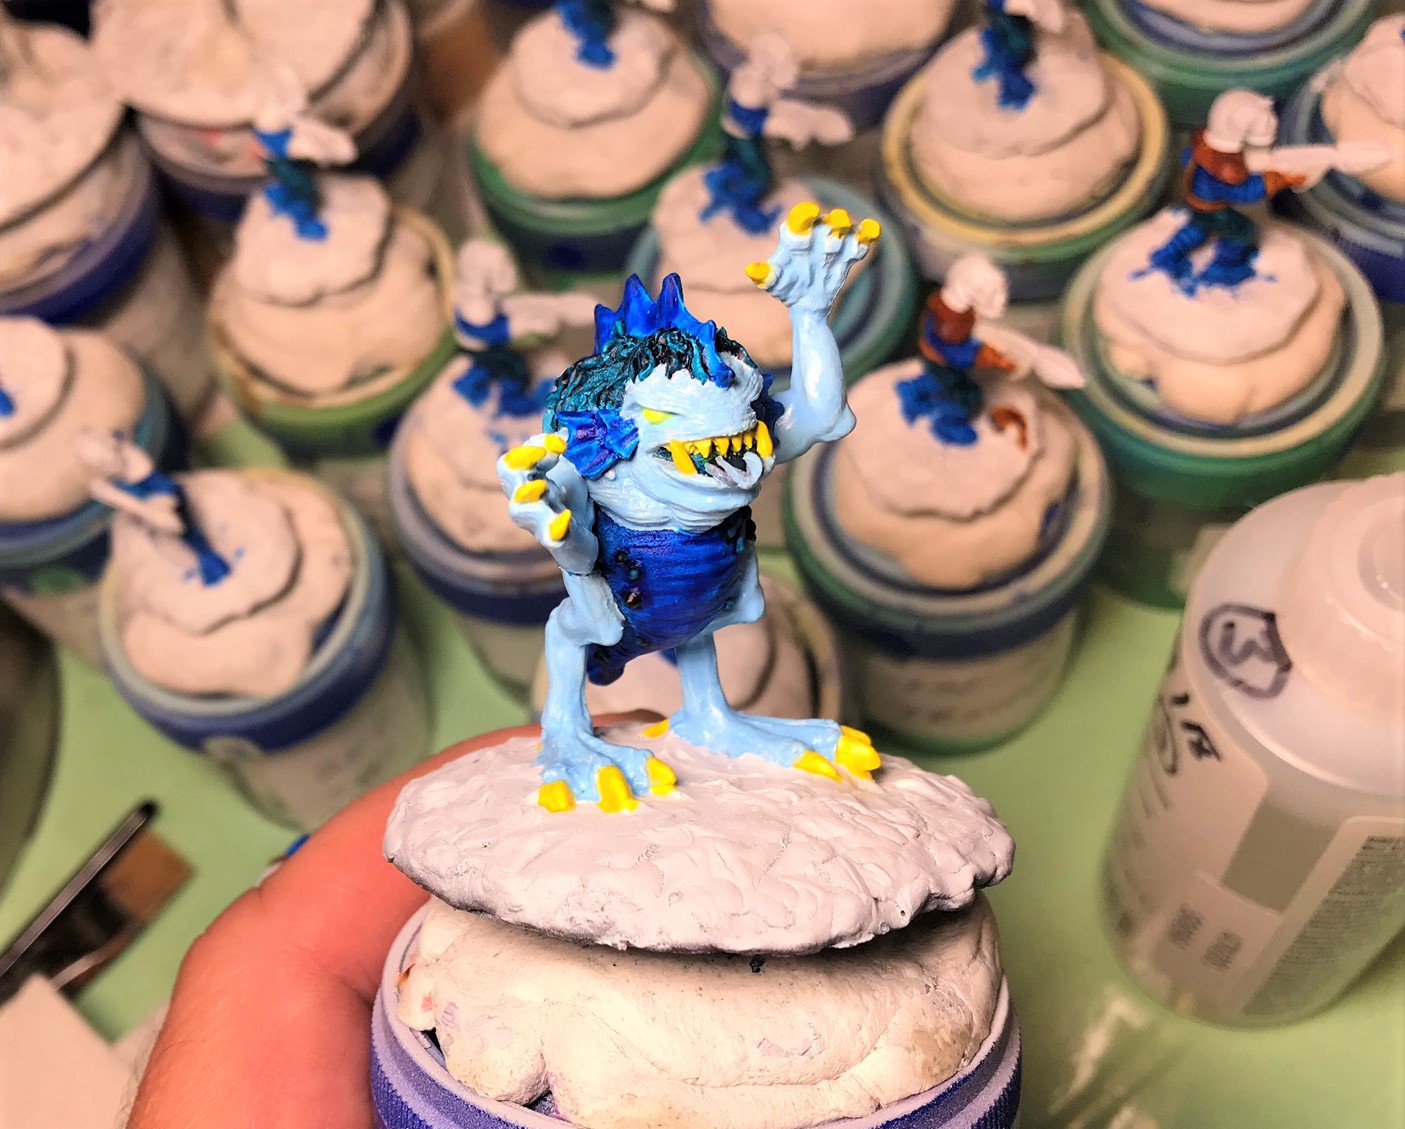
I added Aethermatic Blue Contrast Paint to the blue – and ended up with a look that was more green than blue. This is mid-painting to show the difference (the head has the contrast paint at this point). I ended up finishing the Garkkon blue with the contrast paint, and finding another path for the Retrovian infantry’s flesh color.
This is after I finished the Garkkon’s initial flesh color.
After some more shading, some highlighting, and some glazes, I moved on to the Garkkon base.
Retrovian Infantry
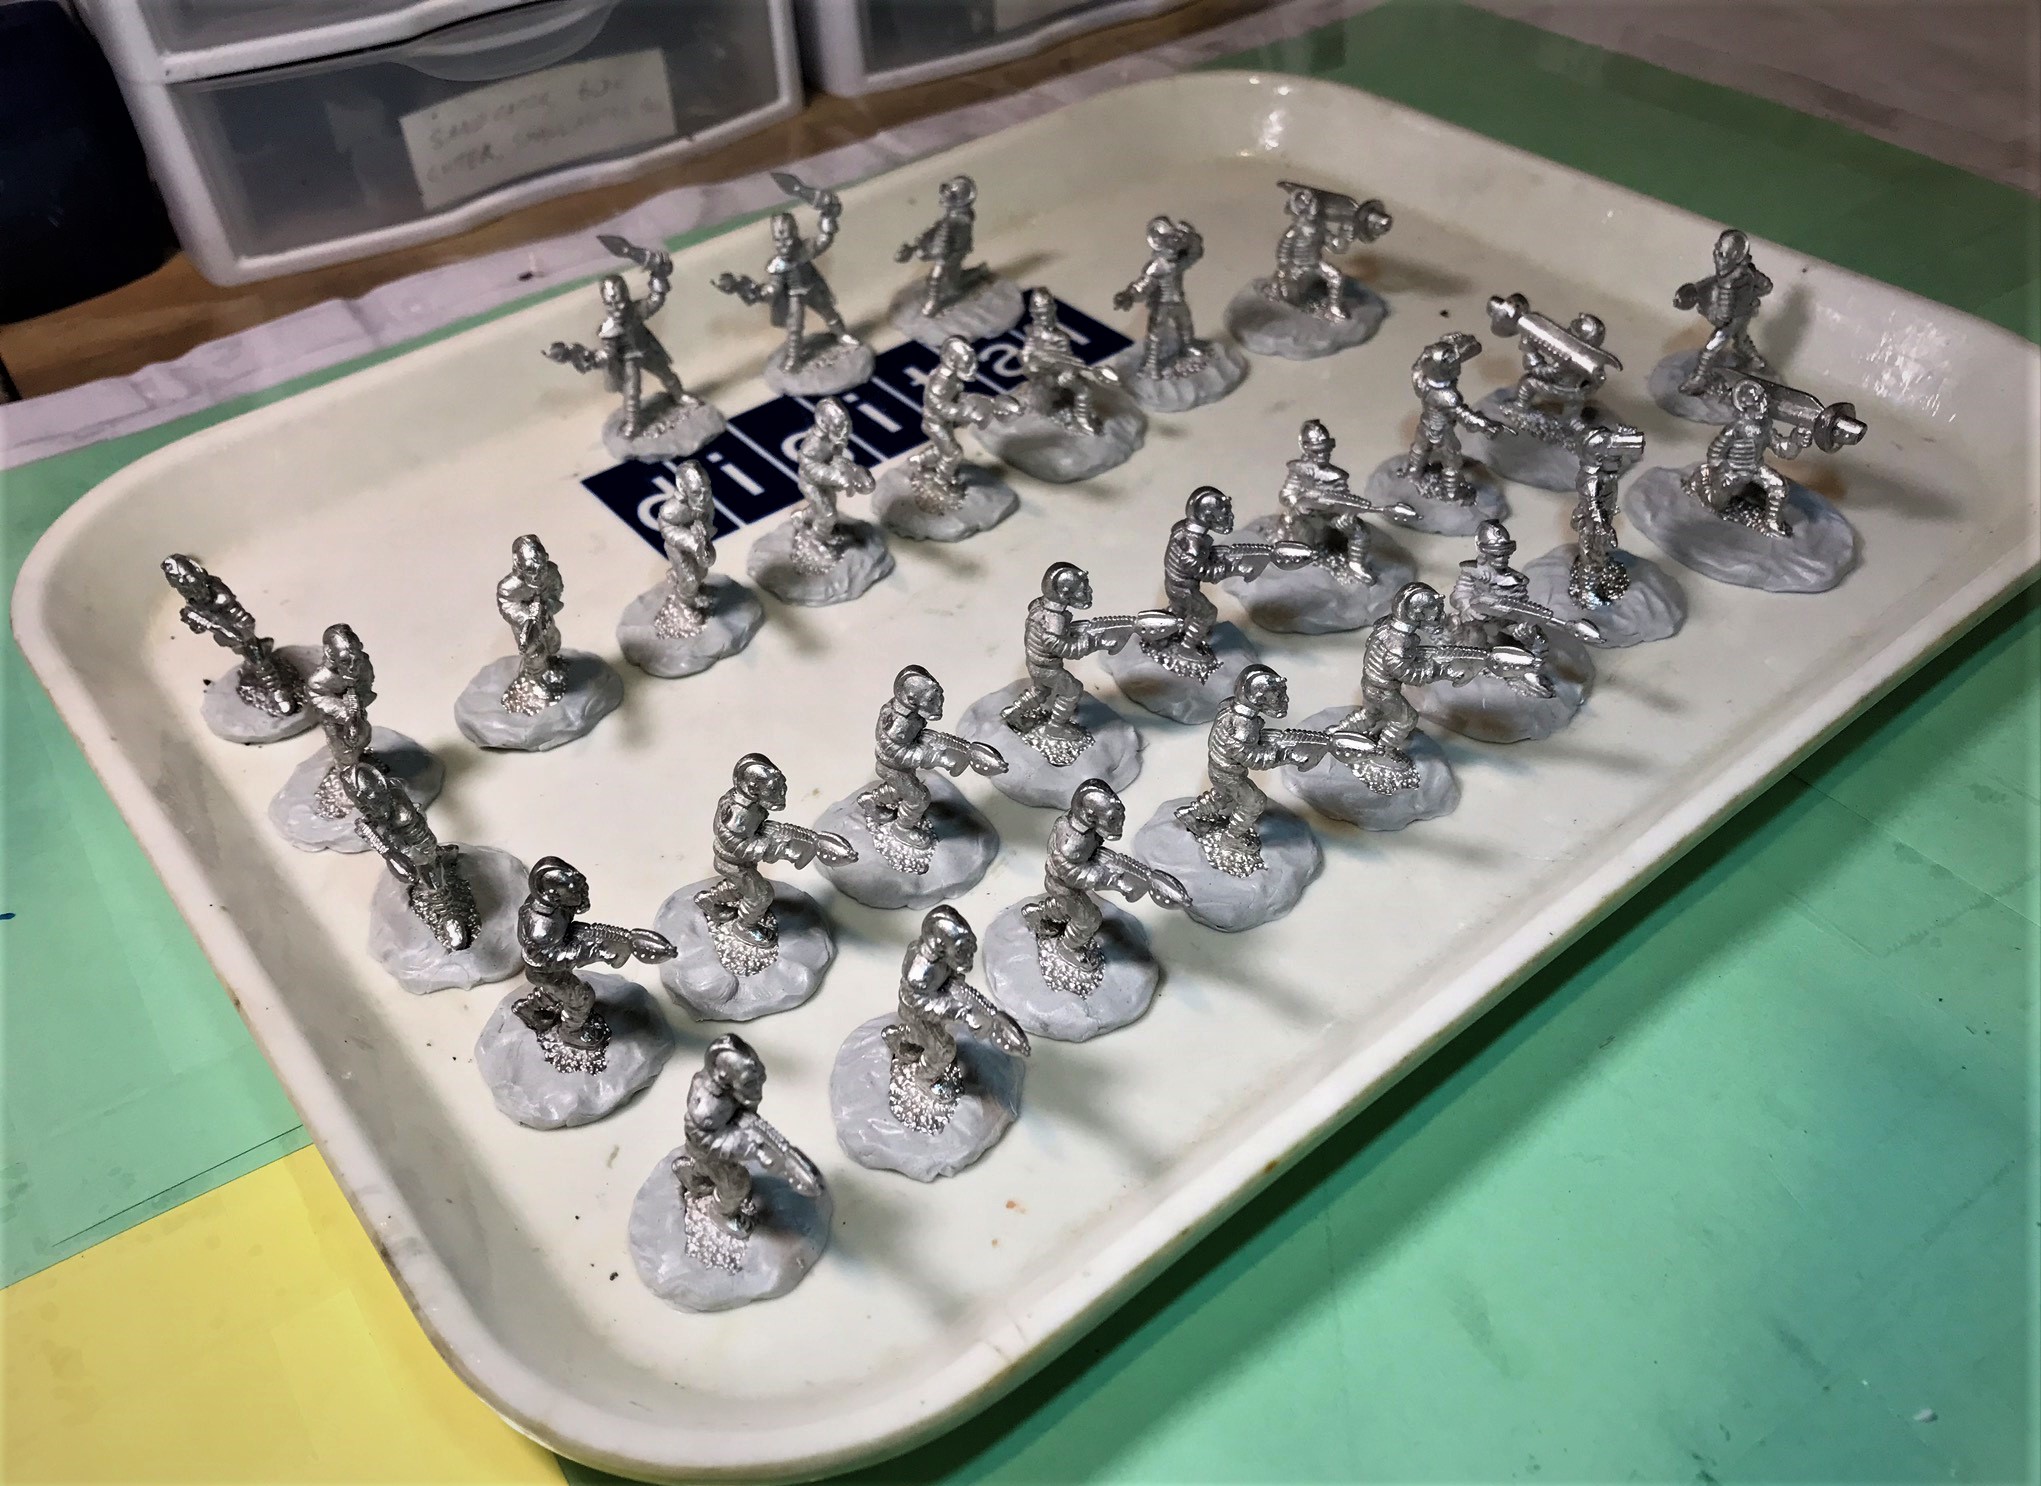
Getting organized…
Initial mounting on fender washers after filing and cleaning. I used slightly larger bases for the Sonic Cannon Gunners and the Marksmen out of necessity.
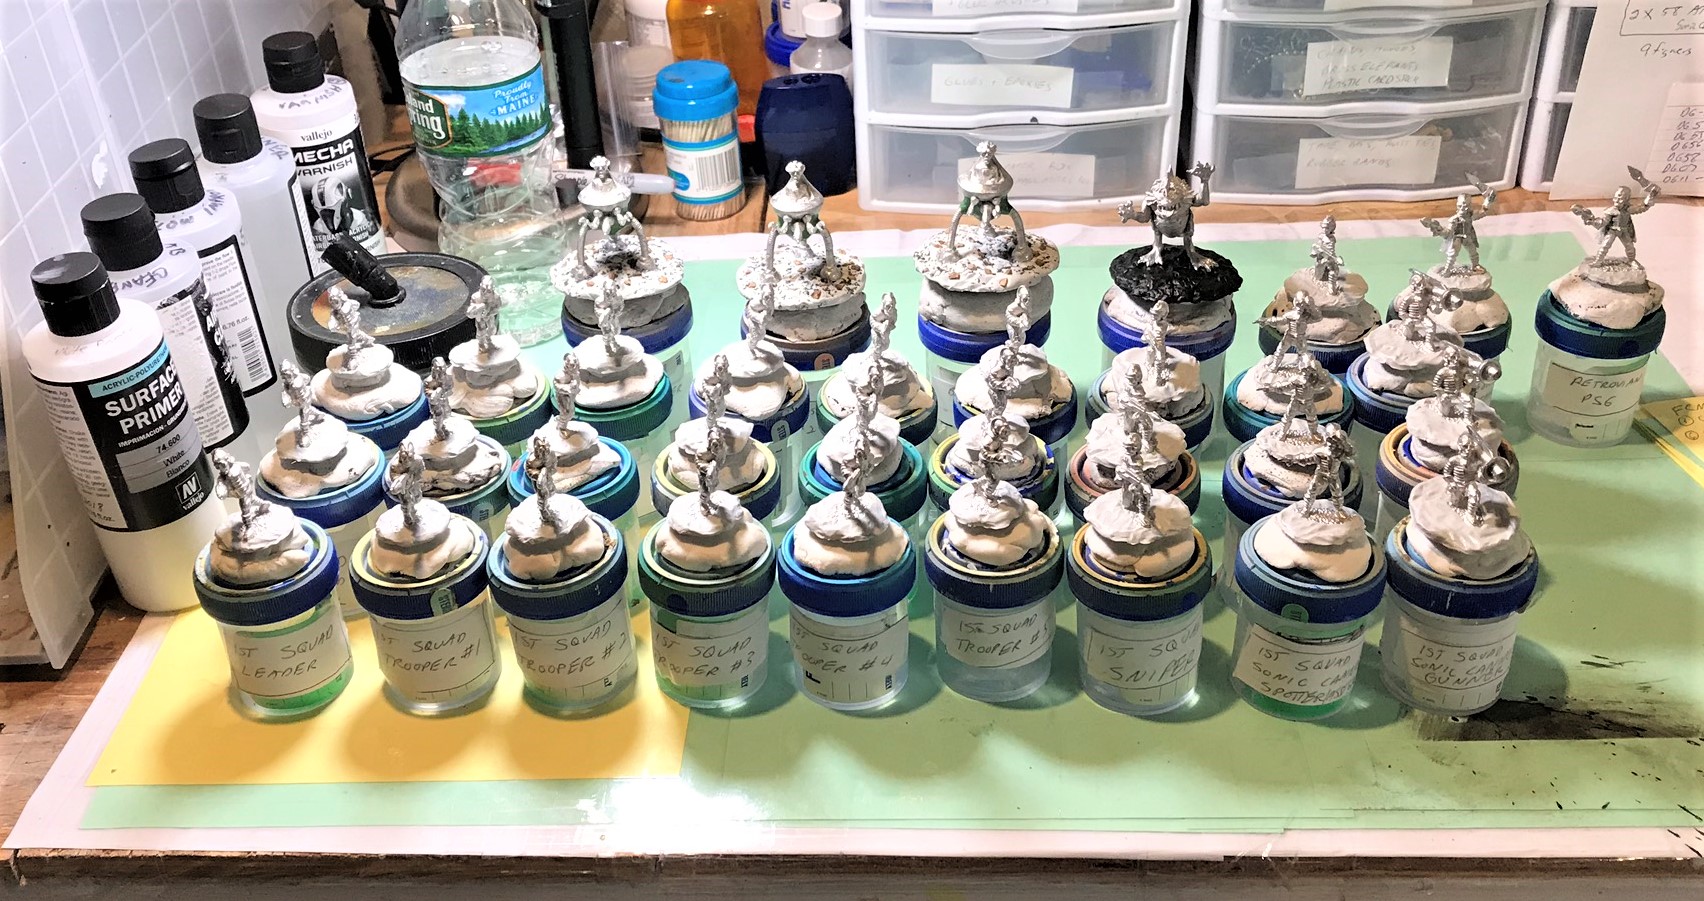
After I added Apoxie Sculpt on the bases and let it harden for a day.
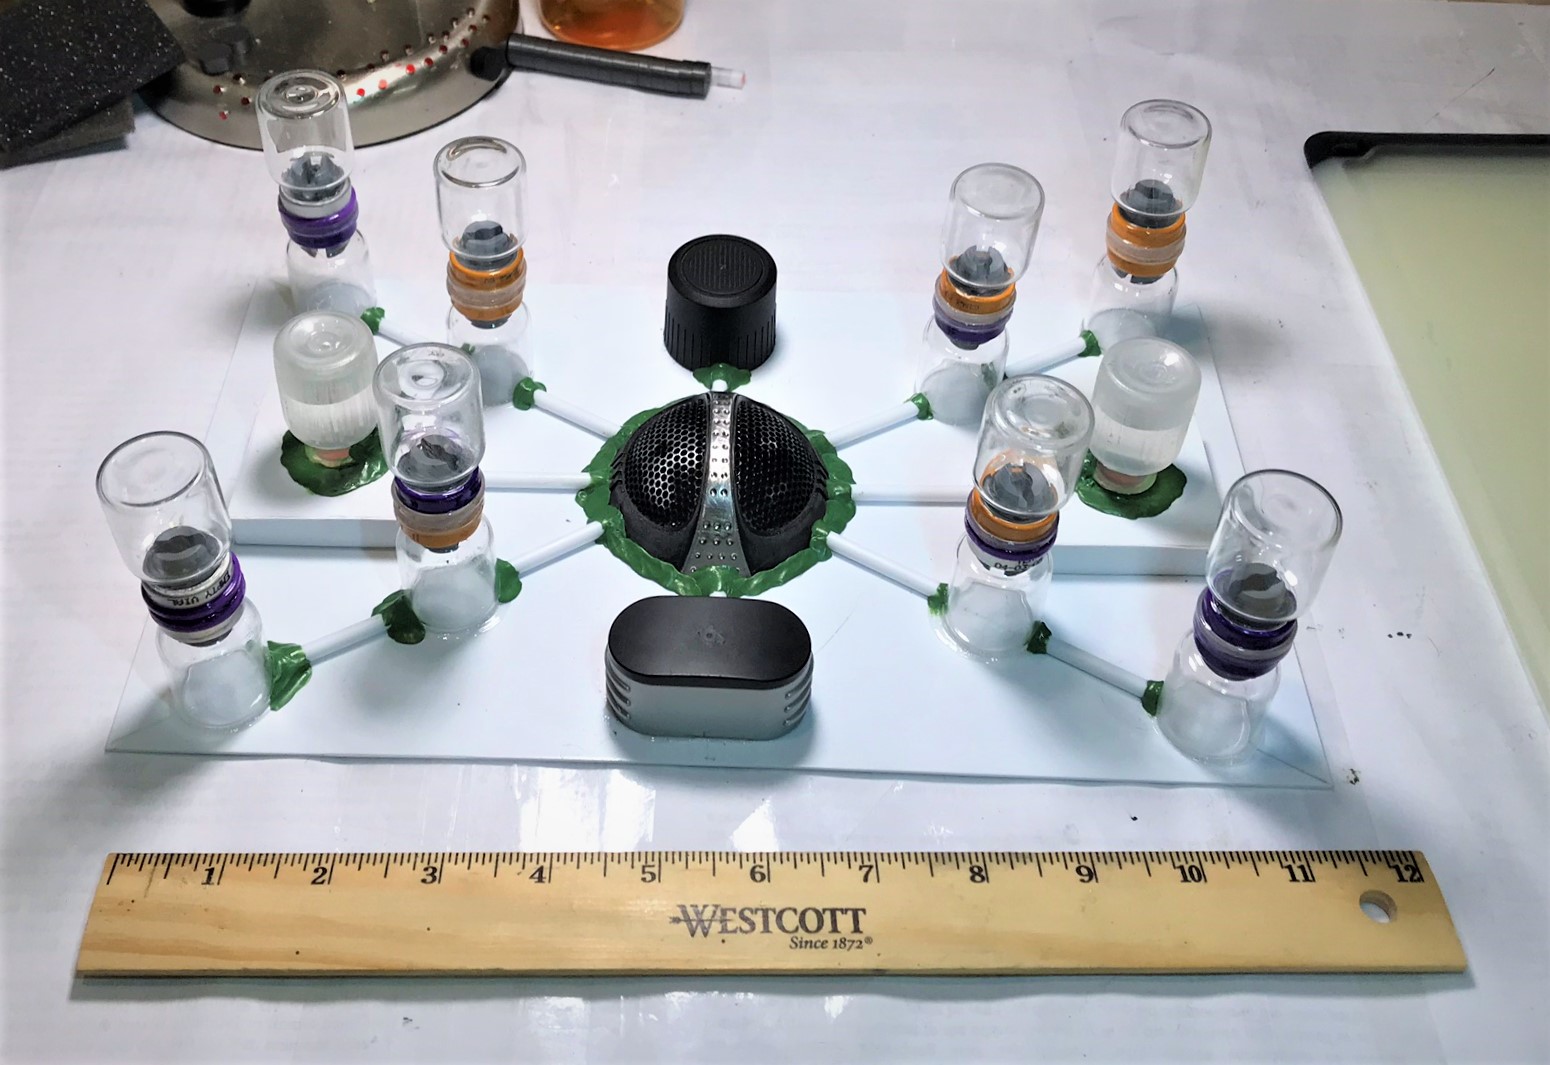
Here you see the platoon ready for priming and painted as mounted on the specimen jars with poster tack.
I used Talassar Blue on the boots and the tunics.
Then I used Akhelian green on the pants – and each squad got a different contrast paint color on the shoulder pads. Here, first squad had Nazdreg Yellow – which ended up looking leather-like.
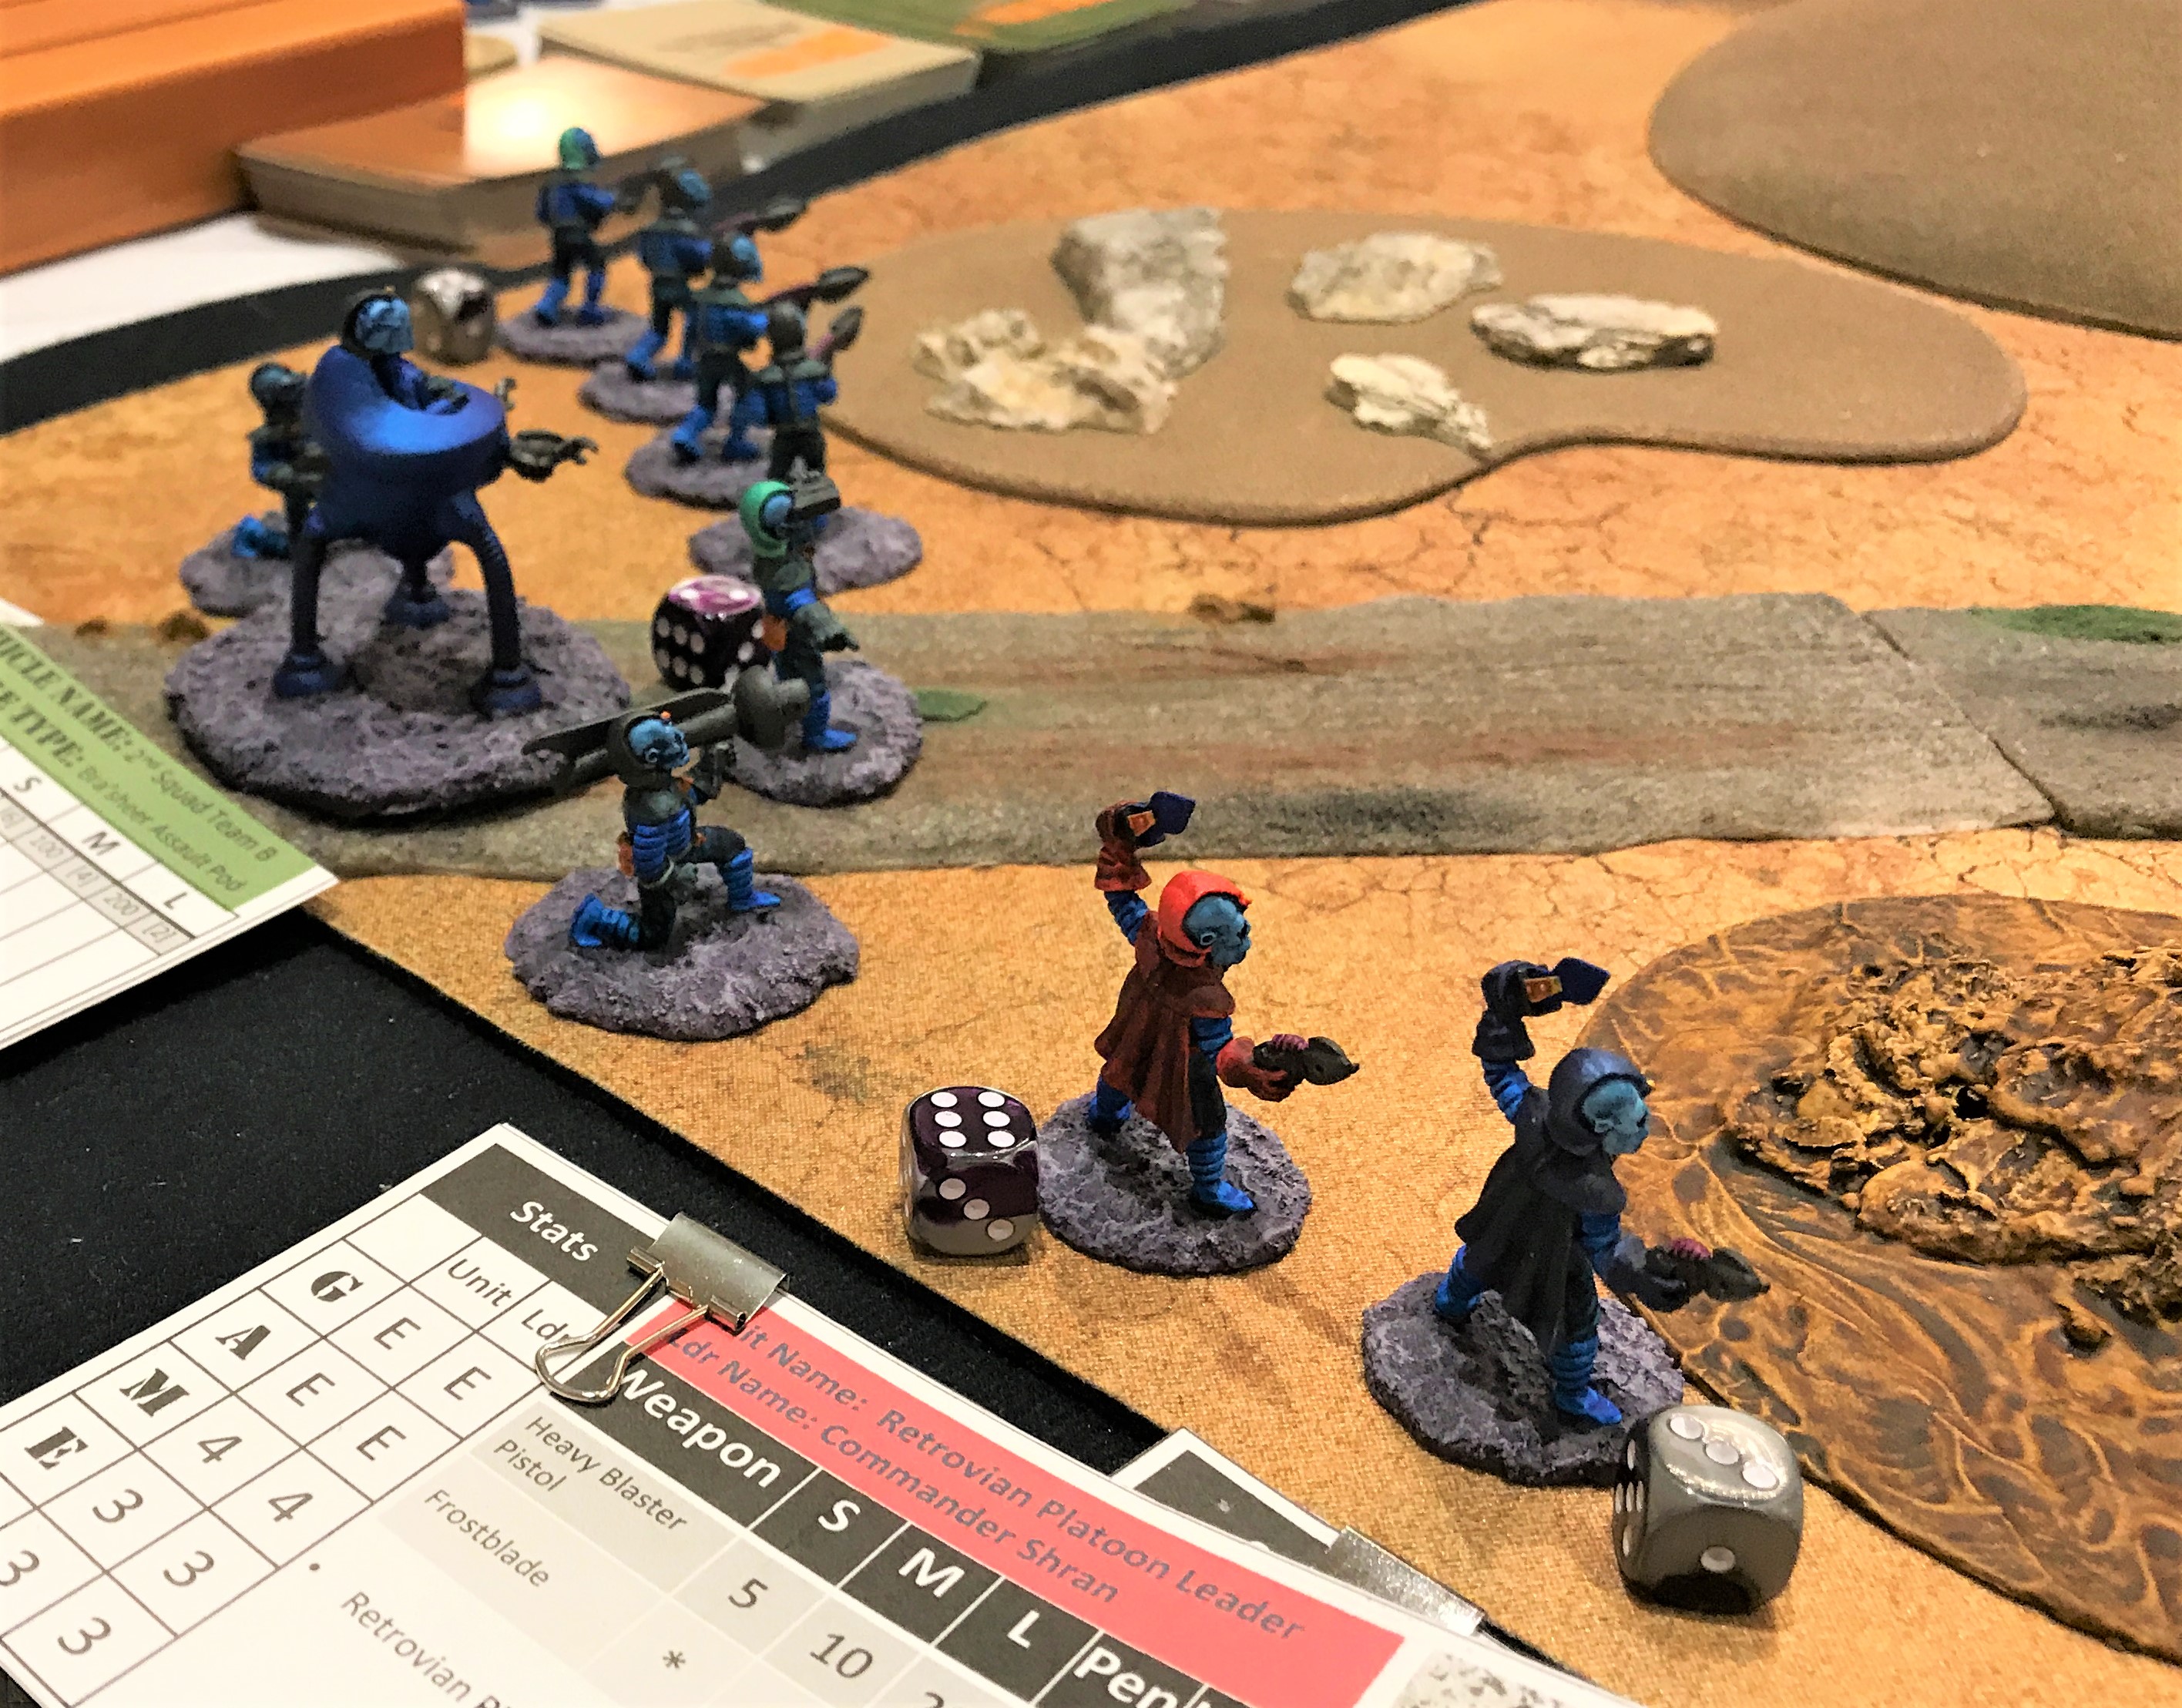
Similarly, 2nd squad and third squad got Gryph-Charger Grey and Volupus Pink respectively. The platoon leader (Commander Schran) got Blood Angels Red, while the platoon sergeant and the Garkkon controller got Ultramarines Blue. I found that these contrast paints needed a few thin coats to be useful.
Commander Schran mid-stage.
The Sonic Gunner from 3rd Squad’s B team mid-stage.
For ease of play on the tabletop, in addition to the different shoulder pad colors, the leaders had different colors on their helmets. Red indicates the platoon leader, blue indicates the platoon sergeant and squad leaders, and green indicated the team leaders. Others just got a metallic black helmet.
As discussed above, the flesh color on the Garkkon was not what I wanted on these guys. The faces are very cool, and I ended up using Army Painter Quickshade Blue Tone over the light blue – and I was very pleased with the result. This is Commander Schran again, and I also wanted to make these swords special – so I brush painted them with the same metallic blue as the Bra’sheer chassis – and called them “Frostblades” – giving them a minor anti-armor capability.
Close to the finish with the bases remaining to be done.
Ready to dry brush the bases!
A 3rd Squad trooper with base complete and ready for varnish .
Completed platoon in the transport box!
Eye Candy of painted Retrovian Platoon and Combat Patrol™ Game Aids
Platoon HQ:
Commander Shran, front view
Commander Shran, rear view
Platoon Sergeant, SFC Thelev
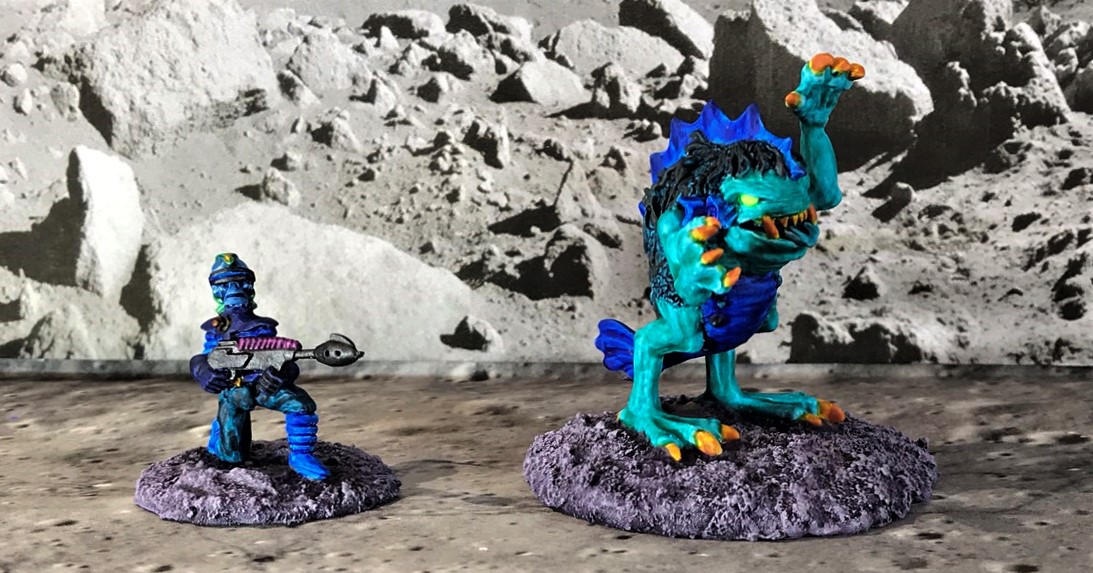
Garkkon Section:
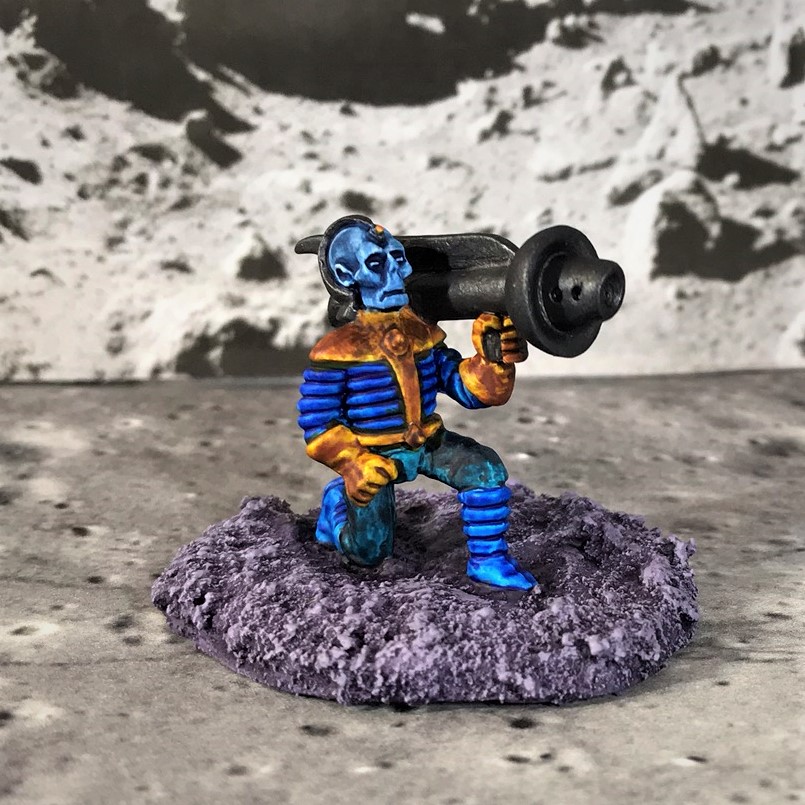
SSG Ushaan-Tor, Garkkon Controller
Garkkon front
Garkkon back view
Garkkon Section
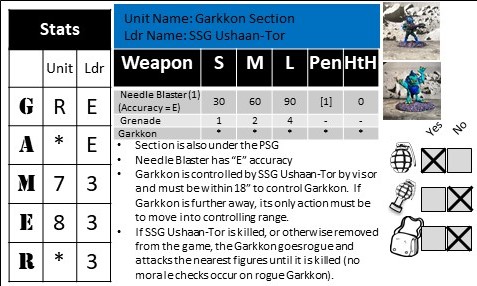
Unit Data Card for the Garkkon Section
1st Squad:
1st Squad Leader, SSG Kumari
1st Squad, A Team Leader
1st Squad, B Team Leader
1st Squad Trooper (A Team)
1st Squad Sonic Cannon Gunner (B Team)
1st Squad Marksman/Sniper (B Team)
1st Squad Bra’sheer
Bra’sheer Vehicle Data Card. The numbers in red circles refer to armor factors. These would be the same for each pod.
1st Squad
2nd Squad:
2nd Squad Leader, SSG Talas
2nd Squad, A Team Leader
2nd Squad, B Team Leader
2nd Squad Trooper (A Team)
2nd Squad Sonic Gunner (B Team)
2nd Squad Marksman/Sniper (B Team)
2nd Squad Bra’sheer (B Team)
2nd Squad
3rd Squad:
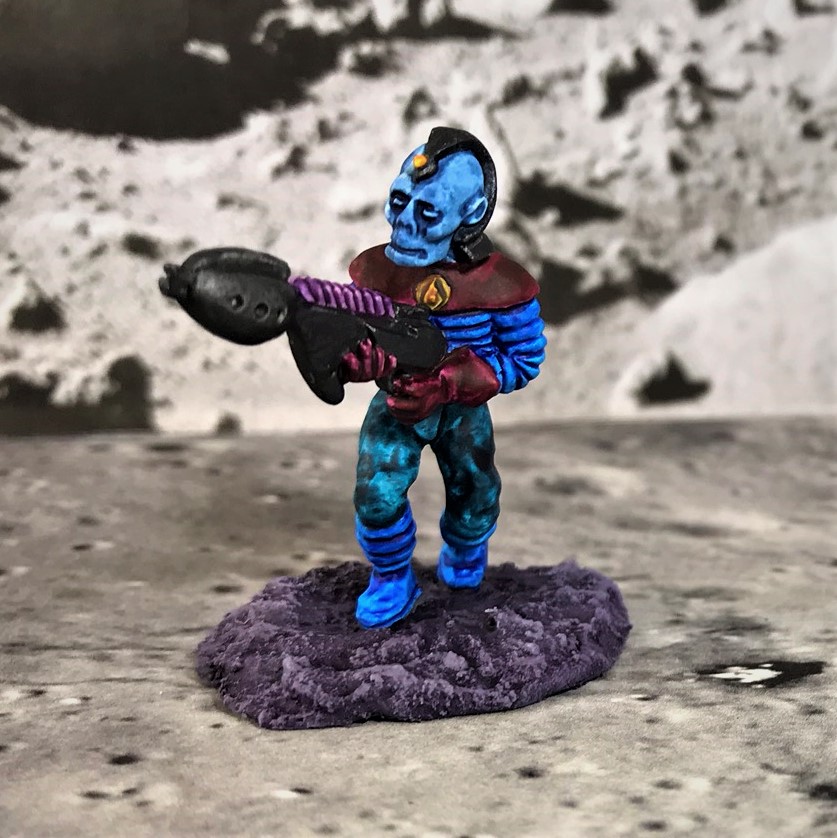
3rd Squad Leader, SSG Aenar
3rd Squad A Team Leader
3rd Squad B Team Leader
3rd Squad Trooper (Team A)
3rd Squad Sonic Gunner (Team B)
3rd Squad Marksman/Sniper (Team B)
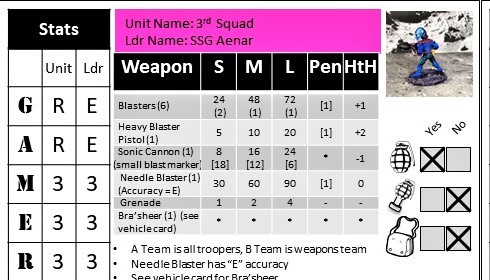
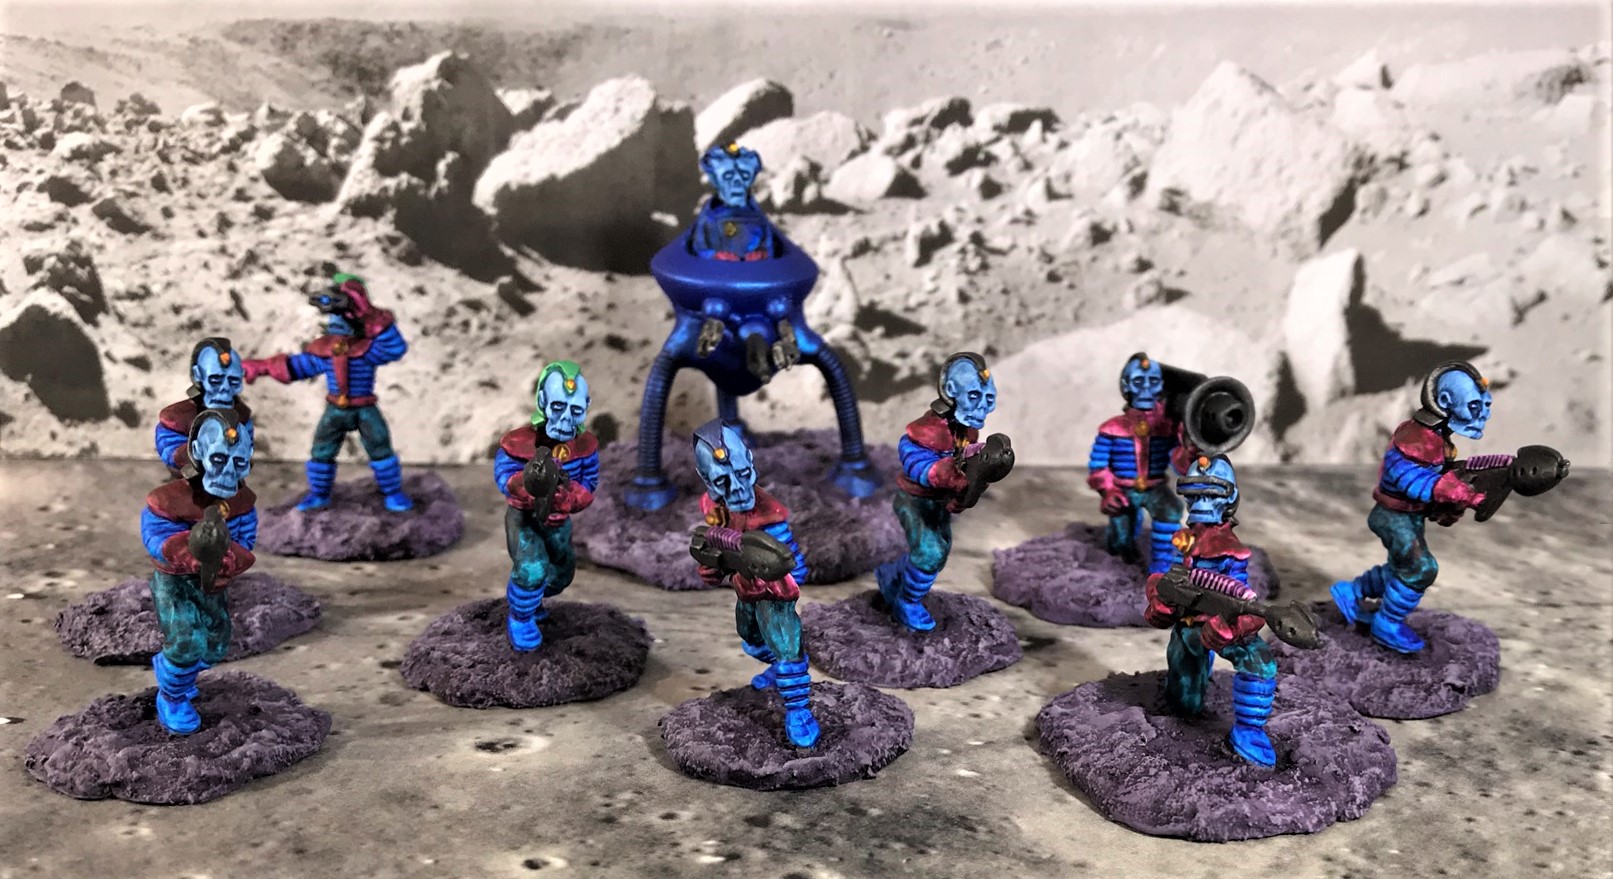
Unit data card example – 3rd Squad
3rd Squad Bra’sheer (Team B)
3rd Squad
Retrovian Platoon (group shots):
Command and Garkkon Section
All three Bra’sheers
Retrovian Platoon!
Retrovian Platoon (top view)
This project took a bit longer than I expected it to – about 3-4 weeks – but it was rewarding. I do hope that you found it interesting and fun to look at – so let me know in the comments section – good or bad. Did you pick up on any Andorian references here?
Thanks again for looking – and until next time, all the best to you and yours!
PAINTS, INKS, GLAZES, SHADES, WASHES, PIGMENTS, FLOCKING, GLUES AND MORE USED ON THESE FIGURES:
Gorilla Glue
E6000 epoxy
Small paper clip wire
2″ Everbilt steel fender washers ( bases for Garkkon and Bra’sheers)
1¼” Everbilt steel fender washers (added to Garkkon and Bra’sheers on 2″ steel fender washers; used as bases for Retrovian Marksmen/Snipers and Sonic Cannon Gunners)
½” stainless steel fender washers as fillers in bottom of 2″ steel fender washer holes (Garkkon and Bra’sheers)
Evergreen polystyrene #9020 card (0.020″ thick) on top of 2″ steel washer holes (Garkkon and Bra’sheers)
Green stuff (kneadatite)
1″ steel fender washers (used as bases for remaining Retrovian infantry figures)
Apoxie Sculpt
Army Painter “Battlefield Rocks” flocking (put into Apoxie Sculpt on Bra’sheer bases)
Army Painter “Black Battlefields” flocking (put into Apoxie Sculpt on Bra’sheer bases)
Poster tack to mount figures to specimen jars for painting
Vallejo “Surface Primer – Black” (on exposed steel and polystyrene on bases)
Vallejo “Surface Primer – White”
Vallejo “Flow Improver”
Vallejo “Airbrush Thinner”
Citadel “Contrast Paint – Talassar Blue”
Citadel “Contrast Paint – Akhelian Green” (except for Bra’sheers)
Vallejo Game Air “White Grey”
Vallejo Mecha Color “Fluorescent Yellow” (Garkkon eyes)
Vallejo Game Air “Moon Yellow” (Garkkon claws and teeth)
Sometimes you need to try new materials, new techniques, and change up your hobby projects to keep fresh. My tabletop battlefield for my Attack of the Warbots game scenario (using the Combat Patrol™ rules system) needed some more ruined industrial terrain. I also wanted to try some new painting techniques with chipping medium, as well as using some crackle paint. The goal was to make something ruined, rusty, with some degree of verticality that would complement my tabletop.
As far as building materials, I had been saving different bits and pieces of this and that for a few years in anticipation of scratch-building something to meet that need. I say saving, my wife says hoarding – (it’s not hoarding if the stuff is organized, labelled, and put away out of sight in drawers dear😁). A previous employer had supplied us with kits that contained dummy vials (empty) that we could use to teach the process of reconstitution of the real thing. At one point years ago, because the FDA drug labeling had changed, and the packaging that the kits had on them was no longer valid, we were ordered to throw them away. I did, but threw the vials into a drawer. I also had some oddly-shaped caps from body sprays, and a purloined cover from my wife’s blow dryer. To be fair, the cover no longer stayed attached, so that was fair game. I also had bits of polystyrene sheets and tubes, and leftover foam rubber pads (packing material) from something I no longer remember. So basically, I had a lot of trash to work with.
As the community painting challenge (run by Azazel) that I participate in for July was “The Jewel of July ’19 Community Painting Challenge”, I thought I’d switch up from doing tanks and make a scenery piece. The scenery qualifications were:
“It’s for the more impressive scenery pieces. A desert oasis or a (ruined?) temple or a bunker complex or a single bunker or a skyscraper or a Ferratonic Incinerator or a Kwik-E-Mart. A forest worth of trees or a jungle worth of plants.”
So, dear reader, you can be the judge of this project as a “jewel”, or not. It will have some good points and some not – I hope that if you have some feedback (good, bad, or otherwise) that you share it so that I and others can learn.
Construction and Planning
I assembled the assorted junk, and made a plan. The glass vials I decided would work well glued together top-to-top as chemical tanks. I had two vials that were plastic that I scuffed up, and I removed any paper labeling from all of them. The blow dryer screen would be the centerpiece. Using a leftover piece of polystyrene sheet (Evergreen #9060 – .06″ thick), I plotted out a chemical plant symmetrically. I made two elevated concrete pads for the shorter vials with thinner polystyrene (Evergreen #9020 – 0.02″ thick) and the foam pads, and Plastruct Bondene. For the vials, my epoxy of choice was E6000, though that did leave a lot of glue strings to clean up later. The tubing was Evergreen 3/16″ #226, complemented by cut plastic straws. Applying E6000 to the strws made them relatively solid. I used green stuff as the piping joints. The plan for the vials was to sequentially prime, apply rust paints, apply chipping medium, apply metallic paints, chip, and rust. The bases were to be done using AK crackle paints, with washing and dry brushing.
The missing cover came from here.
The assembled terrain piece, unpainted.
A side view of the unpainted piece. The smaller vials were plastic and held old normal saline. All were ordered to be discarded. This is how I did that.
Painting
I airbrush primed the piece with Vallejo Black primer, allowing 24 hours to dry. Then I airbrushed it with Vallejo Model Air “Rust” (#71.080).
Airbrushed with a rust base.
I then applied a liberal coat of Citadel “Ryza Rust” and a different Vallejo “Rust” (#71.069) that I hoped would show a nice rust effect under the final color coats. Then, I applied Vallejo “Chipping Medium” over the rust. I was very unsure of the amount to use here, or the pressure with which apply it with the air brush. Add to that the dry time, which I gave 24 hours – too much? I don’t know. Due to the terrain piece’s layout, it was also hard to get into all the areas with the chipping medium.
The rust on one side…
…and the other.
I then chose the final metallic colors for the vials, the pipes, the caps, and the screen. Those, and the other materials, you can see listed at the end of this post. I applied a caot of gloss black to the base to assist later “crackling”.
After applying the colors onto the vials.
At this point, I applied water with a stiff toothbrush to the vials, and that was supposed to cause the chipping. It did some places, but not everywhere. I had to resort to a toothpick in a lot of places, and that pulled ALL of the paint off. As repair, I used Citadel “Typhus Corrosion” trying to simulate rusted leaking tanks. I washed the vials with a light rust wash, and that turned the purple tanks pink/orange! I went back to the Typhus corrosion and tried to compensate.
After the chipping work.
After the chipping work – I tried to make it look pretty contaminated and old.
Then, I needed to add the two different crackle paints, along with washes and highlights. Before that, I applied a gloss varnish to help the crackling effect and to help protect the chipping effects. I knew I could use a matte varnish later to dull it up.
Crackle paints drying in sun on the base. Glossy vials…for now anyways.
After the crackle paint got a glossy wash.
Close up – definitely need to remove the gloss. But first, some dry brushing of the crackle paint was in order.
I sequentially dry brushed, washed, dry brushed, and washed the piece.
Finally, I airbrushed the piece with Vallejo Mecha Varnish “Matt Varnish”. As I had foam rubber part of the piece, I needed to avoid any use of rattle cans to prevent a real chemical meltdown!
Space Roos are surprised by Martians in the plant.
Well, at least it is done.
So, do I have a “Jewel of July” here. Maybe at least a garnet anyways. I think this is OK for the tabletop, given that it was basically made of trash. It hits the game tabletop today!
If you want to see a real “Jewel” – check out Alex’s piece here. THAT is impressive!
Back to my project, I was somewhat disappointed at the Vallejo “Chipping Medium”. I could not find much information on its use, and a lot of that was negative. The AK crackle paints are very good in my opinion, and I will look to see if they have a chipping product.
Any feedback – especially any thoughts on my process and the product – is always appreciated. As always, hope you enjoyed this post.
PAINTS, INKS, GLAZES, SHADES, WASHES, PIGMENTS, FLOCKING, GLUES AND MORE USED ON THIS PROJECT: