
As I described in my previous blog post, I wanted to work on expanding my collection of terrain in order to enhance the visuals and improve play for my retro sci-fi Combat Patrol™ games. Specifically, I wanted to add some ruined and battle-damaged buildings and rusty walls. However, I wanted them to look great – and weathering is a relatively new area of painting for me, hence the challenge!
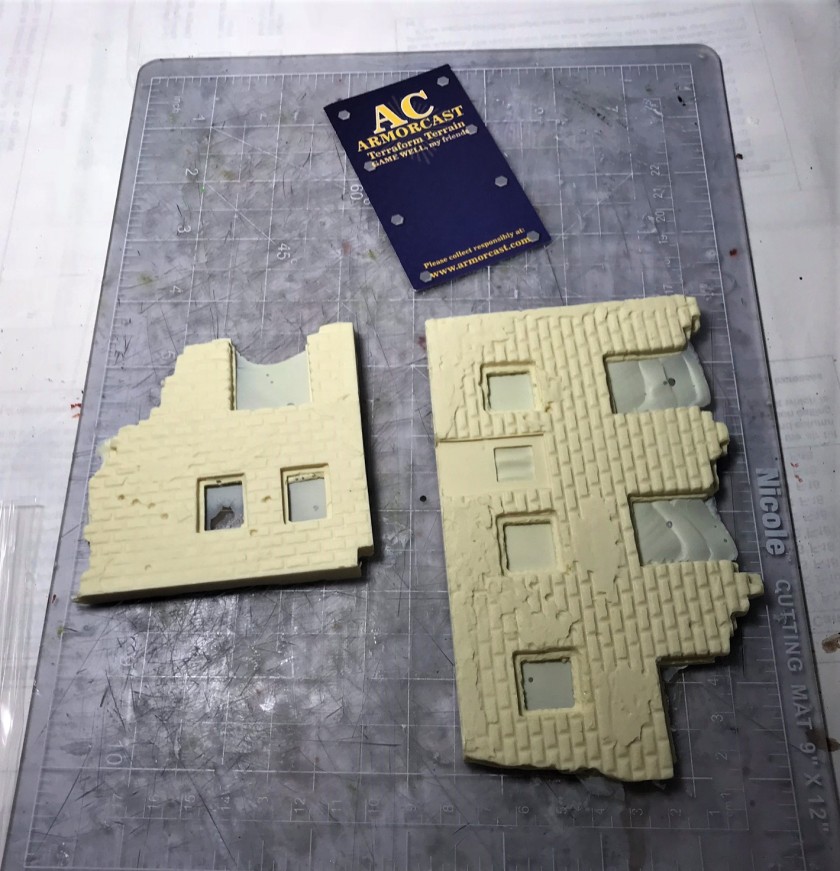
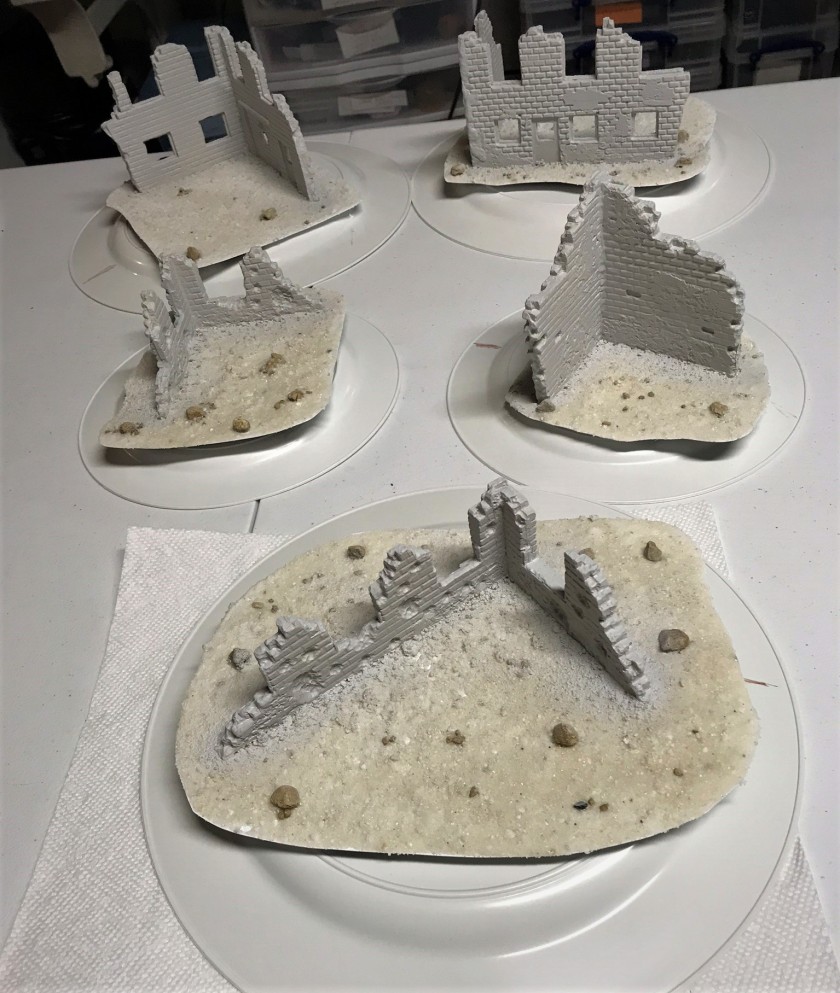
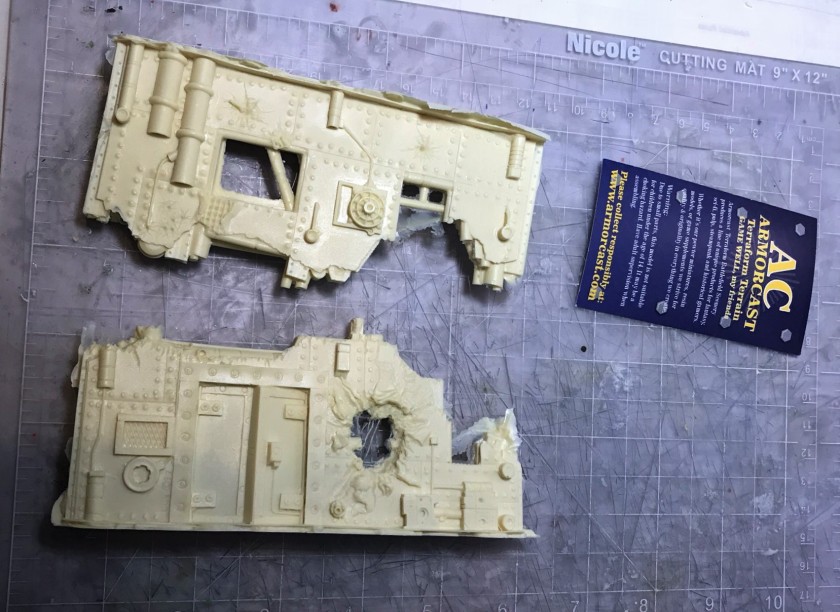
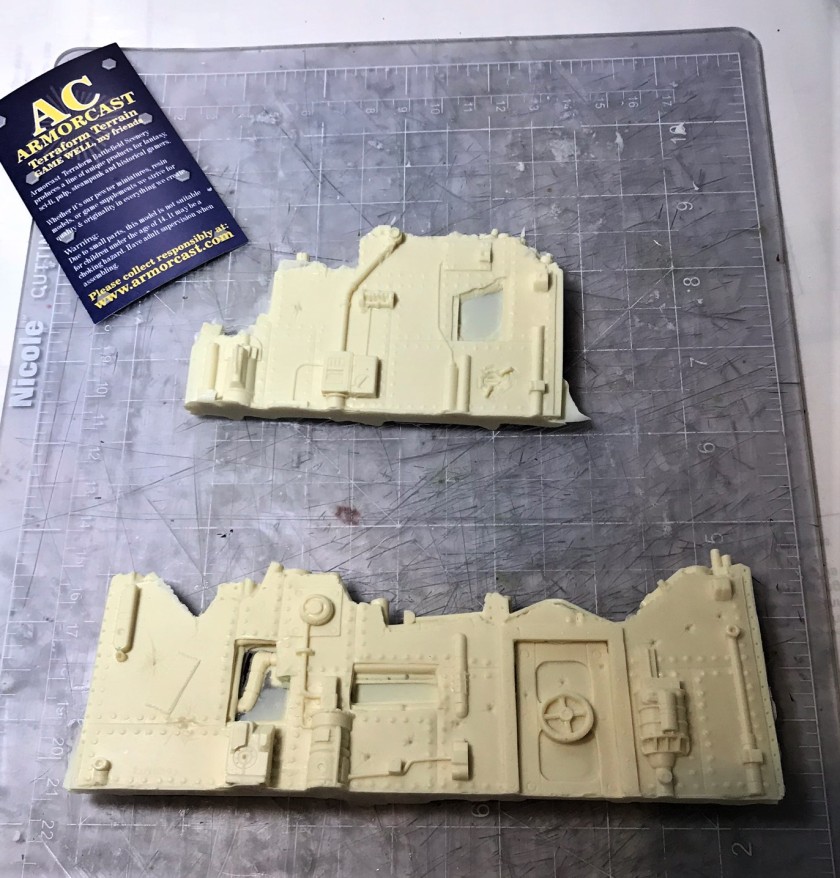
Working with some new materials was a central aspect – especially with regards to weathering and rusting techniques. My journey started in August with Armorcast’s 3-crater set and using Vallejo Pigments. Subsequently, I followed that project up with putting together five ruined buildings and six sci-fi walls (both from Armorcast as well). They included:
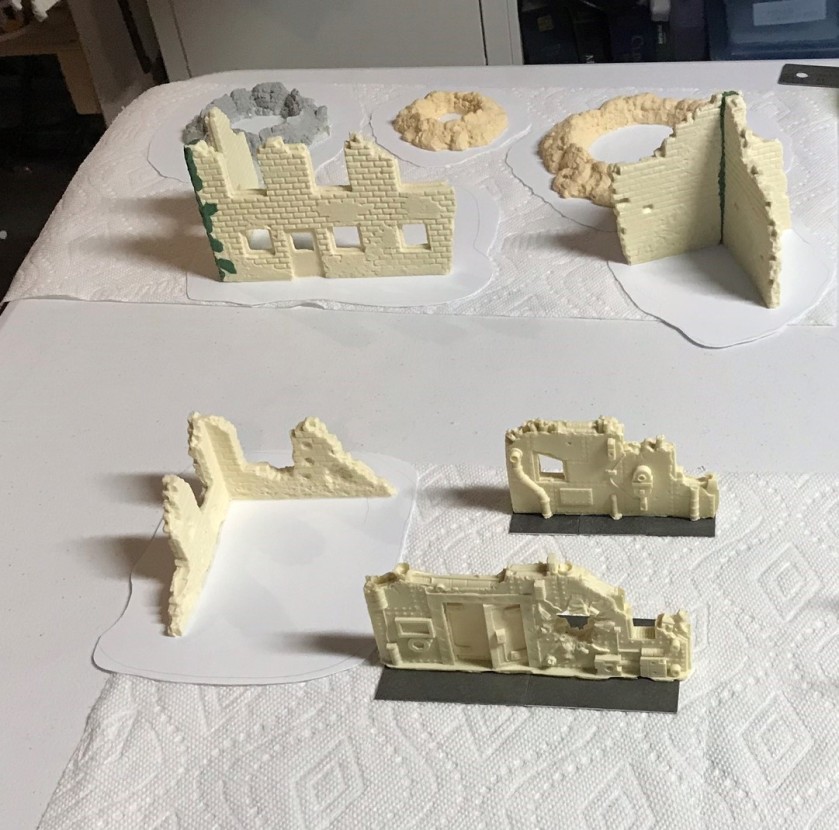
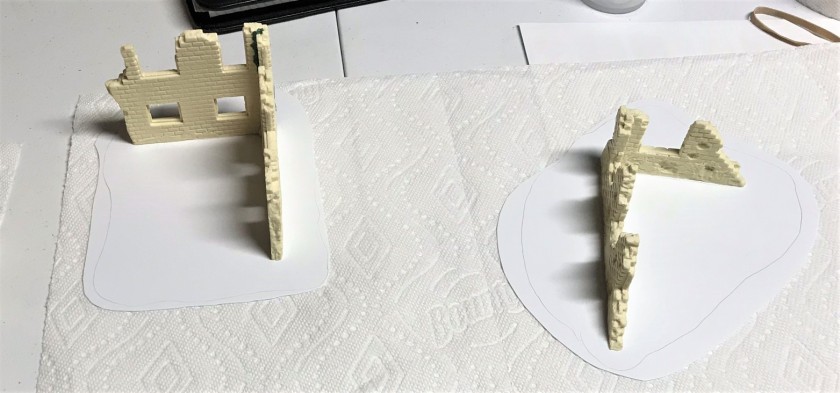
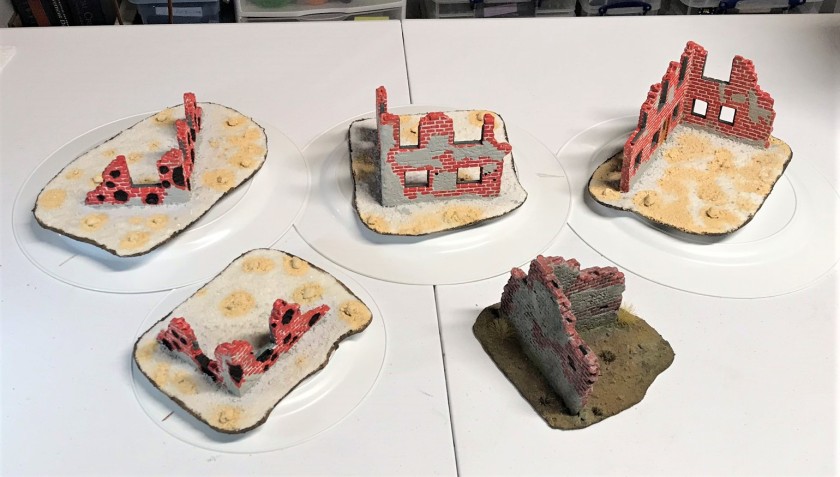
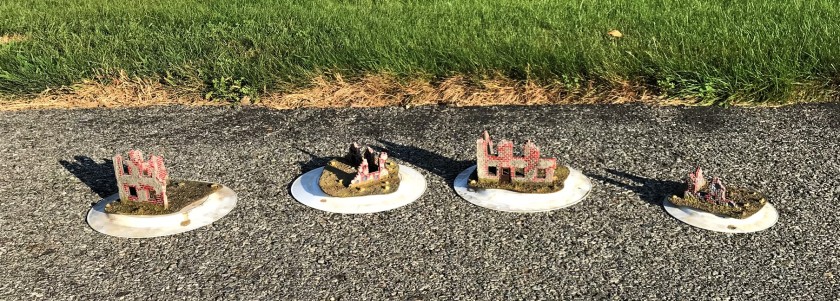
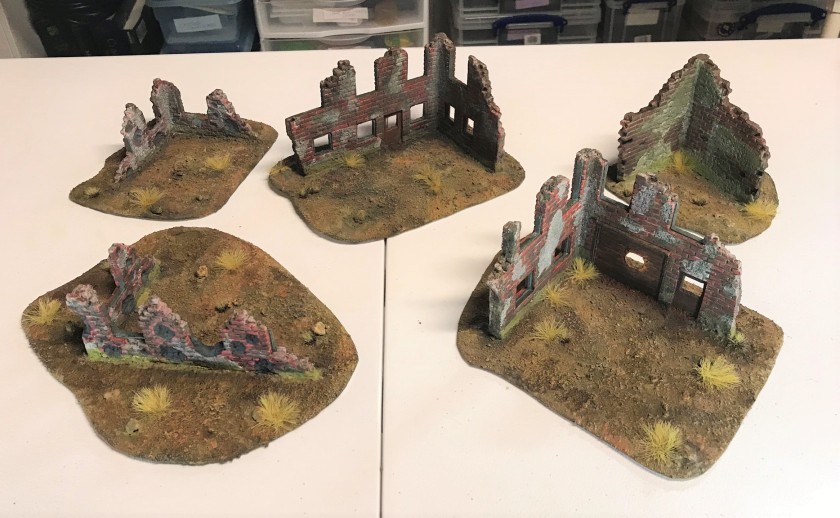
- 5 ruined building corners
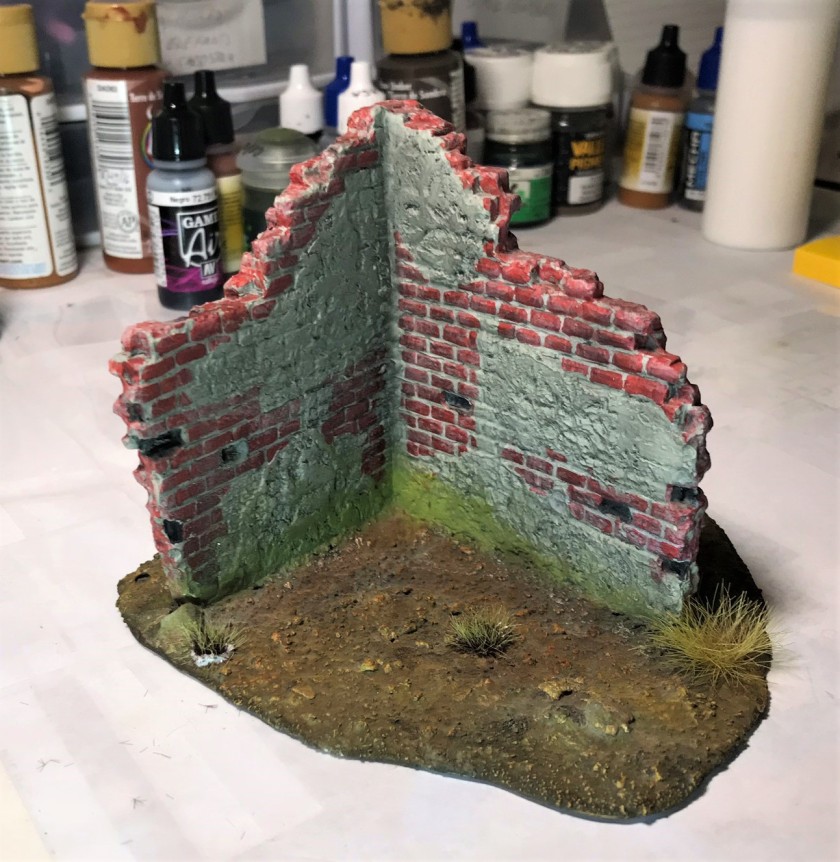
- 1 ACRB008 Corner, 3½” tall sculpted by Cal Gorton
- 1 ACRB009 Corner, 3½” tall, long sculpted by Cal Gorton
- 1 set of ACRB013 corners (set includes 2 pieces), low ruins with shell holes sculpted by David Garton
- 1 T-Section, 3½” tall sculpted by David Garton
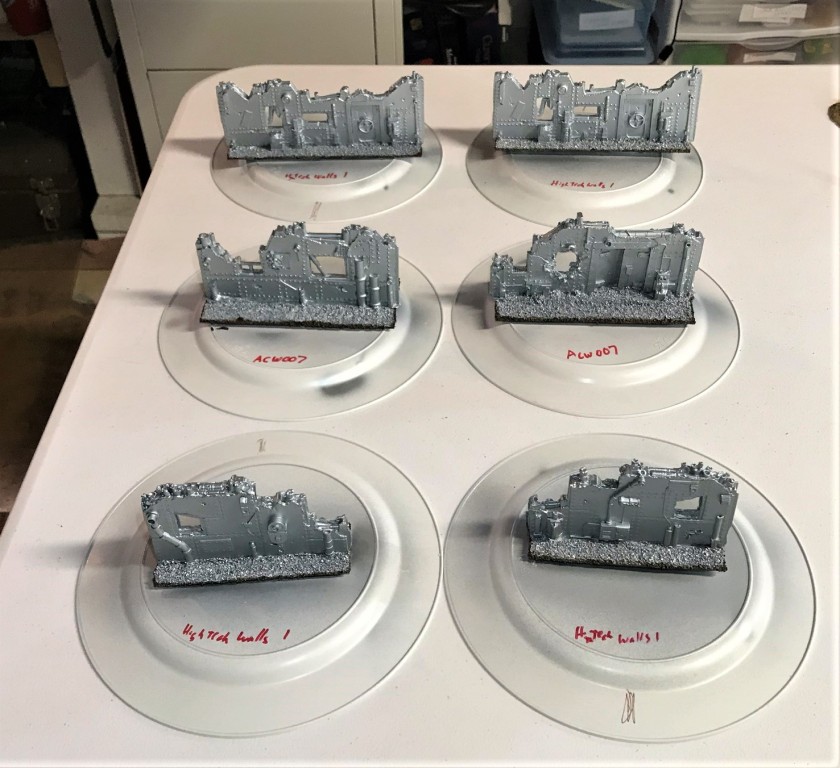
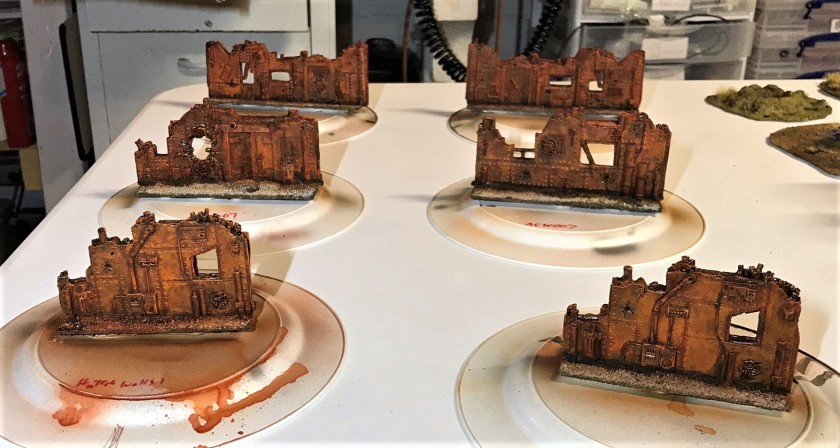
- 6 battle damaged sci-fi walls
- 1 set of ACW007 High Tech Walls 2 (each set includes 2 walls) sculpted by Shawn Lux
- 2 sets of High Tech Walls 1 (each set includes 2 walls) sculpted by Shawn Lux
To complete the project, and work on my techniques, I made a list of goals. I desired to employ several new (to me) technical skills, materials, and techniques. I ended up checking off on all of these except for using the Citadel “Nihilakh Oxide” and the Vallejo Mecha Weathering “Oil Stains (Gloss)” as they proved to be unneeded.
Below is my initial list of goals – the ones in bold were ones used and apply to this post.
- Assembling, building, and basing terrain
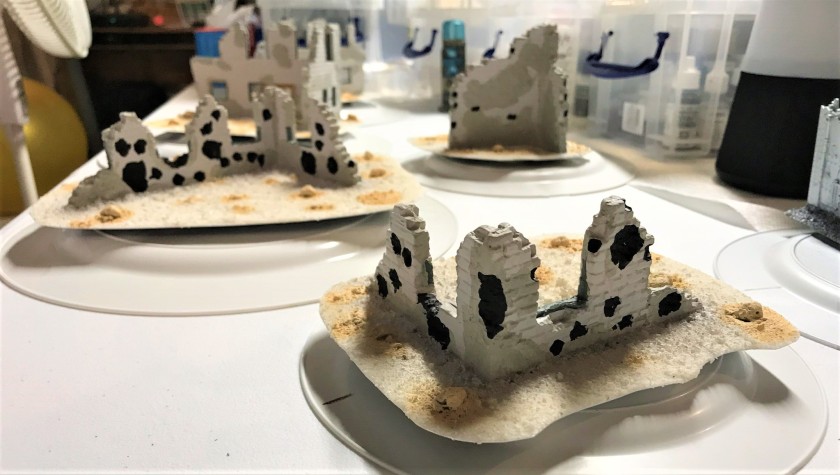
- Use of materials to create weathering and rusting effects, to include:
- Vallejo Pigments, to include application and fixing (covered in this blog post)
- Vallejo Mecha Color weathering products
- Weathering and rusting/oxidizing effect products, to incude:
- Citadel Technical paints:
- Typhus Corrosion
- Ryza Rust
- Nihilakh Oxide
- Vallejo and Vallejo Mecha Color rusting and weathering products
- Vallejo Pigments (various)
- Vallejo Game Air rusts (71.069 and 71.080)
- Vallejo Mecha Color Weathering products
- Oil Stains (gloss)
- Rust Wash
- Rust Texture (Matt)
- Citadel Technical paints:
- Create a new storage system for my terrain pieces
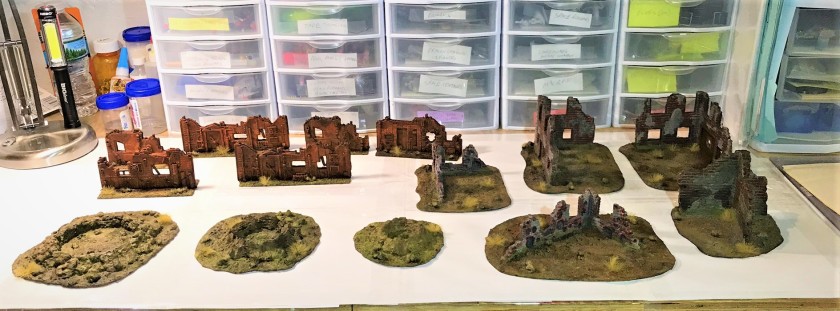
I am glad that I got to use most of them. The buildings will be discussed first, and then the walls, and finally my storage box work. I will aim for plenty of visuals, and there will be eye candy at the end! I will list a lessons learned section and a materials section at the end of the post for those interested. This should hopefully be useful for some of you.
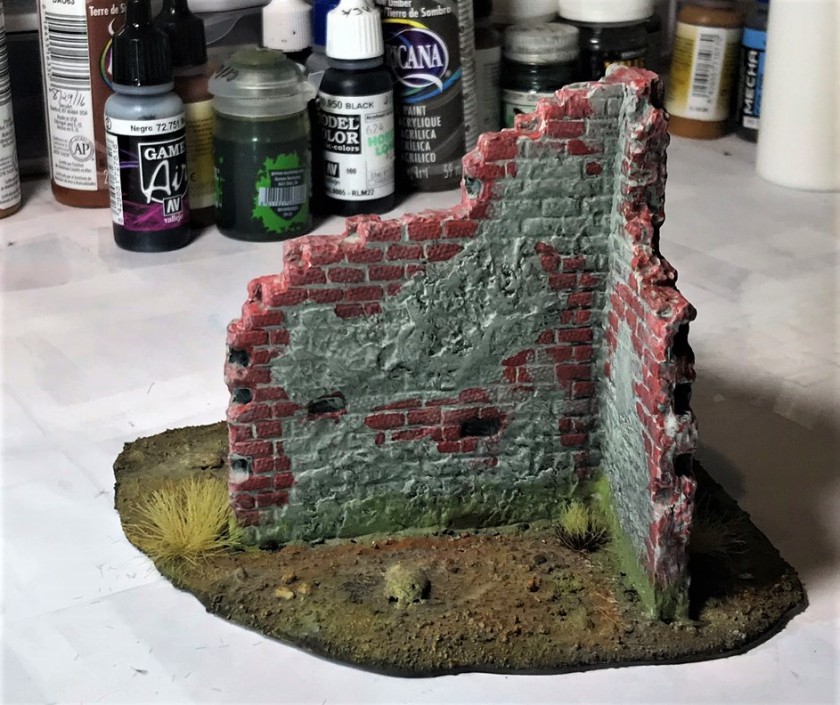
Ruined Buildings


Sci-Fi Walls


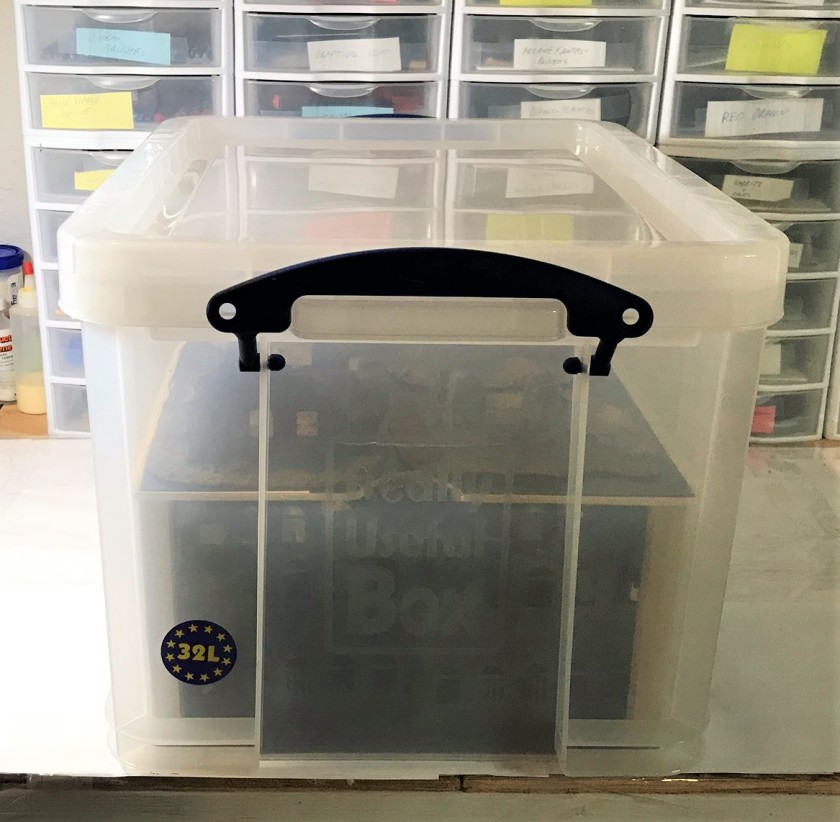
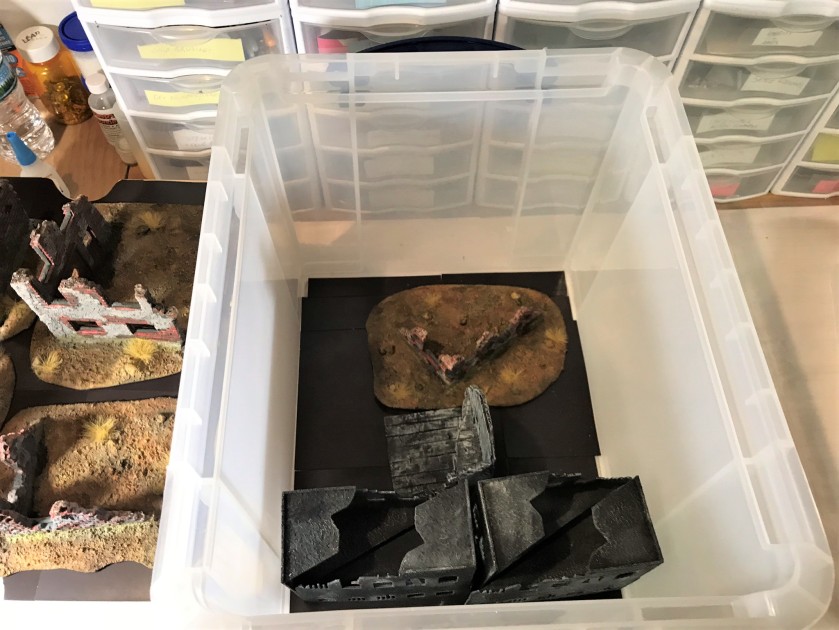
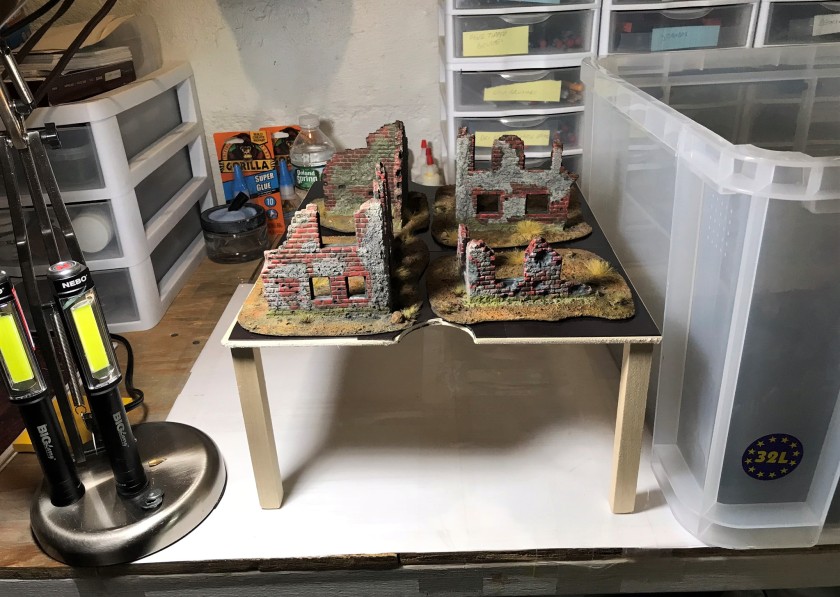
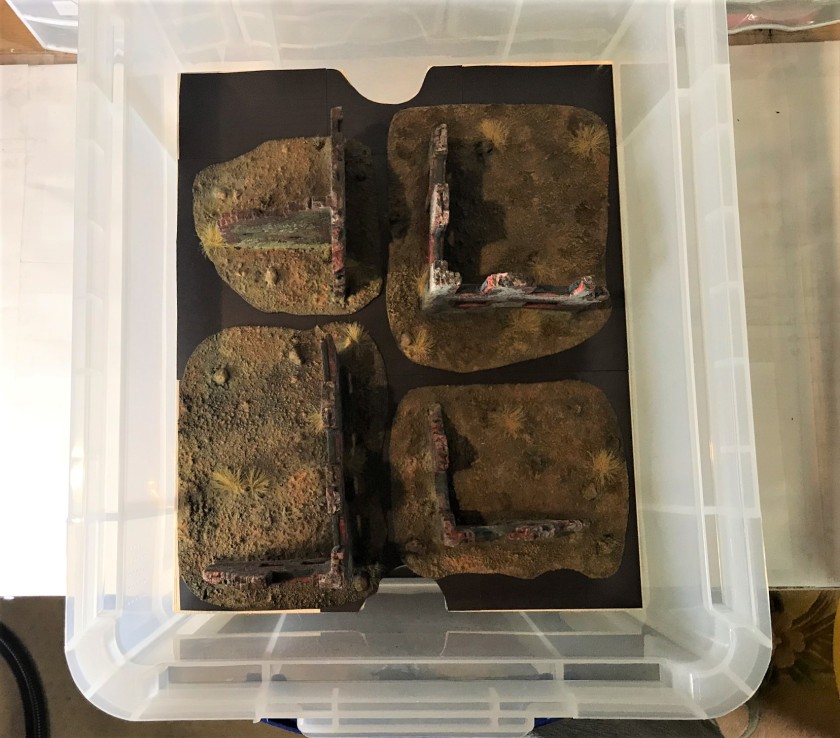
New Storage System/Box
Now that I had all this new terrain, especially the buildings, I needed a good efficient way to store and transport them to my games. I decided to use a 32-liter Really Useful Box and to design a level inside to optimize its volume. Essentially, I built a tray with legs to insert into the box and make it into multiple levels. I plan on repeating this for other terrain in my collection. Note that I use Aleene’s Magnetic Tacky Sheets from Michael’s to line the storage surfaces.
Lessons Learned
I have several “lessons learned” about this project, and I also got great feedback on my last crater post. One area of feedback that I got was from Azazel who suggested I needed a gaming mat. I had wanted to get one or two, but they are indeed expensive. Thanks to advice from him on my last post (and all of you who give me feedback – I thank you all from the bottom of my heart) – and that’s the truth!
Anyways, I got two neoprene (mouse pad material) mats from Gamemat.eu in the Czech Republic. One is “Wastelands”, and the other one is “Highlands in War”. I think both will work well with my terrain, and you can see them in the “eye candy” section below the lessons learned.
So here are the lessons and thoughts I have from the project – some are the same as the crater project, and some are new – but I though I’d try to be complete and list them all here:
- The cleaning and scrubbing of the resin helped with the priming. The Scotch-Brite pads work well for this use.
- Armorcast terrain pieces are fairly priced and a good value. The quality was easy to work with, and any issues were easy to address with green stuff.
- For terrain pieces that will be totally covered in pigments, priming them is not needed.
- You can indeed airbrush a wash, but NEVER try to airbrush anything with “texture” in it, no matter what the label says (maybe a bigger nozzle might work, but I only have one size).
- Fixing pigments with airbrush thinner is easier than with pigment binder. However, add any additional large features, such as extra rocks later, or use pigment binder on the rocks.
- Affixing larger models to plastic dinner plates is a good option for handling without touching the painted surfaces.
- Having trays and palette wells (such as the one I put my pigment palette in) while working with pigments cuts down on the mess considerably. Be ready to use multiple brushes, both wet and dry. The mess vacuumed up or washed off easily from my palettes and trays.
- Always ensure your pigment bottles are shut tight. I see how they could spill over easily.
- PVA glue and play sand are an inexpensive winner.
- The combination of thin steel and thin polystyrene yields a model base with little to any “rise” from the tabletop at its edge, and is strong.
- Real rusting takes time and is random. So is weathering it. The Vallejo and Citadel products I used were really nice. I do see how the pigments would be useful for rusting and will have to try that too sometime.
- Thin your varnish to prevent the crazing! You can airbrush the thinner easily directly on pigments, just need to watch the airflow so they are not blown off.
- The Vallejo pigments video is a must see for newbies.
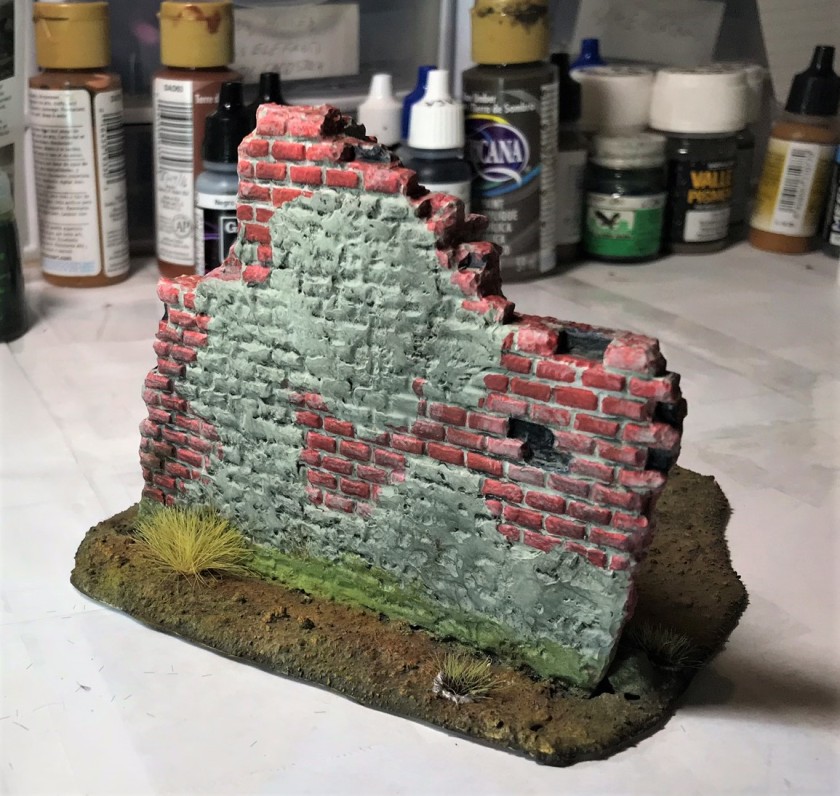
- Washes help in the end for touch ups.
- Love my storage box design!
- Shadow’s Edge Miniatures tufts are fantastic – need no extra glue and dry clearly.
- I love my new game mats!!
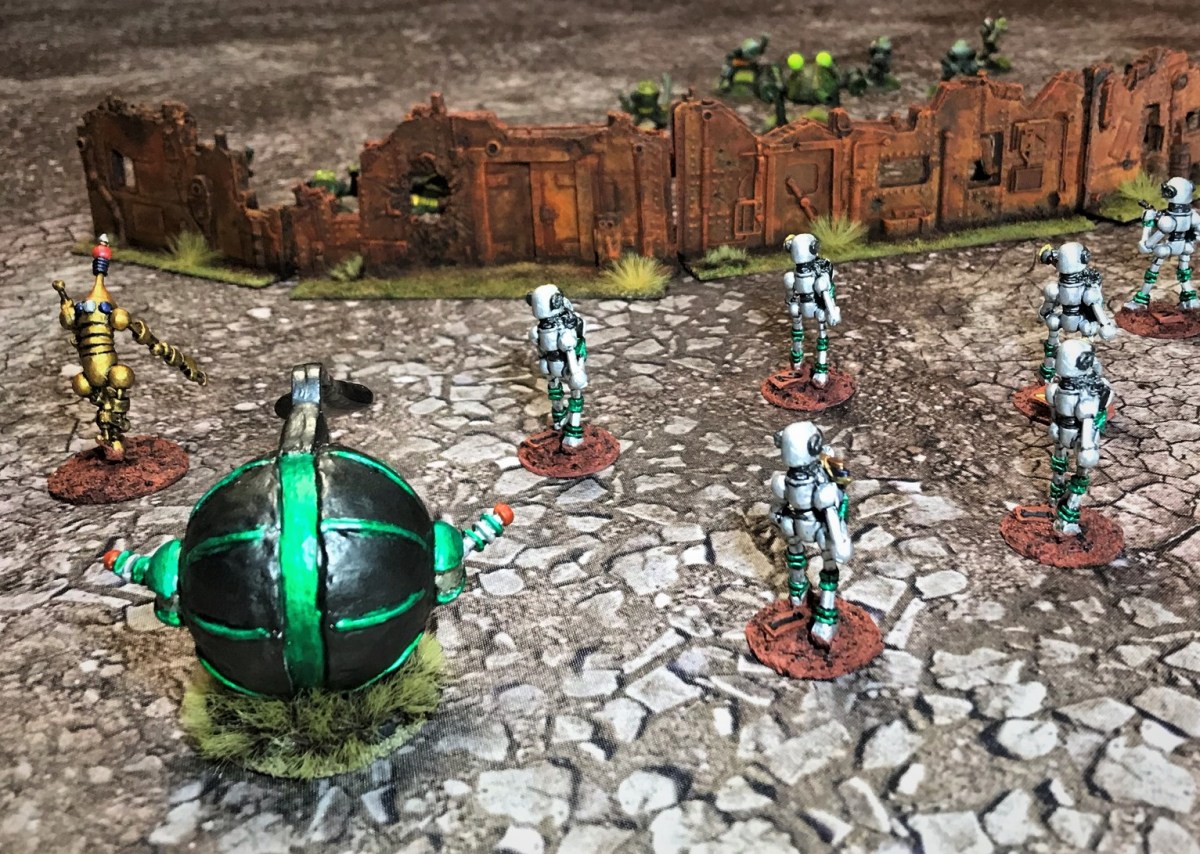
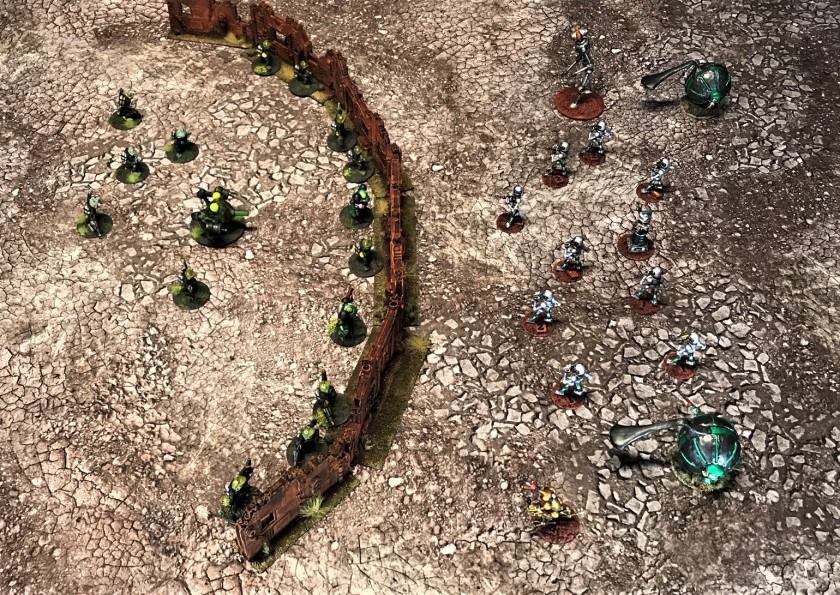
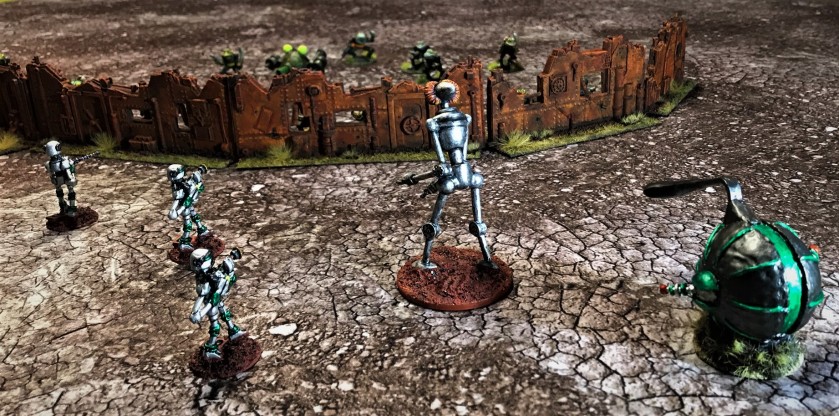
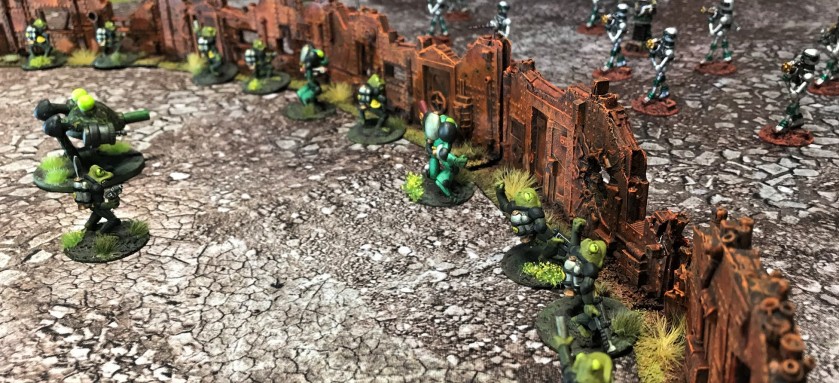
Eye Candy!
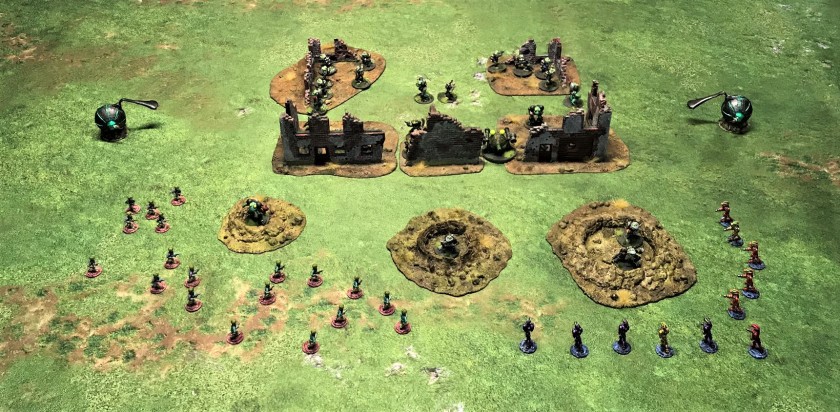


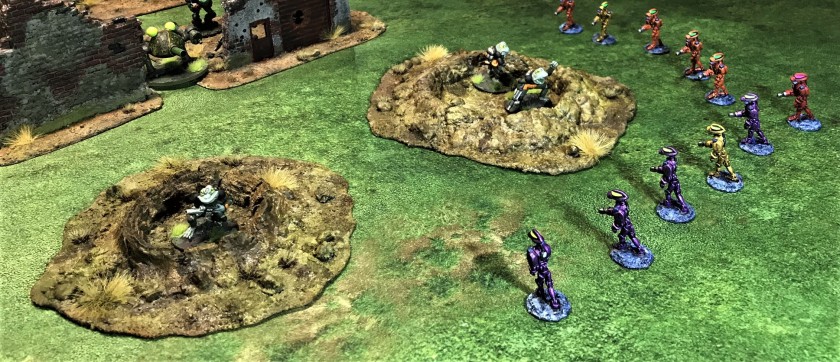

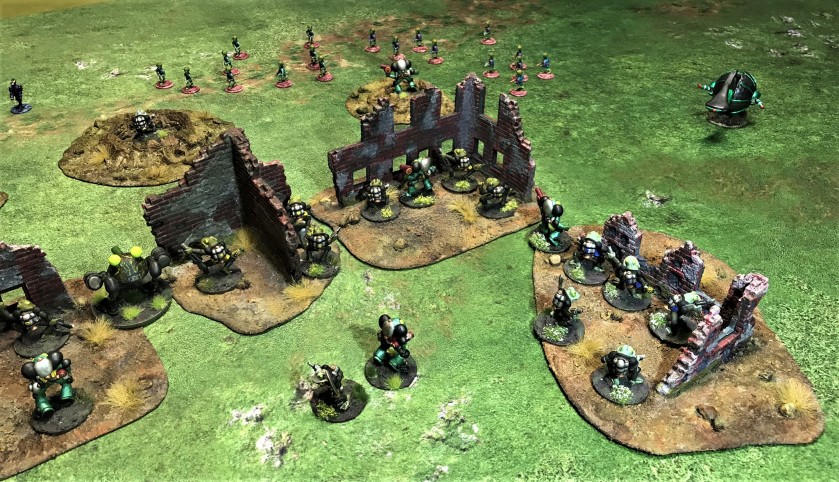

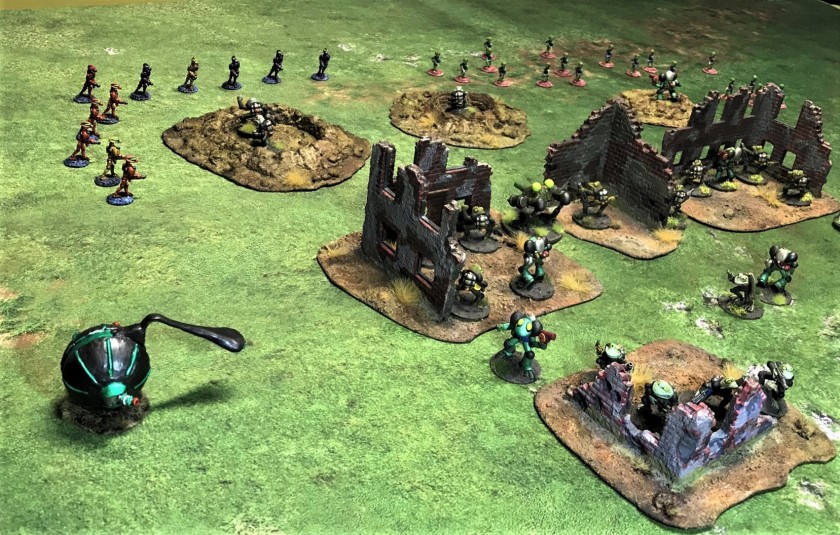

Now for the walls on the “Wastelands” mat! Here we have the F.R.O.G. Commandos getting picked on again and getting assaulted by Archive Warbots, Roberker, and more Mark 1 Sphere tanks – will they hold?


Hopefully you found this post fun and informative. Please leave any feedback or suggestions in the comments section – and I realize that this was a long post, so if you’re still reading, THANKS!
PAINTS, PIGMENTS, INKS, GLUES, GLAZES, WASHES, AND FLOCKING USED:
- Vallejo “Surface Primer – Gray”
- Vallejo “Airbrush Thinner”
- Vallejo “Airbrush Flow Improver”
- Army Painter “Black Battlefields” (flocking)
- Green stuff (kneadatite)
- Generic play sand
- Elmer’s “Glue-All”
- SceneARama “Rocks”
- Vallejo “Pigment Binder”
- Evergreen Scale Models #9020 0.5 mm plain polystyrene sheets
- Gorilla Glue
- Wargames Accessories steel bases (various)
- Vallejo Game Air “Wood”
- Vallejo Game Air “Steel”
- Americana “Raw Umber”
- Polly Scale “WWII Luftwaffe Uniform Gray”
- Vallejo Mecha Color “Dark Steel”
- Vallejo Mecha Color “SZ Red”
- Polly Scale “WWII British Aircraft Gull Gray Light”
- Vallejo “Black”
- Vallejo “Dark Slate Grey” (pigment)
- Vallejo “Light Slate Grey” (pigment)
- Vallejo “Light Sienna” (pigment)
- Vallejo “Faded Olive Green” (pigment)
- Vallejo “Light Yellow Ochre” (pigment)
- Vallejo “Natural Umber” (pigment)
- Citadel “Balor Brown”
- Citadel “Skrag Brown”
- Polly S “Rust”
- Vallejo Mecha Weathering “Rust Texture (Matt)”
- Vallejo Game Air “Rust 069”
- Vallejo Game Air “Rust 080”
- Citadel “Typhus Corrosion”
- Citadel “Ryza Rust”
- Vallejo Mecha Weathering “Dark Rust Wash” (wash)
- Citadel “Valhallan Blizzard”
- Vallejo “Titanium White” (pigment)
- Vallejo “Carbon/Smoke Black” (pigment)
- Secret Weapons Washes “Stone” (wash)
- Vallejo Mecha Weathering “Light Rust Wash” (wash)
- Citadel “Nuln Oil (Gloss)”
- Citadel “Niblet Green”
- Citadel “Athonian Camoshade” (wash)
- Citadel “Agrax Earthshade” (wash)
- Testors “Universal Acrylic Thinner”
- Vallejo Mecha Varnish “Matt Varnish”
- Army Painter “Wasteland Tufts”
- Shadow’s Edge Miniatures “12 mm tufts”
Thanks again – and please let me know your thoughts and suggestions in the comments section!

Cracking job mate, these all look fantastic! Congrats on picking up some mats too mate – they are pricey, but oh so handy… as an added bonus, I’ve found that they are very kind to lead figs (dropped minis tend to bounce rather than chip!)
LikeLiked by 1 person
Thanks Alex! I did debate for a while about which ones to get, and the anti-chipping feature is a bonus for sure. I’ve been lucky so far in that my varnishing has protected my paint jobs. The carry bags for the mats are nice too.
LikeLiked by 1 person
Great stuff Mark but that’s what we’ve come to expect these days! Love your methodical approach to record keeping too. Next steps? I reckon it’s time to start scratch building your own terrain, buildings, trees, etc, you’re clearly capable of doing so.
LikeLiked by 2 people
Thanks TIM, and as I think I said before, your dioramas helped to inspire me to do more for the games with regards to terrain. I’m always open to scratch building too, but I think I need more placards, (game markers) so I’ll probably scratch build those. A lot of my sci-fi minis have jet packs, and I ran out last game I ran. Then there’s the lead mountain to chip away at…🙂
LikeLiked by 2 people
Everything in good time mate, just enjoy it.
LikeLiked by 1 person
Awesome mark. You’ve done so well here. I want a mat
LikeLiked by 1 person
You deserve many mats IRO!
LikeLiked by 1 person
And thanks of course!
LikeLike
Simply stunning work Mark!! love the Sci/Fi walls the rust work is excellent, but for me the ruined brickwork is the star of the show, those look perfect! Top work and a great write up as well.
As said above, some scratch building next, I think.
Cheers Roger.
LikeLiked by 1 person
Hmmm, possibly. I have some “humorous” terrain options I could pursue…glad you liked the brickwork Roger, let me tell you it was a bit tedious! Thanks again for the kind feedback as always!
LikeLiked by 1 person
Great post- your weathering is very good. Nive to see the action shots at the end too.
Cheers,
Pete.
LikeLiked by 1 person
Thanks Pete, its nice to see the painting work out such that others like yourself like it. I did enjoy it, though it was more work than I initially believed it would be
LikeLiked by 1 person
That’s quite a comprehensive post Mark! Nice to see all of that terrain turn out so well. The extra wash on the brick walls has really done the job! And I’m pleased you got your mats – both look good, but I like the “Wastelands” mat in particular. Have really enjoyed this post!
LikeLiked by 1 person
Nice to hear that JNV, agree on the final wash being the kicker. I went with more pics so it would be easier to digest but yeah, it was a bigger post. I do like my mats, and the Wastelands one will get its share of play for sure.
LikeLiked by 1 person
Fantastic work here, Mark. I’ve got both those sets of walls that you’ve done here and you’ve really done a great job on them all. Glad to see that the mat info was helpful to you as well – your new tables look great with the units and terrain on them!
…though looking at some of those bases, you might need a red desert mat of some description in the future? 😉
LikeLiked by 1 person
Ha! I did have a red desert/Mars one in my mind but at the price that hey are at that will be a later purchase consideration. I tend to work on bases with different materials, often to differentiate the units the figures belong to so that game play is easier. Otherwise I’d have to have multiple units for different terrains…
Oh yeah, my wife would just LOVE it for me to have bought 3 mats initially! 😏
LikeLiked by 1 person
Heh. I found the mats were a new addiction and god a couple, then a few more, then a few more. You know, to cover almost every eventuality and a reasonably large selection of surfaces… 😉
LikeLiked by 1 person
So you can save on flooring for your house!
LikeLike
Great work on the walls mate ,I bet you loved painting all those bricks eh! .I noted that your photos are really good to ,I must do a photography course in the near future as mine are so poor .
LikeLiked by 1 person
Ha! Pat that was my tedious surprise! Glad you like the photos and I only use an iPhone 7 with a couple of lights on the side usually. I think the mat pics were a bit bright but that’s because they were taken on a table that was directly under an LED shop light. I download the pics from iCloud on my desktop, and crop,adjust the light, clarity, and color, etc. Then I add them to WordPress.
LikeLiked by 1 person
Just love it Mark ! I’m a 63 year old fossil mate ,I think I know what a LED light is but after that matey you have lost me ,thankyou any way . I showed the Tech adviser your info, and after she sniggered and left the room I’m sure she said poor man, doesn’t he know he is dealing with an old fool ! ,or maybe I miss heard her.
LikeLiked by 1 person
Ha! As today is my last at 55, I can appreciate that. I’d like to think that I had all that tech stuff down but I just learned by trial and error. And my approach is pretty basic I’m sure compared to what could be done, but I’m ok with that!
LikeLiked by 2 people
Hey! Happy Birthday, Mark!
LikeLiked by 1 person
😎
LikeLiked by 1 person
Great to hear Mark, you inspire me to do better mate and apply myself and not just rely on the Tech adviser ,shit she might find a bloke and move out and then where would I be ,left with the old girl that knows about as much as aHHH !
LikeLiked by 1 person
Cool…but…Sounds like you failed a saving roll?
LikeLiked by 1 person
Wow, great looking terrain Mark! The Secret Weapon Stone wash really did the trick on that brick wall. Sorry it was so tedious, seems like there should be an easier way. Maybe painting solid red, then painting in the lines? I don’t know, I imagine there is no simple way, if you can’t dry brush it. Perhaps thin tape strips and airbrush over the top? I’m grasping at straws, haha! Having said that, would you buy brick terrain again or did you get fed up with it?
Those rusted SciFi walls are pretty awesome. They look like post-apocalypse stuff, and look great on the Wastelands map. Hope to see a jungle map someday with some old brick ruins. 😉
I’m in no rush to buy more terrain, but I’ll have to look up the Armorcast stuff to see what scale it comes in.
LikeLiked by 1 person
Thanks Faust! The brickwork was tedious but in the end I was glad with the results. Probably would have been just as tedious to use tape. It did make the brickwork look more realistic in my view. I do plan on getting more, most of what I’ve seen from Armorcast is 28 mm. Like the idea of jungle and rusted walls…hmmm…maybe FROGS!
LikeLiked by 1 person
I’m glad it didn’t deter you, definitely want to see more of you what you can do with terrain.
LikeLiked by 1 person
Thannk you for this
LikeLiked by 1 person