It’s been a bit busier on the gaming front. Jared Burns (USAFA ’04) and I (USMA ’84) got together last Sunday afternoon in preparation for the launch of the Mass Pikemen Gaming Club . We play-tested Combat Patrol™ with Star Rovers figures that I have previously posted about in this blog, as well as an X-Wing game.
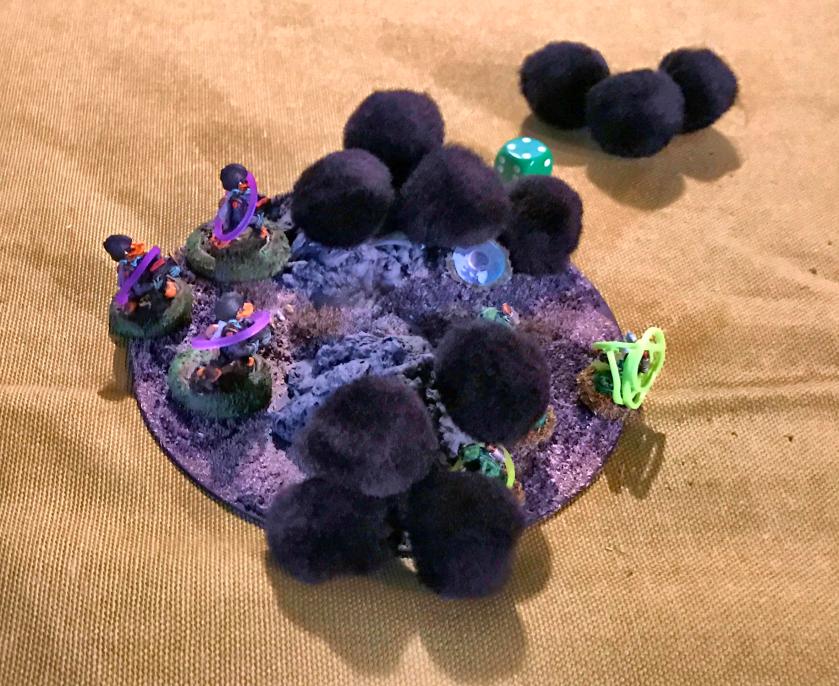
The scenario was one where the Frinx and some Aphids were protecting RT22 in a bunker behind an old factory. The Star Ducks, led by Duck Vader, were attacking to seize RT22, using their jet packs to quickly assault through the open ground which the Frinx had covered with anti-tank weapons. I gave the Star Ducks 3 chances in the game to use their jet packs at 3 movement cards per try – and that worked well rules-wise.
Highlights of the battle! There was a grenade-throwing fest in the center (one of my grenades scattered back into me adding to my losses) between one Star Duck team and a green Aphid team. This resulted in multiple casualties, especially when one of my Aphid’s grenade attacks rebounded from a rock, but the Star Ducks had the better of that fight.
I gave Duck Vader the ability to deflect incoming direct fire, but I got lucky. Duck Vader was in the open at short range and got lit up by two Frinx bazookas and the Frinx platoon sergeant with an automatic grenade launcher. End even though I gave him a 5 endurance, his goose (or rather duck) was cooked with about 7 wounds. His demise then caused the entire Star Duck force to lose heart, effectively ending the game.
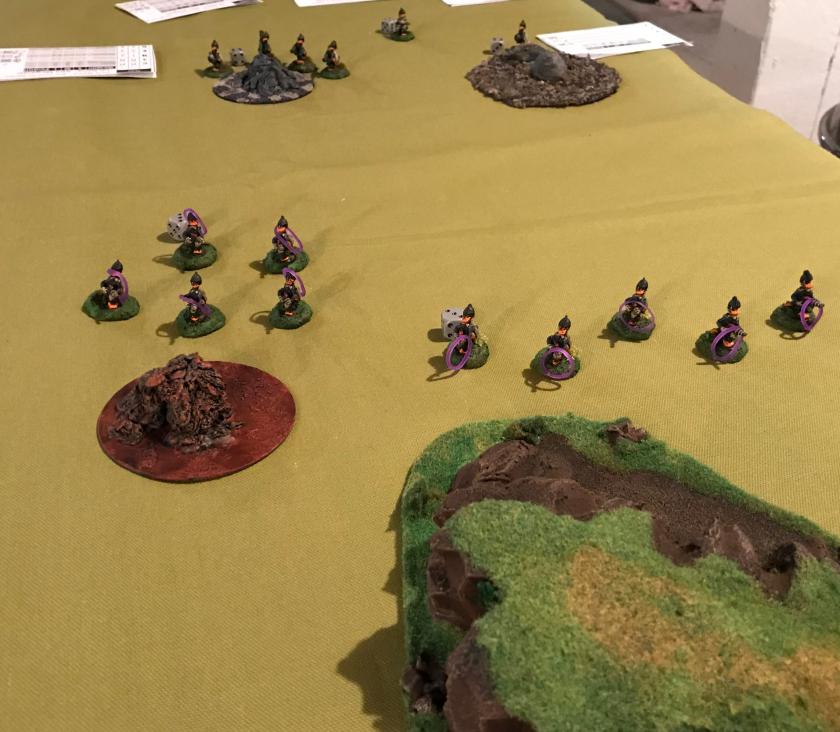
The Star Ducks effectively advance on the escarpment. The purple bands indicate jet pack uses.
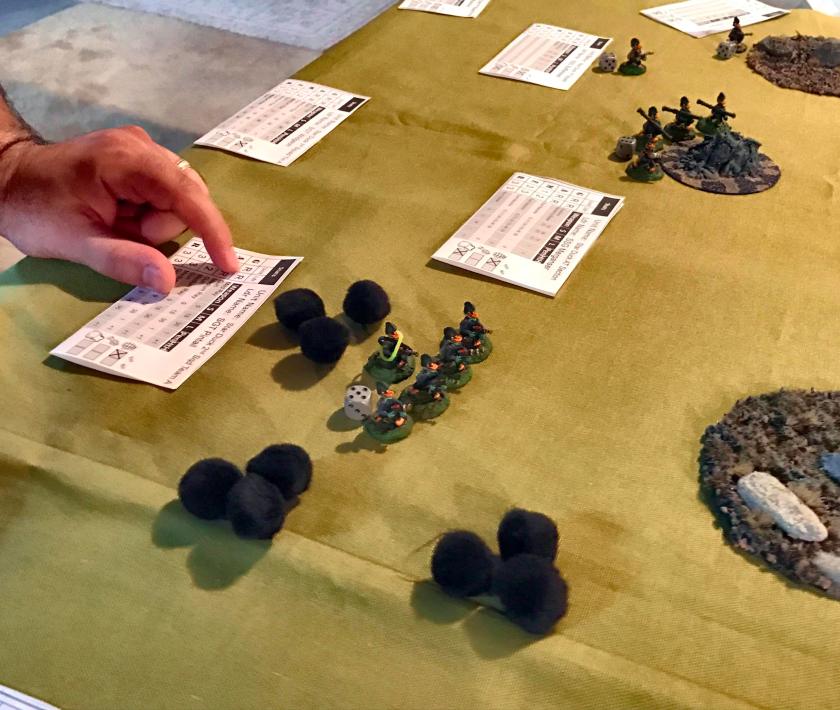
The Frinx guard the factory ruins with anti-tank weapons and an automatic grenade launcher.
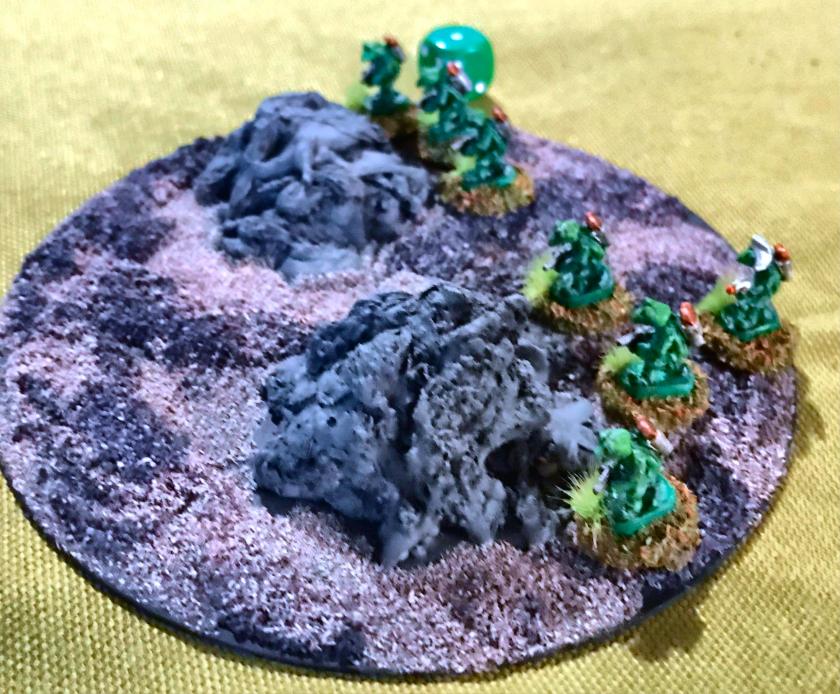
A green (in terms of morale and literally!) Aphid Squad awaits its doom from a storm of grenades.
Star Ducks deploy.
The Star Ducks take multiple incoming rockets, wounding a team leader.
The Star Ducks put the hurt on the Aphids with a storm of grenades.
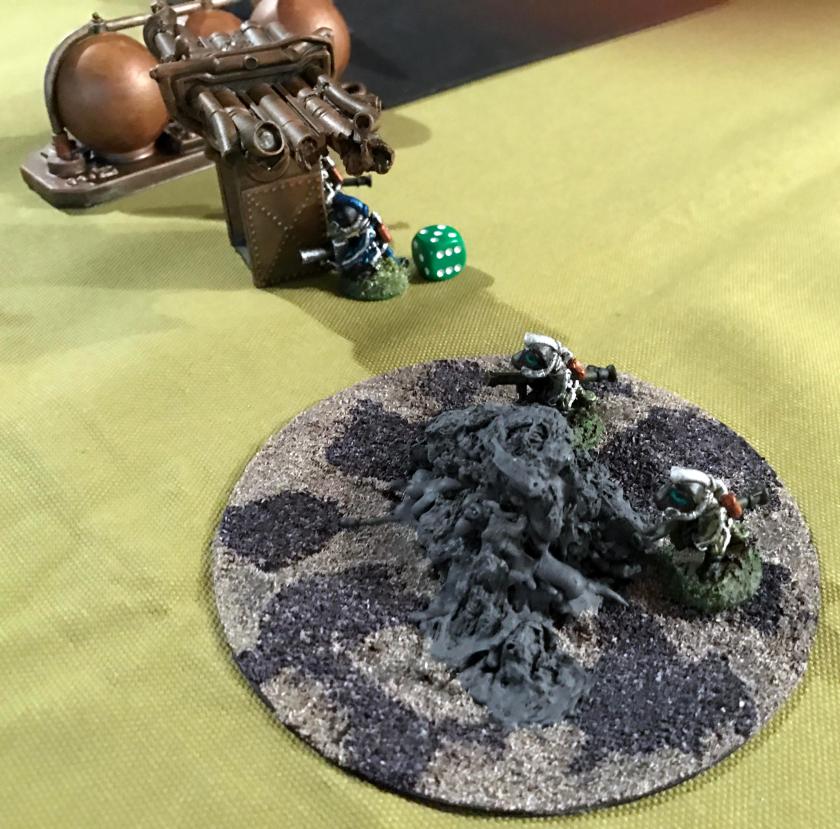
In the foreground, the Star Duck AT team prepares to rain doom on the Frinx. In the upper left, the Aphids attempt to return grenade for grenade, only to bounce them back at themselves.
In the upper center, the Star Ducks jet pack and prepare to flank the Frinx. However, in the foreground, Duck Vader is mortally wounded.
The viewpoint of the Frinx who killed Duck Vader.
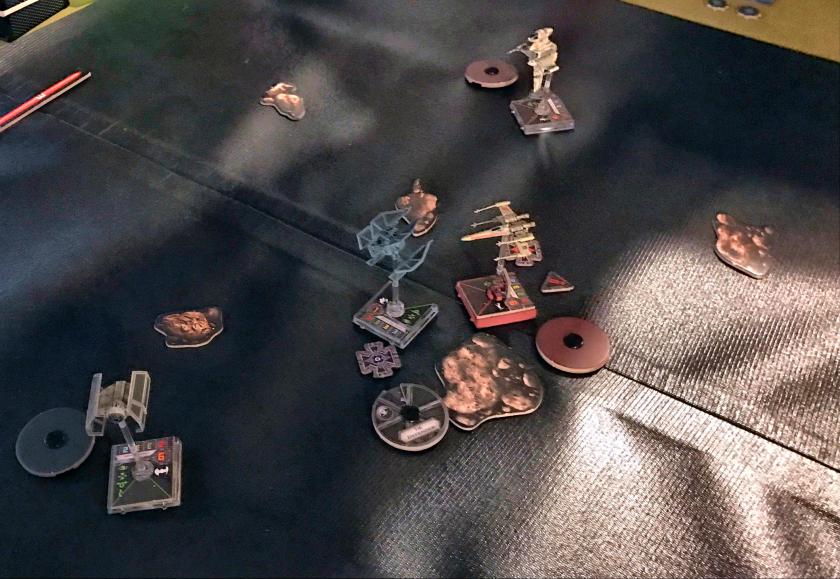
We then played X-Wing, and it was time for the USAF guy to beat (really thrash) the Army guy…ironic…he was the Empire so the day evened out. It was a good playtest for our first game night on July 27th. Jared did a nice job in teaching me the game – and then avenging the previous game. He was the Empire, and I was the Rebels with two ships each.
I successfully pilot my X-Wing into an asteroid…and fail to hit the Empire’s ships.
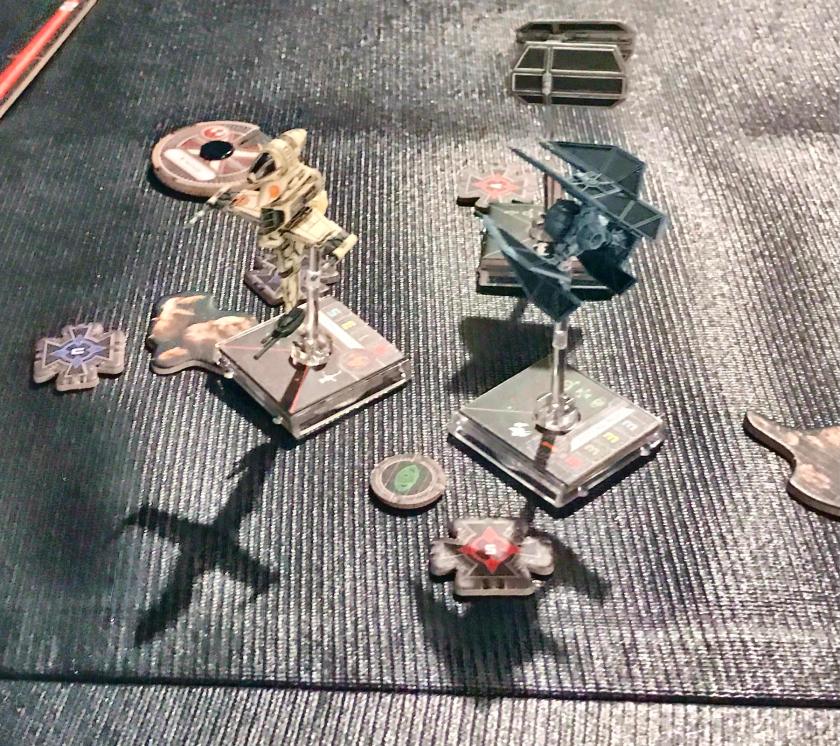
With my X-Wing dispatched, the Empire finishes off my hapless B-Wing.
I really liked the game and the ease at which I learned the basics. Thanks to Jared for a great day!
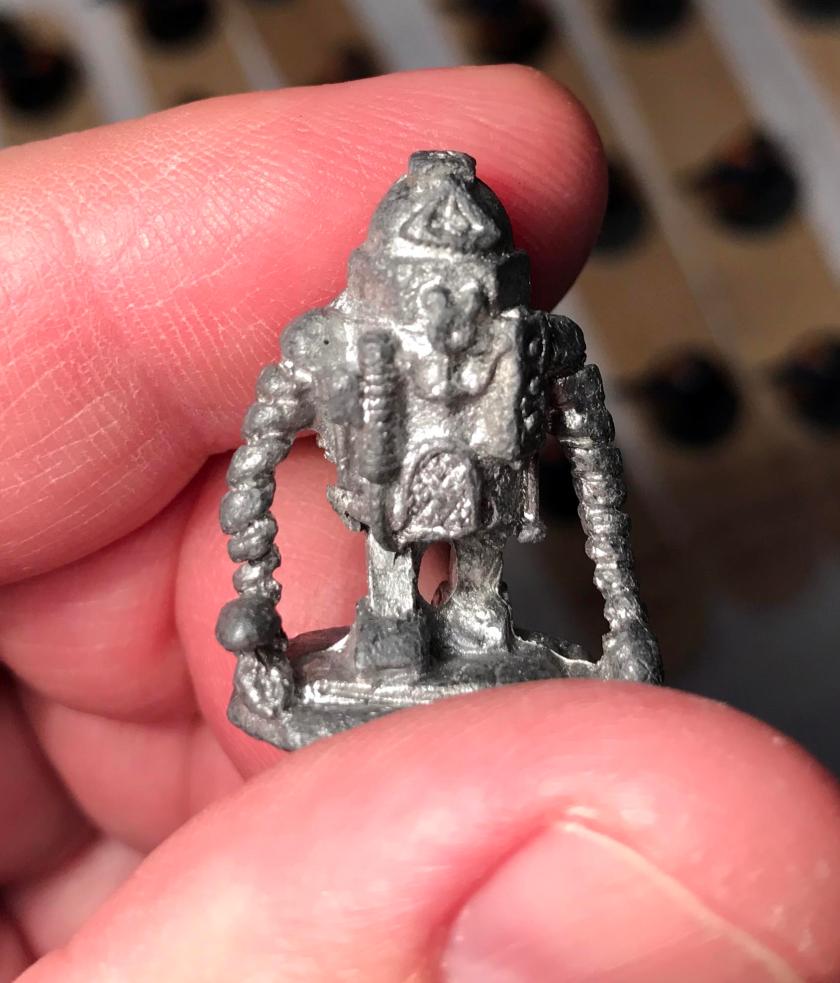
I found a small robot miniature on eBay, listed as “Hardy Toot Toot” from the Archive Miniatures Star Rovers line of miniatures and game. Using The Lost Mini’s Wiki , I was able to see it listed as “Hardy Toot Toot/RV86”. This did not make sense to me as When I looked at the Archive Miniatures catalog from 1981, there was no such listing. I reached out to my fellow miniature collectors on Facebook, notably David Wood (the British version) and Nevile Stocken (who was Archive and probably sculpted this figure) but still I had no luck at identifying it. All I knew was it was between 36 and 40 years old.
Frontal view of figure as I got it from eBay
Side/rear view of the figure as received
Bottom of the figure with “77” (year sculpted) and “Archive”
While I continued to research which figure this actually was, I filed down any unneeded edges, cleaned it in soap and water and let it dry. I then glued it to a 1″ steel washer with wood glue. Then I lightly glued the washer base to a popsicle sick for ease of painting. Next, I brush primed it twice with Citadel “Imperium Primer” thinned with Testors “Universal Acrylic Thinner”. I then gave it a heavy dry-brush application of Tamiya “Chrome Silver”. The figure then waited for a few weeks…
After priming and initial dry brushing with Chrome Silver
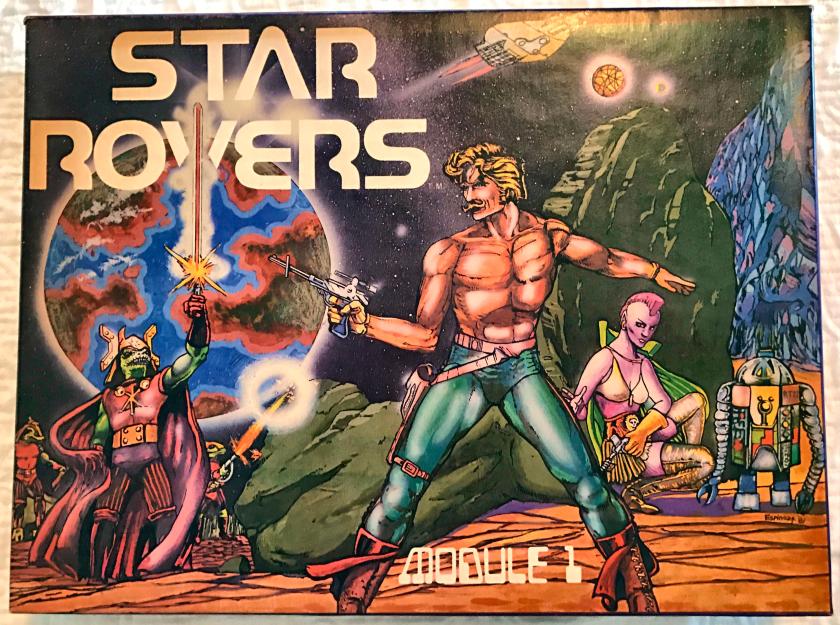
Luckily and surprisingly, I heard back from Nevile Stocken that he thought the figure was on the box cover of the Star Rovers game – which I have! By the way, RV86 is the Robot Cook (2203).
Star Rovers box cover – the robot in question is in the lower right hand corner
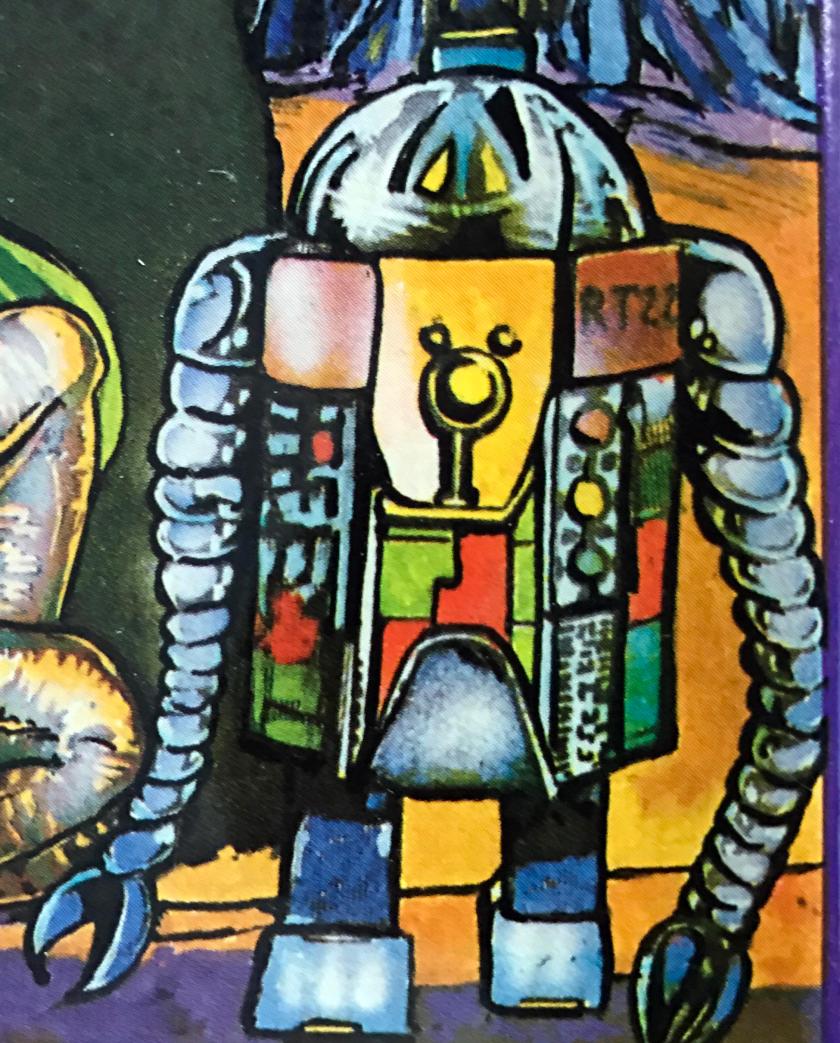
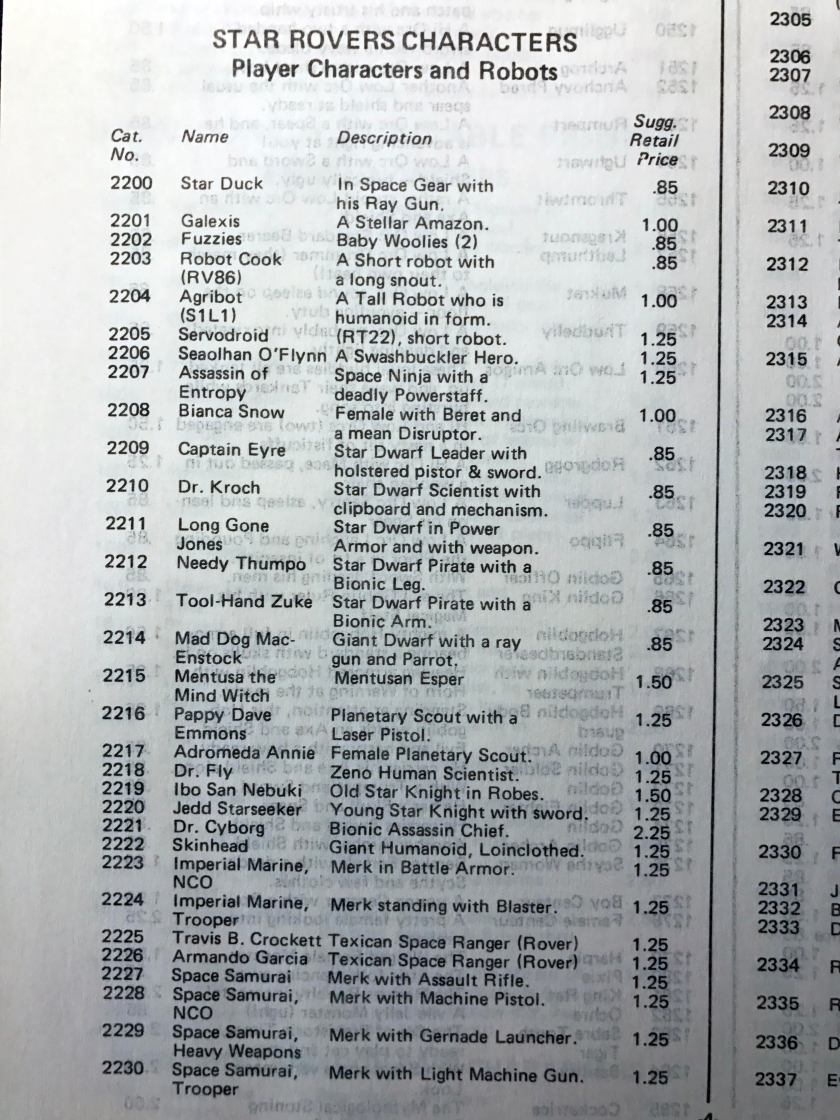
I took a picture of it with my iPhone, cut and pasted it into a PowerPoint file, and printed it. When blown up to 8½” x 11″, I could clearly see on the robot “RT22”! Mystery solved! I verified this by cross-referencing with the catalog as shown below. It was listed as 2205, “Servodroid, RT22, Short Robot”, and retailed for $1.25 back in the day. Many of the old Archive Star Rovers figures were named with a clever nod to Star Wars characters, and this RT22 certainly can claim to be one as a somewhat satirical R2D2.
It has a name – RT22!
The catalog page with 2205 listedZooming into the listing
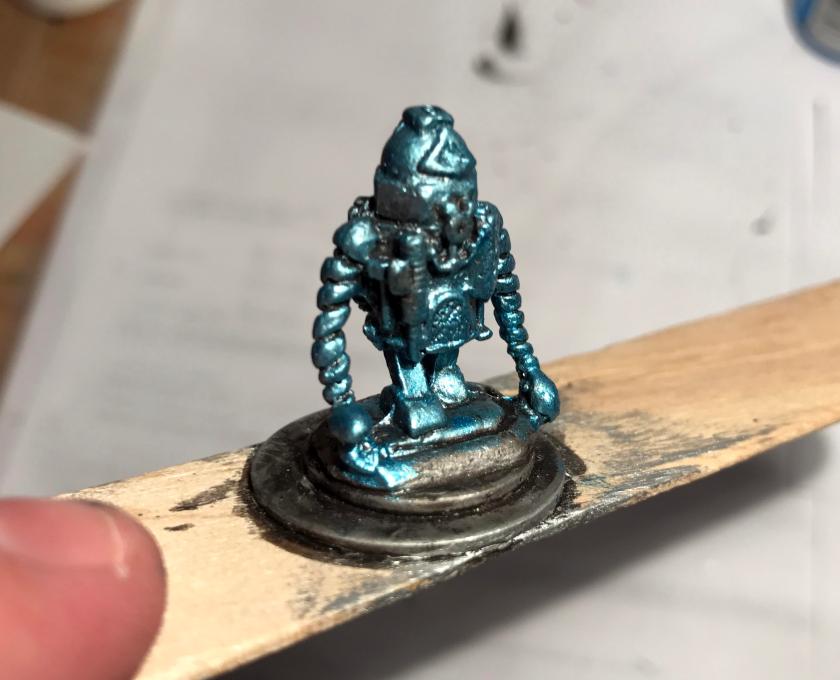
I decided that it would be a neat idea to honor the colors on the robot’s depiction on game box and try to replicate them on the RT22. To achieve the metallic light blue shown on the box, I used a 50/50 blend of Tamiya “Chrome Silver” and Craftsmart Ultra-Bright Metallic “Sapphire”. That seemed to do the trick, and I gave the entire figure a heavy dry brushing with the combination.
After the second dry brushing
I then looked at the drawing of RT22, and there were some subtle differences between it and the figure. To give depth to the figure, I used a couple washes with Citadel “Nuln Oil”. Then, I wanted to replicate the drawing as much as possible, so I used Americana “Kelly Green” and Vallejo “Vermilion” on the body’s lower parts in squares thinly outlined with Vallejo Model Air “Black”. On what looks like an anchor (with Mickey Mouse ears) on the front, I used Vallejo Model Air “Gold” on the background, and Citadel “Yriel Yellow” on the raised portion. The robot had two traffic signals on it – yes really – forward and aft. I used “Kelly Green”, “Yriel Yellow”, and Vallejo Model Air “Signal Red” on the stoplight signals. I then used the Vallejo Model Air “Black” metallic to outline the gold and on the brackets under its arms. I outlined the arch-like structure in front and various wires on the top, back, and sides with Vallejo Model Air “Aluminum”. On the top, I painted the raised structure ridges and its springs with Vallejo “Arctic Blue” – with “Yriel Yellow” highlights as an eye and on the top of the robot. On the top “ring” part of the robot (which was more akin to a hex nut), I used first a light coat of Vallejo Model Air “Fluorescent Red” (which was more orange than red). I then outlined on the angled edges with a thin line of “Aluminum”. I then used two more layers of “Fluorescent Red” on the ring. The rear battery packs got an application of Vallejo Model Air “Copper” and “Arctic Blue”. I then selectively used “Nuln Oil” where I needed more depth on the figure.
For highlights, I used Craftsmart “Bright Yellow” on all the “Yriel Yellow” surfaces. On the arms and chassis, I employed a lighter mix (more “Chrome Silver”, less “Sapphire”) of the original combination with which I started the light blue dry brushing. I also used a little of both yellows on the tips of the robot’s feet to match the box.
Perhaps the most difficult part of the project was writing the “RT22” on the miniature as shown on the drawing. That was indeed a delicate task that took a steady hand!
I then moved on to the base – and used Citadel “Lustrian Undergrowth” to conceal the washer and make the ground on which figure stood to be more realistic. I really like this paint as it has a rough consistency and takes both dry brushing and application of washes really well.
Once that had dried, I applied Citadel “Agrax Earthshade” to the base, and let it dry. I then dry brushed the base sequentially with Armory “Musket Brown” and Citadel “Niblet Green”.
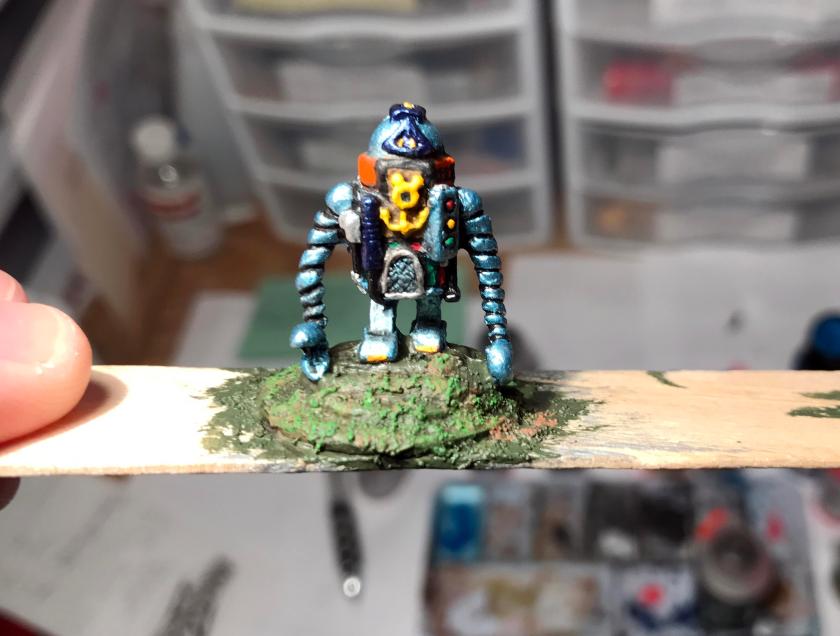
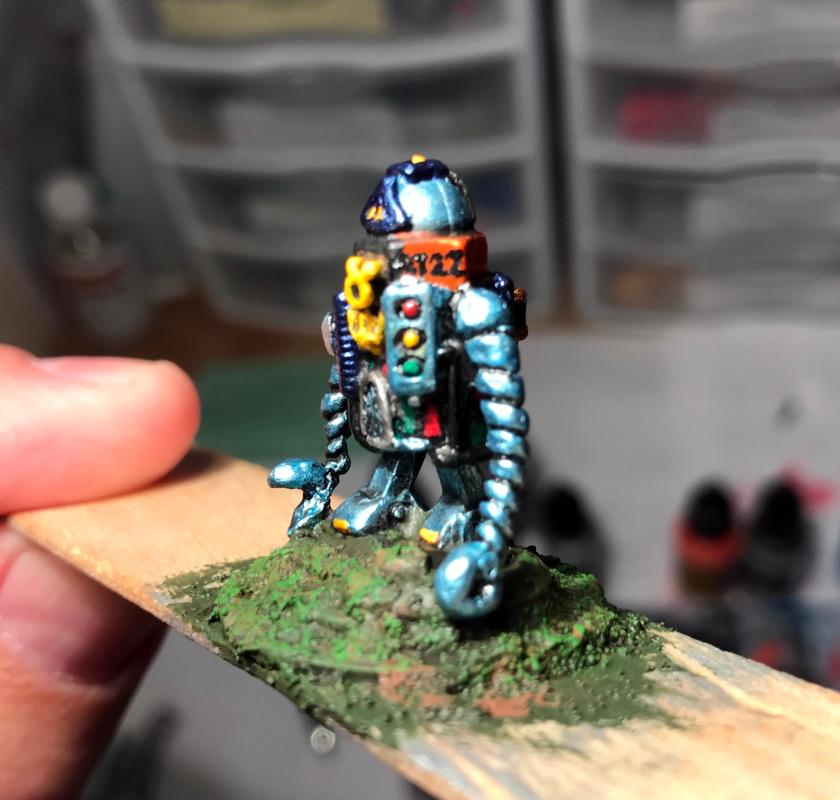
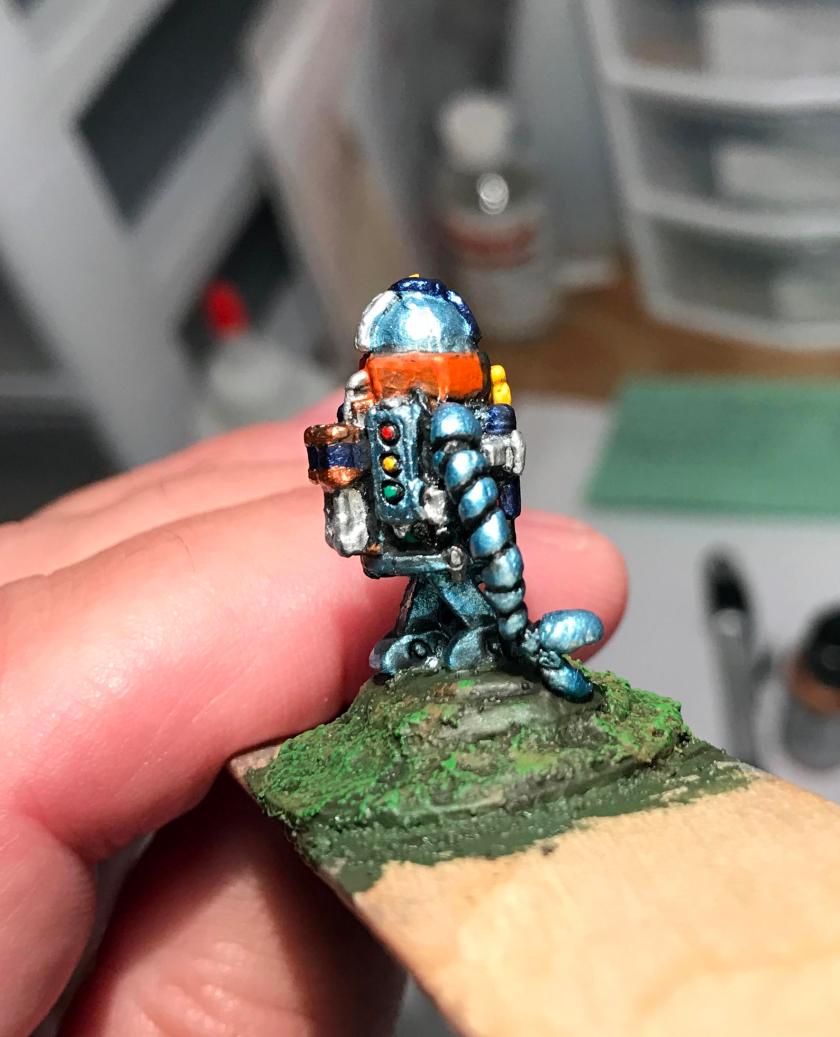
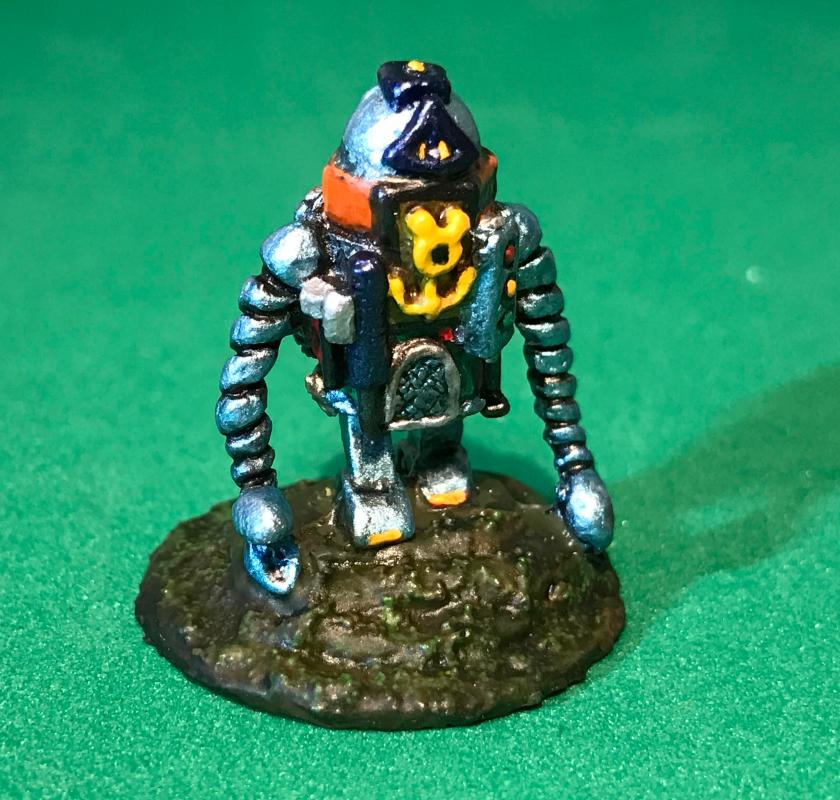
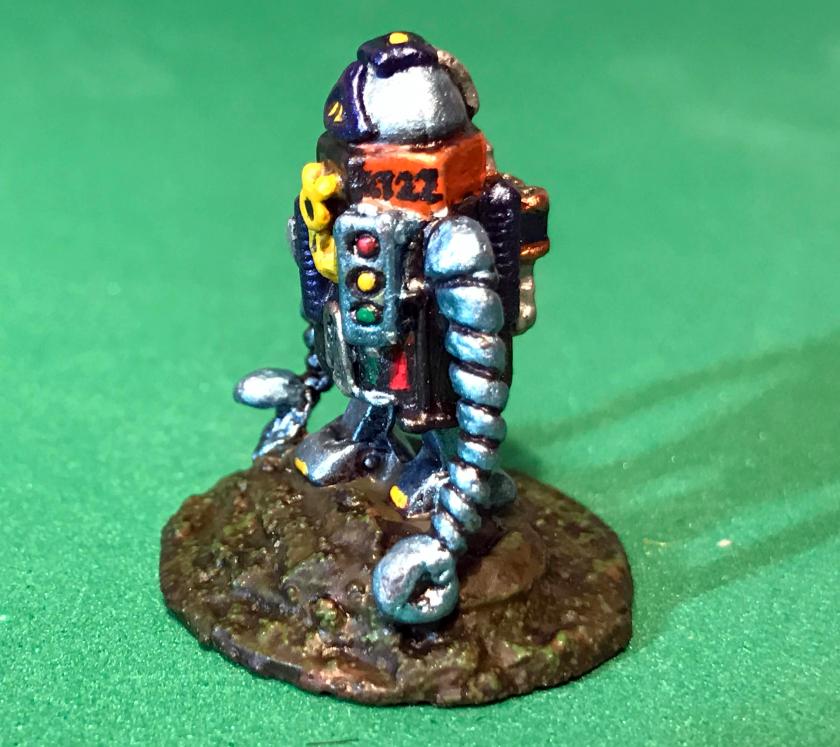
After the application of Lustrian Undergrowth on the base (still wet)After the Lustrian Undergrowth on the base has dried and been dry brushed, frontal viewLeft side view – note the “RT22”Right side view
I then moved on to the varnishing of the figure. As it was a robot, with a very metallic surface, I thought best to use a coat of Krylon clear “Glossy”, followed by two coats of Testors “Dullcoat”, allowing for adequate drying between applications. This worked well, but the base was still too shiny. To fix that, I used a combination of Citadel “Athonian Camoshade” and Army Painter “Anti-shine” brush varnish. It seemed to do the trick.
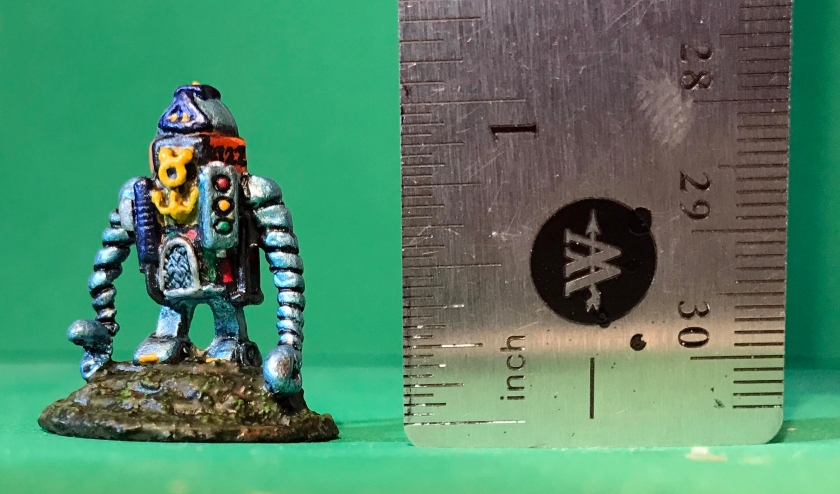
Drying in the sun – but my base is still too shiny!RT22, completed, in front of the enlarged box photo I used as a guide Close up of figure with ruler for scale – about 1.25″ or 25mm or so
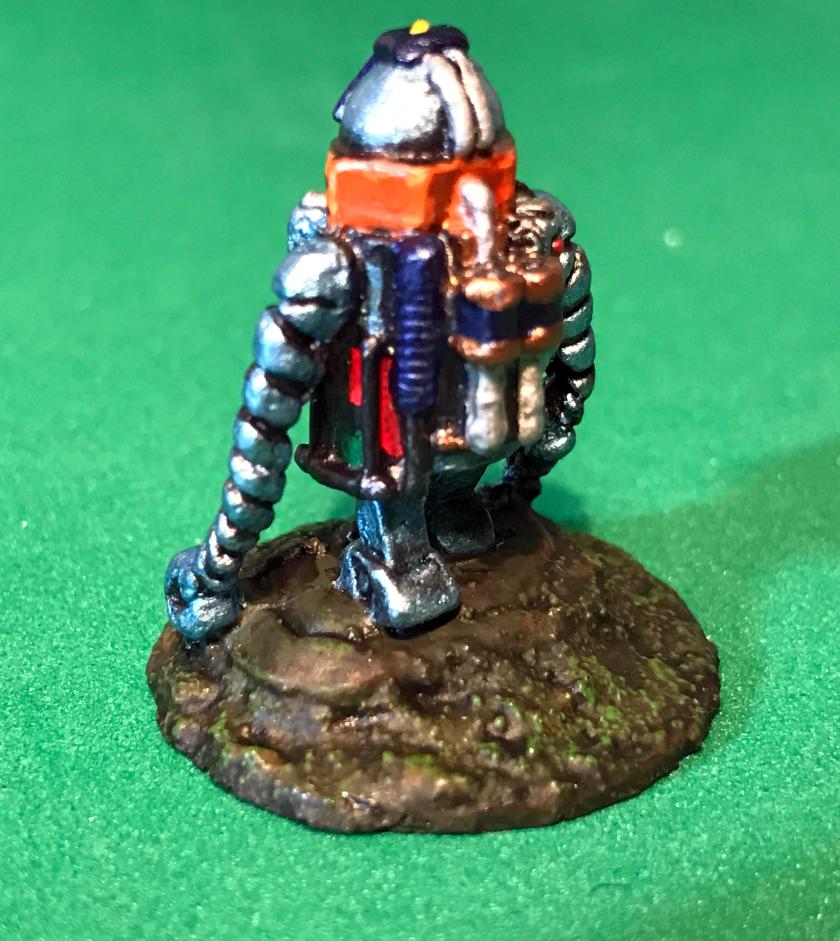
Frontal view of RT22 – note duller baseRear view of completed RT22Side view of completed RT22
The research for this project took a lot longer than the actual painting did. I have submitted corrections to The Lost Minis Wiki, so future collectors may be helped. As for this figure, I plan to use it as part of an objective in a sci-fi version of Combat Patrol™.
Just like R2D2 perhaps?
In any case, I am pretty happy with the miniature, and I am especially glad I used the color scheme from the box. I think it is quirky, and still fun! Feel free to let me know your thoughts!