

I have long been searching for the Archive Miniatures Frinx on Glyptodon (#2042) from the Star Rovers line. This three-figure kit was made in 1978, and was composed of two power-armored Frinx riding a glyptodon. So what is a glyptodon? A glyptodon is basically a prehistoric armadillo – and the size of a small car. Its a quirky kit, reminiscent of a Tusken Raider riding a Bantha in Star Wars.
At long last, my good friend Buck Surdu acquired one kit at exorbitant price on eBay. The plan was to create some Frinx recon sections for use in retro-sci-fi games using the Combat Patrol™ gaming system by recasting.


The kit itself held two glyptodon halves, two rear feet, two bridle bits, one metal reins set, one forward facing Frinx, and one Frinx facing right. Clearly, I needed to consolidate in order to effectively cast this set via gravity casting. My first decision was to abandon any idea of casting the metal reins. I wanted to use the bridle bits, and use some string or similar material for reins when I paint the kit.
The bridle bits were very small as you see below. I used a small pin vise and drilled out a place for the bits on the glyptodon. I secured the bits with super glue, then filled in around them with green stuff. I also opened the bridle bits up, for if I left them closed they would not been locked in by the Quick-Sil and would not have cast well.

The other challenge was that the original glyptodon figure was not well formed or cast. There were large seam lines and gaps on each side. My concern was that this gap would wreak havoc with molding as the Quick-Sil RTV that I use would easily expand into every crevice. It also would look lousy.


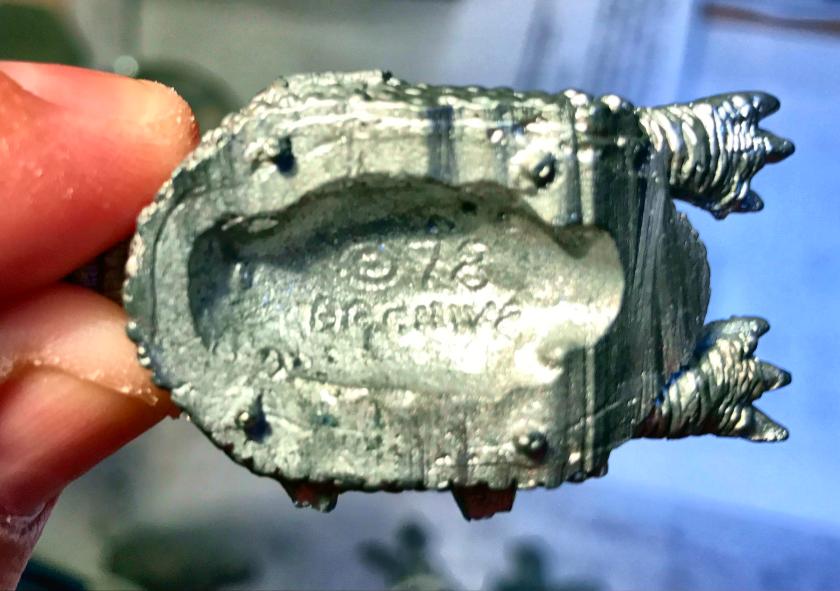

As you can see, because the glyptodon was in two pieces with a hollowed out middle, I needed to address this and the seam issue. Therefore, I decided to fill the middle and the gaps with green stuff. I then affixed the rear feet with super glue, followed by adding green stuff around the gaps there as well.


While I smoothed out the seam lines, I still had unsightly lines that would show up on every cast. I decided to use more green stuff to add a band of tiny armor plates around the base to smooth out the seams – and it worked. I thought that I should keep the figure as original as possible, so the additional plates were left as a lower band, and not over the whole figure.


I then moved on to the riders, and was surprised to see the beginnings of lead rot under their saddles. This discovery made me very happy that I was going to preserve this kit through cleaning and ultimately recasting. I did my best to clean off the oxidation with soap, water, a toothbrush, and an aqueous pewter cleaner.


I made two new mold designs – one for the glyptodon and one basic type for the two riders as shown below. The major concerns that I had with the glyptodon mold were easy flow of alloy, adequate venting, and adequate cooling with so much molten metal. With the smaller molds, I had the same, but I really just wanted great details.


All three molds worked well, with small modifications to ensure good casting. I was able to successfully cast 14 sets (42 total figures).

You can see below a comparison of the recasts and the master figure.


They are officially now in my painting queue (which has grown a bit long so I will wait to cast more figures until I have painted some). Overall, I am pleased with how they came out – please let me know your thoughts in the comments section!
