

Buck A squad of “Space Roomans” See Ma’k Morin’s blog post about Roomans here. Yesterday I painted 13 that Ma’k converted to “space Roomans” by combining parts of a Ral Partha Rooman with the body of a Reaper science fiction figure. I think the conversion was quite effective. One fire team of “Space Roomans” I […]
Month: September 2016
Ducks! — H.A.W.K.S.

Buck My buddy Ma’k made some molds of these long out-of-production figures. They are ducks from the RuneQuest line. He gave them to me a few months back, and this weekend I was able to get them painted. A view of some of the ducks Another view I painted half with the “sun” design on […]
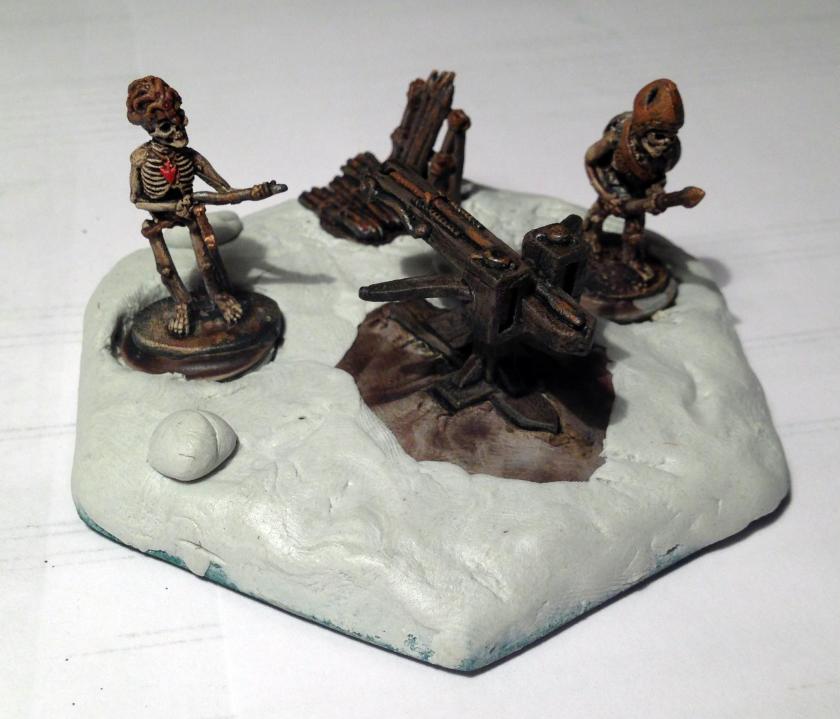
Grenadier Models Dart Thrower and Undead Crew (130), circa 1984
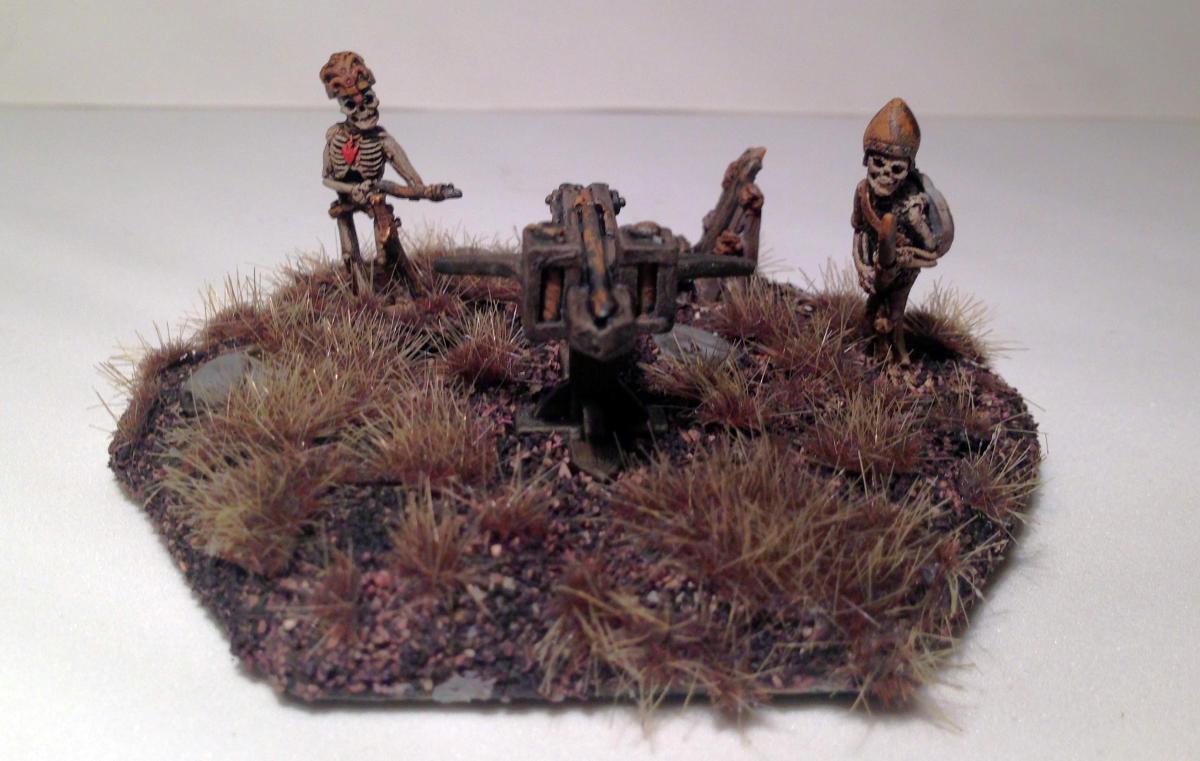
My skeleton army needed a crew-served weapon for War Must Be. I saw an old 1984 Grenadier Models “Dart Thrower and Undead Crew” on eBay and I bought it. It originally was in the Fantasy Lords (First Series), and is listed on Lost Minis Wiki as 130, although there are markings of “A47” on the bottom of the figures. Here is the link: http://www.miniatures-workshop.com/lostminiswiki/index.php?title=Image:G-flbp-130.jpg
I thought I would treat this kit as a small ballista.

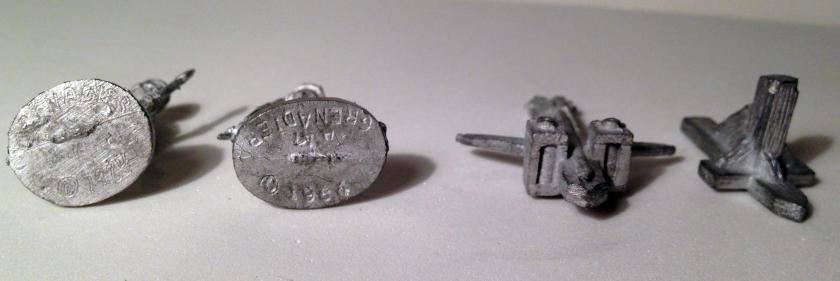
Later on, I came across a stand of bolts and small cannonballs tucked into another miscellaneous lot I got on eBay. I cut away the cannonballs and saved the bolts as ammunition for this crew-served weapon.

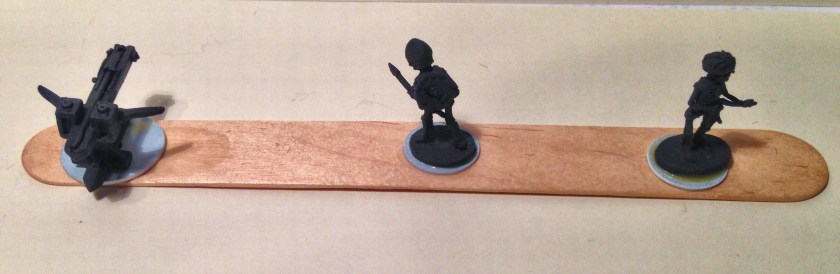
I drilled a small hole in the base of the dart thrower top and bottom, and used a small piece of paper clip wire to secure the two with Scotch super glue. with my scroll saw, I cut a 3″ beveled hexagonal base from 1/8″ luan. I put each of the crew on a ¾” steel washer and the weapon on a 1″ steel washer. I lightly glued each to a popsicle stick for painting. I primed the set with Krylon “Ultra Flat Black” spray paint.
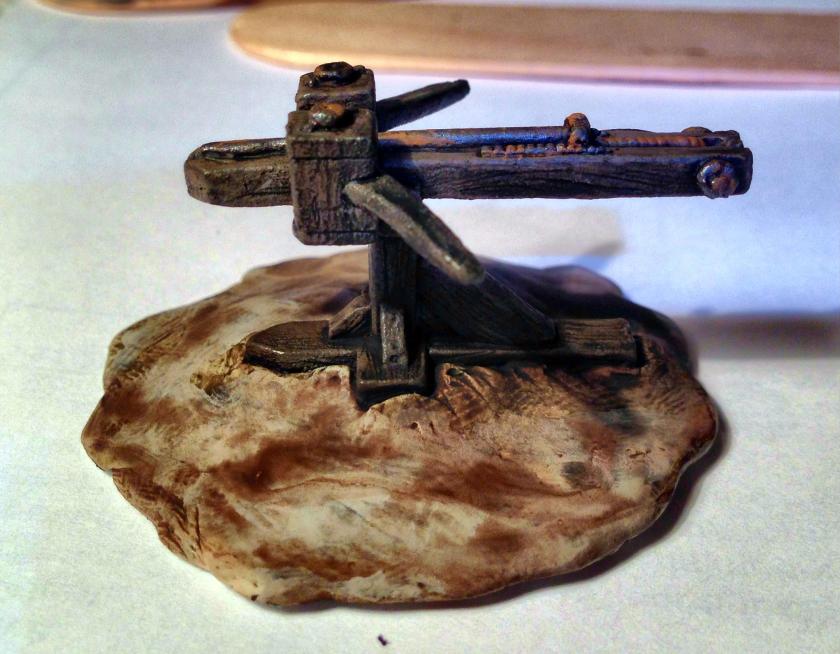
I washed all the figures with Secret Weapons Washes “Heavy Body Black”. I painted the dart thrower with Citadel “Dryad Bark”, followed by a wash with Citadel “Agrax Earthshade”. I then added P3 “Bootstrap Leather” to the bolts. This looked too new to me – and I thought the wood should look old and weathered. Plus, I thought the bolts and metals needed more rust. So I mixed Craftsmart “Grey” and the “Dryad Bark” in a 5:1 ratio, and redid the wood with dry brushing. For the crew, I dry brushed with Citadel “Ushabti Bone”. Then I applied “Agrax Earthshade” to the bolt stand, and washed the crew with Secret Weapons Washes “Sewer Water”. To get a more gray look on the bolt stand and the weapon, I used Secret Weapons Washes “Stone” as another wash, followed by more dry brushing with the 5:1 ratio mix as before.
Then I went back for more dry brushing on the crew with an even mix of “Ushabti Bone” and Americana “Ivory”, followed by a second dry brush mix of Americana “Bleached Sand”. For the metallic, I used Folk Art “Gunmetal Gray” on all helmets, bolts, and metal parts on the dart thrower. For any leather straps on the crew, I painted with “Bootstrap Leather”. I still wanted a more weathered look on the wood, so I mixed P3 “Red Black” ink and Craftsmart “Grey” paint for another wash. That achieved the look I wanted.
For the jewel on the crewmember’s amulet I used 1996 Armory “Red”. The choice for the rust on the helmet was my trusty 1983 Polly-S “Rust”.


Now, my next task was to assemble this set. I affixed the dart thrower and the bolts to the hexagonal base. I applied a couple of washers (for the adhesion of the clay), and chiseled out holes for the crew. I drilled a hole and put a ¼” neodymium magnet in each. I put multiple 1″ steel washers on the model’s underside to secure the neodymium magnets and to provide for future magnetic storage.

I then varnished the model components with a coat of Krylon “Clear Matte” and a coat of Testors “Dull Coat”, allowing for drying in between applications.
Then I mixed a two-piece sculpting clay (Aves Apoxie Sculpt) and applied it to the base. I sculpted a few undulations and rocks as well into the base. I carefully applied a coat of “Agrax Earthshade” to the base, and then flocked it with Army Painter “Brown Battleground”.
This was not “dead” enough, so I used Citadel “Nuln Oil” on the flocking, which darkened it up a lot.

I then applied Army Painter “Wasteland Tuft” in a random pattern so as to disguise the crew’s placement wells.


This will make a nice addition to my skeleton army.
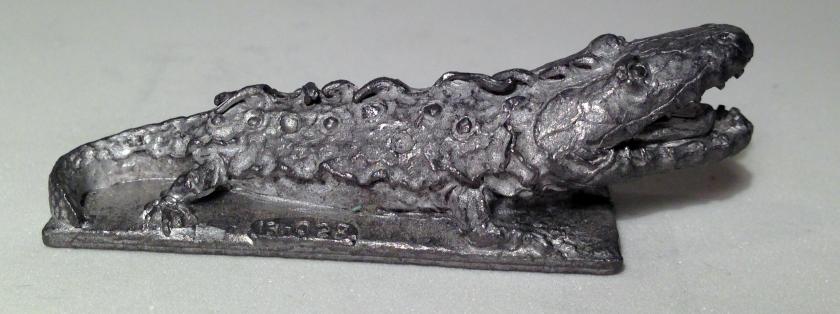
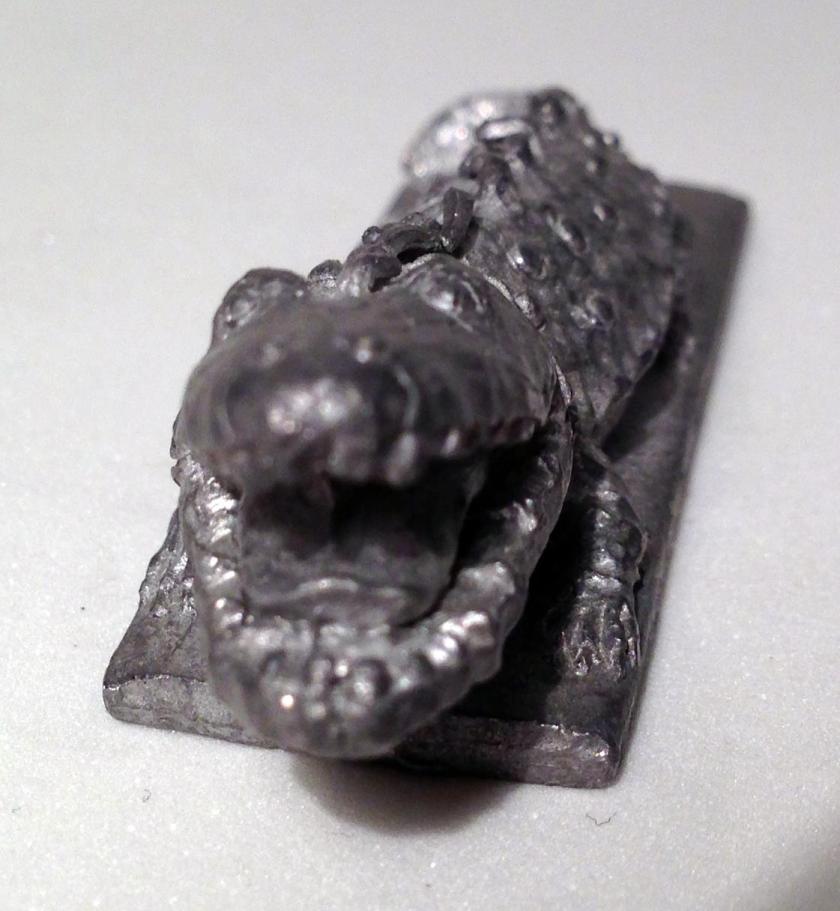
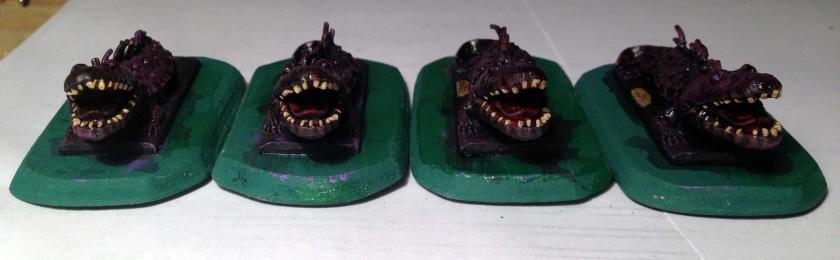
Fire Breathing Salamanders, Ral Partha 13-028 (from 1982)

I am catching up as I can in my blog on projects that I have completed in August and September. Last year, I was looking on eBay for some interesting Ral Partha additions to my fantasy armies. Specifically, some large creatures that Wizards could control in my War Must Be game. In the game, Wizards can use a Mundane Spell (His Master’s Voice) to control a large creature such as the giant scorpion, giant tarantula, or giant spiders that I have previously described in this blog. They use some of their action chips to accomplish this.

Once again, I happened upon an eBay find that intrigued me. There was a group of four “Fire Breathing Salamanders” available, and my imagination took over – this would be like having a Wizard controlling a living flame thrower – pretty cool stuff. Each will have a limited number of powerful short range flame attacks in the game, in addition to tooth and claw capabilities. These figures were sculpted by Dennis Mize as part of the Children of the Night line, and were designated 13-028, and released in 1982.

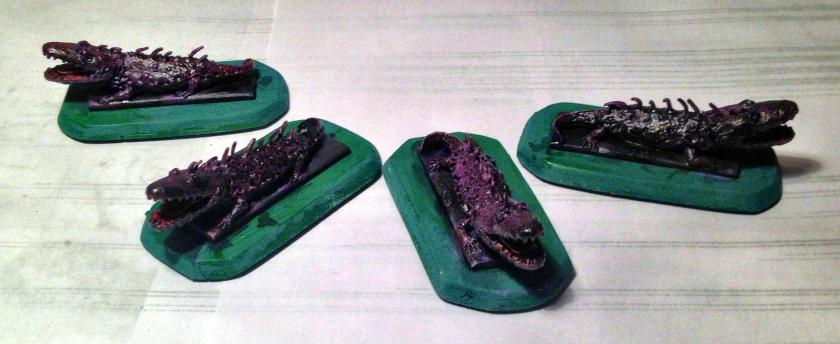
Way back in February, I primed these in Jeff Smith’s heated workshop with Krylon “Ultra Flat Black” spray paint with a gaggle of other figures. Later in the spring, I mounted one on a 3½” beveled hex base made out of 1/8″ luan, but it did not look correct for play. Subsequently, I remounted all four on bases that were roughly octagonal or elliptical, which worked better. I glued two 1″ steel washers to the bottom of each base for future magnetic storage.

As inspiration, I wanted to give these the coloring of a salamander that is native to Massachusetts that I had seen only rarely. I believe that it was a blue-spotted salamander, and the memory I had was of a blackish blue to purple-skinned creature with light spots.

The Dennis Mize figures were more alligator-like, but this was my starting point.
I began by painting the interior of the mouth with Americana “Primary Red”. I mixed equal parts of American “Dioxazine Purple” and “Ebony” for the upper skin. For the lower belly and the spots, I used an equal mix of “Dioxazine Purple”and Americana “Buttermilk”. For the eyes, I used straight “Dioxazine Purple”. I then washed the figures’ skin with Secret Weapons Washes “Purple”, and the mouth with SWW “Heavy Body Black”. I drybrushed the figures with Americana “Lavender”, and then applied two more sequential washes with SWW “Sewer Water” and “Heavy Body Black” as I tried to get a shade that I was happy keeping. This seemed to work adequately.

For the teeth and eyes , I used Citadel “Ushabti Bone” and “Wild Rider Red” respectively. I added an iris with veteran 1984 Polly-S “Slime Green”.
I then touched up the nails with a mix of the “Ebony” and “Dioxazine Purple”, and added some more “Ushabti Bone” to the spots, then another two washes – first with the SWW “Purple” watered down a bit, and then a light one with Citadel “Agrax Earthshade”.
There is a small plaque on each figure with 13-028 on it. These I painted with Martha Stewart Crafts “Brushed Bronze” and washed with SWW “Heavy Body Black” to highlight the numbers.

I used Army Painter “Moss Green” flocking, and I was not happy with the effect. These creatures needed to look as if they were crawling out of a swamp or tall elephant grass. I wanted better. I used two coats of varnish sequentially – Krylon “Clear Matte” and Testors “Dull Coat” to seal the paint job ensuring adequate drying time between coats. Then I moved back to the bases.


I had a good number of Army Painter “Swamp Tuft” and “Jungle Tuft” accessories that I thought would do the trick, and this approach did work. The trick here was to cut the “Jungle Tuft” in half on the cellophane before using and mixing in the “Swamp Tuft”. I affixed these with Elmer’s white glue. This had the advantage of hiding the rectangular base lines and give the “crawling through grass” impression.

Overall, I am very happy with the results. I really think that the final basing, which took some time and a lot of gluing, was worth the effort. I look forward to watching them roast some enemies at the behest of their Wizards!

