Normandy Breakout Game at Mass Pikemen

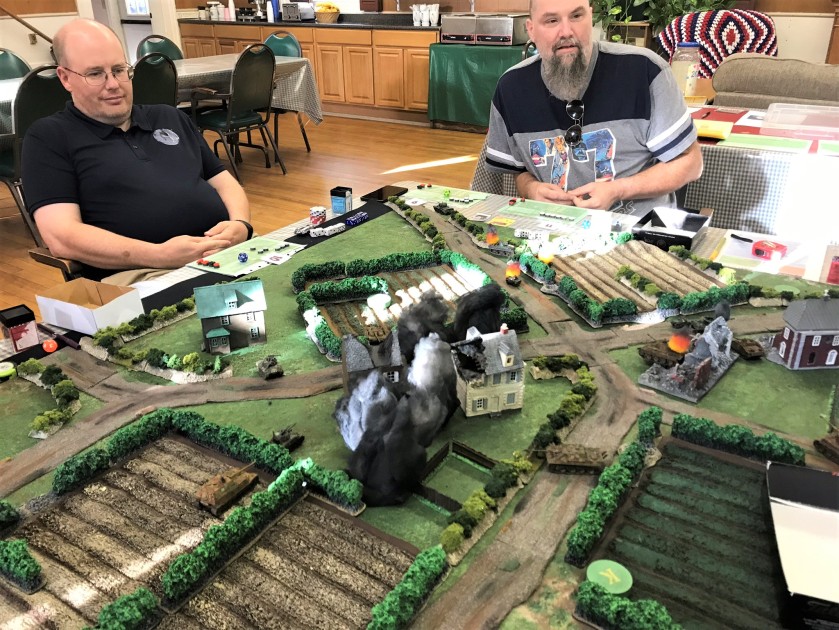
Last Saturday (August 24th) we had a very action-packed game of What a Tanker© using my Normandy Breakout scenario at the Mass Pikemen Gaming Club.  I have been tweaking the scenario, some rules, and improving the terrain and markers – and I believe the gamers who played really noticed all of the upgrades and changes.  I have been fortunate to get valuable feedback from the gamers which has been invaluable, and this game was no exception.  I have acted as a Game Master for this game a couple of times (discussed here), and this, the third iteration, was another great game that had the players highly engaged.

For this post, I will show some of the photos that tell the story – though simultaneously being a photographer and a GM are not always easy.  I appreciate the generosity of both Chris Rett and Ted Salonich helping with some photos – as well as playing of course!

The game scenario is:

After a successful D-Day landing and consolidation, the tanks of the Americans and the British are stymied in the hedgerows of Normandy. German armor has set up effective defensive positions in favorable terrain. However, the Allies do not know the exact locations of the German tanks, and the Germans have limited knowledge of where the Allied armor will be coming from and the direction to which they will try to break out. New rules that allow reconnaissance and the effects of other combat forces will challenge both sides in this action-packed game.

The Germans are in secret positions (basically ambush positions) that they choose in advance of the Allies arrival – which is also secret in terms of the exact vehicles that the Allies choose.  Both sides get to secretly select their vehicles (with some restrictions), and poker chips are used for the scoring.  The Germans here did stop the Allies from breaking out – though the Allies were able to gain more points by both effectively recon of enough blind positions and knocking out enough valuable German vehicles.  The final score was 117-109 in favor of the Allies – with the game score turning on the Allies knocking out a Jagdpanther on the last turn.  The casualties were:

  • Allies – 5 vehicles:
    • UK – 3 vehicles:
      • 2 Daimler Dingoes
      • 1 Firefly
      • 1 M10 Achilles
    • US – 2 vehicles:
      • 1 M3A1 Stuart
      • 1 M10 Wolverine
  • Germany – 3 vehicles:
    • 1 Sdkfz 233
    • 1 Panther D
    • 1 Jagdpanther

Let’s see what the day looked like!

4 map at session
The Allies moved on from here.  The British had the far left road, and the Americans had the far right road.  The middle road could be used by both Allies.  The wooden discs are possible German positions to be reconned.
5 map at session
A side view of the tabletop that better shows some of the (blind) possible German positions.
6 map at session
The view from the German side of the board that the Allies needed to cross.
1 Me as GM
Your properly attired GM.  (Photo by Chris Rett)

The Germans effectively used a Bonus Attack card to draw first blood – calling in a rare Luftwaffe attack on a Daimler Dingo.

7 Dingo hit by Luftwaffe
The Daimler Dingo hit by the Luftwaffe – my new blast/knocked out tank markers looked pretty amazing (and I am biased of course).
4 Jagdpanther hunts Stuart
A Jagdpanther prepares to engage an M3A1 Stuart from an excellent ambush position.  The Stuart decided to run around the corner and recon the disc on the left…(Photo by Chris Rett)
5 Surprise!
… and the Stuart “successfully” reconned the position – it went around the bocage to find the Elefant in the room. (Photo by Ted Salonich)
5a Surrprise
The Stuart fired its 37mm at the frontal armor of the Elefant.  No effect.  The Elefant returned fire, and blew away the Stuart.
9 Firefly knocked out by StuG G
A Panther D and a StuG G combine forces to knock out a Firefly near the burning Dingo.
10 Panther D knocked out by Achilles
An M10 Achilles fires at and knocks the Panther D into a ruined building, damaging it.  It gets a second shot, and rolls well enough to torch the Panther.
11 M18 Hellcat moves up to help British
The Americans move up an M18 Hellcat to help the Brits – it ended up moving behind the Jagdpanther and was able to destroy it.
8 Gamers
The gamers ponder their moves.
13 Last shot
The Allies called in a lot of artillery-delivered smoke to protect their vehicles.  It was effective.
6 Panther burns and Tiger I arrives
Here comes the Tiger!  Note the StuG G that ambushed the M10 Wolverine.  The crew of the M10 survived – as denoted by the black smoke versus the fiery smoke.  Also shows the Allied smoke screen in front of the Jagdpanther.

As the German vehicles are worth, in general, much more points, the loss of their expensive vehicles made a big difference.  Both sides played well, but I have to say the Germans were not very lucky with their dice at times.  

I will be tweaking the game scenario in a couple of ways:

  • Adding stopping bonuses for the Germans:
    • A 20-point bonus for the Germans if no Allied vehicles are able to breakout across the tabletop.
    • A 10-point bonus for the Germans if only one Allied vehicle is able to breakout across the tabletop.  If 2 or more cross, no German bonus.
    • Award the Germans 2 points for each unreconned point.  This will incentivize recon, but force the Allies to choose what is most important.  (The Allies already get 2 points for each reconned point.)
  • Allow a “banked 6” to be used for either an advantage on the next activation (per the rules) or as an automatic “6” on the next activation roll (determined by the player on the turn he banks it). Thanks Ted Salonich!

Thanks again to the all of the players.  And for those who follow this blog who wondered if their named vehicle got fried, only one Cromwell (“IRO”) deployed and did not get into action.  However, the M10 Achilles “Per” (named for Per from Roll a One) did get knocked out by one of the StuG G’s.   Sorry my Swedish friend!

Hope that you enjoyed this – and I will be running this game on Saturday at BARRAGE in Maryland (September 28th) and at the Fort Devens Game Day on October 19th.  I may also run it at other upcoming gaming cons if possible.  Thanks for looking!


Knocked-Out Tank Markers for What a Tanker

With my having committed to multiple upcoming games of my What a Tanker© Normandy Breakout scenario, I wanted to have everything as good as possible.  I made smoke/blast markers with tea lights in the past that I have used in multiple games.  They are great as mortar and artillery, especially with 28mm scale stuff, but not suitably-sized for use on 15mm scale tanks as markers.  In the game, I wanted to be able to designate a knocked out tank better – and if possible – differentiate between a tank that was just knocked out (where the crew survives) and one that was both knocked out and brewed up (where the crew does not live).  These are important distinctions in the game, as I allow crews that survive to get another tank and keep their training and experience (and bonuses) as they reenter the game.

I also wanted to have a better looking tabletop where the tank wrecks are more visible and frankly more realistic smoke-wise.  My older smoke markers are good for artillery-delivered smoke screens, but as you see below, I needed an improvement.

4 painted smoke markers lit up in dark
My tea light blast markers look great here…
1 current smoke markers
…but are way too big here – especially on even smaller vehicles.  Additionally, they do not stay easily on the vehicles due to their size.

I set out to create a new set of markers that would look better, stay on the vehicles, and differentiate between brewed up and just knocked out tanks.  As I use neodymium magnets in most of my tanks’ turrets and they are all similarly oriented in polarity, it was easy to devise a marker using a ceramic magnet as a base.  The magnets I used were small enough and heavy enough to stay on the tanks – even those without magnetic properties.  I used ½” ceramic magnets, #10-24 steel machine screw nuts, and more used ¼” (approximately) steel ball bearings from Jeff Smith’s broken fairway mower to build the core of the marker.  Making sure that the polarity was correct (markers that would be pushed off the vehicles would serve little purpose!), I used Gorilla Glue to fuse the magnet to the nut, and the nut to the bearing.    Then, I mounted the cores on screws and primed them.  I planned for 20 to be black and grey smoke for disabled tanks, and for 20 to be full-on flames.

After the primer had dried, I painted the flaming cores red, orange, and yellow with cheap craft paints to simulate a ball of fire.  Lastly, I applied gloss varnish to the cores to give more reflection.  The smoke ones just got painted black.  If interested, you can see a list of the materials I used at the end of this post.

2 materials
The ball bearings, nuts, and ceramic magnets I used.
3 magnet, nut, and ball bearing
The core.
5 mounted cores for painting
The flaming cores mounted here after red paint was applied.  Later coats would be yellow and orange to simulate a fireball.

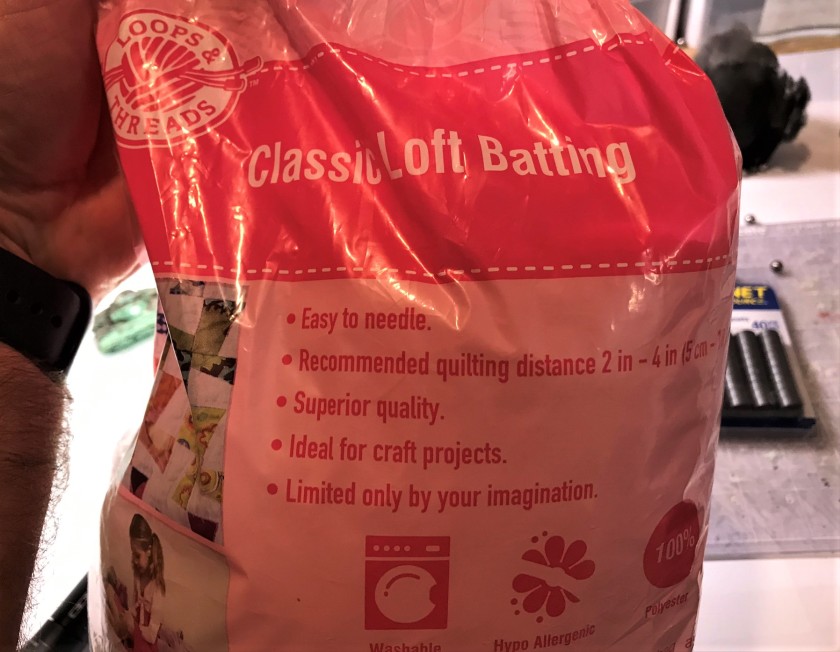
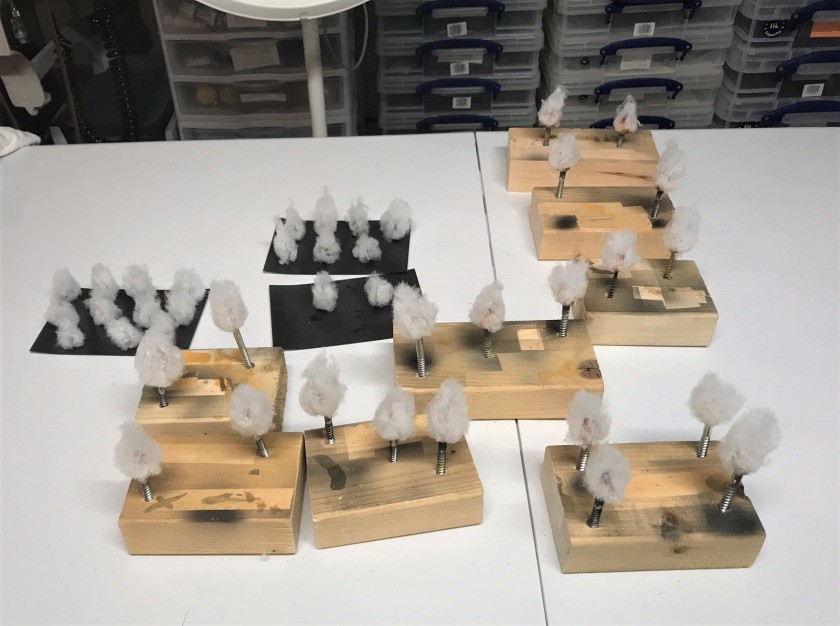
For surface smoke, I went with pillow batting cut off in thin strips of 1-1½”.  As each core needed 4-6 strips, I cut nearly 240 strips.  I hot glued the strips in a flower pattern on the cores.

2a materials (batting)
“Limited only by your imagination” indeed!
4 cut up batting
Batting strips cut before hot gluing to the cores.
6 after batting glued
Here are the cores after hot gluing the batting.

Now, I used a different product to connect the batting in a smoky shape.  As I have built tanks, I have used decals.  The best way to revitalize decals is to coat them with Microscale’s Liquid Decal Film.  However, using this product on the decals as they are on your tanks themselves can ruin the underlying paint (unless used over varnish).  But, this stuff makes a solid protective and nicely tacky coat – as I learned making placards for my Attack of the Warbots game.  I applied the Liquid Decal Film to the strips, forming the small smoke shapes around the cores.  I let these set up and dry.  The stuff worked well, and I got the effect I wanted where you can see the cores on the flaming ones.

7 after batting assembled with liquid decal film
After the Liquid Decal film formed the smoky shapes.
8 close up of ready to paint marker
Close up of the core after the smoky shape was formed.

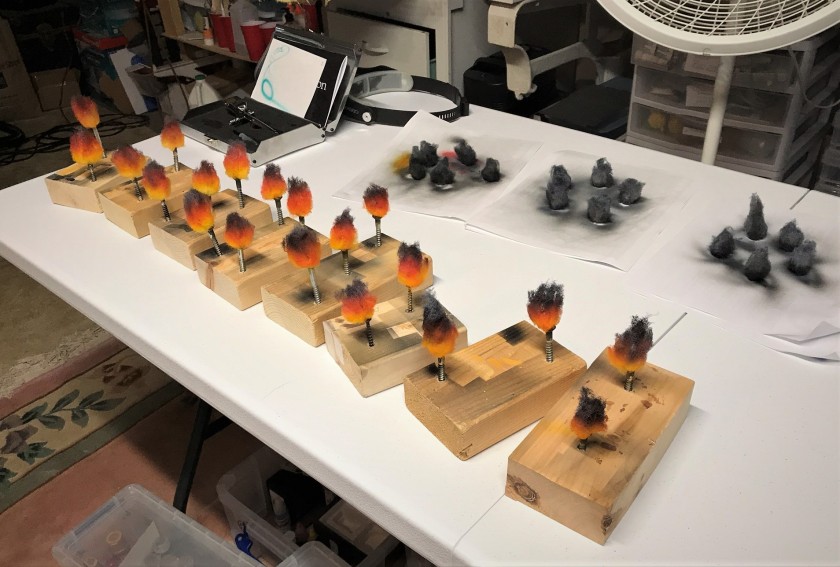
When I paint fire, I like to go from bottom to top with yellow, orange and red.  Here, I decided to use glazes and inks for these colors with my Iwata Micron airbrush at 28 psi.  This allowed me to really blend the colors –  which were Citadel “Lamenters Yellow” (a glaze), P3 “Blazing Ink”, and P3 “Red Ink”.  I then used two Vallejo Game Air paints –  “Black” and “Wolf Grey” – to create a smoky effect.  I also used these latter two on the smoky black/grey cores.

9 completed markers
A view of the flaming markers and 3/4 of the smoky ones as they dried.  
10 using magnetic tacky sheets for transport
The new markers with one of the older (previously made) larger ones in back that I will only use as smoke now.
10a using magnetic tacky sheets for transport
These fit nice and snug on 4 Aleene’s tacky sheets in a 4-liter Really Useful Box.
11 Sherman comparisons
For comparison, these three Shermans have (l-r) a new smoky marker, a flaming marker, and the old large blast marker.  What you cannot see is how well the magnetic ones stay on the vehicles – and these are plastic.  The neodymium turret-mounted magnets and ceramic magnets attract well and effectively, which the larger one does not.
12 M10 comparisons
The M10 (Battlefront) on the left has a turret magnet, while the Old Glory type on the right is lead/tin.  The weight of the magnet keeps the marker on the Old Glory M10 very effectively.
13 light US vehicles
Even on smaller vehicles, these work well.  Here an M3A1 Stuart, an M8 Greyhound, and an M24 Chaffee are all well-marked.  The M8 has no magnetic turret, yet this works well here as well.
14 StuG G and Panzer IVH with knocked out markers
Some vehicles have no turrets like these plastic StuG G’s  – but the markers work great on the deck or the top.  The plastic Panzer IV H magnetic turret holds the smoke marker well. 
15 Tiger II burning
Last but not least, a Tiger II is brewing up.

I also participate in my Australian blogging buddy Azazel’s mothly painting challenges.  This month is “Awesome August” – and submissions were to be HUGE…or… as he wrote:

“If you really prefer to skip the biggies – that normal sized model that you’ve (ideally) done a job that you’re proud of converting or kitbashing, painted to the best of your ability. Remember, it’s not a competition – it’s a showcase – so your only competitor is yourself.  So, the TL:DR is that August’s challenge is to complete something big. Ideally, really big. Or something small that’s ideally converted – and painted really well by your own standards.”

I think that converting ceramic magnets, nuts, used ball bearings, and pillow batting counts as a conversion!  And not for nothing, I really like the paint jobs on these markers.  So, this is my entry for Azazel’s Awesome August ’19 Community Painting Challenge .

I hope that you enjoyed this and maybe got some ideas – please share your thoughts in the comments section, and look you can forward to seeing these used in my after-action battle reports!

PAINTS, INKS, GLAZES, SHADES, WASHES, PIGMENTS, FLOCKING, GLUES AND MORE USED ON THESE MARKERS:

  1. Magnet Source ½” “Ceramic Disc Magnets”
  2. Everbilt #10-24 Steel nuts
  3. Used ~¼” steel ball bearings from Jeff Smith’s fairway mower
  4. Gorilla Glue
  5. Testors “Universal Acrylic Thinner”
  6. Reaper MSP “Black Primer”
  7. Americana “Primary Red”
  8. Craftsmart “Orange” (satin)
  9. Martha Stewart Crafts “Duckling Pearl”
  10. Vallejo “Gloss Varnish”
  11. Vallejo Mecha Varnish “Matt Varnish
  12. Loops & Threads “Classic Loft Batting”
  13. Microscale Liquid Decal Film
  14. Citadel “Lamenters Yellow” (glaze)
  15. P3 “Blazing Ink”
  16. P3 “Red Ink”
  17. Vallejo “Airbrush Thinner”
  18. Vallejo Game Air “Black”
  19. Vallejo Game Air “Wolf Grey”

Always love to get your feedback and read your thoughts?  See you next time!

US Tanks and Tank Destroyers for Normandy Breakout Scenario

Welcome back dear reader for the latest installment on my US armored forces!  I needed to add more US vehicles for my Normandy Breakout scenario which uses the What a Tanker© rules by the UK-based company Too Fat Lardies.  I do modify these rules for the scenario.  For those who missed them (like some of the HAWKS did because I used the wrong hashtag!), the posts about the other vehicles and playtests for this scenario can be found at these links:

Vehicle Posts:

Playtest and related gaming posts:

I am planning on running this scenario at three upcoming events:

  • August 24th at the Mass Pikemen Gaming Club in East Brookfield, MA
  • September 28th at BARRAGE in Havre de Grace Maryland
  • October 19th at the Fort Devens Game Day at the former Fort Devens, MA

This project, with the possible exception of an additional stray German vehicle or two, completes the list of vehicles I need for the scenario.  In looking for vehicles, I wanted to add some Shermans, another M10 Wolverine, and an M18 Hellcat.  I found a deal on a box of 5 plastic British Shermans M4A1’s with cast hulls that would work.  I would have preferred getting models like my M4A2 – but that one is OOP and even the American Shermans that Battlefront is selling now are basically M4A1’s.  So these British ones, properly assembled, at 15mm scale, is just fine.

For an M10, I converted an Old Glory M10 Achilles by using a leftover gun to make it look like an original version.  Technically, is that a conversion of a conversion?  After seeing how John at Just Needs Varnish! added a plastic card underneath his models to make them easier to paint, I was inspired to add a small steel base under my M10 chassis.

The M18 Hellcat I found was really nice – and I wish I had another as well.  This one had a slightly broken front fender, but its hardly noticeable.  In any case, I used enough mud and dirt to obscure that problem.

I also decided to use the Battlefront naming decals on all of these to help differentiate them on the tabletop – as well as by adding spare road wheels, spare tracks, and other accouterments to all of the vehicles.  Thanks to my good friend Jeff Smith, the Shermans got some real steel in them by means of ball bearings in the chassis.

I decided to weather these slightly differently by adding pigments – inspired by Pete’s blog and a Merkava he built.

After a few in-progress shots, I will describe the vehicles alphabetically by name and type.

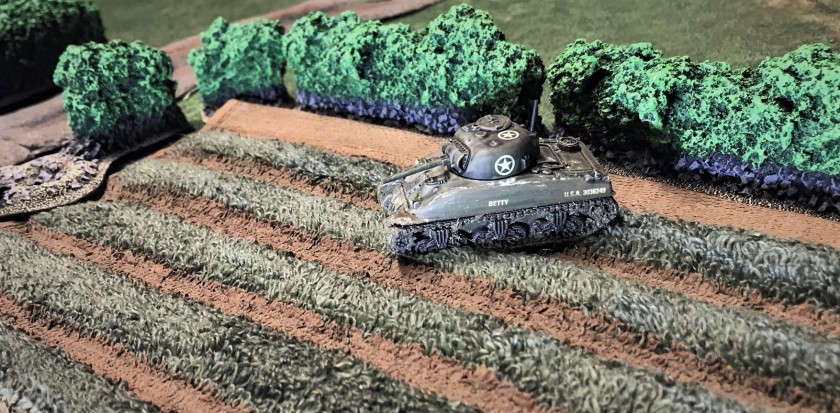
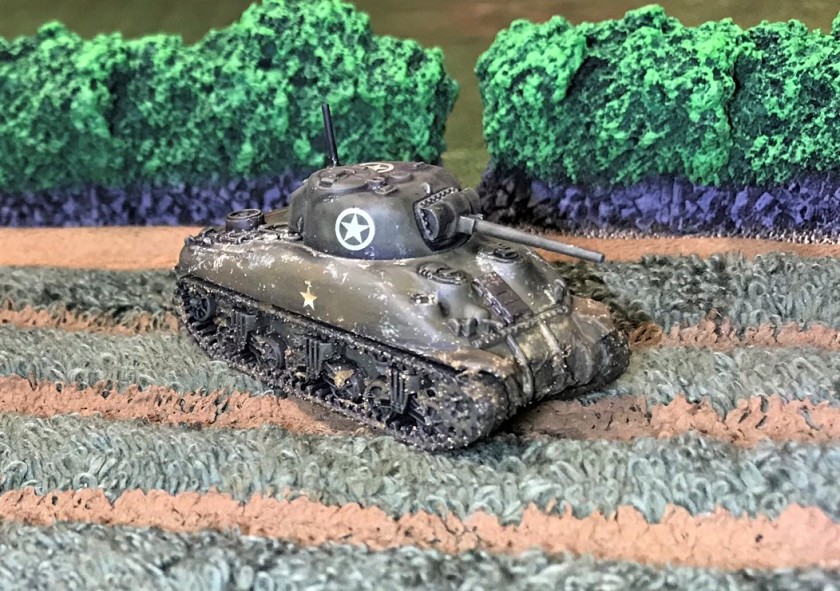
M4A1 “Betty”

1 M4 Betty, left side, crosses a field
“Betty” crossing a field.  

2 M4 Betty, right side, in a field

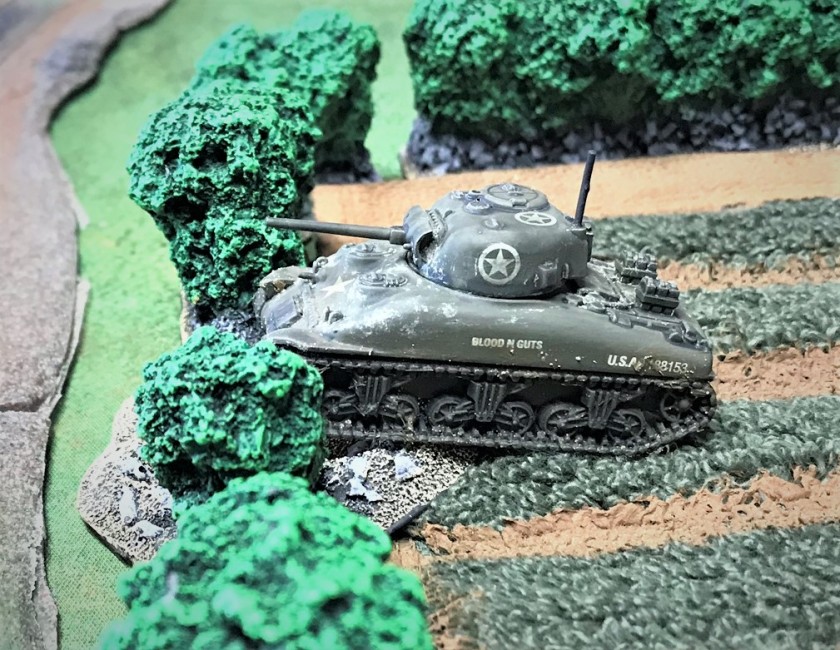
M4A1 “Blood ‘N Guts”

1 Blood N Guts completed, left side
“Blood ‘N Guts” crossing an opening in the bocage.

2 Blood N Guts completed, left side, crossing the opening in the bocage

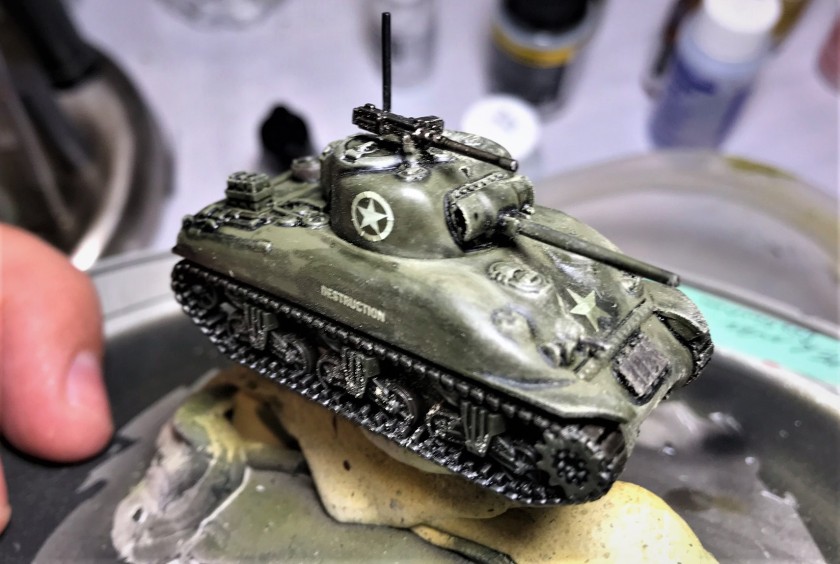
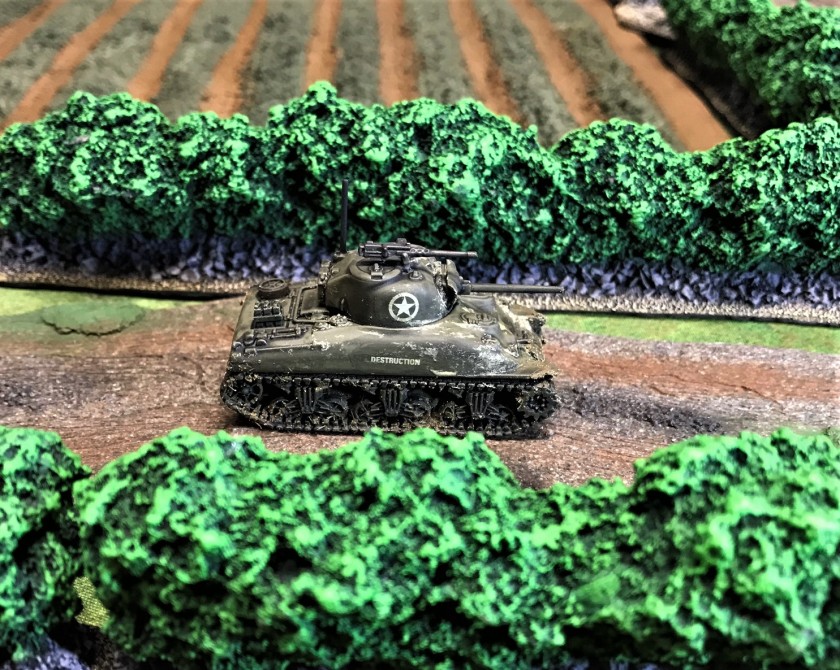
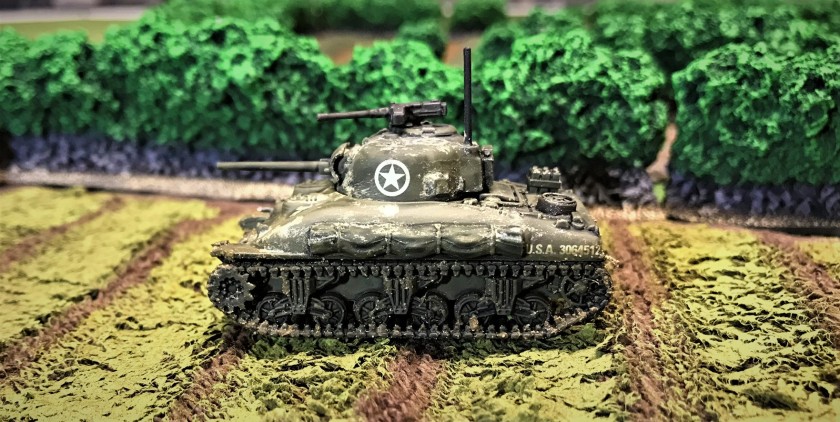
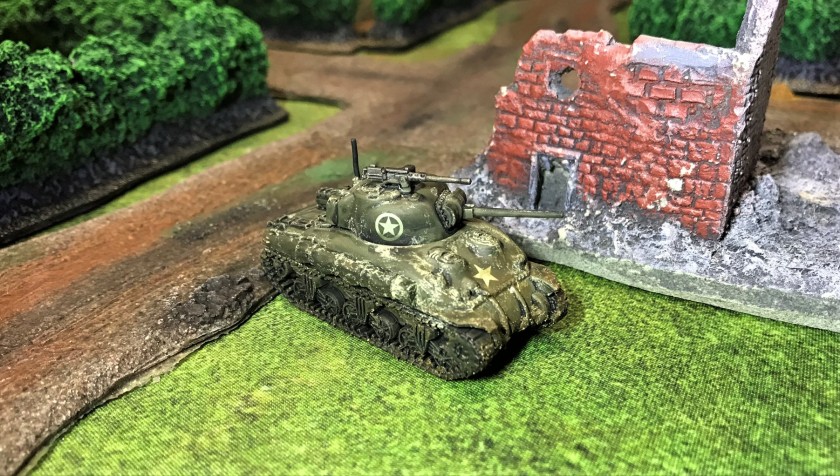
M4A1 “Destruction”

1 Destruction after decals
“Destruction” early in the weathering process right after decal application.
2 Destruction after pigments
“Destruction’s” chassis after weathering
3 Destruction in the hedgerows
“Destruction” moving down the road between the hedgerows.
4 Destruction completed, left side
“Destruction” left side – as an experiment I used Citadel contrast paint on the tarp.

M4A1 “Let ‘Er Buck”

1 Let 'Er Buck after decals and some weathering
“Let ‘Er Buck” chassis early in weathering.  I chose this name/decal in honor of Buck Surdu, though as an infantryman he may object…

2 Let 'Er Buck finished, left side3 Let 'Er Buck finished, front side

4 Let 'Er Buck finished, right side
Note on all these that I used different gear in different stowage to differentiate the tanks.

M4A1 “Polly”

1 Polly completed, left side
“Polly” by some ruins.  As I have a pet cockatiel named Caesar, this is as close as he gets to an avatar tank.

2 Polly completed, right side3 Polly completed, right side, at crossroads

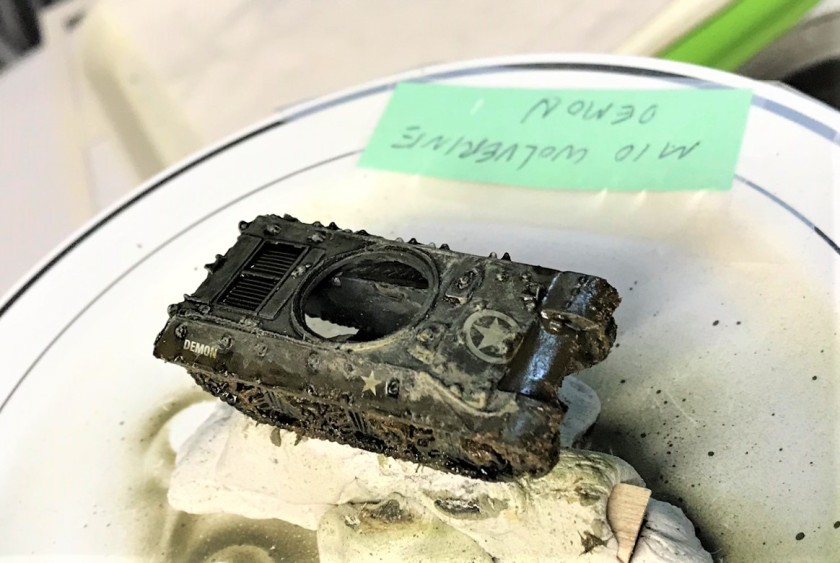
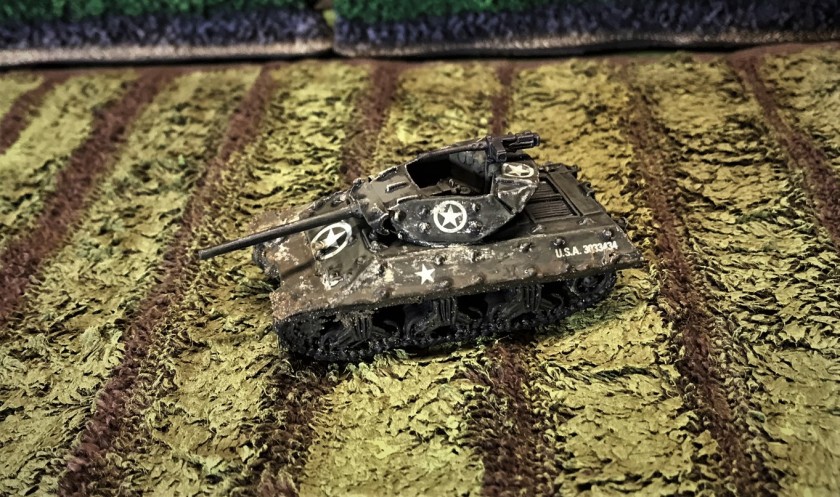
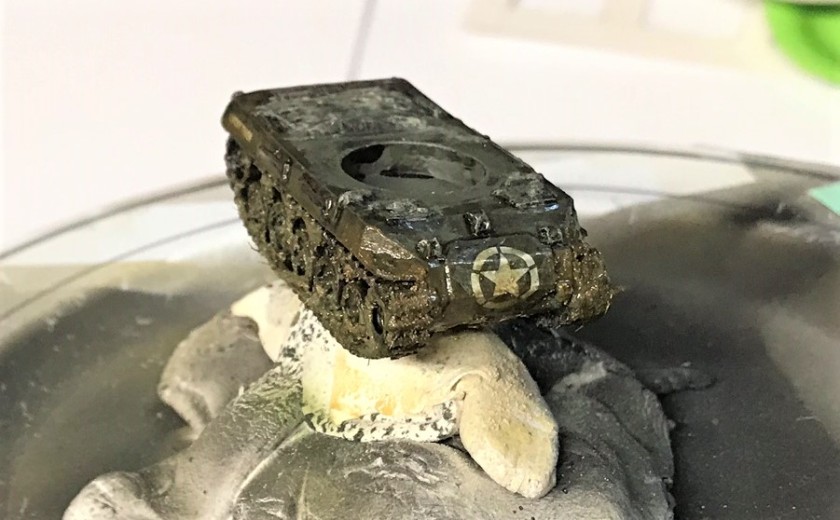
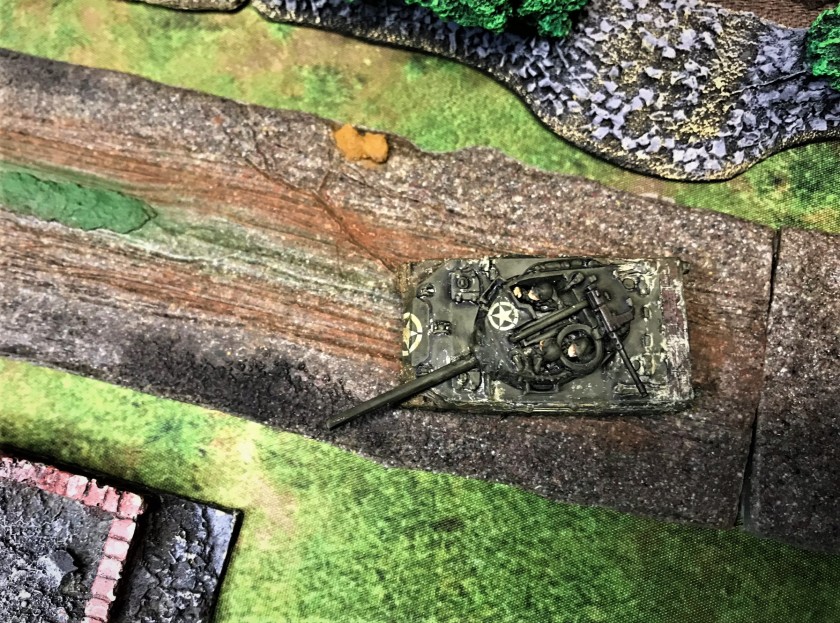
M10 Wolverine “Demon”

1 M10 Demon after weathering
“Demon” getting dirtied up.
2 M10 Demon crosses field, left side
“Demon” crossing a field.  I did not buy crew for this one.

3 M10 Demon crosses field, right side

4 M10 Demon crosses field, front side
Nice view of “Demon’s” front showing the replacement gun.
5 M10 Demon and other Battlefront M10
On the left, “Demon” from Old Glory, on the right, my previously built M10 from Battlefront for comparison.  I used more mud and dirt on “Demon” as it was a much less detailed casting.

M18 Hellcat “Lucky Tiger”

1 M18 Hellcat Lucky Tiger after some weathering
M18 Hellcat “Lucky Tiger” chassis all dirtied up.  I chose the name/decal as I am sure sometime it will face a Tiger I or Tiger II, and it will need to be lucky!
2 M18 Hellcat Lucky Tiger right side on road
“Lucky Tiger” completed and moving down the road.

3 M18 Hellcat Lucky Tiger right side on road4 M18 Hellcat Lucky Tiger left side on road

5 M18 Hellcat Lucky Tiger aerial view on road
Aerial view of “Lucky Tiger” showing the ID decal to keep away friendly air attacks.

6 M18 Hellcat Lucky Tiger front view on road

Group Shots

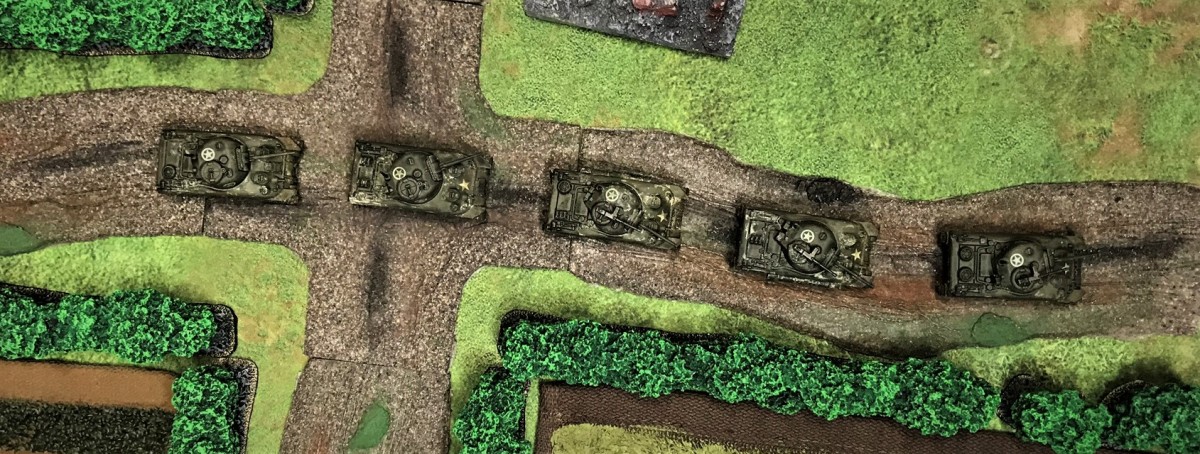
1 Shermans aerial view
Shermans in convoy on road.

2 Shermans aerial and side view

3 Shermans front shot
Frontal view of the five Shermans.
4 All US front shot
My complete American armored troops (currently) for the ETO.  Front row left to right: two M4’s (Wargame Models in Ohio); the five Sherman M4A1’s of this blog post (Battlefront); one M4A2 (Battlefront).  Second row l-r: M10 Wolverine of this post (Old Glory); M10 Wolverine (Battlefront); M18 Hellcat of this post (Battlefront); three M8 Greyhounds (Old Glory).  Third row l-r: two M5 Shermans (Wargame Models in Ohio); one M3A1 Stuart (Battlefront); two M24 Chaffee’s (eBay 3D printed acquisition).  I built and painted all but the Wargame Models in Ohio models.

5 All US side shot

The US vehicle menu for the scenario looks like this now.

US Army Menu

I hope that you enjoyed this post – and thanks in advance for your feedback in the comments section!

PAINTS, INKS, GLAZES, SHADES, WASHES, PIGMENTS, FLOCKING, GLUES AND MORE USED ON THESE VEHICLES:

  1. Gorilla Glue
  2. E6000 epoxy
  3. Vallejo “Flow Improver”
  4. Vallejo “Airbrush Thinner”
  5. Vallejo “Surface Primer – Black”
  6. Vallejo Model Air “US Olive Drab”
  7. Extra .50 cal machine guns from Battlefront kits for the M10 and the M18
  8. Extra 3″ gun from Battlefront kit for the M10
  9. ½” steel base from Wargame accessories for the M10
  10. Steel ball bearings from Jeff Smith’s fairway mower
  11. Daisy Air Rifle BB’s
  12. Reaper MSP “Black Primer”
  13. Vallejo Model Air “Dark Brown”
  14. Battlefront “Dark Gunmetal”
  15. Army Painter “Military Shader” (wash)
  16. Battlefront “European Skin”
  17. Battlefront “Skin Shade” (wash)
  18. Testors “Universal Acrylic Thinner”
  19. Citadel “Contrast Paint – Militarum Green”
  20. Battlefront “Oxide Red”
  21. Secret Weapons Washes “Armor Wash”
  22. Microscale Micro-Set
  23. Microscale Micro-Sol
  24. Microscale Micro-Satin
  25. Microscale Liquid Decal Film
  26. Vallejo Game Air “Satin” (varnish)
  27. Vallejo “Gloss Varnish”
  28. Appropriate decals from Armorcast
  29. Appropriate decals from Battlefront
  30. Vallejo “White”
  31. Vallejo “European Mud” (Thick Mud)
  32. Vallejo “European Slash Mud” (Splash Mud)
  33. Vallejo Weathering Effects “Crushed Grass”
  34. Vallejo “Light Slate Grey” (pigment)
  35. Vallejo “Light Yellow Ochre” (pigment)
  36. Vallejo Mecha Varnish “Matt Varnish

British Armor and Some Blogs Worth a Look

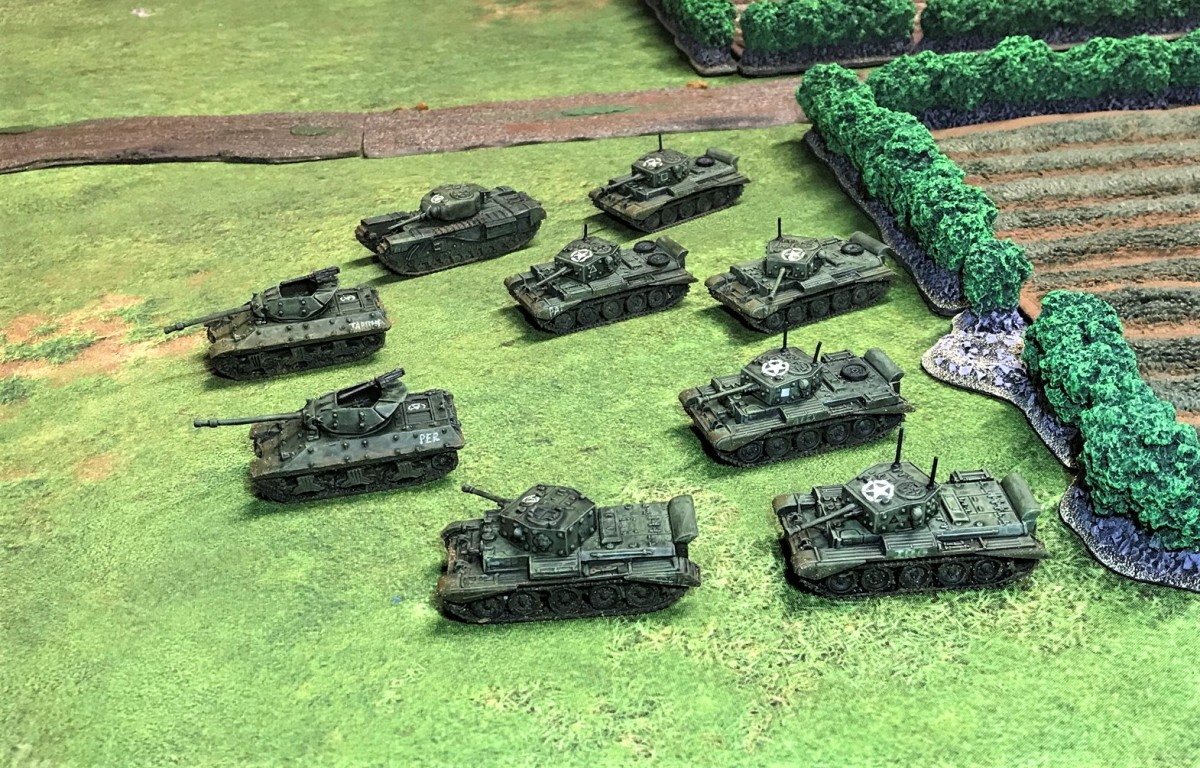
During the Allied breakout from Normandy in 1944, the British Army used several different tanks and tank destroyers.  Some were American-made, some were British-made, and some were conversions of American vehicles.  For my What a Tanker© Normandy Breakout Scenario, I had plenty of British Shermans, a couple of Fireflies, and a few Daimler Dingoes, but the available British vehicle menu needed some fleshing out.  Clearly missing were the Cromwell Mark IV cruiser tank, the Churchill Mark IV heavy infantry tank, and the M10 Achilles tank destroyer.  This project aimed to rectify that situation, especially as I plan to run the game at a few upcoming conventions (such as at BARRAGE and at the Mass Pikemen Gaming Club.

While looking at some images of these vehicles in my reference books, I came up with a new idea to incorporate into the project.  First – a brief segue.

I started this blog back in 2015, inspired by my friend Buck Surdu’s blog.  I was getting back into the hobby – and thought I’d share what I was learning about the gaming I was doing, the miniatures that I was working on, some history, and whatever I found interesting.  Since then, I have posted 143 times (this post is #144), have 139 followers (thanks to all and I am always happy for more so feel free to follow if you don’t already!).  I also learned of many others’ blogs and now I follow many of these.  Several  originate in the United Kingdom, Australia, and other Commonwealth nations.  They inspire and entertain me, and perhaps they will do that for you as well.  So, let’s get back to the idea I just mentioned.  Perhaps I could work in a few of those bloggers into these vehicles and have them be represented in a small way in this project and the future games I run.  More on that shortly…

Now, a few qualifying points.  Each of the vehicles you will see below has a link to a blog – BUT, these are not the only ones that I follow and my goal was not to leave anyone out.  However, I chose to include the following as ones that are among my faves, AND who have a connection to a place where, well, the Queen is on the currency (with two notable exceptions that I’m sure you’ll allow me).  Also, I wanted to use Battlefront decals to both make the tanks both easier to identify on the tabletop (these are small 15mm scale tanks) and have some connections to the bloggers.  Ease of identification on the tabletop is important, as most players have little knowledge of the history of the tanks.  Of course, there are experts somewhere who can correct me – and that’s not an issue.

Truly, I wanted to be as authentic as I could, but as I tried to research British tank markings, frankly, I got more confused!  The issue is not improved by any information about the decals from Battlefront.  US tank markings are pretty straightforward comparatively (IMO).  With 6 Cromwells here, I needed some variety!  You will see I used a number of decals from varying Commonwealth nations – and different theaters – incorrectly – and on purpose!  In addition to the decals, I varied spare road wheel and toolbox placements, as well as adding some freehand names to the tanks.  My freehand work is OK for the scale here I think – you can be the judge – I had to use a spotter brush and still make them look like a crew added the names.  Again, the decals I used below are not as historically accurate as possible, and that’s fine with me – they do accomplish the playability and blogger-linking goals I described.

So onto the project – I had 9 vehicles:

The Achilles had some casting defects that I remedied with green stuff.  I also gave them some leftover plastic .50 caliber machine guns as the ones they had were too bendy.  The plastic Cromwell’s got some BB’s in the hulls to add weight.  I tried to make the tanks a lighter green so as to match the other ETO British Shermans I already had.  I also added some radio antennae.

Now, in alphabetical order by name – and all linked blogs are worth checking out:

Alex

Alex’s blog can be found at Leadbaloony   He does a great job with terrain and older GW Space Orks (I believe from the late 1980’s to early 1990’s) that are painted unbelievably well.  I named a Cromwell Mark IV for him – it has a number 4 and solid white decals on the turret.  The red and white unit decal is (I believe) an older one from the 21st Tank Brigade, which I chose because Alex is a British veteran.

1 Alex done3 Alex front side on road2 Alex left side on road

AZAZEL

Azazel’s blog can be found at Azazel’s Bitz Box.  He is a fantastic painter and modeler and his interests run the gamut from terrain to 40K to Flames of War to board game minis and more.  He still finds time to run a monthly community painting challenge.  This July’s was “The Jewel of July ’19 Community Painting Challenge”, which included:

It’s for Vehicles. A Motorcycle or a Maus. A Starship or a Gaslands Car. A Panzer IV to a Kettenkrad. A Rhino APC or a Konigstiger or a War Rig or a M’ak I. (or M’ak II?)

This post is my second one for July’s challenge (here is my first).  The challenges are a always LOT of fun to see and he is a great guy for doing it month after month.  The Cromwell named for Azazel below has an open white square on the turret and a number 81.  As Azazel is an Aussie, I gave the tank an ahistorical 9th Division (Australia) decal with a lovely platypus on it.  The Aussies during the Normandy campaign were of course busy back in the Pacific theater fighting the Japanese, having already done their time fighting the Germans in North Africa.  I am sure that this Cromwell will acquit itself well.

1 Azazel2 Azazel front in field3 Azazel left side in field

IRO aka Imperial Rebel Ork

Moving on to yet another Aussie, IRO, his blog is Imperial Rebel Ork .  He is the master of kit bashing GW stuff into marvelous creations all his own.  He creates new worlds of wonder is all I can say – and I recommend you take a gander.  He also has a fine podcast he does with his buddy Warren (Waz), and its very funny and worth listening to (and not just because I made a promo on episode 14).  They do indeed need a lesson on American accents that originate outside of the Deep South!

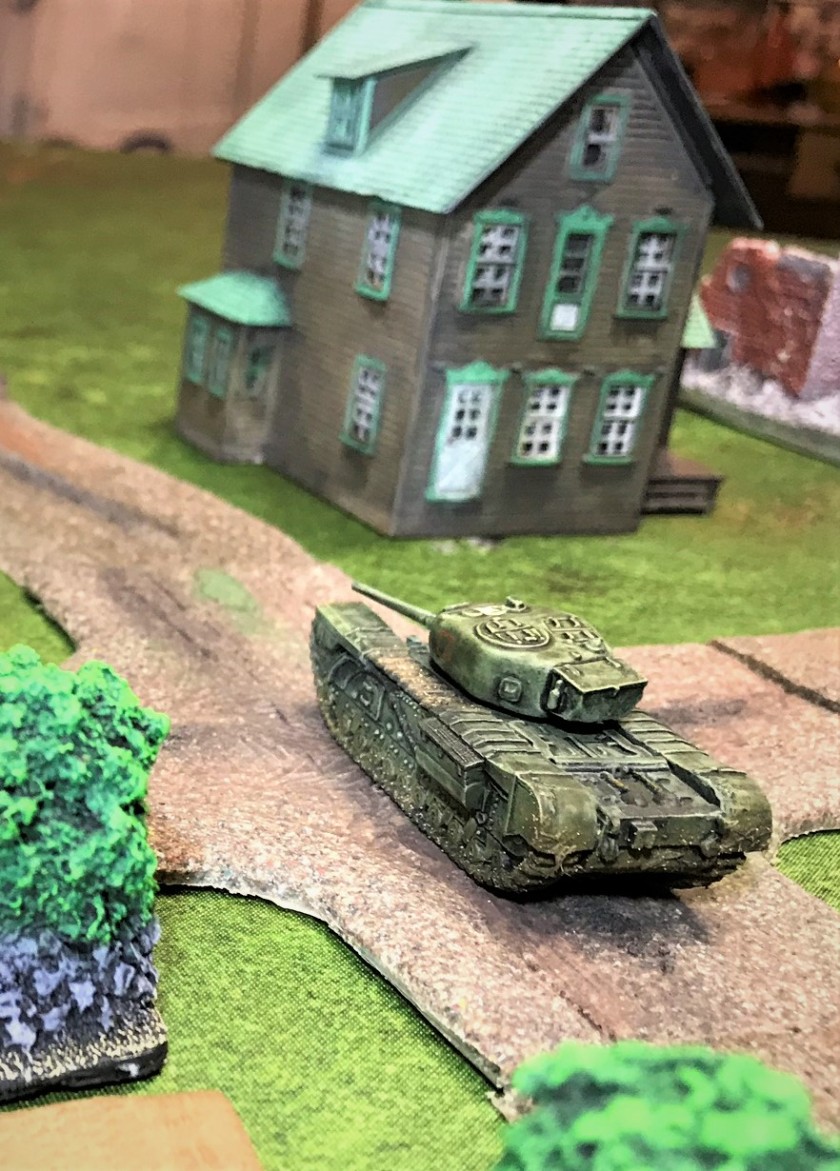
His imagination is wonderful, and you never know what he will come up with next.  His Cromwell has a few markings that need explanation.  The turret has a couple of 3rd Infantry Division (UK)  triangle markings that I chose because I liked the look for the tabletop.  There is a number 75 on the tank, and the unit marker is a later 21st Tank Brigade one (I think).  I chose it because it had a devil/imp on it, and IRO is definitely that!

1 IRO2 IRO Cromwell front3 IRO Cromwell right side4 IRO Cromwell left side

John aka JNV aka Just Needs Varnish!

I find John’s blog Just Needs Varnish! very interesting and informative, PLUS the guy really know how to paint and create games.  His stuff ranges from WWII to lesser-known conflicts like the Paraguayan War and the War of Italian Unification.  He does his research, and I really like his attention to detail.  We are alike in that way I think.  Most importantly, John loves tanks too!

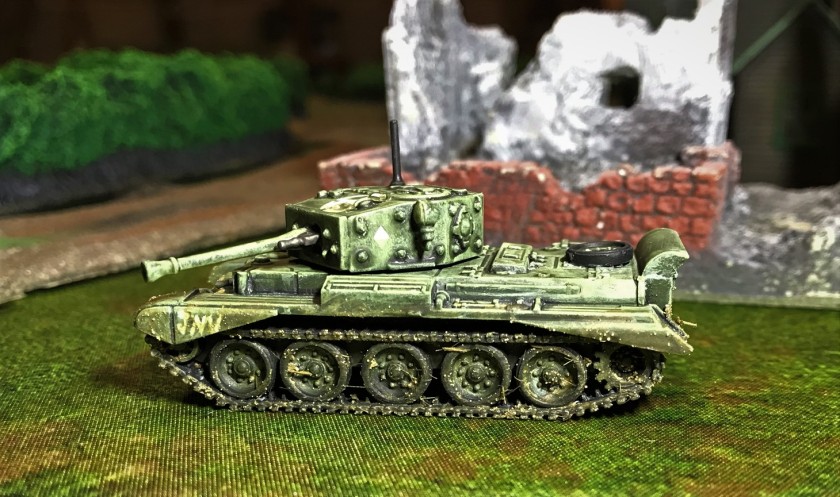
While John is a Brit, the tank with his JNV on it has turret markings for the 1st South African Infantry Division. As with IRO’s tank, these are of course not correct, but will visually helpful on the gaming table.  The tank has a 96 number on it, and a British 2nd Armoured Brigade insignia from North Africa on the hull front.

1 JNV2 JNV front3 JNV front in bocage4 JNV left side

Pat’s 1:72 Military Diorama’s

Pat is a military modeler and not a gamer.  He has a lovely blog Pat’s 1:72 Military Diorama’s that details his work from the medieval era to the English Civil War to WWII.  His projects could be considered epic just from their size and scope, but the man does very high quality work too.  As I call it, great eye-candy – check him out!

Pat is also an Aussie.  His Cromwell has open white triangles on the turrets, and a number 15 on it.  It also has the same Aussie 9th Division platypus marking as Azazel’s tank.  

1 Pat2 Pat Cromwell left side3 Pat Cromwell front side

Per at Roll a One

Here is my first exception to the rule of having links to blogs of subjects of Queen Elizabeth – Per.  Per is Swedish, and I believe lives in the UK, so we’ll include him here.  His gaming blog is Roll a One which I follow on WordPress and on Twitter (though mine is also linked on Twitter I have little idea of what to do with mine on Twitter!).  Per creates truly massive games, most of which deal with Sweden in some way or another.  He has done WWII era what-if games with Swedish tanks, some unbelievable stuff for the Great Northern War in 6 mm, and lately some post-apocalyptic stuff that I really like.  Similar to Alex, he creates very immersive games.

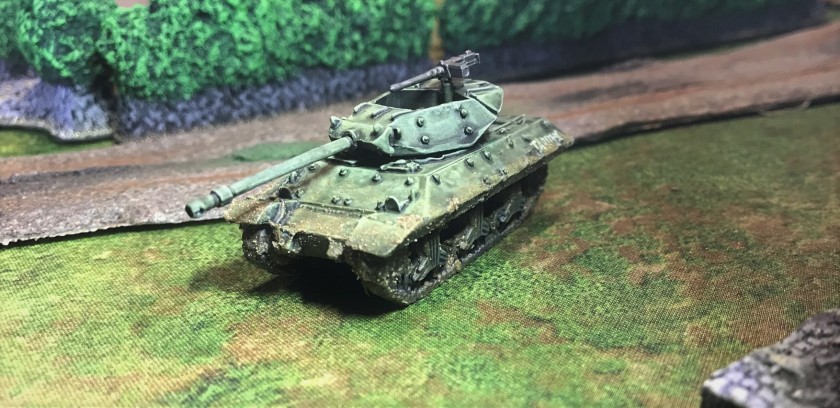
Now I have no Swedish tanks like the Stridsvagn m/42 (but Per does) – and I wanted to include him as I like his stuff.  I’m also 1/8th Swedish, so I had a soft spot!  Per, I named an M10 Achilles for you – but with no decals.  Mainly this was because I could not find much in terms of references on such unit designations – and secondly because the model hull was not great for decals.  It did get (like all my British here) a star to keep them safe from the RAF and USAAF misidentifying them.  I did not buy a crew for this one.

1 Per2 Per left side Achilles

Pete at SP’s Projects Blog

Pete is another Brit with a fantastic hobby blog.  His is SP’s Projects Blog, and is quite good and has a number of interesting projects from terrain to vehicles to infantry.  I like Pete’s blog because he does a great job on his hobby work, and has a number of very interesting modern pieces.  He is also well versed in history, and writes some of the best battle reports on his Necromunda games.

Pete’s Cromwell has turret markings with an open red circle.  This is the only one I made that is resin and metal – the other 5 Cromwell’s were plastic.  It has a number 91 on it, and an insignia from the famous 7th Armoured Division – who was in Normandy!

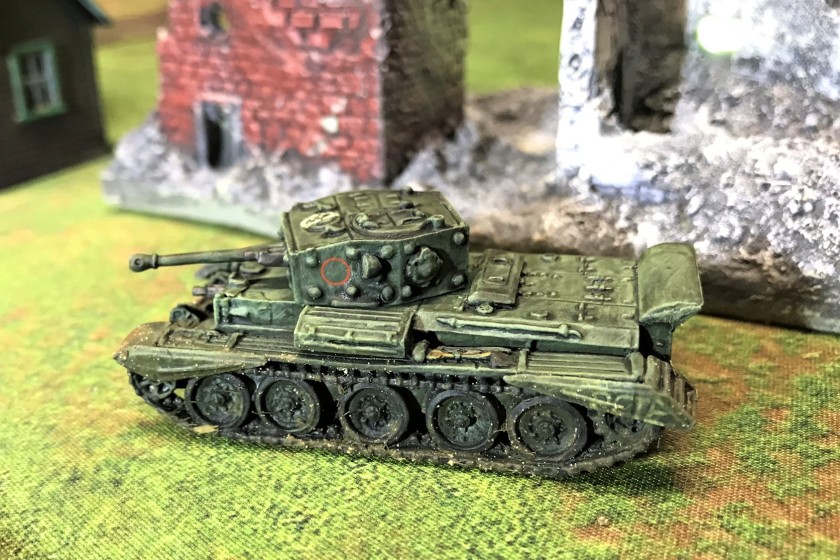
1 Pete2 Pete left side3 Pete front side

Tabitha

Now for a real exception – Tabitha is my granddaughter and only a bit older than 2½.  She’s not a Brit or an Aussie, but she does light up our lives.  I’m still waiting on her blog though…

Similar to Per, she gets an M10 Achilles named for her.  As she has Finnish heritage (through me and my daughter Ellen of course), in her stead I will recommend a full Finn –  Mikko – and his blog here.  Mikko’s blog is the wonderfully named Dawn of the Lead.   Mikko is into pirates and zombies (and maybe pirate zombies).  His painting is superb, check his stuff out.

Now back to Tabitha and her named Achilles.  Also – I did not buy a crew for this one either!

Me and Tabitha1 Tabitha2 Tabitha front Achilles3 Tabitha left side Achilles

TIM aka The Imperfect Modeler

Now last, but most definitely not least, may I present the last tank and blogger for this post!  TIM aka The Imperfect Modeler (neither are his real names – he is actually Dave).  His blog can be found here.  It might be a shorter list to share with you what he is not into in terms of modeling.  His dioramas and figures are 28mm to 54mm, and span the American West, WWII, fantasy, and much more.  They are amazing, and you are missing out if you have not seen his stuff.

Dave also has a skill with writing and his blog postings are also very amusing.  We are relatively close in age, and I appreciate especially his discussions on movies and music.  His painting is top-notch, and his dioramas are stunning.  It’s a shame he is not a gamer though, his tabletops would be mind-blowing.

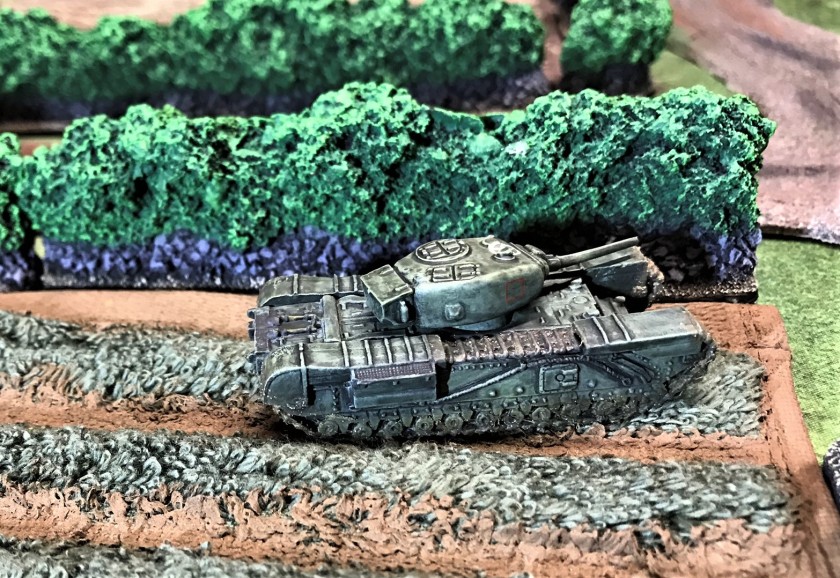
As Dave is a Brit, and a real man worthy of respect (just ask his wife), he gets the Churchill IV heavy infantry tank named after him.  It has turret markings of open red squares, and a number 71 (which was a good year for him I understand).  I chose the battleaxe symbol of the 78th Infantry Division for his tank (also not in Normandy, but worthy of Dave).

1 TIM2 TIM Churchill front3 TIM Churchill left side4 TIM Churchill left side in field5 TIM Churchill right side6 TIM Churchill rear view7 TIM Churchill top view

That wraps up the individual nods – please check them out!  I’ll conclude with a group shot, my new British tank menu for What a Tanker© and the paints and materials I used.  I hope you enjoyed this post, please let me know your thoughts, and I hope you found a new blog to enjoy!  Up next, more Americans!

5 group side

British Tanker Menu

PAINTS, INKS, GLAZES, SHADES, WASHES, PIGMENTS, FLOCKING, GLUES AND MORE USED ON THESE VEHICLES:

  1. Gorilla Glue
  2. Daisy Air rifle steel BB’s
  3. Neodymium magnets (1/8″)
  4. E6000 epoxy
  5. Vallejo “Surface Primer – Black”
  6. Spare Battlefront plastic .50 cal machine guns
  7. Reaper MSP “Black Primer”
  8. Vallejo “Flow Improver”
  9. Vallejo “Airbrush Thinner”
  10. Vallejo Model Air “Olive Green”
  11. Vallejo “White”
  12. Vallejo Game Air “Black”
  13. Battlefront “Dark Gunmetal”
  14. Vallejo Model Air “Aluminum”
  15. Vallejo Model Air “Wood”
  16. Citadel “Typhus Corrosion”
  17. Citadel “‘ardcoat”
  18. Battlefront “Monty Shade” (wash)
  19. Army Painter “Military Shader” (wash)
  20. Vallejo “Surface Primer – Grey Primer”
  21. Vallejo “Gloss Varnish”
  22. Testors “Universal Acrylic Thinner”
  23. Decals from Battlefront
  24. Microscale Micro-Set
  25. Microscale Micro-Sol
  26. Microscale Liquid Decal Film
  27. Vallejo “European Mud” (Thick Mud)
  28. Vallejo “European Slash Mud” (Splash Mud)
  29. Vallejo “Crushed Grass” (weathering)
  30. Vallejo Mecha Varnish “Matt Varnish


Frank Tank Rants

musings of a fat old bloke on tanks and wargames

Dragons of Lancasm

Games, miniatures, painting, books and more games

Tiny Painted Heroes

The Adventures of a lifelong Tabletop Gamer, Game Design hobbyist, and full-time Software Engineer

Home of the Grumpy Gnome

Tinkering with Artwork and Ideas

Steve's Paint Brush
Grimdark model making and mini painting

Wargamesculptors Blog

Life, Golf, Miniatures, & Other Distractions

Dead Dick's Tavern and Temporary Lodging

Life, Golf, Miniatures, & Other Distractions

Guru PIGS Blog

Guru's thoughts on wargaming, life, and the universe!

Wisely lead... without a head!

History, Miniatures and Wargaming

Kuribo's Painting

Fallout, MESBG, and Hellboy Painting, Terrain, Dioramas, and Battle Reports

Don't Give Greg Ideas

Seriously, just don't

War Across the Ages, and other dark horrors

A discussion of miniatures collecting, painting and gaming.

Classic Warhammer 40K

Painting diary focused on Warhammer 40K 2nd ed., 5th ed. WHFB, related GW games, and miscellaneous whimsy

Colonel Mustard

WW2 Modelling in 1/72 Scale

Bogenwald

Random painting and terrain making.

Pat's 1:72 Military Diorama's

Scale diorama tips and ideas

Arcade Dreams

Building the Arcade Dream

P.B.Eye-Candy

Phil's 20th century wargame pages

SP's Projects Blog

A futile fight against entropy or 'Every man should have a hobby'? Either way it is a blog on tabletop wargames, board games and megagames

30mmdave

Wargaming Plausible reality?

Faith&Steel

dave's gaming adventures: faithandsteel.wordpress.com

The Imperfect Modeller

Miniature Figure Painting and Diorama Modelling

Double Down Dice

Painting miniatures and rolling dice!

Just Needs Varnish!

My ongoing wargames projects!

miniaturepopcorns

Sculpting some worlds

Despertaferres

Wargaming with the ability of a dull nine year old

Dawn of the Lead

Miniature wargaming and the occasional zombie

Rantings from under the Wargames table

Wargames, Figures, Sculpting and Converting Miniatures

Simple as War

Miniatures & Terrains

Buck's Blog

Life, Golf, Miniatures, & Other Distractions

IRO aka Imperial Rebel Ork

- I model - therefore I am -

Azazel's Bitz Box.

Painting, Modelling, Miniatures, 1:6, Games... Whatever else I find interesting.

diggingforvictoryblog

Smallholding and Wargaming.......not always at the same time!

Shamutantis

Nørdblog numero uno

Harry Heckel

Writer/Game Designer