Battle Report! The Battle of Otumba – (Feudal Patrol) TotalCon 36, Chapter 4

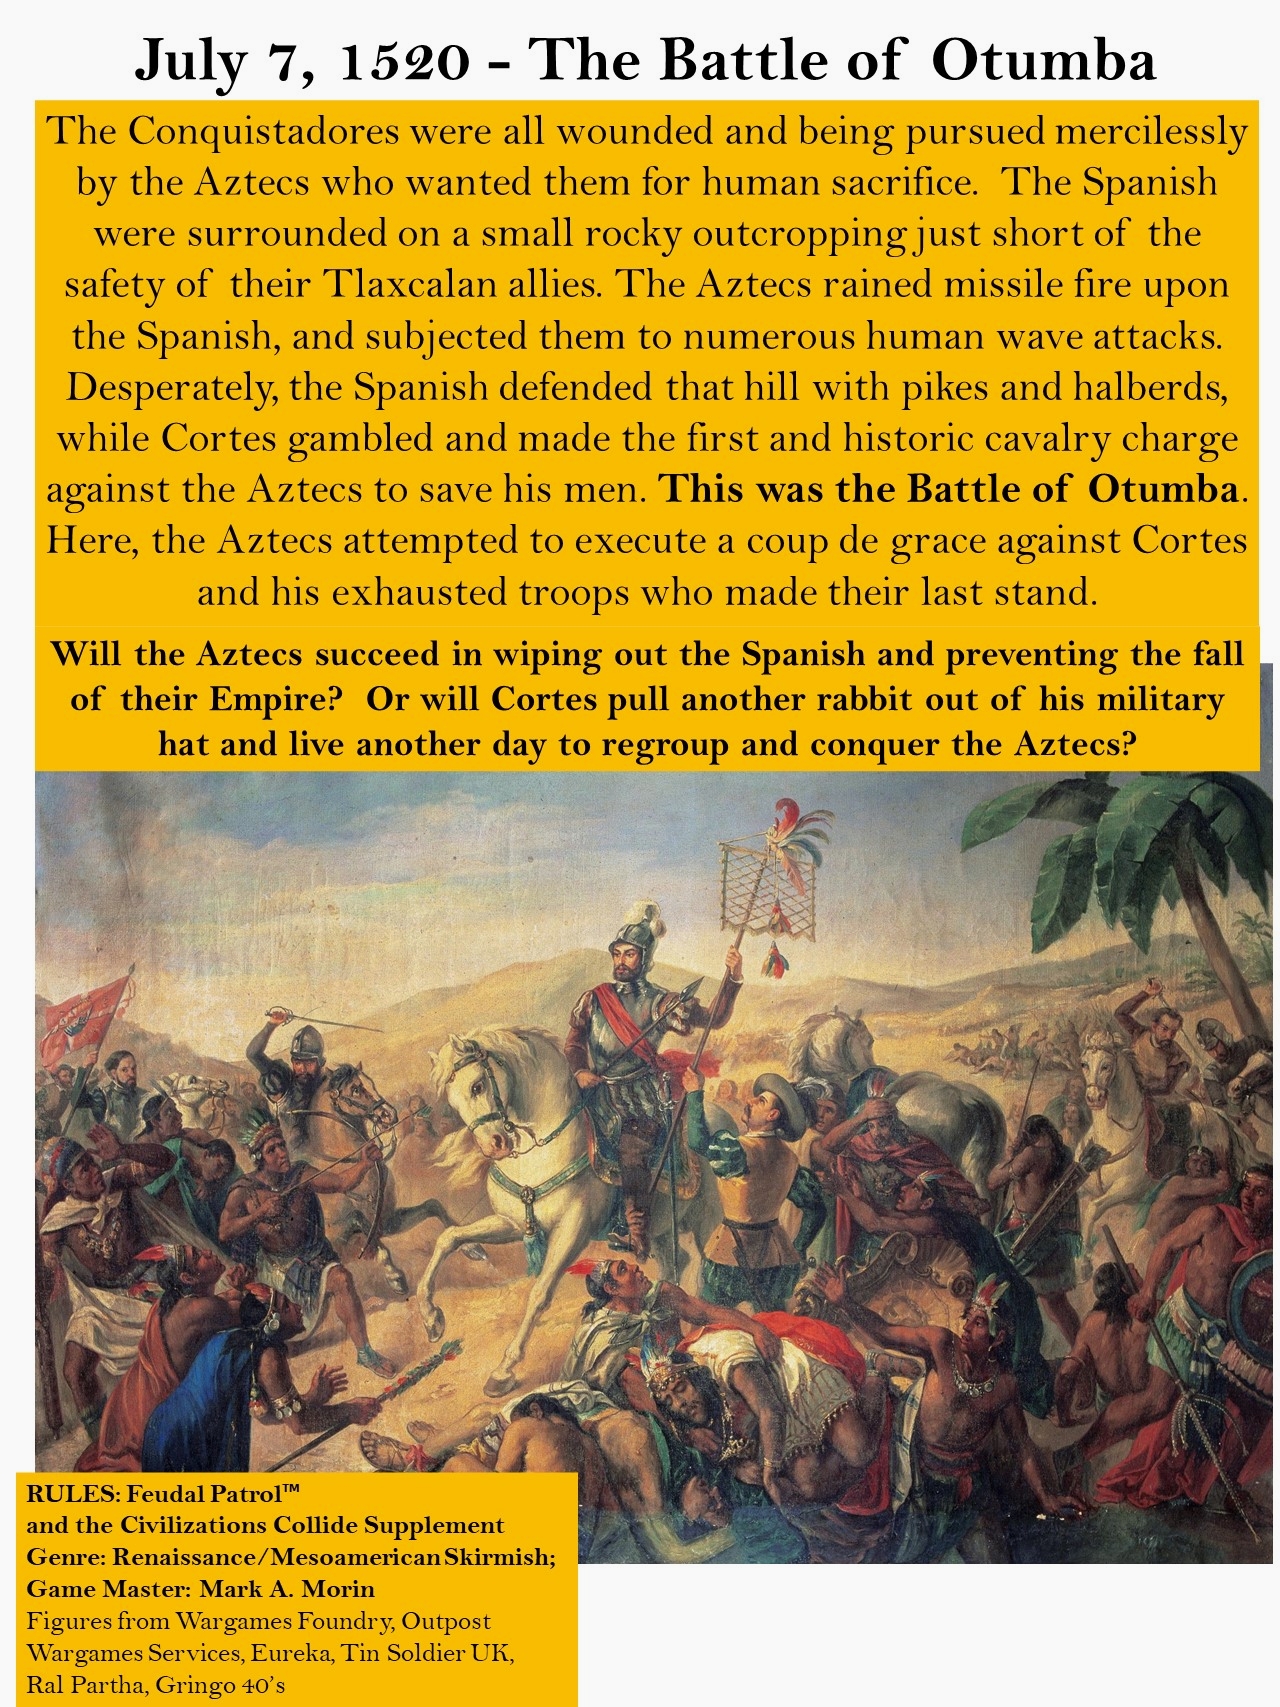
This post covers the fourth and final game that I ran at TotalCon 36 in Marlboro, Massachusetts. The game is a scenario for The Battle of Otumba, which happened on July 7, 1520. I ran the game on the morning and early afternoon of Sunday, February 27th, 2022. As with my two previous Aztec games the rules that I used were Feudal Patrol with my Spanish Conquest rules supplement Civilizations Collide.

My flyer for the game.

I designed the scenario itself to be short but intense. I will share some of the historical background as well as the the key components of the scenario. Then, I’ll share some photos and a narrative of the game as it was actually played at TotalCon 36.

Background:  For almost two weeks, the troops under Cortes retreated across central Mexico – hoping to reach the safety of Tlaxcalan territory.  All of the Spanish were wounded to some degree – many died each day from the wounds suffered during La Noche Triste and the subsequent skirmishes that occurred as the Aztecs, under Cuitlahuac, pursued them mercilessly.  The Conquistadores found themselves on a small rocky outcropping – and according to Diaz nearly surrounded on two sides.  They were just short of the mountain pass that would bring them to safety of Tlaxcala.  They took up a position bristling with pikes and halberds upon on the rocky outcropping overlooking plains.  The Aztecs rained missile fire upon the Spanish, and subjected them to numerous human wave attacks.  The brutal end was near when Cortes noticed that the attacks were being coordinated by the cihuacoatl, the High Priest of Tenochtitlan, the Cihuacoatl Matlatzincátzin.  He was the one who was acting as the Aztec General.  This High Priest was using signalers and bannermen to coordinate the attacks.  Cortes personally rounded up what remained of his cavalry and with great personal courage led a mounted charge towards the High Priest and his retinue.  The Aztecs had never before faced a massed cavalry attack.  While the hooves of the Spanish cavalry were previously unable to make such a charge on the smooth pavements of Tenochtitlan – at Otumba, they were able to make a classic cavalry attack.  The charge succeeded in killing the High Priest and many of his officers.  It was reported that Cortes himself dispatched the High Priest with his lance.  With the death of their leader and disruption of his communications system, the Aztec attack faltered.  It quickly fell apart without the command and control that the signals had provided.  Cortes and what was left of his troops were able to escape to fight another day, and eventually conquer the Aztec Empire – but this battle could have changed the course of history.  This game will last 5 turns and can accommodate 4-12 players on a 6’ x 4’ tabletop.
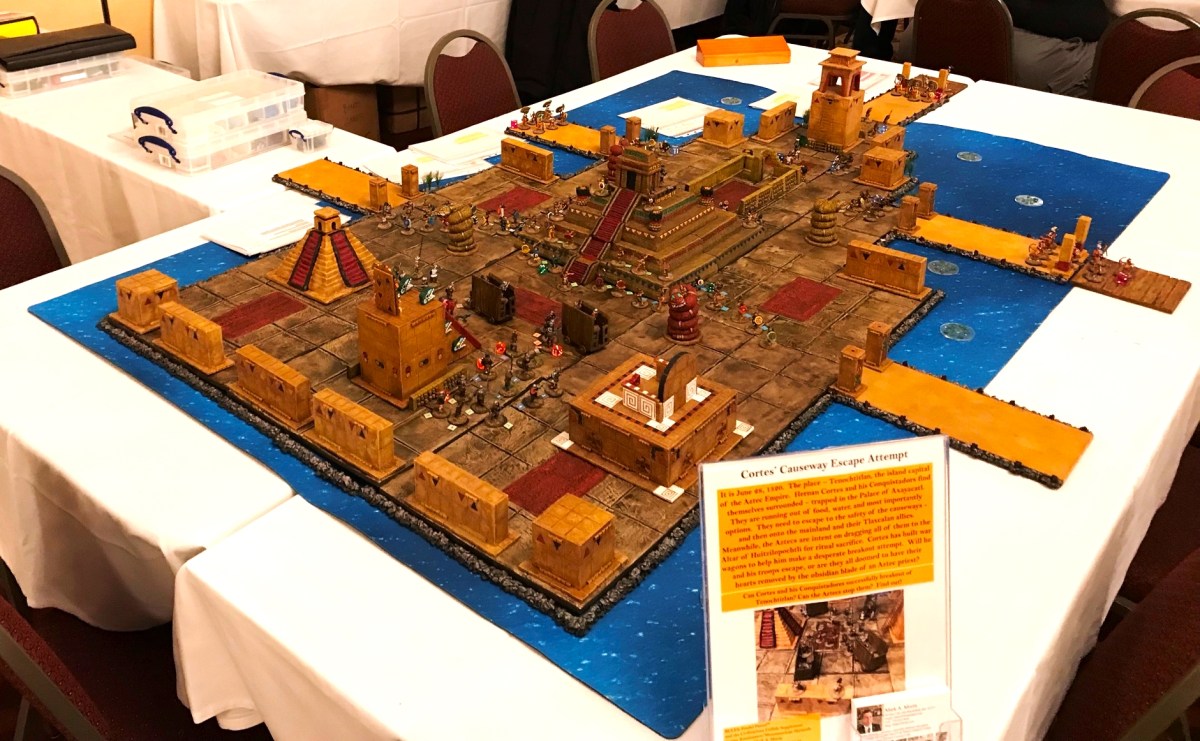
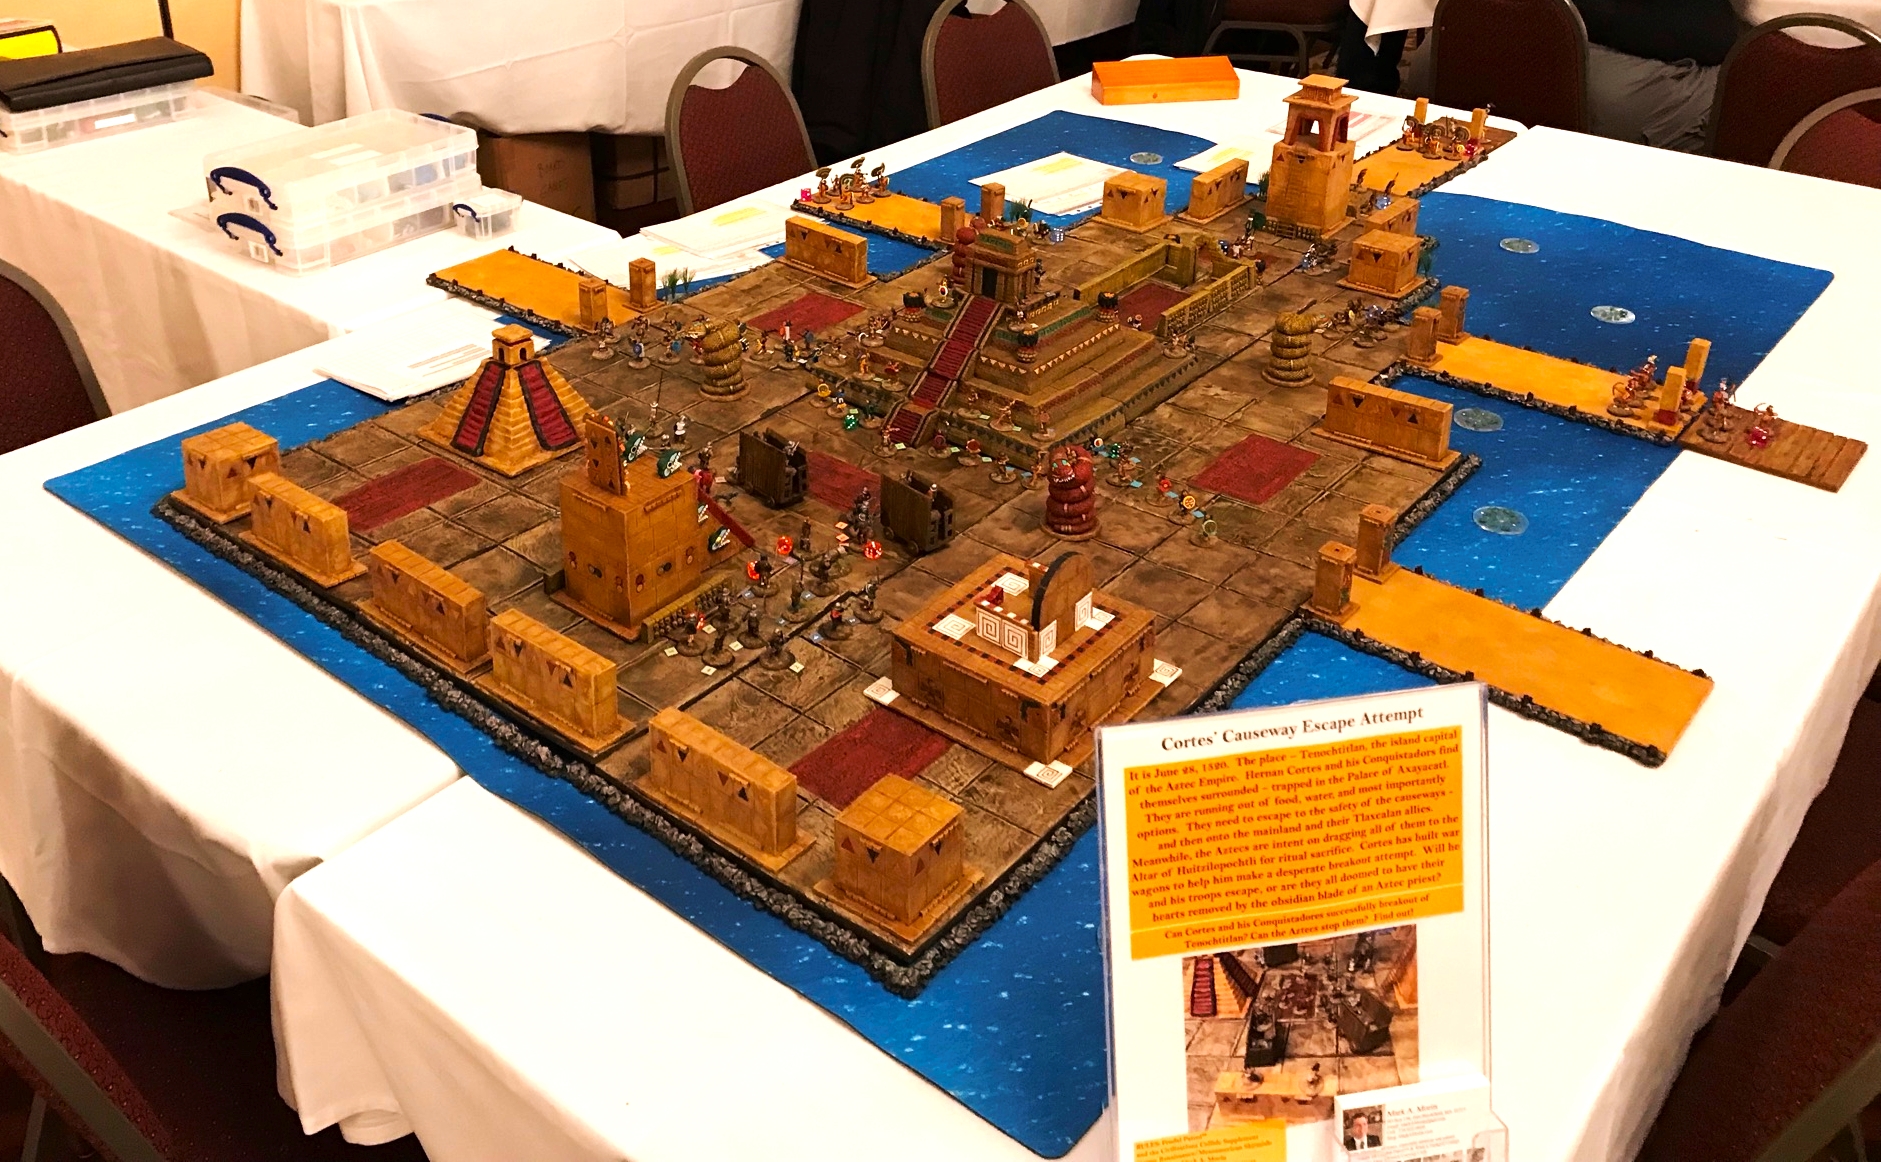
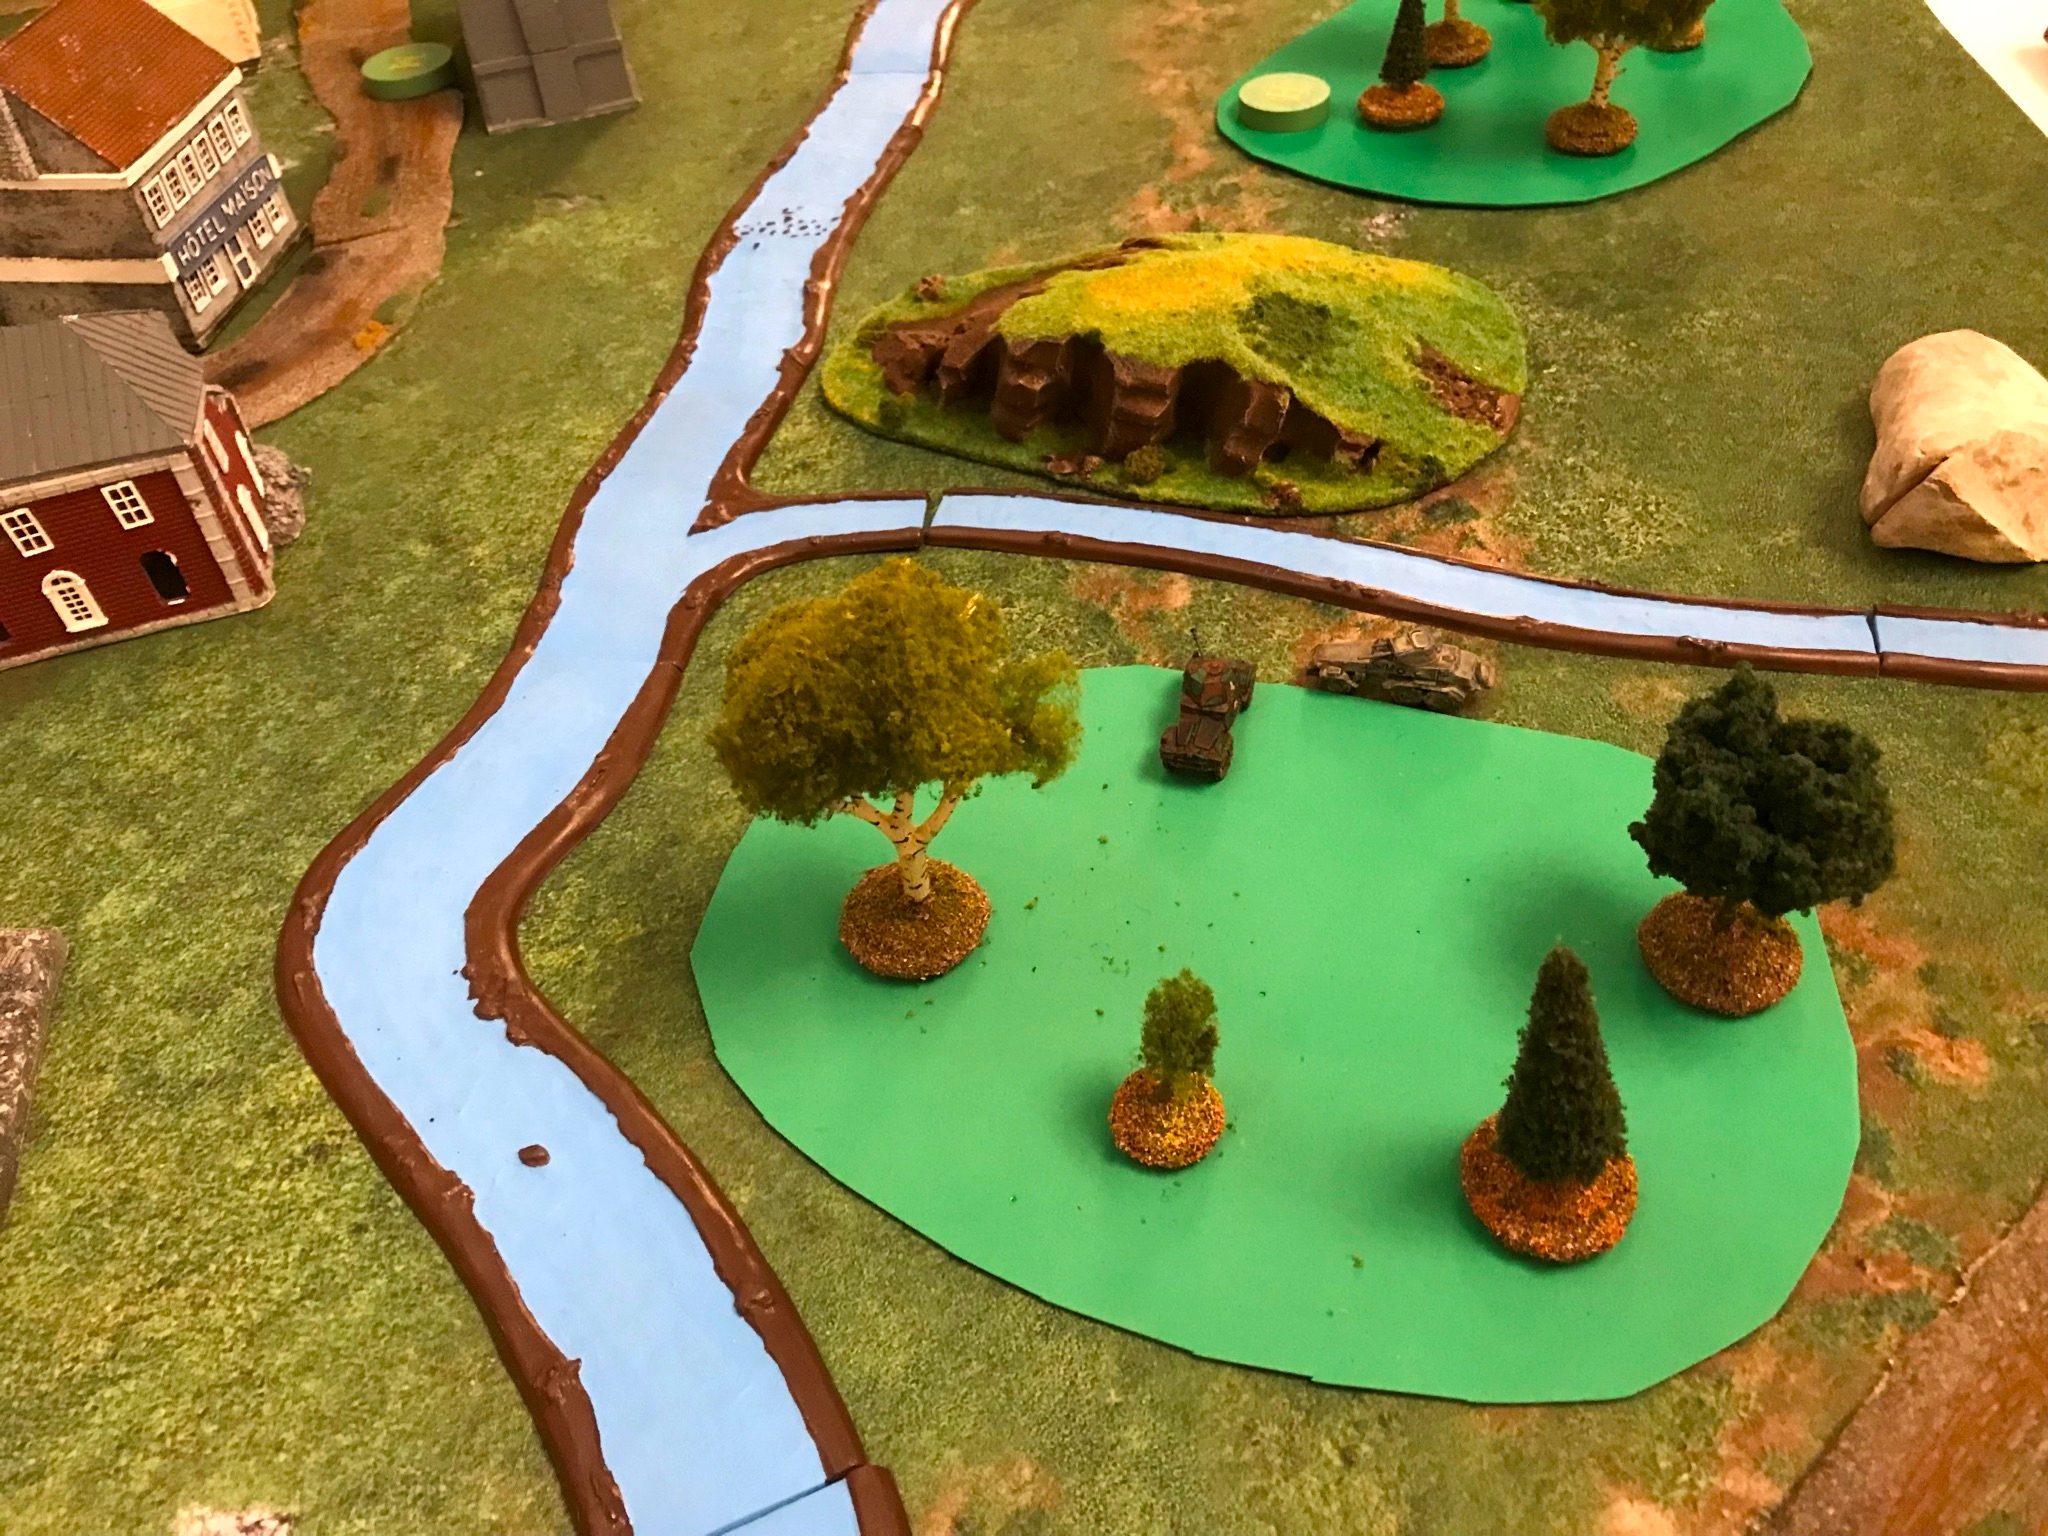
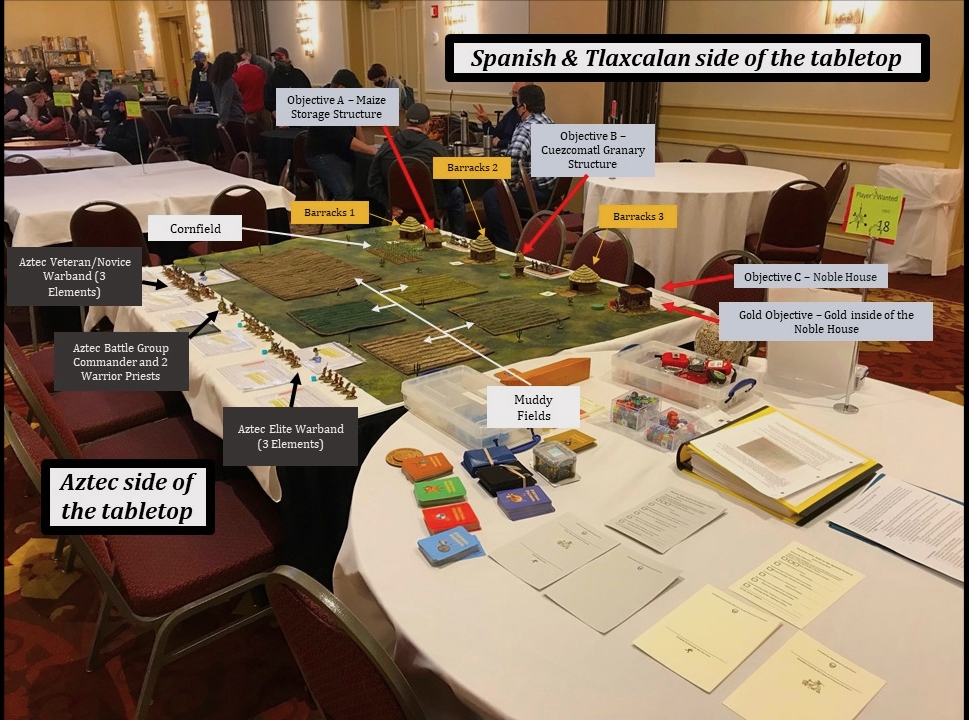
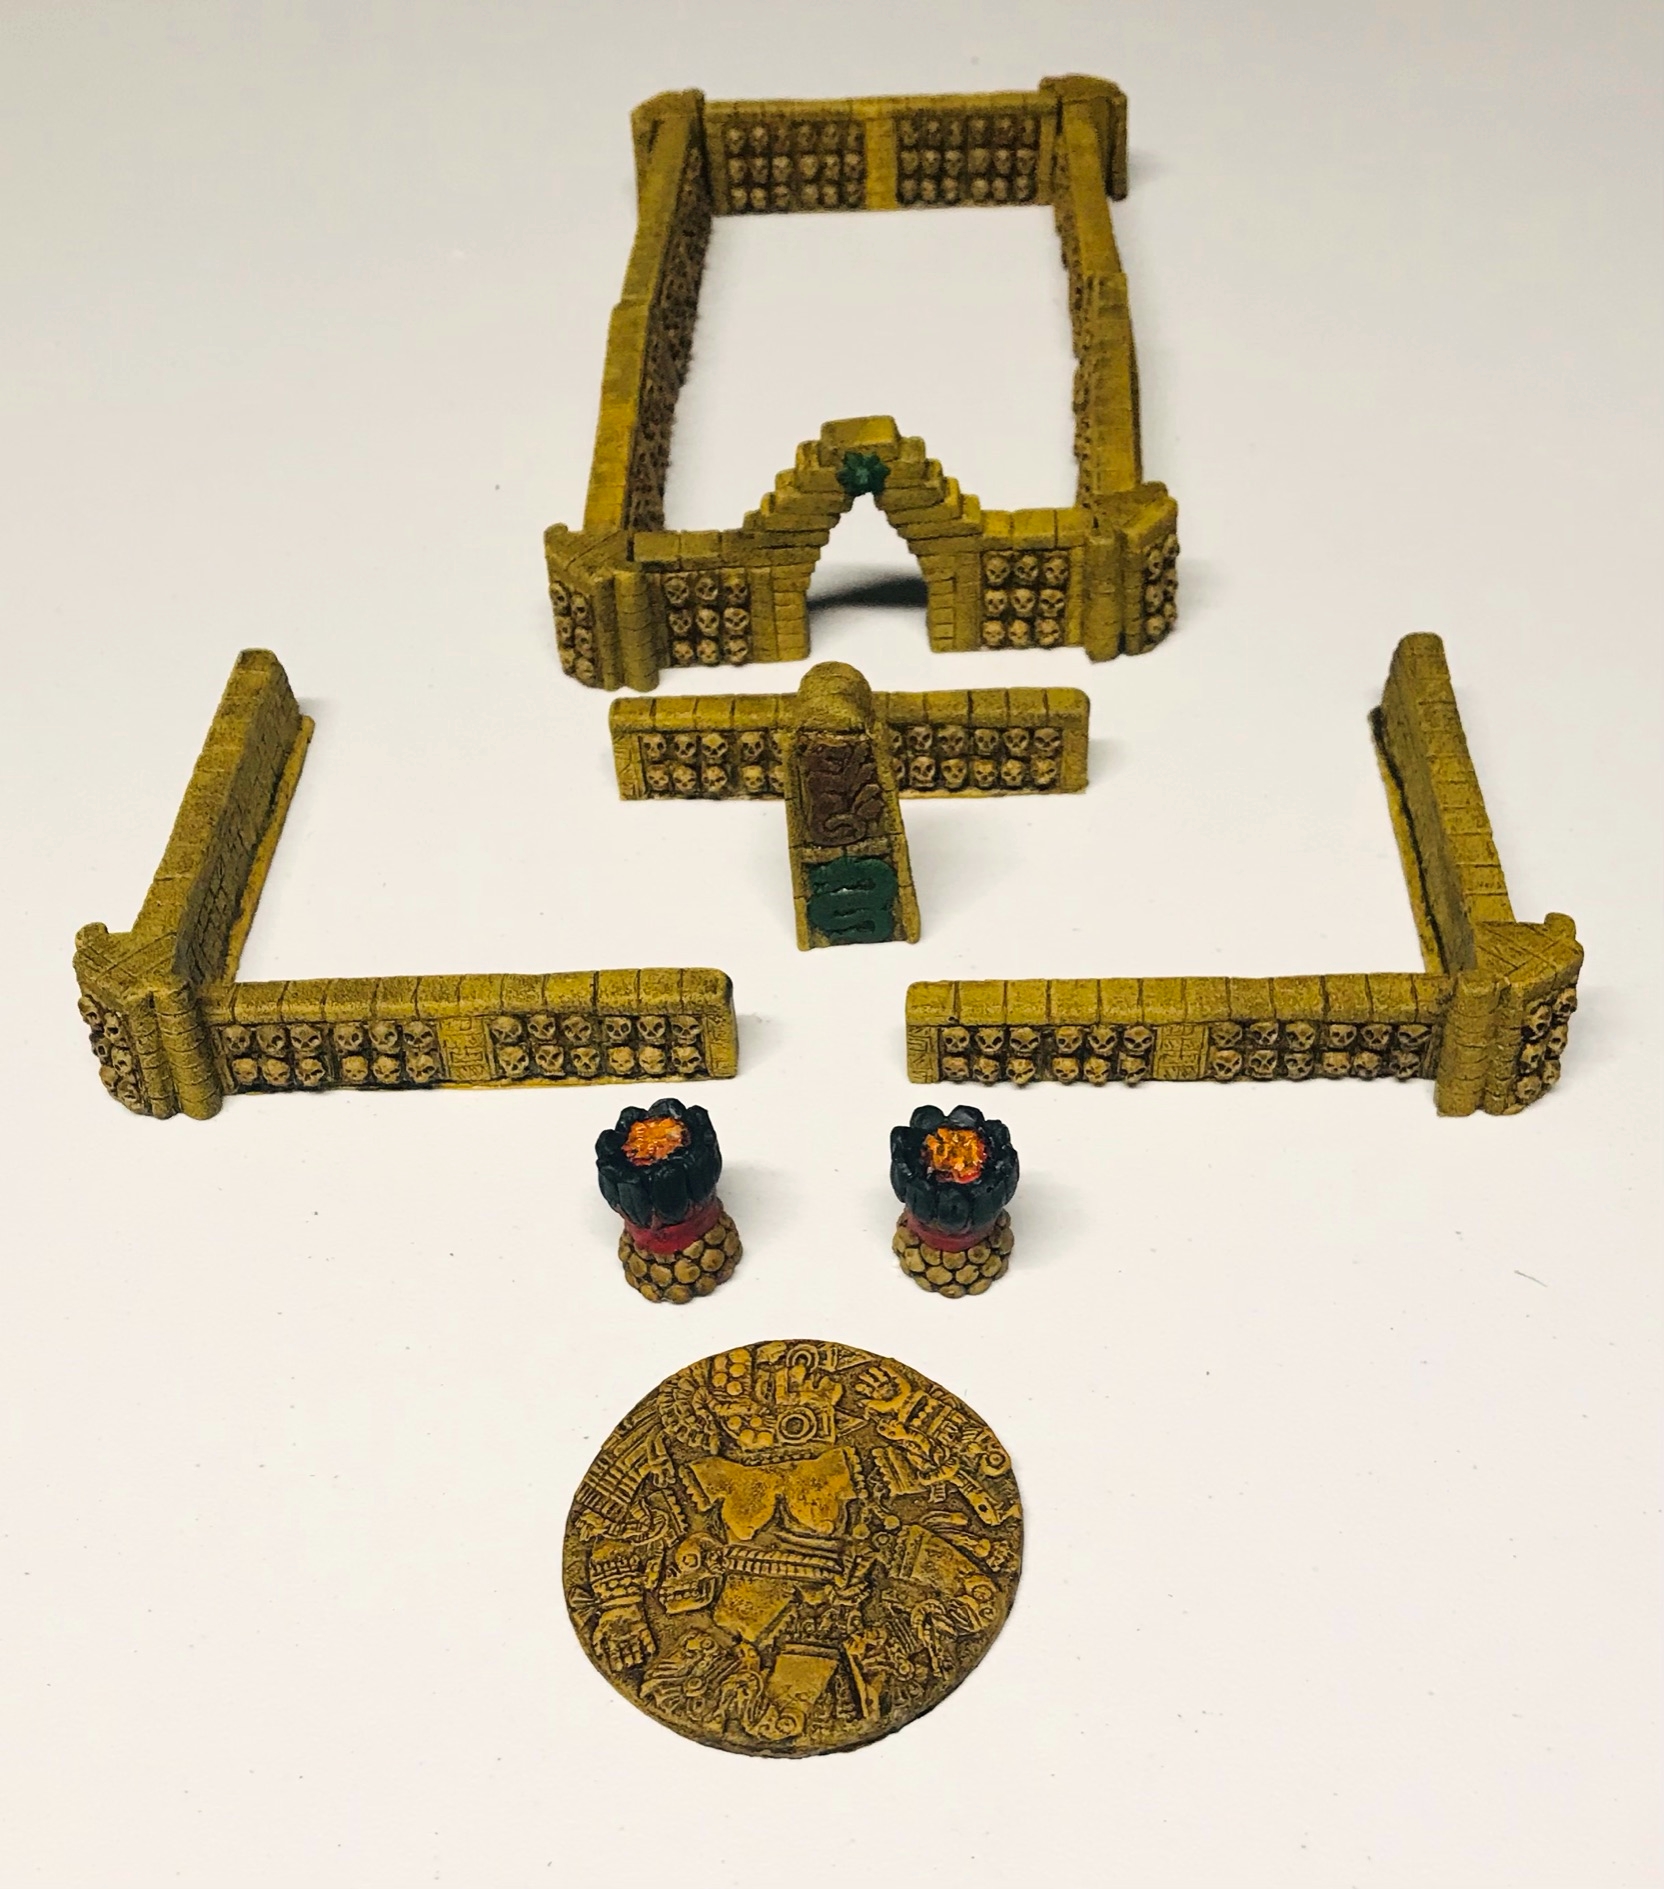
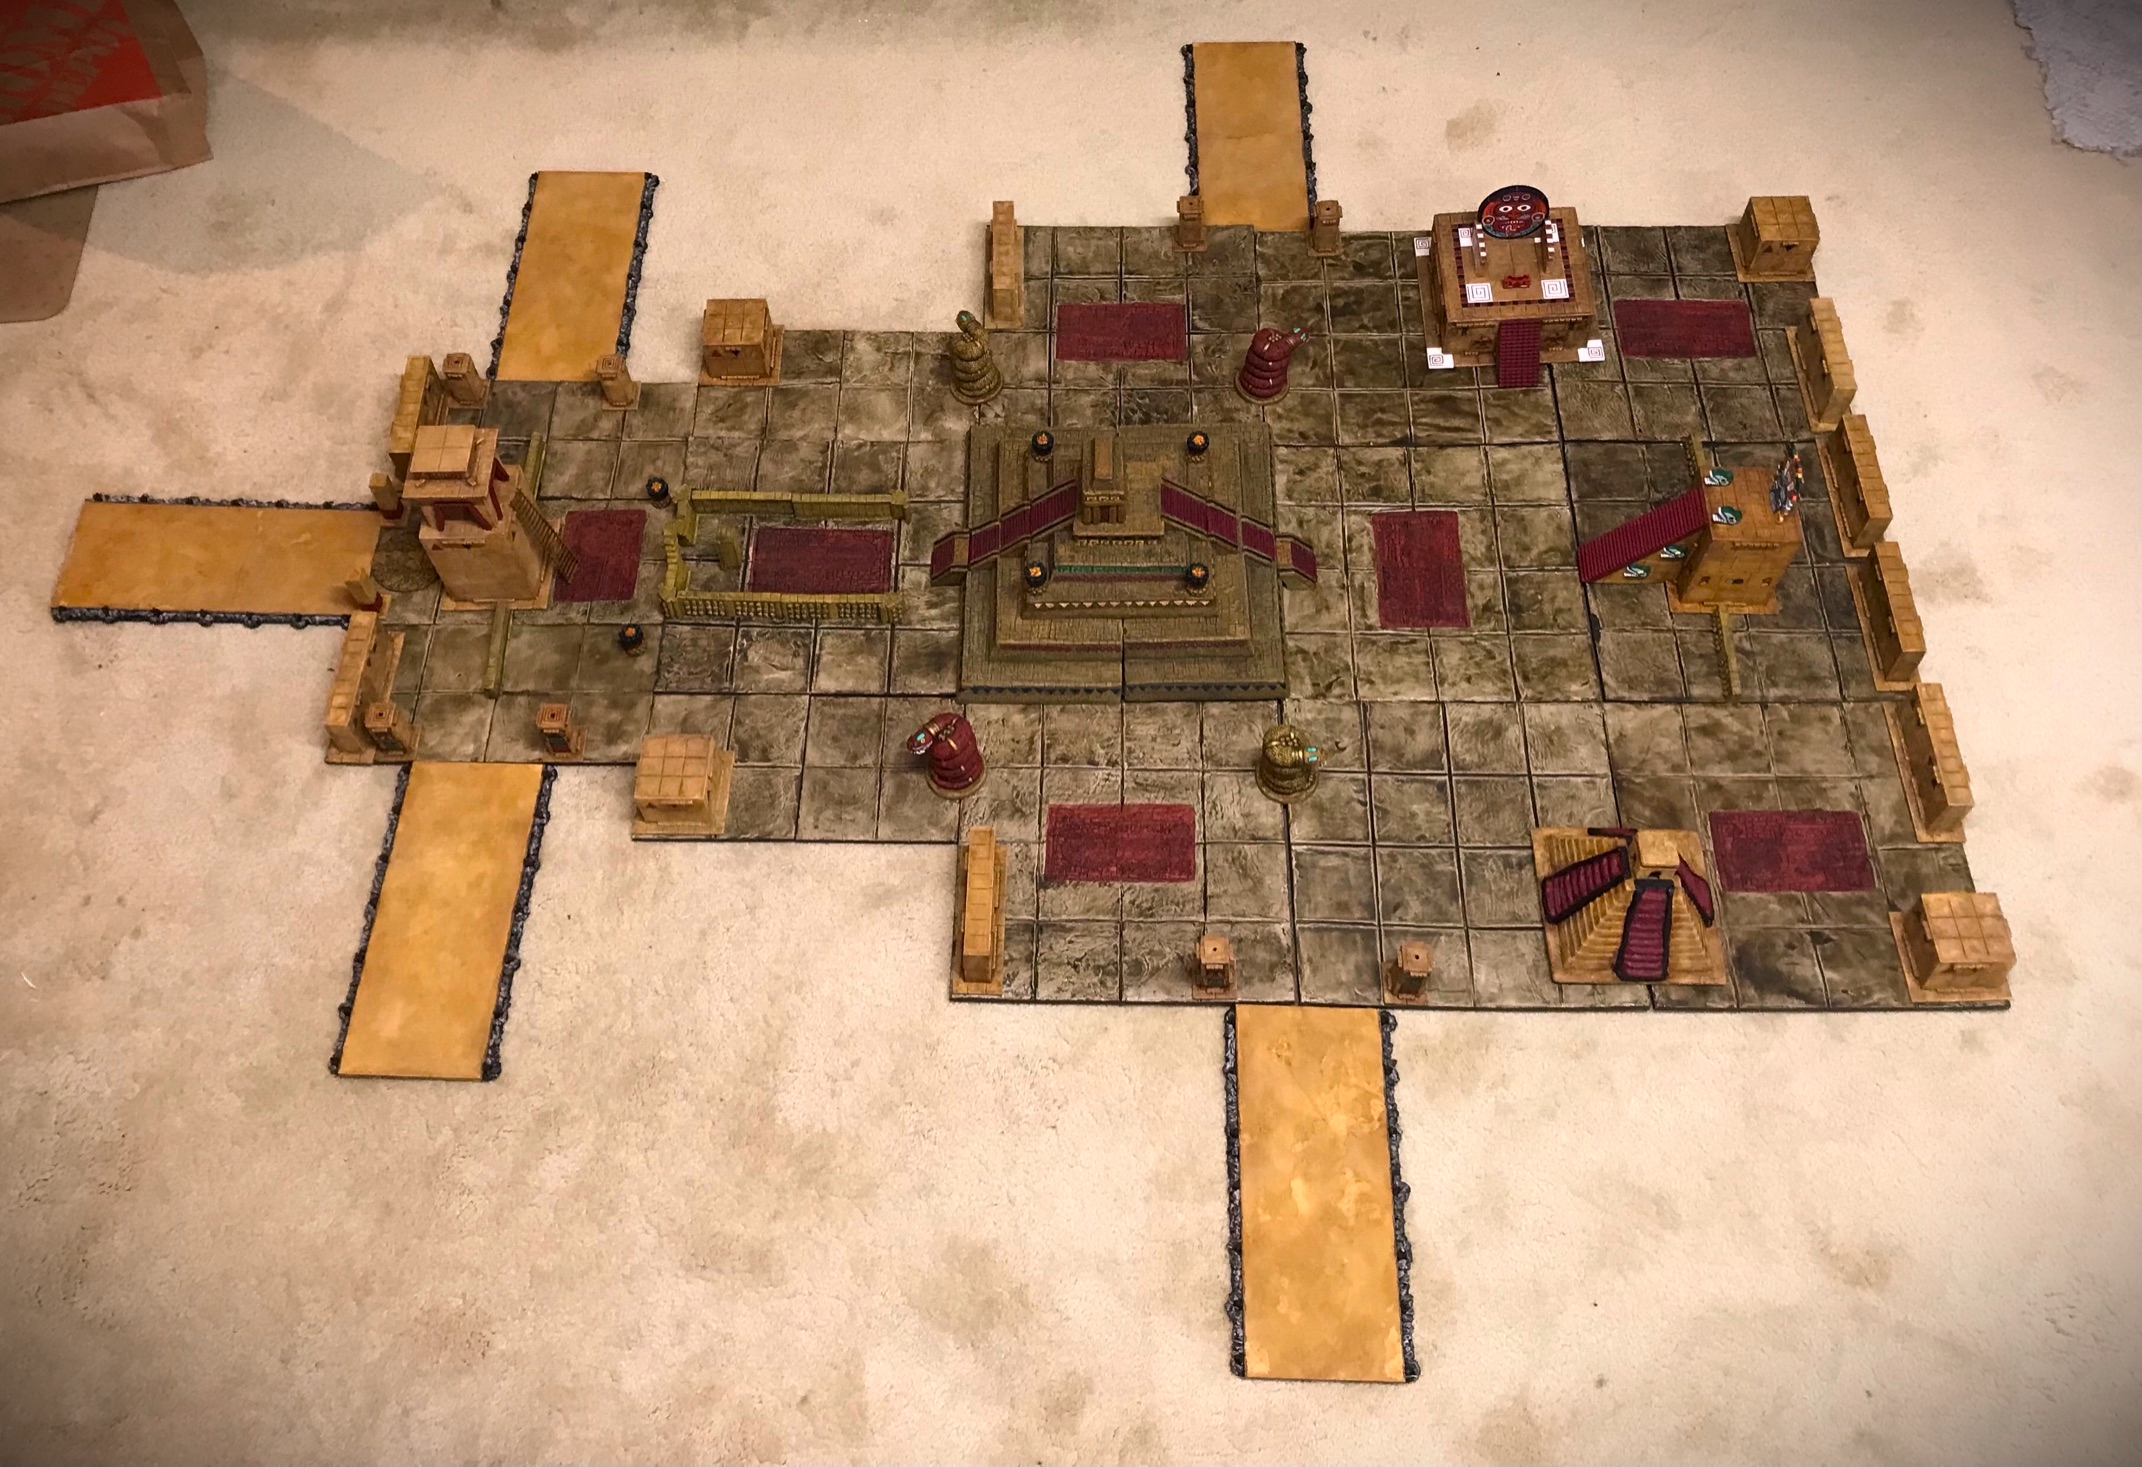
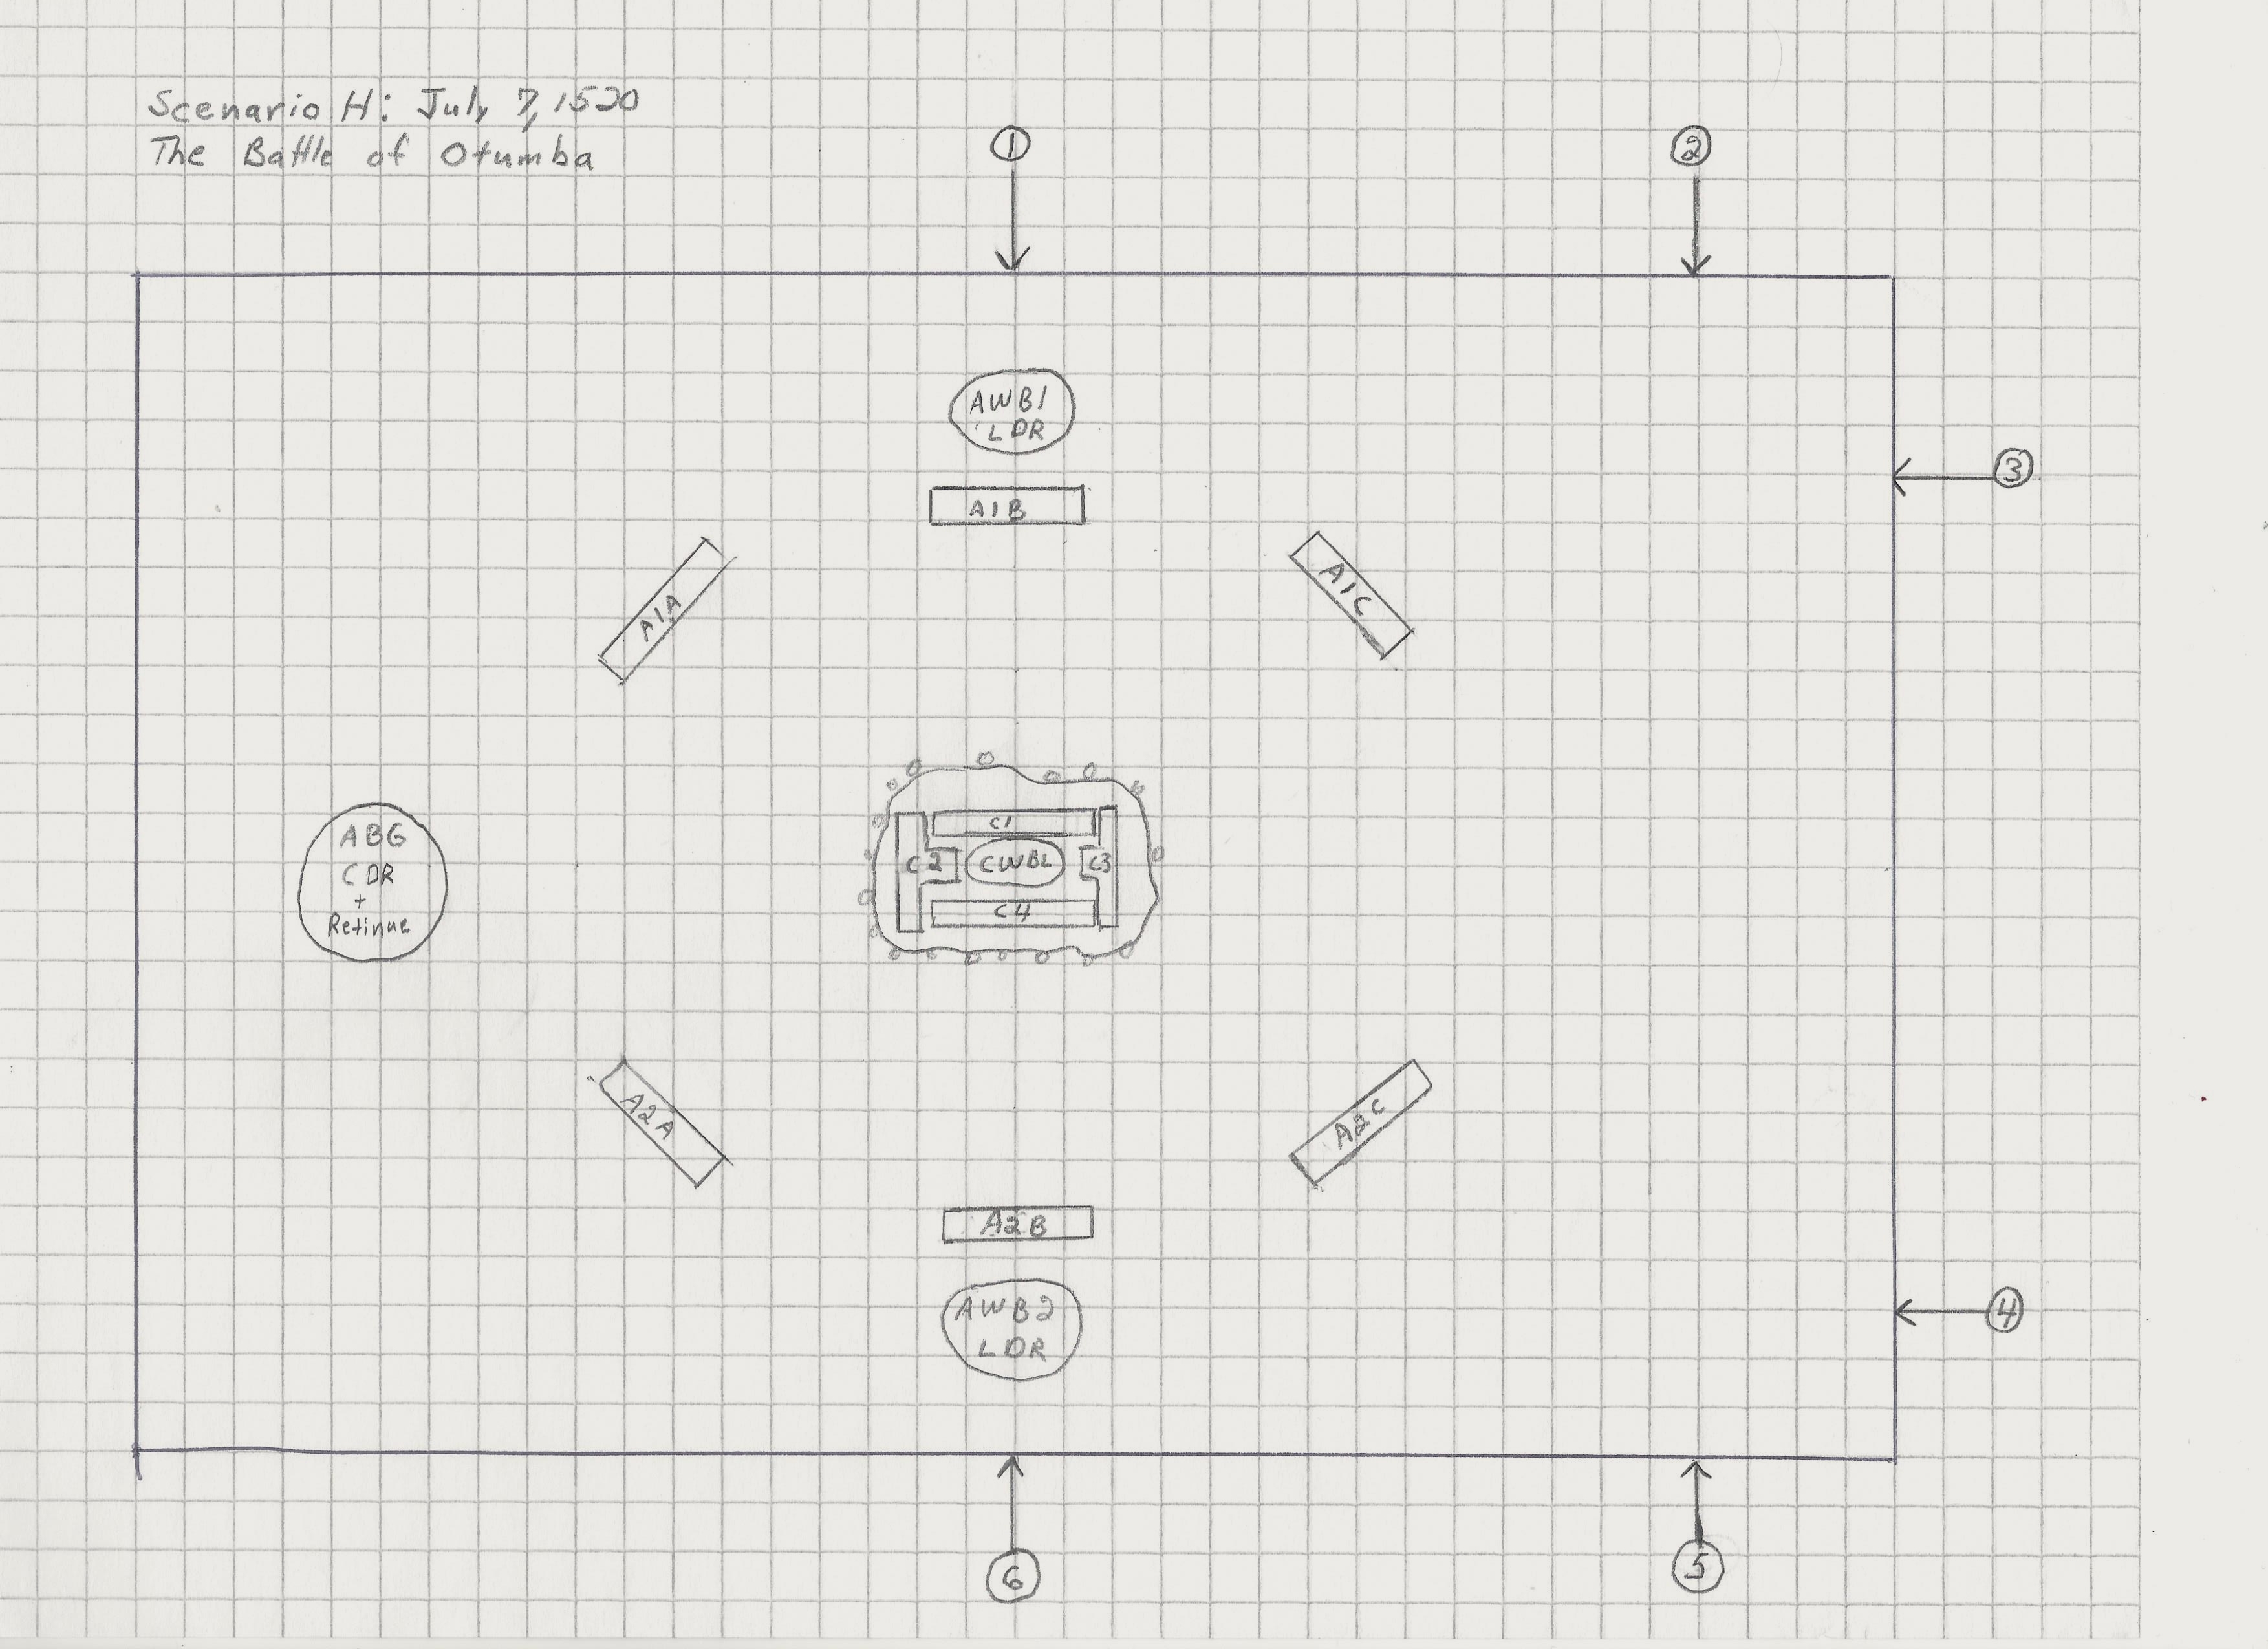
The map:

My set up plan for the tabletop. Below you will see how this translated to the tabletop.
The map drawing brought to life. 2 Aztec Warbands (one Elite, one Regular, each made up of 3 Elements) are surrounding the Conquistadores’ defensive position on a rocky outcropping. The Aztecs are controlled by the High Priest of Tenochtitlan, the Cihuacoatl Matlatzincátzin, who has a small Retinue Element around him and his two signalers. The Spanish infantry are made up of 1 Warband of 4 reinforced Elements, commanded by Pedro de Alvarado. A cavalry Element, led by Cortes, will deploy on Turn 3 from a location that was previously chosen secretly by the Spanish. The potential deployment locations for the arrival of the cavalry are the numbered squares you see here, plus one to either side. All of the Spanish do start the game with one wound. The Aztecs are all fresh, and hoping to take out many Conquistadores.

There are a few special rules in place for this scenario:

Special:  The special rules for this scenario are based on the situation that both sides faced at the Battle of Otumba.  The Spanish were fighting to survive, and were all wounded in some way or another by this point in time.  The Aztecs were for once more concerned with the final annihilation of their enemy than with the prestige earned by taking them as prisoners.  If any Spanish were still alive to be dragged off afterwards – fine – but for this battle it was a true do-or-die for both sides.  The most important special rules for this scenario are:

  • Each Conquistador (humans and war dogs but not horses) starts the battle with one wound. Typically each figure is incapacitated after having been wounded 3 times, but some key leaders might need 4 to be taken out. War Dogs take 5 wounds.
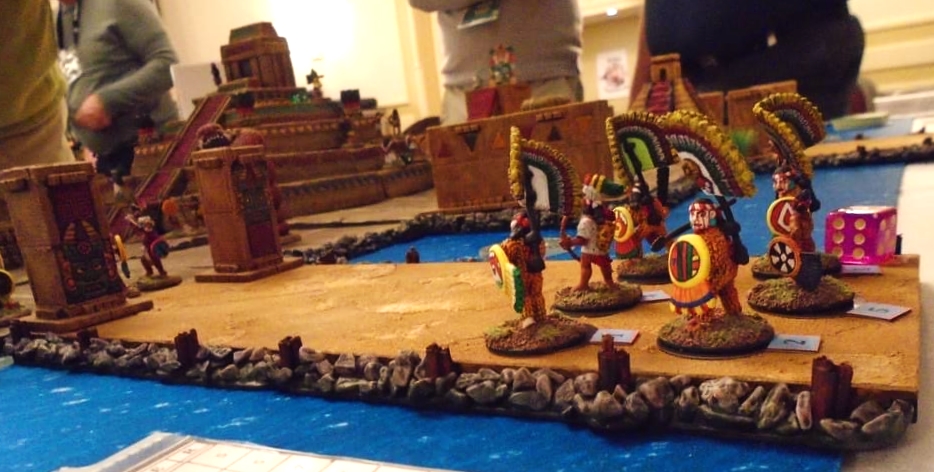
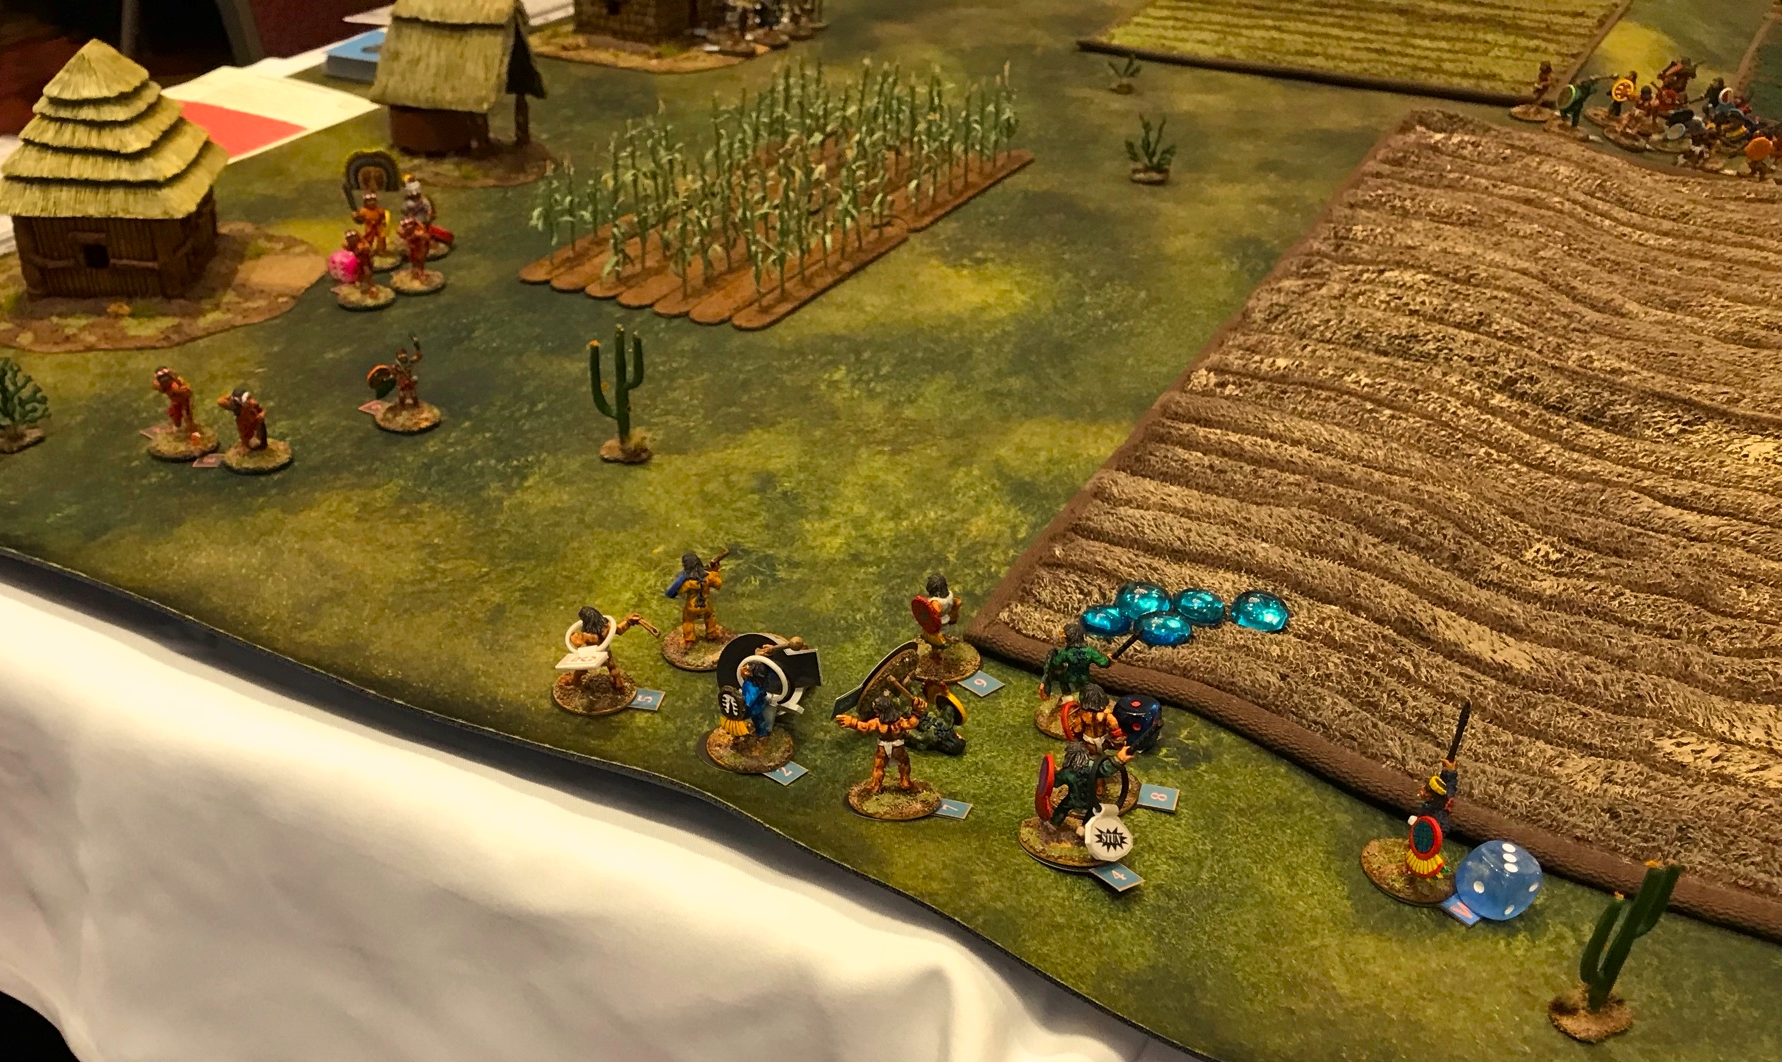
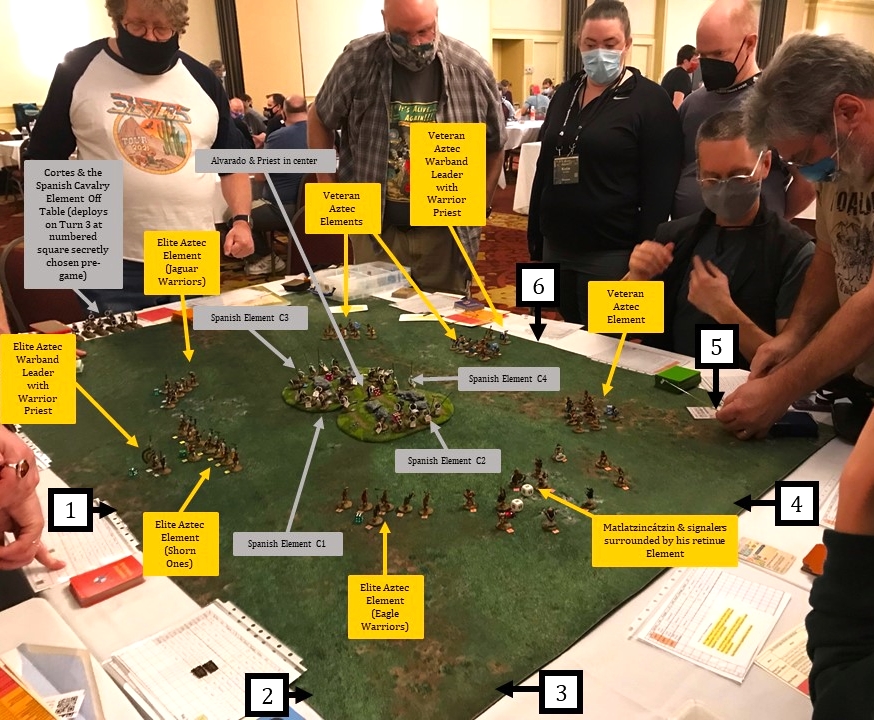
  • The Spanish have taken up a “rectangular” infantry-type square defensive position on the rock outcropping as shown on the map.  They should have pikemen and halberdiers facing out on each side.  Their Warband Leader, Pedro de Alvarado, is in the center.
  • The Spanish infantry and cavalry know that there is nowhere to run, therefore they do not make any Morale Checks.  Also, the infantry may not leave the safety of the outcropping during the game to attack the Aztecs. 
  • If Alvarado becomes incapacitated all of the Spanish infantry would become “pinned”. That means they activate half as often as a non-pinned unit.
  • Cortes and the Conquistador Cavalry Element is off the map initially and deploys on Turn 3.  The Spanish player must secretly choose a Turn 3 entry point for his cavalry prior to the start of the game.  This point chosen will be one number – 1 through 6 as shown on the map above.  This allows the Spanish player to deploy his cavalry at the numbered point or to the point its immediate right or left.  As an example, if the player chooses point 5, he can enter the game at 4, 5, or 6 with his cavalry.  If the player chooses 1 or 6, he will be limited to 1 and 2 or 5 and 6 respectively.  The cavalry Element and Cortes will both arrive on the board on Turn 3. 
  • The cavalry led by Cortes must attempt to take out the High Priest of Tenochtitlan (the Aztec Battle Group Leader) and his retinue.  By doing this successfully (by either incapacitating or routing him), the Aztecs’ Elements, Warbands, and Warband Leaders all become pinned.
  • The Aztecs must try to take the rock outcropping and incapacitate as many Spanish as possible until Turn 4 begins – the turn after the Spanish cavalry arrives.  At that point, and no sooner, the Aztecs in Elements of Warband 1 and 2 may try to engage the cavalry.  The Retinue Element may engage the cavalry without similar restrictions.
  • The Aztec Battle Group Commander, the High Priest of Tenochtitlan, the Cihuacoatl Matlatzincátzin, has the same Morale capabilities as Montezuma has – that is to say that on his activation he can remove up to six morale pips from Elements within twenty-four inches of him.
  • The retinue of the High Priest of Tenochtitlan will start the game around his location – with all of their figures within 8” of his initial location.

The side with the most Victory Points wins. There are no prisoners taken in this scenario by either side.

  • The Spanish earn points by inflicting casualties:
    • Incapacitating the High Priest of Tenochtitlan is worth 100 points.
    • 10 points for incapacitating a Warband Leader.
    • 2 points for each enemy incapacitated.
    • 1 point for any enemy figure that runs off the tabletop.
  • The Aztecs earn points by inflicting casualties:
    • Incapacitating Cortes is worth 50 points.
    • Incapacitating Alvarado is worth 25 points.
    • The Aztecs earn 5 points for each enemy who is incapacitated, to include horses and war dogs.  Thus, a cavalry figure is worth 5 for the rider and 5 for the horse.

In a nutshell, the Aztecs need to overwhelm the wounded Spanish on the outcropping and load up on Victory Points. When the cavalry arrives – the Spanish need to kill Matlatzincátzin and thereby “pin” the Aztecs Elements and Warbands. The Aztecs of course do need to avoid the demise of their leader before the end of Turn 5 as that is the Victory point jackpot.

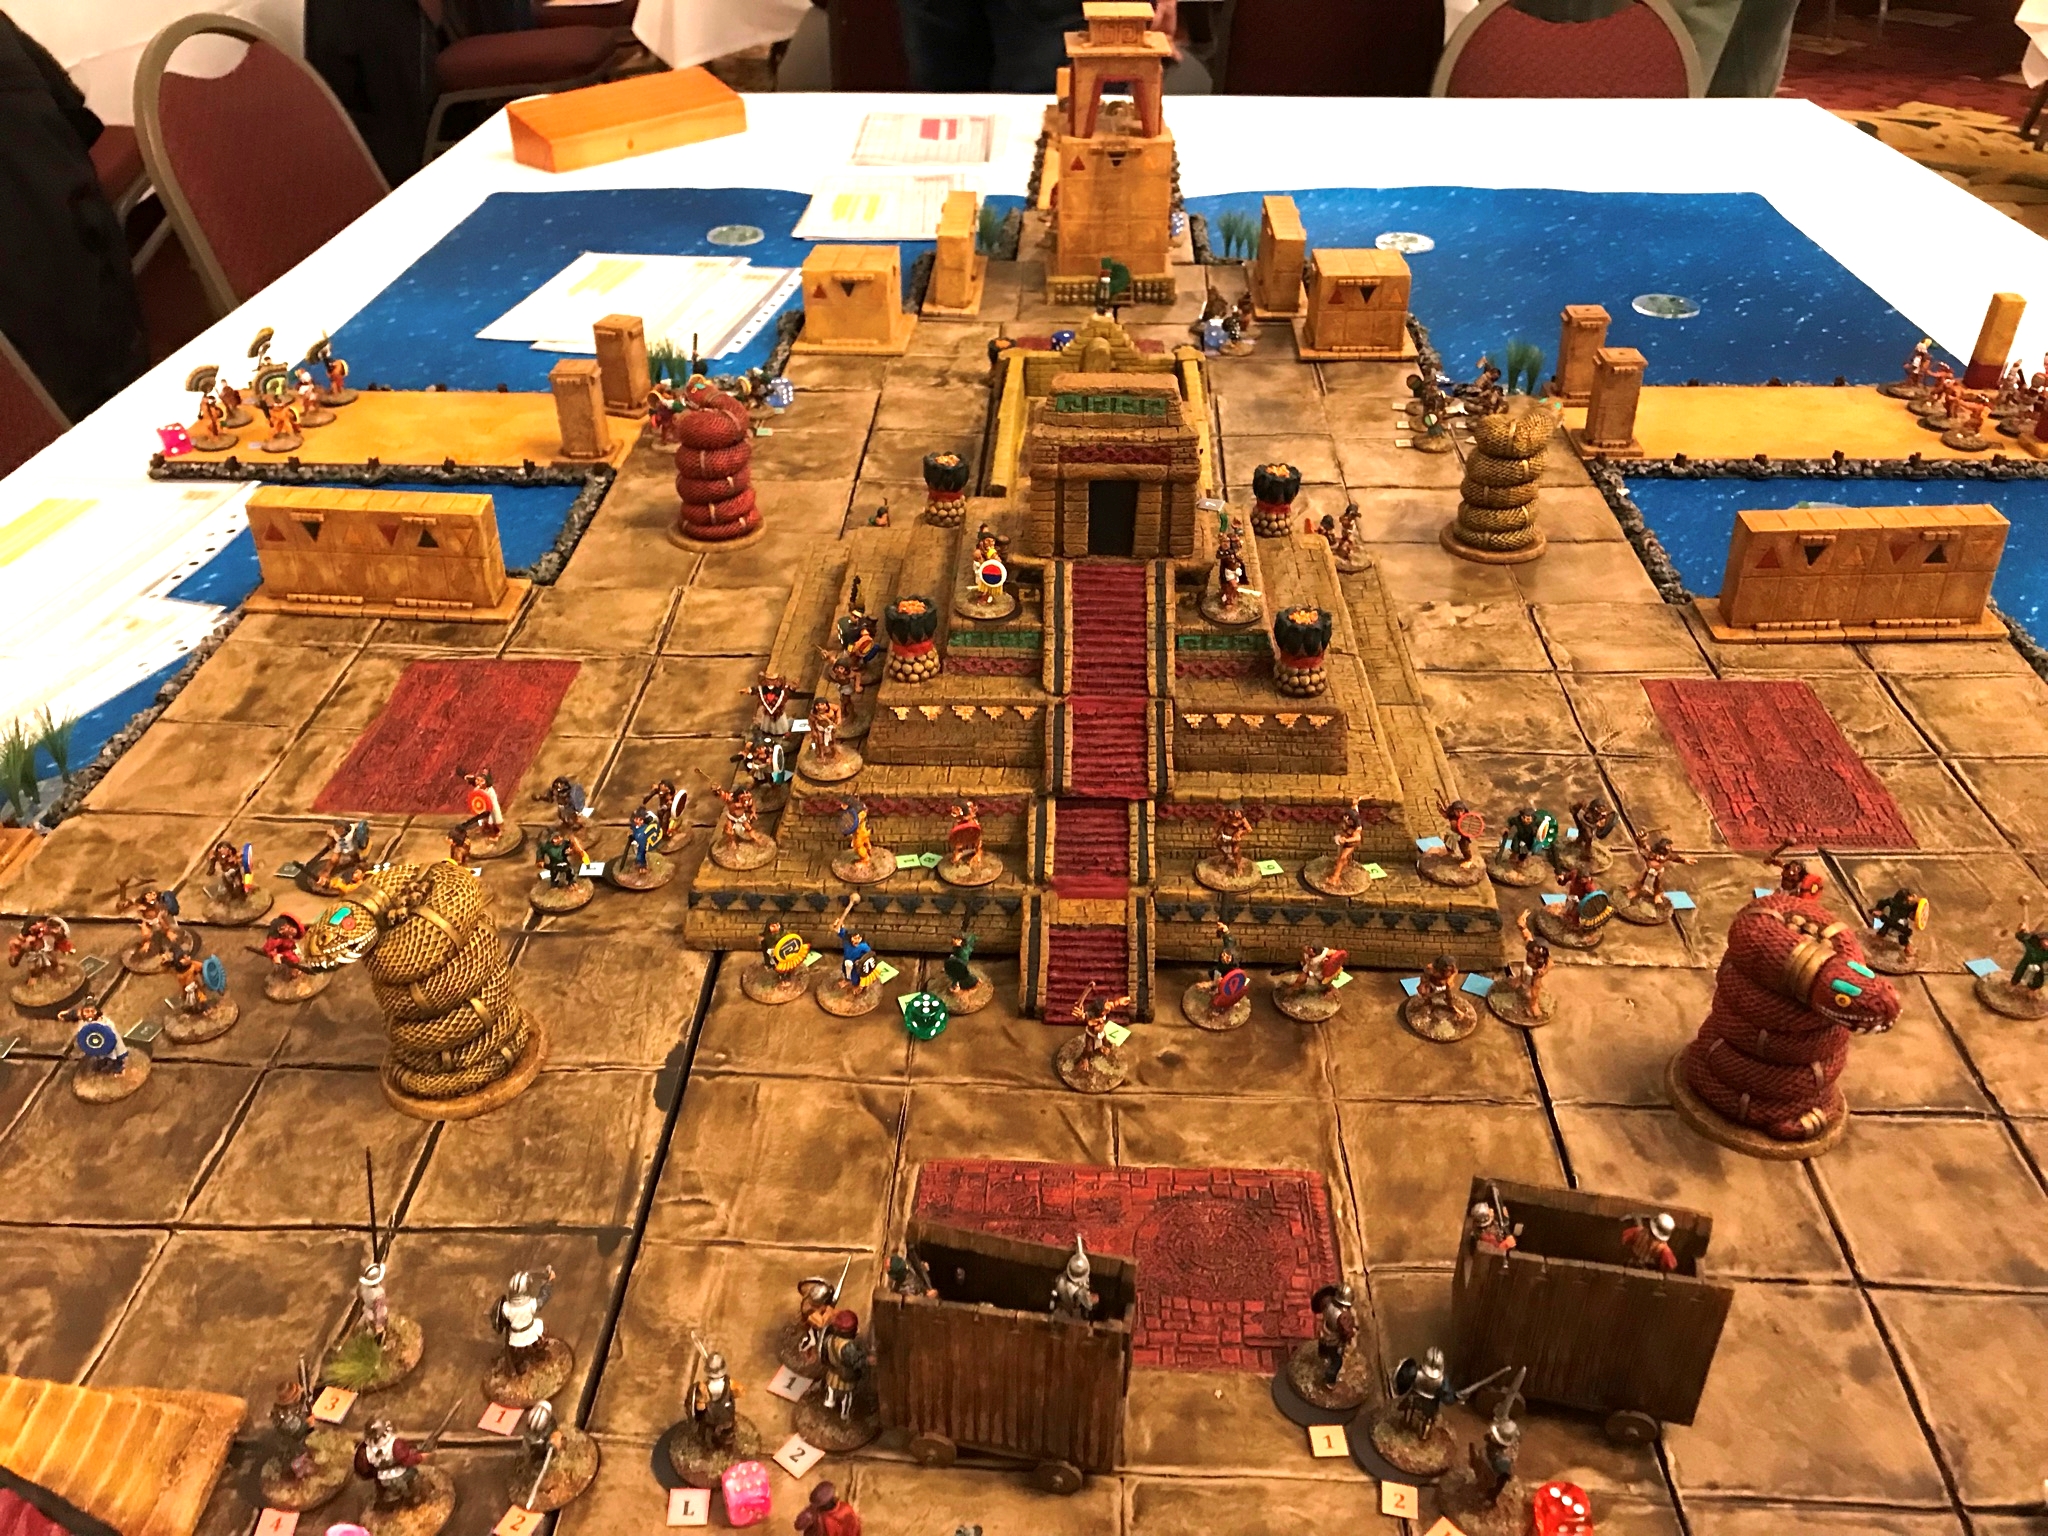
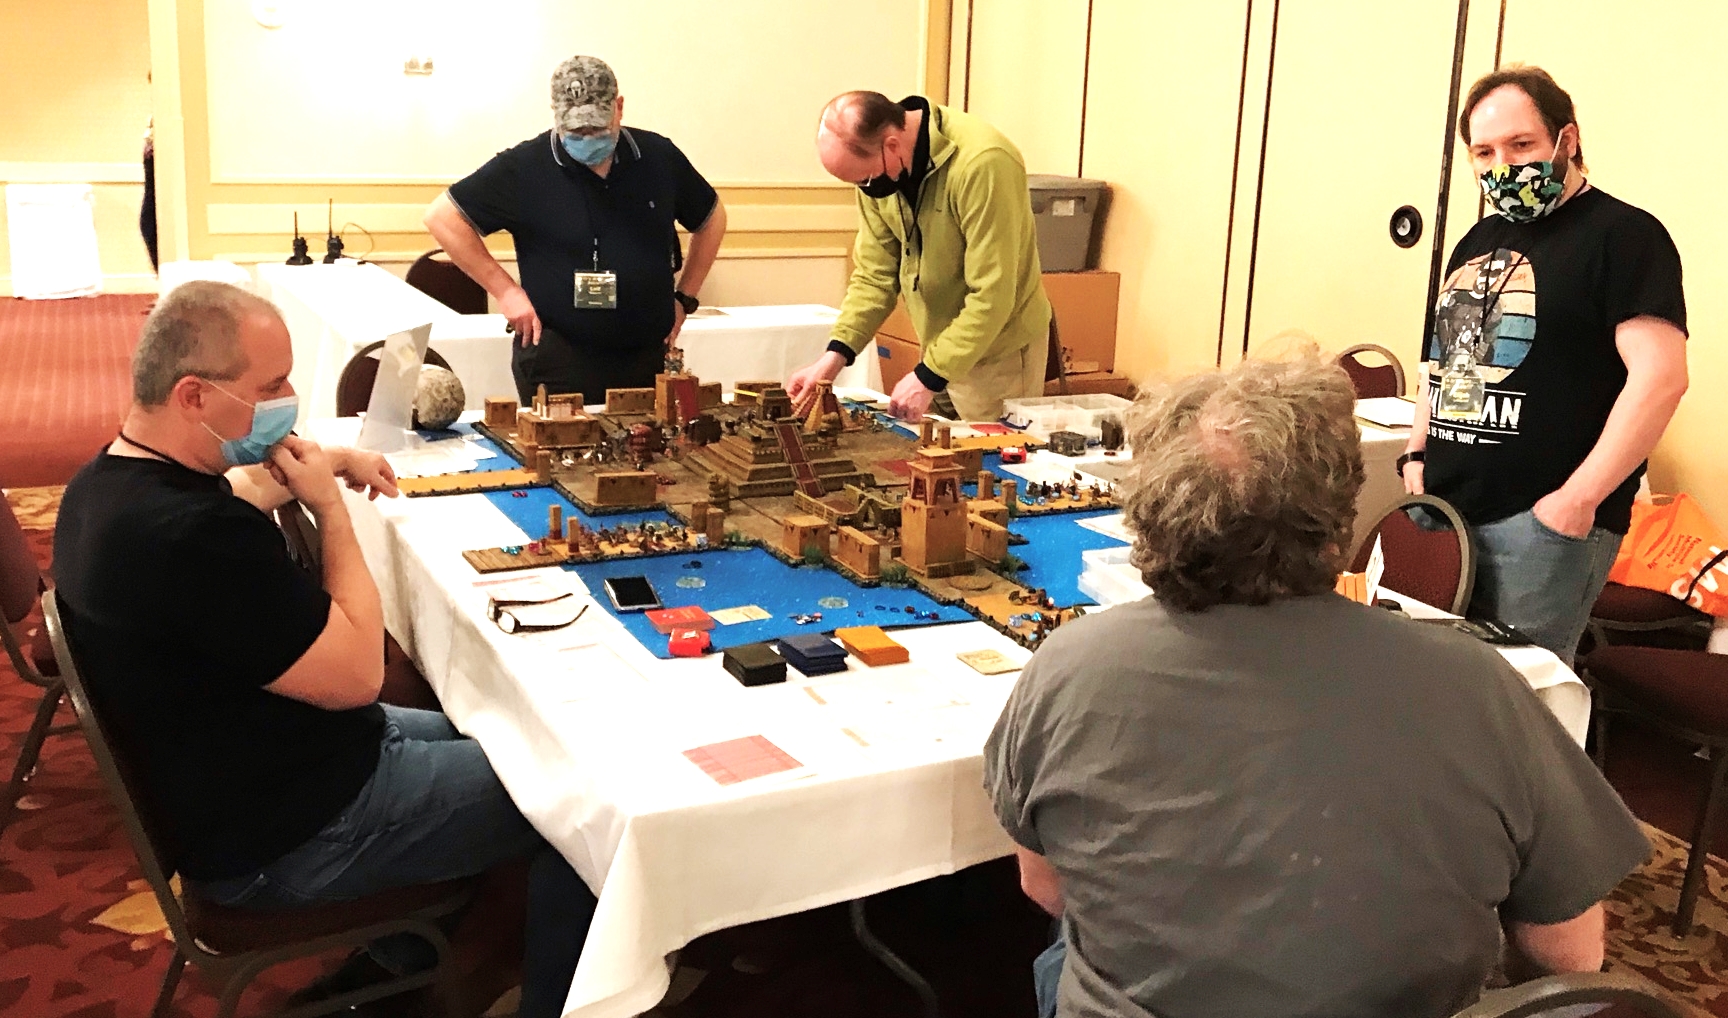
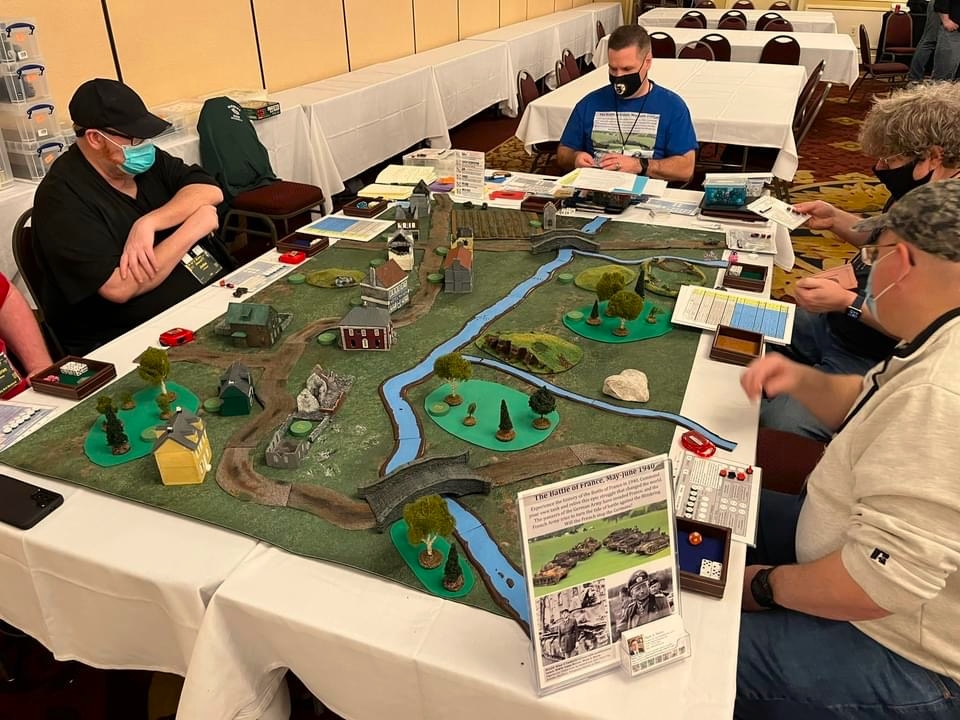
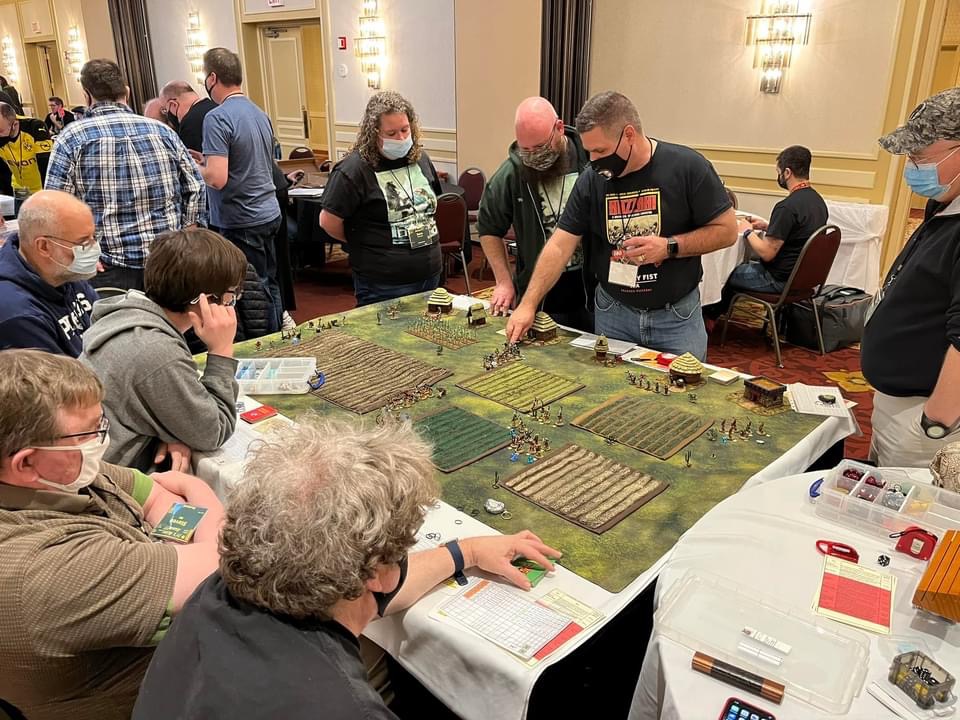
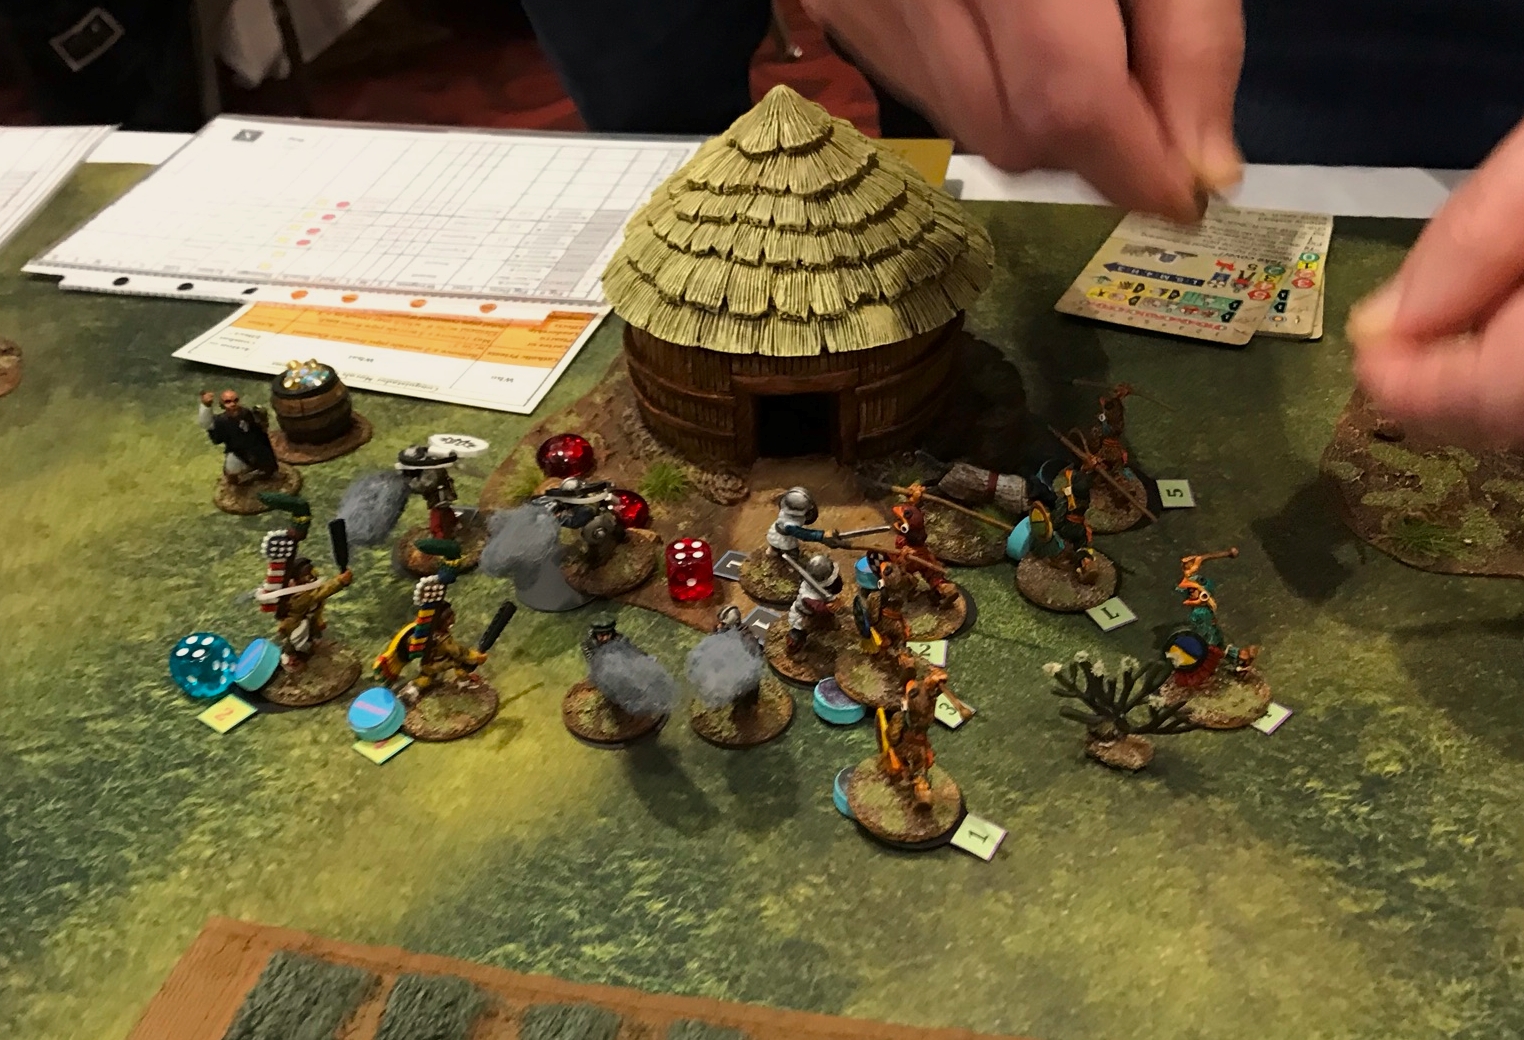
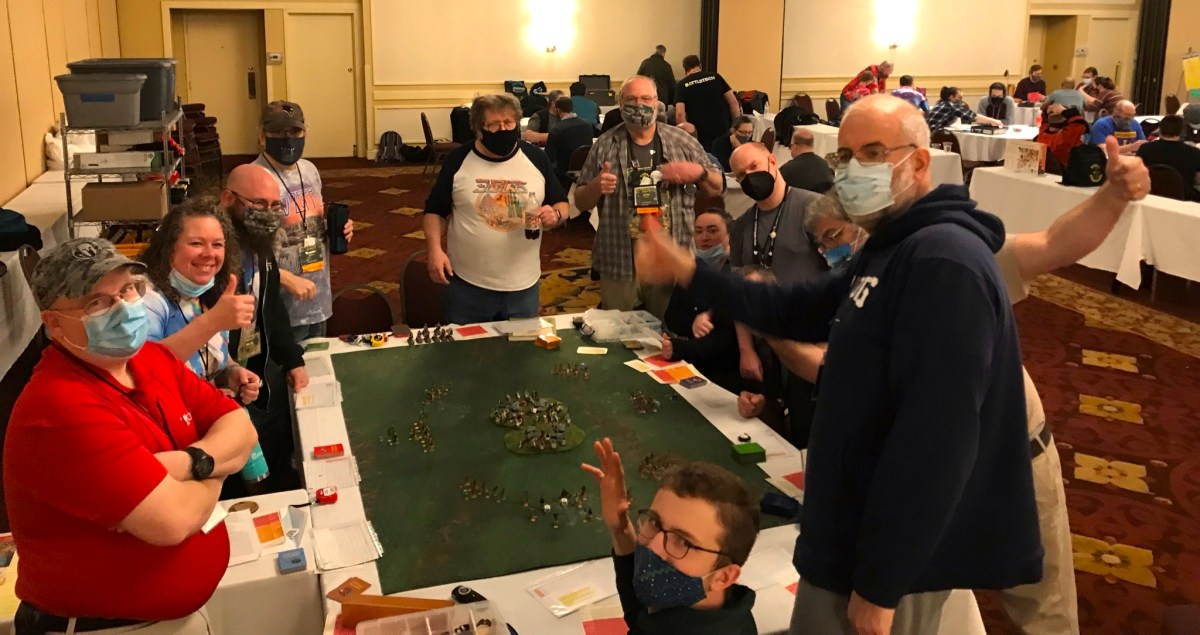
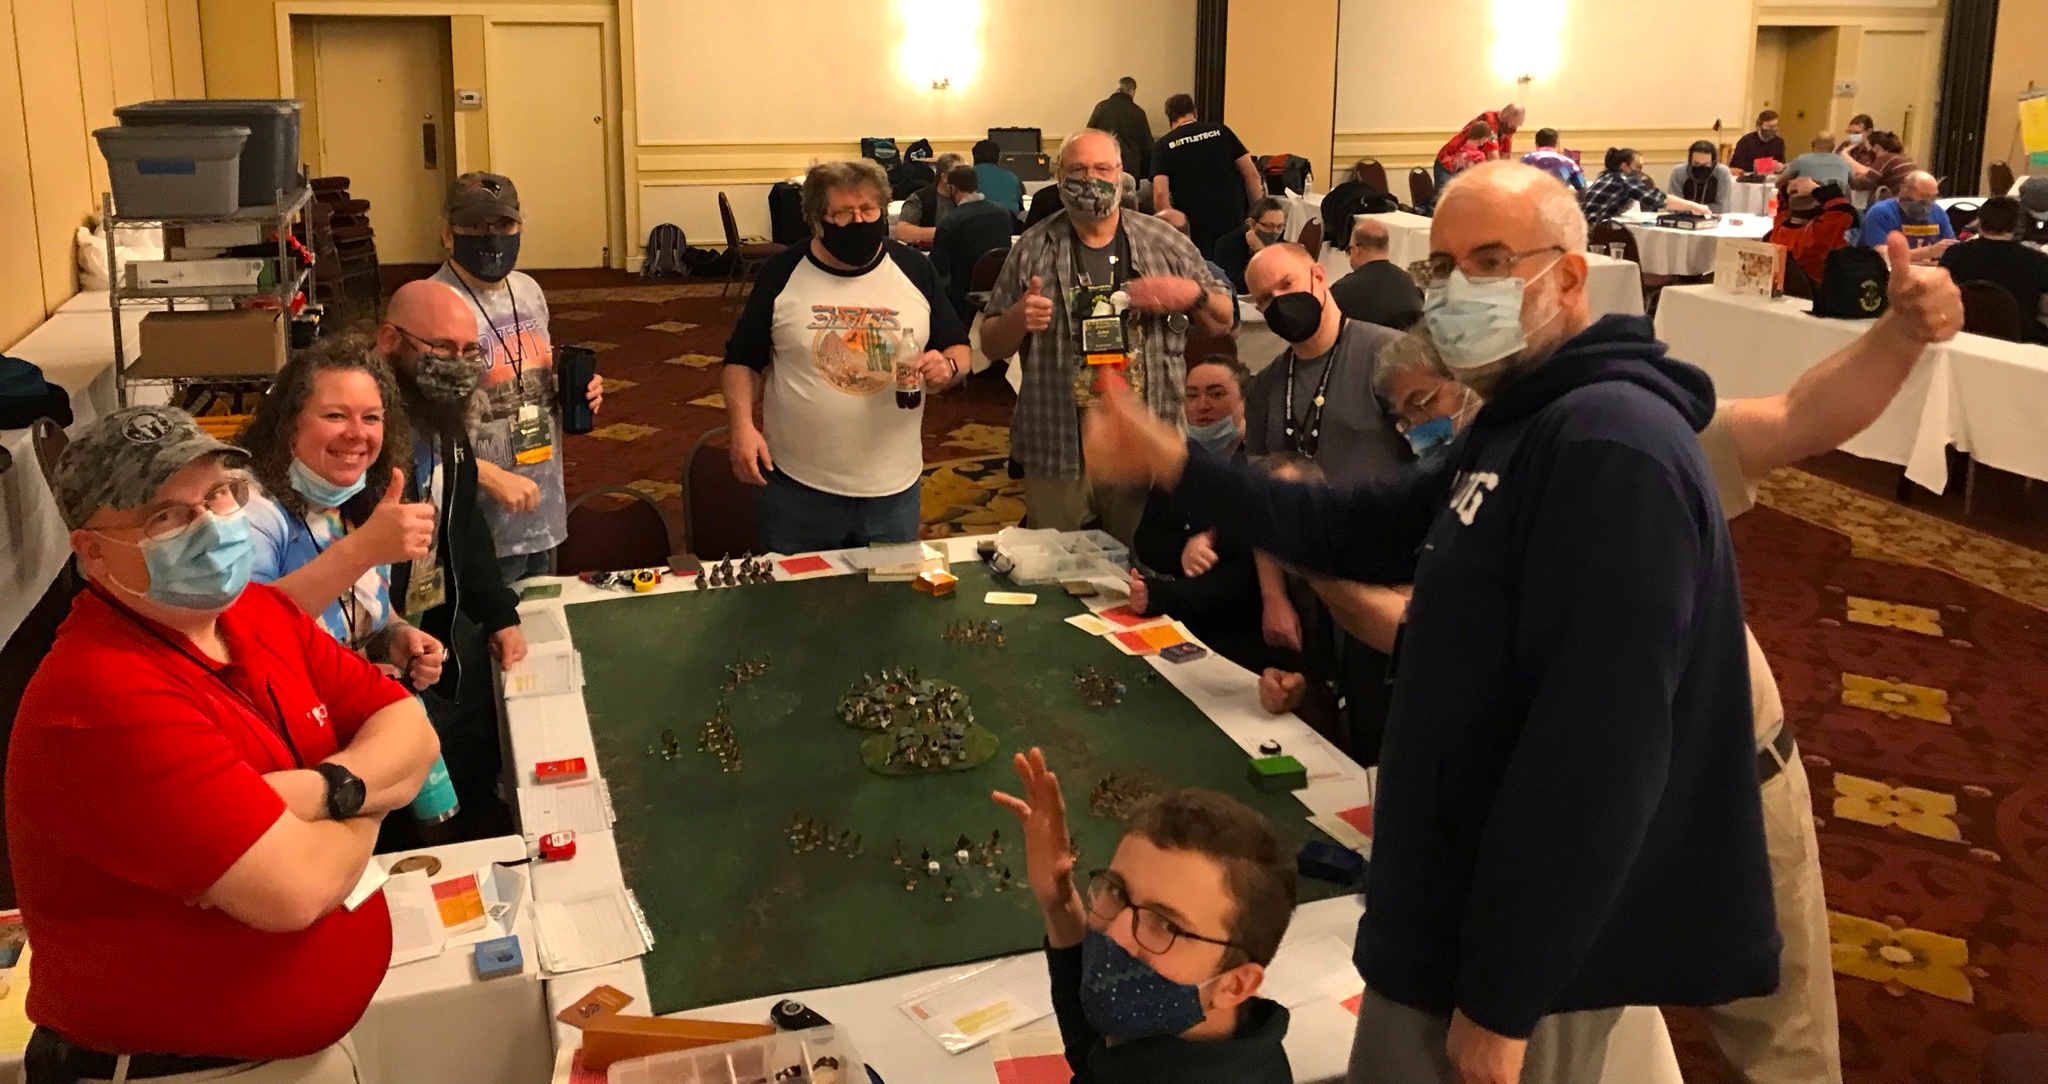
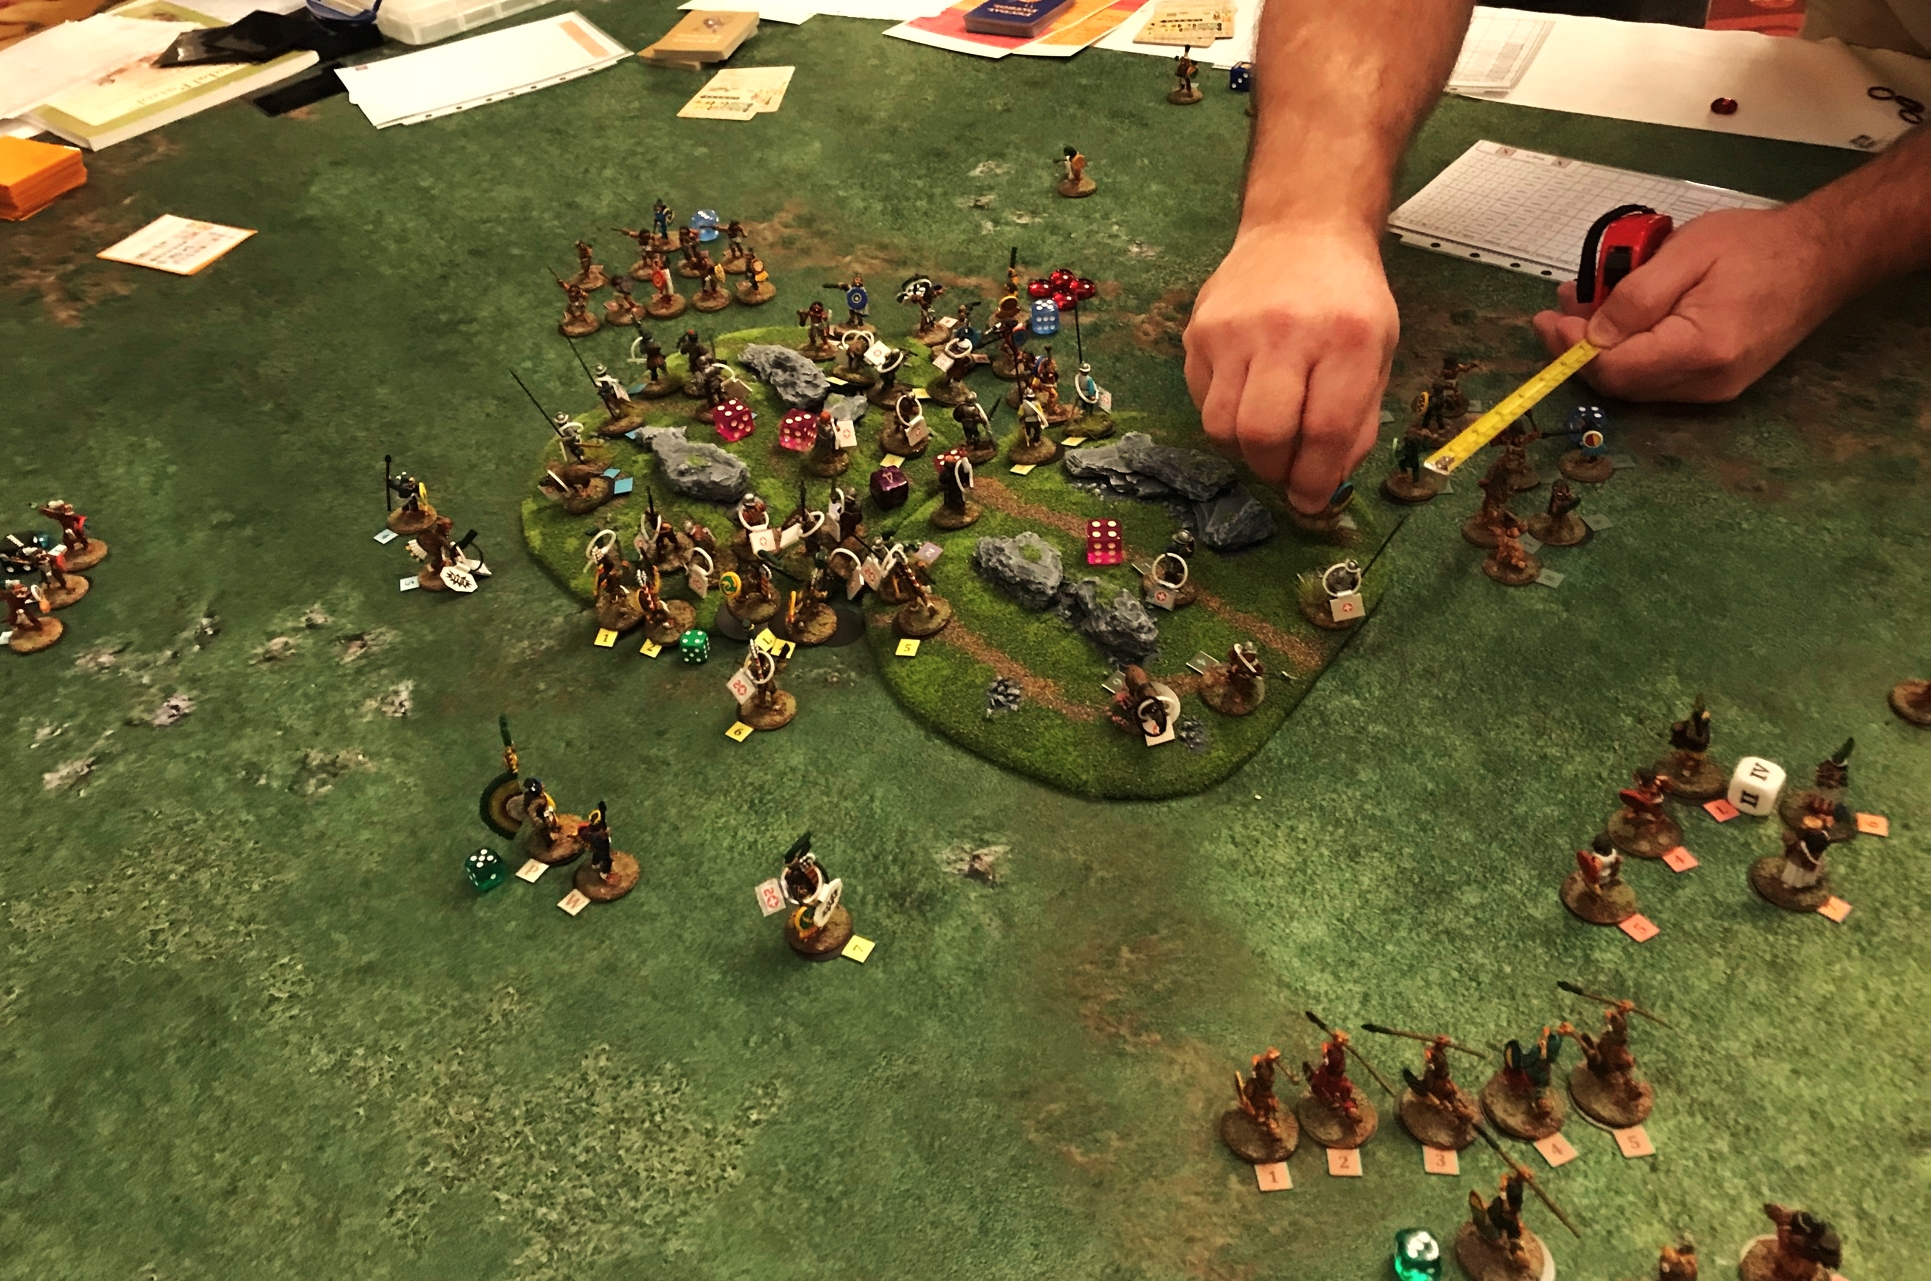
Let’s move on to the game! I was very happy to have my fullest table of the convention- 12 players! A little more than half (7) had at least half had played Feudal Patrol™ before (and most of those were previous players at my other two  Feudal Patrol™ games at TotalCon 36 so that was nice to have enticed repeat players). I briefed the game and ran through some examples of play for the newbies, and we were off. As Feudal Patrol™ is extremely easy to learn, all were playing smoothly in no time.

At the start – what a crowd of happy gamers!
The Aztecs advance. The players on that side were sufficiently aggressive given the game’s VP objectives. The Conquistadores gave as good as they got.

Among the Elite Aztec Elements, the Cuachiqueh (Shorn Ones) hit Conquistador Element C1 first, while the Jaguar Warriors hit the far end of Conquistador Element C3. Casualties on both sides were immediate.

The Jaguar Warriors (top left) and Shorn Ones (center) hit the wounded Spanish hard. The Conquistadores hold.
Veteran Aztec Elements hit C4 in the center of the hill (shown above on the right). Casualties ensue yet again.
Now another Aztec Veteran Element joins the fray on the right here. The Spanish continue to hit, and to be hit. The Jaguar Warriors launch a couple of atlatl’s at the Spanish on the left – but accidentally wound two of their own who were in harm’s way. Friendly fire…isn’t.

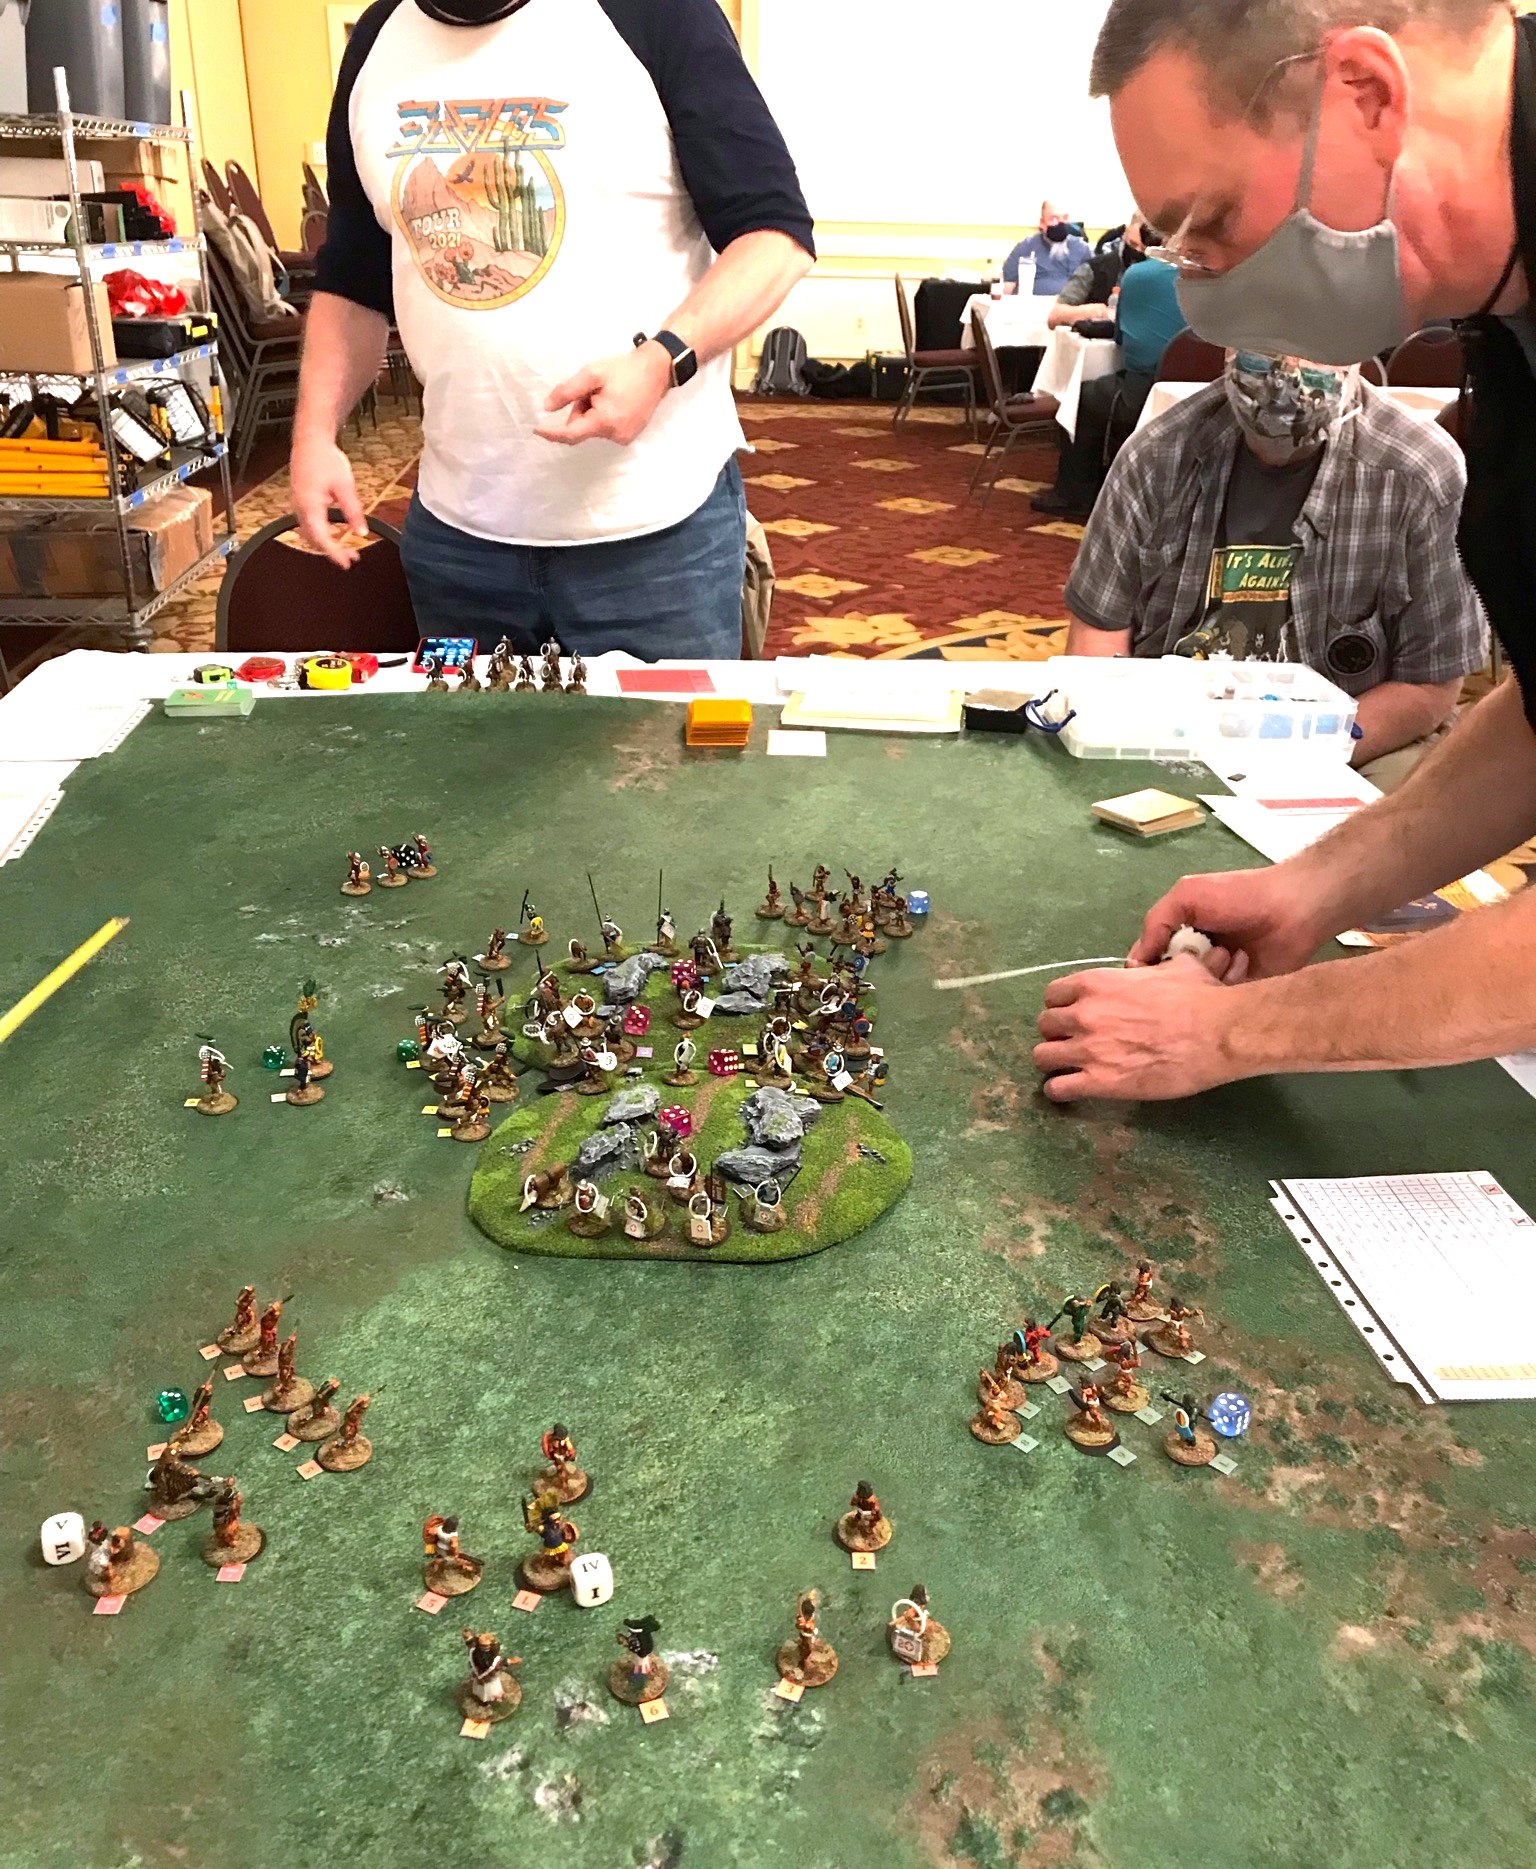
The first two turns saw a BUNCH of casualties. With the Aztecs getting 5 VP for each incapacitated Spaniard (versus 2 VP for the Spanish in reverse), the Aztecs were loading up on VP, swarming the outcropping, and beginning to break any semblance of the Spanish having a cohesive defense. One of the Aztec Veteran/novice Elements did lose heart in the melee and a few of their warriors took off for home, easing the pressure on one corner (between C2 and C3). This did not seem too important at the time, but this did limit the Aztecs a bit.

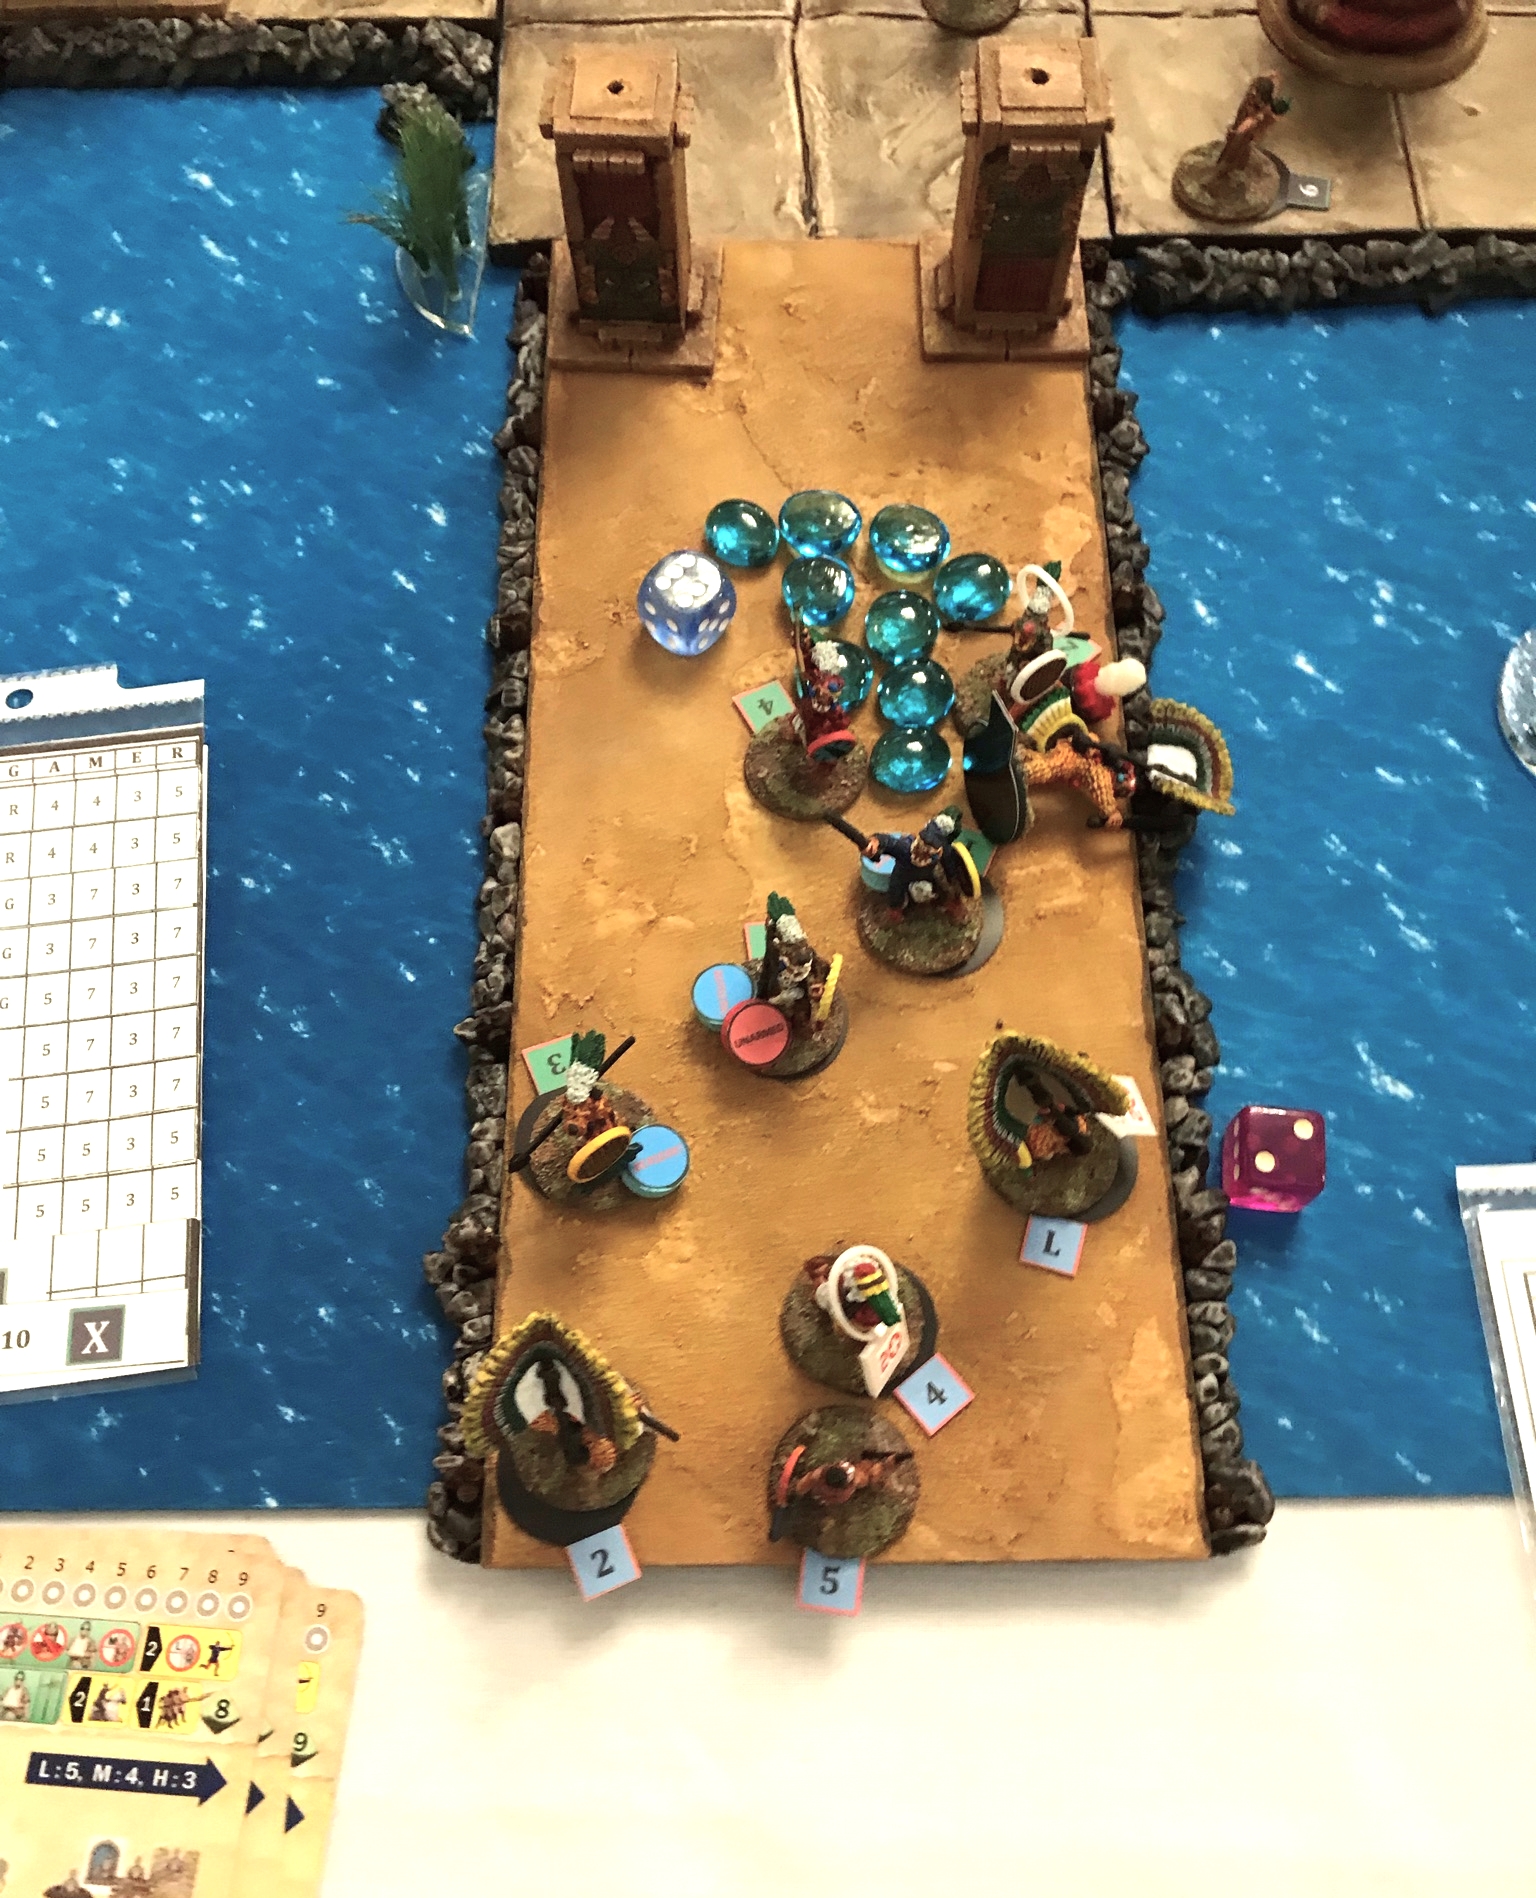
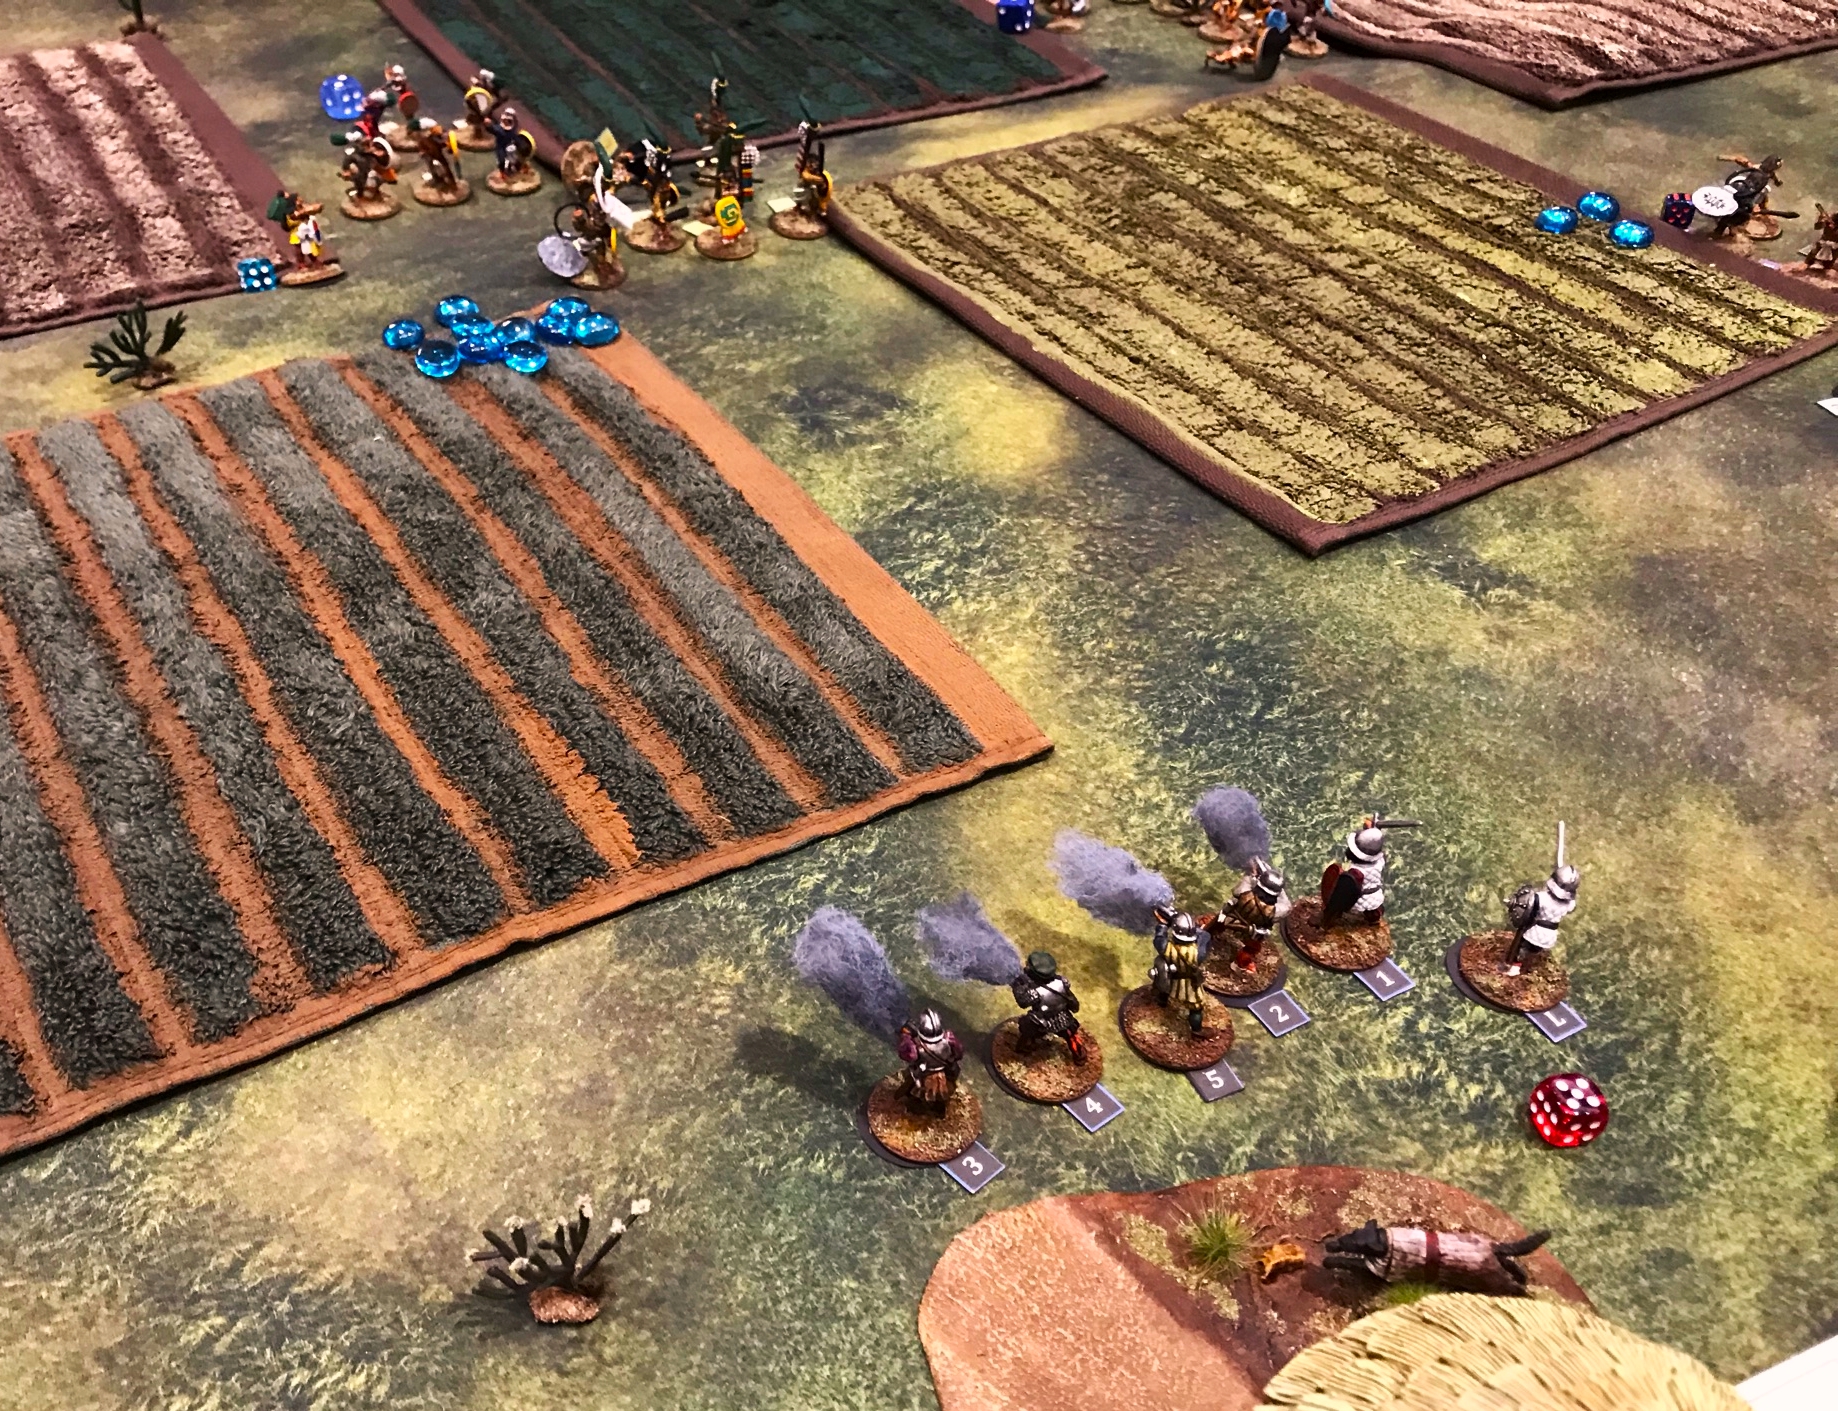
The cavalry arrived on Turn 3 – and between them and Matlatzincátzin was…absolutely NOTHING.

The cavalry arrives, and bears down on Matlatzincátzin (by the white die). Take a look at the faces (ok, masked faces) of the concerned Aztec players on the other side of the table for effect! The cavalry was not able to engage Matlatzincátzin on this activation, but they were close.

The Aztecs then were lucky to activate the Retinue Element in an attempt to save their leader. They decided to heroically use their Retinue Element to try and block the cavalry’s advance. The Retinue sprinted their novices and priests into position, hoping to block the advance of the Spanish cavalry – more or less as human speed bumps!

While the rules do not permit infantry to engage moving cavalry, in this tactic they succeeded a bit – as they denied most of the cavalry “impetus”. In the rules, cavalry gets impetus (and a much better attack strength) if it has a straight line of at least 4″ before it hits an enemy. Without impetus, cavalry can still attack, albeit less effectively. While the Retinue Element was activated, Matlatzincátzin and his signalers did not, and could not move.

The Aztec Retinue Element tries to block the Spanish cavalry.

Soon after, the Conquistador cavalry got a second activation. They made several attacks against members of the retinue (all devastating). However, all eyes were fixed as one cavalryman managed a non-impetus attack on Matlatzincátzin…and despite the odds MISSED HIM!

Matlatzincátzin and his retinue are attacked by the cavalry. Things looked dire.

In response, Matlatzincátzin thrust his tepoztopilli (thrusting spear) at the oncoming Spaniard. He hit his horse, killing it, and this unhorsed his attacker. The act of unhorsing the Conquistador injured the already hurt cavalryman… AND BY FALLING FROM HIS HORSE HE WAS KILLED BY THE IMPACT!!!

Insert loud Aztec player cheering because that indeed happened then!

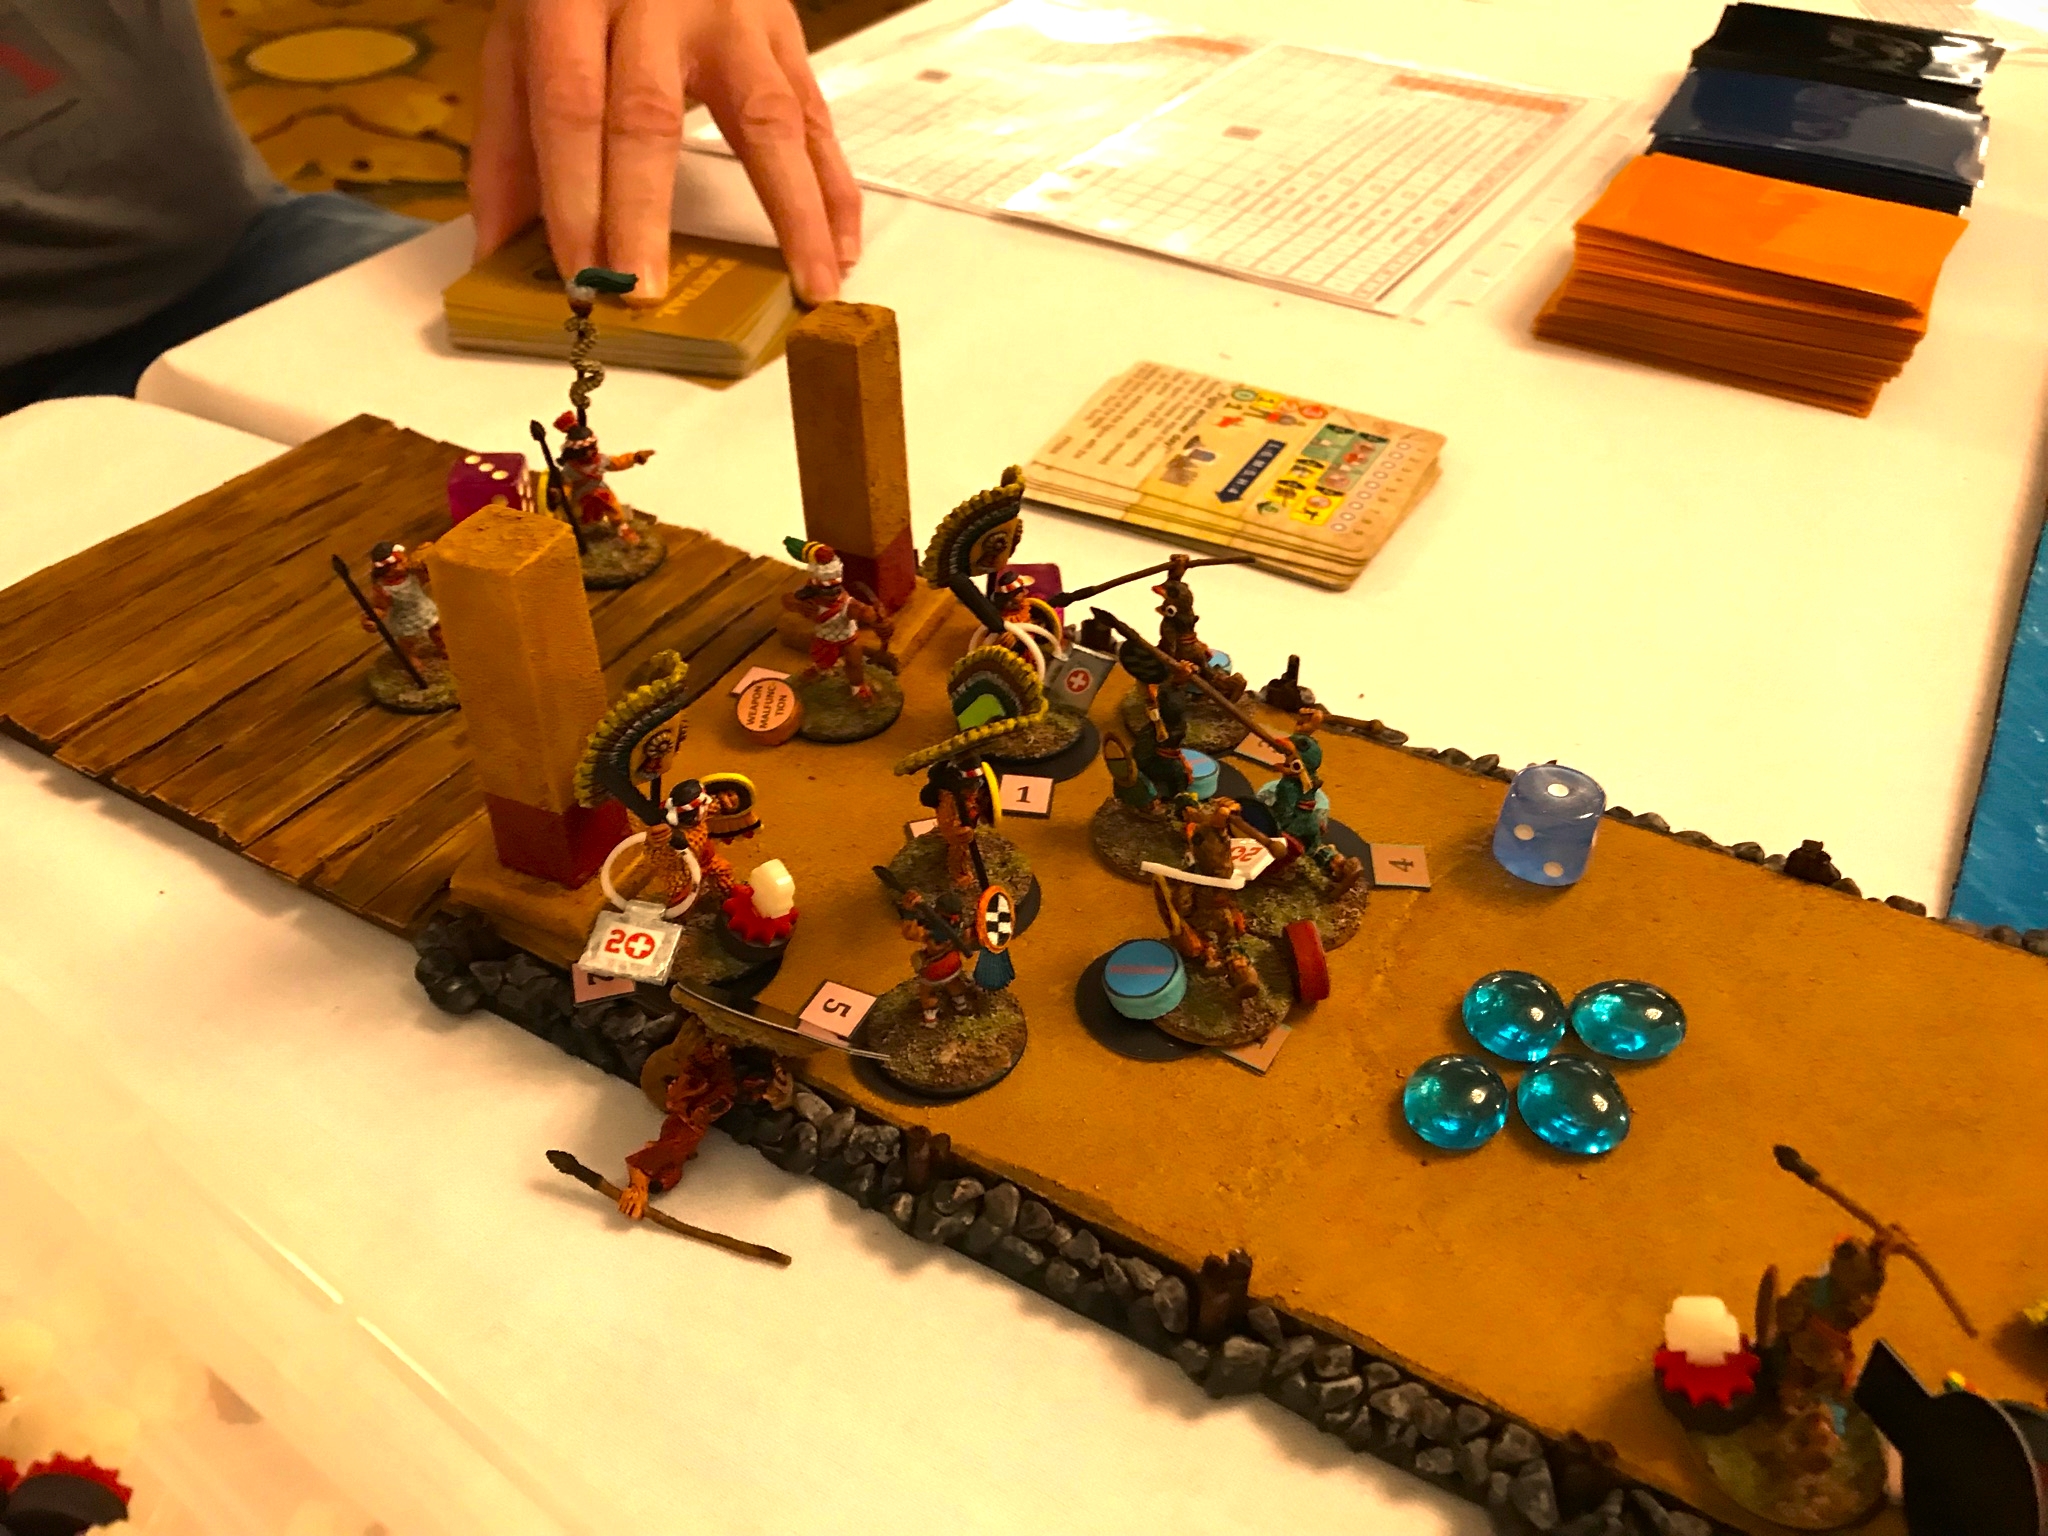
Meanwhile, Cortes deployed onto the table as well. Seeing what happened to his comrades fighting Matlatzincátzin, and not wanting a similar fate, he took a simpler route, and hit the Elite Warband Leader from behind, and killed him (not overly brave, but effective). This “pinned” all Elements of the Elite Warband. Then he killed The Elite Warband Leader’s Warrior Priest for good measure with a well-placed lance to the back. Then Turn 4 ended.

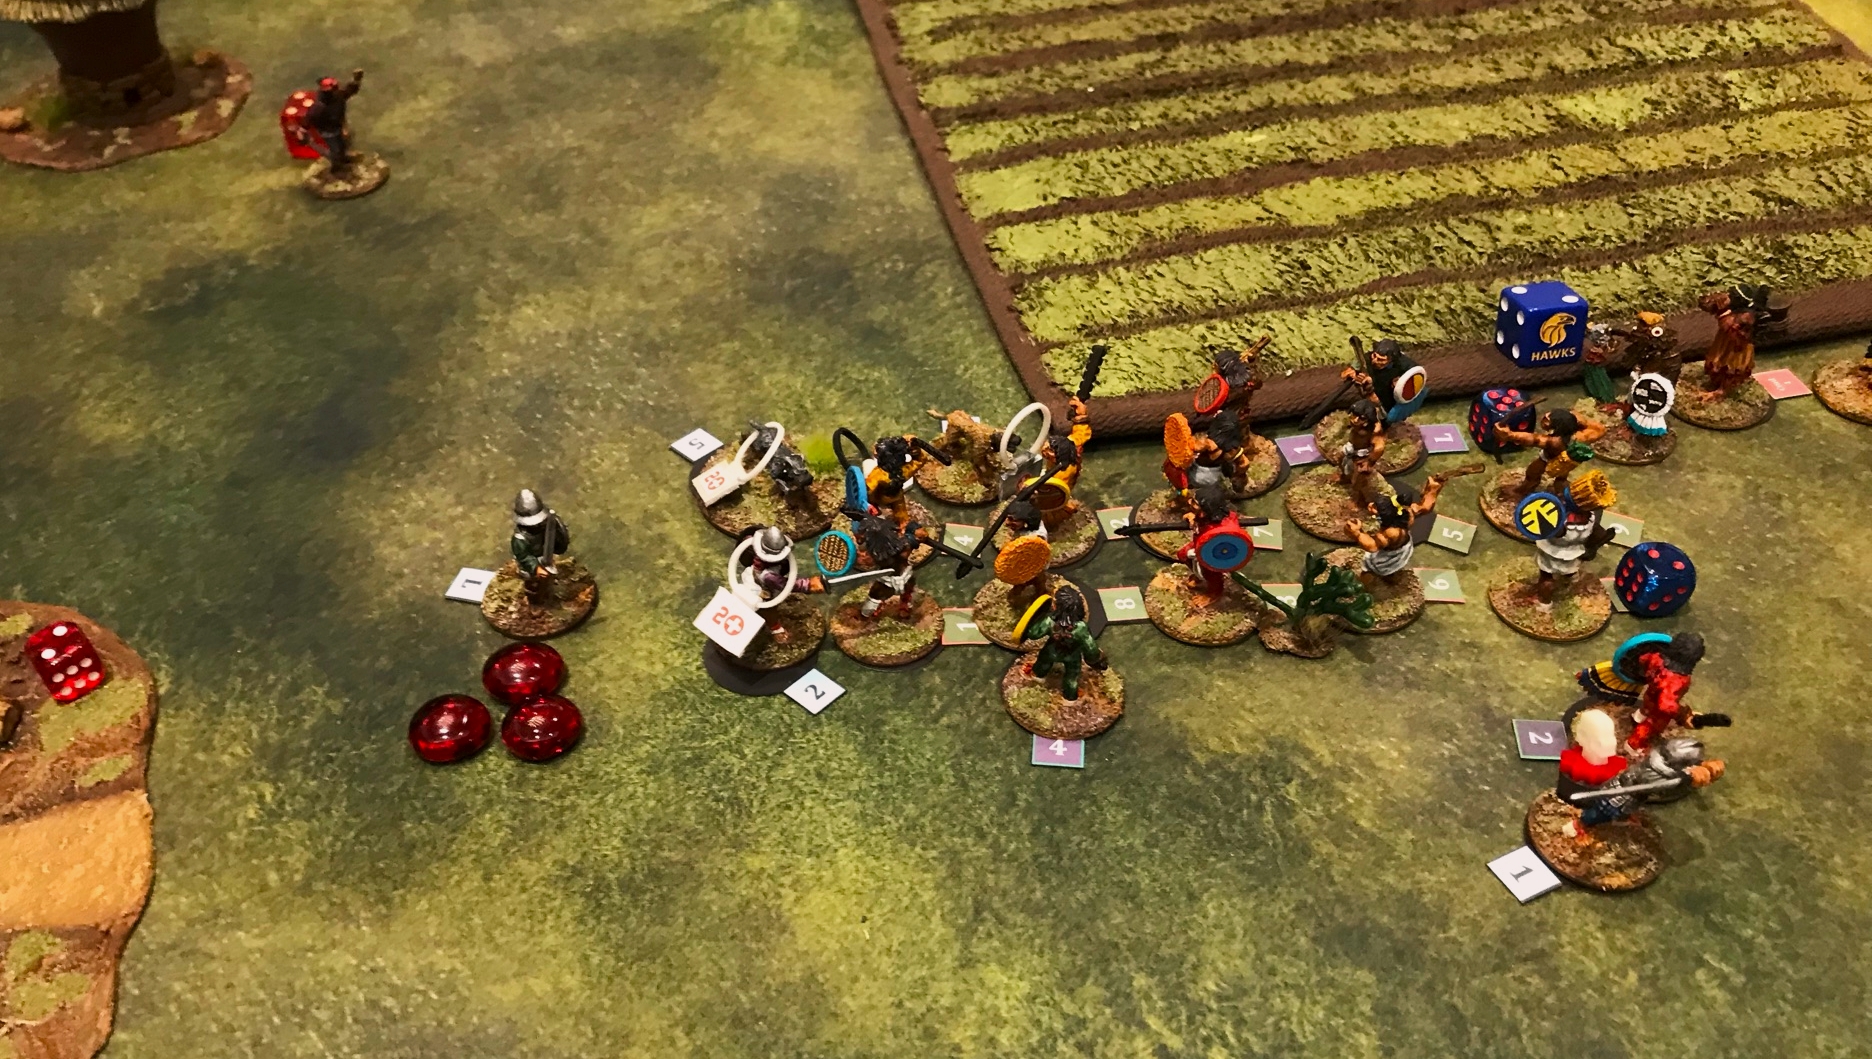
On Turn 5 (the last scheduled turn of the game), Matlatzincátzin activated first, and decided to head for the hill and some of his warriors there for safety. His Retinue Element (or what was left of it) had managed to take out another cavalryman and horse, but not before accumulating a boatload of Morale pips. The Spanish cavalry was still coming…

The aftermath of the “human speed bump maneuver”, with Matlatzincátzin (at the tip of the 12 Retinue Element red Morale pips) trying to get to the hill. Note the black dice on all the Elite Aztec Elements because of Cortes’ (by the red 2 die on the left) having just dispatched the Elite Warband Leader. This loss would limit these Elite Elements in trying to help Matlatzincátzin. The Retinue Element – if activated, would need to clear 12 Morale pips before they could help. Not likely!

Matlatzincátzin and his two signalers would just make it safely to the hill on Turn 5. However, a brave and very wounded Conquistador Sword and Buckler man (the leader of C4) leapt into action and attacked Matlatzincátzin, giving him 3 wounds (he could take 4). The Aztec High Priest struck back and wounded the Spaniard, but not fatally, and that combat ended.

Then, the Aztec infantry killed Pedro de Alvarado, pinning the Spanish infantry on the hill. This accomplishment was big, and gained 25 VP, but was a bit too late – as had it happened just a bit earlier Matlatzincátzin might not have been able to be attacked by the infantryman.

Next, the cavalry activated, and two of them bore down mercilessly on Matlatzincátzin, quickly taking him out – and that earned the Spanish 100 VP -and that pinned ALL of the Aztecs.

At this point, the convention was wrapping up and we called the game for scoring – the Spanish won 160-130 with their last minute taking down of the High Priest of Tenochtitlan. In the end, the game played out similar to how history played out.

Aztecs: 130 points

  • Incapacitating Alvarado: 25 points
  • Incapacitating enemy Conquistadores/war dogs/horses at 5 points each: There were 21 (out of 38 possible!), yielding 105 points

Spanish: 160 points

  • Incapacitating the High Priest of Tenochtitlan (Matlatzincátzin): 100 points
  • Incapacitating a War Band Leader (the Elite one): 10 points
  • Incapacitating enemy Aztecs at 2 points each: There were 23 (out of 65 possible), yielding 46 points
  • Aztecs who ran away: 4 at 1 point apiece

It was an exciting game and there were a lot of smiles all around afterwards – on both sides. It was an engaging game for all and I look forward to running it again at future conventions and club dates. Much thanks to ALL of the players, and much thanks to the TotalCon 36 staff for a great convention. I hope that I captured a bit of the game’s drama for you and that I made it interesting to read about.

I know that four posts are a lot from one con – but these four games were all a blast to run, and worth their own posts.

Thanks again for looking.

Miscellaneous details and references for those interested in that sort of thing:

For all of my previous posts on games, units, and other projects for my 16th Century Spanish Conquest supplement for Feudal Patrol™ – “Civilizations Collide” – please see this page.

Battle Report! Cortes Causeway Escape Attempt – (Feudal Patrol) TotalCon 36, Chapter 3

This post covers the third game that I ran at TotalCon 36 in Marlboro, Massachusetts. It ran on the morning of Saturday, February 26th, 2022, with a snowstorm having dropped a good amount of snow on the night before.

The scenario has Hernan Cortes and his besieged Conquistadores trying to escape Tenochtitlan as the flyer describes below.

The rules used were Feudal Patrol. These games for the Spanish Conquest in Mesoamerica (Aztecs vs. Conquistadores) are run using my supplement Civilizations Collide.

I did run this game before at Historicon. However, since then I have added even more – and I believe better – terrain. So much so that setting this bad boy up is a major effort. Thanks so much again to Bryan Clauss for his help in setting this up with me on Friday night.

Most of this post will be photos of the game. Thanks to Joerg, Mike, and Mal for letting me use some of their shots – it’s tough to GM and photograph a game at the same time! With the previous night’s snowstorm turnout was mixed and this game can easily handle a dozen players. I had to downsize it a bit to accommodate fewer Saturday morning players. Still, I got some walk on players, and in the end had 5-6 players for most of the game. It worked. One of the players, Mark, had seen the game at Historicon back in November and came from Maine just to play in it at TotalCon 36- what an honor and a compliment!

All set up and ready to go – my set up. There are battles on each of the causeways on the far side where the Tlaxcalans are trying to break through to help their trapped Spanish allies. On the near side, the Spanish and their war wagons are trying to get to a causeway and escape Tenochtitlan.
Here you see the game set up at a closer angle. Members of two Aztec Warbands
are on and around my new Temple of Yopico pyramid, facing off against two Spanish Warbands with a couple of war wagons. The war wagons provide cover for a crossbowman and an arquebusier apiece, and are being pushed by Sword and Buckler men. They are prone to breaking down as well.
In the game, the Spanish decided to move towards the nearest causeway seen here on the right.
The Spanish make their move and try to cow (and incapacitate) the enraged Aztecs with arquebusier and crossbow fire. The Aztecs (Mark) would try to flank the Spanish on the right by moving around the small temple.
The players picked up Feudal Patrol very easily and were gaming away in no time. Here I help adjudicate a scrum from the flanking Aztec charge previously noted.

Down on the other end of the tabletop, there were three Elite Aztec Elements (one Elite Warband) attempting to hold off three Tlaxcalan Elements (one Regular Warband) on three different causeways.

This Tlaxcalan Element was loaded with bows, and very deadly. They faced Elite Aztec Arrow Knights (think atlatl’s with two really big spears/darts, similar to Roman pila). Steven moved up his Aztecs to launch a volley, but the Tlaxcalans activated first, and loosed their bows.

The ensuing volley wounded almost every Aztec. The Aztecs returned fire in a massive single volley – unfortunately one poor Tlaxcalan was hit multiple times instead of several (I’m sure his buddies appreciated that!).

Here you see the wounded Aztecs facing the Tlaxcalans. They have moved up a Warrior Priest to remove Morale pips and spur them on in the fight.

On another causeway, the Aztecs sent an Elite Jaguar Warrior Element against an Elite Tlaxcalan Warrior Element (the other two Tlaxcalan Elements were Regular).

The two Elite Elements face off.
Here is a wider shot of the action – showing a few fights: the scrum between the Tlaxcalans and the Arrow Knights is on the causeway on the right; the one between the Tlaxcalan Elites and the Jaguar Warriors is on the far side; the Spanish fight the Aztecs on the left of the photo.

The Jaguar Warriors successfully went berserk and charged the Tlaxcalans. The fight became a draw, with the Aztecs taking some prisoners, losing some warriors, and accumulating a boatload of Morale pips. In the game, going berserk is a way to fight better and avoid being stunned in combat, but Morale pips accumulate. Once a berserker kills another figure, he is stunned, and once a berserking leader is no longer berserking, Morale checks start.

Brutal fighting with the Jaguar Warriors holds up the Tlaxcalans – one of whom is being dragged away for sacrifice here.

The Spanish kept pushing their wagons forward, but one of them broke a wheel and became immobilized. Still, the Spanish made good progress towards the causeway.

Close up shot of the Spanish moving towards the causeway.

The other causeway fight was between an Element of Aztec Eagle Warriors and a mixed Tlaxcalan Veteran/novice Element. The Eagle Warriors also successfully berserked into melee. Fighting here was also heavy, and the Aztecs and the Tlaxcalans took prisoners.

This fight pitted the Eagle Warriors against the Tlaxcalans. No quarter was given.
The view from the three causeway battle side. Leif on the far end (in the hat) has taken command of all the Spanish and is fighting Mark (in the green). One of the Spanish players left, leaving Leif in charge of his troops. He was an RPG player whose game had cancelled and who had to leave for another game – and who had not played miniatures before. I asked him what he thought of the game, and his answer was along the lines of, “it’s ok, just too much of a simulation for me”. That response gave all the wargamers at the table a huge chuckle, and I took it as a great compliment!

At the end of the game, the Spanish had nearly made it to the causeway. The Tlaxcalans and the Elite Aztecs were in heavy back-and-forth fighting on the other end. I added the score up – and it was Spanish/Tlaxcalans 22, Aztecs 20! One figure lost either way would have made a difference – so obviously it was a fair fight. The gamers were very happy, and the tabletop got a LOT of folks coming by to take photos, which was nice to see. As you might well imagine, this tabletop is the best I have ever done IMO.

Thanks again to Leif for all his help, and to the other gamers who were outstanding too.

I will be running this again for sure at HAVOC and HUZZAH!

Lastly, on a personal note, as I mentioned, I had to downsize the game a bit – removing some Elements so that the game could flow. One of the Elements I left off were my cuachicque Elite warriors – known as the “Shorn Ones”. They were the Aztecs toughest. I decided to enter them in the painting contest that was running coincident with the game as a unit – and they won! The post link has better pictures than below – it’s tough to photograph them in a case.

Winners (and they did not even have to fight).

I have one more TotalCon 36 post remaining to share, the Battle of Otumba. You definitely want to see my post on that epic fight!

Thanks very much for looking.

Miscellaneous details and references for those interested in that sort of thing:

For all of my previous posts on games, units, and other projects for my 16th Century Spanish Conquest supplement for Feudal Patrol™ – “Civilizations Collide” – please see this page.

Battle Report! Battle of France, May-June 1940 (What a Tanker) – TotalCon 36, Chapter 2

This post covers the second game that I ran at TotalCon 36 in Marlboro, Massachusetts on the morning of Friday, February 25th. The scenario has the Germans are coming out of a wooded area and trying to break out through the French lines to the other side of the tabletop, and ostensibly on to the sea. The French of course must attempt to stop them.

My game flyer.

I used the Too Fat Lardies What a Tanker Rule set with some modifications. The French set up secretly at any of 18 possible hidden locations (and letting me, the GM, know so that I can adjudicate issues without compromising the French deployment locations). The French tanks remain so hidden until they are spotted or if they choose to shoot their main guns or move.

The Germans deploy onto the tabletop on one of two roads that cross bridges over a river (treated as a minor or major obstacle depending upon where a crossing is attempted). The bridges may or may not be already successfully wired for demolition. As the GM, I resolve that secretly to add more “fog of war ” as a) the Germans may not detect if the bridges were wired properly or at all and correspondingly b) the French sapeurs (combat engineers) may or may not have wired the bridges correctly for successful demolition. The French also get one small minefield (3″ x 5″) that is rarely effective due to the What a Tanker rules. Also, the French use of mines was nearly nonexistent in 1940, mainly because of logistics. However, that small minefield is available there and that is also deployed secretly at the start of the game by the French. The picture below is my set up guide:

The Germans enter from the near side. The French deploy secretly on the circles (possible secret locations). The German’s exit crossing points are the two roads off-board on the far side.

One change that I made from my previous iterations of this scenario was to eliminate the use of poker chips for scoring and resource acquisition. I made “Tanker Bucks” instead. I had found that the poker chips’ values were not always easily understood (as not everyone hits the casino). I also had an excessive number of differently-colored file folders left over from various jobs that I had had before my retirement. I cut up the folders into same-sized an same-colored 3″ x 5″card stock using my paper cutter. I designed the Tanker Bucks in PowerPoint, using images of my 1940 vehicle models – and printed them off on the card stock on two sides with the same images:

Tanker Bucks.

These Tanker Bucks serve three purposes. First, score is kept with the “Tanker Bucks” – as the side with the most Tanker Bucks at the end of the game wins. Second, Tanker Bucks are earned by each side for achieving objectives. Third, they are used to buy resources such as new or respawning tanks, as well as Bonus Attack Cards (BAC’s).

Tanker Bucks are earned by a side by:

  • Knocking out an enemy tank or armored car earns Tanker Bucks (getting a 20% bonus over the initial cost of the AFV).
  • Reconnoitering one of the secret French deployment locations(by the Germans) or voluntarily uncovering one (by the French) both earn Tanker Bucks.
  • Successfully crossing the board to the other side earns the Germans a 20% bonus.
  • Gaining objective bonuses (French only). The French earn potential bonuses at the game’s end in two ways. First. and most importantly, by preventing the Germans from crossing the tabletop. That earns them $25 if none cross, $10 if only 1 crosses, and $0 if more than 2 vehicles cross. Second, they get points for any initial deployment points that have not been uncovered or reconnoitered.

Tanker Bucks are assigned to the team captain, but team collaboration in their use is expected. Each side starts with 100 Tanker Bucks per side or 30 per player, whatever is bigger. Both sides must start with recon vehicles (two SdKfz 231 6 rad for the Germans and three Panhard 178’s for the French. They each may also start with one additional light tank, and they must pay for them all out of their initial Tanker Bucks.

Here is the list of available vehicles for the scenario. Each side starts with all available scout cars, plus one light tank from the next category block listed here may be bought. Subject to availability, subsequent vehicles can only be bought from subsequent category blocks, until at least one vehicle has been previously deployed from each immediately preceding block. Once one vehicle has been deployed from each block, anything may be purchased. As an example, the French start the game with the three Panhard-178’s, and elect to buy an FCM 36 (the next category) in the “Light Infantry Tank” block. . Their next purchase or upgrade could be a Char B1 bis or a Char D2, but not a Hotchkiss H35 or H39.

Tanker Bucks are used to:

  • Buy new AFV’s or upgrade respawning vehicles. Respawning vehicles are replacements for ones that have been either knocked out or that have made it across the tabletop. If the replacement vehicle is of lesser value, there is a refund of the value difference. If the replacement vehicle is of greater value, there is an upcharge of the value difference.
  • Buy Bonus Attack Cards (BAC’s).
    • BAC’s bring the combat effects of other arms or additional resources to a vehicle – at a cost of $5 per card.
    • Buying them is a risk/reward proposition there are no guarantees what card will be bought. The Germans get a chance at a card giving them air support for example, while the French have no chance at that. Similarly, each card bought gives the French relatively more chances for infantry, anti-tank gun, or artillery support.
    • Each recon vehicle can buy and have two BAC’s, and each tank with a radio can have one. These radios replicate the German historical communications advantage as many of the French vehicles have no radios and cannot buy BAC’s. The BAC’s cost $5 each, and are different for each side (see below).

Bonus Attack Cards are additional combat and logistical resource opportunities that can be bought as described below.

The list of BAC’s by side. These cards allow for the addition of resources – in most cases offensive support. Offensive BAC’s can be used as long as a tank has a current ACQUIRE and an AIM on a viable target. The others are self explanatory. As for the bridge cards, they allow the French to keep the Germans guessing as to if they tried to demolish a bridge – and to keep the French guessing if they failed because the bridge was defectively wired with explosives.

On to the Game! I am only mostly sure as to the end score for the turns here – so this is my best recollection of the action. I wish I had more photos, and my thanks to Mal for some of these.

Both sides hopeful at the beginning of the game – here you see the French players on the left and the German players on the right.

Turn 1

The French team (Mal, John, and Cameron) decided to not buy any tanks in addition to the three mandatory Panhard-178’s. They bought two BAC’s for each scout car. The German team (Steven and Leif -and later joined by Gregg) bought the two mandatory SdKfz 231 (6-rad)’s, plus a Panzer 35(t). They also got 5 BAC’s to distribute among them. All deployed onto the tabletop and a few BAC’s came into play as the hidden Panhards called in a few French infantry attacks that failed to hurt the Germans. Meanwhile, the Germans did some reconnaissance, searching for the French. The end of the turn found the Germans ahead, 54-47.

Turn 2

The Germans conserved their Tanker Bucks and spent the turn looking for an enemy to shoot. The French decided to get an R40 tank (Mal) and a BAC, as well as replenish their BAC’s used in the previous turn. No additional Tanker Bucks were gained for the Germans who tried in vain to find a French target – and barely failing to find Cameron’s Panhard in the woods. Notably, the Germans avoided either bridge, choosing instead to ford the river. Cameron, seeing how close one of the German SdKfz 231 (6-rad)’s was to his Panhard, activated it and slightly damaged it before getting further into woods where it was safer. With the French purchases, the end of the turn found the Germans further ahead, 54-32.

The opposing scout cars (Cameron and Leif) play a game of cat and mouse.

Turn 3

The Germans decided that given their lead, they could safely use their Tanker Bucks to jump to the next category and get a Panzer IVD for Leif, bringing them to 4 vehicles on the table. They did not buy any more BAC. The French were feeling poor, so they bought no vehicles or BAC. The French did uncover all of their vehicles during the turn to get a few more bucks and to move and shoot as well as to use BAC. They also attempted to blow the bridge under the Panzer IVD, but the wires fizzled. The Panhards did call in artillery fire that did cause some damage to the Panzer IVD. Additionally, from a hidden location, John’s Panhard opened fire on Leif’s SdKfz 231 (6-rad) and set it ablaze. On the German left, the French R40 took out Steven’s Panzer 35(t) with a side shot. The Germans were able to do more reconnaissance – enough to cover the cost of new – and now-damaged Panzer IVD. The end of the turn found the French catching up but the Germans still ahead, 58-44.

Mal’s R40 kills Steven’s Panzer 35(t) after it fords the river.

Turn 4

Both sides dug into their Tanker Bucks wallets this time. Cameron bought a Char B1 bis (pricey at $12) and a BAC and deployed this tank secretly in a covered position. The Germans respawned Steven’s lost Panzer 35(t) with a StuG IIIA plus a BAC. Leif bought a new Panzer IIC. Mal’s R40 called in smoke to cover his R40 from the approaching StuG IIIA. The Germans reconned more vacant French positions. The purchases on both sides found the Germans slightly increasing their lead to 51-27.

Mal’s R40 lying in ambush for Steven’s StuG IIIA after calling in smoke to cover him.
Mal then backed off a bit into a true ambush position.

Turn 5

The French went on an austerity budget, only buying a replacement BAC. The Germans got a new player, Gregg, to take over the Panzer IIC, and they also went a bit on a spending spree to buy a studly Panzer IIIE for him and 2 BAC. The French made progress! The previously-damaged Panzer IVD got taken out by the Char B1 bis, and Steven’s remaining SdKfz 231 (6-rad) got taken out by artillery. The Germans called in Stukas to hit the Char B1 bis, but missed. The Panzer IIC ran nearly the length of the table but did not get off the table. The French successes saw the score reversed to 41-28 in favor of the French.

Turn 6

Hoping to maintain their lead, the French spent nothing. The Germans respawned Steven’s scout car with a Panzer 38(t), and Leif’s Panzer IVD with a Panzerjager I. They also bought a Panzer IVB for Gregg. The Panzer IIC (Gregg) activated and crossed the rest of the tabletop, cutting into the French’s endgame bonus opportunity. Steven’s Panzer 38(t) with a magical roll of the dice hightailed it across the other bridge and neared the other side. At the same time another French demolition attempt fizzled, and the hidden minefield caused no damage to the Germans. Meanwhile, Steven’s StuG IIIA hunted down Mal’s R40 (which was trying desperately to stop Steven’s Panzer 38(t)). The R40 was destroyed by the StuG by devastating shots to the French vehicle’s rear armor. The French successes of the previous turn were vaporized. The Germans’ successes saw the score reversed to 52-41 in their favor.

A Panzer IVB crosses the bridge and approaches the Char B1 bis position. A German Panzer IVD and a SdKfz 231 (6 rad) burn in the background.

Turn 7

Neither side bought anything on this Turn. The Panzer 38(t) easily crossed the tabletop before the French could stop it, as did the Panzer IIIE. This effectively nullified the French endgame bonus. No further losses happened on the German side, but the French lost a few of their remaining vehicles (not completely sure which ones) as they desperately tried to kill anything German. The French got bonus points for uncovered deployment positions, but it was not enough and after applying bonuses the Germans had won 100-70.

End of the game photo.

I want to thank the players – who all said they had a good time. I will keep this scenario in my quiver – it is a lot of fun, though I will do a few minor tweaks on it. I also want to thank Leif for his help, as well as Bryan Clauss!

I also offered a prize for the game – a 1000-piece tank jigsaw puzzle, won by Leif in a roll-off.

Leif won this beauty!

This was my second game of the con – my first can be found here for those interested.

Battle Report! Surprise Aztec Raid on the Spanish Outpost – TotalCon 36, Chapter 1

TotalCon 36 was held at the Best Western Conference center in Marlboro, Massachusetts from February 24-27th, 2022. It was the first time it was held since 2020. I ran 4 games at the convention – 3  Feudal Patrol games for the Spanish Conquest in Mesoamerica (Aztecs vs. Conquistadores) using my supplement Civilizations Collide, and one What a Tanker game. As many have requested that I do so, I’ll be sequentially sharing brief posts on each game here as battle reports.

I packed up my car tight with all my minis and terrain so that I could get an early start on setting up Thursday. I ended up with 21 Really Useful Boxes, 4 gaming mats, and a briefcase in addition to my suitcase to pack!

My game flyer for my first game of TotalCon 36 .

The first one that I ran was my Surprise Aztec Raid on the Spanish Outpost game. The game briefing goes as follows (apologies for the WordPress formatting on lists!!):

  1. Background:  Near harvest time, a Tlaxcalan village is being raided by the Aztecs, seeking to take wealth, food, and prisoners.  The Aztecs know the majority of the Tlaxcalan troops are with the Conquistadores elsewhere, and expect an easy task.  Unbeknownst to the Aztecs, there are some Spanish troops at this town who will help to defend it.  This is a generic scenario based on Aztecs launching a surprise raid Veracruz or a Tlaxcalan Village serving as a supply base for Cortes.  This scenario lasts 10 turns.
  2. Review Map and objectives:
    • Map:
      • The fields are muddy and movement rate through them is at half-speed.
      • All Aztecs troops deploy anywhere on the south side of the tabletop 6″ from the long end of the mat.
    • Objectives:  Most points wins.  Points are earned by controlling objectives, taking prisoners, and inflicting casualties.  The objectives are:
      • A: – a maize storage structure – 10 points to either side for control (means that the controller has only figure within in 4”)
      • B: Cuezcomatl Granary Structure – 10 points to either side for control
      • C: Tlaxcalan Noble’s House – 10 points to either side for control, plus 5 more for securing the gold inside and having possession of it.
  3. Additionally:
    • The Aztecs and the Tlaxcalans both gain 5 points for each prisoner taken.
    • Both sides get 2 points for each enemy otherwise incapacitated (not taken prisoner).
    • Both sides get 1 point for any enemy figure that runs off the tabletop.
    • Incapacitating a Battle Group Leader or a Warband Leader is worth 10 points, in addition to any points earned by taking them prisoner if applicable.

The Conquistadores have 1 Warband (think platoon) of 3 Elements (think squads), commanded by Cristóbal de Olid: 2 Conquistador Elements, a Tlaxcalan Element, plus his trusty war dog and a Catholic Priest.

The Aztecs have a Battle Group (think company) of 2 Warbands of three Elements each commanded by Asupacaci. One Aztec Warband is Elite and is made up of of 3 Elite Elements: one Element each of Cuachicque (“Shorn Ones”), Eagle Warriors, and Jaguar Warriors. The second Warband is a “twinned” Veteran/Novice Warband of three Regular Elements – each with 10 figures (most Elements only have 4-5). Each Aztec Warband has a Warband Leader and Asupacaci also has 2 Warrior Priests.

The Spanish have two command and control disadvantages. First, at least one Conquistador Element will start too far way from Cristóbal de Olid, (outside of command radius) and will only activate half as often as the other troops until command can be better established. This condition is to simulate the surprise nature of the Aztec attack. The second disadvantage is that the Tlaxcalan Element cannot “swap dice” with Cristóbal de Olid. Swapping dice is the way that commanders can try at times to influence which of their Elements can activate and do things. This condition is to simulate the language barriers between the two allies.

Initial deployment is important and not known to either player beforehand other than that Cristóbal de Olid is at the Noble’s House with his war dog and the Catholic Priest:

The Spanish and Tlaxcalan Leader and Elements are deployed differently.  The Conquistador Warband Leader, Cristóbal de Olid, deploys at C with his wardog and the Catholic priest.  Each of the three Spanish/Tlaxcalan Elements deploy in 1,2, and 3 based upon a secret pre-game decision of the Spanish/Tlaxcalan commander, who informs the GM (me) as to which Elements he chooses to be at locations 1, 2, and 3.  This decision should occur before the Aztecs deploy.  Only one defending Element starts at each location.  Command radii should be noted before the game starts.  This means that at least one Spanish Element will be out of command and cannot swap dice at the beginning of the game due to the Warband Leader’s 24” command radius.  The Tlaxcalan element cannot swap dice, and therefore cannot be considered out of command radius.    After the Aztecs deploy their troops, the defenders place their forces on the tabletop.  The defenders can be outside of their huts or inside as allowed by the terrain models. All Aztecs troops deploy after the Spanish/Tlaxcalans make their secret deployment known to the GM (see Side B discussion) as Warbands anywhere on the south side of the tabletop 6” from the long end of the mat.

The picture below will help understanding the game set up.

Game set up.

Unfortunately, when I arrived my designated table was only 6′ x 5′, and normally I need bigger! My mat alone is 6′ x 4′. It turned out that the room for miniature games was being used for a flea market, so we got smaller tables. No worries, as I was able to take an unused nearby circular table and put it adjacent to my tabletop for my GM needs. And for the rest of the convention, I got bigger tables too.

The players arrived – and I had a full table of 8 players – all were new to the game except one player, although two others had played Combat Patrol™ before. After the game briefing, the two sides chose deployment locations, and the game was on.

The game is on! The Aztecs had their Elite warband on the left and their Vet/novice Warband on the right. They massed two Vet/Novice Elements and two Elite Elements in the middle gaps, with one Element from Each Warband on the outer flanks. The Spanish put their melee-heavy Element in the out-of -command barracks position, and their arquebus-heavy Element in the closer barracks 3. The Tlaxcalans, with their “machine-gun bows” (as coined by Harry/borderguy190 at Historicon) held down barracks 1 by the cornfield.
And at the cornfield the Tlaxcalans (commanded by Sam) riddled Peter’s vet/novice element. Peter said that was the plan to make sure that the Tlaxcalans dis not interfere with the main attack. That ploy worked, though it did cause his Element to take a lot of casualties.
The Aztec center columns moved up (Steven and Aidan), with the Elite cuachicque taking the brunt of fire from the arquebuses (Mal) – and generating a ton of Morale Checks. With clever use of their Warrior Priests, the Aztecs were able to minimize their Morale pips and stay in the game. Meanwhile, the Spanish to the right of this shot (Matt)got a break and were able to get their out-of-command Element fully activated. At this point, the Spanish thought the game was theirs. It looked that way, but as it turned out, it wasn’t.
That newly activated Element in the center (Matt) advanced into a swarm of Aztecs – and did not fare well in the ensuing fight.
Here I’m doing my best to adjudicate the previously shown scrum as GM. Thanks to Mal Martin for the photo.
The scrum goes badly for the Spanish – and in the rear of this photo you can see , Cristóbal de Olid all alone – and in the open – having moved closer to help activate this now-endangered Element.

The Aztecs got lucky with three sequential activations (they got two extra cards in the deck as a game advantage plus a Heroes card came up). This allowed them to press their attacks, especially against the unloaded arquebusiers. To add to their troubles, the Elite Eagle Warriors and Shorn Ones (cuachicque) successfully went “berserk”. This meant that they would go headlong into their enemy, fearing nothing and not stopping until they were killed or they killed an enemy – and they would fight better too while berserk.

The Spanish arquebus Element gets hit by the berserking cuachicque and Eagle Warriors before they can reload.
The fanatical Aztecs overwhelm the arquebusiers and start dragging them off for sacrifice, including the Catholic priest who was dragging away the gold.

As a coup de grace, Cristóbal de Olid (remember him from above all out in the open?) caught the attention of two Jaguar Warriors with atlatls. Two hits ensued, and , Cristóbal was incapacitated, throwing what little remained of the Spanish into being out of command. Plus his eventual fate would be quite gruesome as a sacrificial captive.

The game ended there and no scoring was needed – the Aztecs had won overwhelmingly. This scenario has gone differently each time that I have run it – and is pretty well-balanced. I will be running it again at HAVOC in April and HUZZAH! in May.

I really want to thank the players, especially Leif for his help teaching the game too. I think that the players enjoyed themselves and the response from them was positive. I would see many of them in the remaining games I ran that weekend. I will post about those other games shortly. They were equally – if not more – epic.

Hope this was a fun read for you!

Miscellaneous details and references for those interested in that sort of thing:

For all of my previous posts on games, units, and other projects for my 16th Century Spanish Conquest supplement for Feudal Patrol™ – “Civilizations Collide” – please see this page.

Stonehouse Miniatures Aztec Terrain for my Tenochtitlan Cityscape

When I was at Historicon in November 2021, I ran my “Cortes’ Causeway Escape Attempt” scenario for a Feudal Patrol game for the Spanish Conquest in Mesoamerica (Aztecs vs. Conquistadores) using my supplement Civilizations Collide. One of the issues with my terrain with which I was not fully pleased was the Temple of Yopico model I was using. As readers of this blog may recall (the relevant post is here), I was using a relatively small pyramid that had been given to me that I had converted for the cityscape. Unfortunately, you could not put figures on it for gaming, and I had a template made for gaming with it – certainly this was not an ideal solution for a model of the Temple of Yopico.

My converted temple from last year.

As fortune would have it, in very early February, I discovered that Stonehouse Miniatures sells a pretty good looking Aztec Pyramid made out of foam and resin pieces that looked to me like it would work for 28mm. They also had several other cool items like a skull wall temple courtyard and a moon goddess plaque in resin. I have usually found that most commercially Aztec terrain is made to look like ruins – more suitable for an Indiana Jones scenario or Ghost Archipelago than for Tenochtitlan in 1520. Happily, these new finds were not models of ruins! Yay! I ordered them and they arrived on Valentine’s Day. As 10 days later TotalCon 36 would begin, I needed to get moving forthwith!

The Stonehouse stuff that I ordered.

The temple was painted black, and the other resin was totally unpainted of course (as one would expect). My cityscape is more of an oxidized-limestone hue – so I had my work cut out for me. The three main pieces of the temple that were made of foam – not a material with which I had a lot of experience (but not zero). The rest were made of resin. However, with TotalCon 36 coming up rapidly February 24-27, I was a bit under the gun to get them done, along with some other stuff I made for my France 1940 What a Tanker game (about which I’ll share in details in a future post).

The new building on my tiles. Definitely, the pyramid color needs adjustment!

Given the timing constraints that I was under, I first proceeded to work on the temple, then on how to safely transport it, and finally onto finishing the other resin pieces – so I’ll describe that process here. With this approach, I could at least get the pyramid done, and if I could get to the other pieces before the convention, that would be great.

Let’s start with the pyramid. The model kit is designated BRA-105, “Aztec Pyramid Complete”, and includes 1 single-piece foam Aztec pyramid, 2 foam base expansion pieces, 4 sets of resin stairs, a resin temple (top piece), a resin sacrificial altar, and 4 resin braziers.

BRA-105, “Aztec Pyramid Complete” kit.

First, the issue of priming came up. While using my airbrush would not melt the foam if I primed it – as opposed to a rattlecan – I decided to consider the manufacturer’s black color as the prime. The braziers, the altar, and the other pieces that I got in my order (discussed later in this post) were all unpainted resin. I washed all of them first, scrubbed them, and let them dry while I worked on the pyramid.

Wash that resin!

I had decided that a series of dry brushing applications would be my best bet to achieve the color I wanted – with details added afterwards. On the pyramid’s stairs, there were a few places that had exposed resin surfaces (where the black paint had not adhered). I would deal with those by spot-painting with black primer before I did further work on it. As for the painting process, lots of widespread dry bushing would ensue as the next steps. For the foam pieces, they were quite nice as tabletop wargaming terrain pieces go. The pieces had enough detail that even the small molding defects could be made to look like they were a result of weathering. This was especially the case around the bricks. I was concerned with the friability of the foam, so I proceeded with due caution and planning to deal with that vulnerability.

This is after the first dry brushing color was applied to the one on the left – with the untouched other half for comparison. The first two colors in sequence were Citadel “Tallarn Sand”, then Citadel “Karak Stone”.
The left piece has the second dry brushing color on it – the one on right is for comparison and just has the first color.
The first two dry brush applications on the pyramid are complete here.

The last color to be dry brushed was a craft paint – FolkArt “Yellow Ochre”. I liked the way it worked on the pyramid.

After the yellow oche was added.

From then on I worked on the stairs (dealing with any remaining exposed resin as well) and added colors to the pyramid’s details. The underlying manufacturer’s black served well to define the deeper details, but washes were needed too.

Here you see the painted colors on the pyramid after the dry brushing applications but before the final wash and varnishing.

I then applied Army Painter “Light Tone” with a brush and let that dry, as well as Citadel “Carroburg Crimson” on the red stairs. Finally, I brush-applied a 50% thinned coat of Vallejo Mecha Color “Matt Varnish” to seal the porous foam and to help protect the paint on all of the pieces. These foam pieces were too big for my spray booth and in any case I thought that the foam would blow around too much from an airbrush.

Drying after washing and varnishing.

By February 18th, I could say that the pyramid was done, minus the braziers.

Pyramid done – angled view.
Pyramid done – side view.

I was pretty pleased with the final result, but I still needed to try to get the braziers done and a storage/transport solution built for it.

As being able to transport it and the other accouterments was imperative, I modified a 32-liter Really Useful box with hot glue and posterboard. This also allowed me to create a storage/transport solution for my hills that I use for the Battle of Otumba (of which more will be shared soon when I post about the game but you can see one of the hills in the background of my last post).

Let’s get back to the box. I measured the space that each piece would need in it and marked the box’s interior accordingly with a Sharpie. I lined the bottom of the box with thin sheets of foam from Michaels for cushioning. Then I cut the posterboard into sheets and hot glued those into the box. I left enough room at the top to build a storage box for the smaller pieces.

The storage/transport box’s main compartment as viewed from above. The two hills are shown here with the pyramid sections. The small resin temple is in the foam sheet roll as seen on the left as due to its size and heft (solid resin) it needed protection. On top of this would go the thinner storage box.

As discussed, I did have the pyramid’s braziers to do as well as the other smaller resin pieces – so I actually built the storage box for all of them before I painted them. This way at least I could get the pyramid to the convention.

For the top storage box, I cut the bottom piece of posterboard out and made the sides with posterboard and hot glue. I used wooden toothpicks as pins to secure the posterboard while the hot glue set. This was a new technique for me that I had as an idea and one that worked great – I just broke the toothpicks in half and drove them into the posterboard with an unsharpened pencil immediately after the hot glue was applied. The toothpicks disappeared into the posterboard nicely.

Lastly, I made a posterboard top for the box and put it over the previously shown main compartment.

At this point it was February 19th and now I could attempt to finish the resin pieces. In addition to the braziers that came with the pyramid, I had UTW-301 “Skull Wall Temple Courtyard” and BRA-125 “Moon Goddess Plaque”. The UTW-301 contained 2 more braziers, a skull gate, 6 taller skull walls, 4 smaller skull walls, 6 corner skull wall pieces, a stellae, and yet another sacrificial altar. This kit appears to be no longer be offered on Stonehouse Miniatures website, but most of the components are there under other SKU’s. The BRA-125 was just the plaque. I decided that I could indeed try to finish these as well.

I needed to find a mounting solution for painting these – so used the same combination that I had previously used for tank turrets for the braziers and the corners. I just handled the walls and plaque carefully as I went along. After drilling the braziers, wall corners, stella, and altar out and mounting them on screws and magnets and then into wooden blocks, I moved on to painting all of these on February 22nd.

I brush-primed them with Vallejo Surface Primer “German Dark Yellow”, followed by a generous wash of Secret Weapon Washes now-discontinued) “Sewer Water”. As is my custom, I will list all the paints I used at the end of this post for those interested.

Despite my scrubbing and cleaning, I found some of the resin pieces quite resistant to painting. Still, with a second application of paint or by adding a bit of primer or wash, I was able to get them done.

Smaller remaining resin pieces mounted, primed, and washed.
Close up of the walls from above.

As the braziers were higher on the priority list (with 4 being part of the pyramid), I worked on them first. By the end of February 22nd, they were all done and drying.

Braziers – done!

Then it was onto the other resin. The skull walls had some bubbles (that one would expect from any resin piece), but not many. In any case, I thought they should be dull and sallow-yellowish, reflecting the idea that these skulls had been on the racks for a long time. This also allowed me to camouflage any of the resin bubbles with dry brushing and washes. Besides, these skulls are so small that on the tabletop they would be background around my temples and buildings anyways.

I followed a similar dry brushing pattern as I used for the temple pyramid for the walls, with adaptations for the skulls themselves. By the end of the 22nd, all the resin was painted, varnished, and drying.

Walls and Moon Goddess Plaque done.

I played around with them on the next day (23rd) to see what configuration to use.

One possible configuration. I ended up deciding that all the skulls should face outward.

As it was the 23rd (and I would be packing my car that very day for travel the next morning for TotalCon 36), I partially mocked up the cityscape to see how all of the new pieces would look on my cellar floor. I decided to add the walls as a courtyard next to the pyramid and as eye candy on the side of another building.

Mock up on the floor – but it was time to pack!

I was successful (barely!) at getting all this done for TotalCon 36. At that convention, I ran 4 games – one each Thursday to Sunday, and each game is worth its own blog post. Therefore, I will be sharing more posts and pics of those in the coming days. I also want to catch up on others’ blog posts too, and do a catch up post on my garage+ building project (which has been taking up time too along with grandfather duties). Basically, for my blog followers, that’s why I went silent in February!

As a sneak peek, here below is what the temple looked like in action at the convention.

A preview of the action!

Thanks for taking a look and I hope this was fun for you. As stated, I’ve got more posts for you in the queue! I’ll try not to have you drink all these from a firehose – especially Roger!

Miscellaneous details and references for those interested in that sort of thing:

For all of my previous posts on games, units, and other projects for my 16th Century Spanish Conquest supplement for Feudal Patrol™ – “Civilizations Collide” – please see this page.

PAINTS, INKS, GLAZES, SHADES, WASHES, PIGMENTS, FLOCKING, GLUES AND MORE THAT I USED ON THESE TERRAIN PIECES:

On The Pyramid Structure:

  1. Citadel “Tallarn Sand”
  2. Citadel “Karak Stone”
  3. FolkArt “Yellow Ochre”
  4. Vallejo Model Color “Black”
  5. Armory “Dark Blue”
  6. Vallejo Model Color “White”
  7. Vallejo Game Color “Scarlet Red”
  8. Americana “Kelly Green”
  9. Americana “Cadmium Yellow”
  10. Citadel “Flash Glitz Yellow”
  11. Army Painter “Light Tone” (shade/wash)
  12. Citadel “Carroburg Crimson” (wash)
  13. Vallejo “Airbrush Thinner”
  14. Vallejo Mecha Varnish “Matt Varnish”

On The Smaller Resin Pieces:

  1. Vallejo Surface Primer “German Dark Yellow”
  2. Secret Weapon Washes “Sewer Water” (wash)
  3. Citadel “Tallarn Sand”
  4. Citadel “Karak Stone”
  5. FolkArt “Yellow Ochre”
  6. Vallejo Model Color “Black”
  7. Citadel “Skrag Brown”
  8. Citadel “Contrast Paint – Dark Angels Green”
  9. Citadel “Contrast Paint – Dark Oath Flesh”
  10. Citadel “Evil Sunz Scarlet”
  11. Citadel “Fire Dragon Bright”
  12. P3 “Blazing Ink” (ink)
  13. Citadel “Morghast Bone”
  14. Citadel “Contrast Paint – Skeleton Horde”
  15. Army Painter “Light Tone” (shade/wash)
  16. Vallejo “Airbrush Thinner”
  17. Vallejo Mecha Varnish “Matt Varnish”

On the Storage/Transport Box:

  1. 32-liter Really Useful Box
  2. Posterboard
  3. Hot Glue
  4. Toothpicks
  5. Foam sheets
Frank Tank Rants

musings of a fat old bloke on tanks and wargames

Dragons of Lancasm

Games, miniatures, painting, books and more games

Tiny Painted Heroes

The Adventures of a lifelong Tabletop Gamer, Game Design hobbyist, and full-time Software Engineer

Home of the Grumpy Gnome

Tinkering with Artwork and Ideas

Steve's Paint Brush

Grimdark model making and mini painting

Wargamesculptors Blog

Life, Golf, Miniatures, & Other Distractions

Dead Dick's Tavern and Temporary Lodging

Life, Golf, Miniatures, & Other Distractions

Guru PIGS Blog

Guru's thoughts on wargaming, life, and the universe!

Wisely lead... without a head!

History, Miniatures and Wargaming

Kuribo's Painting

Fallout, MESBG, and Hellboy Painting, Terrain, Dioramas, and Battle Reports

Don't Give Greg Ideas

Seriously, just don't

War Across the Ages, and other dark horrors

A discussion of miniatures collecting, painting and gaming.

Classic Warhammer 40K

Painting diary focused on Warhammer 40K 2nd ed., 5th ed. WHFB, related GW games, and miscellaneous whimsy

Colonel Mustard

WW2 Modelling in 1/72 Scale

Bogenwald

Random painting and terrain making.

Pat's 1:72 Military Diorama's

Scale diorama tips and ideas

Arcade Dreams

Building the Arcade Dream

P.B.Eye-Candy

Phil's 20th century wargame pages

SP's Projects Blog

A futile fight against entropy or 'Every man should have a hobby'? Either way it is a blog on tabletop wargames, board games and megagames

30mmdave

Wargaming Plausible reality?

Faith&Steel

dave's gaming adventures: faithandsteel.wordpress.com

The Imperfect Modeller

Miniature Figure Painting and Diorama Modelling

Double Down Dice

Painting miniatures and rolling dice!

Just Needs Varnish!

My ongoing wargames projects!

miniaturepopcorns

Sculpting some worlds

Despertaferres

Wargaming with the ability of a dull nine year old

Dawn of the Lead

Miniature wargaming and the occasional zombie

Rantings from under the Wargames table

Wargames, Figures, Sculpting and Converting Miniatures

Simple as War

Miniatures & Terrains

Buck's Blog

Life, Golf, Miniatures, & Other Distractions

IRO aka Imperial Rebel Ork

- I model - therefore I am -

Azazel's Bitz Box.

Painting, Modelling, Miniatures, 1:6, Games... Whatever else I find interesting.

diggingforvictoryblog

Smallholding and Wargaming.......not always at the same time!

Shamutantis

Nørdblog numero uno

Harry Heckel

Writer/Game Designer