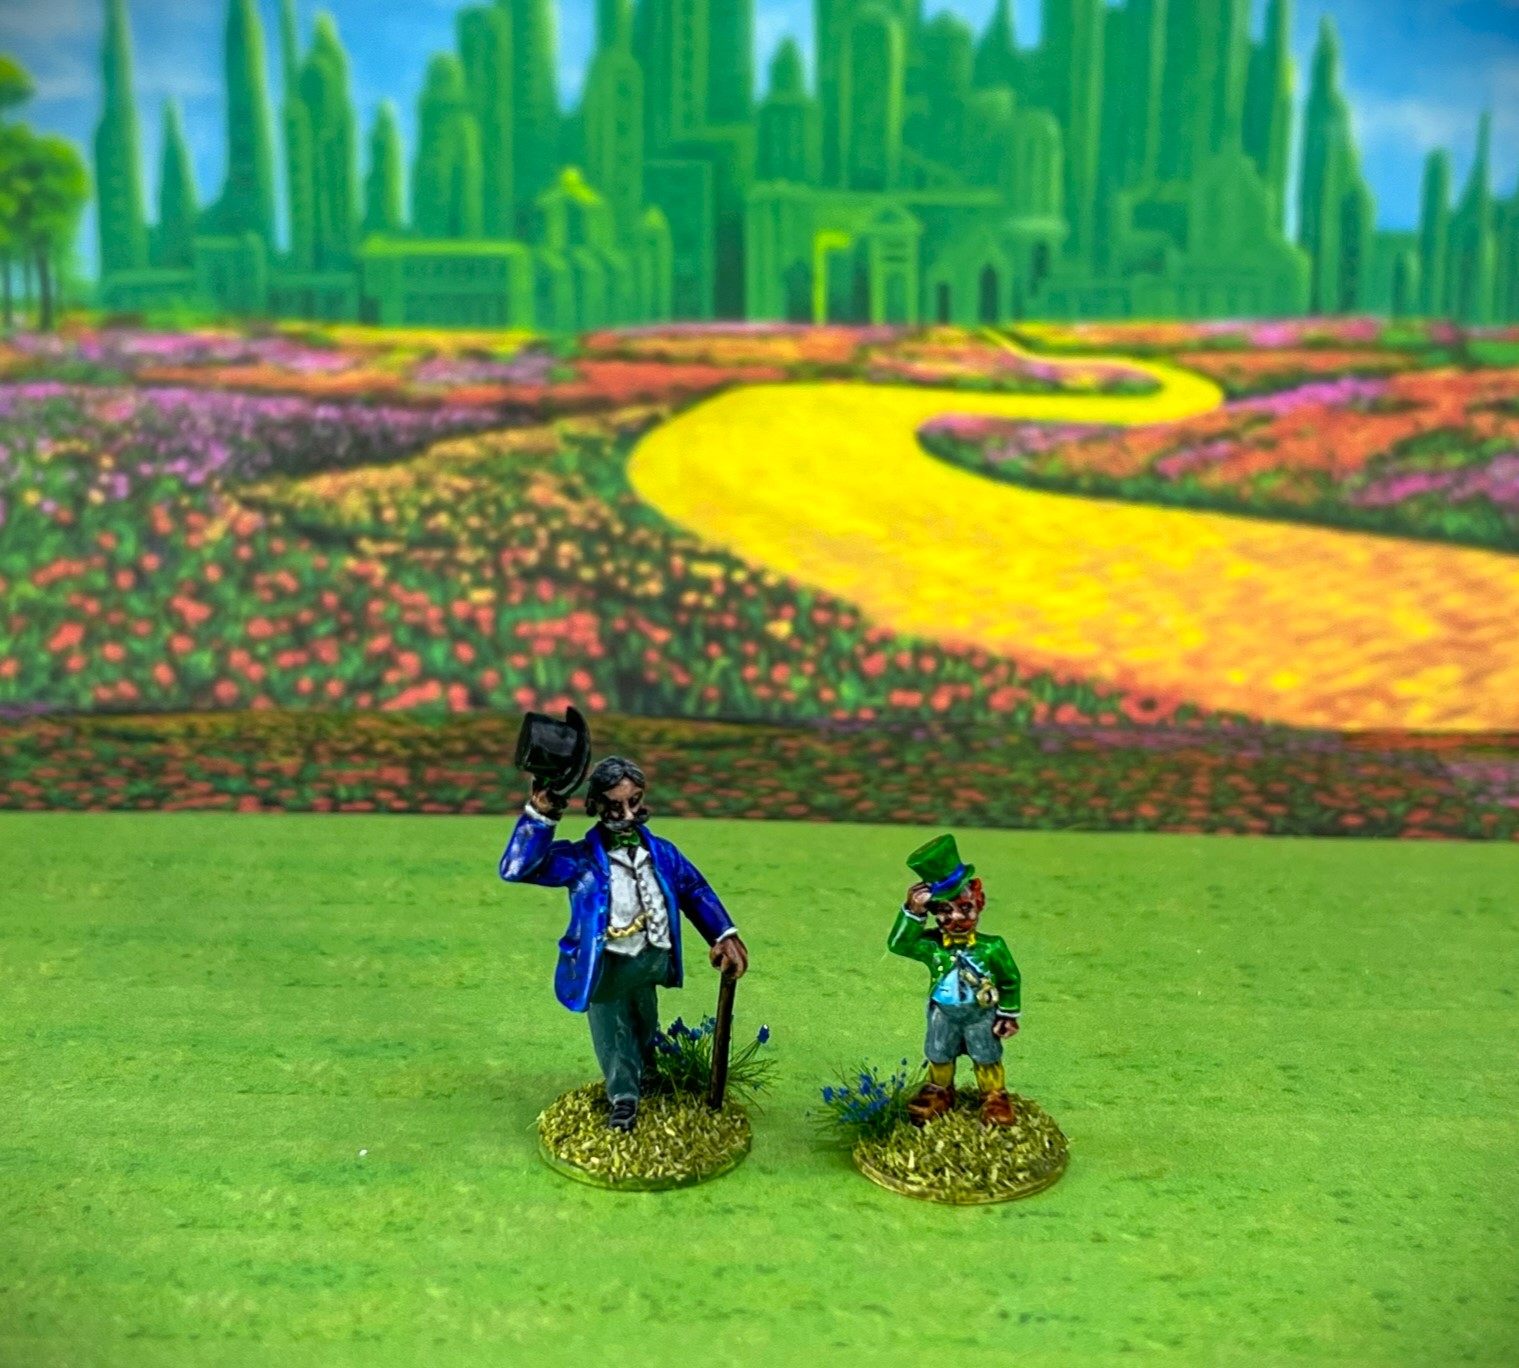
Now that I have a full Munchkin Brigade (as you saw in my last post), I needed to start building a worthy opponent. I decided to go with the Winkies – the orcs of the Wars of Ozz. Yes, the “oh-eee-oh” dudes from the movie.
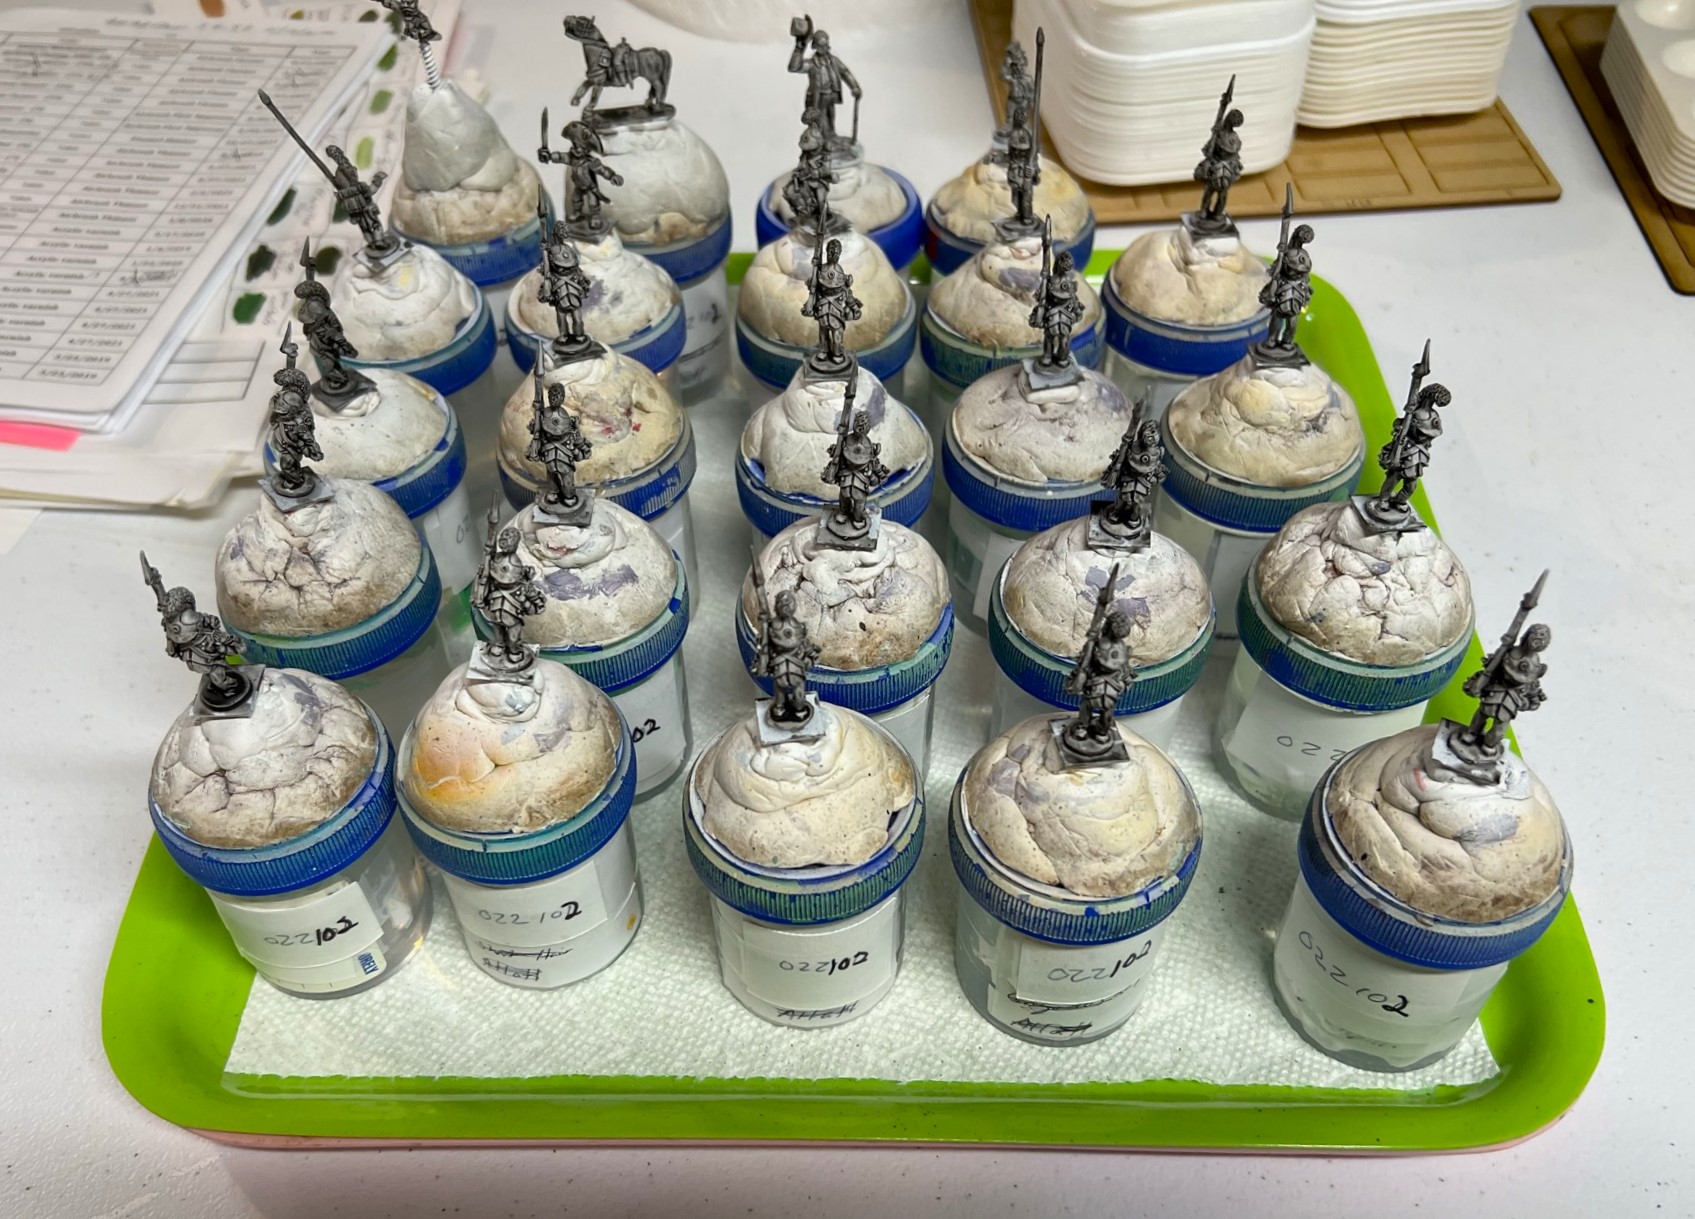
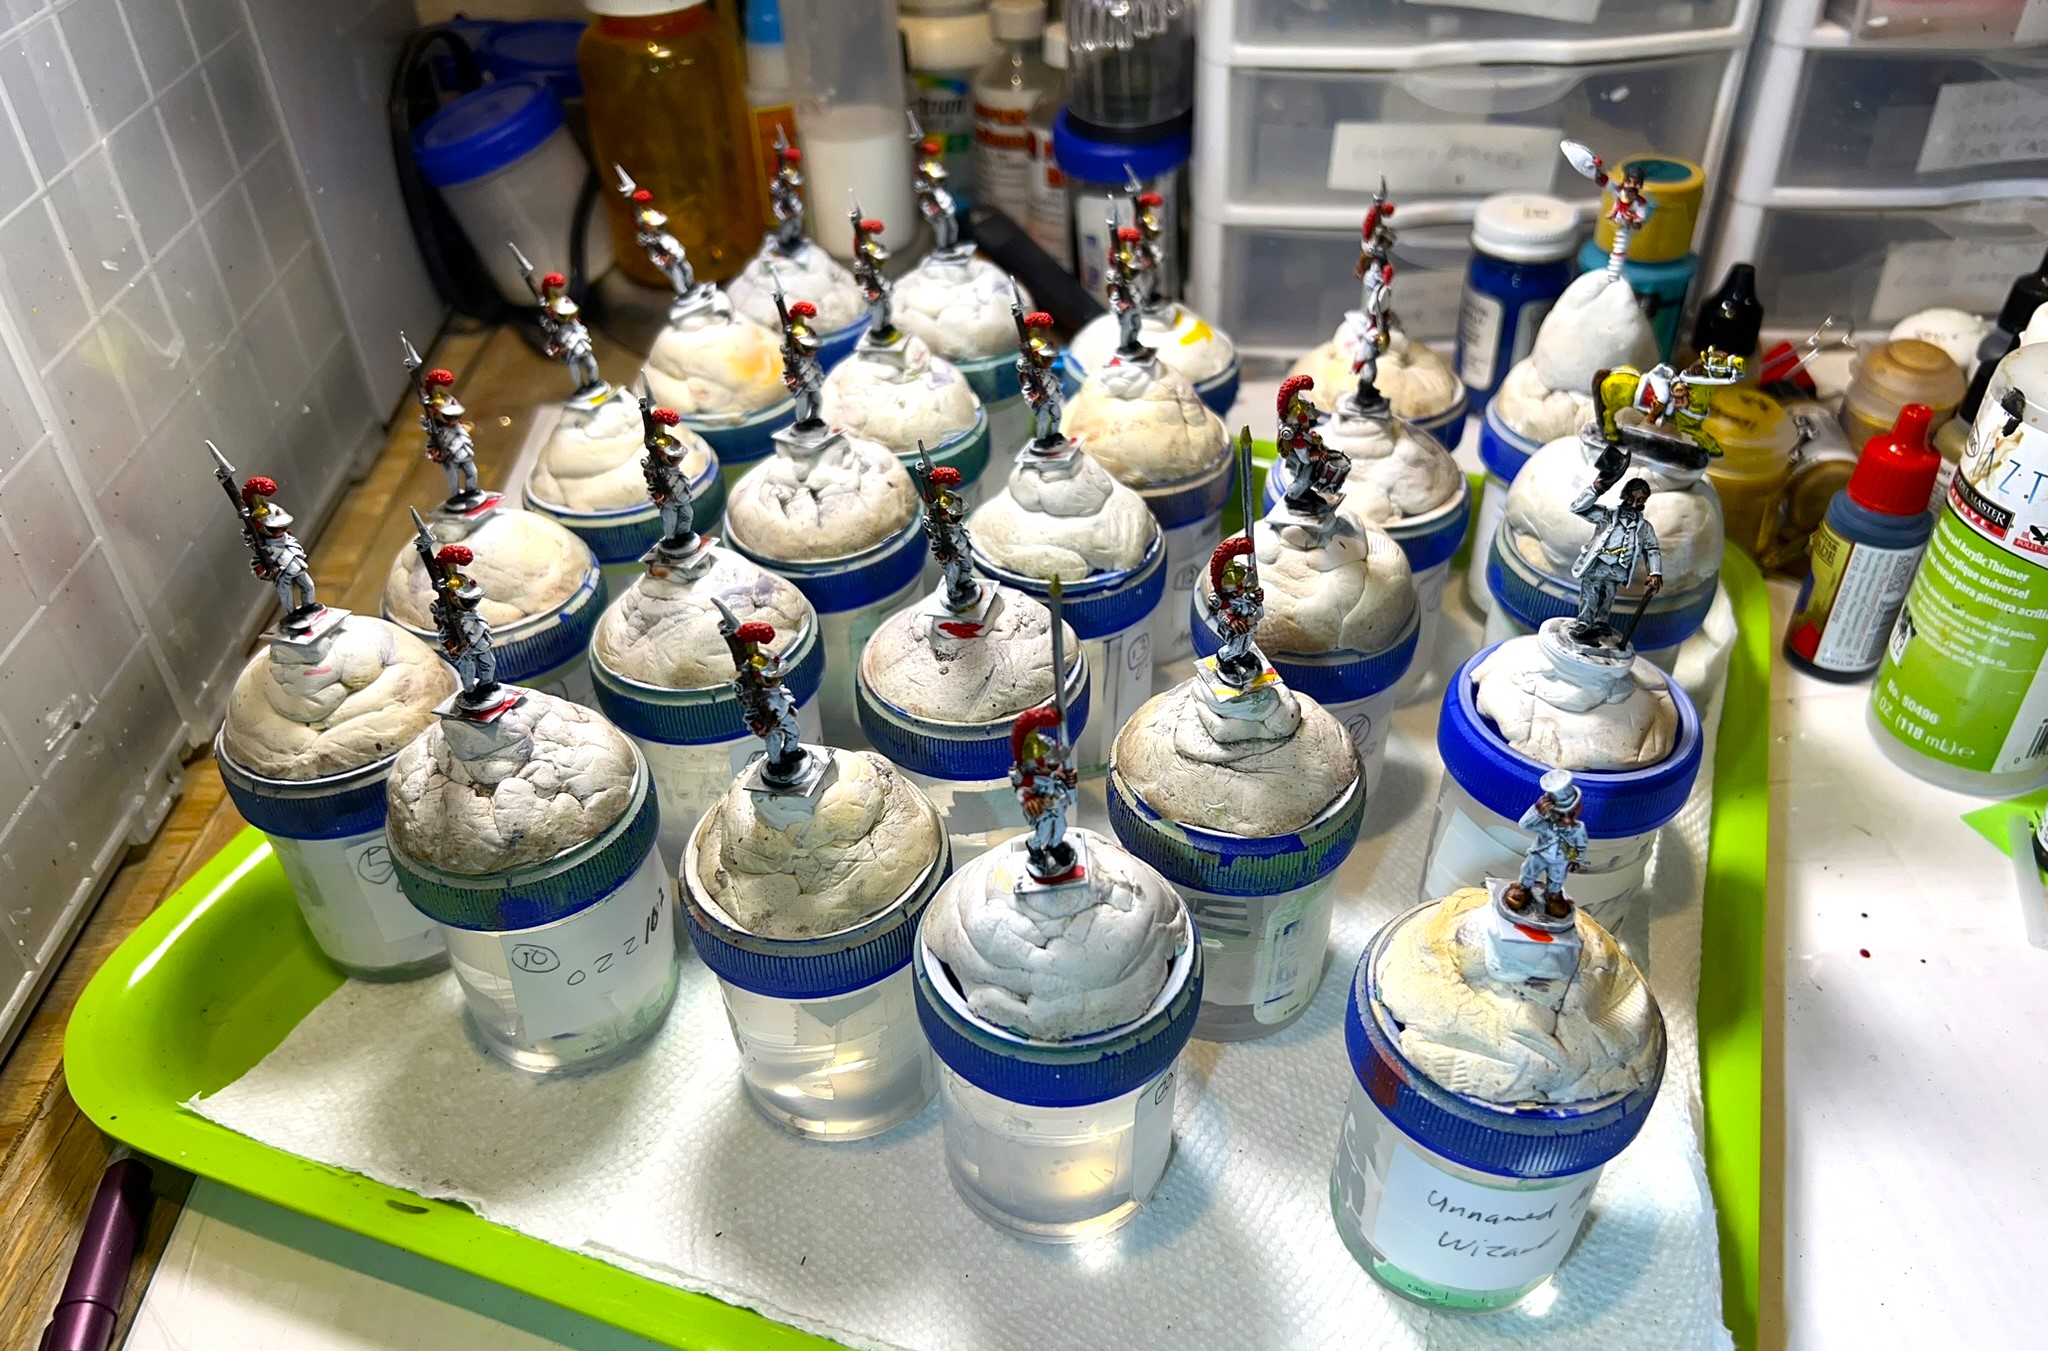
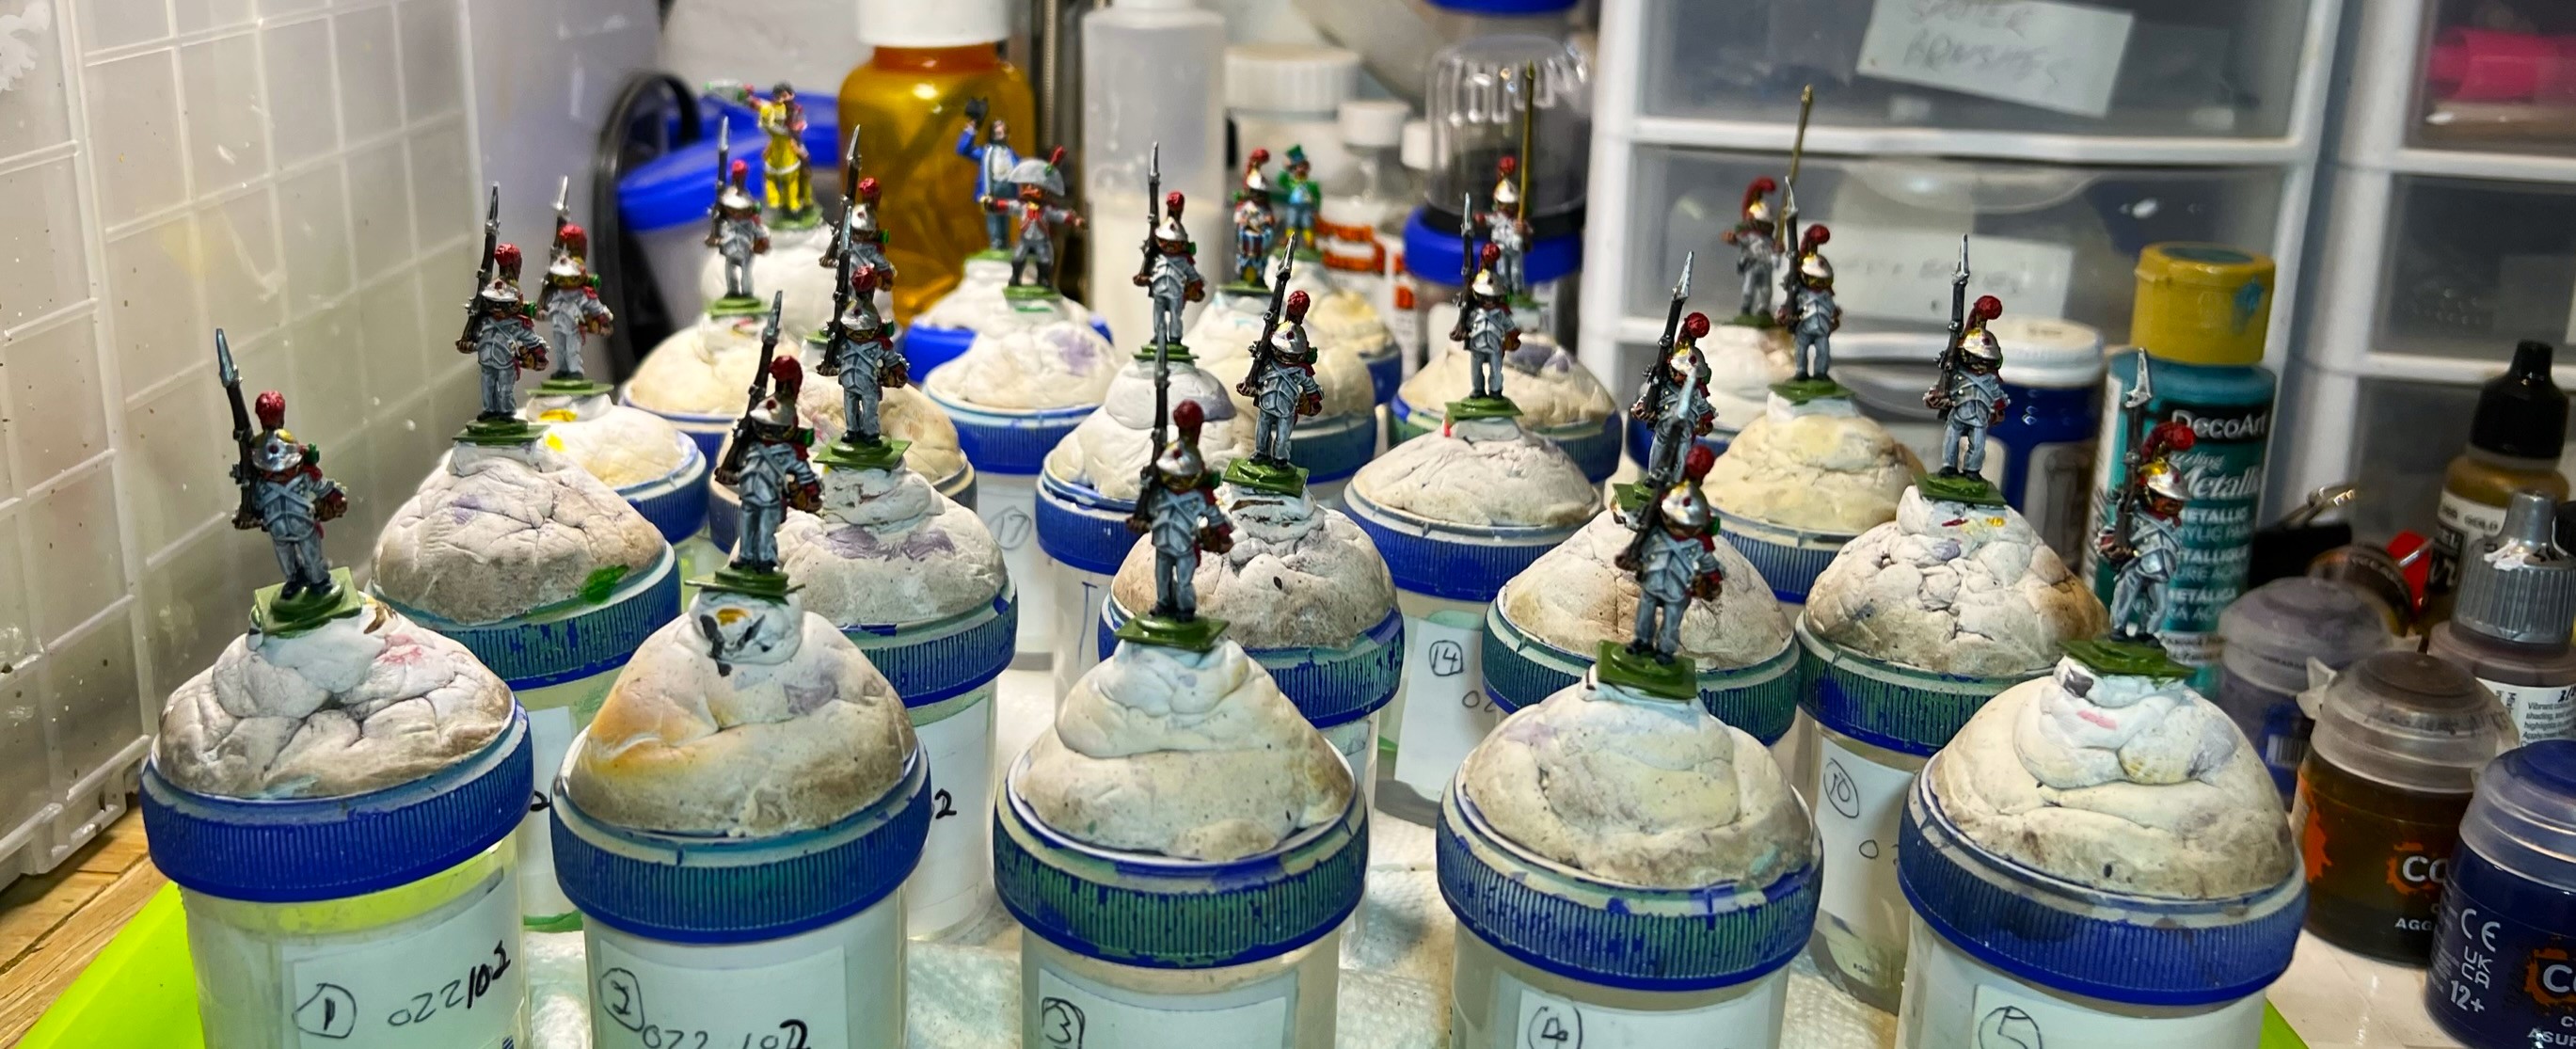
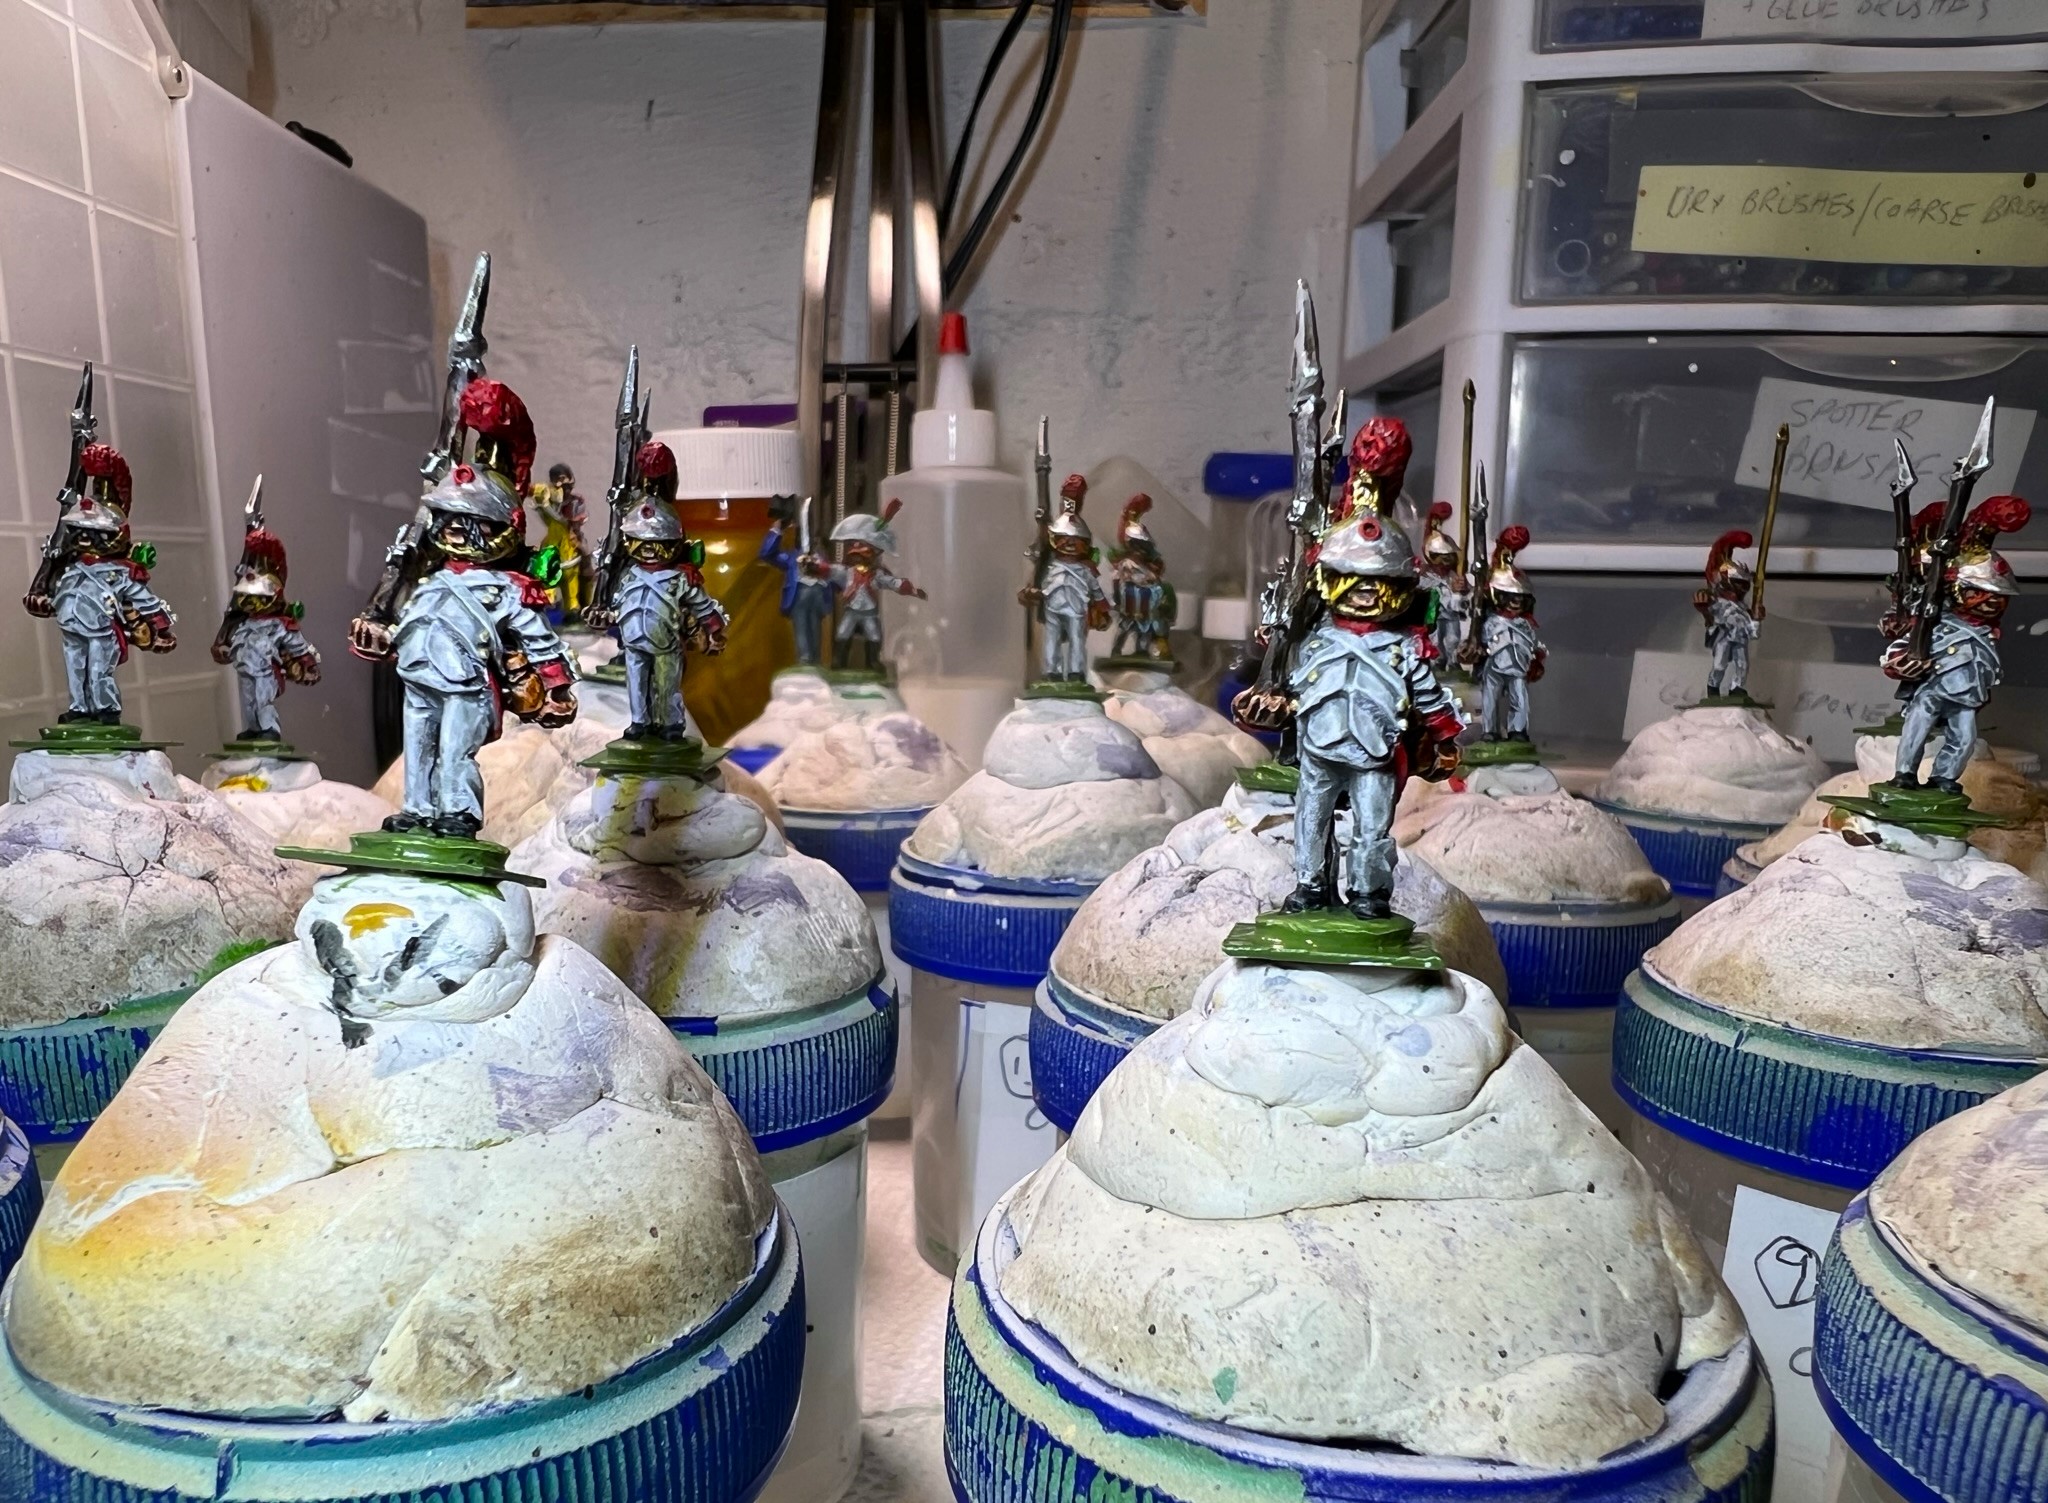
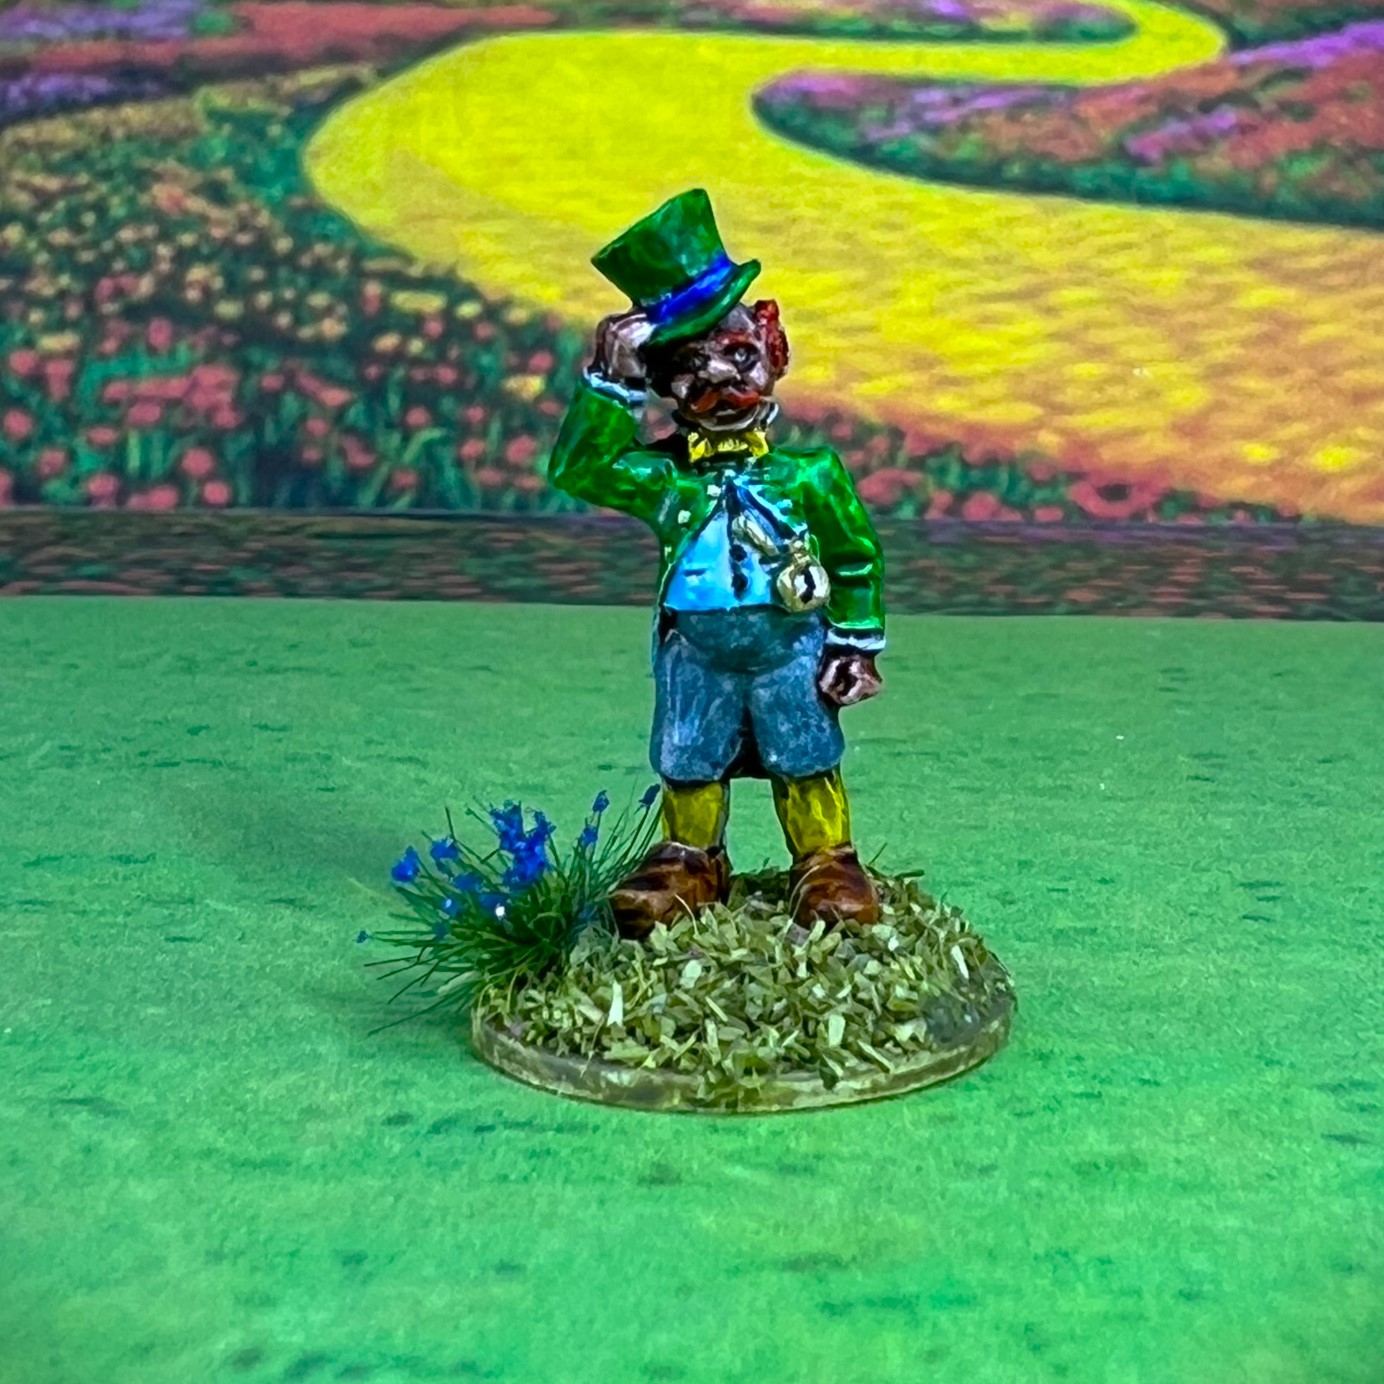
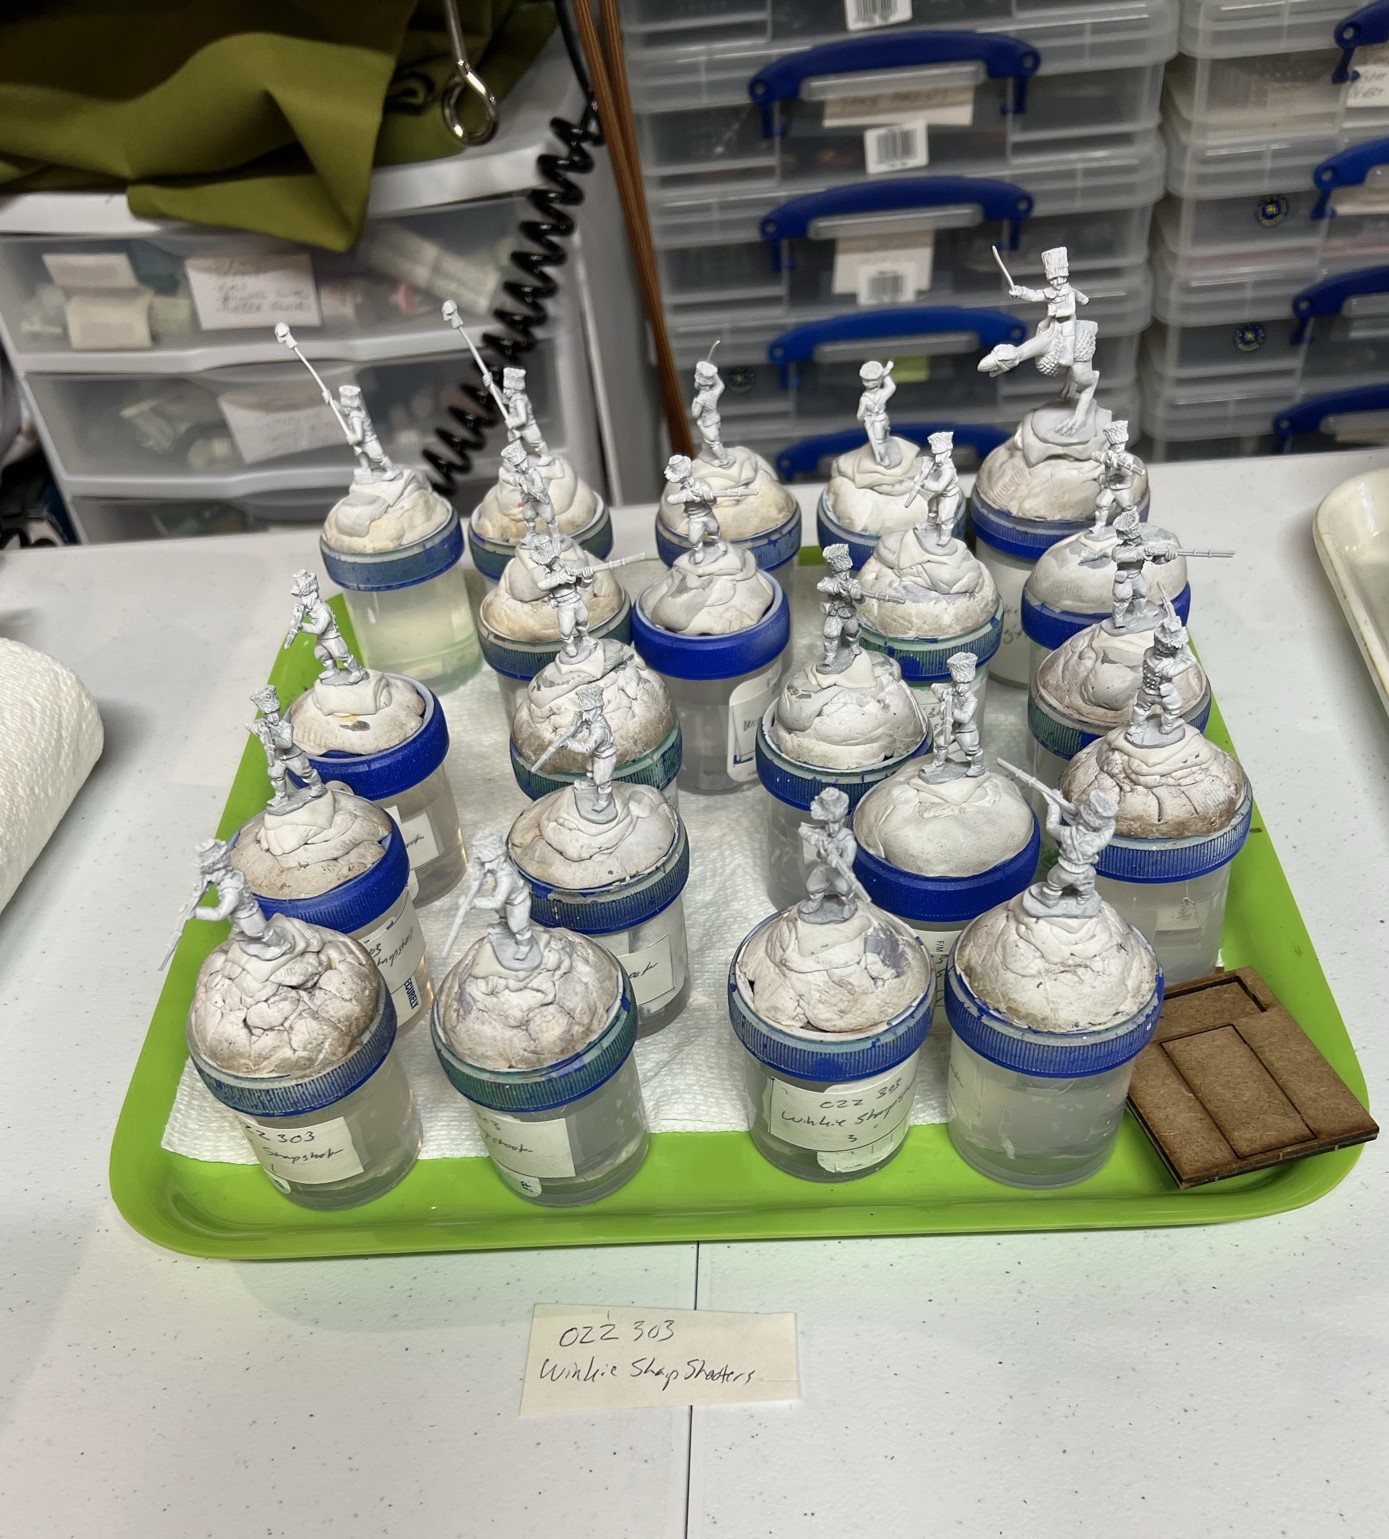
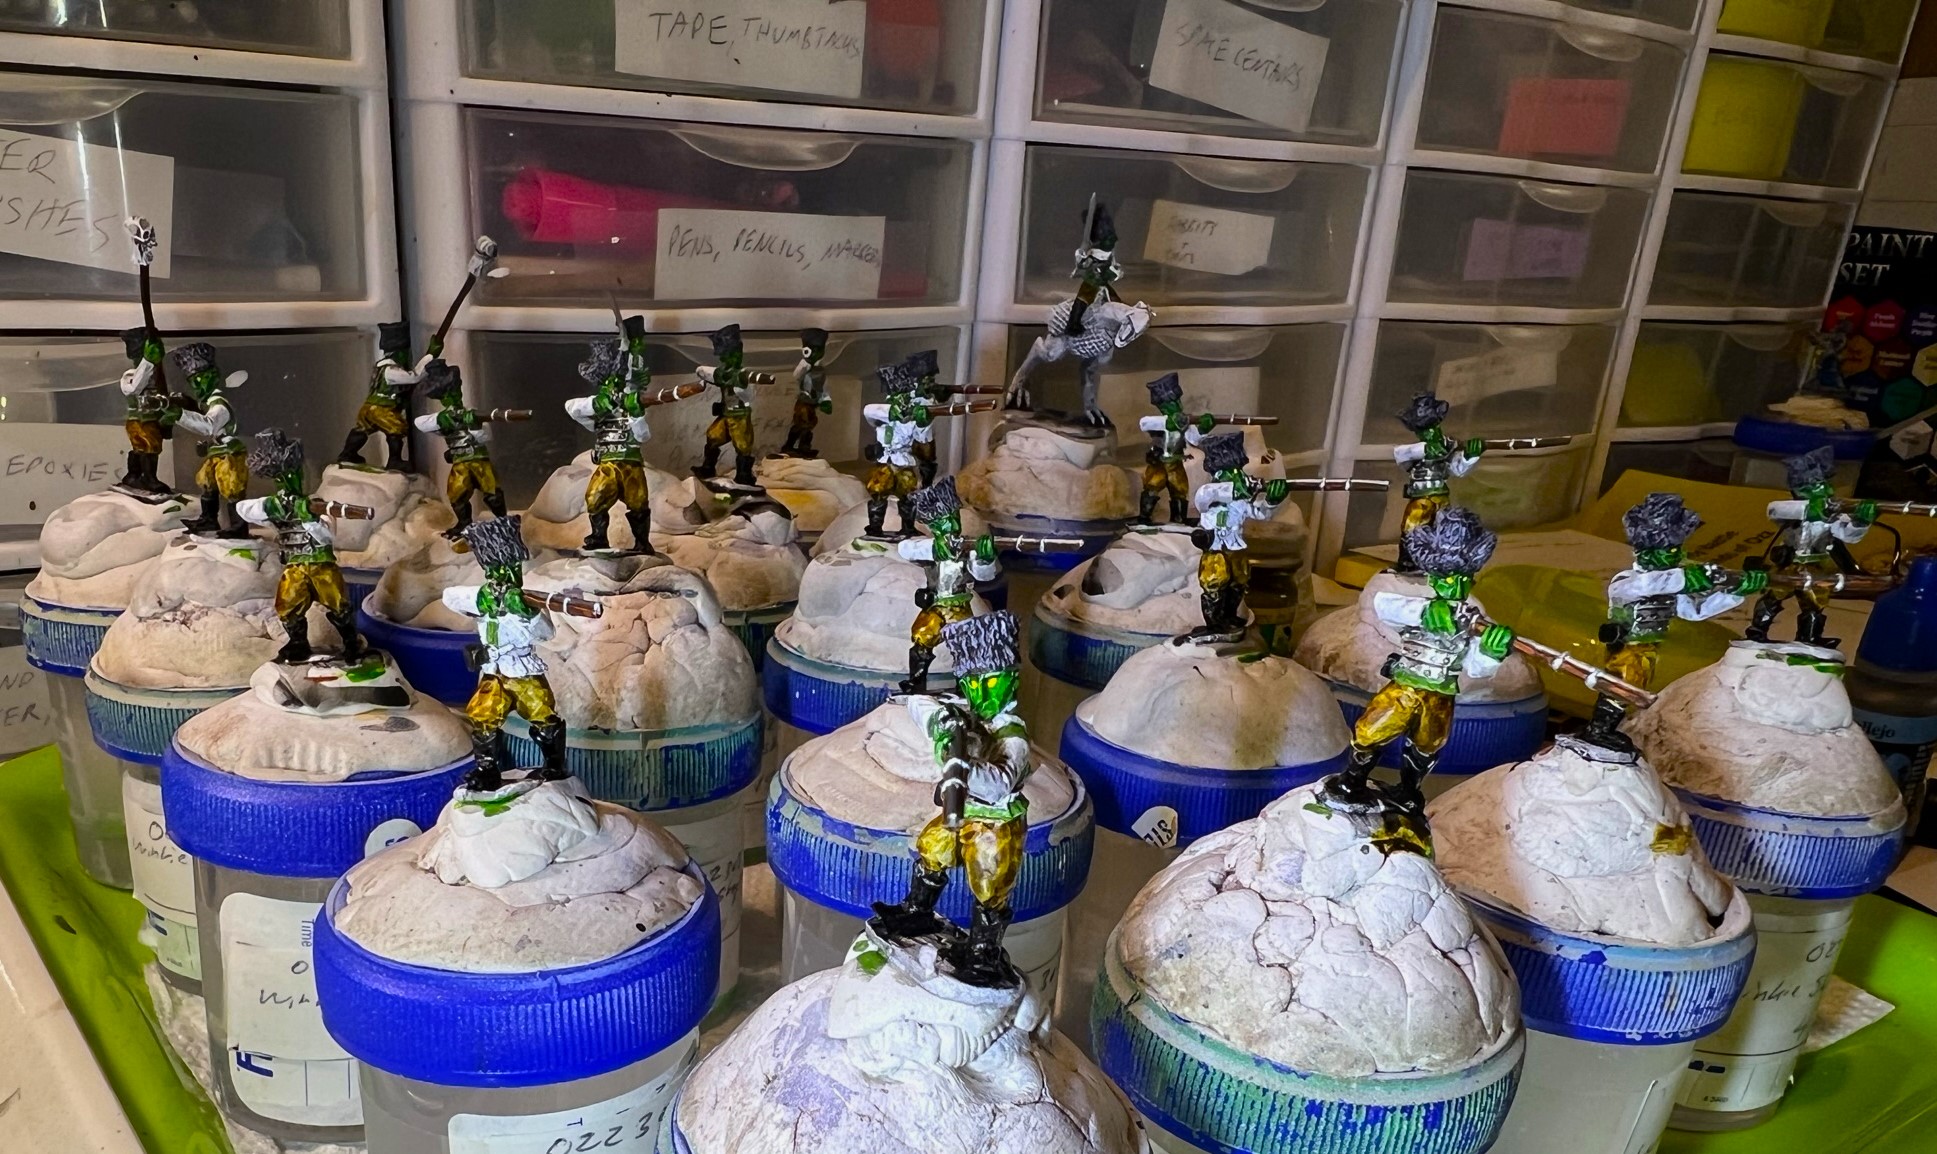
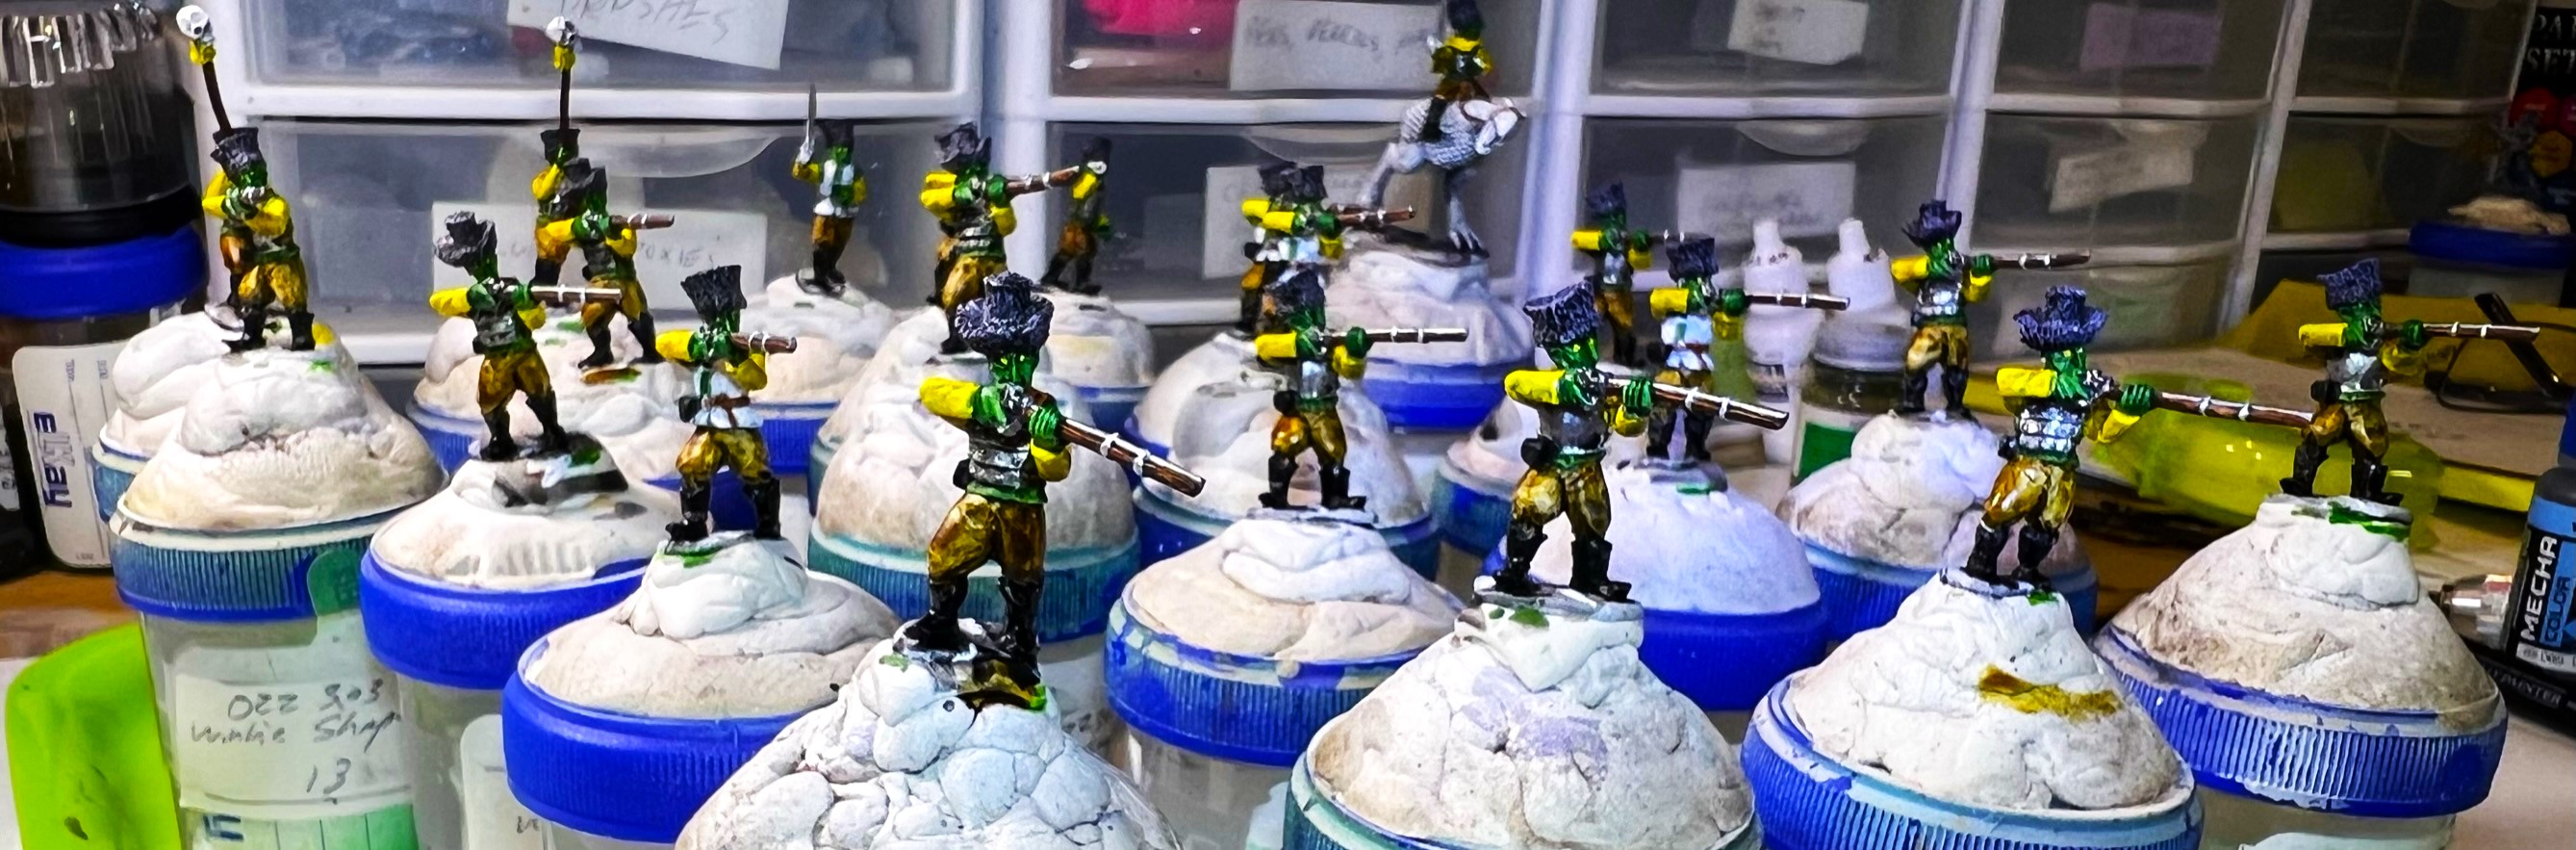
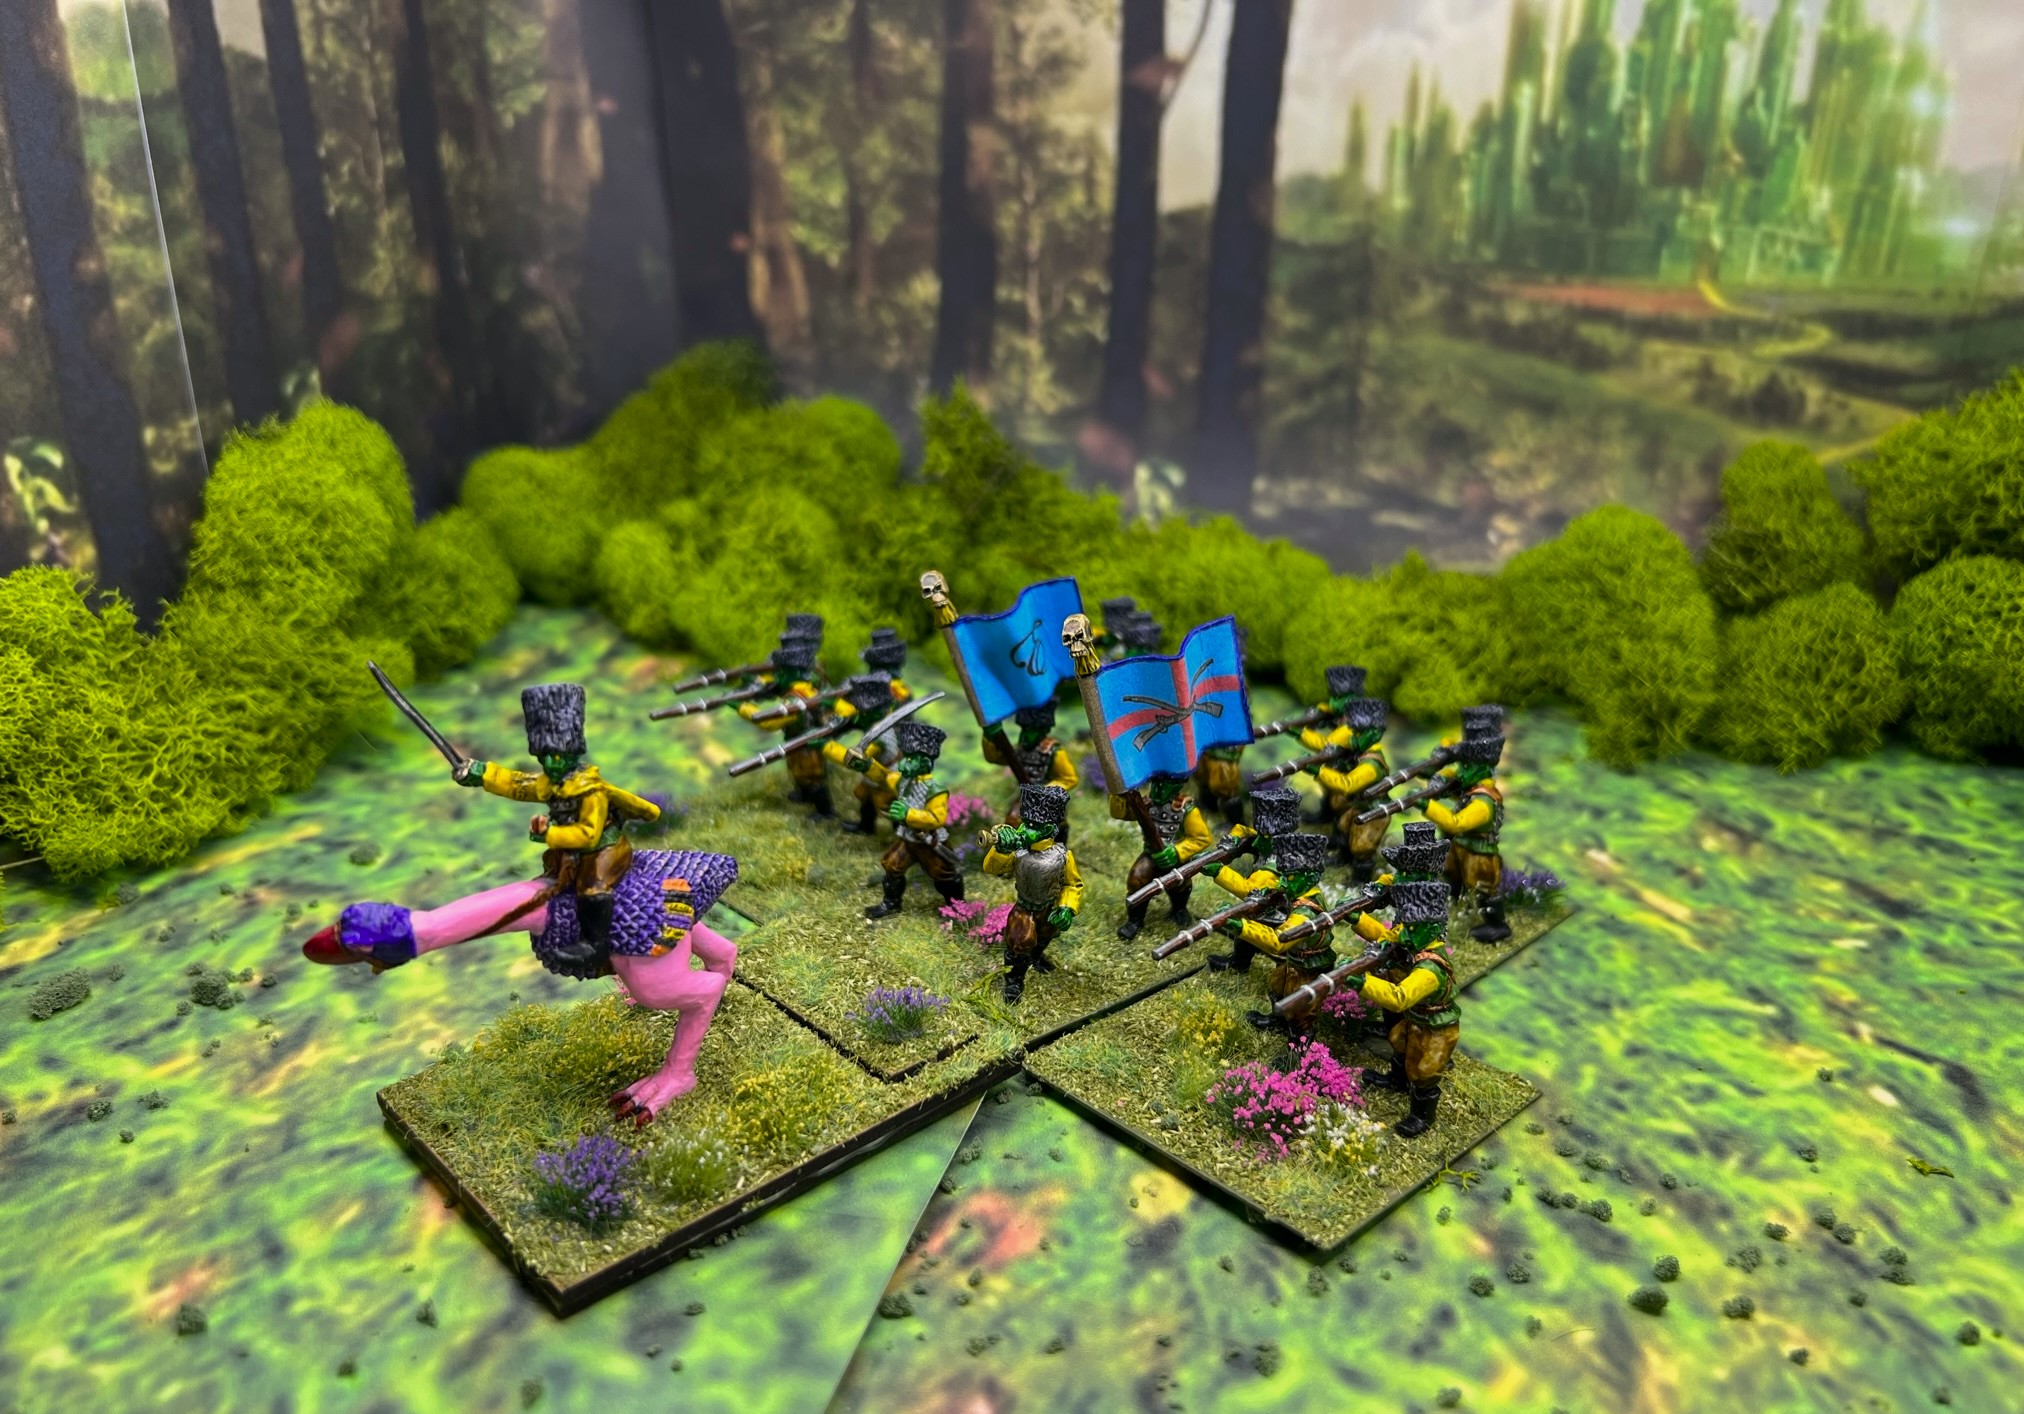
My first unit ended up being atypical – as Winkies normally don’t think much of firearms and missile weapons (or those who wield them in battle). The Winkies consider melee as their preferred means of combat. Still, they do have some artillery, and as shown here a small contingent of troops armed with muskets to provide some firepower. My Winkie brigade will eventually have melee troops, light artillery, and Zilk-riding cavalry (zilks are giant ostrich-like carnivorous birds that Winkies capture and train as mounts – though they are known to eat fallen enemy and their Winkie riders alike). I’ll also have some Great Flying Apes, some lesser apes, and their witch Evora. I am trying to get as many as possible done so games can begin, and to that end I am batch-priming and batch-painting as many units as possible.
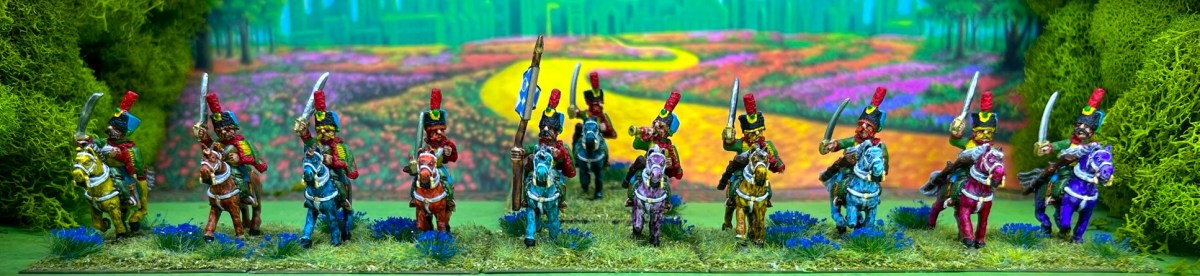
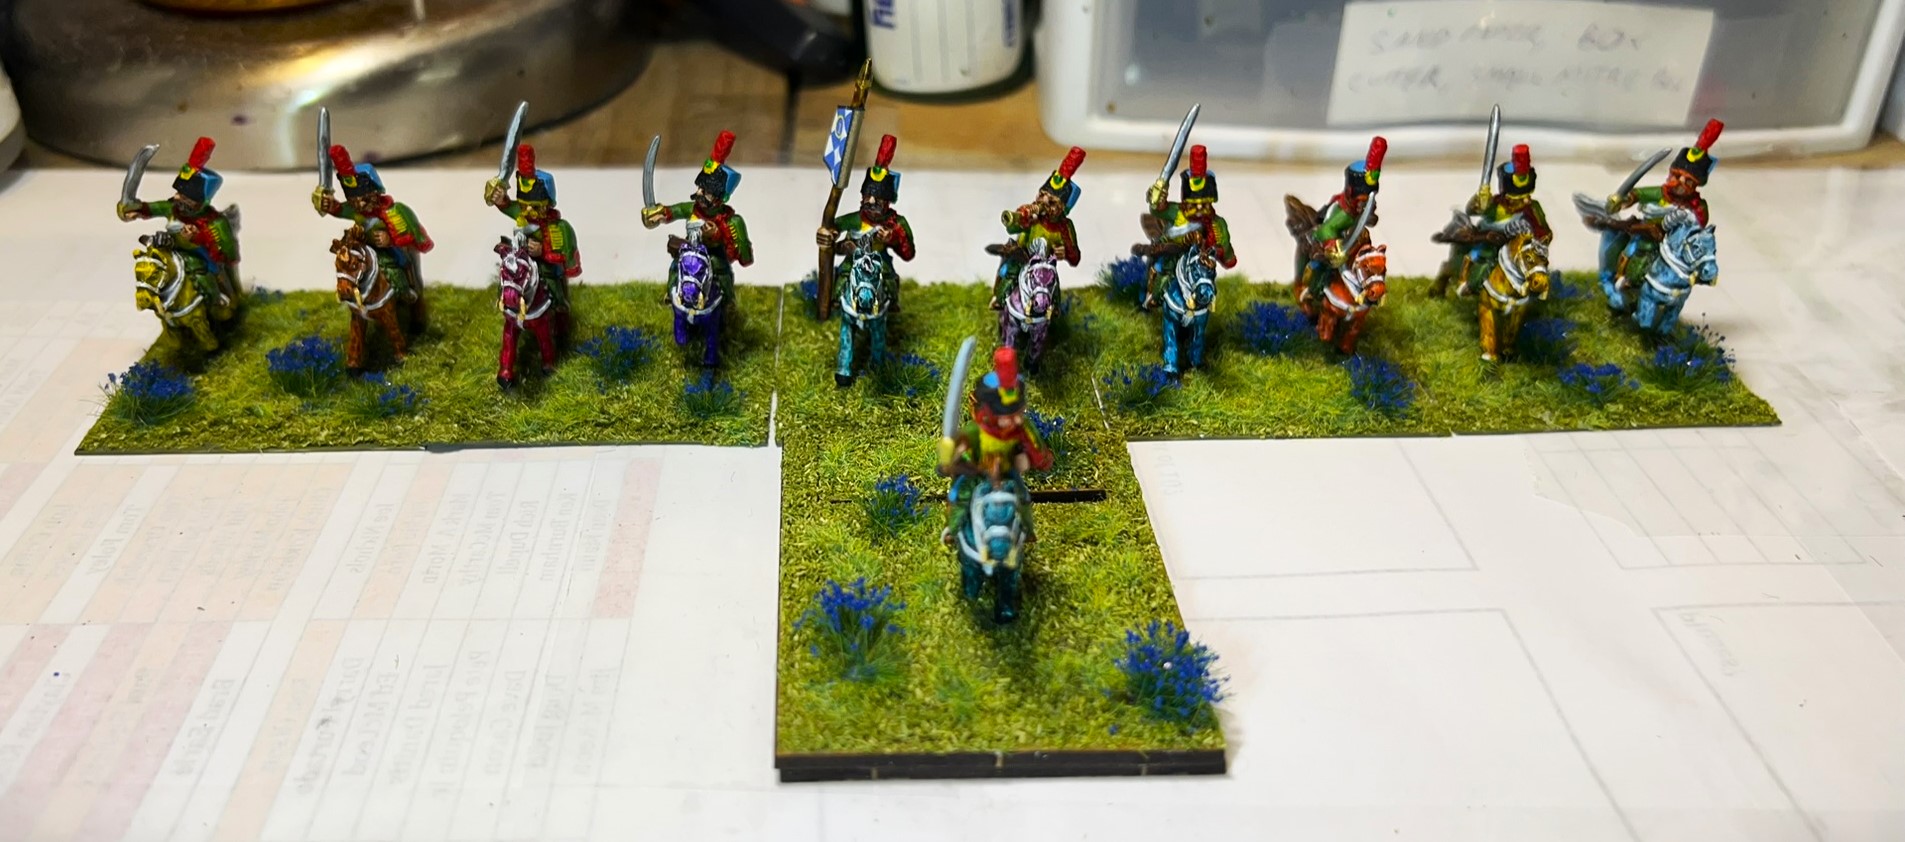
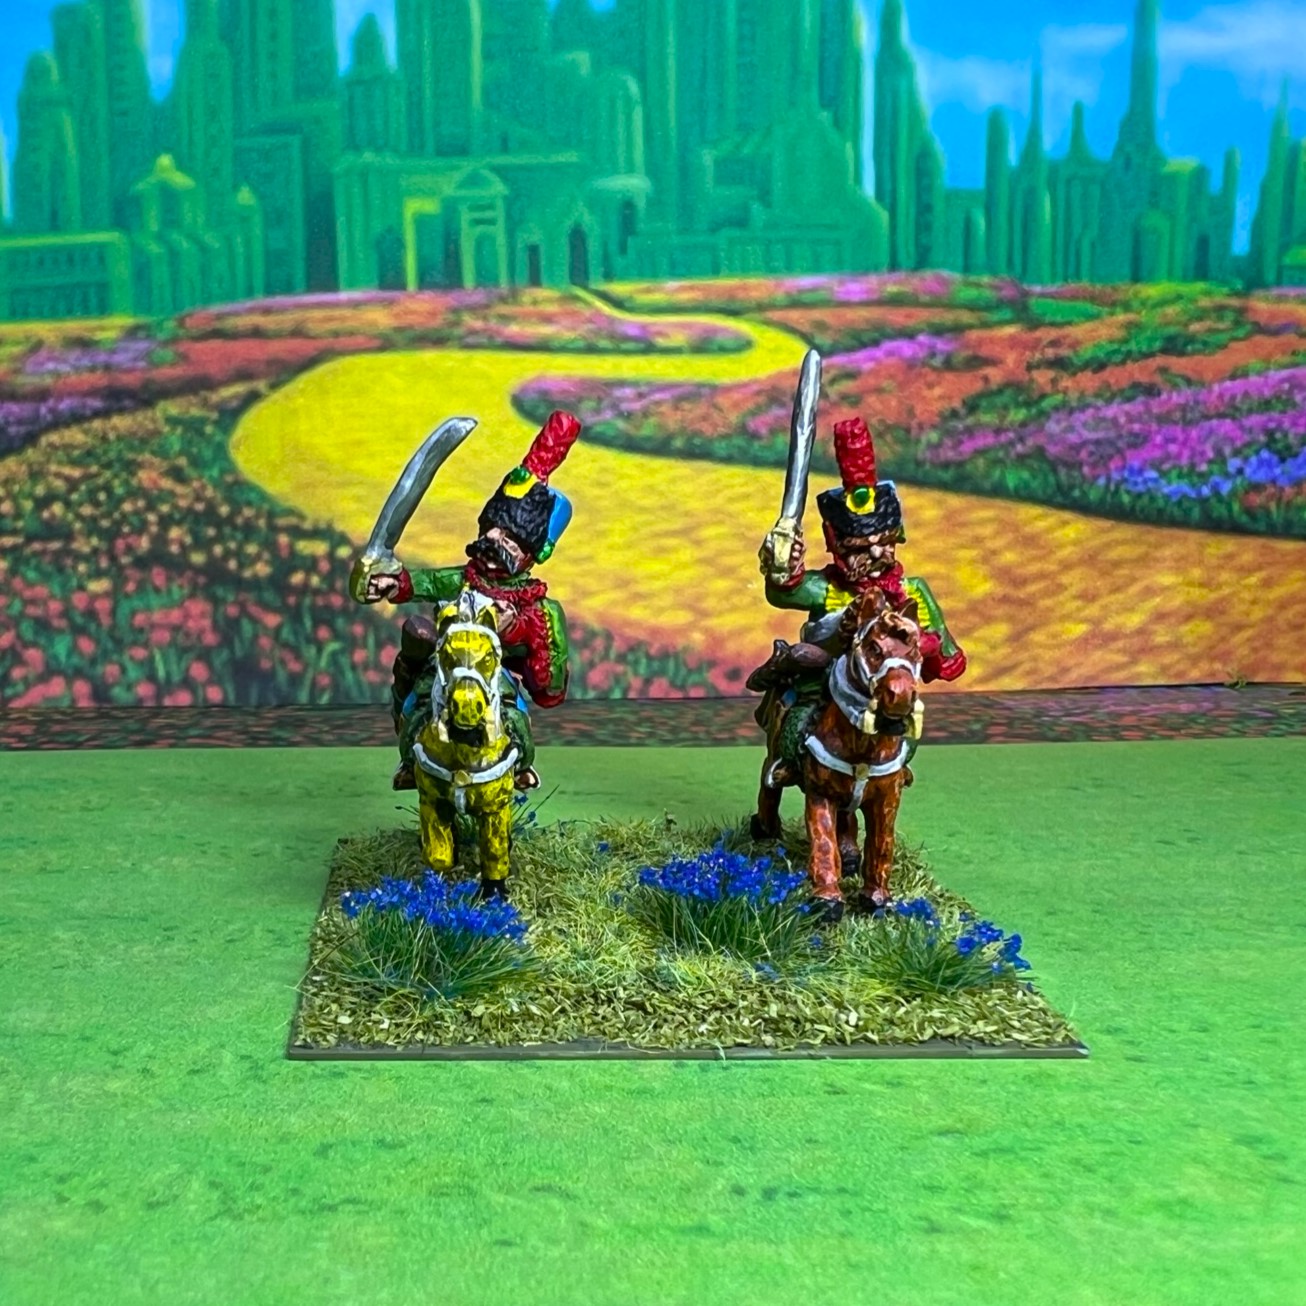
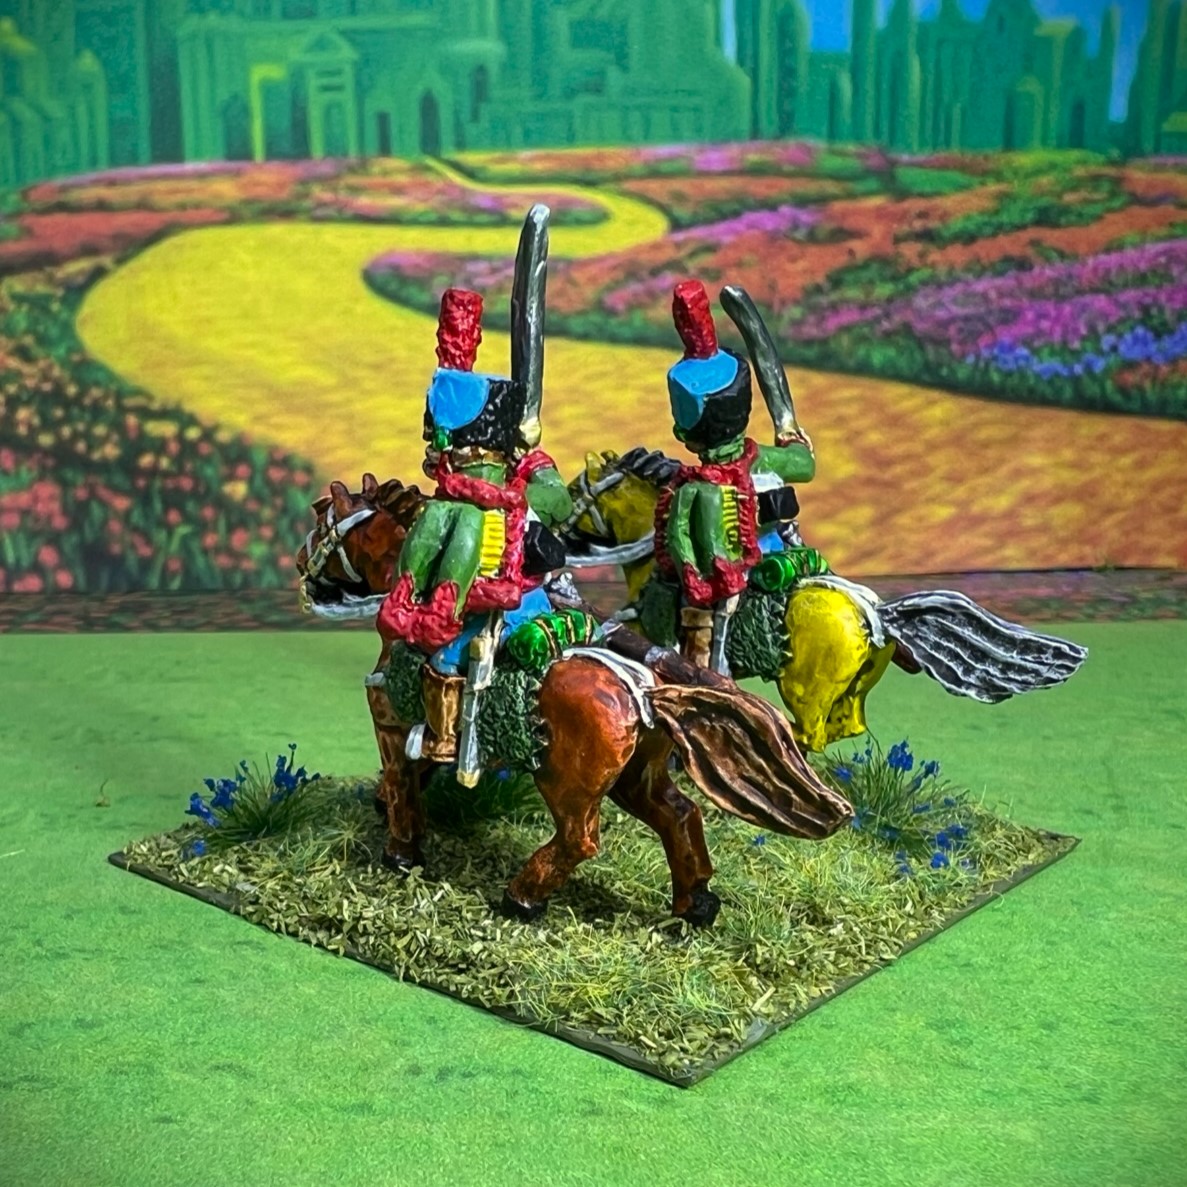
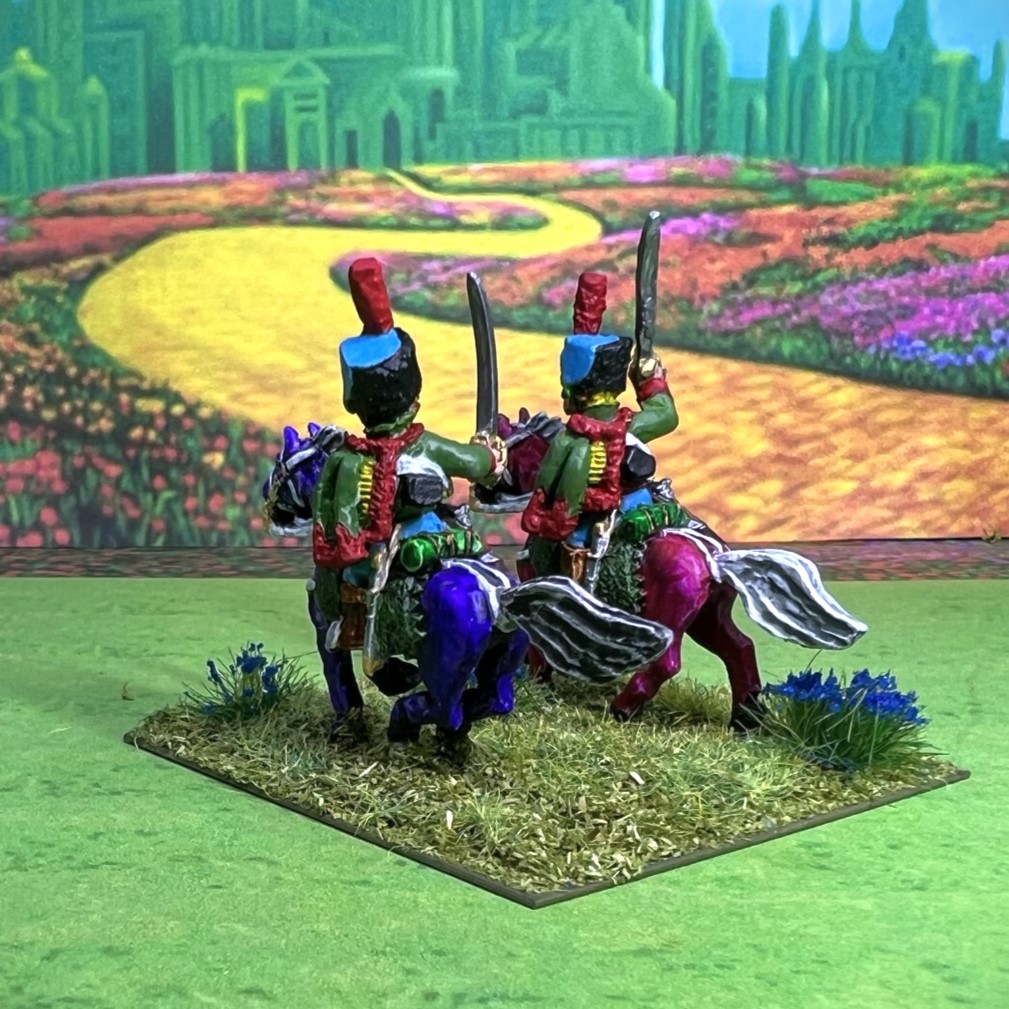
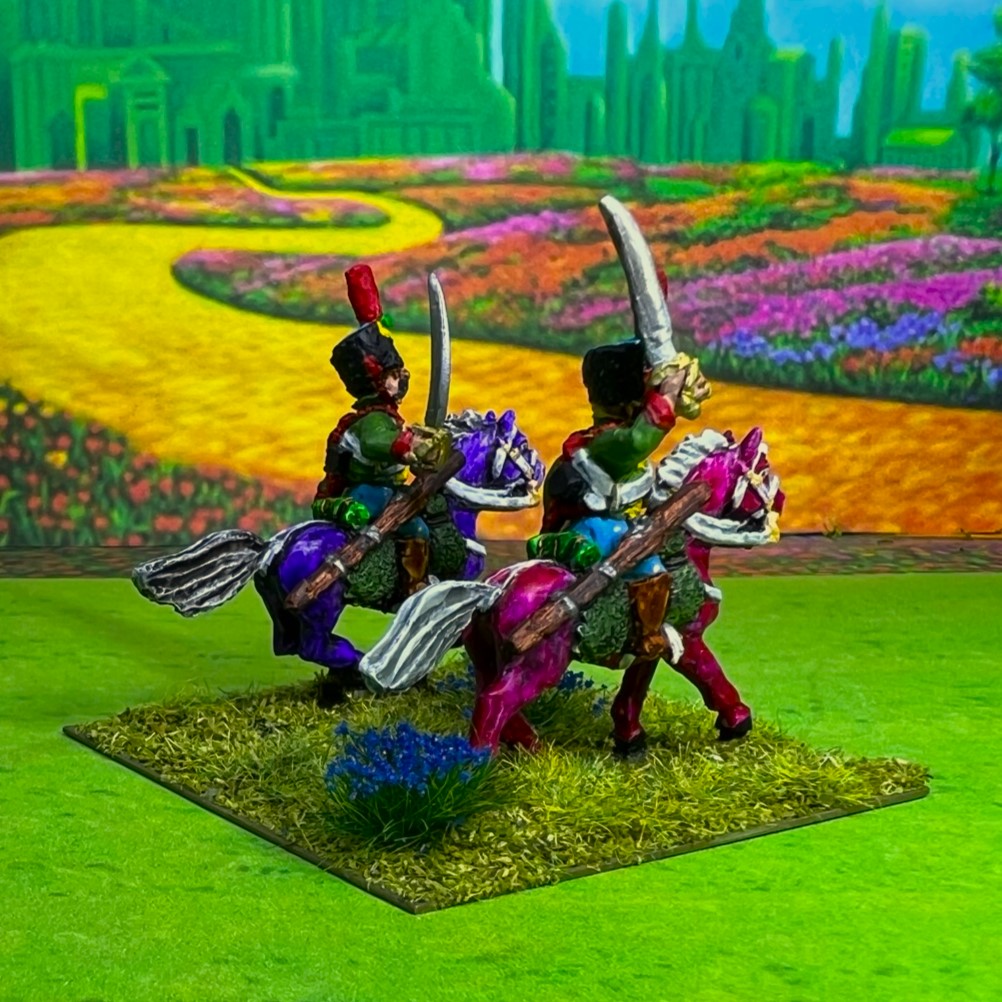
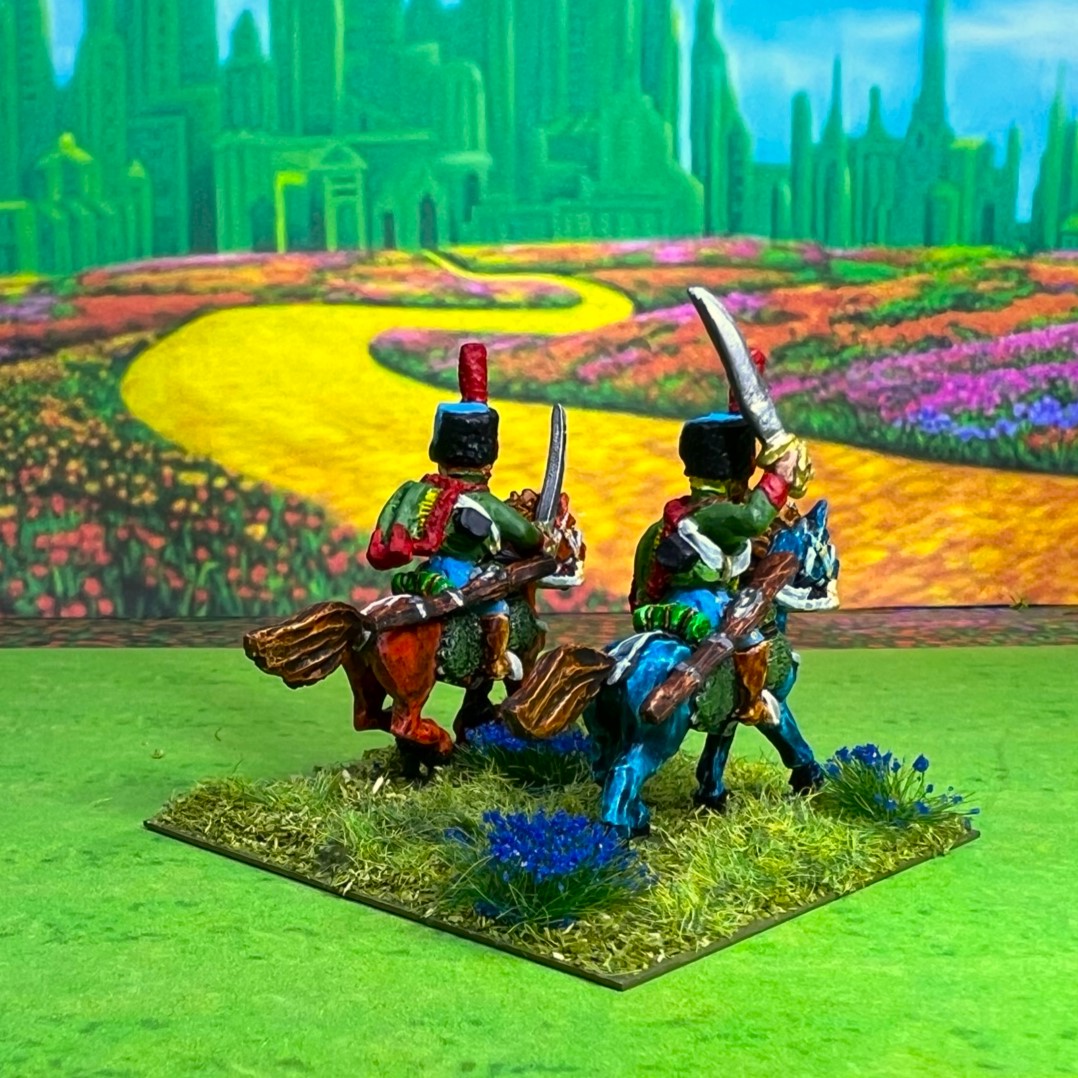
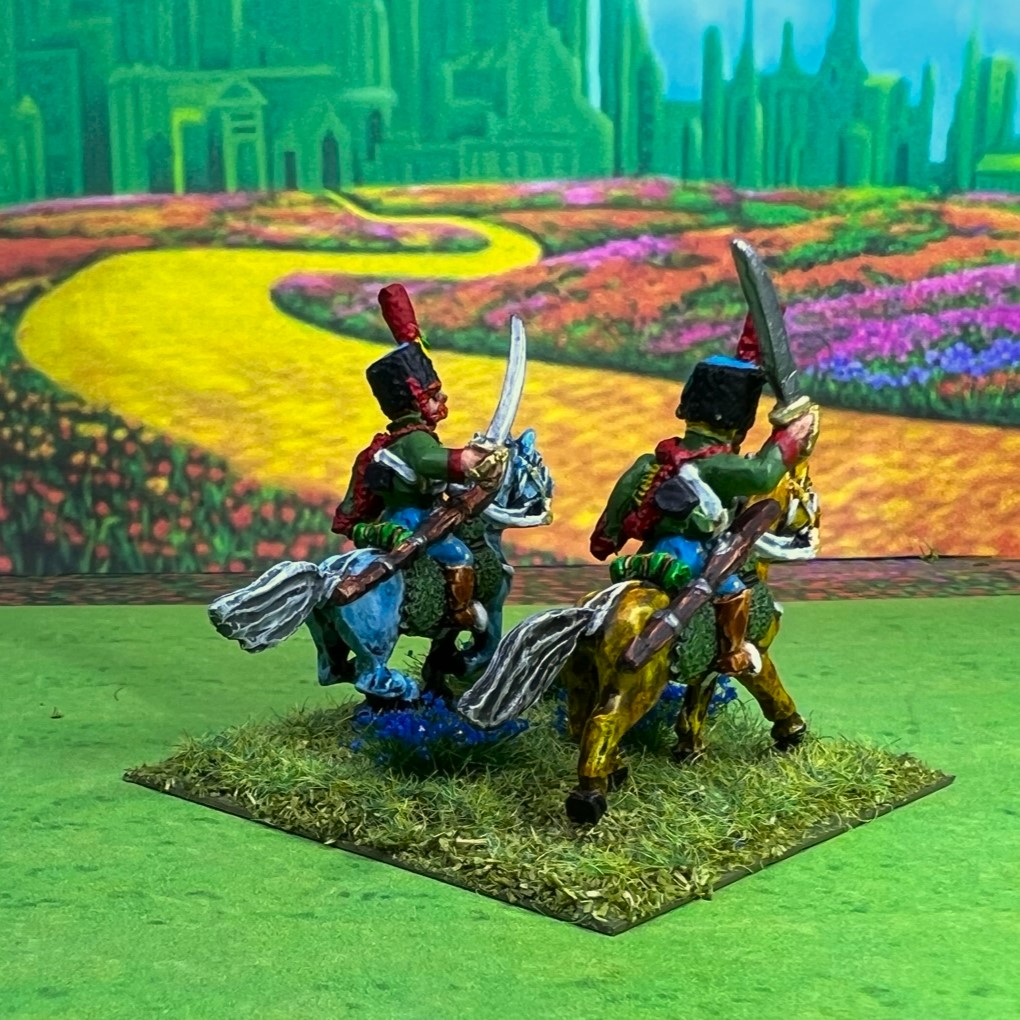
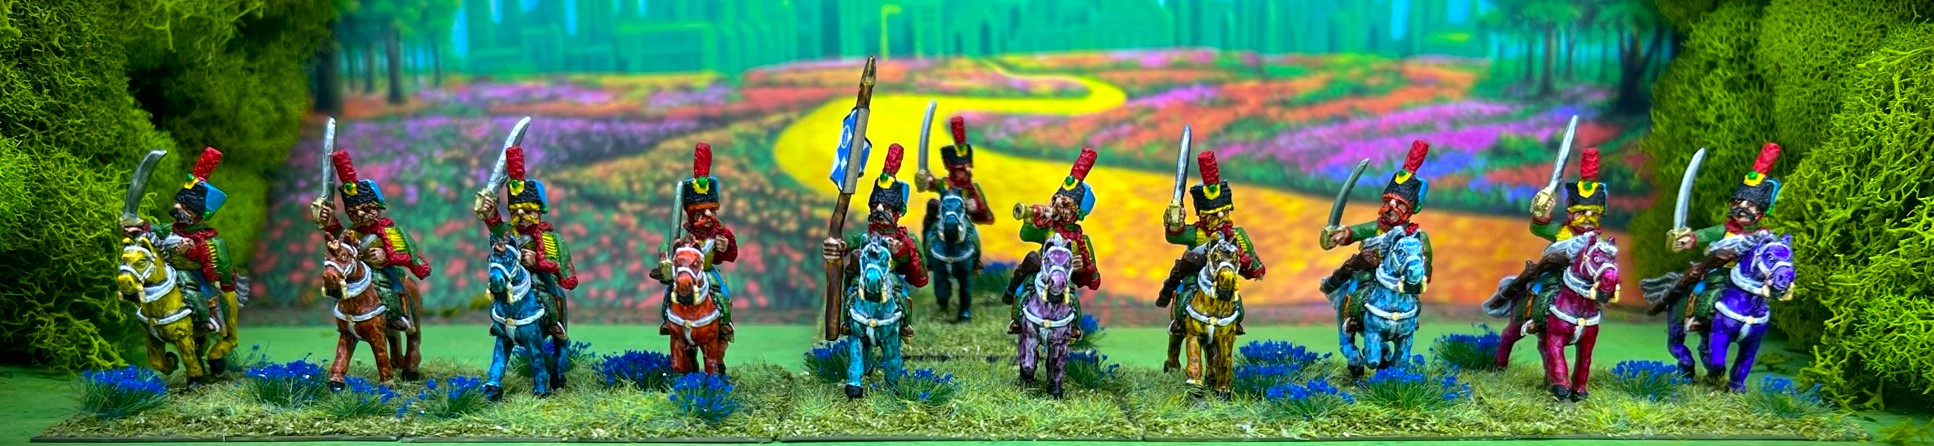
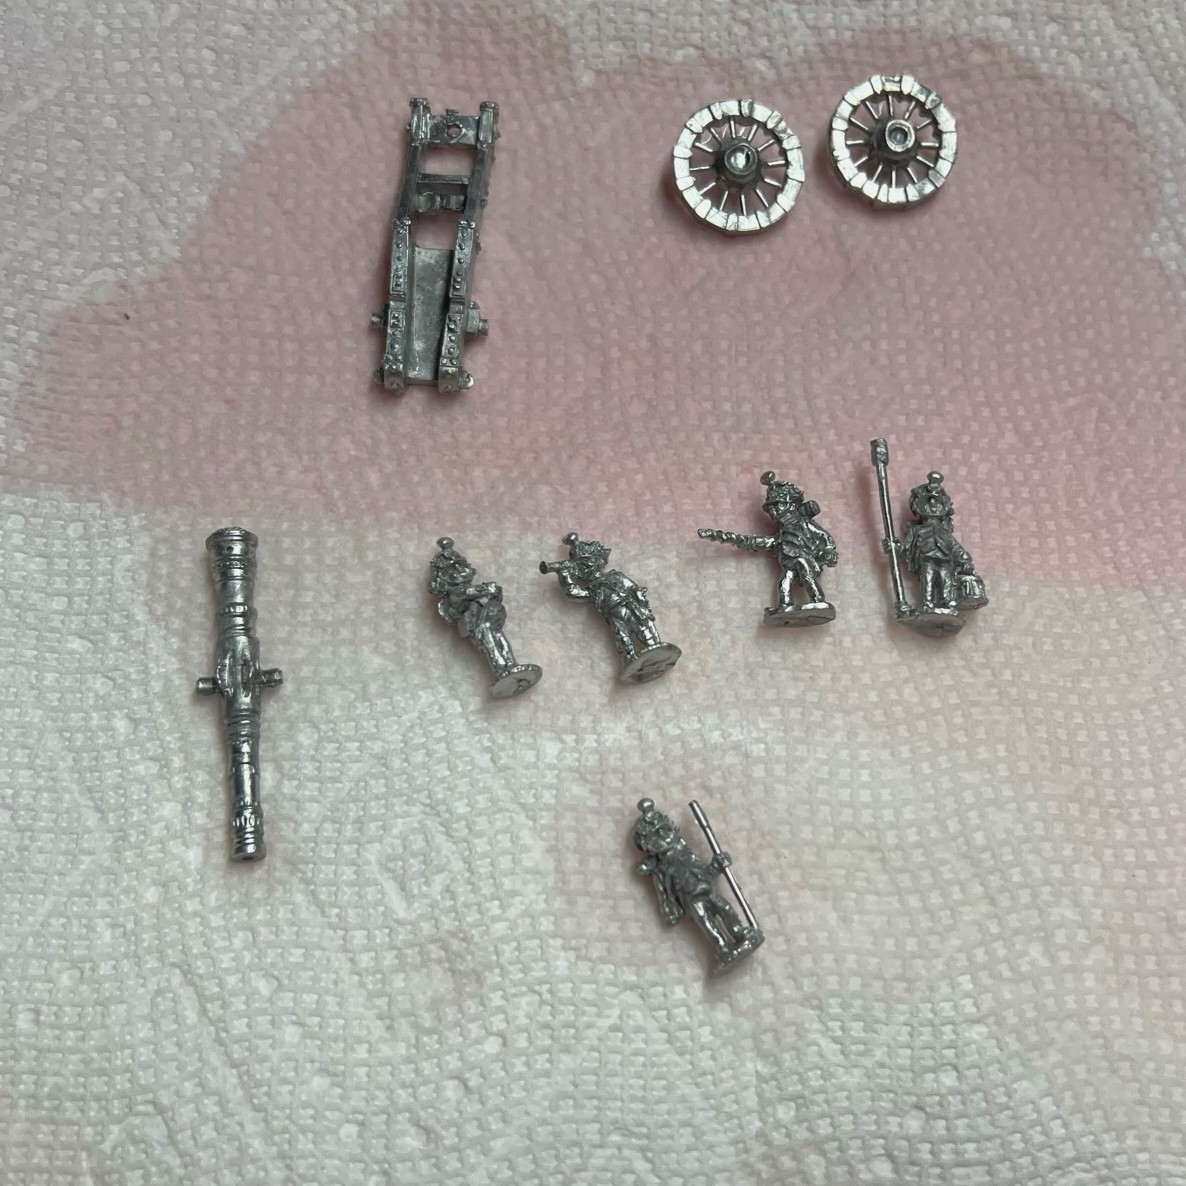
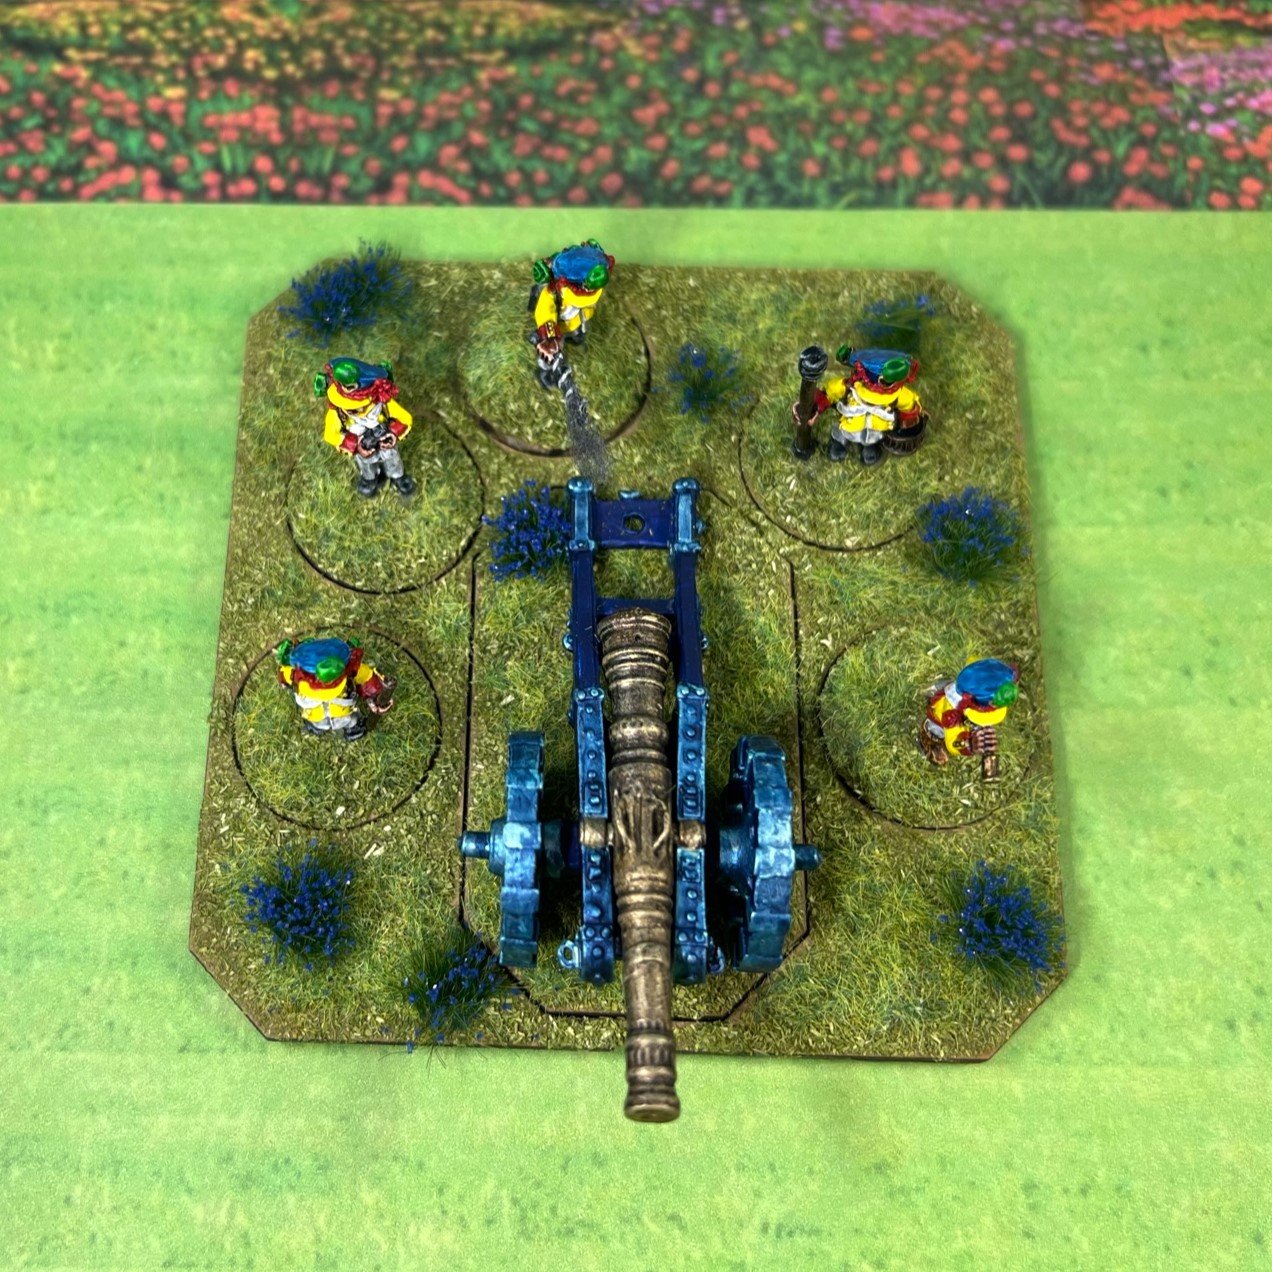
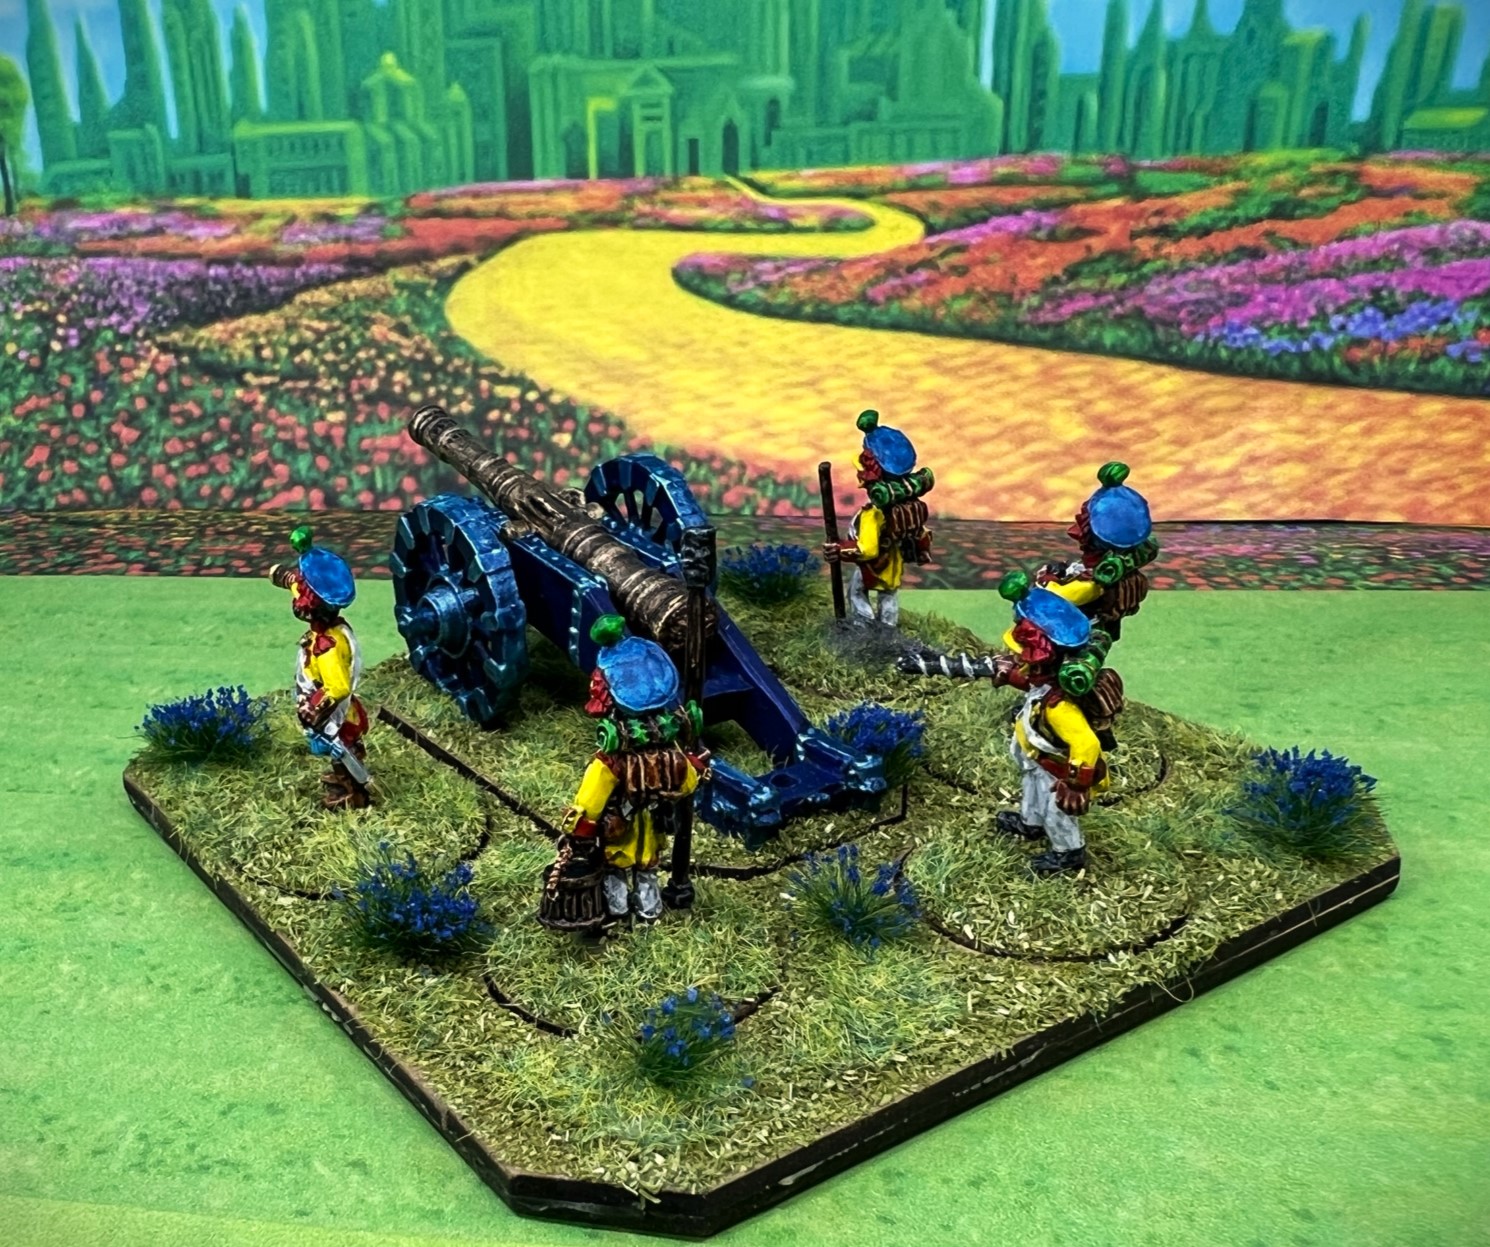
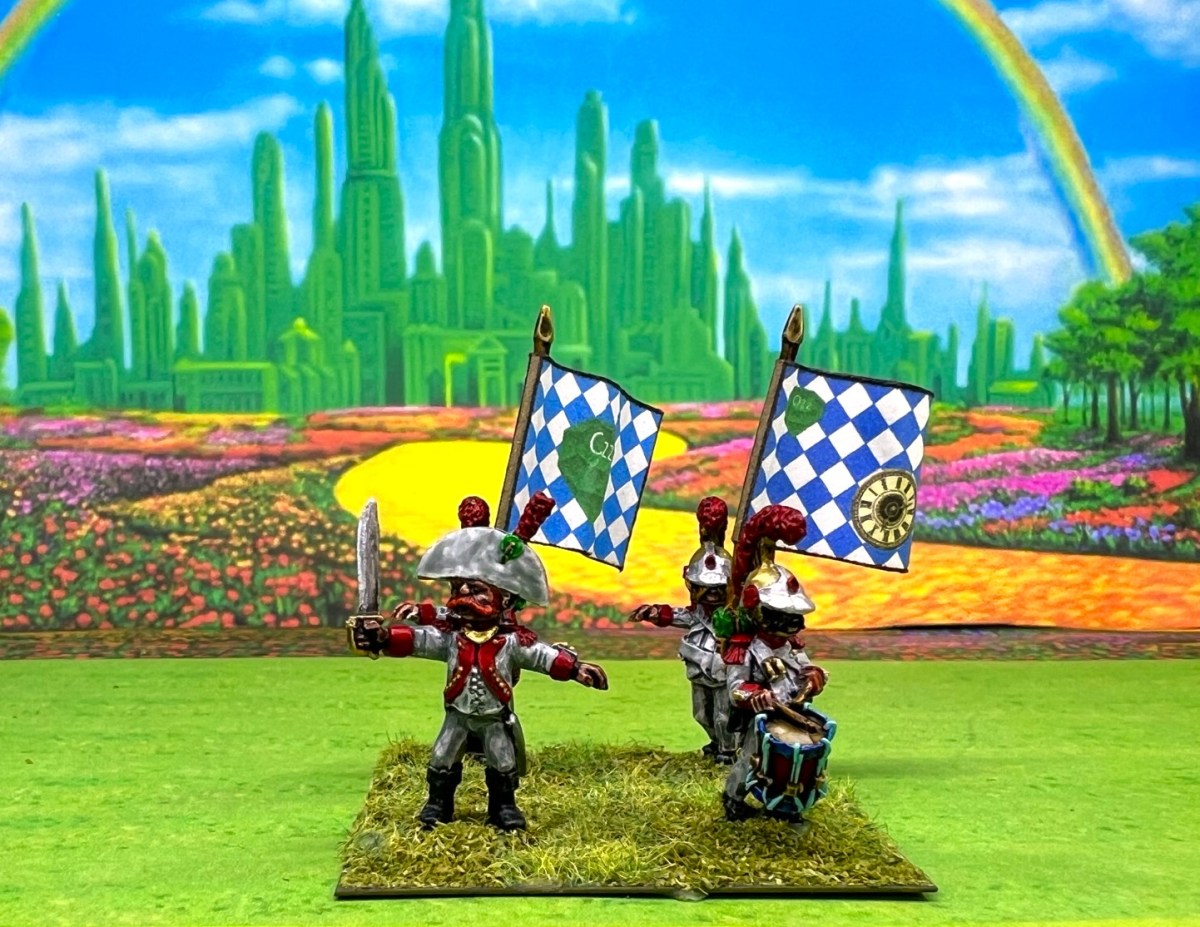
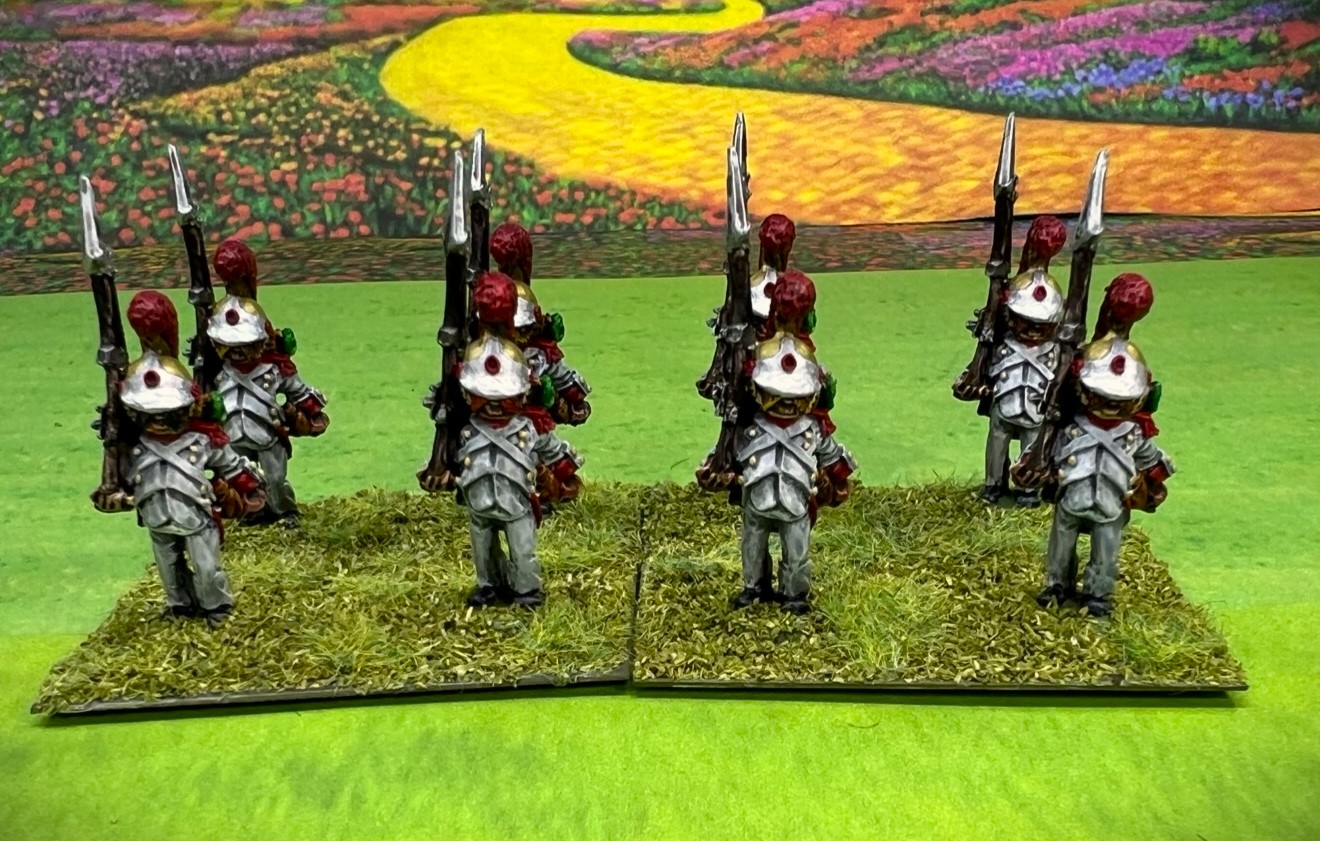
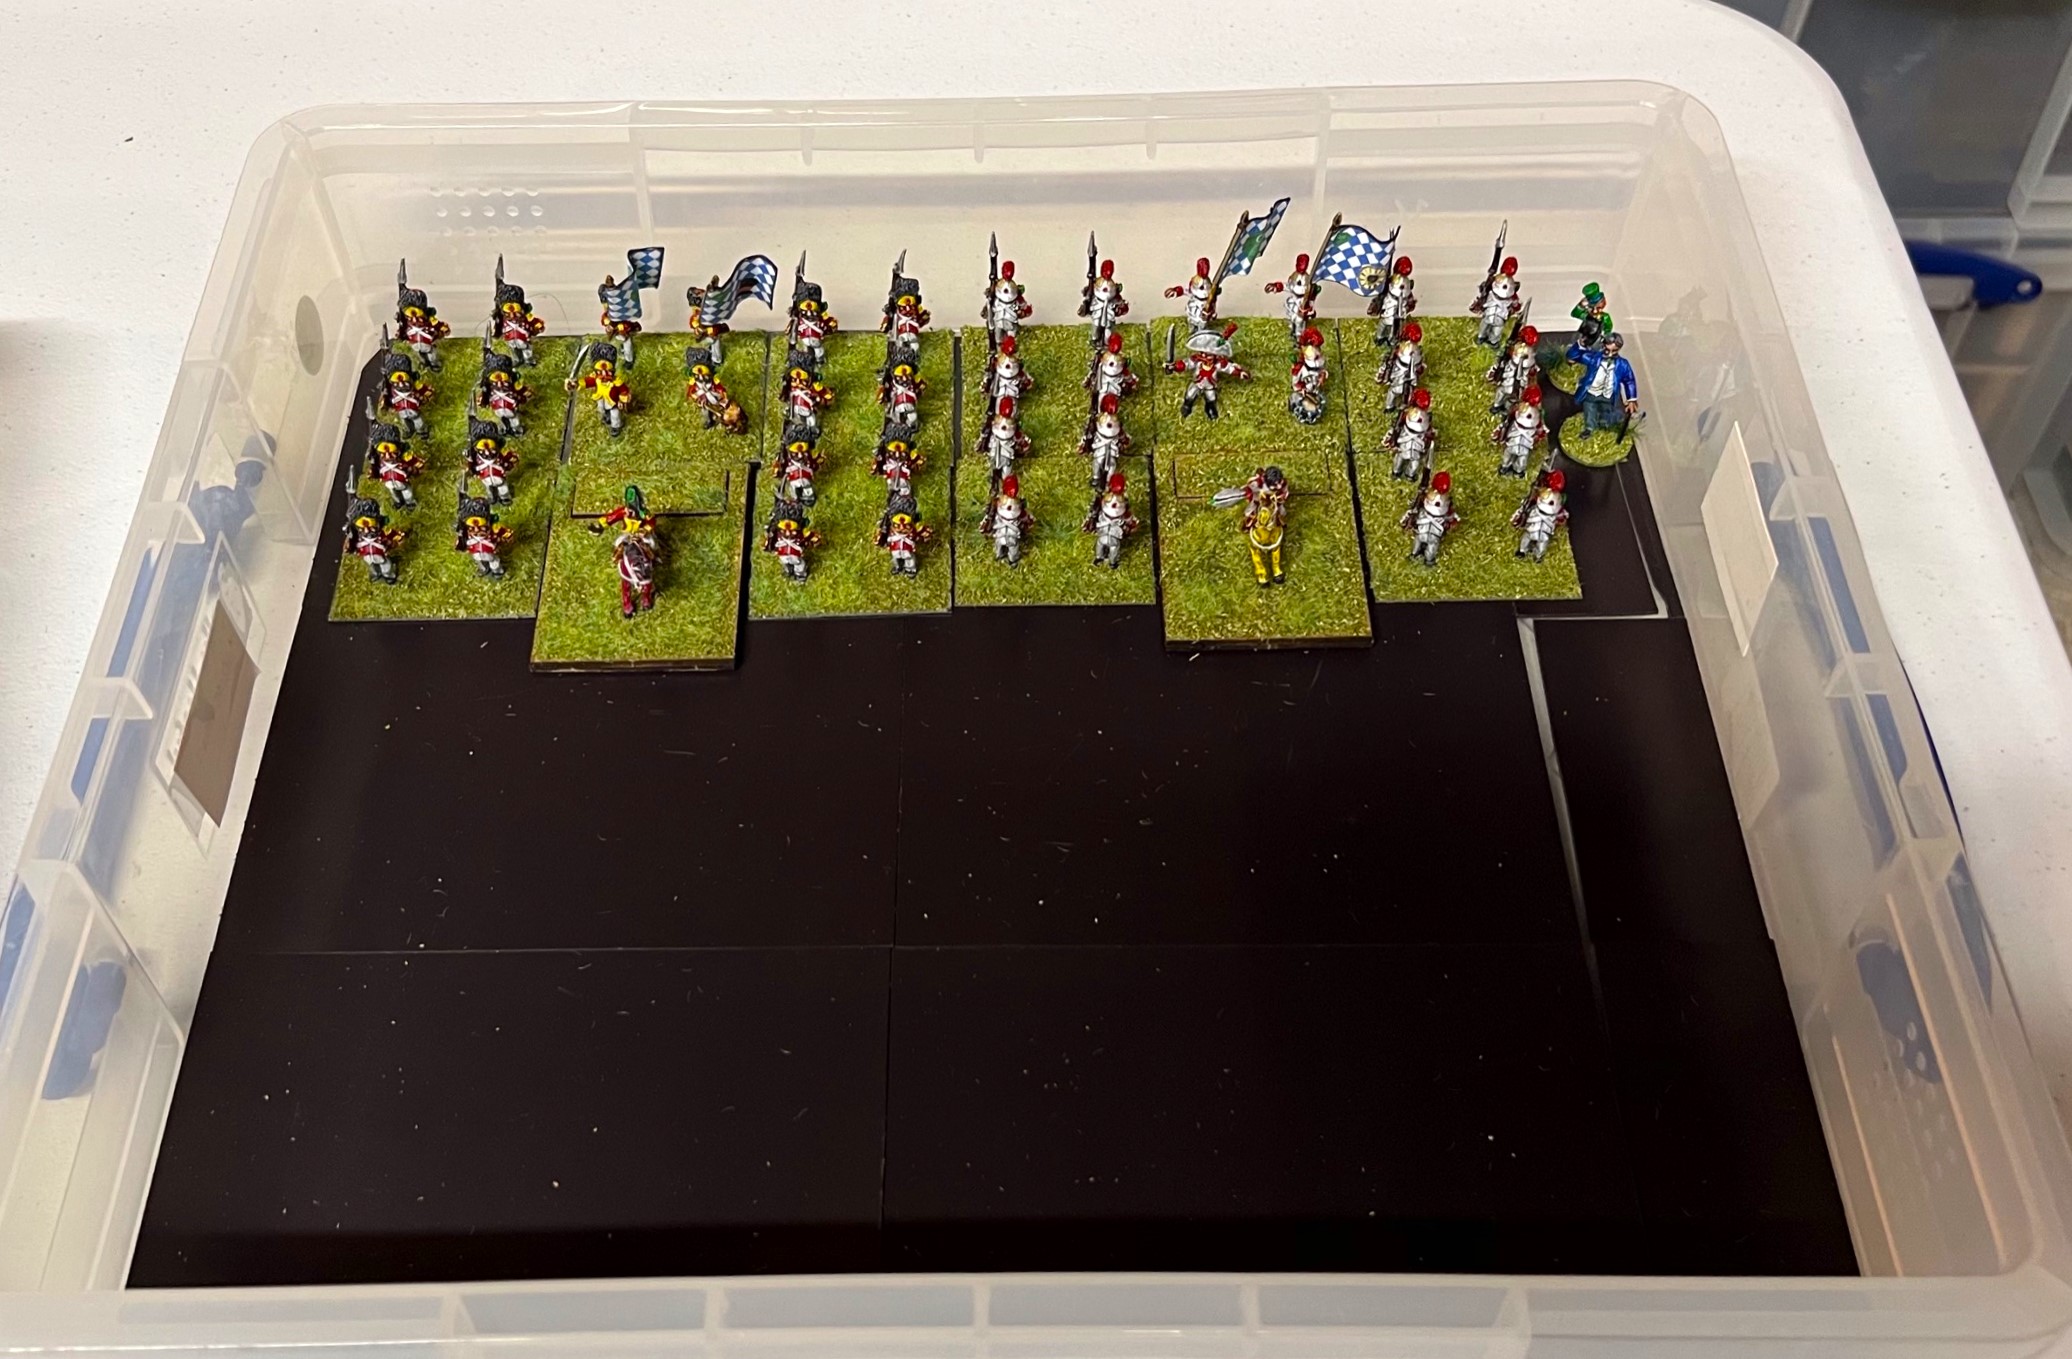
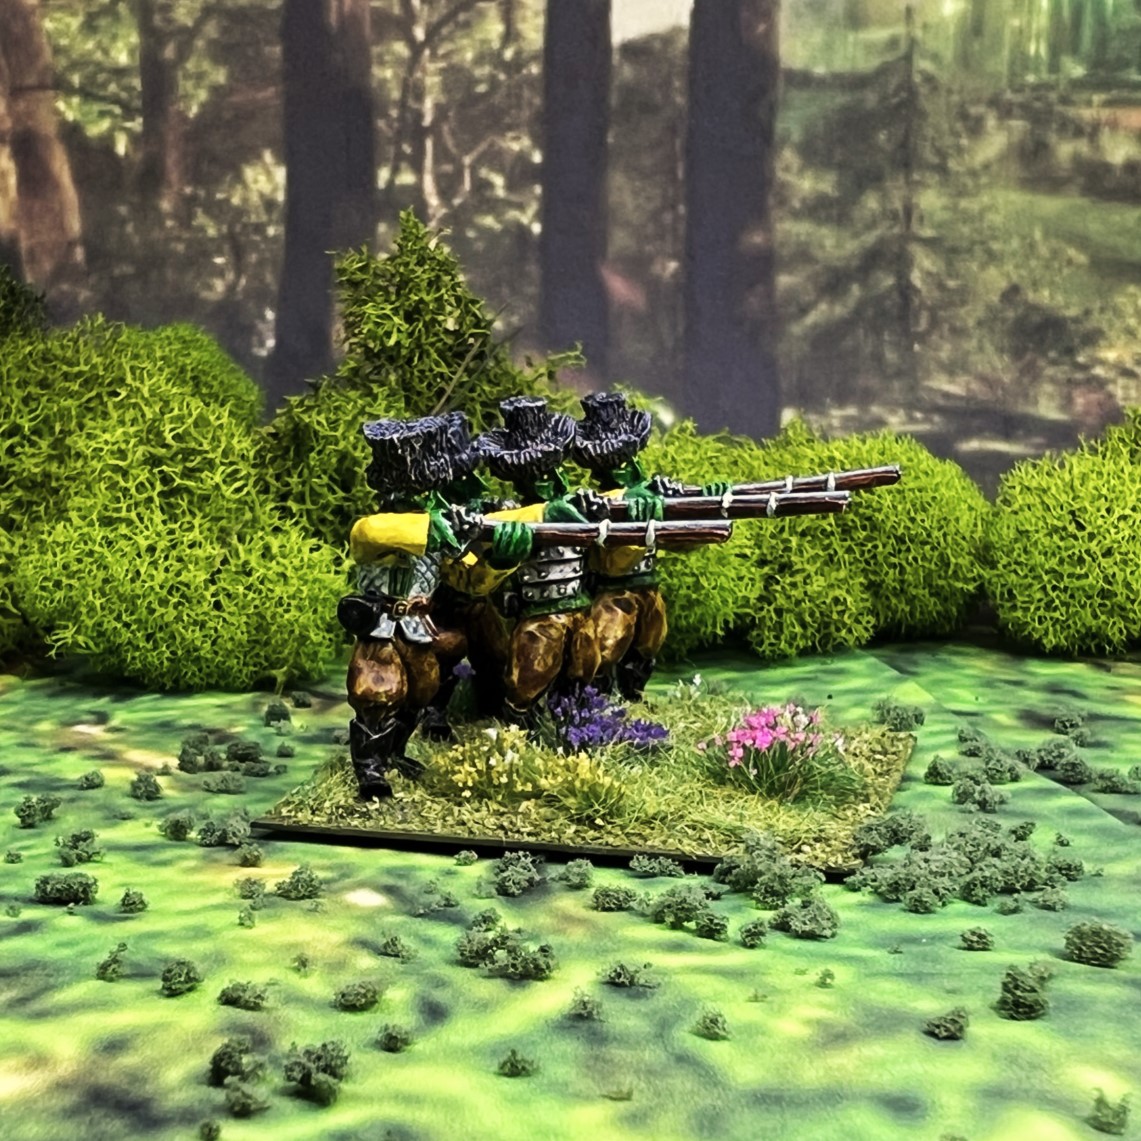
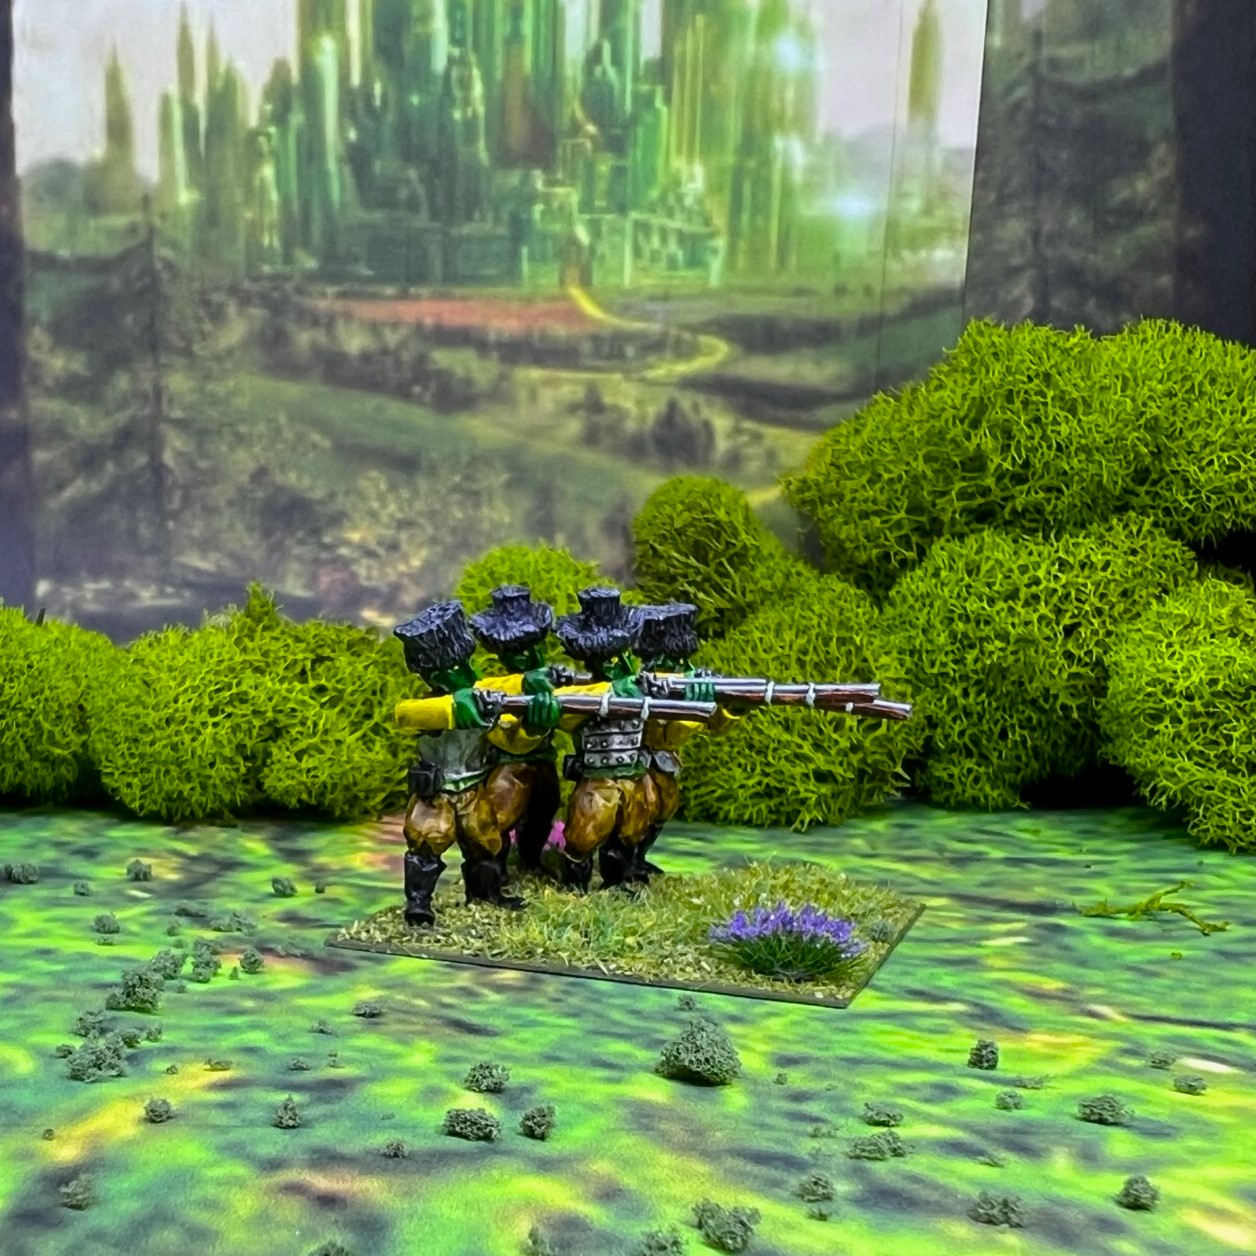
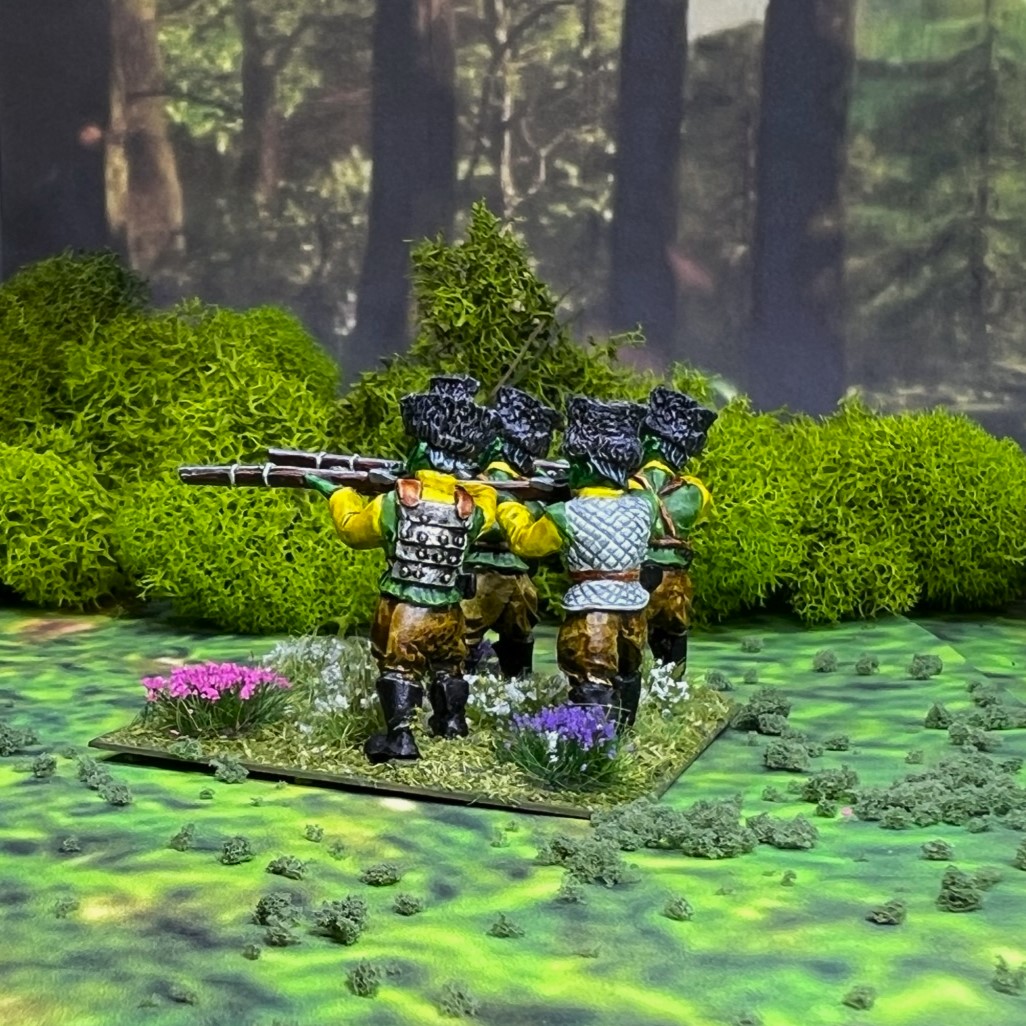
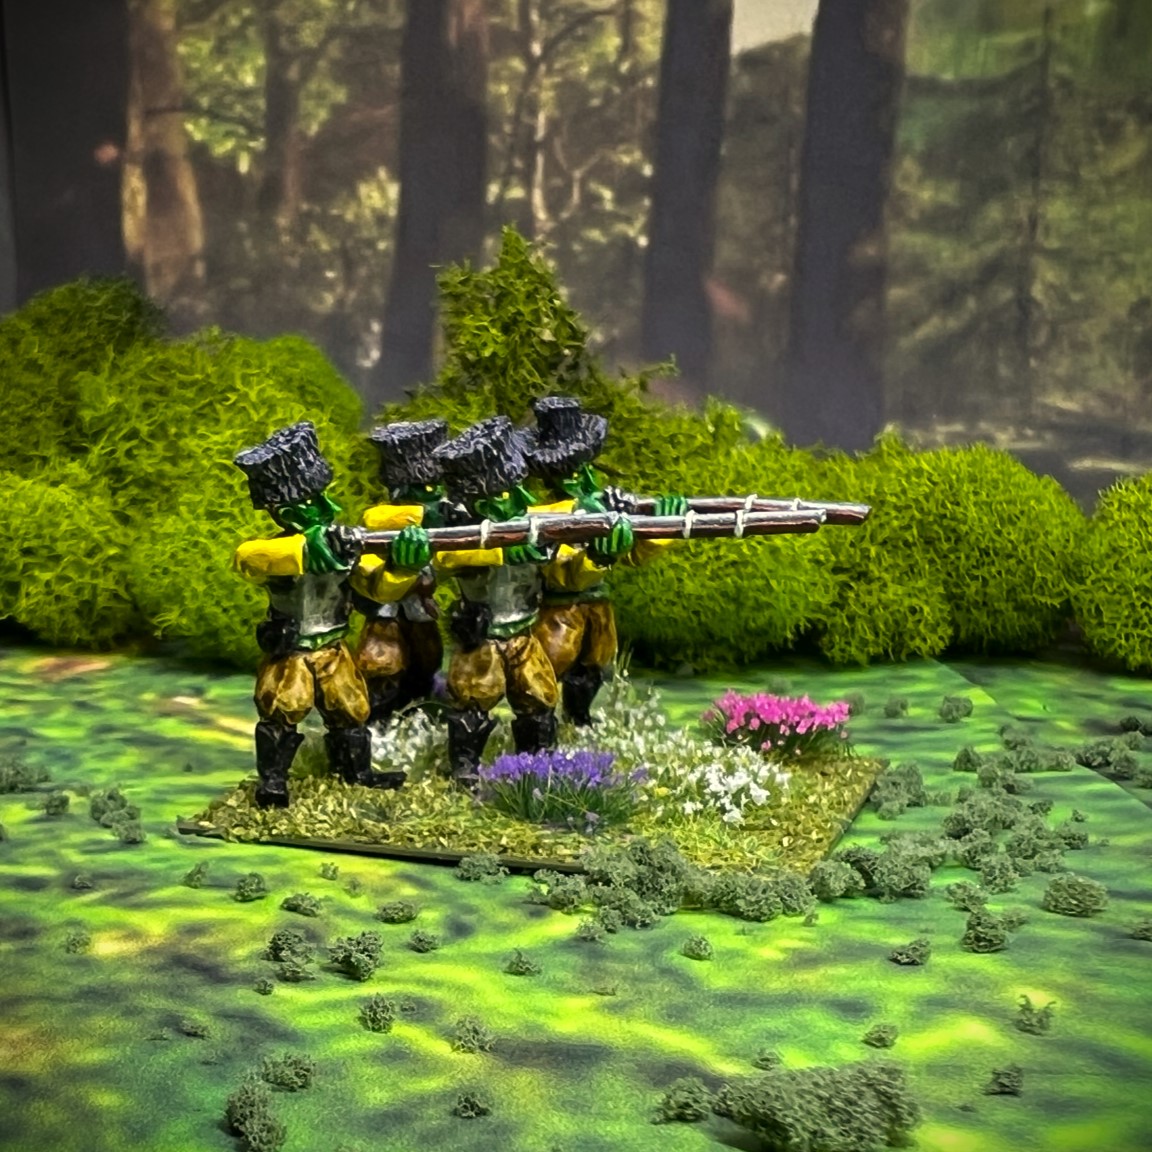
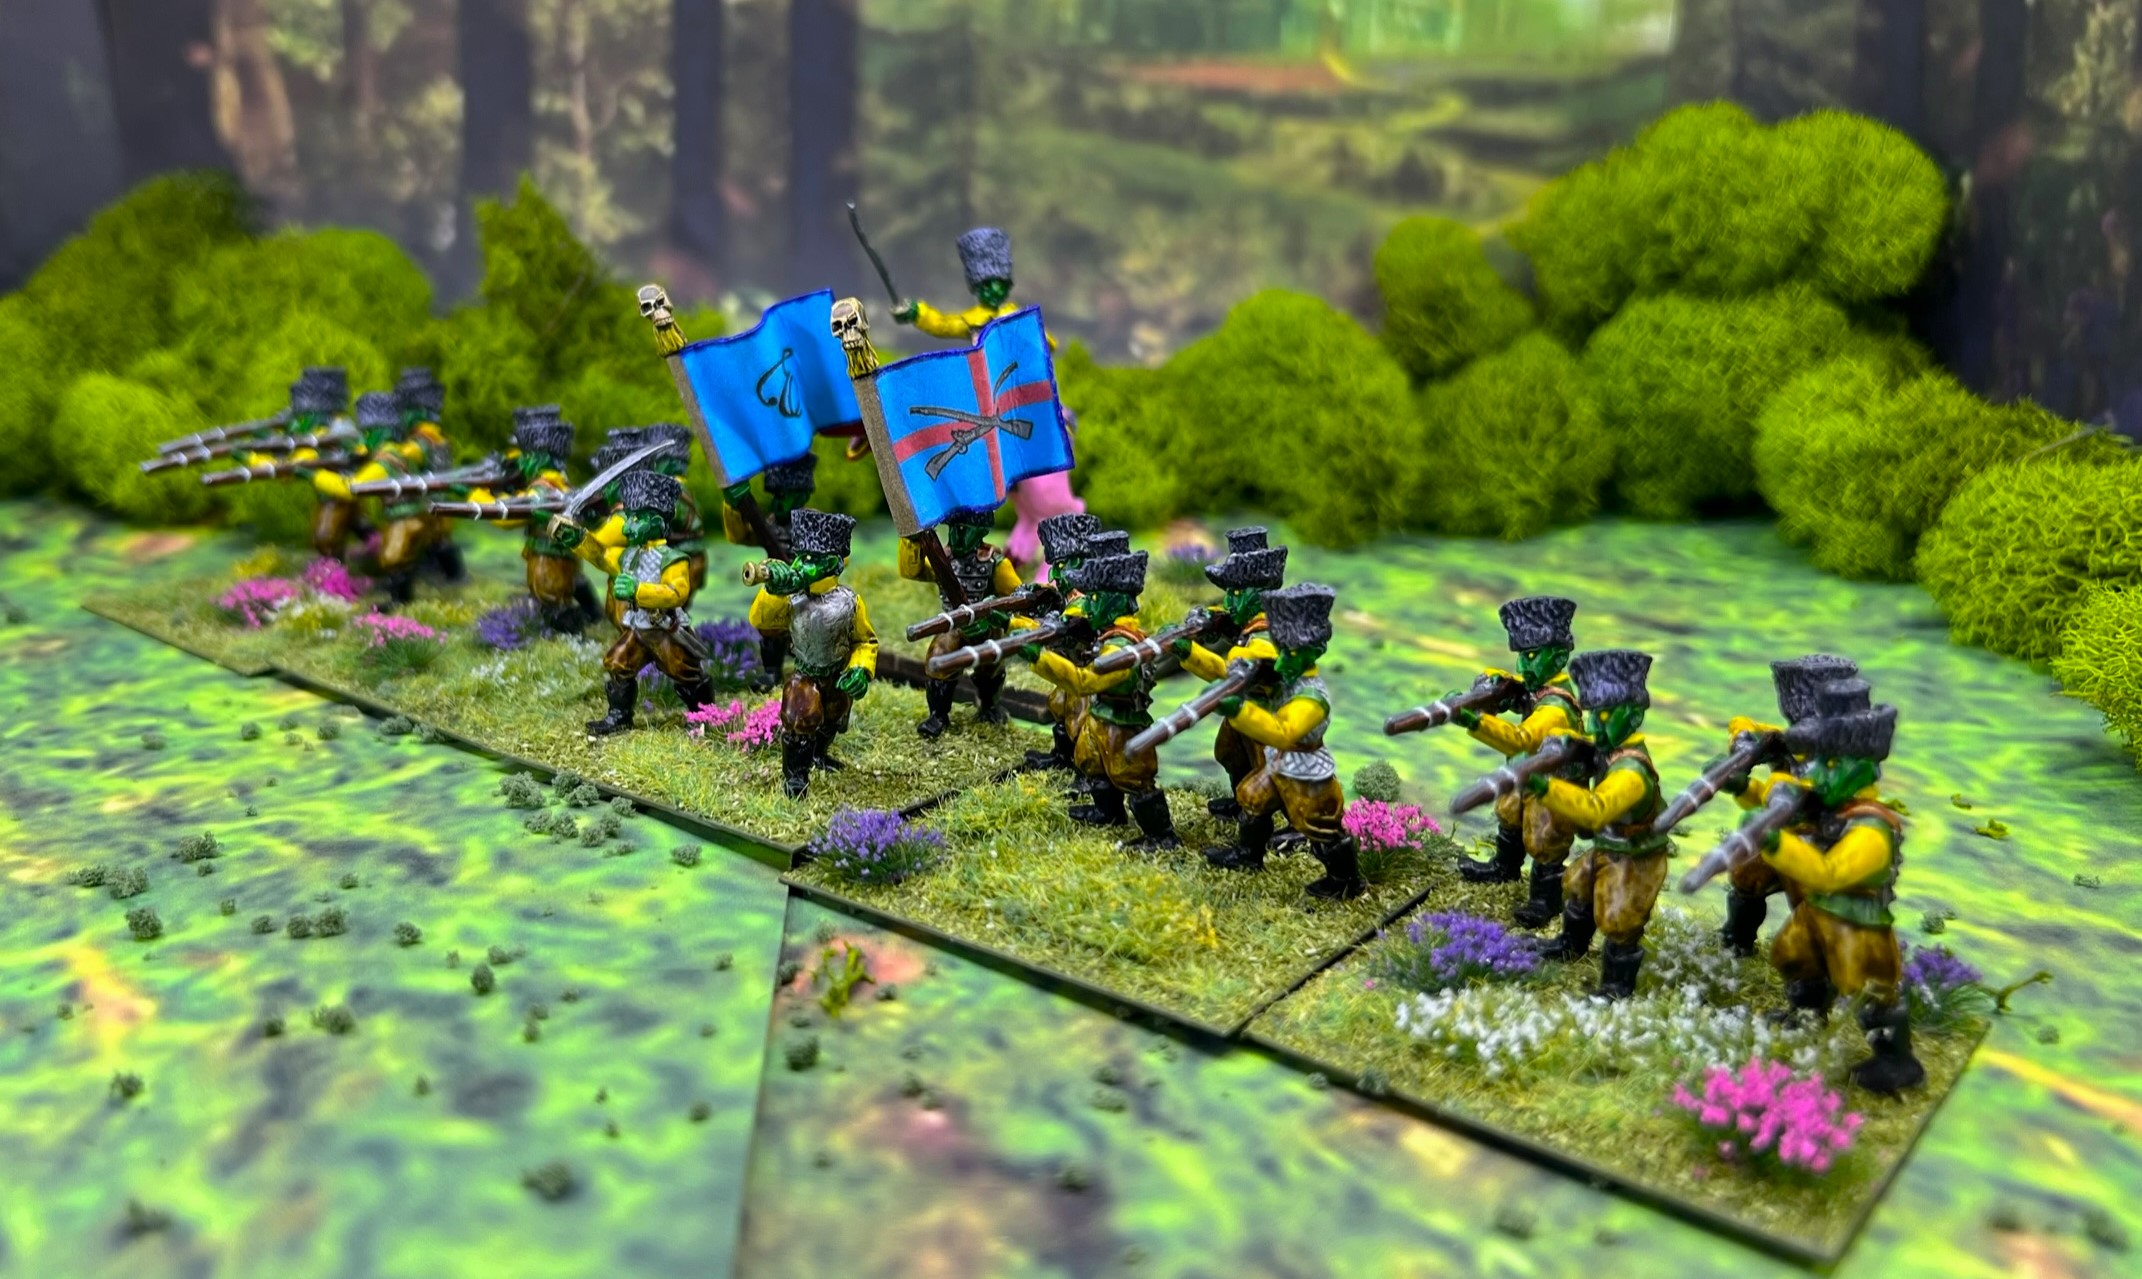
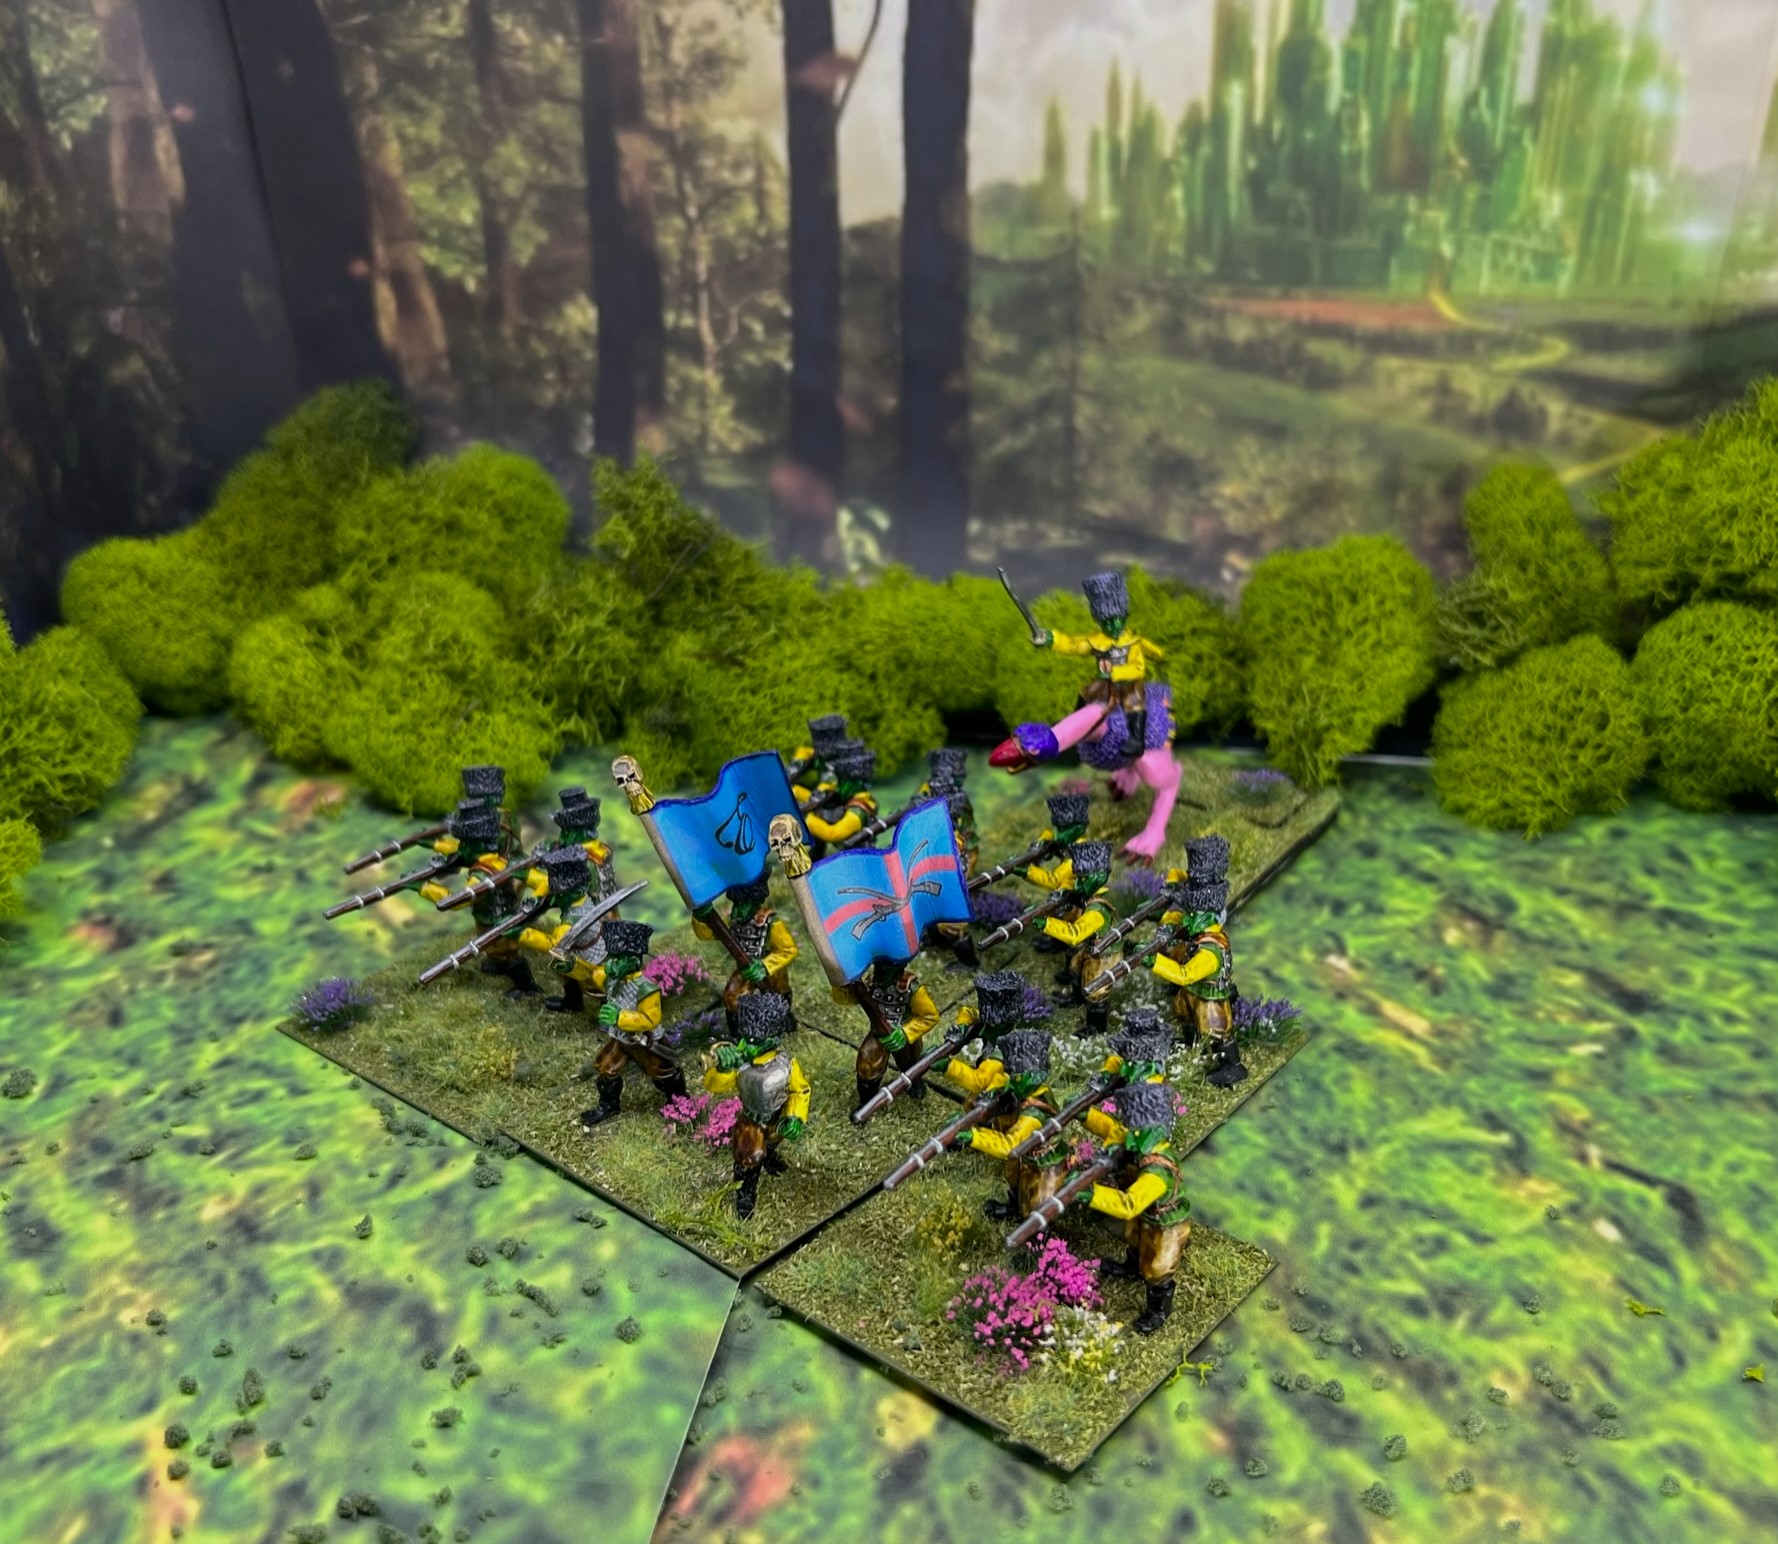
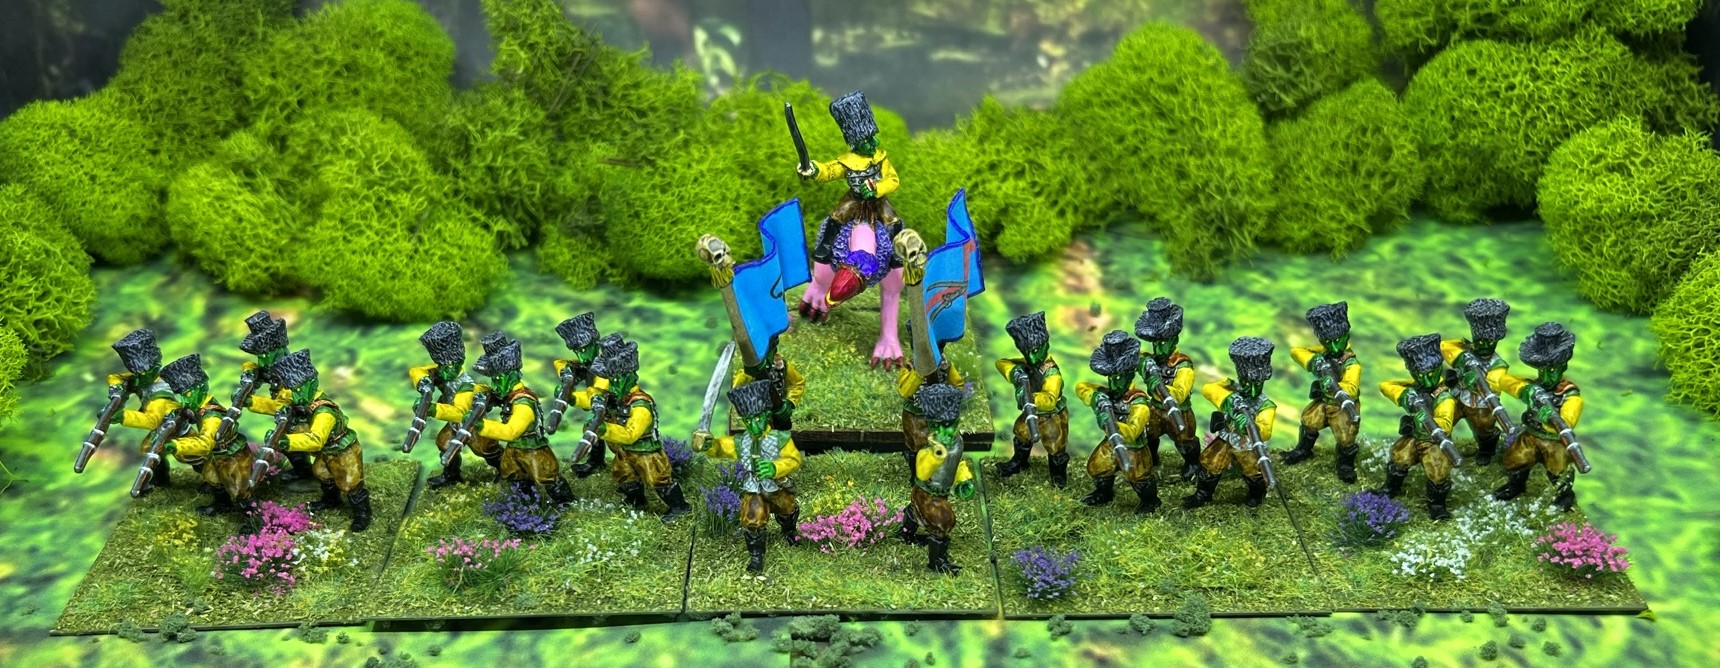
Back to the WSR – just like most Ozz regiments, this Winkie Sharpshooter Regiment (WSR) (#OZZ303) has 21 figures in total. They are on 5 bases – 4 figures with muskets per 4 stands, plus 4 figures on a single command stand, along with a regimental commander stand (MDF). The WSR is 28mm in scale, and the figures are metal. It is worth 7 points versus a regular Winkie infantry unit which costs only 5.
I began prepping the unit back on December 12th – and was hoping to finish by the end of the year – which I did today, December 31st! This allowed me to accomplish two things. First. I got to break the 200 level of painted figures for 2022 (I actually painted 202 in 2022 with the completion of the WSR). It also allowed me to enter this as my first (and definitely not the last) unit for Dave Stone’s “Paint What You Got 2022/2023” challenge.
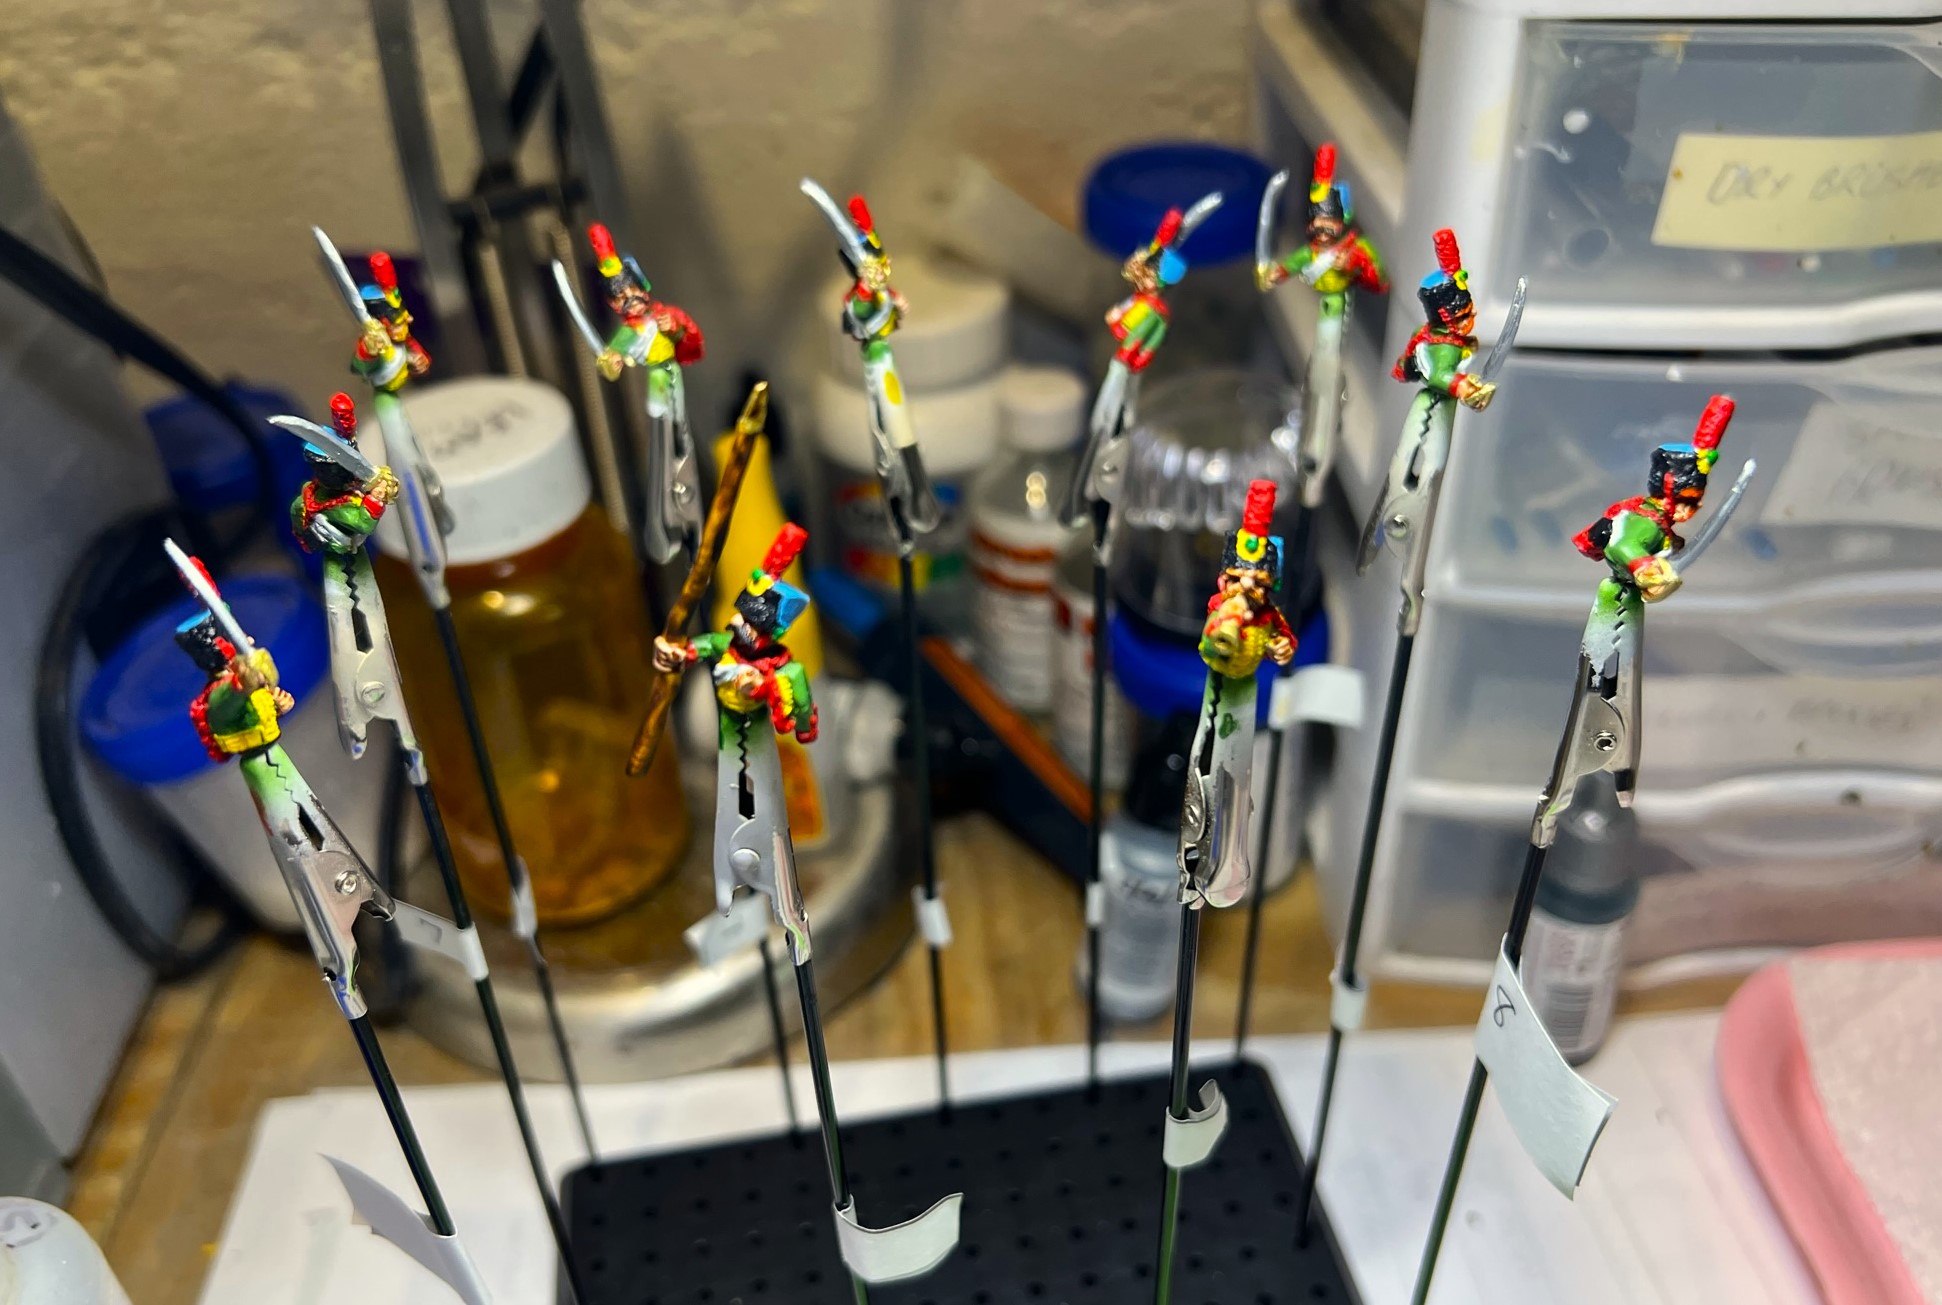
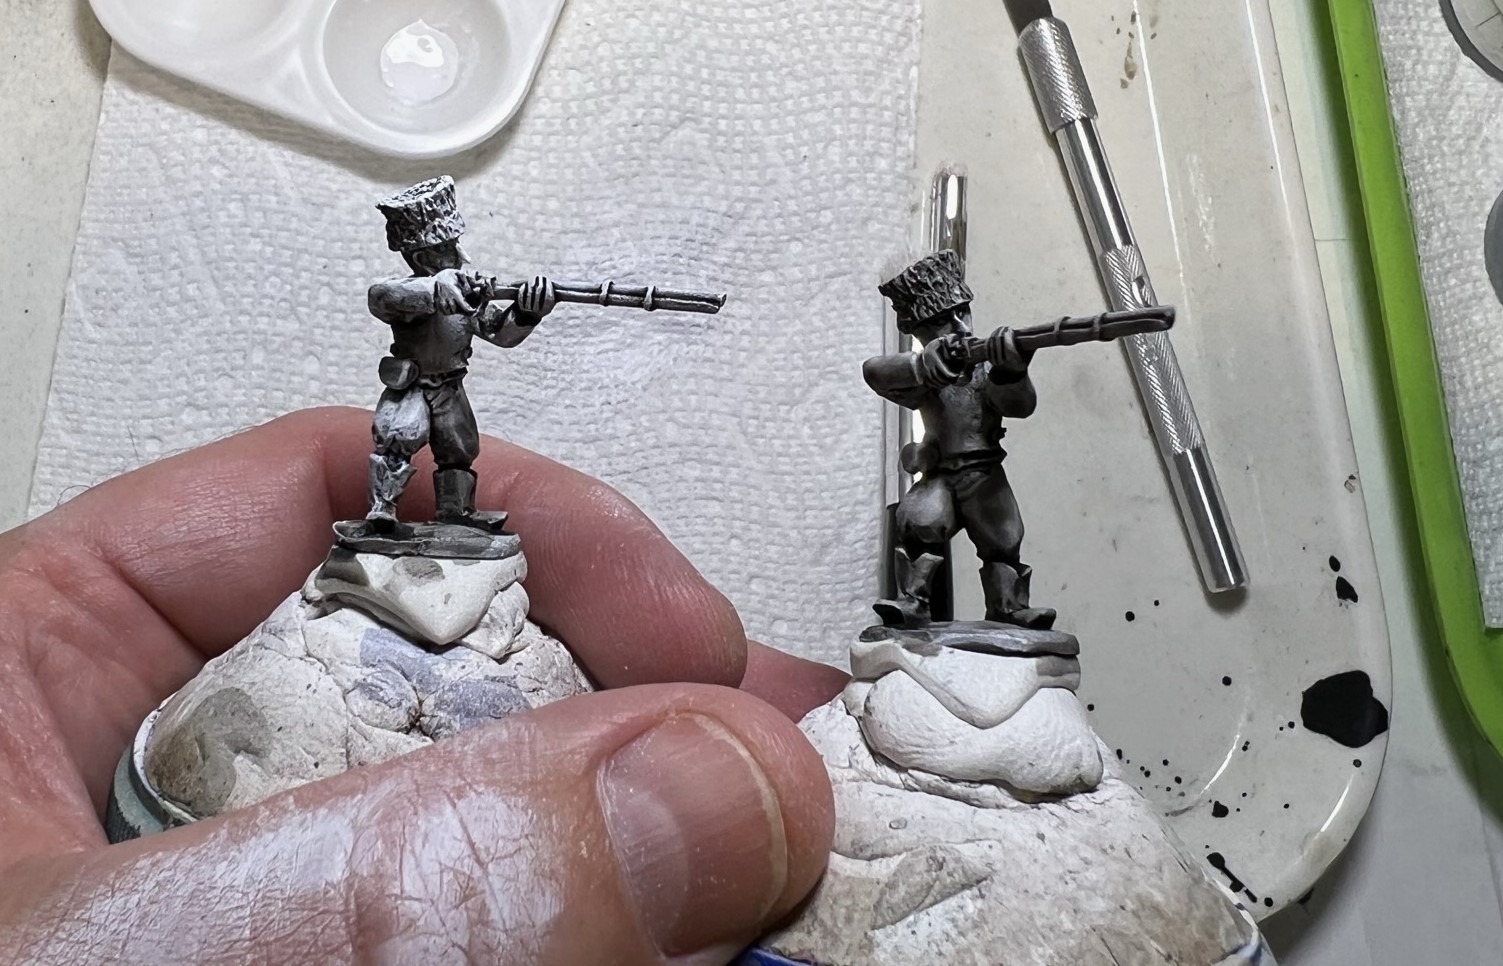
The Ozz rules say that the WSS should have “forest green” coats and khaki trousers. And because Evora just loves yellow – a healthy amount of yellow on all Winkies. The WSR figures had fur caps of two different types, plus three different kinds of armor – to include cotton armor like I had on my Aztecs and Conquistadores. I tried to mix them up them on each stand/base for a more varied look. I worked on the muskets first as I wanted them to be very distinctive of the WSR. As I felt that the fur caps HAD to be black, I made the Winkies’ hair to be a bluish grey over w white highlight so as to better stick out from underneath the dark headpieces. I needed to work around Christmas and and scheduled sinus surgery on 12/28 to complete them, so I am happy that I did. On Christmas Eve and Christmas Day, there is a marathon showing of the movie “A Christmas Story” which influenced me and played a part in some of my choices of colors that you’ll see below. A hint, “pink nightmare”…

More on this in a bit!
My goal is always to achieve a good tabletop standard – and you can be the judge about that. As usual, I will list all the paints I used on this unit at the end of this post for those interested in that sort of stuff (and for my own use for later reference as well – I do forget stuff on occasion). First, I’ll share some WIP shots, then some eye candy of the WSS.
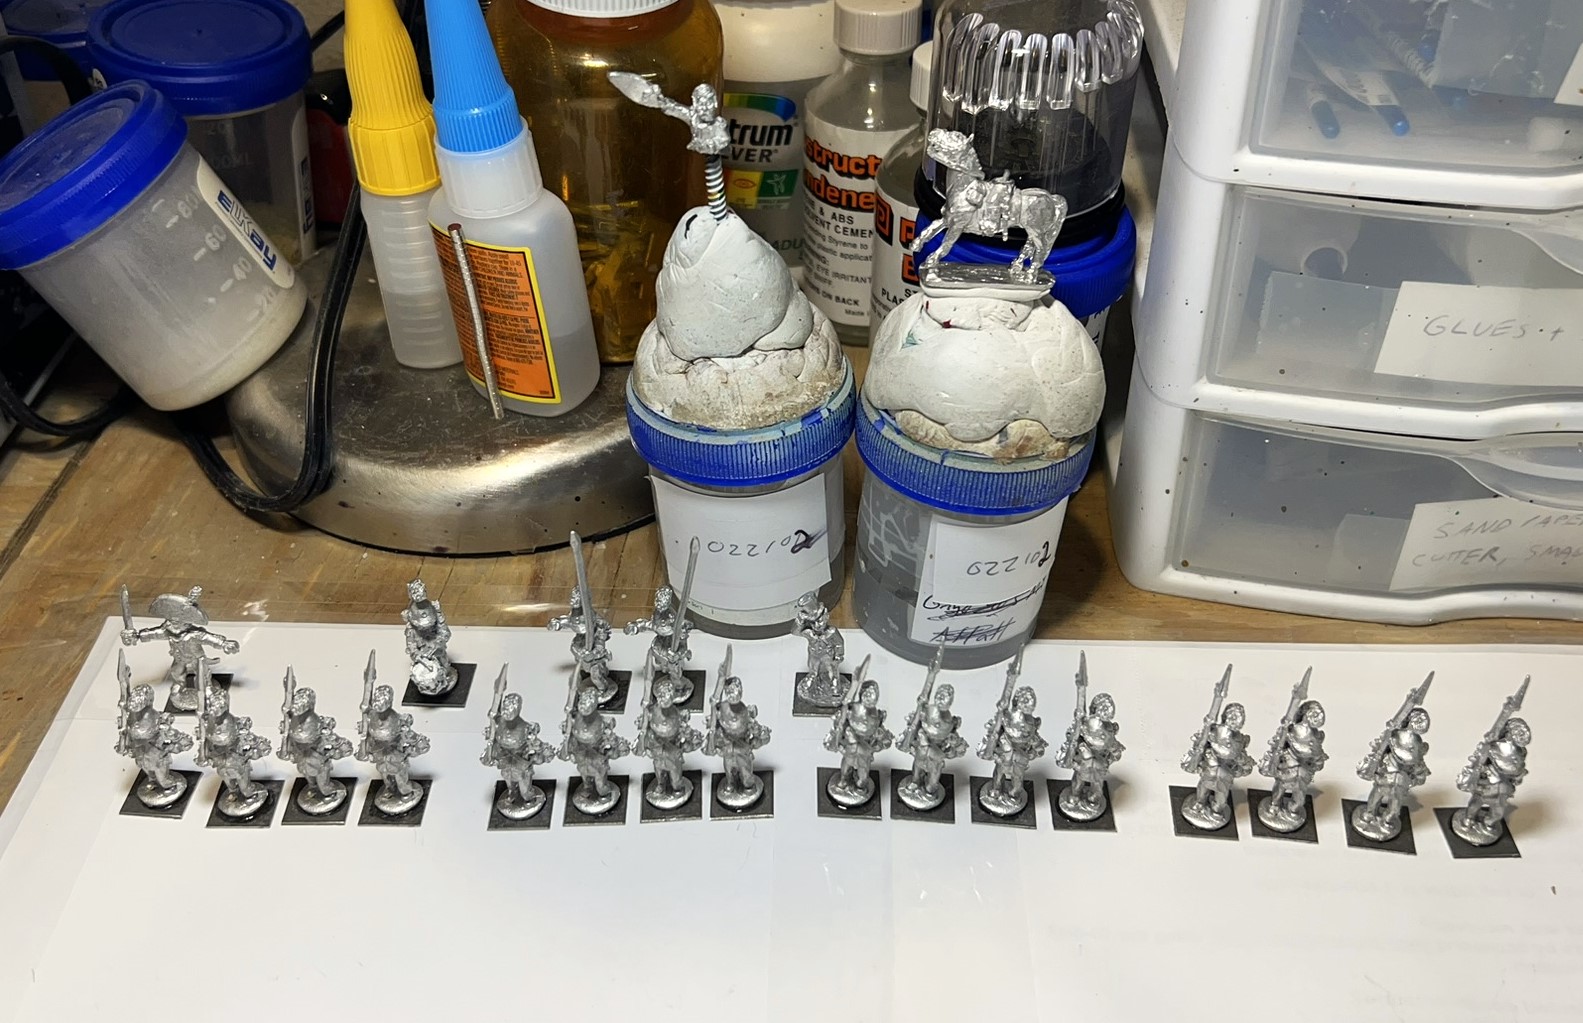
WIP shots…
Then came Christmas! After all the festivities, I knew I only had a couple of days to get the unit mostly done before I had my sinus surgery. That surgery would consist of my surgeon drilling out my internal sinus openings so I could drain better – as I have been plagued with increasingly worse headache episodes all year. Yes, this was done under anesthesia and more drugs. The headaches DID get in the way of both golf and miniature painting, as well as all of the simultaneous sinus infections I was having, so this was necessary.
Then it was time to get my head drilled on December 28th. All went well, and recovery is coming along as expected, but I was in no shape to paint!

Did I mention that as part of this procedure the surgeon applies cocaine? Yup, and I’m pretty much just a beer guy so…yeah…
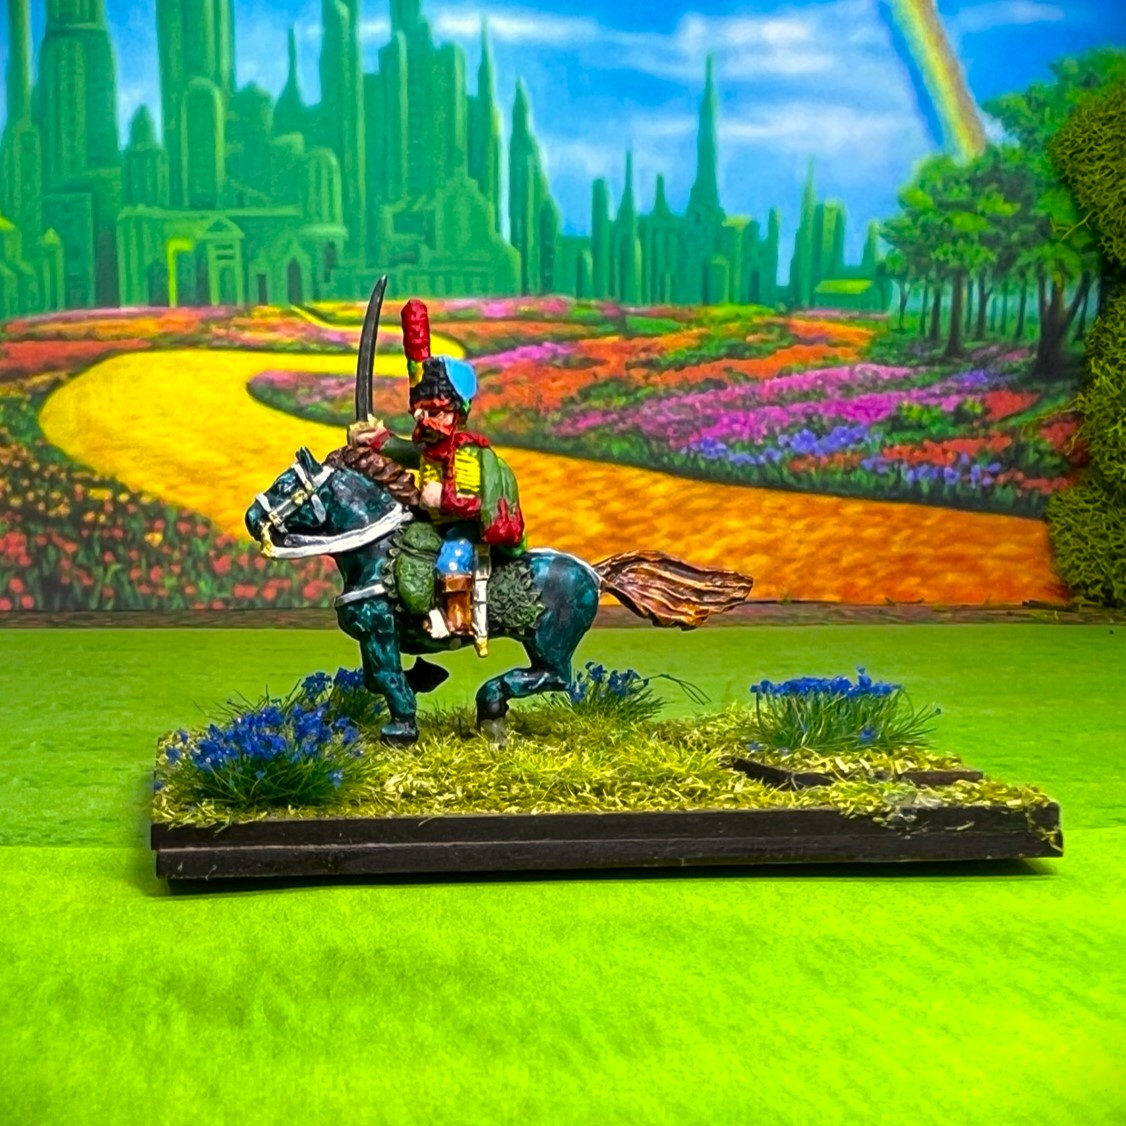
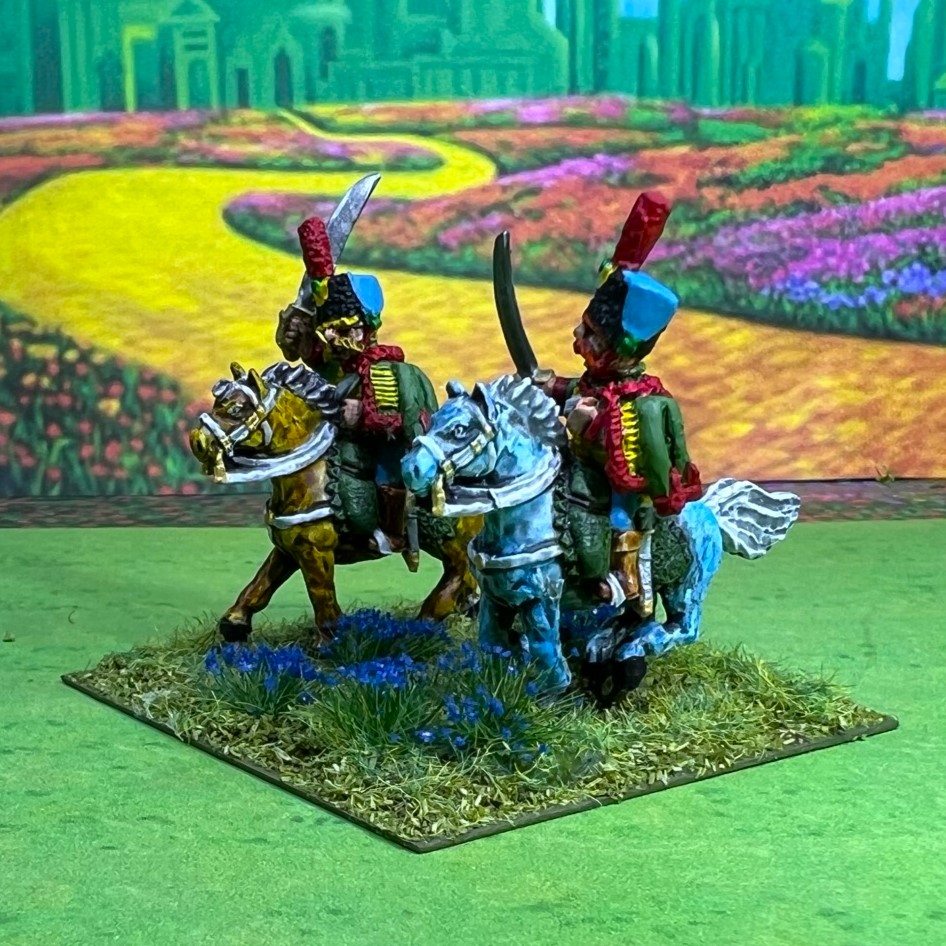
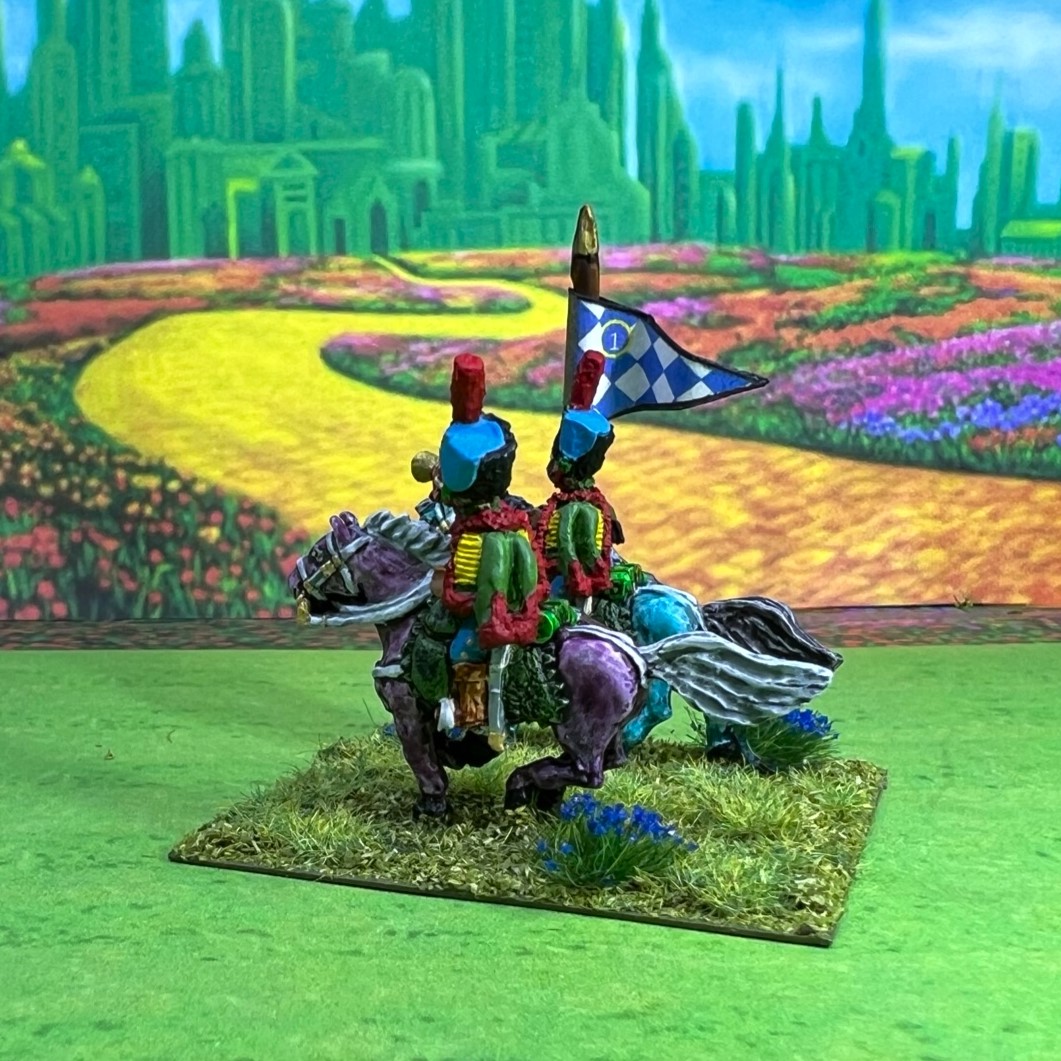
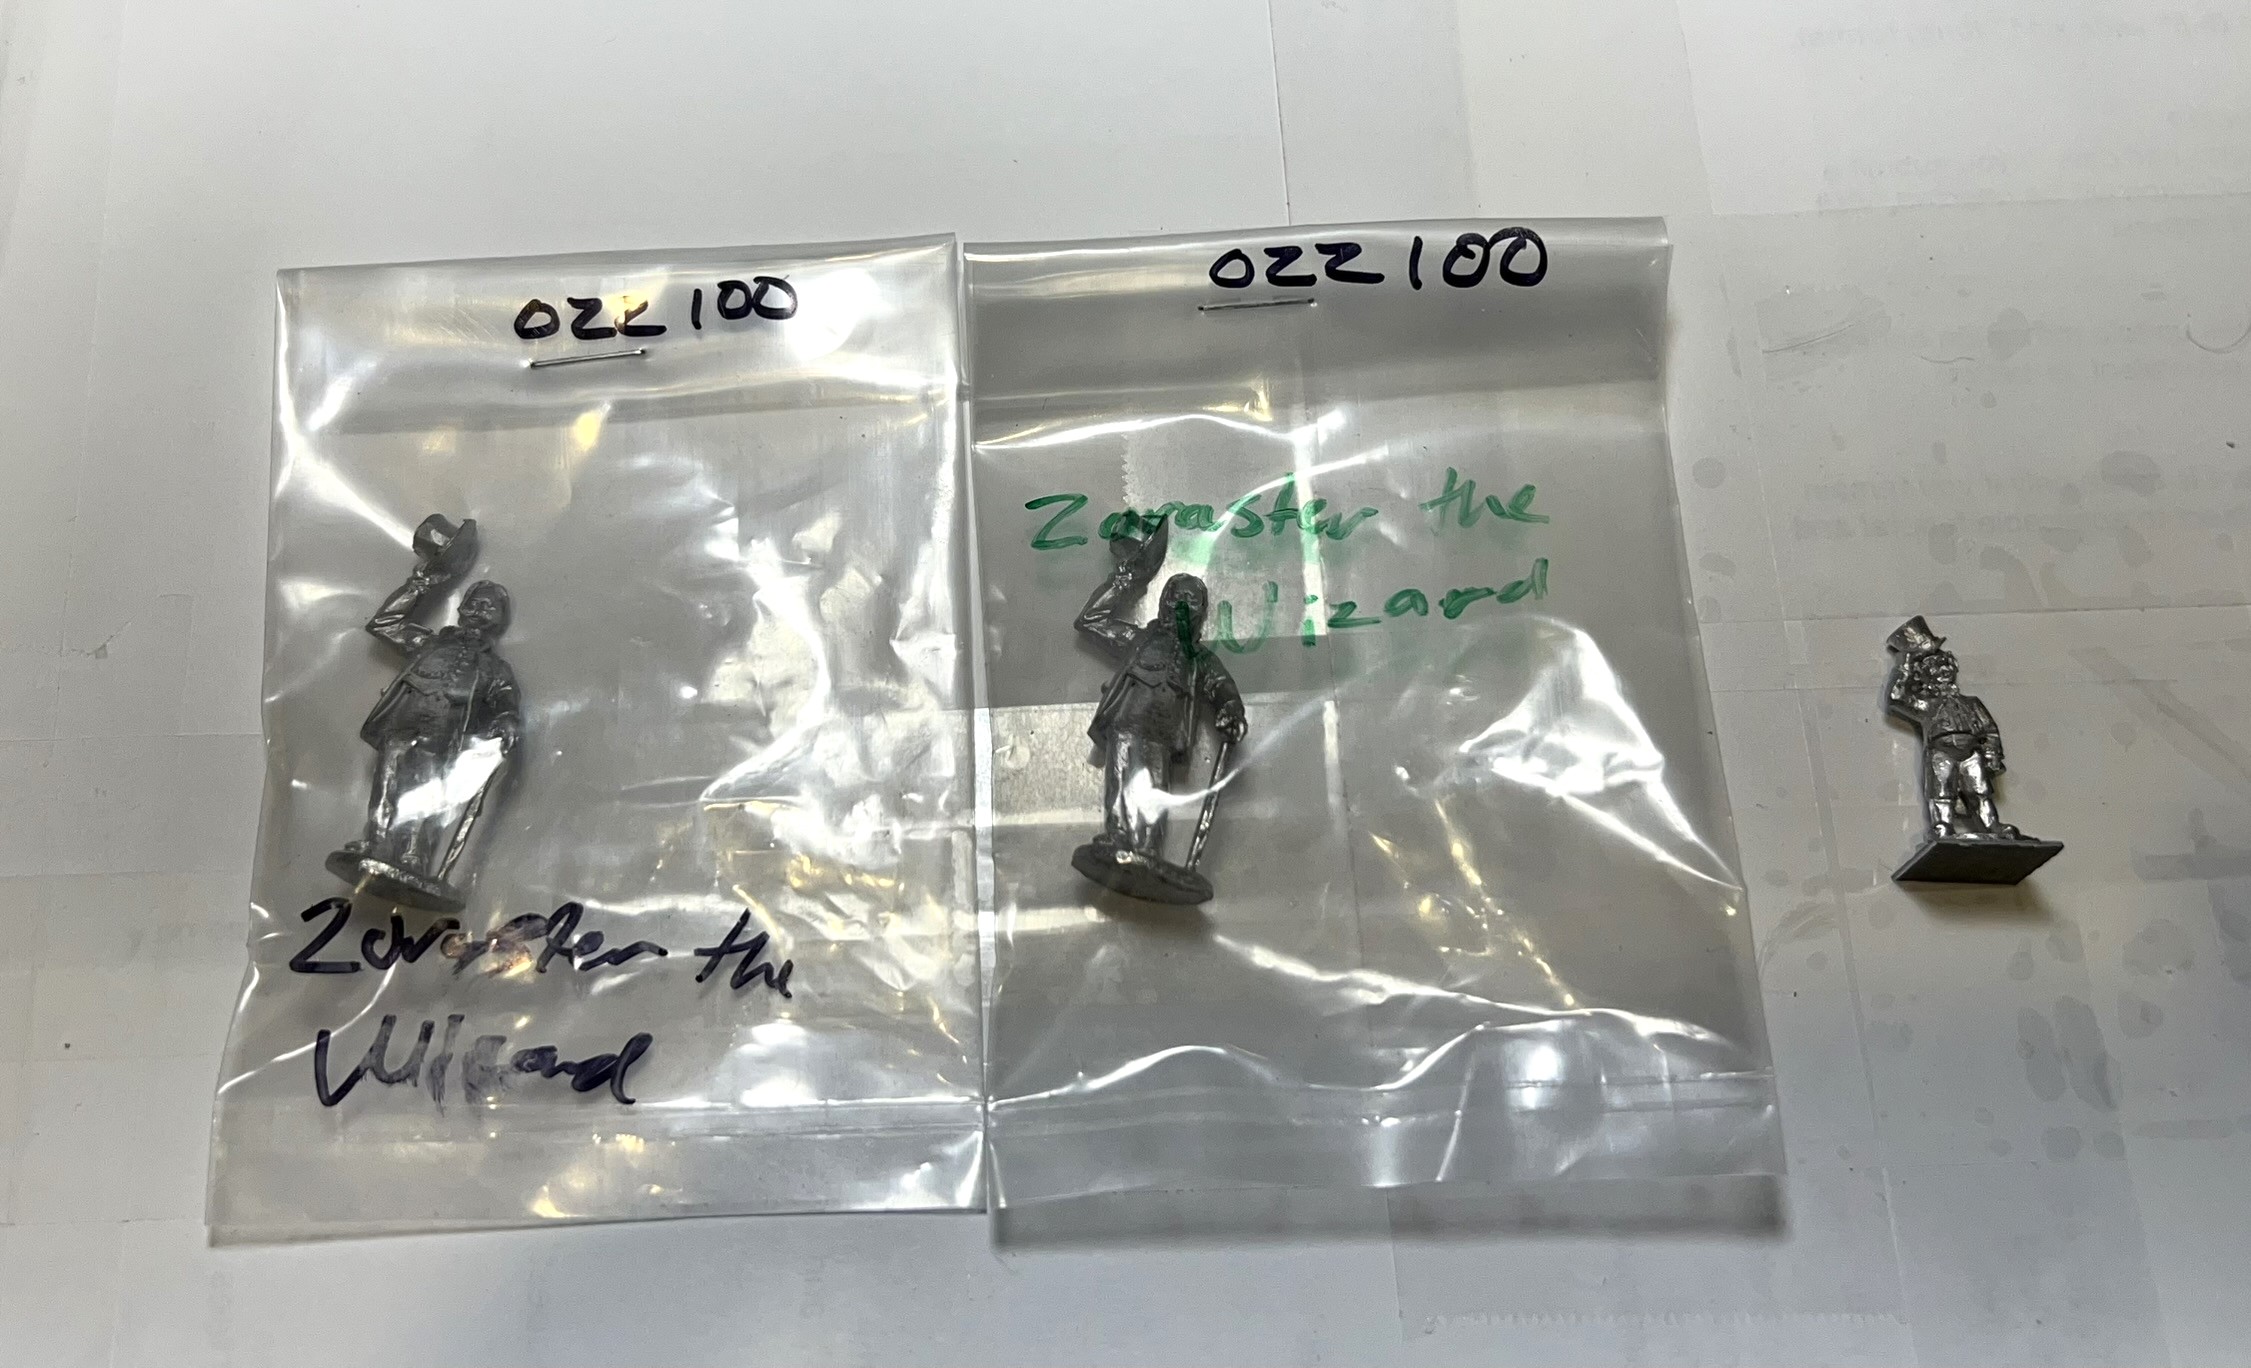
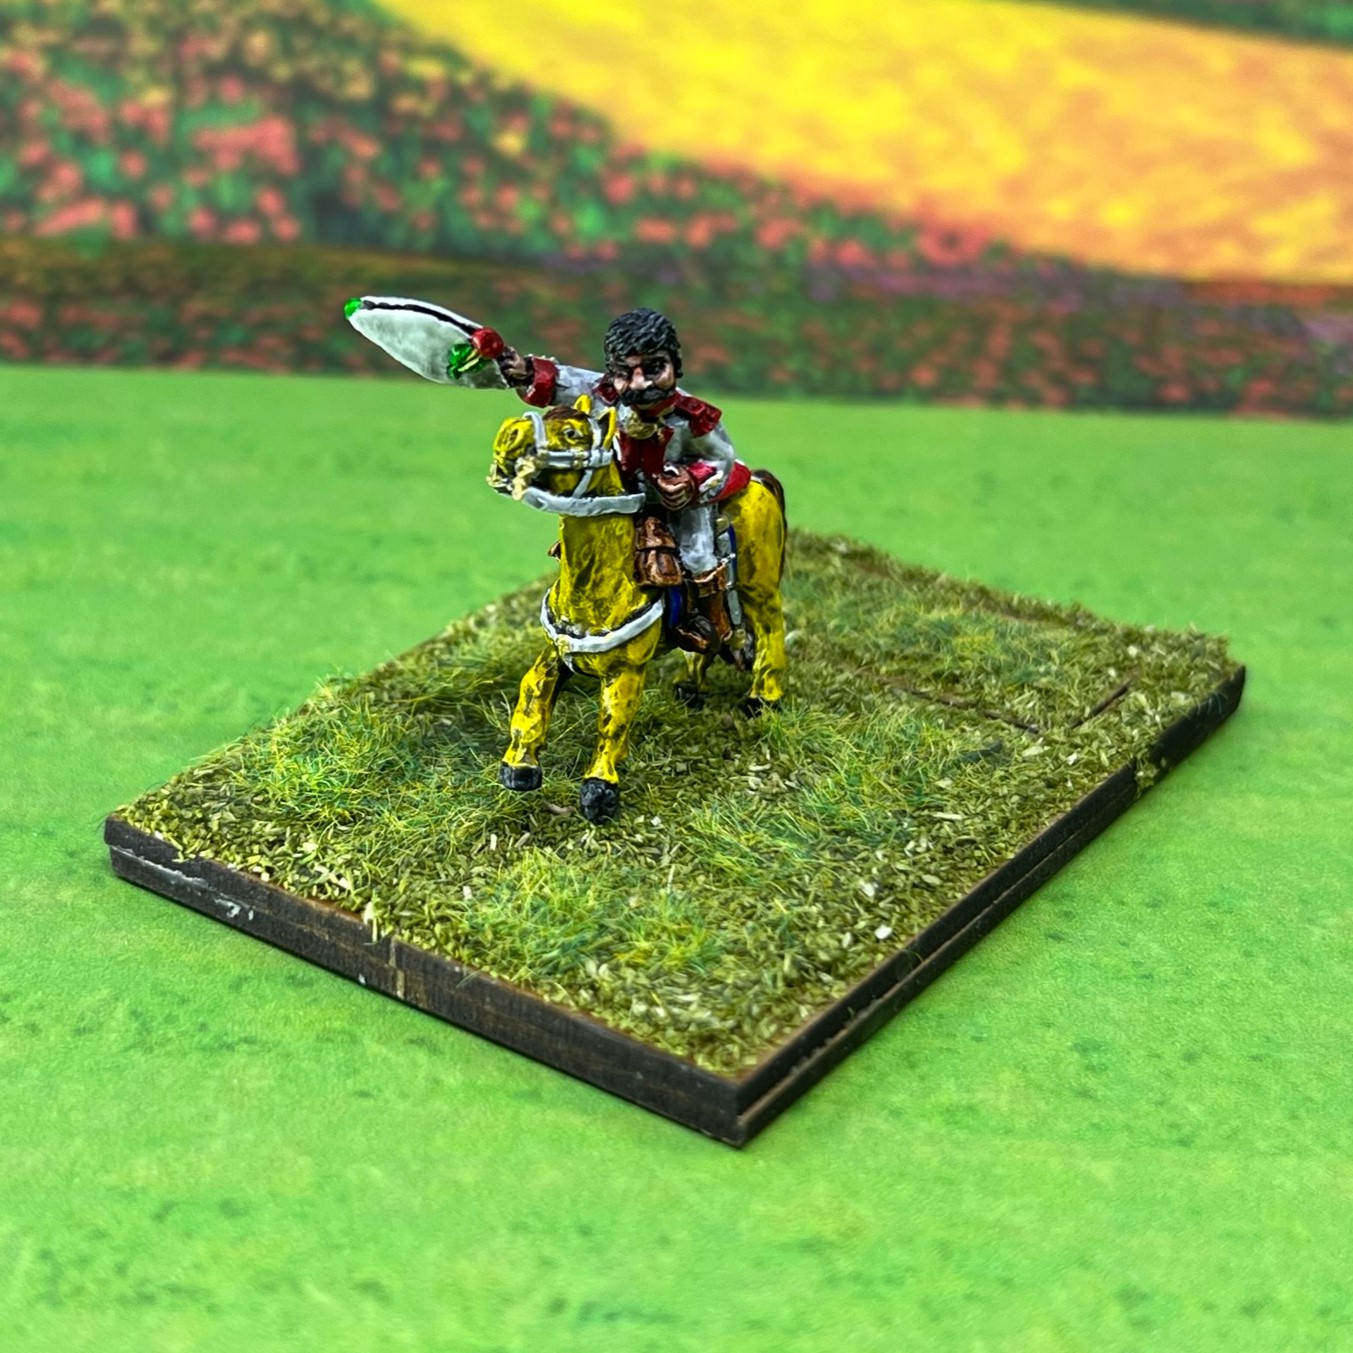
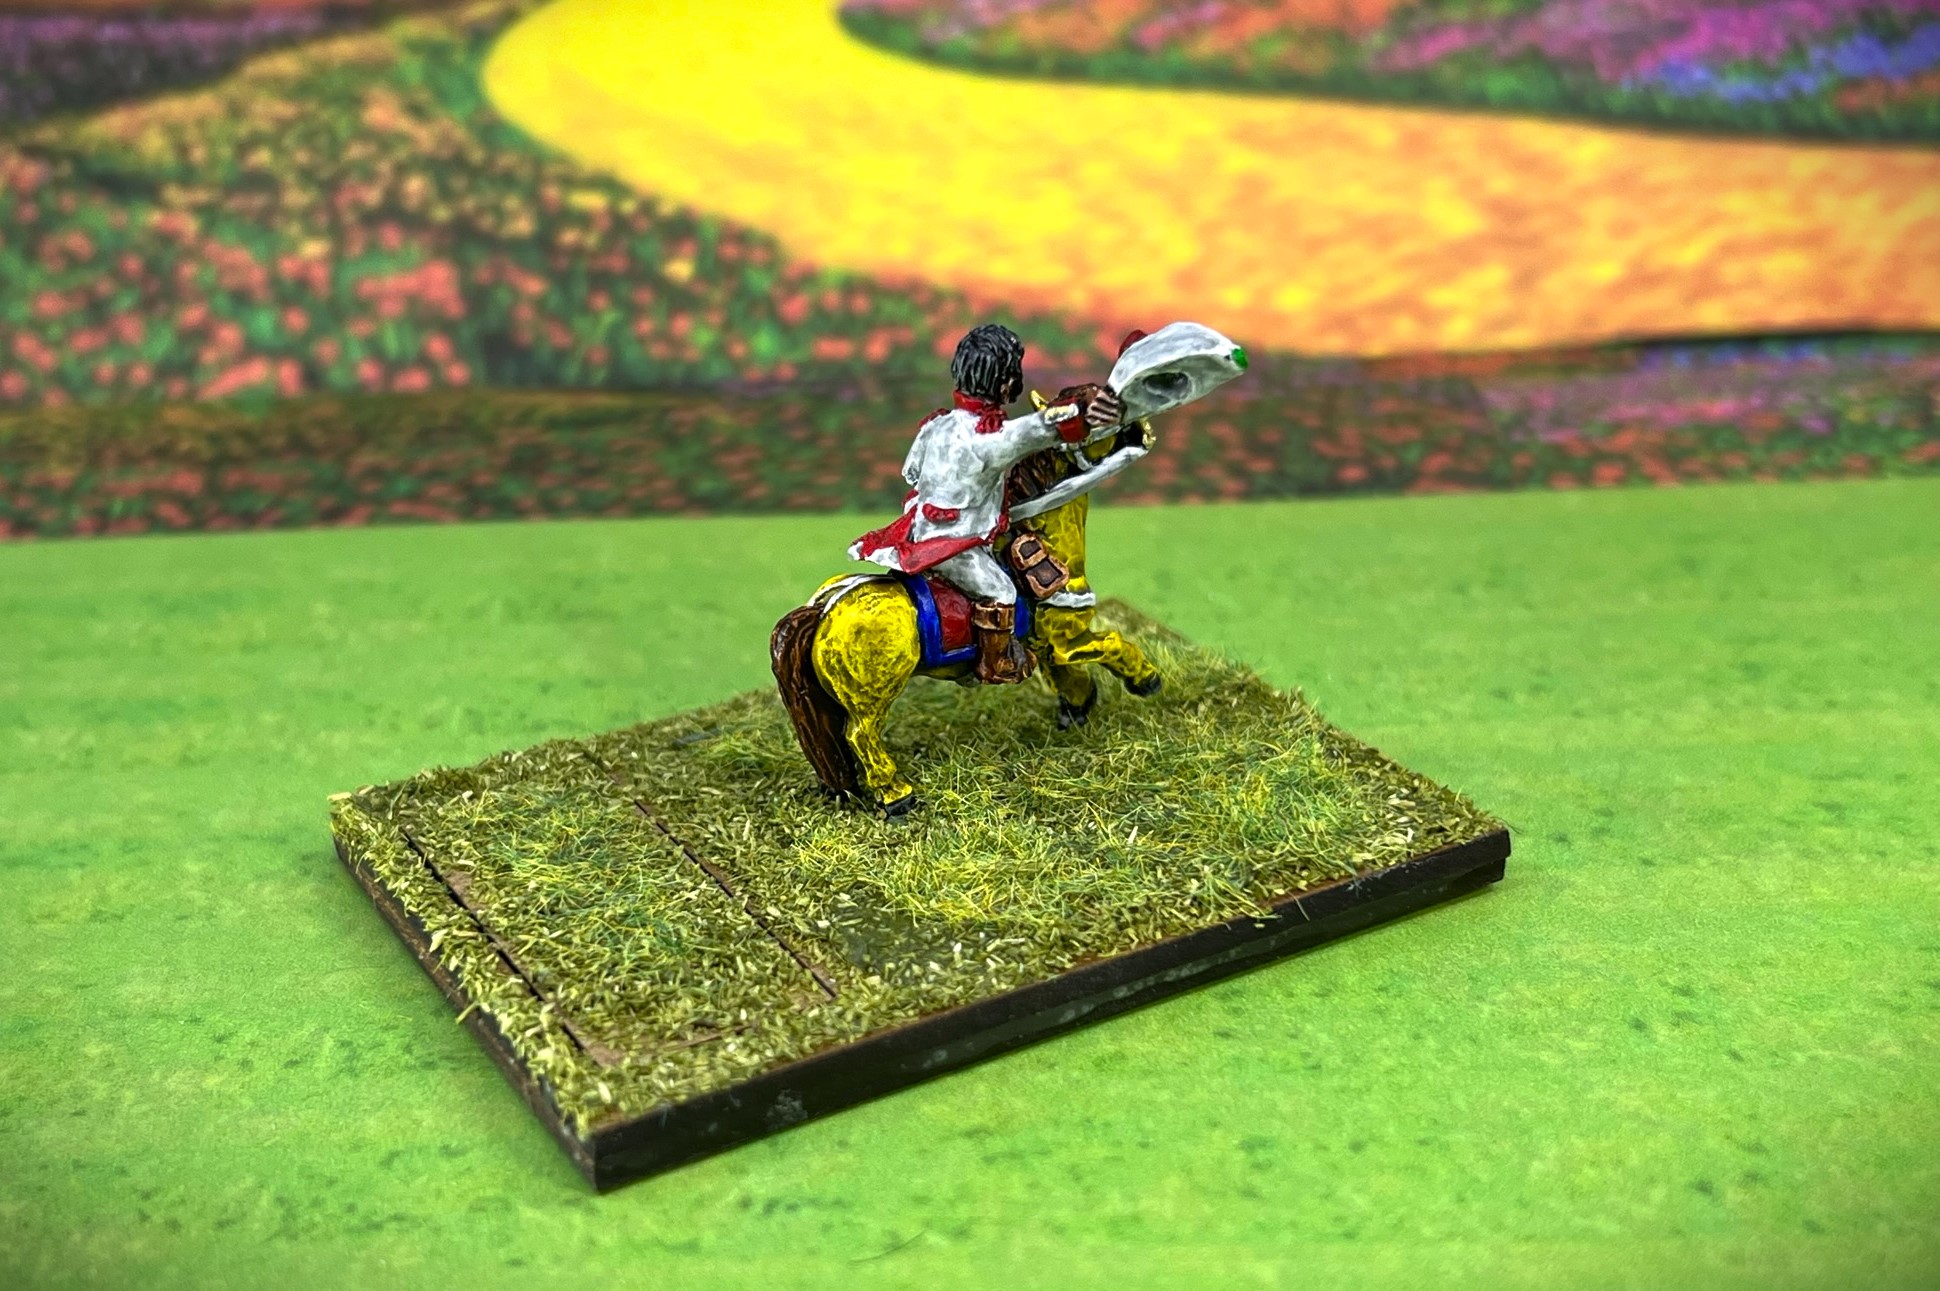
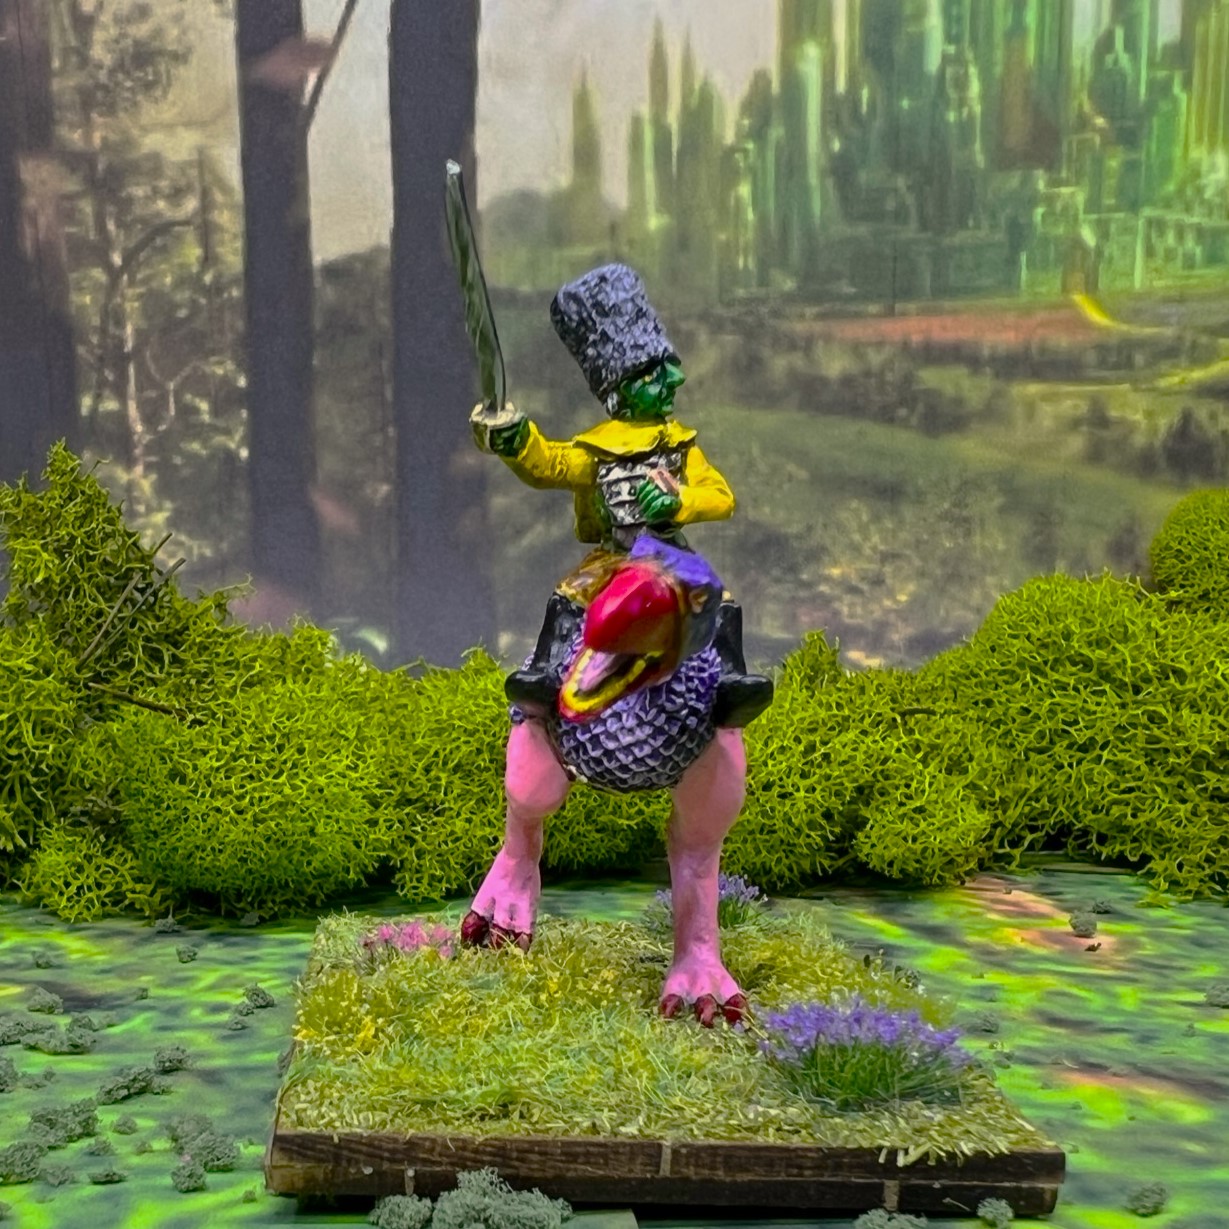
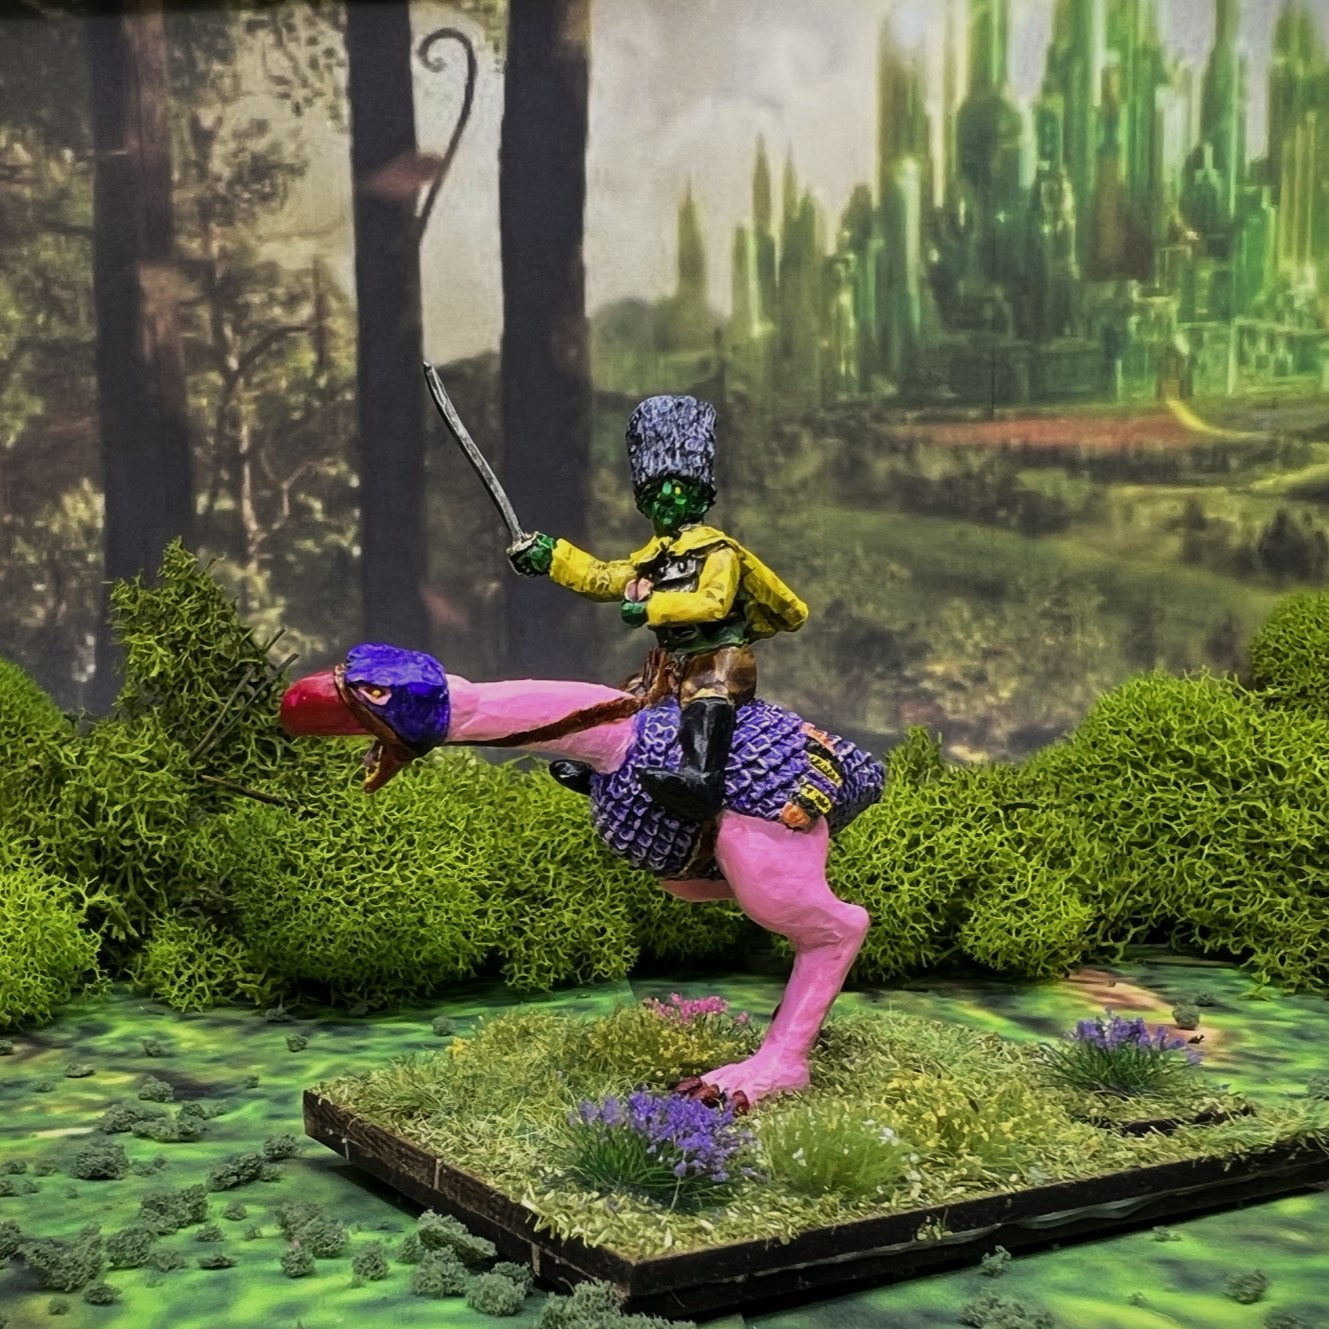
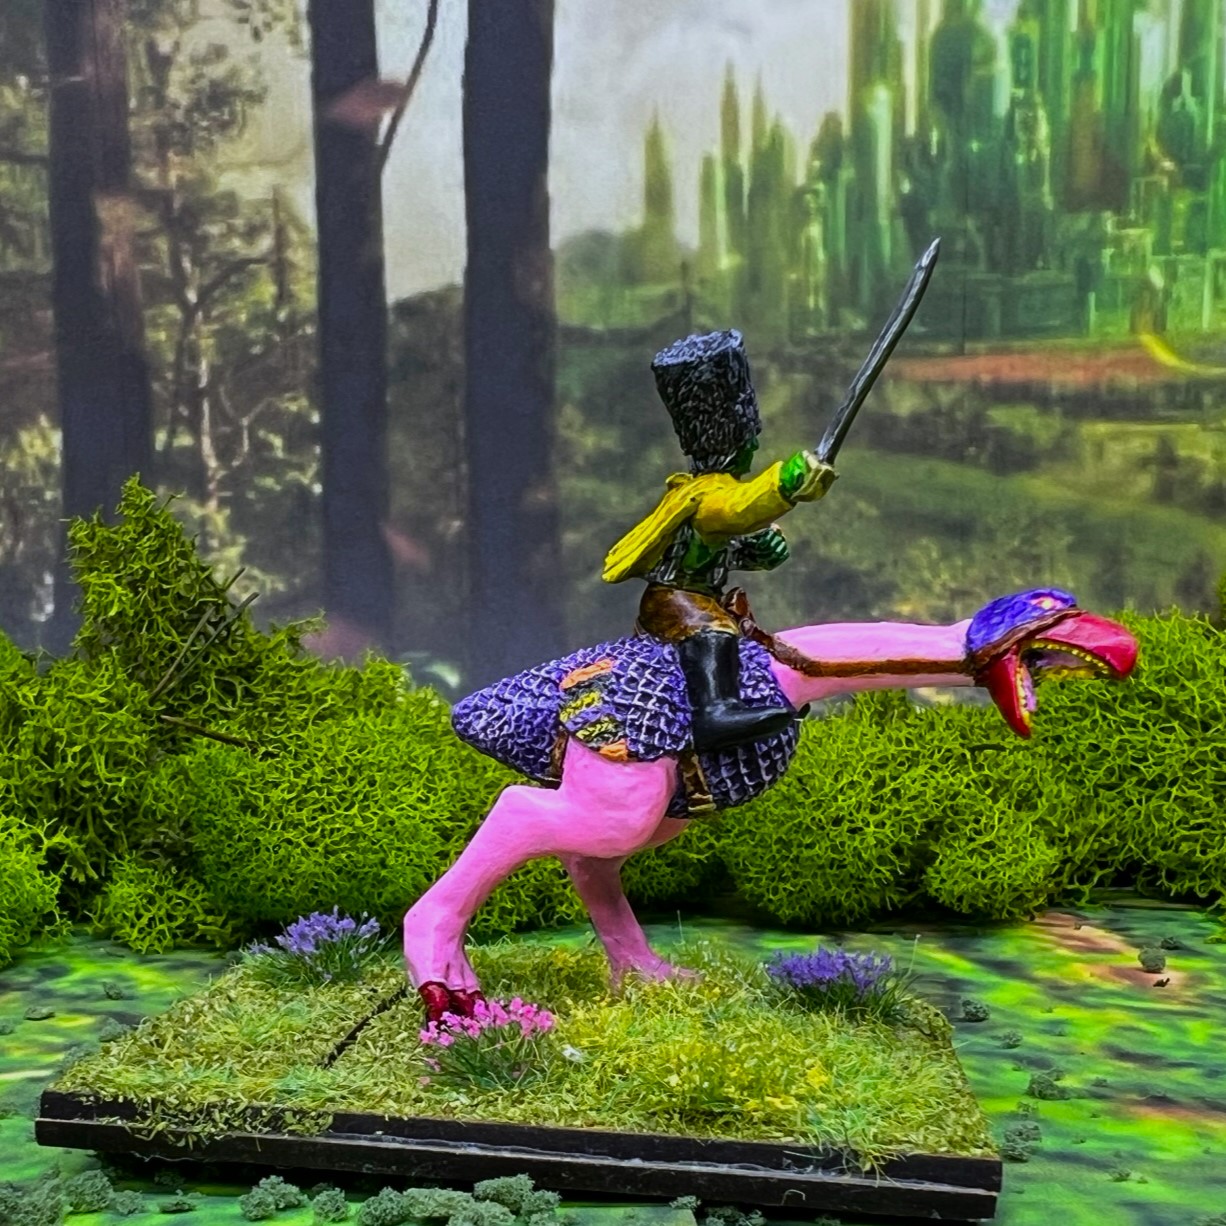
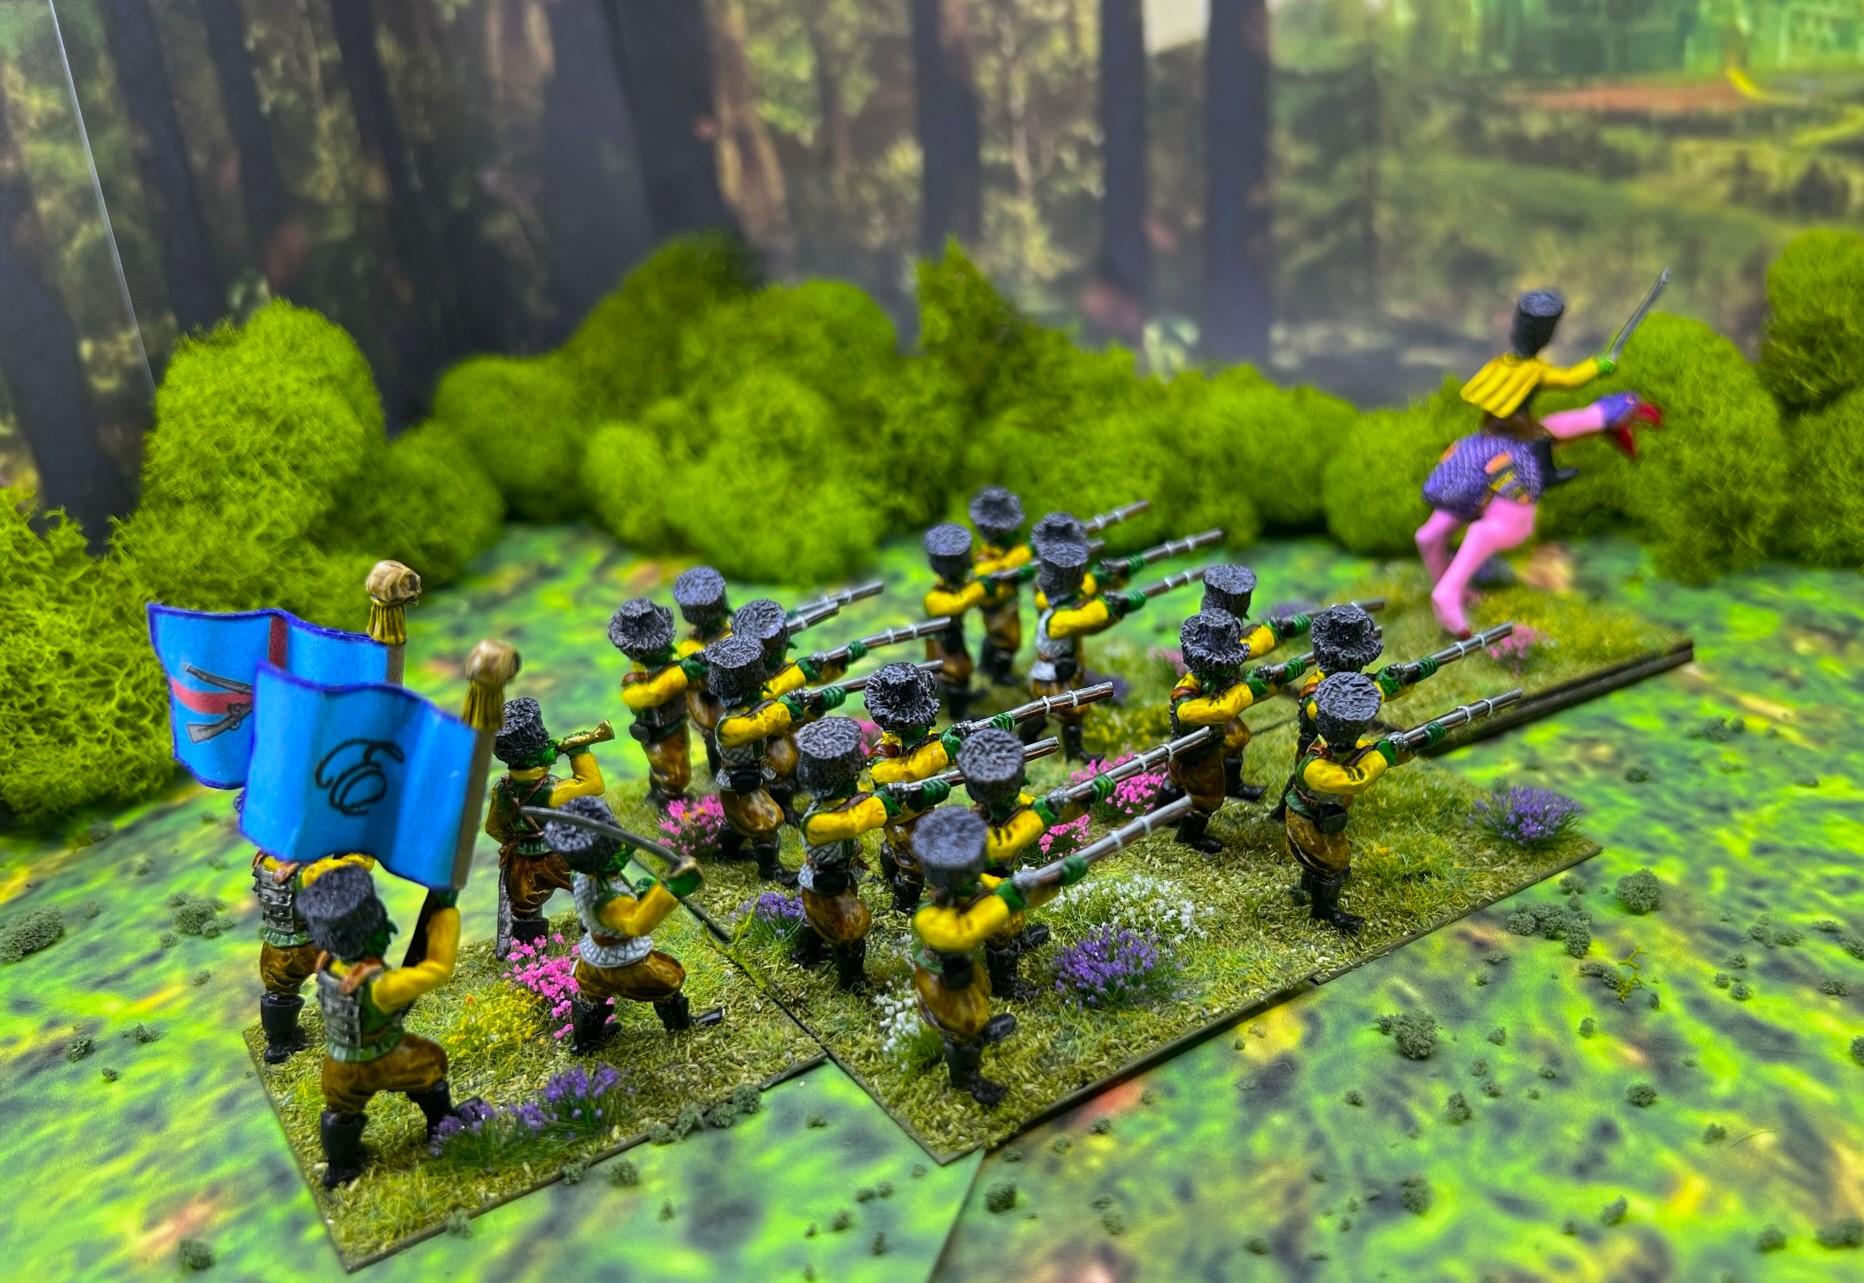
Anyways, I was back painting on the 29th, and made good progress by the 30th. One remaining major issue for me was how to paint the regimental commander’s zilk. Remember, Winkies look down on missile weapons, and I can imagine that the better-looking zilks would go to the cavalry and the regimental commanders of melee weapon-bearing infantry. I also had Ralphie’s rabbit suit in my mind subliminally, plus add in any residual cocaine…
And I ended up with a bubble-gum pink and purple zilk…
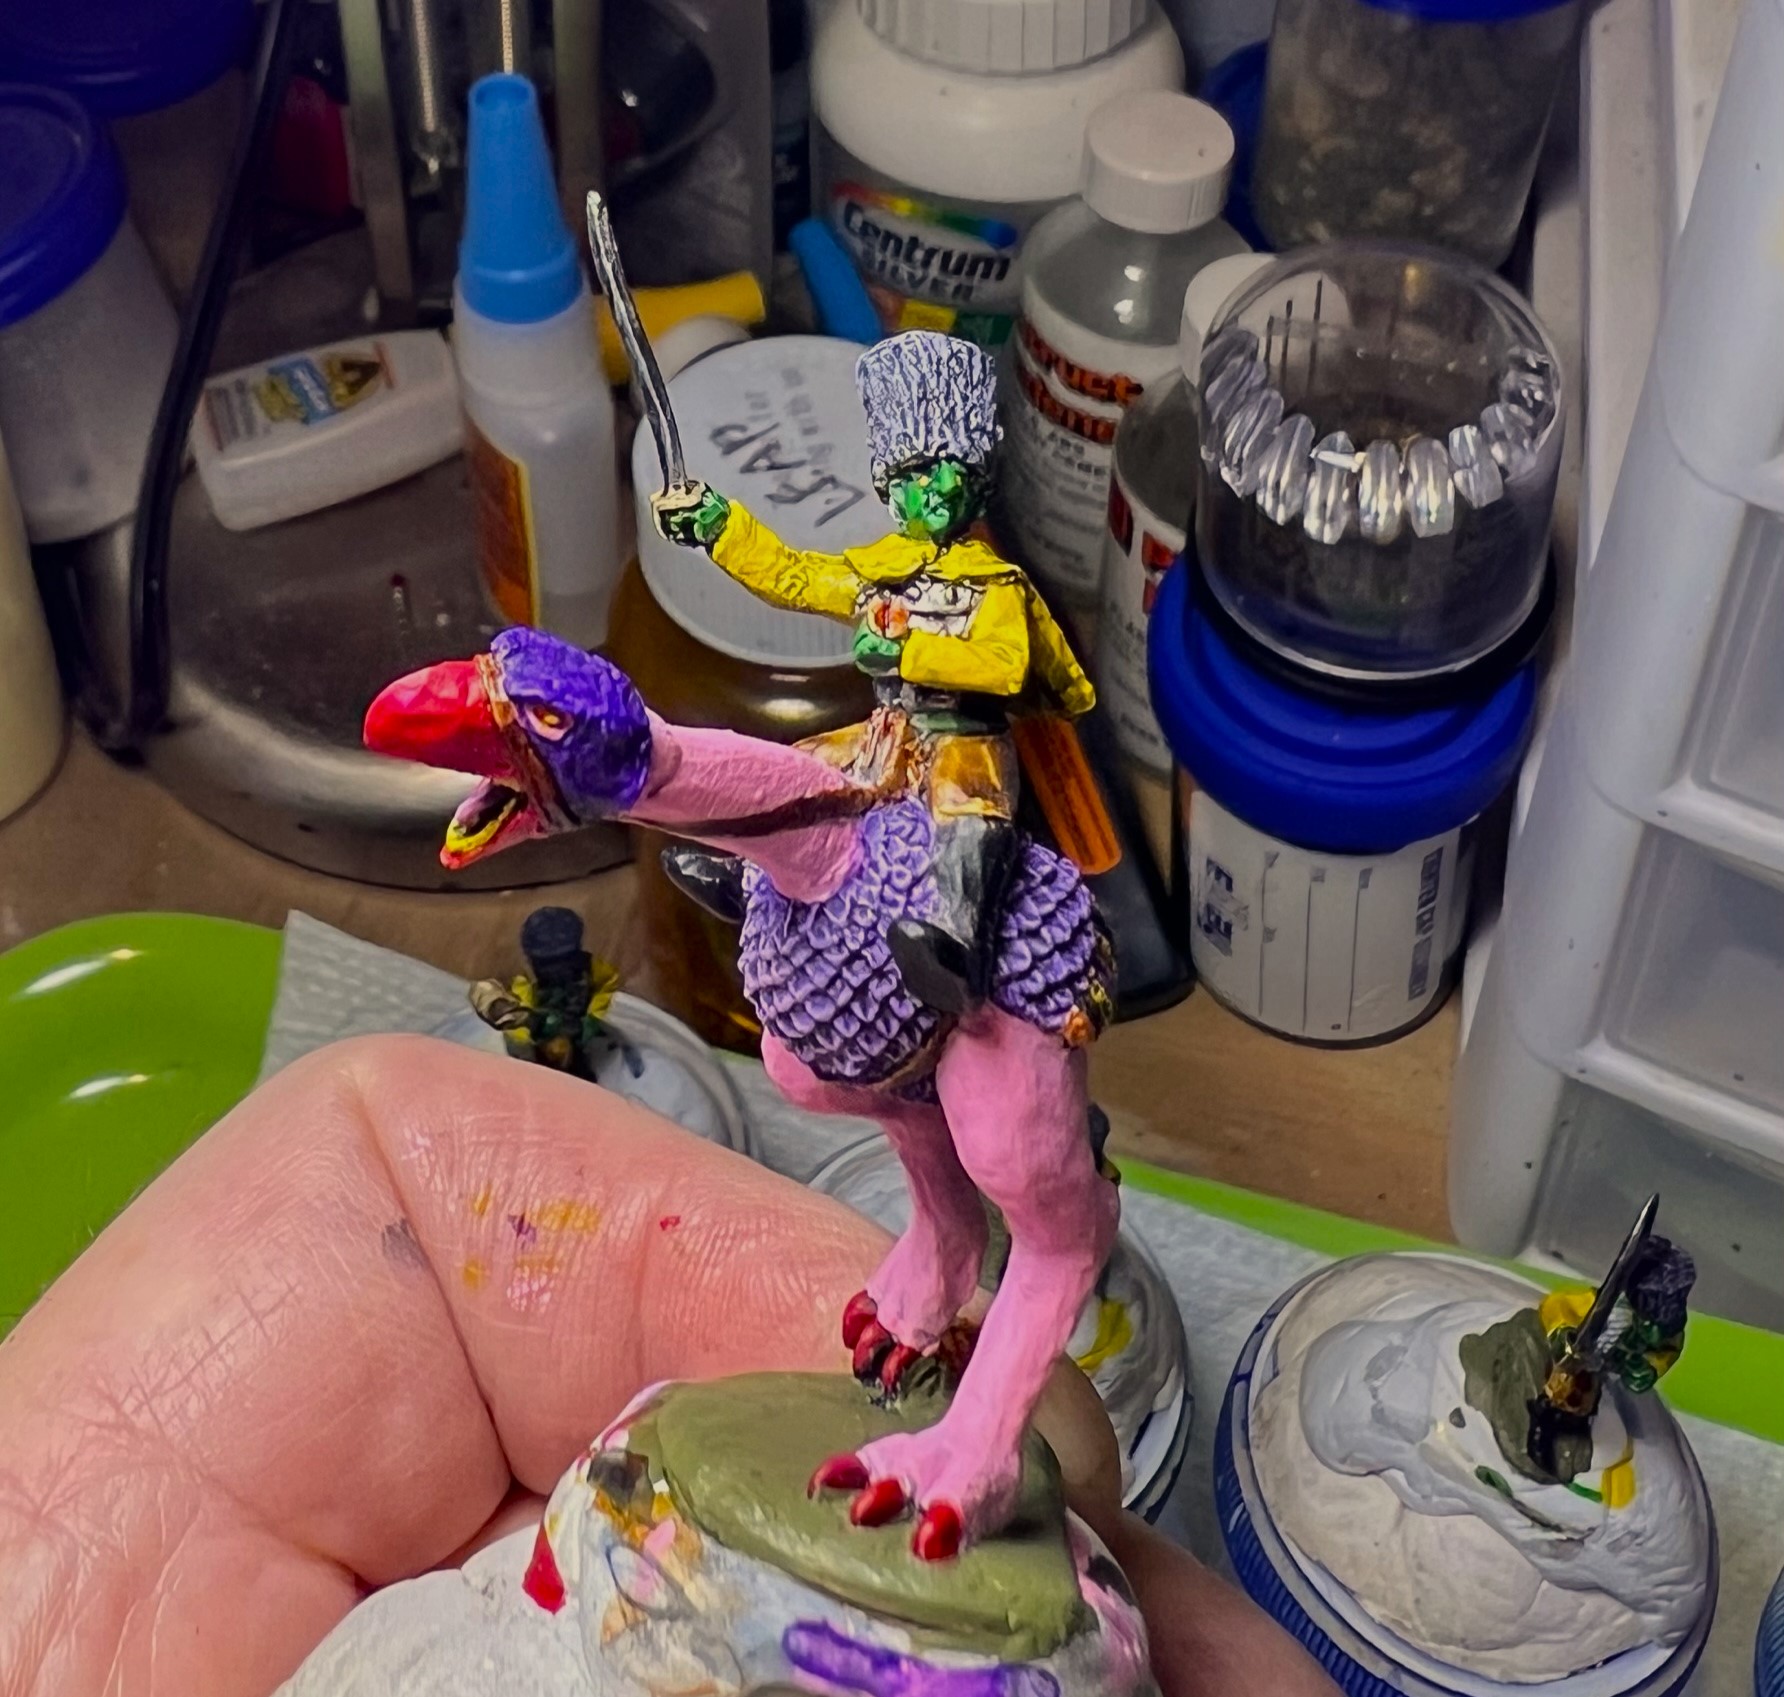

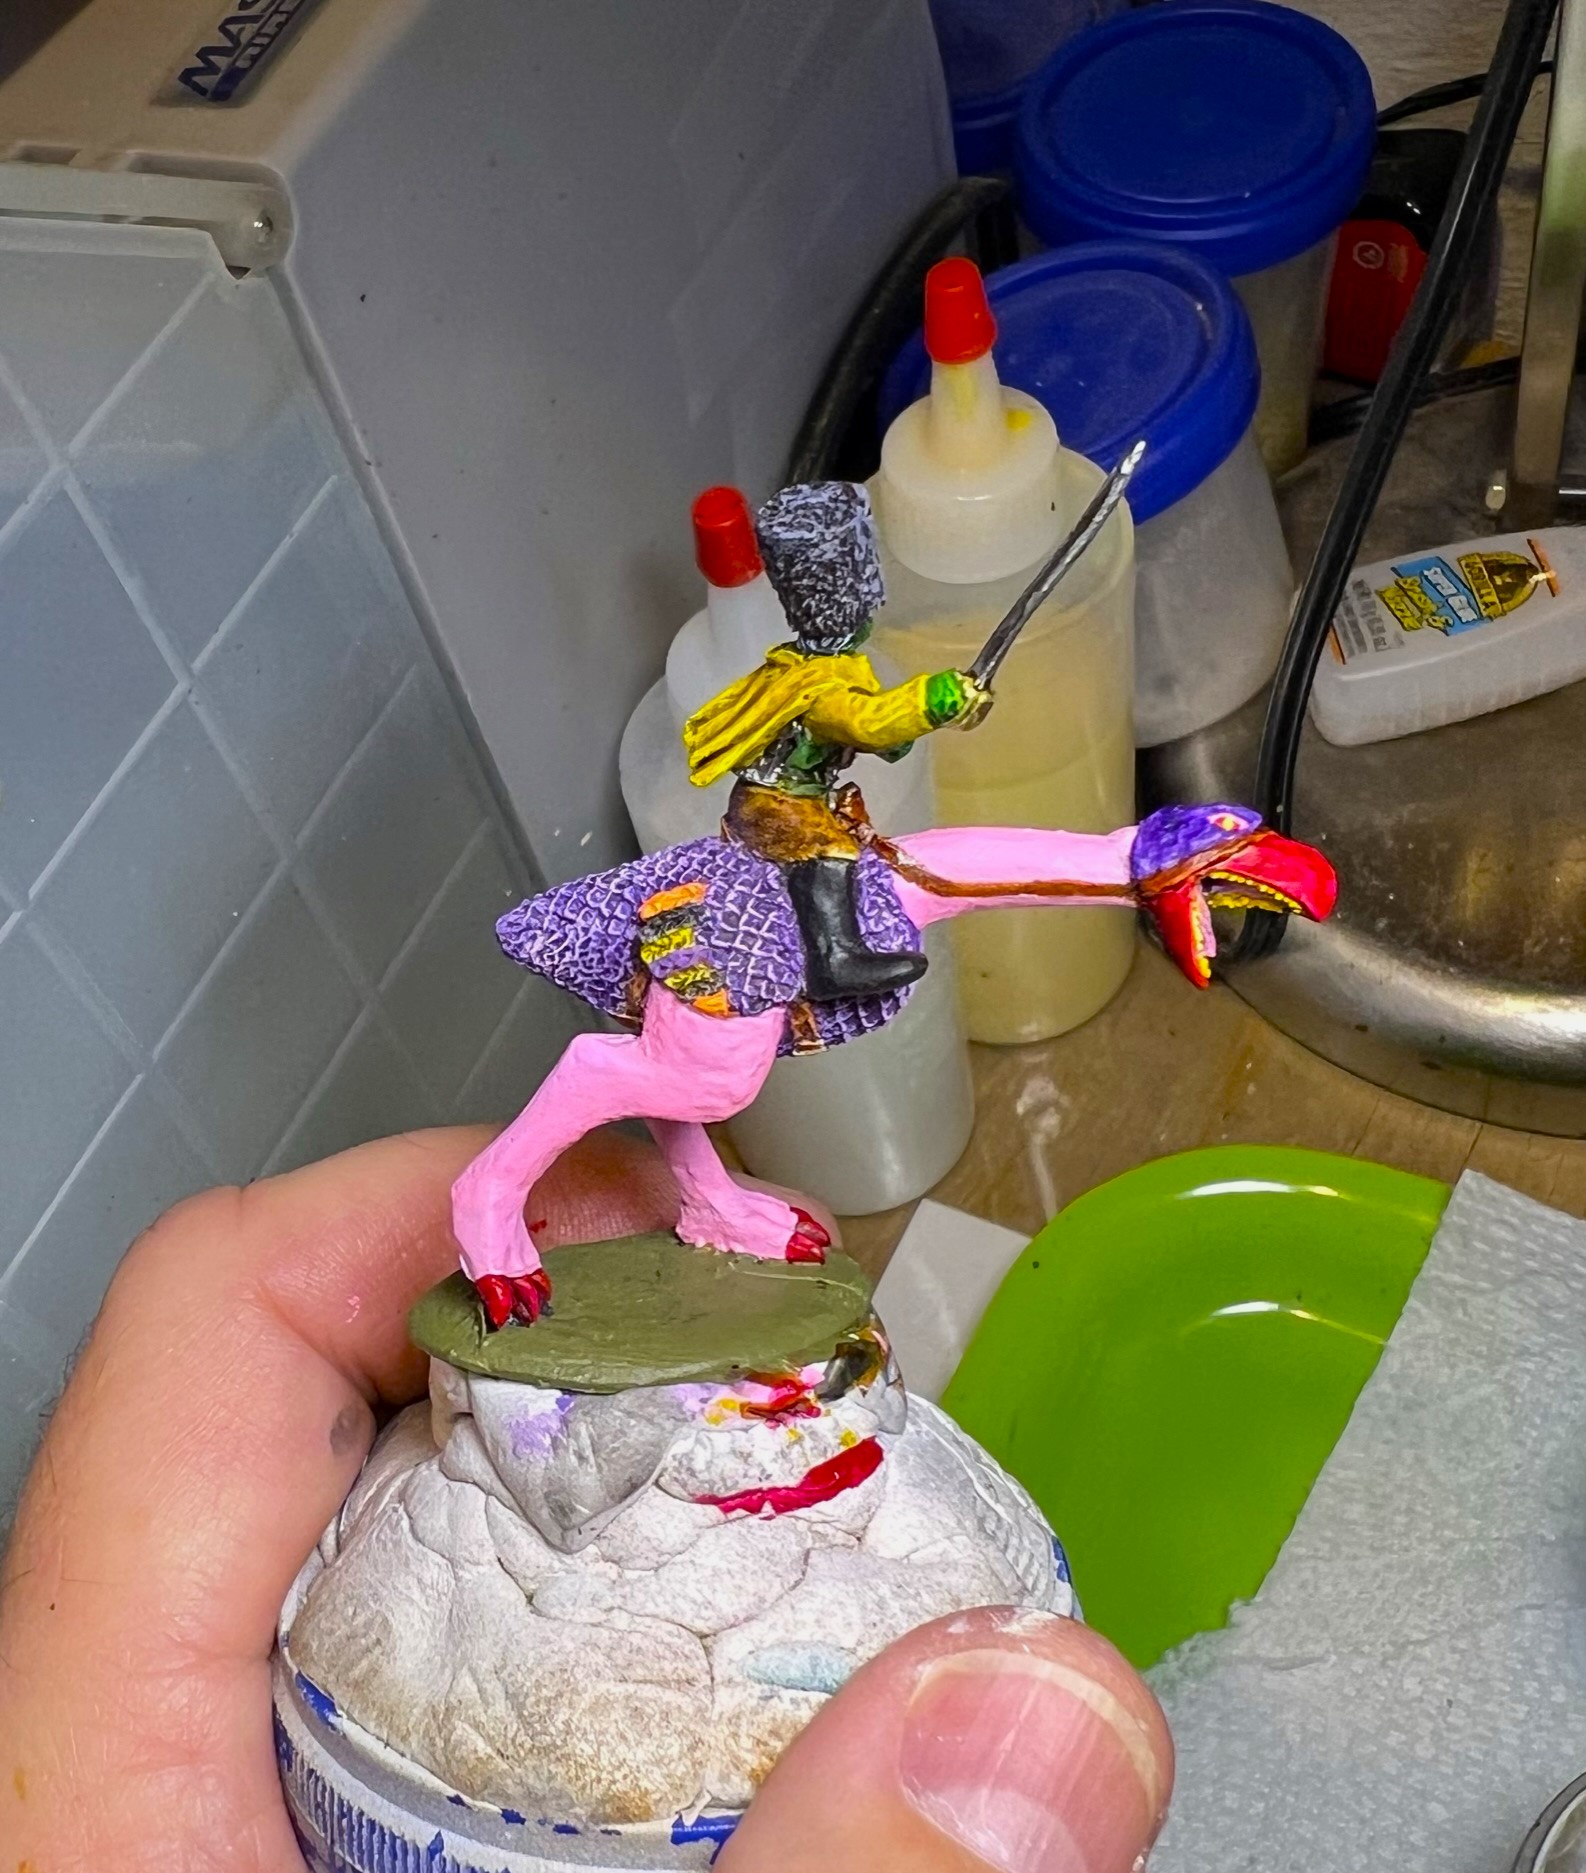
Now, I am not sure how I feel about it, but it’s done now! Wars of Ozz are supposed to be colorful anyway – and hell, I had had that pink paint for a while without ever using it. I ended up airbrush varnishing the WSR with a gloss then a matte varnish so as to keep the colors bright but not shiny.
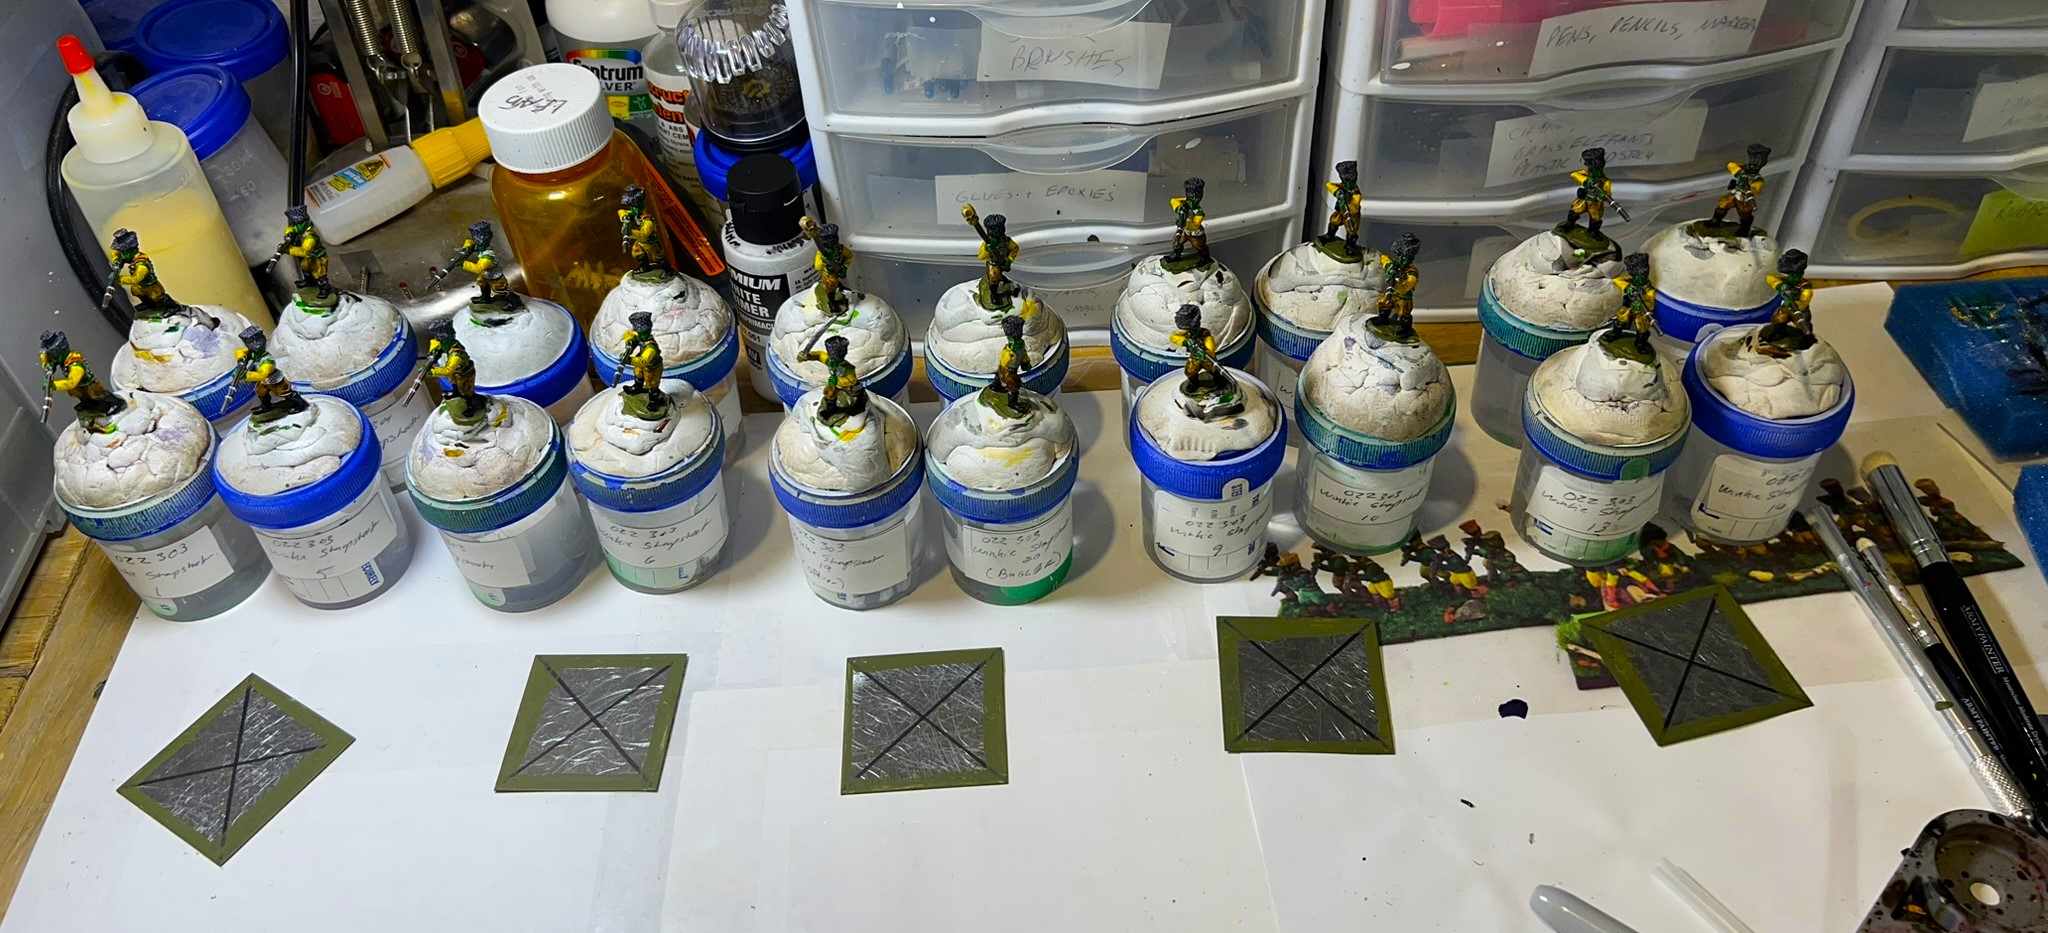
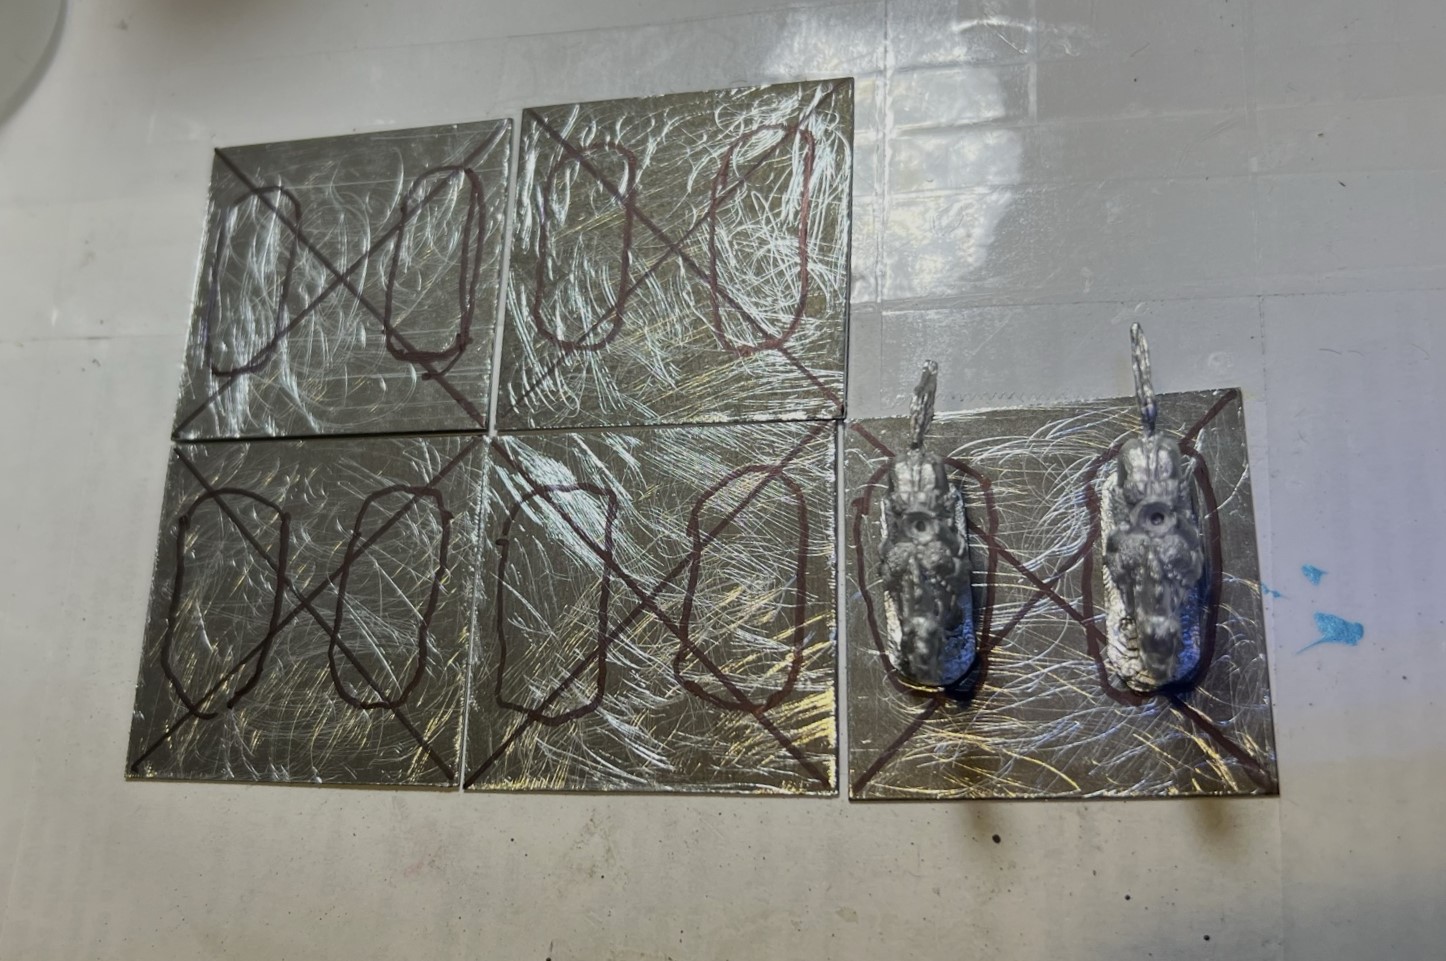
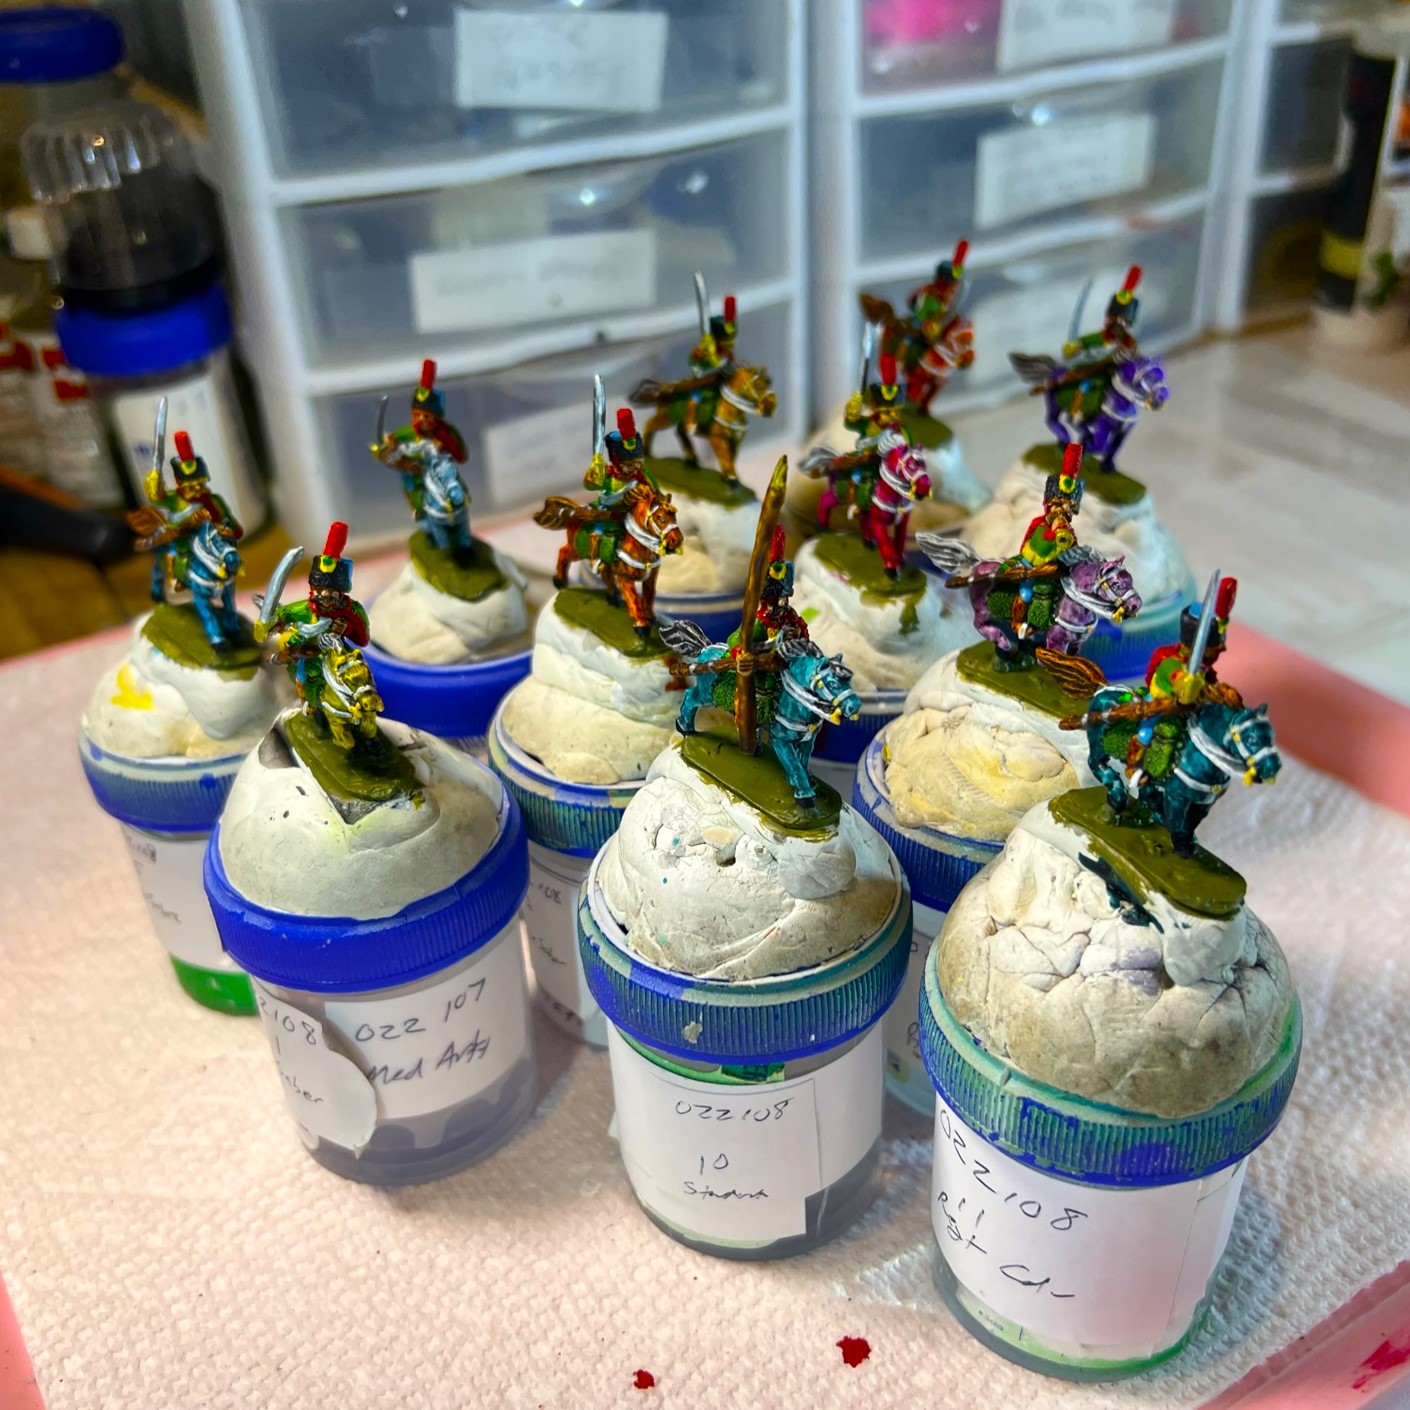
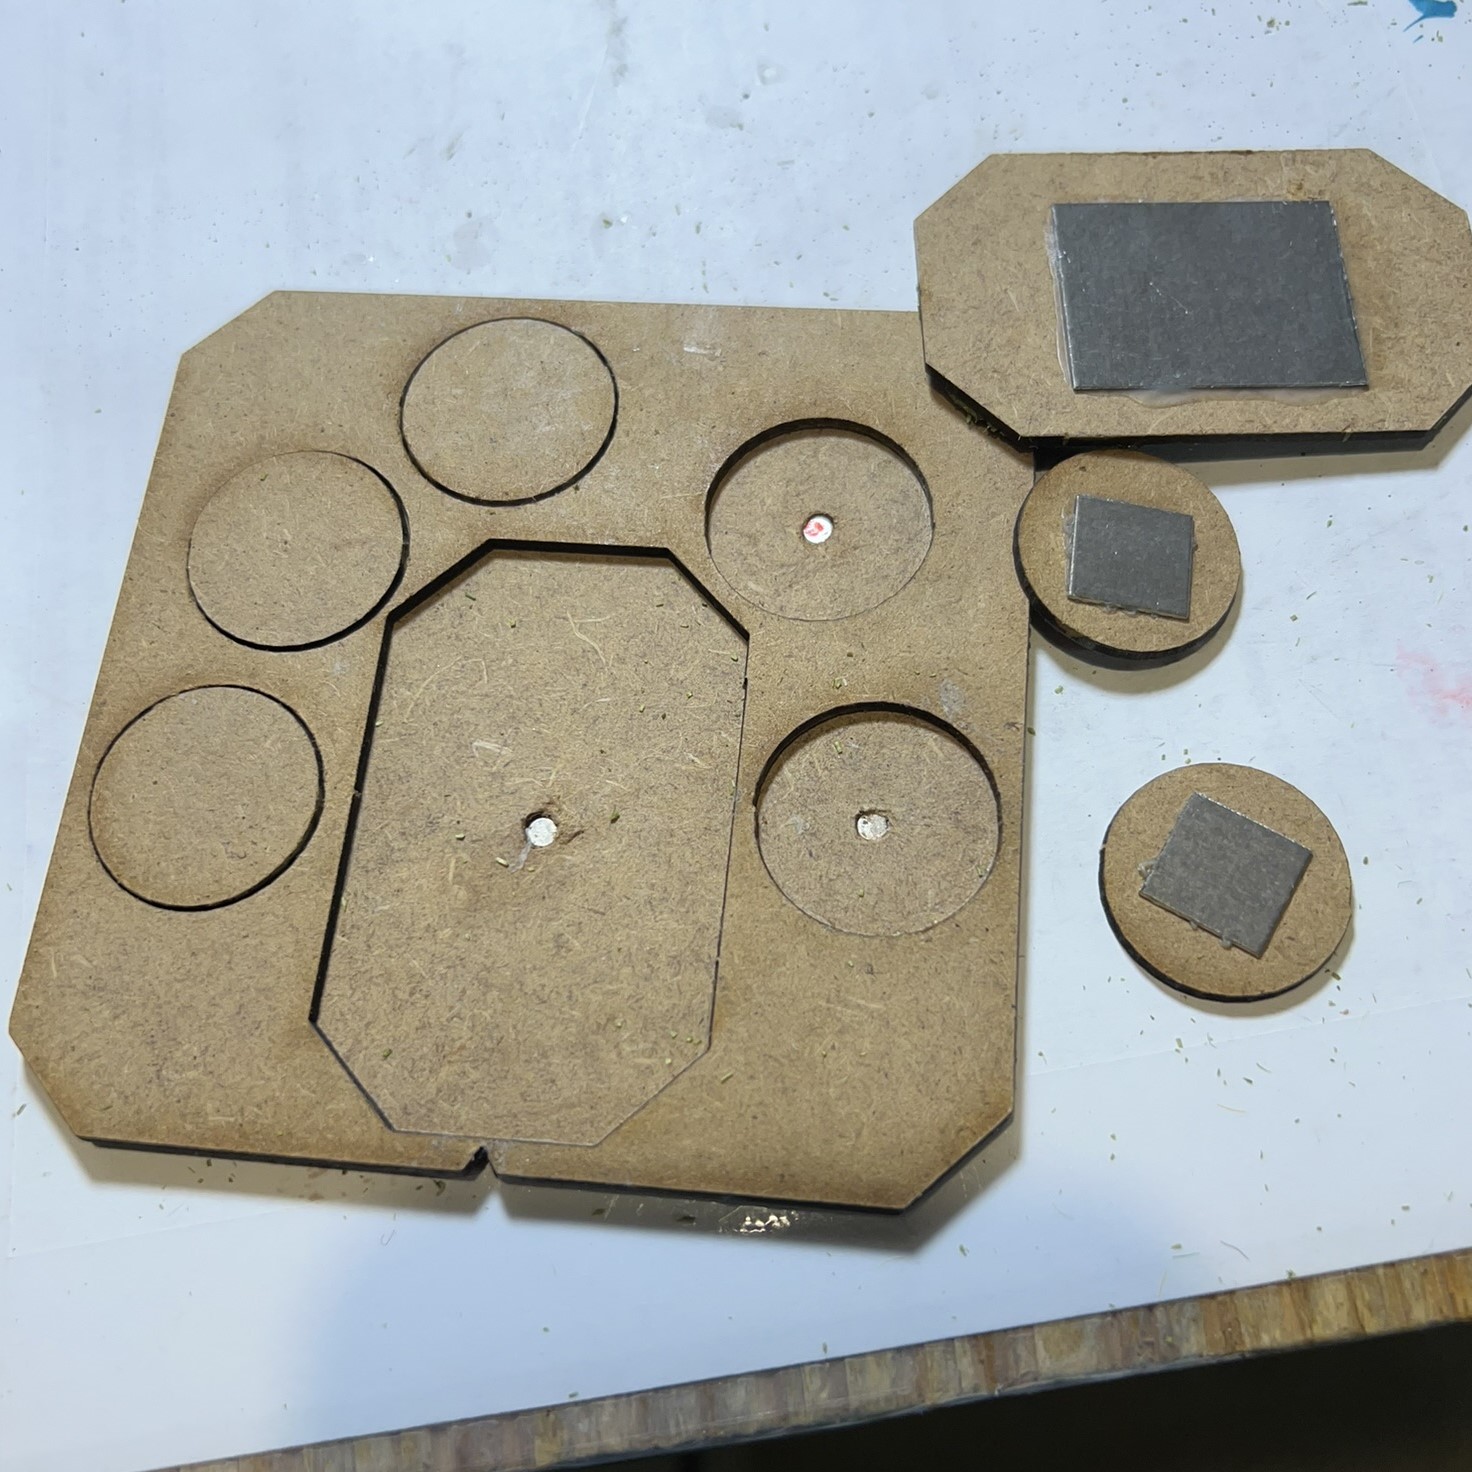
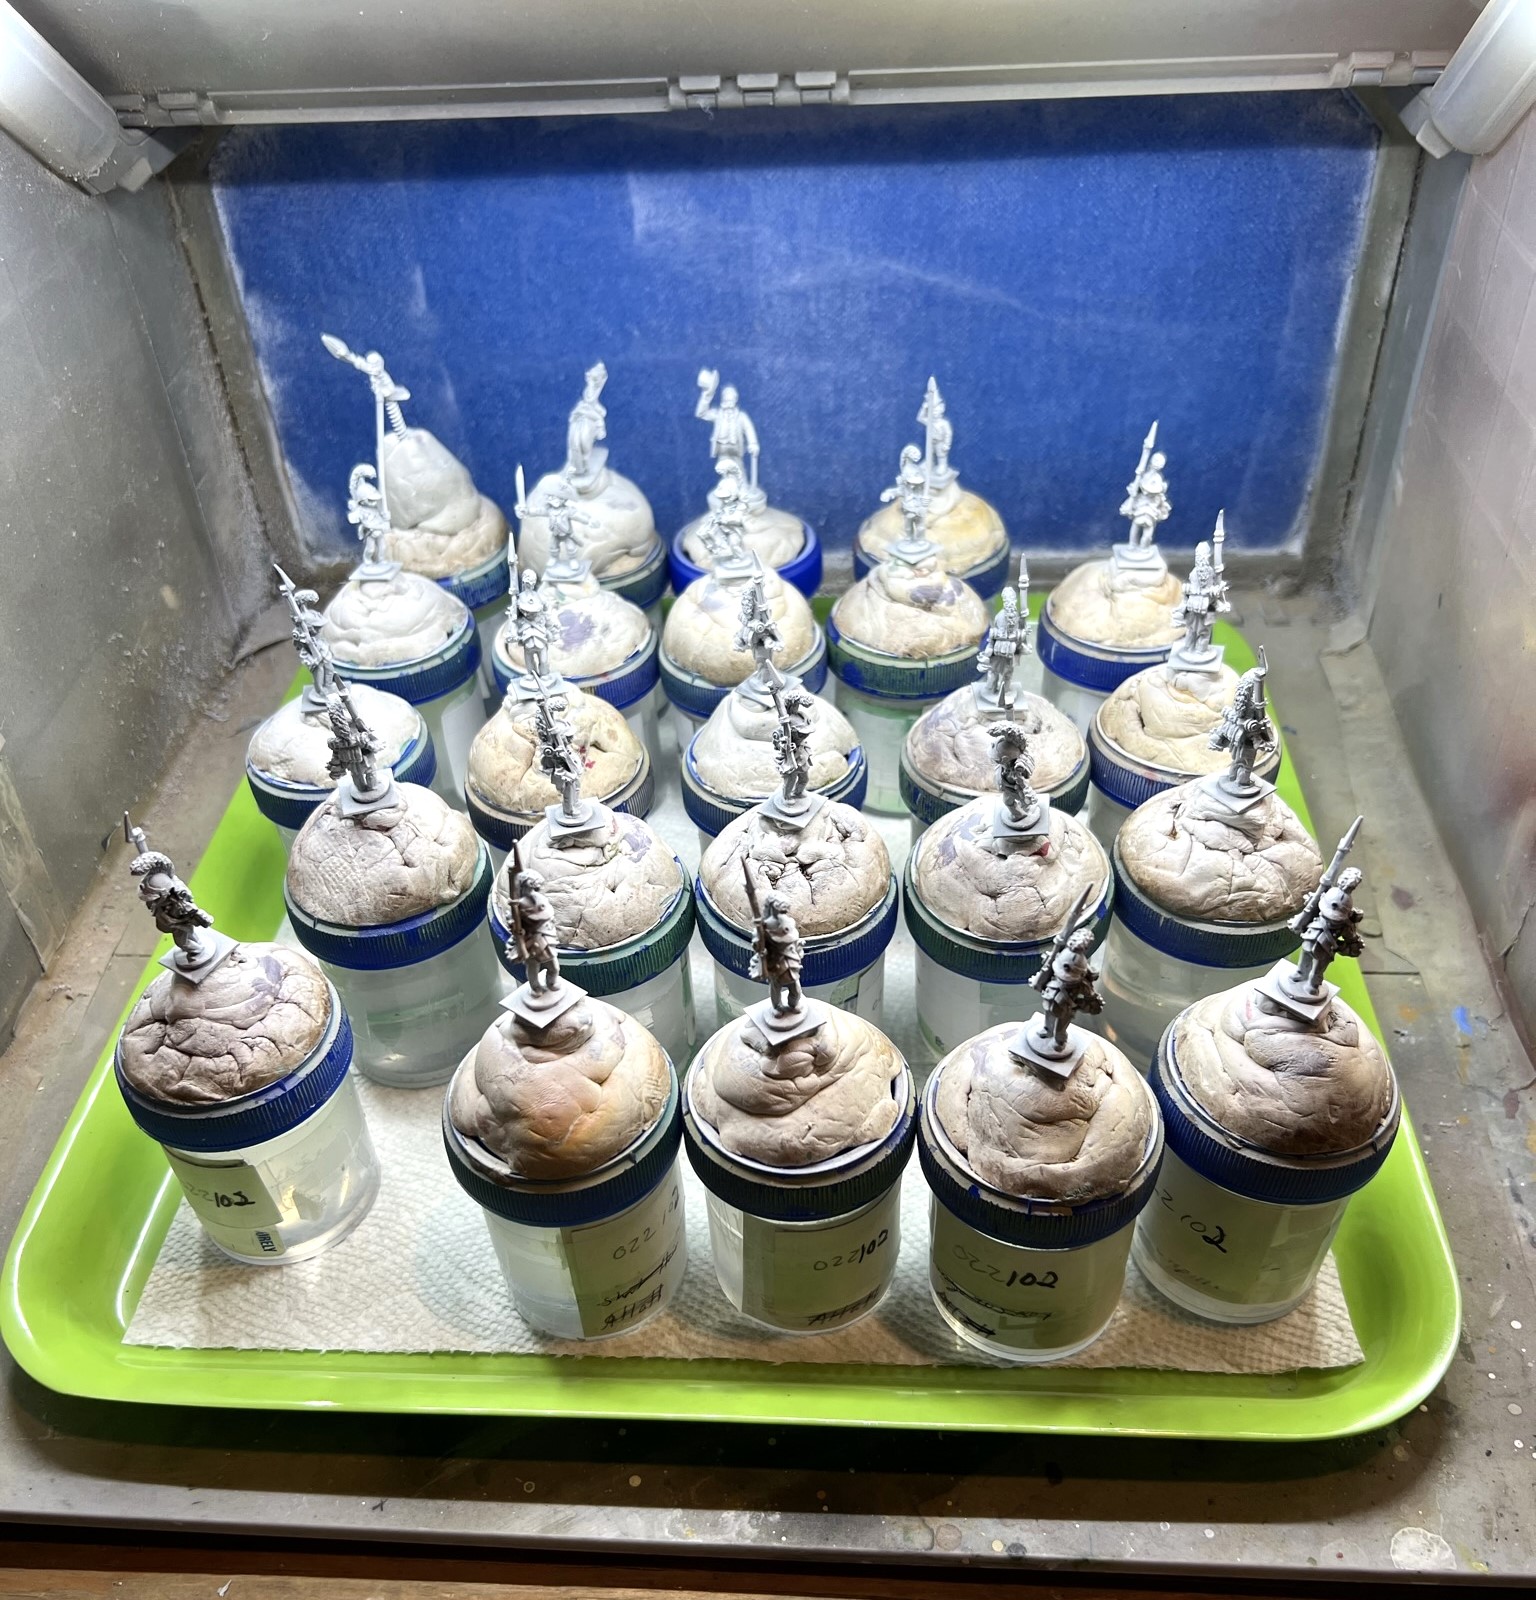
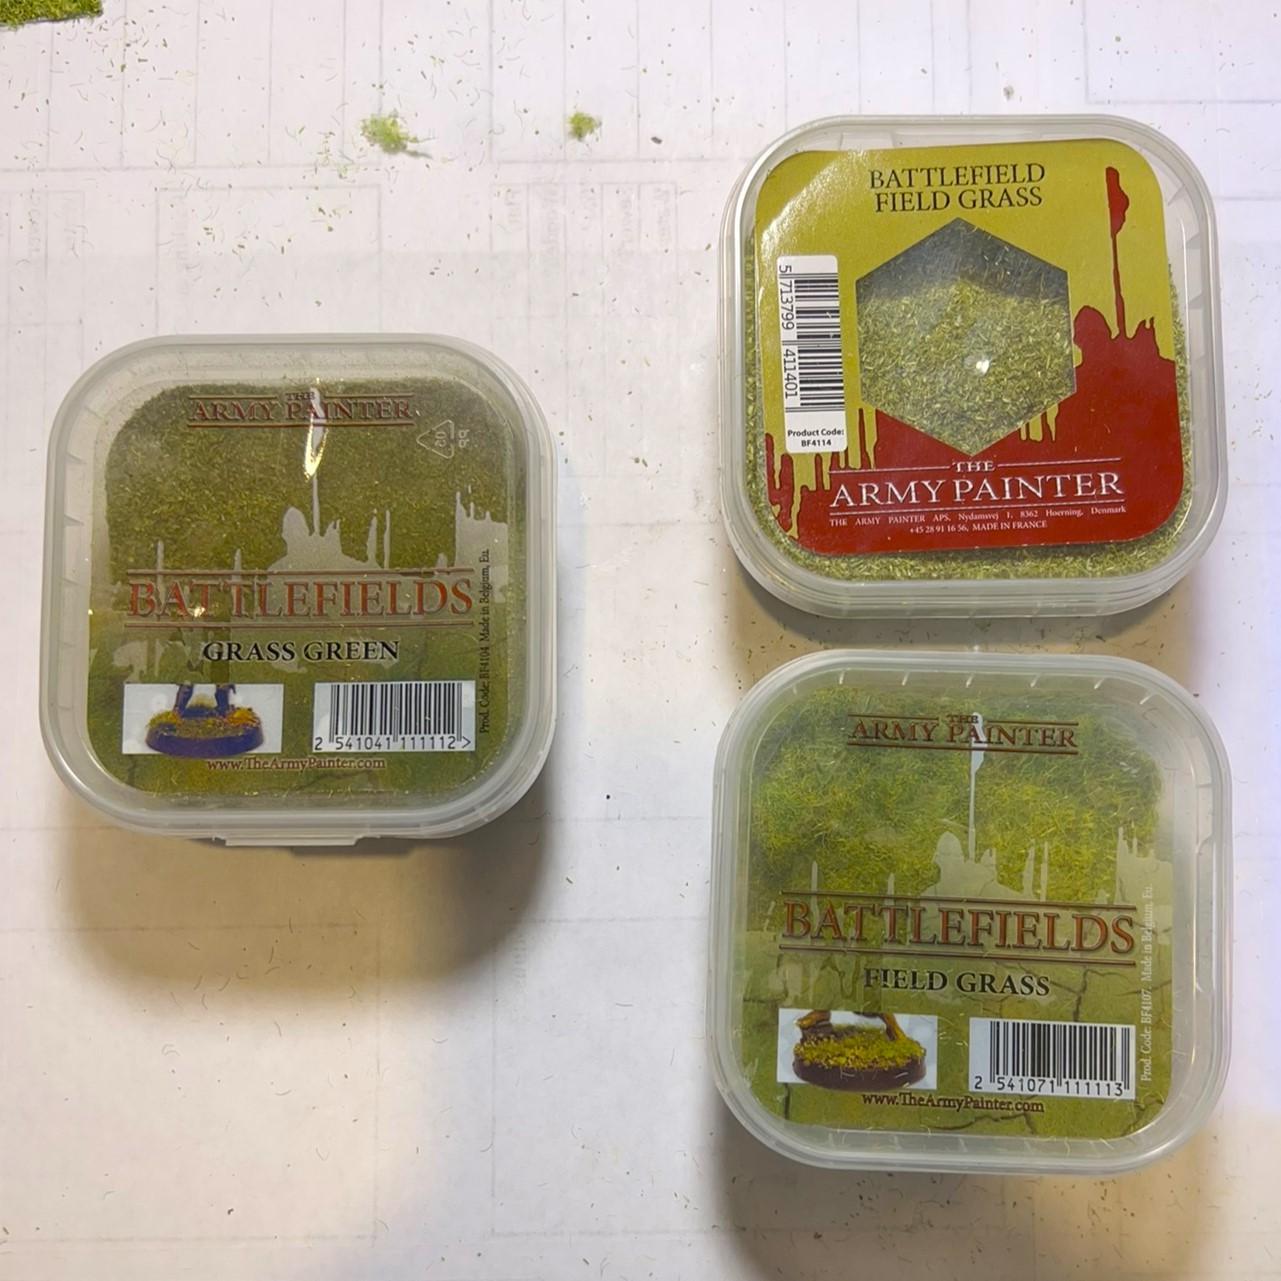
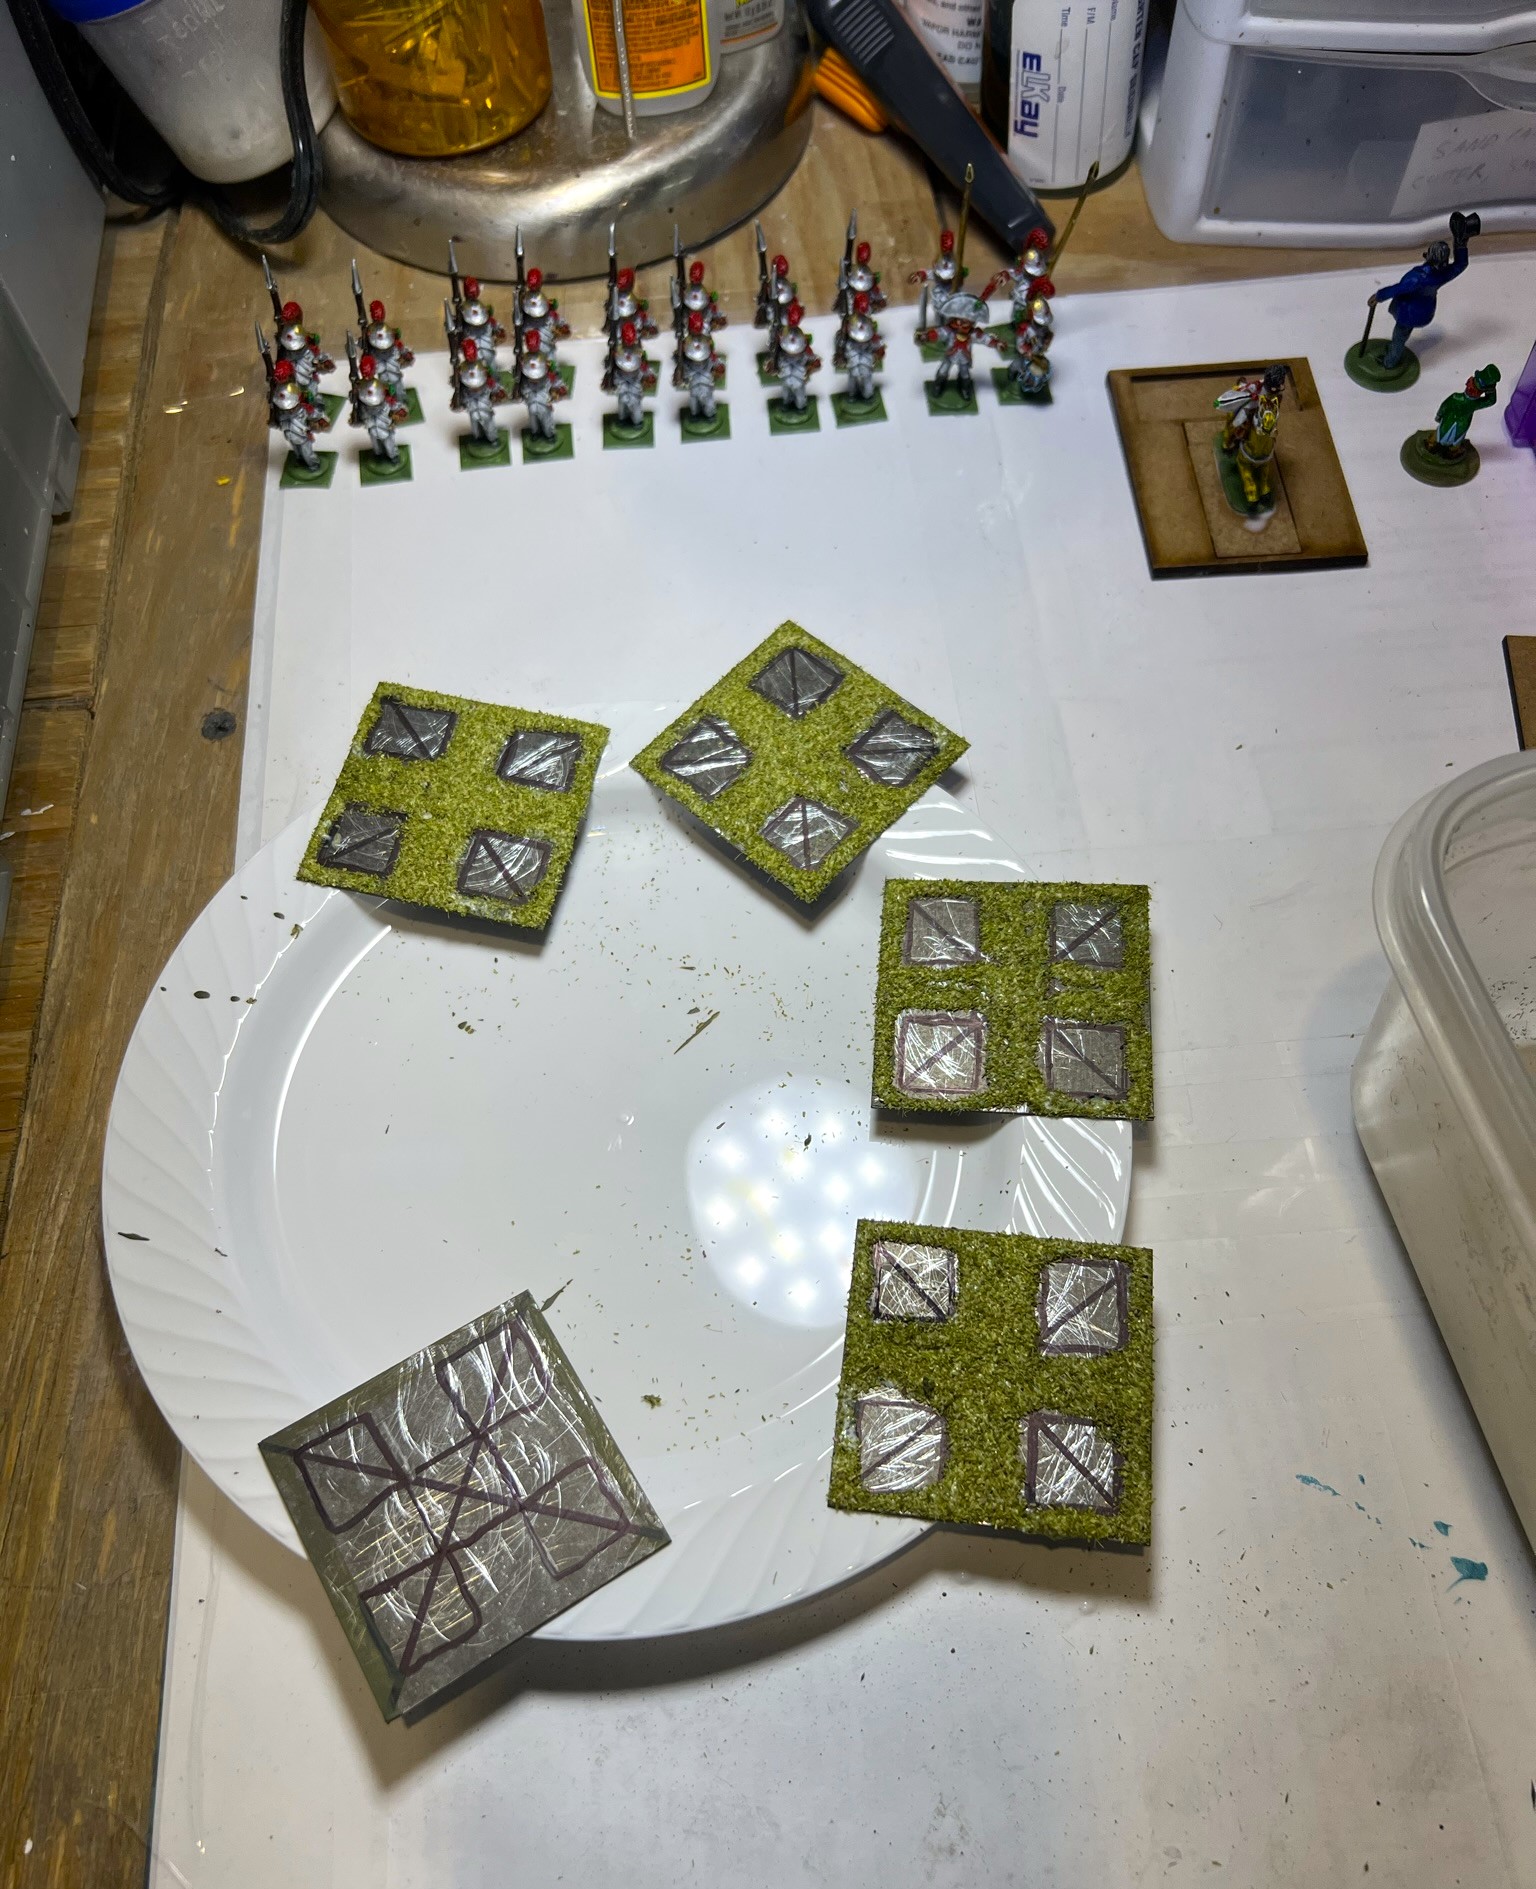
As for mounting, I wanted the bases to have an appropriate look – with muskets facing forward and in parallel. Once the varnish had dried, I removed the WSR from their specimen jars. Then, I needed to use small bits of poster tack on the figures’ actual bases/bottoms – and a sharpie to trace out how they would fit on the 2″ square steel bases. Then I applied an initial flocking around where the figures would not be. After that had dried, I glued the figures carefully to the steel bases and added multiple grasses and flocking to the steel bases and the regimental commander’s MDF base. This took up most of the effort on the 30th as I added three types of grass plus flowers to give the bases depth and to not just see the shapes of the figures under one layer of flocking. It’s probably overkill, but I do prefer to have nicer bases. The flocking was done on December 30th. Then, it was flag time.
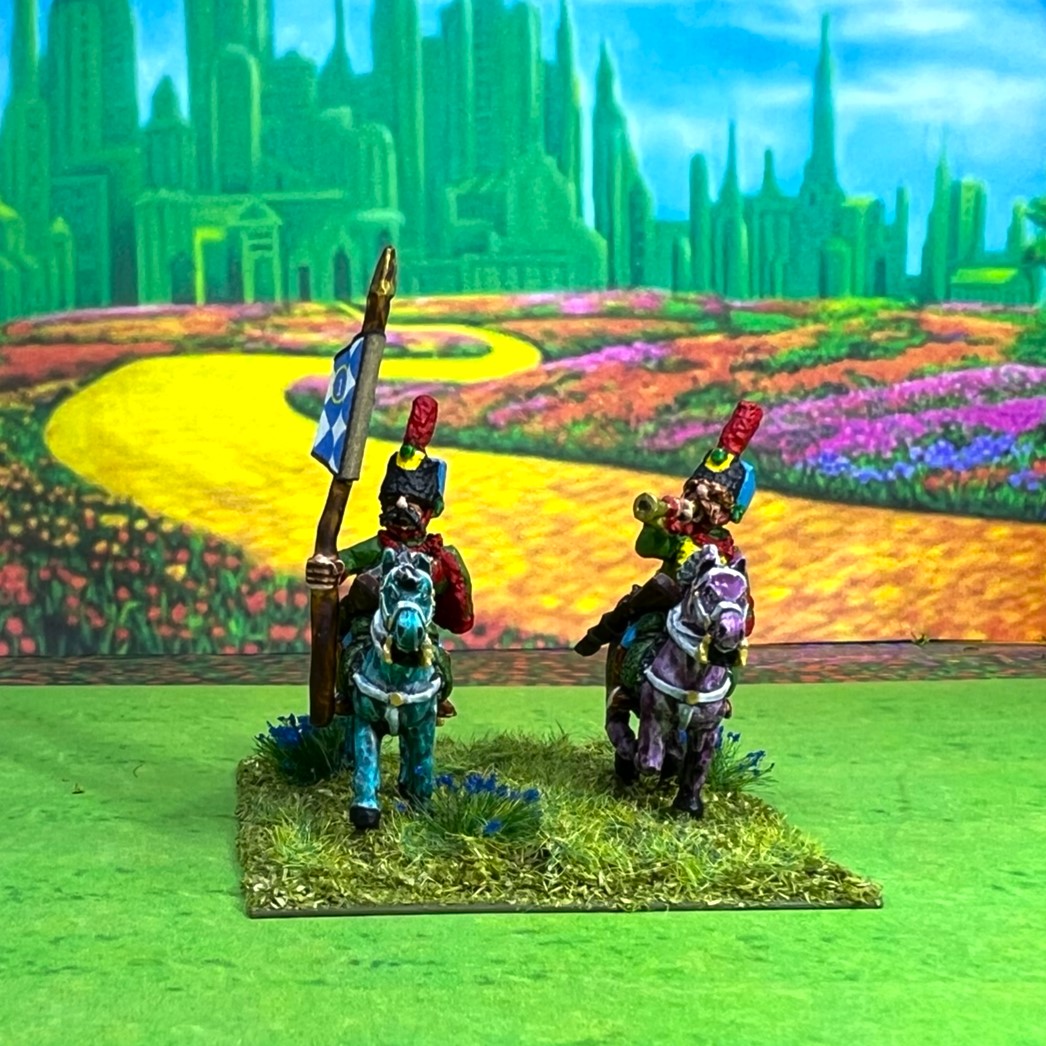
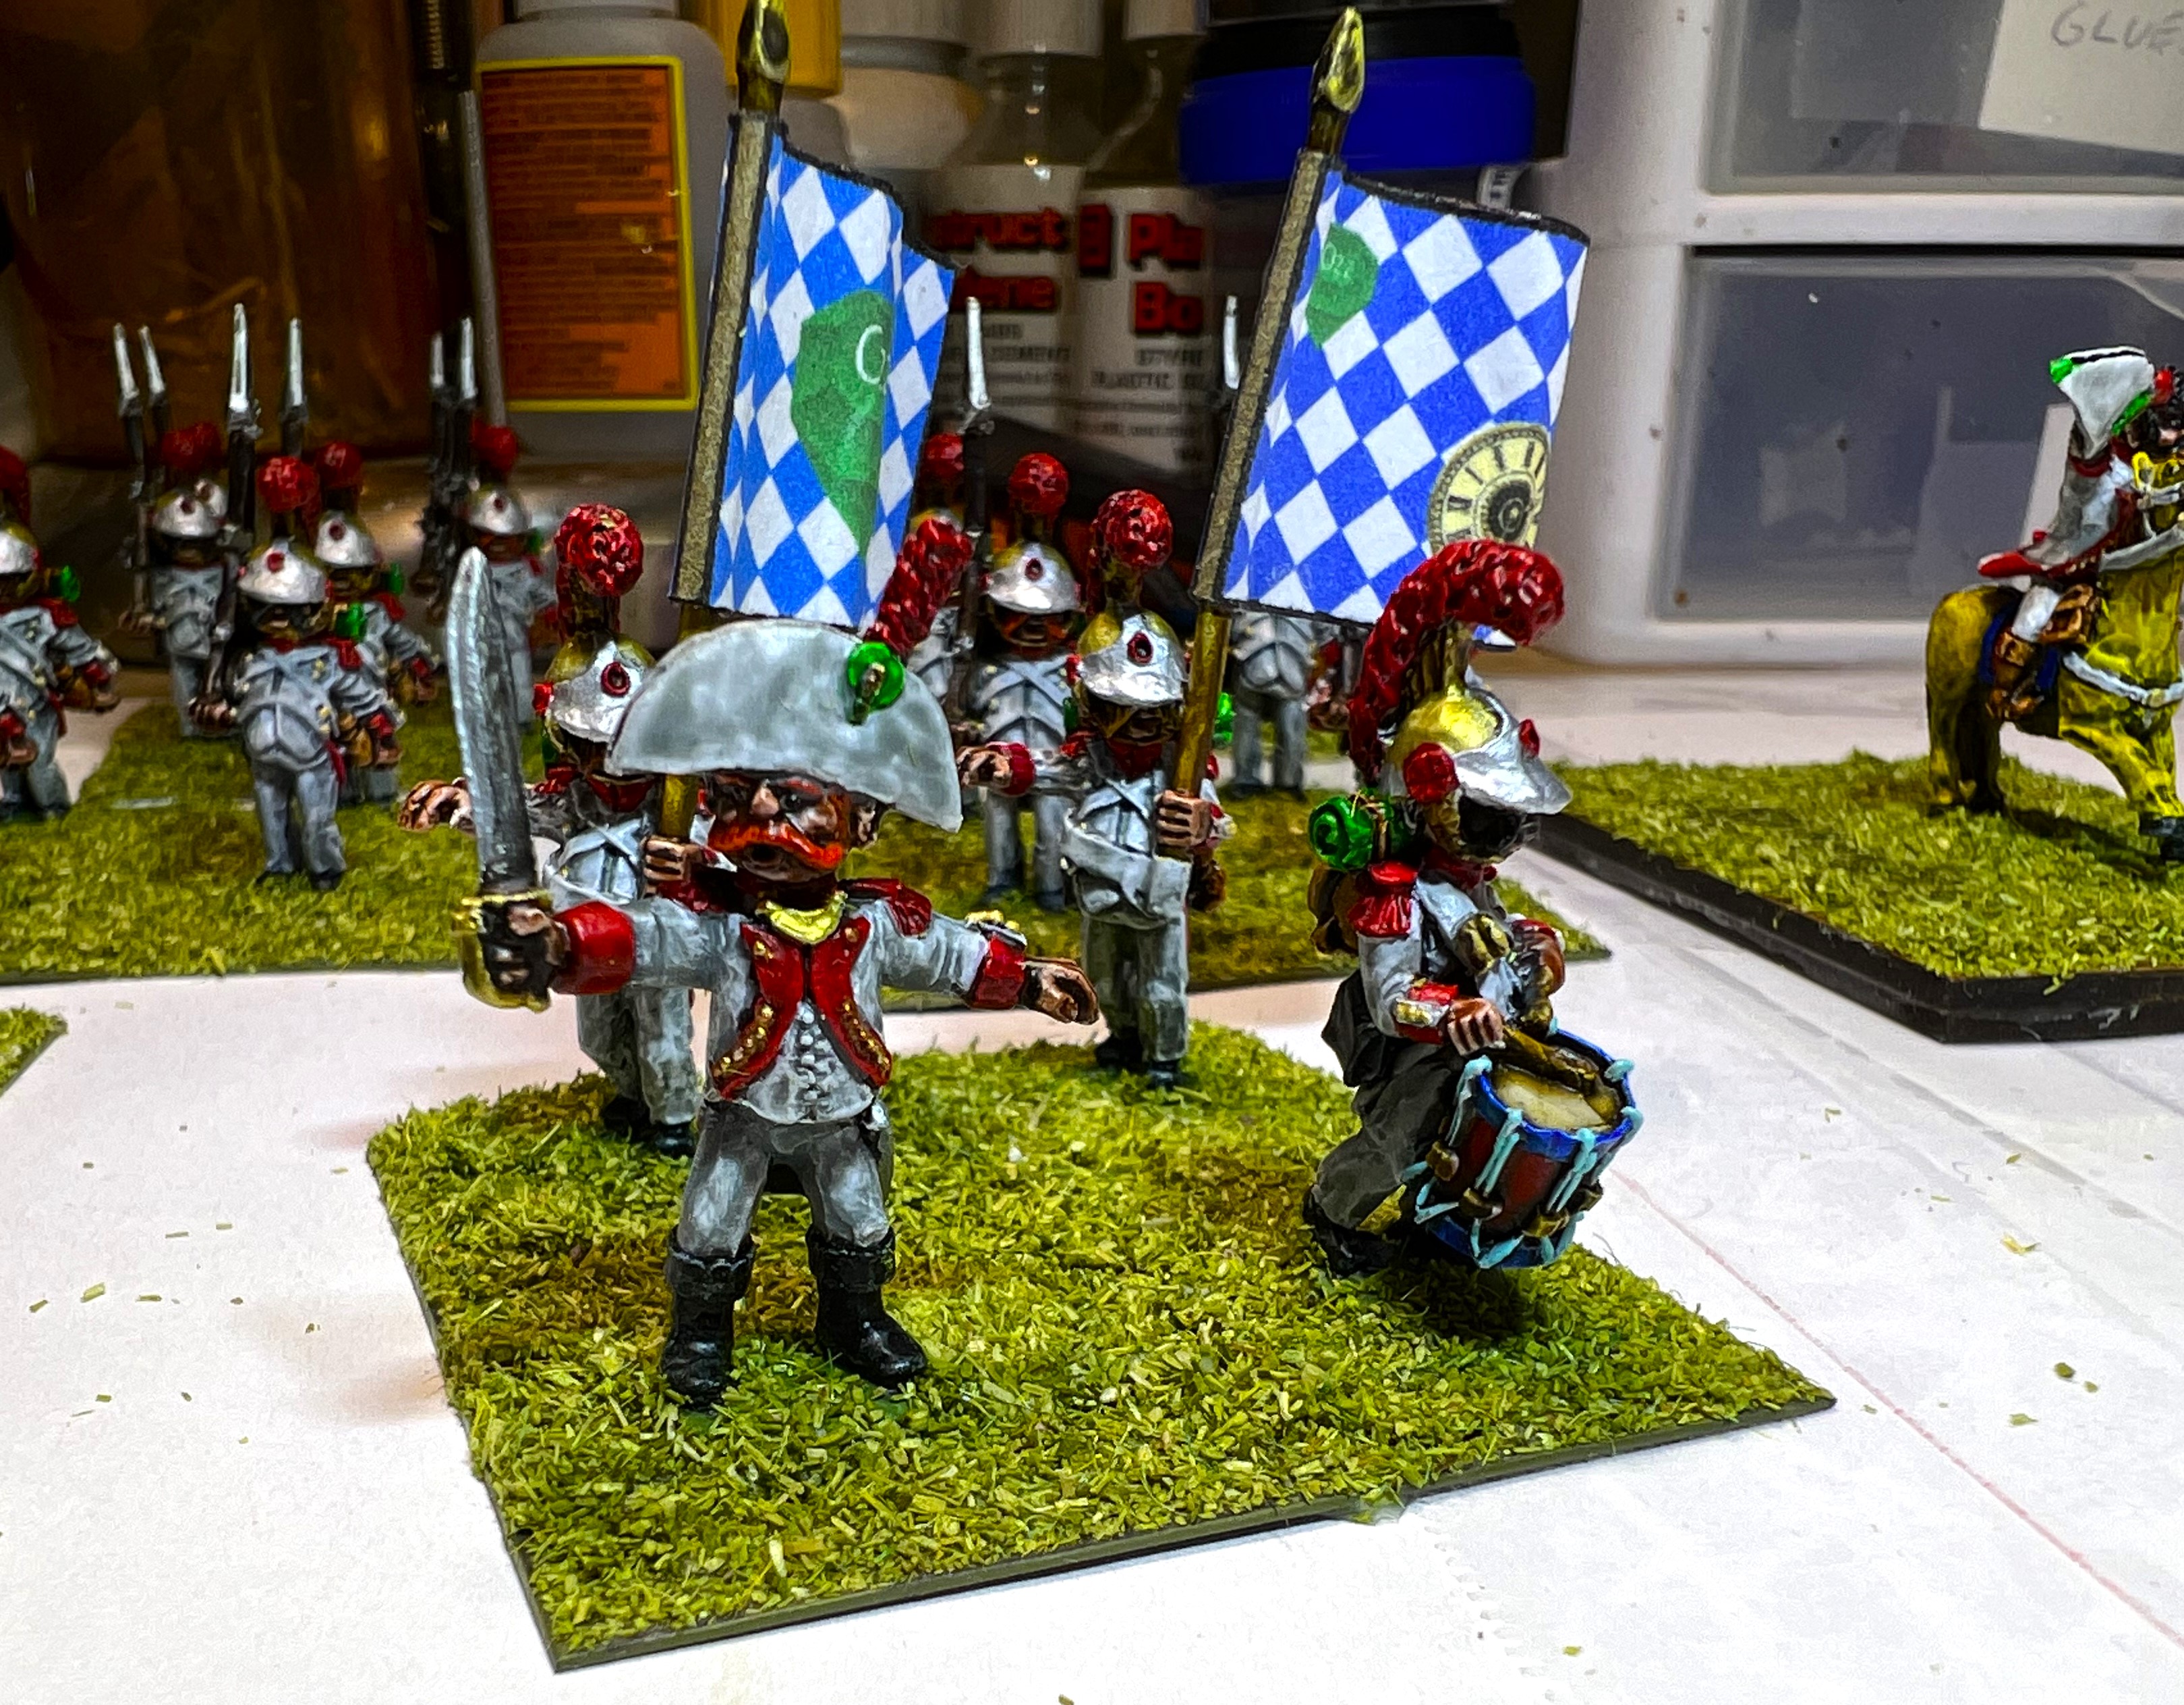
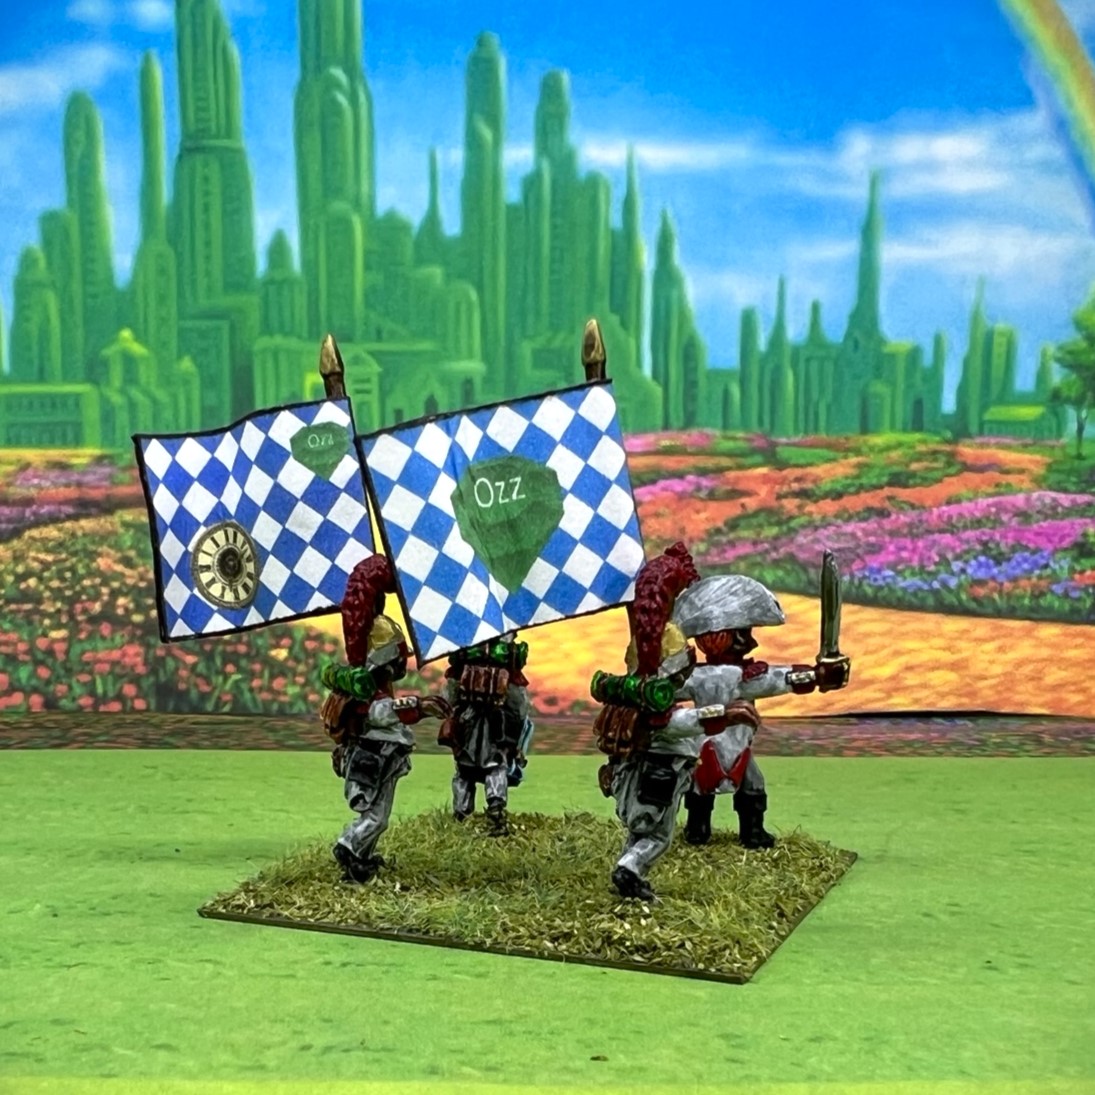
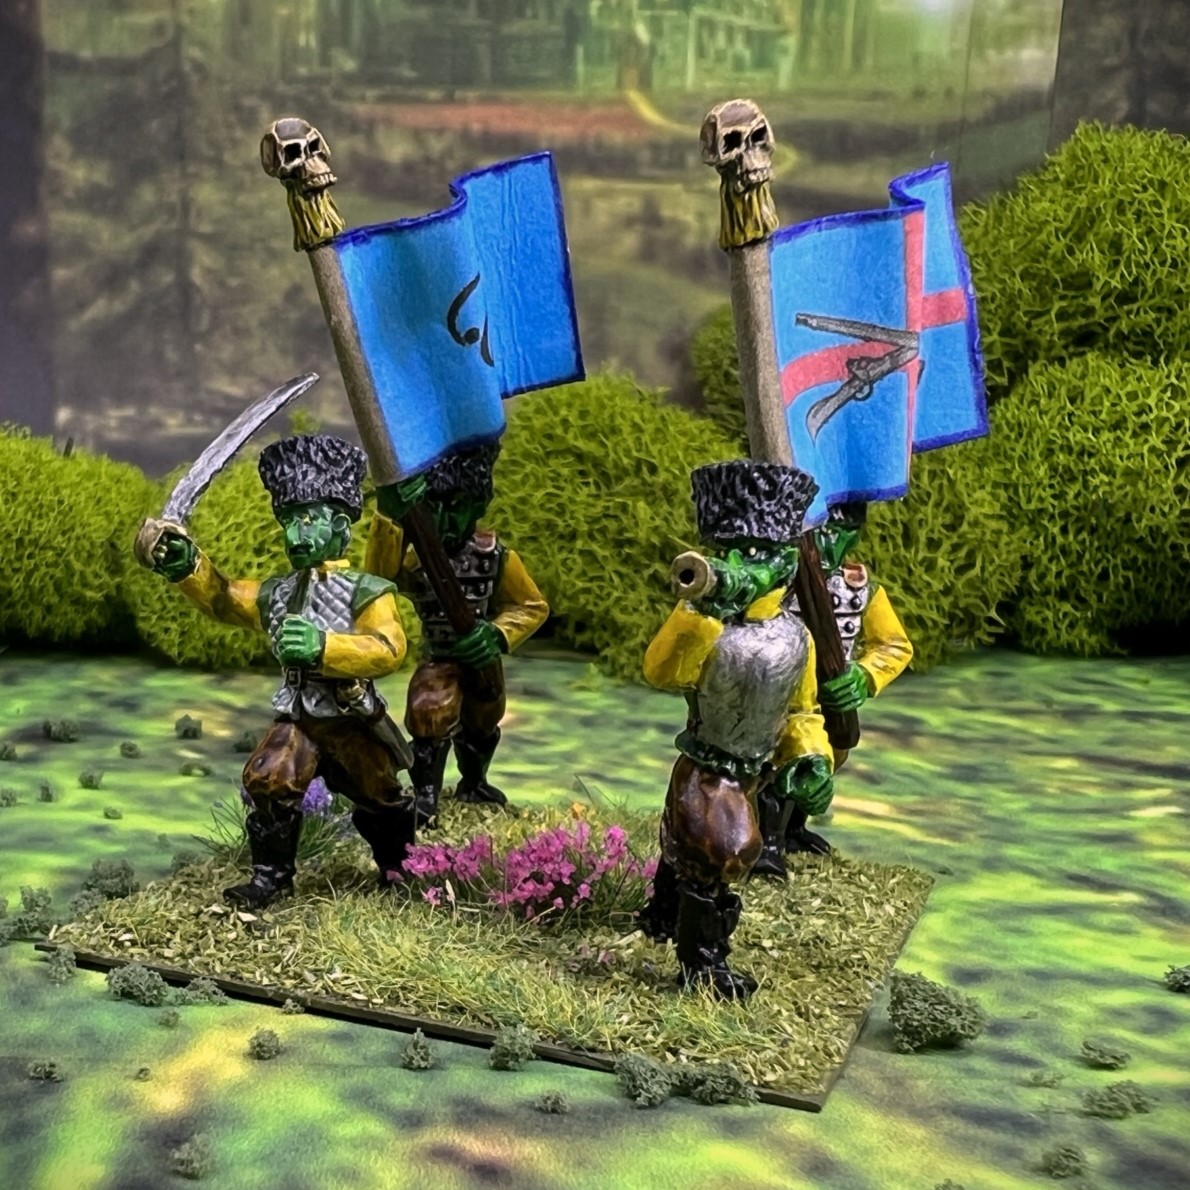
Most (but not all) regiments in Ozz have standards to apply to a couple of figures on a command base. One would be for the faction, the other would be for the regiment. These are available on the Ozz Facebook page as free downloads. When I looked for the WSR, there was no specified flag! By luck, my West Point buddy (and author of the Wars of Ozz rules) Buck Surdu had called me to check in on me post-surgery, and told me he would fix that – and boy he did as you’ll see below – Morin’s Sharpshooters! Hmmm, Buck, does this mean I ride a pink Zilk?
As New Year’s Eve is today, I printed off the flags and finished the WSR. I also made a new backdrop for taking photos of the Winkies as I thought they needed a darker and less friendly look than I gave the Munchkin regiments. You’ll see that below in…
Eye Candy
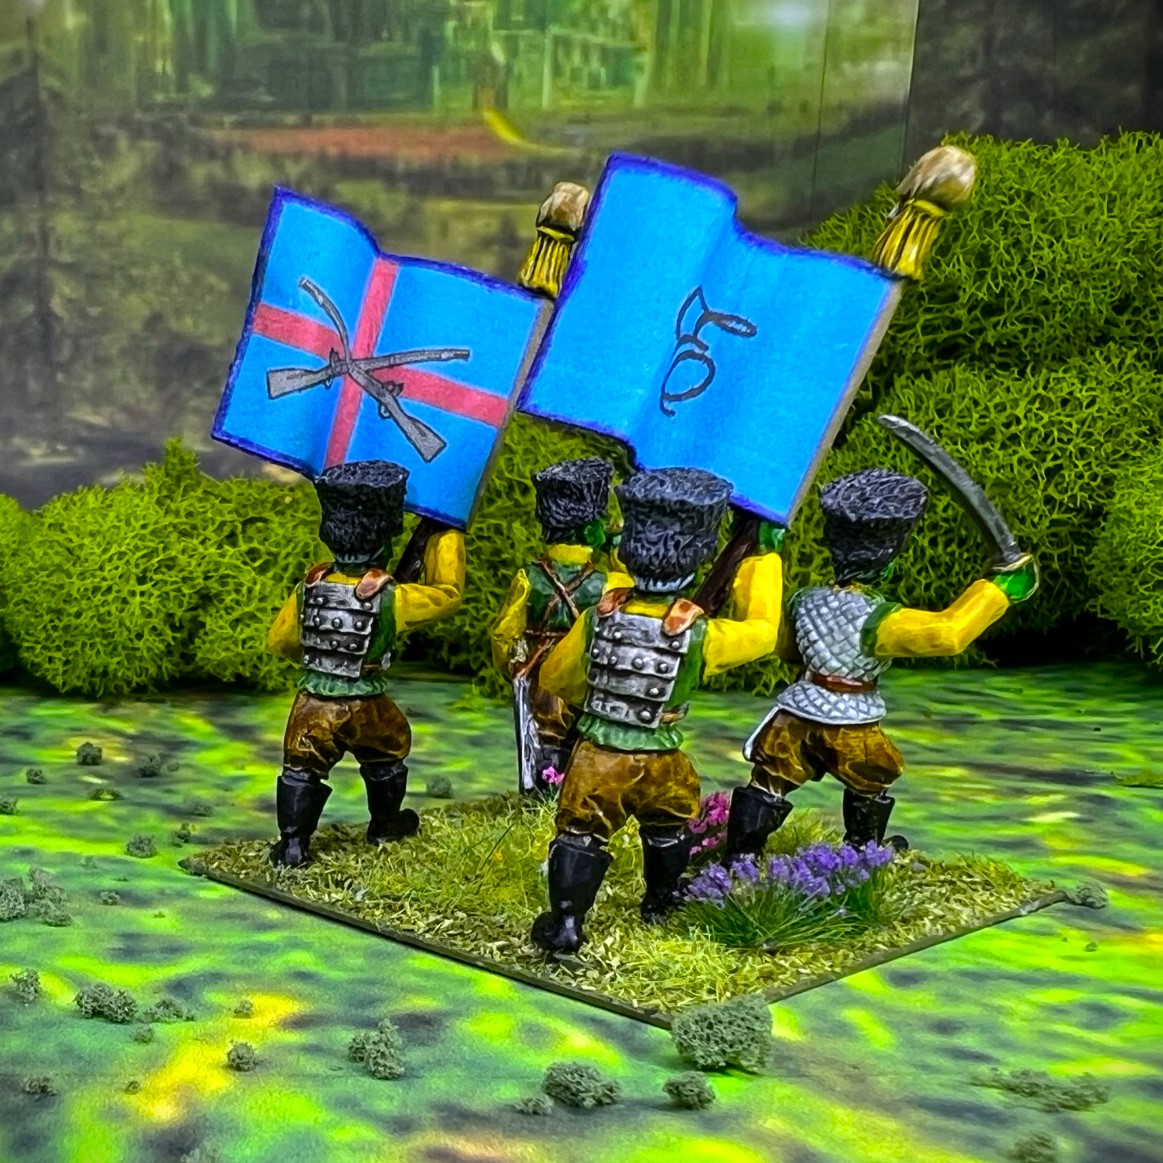
There are 5 stands of 4 figures each – 4 are similar and one is a command stand with an officer, 2 standard bearers and a bugler. I varied the flocking slightly but distinctly – hoping to have an overall match while having some uniqueness for each base. The pink zilk-mounted regimental commander goes on an MDF stand.
Regimental Commander Stand
Stand 1


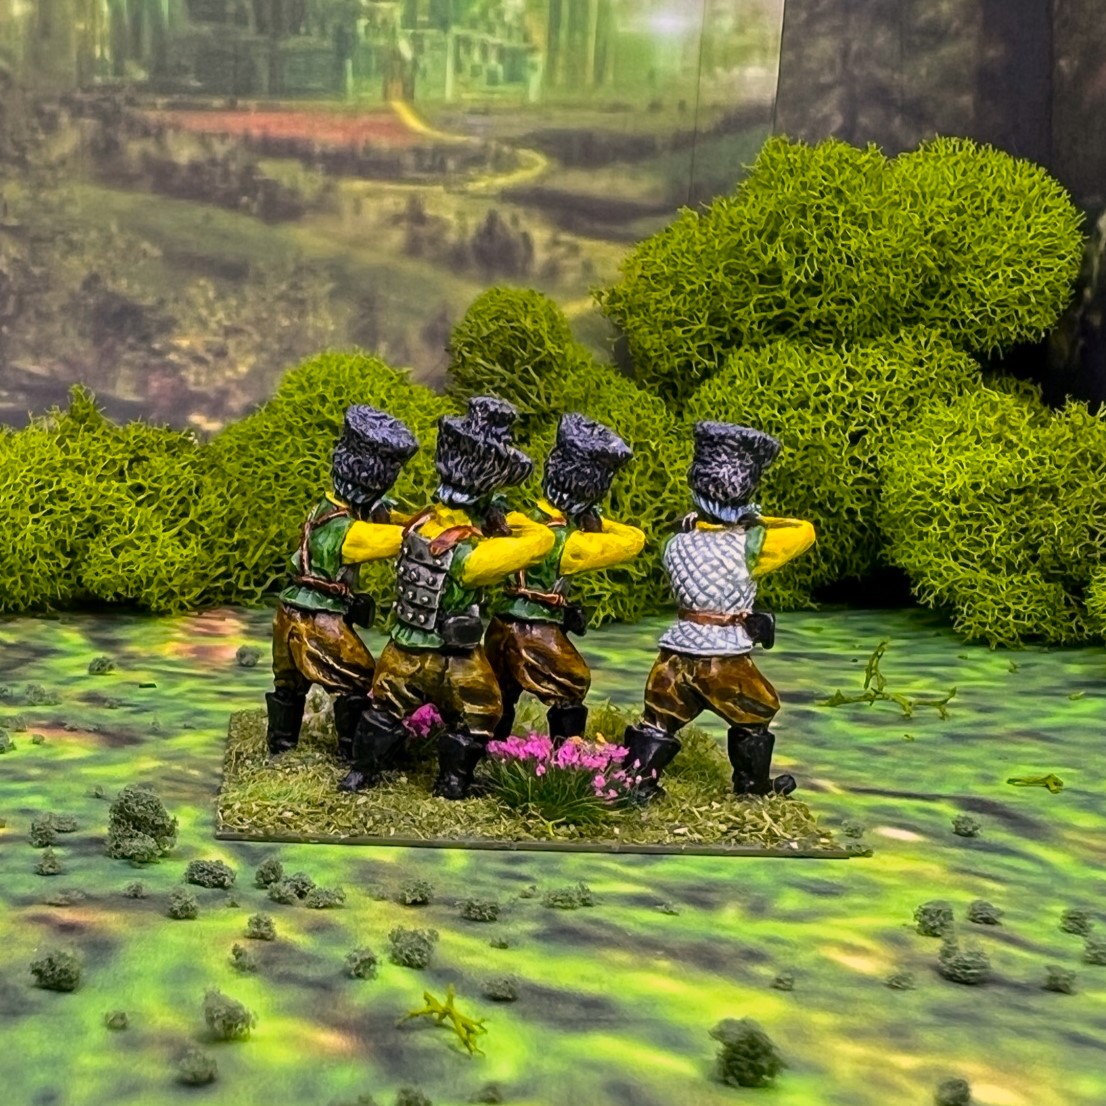
Stand 2
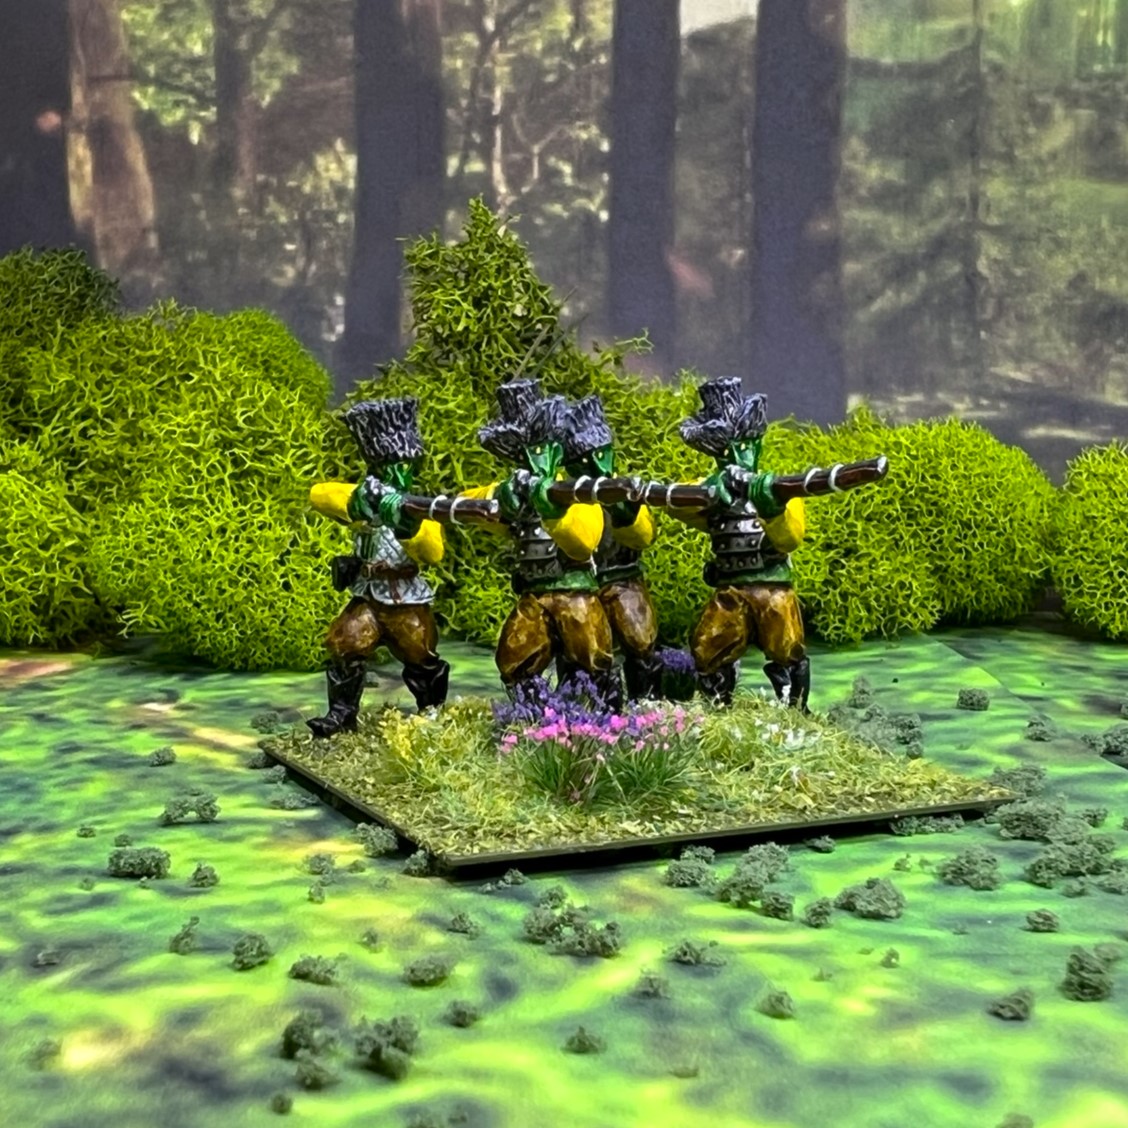
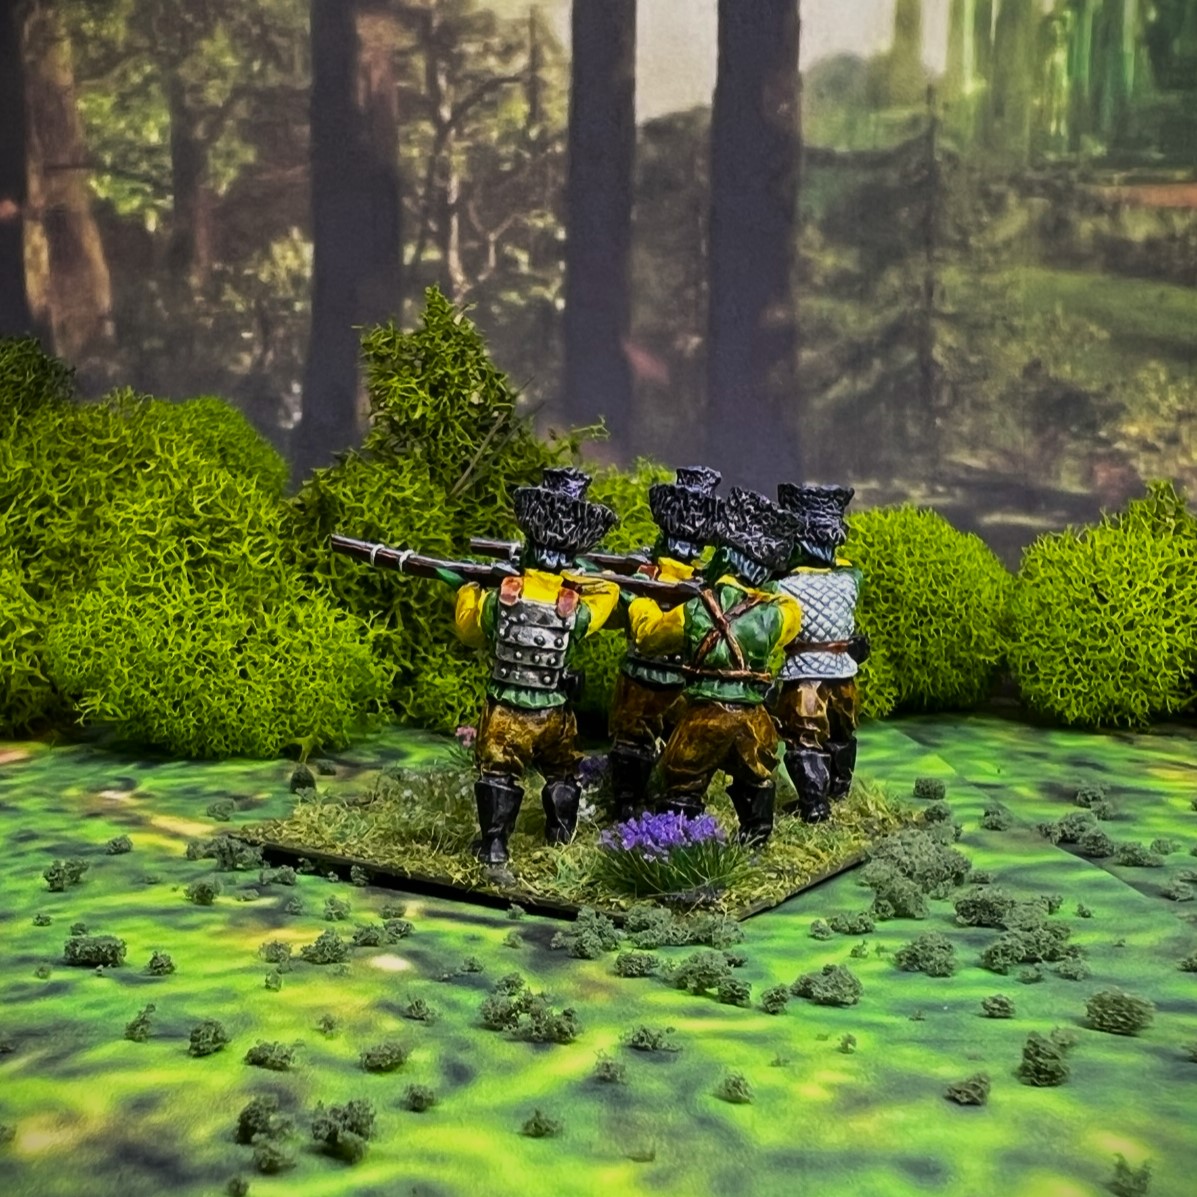
Stand 3


Stand 4

Command Stand

Group shots

I will continue to build my brigade of Winkies in 2023, as well as more Ozz goodness. I hope that you will stay with and/or join me on this journey.
My next post will be a 2022 roundup and 2023 goal setting one. There, I’ll review and hold myself accountable for my 2022 predictions and goals of a year ago. Hell, somebody has to do it!
There, I will set my 2023 goals as well.
I wish all of you a very Happy New Year – and please know that I am very appreciative of your readership and support!
Still have more to come…
Miscellaneous details and references for those interested in that sort of thing:
For all of my previous posts on Wars of Ozz games, figures, units, and other related projects – please see this page.
PAINTS, INKS, GLAZES, SHADES, WASHES, PIGMENTS, FLOCKING, GLUES AND MORE THAT I USED ON THIS WINKIE SHARPSHOOTER REGIMENT:
- Gorilla Glue
- Paper clip wire pieces
- 1 1/4″ x 1″ steel base from Wargames Accessories (#FOW1)
- Poster tack
- Vallejo Premium Primer “White”
- Vallejo “Flow Improver”
- Vallejo “Airbrush Thinner”
- Citadel “Nuln Oil” (wash)
- Vallejo Model Color “White”
- Citadel “Contrast Paint – Ork Skin”
- Citadel “Contrast Paint – Contrast Medium”
- Vallejo Model Air “Gun Metal”
- Vallejo Model Air “Steel”
- Vallejo Model Color “Wood Grain”
- Army Painter “Speed Paint – Runic Grey”
- Citadel “Ironbreaker”
- Citadel “Nuln Oil GLOSS” (wash)
- Citadel “Contrast Paint – Black Legion”
- Citadel “Contrast Paint – Aggaros Dunes”
- Citadel “Warpfiend Grey”
- Citadel “Contrast Paint – Black Legion”
- Citadel “Contrast Paint – Striking Scorpion Green”
- Vallejo Game Air “Sick Green”
- Vallejo Game Ink “Yellow”
- Army Painter “Speed Paint – Hardened Leather”
- Vallejo Game Ink “Black Green”
- Citadel “Contrast Paint – Ironjawz Yellow”
- Citadel “Lamenters Yellow” (glaze)
- Vallejo Model Air “Bright Brass”
- Citadel “Contrast Paint – Skeleton Horde”
- Army Painter “Speed Paint – Holy White”
- Americana “Bubblegum Pink”
- Citadel “Fire Dragon Bright”
- Vallejo Game Air “Black”
- Americana “Dioxazine Purple”
- Citadel “Contrast Paint – Doomfire Magenta”
- Army Painter “Purple Tone” (wash/shade)
- Citadel “Changeling Pink” (dry)
- Vallejo “Gloss Varnish”
- Vallejo Mecha Varnish “Matte Varnish”
- Regimental MDF base from Old Glory/Wars of Ozz Miniatures
- 2″ square steel base from Wargames Accessories (#21)
- Black Sharpie pen
- PS Model Color “British Brown Drab”
- Elmer’s PVA Glue
- Army Painter “Battlefields Grass Green” (flocking)
- Army Painter “Battlefield Field Grass” (flocking)
- Army Painter “Battlefields Field Grass” (flocking)
- Army Painter “Battlefields Meadow Flowers” (flocking)
- Shadow’s Edge Miniatures “6mm Dark Forest Pink Tufts” (flocking)
- Shadow’s Edge Miniatures “6mm Dark Forest Purple Tufts” (flocking)
- Winkie Flags from Buck Surdu printed on card stock
- Blue Sharpie Pen
- Brown Sharpie Pen
Again, as you may want to check out the Wars of Ozz figures range – there are two places to get them (and I make no money from this btw). The game rules and figures are available from the following two places:
In the US Old Glory has a site – Wars of Ozz Miniatures.
In the UK go to Sally 4th.