Yes, it’s been a while since I updated you on the project – a month! It often seems like either everything is going on at the same time, or we are waiting and nothing is happening , and November 2021 was such a month.
Lots of external and internal issues happened. I had Historicon, surgery, Thanksgiving, and weather to deal with, plus a broken dishwasher and some old school Vikings minis to paint that I just posted about. So, where are we? Like I wrote, some days it was like crazy-town with activity, and others like crickets as we waited for inspections or materials. We are further along but winter is coming – so I’ll give you the progress time line in pictures.
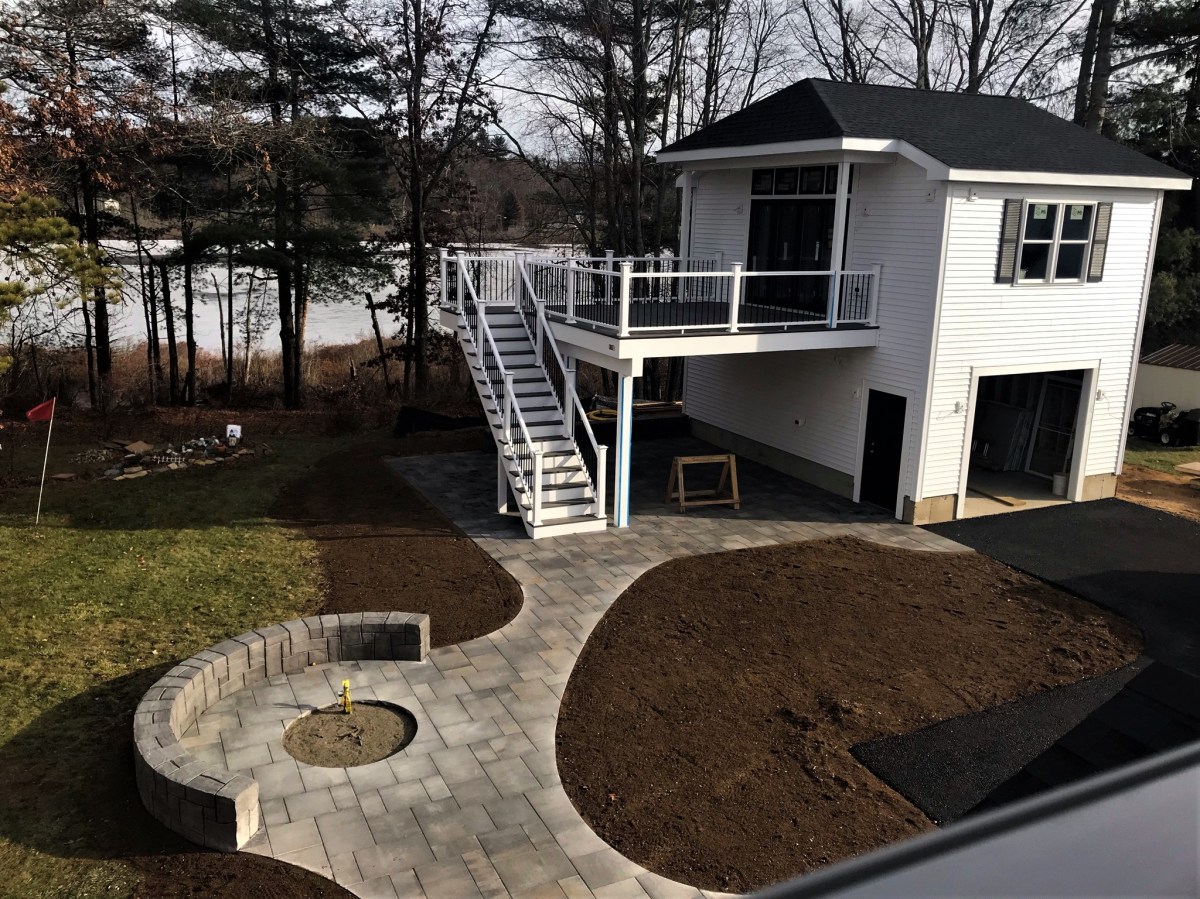
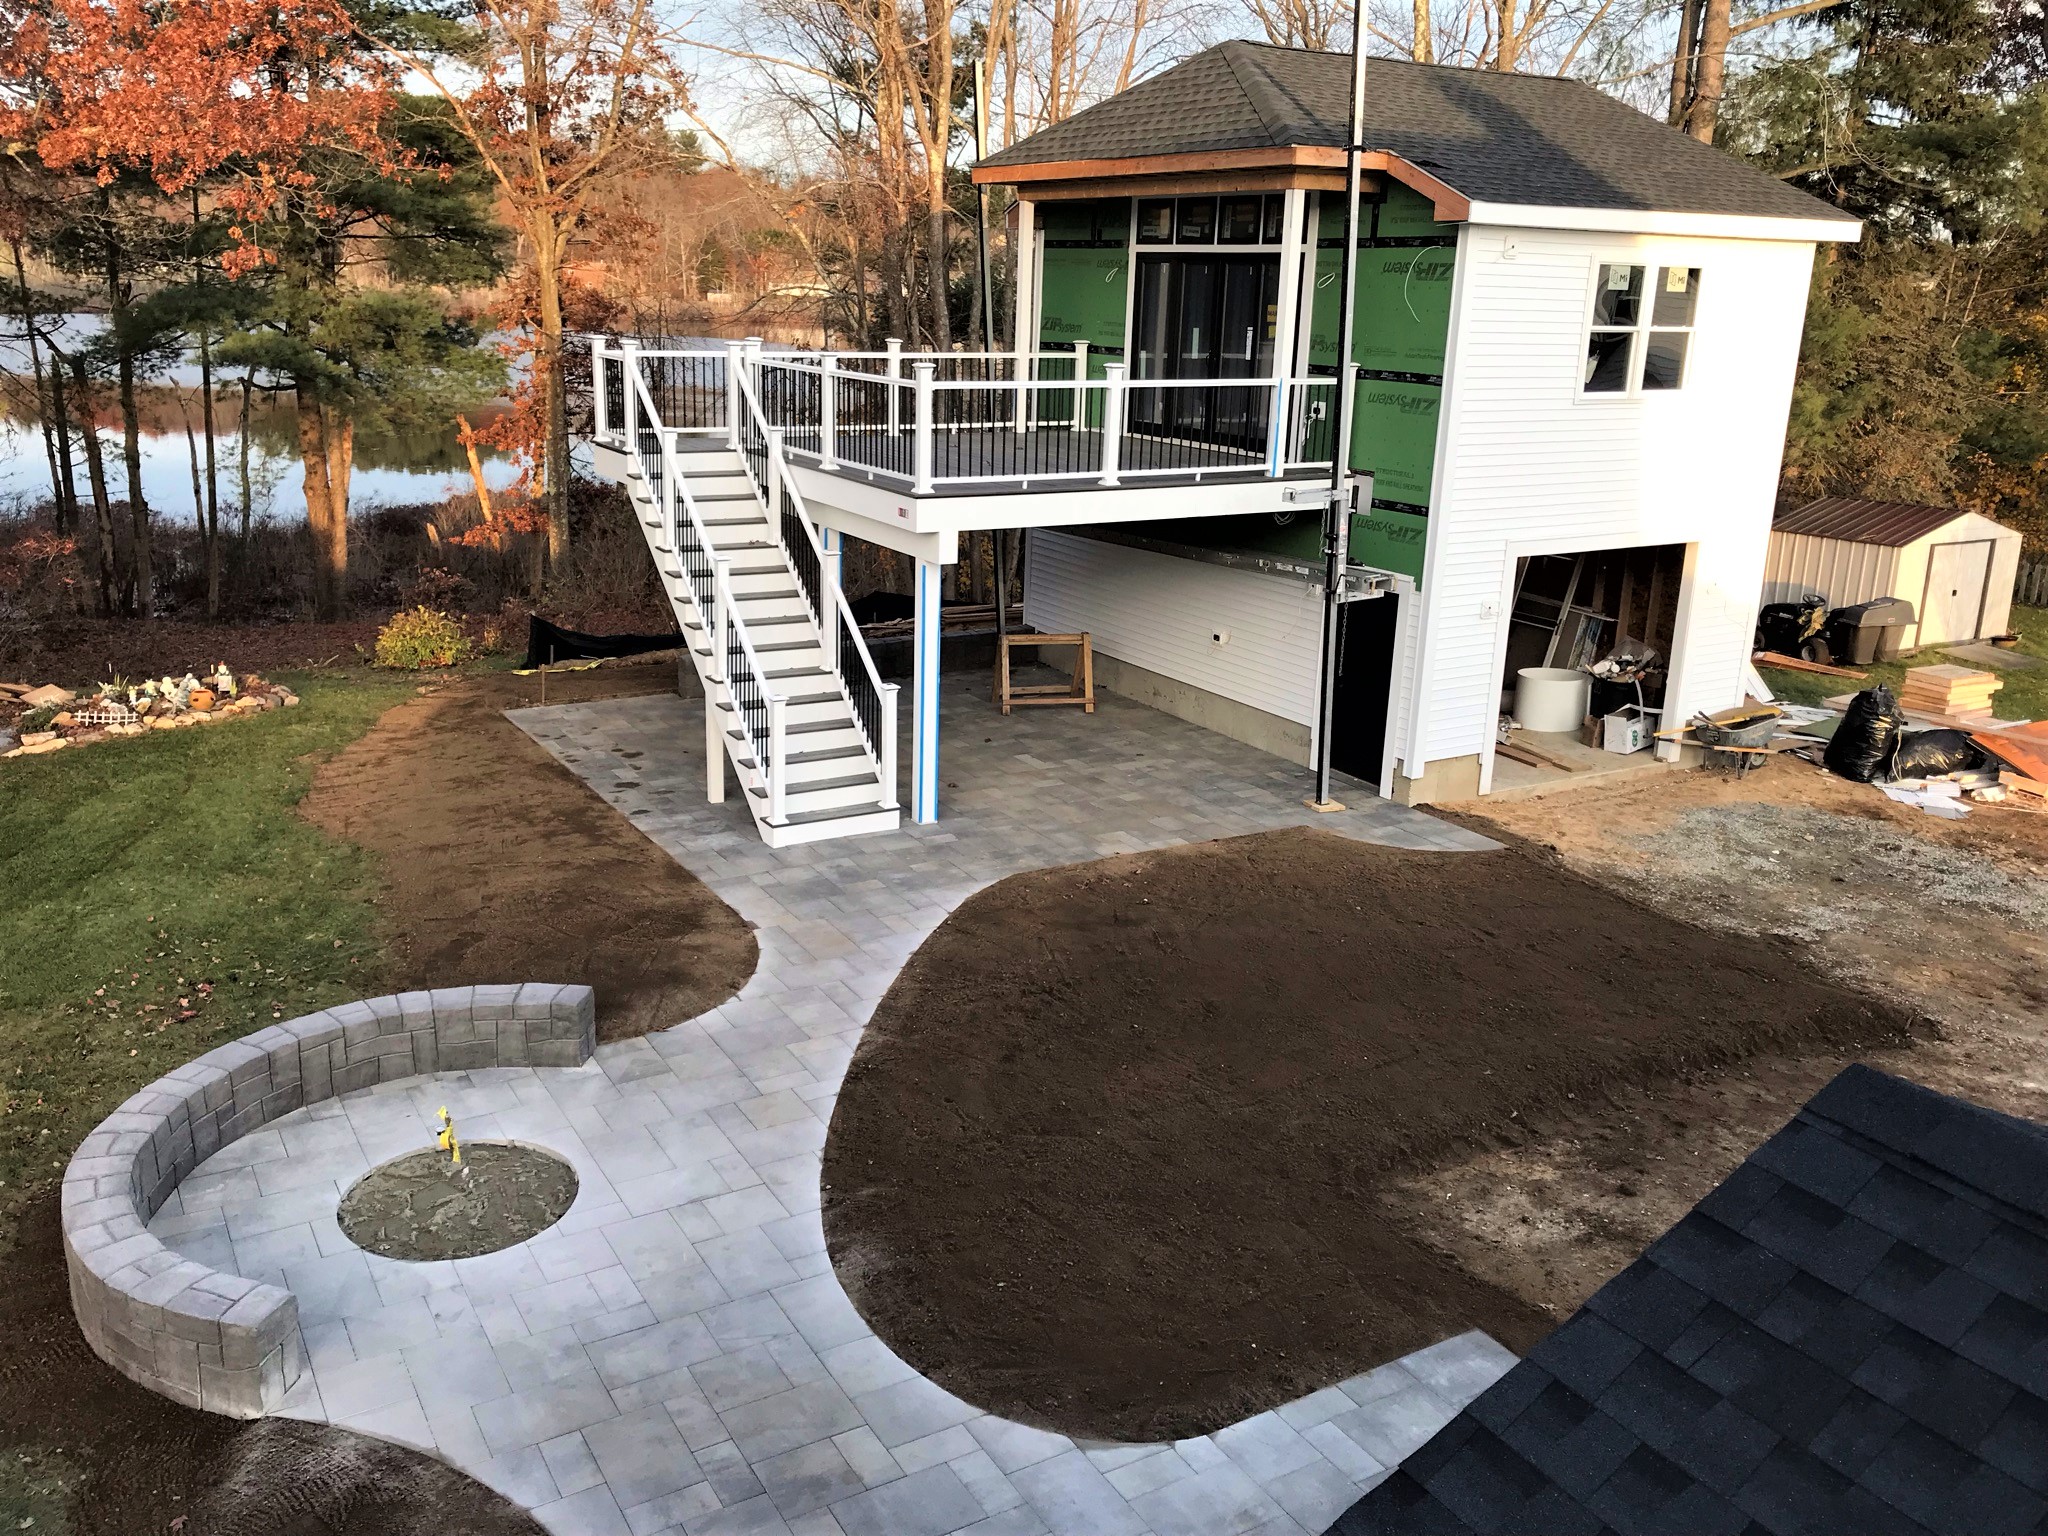
As a reminder – as of November 6th – the project looked like this:
Week 17 – November 7th to 13th
November 9
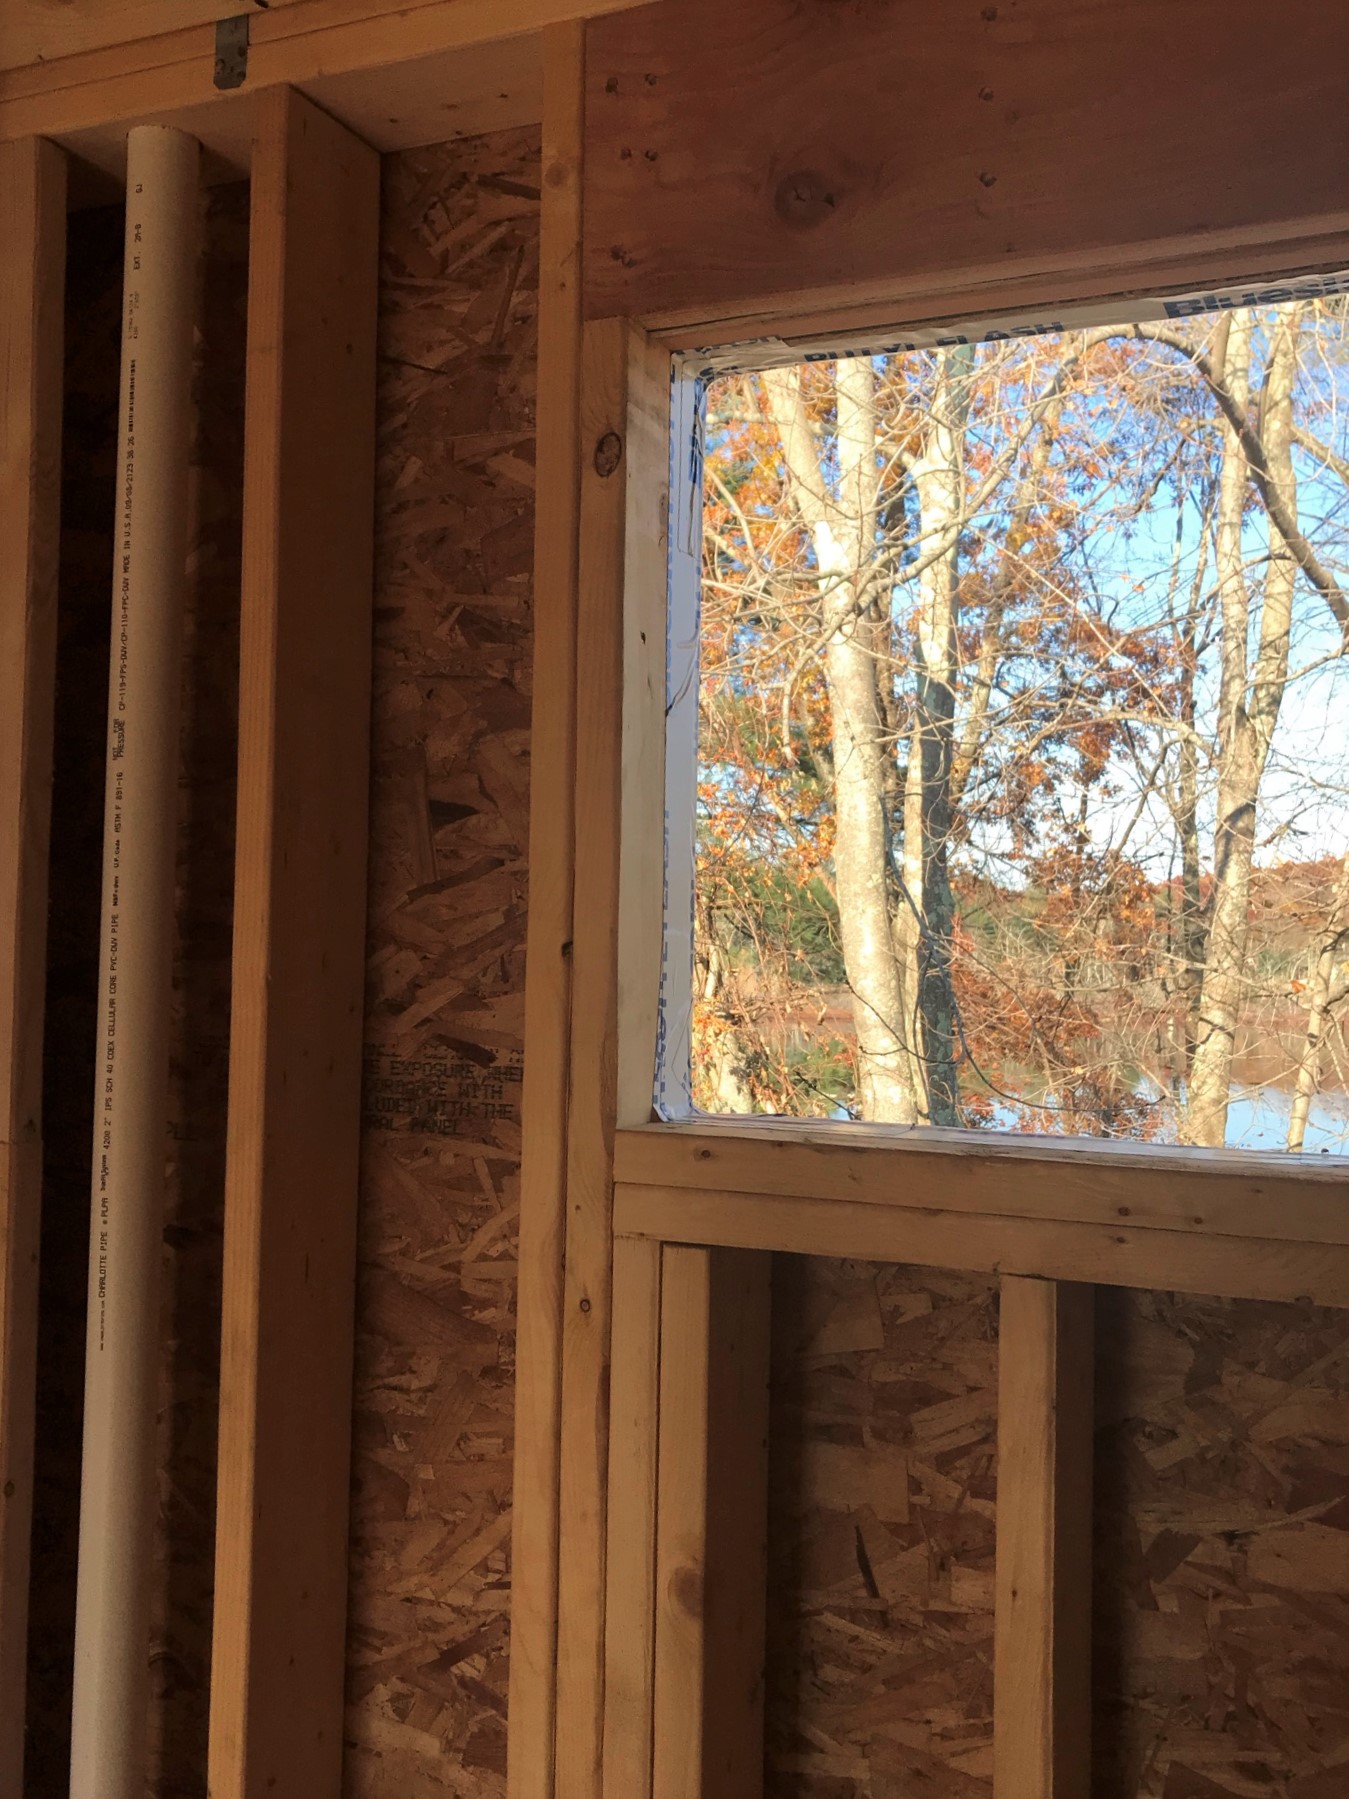
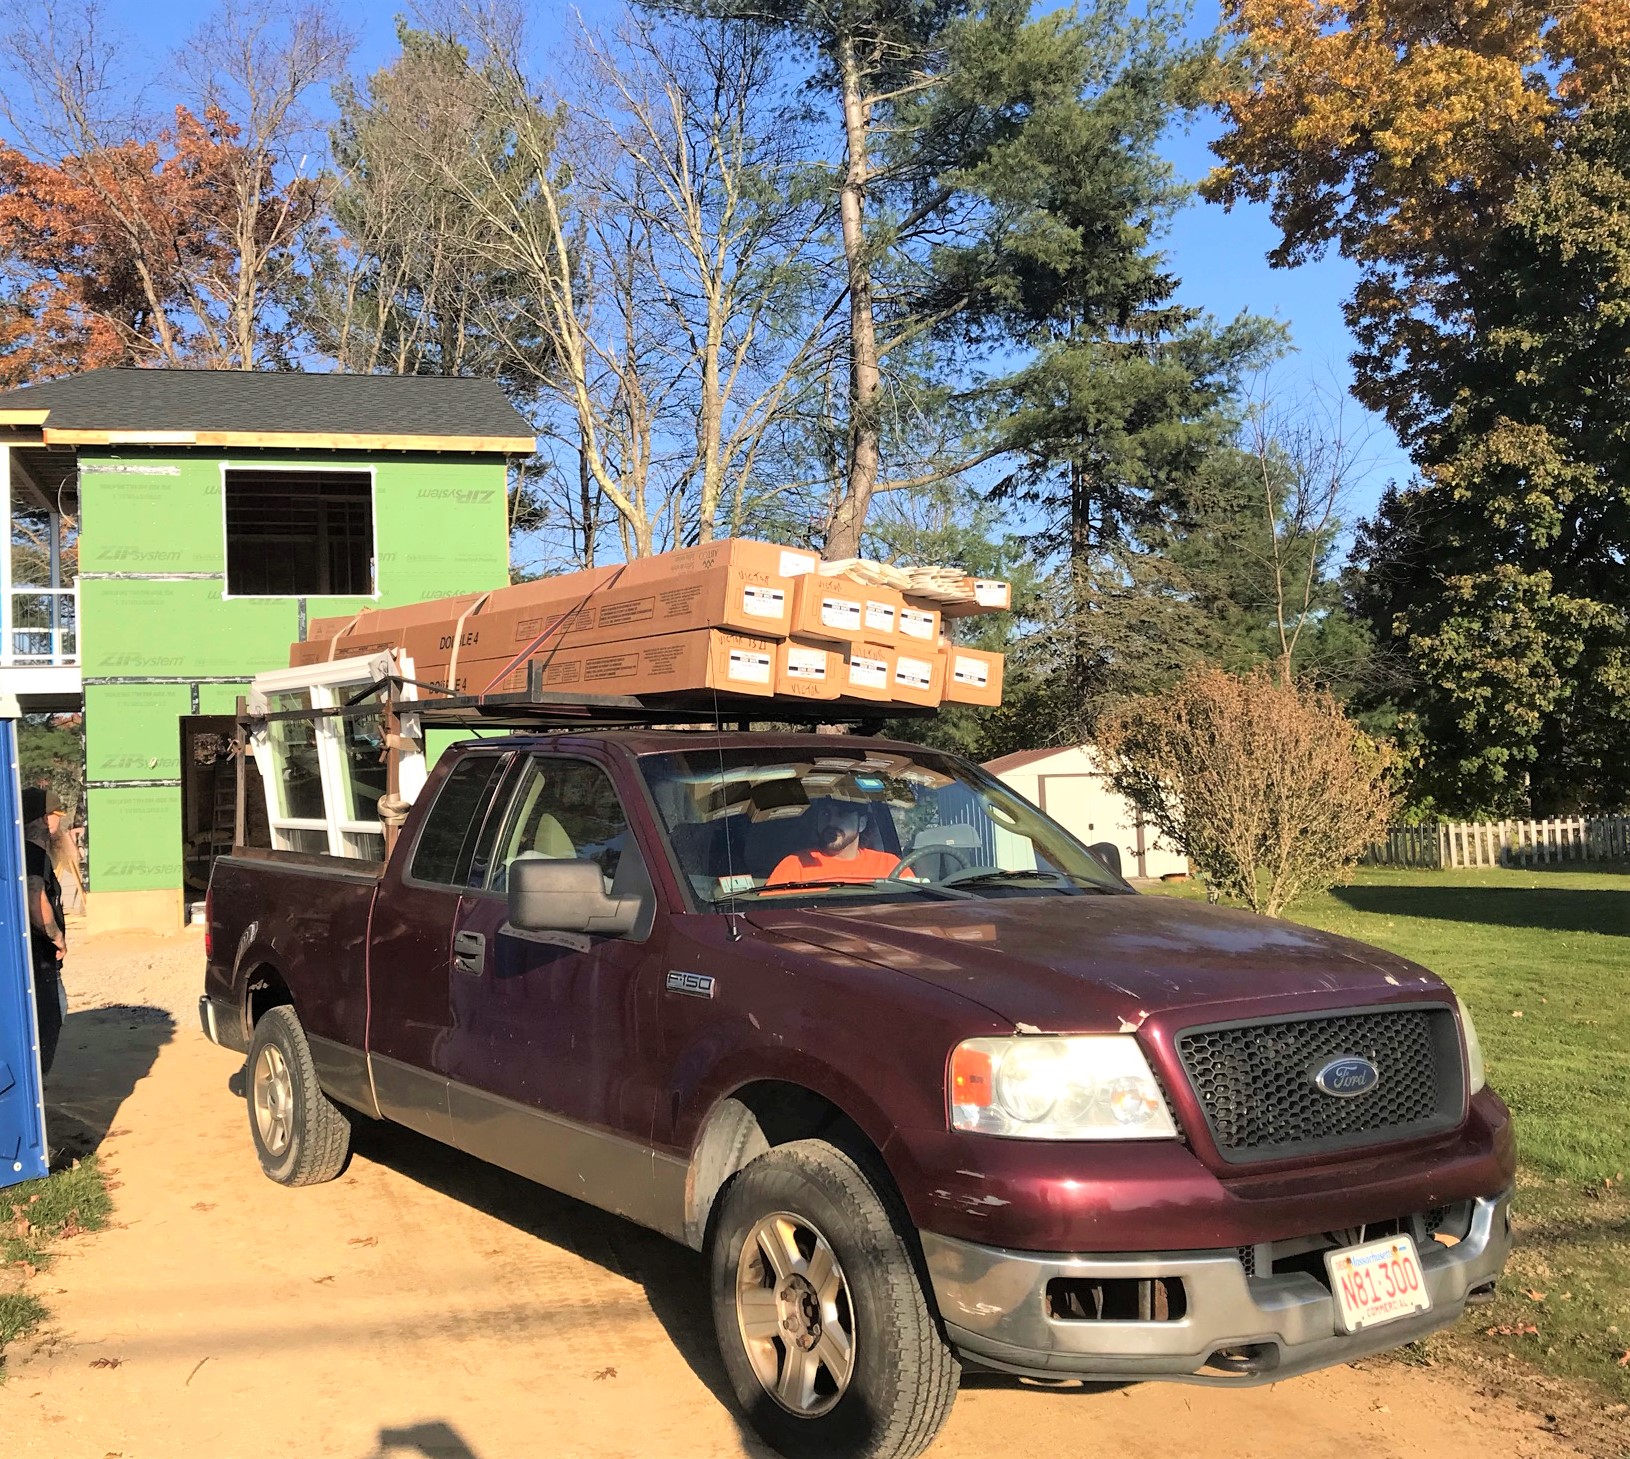
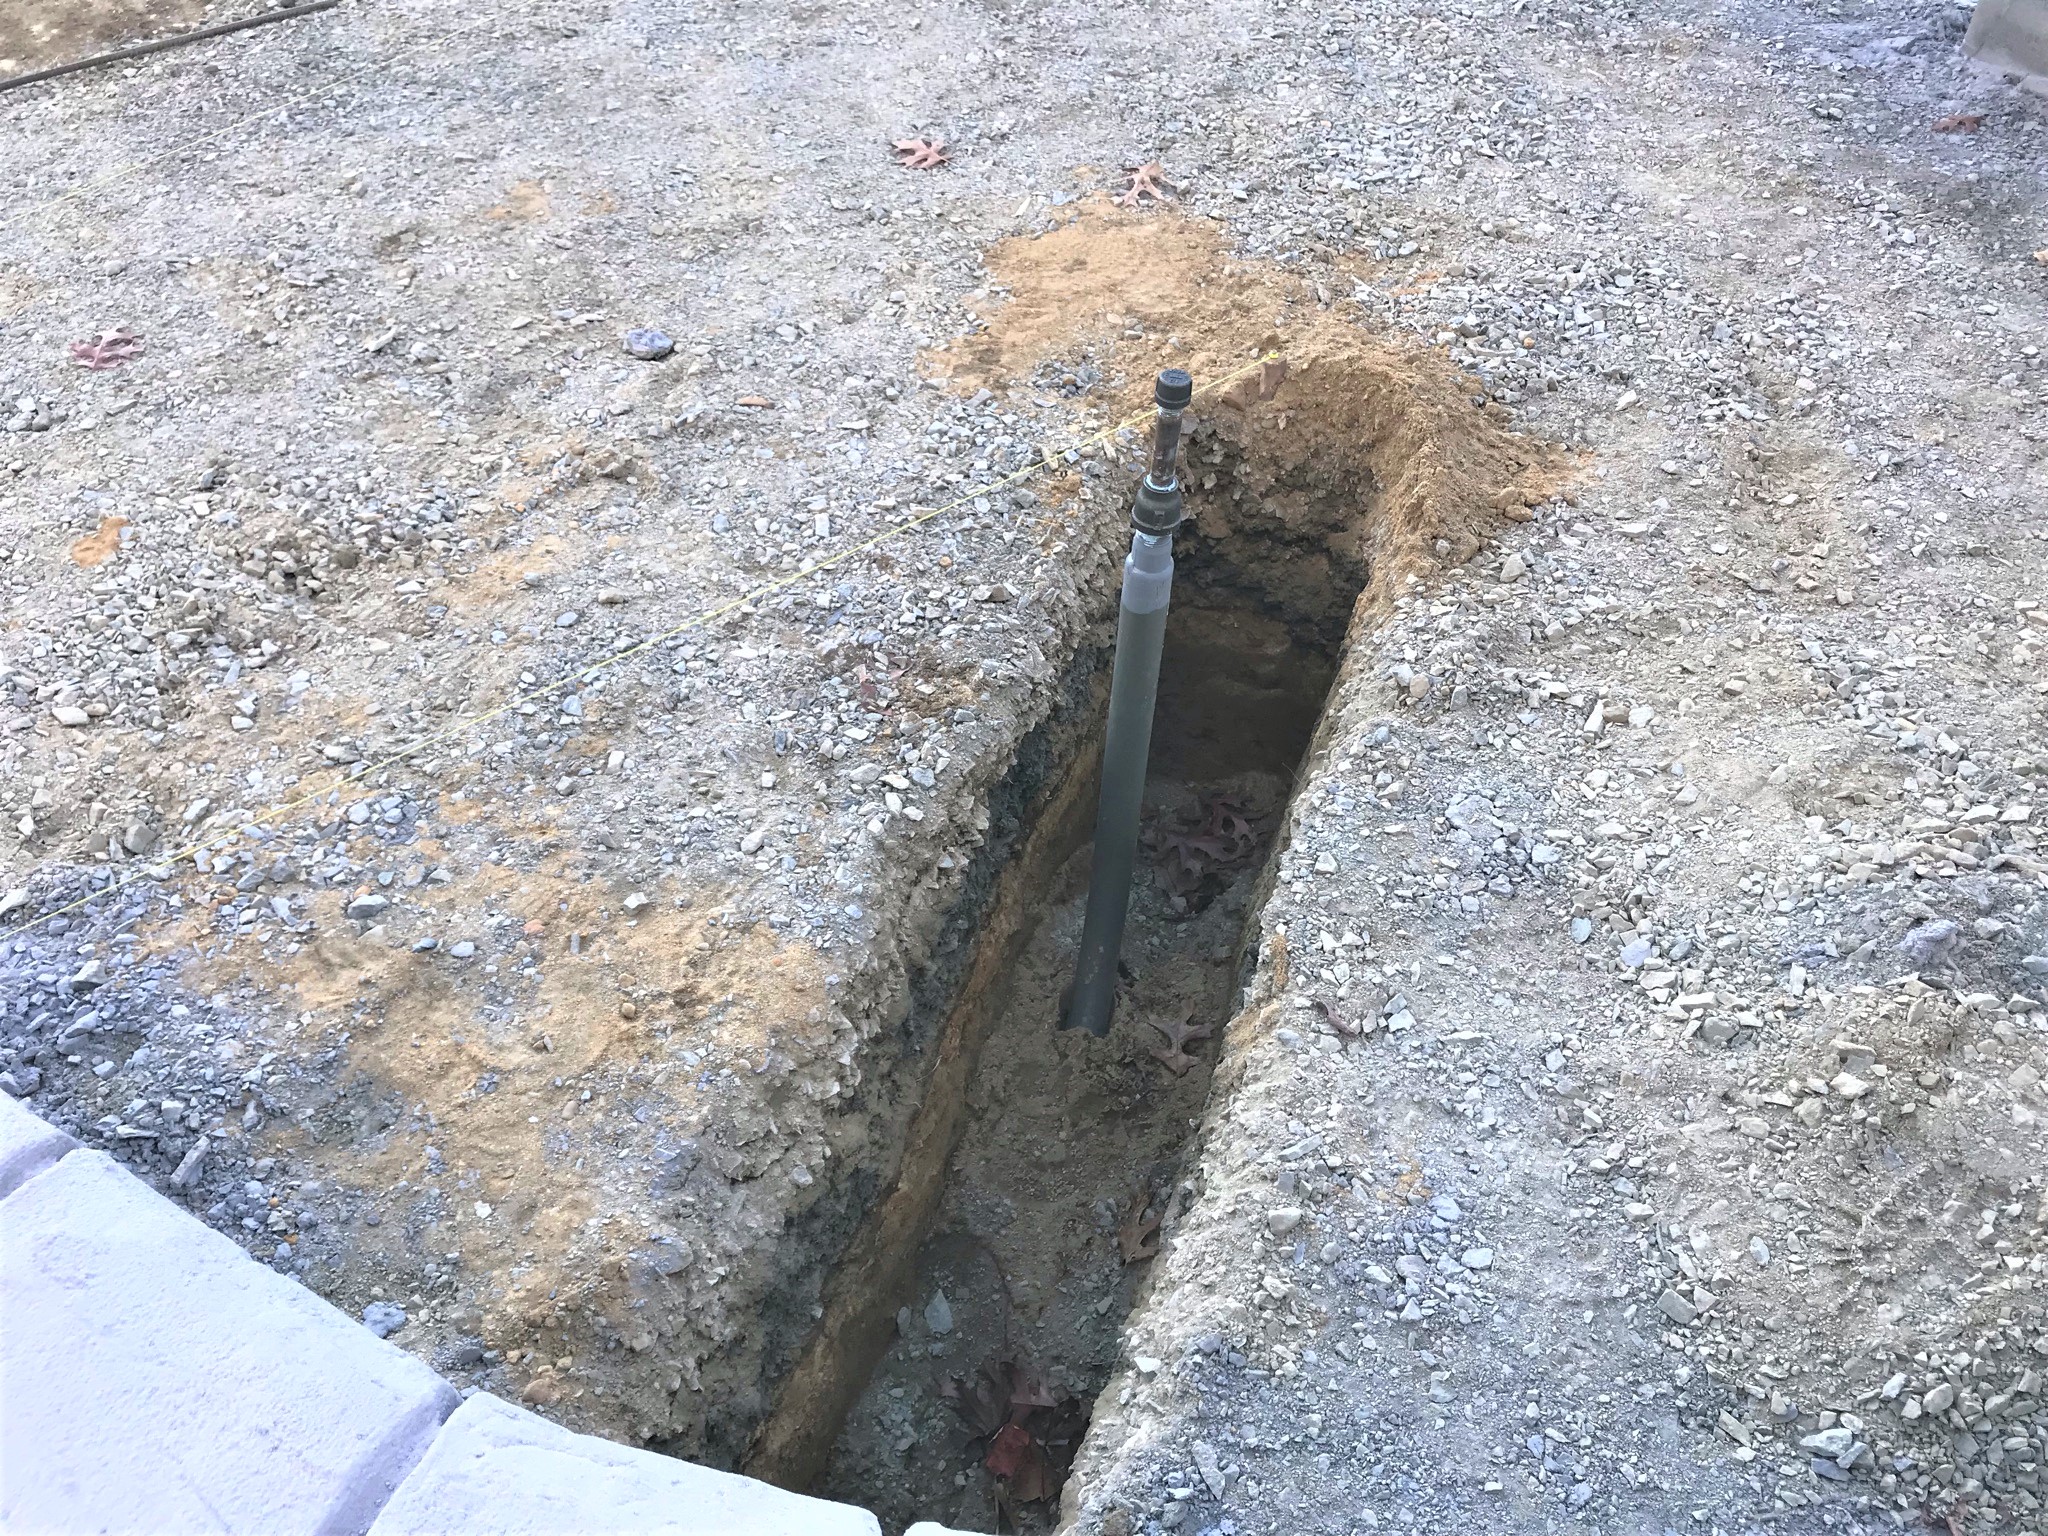
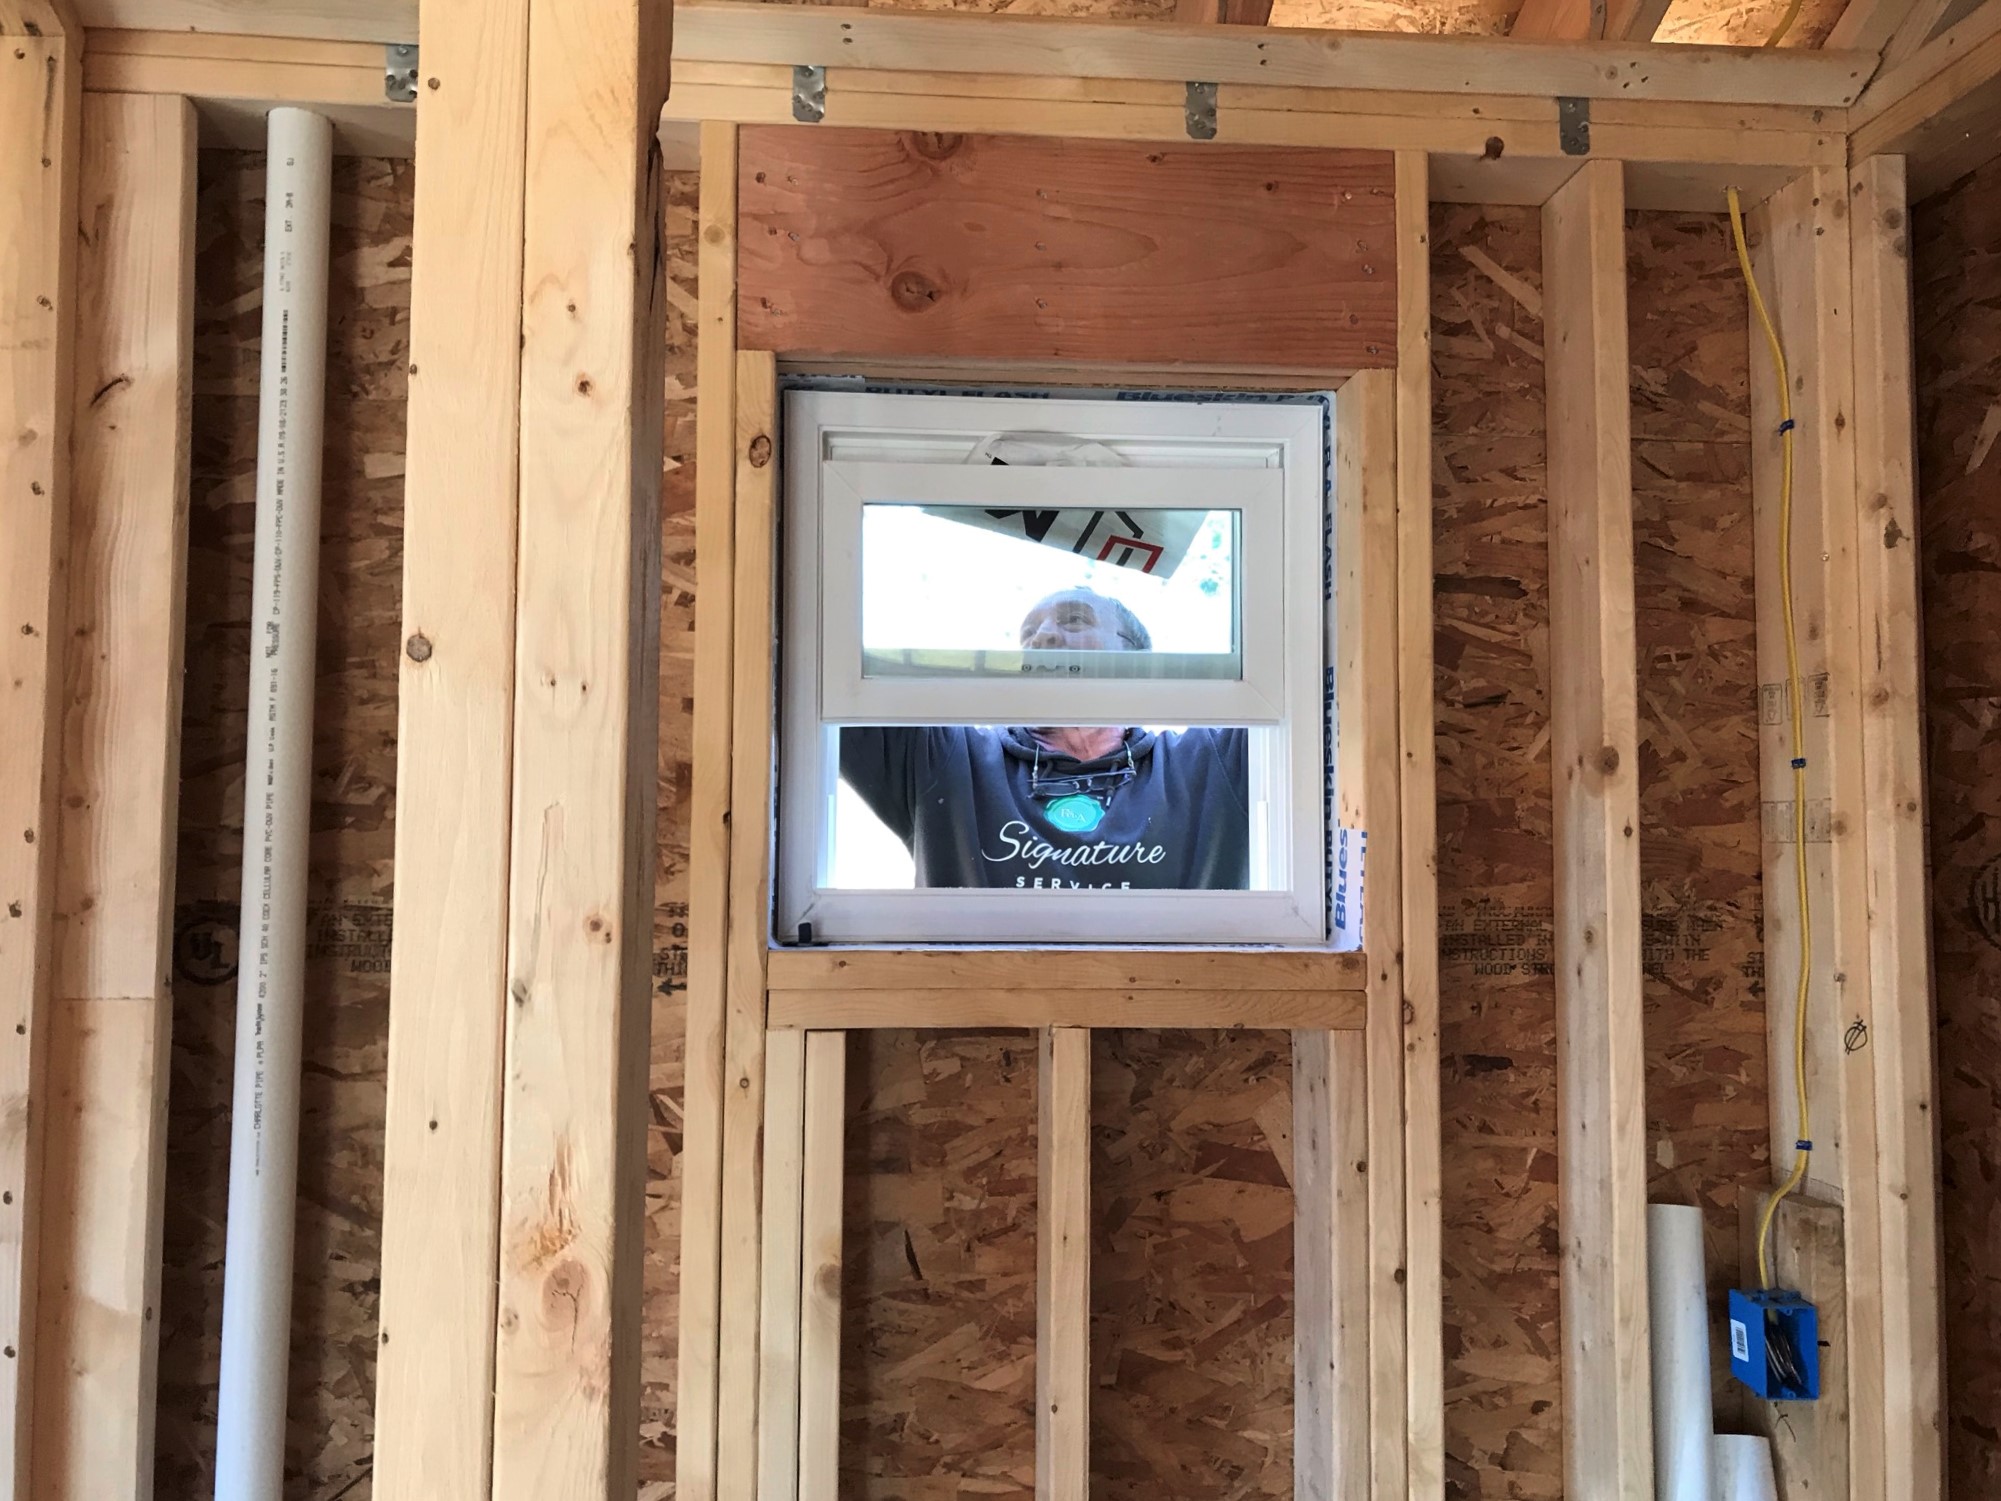
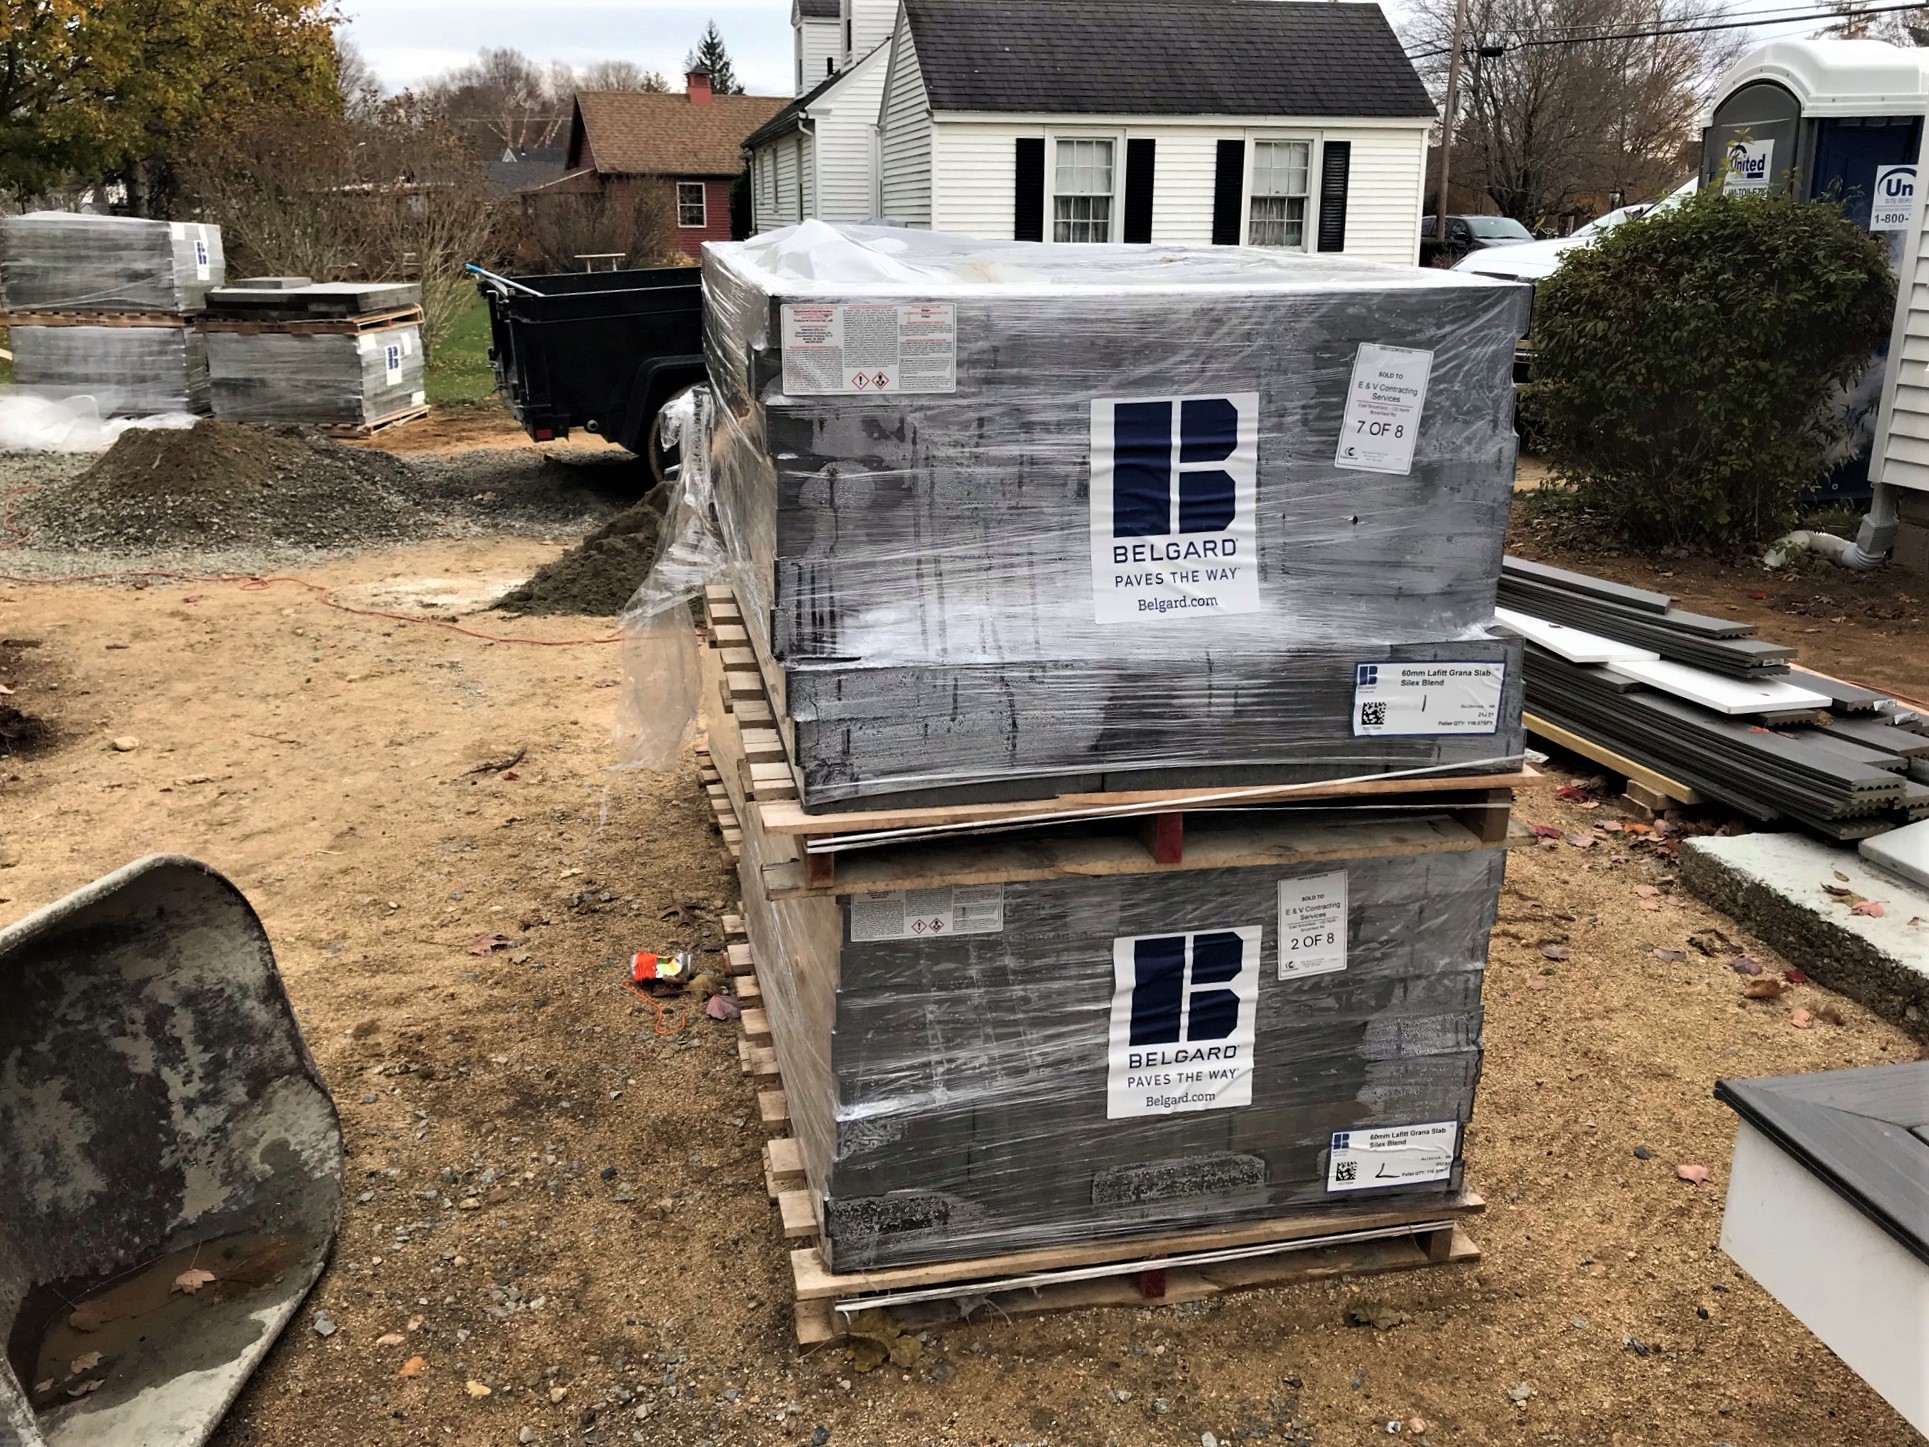
Evandro’s guys excavated the gas line (by hand) into the fire pit area.The windows were prepped for installation.Finally – after a long supply chain delay, windows and siding arrived and were moved onto the job site.
November 10
Early Wednesday morning shows the front window getting installed, Don Millette putting the gas line in the trench, and the Victors supervising.
Gas line in trenchGas Line hookup in fire pitGas line installation.The transom windows and door frame.
Frame going in!
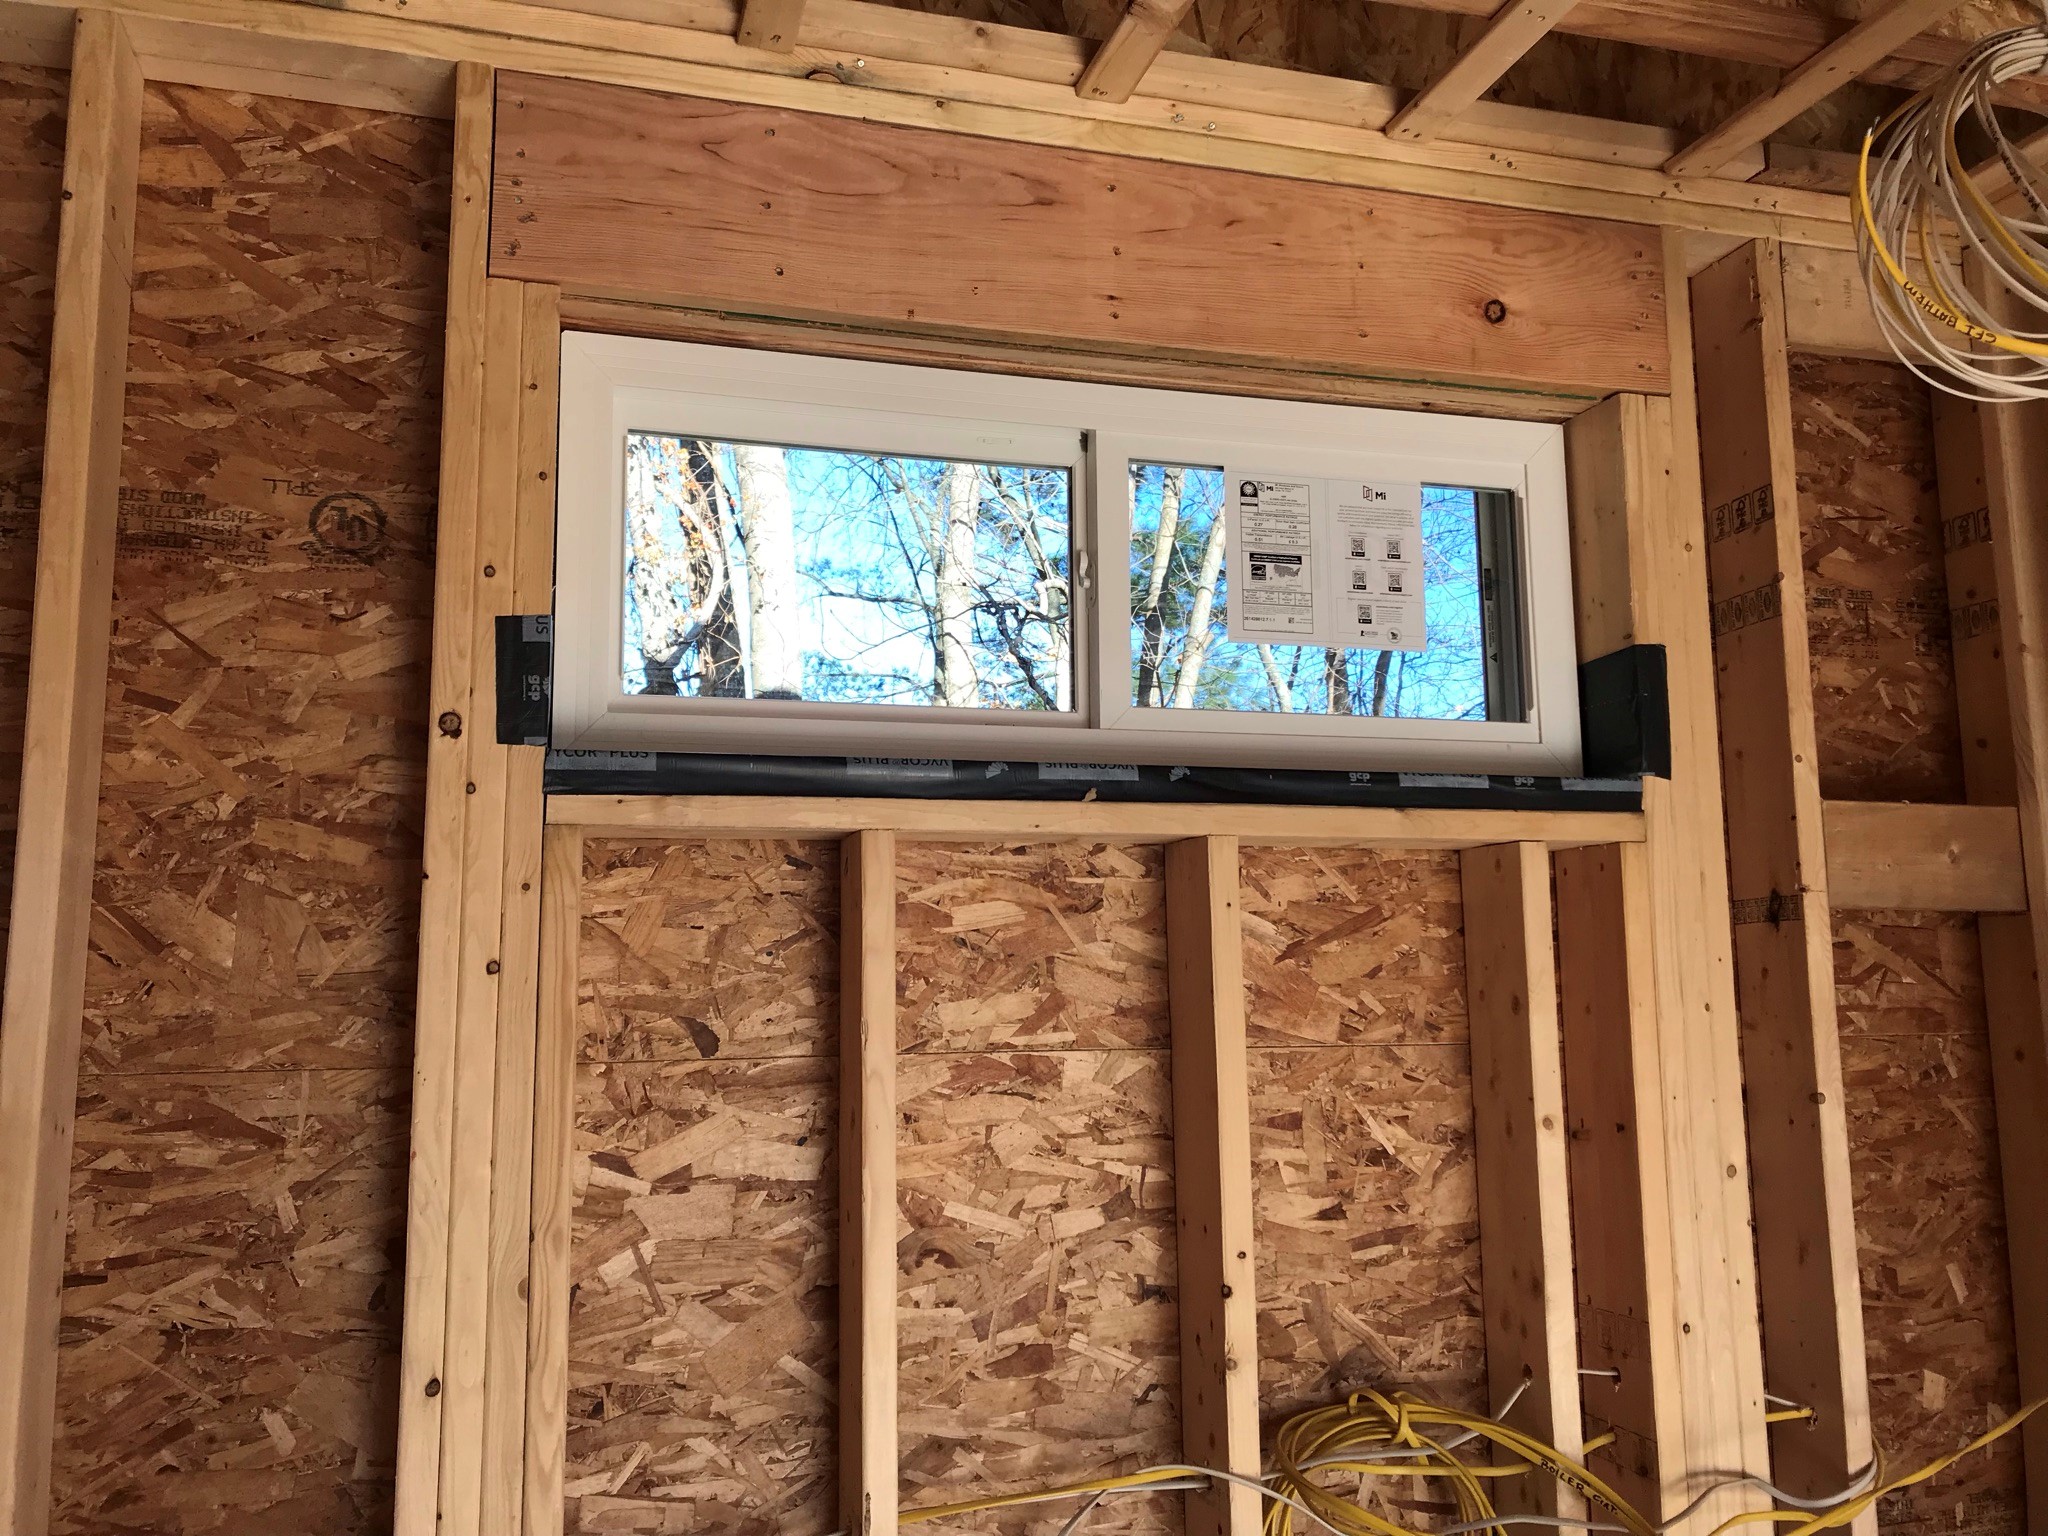
Bathroom window, 2nd floorGarage back windowOther windows went in too.
Back side of the building showing installed windows.
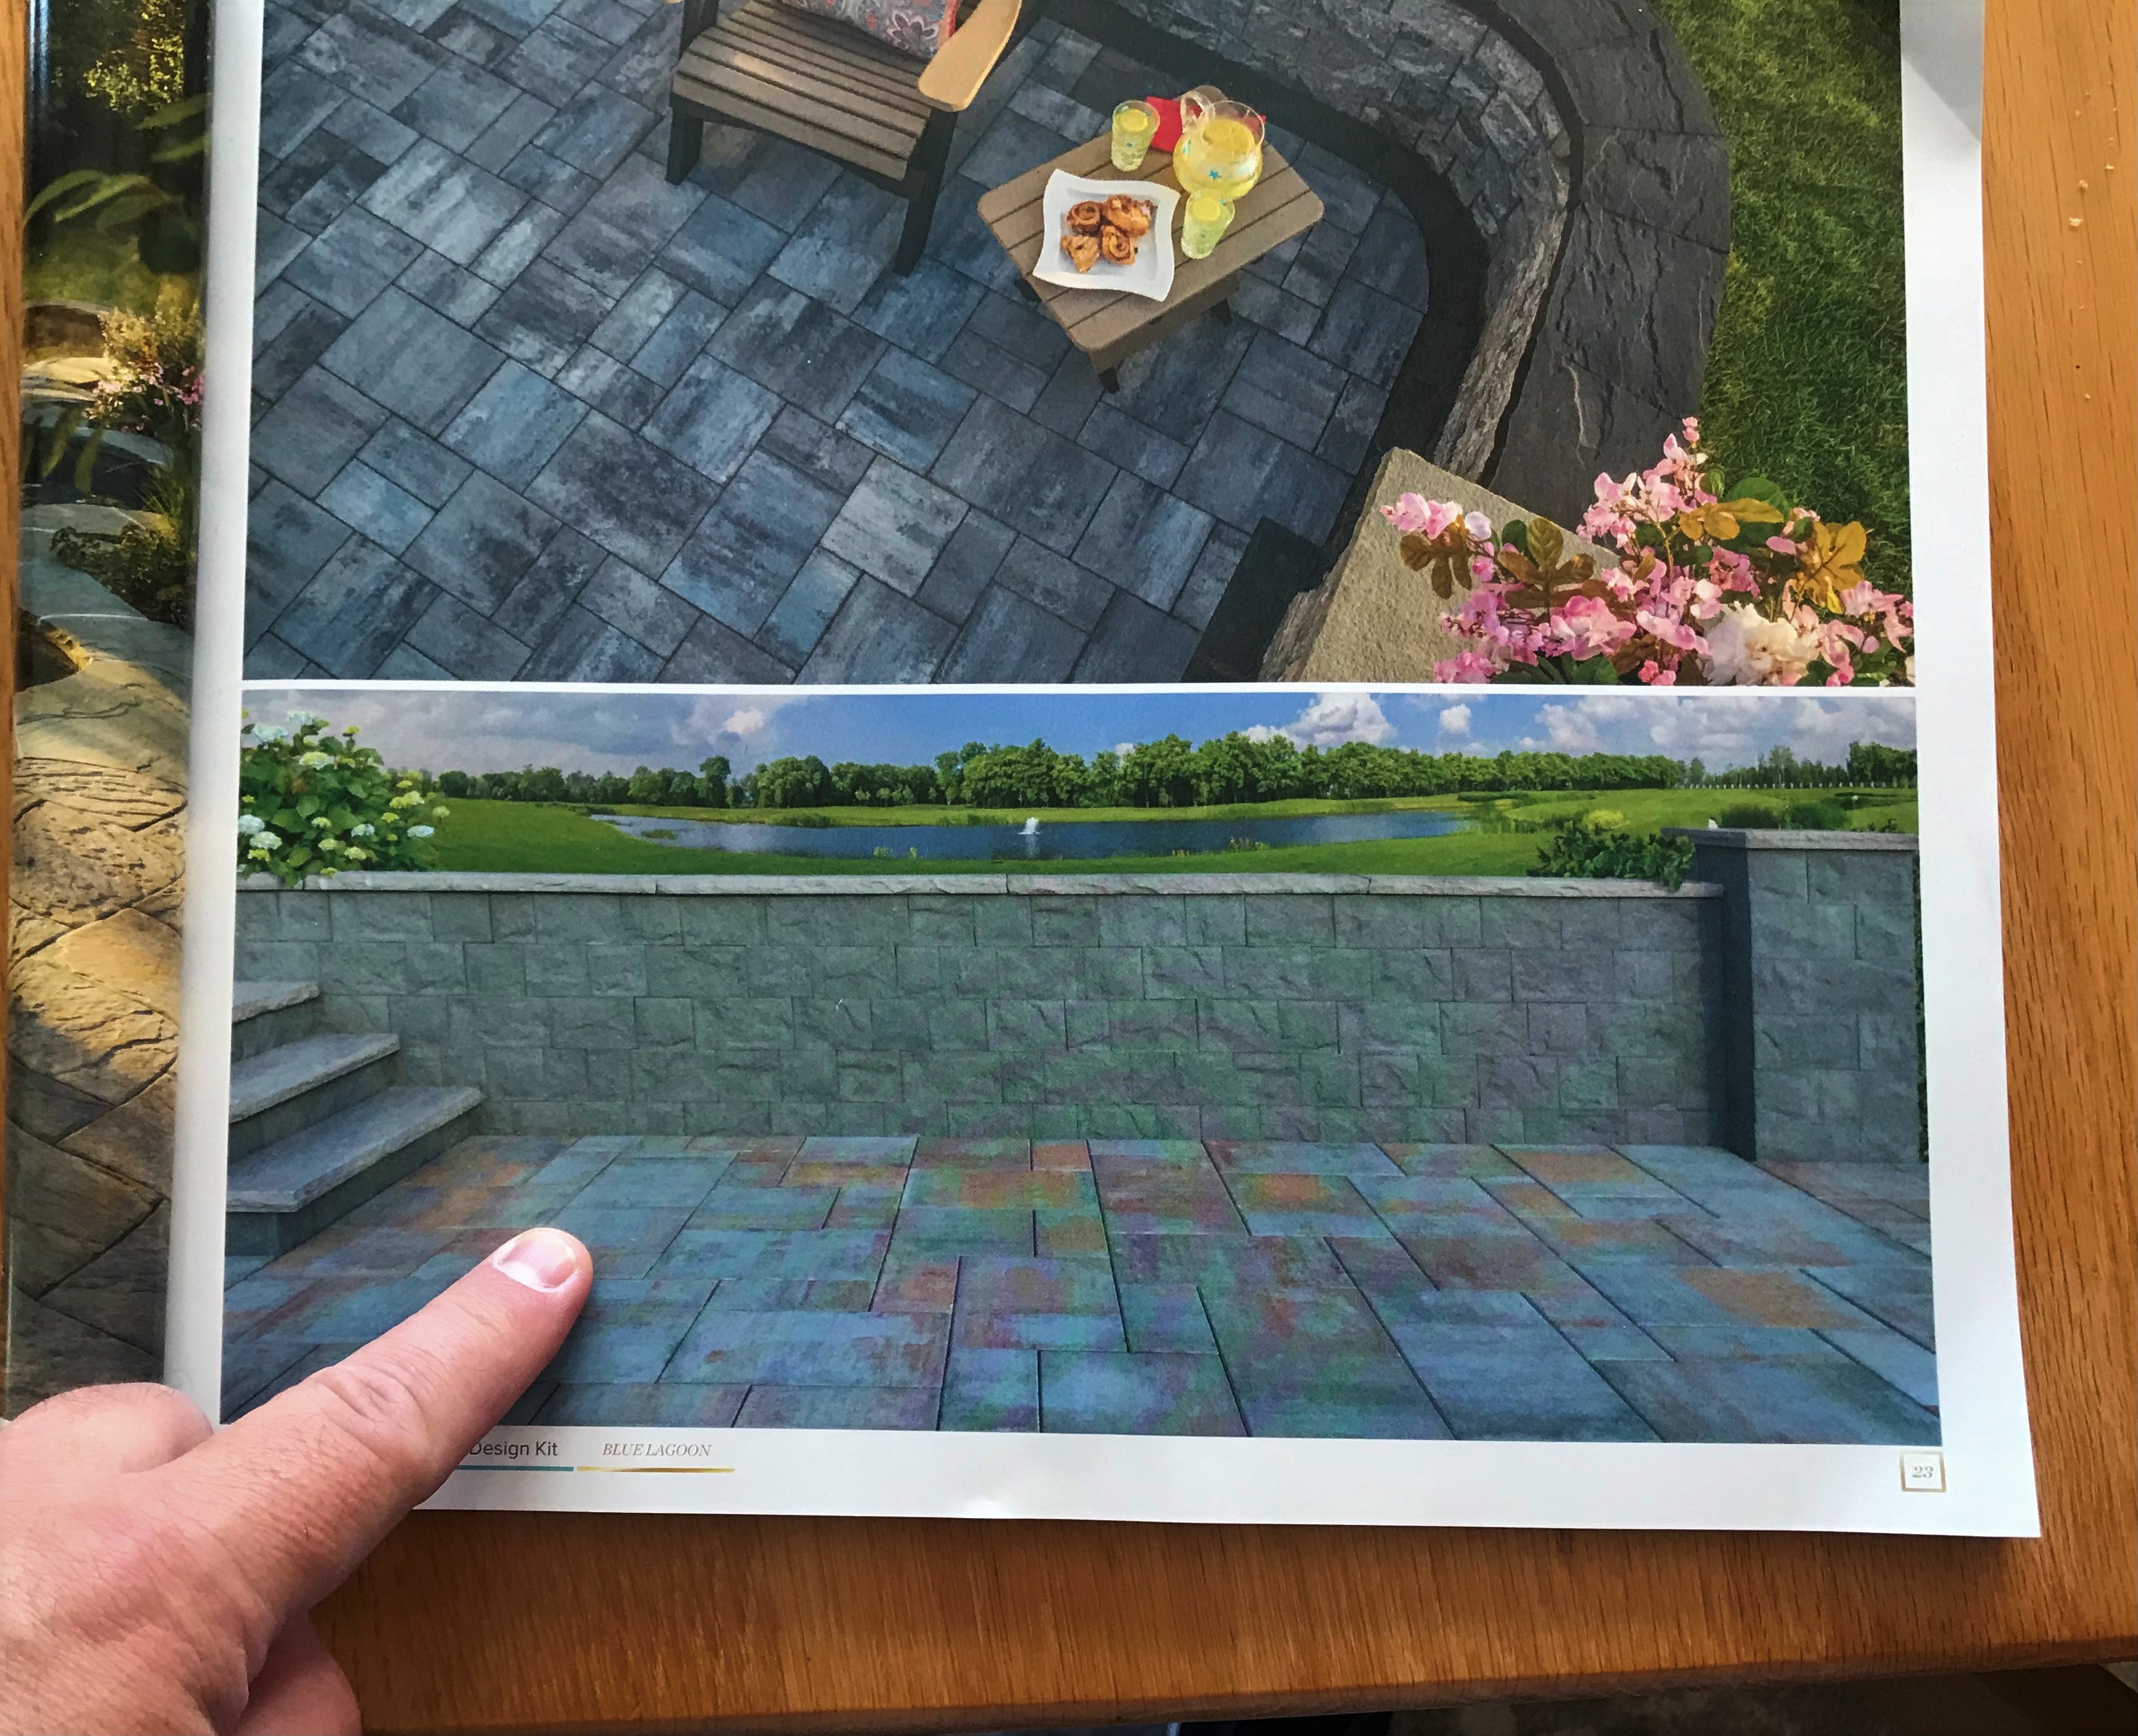
Then, a minor supply-chain-related crisis. Evandro (our masonry guy) found out that the paving stones that we wanted were not available. We would need to scramble. I told Evandro that for this project I was function (what works), and my wife Lynn was form (i.e. she picks colors and similar choices – what looks good). At the time Lynn was at work, and Evandro had a book of stone examples but no physical samples. As it’s a major decision, we asked to see some, and Evandro came back later in the evening (after dark) with probably a dozen full-size paving stones as samples (each weighing maybe 30 pounds). We thought the samples would be, well, small! Anyways, by flashlight we were able to make a choice so Evandro could keep going. The choices are less bluish, but still a nice mixed gray hue.
Original choice – not in stockNext choiceThe paving stone issue.
The next day I was off to Historicon, returning Sunday the 14th.
Week 18 – November 14th to 20th
November 14
When the sun came up, this was the progress while I was away. You can see progress on the patio and the doors and windows.
Sunday morning November 14th showed me this!
However, Evandro was still at work that Sunday trying to take advantage of the good weather.
Lots of paving stones.
Paving stones going in on smoothed sandReverse angle
The other progress was nice as well on doors and windows.
Deck doorwaySmall garage door
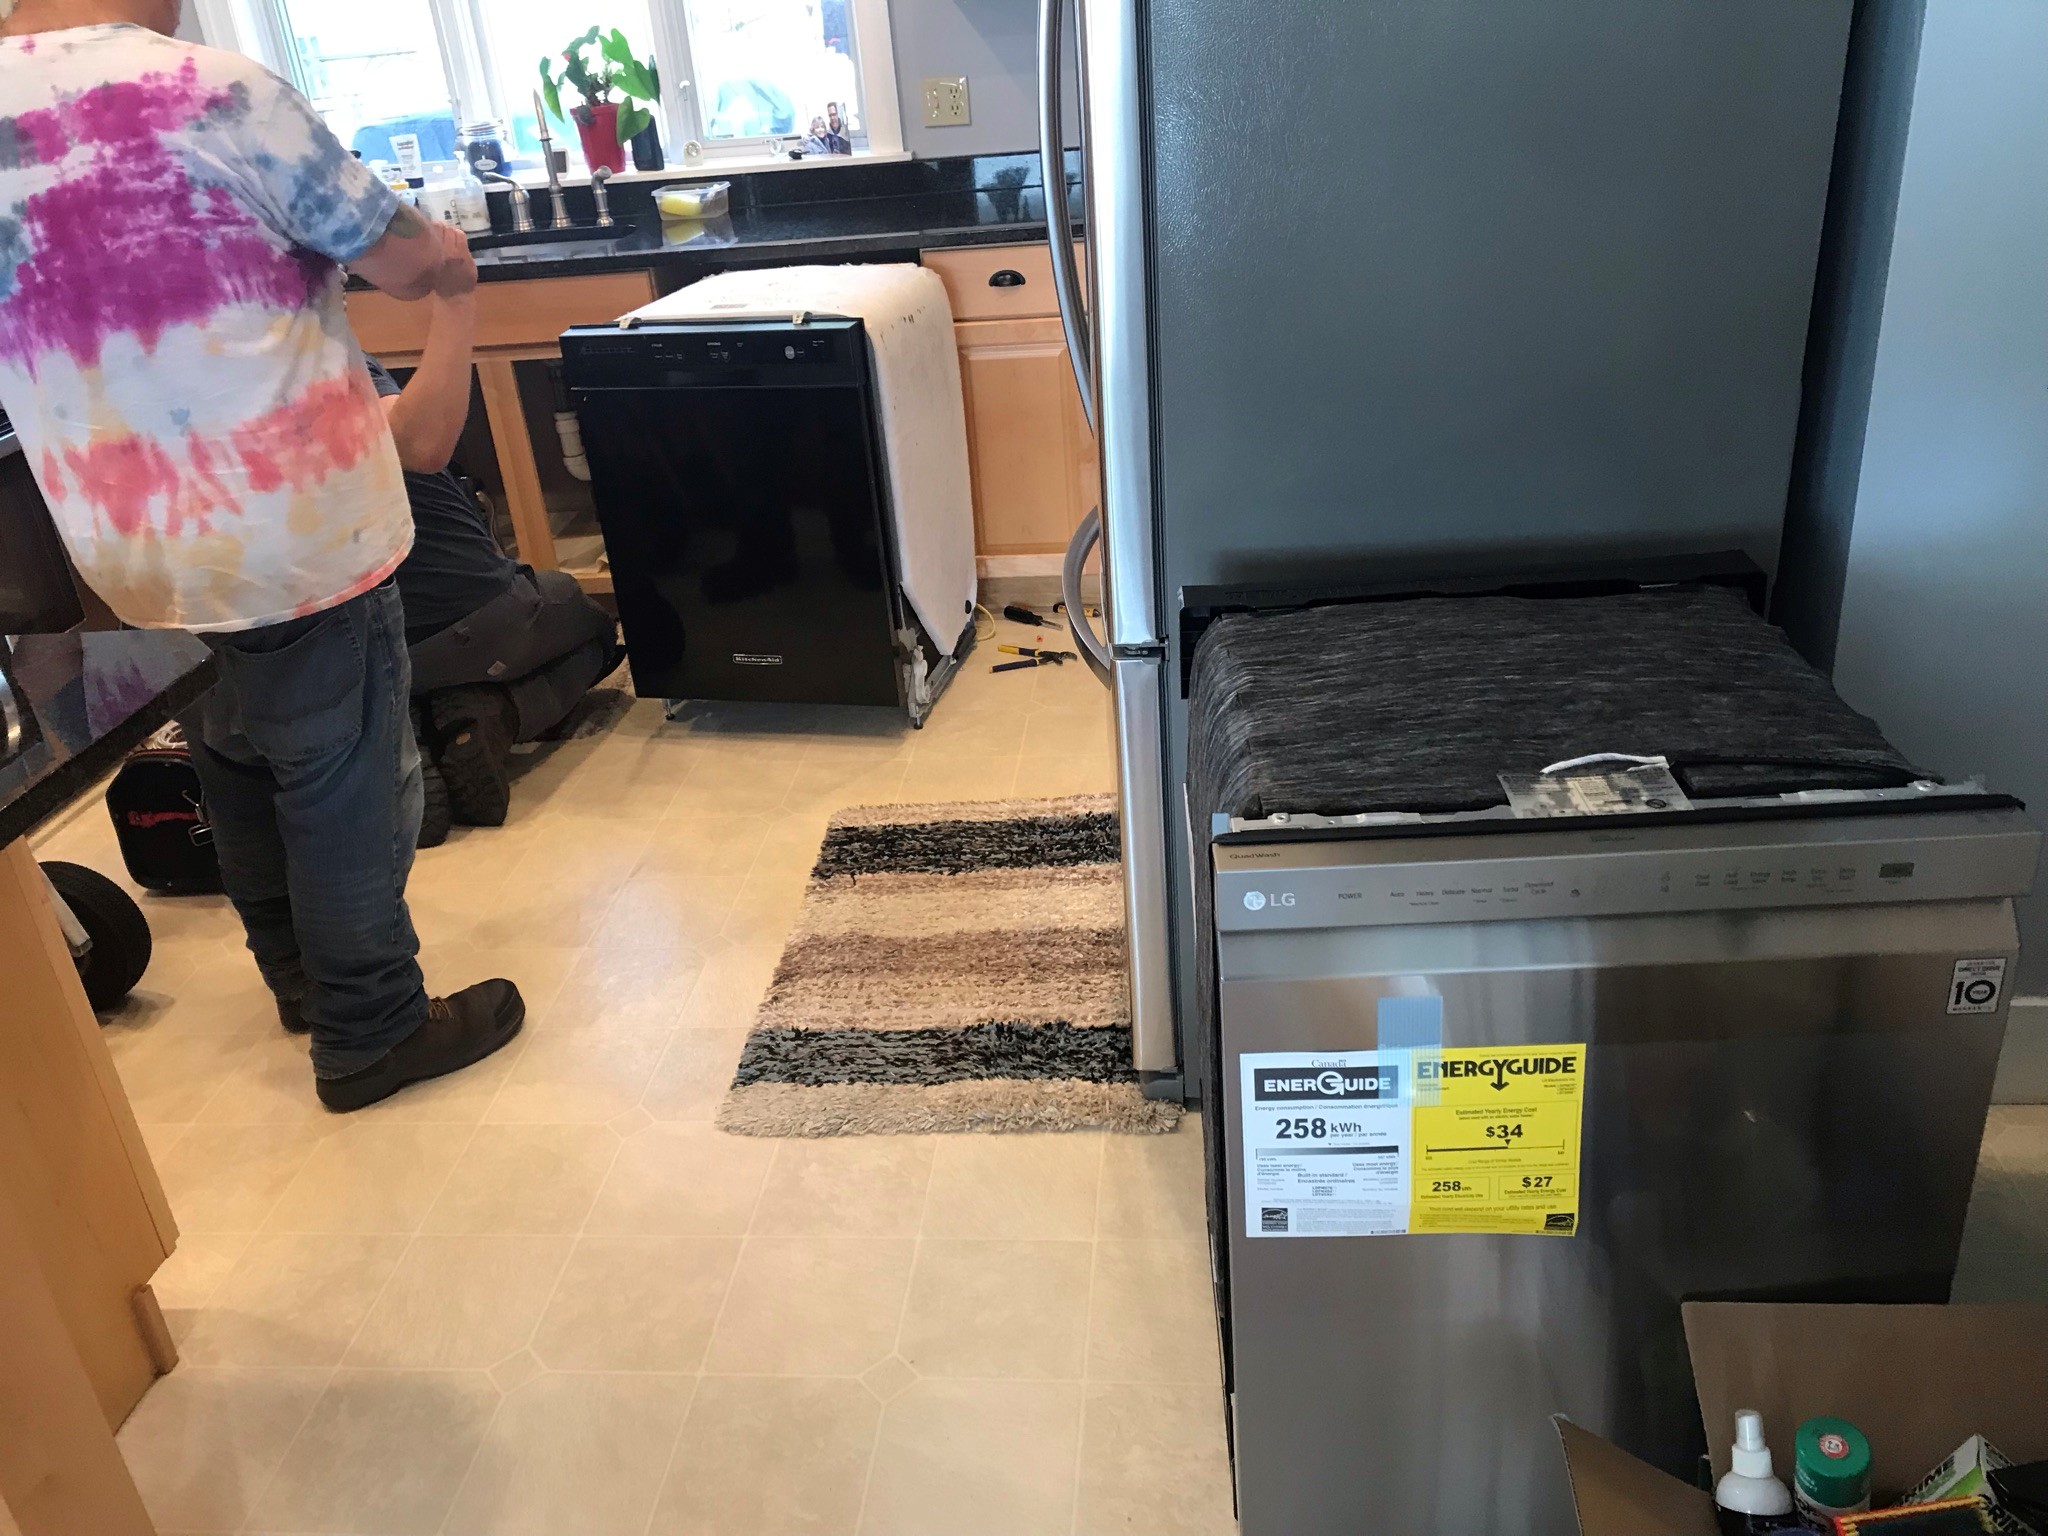
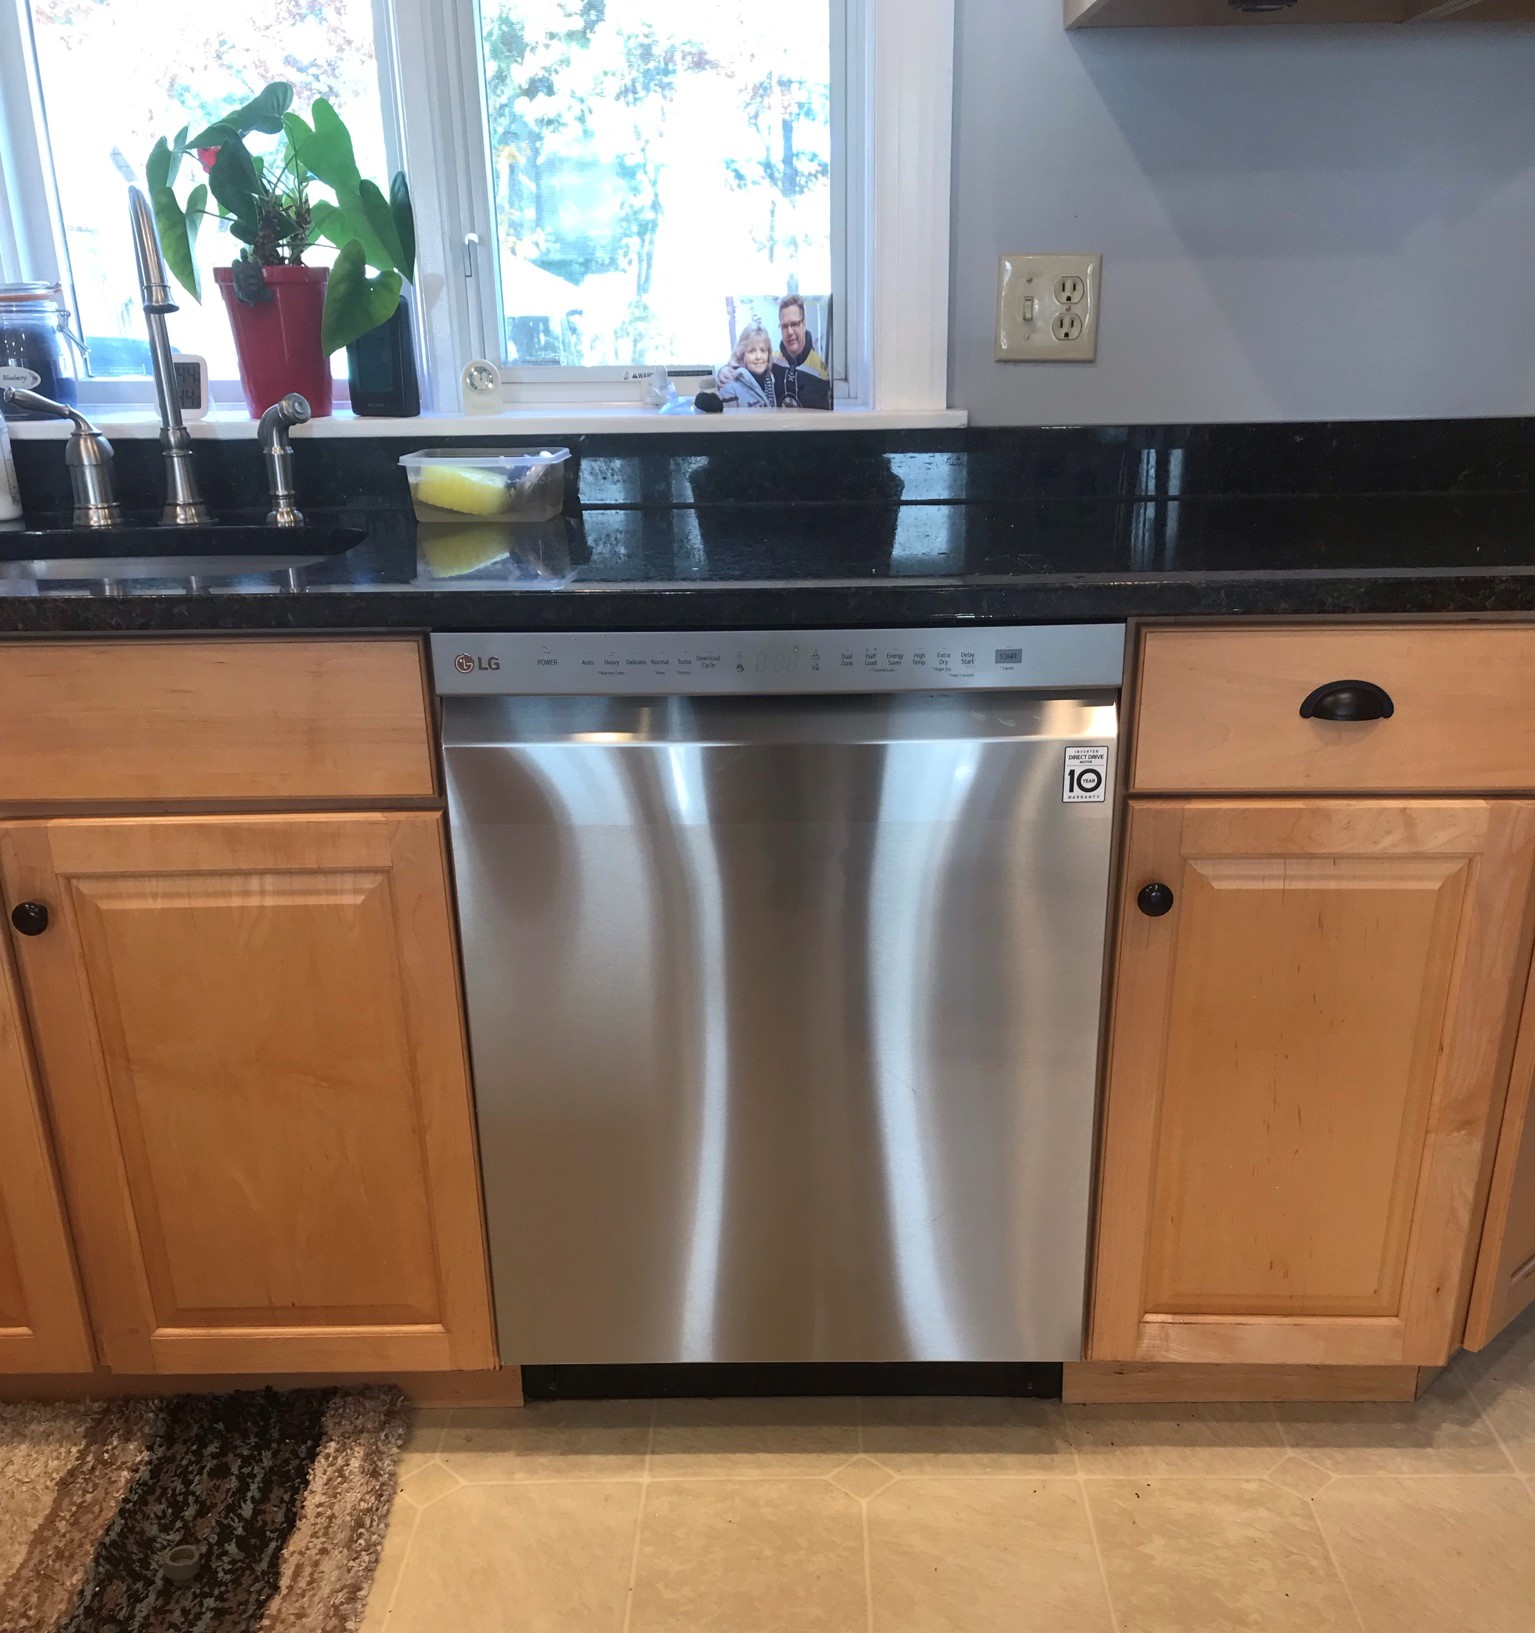
While I was away, our dishwasher decided to shed its mortal coil – or at least to begin to leak. This was not part of the project, but needed attention as we also discovered that we needed new valves under the kitchen sink. Luckily we got a plumber to replace the valves and found a dishwasher model locally for delivery later in the week.
November 15
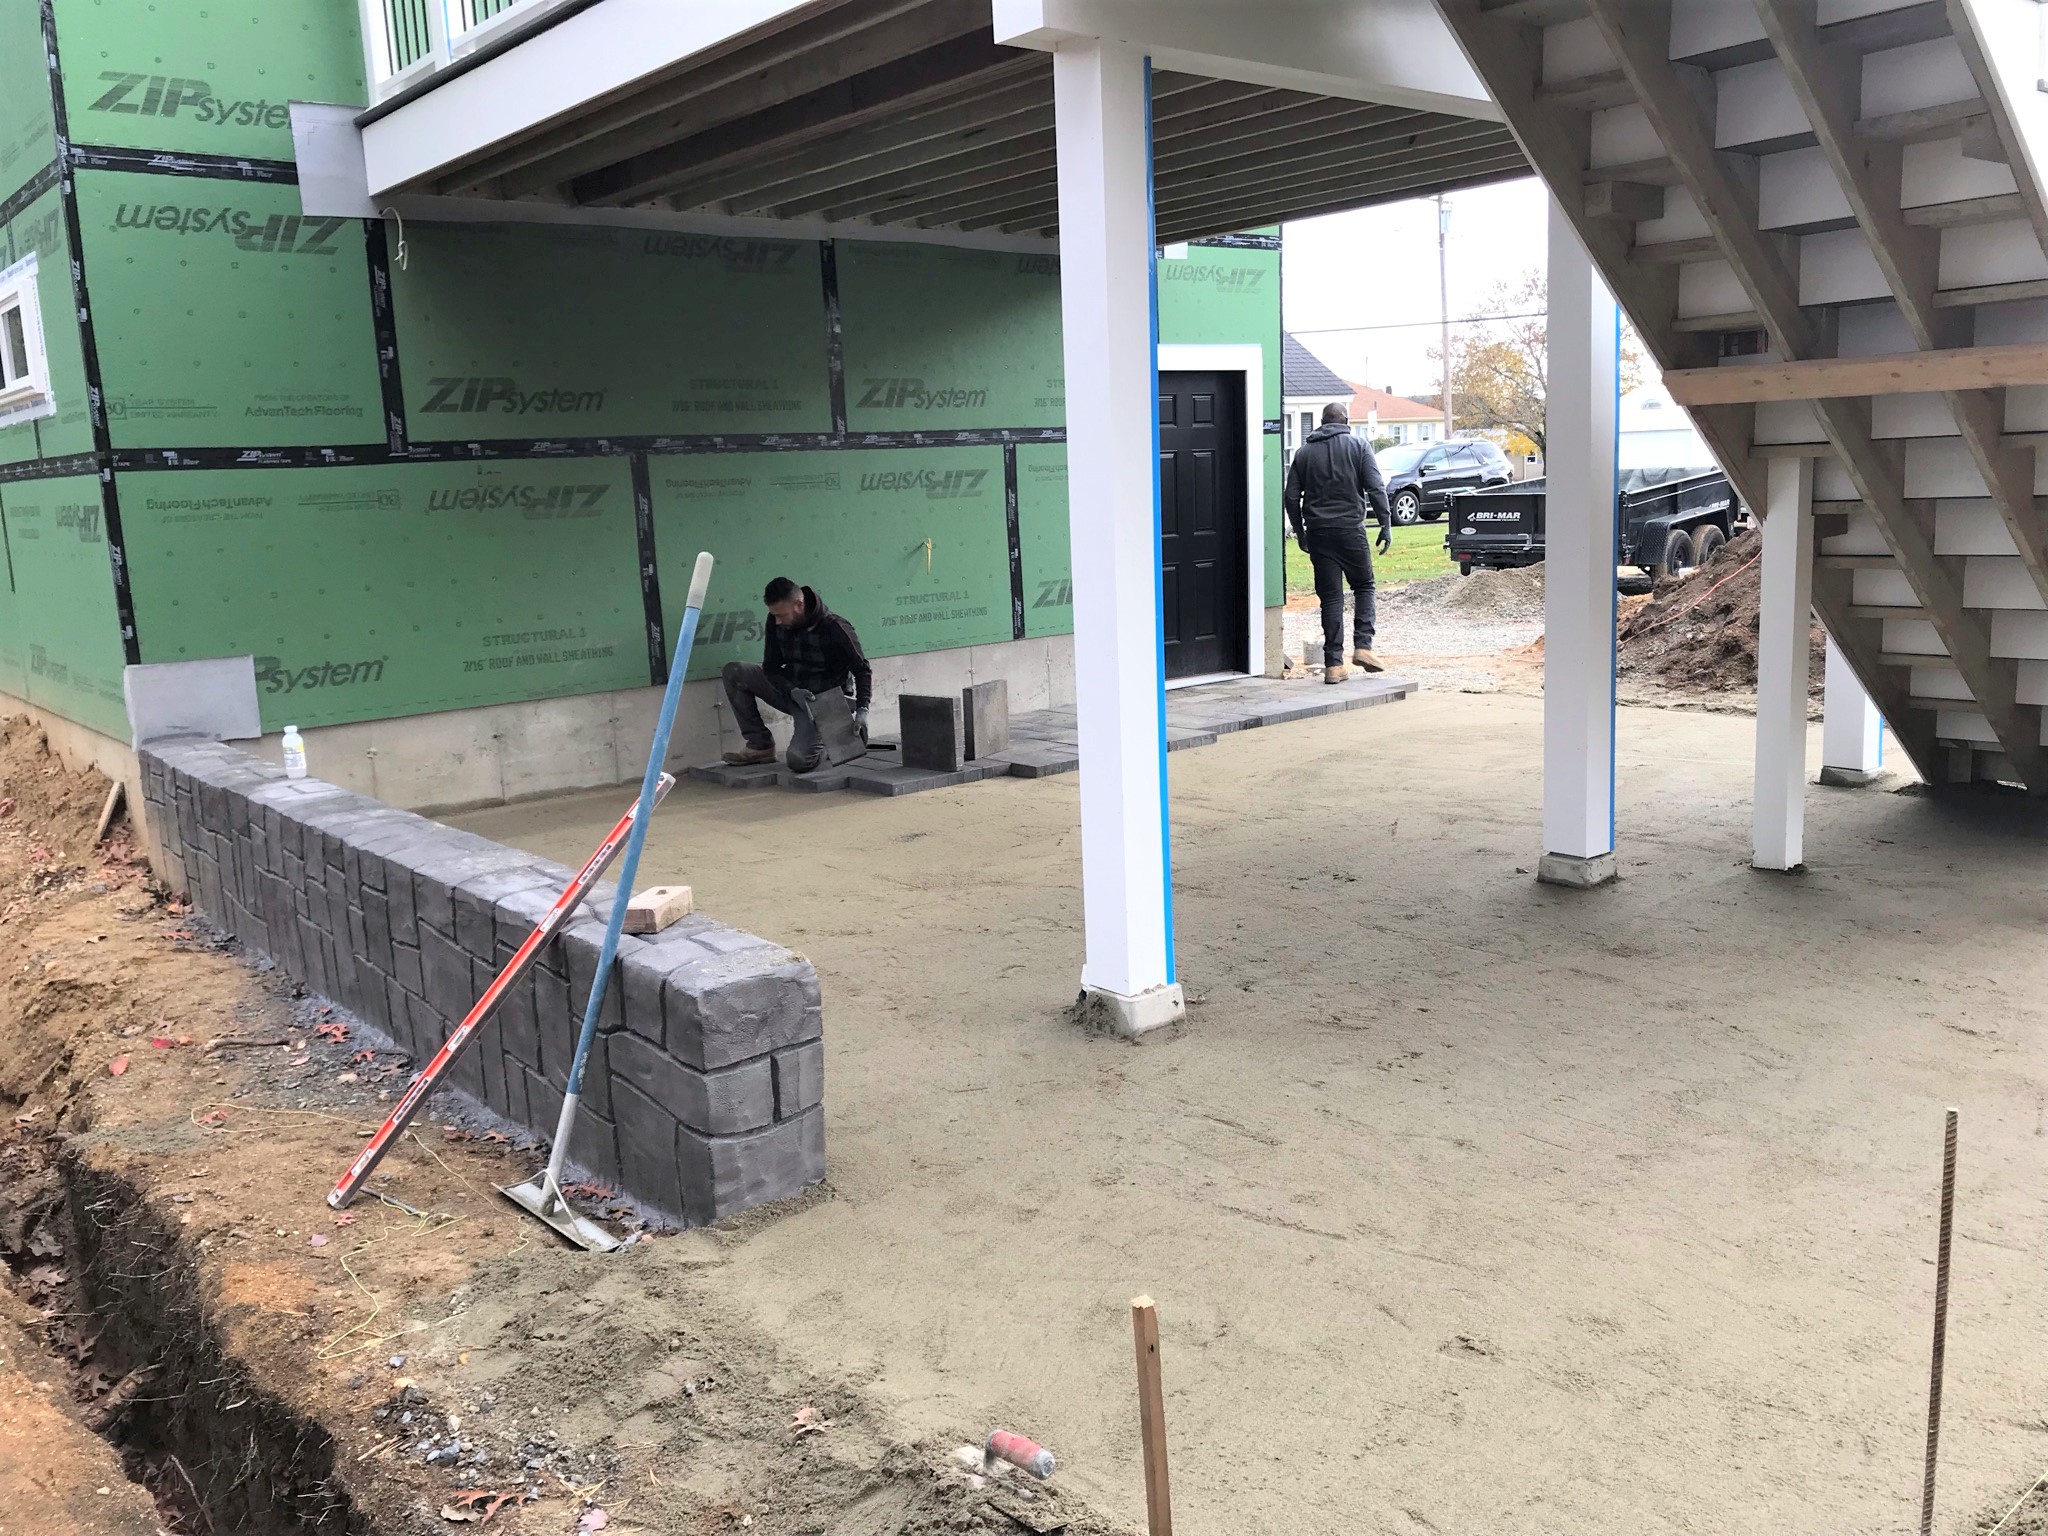
The patio made significant progress on the 15th getting under the stairs.
November 16
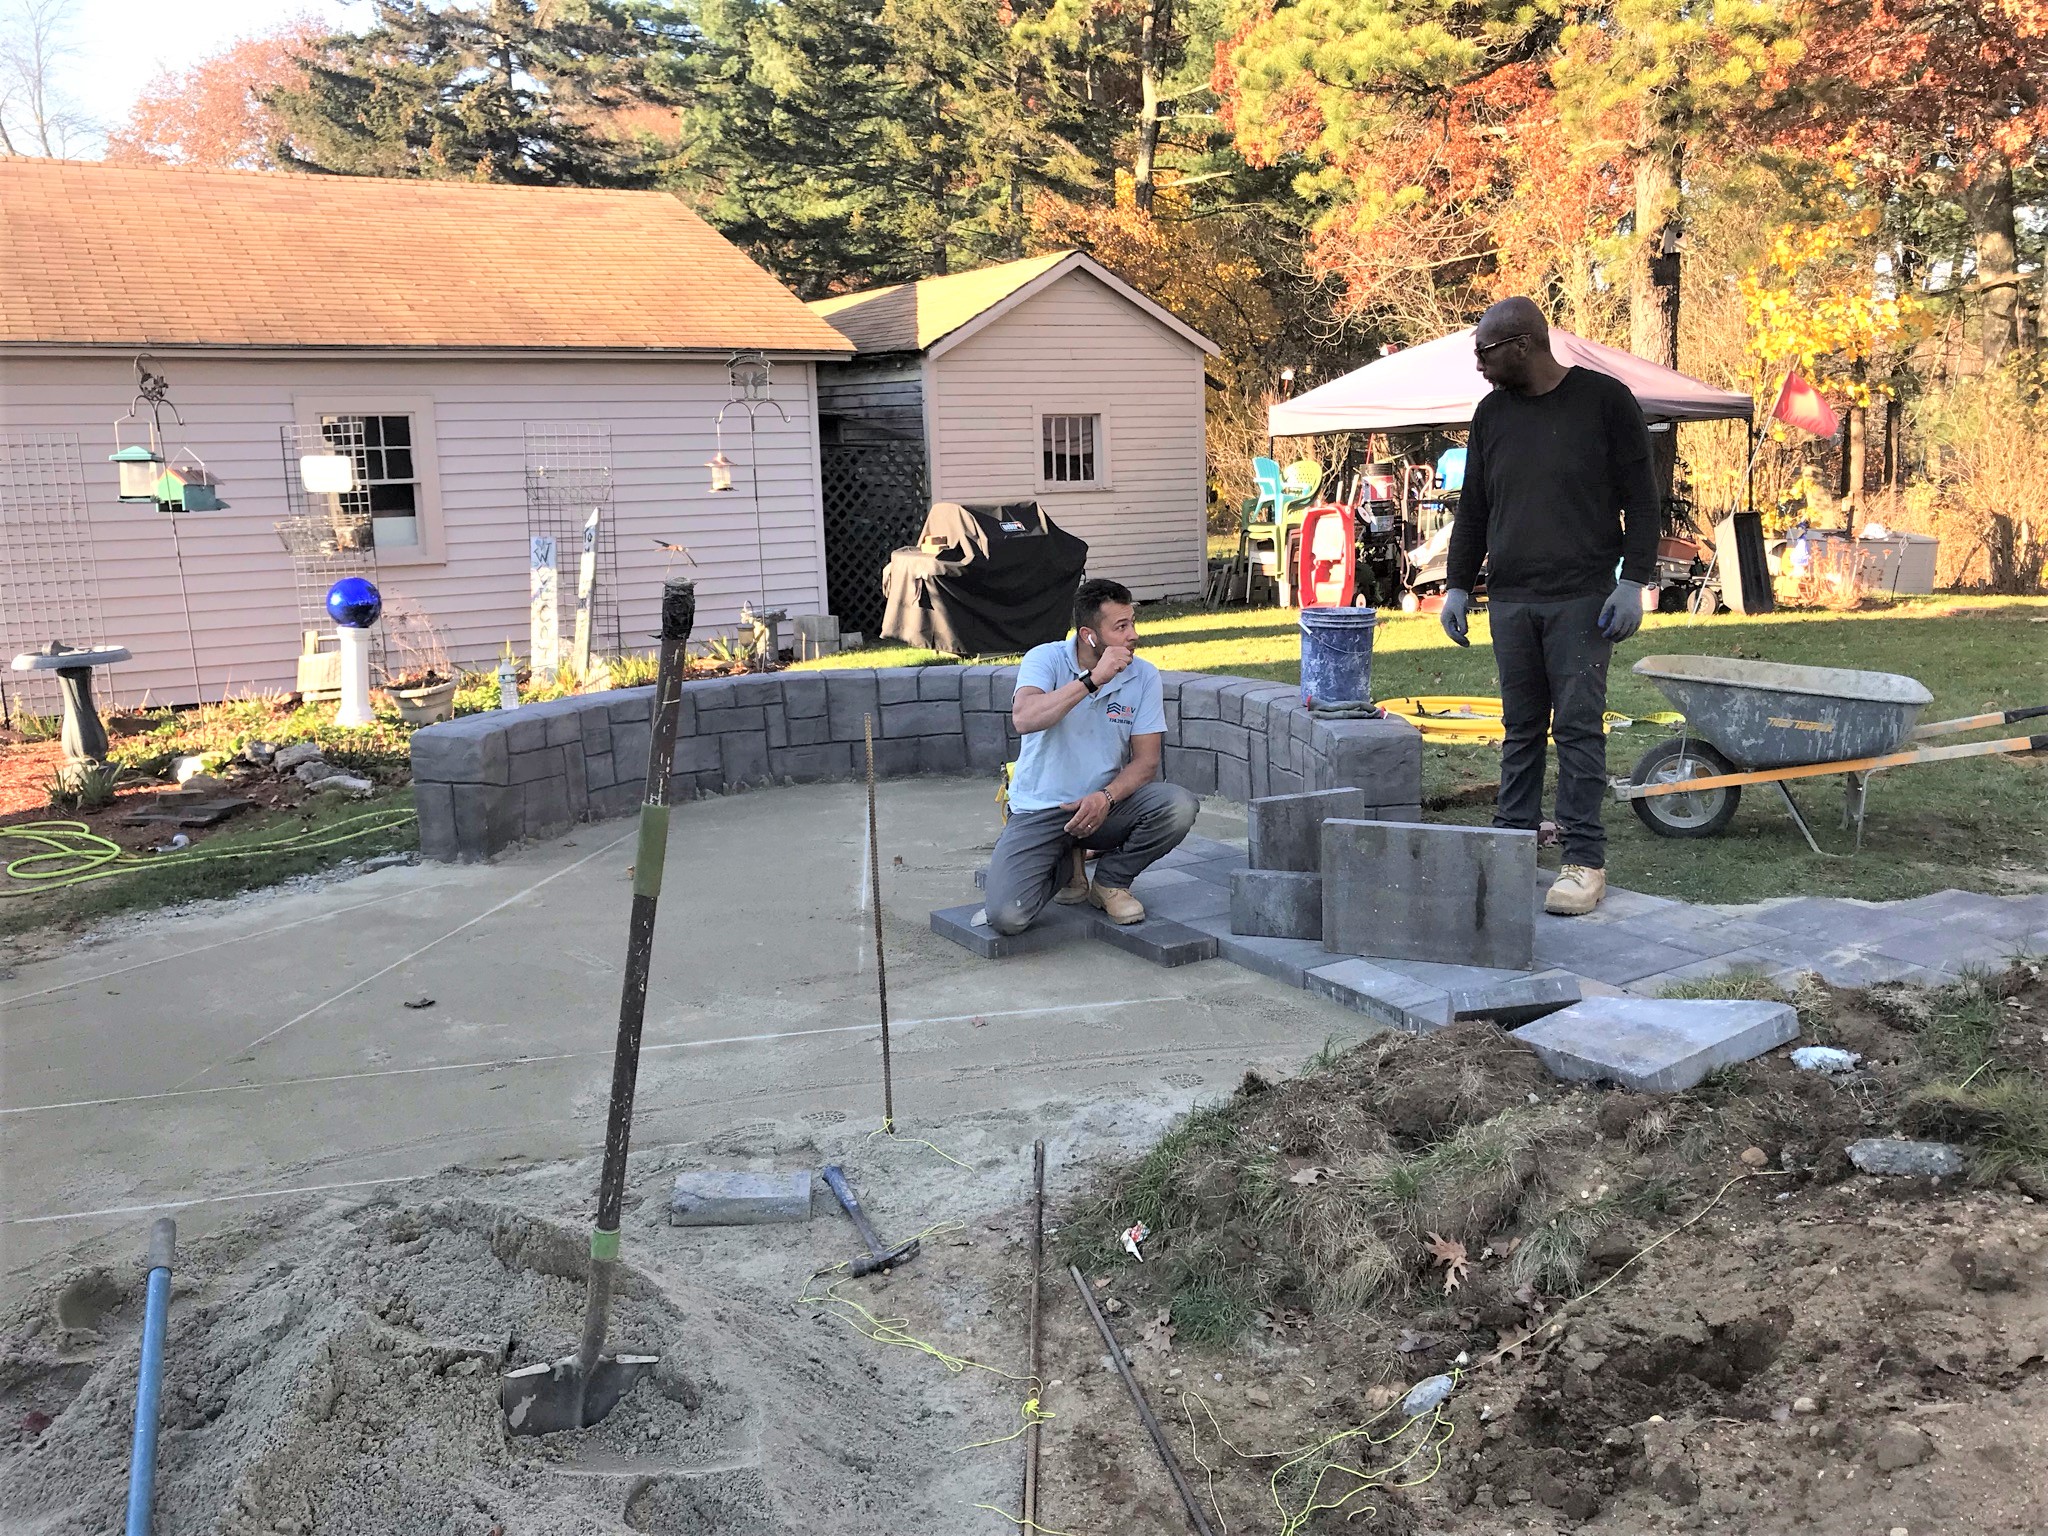
On the 16th, Evandro was well into prepping the fire pit for paving stones – but the gas line needed inspection before we could go further.
Gas line passed inspectionThe artistic corner cut by the garage.
November 17
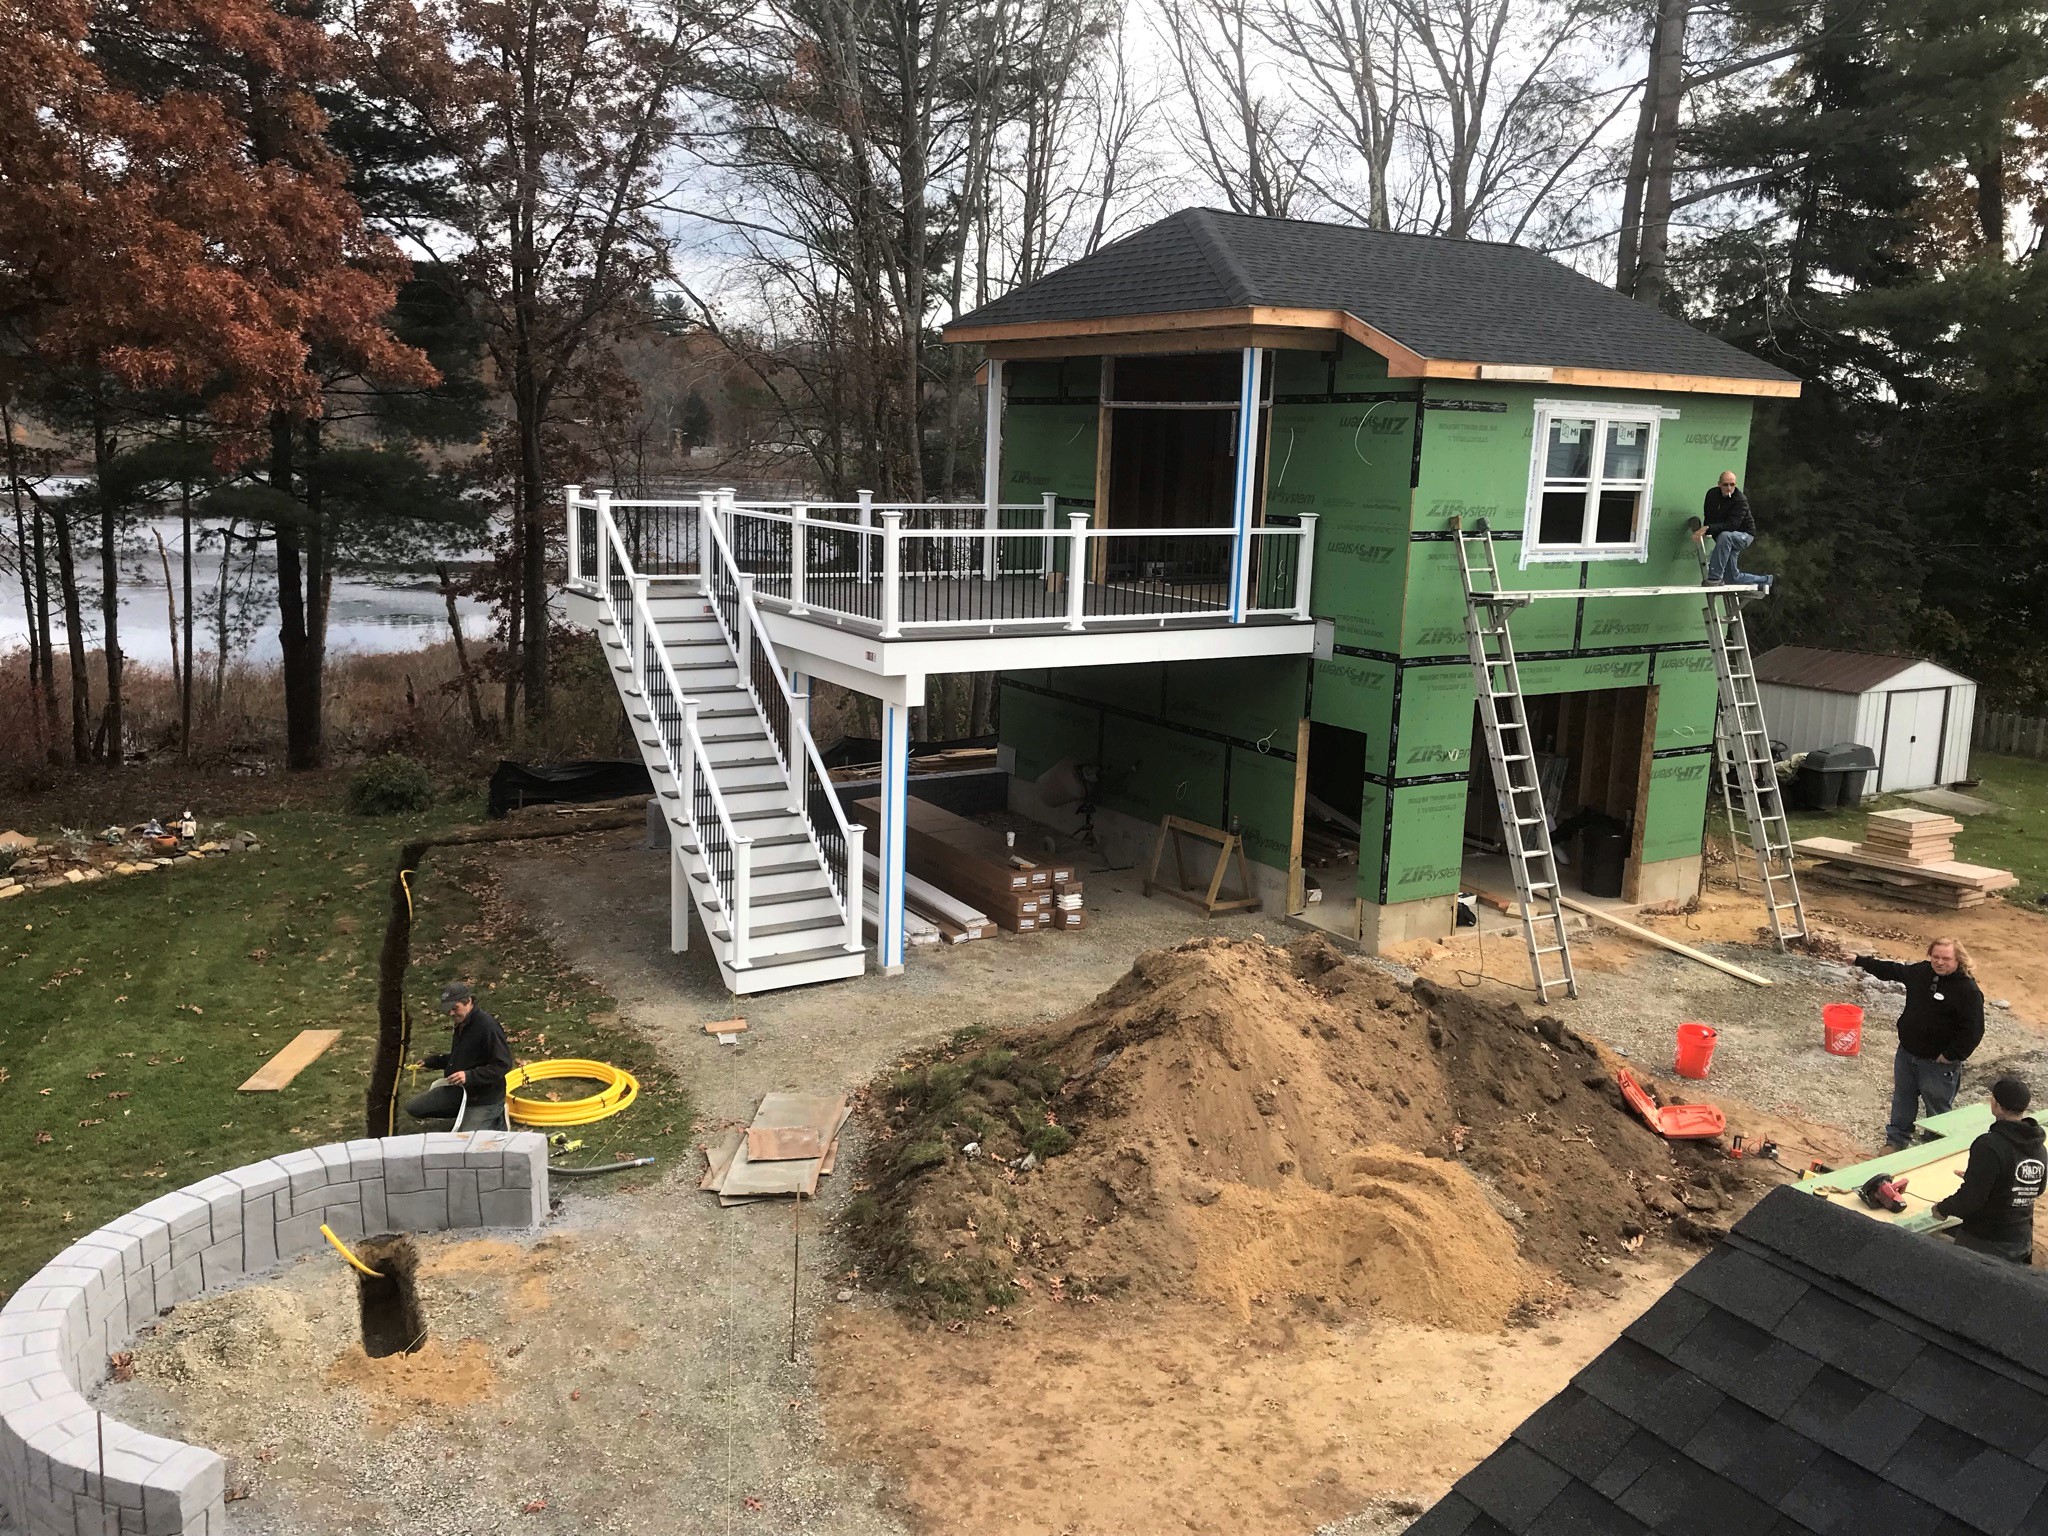
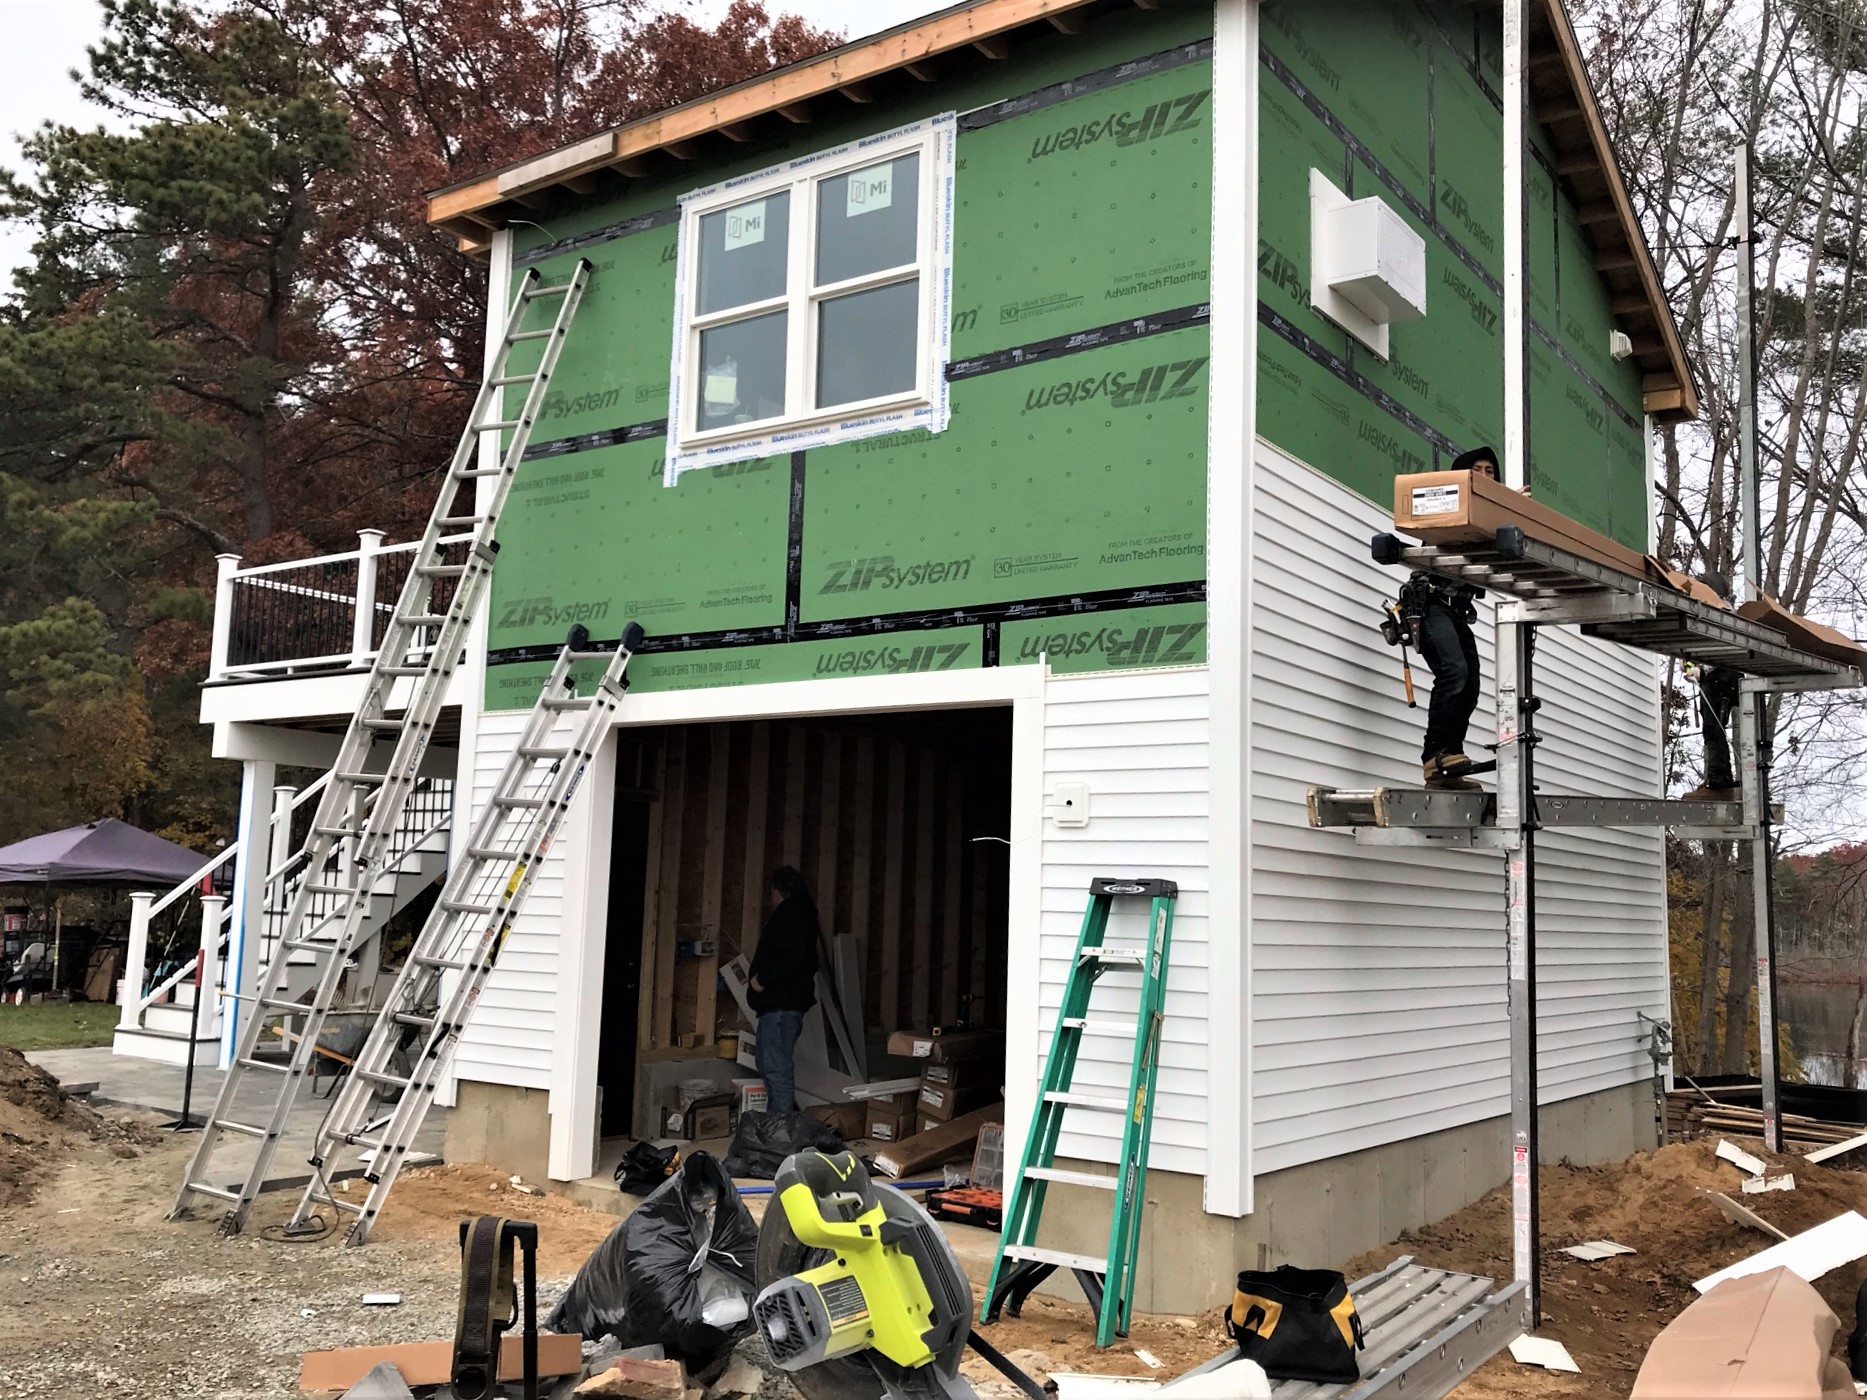
The morning of the 17th there was a heavy frost – yes, my roof is not normally white. Jonny Victor was early and got going on the siding installation.
Siding going up.
November 18
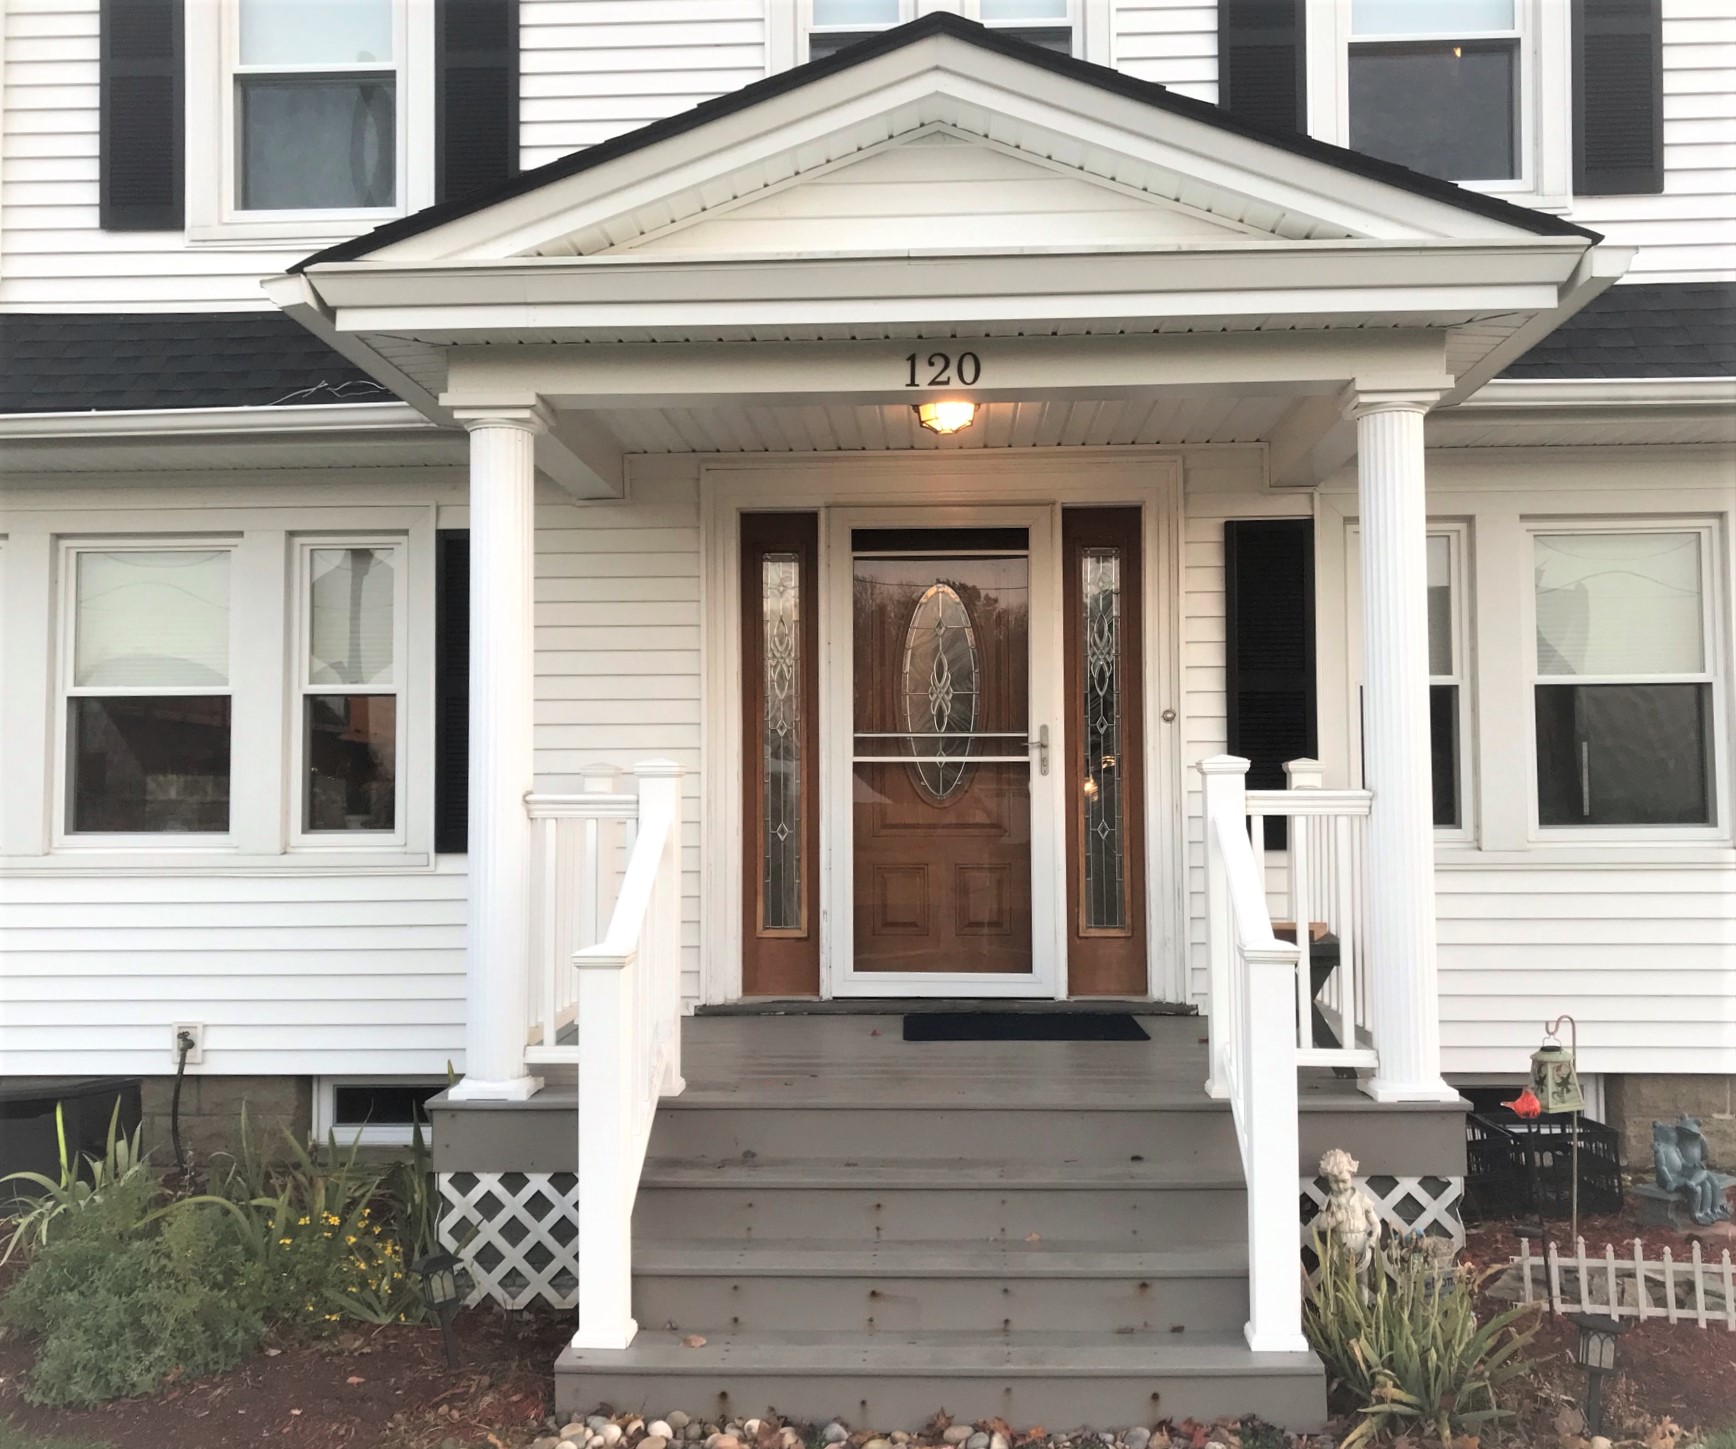
The weather warmed up significantly on the 18th, which made it an ideal day to replace our front door. It had been previously ordered to be installed in the summer, but the retailer screwed up and sent a door with no stain on it. That was sent back, and finally the new one arrived.
The old front door with the storm door over it. The storm door had trapped sunlight (and heat) and delaminated our front door, so it needed replacement.
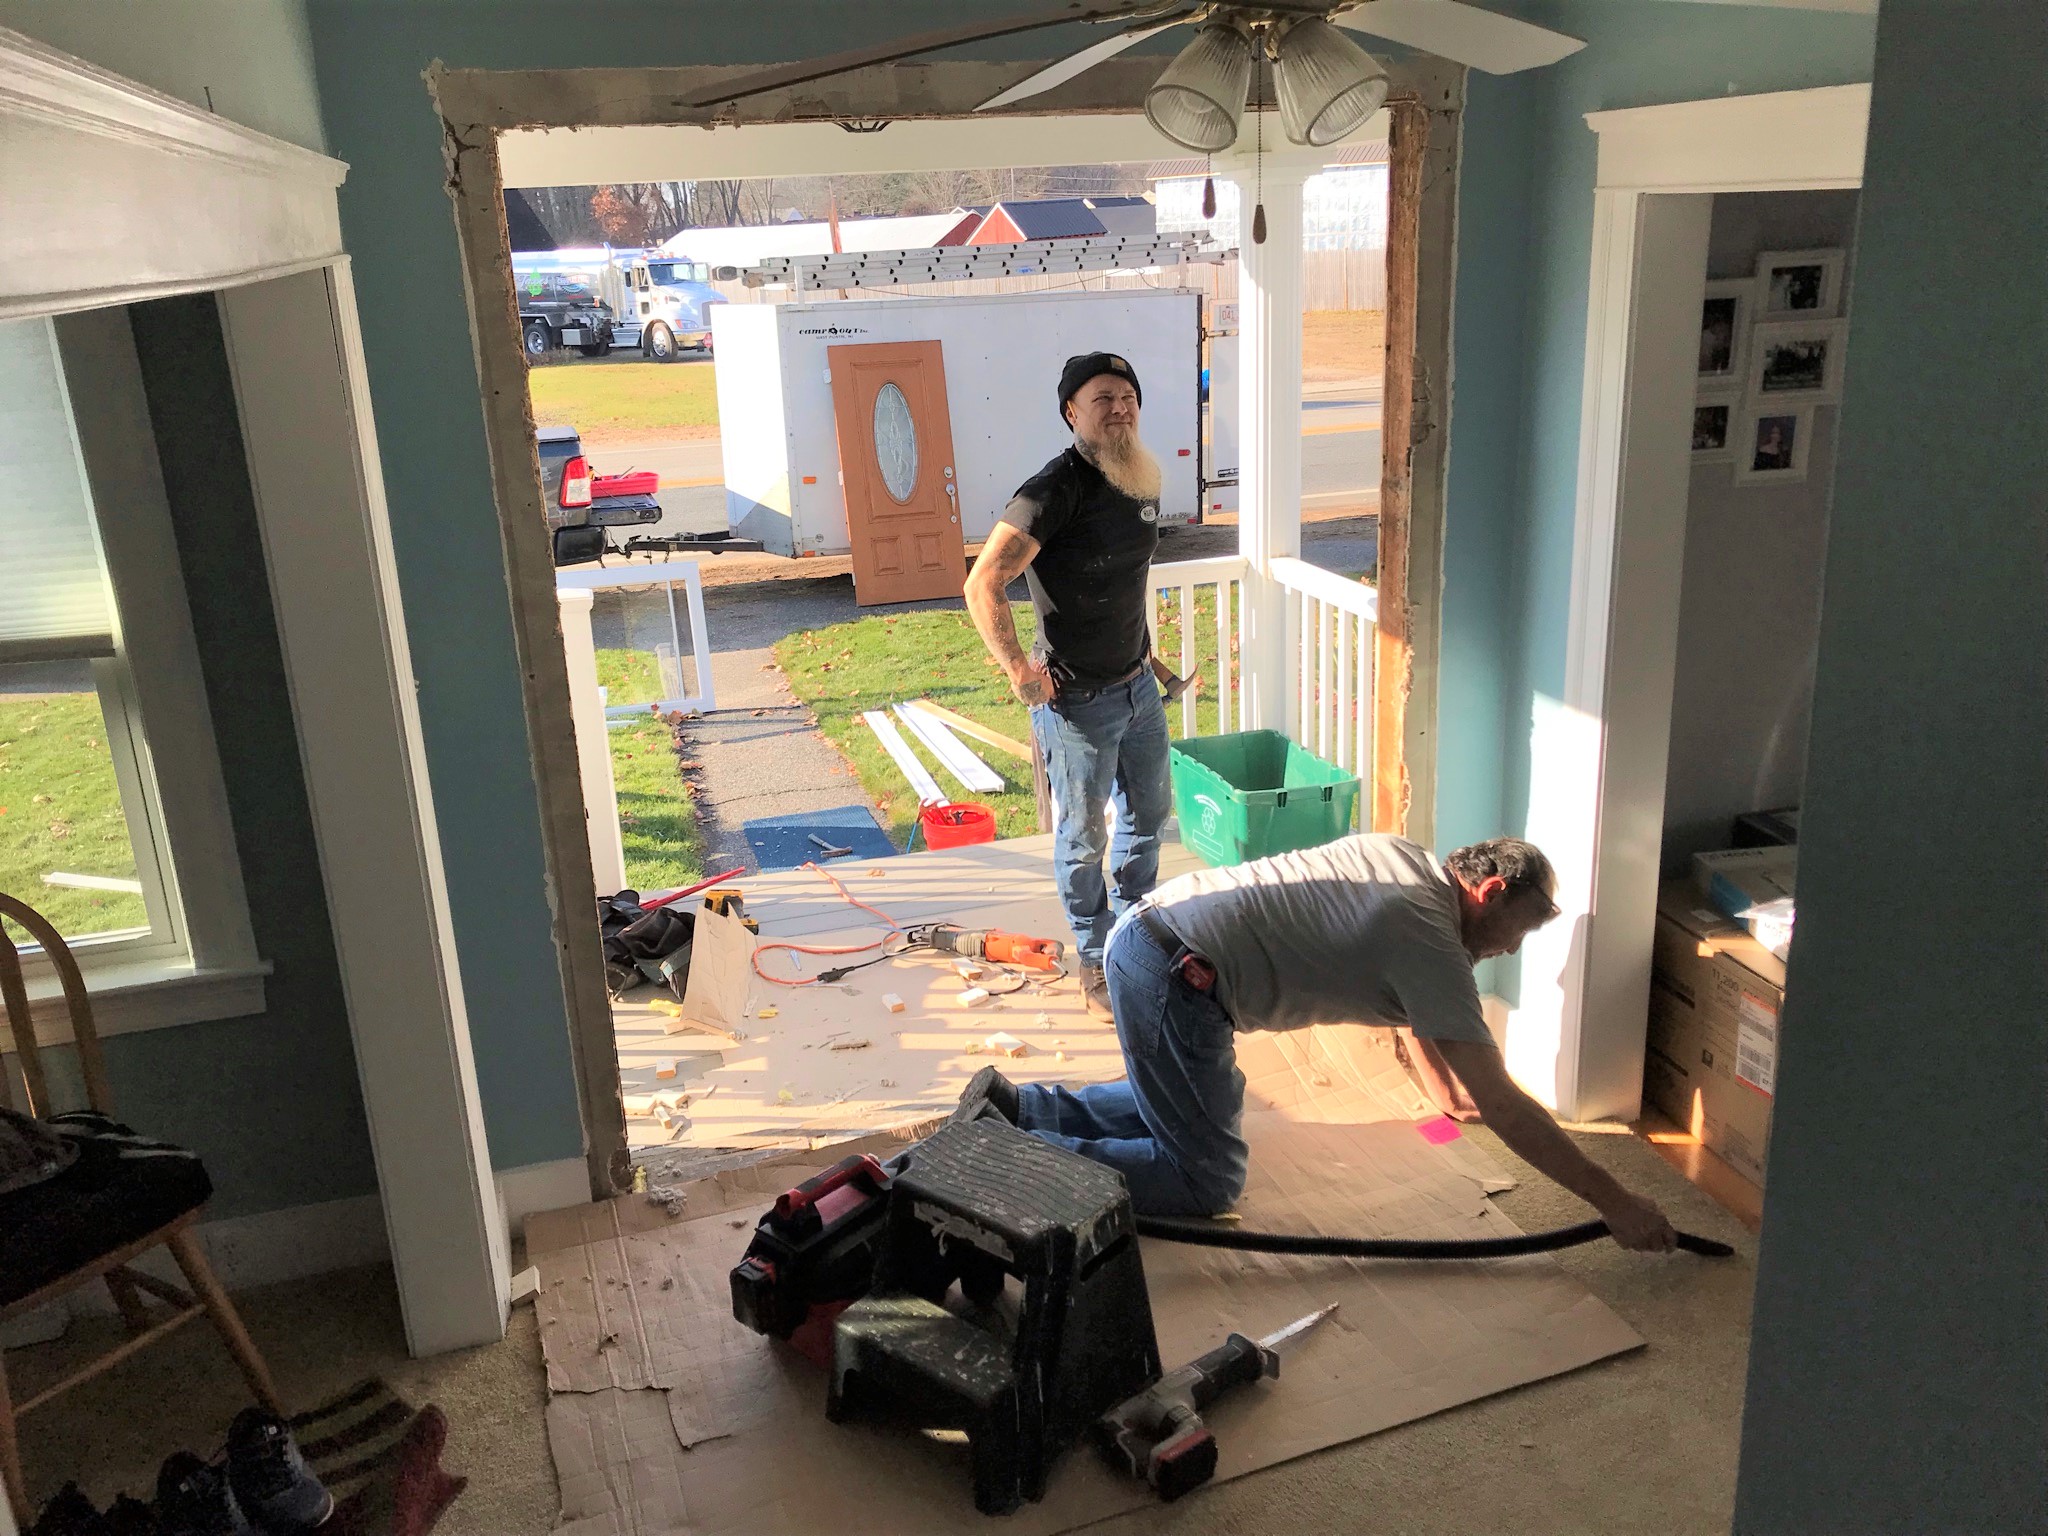
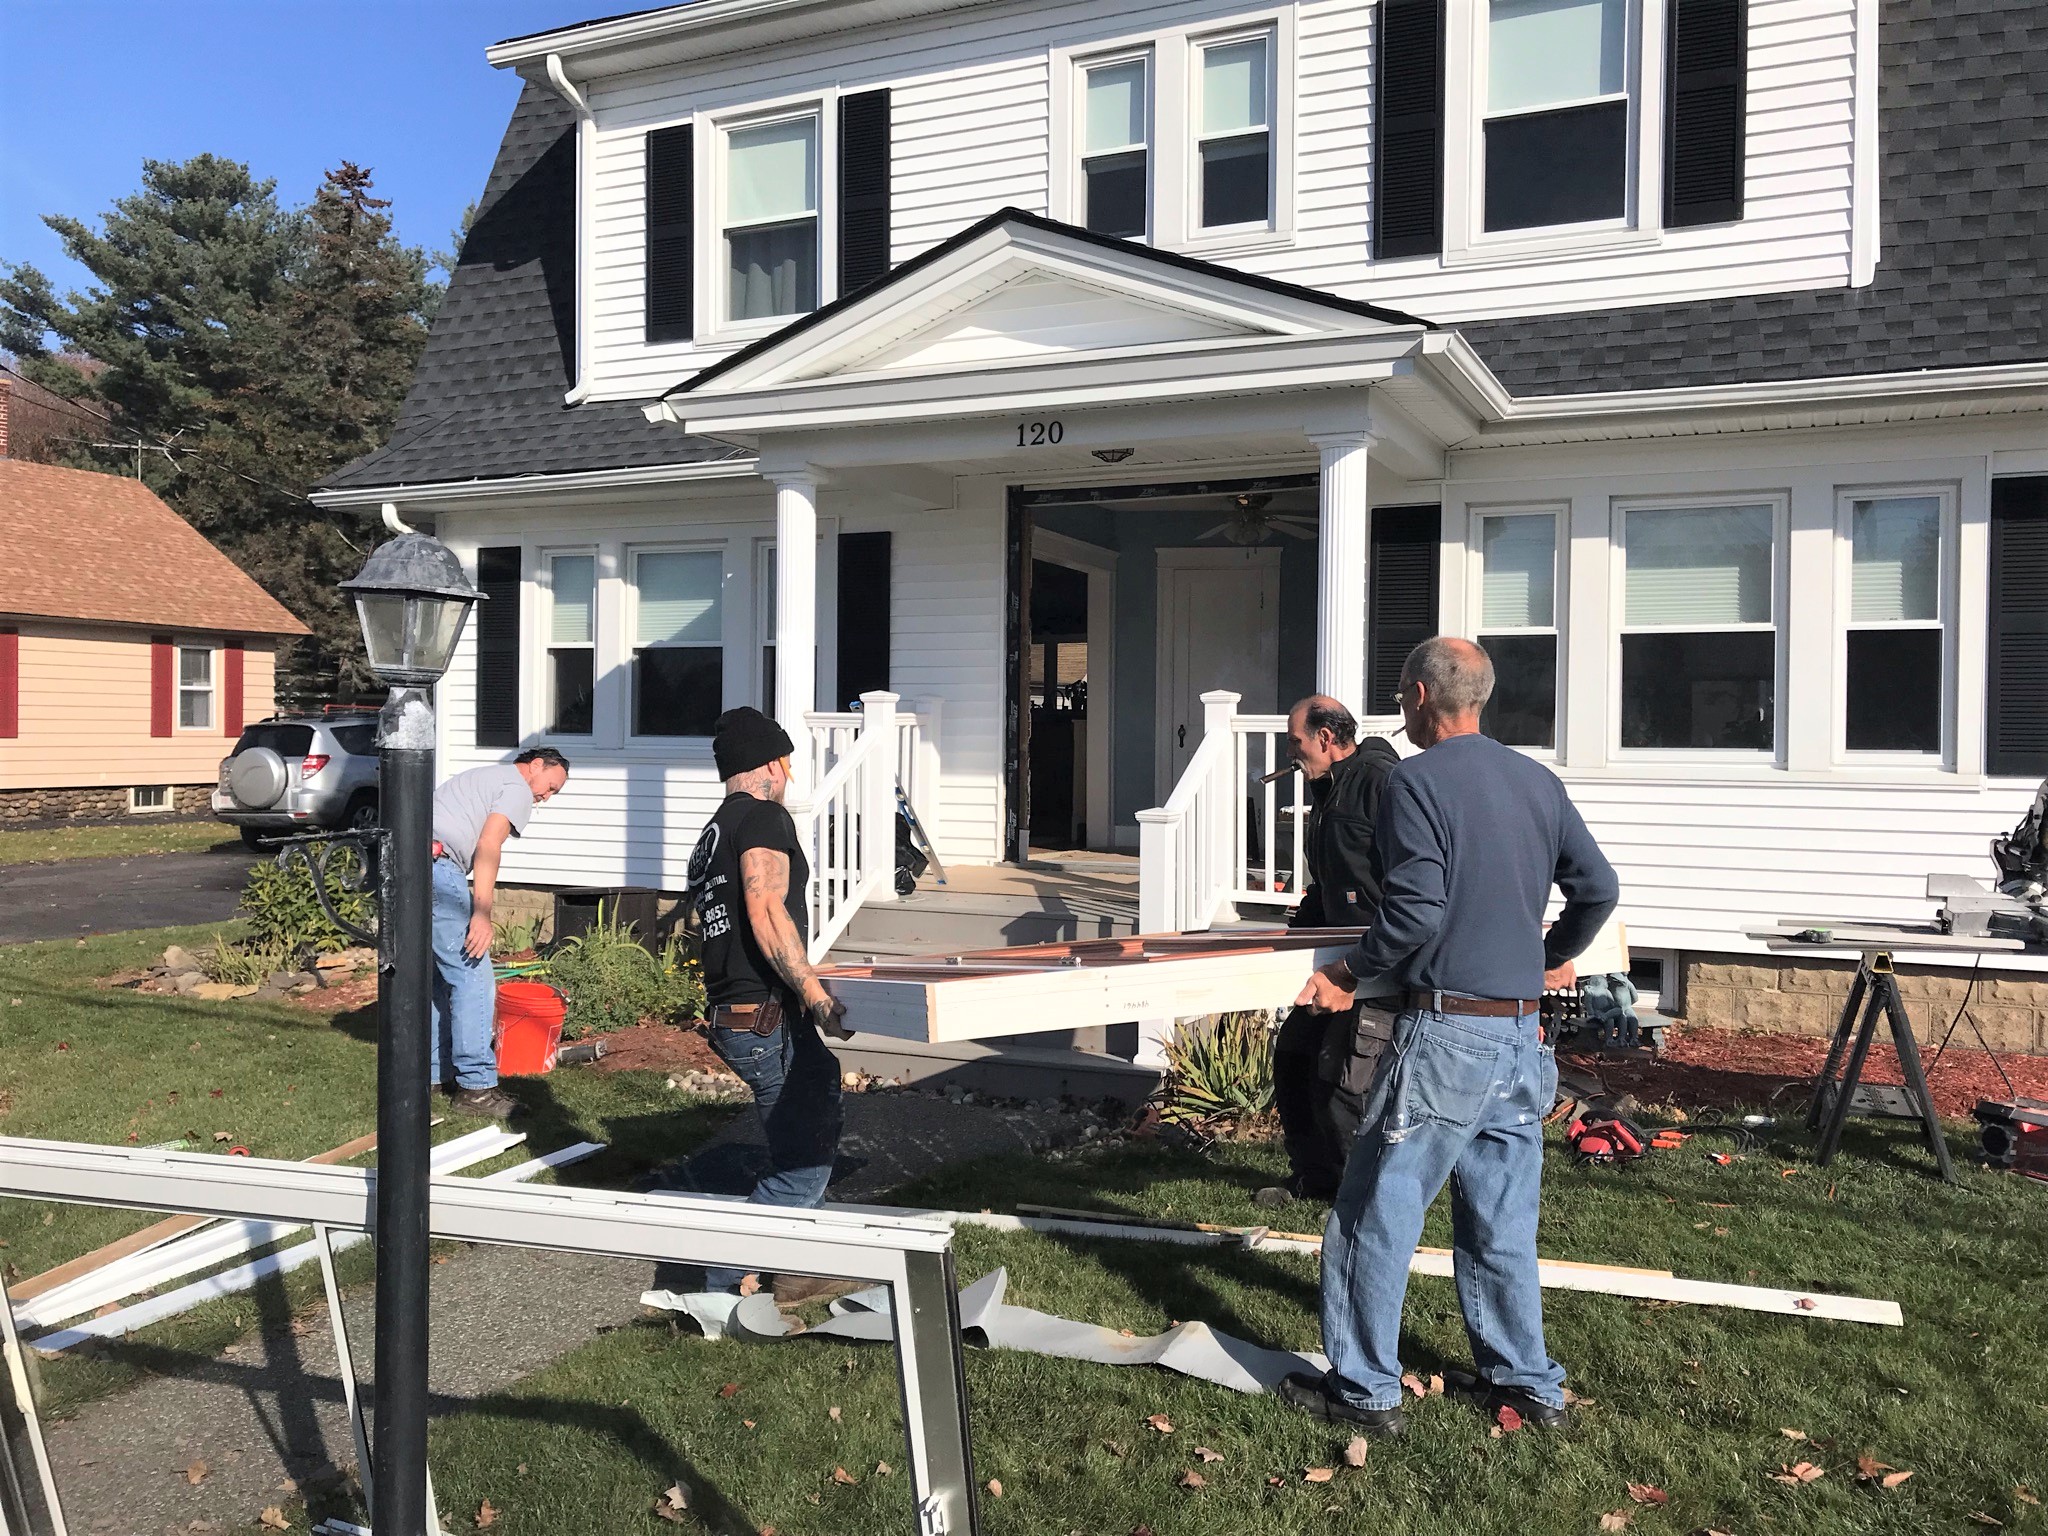
The old door and side panes are removed.The new door is carried in.
Inside showing the new door, unfortunately it’s defective!
The door width was 1/8″ wider in the middle than at the top! So, it sticks, and will need to be redone – unfortunately – but as it’s a manufacturing defect we should be ok with a replacement. Timing in November is not good, and it only gets colder. At least the old one is gone now.
Evandro progressed on paving the fire pit.
And on the same day, the dishwasher was delivered for installation – so yeah, busy.
Out with the old……in with the new.New dishwasher installation happening in the midst of the front door installation.
November 19
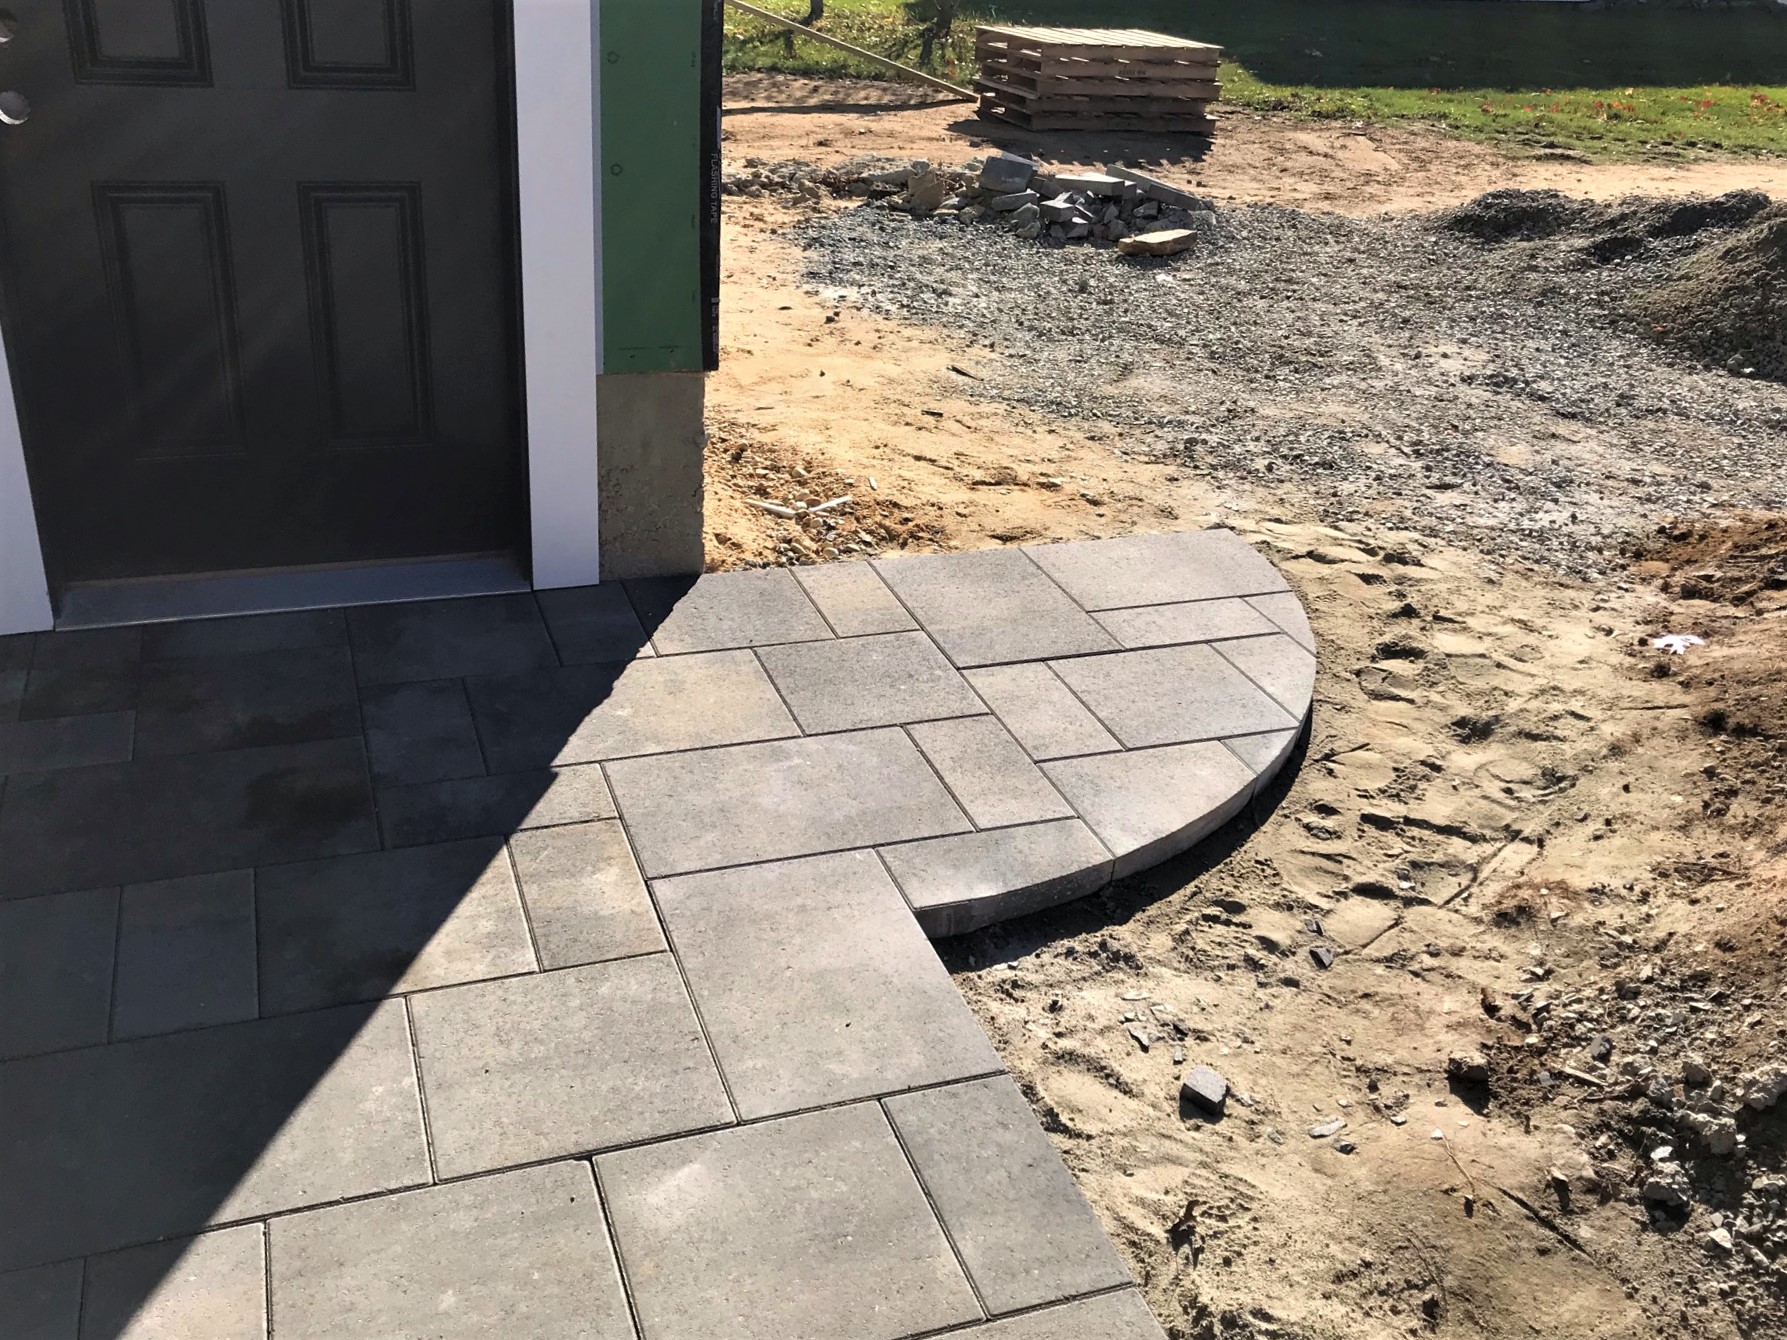
Early morning Friday the 19th showing siding and patio progress around the fire pit. All pavers are cut to shape.
Electrical work connecting the power in the house to the garage went on – plus a fluorescent light was replacement in the cellar with a safer LED.
November 20
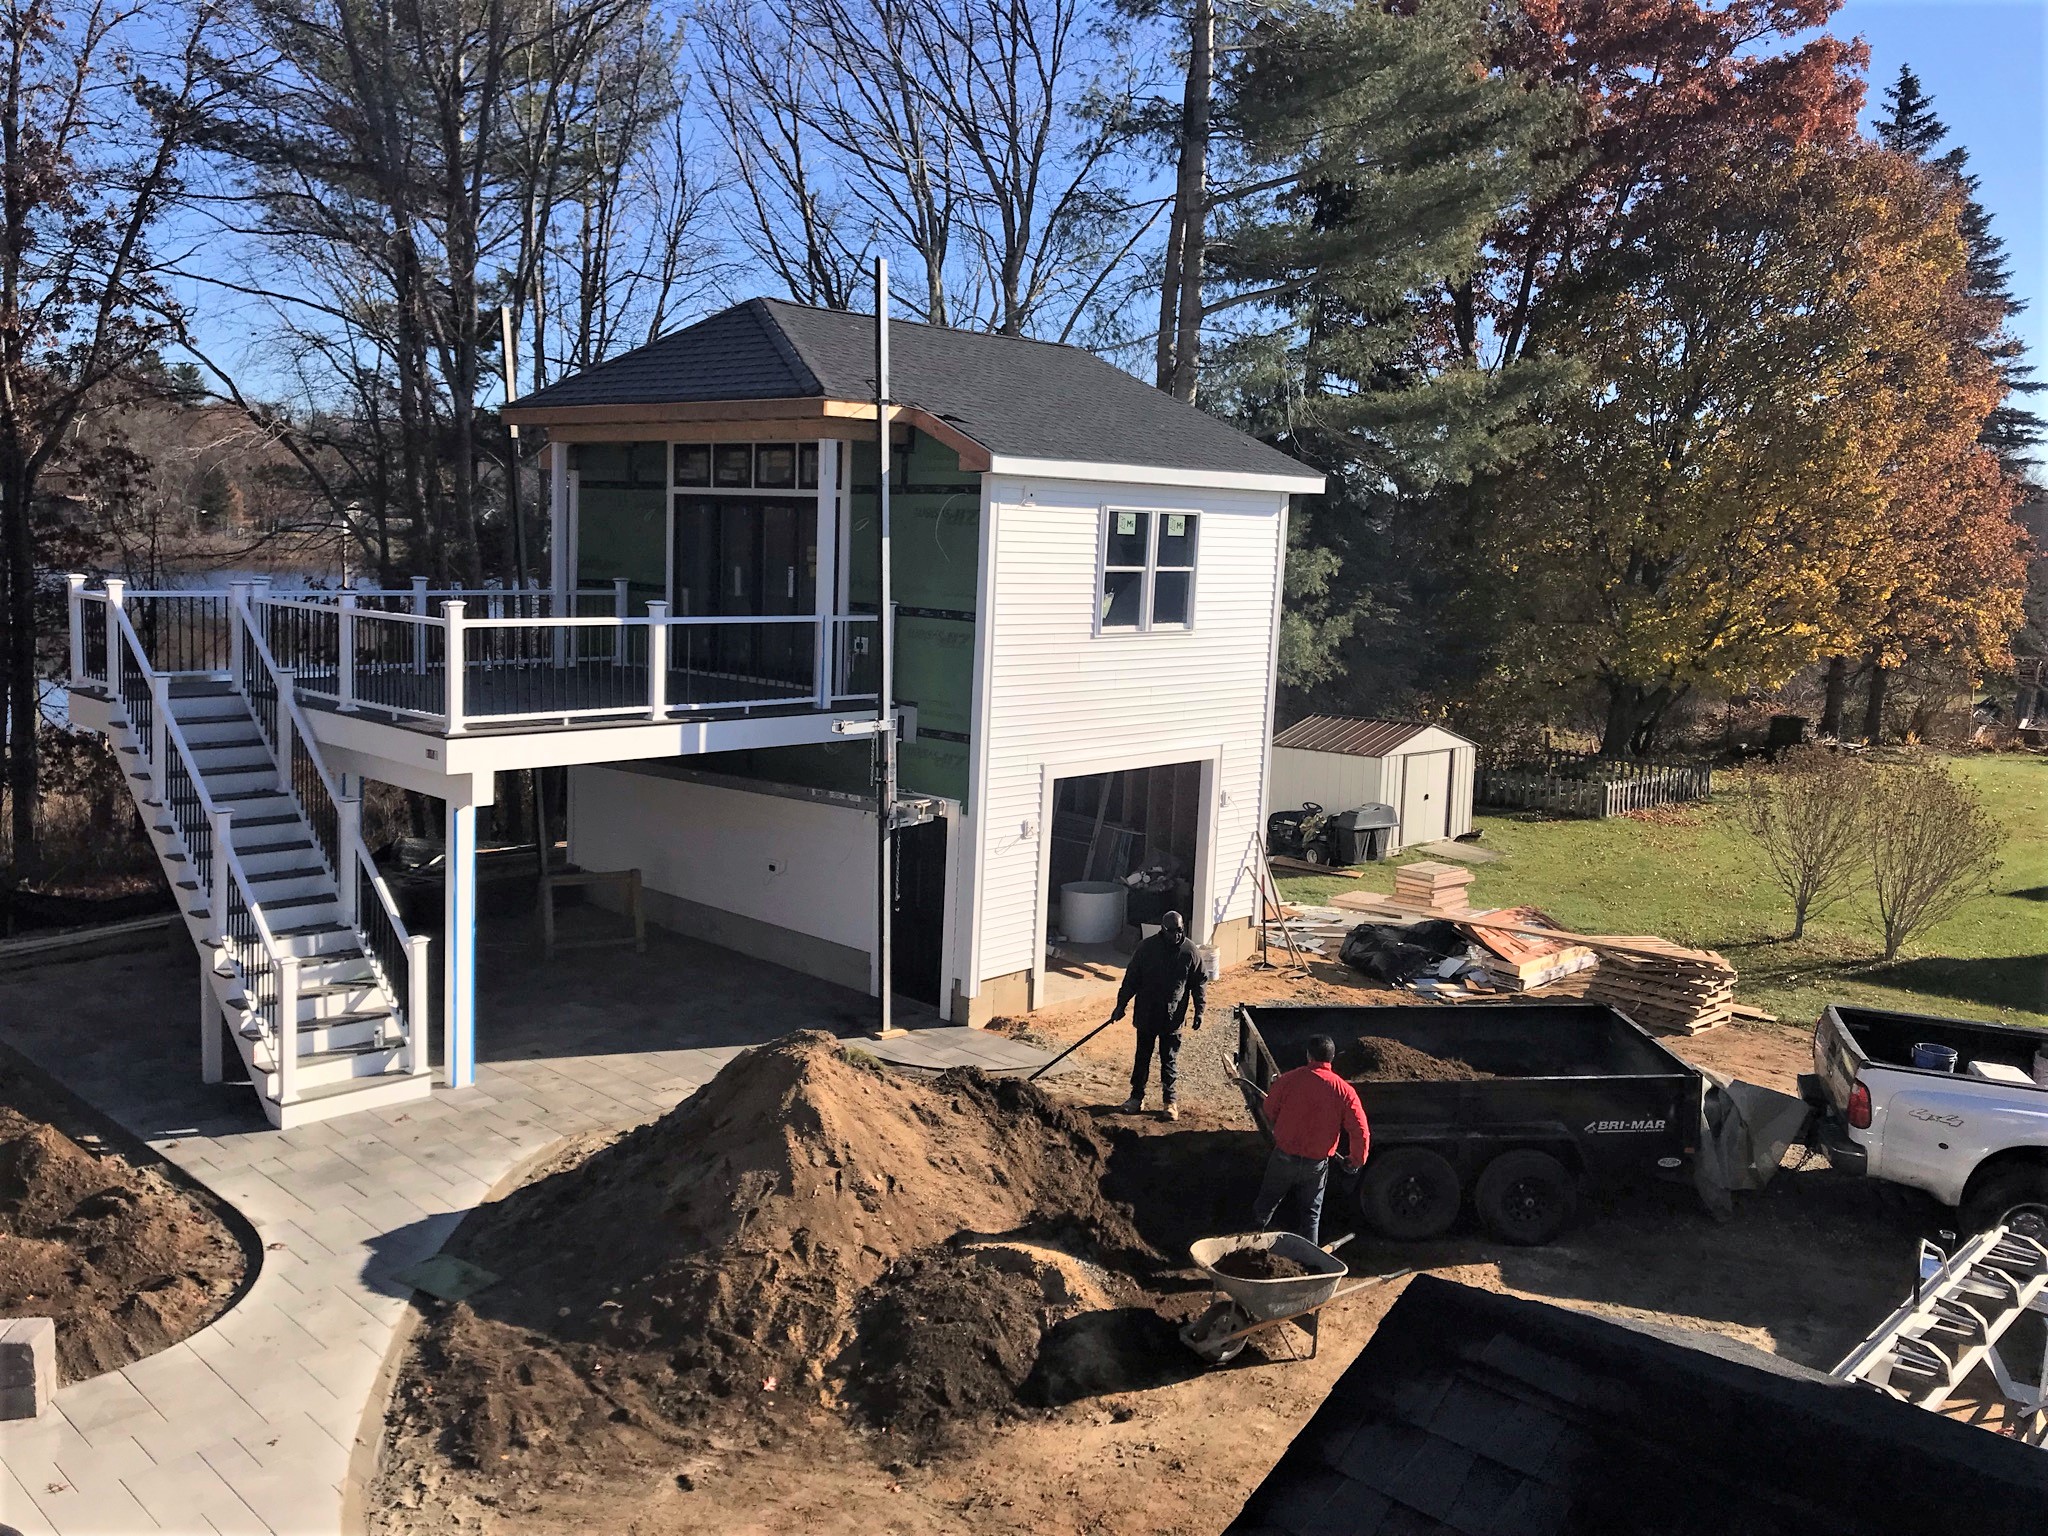
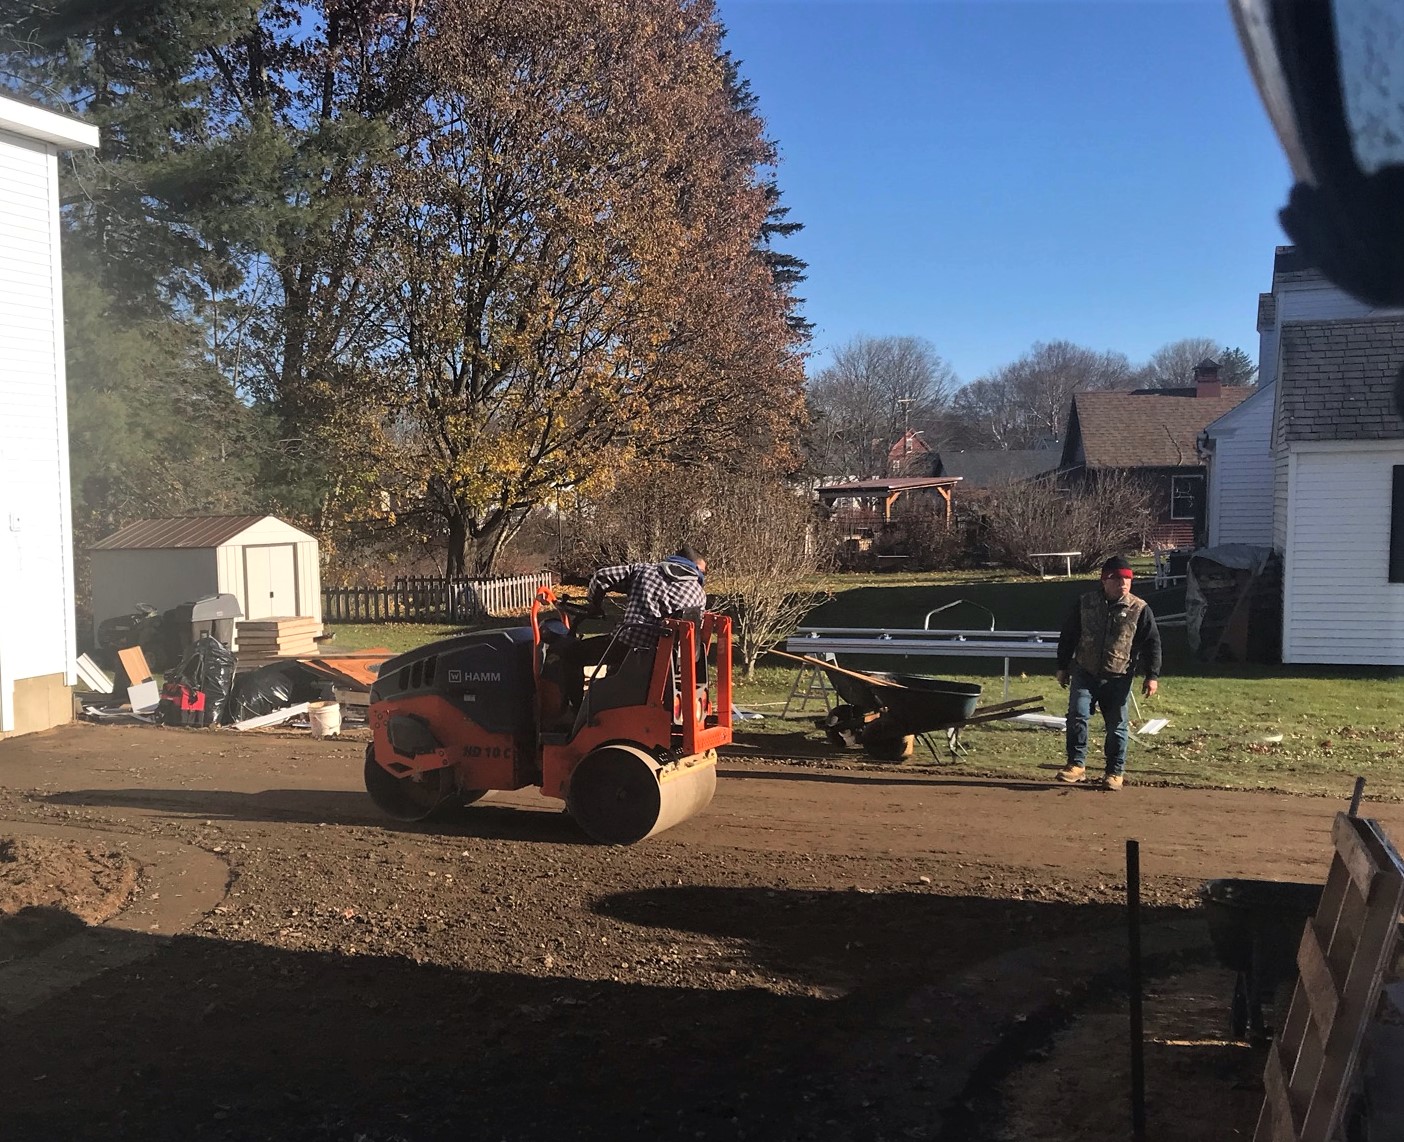
On Saturday, Evandro’s crew kept going – this time attacking the overburden pile of dirt they had previously excavated for the patio and gas line by hand. This was needed as we expected to get the driveway paved with a base course of asphalt within a week.
Moving the overburden by hand.
And it’s gone!
Progress at the end of a very busy week.
Week 19 – November 21st to 27th
November 22
On the 22nd, I was scheduled for minor surgery at noon – and I checked out the project. Siding work continued.
Siding work continuing by the deck door.
The surgery went ok, but I was pretty much out the rest of the day! Anesthesia and I do not work well together…
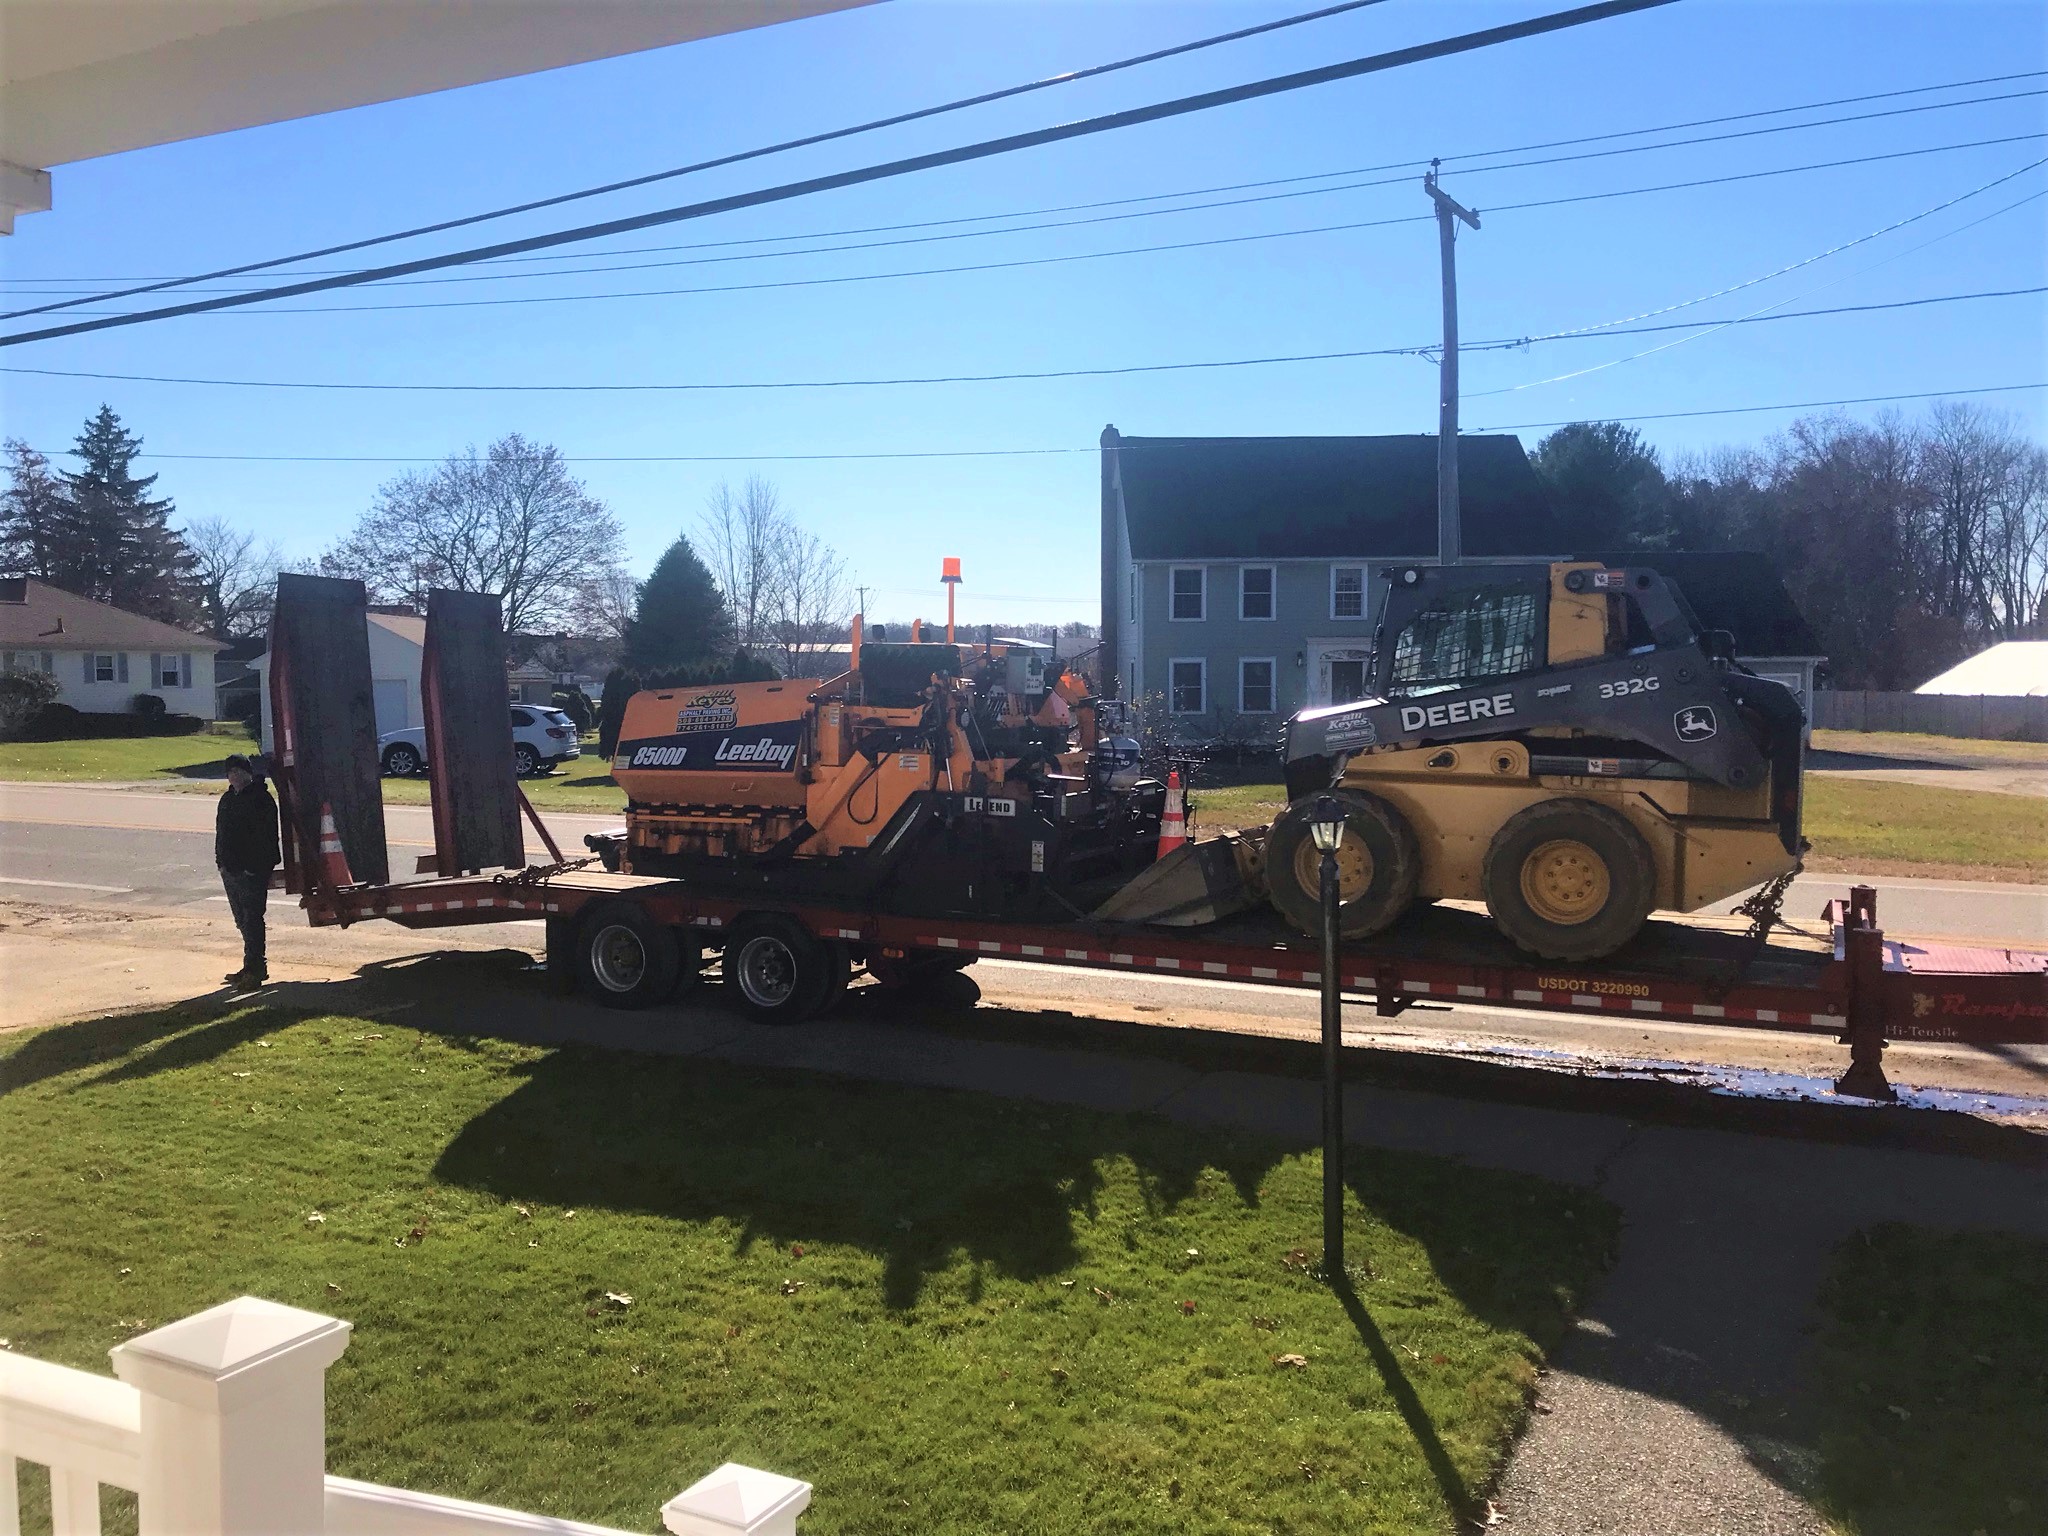
November 23
This was a part of the construction project that I really wanted to see close up – Bill Keyes Asphalt doing the paving! However, I was in no shape physically to do much more than poke my head out of the door or through a window to take pictures.
Gravel base materialPaving equipment arrivesGarvel was spread.Gravel leveledGravel compactedAshpalt arrivesSpreading the asphalt by the paving stones.Asphalt operationsAsphalt set and curing (like I was trying to do at the same time in the house).
November 24
The next day, the siders came back and installed the shutters and repaired the siding by the house deck that had to be replaced as a result of the new deck.
Shutters going in – these are for aesthetics only! I know Pat in Australia had asked me about shutters here – just for looks unless your house is 200 years old.
Repairing the siding by the house deck.
November 25
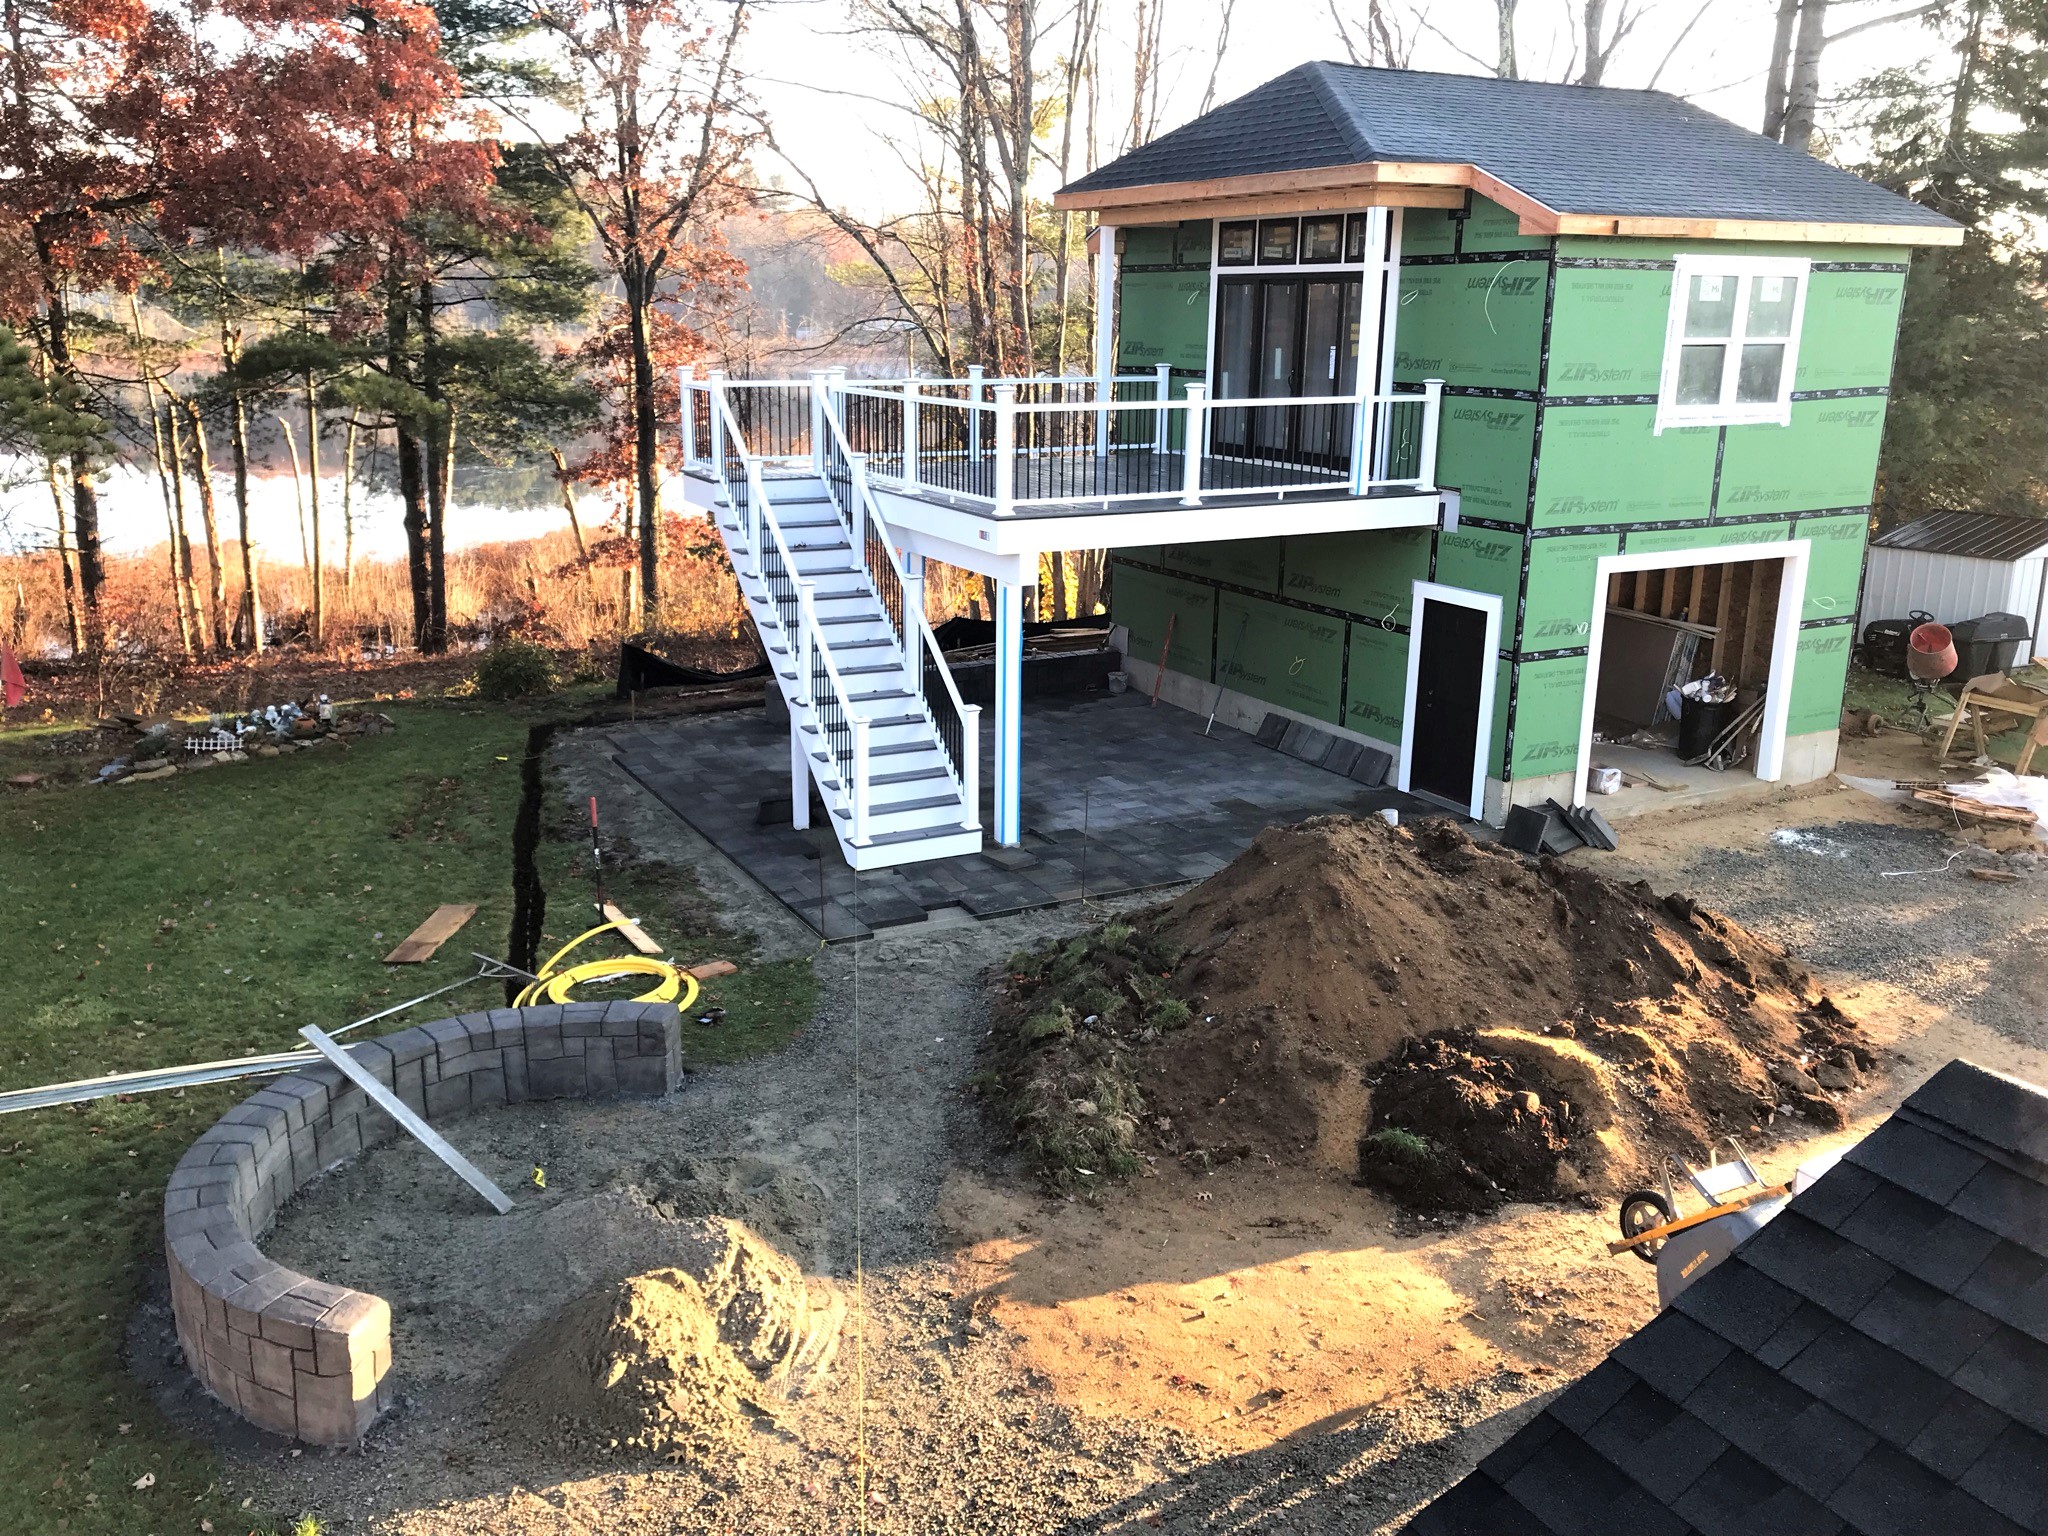
This was Thanksgiving – so no work happened of course. But the project looked like this below – and its getting colder.
Shaping up nicely and we even are parked in the driveway – for now anyways. Yes, that pond is freezing up too.
November 26
This date was our wedding anniversary – normally a day to hit the casino and have fun – but I was still recovering in the house. Of course, this being New England, we got snow anyways.
Well this sucks…
It did not last but it’s still been pretty cold.
Week 20 – November 28th to December 4th
With all the cold and needed inspections, and the Thanksgiving holiday weekend, the progress slowed to a halt. We did pass all of our inspections, and did get a dumpster dropped off to help with all of the rubbish and construction debris that had piled up – especially from the siding.
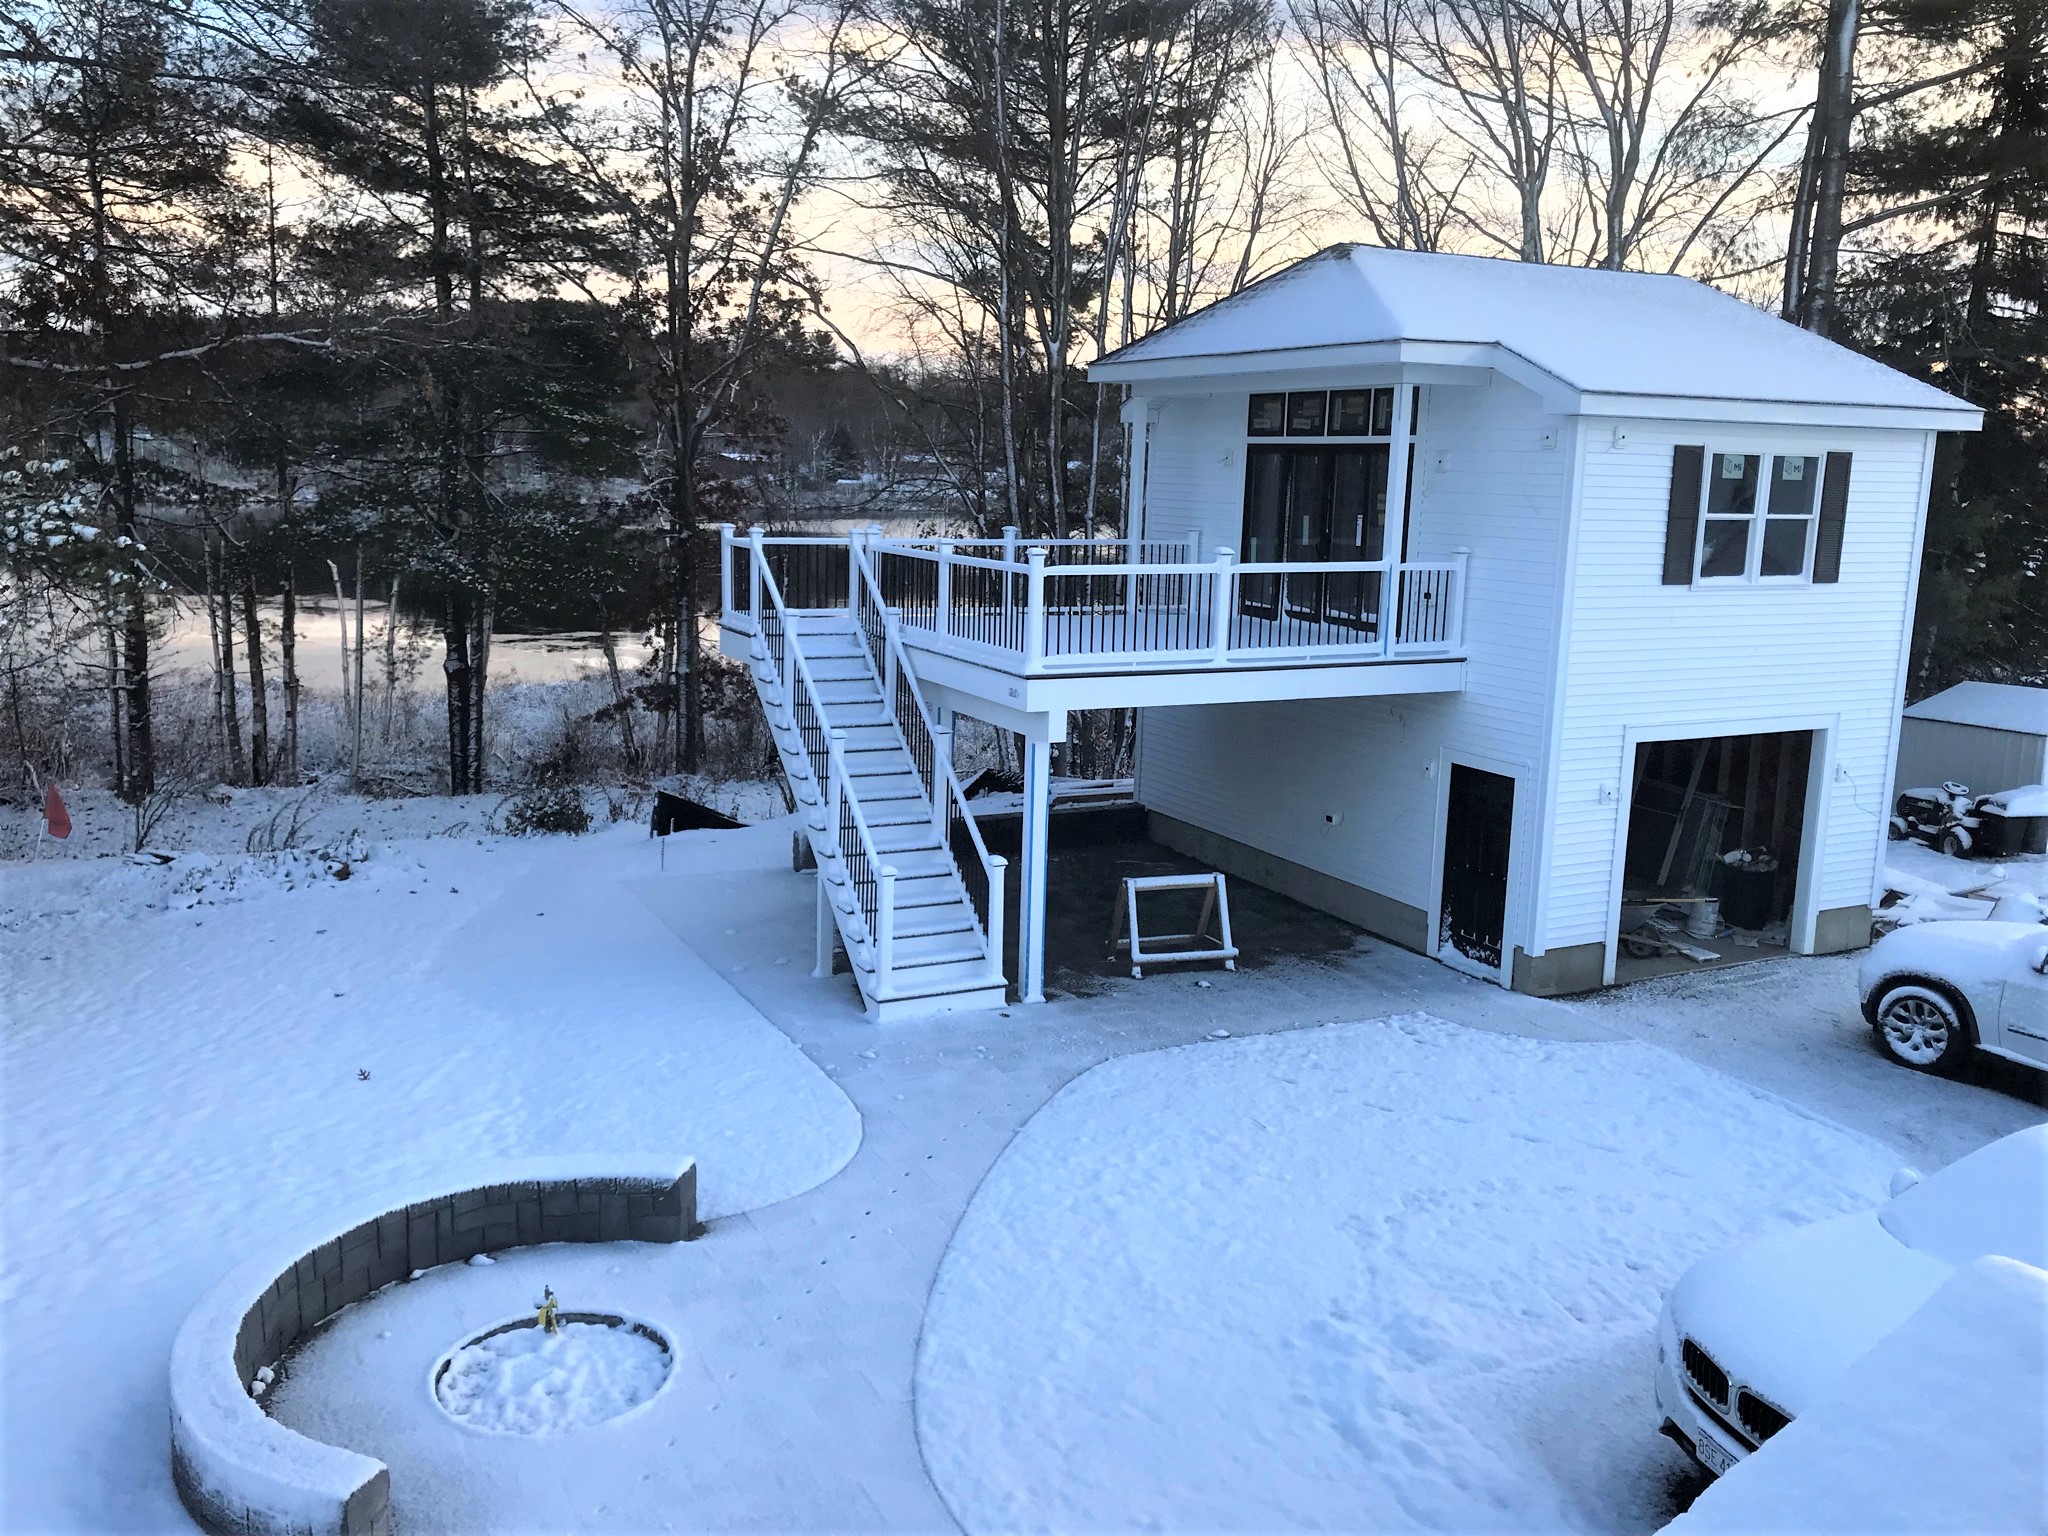
Hopefully, the upcoming week will show gutter installation, insulation, and more. As of now, it looks like this as of Saturday, December 4th.
Latest progress shot – and it’s getting colder and darker every day.
I was originally enticed into the hobby by way of 25mm metal figures from Ral Partha, Grenadier, and Minifigs back in the 1980’s. Some of you of course are remarking to yourselves at this point that you have no idea of those days!
Well, no internet existed such that one could go out and find whatever one wanted with a click. You either ordered from a catalog or got lucky at a hobby store with whatever existed in the shop (insert bad joke here).
Some of the figures were pretty simplistic, others were (and are still) marvels of art. Most readers of this blog will recognize that until recently, I have been very much involved with painting and building figures and terrain for my Civilizations Collide project (Aztecs, Conquistadores, etc. for Feudal Patrol. So, you ask, Mark, what the f**k you doing with old school Vikings?
Well, this is related to my recent trip to Historicon (which I wrote about here). Several of the scenarios that I am developing for the Spanish Conquest require Aztec (and Tlaxcalan) war canoes, which were involved in many of the battles, both along the causeways out of Tenochtitlan and in naval combat with Spanish brigantines on Lake Texcoco. At Historicon, I searched high and low in the vendors area and in the flea market for reasonably priced war canoes. All I found were a Blood and Plunder model for $20 (not reasonable) from a vendor’s booth and a single $3 scratch-built balsa-wood version from the flea market.
I got both as options for considering how to design and scratch-build my own. As I estimate that I need 4-6 war canoes for each of the 4 brigantines that I have in queue. That’s 16-24 canoes – and I am not going to pay $20 per canoe! Shortly after the convention, Greg Priebe (who was with me at Historicon) suggested that he could 3D print canoes for me! I was elated, and I asked him what I could offer in trade. Greg kindly said don’t worry about it. But, I thought that’s unfair, and I could paint some figures for him as a fair exchange.
Greg is the author of the Vikings Feudal Patrol supplement (which you can download for free here), so I offered him Vikings. He agreed, and when I got home I went into my unpainted stash to see what I had available.
My supply of unpainted lead includes many figures from the ’80’s. I got a lot of them when I returned to the hobby but have not painted a lot of the 25mm ancient stuff. We conferred, and Greg agreed that he would like ones from three blister’s of 25mm figures and a single 28mm berserker. They all work for skirmish games.
One was a six-figure blister of Ral Partha Imports “Viking Berserkers with Axes” (#DA45) – circa 1982. The second was a six-figure Minifigs “Viking Command” blister pack probably from around 1980-1982. The third was a six-figure pack of Ral Partha “Saxon Huscarle” (#1117) from their “1200 A.D.” line – circa 1982. The last was a single figure from RAFM, “Berserker” from their “Adventurers” line circa 1989. This adds up to 19 figures, and Greg is making me 20 or so canoes. So, the following will describe how I proceeded to paint all of these up.
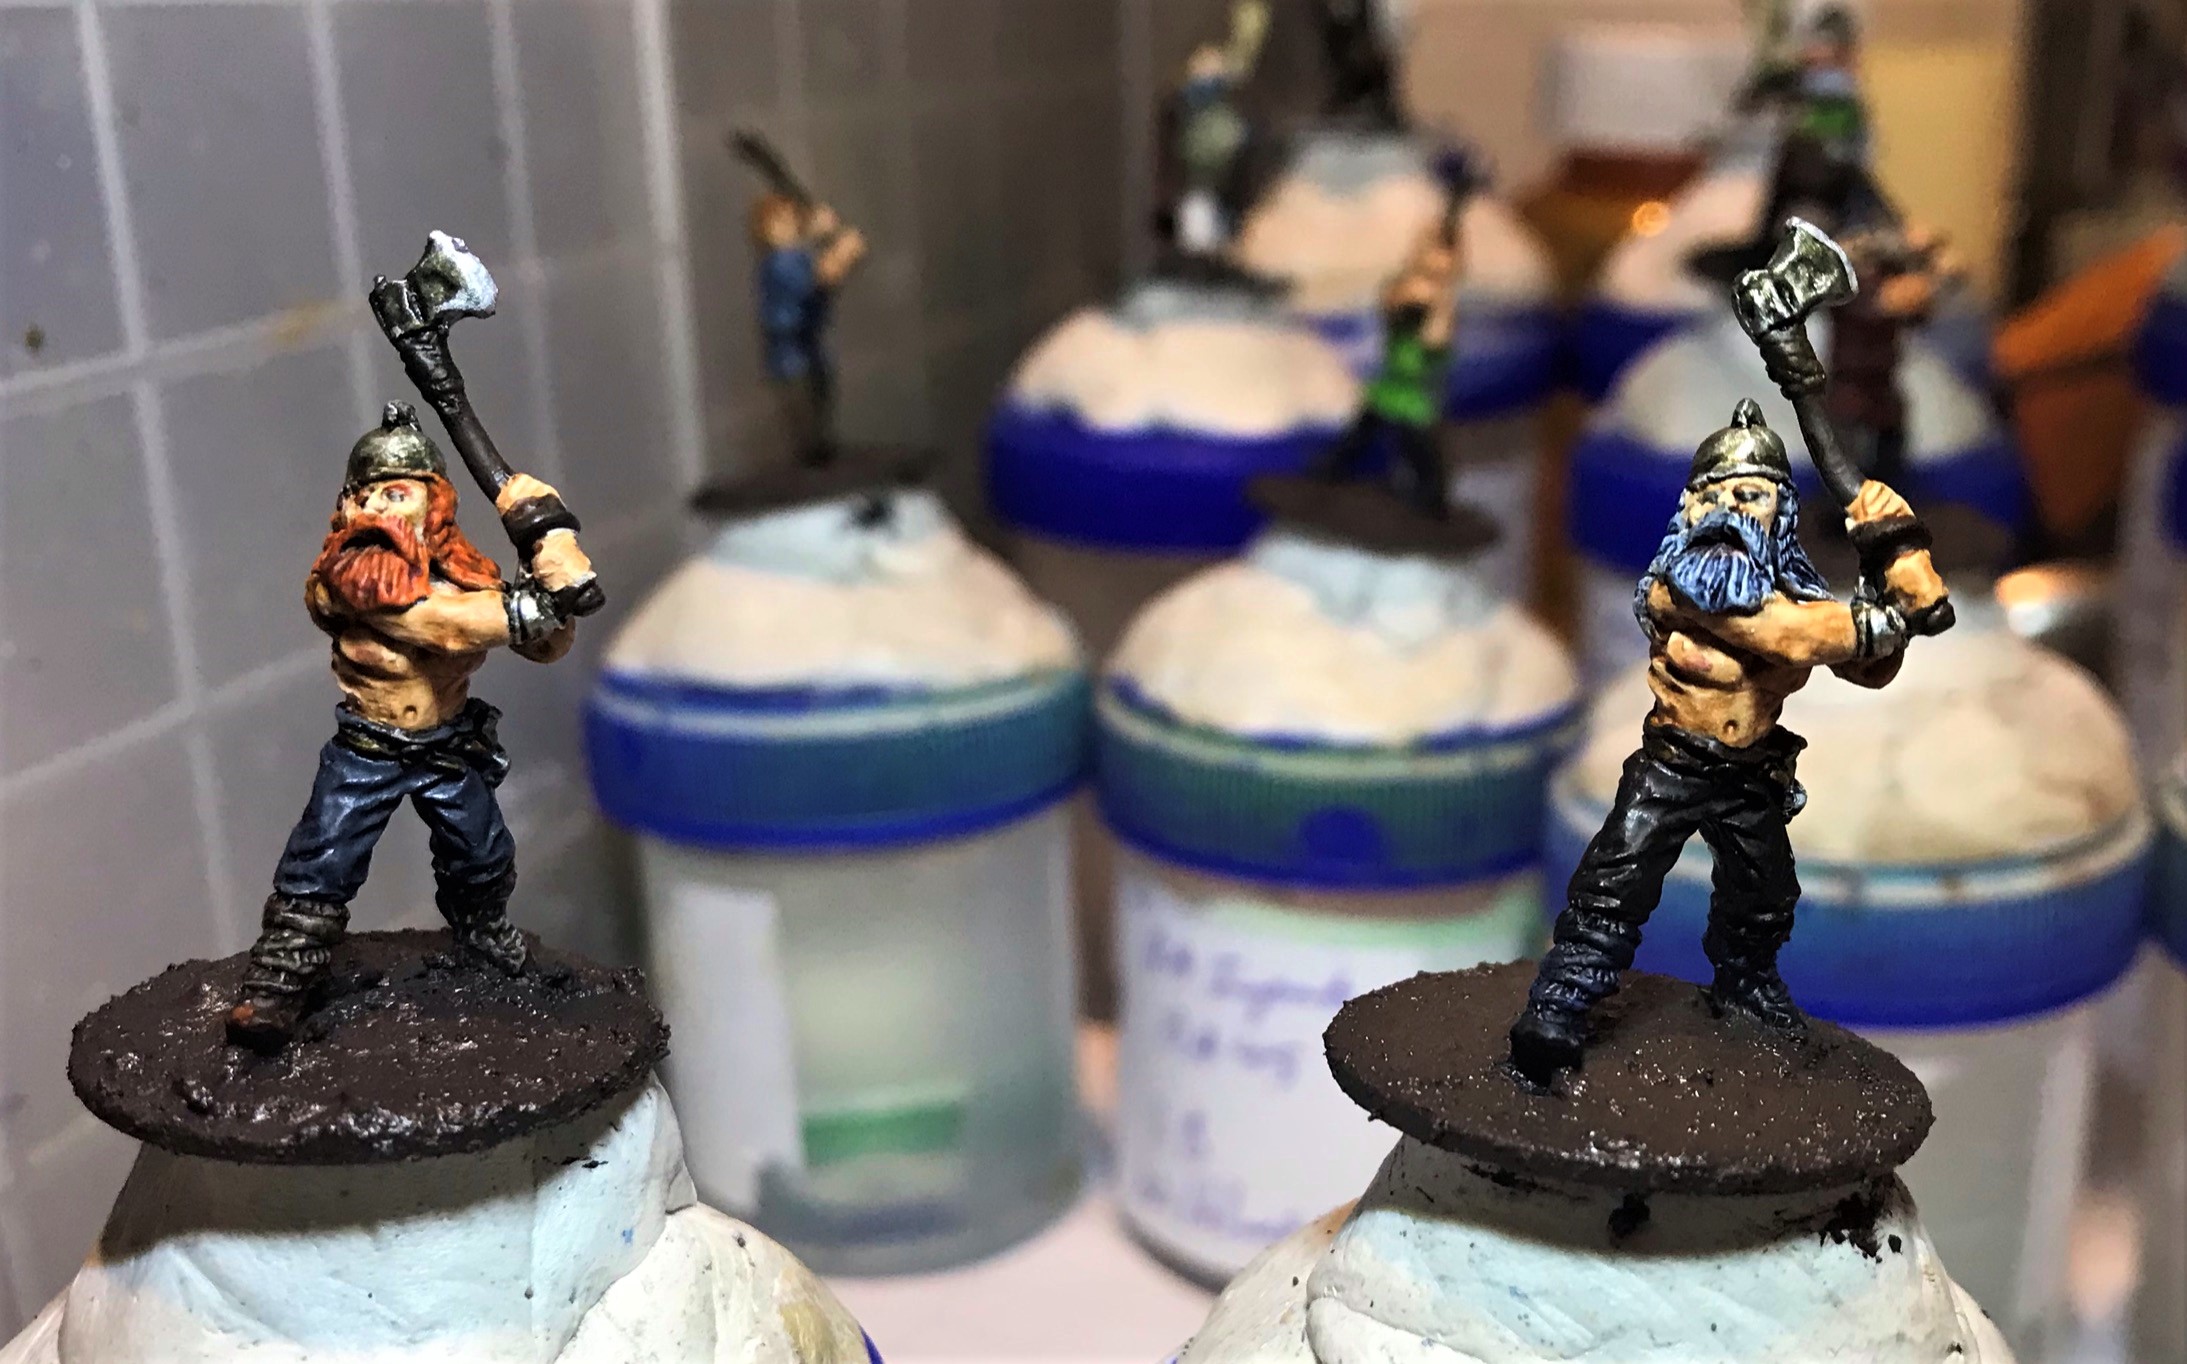
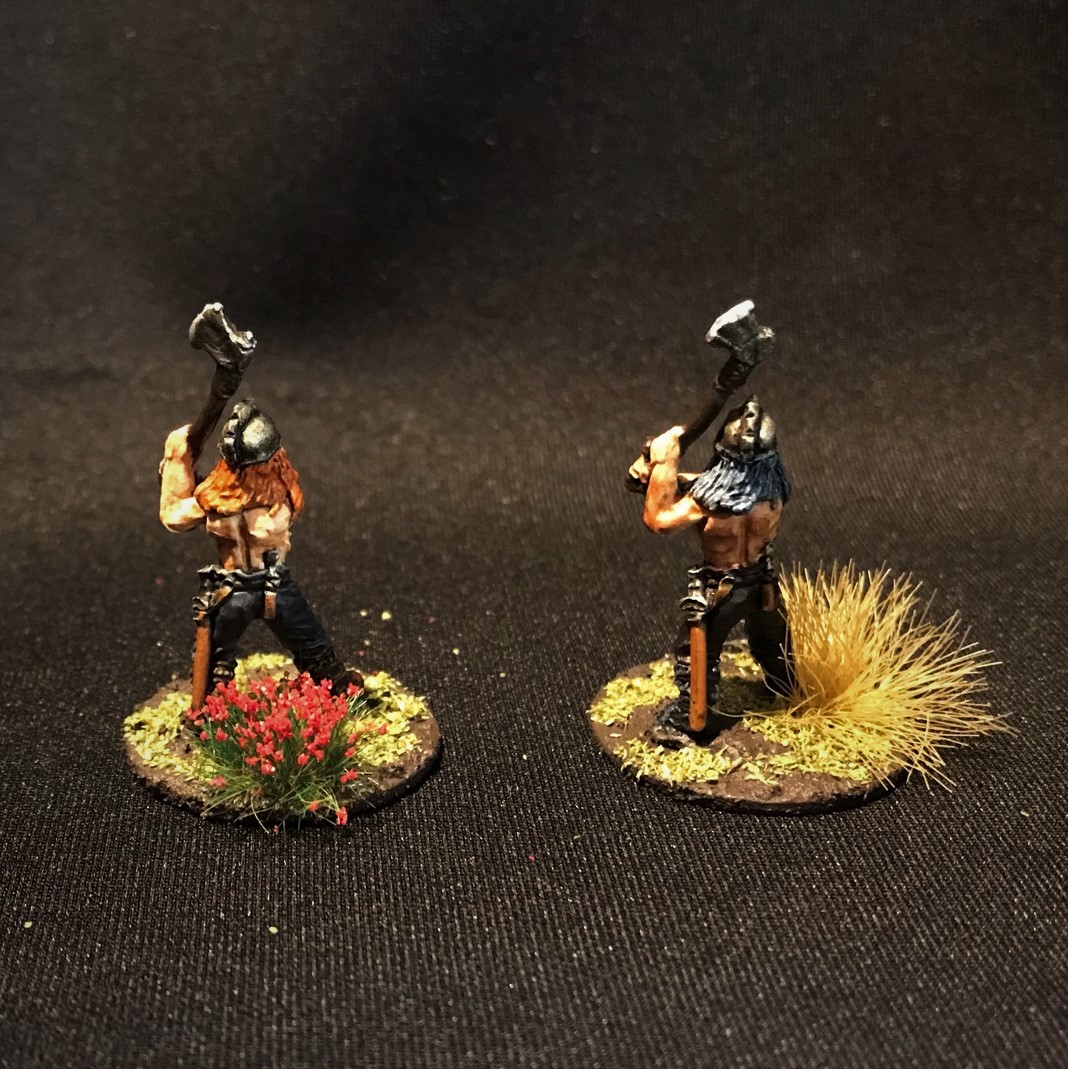
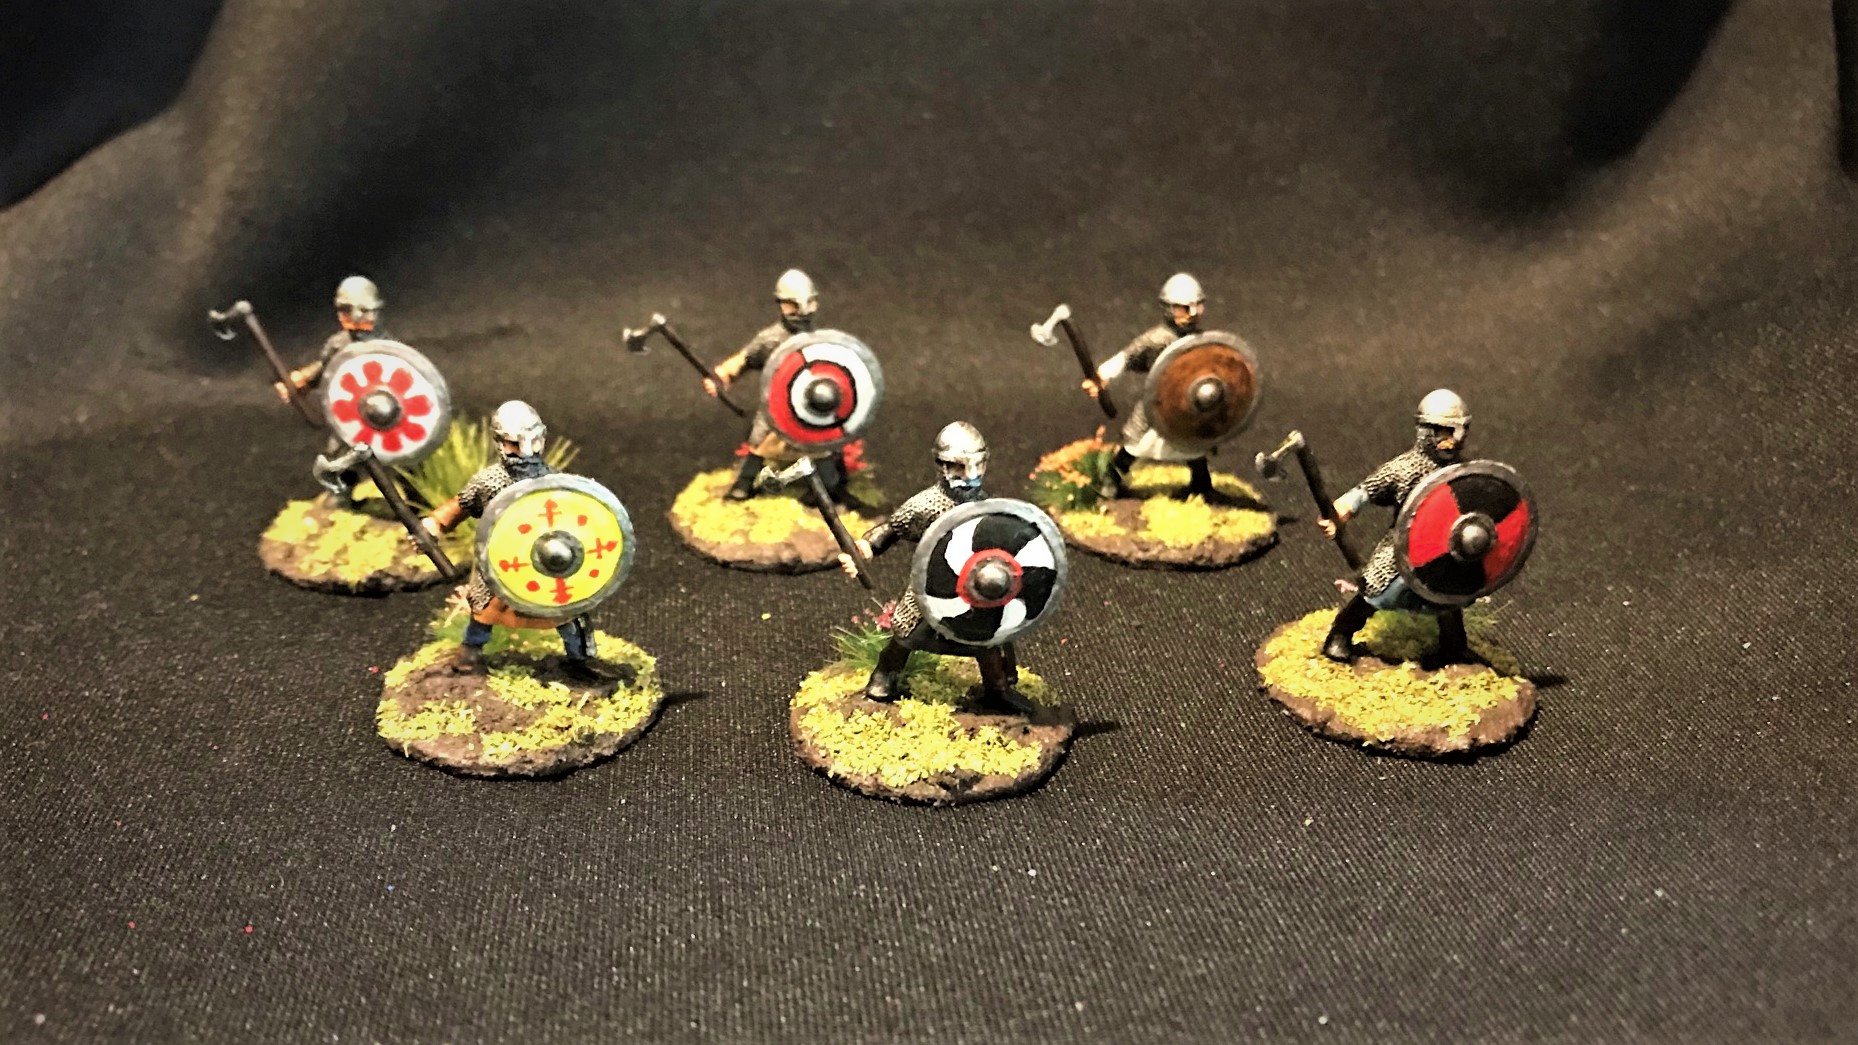
Ral Partha Imports “Viking Berserkers with Axes“
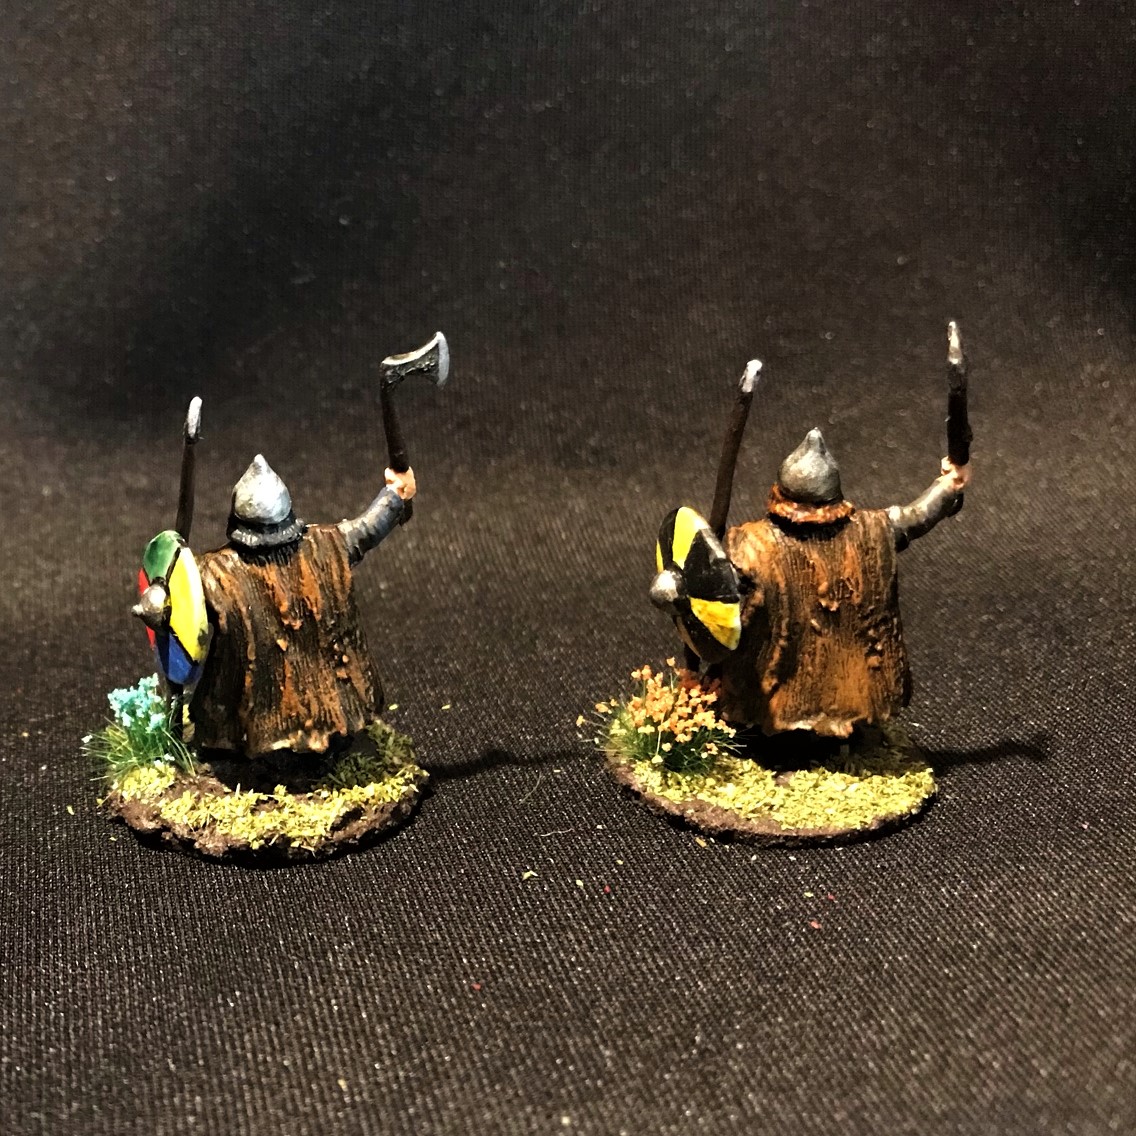
These were likely made by Citadel and marketed by Ral Partha – a common commercial practice back then. The bases had “1982” and DA45 on them. As my process was modified batch-painting, I’ll include some of the steps I took on all of the models here and spare you a repeat later. There were three poses among the six figures, which was a lot back then (most packs of six had just one pose). But, I needed on all of these to make them different enough for easy identification and for fun on the tabletop.
The blister pack of DA45. Opened after 40+ years,
The figures had substantial mold lines, which was common back then. That issue was easily remedied. Their axe shafts were also a bit bendy (common as well) – and I gave them all a light coat of Gorilla Glue – to stiffen up the shafts (insert bad joke here).
Mold lines seen here. Also bendy axes.
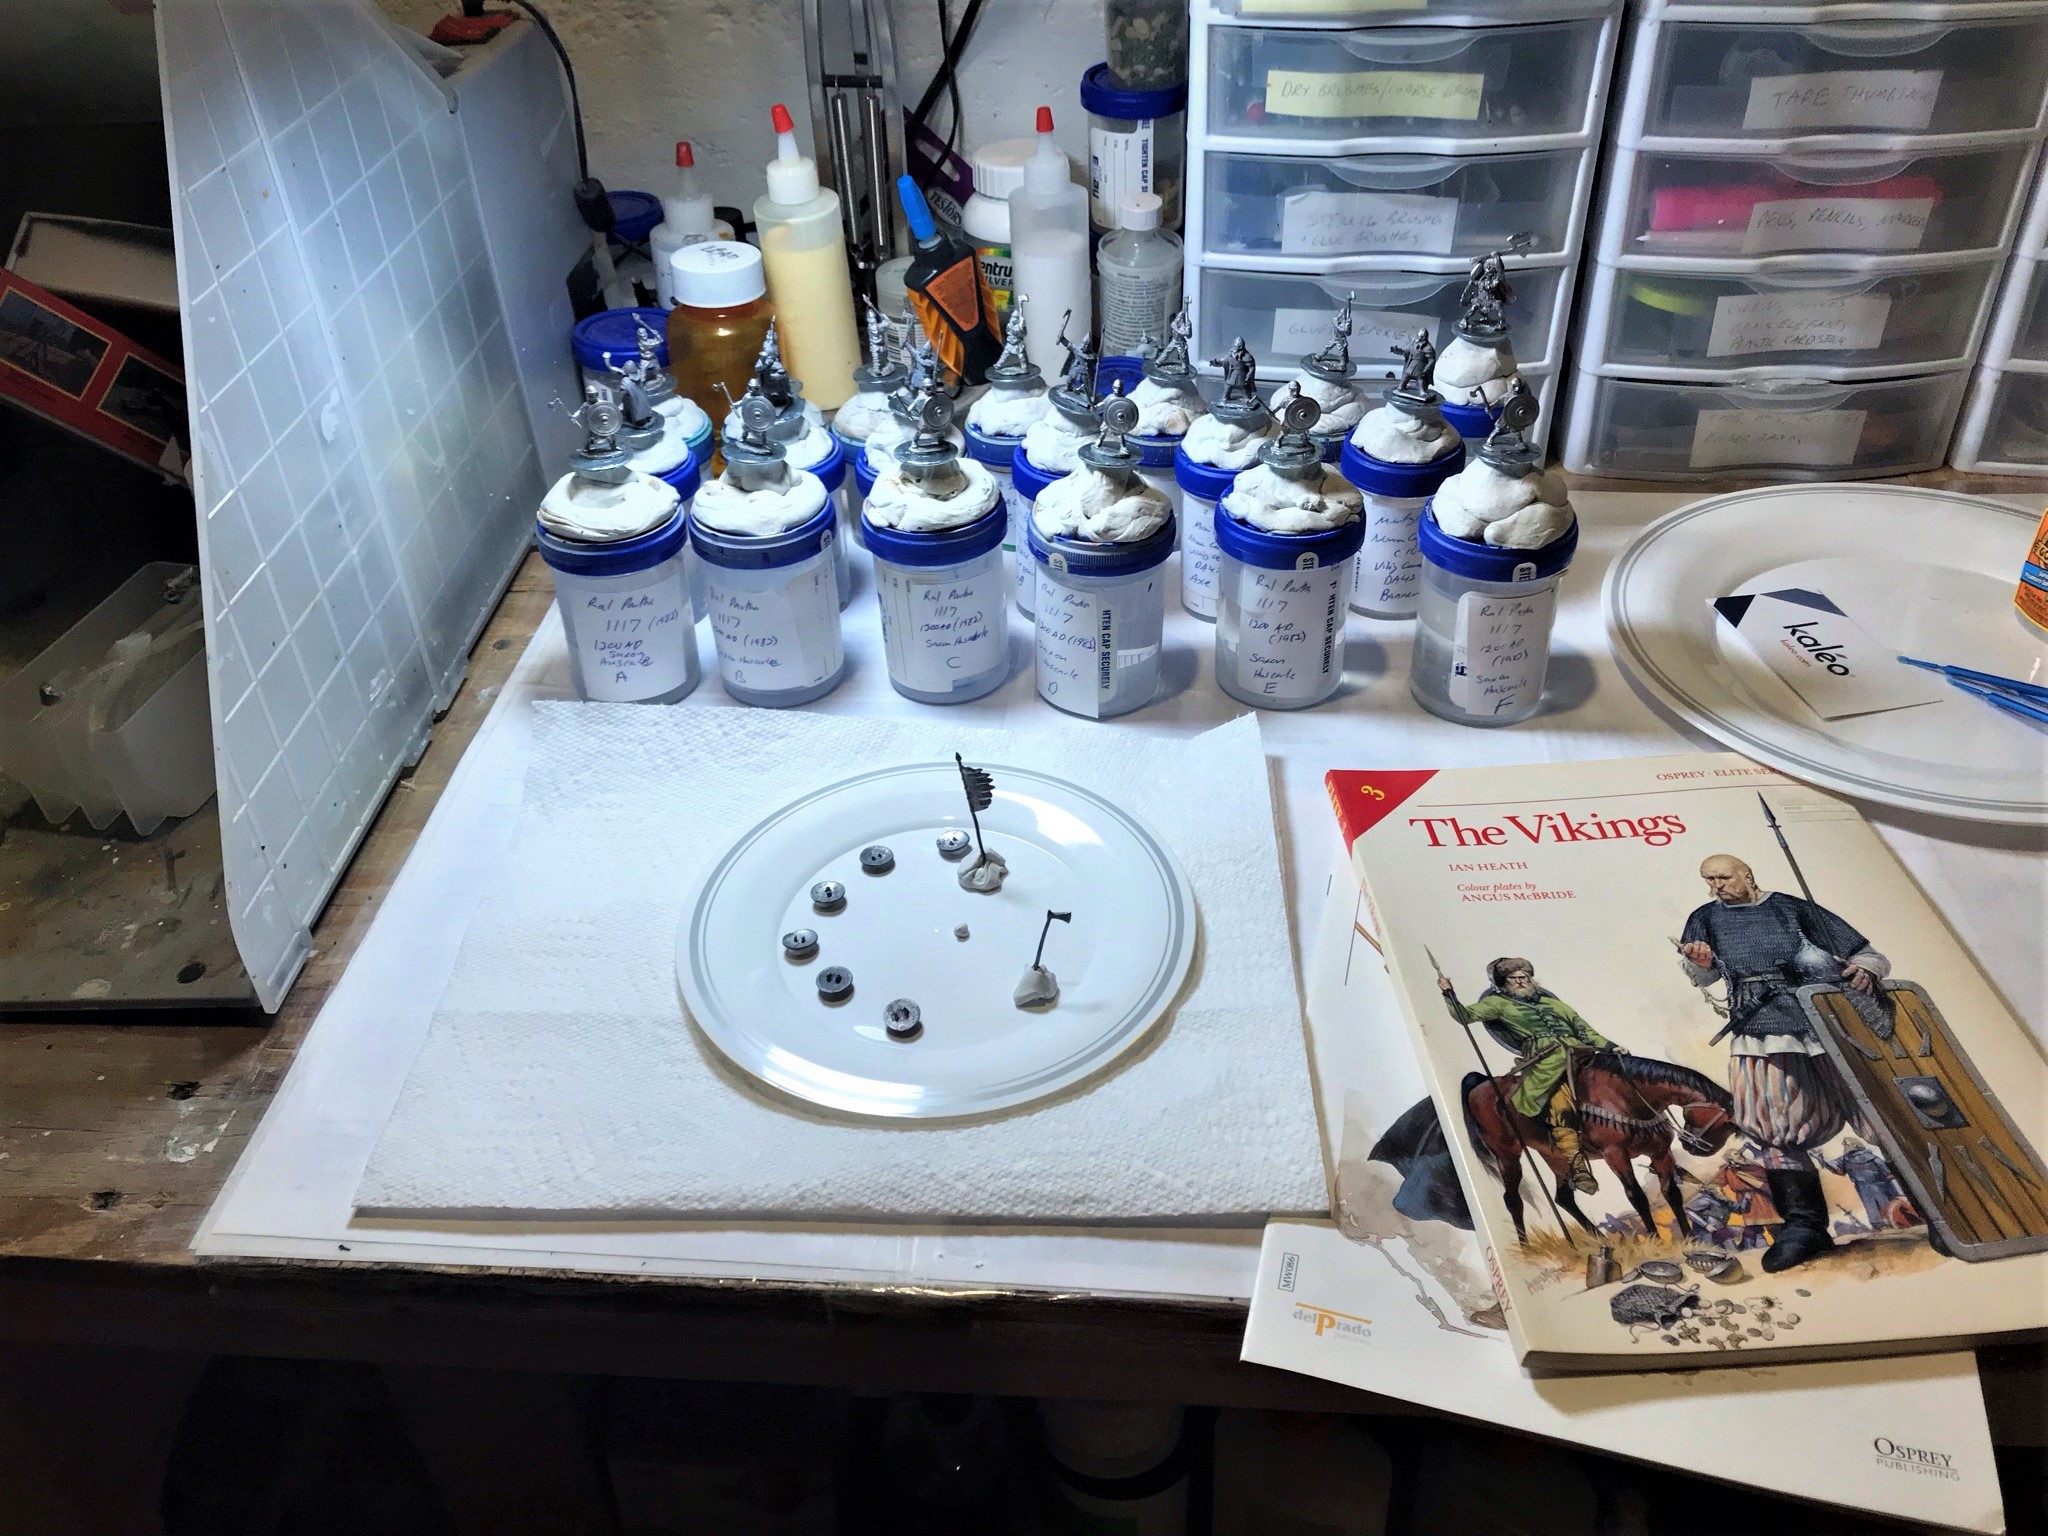
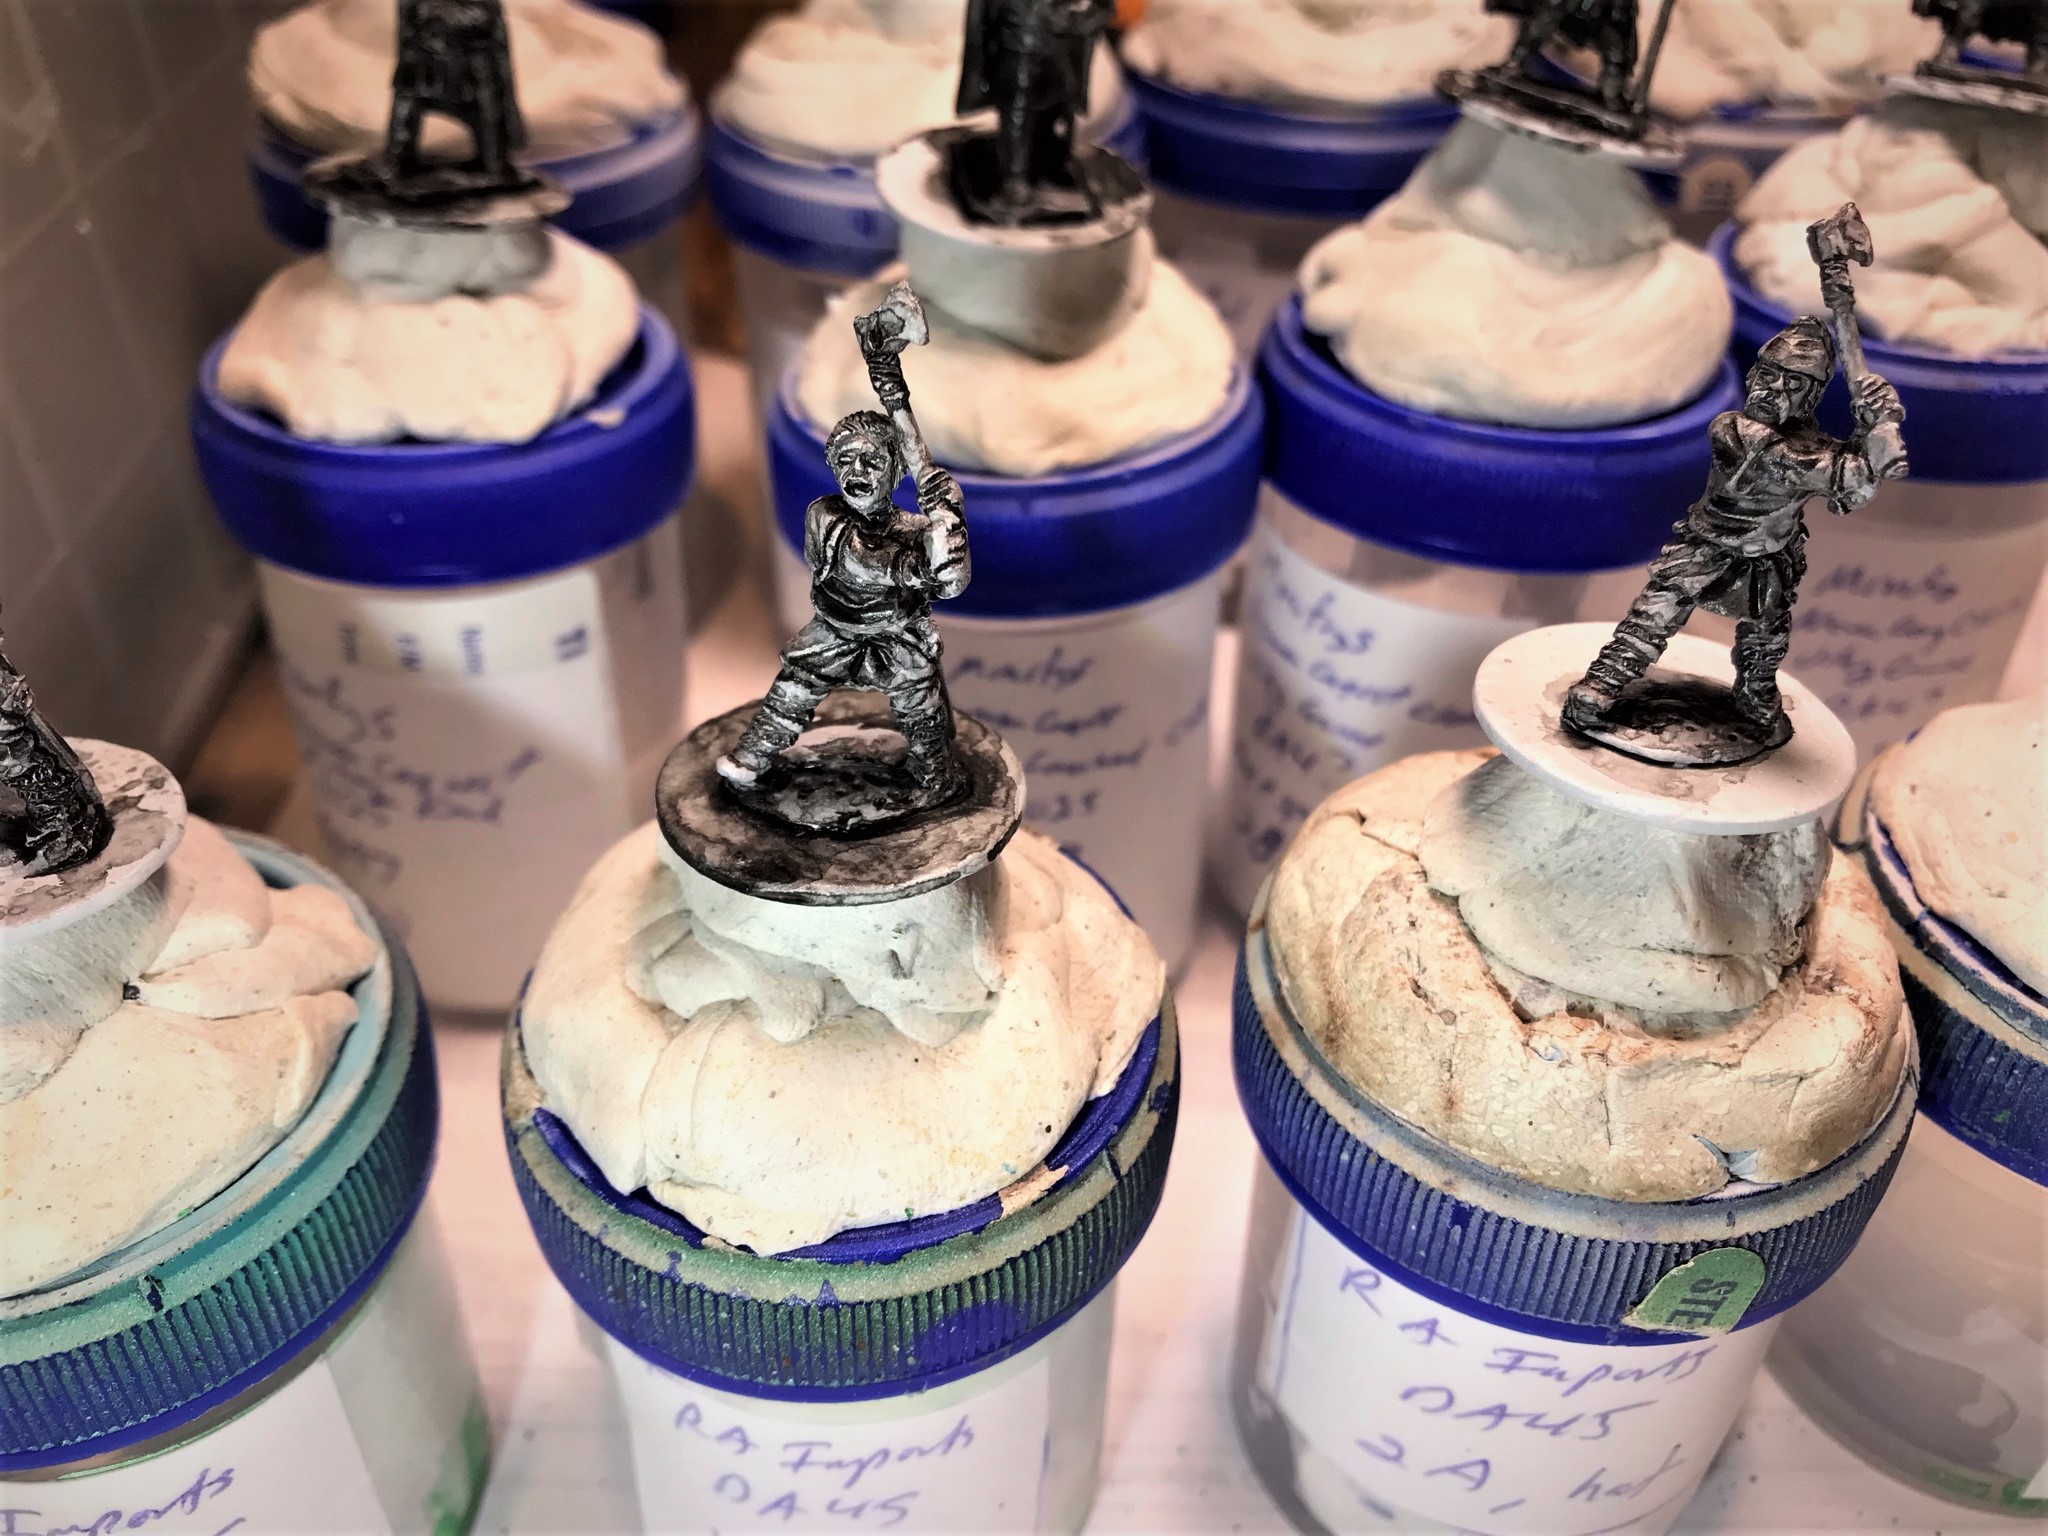
I then mounted all the figures on 1″ steel washers, and put them on poster tack on specimen containers for ease of painting. I primed them all white with my airbrush and after they dried, I washed with “Heavy Body Black” from Secret Weapon Washes (all of the paints that I used will be listed at the end of this post for those interested).
Mounted for paintingAfter prime and HBB washEarlybase coat
Close up of the HBB wash on the Berserkers. It helps me to see details and preshades the models – both very helpful steps with 25mm.
I numbered the six figures by the three poses (1A, 1B, 2A, 2B, 3A, and 3B) so that I could plan differences in painting. At least these had no shields…for the rest that did I needed a plan as well. Yes, I used Excel!
Pose 1Pose 2Pose 3Here all of the 19 figures are ready for varnish, but I did need to work on the shields. More on that in a bit.
On all of these, in terms of painting, I aimed for a good tabletop standard. While I do not think these are badly painted at all, I have done better work – but these reminded me of how much easier painting modern figures is now, especially 28mm. Another challenge was effectively painting blonde hair. I don’t think I’ve done that in 40 years. Anyways, I toned down yellow (very Sailor Moon) with “Snakebite Leather” contrast paint and Seraphim Sepia” wash and worked ok. The ginger hair was easier. I also added differently colored tufts to the bases for ease of identification as well.
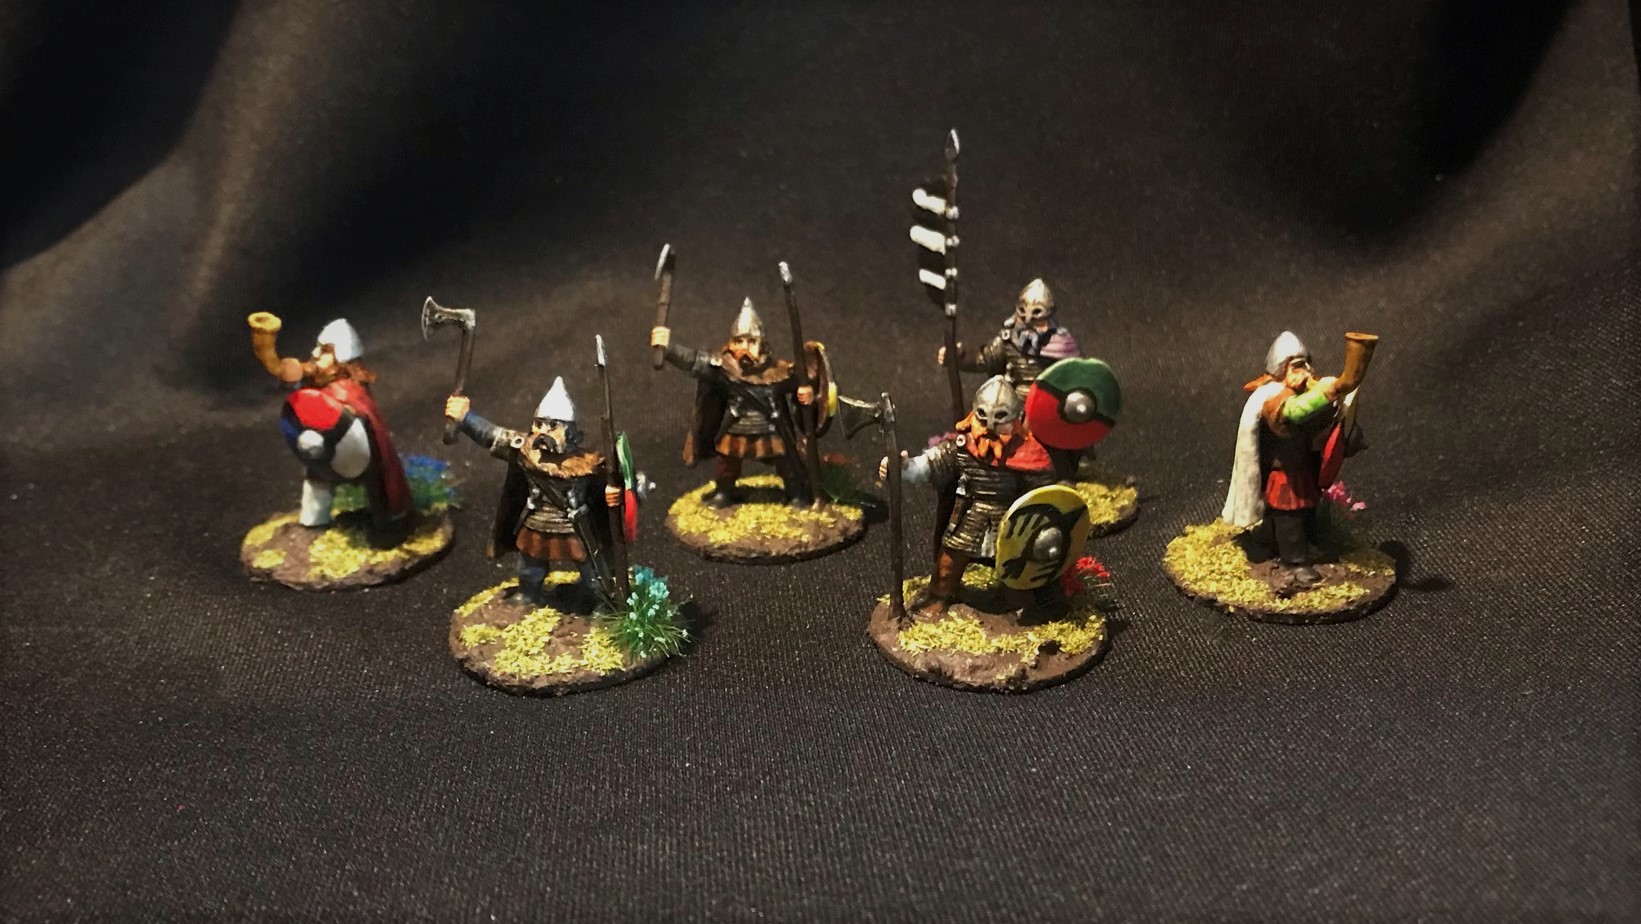
Now, let’s see the models from this blister all completed.
The first pose had no helmets.The second pose had caps.The third pose was more of a classic Viking berserker one with no shirts and helmets.The group. I tried to give the eyes a “mascara” look like the show “Vikings” did. At 25mm, this was hard to do, but you can let me know if it worked or not to your eye (pun intended).
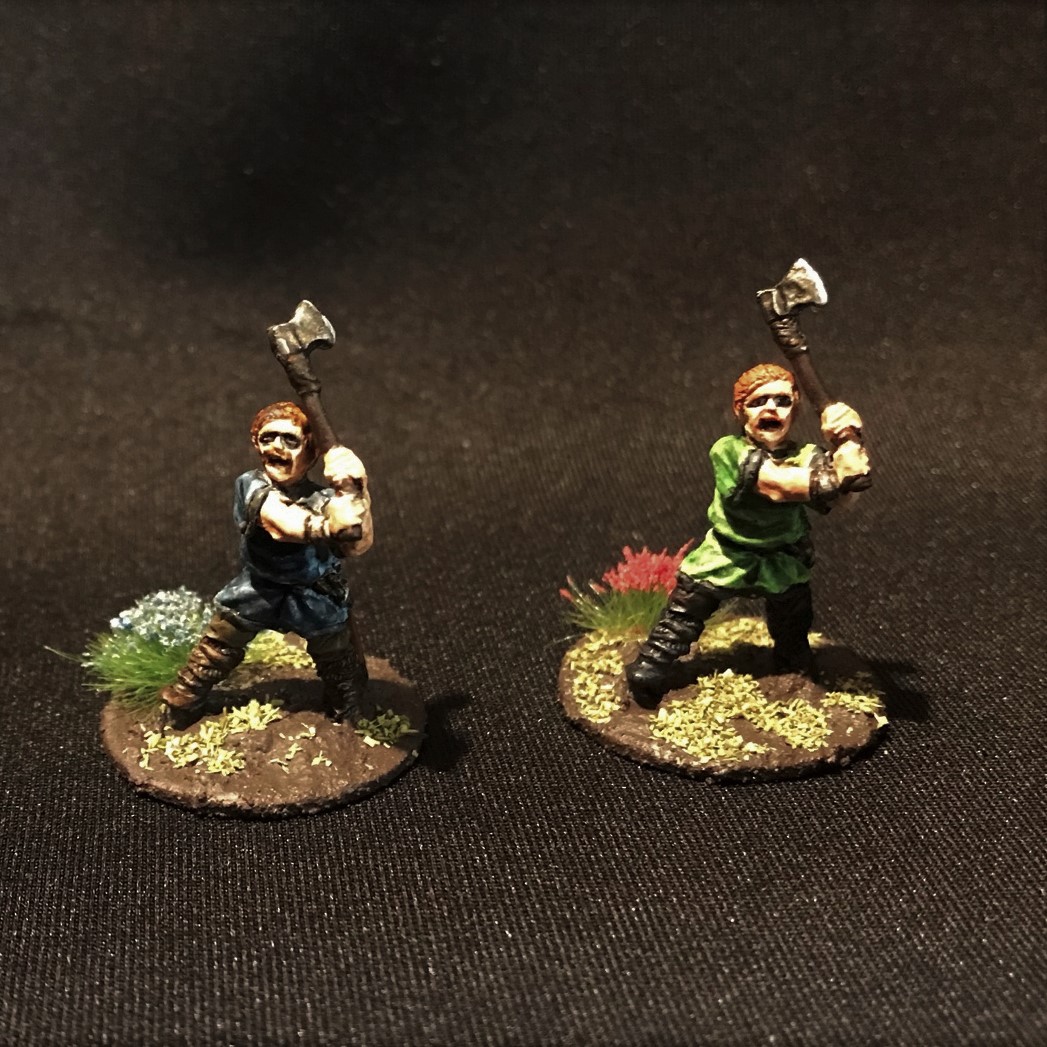
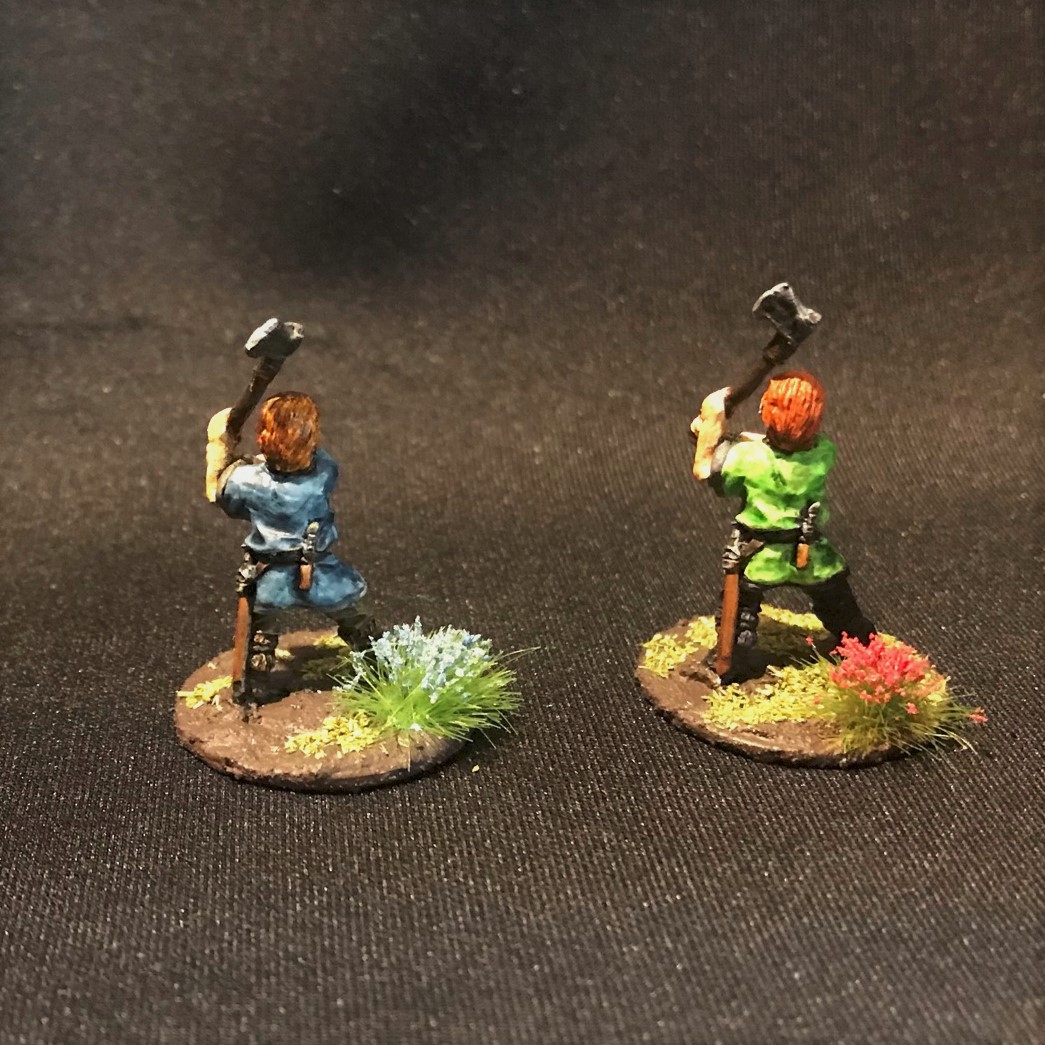
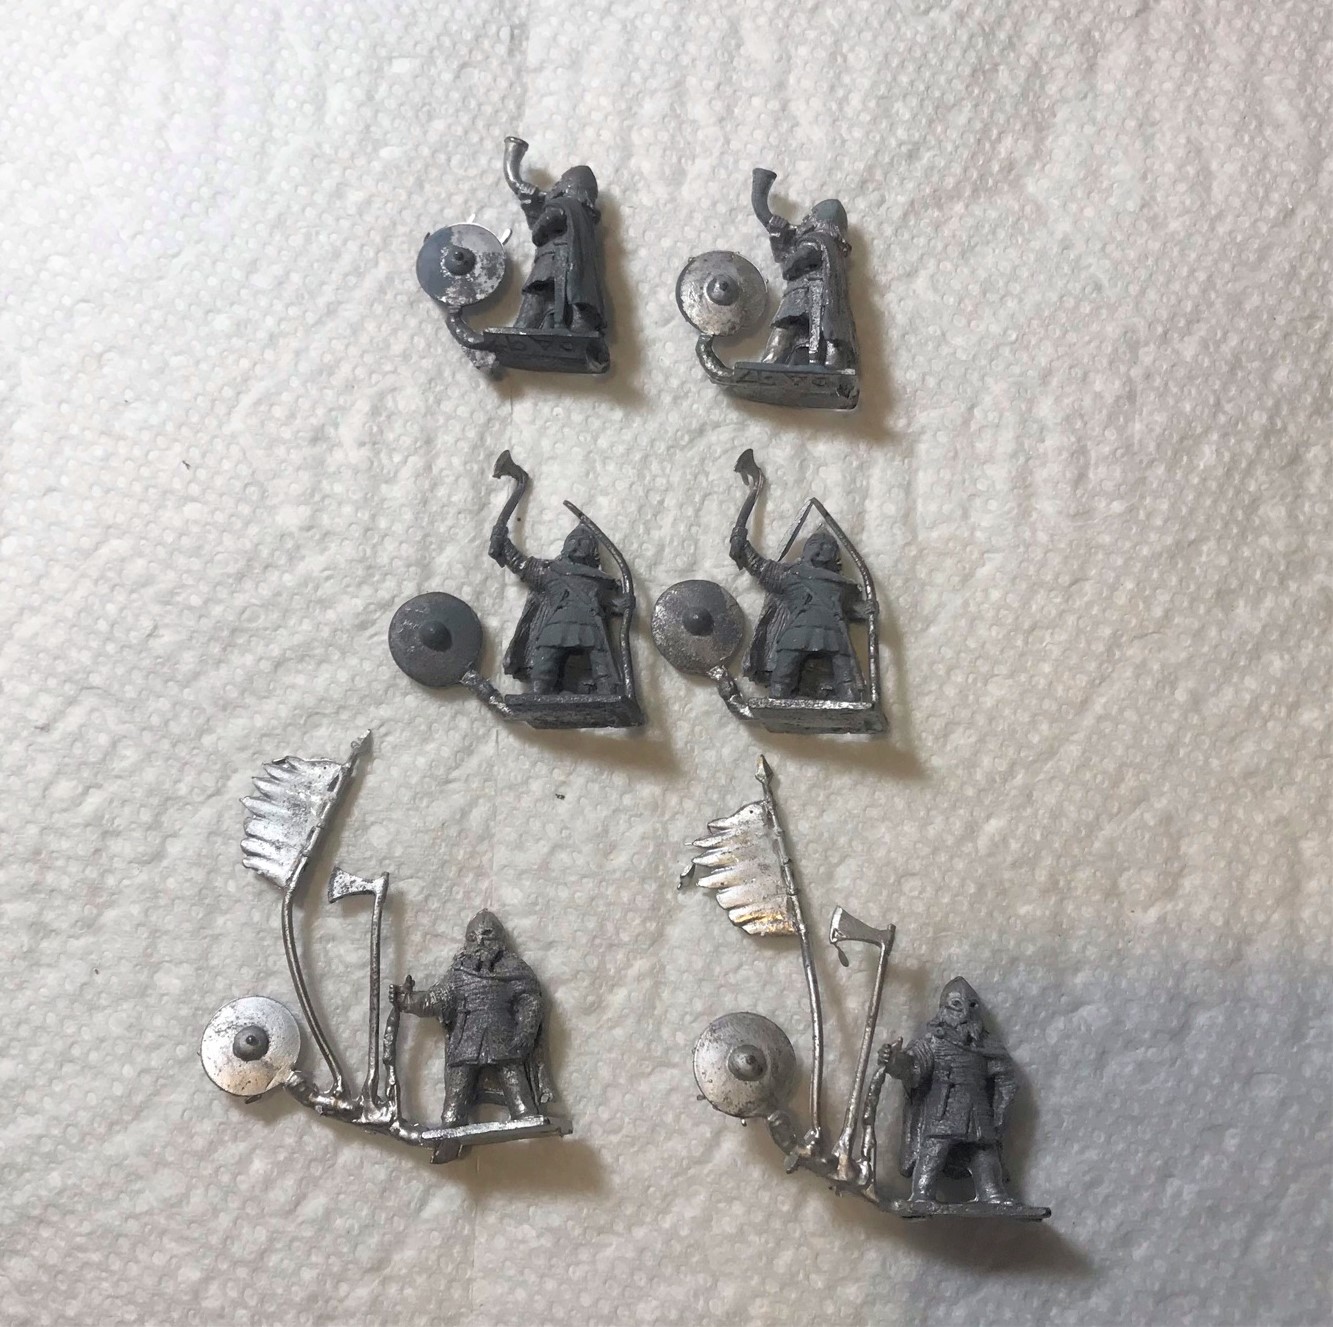
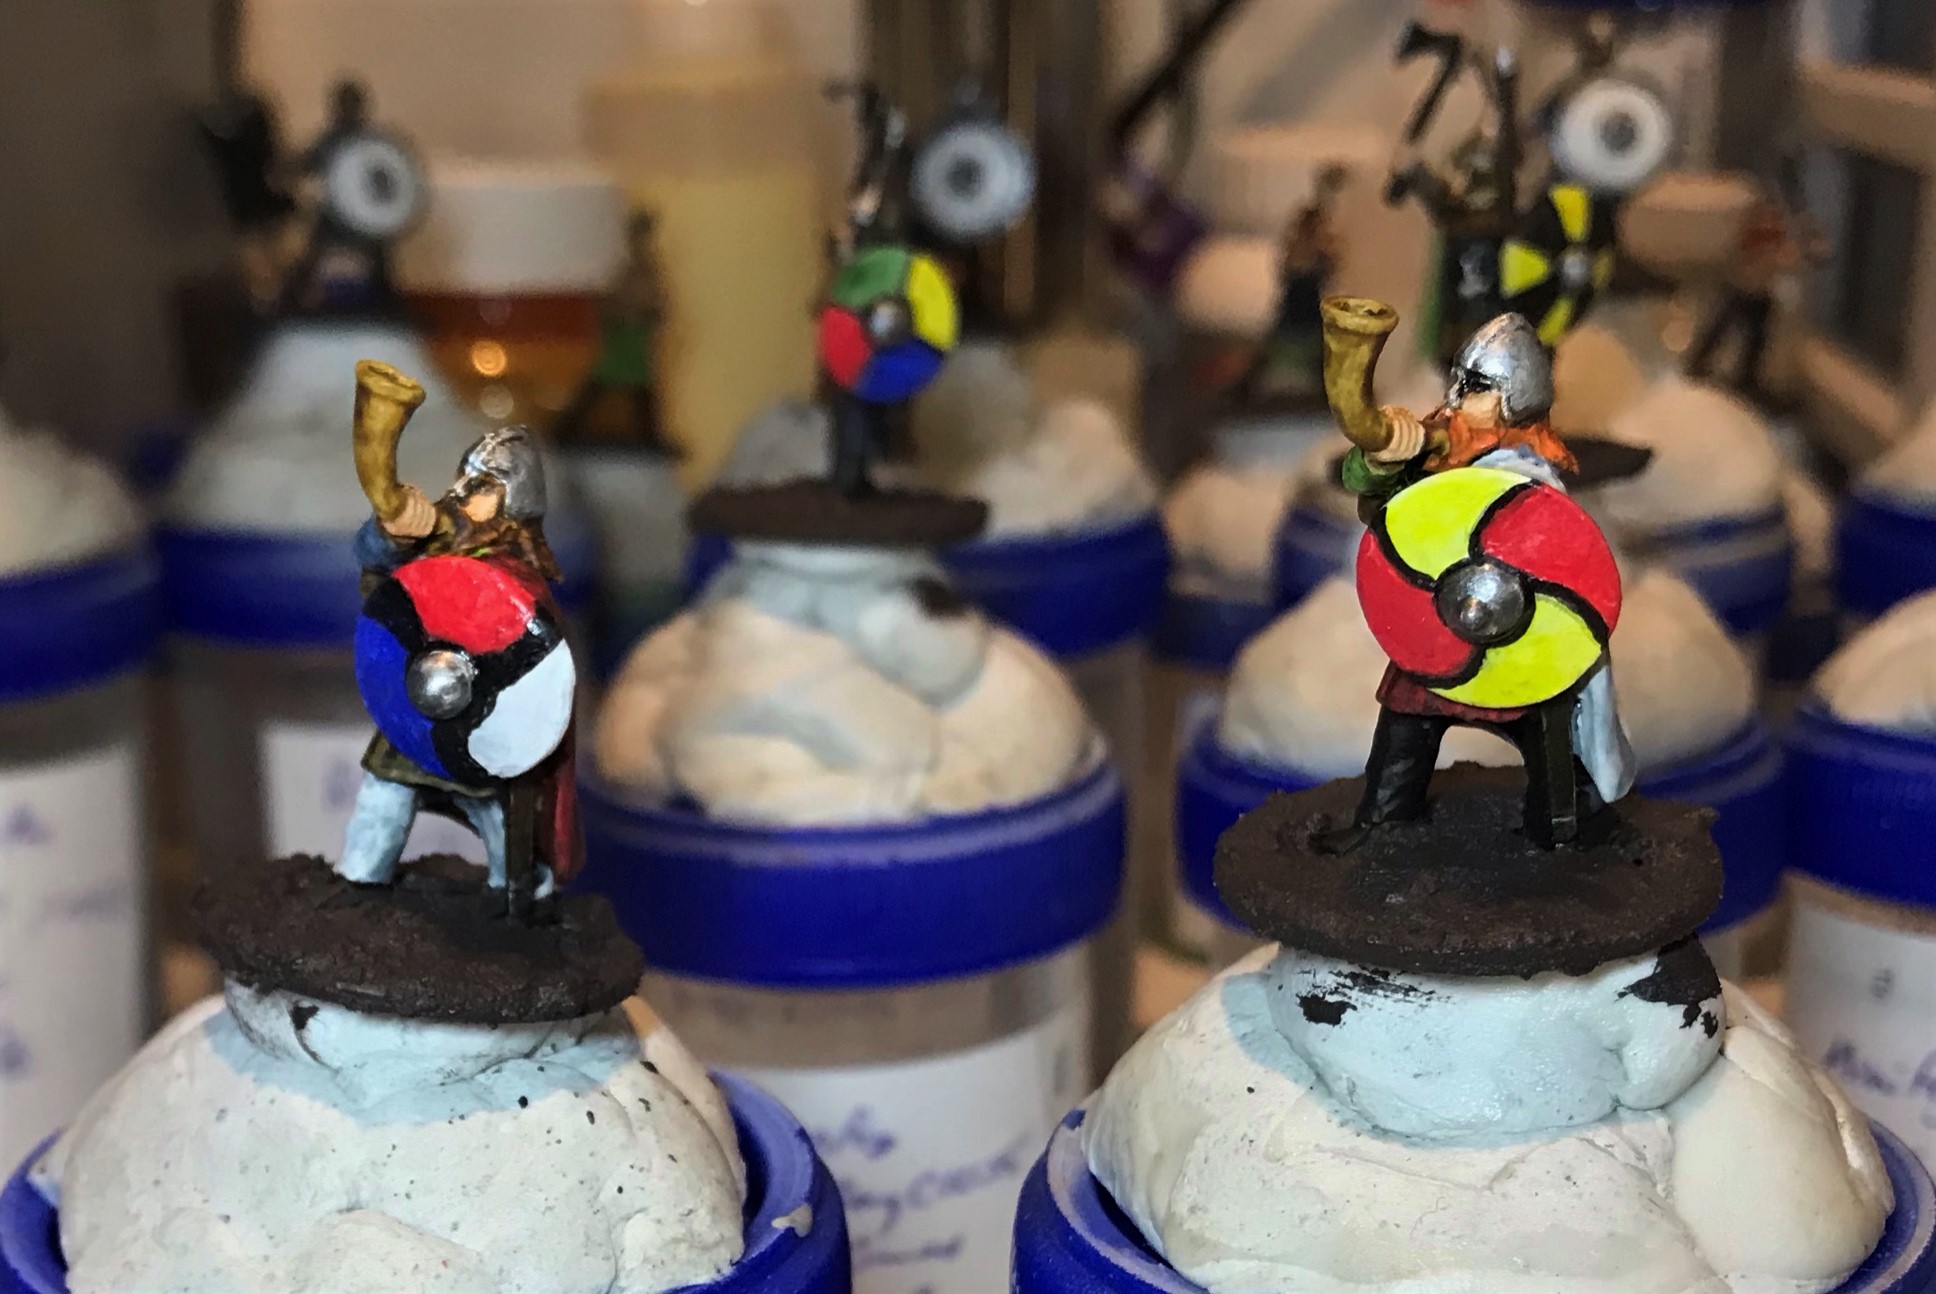
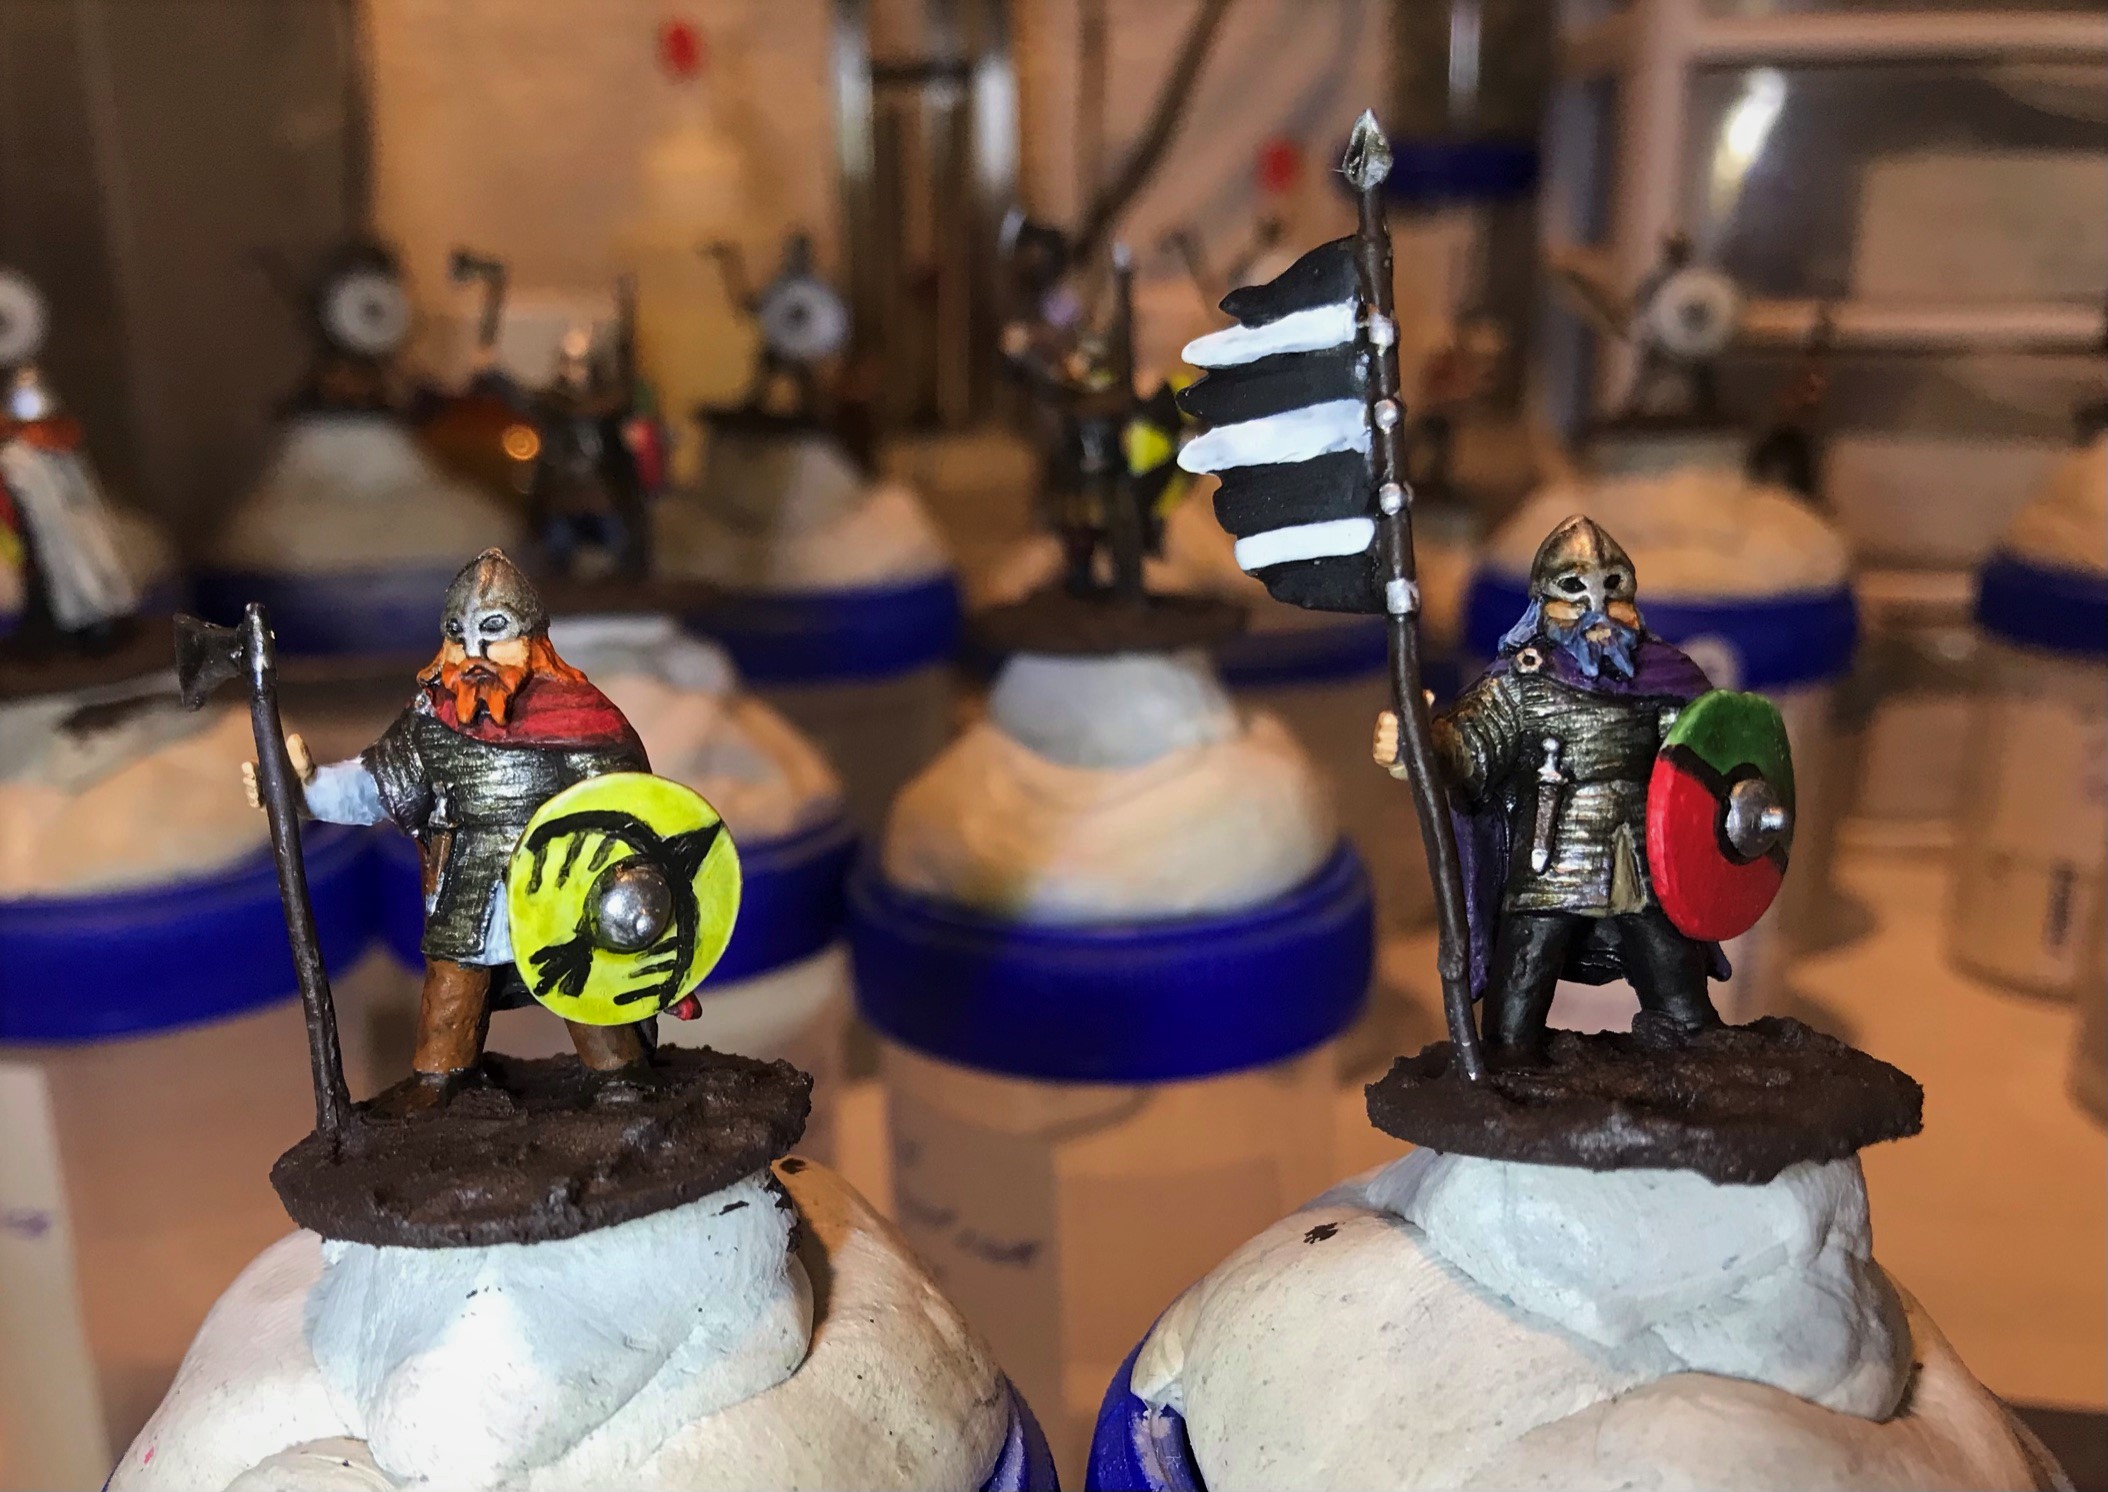
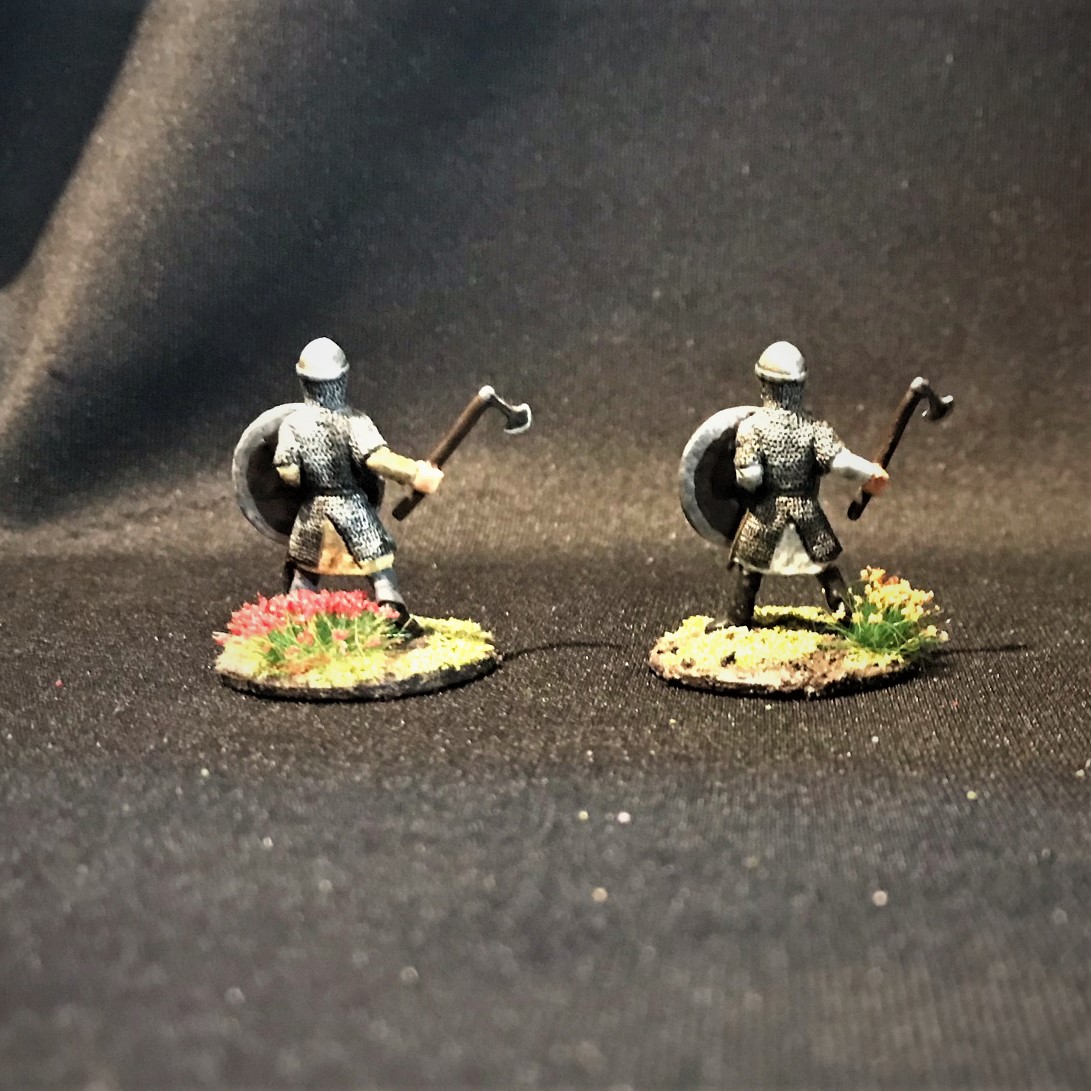
Minifigs Viking Command
I remember painting a number of fantasy Minifig miniatures back in the day. They had square bases and the details were rather plain. These were the same as those. My guess is dating from the early ’80’s or possibly even the late ’70’s.
Unfortunately, these had a severe coating of oxide or something black and crusty on them. I don’t think it was lead rot, but I did clean them up with baking soda just in case. Their spears and banner shafts were even more bendy than the others – which was very much a common issue for this manufacturer back then. I added a second stiffening coat of Gorilla Glue to these bendy shafts, and then proceeded as discussed previously.
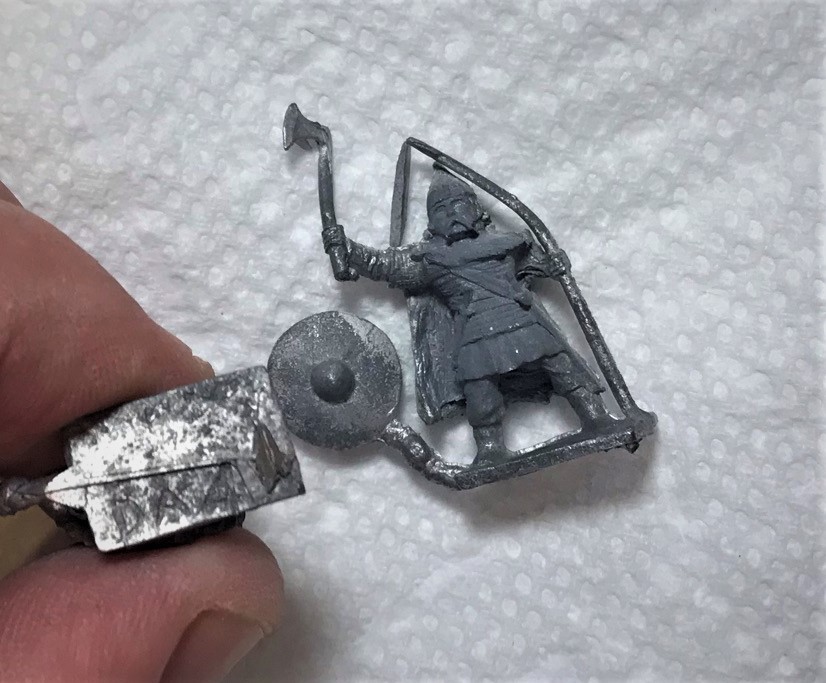
There were three poses here. Two with a horn, two with spears and axes, and two with either a banner or a long-shafted axe. For the last group, I gave one an axe and one a banner. They all had shields (unattached) so I did need to get some references for free-hand painting them.
The old blister – $3.98 for six figures!You can see the dark oxidation (if that’s what it was) on all the figures – which needed filing, cleaning, and fixing of the more-bendy shafts.Close-up shot showing issues.
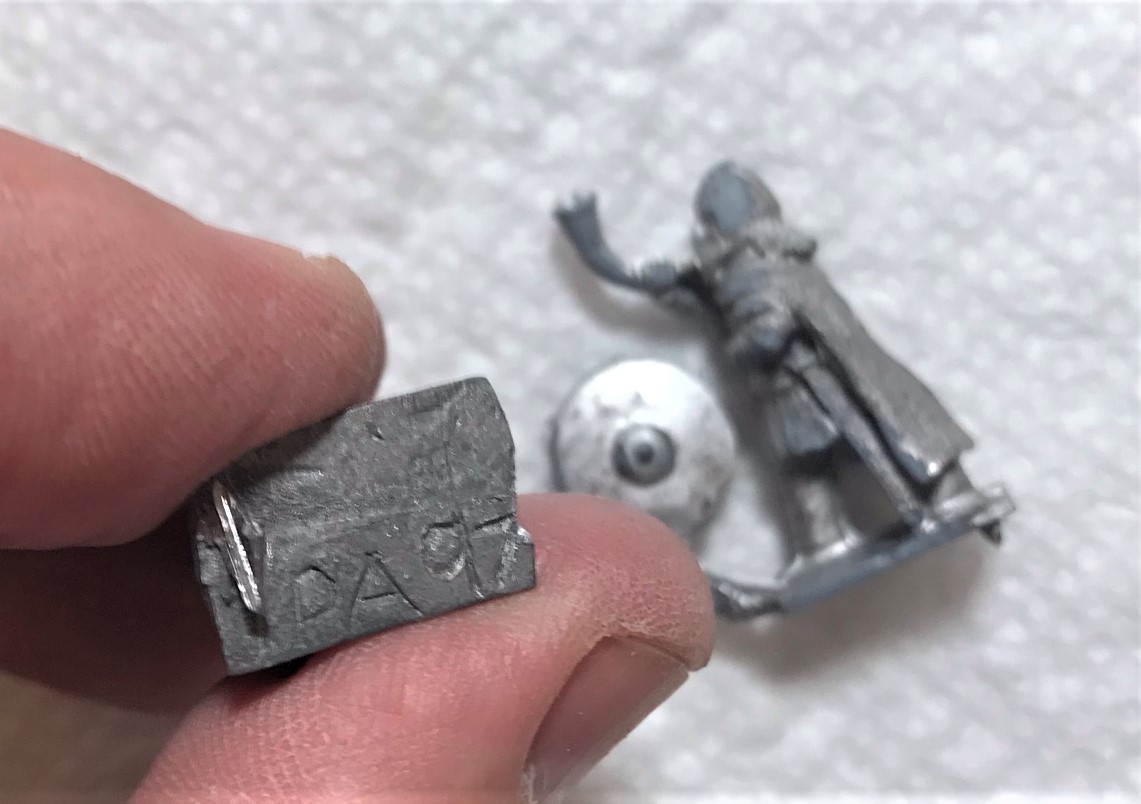
Each of the three poses had a different number on the bases. Pose 1 (with horn) was DA97, pose two (with axe and spear) had only partially DA4-something, and the last one was DA42. I’m assuming DA stood for “Dark Ages”.
DA97DA4?DA42
Second pose after HBB wash.
I tried to give different looks to these as well – again, a painting plan in Excel helped. As for the shields – they were fun the most enjoyable to paint – and different than the Aztec shields to be sure. I chose 6 designs that I thought would work with the colors. Instead of thinner, I used Vallejo Flow Improver with the black on a Newton & Windsor 0000 brush – and that worked (thanks to The Imperfect Modeler for that suggestion).
I would sketch lightly with a .5mm pencil, then line with black paint thinned with flow improver.Painted shields.
After I painted the shields, I gave them a brush of satin varnish. Once they dried, I mounted them to the figures.
Pose 1Pose 2Pose 3
Then after drying time, they were off to varnishing and flocking (similar to the previous group). Below are the finished models.
The first pose with the horns. It was easier to give their capes details than it was for their faces.Pose two with the axes and spears. Pose two with the axes and spears.Pose three had the banner or the long axe.The Viking Command Group together.
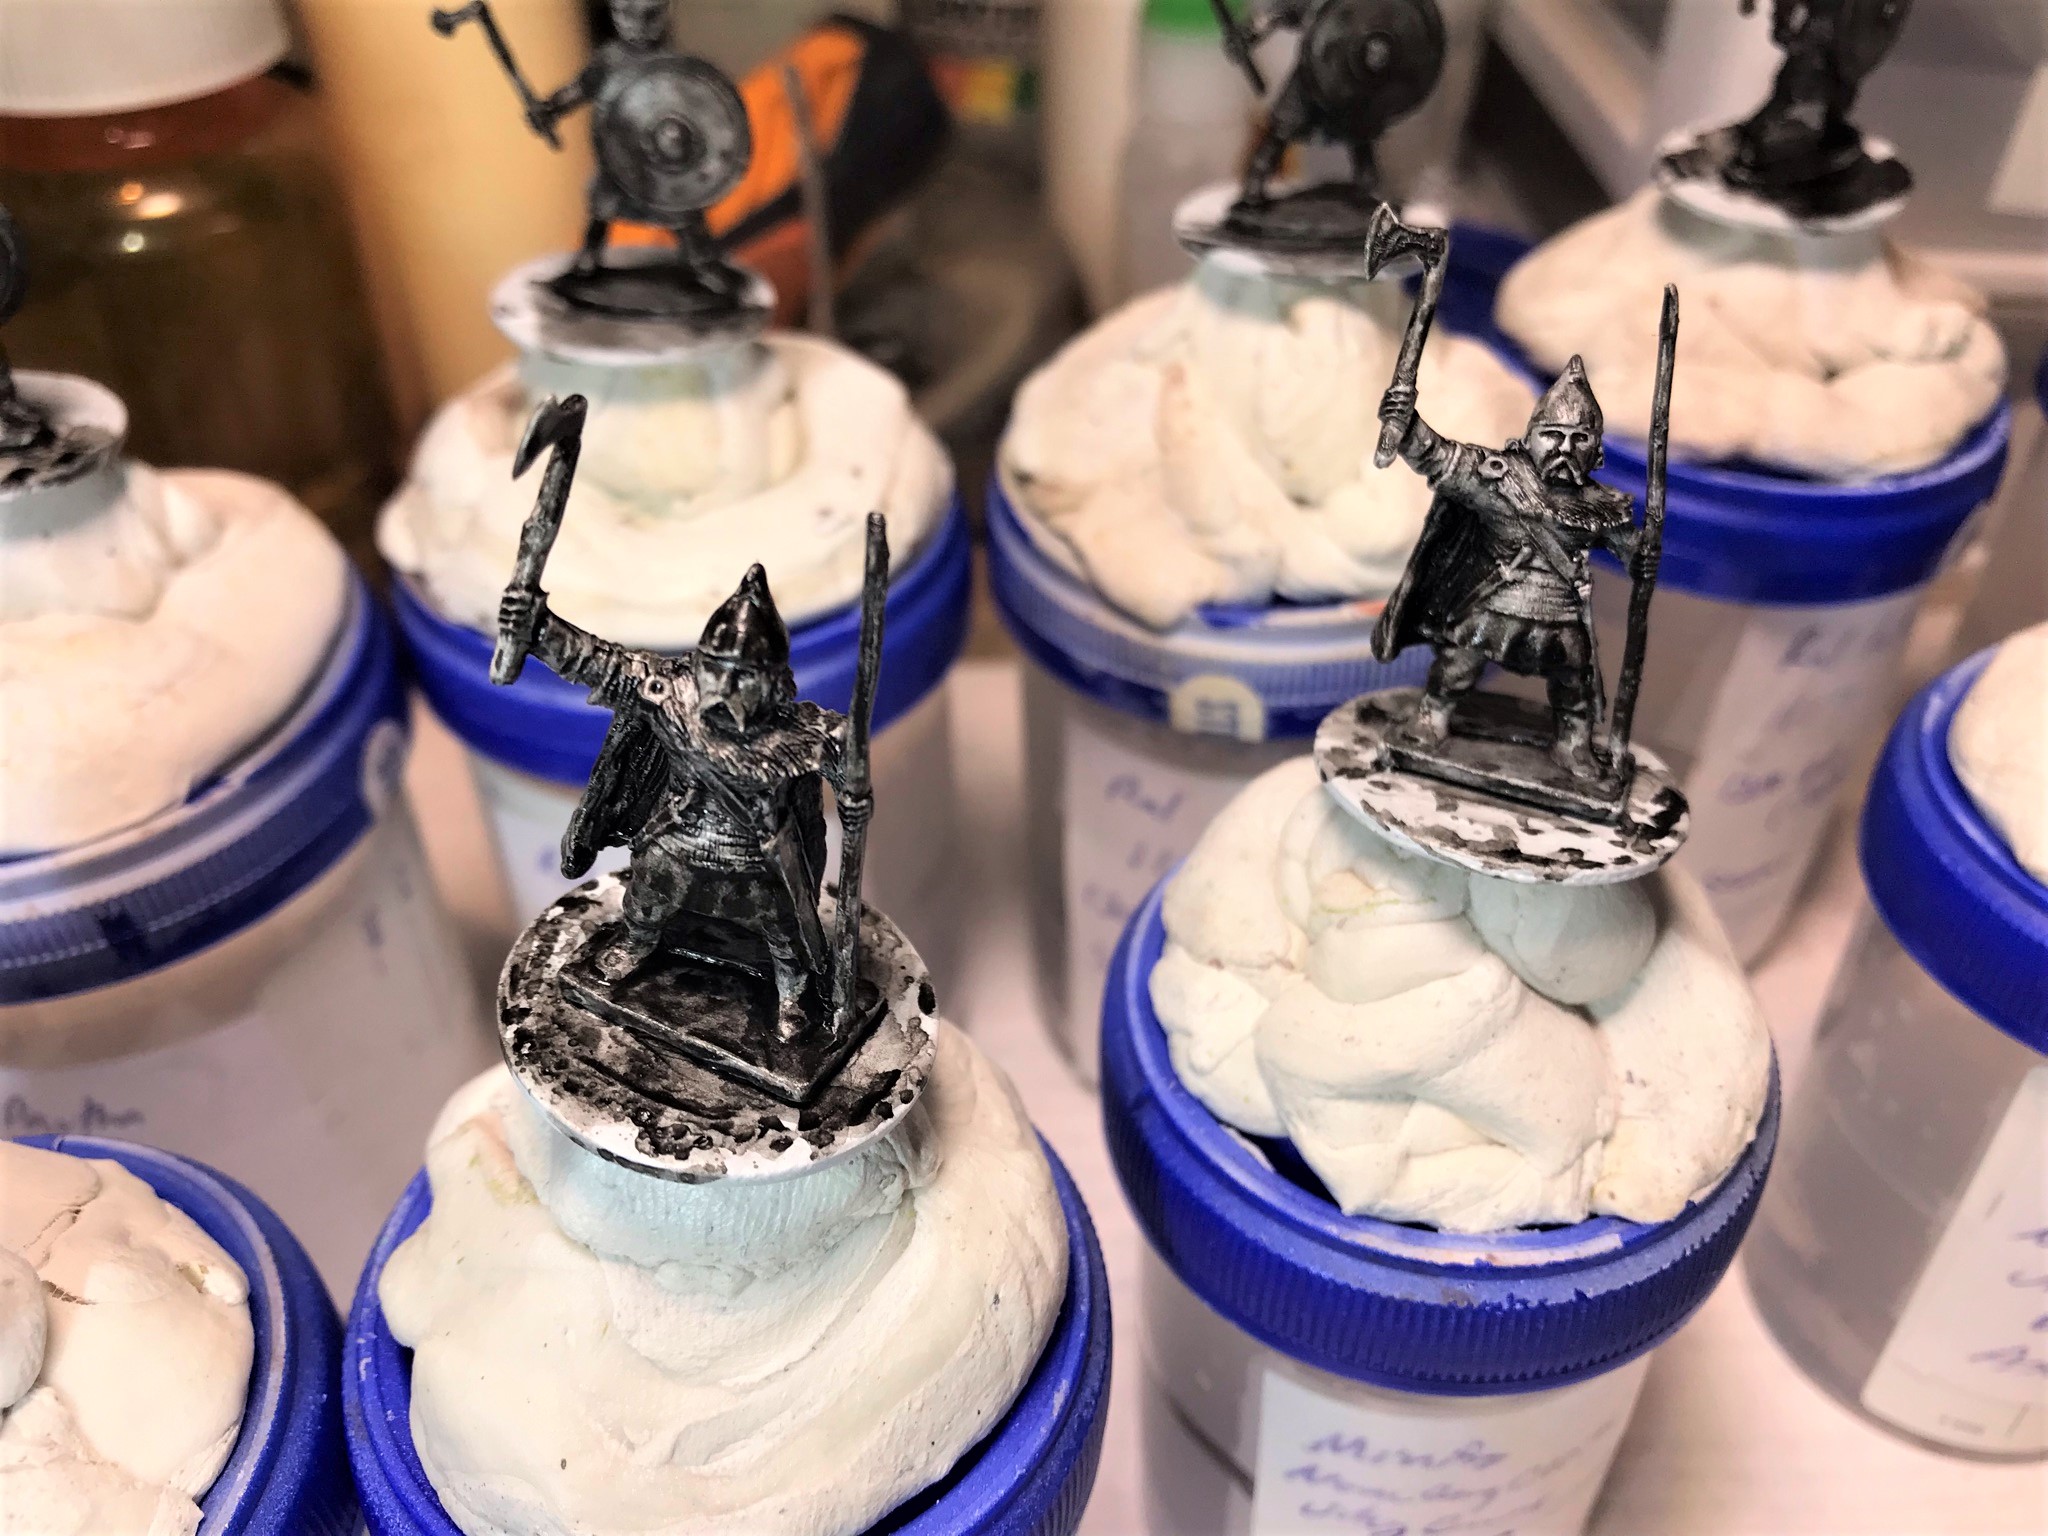
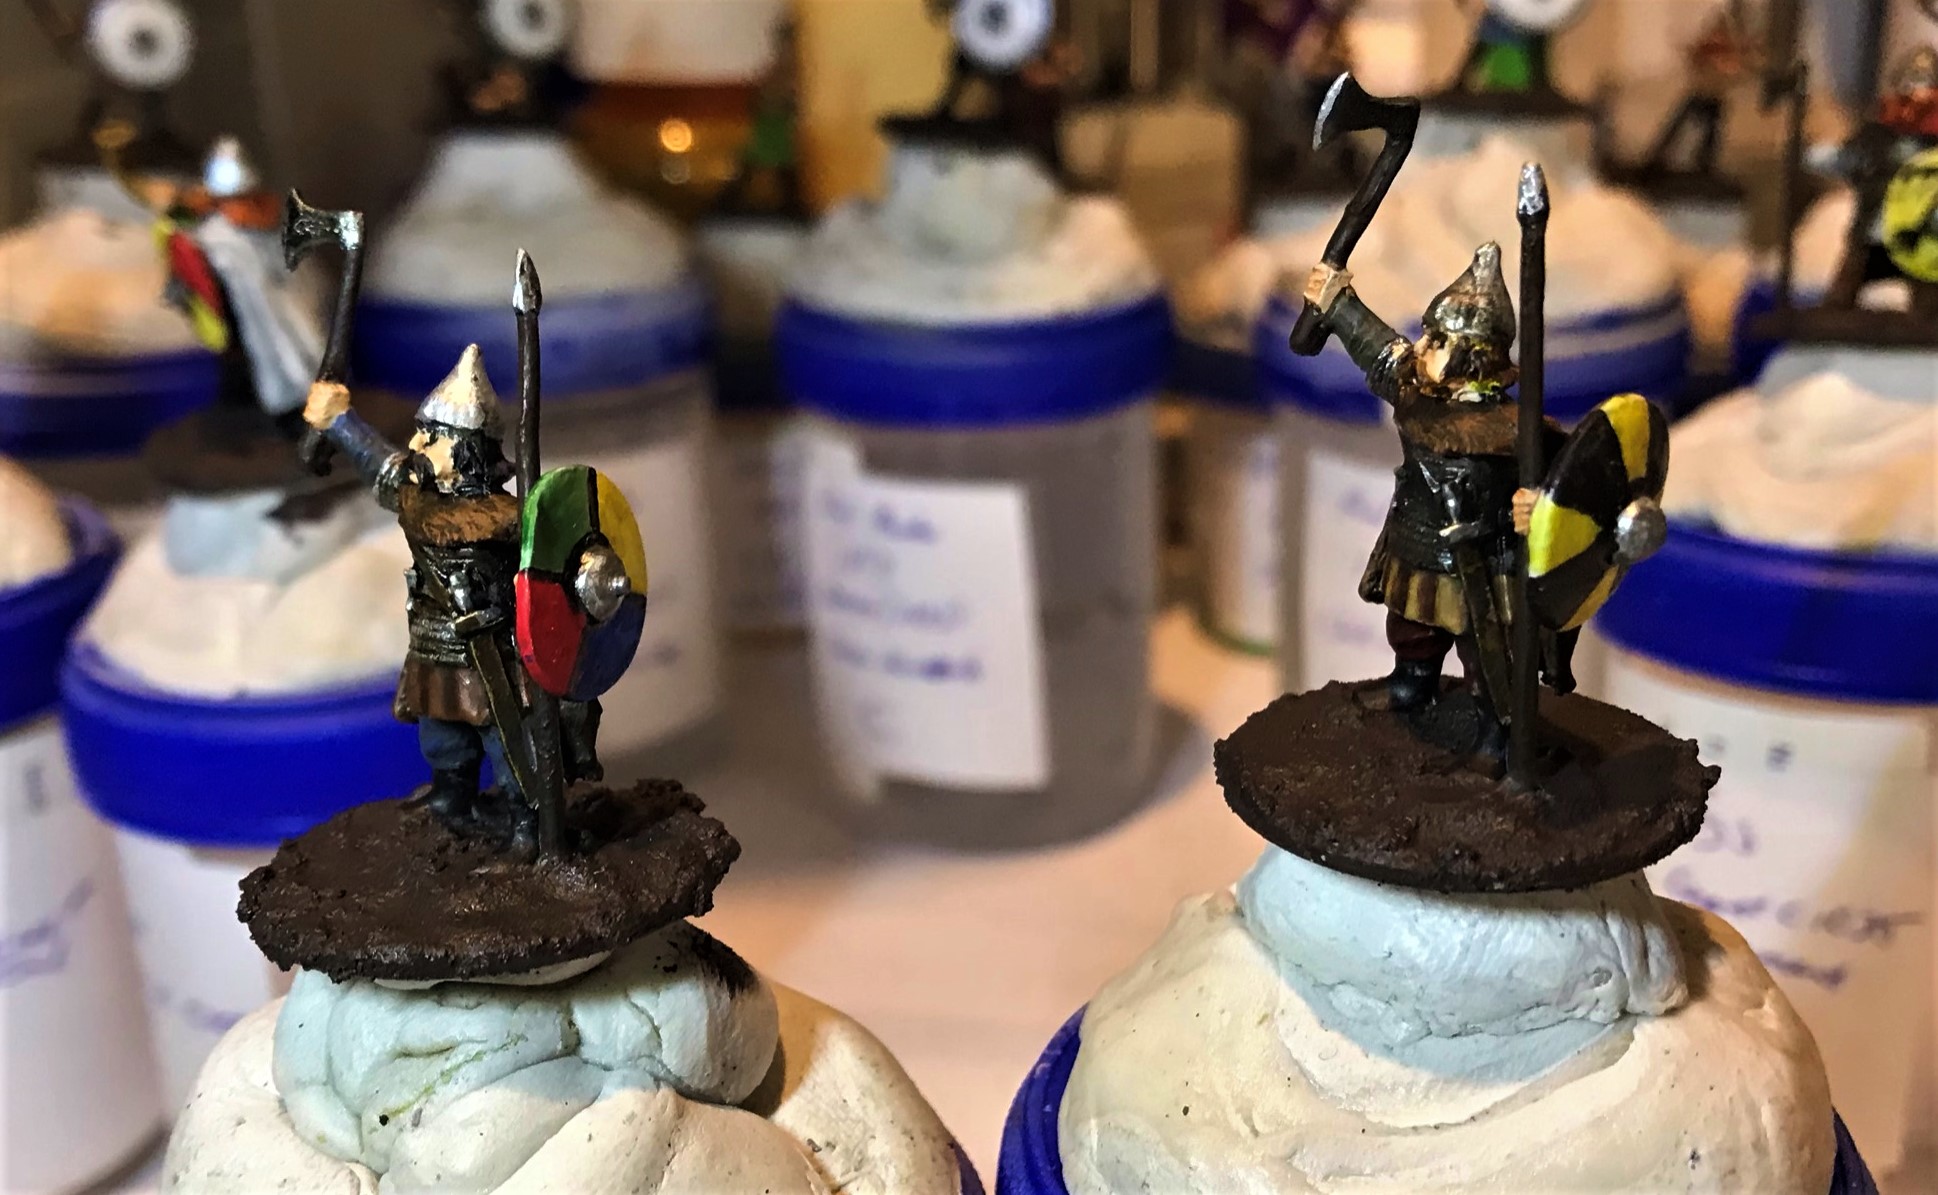
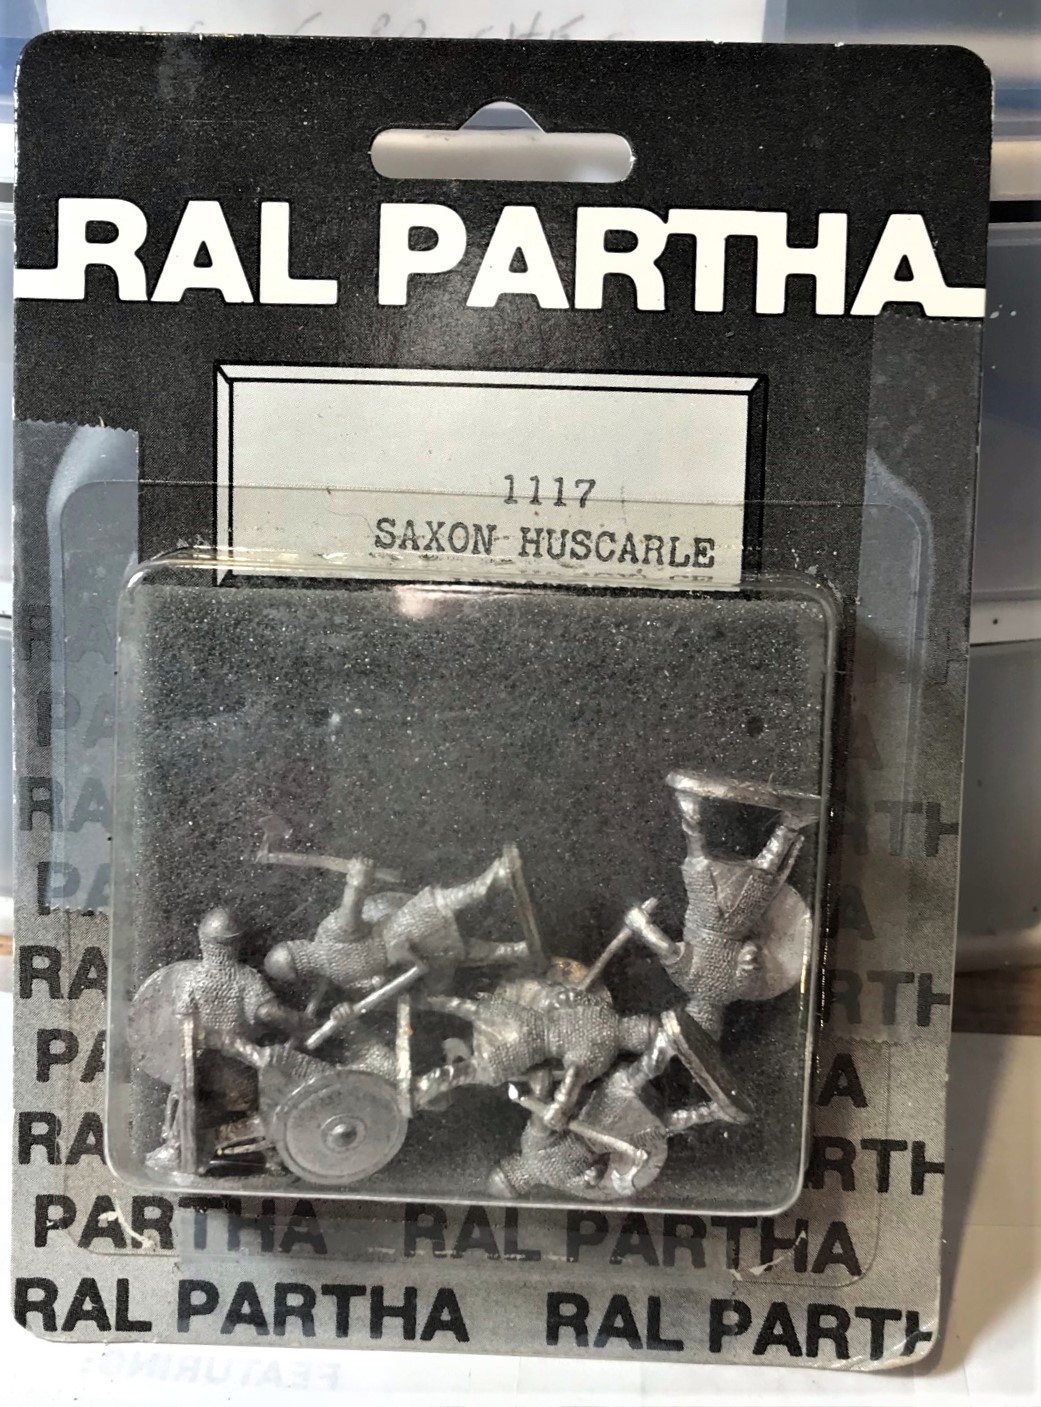
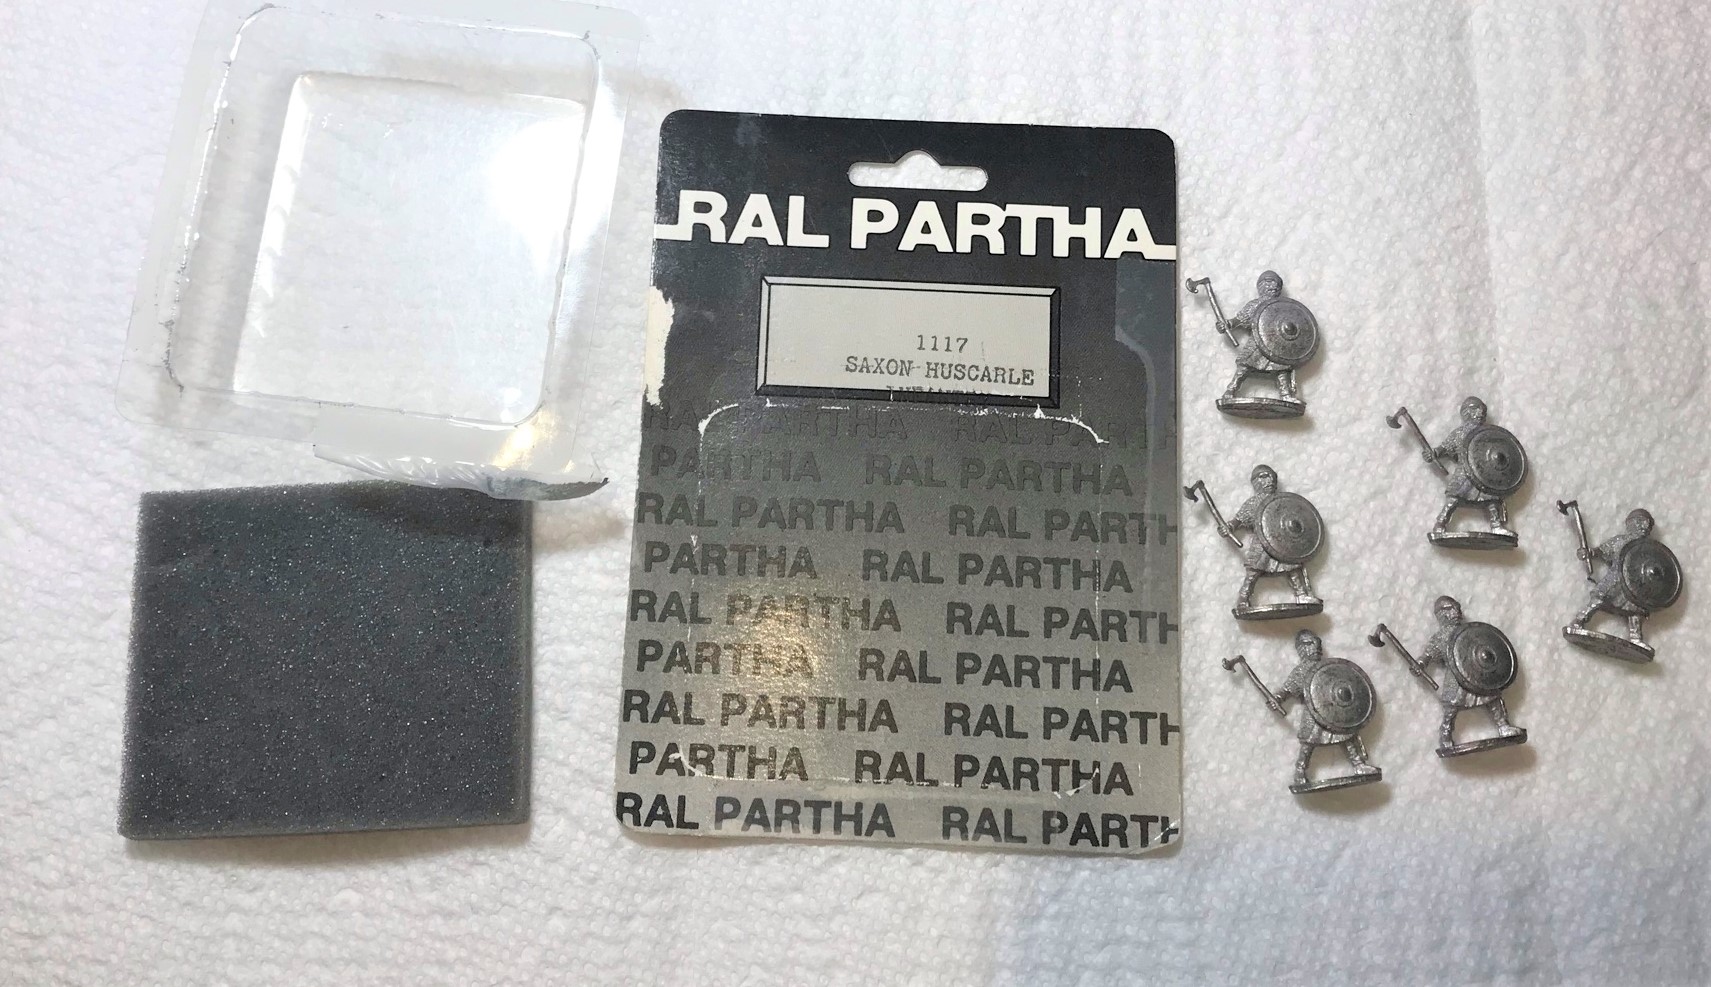
Ral Partha Saxon Huscarle
While housecarles in English is proper, the blister said “Huscarle”, so…
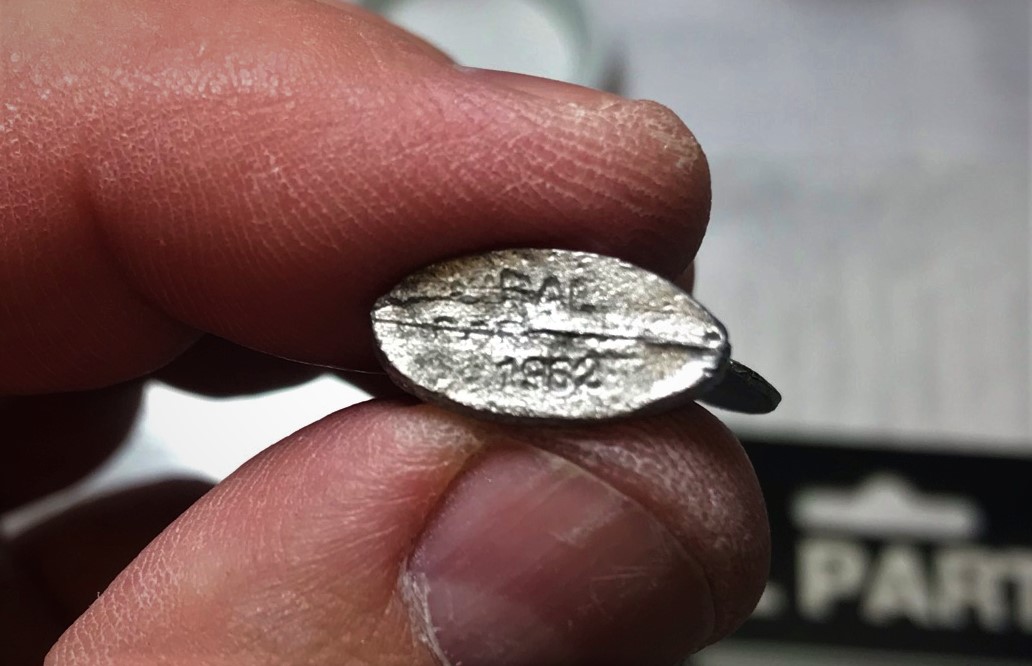
The old blister from the 1200 A.D. line.
The sculpts were pretty nice – especially the chain mail. However, these were in all the same pose (as was common back when these were launched in 1982). Therefore, differentiation was more needed.
All the same!RAL 1982
I followed the same process as discussed above with priming and the initial wash application. Another nice thing about these was that the shields were already attached – that and the eyes would not need special attention.
After the priming and the HBB wash application. I could have used Nuln Oil but I thought I’d use the HBB before it became useless.
For shields, I looked up some images for Saxon ones and chose six.
Saxon shield painting.
The final six look as follows:
The first and the second Saxon figures.The third and the fourth Saxons.The fifth and the sixth Saxons.The Saxon Huscarle group.
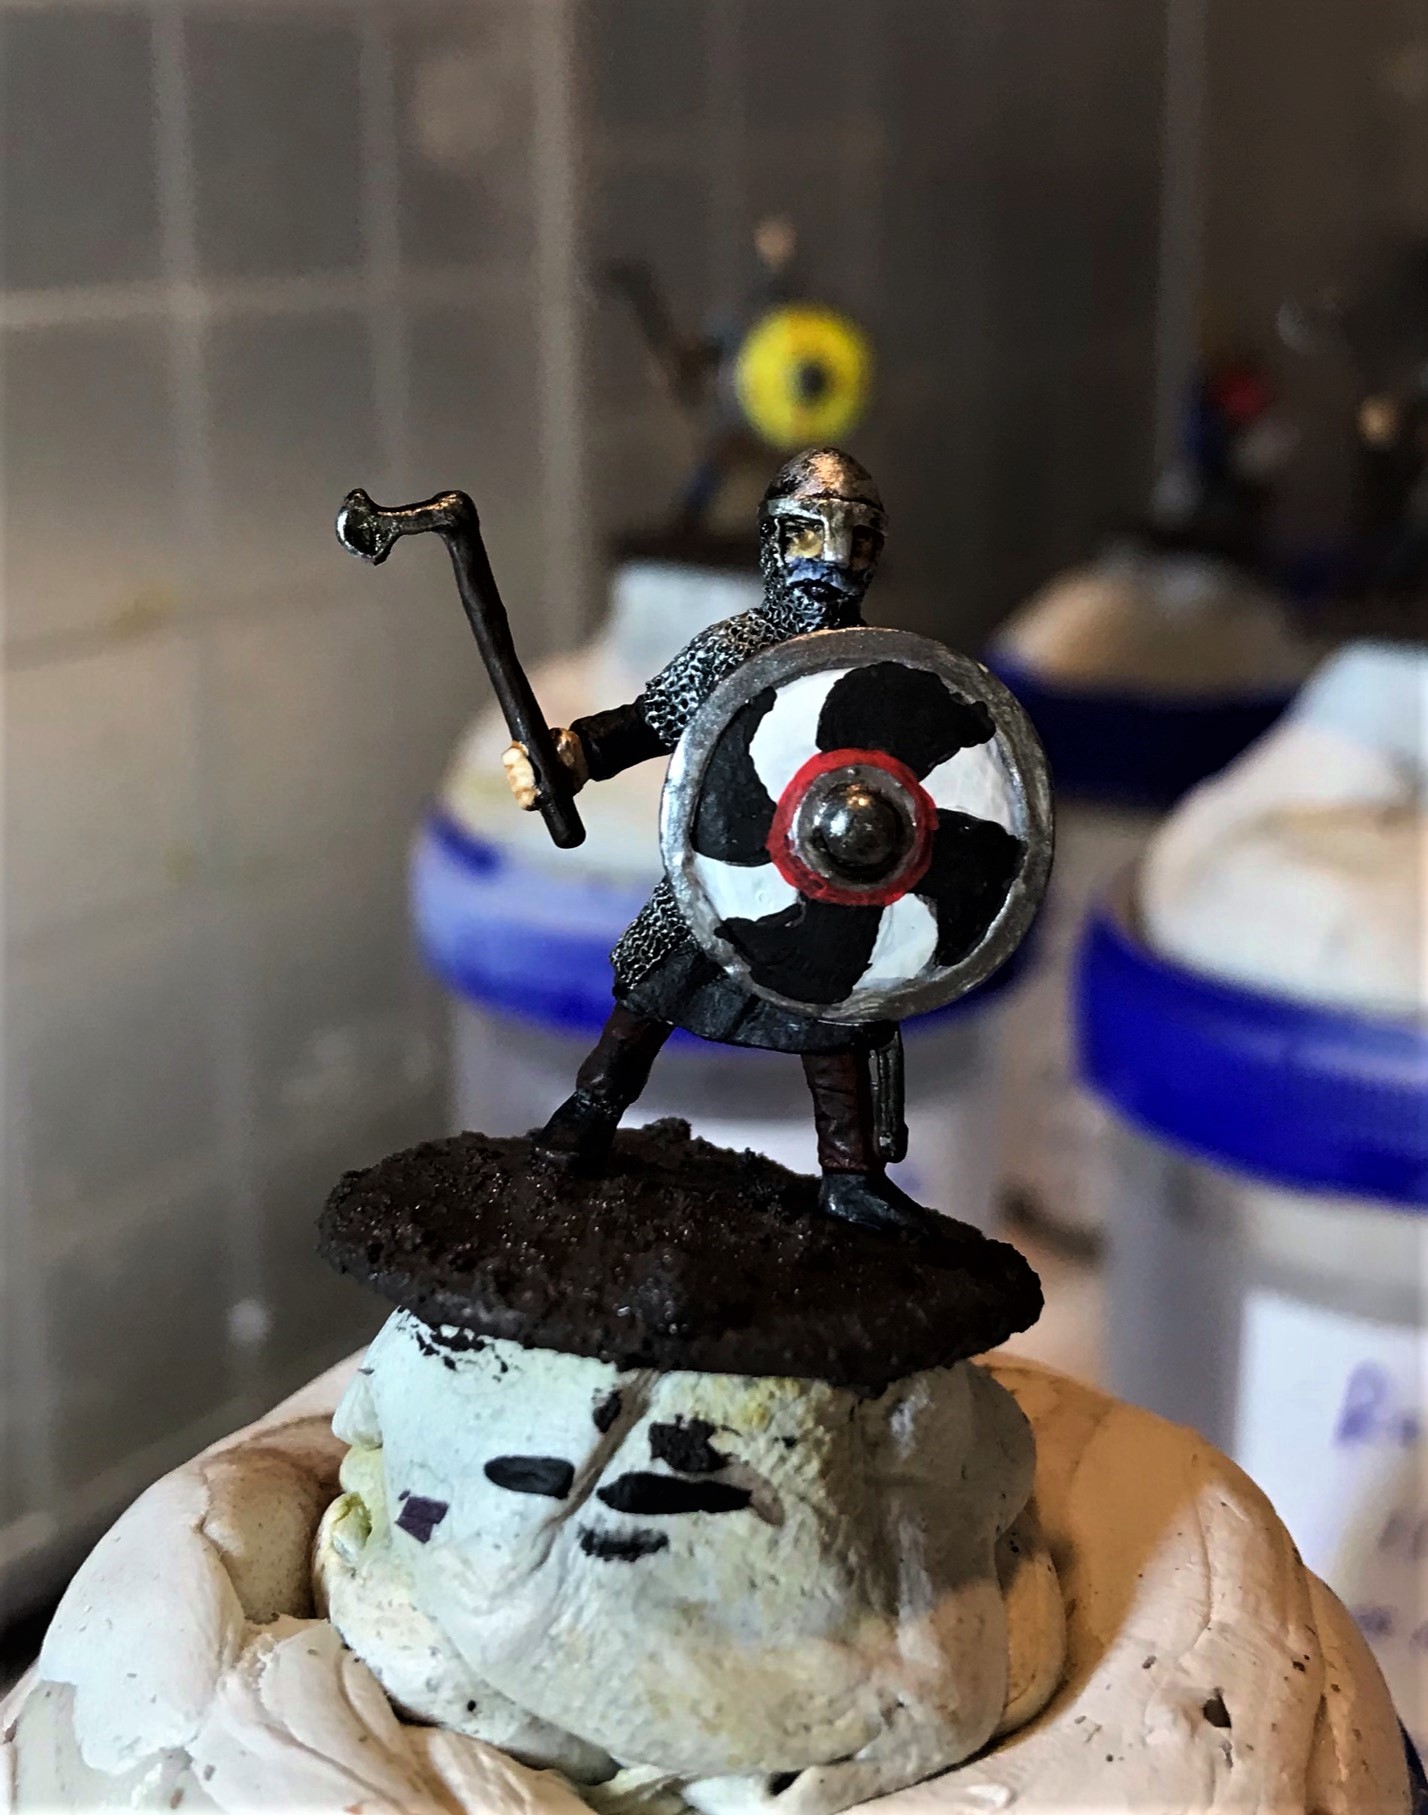
RAFM Berserker
The last figure was a single one – and he looks to be 28mm hero-scale. That makes him a bit off of the others, but maybe he’s like the Mountain from GoT?
Anyways, he looks pretty Viking-like, and Greg wanted him, so he’s in!
In his 1989 blister.Just out of the blister.After priming and wash.
This figure was so much easier to paint as it had virtually no mold lines and was well-sculpted. I only wish his axe was reasonably-sized.
Painted RAFM Berserker.
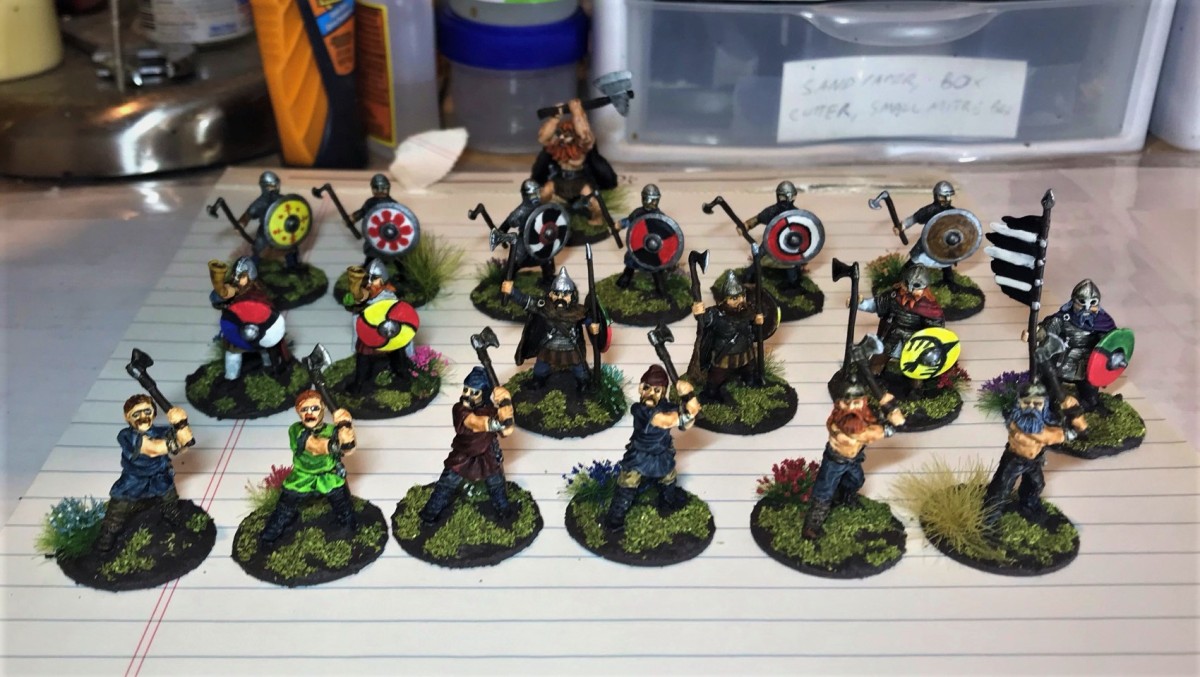
That’s the last of the 19. Here’s a group shot of them finished.
Group Shot. All in the mail to Greg in Maryland now!
I originally wanted to paint them all up as part of Roger’s (over at Rantings Under the Wargame Table) “Mo’vember Challenge”, but between surgery in November, Historicon, Thanksgiving, and my garage +build, it did not happen. Still, check out Roger’s cool roundup – I did get in Cortes…
As you may imagine, making all these figures different took a hell of a lot of paint! The list is at the end, but here’s a shot:
That’s a lot of paint!
I hope that this was enjoyable – and a change of pace was nice for me. Not sure what’s next, probably brigantines, but I do want to post a belated garage+ update by the end of this weekend. Thanks for looking and sharing any thoughts.
PAINTS, INKS, GLAZES, SHADES, WASHES, PIGMENTS, FLOCKING, GLUES AND MORE THAT I USED ON THESE VIKING FIGURES:
Below is a blog post from borderguy190 that some of you may not have seen – I am reblogging it with his permission. I (Mark) met him (Harry) at Historicon and he was a player in my Aztec/Conquistador game. I think he did a nice player review of my game as well as a superb review of the convention. His blog site is here – and I highly recommend you take a look! Now, here is his Historicon post:
One of the biggest joys of my year is getting to attend Fall In!, or as in the case this year, Historicon. Last year was a complete bust for conventions, and here in Michigan, the small local cons got called off for C19 earlier this year. Fall In! was my last hope. At some point […]