Convention season has arrived! So, I needed to finish off a few regiments in anticipation of several games between now and June. This time, I needed to augment my forces of Professor Nitpik and his Mechanical Men. Click the link to learn his back story.
Luckily, my first group of mechanical men miniatures for 2026 is now done. By group, I mean 41 figures for my Wars of Ozz games.
The Mechanical Men would need help in 2026 defending against marauding Munchkins. They would also need help chasing them down as they attempt to steal technological secrets. I chose to build and paint up two regiments of axemen (OZZ-511). Additionally, I chose two regiments armed with napalm blasters (OZZ-539 – not sharing a link as the picture is incorrect on the website). I also had a mechanical wizard, Androit (OZZ-543).
Luckily Buck Surdu has changed the basing rules for these such that a regiment has 10 figures, not 20. They still do come in 20 figures though! This is why I was able to turn each SKU into two regiments of each!
I wanted to give these bad bots a colorful metallic shine. To that end, I experimented by mixing Vallejo “Metallic Medium” with Army Painter Speed and Citadel Contrast Paints. I even tried this with a few of the 1.0 versions that have a reputation for “bleeding”. I am happy to report that no bleeding occurred with this combination.
The group all cleaned up and ready for assembly and priming.Here you see the two regiments of axemen in progress. These regiments would be “The Jade Automata” and “The Pink Nightmares”
The two napalm blaster regiments would be yellow-themed (“The Lemon Drop Legionnaires”) and orange-themed (Morin’s Monsters). Buck edited his flags for me and named that last one so I just had to give that moniker!
Napalm blasters painted, before washes added……after washes..
Below the axemen in progress:
They have gun metal arms and legs, but colorful torsos for Ozz! The Metal Medium and contrast/speed paint combination worked well.The command bases of the 4 regiments with their nice new battle standards.Top view.
I also painted up Androit, plus 4 crates as game markers for the games to come. These represent stores of Professor Nitpik’s technological secrets.
First Androit:
Androit frontAndroit back with placard
And the crates – I think I got these from Armorcast years ago.
Crates of unknown technological secrets from before the Last Great War…
How about some eye candy (they do already look quite sugary, no?)
Completed Eye Candy
Morin’s Monsters
The Lemon Drop Legionnaires
The Jade Automata
The Pink Nightmares
(Apologies to Ralphie.)
Androit The Mechanical Wizard
Group Shot
I also posted a short video on Instagram showing these mechanical men up close:
As I write this I have just returned from Cold Wars in Lancaster, PA. These miniatures debuted in their first game, “The Great Munchkin Heist”. In upcoming posts, I will share that game and some photos from Cold Wars.
Below is the flyer for that game.
The game went exceptionally well and I look forward to sharing it in a post in the near future. I also intend to share more apocalyptic terrain that I made it for this and another scenario. I also hope to do a 2025 roundup post as well…again, I said hope!
AND I hope to see some of you soon at conventions!
Final Notes and Links
Want to learn more about Ozz and its world? If you want to check out the excellent Wars of Ozz figures’ range, there are two places to get them. You can also get the rules there. (I make no money from this.) The game rules and the figures are available from the next two places:
As for the paints I used here – the list is extensive. But my memories are not always – so they are as much a resource to me as to you. Given that I have so much wreckage on the mechanical men’s bases, it does add to the variety.
If interested, here you go. If not, thanks for looking at these bots. Until next time…
Miscellaneous details and references for those interested in that sort of thing:
For my earlier posts on Wars of Ozz games, view this page. It includes figures, units, and other related projects.
PAINTS, INKS, GLAZES, SHADES, WASHES, PIGMENTS, FLOCKING, GLUES AND MORE THAT I USED ON THE TWO REGIMENTS OF NITPIK AXEMEN:
Polystyrene sheet
Gorilla Glue
PVA Glue
Popsicle sticks
2″ Square War Games Accessories Steel Bases (21)
Vallejo Surface Primer “Black”
Vallejo Mecha Primer “White”
Vallejo Thinner
Army Painter Speed Paint 2.0 “Familiar Pink”
Vallejo “Metal Medium”
Citadel Contrast Paint “Striking Scorpion Green”
Popsicle sticks
PVA Glue
Vallejo Model Air “Concrete”
Vallejo Model Air “Tire Black”
Vallejo Model Air “Bright Brass”
Army Painter Warpaints Metallics “Gun Metal”
Vallejo Mecha Color “Light Steel”
Vallejo Mecha Color “Off White”
Army Painter Speed Paint 2.0 “Polished Silver”
Createx Wicked Colors “Pearl Red”
Citadel Contrast Paint “Moon Yellow”
Createx Wicked Colors “Pearl Blue”
Createx Wicked Colors “Pearl Green”
Vallejo Model Air “IDF Sand Grey”
Reaper MSP Core Colors “Pure Black”
Army Painter “Red Tone” (wash)
Secret Weapon Washes “Red Black” (wash)
Secret Weapon Washes “Ruby” (wash)
P3 “Red Ink” (ink)
Vallejo Game Air “Red Terracotta”
Army Painter “Green Tone” (wash)
Citadel “Nuln Oil GLOSS” (wash/shade)
Citadel “Astrogranite” (texture)
Citadel “Astrogranite Debris” (texture)
Vallejo “Gloss Acrylic Varnish”
Vallejo Flow Improver
Vallejo “Satin Varnish”
Juweela 1:35 Debris
Juweela Metal Scrap Rusty
Juweela 1:35 Bricks
Wood shards
Vallejo “Old Rust” (pigment)
Vallejo “Carbon Black” (pigment)
Vallejo “Light Slate Grey” (pigment)
Vallejo “Titanium White” (pigment)
Pendraken 12mm dice frames
Nitpik flag design from Wars of Ozz Facebook page (printed on card stock)
PAINTS, INKS, GLAZES, SHADES, WASHES, PIGMENTS, FLOCKING, GLUES AND MORE THAT I USED ON THE TWO REGIMENTS OF NITPIK MECHANICAL MEN ARMED WITH NAPALM BLASTERS:
2″ Square War Games Accessories Steel Bases (21)
PVA Glue
Popsicle sticks
2″ Square War Games Accessories Steel Bases (21)
Vallejo Mecha Primer “White”
Vallejo Thinner
Army Painter Speed Paint 1.0 “Zealot Yellow”
Vallejo “Metal Medium”
Army Painter Speed Paint 1.0 “Fire Giant Orange”
Createx Wicked Colors “Pearl Red”
Createx “4011 Reducer”
Vallejo Model Air “Tire Black”
Vallejo Mecha Color “Light Steel”
Vallejo Model Air “Bright Brass”
Turbo Dork “People Eater”
Army Painter Warpaints Metallics “Gun Metal”
Vallejo “Thinner Medium”
Vallejo Model Air “Black Metallic”
Vallejo Mecha Color “Off White”
Army Painter Speed Paint 2.0 “Polished Silver”
Citadel Contrast Paint “Moon Yellow”
Createx Wicked Colors “Pearl Blue”
Createx Wicked Colors “Pearl Green”
Vallejo Model Air “IDF Sand Grey”
Secret Weapon Washes “Yellow Snow” (wash)
Secret Weapon Washes “Sunshine” (wash)
Army Painter “Red Tone” (wash)
Secret Weapon Washes “Red Black” (wash)
Secret Weapon Washes “Ruby” (wash)
P3 “Red Ink” (ink)
Vallejo Game Air “Red Terracotta”
Citadel “Nuln Oil GLOSS” (wash/shade)
Citadel “Astrogranite” (texture)
Citadel “Astrogranite Debris” (texture)
Vallejo “Gloss Acrylic Varnish”
Vallejo Flow Improver
Vallejo “Satin Varnish”
Juweela 1:35 Debris
Juweela Metal Scrap Rusty
Juweela 1:35 Bricks
Wood shards
Vallejo “Old Rust” (pigment)
Vallejo “Carbon Black” (pigment)
Vallejo “Light Slate Grey” (pigment)
Vallejo “Titanium White” (pigment)
Pendraken 12mm dice frames
Nitpik flag design from Wars of Ozz Facebook page (printed on card stock)
PAINTS, INKS, GLAZES, SHADES, WASHES, PIGMENTS, FLOCKING, GLUES AND MORE THAT I USED ON ANDROIT THE MECHANICAL WIZARD:
And now little bots from the apocalyptic ruins of the Industrial City!
This unit is a part of Professor Nitpik’s Industrial City Army. This regiment is composed of 40 mini-mechanical men (robots), deployed on five 2″ bases. The figures are metal and 28mm in size.
I have described my work on the good Professor’s background and army in three previous posts that you can check out:
I decided to go red on gold again. I really liked the effect I got on the artillery battery.
After priming – a good airbrush application of Createx “Pearl Red” on April 15.
The pearlized red works well with pearlized copper. I faced a downside. It was unbeknownst to me that my spray booth filter needed cleaning before I started. As a result, my basement had some residual fumes after painting, which I otherwise never see. Luckily I always mask up when airbrushing.
Finished hand brush painting these on April 16th, to include a wash.
The regiment does not have a regimental commander. However, I thought it would be good to give them a standard. So I took a wire spear from my unused Aztec bits, and a nut. With some green stuff, I crafted an ersatz standard pole.
The standard pole.
I then varnished all the bots with a gloss coat. This allowed me to handle them and better mount them on the bases without causing any damage.
All glossied up.
I mixed and matched the bots into different places on the bases. I also drilled out one bot claw and base to hold the standard. Next came a generous flocking of Army Painter “Black Battlefield”. I also added rusted bits and brick rubble before adding pigments.
Basing started.
After a matte varnishing, the last step was to add the standard!
April 19th – done!Close up of the command stand.The regiment in column formation.
That’s a wrap on this regiment – and for my Ozz painting for a while. I will be starting a new project in support of my upcoming HISTORICON 2025 games. Yes, I will still be running Wars of Ozz games – BUT I’m branching out a bit after painting over 1,000 (1,040 to date) Ozz figures…
Hint – I’ll be plowing new ground – but not totally new ground…yes, TANKS! But for which period and theater…hmmm….do you have a guess?
I will get back to Ozz painting sometime this year, so I can finish off my forces.
Here’s the Instagram link for a video that shows the command stand:
Want to learn more about Ozz and its world? If you want to check out the excellent Wars of Ozz figures’ range, there are two places to get them. You can also get the rules there. (I make no money from this.) The game rules and the figures are available from the next two places:
Below you’ll see the list of paints and the like that I used on this project. They are more useful for me when I need to recreate a color scheme in the future. They are not likely as useful for you as they are for me. I have had to refer back to a post more than once. This happens when I need to recreate a color theme. It also happens when I need to repair a unit. In any case, that’s why I post the lists.
Miscellaneous details and references for those interested in that sort of thing:
For my earlier posts on Wars of Ozz games, view this page. It includes figures, units, and other related projects.
PAINTS, INKS, GLAZES, SHADES, WASHES, PIGMENTS, FLOCKING, GLUES AND MORE THAT I USED ON THE MECHANICAL MINI SWARM WITH PULSE BLASTERS REGIMENT:
Popsicle sticks
PVA Glue
War Games Accessories Steel Bases (number 16)
Vallejo Surface Primer “Black”
Createx Wicked Colors “Pearl Red”
Createx Wicked Colors “High Performance Reducer”
ComArt “Opaque Carmine”
Createx Airbrush Colors “Pearl Copper”
Vallejo Model Air “Tire Black”
Vallejo Model Air “Gun Metal”
Vallejo Mecha Color “Off White”
Army Painter Warpaints Fanatics Effects “Blue Flux” (effect)
Citadel “Nuln Oil GLOSS” (wash/shade)
Aztec leftover wire spear
Steel nut
Green stuff (kneadatite)
Army Painter “Black Battlefields” (flocking)
Citadel “Gehenna’s Gold”
Gorilla Glue
Juweela 1:35 Debris
Juweela Metal Scrap Rusty
Juweelinis “Diorama Mix” – various metal scrap, tires, bricks
Vallejo “Carbon Black” (pigment)
Vallejo “Titanium White” (pigment)
Vallejo Acrylic Varnish “Gloss”
Vallejo Flow Improver
Vallejo Thinner
Vallejo Premium Color “Matte Varnish”
Pendraken 12mm dice frame
Card stock
Wars of Ozz flag from supplement
Black Sharpie Pen
Brown Sharpie Pen
If you have any questions or feedback – go for it in the “Comments” section! Thanks for looking as always!!
To paraphrase Monty Python’s Flying Circus, “…and now for something completely different…” – specifically, Pollywomps.
After Christmas but before New Year’s Eve I managed to complete a Pollywomp brigade for my Wars of Ozzgames. The brigade right now will be led by my Sleestak Command Base that I shared a description of recently in this blog. It was actually completed by December 30th, qualifying almost the entire brigade (less the Sleestak) for for Dave Stone’s annual “Paint What You Got Challenge”. It’s a fun and global challenge to paint up figures between Christmas and the end of February. The Pollywomps were perfect candidates for it.
So who are these Pollywomps? According to the “Wars of Ozz supplement“, they are denizens of “The Principality of Dismal”, also known as “the Bottomless Swamp”, and subjects of Prince Wartskin.
Nobody would ever accuse the Pollywomps of being smart. Savage, impulsive, sometimes clever – yes, but never smart. Thus, it was a wonderment when a trio of garishly accessorized Pollywomps visited each capital of the major kingdoms of Ozz and announced themselves as speakers for Prince Wartskin of Dismal. Nobody had ever heard of a place called Dismal, and with good reason, it didn’t exist until it was announced, nor was it called Dismal, but rather some blurpy Pollywomp word that sounded, at best, like Dismal. According to the Pollywomp speakers, Dismal was the city and the new principality, sometimes called the Bottomless Swamp. And just like that, another nation emerged overnight….
…The Pollywomps are more than just spear-armed infantry. In addition, Prince Wartskin fields Pollywomprats as light cavalry. Pollywomp artillery is all light cannons acquired from the Munchkins (and sometimes Winkies). They have unlimbered and strapped onto the backs of giant lumbering turtles raised in the swamp. While the turtles are slow, they do not require unlimbering to fire, and their massive shells provide some protection to the fishing crews. The wizard Nemo Mudbottom is Dismal’s foremost mage and often travels with the army. When he is among the ranks, his mere presence triggers the ability for nearby troops to blend with their terrain. Other wizards who serve, even if they are Pollywomps, lack this unique ability.
My brigade currently consists of an infantry regiment, a cavalry regiment, an artillery battery, Nemo Mudbottom, and the Sleestak Command base (which will lead until the Prince Wartskin figure becomes available anyways). I decided to consolidate the brigade into this one blog post as I worked on the units and Nemo simultaneously.
With the exception of the resin giant turtle, the figures are all metal, and 28mm. The infantry and cavalry soldiers look like the Gill-Man from the classic 1954 film “Creature from the Black Lagoon“, so I painted them as such, with some turquoise modifications around the gills and back fins.
Movie poster from “Creature from the Black Lagoon“
The artillery crew and Nemo Mudbottom are fishmen. Rather than make them look swampy, I decided to give them metallic blue and green shades to simulate their scales. The bases for all were painted up to represent swamp, mud, and puddles as you will see. As for combat stats, here are their stats:
There were 20 infantry figures, 11 mounted cavalry figures, 5 artillery crewmen, 1 giant turtle with a light cannon, and Nemo. Below is what I started with:
The Pollywomp InfantryThe Pollywomp Cavalry, Artillery, and Nemo
I did give the regiment a banner that I made out of green stuff and a plastic jungle leaf, even though the regiment does not have a regimental commander. All have glowing green eyes.
Here are some jungle shots of the regiment in line and column formations:
Pollywomp Infantry Regiment in line formationPollywomp Infantry Regiment in column formation
Here are some closer shots of the individual bases:
Note the leaf banner!
Pollywomp Cavalry on Pollywomprats
The cavalry regiment rides on “pollywomprats” which resemble a cross between an alligator and a monitor lizard. As the pollywomprats are supposed to have varied colors (similar to how the Munchkin cavalry has ponies of different colors), I made sure that no two were alike. Unlike the infantry, the regiment does have a regimental commander, which gives the unit an ability as rolled by dice. This regiment got “The Swift” giving them a +2″ bonus when they move. I also gave them a leaf banner. The riders were painted exactly the same way as the infantry color-wise.
The Pollywomp cavalry regiment, OZZ-535, ready for varnish, basing, and final flocking.The Pollywomp cavalry based and awaiting flocking.Pollywomp Cavalry Regiment in line formation.
And here are some closeup shots of the bases, starting with the regimental commander’s single-figure base. Very muddy bases!
Note the leaf banner!
Both Pollywomp infantry and cavalry have limited missile capabilities. Each base can fire twice per game. So, for both I made small markers to keep track of that in the game. The markers are just toothpick pieces on washers, lightly painted, but small enough to put on the bases unobtrusively.
Pollywomps Artillery Battery
As described previously, the Pollywomps artillery is a light cannon on a giant turtle, crewed by fishmen. I painted the turtle to resemble a snapping turtle – like the ones that I shared photos of during my garage build. Both of these large turtles were trying to take advantage of my newly-seeded areas to lay their eggs.
Female snapping turtle digging out to lay her eggs in my yardFemale snapping turtle glaring at me in driveway – this one was trying and failing on the right.
I painted up the turtle, its gun, and carriage and prepped the artillery base for the crew. I gave the gun a rusty iron look as befitting a swampy artillery piece.
For painting the artillery fishmen crew, I experimented on a leftover piece of polystyrene. I made a palette with it using some metallic and airbrush paints to get the right combination of colors.
My palette. I ended up using the far right combination for the main body colors and the fifth from the left for fin colors.
The crew painted up quickly.
Three of the five crew members. The one on the far left is supposed to have a match – but that did not cast. No worries, as I made one as you will see shortly.
I flocked the artillery base similar to the other Pollywomps as you see here below. The mud puddles were fun to do.
Lastly, we have Nemo Mudbottom, the Magical Swamp Mage. This wizard has three spells – Raise the Dead, Fear, and Heal. He also can provide a chameleon-like benefit to nearby troops that makes them tougher to hit with musketry.
He is larger than the Fishmen crew, but I gave him the same color scheme.
Nemo Mudbottom (in middle) with two of the Fishmen artilleristsNemo done – front……and back. Nice thong Nemo!
After finishing the brigade, it was time to end 2024 in style as my wife and I usually do with some big lobsters!
Nice 3 pound lobster on New Year’s Eve!!
That is it for now – next in the blog I will do a roundup of 2024 as I have done at the end of every year (well usually anyways). 2024 has been a bit insane hobby-wise…and golf wise!
Final Note
If you want to check out the excellent Wars of Ozz figures’ range – there are two places to get them and to get the rules (and I make no money from this btw). The game rules and the figures are available from the next two places:
Below you’ll see a loooong list of paints and the like that I used on these – and they are more useful for me when I need to recreate a color scheme in the future than maybe you – but in any case that’s why I post them.
Miscellaneous details and references for those interested in that sort of thing:
For all of my earlier posts on Wars of Ozz games, figures, units, and other related projects – please see this page.
PAINTS, INKS, GLAZES, SHADES, WASHES, PIGMENTS, FLOCKING, GLUES AND MORE THAT I USED ON THE POLLYWOMP INFANTRY REGIMENT:
Popsicle sticks
PVA Glue
Vallejo Premium White Primer
Vallejo Thinner
2″ Square War Games Accessories Steel Bases (SKU Number 21)
Secret Weapon Washes “Sewer Water” (wash)
Army Painter “Dark Tone” (shade/wash)
Vallejo Mecha Color “Off White”
Vallejo Model Color “Off White”
Vallejo Mecha Color “Green Blue”
Citadel Contrast Paint “Akhelian Green”
Army Painter Speed Paint 2.0 “Maize Yellow”
Secret Weapon Washes “Green” (ink/wash)
Army Painter Speed Paint 2.0 “Carmine Dragon”
Army Painter Warpaints Fanatics Effects “Data System Glow” (effect)
The first question that I am sure that you have is – “what the hell is a Temujican?“!
To answer that, let’s ponder the wild and wonderful world of the Wars of Ozz for a minute. Recently, my posts have shown the mighty Whim Whim and their leader, Sultan Whim. While the Whim Whim are indeed a force to be reckoned with in the Great Impassable Desert of the South- they do face a rival force in the Temujicans. These green-skinned desert nomads are cousins of the Gillikins (and are somewhat goblin-like).
Map of Ozz
As for the name “Temujicans”, it has an origin, and I had a hand in it. When the force was launched they were called “Eastern Desert” nomads. Rather mundane to be sure. The great Buck Surdu challenged several of us to come up with a better name that would evoke a historical reference for a cavalry-based force that could sweep across plains and deserts. My first thoughts went to considerations of the history of Genghis Khan:
Now you see. As he was born “Temujin”, and the Gillikins were their cousins, I came up with the name “Temujicans”. Thus this was adopted as the official name of the faction! I contributed!
In any case, I decided to start building my Temujican army with the four infantry regiments I had. While in the game they are more cavalry-oriented – I decided that starting with infantry was a reasonable way to get going on the faction. Like the Whim Whim, the Temujicans do not have artillery or musketry.
As cousins of the Gillikins, they do have access to units of “Mercenary Gillikin Longbows”, which are SKU OZZ-409. I had two of these regiments to paint. I also had two other infantry regiments of “Infantry with Command – Unknown Immortals”, which are SKU OZZ-533. All four regiments have 21 figures each for a total of 84 figures for this post. All are metal and 28mm – though both Gillikins and Temujicans are somewhat diminutive in stature. They are bigger than Munchkins though. The Unknown Immortals, have their faces hidden, and all have the same pose except for the leader, drummer and regimental commander. The MGL’s have multiple poses.
Mercenary Gillikin Longbowmen from the Wars of Ozz websiteUnknown Immortals from the Wars of Ozzwebsite
Both types are armed with bows, but the Mercenary Gillikins have longbows (regiments hereafter referred to as MGL). An advantage for the MGL’s is that longbows can fire over intervening troops. The Unknown Immortals have bows and spears.
The MGL’s cost 5 points apiece – and have values for Marksmanship, Melee, Resolve, and Elan of 6/10, 5/10, 6/10, and 5/10. Each brigade can have up to two of them. The Unknown Immortals cost 6 points and have similar values for Marksmanship, Melee, Resolve, and Elan of 6/10, 5/10, 5/10, and 6/10. There can be up to two regiments of Unknown Immortals in a Temujican brigade.
So why are Temujicans green skinned? In Wars of Ozz, all races, to include Gillikins and Temujicans, were affected by the viruses and mutagenics released in the Last Great War. One of those effects was mutation of humans (and others) into different races. Another was the effect of “color mania” – with different factions being affected differently. While the Army lists (found here) describe the Temujicans as being outfitted in different sandy and brown shades, I thought they must have some residual affinity for purples as the Gillikins do. Hence, I decided to use some magenta and purple colors on them. I also used some darker bronze for some of the metallics like buttons and badges. You will also notice some neon colors like yellow and yellow/orange as liners and shield colors. Additionally, like I did with the Whim Whim, I tried to have common colors among the units designated as 1st or 2nd. I did this so as to manage to make sense on the tabletop as I deploy brigades. This will be more clear after you see some photos, so let’s start with WIP shots and discussions
WIP Discussion and how the Project Progressed
I started back on October 14th, and finished all on November 2nd. In between all this I had several golf events plus a costume party! More on those in a bit. While there were 84 figures in total – the Immortals had each a shield, a bow holder, and a quiver.
First, I needed to do lots of filing!
The Unknown Immortals regiments in prep.Close up of the sprue that held the Immortal’s bow holder/sword handle combination, and a quiver with arrows.
Then it was on to washing and organizing it all:
All pieces for this Temujican infantry project filed, washed, and ready for assembly/painting on October 15th.
By October 24th I had made some progress on the accouterments and the figures.
As I mentioned, there was golf and Halloween too. I did end up shooting an 84 on my home course – which was a personal best – plus coming in tied for first in the year-long contest at my club – but I digress…
Plus for Halloween we had a nice visit from Elsa (aka Tabitha my granddaughter):
My daughter Ellen, Tabitha (as Elsa), and my wife Lynn
Then our Halloween party saw this couple (us) as Gru and a Minion:
Gru and his minion
Back to the Temujicans!
By October 29th, I was nearly finished with initial painting and assemblies:
Basing work on the figures followed:
Gluing the figures down AND SURGICALLY covering the bases with the sand paste and rocks took some time. I did not want a mess on the paint jobs, so typically I glued down 3 out of 4 of the figures first, then applied the paste, then added the final figure. Below you’ll see that after the paste dried, I added pigments to the bases. One regiment has no pigments as a comparator. I really like the effect of the three pigments I use on the sand paste – and recommend their use if you want a desert look.
Bases showing 3/4 with pigments.
Then I varnished the lot with an airbrush, and once that dried I added flocking tufts and rocks.
All the paints that I used are listed at the end of this post – but let’s share some…
Eye Candy
1st Mercenary Gillikin Regiment
1st Gillikin Mercenary Longbow Regiment in line formation. Their coats are reddish brown with a sallow yellow/orange liner.1st Gillikin Mercenary Longbow Regimental Commander. Note the magenta bicorne hat.Typical stand of the 1st Gillikin Mercenary Longbow Regiment.Command stand of the 1st Gillikin Mercenary Longbow Regiment.1st Gillikin Mercenary Longbow Regiment in column formation.
2nd Mercenary Gillikin Regiment
2nd Gillikin Mercenary Longbow Regiment in line formation. The coats are a sandy brown with neon yellow/greenish lining.1st Gillikin Mercenary Longbow Regimental Commander. Note the purple bicorne hat.Typical stand of the 2nd Gillikin Mercenary Longbow Regiment.Command stand of the 2nd Gillikin Mercenary Longbow Regiment.2nd Gillikin Mercenary Longbow Regiment in column formation.
1st Temujican Unknown Immortals Regiment
1st Temujican Unknown Immortals Regiment in line formation. Their coats are greenish brown. Their shields have alternating chevron colors of green (for Temujicans flesh color) and sallow yellow/orange.1st Temujican Unknown Immortals Regimental Commander. Note the magenta bicorne hat.Typical stand of the 1st Temujican Unknown Immortals Regiment.Command stand of the 1st Temujican Unknown Immortals Regiment.1st Temujican Unknown Immortals Regiment in column formation.
2nd Temujican Unknown Immortals Regiment
2nd Temujican Unknown Immortals Regiment in line formation.2nd Temujican Unknown Immortals Regimental Commander. Note the purple bicorne hat.Typical stand of the 2nd Temujican Unknown Immortals Regiment.2nd Temujican Unknown Immortals Regiment in column formation. I thought this showed the command stand pretty well.
Group Shots
Here are some group shots of all of the 4 regiments:
Video
Lastly, here is a very short video I took of all 4 regiments that is nice:
Alternatively, I did post the same video on Instagram with some music from Thin Lizzy:
I did think about how many “points” IRO or Wudugast would have given me for these 84 goblinoids for their “Orktober” painting extravaganza (if I was in it), but that’s more curiosity than anything else. Plus I really took until November 2nd to finish. Given that my 1984 West Point class was having our 40th reunion during that (last) weekend (which I did not attend) AND that Army beat Air Force in football too (which I did watch) – I did get to remember my 84 class with finishing these 84 figures.
So next I am on to the Temujican cavalry. I have two regiments of heavy and three of light, plus three brigade commanders to do. Onwards!
PAINTS, INKS, GLAZES, SHADES, WASHES, PIGMENTS, FLOCKING, GLUES AND MORE THAT I USED ON THE TWO REGIMENTS OF MERCENARY GILLIKIN LONGBOWMEN:
Square MDF Brigade Leader bases from Wars of Ozz Miniatures (used as regimental commander bases)
Wargames Accessories number 21 bases (2″ square steel bases)
Wargames Accessories number 17 (1.5″ X 1″ steel bases)
Temujican flag designs from Wars of Ozz Facebook page (printed on card stock)
Card stock
If you want to check out the excellent Wars of Ozz figures’ range – there are two places to get them and to get the rules (and I make no money from this btw). The game rules and the figures are available from the next two places:
Hmm…that title sounded very ominous…are the Whim Whim, wiped out, a dead faction, lost forever in the sands of time, or at least the sands of the deserts of Ozz?
Well, the Whim Whim are still around! After 215 figures, I have just finished painting up this faction of nomadic desert-dwelling tribesmen! And before I moved on, I wanted to document the last few pieces of the Whim Whim faction that I have completed.
In a bit, you’ll get to see a video of the entire faction on the tabletop. But for now, what this post will cover are the last three SKU’s that I finished up. One SKU is the elite regiment of Whim Whim Janissaries (OZZ-1400), another is Sultan Whim himself (OZZ-1406), and the last one is the faction’s wizard, The Ancient Mystical One (OZZ-1405). The Janissaries are the same figures as the Whim Whim Spearmen I painted before, just with different colors. I will include some select WIP photos, as well as eye candy.
One reason for my relative photographic laxness is that I finished these off while fighting off COVID in early October! That was a bit of a struggle, but nothing I couldn’t overcome…eventually. Thus, my photography took a back seat to getting these figures done.
All of the figures are metal and 28mm in size. Let’s look at each in turn.
The Whim Whim Janissaries Regiment
The Whim Whim Janissaries Regiment (WWJR) is similarly-armed like the other spearmen. The difference is that their attributes are better. Neither type have missile weapons, and both have Melee values of 7/10 with a first-strike bonus. The WWJR has a Resolve value of 9/10 (50% higher than a regular spearmen regiment’s 6/10), and an Elan value of 10/10 (versus 8/10 for the regular spearmen). The WWJR costs 1 point more at 6 points. However, a Whim Whim brigade can only have one of them.
I decided that, like my previous spearmen, the WWJR needed a similar addition to the front of the shields to cover the little holes – but a different style.
I found some terracotta stars that fit perfectly on the head of a number 18 flat nail. With some really careful drilling, I managed to add the stars/nail combos to the shields and use them to support their mounting. I also used the DH-507 spear tip pennons again from Iron Winds Metals to jazz up the spears.
Additionally, as the elite infantry unit of the Whim Whim, I armed them with golden weapons. Yes, gold’s impractical in such a use, but it looks good! I also gave the regimental commander a rare albino siliyiplix as a mount. The Army List canon for them says:
Red armor and uniforms, brown boots. Turbans are white. Shields red with white trim. Spears have red pennons.
I used a metallic craft paint on the armor to decent effect. To offset so much red, I gave them white kilts. In the end, they do look a bit Santa-like with all the red. All the paints I used are listed at the end of this post for each project. Mainly for me as I often need to recreate a look!
Whim Whim Janissaries Regiment WIP Shots
I started these on September 22nd and finished them on October 7th. The key WIP I want to share is the star additions. I’ll share some shots below.
All filed, washed, and ready to get started.I drilled out the shields twice. First, I did so with a pin vise that would give just enough space for the shaft of an 18-gauge flat head nail to pass through. Then I went on to VERY gently drilling out the shield with a 1/8″ drill bit on my power drill – such that the depth of the holes would allow the heads of the nails to nest flatly on the shields.Here you see the 18-gauge nail head flush with the hole in the shield.The cheap stars.Stars on nail heads.…and mocked up on the shields (not yet glued).
I used the alligator clip base for painting the shields. Once it was time to mount them into the holes that I had drilled into the wrists and hands of the Janissaries, I individually sized the cut needed on each nail.
Here you see how I individually sized up each nail – I needed enough length but not too much. Cutting the nails involved SLOWLY cutting around the nails at the right length with wire cutters in a circular fashion. Then I bent the excess steel off – without having nail shards ricochet into my eyes.
Now for the finished regiment!
Whim Whim Janissaries Eye Candy
The Whim Whim Janissaries in line viewed from their left front.The Whim Whim Janissaries in line viewed from their right front.The Whim Whim Janissaries in column formation viewed from their left.
Sultan Whim
The Sultan Whim figure comes listed as OZZ-1406 “Sulton Whim Carried on a Palanguin”. I will refer to him as “Sultan”. Also, technically a “palanquin” has a covered box – and he is on a litter with blankets and an umbrella. No worries, I just had to look up a few words to be sure myself. Litter, palanquin, call it what you want.
Early concept/sculpt of the Sultan Whim model from Russ Dunaway.
Sultan Whim WIP Shots
This project went pretty fast as far as assembly and painting goes. I made a small 3″ by 5.75″ styrene base for him, with steel bases underneath for magnetic storage and travel. I also built a placard holder on the back end. I mounted the bearers on it first and made sure that the litter would fit by manipulating and bending the arms, then lining them up with a steel ruler. The bearers were easy to paint this way – and I ended up using my alligator clip modeling base to hold the litter for painting. I drilled out Sultan’s – um posterior – and put a screw in there to allow painting him to be easy as well. The umbrella was treated similarly.
Laying out the pieces and figuring out the right design. (The Ancient Mystical One is not part of this model and is on the right).Side view of earlier image.I used graph paper and a steel ruler to figure out both the appropriate base size and figure locations. You can see the placard holder and 12mm dice frames in the back.Somehow I needed to figure a way to paint the Sultan – the image above is enough of a clue I think!
For painting, I tried to incorporate purples, oranges, and golds, as those were dominant colors I used in the different regiments of the same type. My concept was to give Sultan Whim a luxurious bed on his litter/palanquin to travel the desert while consuming a large turkey leg! In the game, the Sultan can give an attached unit Superior Fighting skills, and as an overall commander has the “Legendary” ability.
I started the model on October 8th, finishing it on October 10th.
Sultan Whim Eye Candy
Sultan Whim on his litter from his front left.Sultan Whim on his litter from his front right.Sultan Whim on his litter from his front.A view of the back. He has a nice pink parasol to give him shade as he devours his turkey leg.
The Ancient Mystical One
This painted up very easily in one day as you can see. Skulls make painting so much easier!
The Ancient Mystical One has Spell and luck values of both 6/10. He does get three spells, at a cost of 2 points.
The Ancient Mystical One WIP Shots
The Ancient Mystical One seen here before varnishing and final base work.
The Ancient Mystical One Eye Candy
The Ancient Mystical One from the front.Rear view.Side view.
Lastly, I promised a video of all of the Whim Whim faction on the table. It consists of 11 regiments plus individuals:
I hope that you have enjoyed this Whim Whim journey with me. As the Wars of Ozz is a post-apocalyptic world, the Whim Whim Janissaries, Sultan Whim, and The Ancient Mystical One you have seen here are eligible for Dave Stone’s recent painting challenge, “APOCALYPSE ME 2024”. It might not be the apocalypse many of you envisioned, but it is in Ozz!
Thanks for looking – and now on to the Temujicans – sworn enemies of the Whim Whim!
Miscellaneous details and references for those interested in that sort of thing:
For all of my earlier posts on Wars of Ozz games, figures, units, and other related projects – please see this page.
PAINTS, INKS, GLAZES, SHADES, WASHES, PIGMENTS, FLOCKING, GLUES AND MORE THAT I USED ON THE REGIMENT OF WHIM WHIM JANISSARIES:
Iron Wind Metals Banner Spear Head Sprues SKU #DH507
MDF Brigade Leader bases from Wars of Ozz Miniatures (used as regimental commander bases)
As you may want to check out the excellent Wars of Ozz figures’ range – there are two places to get them and to get the rules (and I make no money from this btw). The game rules and the figures are available from the next two places:
In my last post I wrote about the two regiments of Whim Whim cavalry that I painted up in August 2024. There, I mentioned that while each brigade of these desert nomads can have up to six regiments of spearmen, they are limited to just one unit of cavalry, chariots, bowmen, or Janissaries, and just two units of Noobi. With the figures that I have, I believe that I will be fielding two distinct brigades of Whim Whim, with common color features that do not distract from the canon colors.
Regarding bowmen, I had two Whim Whim Bowmen regiments (WWBR) to paint. Each has 20 bowmen and a mounted leader on the common 6-eyed multiple-tailed beasts called siliyiplix. The SKU number is OZZ-1401. The figures are metal, and 28mm in size. The bowmen came in five different poses. My goal was to get these done between golf rounds in September!
On the Wars of Ozz website the photo of the regiment is as shown below:
“Sand-colored tunics, white turbans, brown boots.”
So, not much in terms of restrictions there – and that left me with a lot of room to both follow the canon and add my own colors to make some differentiation between the two regiments. I decided to make these color choices:
Greenish-yellow (1st Regiment) and orange (2nd Regiment) mounts as I did for the cavalry, as well as yellow (1st Regiment) and orange (2nd Regiment) saddles.
Aztec yellow (1st Regiment) and copper helmets (2nd Regiment).
Dark green kilts and leader sashes (1st Regiment) and light green kilts and leader sashes (2nd Regiment).
Yellowish-sand tunics (1st Regiment) and tan-sand tunics (2nd Regiment).
Light (1st Regiment) and dark-colored (2nd Regiment) bows and spears.
Three different beard colors (grey, dark grey, and black) were also used to vary the figures. I figured that these WWBR’s would be a more logical place for older warriors.
For the white turbans, I used Army Painter “Speed Paint – Blinding Light 2.0” for the first time. In color, it is very similar to Citadel “Apothecary White”. Also similar to the Citadel product, it is not quite white enough – but a little dry brush action with some off-white paint on the turbans remedied that. I will say that the AP product flowed better – and was less difficult to mix and distribute the pigment after shaking. Both are good, I just think I’ll prefer the “Speed Paint – Blinding Light 2.0” version going forward.
I do list all of the exact paints and more that I used at the end of the post for those interested in such information.
WWBR are excellent missile units that cost 6 points. In the game, their bows are equivalent to muskets in terms of combat power and range. The WWBR have a Marksmanship value of 8/10. In Melee, they are still relatively stalwart at 6/10. The WWBR have similar a Resolve value (ability to stand against an attack) and Elan value (desire to get into and stay in a fight)of 6/10.
I started work on my WWBR’s on August 30th and finished them on September 20th. I’ll share some WIP work below, and then some eye candy of the completed regiments.
Whim Whim Bowmen WIP Shots and Discussion
Unlike the cavalry, there was minimal assembly here (just for the leaders and the drummers).
The two regiments as received. Note that there were 5 different poses of the bowmen.
Mold-line and flash removal preceded washing of the figures on September 1st.
All cleaned up!
Once again I brush-primed both units to use up my 200ml primer bottle of Vallejo Mecha White Primer that was clogging my airbrush. I have about 20% left and don’t want to waste it. After the primer had had a day to cure, I added a wash with Army Painter Dark Tone – by September 2nd. Next, I dry-brushed both regiments with an off-white paint.
The two regiments are here primed and mounted for painting. I used popsicle sticks with similar poses put together, as well as the stand with alligator clips for the components that needed assembly.
I worked on and off on the WWBR’s through September 15th – usually anywhere from a half hour to more at a time. By then, the figures were done.
Main painting completed.
As I had only lightly glued the figures to the popsicle sticks (with PVA glue), they were easy to detach on September 16th.
The WWBR’s ready for basing.
I have found that sequential basing works best for these desert dudes and the sand basing paste. Normally, infantry are mounted four figures to a base. By sequential, I mean that I use Gorilla Glue to affix two of the four figures to the 2″ square steel bases. Then I apply the sand basing paste/texture paint to the sides of the bases with the two figures – and let that dry. I then glue on the remaining two figures to each base. Next, I apply the remaining unpainted parts of the bases with the sand paste, and let that dry.
This photo shows the dried sand paste covering half of the steel bases and a recent add of the remaining figures on September 16th.The remaining parts of the bases here are recently covered with the sand paste on September 16th. Application of three pigments and two types of varnish came next.
I then mounted the figures on poster tack-covered specimen jars (as seen in the gallery below). This I did in order to add three types of sandy pigments before using my air brush to varnish everything.
2nd Regiment stand after varnishing but before final flocking and flags are added.1st Regiment command stand at the same point.
Once the two coats of varnish dried, I flocked everything with rocks and tufts, then added the flags. On September 20th – these were 100% done.
So how did they come out…let’s see! Click on any image to see them better.
Eye Candy
1st Whim Whim Bowmen Regiment
1st WWBR Stands
1st WWBR COMMAND Stand
1st WWBR Regimental Commander
1st WWBR Group Shots
2nd Whim Whim Bowmen Regiment
2nd WWBR Stands
2nd WWBR COMMAND Stand
2nd WWBR Regimental Commander
2nd WWBR Group Shots
Group shots of both
The completion of these two WWBR’s brings me up to 187 painted figures for the Whim Whim faction. Right now, for Whim Whim units, I have just one regiment left to paint – the elite Janissaries.
I hope that you enjoyed these two and that it was of interest. I’d be interested in any feedback on my color choices – as it is Ozz!
And yes, I still have much more Ozz to come…
Miscellaneous details and references for those interested in that sort of thing:
For all of my earlier posts on Wars of Ozz games, figures, units, and other related projects – please see this page.
PAINTS, INKS, GLAZES, SHADES, WASHES, PIGMENTS, FLOCKING, GLUES AND MORE THAT I USED ON THESE TWO REGIMENTS OF WHIM WHIM BOWMEN:
MDF Brigade Leader bases from Wars of Ozz Miniatures (used as regimental commander bases)
Pendraken 12mm dice frames
Wargames Accessories FOW #1 (1.25″ X 1″ steel bases)
Whim Whim flag design from Wars of Ozz Facebook page (printed on card stock)
Blue Sharpie pen
Brown Sharpie pen
As you may want to check out the excellent Wars of Ozz figures’ range – there are two places to get them and to get the rules (and I make no money from this btw). The game rules and the figures are available from the next two places:
It’s been a while since I had a chance to finish a blog post on any new Wars of Ozz units. That doesn’t mean that I have not been working on any – in fact between golf since April (which you have seen a bit about here in this blog), HUZZAH in May, I have posted about the Noobi, allies of the Whim Whim. I have been working my way through some Whim Whim units.
The Whim Whim are nomadic tribesmen who hail from the southern “underbelly” of Ozz. This faction has many very cool units, especially in terms of cavalry and infantry. (However, artillery? Nothing – as is appropriate for these nomads.)
Still, I have enough figures to build two brigades for the Whim Whim in concert with the Noobi. I decided to start with an infantry core – with 2 Whim Whim Spearmen Regiments (WWSR’s). As a Whim Whim brigade can have up to 6 WWSR’s, this seemed to me to be a good start on the brigades. Of course, the two brigades would need leaders. My good friend Greg Priebe also 3D printed some “Ottoman Noble Admirals” for me that will serve as either ersatz brigade or divisional commanders until more are avaialble from Old Glory. I worked on the leaders at the same time as I did on the WWSR’s.
The regiments are listed on the website under “The Kingdom of Whim Whim Tribes” as SKU#1400, “Whim Whim Spearmen with Command”. There are 4 command figures, 16 spearmen, and a regimental leader mounted on a siliyiplix in each regiment. Don’t worry – I cannot pronounce it (the mount) either – but it’s the common one for the WW. Apparently it’s a camel-like animal with 6 eyes and a double tail. This is Ozz after all… That makes a total of 42 figures for both WWSR’s together.
As the WWSR’s are only armed with long thrusting spears, Marksmanship is irrelevant for them. The WWSR’s are, however, very good in Melee with a value of 7/10 – plus they get an extra die in the first round of Melee, giving them a nice shock advantage. As far as their ability to stand against an attack, the WWSR’s are average with a Resolve value of 6/10. They do more enjoy more getting into and remaining in a fight with an Elan value of 8/10. Point-wise, they cost 5 points per WWSR. The figures are 28mm and metal. There are a few very subtle differences among the spearmen as far as the individual sculpts go.
On the website, the WWSR photo has them with paper pennons attached to their spears. Additionally, there are no protrusions from their shields where the little holes are. The website photo is below.
Photo from the Wars of Ozz website
I decided that I would modify my WWSR’s in these two areas. First, I would change the spear tips with an Iron Wind Metals spear tips product that I remember using in my Ral Partha Rooman project that I did a while back. That product is now sold under IWM, is very reasonably priced, and is called SKU#DH-507 “Banner Spear Head Sprue”. There are 6 tips per sprue.
DH-507 spear tips sprue
The other modification that I made was to disassemble the little balls from a pull-chain (the kind that lights use), and add them to the shield fronts where the holes are. As for colors, the 1st Regiment would have a purple theme, and the 2nd an orange theme – which is completely fine with the canon. I started working on these back in late May.
As for the leaders, Greg printed up Wargames Atlantics SKU WAAD00063, “Ottoman Noble Admirals”. He mailed me 5, of which 3 bodies and 5 heads survived the USPS journey.
The Admirals.
The figures curing in Greg’s Laboratory of fun.
I started work on all of these (45 figures in total) back in May – and with my modifications it took a while (there was a LOT of drilling and gluing). Another issue really added to the time for this project – 1.0 versions of Speed Paint.
I mistakenly forgot that one of the the purple paints that I used (Army Painter “Purple Alchemy”) and one of the orange ones (Army Painter “Fire Giant Orange”) were not 2.0 but were instead 1.0 versions. As a result, I didn’t mix them initially with Citadel “Contrast Medium” – which I normally do to avoid the notorious bleeding in the 1.0’s. AARGH!
This led to a lot of repainting, but luckily it was mainly on the shields. I do want you to know that after mixing with the Citadel “Contrast Medium”, no bleeding occurs in my experience. I just have many more 2.0’s than 1.0’s, so I forgot – and I have had no bleeding issues with the 2.0’s.
Now onto WIP shots for both the WWSR’s and the leaders!
Whim Whim Spearmen WIP Shots and Discussion
As receivedWashed and ready for primerSpears with the IWM tipsEarly painting on the shields – with visible bleeding having started. I glued on the pull-chain balls to the shields and used Gorilla Glue to fill voids on them. The balls also acted as handles for painting them – again and again due to the bleeding.
I mounted the figures themselves on popsicle sticks for painting instead of the specimen jars that I usually use to save space.
By the end of May I had the WWSR’s drilled out (for shields, heads, and spears!), primed, washed and dry brushed.
I needed a jig to hold the spears while they were assembled and paint dried on them – not ideal but it worked.
32 modified spears.
Then I worked on the two regimental commanders and their siliyiplixes (is that the plural???).
I used a new (to me) pumice sand-basing paint/paste on the bases. I acquired it from Shadow’s Edge Miniatures and it is called Shadow’s Edge Miniatures Earth Works Dirt Colors “Sand Dust”. It comes in a 230ml/8 oz jar and I really liked it a lot. The only downside is that there is no photo on the website – you just have to choose “Sand Dust”. I have a photo below of the jar mid-project after using a lot!
Shadow’s Edge Miniatures “Earth Works Dirt Colors Sand Dust”Early work on the mountsAdding “Sand Dust” initially
By mid-June I had the infantry figures mainly painted and ready for weapons and shields.
We need spears – and shields!
You notice that I alternated drilling out on the forearms and the hands for the shield mounting so as to give more differentiation.
Armed!
With the final proximity of each figure to each other on a 2″ base, I needed to sequentially add the basing paste. First, I added the basing texture where the figures were to be affixed with Gorilla Glue. I got help from my granddaughter Tabitha who had fun doing this.
Tabitha at work!!Here you can see the sequential process that I followed – which allowed much easier application of the “Sand Dust” texture paint between the figures – but this added TIME.
After the “Sand Dust” had dried, I added three pigments to give better subtlety to the sand (and all the paints that I used are listed at the end of the post). Then I added varnish and flocking. By the end of June I had them completed and varnished as well as the leaders – but let’s get to their WIP next.
Whim Whim Brigade Commanders WIP Shots and Discussion
The brigade commanders went much more quickly as the drilling was limited to their heads! The figures looked great.
At the start – heads drilled out.
After assembly, I followed the same procedure as with the WWSR’s.
Two of the heads on paper clip wire after dry brushingBodies after drybrushing. I painted the figures then assembled them.
Before basing, I had these looking pretty good.
Then I was on to basing them like the WWSR’s, except this time on MDF bases.
Basing showing the figures with and without pigments on the sand on their bases.
Enough WIP I’d say – let’s jump into some…
Eye Candy
1st WWSR from the front in line formation1st WWSR in column formation2nd WWSR in line formation from the front2nd WWSR in column formation
And the leaders:
Leader with a blue turban from the frontLeader with a Blue turban from the sideLeader in armor from the frontLeader in armor from the sideOlder Leader with a red turban from the frontOlder Leader with a red turban from the sideBoth WWSR’s and the three Brigade Leaders assembled
These did make their first tabletop battle at Historicon in July, as did another Whim Whim unit – but I’ll save those pics for the next post. That will be coming shortly (so I can get caught up)! Let’s just say it will be cavalry units that required some modeling for sure.
I now have a full box of Whim Whim and Noobi – though in retrospect I should have slightly trimmed the spear shafts to fit better height-wise in the Really Useful Box.
One box of Whim Whim and Noobi!
I hope that this was enjoyable to read. Your feedback in the comments section is always appreciated – and thank you for looking!
And yes, I still have much more Ozz to come…
Miscellaneous details and references for those interested in that sort of thing:
For all of my earlier posts on Wars of Ozz games, figures, units, and other related projects – please see this page.
PAINTS, INKS, GLAZES, SHADES, WASHES, PIGMENTS, FLOCKING, GLUES AND MORE THAT I USED ON THESE TWO WHIM WHIM SPEARMEN REGIMENTS:
Number 6 steel washers
Iron Wind Metals Banner Spear Head Sprues SKU #DH507
As you may want to check out the excellent Wars of Ozz figures’ range – there are two places to get them and to get the rules (and I make no money from this btw). The game rules and the figures are available from the next two places:
After finishing off my Quadlings (for the moment anyways), I decided that it was time to work on some of the troops from the southern “underbelly” of Ozz. These southerners are composed of Whim Whim tribesmen, their ally the Noobi, and the Gillikin cousins known as the Temujicans.
The World of Ozz – so far!
I decided to start off with the Noobi as the figures really intrigued me. They look like tribal Oompa Loompas, although with orange skin and green hair. They inhabit the Lost Jungles of Noobi. I had two regiments of them plus some leaders and witch doctors that I got from Russ Dunaway (Old Glory) – that have not yet been put on the Wars of Ozz website.
The regiments are SKU#1600, “Noobi Warriors with Blowguns“. They are listed on the website as Noobi – but currently fall under the desert-dwelling Whim Whim as organic troops (not costing extra points like other allies would).
Their Marksmanship is very good at 7/10. As would be expected, these little guys are not great in Melee with a value of 4/10. But they will stick around in a fight (Resolve at 7/10) and are better than average at taking it to an enemy (Elan at 6/10).
Each Whim Whim brigade can have up to 2 of these Noobi regiments at a cost of 5 points each. The downside to these is the ranges of the blowguns are only 4″ for short and 8″ for long (as compared with muskets which have ranges of 7″ for short and 14″ for long, or carbines which have ranges of 4″ for short and 8″ for long). So blowguns are like weaker carbines as far as range goes.
But, an advantage for them is that at short ranges the Noobi can get 1.5 bases of firepower (rounded up) into the fight which is a big increase. A challenge is they move at Munchkin speed, so getting them into a fight or into range takes time.
The figures are metal, and despite the Noobi’s diminutive height, are 28mm in scale. The Noobi are supplied in multiple poses that allow one to vary each of the five bases for each regiment. There are metal feathers that come with each SKU that could be affixed to either the blow guns or the Noobi – I went with the latter option and drilled out mounting slots on the different heads. While according to the Ozz canon, the Noobi have orange flesh and green hair – no mention was given as to eye color. Therefore I went with pink/magenta as I though, why not?
The Whim Whim can only have one bowmen unit in a brigade, and they have no organic artillery. Therefore, having these Noobi provides adds a crucial missile capability. Time will tell if there will be more types of Noobi going forward.
The leaders and Witch Doctors will be SKU#1601 I believe – and I had enough for two leader bases (each having a leader and a drummer) and two witch doctors. The leaders are not special, getting only one skill, but the Witch Doctors get three spells instead of just two. The leader and Witch Doctor figures are not currently shown on the website, but should be soon.
I worked on these in parallel with efforts on Admiral Jinjur’s Personal Band. I had been very convention-busy in April (HAVOC AND MAYHEM) and in May (HUZZAH Goes Hollywood. Let’s not forget that the golf season kicked off in April too. So, while I finished these at the very end of April, I am only getting this post up now. I am also getting ready for a post on a some Whim Whim that are now done. As you have seen I have kept up with post-convention and post-golf tournament posts instead. Now, for the moment, more posts on miniatures (at least today).
Now on to my progress on the Noobi:
WIP Shots and Discussion
First, clean up and wash the figures! At this point I also drilled out for the feathers.
All washed! I organized the figures and primed them.
I used a mix of grey and white primer with a brush instead of an airbrush. Why? Well, the primer paint I was using was getting old and getting stuck in the airbrush – and I hate to waste anything. The primer was still useful with a brush.
After priming, I applied a dark wash, then once dry added a dry brush application with a white paint. Then it was on to applying speed/contrast paints and some shading and highlighting as needed. The two regiments were painted similarly – with some differences. I planned to differentiate the bases for easier tabletop play down the line.
Here below are shots of some early work on the regiments:
And the individuals:
The individual figures in progress.I think he’s upset because of “pink eye”…
Below is a gallery of the figures right after varnishing (with an airbrush) before I added flocking.
Now, let’s add some…
Noobi Eye Candy
The first regiment got blue and orange tufts:
1st Noobi Blowgun Regiment in line.1st Noobi Blowgun Regiment in a column of single bases.1st Noobi Blowgun Regiment in a modified line as seen from the left.
I gave the second regiment red and blue tufts:
2nd Noobi Blowgun Regiment in line.2nd Noobi Blowgun Regiment in column.
Then the leader bases and Witch Doctors:
A Noobi leader with his drummer.The other Noobi leader and his drummer.I gave this Witch Doctor an orange and purple mask.For this Witch Doctor, I went with a blue and yellow mask.All the individuals together.
These were fun to paint and I look forward to their first tabletop battle at Historicon in July! Any feedback is always appreciated – and thank you for looking!
And yes, I still have much more Ozz to come…
Miscellaneous details and references for those interested in that sort of thing:
For all of my previous posts on Wars of Ozz games, figures, units, and other related projects – please see this page.
PAINTS, INKS, GLAZES, SHADES, WASHES, PIGMENTS, FLOCKING, GLUES AND MORE THAT I USED ON THESE NOOBI WARRIORS, LEADERS, AND WITCH DOCTORS:
As you may want to check out the excellent Wars of Ozz figures’ range – there are two places to get them and to get the rules (and I make no money from this btw). The game rules and the figures are available from the following two places:
With apologies to Paul Revere, of course! (these DO have red coats!)
But this post is not about one Quadling regiment – it is about 3 infantry regiments (63 figures), 2 artillery batteries (12 figures), 2 generic brigade commanders, a named brigade commander (Rolf von Guufling), a Quadling faction witch (Glenda the Sorceress), and 2 hero conversions (Zeb the Scribe of Ozz and Wood the Courier of Ozz). Yes, that’s 81 figures, AN ENTIRE QUADLING BRIGADE!
Quadlings are the “beefy farm boys” of the world of Ozz. They are the most human-like of the factions, and are great friends with the Munchkins. Their color fixation is red. Most of their army is made up of militia. I had not had any of my own Quadlings on the tabletop at previous conventions.
I was about to hit another two gaming conventions (HAVOC and MAYHEM) in April. I am also going to HUZZAH! in May. After 3 weeks of being away on vacation, I returned back from Florida on March 19th, hoping to make a dent in my mass of Quadlings. These I had previously gotten from Greg Priebe (80 figures) and Chris Palmer (1 figure). It would make up an entire Quadling brigade plus two heroes – but the HAVOC convention would start on April 5th – could I do it? In just 17 days? I decided to try to and plow on and get a whole brigade of figures done for my upcoming Wars of Ozz convention games. I finished on April 4th!
As I did not have enough time to do my usual type of post with WIP and all that – I focused on painting these – and getting them fully tabletop-ready. So this post will just be fully painted stuff. I’m not even going to add the paints this time! (ok I might edit and add them later next week).
So enjoy the photos – and if you are coming to an upcoming convention (add HUZZAH! to that list too), these will be in play – so join me!
Here we go – EYE CANDY!
Eye Candy
1st Quadling Infantry Regiment
This (and the other regiments I painted) are all Northern Quadling regiments – with a slighly better Melee value of 7/10 and a Marksmanship value of 6/10 than other Quadlings. Their Resolve and Elan are average at 5/10 and 6/10 respectively. As all of these regiments are the same sculpts, I painted each with slightly different colors to match the flags that Buck Surdu designed. On this regiment I used a blue facing theme of color over white pants. The plumes on the shakos are red. They are all armed with muskets.
2nd Quadling Infantry Regiment
I went with a sallow yellow-facing theme over light grey pants – and put white plumes on the shakos.
And a side view below:
Some close ups:
4th Quadling Infantry Regiment
For the 4th, I went with a bright green-facing theme over dark grey pants – and I put red plumes on the shakos. I skipped the 3rd because its flag is red, and I wanted a contrast with the red coats!
Marching in column:
Lastly, a gallery collection of views:
1st and 2nd Quadling Light Artillery Batteries
These I only varied in the plume colors (white and red). I also painted the guns slightly differently. They have Marksmanship and Melee values of 6/10 and 4/10 respectively. They do have good Resolve at 7/10 and the Elan of 6/10 is good for artillery.
2 Generic Brigade Commanders
Overall I had 7 mounted leader figures to deal with (each regiment had one, I had the leader pack with three from Greg Priebe, and Chris Palmer gave me one at Fall In 2023). This allowed me (if you had not previously noticed above) to vary each regimental commander’s pose for each infantry regiment. I decided to use two of the remaining ones as generic brigade commanders – and save two more as conversions for Ozz heroes for which there are no dedicated figures to buy. For these two, I painted them slightly differently as they were the same pose.
Rolf Von Guufling, named Brigade Commander
A named brigade commander has 2 additional abilities/skills versus generic ones that have only 1. Of course, the generic ones are free to each brigade, and a named one cost 2 points. Greg’s lot of Quadlings included named Rolf, with his plate of cookies (which as anyone who knows me that the cookies HAD to be chocolate chip). He has Magical Protection plus one additional randomly selected skill. I thought that his bringing chocolate chip cookies to the battlefield merited a burgundy/pink theme for his facings – or maybe his magical protection…
A view from the front:
Glenda the Sorceress
Of course each faction has a witch – and this one is Glenda. She has spells: Transport (can send any unit 10″ in any direction – even behind enemy lines), Fleet Feet (can increase a friendly unit’s Movement rate), Confusion (can rattle an enemy unit’s attacks), and Good Luck (can improve a frienly units. She also can act as a commander with the ability of Charismatic as an as overall leader which is very powerful.
And a view from the side:
Ain’t she pretty in pink?
Zeb the Scribe of Ozz
As I mentioned, I converted two of the mounted Quadling commanders (all are mounted on giant boars) to heroes. They could be part of any faction. The first was Zeb the Scribe, an homage to Zeb Cook, a legend of the early days of Dungeon & Dragons and other games. Zeb played in one of my games at TotalCon 38 in February. I found some small resin books and used green stuff to create a sort of book rack for the figure. When attached to a unit, Zeb can rearrange one attribute of that unit to the best value of the four.
Zeb’s theme was very purple and yellow:
From the other side:
Wood the Courier of Ozz
This one I really thought a lot about as well as it is an homage to Dave Wood, my West Point classmate/roommate and longtime buddy. Over the last months, Dave has helped transfer many figures for other GM’s for Ozz games and more support of conventions – hence the “Courier” appellation. Dave is also a ultra-distance runner who thinks marathons are short (seriously). I knew that Dave’s drink of choice is Diet Mountain Dew (caffeine-free if possible as well). But this is Ozz, so what about Munchkin Dew? So, I found some doll house/diorama Mountain Dew bottles, and designed and sculpted a couple of baskets to hold them, and voila! I think it will be fun on the tabletop.
The figure gives +2″ of movement to an attached unit.
Another view:
A nice side view:
Cheers Dave!!
Lastly, I put all of the Quadlings into their own box – with Zeb and Dave joining my box of heroes separately.
That concludes this post. On April 5th – they will be on the tabletop!
I’d love to hear your thoughts on these – any favorites or suggestions on my insanity are all welcome fodder.
Until next time – thanks for looking!
Miscellaneous details and references for those interested in that sort of thing:
For all of my previous posts on Wars of Ozz games, figures, units, and other related projects – please see this page.
As you may want to check out the Wars of Ozz figures’ range – there are two places to get them and the rules (and I make no money from this btw). The game rules and the figures are available from the following two places:
In the world of the Wars of Ozz, Pirate-General (Admiral) Jinjur is said to:
sail on the (Great Nonastic Ocean). She commands a flotilla ofships big and small, all crewed by female pirates. Her pirates board ships and raid seaports, ruthlessly overwhelming any resistance.
Wars of Ozz, Section2.6.6, The Lands Beyond Ozz, pages 45-46
Her pirate forces are composed of females from all over Ozz – so her troops are made up of Gillikins, Munchkins, Winkies, and Quadlings – all the main races of Ozz.
Because I participated in the Kickstarter for Ozz a few years ago, I got a bonus of 4 of these figures for Admiral Jinjur’s Female Pirates (AJFP), SKU #OZZ-516 with my initial order. Later, when I bought a number of Gillikin-affiliated Ozz units from a UK estate sale – I was surprised to see that three fully-painted stands of AJFP had been thrown in the shipment. This left me with a need for another just 4 figures to round out the group for a full regiment of 5 stands/20 figures. Russ Dunaway was kind enough to get me not just 4, but 10 more – which if you are doing the math added up to 4 (Kickstarter) + 12 (estate sale) + 10 (Russ) = 26! Now, I could have said, ok, that’s enough for 20, but part of me decided to push the envelope for two full regiments. Rather than beg Russ again, I decided to roust out from my lead pile 14 Old School female warriors – mainly Amazons, halflings, and female fantasy types, and convert them into appropriate AJFP’s. These would be 25mm Ral Partha, Citadel, Ral Partha Imports, RAFM, and Grenadier figures, that were 30-40+ years old. I would give them new weapons and paint them up as members of the the various Ozz factions and size them to be close to the 28mm originals in terms of faction assignment.
This post is a definite result of my predilection for being focused on completion of a project. I could simply not move on to the Quadlings and leave these AJFP undone! While I am not IRO when it comes to converting figures, nor Roger when it comes to sculpting with green stuff, hopefully the figures that I will share below will be fine enough for my standards for the tabletop. After finding the suitable candidates for “drafting” into the AJFP, the next question I had was how to organize and use the figures these “draftees”. I decided that because the 12 already-painted estate sale figures had a sandy/beach base, I would make that regiment entirely of original AJFP Wars of Ozz figures on sandy bases. This would take adding two stands – one of Quadlings and one of part Munchkin/part Gillikin.
The other regiment would be based on grassy terrain, with a mix of original Ozz and the Old School warriors from the 1980’s. As I like to track where the Old School stuff actually came from, I will be sharing that research as well. Below you see my starting point – with all of the figures plus some of the conversion weapons. Some of the weapons were left over from other projects, and some were some I cast myself years ago. These would help me convert the draftees into more appropriate-looking Ozz types. While I hardly ever deviate from the “official” figures, I thought that this would be fine and a chance to paint up some older stuff and that was most intriguing.
All of the 40 figures shown here at the start – including many Old School figures still ensconced in their blister packs for the last 40 years or so.
Let’s start with the sandy-based regiment. As I mentioned, all of the figures were canon – original Ozz stuff. I think the three stands of estate sale figures were painted well enough. However, they were not fully varnished, and where they were, it was gloss – and I prefer matte as a final coat. Additionally, there was some paint loss/wear – and I would need to try to have the two new stands look similar to the estate sale stands – which also needed work.
A stand from the estate sale – showing the paint loss on a hat, some glossy varnish, and a base that needed work.
All three estate stands with the steel bases I added underneath.
For all of the figures that I would paint here – each would be painted in their faction colors – so red for Quadlings, purple for Gillikins, blue for Munchkins, and yellow for Winkies.
Early work on Quadling baseGetting close to the finish for the Quadling base
Below are in-progress close up shots of the three original OZZ-516 Munchkins and the one Gillikin that I used on the sandy-based AJFP regiment.
These 4 Quadlings, 3 Munchkins, and the the Gillikin figure, would go onto the green stuff covered polystyrene bases you see below, and then be flocked in conjunction with the estate sale bases.
Ready to be based with the three estate stands.
It turned out that flocking these to match each other was more involved than I initially anticipated. I ended up using a combination of chinchilla dust, cork rocks, washes, and tufts to try to make them look alike. The chinchilla dust came out more looking like snow so I needed to darken that up. The rocks and tufts helped. My two stands ended up thicker than the estate sale three, but I don’t think that will be a problem.
Sandy-Based Regiment
After finishing – here are the estate stands:
As for the two stands that I painted for this regiment – first the base with Munchkins and Gillikins:
3 Munchkins and a Gillikin
And now the Quadling base – btw painting these gave me an ear worm of Queen’s “Fat Bottomed Girls”:
And a group shot:
Now, let’s move onto the grassy-based AJFP regiment! Of course, there was a LOT more work to be done on the grassy-based regiment as it involved so many conversions.
Below you see the source of all of the figures I used for the grassy-based AJFP regiment – and I was able to find the origin of each except for one (and if you know that one please let me know!). The research here was not easy – even with the help of the Lost Minis Wiki and The DnD Lead websites – but those really helped. Check out both of them to see what you young folks missed – or what you old folks might remember.
As you can see from the chart above, six of the figures in this AJFP regiment were original OZZ-516 Wars of Ozz figures. They would primarily go on two bases – one with 4 Winkies and one with 4 Gillikins.
Here are a few shots of the original Winkies in progress for the grassy-based regiment:
Here are a few photos of the original Gillikins in progress:
Now onto the conversion figures. Six of these were Grenadier #3102, and were repackaged by Mirliton as female warriors. They were originally sculpted around 1992 by Sandra Garrity, and were called “Women of War”. Grenadier was later bought by Mirliton, and many of their miniatures were repackaged post-acquisition. These are not found on the Mirliton website so OOP.
I gave these warriors hats and pistols, plus I bent a few swords to look like cutlasses. My sculpting efforts here as I said are not great – and I learned to my chagrin that using old green stuff with the consistency of used hardened bubblegum (like from under a desk) is NOT what you want to use. Still, I used all as female Winkies due to their poses and sizes.
Below is one of the conversions – I made all to have a different look.
With a new big pistol and a big hat.
A few shots of the 6 Grenadier “Women of War” later in the project:
Added a slouchy hatAdded a bandanaAdded a tricorn hat and a pistol Bent her sword to look like a cutlassBent her sword to look like a cutlass and gave her a pistolGave her a bicorn hat and a freehand skull & crossbones
The next figure was also a Grenadier figure, but much older, and came to me in an eBay lot. I remember stripping off her bad paint job years ago, but that was all that I did with her. She is Grenadier 102 (v2) from the Fantasy Lords First Series “Females”. The figure is called “Female Assassin”, and dates from 1981. I gave her a bicorn hat and designated her as a Gillikin.
Next up are the Munchkin surrogates. I found 3 loose little female halfling figures in my stash that could stand in as Munchkins. I discovered that they were from the Ral Partha AD&D Adventurers Series. The figure is named “Female Halfling Fighter Thief” #11-102 (b) from “Halfling Fighter Thieves” circa 1989. This figure is the “b” version, and is a Tom Meier/Dennis Mize sculpt. I removed the staff, and modified one with a leftover Munchkin carbine from the Munchkin Light Cavalry project, one with a pistol, and one with a cutlass. Plus, no one got furry feet painted…
With a pistol and a bandanaWith a little garrison-like cap and a cutlassWith a Munchkin carbine.
The next one was to be a Gillikin. She is an Amazon figure originally sourced from Ral Partha Imports Fantasy Adventurers Series – FA-27 “Amazon with Sword” – from 1986. Back in the 1980’s, Ral Partha imports took Citadel figures and marketed them in the US under licence. I made her a Gillikin and left her alone – except to give her a purple shield. Maybe it was her chain mail bikini…
FA-27 in her blister pack. Nice price for back then – but “historical miniatures”? I missed that chapter in history!After priming, dry brushing, and an initial washReady to get based
The next figure was a bit of a mystery to research. It started with her blister package. As you can see below – the figure’s blister was mislabeled as FFA35 “Necromancer Slime Beast with Sword”.
Needless to say – she is not a necromancer. Her base had FA-19 on it, which allowed me to dig deeper and find her image here. The figure is actually FA-19 V2 “Female Fighter with Breastplate and Sword”. She was sourced from Citadel Miniatures US FA-19 (v2) from “Fantasy Adventurers” line circa 1982. From what I can tell, similar to Ral Partha Imports, this brand was either manufactured or imported by Ral Partha in the 1980’s. I modified the figure with a bicorn hat. As I thought she looked more as if she was wearing a tunic versus a breastplate – I painted her accordingly and as a Gillikin.
FA-19 on baseAfter conversion
The penultimate figure in the group of draftees was a RAFM figure of a female ranger and her hawk on her right arm. It appears that the figure was initially sculpted around 1986. Many RAFM figures (including this one) are still commercially available as Silver Fox Productions (SFP) now owns the RAFM lines. I sourced it from RAFM at some point maybe 8 years ago. It is RAFM Miniatures#3908 “Female Ranger”. I gave her a bandana and painted her as Winkie.
Love the handwritten SKU#!Later in the project
The last of the 20 draftees is a female figure with a dagger. That’s all I know as the figure’s base was devoid of any markings and I could not discover her origin. As it was the last female figure I found (that was not topless – I couldn’t bring myself to put topless Amazons into Ozz – and I have a bunch of those). As she is, she seemed ok, so she was in. I painted her as a Gillikin but added nothing else.
The mystery stabbing Gillikin.
Let’s see the finished AJFP grassy-based regiment:
Grassy-Based Regiment
This first base has 4 Winkies – 3 from OZZ-516, plus one Grenadier “Women of War” figure. The die is a 12mm die.
The second base has three Gillikins that are original plus the Grenadier 102 (v2) “Female Assassin”.
The third base has three of the Grenadier “Women of War” figures and the RAFM Miniatures#3908 “Female Ranger”, all as Winkies.
The fourth base has three Munchkins (the converted Ral Partha “Female Halfling Fighter Thief” #11-102 (b) figures) and the unknown Gillikin figure.
Rounding out the grassy-based AJFP regiment, the fifth base is composed of two of the converted Grenadier “Women of War” figures in the front rank, with two Gillikins in the back rank – the Ral Partha Imports Fantasy Adventurers Series – FA-27 “Amazon with Sword” and the Citadel FA-19 V2 “Female Fighter with Breastplate and Sword”.
Group shot of the AJFP on the grassy bases
These two AJFP regimentscount as my sixth and seventh unit respectively for Dave Stone’s “PAINT WHAT YOU GOT CHALLENGE 2023/2024” painting challenge that runs from December 26th, 2023 to February 29th, 2024.
Both regiments will play a major role in many of my upcoming games for the multiple gaming conventions that I plan on supporting as a GM. The good news is that they will provide some firepower to a brigade as they are treated as having carbines. The regiments are good at missile combat – having a Marksmanship value of 6/10. As for Melee, they are middle of the road with a value of 5/10. Their Resolve value is similar at 5/10, but their Elan value is a little better at 6/10. Each unit costs 5 points. As Buck says, it’s nice for players to have some “shooty units”!
My convention games are coming up fast. At present, that support level is now at 25 four-hour games from February through May across 4 different conventions in Massachusetts, Maine, and New Hampshire (TotalCon38, HAVOC, Mayhem, and HUZZAH!). Check them out and maybe just come?
A quick side note: I also got a surprise during the painting of these two regiments. My good friend Buck Surdu sent two more individual figures that can act as heroes in the game. One is “Boom Boom Palmer” (named after Chris Palmer). This figure can attach to an artillery unit and make it more effective. The other is Grand Admiral Priebe, who can give an attached infantry unit the ability to charge cavalry. THANKS BUCK!!
I did enjoy getting to paint both of these AJFP regiments- and to incorporate the Old School stuff really was a nice and fun change. But, now it’s back to more Ozz stuff!
As always, much thanks for looking!
And yes, I still have much more Ozz to come…
Miscellaneous details and references for those interested in that sort of thing:
For all of my previous posts on Wars of Ozz games, figures, units, and other related projects – please see this page.
PAINTS, INKS, GLAZES, SHADES, WASHES, PIGMENTS, FLOCKING, GLUES AND MORE THAT I USED ON THE TWO ADMIRAL JINJUR FEMALE PIRATE REGIMENTS:
Three original figure stands of Admiral Jinjurs Female Pirates
Old School miniatures as detailed above
Plastruct #91107 2.5mm polystyrene sheet
2″ square steel bases from Wargames Accessories (#21)
Shadow’s Edge Miniatures “6mm Dark Forest Plum” (flocking)
Shadow’s Edge Miniatures “6mm Dark Forest Blue” (flocking)
Gamers Grass “Yellow Flowers” (flocking)
Citadel “Agrax Earthshade” (wash/shade)
As you may want to check out the Wars of Ozz figures’ range – there are two places to get them and the rules (and I make no money from this btw). The game rules and the figures are available from the following two places:

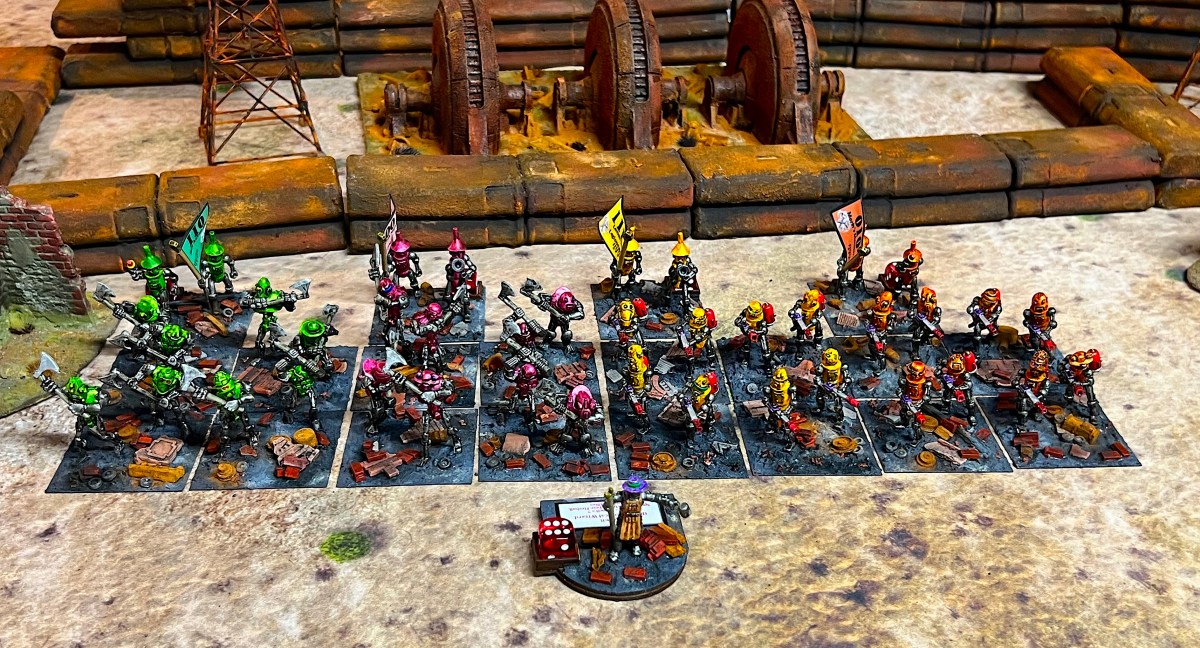
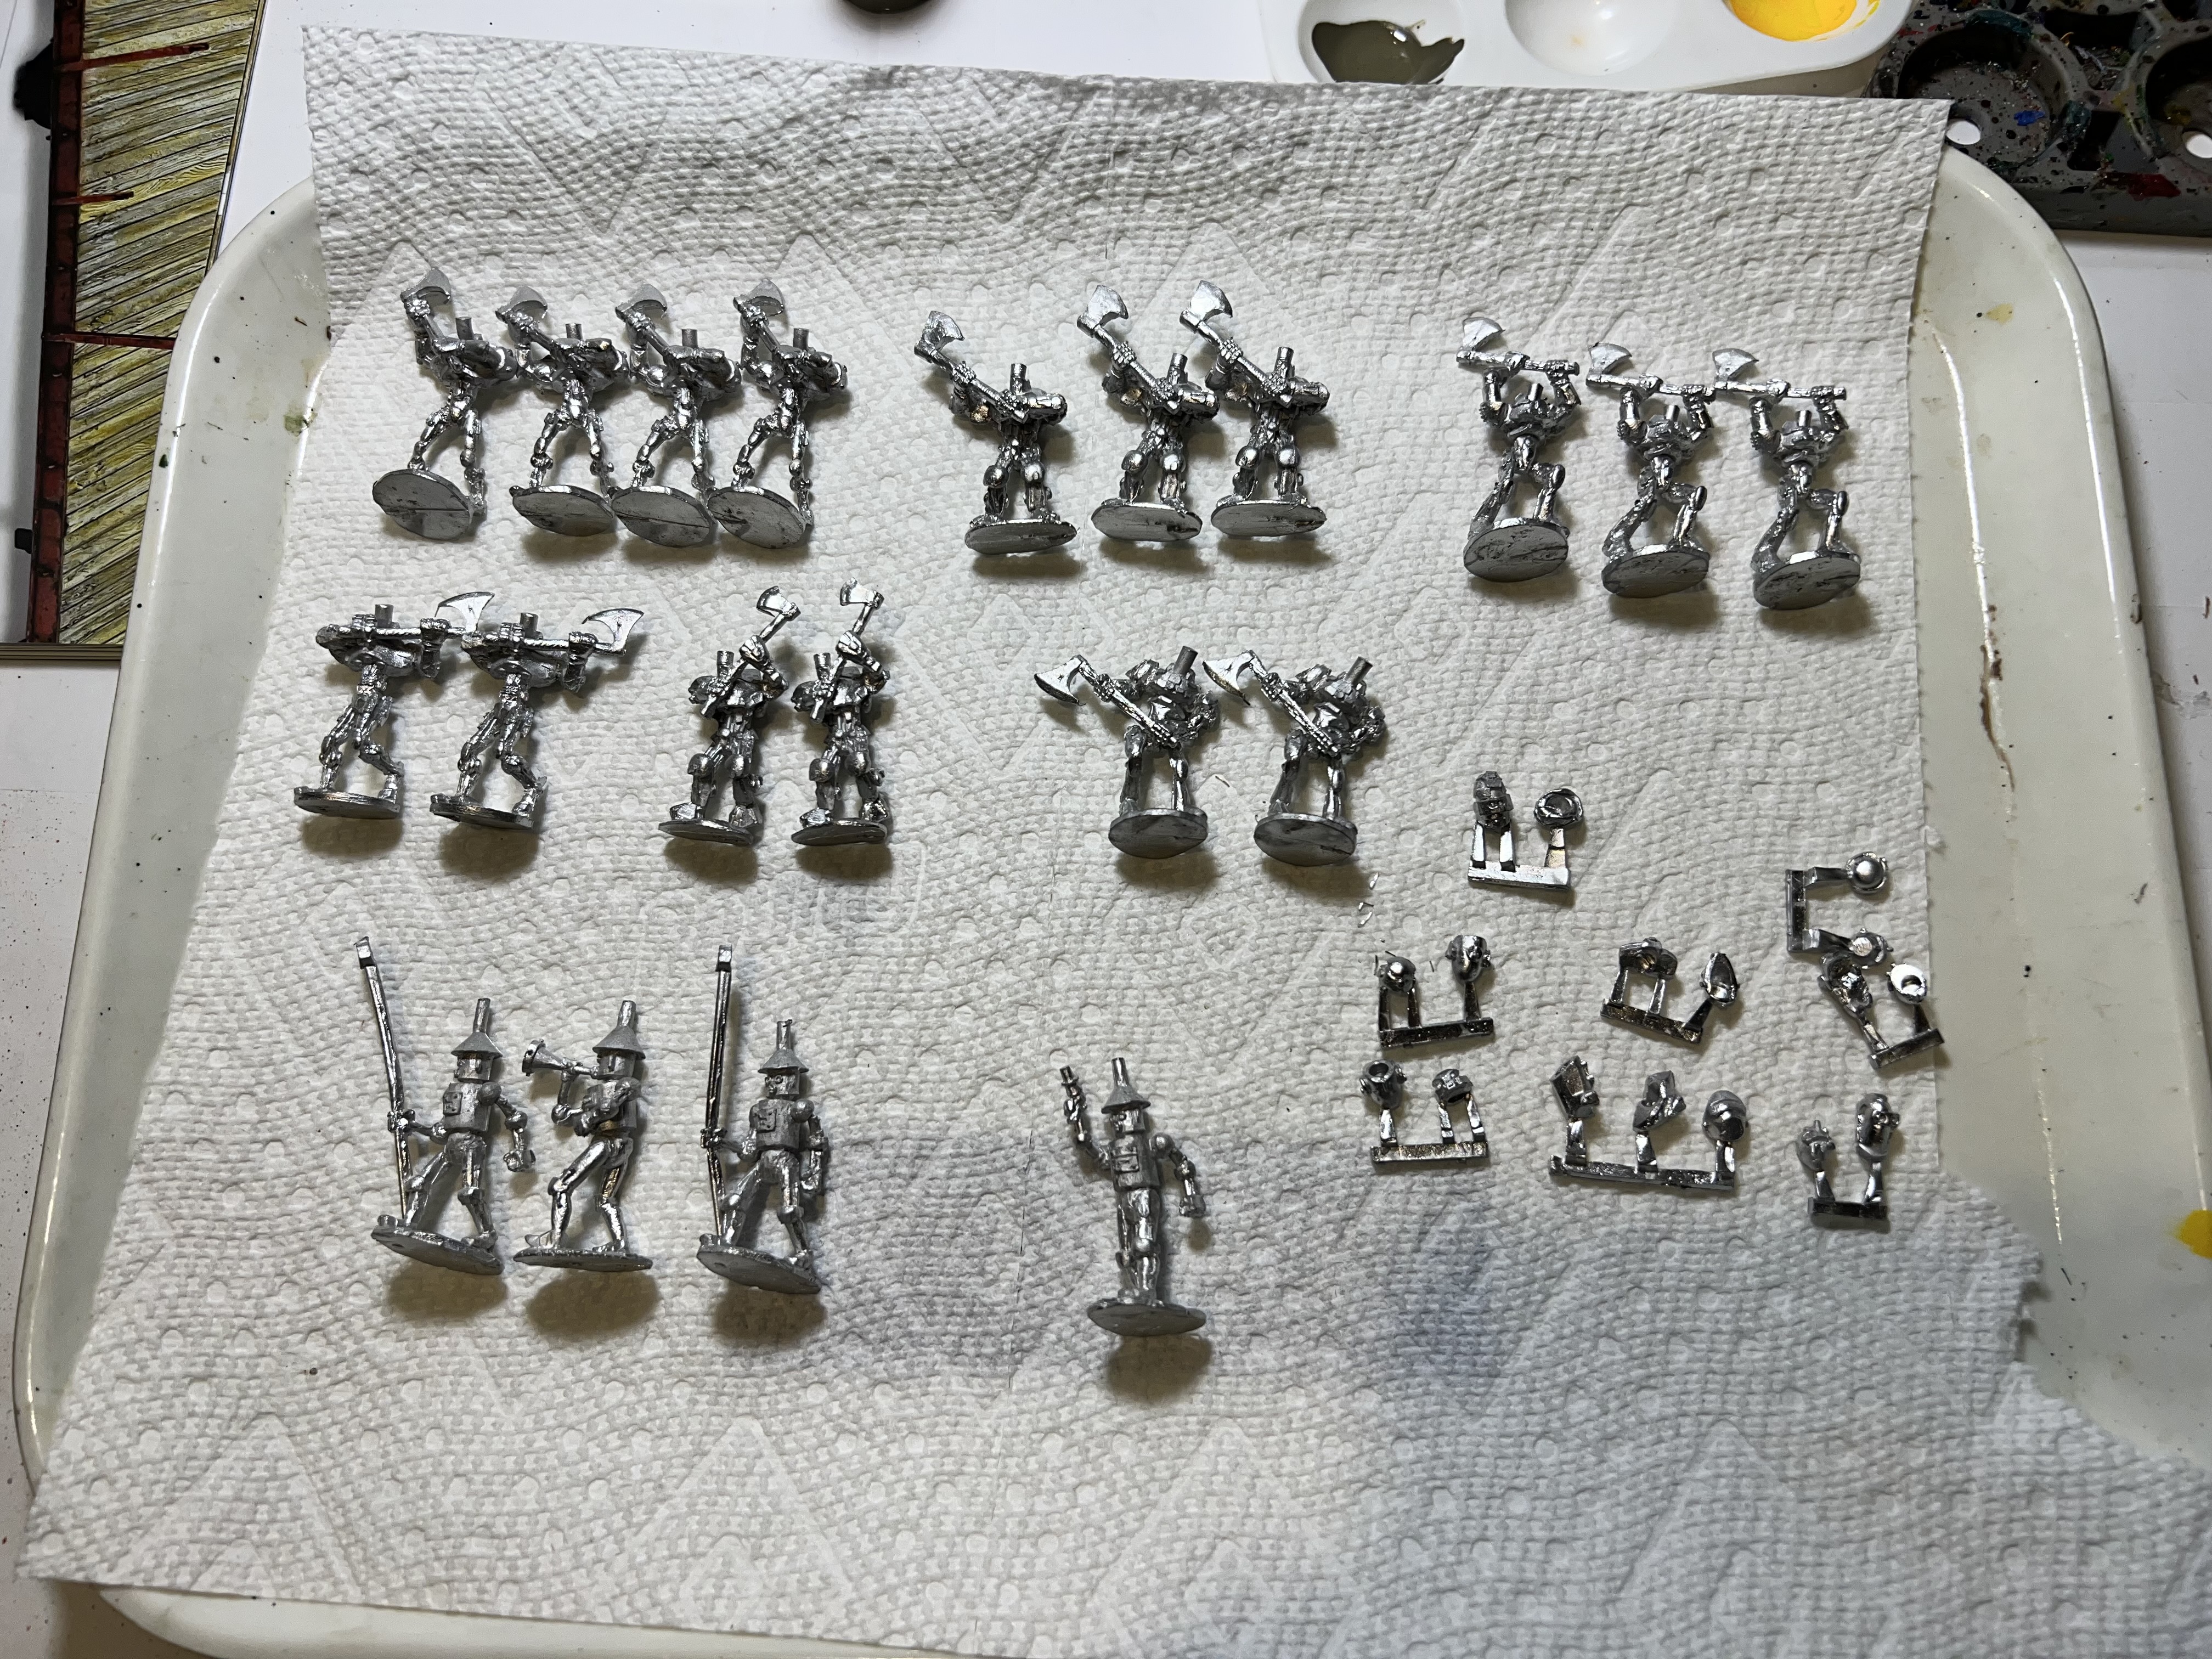
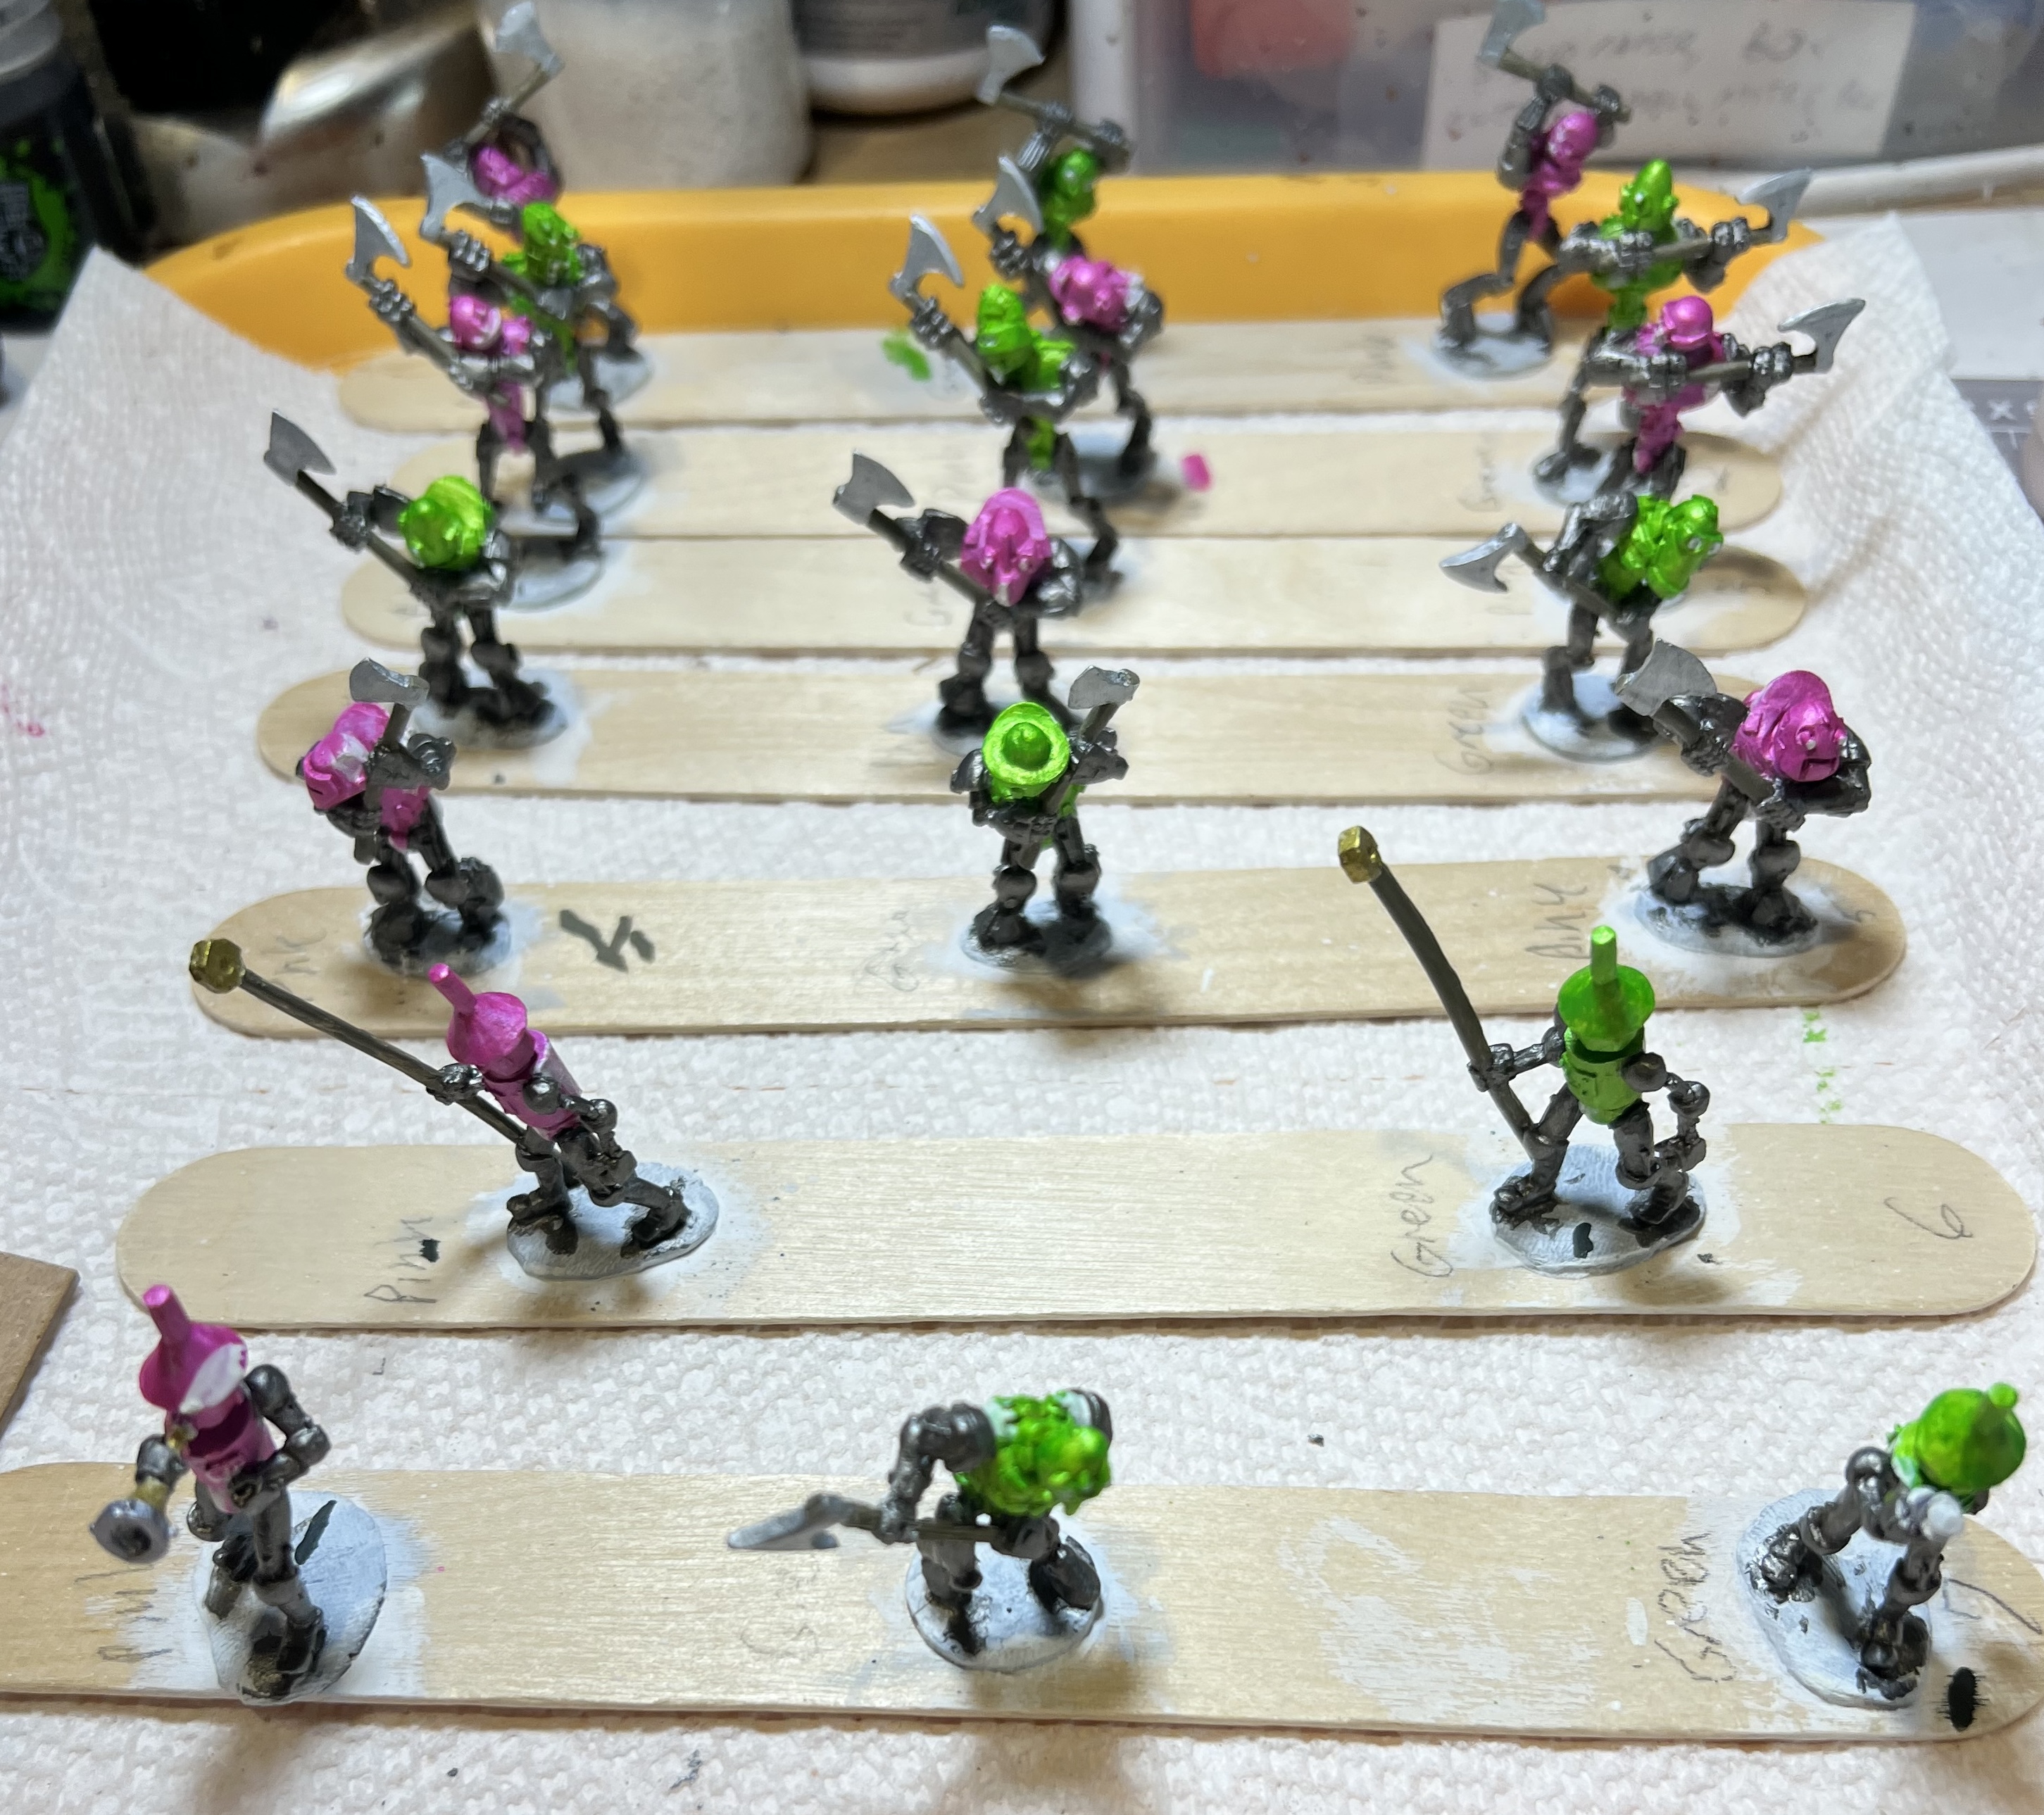
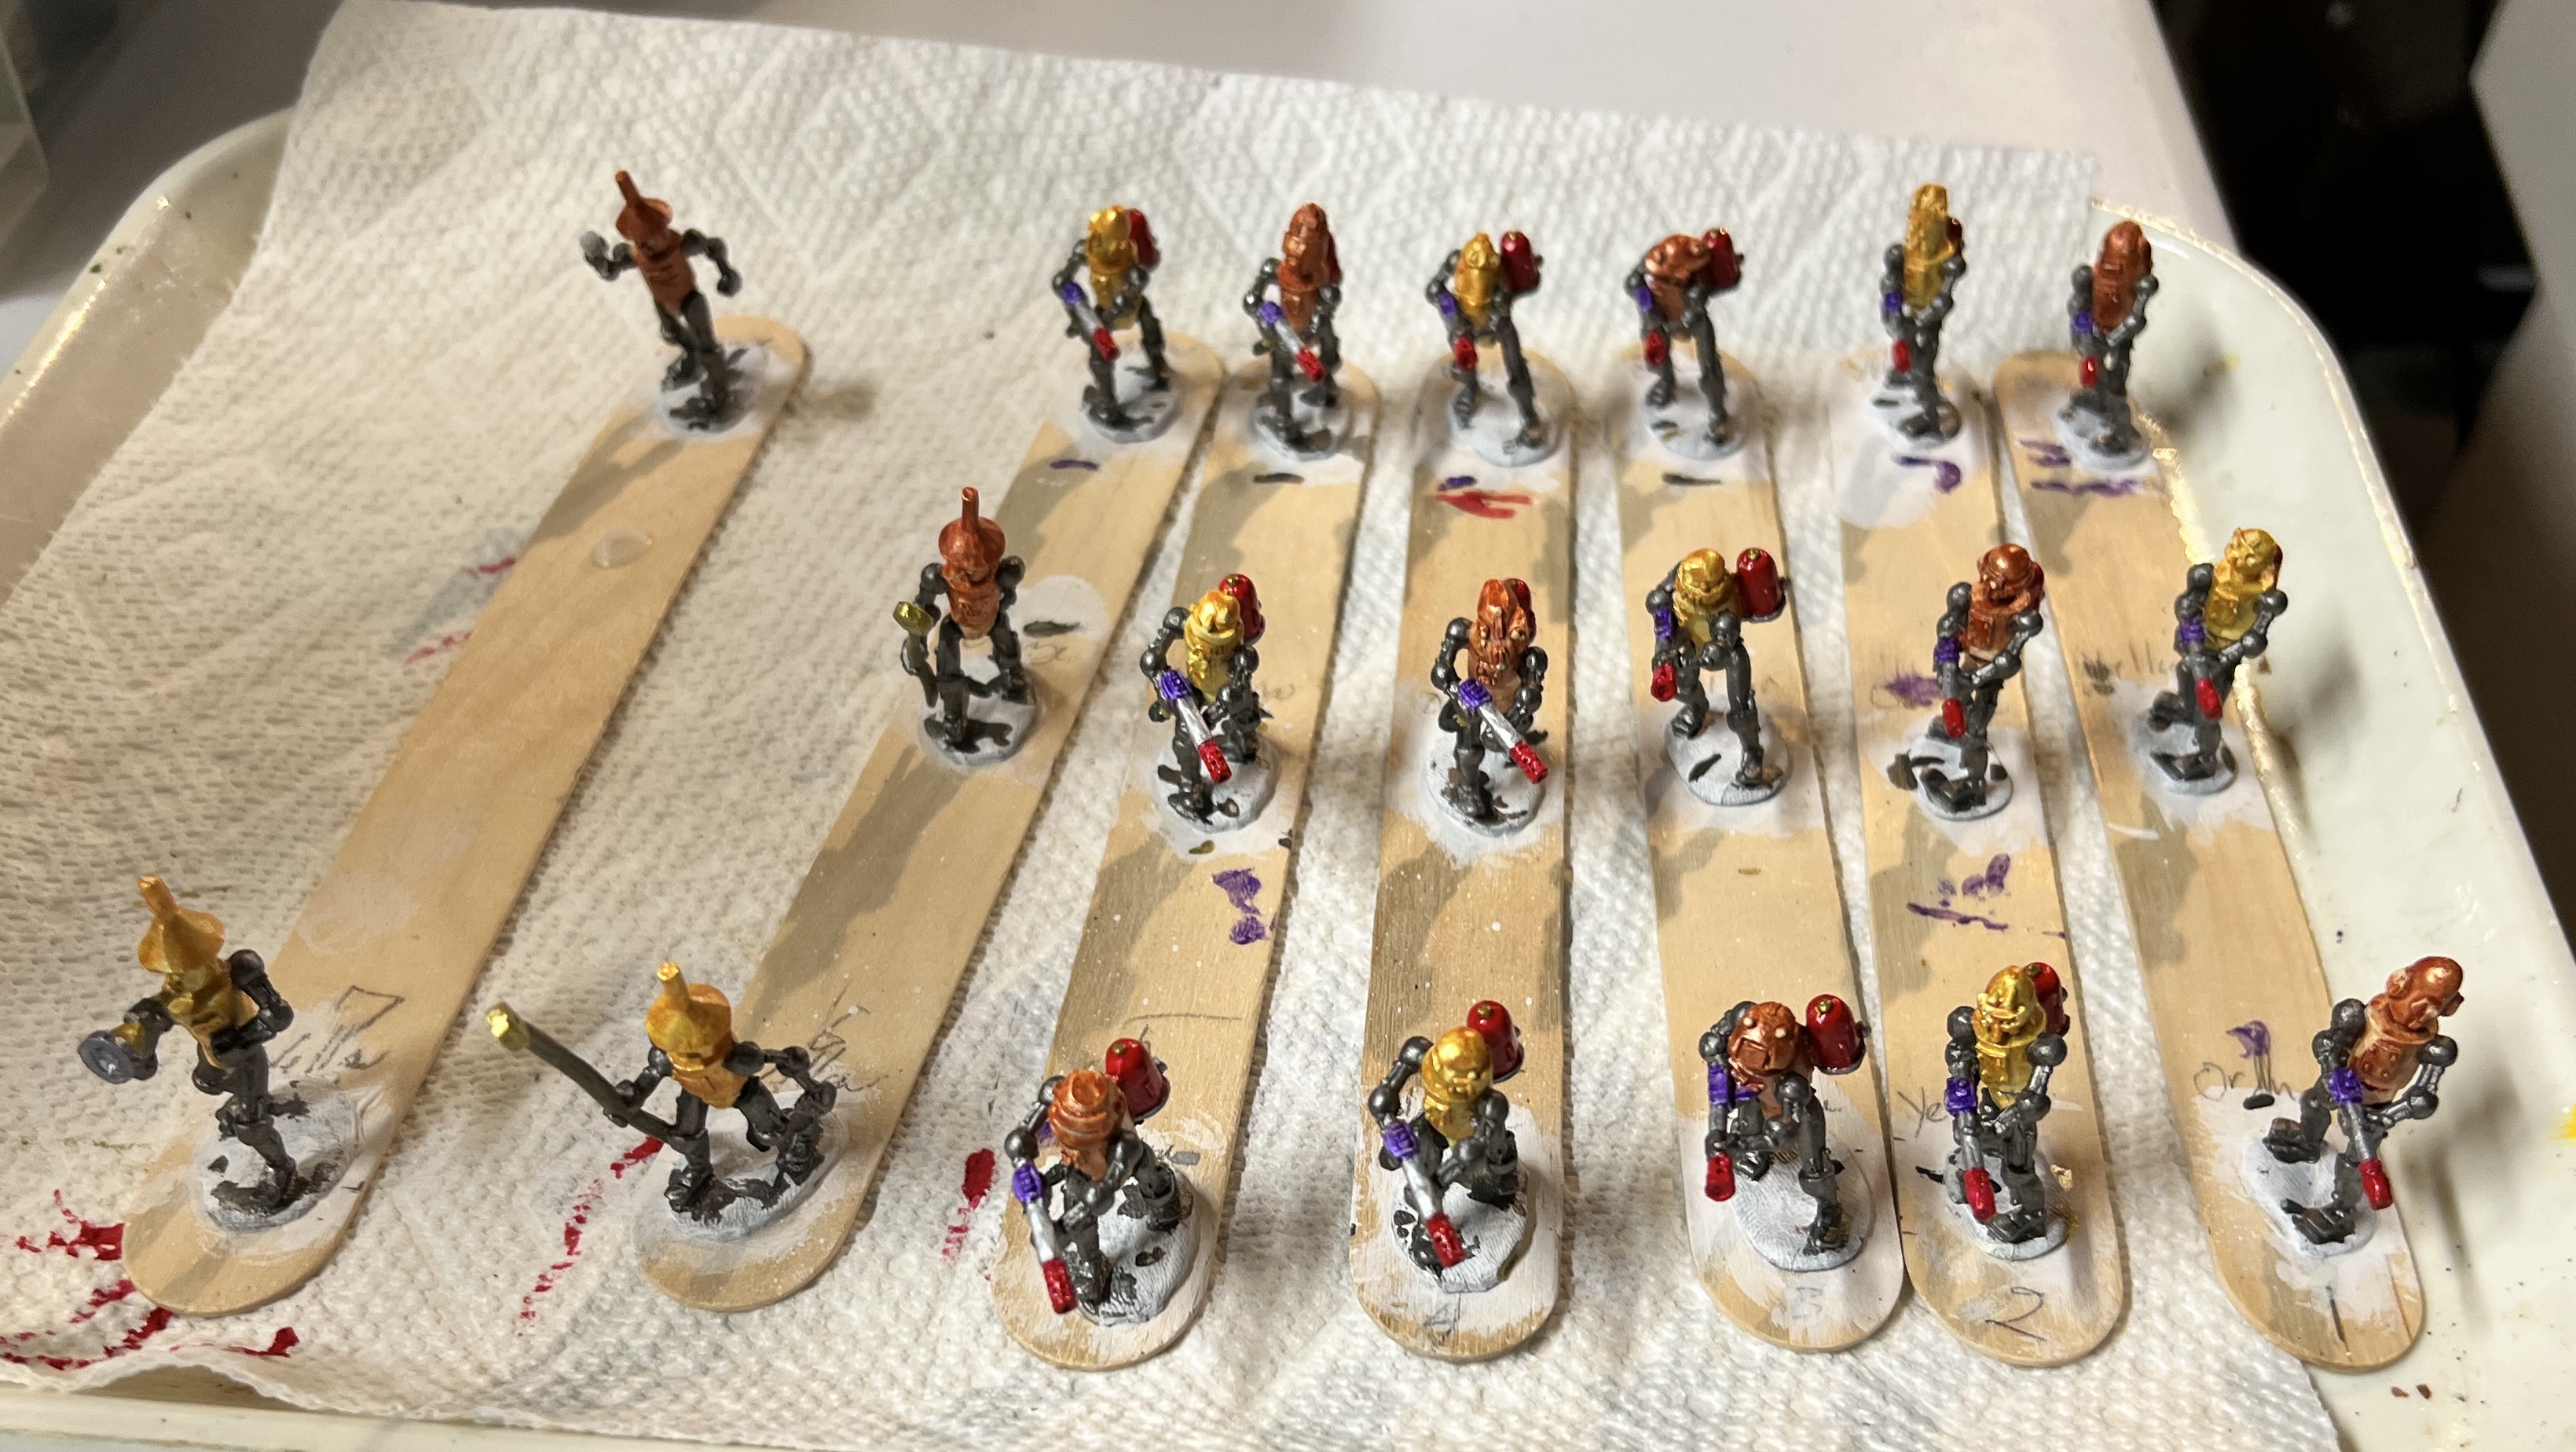
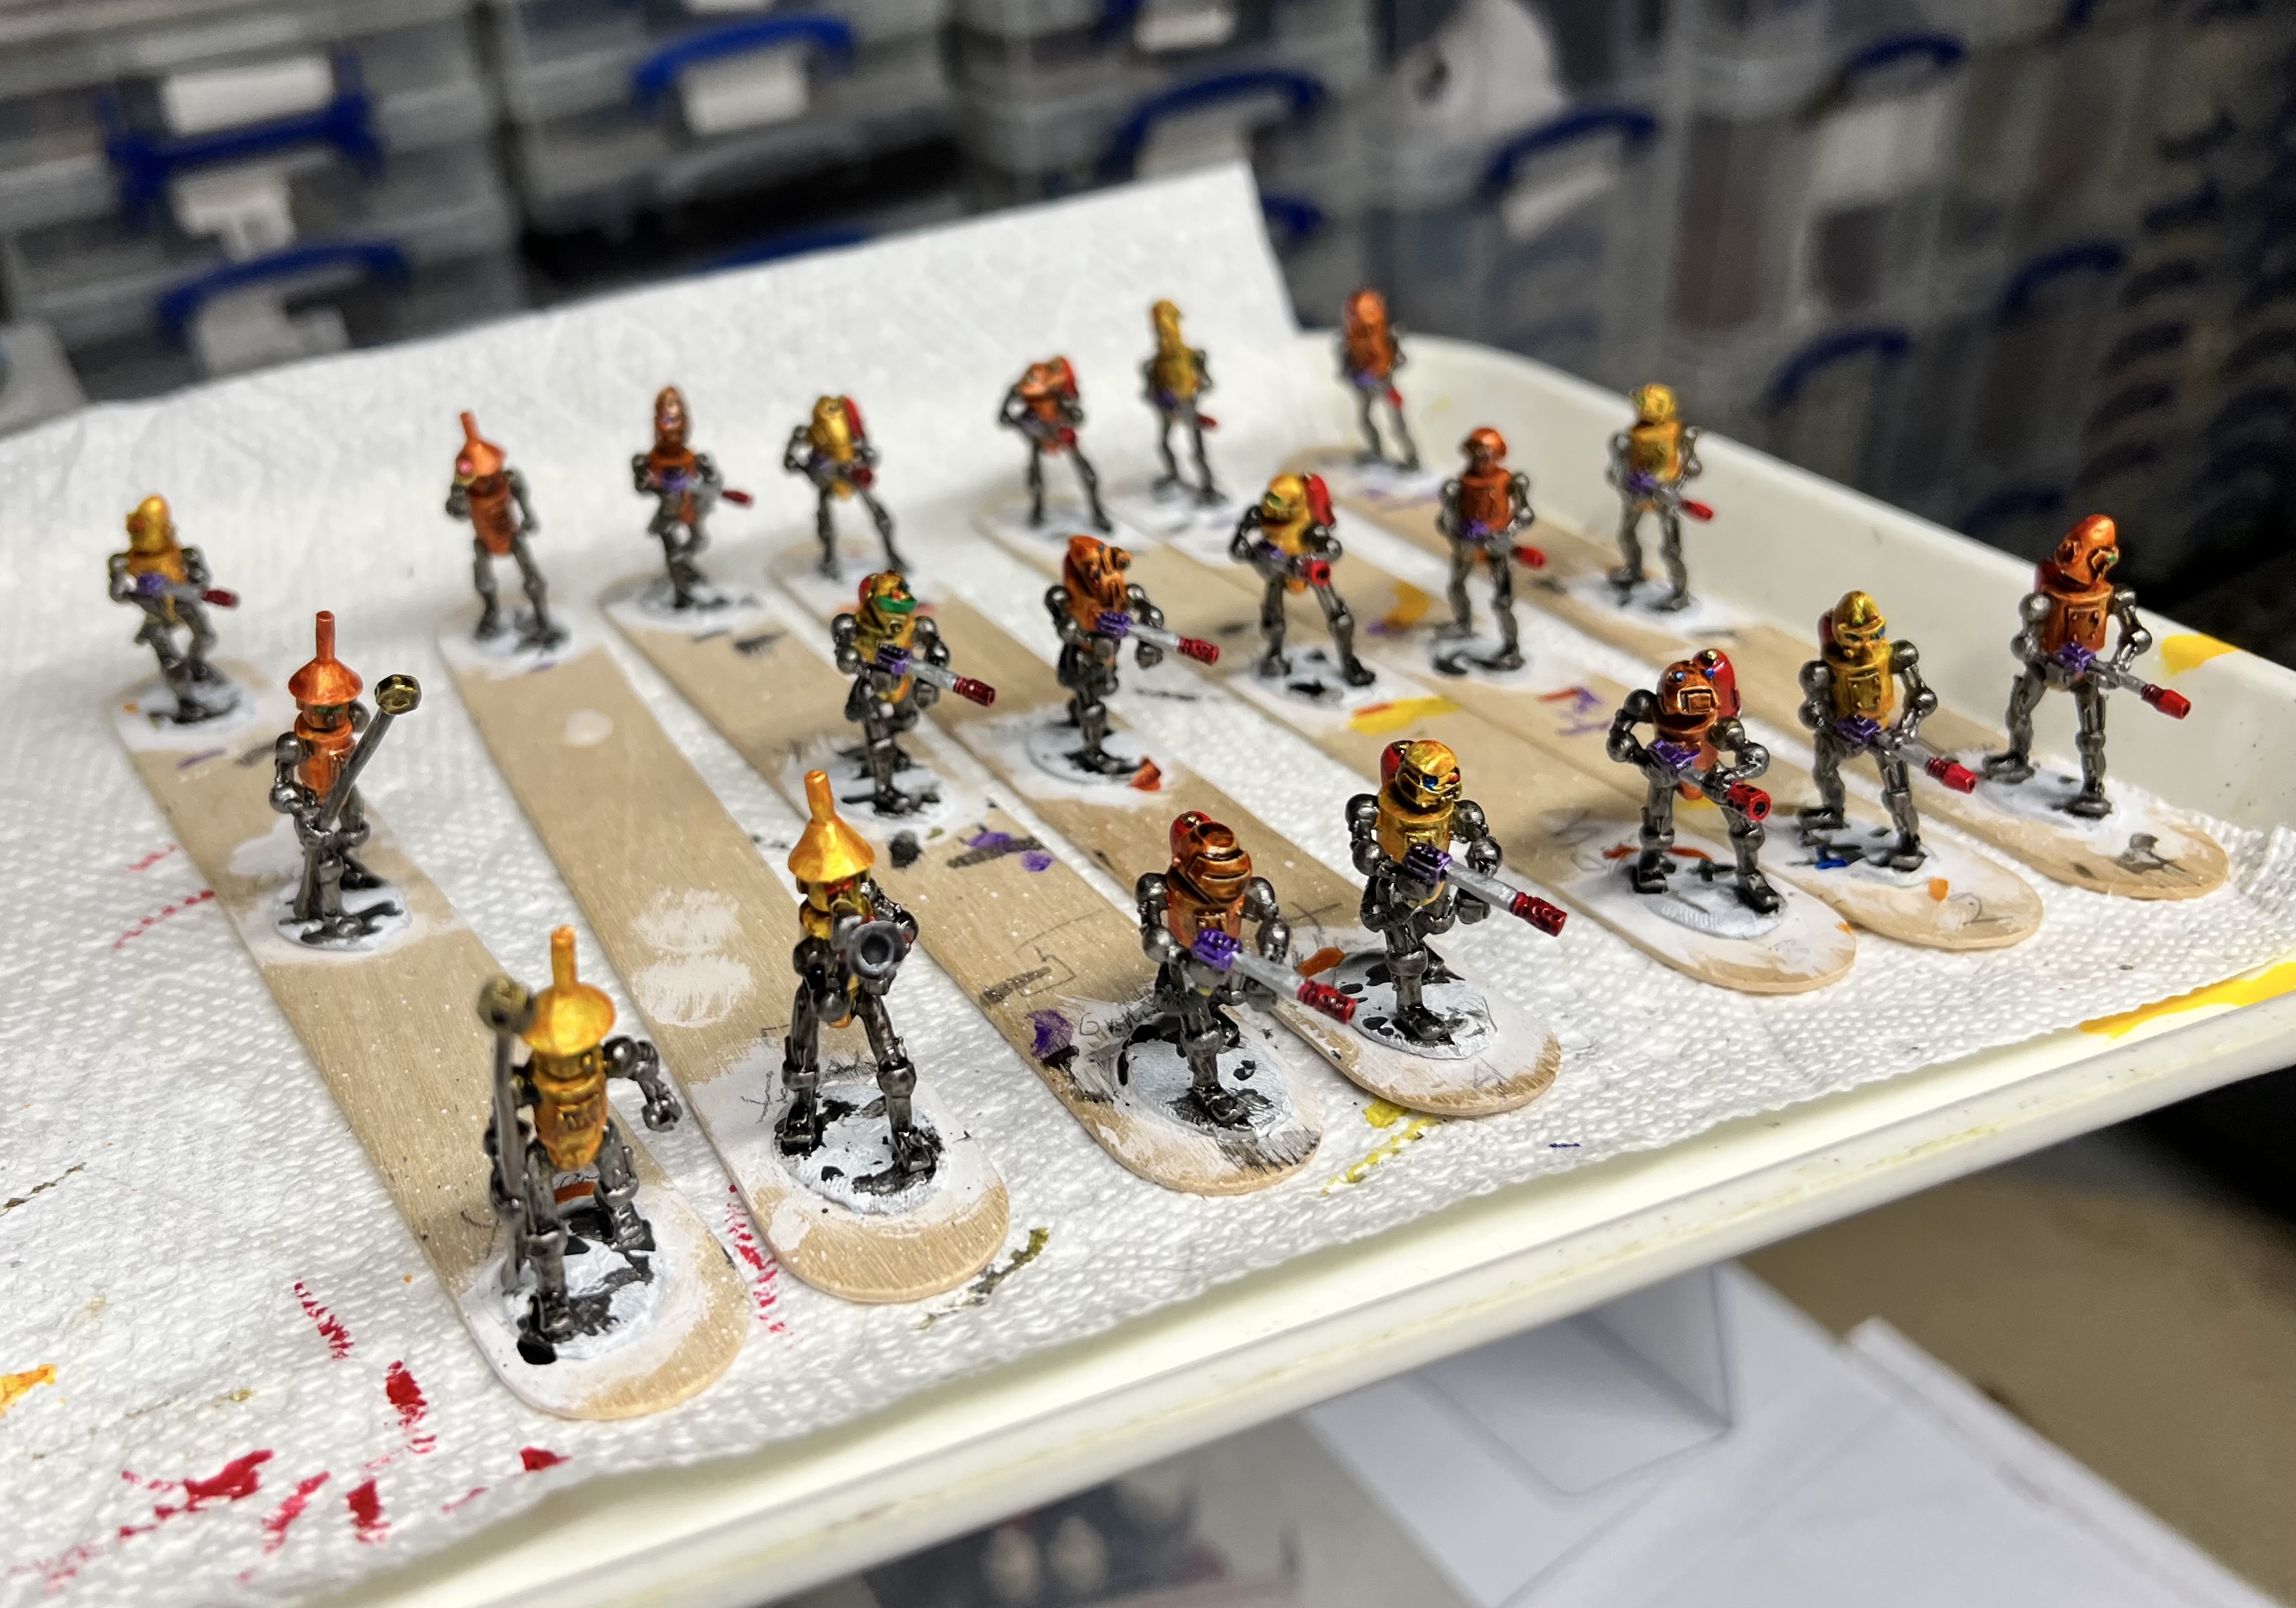

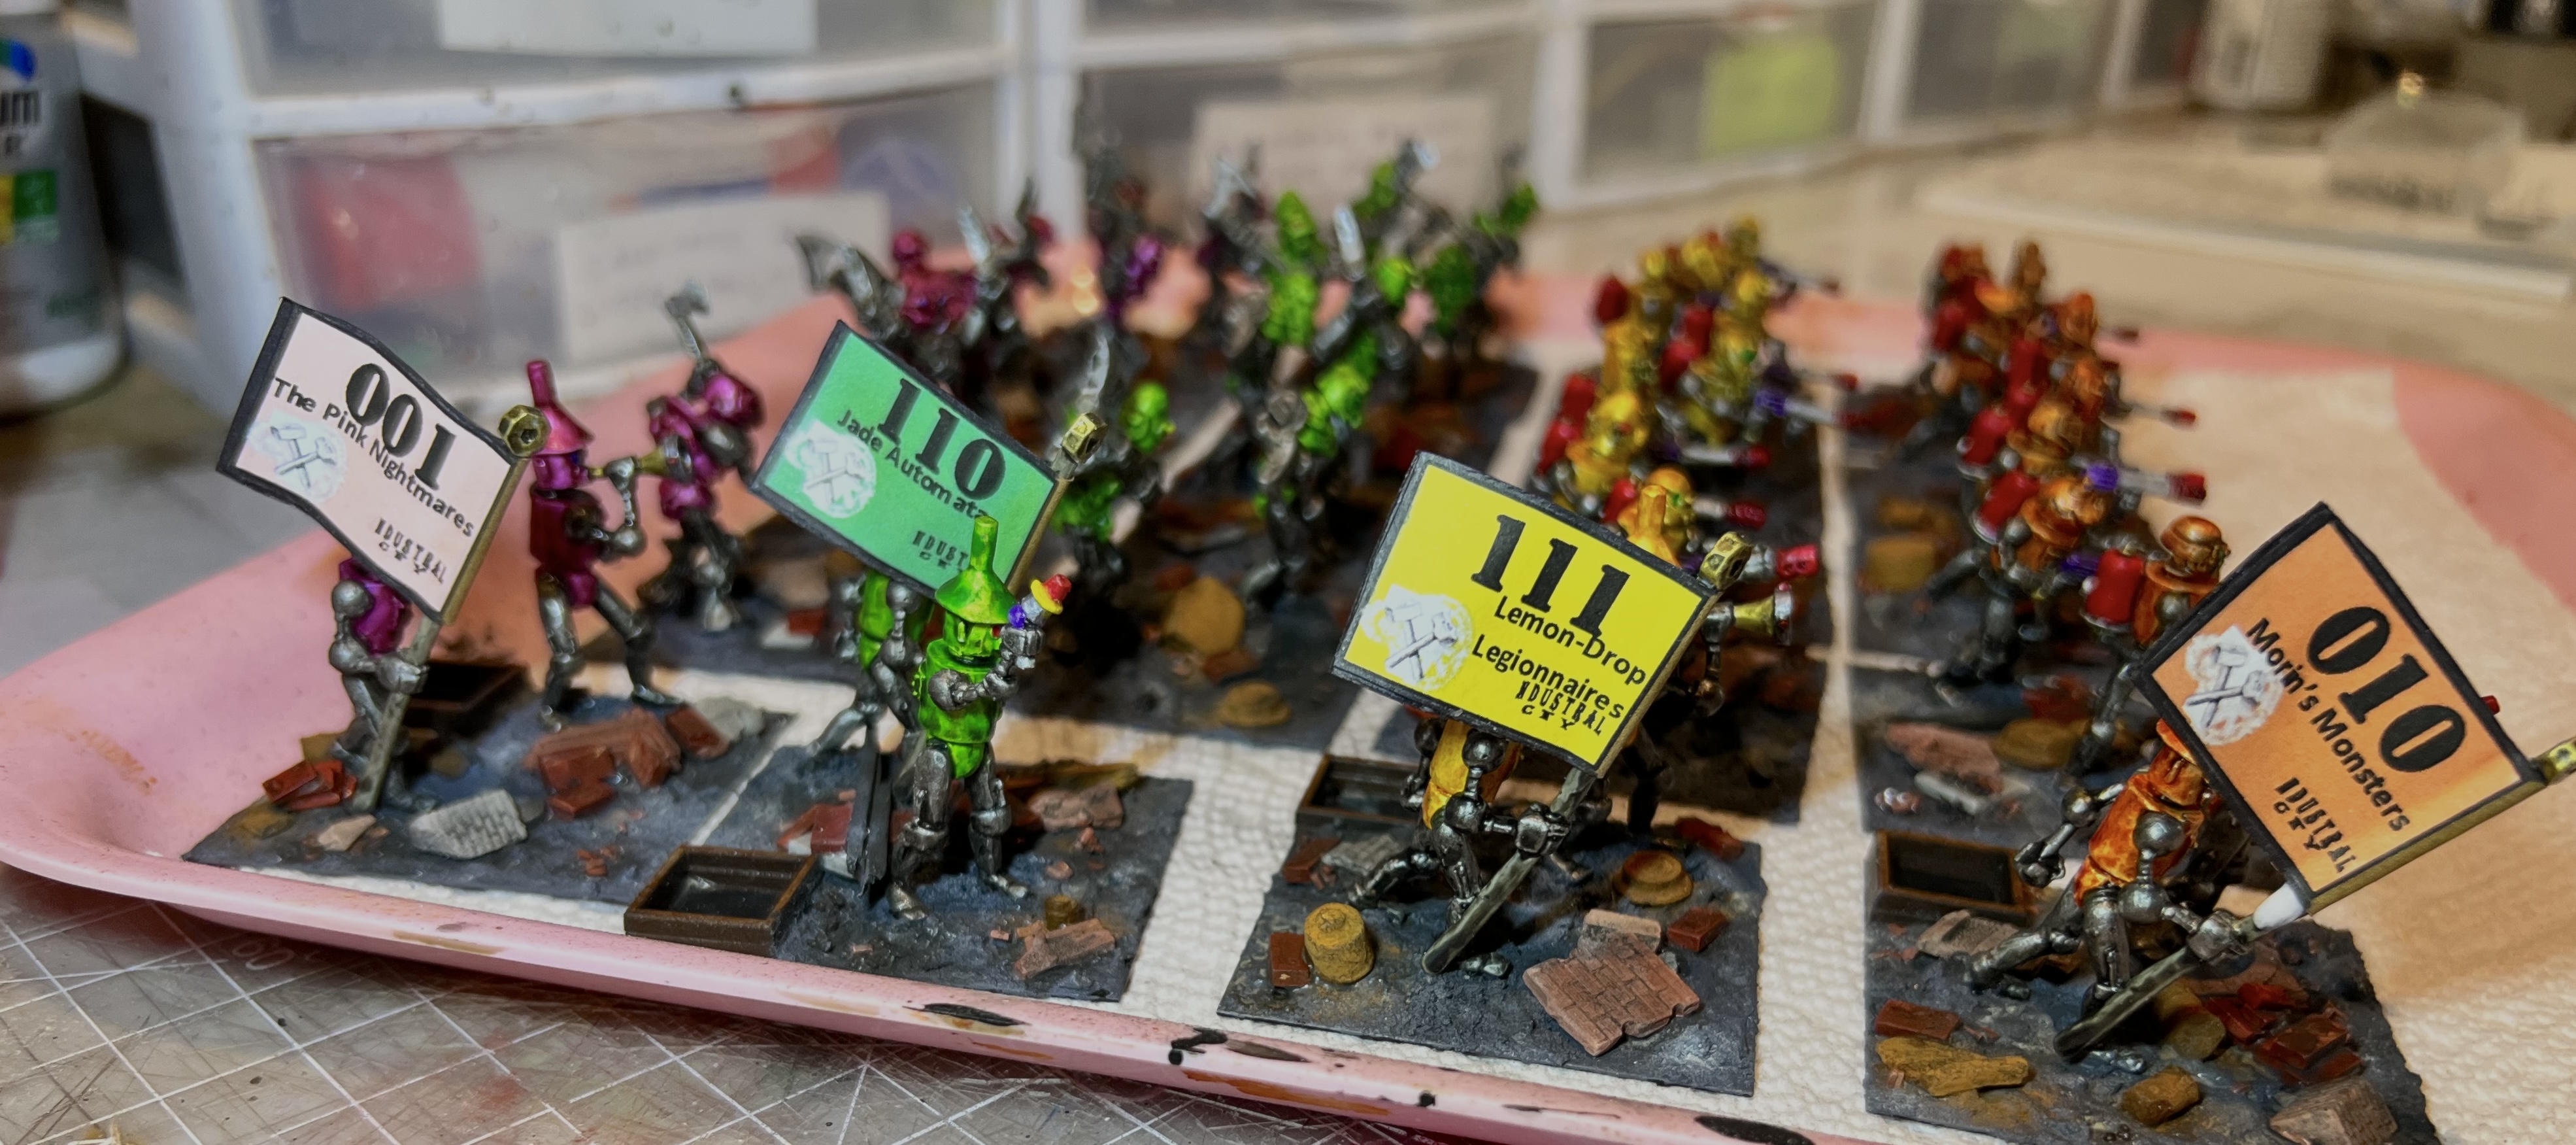
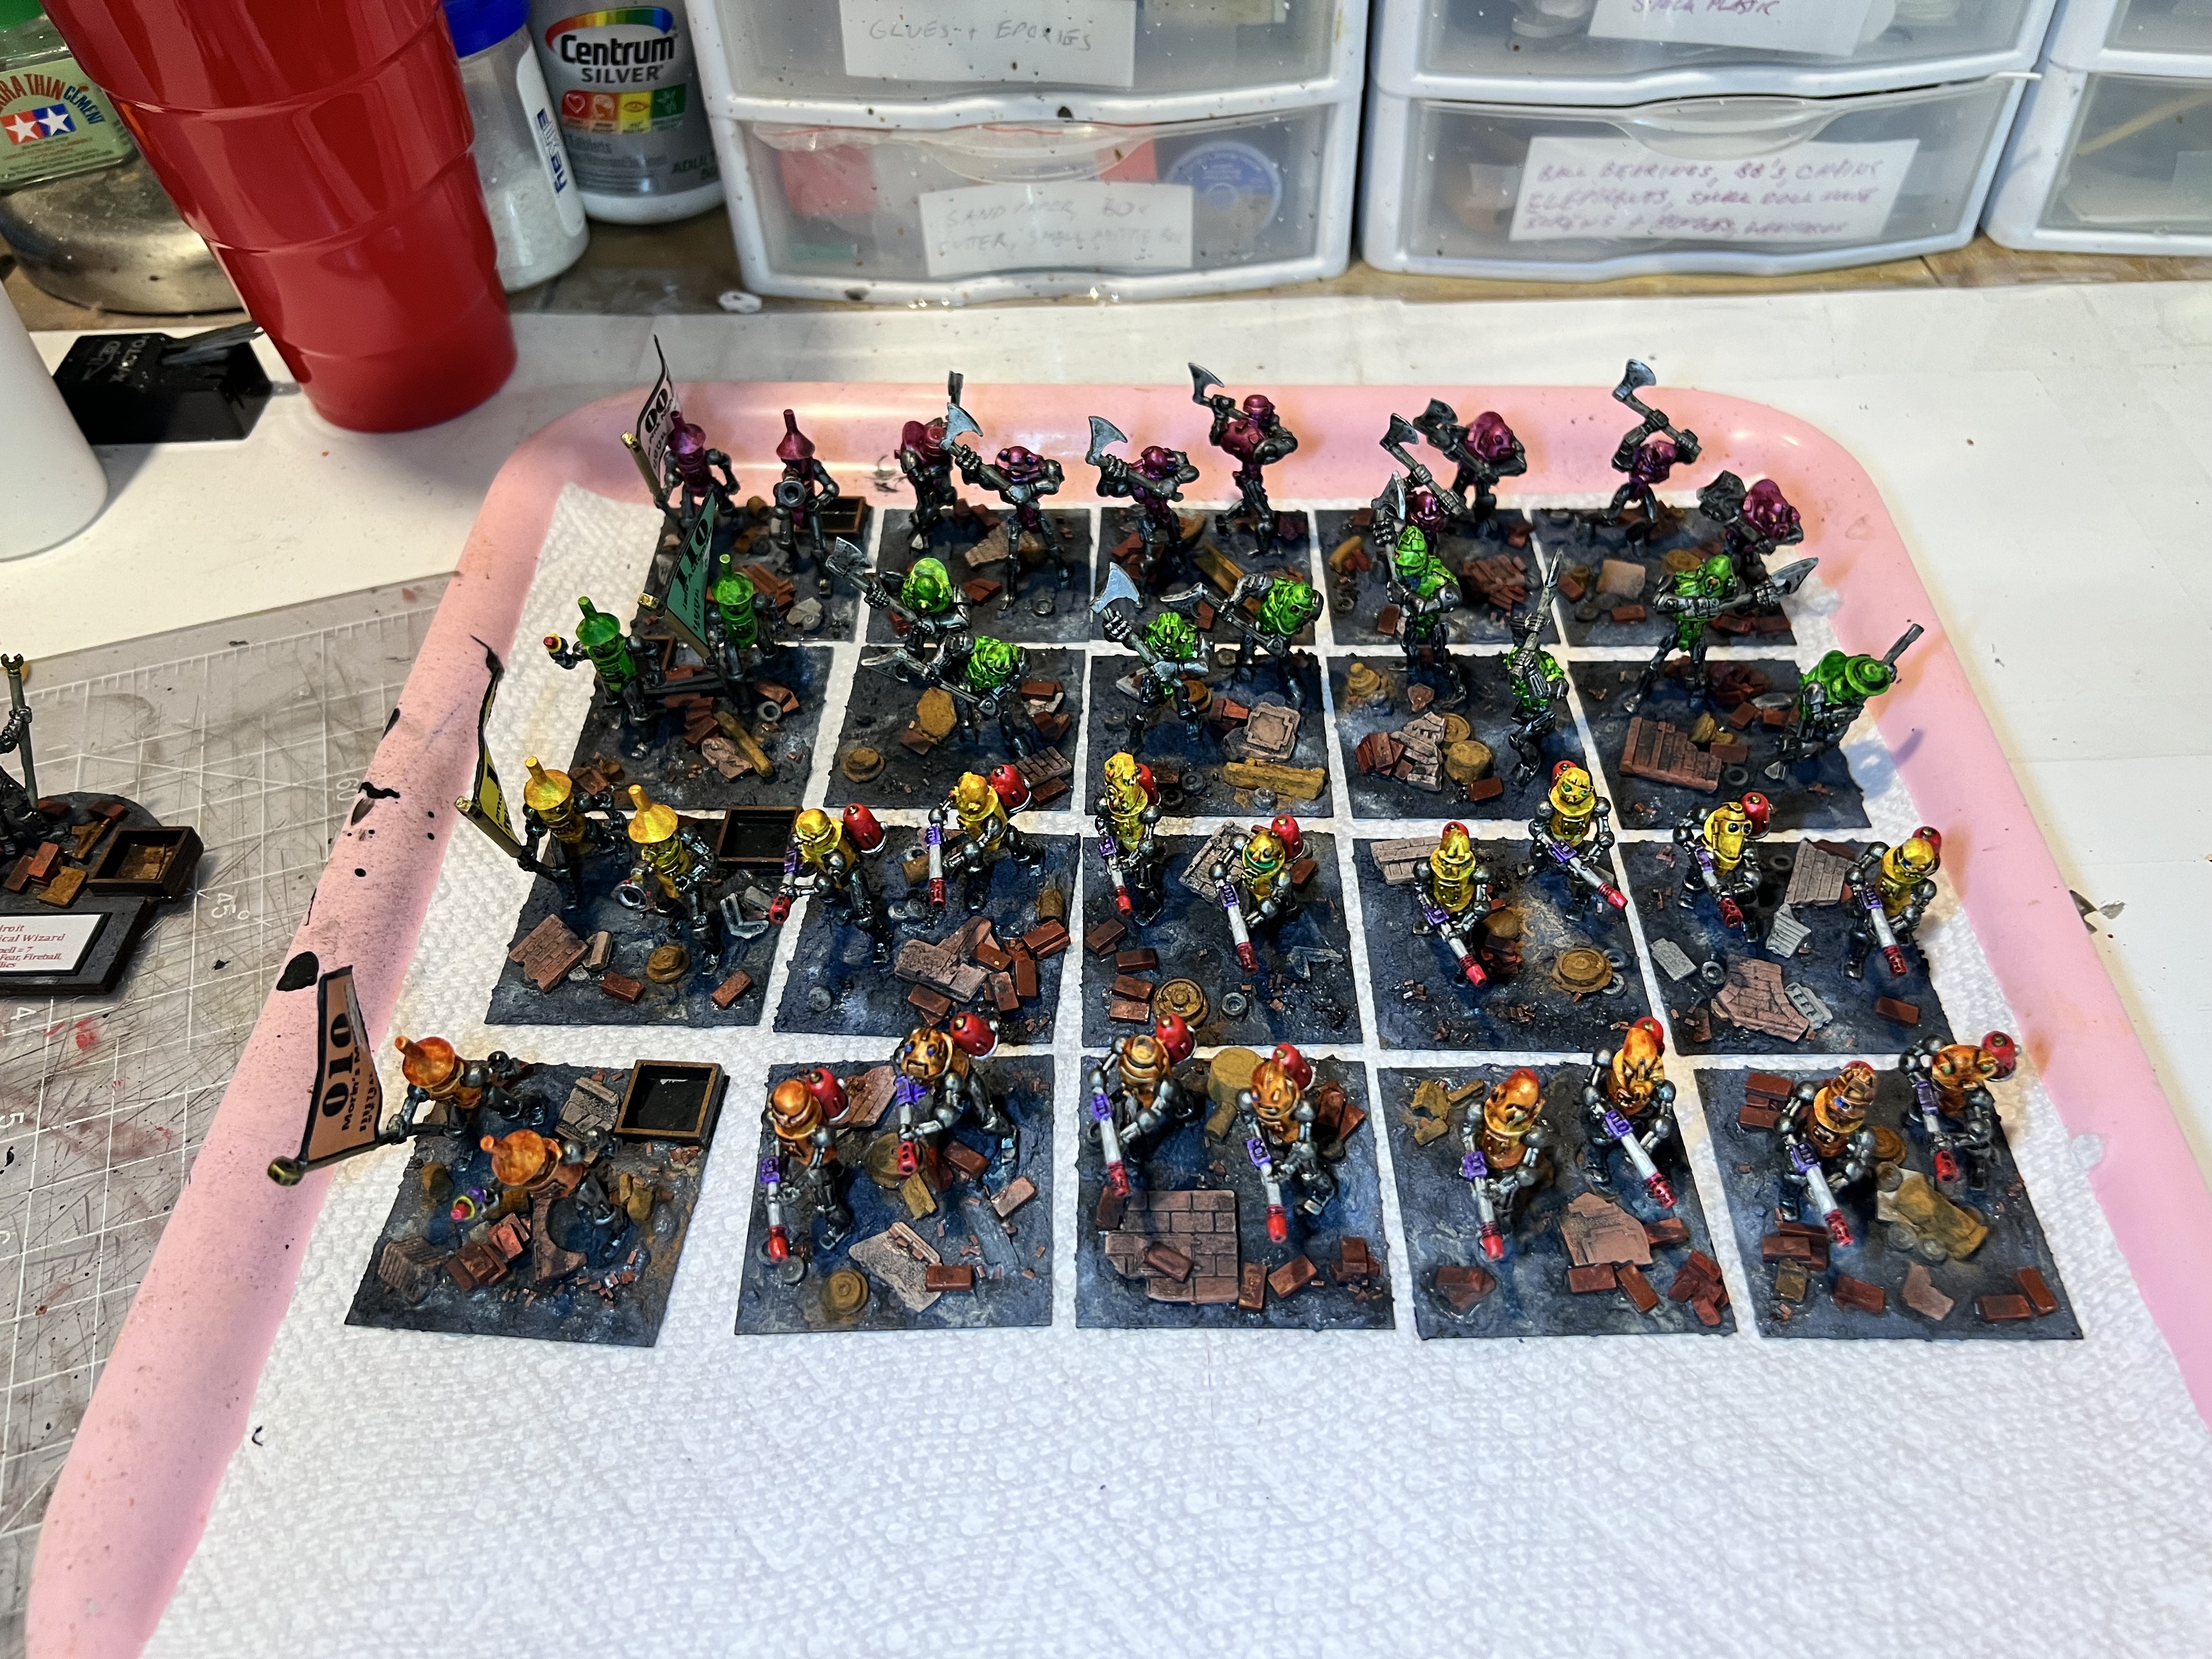
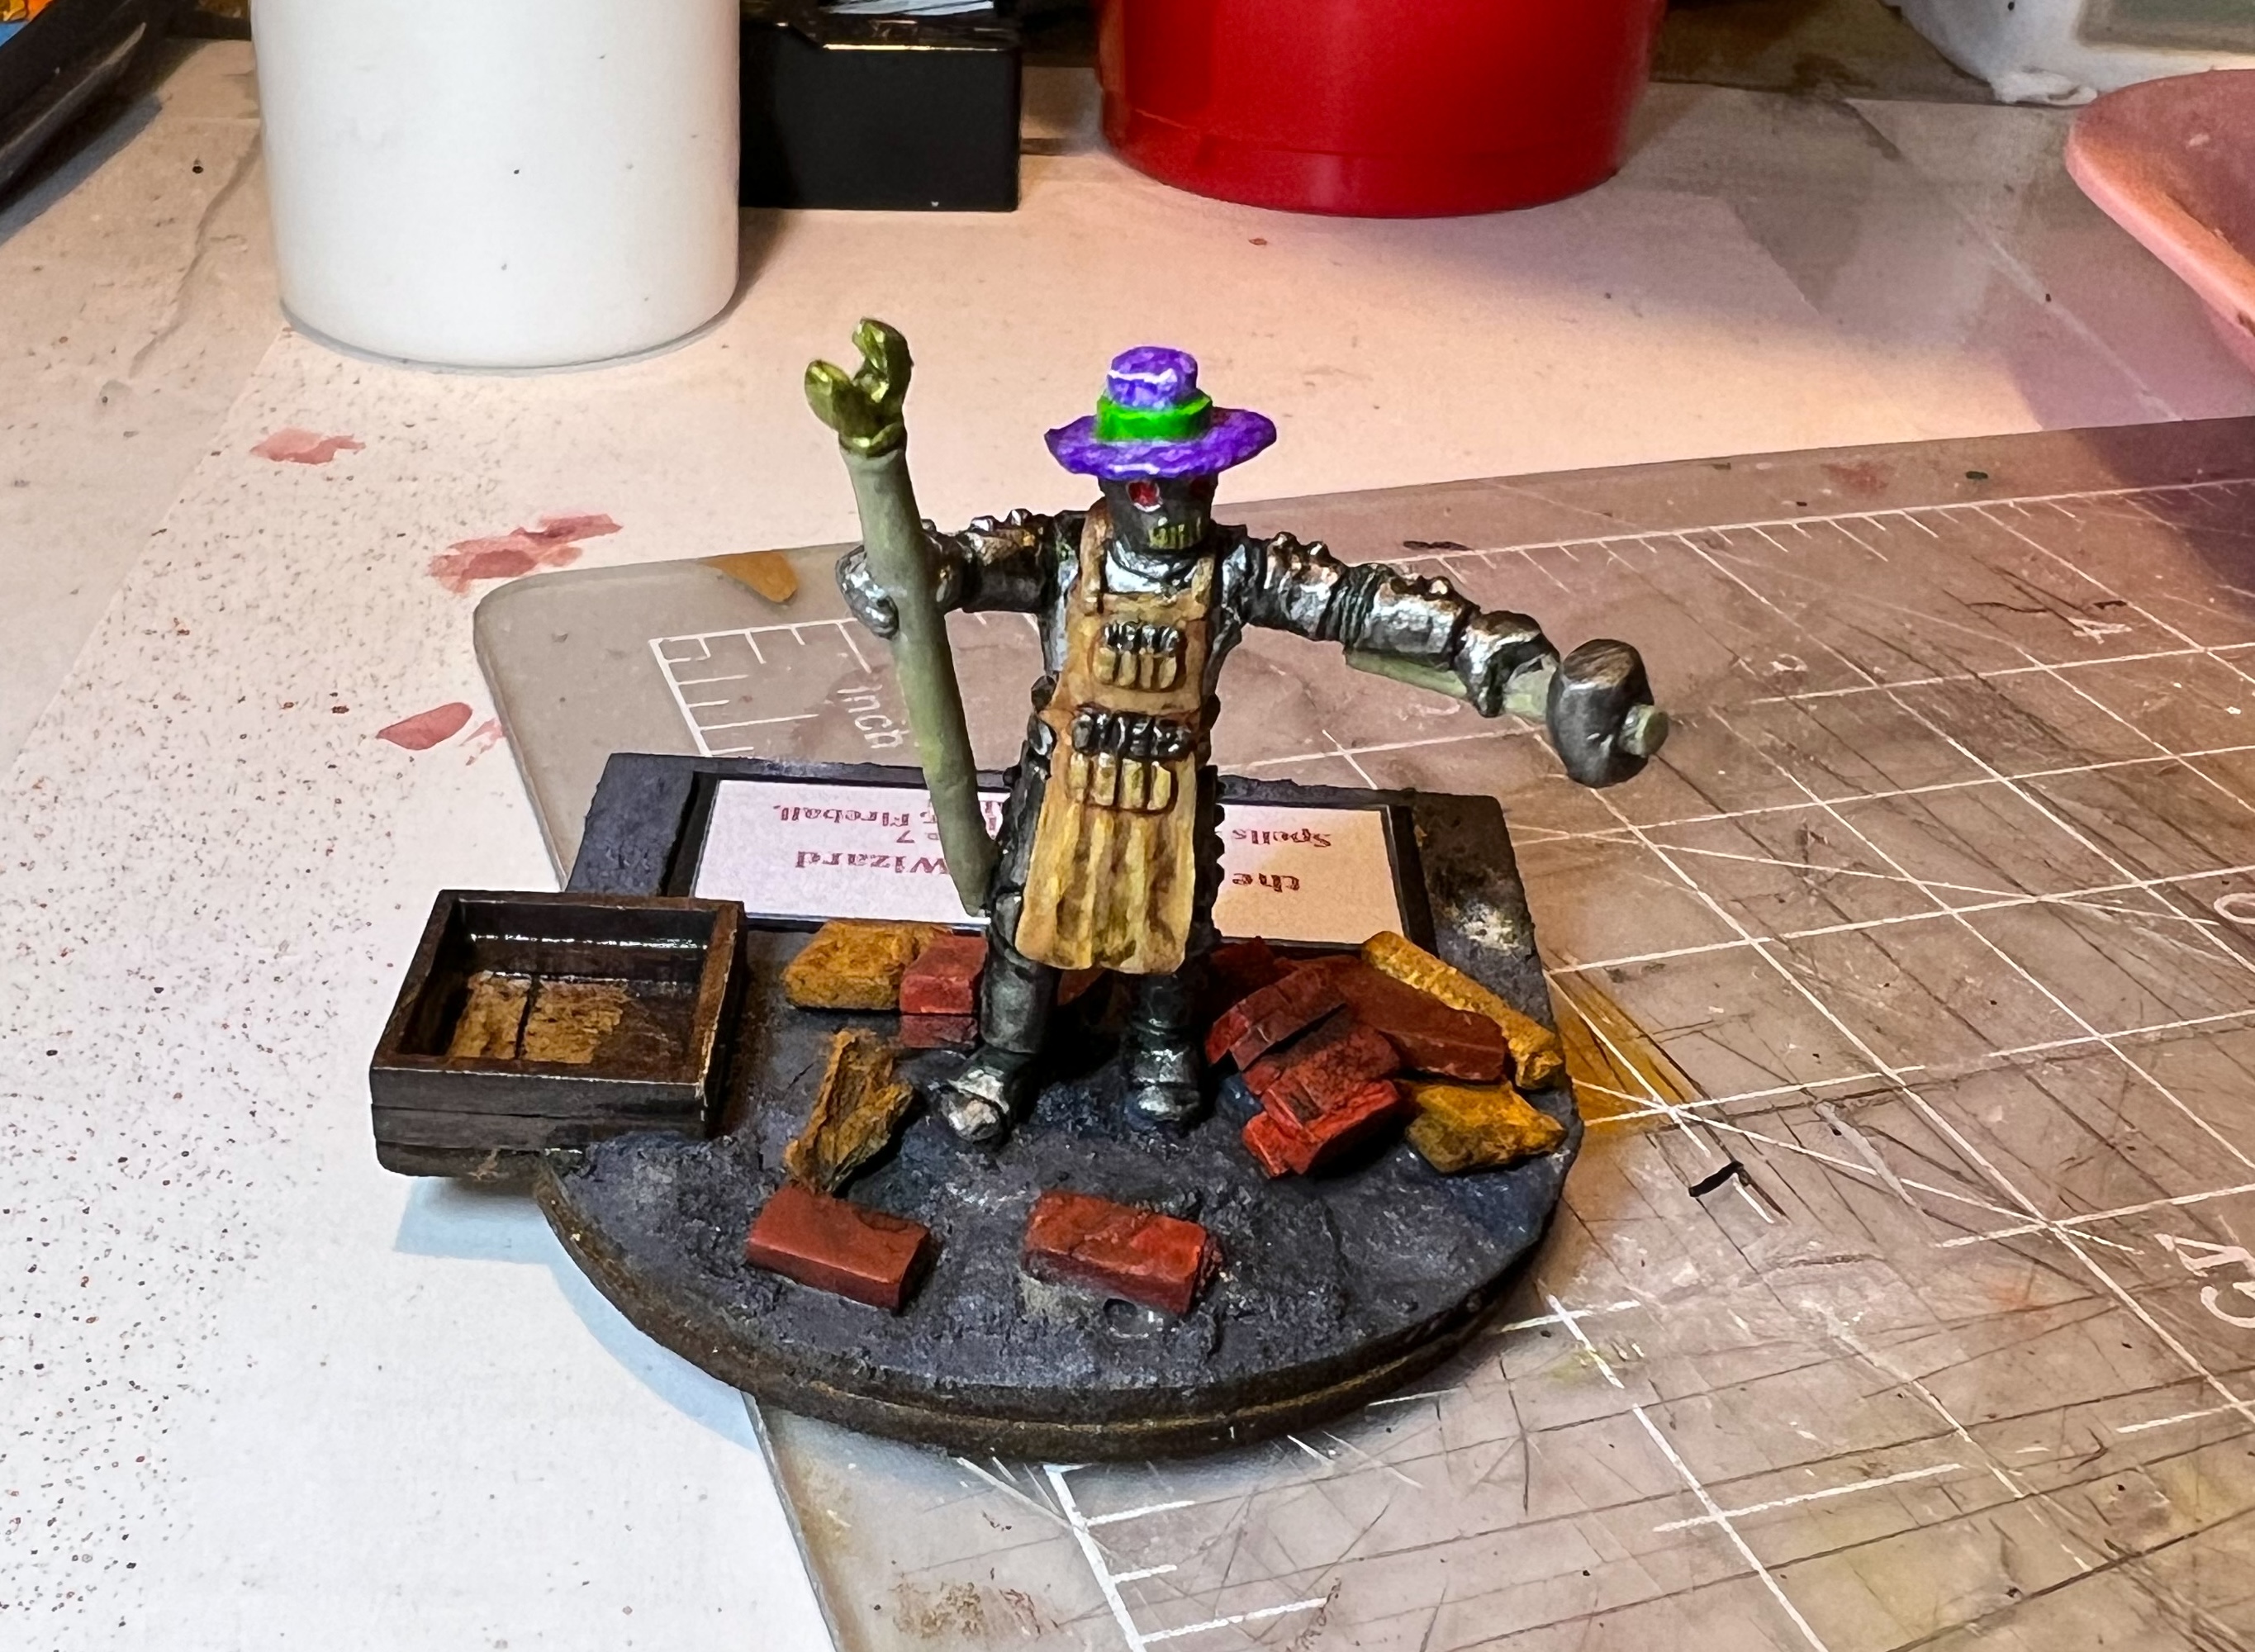
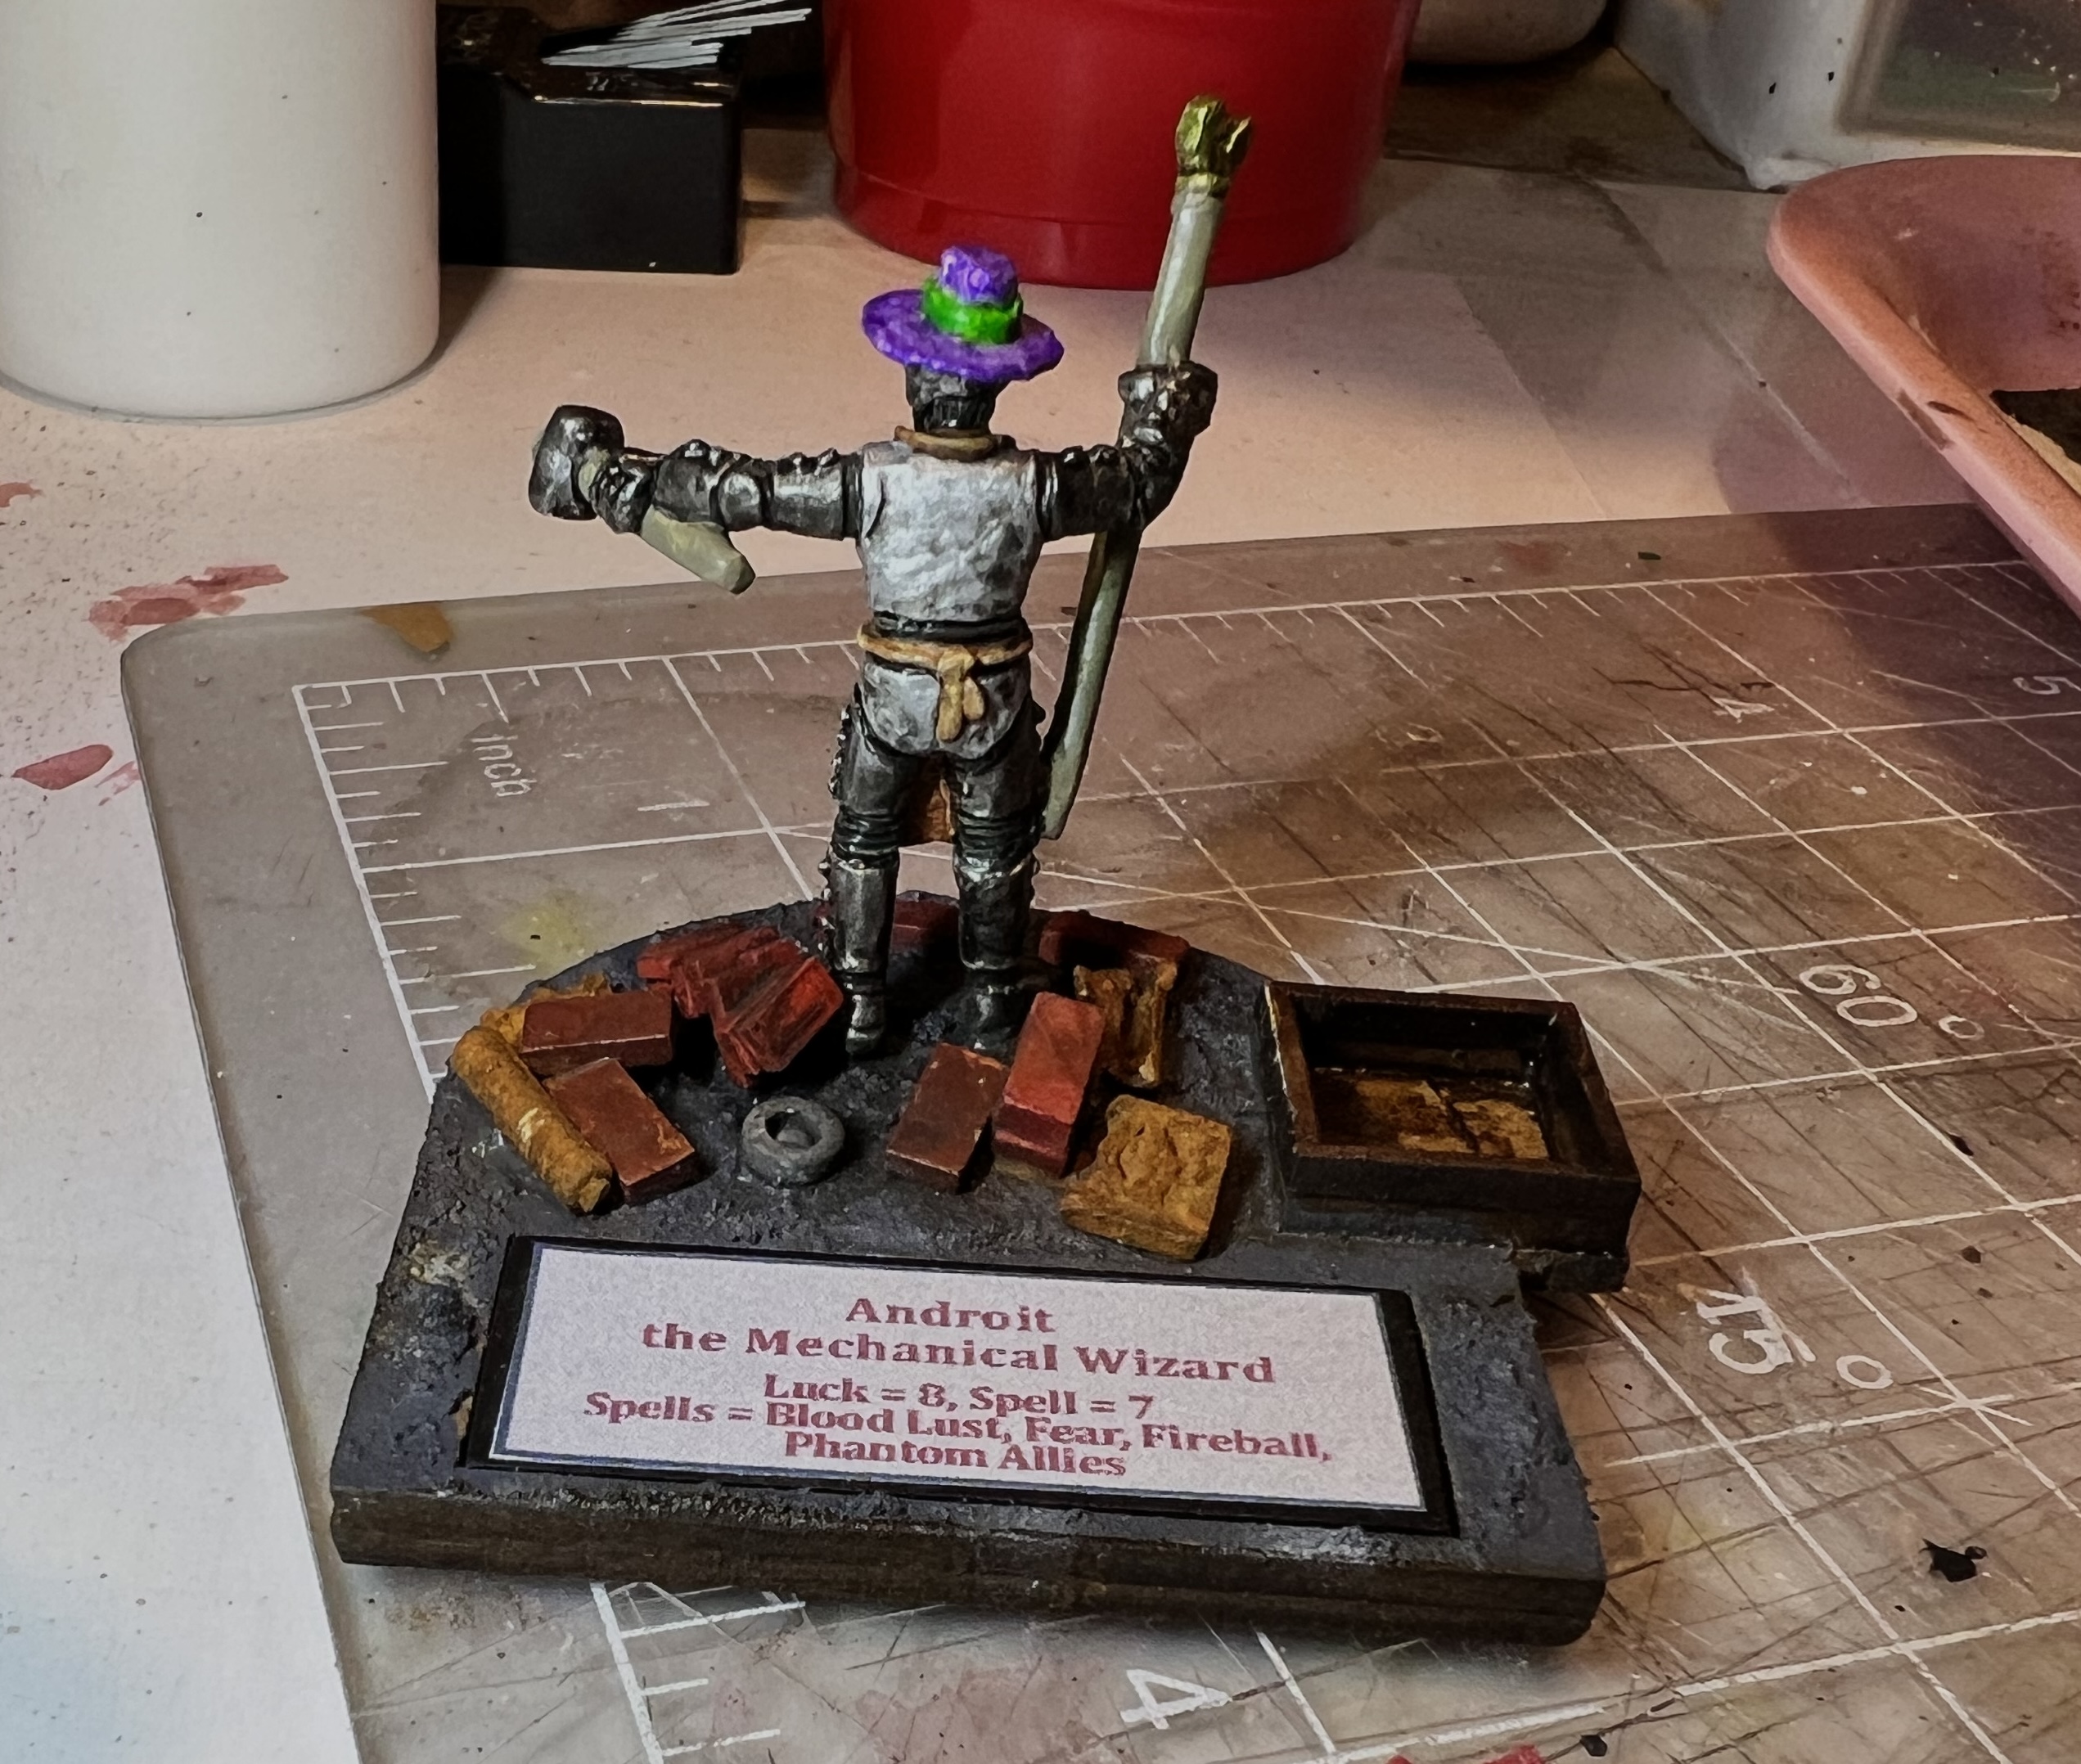
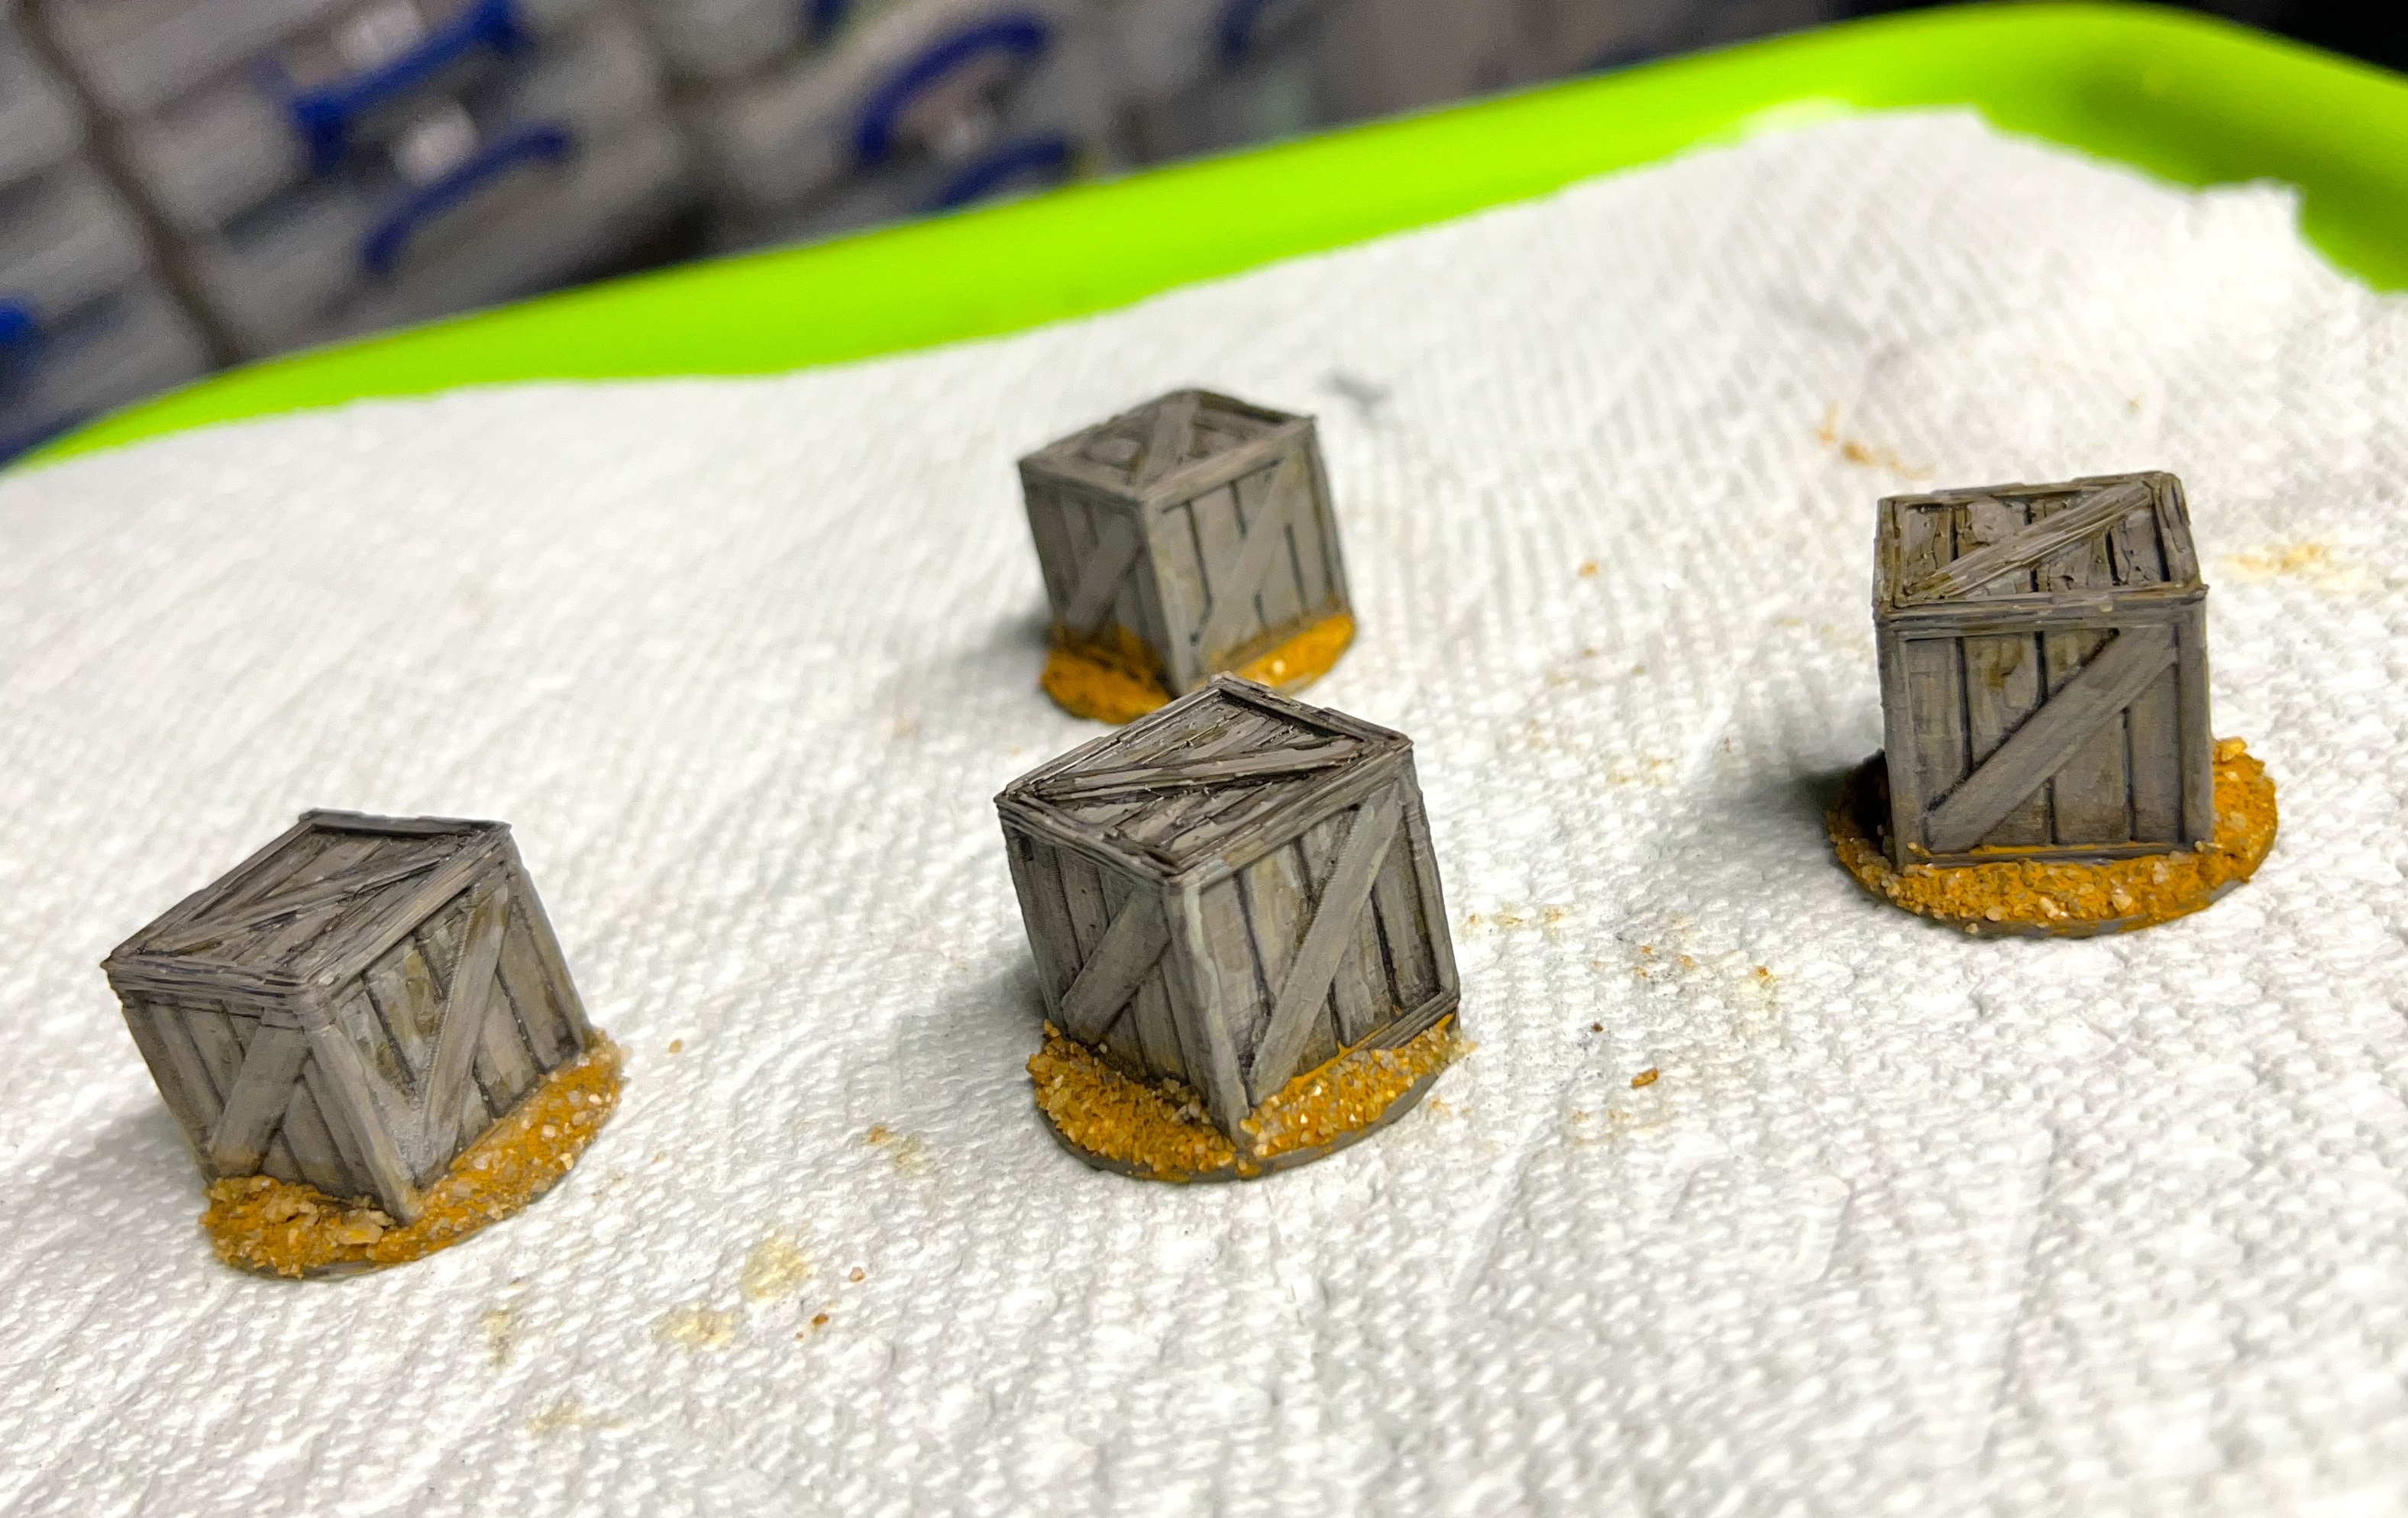
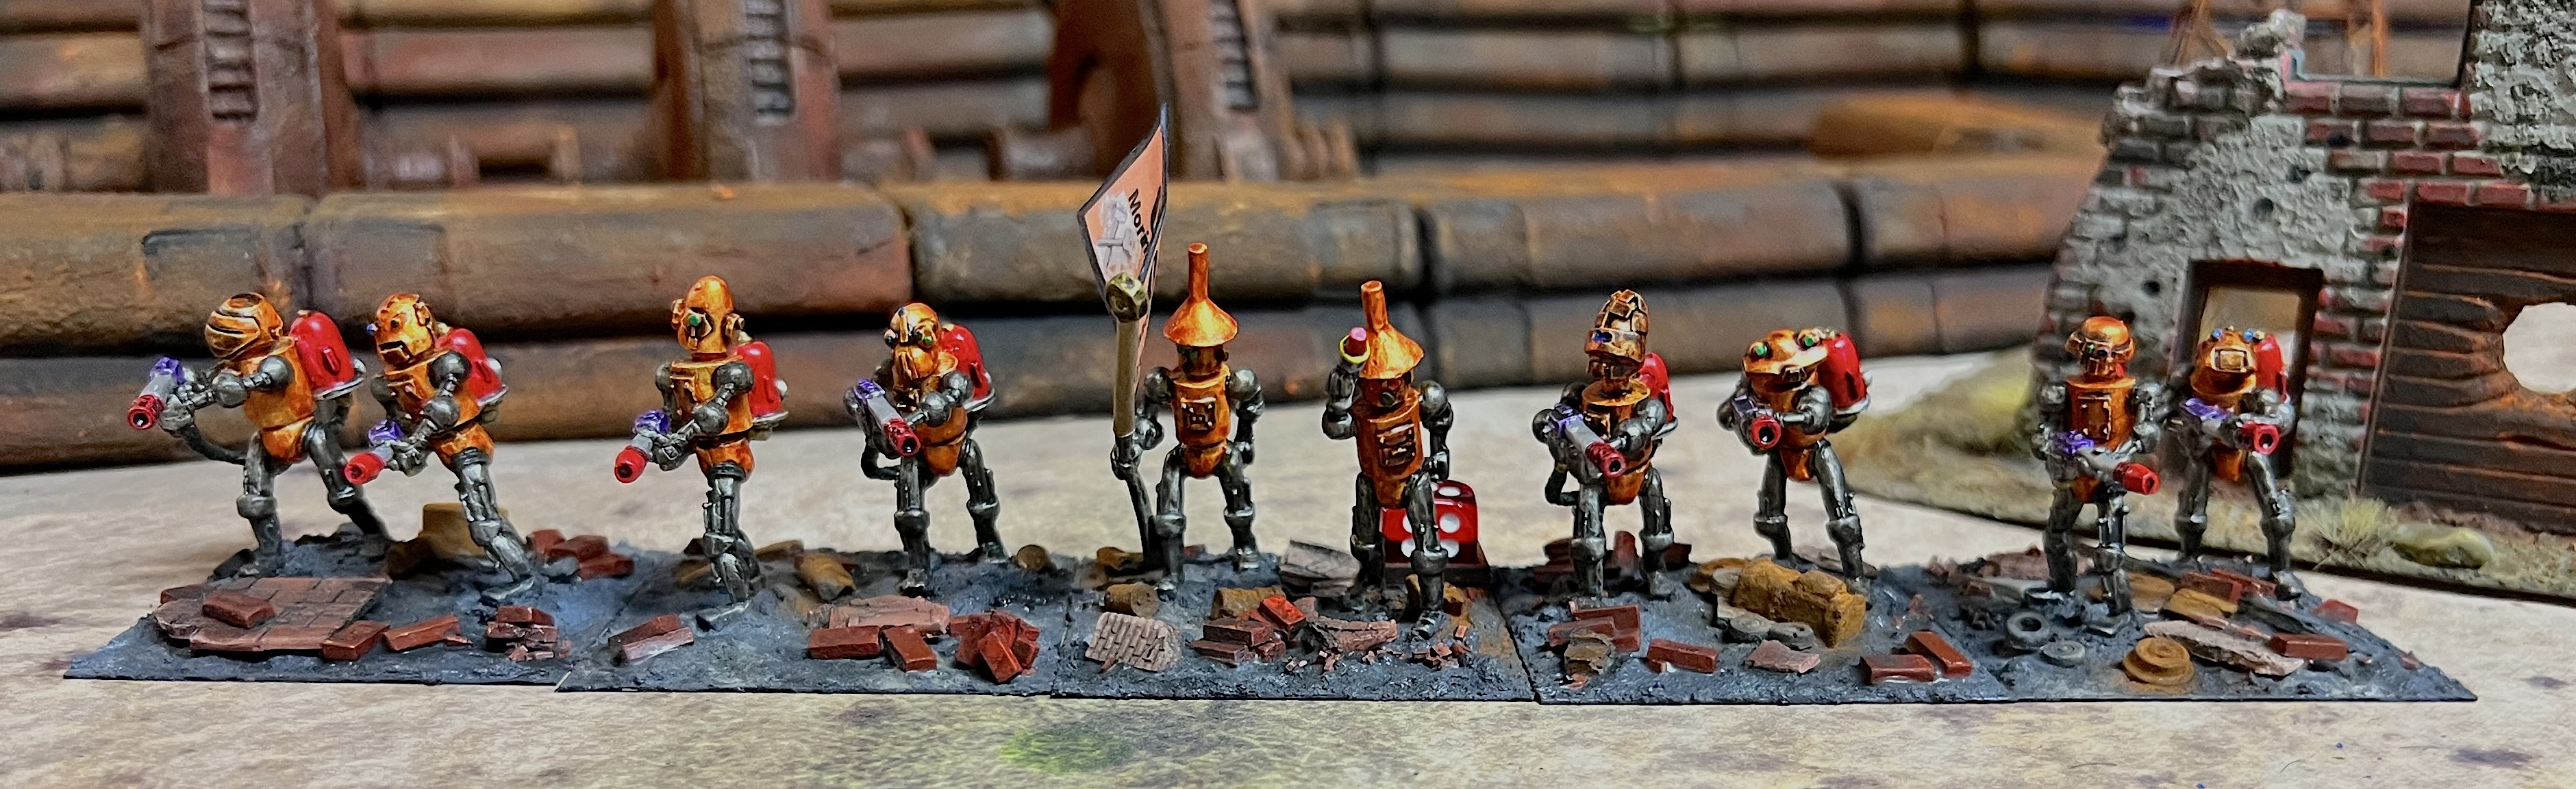
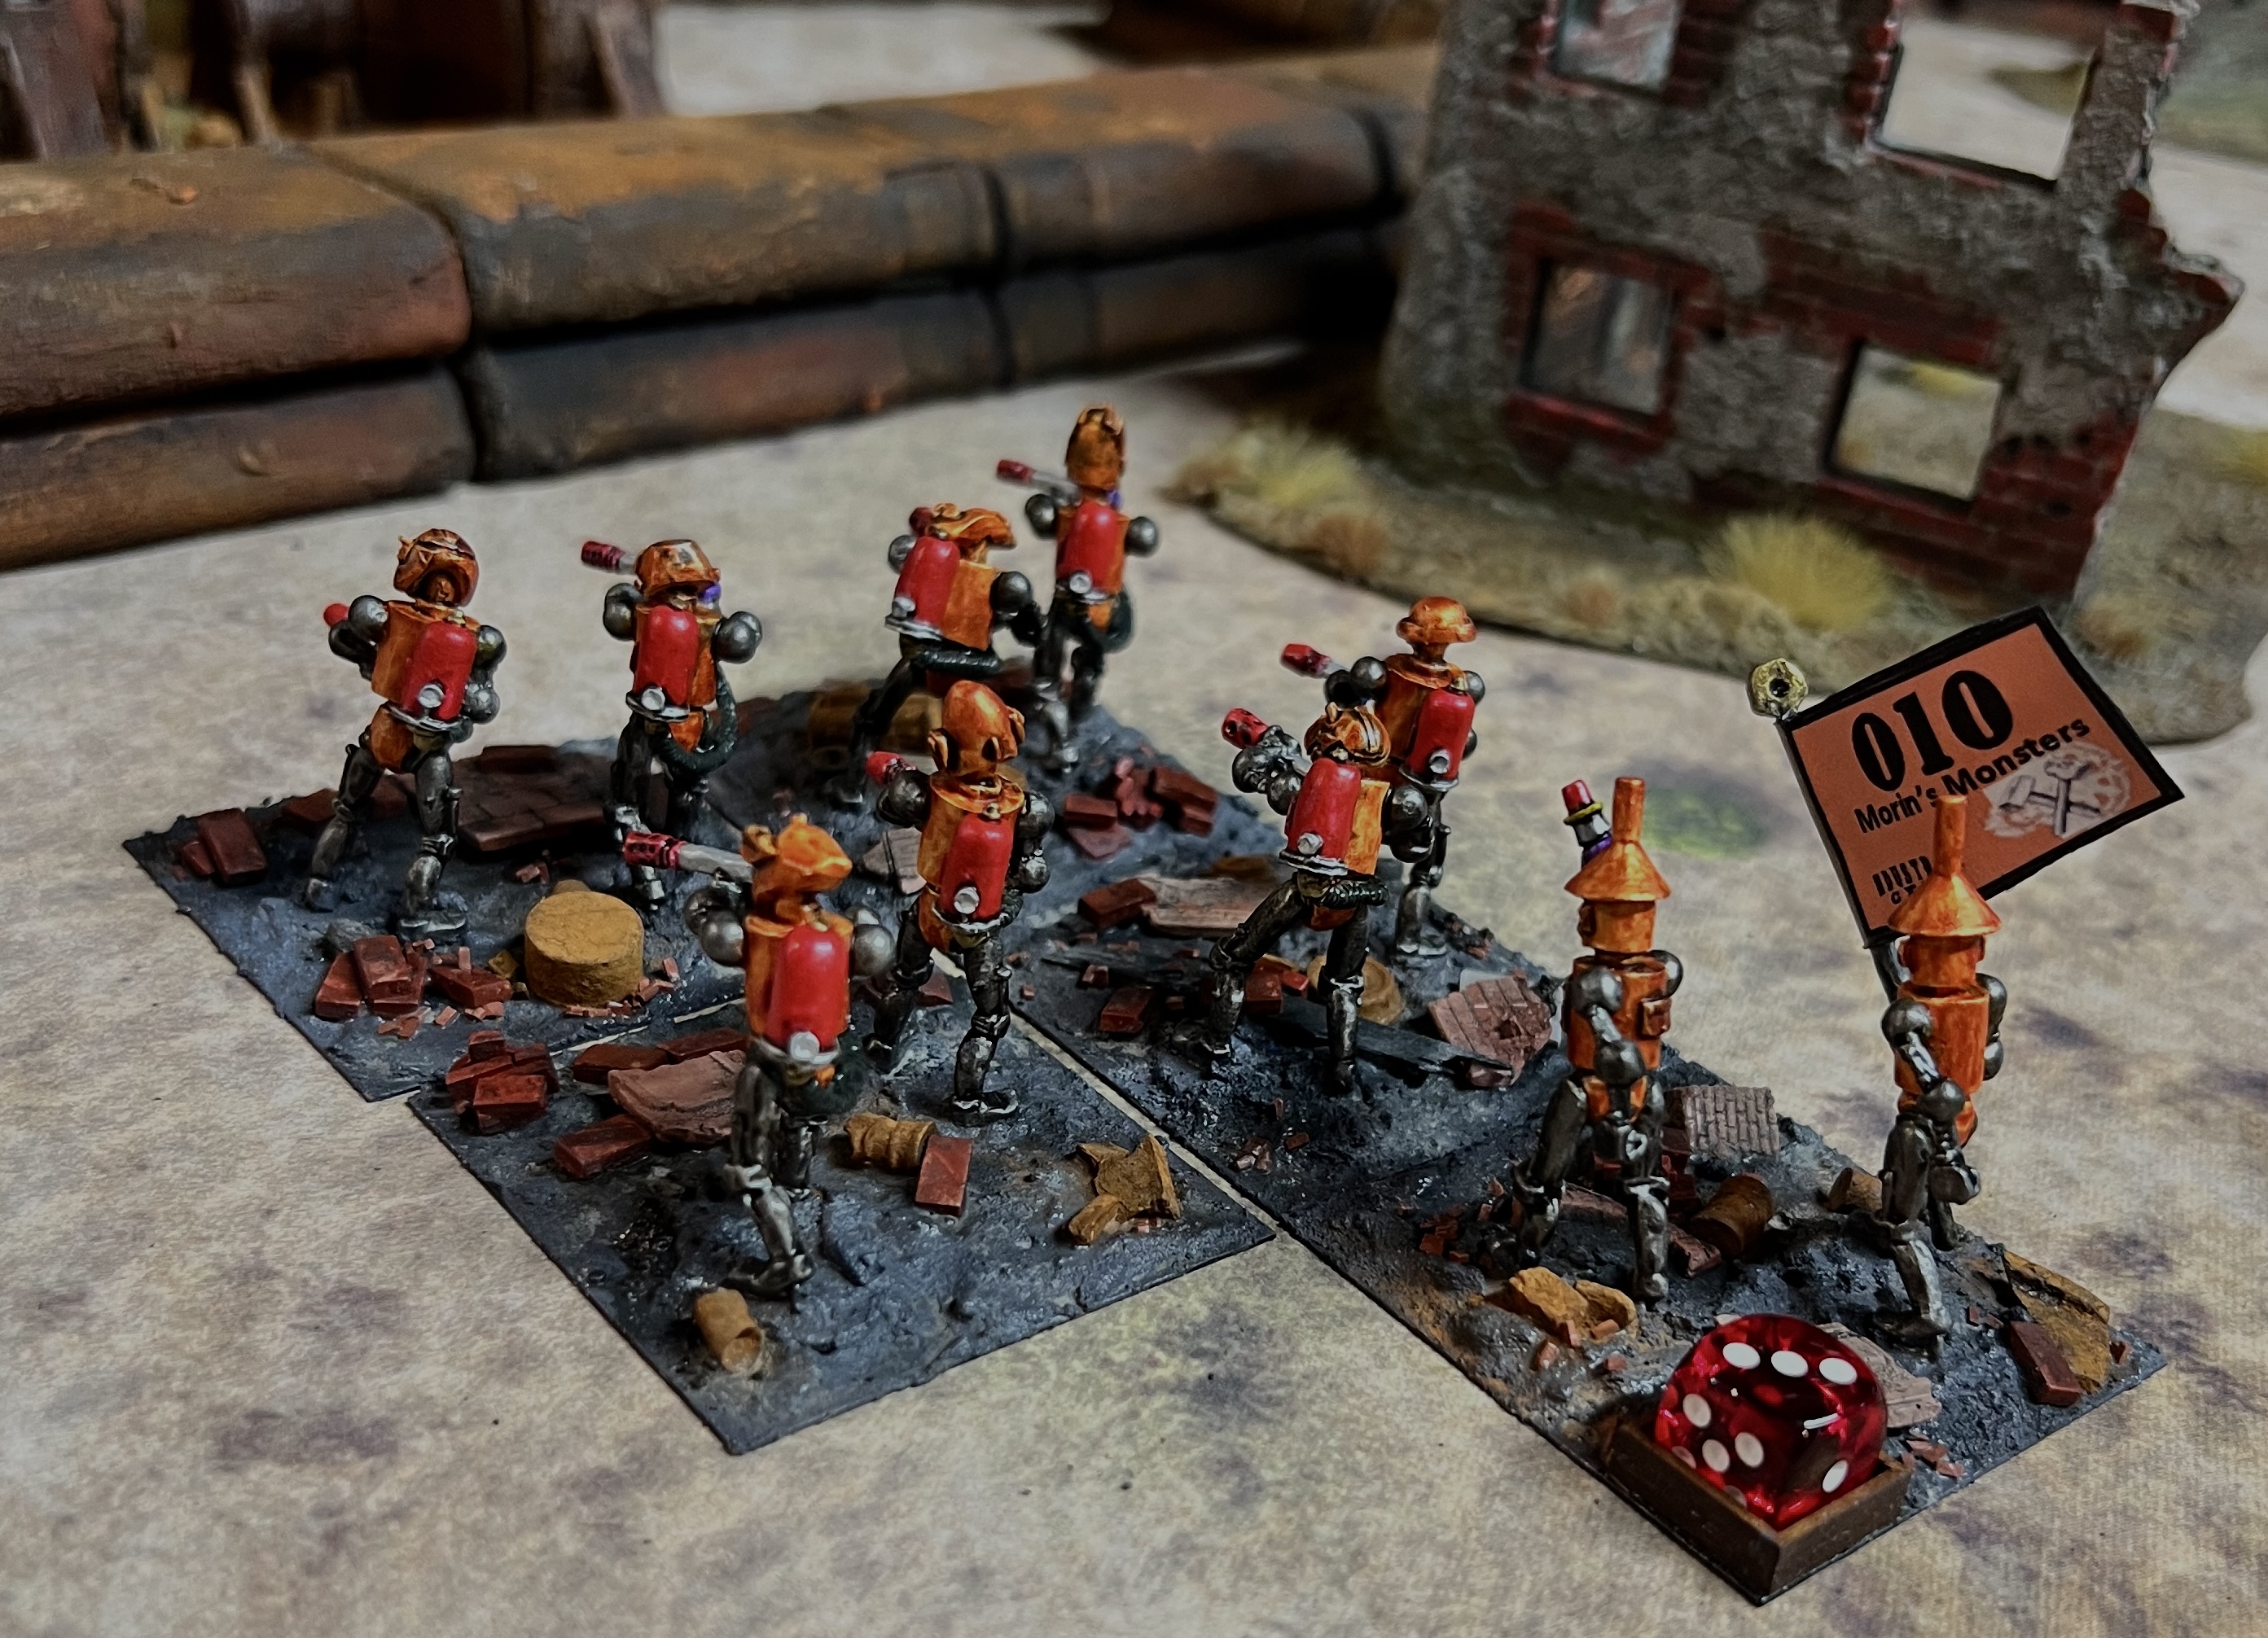
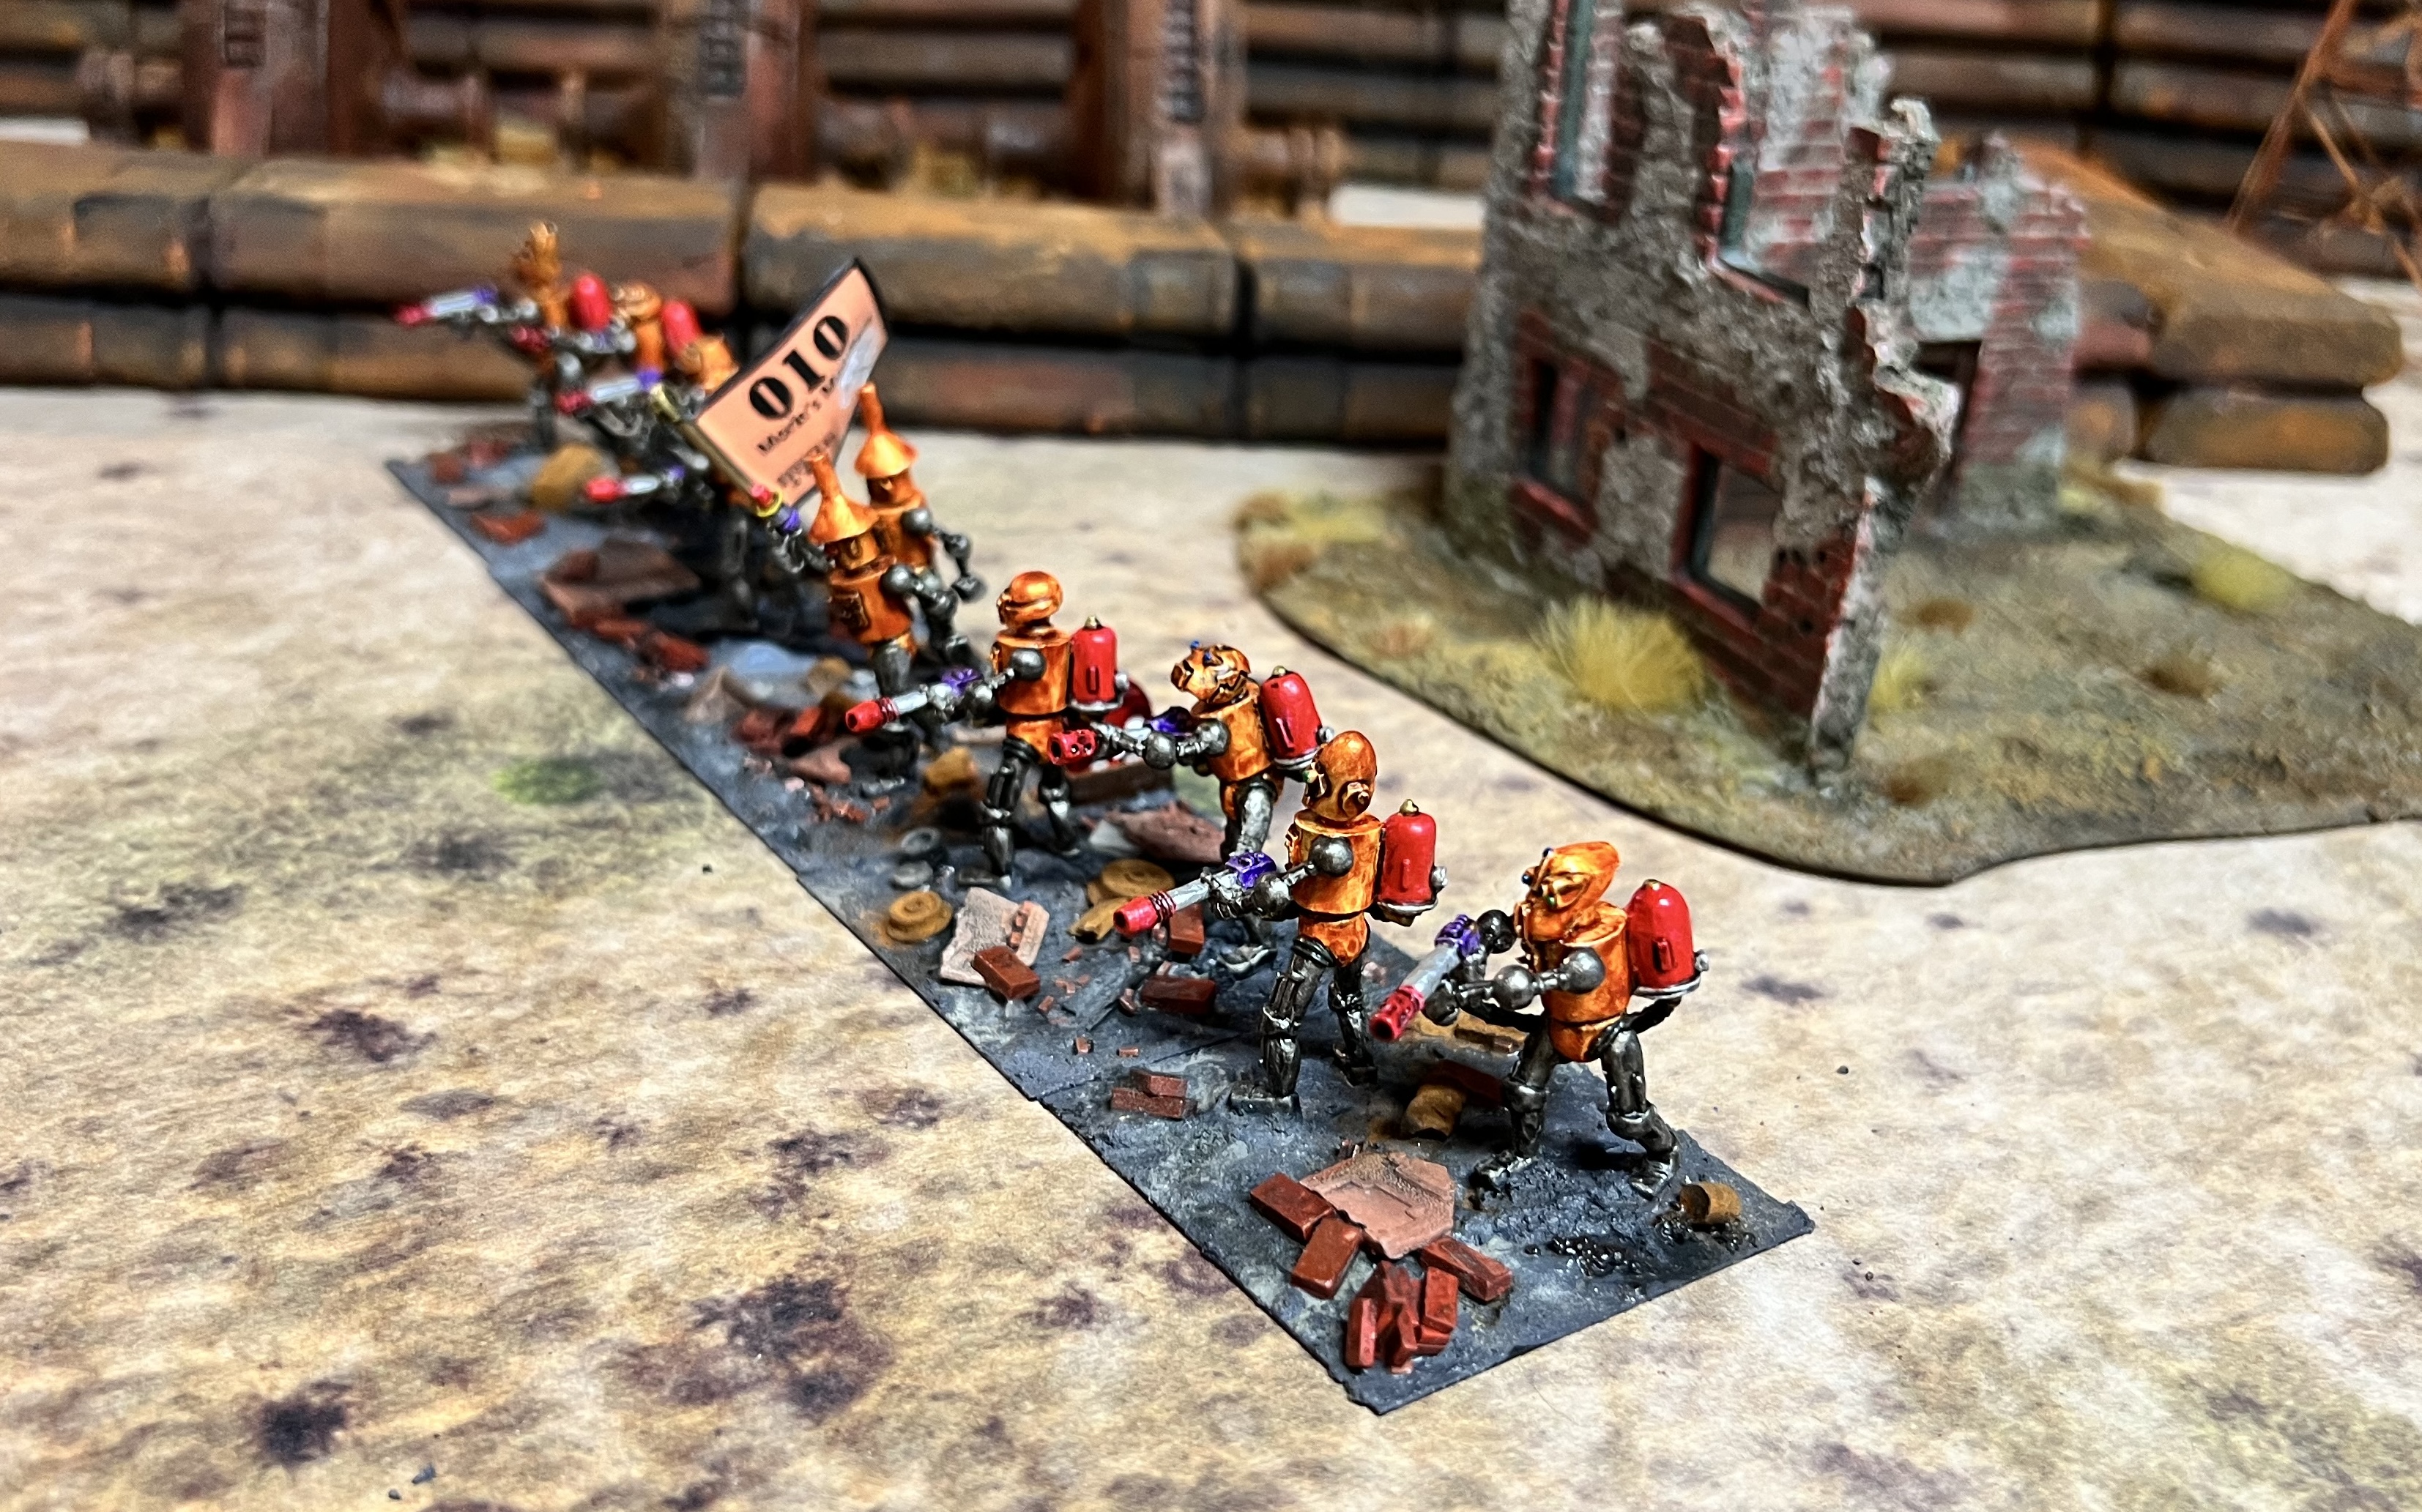
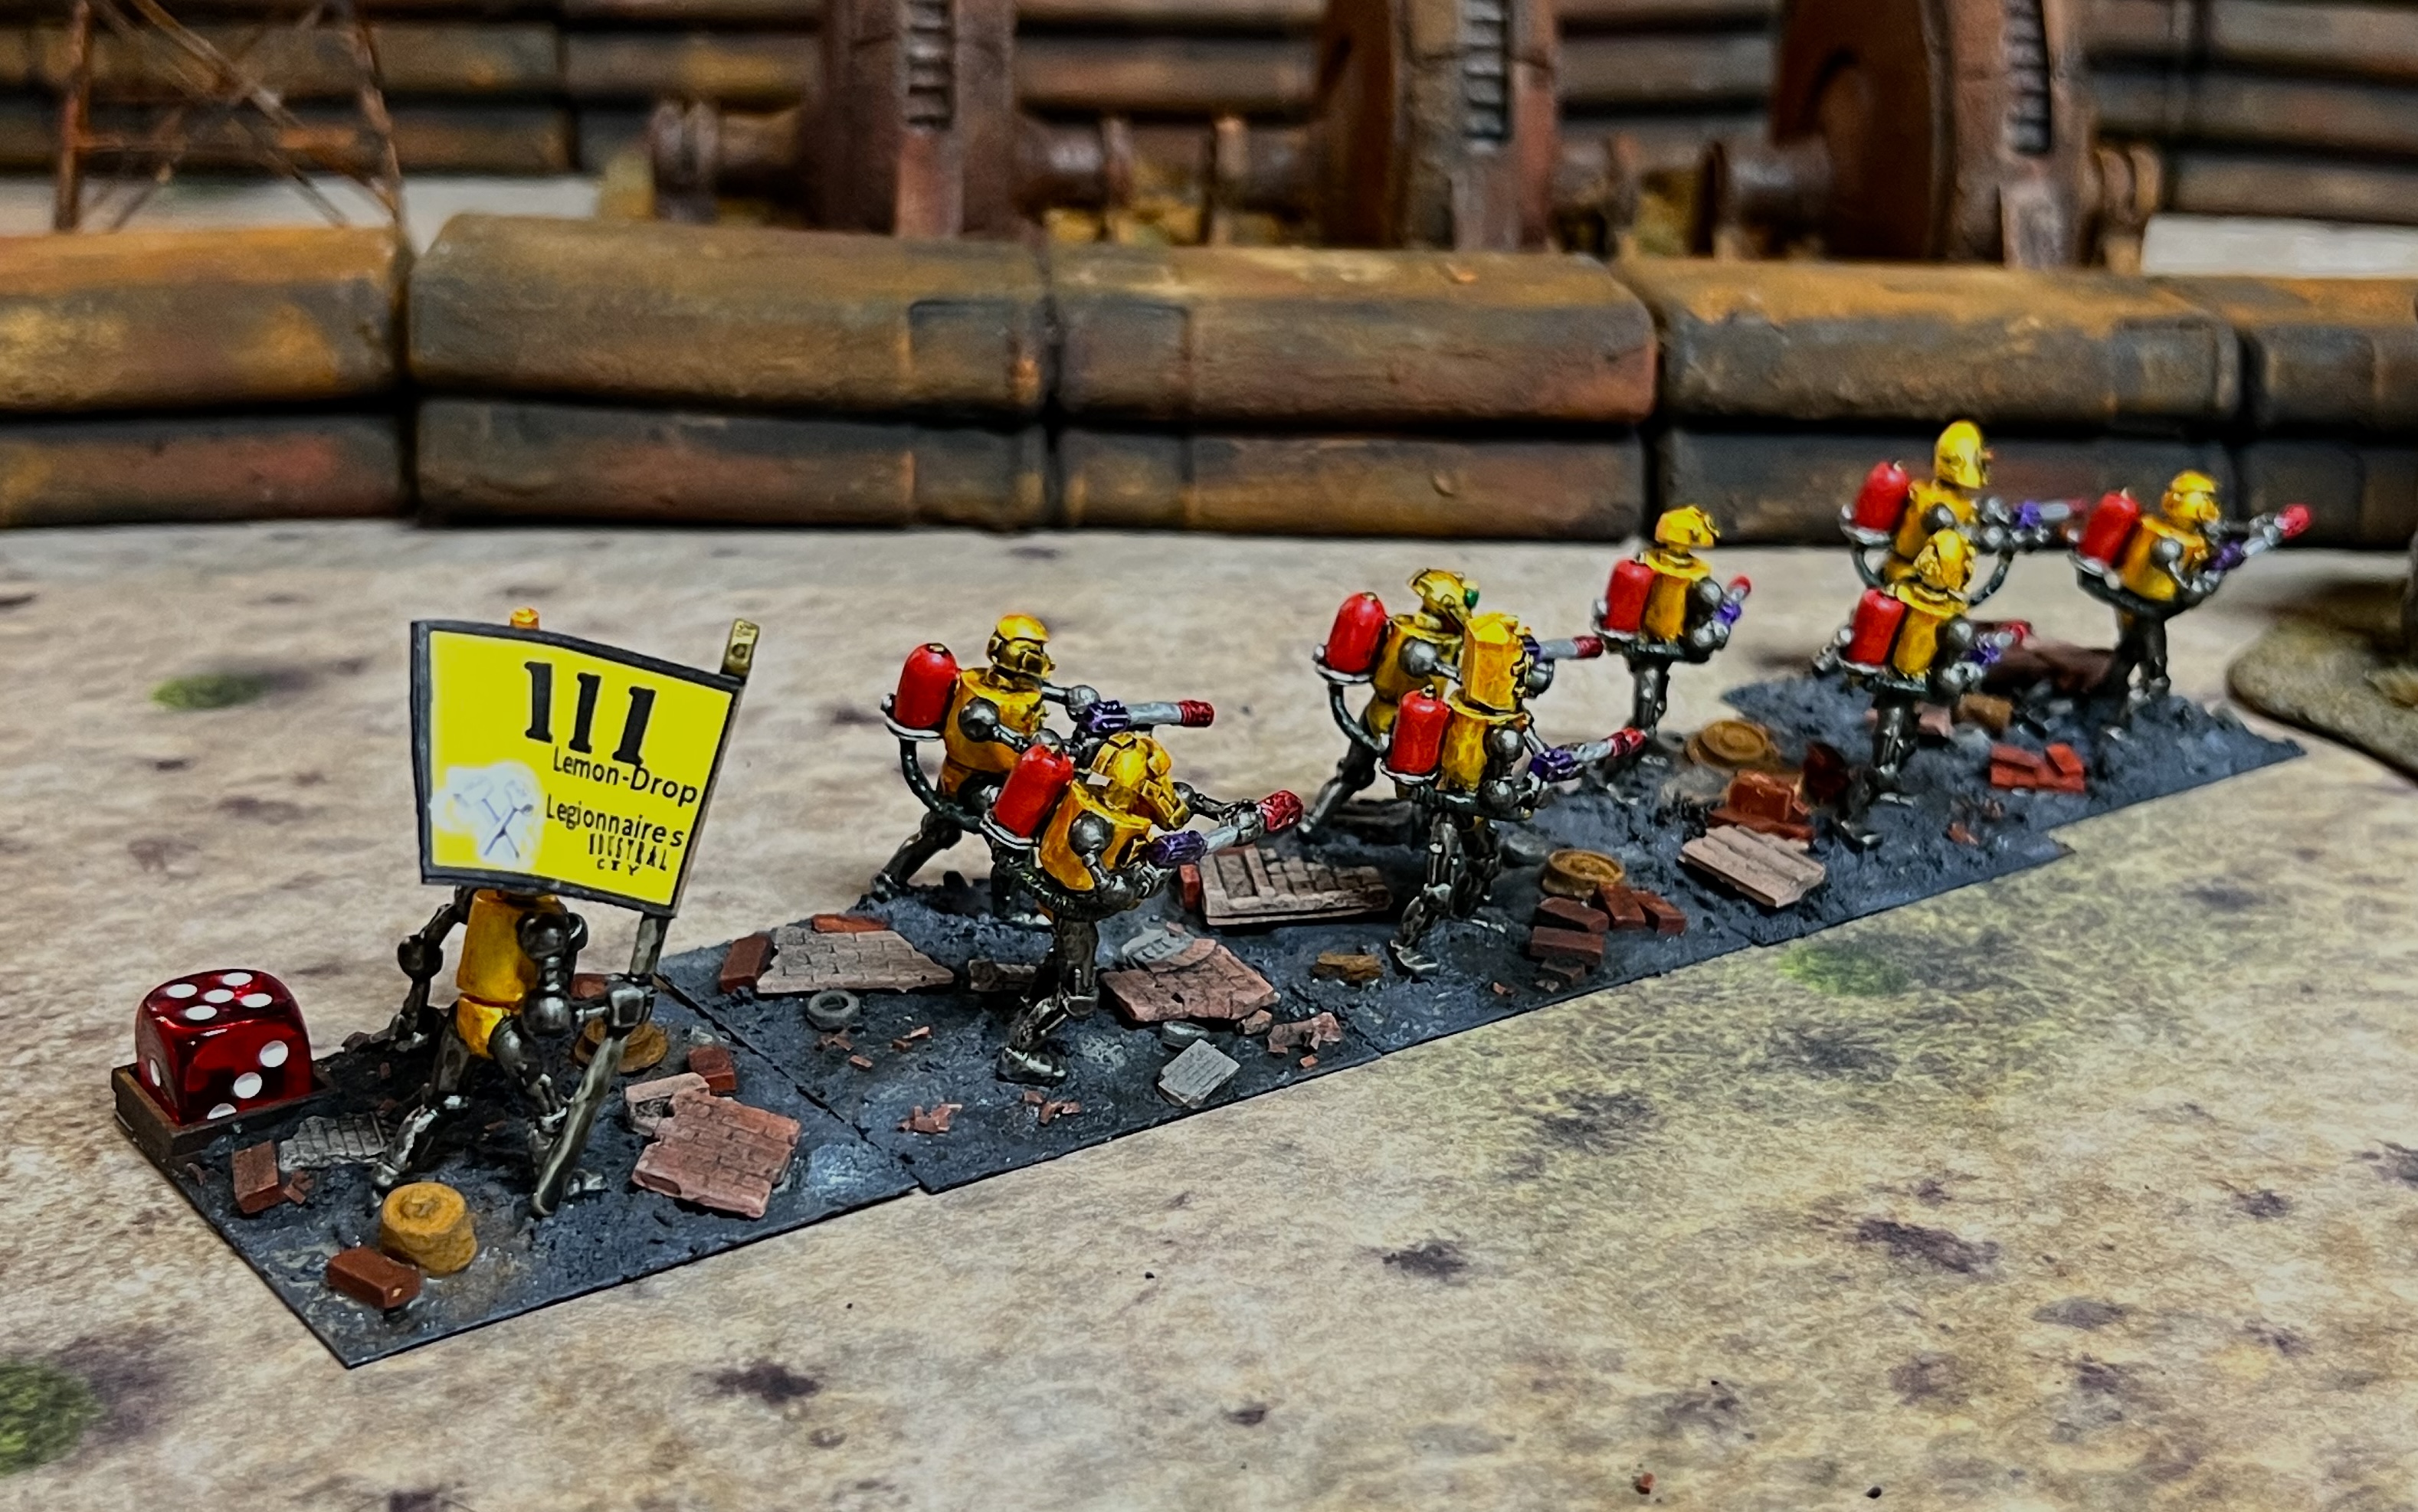
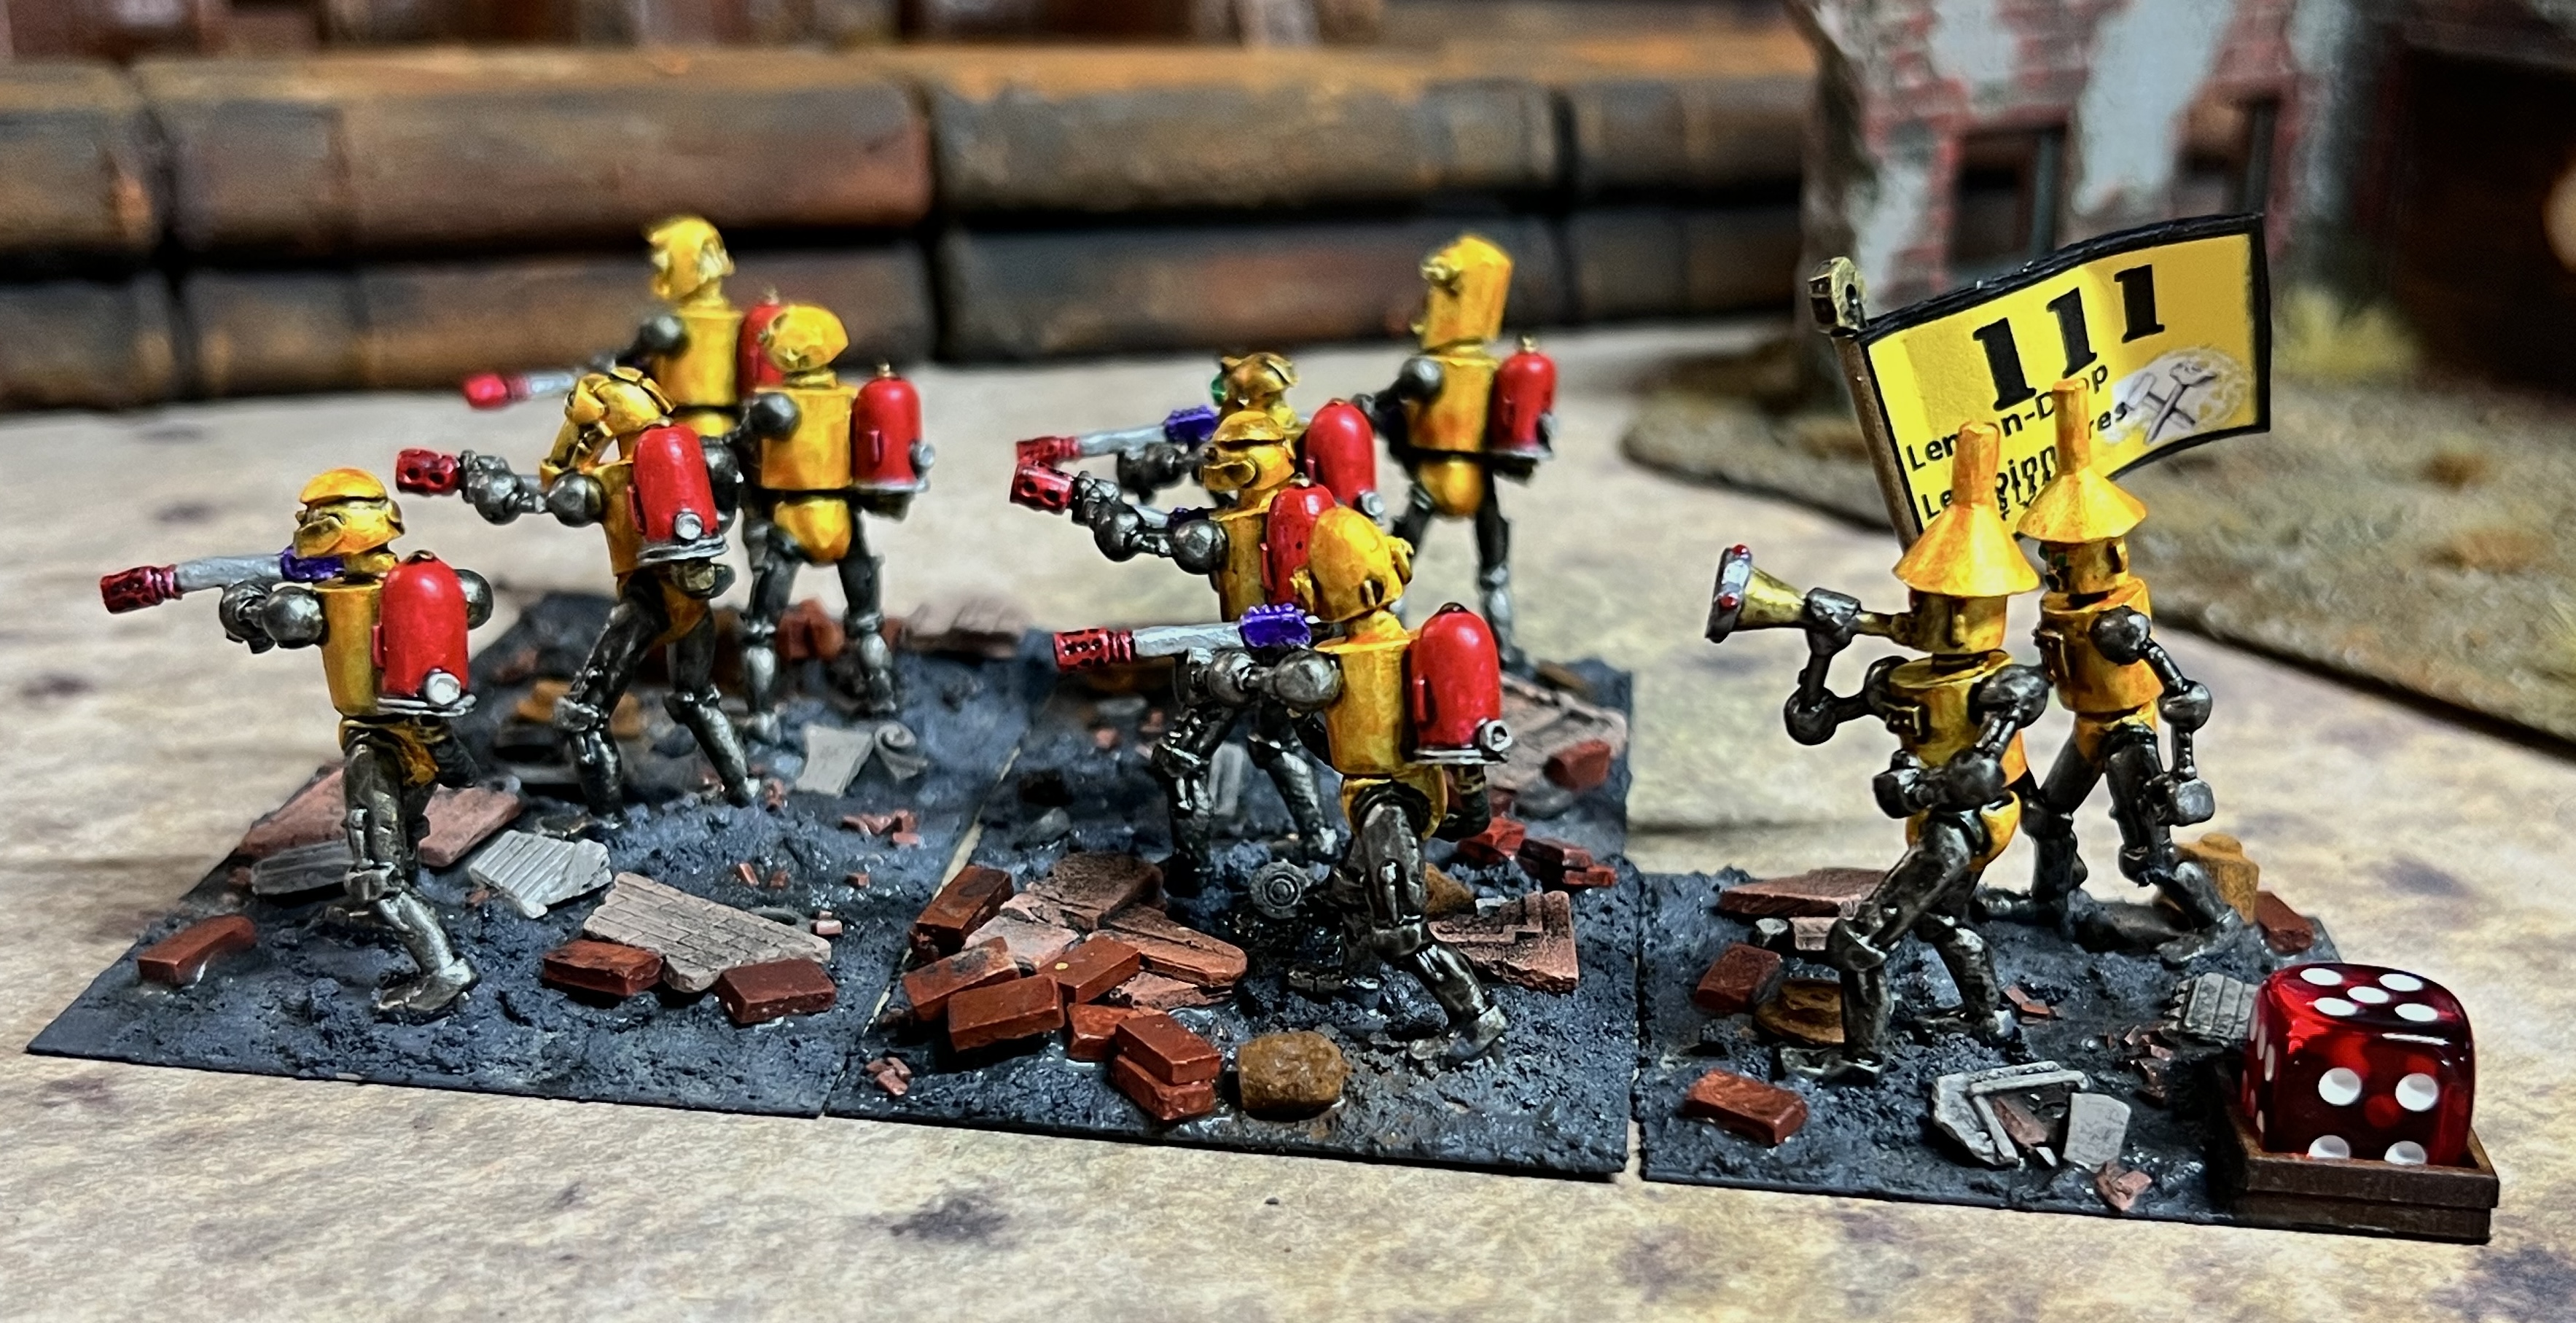
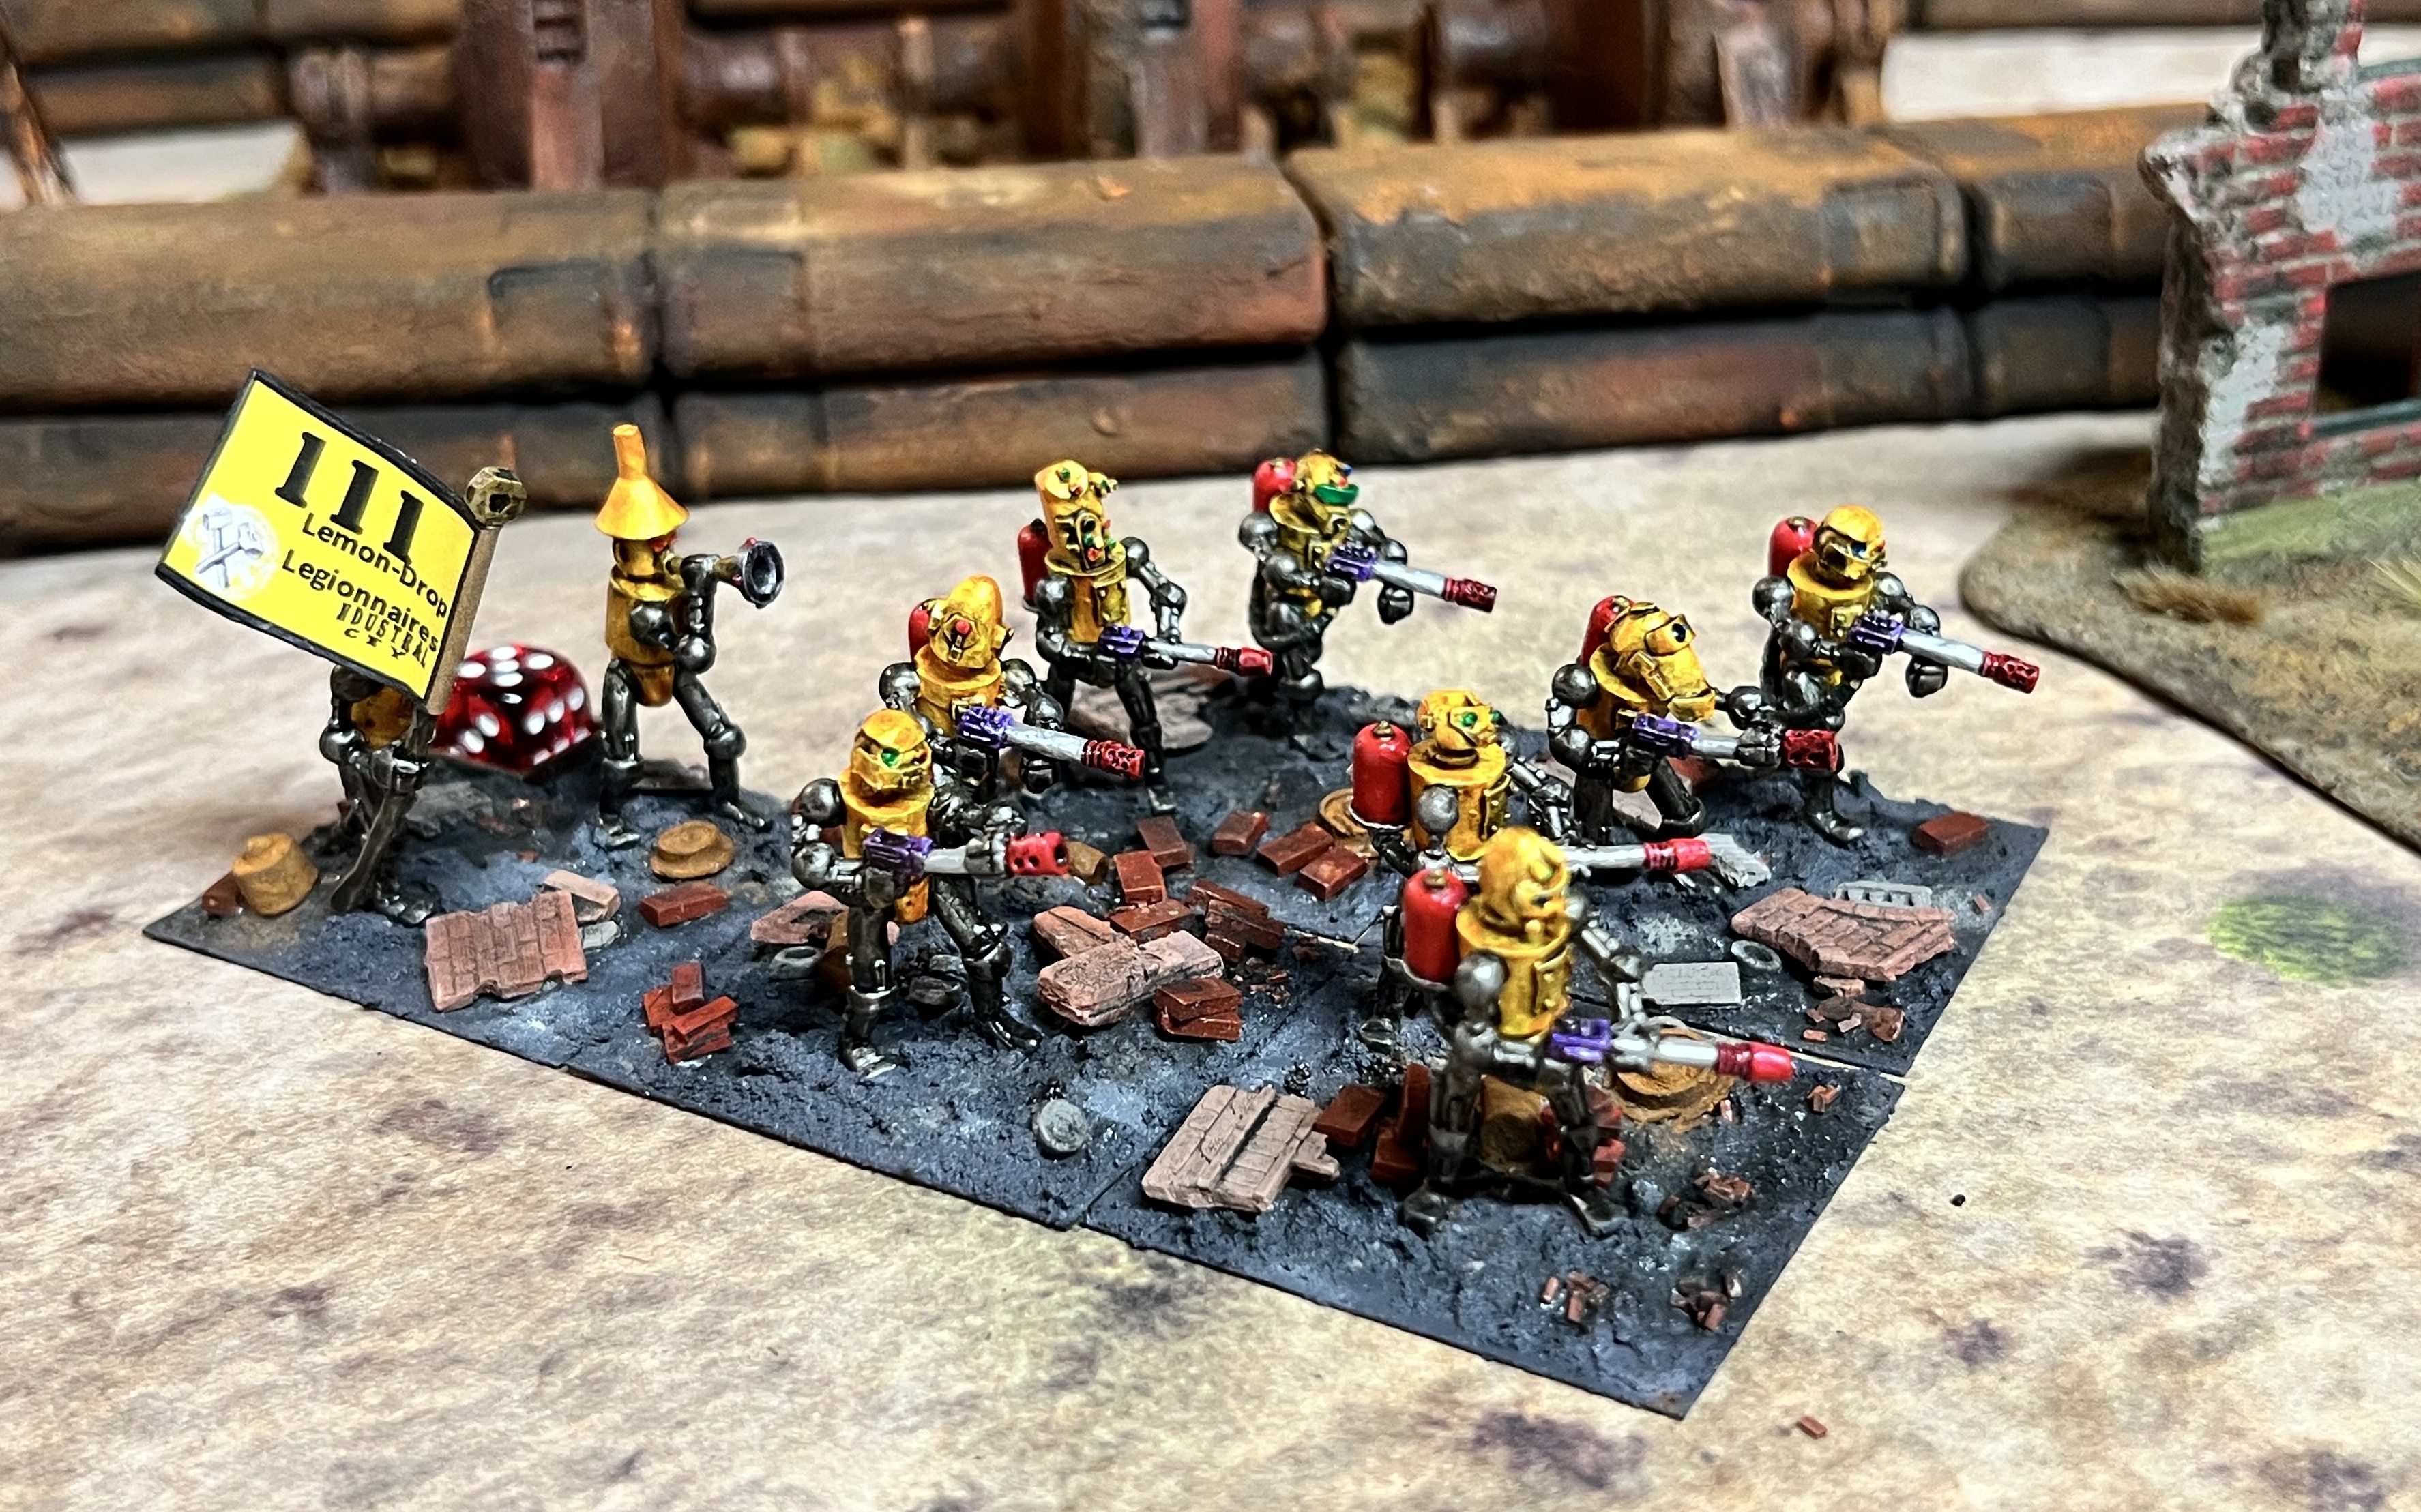
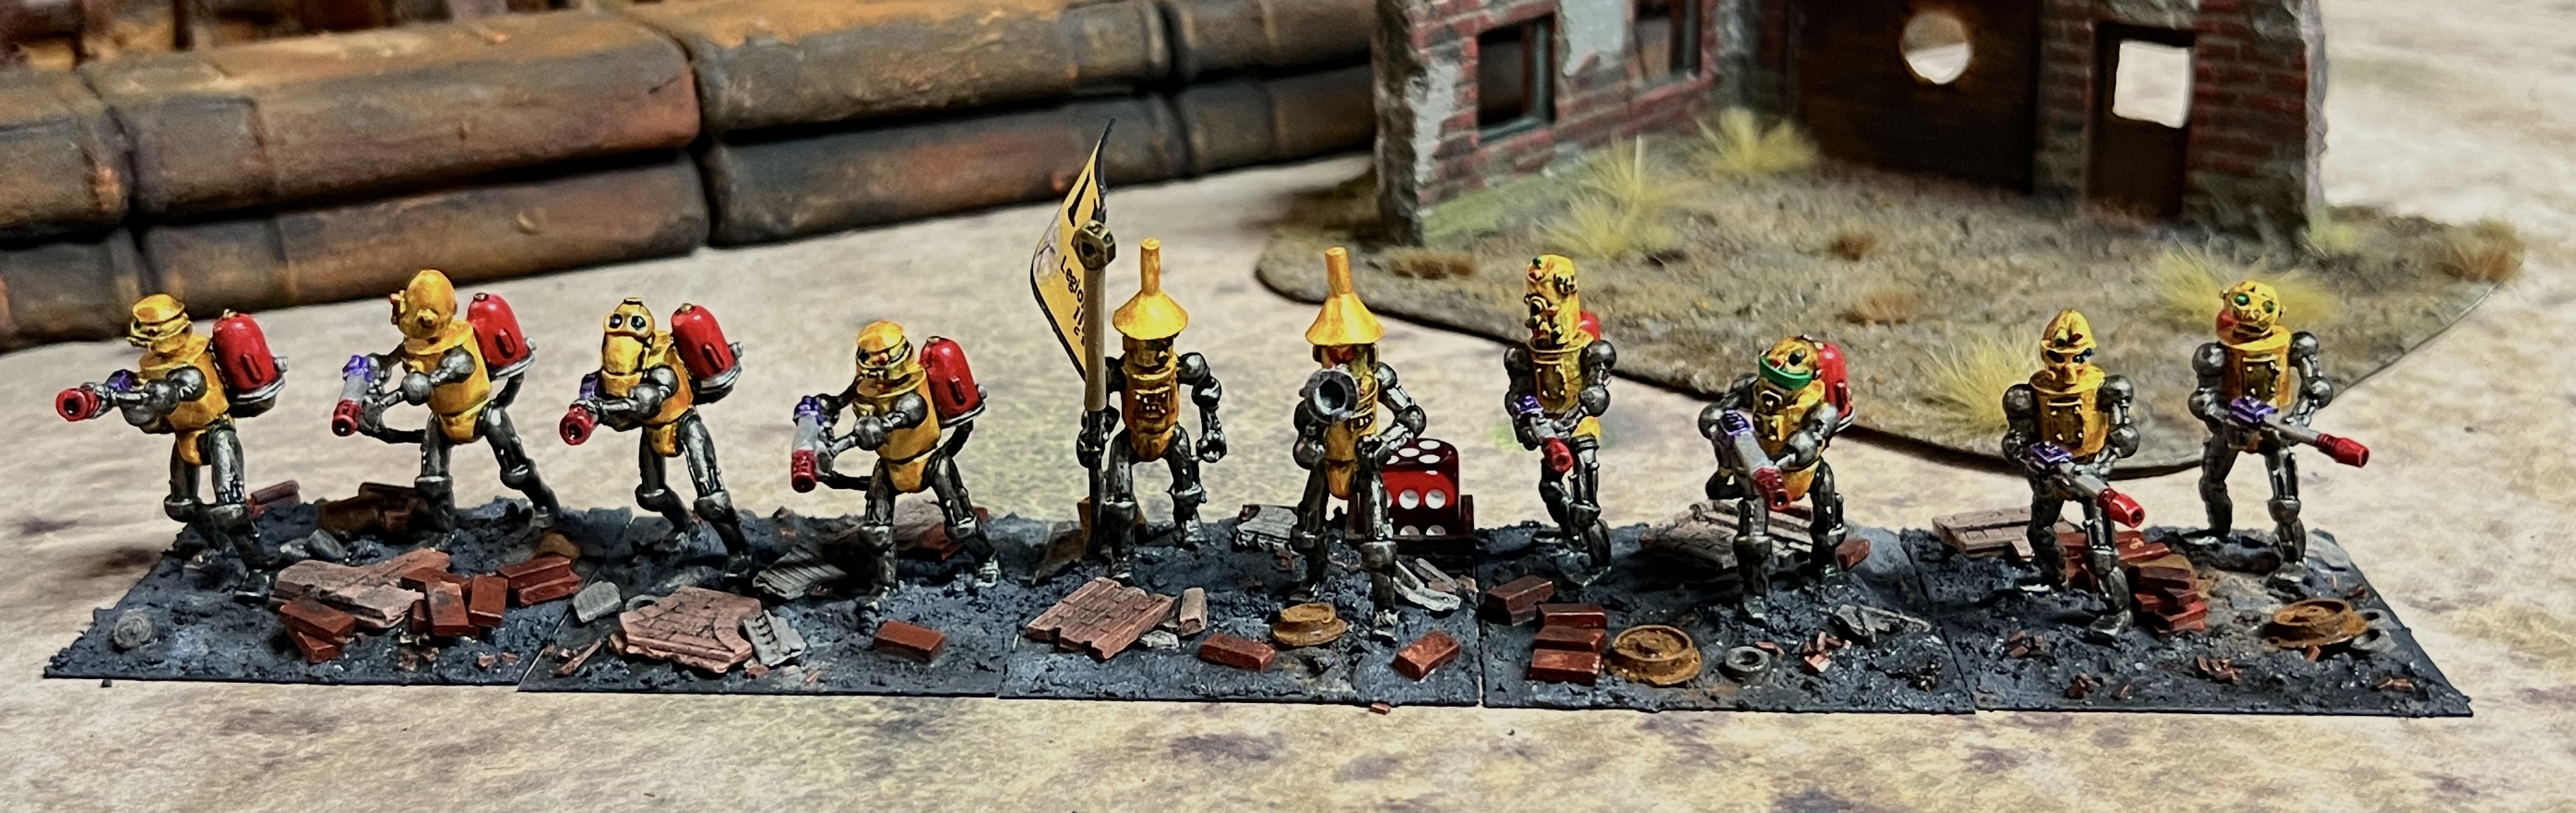
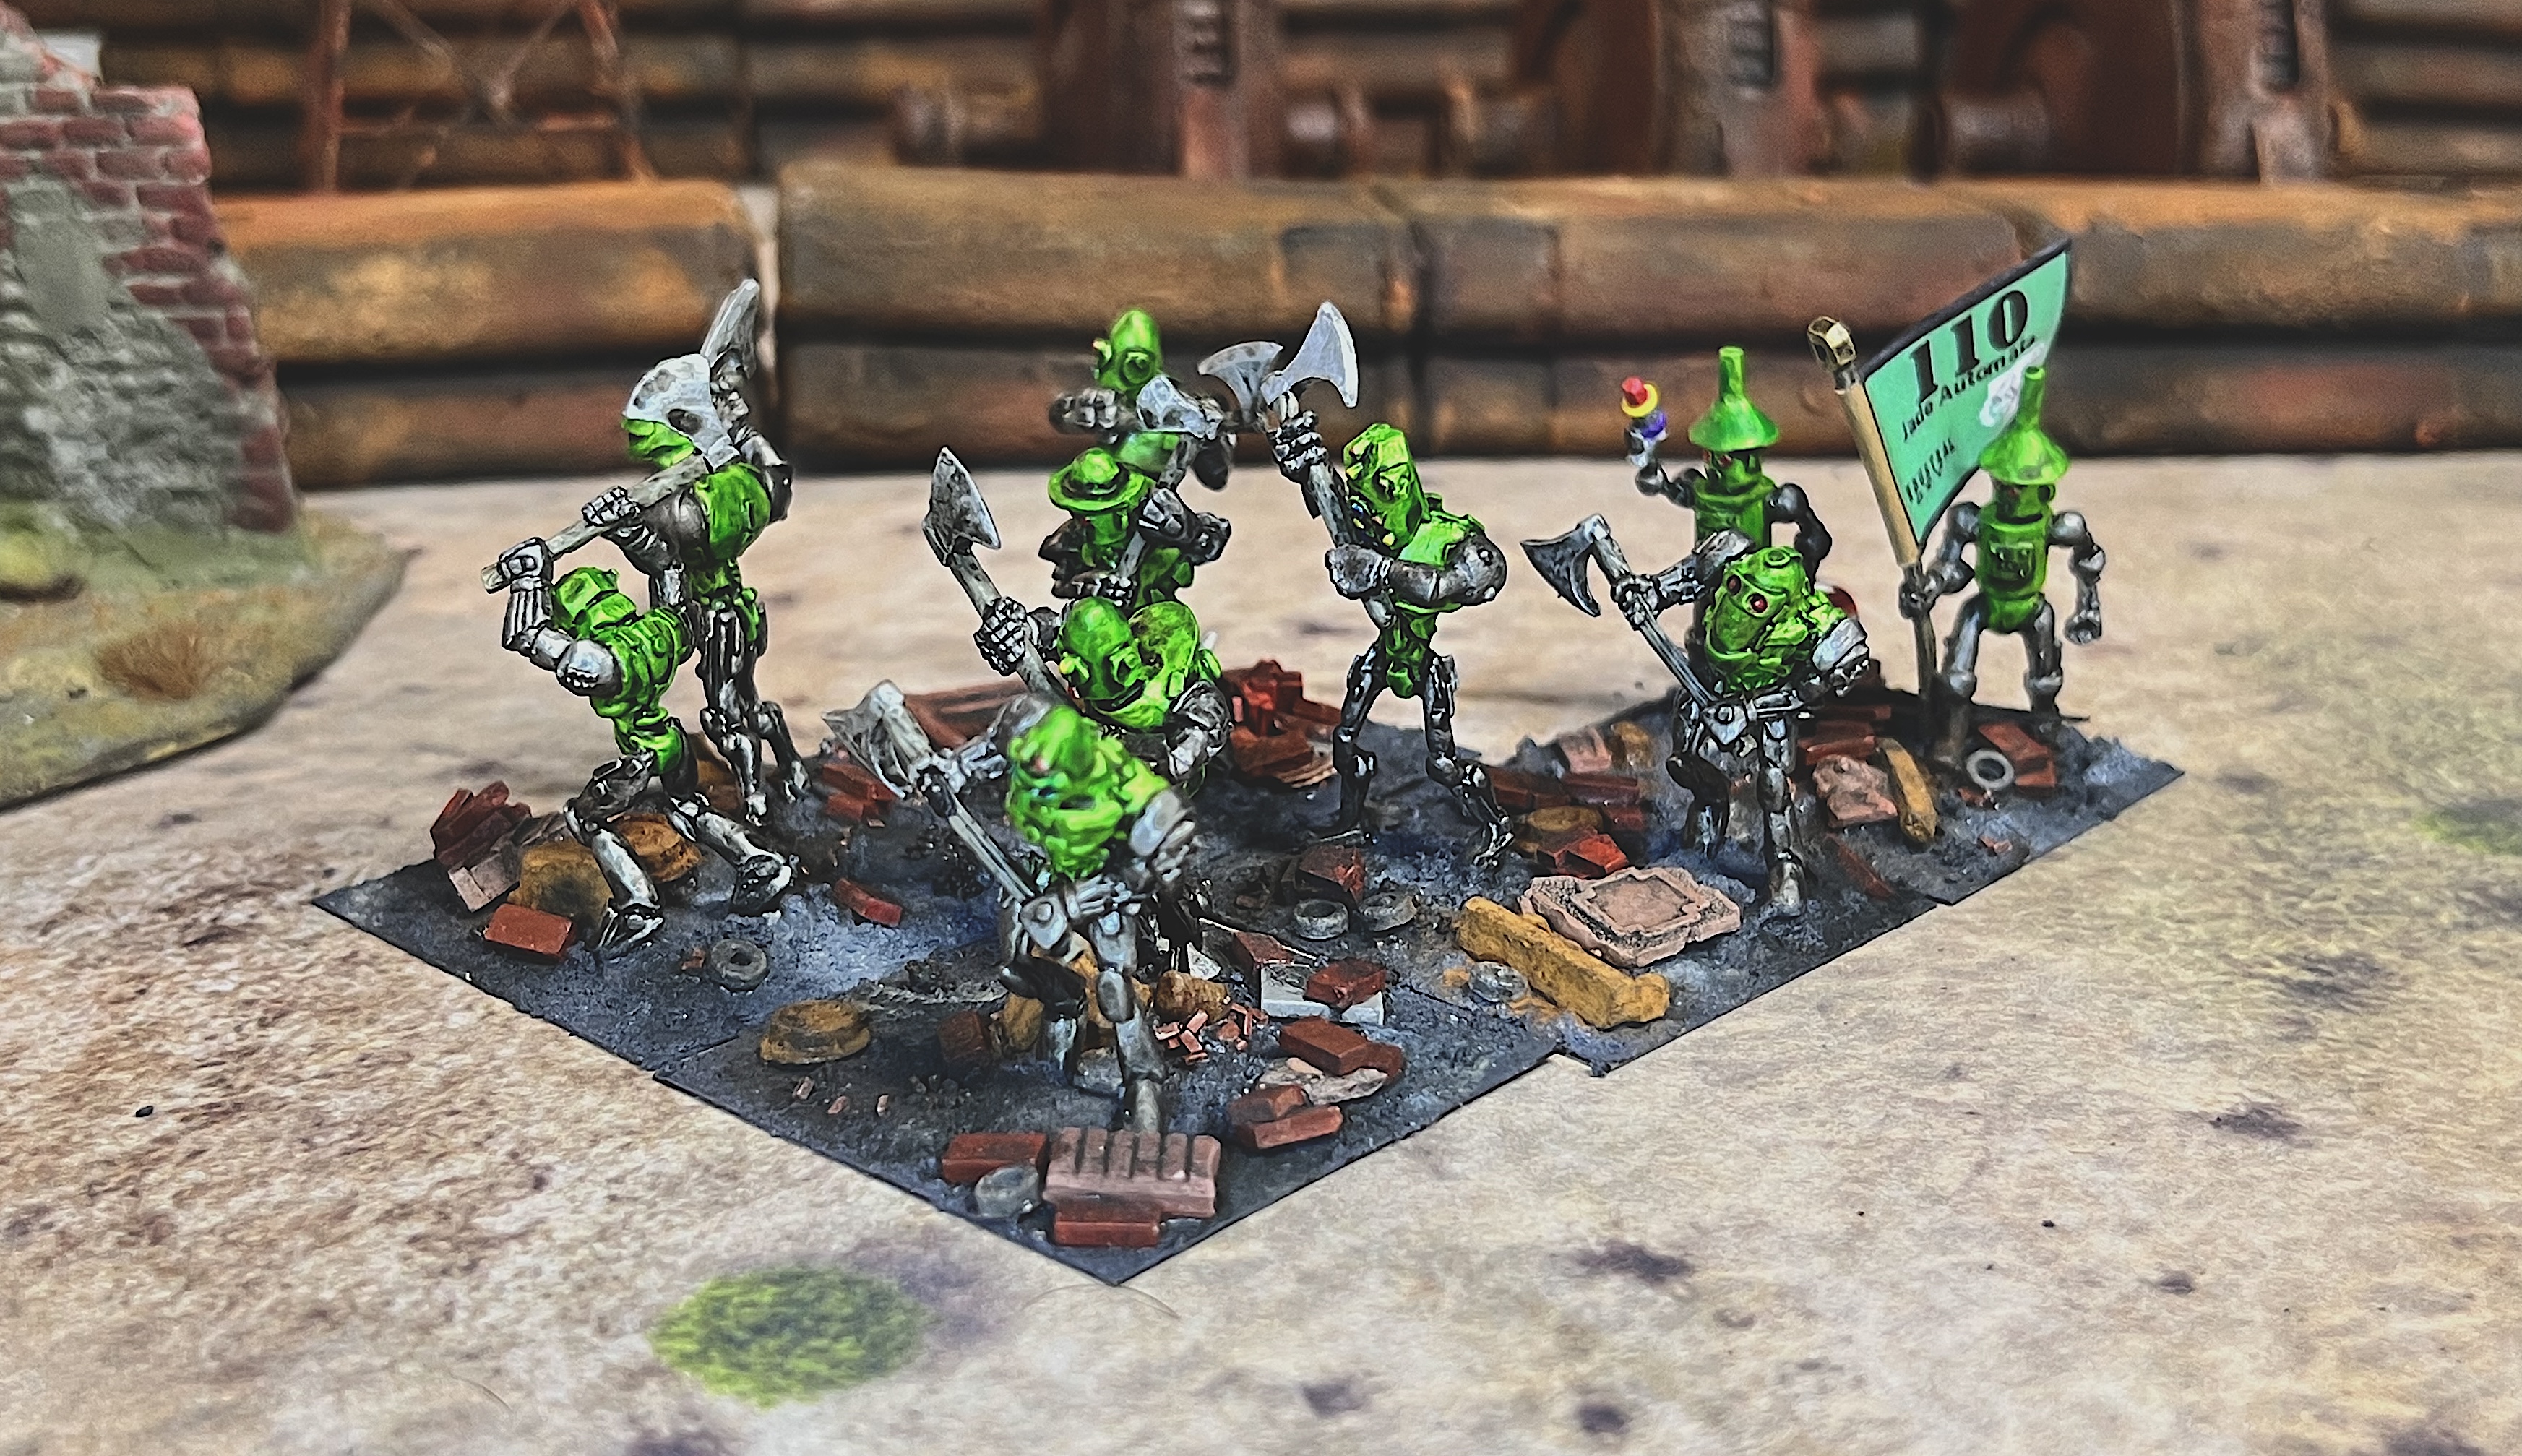
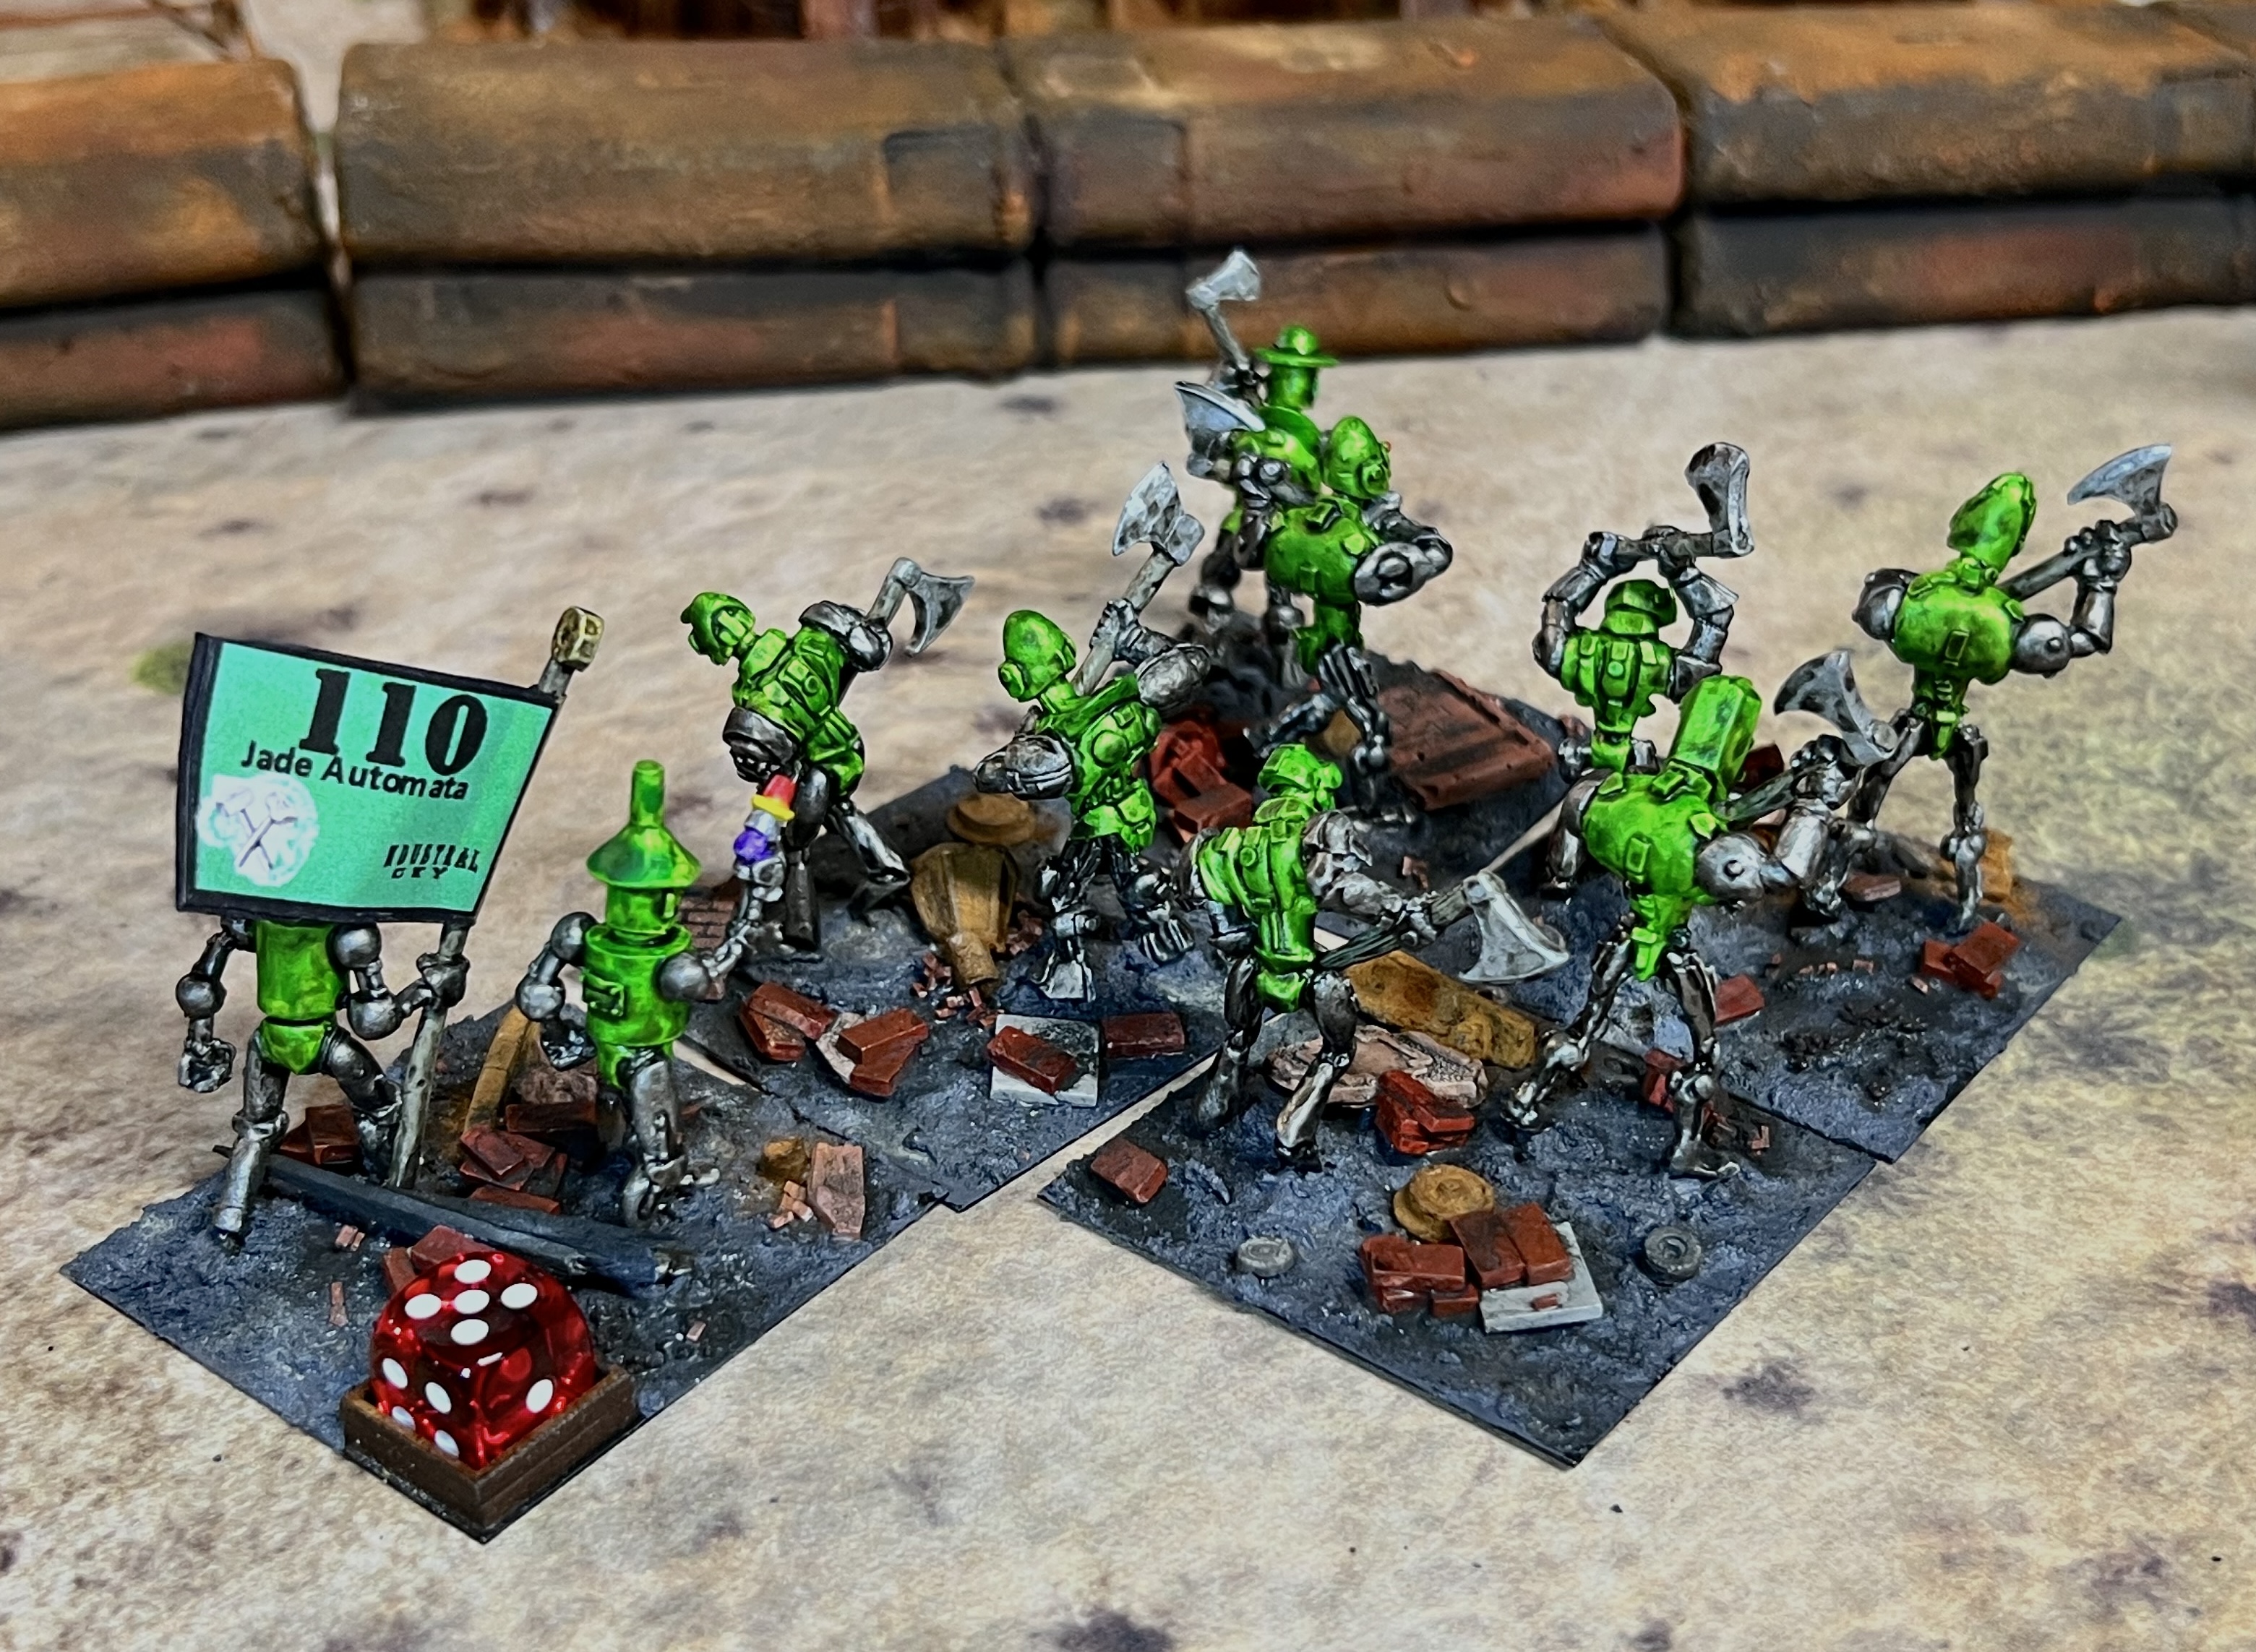
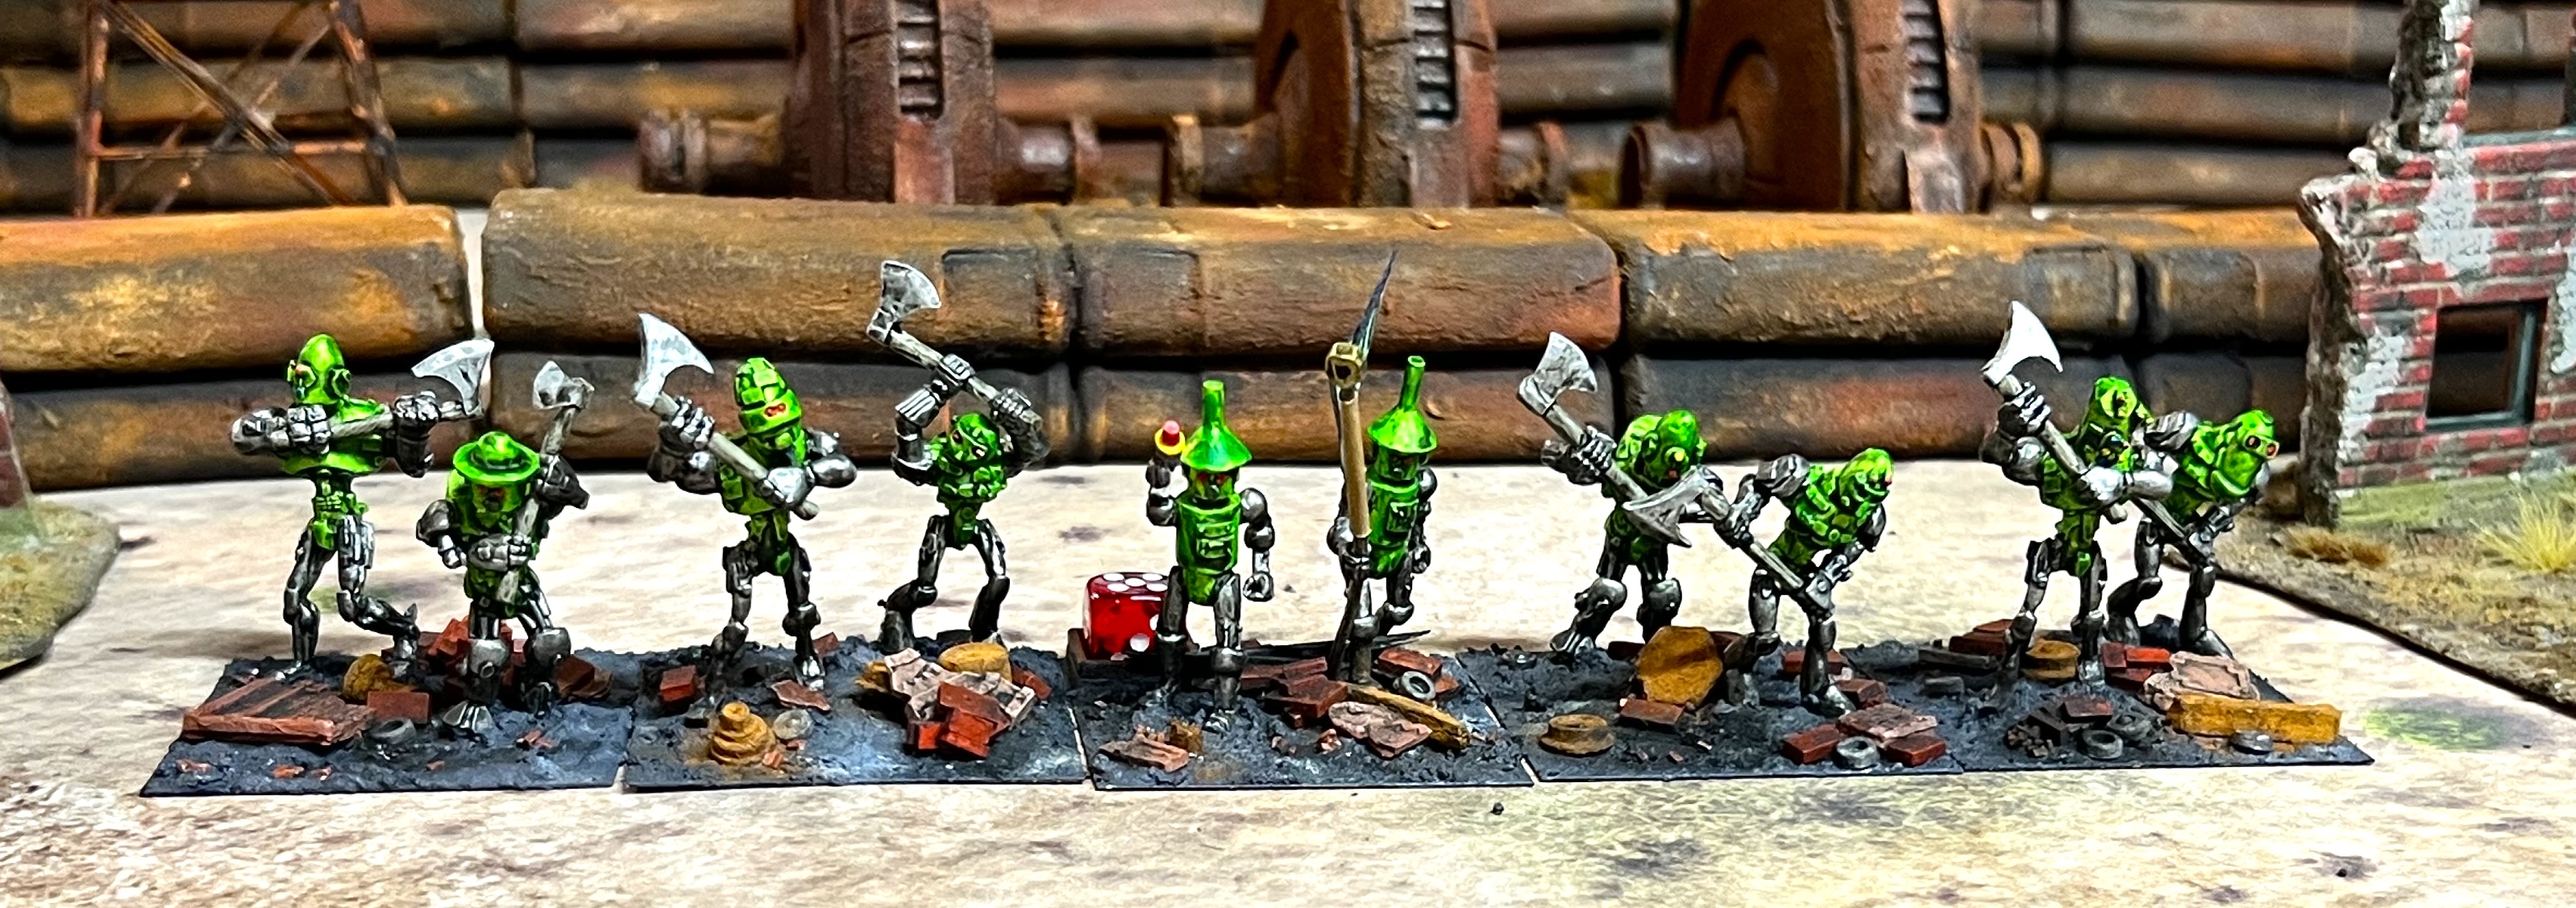
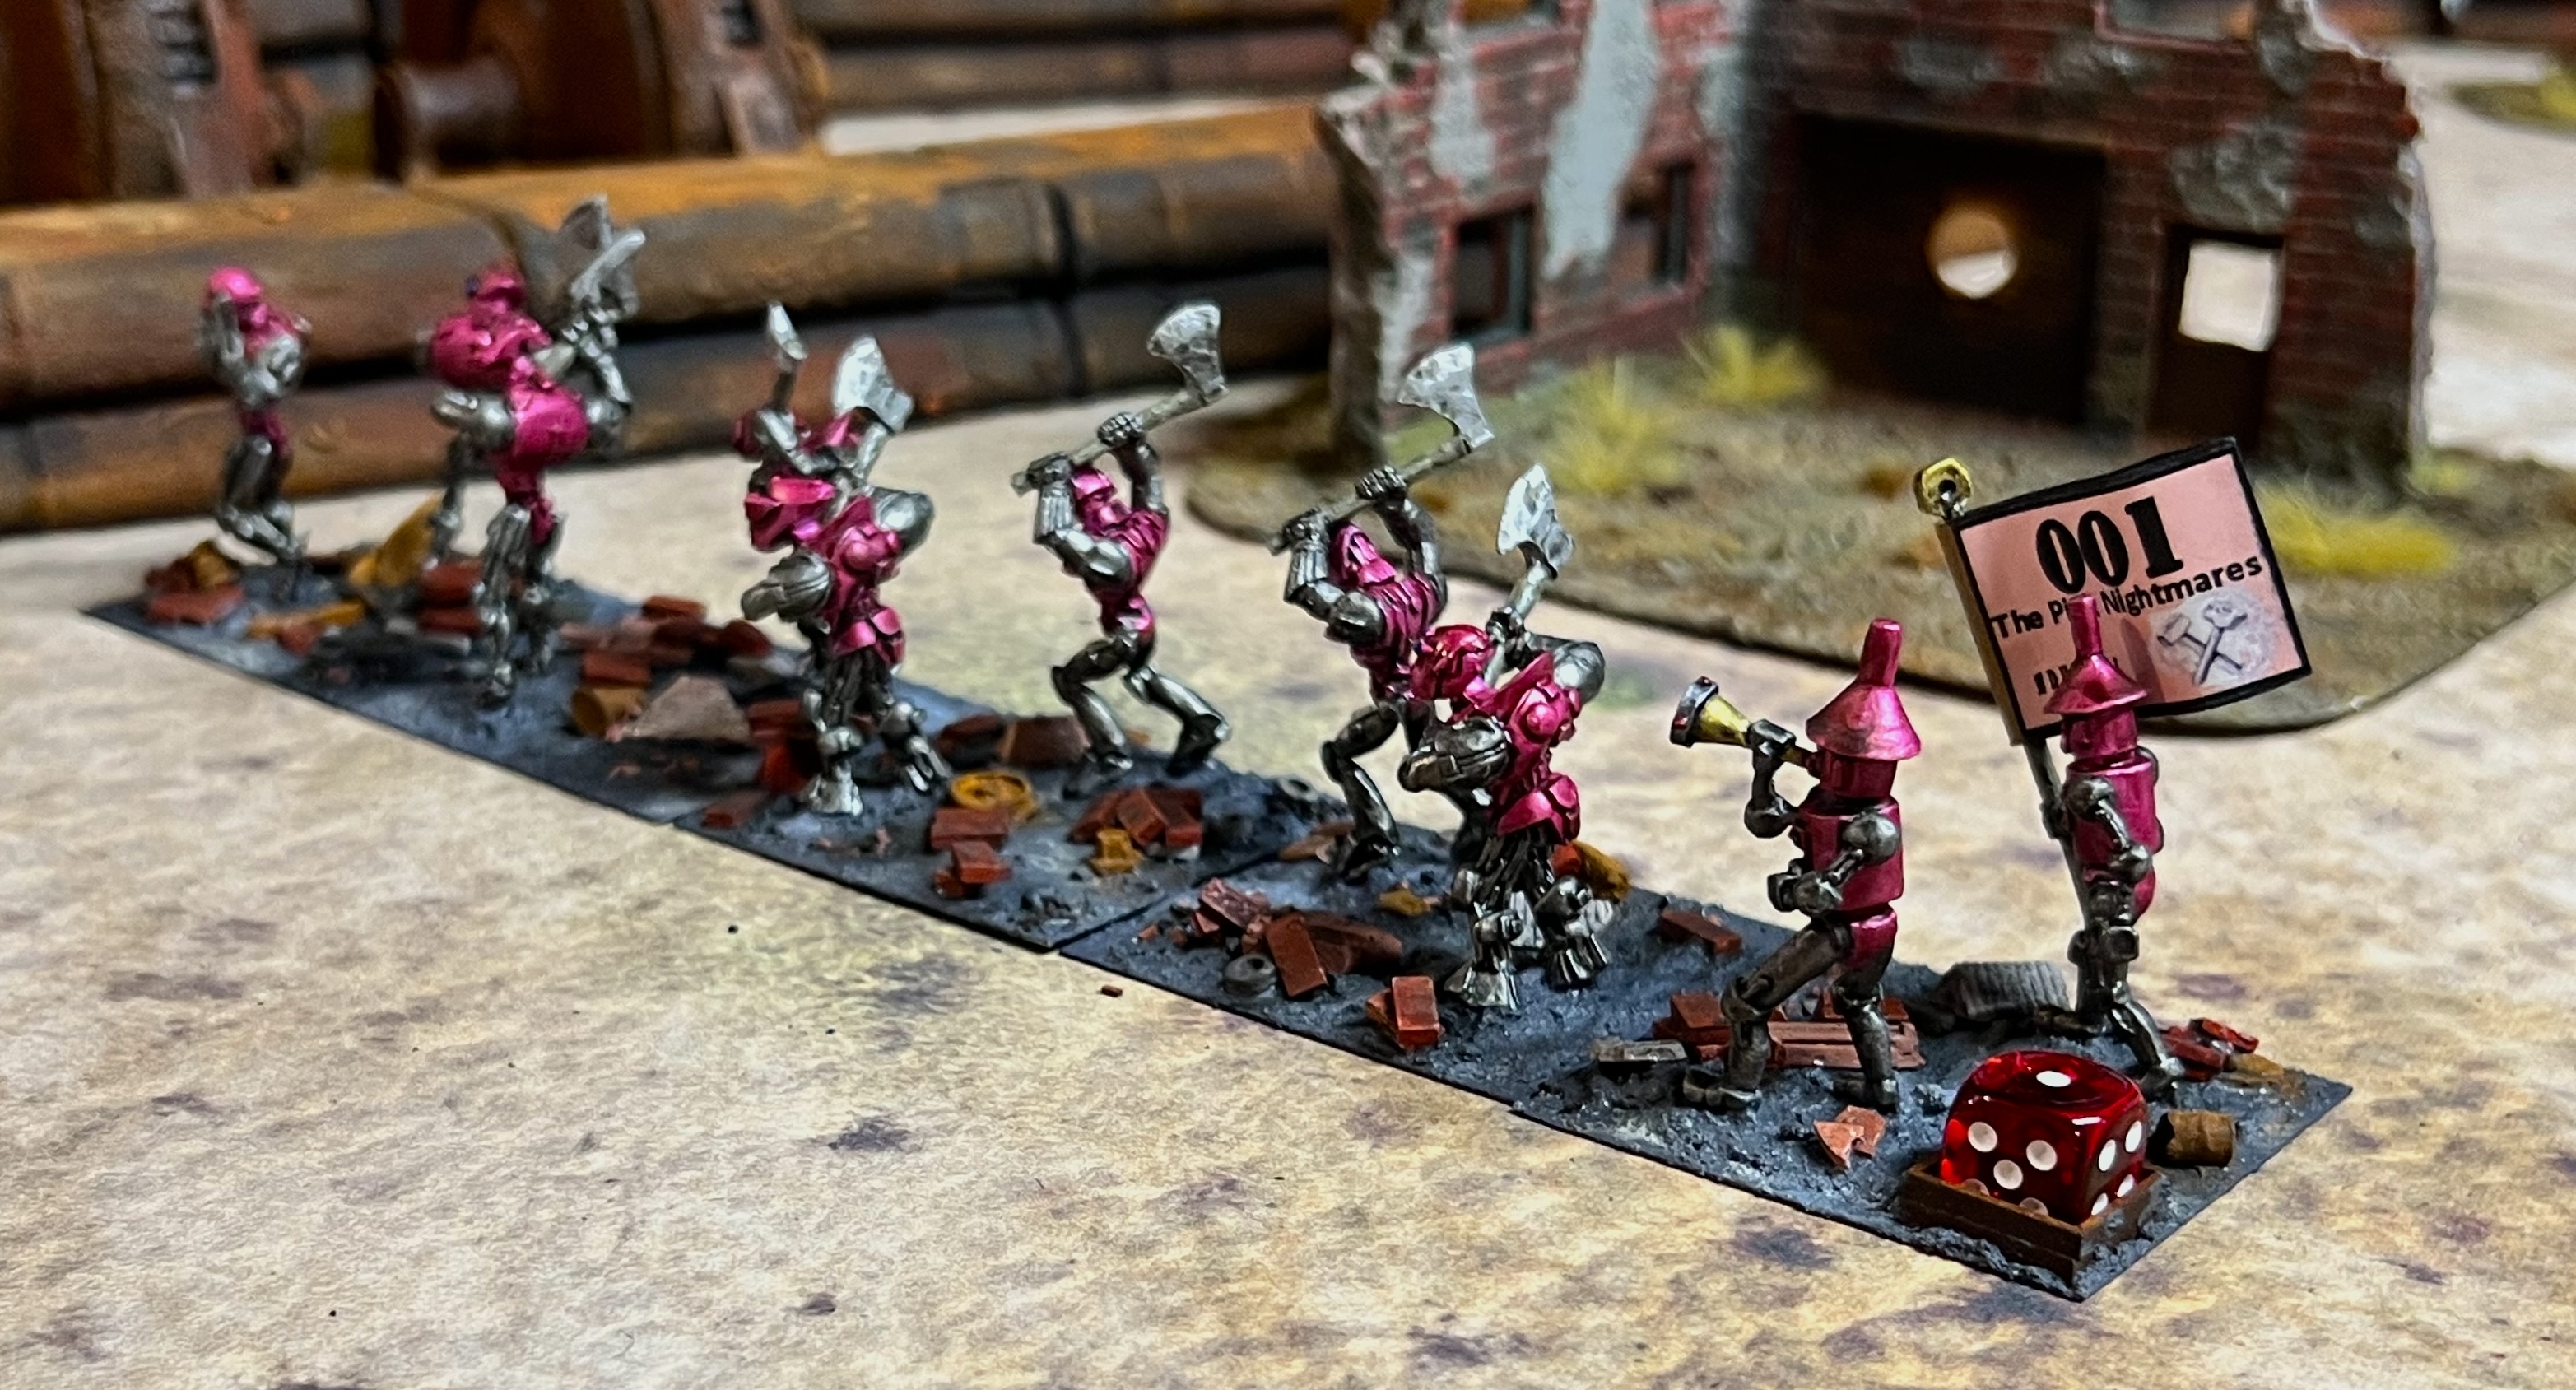

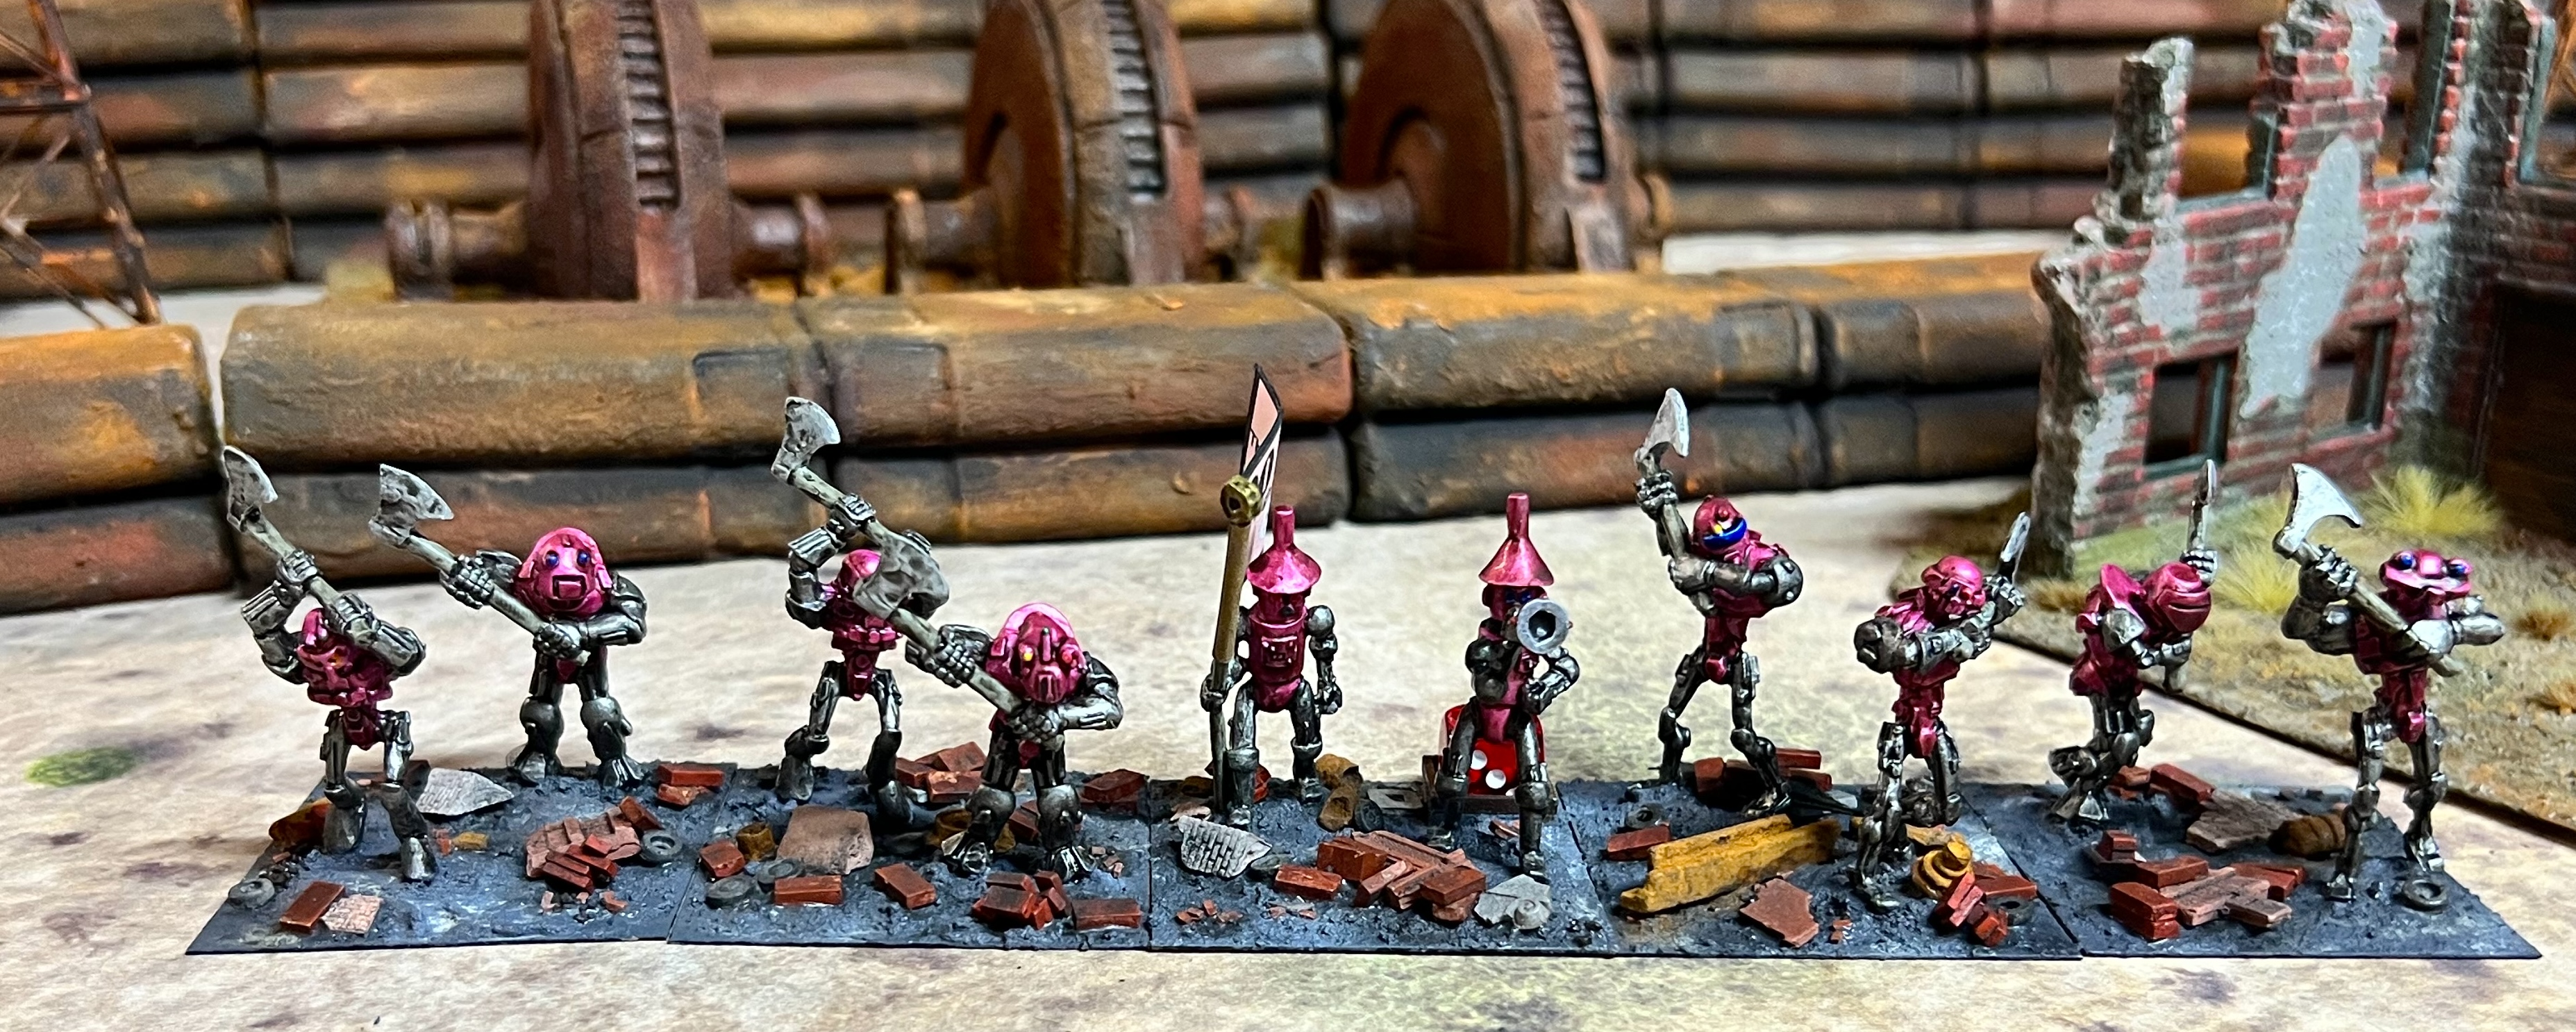
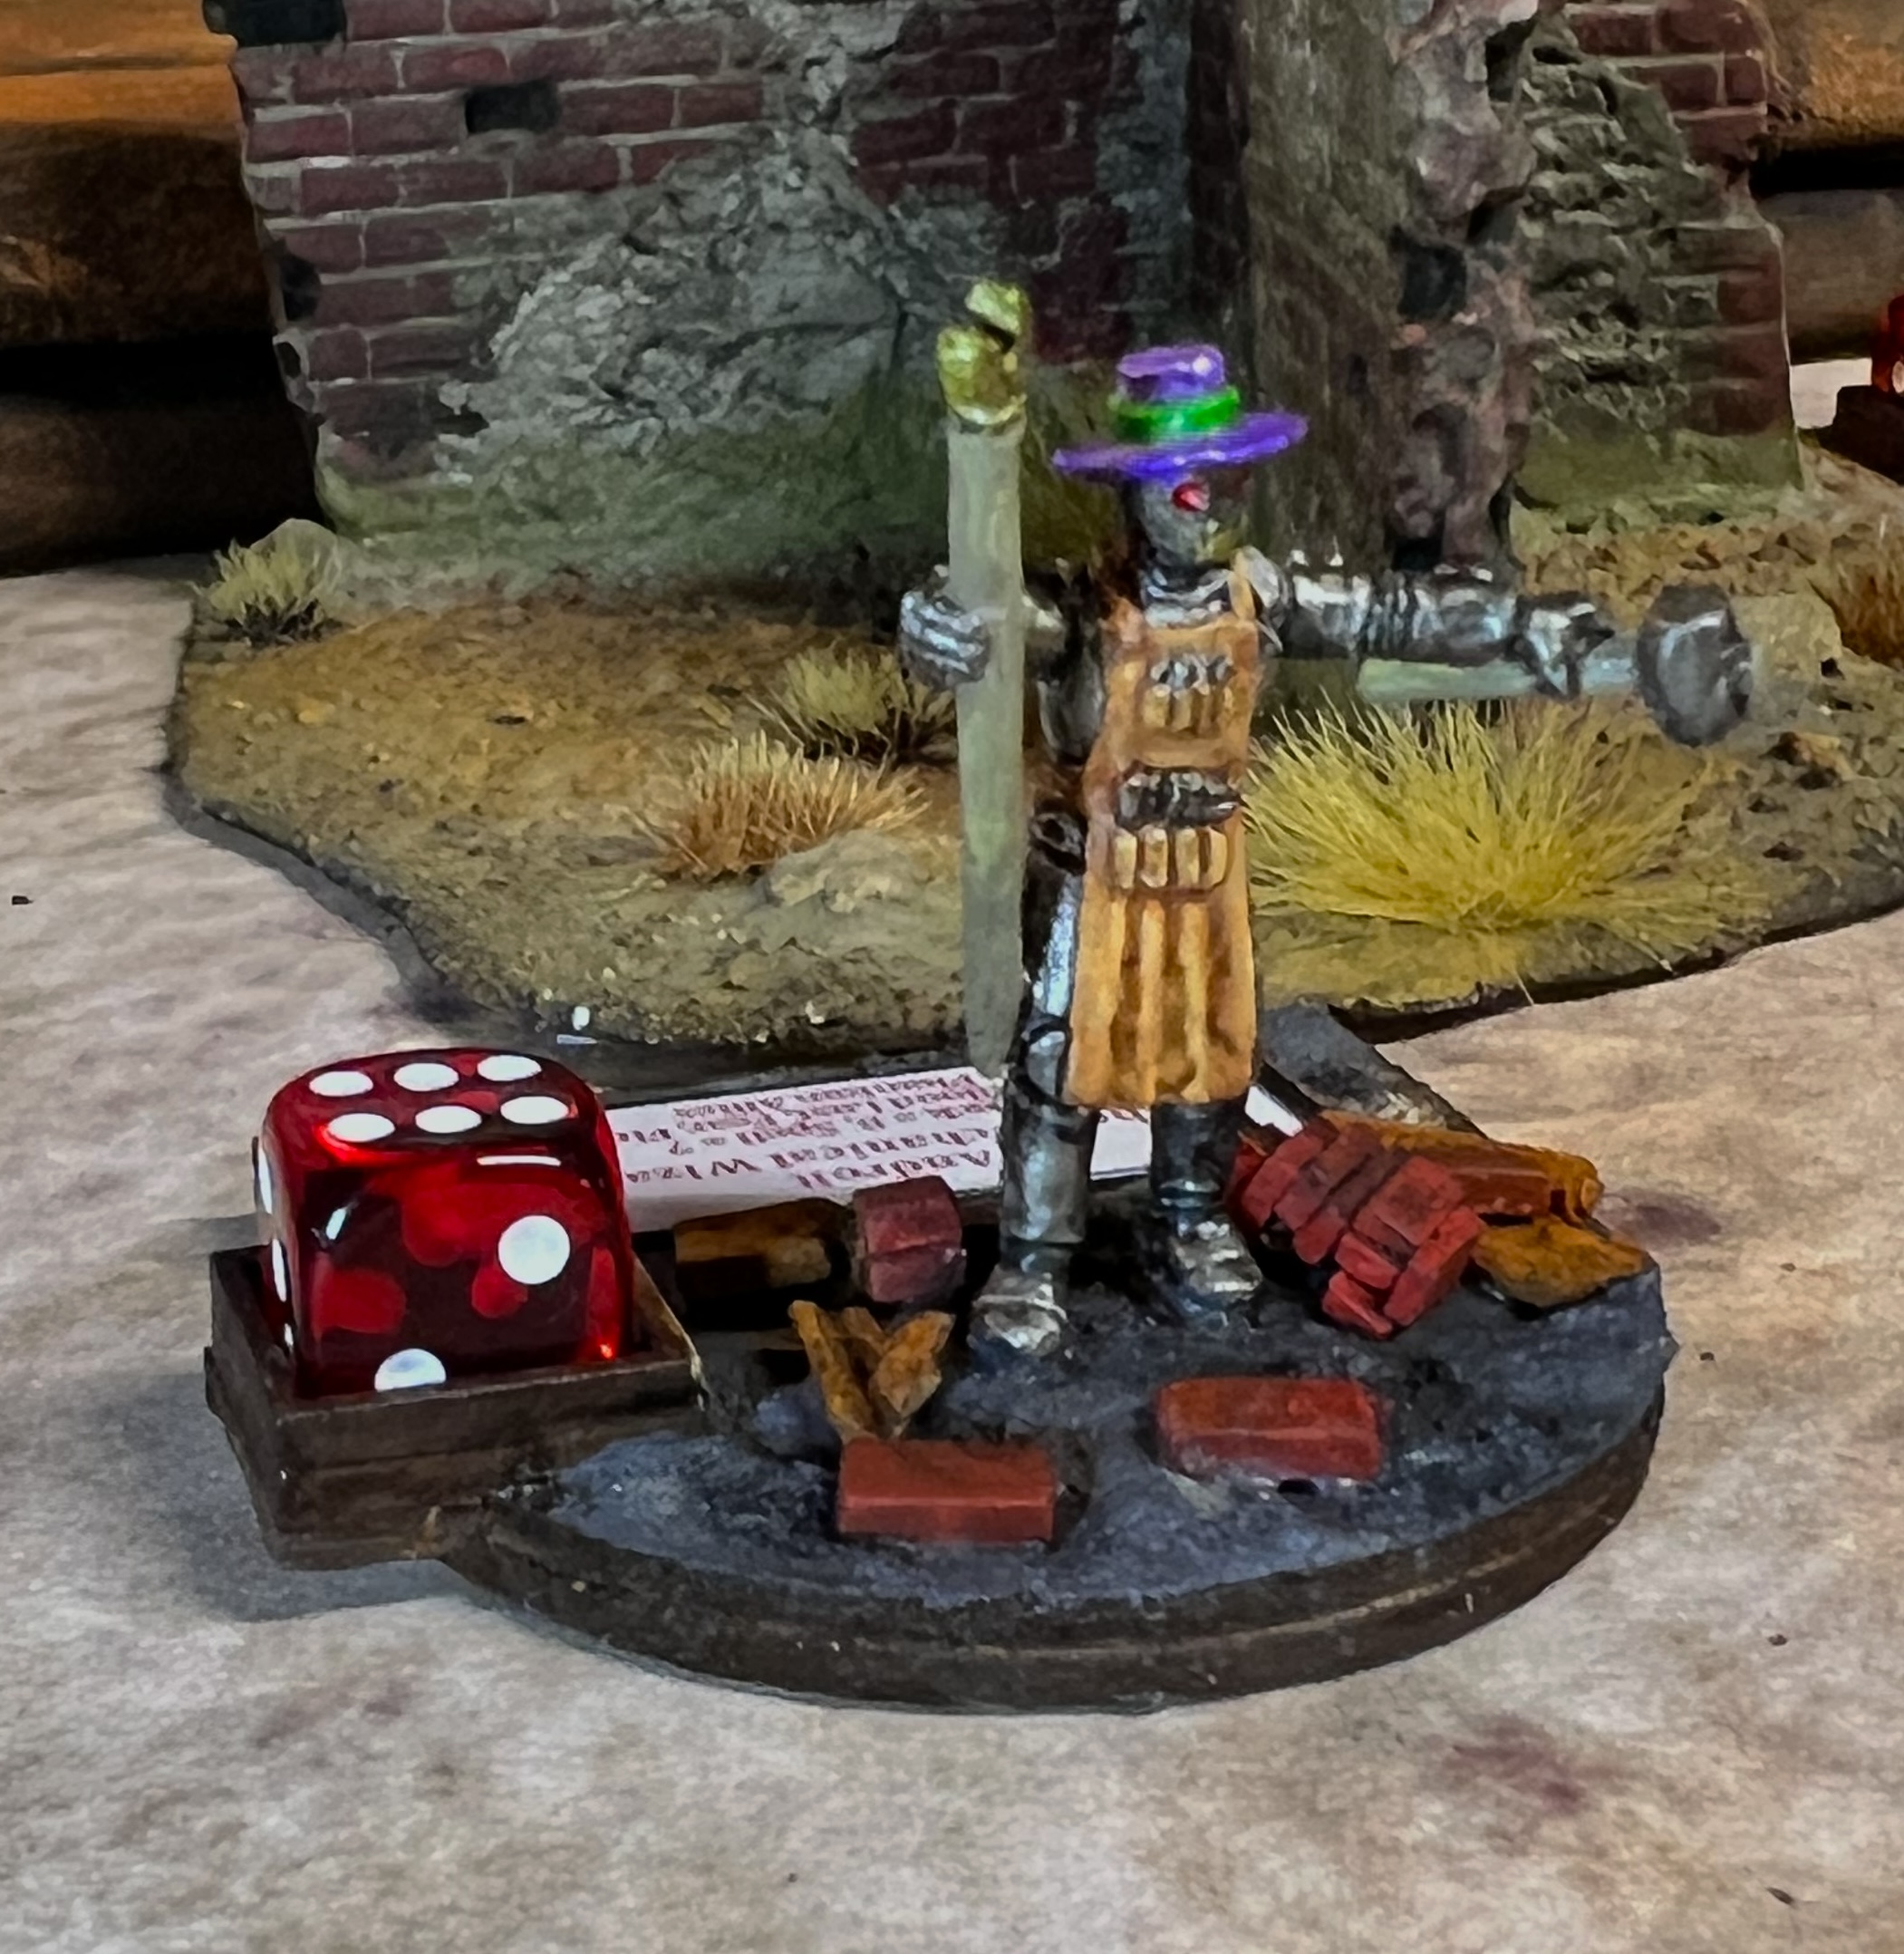
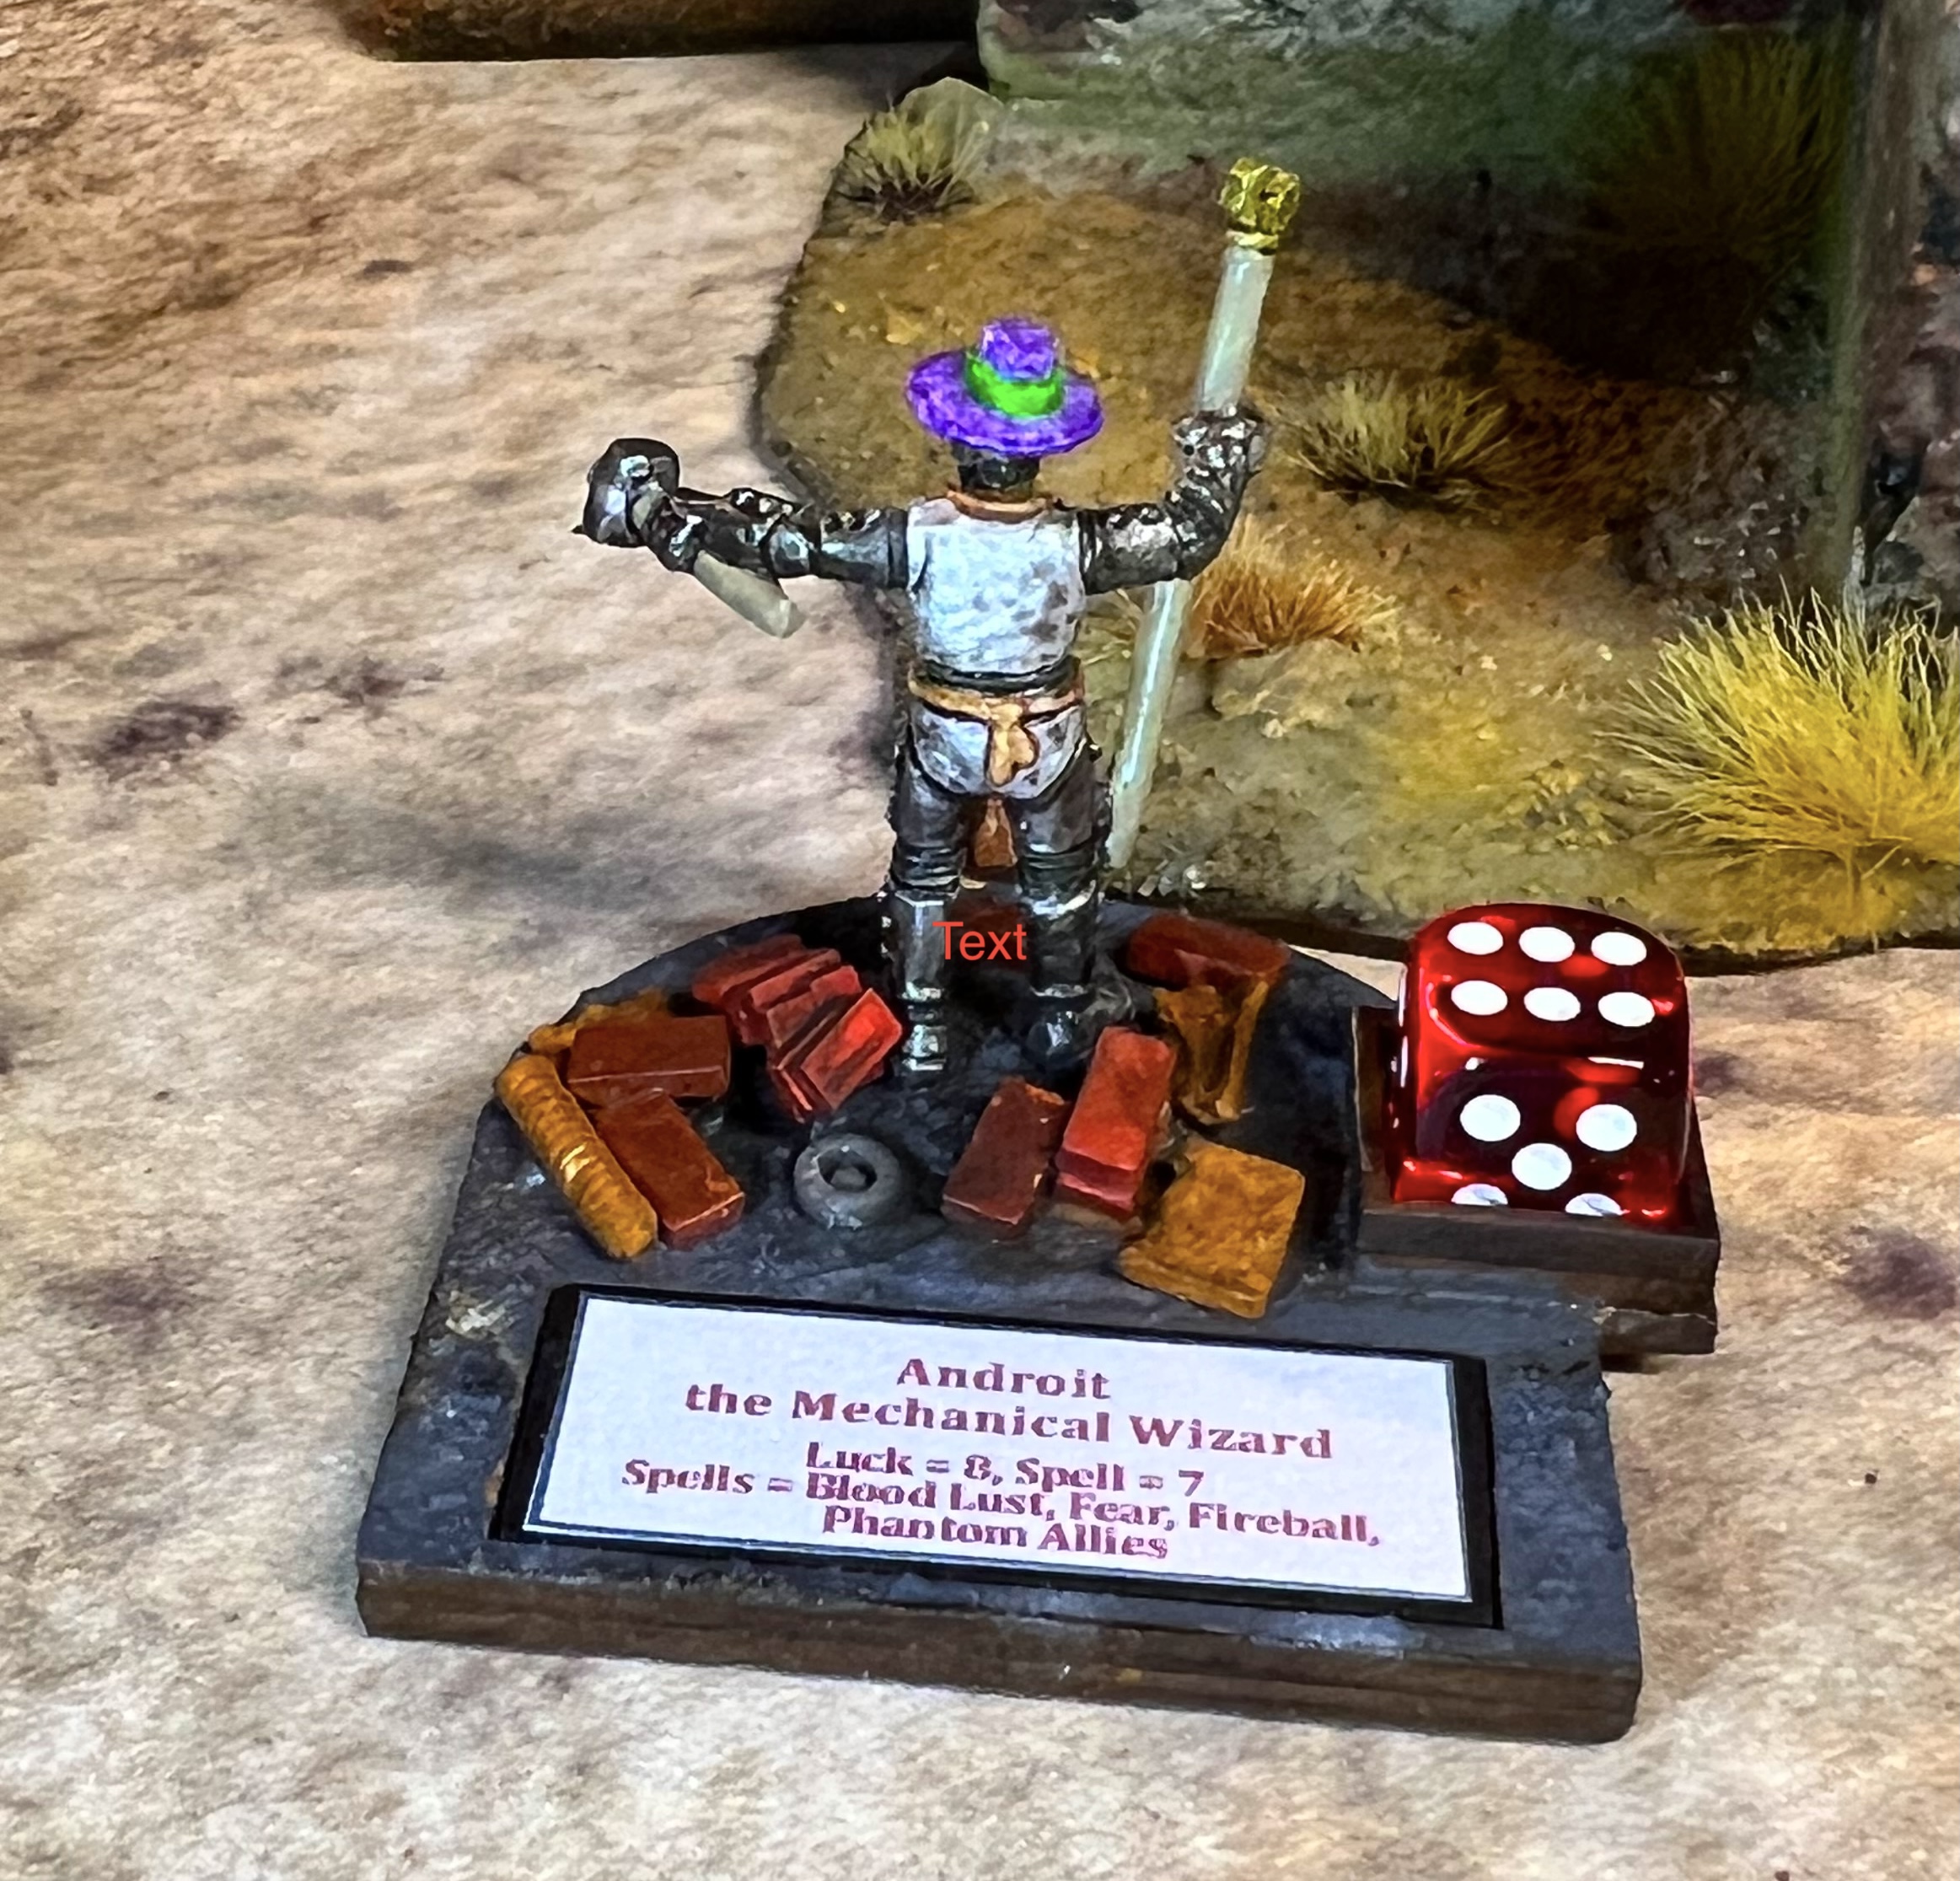
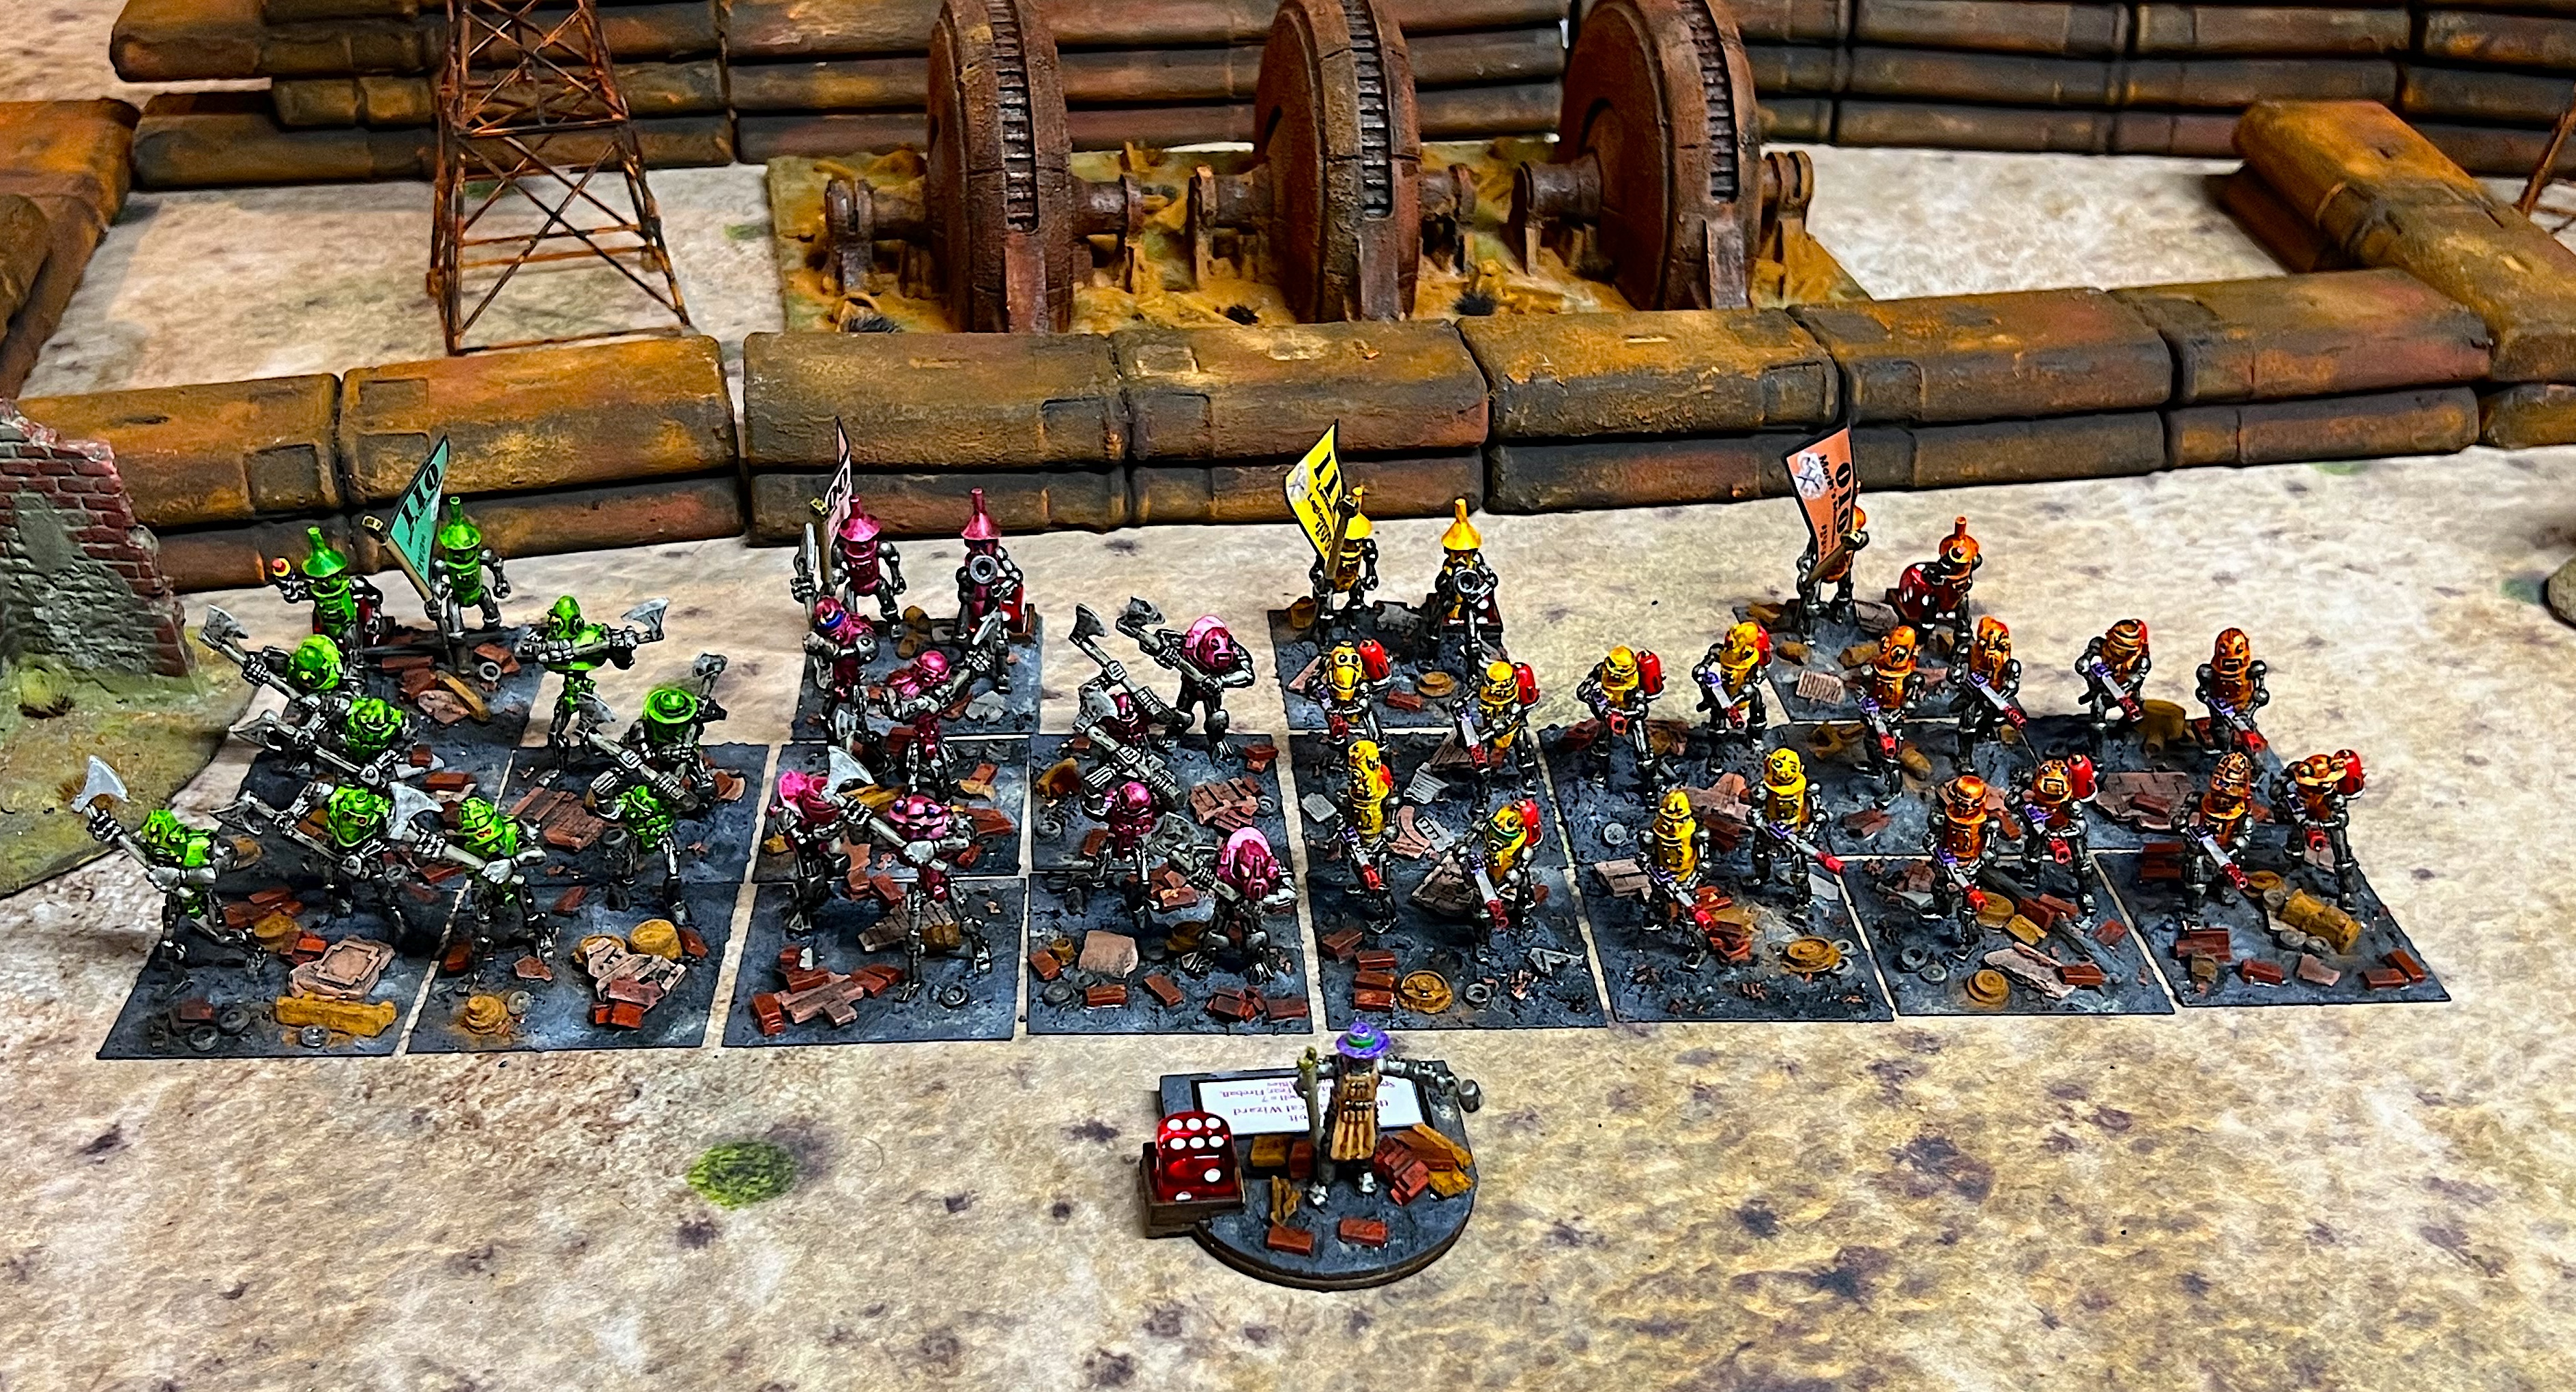
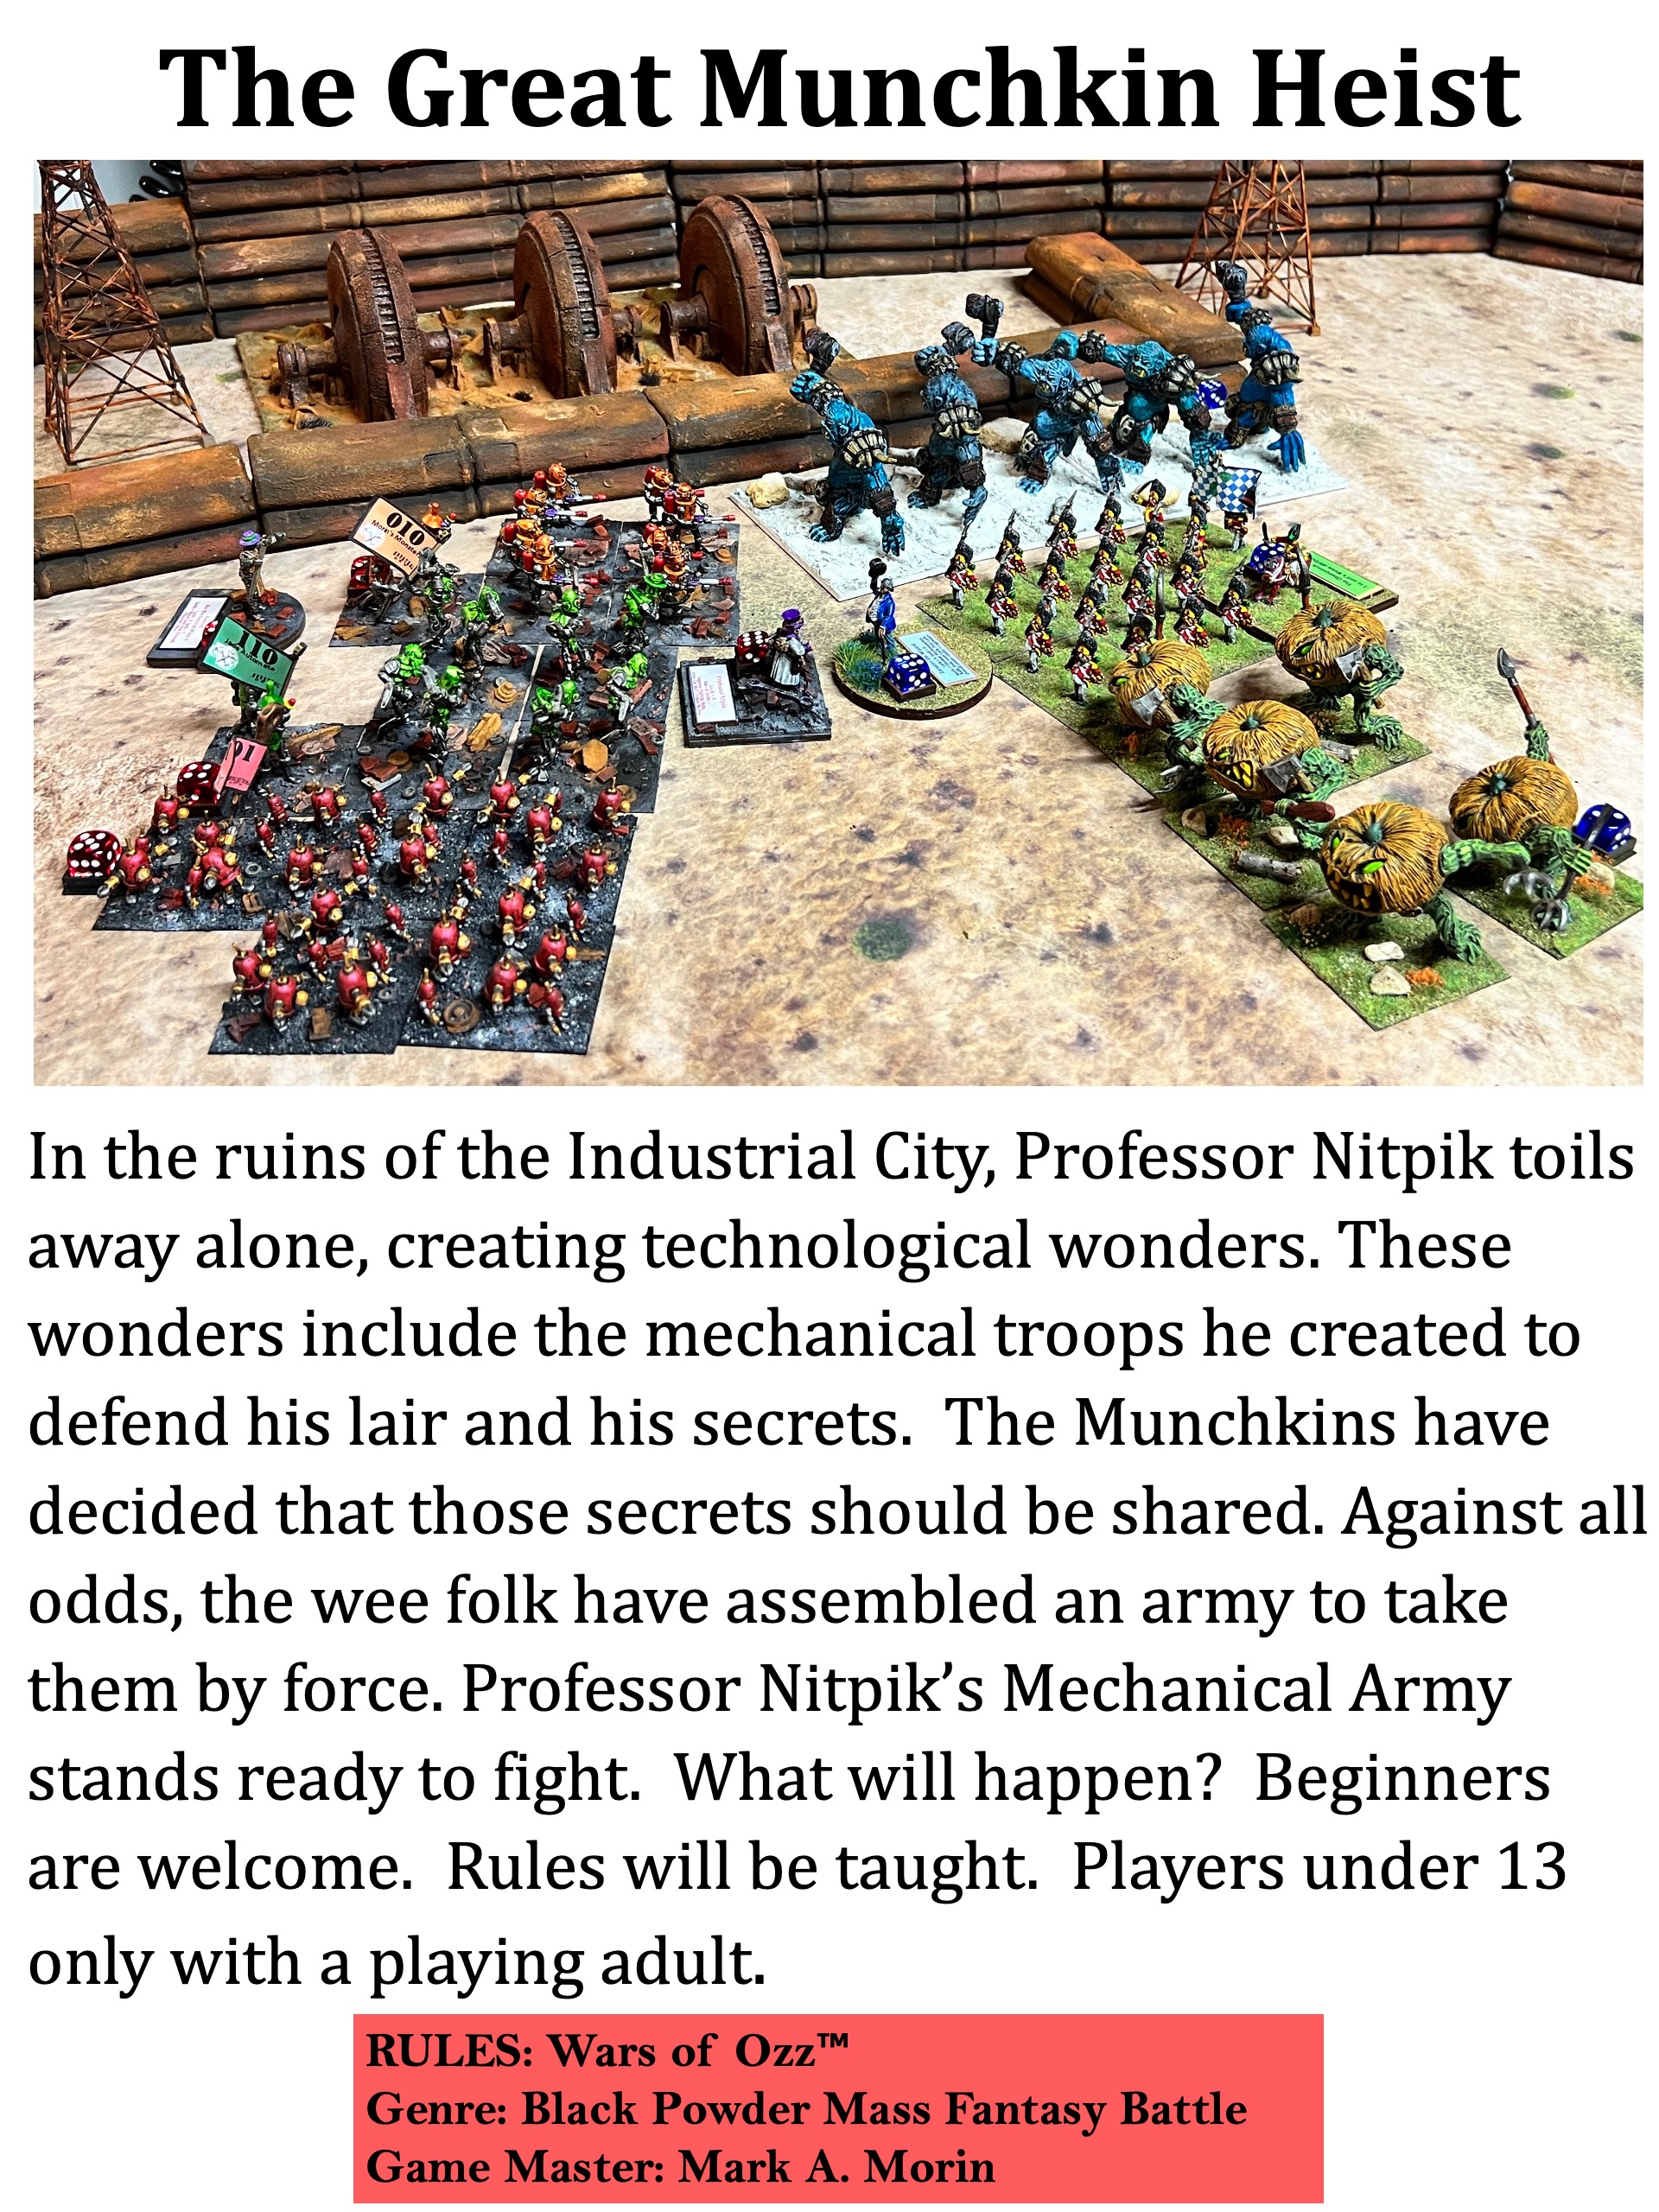

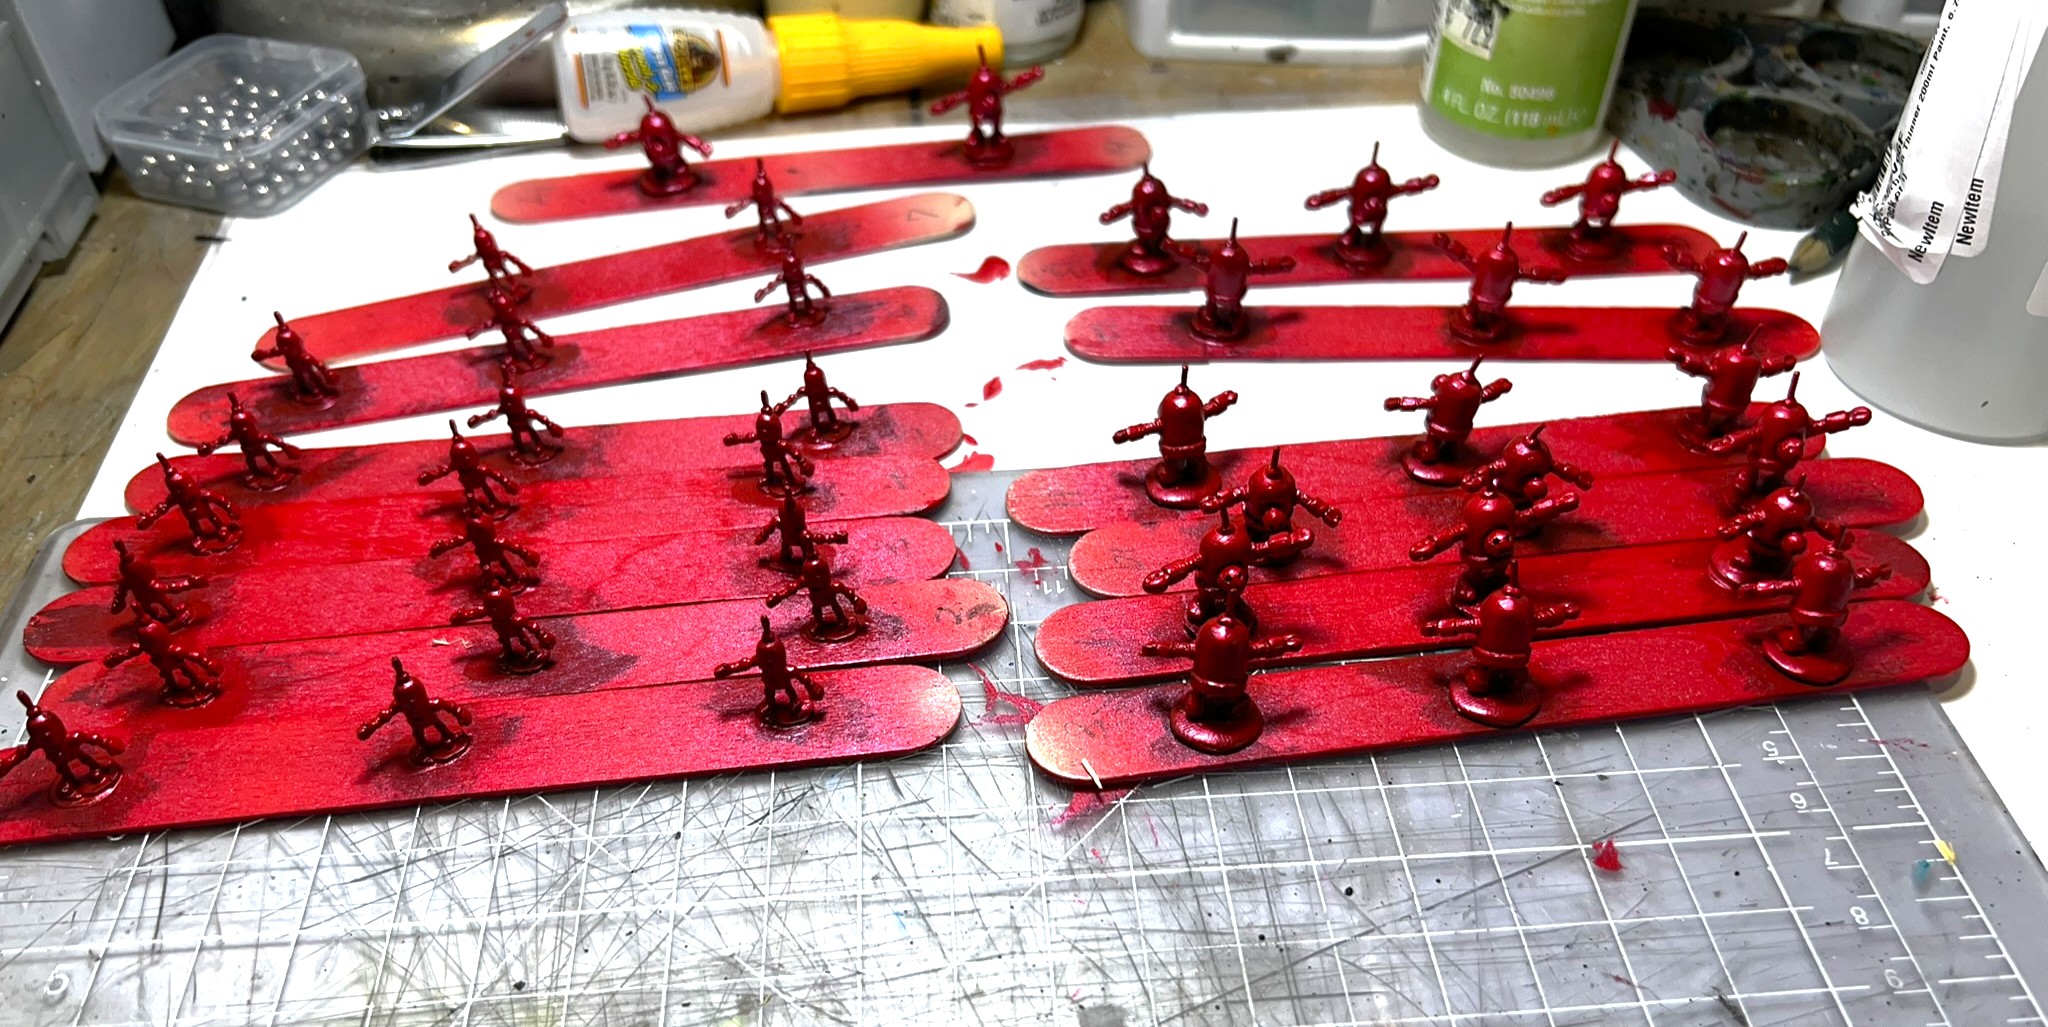
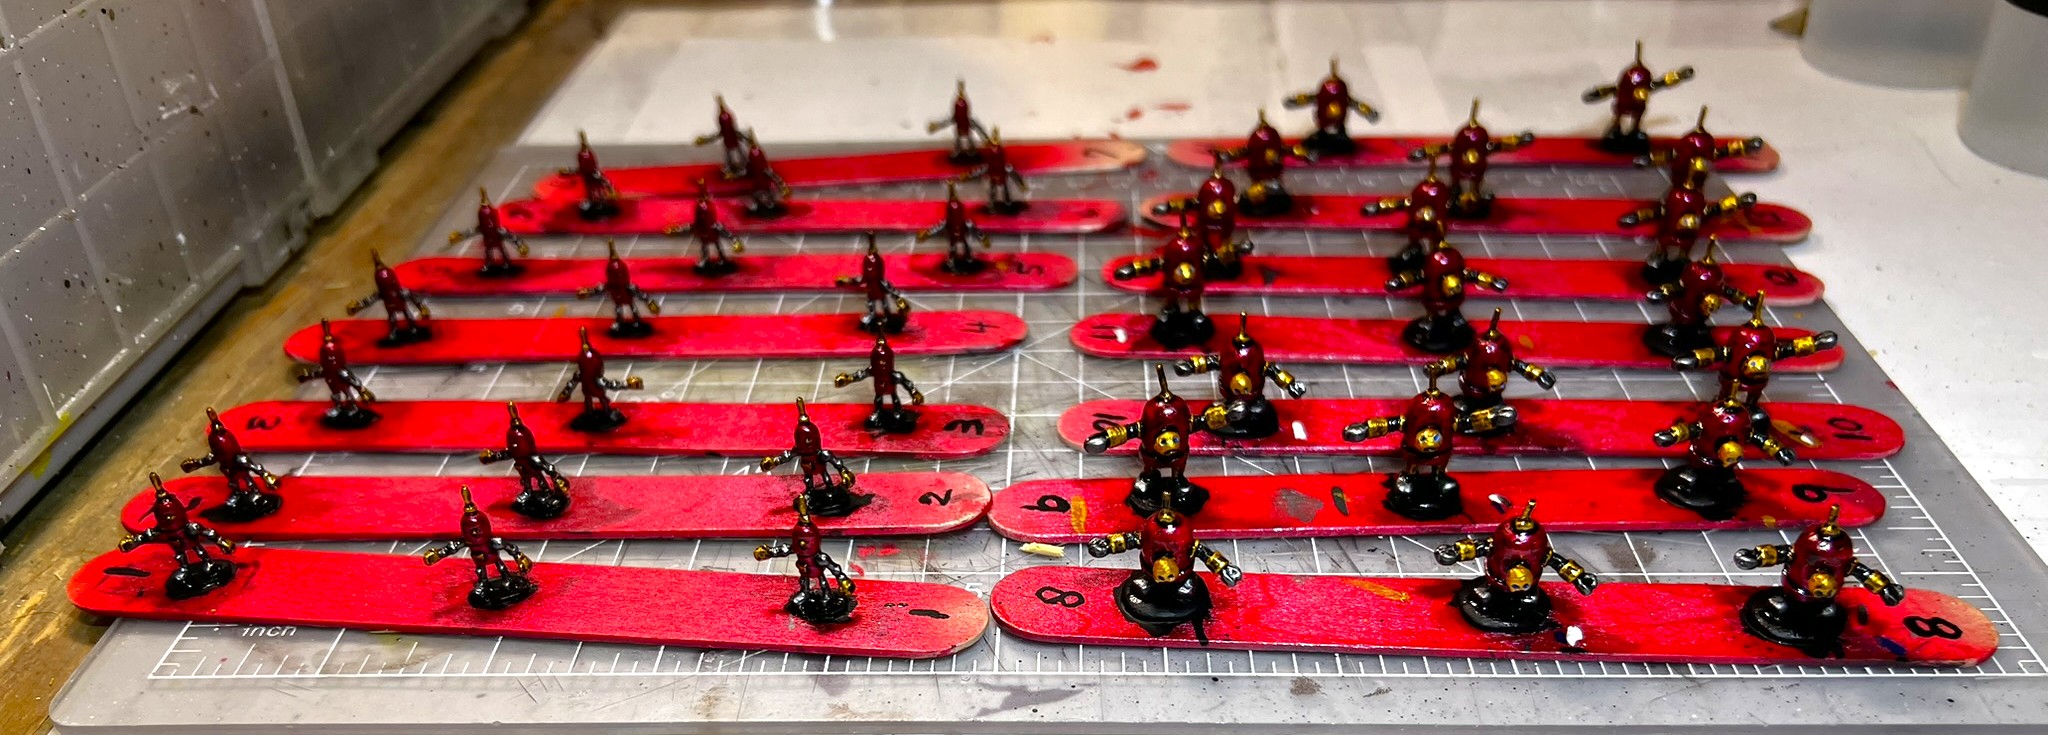
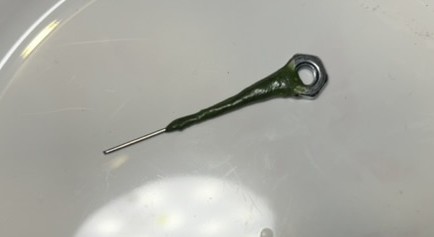
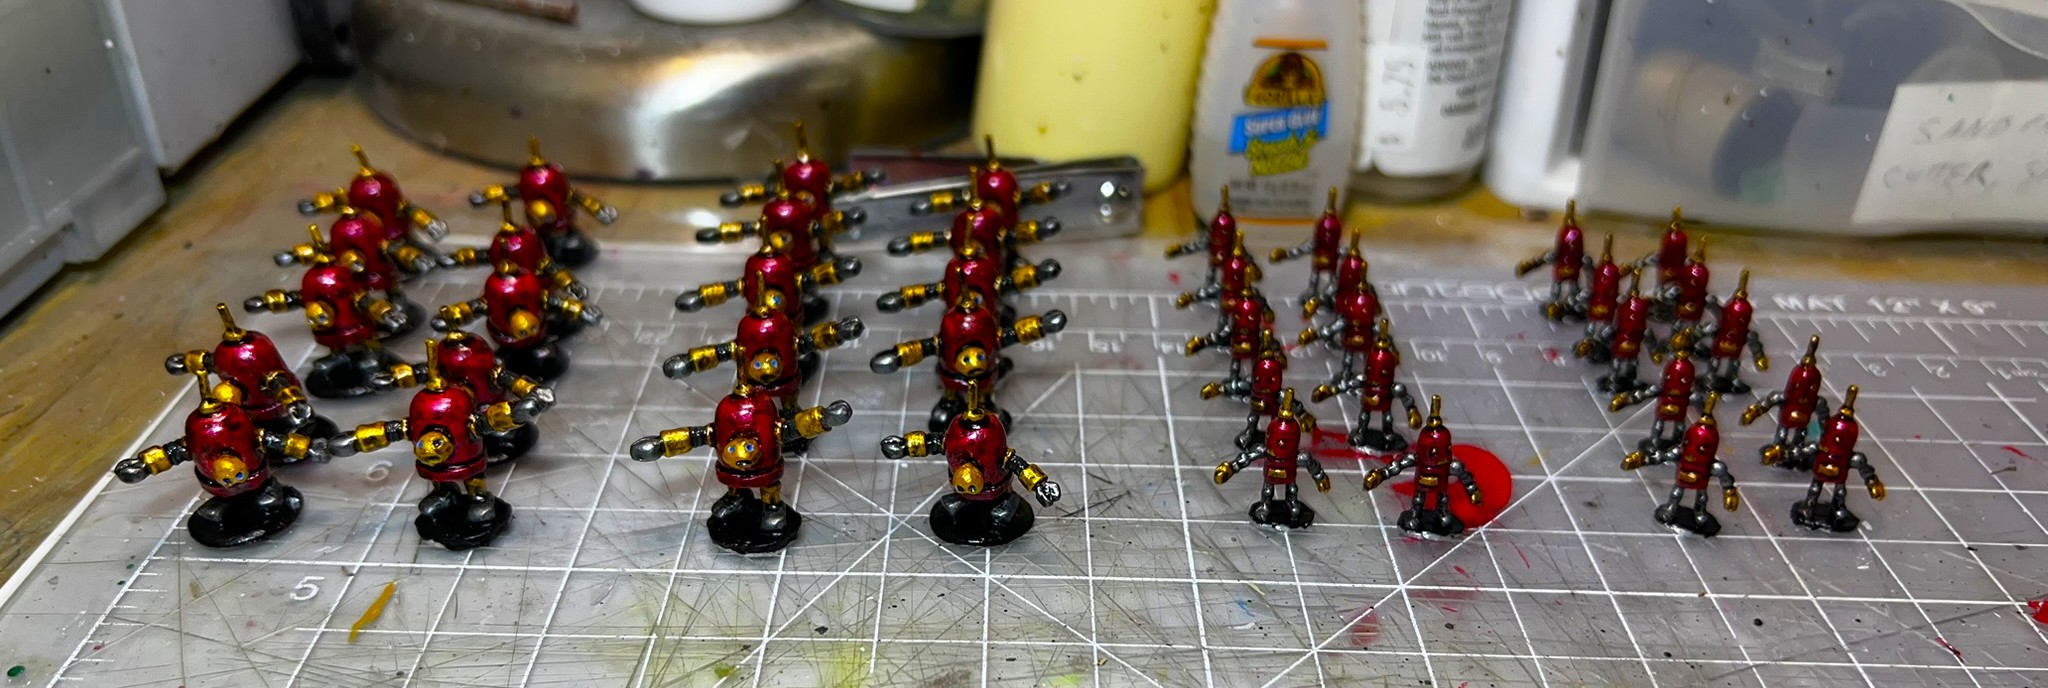
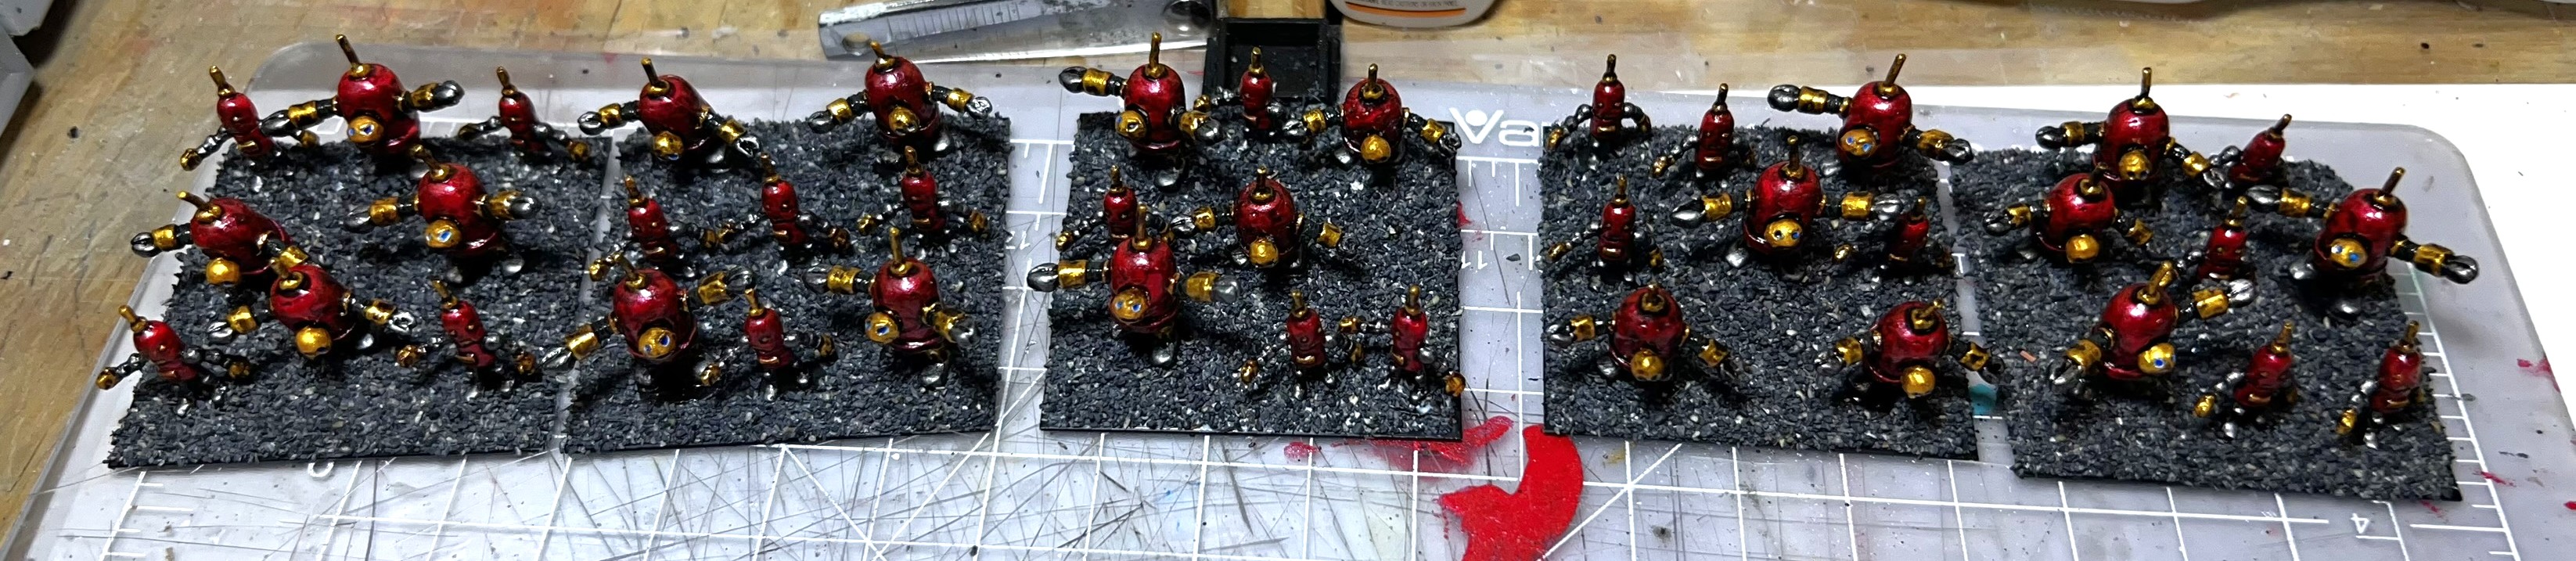


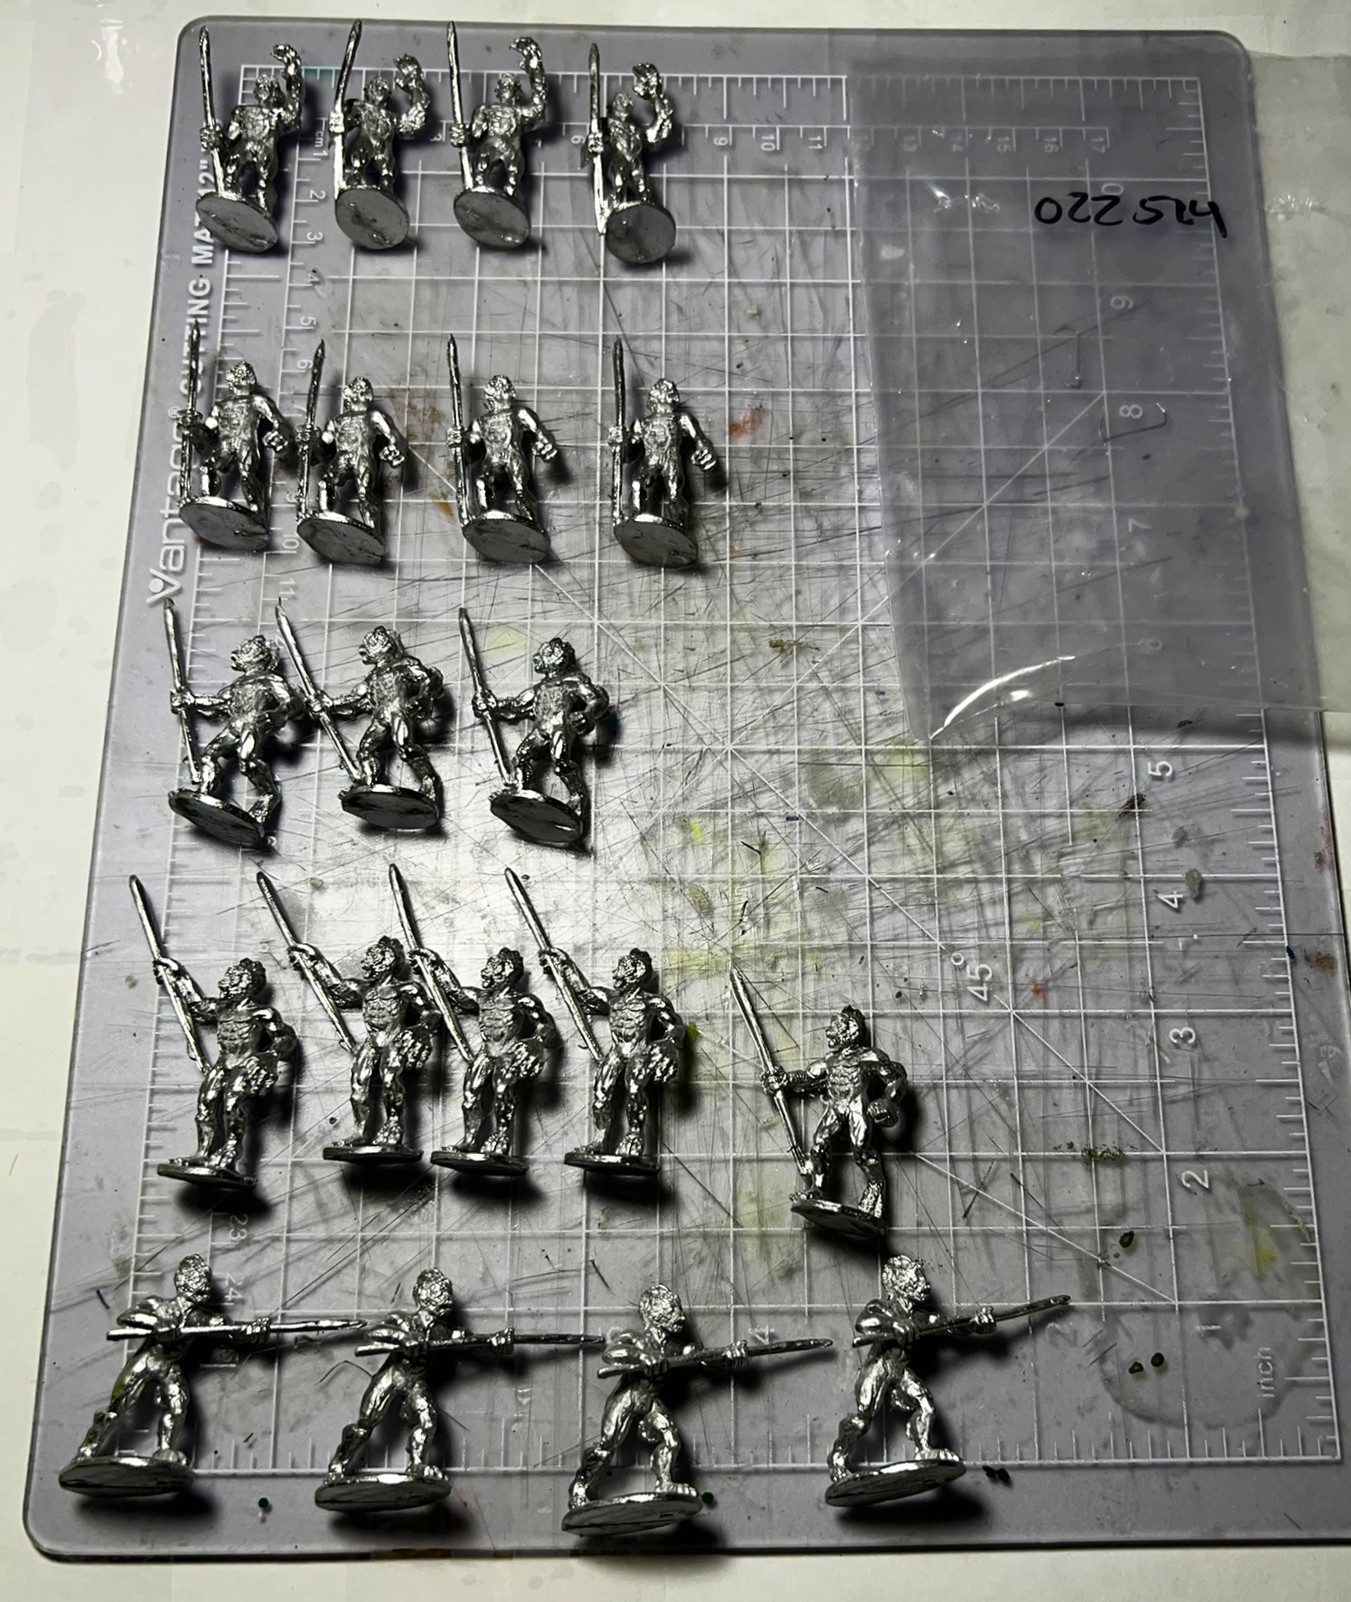

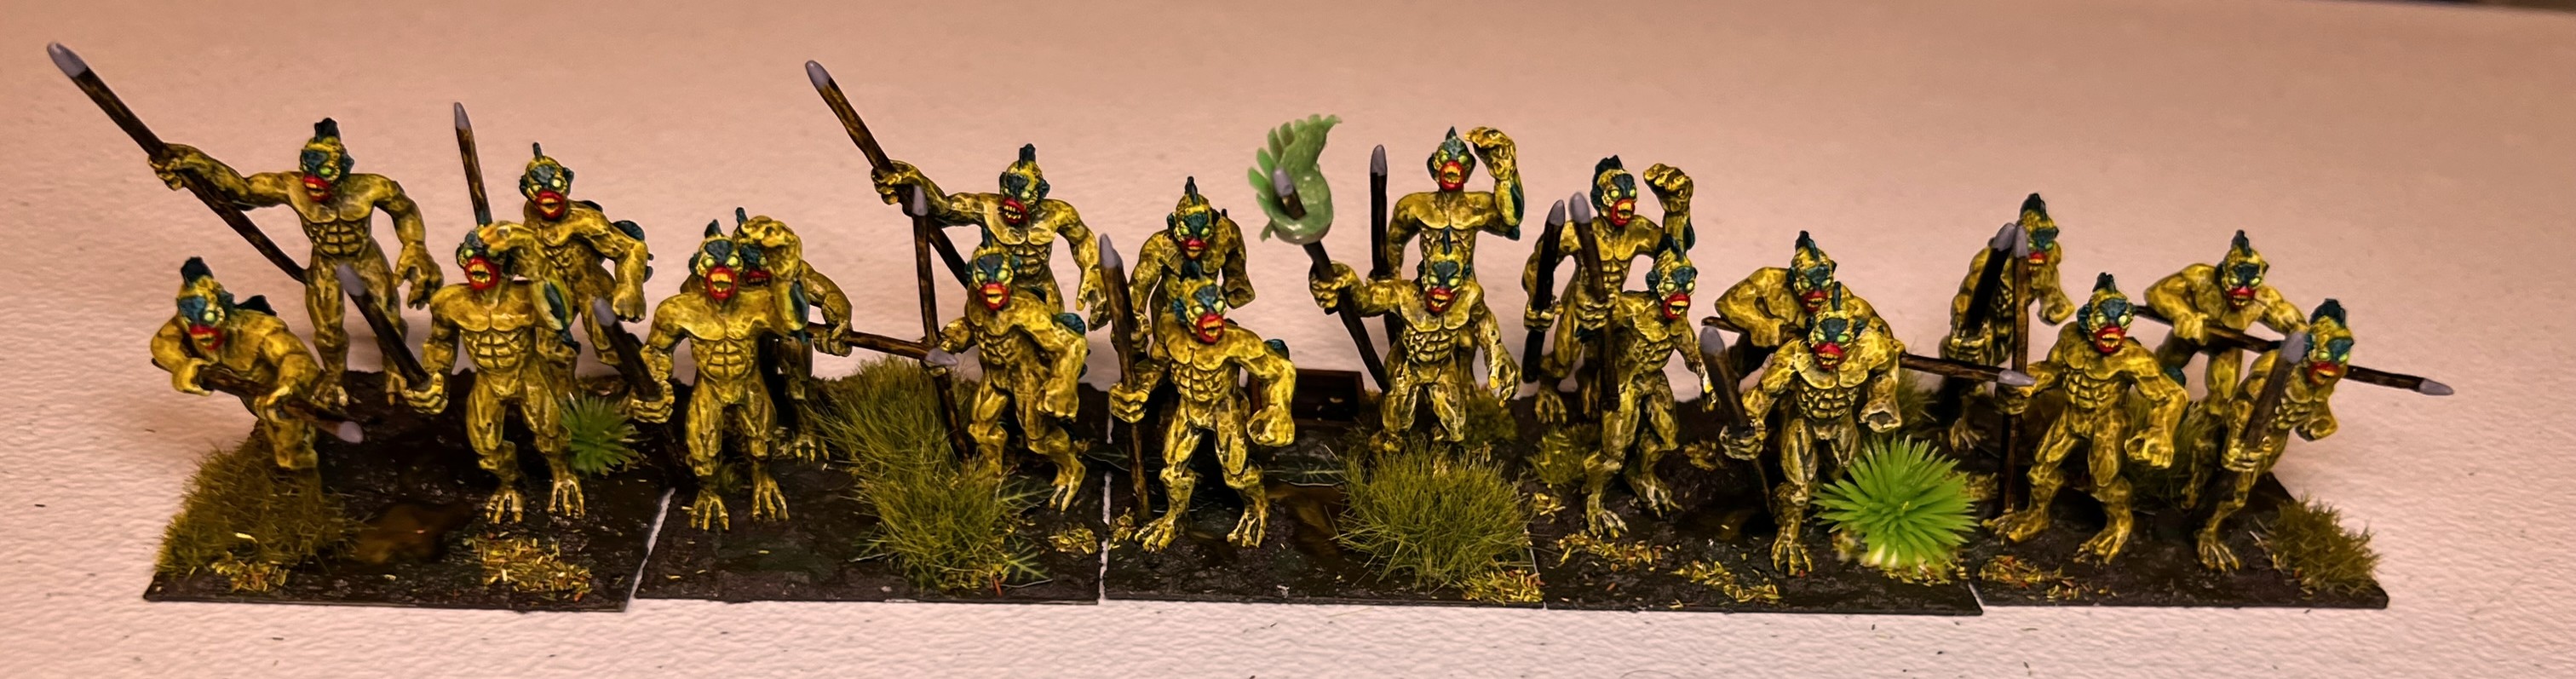
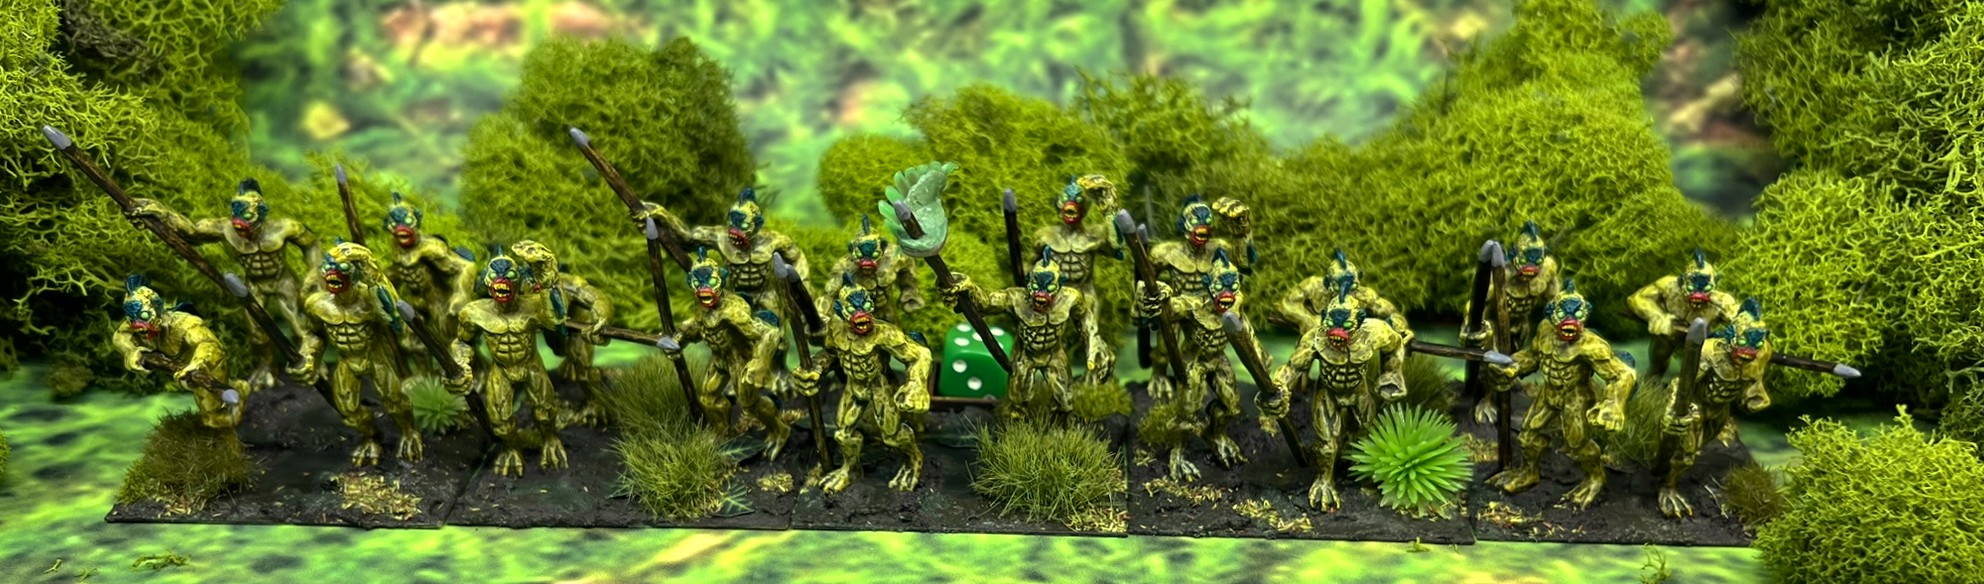

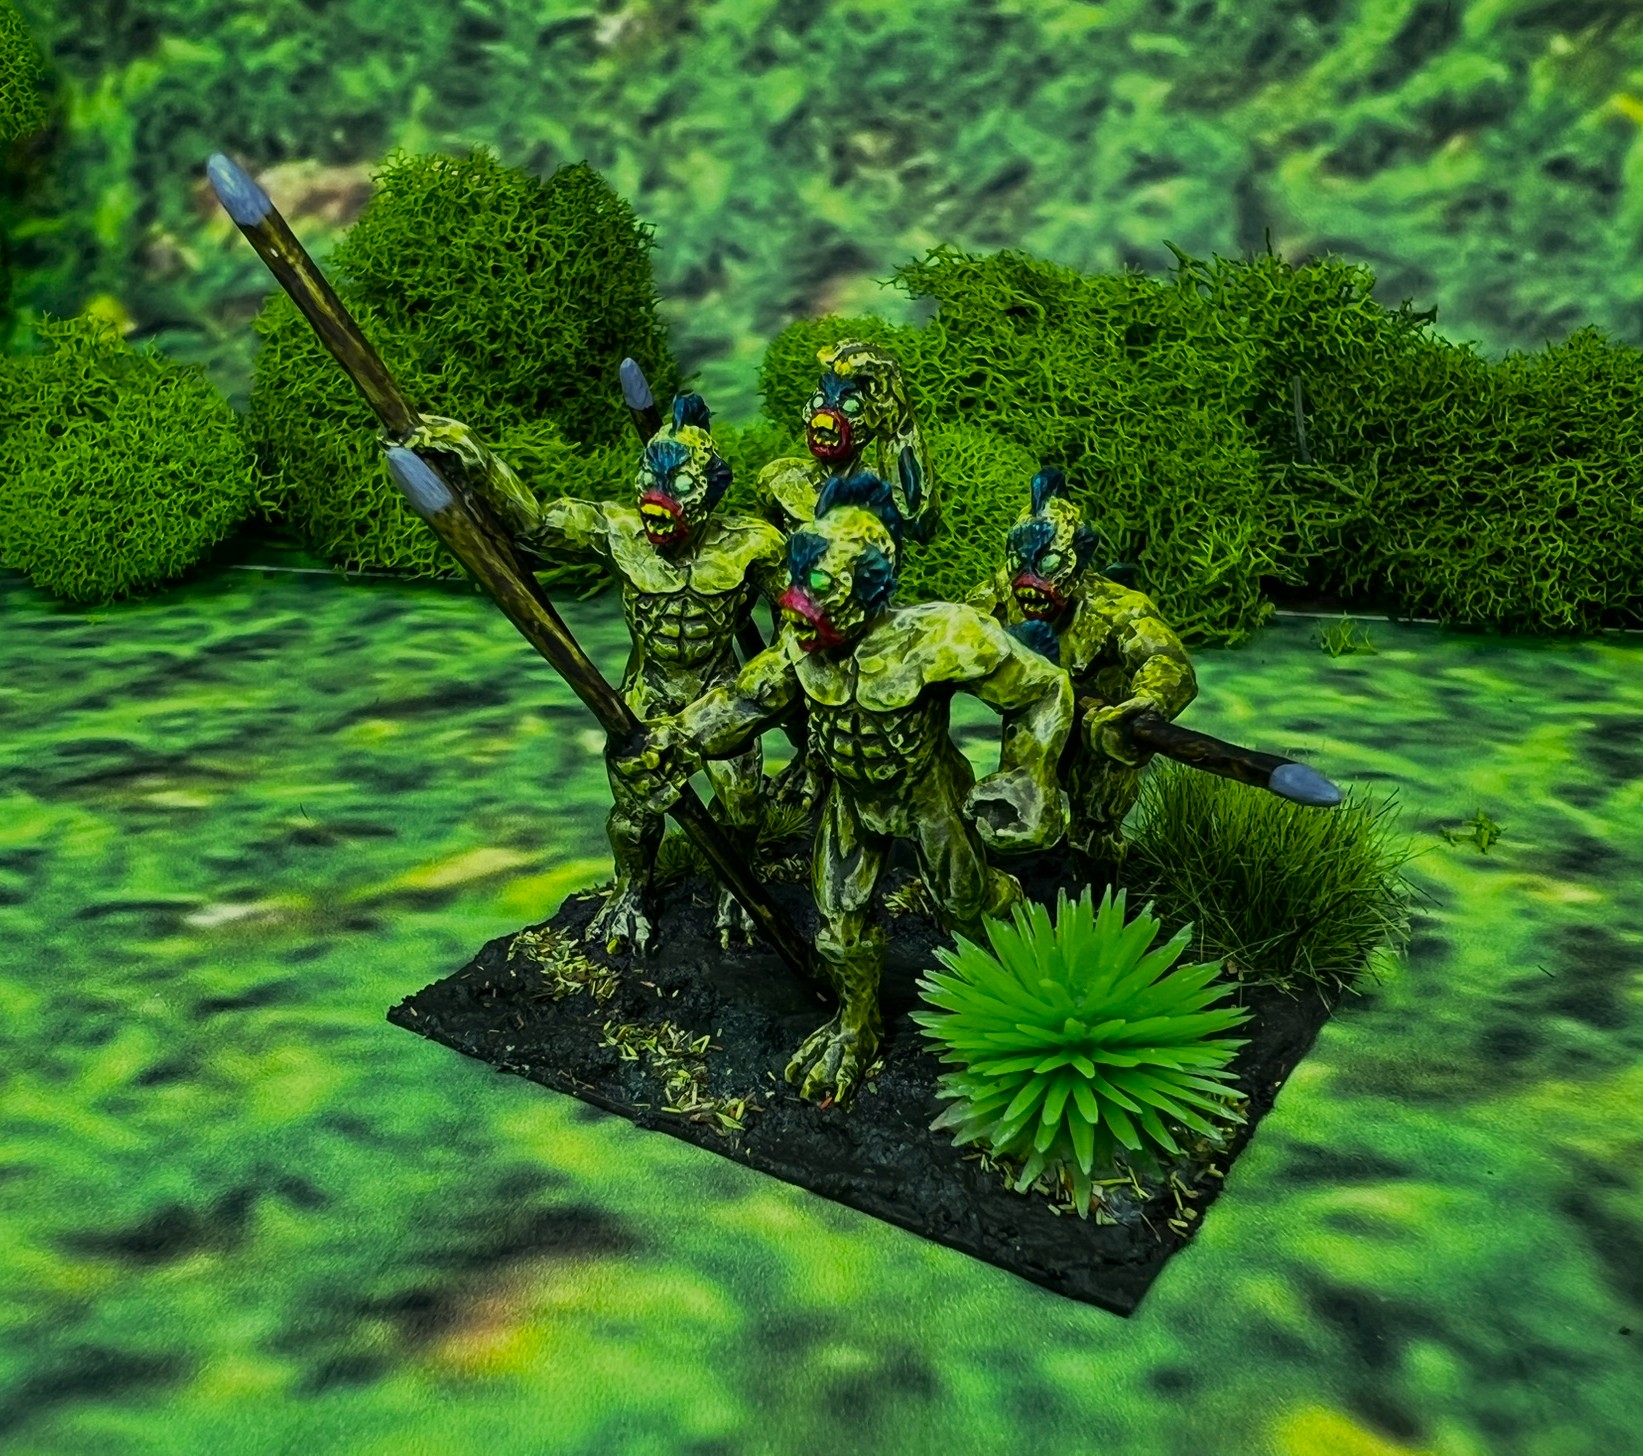
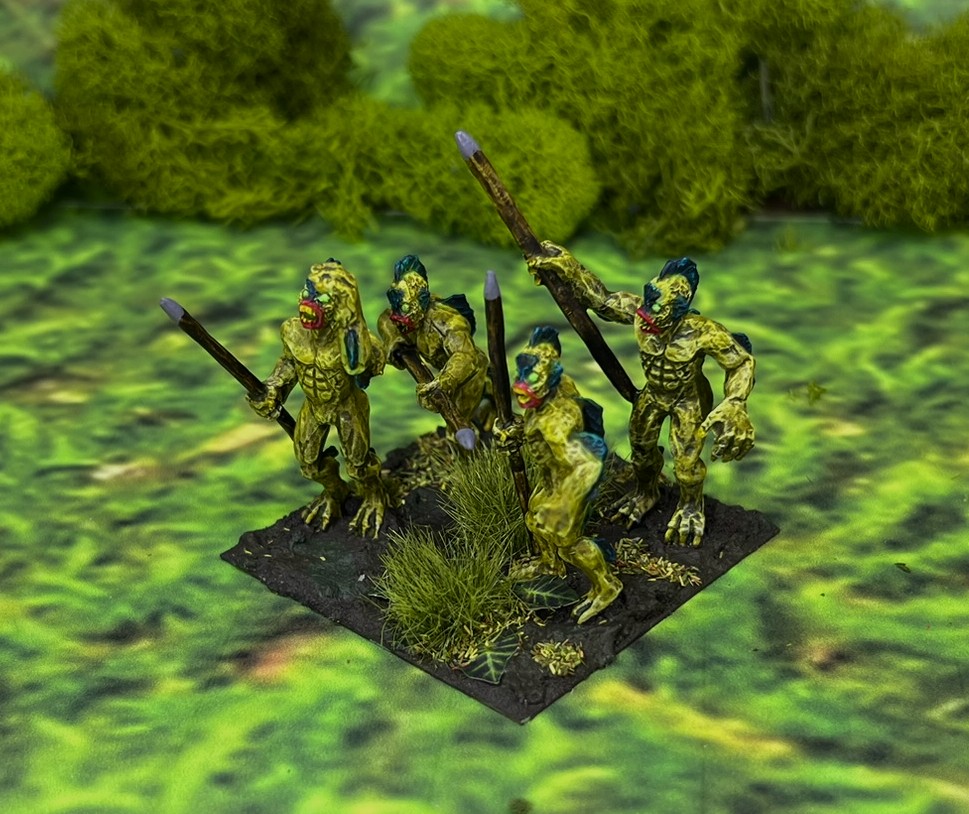
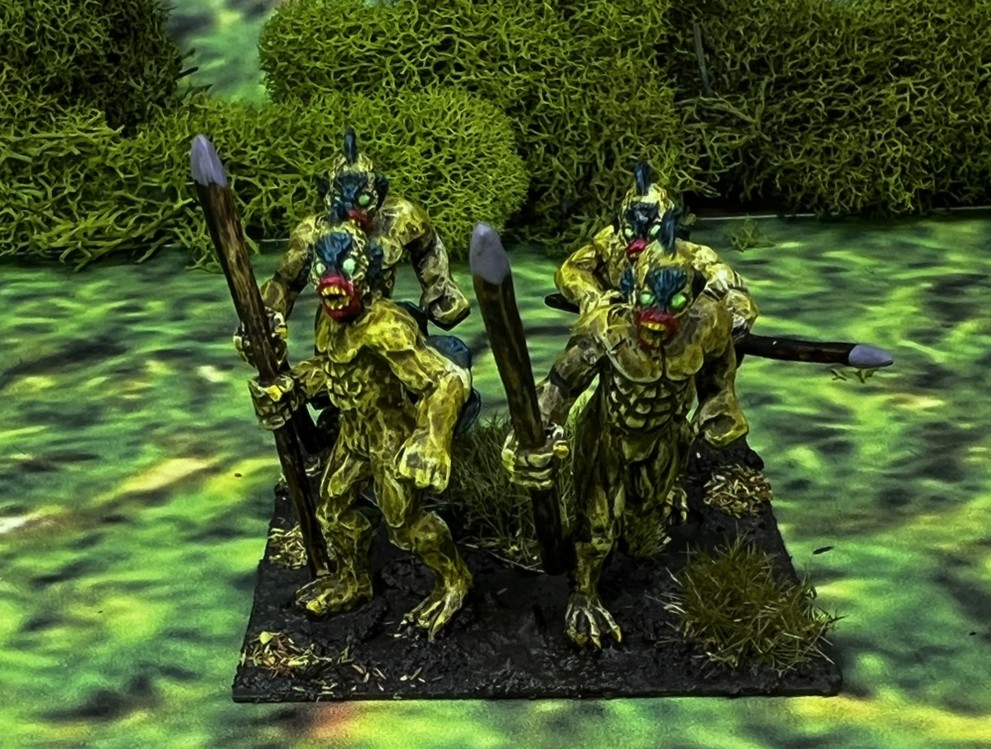
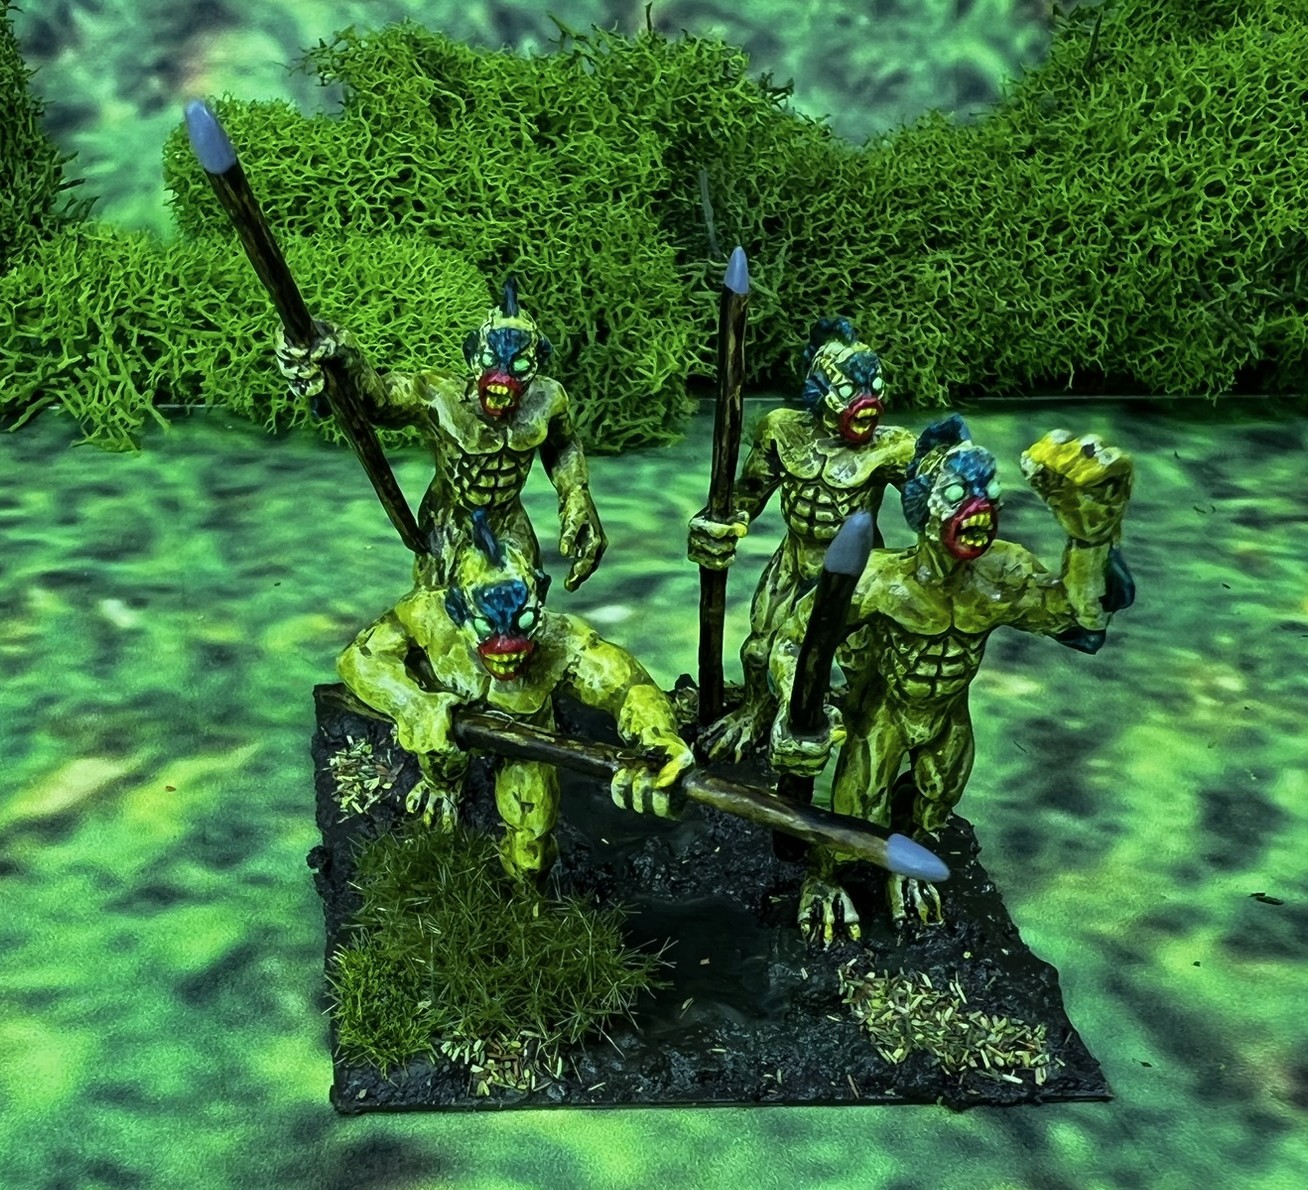

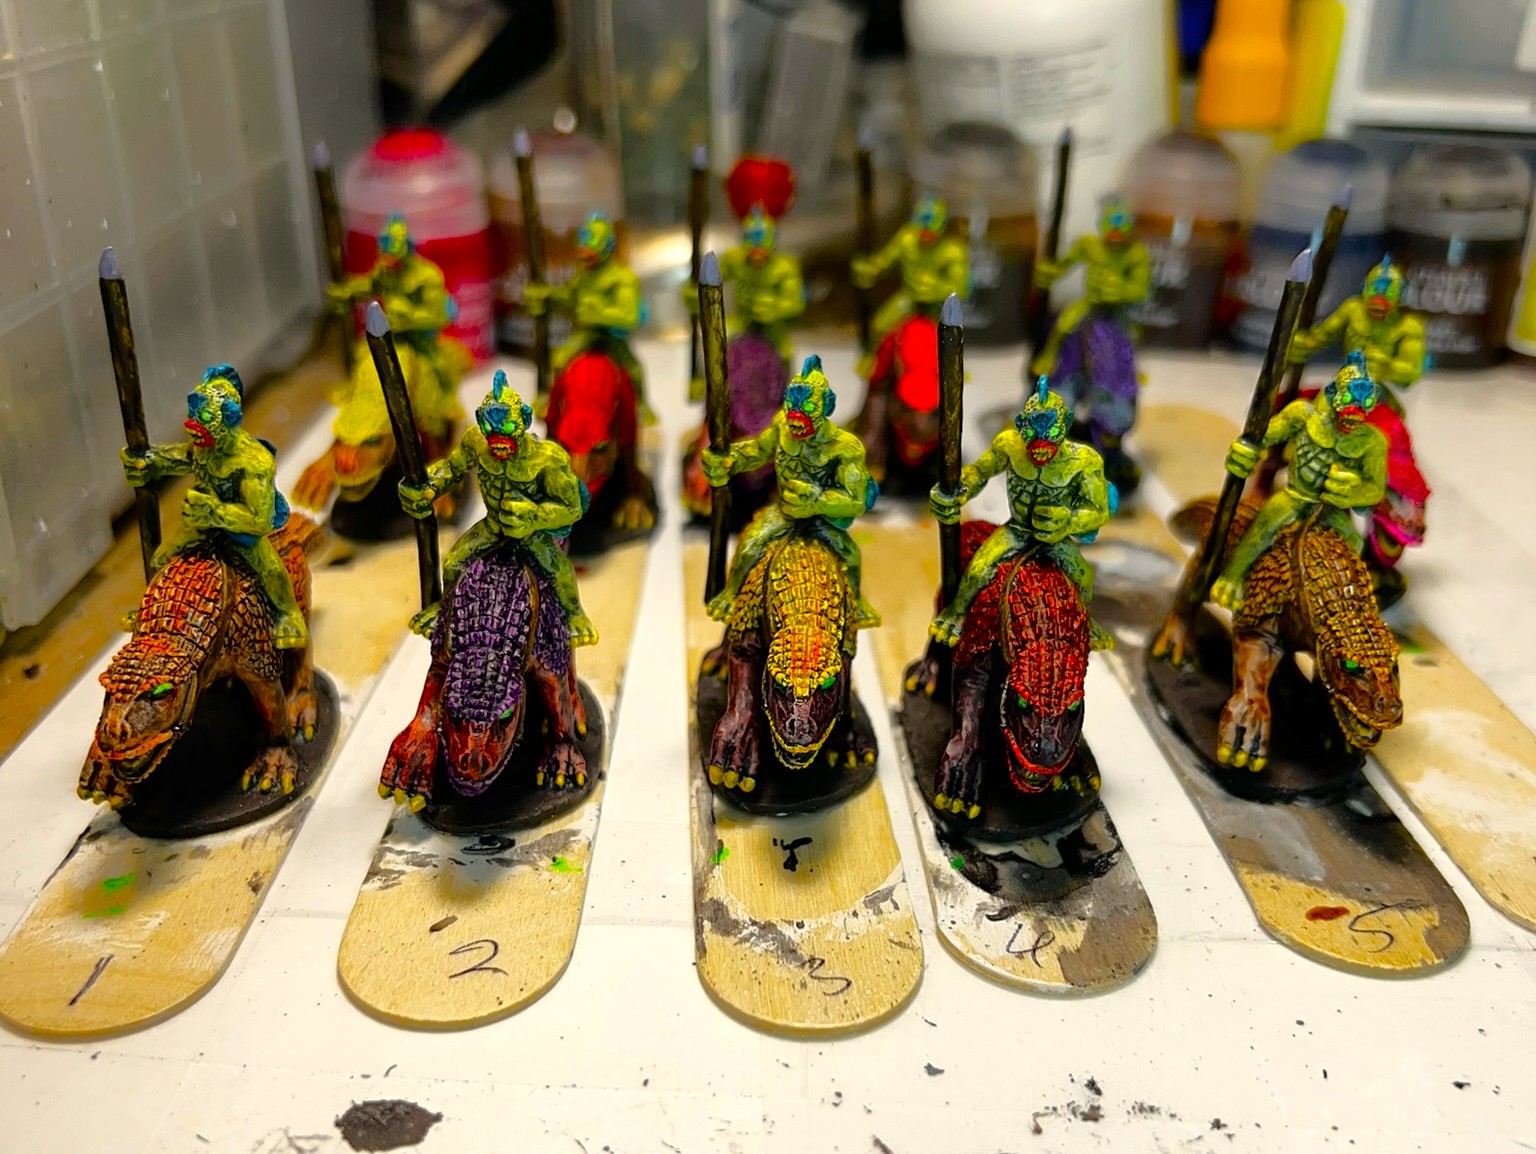
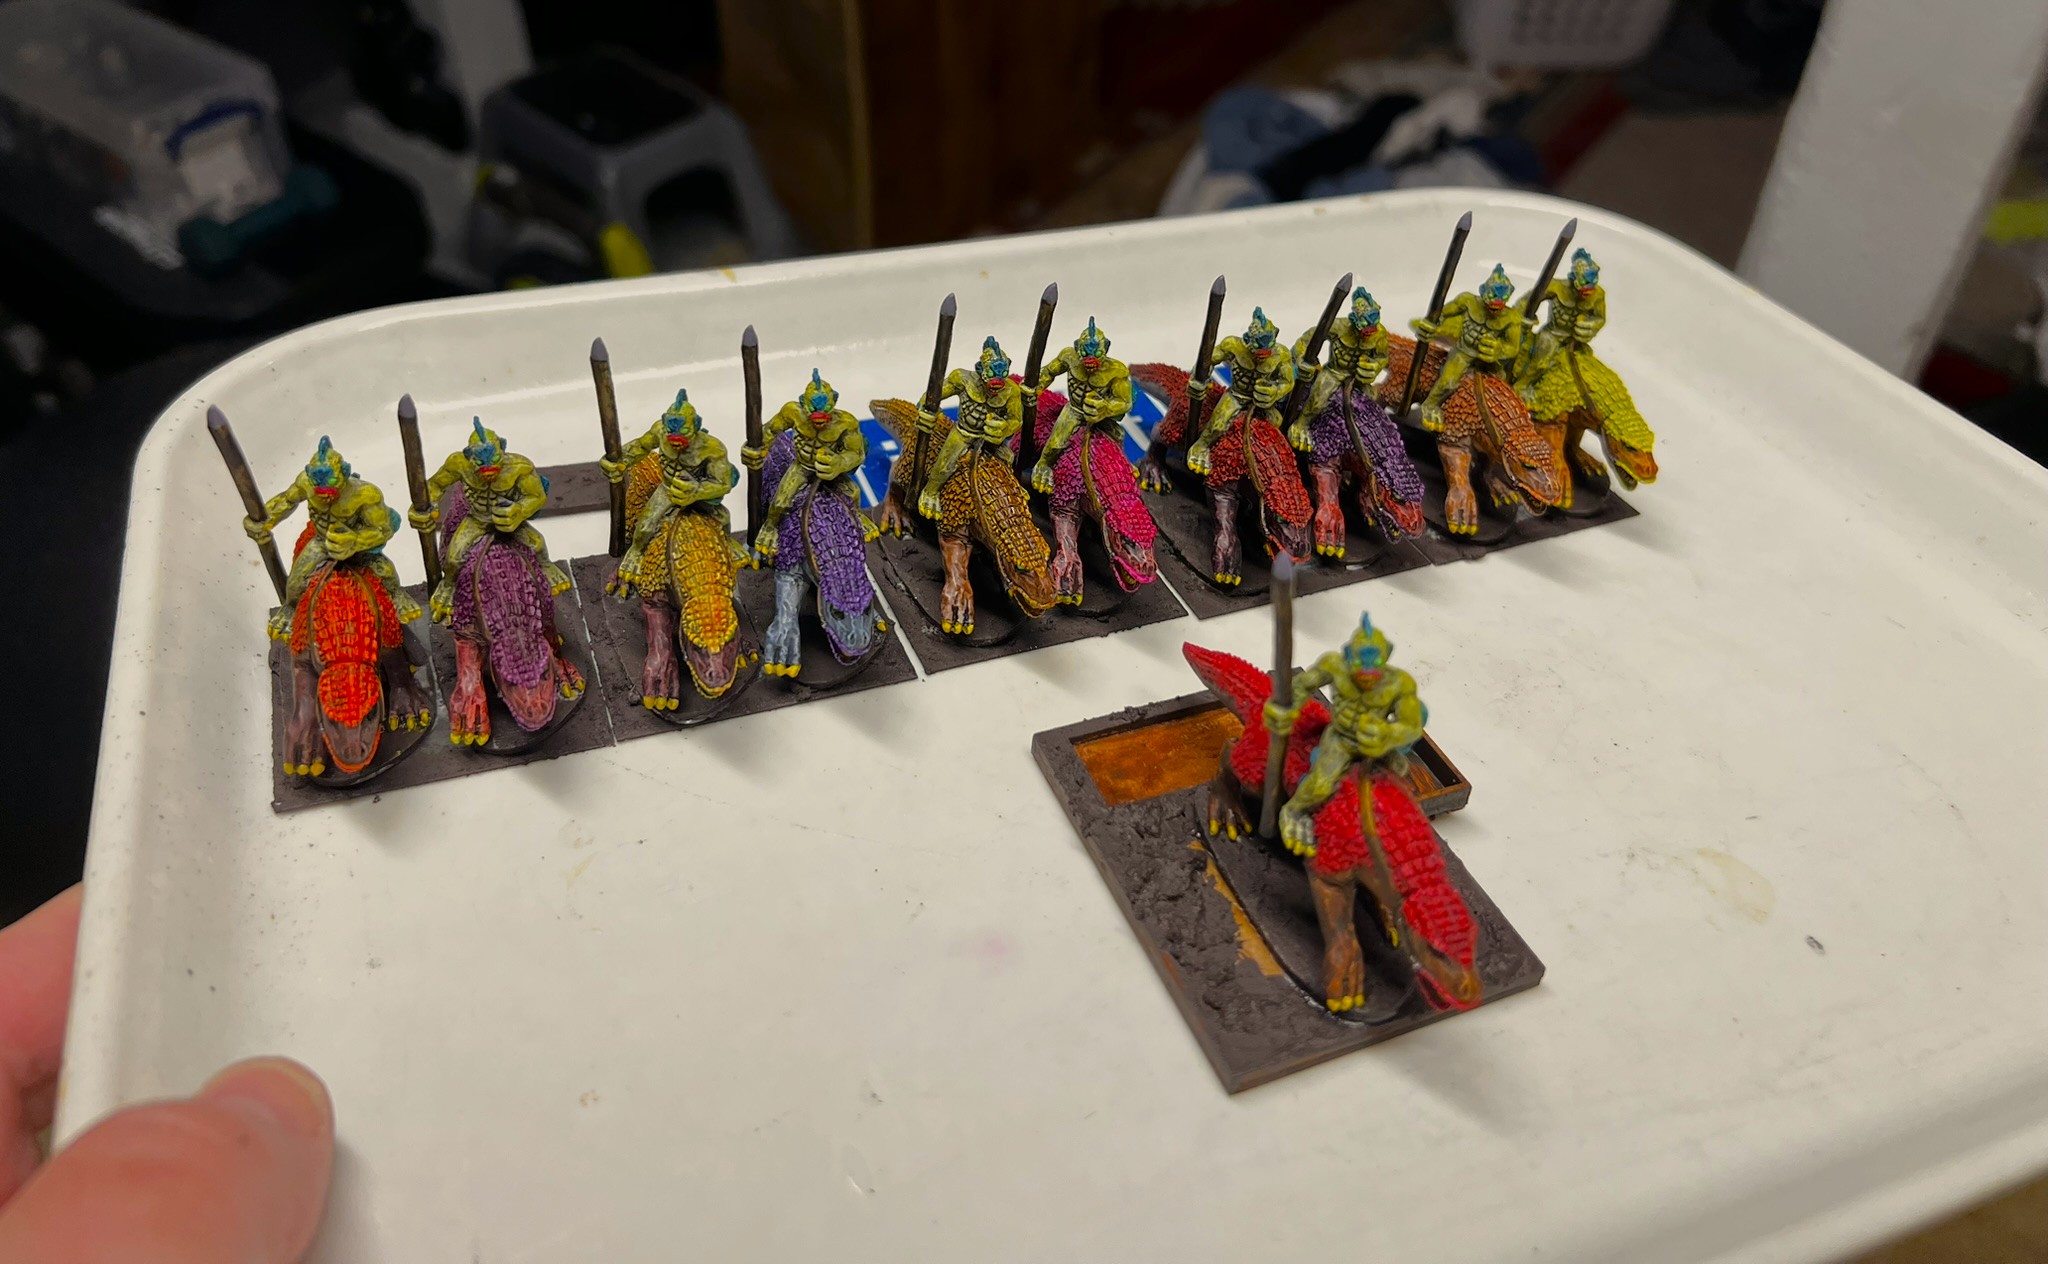

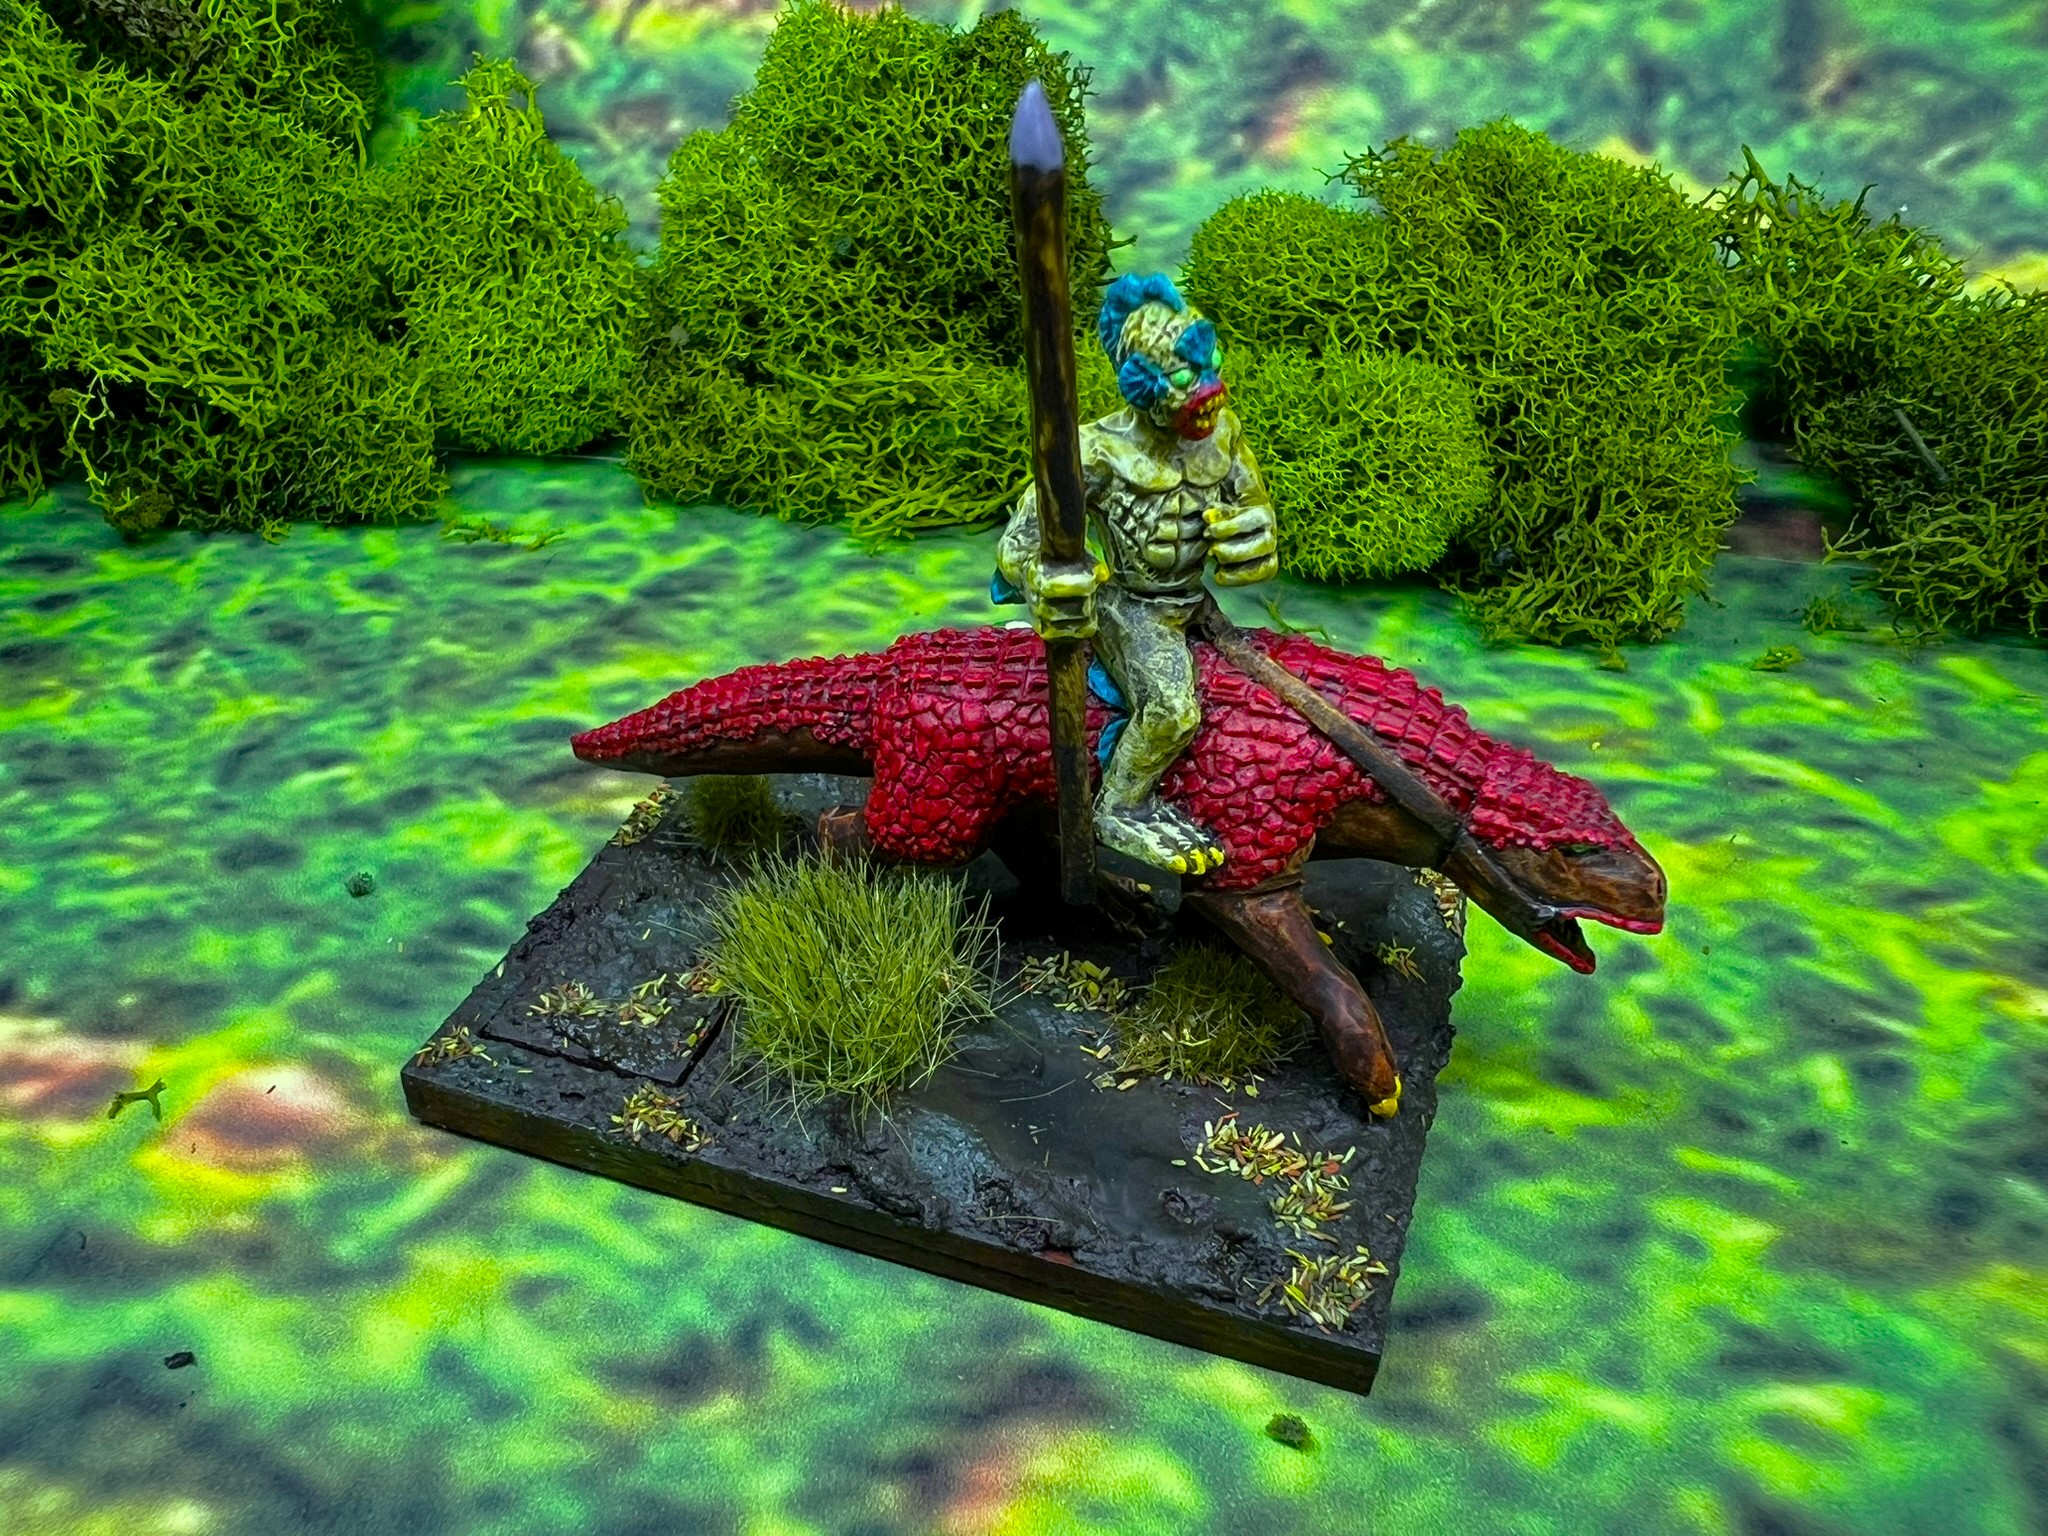
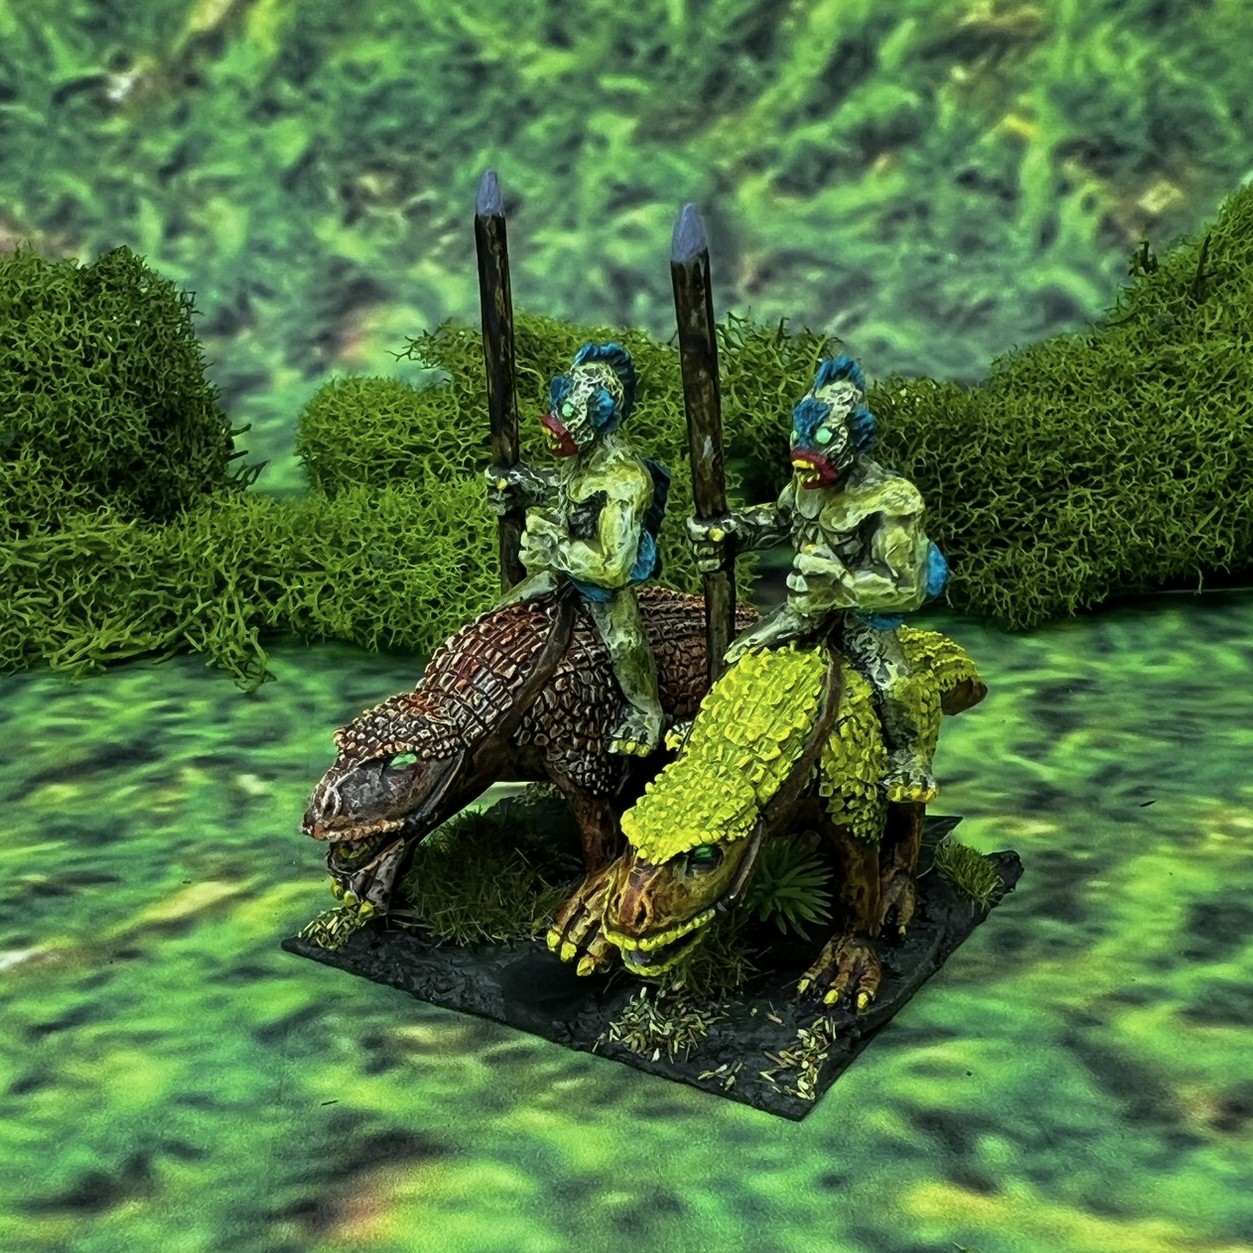
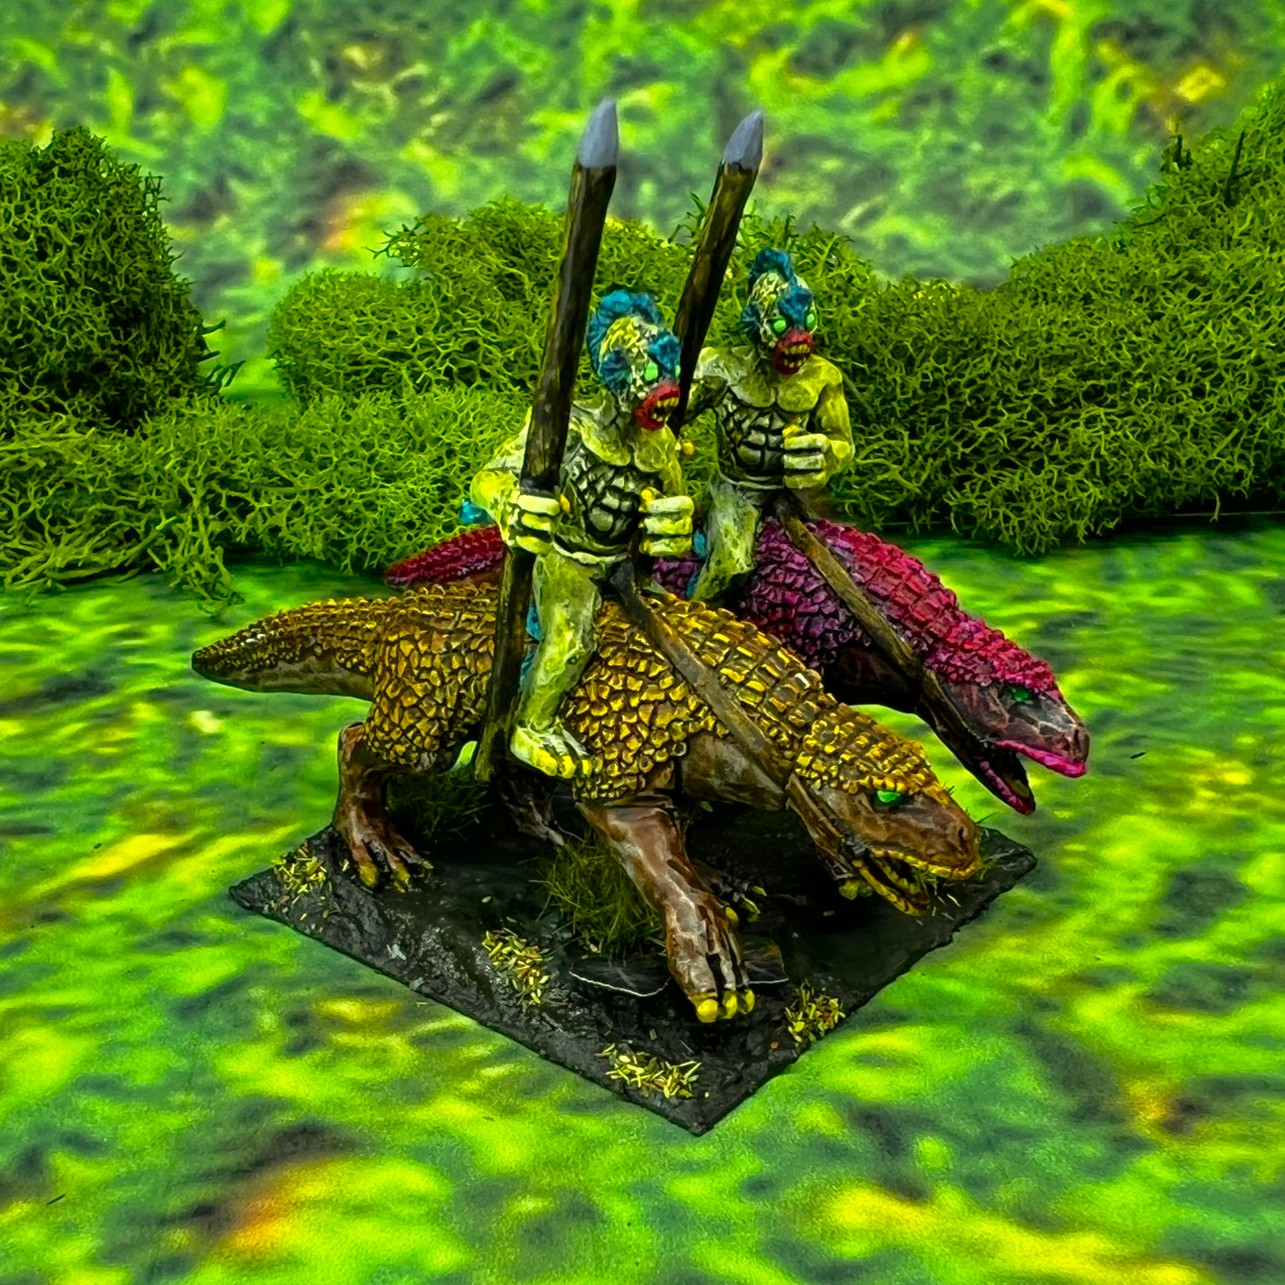
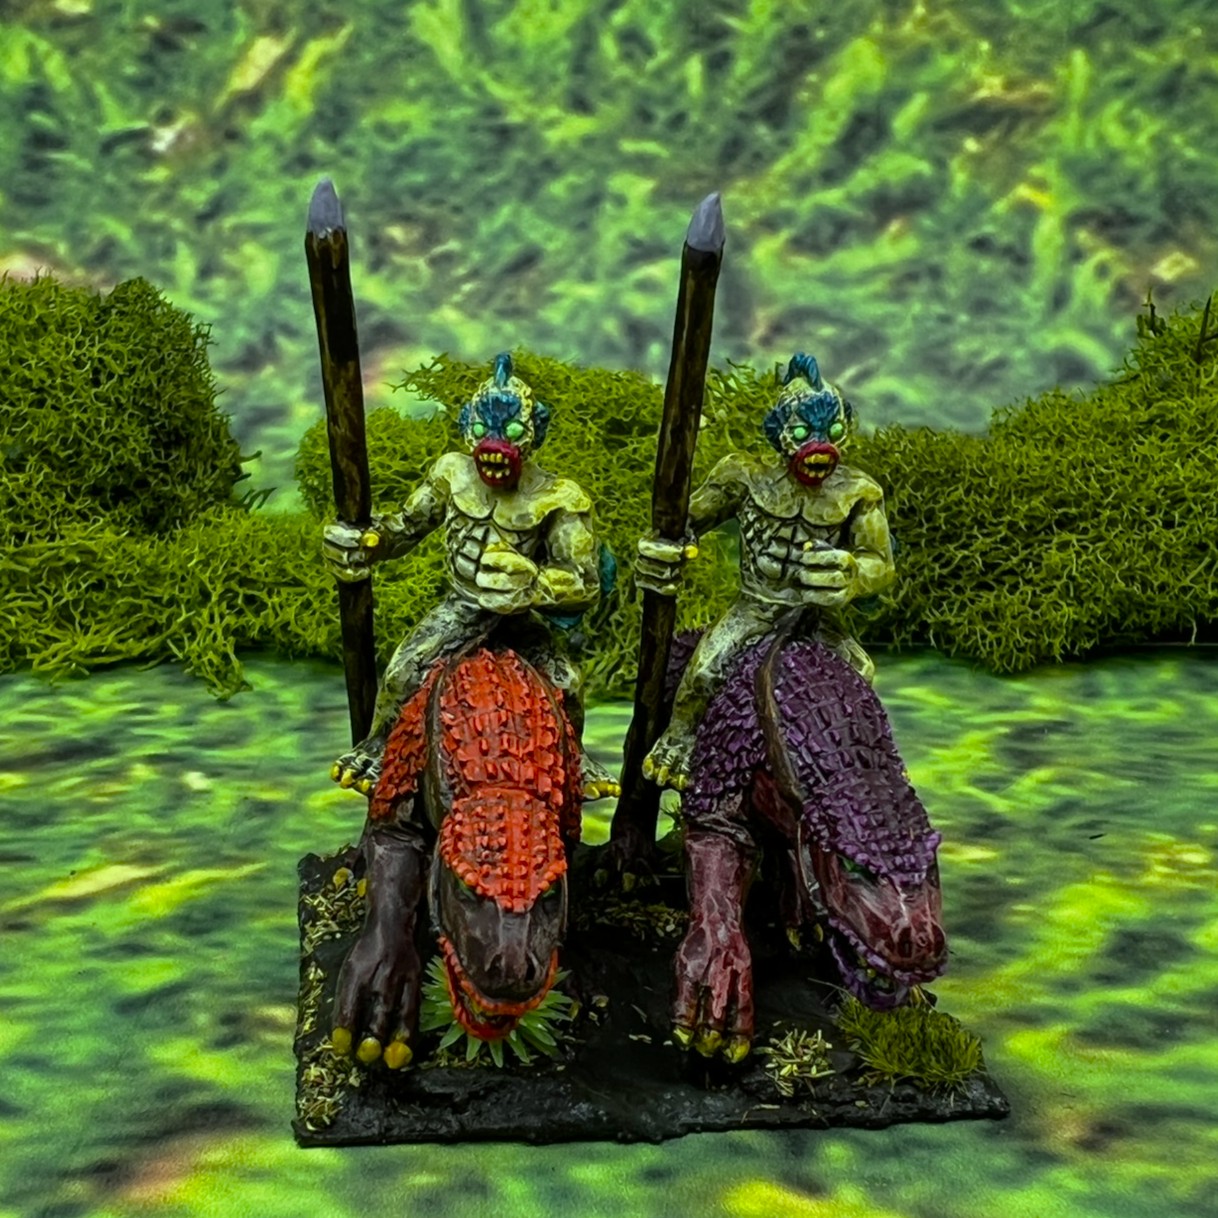
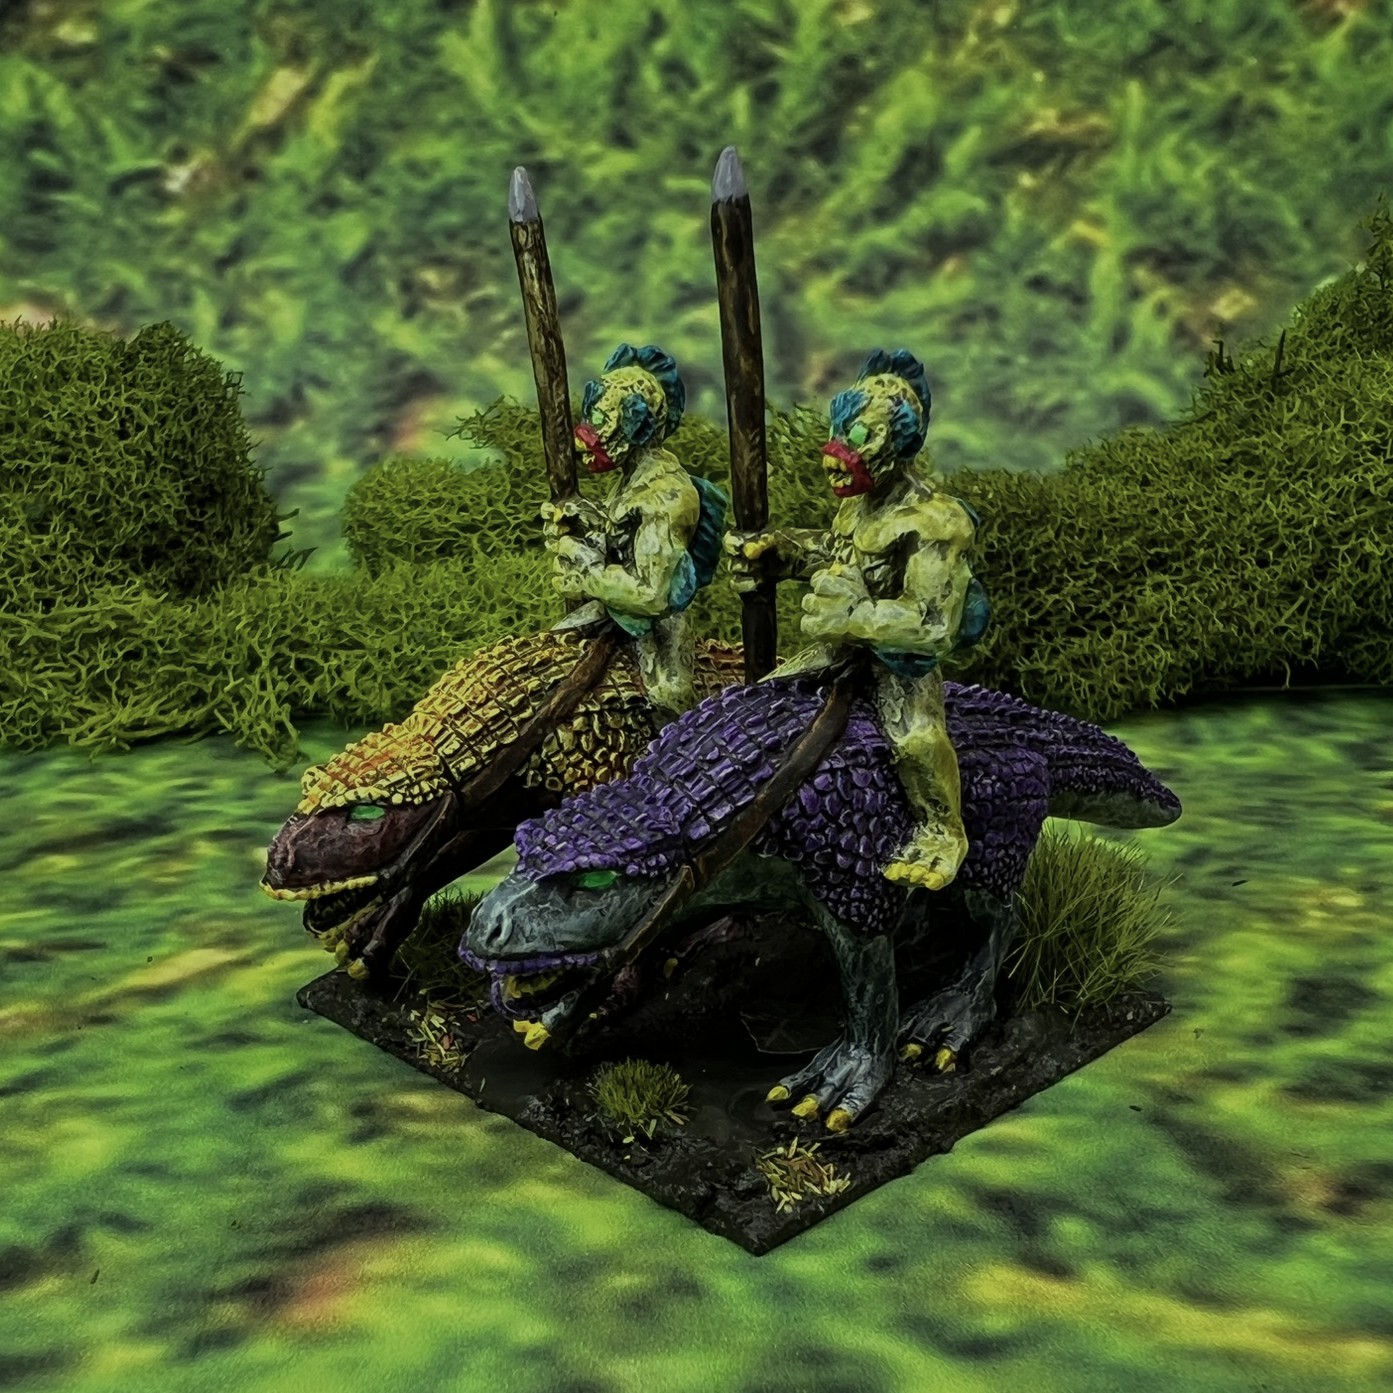
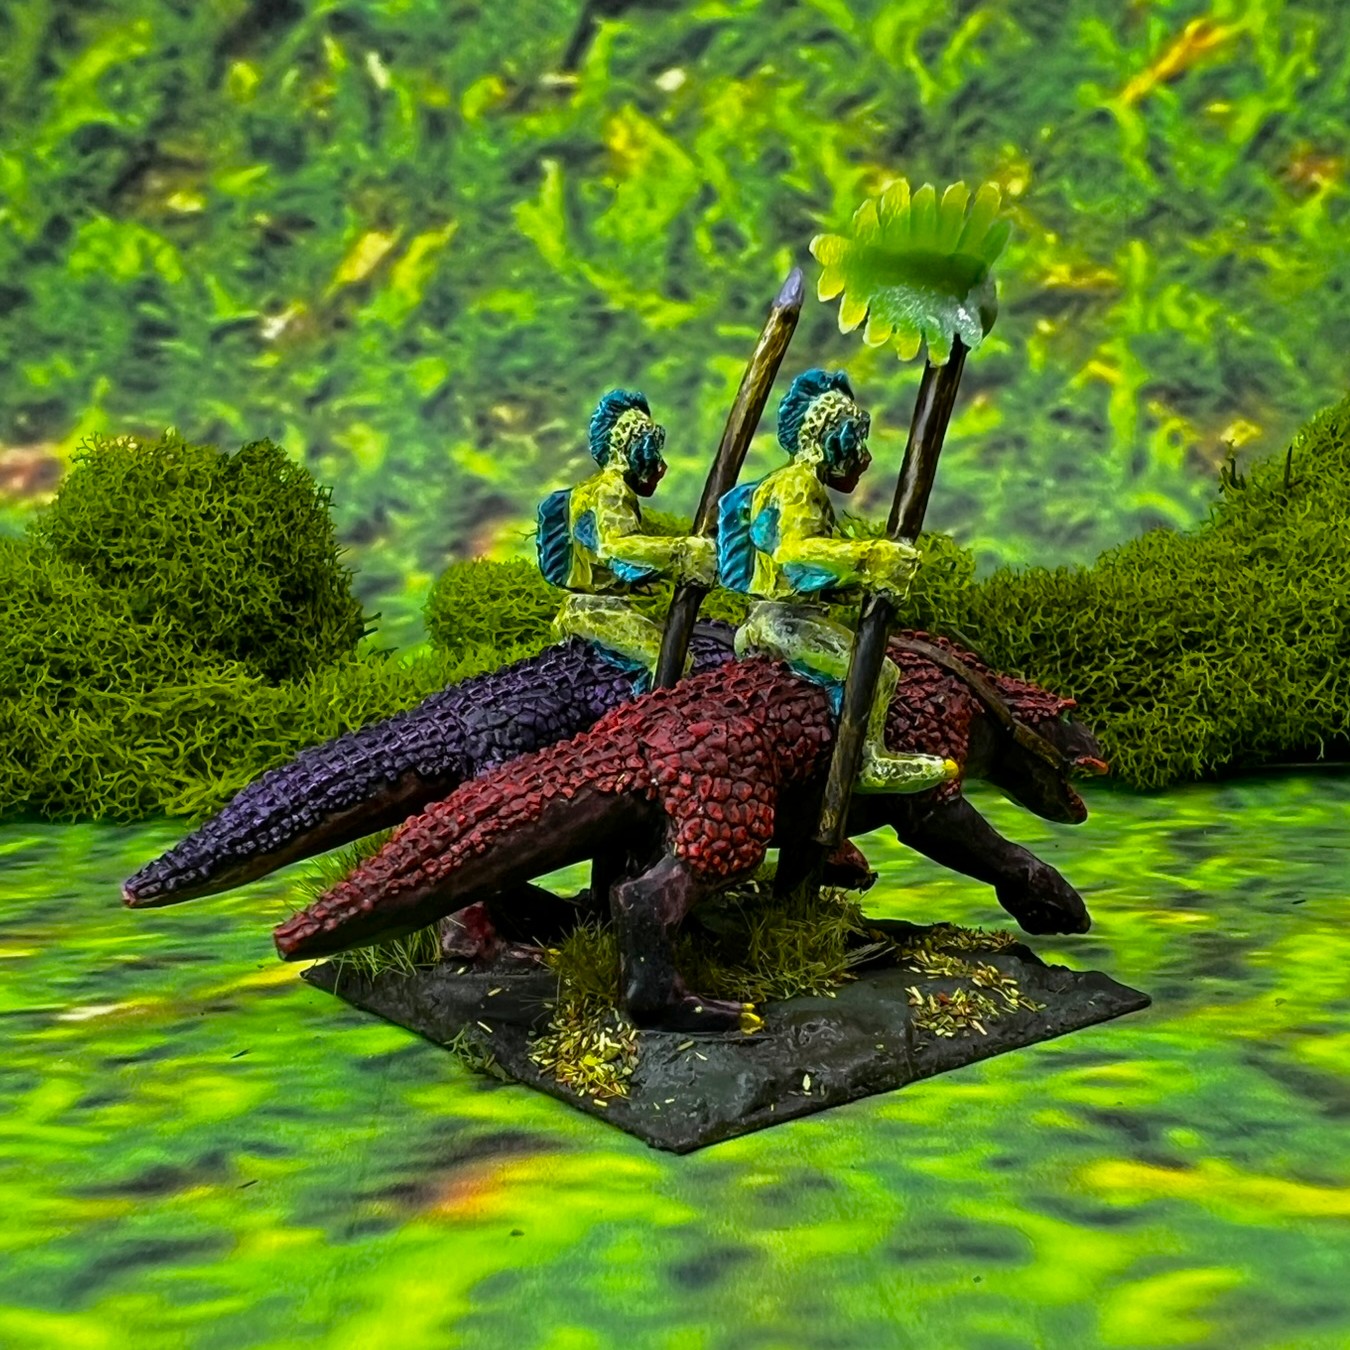
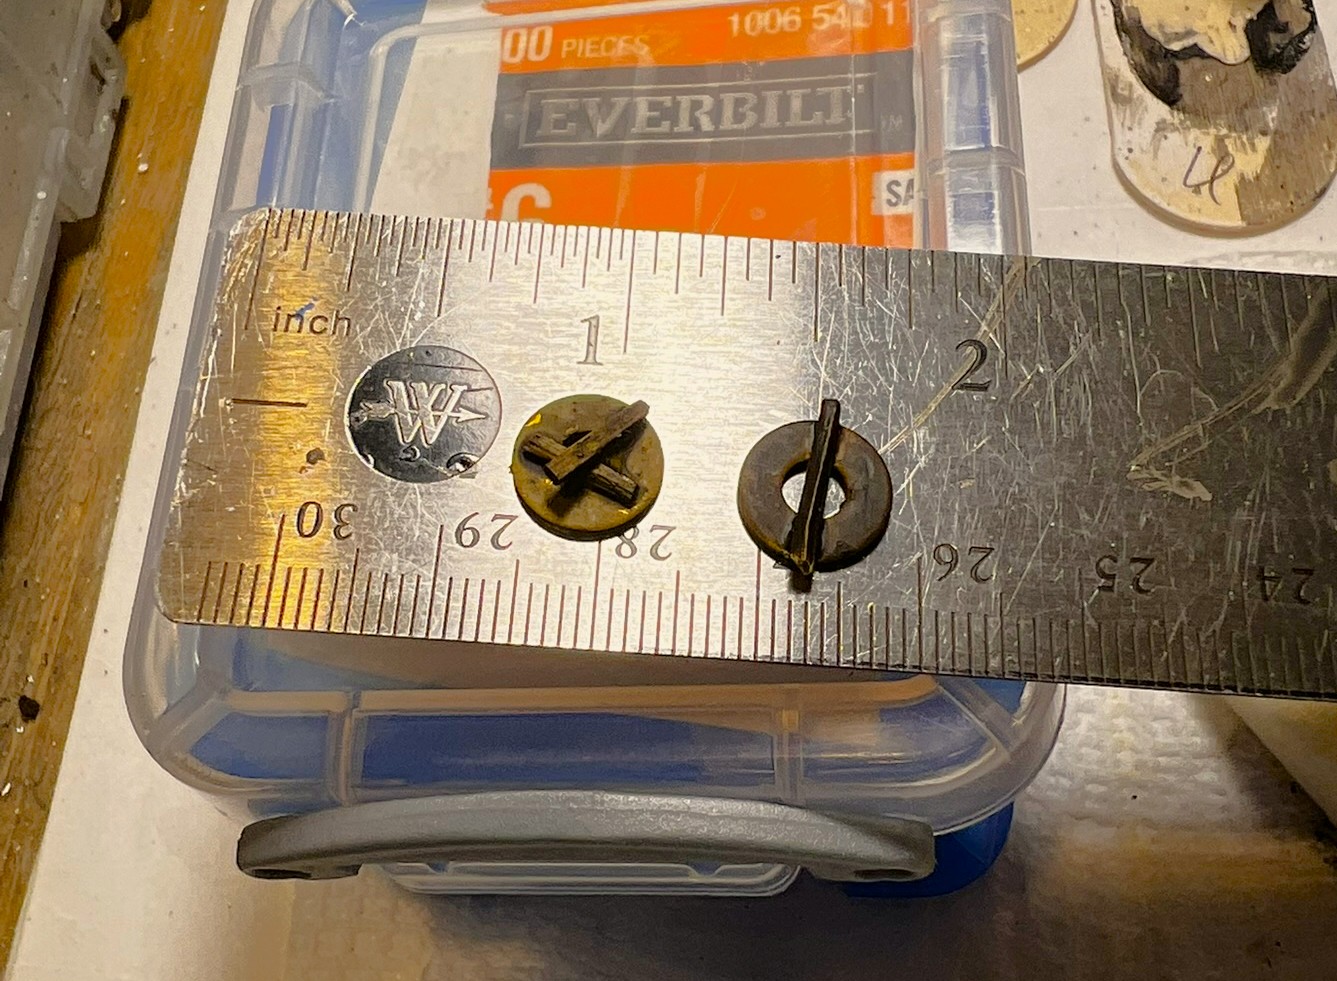
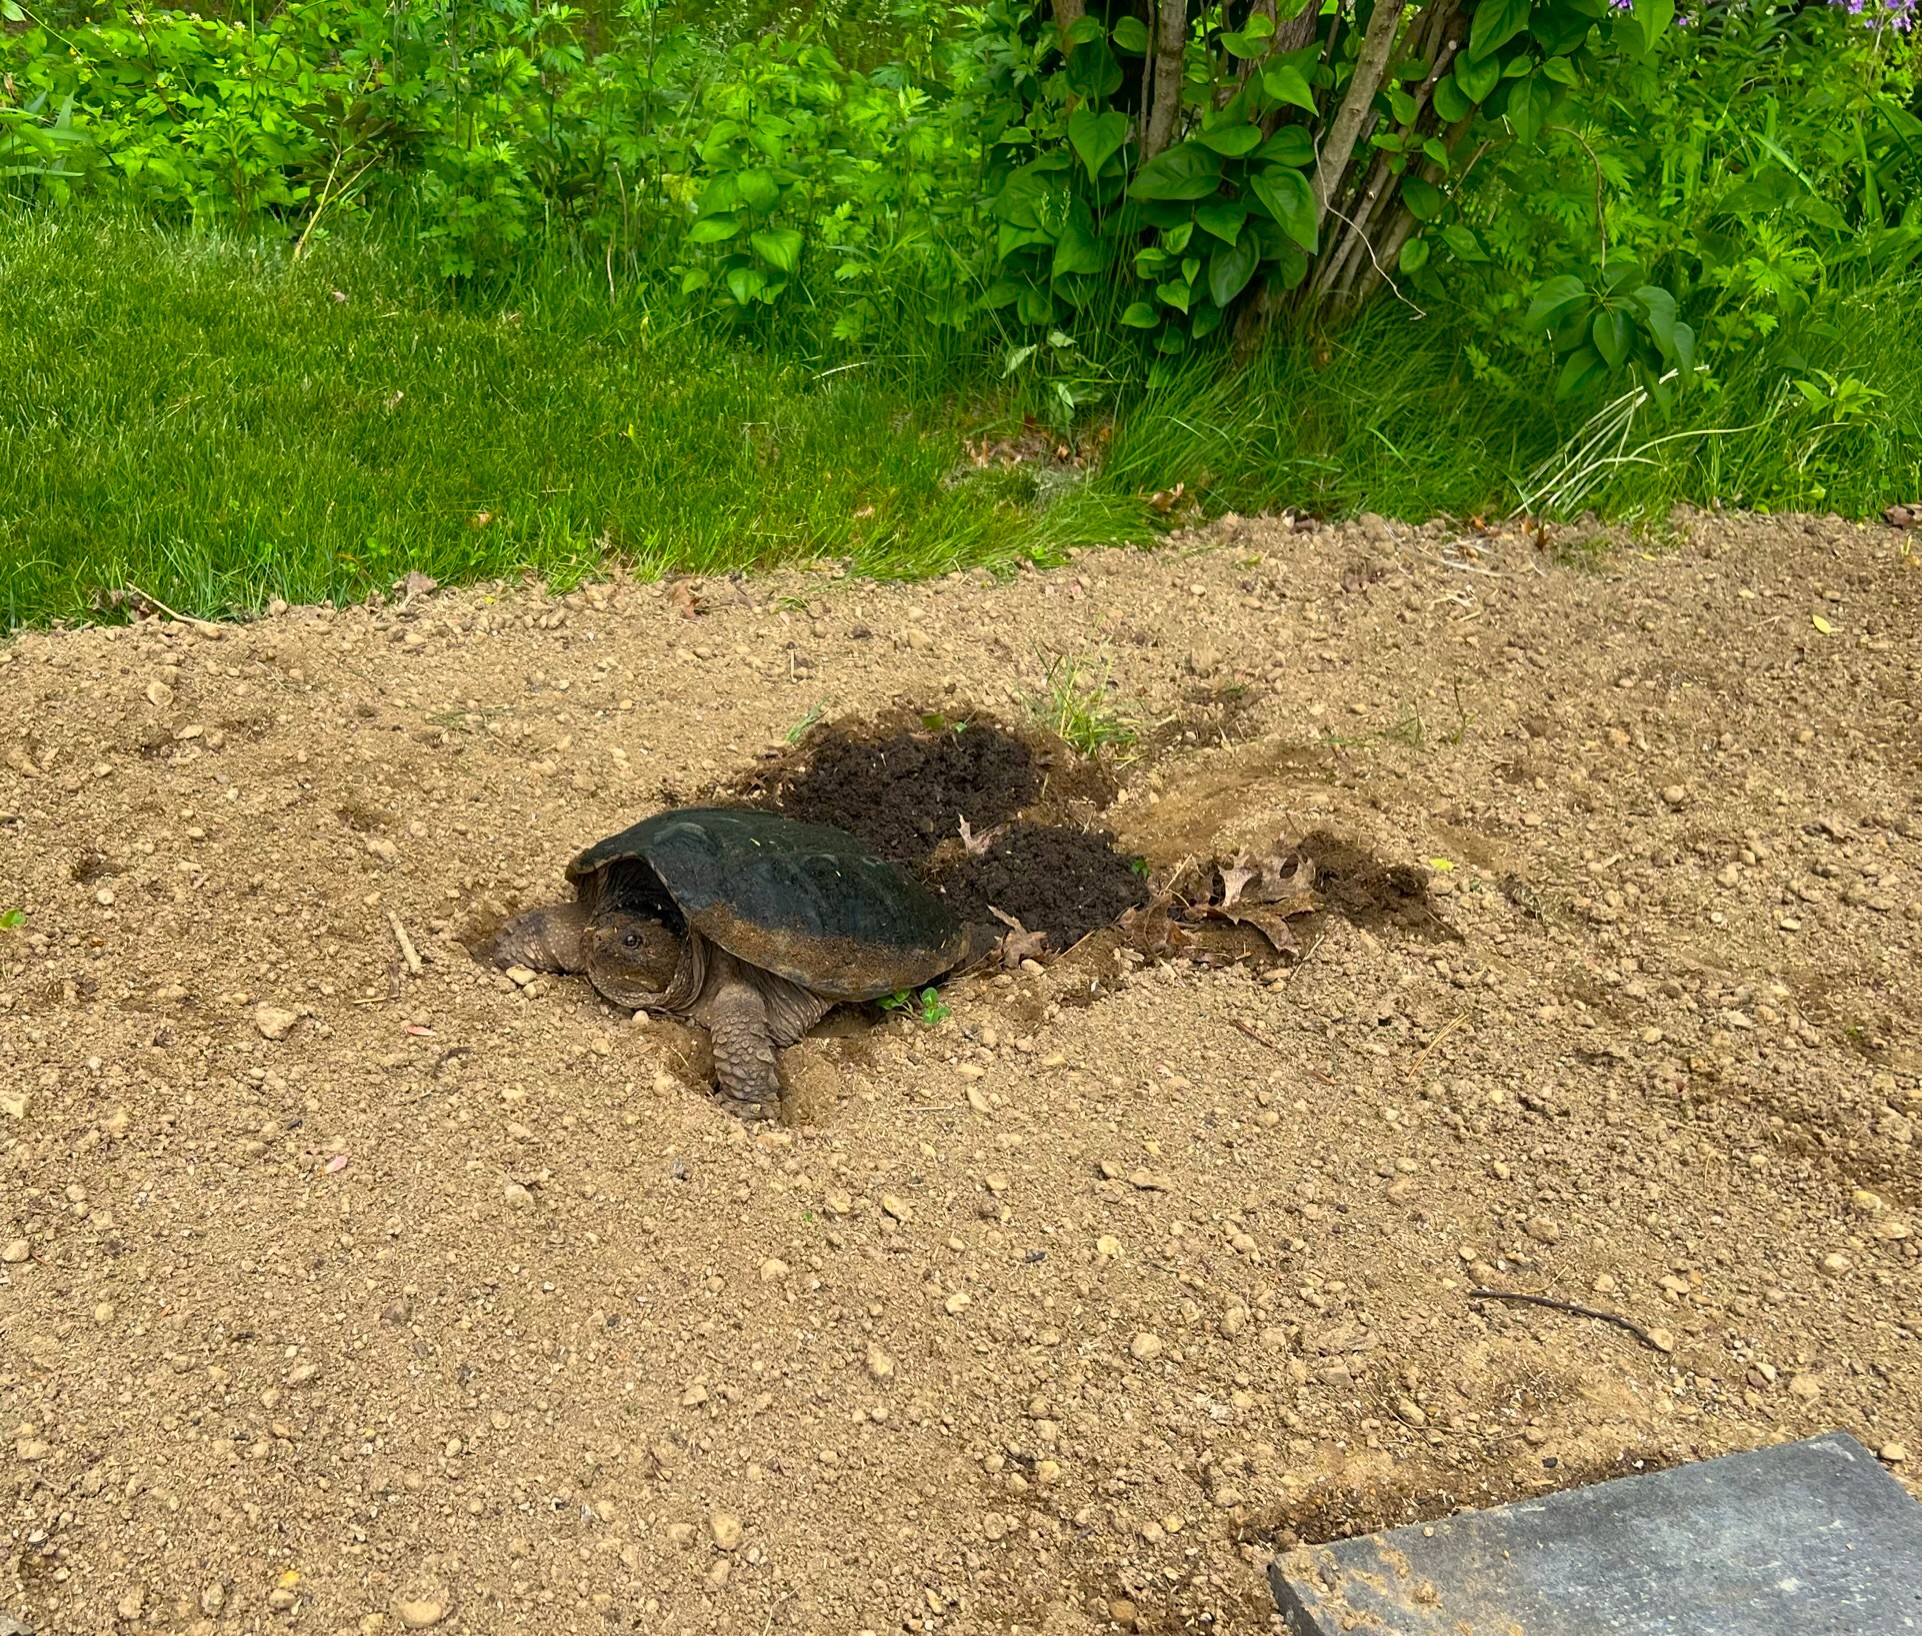

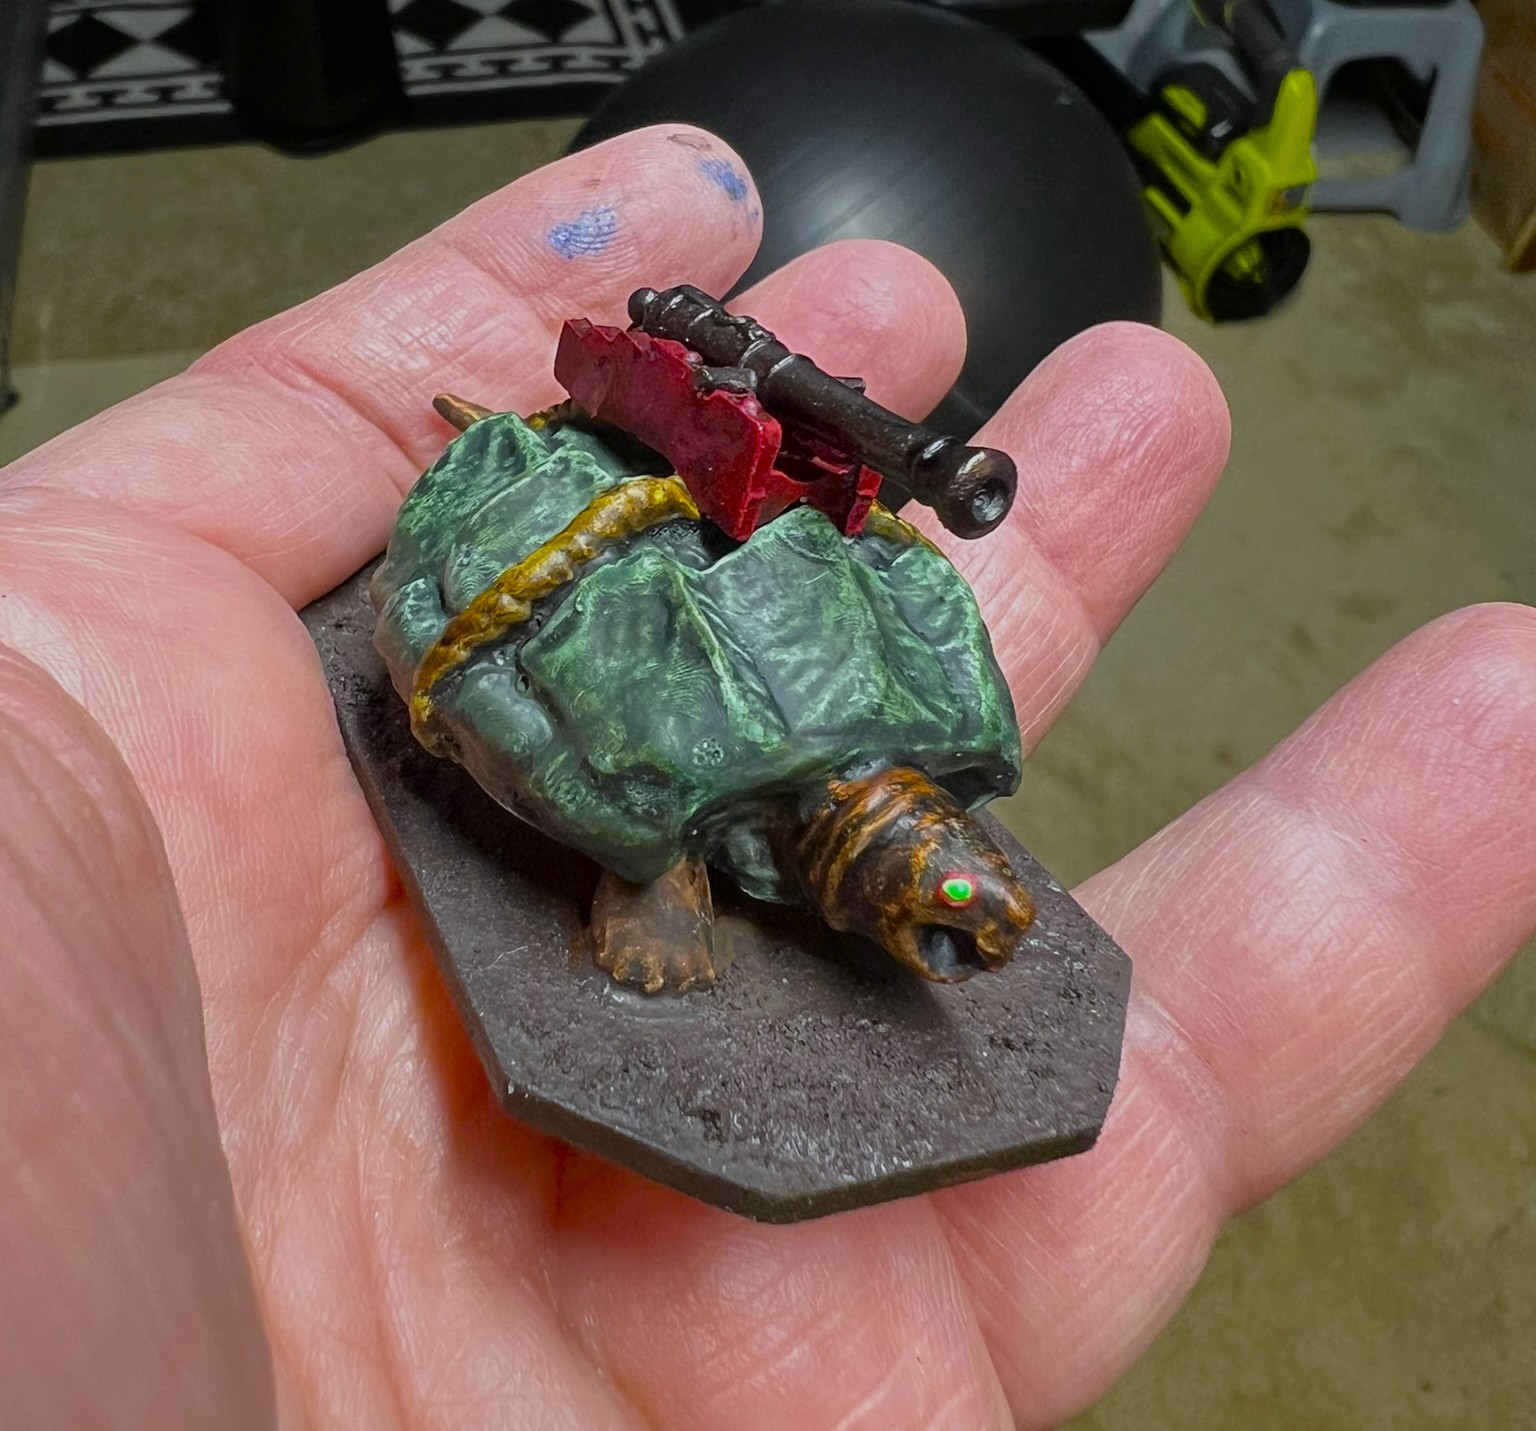
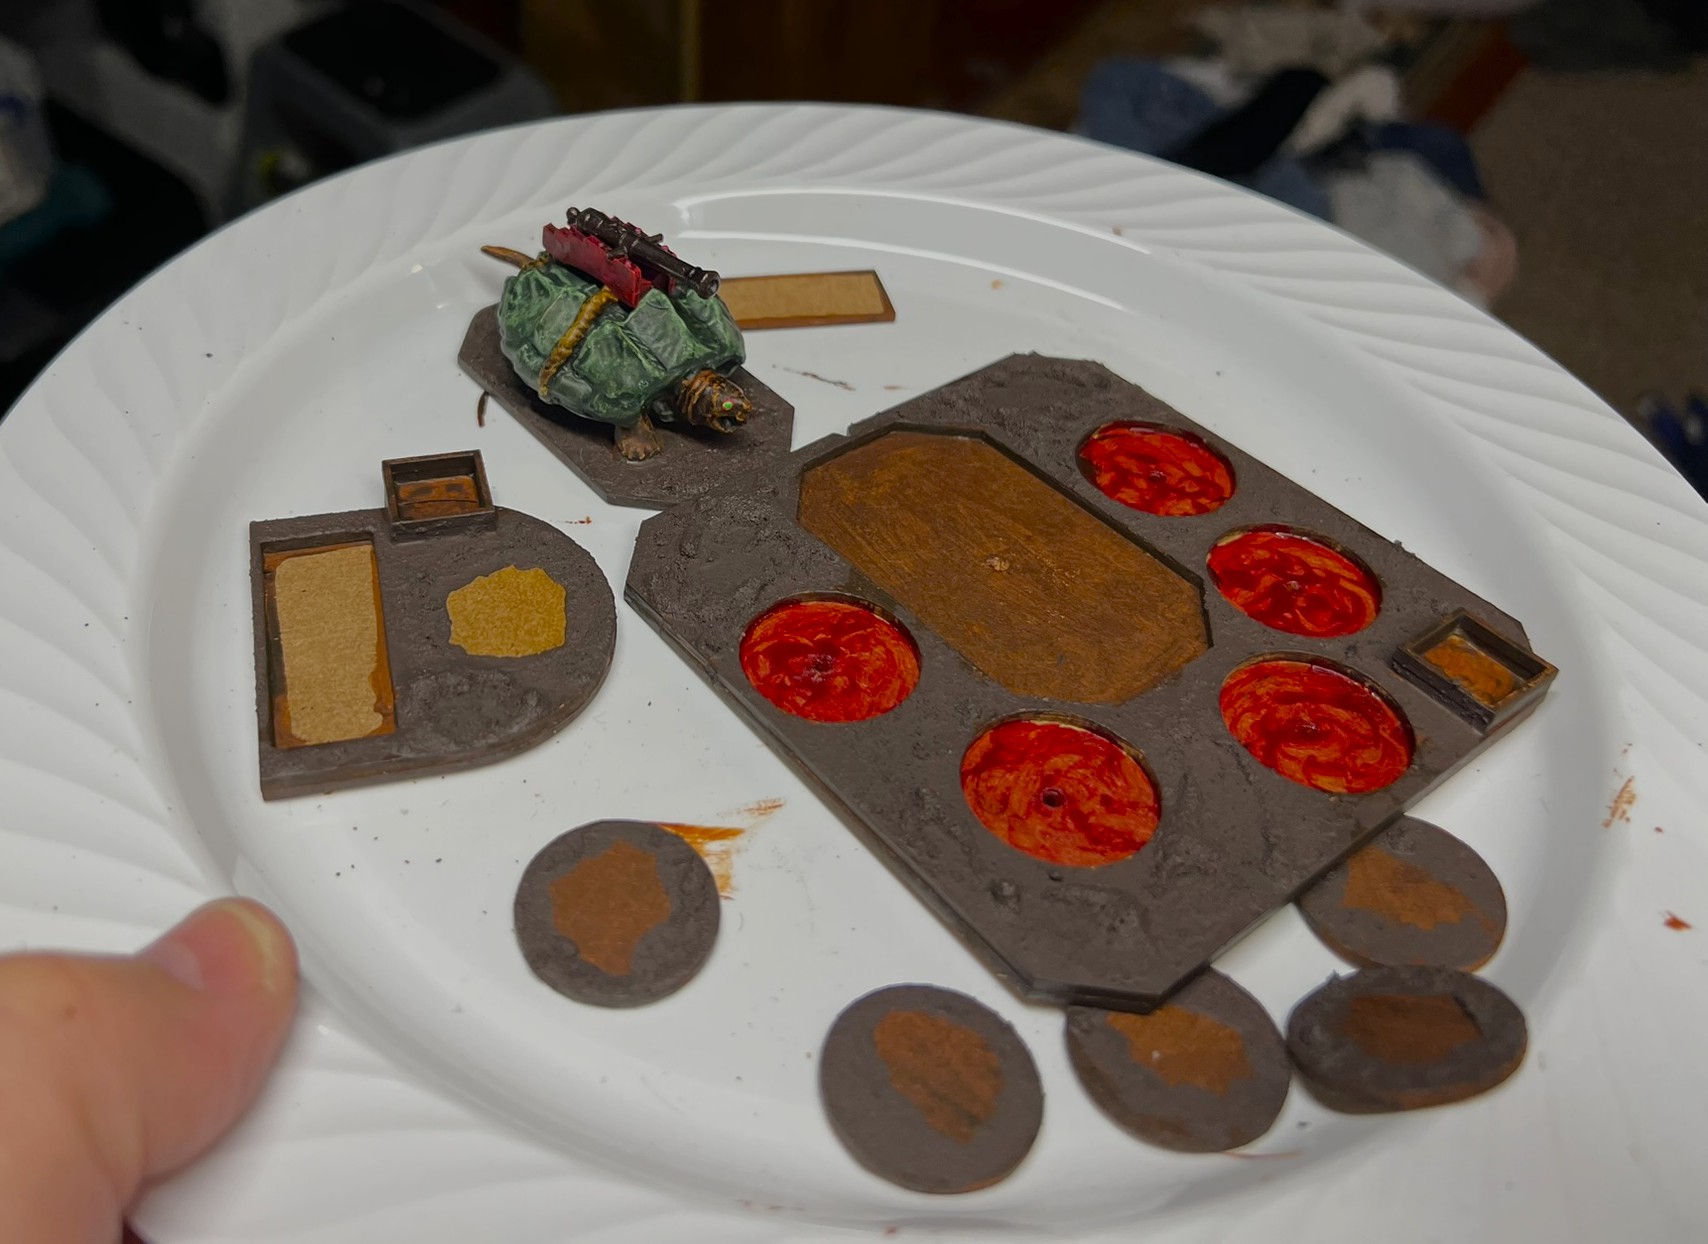
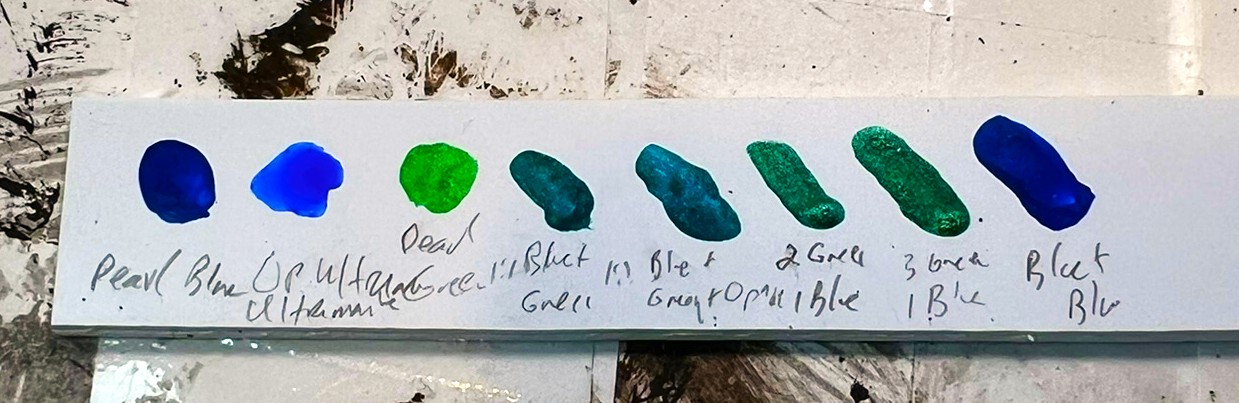
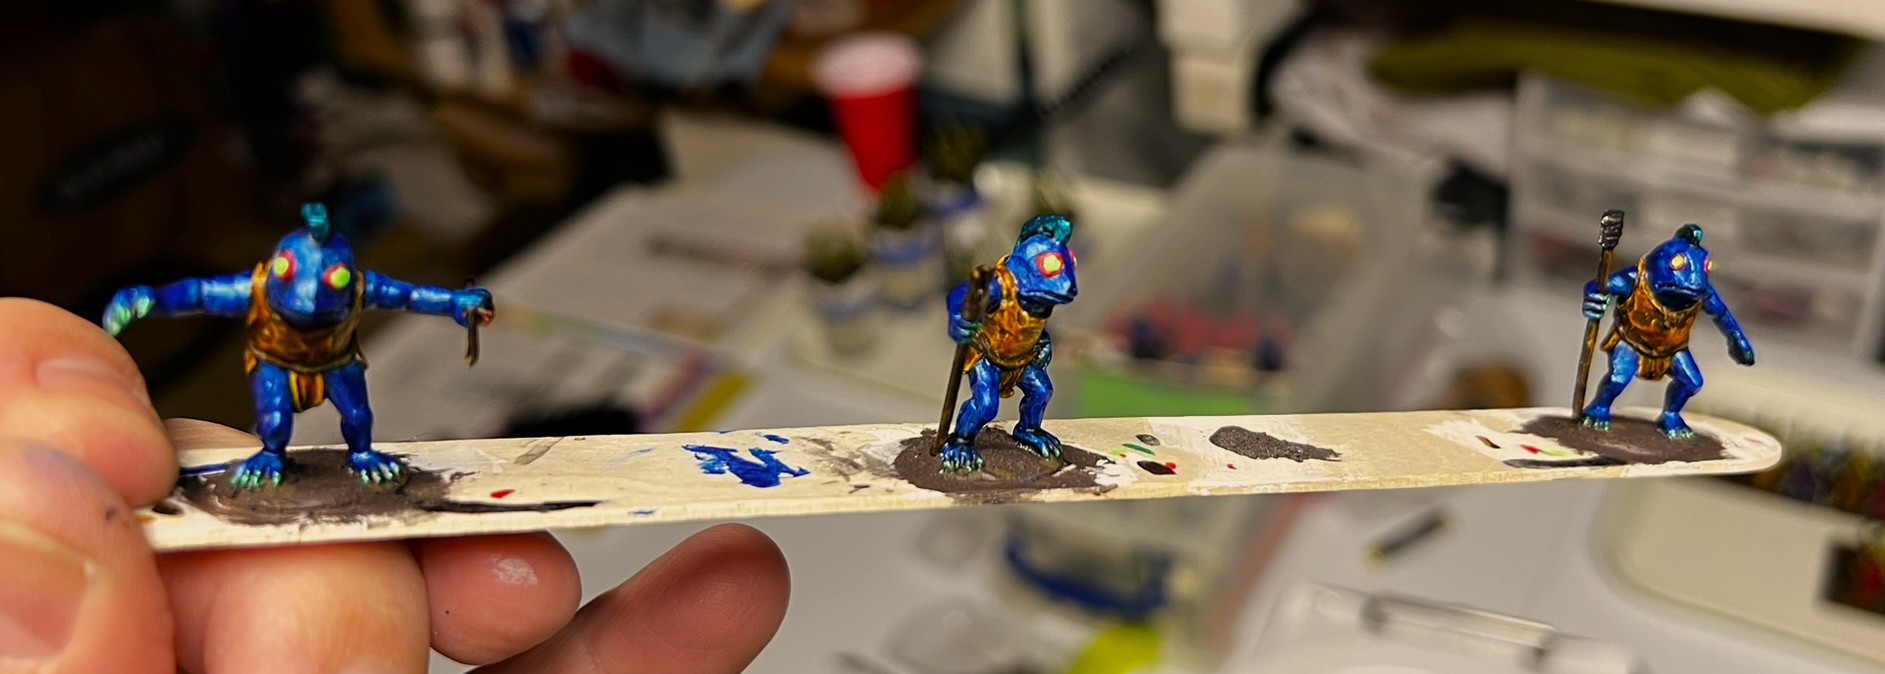
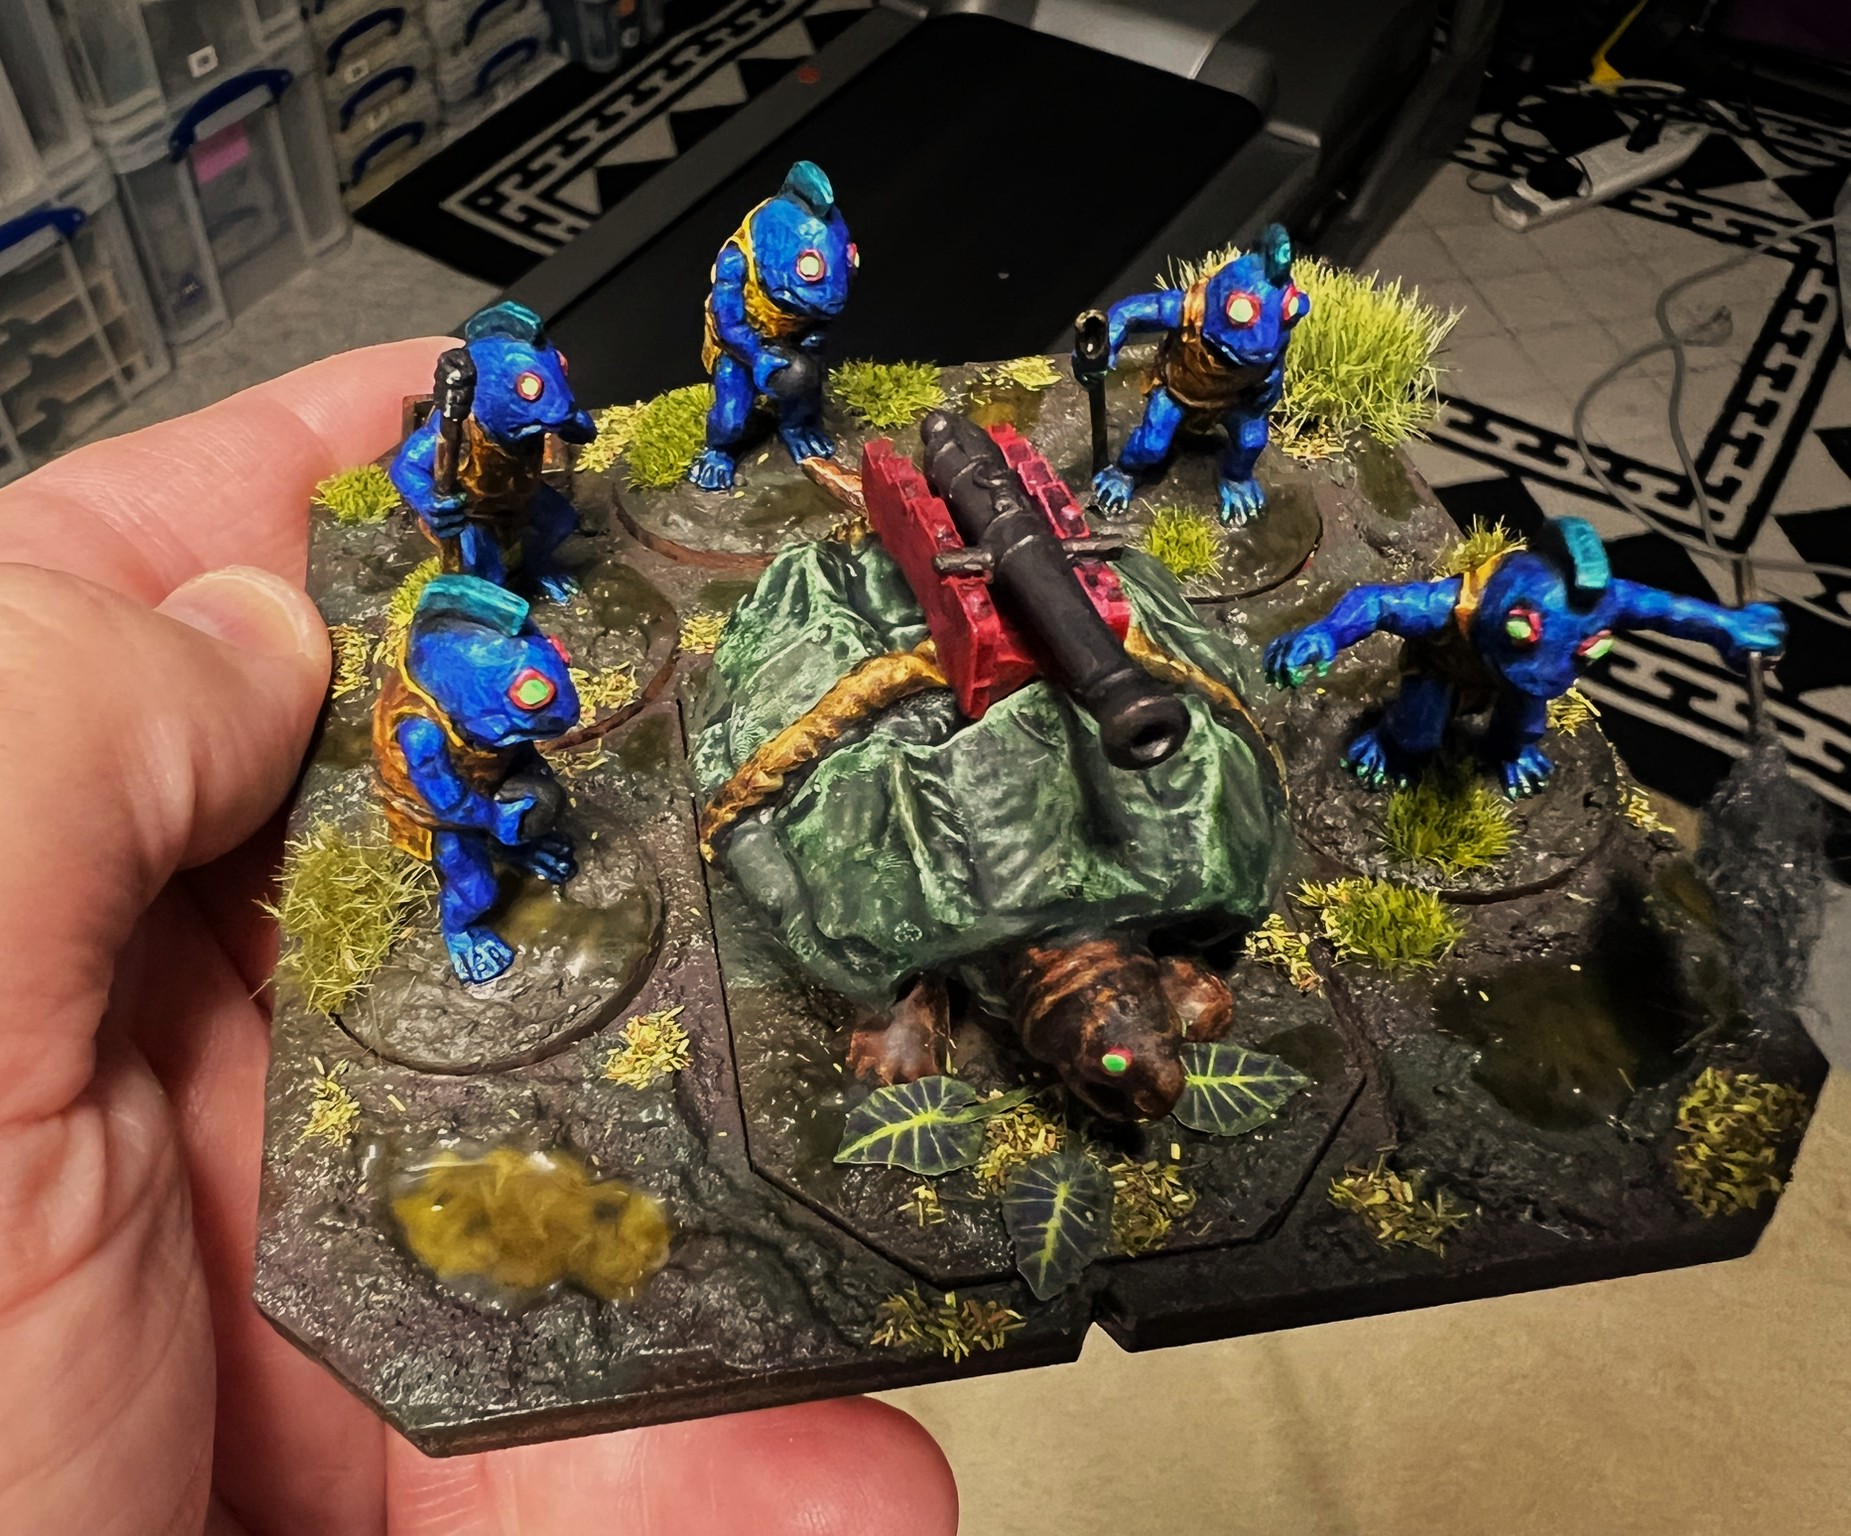
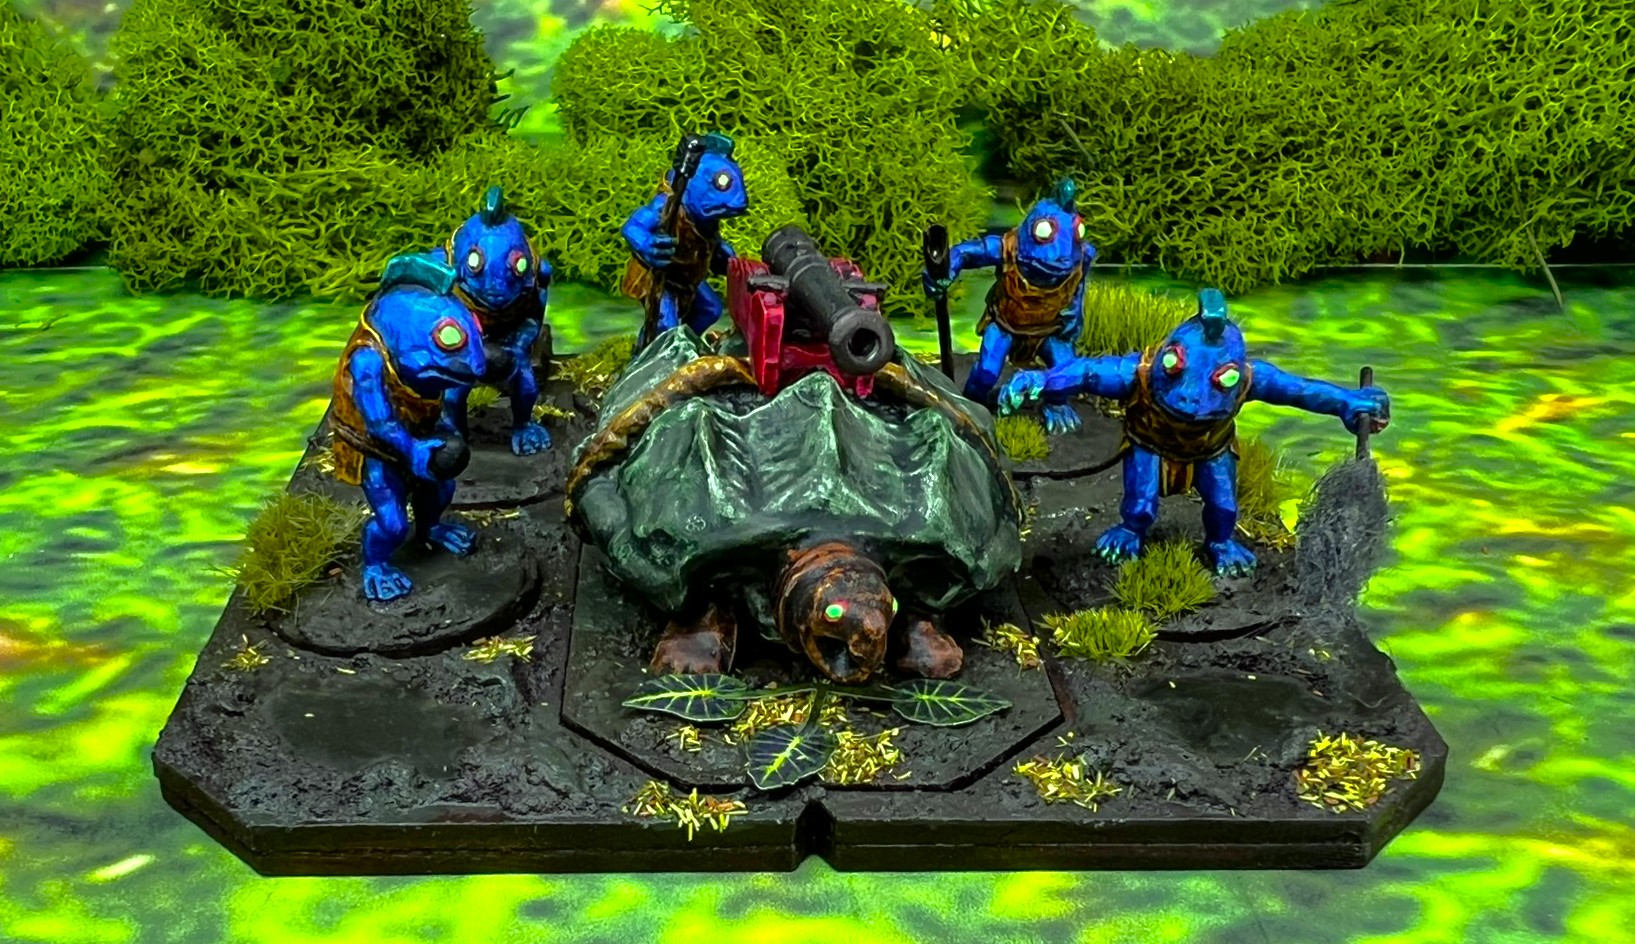
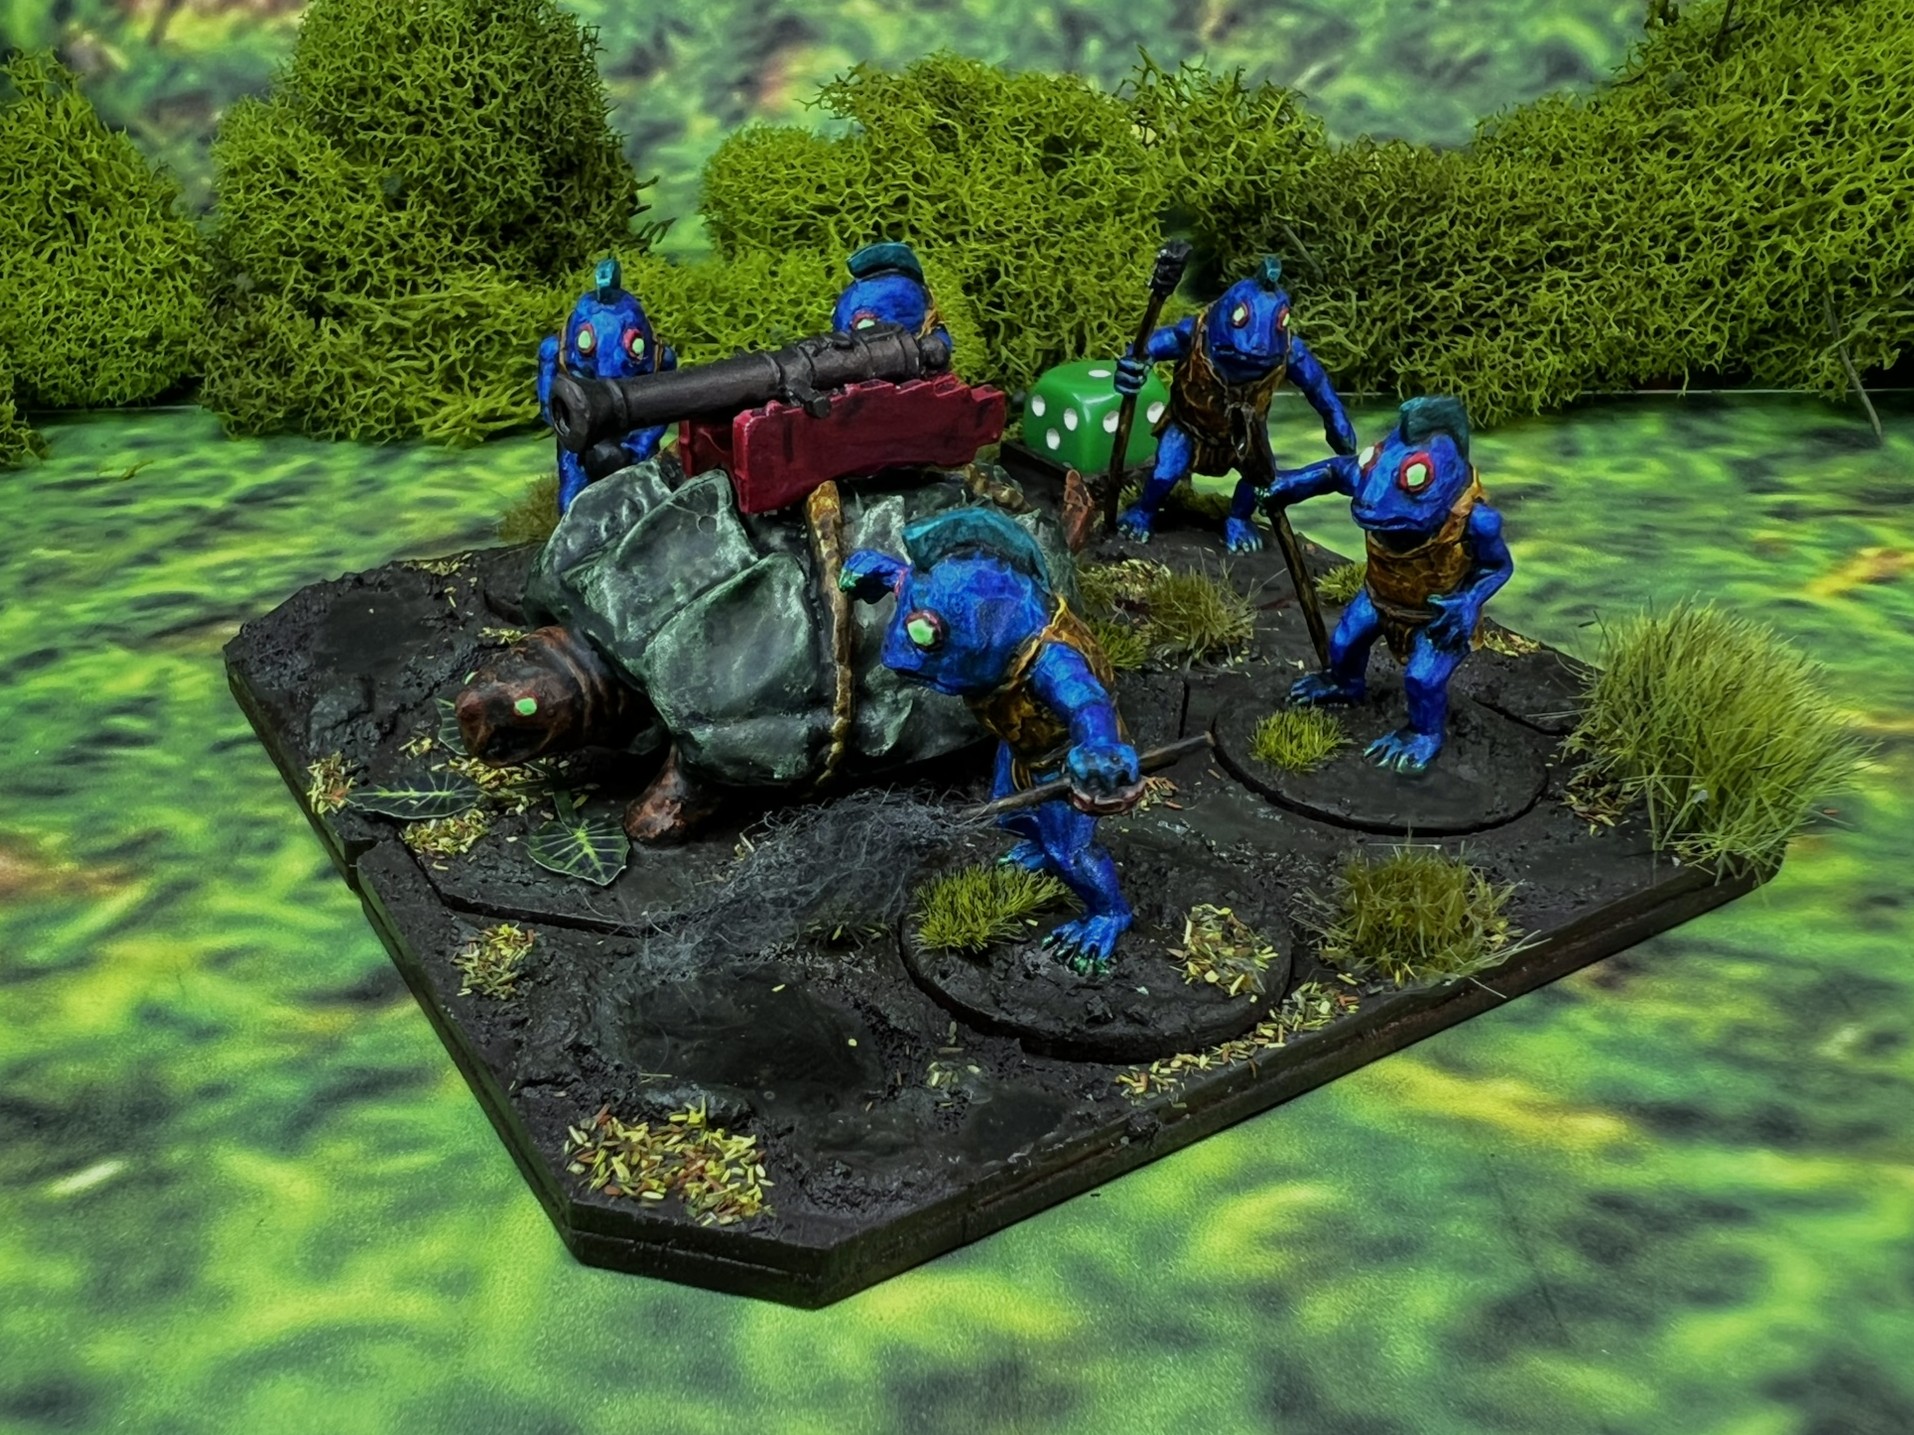
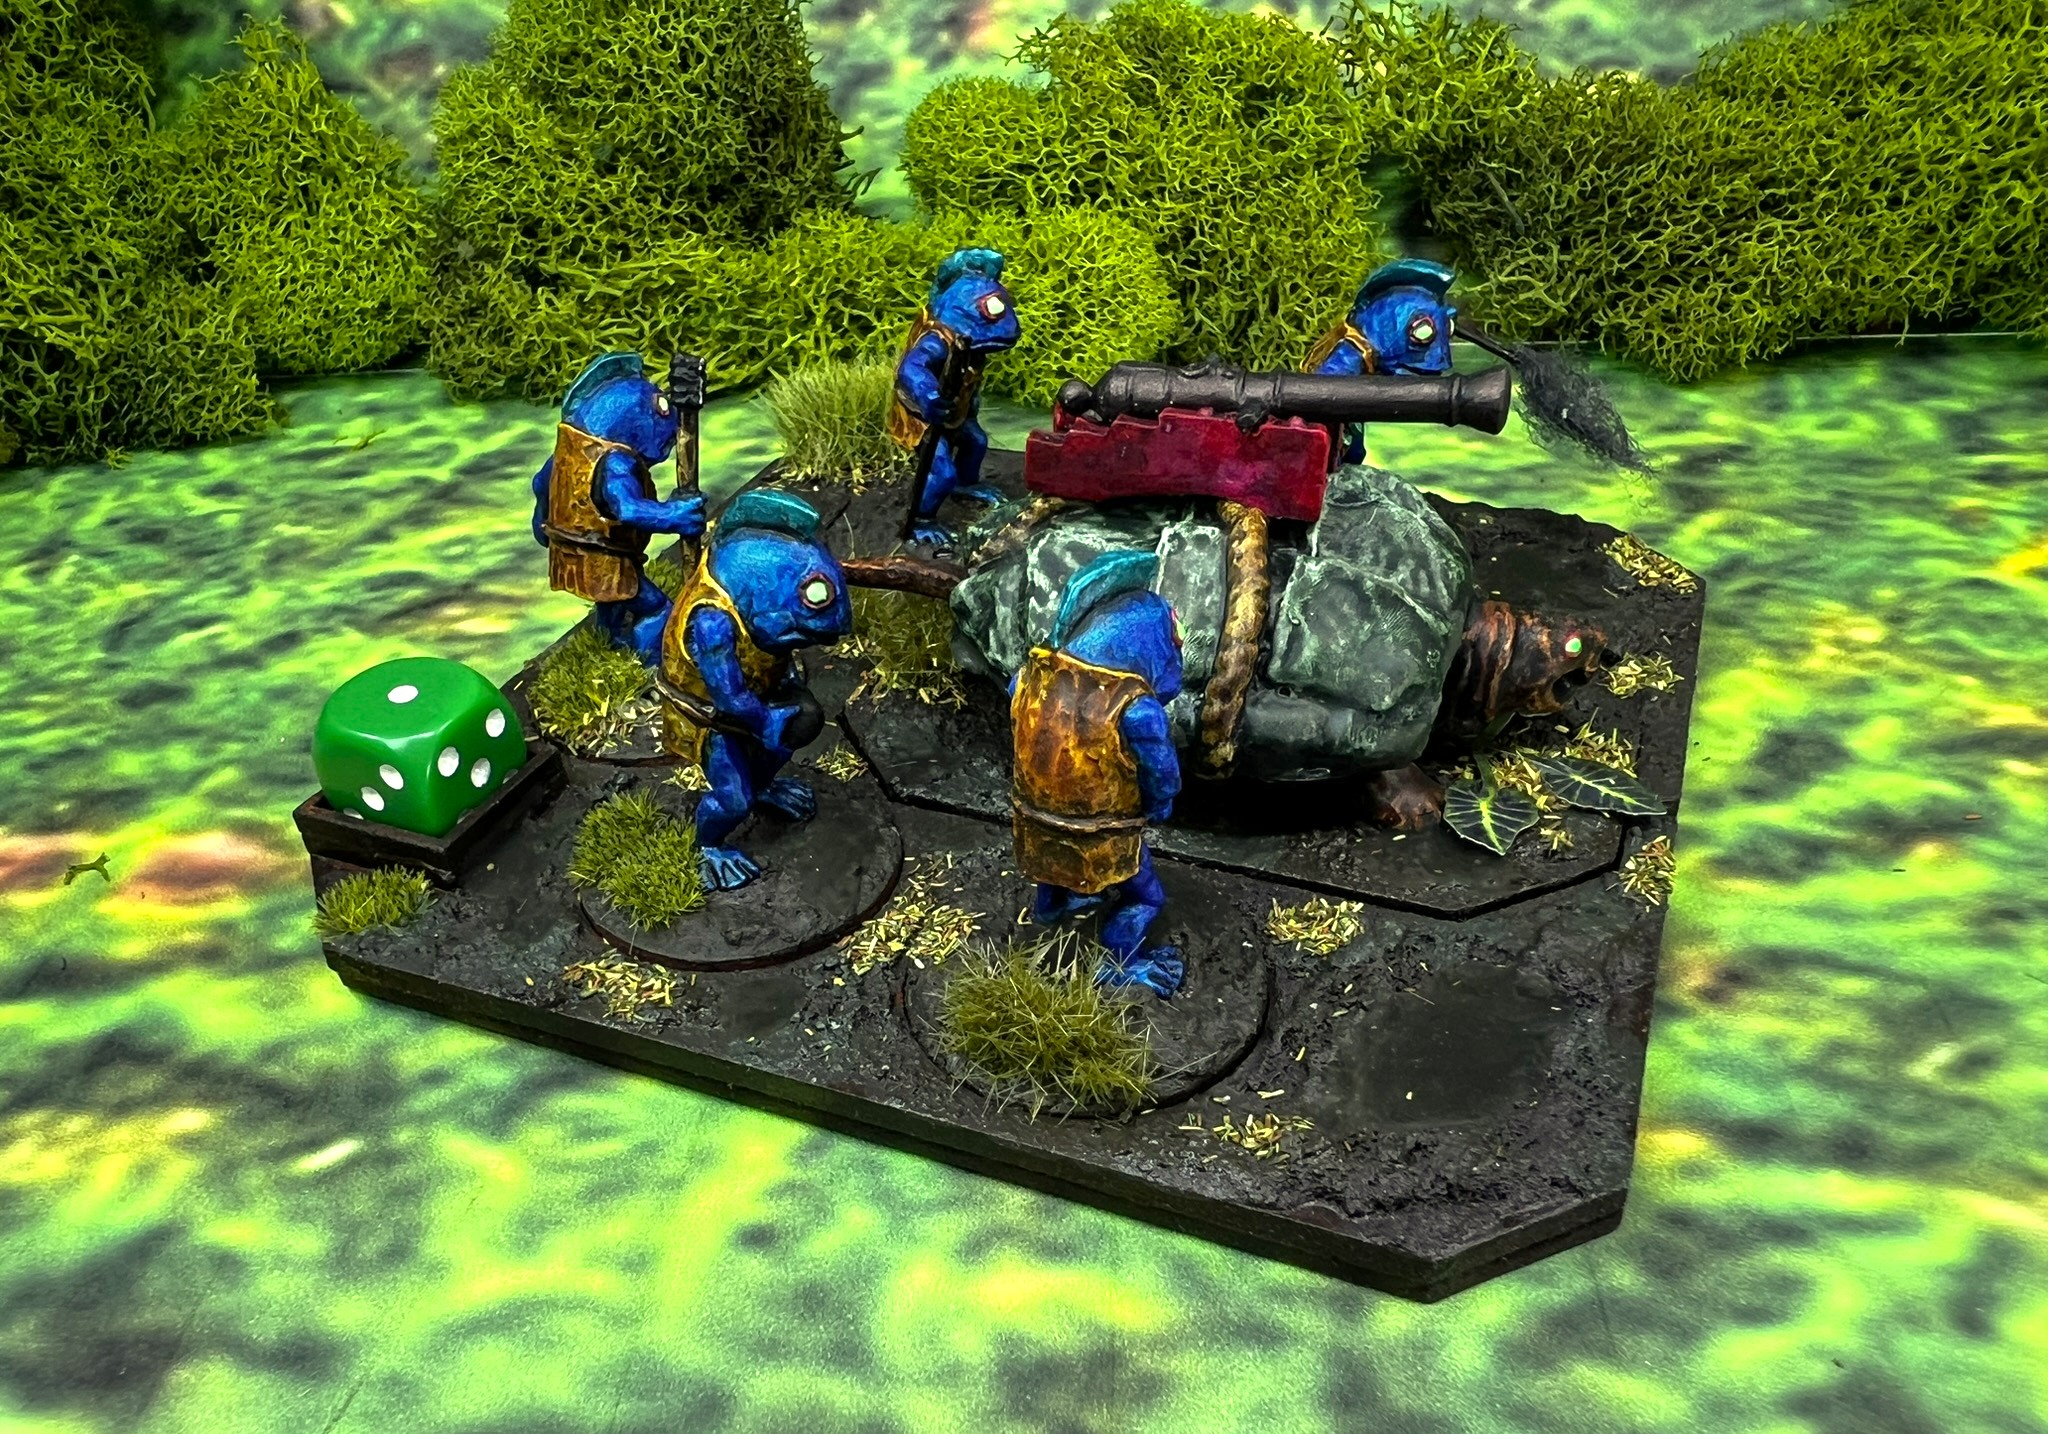


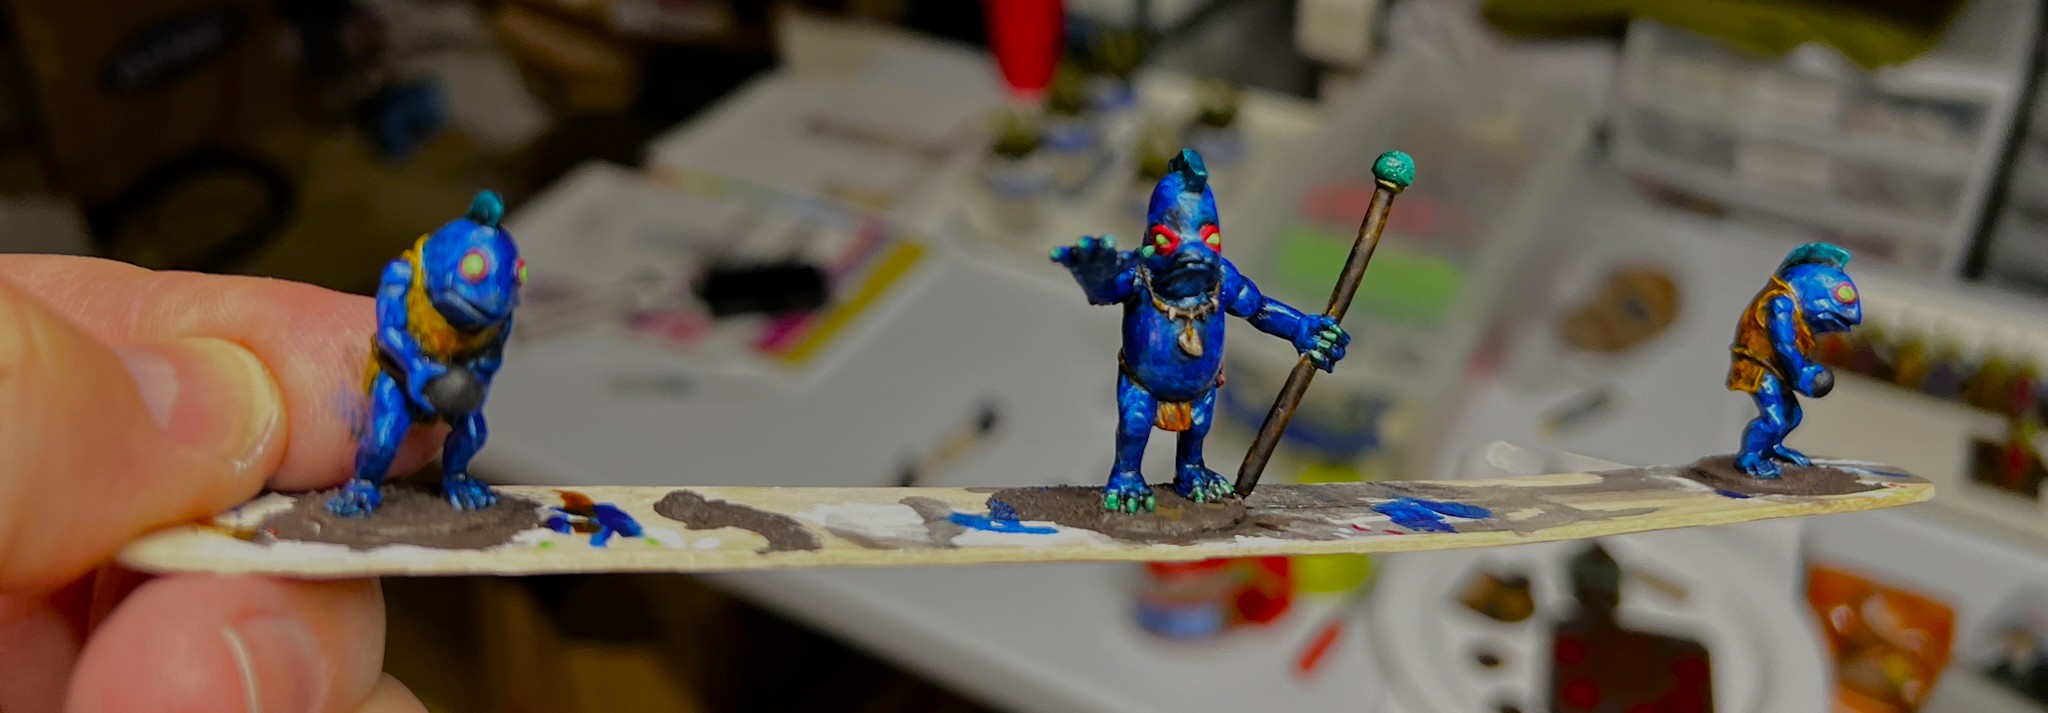
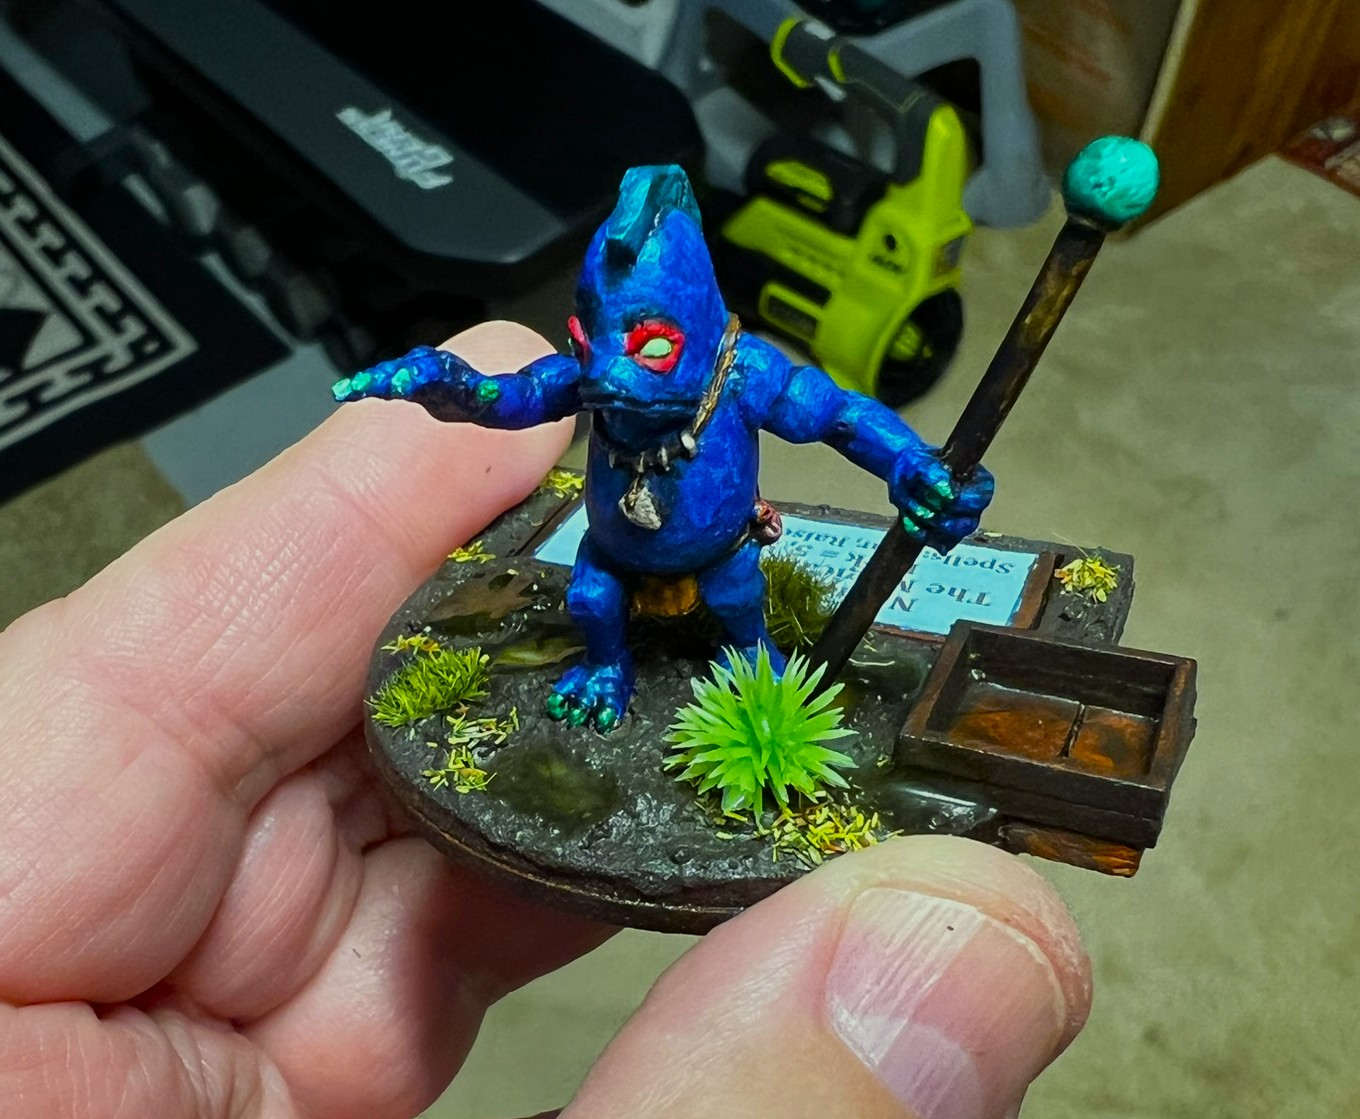


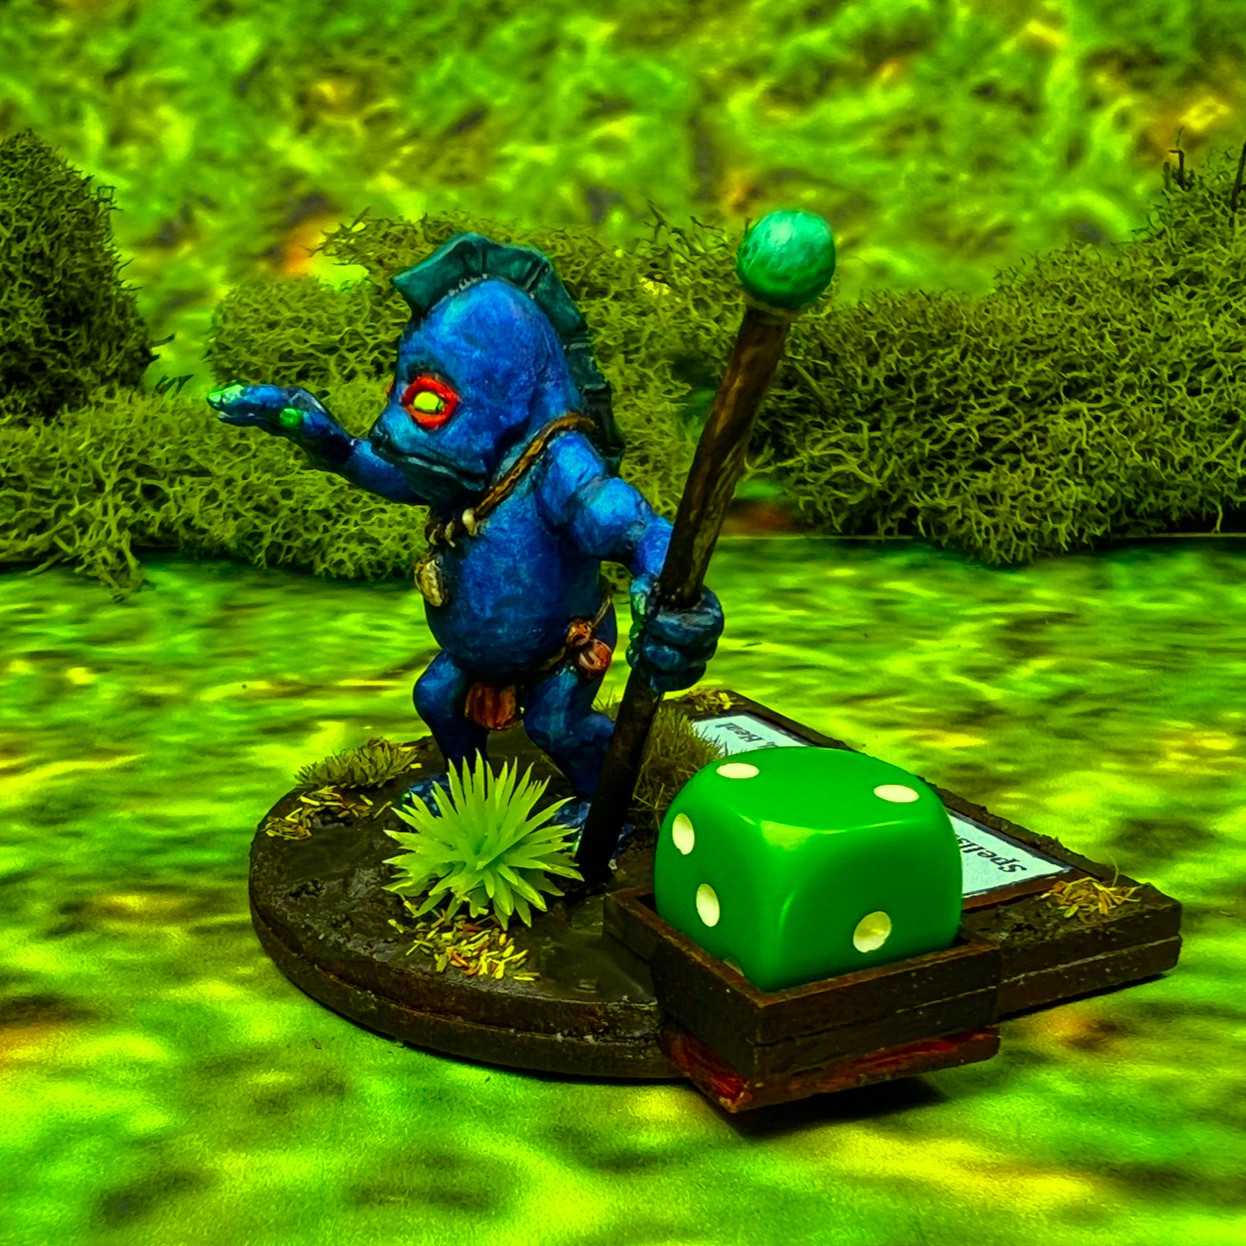

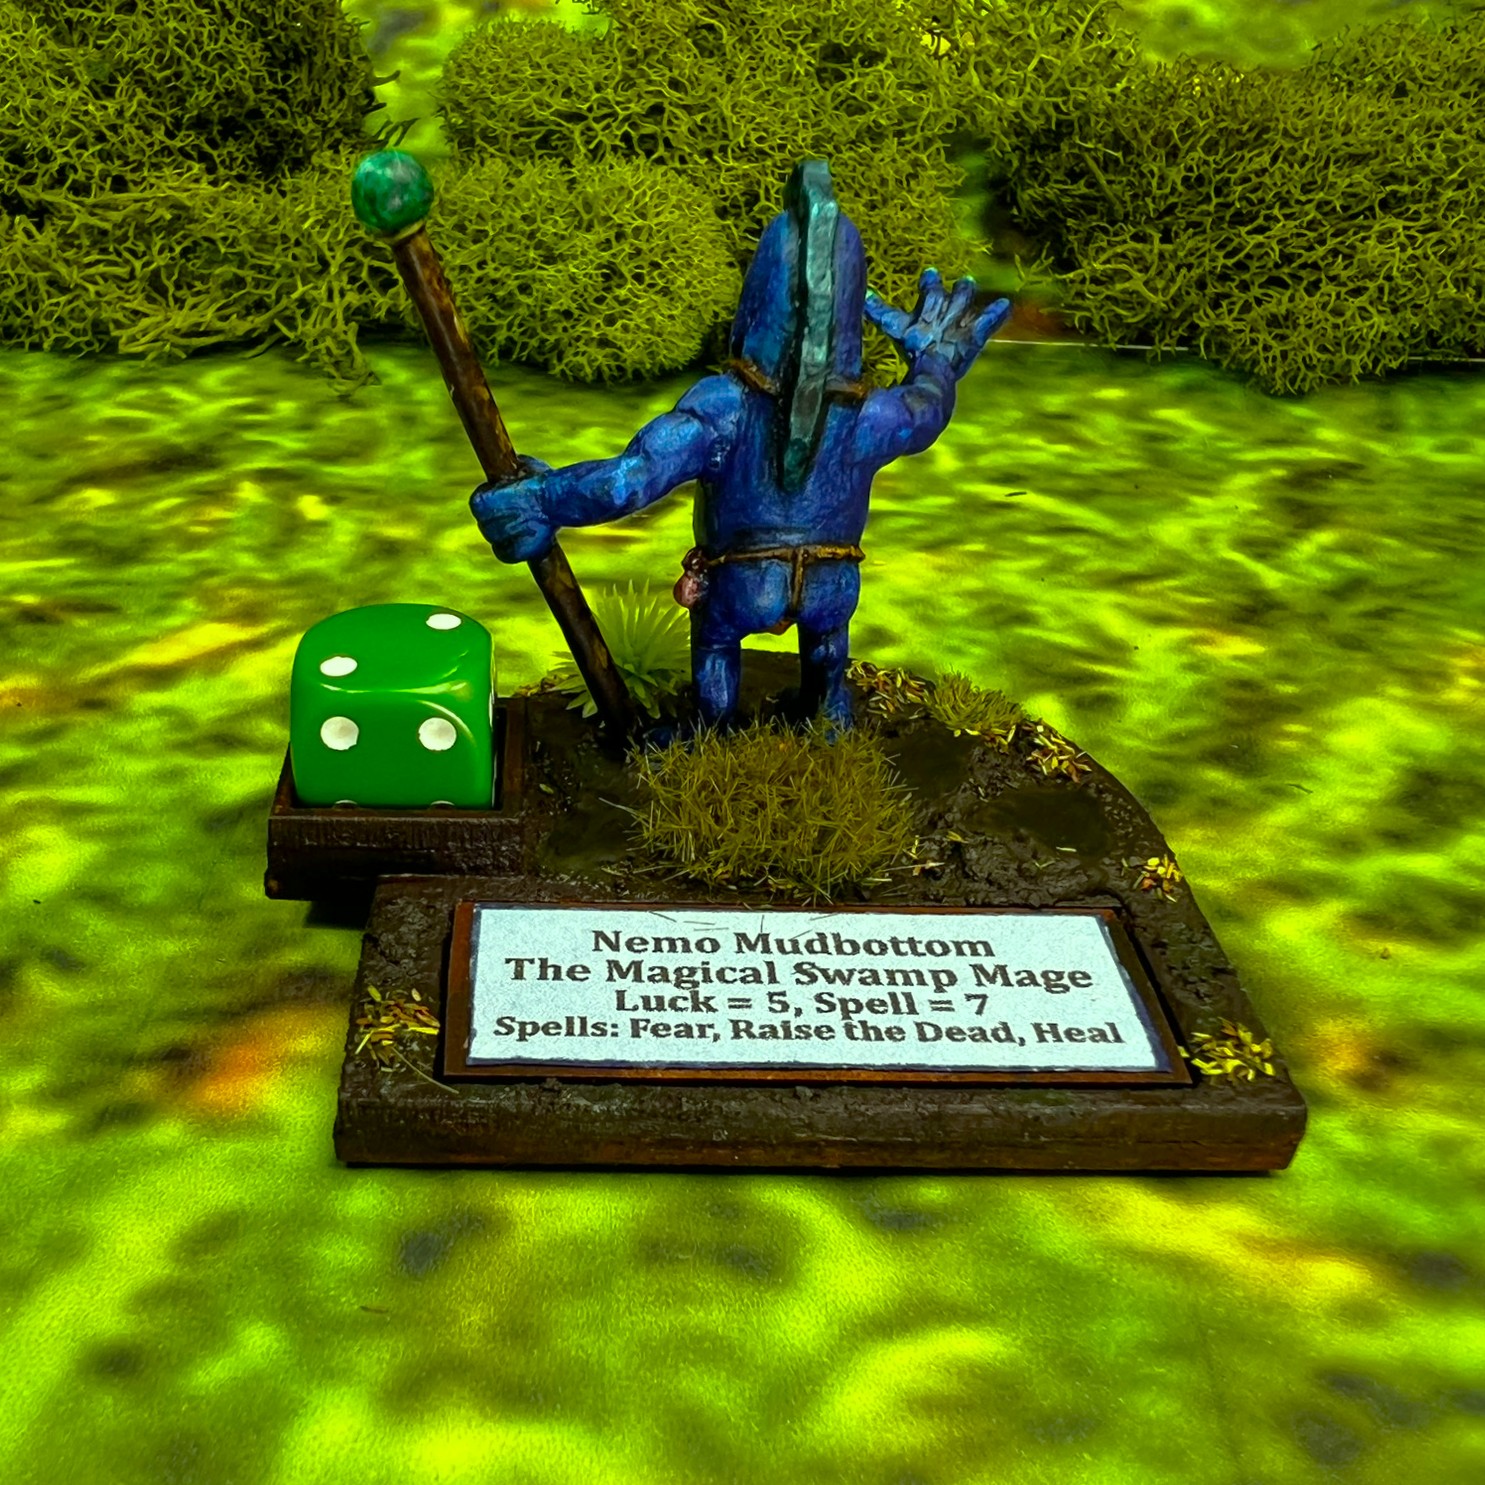
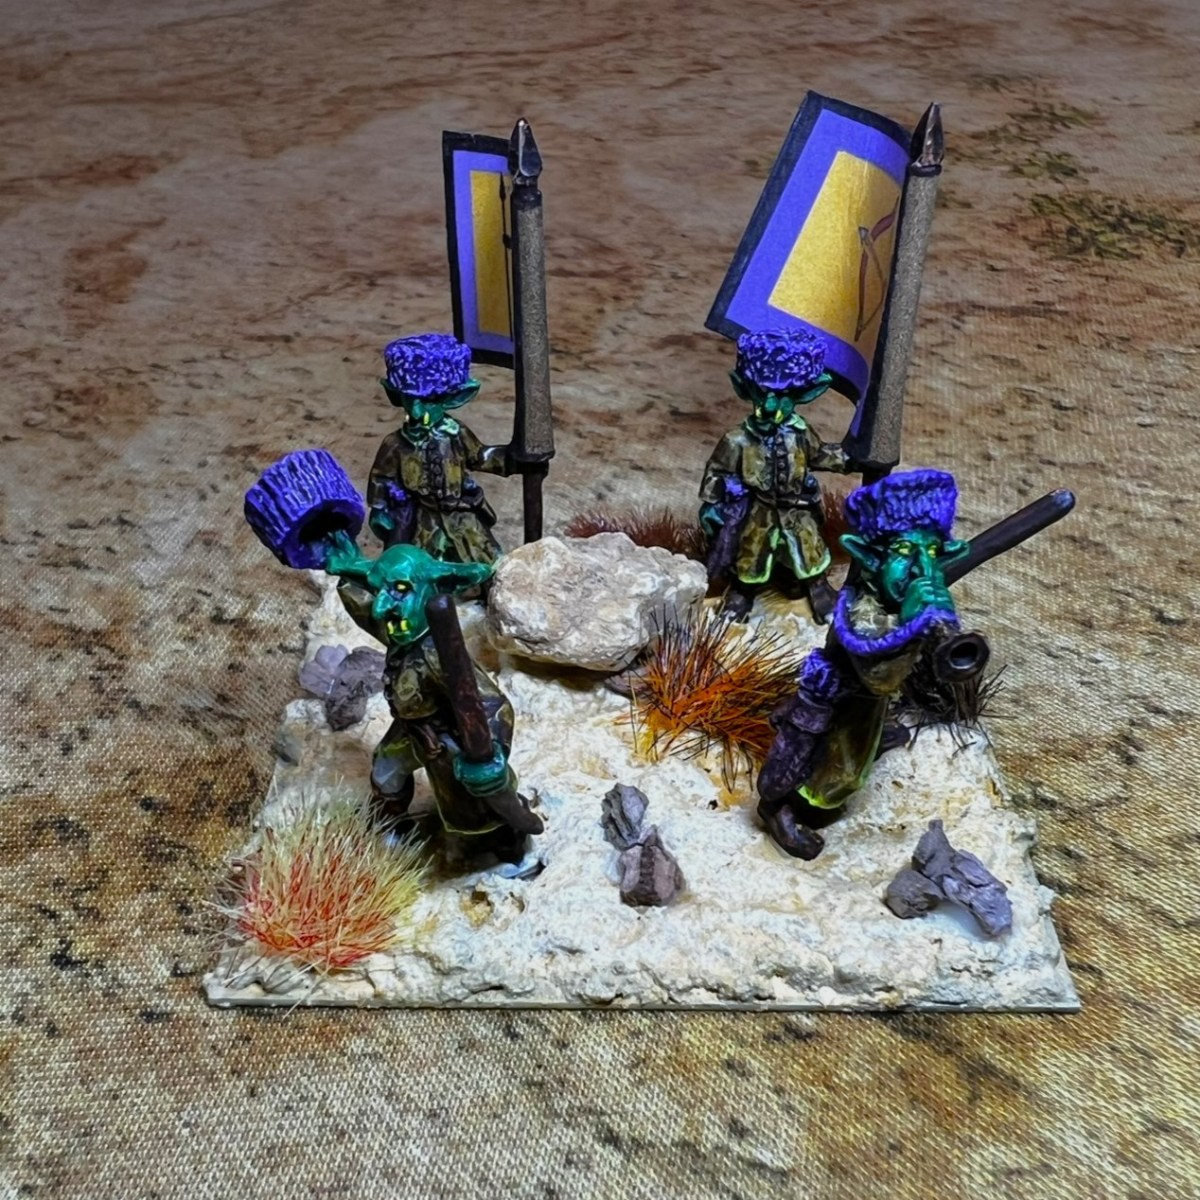


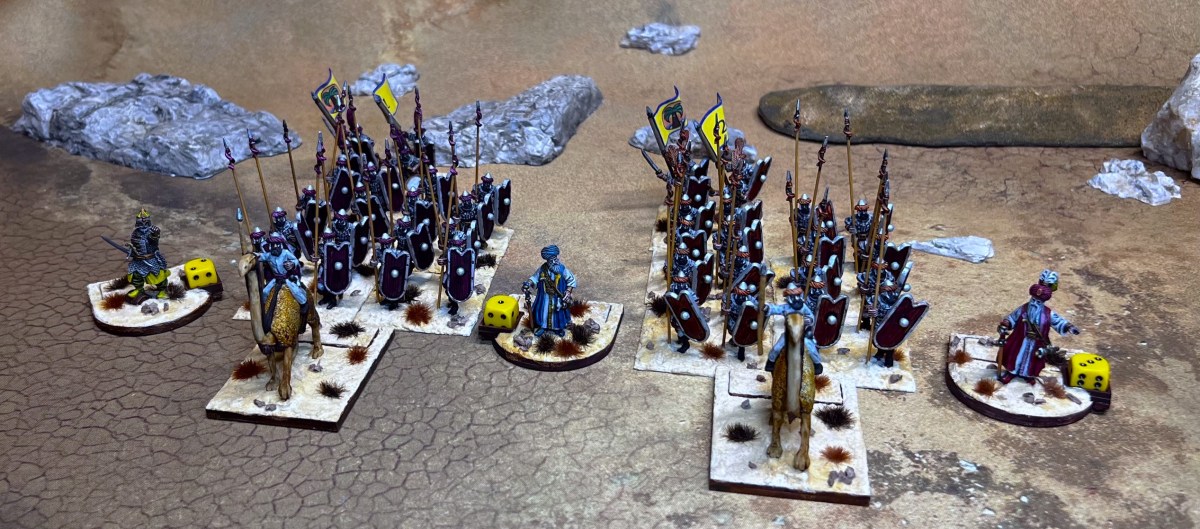


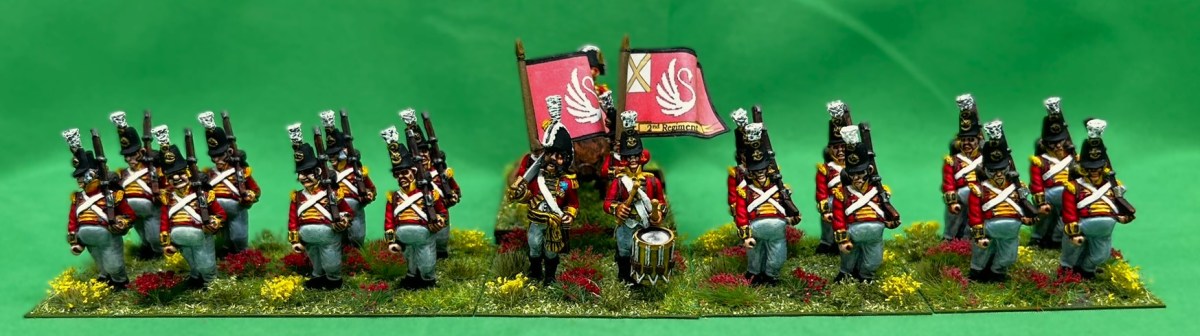
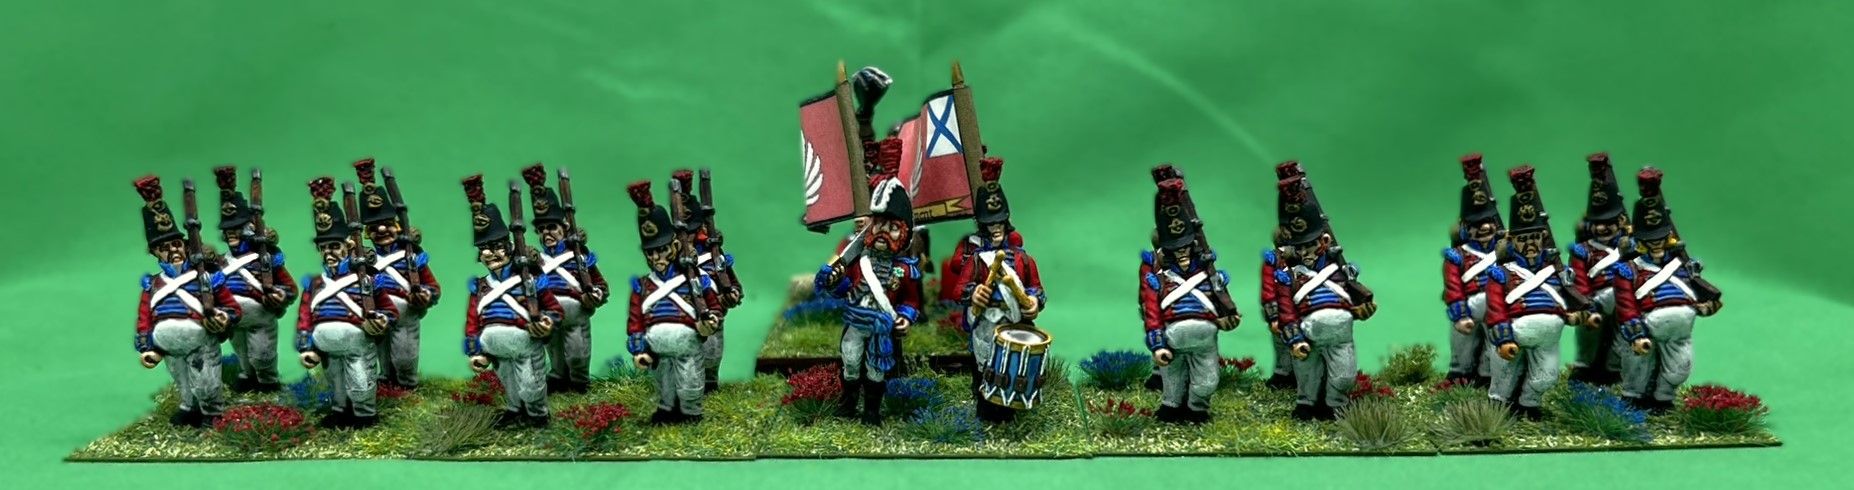
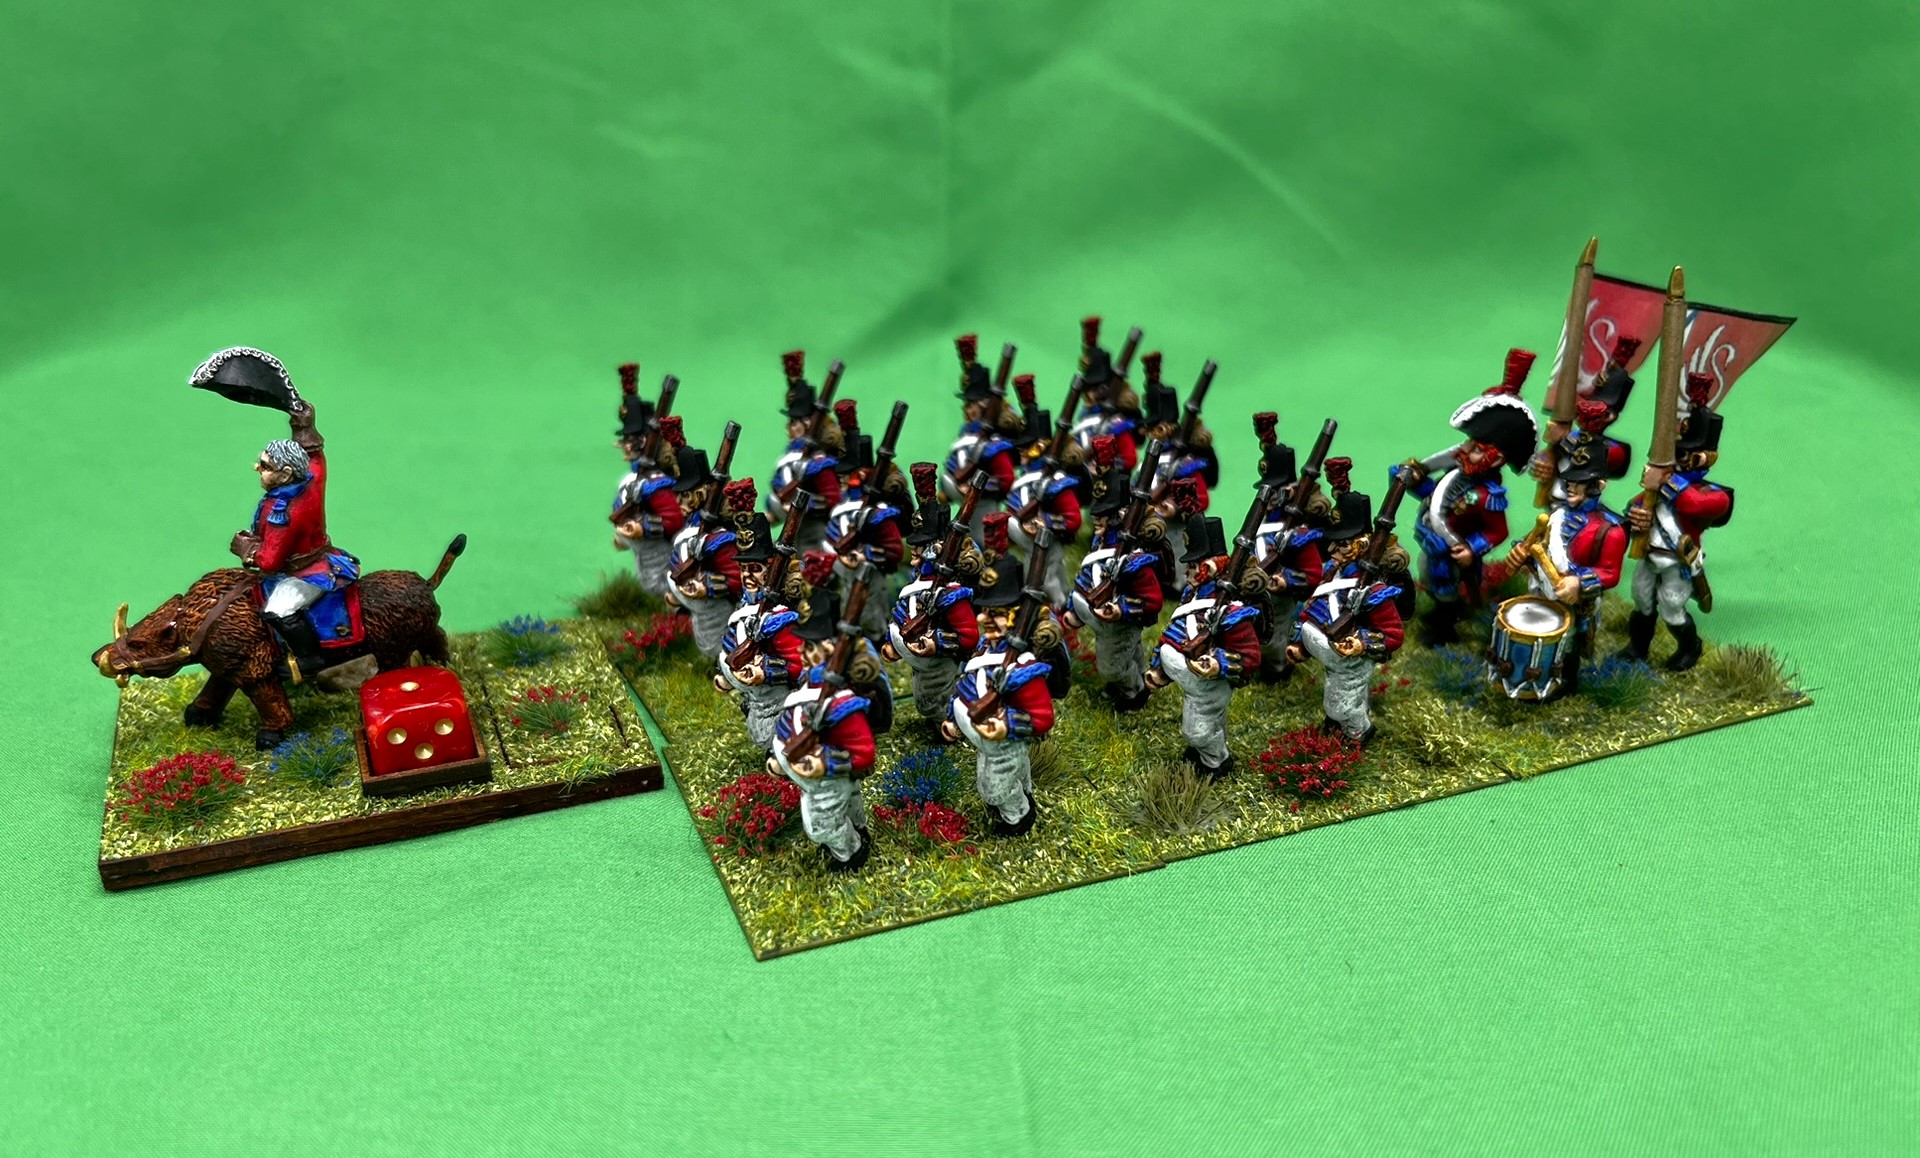
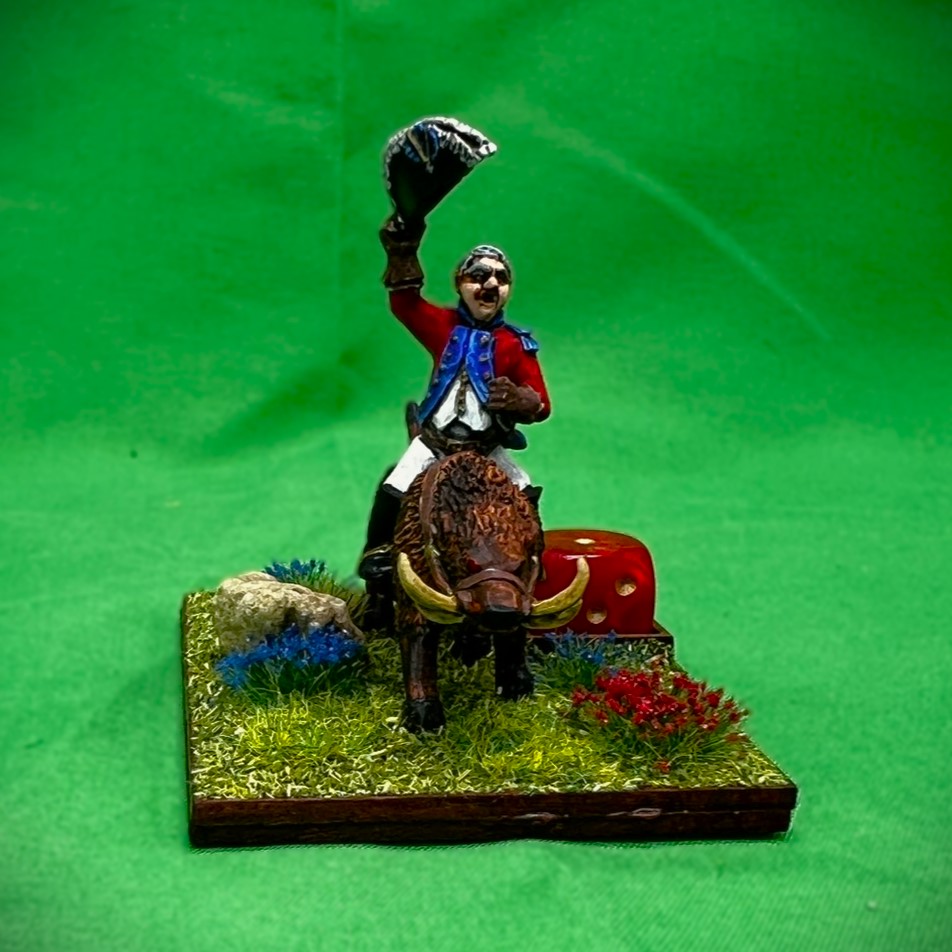
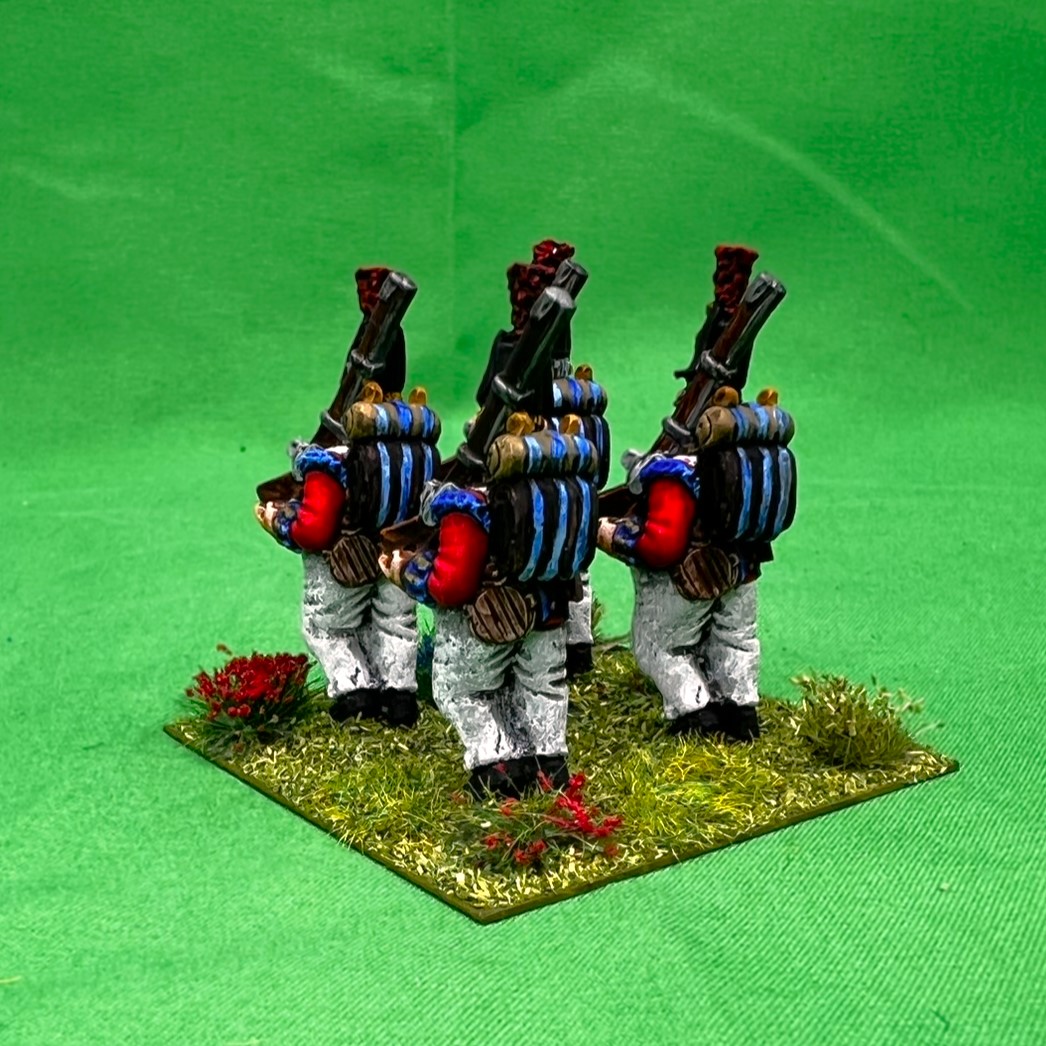


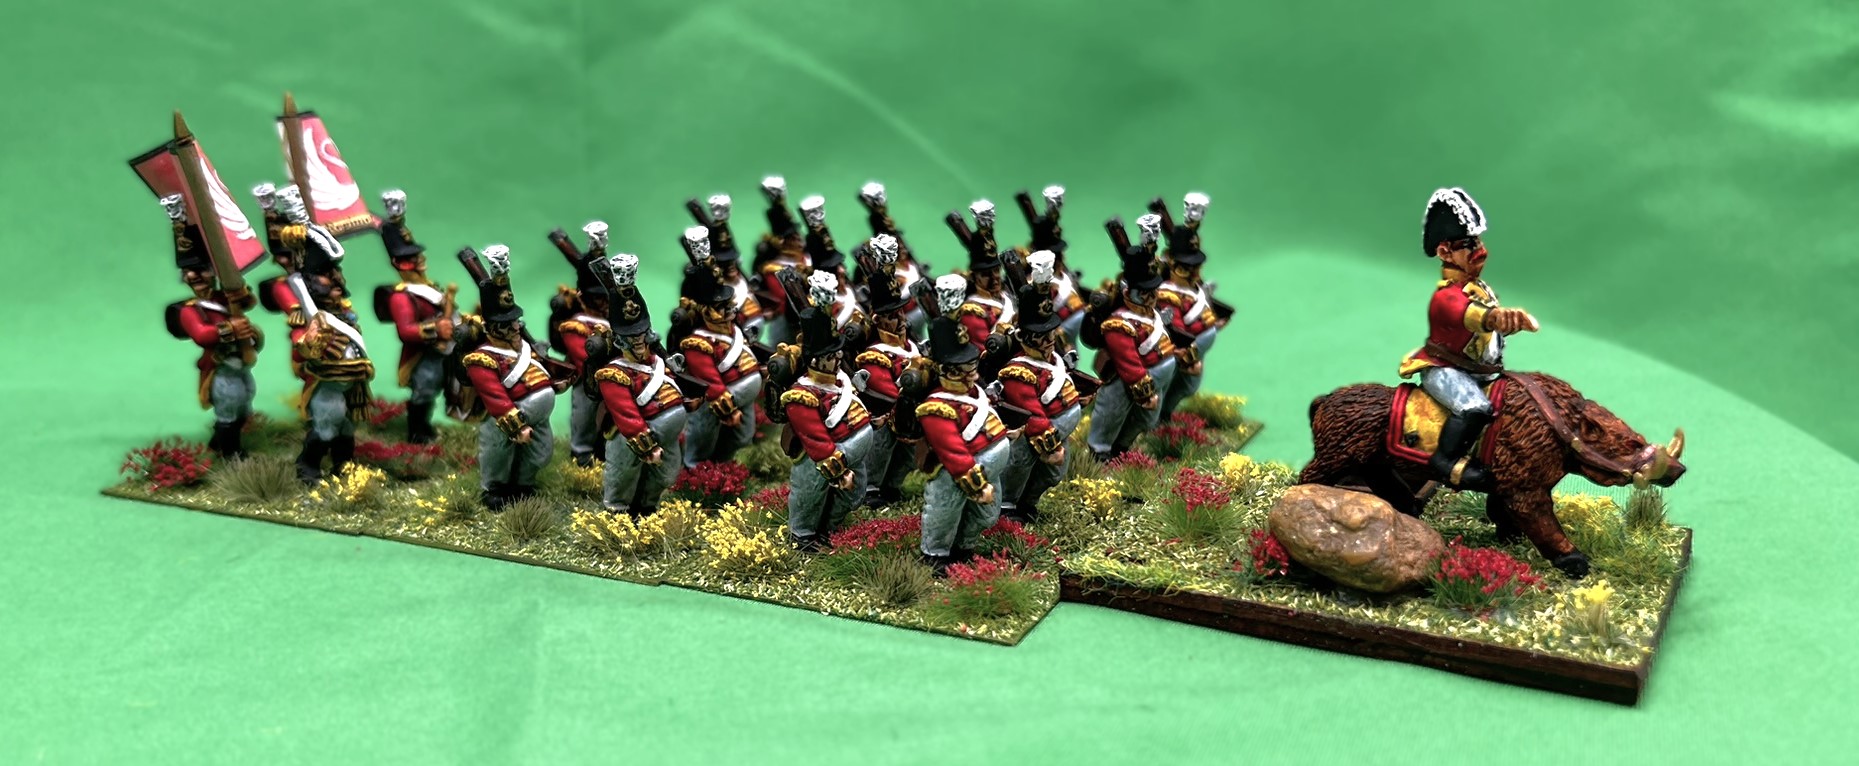

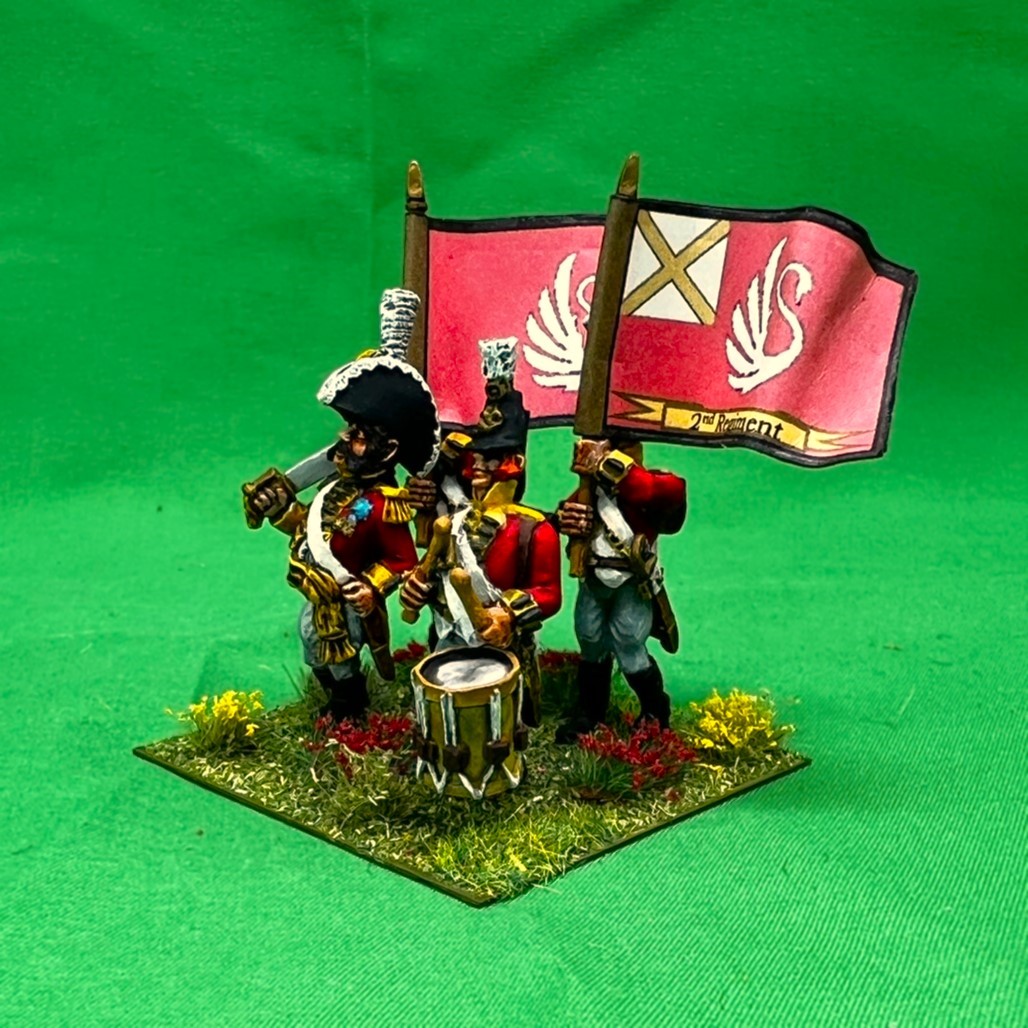


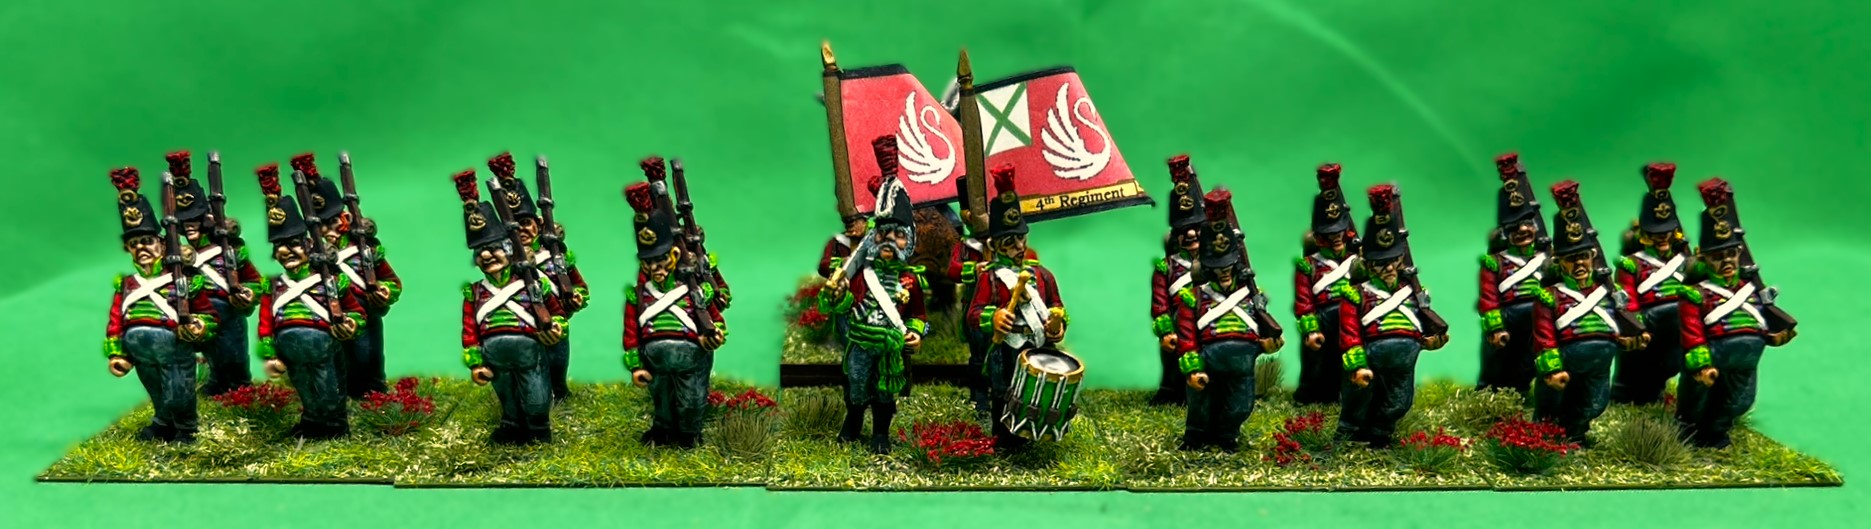

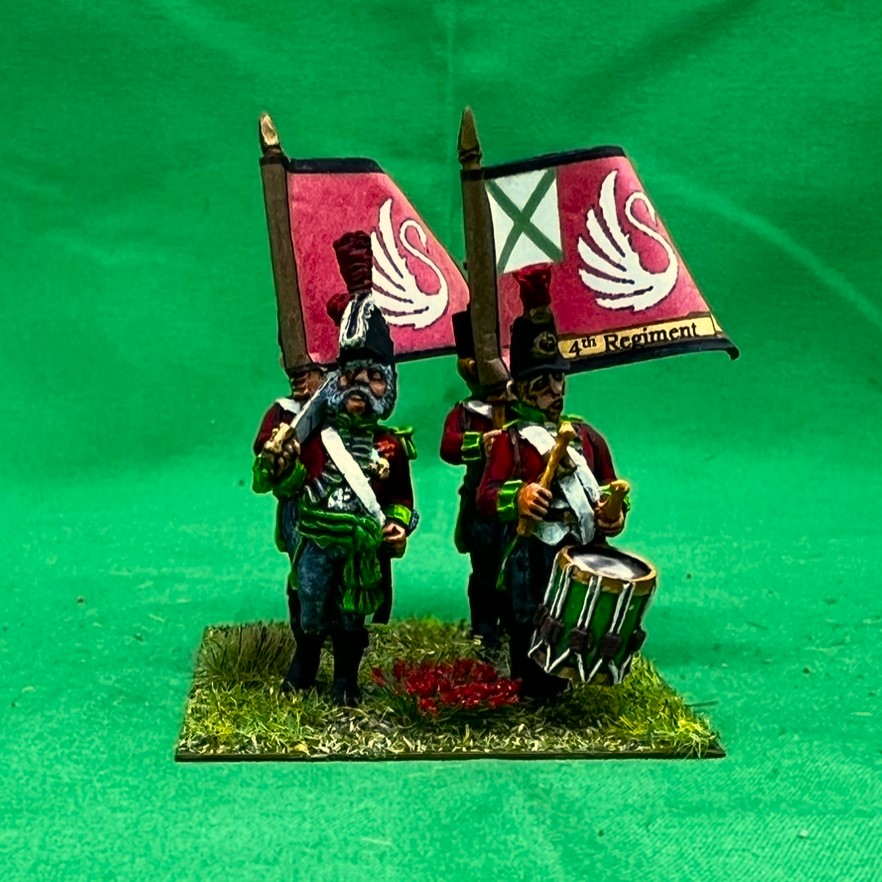
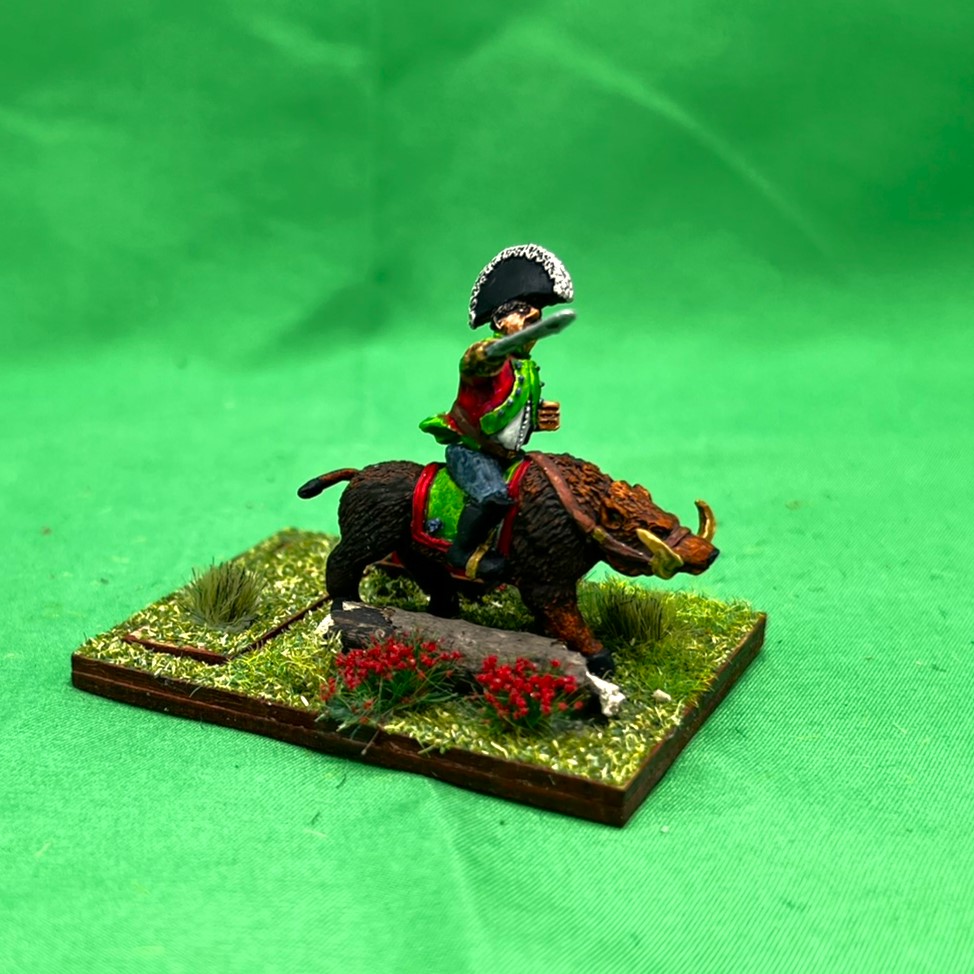
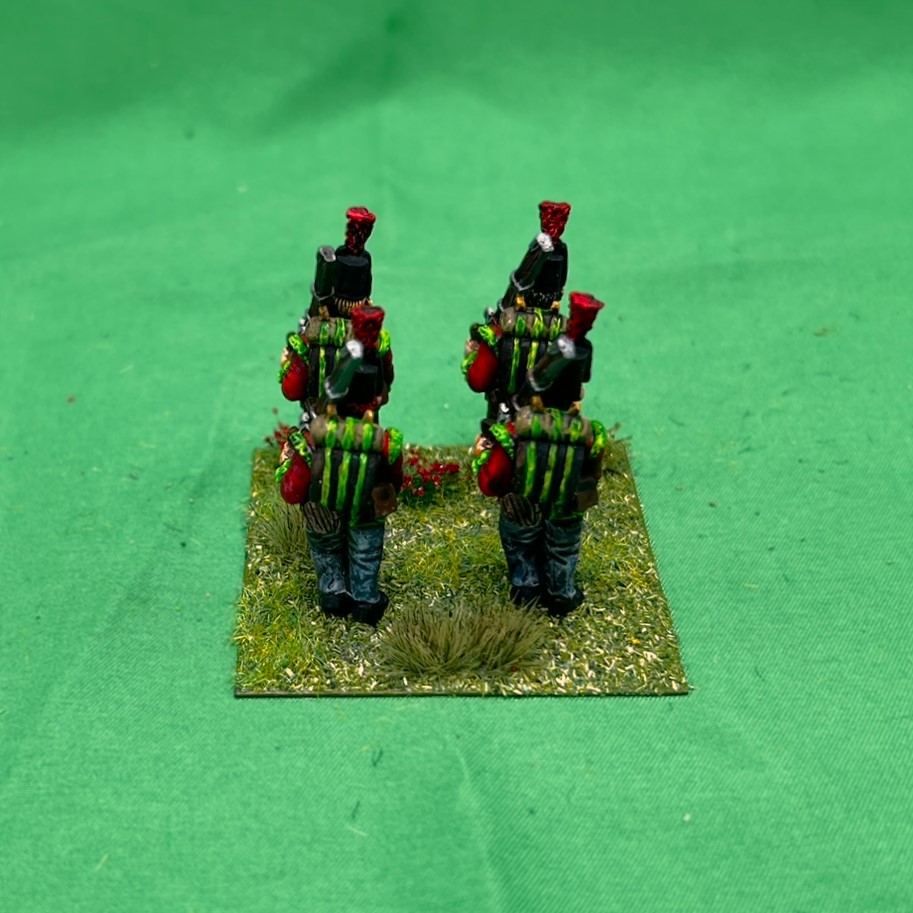

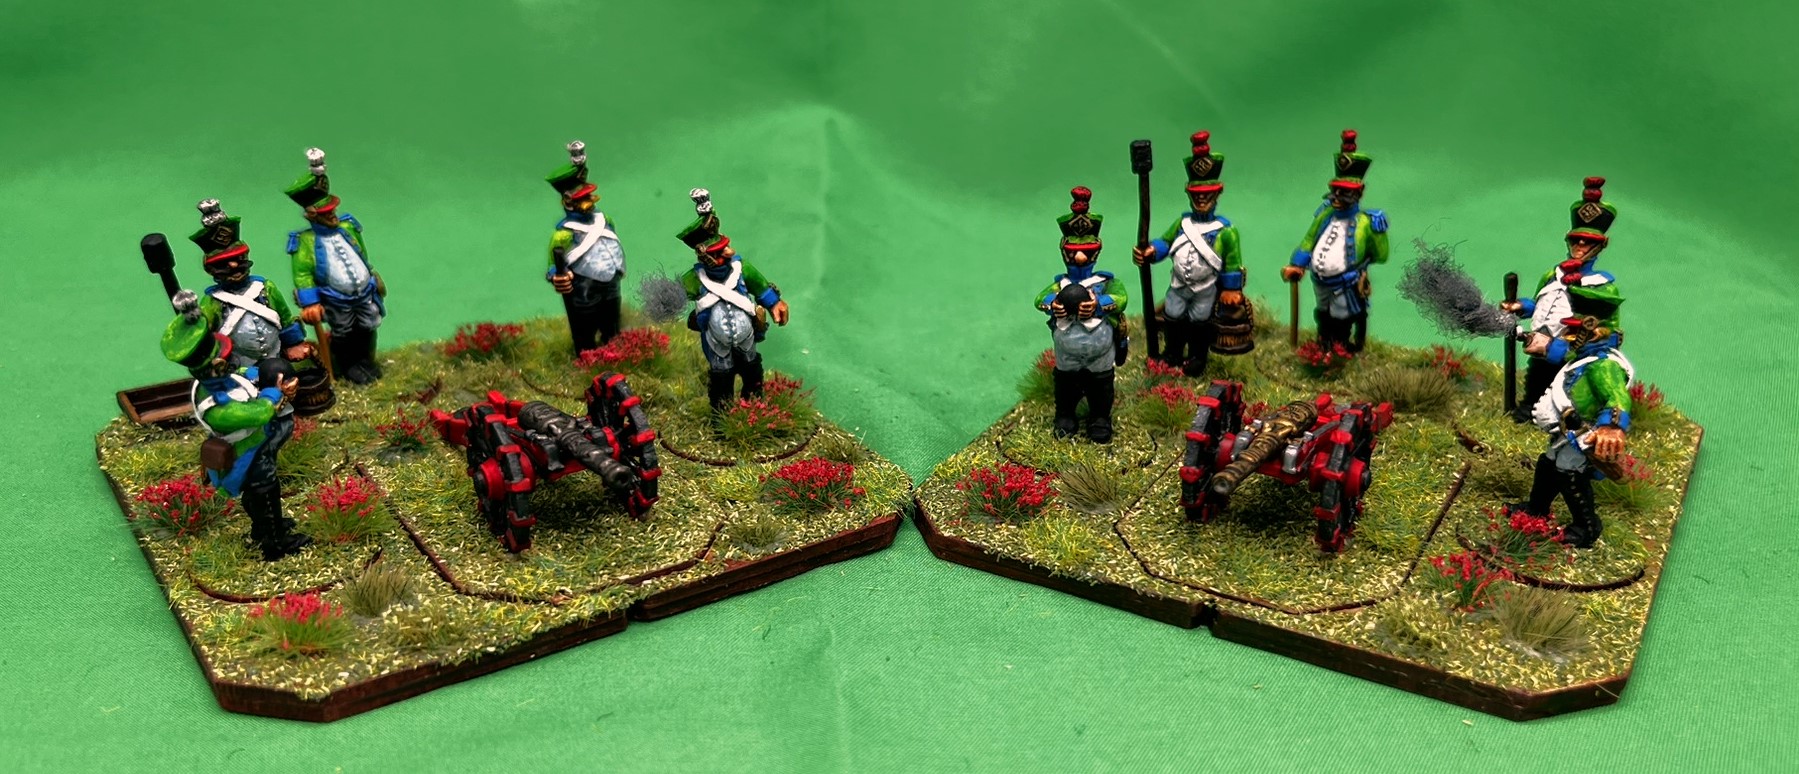


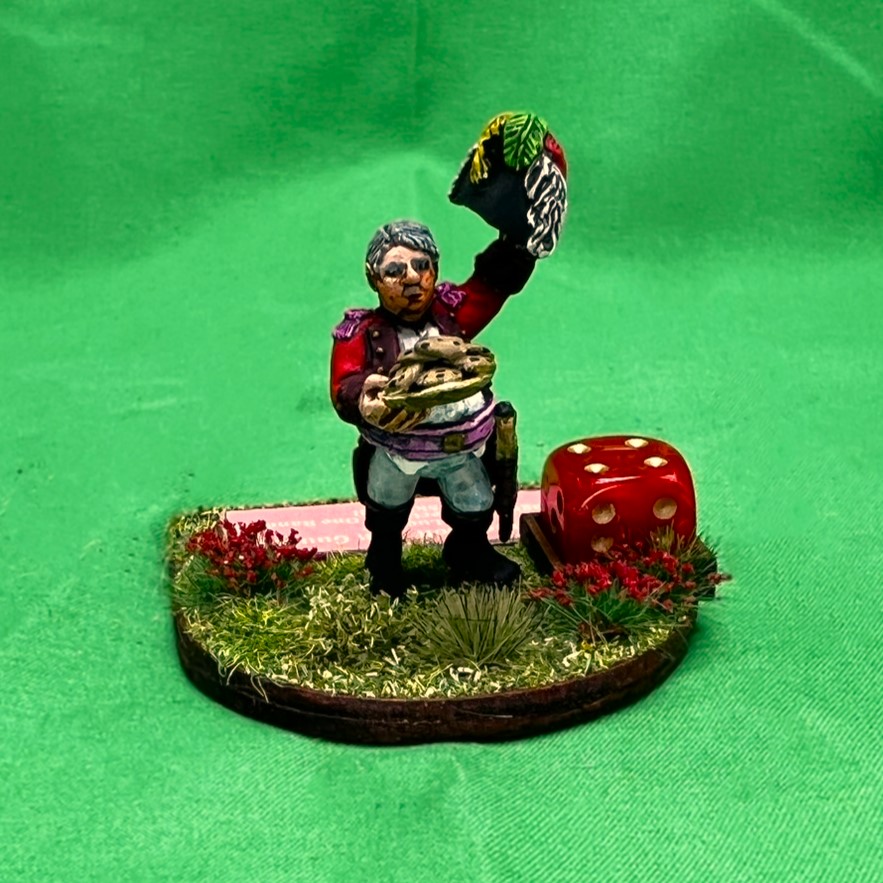


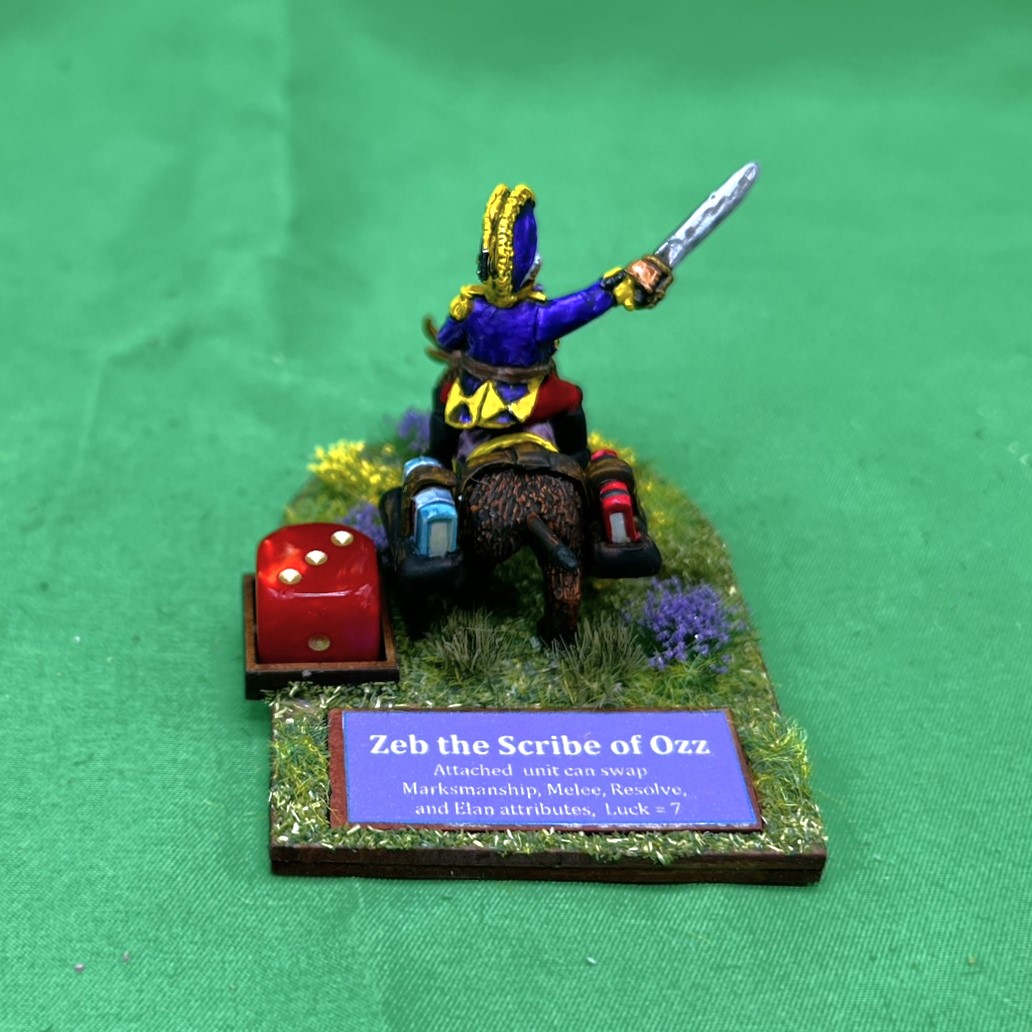

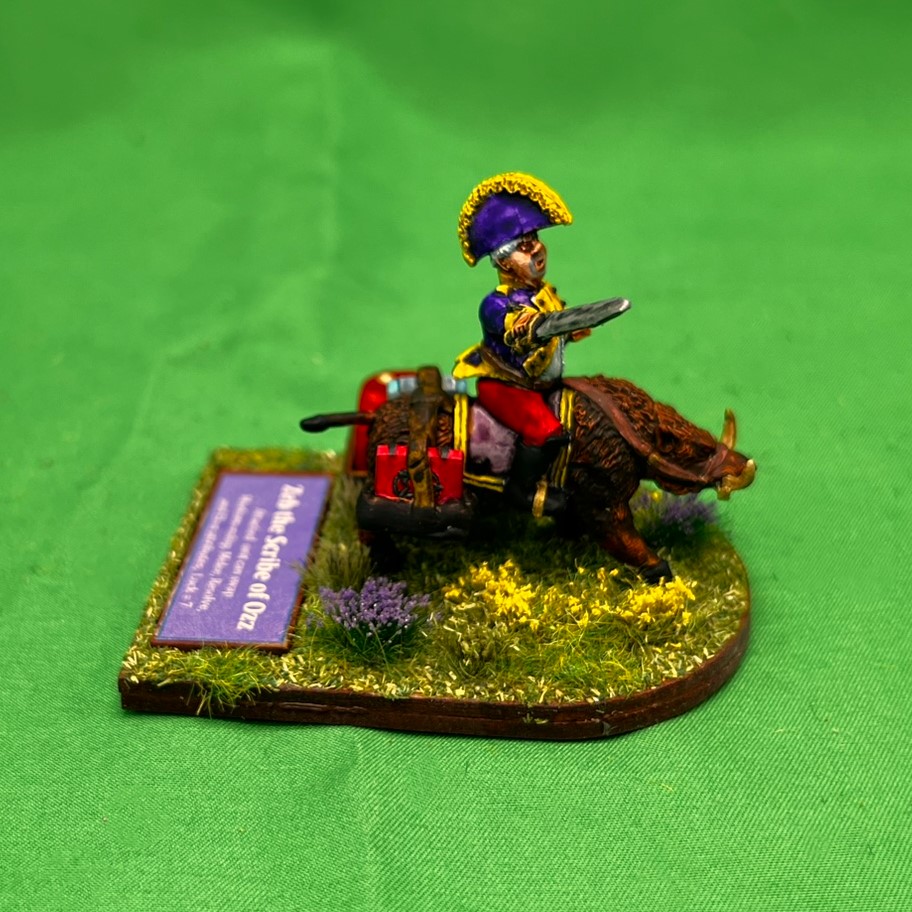


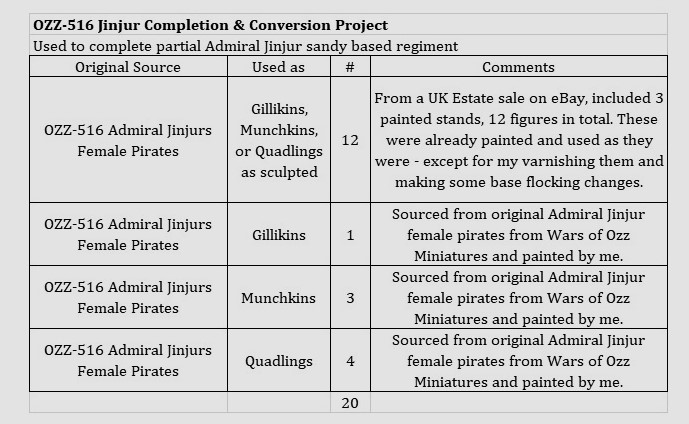


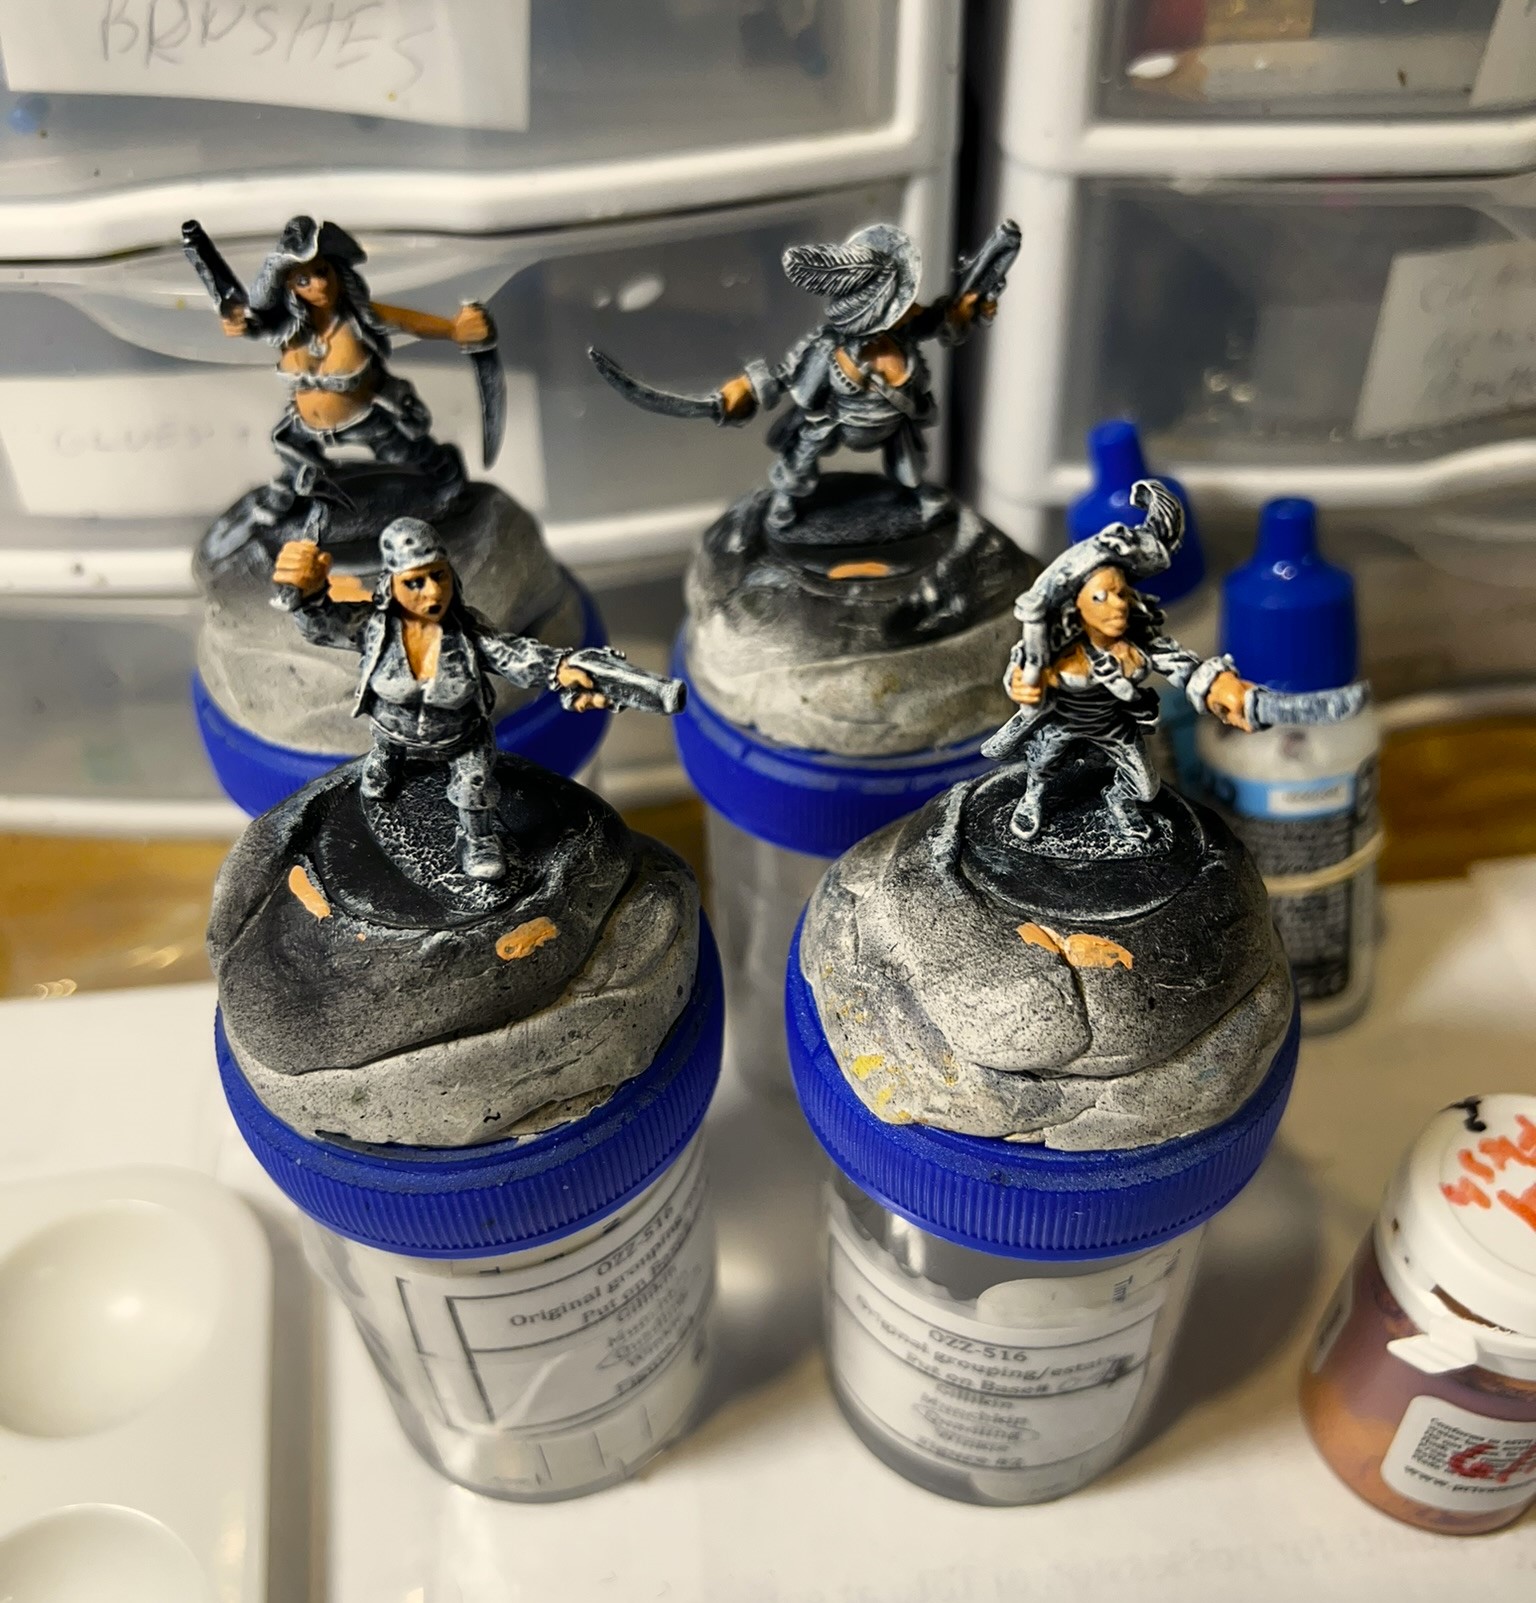
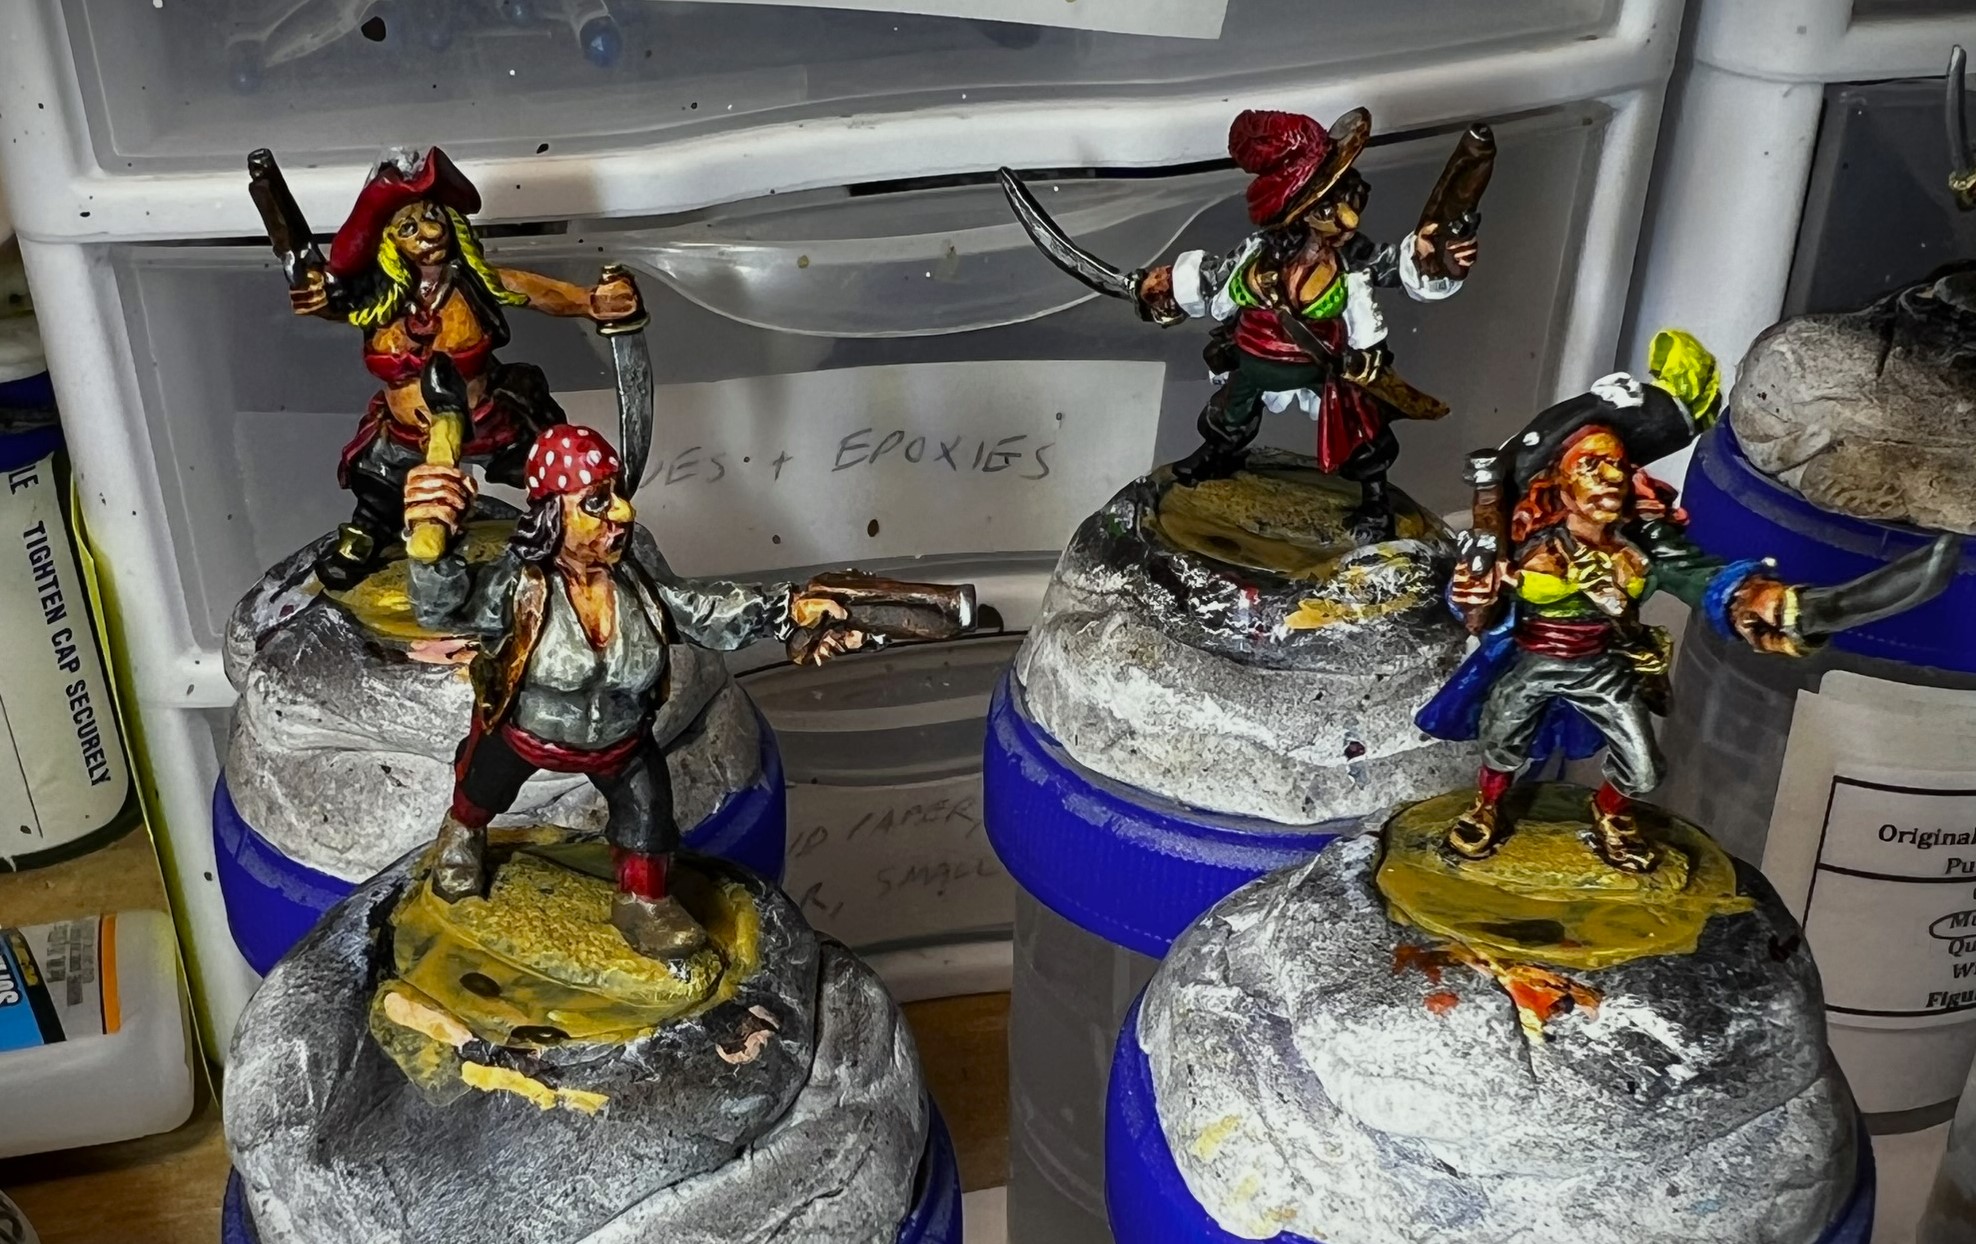
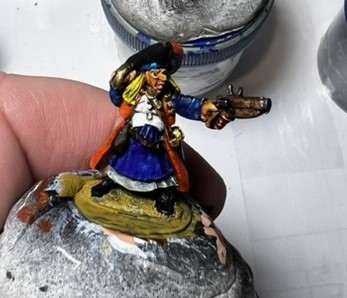
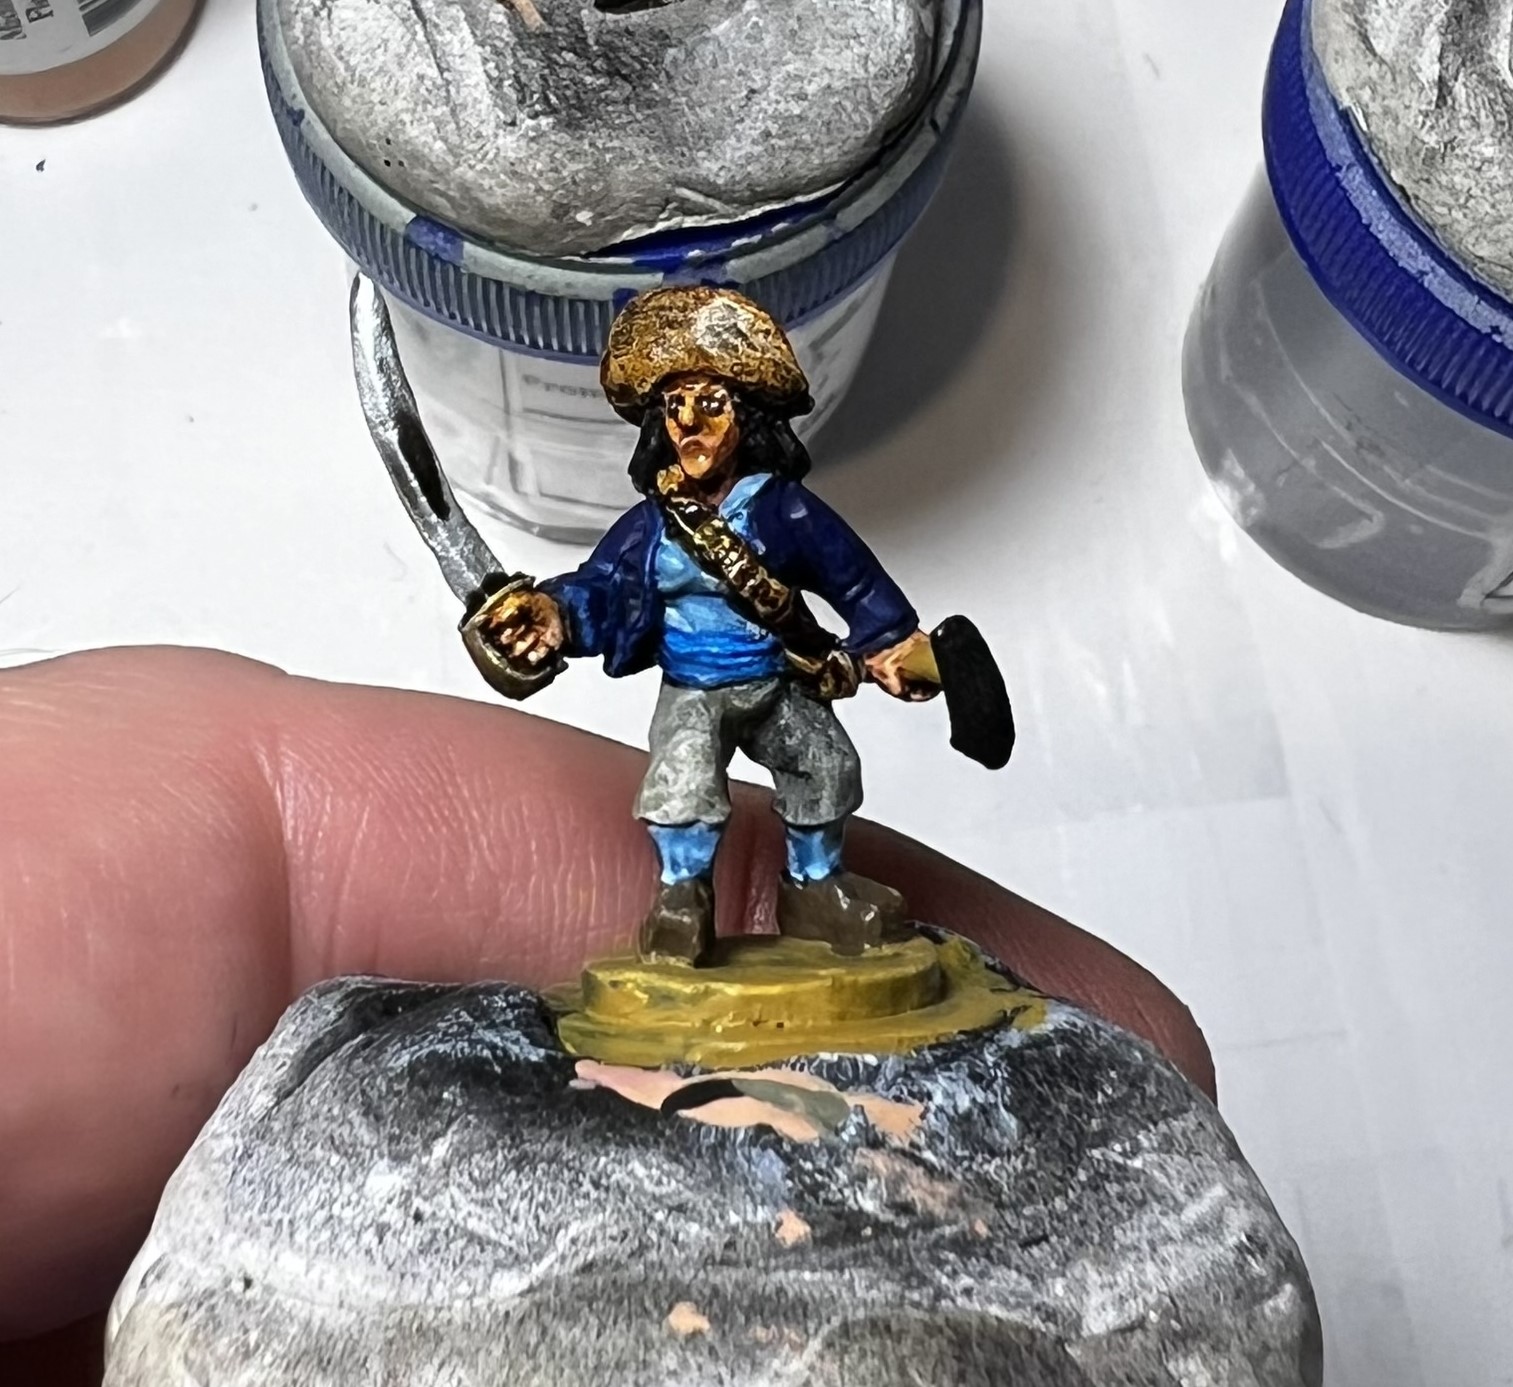
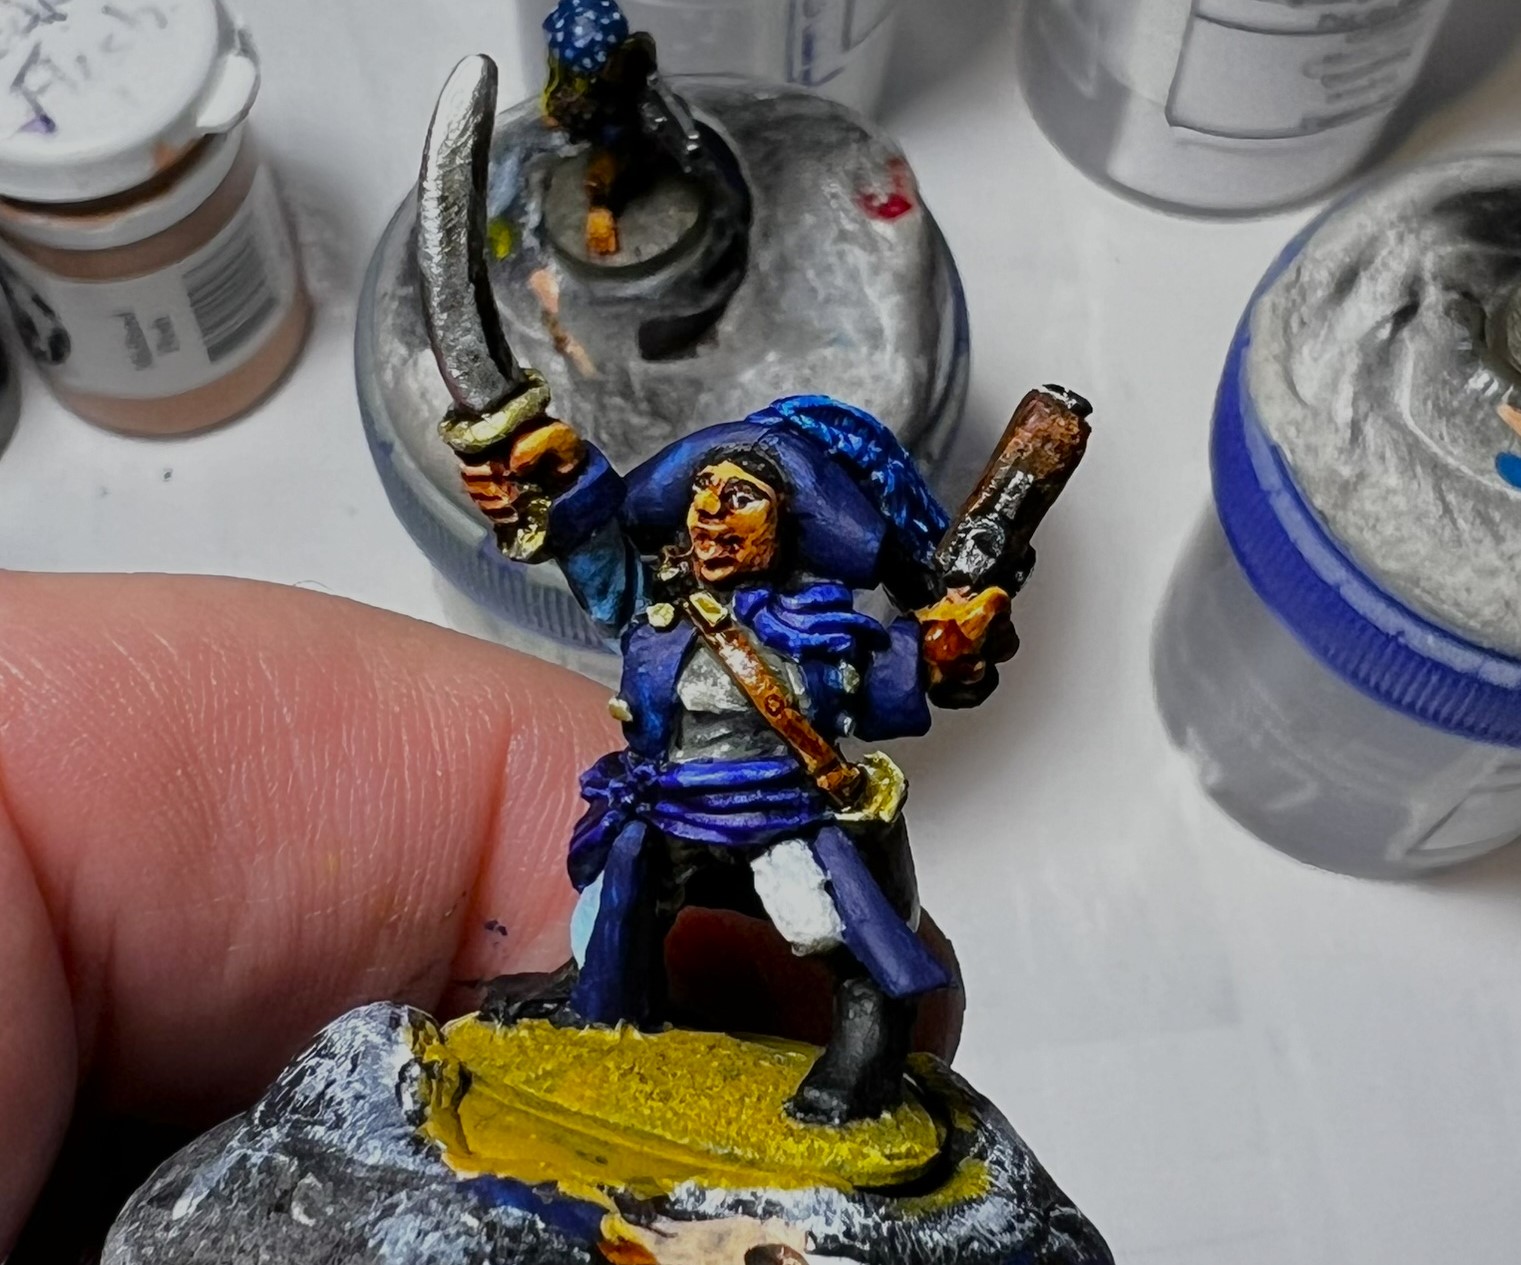
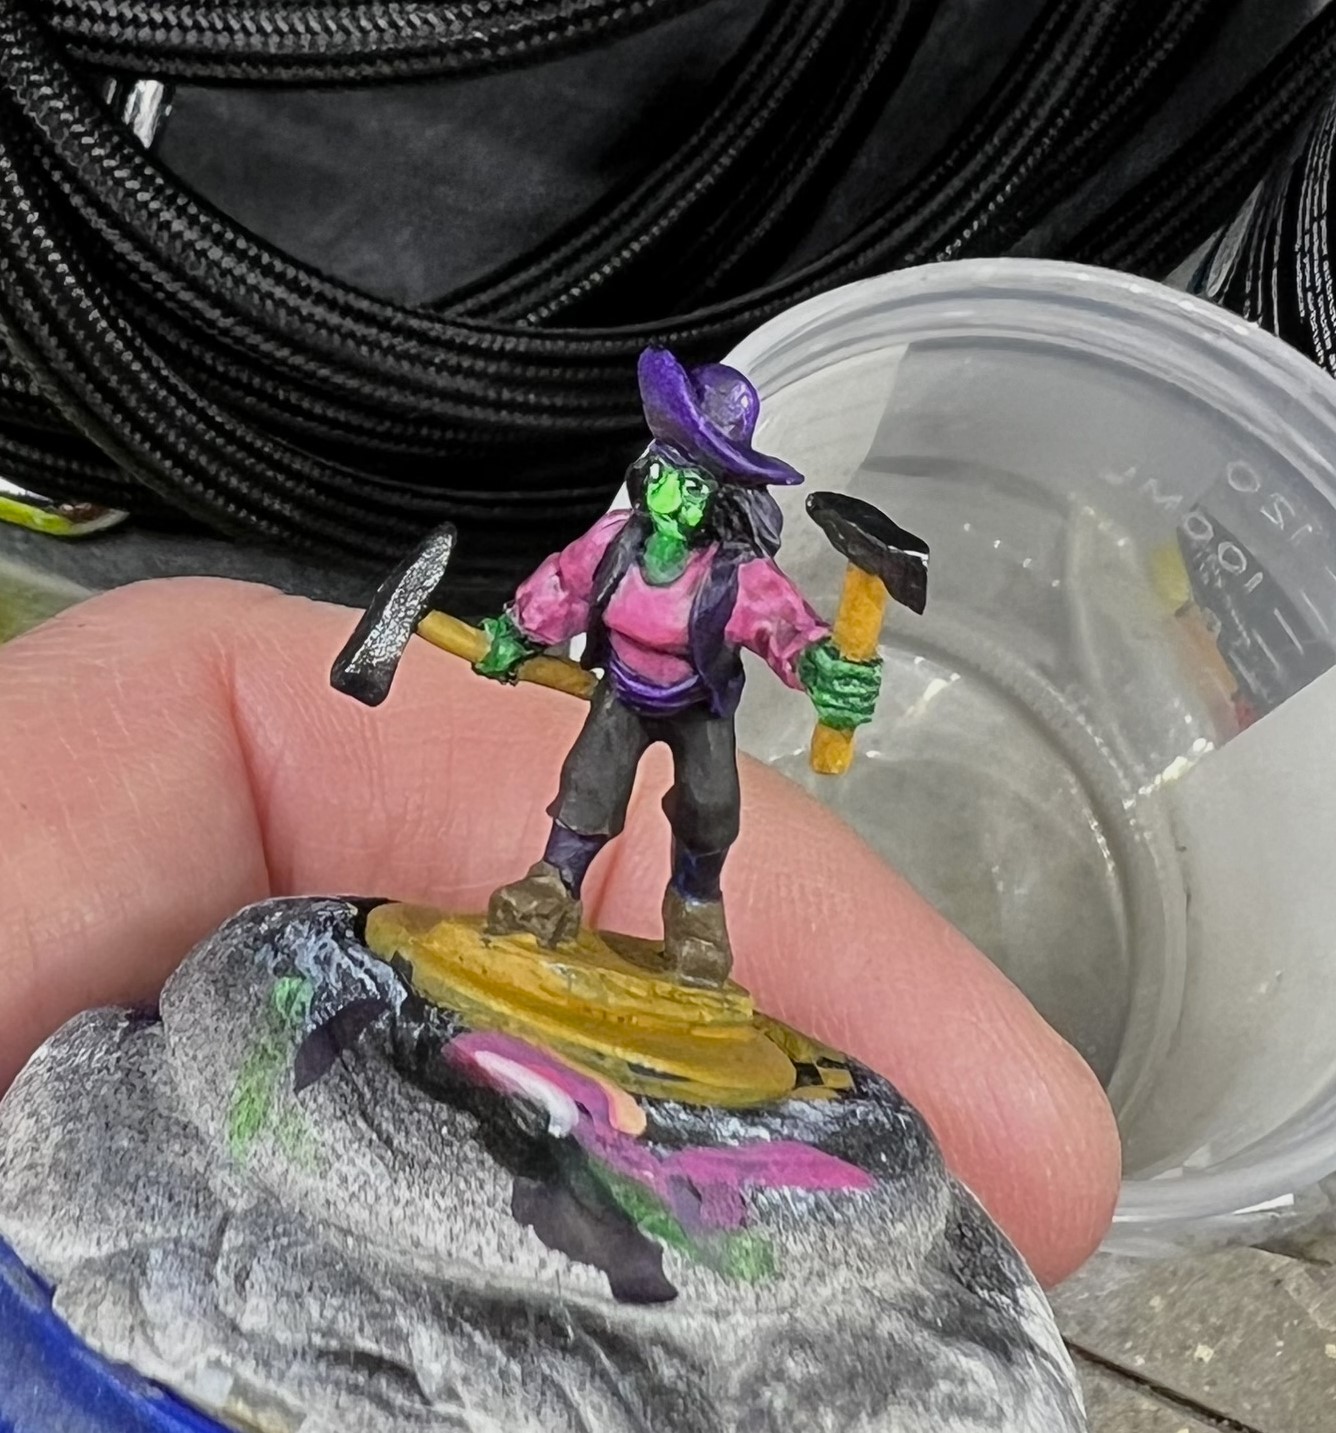
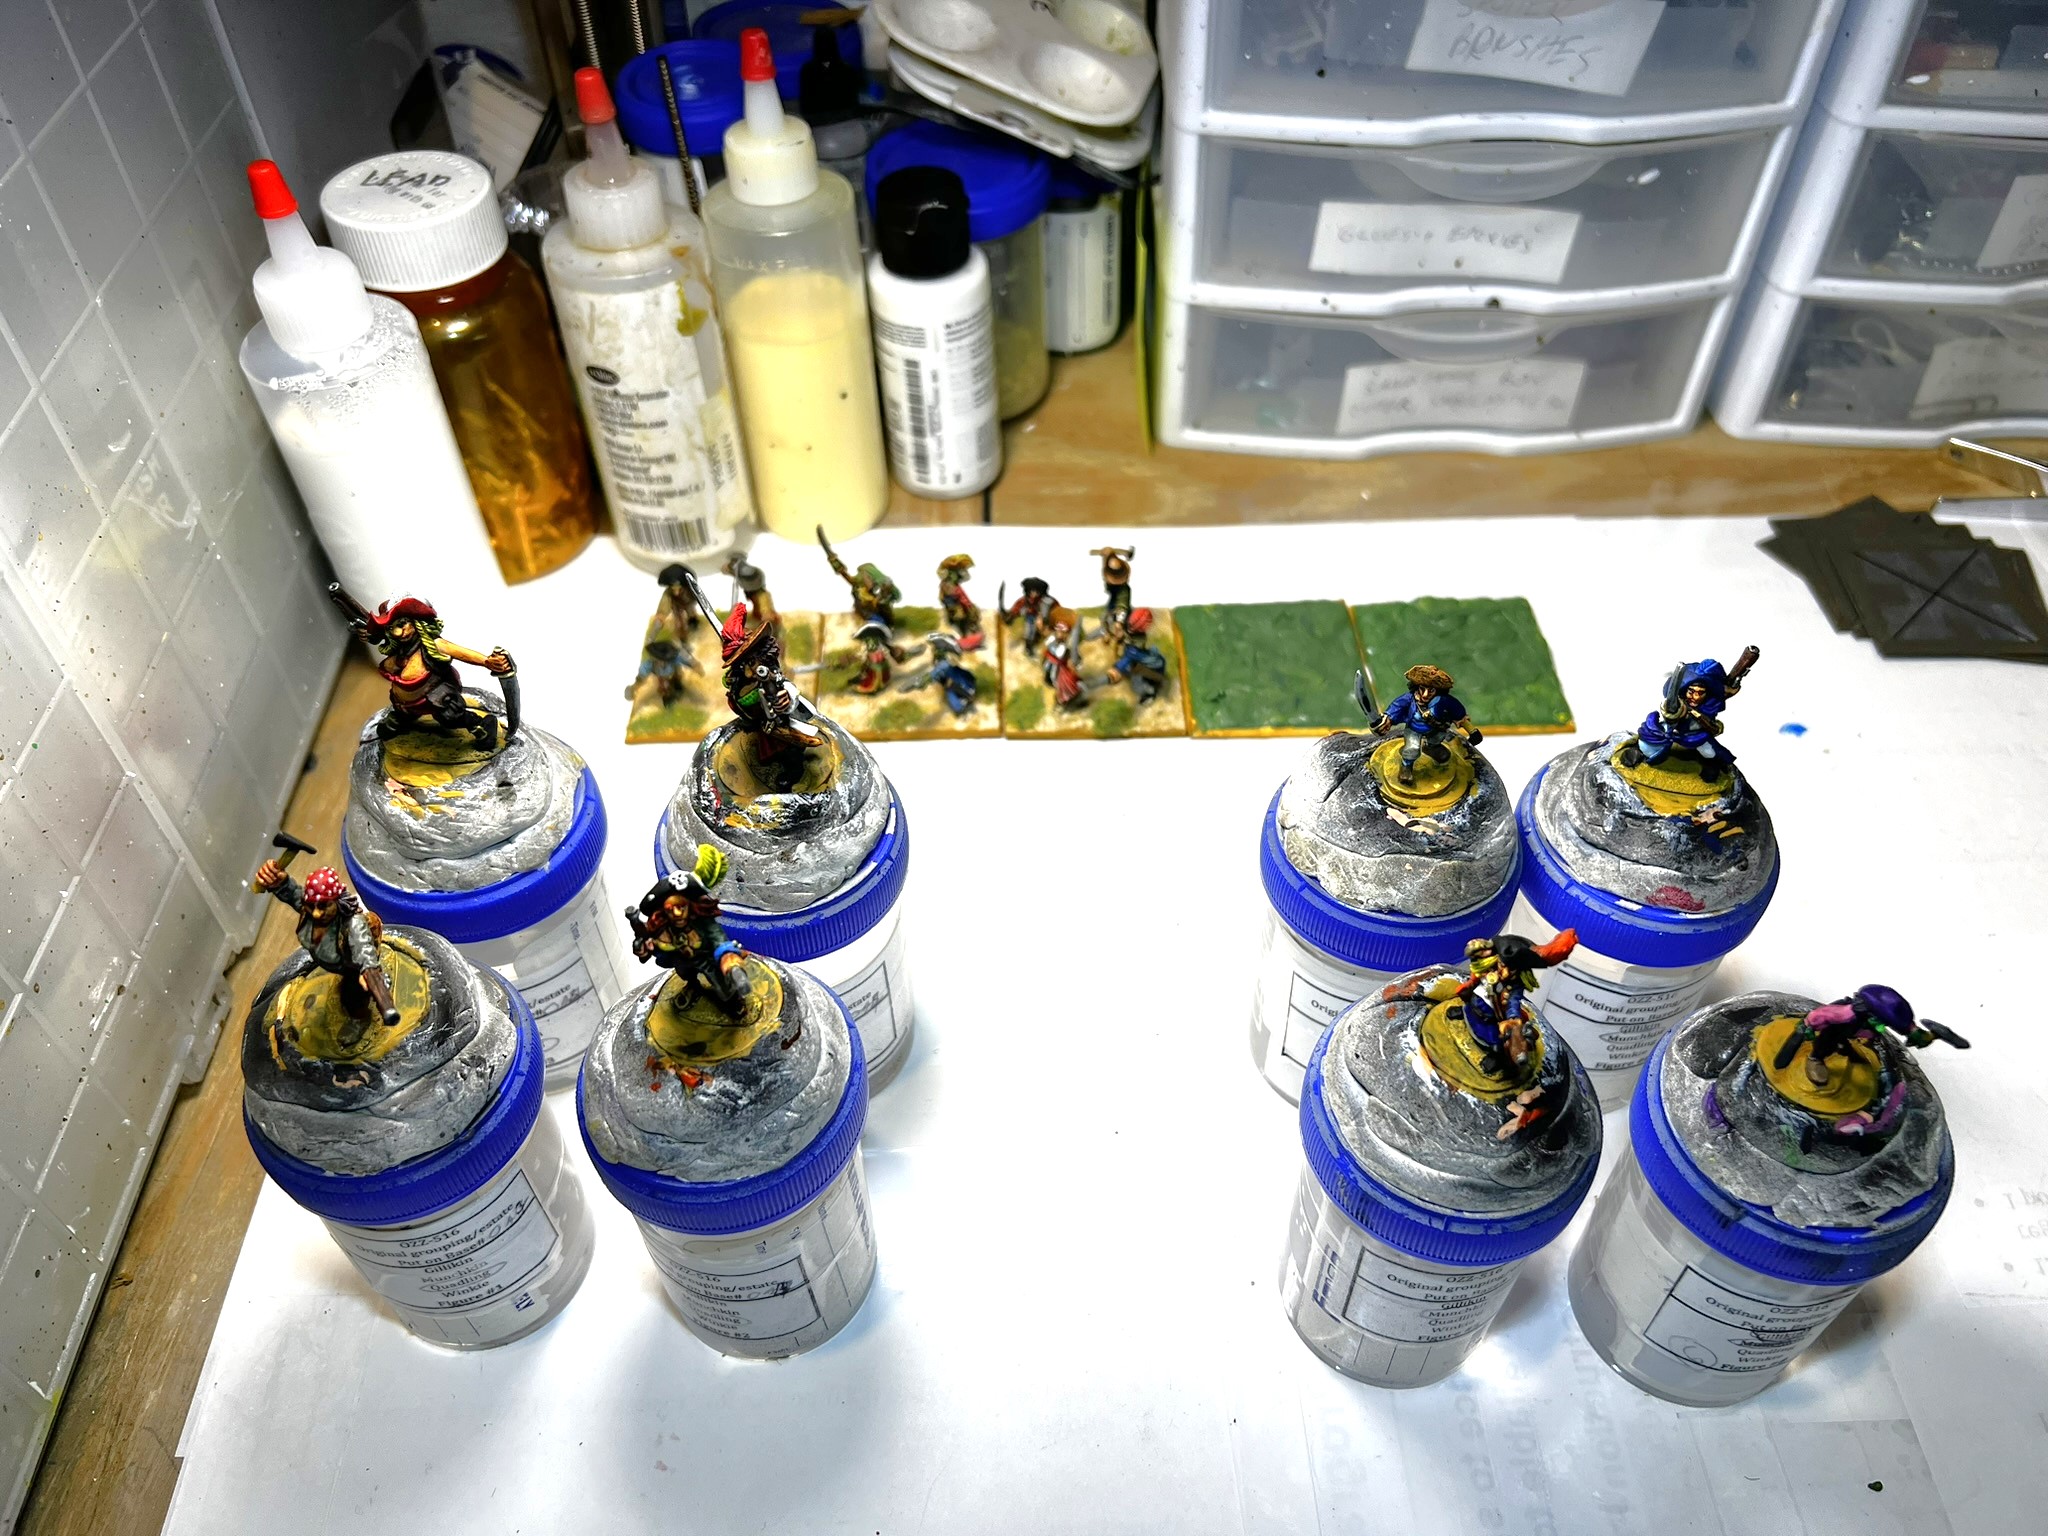
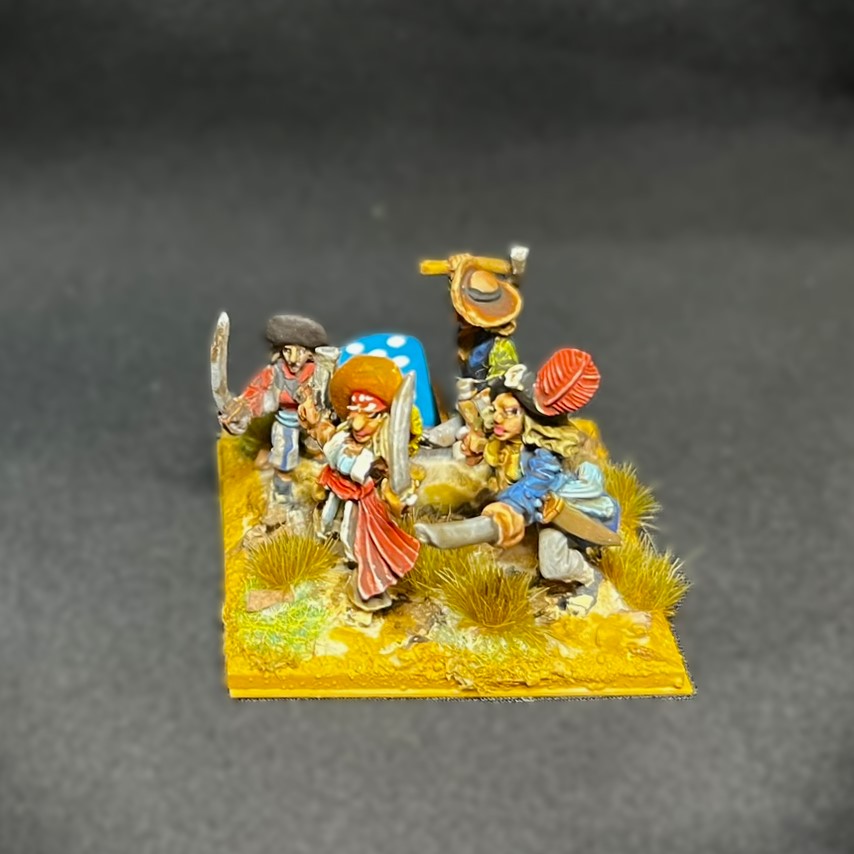
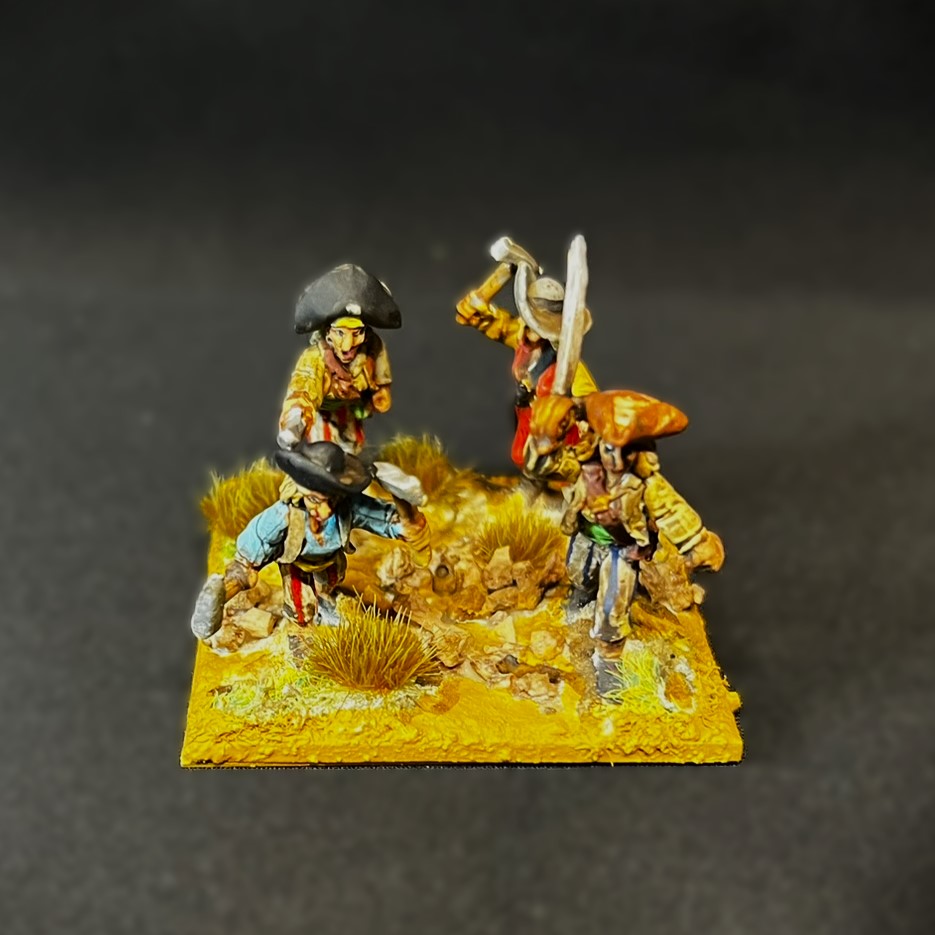
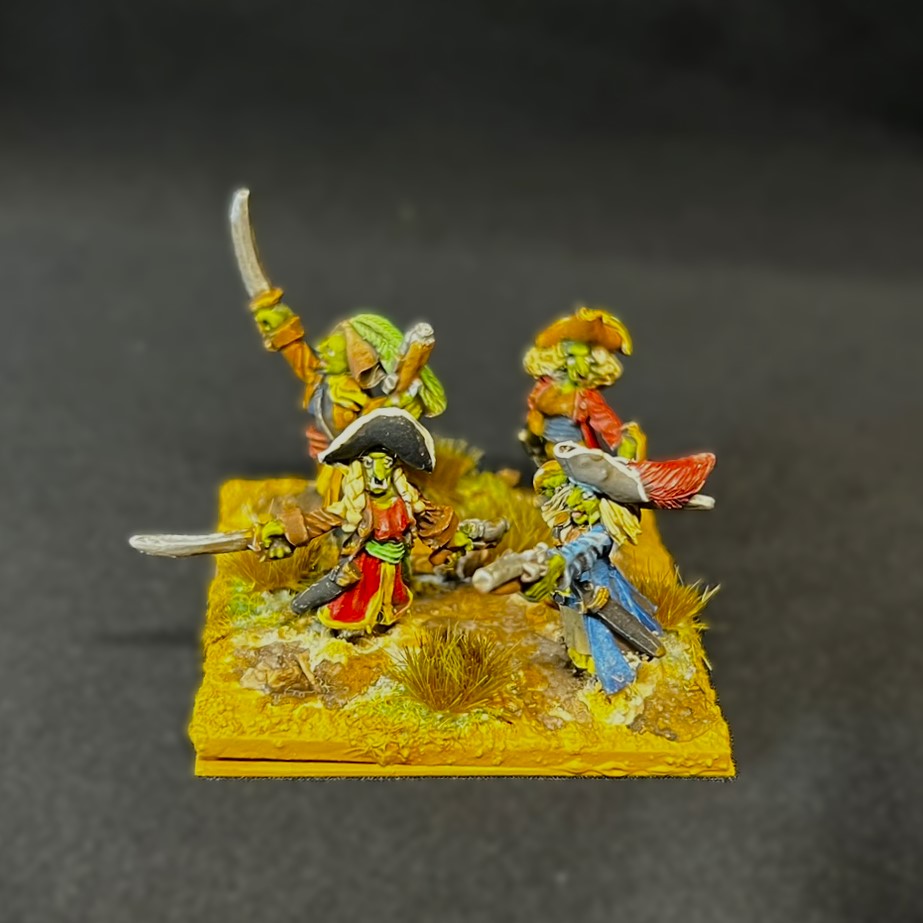


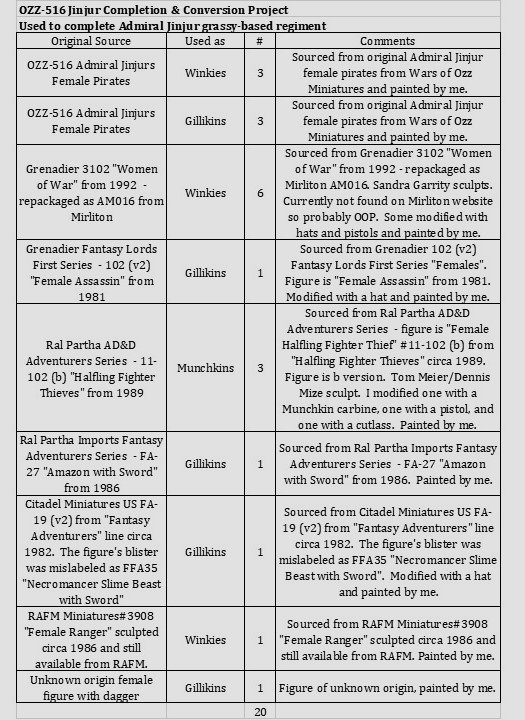


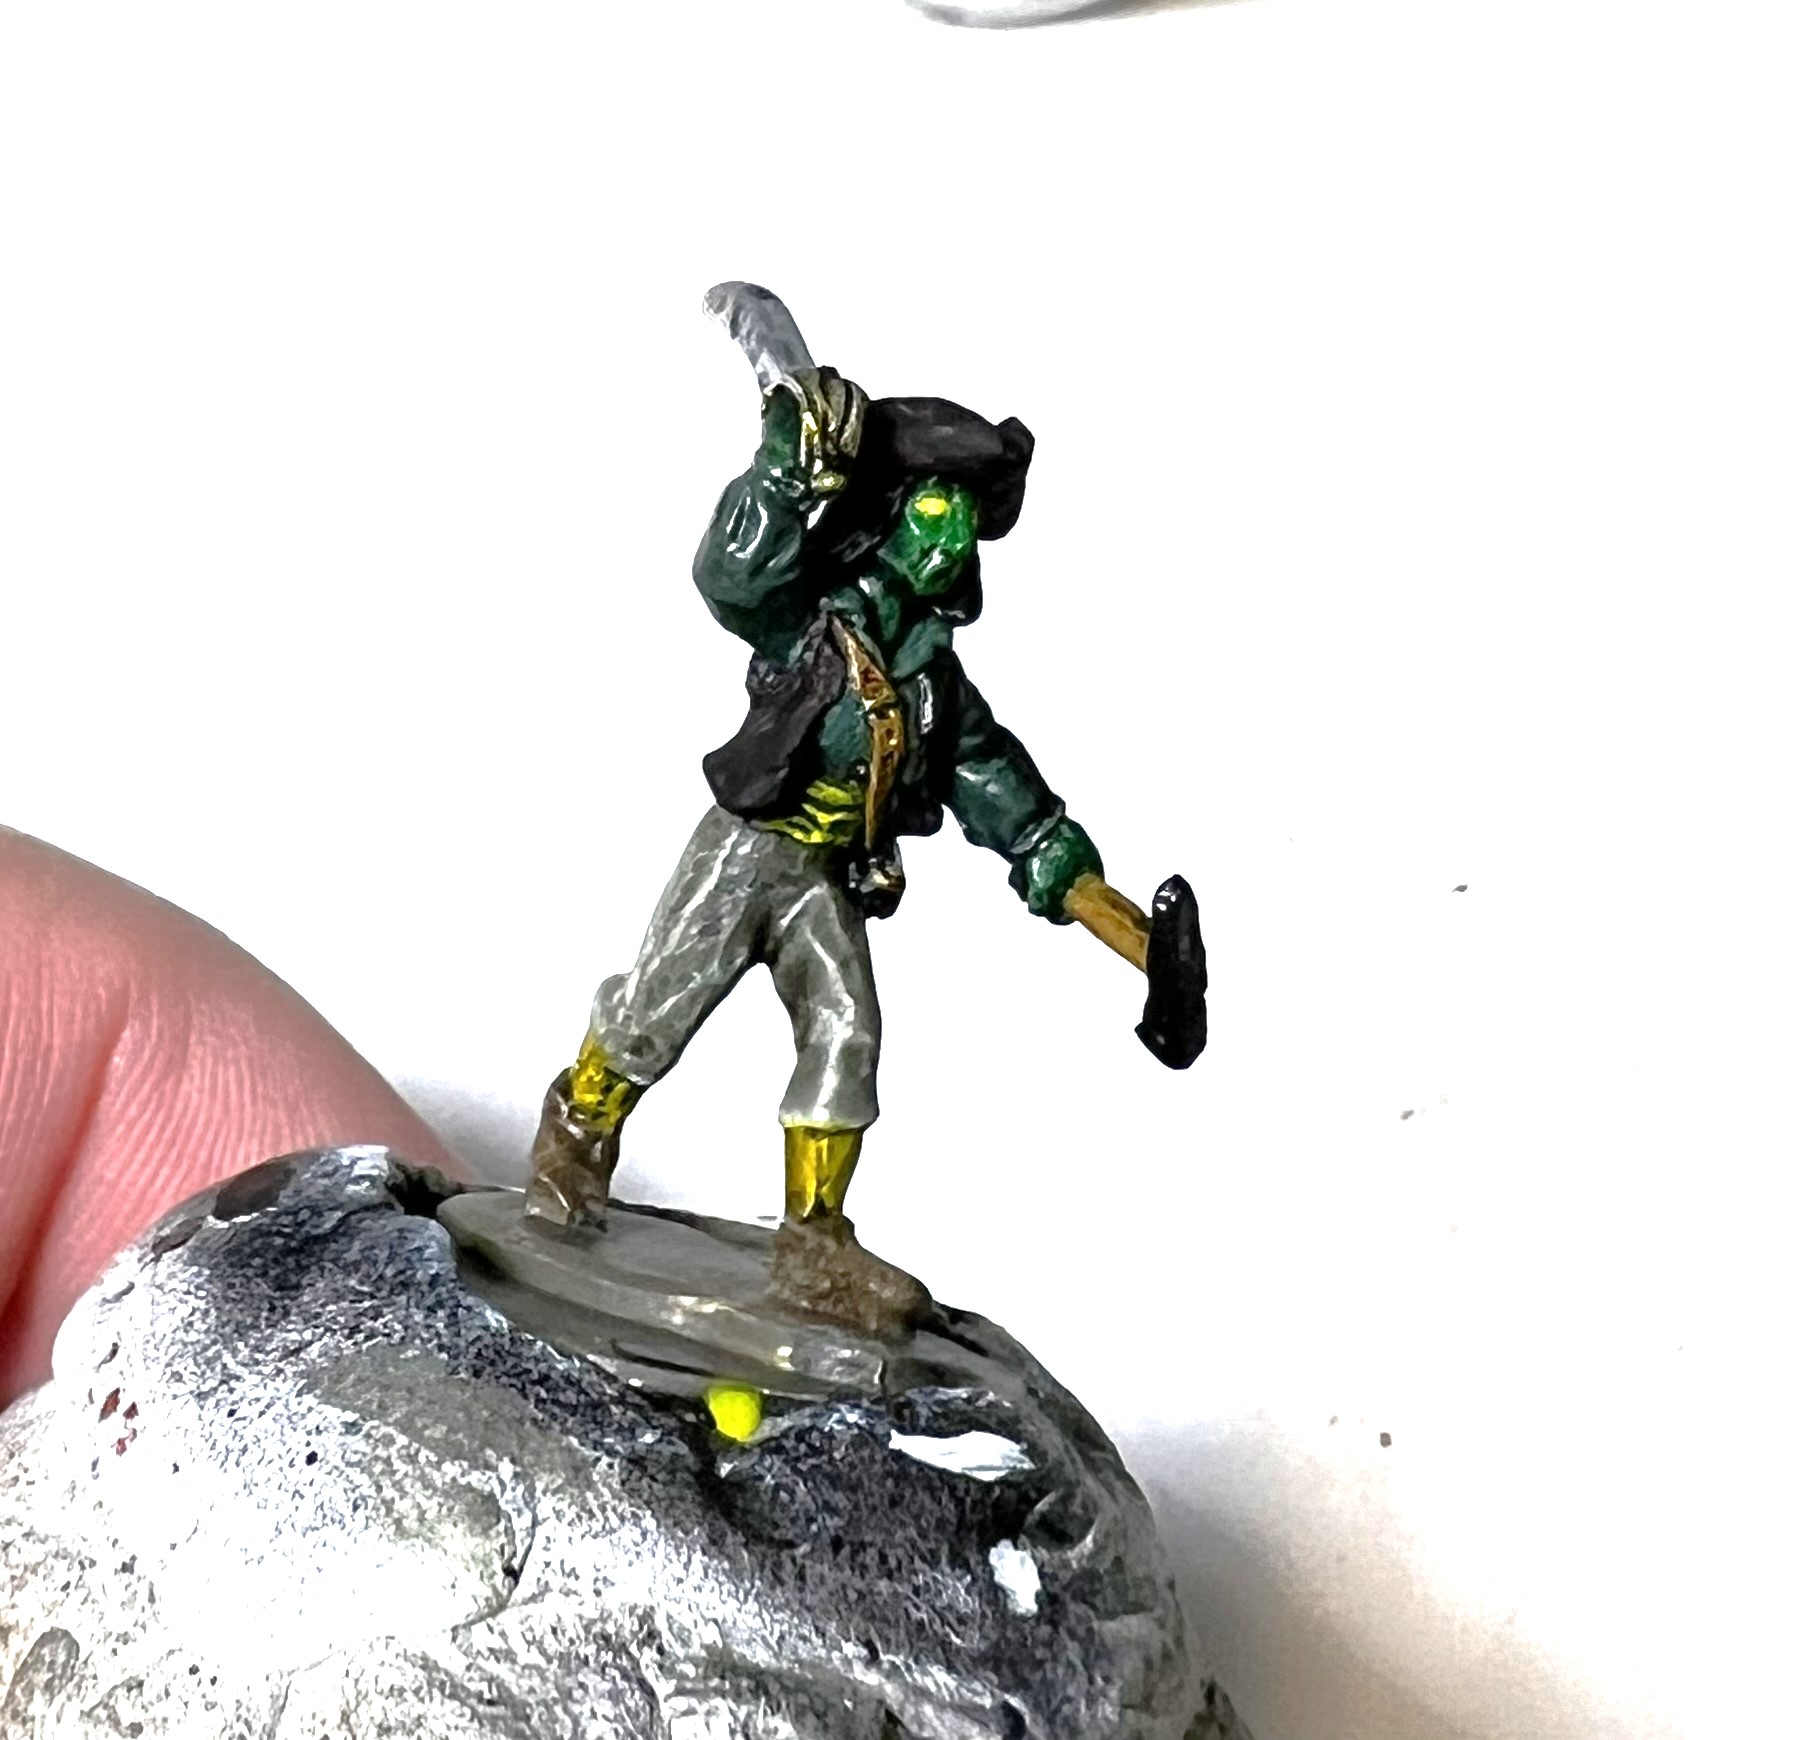


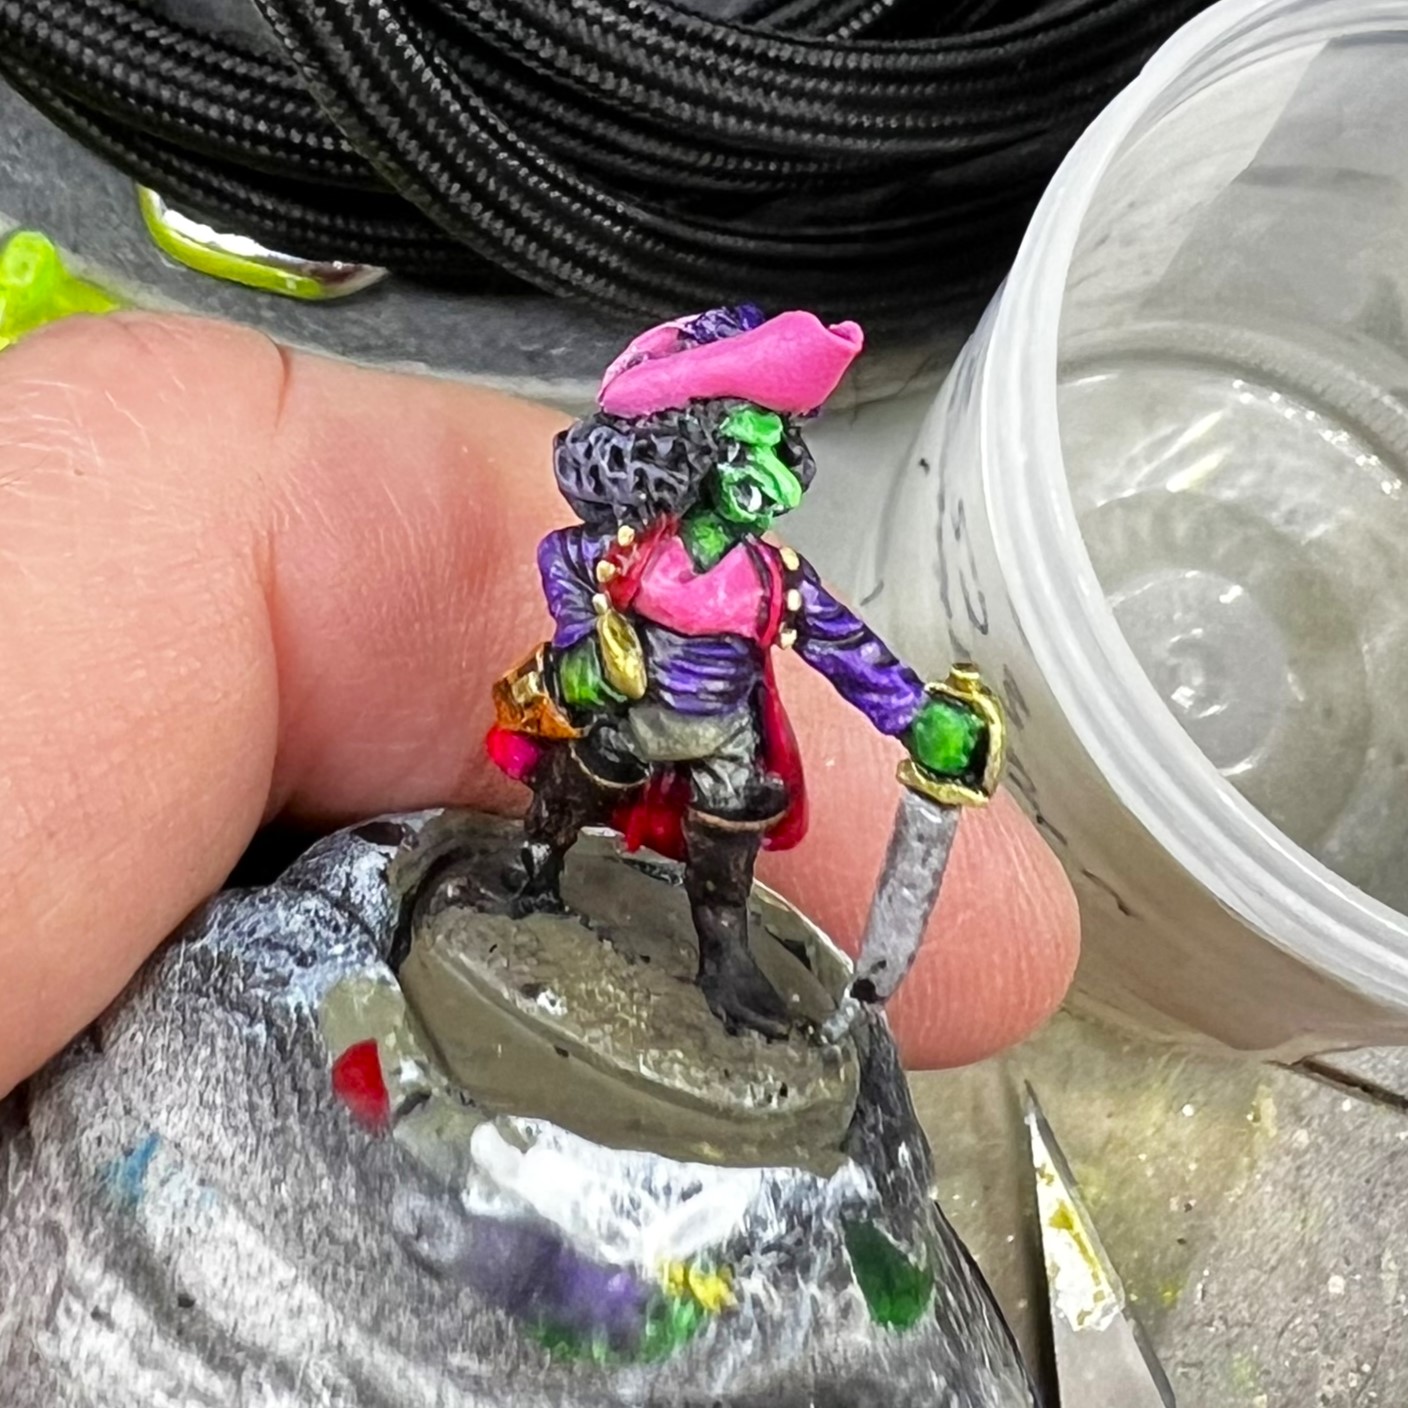


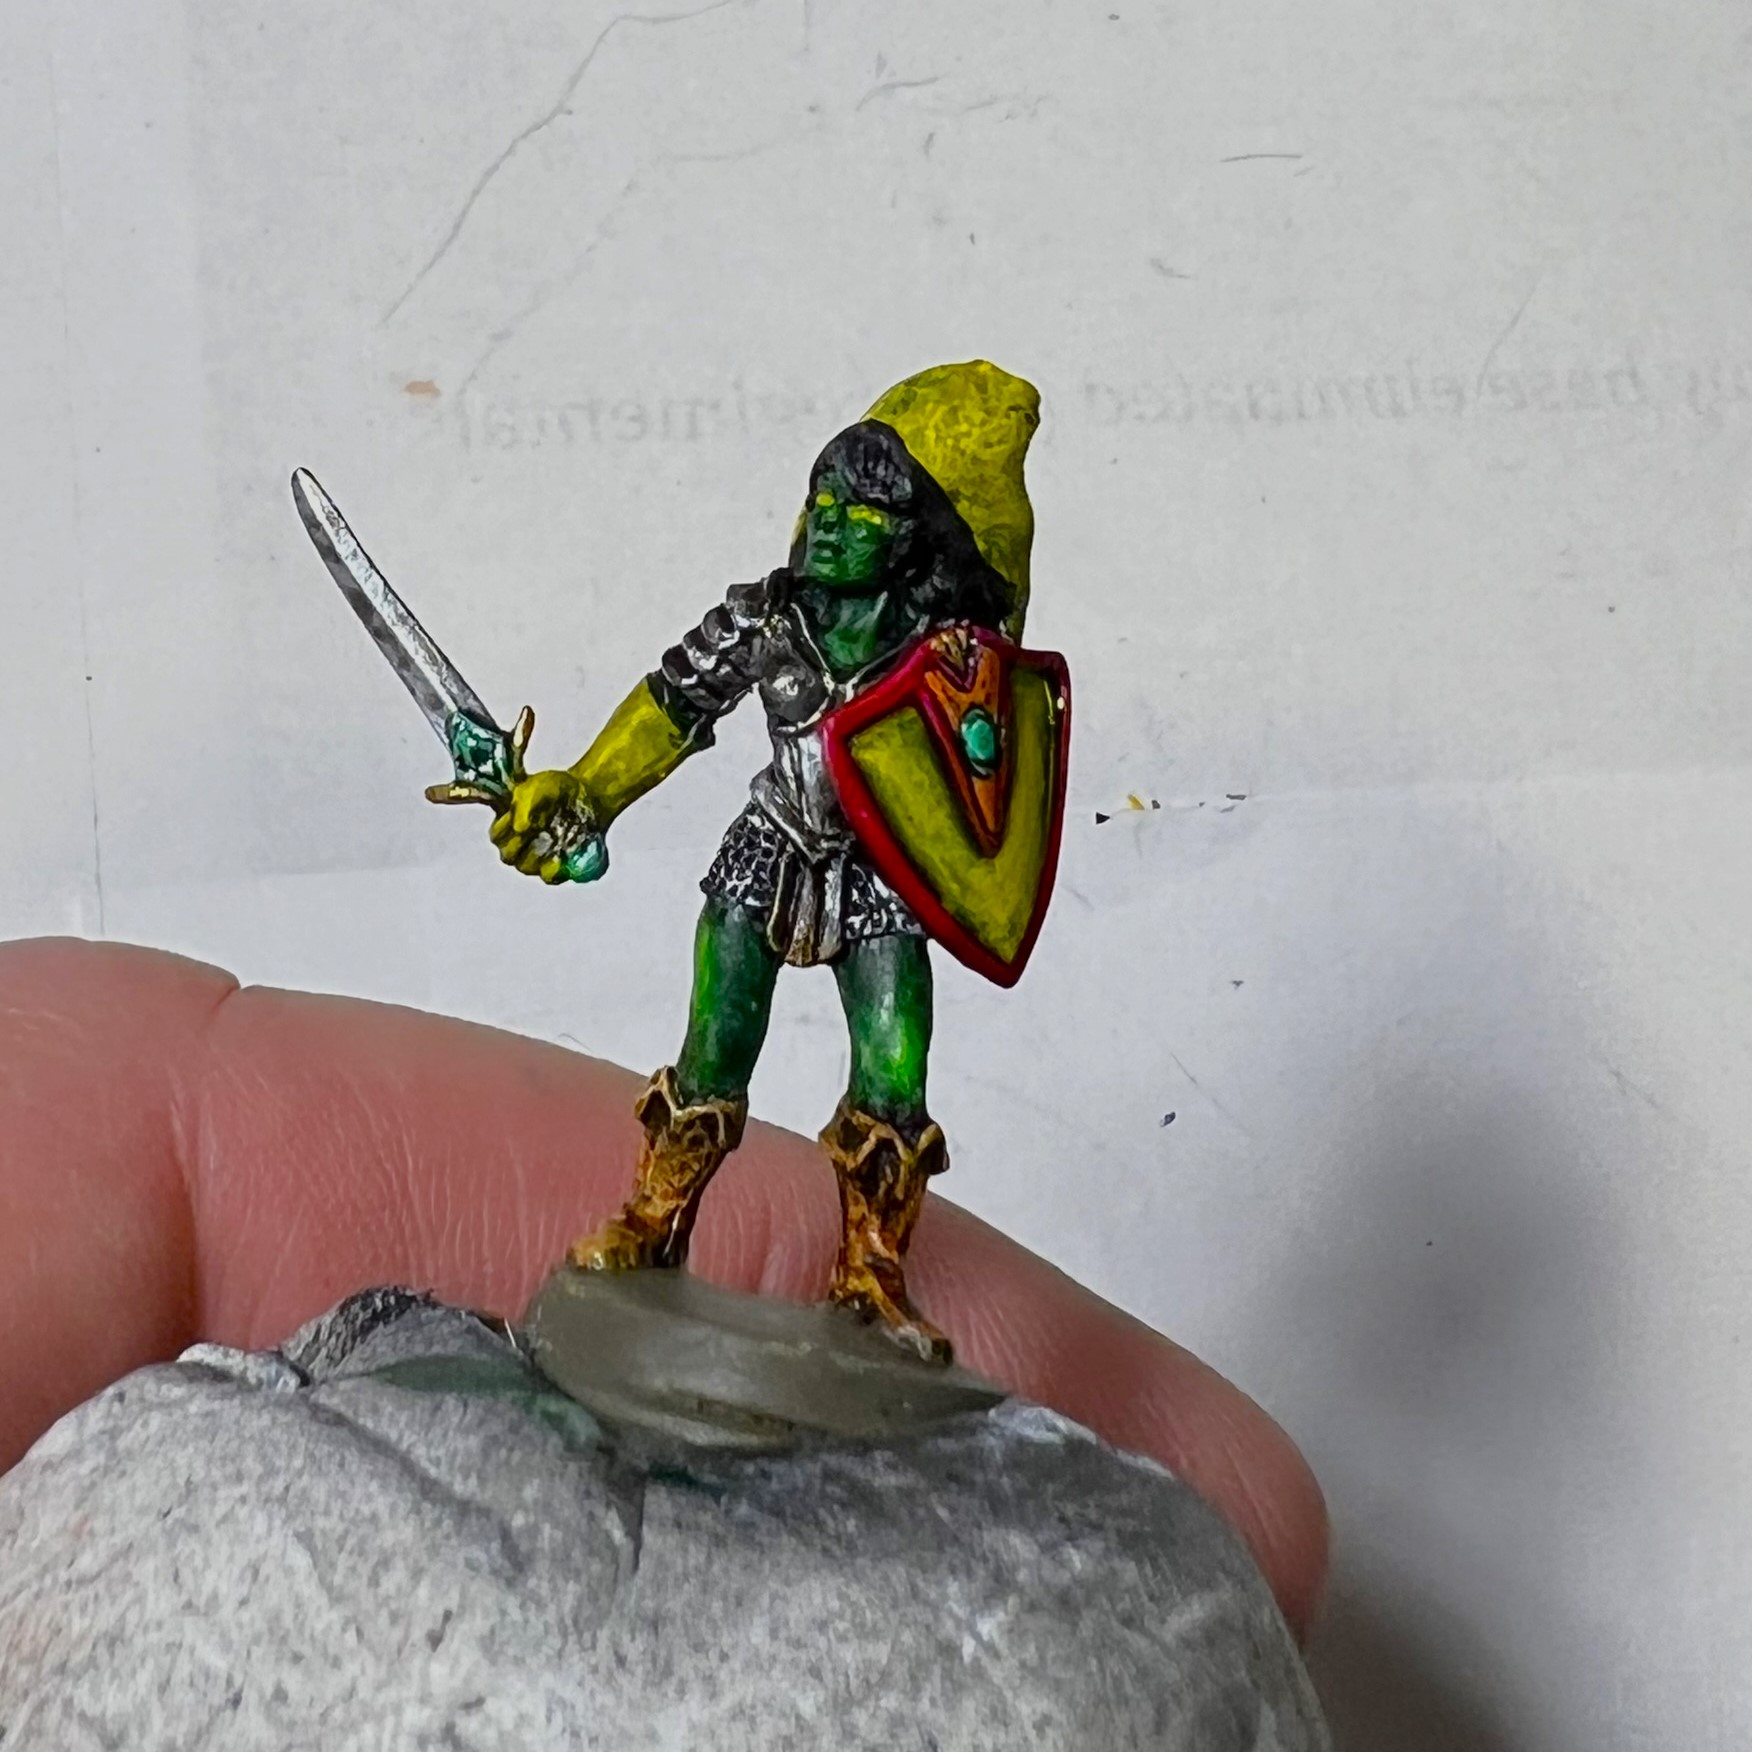
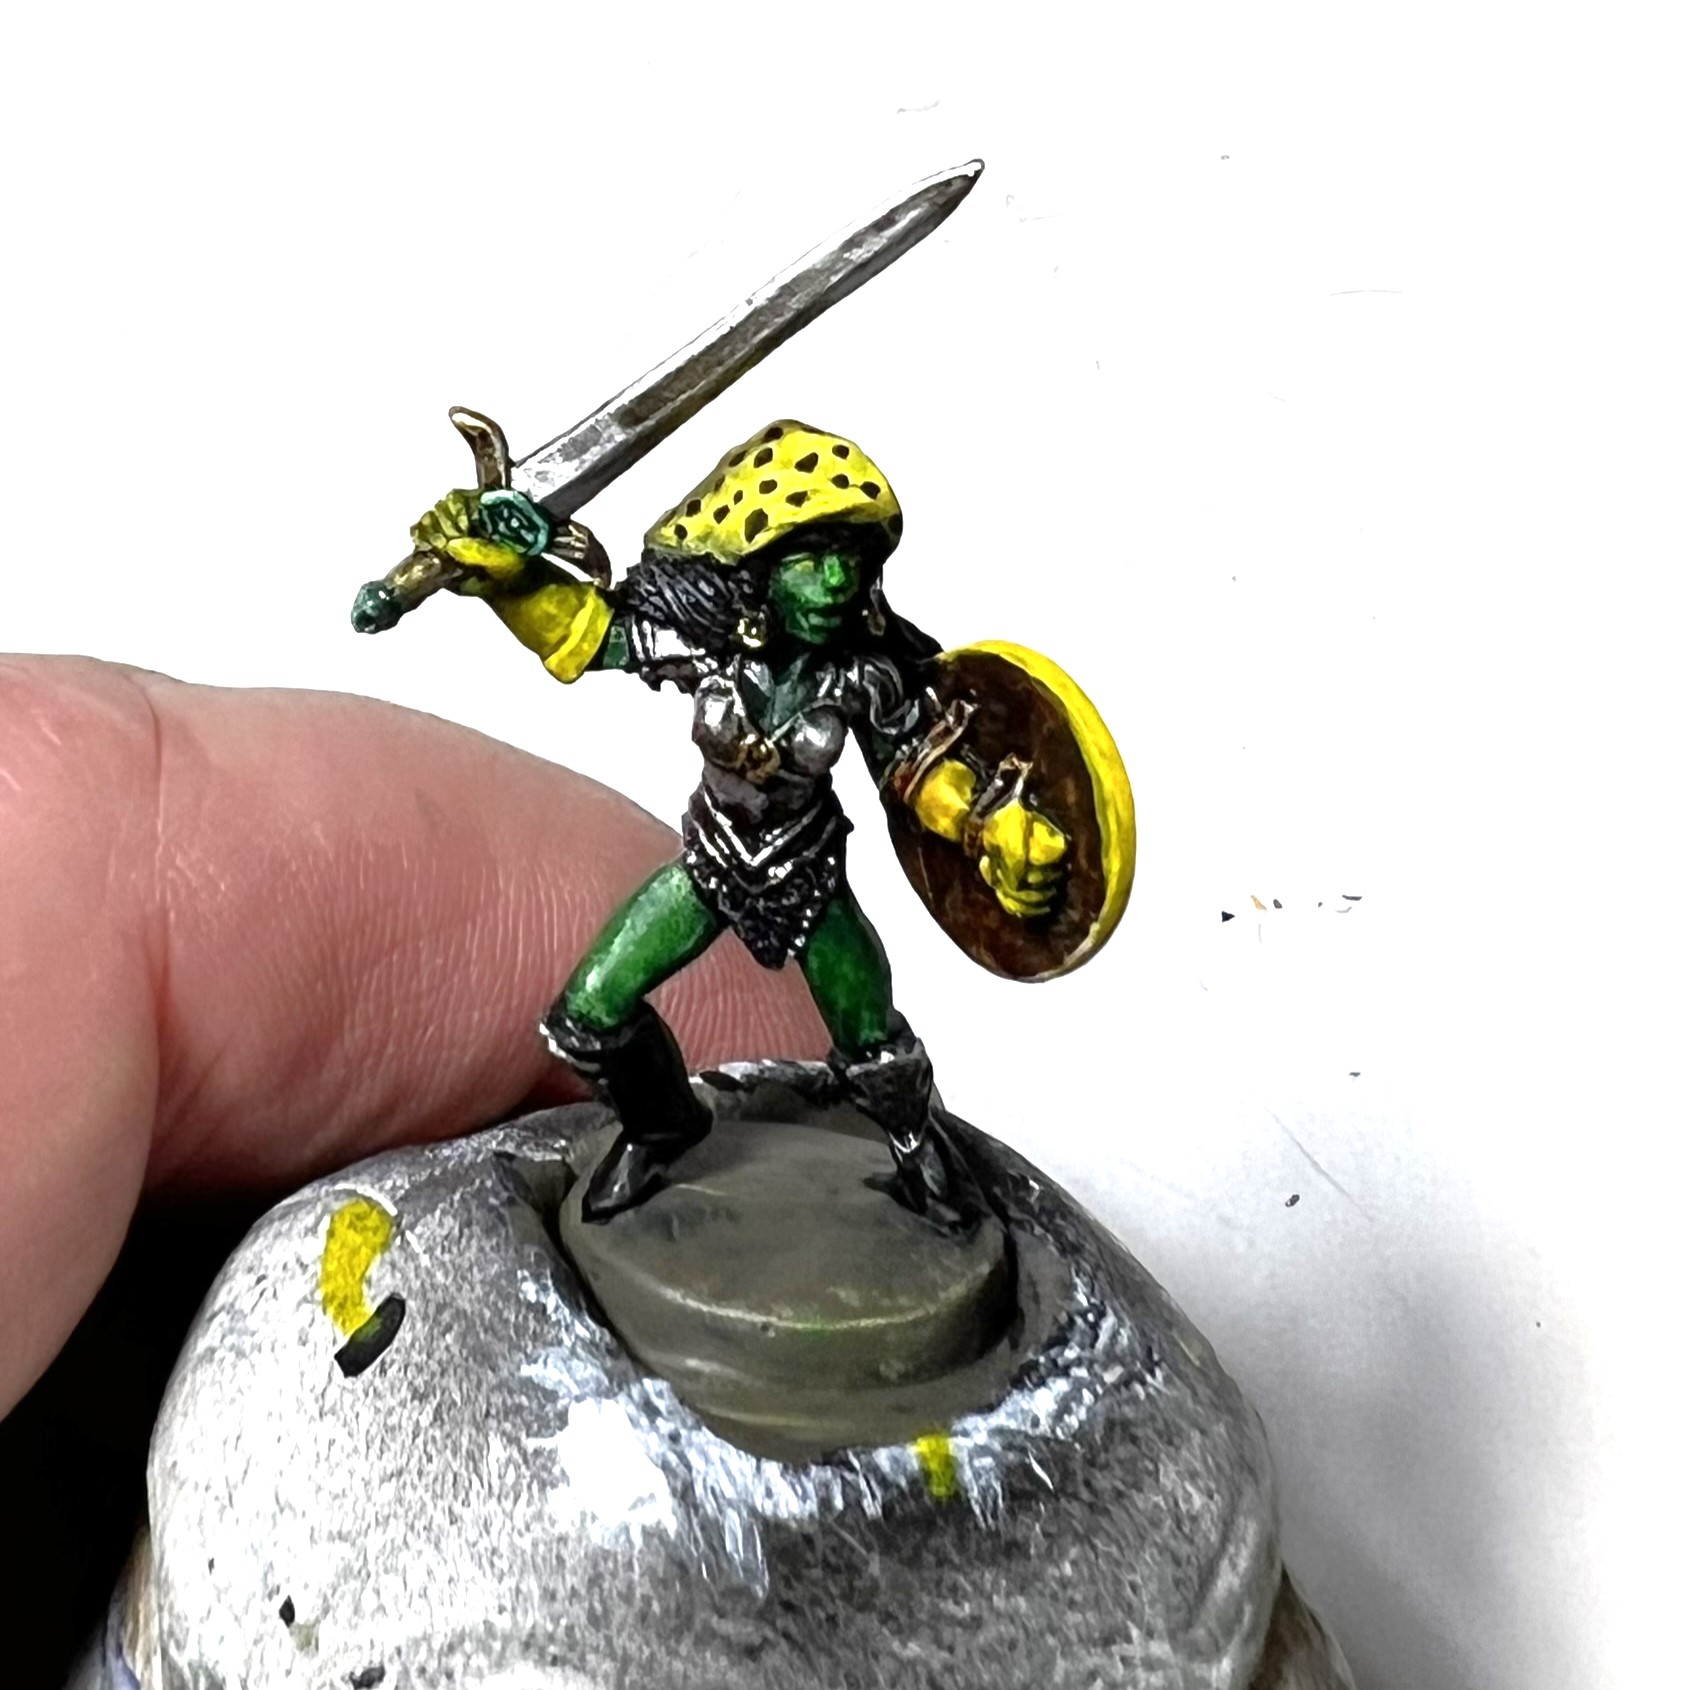

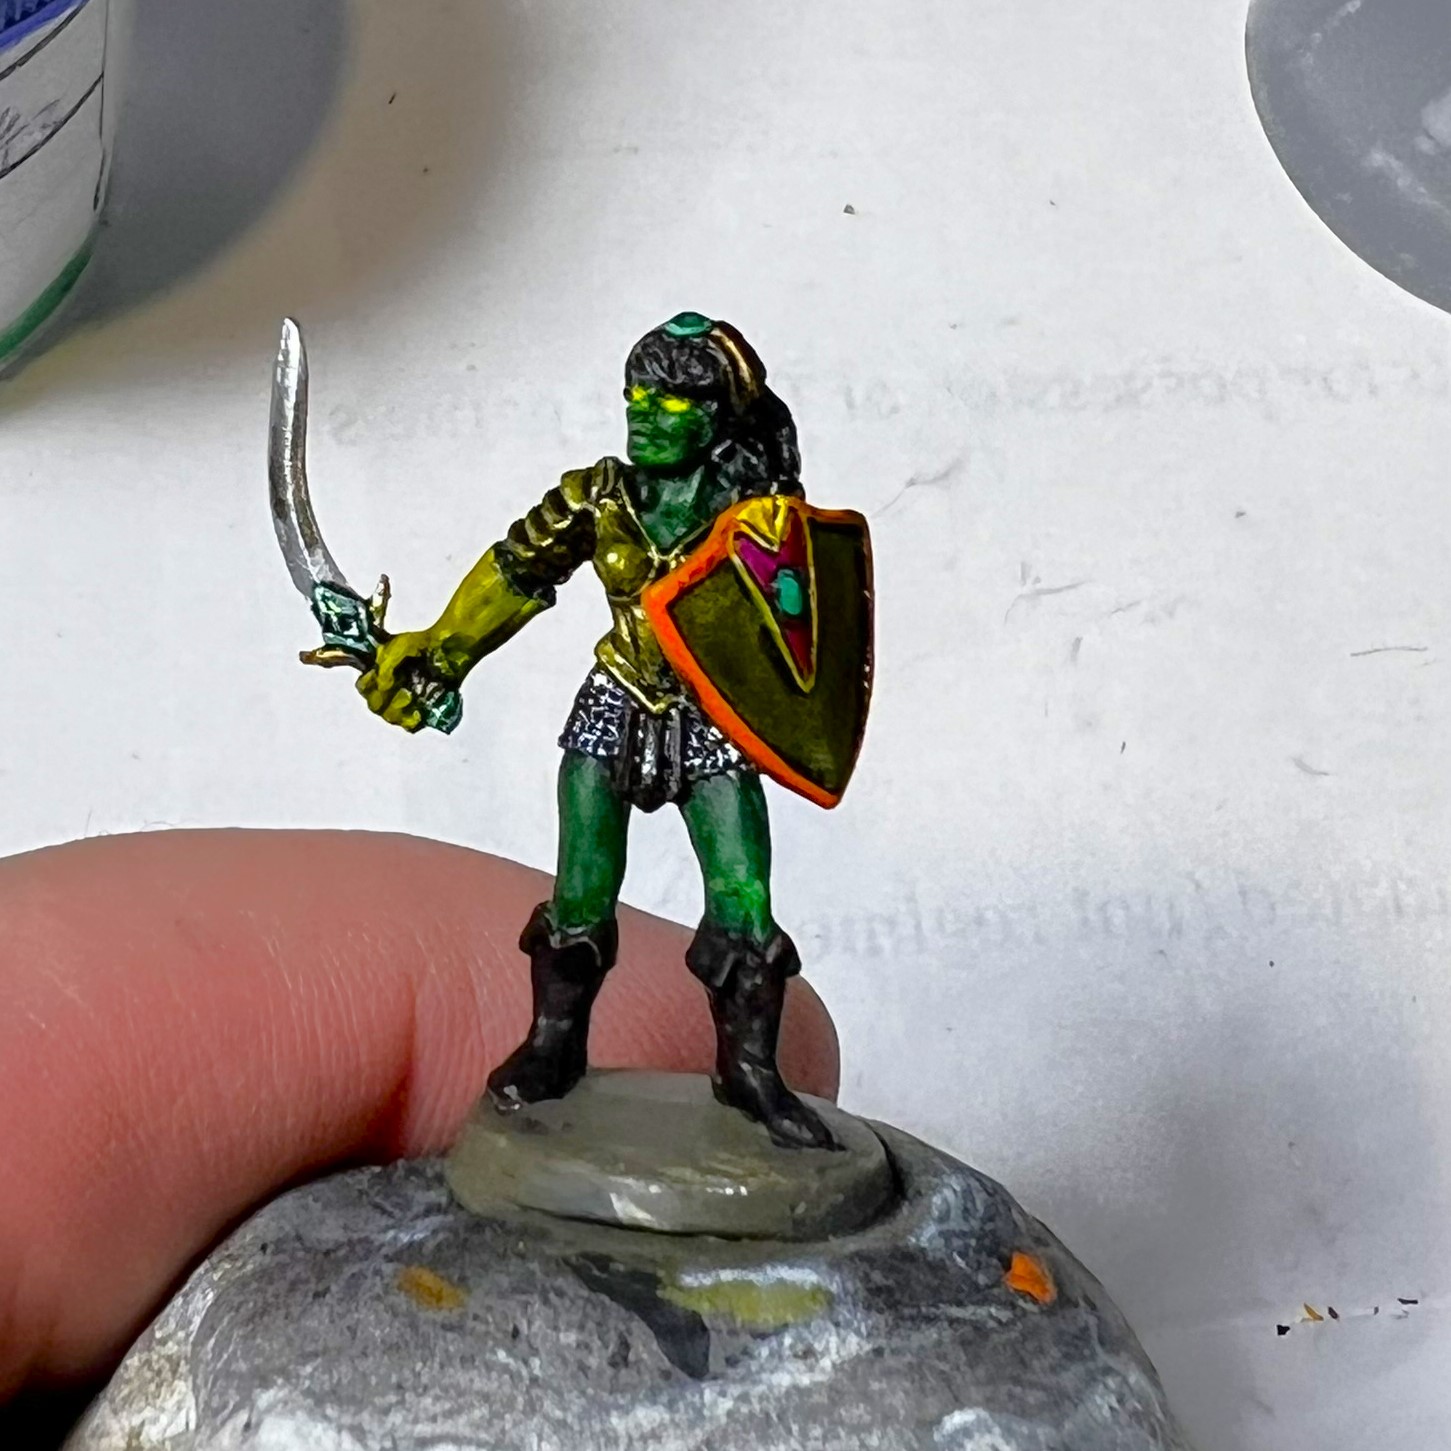


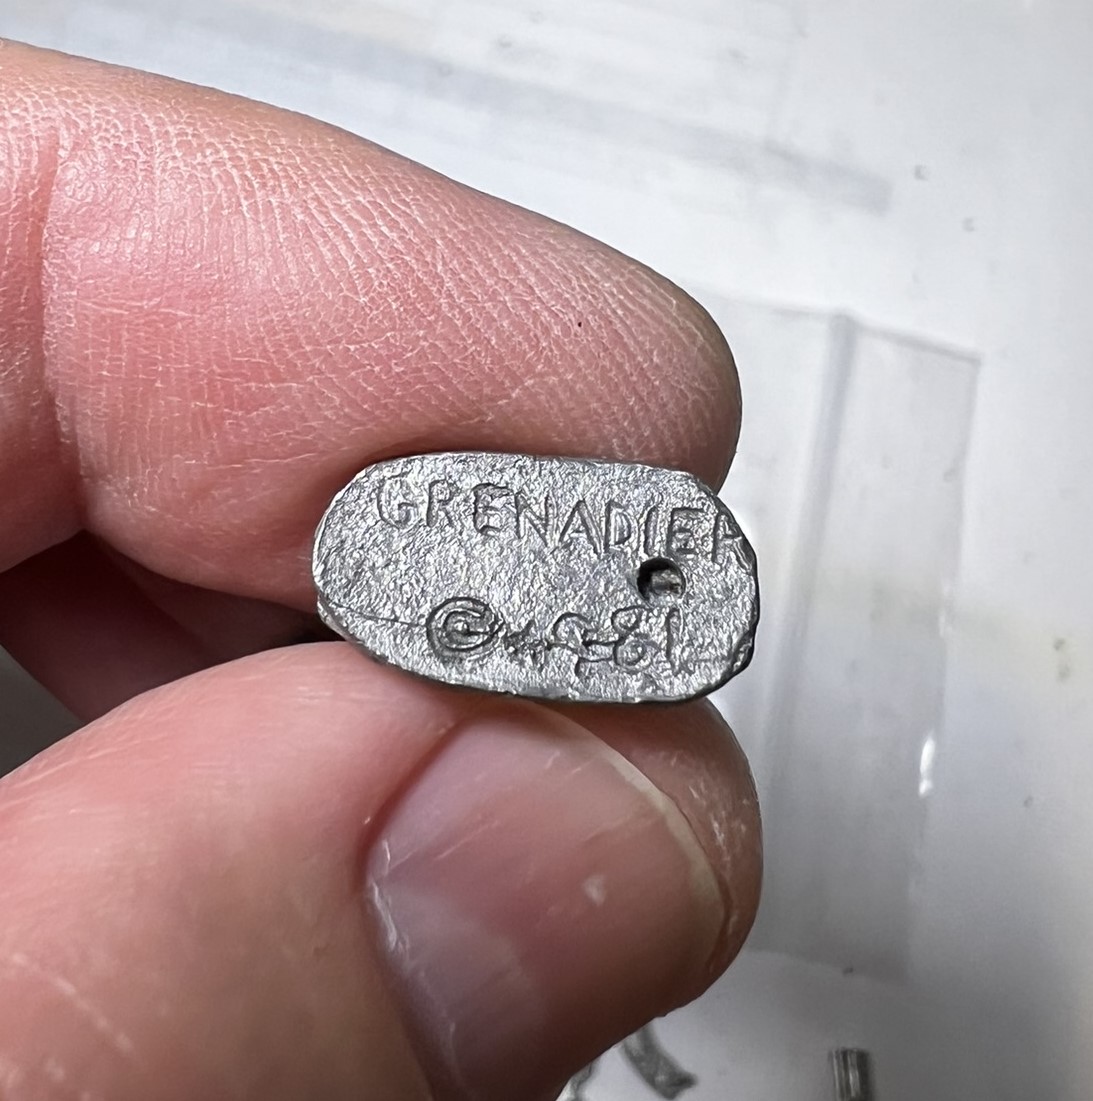
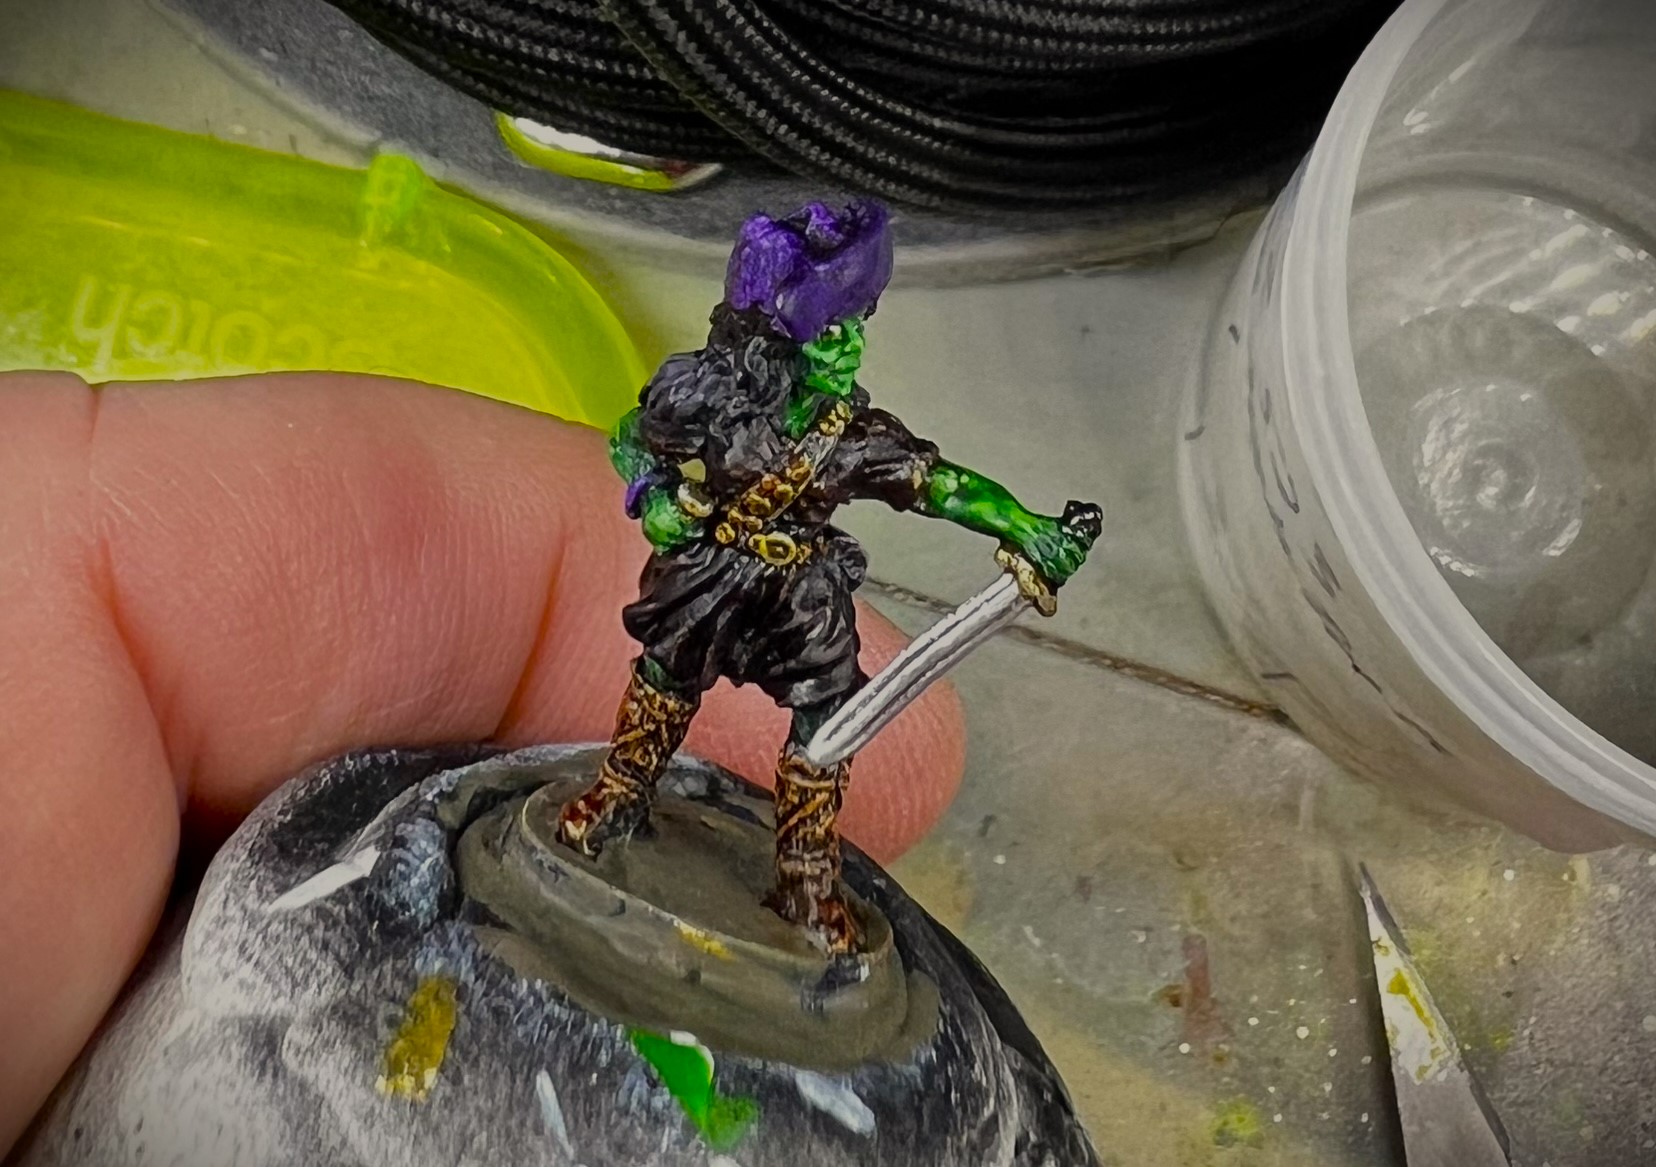
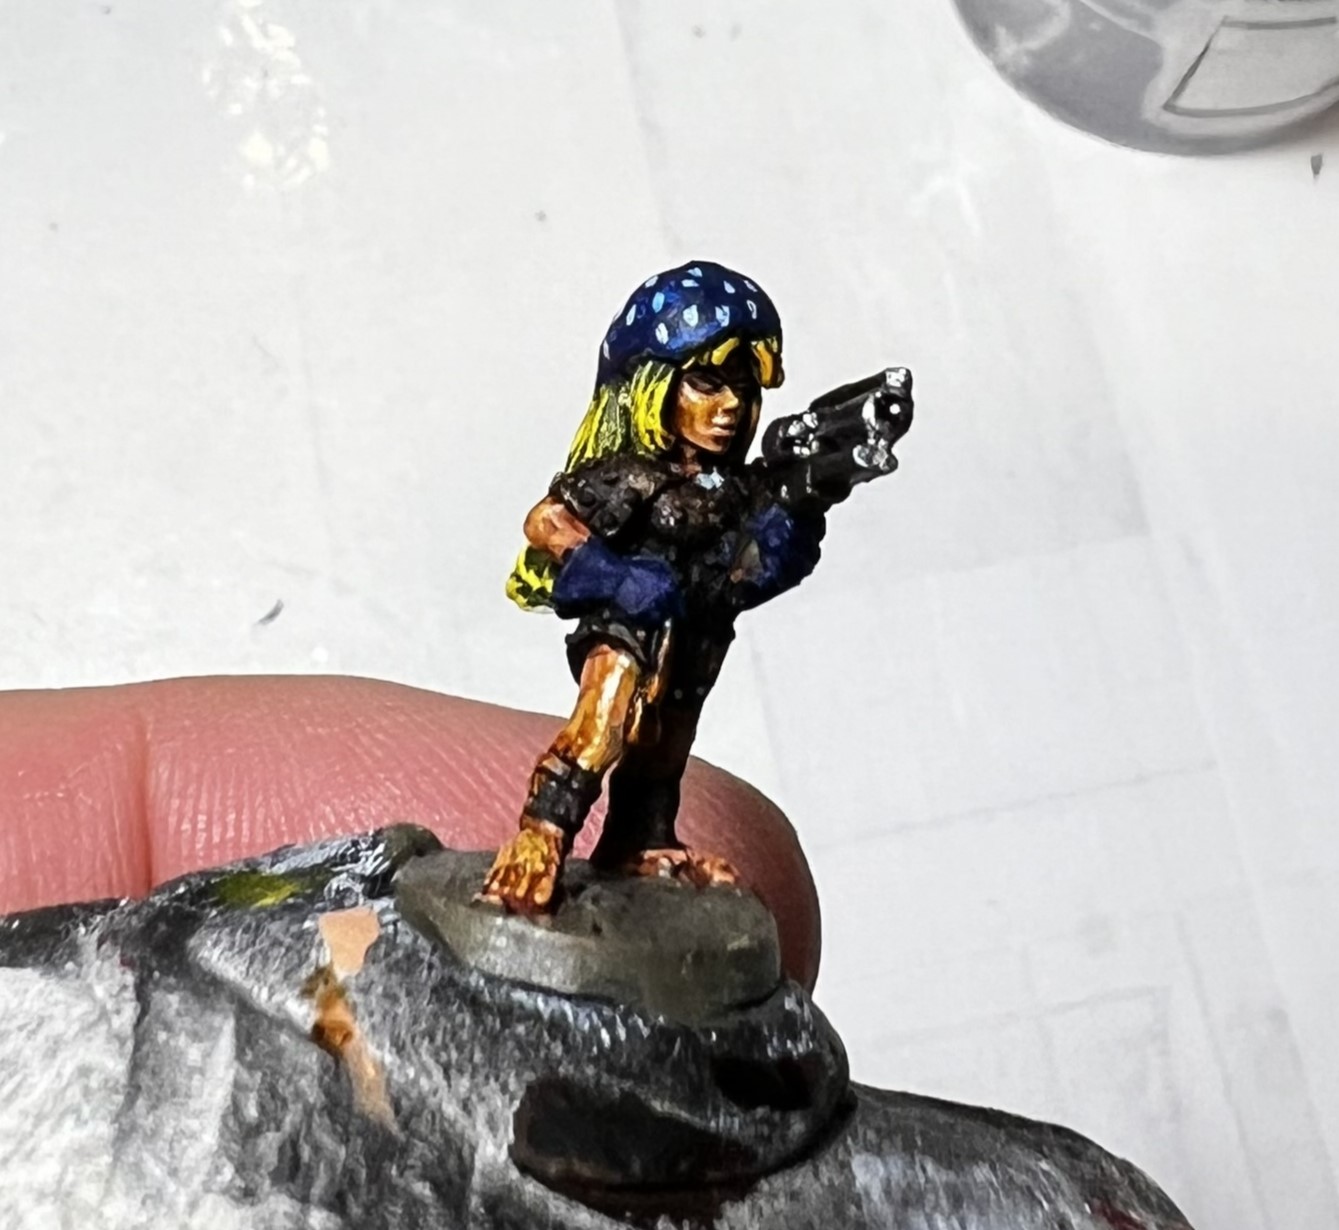

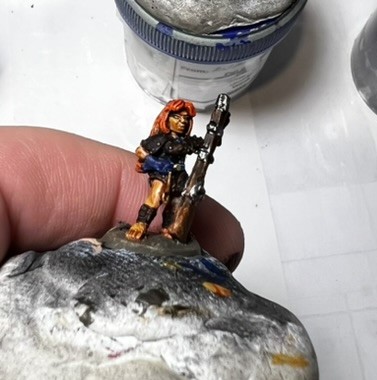


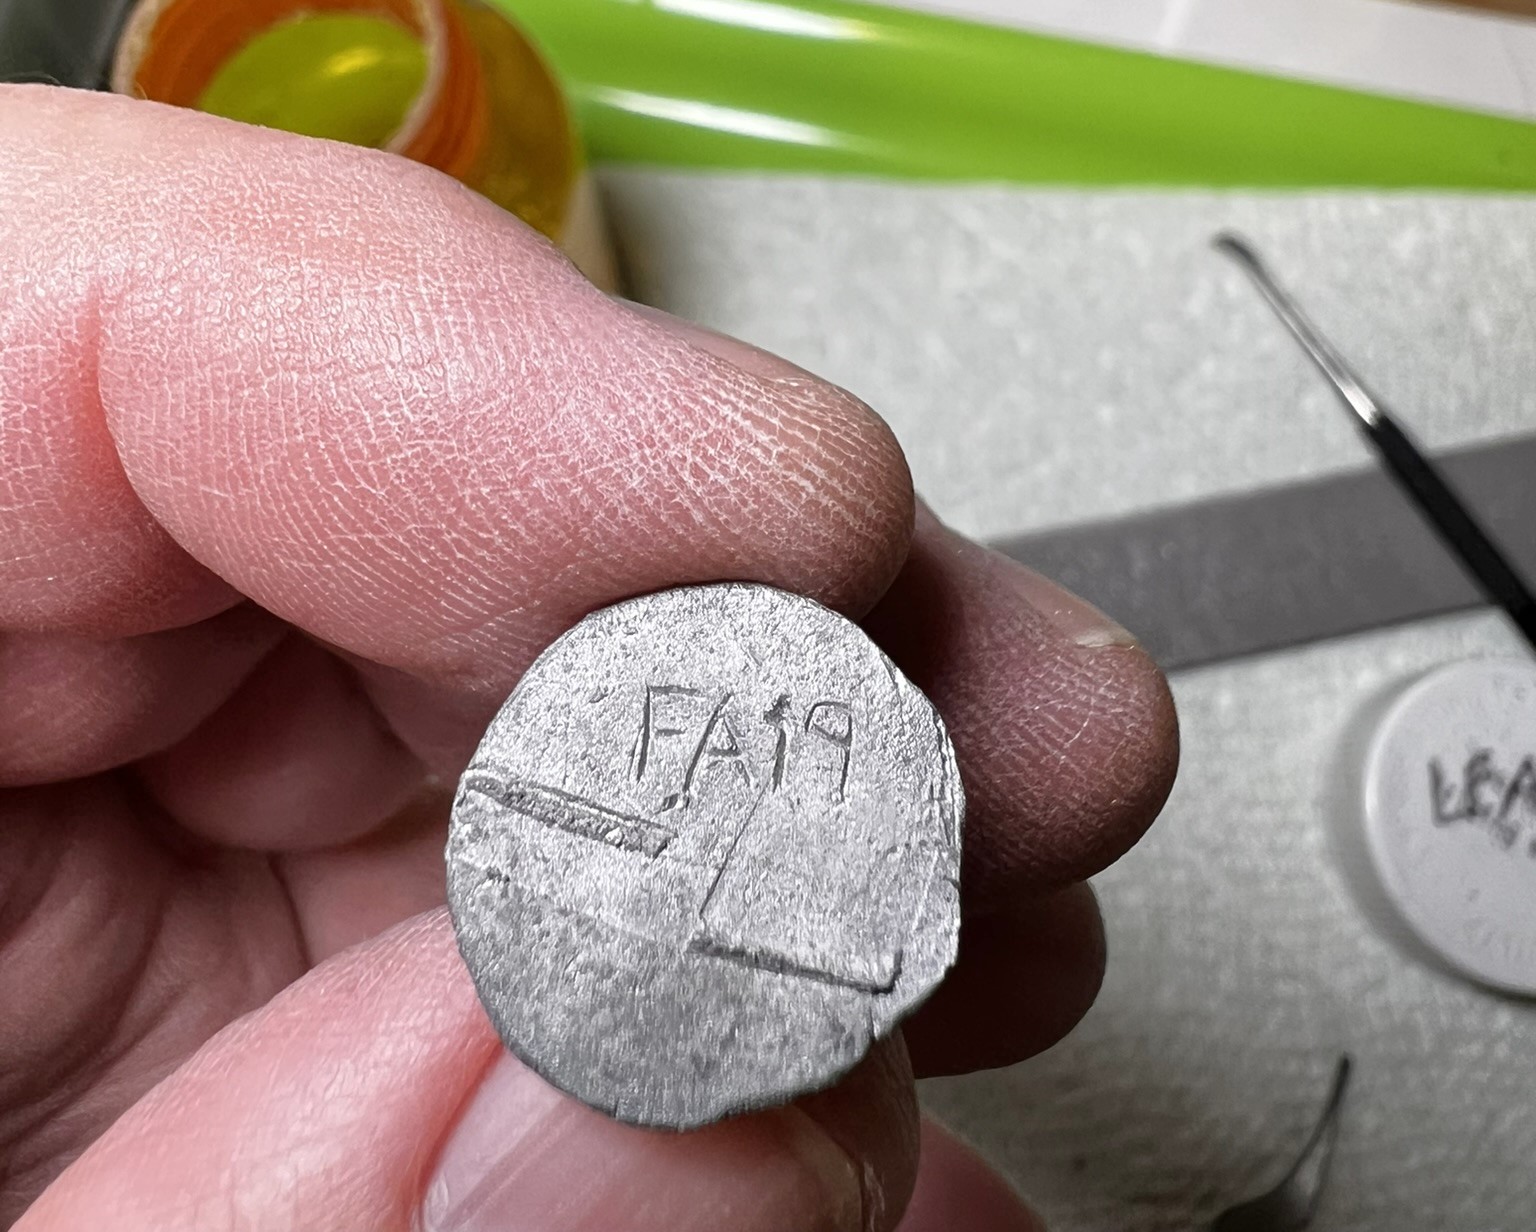


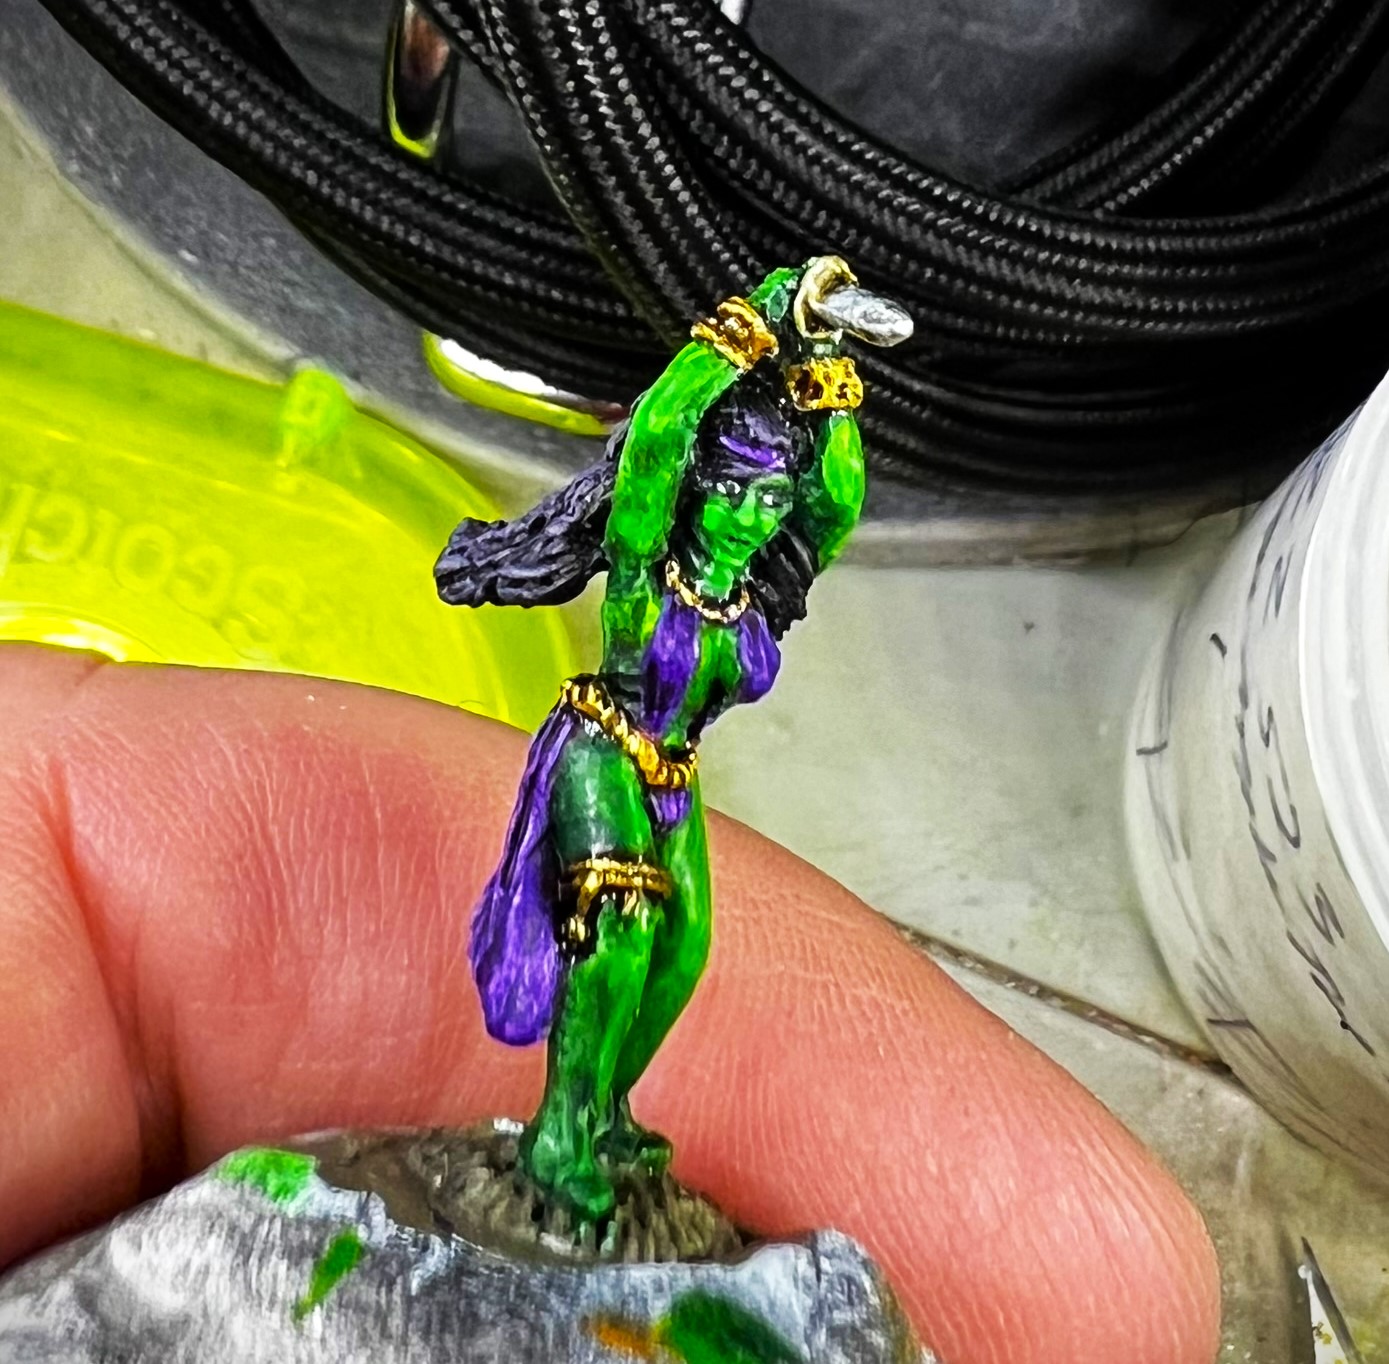
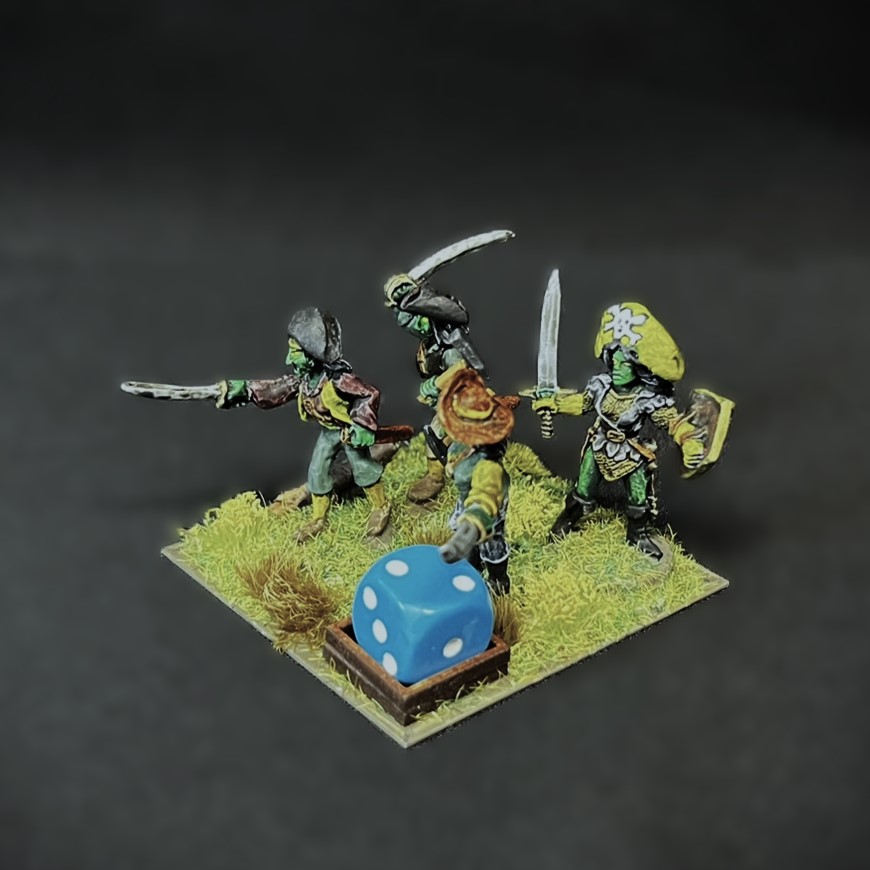

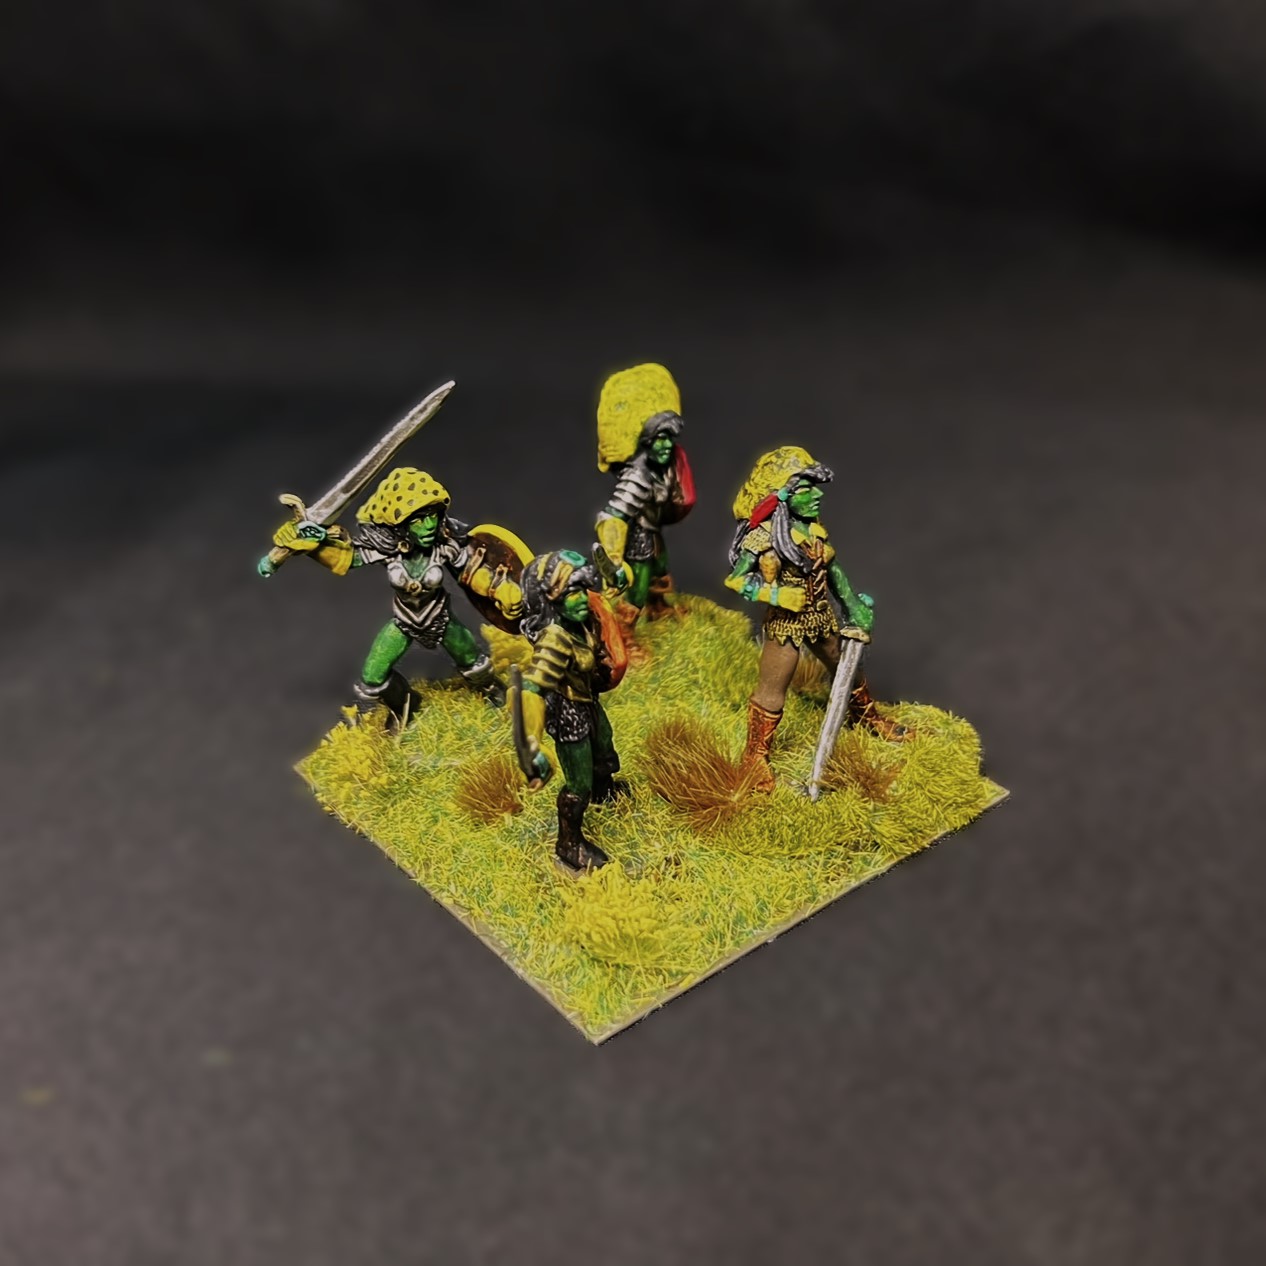
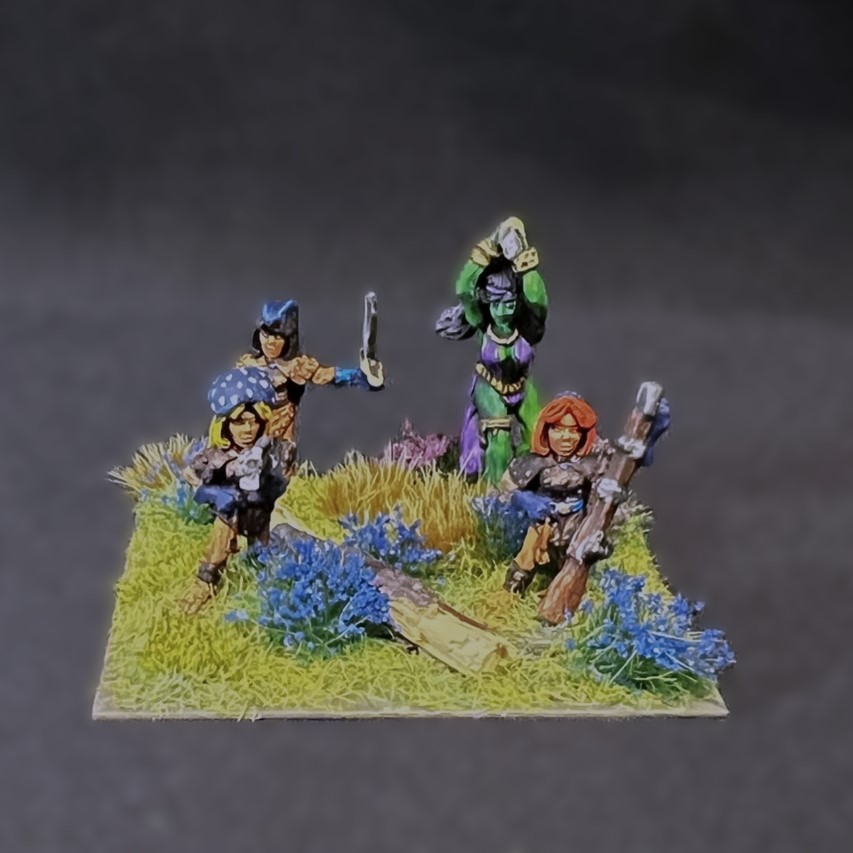


