Recruiting problems solved – just summon the dead! The Summoning Bell (Wars of Ozz)

Let’s say you are on a battlefield in the world of Ozz as a either of the two witches Evora or Arella. Your recruiting efforts among your respective Winkie or Gillikin towns has not been stellar – so how to fix that? The Summoning Bell!

The Summoning Bell is a Wars of Ozz unit that has intrigued me since I first saw it on pages 24, 26, and 82 of the rulebook. Especially as the competing witch sisters Evora (Empress of the Winkies) and Arella (Empress of the Gillikins) have fought many times over posession of the Bell – with each having success. It is powerful for either the Winkies or the Gillikins – as it can summon skeletal troops to augment their forces. While ostensibly it is a Winkie unit – the Gillikins could have it too. The background is described in the rulebook as follows:

When Evora first appeared she was lugging about with her the Summoning Bell. This is an understatement; it is an enormous bell, so large it had to be toted about by slaves. It is not a creation of the Last Great War. It dates to a time much earlier and draws on powers that defy science. Where Evora found the bell and how she learned to use it is her secret. With it she can raise masses of skeleton soldiers with a single thunderous toll.

Its power has not escaped her sister, Arella. She has seen it used on the battlefield, both as an ally and against her. She has lusted for its power, and what Arella wants, she often gets. And in this case, that has been more than once. The two sisters have literally fought wars over the Bell…

Wars of Ozz rulebook, section 2.2.2.2, page 24

True, the concept of summoning the dead for a battle was already one used by J.R.R. Tolkien in The Lord of the Rings. But, it’s a concept seen in many other games as well since that time. I always find it cool.

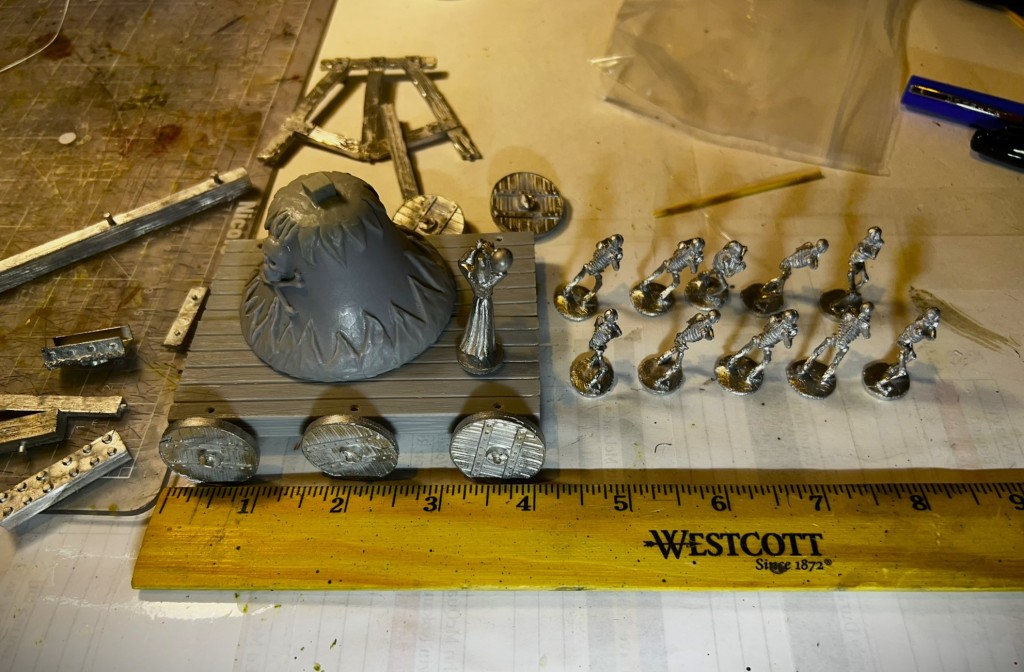
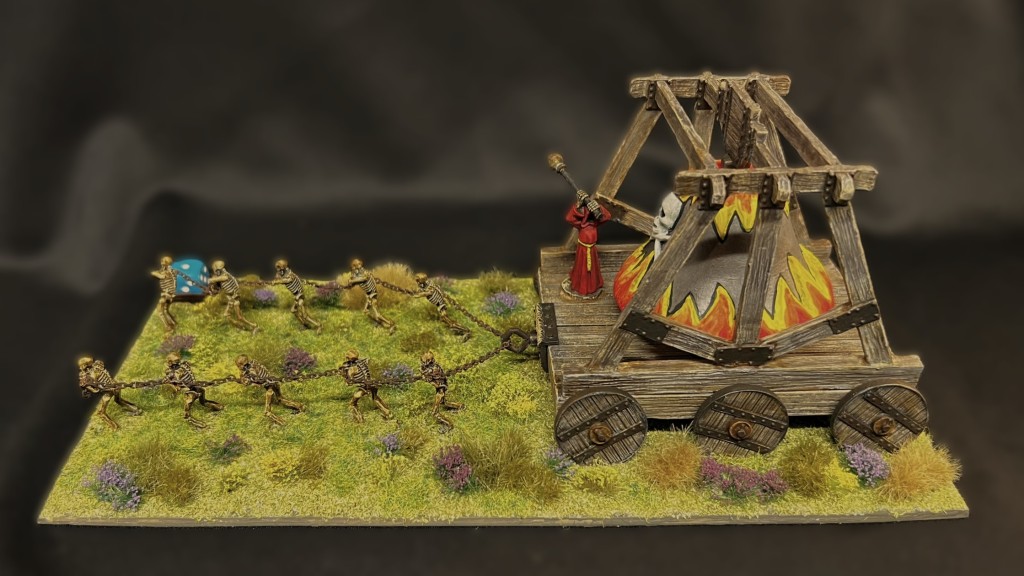
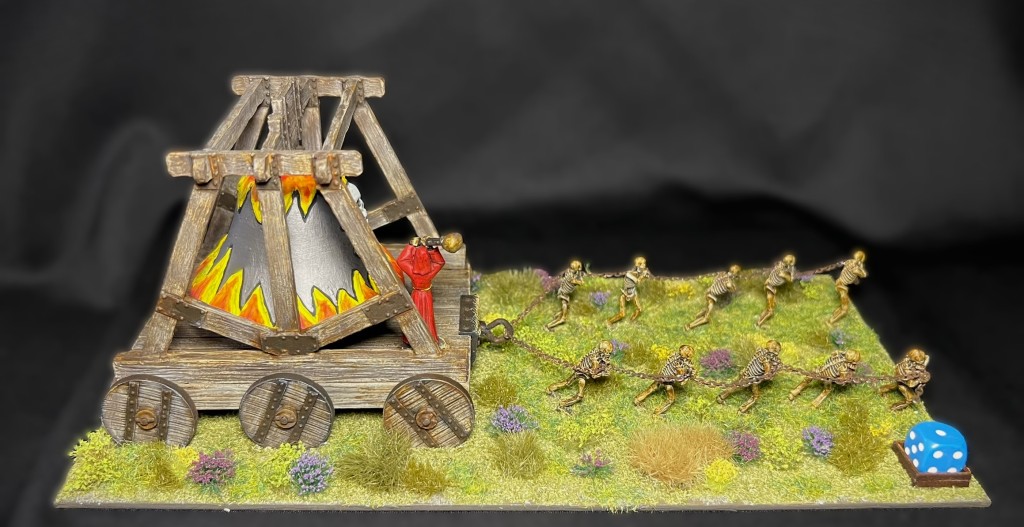
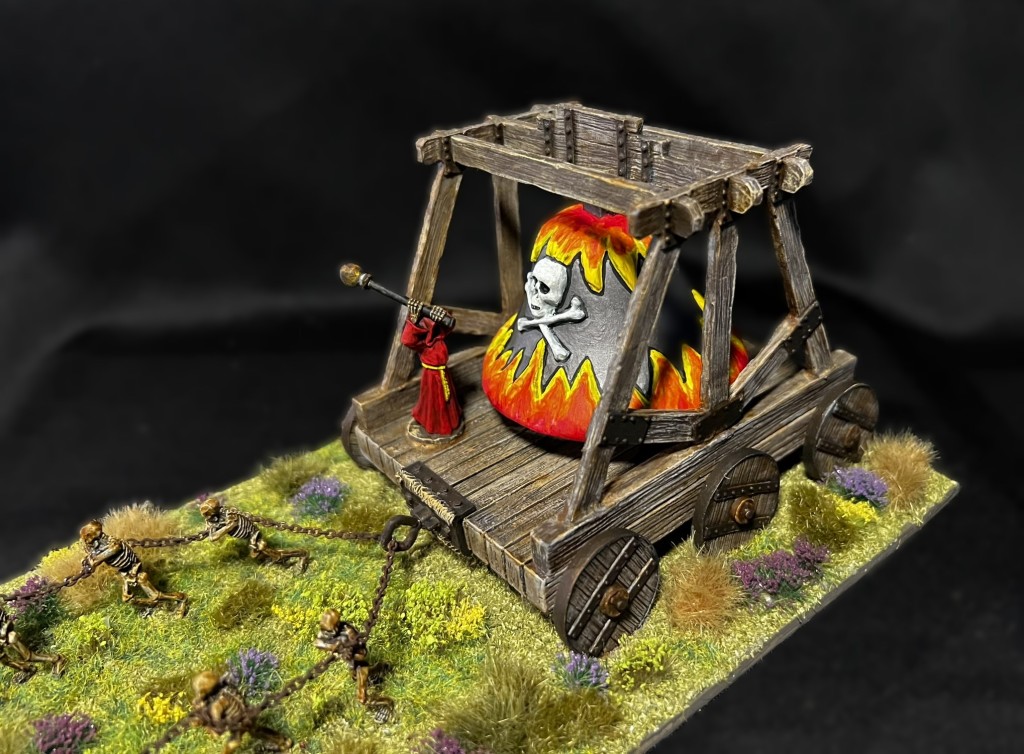
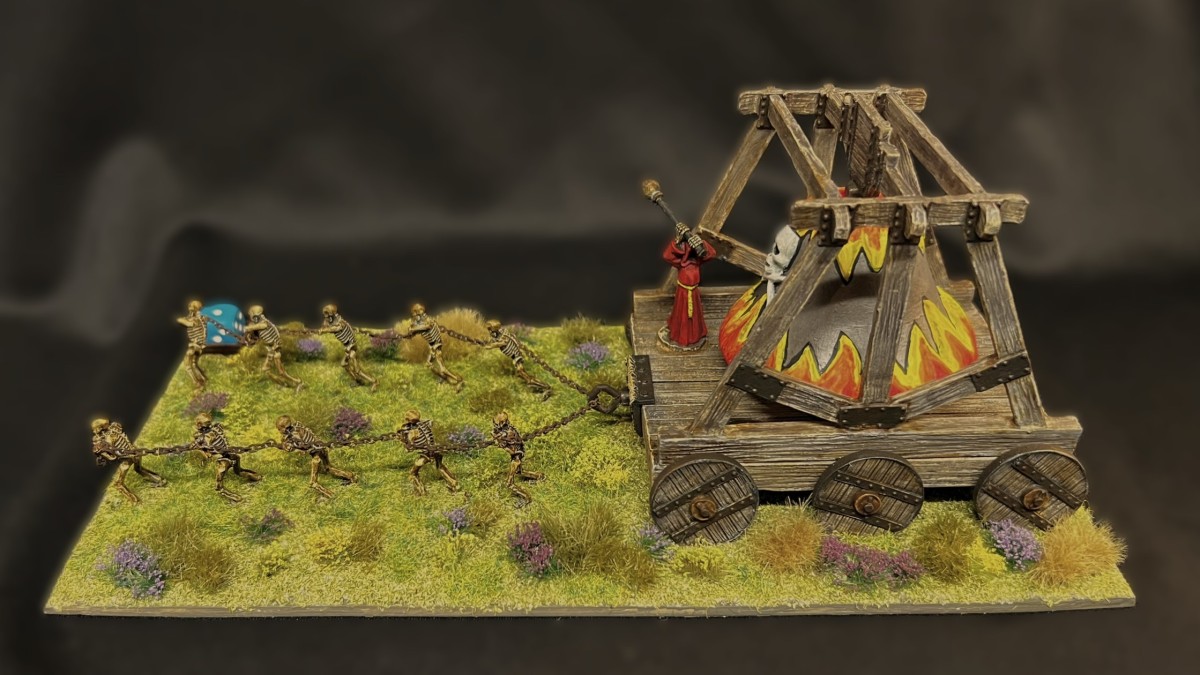
The Summoning Bell is SKU# OZZ-315. According to the website, it is supposed to have “1 Large Summoning Bell on Cart pulled by 8 Skeletons and 1 Hooded Character Striking the Bell”. The hooded dude is “The Taskmaster”. The bell and the figures are all 28mm in size and cast in metal, while the Bell is cast in resin. 

I was fortunate in that when it arrived I found that it mistakenly had an extra two skeletons – so 10 versus 8 (thanks Russ!). Given that more is better, I definitely would incorporate the extra two skeletons into the model. According to the rules, the Summoning Bell can – similar to the “Raise the Dead” spell – raise a stand/base of skeletons as long as it is in the command radius (12″) of Evora or Arella and if the roll is successful. I am assuming that it would succeed by rolling under a spell value of 8 (so successful 70% of the time – the same as Arella or Evora). Each base of skeletons so summoned could be used in three ways – as a stand-alone unit; incorporated into an existing skeleton unit that has had losses; or to augment a previously summoned unit. The maximum number of stands/bases that can be summoned is 5. Now, Arella can also try to raise the dead on her own – so that potentially increases the maximum summoned to 10 stands or 2 full regiments of skeletons.

The Summoning Bell movement rate is quite variable and likely slow as it only has a movement rate of 1d10, not the best of 2d10. It is worth only 3 points – so it is relatively cheap. It fights poorly in Melee at 4/10. Its Resolve (desire to stay in a fight) and its Elan (desire to take the fight to the enemy) are both less than average at 5/5. As its use is not usually in Melee combat, this is moot I think, as long as it can generate skeletons. While the Bell is treated as infantry, similar to an artillery base it can take 5 hits – though when it gets to 4 hits the unit is eliminated.

The Summoning Bell is my final Winkie unit unit at this time. (I am counting it as a Winkie unit in my inventory). This is my fifth unit for Dave Stone’s “PAINT WHAT YOU GOT CHALLENGE 2023/2024” painting challenge that runs from December 26th, 2023 to February 29th, 2024. It’s also going to play a major role in many of my upcoming games for the multiple gaming conventions that I plan on supporting as a GM. At present, that support level is now at 25 four-hour games just through May across 4 different conventions in Massachusetts, Maine, and New Hampshire (TotalCon38HAVOCMayhem, and HUZZAH!).

Building this unit was more of a modeling challenge than most – but painting it was also related as I needed to vary many steps – plus allow for the drying of glues, varnishes, and paints. As a result, I have many more, hopefully fun, WIP shots than I have in recent posts. Lastly, I’ll share some eye candy shots and list the paints and other materials that I used.

WIP shots…

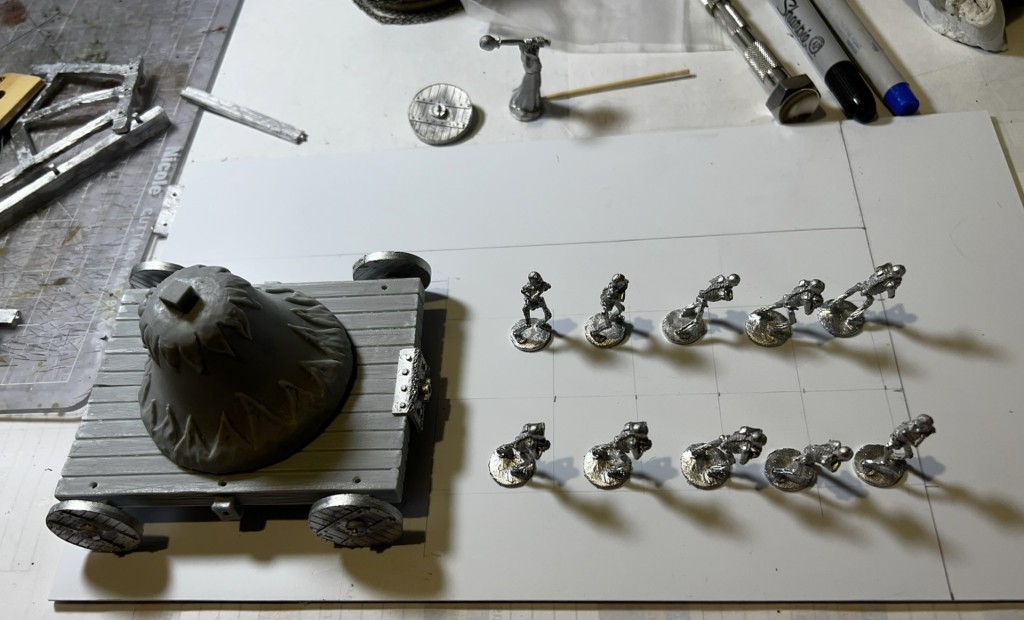
I started the work on January 12th. The first challenge was to figure out the size of the base needed and what materials to use. I mocked up the 10 skeletons and the cart and figured that I needed a 5″ by 10″ base.

Determining that the base needed to be 5″ x 10″.

I took a sheet of polystyrene, and laid out a general idea of where everything would fit.
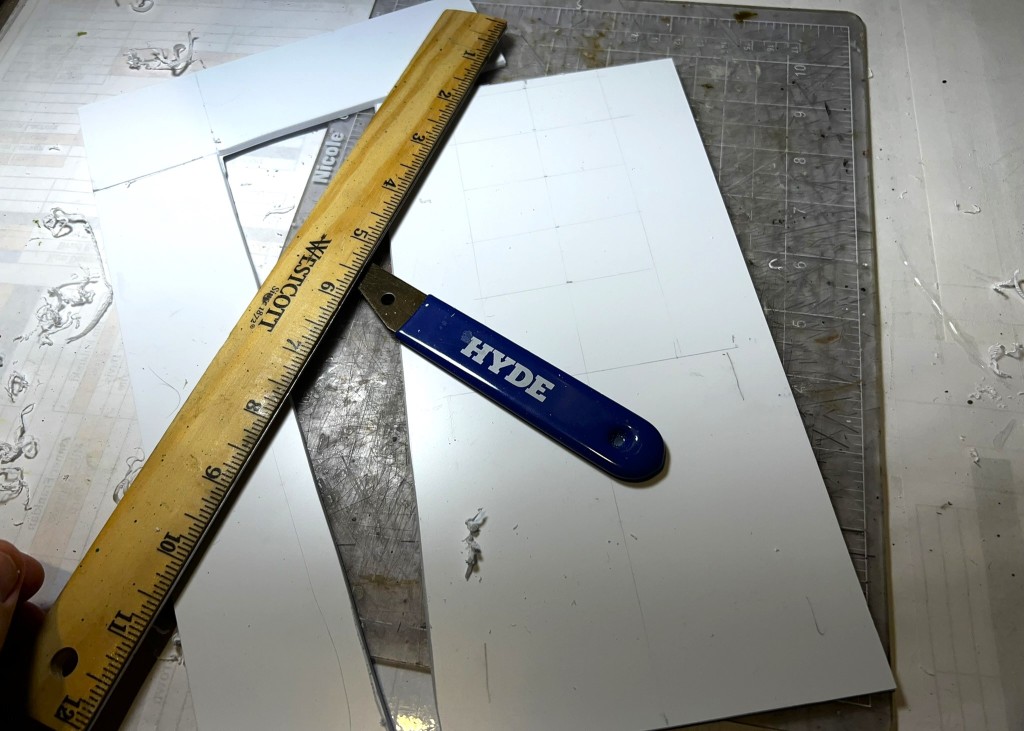
Sketching out a mock up on the polystyrene sheet.
Cutting the polystyrene sheet – the Hyde tool is perfect for this purpose. It scores nice and clean lines.

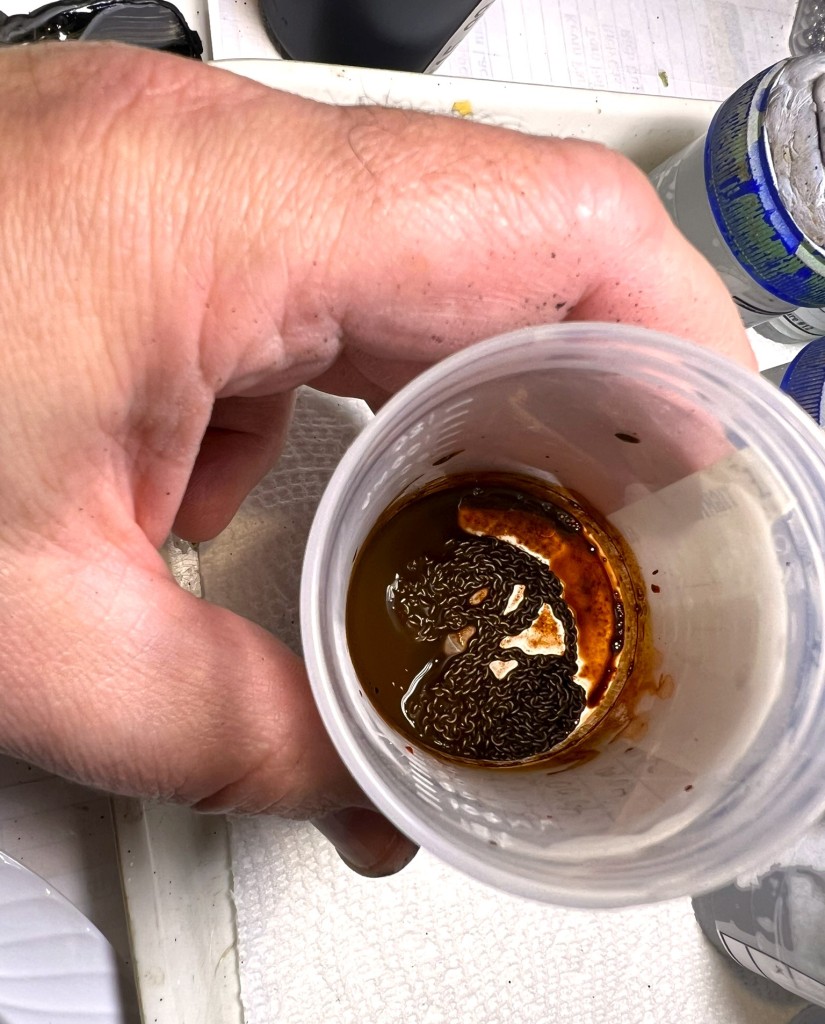
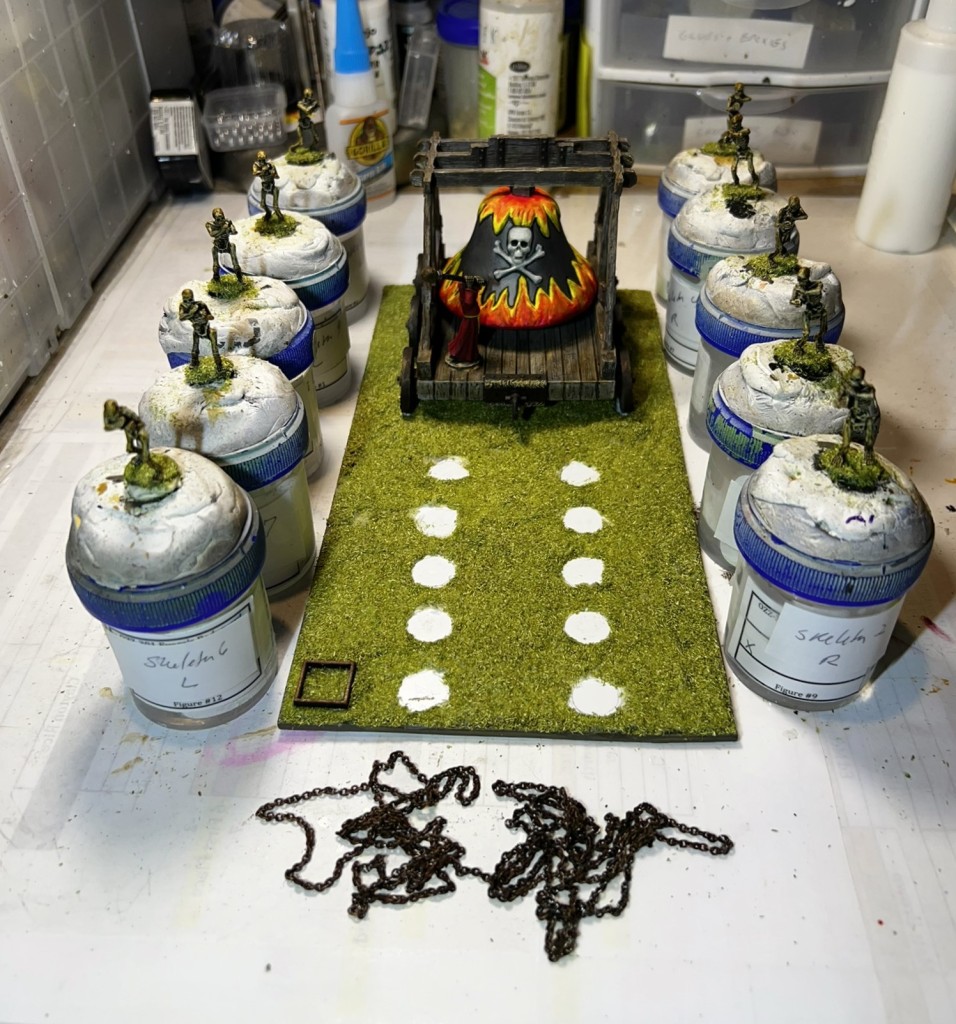
The model came with what appears to be 28-gauge wire to use as ropes with which the skeletons are supposed to pull the cart. I thought that given the backstory that chains would be far more appropriate. I had used jewelry chains similarly before with my Frinx glyptodon mounts. All I needed to do here was to drill small gaps on the skeleton figures to accomodate the chains later on and to make the chains look ancient and rusty. I cut a good length and bathed them for a while in a cup filled with rust texture paint and rust wash.

Rusting up the chains.

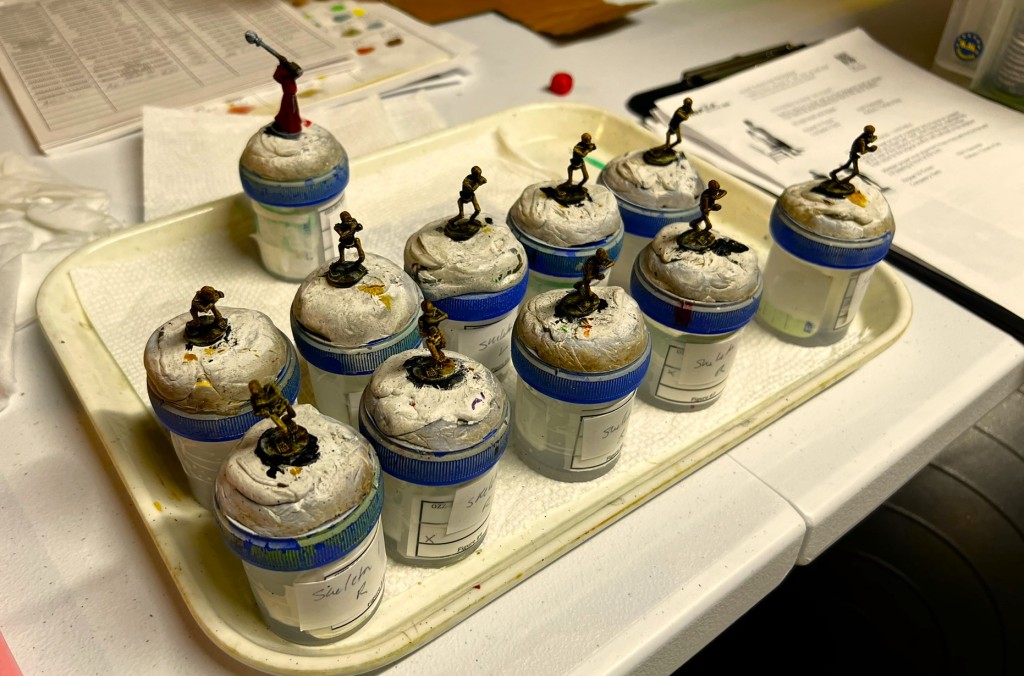
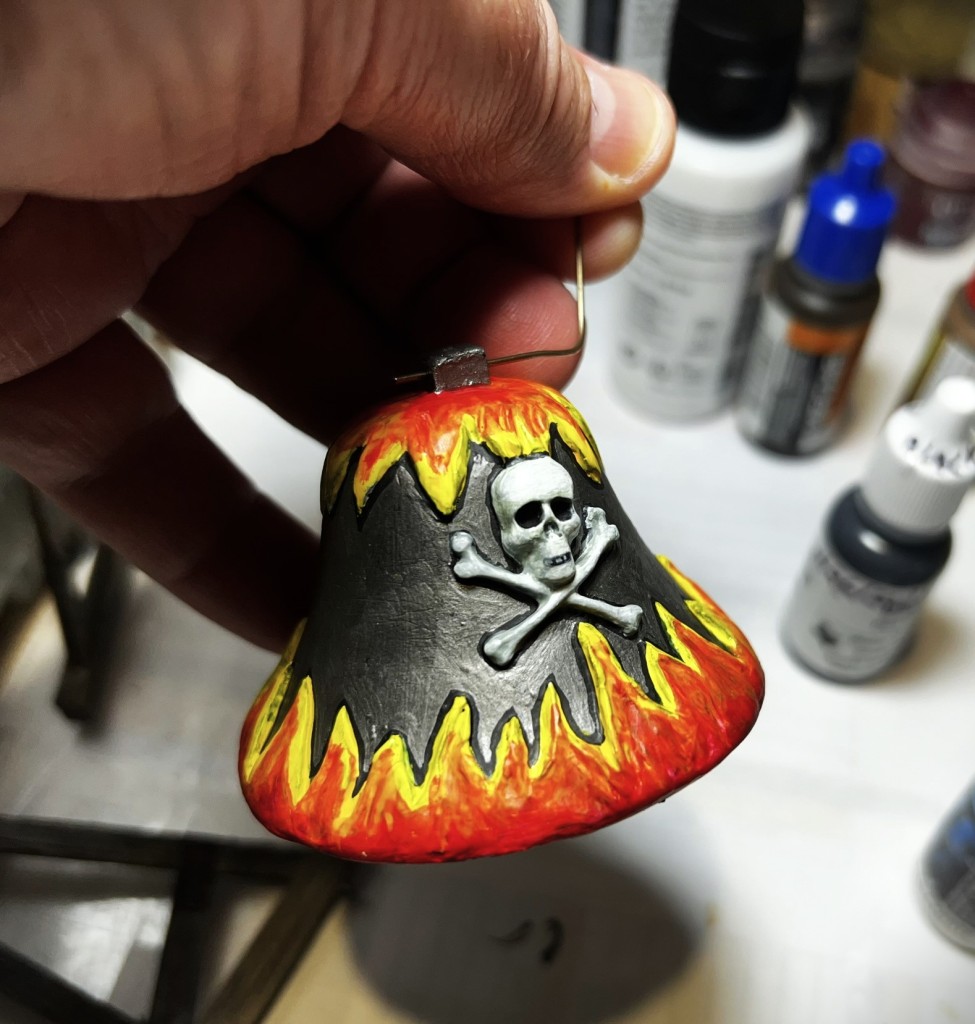
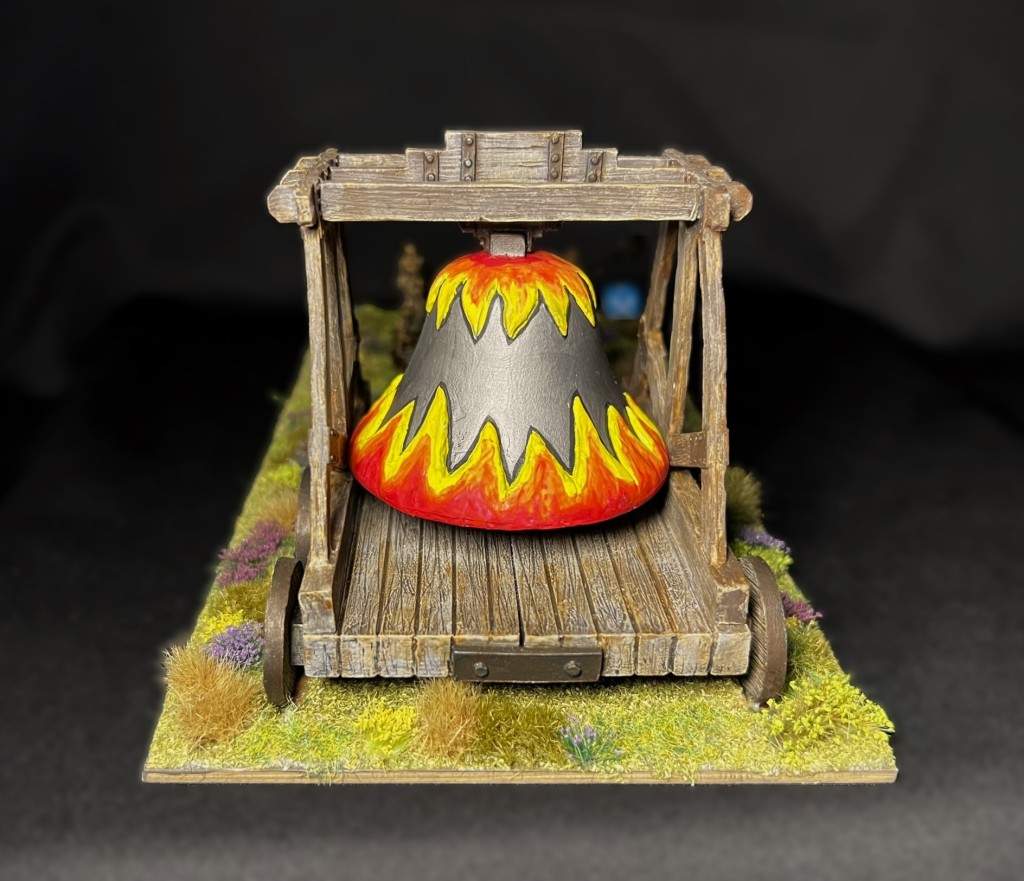
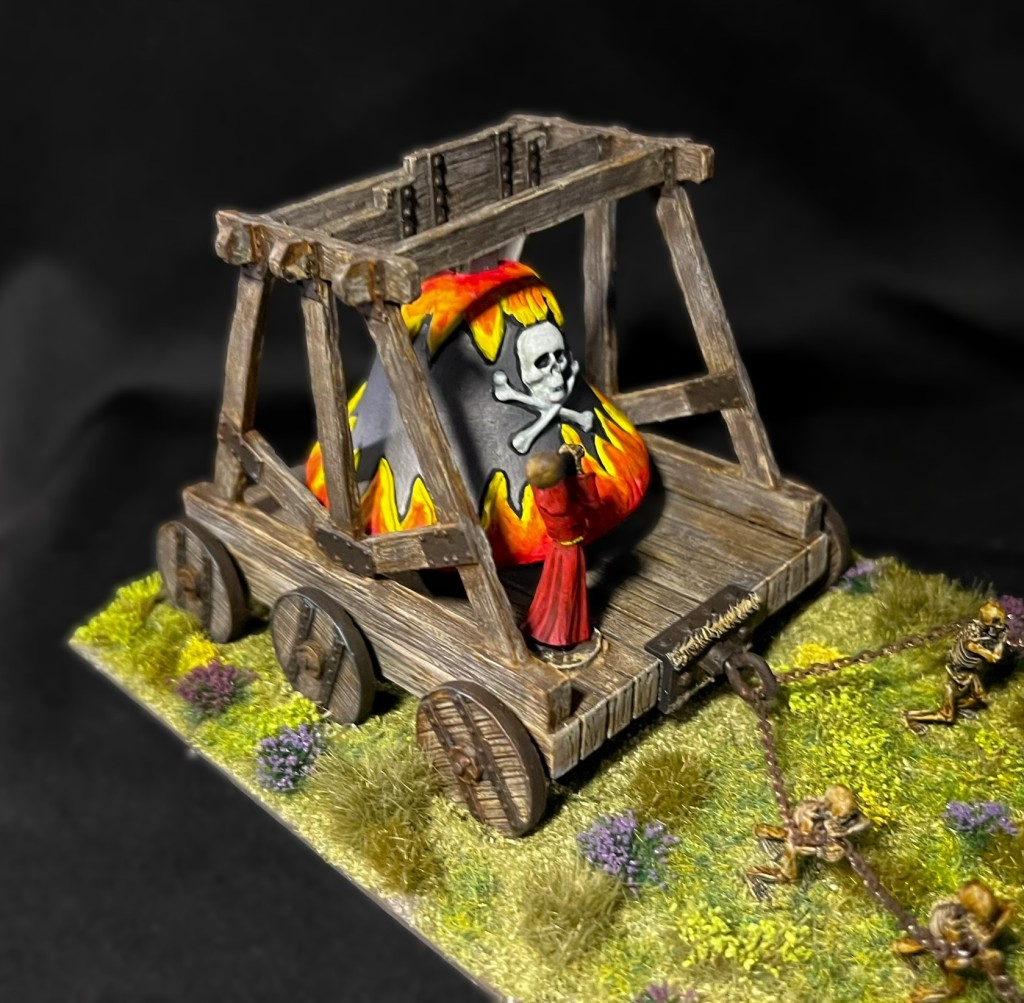
By January 17th I had primed all of the components as well as some dry brushing of the wood sections (that are made of metal). I also saw that the Bell had flames on it – as well as a skull. I decided that, unlike the photos in the rulebook, my Bell would have magical evil flames adorning it to announce the arrival of dead warriors.
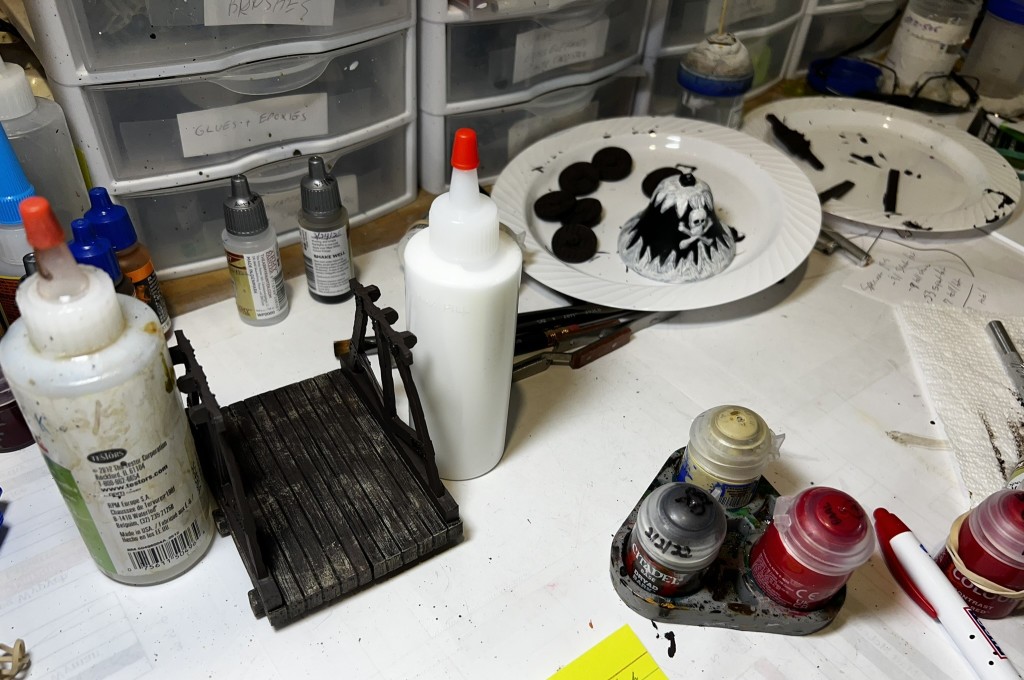
On January 17th – I was on to priming and early dry brushing of the cart and the 6 wheels and prepping the bell for the painting of flames.

As for the augmented “skeleton crew” (there’s an oxymoron, no?) and the Taskmaster, they painted up easily and were pretty much done by January 17th less varnish and flocking. Luckily, there were 5 that would carry the rope or chain over their left shoulders, and 5 over their right – which was perfect for the model.

Skeleton crew and the Taskmaster by January 17th.

January 18th saw me doing a LOT of dry brushing of three colors plus washes to achieve a weathered wood look on the cart. I also tried to give its ironwork an appropriate rusted look. I drilled a hole through the Bell top and the metal of the Bell mount to reinforce with a paper clip wire – so that all the weight of the bell would not be supported by just glue. This might have been unnecessary as the Bell is light, but I did it anyways.

January 18th dry brushing progress.

The rest of the day was used to put on the cart’s wheels and to paint the Bell as shown below. I lined the edge of the Bell with black so as to give the three colors of the flames some depth. You can see how the drilled hole in the Bell helped with painting.

Painting the Summoning Bell.

As it was late – and I wanted to sleep on it – I put the cart on the base with the bell to see how I could mount it to the slippery polystyrene. I was concerned that the heavy cart would be needing some support, especially after the Bell structures were added. At that point, I needed to sleep on it…

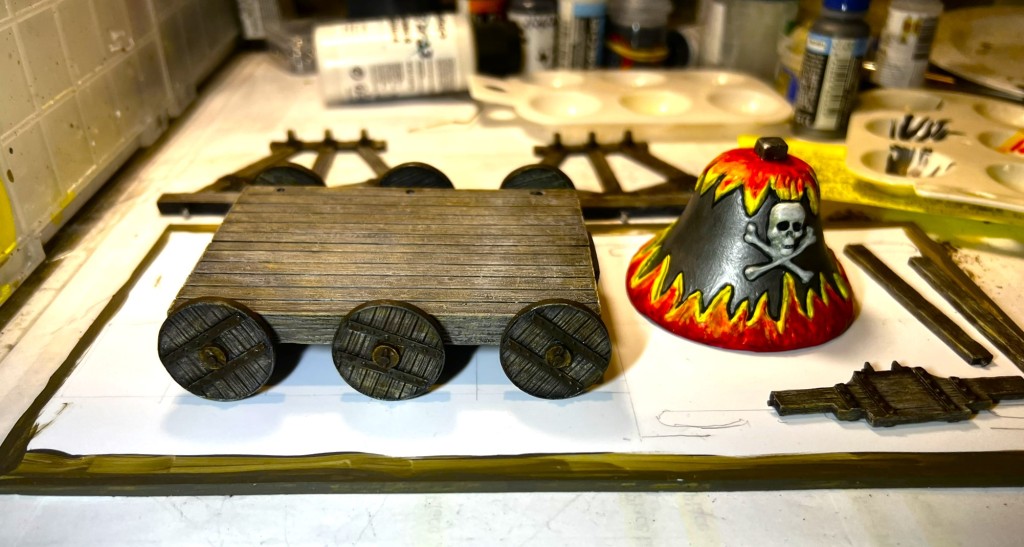
The lower part of the cart and the Bell were done – but the supports and mountings remained.
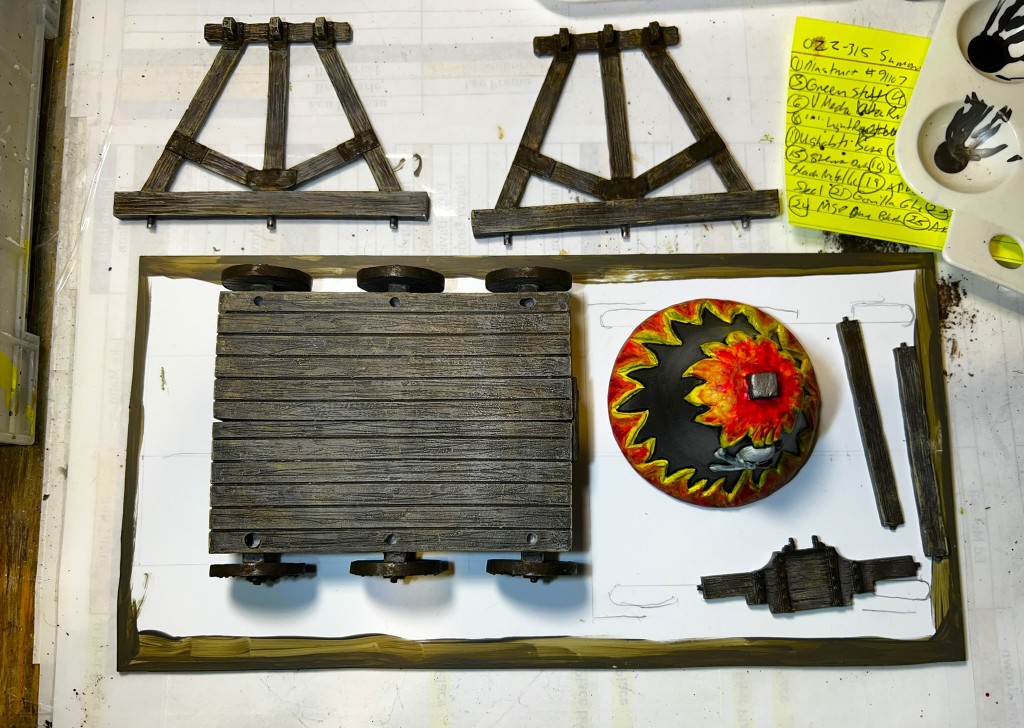
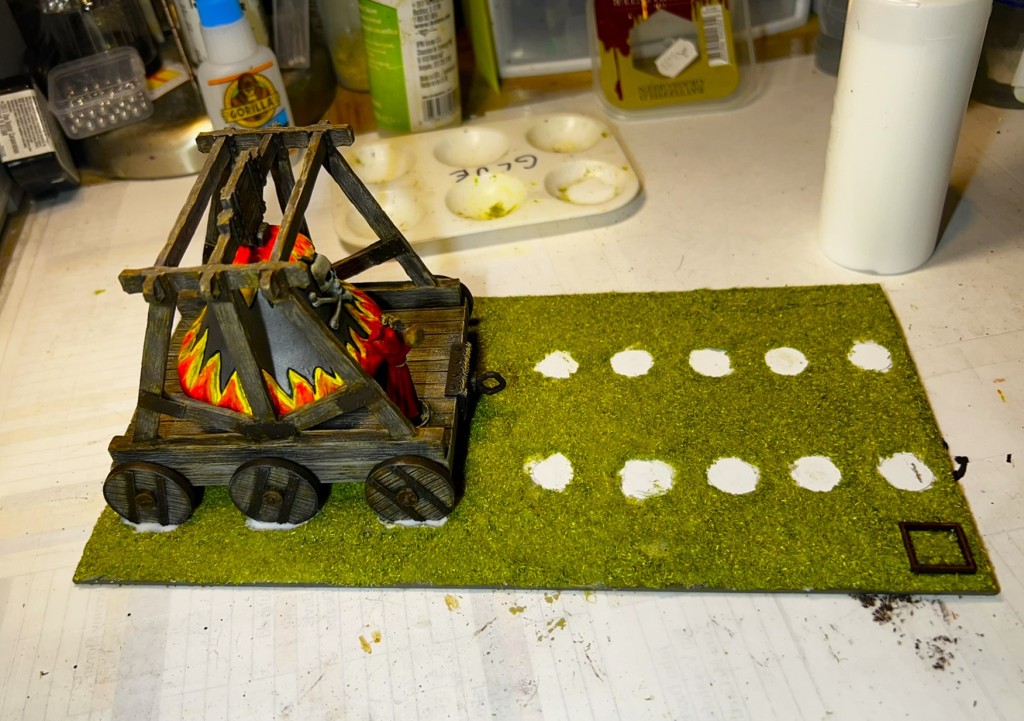
A top view of the previous photo with the proposed wheel positions marked in pencil.

By the morning of January 19th, I thought that I needed to chock the wheels in some subtle way that I could hide with flocking. The solution came by way of an MDF OZZ-BAS2 artillery base frame that I had saved for future use. I used half of it to glue onto the PS base along the line of the cart wheels. Always save your MDF frames!
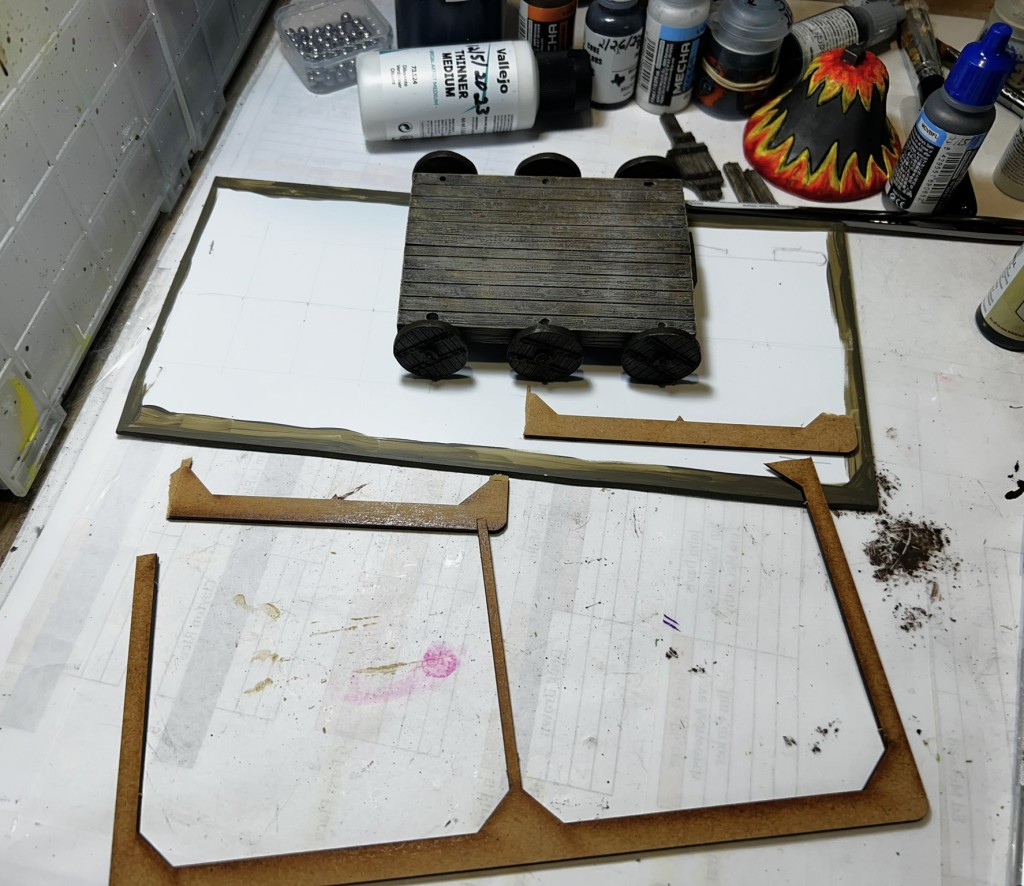
January 19th – I cut off one edge of the MDF frame and then cut that into two equal-sized pieces. This made alignment easy.

The frame pieces were then glued down, and I carefully carved out the holes to match the cart wheels. I also mounted the front chain mount to the cart using Gorilla Glue in conjunction with a small eyelet that I had rusted up to look like the chains.
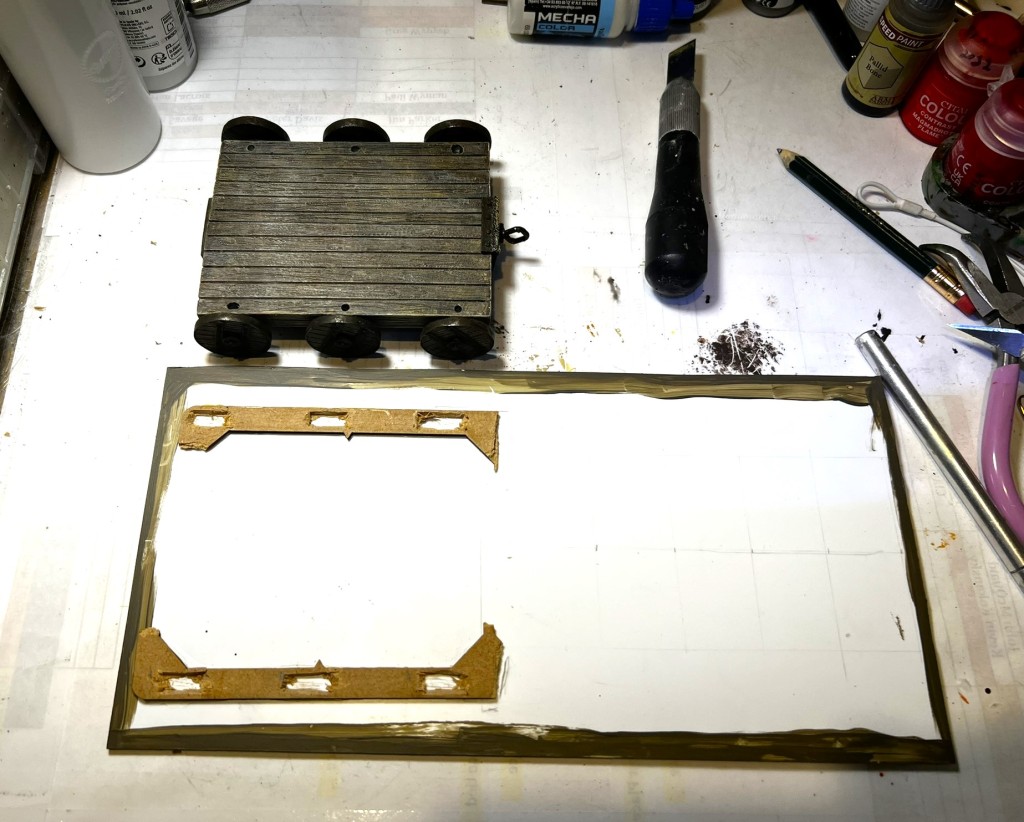
The frame sections glued down with the cart used as a template. I also applied PVA all over the base except where the skeletons would go.

While the PVA dried, I assembled and glued the cart pieces and the Bell together.

While the cart PVA glue dries – rubber bands assist the connections getting glued correctly.

Once assembled, I varnished the cart/Bell and crew with two coats of varnish with an airbrush, and went back to the base. After the PVA on the base had dried, I covered most of the base with a Vallejo ground texture – and then let that dry.

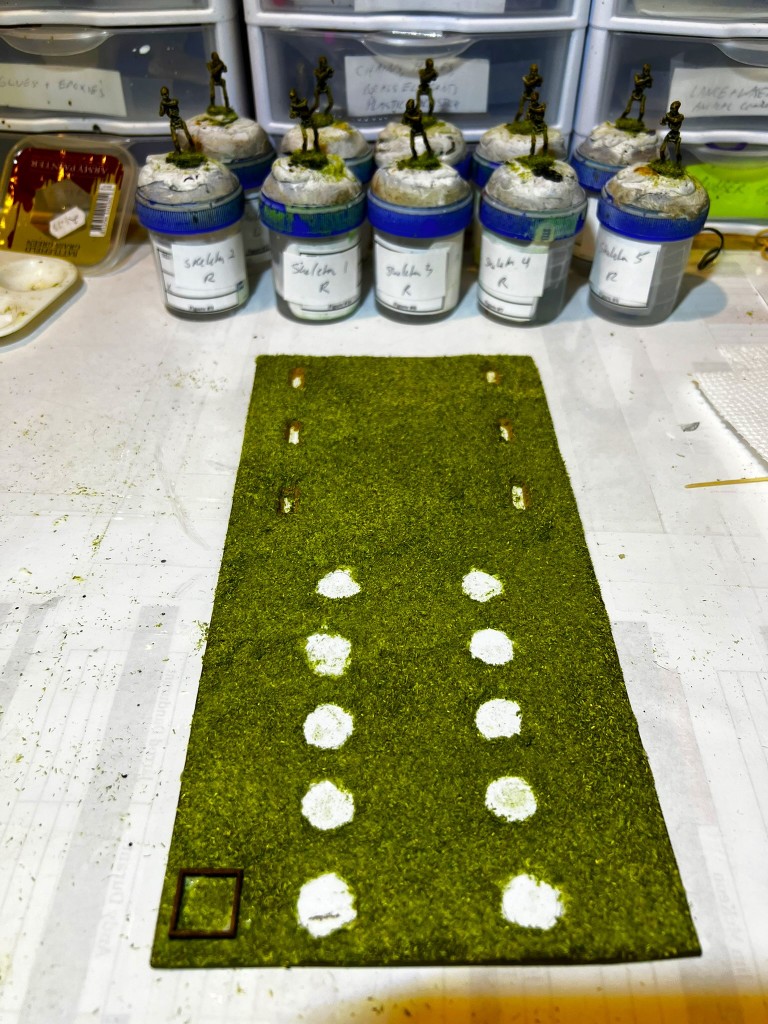
The base after the texture paint was applied.

When that texture paint had dried sufficiently, I gave the base a flocking of grass. This would take care of the area under the cart flocking-wise.

The skeletons look on as the base gets its first grass and a Pendraken 12mm MDF dice frame.

The last thing I did on January 19th was to mount the cart in the holes, add PVA to the holes, and go to sleep with hope for the morning!

The cart mounted for overnight glue setting.
The end of January 19th – awaiting January 20th to finish!

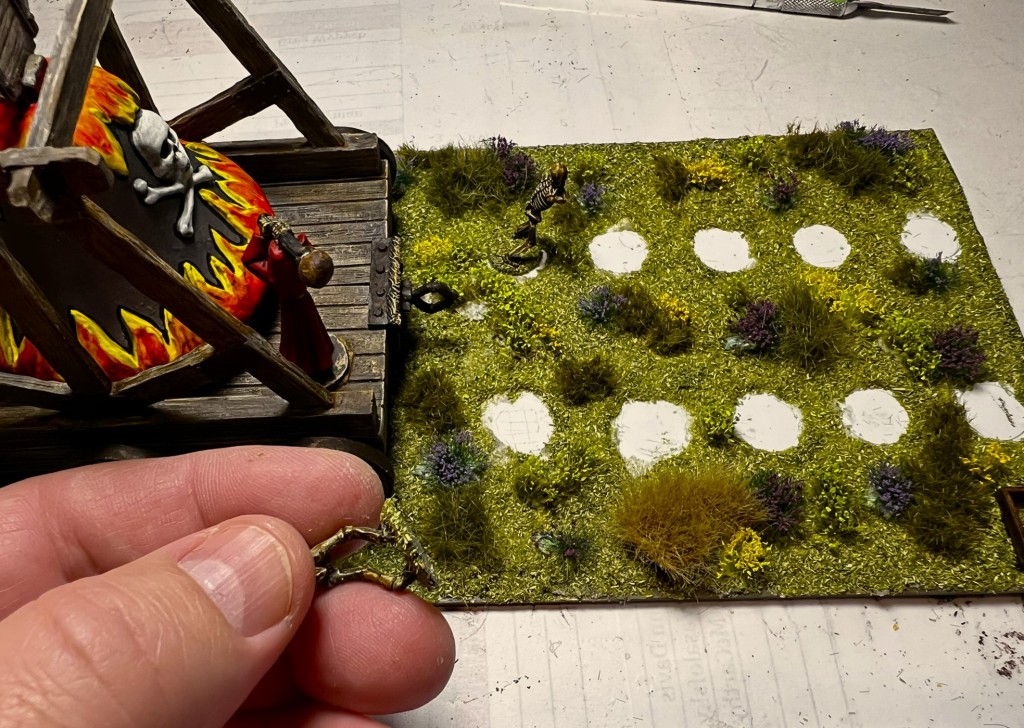
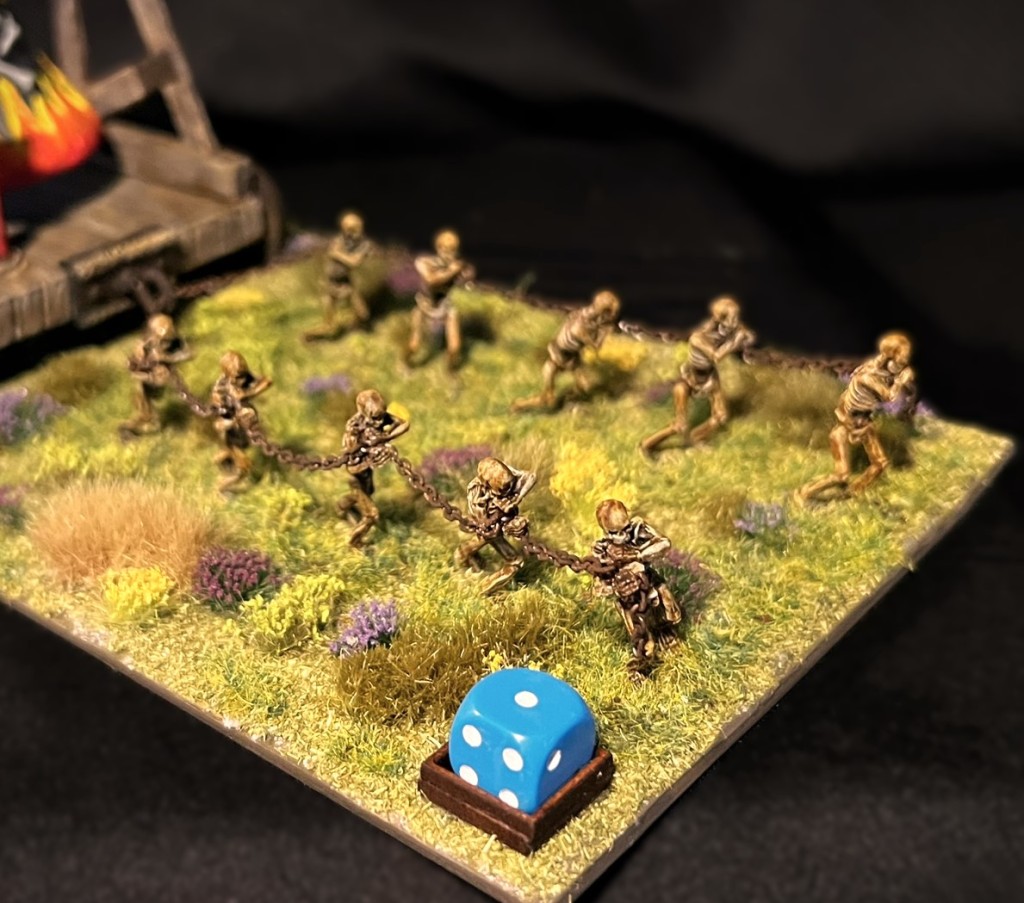
In the morning of January 20th – I was pleased to see the cart was securely affixed to the PS base. The MDF’s frames absorbency, especially for PVA, really helped with the fastening. I now needed to mount the crew – and affix the chains – but first I flocked the base so as to have better room to do that. I used both yellow and purple flowers to represent the Winkies and Gillikins respectively. I also used a variety of green and tan tufts to create a field-like look. Then, I was able to meticulously affix two skeletons at a time and then their chains. I secured the chains to the skeletons’ little hand holes with Gorilla Glue applied by a toothpick. I later covered up the shiny dried glue with rust or paint so it would not detract from the model’s aesthetics.
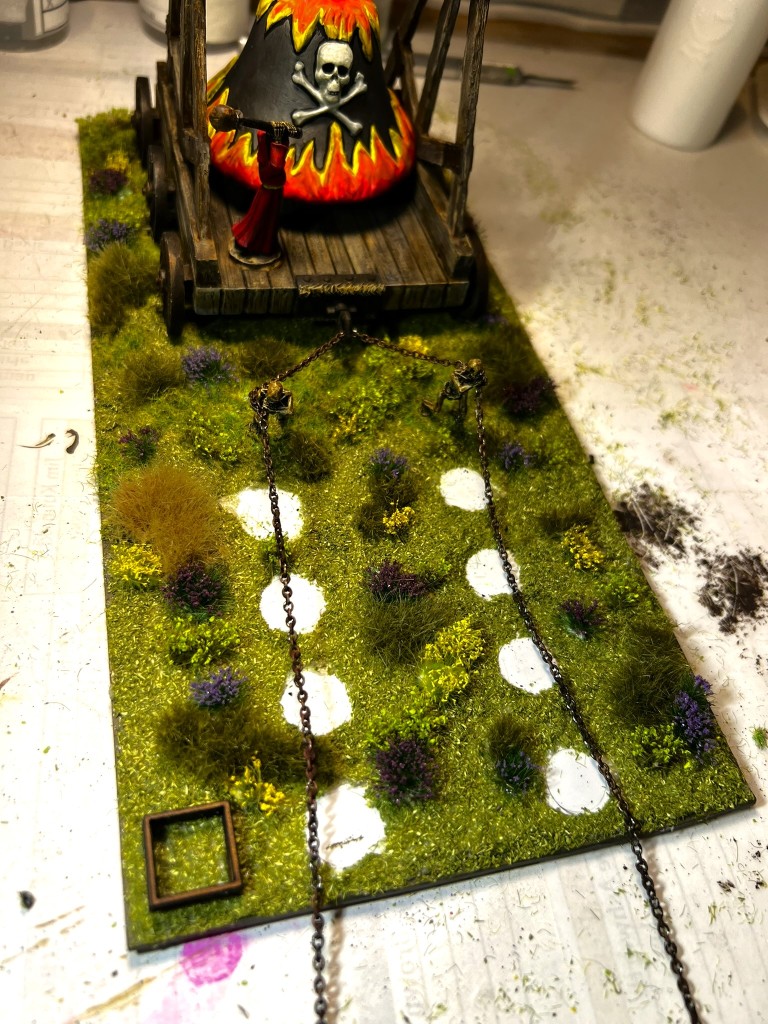
Mounting the skeletons.
How I serially mounted the skeletons and their chains. Doing two at a time gave me much more flexibility in this process.

And yes, I finished this bad boy on January 20th!

Success!
Skeleton-level view.

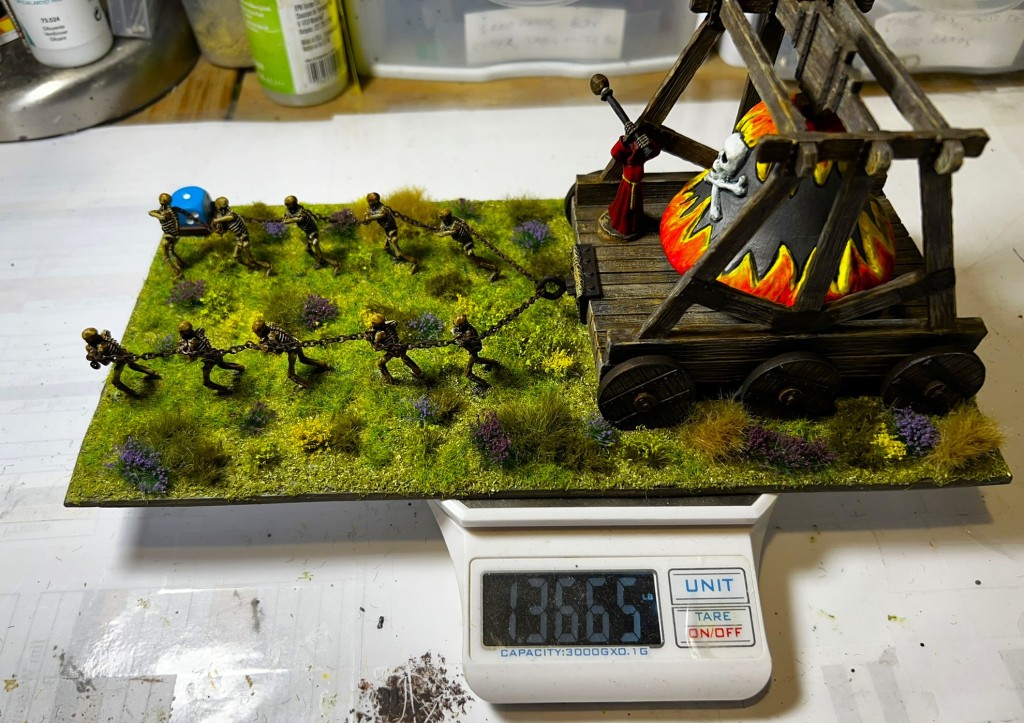
The model is relatively heavy at 1.3665 pounds!

While the cart, the Bell, and the base are not metal – the supports are!

Finishing this was gratifying to say the least – now for some Summoning Bell…

Eye Candy

The Summoning Bell – left side.
The Summoning Bell – right side.
The Summoning Bell – from the front.
The Summoning Bell – back side.
The Summoning Bell – close up on right side.
The Summoning Bell – close up on left side.
The Summoning Bell – close up of the crew. I like my skeletons grungy.

I appreciate your indulgence at all of these photos. I thought that this would be a unit where all the WIP might be more interesting or possibly helpful you, to the reader. You can let me know in the comments section. 

As mentioned above, the Summoning Bell is my final Winkie unit unit at this time. I think that this was an epic way to finish the faction off.

While I am counting it as a Winkie unit in my inventory – I will let the Gillikins use it too – especially in some of the convention games. I will be transitioning to a different faction next – but will also be busy getting stuff ready for the conventions that start next month. I hope that I can get more done for Dave’s challenge. 

As always, much thanks for looking!

And yes, I still have much more Ozz to come…

Miscellaneous details and references for those interested in that sort of thing:

For all of my previous posts on Wars of Ozz games, figures, units, and other related projects – please see this page.

PAINTS, INKS, GLAZES, SHADES, WASHES, PIGMENTS, FLOCKING, GLUES AND MORE THAT I USED ON THE SUMMONING BELL:

  1. Plastruct #91107 2.5mm polystyrene sheet
  2. Vallejo Surface Primer “Black”
  3. Green Stuff (kneadatite)
  4. Gorilla Glue
  5. Poster Tack
  6. Beach Landing Jewelry Chain
  7. Vallejo Mecha Weathering “Rust Texture”
  8. Vallejo Mecha Weathering “Dark Rust Wash” (wash)
  9. Vallejo Mecha Weathering “Light Rust Wash” (wash)
  10. Citadel “Dryad Bark”
  11. Vallejo Mecha Color “Off White”
  12. Citadel “Ushabti Bone”
  13. Army Painter “Speed Paint – Pallid Bone 1.0”
  14. Army Painter “Speed Paint – Speed Paint Medium 1.0”
  15. Citadel “Contrast Paint – Baal Red”
  16. Battlefront “Sherman Drab”
  17. Vallejo “Thinner Medium”
  18. Citadel “Longbeard Grey” (dry)
  19. Vallejo Model Air “Black ” (metallic)
  20. Army Painter “Light Tone” (wash/shade)
  21. Vallejo Mecha Color “Dark Steel”
  22. Citadel “Contrast Paint – Magmadroth Flame”
  23. Citadel “Contrast Paint – Bad Moon Yellow”
  24. Reaper MSP “Pure Black”
  25. Citadel “Contrast Paint – Apothecary White”
  26. Citadel “Contrast Paint – Snakebite Leather”
  27. Citadel “Contrast Paint – Ratling Grime”
  28. Army Painter “Red Tone” (wash/shade)
  29. Paperclip wire
  30. Artillery Battery MDF sabot base frame piece from Old Glory/Wars of Ozz Miniatures
  31. Steel Eyelet
  32. Vallejo Ground Texture “Rough Grey Pumice”
  33. Vallejo “Flow Improver”
  34. Vallejo “Airbrush Thinner”
  35. Vallejo Mecha Varnish “Matte Varnish”
  36. Pendraken 12mm dice frames
  37. Elmer’s PVA Glue
  38. Gamers Grass “Dense Green Wild 6mm Tufts” (flocking)
  39. Gamers Grass “Dry Green XL Wild 12mm Tufts” (flocking)
  40. Gamers Grass “Beige XL Wild 12mm Tufts” (flocking)
  41. Gamers Grass “Wild Shrubs” (flocking)
  42. Army Painter “Yellow/Meadow Flowers” (flocking)
  43. Gamers Grass “Yellow Flowers” (flocking)
  44. Shadow’s Edge Miniatures “6mm Dark Forest Purple” (flocking)
  45. Shadow’s Edge Miniatures “6mm Dark Forest Plum” (flocking)
  46. Army Painter “Battlefield Field Grass” (flocking)

As you may want to check out the Wars of Ozz figures’ range – there are two places to get them and the rules (and I make no money from this btw). The game rules and the figures are available from the following two places:

In the US Old Glory has a site – Wars of Ozz Miniatures.

In the UK go to Sally 4th.
2 Regiments of Skeletons (Wars of Ozz)

In the game of Wars of Ozz, there are skeletons that can be part of Winkie brigades. They can be part of other types of brigades as well as allies, though they must be purchased at a higher point cost. There are additional nuances to their use as well.

During my last few games of Wars of Ozz, I had GM’d games with Arella the Witch, the Gillikin Leader. She acted as both a witch and a leader. As a witch, she has a “Raise the Dead” spell that according to the Wars of Ozz rulebook:

When successfully cast, this spell creates one base of skeletons that touches the witch or wizard’s base. This skeleton base gets its own command die. The skeleton base may be combined with other skeleton bases in contact with the wizard or witch to create a “regiment” of skeletons. The witch or wizard may not have more than 5 skeleton bases in the game at the same time.

Wars of Ozz rulebook, page 109, section 8.8, Consolidated Magic Tables

Other witches or wizards (such as lesser ones) may also possibly get this spell when they are set up at the beginning of the game. So, anyone could have skeletons in their forces.

Additionally, as part of the game there is a “Summoning Bell” that could be owned by either Arella or her sister, Evora the Witch, the Empress of the Winkies (but not both). Evora does not have the “Raise the Dead” spell that Arella has in her spell list, but could use the bell. The rules discuss the history of the bell in section 2.2.2.2 on page 24. Its use is more fully described in the Winkies section 4.3.1 as follows:

Evora the Witch created the Summoning Bell. The Winkies and Gillikins often wrestle for control of the bell…the Summoning Bell is led by ‘the Taskmaster’ and is pulled by skeletons…as long as (it is) within command radius of Arella or Evora (it) may execute the equivalent of the ‘Raise the Dead’ spell…

Wars of Ozz rulebook, page 82, Section 4.3.1, The Summoning Bell

The section goes on to describe that if Arella has the Bell she can both attempt to throw the “Raise the Dead”spell and have the bell generate even more skeletons as well.

I do not yet have my Summoning Bell painted, but you can see it on the website here. It’s in my painting queue but not likely next up.

However, I do have Arella and I did need to have skeletons for her in case that she did throw the “Raise the Dead” spell in one of my games. I also knew that having a regiment of skeletons would work to expand my available forces – but also that having two regiments would be even better!

I had some experience in painting skeletons as seen in The Nightmare Legion (my first blog post way back in 2015) and in Grenadier Models Dart Thrower and Undead Crew (130), circa 1984 (from my blog in 2016). Painting skeletons is relatively straighforward, but this time I would try to add the new tool of speed paints to these. Basically, I airbrush primed the skeletons in black, then heavy dry brushed them in white. Then to get a sepia tone on the bones I went with Army Painter “Pallid Bone” Speed Paint 1.0 that I cut 50% with Army Painter “Speed Paint Medium 1.0”. This gave me the tone I wanted without getting too dark. Then I tried to rust up and age all the weapons. As is my habit, for those interested, I do list all of the paints and more that I used on this project at the end of the post.

For the SKU OZZ-314, there are 20 figures – with no regimental commander, so with two regiments that was 40 figures for this project – all cast in metal and 28mm in size. The skeletons are of course infantry and are less affected by musketry (but not cannon). The skeletons are based 4 apiece to a 2″ square base – so five bases for each 20-figure regiment.

The figures came in two pieces – and some minor assembly was required as there was an upper and a lower torso . Assembly was indeed facilitated by my having forceps that could stay clamped down for a brief time on the figures while the Gorilla Glue set.

A skeleton regiment is better than average with a Melee value of 6/10, and an Elan value of 6/10 as well. Where they really shine is at Resolve (not running away from a fight) – with value of 9/10. The unit costs 5 points for the Winkies, and 6 points for everyone else (Winkies get a discount). They are armed with an assortment of swords, hatchets, axes, and pole weapons – all of which I aged and/or rusted up, as you will see shortly. You will also see how I based them so as to mix and match the poses and the warriors’ weapons and the figure types such that no two bases in each regiment were identical.

For basing, I wanted to differentiate between the two regiments for the tabletop. As the Gillikins are purple-oriented, and the Winkies are yellow-oriented, I went with these colors as themes with the flocking. I also incorporated some spikey green flora to hide the middle of the bases where there was a depression between the figures’ bases after early flocking. On one base of each regiment, I affixed two Pendraken 12mm dice frames – one on top of the other – to hold activation dice. Now I’ll share some WIP shots showing what I just discussed.

WIP Shots

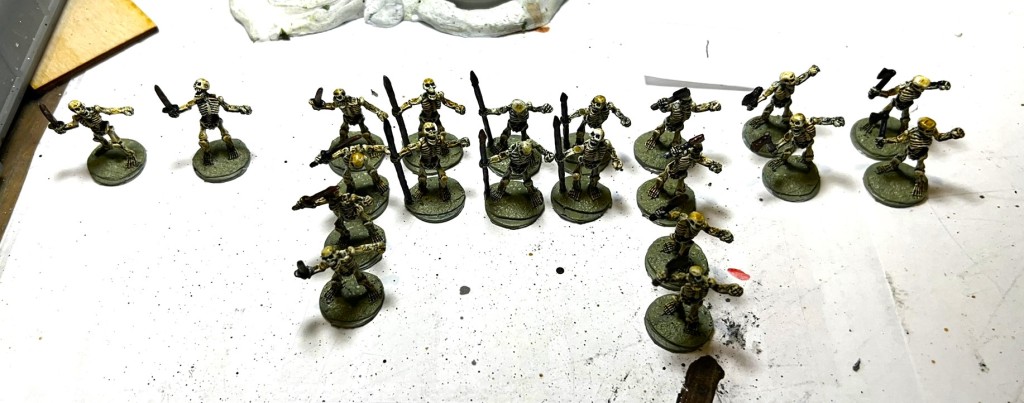
As received.
Each of the two regiments ready for assembly after filing off any mold lines and flash and a giveing the figures a good washing to remove any oils.
Thank you Mr. Forceps! No sticky fingers!
Airbrush primed in black.
Dry brushed in white.
Example of an individual skeleton after being dry brushed.
After the 50% Pallid Bone Speed Paint.

You can see three examples of the Speed Paint effect below. Yes, this is 1.0 and I do have 2.0 as well – but I thought the “Pallid Bone” looked better on swatches.

After varnishing the regiments with my airbrush, and letting that cure, it was basing time. Given the figures are mounted on 2″ square bases, the flocking needed to be done sequentially for best results.

First, I needed determine which types of figures were EXACTLY the same. Many of these had to be differentiated by the placement of the feet on the bases (as differences were slight). The figures did bend easily so between that and affixing different heads it was simple to create unique bases for each regiment.
Then it was time to mock these up on bases before gluing them down. I also needed to find space for the dice frames on one base.
As you can see, I traced out the approximate positions for each figure then glued two at a time to each base. After that had dried, I then flocked the areas outside the two glued figures and the open spaces on the bases. When that had dried, I mounted the remaining two figures per base and continued flocking. I needed to wait for each step of gluing to dry.
The regiments flocked with their final glued flocking in the process of drying.

Now, I will throw you, my readers, a bone – or rather several bones – it’s time for…

Eye Candy

Regiment 1

Base 1A

Base 1B

Base 1C

Base 1D

Base 1E

Skeleton Regiment 1 Group Shot

Regiment 2

Base 2A

Base 2B

Base 2C

Base 2D

Base 2E

Skeleton Regiment 2 Group Shot

Both Regiments Group Shot

These were fun and very quick to do – I started on Sunday November 12th and took the photos of the finished regiments on November 16th. I’m still working on the right combination of lights for my photo booth but am getting a bit better.

Like other units I have shared, these skellies will make excellent allies to other brigades on the tabletop.

My next post will be a surprise to us all as I have actual gaming to do now!

And yes, I still have more Ozz to come…

Miscellaneous details and references for those interested in that sort of thing:

For all of my previous posts on Wars of Ozz games, figures, units, and other related projects – please see this page.

PAINTS, INKS, GLAZES, SHADES, WASHES, PIGMENTS, FLOCKING, GLUES AND MORE THAT I USED ON THE FIGURES FOR THESE TWO SKELETON REGIMENTS:

  1. Gorilla Glue
  2. 3/4″ steel washers
  3. Poster tack
  4. Vallejo Black Surface Primer
  5. Vallejo “Flow Improver”
  6. Vallejo “Airbrush Thinner”
  7. Vallejo Model Color “White”
  8. Army Painter “Speed Paint Medium 1.0”
  9. Army Painter “Speed Paint – Pallid Bone 1.0”
  10. Vallejo Model Color “Dark Sea Grey”
  11. Army Painter “Speed Paint – Runic Grey 1.0”
  12. Army Painter “Speed Paint – Gravelord Grey 1.0”
  13. Vallejo Model Air “Bright Brass”
  14. Vallejo Model Air “Black Metallic”
  15. Vallejo Model Air “Steel”
  16. Vallejo Mecha Color “Dark Steel”
  17. Citadel “Nuln Oil” (wash)
  18. Battlefront “Tommy Green”
  19. Vallejo “Thinner Medium”
  20. Vallejo Mecha Weathering “Rust Texture”
  21. Vallejo Mecha Varnish “Matte Varnish”
  22. Vallejo Mecha Weathering “Dark Rust Wash”
  23. 2″ square steel bases from Wargames Accessories (#21)
  24. Elmer’s PVA Glue
  25. Pendraken 12mm dice frames
  26. Army Painter “Battlefield Field Grass” (flocking)
  27. Battlefront “Sherman Drab”
  28. Gamer’s Grass “Spikey Green” (flocking)
  29. Army Painter “Wilderness Tufts – 4mm” (flocking)
  30. Army Painter “Meadow Flowers (yellow)” (flocking)
  31. Gamer’s Grass “Yellow Flowers” (flocking)
  32. Shadow’s Edge Miniatures “Dark Forest Plum Flowers” (flocking)
  33. Shadow’s Edge Miniatures “Dark Forest Purple Flowers” (flocking)

Again, as you may want to check out the Wars of Ozz figures’ range – there are two places to get them (and I make no money from this btw). The game rules and the figures are available from the following two places:

In the US Old Glory has a site – Wars of Ozz Miniatures.

In the UK go to Sally 4th.
Frank Tank Rants

musings of a fat old bloke on tanks and wargames

Dragons of Lancasm

Games, miniatures, painting, books and more games

Tiny Painted Heroes

The Adventures of a lifelong Tabletop Gamer, Game Design hobbyist, and full-time Software Engineer

Home of the Grumpy Gnome

Tinkering with Artwork and Ideas

Steve's Paint Brush

Grimdark model making and mini painting

Wargamesculptors Blog

Life, Golf, Miniatures, & Other Distractions

Dead Dick's Tavern and Temporary Lodging

Life, Golf, Miniatures, & Other Distractions

Guru PIGS Blog

Guru's thoughts on wargaming, life, and the universe!

Wisely lead... without a head!

History, Miniatures and Wargaming

Kuribo's Painting

Fallout, MESBG, and Hellboy Painting, Terrain, Dioramas, and Battle Reports

Don't Give Greg Ideas

Seriously, just don't

War Across the Ages, and other dark horrors

A discussion of miniatures collecting, painting and gaming.

Classic Warhammer 40K

Painting diary focused on Warhammer 40K 2nd ed., 5th ed. WHFB, related GW games, and miscellaneous whimsy

Colonel Mustard

WW2 Modelling in 1/72 Scale

Bogenwald

Random painting and terrain making.

Pat's 1:72 Military Diorama's

Scale diorama tips and ideas

Arcade Dreams

Building the Arcade Dream

P.B.Eye-Candy

Phil's 20th century wargame pages

SP's Projects Blog

A futile fight against entropy or 'Every man should have a hobby'? Either way it is a blog on tabletop wargames, board games and megagames

30mmdave

Wargaming Plausible reality?

Faith&Steel

dave's gaming adventures: faithandsteel.wordpress.com

The Imperfect Modeller

Miniature Figure Painting and Diorama Modelling

Double Down Dice

Painting miniatures and rolling dice!

Just Needs Varnish!

My ongoing wargames projects!

miniaturepopcorns

Sculpting some worlds

Despertaferres

Wargaming with the ability of a dull nine year old

Dawn of the Lead

Miniature wargaming and the occasional zombie

Rantings from under the Wargames table

Wargames, Figures, Sculpting and Converting Miniatures

Simple as War

Miniatures & Terrains

Buck's Blog

Life, Golf, Miniatures, & Other Distractions

IRO aka Imperial Rebel Ork

- I model - therefore I am -

Azazel's Bitz Box.

Painting, Modelling, Miniatures, 1:6, Games... Whatever else I find interesting.

diggingforvictoryblog

Smallholding and Wargaming.......not always at the same time!

Shamutantis

Nørdblog numero uno

Harry Heckel

Writer/Game Designer