
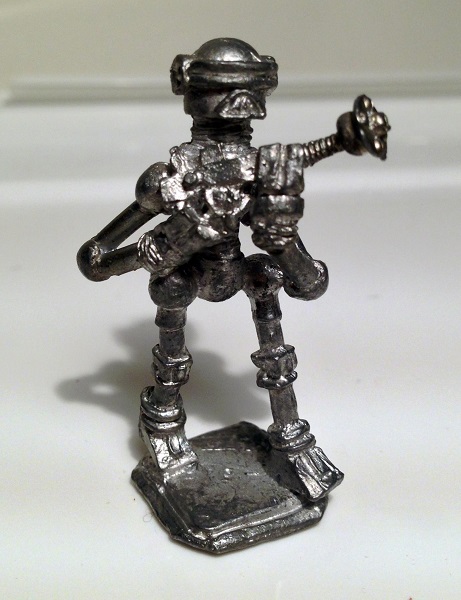
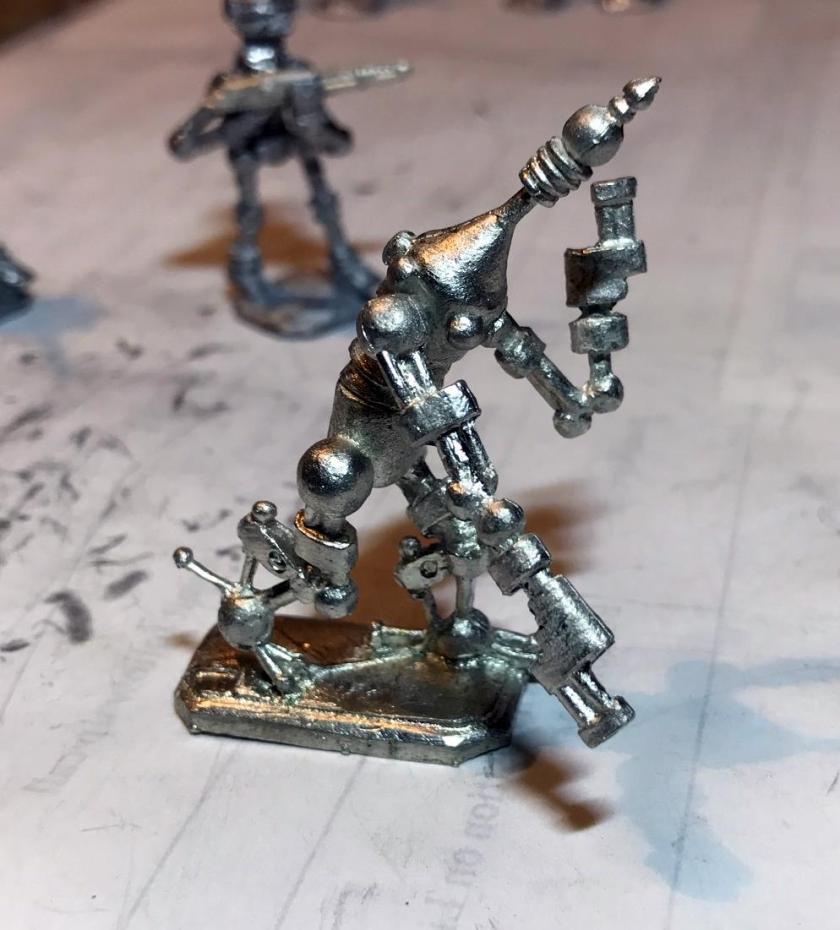
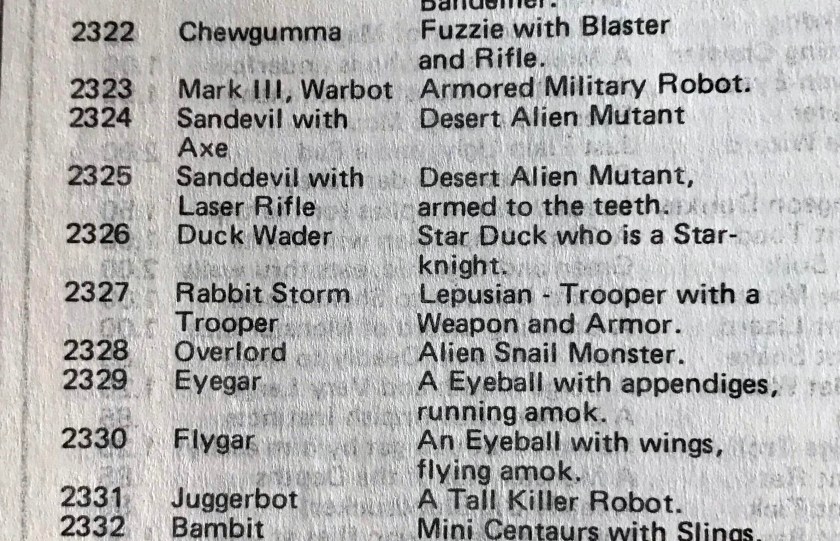
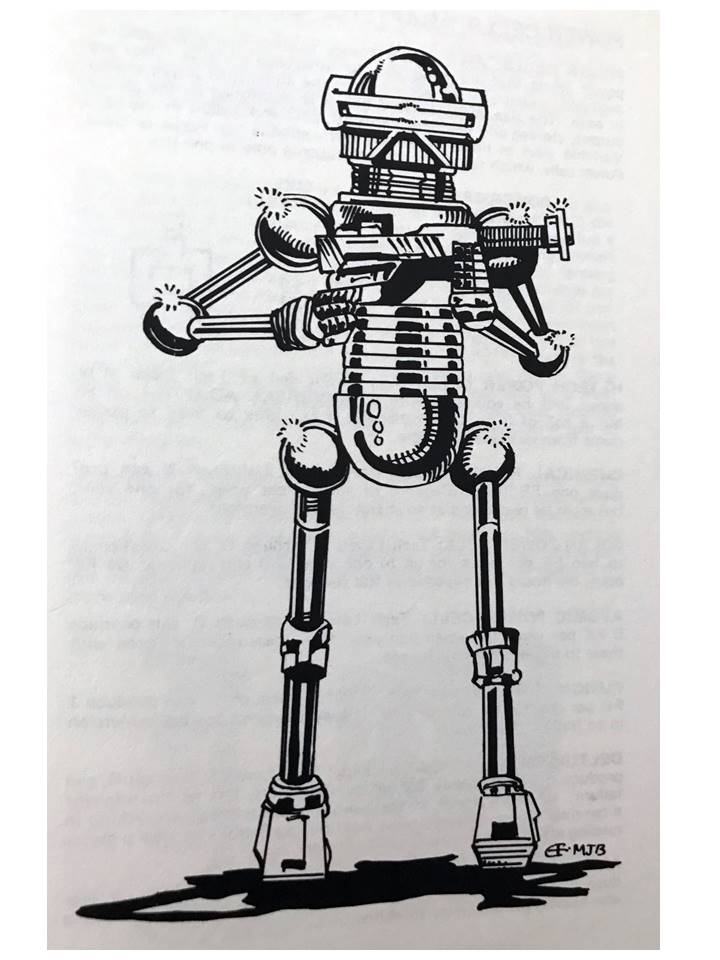
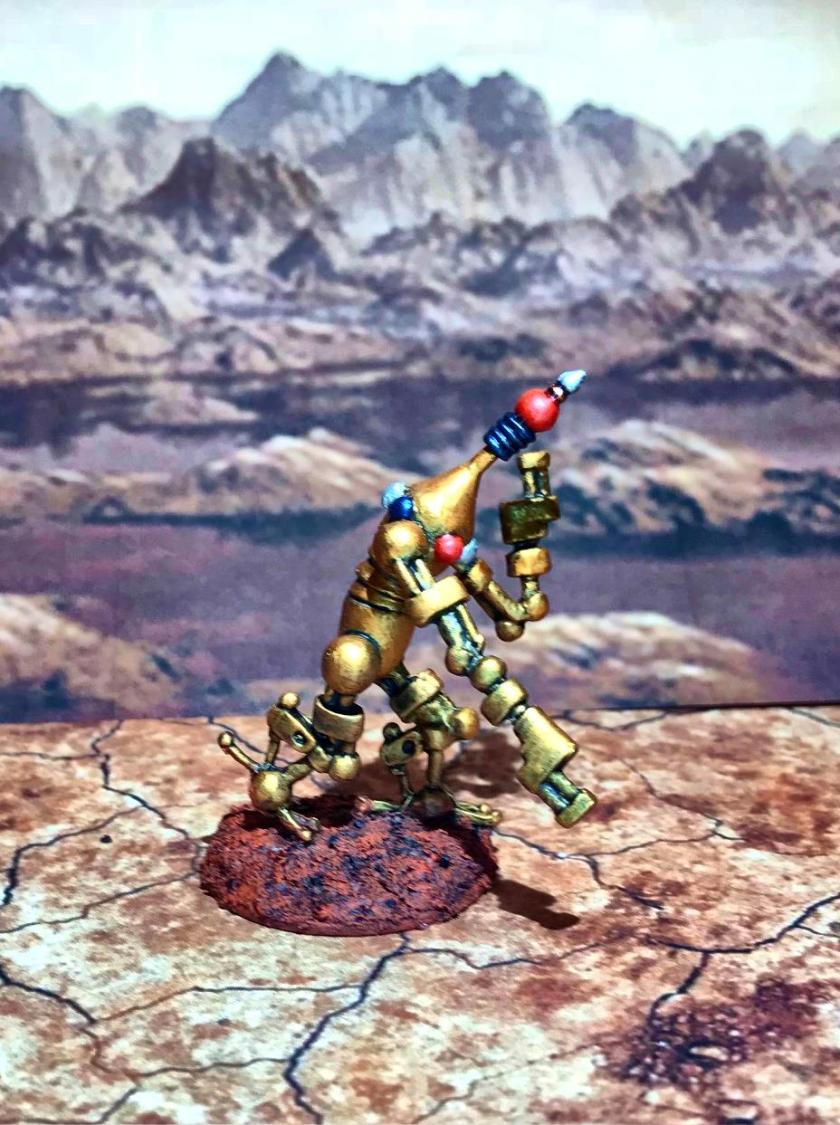
Followers of this blog may have wondered where I have been, why have I not been posting? Well, I have been working on building a platoon of Archive Miniatures “Mark III Robots” (#2323). The platoon will be led by Archive Miniatures “Juggerbot” (#2331). Both of these sculpts are from the vibrant imagination of Nevile Stocken, who was way ahead of his time with his work. Given that these figures were from the late 70’s and early 80’s, I have to think that they were inspired (especially the visors) by the original Cylons from the 1978 TV series Battlestar Galactica. I loved that show when I was a kid! So, I had to make them shiny!

These will be used in upcoming games using the Combat Patrol™ set of card-based rules. The figures are effectively 25-28mm, being large robots (larger than humans).
This long project started with making a mold and casting 38 out of the 40 Mark III Robots as described previously here. I wish that I could have just bought them, but my time machine is broken…and that made purchasing them an impossibility. The platoon will have 4 squads of 10 (5 per team), plus 4 squad leaders, and Juggerbot – so the platoon is composed of a total of 45 figures.
The original Mark III’s (there were no Mark I’s or II’s!) were from the Star Rovers line of figures made by Archive in the 1979-1981 timeframe. They are very tough to find on eBay or anywhere else. I managed to acquire two originals, but only one was fully intact, and it became the master for my recasting efforts. The other original I converted with another weapon.
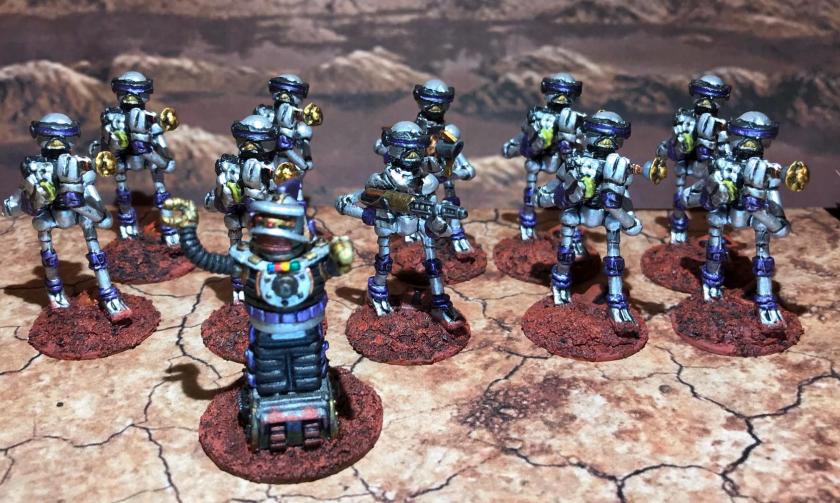
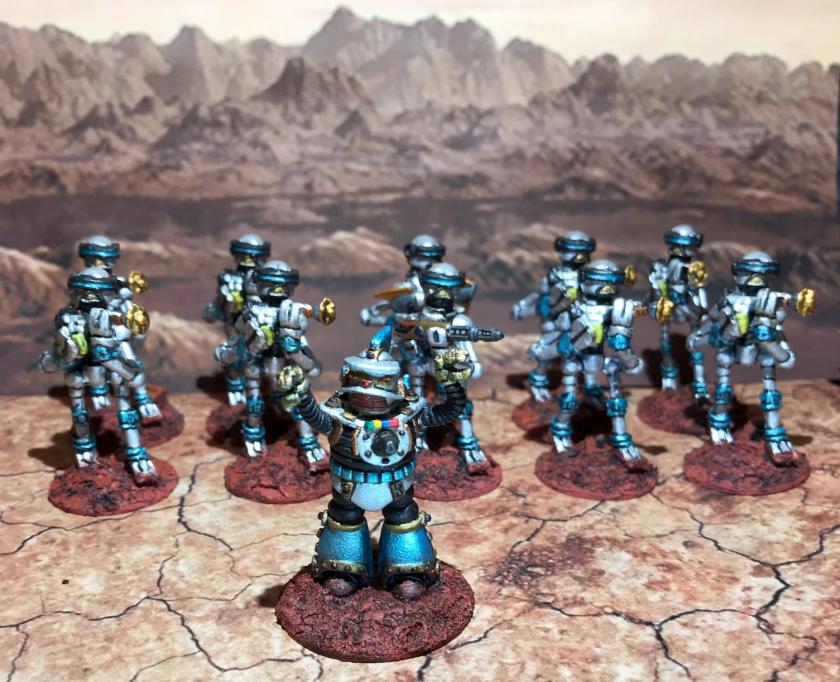
I found the Juggerbot kit on eBay, and decided that it would make an excellent platoon leader. For squad leaders, I have four War Games Supply Dump Khang Robots that were previously described in this blog here. Each Khang is color-coded (red, green, blue, and purple), and each squad in my platoon follows that scheme. Each Mark III Warbot Squad consists of the Khang Squad Leader, and two teams of five Warbots.
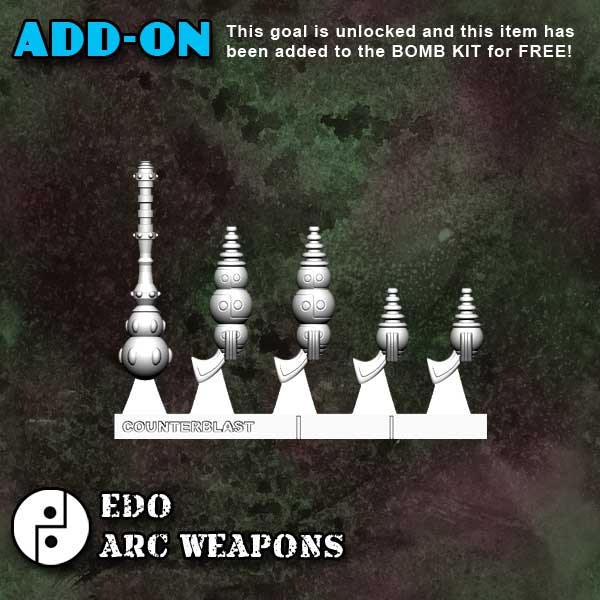
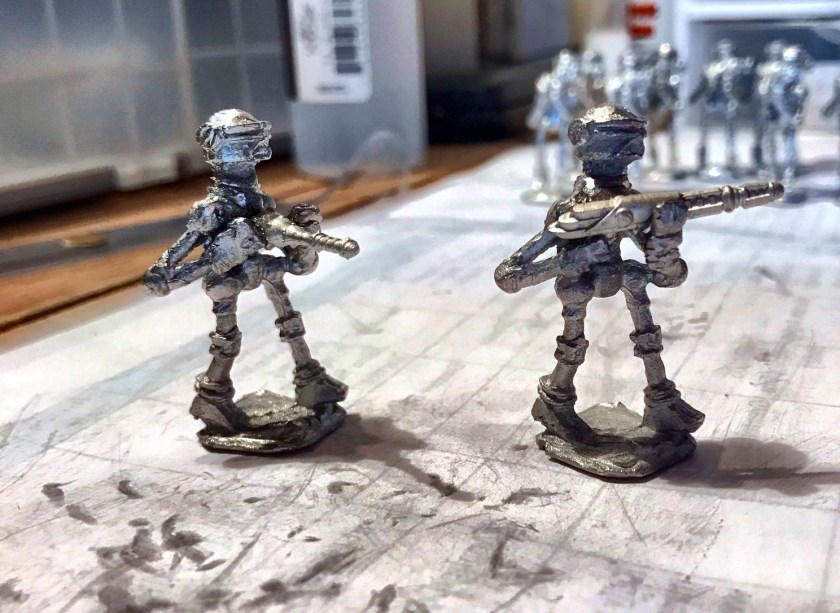
I converted one Warbot per team with a special weapon. Each squads’ Team 1 had a conversion with Bombshell Miniature’s “particle beam weapon” (BOM36016). I gave the Team 2’s two different weapons each. Two teams got Bombshell Miniatures large “arc weapon” as their conversion, while the other two got a large War Games Supply Dump retro sci-fi weapon from the WP01 “Weapons Pack 1”. All of the conversions I did were with these weapons, which are no longer available from either Bombshell or the now-shuttered War Games Supply Dump.
Conversion of these figures, as well as cleanup in terms of cutting and filing were major efforts in this project. I use mostly tin (about 67%) in my casting, and this made sawing away and filing pieces from them tedious as they are not as soft as a higher-lead alloy would be. Still, I was able to convert 7 of my castings plus the extra original for a total of 8 conversions. In most cases, I needed to bend the arms to accommodate the new weapons. My concept was for Team 1 to have one Warbot with a higher rate of fire weapon, while the Team 2’s would have specialized breaching or anti-armor capabilities.


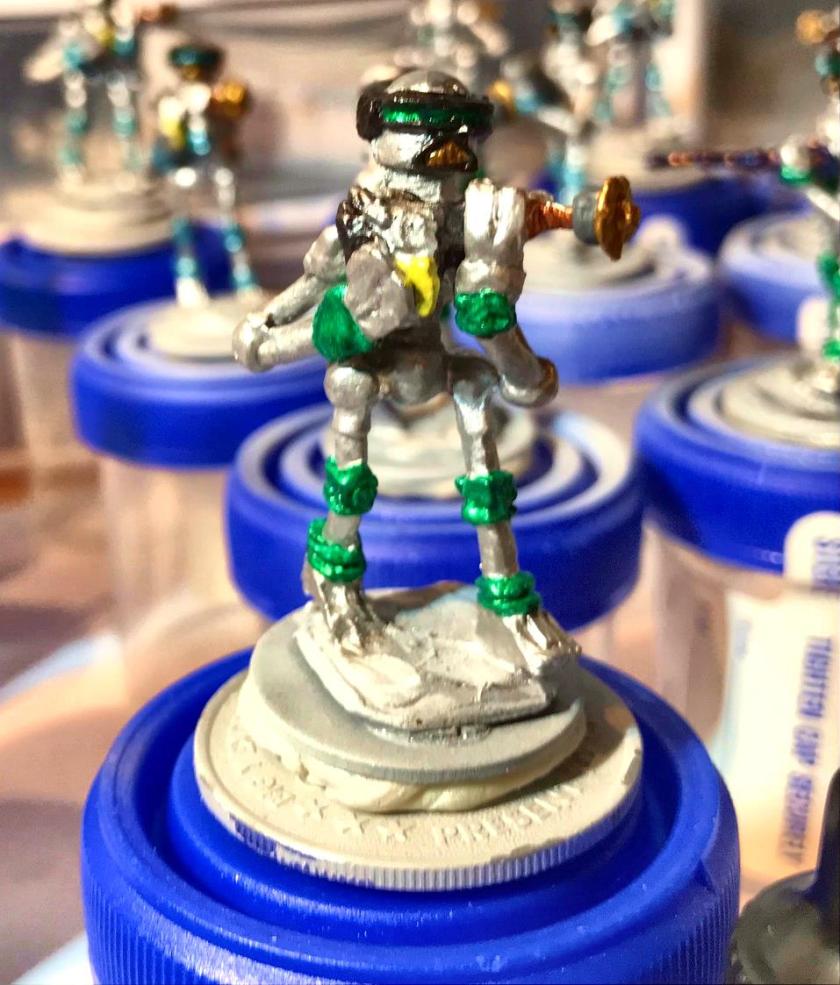
After cleaning up the figures, I made a plan to complete the conversions. I also wanted to try a few new things in making this platoon. I wanted to use my new airbrushes and spray booth, and I wanted to use poster tack on specimen bottles and grocery store coins to have greater ease of painting with both the airbrushes and traditional brushes.


After all of my conversions were complete, I mounted the figures on steel washers for eventual magnetized storage. I had to use a bigger washer for Juggerbot. The platoon was then affixed to outdated grocery store bonus coins and specimen bottles or just to the bottles themselves with poster tack. In the future, I will not use the coins, as it was just easier to use the bottles minus the coins. I used an Aztec airbrush to prime the figures with gray Vallejo “Surface Primer”, giving the figures 24 hours to dry. I had read that doing that is desirable so that this primer paint can harden.

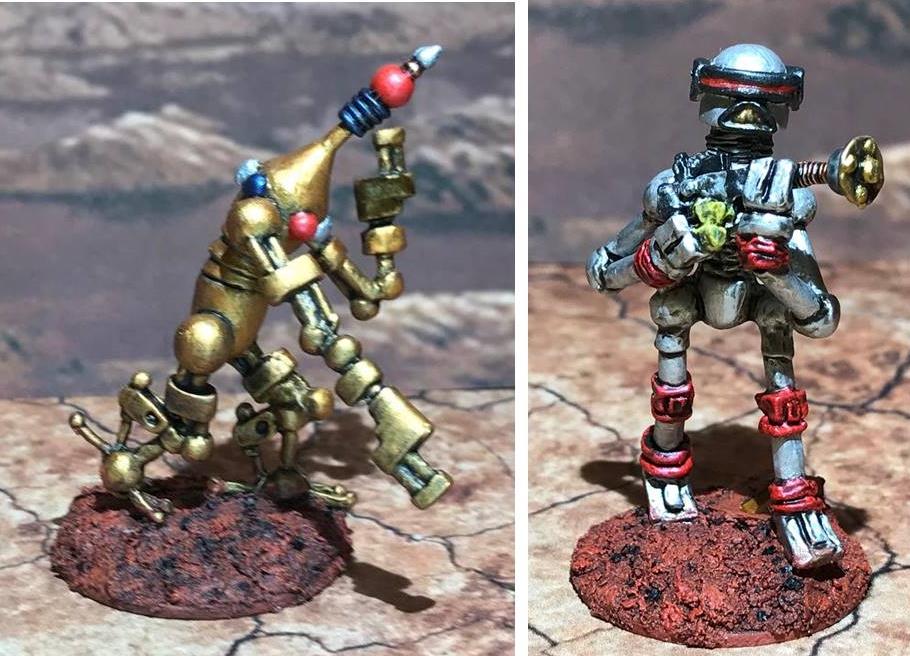
I then used Createx “Wicked Aluminum” airbrush paint (very sparkly) to base coat the Warbots using an Iwata Eclipse air brush – and I found this brush to be a much easier tool than the Aztec. I used Vallejo Model Air “Gold” to base coat Juggerbot with the airbrush.


I saw that the Createx paint had given the Warbots the appropriate shiny starting point for further development of the paint scheme I wanted, which was to be very retro sci-fi metallic, and reminiscent of the Cylons. Then I went back to the regular brush!
For my color schemes of red, blue, green, and purple on the Warbots, I went with DecoArt “Festive Red”, “Peacock Pearl”, “Crystal Green”, and Craftsmart “Amethyst” respectively. These metallic paints are great, but thick, and not easily thinned. Still, they worked well and I put these colors on the ankle, knee, and wrist joints for ease of tabletop play. I chose to use them as well for the visor interior colors, with Vallejo Model Air metallic “Black” for the outer parts of the visors. I then used “Gold” for the Warbot voice boxes and weapons tips on the unconverted troopers. “Black” was my choice for the rest of the weapons, offset with Vallejo Model Air “Steel” and Martha Stewart Crafts “Duckling” (this was a nod to my friend Buck Surdu, whose love of all things ducky and his take on the Mark III Warbots helped me plan out my approaches here).
For the common weapon barrels, I employed Vallejo Model Air “Copper”, and complemented them with Vallejo Model Air “Medium Gunship Gray”. Juggerbot had several lights on him, so Vallejo Model Air “Arctic Blue” and “Signal Red”, and “Aluminum” helped me with these details. I used these as well on the conversion weapons.
I then used several applications of Citadel “Nuln Oil Gloss” and “Black” on Juggerbot to shade the recesses of the figure. Moving back to the Warbots, I used “Aluminum” on the bodies, then similar to what I did with Juggerbot, I shaded with “Black” and “Nuln Oil Gloss”. Interestingly, I found that the inks really rolled off the figures, and the “Black” paint really helped with the shading.
I then added a healthy coat of Citadel “Ardcoat” to all visor and lighted surfaces. As a final highlight for Juggerbot and the Warbot weapon tips, I used Citadel “Retributor Armour”.


I decided that I wanted to be able to differentiate between the two teams within each squad. To do this, I experimented with kneadatite (green stuff) and Apoxie Sculpt and some numbered stamps. I found that the Apoxie Sculpt was easier to form, stamp, and once dry, cut. I applied these numbers to the figures’ bases with Gorilla Glue.

I used Citadel “Imperium Primer” on the Apoxie Sculpt numbers, then added Citadel “Martian Ironearth” to them. Then, I built up the bases with Citadel “Martian Ironcrust” with a light sprinkle of Army Painter “Black Battleground” for more texture. After using both “Ironearth” and “Ironcrust”, I dried them to a crackly surface with a hand-held hair blow dryer. I highly recommend this technique.
After a day of drying, I dry brushed the bases with Armory’s “Red Brown” and “Brick Red”. I filled the numbers in with “Imperium Primer” for all troopers, with the team leaders getting “Retributor Armour” on theirs. Then it was back to the paint booth for two coats of varnish, this time with an Iwata Neo airbrush, allowing for adequate drying between applications.


I now needed to remove the figures from the bottles and coins. The poster tack was easier to remove when I did not use the coins. I lightly painted the underside of the bases with Craftsmart “White” so I could use a black fine-tipped Sharpie to write information on the figures’ bottoms.


I cannot express enough how much I like this platoon! The figures started off pretty rough, but in the end, I was able to make a nice unit for tabletop gaming. It did take me a couple of months, but it was worth it. They will be in action this upcoming weekend, as they make their tabletop debut – stay tuned, and let me know your thoughts below!

Wow, talk about worth the wait – these guys are brilliant! Love it mate, what a wonderful and unique battle force 🙂
LikeLiked by 1 person
Thanks Alex! I can’t wait to get them into play!
LikeLiked by 1 person
Nostalgia and robots, what’s not to like! Can see why it’s a while since you last posted! Really like the finish you get with your metallics. Looking forward to seeing this lot in action!
Great stuff,
John
LikeLiked by 1 person
Thanks John. Been trying to experiment with different metallics for Retro Sci-fi, glad you like them!
LikeLiked by 1 person
Great work, Mark – an epic project and an entire army showcase in one post! Awesome, impressive stuff here. Do you have any plans to expand them in the future. I feel like Mantic Games’ Mars Attacks “Giant Stompy Robot” would fit right in with these guys.
LikeLiked by 1 person
Thanks Azazel! I may expand them in the future, but I have other platoons that I plan to do, such as Space Phraints, Space Roomans, Space Centaurs, Dragonspawn Infantry, and Retrovians, Khang and more! Also have a few old Critter Commando forces. I really like that Mantic Robot, very cool, and might buy…but first need to finish more of the unfinished stuff, most of which I cast. Appreciate the kind words, especially from such a talent as yourself!
LikeLike
Sounds good, Mark! Just that I believe the GSR is now OOP, so chances to grab one will be getting smaller. Maybe you could get a lucky Black Friday find, though… 🙂
LikeLiked by 1 person
There’s also some really cool stuff from Hydra Minis too…so many Minis, so little time!
LikeLiked by 1 person
Another impressive project! I really like these guys and their metallic paint jobs.
LikeLike