

I have been collecting various examples of the long-defunct Archive Miniatures Star Rovers line of figures from 1977. This month, I have had some health issues that precluded being able to sit down (long story and a pain if you know what I mean). Therefore, I chose to work on making molds and casting, focusing on Star Rovers, which is something I do standing up.
My overall goal is to create squad-sized units of these “lost” but very cool minis. I want these to set up and play games of Buck Surdu’s Combat Patrol™, as well as to see if I can create a scenario using the Star Rovers figures that I have collected. Combat Patrol™ was created as a WWII skirmish card-based miniatures rules set, but it has been successfully adapted to other historical periods as well as Star Wars™ scenarios. To learn more about Combat Patrol™, click here.
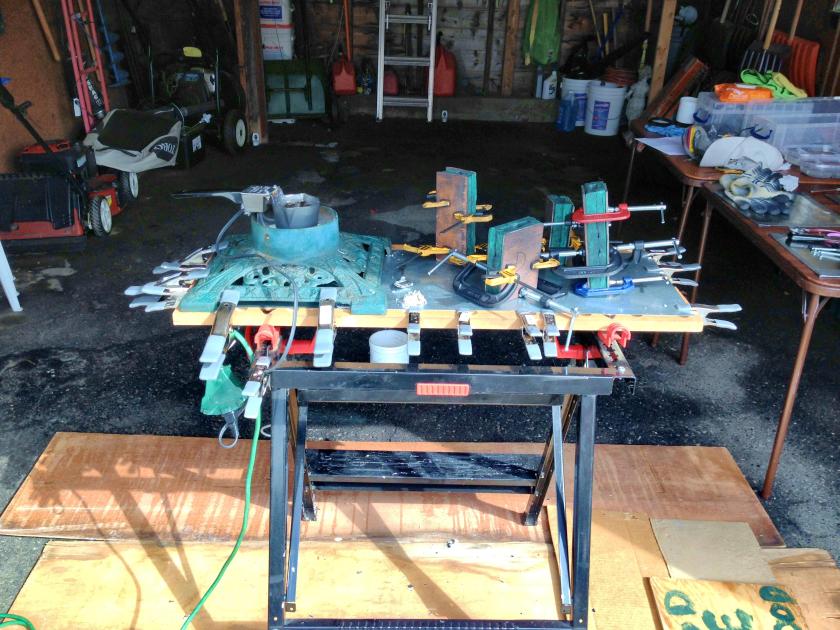
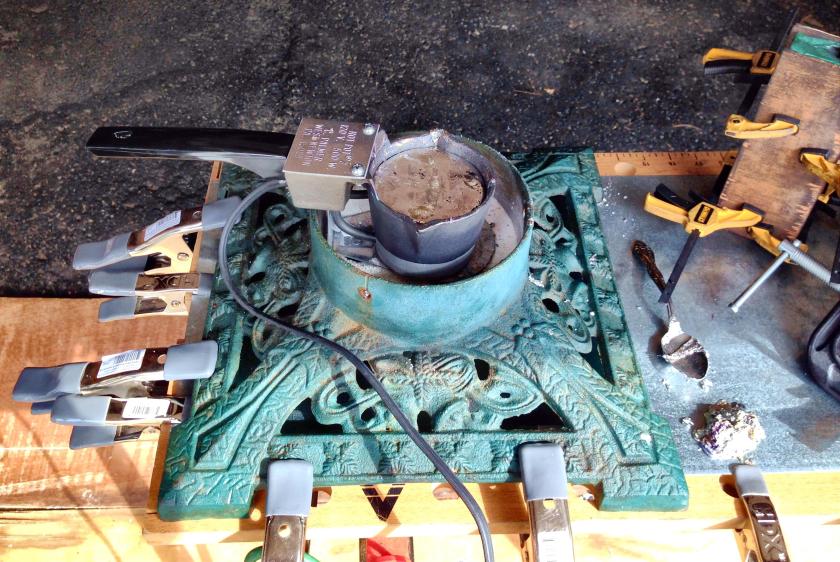
Before I get to the figures and the making of the molds, I wanted to share information about my casting set up. I basically use pewter and I use a Hot Pot 2 crucible with a Lyman pyrometer to measure the alloy’s temperature.
I also use appropriate safety equipment!
The Hot Pot 2 holds about 4 pounds of molten metal, and is used for making bullets, fishing sinkers, and miniatures. Unfortunately, it comes with a tripod stand which teeters and is prone to tipping. Why the manufacturer did not use four legs on the stand for stability is beyond me. After a couple of spills (where I dodged the 650° F contents and had a lovely clean up) I was determined to have a new set up. Currently I have 1′ x 1′ steel sheets clamped to my old Sears Craftsman® work bench that I have had for close to 30 years. My friend Jeff Smith came up with an idea that proved to be a great fix. He had an old cast iron (heavy) Christmas tree stand he was not using. I filled the large holder with play sand to raise the bottom up and put the tripod into the sand in the tree well. This provided great stability and rendered the set up virtually spill-proof. I clamped the tree stand to my work bench (after extending my bench depth about an inch). This worked great and I am very happy with my new casting set up.
Now I need to step back – I made four molds for five figures this month using Castaldo® QuickSil RTV Jewelry Molding Compound. These Star Rovers figures were:
- Archive #2064, Hurraku, Space Phraints
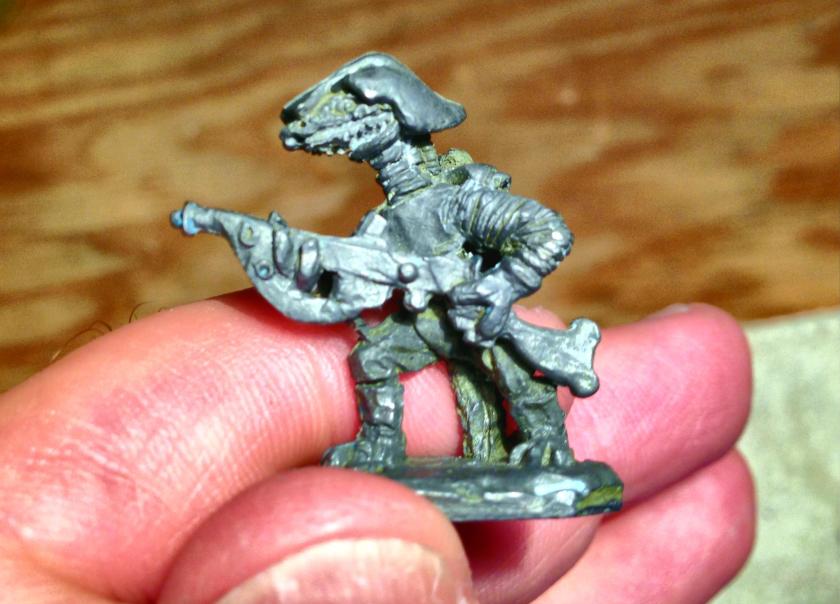
- Archive #2075, Mark III Warbots
- Archive #2020, Space Centaur Officer with Pistol
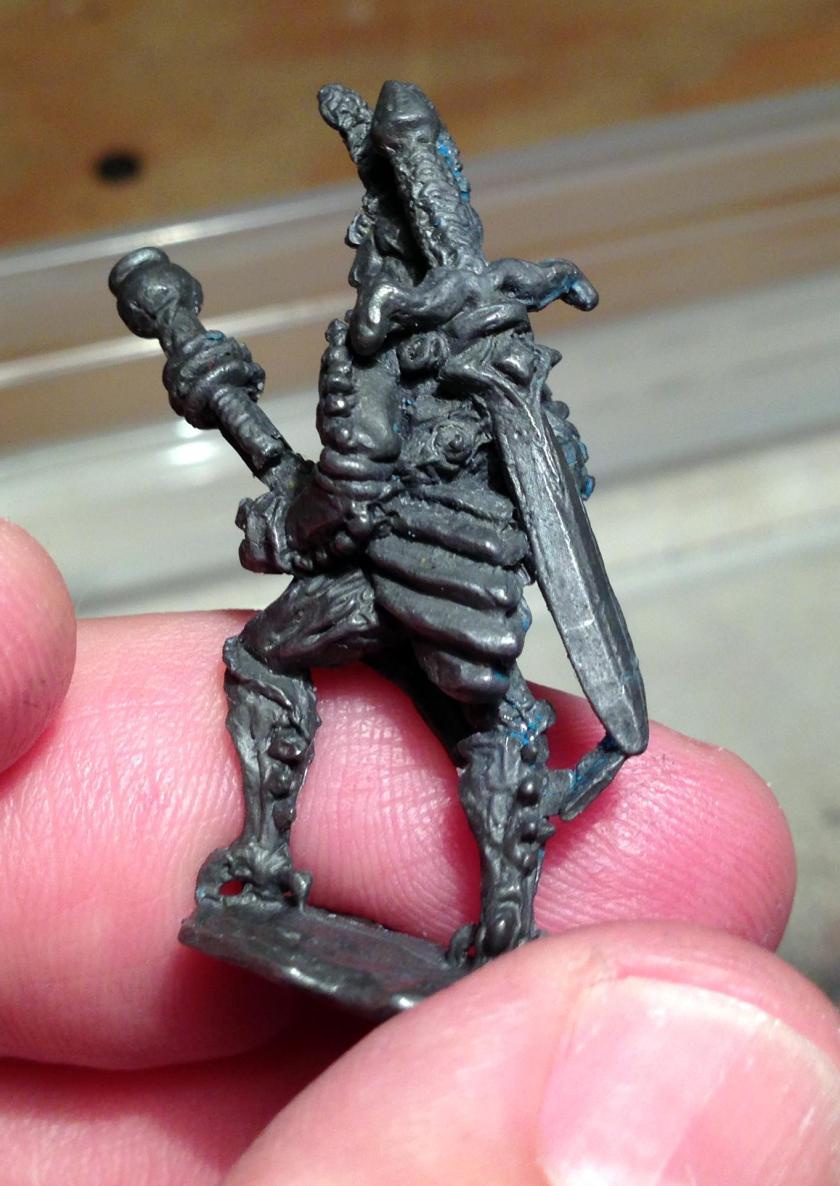
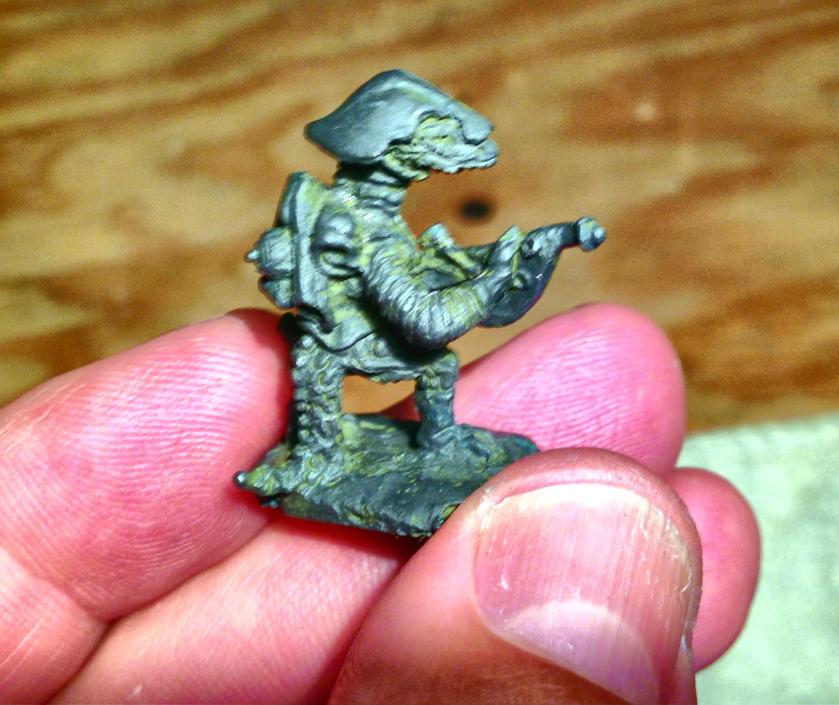
- Archive #2050, Dragonspawn Advance Guard, Lizardaen
- Archive #2052, Kneeling Dragonspawn Trooper
To learn more about the Archive Miniatures Star Rovers line click here.
I cannot find any reliable sources to buy these figures – I only find them sporadically on eBay. This is why I recast them for personal use and for gifts.
My first mold in October was for the Space Phraints. These are 9 foot tall emotionless insect men that were in the old Arduin game. These are armed with huge swords and a ray gun.
I found a nice synopsis on Phraints from Saundby.com that you can see here. The photos below show the original I got on eBay (the blue clay you see came from the mold-making process and is easily removed).

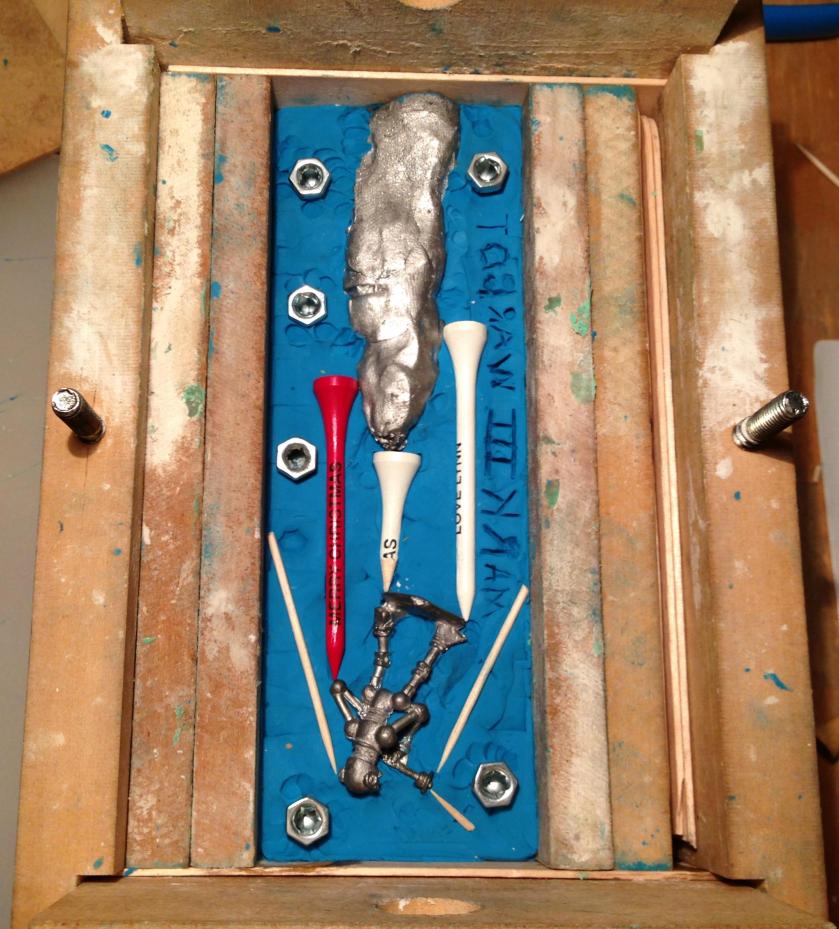
Below is the first mold half set up for the Space Phraint. I used an old metal mold plug to create my flow aperture along with some golf tees my wife gave me a while back for Christmas. I also used toothpicks to create air flow vents and release points for better casting. I also wrote a mirror image of the word “PHRAINT” on the clay. The QuickSil is measured and mixed and put into the mold press for curing. I generally wait 28 minutes for it to cure – and I use a hand-held hair dryer to warm the outside of the press to assist in curing the RTV (room temperature vulcanizing) compound.
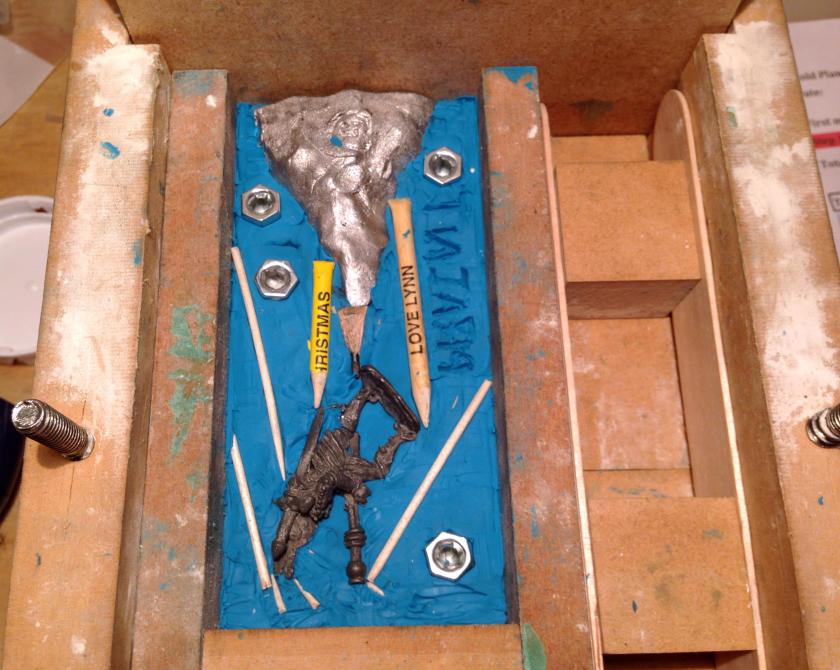


I then put the first half back into the mold press, applied a releasing cream to any wooden surfaces of the press that QuickSil would touch as well as the green set up rubber RTV. I then measured and mixed more QuickSil and repeated the process. After I made the mold, I cut out wooden backings for the mold from 1/8″ plywood using my scroll saw.
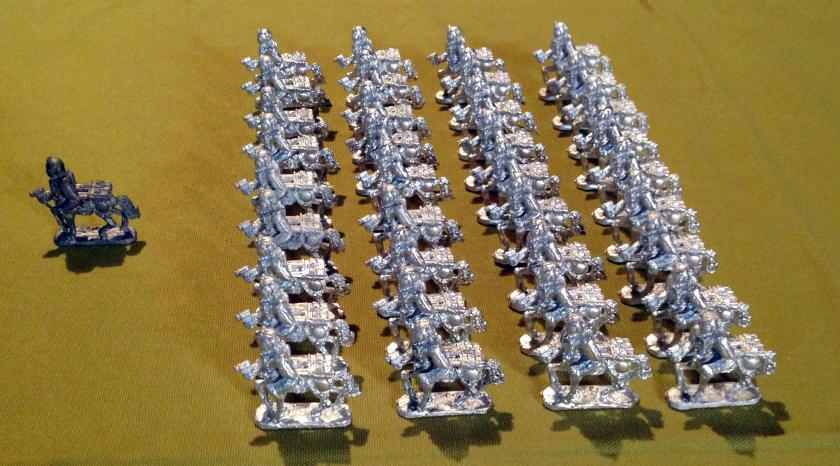
The Space Phraint mold was very successful and needed little modification during the casting process. I was able to cast 42 figures from this mold.

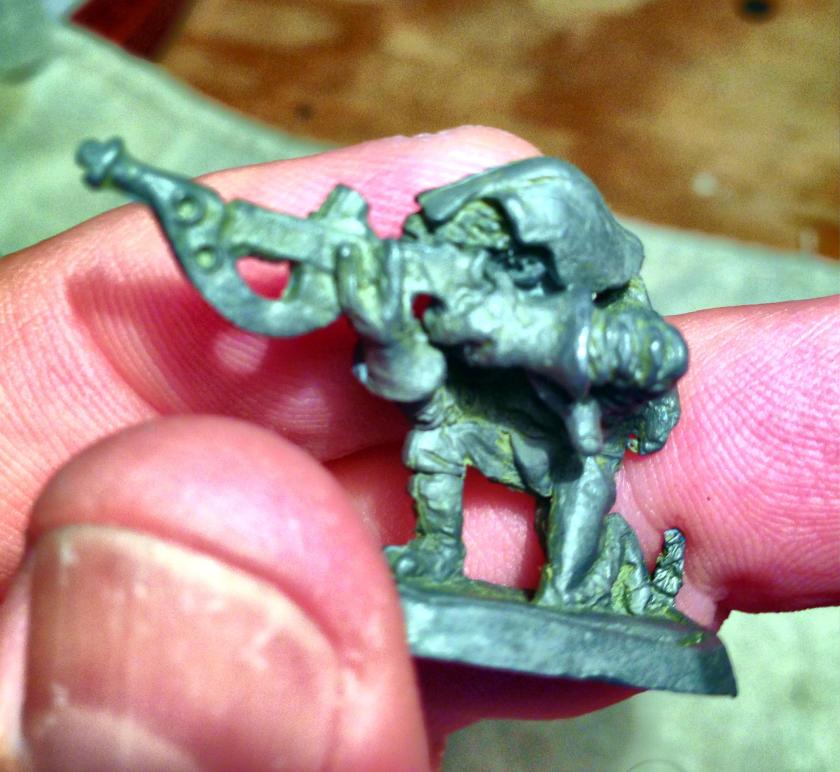
The next mold is a Mark III Warbot. As far as I can tell, there are no Mark I or II’s in Star Rovers! He is clunky and retro looking, with a very cool ray gun/blaster. He reminded me of Bender from Futurama, though he was created in 1977!


I followed a similar process in making this mold as described above.

This also was a successful mold. I cast 42 figures using it.

I then moved onto the Space Centaur, who has rocket packs on his back, but is only armed with a laser pistol! This was my first try at making a mold of a four-legged creature. The mold itself needed more tweaking during the casting process than I like in terms of cutting vents and opening up spaces. I believe that I should have used more of a cone-shaped pour aperture for the mold. Here I used a small hotel soap and golf tees to shape the pouring well – and I think that works less effectively than a cone. I also had leaking issues with the mold initially. I solved these with adding more C-clamps when casting.
I was able to cast 36 figures with this mold.

The last two figures that I worked on were Dragonspawn Infantry. There were actually three made by Archive, but I do not have the prone figure, only the crouching and kneeling ones. My guess from these pictures is that they were originally painted but then stripped.

I tried a new mold design – two figures in one mold. I wanted to see if this would be more efficient. It was not, primarily I believe that the cone aperture design works better, especially a tall one. Here I used another hotel soap and golf tees – and I had a lot of casting failures with this mold. With some adaptations during the casting process (making the pouring aperture and tees wider), my success rate improved, but the overall mold leaked a lot and was a pain to work with. At one point, some of the RTV came off in a figure, but this did not seem to be a major issue with subsequent castings.

I was able to cast 24 good figures of each type, but I probably had a 50% failure rate overall.

I cast 168 miniatures in total with the four molds. Some I am giving to friends, while the rest I an putting into the painting queue.

I learned some new things about the process, and got a new casting set up that is much safer. My next casting will be in a few months – I really want to start painting now that the weather is turning colder, and get them into a Combat Patrol™ game!

I really enjoy these casting posts of yours, Mark. Very cool stuff to once again see how the sausage is made!
LikeLike