

Sounds like a good concept for a reality show doesn’t it? Circa 1520 or so…
Actually, it’s my latest attempt at adding another structure to my Aztec terrain/buildings for games of Feudal Patrol™ in Mesoamerica (using my Civilizations Collide supplement). There have been a good number of buildings from me lately (which is why I did my contest). There is also a link at the end of this post on all of my project terrain and miniature builds for it.
And this particular post is dedicated to Ryan MacRae and Chris Rett. Why?
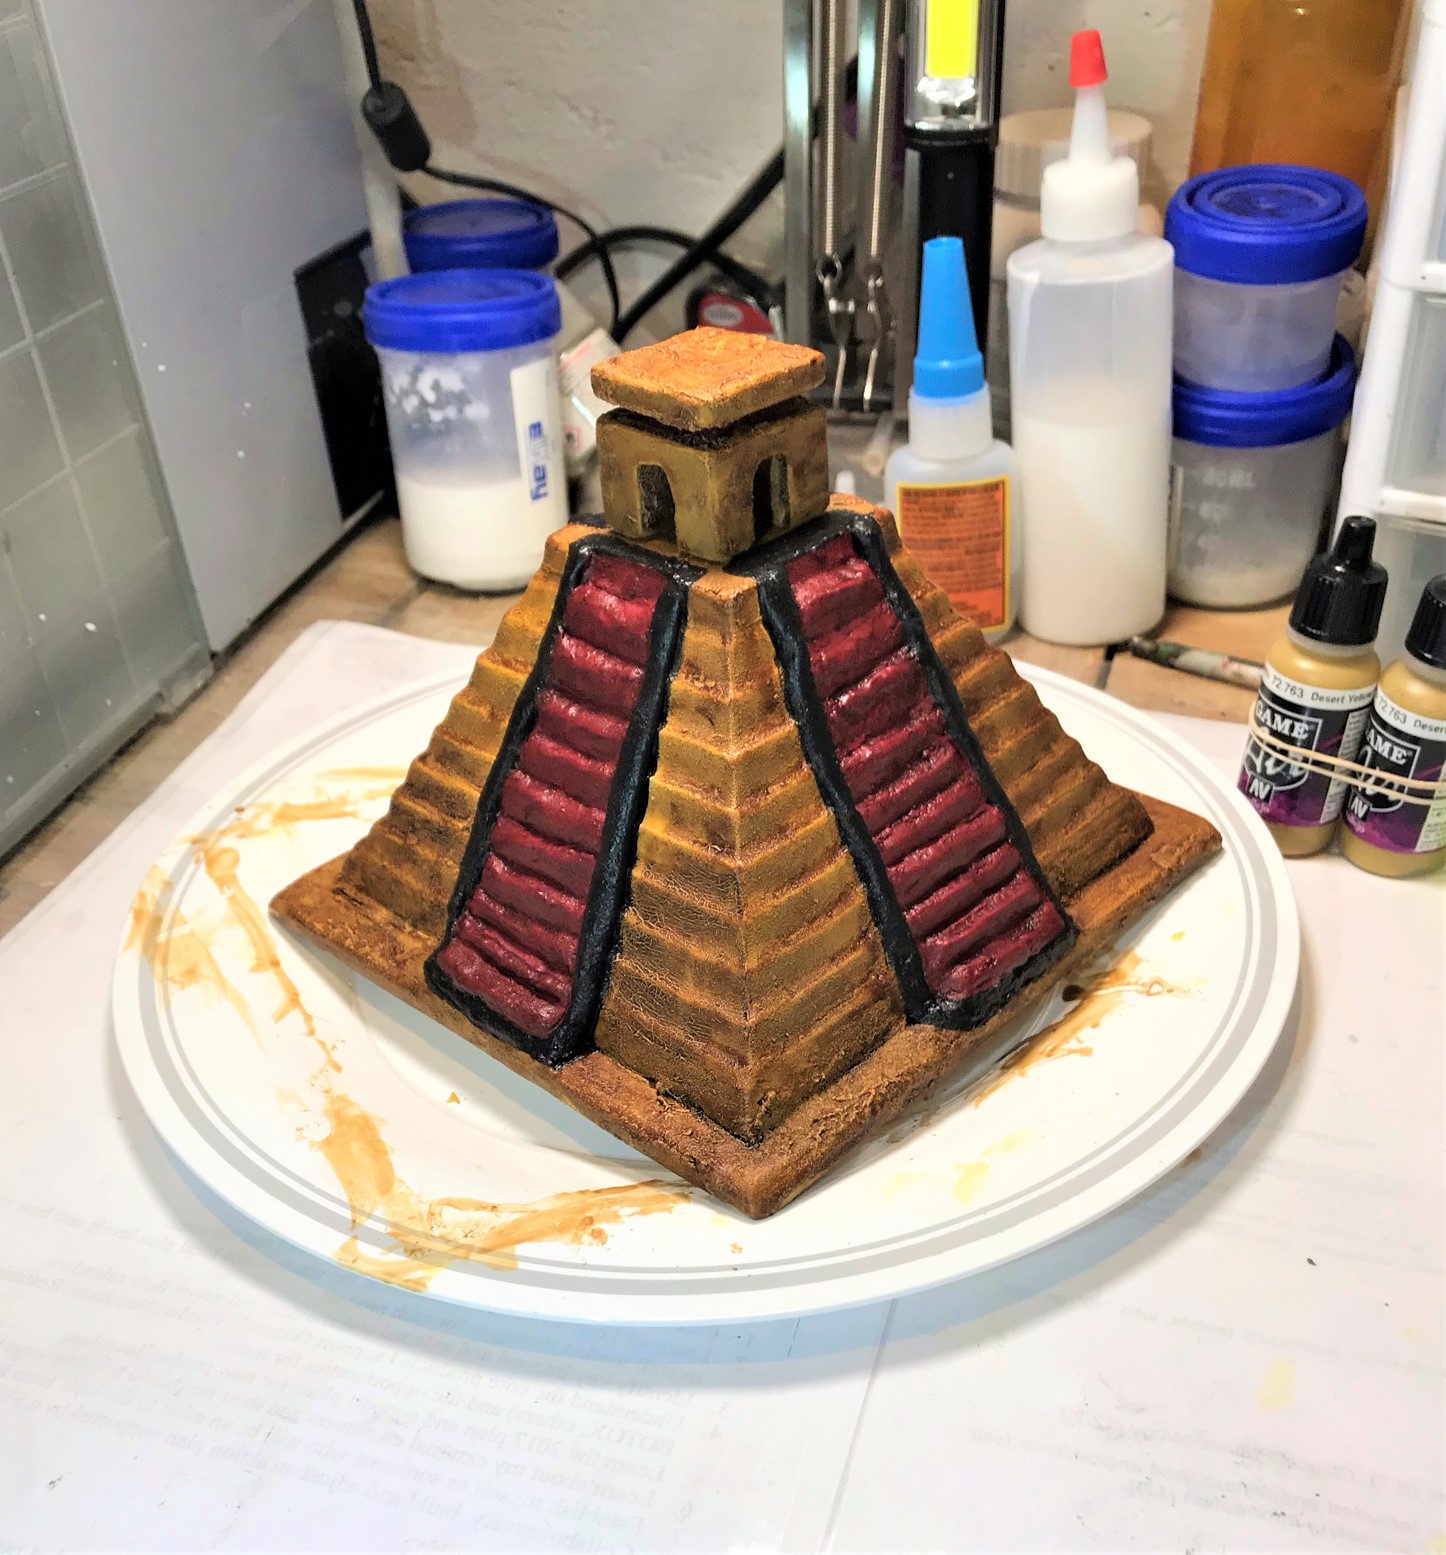
Well, this temple piece has a somewhat unclear past. It was given to me by Ryan MacRae and Christopher Rett. It was left over from their back room cleanout at the Great Stories store in Uxbridge, MA. Ryan said it was maybe originally found in his dad’s garage? Was it a souvenir? A kit project? A piece for a terrarium or even an aquarium? Who knows. All I saw in it was potential as a reasonable secondary temple-type building for Tenochtitlan. It was in two unconnected pieces, had a few cracks, and seemed to be somewhat ceramic. Obviously, I needed to have it match my other pieces. I was not thrilled with the stairs and their alignment, and it was mostly (but not totally) symmetrical. Though I believe something is either symmetrical or its not right? The top would not stay on the top if bumped. Anyways, I thought I could try to make something more useful out of it gaming-wise.
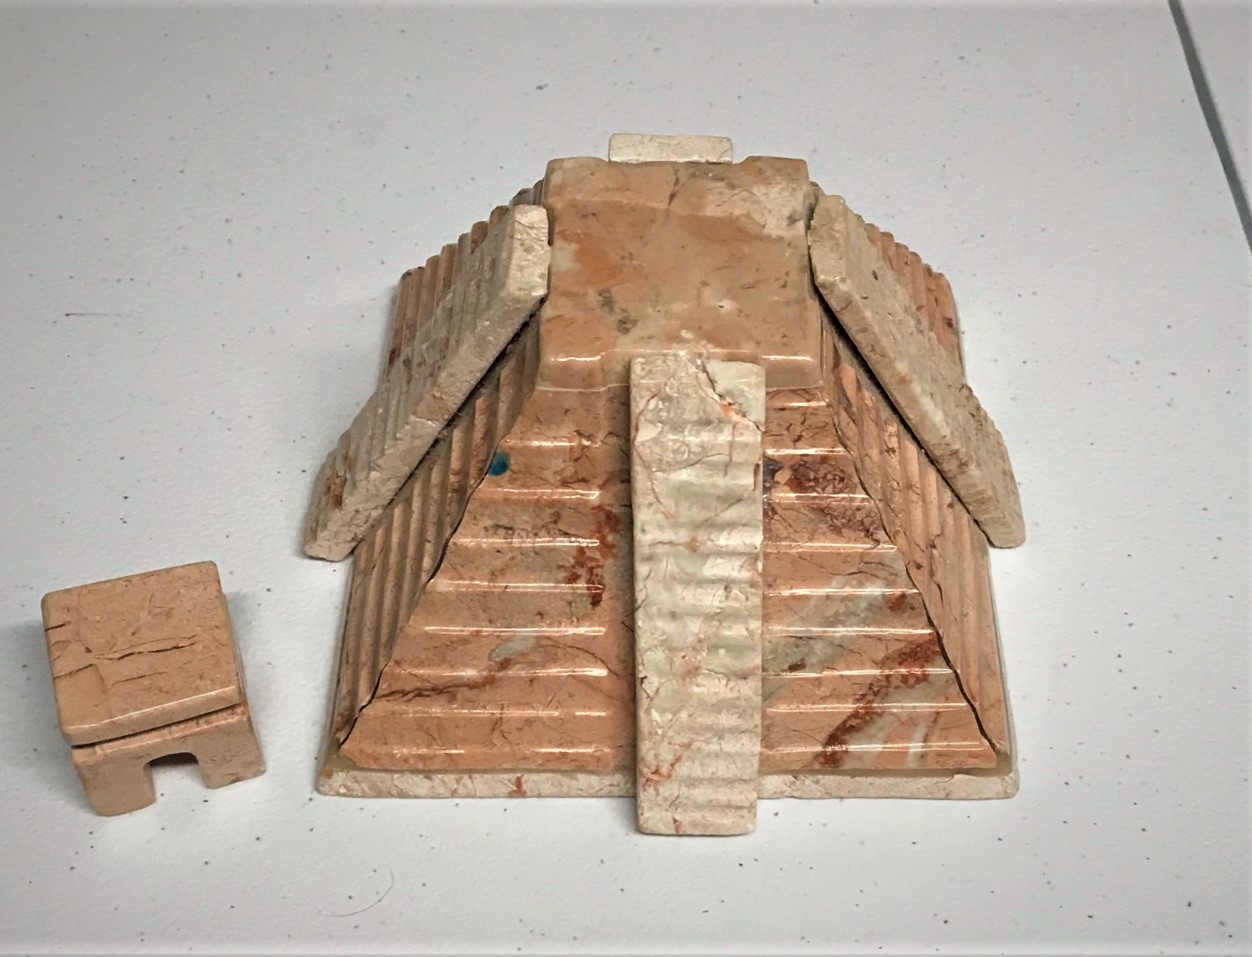
The first thing I did was to drill and install 1/8″ neodymium magnets to secure the top. 
The next step was to pry off the old stairs, which I did with a screwdriver and nearly hitting myself in the eye with broken ceramic shards – I should have been more careful.
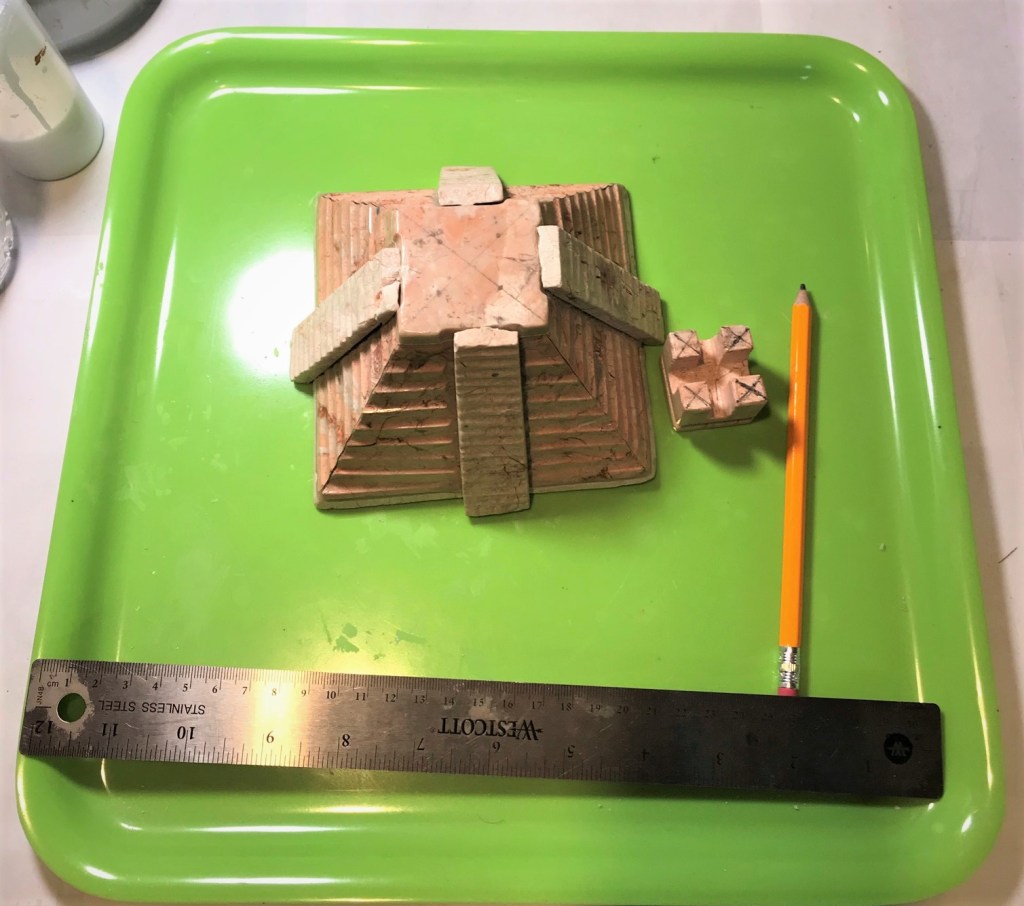
I thought it needed a base, and I did have an spare piece of Revell plywood that I cut to size up to the piece – as symmetrically as possible.
I debated about whether to use balsa or plywood, and went with the latter 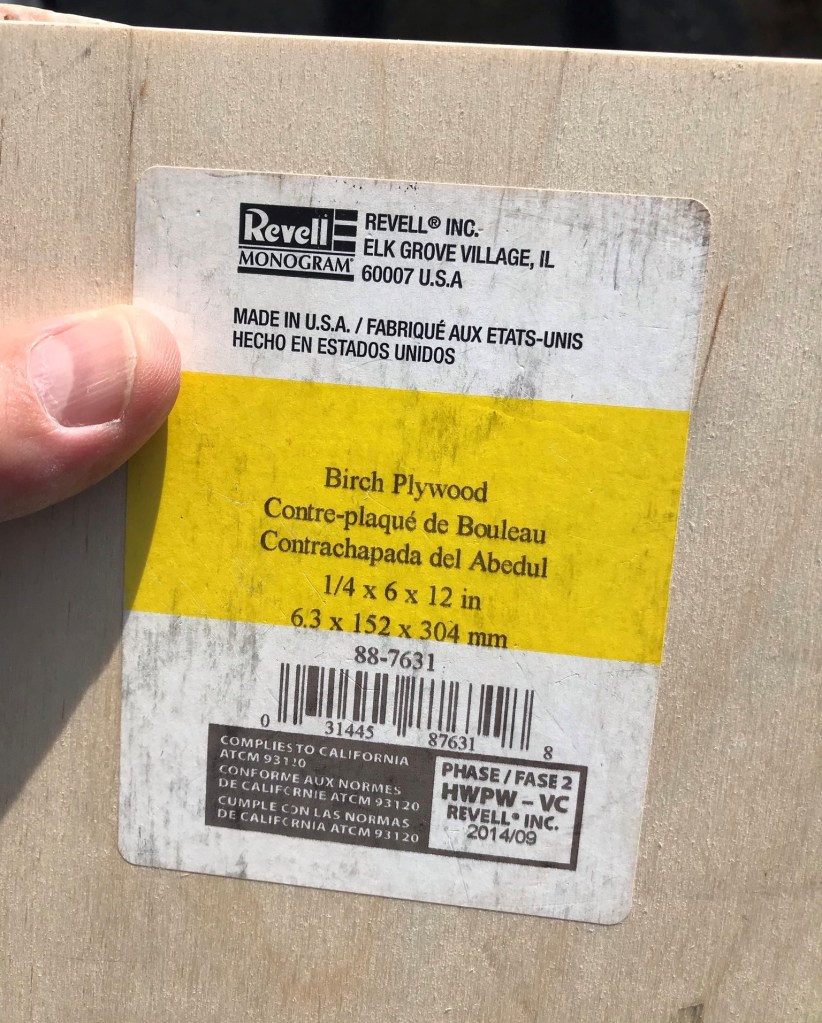
Good quality hobby stuff 
This mess shows my outdoor wood cutting setup – a Black and Decker cordless circular saw and my Craftsman workbench I bought in 1988.
I then sanded the edges of the plywood and the bottom of the piece, and attached the two with wood glue. As you can see, I found a way to compress the two while the glue set!

Lots of wood glue 
As symmetrical as I could get it to be on the base. 
Add an MBA reference book and a hematology textbook as weights and let dry overnight.
I then decided to use black Milliput to construct the stairs. Why black? It was what was available! I don’t have a lot of experience with it, and I chose it due to being cheaper than green stuff. I did not expect to get great sculpted details on the stairs – I just wanted something that would be aesthetically ok on the tabletop. I did consider using square wood dowels, but the work involved in sizing them seemed disproportionate to the needs of this project. I also would make the steps wider and more visible – but still they would not useable by a figure on a base.

I traced out the stairs – note I made them wider as the original piece’s slots for stairs was both irregular and not quite centered. 
I drilled two 1/8″ holes per stair for paper clip wires. These were at the bottom of the stairs to help with mounting. Note the asymmetry on this side.
As for the sculpting – it was a bit more difficult than I had imagined beforehand. I tried to use the existing lines on the piece as guidelines, and was successful for the most part. It’s not Michelangelo, that’s for sure. I actually was a little disappointed at this point, but I pressed on thinking the rest of the rehab may go better, and let the Milliput cure.

The sculpted stairs in black milliput. 
Getting ready to dust the piece with chinchilla dust.
The dusting process was similar to my previous efforts with MDF – that being painting the model with a PVA/water slurry and dusting with a salt shaker containing the dust. I did add (temporarily) extra neodymium magnets so as to prevent the dust from blocking the installed ones.

I then moved on to painting it. I dry brushed it and then painted it in the same color schemes as my MDF.

I then used Army Painter “Light Tone” on it and let it dry. Once dry, I added more highlights.

To get a feel for the model, here are some eye candy shots.


I learned a bit during the processes of this project. I’m on the fence on Milliput as an architectural sculpting agent – it was not easy to sculpt into the stairs and I did face a challenge with regards to the Milliput’s “slump” (a term used to describe how wet concrete settles and does not hold a shape). Though, the extreme slope of the stairs (as is found with the actual ones) made gravity NOT my friend in this aspect. Maybe green stuff or Apoxie Sculpt would have been easier but more expensive. I am unsure. I think my approach in the end worked out ok, and the painting helped I think – and you, dear reader, can let me know your assessments.
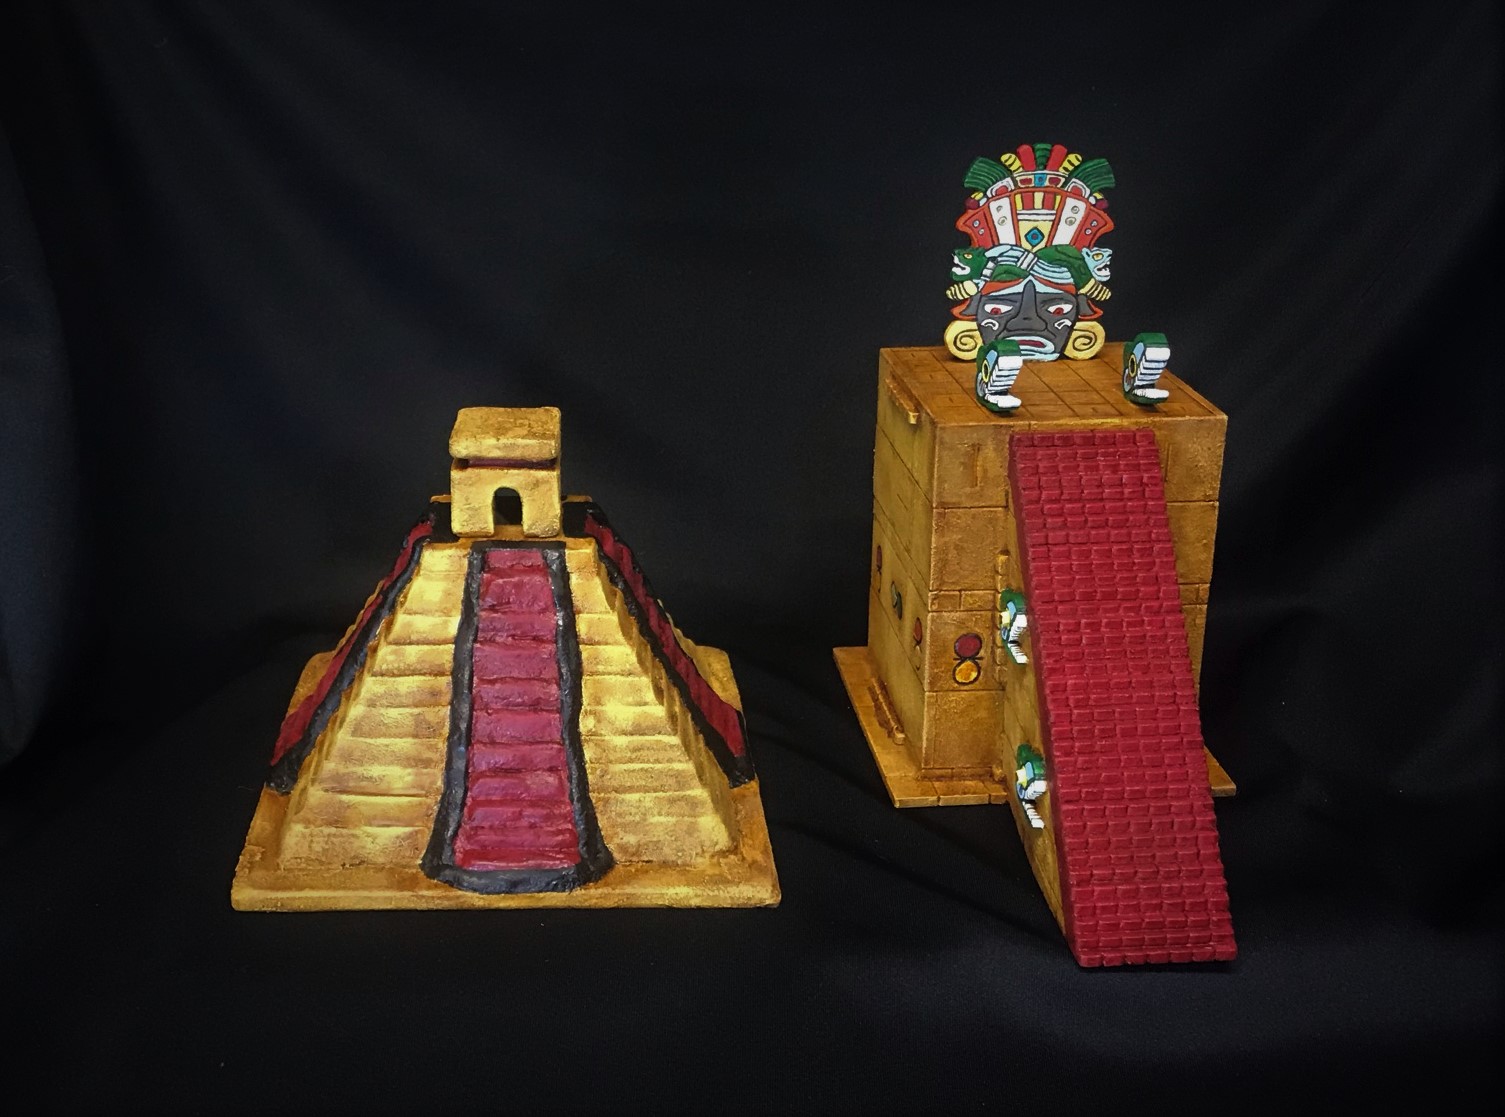
My biggest goal was for this piece to be a good add to my little mini Tenochtitlan tabletop. The next two pics are good comparisons. I think it succeeded. Not my finest work, but it is acceptable.

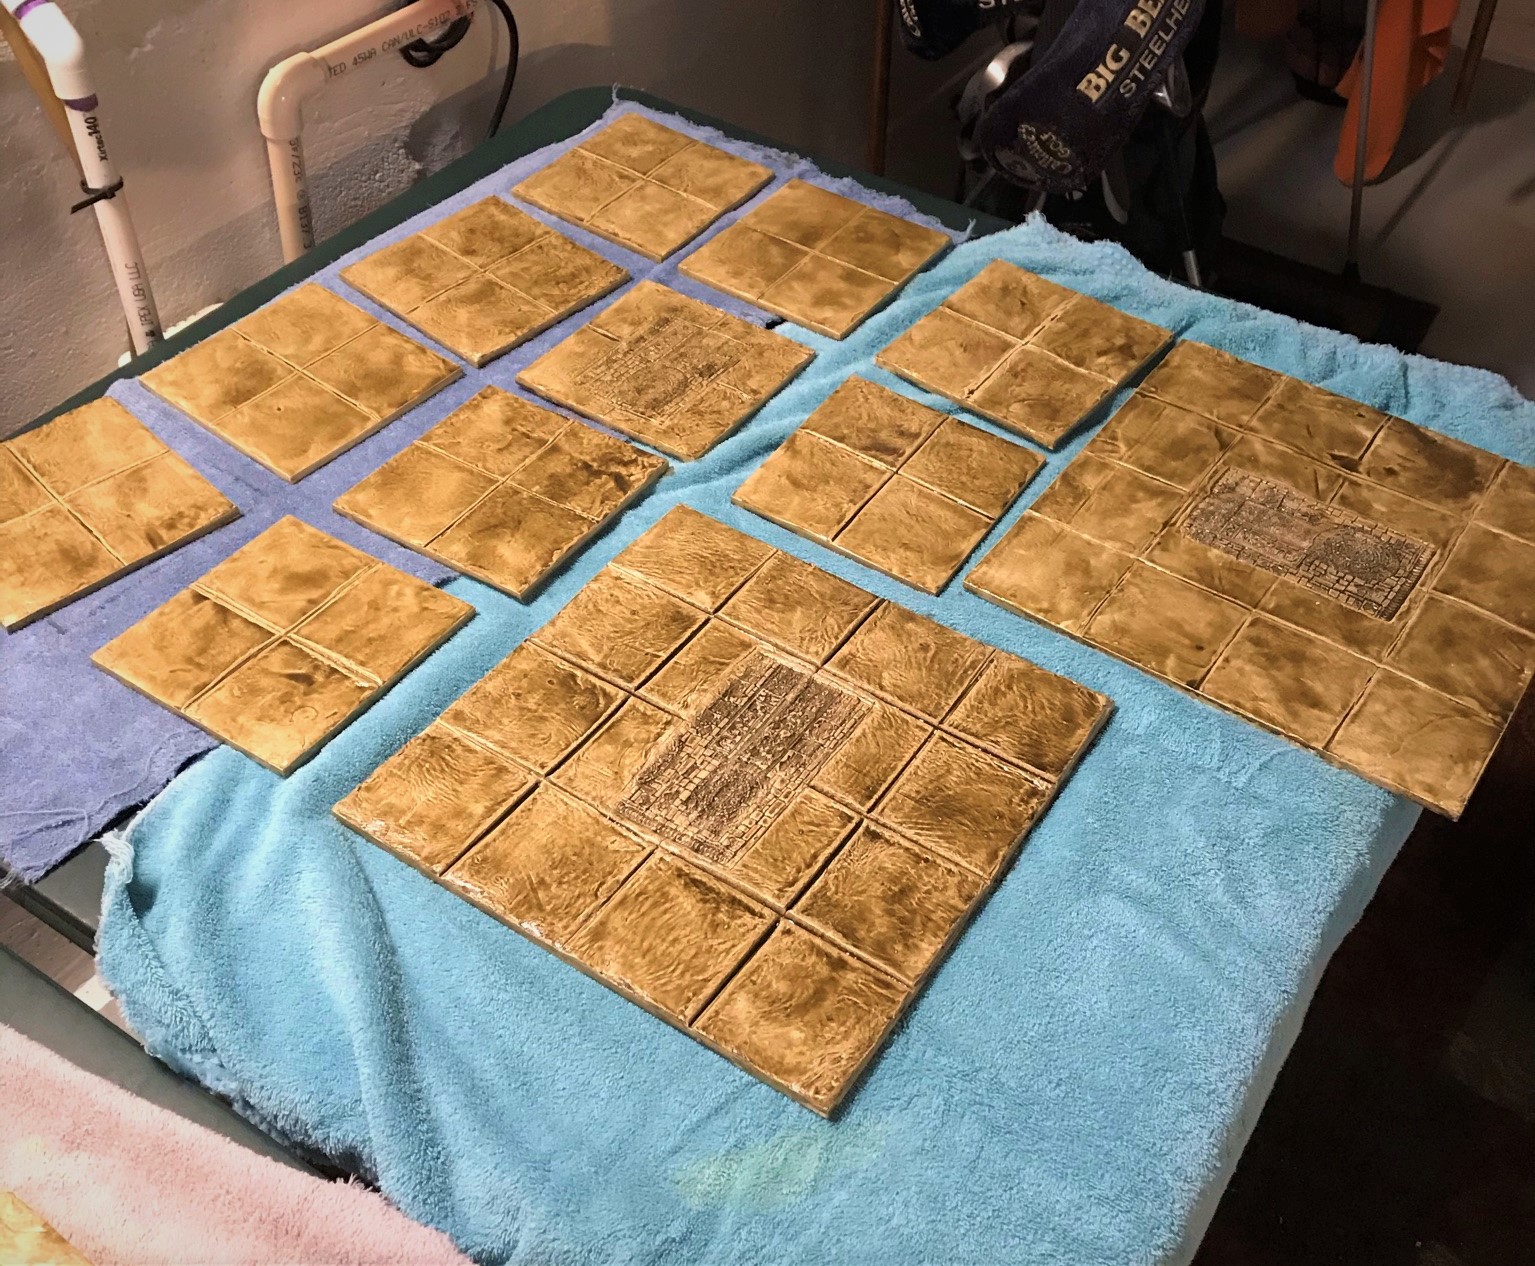
I think now my terrain just needs pavement and some causeways – I already have a working concept (below) and I will be making the surrounding lake swampy with some neat floating flora. More on this when I’m done with that!

The pavement is in WIP. I used MDF with sculpted DAS clay (including a Green stuff Aztec roller in judicious spots). It needs to set and get matte varnished, but I’m excited on the potential. I also need to build the causeways.
So that’s it for now – hope you enjoyed this post – let me know your thoughts – good, bad, or otherwise – in the comments section. Thanks for looking!
For all of my previous posts on games, units, and other projects for my 16th Century Spanish Conquest supplement for Feudal Patrol™ – “Civilizations Collide” – please see this page.
PAINTS, INKS, GLAZES, SHADES, WASHES, PIGMENTS, FLOCKING, GLUES AND MORE THAT I USED ON THIS MODEL
- Wood Glue
- Plastic Plates
- 1/8″ neodymium magnets
- Gorilla Glue
- Revell Birch plywood (1/4″ x 6″ x 12″)
- Paper clip wire
- Black Milliput
- All Living Things Dry Dust Bath (chinchilla dust)
- Vallejo “Flow Improver”
- Vallejo “Airbrush Thinner”
- Vallejo Model Air “Sand (Ivory)”
- Vallejo Model Color “Dark Sand”
- FolkArt “Yellow Ochre”
- Vallejo Model Color “Black”
- Vallejo Model Color “Red”
- Army Painter “Light Tone” (wash)

I have been following your progress on this project from the beginning. Very nice work. This is going to awesome on the table.
LikeLiked by 2 people
Thanks Buck!
LikeLike
New on HGTV…
LikeLiked by 3 people
Ha!
LikeLike
Awesome work… I just remembered, I was going to drop you a message to say about the Greenstuff world Aztec floor roller. Something like it might be of use to you. I have got some examples of the effect if you want me to send some on. I got it for my Lizardmen army.
LikeLiked by 2 people
Thanks – really appreciate the help. I do have one and used it judiciously on some of my city pavements (which I will post about eventually when I finally can varnish them!).
LikeLiked by 2 people
I thought you would know about them, but just wanted to check just in case.
LikeLiked by 2 people
You’re a good man, my favorite Shetlander – thanks!
LikeLiked by 1 person
Great repurposing of the gifted scenery piece Mark, and ties in well with the rest of your scenery.
As for the problems you had with the Milliput, all the other mediums would suffer the same sag with the incline you were working on, the way to get round this, would be building in layers, so do all four bottom steps, let dry, straighten with a knife or sandpaper, then build the next layer, and repeat until you reach the top, once all done and dry, build the edges as these now have something to stick to and shouldn’t sag as much. Hope this helps
LikeLiked by 2 people
Thanks Dave – and interestingly I considered that with wood but thought it would take too long (I was impatient I guess). Definitely next time I will be more patient, but you only learn by trying right? Really appreciate the tips Dave!
LikeLiked by 2 people
The alternative you could use, that I find quicker to work with , is the dense insulation foam, it can be cut and sanded easily, and easily glued in place. Fully understand the impatience, suffer with it greatly ! LOL
LikeLiked by 2 people
In the end it really was a cost-benefit situation – I wanted to make something out of it but at some point it would have not been worth it versus other stuff in the queue.
LikeLiked by 2 people
Outstanding old boy!!!!
LikeLiked by 2 people
And Wales has spoken! 👍
LikeLiked by 2 people
Wow, you did an amazing job rehabilitating that temple, it looks a million times better than when you got it. I understand your frustration with Milliput, I agree with Dave that insulation foam would have been a lot easier. Still, we live and learn 🙂
LikeLiked by 4 people
Appreciate that Matt. But, then again, insulation foam would be easily deformed, no?
LikeLiked by 4 people
You can coat it with PVA to make it stronger Mark, and the high density stuff is pretty durable, or a thin coat of wall filler can add even more strength
LikeLiked by 4 people
Hmm. Still gotta be cognizant of ham-handed gamers! I was going to do balsa wood stairs originally but did not as I worried about damage.
LikeLiked by 3 people
Possibly, but you could strengthen it with a thin layer of greenstuff or Milliput?
LikeLiked by 4 people
Like I just responded to Dave, I was going to do balsa wood stairs originally, but passed due to worry that gamers could cause damage.
LikeLiked by 3 people
You can Matt, just be prepared Milliput doesn’t like to stick to it easily, greenstuff not so much of a problem
LikeLiked by 3 people
If it wasn’t so expensive Dave I’d have gone with Apoxie sculpt!
LikeLiked by 3 people
I think the end result justifies all of the effort. The whole terrain project is excellent and will be well worth the effort when you first use it in anger. Cannot wait for that first BR.
LikeLiked by 3 people
That day is coming. Tomorrow I’ll be doing a rural scenario using those buildings, and the cityscape awaits varnish on the tiles (and better weather for spraying). Appreciate your kind feedback!
LikeLiked by 2 people
It looks great, definitely fits in with the overall look you have set for the other pieces, and the customisation works for letting you utilise and adapt an existing piece. You are fast coming to the end of this project, not too many more things to add.
LikeLiked by 3 people
Thanks Anthony, gaming is coming!
LikeLiked by 1 person
You went to town on that one Mark and boy didn’t it come out looking great. Fits very well with everything else you’ve done and that table top is looking awesome. 🙂
LikeLiked by 3 people
Cheers Dave!
LikeLiked by 2 people
The finished ziggurat looks great. A pity its not a little larger to scale well with everything else, but you’ve done a good job repurposing it.
LikeLiked by 2 people
Thanks, while bigger would have been nice as you said, I’m actually happy as it’s mid-size and complements the rest on my cityscape. On to the end!
LikeLiked by 1 person
Very nice stuff Mark, I have some Egyptian looking pieces of “Fish Tank” scenery in the loft, that I’ve never done anything with, in fact I can’t even remember why I bought them now!
Cheers Roger.
LikeLiked by 3 people
Thanks Roger, I am sure we all have stuff we bought that linger in our possessions that we can’t remember why we wanted them!
LikeLiked by 2 people
That looks great Mark- nice work on the stairs. I’ve never used black miliput before- is it any different to the others in terms of useability?
Cheers,
Pete.
LikeLiked by 3 people
Not sure, it seemed similar to the white stuff I used a few years back.
LikeLiked by 1 person
Also I’m loving the table set up too.
Cheers,
Pete.
LikeLiked by 2 people
Thanks Pete!
LikeLike
It is very impressive the way you took that somewhat rough looking gift and improved it! Your patience and creativity really paid off I’d say. It is neat seeing all of the terrain laid out on the table as well and it is going to be one awesome looking game when you get everything finished.
LikeLiked by 3 people
Oooh, I like that! 🙂 Well done, Mark! I use milliput a lot and would not have attempted that with it, but you’d probably have your work cut out however you tried it! I think it looks spot on (which means “exactly right” – I forget we speak completely different versions of the same language sometimes)!
LikeLiked by 2 people
Well done Mark a great conversion! I to have used such pieces and converted them into things I needed, I’m always on the look out in tourist and Dollar shops for things I can use!
LikeLiked by 2 people
Good ideas there Pat! Scale is possibly an issue of course, but sometimes, like here, ya just get lucky.
LikeLiked by 1 person