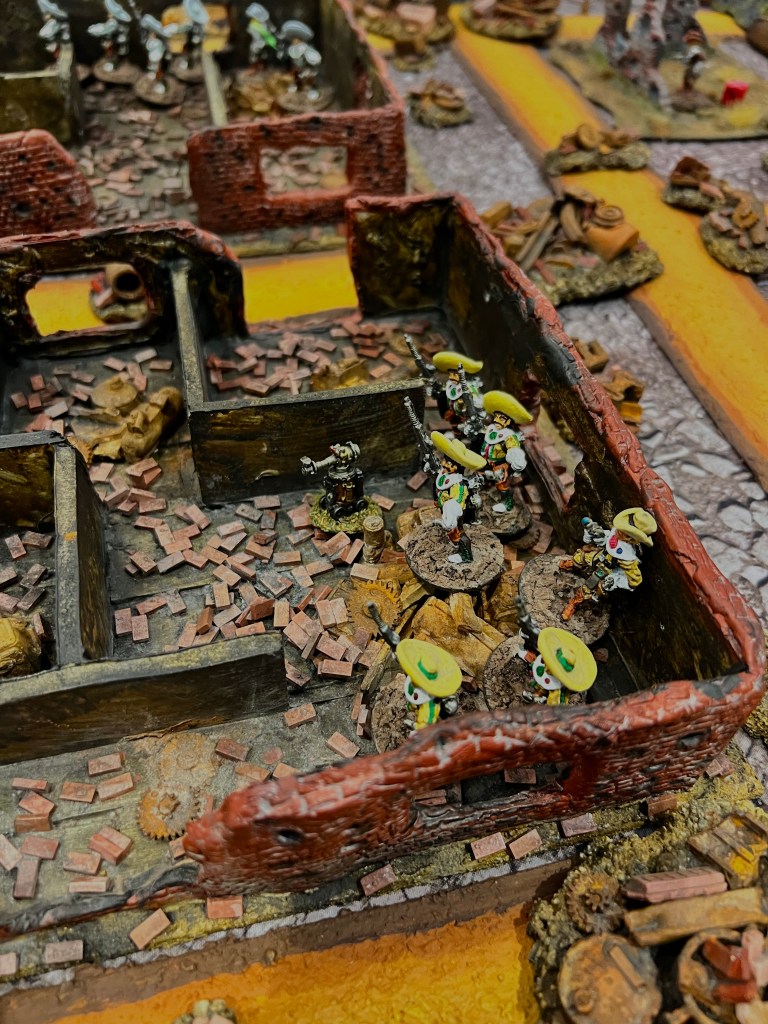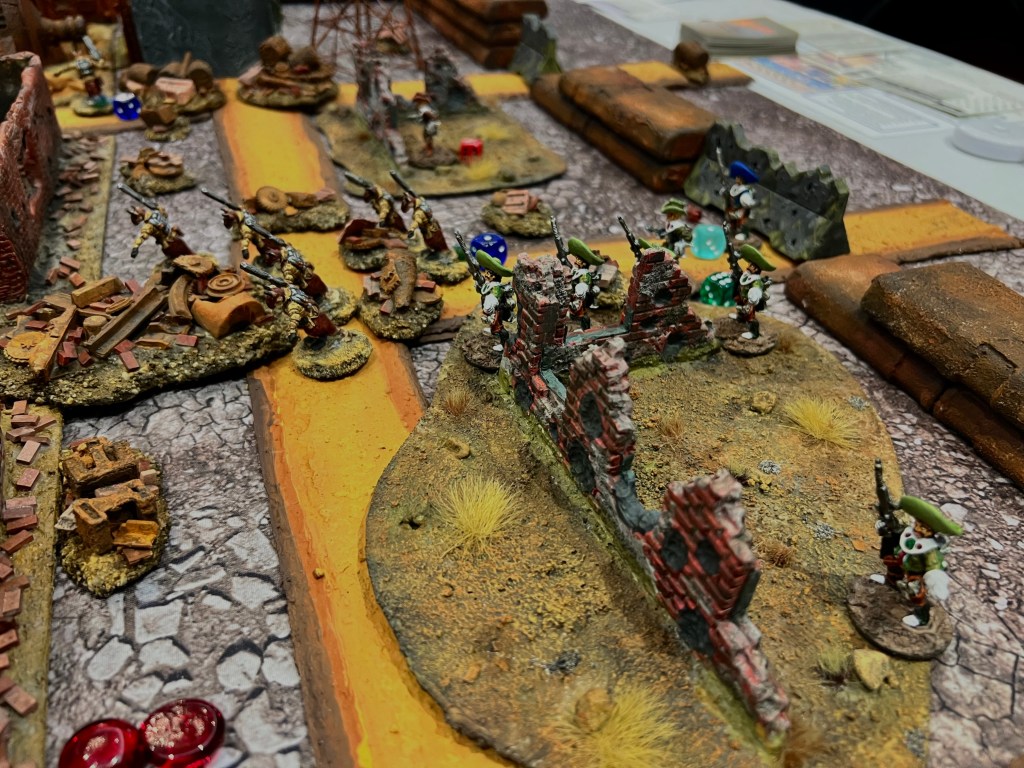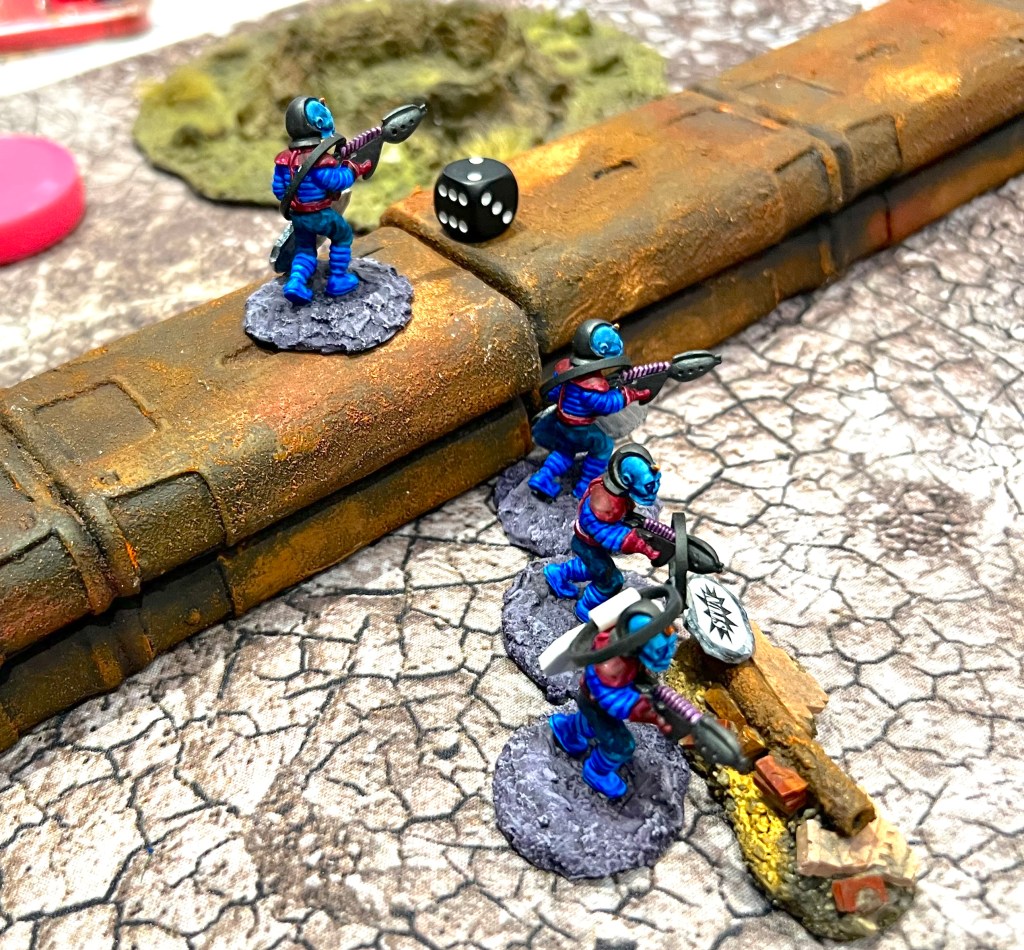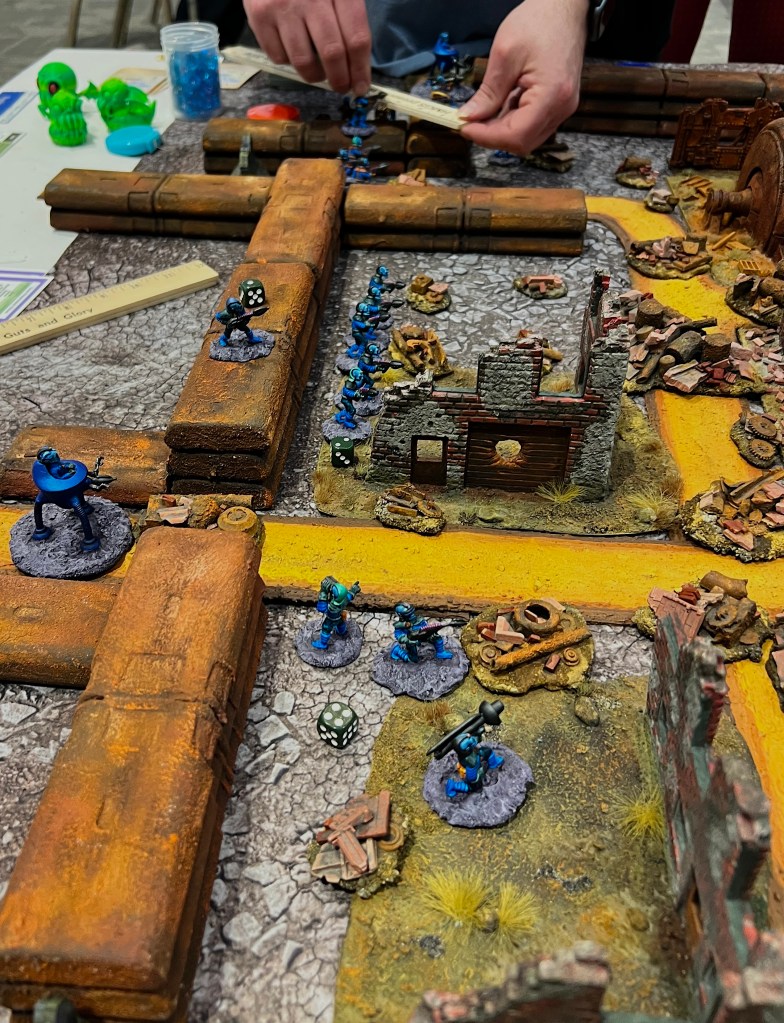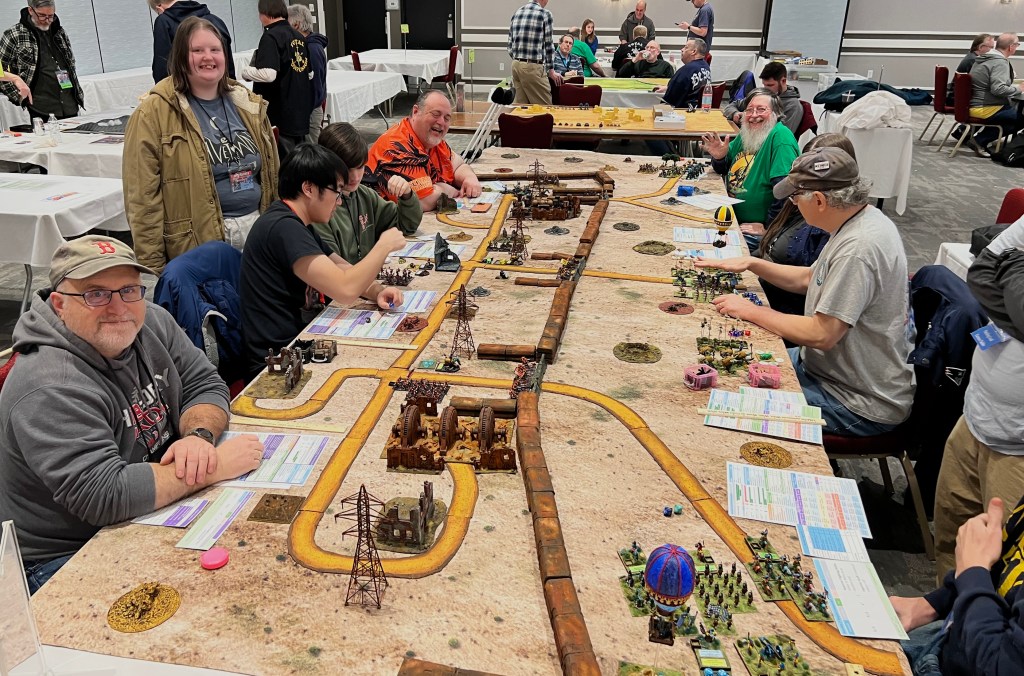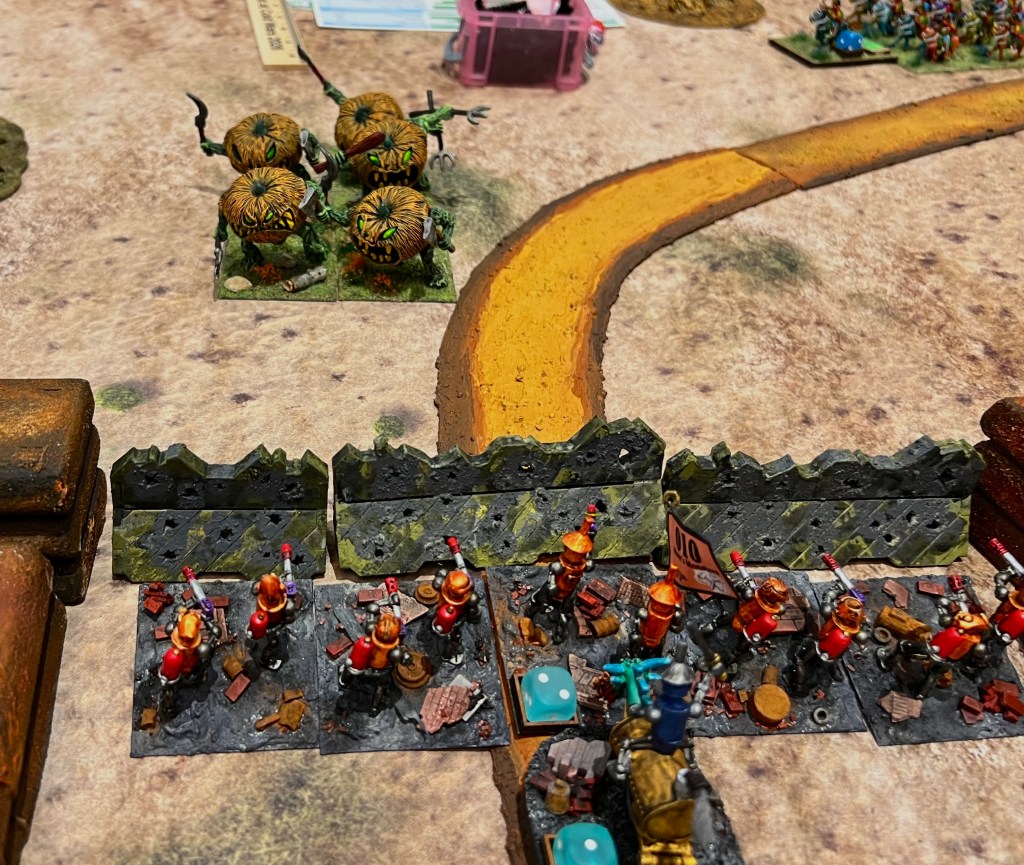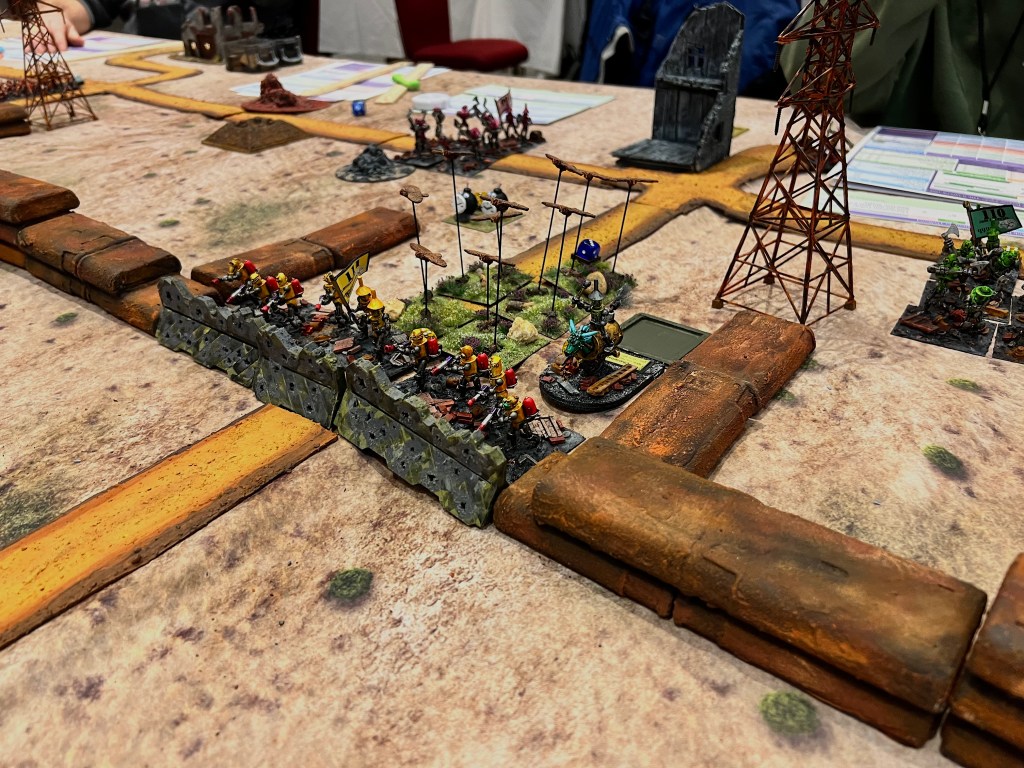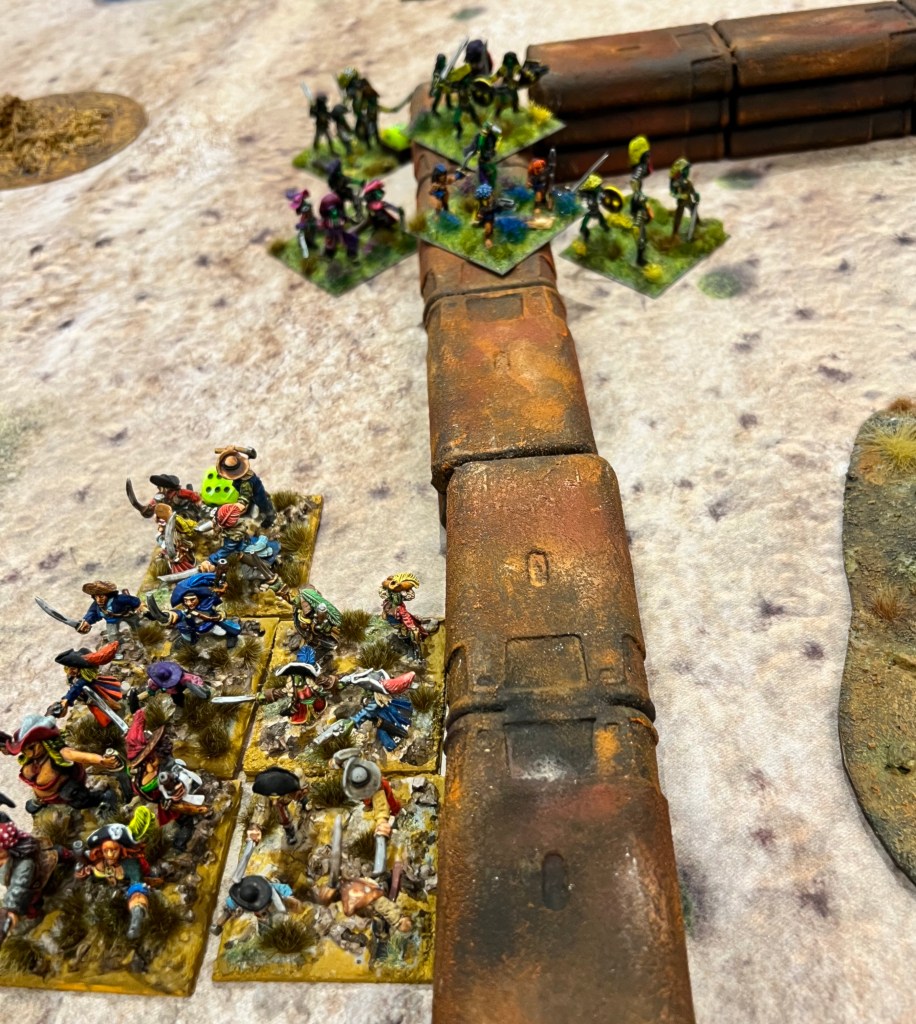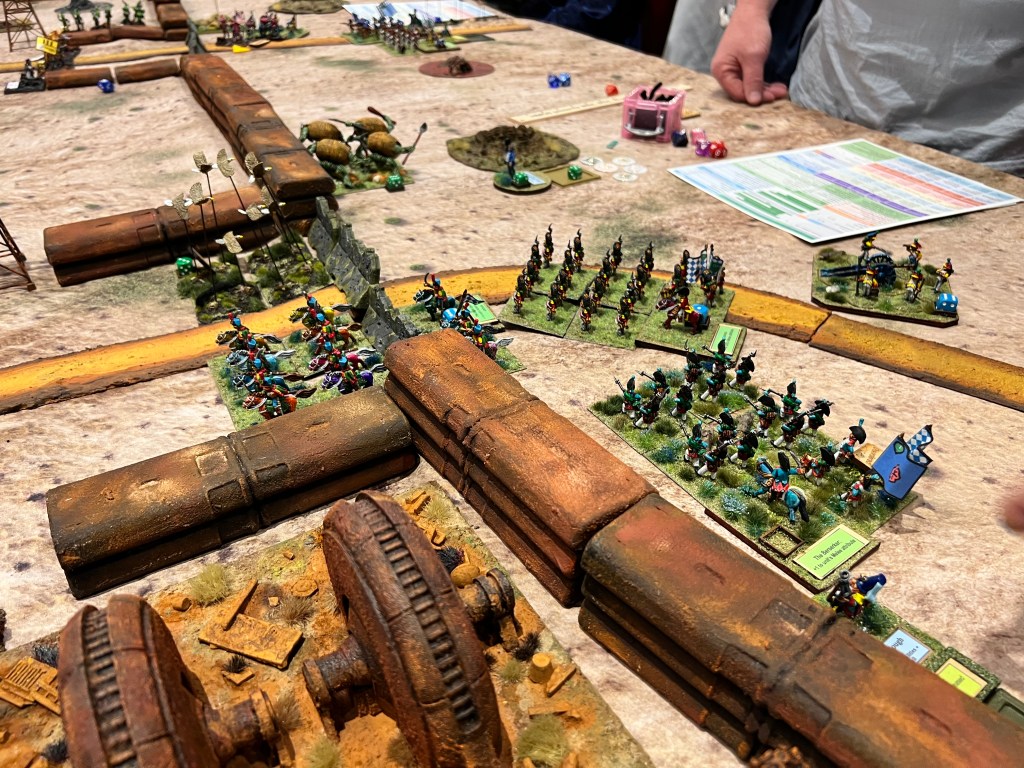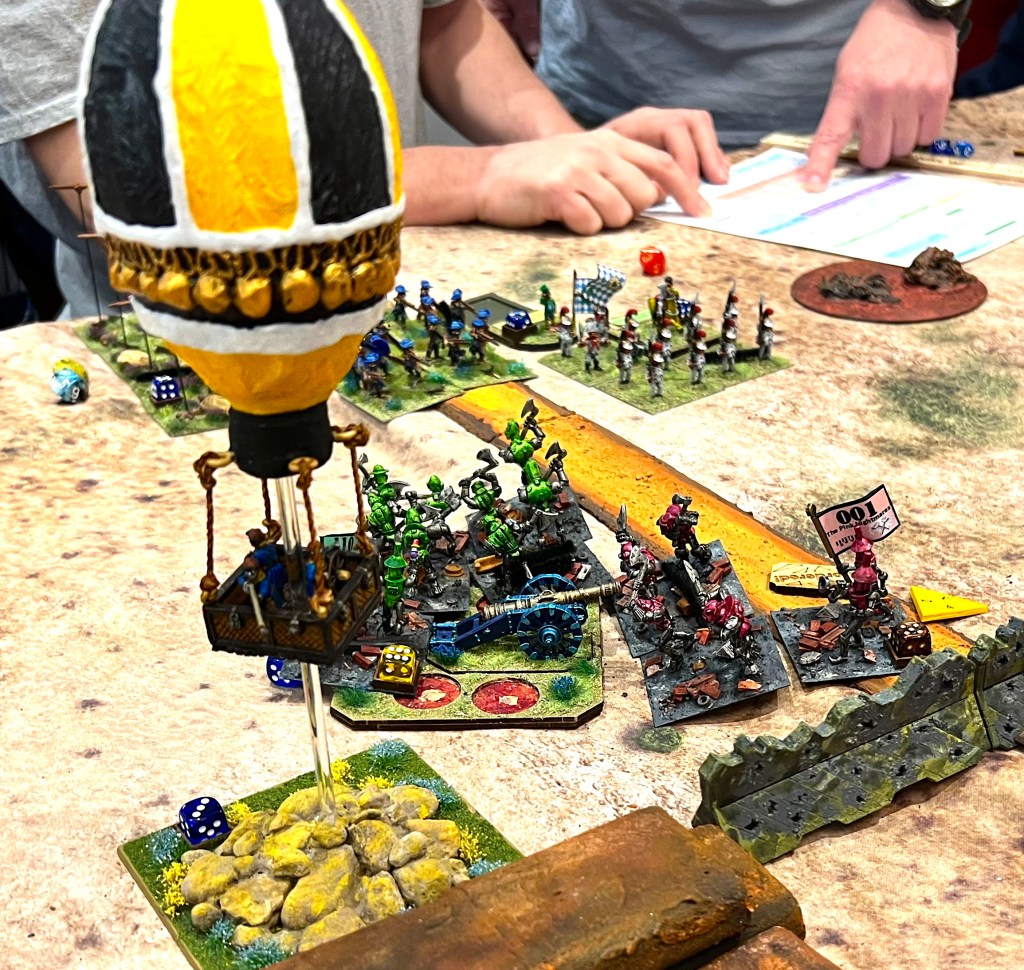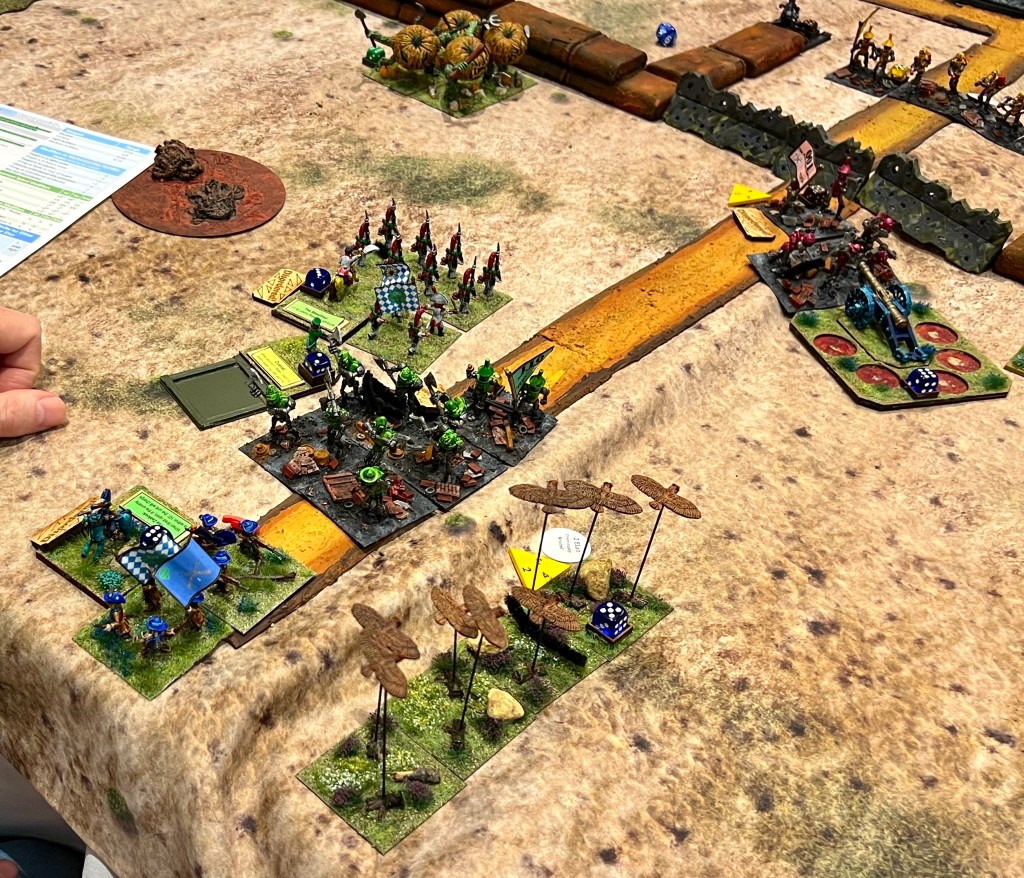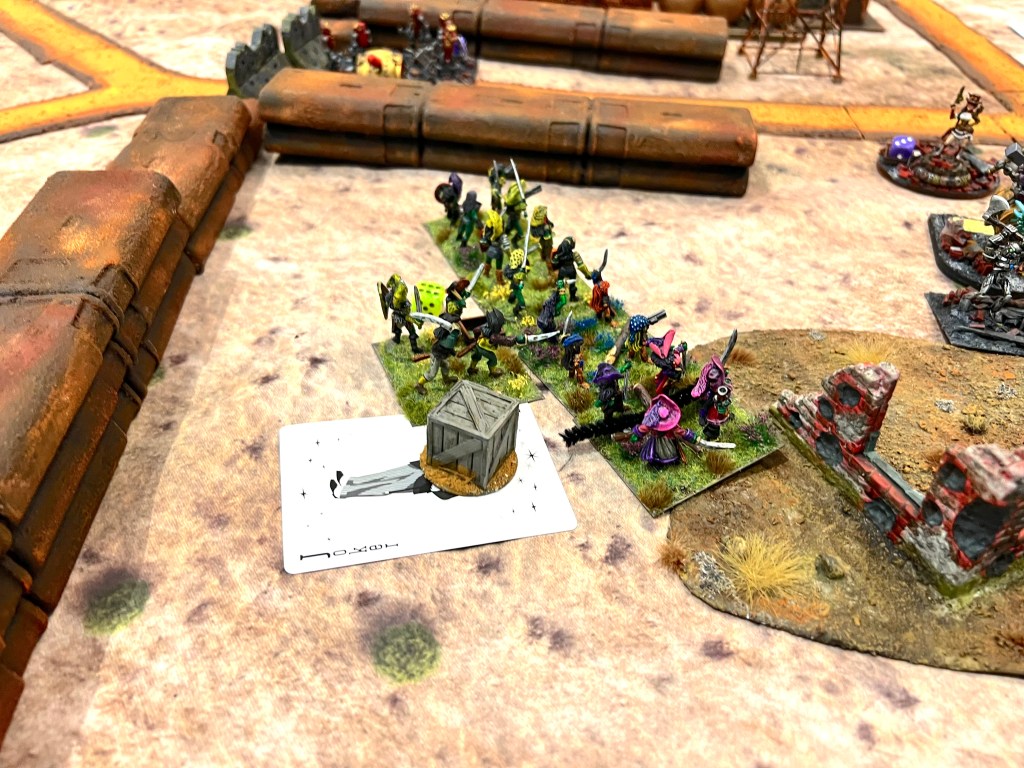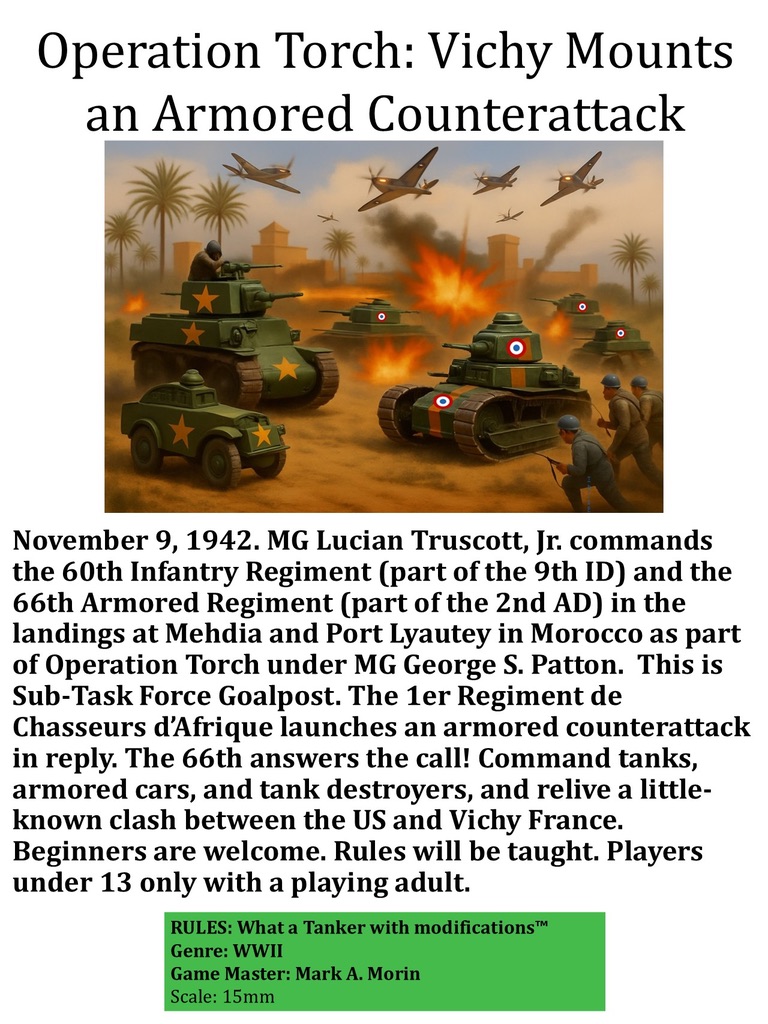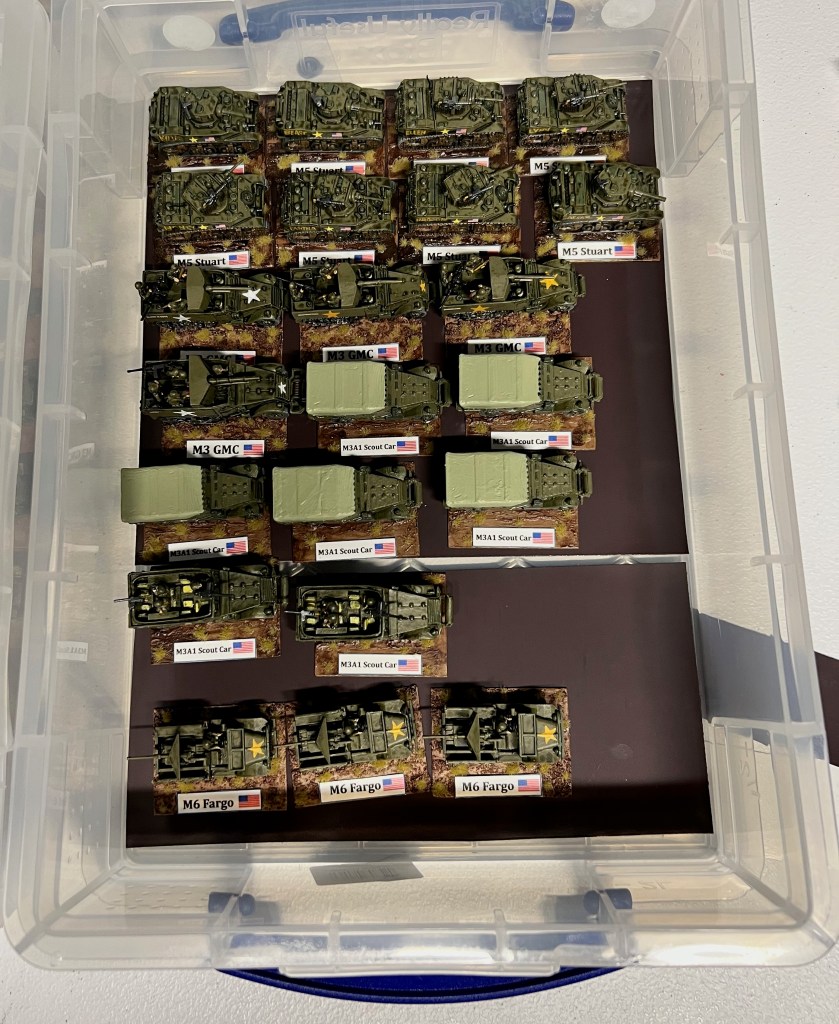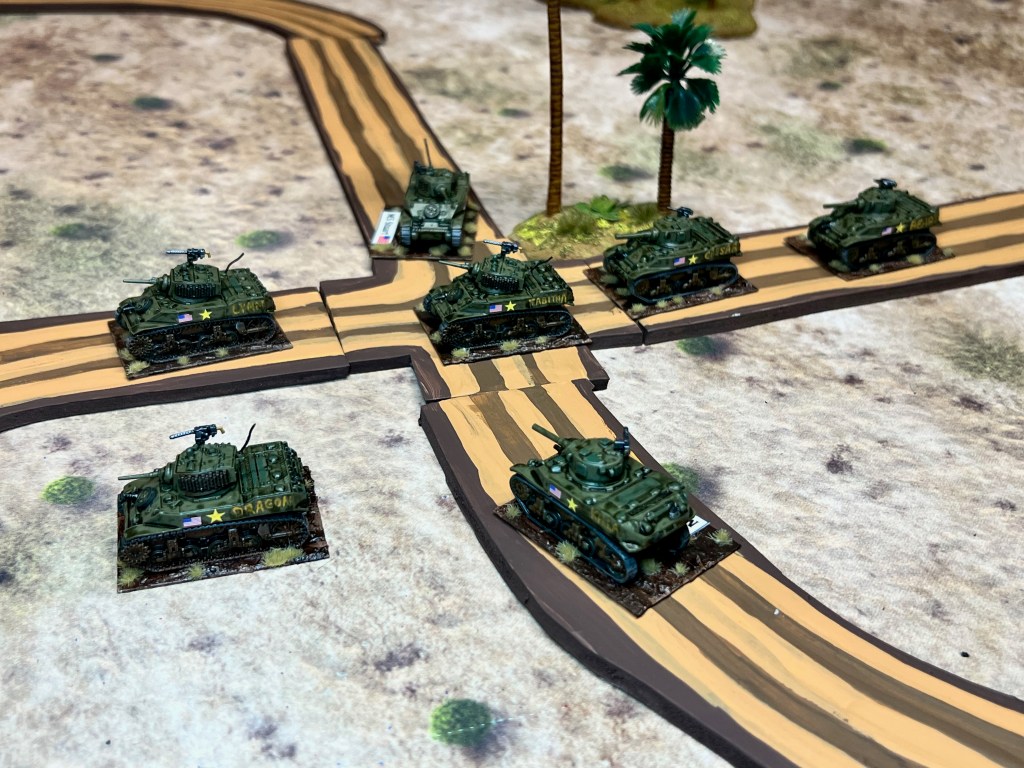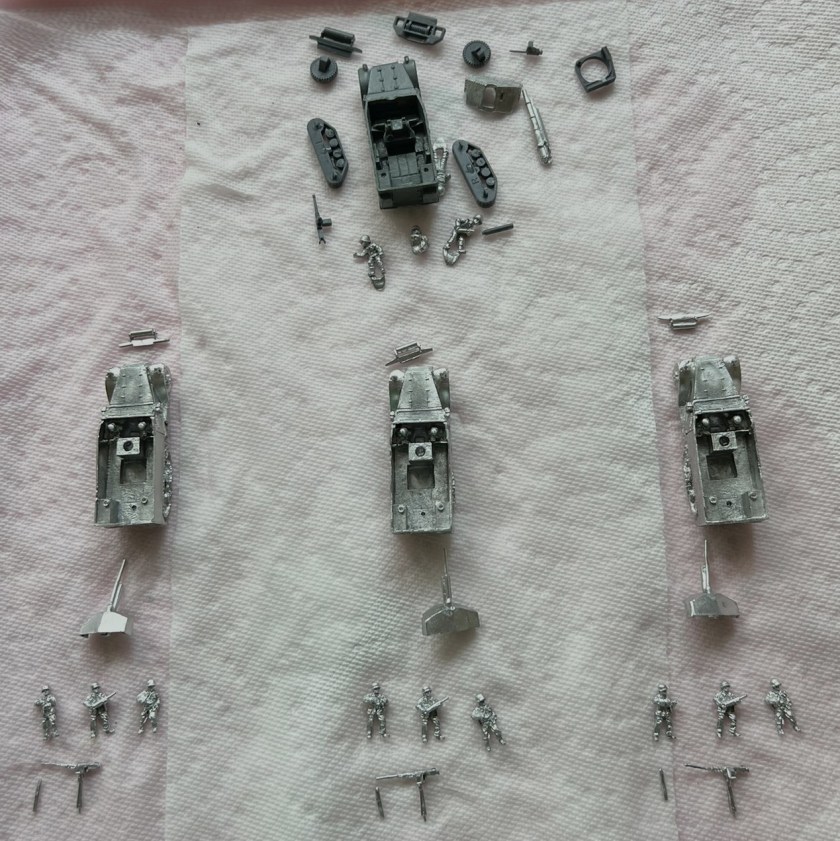
Cold Wars 2023 – from my view (& lots of photos!)

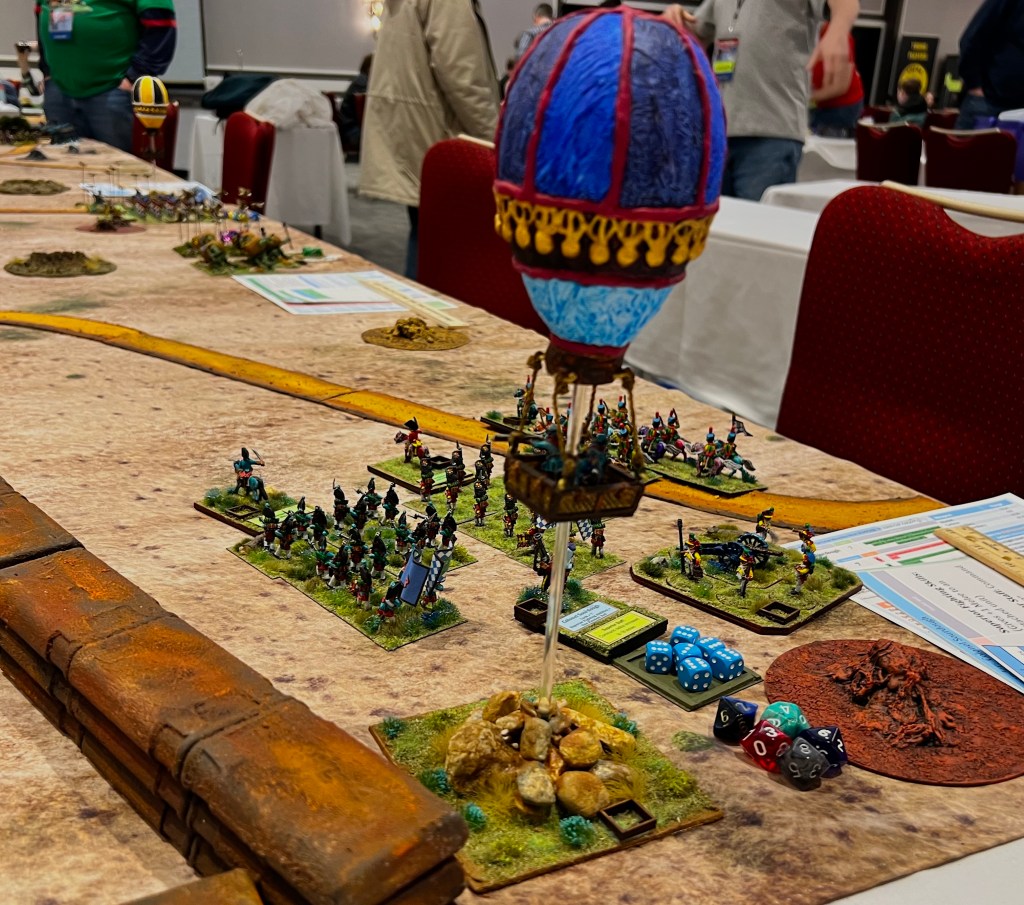
Last weekend the Cold Wars 2023 gaming convention was held in Valley Forge, PA at the Valley Forge Casino Resort. I participated as a game master and as a player. I ran three games of Feudal Patrol, played in two games of Wars of Ozz, and participated as a player in an American War of Independence (AWI) game. I really enjoyed the convention – and personally had some special moments as you will soon see in this post. I, a Massachusetts “carpetbagger”, am grateful once again for the welcome, hospitality, and friendship of the HAWKS club, especially Buck Surdu, Greg Priebe, Chris Palmer, Dave Wood, and Eric Schlegel – who all contributed to making my experience a memorable one. I also want to thank the players who chose to play in my games. I also must thank the HMGS staff and volunteers for making the convention work so well.

I thought the best way to share this with my readers was to focus on photographs – with a little bit of description. Some of these photos came from Chris Palmer and others on Facebook, and some are from myself.

AWI Playtest

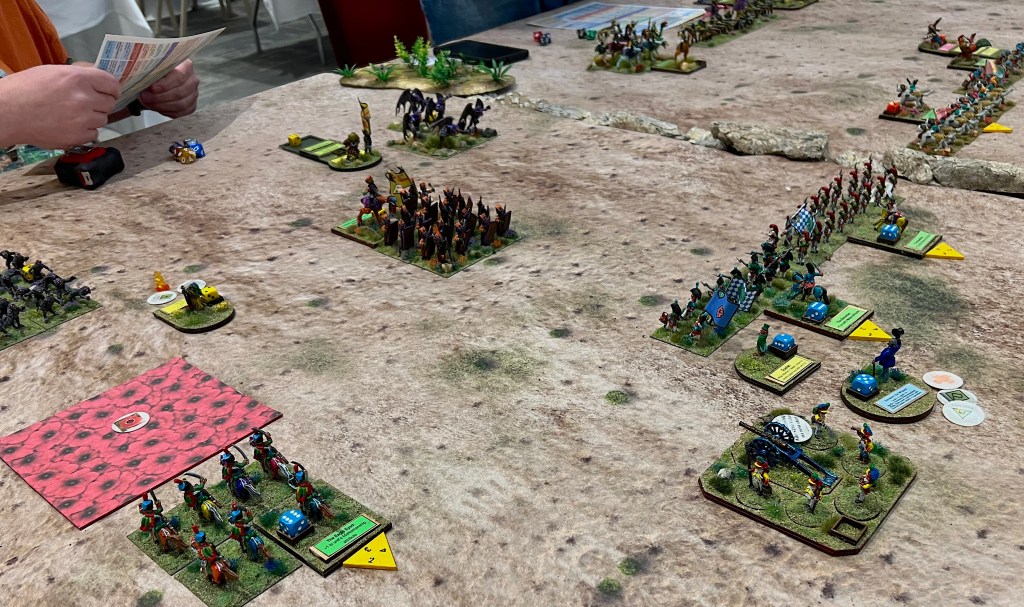
This was on Thursday night in the HAWKS room and was a playtest of a set of rules being worked on by Buck Surdu, Chris Palmer, and Greg Priebe and other HAWKS. Basically it is taking the Wars of Ozz/Eagles and Empires engine and applying it to the AWI. I needed to set up my first game (The Battle of Centla) so that I could play on Friday morning in a Wars of Ozz game without any concerns. I played on the British side with 3 line regiments and two grenadier regiments. I had nothing but open field in front of me and a mission to take out an American gun battery that was surrounded by colonial infantry in soft cover commanded by Chris Palmer.

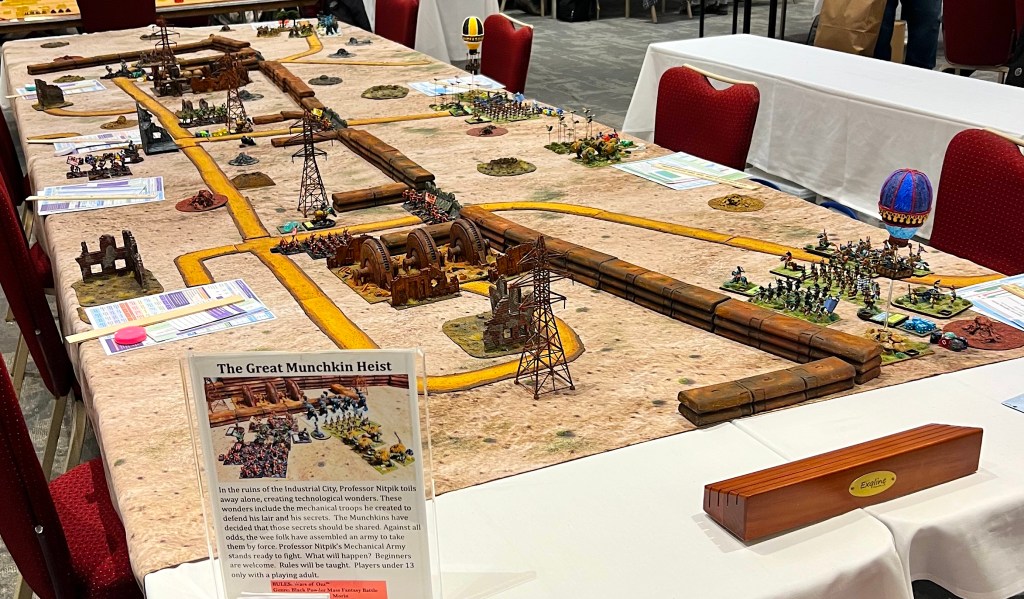
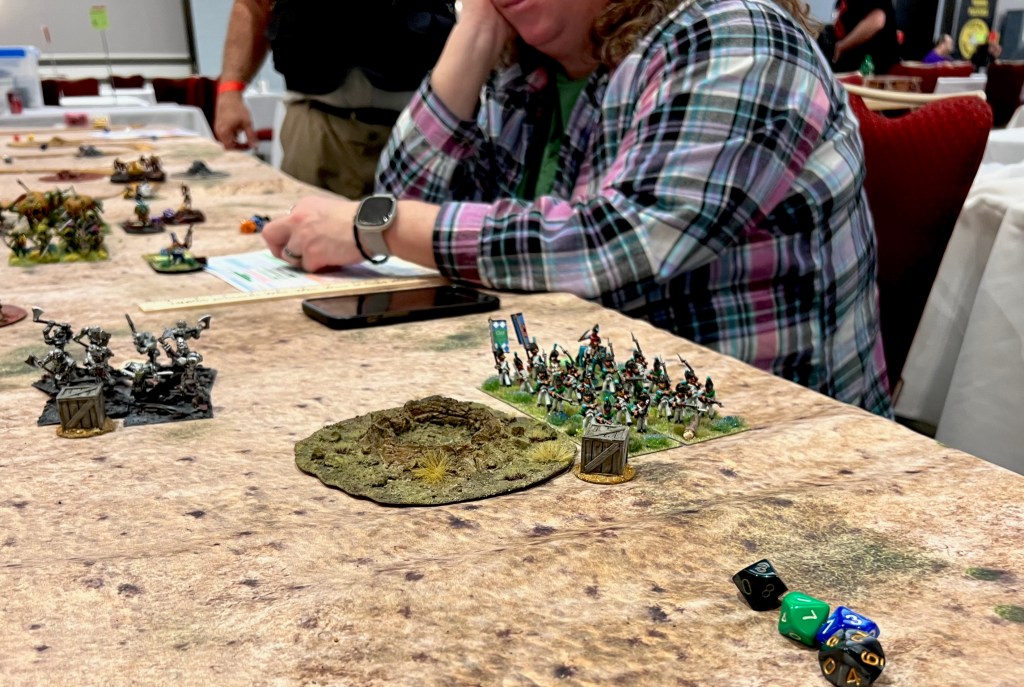
The set up for the AWI playtest. You can also see my Battle of Centla game all set up for Friday in the background.

I advanced my troops as quickly as possible but got shredded by canister as I git close – though I did do some – but not enough – damage to Chris.

I got trounced but it was not a situation that I think I could have attempted differently, but hey, it’s a game and a playtest at that.

…and a satisfied Chris surveys the battlefield!

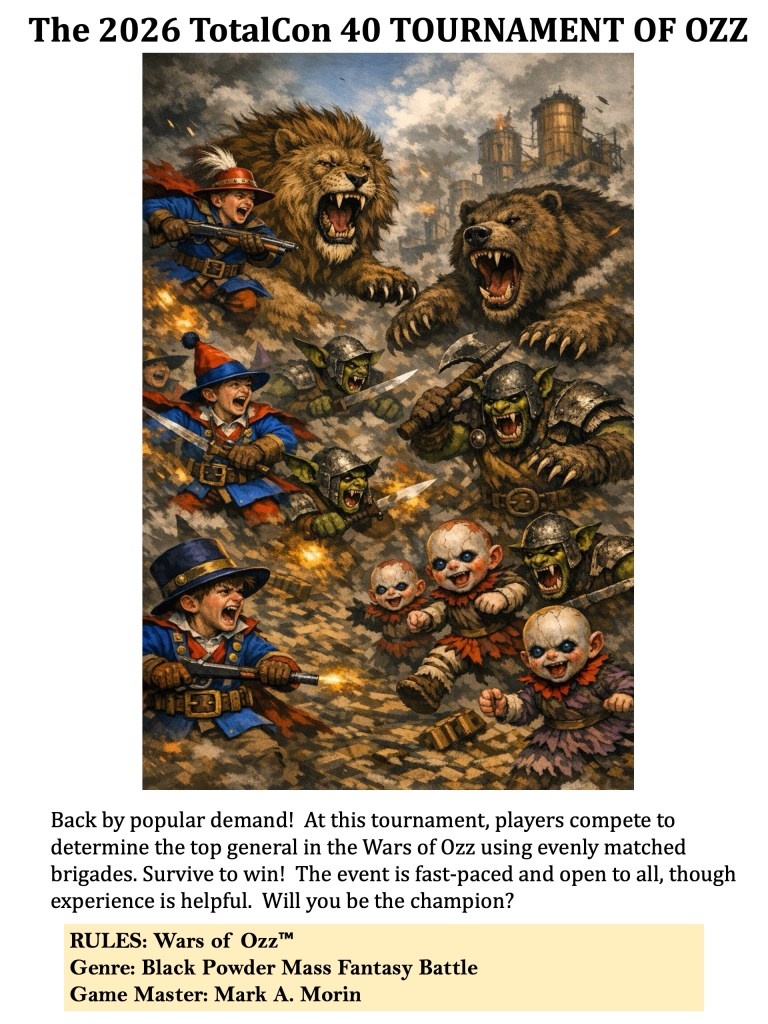
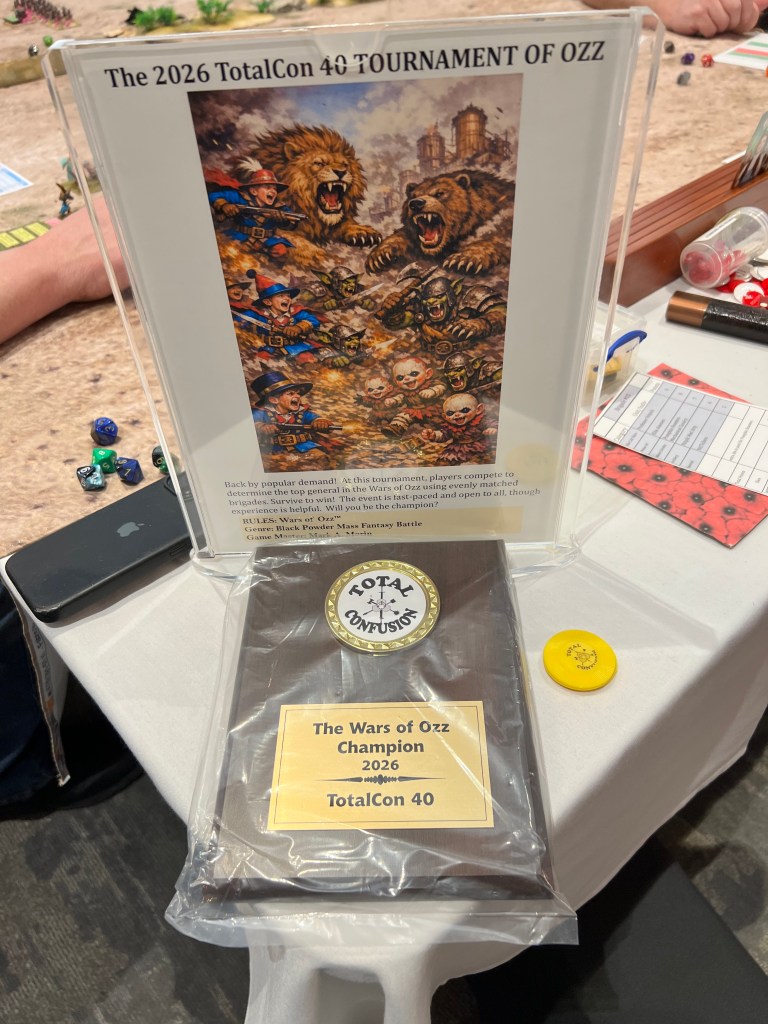
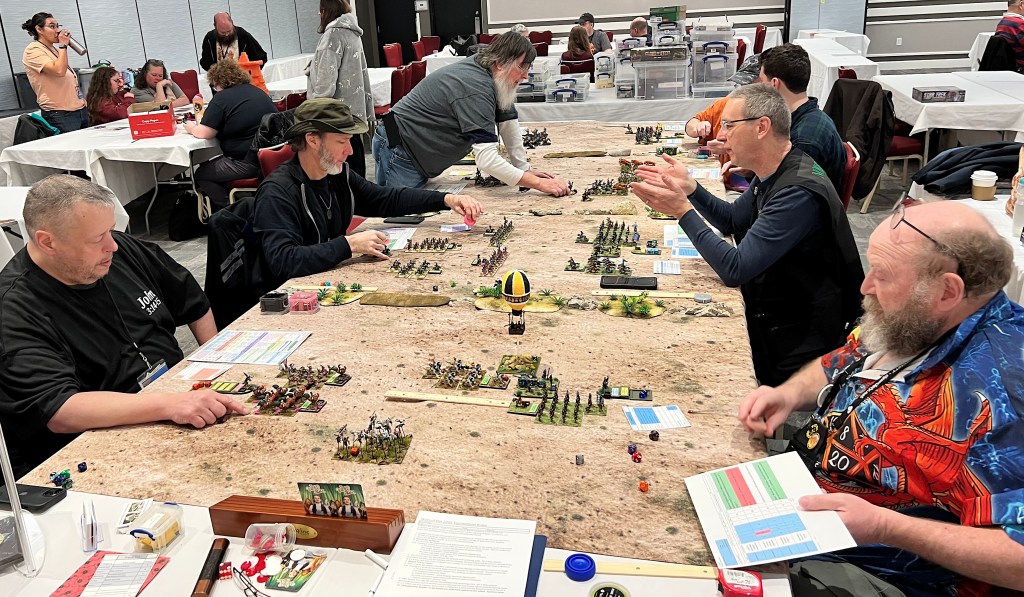
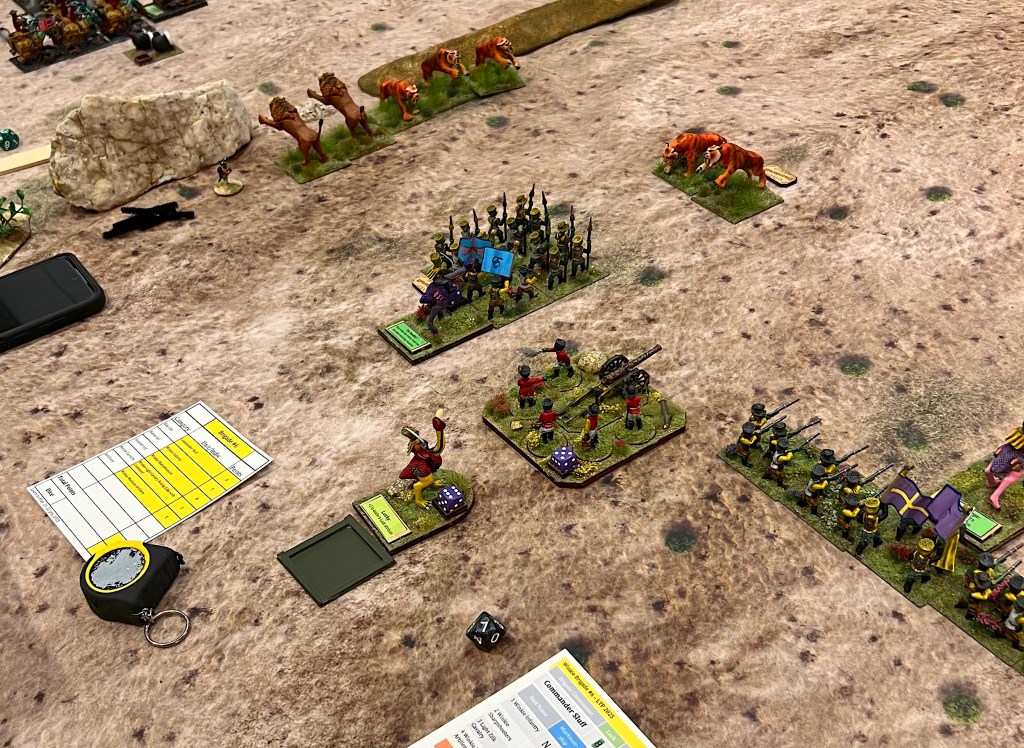
Wars if Ozz – Winter of Discontent (Wars of Ozz)

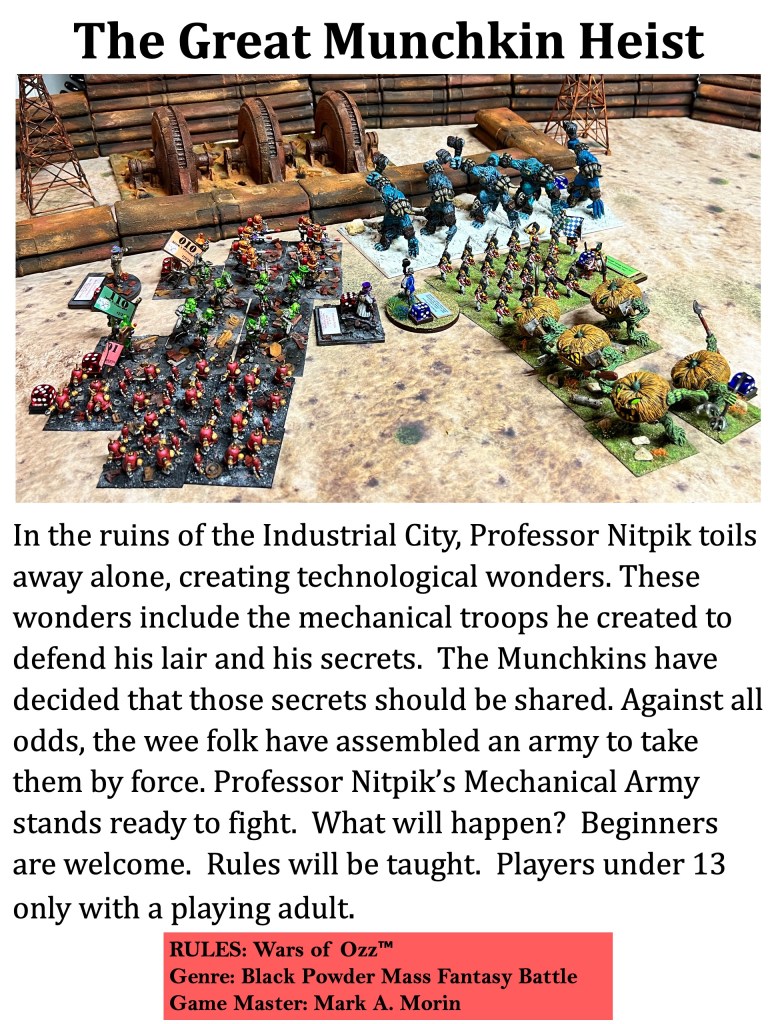
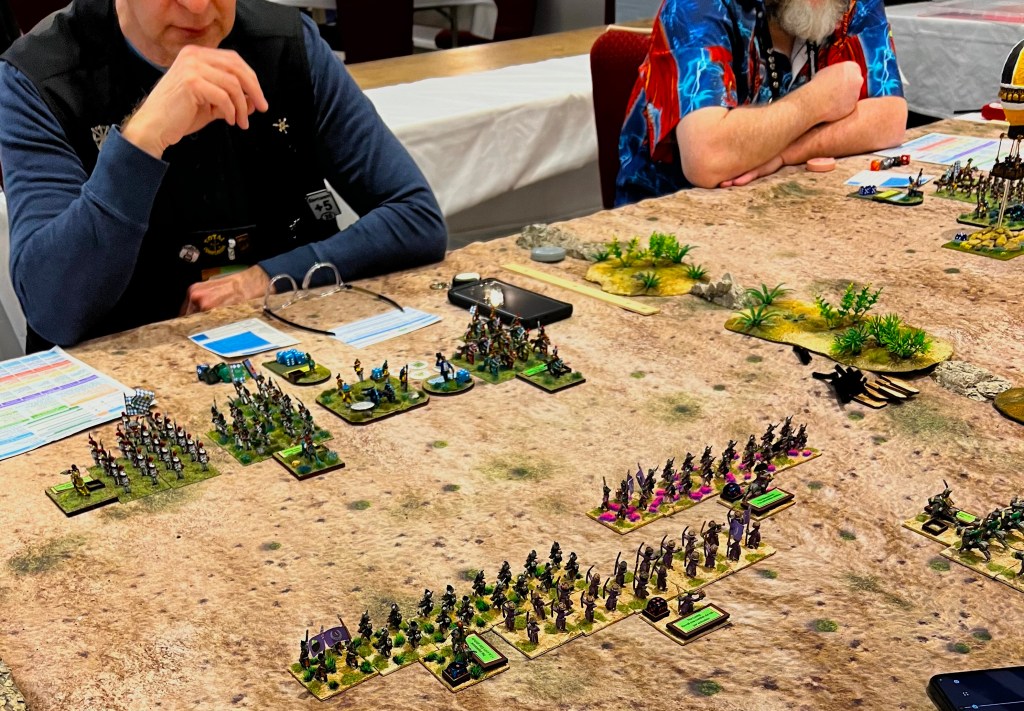
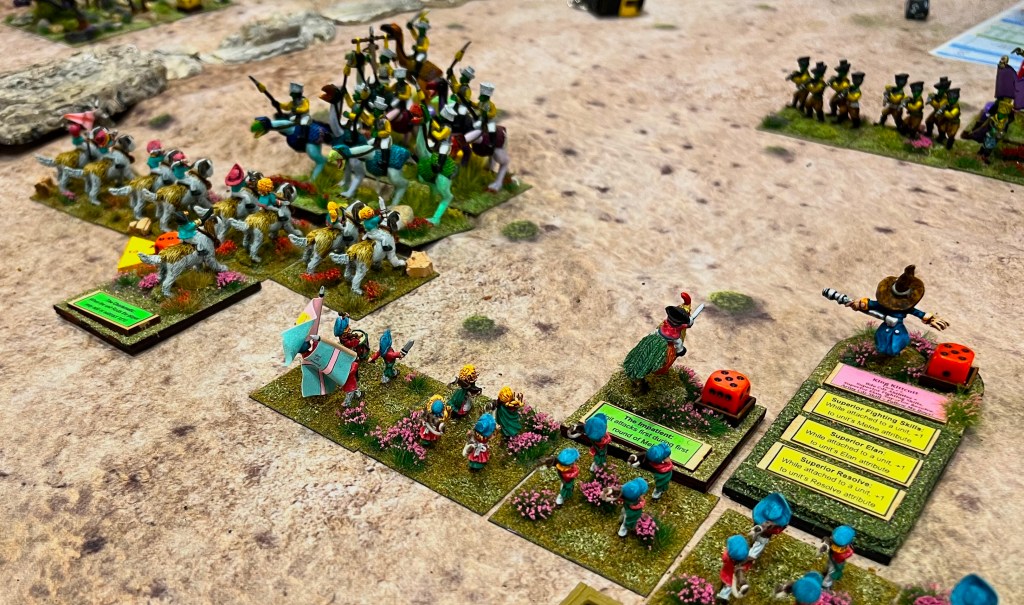
This was a “bring your own brigade” game GM’d by Chris Palmer – and to help I brought both my Winkie and my Munchkin brigades in case they were needed. As it turned out, I commanded the Munchkins, and faced my own Winkies!

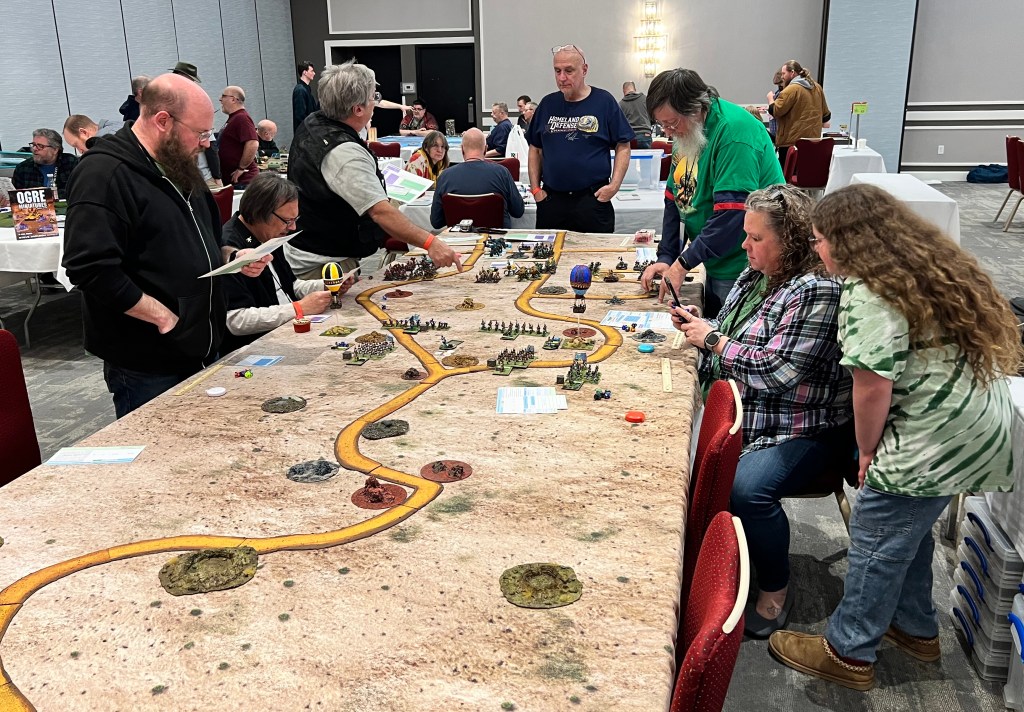
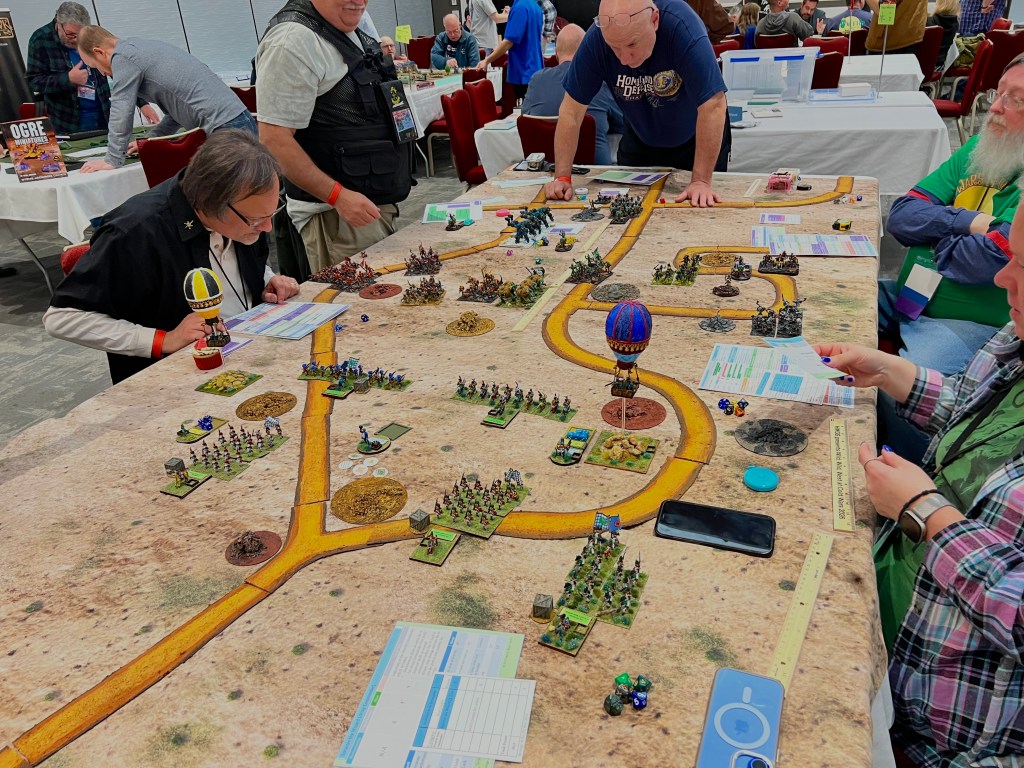
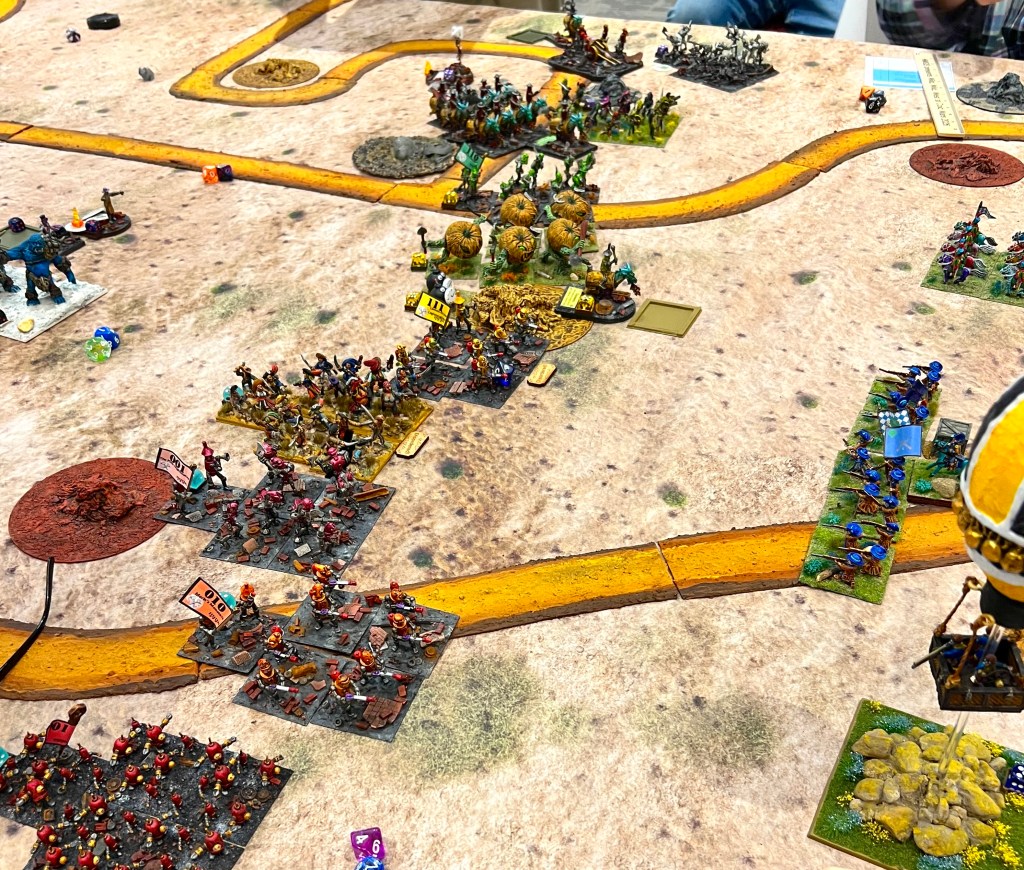
Several different factions are shown below.

And here are some more – click on the images for a better view:

The board was fairly open with some hills and woods in a wintery scene.

The game set up.

It was a fun game, though I felt like I was a bit torn fighting my own troops!

Moving my forces out.
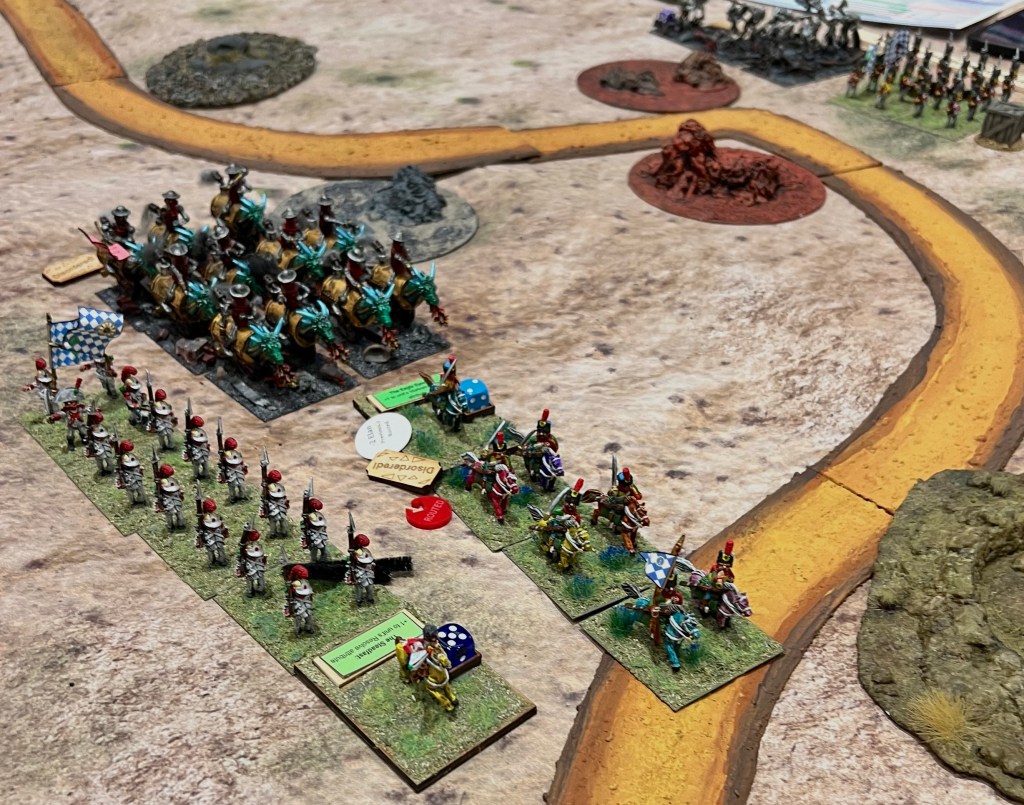
Looking across to my fun opponents – here I have moved Colonel Tik-Tik’s regiment on the left into line to optimize missile fire – but the Winkie zilk-riders went into line and smashed into them.

That Winkie cavalry attacking player rolled 5 dice for hits – not a single miss (the roll was amazing) – and those hits would be doubled due to impetus. All 5 hit rolls yielded 10 hits – and that took out fully 50% of Tik-Tok’s regiment in one fell swoop. Tik-Tok routed, but I was able to rally it and keep it in the game.

While successful in their attack, the 20th Winkie Light Cavalry was now disordered – and my Munchkin battery and my own pony riding cavalry took the opportunity to hit the zilks from both the flank and the rear, and sent them into a retreat.

“Avenge our dead” – was the cry of the survivors of Colonel Tik-Tok’s infantry as their brethren close on the hated Winkie zilk riders of the 20th Winkie Light Cavalry.

The Winkies then attacked – buy mainly piecemeal – and the Munchkins were able to hold and repel both charges by the Winkie Sharpshooters and their ally the Lesser Apes. The artillerists did abandon their gun when the apes hit, but short range canister and a round of melee had already sent the Lesser Apes packing.

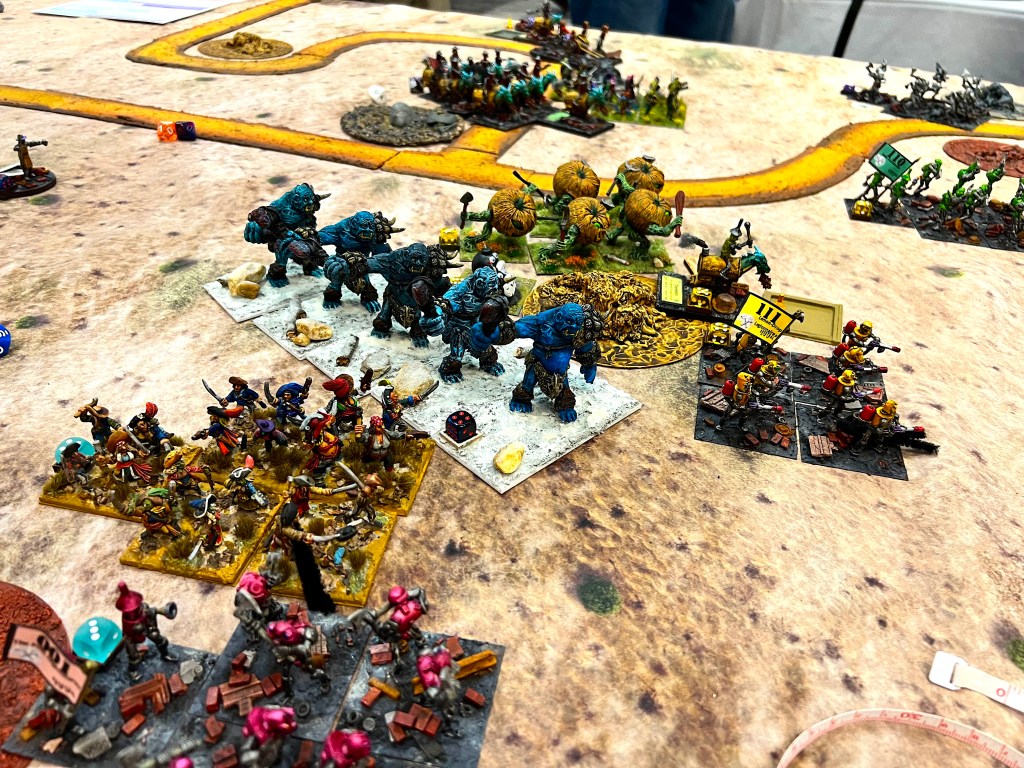
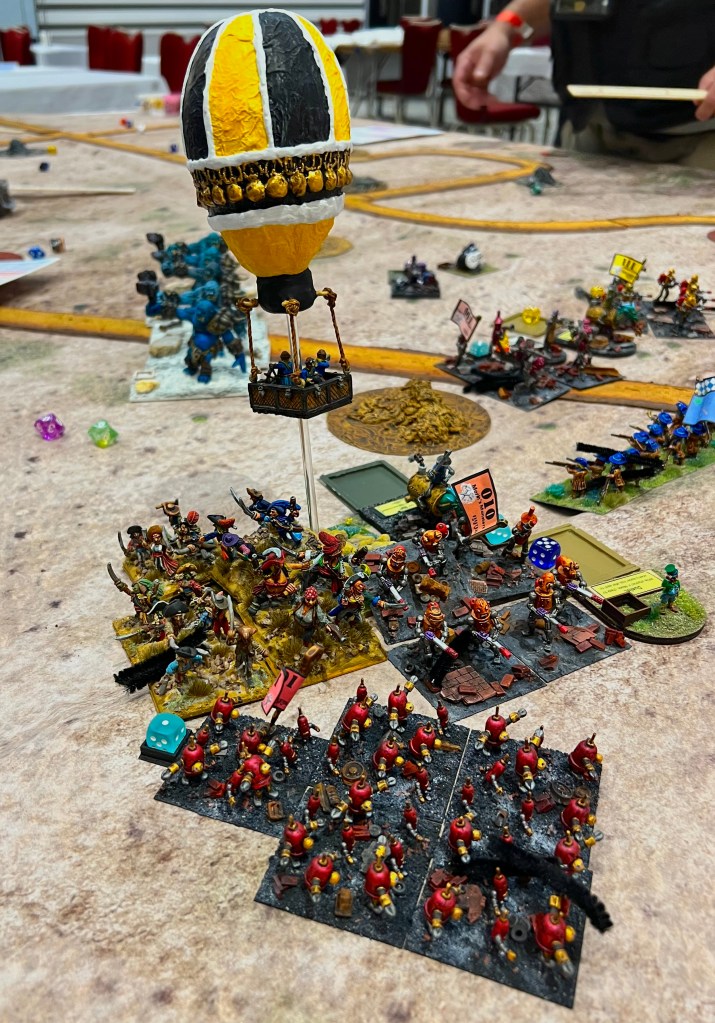
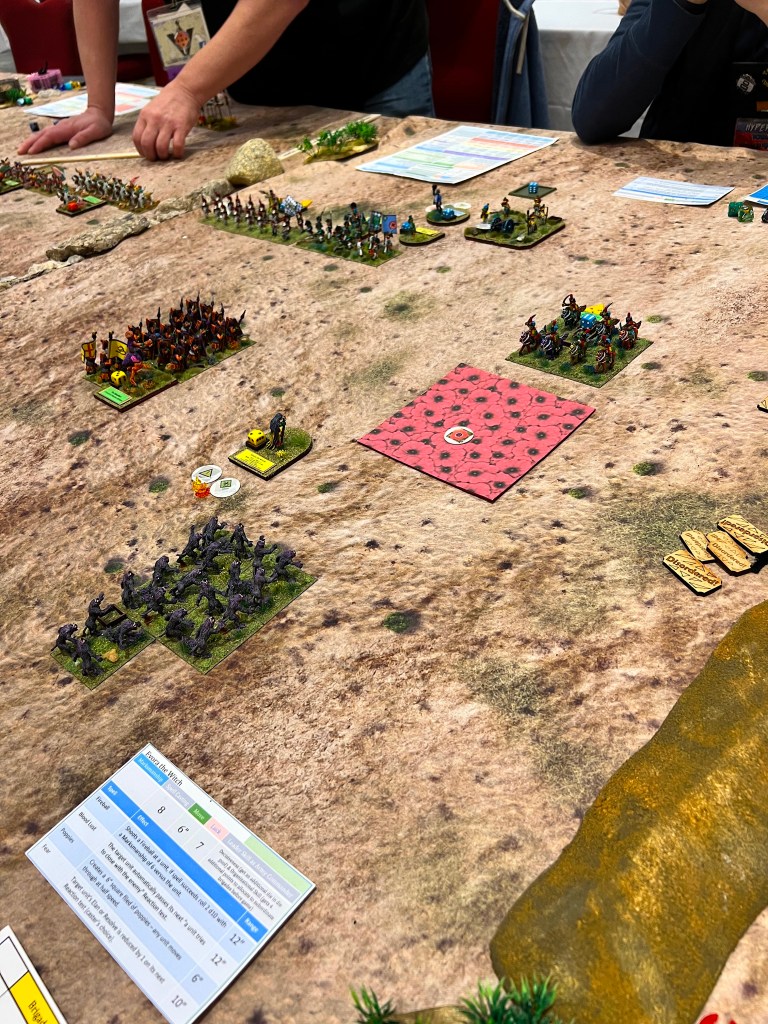
In the middle of the game was a big scrum between the brigade of Ice Trolls, Elves, Dark Elves, and that of the Teddy Bear Infantry, Teddy Bear Artillery, and the Toy Soldier Cavalry.

Scrum in the middle.

The game was a “good guys” victory!

The Battle of Centla (Feudal Patrol)

On Friday afternoon, I ran the Feudal Patrol game of the Battle of Centla – a battle between the Maya and the Conquistadores under Hernan Cortes.

The Spanish needed to reach the Maya city or kill 50% of the Spanish, or kill Tabscoob, the Maya leader. The Maya needed to prevent the Spanish from achieving their victory conditions, kill Cortes, or kill 50% of the Conquistadores. In the game, the Maya do get reinforcements, and the Spanish do not. Time is not on the Spanish players’ side.

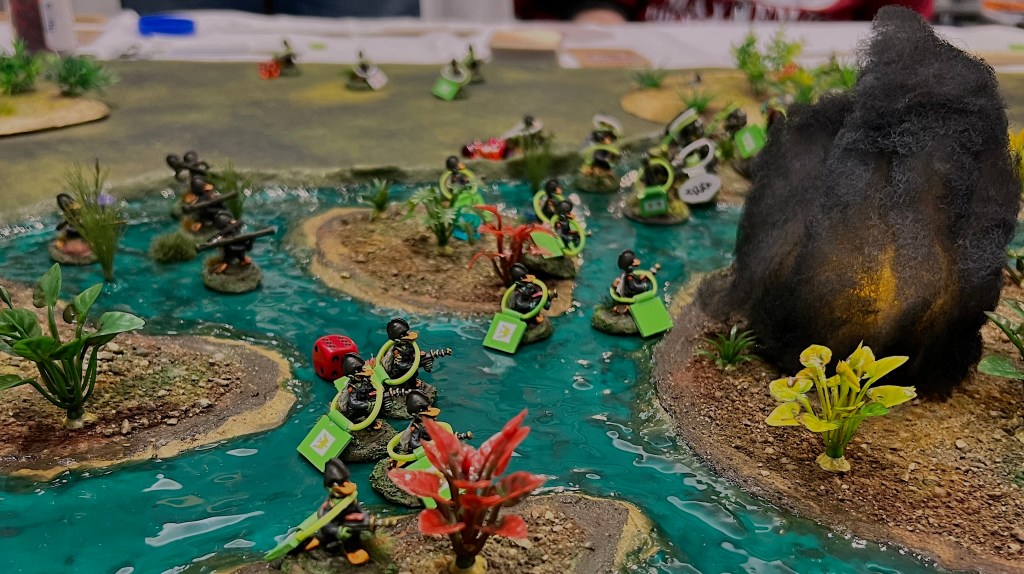
I was happy to be able to use some of my new beach-adjacent jungle bases here.

The game set up – the Spanish are on the beach.
Maya moving onto the beach.
Buck Surdu joins the game replacing a departing player – and commands Cortes.

The Spanish were not initially as aggressive as I expected – though as the game progressed they did start to advance.

Buck and I confer on his troops’ data.

Unfortunately, the Spanish needed to take some risks – and Buck moved Cortes up and into the fight. This was very appropriate given the state of the game at that point. A Maya warrior got a lucky hit on him and cut off his leg – yielding a victory for the Maya. This game is very cool – I have run it several times and both sides have won in the past.

Surprise Aztec Raid on the Spanish Outpost (Feudal Patrol)

After the Friday afternoon game (Centla), I quickly got my next game ( this was held on Friday evening) set up with a lot of help from Buck, Dave Wood, and Greg for Friday night. This is a scenario as described below:

The game went back and forth and it was not clear at all which side would eventually win. There was a lot of action.

The game at the start – the Aztecs needed to cross muddy field to reach the Spanish and the Tlaxcalans. There were also food and gold objectives, and of course VP for inflicting casualties or taking captives.
Greg Priebe advances his Aztec commander, Asupacaci and his warrior priests.

The Spanish used their war dogs and arquebuses to good effect – but the Aztec Elite troops berserked and fought bravely.

Finally, both the Aztecs and the Tlaxcalans started taking prisoners for sacrifice – and gaining victory points in the process. Eric Schlegel successfully fired his falconet again with langridge at a swarm of Aztecs, taking out several of them in the last turn. This was to be pivotal.

I tallied the points – and it was a TIE! 46-46! I call that play-balanced!

I then set up my massive Battle of Lake Texcoco, which would be played on Saturday afternoon. This way I would have all the time I needed to enjoy my next game as a player on Saturday morning – which would be the Wars of Ozz game described next.

War to Save Yule: Battle for the Bauble of Time (Wars of Ozz)

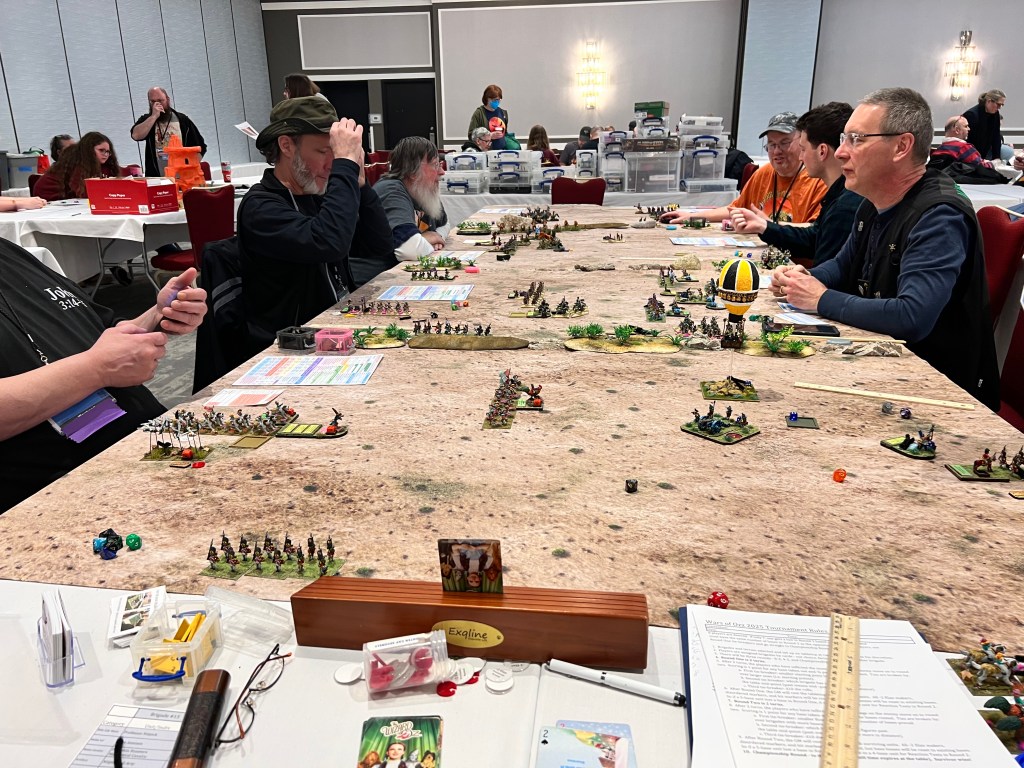
After a short sleep, I played in another Ozz game on Saturday morning. This one was the second of three linked Wars of Ozz scenarios that Chris Palmer and Buck Surdu ran pitting the forces of the Ice Queen, Aurora, versus those of Babbo Natale (really Santa). Aurora wants to seize the Bauble of Time – a magic item that can bend time and lets Babbo deliver all his toys in one night. Of course, Aurora wants it for her own evil purposes. The Bauble was hidden in one of three buildings – and the neither the forces of Yule or Aurora knew which one. The goal of the attacking Ice Queen was to search each of the three areas – which meant that her forces needed to clear defenders from them first. I played on the Yule side in this game, on the Yule’s far left flank.

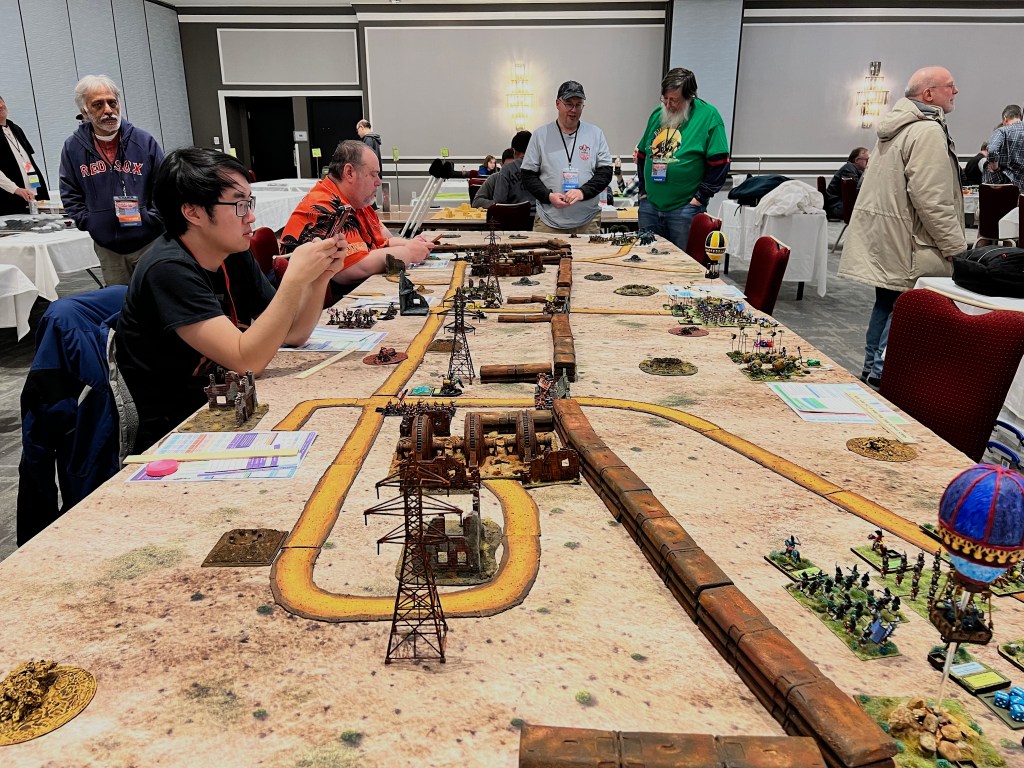
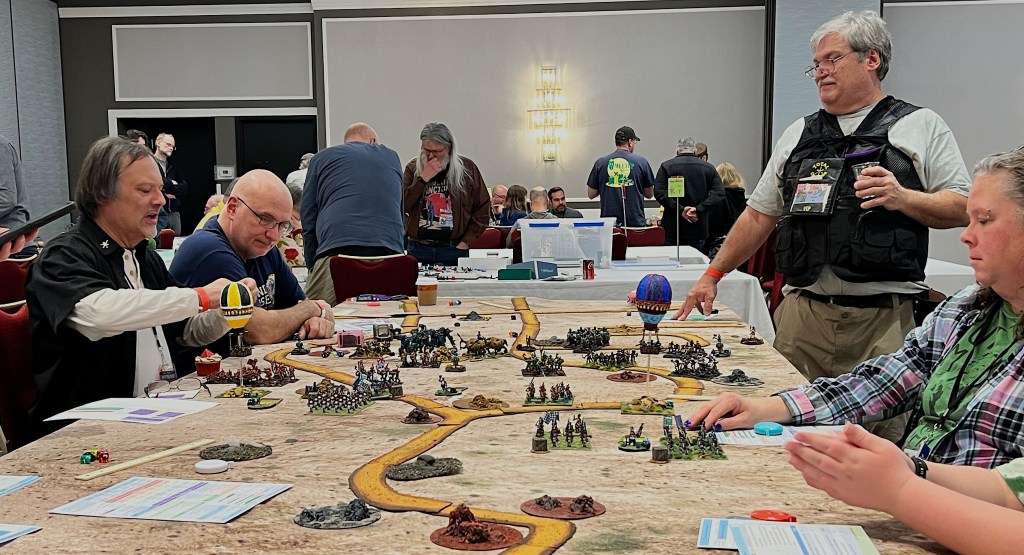
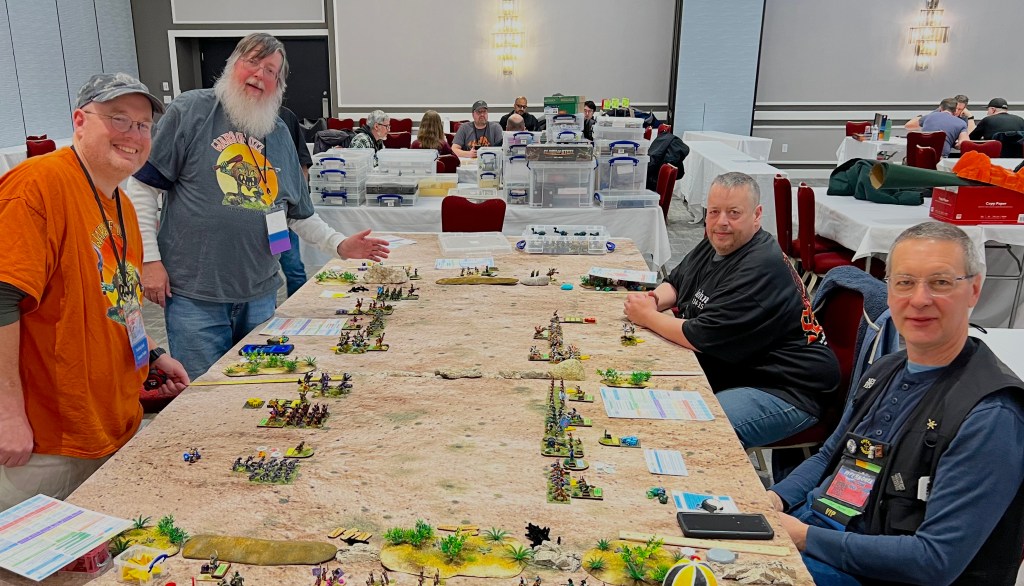
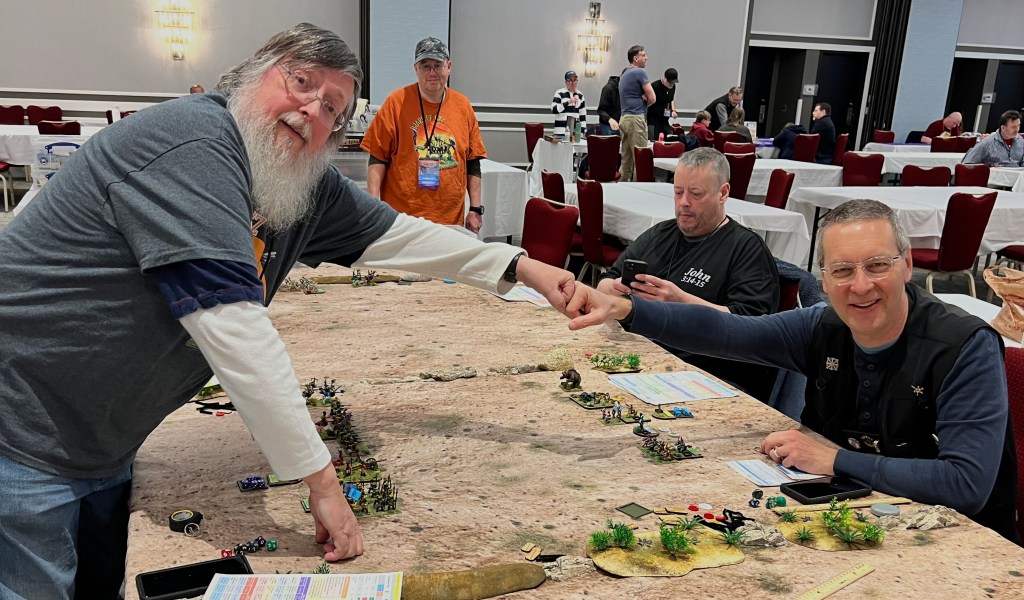
The game set up. Bruce, Buck, and Chris discuss the scenario.

The three possible search zones were as shown below.

Here is a photo of me by Chris surveying the battlefield:

A view towards my position. Aurora’s forces were attacking from the right here. I think I look tired!
Opposite view as Chris briefs the players earlier.

The forces defending the buildings/search zones on the Yule right and center were overwhelmed. Only the one on the Yule left held.

The odds were in favor of the Ice Queen at this point with 2/3 search zones in her control.

Bruce tries to fight off the Ice Trolls.

In the end we were lucky as the Bauble was in the last search zone and safe from the Ice Queen, so a victory for us. Chris would run a second follow on game later that I will share a few pictures of at the end of this post with others that I did not play in or GM. I did play in the 3rd linked game as well – more on that game in a bit.

The game ends.

The Battle of Lake Texcoco (Feudal Patrol)

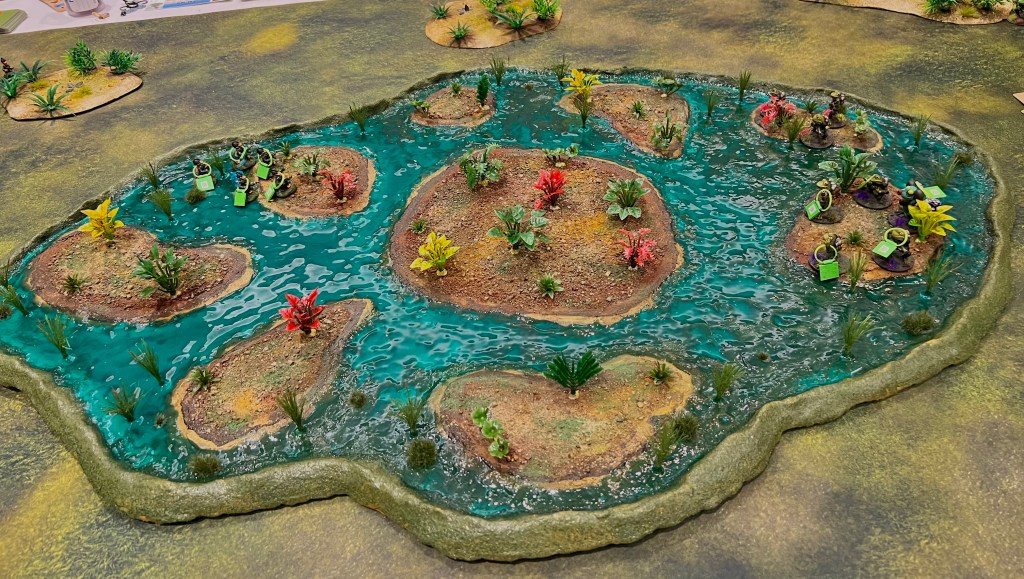
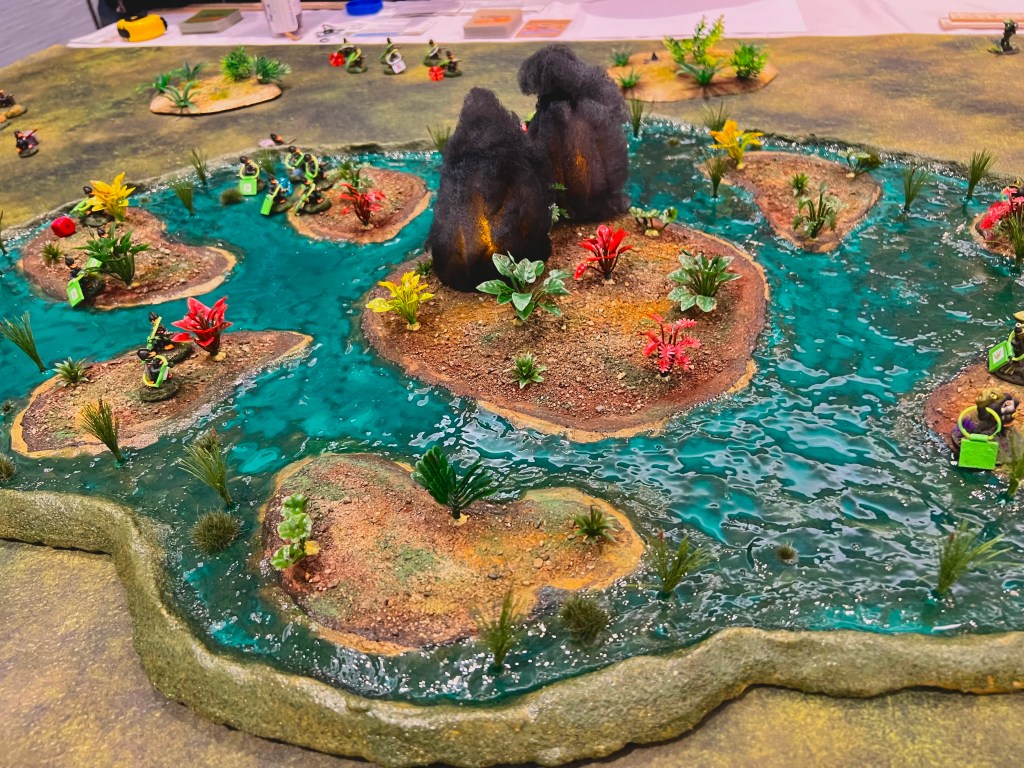
I always look forward to running this game – yes it’s massive but more importantly a lot of fun. Basically there are 5 brigantines loaded with conquistadores and primitive cannon (lombards or falconets) that need to cross the tabletop and shell the other side of the table – where the Aztec capital of Tenochtitlan is located. Opposing them are 21 war canoes filled with Aztecs hell-bent on boarding the invaders’ ships and stopping them. VP are awarded for shelling the city, boarding a brigantine, sinking canoes, and for casualties on both sides. The Spanish have to try to navigate the uncharted waters to do this too.

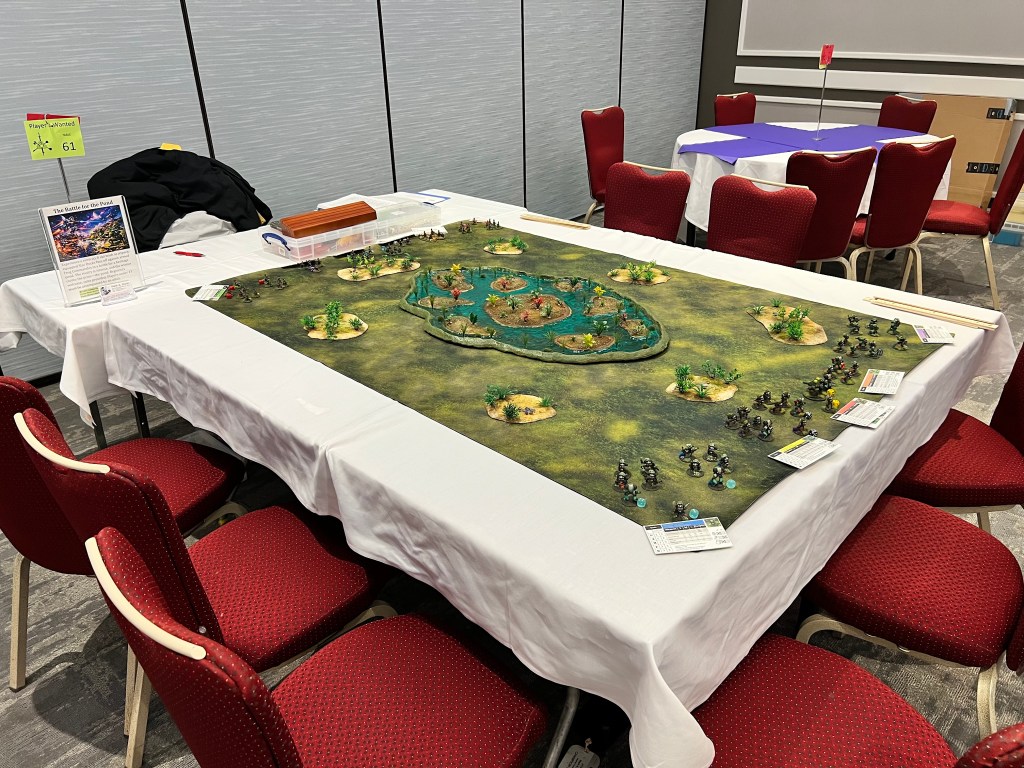
The set up for the game.

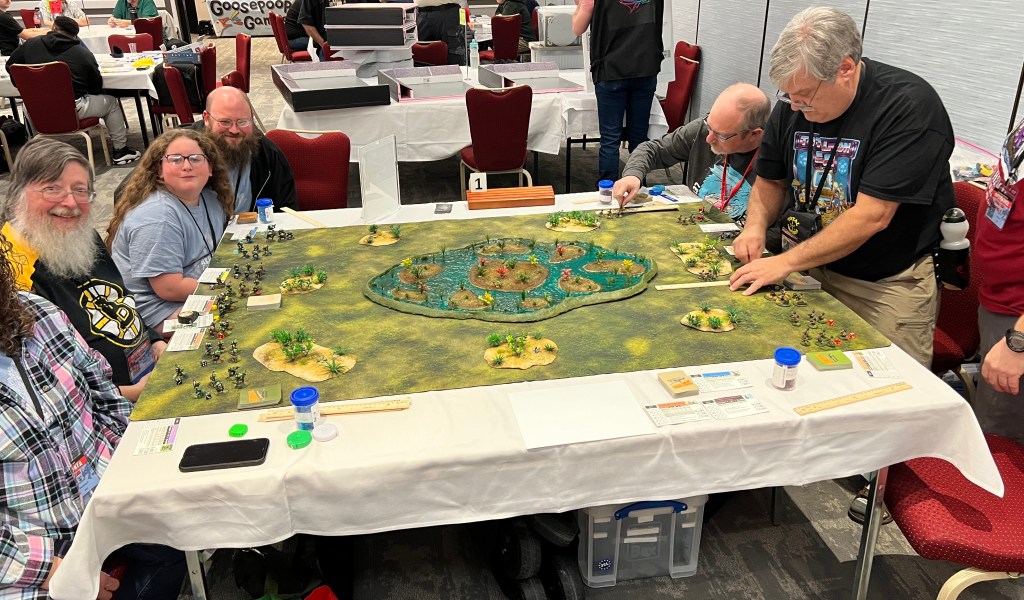
The players were excellent!

The start of the game.

The Spanish moved out and avoided collisions with each other or the islands. Only one got stuck on an underwater obstacle (El Gregorio) – resulting in the Aztecs getting a “Burst of Exuberance” which allowed it to be boarded first. Eventually, all of the brigantines would be boarded to greater or lesser extent.

Boarding!

The Spanish held on and were able to get three ships to shell the city.

Tenochtitlan takes its first hit of solid shot from El Marcos.
A photo from Chris Palmer showing me helping to adjudicate a fight.
The battle rages on the lake.

Of course, there was even more boarding!

El Marcos is boarded.

The game was pleasantly and briefly interrupted at this point by the HMGS staff. As it turned out, my game was selected to be honored with a “PELA” award for the time slot. PELA stands for “Pour Encourager Les Autres” which in English translates to “For Encouraging the Others”. These awards are defined by HMGS as going:

“to the games that best embody the positive traits of miniatures gaming, such as well-painted figures, great looking terrain, interesting scenarios, enjoyable rules, good sportsmanship, and an enjoyable time – events that do the most to “encourage others”.”

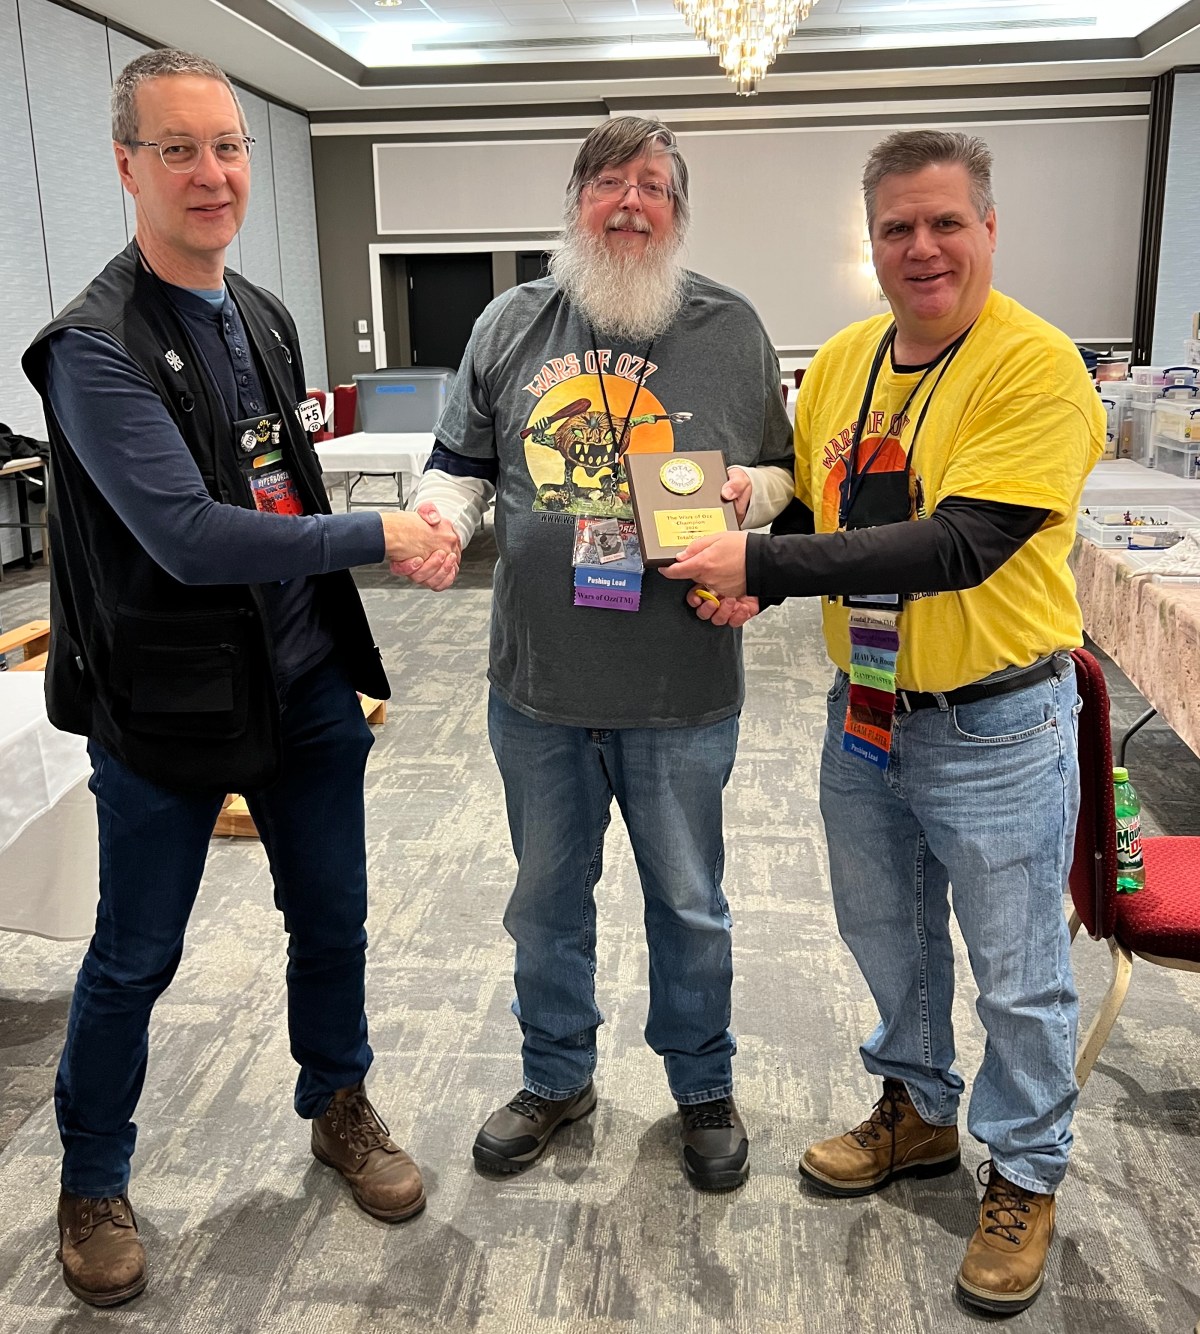
This was something as a GM that you can really appreciate! I was really honored – and it was nice to get applause from the room and my table too. I think that there were about 30+ games in my time slot – so this was tough to get. The award was a lovely knight figure on a plinth and a voucher for the vendor hall. Thanks HMGS, it has a place of honor at home! Thanks players!

I am awarded a PELA!
The PELA among Spanish casualties (hey, I was still running the game!).

In the end, the Spanish narrowly won the game by a score of 367-316. If the Conquistadores had made one less shot into Tenochtitlan, it would have been only a one shot victory.

As this was my last game to GM, I was able to get most of it picked up (thanks again to the HAWKS for all the help) – and get into playing my last game of the convention.

War to Save Yule – Ambush or Fighting Retreat (Wars of Ozz)

This was the third Ozz linked game run by Buck Surdu. In the second game, the forces of Yule held on to the Bauble of Time. Here, the Ice Queen’s forces are ambushing a convoy of Babbo Natale who is trying to get the Bauble to a safe place. I did not get as many pictures of this game – but I played on the side of the Ice Queen this time. We ended up taking the Bauble (Giant Evil Snowmen charged the convoy and stole it). It was a lot of fun.

My Ice Trolls take a beating from the Toy Soldier cavalry.

I was on the far left flank of the Ice Queen’s forces – and I after the Toy soldier cavalry and the Teddy Bear artillery beat up my Ice Trolls and Krampus, I was able to flank the Teddy Bear battery with Dark Elves. This attack sent them fleeing and the rear middle of the battlefield became congested with forces. Meanwhile, Chris Palmer valiantly pursued the Snowmen with the Toy Soldier cavalry. Luckily for our side, the Snowmen escaped into woods where the cavalry would not move as quickly – with the Bauble. Victory!

My Dark Elves move up the Yule flank.
Snowmen abscond with the captured Bauble!

Other Game Photos

There were of course many other games – and I tried to get some photos of them plus I have included many from Chris Palmer. This is not all of the games at Cold Wars by any means.

For the gamers, please enjoy these here! For the GM’s, kudos on the work you put in on some amazing games, and apologies in advance if I get any descriptions wrong here.

Battle of Hanau, 1813

Dave Wood’s Fate of Battle game in 10mm looked amazing.

The Natives Return to Schlegel’s Ferry

Eric Schlegel had a really cool board for his colonial Chesapeake game of Feudal Patrol.

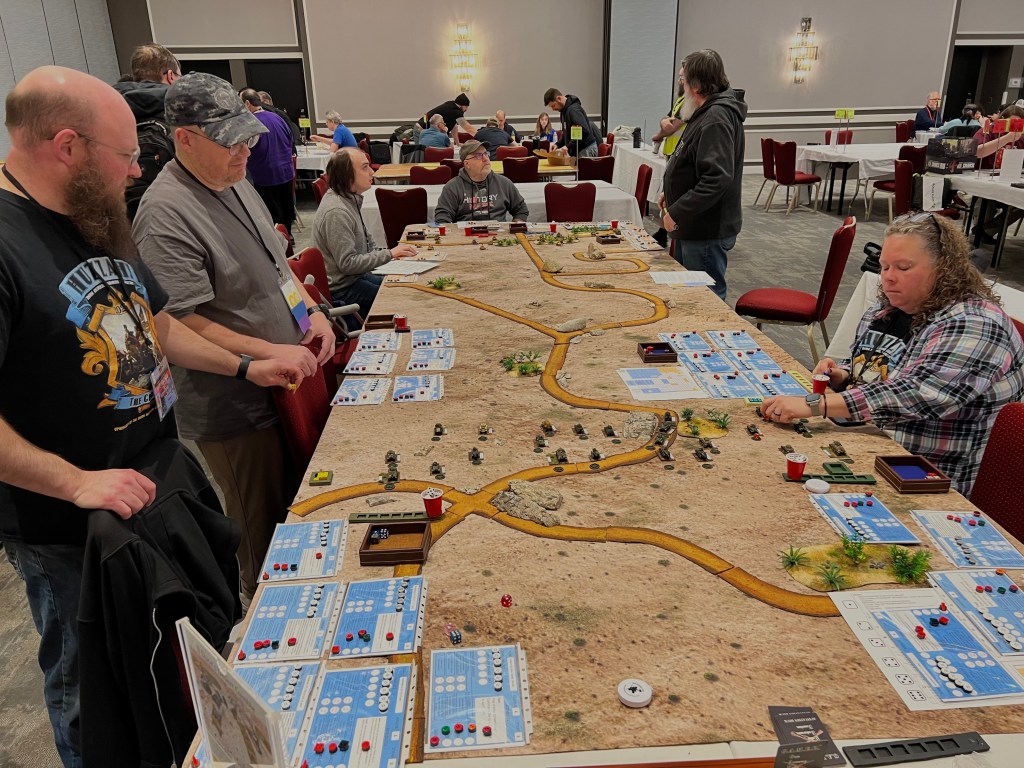
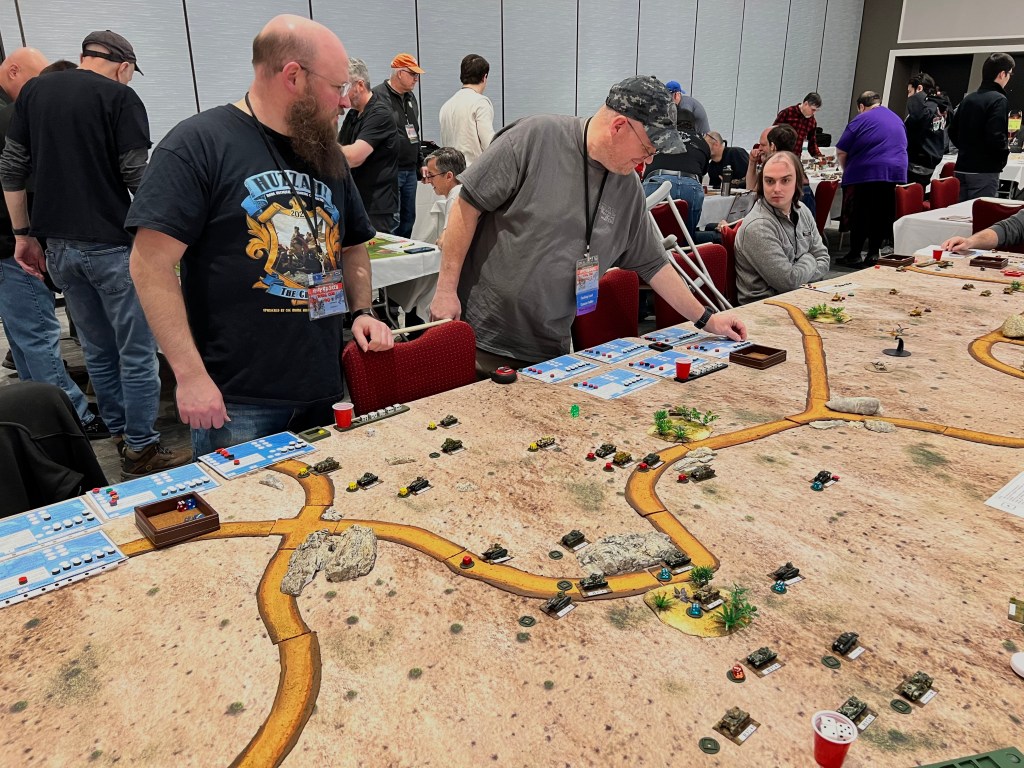
Let’s Play Combat Patrol – France 1940

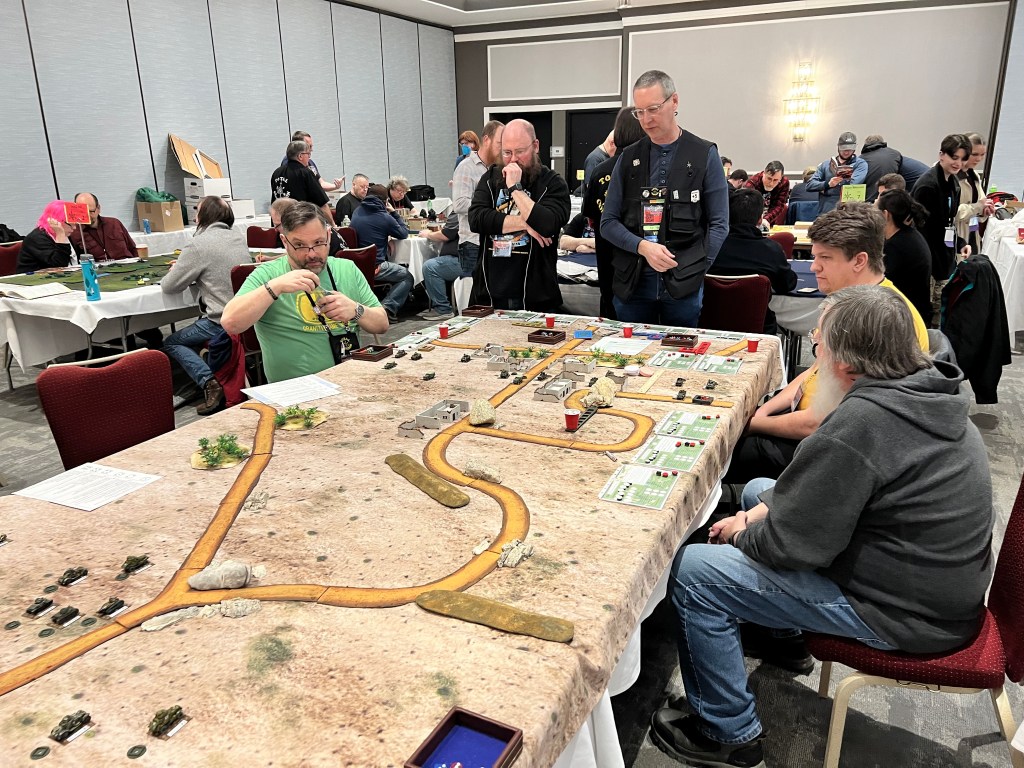
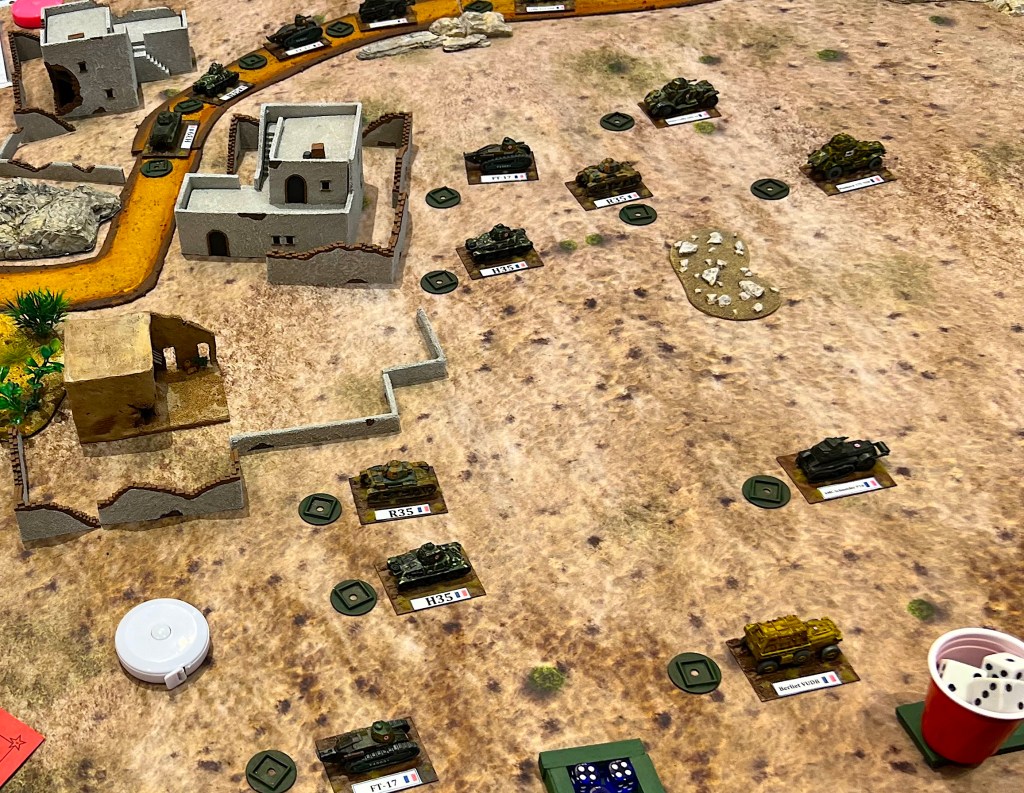
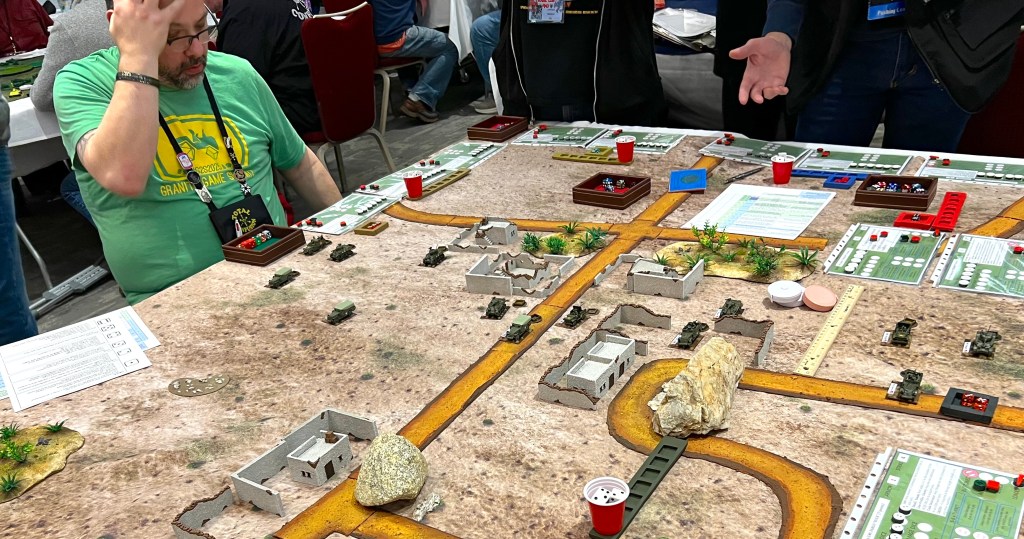
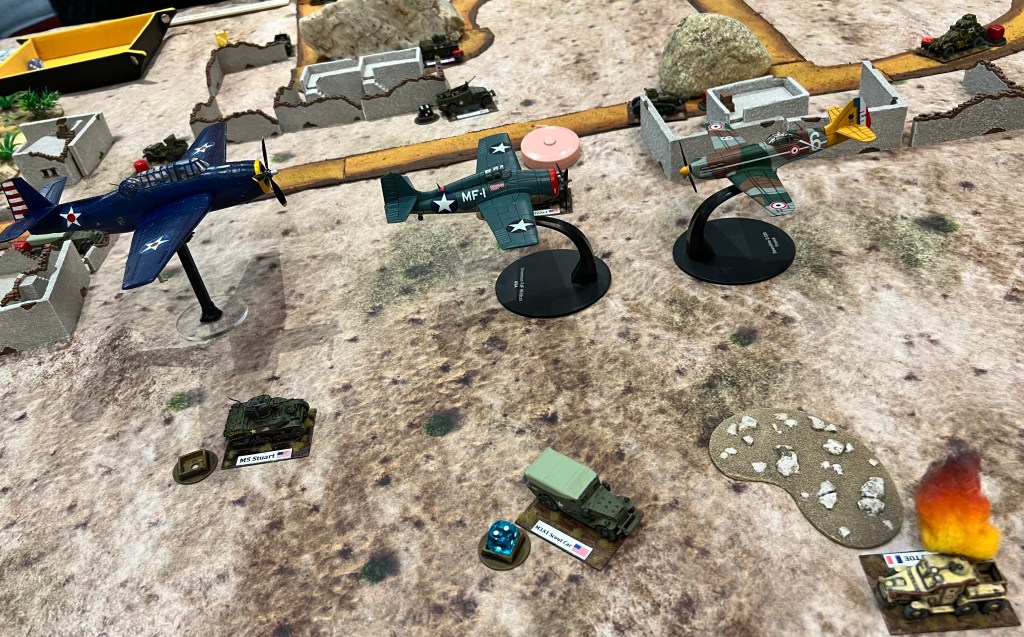
Greg Priebe ran a France 1940 scenario for Combat Patrol.

Greg and Buck survey Greg’s set up.

Wars of Orcs and Dwarves (WOOD) Playtest

Dave Wood ran a few WOOD games with amazing set ups.

War to Save Yule – River of Ice (Wars of Ozz)

This was the first of the linked Ozz games. This is the one that I did not play in as I was running my Aztec raid game.

Counterattack Near Dubno (Battleground WW2)

Don Hogge’s always popular WW2 games are so cool. This was a 28mm game set on the Eastern Front on June 28th, 1941.

Forest Encounter (Mobile Suit Gundam: The Gravity Front)

Here’s a look at Kevin Fischer’s game set up.

Got Skogskatter (SAGA)

James McWilliams ran a couple of SAGA games.

Pierce’s Hill, Philippines 22 December 1941 (Combat Patrol)

Buck Surdu ran a very cool looking game set during the Japanese invasion of the Philippines in 1941. He worked hard to get the 1941 look right – and he nailed it.

Let’s Play Feudal Patrol! – Viking Raid

Greg ran his introductory Feudal Patrol Viking Raid game and had a full table!

Can the Ratlings save their homeland again from the army of the Necromancer? (Wars of Orcs and Dwarves)

Dave Wood ran yet another visually stunning game – and for fun he used my Winkie Cavalry and Infantry in the game, plus my Lesser Apes. The feedback I got was that they acquitted themselves very well while I was off in Mesoamerica!

Game view.
Dave running his huge WOOD game.

Al Capone Comes to Schlegel’s Ferry (Blood & Swash)

Another great use of Eric’s terrain for a 1920’s game.

A truly engaged table deals with smuggling and gangsters in the 1920’s.

Concord to Lexington – Theme

Geoff Graff ran this game of 15mm figures set in my home state in the beginning of the AWI.

Test of Honour – The Last Yamashiro (Test of Honour – Quick Play)

I saw this in the adjoining room to the HAWKS – WOW what a set up! GM was David Hill.

This is a HUGE game!

At the other end of this beauty was a harbor and ships too.

Beautiful set up – nice to see young gamers too.

WWI – Battle of Gnila Lipa (Fall of Eagles WWI)

This set up caught my eye as well – GM David Rollins had a huge table for this battle between the Austrians and the Russians in WWI.

Mars Attacks – Beach Head! (Wings of Glory Tripods and Triplanes)

What a concept – Martians in Tripods taking on Spads and Nieuports in the aftermath of a post-WWI meteor shower! GM was Mike Jacobs.

As I said, this is a big post but I hope that it was enjoyable to look at. Sorry if a game you were or that you ran in was not included – but I’m sure somewhere else there are photos for the world (at least I hope so)!

That’s it for now! Feel free to comment!

Historicon 2021, Christoricon, and Axis & Allies

This post will cover my wargaming over the extended Veteran’s Day weekend – hopefully you will enjoy the discussion and the photos of the games here. Hell, grab a beer or a wine or whatever! Some cool pics and links to be sure.

I had been planning to attend the last Historicon – but it got moved (I think there was a pandemic or something, I (try) to forget). The event was then rescheduled for November. As Historicon and the other HMGS events have been on my bucket list, I wanted to go as a GM anyways and player too.

Also, as followers of this blog know – I have been deep into building out a series of games for the Spanish Conquest over the last year-and-a-half. This has involved many aspects – writing a rules supplement, painting figures, and building a series of games and battlefields much more for the for Feudal Patrol™ games for the period of the Spanish Conquest in Mesoamerica 500 years ago. I also recently rewrote my supplement Civilizations Collide – which will be a free download (as will a scenario booklet with multiple historic scenarios that I am working on now). So, I was very much looking forward to Historicon 2021.

Therefore, I signed up to run two games – both of which are scenarios on my in-progress booklet. I planned on running both my “Surprise Aztec Raid on the Spanish Outpost” and “Cortes’ Causeway Escape Attempt” games on Thursday night and Saturday morning respectively.

The Maryland-based H.A.W.K.’s were kind enough to admit me as a game master and share their room. I have been long-time friends with two members, Dave Wood (my old West Point roommate) and Buck Surdu (who also has been a friend since our West Point days which are now going back aways). Buck is also the author of many games, to include  Feudal Patrol™ and Wars of Ozz© (see a nice review of Ozz here).

My friend Craig Hogan, myself, and Dave Wood back at USMA – probably Ring Weekend in the Fall of 1983. Craig sadly was killed a few years ago now in a private plan crash.
Thanksgiving 1987 in Hagenbach, Rhineland-Pfalz, West Germany, Buck, myself, and my daughter Ellen (who is 34 now). We got together for gaming and the holiday. Buck came up from Vicenza, Italy where he was stationed to my place with a buddy, and we gamed and we had fun.

Through Dave and Buck, I have been lucky to make new friends with others of the H.A.W.K.’s, like Greg Priebe, Chris Palmer, and Duncan Adams (and many more too – like Zeb, Don, Eric and others – please don’t feel left out if I did not mention you). Due to my ongoing garage+ build (of which there are a number of updates that are listed here), I missed BARRAGE in September. So, I was pretty stoked about the opportunity to get together with friends (and make new ones) and push lead around the tabletop.

However, as fate would have it, some folks would not be able to attend Historicon due to personal reasons. As seeing and gaming with friends are as much a draw for me as the convention itself, I needed to make a change in plans. We had a Zoom call, and collectively arrived at a new plan. I would drive down from Massachusetts and meet Dave in Maryland for a gaming afternoon on the 11th at my hotel room. Then on Friday morning I would run my “Surprise Aztec Raid on the Spanish Outpost” game in Chris Palmer’s gaming room in Maryland, and then play in an Ozz game afterwards until I needed to leave for Historicon (about 90 minutes away). Friday night I would drive up to Valley Forge, Pennsylvania to set up my “Cortes’ Causeway Escape Attempt” game for Saturday morning play.

So, on a 28-degree morning in Massachusetts, I defrosted my loaded car (12 boxes of terrain, plus 2 mats, a wagon, plus a suitcase) and headed to Maryland – arriving around mid-day – where it was 4o degrees warmer. Ah, New England!

Frosty morning departure.

Axis & Allies

Dave and I have now gamed since 1982 – so coming up on 40 years. We have played Avalon Hill’s “Victory in the Pacific” (as well as other titles) dozens of times over the years. On Thursday, after I arrived, we decided to be different and try Milton Bradley’s “Axis & Allies” this time – a board game with plastic miniatures that we have discussed many times but never played before. I got this game back in the mid-80’s. At one point there was an on-line version but we never got around to playing that either. For this game, we picked sides at random, and Dave played the Axis, and I the Allies. It was Veteran’s Day, and as we are obviously both vets, it was a nice add.

The game went back and forth. A lot. I managed to keep Russia in the game – and built an industrial complex in India for the British. This allowed me to build 3 units per turn there in an attempt to keep the Japanese off the Russian’s back.

After the first turn, I had consolidated a nice position in Mother Russia to try to thwart Dave. And yes, the shirt says what I am impressed with – Dave has run dozens of marathons and many runs up to 50 miles and maybe more in distance.
We had a back and forth fight over the Karelia territory that had a factory I did not want to lose. Eventually, I did.

Meanwhile, my Indian gambit attracted a lot of Japanese attention – maybe too much. Dave hammered away at it and while the Japanese were unsuccessful he did attrite my forces and that prevented me from exploiting my force buildup.

Dave made multiple attacks on India supported by carrier-based fighters and land-based bombers. I had sent the American-supported Chinese infantry in to help defend. Meanwhile, Russia fell.

Dave kept hammering away at India, and eventually had his Germans violate Afghan neutrality – hitting India for the decisive blow. Yes, the Germans took India by blitzing panzers through Afghanistan…

I built India up and flew in American air support, but the next turn it fell.

I did desperately roll for Weapon’s Development for both the Americans and the British – with only the British succeeding in getting 3 – Rockets, Super Subs, and Strategic Bombers. My rocket and strategic bomber attacks slowed the German’s production, but it was too late…congrats to Dave!

Christoricon – Surprise Aztec Raid on the Spanish Outpost

Originally I was supposed to run my one of my games at Historicon on Thursday night – that being a rural one where Aztecs are making a surprise raid on a Tlaxcalan village (acting as a Conquistador supply depot) – only to see that there were indeed some Spanish there. Instead, we went to Chris Palmer’s house and I ran the game on early Friday morning. We joked and called it “Christoricon”. I hosted and there were 5 players – Buck, Duncan Adams, and Dave for the Aztecs, and Chris and Greg Priebe for the Spanish/Tlaxcalans. The defending Spanish/Tlaxcalans had one Warband of three Elements – 23 figures worth 41 points. The attacking Aztecs had two Warbands of 3 Elements each – 53 figures worth 78.25 points. Buck has already written a great post about this game and the others that day on his blog here – and his write-up and pics are great. I took some photos that you see below, but for me, simultaneously being a GM and a photographer is not easy – so I do recommend you take a look. Meanwhile, here are my pics.

The game is ready to begin. Chris and Greg elected to place the Conquistador Element armed with arquebuses further away from their leader in their secret deployment in lieu of their Element of Sword & Buckler men. This meant that they were “pinned” with their black powder weapons only activating at best on half of the turns. They could have “unpinned” but as luck would have it the dice did not let that happen. Note also that Franco the unlucky Conquistador made the trip!

Chris chose to send out his war dogs towards Dave’s Aztecs as a screen, and they promptly took atlatl damage. Dave, Duncan and Buck moved up quickly, while Greg took up a position in the maize field with his dangerous Tlaxcalan bowmen.

Dave moves up his “twinned” Elements of veteran/novice warriors towards a wounded war dog.

The Spanish then had their Catholic Priest take possession of the gold (possession of the gold was one of the game objectives) and drag it to a more secure location while they contested the Noble House (another objective) – (insert joke here).

Battle starting at the Noble House – the war dogs are already going down here. Their priest has already dragged away the gold to a safer location.

Buck’s advancing Elite Cuahchicque (“Shorn Ones”) took the full volley of arquebus fire from the less-activating pinned Spanish. Despite these Elite Aztecs taking a lot of damage and having a ton of Morale checks to overcome, Buck was able to rally his troops successfully against the odds twice. Meanwhile Duncan moved his Jaguar and Eagle Warriors against Greg’s Tlaxcalan bowmen in the cornfield – hoping to best them in melee.

Dave and Buck confer while surveying Duncan’s advance – and their chances at victory – with concern. This shows the second volley that Buck’s Elite Shorn Ones took and the blue beads are Morale checks he needed to pass. He did. Twice.

Slowly, the tide of battle started turning in the Aztecs’ favor. Dave’s attack on the Aztec right was making headway, and they were gaining control of the objectives.

Priest still dragging the gold away here.
Lots of carnage on the tabletop.

Eventually, the Spanish and Tlaxcalans were overwhelmed.

The game ended as a resounding Aztec win, as they had control of three objectives, as well as dragging off 9 pour souls for sacrifice, killing 2 more, and making one run away. The Spanish had only the gold, but did dispatch 15 Aztecs and capture one more. The final score was 86-40 as you see below. I think the players had a good game. Congrats to Dave, Buck, and Duncan!

Christoricon – Ozz

After the Aztec/Spanish game, Chris Palmer ran a Wars of Ozz© game that I played in briefly – again, Buck’s blog post has an excellent account as I left after having stymied Dave’s advance a bit (though I was pretty well smashed force-wise in that effort). I commanded a force of Winkies with allies (Greater and Lesser Pumpkinhead Warriors). My sacrifice was not in vain, and it allowed Chris and Greg to smash the Munchkin center.

I love the Ozz figures!

I then drove to Historicon, and set up for Saturday morning’s game.

Historicon – Cortes’ Causeway Escape Attempt

The drive up to Valley Forge Resort Casino was uneventful – though finding the H.A.W.K.’s room was a challenge. The gaming was not located in one location at the resort. Unfortunately, it was also a Friday night at a casino and all the close parking was gone. Luckily, I have a little collapsible wagon and was able to get into the room with my stuff in a few trips and set up the terrain and the troops for Saturday morning’s game, Cortes’ Causeway Escape Attempt.

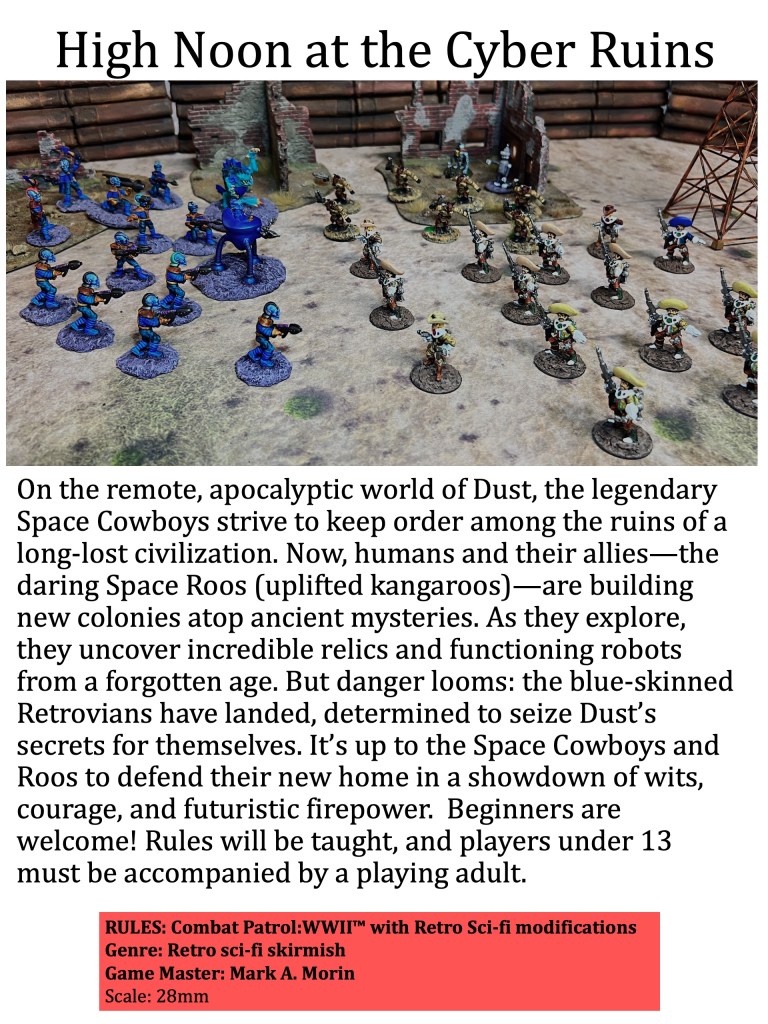
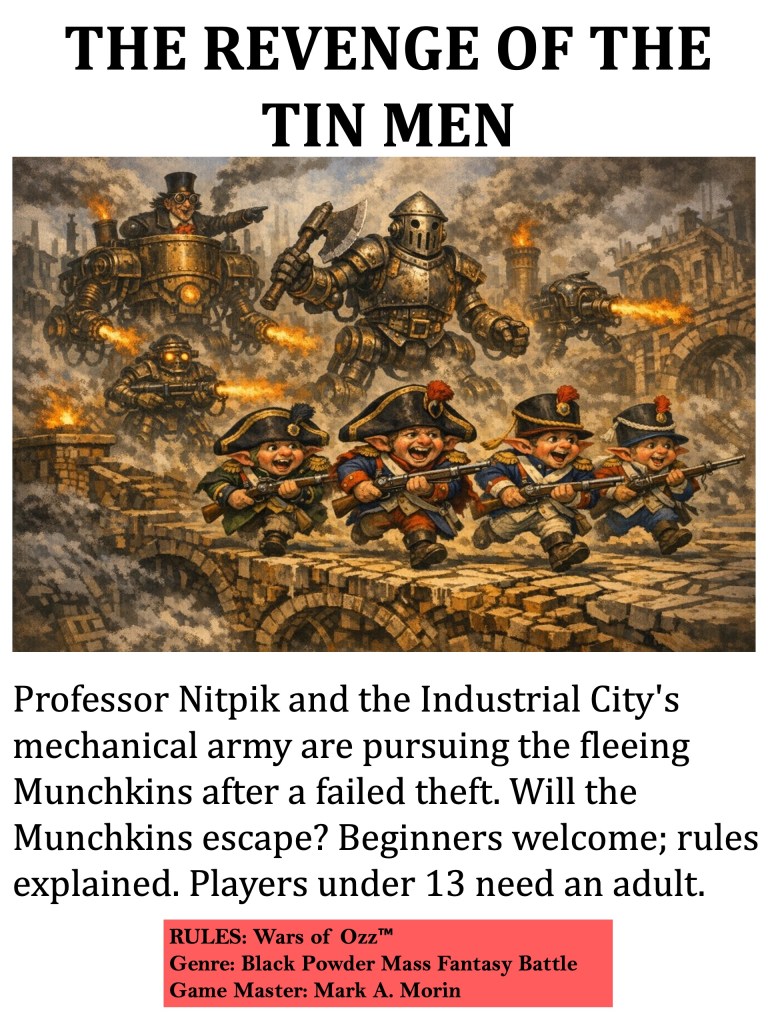
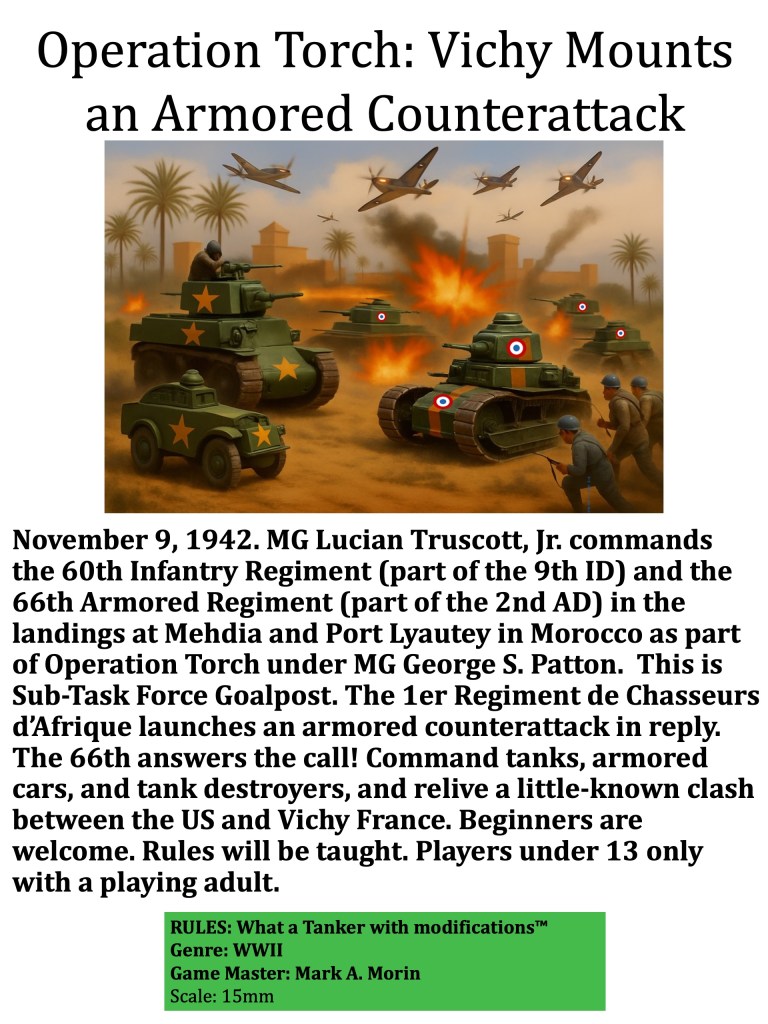
My game flyer

You can see a short Instagram video of the set up here.

It’s a BIG battle. The Spanish/Tlaxcalans have three Warbands of three Elements (2 Spanish, 1 Tlaxcalan) plus support – 77 figures (including the 4 war wagons) worth 161.75 points. The Aztecs have five Warbands of 2-3 Elements each – 109 figures worth 154.25 points. 186 figures in total. This battle is Cortes’ second attempt to escape. He would do a second on the following day, and three days later a third – La Noche Triste. Originally, on the Historicon listings, the game was supposed to be La Noche Triste – which again happened three days later (and of which I will have that scenario written soon) – but I needed war canoes for that one. Those I don’t have yet, and will be mentioned here in a bit.

Back to the game set up. As I was setting up, I had a number of people come by to remark positively on the game visuals – terrain and figures. They had seen my posts on different forums (or fora both are ok!). To all of you, thank you so much for your kind words and interest.

Besides all of the cityscape – and it’s a lot I know – but with everything predeployed I just needed to put players on their troops and let them know what they needed to do on their part of the battlefield.

As I mentioned before, I had previously needed to cancel my Thursday game – and I got a comment from one of our blog community – Harry (aka borderguy190)- that he was disappointed as he had signed up for the game. I apologized, as I wish I could have ran that too at Historicon as well. But the good news was that he would be playing in this game!

He joined 7 other players. They seemed to grasp the concepts of the game quickly – and I did get some help from Greg Priebe and Buck Surdu in the early turns before they had to help run an Ozz game.

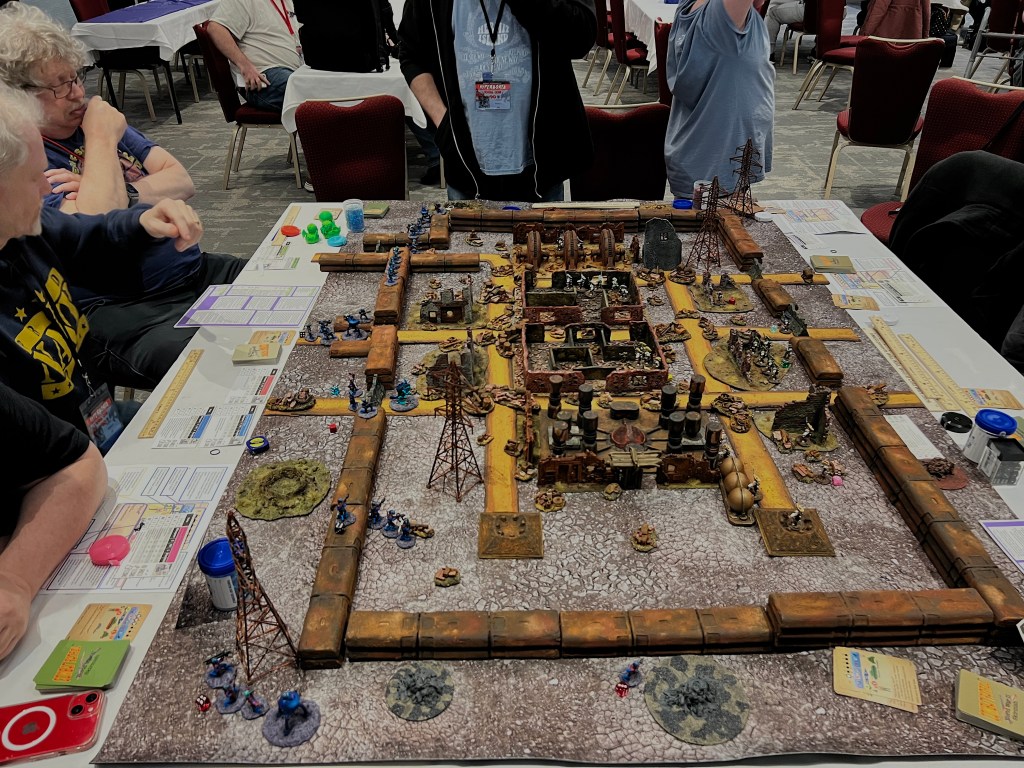
The game set up.
Troops deployed and dashboards out. My undermagnets and game markers really have proven their worth – especially in big melee scrums.

In this game, the Conquistadores are surrounded, and need to fight their way out from the Palace of Axayacatl where they were holed up with their hostage/puppet Montezuma II. They have war wagons, and while these are helpful in providing cover against missile weapons, they are also rickety and slow – and prone to breaking. In fact, all of them broke during the game and were unable to move afterwards. The Aztecs are trying to get to the Conquistadores and avenge the massacre that the Spanish perpetrated at the Festival of Toxcatl. Their Tlaxcalan allies are mostly on the other end of the tabletop and trying to break into Tenochtitlan to help their Spanish allies escape.

There were ups and downs for both sides all over the table. The Conquistadores breakout went slowly, but they did take out a lot of Aztecs. On the other end where the Tlaxcalans were trying to help, the two sides traded missile fire and got into a scrum but were unable to change the status quo.

Lots of action! Harry (in red) ponders his next move.
Aztecs swarm the war wagons and wound the crossbowmen and arquebusiers inside.
Thinks get more contested in Tenochtitlan.

One of the aspects of the game is the importance of The Banner of Cortes. It provides inspiration to the Conquistadores and helps them to reduce negative Morale effects. However, I also made its capture (as well as incapacitating Cortes and dragging him off for sacrifice) game objectives. The Aztecs took some heavy losses BUT were able to take out the bannerman and seize the banner. This lead to the Spanish having to try to satisfy Honor and retake the banner. However, this did not happen before the game’s end. As it was worth 50 points (see below), it was decisive.

The Banner of Cortes is taken!
Aztecs won 78-35. The 50 points for the capture of The Banner of Cortes made all the difference!

Thanks so much to all who played! I did not win any awards for the game – though many said I should have. Anyways, the best reward is happy gamers afterwards – and I got that in abundance!!

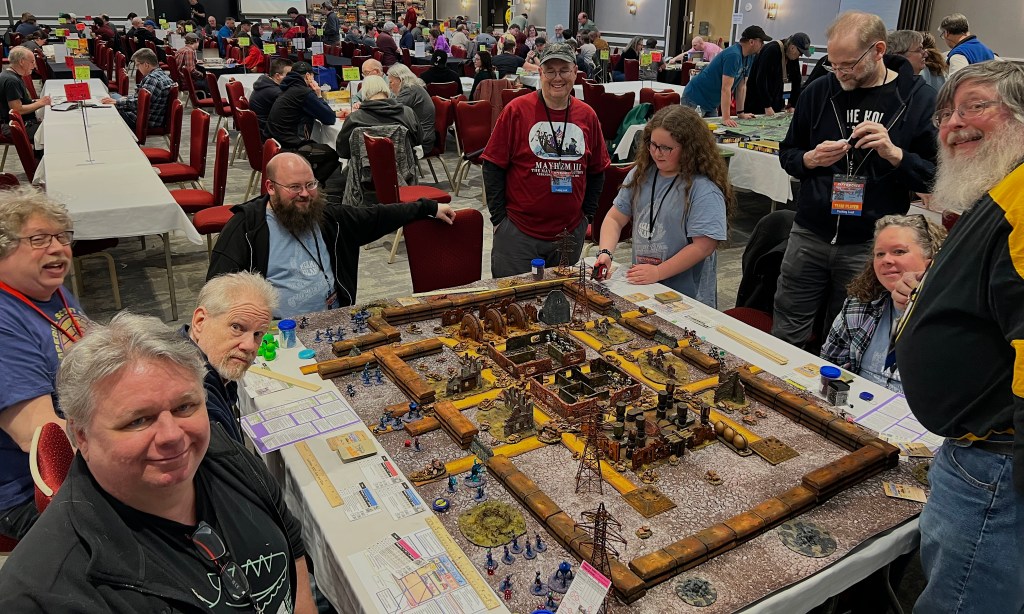
The gamers! Very cool group – thanks to all!

After the game, I got a lot of positive feedback, and learned of some areas to help make the play easier. Those suggestions have already have already been acted upon when I got home (mainly on the dashboards such as linking the undermagnet colors to the dashboards).

After the game, I then went with Greg and Buck to the vendors and the Flea Market. It was nice to go to the Badger Games booth and actually be remembered! Also, I was looking for canoes to use as war canoes, but only found one from Firelock Games that was $20. That is way too expensive when you need as many as do. I also found one in the Flea Market – a balsa wood scratch-built one from an estate sale- for $3. I am going to use both for gaming and as ideas on how to make my own. Of importance, Greg is a big lover of his 3D printer – and in exchange for me painting up some Viking figures for him, he will make me a good number of canoes! Win-win! So, my next job will be to paint those up.

I look forward to returning to the gaming and convention scene as a GM and a gamer. I hope you found this interesting – thanks for looking.

For all of my previous posts on games, units, and other projects for my 16th Century Spanish Conquest supplement for Feudal Patrol™ â€“ â€śCivilizations Collide” – please see this page.

Combat Patrol and What a Tanker games – My TotalCon 34 Recap

It’s been about a month since the last gaming convention I attended, and my how the world has changed.  I cannot see how a large convention could be held right now (though Cold Wars indeed happened in Pennsylvania this weekend).  There are a few upcoming gaming cons in obvious risk – and for now I think it useful to blog and paint and reflect back until this COVID-19 crisis passes (and that it will).  Best wishes for health and happiness to all my readers all over the world, from the US to Australia to the UK, All across Europe, and Africa and Asia. Now with everything at a lock down or a standstill due to the coronavirus crisis, I thought it was a good time to write a post about the games at my last convention as a distraction.

I had promised you great readers a few battle reports from TotalCon 34.  It was a very large convention with around 600 attendees.  Miniature games were a smaller offering there compared to RPG, LARP, board games – and a number of other offerings with which I was unfamiliar!

The convention was held from February 20-23, 2020 at the Best Western Conference Center in Marlborough, MA.  I had signed up to run four games – two on Friday and two on Saturday.  Two were Combat Patrol™ retro sci-fi games – “Space Cowboys versus Giant Zombie Cosmonauts” and “Attack of the Warbots” with my mostly OOP collections from Archive Miniatures, Mega Miniatures, War Games Supply Dump (and my own creations).  The other two were scenarios for What a Tanker© that I have created and discussed previously in this blog: “Battle of France May-June 1940” and “Normandy Breakout!“.

Running four different games in two days was a challenge (my vehicle was full of mats, terrain, and miniatures) but I pulled it off well enough I believe.  I’ll share some photos and some descriptions of the action.  I think the players had a good time.  This post will be pretty photo-heavy.

The first game I ran was on Friday was “Space Cowboys versus Giant Zombie Cosmonauts“.  I had four players (though I could have accommodated 9).  It turned out that I had two seasoned gamers on the defending Space Cowboys side and two younger players on the attacking Giant Zombie Cosmonaut/Martian/Retrovian side.

02212020 TOTALCON Space Cowboys versus Giant Zombie Cosmonauts
My flyer for this game – the space on the right is for business cards to share information about my gaming club –  the Mass Pikemen Gaming Club.

1 set up from defenders side
View from the defenders’ side.  They must save the chemical plant from destruction or kill The Mind.

2 set up from attackers side
View from the attackers’ side.  They must destroy the chemical plant in 10 turns or less.

1 SC vs GZC setup
The game set up at TotalCon 34.

2 SC vs GZC setup
Retrovians prepare to attack.

3 SC vs GZC setup
Close up of the chemical plant before the defenders deployed.  I allow the defenders to deploy by any barrier or the chemical plant.

4 Retrovians attack
The attackers ponder their next move.  The defenders moved and took up good defensive positions in and overlooking the wadi.

5 SC take casualties
On the attackers’ left flank, Retrovian fire begins to take its toll on the defending Space Cowboys (aka Texican Space Rangers).

6 Martians take casualties in wadi
On the other side of the table, Martian infantry attempt to charge across the wadi.  Effective rifle fire decimates the Martians in the open.  The stack of cards on the right indicates a pile of Martian KIA that ran into a hail of cowboy lead.

7 GCZ take casualties and move towards wadi
The Mind and its Giant Zombie Cosmonauts get close to the wadi, while Retrovians provide supporting fire.

8 SC squad runs away
The Retrovian fire is too much for one squad of Space Cowboys, which fails a morale check and skedaddles for cover.

9 Robo servo gun and Brasheer knocked out
Carnage ensues.  A Robo-Servo gun is destroyed (black smoke), while another gun destroys a Retrovian three-legged assault pod.  The fleeing Space Cowboy squad from the previous shot is in the upper left.  The Mind is breaking through in the top center, but many of its zombies have taken hits to legs and are falling away from the advance.

10 Brain is killed
As the protecting zombies fall away, the platoon sergeant, Armando Garcia, jet packs next to The Mind in a desperate attack.  The Mind had a 60% chance to react to the move and preemptively fry the Space Cowboy, but failed in the attempt.  SFC Garcia fired his assault rifle and killed The Mind, ending the game.

The game was a blast.  The defenders took up good positions but the attackers’ pressure was building to a decisive point.  Unfortunately, The Mind became vulnerable and the defenders’ gambit worked this time.  The players quickly got used to the Combat Patrol™ system.

The next game was later that night, when I ran “Attack of the Warbots”.  I have run this game several times, and it always is a crowd pleaser.

02212020 TOTALCON Attack of the Warbots
My flyer for the game.

I had about 8 players for the game.  The attacking Warbots made good progress initially in breaching the wall.  However, the defenders jet-packed their bazooka-armed Star Ducks onto unprotected rooftops – and got pretty shot up.

1 Attack of the Warbots set up
The Biological Alliance is in an “Alamo” type of a defense, with a massive force of Warbots attacking from this side, and an allied Martian force (yup they showed up in this game too) from the opposite side.

2 wall is pierced
The Warbot on the far right uses a plasma beam breacher (basically a long disintegrator ray) to piece the defenders rusty wall.  This kicks up a lot of smoke from the vaporized material.  The Warbot that did this uses a lot of energy in the effort and is stunned for three turns while recharging (hence the multiple “stun” placards).

3 targets on the roof
More Warbot destruction ensues as they fire another plasma beam breacher through the Aphid position in the center.

4 Mark 1 Sphere tank stunned by attacking Frinx
Frinx cavalry (on glyptodons) armed with anti-robot arc weapons and blasters charge!  They manage to stop a Mark 1 Sphere tank with a non-penetrating hit that stuns it at the walls edge.

5 The other Mark 1 Sphere tank attempts to flank
On the left Warbot flank, a defending Space Roo player checks to see if his RPG-armed Space Roo can engage the other Warbot Mark 1 Sphere tank.  It could, and at extreme range knocked out the other Warbot tank.

5a end of game
The end of the game found the captured Warbot tank repaired and capable of driving off of the board.  Therefore, a Biological Alliance victory!

6 After Battle
Happy gamers (and me) after the game are all smiles!

After this game, (which was around 11:00 PM+), I and some of the players cleaned this all up.  As my next game was in the morning at 8 AM, I set up my Normandy Breakout! scenario for What a Tanker©!  I have a lot of  bocage (hedgerows) for this game as you will see.  I got set up, and ambled off to my hotel room for a few hours of shut-eye.

02222020 TOTALCON Normandy Breakout!
My flyer for the game.

This scenario is as described on the flyer above, but to be clear, the Germans are in hidden positions across the board known only to them and the GM (me).  Additionally, the exact force composition selections on both sides are done secretly, as each side buys vehicles and Bonus Attack cards with points.  Each side starts with 200 points.

Points are earned by the Allies (US and UK) for successfully reconnoitering hidden positions (which could have either possible or actual Germans there), for knocking out Germans, and for crossing the board and breaking out.  Germans earn points for unreconnoitered positions, knocking out Allied vehicles, and can get a game bonus for limiting Allied crossings to zero or no more than 1 vehicle.  The Germans vehicles are more expensive, so their defensive benefits need to be offset by successful ambushes and an overall defense against any Allied breakout.  I announce only who is winning at the beginning of each turn, but not the exact score – so as to keep the game feeling crew-focused.

I had between 4 and 6 players (some joined mid-game).  The Germans went initially with two 8-wheeled scout cars (an Sd.Kfz. 231 and an Sd.Kfz. 233, a Panther D, and a Tiger I, all of which deployed secretly.  They loaded up on Bonus Attack cards as well.

The US deployed on the left half of the board, and the UK/commonwealth on the right half.  The US chose an M5 Stuart light tank (with recon abilities) and an M10 Wolverine tank destroyer to start, while the Brits took a Daimler Dingo scout car and an M4 Sherman.  The Allies also maxed out their Bonus Attack cards possibilities.

1 Dingo and Achilles move out
The Americans move up their M10 Wolverine “Demon”, while behind a British Daimler Dingo recons a field.

On turn 1, the Allies spent 71 points on vehicles and cards.  They successfully reconned 5 positions at 2 points each for 10 points, leaving them with 139 points at the end of the turn.  The Germans spent 88 points on vehicles and cards.  The German Tiger I ambushed and knocked out the British M4 Sherman for 14 points.  At the end of turn 1, it was close – 139 to 126 in favor of the Allies.

On turn 2, the Allies respawned another British M4 Sherman for the destroyed one, and bought 1 more Bonus Attack card.  This new vehicle was at no cost as the replacement cost as much as the previous loss (the Germans did get more points for killing that previous Sherman on turn 1).  The M10 Wolverine rolled a great movement, and was able to breakout successfully, gaining the Allies 16 points and taking away half of any potential German end-of-game bonus for preventing Allied vehicle crossings.  On turn 1, the US M5 Stuart had been able to move into a field and successfully recon a position where an Sd.Kfz. 231 was hiding.  On turn 2, the Stuart activated first, and destroyed the German scout car, gaining 11 more points for the kill. The Germans for their part bought two more Bonus Attack cards for 10 points.  Overall, the Germans had a weak turn, and only recovered 2 points by activating their Sd.Kfz. 233 before the US could find it.  The successful M10 “Demon” crossing widened the score at the end of turn 2 to 161-118 in favor of the Allies.

2 Sd.Kfz. 231 is pursued by M5 Stuart with Brit M4 Sherman burning
At the end of turn 1, the M5 Stuart chased down a German Sd.Kfz. 231 in a field.  The M5 activated first in turn 2, and destroyed the German scout car.

On turn 3, the Germans knew that they were losing, but not by how much.  They made a bold move and chose an expensive new tank for a respawn of their lost Sd.Kfz. 231 – a Tiger II.  The net cost was 18 points after “credit” for the “trade-in” in lieu of a free respawn of another Sd.Kfz. 231.  Adding another Bonus Attack card brought the German spend for turn 3 to 23 points.  The US player got a free respawning replacement M10 for the one that crossed on turn 2, so the Allies spent no points at all on turn 3.  They did earn 6 points for reconning German positions.  The Germans got a bit of revenge as a Panther activated and took out the M5 that killed the Stuart for 12 points, and the Tiger I moved to a crossroads and took out a second British Sherman for 14 points.  The score at the end of turn 3 was 167-123 in favor of the Allies.

3 early game action with Tiger etc.

Turn 3 action – the destroyed the German scout car is the left.  The Tiger I has moved to an excellent position at the crossroads and has knocked out the second Brit Sherman.  The Panther (not seen ) was hiding at position “F”, and activated.

4 Panther avenges Sd.Kfz.231 by taking out Stuart
The M5 Stuart was no match for the activated Panther.

On turn 4, the Allies decided to get three more vehicles.  Two were respawning ones for turn 3 losses – the US got a “free” M5 to replace the one killed in turn 3, and the Brits “upgraded” its second lost M4 Sherman to an M10 Achilles tank destroyer “Tabitha”.  They also bought another M4 Sherman for a new very young player that joined the game, and a couple of Bonus Attack cards.  The Allied spend was 24 points.  The Germans only bought 1 card, for 5 points.

During turn 4, the Daimler Dingo had a fun time.  It successfully reconned the hidden position of the Tiger II!  Then, scared for its survival, it and its crew sped off down the road to cross the other side  – gaining 7 points for crossing and thereby nullifying any potential German end-of-game bonus.

The Brit side then flanked the Tiger I at the crossroads with the M10 Achilles “Tabitha”.  It took a quick flank shot on the German, and did some damage.  It then called in the RAF (with a Bonus Attack card) which destroyed the Tiger I for a big 25 points.  The Allies successes widened the score at the end of turn 3 to 177-118 in their favor.

5 Dingo finds Tiger II
Surprise!  Daimler Dingo finds a Tiger II and takes off before it can be destroyed.

6 Young player and his Dad use a SHerman
A young player takes command of a Sherman for the US.

7 lots of action and Tiger I hit by USAAF
The Tiger I is destroyed in the crossroads by the RAF.

Turn 5 would be the last turn of the game.  The Allies respawned another Daimler Dingo for the one that crossed in turn 4, and bought a couple more Bonus attack cards, spending only 10 points.  The Germans were despondent, and decided to buy a Jagdpanther and a Bonus Attack card for 29 points.

The M10 Achilles “Tabitha” fresh off the combined arms kill of the Tiger I maneuvered for a rear shot on the Panther – and killed it for 22 points.  The Germans tried to hunt down a fleeing M5 Stuart.  It lined up a deadly point-blank rear shot on the Stuart – only to miss the shot.  It was emblematic of the German sides day.  After another position was reconned, the day belonged to the Allies.  The final score was a lopsided 191-89 in favor of the Allies.

This was the biggest disparity in this game ever (and I have run it many times).  In my opinion, the Germans did not keep their eyes on the objectives.  They also did not effectively take advantage of their ambush positions, and left too many openings for the Allies, who maneuvered their lesser vehicles much better than their foes.  With that said, all had a fun game.

8 Jagdpanther hunts M5 Stuart
Turn 5 – the M5 Stuart is missed by the Jadgpanther.

With some help from players, the tabletop was cleaned and it was time to take a break.  I could have played a game but I decided to spend the next game slot relaxing as I felt a but tired.

My next game was on Saturday night – “The Battle of France, May-June 1940” for What a Tanker©.  The scenario reverses the previous game a bit, with the Germans attempting to break through the French defenses and head to the channel and cut off the Allied forces in Belgium.  There are also two different Bonus Attack card decks that I made for this scenario.  I described this scenario in my blog previously here.

02222020 TOTALCON Battle of France 1940
My flyer for the game.

I had originally 10 players signed up for this game, with 2 on a waiting list.  I was disappointed that I only had 5 players show up – but it was fine.  I had two German players and three French players.

Each side had 200 points at the start.  Here again, the exact force composition selections on both sides are done secretly, as each side buys vehicles and Bonus Attack cards with points.  Points here are earned by the Germans for successfully reconnoitering hidden positions (which could have either possible or actual French located there), for knocking out French vehicles, and for crossing the board and breaking out.  The French earn points for unreconnoitered positions, knocking out German vehicles, and can get a point bonus for limiting German crossings to zero or no more than 1 vehicle.  Similar to the Normandy Breakout! game, I announce only who is winning at the beginning of each turn, but not the exact score.  This definitely keeps the game feeling crew-focused.

There are a couple more key additional nuances to this scenario.  There are two bridges, and the French player can spend points to wire one, both or neither bridge for demolition.  Any French attempts at demolition may be tried at any time, but are not guaranteed.  They also get a “free” small minefield (that is not very effective) that is also secretly set at the beginning of the game.  The French decided to wire the bridge on their right flank for demolition prior to the game, leaving the one on their left with the small minefield next to it.  During the game (which I will discuss), the French did blow the bridge on the right, and were able to fool the Germans into believing that the other was wired as well.  This rendered the minefield a non-factor in the game, but made the Germans attempt to ford the river.

The Germans decided to buy 2 6-wheeled Sd.Kfz. 231’s and a Panzer 38(t) on turn 1.  They also maxed out on Bonus Attack cards for a total of 50 points spent.  The French deployed in hidden positions (half the tabletop is designated as under the control of French cavalry tanks, and the other half (mainly the town area) is under the control of French infantry tanks.  The French bought a Panhard 178 armored car, a Char B1 bis, and a SOMUA S35.  Their initial purchases all had radios (some French tanks do not), so they were able to max out their Bonus Attack cards.  The total initial French spend was 71 points, including the wiring of the right flank bridge.

During turn 1, the Germans drove one of their scout cars onto the right flank bridge, and the French successfully destroyed the bridge with the German on it, gaining 11 points.  This also spooked the Germans to avoid the bridge as they feared it was also wired (and it was not!).  After this the Germans were forced to use fords to attempt crossing the river.  The Germans did successfully recon one possible hidden position for 2 points.  The score at the end of turn 1 was 152-140 in favor of the Germans.

On turn 2, the Germans respawned a Panzer IVD for the lost Sd.Kfz. 231 at no net point cost.  They also reconned a couple of French potential positions for 4 more points.  The French bought an additional SOMUA S35 for the cavalry for 10 points, and uncovered three of their own positions in order to meet a table-crossing threat from the surviving Sd.Kfz. 231 and a Panzer 38(t).  This gained them 6 points.  The Panzer 38(t) is a fast light tank, and was able to ford the river, along with the other scout car.  The French recognized this threat, and attempted to deal with it by activating its vehicles in the town.   The Germans used a Bonus Attack card to bring down smoke and obscure their movements.  The score at the end of turn 2 was 156-136 in favor of the Germans.

1 Sd.Kfz. 231 and Panzer 38(t) skirt the town
The Panzer 38(t) on the left and the Sd.Kfz. 231 (6-rad) on the right successfully ford the river, fearing that the bridge was wired for demolition (it wasn’t).  They get ready to dash off the table into the vulnerable French rear.

2 Germans plan their assaults and roll dice
The Germans get some excellent movement rolls.

3 Char B1bis moves out in town
The French react and send tanks such as their Char B1 bis to stop the penetration by the Germans.

4 German smoke screen blocks Char B1
The Germans foil the Char B1 with a smoke screen.

On turn 3, the French hurriedly bought a Renault R40 for 8 points and tried to use it to stop the crossings.  The French also bought more Bonus Attack cards for 15 points.  The Germans bought nothing.  During the turn, the Germans successfully crossed the Panzer 38(t).  This despite the fact that at first the Char B1 crossed the smoke and missed it, and then the R40 shot at and missed it.  This crossing earned the Germans 8 points, and limited the French end-of-game bonus chances.

On the cavalry side of the table, the Germans tried another smoke screen to protect a Panzer IVD as it crossed a ford.  one of the smoke rounds hit the river mud and did not ignite – leaving a hole in the smoke screen.  The French cavalry S35 did manage to shoot and damage the Panzer IVD on the other side, just after it forded the river.  This pushed it back into the river.  The French SOMUA then called in and then destroyed it with an artillery barrage using a Bonus Attack card, earning 8 points as well (and blocking that ford).  The Germans also reconned another of the hidden positions for 2 points.  However, the Sd.Kfz. 231 made it to within 1″ of the other side of the table – and the R40 had a rear shot aimed at it at turn’s end.  The score at the end of turn 3 was 166-124 in favor of the Germans.

5 Sd.Kfz. 231 escapes R40 and Panzer 38(t) sees Char B1
The Char B1 crosses the smoke and takes aim at the Panzer 38(t) – and misses.  An R40 activated and missed the Panzer 38(t) as well.  The Panzer 38(t) then rolled well and was able to cross the table.  The German Sd.Kfz. 231 almost made it off of the table and was in the R40’s sights as turn 3 ended.

6 On other flank, bridge blows and fords attempted
The German smoke screen imperfectly covers the Panzer IVD after it fords the river…

7 Panzer IV knocked into ford and knocked out
The Panzer IVD is pushed back into the ford and destroyed by artillery and SOMUA fire.  This blocks the ford (to the consternation of the following Panzer 38(t)!).

On turn 4, the Germans respawned the crossing Panzer 38(t) and the destroyed Panzer IVD for identical models, and added a Bonus Attack card for a total spend of only 5 points.  The French bought 3 Bonus Attack cards in the hope of stopping the German scout car from crossing.  The R40 activated first, and then missed the Sd.Kfz. 231.  The German scout then crossed, ending any chance of a game bonus for the French and earning 11 points for the Germans.  The score at the end of turn 4 was 172-109 in favor of the Germans.

I failed to get any more photos after turn 4 (I think I was getting tired!)

On turns 5 and 6, the French were getting desperate as they knew they had lost the game bonus.  They bought an Hotchkiss H35, and a SOMUA S35 took out another Panzer IVD.  The Germans bought a StuG III ausf. A.  Both bought more Bonus Attack cards.  The Luftwaffe was called in on the Char B1 bis and successfully destroyed it.  That loss ended the game.  The score at the end of the game was 159-89 in favor of the Germans.

Both sides played well, bu I have to say the dice abandoned the French at critical times.  The Germans crossings sealed the fate of the game.  It’s nice to see that both games results have differed each time and that no side has an advantage.

After this, I packed up with help (especially from Leif Magnuson – who was a BIG HELP THANK YOU!), and went home to sleep.

I hope you enjoyed these battle reports.  Now that the COVID-19 is endangering lives, we’ll have to see if and when I get to run these games again soon.  Let’s all hope for the best, and prepare accordingly.

Wishing all of you and your families safety and health!


German Armor for the 80th Anniversary of the Battle of France: Panzer 35(t), Panzer 38(t), Panzer IVB, and Panzer IVD Tanks; and Sd.Kfz. 231 (6-rad) Armored Cars

This post marks the last of my vehicle additions for the 80th Anniversary of the Battle of France in May-June 1940.  These German vehicles were completed in late January, but with my personal situation, naturally my posting and hobby activities were put on hold.  Time has passed now and I want to return to a certain degree of normalcy – of course that’s not the easiest thing to do.  But I’ll try – and now let’s catch up and get back to good old hobby stuff.

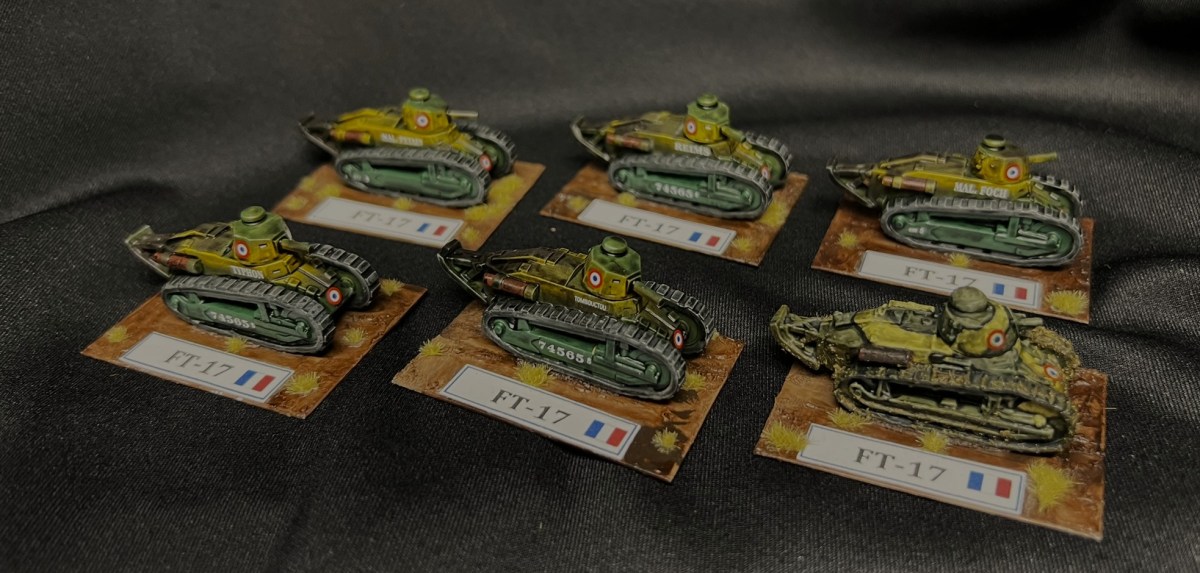
As readers of this blog know, I had needed to augment the depth and breadth of my 15 mm/1:100 scale armor (both sides) for my What a Tanker© Battle of France 1940 scenario.  I also wanted to develop some Bonus Attack cards for it as well (similar to what I did with my Normandy Breakout! scenario).  I had promised to get these projects covered on the blog and share some about games that I have run for them (at club days and the TotalCon convention).  Here, I will focus here uniquely on these German vehicles and the Bonus Attack Cards and post about the gaming events separately.

Below is my poster for the game that I use at convention-style events.

02222020 TOTALCON Battle of France 1940

Previously, I had posted and described several projects in support of building this scenario – here they are for reference:

Basically, prior to this project I had only 11 German vehicles for the scenario, and the mix was a bit unbalanced to say the least.  I had 4 Panzer IIC’s, 1 Panzer IIIE, 1 Panzerjäger I, 2 Panzer IVD’s, and 3 Sturmgeschutz A’s.  Now that I have 23 French vehicles, I needed to increase the size of the available German vehicles for the scenario.

Back in May-June 1940, Panzer I’s and Panzer II’s did form a large proportion of the German armored forces in May-June 1940.  As Panzer I’s have only machine guns, which are somewhat useless in a tank-on-tank game).  As I have 4 Panzer IIC’s in the inventory, I decided to augment the light tanks with Panzer 35(t)’s and Panzer 38(t)’s.  These were originally built for the Czechoslovakian Army, and the Wehrmacht happily incorporated these vehicles into their units – and continued building the both after the annexation.  I got two metal Panzer 35(t) models (#GFV28) from QRF in the UK, and two metal and resin Panzer 38(t) models (#GE022) from Battlefront.  Perhaps later on I might add a Panzer I, we’ll see.

For the medium tanks, I “assigned” (for game purposes) my two currently-painted Wargame Models in Ohio Panzer IVD’s into ausf A versions – and added B and D variants of the venerable Panzer IV with Zvezda models (SKU #ZD35 or #6151 for each box) from The Plastic Soldier Company.  PSC has a reasonable deal for a platoon of 5 so I grabbed those.  I already have one Panzer IIIE model for France 1940, and decided that was enough of those (for now anyways).

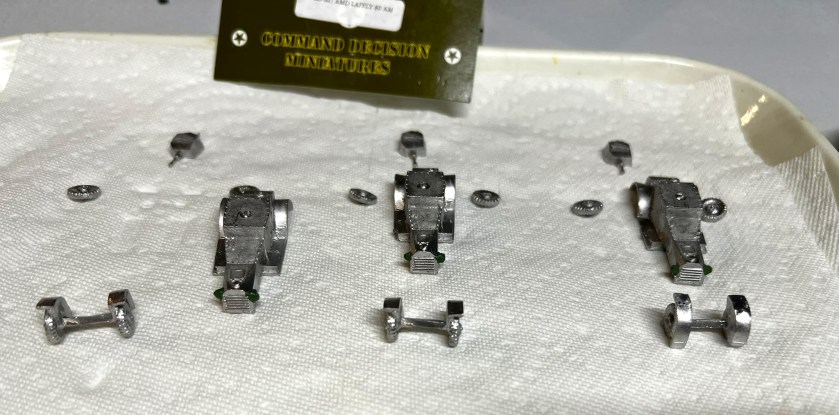
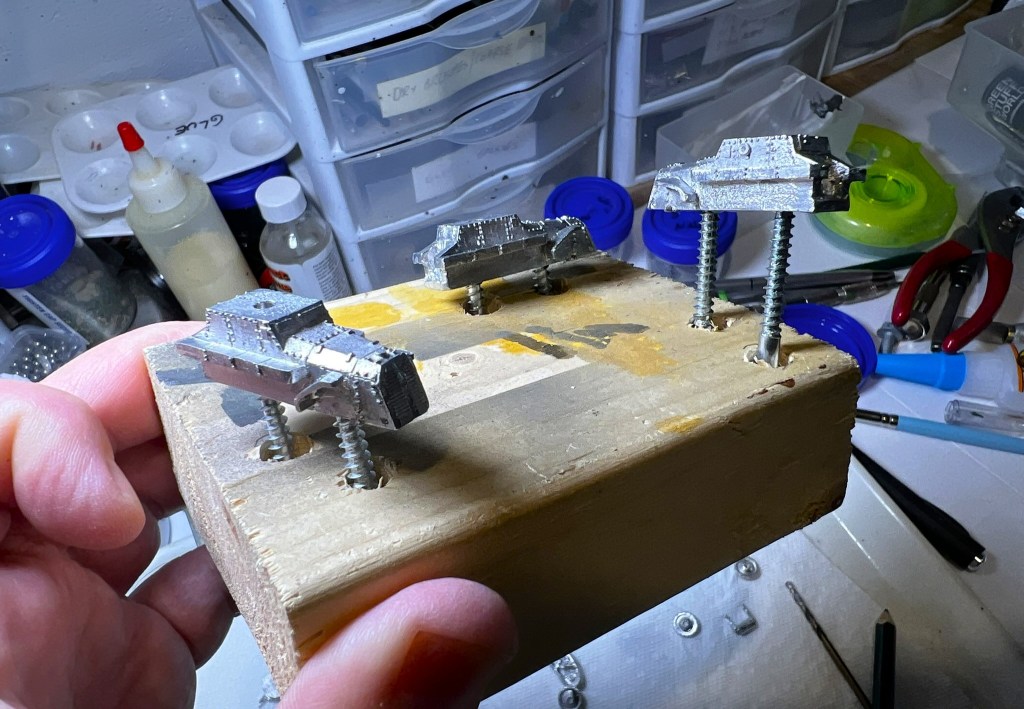
Lastly, similar to what I did with the French Panhard 178’s , I added 2 Sd.Kfz. 231 (6-rad) armored cars (#GE320) from Battlefront.  I know that the 8-wheeled versions were available and used in May 1940.  However, at the time the 6-wheel 231’s were being phased out in favor of the 8-wheeled versions – and I thought having the older ones would give a better feel to the scenario.  By building these models and converting the ones mentioned, I now have 23 vehicles available for both sides to choose.  I will go through a bit of a WIP with each type – as I did experiment a bit with contrast paints on them – to a bit of frustration which I will share.  I’ll also show the Bonus Attack Cards, some eye-candy shots, references, and list of paints for those interested.

General Assembly

The QRF Panzer 35(t) models were all metal, the Battlefront Panzer 38(t) and Sd.Kfz. 231 (6-rad) models were metal and resin, and the Zvezda Panzer IV’s were plastic.  I cleaned and prepped them all prior to assembly and painting, to include magnetizing the turrets.  Some green stuff reinforcement and repair was needed.  My overall goal was to have vehicles that were more grey and less dark than my previous German vehicles for 1940.  The dark colors were also historically correct – I just wanted a bit more variety in the collection that was also historically correct.

1 German armor for 1940 part two
The 11 models for this project in their packaging.

3 Czech armor assembled
The Panzer 38(t) models and the Panzer 35(t) models assembled.

7 All assembled for painting
All of the 11 models are here assembled.

8 All mounted for painting
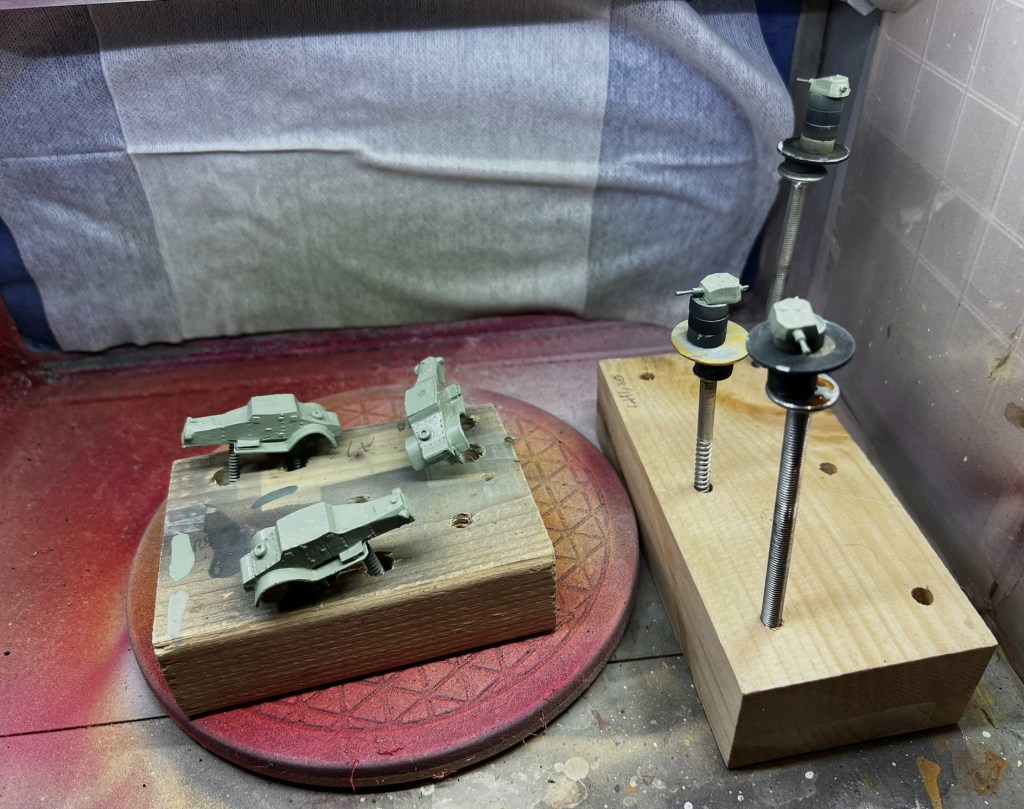
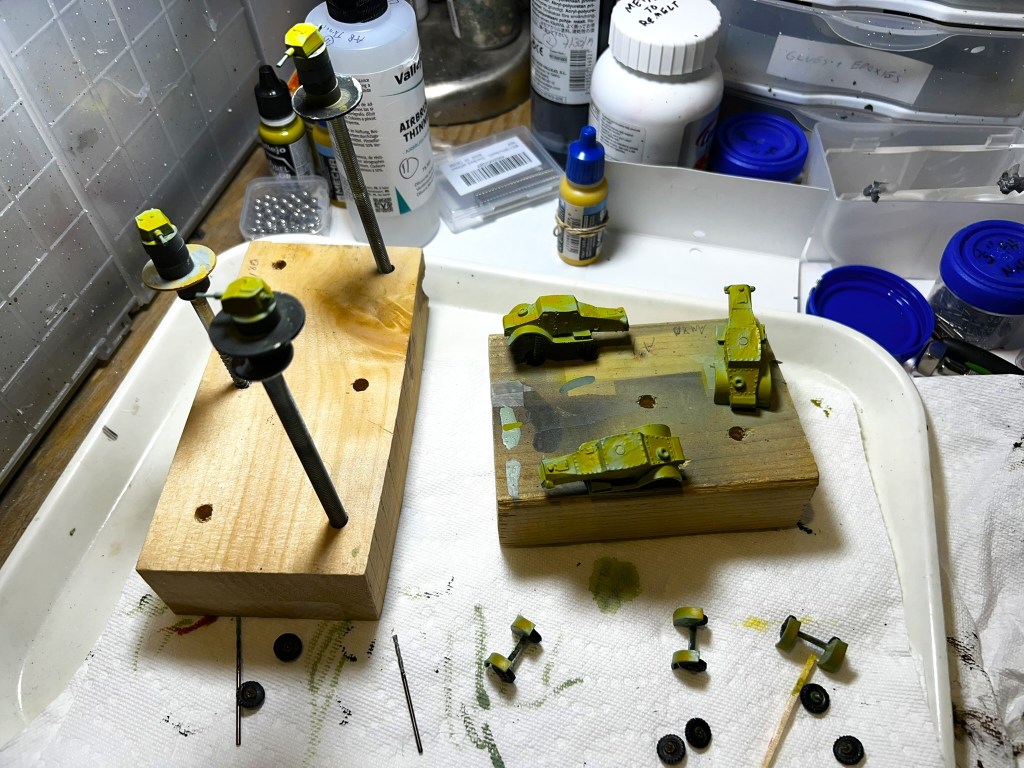
I always prime and base coat the tank bottoms first – they are affixed to small plastic plates with poster tack.

The painting process was a bit different for me this time.  I basically did this sequence with all 11 vehicles.  I wanted to test out the contrast paints, so I decided to try the “Space Wolves Grey” contrast paint over Vallejo “German Panzer Grey” primer – and the chassis were nearly purple.

2 Panzer 35(t) with Space Wolves Grey contrast paint
My Panzer 35(t)  model looking a bit too purple for my tastes.

I then went back and dry brushed them with Vallejo “White” primer, then used “Apothecary White” contrast paint and dry brushed with a few more grays and added some shading (see the list at the end of this post).

3 Panzer 35(t) turrets after Apothecary White contrast paint
After redoing with a dry brush of white, added “Apothecary White” as seen with these turrets.ion

4 Panzer 35(t) completed turrets
I shaded these, and more dry brushing, followed by decals.  Here are some turrets looking better!

2 Panzer IVD needs weathering
Here is a Panzer IV chassis before weathering.

For weathering, I used Vallejo pigments – a combination/blend of two pigments on these with a makeup brush for dusting effect.

5 Panzer 35(t) in progress weathering
Weathering this Panzer 35(t)

Then I varnished the tanks with Vallejo Mecha Color “Matt Varnish”.  Now, let’s look at each type in brief.

Panzer 35(t)

These were originally built by Skoda.  The (t) stands for the German word for Czech, which is tschechisch.  The Germans had 244 of these after the annexation, and used them in both the invasion of Poland and of France.   Around 132 were involved in the Battle of France, and they served in the Wehrmacht through the invasion of the USSR until the summer of 1941.  By that time, there were no more spare parts being made, was performing badly in the cold, and it was badly obsolete.  Some were then converted to other uses, and some sold to Romania.

The Panzer 35(t) had a reasonably good (for 1940) 37 mm gun capable of penetrating 30 mm of armor.  It was a light tank, and had maximum frontal armor of 25 mm, with 15-16 mm on the side, 15-19 mm on the rear, and 8 mm on the top.  This allowed better speed and greater range than most French contemporaries, with a top speed of 21 mph and a range of 120 miles from its 120 hp 4-cylinder engine.  The chassis armor was riveted together.  It did have a radio.

Panzer 38(t)

The Panzer 38(t) was another Czech “acquisition” as it were.  It was designed and built by CKD.  Over the course of the war, the Germans had over 1,400 – of which only about a hundred were used in France.

The Panzer 38(t) had a better 37 mm gun than the Panzer 35(t).  That gun was capable of penetrating 36-59 mm of armor.  It also was a light tank, with a (in 1940) maximum frontal armor of 30 mm.  It also had much better speed and greater range than most French (and some German) contemporaries, with a top speed of 26 mph and a range of 160 miles from its 123.3 hp 6-cylinder engine.  The chassis armor was riveted together, and the tank had a radio.  The tank itself was used by the Germans until 1942, and the chassis was reused for many other vehicles, notably the Grille and the Hetzer, as well as being exported to Sweden (who also built them under license), Slovakia, Romania, and even Peru.  Peru also had acquired some from Czechoslovakia and used them in combat in South America versus Ecuador in 1941 in the Ecuadorian-Peruvian War as well as 50 years later against the Shining Path insurgents.

1 Panzer 38(t) turrets with decals

Panzer 38(t) turrets late in project

2 Panzer 38(t) chassis with decals
Panzer 38(t) chassis – I was happy with this shade of grey.

Sd.Kfz. 231 (6-rad)

Most modelers and WWII gamers know the Sd.Kfz. 231 8-wheeled version but the 6-wheeled (“6-rad”) version preceded it.  Over 900 were built from 1932-1937.  The Sd.Kfz. 231 (6-rad)  and the 8-wheeled versions were both known as Schwerer Panzerspähwagen (heavy armored reconnaissance vehicle).  The acronym Sd.Kfz. stood for Sonderkraftfahrzeug (special purpose vehicle).  The Sd.Kfz. 231 had the same automatic 20 mm gun as the Panzer II, so it had some anti-tank capability (able to penetrate 40 mm at 100 meters and 23 mm at 500 meters).  Like the Panhard 178, it could be driven either forwards or backwards with redundant driver positions.  Armor was thin (8-15 mm) but it could get up to 53 mph.  They served in the Wehrmacht up until the early stages of the invasion of the USSR.

The models did have some QC issues – notably big pieces of resin were missing on fenders and on the rear spare tire.  I fixed these with green stuff.  These will serve the Germans as (of course) reconnaissance vehicles for my 1940 scenario.

Panzer IVB and Panzer IVD

The Panzer IV is iconic and was ubiquitous in WWII in Europe and North Africa.  My goal for the game scenario was to have A, B, and D models, all of which participated in the Battle of France.  The Germans made only 35 A’s, which had less armor (only 14.5 mm on the front!) than the B’s and D’s (30 mm on the front) and a less powerful engine (247 hp) making it only capable of 19 mph.  The B’s and D’s had a 296 hp engine, and more armor, and were faster (26 mph).  The Germans made 42 B models and 248 D models.  There was a C model, but that did not have a hull-mounted machine gun like the B’s and D’s, so I opted not to build these as C’s (140 C’s were made).  All had the short 75 mm gun.

I designated 3 of the Zvezda models as B’s and 2 as D’s.  In the game, they have the same stats – and are almost identical anyways.  I did use white numbers for the B’s and red numbers for the D’s.

1 Panzer IVD mounted for painting
Panzer IVD assembled and mounted for priming.


1 Panzer IVB after wash and decals
Panzer IV B chassis later on before weathering added.

3 Panzer IVD Done!
Panzer IVD completed.

Bonus Attack Cards

In my scenario, each side starts at 200 points and must use points to buy vehicles and other combat items.  I added Bonus Attack cards, which were optional 5-point purchases apiece for each side.  I allow reconnaissance vehicles to buy and have up to two at a time, and others one.  The caveat is that your vehicle must have a radio!  So the French FT-17, FCM 36, R35, and H35 tanks cannot get these cards.  Additionally, there are two bridges that the French player can choose to wire for demolition – at a cost of 20 points each.  The river does have fords, but obviously that slows the Germans down.  The French player can wire two, one, or no bridges for demolition.  Only the French players and the GM know what has been done, and I allow them to try to blow the bridges at any time.  The attempts may fail, or they may drop a German tank into the river.  Each crossing German vehicle and each failed attempt makes the demolition more difficult.  I also added “dummy explosion cards” (with an exploding dummy on it) so that the French player can keep the Germans unsure whether the bridges were wired for demolition or not.  The Germans get the Luftwaffe here – and the French Air Force does not show up.

You can see the cards below – the players buy these and get random results:

  • 104 “Bonus Attack Cards” built for What a Tanker© games
    • 50 German cards
      • 16 Infantry Assault cards
      • 6 37 mm anti-tank gun cards
      • 3 88 mm anti-tank gun cards
      • 7 Artillery HE Support cards
      • 10 Air Support cards
      • 3 Artillery Smoke Support Cards
      • 2 Radio problem cards
      • 2 Quick Repair cards
      • 1 Heinz Guderian Arrives! card
    • 54 French cards
      • 20 Infantry Assault cards
      • 7 25 mm anti-tank gun cards
      • 4 47 mm anti-tank gun cards
      • 10 Artillery HE Support cards
      • 4 Artillery Smoke Support Cards
      • 2 Radio problem cards
      • 2 Quick Repair cards
      • 1 Charles de Gaulle Arrives! card

French Deck, 1940
French Deck

German Deck, 1940
German Deck

And finally, a couple of group shots in front of an old Maginot Line fort:

1 German armor group shot frontal2 German armor group shot frontal top

I am repeating my reference section below for those interested.

References

Throughout this project I have used many of the books that I have as references – here are some I have used and strongly recommend.  I do not get paid by anyone to recommend these, but I am sharing the links if you want to get them.  I did study with BG Robert Doughty at West Point over 35 years ago – and he did give me my copy of the B.T. White book in 1984 – that I still have and used many times.  There are certainly other books, but these I recommend.  I will be using these in my next phase with my German tank additions.

For history of the conflict I recommend buying:

Doughty, Robert A. (1985). The Seeds of Disaster: the development of French Army Doctrine 1919-1939. Mechanicsburg, PA: Stackpole books. (available at Amazon here)

Doughty, Robert A. (1990). The Breaking Point: Sedan and the Fall of France, 1940. Mechanicsburg, PA: Stackpole books.  (available at Amazon here)

Horne, Alistair. (1969, 1990). To Lose a Battle: France 1940. London: Penguin books. (available at Amazon here)

For modelers and gamers interested in the vehicles’ look and history:

Forty, G. and Livesey, J. (2017). The World Encyclopedia of Tanks & Armoured Fighting Vehicles.  London: Lorenz Books. (available at Amazon here)

Jackson, R. (2009). Tanks and  Armored Fighting Vehicles Visual Encyclopedia in color.  London: Amber Books. (available at Amazon here)

Restayn, Jean. (2007). World War II Tank Encyclopedia in color 1939-1945.  Paris: HISTOIRE & COLLECTIONS. (available at Amazon here)

Smithsonian Enterprises. (2017). Tank: the Definitive Visual History of Armored Vehicles.  New York, NY: Penguin Random House. (available at Amazon here)

White, B.T. (1972). Tanks and other A.F.V.s of the Blitzkrieg Era 1939 to 1941.  Dorset: Blandford Press. (available at Amazon here)

Zaloga, S. (2014). French Tanks of World War II (1): Infantry and Battle Tanks. New York, NY: Osprey.  (available at Amazon here)

Zaloga, S. (2014). French Tanks of World War II (2): Cavalry Tanks and AFVs. New York, NY: Osprey.  (available at Amazon here)

PAINTS, INKS, GLAZES, SHADES, WASHES, PIGMENTS, FLOCKING, GLUES AND MORE USED ON THESE VEHICLES:

  1. Microscale Liquid Decal Film
  2. 1/8″ neodymium magnets
  3. Green stuff (kneadatite)
  4. Gorilla Glue
  5. Poster tack and plastic plates
  6. Vallejo “Surface Primer – German Panzer Grey”
  7. Vallejo “Flow Improver”
  8. Vallejo “Airbrush Thinner”
  9. Citadel “Contrast Paint – Space Wolves Grey”
  10. Vallejo “Surface Primer – White Primer”
  11. Citadel “Contrast Paint – Apothecary White”
  12. Vallejo “German Grey”
  13. Vallejo “Neutral Grey”
  14. Battlefront “Dark Gunmetal”
  15. Battlefront “Oxide Red”
  16. Citadel “Typhus Corrosion”
  17. Citadel “Ryza Rust”
  18. Army Painter “Dark Tone” (shade)
  19. Vallejo Model Weathering “Dark Rust Wash”
  20. Vallejo Model Air “Gloss Varnish”
  21. Microscale Micro-Set
  22. Microscale Micro-Sol
  23. Appropriate decals from Battlefront
  24. Vallejo “Light Sienna” (pigment)
  25. Vallejo “Light Slate Grey” (pigment)
  26. Vallejo Mecha Varnish “Matt Varnish”

Thanks for looking – please let me know your thoughts and feedback!


Allies Defeat Germans at Fort Devens Game Day

On October 19th, 2019, the Fort Devens Gaming Day was held at the Fort Devens Museum.  This was our monthly gaming day as an “away” game day for the Mass Pikemen Gaming Club.  Our club sponsored two games as Scott Howland ran a pulp game in another room which was very well-received. I believe it was similar to this one.

This was my second time attending this small convention and my first time as a game master there.  For nostalgia alone, I really looked forward to the event as I was stationed at the old Fort Devens before it was closed in the 1990’s.   It has since been converted to commercial uses and some US Army Reserve functions.  Running a game here was fun.

10192019 Normandy Breakout with contact info

Mike Morgan graciously helped me set up my game in the museum among the exhibits (as you will see below)).  Thanks so much Mike!  Mike also supported Scott as a player in his game, and that was very cool.  I ran my Normandy Breakout game for What a Tanker©.  We had seven players – including several from the Mass Pikemen.  On the German side were Chris, Peter, and Steve.  On the Allied side were Leif and Walter (US), and Evan and Alex (UK).

Both sides started with 150 points/chips to use during the game.  The Allies started with a 40 points worth of vehicles.  For the UK, they bought a Dingo scout car and a Churchill “TIM” (nicknamed for theimperfectmodeler aka TIM), along with an M5 Stuart, and an M8 Greyhound for the US.  The Germans spent slightly less, choosing to buy an SdKfz 231 scout car, a StuG IIIG, and a Panzer IVH for 36 points.

1 Set up
The players prepare for battle among the museum exhibits.

The Germans took up very good ambush positions – especially the Panzer IVH, which was hull-down behind a stone wall.  The M5 Stuart successfully reconned it, and the German fired point-blank at the light tank, missing it.  The Stuart then prudently backed up behind the hedgerow.  The Churchill “TIM” then moved up the road, to be also shot at, and again missed by the Panzer IVH.  Amazingly, the Churchill immediately reversed the bad German die rolls, and miraculously hit and knocked out the Panzer IVH for its first kill ring of the day.

2 Churchill takes out Pzkw IVH
The first exchange goes badly for the Germans as the Panzer IVH missed its first two targets (the M5 Stuart and the Churchill).  The retreating M5 is at top behind the hedgerow.  The Churchill “TIM” drives past the knocked out (with crew surviving) Panzer IVH.

The Allies then successfully reconned nine possible German positions at 2 points apiece, adding to their score.  They also successfully crossed the tabletop with an M8 Greyhound, gained the points, and respawned as another M8.  The Germans spent some points and respawned the destroyed Panzer IVH crew into a Panther D which drove up next to the burning Panzer IVH.  The Churchill “TIM” went Panther hunting.

Meanwhile, the Germans tried to put an end to the Allied reconnaissance successes.  The StuG IIIG ambushed both the M5 and the Dingo gaining them crucial points, which they used to buy a Marder III.  The Allies respawned both losses with similar models.

3 StuG IIIG takes out M5, while Churchill moves around Panther
The Churchill “TIM” at top maneuvers to attack a Panther in the rear.  In the foreground, The StuG IIIG takes out the M5…  

The Allies spent some chips to respawn the Dingo as a Cromwell IV nicknamed “IRO” aka imperialrebelork.  The Germans dropped some obscuring smoke in front of the Cromwell.

4 StuG IIIG takes out Dingo, while Churchill moves around Panther
…and then the Dingo.  The Germans dropped smoke to protect the StuG from the Cromwell IV “IRO”.  The Churchill “TIM” at top hunts the Panther D.

“TIM” continued its winning ways and managed a flank shot on the Panther D.  Its good dice rolling (and the German bad dice rolling) yielded a second kill ring for “TIM”.

5 Churchill gets second kill ring against Panther
The Churchill “TIM” takes out the Panther D.

The Germans were aghast at this expensive loss and vowed revenge.  The SdKfz 231 managed to call in a rare Luftwaffe air strike on the Churchill, which destroyed “TIM” after it had been so effective.

The British mourned this loss, and respawned it as an Achilles 17-pounder nicknamed “Per”.  The British also bought another Dingo and a Cromwell IV nicknamed “JNV” or justneedsvarnish.  The US bought an M10 Wolverine.  The Germans went for broke and bought a Jagdpanther and an SdKfz 233.

The StuG IIIG went head-to-head with the Cromwell “IRO”, and took it out.  The Jagdpanther caught the Achilles “Per” in the open and made short work of it.  In the meantime, the Allies successfully crossed a Dingo and an M8 Greyhound.  This resulted in denying the Germans any end of game bonus points for preventing more than two Allied vehicles crossing the table.

To make matters worse for the Germans, the respawned M5 Stuart knocked out a well-hidden Marder III with some help from a supporting infantry assault (see how I use bonus attack cards here) and well-placed 37mm rounds.  As the game was winding down, and it was clear the Allies had a commanding edge in the score, The Germans bought a Tiger I and converged all vehicles on the plucky M5.

6 Marder III taken out and other Germans seek vengeance
The Marder III burns, and the Tiger I and SdKfz 233 hunt the M5 Stuart… 

7 Stuart will not die
…and are joined by the Jagdpanther!

8 Traffic jam
This traffic jam at game’s end yielded no damage on the M5 Stuart – the dice had completely deserted the Germans.

At games end, the final score was Allies 193, Germans 142.  This game yet again delivered a different result.  Player choices, and player luck all made this game fun and unique.

This is my 12th post about my development and running of this scenario and the models that went into making it.  I started back in May 2019, so it’s been a lot of work, but one project that I really am proud of now.

I wanted to honor the history and the struggle of the Allies in the days after the D-Day landing 75 years ago.  I will continue to run the game, and at this point I really only need to add a StuG IV to be really complete vehicle-wise (and I have one to build!).  To read about previous games and related posts, see the following:

Thanks to the Fort Devens Museum, Peter Lowitt. and the guys at Fencing Frog Gaming Adventures for running the event.  I hope to see you next year, if not sooner.  I also hope that some of the players join us at The Mass Pikemen Gaming Club.

I hope you enjoyed this post and would love to read your feedback!


Normandy Breakout Game at Mass Pikemen

Last Saturday (August 24th) we had a very action-packed game of What a Tanker© using my Normandy Breakout scenario at the Mass Pikemen Gaming Club.  I have been tweaking the scenario, some rules, and improving the terrain and markers – and I believe the gamers who played really noticed all of the upgrades and changes.  I have been fortunate to get valuable feedback from the gamers which has been invaluable, and this game was no exception.  I have acted as a Game Master for this game a couple of times (discussed here), and this, the third iteration, was another great game that had the players highly engaged.

For this post, I will show some of the photos that tell the story – though simultaneously being a photographer and a GM are not always easy.  I appreciate the generosity of both Chris Rett and Ted Salonich helping with some photos – as well as playing of course!

The game scenario is:

After a successful D-Day landing and consolidation, the tanks of the Americans and the British are stymied in the hedgerows of Normandy. German armor has set up effective defensive positions in favorable terrain. However, the Allies do not know the exact locations of the German tanks, and the Germans have limited knowledge of where the Allied armor will be coming from and the direction to which they will try to break out. New rules that allow reconnaissance and the effects of other combat forces will challenge both sides in this action-packed game.

The Germans are in secret positions (basically ambush positions) that they choose in advance of the Allies arrival – which is also secret in terms of the exact vehicles that the Allies choose.  Both sides get to secretly select their vehicles (with some restrictions), and poker chips are used for the scoring.  The Germans here did stop the Allies from breaking out – though the Allies were able to gain more points by both effectively recon of enough blind positions and knocking out enough valuable German vehicles.  The final score was 117-109 in favor of the Allies – with the game score turning on the Allies knocking out a Jagdpanther on the last turn.  The casualties were:

  • Allies – 5 vehicles:
    • UK – 3 vehicles:
      • 2 Daimler Dingoes
      • 1 Firefly
      • 1 M10 Achilles
    • US – 2 vehicles:
      • 1 M3A1 Stuart
      • 1 M10 Wolverine
  • Germany – 3 vehicles:
    • 1 Sdkfz 233
    • 1 Panther D
    • 1 Jagdpanther

Let’s see what the day looked like!

4 map at session
The Allies moved on from here.  The British had the far left road, and the Americans had the far right road.  The middle road could be used by both Allies.  The wooden discs are possible German positions to be reconned.

5 map at session
A side view of the tabletop that better shows some of the (blind) possible German positions.

6 map at session
The view from the German side of the board that the Allies needed to cross.

1 Me as GM
Your properly attired GM.  (Photo by Chris Rett)

The Germans effectively used a Bonus Attack card to draw first blood – calling in a rare Luftwaffe attack on a Daimler Dingo.

7 Dingo hit by Luftwaffe
The Daimler Dingo hit by the Luftwaffe – my new blast/knocked out tank markers looked pretty amazing (and I am biased of course).

4 Jagdpanther hunts Stuart
A Jagdpanther prepares to engage an M3A1 Stuart from an excellent ambush position.  The Stuart decided to run around the corner and recon the disc on the left…(Photo by Chris Rett)

5 Surprise!
… and the Stuart “successfully” reconned the position – it went around the bocage to find the Elefant in the room. (Photo by Ted Salonich)

5a Surrprise
The Stuart fired its 37mm at the frontal armor of the Elefant.  No effect.  The Elefant returned fire, and blew away the Stuart.

9 Firefly knocked out by StuG G
A Panther D and a StuG G combine forces to knock out a Firefly near the burning Dingo.

10 Panther D knocked out by Achilles
An M10 Achilles fires at and knocks the Panther D into a ruined building, damaging it.  It gets a second shot, and rolls well enough to torch the Panther.

11 M18 Hellcat moves up to help British
The Americans move up an M18 Hellcat to help the Brits – it ended up moving behind the Jagdpanther and was able to destroy it.

8 Gamers
The gamers ponder their moves.

13 Last shot
The Allies called in a lot of artillery-delivered smoke to protect their vehicles.  It was effective.

6 Panther burns and Tiger I arrives
Here comes the Tiger!  Note the StuG G that ambushed the M10 Wolverine.  The crew of the M10 survived – as denoted by the black smoke versus the fiery smoke.  Also shows the Allied smoke screen in front of the Jagdpanther.

As the German vehicles are worth, in general, much more points, the loss of their expensive vehicles made a big difference.  Both sides played well, but I have to say the Germans were not very lucky with their dice at times.  

I will be tweaking the game scenario in a couple of ways:

  • Adding stopping bonuses for the Germans:
    • A 20-point bonus for the Germans if no Allied vehicles are able to breakout across the tabletop.
    • A 10-point bonus for the Germans if only one Allied vehicle is able to breakout across the tabletop.  If 2 or more cross, no German bonus.
    • Award the Germans 2 points for each unreconned point.  This will incentivize recon, but force the Allies to choose what is most important.  (The Allies already get 2 points for each reconned point.)
  • Allow a “banked 6” to be used for either an advantage on the next activation (per the rules) or as an automatic “6” on the next activation roll (determined by the player on the turn he banks it). Thanks Ted Salonich!

Thanks again to the all of the players.  And for those who follow this blog who wondered if their named vehicle got fried, only one Cromwell (“IRO”) deployed and did not get into action.  However, the M10 Achilles “Per” (named for Per from Roll a One) did get knocked out by one of the StuG G’s.   Sorry my Swedish friend!

Hope that you enjoyed this – and I will be running this game on Saturday at BARRAGE in Maryland (September 28th) and at the Fort Devens Game Day on October 19th.  I may also run it at other upcoming gaming cons if possible.  Thanks for looking!


US Tanks and Tank Destroyers for Normandy Breakout Scenario

Welcome back dear reader for the latest installment on my US armored forces!  I needed to add more US vehicles for my Normandy Breakout scenario which uses the What a Tanker© rules by the UK-based company Too Fat Lardies.  I do modify these rules for the scenario.  For those who missed them (like some of the HAWKS did because I used the wrong hashtag!), the posts about the other vehicles and playtests for this scenario can be found at these links:

Vehicle Posts:

Playtest and related gaming posts:

I am planning on running this scenario at three upcoming events:

  • August 24th at the Mass Pikemen Gaming Club in East Brookfield, MA
  • September 28th at BARRAGE in Havre de Grace Maryland
  • October 19th at the Fort Devens Game Day at the former Fort Devens, MA

This project, with the possible exception of an additional stray German vehicle or two, completes the list of vehicles I need for the scenario.  In looking for vehicles, I wanted to add some Shermans, another M10 Wolverine, and an M18 Hellcat.  I found a deal on a box of 5 plastic British Shermans M4A1’s with cast hulls that would work.  I would have preferred getting models like my M4A2 – but that one is OOP and even the American Shermans that Battlefront is selling now are basically M4A1’s.  So these British ones, properly assembled, at 15mm scale, is just fine.

For an M10, I converted an Old Glory M10 Achilles by using a leftover gun to make it look like an original version.  Technically, is that a conversion of a conversion?  After seeing how John at Just Needs Varnish! added a plastic card underneath his models to make them easier to paint, I was inspired to add a small steel base under my M10 chassis.

The M18 Hellcat I found was really nice – and I wish I had another as well.  This one had a slightly broken front fender, but its hardly noticeable.  In any case, I used enough mud and dirt to obscure that problem.

I also decided to use the Battlefront naming decals on all of these to help differentiate them on the tabletop – as well as by adding spare road wheels, spare tracks, and other accouterments to all of the vehicles.  Thanks to my good friend Jeff Smith, the Shermans got some real steel in them by means of ball bearings in the chassis.

I decided to weather these slightly differently by adding pigments – inspired by Pete’s blog and a Merkava he built.

After a few in-progress shots, I will describe the vehicles alphabetically by name and type.

M4A1 “Betty”

1 M4 Betty, left side, crosses a field
“Betty” crossing a field.  

2 M4 Betty, right side, in a field

M4A1 “Blood ‘N Guts”

1 Blood N Guts completed, left side
“Blood ‘N Guts” crossing an opening in the bocage.

2 Blood N Guts completed, left side, crossing the opening in the bocage

M4A1 “Destruction”

1 Destruction after decals
“Destruction” early in the weathering process right after decal application.

2 Destruction after pigments
“Destruction’s” chassis after weathering

3 Destruction in the hedgerows
“Destruction” moving down the road between the hedgerows.

4 Destruction completed, left side
“Destruction” left side – as an experiment I used Citadel contrast paint on the tarp.

M4A1 “Let ‘Er Buck”

1 Let 'Er Buck after decals and some weathering
“Let ‘Er Buck” chassis early in weathering.  I chose this name/decal in honor of Buck Surdu, though as an infantryman he may object…

2 Let 'Er Buck finished, left side3 Let 'Er Buck finished, front side

4 Let 'Er Buck finished, right side
Note on all these that I used different gear in different stowage to differentiate the tanks.

M4A1 “Polly”

1 Polly completed, left side
“Polly” by some ruins.  As I have a pet cockatiel named Caesar, this is as close as he gets to an avatar tank.

2 Polly completed, right side3 Polly completed, right side, at crossroads

M10 Wolverine “Demon”

1 M10 Demon after weathering
“Demon” getting dirtied up.

2 M10 Demon crosses field, left side
“Demon” crossing a field.  I did not buy crew for this one.

3 M10 Demon crosses field, right side

4 M10 Demon crosses field, front side
Nice view of “Demon’s” front showing the replacement gun.

5 M10 Demon and other Battlefront M10
On the left, “Demon” from Old Glory, on the right, my previously built M10 from Battlefront for comparison.  I used more mud and dirt on “Demon” as it was a much less detailed casting.

M18 Hellcat “Lucky Tiger”

1 M18 Hellcat Lucky Tiger after some weathering
M18 Hellcat “Lucky Tiger” chassis all dirtied up.  I chose the name/decal as I am sure sometime it will face a Tiger I or Tiger II, and it will need to be lucky!

2 M18 Hellcat Lucky Tiger right side on road
“Lucky Tiger” completed and moving down the road.

3 M18 Hellcat Lucky Tiger right side on road4 M18 Hellcat Lucky Tiger left side on road

5 M18 Hellcat Lucky Tiger aerial view on road
Aerial view of “Lucky Tiger” showing the ID decal to keep away friendly air attacks.

6 M18 Hellcat Lucky Tiger front view on road

Group Shots

1 Shermans aerial view
Shermans in convoy on road.

2 Shermans aerial and side view

3 Shermans front shot
Frontal view of the five Shermans.

4 All US front shot
My complete American armored troops (currently) for the ETO.  Front row left to right: two M4’s (Wargame Models in Ohio); the five Sherman M4A1’s of this blog post (Battlefront); one M4A2 (Battlefront).  Second row l-r: M10 Wolverine of this post (Old Glory); M10 Wolverine (Battlefront); M18 Hellcat of this post (Battlefront); three M8 Greyhounds (Old Glory).  Third row l-r: two M5 Shermans (Wargame Models in Ohio); one M3A1 Stuart (Battlefront); two M24 Chaffee’s (eBay 3D printed acquisition).  I built and painted all but the Wargame Models in Ohio models.

5 All US side shot

The US vehicle menu for the scenario looks like this now.

US Army Menu

I hope that you enjoyed this post – and thanks in advance for your feedback in the comments section!

PAINTS, INKS, GLAZES, SHADES, WASHES, PIGMENTS, FLOCKING, GLUES AND MORE USED ON THESE VEHICLES:

  1. Gorilla Glue
  2. E6000 epoxy
  3. Vallejo “Flow Improver”
  4. Vallejo “Airbrush Thinner”
  5. Vallejo “Surface Primer – Black”
  6. Vallejo Model Air “US Olive Drab”
  7. Extra .50 cal machine guns from Battlefront kits for the M10 and the M18
  8. Extra 3″ gun from Battlefront kit for the M10
  9. ½” steel base from Wargame accessories for the M10
  10. Steel ball bearings from Jeff Smith’s fairway mower
  11. Daisy Air Rifle BB’s
  12. Reaper MSP “Black Primer”
  13. Vallejo Model Air “Dark Brown”
  14. Battlefront “Dark Gunmetal”
  15. Army Painter “Military Shader” (wash)
  16. Battlefront “European Skin”
  17. Battlefront “Skin Shade” (wash)
  18. Testors “Universal Acrylic Thinner”
  19. Citadel “Contrast Paint – Militarum Green”
  20. Battlefront “Oxide Red”
  21. Secret Weapons Washes “Armor Wash”
  22. Microscale Micro-Set
  23. Microscale Micro-Sol
  24. Microscale Micro-Satin
  25. Microscale Liquid Decal Film
  26. Vallejo Game Air “Satin” (varnish)
  27. Vallejo “Gloss Varnish”
  28. Appropriate decals from Armorcast
  29. Appropriate decals from Battlefront
  30. Vallejo “White”
  31. Vallejo “European Mud” (Thick Mud)
  32. Vallejo “European Slash Mud” (Splash Mud)
  33. Vallejo Weathering Effects “Crushed Grass”
  34. Vallejo “Light Slate Grey” (pigment)
  35. Vallejo “Light Yellow Ochre” (pigment)
  36. Vallejo Mecha Varnish “Matt Varnish

US Armor for 75th D-Day Anniversary

I am working on creating a Normandy scenario for a What a Tanker© game that I plan to run at a monthly gaming session at both the Mass Pikemen Gaming Club and the Historical Gaming Club of Uxbridge.  With the 75th Anniversary of D-Day coming up in little more than a month, I thought that would be appropriate. 

My challenge was that I really did not have enough historically-appropriate tanks and tank destroyers for such a scenario.  I did have 9 plastic British Shermans and 2 Fireflies that I bought on eBay that were well-painted.  I also had 2 resin Shermans and 2 resin Stuarts that I got from a guy who makes his own models and sells them already painted.  The British stuff came with a bunch of infantry that I sold, so the nice plastic British armor ended up costing me net only $1.40 each!  The US tanks were OK for the tabletop, and for the price (about $5-6 as I remember), a relative bargain – but I wanted better.  I also had no Germans for that theater, so that is part 2 of the project.  For this part, I am focused on five US vehicles.  Together, I will have enough to make a joint US/UK force.

Three of the five vehicles came from Battlefront and were metal and resin and some plastic:  one M3A1 Stuart (#US003); one M4A2 Sherman (#US045); and one M10 Wolverine tank destroyer (#US102).  The other two were M24 Chaffee tanks that did not make it to D-Day, but replaced Stuarts starting in the latter part of 1944.  These two were 3D printed models from somebody on eBay – and not great detail-wise.  But, the M24 was the tank my grandfather, Marcus C. Delaney, drove in Europe during WWII, so I thought I’d work on those at the same time.  I used many of the same research books that I have cited before – and I did not take pictures as these are more recognizable to most gamers and modelers.

Above, you can see the group – below is a group shot after assembly.

1 all assembled
Ready for paint – 2 M24 Chaffee’s, an M3A1 Stuart, an M4A2 Sherman, and an M10 Wolverine – with its crew on toothpicks.

2 turrets
Turrets mounted for painting.

I mostly used my airbrush for painting – and on the M24’s I tried to minimize the 3D printer lines with paints, washes, and weathering.  I decided to try a few Vallejo weathering products that caught my eye – I made a test of them first.  Of course, these are applied with a brush!

3 weathering
I thought the brown mud was too heavy, and the industrial splash mus was too thin – so I went with the other three.

3a weathering
I really liked these three – very nice weathering products.  The white labels on the top are what I do to help identify them in my supplies.

4 turrets painted
Completed turrets.

It’s now time to share some eye candy of the completed tanks and the tank destroyer.  Of course, I am also using these 5 as the first entry for a monthly painting challenge from Australia’s own Azazel – this being “Mechanismo May ’19 Community Painting Challenge“.

5 M3A1 front
M3A1 Stuart in the bocage.

6 M3A1 side
Side shot of the Stuart in a field.

7 M3A1 rear
Rear shot of the Stuart – it’s not as shiny as this!

8 M4A2 side
My M4A2 Sherman – “Deuces Wild”.

9 M4A2 front
Nice shot coming through the bocage – I really liked the mud and grass effects.

10 M4A2 rear
Rear shot – beware lurking panzerfausts!

11 M10 in field side view
Side shot of the M10 Wolverine cutting across a field into a gap in the bocage.

12 M10 in field side view
Another side shot – this was a very fun model to build.

13 M24's front
My two M24 Chaffee’s.  They won’t be at Normandy, but they will be later in the war.  I do like that I was able to give them some better texture with the weathering products.

13 M24's rear
Rear shot of the M24’s.  

13 M24's side
M24’s in convoy.  They were mostly used as scouts, and were used (and some are still used) by many different armies worldwide.  My grandfather told me many stories about his service driving one.

14 All US painted
My 5 US tanks for this project.

15 3 Shermans
For comparison, here you see three Shermans – from left to right – my M4A2, a plastic British Sherman I bought already painted, and the resin one I bought pre-painted on eBay.  

16 2 Stuarts
Here are the two Stuarts for comparison.  Mine is on the left – and the eBay resin one is on the right.  I will treat the resin ones as M5’s, which are better in What a Tanker. 

17 all Allied ETO
My complete ETO Allied vehicles – there’s a couple of Fireflies in there too.  I will use all of these except the M24’s for Normandy.

Now I have 18 US/UK vehicles for Normandy – which should be plenty.  I also know that some folks are bringing some DD Shermans and a couple of Churchill’s.  I have 6 German tanks and tank destroyers for Normandy and 11 for the Eastern Front (all about 60% completed), with 3 more to assemble (plus 5 scout cars).  That should be enough for a couple of fun games.  Stay tuned as I’m hoping to complete the Germans soon.

Thanks for checking this out – below are the paints etc.  Let me know your thoughts if you would!

PAINTS, INKS, GLAZES, SHADES, WASHES, PIGMENTS AND FLOCKING USED ON THESE VEHICLES:

  1. Vallejo “Flow Improver”
  2. Vallejo “Airbrush Thinner”
  3. Vallejo “Surface Primer – Black”
  4. Testors “Universal Acrylic Thinner”
  5. Vallejo Model Air “US Olive Drab”
  6. Vallejo Game Air “Black”
  7. Battlefront “Black”
  8. Battlefront “Dark Gunmetal”
  9. Battlefront “European Flesh”
  10. Battlefront “Skin Shade”
  11. Vallejo Model Air “Bright Brass”
  12. Vallejo “Base Grey Primer”
  13. Vallejo “Neutral Grey”
  14. Army Painter “Military Shader” 
  15. Vallejo Model Air “Wood”
  16. Polly S “Rust”
  17. Vallejo Mecha Color “Light Rust Wash” (wash)
  18. Gorilla Glue
  19. Vallejo Mecha Varnish “Gloss Varnish”
  20. Microscale Micro-Set
  21. Microscale Micro-Sol
  22. Microscale Liquid Decal Film
  23. Microscale Satin
  24. 1/8″ rare earth neodymium magnets
  25. Appropriate decals from Battlefront
  26. Vallejo “European Mud” (Thick Mud)
  27. Vallejo “European Slash Mud” (Splash Mud)
  28. Vallejo “Crushed Grass”
  29. Vallejo Mecha Varnish “Matt Varnish”
  30. Aleene’s poster tack


Looking Forward to HAVOC!

I have been very busy – too busy to effectively write blog entries lately.  I have been working on terrain and game support for the two games I will be running at HAVOC on April 5th and 6th.  Each will support 10 players – and its my goal that all have a blast!  So, in the interim, please enjoy these two announcements – hopefully I get some other stuff painted and blog-worthy for you dear readers!  The link for the convention is here.

I am looking forward to seeing a number of friends – including my old USMA classmate (and HAWKS member) Dave Wood who is also running a couple of games – so that’s exciting too.

I’ll be running these two games!  

04062019 HAVOC What a Tanker North Africa Photo

I updated this game with my Space Roos and have new terrain!

04062019 HAVOC Attack of the Warbots Photo


Terrain for What a Tanker: Making a Panzer IVD Wreck and Blast Markers

I have been trying to amass and put together more desert terrain and terrain markers for running What a Tanker© games set in North Africa in WWII.  A few months back I received a defective Panzer IVD model from Battlefront Miniatures –  in that it came with two left tracks.  Battlefront did a nice job in rectifying that situation and sent me a brand new model.  I finished that as a DAK Panzer IVD and wrote about it here.  But, I still had most of a Panzer IVD model that I could use for something.  I decided to make it into a wreck  – that would also be a nice addition as a terrain feature.  As I will be running a WaT game at HAVOC in April, so I decided to knock out four more smoke/blast markers to support that as well.  Both of these projects will be covered in this post.

These projects are my February submissions for Azazel’s February Community Painting Challenge, which he supplemented to include terrain.  This week I also started a new job!  So, I wanted to wrap up these projects this weekend.

Panzer IVD Wreck

I decided to base the wreck on an old CD that was surfaced with play sand and Elmer’s (PVA) glue.  To cover the hole, I affixed some leftover polystyrene bits.  Then, I used sandpaper to lightly scratch the CD, then applied the glue, then the sand, and let it harden overnight.  I removed the front and rear sprockets from one of the tracks and cut away some road wheels, so as to be able to flip them on the CD and make them available for the right side of the wreck in the correct locations as debris.  I carefully cut away the road wheels and part of the track and some fender, and washed everything to prep for painting.

After all the pieces had dried, I then I assembled the model to look “messed up”.  I put the gun and mantlet on slightly crooked.  The turret and bustle rack were put on a bit akimbo as well.

I took a 1/8″ drill bit and drilled a hole into the hull between the missing road wheels to simulate the impact of a hard shot into the weaker flank of the tank.  In my portrayal, that shot hit ammunition, causing an explosion.  I scattered the resultant debris on one side of the tank to simulate that, affixing everything with E6000 epoxy.  I then mounted the CD onto a disposable plastic plate using poster tack for ease of painting.  I applied a coat of Citadel “Imperium Primer” as the E6000 was a bit rubbery and smooth – and I was worried that it would not hold paint well.  To double up on priming, I then airbrushed on another primer coat – Vallejo “Surface Primer – Black”.

4 Wrecked primed
My initial basing and priming 

My next thought was to do a bit of the original Panzer IVD paint on the wreck before I changed it into a wreck, as perhaps some of it would survive (I don’t think much eventually did, but I thought, better safe than sorry).  This consisted of the same basic pattern I followed on my previous German tanks.

5 base coat (first)
First some grey…

6 base coat (second)
…and then some more DAK colors.

My concept at this point was to portray the Panzer IVD as having been hit, having caught fire, then after being abandoned, rusting away.  The fire would have destroyed all or most of the original paint on the hull.  Any metal debris would have rusted afterwards in my opinion, so I decided that decals would be a waste here.

7 early rust
Here, I worked on rusting things up with several different rusting products (all listed at the end of the post).

The sand and PVA glue texture was insufficiently granular for the base, so I used Citadel “Armageddon Dunes” to roughen up the landscape.  It also allowed me to make the doomed German tank’s last tracks in the desert at the rear of the vehicle.  I darkened them up with Citadel “Agrax Earthshade”.

8 after Armageddon Dunes on base
After using the Armageddon Dunes texture paint to gain a better surface on the base.

Then I went into using various Vallejo weathering pigments to create soot, smoke, and dust on and around the model.  I especially like the soot!

9 pigments and weathering and rust, impact side
Impact side, after weathering but before varnishing.

10 pigments and weathering and rust, left side
Opposite side of the tank before varnishing.

10 pigments and weathering and rust, top side
Top of the tank before varnishing.

For varnishing, I used two coats.  First, I applied a Vallejo “Satin” varnish with my airbrush.  After that had dried, I applied a light coat of Vallejo Mecha Color “Matt Varnish”.   I did not want to overly dull the tank, but I definitely did not want it too glossy.

12 after varnish, front
After first coat of varnish.

I am reasonably happy with the final results.  Here are some eye-candy shots on my desert game mat – you be the judge!

13 on mat complete, impact side
Completed Panzer IVD wreck model, impact side.

14 on mat complete, rear side
Completed Panzer IVD wreck model, rear side, showing the track marks in the sand before its final moments.

15 on mat complete, left side
Completed Panzer IVD wreck model, left side.

16 on mat complete, impact side
One of my favorite views.

17 that could have been us
An intact Panzer IVD crew drives by the wreck, thinking it could have been them!

18 that could have been us
Let’s be careful Heinz!  We don’t want to end up crispy like that one!

19 holding it
A little different angle – plus my hands for scale.

20 holding it top
Nice view of the top – some of the original paint can be seen here I think.

Smoke/Blast Markers

The next project was making some more (and better) to put on the tabletop when tanks meet their demise – or for any explosions in general.   I took tea lights, and hot glued thin strips of pillow batting to them in a “closed lily” type of shape.

1 unpainted smoke markers
After building the markers, but before painting them.

2 unpainted smoke markers lit up in dark
Lit up with the lights down.

I then painted them black and grey, trying to make them less dark thank my previous attempts.

3 painted smoke markers
Completed and lit in the light.

4 painted smoke markers lit up in dark
Look much better in less light!

Thanks for looking at these – and I hope that perhaps these give you some ideas.  In any case, I hope you enjoyed seeing them and my processes.  Please share any feedback you have in the comments section!

PAINTS, INKS, GLAZES, SHADES, WASHES, PIGMENTS AND FLOCKING USED ON THE PANZER IVD WRECK:

  1. Play sand
  2. Used CD
  3. Elmer’s Glue
  4. Battlefront model #GE040
  5. E6000 epoxy
  6. Gorilla Glue
  7. Testors “Universal Acrylic Thinner”
  8. Citadel “Imperium Primer”
  9. Polystyrene bits
  10. Vallejo “Flow Improver”
  11. Vallejo “Airbrush Thinner”
  12. Vallejo “Surface Primer – Black”
  13. Vallejo Model Air “Base Grey”
  14. Vallejo Model Air “German Green Brown”
  15. Vallejo Model Air “Light”
  16. Vallejo Model Air “German Green Brown”
  17. Vallejo Model Air “Hull Red”
  18. Vallejo Model Air “First Light”
  19. Vallejo Model Air “Brown”
  20. Citadel “Armageddon Dunes” (Texture)
  21. Battlefront “Monty Shade” (shade)
  22. Vallejo Mecha Color “Light Rust Wash” (wash)
  23. Vallejo Mecha Color “Dark Rust Wash” (wash)
  24. Citadel “Agrax Earthshade” (wash)
  25. Vallejo “Dark Sand”
  26. Battlefront “Dry Dust”
  27. Vallejo “Titanium White” (pigment)
  28. Vallejo “Carbon Black” (pigment)
  29. Vallejo “Pigment Binder”
  30. Citadel “Typhus Corrosion”
  31. Citadel “Ryza Rust”
  32. Vallejo “Desert Dust” (pigment)
  33. Vallejo “Dark Yellow Ochre” (pigment)
  34. Vallejo “Light Yellow Ochre” (pigment)
  35. Vallejo Model Air “Satin Varnish”
  36. Vallejo Mecha Varnish “Matt Varnish”
  37. Citadel “Nuln Oil” (wash)

PAINTS, INKS, GLAZES, SHADES, WASHES, PIGMENTS AND FLOCKING USED ON THE SMOKE/BLAST MARKERS:

  1. Tea lights (battery operated)
  2. Pillow batting material
  3. Hot glue from glue gun
  4. Vallejo “Flow Improver”
  5. Vallejo “Airbrush Thinner”
  6. Vallejo “Surface Primer – Black”
  7. Vallejo Model Air “Base Grey”
Frank Tank Rants

musings of a fat old bloke on tanks and wargames

Dragons of Lancasm

Games, miniatures, painting, books and more games

Tiny Painted Heroes

The Adventures of a lifelong Tabletop Gamer, Game Design hobbyist, and full-time Software Engineer

Home of the Grumpy Gnome

Tinkering with Artwork and Ideas

Steve's Paint Brush

Grimdark model making and mini painting

Wargamesculptors Blog

Life, Golf, Miniatures, & Other Distractions

Dead Dick's Tavern and Temporary Lodging

Life, Golf, Miniatures, & Other Distractions

Guru PIGS Blog

Guru's thoughts on wargaming, life, and the universe!

Wisely lead... without a head!

History, Miniatures and Wargaming

Kuribo's Painting

Fallout, MESBG, and Hellboy Painting, Terrain, Dioramas, and Battle Reports

Don't Give Greg Ideas

Seriously, just don't

War Across the Ages, and other dark horrors

A discussion of miniatures collecting, painting and gaming.

Classic Warhammer 40K

Painting diary focused on Warhammer 40K 2nd ed., 5th ed. WHFB, related GW games, and miscellaneous whimsy

Colonel Mustard

WW2 Modelling in 1/72 Scale

Bogenwald

Random painting and terrain making.

Pat's 1:72 Military Diorama's

Scale diorama tips and ideas

Arcade Dreams

Building the Arcade Dream

P.B.Eye-Candy

Phil's 20th century wargame pages

SP's Projects Blog

A futile fight against entropy or 'Every man should have a hobby'? Either way it is a blog on tabletop wargames, board games and megagames

30mmdave

Wargaming Plausible reality?

Faith&Steel

dave's gaming adventures: faithandsteel.wordpress.com

The Imperfect Modeller

Miniature Figure Painting and Diorama Modelling

Double Down Dice

Painting miniatures and rolling dice!

Just Needs Varnish!

My ongoing wargames projects!

miniaturepopcorns

Sculpting some worlds

Despertaferres

Wargaming with the ability of a dull nine year old

Dawn of the Lead

Miniature wargaming and the occasional zombie

Rantings from under the Wargames table

Wargames, Figures, Sculpting and Converting Miniatures

Simple as War

Miniatures & Terrains

Buck's Blog

Life, Golf, Miniatures, & Other Distractions

IRO aka Imperial Rebel Ork

- I model - therefore I am -

Azazel's Bitz Box.

Painting, Modelling, Miniatures, 1:6, Games... Whatever else I find interesting.

diggingforvictoryblog

Smallholding and Wargaming.......not always at the same time!

Shamutantis

Nørdblog numero uno

Harry Heckel

Writer/Game Designer