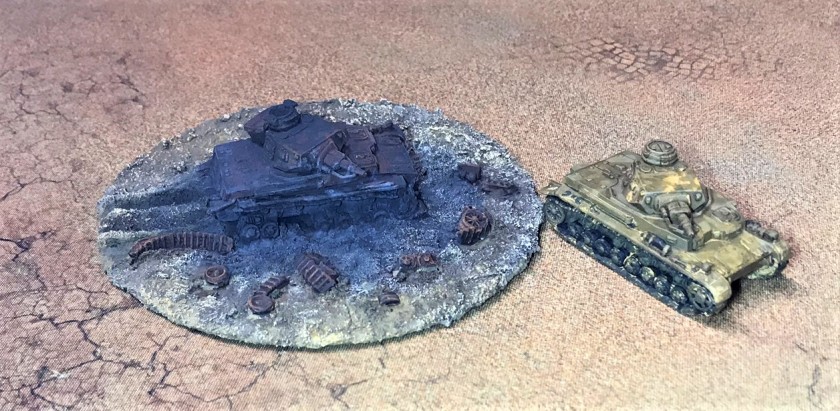
I have been trying to amass and put together more desert terrain and terrain markers for running What a Tanker© games set in North Africa in WWII. A few months back I received a defective Panzer IVD model from Battlefront Miniatures – in that it came with two left tracks. Battlefront did a nice job in rectifying that situation and sent me a brand new model. I finished that as a DAK Panzer IVD and wrote about it here. But, I still had most of a Panzer IVD model that I could use for something. I decided to make it into a wreck – that would also be a nice addition as a terrain feature. As I will be running a WaT game at HAVOC in April, so I decided to knock out four more smoke/blast markers to support that as well. Both of these projects will be covered in this post.
These projects are my February submissions for Azazel’s February Community Painting Challenge, which he supplemented to include terrain. This week I also started a new job! So, I wanted to wrap up these projects this weekend.
Panzer IVD Wreck
I decided to base the wreck on an old CD that was surfaced with play sand and Elmer’s (PVA) glue. To cover the hole, I affixed some leftover polystyrene bits. Then, I used sandpaper to lightly scratch the CD, then applied the glue, then the sand, and let it harden overnight. I removed the front and rear sprockets from one of the tracks and cut away some road wheels, so as to be able to flip them on the CD and make them available for the right side of the wreck in the correct locations as debris. I carefully cut away the road wheels and part of the track and some fender, and washed everything to prep for painting.
After all the pieces had dried, I then I assembled the model to look “messed up”. I put the gun and mantlet on slightly crooked. The turret and bustle rack were put on a bit akimbo as well.
I took a 1/8″ drill bit and drilled a hole into the hull between the missing road wheels to simulate the impact of a hard shot into the weaker flank of the tank. In my portrayal, that shot hit ammunition, causing an explosion. I scattered the resultant debris on one side of the tank to simulate that, affixing everything with E6000 epoxy. I then mounted the CD onto a disposable plastic plate using poster tack for ease of painting. I applied a coat of Citadel “Imperium Primer” as the E6000 was a bit rubbery and smooth – and I was worried that it would not hold paint well. To double up on priming, I then airbrushed on another primer coat – Vallejo “Surface Primer – Black”.

My next thought was to do a bit of the original Panzer IVD paint on the wreck before I changed it into a wreck, as perhaps some of it would survive (I don’t think much eventually did, but I thought, better safe than sorry). This consisted of the same basic pattern I followed on my previous German tanks.
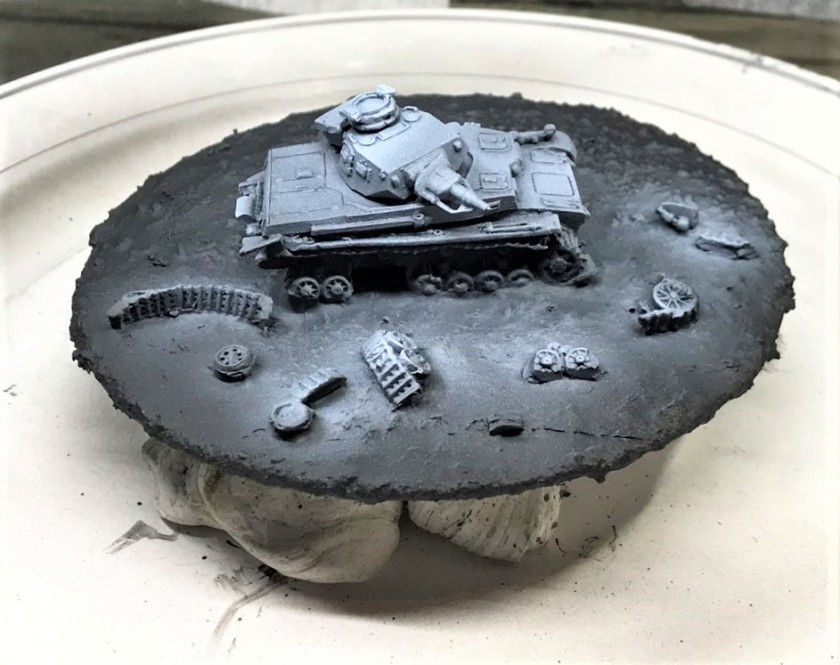

My concept at this point was to portray the Panzer IVD as having been hit, having caught fire, then after being abandoned, rusting away. The fire would have destroyed all or most of the original paint on the hull. Any metal debris would have rusted afterwards in my opinion, so I decided that decals would be a waste here.
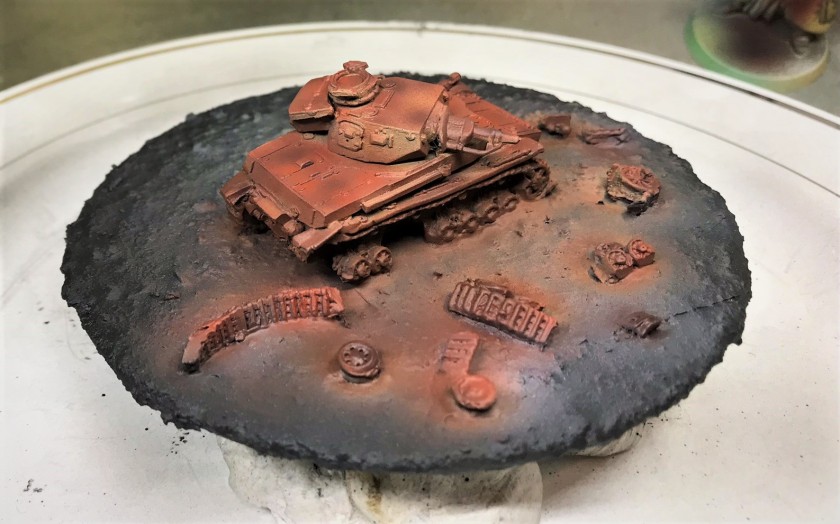
The sand and PVA glue texture was insufficiently granular for the base, so I used Citadel “Armageddon Dunes” to roughen up the landscape. It also allowed me to make the doomed German tank’s last tracks in the desert at the rear of the vehicle. I darkened them up with Citadel “Agrax Earthshade”.

Then I went into using various Vallejo weathering pigments to create soot, smoke, and dust on and around the model. I especially like the soot!


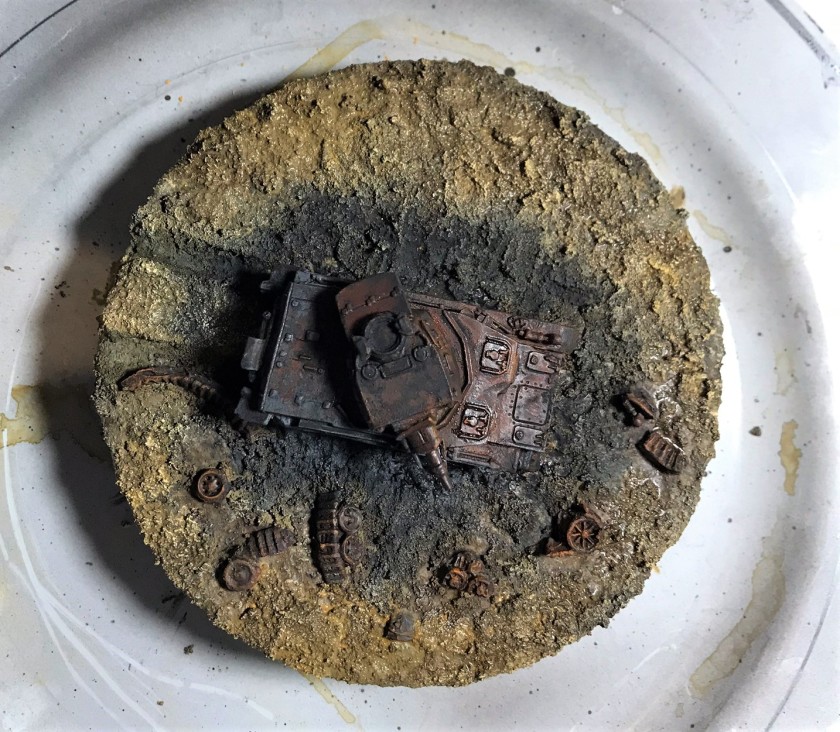
For varnishing, I used two coats. First, I applied a Vallejo “Satin” varnish with my airbrush. After that had dried, I applied a light coat of Vallejo Mecha Color “Matt Varnish”. I did not want to overly dull the tank, but I definitely did not want it too glossy.

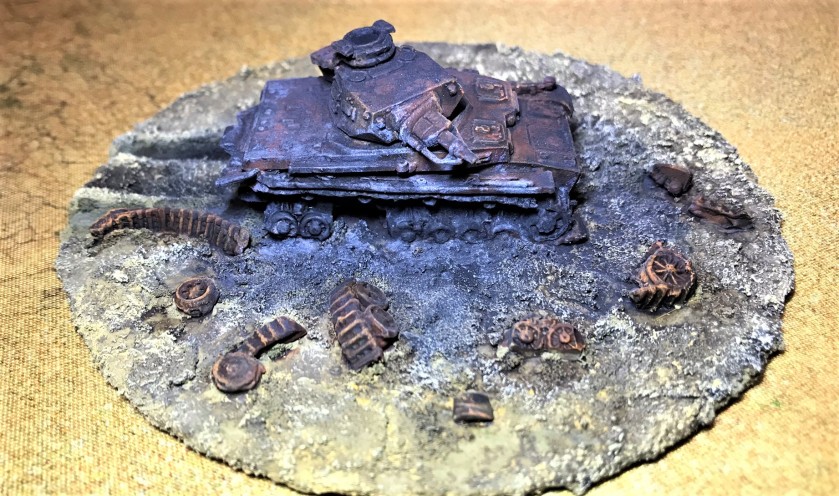
I am reasonably happy with the final results. Here are some eye-candy shots on my desert game mat – you be the judge!





Smoke/Blast Markers
The next project was making some more (and better) to put on the tabletop when tanks meet their demise – or for any explosions in general. I took tea lights, and hot glued thin strips of pillow batting to them in a “closed lily” type of shape.


I then painted them black and grey, trying to make them less dark thank my previous attempts.


Thanks for looking at these – and I hope that perhaps these give you some ideas. In any case, I hope you enjoyed seeing them and my processes. Please share any feedback you have in the comments section!
PAINTS, INKS, GLAZES, SHADES, WASHES, PIGMENTS AND FLOCKING USED ON THE PANZER IVD WRECK:
- Play sand
- Used CD
- Elmer’s Glue
- Battlefront model #GE040
- E6000 epoxy
- Gorilla Glue
- Testors “Universal Acrylic Thinner”
- Citadel “Imperium Primer”
- Polystyrene bits
- Vallejo “Flow Improver”
- Vallejo “Airbrush Thinner”
- Vallejo “Surface Primer – Black”
- Vallejo Model Air “Base Grey”
- Vallejo Model Air “German Green Brown”
- Vallejo Model Air “Light”
- Vallejo Model Air “German Green Brown”
- Vallejo Model Air “Hull Red”
- Vallejo Model Air “First Light”
- Vallejo Model Air “Brown”
- Citadel “Armageddon Dunes” (Texture)
- Battlefront “Monty Shade” (shade)
- Vallejo Mecha Color “Light Rust Wash” (wash)
- Vallejo Mecha Color “Dark Rust Wash” (wash)
- Citadel “Agrax Earthshade” (wash)
- Vallejo “Dark Sand”
- Battlefront “Dry Dust”
- Vallejo “Titanium White” (pigment)
- Vallejo “Carbon Black” (pigment)
- Vallejo “Pigment Binder”
- Citadel “Typhus Corrosion”
- Citadel “Ryza Rust”
- Vallejo “Desert Dust” (pigment)
- Vallejo “Dark Yellow Ochre” (pigment)
- Vallejo “Light Yellow Ochre” (pigment)
- Vallejo Model Air “Satin Varnish”
- Vallejo Mecha Varnish “Matt Varnish”
- Citadel “Nuln Oil” (wash)
PAINTS, INKS, GLAZES, SHADES, WASHES, PIGMENTS AND FLOCKING USED ON THE SMOKE/BLAST MARKERS:
- Tea lights (battery operated)
- Pillow batting material
- Hot glue from glue gun
- Vallejo “Flow Improver”
- Vallejo “Airbrush Thinner”
- Vallejo “Surface Primer – Black”
- Vallejo Model Air “Base Grey”


Amazing work and detail Mark. Very impressive.
LikeLiked by 1 person
Thanks!
LikeLike
That’s some impressive terrain there, Mark! And good luck with the new job, I start my own new employment in two weeks!
LikeLiked by 1 person
Thanks and best to you as well
LikeLike
Your work just gets better and better my friend. Using a CD for the base is a great idea. Hmmm what albums don’t I listen to anymore… Spice Girls…….. Tiny Tim……….. Avril Lavigne………….. Backstreet Boys…….. haha
LikeLiked by 2 people
Ha! Well HP doesn’t hit the top 40! Thanks dude.
LikeLiked by 1 person
Impressive work and using of various paints.
LikeLiked by 1 person
Thanks Le Bim, glad you liked it.
LikeLiked by 1 person
Looking great Mark.
LikeLiked by 1 person
Thanks!
LikeLike
Great all round Mark. Like the use of the CD and the redundant kit for terrain. The explosions look great, I’m assuming these are battery operated tea lights? In any event they look fantastic and the low light photos do them justice. Hope all goes well in the new job. Make sure you find time for modelling! 😊
LikeLiked by 1 person
Thanks Dave. Yes, they are indeed battery-operated. May have some time in the evenings and on weekends!
LikeLiked by 1 person
Excellent mate – that burned out tank is a brilliant piece, and I love the tealight explosions 🙂
LikeLiked by 1 person
Thanks Alex. Sorry as I will not get any female models done this month as I’m still in preparation for running a WaT game in early April. I had wanted to, but time running out and I have two Grants, 3 M11/39’s, and several (tbd) Marder III’s to complete!
LikeLiked by 1 person
Crikey, Mark, what a brilliant post! Panzer IV wreck – excellent! Explosion markers – by far the best I’ve ever seen! My wife was impressed (and she barely looks at my stuff)!
Good luck with the new job!
LikeLiked by 1 person
Thanks John! And my best to your lady in terms of tastes in blast markers and husbands! New job is exciting, I’m covering a HUGE swath of the US, so that’s different. Company is exciting too.
LikeLiked by 1 person
Great work Mark. The panzer will make a fine addition to your table top.
Cheers,
Pete.
LikeLiked by 1 person
I hope so Pete, much appreciate the feedback
LikeLike
Looking great here, Mark. Love the burnt-out Panzer. You reminded me that I started on that tank graveyard a while ago and need to get back to it sometime. The tea light explosions also look great. Are you able to change the batteries in them still?
LikeLiked by 2 people
Thanks and yes the batteries are replaceable
LikeLiked by 1 person
Wow, very nice. Every time I see something like this I think to myself, “Someday you should learn how to use an airbrush. 🙂
I also like those blast markers. The first time I saw anything like that in person was at a WWI game at a con near Oakland a few years ago. They really add a lot to the presentation of a table.
LikeLiked by 2 people
Thanks Ann, glad you liked them. I finally broke down and got an airbrush and compressor about three years ago when I finally got sick of waiting for the right weather to be able to prime or varnish. As we speak, it’s 16° here and windy and we’re waiting for more snow. So, with an airbrush and a spray booth I am able to do a lot more with my hobbies that I would have been able to otherwise. And blast markers that light up are always fun!
LikeLiked by 2 people
I’m waiting for Mark to come out here and show me how to use the bloody thing. 🙂
LikeLiked by 2 people
I’d love to if I was in the neighborhood! To tell you the truth, I learned by trial and error seasoned with looking at YouTube videos. Two areas that I would focus on would be cleaning the brush and safety. Safety being protecting lungs and keeping your hobby area free of dusty paint particles. I love my spray booth for that, and I overprotect with a respirator anyways. And I only use water based stuff- and that works well. Besides, I’d be out of production without my set up (compressor, airbrush, and spray booth).
LikeLiked by 1 person
I (finally) picked up a respirator today – very overdue. Truth be told, I looked up the hardware barn’s website and asked Marouda to pick it up for me on her way back from the Gym. But I finally have it. Spray booth (and space) are my biggest obstacles. Oh, and time…
LikeLiked by 1 person
Yeah, I’d probably get one if I had someone to show me how to use it. I could certainly go onto Youtube and teach myself, but that would require I overcome a certain inertia I have against such things.
LikeLiked by 1 person
Yeah. I already failed once or twice (drying paint in the brush, a brush clean that resulted in the brush not working anymore even though I’m sure I put it back together properly) so that’s put up a huge mental barrier.
Also, space to work with it. My lightbox area is my nominal airbrush area.
LikeLiked by 1 person
Yeah, the downside is cleaning, but I do that immediately after I paint and that takes 15 minutes max. My spray booth folds up into a little box with a handle – and has great LED lights . I do not use the extension hose, so its pretty compact. https://tcpglobal.com/products/mas-b440dclk
LikeLike
Brilliant job on the burnt out tank !I’m like Ann maybe I will look at air brushing sometime in the future.
LikeLiked by 1 person
High praise from you Pat! Airbrushing is a tool, anyone can learn
LikeLiked by 1 person
Gorgeous work, Mark!
LikeLiked by 1 person
Thanks Mikko!
LikeLike