Aztec Novice Warriors and a few Frinx

Last month (March) was the first month in several years that I had not painted any miniatures at all.  This happened because I was busy early in the month looking for a job, and then the pandemic hit with all that that entailed.  I decided that I would take the time to honor a commitment made to my good buddy Buck Surdu (who attended West Point with me).

Buck has published many games, and as readers of this blog know, I am very fond of his Combat Patrol™ – WWII Skirmish card based system.  If you take a look at his website, you will see many different (and very well done) free supplements that have been written for other periods and conflicts – check them out here.  One limitation of Combat Patrol™ is that it does not adapt well to the periods before firepower became predominant in warfare – such as before the 17th Century.  Buck has developed a new set of card-based rules for these earlier skirmish battles called Feudal Patrol™ – and they should be published this year I believe.

So back to my commitment – I agreed to help Buck by researching and writing one of the free supplements for the upcoming Feudal Patrol™.  But which era?

When I returned to the hobby (back six years or so ago), I bought many miniatures that I found on eBay that were from the 1970’s to 1990’s.  It was my way of catching up.  One of the groupings I bought were Aztecs, so (without a fully developed concept – or an in-depth understanding of the history of the Conquest) I volunteered to write a supplement covering the Spanish Conquest of the Americas in the 16th Century – covering the Aztecs, the Maya, the Tlaxcalans, the Mixtecs/Zapotecs, the Inca, and of course the Conquistadores.  The research (reading 4 books and other internet material) for this took me the better half of March, and writing the supplement (about 30 pages) took up the rest – so no painting in March for me.  I have finished the draft and we’ll see where that goes – but so far it looks (to my biased eyes) pretty good.

1 books
Research, research.

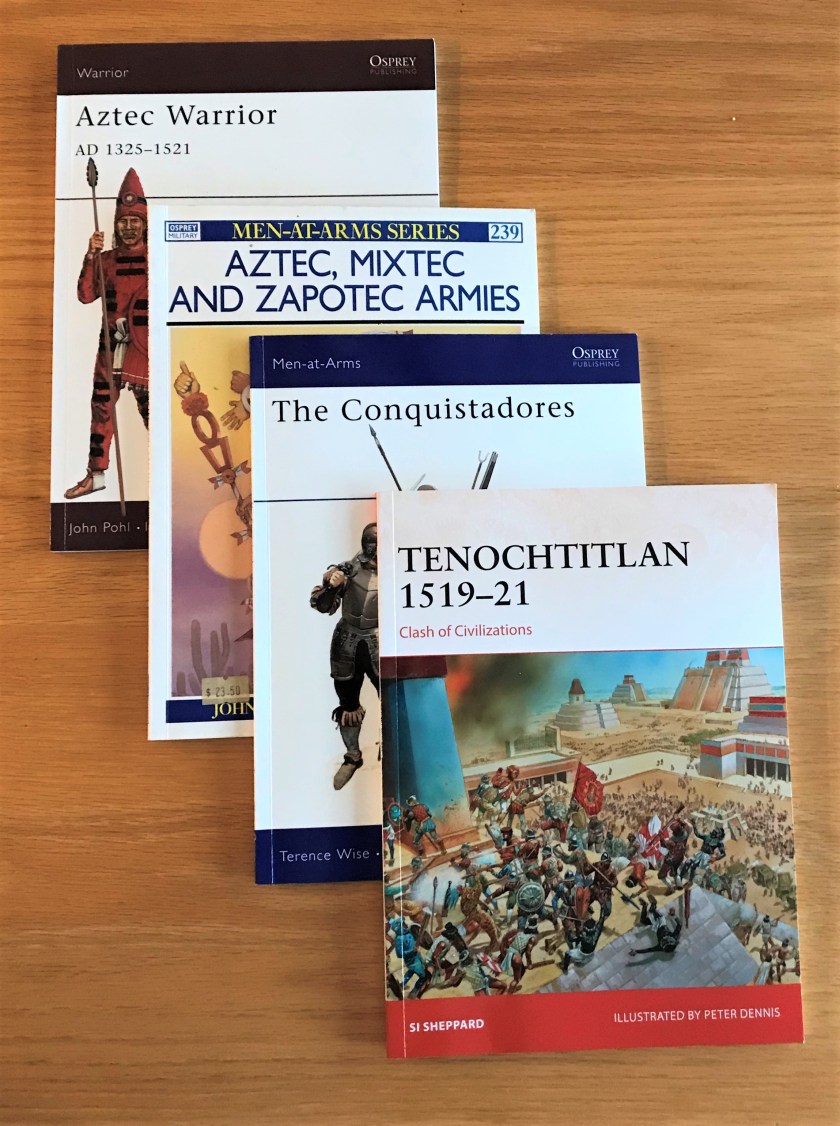
The resources that I found were adequate I believe – as the authors are all subject matter experts.  Besides, I just needed enough to design a gaming supplement – not pursue a doctorate.  In any case, I now can start painting forces to use with the supplement and hopefully bring to club meetings and conventions.

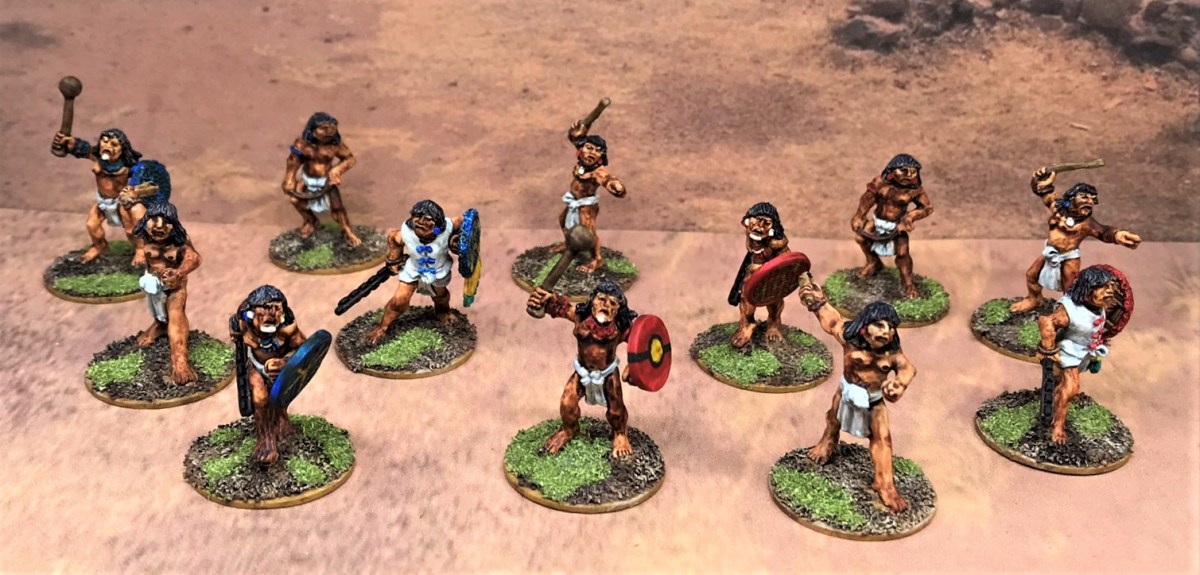
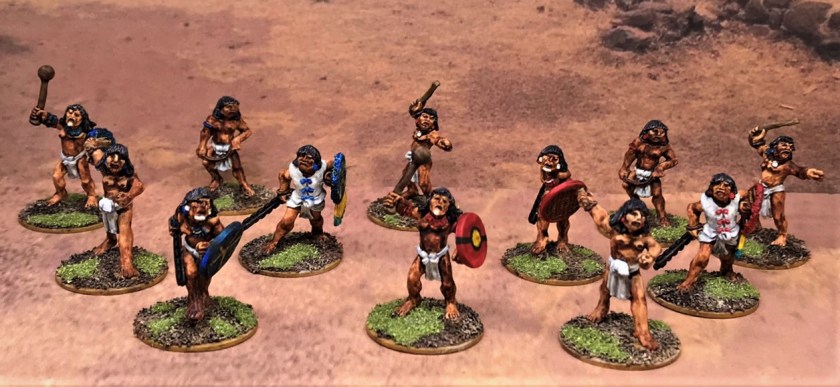
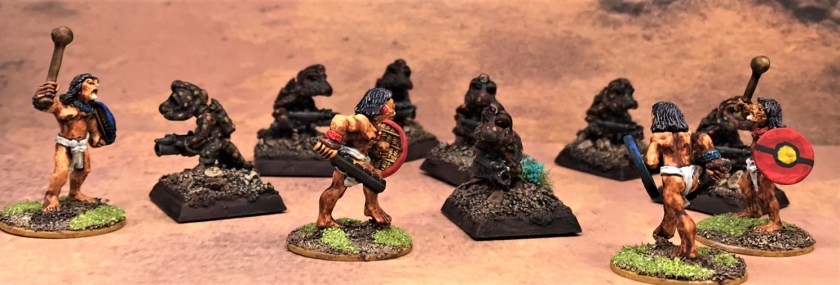
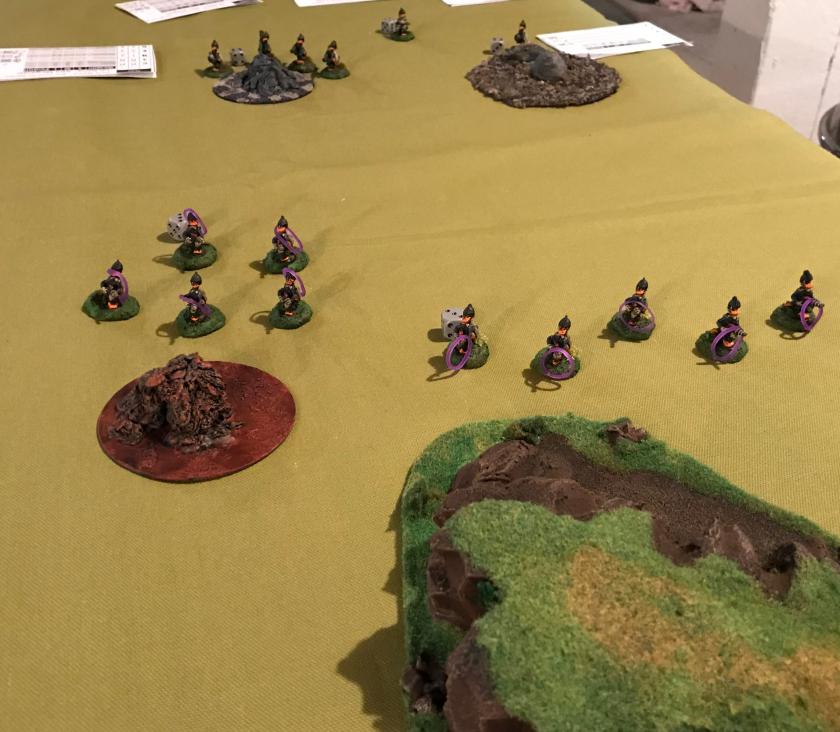
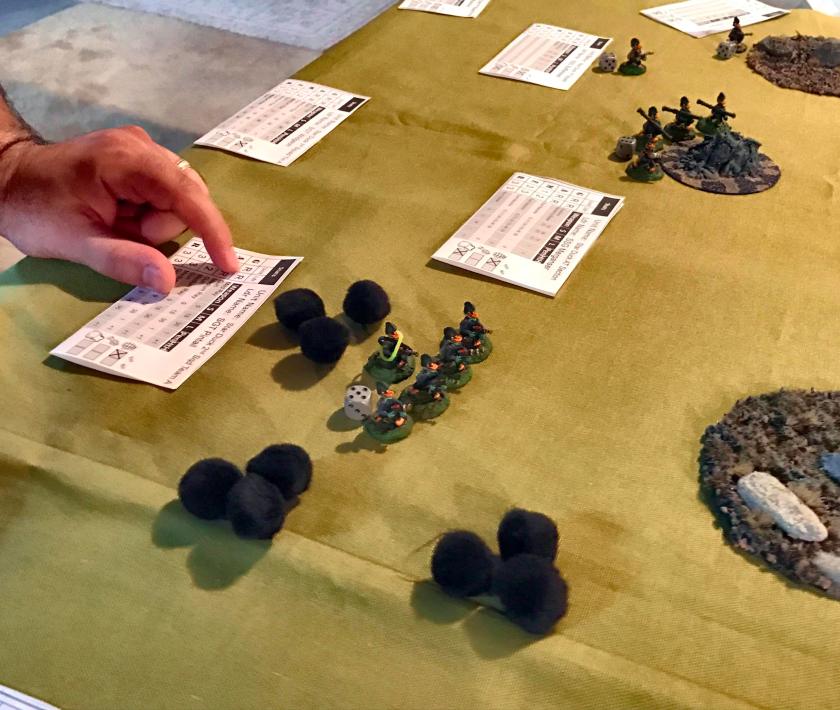
I started with Aztec novice warriors.  A major aspect of warfare in this period was the overriding need to take captives.  The Aztecs would place the taking of captives at a higher premium than actually killing the enemy.  Rank and prestige in the Aztec army (and Aztec society) were dependent on two things – the number and the quality of the enemy warriors one had captured.  These captured were used for ritualized sacrifice or for making into slaves.  The value of all captives was not equal – capturing a high-ranking member of a strong warrior tribe was better than a weaker one from a less-respected foe.  Aztec troops were typically composed of a group of veteran warriors and an attached group of novices.  The novices were usually (but not always) in a second rank, following the veterans.  The veterans were supposed to be responsible for the novice’s training.  In the game, I match up a group of novices to an equally-sized group of veterans (not elite units).

Novice warriors advance by capturing enemy warriors under the tutelage of the veterans.  The first two blisters that I had were “Aztec Novice Warriors II”  and came from Wargames Foundry.  These are available in the US from Badger Games – here is a link to them.

2 In blisters
My first two blister packs of Aztec troops.

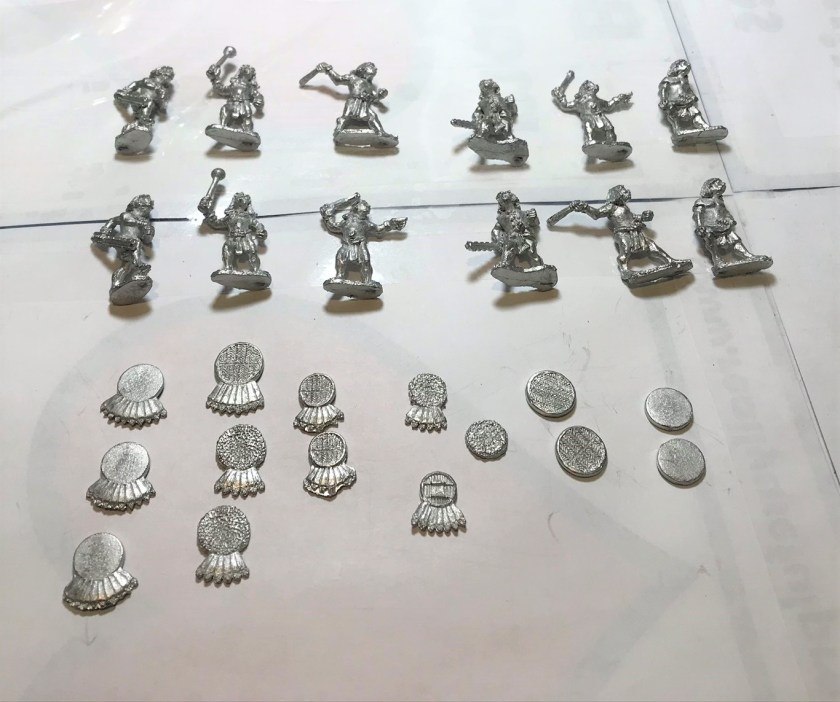
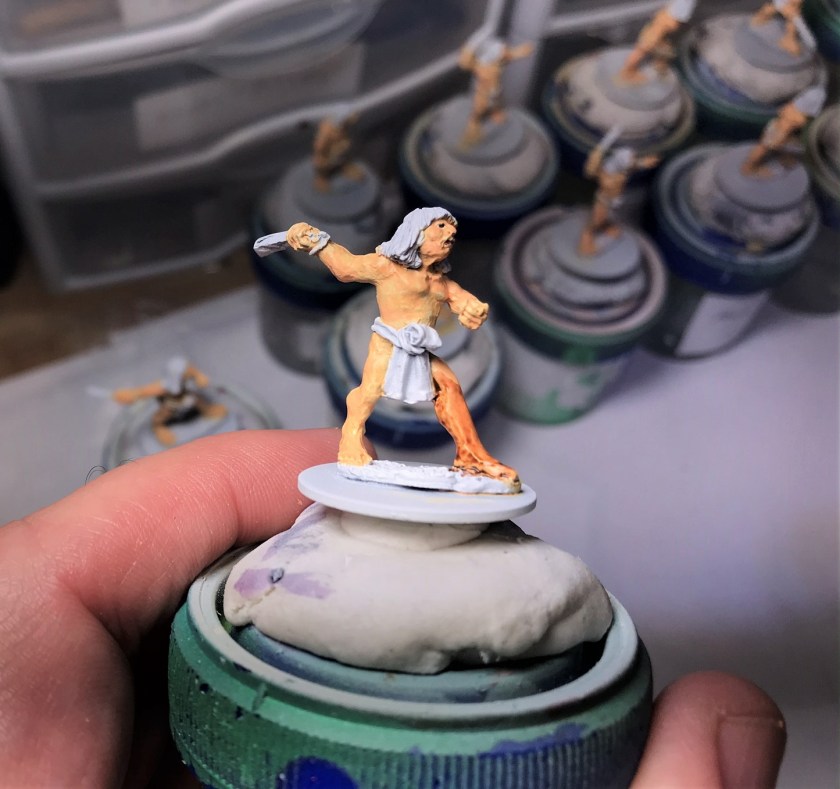
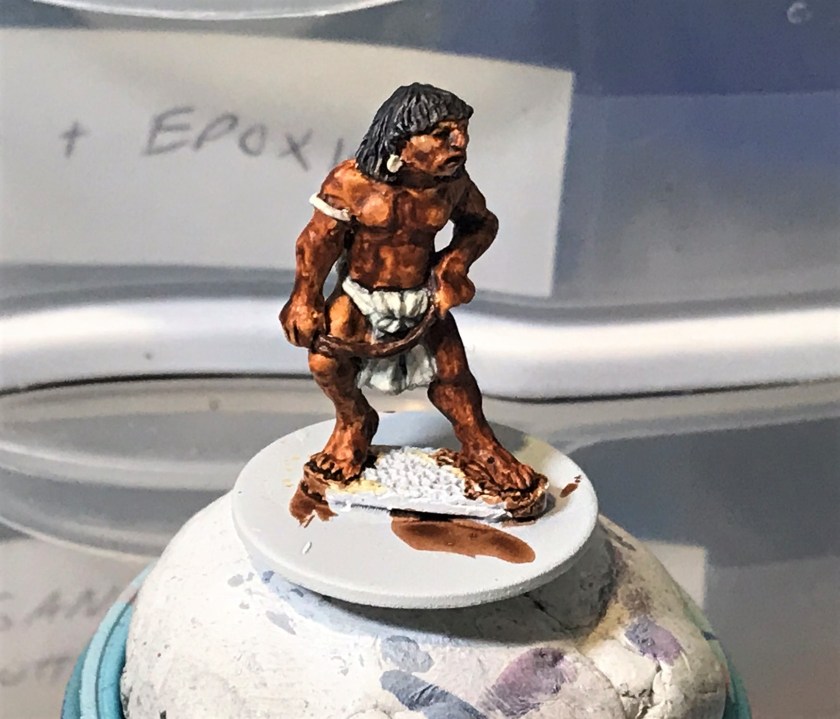
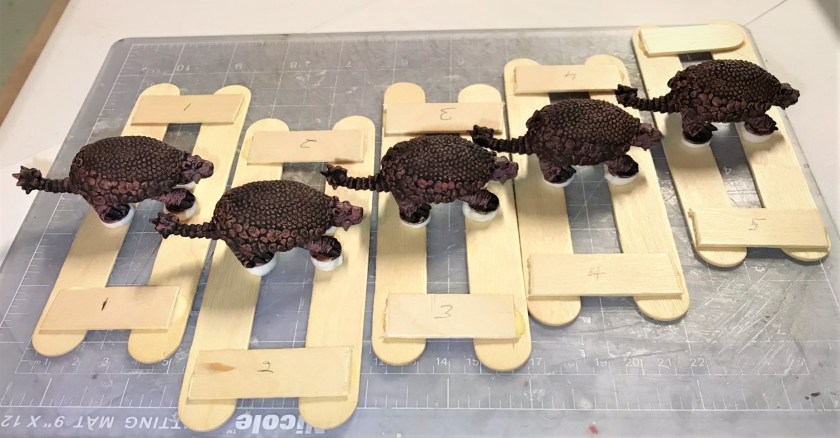
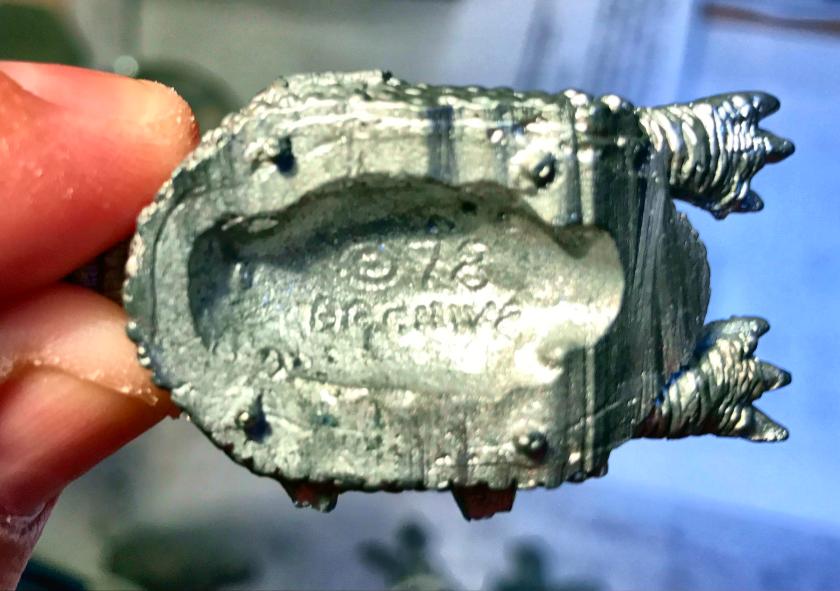
The metal models cleaned up easily enough – but I discovered that there were a few lingering mold lines that I missed.  Still, these would be a nice way to challenge my painting skills (and add to them) as I had not painted human flesh of any type in 28mm for several years – maybe these old 1970’s era Minifig neanderthals were the last similar types that I did.  As these novices are mostly wearing only loincloths, it would be a lot of skin to paint.

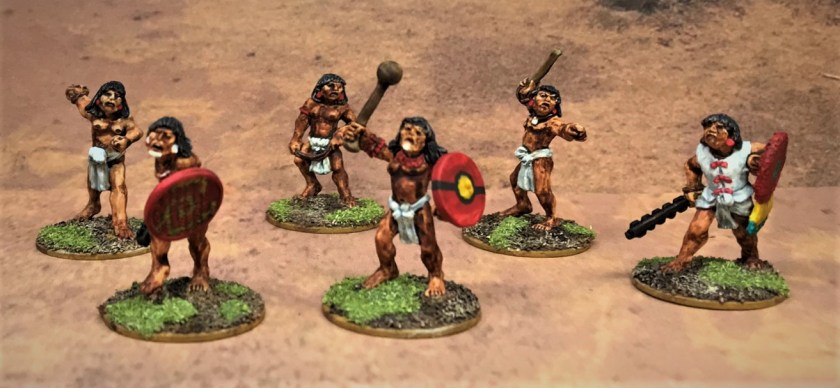
The packs also came with many shields.  Each blister pack of six contained 3 novices armed with slings, two armed with an obsidian-bladed wooden sword club called a macuahuitl (ma-kwa-wheat), and one with a a roundhead club called a cuauhololli (kwa-ho-lolly).  One of the macuahuitl figures had a quilted cotton armor tunic called an ichcahuipilli (each-ca-we-pee-lee).

As a side note – part of the research into this era was the major challenge of pronunciation and spelling for Aztec terms!

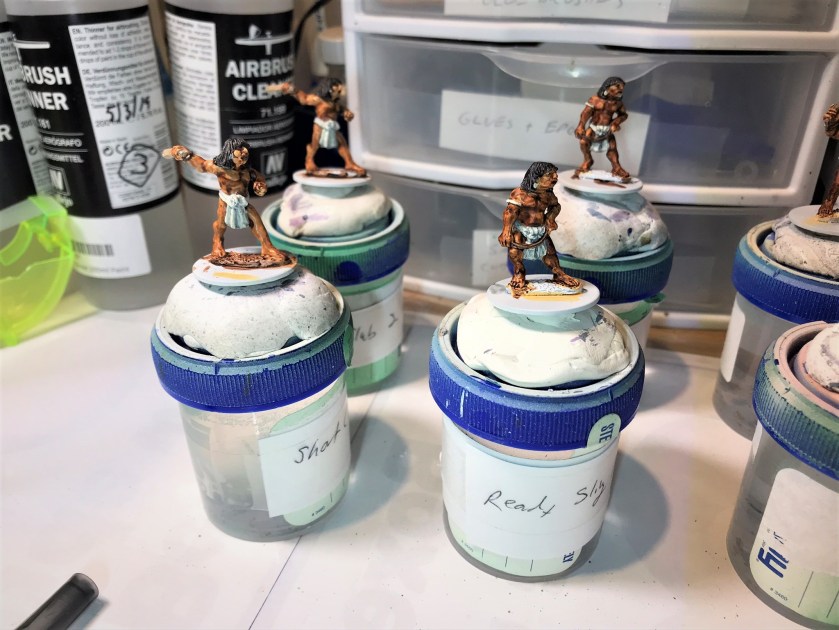
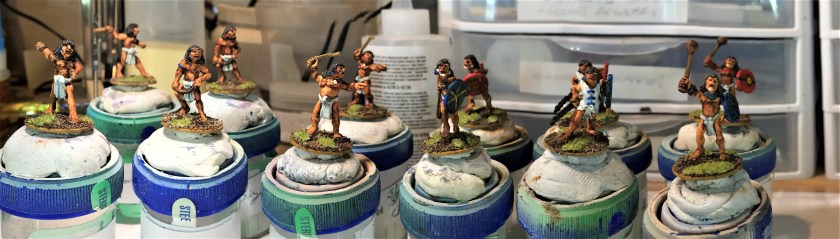
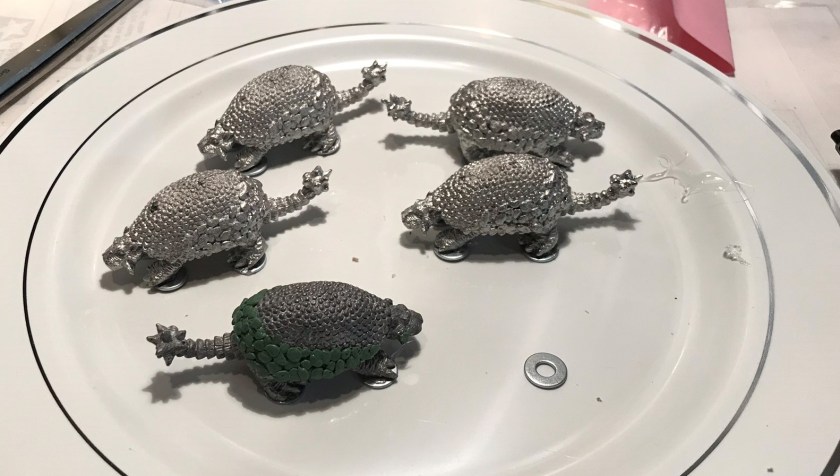
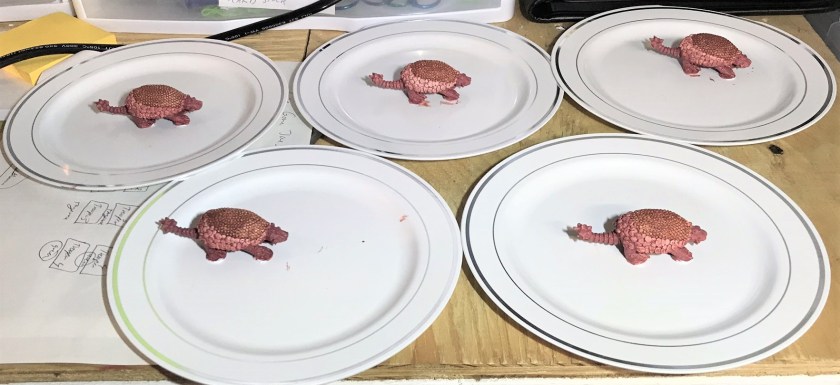
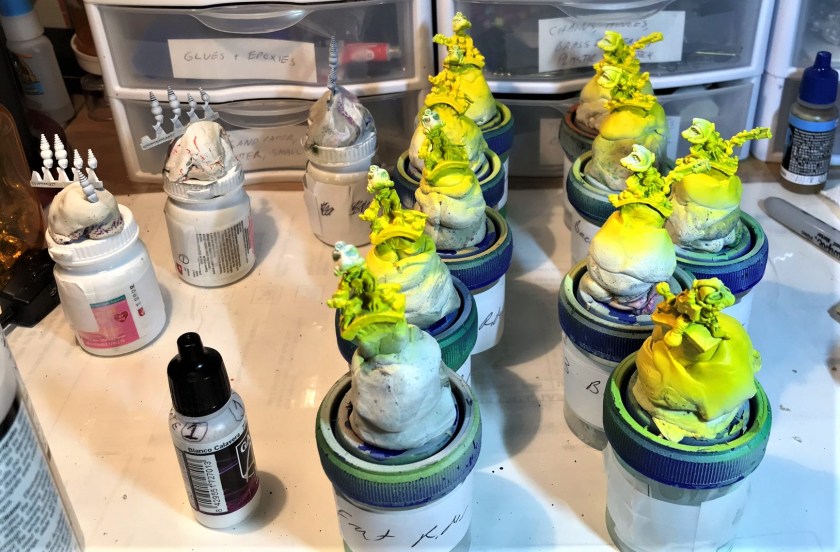
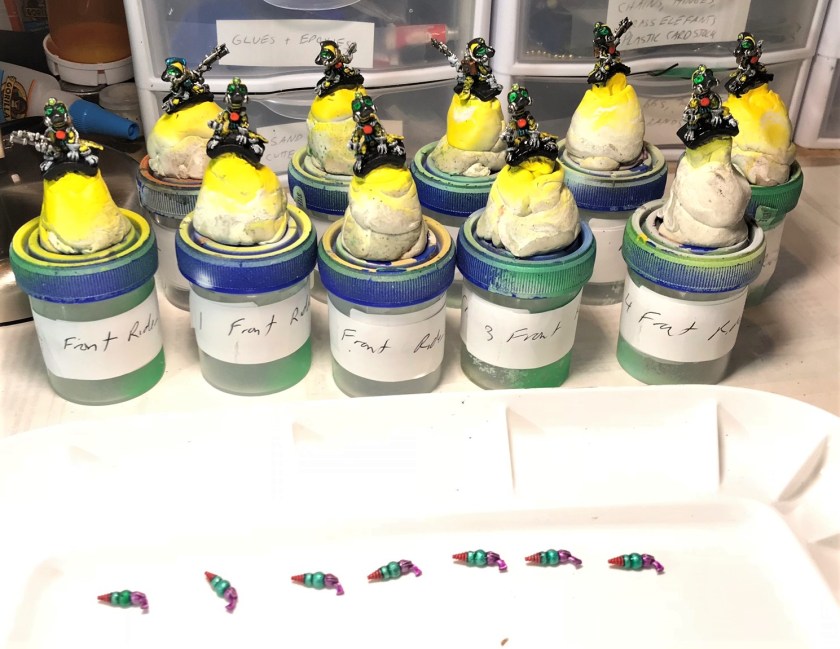
I filed and cleaned the models, and mounted them on 1″ steel fender washers for painting.  These were then mounted on specimen jars with poster tack for ease of painting.

3 each blister had these
The blister contents  – there were many more shields than I needed – as I did not think slingers should have shields.
4 prepped amd mounted for painting
Mounted for priming and painting.  I used a plastic plate to mount the shields for separate painting and later attachment to the models.
6 after base flesh
Early base coat of the flesh with Vallejo Model Color “Sunny Skin Tone”.
5 slinger with contrast paint on leg
I decided that I would try to paint a lighter flesh base coat and then use Citadel Contrast paint (in this case Citadel “Contrast Paint – Fyreslayer Flesh”) on that.  Here, I have only done one leg to show the effect.
7 after adding contrast paints
The Citadel “Contrast Paint – Fyreslayer Flesh” proved to be in need of thinning.  I painted these in order from left to right, and the ones on the far right came out way too dark and needed a redo.  By using Testors Universal Thinner with the Citadel “Contrast Paint – Fyreslayer Flesh”, I was able to get a better Aztec skin tone.
8 lightened slingers
The two slingers on the far left after the redo.
10 close up progress April 18
I tried to highlight and shade the flesh here such that from a distance the figures would look right.  I also gave each type of model a slightly different color theme on their accouterments for easier identification and better play on the tabletop.
11 start on shields
Moving on here to start painting the shields.  I had very little experience in panting tiny designs on tiny shields (as you will see).

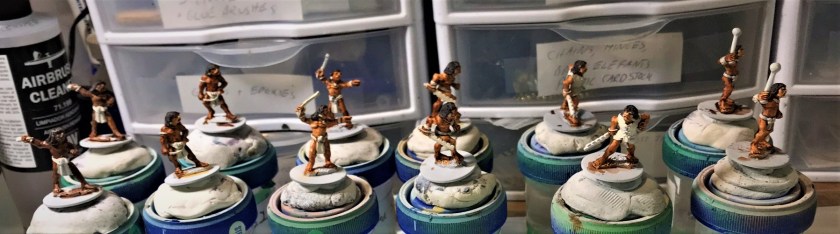
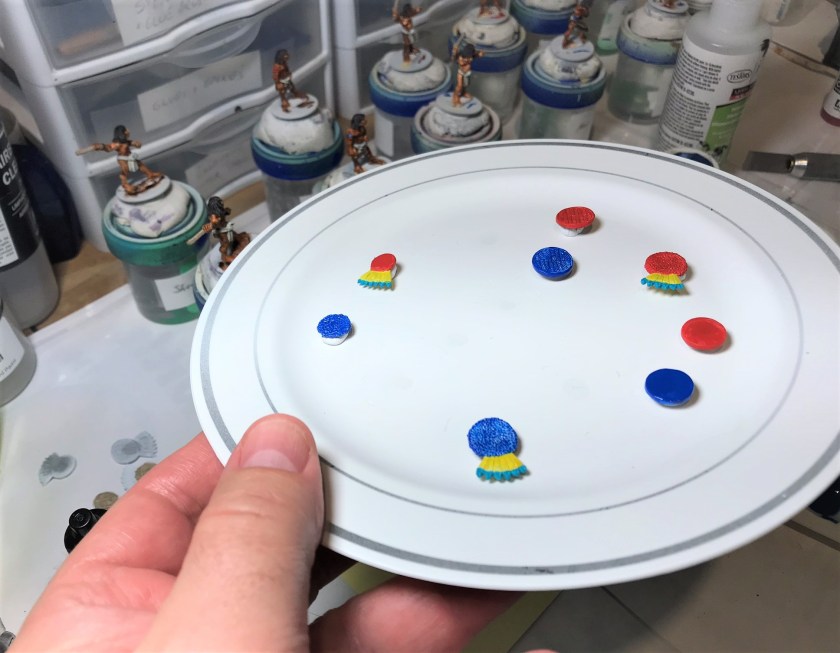
By April 19th and 20th, I had gotten the models to where I could begin to choose which shields to use and affix.  I did this with first Gorilla glue, and then with E6000 epoxy – allowing to harden overnight.  At that point, I was able to use shading on the models and the shields – and flock the bases.

For flocking, I used Army Painter “Brown Battlefields”, followed by some pigments (see painting list below).  I then airbrushed the models with varnish, and after that dried overnight, I applied random grass patches to the bases.

17 after varnish
Finished models.

For better viewing, I will now share close up groupings of photos of each type of figure and some group shots as eye candy.

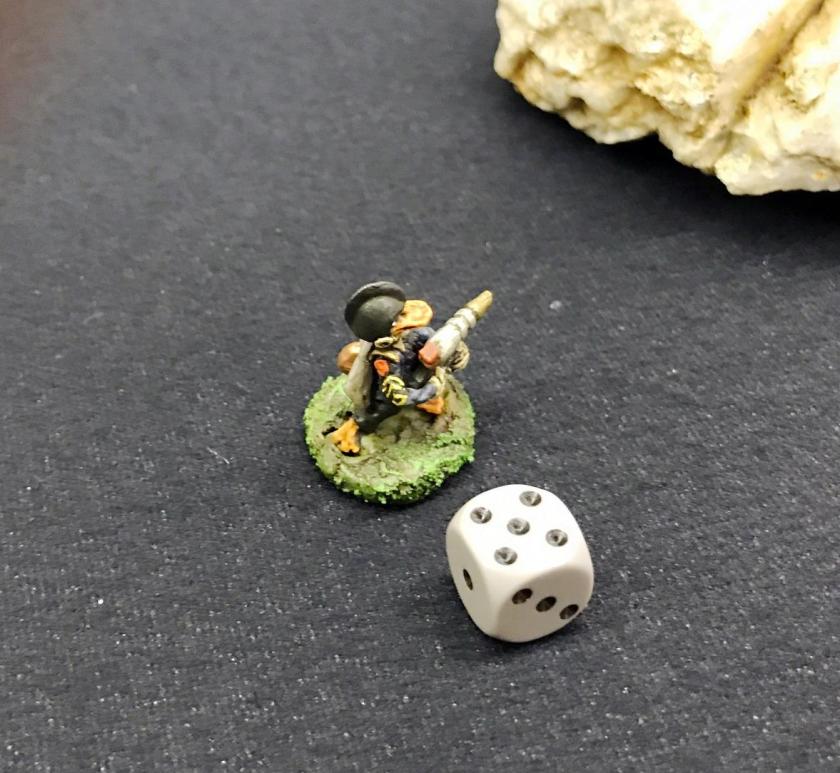
First, the slingers with cocked arms:

Next, the slingers loading their slings:

Next, the novice figures with shields and macuahuitl advancing.

Next, here are the two cuauhololli-armed novices.

The one type of figure with a macuahuitl , and a quilted cotton armor tunic called an ichcahuipilli.

The sixth type, a slinger with sling above his head:

And some group shots:

20 Blue themed warriors
The blue-themed novices
21 Red themed warriors
The red-themed novices.
22 Group shot
The twelve novices assembled.

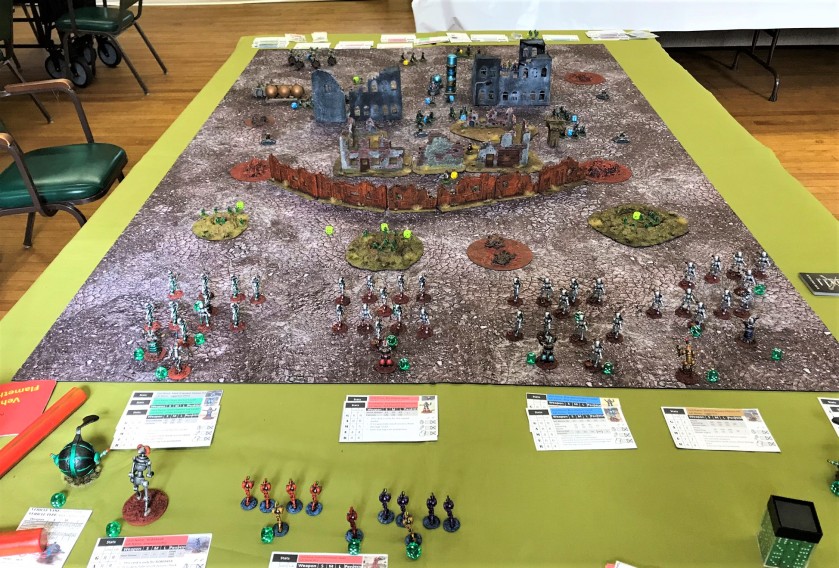
I hope that you enjoyed seeing these figures and my processes.  I do believe that I can improve upon them and I hope to do so with subsequent projects for the Spanish Conquest – there will be several going forward.  I did want these to count for the Ann’s April 2020 “Paint the Crap You Already Own!” Painting and Hobby Challenge over at Ann’s Immaterium blog.

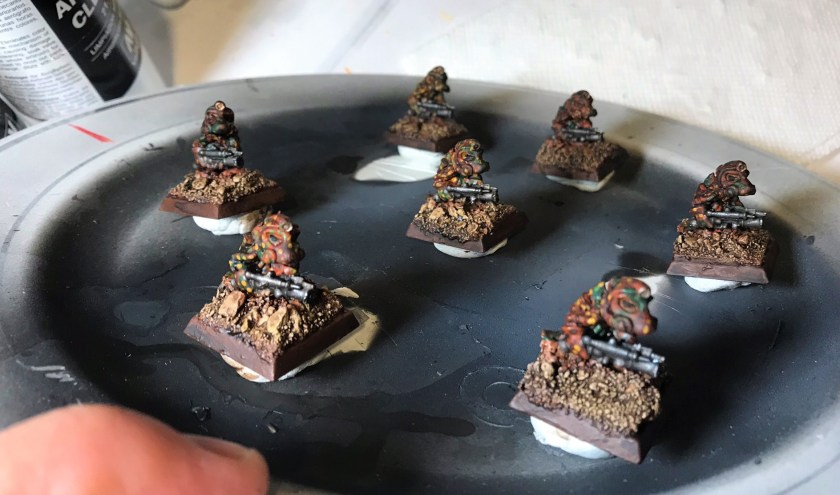
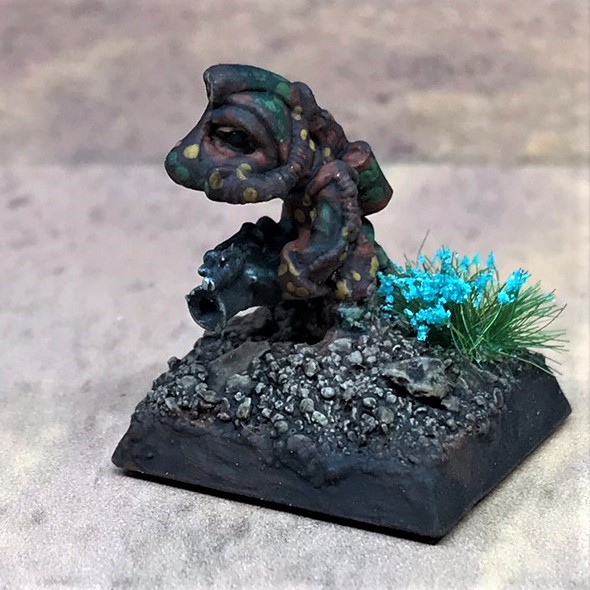
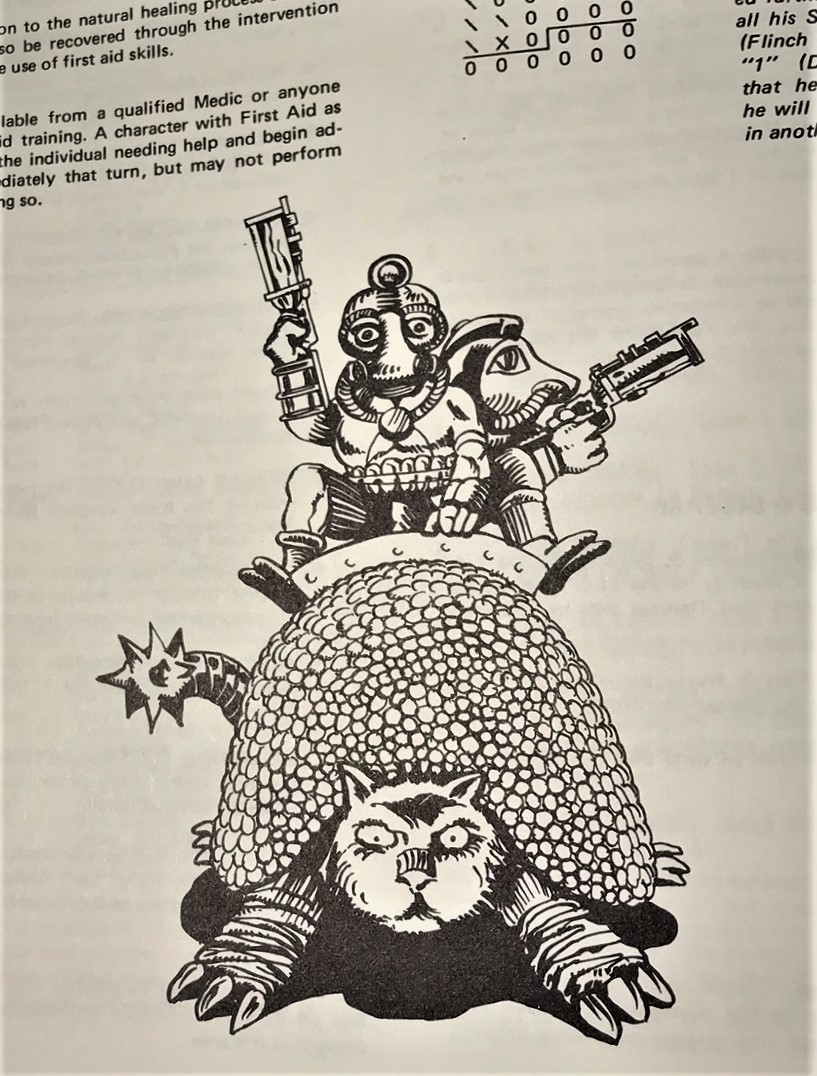
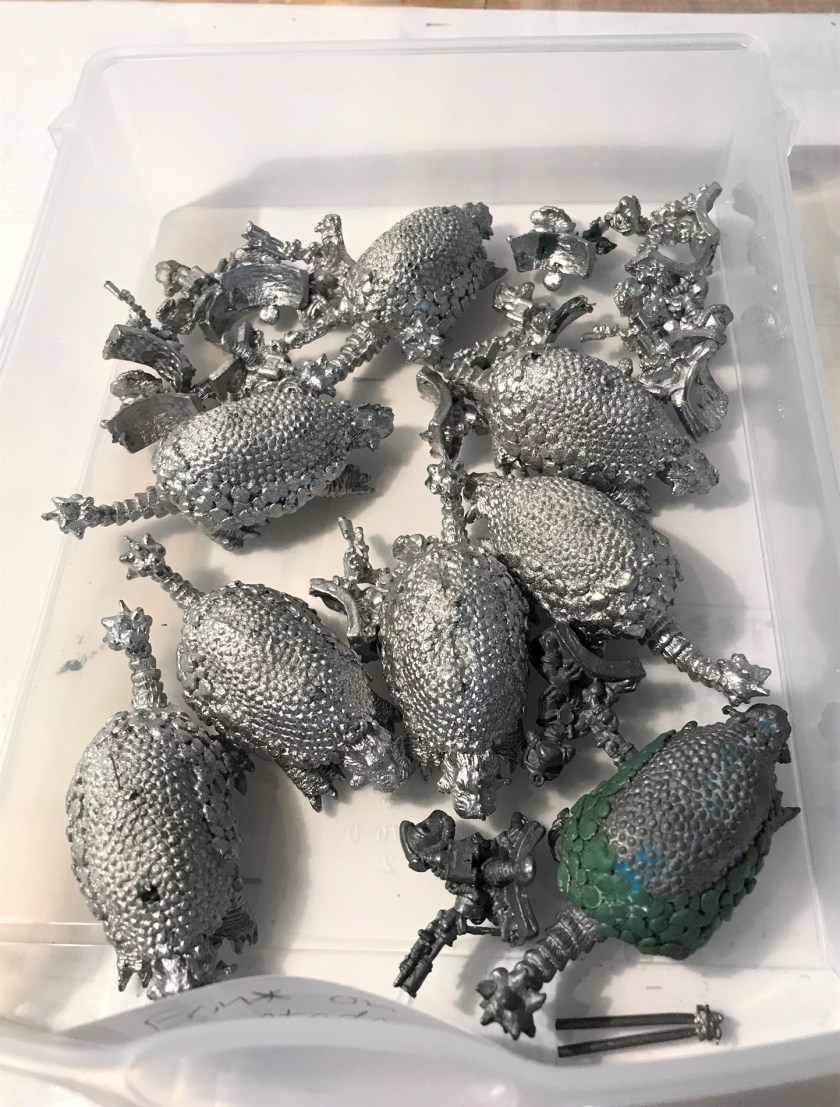
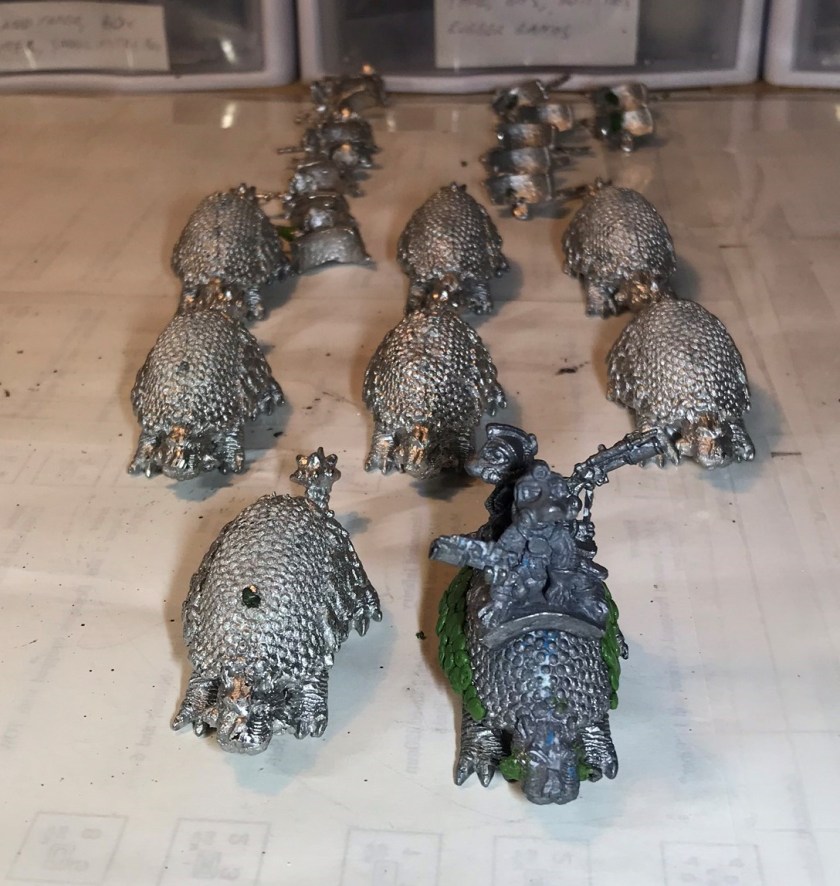
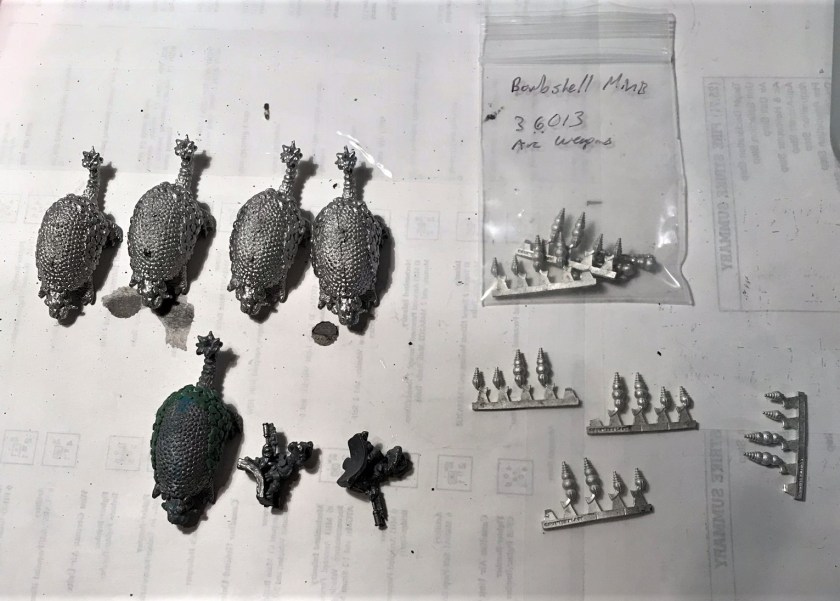
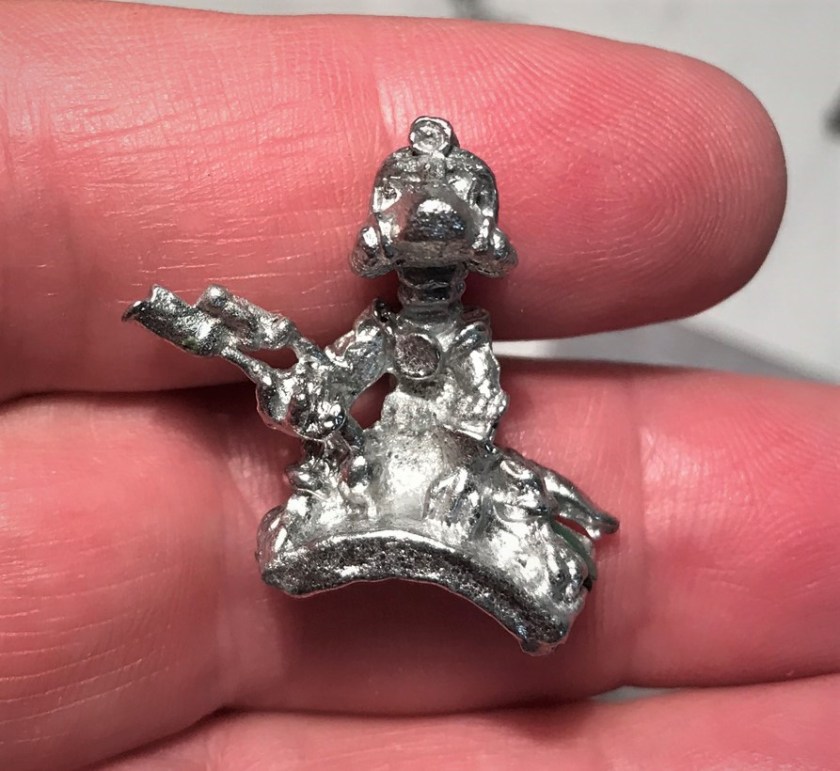
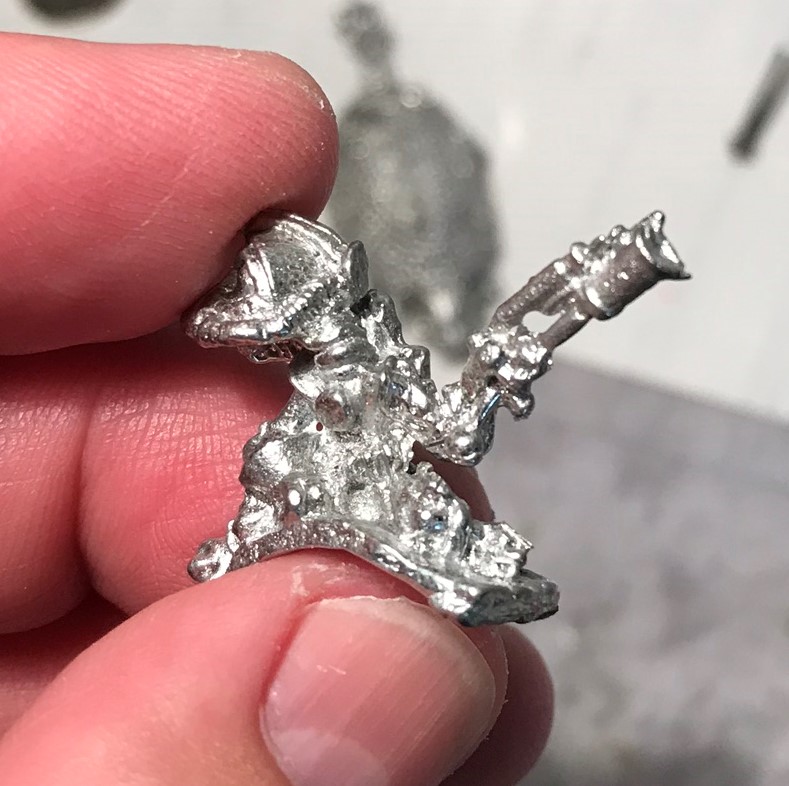
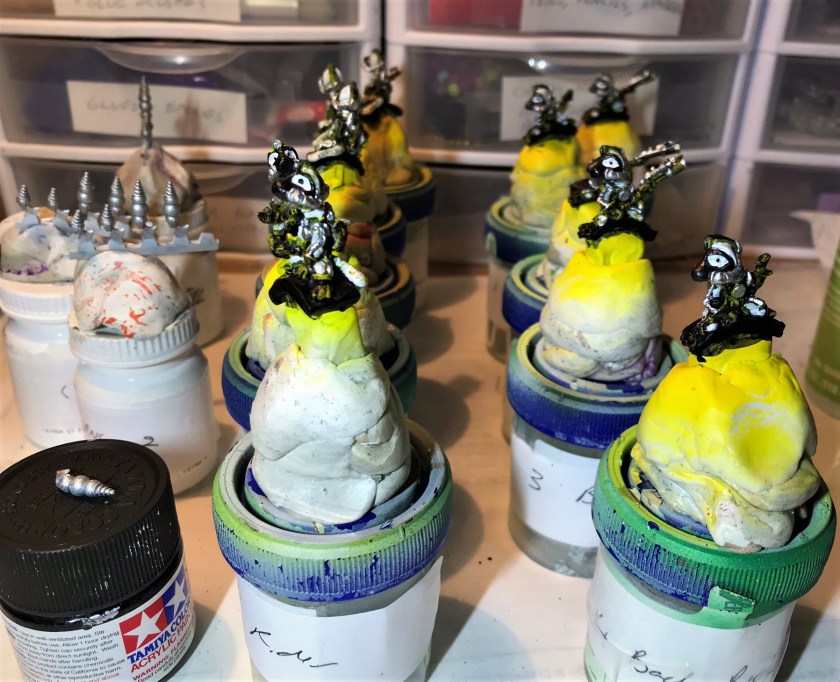
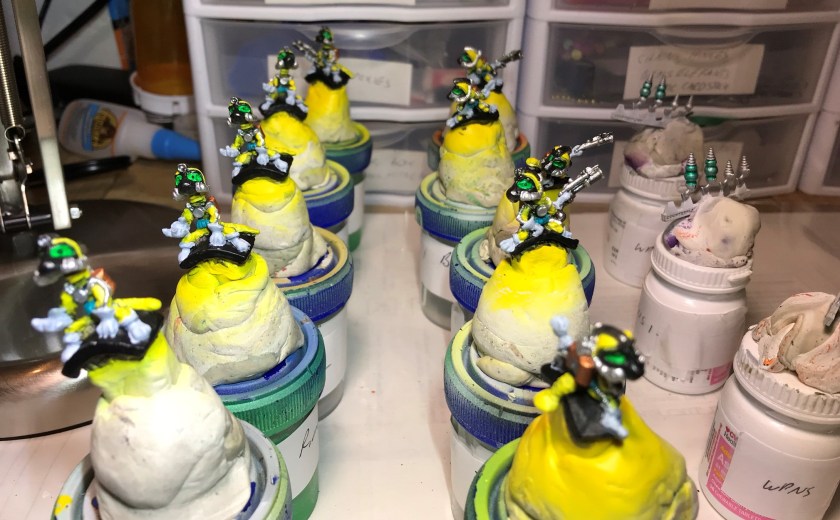
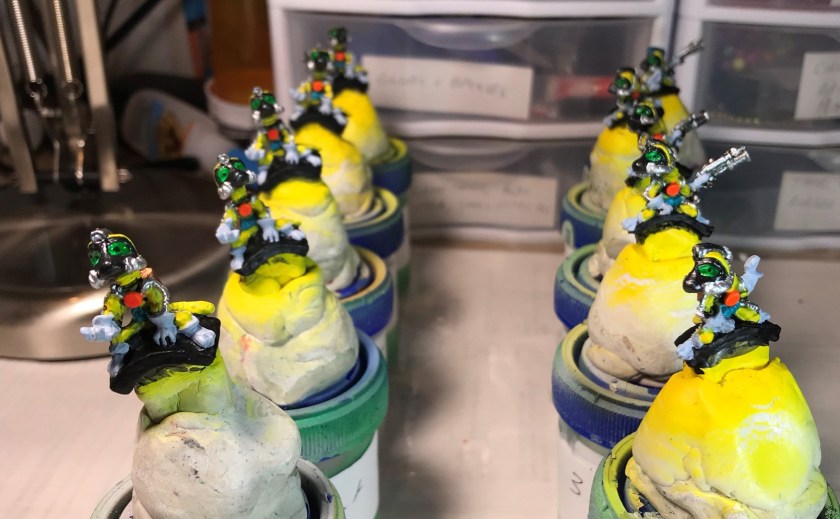
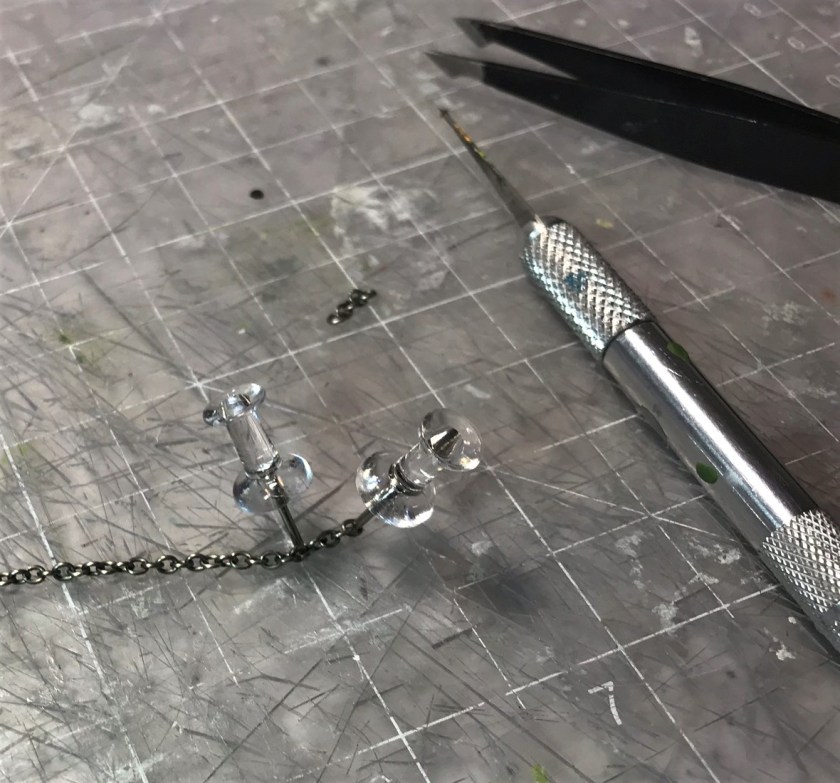
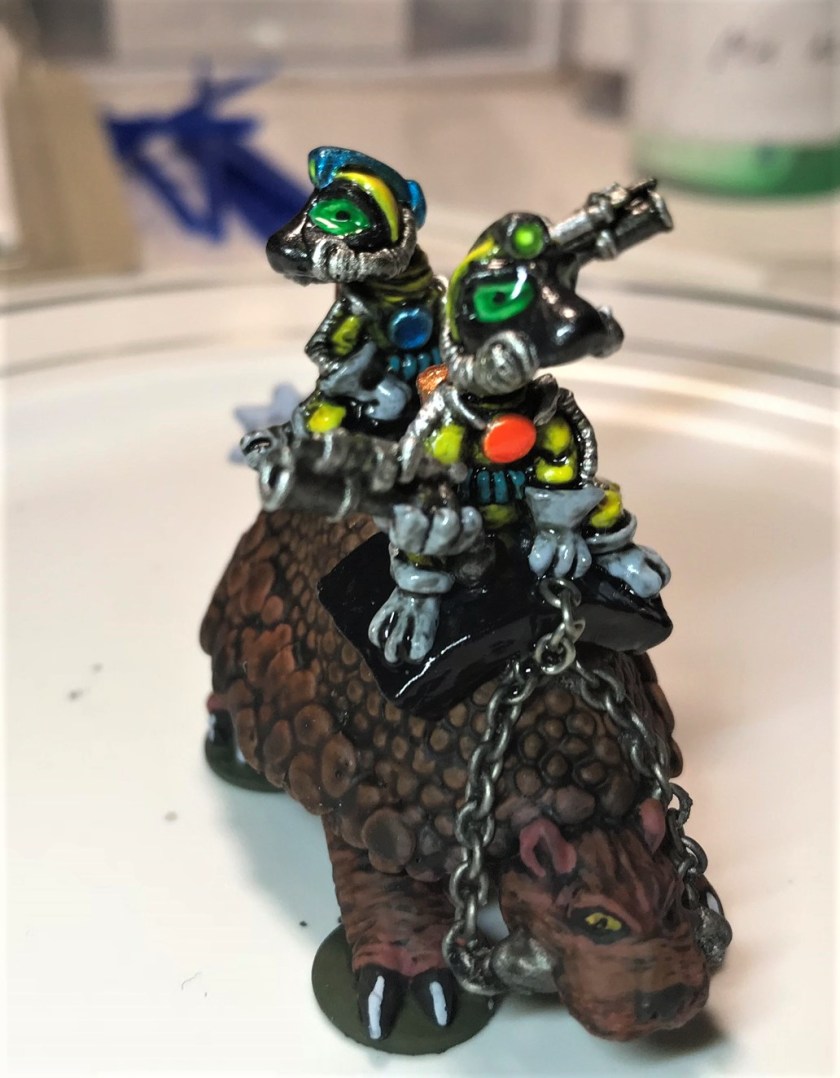
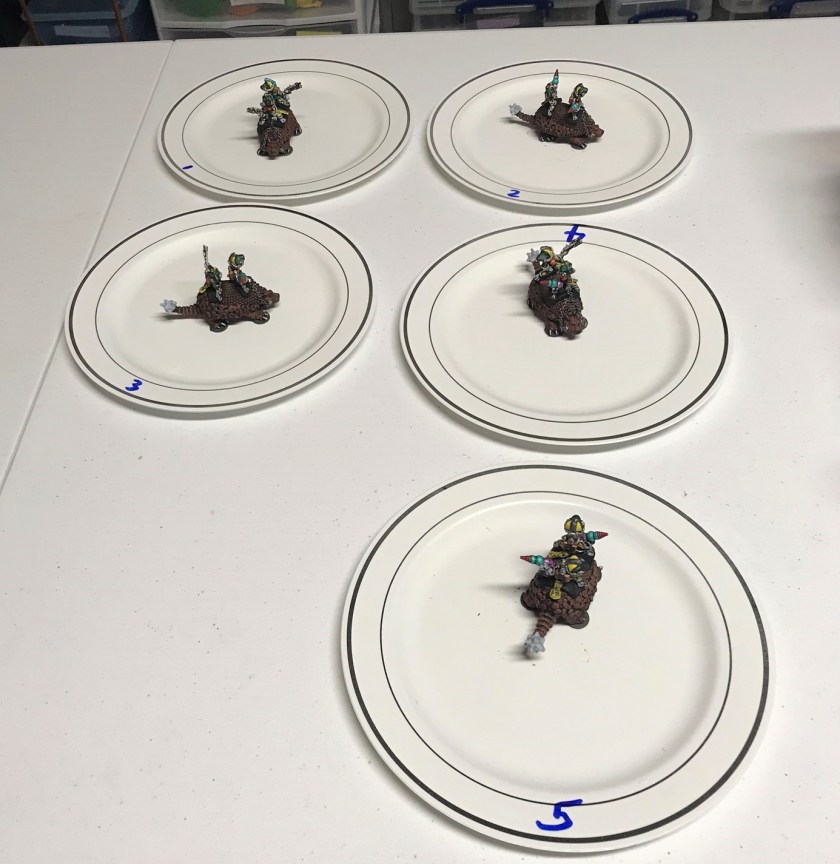
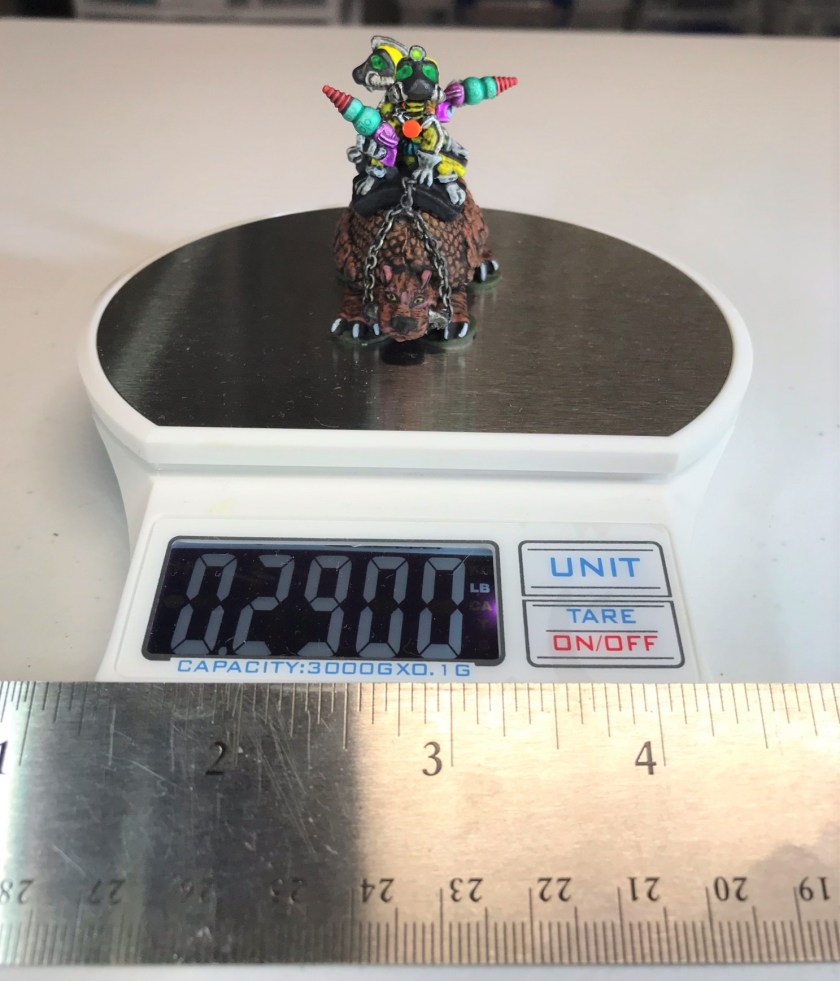
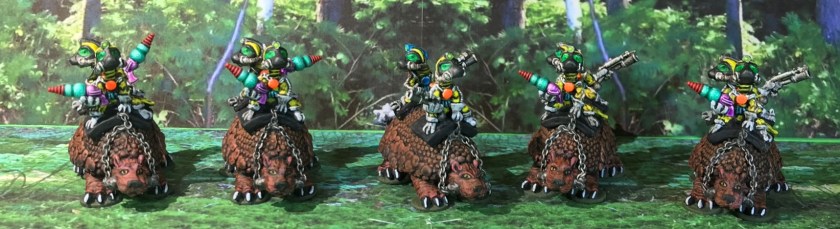
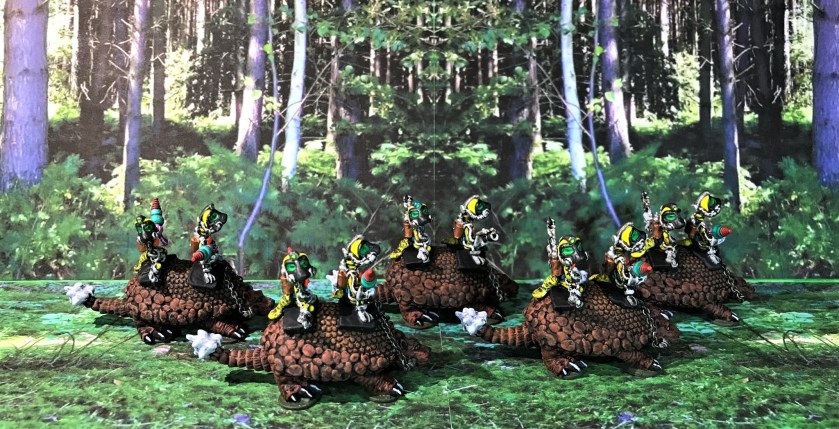
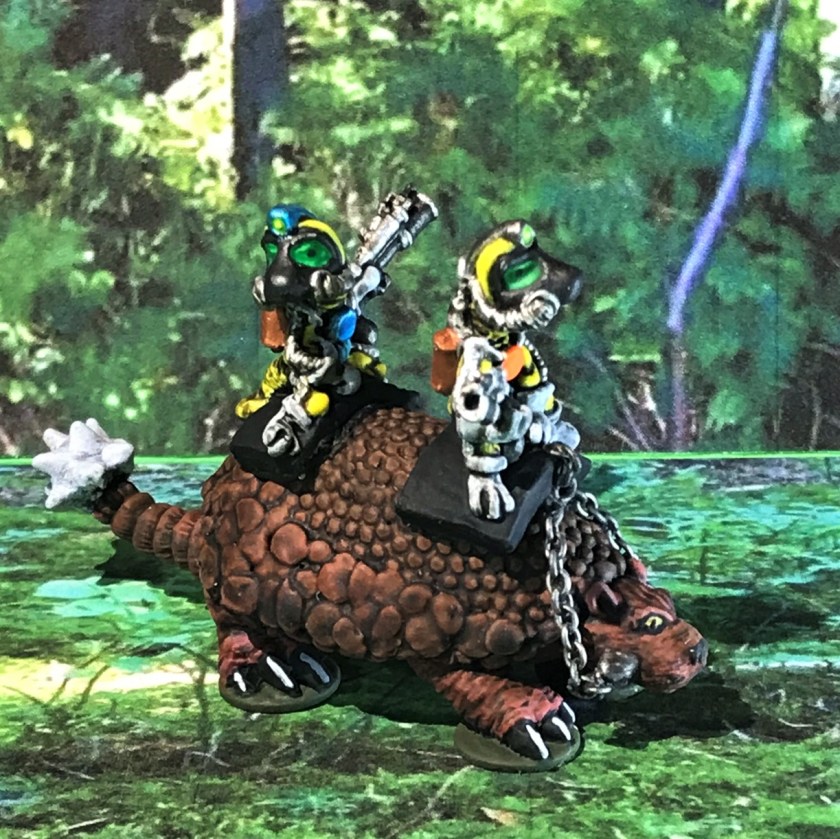
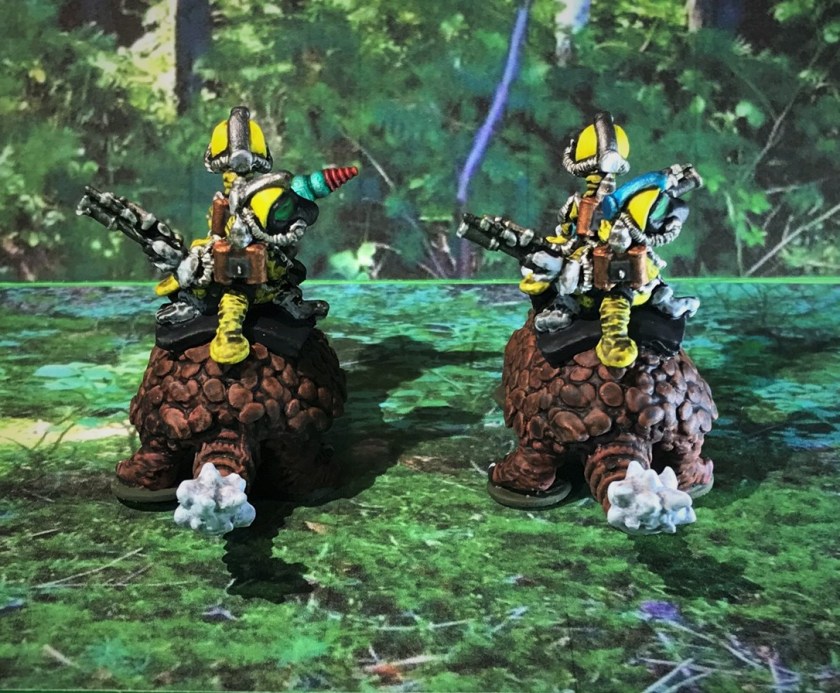
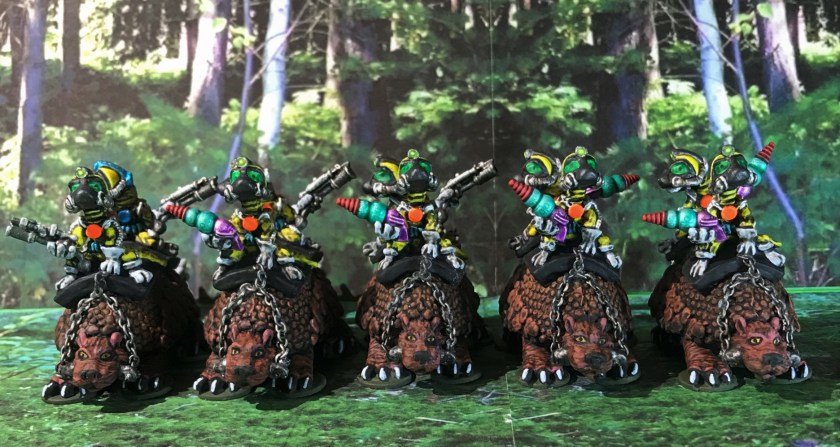
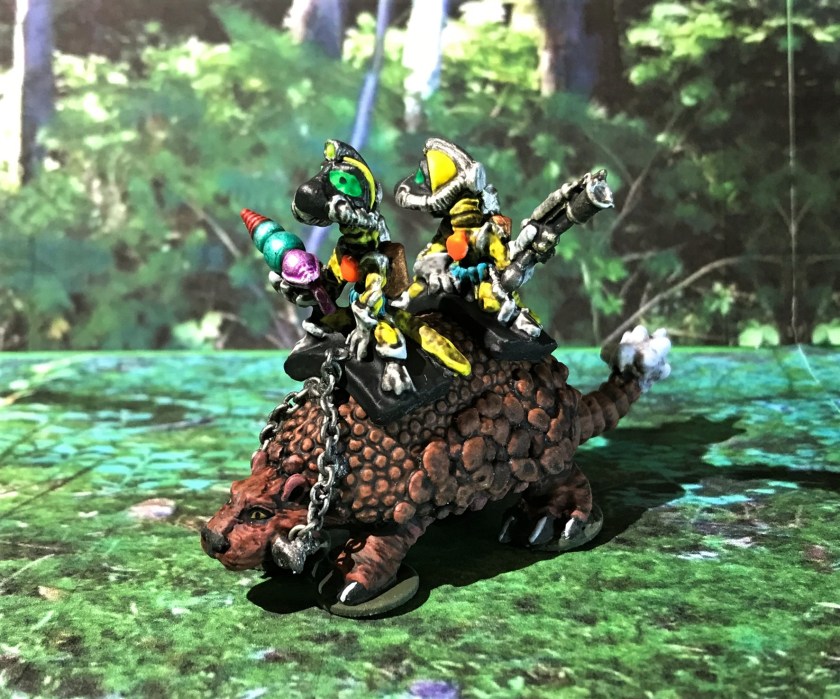
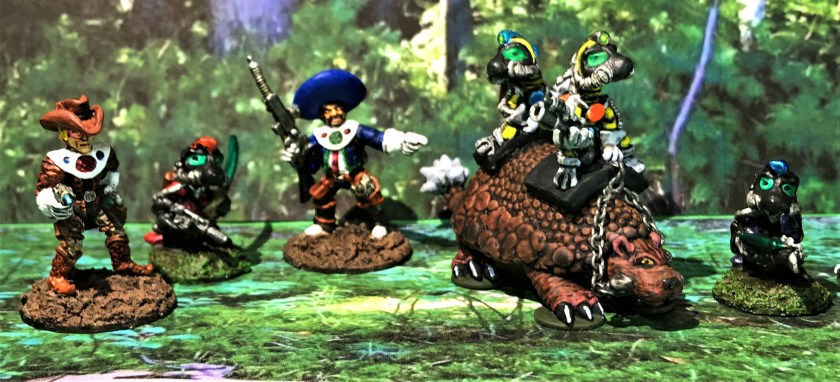
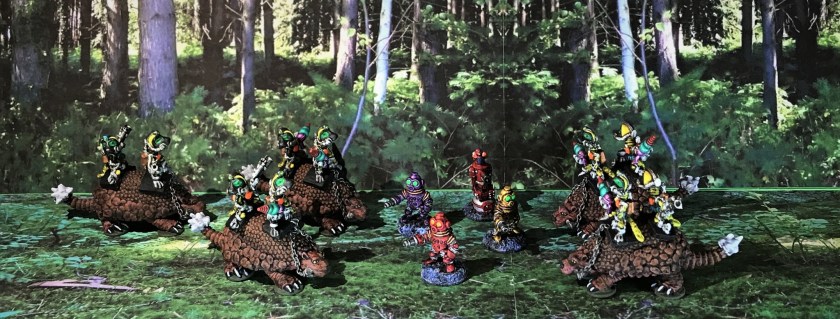
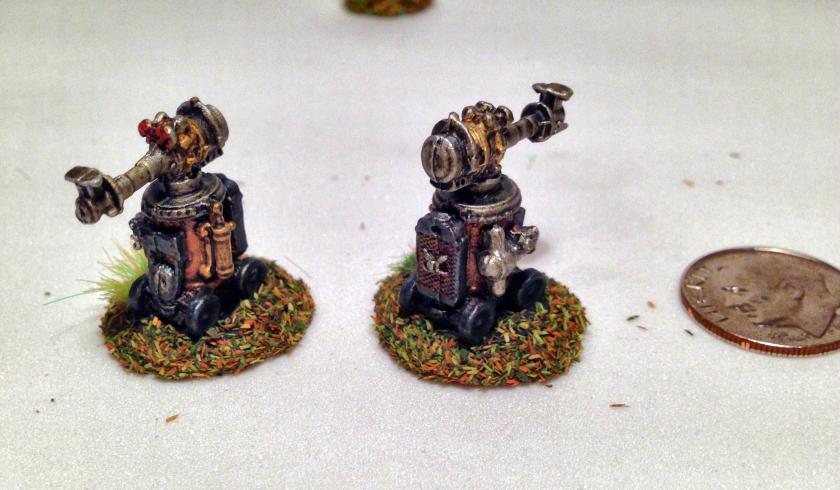
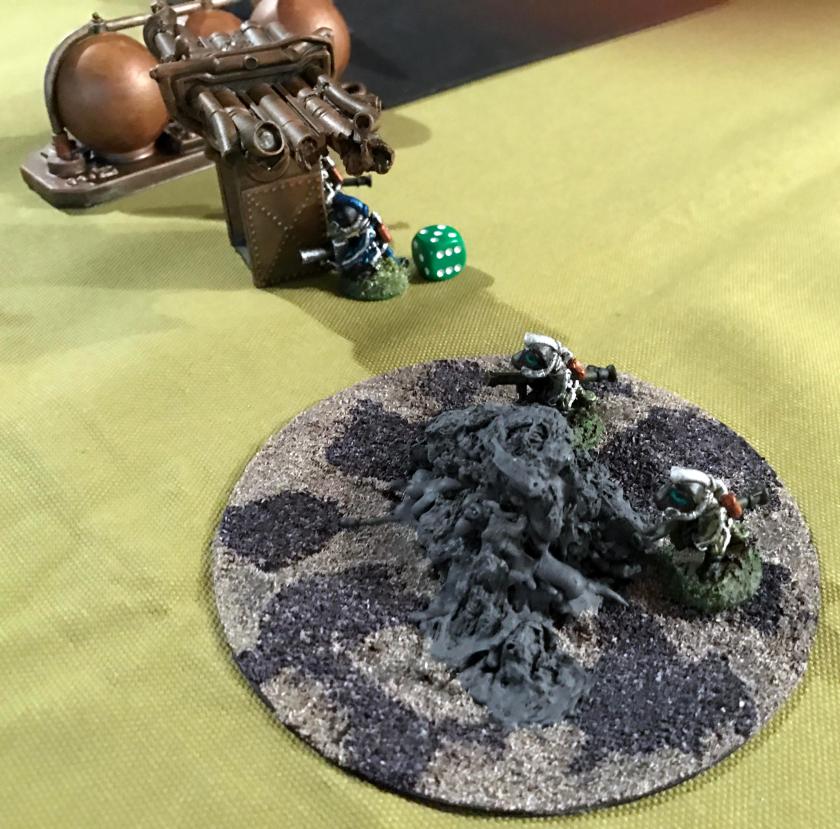
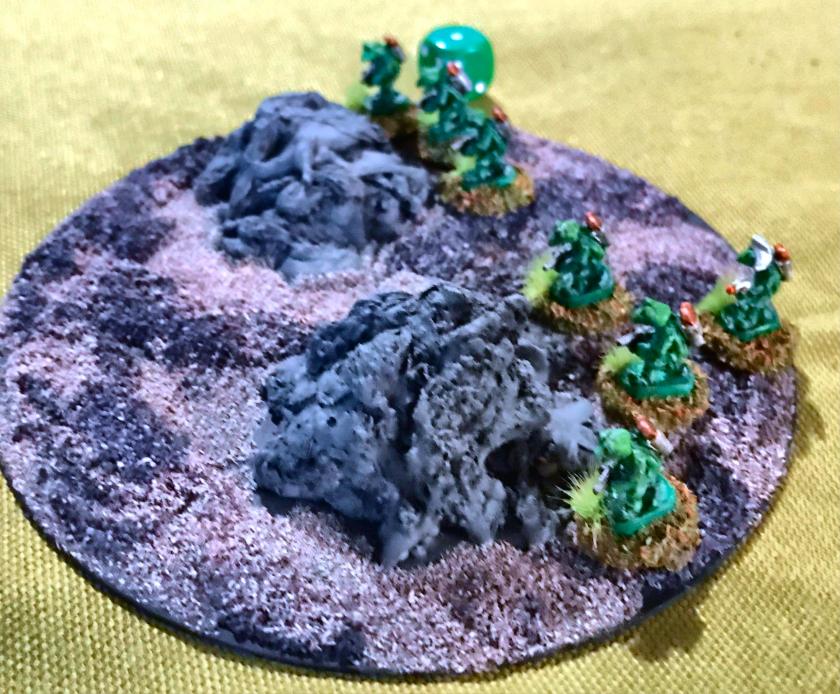
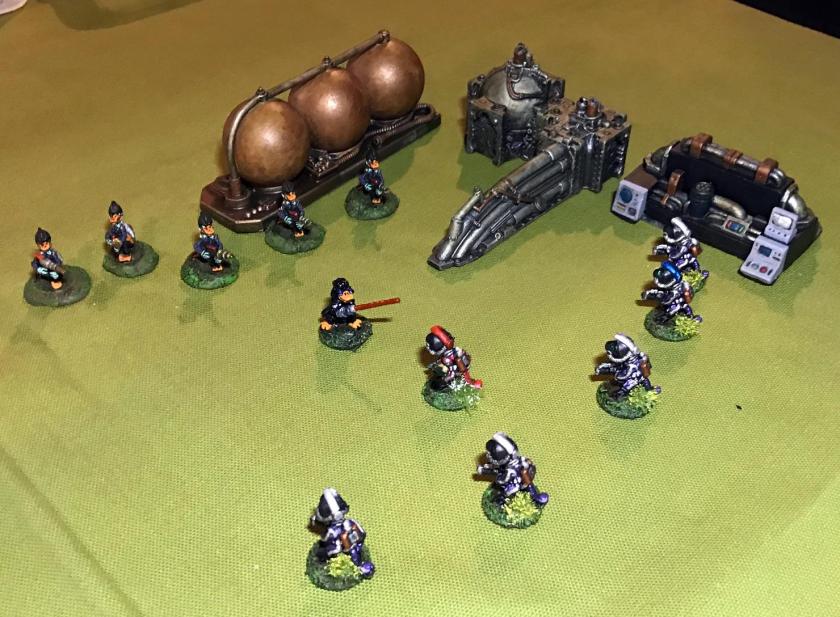
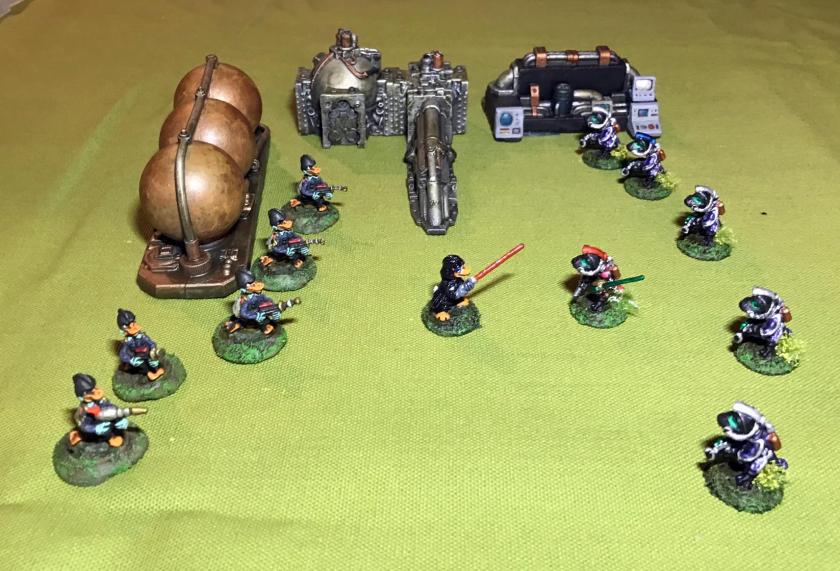
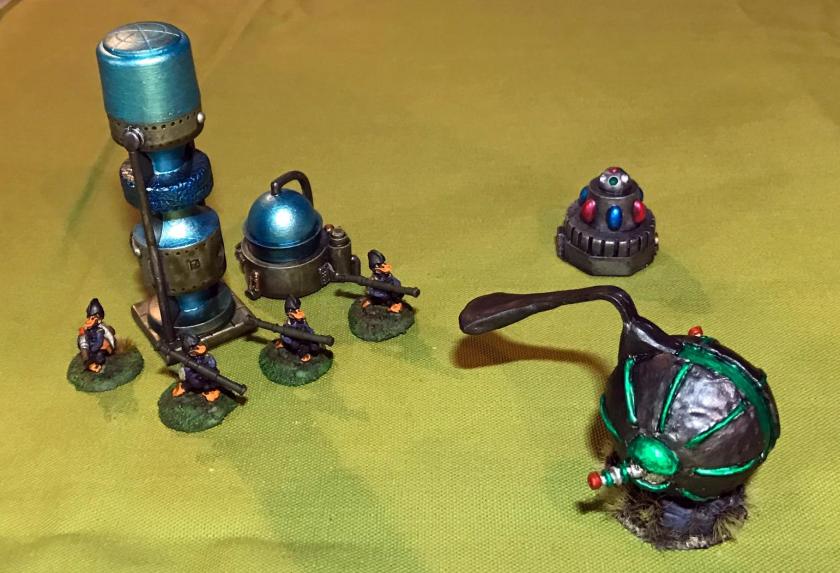
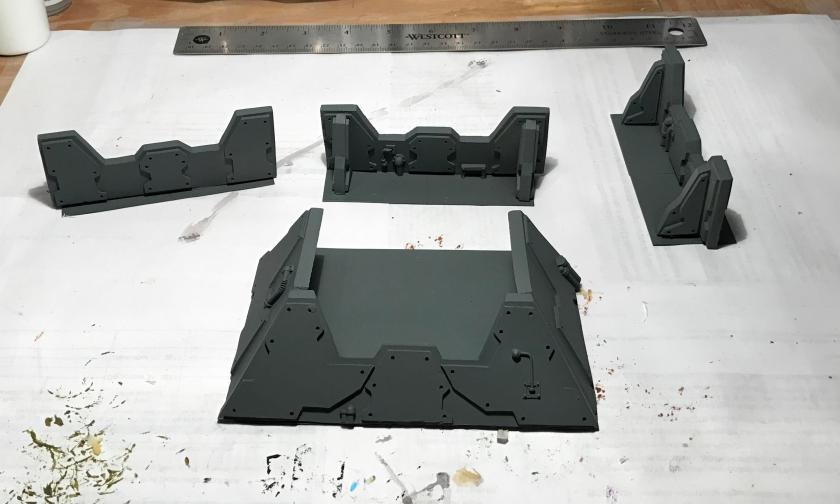
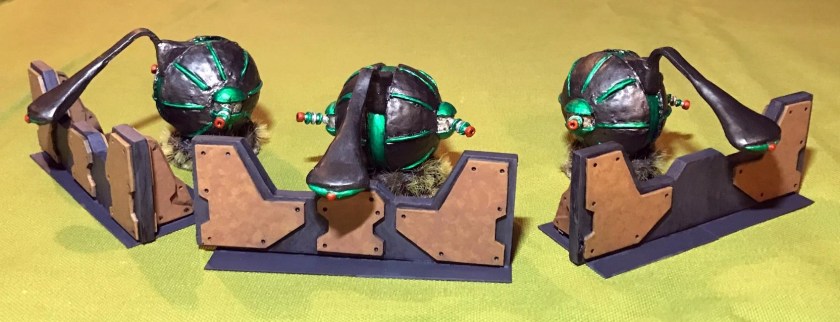
Lastly, as an add-on bonus , I also redid seven Archive Power-Armored Archive Frinx infantry that I found on eBay a while back.  I have a good number of Frinx and game with them often as shown in this blog – just search for “Frinx” on my blog and see what I mean!

I did not paint their original colors, but they were done well-enough with a dotted camouflage scheme, very different from my other brightly-painted Frinx.  But as they were based such that I’d never get them off of the bases that they were on, I just touched up the worn-away paint, used some shading, varnished them, and improved the worn bases.  I’ll use them as commando Frinx.  For fun, here they are:

1 after wash
After varnishing.
3 Done
In the desert.
5 Frinx Leader casualty card
Close up of the leader.
4 not a fair fight
How did this happen?

That’s it for now!


PAINTS, INKS, GLAZES, SHADES, WASHES, PIGMENTS, FLOCKING, GLUES AND MORE USED ON THE AZTECS:

  1. Gorilla Glue
  2. 1/8″ x 1″ Everbilt Fender Washers
  3. Poster tack and plastic plates
  4. Vallejo “Surface Primer – White Primer”
  5. Vallejo “Flow Improver”
  6. Vallejo “Airbrush Thinner”
  7. Vallejo Model Air “Weiss” (off-white)
  8. Vallejo Model Color “Red”
  9. Vallejo Model Color “Black Grey”
  10. Vallejo Model Color “Sunny Skin Tone”
  11. Citadel “Contrast Paint – Fyreslayer Flesh”
  12. Testors “Universal Acrylic Thinner”
  13. Citadel “Contrast Paint – Basilicanum Grey”
  14. Citadel “Contrast Paint – Apothecary White”
  15. Battlefront “Dark Leather”
  16. Battlefront “Wool Brown”
  17. Citadel “Dryad Bark”
  18. Tamiya “Copper (XF-6)”
  19. Tamiya “X20A Thinner”
  20. Citadel Air “Evil Sunz Scarlet”
  21. Deka Lack “Blau” (a survivor from 1987!)
  22. Vallejo Mecha Color “Turquoise”
  23. Vallejo Model Color “Glossy Black”
  24. Citadel “Balor Brown”
  25. Elmer’s PVA Glue
  26. E6000 Epoxy
  27. Army Painter “Brown Battlefields” (flocking)
  28. Vallejo Model Air “Moon Yellow”
  29. Citadel “Seraphim Sepia” (shade)
  30. Vallejo “Dark Yellow Ochre” (pigment)
  31. Vallejo “Burnt Umber” (pigment)
  32. Americana “Desert Sand”
  33. Citadel “Agrax Earthshade” (shade)
  34. Vallejo Mecha Varnish “Matt Varnish”
  35. Army Painter “Grass Green” (flocking)

Thanks for looking – please let me know your thoughts and feedback!

Art Imitating Life Imitating Art

This will be a very short blog post – but for those of you who love the old Archive Star Rovers figures, this will touch your heart!  As many of you know, I have been collecting and painting Duck Wader, Star Ducks, Power-Armored Frinx, and a number of other Archive gems.  I use them in Combat Patrol™ retro-sci-fi games – many of which my daughter Ellen Morin and her fiance Chris Smedile have played in and enjoyed.

Ellen’s birthday is in September, as is mine, but we did not get around to celebrating until the first Saturday in October.  She got me a couple of very cool gifts.  One was an awesome Boston Bruins sweater (cannot have too much Bruins gear by the way).  The other was a painting of Duck Wader and some Frinx breaching a wall, with Star Ducks jet-packing through the air above!   She used photos from my blog to sketch and ultimately paint the scene.  I think it was an awesome gift!  Here is the painting below:

2 painting

I’m a lucky Dad!  Thanks Ellen, love ya!

“Attack of the Warbots” at September Mass Pikemen Gaming Session

We had a good showing on Saturday at the September Mass Pikemen Gaming Club session.  We played an “Attack of the Warbots” scenario using the Combat Patrol™ system.

The biological Alliance (Star Ducks, Space Dwarves, Frinx, and Aphids) have captured a Warbot Mark 1 Sphere tank and are attempting to repair and convert it to their use. The Warbots have landed a large force and aim to deny their enemy this loss of technology. Can the Warbots be stopped? 

This one, like all of the games that I run, was modified for playability based on experience and the number of available players.  This time I also got to add some new terrain and my new Wastelands gaming mat (which I described here and here).  I did not take as many pictures as I had wanted to – but what I have is below.

The game went well with a victory for the biological alliance of Star Ducks, Power-Armored Frinx (with glyptodon cavalry), Space DwarvesAphids, and RT22 (and his Robo Sentry guns).    The Mark III Warbots were supported by Roberker and two Mark 1 Sphere tanks – and the Robot Peacekeepers.  Most are all old Archive figures from the 1970’s.

The Aphids held up the Warbot attack and were almost wiped out by the Warbots.  However, they did delay them enough to achieve a victory, however, the tide of battle was about to turn so it could have ended differently.  Time just ran out on the Warbots.

The photos below are the set up and a bit of initial play.

1 set up defender side
The set up from the defenders’ side.

2 set up attacking side

Set up from the attackers side.  Reinforcements await deployment on the table’s edge.

3 PSG Juggerbot blows up from Aphid critical hit
Aphid casualties pile up as the Warbots move forward.  The Aphids, defending the middle crater, were able to get a very lucky critical hit on the Warbots’ platoon sergeant, causing a catastrophic explosion of its power plant (the smoke plume in the center above).  This explosion also killed and wounded several Aphids, and dented a couple of nearby Warbots.
4 Mortar Rounds and Plasma Breaching
The Warbots move into the smoky crater that once held a squad of Aphids.  The Warbots used a plasma ball breacher to fry the bugs, hence the smoke plume.
5 wide view
Aphid and Star Duck mortars add to the chaos of the battlefield as the Warbots breach the initial wall defense and roast an unlucky Star Duck alive.  Biological Alliance reinforcements move up on the right.

This fun scenario, with some minor tweaks, will be coming to BARRAGE on 9/28/2018!


Power-Armored Frinx on Glyptodons – Archive #2042, circa 1978 – Completed!

The Power-Armored Frinx are back, and this time as cavalry riding glyptodons into battle!  The Frinx were a creation of Archive Miniatures back around 1977 or 1978.  They are a smallish lizard-like race, often wearing power armor.

Glyptodons on the other hand were very real and existed from the Ice Age until about 11,650 years ago (give or take).  They were prehistoric cousins of the modern armadillo, only they were mega fauna – and were as big as a Volkswagen bug.  Plus, there is that massive spiked tail to consider.  Why Archive put these two together is anyone’s guess, but the combination is indeed quirky and fun.

7 Glyptodon
Artist conception of a glyptodon – as big as a car


6 Armadillo
For you non-US folks, this is an armadillo. It’s about the size of a cat or small dog.  None are around me in New England, but I saw plenty as road kill when I lived down South.
0 Star Rover rules pic
Sketch of Power-Armored Frinx on Glyptodon from page 3.10 of the Star Rovers Module 1 rules

As a Frinx backgrounder for those interested, I have previously written several posts on the venerable Frinx, going back to my casting of their infantry in February 2016 (here), my painting and figure conversions of my Power-Armored Frinx infantry platoon in February 2017 (here), my May 2017 discovery and acquisition of an original Star Rovers RPG (here), and my casting of the Power-Armored Frinx on Glyptodon (Archive #2042) in July of 2017 (here).  So this journey has already been 2½ years in the making.  Phew!

Interestingly, the 1981 Archive catalog that came with my Star Rovers game does not have the #2042 listed, despite the drawing shown above being in the rule book.  My guess would be that the kit was uneconomical to produce and/or difficult to produce well.  I document several these issues in my casting post – but originally the kit contained no less than 11 pieces as shown below.  As reference, the scale of the set is 25mm to 28mm.

3 close up contents
Original Power-Armored Frinx on Glyptodon kit

I made my own modifications to this particular set and made molds to recreate the kit.  It is indeed rare and given that it was already OOP by 1981, there cannot be many of these around.  I thought they would serve well in a traditional cavalry role for my Frinx platoon.  I cast several and shared with Buck Surdu (who graciously provided me the original you see above so that we both could have some).  Buck did a great job painting seven of my recasts of these back in 2017 which you can see here.

This month to add to my Frinx forces I managed to finish 5 Power-Armored Frinx on Glyptodons (let’s call them PAFOG for short!) models.  As shown above, each set has two Frinx riders on a glyptodon.  I chose 5 because I felt that 10 Frinx riders would be a good number for a cavalry squad in either the recon or screening role in my Combat Patrol™ games.  It also would give the unit enough punch if deployed as a mobile counterattack force.  I sorted out what figures that I had, and chose the ones I would use for the cavalry squad.  Some of the riders’ weapons were not very well cast, so I converted these weapons.  I used Bombshell Miniatures sprues of Arc Weapons (#36013) to replace six of the blasters.  My initial plan is currently  to give these weapons better capabilities versus robot foes, which should prove interesting given that I have a lot of robots now.

1 Frinx on Glyptodon - collection
My initial assortment of PAFOG before I cleaned the chosen 5 – you can see that I still had modeling clay on the original on the bottom right.
2 Frinx on Glyptodon - collection ready for cleaning
Boot camp time – must select the best for the cavalry!
3 Frinx on Glyptodon - final 5 and weapons
The final five plus the Bombshell Miniatures Arc Weapons.  I decided to use the largest arc weapons that you see here as their sizes worked well.
4 example casting front
Washed and ready for priming.  As you can see, the details are much less crisp than I would like.  His weapon was replaced with an arc weapon.   This is the front rider (recast).
5 example casting back
This is the back rider (recast).

In order to make these Frinx “pop”, I needed a plan.  Clearly, my painting was going to do a lot to overcome the plainness of the riders.  I also needed to figure out how I was going to base them for painting and handling – unlike other Archive Miniatures these had no bases.  These are also very heavy (solid lead/tin).  The feet of the glyptodons were not level, so choosing the right basing was a big quandary for me for several reasons.  I tried several approaches in my mind, but eventually chose to emulate Buck’s choice and use washers.  I did choose smaller ones than Buck did – using #8 steel washers and E6000 epoxy under each foot, allowing for hardening overnight.

8 basing on #8 washers
On their washers for an overnight set.

Once they had set, I began by priming the bottoms, letting that cure, and then doing the tops.  My goal was to make the bottoms reddish brown, leading to a more brownish top as the drawing of the glyptodon above shows.  It was not easy!  I had to do a lot of handling of the paint jobs and eventually I moved them to popsicle stick frames with poster tack, which was good for a temporary, if imperfect, solution.

10 glyp base coating
Early stages of priming and base coating of the glyptodons.
12 glyps on frames
Eventually I mounted the glyptodons on these temporary frames for painting – still not ideal.

After carving away 6 defective metal weapons, I mounted the riders on poster tack mounds on specimen jars.  The saddles really did not present me with many other options for mounting them for painting.

As for a color scheme, I decided to go with the branch color of the US Army Cavalry (now Armor), that being yellow.  Besides, yellow is a difficult color to pull off, so I thought it would pose a nice additional challenge.  I primed them, and subsequently airbrushed the riders with Vallejo Game Air “Moon Yellow” as a base coat.  I then used Reaper MSP “Grey Liner” over the riders to help show me what parts I could paint to bring out the best details.  This step really was useful.

11 riders airbrushed
Frinx riders after airbrush the primer and base coat.
13 mid stage on riders
Early stages of painting the riders
14 mid stage on riders
Adding some metallics to the riders and inks to the arc weapons
15 riders painted need wash
Painting completed for riders – awaiting a wash application
16 washed awaiting affixing of weapons
The 10 riders washed and waiting for their weapon conversions.  I converted 6, and yes, I painted an extra arc weapon just in case!  I primarily used inks on the arc weapons over a chrome base coat for a retro sci-fi look.  After this, I applied a gloss varnish to them.

It was time now to return to the sturdy mounts – and I had gotten to the point that I was happy with my painting on them.  However, what was missing was a set of reins for each glyptodon.  When I cast them, I did use the original bits in their mouths, but the original reins were totally inadequate in my view.

I decided to make reins from the smallest jewelry chain I could find.  Figuring out how to affix the chains was a lot of trial and error on one of the extra unpainted glyptodons that I had.  I tried using wire, thread, as well as just hooking the chain to the mounts – all for naught.  Then, a light bulb went off – toothpicks!

I determined that I needed 27 links for the main chain loop for the reins.  I threaded the last chain link through a wooden toothpick.  I then inserted the toothpick into the bits by the mouths.  I used a push pin to slide the link into position on the toothpick, and applied a very small amount of Gorilla Glue on the wood/chain/bit connection.  After the glue dried (often with the assistance of a hand held hair dryer), I snipped the toothpick with a sprue cutter as close as I could to the bit.  The net effect was like a tent peg and a rope, securing the chain to the glyptodons’ bridle bits.  I repeated the process on both sides, then tack glued the chain at the top and above the ears to make a loop.  Then I dry brushed the chain with Tamiya “Gun Metal X-10” and let it dry.  Lastly, I applied Citadel “Nuln Oil” to the chain.

17 glypts on frame mid stage
Painted glyptodons before final wash application and addition of reins.
18 glypts after gloss wash
I applied Citadel “Agrax Earthshade Gloss” on the back, expecting the later matte varnish to dull it down.  Still need reins!
18a old reins
These are the original reins – not acceptable!
19 chain
Time for some jewelry making, I mean rein making (sounds weird huh!).
20 27 links
27 links, no more no less!
21 toothpick design
He looks a bit like he needs an orthodontist.  This is how I mounted the chains into the bits.
22 after snipping toothpick and gluing chains
Main chain loop mounted, before painting it and the bits.

After this, I removed the glyptodons from the frames in order to give the mounts a matte varnish airbrush treatment.  Then I mounted the riders to the mounts with E6000 epoxy, and let it harden.  I wanted to connect the chains to the front riders hands.  For this I needed a massive 4 links of jewelry chain per model, push pins, and patience.  I used Gorilla Glue, push pins, and the blow dryer to get the additional chain segments in place.  I then applied the same painting and wash techniques to the 4 links.

23 4 links
4 links, no more, no less!  I used push pins to help as I cut the links.


24 with extra chain and waiting final matte
The glossy riders on the matte glyptodon with the new chain attachment which has not yet been painted.  Subsequently, the whole PAFOG got a couple of matte varnish coats.
25 dinner anyone
After final varnish of an airbrush matte coat.
26 metric
For you metric system users, an idea of the weight and size of the model as completed.
27 english pounds 4.64 ounces
For us in the USA, its a mere 4.64 ounces of heavy metal goodness…not a quarter pounder I’d eat by the way…

The PAFOG squad project was now complete – except that I needed to make corrals for them as they are so heavy as to slide in my other Frinx box.  No worries, as I want them to survive for many future games, and I’ve done that for other outsized figures

This project also counts for me in a community painting challenge that my Australian friend Azazel has sent out for July 2018.  It is for a “Jewel” project – and given all the work that went into these from acquisition to casting to conversion to final painting – I’m confident that these will meet the requirement!

The eye candy follows, and hopefully you will find these as cool as I did.  I always appreciate your feedback dear readers – let me know your thoughts and suggestions.  Thanks for looking!

29 group shot 2
Frinx, form up!
30 moving out
Move out!
32 square trooper for casualty cards
This is the section leader’s mount.  The section leader has blue markings.  These figures are the originals and have the original weapons.  In a Combat Patrol game, they will draw two cards for movement.  Between the power armor and the glyptodon’s armor, they should have some ability to take damage.
33 rear shot
A good view of the back ends where the bony spiked tails are found.  Here, on the right is the section leaders mount, and on the left is a mount with one Frinx armed with an arc weapon and the other with a blaster.
34 group front
Nice group shot – note the conversions with the arc weapons.
35 trooper side
Close up of the right side.
37 conferring with Texicans
A conference with Lt. Ma’k (the Frinx platoon leader in red), some Frinx Amethyst Squad infantry, and the Texican Space Rangers.
38 surrounding space dwarves
Surrounding the Space Dwarves in a final charge!

For those interested, here is the list of the paints, etc. that I used in this project.

PAINTS, INKS, GLAZES, WASHES, AND FLOCKING USED:

  1. Citadel “Imperium Primer”
  2. Vallejo “Surface Primer – White”
  3. Vallejo “Flow Improver”
  4. Vallejo “”Airbrush Thinner”
  5. Testors “Universal Acrylic Thinner”
  6. Vallejo Game Air “Beastly Brown”
  7. Vallejo Game Air “Dead White”
  8. Vallejo “Red”
  9. Vallejo Game Air “Moon Yellow”
  10. Vallejo “Black Grey”
  11. Citadel “Agrax Earthshade” (wash)
  12. Reaper MSP “Grey Liner” (wash)
  13. Vallejo Game Air “Black”
  14. Vallejo Model Air “Black (metallic)”
  15. Vallejo Mecha Color “Yellow Ochre”
  16. Vallejo Mecha Color “Brown”
  17. Vallejo Model Air “Rust 080”
  18. Citadel “Ceramite White”
  19. Tamiya “Chrome Silver X-11”
  20. Tamiya “X-20A Thinner”
  21. Vallejo Mecha Color “Turquoise”
  22. Vallejo Model Air “Medium Gunship Gray”
  23. Tamiya “Copper XF-6”
  24. Tamiya “Gun Metal X-10”
  25. Vallejo Game Air “Wolf Grey”
  26. Citadel “Hexwraith Flame”
  27. P3 “Green” (ink)
  28. Citadel “‘Ardcoat”
  29. Secret Weapons Washes “Just Red” (ink)
  30. Citadel “Soulstone Blue”
  31. Vallejo Game Air “Fluorescent Red”
  32. Citadel “Nuln Oil Gloss” (wash)
  33. Secret Weapons Washes “Purple” (ink)
  34. Vallejo Mecha Color “Yellow Fluorescent”
  35. Vallejo Mecha Color “Sand Yellow”
  36. Citadel “Seraphim Sepia” (wash)
  37. Polly Scale “WWII British Aircraft Gull Gray Light”
  38. Citadel “Agrax Earthshade Gloss” (wash)
  39. Citadel “Carroburg Crimson” (wash)
  40. Citadel “Castellan Green”
  41. Citadel “Nuln Oil” (wash)
  42. Vallejo “Thinner Medium”
  43. Vallejo “Gloss Varnish”
  44. Vallejo Mecha Varnish “Matt Varnish”

Thanks again!


Mark Con 2017 (aka Ma’k Con 2017)

I have been accused of having a Boston accent, but this is not really true – I have a Worcester accent, or properly a Worcester County accent.  Throughout my military and civilian career, my pronunciation of my name, Mark, sounds to others like Ma’k.  My good buddy Buck Surdu has often shortened it to “Ma’k” on his blog posts.  Last weekend (right before Thanksgiving) he and my other good buddy, Dave Wood, made the drive up from Maryland on a traffic-filled Friday afternoon for a Saturday full of gaming – and it was called “Ma’k Con”.  My wife Lynn really helped out as well with her keeping us well fed.  This blog post is about the gaming we crammed into that Saturday.

Buck and Dave got me into tabletop wargaming when we were back at West Point.  Since then, Buck has published a myriad of rules for gaming, and Dave has contributed to many of those rule sets.  The most recent rules that Buck published is a fantastically easy to play and streamlined card-based system for skirmish-level combat in WWII called Combat Patrol™.  It is truly flexible, and has had optional rules and supplements written to cover different possible scenarios, to include the South Pacific theater, the Winter War, the Falklands War, the Napoleonic era, and even the Star Wars universe.  These can be downloaded for free from his website, and the cards are available in the US from Drive Thru Cards and in the EU from Sally Forth. The rules are also available in book form from both On Military Matters and Sally Forth.

Buck recently added a new set of cards for the South Pacific, which have different morale results for Japanese troops.  Readers of this blog know that I have been collecting and assembling units from the old Archive Miniatures Star Rovers line of figures, specifically Star Ducks, Power-Armored Frinx, Aphids, and Mark III Warbots.  Additionally, I have been supplementing these forces with Khang Robots, weapons, Robo-Sentry Guns from War Games Supply Dump, and my own sculpt of a sphere tank.  I also used some weapons from Bombshell Miniatures.

I decided that I would combine aspects from different Combat Patrol™ rules for a fun retro sci-fi game.  Specifically, I would use the new South Pacific deck for morale results for robots, the new vehicle-mounted flame thrower template for my sphere tanks’ death rays, and the Sith rules from the Star Wars supplement.  Also, I added in several rules from the optional rules.  Lastly, I added my own special rules for the Mark III Warbots and their leader, Juggerbot, to account for possible effects that weapons fire could cause on their behaviors and capabilities.

Upon arrival in Massachusetts, Buck surprised Dave and I with uniform t-shirts from West Point that we would have worn to gym or when we played sports.  It was called Gym-A (Gym-Alpha) and we wore it for Saturday’s game marathon.  Admittedly, both Buck and Dave wore it better than I did.  We were also joined by my daughter Ellen Morin and her fiancé Chris Smedile.

0 Ma'kcon
Buck Surdu, me, and Dave Wood (US version for you UK followers) in our Gym-A shirts

The scenario was one where the Star Ducks, Aphids, and Frinx were allied against the cybernetic horde of attacking robots.  The non-metallic forces had captured a robot Mark 1 Sphere tank.  The Frinx were attempting to repair it so it could be used against the robots, who were to have two Mark I Sphere tanks of their own in the assault.  The tanks have two side mounted laser cannons, and a Death Ray (think 1953 War of the Worlds movie).  Dave and Ellen had the robots, while Buck, Chris and I defended.

1 Ma'kcon
Dave and Ellen prepare to attack.  The Aphids are in the ruined building to the front, and there are the Robo-Sentry Guns acting as speed bumps to their front.

The Robo-Sentry guns slowed the attacking robots slightly, but allowed Aphid and Star Duck mortar fire to hit the Warbots near Juggerbot, damaging the robot leader, and causing some of his robots to go rogue, or blow up.  When they went rogue, they would attack the nearest figure.  Juggerbot ended up dealing with such a problem.

2 Ma'kcon
The battle begins with the Warbots clearing the Robo-Sentry gun defenses.

Normally, in Combat Patrol™ games, figures can take a certain number of hits, usually three wounds, before they die or are incapacitated.  In this game Frinx had 4 wounds (because of their power-armor), most line Star Ducks had 3, and Warbots had 6.  However, I allowed for critical hits as outlined below.  This had a nice balancing effect on the game.

Warbot critical hit
Warbot Critical Hit Chart – lots of 4’s and 5’s happened!

The Warbots also had some devastating energy weapons.  The opposing forces had two “Sith Lords” (Duck Wader from the Star Ducks and Lt. Ma’k from the Frinx) with special powers from the Star Wars supplement.  Early in the game, Buck moved Duck Wader up to engage the Warbots, only to get vaporized along with some Aphids by an arc weapon blast.

3 Ma'kcon
Duck Wader (center) near the corner where he was shortly vaporized thereafter
4 Ma'kcon
The Frinx AT section moves up – only to never make an impact

The other Sith, Lt. Ma’k, used his Force powers to fly into the middle of a group of 8 immobilized Warbots (they had drawn a “Hold until Death” morale result due to Frinx fire, but the robots could still fire).

Lt. Ma’k (a Frinx) then tried a Sith power – Force Blast – which damaged some robots’ weapons and caused them to explode.  Additionally, friendly mortar rounds landed there (Lt. Ma’k did not care) and eventually he succumbed, as did several Warbots. Simultaneously, Juggerbot finally was destroyed by Aphids on Grav-Cycles.  As he was the platoon leader, his destruction led to his unit becoming pinned – and only activating on black cards.  This really had the effect of reducing the entire robot platoon’s combat effectiveness.

5 Ma'kcon
Lt. Ma’k (by the purple die) makes his last stand.  Note the black die for the Warbot Green Team 2 due to a “Hold until Death” morale role.  Later the entire Warbot platoon would get black dice (“pinned”) when Juggerbot was destroyed.
6 Ma'kcon
The death (destruction) of Juggerbot
7 Ma'kcon
Aphids an Grav-Cycles make a desperate charge before dying to the last bug – but they sealed Juggerbot’s fate
8 Ma'kcon
Frinx on Glyptodon cavalry move up before being taking heavy fire and being routed

At this point, the carbon-based living got very lucky and fixed their captured Sphere tank earlier than would have been expected due to Chris pulling some great cards.  However, the robots got reinforcements in the form of two of their own Sphere tanks, a squad of Warbots, plus 2 self-propelled robot guns.   Chris and Buck were able to immobilize one tank with some very lucky shots.  The other annihilated a squad of Buck’s Star Ducks with a Death Ray Blast.

9 Ma'kcon
Buck’s Star Ducks are hit by Death Ray fire
10 Ma'kcon
Some of Buck’s Star Ducks jet pack onto the immobilized Mark I Sphere tank.  Their satchel charges (6) attacks all failed to destroy the tank.

By now it was dinnertime and pizza called, plus we wanted to move to the next game.  It looked like a slight victory for the living forces, but casualties were high!  The game turned out well and I may redo this scenario at Barrage in Maryland in January.  Buck’s account of the battle is the next entry in this blog.

11 Ma'kcon
Surveying the carnage
12 Ma'kcon
Great Game!

Then we moved onto a play test of Dave’s micro-armor game of “The Battle of Nikolayevka (Nikitowka)” using the Look Sarge No Charts rules.  This was a breakout of Italian forces on the Eastern Front in 1943 as part of the Battle of Stalingrad.  So we had Italians and some Germans attacking a small town held by the Russians.  The link above describes the historical battle well.

Buck attacked with a combined German/Italian force on the right half of the battlefield and I attacked along the left half.  Dave defended.  It was a tough slog, with the Russian artillery (they had no armor) making progress difficult.  Later in the game Dave had us command reinforcements in the form of the Italian stragglers from an earlier phase in the battle.  It was a good scenario, and interesting to see a primarily Italian versus Russian scenario.

13 Ma'kcon
Initial set up – Italians and Germans (on left) fight into the town to the right of the railway crossing (in light orange)
14 Ma'kcon
Another view showing the town in the upper right.  The attackers needed to get into the town so as not to freeze to death.
15 Ma'kcon
Assaulting the rail line defenses
16 Ma'kcon
Buck tries to get into the town

I think Dave will have a very good scenario for an upcoming convention!

The day flew by, and I am so appreciative that we West Point Old Grads had the chance to game together.  Thanks to Buck and Dave, and Chris and Ellen!  And of course, Lynn for her logistical support!!

September 2017 Gaming Night – Star Ducks Attack The Frinx!

To round out September, the Mass Pikemen Gaming Club ran a game during which the Star Ducks attacked the positions held by the Power-Armored Frinx.  Both of these forces are from Archive Miniatures circa 1979-1981.  You can learn more about their origins here.  Click on Star Ducks or Power-Armored Frinx to learn more about their platoons.  We used the Combat Patrol™ system, with modifications to approximate the abilities of the Star Ducks to use their jet packs, and the durability of the Frinx as a result of their power armor.  The Frinx also had the support of two Archive RVS86 “Robot Cooks” which were analogous to small self-propelled guns.


3-archive-robot-group-2-2011-completed
Two RV86 supported the Frinx

The scenario was one where the Frinx, led by Lieutenant Ma’k were defending some old ruined buildings that held some lost technology – and the Star Ducks, led by Duck Vader, were hell-bent on getting into the building and killing Frinx in general.  The Frinx, on their part, desired to dispatch the Star Ducks with extreme prejudice.


01 Sep 28 MP Gaming night
The Star Ducks advance in the foreground, the Frinx defend the buildings and barriers.

The Star Ducks used their jet packs to quickly advance towards the buildings on the Frinx’s left flank.  You can see the small purple rubber bands on the Star Ducks, which indicate the number of “jumps” that they have taken.  Due to limited fuel, the Star Ducks have only three jumps per game, but they do help!


02 Sep 28 MP Gaming night
Approaching the Frinx positions, the Star Ducks move quickly using their jet packs.

The initiative switched to the Frinx, who then bracketed them with bazooka fire.  The white rubber bands indicate wounds, while the glass beads indicate a team must take a morale check for each one the next time they are activated.  We use red rubber bands to denote a weapon that has jammed or is out of ammunition.  We also use black rubber bands to denote figures who are stunned.


03 Sep 28 MP Gaming night
The smoke from the Frinx anti-tank rockets surrounds the Star Ducks, as they take wounds from the explosions

In the middle of the table, a pitched ray gun/blaster battle left several dead and wounded Frinx.  The Star Duck team making this assault was however, annihilated, as Frinx Staff Sergeant A’Haze led his Frinx ably and directed their fire.


04 Sep 28 MP Gaming night
The Star Ducks do significant damage to the Frinx defending the barriers and slag mounds – note the dead Frinx, the multiple wounds, and the multiple morale pips.  The Star Duck A team was wiped out here.

The only Star Duck survivor in this area was Staff Sergeant Bufflehead.


05 Sep 28 MP Gaming night
SSG Bufflehead watches his A team die valiantly.

And then this happened…and the other RV86 was immobilized as well by bazooka fire from the other flank.


06 Sep 28 MP Gaming night

Meanwhile, back at the buildings, the Star Ducks jumped again, going over the ruined buildings, and assaulting the Frinx from the rear.  This move was met effectively by the Frinx with Platoon Sergeant First Class Grengelu’s automatic grenade launcher, wounding and killing several Star Ducks.


07 Sep 28 MP Gaming night
After the vertical envelopment, the Frinx make the Star Ducks pay.  Note Frinx LT Ma’k in the upper floor on the left – his blaster also hit several Star Ducks.

However, there were enough Star Ducks to close with the Frinx in hand-to-hand melee (or is it claw-to-wing?) and begin to clear the buildings.  SFC Grengelu was overcome and killed in the scrum.


08 Sep 28 MP Gaming night
Everybody gets in the fight!


09 Sep 28 MP Gaming night
SSG Bufflehead is surrounded by Frinx in melee

At this point, the game was called due to time and was determined to be a draw.  While the Star Ducks had cleared one building completely, and another one partially, they still had a couple more to go.  Casualties were high on both sides!

The game was a lot of fun and the battle was touch and go all night.  Once again, Buck Surdu’s Combat Patrol™ system demonstrated its great versatility and ease of play!


I hope you enjoyed this battle report – please share your feedback in the comments section!

Archive Miniatures Frinx on Glyptodon – Resurrection!

I have long been searching for the Archive Miniatures Frinx on Glyptodon (#2042) from the Star Rovers line.  This three-figure kit was made in 1978, and was composed of two power-armored Frinx riding a glyptodon.  So what is a glyptodon?  A glyptodon is basically a prehistoric armadillo – and the size of a small car.  Its a quirky kit, reminiscent of a Tusken Raider riding a Bantha in Star Wars.

At long last, my good friend Buck Surdu acquired one kit at exorbitant price on eBay.  The plan was to create some Frinx recon sections for use in retro-sci-fi games using the Combat Patrol™ gaming system by recasting.


0 in bag
The original kit in unopened bag


0a in bag
Archive card in bag


3 close up contents
Contents of the kit


The kit itself held two glyptodon halves, two rear feet, two bridle bits, one metal reins set, one forward facing Frinx, and one Frinx facing right.  Clearly, I needed to consolidate in order to effectively cast this set via gravity casting.  My first decision was to abandon any idea of casting the metal reins.  I wanted to use the bridle bits, and use some string or similar material for reins when I paint the kit.

The bridle bits were very small as you see below.  I used a small pin vise and drilled out a place for the bits on the glyptodon.  I secured the bits with super glue, then filled in around them with green stuff.  I also opened the bridle bits up, for if I left them closed they would not been locked in by the Quick-Sil and would not have cast well.


4 bridle bits on fingertips
The small bridle bits

The other challenge was that the original glyptodon figure was not well formed or cast.  There were large seam lines and gaps on each side.  My concern was that this gap would wreak havoc with molding as the Quick-Sil RTV that I use would easily expand into every crevice.  It also would look lousy.


5 glyptodon showing gaps and seams
Good view of the gap between the glyptodon halves on the right side


6 glyptodon showing gaps and seams no feet
Similar gap issue on the left.  Note the rear feet are unattached.


11 glyptodon interior
Interior view of the bottom glyptodon half – note the Archive 78


12 glyptodon interior top
Top half of the glyptodon 

As you can see, because the glyptodon was in two pieces with a hollowed out middle, I needed to address this and the seam issue.  Therefore, I decided to fill the middle and the gaps with green stuff.  I then affixed the rear feet with super glue, followed by adding green stuff around the gaps there as well.


13 glyptodon interior and bottom with green stuff
Green stuff to the rescue


14 glyptodon top with green stuff and bits
Nice view of the modified bridle bits

While I smoothed out the seam lines, I still had unsightly lines that would show up on every cast.  I decided to use more green stuff to add a band of tiny armor plates around the base to smooth out the seams – and it worked.  I thought that I should keep the figure as original as possible, so the additional plates were left as a lower band, and not over the whole figure.


15 glyptodon repaired with green stuff and bits
The glyptodon with its new armor plates added, left side view – no unwanted lines!


16 glyptodon repaired with green stuff and bits rear view
Rear view after adding armor plates


17 glyptodon repaired with green stuff and bits right side view
Right side view after adding armor plates


I then moved on to the riders, and was surprised to see the beginnings of lead rot under their saddles.  This discovery made me very happy that I was going to preserve this kit through cleaning and ultimately recasting.  I did my best to clean off the oxidation with soap, water, a toothbrush, and an aqueous pewter cleaner.


18 rider with rot on bottom
Lead rot begins…before cleaning


19 ready to cast
Ready for molding


I made two new mold designs – one for the glyptodon and one basic type for the two riders as shown below.  The major concerns that I had with the glyptodon mold were easy flow of alloy, adequate venting, and adequate cooling with so much molten metal.  With the smaller molds, I had the same, but I really just wanted great details.


20 glyptodon mold first half
First half of the glyptodon mold 


22 front frinx mold 1st half
First half of the front Frinx rider


23 back frinx mold 1st half
First half of the rear Frinx rider


24 all molds
All three molds completed


All three molds worked well, with small modifications to ensure good casting.  I was able to successfully cast 14 sets (42 total figures).


27 day 3 production
14 sets!


You can see below a comparison of the recasts and the master figure.


28 side by front
Frontal view of recast and modified master figure


29 side by left side
View of right side


30 side by rear
Rear view


31 side by right side
Left side view

They are officially now in my painting queue (which has grown a bit long so I will wait to cast more figures until I have painted some).  Overall, I am pleased with how they came out – please let me know your thoughts in the comments section!


Combat Patrol with Star Rovers and an X-Wing game

It’s been a bit busier on the gaming front.  Jared Burns (USAFA ’04) and I (USMA ’84) got together last Sunday afternoon in preparation for the launch of the Mass Pikemen Gaming Club .  We play-tested Combat Patrol™ with Star Rovers figures that I have previously posted about in this blog, as well as an X-Wing game.
The scenario was one where the Frinx and some Aphids were protecting RT22 in a bunker behind an old factory.  The Star Ducks, led by Duck Vader, were attacking to seize RT22, using their jet packs to quickly assault through the open ground which the Frinx had covered with anti-tank weapons.  I gave the Star Ducks 3 chances in the game to use their jet packs at 3 movement cards per try – and that worked well rules-wise.
Highlights of the battle!  There was a grenade-throwing fest in the center (one of my grenades scattered back into me adding to my losses) between one Star Duck team and a green Aphid team.  This resulted in multiple casualties, especially when one of my Aphid’s grenade attacks rebounded from a rock, but the Star Ducks had the better of that fight.
I gave Duck Vader the ability to deflect incoming direct fire, but I got lucky.  Duck Vader was in the open at short range and got lit up by two Frinx bazookas and the Frinx platoon sergeant with an automatic grenade launcher.  End even though I gave him a 5 endurance, his goose (or rather duck) was cooked with about 7 wounds.  His demise  then caused the entire Star Duck force to lose heart, effectively ending the game.
1 Ducks hit right flank
The Star Ducks effectively advance on the escarpment.  The purple bands indicate jet pack uses.


2 Frinx defend with AT
The Frinx guard the factory ruins with anti-tank weapons and an automatic grenade launcher.


3 hapless Aphids defending
A green (in terms of morale and literally!) Aphid Squad awaits its doom from a storm of grenades.


4 Ducks prepare to move out
Star Ducks deploy.


5 Hey, who shaot at us with Bazookas
The Star Ducks take multiple incoming rockets, wounding a team leader.


6 every body throw grenades
The Star Ducks put the hurt on the Aphids with a storm of grenades.


7 top of the hill while behind grenade hell
In the foreground, the Star Duck AT team prepares to rain doom on the Frinx.  In the upper left, the Aphids attempt to return grenade for grenade, only to bounce them back at themselves.


8 Duck Vader dies
In the upper center, the Star Ducks jet pack and prepare to flank the Frinx.  However, in the foreground, Duck Vader is mortally wounded. 


9 end game
The viewpoint of the Frinx who killed Duck Vader.


We then played X-Wing, and it was time for the USAF guy to beat (really thrash) the Army guy…ironic…he was the Empire so the day evened out.  It was a good playtest for our first game night on July 27th.  Jared did a nice job in teaching me the game – and then avenging the previous game.  He was the Empire, and I was the Rebels with two ships each.
10 xwing
I successfully pilot my X-Wing into an asteroid…and fail to hit the Empire’s ships.


11 xwing
With my X-Wing dispatched, the Empire finishes off my hapless B-Wing.


I really liked the game and the ease at which I learned the basics.  Thanks to Jared for a great day!

Slag Mounds, Bunkers, Barriers and more!

This month, in between other projects and recovery, I worked on several terrain pieces for use with my Star Rovers figures and the Combat Patrol™ gaming system.  Some I got earlier in the year from WorldWorks Games on Amazon, others I got on eBay that were from Armorcast Battlefield Scenery, others I made – and some I just don’t know who made them.  I’m hoping to use these at The Battle Standard in Auburn soon after coordinating with the owner, Jared Brodeur.

Normally I have more detail (how-to), but I lost most of the details of these terrain projects, as I had a few that I had to rework.  I think the pictures below are hopefully sufficient.  I was really happy to try new techniques with rust applications using a “pointillism” technique with a combination of Polly-S (“Rust”) and Vallejo (“Rust” 71.069 and 71.080) paints.  I mounted all of the terrain pieces on flat steel basing pieces.

The mostly Armorcast “set” I got on eBay were various refinery or industrial pieces that were airbrushed silver and gold, and that did not work for me.  I wanted the industrial ones to be more dirty and rusty.  I ended up painting some of them with various colors, and then using Army Painter Quickshade “Soft Tone” to shade.  I was not happy with most of these results, especially the Quickshade effects.  I repainted them, some with bright colors for the newer pieces of terrain, and with rust for the grittier ones, and then used spray varnish to seal.  Luckily, the Testors “Dullcoat” actually had a “crackling” chemical effect on one of the industrial tanks which worked well – (note – this was not an Armorcast piece and was likely homemade with some type of Styrofoam).  I was surprised as there was already a lot of paint and varnish on it at that point – but it was minimal and I liked it anyways.

1 terrain group start
The initial set of mostly Armorcast terrain I got on eBay, plus the slag mounds I made.  This is how I got them.  The triple tank is the homemade one that the varnish affected.

10 refinery stuff final
The pipeline/industrial terrain after repainting (and repainting).  Duck Vader and his Star Ducks confront Power-Armored Frinx led by their platoon leader.

9 refinery stuff final
Frontal view of the skirmish – light saber versus light cutlass!

12 wrecked pipeline final
Aphids on Grav-Cycles swing around a ruined overhead pipeline to swarm attack a Frinx Mark 1 Sphere tank

13 cryo unit and condensors and apu
Star Duck Bazookaducks ambush a Mark 1 in front of a large moisture condenser, a cryo unit, and a small power unit
The WorldWorks Games set consisted of a bunker, and three barricades.  They are for 28mm for sure.  The bunker was used, and difficult to assemble well with super glue.  I ended up using steel base material, popsicle sticks, wood glue, and cardboard to assist in the construction.  Here, I really liked my use of the rust pattern that I discussed earlier.

2 barrier unpainted
Assembled barrier before priming

3 defensive pit unpainted
Assembled bunker, front view, before priming

4 defensive pit unpainted, back
Assembled bunker, back view, with cardboard mounted on popsicle sticks mounted on steel bases

5 defensive pit unpainted, bottom
Bottom of the bunker – I needed to trim the steel bases and file off sharp edges

6 defensive pit and barriers primed
After priming with gray

7 defensive pit final
A Star Duck Mortarduck crew operates from the finished bunker

8 defensive walls final
Three Mark 1 Sphere tanks set up in defensive positions behind the barriers
Lastly, I had three slag mounds that I mounted on two old CD’s.  The slag was a byproduct of my casting projects.  For these, I had a “Red Planet” plan, and used Citadel “Martian Ironcrust” and “Martian Ironearth” to good effect, as well as different washes.

11 aphids in slag mounds final
An Aphid squad and their robot assault gun patrol the slag mounds
It’s a good start and I’m sure I could use some buildings and other things, but that I will get to in due time!


Home of the Grumpy Gnome

Tinkering with Artwork and Ideas

Steve's Paint Brush

Grimdark model making and mini painting

Wargamesculptors Blog

Life, Golf, Miniatures, & Other Distractions

Dead Dick's Tavern and Temporary Lodging

Life, Golf, Miniatures, & Other Distractions

Guru PIGS Blog

Guru's thoughts on wargaming, life, and the universe!

Wisely lead... without a head!

History, Miniatures and Wargaming

Kuribo's Painting

Fallout, MESBG, and Hellboy Painting, Terrain, Dioramas, and Battle Reports

Don't Give Greg Ideas

Seriously, just don't

War Across the Ages, and other dark horrors

A discussion of miniatures collecting, painting and gaming.

Classic Warhammer 40K

Painting diary focused on Warhammer 40K 2nd ed., 5th ed. WHFB, related GW games, and miscellaneous whimsy

Colonel Mustard

WW2 Modelling in 1/72 Scale

Bogenwald

Random painting and terrain making.

Pat's 1:72 Military Diorama's

Scale diorama tips and ideas

Arcade Dreams

Building the Arcade Dream

P.B.Eye-Candy

Phil's 20th century wargame pages

SP's Projects Blog

A futile fight against entropy or 'Every man should have a hobby'? Either way it is a blog on tabletop wargames, board games and megagames

30mmdave

Wargaming Plausible reality?

Faith&Steel

dave's gaming adventures: faithandsteel.wordpress.com

The Imperfect Modeller

Miniature Figure Painting and Diorama Modelling

Double Down Dice

Painting miniatures and rolling dice!

Just Needs Varnish!

My ongoing wargames projects!

miniaturepopcorns

Sculpting some worlds

despertaferres

Wargaming with the ability of a dull nine year old

Dawn of the Lead

Miniature wargaming and the occasional zombie

Rantings from under the Wargames table

Wargames, Figures, Sculpting and Converting Miniatures

Simple as WaR

Miniatures & Terrains

Buck's Blog

Life, Golf, Miniatures, & Other Distractions

IRO aka Imperial Rebel Ork

- I model - therefore I am -

Azazel's Bitz Box.

Painting, Modelling, Miniatures, 1:6, Games... Whatever else I find interesting.

diggingforvictoryblog

Smallholding and Wargaming.......not always at the same time!

Shamutantis

Nørdblog numero uno

Harry Heckel

Writer/Game Designer

The Lost and the Damned

Fantasy, sci-fi and historical miniature gaming

sho3box

Toy soldier wargaming stuff.

L'ANSPESSADE

L"histoire militaire à lire, à voir, à jouer et à réinventer