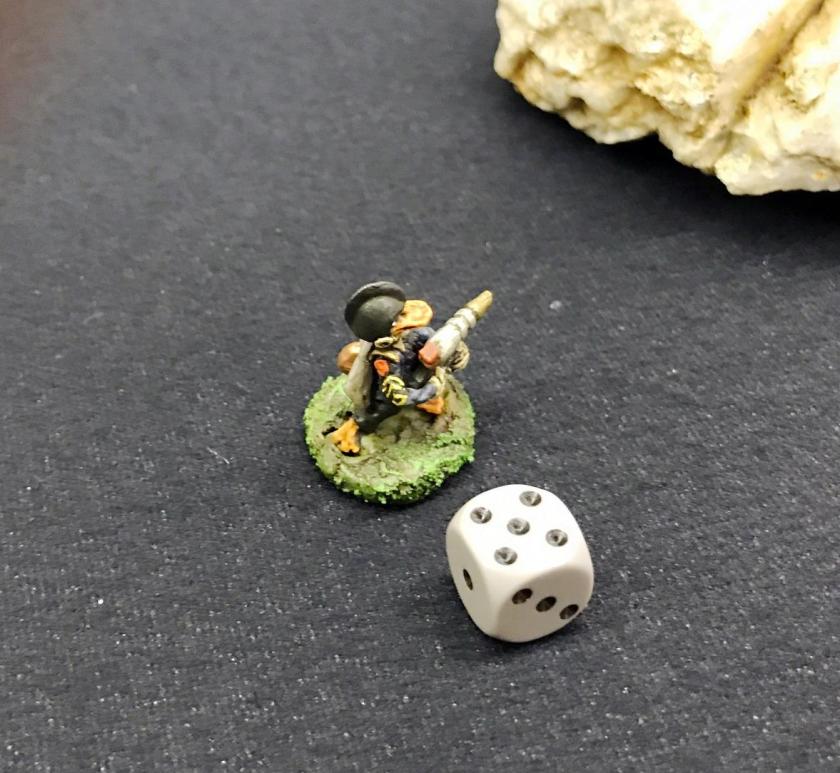
This will be a very short blog post – but for those of you who love the old Archive Star Rovers figures, this will touch your heart! As many of you know, I have been collecting and painting Duck Wader, Star Ducks, Power-Armored Frinx, and a number of other Archive gems. I use them in Combat Patrol™ retro-sci-fi games – many of which my daughter Ellen Morin and her fiance Chris Smedile have played in and enjoyed.
Ellen’s birthday is in September, as is mine, but we did not get around to celebrating until the first Saturday in October. She got me a couple of very cool gifts. One was an awesome Boston Bruins sweater (cannot have too much Bruins gear by the way). The other was a painting of Duck Wader and some Frinx breaching a wall, with Star Ducks jet-packing through the air above! She used photos from my blog to sketch and ultimately paint the scene. I think it was an awesome gift! Here is the painting below:
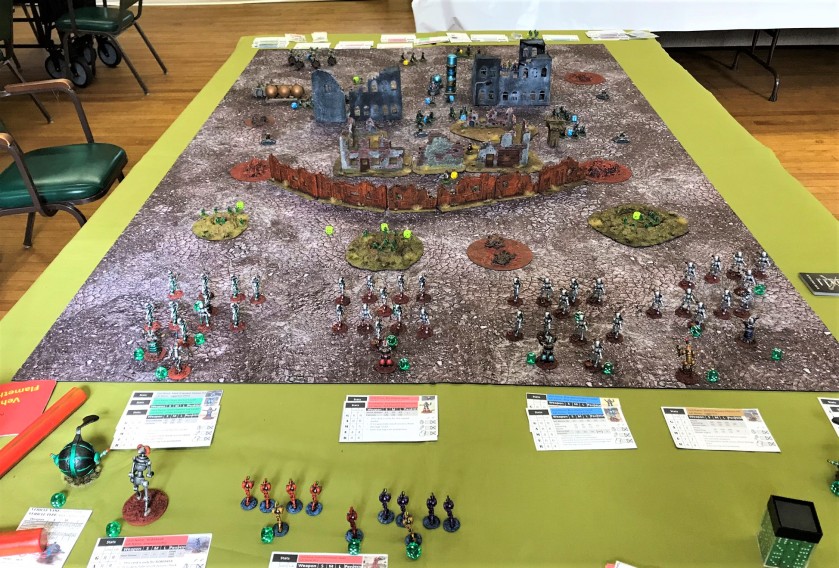
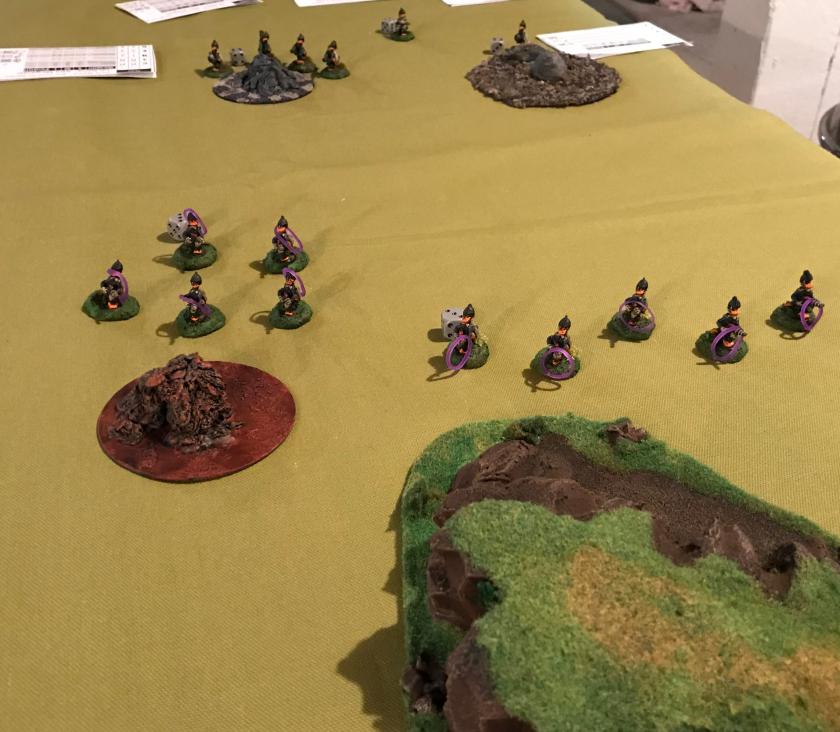
We had a good showing on Saturday at the September Mass Pikemen Gaming Club session. We played an “Attack of the Warbots” scenario using the Combat Patrol™ system.
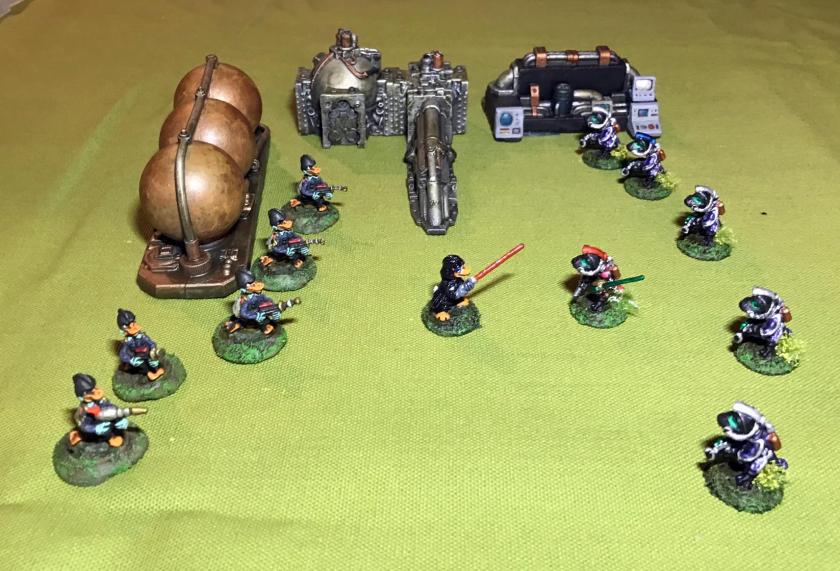
The biological Alliance (Star Ducks, Space Dwarves, Frinx, and Aphids) have captured a Warbot Mark 1 Sphere tank and are attempting to repair and convert it to their use. The Warbots have landed a large force and aim to deny their enemy this loss of technology. Can the Warbots be stopped?
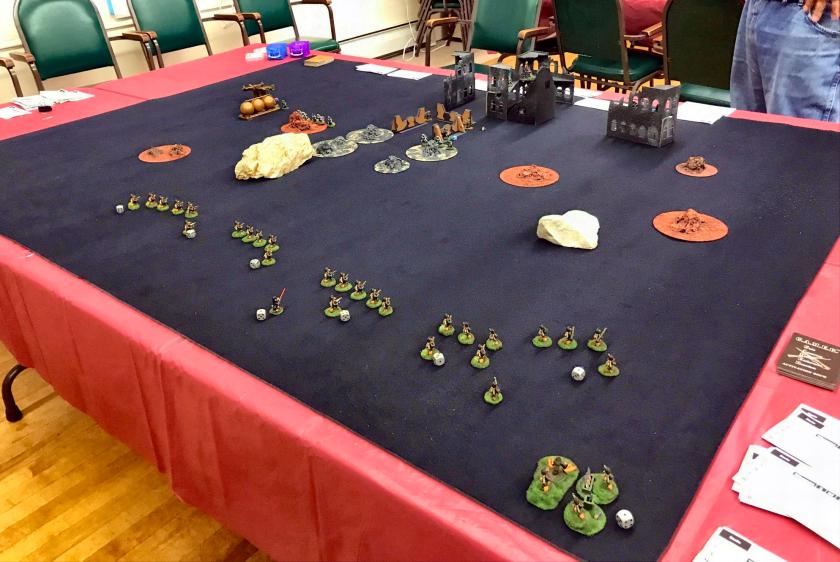
This one, like all of the games that I run, was modified for playability based on experience and the number of available players. This time I also got to add some new terrain and my new Wastelands gaming mat (which I described here and here). I did not take as many pictures as I had wanted to – but what I have is below.
The Aphids held up the Warbot attack and were almost wiped out by the Warbots. However, they did delay them enough to achieve a victory, however, the tide of battle was about to turn so it could have ended differently. Time just ran out on the Warbots.
The photos below are the set up and a bit of initial play.
The set up from the defenders’ side.
Set up from the attackers side. Reinforcements await deployment on the table’s edge.
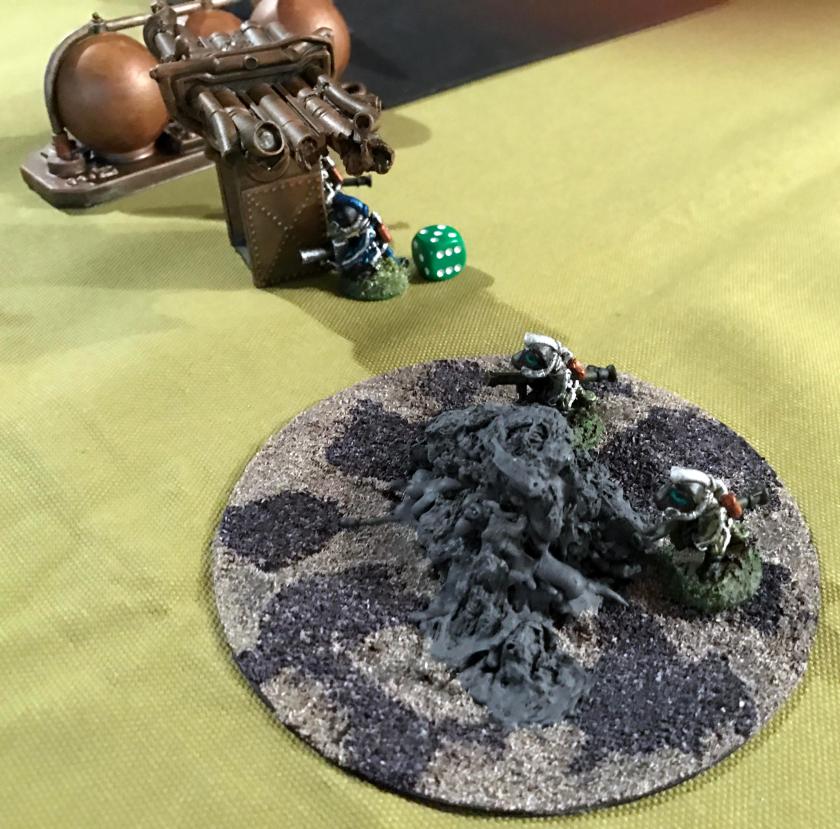
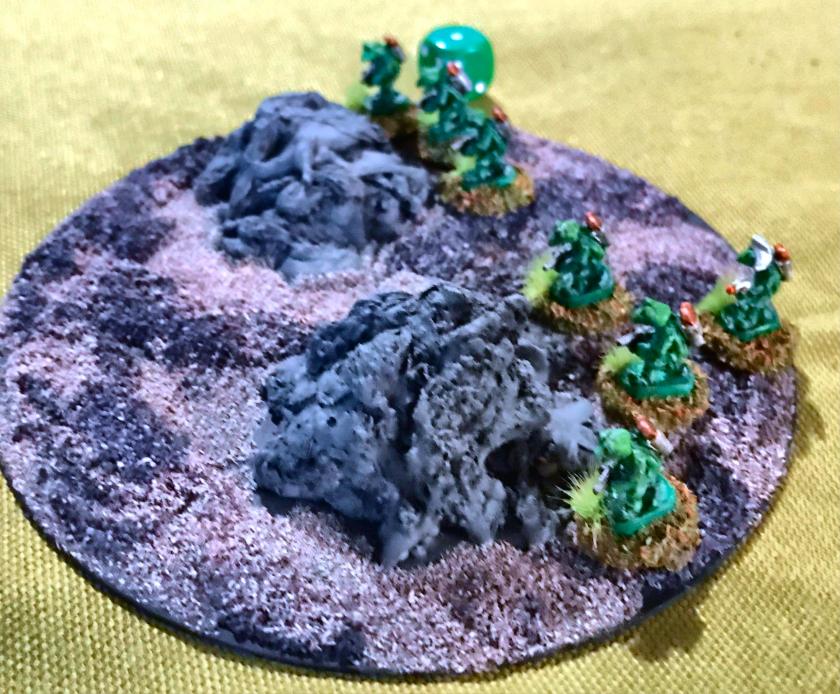
Aphid casualties pile up as the Warbots move forward. The Aphids, defending the middle crater, were able to get a very lucky critical hit on the Warbots’ platoon sergeant, causing a catastrophic explosion of its power plant (the smoke plume in the center above). This explosion also killed and wounded several Aphids, and dented a couple of nearby Warbots.The Warbots move into the smoky crater that once held a squad of Aphids. The Warbots used a plasma ball breacher to fry the bugs, hence the smoke plume.Aphid and Star Duck mortars add to the chaos of the battlefield as the Warbots breach the initial wall defense and roast an unlucky Star Duck alive. Biological Alliance reinforcements move up on the right.
This fun scenario, with some minor tweaks, will be coming to BARRAGE on 9/28/2018!
I have been getting ready for Christmas, but I wanted to get at least a few things done hobby-wise before 2018 rings in. Last month, we had a rousing sci-fi game using Buck Surdu’s Combat Patrol™card-based rules (you can read about that game here).
We were able to use the new Japanese South Pacific decks for robot morale checks, and incorporated many of the rules from Greg Priebe’s superb Star Wars supplement. We also used some of my rule additions for Mark III Warbot casualties, special weapons, and a few other nuances.
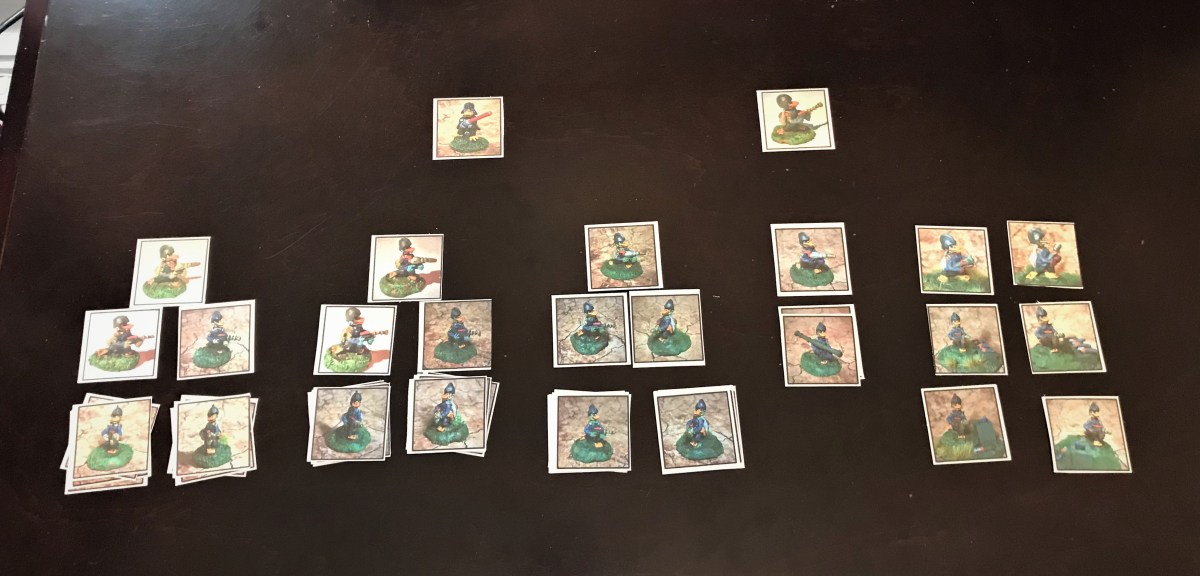
One of the issues came in the way of finding an easier way of denoting casualties on the table and making play a little easier. As you can see below, we just tipped over the figures, and that became crowded! I do like to see the casualties on the table as it gives a nice account of what occurred in the game, but perhaps there is a better way? Also, given that the Warbots take many wounds, I also am making some play aids specifically for them and their weapons (and I will cover this work in a future blog entry).
Casualties litter the field/table last month
As for the casualties, Buck suggested that I could create some cards for the casualties that would take the place of the “dead” miniature on the table. This would allow for showing the results of the battle, and enable an easier playing experience.
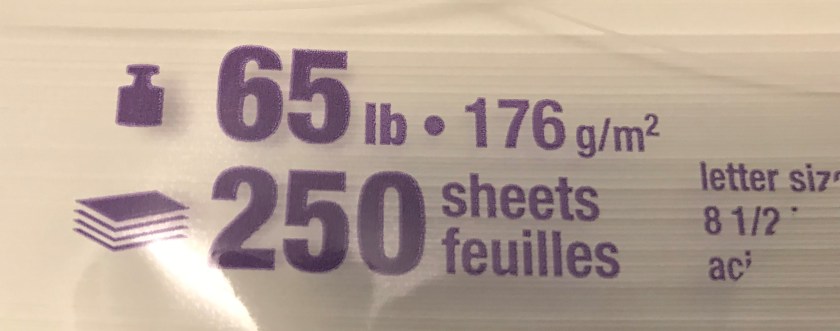
For this project, I bought a Fiskars® paper cutter from Michael’s. I had a 40% off coupon so I got it pretty cheaply. I used white 65-lb. card stock from Staples for the cards.
Fiskars paper cutter
I started out last week with the Aphid platoon. My goal was to make the card sizes as close to the actual miniature sizes as possible. The Aphids are really small, so their cards were small. I experimented with Microsoft PowerPoint, using the grid lines tool, and comparing what I printed with the actual miniatures. I ended up making the Aphids cards about ¾” – 3/8″ high by ¾” wide. I had a lot of variability as I got used to using the paper cutter. The pictures that I inserted into PowerPoint had different aspect ratios, and I remedied this when I moved on to the Star Ducks.
I do recommend using the aspect ratio tool when cropping pictures for this type of work. Additionally, the grid line tool in PowerPoint allowed me to make exact front and back cards by making sure that the sizes were the same and aligned. The easiest way to do this is to import your photos first, and then copy that slide. Then, you replace the photos on the second slide with the written cards. By printing these on both sides of the paper (use regular paper first, not card stock to check), they will line up perfectly. The only caveat I need to add is that you need to pay attention to the cards as you will need to reverse the text in the blocks so as to match the pictures – see below.
My PowerPoint page of 39 Aphid photos – note the reversing of texts below on the text portion The text section – I numbered these text box blocks and put up to the light to see which text went where – each is an individual text box
I printed these on card stock with a “thick paper” setting on my printer, and used two-side printing. I then cut them out using the Fiskars tool. There is a learning curve to the tool, and it worked out fine. The Aphids on Grav-Cycles were not sized to the miniatures, but I wanted all of the Aphids cards in their deck to be the same size, so I can live with that discrepancy. I did however want to improve for the next group of cards – which was for the Star Ducks.
Here, I needed to make bigger cards, and went with 1½” by 1½”. I made a few important changes in my processes. First, I used the “aspect ratio” function when I cropped the photos – in this case using the “square” aspect. I also added a 2-point thick line on the pictures and the text boxes, which really made cutting easier. Lastly, I colored the cards text-printed side with light orange hue, to match their bills! I plan on having future unit casualty cards with different colors on the printed sides.
Page 1 of my cards (photo side). These when printed on a standard sheet of paper approximated the true sizes of the miniatures.The text block side of the PowerPoint, with adjustments so that the two-sided printing would line up properly. These were then colored orange as below.The photo sides of the cards after cutting – they are 1.5″ square
The printed sides of the cards with the orange backgroundsClose up of the cards
These were much better – and I feel confident that I can finish off cards for the Frinx and Mark III Warbots soon. My goal is that when I next run a game that these aids will make play even easier than Combat Patrol already is! These are not perfect, but are close enough and stiff enough to avoid becoming paper canoes!
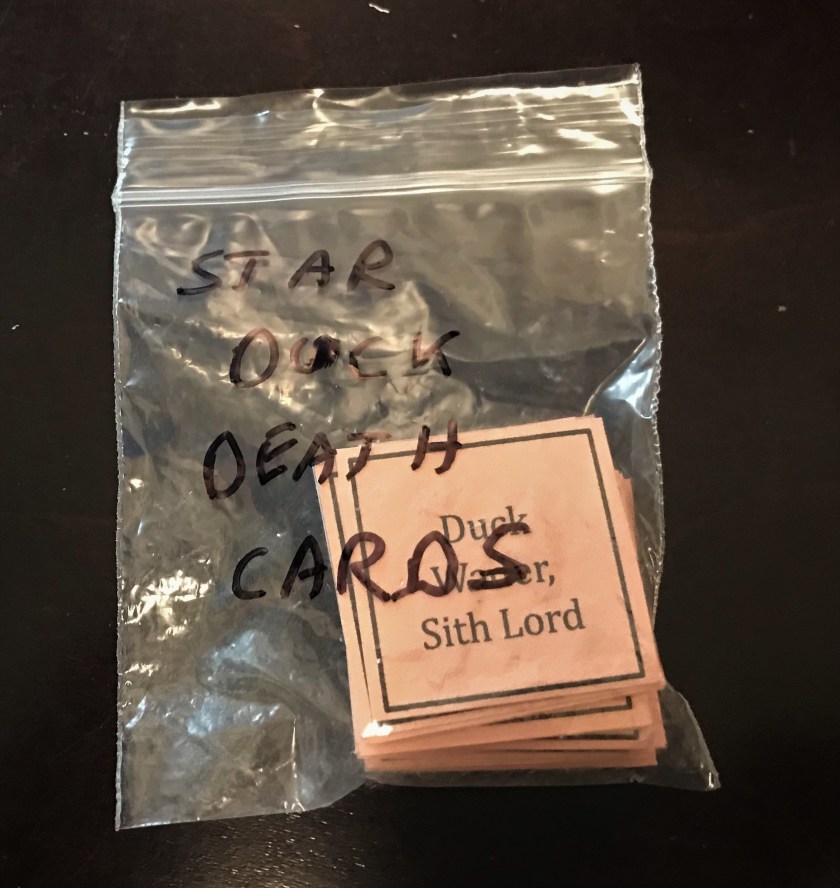
Casualty cards, Death cards, whats the difference!
Please let me know what you think in the comments section – thanks for looking!
I have been accused of having a Boston accent, but this is not really true – I have a Worcester accent, or properly a Worcester County accent. Throughout my military and civilian career, my pronunciation of my name, Mark, sounds to others like Ma’k. My good buddy Buck Surdu has often shortened it to “Ma’k” on his blog posts. Last weekend (right before Thanksgiving) he and my other good buddy, Dave Wood, made the drive up from Maryland on a traffic-filled Friday afternoon for a Saturday full of gaming – and it was called “Ma’k Con”. My wife Lynn really helped out as well with her keeping us well fed. This blog post is about the gaming we crammed into that Saturday.
Buck and Dave got me into tabletop wargaming when we were back at West Point. Since then, Buck has published a myriad of rules for gaming, and Dave has contributed to many of those rule sets. The most recent rules that Buck published is a fantastically easy to play and streamlined card-based system for skirmish-level combat in WWII called Combat Patrol™. It is truly flexible, and has had optional rules and supplements written to cover different possible scenarios, to include the South Pacific theater, the Winter War, the Falklands War, the Napoleonic era, and even the Star Wars universe. These can be downloaded for free from his website, and the cards are available in the US from Drive Thru Cards and in the EU from Sally Forth. The rules are also available in book form from both On Military Matters and Sally Forth.
Buck recently added a new set of cards for the South Pacific, which have different morale results for Japanese troops. Readers of this blog know that I have been collecting and assembling units from the old Archive Miniatures Star Rovers line of figures, specifically Star Ducks, Power-Armored Frinx, Aphids, and Mark III Warbots. Additionally, I have been supplementing these forces with Khang Robots, weapons, Robo-Sentry Guns from War Games Supply Dump, and my own sculpt of a sphere tank. I also used some weapons from Bombshell Miniatures.
I decided that I would combine aspects from different Combat Patrol™ rules for a fun retro sci-fi game. Specifically, I would use the new South Pacific deck for morale results for robots, the new vehicle-mounted flame thrower template for my sphere tanks’ death rays, and the Sith rules from the Star Wars supplement. Also, I added in several rules from the optional rules. Lastly, I added my own special rules for the Mark III Warbots and their leader, Juggerbot, to account for possible effects that weapons fire could cause on their behaviors and capabilities.
Upon arrival in Massachusetts, Buck surprised Dave and I with uniform t-shirts from West Point that we would have worn to gym or when we played sports. It was called Gym-A (Gym-Alpha) and we wore it for Saturday’s game marathon. Admittedly, both Buck and Dave wore it better than I did. We were also joined by my daughter Ellen Morin and her fiancé Chris Smedile.
Buck Surdu, me, and Dave Wood (US version for you UK followers) in our Gym-A shirts
The scenario was one where the Star Ducks, Aphids, and Frinx were allied against the cybernetic horde of attacking robots. The non-metallic forces had captured a robot Mark 1 Sphere tank. The Frinx were attempting to repair it so it could be used against the robots, who were to have two Mark I Sphere tanks of their own in the assault. The tanks have two side mounted laser cannons, and a Death Ray (think 1953 War of the Worlds movie). Dave and Ellen had the robots, while Buck, Chris and I defended.
Dave and Ellen prepare to attack. The Aphids are in the ruined building to the front, and there are the Robo-Sentry Guns acting as speed bumps to their front.
The Robo-Sentry guns slowed the attacking robots slightly, but allowed Aphid and Star Duck mortar fire to hit the Warbots near Juggerbot, damaging the robot leader, and causing some of his robots to go rogue, or blow up. When they went rogue, they would attack the nearest figure. Juggerbot ended up dealing with such a problem.
The battle begins with the Warbots clearing the Robo-Sentry gun defenses.
Normally, in Combat Patrol™ games, figures can take a certain number of hits, usually three wounds, before they die or are incapacitated. In this game Frinx had 4 wounds (because of their power-armor), most line Star Ducks had 3, and Warbots had 6. However, I allowed for critical hits as outlined below. This had a nice balancing effect on the game.
Warbot Critical Hit Chart – lots of 4’s and 5’s happened!
The Warbots also had some devastating energy weapons. The opposing forces had two “Sith Lords” (Duck Wader from the Star Ducks and Lt. Ma’k from the Frinx) with special powers from the Star Wars supplement. Early in the game, Buck moved Duck Wader up to engage the Warbots, only to get vaporized along with some Aphids by an arc weapon blast.
Duck Wader (center) near the corner where he was shortly vaporized thereafterThe Frinx AT section moves up – only to never make an impact
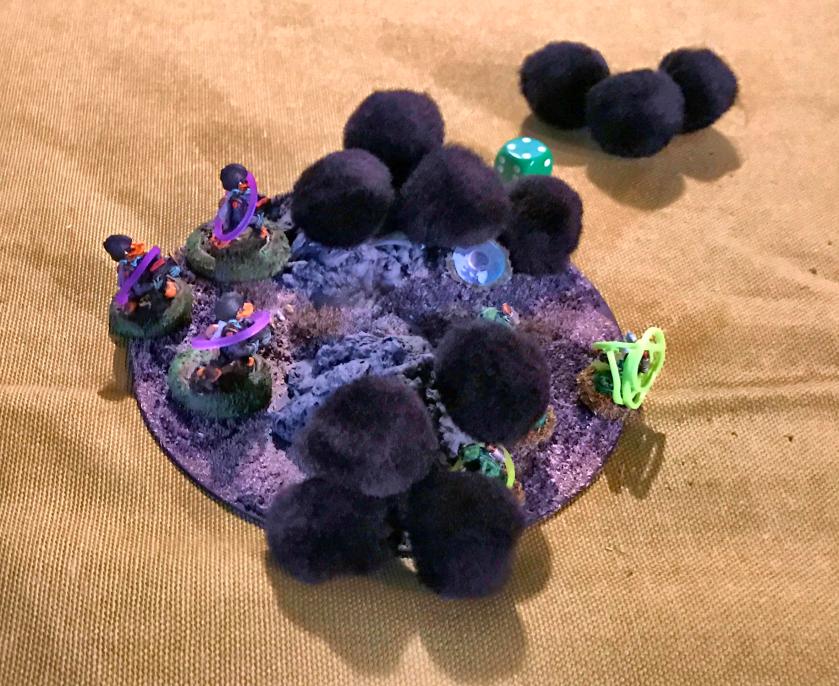
The other Sith, Lt. Ma’k, used his Force powers to fly into the middle of a group of 8 immobilized Warbots (they had drawn a “Hold until Death” morale result due to Frinx fire, but the robots could still fire).
Lt. Ma’k (a Frinx) then tried a Sith power – Force Blast – which damaged some robots’ weapons and caused them to explode. Additionally, friendly mortar rounds landed there (Lt. Ma’k did not care) and eventually he succumbed, as did several Warbots. Simultaneously, Juggerbot finally was destroyed by Aphids on Grav-Cycles. As he was the platoon leader, his destruction led to his unit becoming pinned – and only activating on black cards. This really had the effect of reducing the entire robot platoon’s combat effectiveness.
Lt. Ma’k (by the purple die) makes his last stand. Note the black die for the Warbot Green Team 2 due to a “Hold until Death” morale role. Later the entire Warbot platoon would get black dice (“pinned”) when Juggerbot was destroyed.The death (destruction) of JuggerbotAphids an Grav-Cycles make a desperate charge before dying to the last bug – but they sealed Juggerbot’s fateFrinx on Glyptodon cavalry move up before being taking heavy fire and being routed
At this point, the carbon-based living got very lucky and fixed their captured Sphere tank earlier than would have been expected due to Chris pulling some great cards. However, the robots got reinforcements in the form of two of their own Sphere tanks, a squad of Warbots, plus 2 self-propelled robot guns. Chris and Buck were able to immobilize one tank with some very lucky shots. The other annihilated a squad of Buck’s Star Ducks with a Death Ray Blast.
Buck’s Star Ducks are hit by Death Ray fireSome of Buck’s Star Ducks jet pack onto the immobilized Mark I Sphere tank. Their satchel charges (6) attacks all failed to destroy the tank.
By now it was dinnertime and pizza called, plus we wanted to move to the next game. It looked like a slight victory for the living forces, but casualties were high! The game turned out well and I may redo this scenario at Barrage in Maryland in January. Buck’s account of the battle is the next entry in this blog.
Surveying the carnageGreat Game!
Then we moved onto a play test of Dave’s micro-armor game of “The Battle of Nikolayevka (Nikitowka)” using the Look Sarge No Charts rules. This was a breakout of Italian forces on the Eastern Front in 1943 as part of the Battle of Stalingrad. So we had Italians and some Germans attacking a small town held by the Russians. The link above describes the historical battle well.
Buck attacked with a combined German/Italian force on the right half of the battlefield and I attacked along the left half. Dave defended. It was a tough slog, with the Russian artillery (they had no armor) making progress difficult. Later in the game Dave had us command reinforcements in the form of the Italian stragglers from an earlier phase in the battle. It was a good scenario, and interesting to see a primarily Italian versus Russian scenario.
Initial set up – Italians and Germans (on left) fight into the town to the right of the railway crossing (in light orange)Another view showing the town in the upper right. The attackers needed to get into the town so as not to freeze to death.Assaulting the rail line defensesBuck tries to get into the town
I think Dave will have a very good scenario for an upcoming convention!
The day flew by, and I am so appreciative that we West Point Old Grads had the chance to game together. Thanks to Buck and Dave, and Chris and Ellen! And of course, Lynn for her logistical support!!
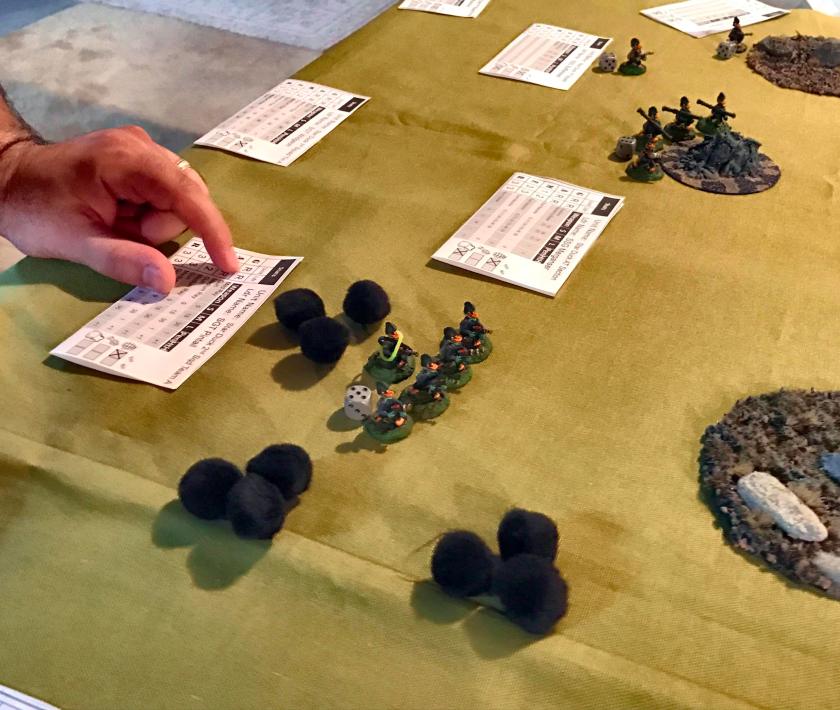
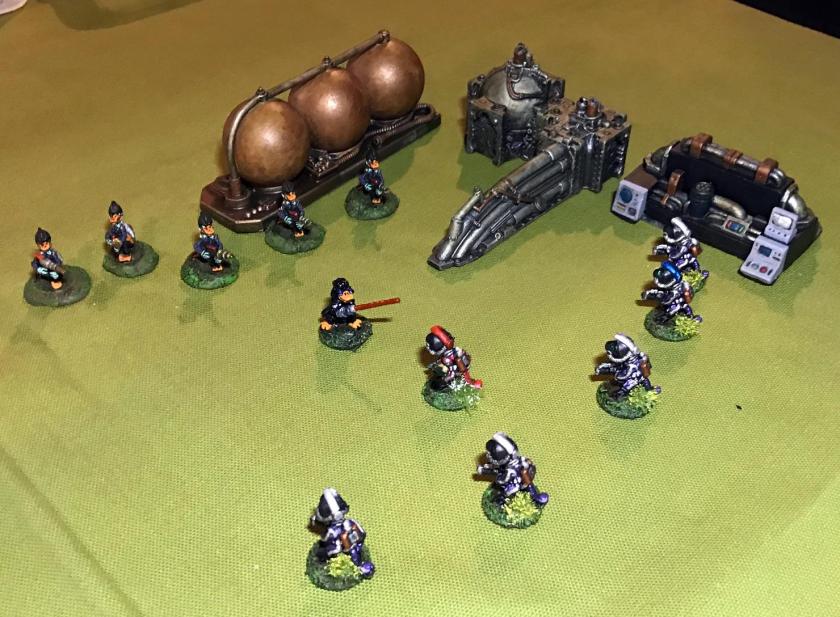
To round out September, the Mass Pikemen Gaming Club ran a game during which the Star Ducks attacked the positions held by the Power-Armored Frinx. Both of these forces are from Archive Miniatures circa 1979-1981. You can learn more about their origins here. Click on Star Ducks or Power-Armored Frinx to learn more about their platoons. We used the Combat Patrol™ system, with modifications to approximate the abilities of the Star Ducks to use their jet packs, and the durability of the Frinx as a result of their power armor. The Frinx also had the support of two Archive RVS86 “Robot Cooks” which were analogous to small self-propelled guns.
Two RV86 supported the Frinx
The scenario was one where the Frinx, led by Lieutenant Ma’k were defending some old ruined buildings that held some lost technology – and the Star Ducks, led by Duck Vader, were hell-bent on getting into the building and killing Frinx in general. The Frinx, on their part, desired to dispatch the Star Ducks with extreme prejudice.
The Star Ducks advance in the foreground, the Frinx defend the buildings and barriers.
The Star Ducks used their jet packs to quickly advance towards the buildings on the Frinx’s left flank. You can see the small purple rubber bands on the Star Ducks, which indicate the number of “jumps” that they have taken. Due to limited fuel, the Star Ducks have only three jumps per game, but they do help!
Approaching the Frinx positions, the Star Ducks move quickly using their jet packs.
The initiative switched to the Frinx, who then bracketed them with bazooka fire. The white rubber bands indicate wounds, while the glass beads indicate a team must take a morale check for each one the next time they are activated. We use red rubber bands to denote a weapon that has jammed or is out of ammunition. We also use black rubber bands to denote figures who are stunned.
The smoke from the Frinx anti-tank rockets surrounds the Star Ducks, as they take wounds from the explosions
In the middle of the table, a pitched ray gun/blaster battle left several dead and wounded Frinx. The Star Duck team making this assault was however, annihilated, as Frinx Staff Sergeant A’Haze led his Frinx ably and directed their fire.
The Star Ducks do significant damage to the Frinx defending the barriers and slag mounds – note the dead Frinx, the multiple wounds, and the multiple morale pips. The Star Duck A team was wiped out here.
The only Star Duck survivor in this area was Staff Sergeant Bufflehead.
SSG Bufflehead watches his A team die valiantly.
And then this happened…and the other RV86 was immobilized as well by bazooka fire from the other flank.
Meanwhile, back at the buildings, the Star Ducks jumped again, going over the ruined buildings, and assaulting the Frinx from the rear. This move was met effectively by the Frinx with Platoon Sergeant First Class Grengelu’s automatic grenade launcher, wounding and killing several Star Ducks.
After the vertical envelopment, the Frinx make the Star Ducks pay. Note Frinx LT Ma’k in the upper floor on the left – his blaster also hit several Star Ducks.
However, there were enough Star Ducks to close with the Frinx in hand-to-hand melee (or is it claw-to-wing?) and begin to clear the buildings. SFC Grengelu was overcome and killed in the scrum.
Everybody gets in the fight!
SSG Bufflehead is surrounded by Frinx in melee
At this point, the game was called due to time and was determined to be a draw. While the Star Ducks had cleared one building completely, and another one partially, they still had a couple more to go. Casualties were high on both sides!
The game was a lot of fun and the battle was touch and go all night. Once again, Buck Surdu’s Combat Patrol™ system demonstrated its great versatility and ease of play!
I hope you enjoyed this battle report – please share your feedback in the comments section!
It’s been a bit busier on the gaming front. Jared Burns (USAFA ’04) and I (USMA ’84) got together last Sunday afternoon in preparation for the launch of the Mass Pikemen Gaming Club . We play-tested Combat Patrol™ with Star Rovers figures that I have previously posted about in this blog, as well as an X-Wing game.
The scenario was one where the Frinx and some Aphids were protecting RT22 in a bunker behind an old factory. The Star Ducks, led by Duck Vader, were attacking to seize RT22, using their jet packs to quickly assault through the open ground which the Frinx had covered with anti-tank weapons. I gave the Star Ducks 3 chances in the game to use their jet packs at 3 movement cards per try – and that worked well rules-wise.
Highlights of the battle! There was a grenade-throwing fest in the center (one of my grenades scattered back into me adding to my losses) between one Star Duck team and a green Aphid team. This resulted in multiple casualties, especially when one of my Aphid’s grenade attacks rebounded from a rock, but the Star Ducks had the better of that fight.
I gave Duck Vader the ability to deflect incoming direct fire, but I got lucky. Duck Vader was in the open at short range and got lit up by two Frinx bazookas and the Frinx platoon sergeant with an automatic grenade launcher. End even though I gave him a 5 endurance, his goose (or rather duck) was cooked with about 7 wounds. His demise then caused the entire Star Duck force to lose heart, effectively ending the game.
The Star Ducks effectively advance on the escarpment. The purple bands indicate jet pack uses.
The Frinx guard the factory ruins with anti-tank weapons and an automatic grenade launcher.
A green (in terms of morale and literally!) Aphid Squad awaits its doom from a storm of grenades.
Star Ducks deploy.
The Star Ducks take multiple incoming rockets, wounding a team leader.
The Star Ducks put the hurt on the Aphids with a storm of grenades.
In the foreground, the Star Duck AT team prepares to rain doom on the Frinx. In the upper left, the Aphids attempt to return grenade for grenade, only to bounce them back at themselves.
In the upper center, the Star Ducks jet pack and prepare to flank the Frinx. However, in the foreground, Duck Vader is mortally wounded.
The viewpoint of the Frinx who killed Duck Vader.
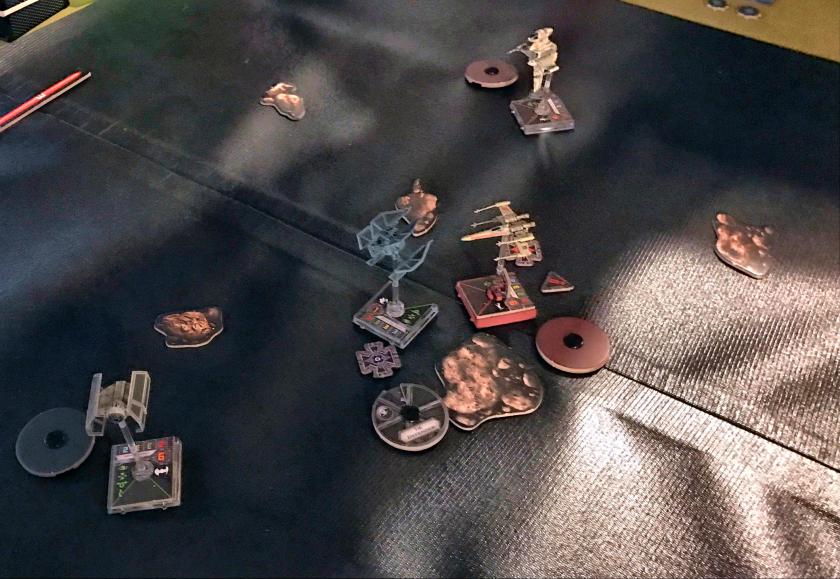
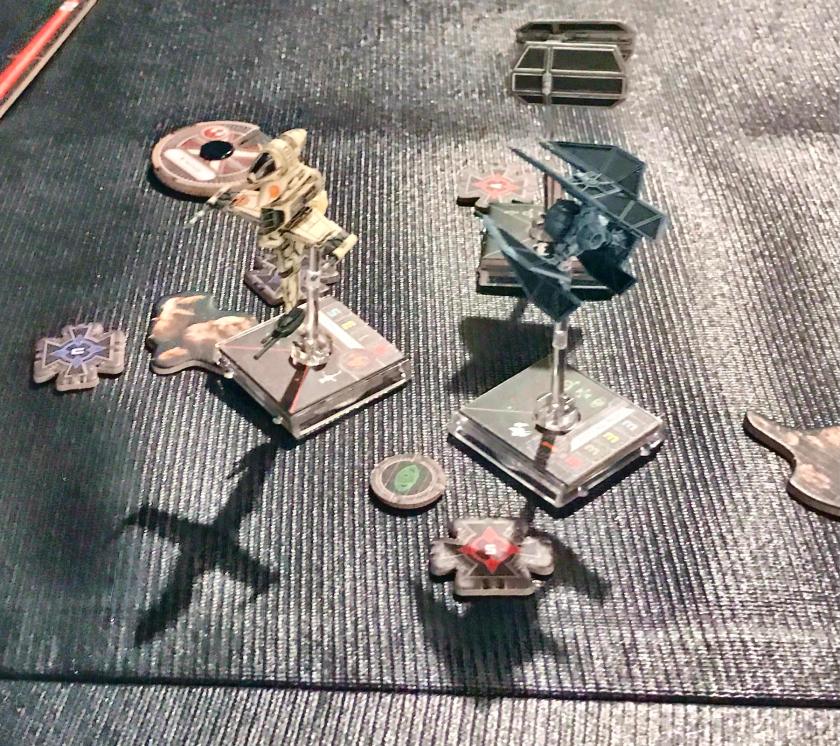
We then played X-Wing, and it was time for the USAF guy to beat (really thrash) the Army guy…ironic…he was the Empire so the day evened out. It was a good playtest for our first game night on July 27th. Jared did a nice job in teaching me the game – and then avenging the previous game. He was the Empire, and I was the Rebels with two ships each.
I successfully pilot my X-Wing into an asteroid…and fail to hit the Empire’s ships.
With my X-Wing dispatched, the Empire finishes off my hapless B-Wing.
I really liked the game and the ease at which I learned the basics. Thanks to Jared for a great day!
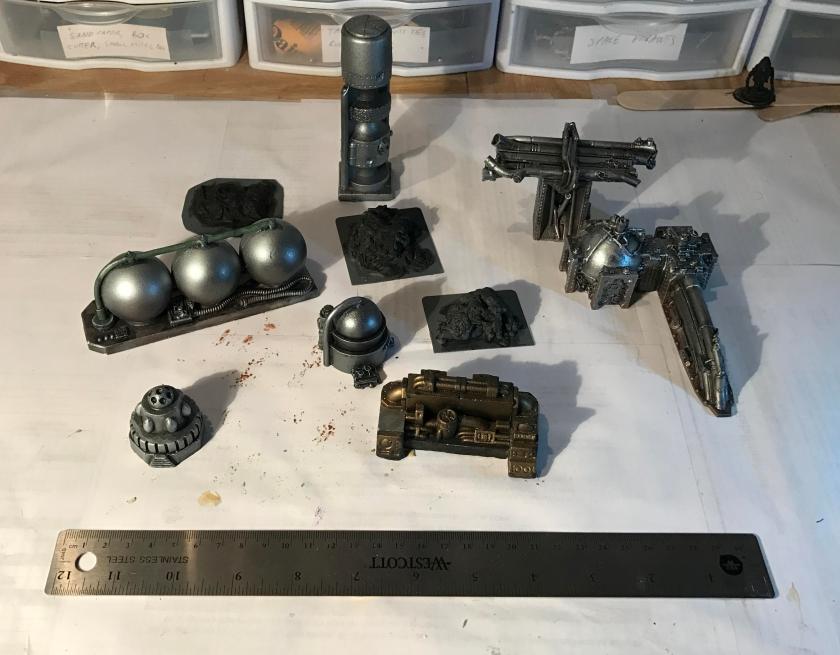
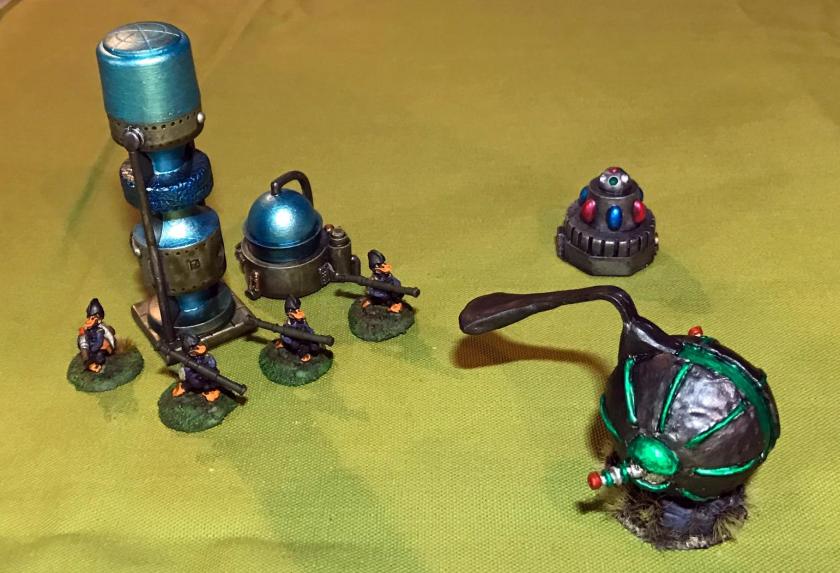
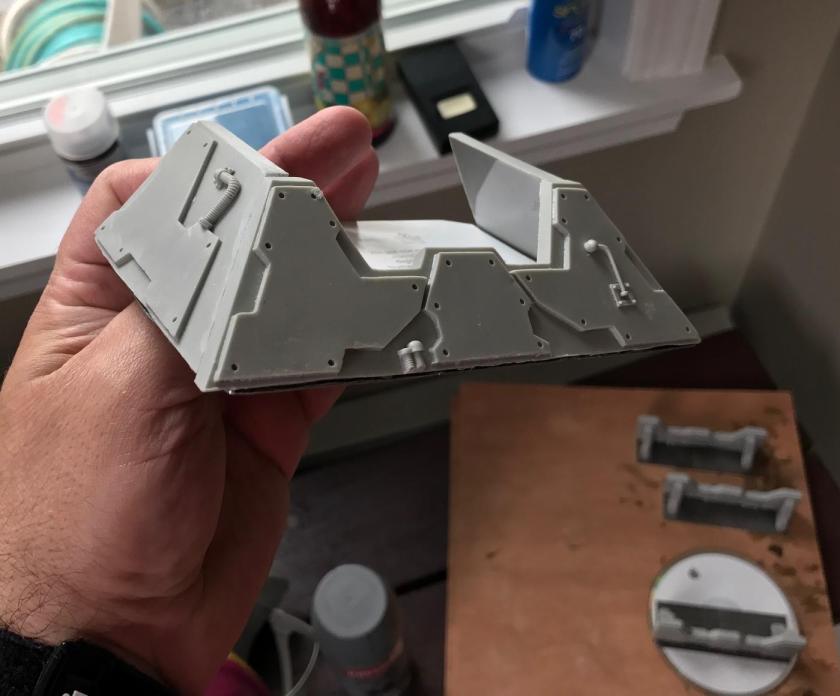
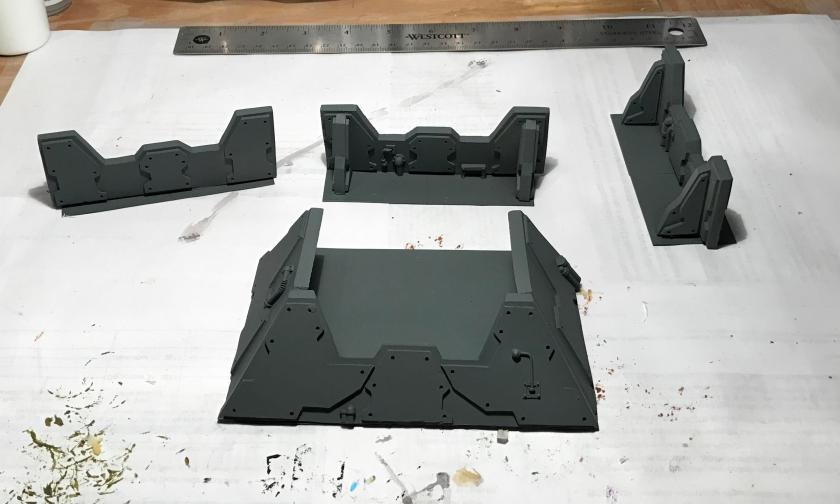
This month, in between other projects and recovery, I worked on several terrain pieces for use with my Star Rovers figures and the Combat Patrol™ gaming system. Some I got earlier in the year from WorldWorks Games on Amazon, others I got on eBay that were from Armorcast Battlefield Scenery, others I made – and some I just don’t know who made them. I’m hoping to use these at The Battle Standard in Auburn soon after coordinating with the owner, Jared Brodeur.
Normally I have more detail (how-to), but I lost most of the details of these terrain projects, as I had a few that I had to rework. I think the pictures below are hopefully sufficient. I was really happy to try new techniques with rust applications using a “pointillism” technique with a combination of Polly-S (“Rust”) and Vallejo (“Rust” 71.069 and 71.080) paints. I mounted all of the terrain pieces on flat steel basing pieces.
The mostly Armorcast “set” I got on eBay were various refinery or industrial pieces that were airbrushed silver and gold, and that did not work for me. I wanted the industrial ones to be more dirty and rusty. I ended up painting some of them with various colors, and then using Army Painter Quickshade “Soft Tone” to shade. I was not happy with most of these results, especially the Quickshade effects. I repainted them, some with bright colors for the newer pieces of terrain, and with rust for the grittier ones, and then used spray varnish to seal. Luckily, the Testors “Dullcoat” actually had a “crackling” chemical effect on one of the industrial tanks which worked well – (note – this was not an Armorcast piece and was likely homemade with some type of Styrofoam). I was surprised as there was already a lot of paint and varnish on it at that point – but it was minimal and I liked it anyways.
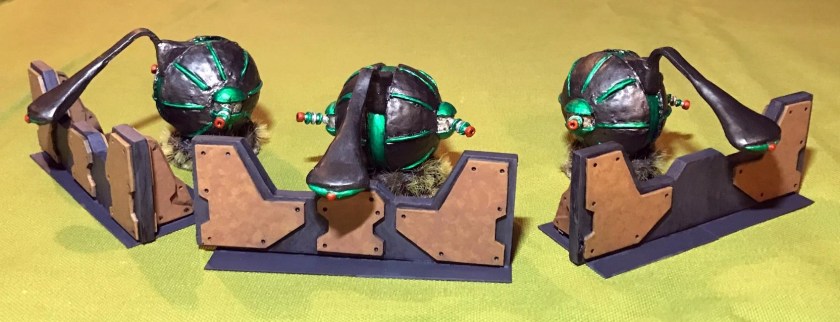
The initial set of mostly Armorcast terrain I got on eBay, plus the slag mounds I made. This is how I got them. The triple tank is the homemade one that the varnish affected. The pipeline/industrial terrain after repainting (and repainting). Duck Vader and his Star Ducks confront Power-Armored Frinx led by their platoon leader. Frontal view of the skirmish – light saber versus light cutlass! Aphids on Grav-Cycles swing around a ruined overhead pipeline to swarm attack a Frinx Mark 1 Sphere tank Star Duck Bazookaducks ambush a Mark 1 in front of a large moisture condenser, a cryo unit, and a small power unitThe WorldWorks Games set consisted of a bunker, and three barricades. They are for 28mm for sure. The bunker was used, and difficult to assemble well with super glue. I ended up using steel base material, popsicle sticks, wood glue, and cardboard to assist in the construction. Here, I really liked my use of the rust pattern that I discussed earlier.
Assembled barrier before priming Assembled bunker, front view, before priming Assembled bunker, back view, with cardboard mounted on popsicle sticks mounted on steel bases Bottom of the bunker – I needed to trim the steel bases and file off sharp edges After priming with gray A Star Duck Mortarduck crew operates from the finished bunker Three Mark 1 Sphere tanks set up in defensive positions behind the barriersLastly, I had three slag mounds that I mounted on two old CD’s. The slag was a byproduct of my casting projects. For these, I had a “Red Planet” plan, and used Citadel “Martian Ironcrust” and “Martian Ironearth” to good effect, as well as different washes.
An Aphid squad and their robot assault gun patrol the slag moundsIt’s a good start and I’m sure I could use some buildings and other things, but that I will get to in due time!
This was a very large project that ended up with producing a 45-figure platoon. I hope that you find this story interesting, if only to see the determination I had to have to see this through! I am going to give some background, and then show the photos for the finished unit. After that, I will give a detailed description for my fellow hobbyists as to how I completed the various aspects of this unit – this will allow you to see the final product earlier in the blog – and those who want more details can go past the completed photos to see more detail.
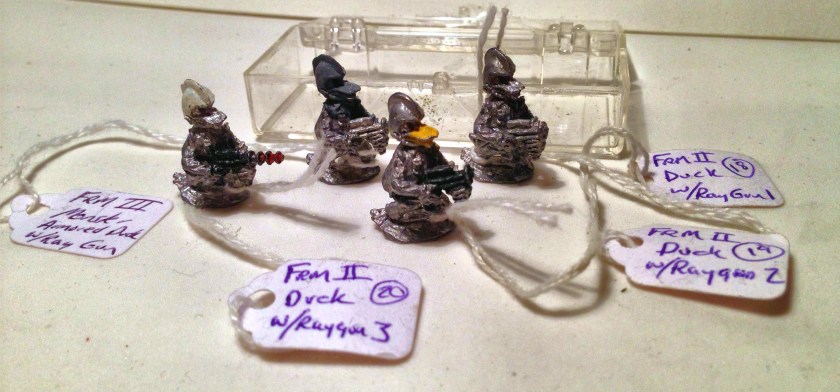
The beginning -my original 4 Star Ducks from an eBay estate sale. Note the broken ray guns. The broken ones made good candidates for conversions.
My Duck Vader box from eBay – this was a reproduction by Dark Ages miniatures, which like Archive, is no more. Note Nevile Stocken’s name is misspelled.
Background
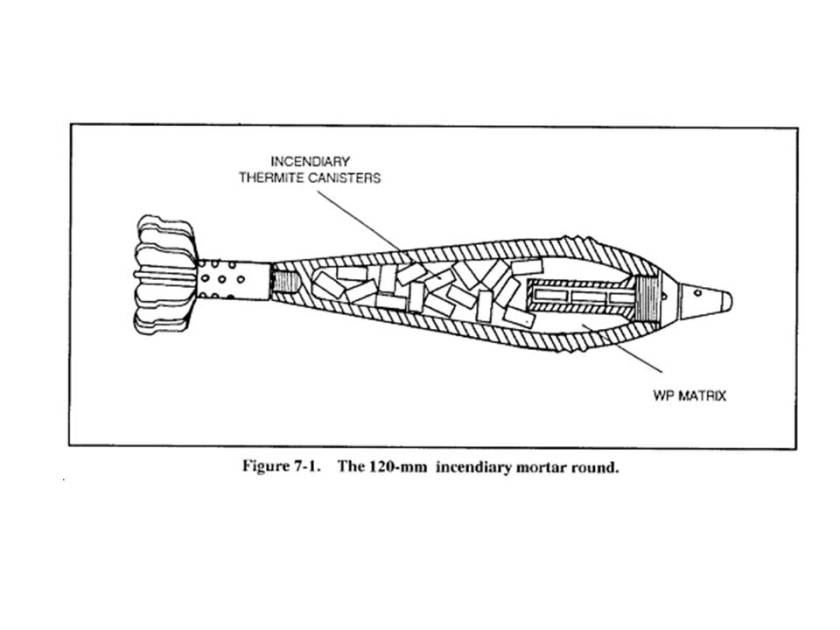
I first saw the Archive Star Ducks (#2002) and Duck Vader (#2326) on the Lost Minis Wiki as I was researching some other Archive Star Rovers figures. These were made by Archive between 1977 and 1981 or so. They are made of lead and tin alloy. These were sculpted by Nevile Stocken. He sent me the drawing below via Facebook Messenger.
The rights to some of Archive’s figures have been sold off a few times. Several have been reproduced, but they are not currently in production. I searched through eBay, and these are very hard to find. I did manage to find only 4 Star Ducks and one Duck Vader, but that paltry number does not make a unit. My stretch goal was to create a platoon for use with Buck Surdu’s Combat Patrol™ system for tabletop skirmish gaming. I thought that I would need about 40 or more figures to make the unit, and I ended up with 45, which is a good size for a traditional platoon. In this process, I ended up making a mold and casting 40 for myself and some for Buck as previously described in this blog and Buck’s. I converted 4 Squad Leaders with War Games Supply Dump retro sci-fi weapons – which I was lucky to get as WSD closed on March 31st, 2017. I converted 6 figures to make up the mortar crew, to include making the mortars, ammo boxes, and mortar rounds. I also converted three figures to make up an Anti-Tank section (now known as the Bazookaducks) by arming them with Reaper Chronoscope bazookas.
Platoon Organization
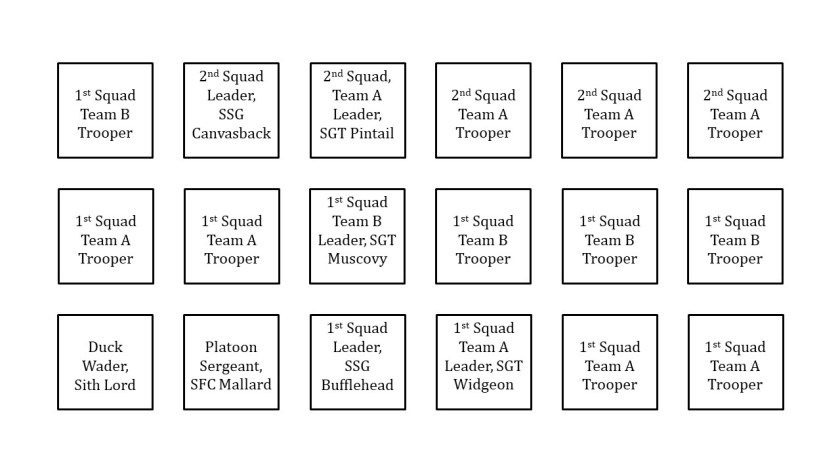
The platoon is composed of 45 figures as described below. Five of the figures, including the platoon sergeant and the platoon leader are original castings. The remaining 40 are all Star Ducks that I cast over the last year.
Star Duck Platoon
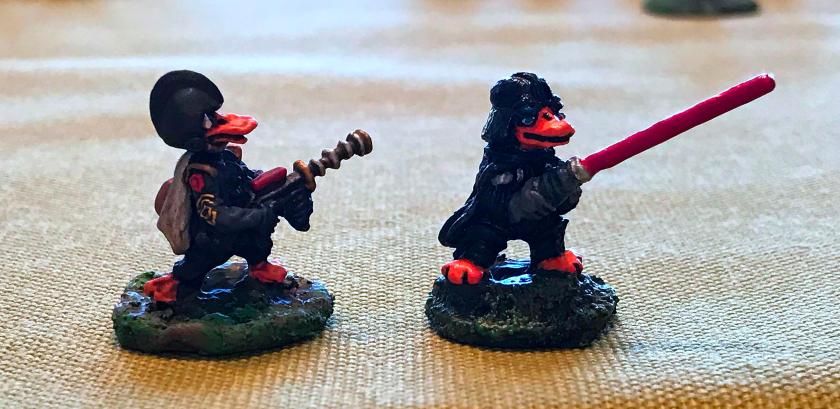
Platoon leader – Duck Vader (1)
Platoon Sergeant (1)
Duckfoot Mortar Section (6 figures)
Mortar Crew 1 (3 converted Star Duck figures as crewducks)
1 loader
2 crewducks
Mortar Crew 2 (3 converted Star Duck figures as crewducks)
1 loader
2 crewducks
First Squad (11 figures with tan gloves)
Squad Leader (1 converted figure with WSD weapon)
Team A (5 figures)
Team Leader (1) and 4 Star Ducks
Team B (5 figures)
Team Leader (1) and 4 Star Ducks
Second Squad (11 figures with light blue gloves)
Squad Leader (1 converted figure with WSD weapon)
Team A (5 figures)
Team Leader (1) and 4 Star Ducks
Team B (5 figures)
Team Leader (1) and 4 Star Ducks
Third Squad (11 figures with light green gloves)
Squad Leader (1 converted figure with WSD weapon)
Team A (5 figures)
Team Leader (1) and 4 Star Ducks
Team B (5 figures)
Team Leader (1) and 4 Star Ducks
Bazookaduck Section (4 figures with dark red gloves)
Squad Leader (1 converted figure with WSD weapon)
Bazookaducks (3 Star Ducks with Reaper Anti-Tank weapons)
The Completed Duck Platoon
Platoon Sergeant and Duck Vader, Platoon Leader, frontal view. The Platoon Sergeant is an E-7 (Sergeant First Class). Duck Vader is a First Lieutenant.
Platoon Sergeant and Duck Vader, Platoon Leader, reverse view. Both are original.
The 4 Squad Leaders, converted with WSD weapons. Each is an E-6 (Staff Sergeant). From right to left, 1st, 2nd, 3rd Squad and AT Section leader. I used different colors on the gloves, lapels, and helmet buttons to differentiate them for tabletop play.
The team leaders for each line infantry squad, with the same coloration of the Squad Leaders but with original Star Duck weapons. The B teams for each squad have a unique tuft. These are E-5’s (Sergeants).
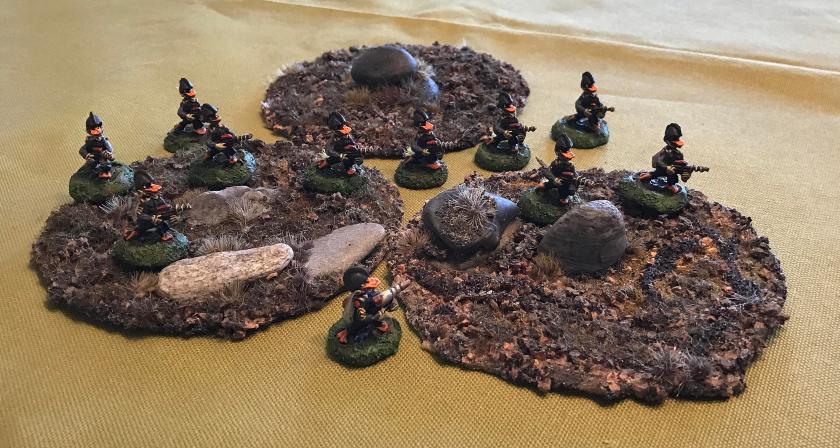
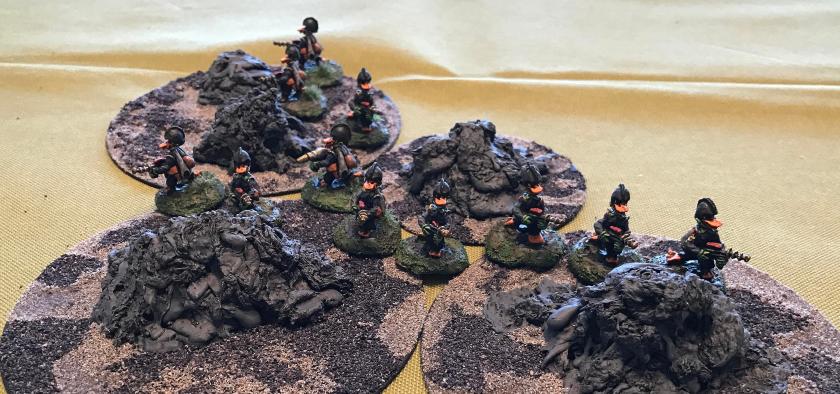
First Squad moves out.
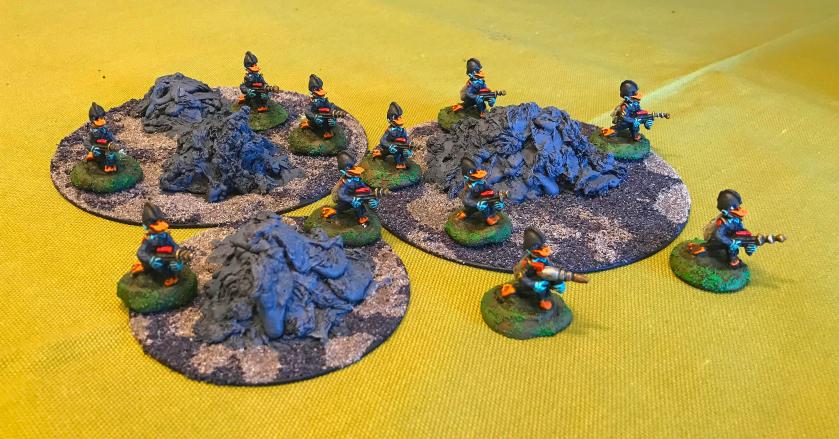
Second Squad defends the lava mounds.
Third Squad assembles.
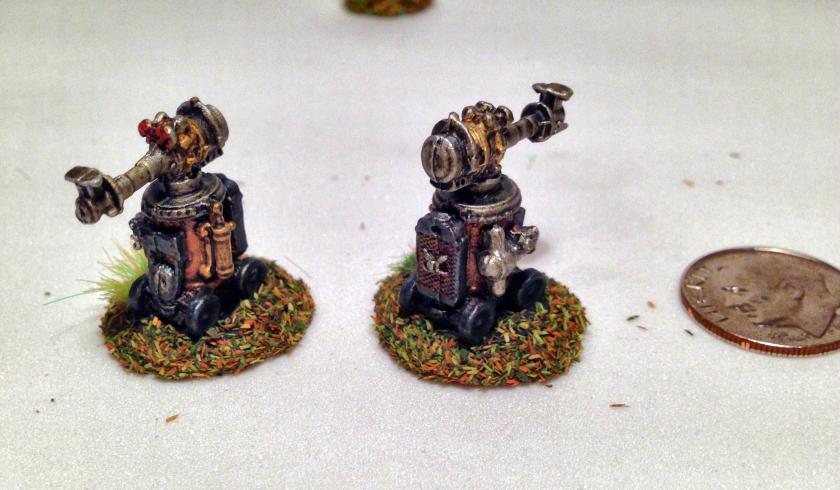
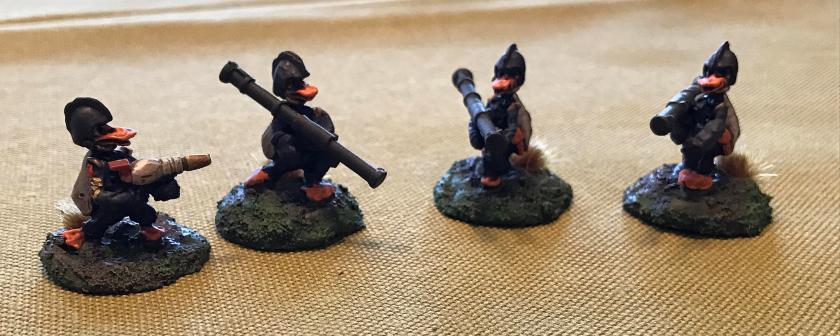
The Bazooka Ducks face off against Frinx Sphere tanks. For scale, the sphere tanks are golf ball sized.
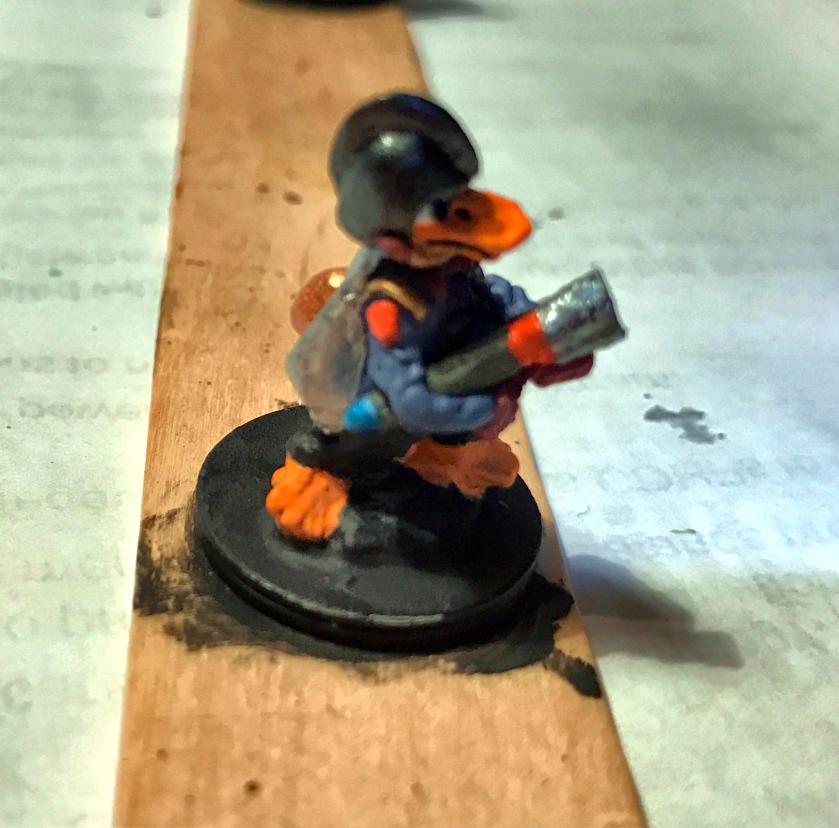
The Bazookaduck Section Leader (an E-5), and the three Bazookaducks with Reaper Chronoscope bazookas.
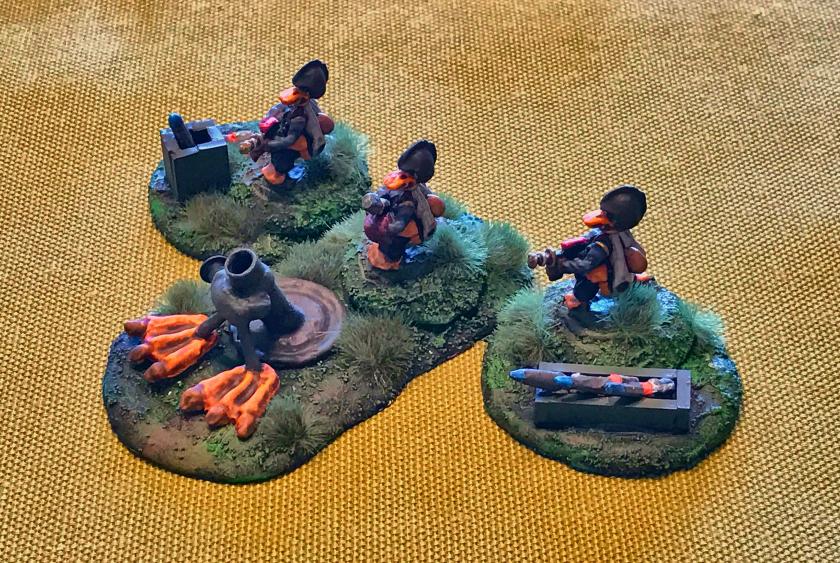
Mortarduck crew A with Duckfoot mortar. The two outer crewmen have ammo boxes and rounds to prepare for the loader. The loader is converted and holds a scratch-built round. The mortar is scratch-built from a washer, a bolt extender, paper clips, servo parts, and green stuff. Brown tufts designate this as crew A.
Reverse view of crew A.
Mortarduck crew B. Made similarly to crew A, except this crew has green tufts.
Reverse view of crew B.
The Star Duck Platoon in formation, view from the right.
Star Duck Platoon, reverse view.
Overall, I am very happy with the unit. I did use Army Painter Quickshade (Soft Tone) which darkened them much more than I expected. The effect was acceptable, but some of my identifying colors were muted.
I will now go into the how-to’s of the making of the unit.
How to Section
Conversions
All of the figures that I converted were missing the ray gun ends. These were either original casts or my own. I used a jewelry saw, wood carving knives, files, an awl, and an Exacto knife to remove the ray guns and make room for the weapons. Some of the figures lost limbs in this process, but I was able to use green stuff to recreate arms and hands for these figures. I drilled any “amputees” with a pin vise, and used 24 gauge wire as an armature for these.
a. Mortars and Mortarducks
The mortars and mortarducks were the first conversions I attempted for this unit. I envisioned two teams of three – made up of a loader, and two crewducks with ammunition boxes. I made the ammo boxes from Plastruct styrene plastic and special styrene adhesive. I had acquired some Army Painter green stuff, and decided to give it a go for the mortars and rounds. I ended up using my steel sculpting tools, but quickly learned that I needed something different for green stuff, so I got some silicone- tipped tools that worked much better (less stickiness problems). I used paperclip wire with the green stuff for the mortar legs and the rounds. I tried to make a form for the mortar round bases out of 1/8″ plywood, with mixed success. Eventually, I found that correction with an Exacto knife was a good way to go. I made the bases with Apoxie Sculpt and steel washers. In the case of the mortar base, this made sense as I was able to make a strong base with room for the loader using two slightly different washers. The mortars themselves were made with screw extenders, washers, and servo parts for a model airplane. Testors super glue was the means by which I glued the rounds to the loaders and the ammo boxes. Additionally, I found that having some small hobby mirrors from Michaels made the sculpting and assembly process much easier. I decided to leave the two crewducks with their original weapons as the loader conversion had proved to be a lot of work and I did not think it made a difference as I already had the ammo boxes.
My mortar plan and notes
Idea for mortar round sculpts
Initial work on the mortar and the rounds
Early stage in sculpt
Early stage in sculpt, side view
Middle stage of sculpt, before Duckfoot alteration
Duckfoot mortars!
Mortar Rounds completed and painted
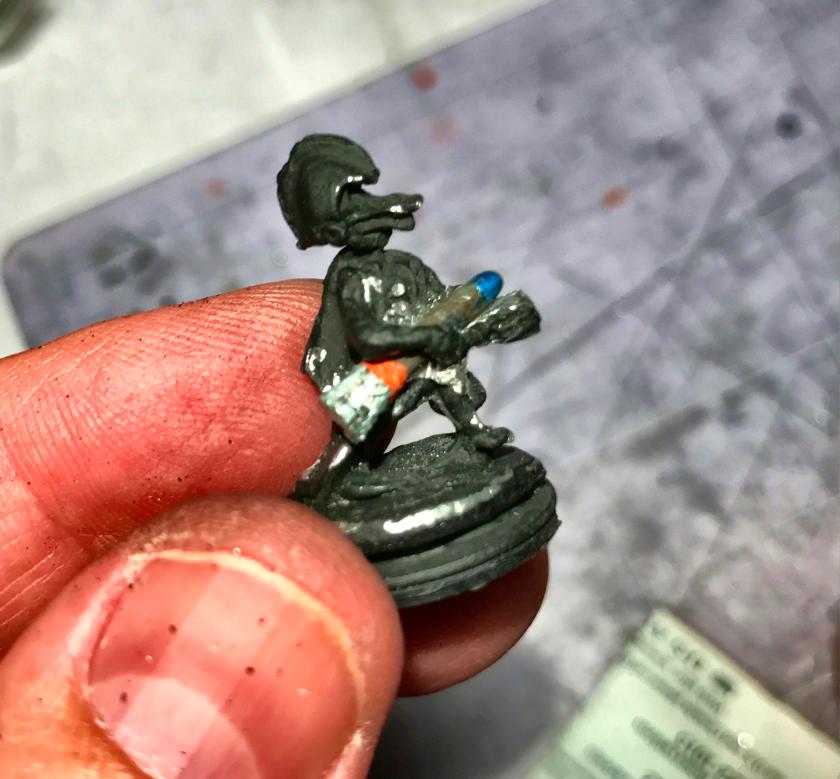
Mortarduck loader conversion in progress
b. Bazookaducks
I wanted the unit to have an anti-tank capability beyond the mortars. I had previously converted some Frinx for this purpose, and decided to do the same for the Star Ducks. The bazookas are from Reaper and came with several other weapons. I basically carved away the ray gun and made the bazookas “fit”. There were amputees in this group, but I think the conversions worked well.
c. Squad Leaders
The squad leaders were simply converted with the same tools. I gave them the War Games Supply Dump blasters from the Dirk Garrison line.
3. Painting and Basing
The biggest challenge with painting was the color orange – I had not used it much before – and it took several iterations of trying different combinations until I found what I liked.
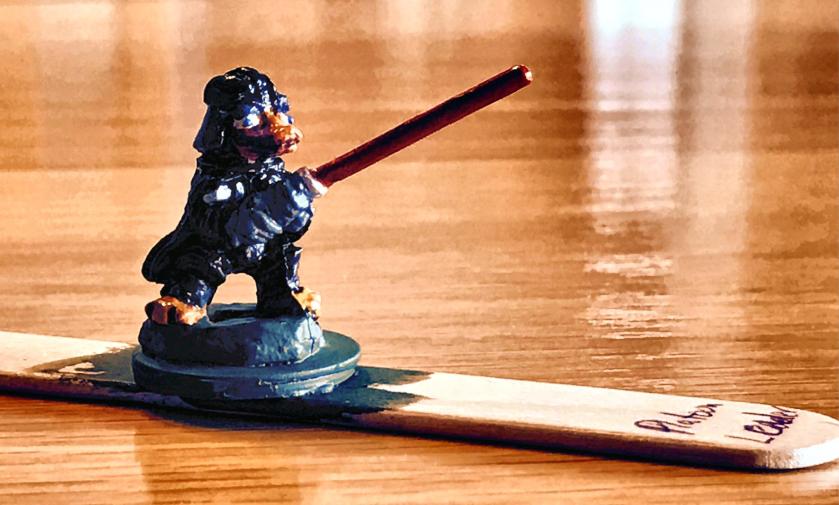
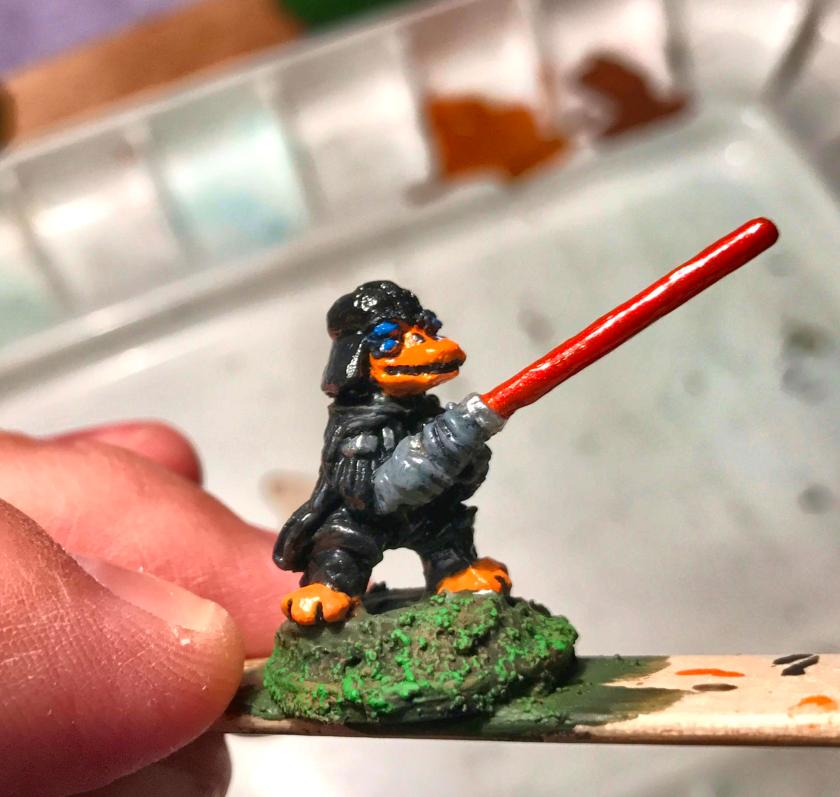
a. Duck Vader
The sequence was as follows:
Citadel “Imperium Primer” as a brush primer
Armory “Gloss Black” on helmet
Craftsmart “Orange” on feet and bill
Tamiya “Orange” on feet
Citadel “Ceramite White” on face and tail
Reaper MSP “Blue Liner” around eyes and pupils
Vallejo “Aluminum” on light saber beam
Vallejo “Chrome” on light saber handle
Vallejo “Steel” on chest details
Vallejo “Medium Gunship Gray” on gloves
P3 “Cygnar Blue Highlight” on eyes
Citadel “The Fang” on eyebrows
Citadel “Castellan Green” on base
Citadel “Nuln Oil Gloss” on cape and fingers
Citadel “Spiritstone Red” on light saber
P3 “Flesh Wash” on tail
Highlight cape with Vallejo “Black Grey”
Vallejo “Black” and “Glazing Medium” on cape and mouth slit
Deka Lack “Weiss” highlight on tail and face
Vallejo “Gloss Varnish” on helm
Army Painter “Anti-shine Varnish” on figure
Base coated
Finished Duck Vader
b. Mortar and mortar rounds
The sequence was as follows:
Citadel “Imperium Primer” as a brush primer
Armory “Gloss Black” on mortar base
Vallejo “US Dark Green” on mortar rounds
Tamiya “Titanium Silver” on mortar round tips and base
Craftsmart “Orange” on Duckfoot mortar feet
Tamiya “Orange” on feet
Citadel “Athonian Camoshade” wash on mortars
P3 “Sulfuric Yellow” on toes of mortar feet
Highlight with Tamiya “Orange” on feet
Citadel “Soulstone Blue” on mortar tip/fuse
Vallejo “Olive Drab” on mortar and rounds
Vallejo “Steel” and “Black Metallic” on mortar fins
Citadel “Fire Dragon Bright” on mortar rounds
Mounted the mortars and boxes and rounds on bases
Bases painted with Citadel “Lustrian Undergrowth”
Bases shaded with Citadel “Seraphim Sepia”
Bases highlighted with Armory “Musket Brown”
Bases highlighted with Citadel “Niblet Green”
Mortar dipped in Army Painter “Quickshade (Soft Tone)”
Mounted mortar and rounds got coat of Testors “Dullcoat”
c. Star Ducks
Citadel “Imperium Primer” as a brush primer
Citadel “Nuln Oil” on figures
Citadel “Ceramite White” on face and tail
Citadel “Fire Dragon Bright” on feet and bills
Reaper MSP “Blue Liner” around eyes and pupils
Citadel “Soulstone Blue” on eyes
Citadel “The Fang” on the jacket
Vallejo “Metallic Black” on helmets and infantry ray guns
Vallejo “Copper” on fuel tanks
Americana “Ebony” on trousers
Vallejo “Black” on mouth slit
Vallejo “Aluminum” on jet venturi on back
Vallejo “Gold” and “Chrome” on ray guns
Polly-S “Goblin Flesh” and Vallejo “Glaze Medium” on holsters
Vallejo “German Grey” on ammo pouches
Vallejo “Signal Red” on ray gun scopes
Vallejo “Gold”, “Chrome”, “Copper”, and “Signal Red” on WSD blasters
Different glove colors on lapels, helmet buttons, and gloves: Platoon Sergeant – Vallejo Metallic “Arctic Blue”; 1st Squad – Citadel “Ushabti Bone”; 2nd Squad – Americana “Bahama Blue”; 3rd Squad – Americana “Apple Green”; Bazookaducks – Polly-S “Demon Deep Red”; Mortarducks – Americana “Dioxazine Purple”
Armory “Musket Brown” and Vallejo “Neutral Grey” on cigars
Vallejo “Black” on bill vents
Vallejo “Light Orange” and “Glaze Medium” as glaze on bills and feet
Vallejo “US Dark Green” on bazookas
Citadel “Athonian Camoshade” wash on bazookas
Milliput (yellow) on bases
Bases painted with Citadel “Lustrian Undergrowth”
Bases shaded with Citadel “Seraphim Sepia”
Bases highlighted with Armory “Musket Brown”
Bases highlighted with Citadel “Niblet Green”
Figures dipped in Army Painter “Quickshade (Soft Tone)”
Figures coated with an application of Testors “Dullcoat”
Used various Army Painter tufts and meadow flowers on bases to designate teams
Base coated and ready for varnishClose-up of unit pre-varnishMortarduck loader, pre-varnishPlatoon Sergeant, post-dipPlatoon post dip, with Milliput added to bases
To wrap up, I am very happy that the unit is done. I am on the fence as to the use of the Army Painter “Quickshade” – the figures are darker and well-shaded, and should be well protected, but some details are obscured. I enjoyed my new Vallejo products and found that they really worked well. I also learned that orange as a color requires multiple applications and glazing to work well.
I learned much that I can use for future projects, and I hope that you enjoyed this blog entry.


