I have been very busy – too busy to effectively write blog entries lately. I have been working on terrain and game support for the two games I will be running at HAVOC on April 5th and 6th. Each will support 10 players – and its my goal that all have a blast! So, in the interim, please enjoy these two announcements – hopefully I get some other stuff painted and blog-worthy for you dear readers! The link for the convention is here.
I am looking forward to seeing a number of friends – including my old USMA classmate (and HAWKS member) Dave Wood who is also running a couple of games – so that’s exciting too.
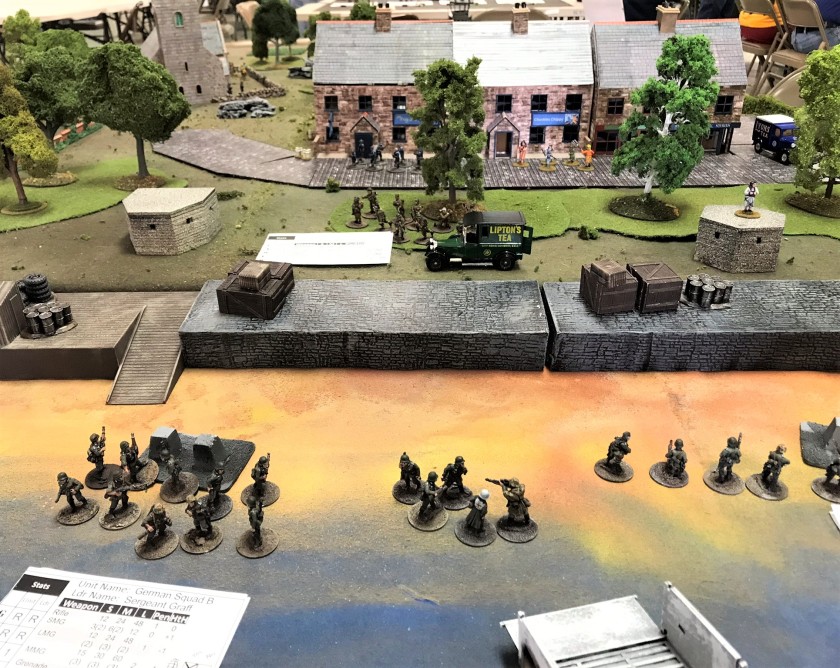
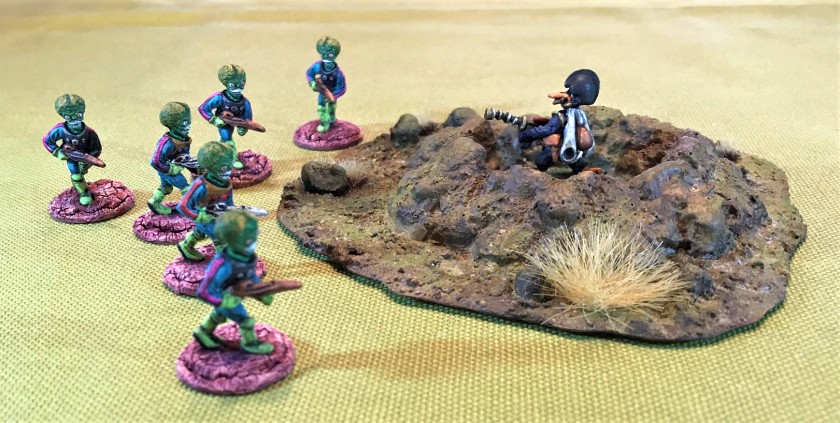
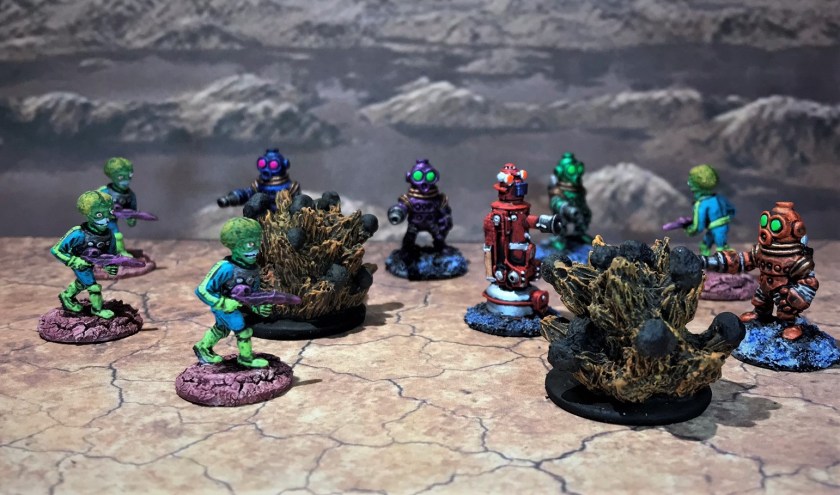
I’ll be running these two games!
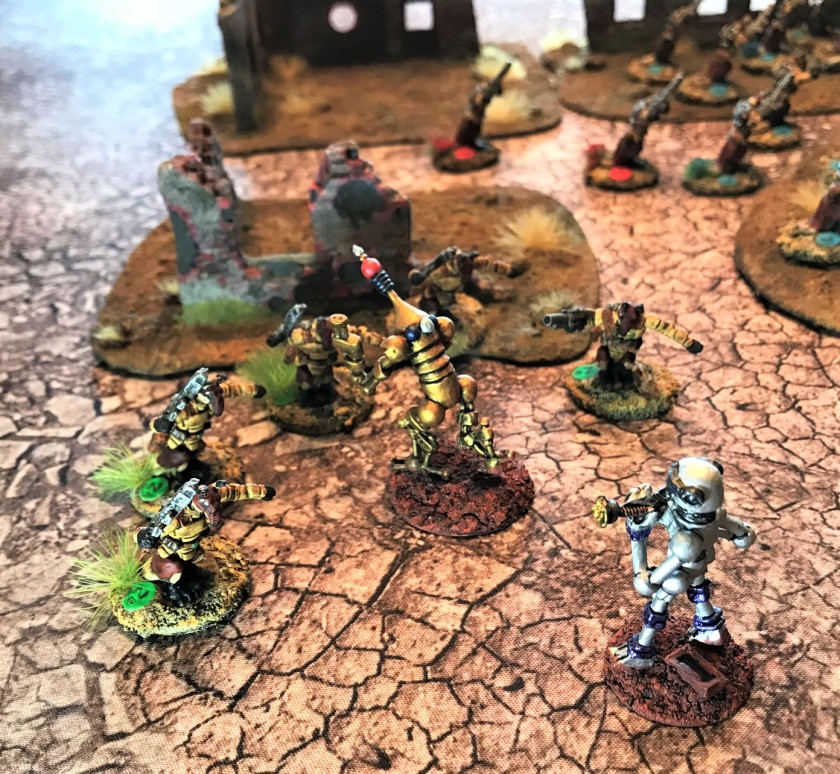
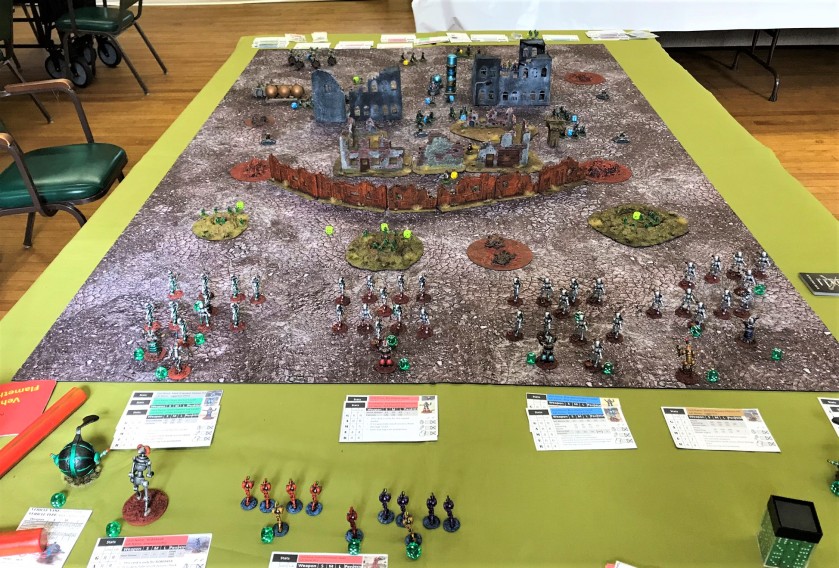
I updated this game with my Space Roos and have new terrain!
Some of the items on the activity list below could be fairly called double-counting, but hey, no blood no foul! I tend to count projects in terms of their distinctive nature, ie the building/assembling/creating processes to me are different than painting, as is converting figures. I did not cast anything this year or make any molds as I still have plenty of figures to paint, and my hope is to knock out more of them in 2019, as I will not need to make as many game pieces/game aids.
This list, which is a separate page on my blog, helped me to stay focused. The adding of the hyperlinks that you see on the items below helps me to review past projects as prologue for future ones.
Thanks for checking this out – and good luck to all in 2019! Hope I keep you amused and entertained!
2018 Total Projects: 2,036
244 figures painted
0 figures cast
47 figures assembled
33 terrain pieces made or assembled
28 terrain pieces painted
10 figure conversions
867 creations or components sculpted or scratch-built
0 molds made
807 game pieces/game aids made and/or painted
January: 91 projects
Creations/components sculpted or scratch-built (91):
2 A9 Cruiser Mark I tanks (15mm/1:100 scale), from Battlefront Miniatures (#BR020)
1 A10 Cruiser Mark IIA (Desert) tank (15mm/1:100 scale), from Battlefront Miniatures (#BR023)
1 A13 Cruiser Mark IVA (Desert) tank (15mm/1:100 scale), from Battlefront Miniatures (#BR026)
1 Valentine III tank (15mm/1:100 scale), from Battlefront Miniatures (#BR061)
1 Crusader II tank (15mm/1:100 scale), from Battlefront Miniatures (#BR032)
1 Crusader III tank (15mm/1:100 scale), from Battlefront Miniatures (#BR034)
1 M3 Grant tank (15mm/1:100 scale), from Battlefront Miniatures (#BR100)
1 Churchill II tank (15mm/1:100 scale), from Battlefront Miniatures (#BR070)
5 M3 Stuart “Honey” tanks (15mm/1:100 scale), from Battlefront Miniatures (#BR006) – Brits will get two, I am saving one for future Soviet Lend-Lease, one for future captured German use in North Africa, and one as an American M3 for future captured Japanese use in Burma or the Philippines.
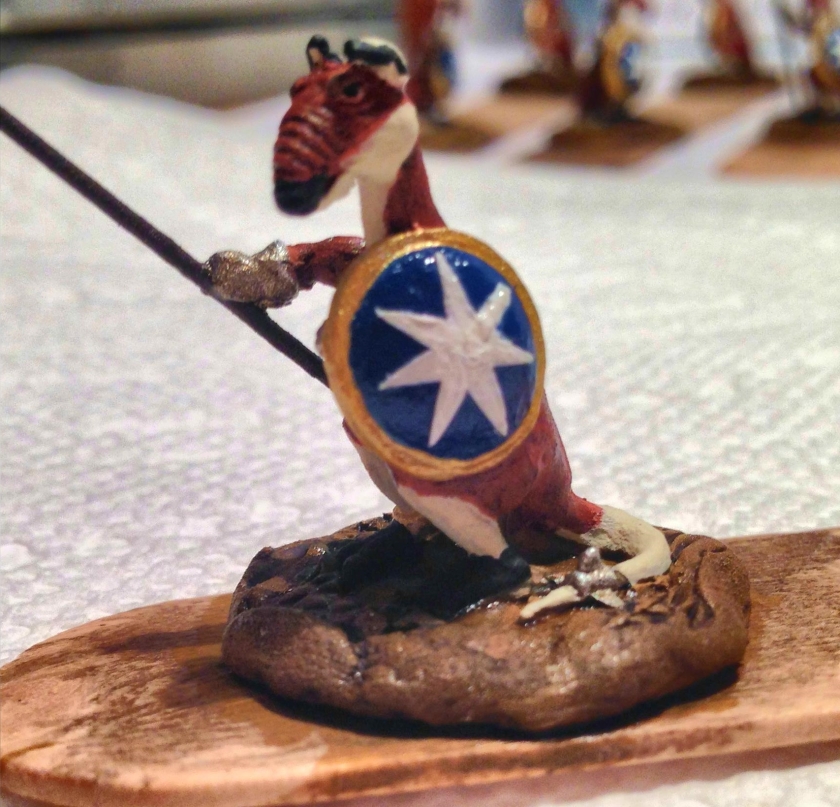
Back in 2016, I had finally completed an original Ral Partha “Rooman War Party” (#01-044) from 1977. This effort culminated in my building a 21-figure phalanx of pike-armed anthropomorphic kangaroos, replete with Australian 7-pointed stars on their shields.
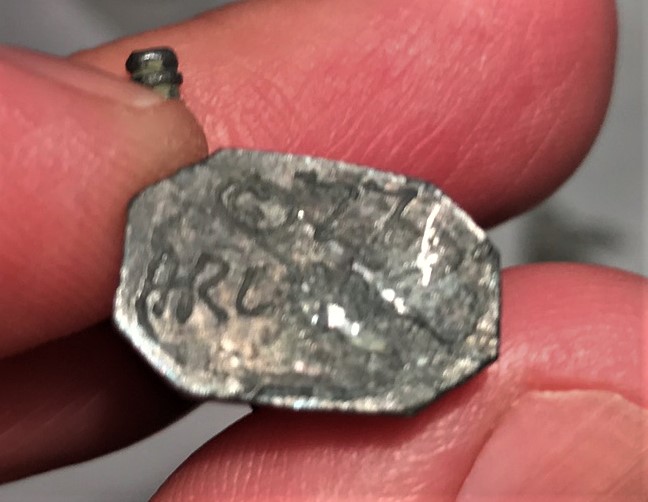
At that time, I also began to see that others, like the wonderfully named Imperial Rebel Ork (IRO for short) were doing amazing “kit-bashes” and conversions with different models. Of course, IRO uses plastic, and I’m more of an old school metal guy. I also was getting more into retro sci-fi figures and using them for skirmish games. I was inspired by IRO and Azazel (both Aussies) to push myself to do my own conversion. So, I combined two figures – a Ral Partha Rooman (25 mm scale) and a Reaper #80010, “Nova Corp Sergeant” (28 mm scale), made a mold, and cast a bunch of “Space Roomans” (in metal of course). You can read about that somewhat massive project here. Getting around to painting these took a bit longer, and even my good friend Buck Surdu painted some that I gave him much quicker than I did.
Ral Partha RoomanThe Reaper figure (circled) that I used was in a bunch of figures I got on eBay
Azazel is kind enough to run a monthly community painting challenge – and October’s was “Unit-ed October”, and focused on units. So, I took this opportunity to get these done. Of course, this effort was slightly affected by some gaming and the Red Sox winning the 2018 World Series (YES!), but I got them (the Space Roos that is) done by October 31st, 2018. I will use them in Combat Patrol™ games.
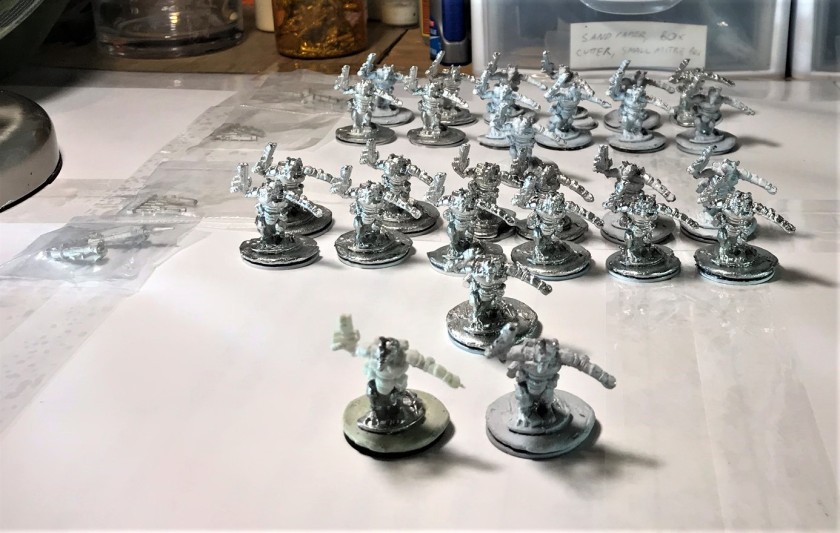
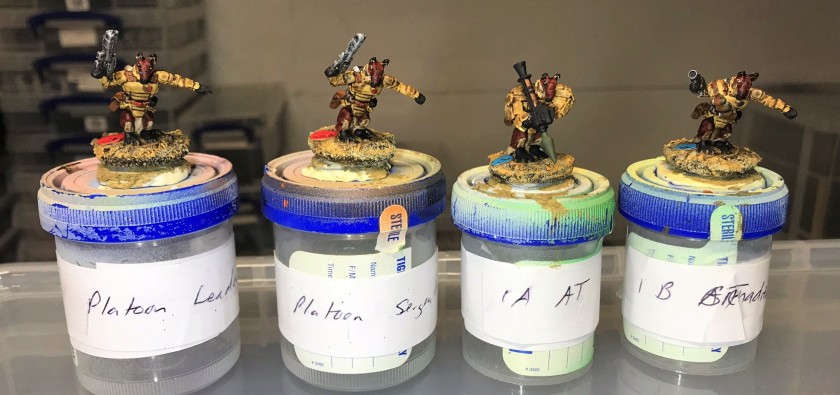
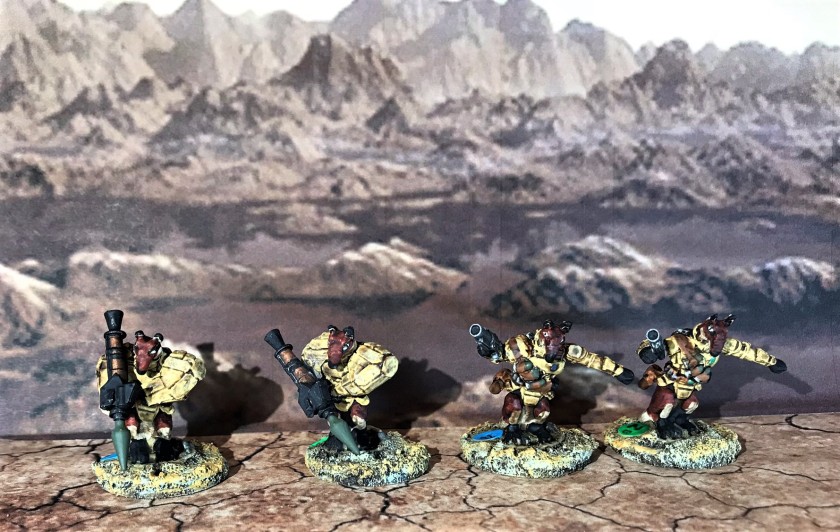
I decided to paint the Roos similar to the way I did the Roomans, except that I wanted a more dusty and dirty look to them, as they are intrepid infantrymen (infantryroos?). I also wanted to convert a couple of figures per squad (yes, a conversion of a conversion) to carry different weapons. In this case, I used a grenade launcher sprue from RBJ miniatures to make two Roos into grenadiers, and a different RPG sprue from RBJ to make two other Roos into anti-tank troopers. So my 28-figure platoon would consist of:
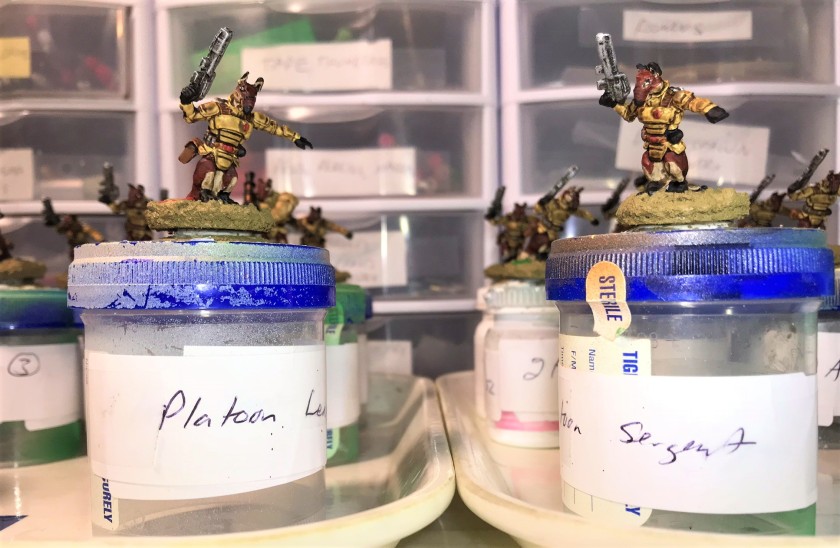
Platoon Leader
Platoon Sergeant
2 Space Roo Squads consisting of:
1 Squad Leader in each squad
2 teams of:
1 TL per team
4 Space Roos with assault rifles/blasters per team
1 Space Roo per team with either a grenade launcher or anti-tank weapon
Two squads make a light platoon, but I think that they will be a potent elite fighting force on the tabletop. Also, these Roos are equipped with body armor on their torsos, and importantly, jet packs! I will also give them a higher rate of movement similar to what I did for the Space Phraints (1½ cards of movement). I cleaned and filed the models, and prepared them for conversion and priming by mounting them on 1″ steel washers.
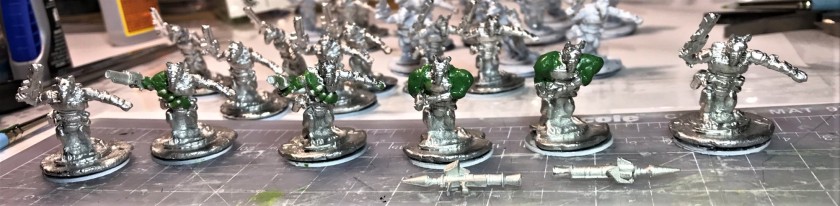
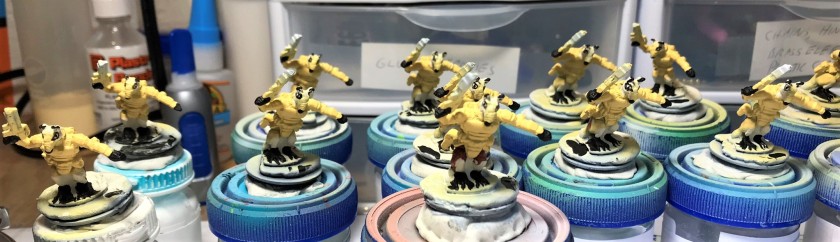
The two squads behind their platoon leader and platoon sergeant. The weapons for conversion are on the left.
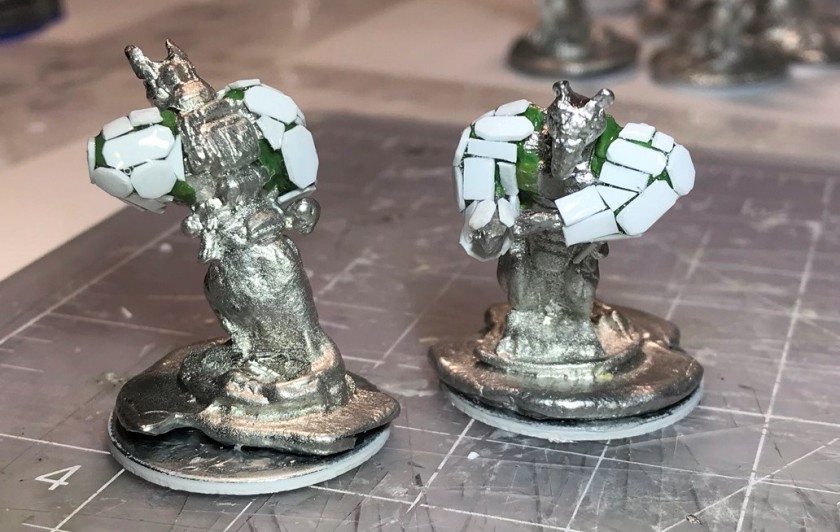
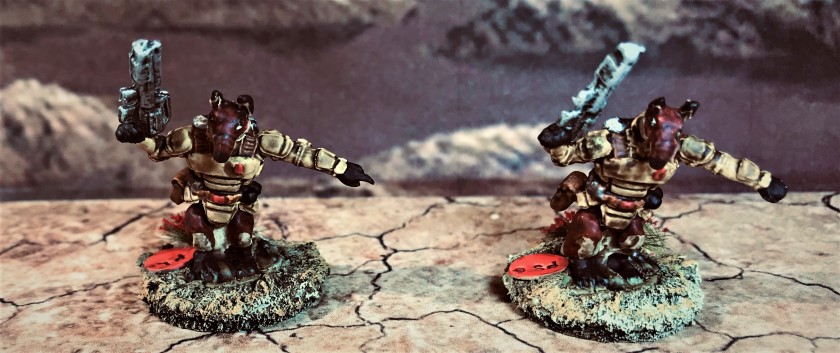
I had a tough time reorienting the arms of the RPG-armed Roos, and I needed to break them and use green stuff to create a proper pose. Pinning was not feasible unfortunately. I also used green stuff to mount the grenadiers’ launchers and to give them bandoleers of grenades. The grenadiers looked fine enough for the tabletop, but I was unhappy with the RPG Roos, as they looked “Popeye” like in their arms. As the Space Roos body armor gives them an angular body look, I decided to use a series of very small 2 mm polystyrene chips to create an “armored look” over the arms by affixing them with Gorilla glue.
The green stuff conversions – note the bulbous arms that needed attention on the AT Roos.My fix for the arms. You can see that my casts varied in terms of “crispness”. Clearly, I was going to need the brushwork to make these work.
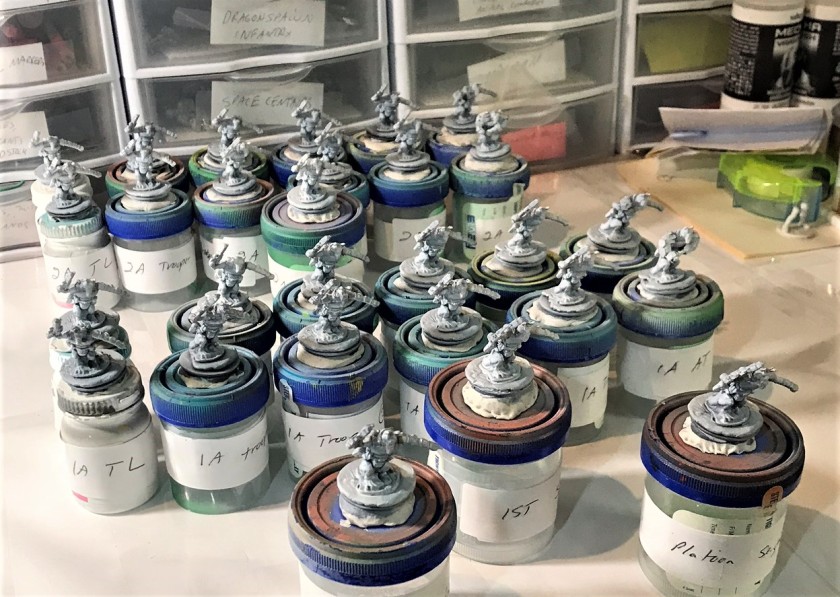
I ended up double priming these figures, as I knew that I would need to fix much with brushwork and painting. For example, there was a large indentation on the Roos’ left feet (paws?) that I needed to paint over. I thought that a thinned brush priming followed by a thinned airbrush priming would help. I think it did.
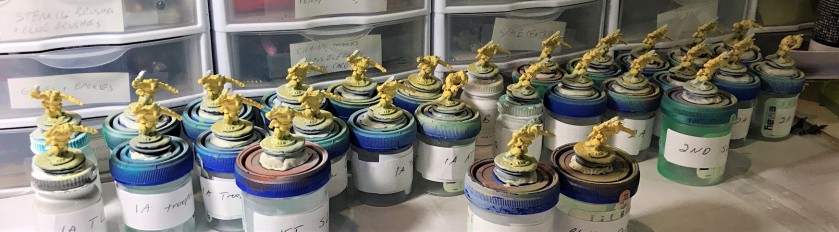
The platoon primed
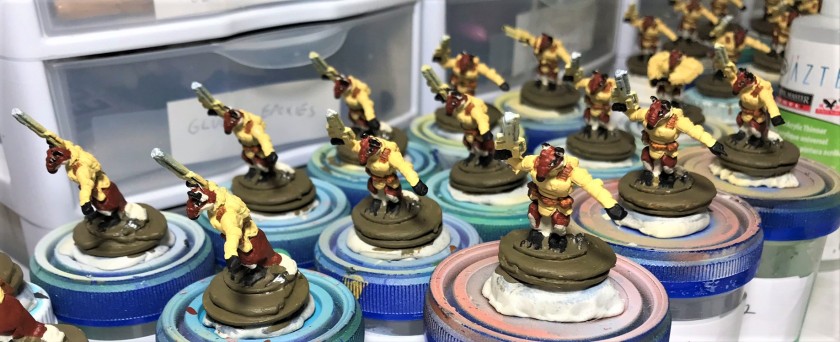
For their base colors, I went with a yellowy/sandy look for their armor, which I thought would reflect a desert or dusty deployment.
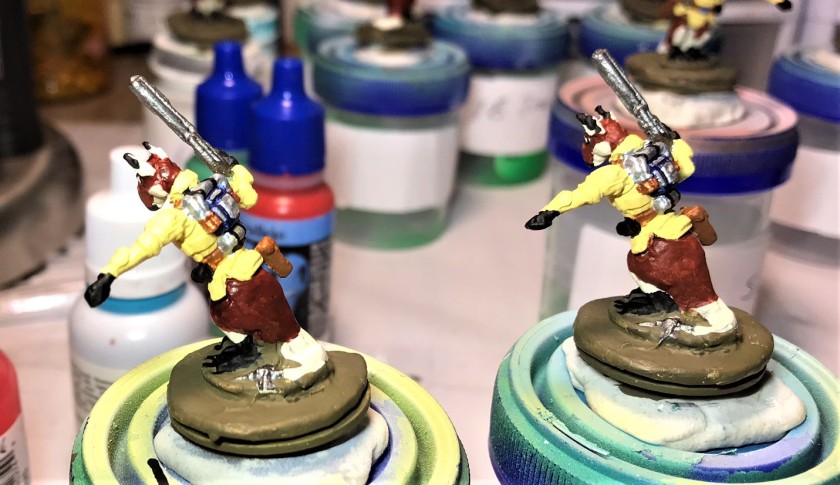
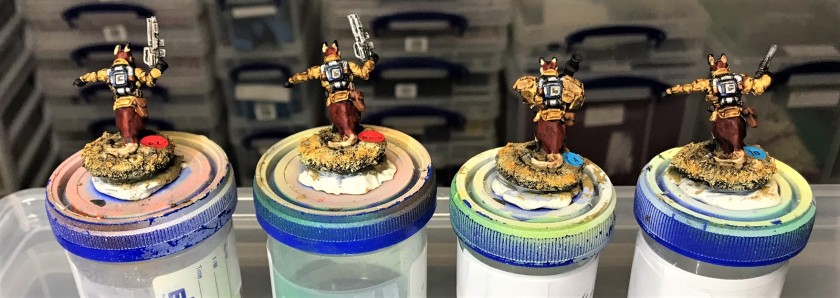
I airbrushed the armor with a yellowish/sand color. The idea was to use washes to bring out details (and allow me to obscure casting abnormalities). This would give me a nice camouflaged look at the end.Outlining the eyes, ears, feet, and gloves in black. I went with a red kangaroo coloring for the Roo parts .Moving on to fur painting. Inks and washes gave more depth to this later on.Jet packs!The bottom torso on the left has been painted with additional inks for depth.Comparison of the weapons – before (left) and after (right) dry brushing. The blue is indicative of the 1st Squad.
One of the issues I really want to focus on when I build a platoon is to make it easy for the players (some of us with “experienced” eyes) to see and identify a figure’s squad and team. I got some steel punches, and some jewelry stamps to make 1/4″ and 5/16″ placards that I could mount on the figures’ bases.
My 1/4″ punch and the two jewelry stamps next to the polystyrene placards. I did use 5/16″ placards for the platoon leader and platoon sergeant.The placards, stamped and painted. I used a wash to fill out the letters and numbers.Placard close up shot
Next, I washed the figures twice with Citadel “Agrax Earthshade”. I then mounted the RPG’s with Gorilla glue.
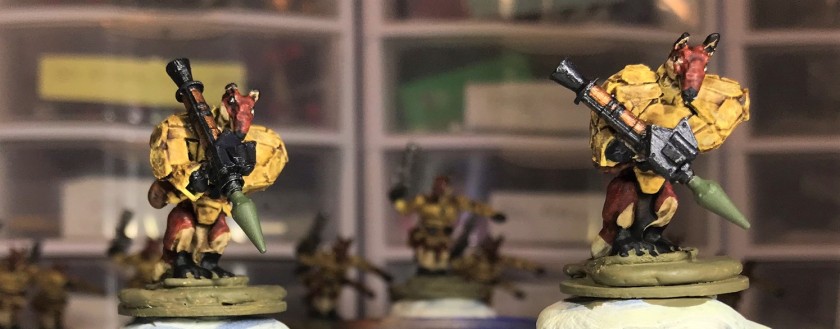
RPG Roos!
Lastly, I used a whole bottle of Citadel “Armageddon Dunes” to fill and shape around the bases and let them dry and harden. The placards were mounted into this paint. Then I gave the bases a wash with “Agrax Earthshade” and two different dry brush applications (Polly Scale “WWII German Armor Light Tan” and Vallejo “Light Brown”). Then I gave everything two coats of matte varnish.
After filling the bases The platoon leader and platoon sergeant almost ready!Nice close up of the bases. The shading gave the body armor the dirty effect that I wanted.The four conversions of conversions, front……and back
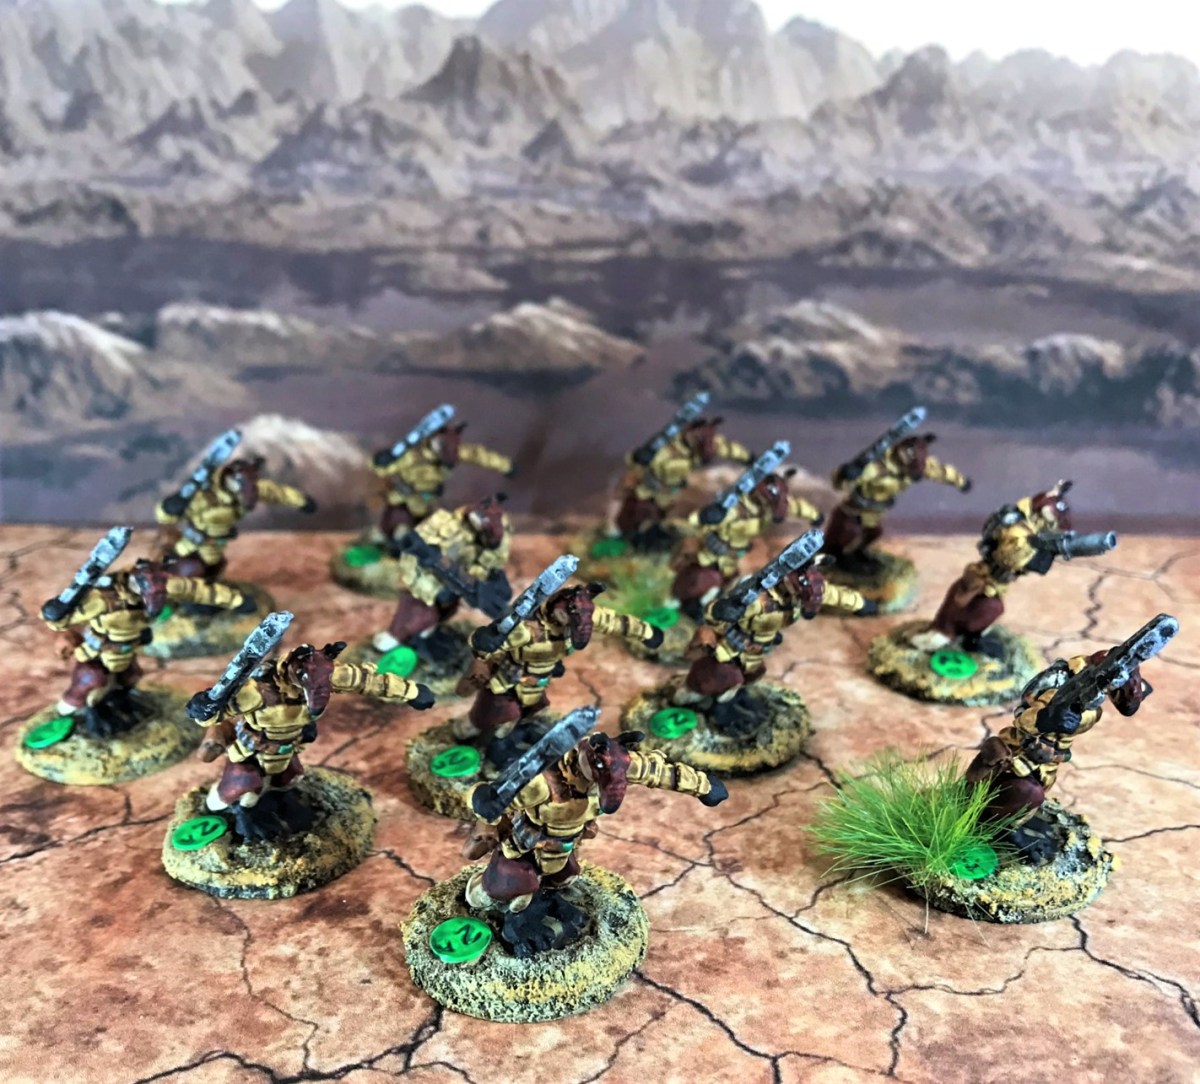
After adding some tufts from Shadows Edge Miniatures for even better identification, the platoon was finally done (I LOVE their tufts). I am happy with it, given the work and effort it took to bring it to life. So, now, appropriately, I will share with you some eye candy!
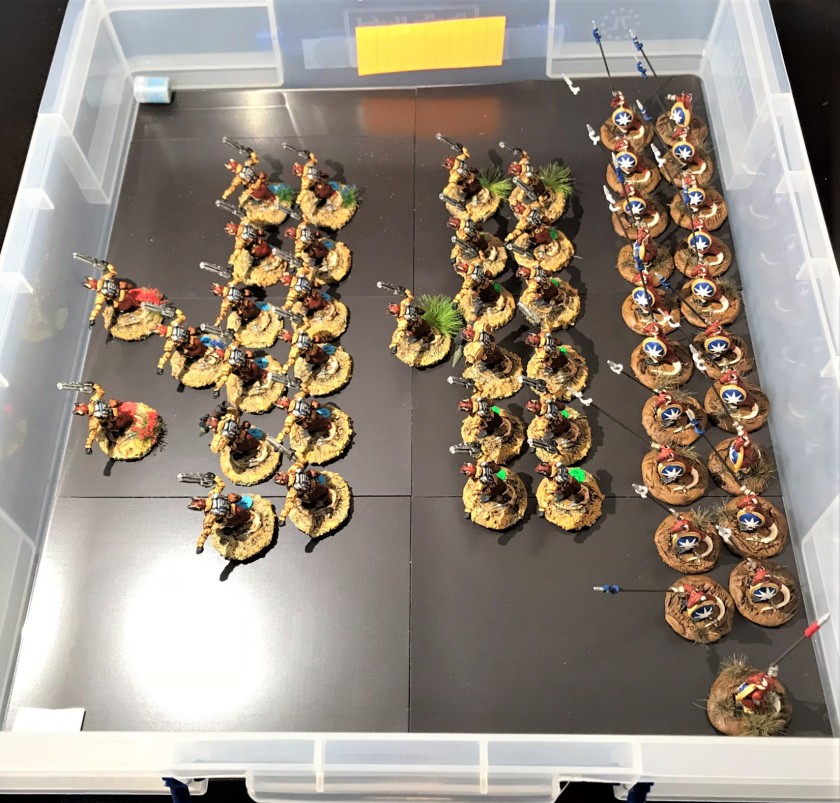
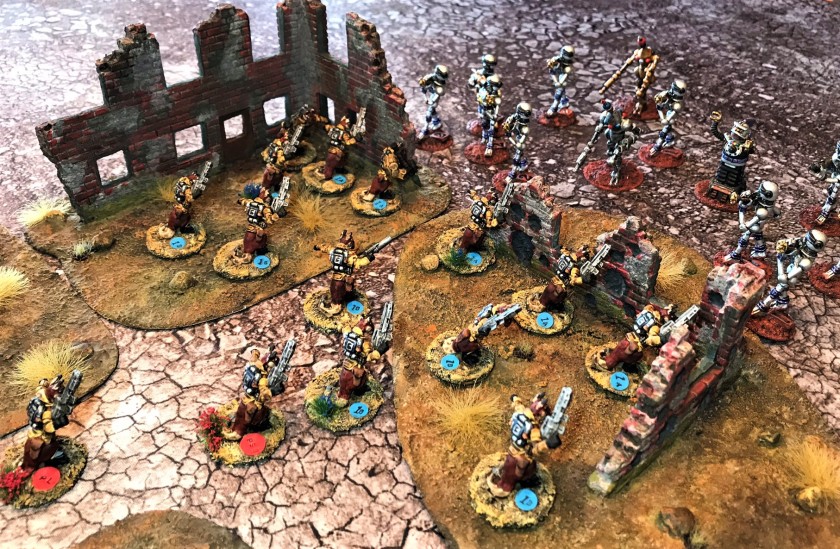
The platoon HQ, frontal view…and rear view, with a good view of the jet packs, red placards, and tufts. 1st Squad with blue placards2nd Squad with green placards and green tufts on the leaders.The AT and grenadier RoosThe Space Roos meet their ancestors, the Roomans!My box of Roos and RoomenThe Space Roos’ 1st Squad holds off the WarbotsThe 2nd Squad close Assaults Juggerbot
I am looking forward to seeing these guys in action soon. I appreciate your looking and hope that you enjoyed this post. I always read your feedback, so please let me know what you think in the comments section at the bottom of this post.
I dedicate this post to all my Aussie friends!
PAINTS, INKS, GLAZES, WASHES, AND FLOCKING USED:
Citadel “Imperium Primer”
Vallejo “Surface Primer – White”
Vallejo “Flow Improver”
Vallejo “Airbrush Thinner”
Testors “Universal Acrylic Thinner”
Vallejo Mecha Color “Sand Yellow”
Vallejo Game Air “Red Terracotta”
Citadel “Flayed One Flesh”
Americana “Bleached Sand”
Americana “Black Tie – Satin”
Vallejo “Black”
Vallejo “US Dark Green”
Tamiya “Copper XF-6”
Tamiya “X-20A Thinner”
Tamiya “XF-49 Khaki”
Vallejo Game Air “Weiss”
Tamiya “Gun Metal X-10”
Vallejo Game Air “Steel”
Vallejo Game Air “Beasty Brown”
Vallejo Mecha Color “Light Steel”
Vallejo Mecha Color “Dark Steel”
Vallejo Mecha Color “Metallic Blue”
Vallejo Game Air “Electric Blue”
Vallejo Mecha Color “Metallic Green”
Citadel “Hexwraith Flame”
Vallejo Mecha Color “SZ Red”
Secret Weapons Washes “Just Red” (ink)
P3 “Brown” (ink)
Secret Weapons Washes “Armor Wash” (wash)
Citadel “Nuln Oil Gloss” (wash)
Citadel “Agrax Earthshade” (wash)
Gorilla Glue
Citadel “Armageddon Dunes”
Polly Scale WWII “German Armor Light Tan”
Vallejo “Light Brown”
Vallejo Mecha Varnish “Matt Varnish”
Shadows Edge Miniatures 6 mm “Dark Forest Red” (tufts)
Shadows Edge Miniatures 6 mm “Dark Blue” (tufts)
Shadows Edge Miniatures 12 mm “Wild Tufts” (tufts)
Thanks again for looking and for your feedback! ESPECIALLY AUSSIES!
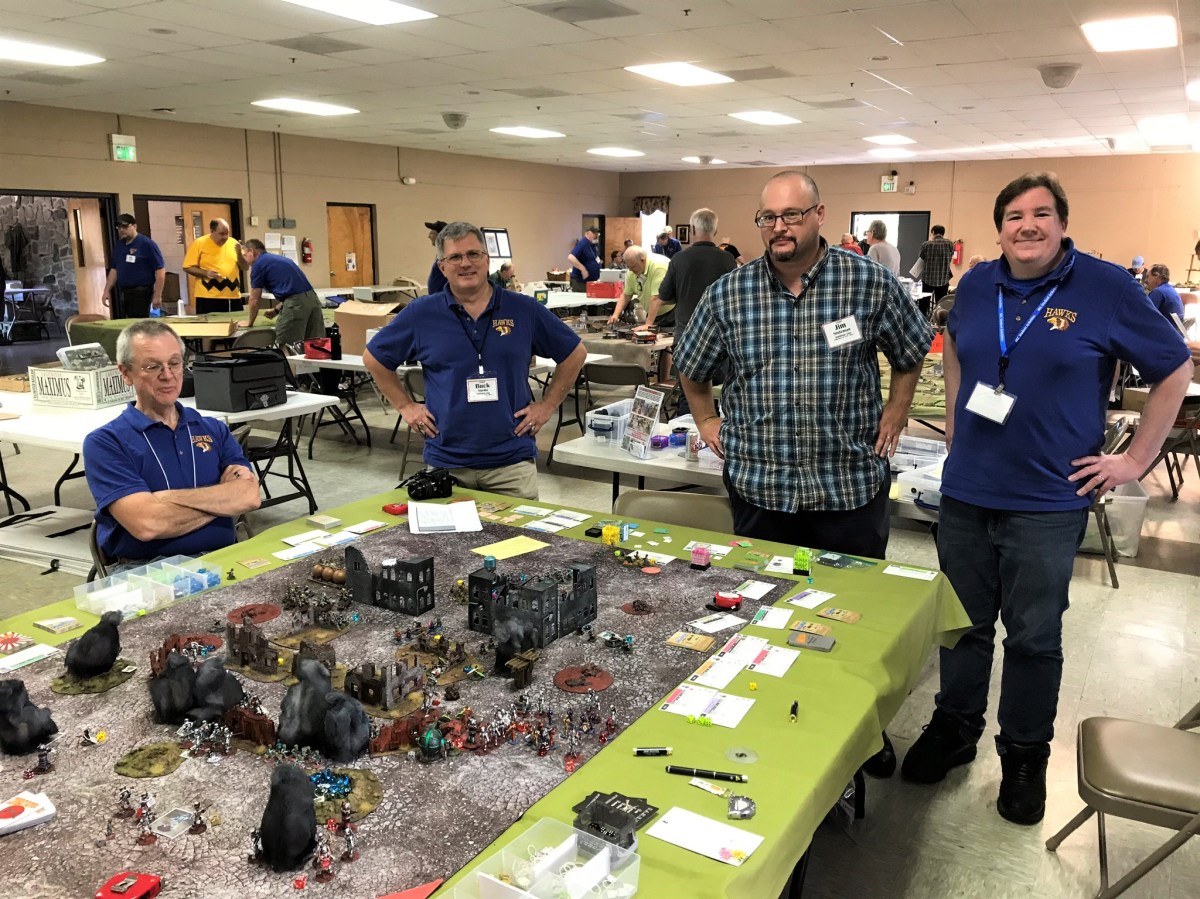
The H.A.W.K.’s held their BARRAGE convention in Havre de Grace, Maryland at the end of September 2018. They had over 70 gaming events, and it had been on my “hoping to attend” list for most of 2018. Also on my wish list was to be able to run my “Attack of the Warbots” game using the Combat Patrol™ card-based system. I was hoping to attend but was unsure (for several reasons) up to a week beforehand as to whether I was going to be able to go or not. In the end, the stars aligned, and I also got to run my game! Box checked!
There was a lot going on here – and I saw a lot of great games. The following is just a snippet, through my eyes, of the experiences that I had. The games and the game masters that I saw did an incredible job. Truly impressive. Certainly, the H.A.W.K.’s put on a great gaming convention and my kudos to all of them and the other game masters.
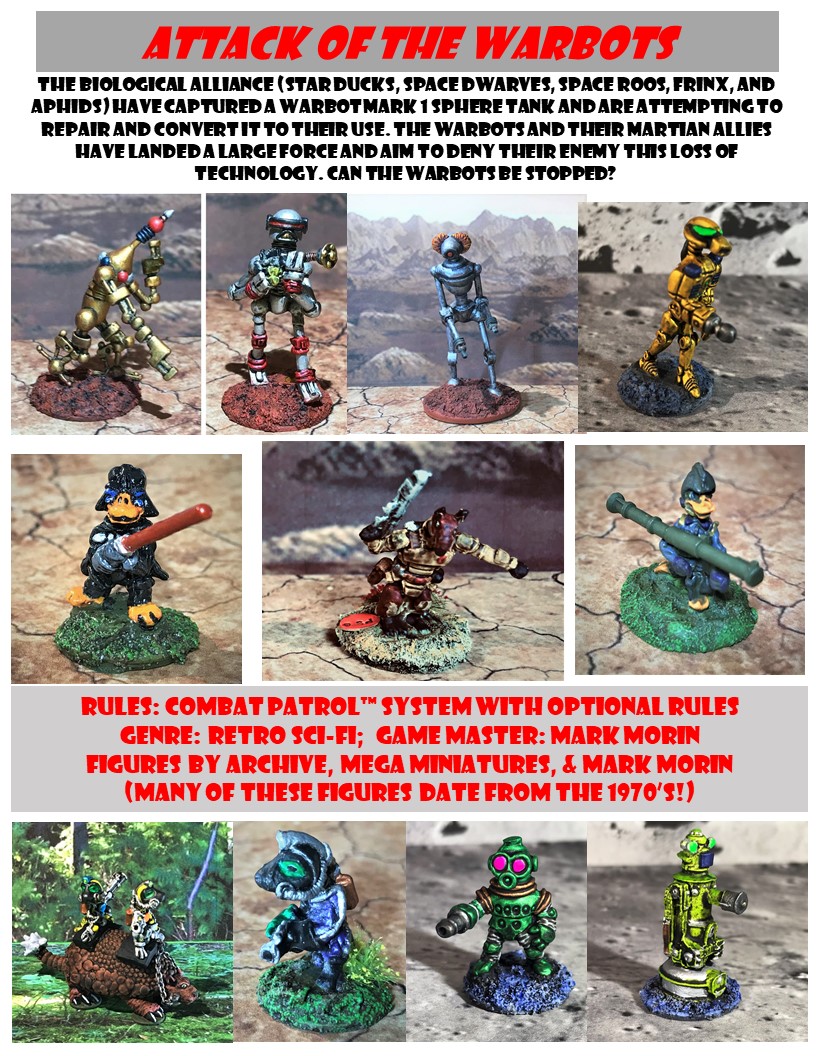
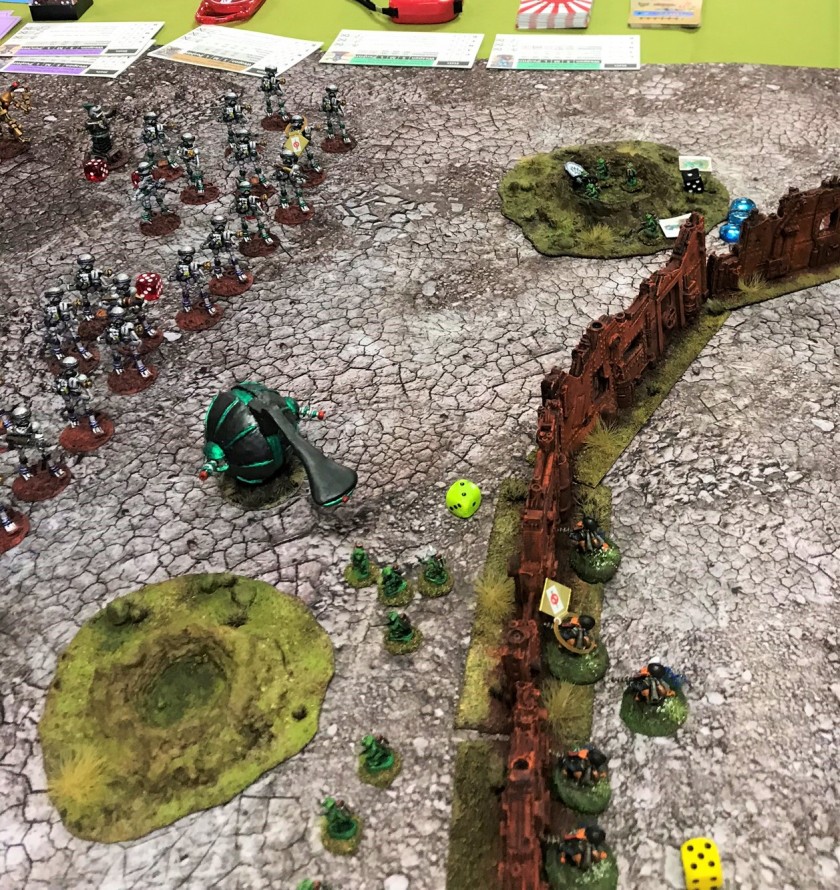
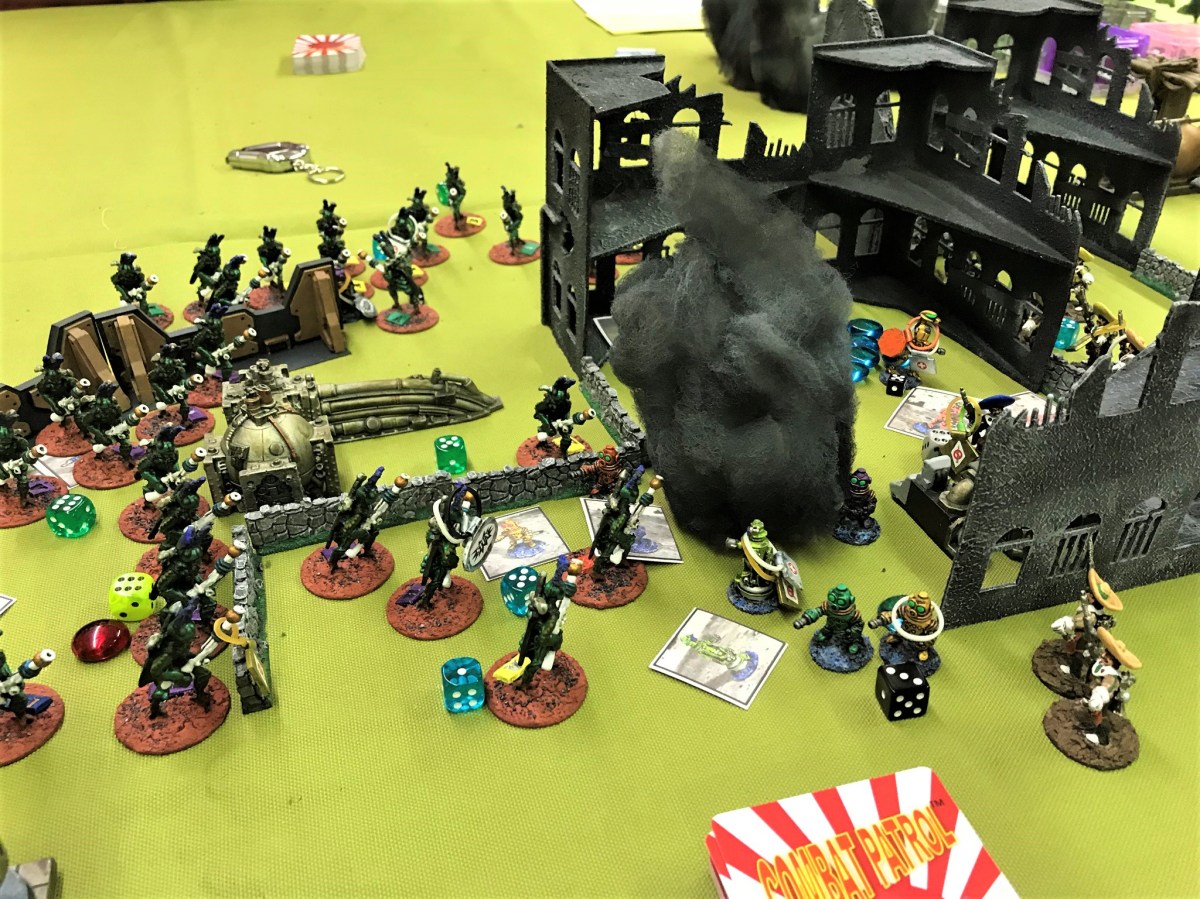
I started on Friday with running my latest iteration of “Attack of the Warbots” with my Archive, Mega Miniatures, and Wargames Supply Dump figures, all of which are OOP. I had seven players, with three on the Warbot side, and four on the defending side. Of note, I was lucky to have had as players both Buck Surdu (my old West Point buddy and the author of the Combat Patrol™ rules) and Dave Wood (my old West Point roommate who introduced me to tabletop gaming in 1982). I also had the good fortune to have Greg Priebe playing alongside Buck – and Greg wrote the Star Wars supplement for Combat Patrol™. Buck is very fond of ducks (in a good way of course), and was in command of Duck Wader and some Star Ducks, while Dave was on the Warbot side with a couple of Mark 1 Sphere tanks. Greg commanded the Aphids and the Frinx. A few other players were there but I did not get their names (sorry). The Warbots needed to recapture a lost Mark 1 before the defenders could repair it and get it off the board.
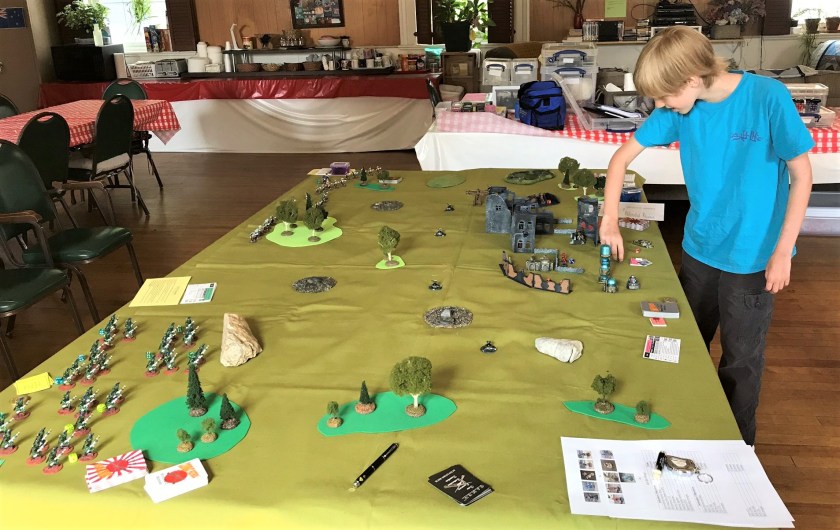
My flyer for the “Attack of the Warbots”Game set up from the attacking Warbot side. I got set up early, which is why there seems to be an empty hall, but it filled up quickly.Early action – the defenders gained the initiative and the Red Warbot squad on the left of the photo took casualties from effective Star Duck and Aphid fire. The Warbots smartly maneuvered a Mark 1 tank to attempt to breach the rusty steel wall defenses.Closer view of previous action showing Aphids in a bad place.Aphids strike back! They get a critical hit on a Red Warbot’s power plant, triggering a catastrophic explosion (smoke plume), which damaged several of its nearby comrades. This made this fire team have to make multiple morale checks (as shown by the red beads). One of these pinned the team in place for the remainder of the game. As the critical hit catastrophically destroyed the smoky Warbot, that plume would restrict line of sight for that pinned team as well!Dave Wood prepares to destroy the wall with his Mark 1’s Death Ray, and……the wall is breached, frying a few defending Star Ducks.Roberker moves towards the breach.Meanwhile, on the other flank, Duck Wader used a Force Leap to engage the Green Warbots in melee. He was able to give the Aphids on that side a brief respite. Wader got initiative again before the Warbots, and was able to Force Leap back to safety after damaging several Warbots with his light saber.Back on the right, the Warbots get one of their two Mark 1’s within a few inches of the building where the captured tank was being repaired. SSG Canvasback (yes, he has a name!), the 2nd Squad Leader, fires his Quackers Repeating Blaster and got a lucky hit, knocking out the tank’s left auto cannon sponson. This allowed enough suppressive fire cover for the Star Duck Squad led by SSG Gadwall to close assault the tank with satchel charges……and successfully knock out the Mark 1!! Roberker, a giant flame-throwing robot was following closely behind, but another critical hit from Greg Priebe’s Frinx immobilized the giant robot, stalling the attack.At the same time on the left flank, Duck Wader again Force-leaped over the wall into the midst of the Green Warbots, and launched a Force-Blast attack. This sent waves of destructive energy through the closely-crowded Warbots. Many were damaged, and one even had a power plant explosion, which caused even further damage to that team and multiple morale checks due to a second explosion. These morale checks eventually disrupted the attack as the Green Warbots either ran off the table, or got into a massive traffic jam at the breach. Here, you see Duck Wader after he had dispatched the Warbots. He was wounded, but had wreaked havoc on the Warbots.At this point, the other Warbot tank was immobilized, and the game was called as a defenders’ victory. It was a near-run thing as the defenders were unlucky in rapidly repairing their captured Mark 1, but they would have been able to complete the repairs. Here are some of the happy defenders – Rob Dean, Buck Surdu, Jim Stutzman, and Greg Priebe.
I then turned into a player, and decided to try a Lion Rampant game ably run by Philip Jones. We were the Vikings who had seized prelates, monks, and treasure in a raid, and were trying to escape to their longship, while being pursued and blocked by Welsh troops.
“Llandaff is in flames, the bishop and his monks carried off- but the men of Glywysing have the Vikings trapped between two forces as they try to get back to their ships. Will they break through or will Bishop Cyfeilliog be rescued?”My forcesOur initial deployment – Welsh would block us and harry us from the rear.The Welsh harry from the rear and Dave Wood prepares for battle.Vikings moving out.Crossing the river and all looks good……until Welsh forces combine to slow and stop us.A monk escapes!
Our casualties mounted! The game points were tallied, and rightly called for the Welsh. I did find the system fun, and Philip ran the game in a very fun way.
After this, I was walking around, and was recruited for a “What a Tanker” game run by Brian Lipscomb. It was set in North Africa, 15mm scale, with the British set against the Germans and Italians. Brian asked if I wanted to have a German or Italian tank. Being a sucker for a challenge, I of course said Italian. I was given a Fiat M13/40 tank.
My M13/40 tank sheet. Brian did a nice job with using magnets for managing data on the sheets.I am pursuing a rear shot on a British Stuart “Honey”. He slipped away, for the moment…Don Hogge pursued me in his Crusader II to take the pressure off the Honey. Don shot at me and missed. I rotated, fired, and smoked his tank.This allowed me to renew my approach on the Honey. I got hit with minor damage to my running gear. I returned fire, and got the Honey with my first shot. That’s two tanks! Later, I finished off a Matilda II for my third kill (on the deep left) – and all this with an Italian M13/40!
Needless to say, I really enjoyed this game and the mechanics. Brian is a superb GM. More on that in a bit…but this was a fun way to end Friday!
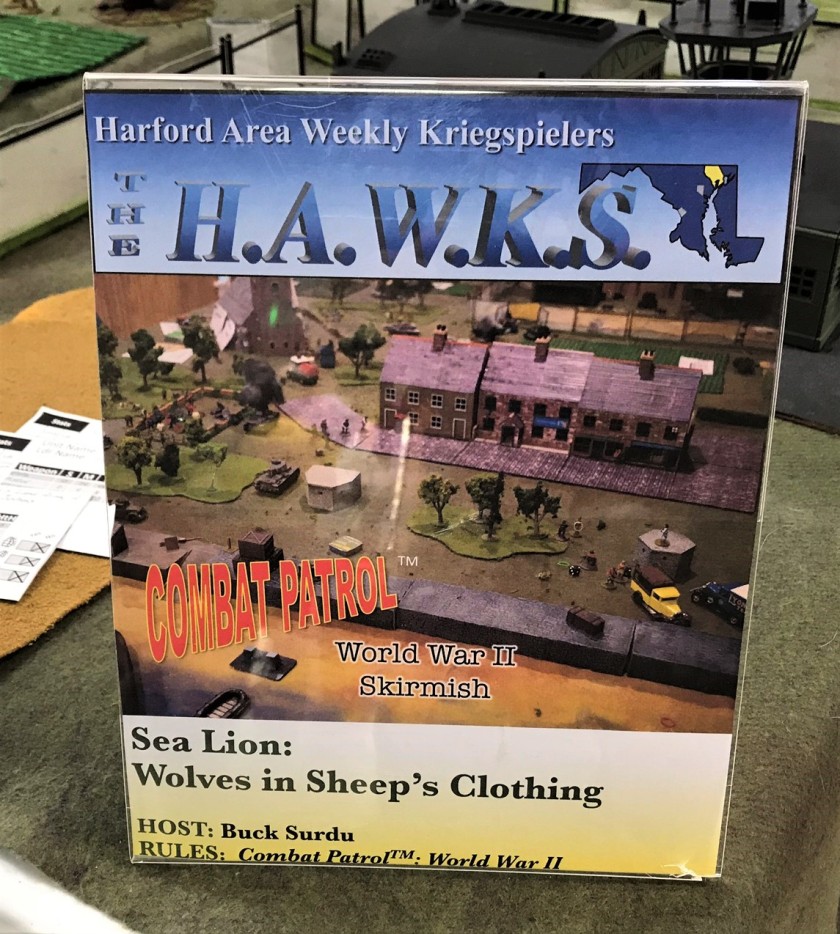
On Saturday, I had really looked forward to playing Buck’s Sea Lion game. There weren’t enough players, so it was called, BUT I wanted to share the unbelievably beautiful game set up. Buck will run this game at Fall In and you can read about a play test of the game here.
Rear of the tableSome Women’s Land Army troopsGreat scenery – these are the Germans assaulting the beach.Another view of the beach and wharves. Landing craft in front held two 35(t) tanks, and a Panzer III.Nice bars with British sailors and folks hanging out…or are they?
So again, I wandered around, and saw another Brian Lipscomb “What a Tanker” game, this time set on the Eastern Front. After Friday, I was happy to give it another go. I was teamed with two others who had not previously played the game. We had a certain number of points, so I volunteered to take a lesser tank (a T-70 light tank) so that they could have better ones – in this case a T-34 and an SU-76.
Love what he did with these data sheets and the magnets! This is for the T-70.I maneuvered alongside the T-34 and put the killing round into a Panzer IV. Kill #4 for the weekend.
At this point, Don Hogge and Buck Surdu visited the table put up a dollar each for anyone to kill me! Talk about motivation! We were being outmaneuvered by the Germans at this point, so I moved back and used my kill points to upgrade my T-70 to an SU-85.
My upgrade to an SU-85.
The scenario that Brian devised also had infantry (controlled by him as the GM and using a random events chart) – with the town as an objective. I used the SU-85 to hammer the German infantry as Soviet infantry was arriving. I killed four stands and got a bunch of kill points. I reminded my teammates that I had started off as a T-70, and they gave me one extra kill point, which allowed me to get a monster ISU-152. At the same time, the Germans were reinforced with a Jagdpanther and a Sturmgeschutz III.
My last upgrade – the ISU-152.
Immediately I maneuvered the ISU-152 to hit more infantry. The Germans decided to try to get me with their Jagdpanther and the Sturmgeschutz III. I moved my tank destroyer next to a building to face the Jagdpanther down the main street. He fired.
He missed!
I returned fire and destroyed the German tank destroyer.
My ISU-152 nails the Jagdpanther. Kill #5 for the weekend.Jagdpanther burns.
At this point, the Sturmgeschutz III was maneuvering to get a flank or rear shot on me. As the ISU-152 is very heavy and slow, I was only able to spin to face the Sturmgeschutz III. It was a question of initiative – and I got it, hit the German assault gun, and got kill #6 for the weekend (and the $2 bounty on me!).
Kill #6!
I then participated in a play test for a near future warfare scenario using cyber warfare with the Look Sarge No Charts system. It was run by Dave Wood and was interesting to do.
Dave explaining the system.Assault on the hill.
Every BARRAGE there is a pickup WWI air combat game that is a hoot. I’ve never managed to get a kill in the game before, but I did this year as a German. Eventually, I got shot up and had to glide home.
WWI fighter game – I had the red plane in the center.
The last tabletop game that I played in was a First Boer WarCombat Patrol™ game. I was on the Boer side and we had to defend our wagon from being seized by the British. The game was fun, but there was a low point. We had a couple of players from New Jersey who vanished mid-game without so much as a notice that they were leaving. I think they hated defending. Anyways, we struggled on and ended up winning the game. The other players were great sports, and were great company.
Boer War game
After this game at the end of the con, I got to play in the traditional LARP pirate game. I had a nerf crossbow (treated by the GM as a musket) that took out Buck with a shot to the glutes. My weapon later misfired, and the resultant damage took me out. That LARP is always a fun game though!
The flea market presented many vendors and items for sale. I grabbed a Verdun game that I had last played with a gaming club in Monterey, CA in 1985! I’m not sure when I will get to play it, or with whom, but it was OOP in 1985, so a nice find! Buck and I visited the Verdun battlefield in 1987 or so, so it was nice to get this game here.
I must congratulate again the H.A.W.K.’s on a well-run con. Little Wars TV attended and filmed so you can see more of the convention here.
Thanks for looking and as always, I love any feedback!
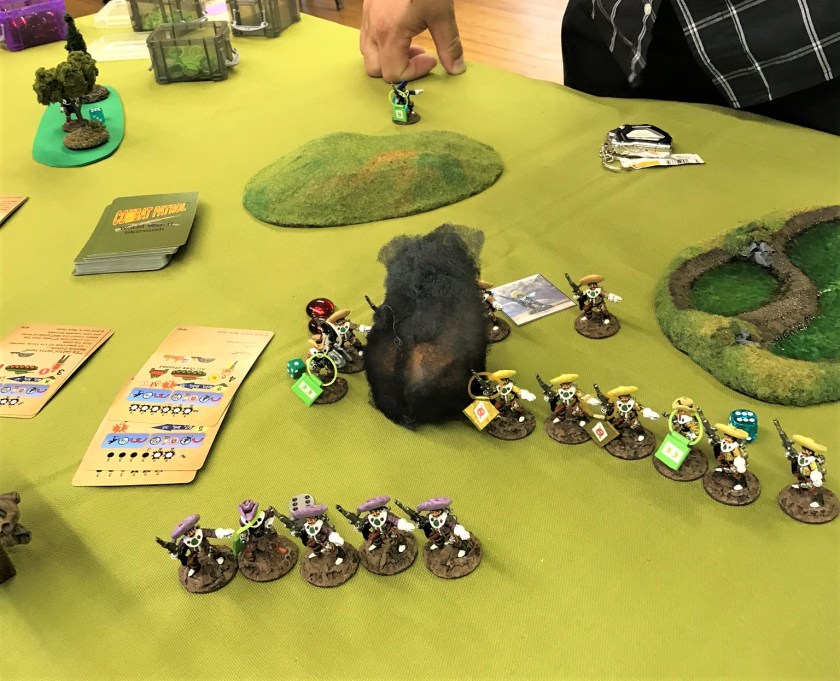
We had a good showing on Saturday at the September Mass Pikemen Gaming Club session. We played an “Attack of the Warbots” scenario using the Combat Patrol™ system.
The biological Alliance (Star Ducks, Space Dwarves, Frinx, and Aphids) have captured a Warbot Mark 1 Sphere tank and are attempting to repair and convert it to their use. The Warbots have landed a large force and aim to deny their enemy this loss of technology. Can the Warbots be stopped?
This one, like all of the games that I run, was modified for playability based on experience and the number of available players. This time I also got to add some new terrain and my new Wastelands gaming mat (which I described here and here). I did not take as many pictures as I had wanted to – but what I have is below.
The Aphids held up the Warbot attack and were almost wiped out by the Warbots. However, they did delay them enough to achieve a victory, however, the tide of battle was about to turn so it could have ended differently. Time just ran out on the Warbots.
The photos below are the set up and a bit of initial play.
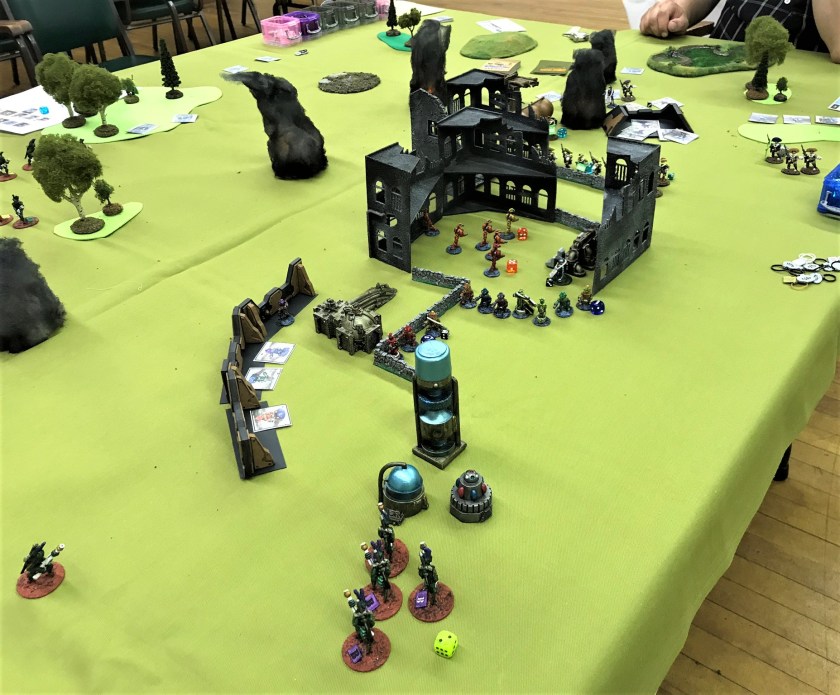
The set up from the defenders’ side.
Set up from the attackers side. Reinforcements await deployment on the table’s edge.
Aphid casualties pile up as the Warbots move forward. The Aphids, defending the middle crater, were able to get a very lucky critical hit on the Warbots’ platoon sergeant, causing a catastrophic explosion of its power plant (the smoke plume in the center above). This explosion also killed and wounded several Aphids, and dented a couple of nearby Warbots.The Warbots move into the smoky crater that once held a squad of Aphids. The Warbots used a plasma ball breacher to fry the bugs, hence the smoke plume.Aphid and Star Duck mortars add to the chaos of the battlefield as the Warbots breach the initial wall defense and roast an unlucky Star Duck alive. Biological Alliance reinforcements move up on the right.
This fun scenario, with some minor tweaks, will be coming to BARRAGE on 9/28/2018!
For August, I decided that my efforts needed to be directed towards a few new areas that would be challenging for me. I wanted to get more terrain for my games, specifically some that would be useful in making my Combat Patrol™ games more visually appealing to the players. I also wanted to try to use some new techniques and incorporate new materials into my hobby kit bag.
This would involve working on things and using multiple materials with which I am less than fully experienced. My goal was to stretch my horizons as it were, and this goal also dovetailed nicely with the monthly painting challenge run by our Australian friend Azazel. The theme for August was “Technical August”, which was a wide-open challenge to try or improve upon techniques that we had little to no experience in doing previously. With that said, I decided that assembling, building, and painting some Armorcast terrain would be a good way to do that. Mainly my goal was to focus on using the five 4-pigment bottle sets of Vallejo Pigments that I have not really used (Dust & Dirt, Mud & Sand, Rust & Corrosion, Soot & Ashes, and Stone & Cement). I did use the Soot & Ashes set on some cheap 3D printed buildings, but otherwise not much.
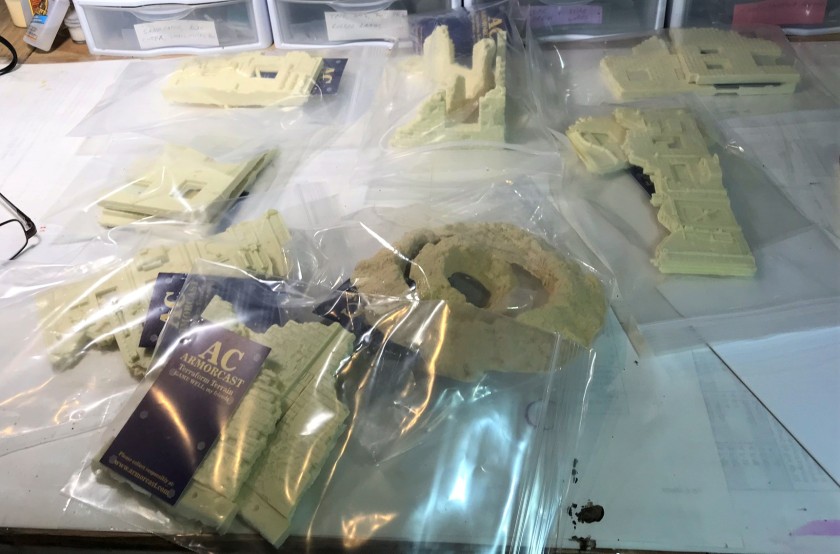
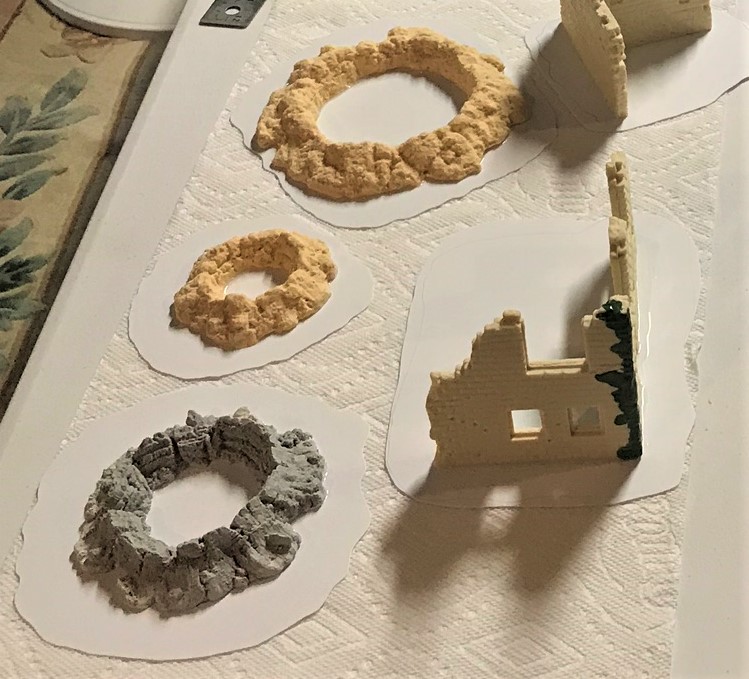
I acquired three types of Armorcast resin terrain (all suitable for 28mm scale) for the August challenge – craters, ruined buildings, and sci-fi ruined walls:
1 ACCR001 3-crater set (includes 3 differently-sized impact craters – 6″, 4″, and 3″ – and the set is the subject of this post)
5 ruined building corners (subjects of a future post)
As for my technical goals, my list of “challenge” skills, materials, and techniques include:
Assembling, building, and basing terrain
Use of materials to create weathering and rusting effects, to include:
Vallejo Pigments, to include application and fixing (covered in this blog post)
Vallejo Mecha Color weathering products
Weathering and rusting/oxidizing effect products, to incude:
Citadel Technical paints:
Typhus Corrosion
Ryza Rust
Nihilakh Oxide
Vallejo and Vallejo Mecha Color rusting and weathering products
Vallejo Pigments (various)
Vallejo Game Air rusts (71.069 and 71.080)
Vallejo Mecha Color Weathering products
Oil Stains (gloss)
Rust Wash
Rust Texture (Matt)
Create a new storage system for my terrain pieces
The ones above in bold font are ones I worked on for the 3-crater project. Others will be used for the remaining projects, even if that lasts into September (which is likely).
I had previously worked on some Armorcast sci-fi pieces and grenade blasts. I like their products, but wanted to get better at getting them on the tabletop.
My collection of resin awaiting work
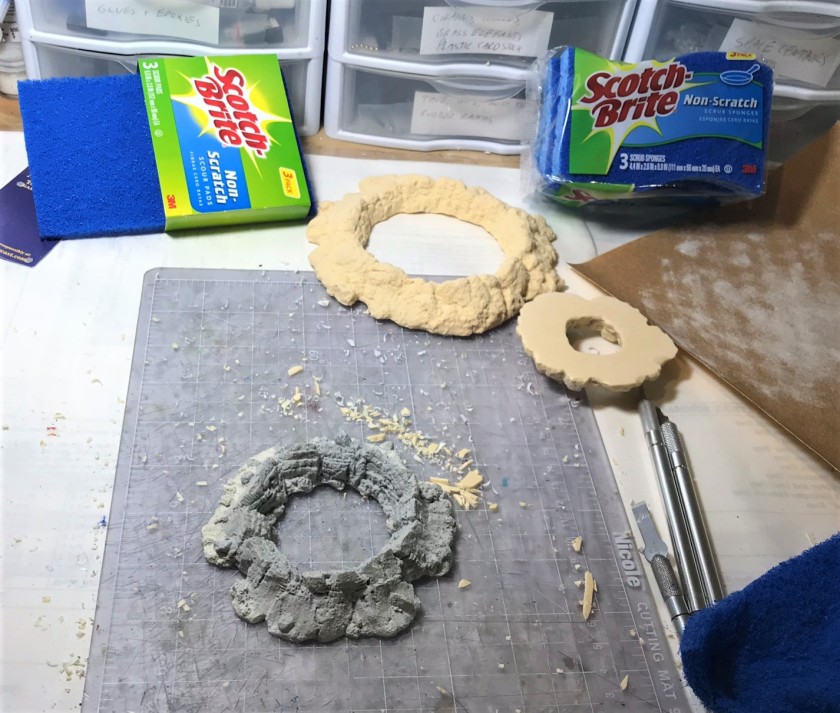
I got good advice from Armorcast (Gin Fritter) and Buck Surdu about preparing the resin for painting. I ended up using a few Exacto knives to remove flash, and then used Scotch-Brite pads to lightly (imperceptibly in fact) give the pieces a rubdown to achieve a “bite” for airbrush priming. Additionally, I used a 180 grit sandpaper sheet to scuff up the craters’ bottoms so that they would glue better to their planned bases. I then washed the pieces thoroughly with dish washing soap in the sink and let them dry.
Cleaning the resin craters – one was gray, the other two were not. You can see the sandpaper, pads, and removed resin.
For basing, I chose to incorporate a few different materials. First, I cut irregular shapes from Evergreen Scale Models #9020 polystyrene sheets – which is quite thin (.020″/0.5 mm). I mounted the crater pieces to the cut shapes with Gorilla Glue. Then, I also used a number of differently sized thin steel bases from Wargames Accessories to mount under the shapes for both strength and to be able to later store and transport securely in magnetically lined storage boxes (which is another project in and of itself that I have planned). Here, I also used Gorilla Glue.
The polystyrene sheets that I used for basesMy craters and a ruined building on my polystyrene sheet bases
From my minimal experience with using pigments, I knew they had the potential for a huge mess. I learned that using a cafeteria-type tray would make using them easier. I hit my local Salvation Army and found four trays for this use. Interestingly, three of them were from a former Digital (DEC) facility (there were a lot of them in Massachusetts before Compaq and later Hewlett Packard consumed them in 1998). I removed what appeared to be ancient chili from them, and put them into use. I also got a small palette from Michael’s craft store to use just for pigments. I put that palette into a deep plastic Rubbermaid salad container, and I thereby effectively limited the migration of pigments from my work space. You definitely do not want to have a fan or strong air circulation going while using pigments!
Trays for using pigments. Oh DEC, your cafeteria trays soldier on…
I then used PVA glue (good old Elmer’s) to affix some play sand and some Woodland Scenics stones to the bases, and let them harden.
My sand and rocks for the bases
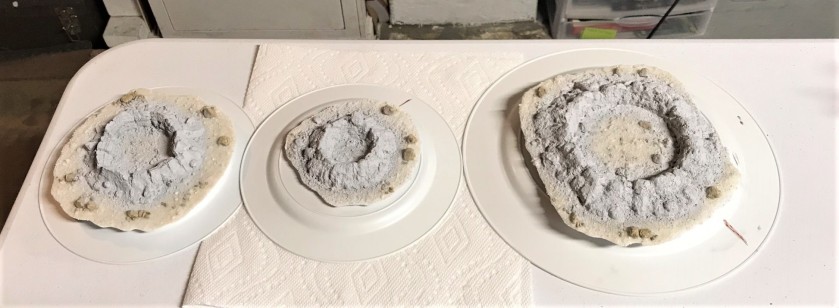
Next, in order that I could handle and work with the craters, I affixed their bases with poster tack to upside-down plastic plates before priming. I marked each plate with a brown ink line for reference, and proceeded to airbrush prime the set with Vallejo “Surface Primer – Gray”.
Primed craters
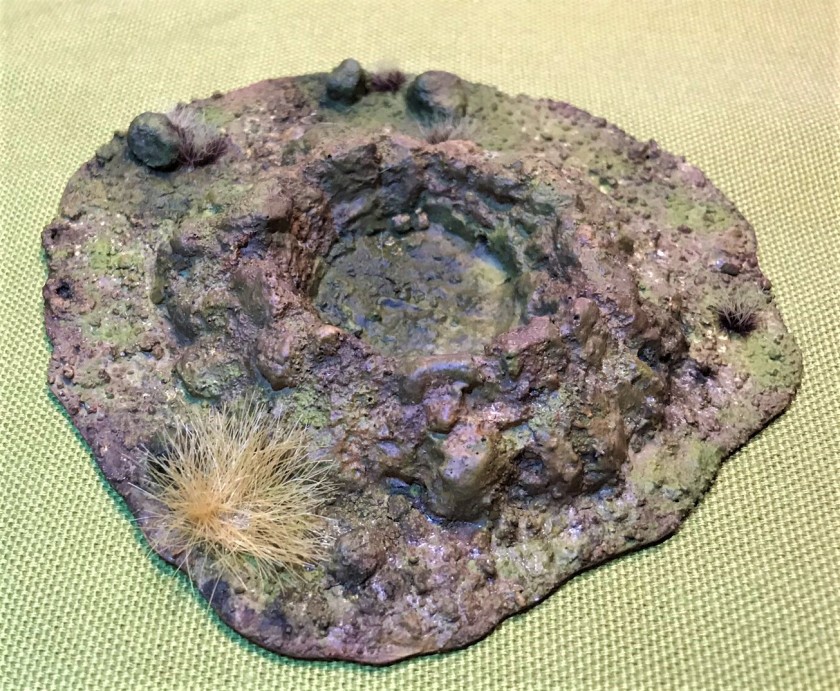
I then worked on the three craters sequentially, going from smallest to largest. For the smallest one, I dry brushed with multiple shades of brown (there is a list of materials that I used at the end of this blog). I was not sure that I needed to or if the pigments would be enough. Primarily, I used the four pigments from the Vallejo “Mud and Sand” set (“Light Yellow Ochre”, “Natural Umber”, “Light Sienna”, and “Light Slate Grey”) plus the Vallejo “Faded Olive Green”. I looked at the Vallejo YouTube video on pigments, and used some of the different techniques to apply and fix the pigments.
The smallest crater after heavy dry brushing.The first crater after applying multiple pigments in a dry fashion. I then fixed them with Vallejo “Airbrush Thinner” with a capillary action technique, leading to this mucky wet look.
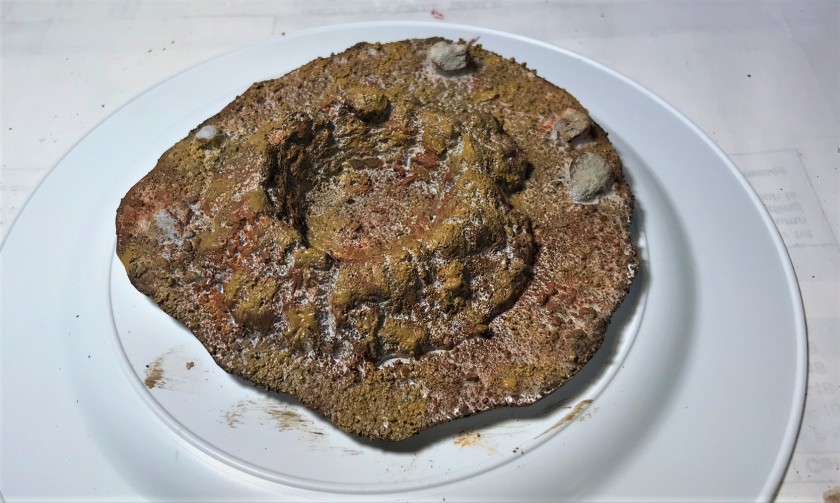
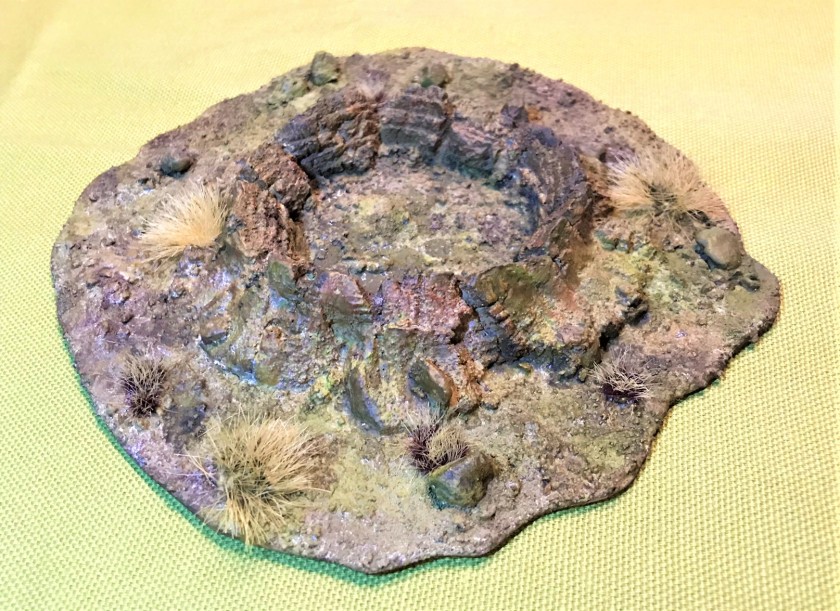
After this, I moved on to the next larger crater, and also dry brushed it and used the same method of fixing the pigments. One downside that I discovered was that the airbrush thinner tended to dissolve the PVA holding the rocks in place (but not the sand). I replaced the displaced rocks on the bases after the airbrush thinner dried.
The middle-sized crater before fixing the pigments – I also added more colors before fixing them here – this is a lot of “Natural Umber”.
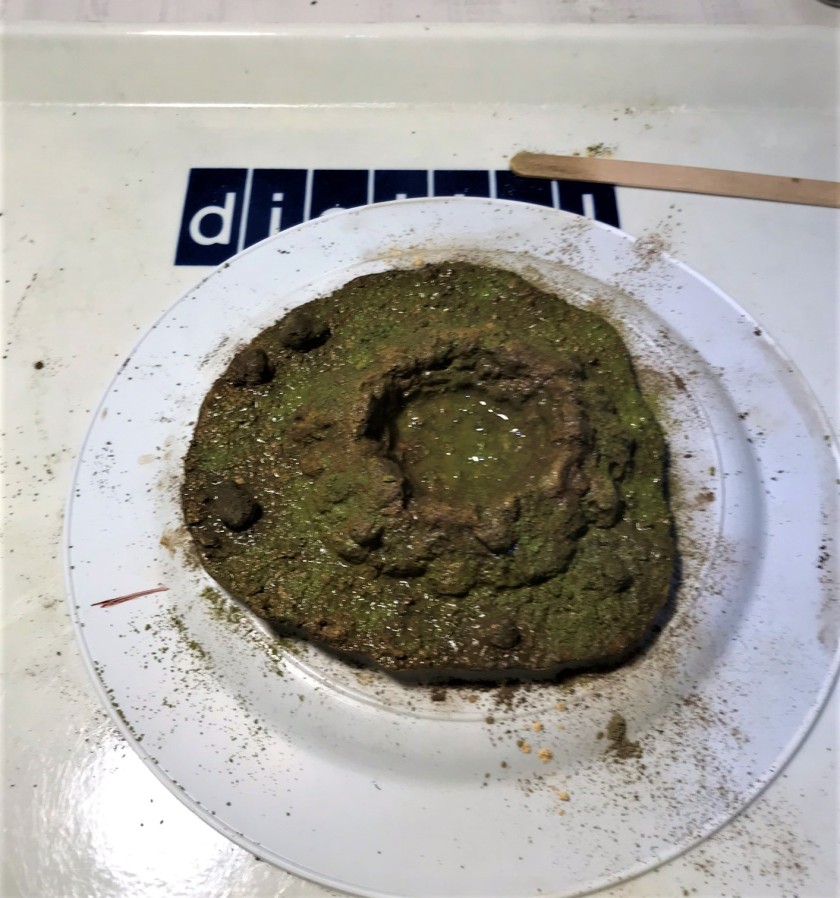
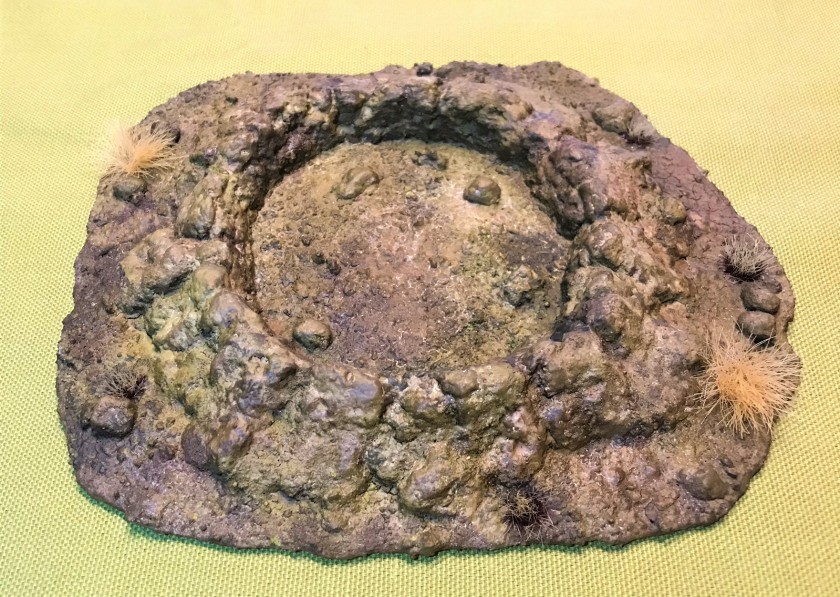
Lastly, I worked on the largest crater. Here, I passed on doing any dry brushing. For this one, I employed Vallejo “Pigment Binder” instead of the airbrush thinner to fix the pigments – and to prevent the dissolving issue under the added rocks. I also needed to use Secret Weapons Washes “Sewer Water” to give better shading. While the pigment binder worked, it did lead to a thicker application of pigment as you see below. I thought it blended too much – and I believe that one should use that product selectively. I subsequently added more pigments to make the crater less of a solid olive green, fixing them with airbrush thinner. It worked.
The largest painted crater before varnish
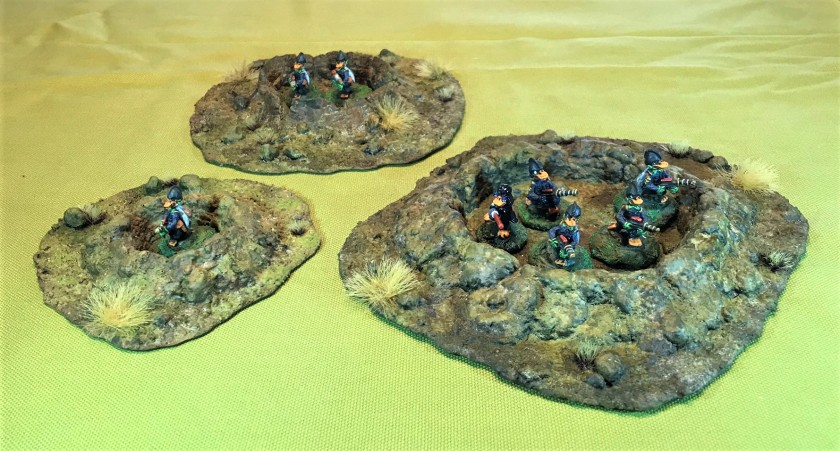
Lastly, I decided to airbrush varnish the craters. Did I need to? I wanted to protect the paint work, so I did. I do think I needed to thin the varnish more, as I had some crazing to deal with, something I had not seen previously with its use on miniatures. To help with color variety, I applied Citadel “Agrax Earthshade” and “Athonian Camoshade” washes, mixed with a little varnish and applied with a brush to the affected areas. I then applied Army Painter “Wasteland Tufts” and some 12 mm grasses from Shadow’s Edge Miniatures.
As an aside – I can say without a doubt that the Shadow’s Edge Miniatures products are far superior to Army Painter’s – they need no additional gluing, and they are visually stunning. I plan on using their products, especially the flowers, on future unit bases to help with tabletop differentiation.
The three craters on the tabletop. The thin bases made them quite flush with the tabletop.The bottom of the craters showing the use of the Wargames Accessories steel bases.Close up of the large crater as finished. Close up of the middle-sized crater. I liked this sculpt the best of the three.The smallest crater. I like the way the pigments made the bottom look realistically muddy.Some Star Ducks defend the craters. I decided that the craters would be more useful looking as if they were from an older battle. I was thinking of those I have seen at Verdun, though there are no historical records of ray gun armed ducks at Verdun……or Martians…SFC Mallard defends the small crater against a Martian assault.The Martians assault the middle-sized crater defended by Duck Wader and SFC Mallard.The Space Dwarves’ large crater is assaulted by the Star Ducks.
My lessons and thoughts from the project:
The cleaning and scrubbing of the resin helped with the priming. The Scotch-Brite pads work well for this use.
For terrain pieces that will be totally covered in pigments, dry brushing with paint is not needed. When I get to doing vehicles, such as tanks, it will be interesting to see how that works.
Fixing pigments with airbrush thinner is easier than with pigment binder. However, add any additional large features, such as extra rocks later, or use pigment binder on the rocks.
Having trays and palette wells (such as the one I put my palette in) while working with pigments cuts down on the mess considerably. Be ready to use multiple brushes, both wet and dry. The mess vacuumed up or washed off easily from my palettes and trays.
Always ensure your pigment bottles are shut tight. I see how they could spill over easily (and I was lucky enough not to have this problem).
PVA glue and play sand are an inexpensive winner.
The combination of thin steel and thin polystyrene yields a model base with little to any “rise” from the tabletop at its edge, and is strong.
Thin your varnish to prevent the crazing! (Speaking with Buck today, he uses varnish to fix his pigments, so that needs to be considered). I also want to see how well airbrushing the thinner fixes pigments in future projects, like my ruined buildings.
Washes help in the end for touch ups.
Shadow’s Edge Miniatures tufts are fantastic – need no extra glue and dry clearly.
Now the three craters are now ready to join my other terrain. Hopefully I can get more done this month.
Thanks for reading and if you have feedback, especially on my results or suggestions from your experiences, please, share them in the comments section. I do so much appreciate them!
PAINTS, PIGMENTS, INKS, GLUES, GLAZES, WASHES, AND FLOCKING USED:
Vallejo “Surface Primer – Gray”
Generic play sand
Elmer’s “Glue-All”
SceneARama “Rocks”
Evergreen Scale Models #9020 0.5 mm plain polystyrene sheets
Gorilla Glue
Wargames Accessories steel bases (various)
Americana “Raw Umber”
Citadel “XV-88”
American “Burnt Sienna”
Citadel “Skrag Brown”
Citadel “Balor Brown”
Vallejo “Natural Umber” (pigment)
Vallejo “Light Yellow Ochre” (pigment)
Vallejo “Light Slate Grey” (pigment)
Vallejo “Light Sienna” (pigment)
Vallejo “Faded Olive Green” (pigment)
Vallejo “Airbrush Thinner”
Vallejo “Pigment Binder”
Vallejo “Airbrush Flow Improver”
Secret Weapons Washes “Sewer Water” (wash/shade)
Citadel “Agrax Earthshade”
Citadel “Athonian Camoshade”
Testors “Universal Acrylic Thinner”
Vallejo Mecha Varnish “Matt Varnish”
Army Painter “Wasteland Tufts”
Shadow’s Edge Miniatures “12 mm tufts”
Thanks again – I hope this helps you or please feel free to add your own suggestions in the comments section. After all, I am no expert in these – and I am just sharing my lessons learned – and I KNOW there are many other ways to accomplish what I did (I just don’t know them all!!).
I am always searching for cool old school figures that are out of production that I could use in my Combat Patrol™ retro sci-fi games. This is firstly because I like to find neat stuff that time has passed by – and expose the figures to a brand new audience. Secondly, it allows me to run really fun games – as the rules are so easy to play and learn even for true newbies – while older gamers are simultaneously having a good time.
Fortunately, I came across Michael Thomas’ site, classicminiatures.net. There I found many Archive Star Rovers figures that he could cast (as he has a spin caster and now owns many original molds). I acquired my Space Dwarves (Archive’s Long Gone Jones) from him, and he suggested two others that I might like.
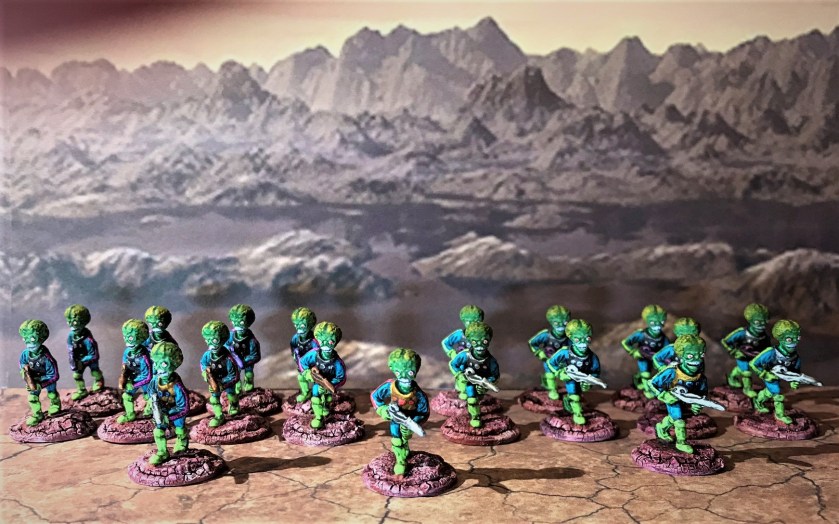
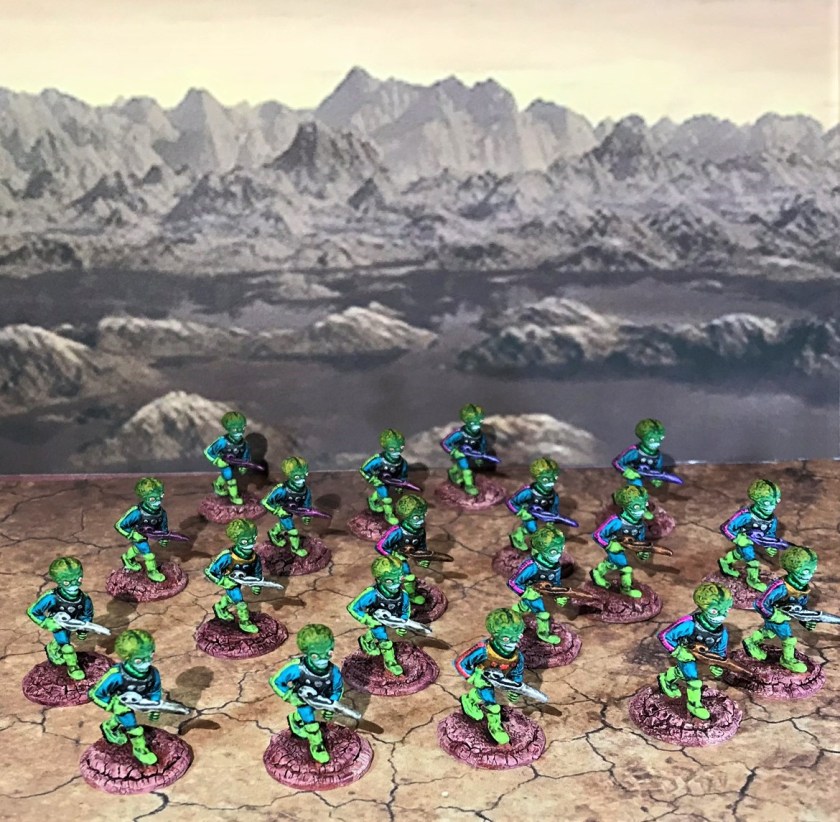
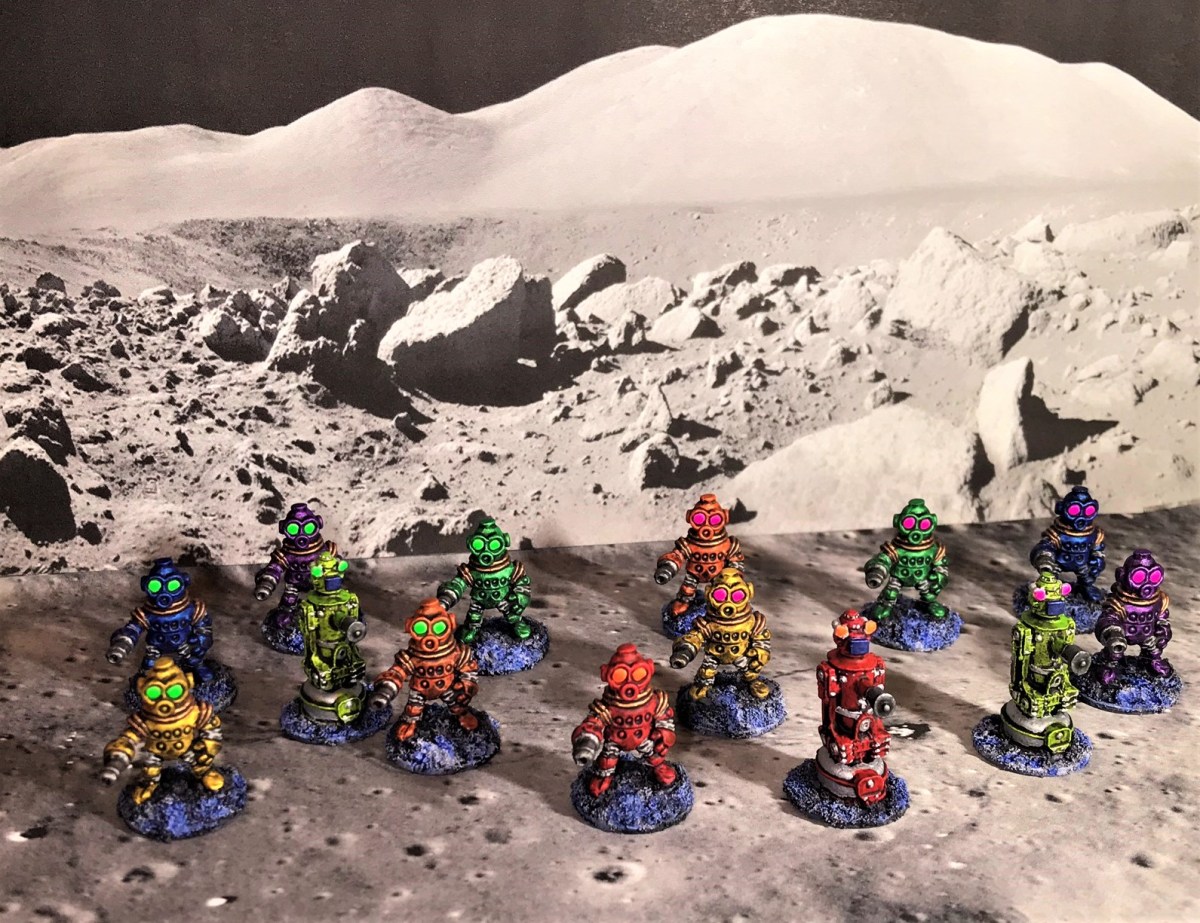
One was also previously described in this blog – that being Mega Miniatures Robot Peacekeepers. These were my first figures from that now-defunct company. Michael piqued my interest with a second figure, which was Mega Miniatures “Mars Alien” (#71501 seen here in the Lost Minis wiki) from their Sci Fi Future range Aliens subset. It looks like the figure is the only one in that group, and was OOP in 2003. It was sculpted by Hermann Grassnick, and the rights were sold by Mega Miniatures in 2011 (I am assuming to Michael Thomas). I got 19 of the figures for a two-squad Martian platoon.
Interestingly, I wonder if there was a copyright issue that caused a cessation of production? I was also completely unaware that a UK company called Mantic Games put out a Mars Attacks game complete with figures and terrain. I looked through the Mantic website, but it looks like the game is not really available or at least not supported much, or that Mantic is just selling whatever inventory it has of its components. (Side note – I did also see the Kings of War game there which I have seen referred to often in the blogosphere. If I ever get back to fantasy armies, perhaps this will be a resource!).
Back to my Martians…
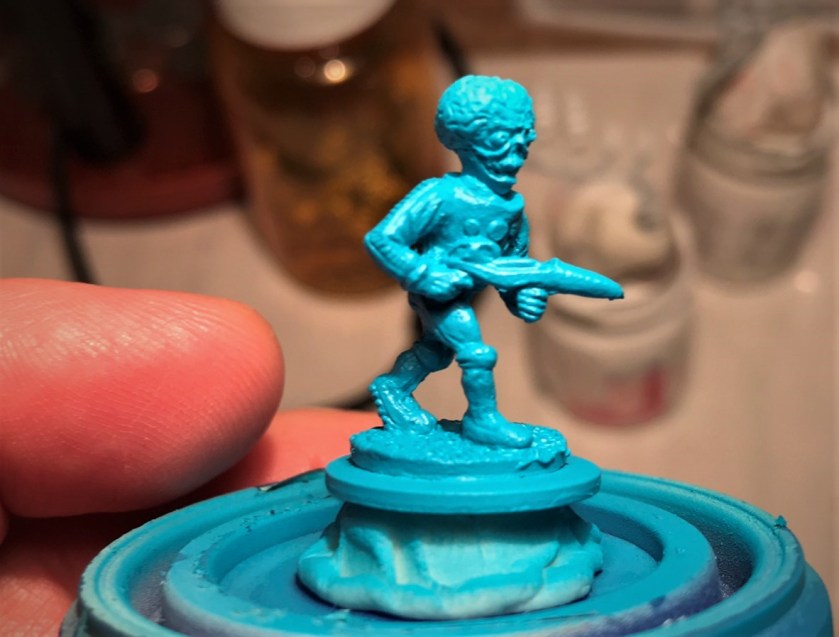
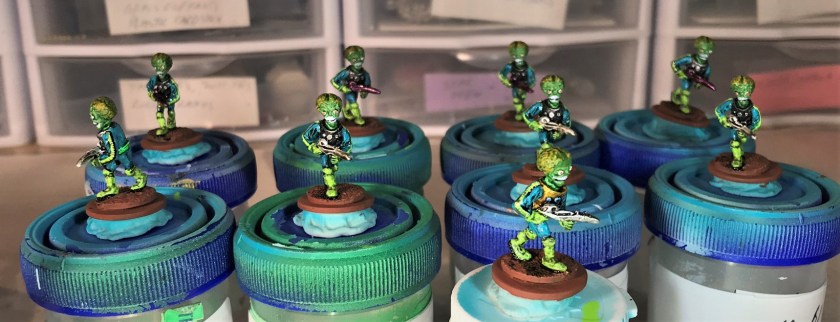
I did see that the figures from Mantic were colored like the movie, so I adopted that scheme for my Mega Miniature figures, which is a turquoise and lime green combination. Of course, I thought I could finish these in time for a painting challenge by Azazel called “Jewel of July” – after all turquoise is a jewel right? But it was not to be, so these Martians got completed in early August. There were no helmet bubbles or air tanks, but otherwise the figures were comparable.
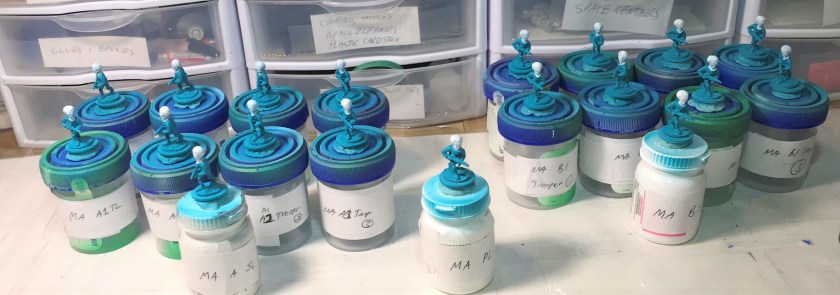
I cleaned off any unwanted sprue residue, filed, and washed the figures. They cleaned up easily, and the casting quality was good. They are probably 25mm in scale (Star Duck size). I mounted the figures to ¾” steel washers with Gorilla Glue, and then used poster tack to affix them to my painting jars.
The Martians as received
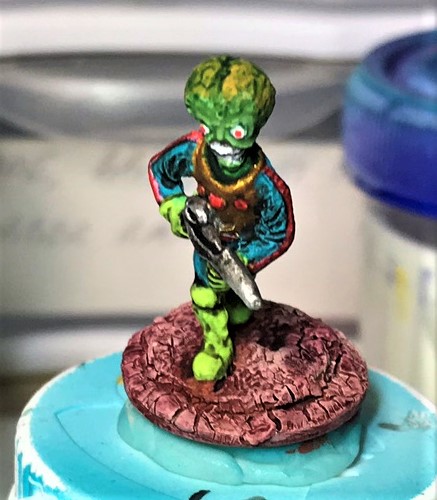
I wanted there to be an easy way for the platoon to be used on the tabletop. I decided that I needed a painting plan. So I made one, using different colors for the weapons, armored vests, belts, and accouterments – it was 11 PowerPoint pages – and you can see one such example below. This helped me to keep it all straight. I list all the paints that I used at the end of this blog post for those interested – there were a number used!
I usually use some details to denote who is who. Usually red for officers, blue for higher NCO’s, and green for lower NCO’s. I used two different colors on the trim to denote each squad.
As for the figures’ details, I did have an issue with the teeth and the brain folds (who doesn’t), as they tended to fill up quickly even with light airbrushing. Eventually, I figured out how to present them in a game-worthy way.
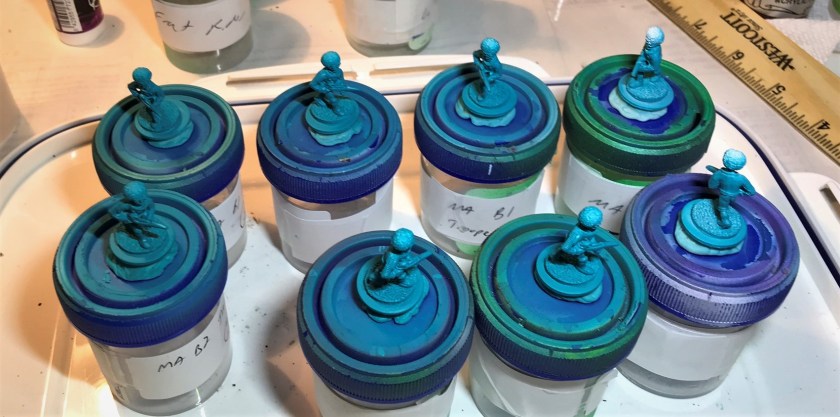
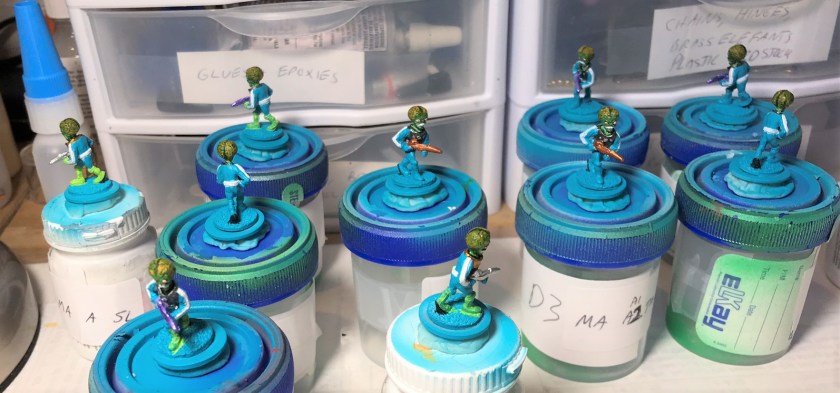
After priming and base coating with turquoiseThe B squad after priming
I ended up using multiple very thinned applications of Citadel “Ceramite White” on the Vallejo Mecha Color “Turquoise” so that I could get the other colors to be more vivid.
White heads – trim and belts next!
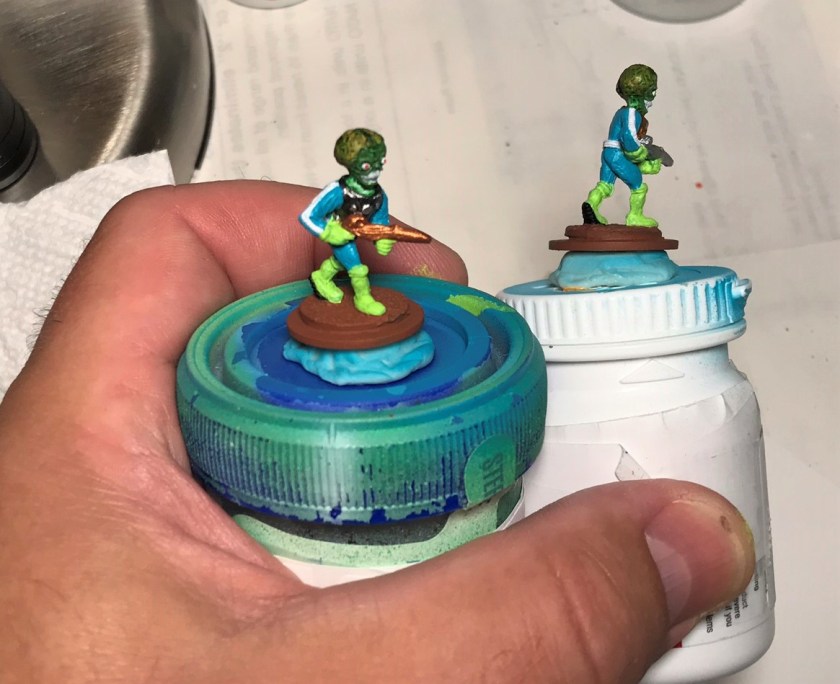
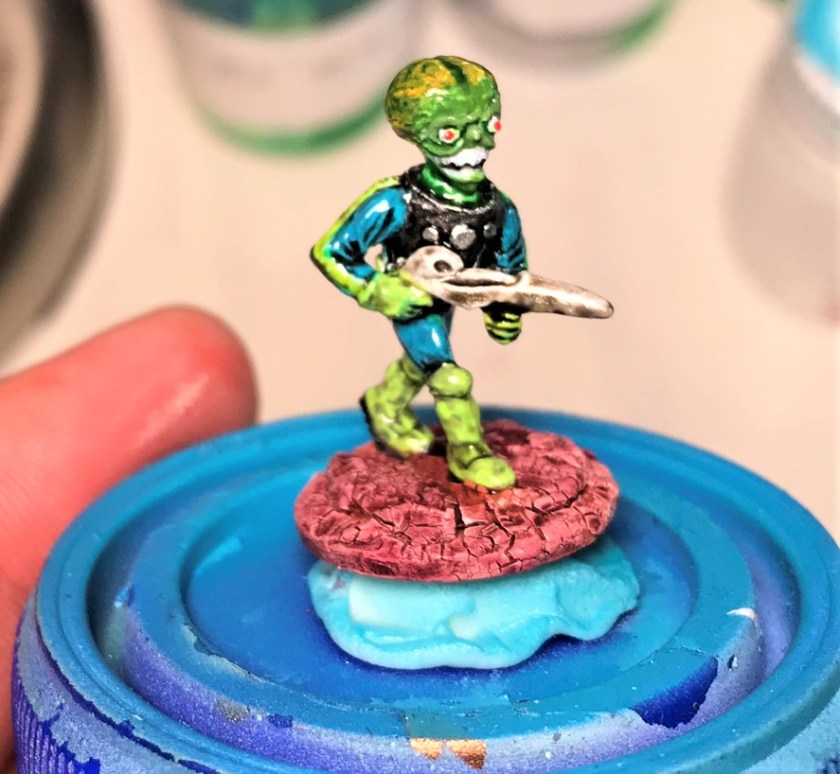
I tried to match the colors from the movie on the skulls and brains. It was tough, but I found that using multiple inks, dry brushing, and washing here was a winning approach. My initial tries were too dark or too light as shown below.
Need a middle ground!Eventually, using patience, dry brushing, inks, and washes, I got my Martians’ brains to be close to the desired result.I worked on the heads first, then inside to out on the torsos and legs.
After the painting was at a stage that I was happy with and what I wanted, I gave the torsos downward a good wash with Citadel “Nuln Oil Gloss”. I like the results it gives with metallics. Still, the damn teeth were bedeviling me, Washes were not working, and dry brushing them was not either. They were fairly snaggle-toothed dudes.
The platoon leader after an application of wash on his torso. But the teeth were unacceptable!
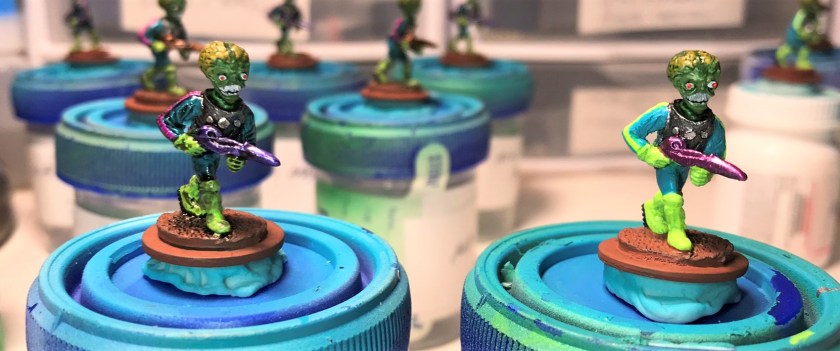
My dental solution was to use a very thin and slightly jagged line of Vallejo Game Air “Black” just under the upper teeth – and I settled on that.
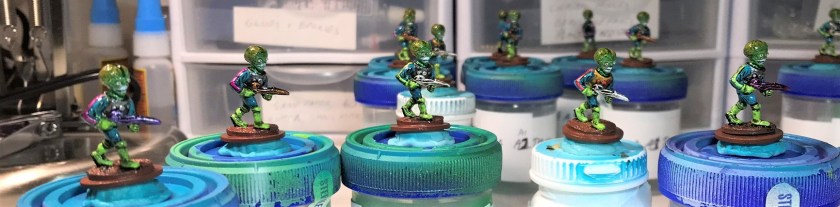
A member of A squad (fluorescent magenta highlights) on the left and a B squad member (fluorescent yellow highlights) on the right. The B Martian has not yet gotten a wash with the Nuln Oil Gloss. Here, the teeth are improved.B squad after the Nuln Oil Gloss wash on their torsos and legs.
I then used Vallejo “Gloss Varnish” for my first varnishing application. I planned on adding a matte coat after I finished the bases.
Shiny happy people…err Martians…after the gloss varnish (apologies to REM)
I then worked on the bases. I decided to use Citadel “Martian Ironearth” on them. I really like to get the crackling effect from that paint when you use a hand-held hair dryer on it as it dries. So yes, I used a blow dryer on dudes that not only had no hair, but no scalps…in any case the bases came out fine. Instead of using a wash on them, I dry brushed the bases sequentially with Armory “Brick Red” (from 1996) and P3 “Ryn Flesh”. I liked the effect better than my previous uses.
B squad figure after base completion but before the matte varnishThe platoon all done and waiting for the matte varnish to dryCloseup of the platoon leaderAn A squad trooper from Team 1 (denoted by the copper colored weapon)
Overall, I am happy to have some more “bad guys” to add to my retro sci-fi forces. I do not think that they are my best work, but they are good enough, and should be fine for gaming. And now, some action shots!
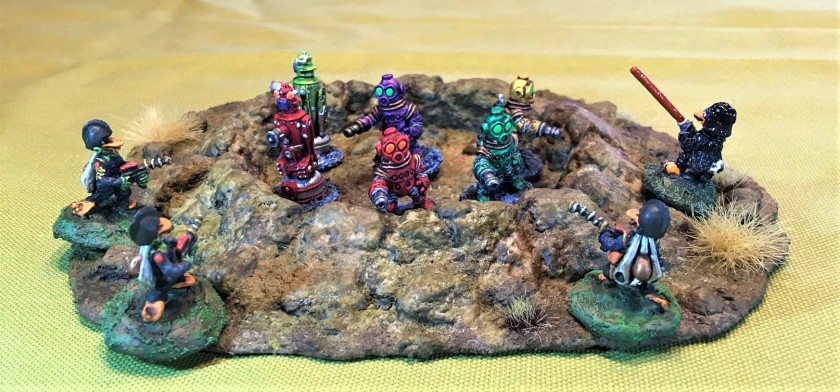
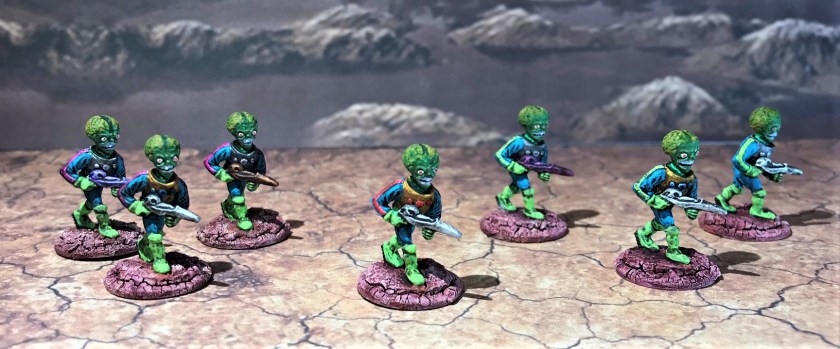
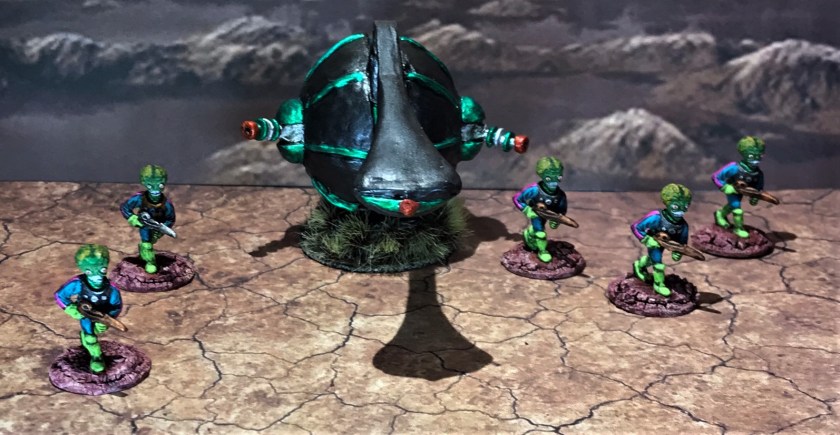
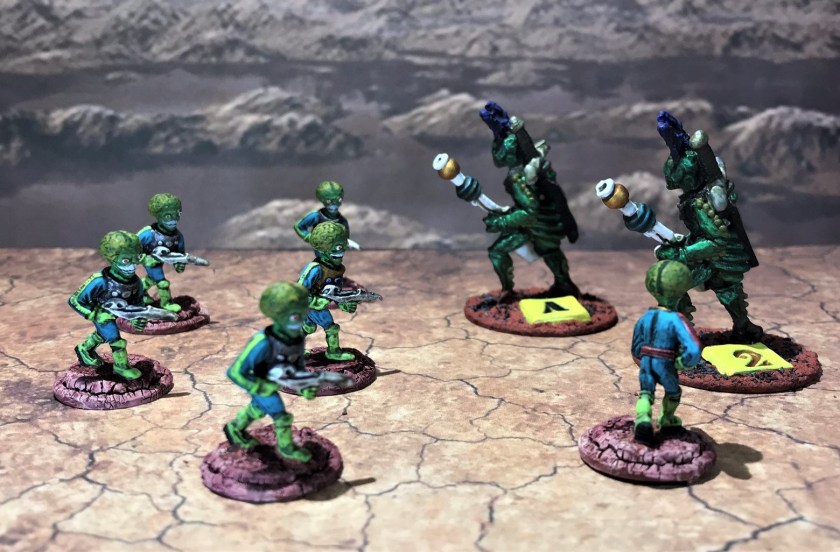
The Martian platoonMartian Platoon leadership – platoon leader is in the center, with the A squad leader and his two team leaders on the left of the photo, and the B squad leader and his two team leaders on the right.An example of how I painted the belts differentially. From left to right, the platoon leader (red), the A squad leader (blue), a B squad team leader (green), an A squad trooper (magenta), and a B squad trooper (yellow)The A squad moves out around some Armorcast terrain.The B squad checks out the cooling units and power generatorThe A squad’s Team 1 moves up alongside a Mark 1 Sphere tankThe A squad’s Team 2 surrounds some Texican Space RangersSize does not matter as the platoon leader and the B squad’s Team 1 move in to kill the Hurraku Space Phraints…or at least try to do so!The Space Dwarves throw grenades at the advancing Martians – the Team 2 from B squadACK ACK ACK!
I hope you enjoyed this post – please let me know your thoughts and suggestions in the comments section. And no, I will not have a Slim Whitman weapon that will kill these guys!
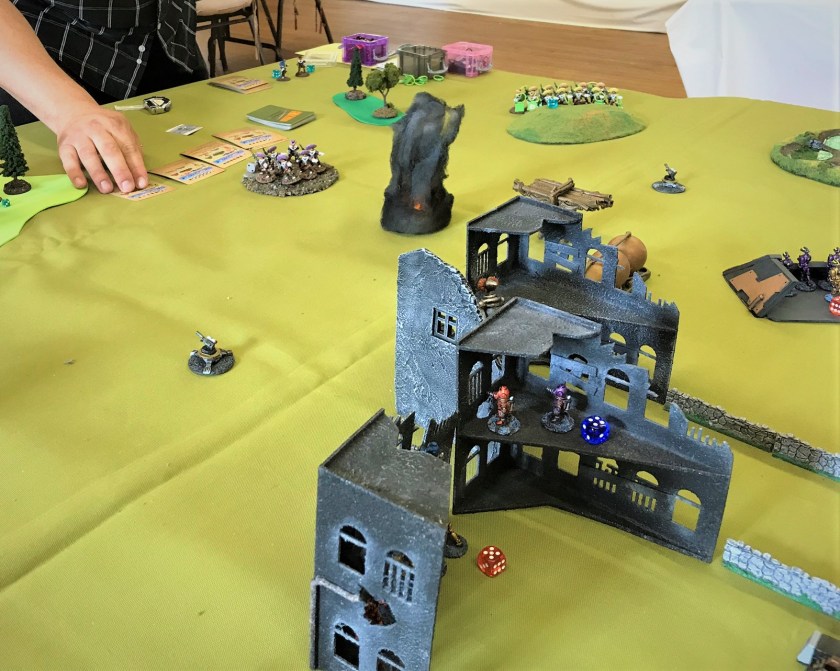
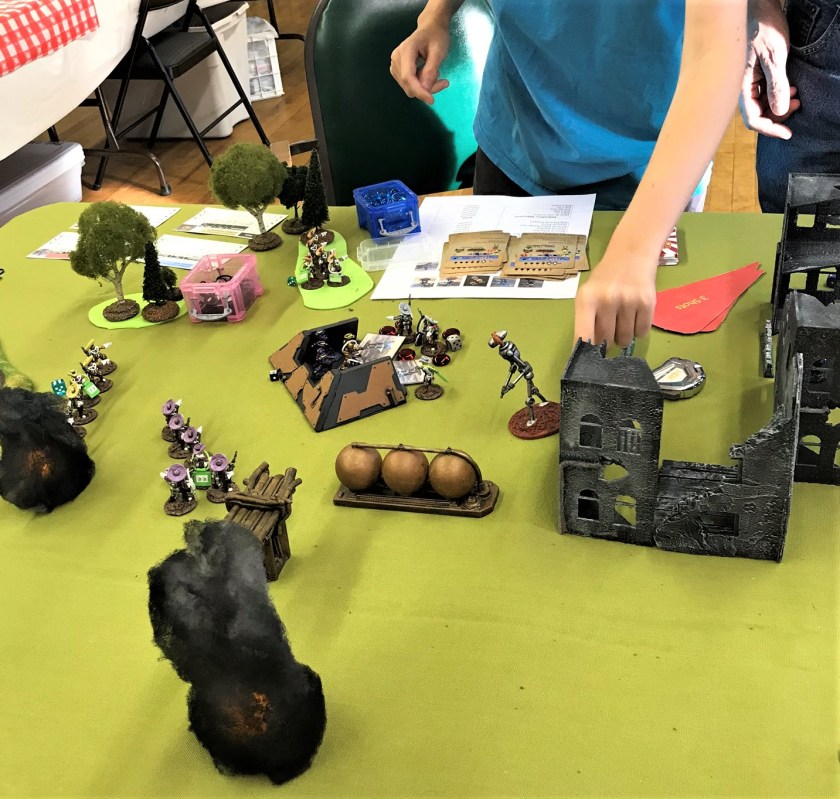
The July 2018 session of the Mass Pikemen Gaming Club was fun time for all. We had an epic battle using the Combat Patrol™ gaming system. The battle (called “Get The Data!”) was between the attackers (an alliance of the Texican Space Rangers and the Hurraku Space Phraints) and the combined forces of the Robot Peacekeepers and the Space Dwarves. The objective for the attackers was to seize weapons design data from a computer in an abandoned and ruined factory/research facility. The defenders mission was to exact a high price in casualties from the assault force.
So why did I align the Texicans and the Hurraku? One picture in the Star Rovers game shows them having a drink at Moondog Maude’s Cantina – so I went with that.
Hey, after this drink, let’s go to battle!
I assigned points differentially for the attackers and the defenders based on the mission. The Hurraku attacked on the defenders’ left, and the Texican Space Rangers attacked from the defenders’ right. The defenders also had Robo-Sentry guns deployed run by RT22. I also gave them Roberker, a flame-throwing giant robot to help with their defense.
Will prepares to defendThe Texicans destroy a Robo-Sentry gun, then take cover. You can see the defenders in position in the building. If only the defenders had mortars!Two Texicans are dispatched by automatic weapons fire. I use casualty cards to designate fallen figures and to help score the battle at the end. Plus I think it shows the battle’s progression without having a bunch of minis tipped over. Chris Comeau (Texican commander) made a bold move and had his gray squad jet pack directly into a bunker filled with one of Will’s Robot Peacekeeper team. The bots passed a reaction test and the Rangers took massive fire and three dead before they could fire. The red beads mark morale checks for them, the blue for the bots. This sacrifice was to prove worthy, as follow on teams of Space Rangers were able to clear the stunned robots from the bunker.Another of the 5 Robo-Sentry guns is cleared by the Space Rangers.On the other flank, Jared Burns and Mike Morgan were able to use the long ranges of the Hurraku blasted to keep the defenders’ heads down. They maneuvered to flank the defenders.One of the Agribot automatic weapons did hit a team of Hurraku for one wound. Unluckily, the team promptly failed morale and became pinned behind a boulder. They were eventually able to rally.Back on the right flank, Will and Dave decided that it was time for Roberker to counterattack with his dual flame throwing arms. Roberker successfully roasted a number of the purple-sombreroed Space Ranger team. However, he put himself in the open……and he took automatic weapons fire from multiple Rangers. The plume from his smoking hulk is next to the bunker…Chris Comeau smiles…he also killed Roberker in his last game BTW!The Robot Peacekeepers in the bunker then drew an unfortunate morale result that caused them to perform a banzai charge (I have robots use the WWII Japanese in the Pacific cards for morale). Thus, they left the nice safe bunker and got mauled. Note the large number of blue morale checks to be performed after the banzai charge.By this point, Will and his dad Dave had to leave, so I took over. The defense was collapsing, so I withdrew the front line defenders as best as I could.The sacrifices of the Texican Space Rangers allowed the Hurraku to penetrate the defensive position. The first in was their Sith warrior, who used the powers of the Force to smash two robots (RT22 and a Robot Peacekeeper) with a Telekinesis attack by sending them into the factory walls. This destroyed them. As you can see, the morale checks were piling up……so why not add more to the carnage with a satchel charge thrown by a Hurraku Space Phraint into the Space Dwarves (the smoke plume here)! Meanwhile, the Hurraku Space Phraints swarmed in.The attackers swarm the compound. Game over.
The game was fun, and when the tide turned, the attackers did a good job of exploiting the openings presented. I love it when maneuver is executed well. The Texican Space Rangers aggressiveness resulted in nearly 50% casualties, but helped the Hurraku press their assault on the other flank. The defenders did get some very unlucky morale results, but so did the attackers so it was a wash there. Next time I run this scenario, I probably will include some defensive indirect fire support as well as some time constraints on the attackers.
Still, it was a fun session, and I am appreciative to the players! It was nice to meet everyone, and I’m glad that they got to learn the system so quickly. Our next session is tentatively scheduled for August 18th.
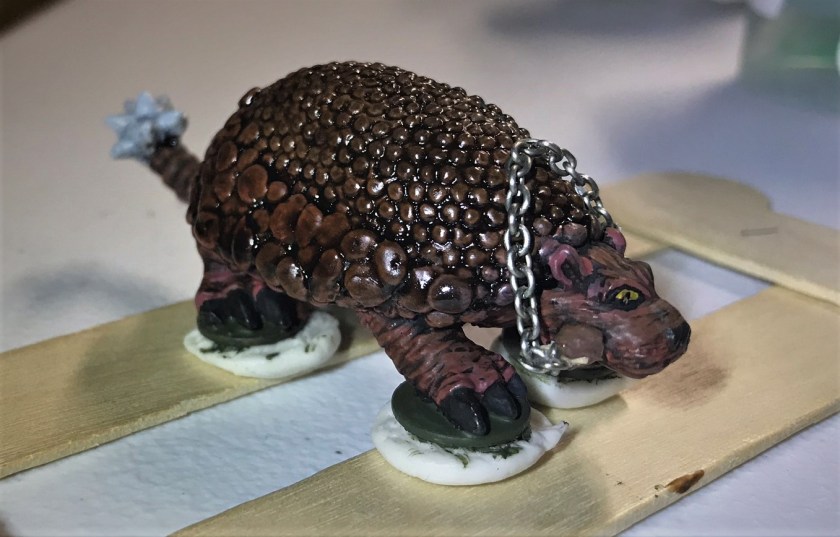
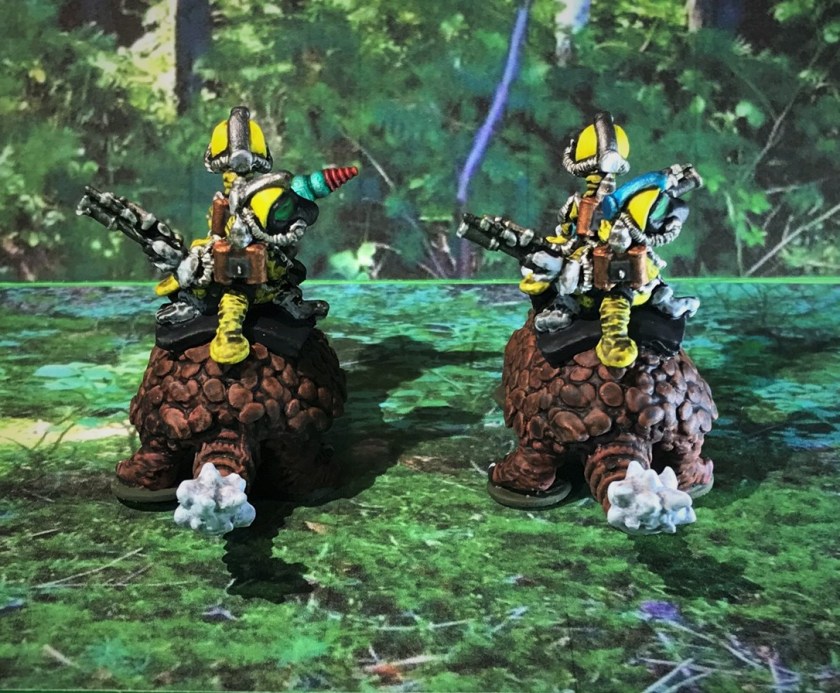
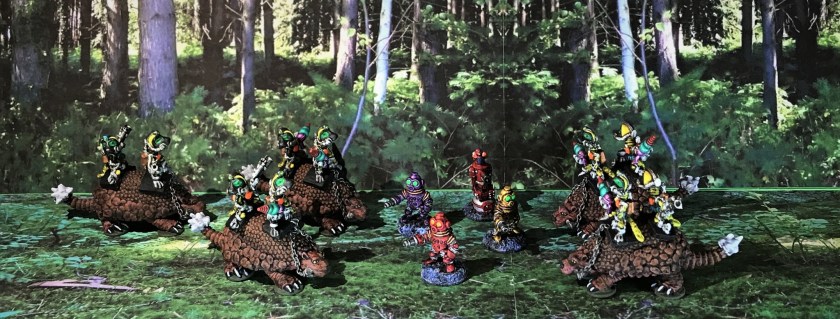
The Power-Armored Frinx are back, and this time as cavalry riding glyptodons into battle! The Frinx were a creation of Archive Miniatures back around 1977 or 1978. They are a smallish lizard-like race, often wearing power armor.
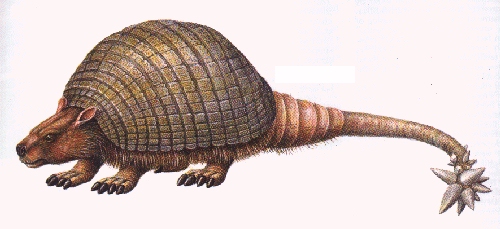
Glyptodons on the other hand were very real and existed from the Ice Age until about 11,650 years ago (give or take). They were prehistoric cousins of the modern armadillo, only they were mega fauna – and were as big as a Volkswagen bug. Plus, there is that massive spiked tail to consider. Why Archive put these two together is anyone’s guess, but the combination is indeed quirky and fun.
Artist conception of a glyptodon – as big as a car
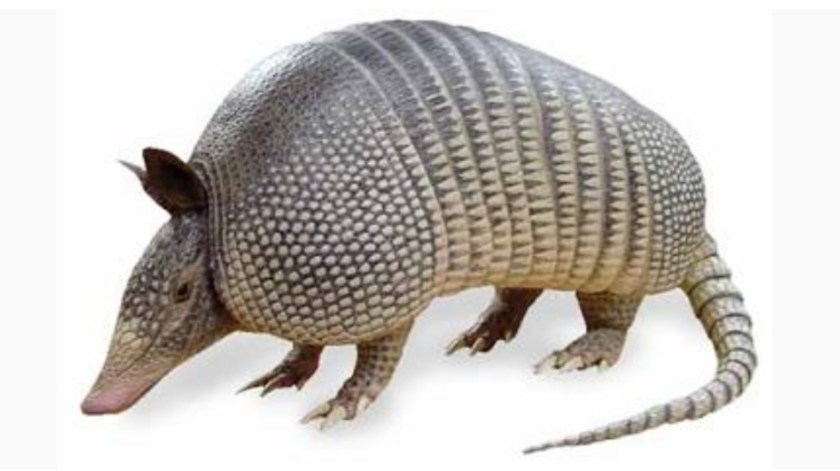
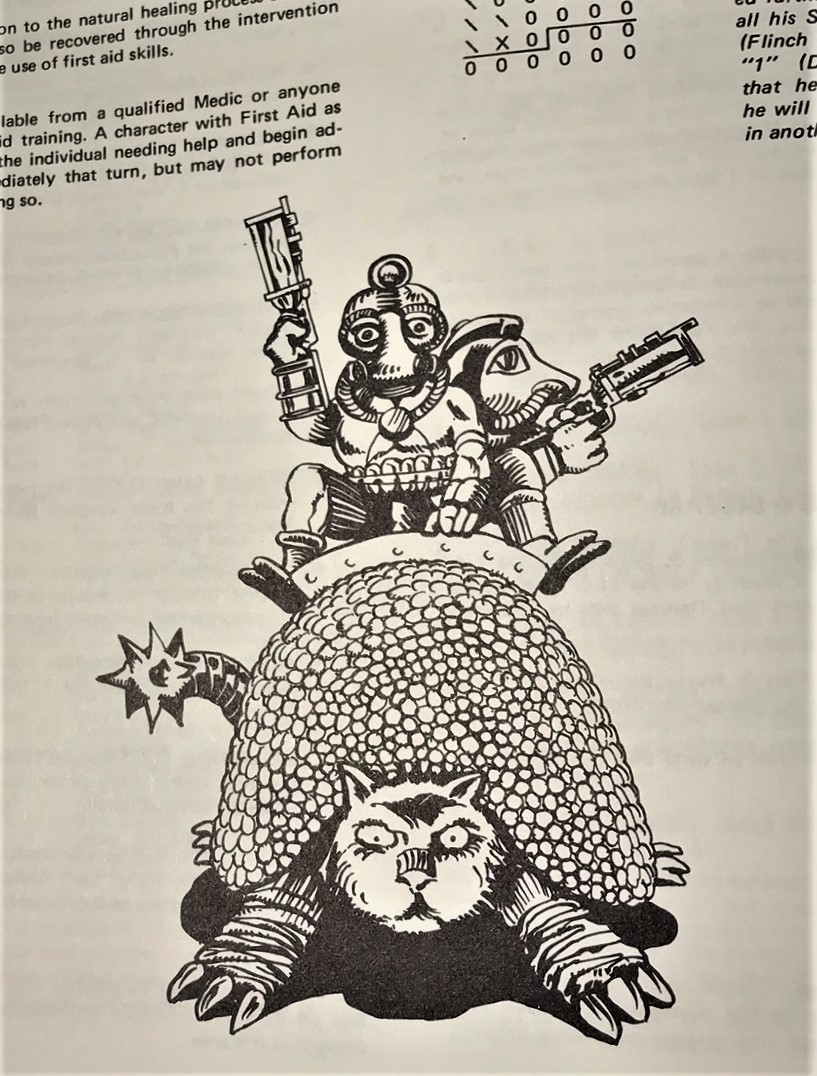
For you non-US folks, this is an armadillo. It’s about the size of a cat or small dog. None are around me in New England, but I saw plenty as road kill when I lived down South.Sketch of Power-Armored Frinx on Glyptodon from page 3.10 of the Star Rovers Module 1 rules
As a Frinx backgrounder for those interested, I have previously written several posts on the venerable Frinx, going back to my casting of their infantry in February 2016 (here), my painting and figure conversions of my Power-Armored Frinx infantry platoon in February 2017 (here), my May 2017 discovery and acquisition of an original Star Rovers RPG (here), and my casting of the Power-Armored Frinx on Glyptodon (Archive #2042) in July of 2017 (here). So this journey has already been 2½ years in the making. Phew!
Interestingly, the 1981 Archive catalog that came with my Star Rovers game does not have the #2042 listed, despite the drawing shown above being in the rule book. My guess would be that the kit was uneconomical to produce and/or difficult to produce well. I document several these issues in my casting post – but originally the kit contained no less than 11 pieces as shown below. As reference, the scale of the set is 25mm to 28mm.
Original Power-Armored Frinx on Glyptodon kit
I made my own modifications to this particular set and made molds to recreate the kit. It is indeed rare and given that it was already OOP by 1981, there cannot be many of these around. I thought they would serve well in a traditional cavalry role for my Frinx platoon. I cast several and shared with Buck Surdu (who graciously provided me the original you see above so that we both could have some). Buck did a great job painting seven of my recasts of these back in 2017 which you can see here.
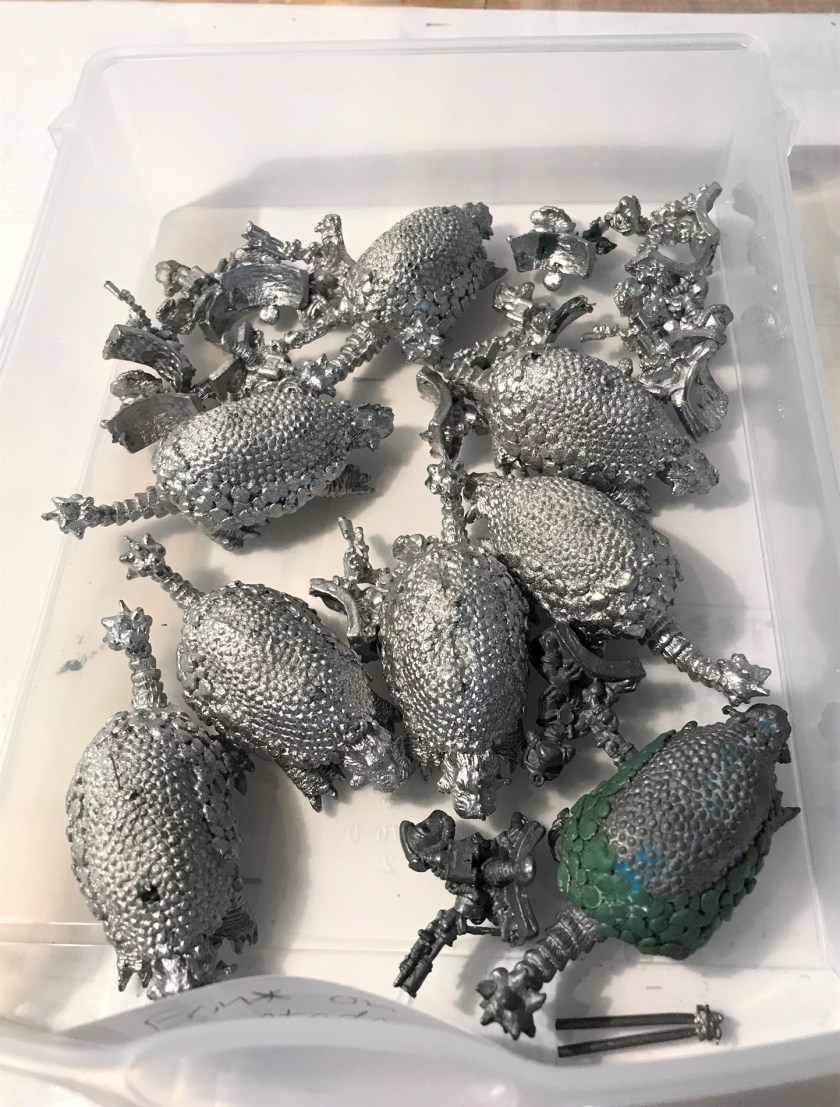
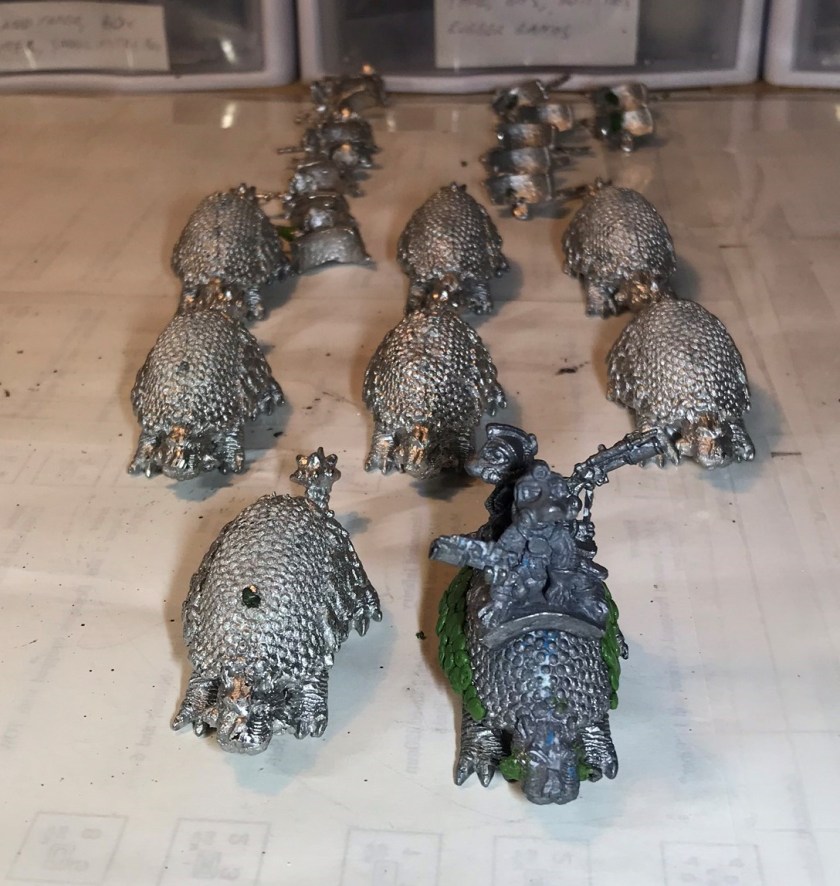
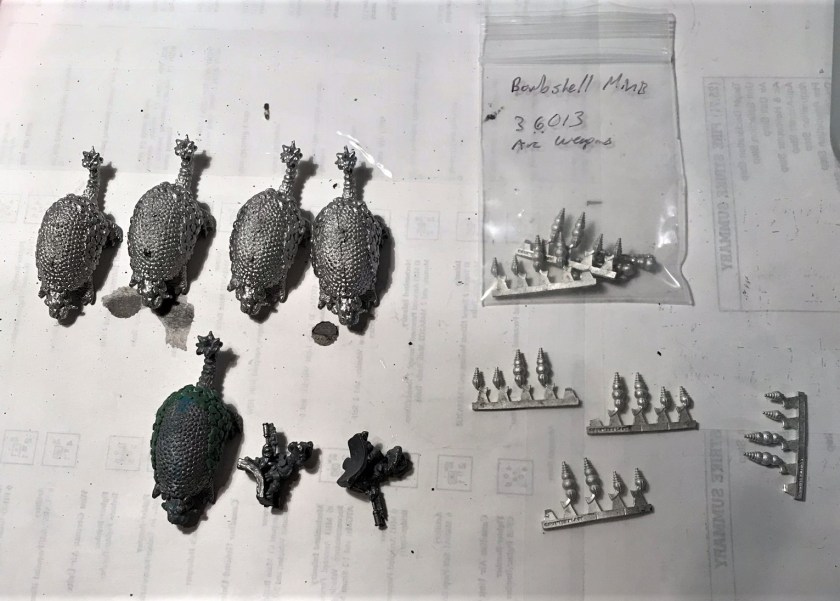
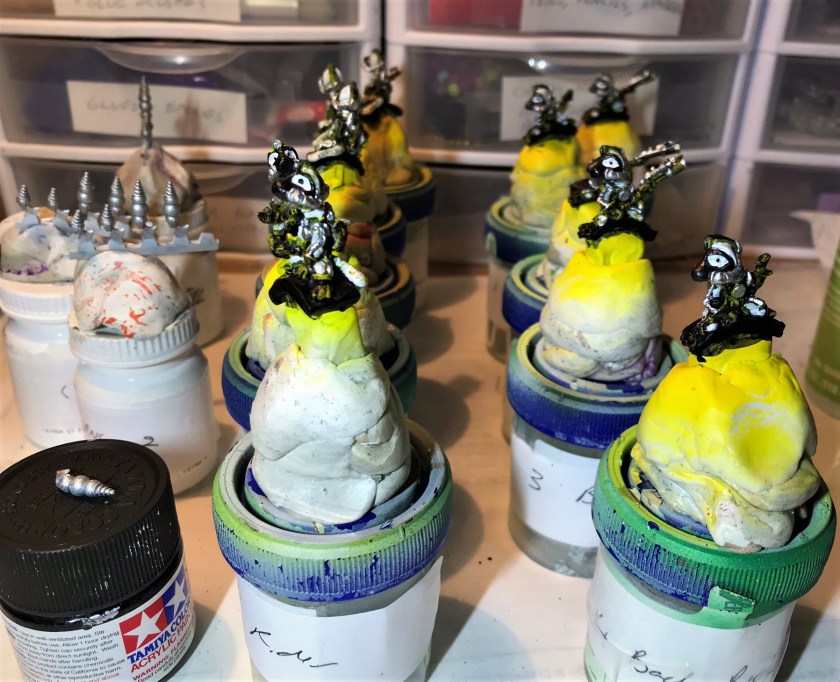
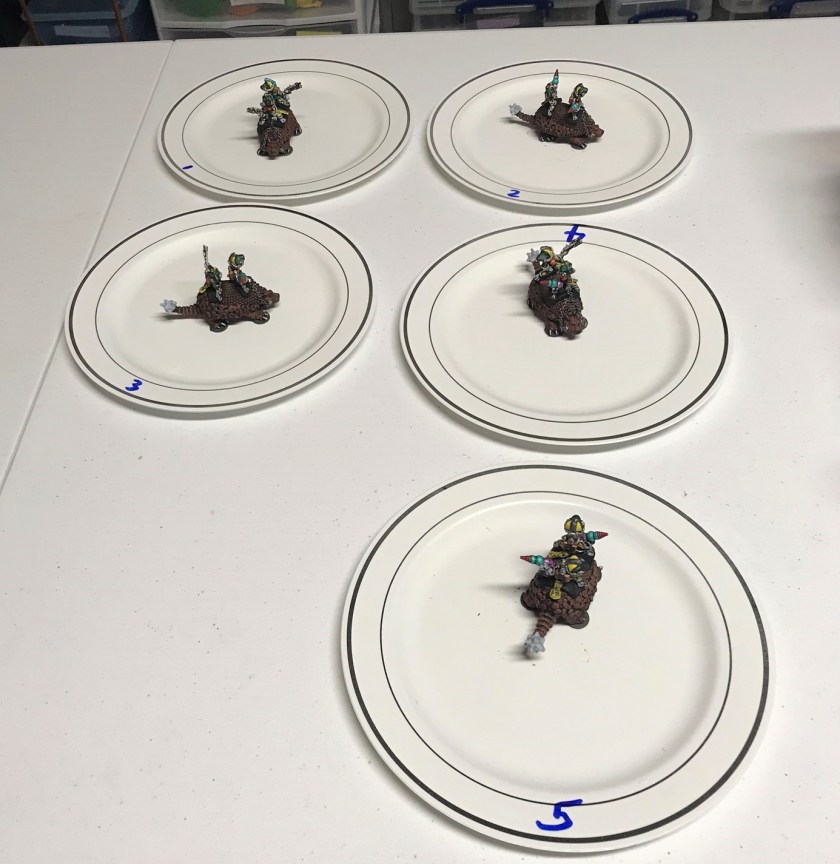
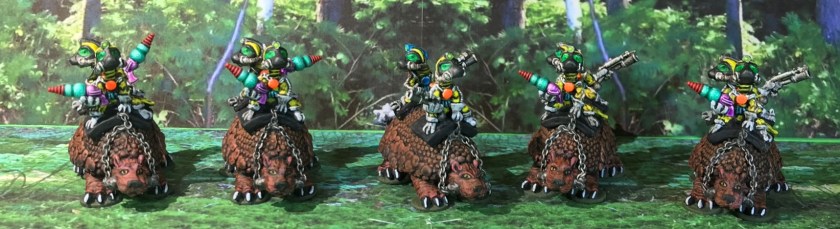
This month to add to my Frinx forces I managed to finish 5 Power-Armored Frinx on Glyptodons (let’s call them PAFOG for short!) models. As shown above, each set has two Frinx riders on a glyptodon. I chose 5 because I felt that 10 Frinx riders would be a good number for a cavalry squad in either the recon or screening role in my Combat Patrol™ games. It also would give the unit enough punch if deployed as a mobile counterattack force. I sorted out what figures that I had, and chose the ones I would use for the cavalry squad. Some of the riders’ weapons were not very well cast, so I converted these weapons. I used Bombshell Miniatures sprues of Arc Weapons (#36013) to replace six of the blasters. My initial plan is currently to give these weapons better capabilities versus robot foes, which should prove interesting given that I have a lot of robots now.
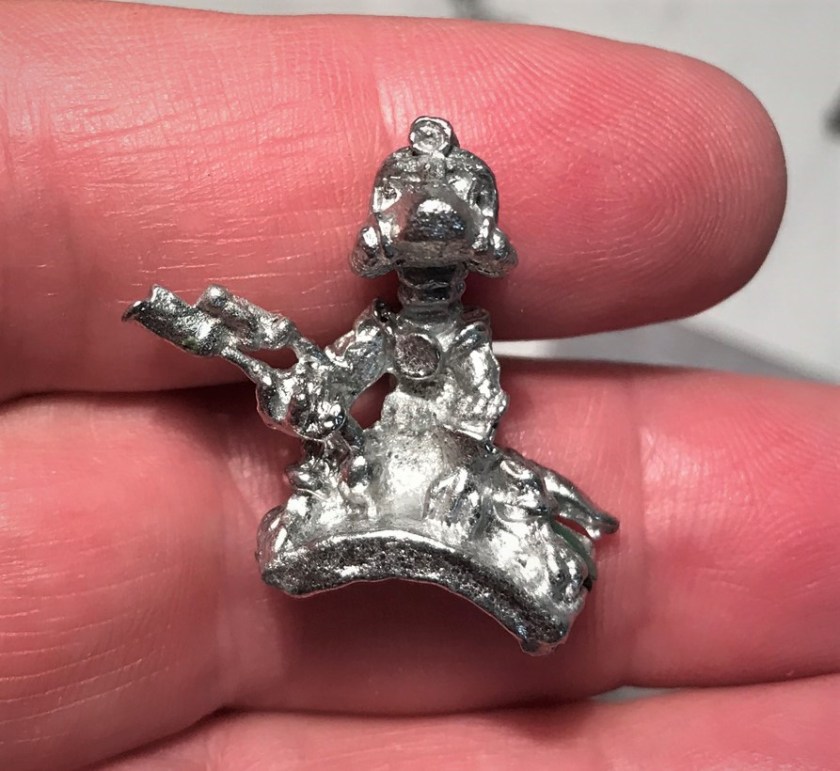
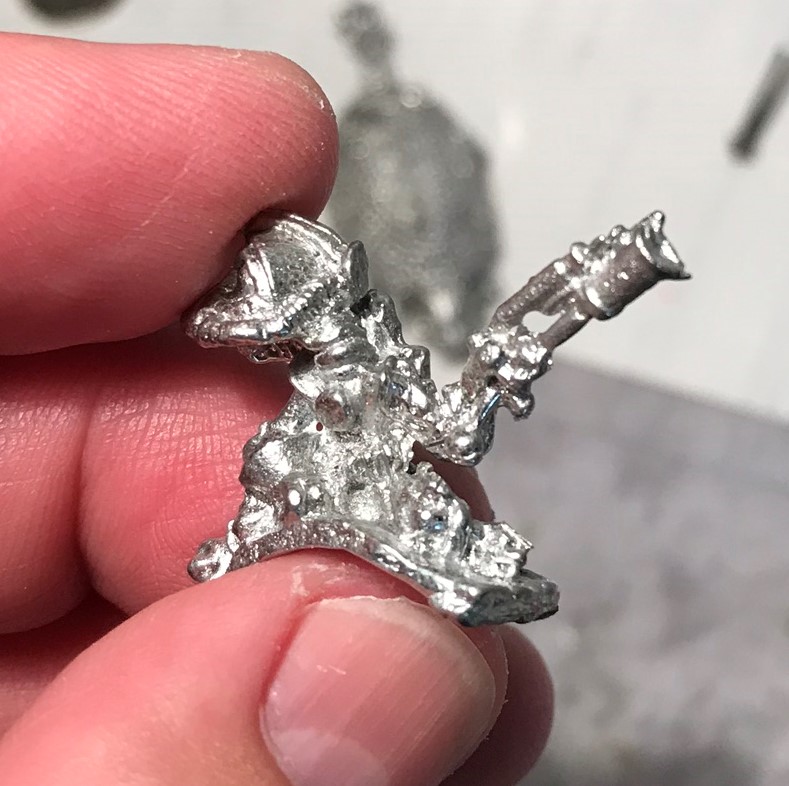
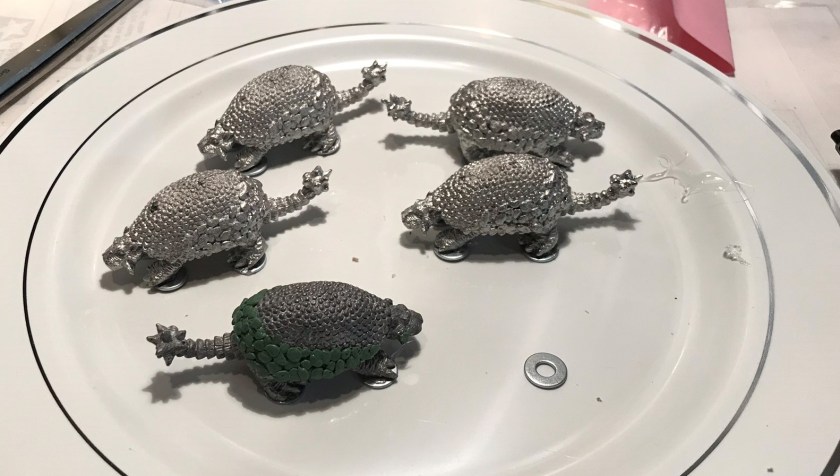
My initial assortment of PAFOG before I cleaned the chosen 5 – you can see that I still had modeling clay on the original on the bottom right.Boot camp time – must select the best for the cavalry!The final five plus the Bombshell Miniatures Arc Weapons. I decided to use the largest arc weapons that you see here as their sizes worked well.Washed and ready for priming. As you can see, the details are much less crisp than I would like. His weapon was replaced with an arc weapon. This is the front rider (recast).This is the back rider (recast).
In order to make these Frinx “pop”, I needed a plan. Clearly, my painting was going to do a lot to overcome the plainness of the riders. I also needed to figure out how I was going to base them for painting and handling – unlike other Archive Miniatures these had no bases. These are also very heavy (solid lead/tin). The feet of the glyptodons were not level, so choosing the right basing was a big quandary for me for several reasons. I tried several approaches in my mind, but eventually chose to emulate Buck’s choice and use washers. I did choose smaller ones than Buck did – using #8 steel washers and E6000 epoxy under each foot, allowing for hardening overnight.
On their washers for an overnight set.
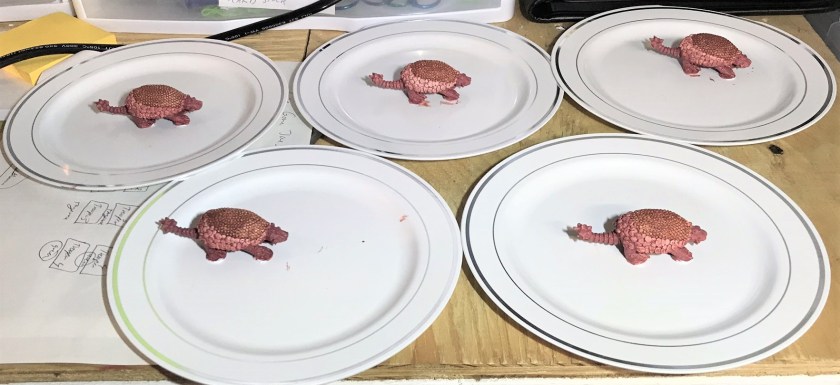
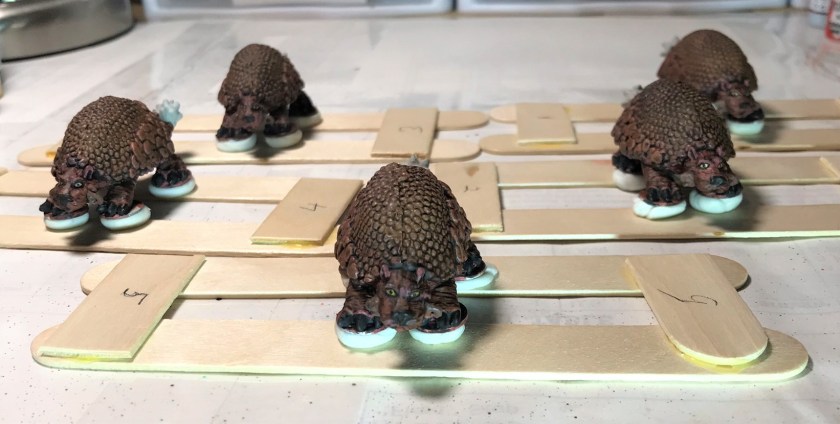
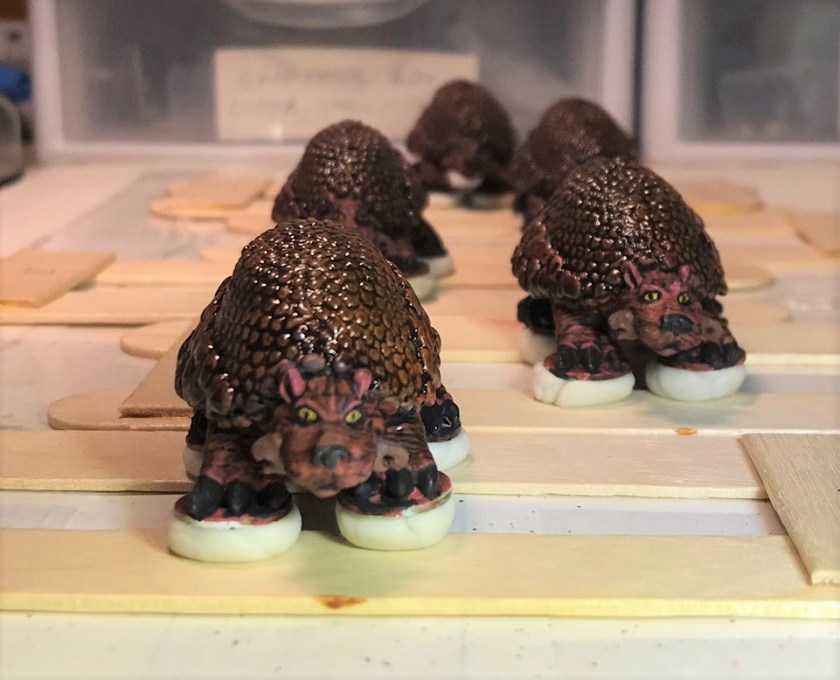
Once they had set, I began by priming the bottoms, letting that cure, and then doing the tops. My goal was to make the bottoms reddish brown, leading to a more brownish top as the drawing of the glyptodon above shows. It was not easy! I had to do a lot of handling of the paint jobs and eventually I moved them to popsicle stick frames with poster tack, which was good for a temporary, if imperfect, solution.
Early stages of priming and base coating of the glyptodons.Eventually I mounted the glyptodons on these temporary frames for painting – still not ideal.
After carving away 6 defective metal weapons, I mounted the riders on poster tack mounds on specimen jars. The saddles really did not present me with many other options for mounting them for painting.
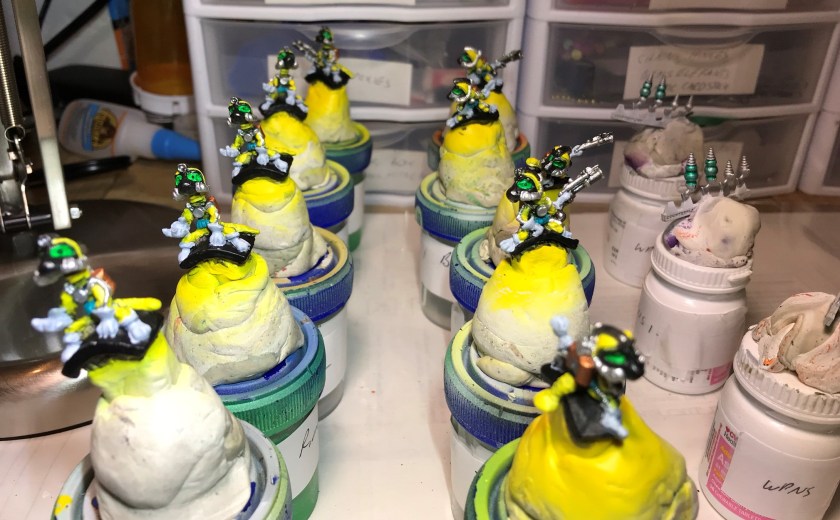
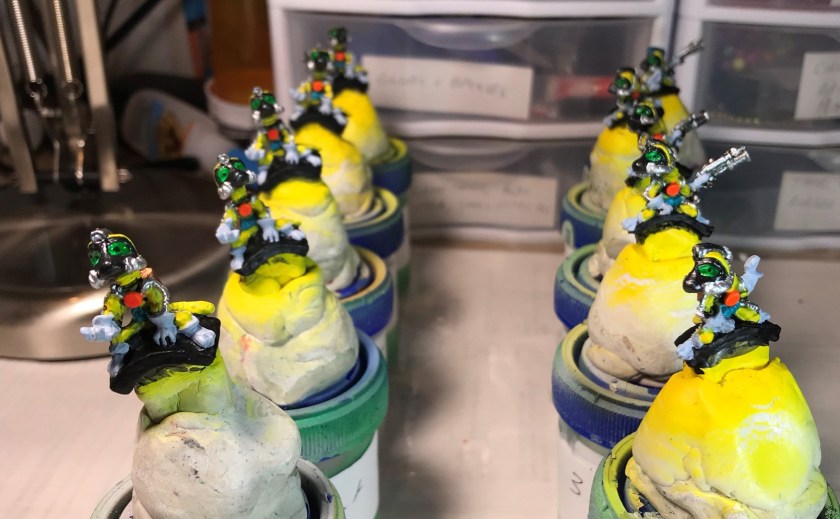
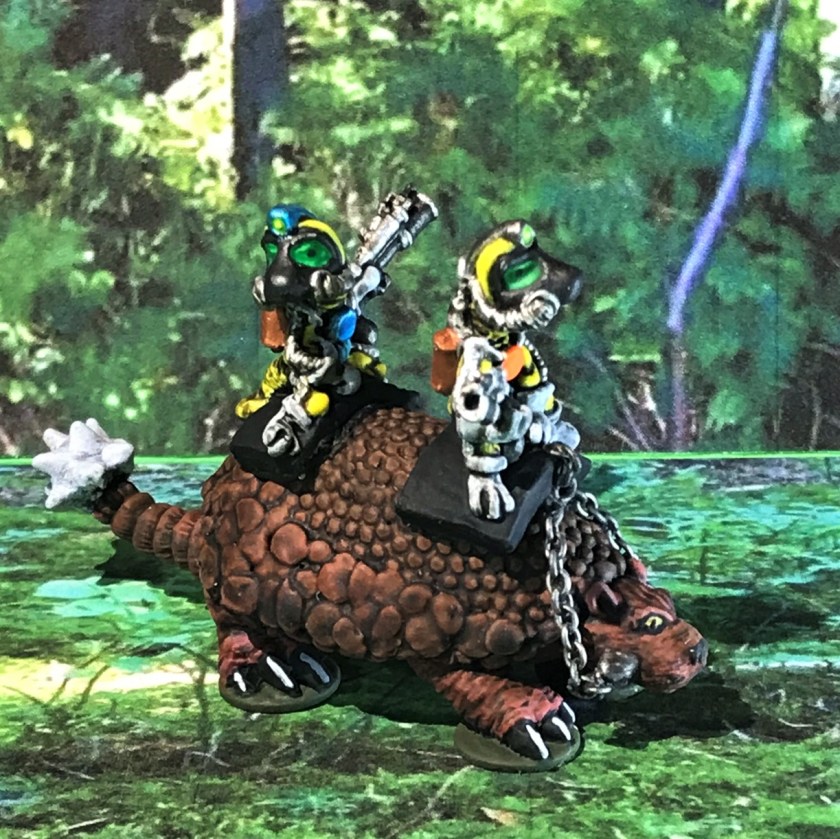
As for a color scheme, I decided to go with the branch color of the US Army Cavalry (now Armor), that being yellow. Besides, yellow is a difficult color to pull off, so I thought it would pose a nice additional challenge. I primed them, and subsequently airbrushed the riders with Vallejo Game Air “Moon Yellow” as a base coat. I then used Reaper MSP “Grey Liner” over the riders to help show me what parts I could paint to bring out the best details. This step really was useful.
Frinx riders after airbrush the primer and base coat.Early stages of painting the ridersAdding some metallics to the riders and inks to the arc weaponsPainting completed for riders – awaiting a wash applicationThe 10 riders washed and waiting for their weapon conversions. I converted 6, and yes, I painted an extra arc weapon just in case! I primarily used inks on the arc weapons over a chrome base coat for a retro sci-fi look. After this, I applied a gloss varnish to them.
It was time now to return to the sturdy mounts – and I had gotten to the point that I was happy with my painting on them. However, what was missing was a set of reins for each glyptodon. When I cast them, I did use the original bits in their mouths, but the original reins were totally inadequate in my view.
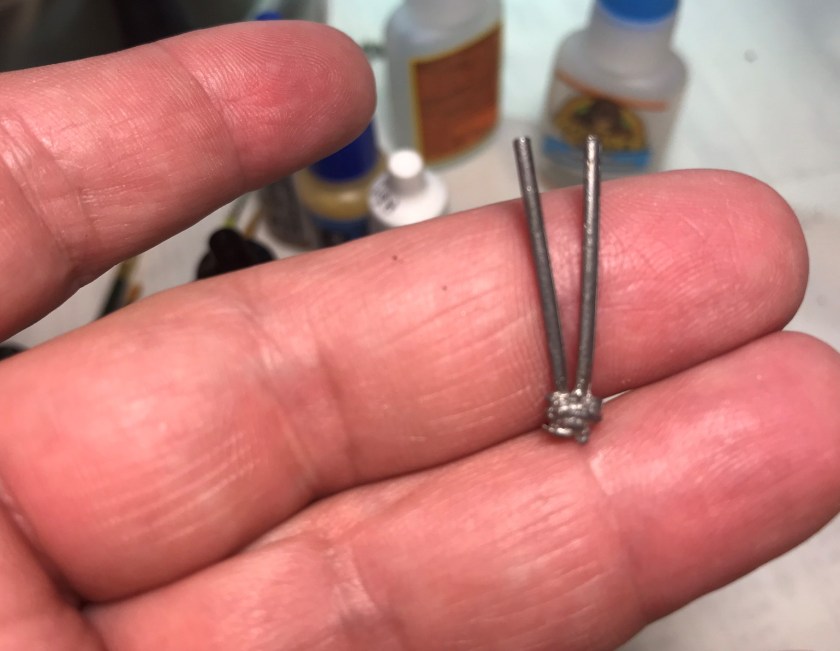
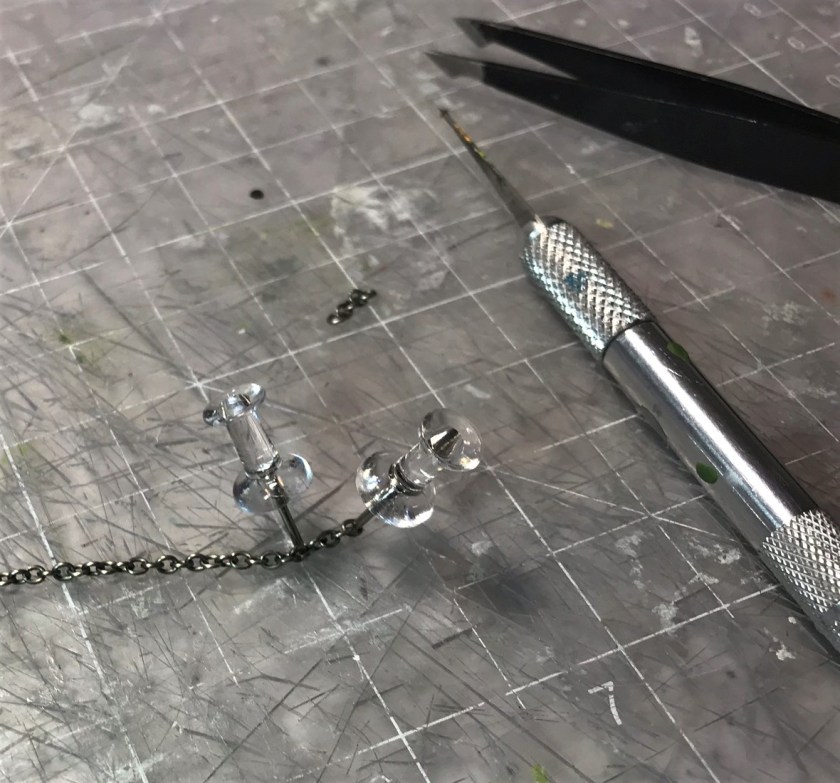
I decided to make reins from the smallest jewelry chain I could find. Figuring out how to affix the chains was a lot of trial and error on one of the extra unpainted glyptodons that I had. I tried using wire, thread, as well as just hooking the chain to the mounts – all for naught. Then, a light bulb went off – toothpicks!
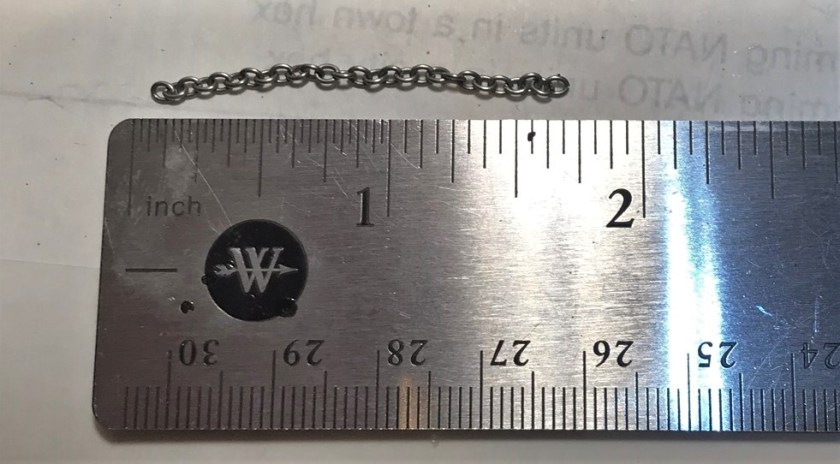
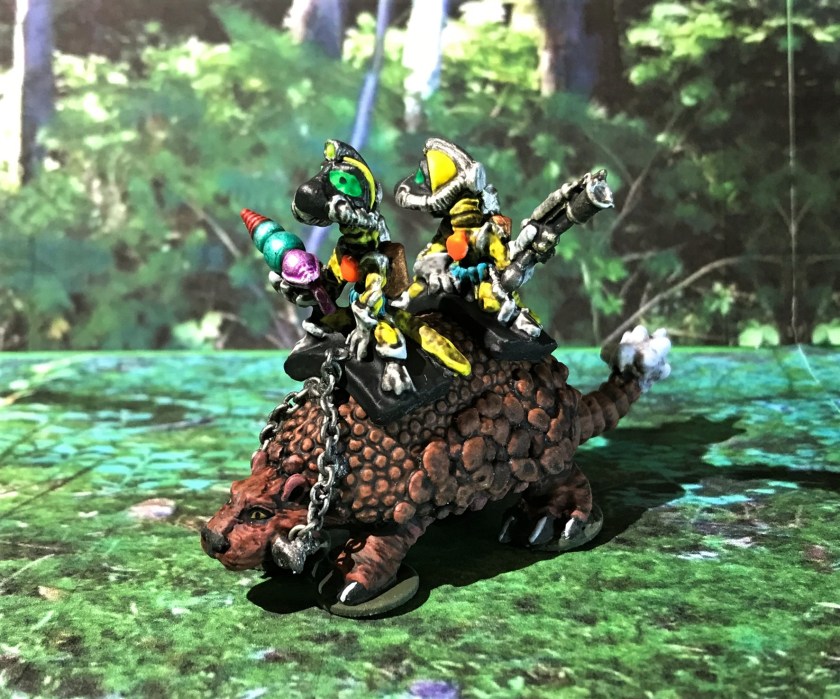
I determined that I needed 27 links for the main chain loop for the reins. I threaded the last chain link through a wooden toothpick. I then inserted the toothpick into the bits by the mouths. I used a push pin to slide the link into position on the toothpick, and applied a very small amount of Gorilla Glue on the wood/chain/bit connection. After the glue dried (often with the assistance of a hand held hair dryer), I snipped the toothpick with a sprue cutter as close as I could to the bit. The net effect was like a tent peg and a rope, securing the chain to the glyptodons’ bridle bits. I repeated the process on both sides, then tack glued the chain at the top and above the ears to make a loop. Then I dry brushed the chain with Tamiya “Gun Metal X-10” and let it dry. Lastly, I applied Citadel “Nuln Oil” to the chain.
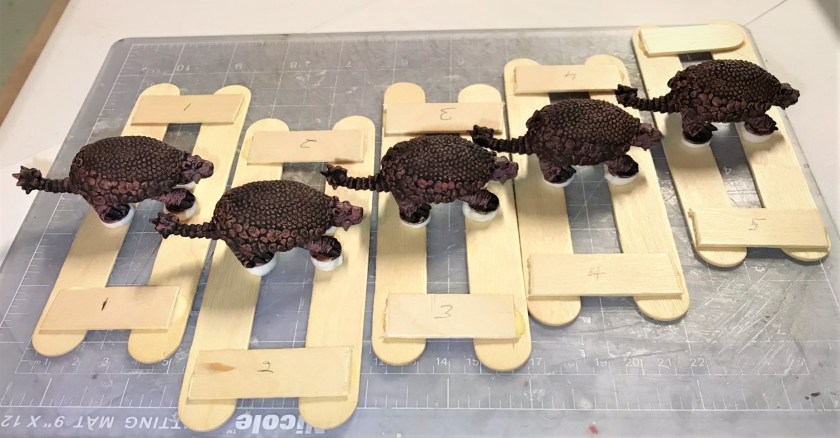
Painted glyptodons before final wash application and addition of reins.I applied Citadel “Agrax Earthshade Gloss” on the back, expecting the later matte varnish to dull it down. Still need reins!These are the original reins – not acceptable!Time for some jewelry making, I mean rein making (sounds weird huh!).27 links, no more no less!He looks a bit like he needs an orthodontist. This is how I mounted the chains into the bits.Main chain loop mounted, before painting it and the bits.
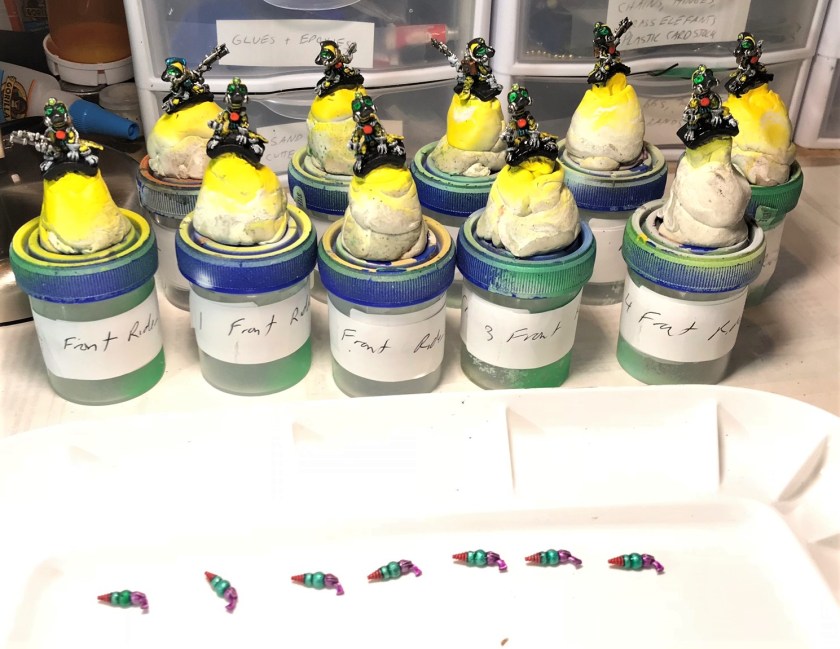
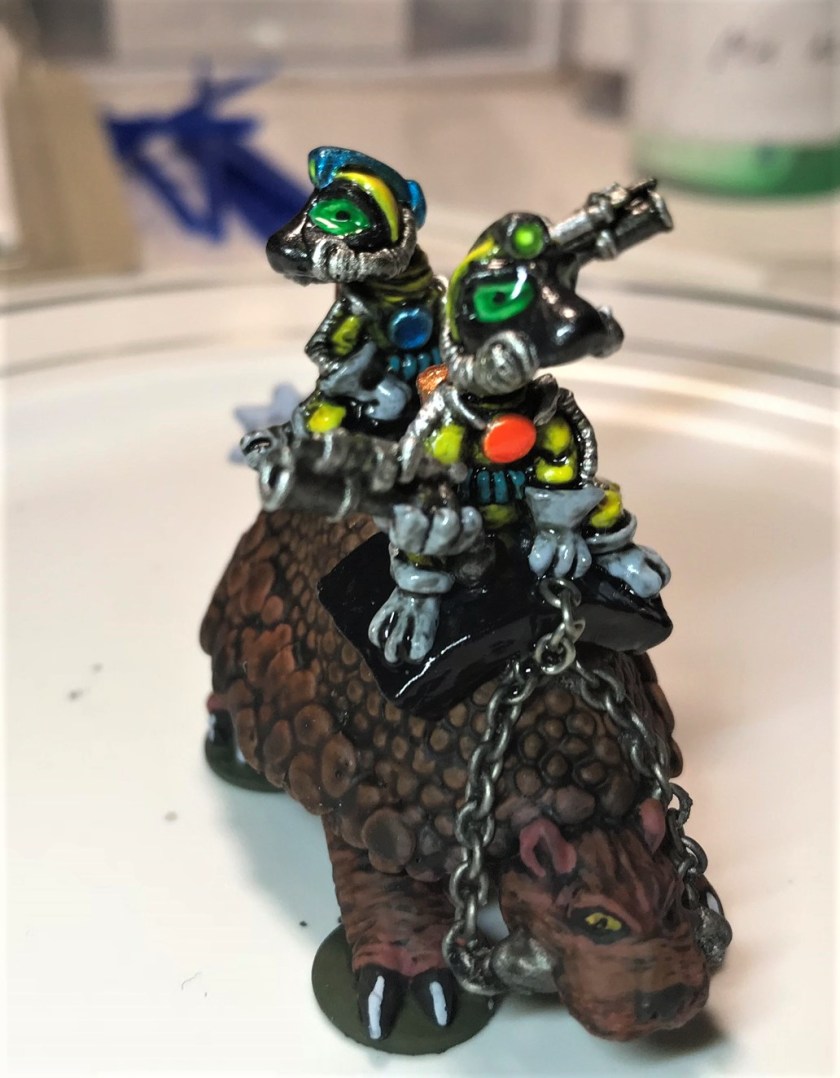
After this, I removed the glyptodons from the frames in order to give the mounts a matte varnish airbrush treatment. Then I mounted the riders to the mounts with E6000 epoxy, and let it harden. I wanted to connect the chains to the front riders hands. For this I needed a massive 4 links of jewelry chain per model, push pins, and patience. I used Gorilla Glue, push pins, and the blow dryer to get the additional chain segments in place. I then applied the same painting and wash techniques to the 4 links.
4 links, no more, no less! I used push pins to help as I cut the links.
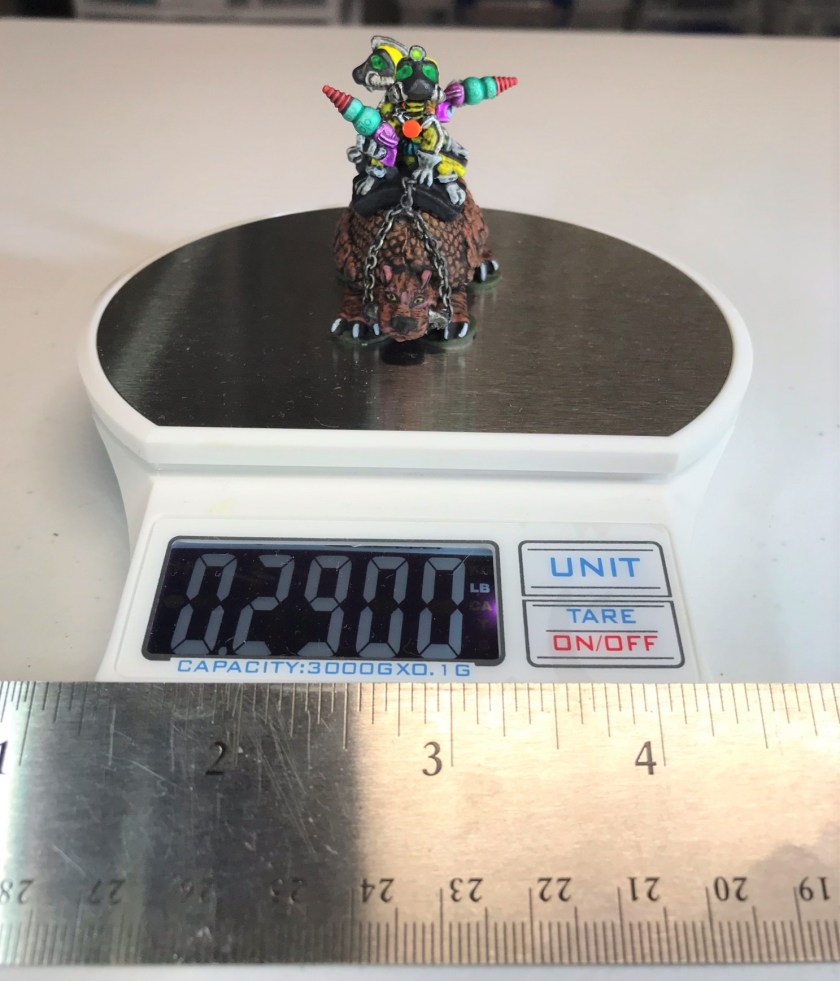
The glossy riders on the matte glyptodon with the new chain attachment which has not yet been painted. Subsequently, the whole PAFOG got a couple of matte varnish coats.After final varnish of an airbrush matte coat.For you metric system users, an idea of the weight and size of the model as completed.For us in the USA, its a mere 4.64 ounces of heavy metal goodness…not a quarter pounder I’d eat by the way…
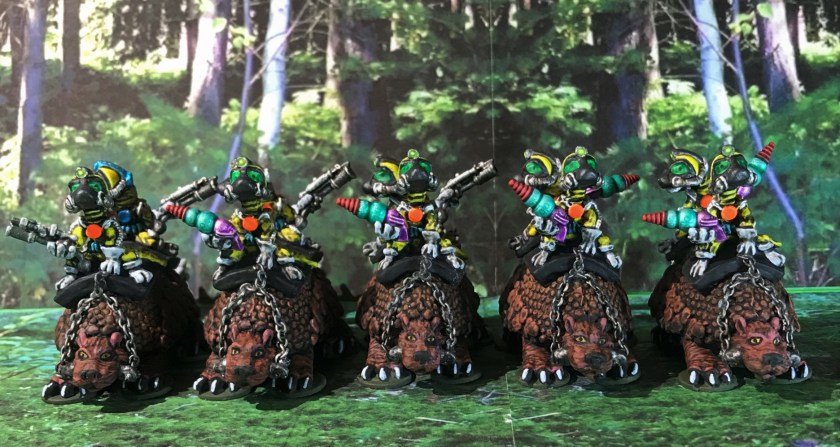
The PAFOG squad project was now complete – except that I needed to make corrals for them as they are so heavy as to slide in my other Frinx box. No worries, as I want them to survive for many future games, and I’ve done that for other outsized figures
This project also counts for me in a community painting challenge that my Australian friend Azazel has sent out for July 2018. It is for a “Jewel” project – and given all the work that went into these from acquisition to casting to conversion to final painting – I’m confident that these will meet the requirement!
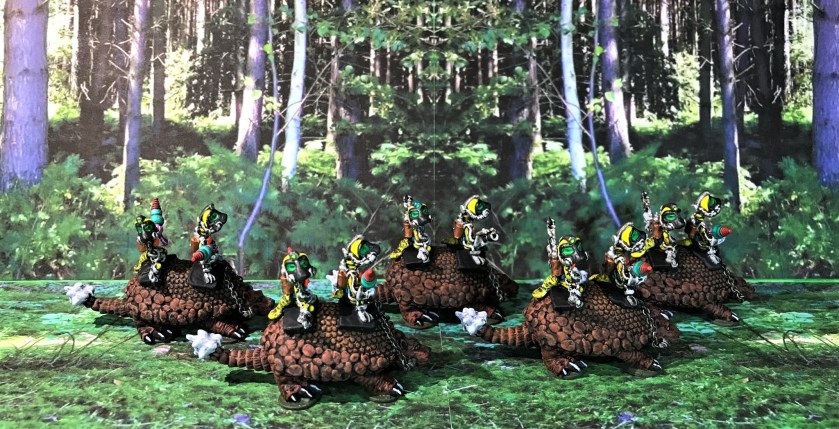
The eye candy follows, and hopefully you will find these as cool as I did. I always appreciate your feedback dear readers – let me know your thoughts and suggestions. Thanks for looking!
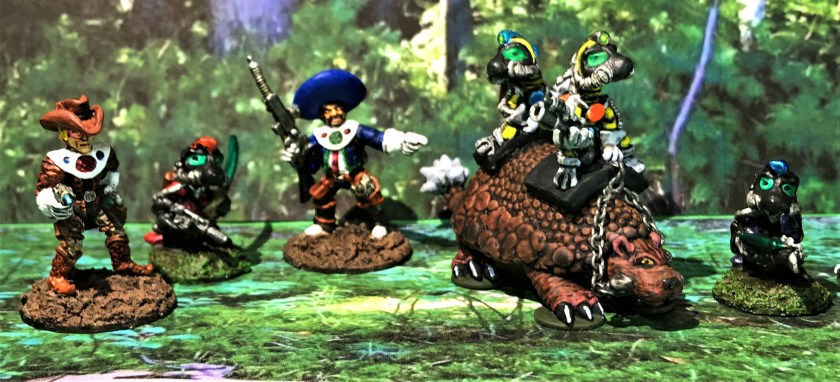
Frinx, form up!Move out!This is the section leader’s mount. The section leader has blue markings. These figures are the originals and have the original weapons. In a Combat Patrol game, they will draw two cards for movement. Between the power armor and the glyptodon’s armor, they should have some ability to take damage.A good view of the back ends where the bony spiked tails are found. Here, on the right is the section leaders mount, and on the left is a mount with one Frinx armed with an arc weapon and the other with a blaster.Nice group shot – note the conversions with the arc weapons.Close up of the right side.A conference with Lt. Ma’k (the Frinx platoon leader in red), some Frinx Amethyst Squad infantry, and the Texican Space Rangers.Surrounding the Space Dwarves in a final charge!
For those interested, here is the list of the paints, etc. that I used in this project.
PAINTS, INKS, GLAZES, WASHES, AND FLOCKING USED:
Citadel “Imperium Primer”
Vallejo “Surface Primer – White”
Vallejo “Flow Improver”
Vallejo “”Airbrush Thinner”
Testors “Universal Acrylic Thinner”
Vallejo Game Air “Beastly Brown”
Vallejo Game Air “Dead White”
Vallejo “Red”
Vallejo Game Air “Moon Yellow”
Vallejo “Black Grey”
Citadel “Agrax Earthshade” (wash)
Reaper MSP “Grey Liner” (wash)
Vallejo Game Air “Black”
Vallejo Model Air “Black (metallic)”
Vallejo Mecha Color “Yellow Ochre”
Vallejo Mecha Color “Brown”
Vallejo Model Air “Rust 080”
Citadel “Ceramite White”
Tamiya “Chrome Silver X-11”
Tamiya “X-20A Thinner”
Vallejo Mecha Color “Turquoise”
Vallejo Model Air “Medium Gunship Gray”
Tamiya “Copper XF-6”
Tamiya “Gun Metal X-10”
Vallejo Game Air “Wolf Grey”
Citadel “Hexwraith Flame”
P3 “Green” (ink)
Citadel “‘Ardcoat”
Secret Weapons Washes “Just Red” (ink)
Citadel “Soulstone Blue”
Vallejo Game Air “Fluorescent Red”
Citadel “Nuln Oil Gloss” (wash)
Secret Weapons Washes “Purple” (ink)
Vallejo Mecha Color “Yellow Fluorescent”
Vallejo Mecha Color “Sand Yellow”
Citadel “Seraphim Sepia” (wash)
Polly Scale “WWII British Aircraft Gull Gray Light”
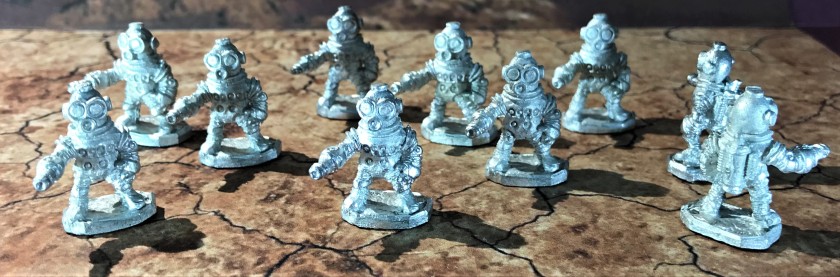
Archive Miniatures Star Rovers game and miniature range had a lot of very fun figures, many of which I have painted and discussed in past entries in this blog. A couple of the line that caught my eye were “Long Gone Jones” (Archive #2211), a space dwarf, and “Agribot S1L1” (Archive #2204). Both were sculpted and put into production around 1977. I’m not exactly sure of the name derivations, but methinks there was some degree of Archive humor there based on the late 70’s – and I leave it to you readers to make your own guess!
I had previously acquired one Long Gone Jones (let’s call him LGJ) miniature on eBay, but had not found any others. However, Michael Thomas at classicminiatures.net (who produced the Robot Peacekeepers I previously described here) also had the molds for these figures. So I placed the order from him, and got ten LGJ’s to add to my original one in addition to three Agribots. I thought I would now have enough to build a squad for sci-fi games using Combat Patrol™ .
Each LGJ is in power armor, has a jet pack, and is armed with an automatic weapon coming out of his right arm. The Agribots look like they have a hovering mechanism, and are armed with what looks like a machine gun.
For the unit’s organization, I decided to have a LGJ squad leader with a dedicated Agribot as the squad headquarters. He would lead the squad’s two Space Dwarf Assault teams (A and B). Each team would have its own LGJ team leader, 4 LGJ troopers, and an Agribot. I’ll probably treat the LGJ weapons as analogues to sub-machine guns, and the Agribots as mobile medium machine guns. This made a total of 14 figures for the squad. I was thinking about the organization of Soviet Machine Pistol squads in WWII as inspiration. My numbers aren’t exactly the same, but we are talking about Space Dwarves here! To round out the end of June, I finished off the Space Dwarf Assault Squad.
One of the Agribots I got from Michael Thomas. It has the typical crispness one would expect from a 1970’s mold – clearly I needed to be creative to make this one look good. The other side cast better as you see below.Agribots better side
First, I cleaned and washed the group. Then I filed off the mold lines and flash on the figures. After this, I mounted them on ¾” steel washers with Gorilla glue, and affixed the washers to poster tack on top of specimen bottles. I primed the squad white with Vallejo “White Surface Primer” with my Iwata Eclipse airbrush, and let that harden.
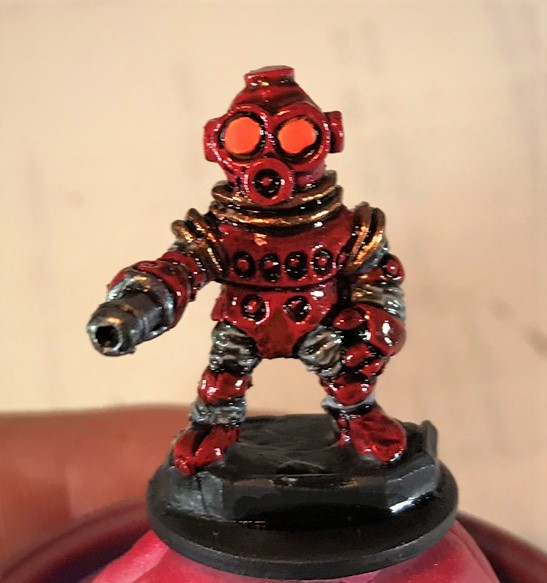
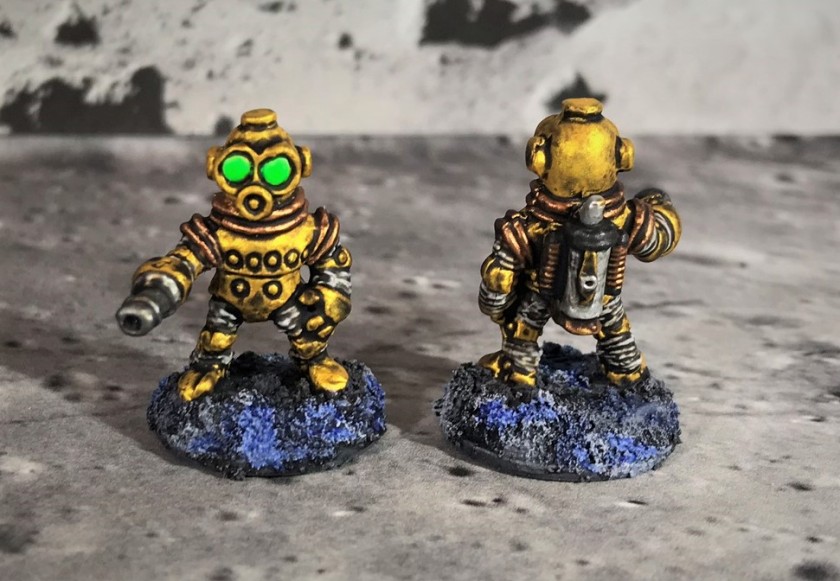
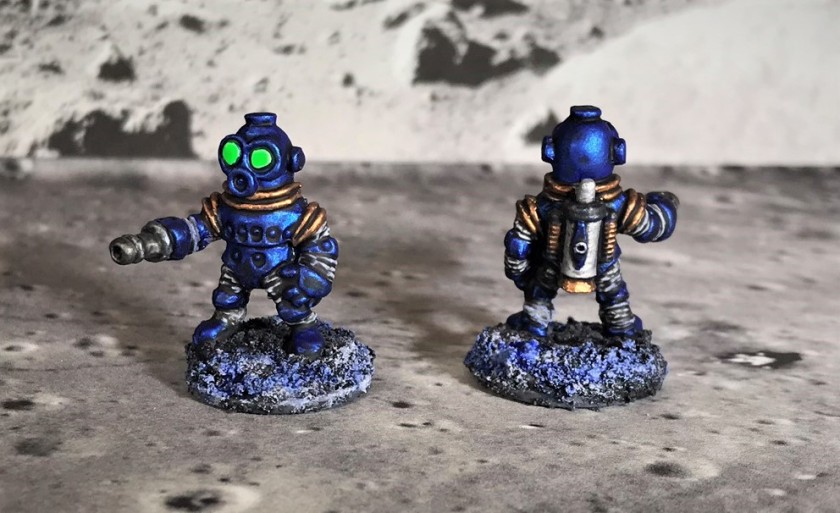
I wanted to give these figures a totally retro sci-fi look – so I again used the Createx paints to airbrush even more colors (added Pearl Blue, Pearl Lime Green, and Pearl Green) onto the squad than I had done with the Robot Peacekeepers. I figured the dwarves would want more individuality! For ease of play on the tabletop, I did plan to similarly color coordinate the lenses on the LGJ’s and the Agribots with Vallejo Mecha Color fluorescent paints. On the optics/lenses, the squad leader and his Agribot would get Vallejo Game Air “Fluorescent Red”, Team A got Vallejo Mecha Color “Green Fluorescent”, and Team B got Vallejo Mecha Color “Green Fluorescent”. These would take multiple light thin coats to get the desired effects. And of course with so much metallics, I needed to use a lot of Citadel “Nuln Oil Gloss”. I list the paints and materials I used at the end of the blog for those interested.
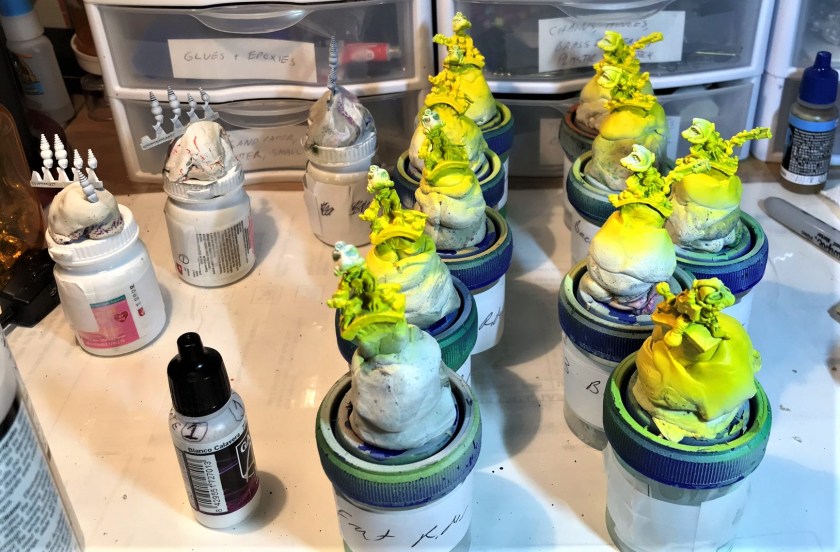
The squad awaits mounting and primingAnd here they are primed and mounted! I labeled the specimen jars to keep track of which one was in which squad, and what the color plan was for each figure.After airbrushing the base colors.Pearlized Createx colors used (bottle backs)Createx bottles fronts – I love that many of them are designated “Wicked Colors”. “Wicked” is a common term here in Massachusetts to designate much more than “very”.After a painting the small details and using multiple washes, I detailed the optics/lenses with white to help with the adhesion and look of the fluorescent paints.Awaiting the first coat of gloss varnish
My plan for varnishing the group and the bases was to initially apply an airbrush coat of Vallejo “Gloss Varnish” before working on the bases. The bases would then get a treatment of Citadel “Astrogranite Debris”. I like it better than “Astrogranite” – it sets up better for dry brushing later. Once that was dry, I washed it with “Nuln Oil”, let that dry, and then dry brushed the bases with Vallejo Game Air “Wolf Grey”. To give the bases a nice lunar look, I added Citadel “Gulliman Blue” glaze and let that dry. Lastly, I gave the entire squad a second coat of Vallejo Mecha Varnish “Matt Varnish” for protection and to dull the shines down to an acceptable level.
After application of gloss varnish – shiny new space dwarves…Squad leader close up after gloss varnishSquad leader’s Agribot after gloss varnish
I think you’ll see below on the finished figures the difference that the matte varnish adds, while preserving the metallic look of the power armor that I was attempting to capture.
Finished Long Gone Jones squad leader and Agribot. Their base color was “Pearl Red”.Team ATeam BSpace Dwarf Assault Squad leadership – the team leaders are in “Pearlized Copper”.The three Agribots, arranged to see the side and back details.Front and back details of the team leaders.Front and back details of the Space Dwarf troopers in “Pearl Tangerine”Front and back details of the LGJ troopers in “Pearl Plum”Front and back details of the LGJ troopers in “Pearlized Green”Front and back details of the LGJ troopers in “Pearlized Blue”Space Dwarf Assault Squad moves out for action!
I am pleased with the final product – and I can see them being on one side or the other of many future tabletop conflicts. Whoever is paying them the most of course! That’s the nice part of not needing a Codex! I do think that they are colorful enough, but power armor covers them nicely.
I hope that you enjoyed looking at this – and this was my most productive month ever in terms of painting – 57 figures in total (3 units) for “Junit”, a community painting challenge run so very well by our Aussie friend Azazel. If you’re reading this and are not familiar with his blog, it’s well worth the look.
June’s production – 32 Archive Texican Space Rangers, 11 Mega Miniatures Robot Peacekeepers, and 14 in the Space Dwarf Assault Squad.
I always read your comments and feedback – and as the goal of this blog to entertain and bemuse you – let me know if I did (or did not). So let me know your thoughts – and as always, thanks for looking!


