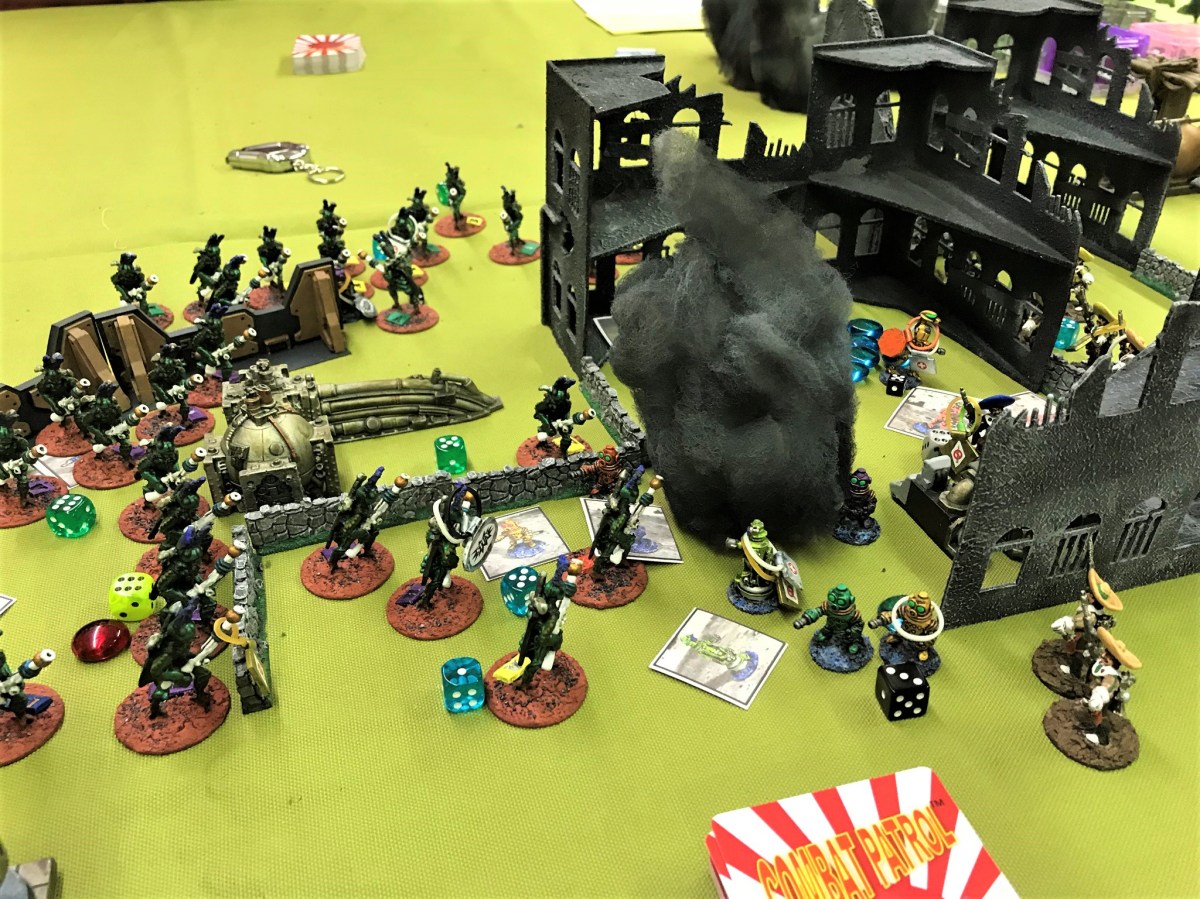
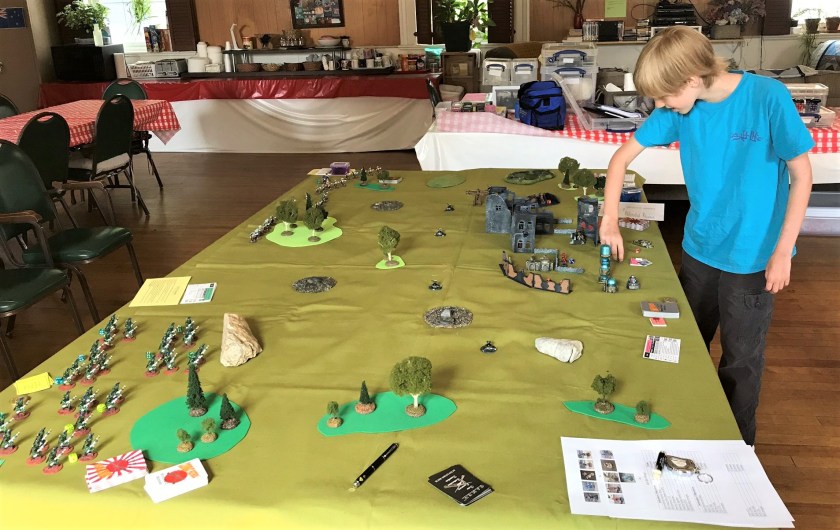
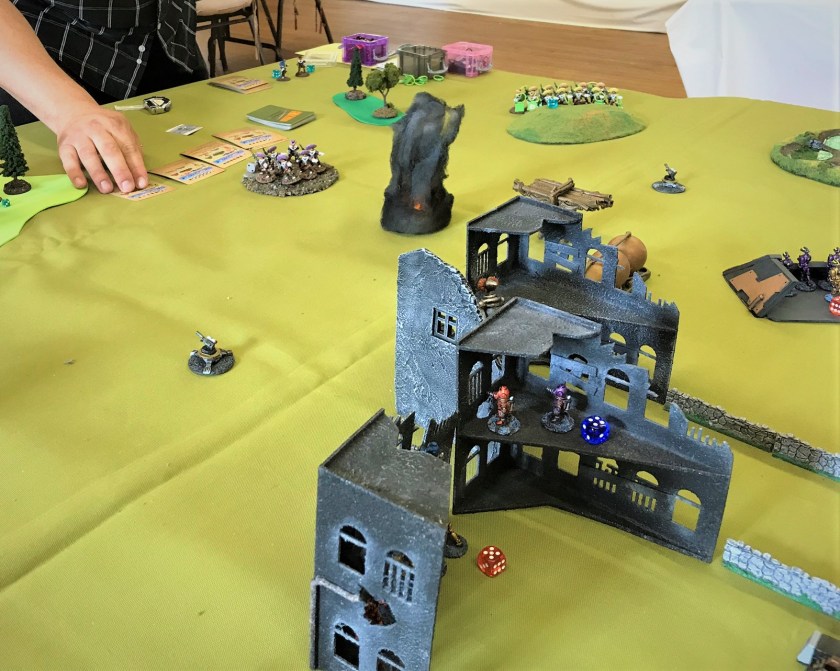
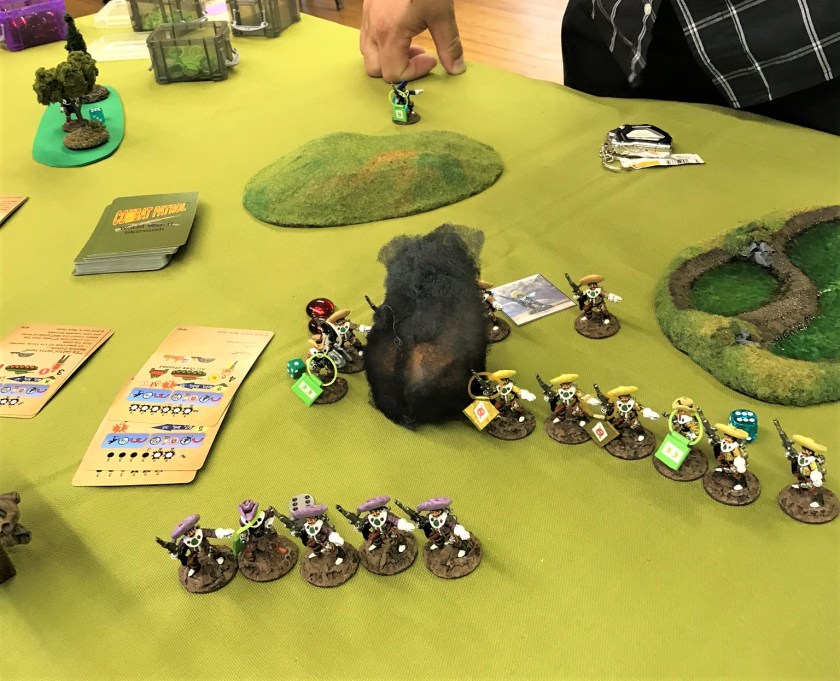
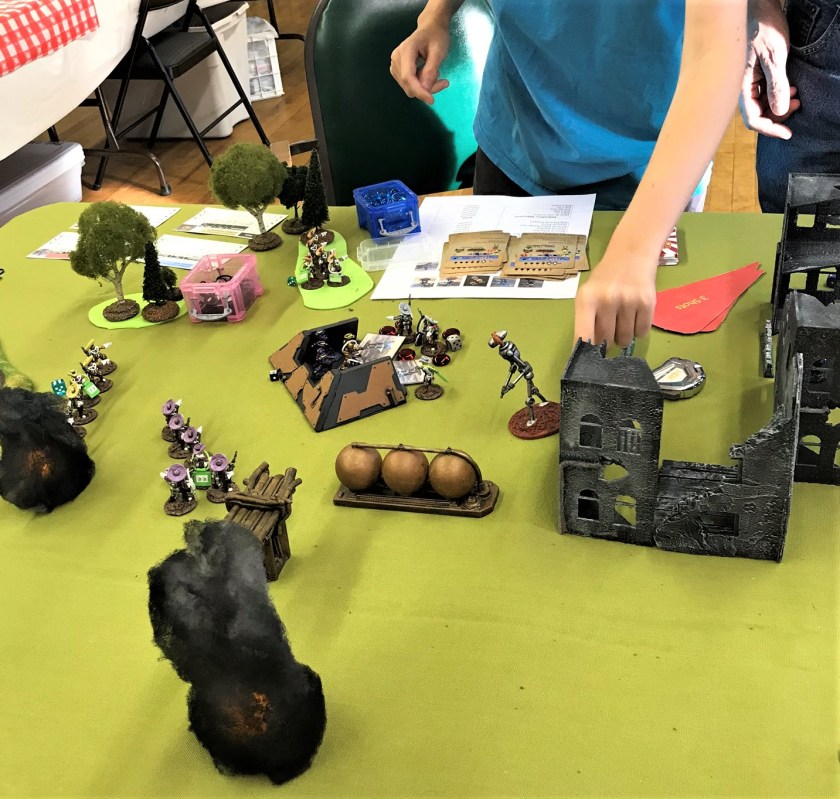
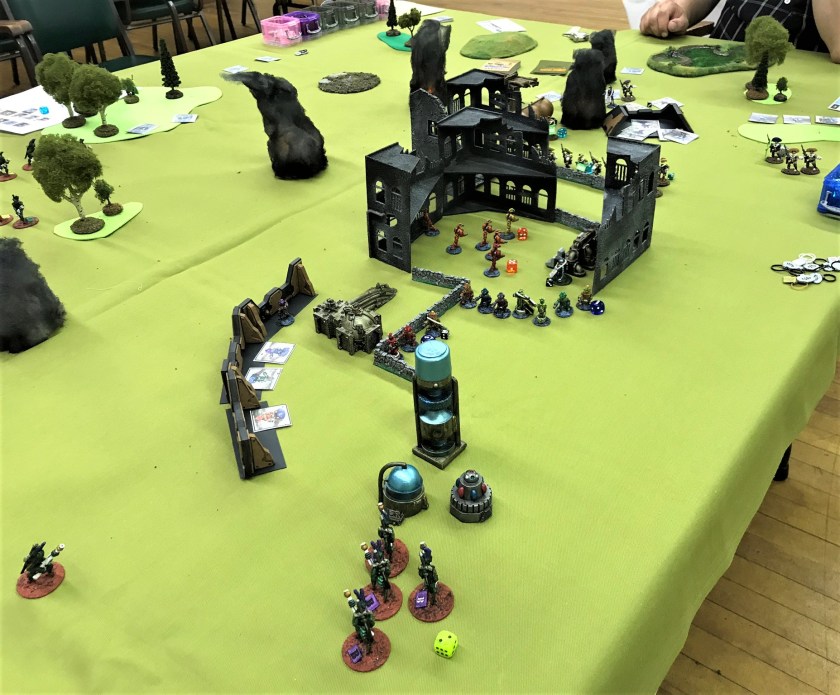
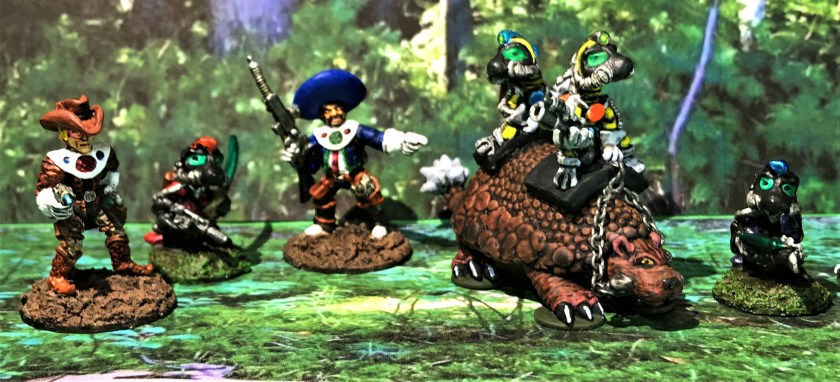
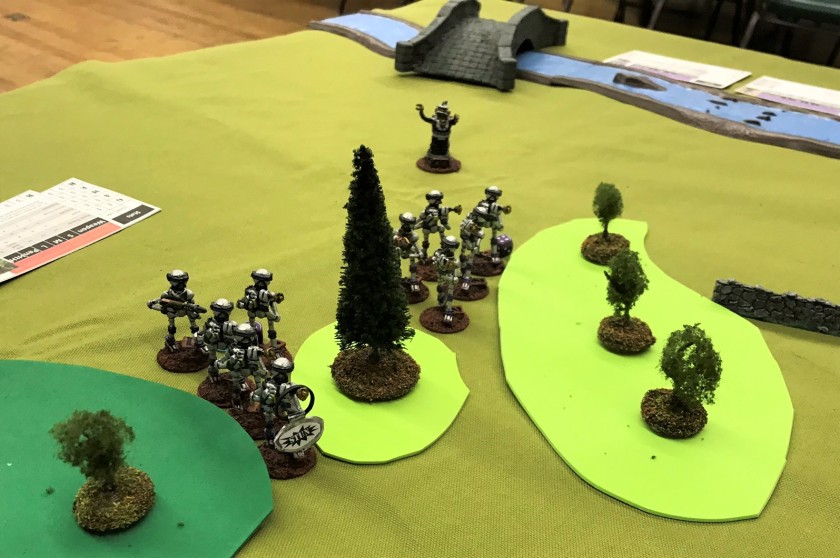
The July 2018 session of the Mass Pikemen Gaming Club was fun time for all. We had an epic battle using the Combat Patrol™ gaming system. The battle (called “Get The Data!”) was between the attackers (an alliance of the Texican Space Rangers and the Hurraku Space Phraints) and the combined forces of the Robot Peacekeepers and the Space Dwarves. The objective for the attackers was to seize weapons design data from a computer in an abandoned and ruined factory/research facility. The defenders mission was to exact a high price in casualties from the assault force.
So why did I align the Texicans and the Hurraku? One picture in the Star Rovers game shows them having a drink at Moondog Maude’s Cantina – so I went with that.
Hey, after this drink, let’s go to battle!
I assigned points differentially for the attackers and the defenders based on the mission. The Hurraku attacked on the defenders’ left, and the Texican Space Rangers attacked from the defenders’ right. The defenders also had Robo-Sentry guns deployed run by RT22. I also gave them Roberker, a flame-throwing giant robot to help with their defense.
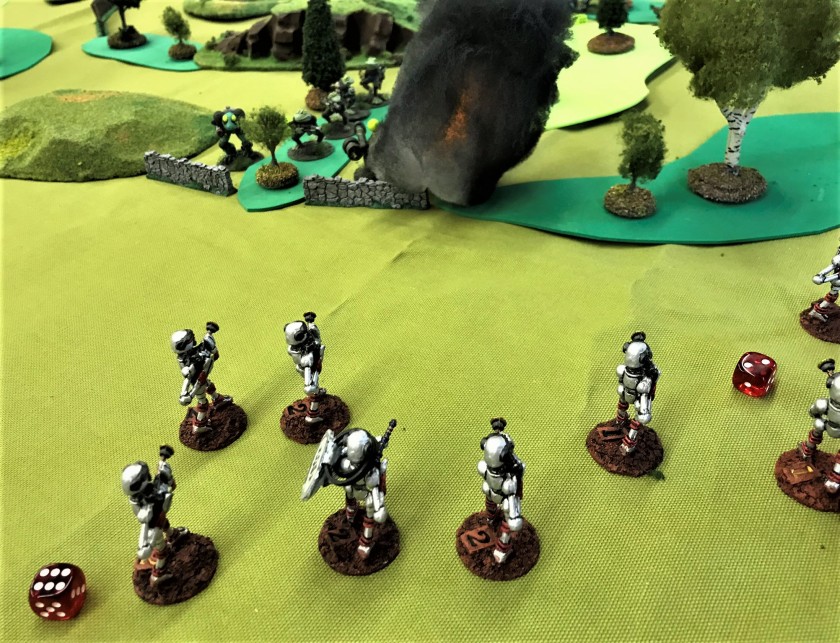
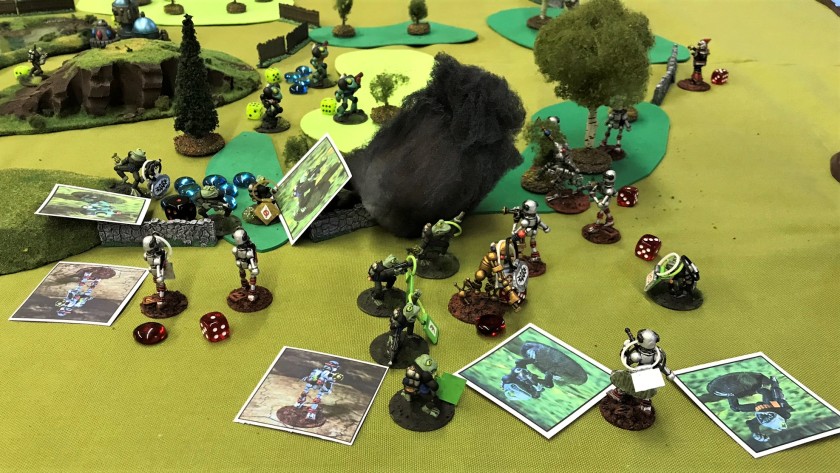
Will prepares to defendThe Texicans destroy a Robo-Sentry gun, then take cover. You can see the defenders in position in the building. If only the defenders had mortars!Two Texicans are dispatched by automatic weapons fire. I use casualty cards to designate fallen figures and to help score the battle at the end. Plus I think it shows the battle’s progression without having a bunch of minis tipped over. Chris Comeau (Texican commander) made a bold move and had his gray squad jet pack directly into a bunker filled with one of Will’s Robot Peacekeeper team. The bots passed a reaction test and the Rangers took massive fire and three dead before they could fire. The red beads mark morale checks for them, the blue for the bots. This sacrifice was to prove worthy, as follow on teams of Space Rangers were able to clear the stunned robots from the bunker.Another of the 5 Robo-Sentry guns is cleared by the Space Rangers.On the other flank, Jared Burns and Mike Morgan were able to use the long ranges of the Hurraku blasted to keep the defenders’ heads down. They maneuvered to flank the defenders.One of the Agribot automatic weapons did hit a team of Hurraku for one wound. Unluckily, the team promptly failed morale and became pinned behind a boulder. They were eventually able to rally.Back on the right flank, Will and Dave decided that it was time for Roberker to counterattack with his dual flame throwing arms. Roberker successfully roasted a number of the purple-sombreroed Space Ranger team. However, he put himself in the open……and he took automatic weapons fire from multiple Rangers. The plume from his smoking hulk is next to the bunker…Chris Comeau smiles…he also killed Roberker in his last game BTW!The Robot Peacekeepers in the bunker then drew an unfortunate morale result that caused them to perform a banzai charge (I have robots use the WWII Japanese in the Pacific cards for morale). Thus, they left the nice safe bunker and got mauled. Note the large number of blue morale checks to be performed after the banzai charge.By this point, Will and his dad Dave had to leave, so I took over. The defense was collapsing, so I withdrew the front line defenders as best as I could.The sacrifices of the Texican Space Rangers allowed the Hurraku to penetrate the defensive position. The first in was their Sith warrior, who used the powers of the Force to smash two robots (RT22 and a Robot Peacekeeper) with a Telekinesis attack by sending them into the factory walls. This destroyed them. As you can see, the morale checks were piling up……so why not add more to the carnage with a satchel charge thrown by a Hurraku Space Phraint into the Space Dwarves (the smoke plume here)! Meanwhile, the Hurraku Space Phraints swarmed in.The attackers swarm the compound. Game over.
The game was fun, and when the tide turned, the attackers did a good job of exploiting the openings presented. I love it when maneuver is executed well. The Texican Space Rangers aggressiveness resulted in nearly 50% casualties, but helped the Hurraku press their assault on the other flank. The defenders did get some very unlucky morale results, but so did the attackers so it was a wash there. Next time I run this scenario, I probably will include some defensive indirect fire support as well as some time constraints on the attackers.
Still, it was a fun session, and I am appreciative to the players! It was nice to meet everyone, and I’m glad that they got to learn the system so quickly. Our next session is tentatively scheduled for August 18th.
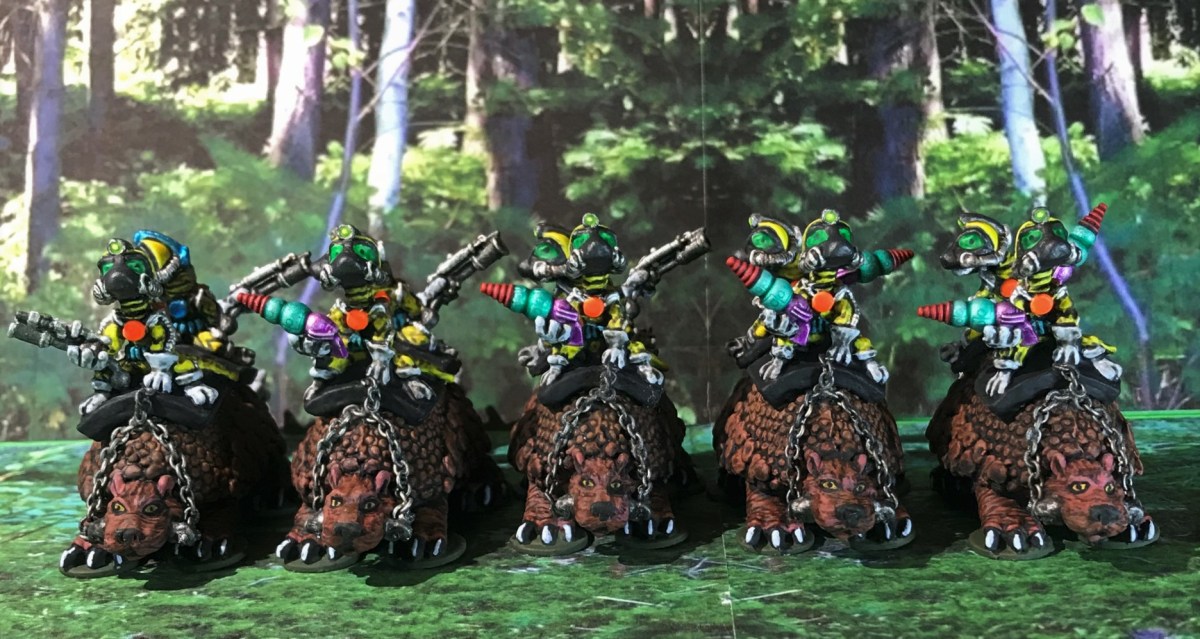
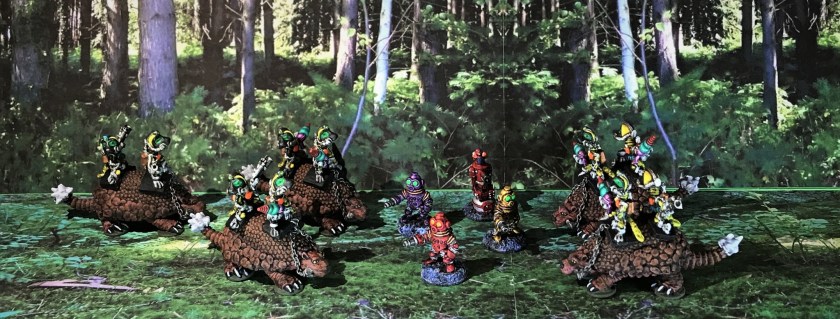
The Power-Armored Frinx are back, and this time as cavalry riding glyptodons into battle! The Frinx were a creation of Archive Miniatures back around 1977 or 1978. They are a smallish lizard-like race, often wearing power armor.
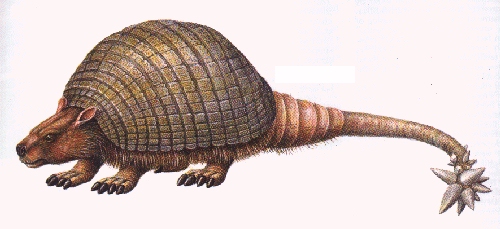
Glyptodons on the other hand were very real and existed from the Ice Age until about 11,650 years ago (give or take). They were prehistoric cousins of the modern armadillo, only they were mega fauna – and were as big as a Volkswagen bug. Plus, there is that massive spiked tail to consider. Why Archive put these two together is anyone’s guess, but the combination is indeed quirky and fun.
Artist conception of a glyptodon – as big as a car
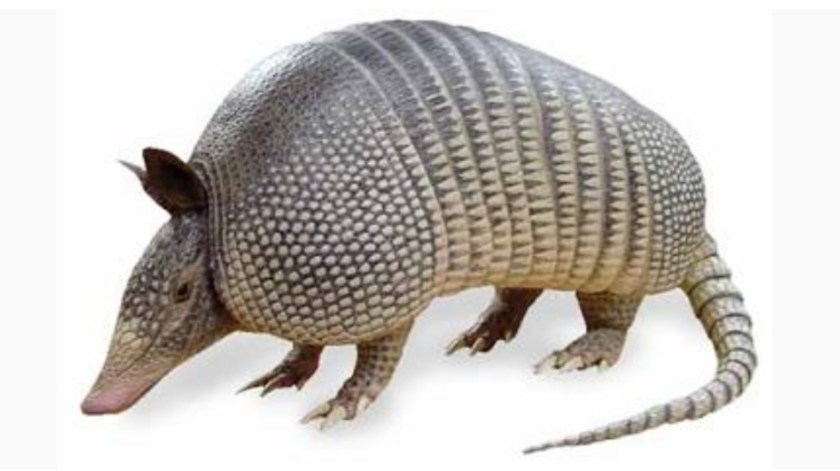
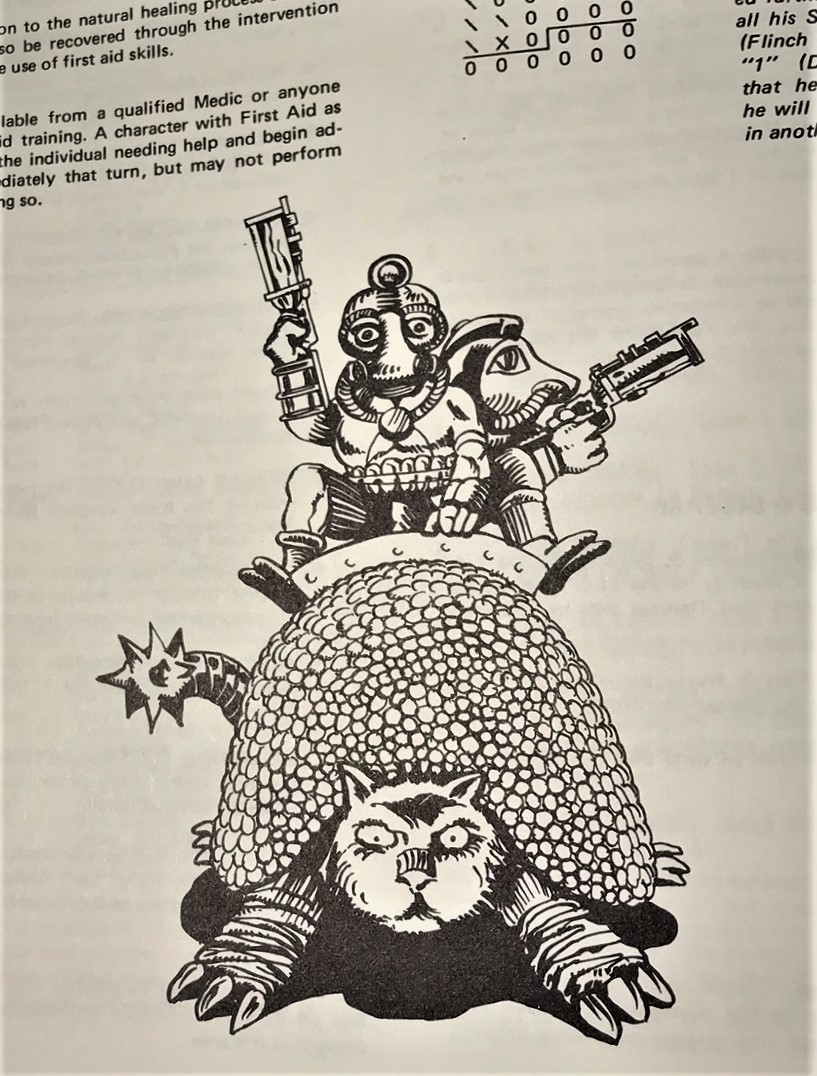
For you non-US folks, this is an armadillo. It’s about the size of a cat or small dog. None are around me in New England, but I saw plenty as road kill when I lived down South.Sketch of Power-Armored Frinx on Glyptodon from page 3.10 of the Star Rovers Module 1 rules
As a Frinx backgrounder for those interested, I have previously written several posts on the venerable Frinx, going back to my casting of their infantry in February 2016 (here), my painting and figure conversions of my Power-Armored Frinx infantry platoon in February 2017 (here), my May 2017 discovery and acquisition of an original Star Rovers RPG (here), and my casting of the Power-Armored Frinx on Glyptodon (Archive #2042) in July of 2017 (here). So this journey has already been 2½ years in the making. Phew!
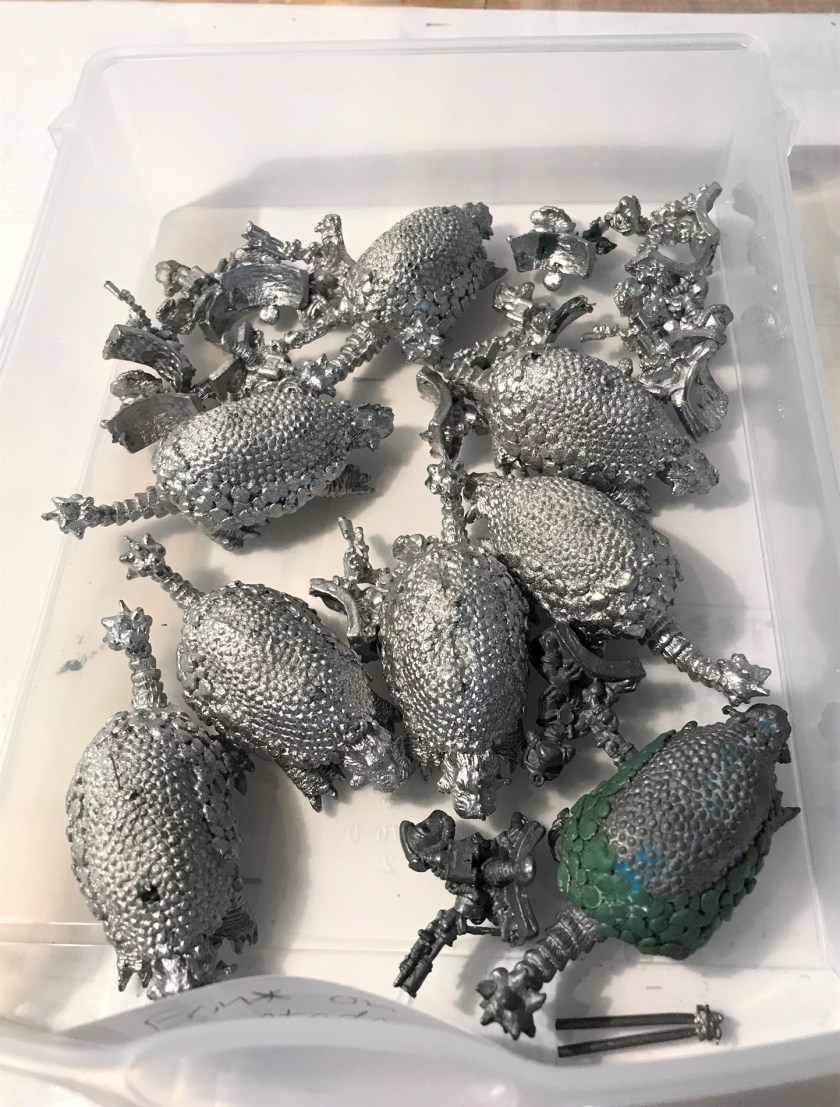
Interestingly, the 1981 Archive catalog that came with my Star Rovers game does not have the #2042 listed, despite the drawing shown above being in the rule book. My guess would be that the kit was uneconomical to produce and/or difficult to produce well. I document several these issues in my casting post – but originally the kit contained no less than 11 pieces as shown below. As reference, the scale of the set is 25mm to 28mm.
Original Power-Armored Frinx on Glyptodon kit
I made my own modifications to this particular set and made molds to recreate the kit. It is indeed rare and given that it was already OOP by 1981, there cannot be many of these around. I thought they would serve well in a traditional cavalry role for my Frinx platoon. I cast several and shared with Buck Surdu (who graciously provided me the original you see above so that we both could have some). Buck did a great job painting seven of my recasts of these back in 2017 which you can see here.
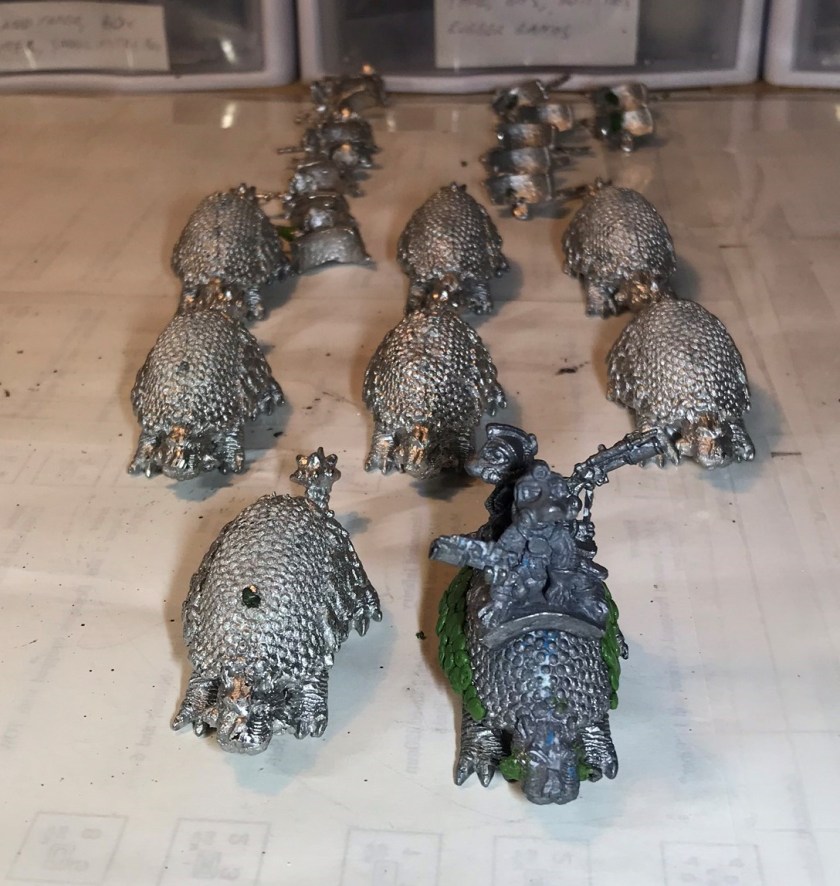
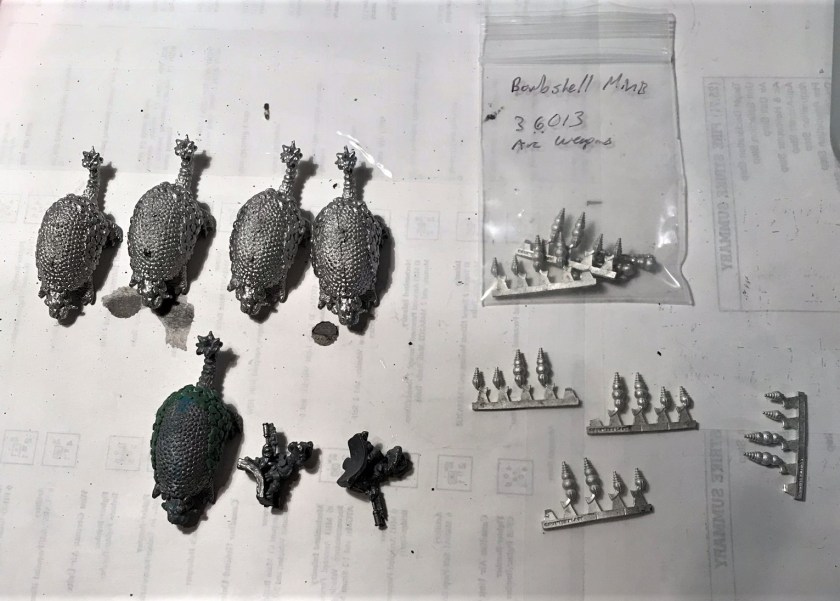
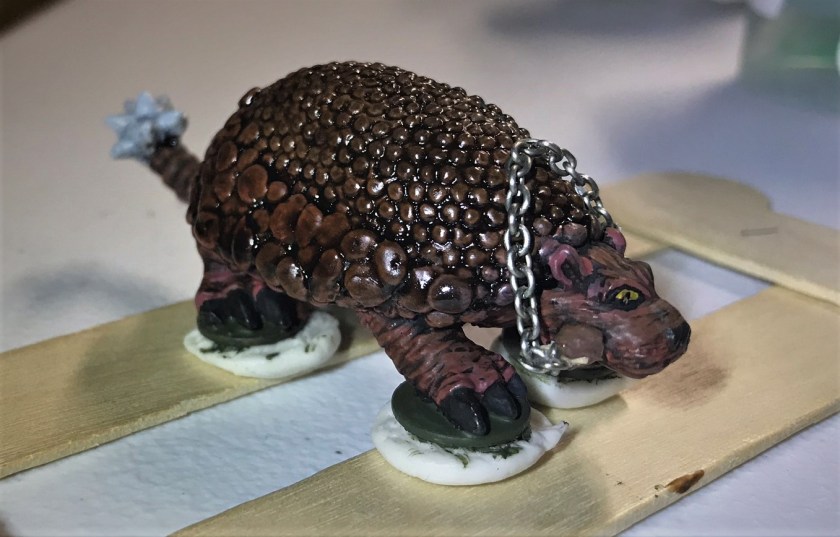
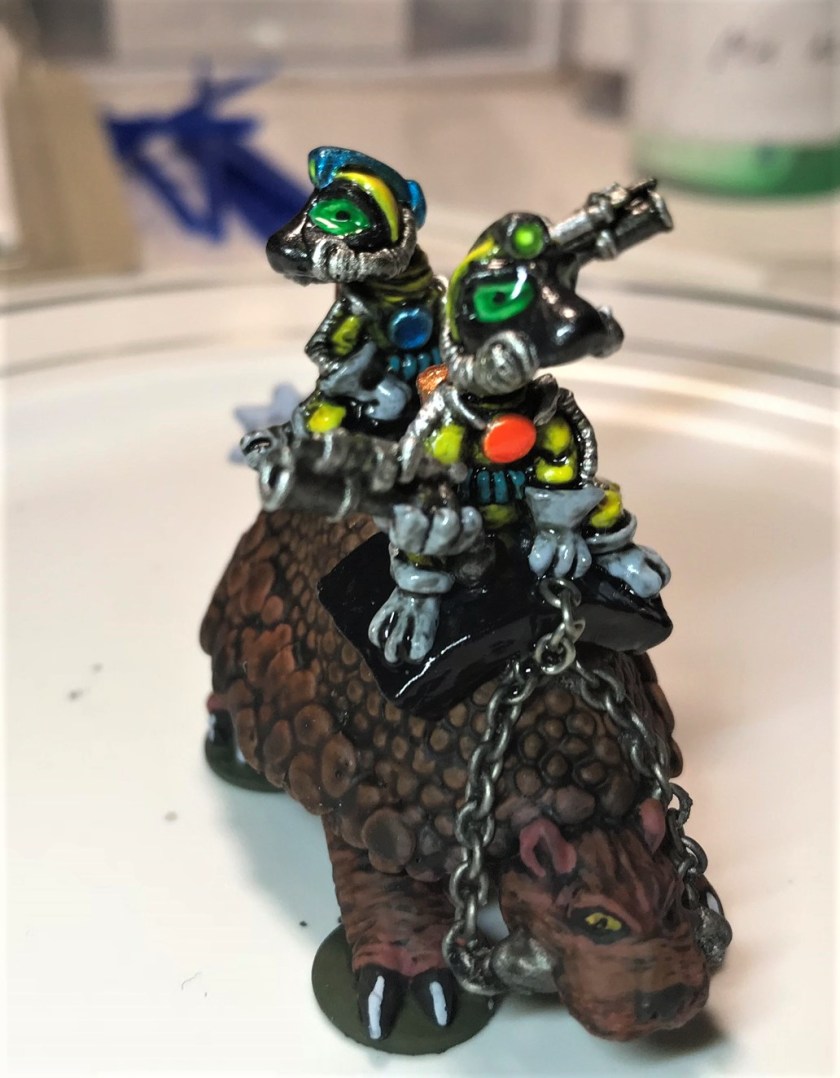
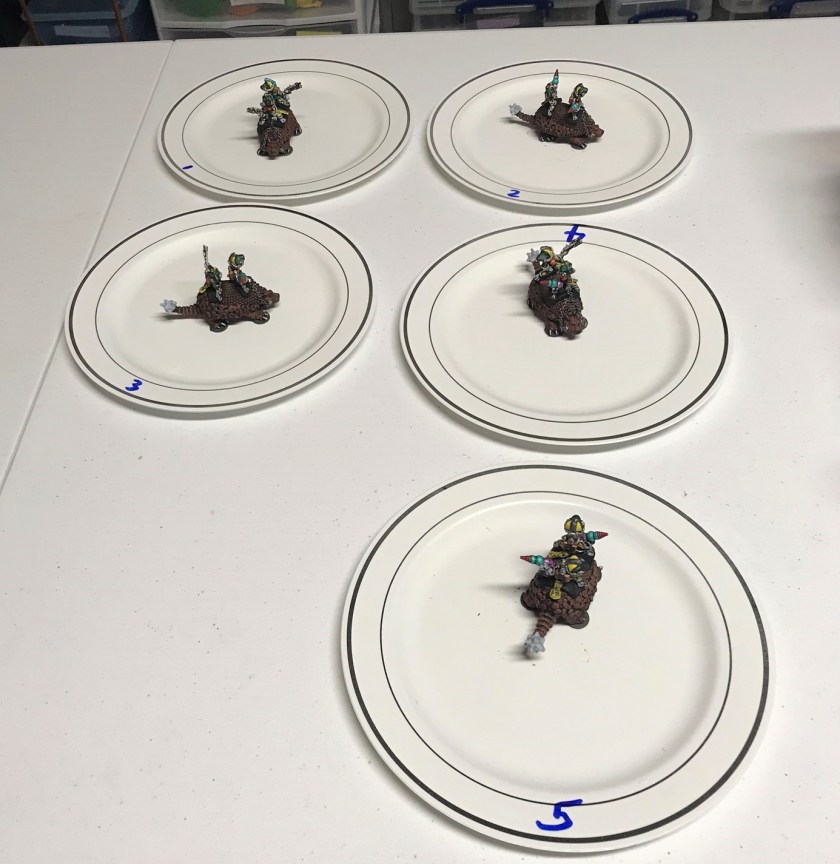
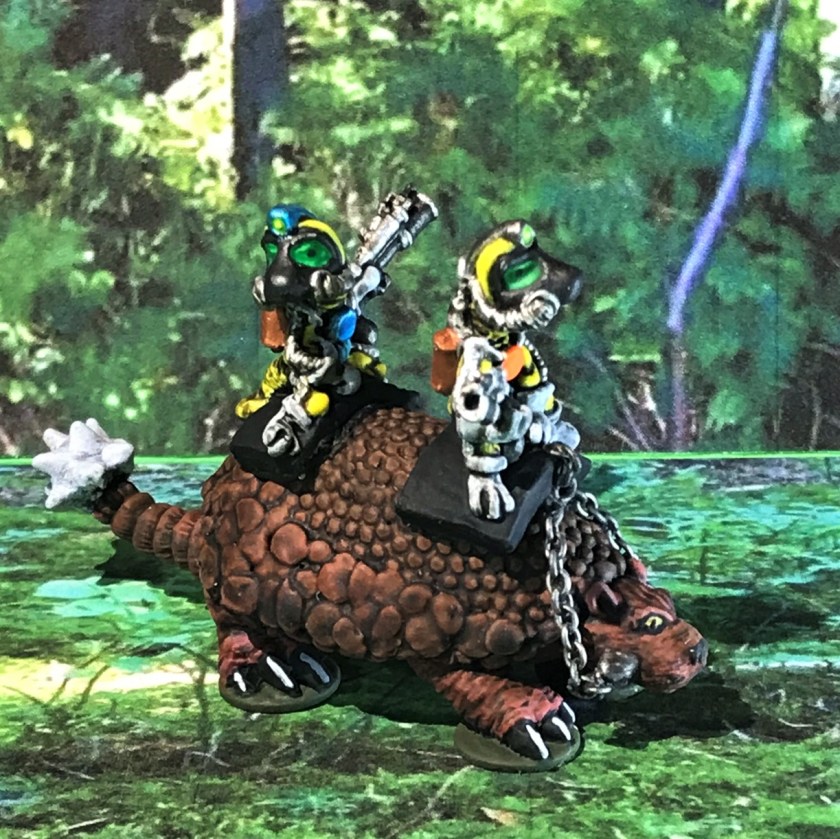
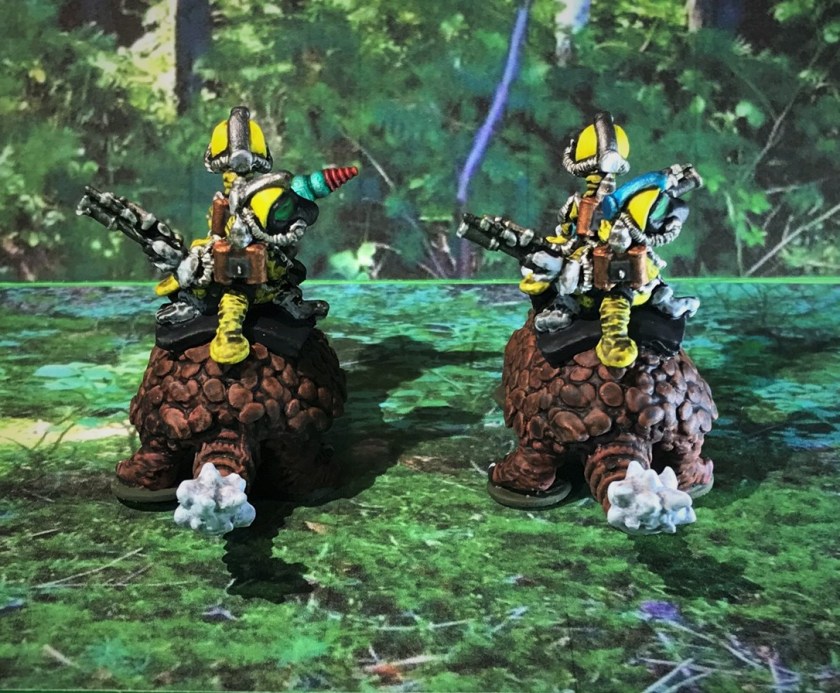
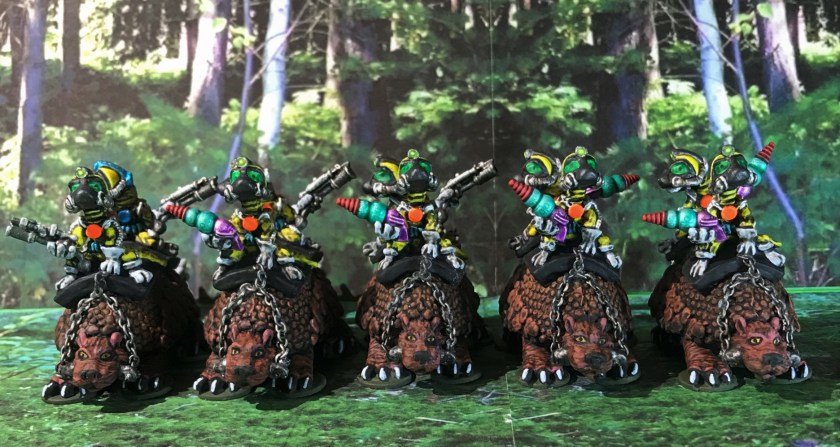
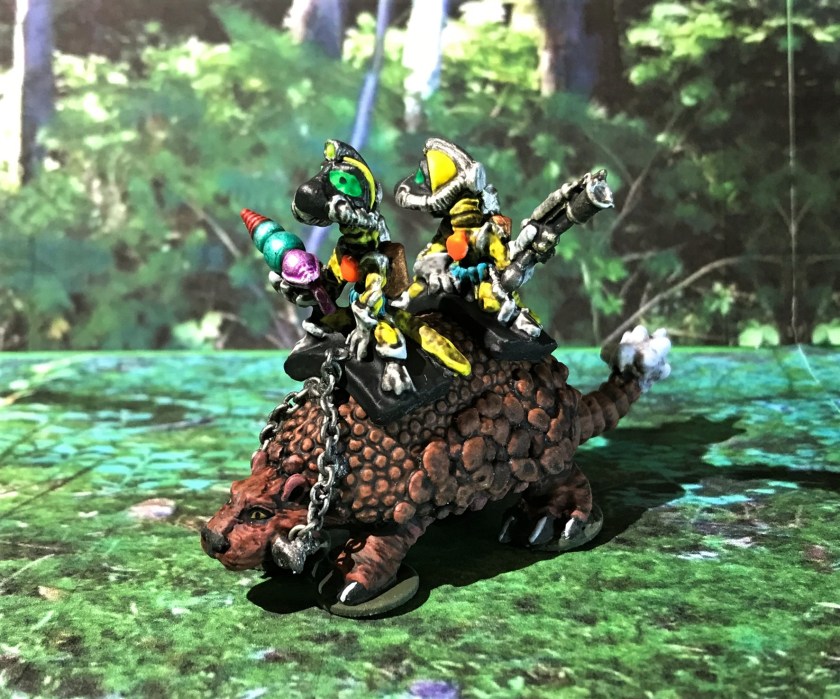
This month to add to my Frinx forces I managed to finish 5 Power-Armored Frinx on Glyptodons (let’s call them PAFOG for short!) models. As shown above, each set has two Frinx riders on a glyptodon. I chose 5 because I felt that 10 Frinx riders would be a good number for a cavalry squad in either the recon or screening role in my Combat Patrol™ games. It also would give the unit enough punch if deployed as a mobile counterattack force. I sorted out what figures that I had, and chose the ones I would use for the cavalry squad. Some of the riders’ weapons were not very well cast, so I converted these weapons. I used Bombshell Miniatures sprues of Arc Weapons (#36013) to replace six of the blasters. My initial plan is currently to give these weapons better capabilities versus robot foes, which should prove interesting given that I have a lot of robots now.
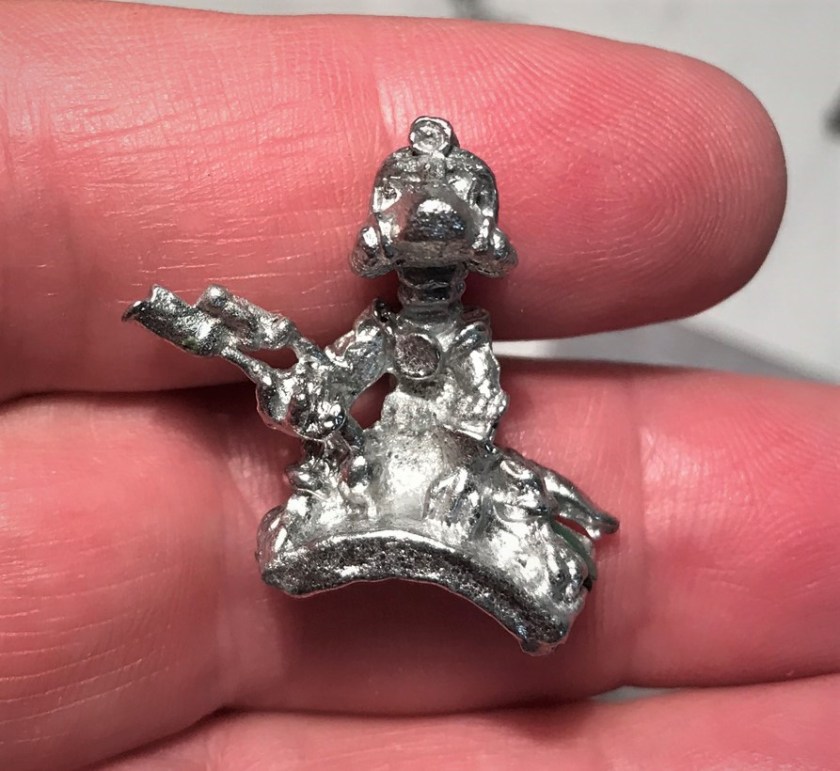
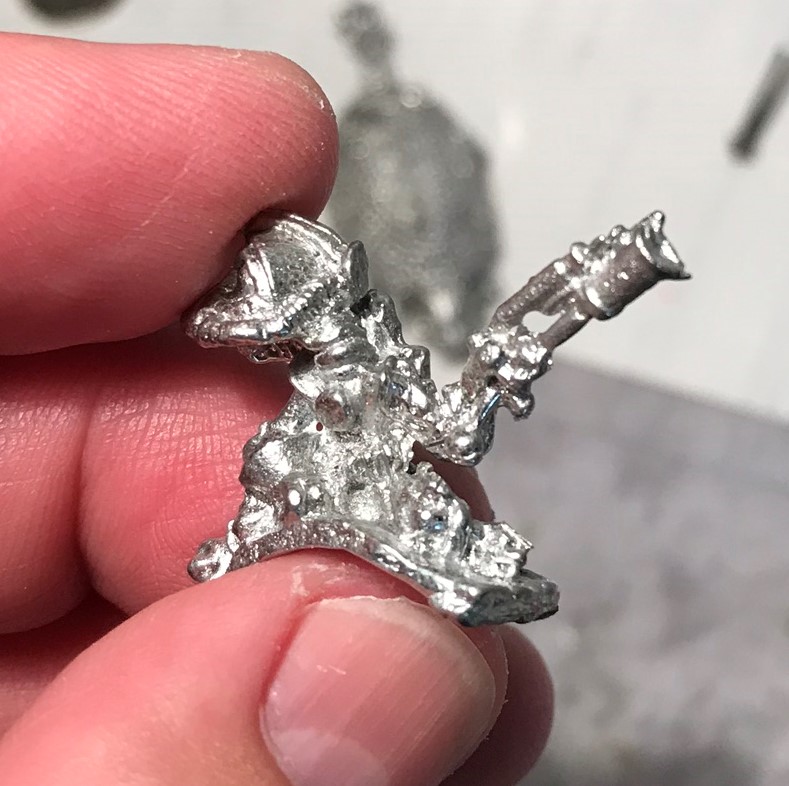
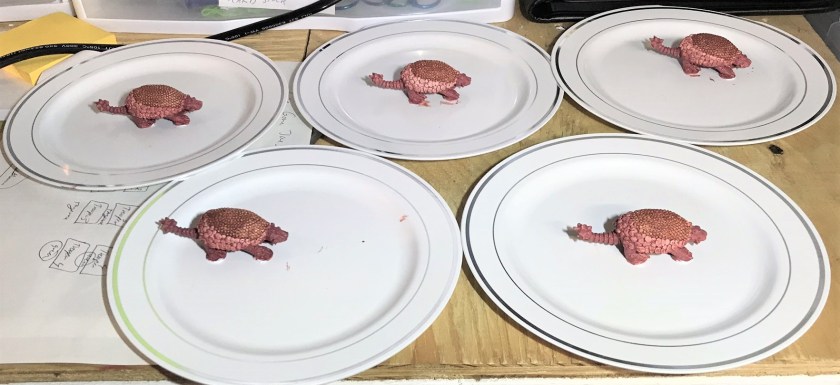
My initial assortment of PAFOG before I cleaned the chosen 5 – you can see that I still had modeling clay on the original on the bottom right.Boot camp time – must select the best for the cavalry!The final five plus the Bombshell Miniatures Arc Weapons. I decided to use the largest arc weapons that you see here as their sizes worked well.Washed and ready for priming. As you can see, the details are much less crisp than I would like. His weapon was replaced with an arc weapon. This is the front rider (recast).This is the back rider (recast).
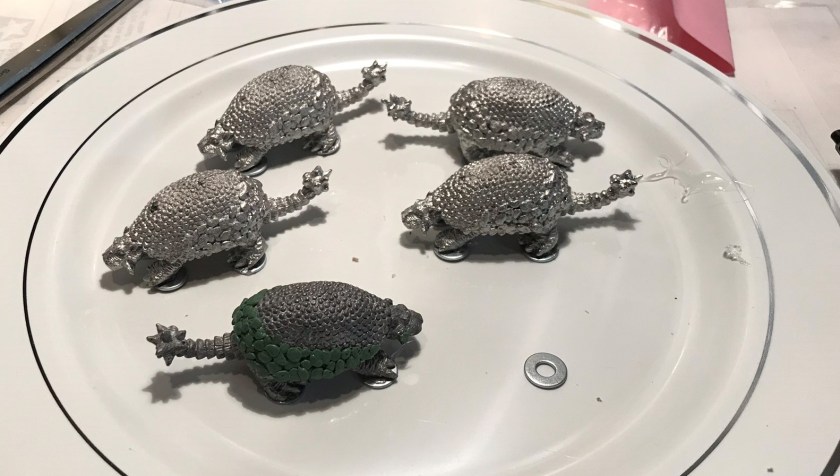
In order to make these Frinx “pop”, I needed a plan. Clearly, my painting was going to do a lot to overcome the plainness of the riders. I also needed to figure out how I was going to base them for painting and handling – unlike other Archive Miniatures these had no bases. These are also very heavy (solid lead/tin). The feet of the glyptodons were not level, so choosing the right basing was a big quandary for me for several reasons. I tried several approaches in my mind, but eventually chose to emulate Buck’s choice and use washers. I did choose smaller ones than Buck did – using #8 steel washers and E6000 epoxy under each foot, allowing for hardening overnight.
On their washers for an overnight set.
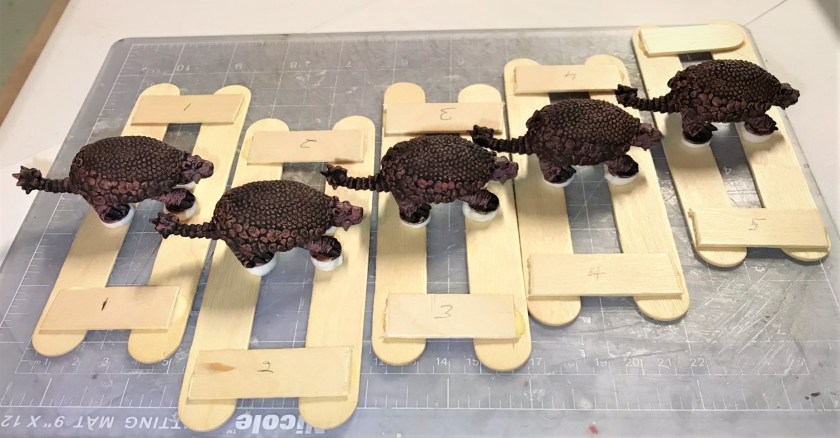
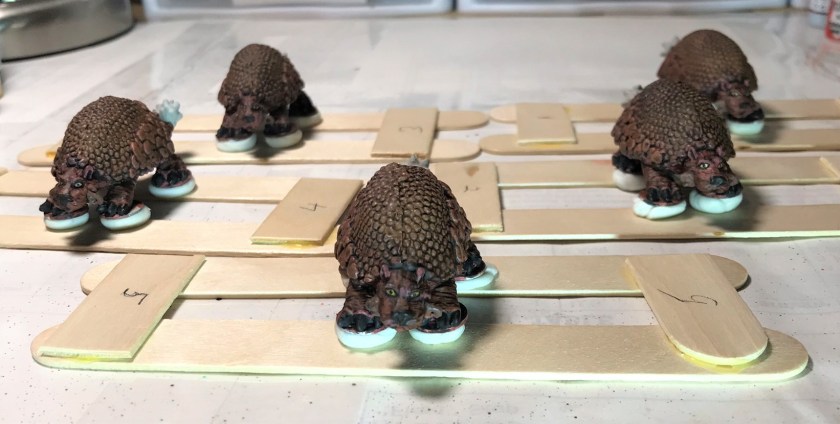
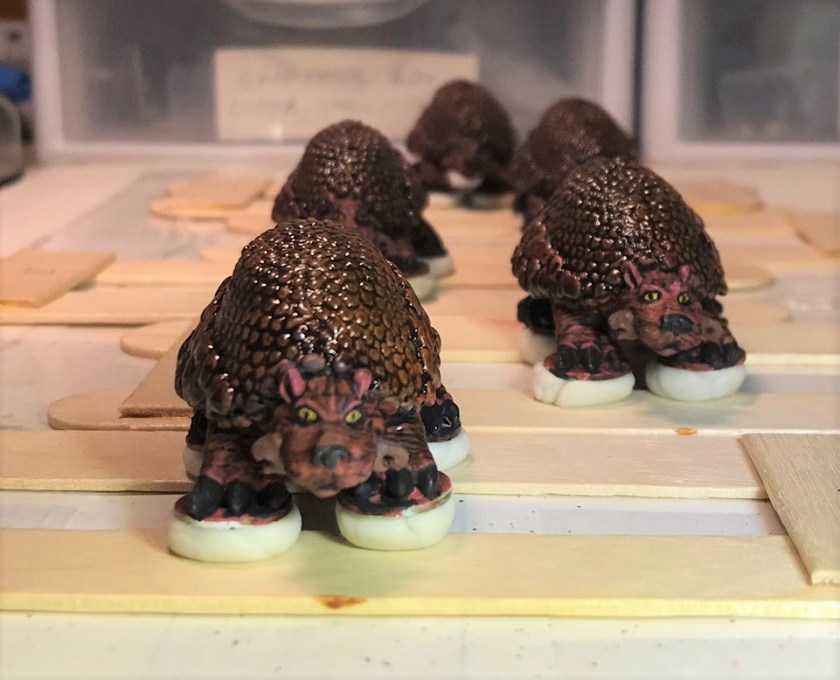
Once they had set, I began by priming the bottoms, letting that cure, and then doing the tops. My goal was to make the bottoms reddish brown, leading to a more brownish top as the drawing of the glyptodon above shows. It was not easy! I had to do a lot of handling of the paint jobs and eventually I moved them to popsicle stick frames with poster tack, which was good for a temporary, if imperfect, solution.
Early stages of priming and base coating of the glyptodons.Eventually I mounted the glyptodons on these temporary frames for painting – still not ideal.
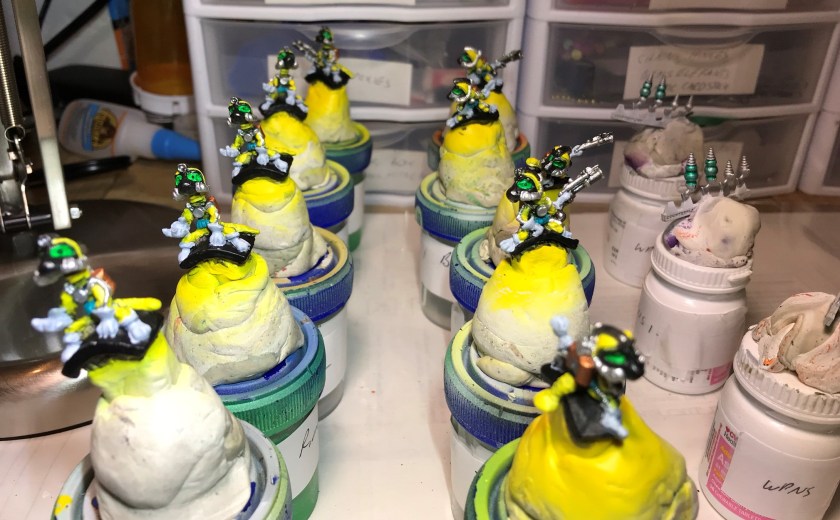
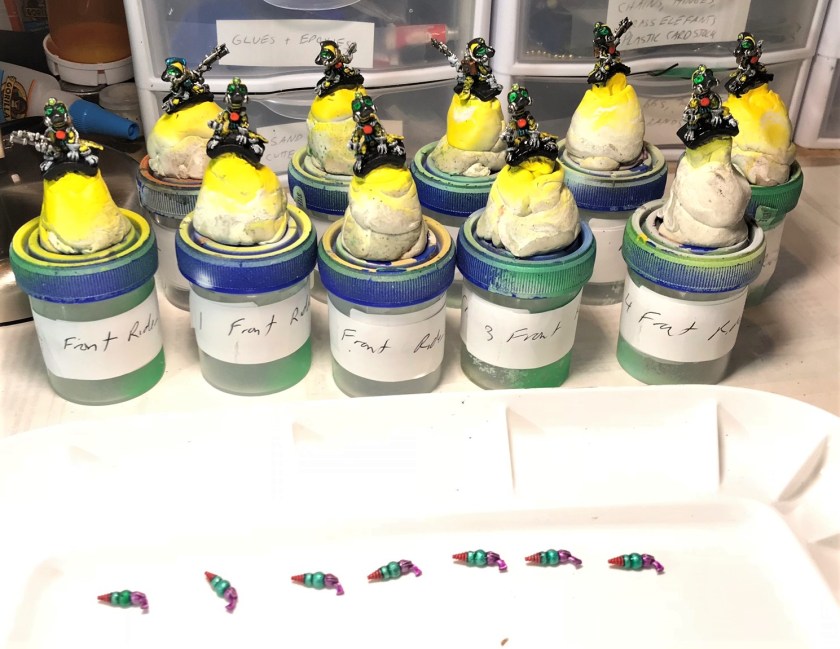
After carving away 6 defective metal weapons, I mounted the riders on poster tack mounds on specimen jars. The saddles really did not present me with many other options for mounting them for painting.
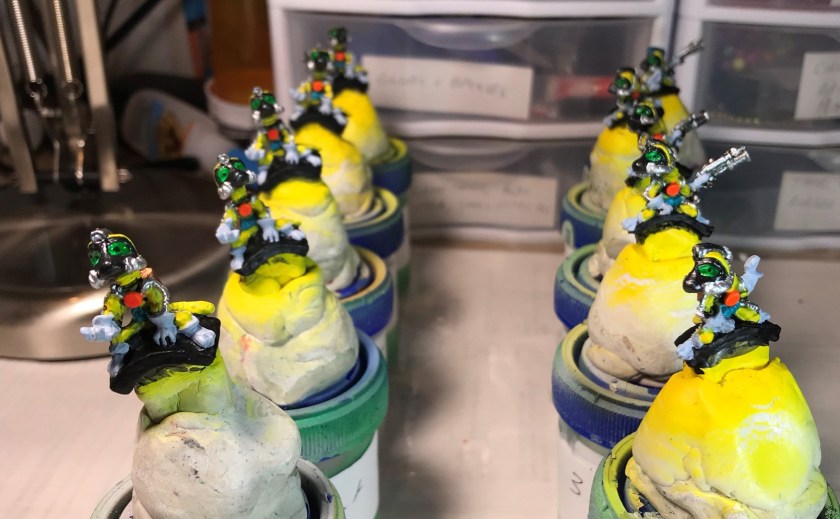
As for a color scheme, I decided to go with the branch color of the US Army Cavalry (now Armor), that being yellow. Besides, yellow is a difficult color to pull off, so I thought it would pose a nice additional challenge. I primed them, and subsequently airbrushed the riders with Vallejo Game Air “Moon Yellow” as a base coat. I then used Reaper MSP “Grey Liner” over the riders to help show me what parts I could paint to bring out the best details. This step really was useful.
Frinx riders after airbrush the primer and base coat.Early stages of painting the ridersAdding some metallics to the riders and inks to the arc weaponsPainting completed for riders – awaiting a wash applicationThe 10 riders washed and waiting for their weapon conversions. I converted 6, and yes, I painted an extra arc weapon just in case! I primarily used inks on the arc weapons over a chrome base coat for a retro sci-fi look. After this, I applied a gloss varnish to them.
It was time now to return to the sturdy mounts – and I had gotten to the point that I was happy with my painting on them. However, what was missing was a set of reins for each glyptodon. When I cast them, I did use the original bits in their mouths, but the original reins were totally inadequate in my view.
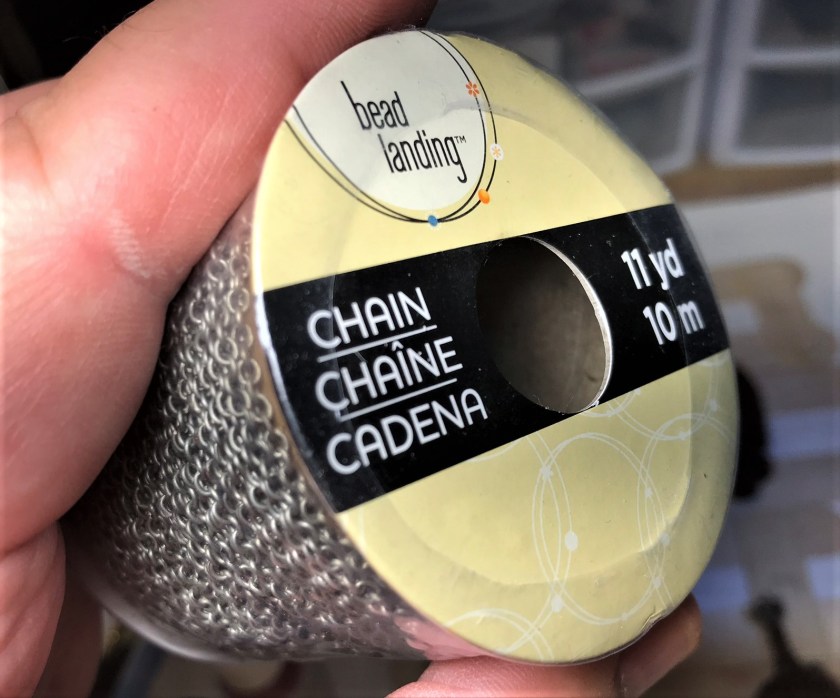
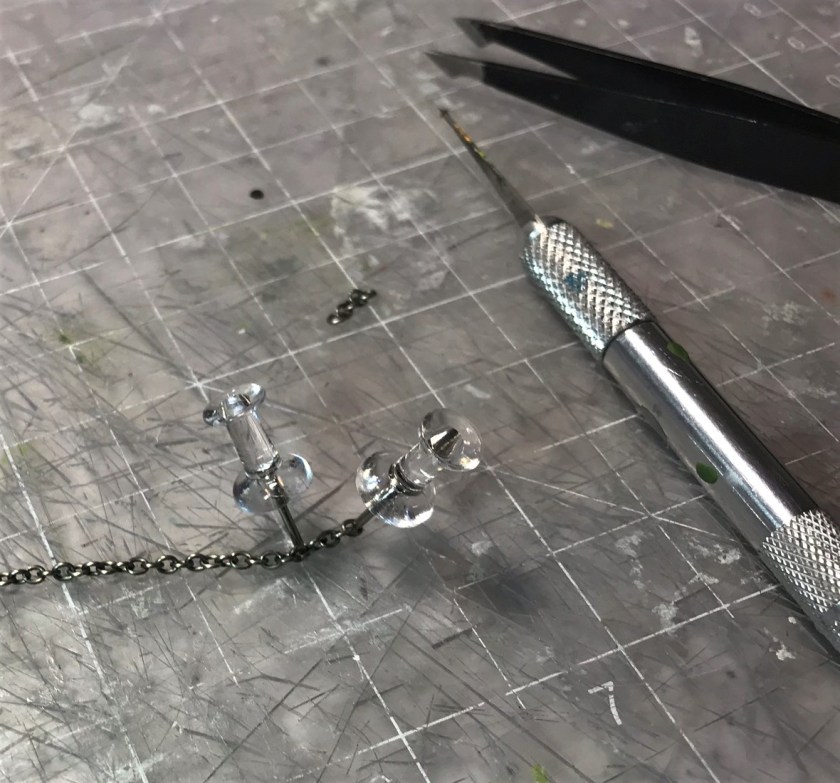
I decided to make reins from the smallest jewelry chain I could find. Figuring out how to affix the chains was a lot of trial and error on one of the extra unpainted glyptodons that I had. I tried using wire, thread, as well as just hooking the chain to the mounts – all for naught. Then, a light bulb went off – toothpicks!
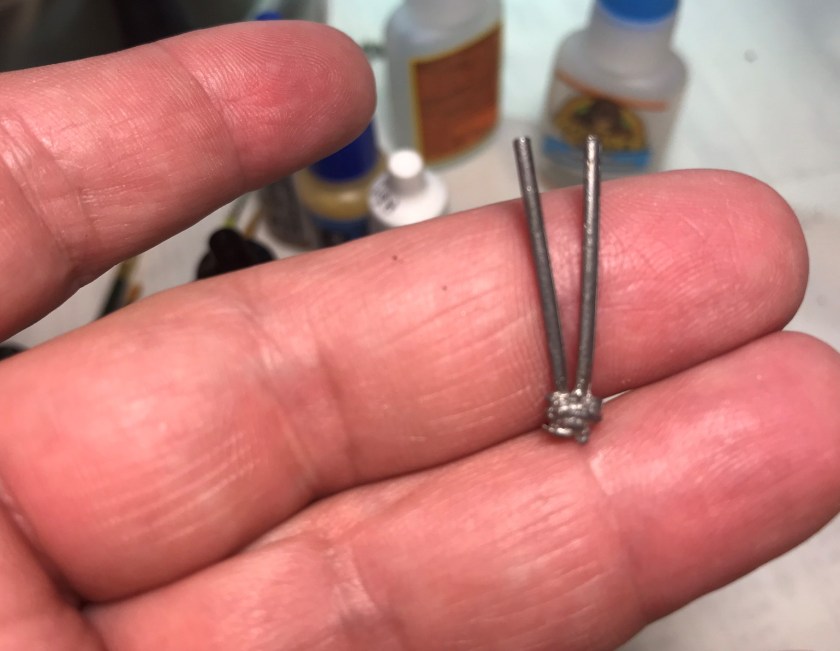
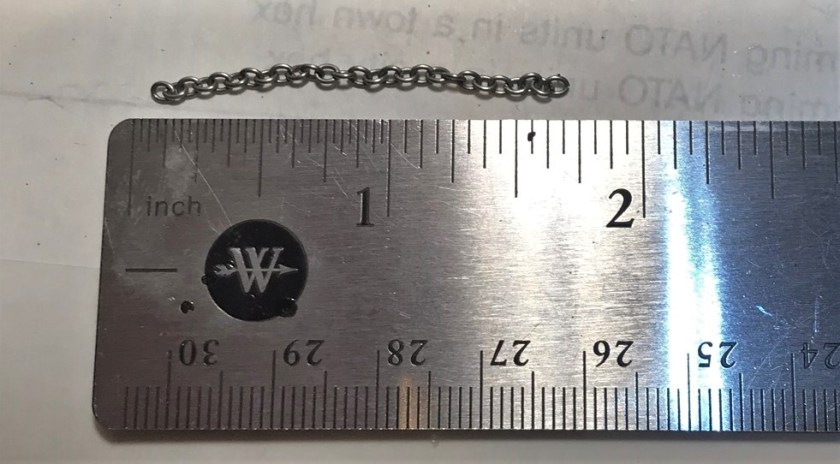
I determined that I needed 27 links for the main chain loop for the reins. I threaded the last chain link through a wooden toothpick. I then inserted the toothpick into the bits by the mouths. I used a push pin to slide the link into position on the toothpick, and applied a very small amount of Gorilla Glue on the wood/chain/bit connection. After the glue dried (often with the assistance of a hand held hair dryer), I snipped the toothpick with a sprue cutter as close as I could to the bit. The net effect was like a tent peg and a rope, securing the chain to the glyptodons’ bridle bits. I repeated the process on both sides, then tack glued the chain at the top and above the ears to make a loop. Then I dry brushed the chain with Tamiya “Gun Metal X-10” and let it dry. Lastly, I applied Citadel “Nuln Oil” to the chain.
Painted glyptodons before final wash application and addition of reins.I applied Citadel “Agrax Earthshade Gloss” on the back, expecting the later matte varnish to dull it down. Still need reins!These are the original reins – not acceptable!Time for some jewelry making, I mean rein making (sounds weird huh!).27 links, no more no less!He looks a bit like he needs an orthodontist. This is how I mounted the chains into the bits.Main chain loop mounted, before painting it and the bits.
After this, I removed the glyptodons from the frames in order to give the mounts a matte varnish airbrush treatment. Then I mounted the riders to the mounts with E6000 epoxy, and let it harden. I wanted to connect the chains to the front riders hands. For this I needed a massive 4 links of jewelry chain per model, push pins, and patience. I used Gorilla Glue, push pins, and the blow dryer to get the additional chain segments in place. I then applied the same painting and wash techniques to the 4 links.
4 links, no more, no less! I used push pins to help as I cut the links.
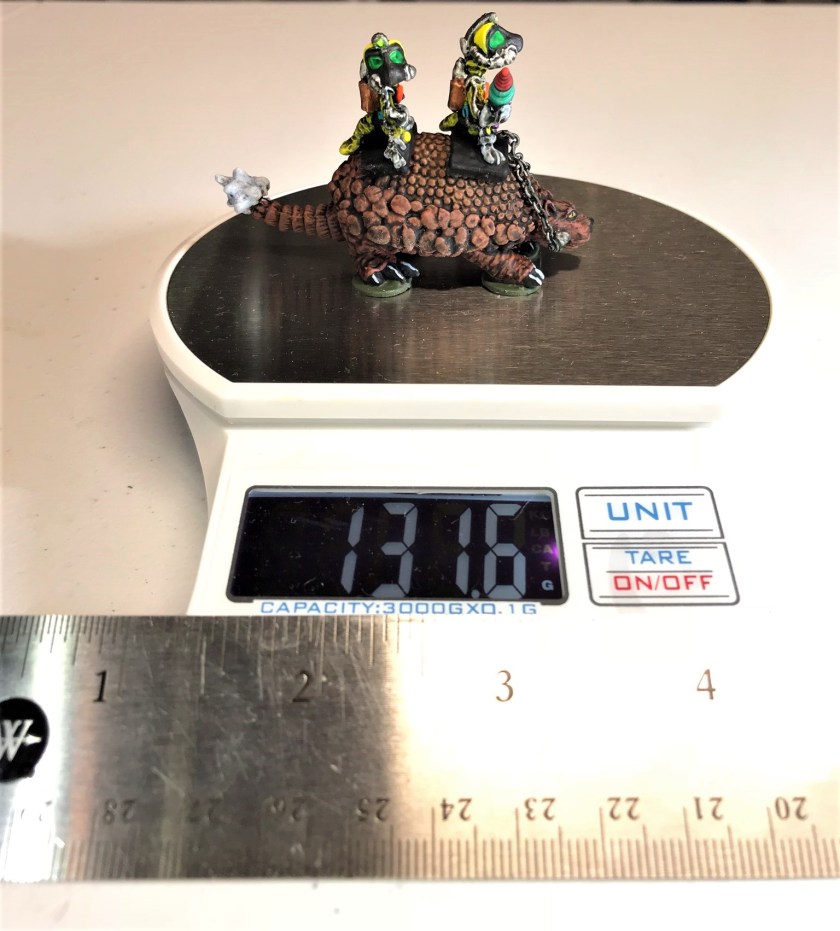
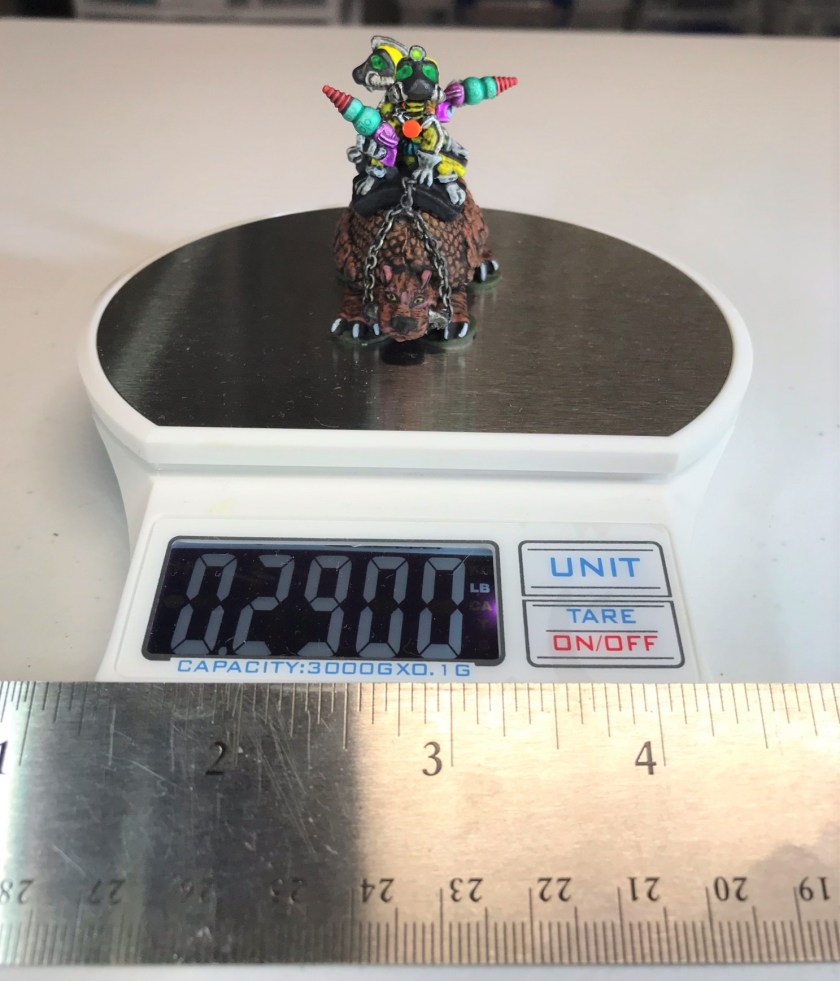
The glossy riders on the matte glyptodon with the new chain attachment which has not yet been painted. Subsequently, the whole PAFOG got a couple of matte varnish coats.After final varnish of an airbrush matte coat.For you metric system users, an idea of the weight and size of the model as completed.For us in the USA, its a mere 4.64 ounces of heavy metal goodness…not a quarter pounder I’d eat by the way…
The PAFOG squad project was now complete – except that I needed to make corrals for them as they are so heavy as to slide in my other Frinx box. No worries, as I want them to survive for many future games, and I’ve done that for other outsized figures
This project also counts for me in a community painting challenge that my Australian friend Azazel has sent out for July 2018. It is for a “Jewel” project – and given all the work that went into these from acquisition to casting to conversion to final painting – I’m confident that these will meet the requirement!
The eye candy follows, and hopefully you will find these as cool as I did. I always appreciate your feedback dear readers – let me know your thoughts and suggestions. Thanks for looking!
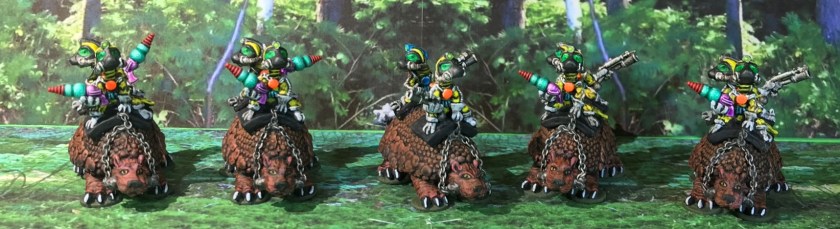
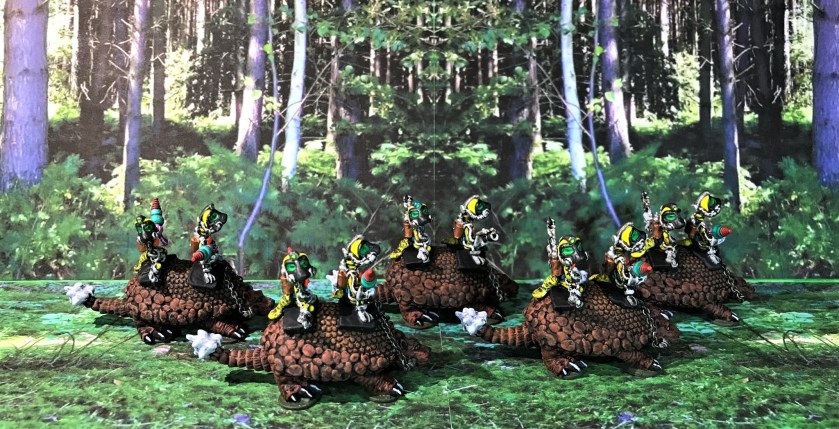
Frinx, form up!Move out!This is the section leader’s mount. The section leader has blue markings. These figures are the originals and have the original weapons. In a Combat Patrol game, they will draw two cards for movement. Between the power armor and the glyptodon’s armor, they should have some ability to take damage.A good view of the back ends where the bony spiked tails are found. Here, on the right is the section leaders mount, and on the left is a mount with one Frinx armed with an arc weapon and the other with a blaster.Nice group shot – note the conversions with the arc weapons.Close up of the right side.A conference with Lt. Ma’k (the Frinx platoon leader in red), some Frinx Amethyst Squad infantry, and the Texican Space Rangers.Surrounding the Space Dwarves in a final charge!
For those interested, here is the list of the paints, etc. that I used in this project.
PAINTS, INKS, GLAZES, WASHES, AND FLOCKING USED:
Citadel “Imperium Primer”
Vallejo “Surface Primer – White”
Vallejo “Flow Improver”
Vallejo “”Airbrush Thinner”
Testors “Universal Acrylic Thinner”
Vallejo Game Air “Beastly Brown”
Vallejo Game Air “Dead White”
Vallejo “Red”
Vallejo Game Air “Moon Yellow”
Vallejo “Black Grey”
Citadel “Agrax Earthshade” (wash)
Reaper MSP “Grey Liner” (wash)
Vallejo Game Air “Black”
Vallejo Model Air “Black (metallic)”
Vallejo Mecha Color “Yellow Ochre”
Vallejo Mecha Color “Brown”
Vallejo Model Air “Rust 080”
Citadel “Ceramite White”
Tamiya “Chrome Silver X-11”
Tamiya “X-20A Thinner”
Vallejo Mecha Color “Turquoise”
Vallejo Model Air “Medium Gunship Gray”
Tamiya “Copper XF-6”
Tamiya “Gun Metal X-10”
Vallejo Game Air “Wolf Grey”
Citadel “Hexwraith Flame”
P3 “Green” (ink)
Citadel “‘Ardcoat”
Secret Weapons Washes “Just Red” (ink)
Citadel “Soulstone Blue”
Vallejo Game Air “Fluorescent Red”
Citadel “Nuln Oil Gloss” (wash)
Secret Weapons Washes “Purple” (ink)
Vallejo Mecha Color “Yellow Fluorescent”
Vallejo Mecha Color “Sand Yellow”
Citadel “Seraphim Sepia” (wash)
Polly Scale “WWII British Aircraft Gull Gray Light”
Archive Miniatures Star Rovers game and miniature range had a lot of very fun figures, many of which I have painted and discussed in past entries in this blog. A couple of the line that caught my eye were “Long Gone Jones” (Archive #2211), a space dwarf, and “Agribot S1L1” (Archive #2204). Both were sculpted and put into production around 1977. I’m not exactly sure of the name derivations, but methinks there was some degree of Archive humor there based on the late 70’s – and I leave it to you readers to make your own guess!
I had previously acquired one Long Gone Jones (let’s call him LGJ) miniature on eBay, but had not found any others. However, Michael Thomas at classicminiatures.net (who produced the Robot Peacekeepers I previously described here) also had the molds for these figures. So I placed the order from him, and got ten LGJ’s to add to my original one in addition to three Agribots. I thought I would now have enough to build a squad for sci-fi games using Combat Patrol™ .
Each LGJ is in power armor, has a jet pack, and is armed with an automatic weapon coming out of his right arm. The Agribots look like they have a hovering mechanism, and are armed with what looks like a machine gun.
For the unit’s organization, I decided to have a LGJ squad leader with a dedicated Agribot as the squad headquarters. He would lead the squad’s two Space Dwarf Assault teams (A and B). Each team would have its own LGJ team leader, 4 LGJ troopers, and an Agribot. I’ll probably treat the LGJ weapons as analogues to sub-machine guns, and the Agribots as mobile medium machine guns. This made a total of 14 figures for the squad. I was thinking about the organization of Soviet Machine Pistol squads in WWII as inspiration. My numbers aren’t exactly the same, but we are talking about Space Dwarves here! To round out the end of June, I finished off the Space Dwarf Assault Squad.
One of the Agribots I got from Michael Thomas. It has the typical crispness one would expect from a 1970’s mold – clearly I needed to be creative to make this one look good. The other side cast better as you see below.Agribots better side
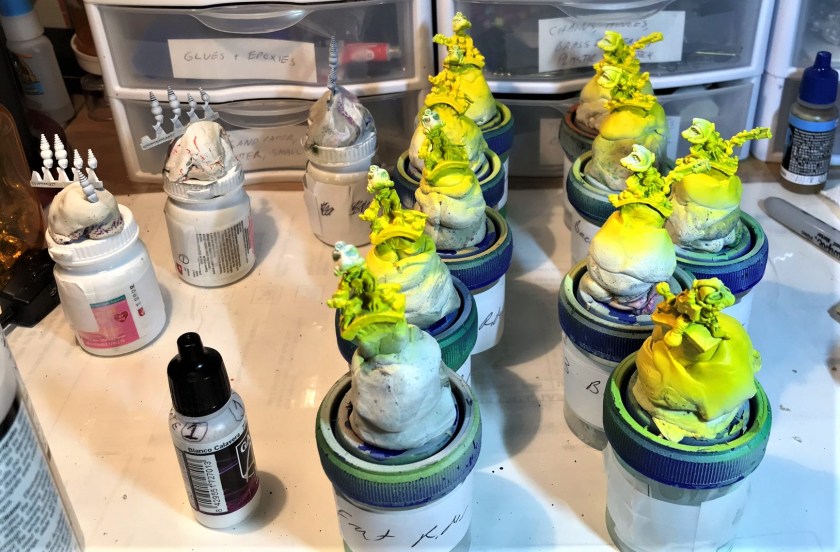
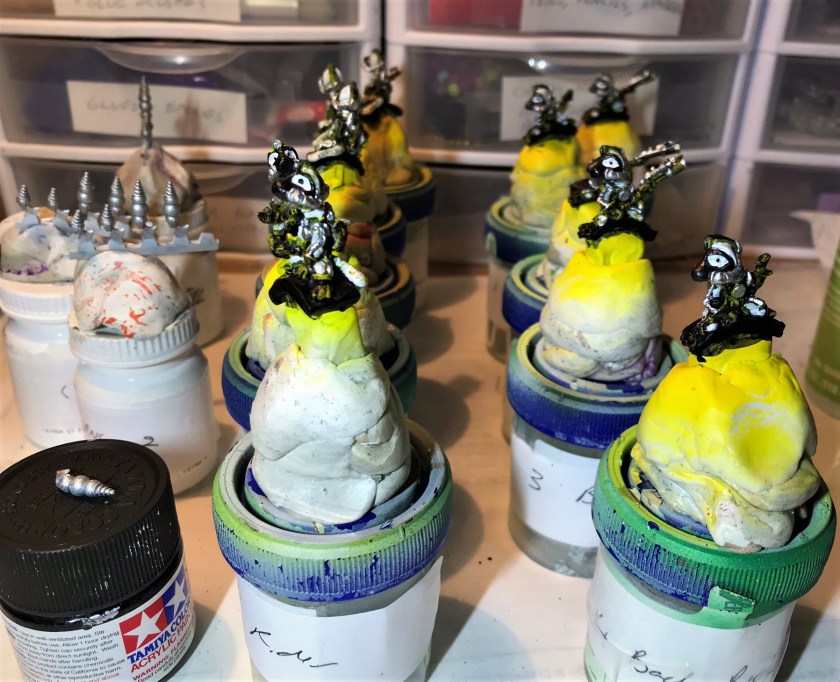
First, I cleaned and washed the group. Then I filed off the mold lines and flash on the figures. After this, I mounted them on ¾” steel washers with Gorilla glue, and affixed the washers to poster tack on top of specimen bottles. I primed the squad white with Vallejo “White Surface Primer” with my Iwata Eclipse airbrush, and let that harden.
I wanted to give these figures a totally retro sci-fi look – so I again used the Createx paints to airbrush even more colors (added Pearl Blue, Pearl Lime Green, and Pearl Green) onto the squad than I had done with the Robot Peacekeepers. I figured the dwarves would want more individuality! For ease of play on the tabletop, I did plan to similarly color coordinate the lenses on the LGJ’s and the Agribots with Vallejo Mecha Color fluorescent paints. On the optics/lenses, the squad leader and his Agribot would get Vallejo Game Air “Fluorescent Red”, Team A got Vallejo Mecha Color “Green Fluorescent”, and Team B got Vallejo Mecha Color “Green Fluorescent”. These would take multiple light thin coats to get the desired effects. And of course with so much metallics, I needed to use a lot of Citadel “Nuln Oil Gloss”. I list the paints and materials I used at the end of the blog for those interested.
The squad awaits mounting and primingAnd here they are primed and mounted! I labeled the specimen jars to keep track of which one was in which squad, and what the color plan was for each figure.After airbrushing the base colors.Pearlized Createx colors used (bottle backs)Createx bottles fronts – I love that many of them are designated “Wicked Colors”. “Wicked” is a common term here in Massachusetts to designate much more than “very”.After a painting the small details and using multiple washes, I detailed the optics/lenses with white to help with the adhesion and look of the fluorescent paints.Awaiting the first coat of gloss varnish
My plan for varnishing the group and the bases was to initially apply an airbrush coat of Vallejo “Gloss Varnish” before working on the bases. The bases would then get a treatment of Citadel “Astrogranite Debris”. I like it better than “Astrogranite” – it sets up better for dry brushing later. Once that was dry, I washed it with “Nuln Oil”, let that dry, and then dry brushed the bases with Vallejo Game Air “Wolf Grey”. To give the bases a nice lunar look, I added Citadel “Gulliman Blue” glaze and let that dry. Lastly, I gave the entire squad a second coat of Vallejo Mecha Varnish “Matt Varnish” for protection and to dull the shines down to an acceptable level.
After application of gloss varnish – shiny new space dwarves…Squad leader close up after gloss varnishSquad leader’s Agribot after gloss varnish
I think you’ll see below on the finished figures the difference that the matte varnish adds, while preserving the metallic look of the power armor that I was attempting to capture.
Finished Long Gone Jones squad leader and Agribot. Their base color was “Pearl Red”.Team ATeam BSpace Dwarf Assault Squad leadership – the team leaders are in “Pearlized Copper”.The three Agribots, arranged to see the side and back details.Front and back details of the team leaders.Front and back details of the Space Dwarf troopers in “Pearl Tangerine”Front and back details of the LGJ troopers in “Pearl Plum”Front and back details of the LGJ troopers in “Pearlized Green”Front and back details of the LGJ troopers in “Pearlized Blue”Space Dwarf Assault Squad moves out for action!
I am pleased with the final product – and I can see them being on one side or the other of many future tabletop conflicts. Whoever is paying them the most of course! That’s the nice part of not needing a Codex! I do think that they are colorful enough, but power armor covers them nicely.
I hope that you enjoyed looking at this – and this was my most productive month ever in terms of painting – 57 figures in total (3 units) for “Junit”, a community painting challenge run so very well by our Aussie friend Azazel. If you’re reading this and are not familiar with his blog, it’s well worth the look.
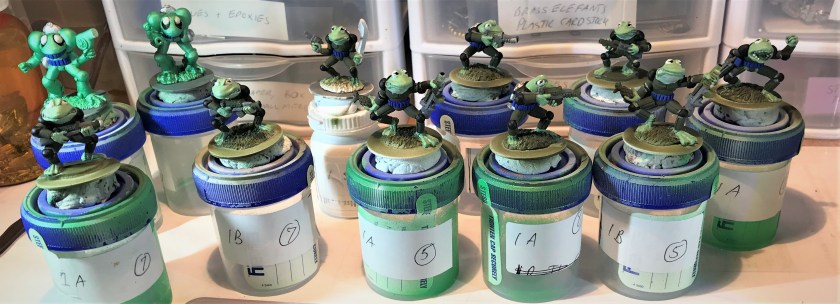
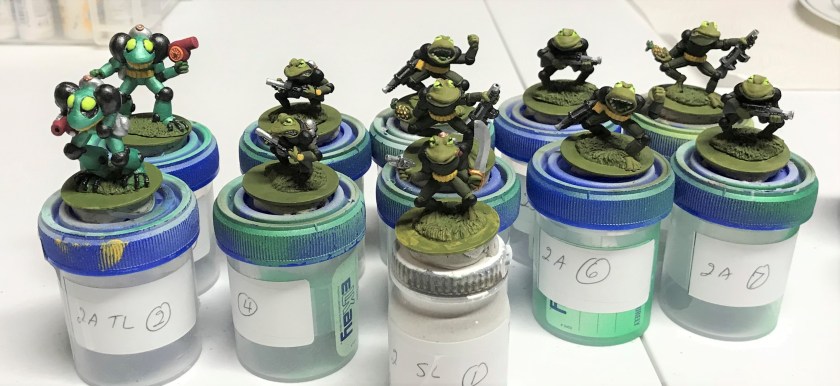
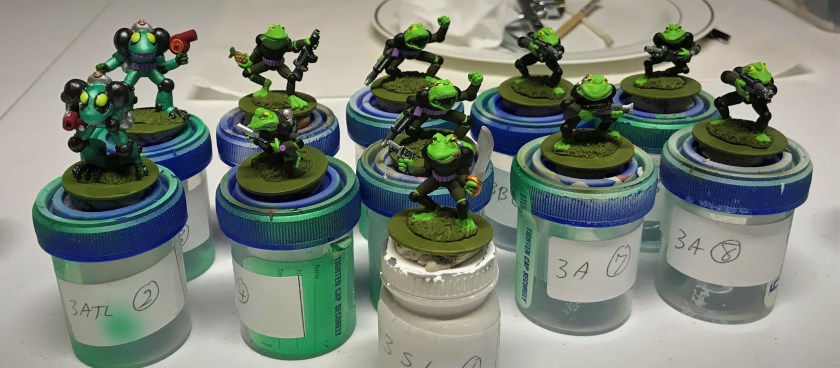
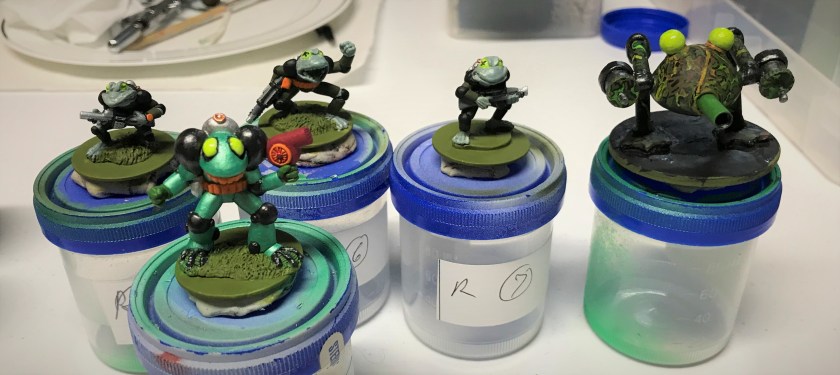
June’s production – 32 Archive Texican Space Rangers, 11 Mega Miniatures Robot Peacekeepers, and 14 in the Space Dwarf Assault Squad.
I always read your comments and feedback – and as the goal of this blog to entertain and bemuse you – let me know if I did (or did not). So let me know your thoughts – and as always, thanks for looking!
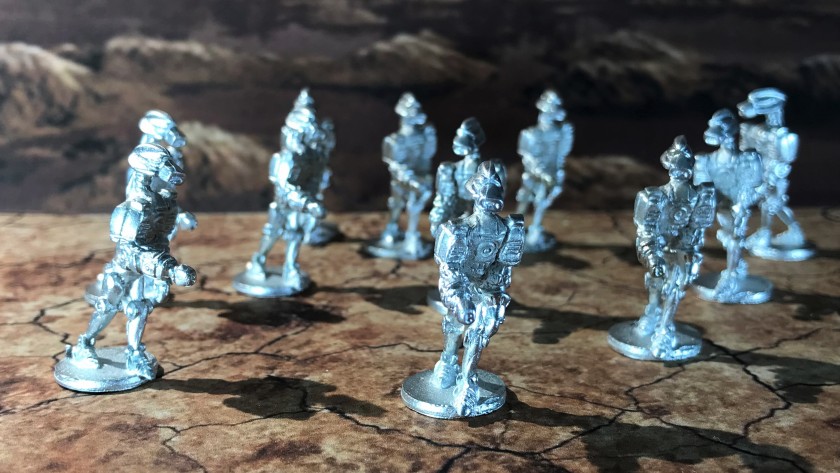
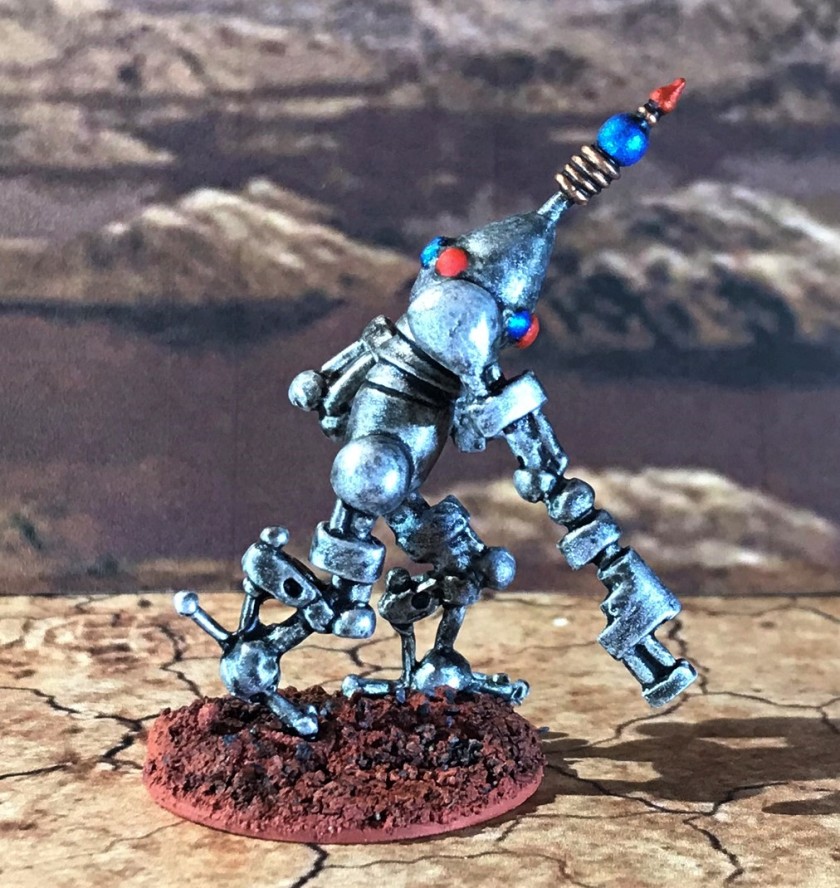
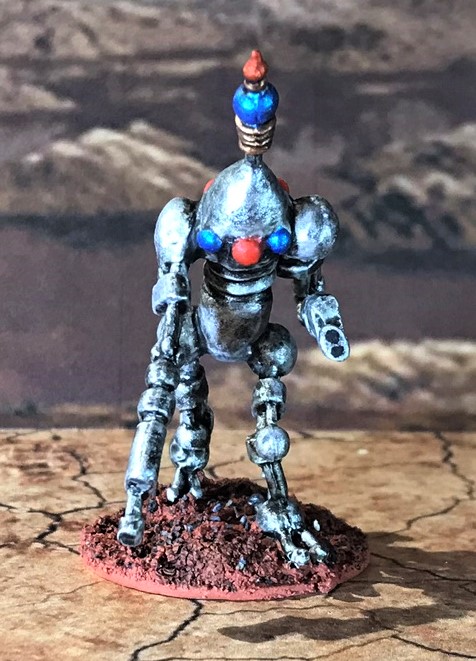
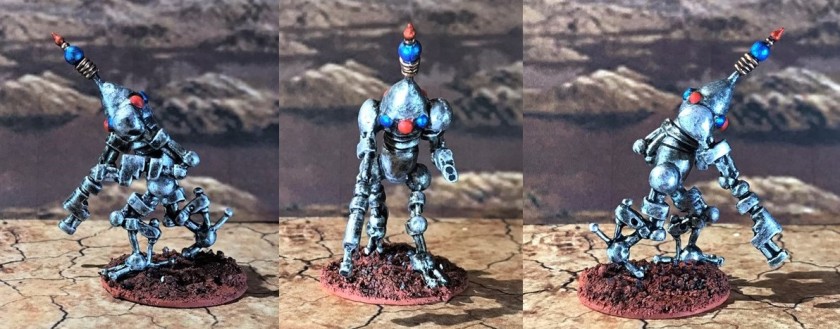
Back when I was acquiring the Texican Space Rangers from Michael Thomas’ site, classicminiatures.net, Michael let me know that he had some other cool figures that were not listed on his miniatures list. One of these was a cool robot that he called “Advancing Robot”. Supposedly, it was from the now-shuttered Mega Miniatures company as part of its Salvage Crew Robots & Vehicles line, with a product number of DEAL-0372. Michael sent me a picture, and I bought 11 for a squad for Combat Patrol™ games, along with some others that I will hopefully be able to share with you all when they are painted. The figures are 28mm in size. Certainly, Michael is great to work with if you have any interest in buying from him
However, when I looked at the Lost Minis Wiki, I was perplexed – it was not there! I reached out to the Old School Miniatures group on FaceBook as I thought these might be old, but no luck was to be found there. Then I tried The Miniatures Page (TMP), and got a bit luckier with this information. So, my newly acquired robots were indeed from Mega Miniatures but circa 2008, which ironically makes them relatively young in my collection. Still, I had no luck with any catalog or descriptor info, until Neil at Lost Minis Wiki helped me out with a 2012 Mega Miniatures catalog and there on page 60 was my robot.
There it is! Bottom row, second from the right.
I now knew the figure was DEAL-0372, Robot Peacekeeper from Mega Miniatures! It was armed with an automatic weapon left hand and a claw on its right hand. As I had 11 of these, I decided that it would be a squad of two teams of five robots (four each plus its own team leader) and led by a squad leader.
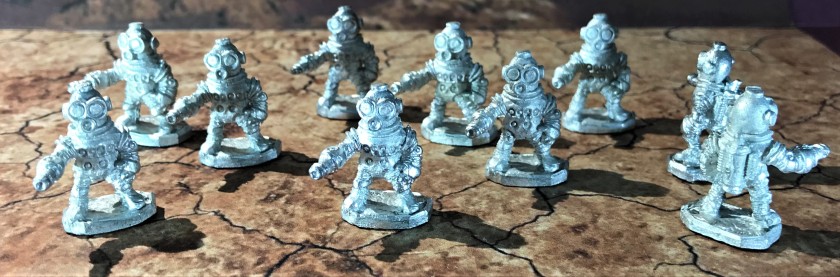
As delivered
I cleaned the figures, and filed and cut away any flash (of which there was very little). I mounted them on ¾” steel washers with Gorilla Glue. Then I affixed them to poster tack on top of specimen jars for painting. I used my airbrush to prime them white with Vallejo “Surface Primer-White”.
The squad assembled and primed for painting
As for a painting scheme, I decided that I wanted them to pop color-wise, so I again used paints that are more likely to be used models of muscle cars. Createx makes some really cool pearlized colors that I like for metallics – they really work well as long as you use the proper pressure in your airbrush and you thin them appropriately. What I really like is that they put the appropriate pressure setting on the bottle.
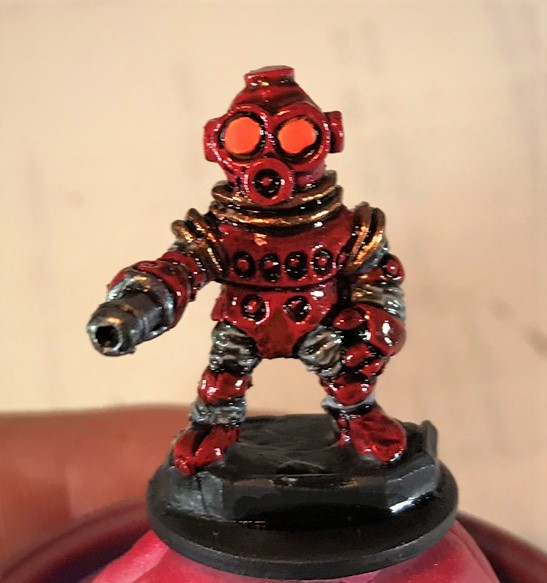
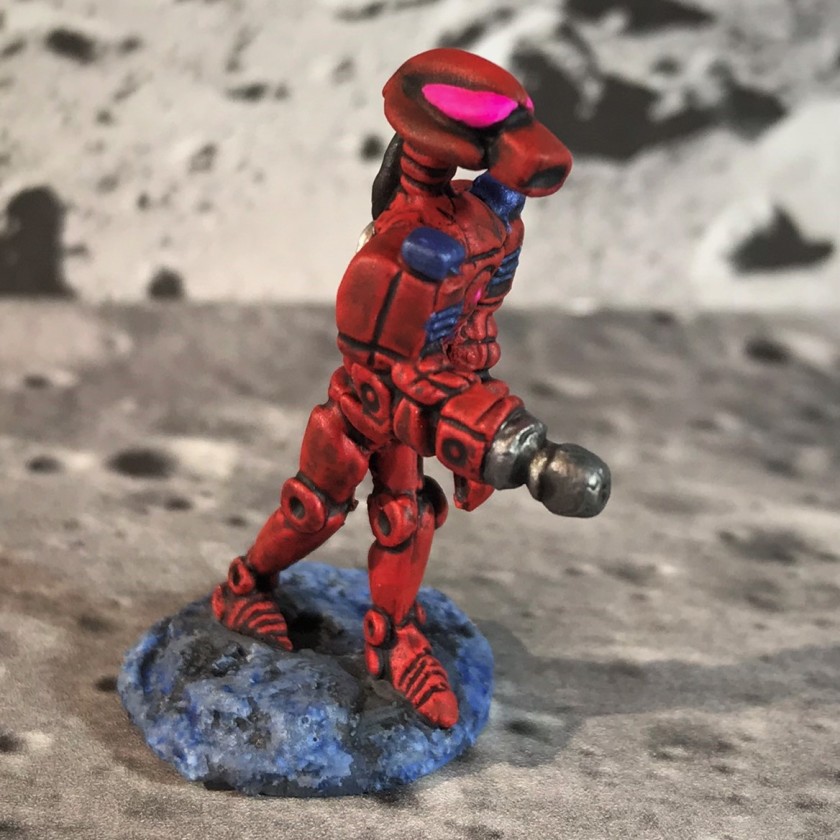
For the squad leader, I used “Pearlized Red”. Each of the two team leaders got “Pearl Copper”. Team A got “Pearl Tangerine”, and Team B got “Pearl Plum”. Each of these had different pressure requirements, but switching between paints was extremely easy and cleanup afterwards was a breeze.
All base coatedThe base coat paints
At this point, my daughter Ellen, who was visiting with her daughter (our granddaughter) Tabitha, saw them and said, “cool, they look like Skittles”. As a result, I kept thinking about candy as I worked on them! Of course, a song crept into my mind, and so from 1982, here’s the theme for this blog post, from Bow Wow Wow for no other reason that it stuck in my head.
Try getting that out of your head now!
Back to the project! I then used a series of washes and paints on them to bring out details better and to make them easier to use on the tabletop. I decided that the optics (can’t really say that the robots have eyes) would be the key differentiating feature between Team A and Team B. I painted the optics white, then lined them with “Nuln Oil Gloss” (the gloss version works much better on metallics). Then, using fluorescent colors (yellow, magenta, and green) from Vallejo Mecha Colors, I painted each robots peepers (I needed another word for optics) multiple times until I got a nice radiant glow from them. I highlighted the group with brushing on more of the aforementioned pearlized paints. All the paints that I used are listed at the end of this post for those interested.
Mid stage, showing the optics in progressCompletely painted and shiny (too shiny)Yes, too shiny…but it was all part of a plan…
I then used an airbrushed gloss varnish to protect the paint jobs. But wait you say, gloss? On already shiny minis? Yes – and after that dried it allowed me then to work on my bases.
For this group, I wanted to use a less Martian-like red on the bases – and go with a more lunar look. For this, I used Citadel’s “Astrogranite”, a texture paint on the bases. With all of Citadel’s texture paints, I find it useful to use a hand-held hair dryer to get better effects from them in terms of cracking or making crevices. I did not see that effect with the “Astrogranite”, but it did dry enough for easy dry brushing later. After it dried I was able to effectively apply a wash of Citadel “Nuln Oil Gloss” to darken the low spots. For dry brushing, I applied Vallejo “Wolf Grey” to the bases. That turned out to be a bit too plain for my tastes, so I added a glaze of Citadel “Gulliman Blue” which made a nice tint on the bases. Now I had a good lunar look.
After bases painted before applying the matte varnish
Lastly, I finished the models with a second coat of varnish, this time Vallejo “Mecha Varnish Matt Varnish” with my airbrush. This did a nice job on the models and the bases.
Drying on the deck in the sunCatching some rays, not ray guns…
I am pretty satisfied with how the unit came out. The sculpts are retro-looking enough to work with my other Archive stuff – I think they look “Robocop-ish”, and I’m sure I can use them to augment any force, maybe even the Texican Space Rangers. The Lost Minis Wiki is now updated with the Salvage Crew Robots & Vehicles range.
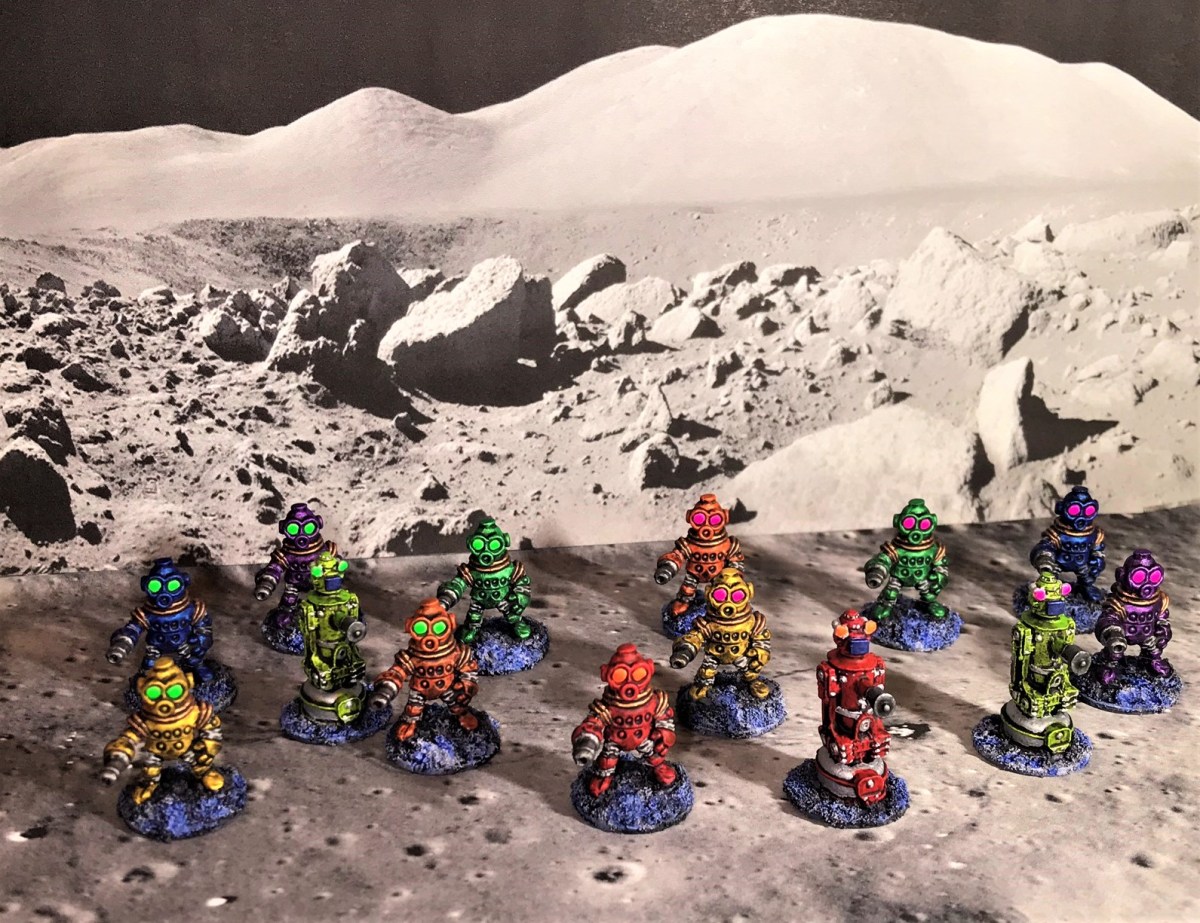
The squad assembled. The red Robot Peacekeeper is the squad leader. The yellowish ones are the team leaders. Orange is the color for Team A (with green optics) and purple (or plum) is the color for Team B (with yellow optics)
The leadershipTeam ATeam BRobot Peacekeeper Squad Leader close up, frontal view. Contrast this one with the shinier version I showed before.Robot Peacekeeper Squad Leader, from the backTeam A leaderTeam A Robot PeacekeeperTeam B Robot PeacekeeperThe squad moves out!
I hope you enjoyed these Robot Peacekeepers! Please leave your feedback in the comments section – I enjoy your thoughts and suggestions. Thanks and hopefully I get another group done soon.
Space Cowboys! More properly Archive Miniatures Texican Space Rangers (circa 1978), are the subject of this blog, plus some Steve Miller Band stuff from the 1970’s. Most people are familiar with the Steve Miller Band song The Joker:
Some people call me the space cowboy yeah Some call me the gangster of love Some people call me Maurice ‘Cause I speak of the pompitous of love…
Lyrics from The Joker, Steve Miller Band, 1973
Some also know that the opening line of The Joker refers to the band’s 1969 hit Space Cowboy – a rousing song with psychedelic undertones.
I told you ’bout living in the U.S. of A. Don’t you know that I’m a gangster of love Let me tell you people that I found a new way And I’m tired of all this talk about love And the same old story with a new set of words About the good and the bad and the poor And the times keep on changin’ So I’m keepin’ on top Of every fat cat who walks through my door
I’m a space cowboy Bet you weren’t ready for that I’m a space cowboy I’m sure you know where it’s at Yeah, yeah, yeah, yeah…
Lyrics from Space Cowboy, Steve Miller Band, 1969
If you have not heard it before, and/or if you want a theme song for this blog post, here it is:
I’m sure that in some way, shape, or form, these songs influenced the sculpting of these figures.
Back to the miniatures!
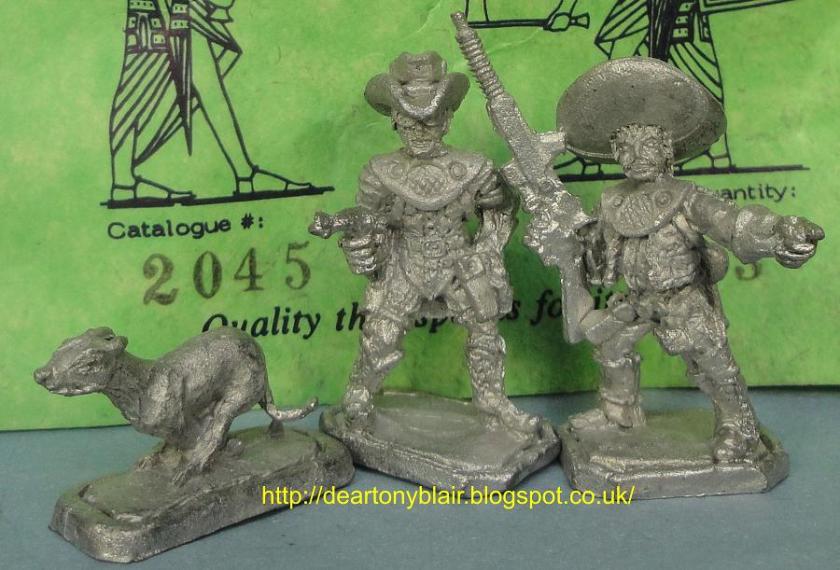
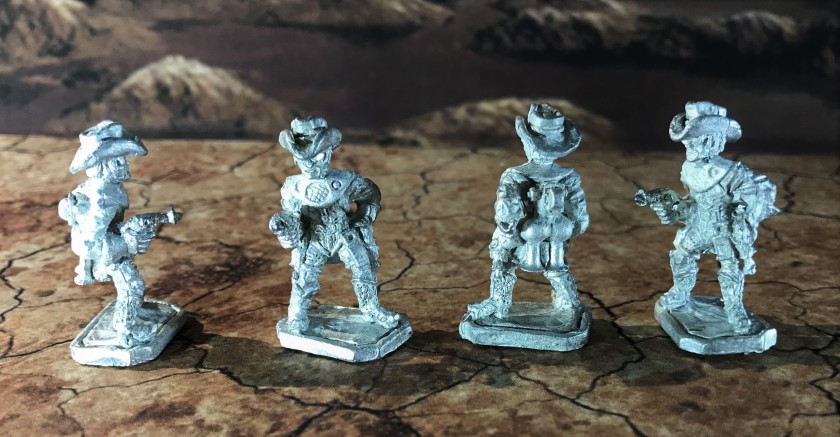
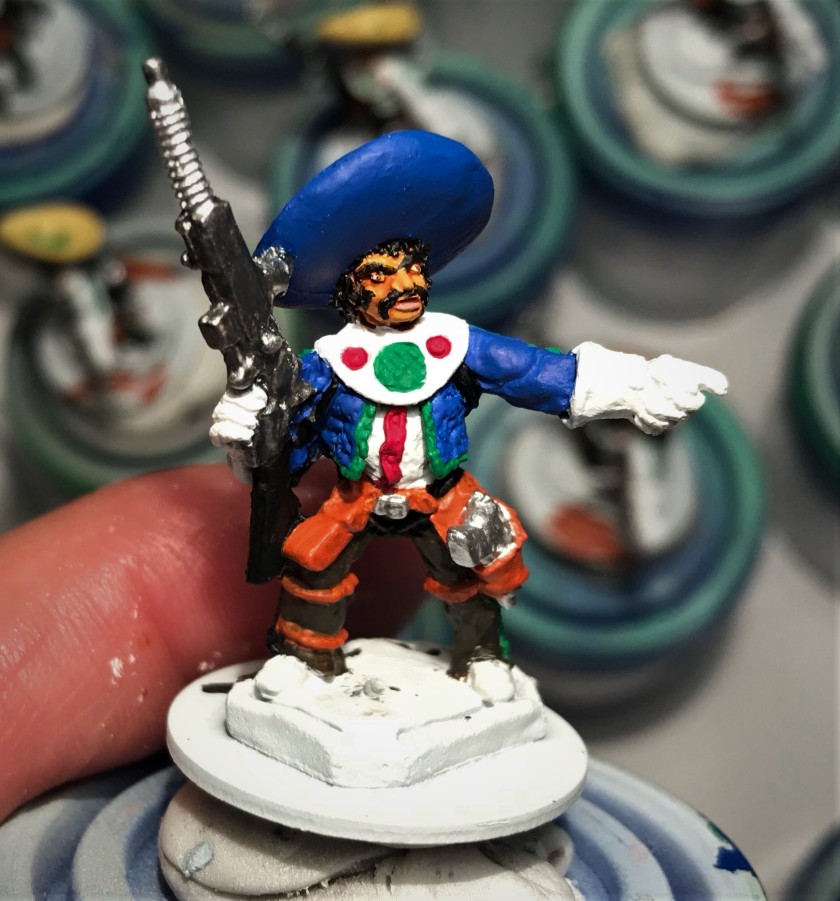
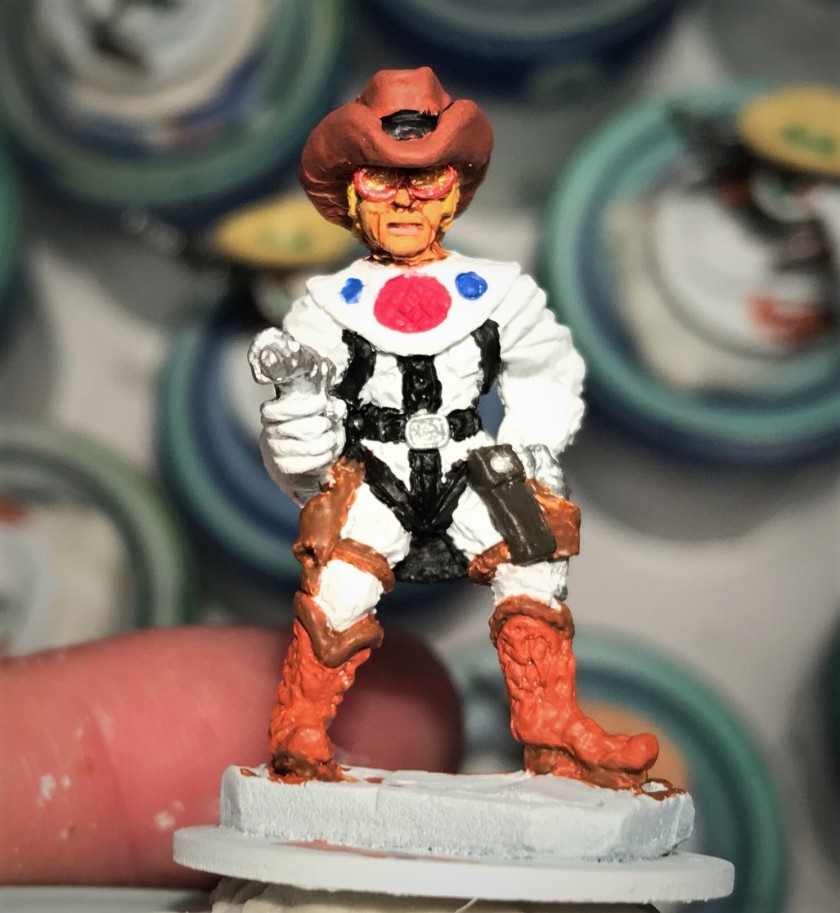
In the early stages of my chasing down Archive Star Rovers a couple of years ago, I discovered two figures that were called Texican Space Rangers. One figure was Travis B. Crockett who was armed with a couple of laser pistols. The other was Armando Garcia, who had an assault rifle, a laser pistol, and a very imposing sombrero. Both had very cool jet packs as well. I did think that they would make an awesome unit for Combat Patrol™ games. Archive packaged them in two ways. One was as a set (along with a dog I have not found) as #2045 Texican Space Ranger Group. The other was individually as #2225 (Travis) and #2226 (Armando).
From the Archive Miniatures CatalogFrom the excellent Lost Minis Wiki website. The photo above includes the elusive dog, and was posted by David Wood whose excellent blog http://deartonyblair.blogspot.co.uk/ is worth a look if you like old school minis!
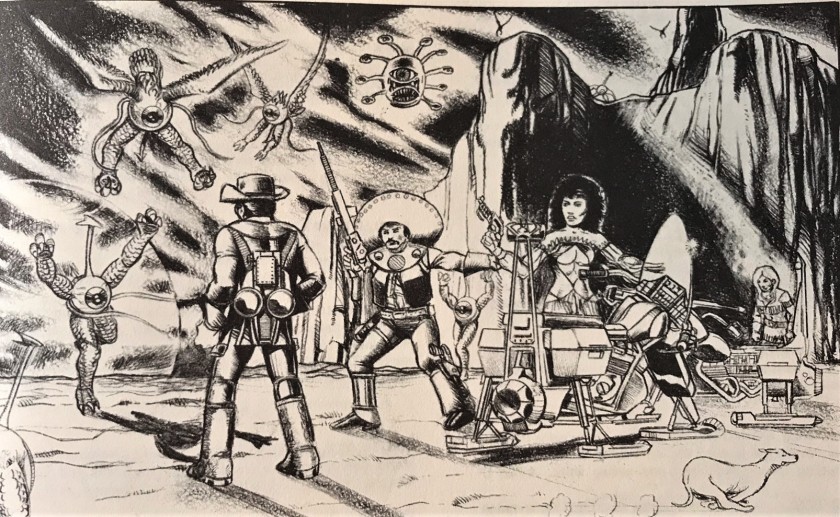
There are a few images in the Star Rovers game that showcase the Texican Space Rangers. I think the artwork is very cool and worth sharing as well.
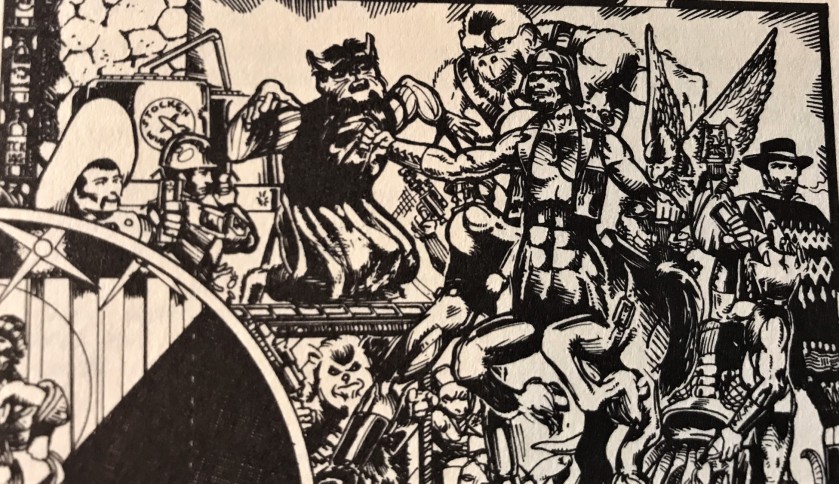
Here the Texican Space Rangers are being attacked by Eyegars and Flygars. Note the dog disappearing here as well on the lower left (maybe why I cannot find it?).Travis hanging out with a Hurraku Space Phraint at a bar! I made a platoon of these Arduin types earlier this year which you can read about here.Quite the bar fight mash-up here. I see Armando on the left, some Space Centaurs, Felynxi, Clint Eastwood (?) and a Chewbacca look alike under the table? Also a Nevile Stocken logo behind the bar near Armando.
I searched, and the only source that I initially found for the figures was on eBay which made the prospect of building a platoon-sized unit very expensive. Because of this, back in June 2016 I made a mold of Armando Garcia and cast several for personal use and for some friends which I wrote about here. I had a plan to cast Travis B. Crockett, but did not get around to it, which was lucky for me as I found a better option.
Michael Thomas is a hobbyist who bought a spin caster and has been collecting OOP miniature molds and making them available for a very reasonable price. I discovered that Michael has both Texican Space Rangers (among many other lost and OOP miniatures) available at http://classicminiatures.net/. The product codes are RKV-0122 for Travis and RKV-0021 for Armando, with their prices being $3.50 and $3.75 respectively, which is very reasonable. I had a sufficient number of Armando’s, so I ordered enough Travis figures to round out a small platoon sized unit of 32.
My concept for the Texican Space Rangers was to have them as a small constabulary-type unit (like the Texas Rangers). I made a command group (1 of each type), and 5 infantry teams. Each team would have one Travis and five Armando’s. Filing and cleaning the originals ones I got from eBay and from Michael was a breeze, while my castings needed much more work to make them presentable. They are moderate in terms of crispness, but not like today’s figures. But hey, this is what it was like in the 1970’s! Once that was done, I used my airbrush to prime them, and moved on to painting them.
I also had a pretty important secondary goal on this project, which was to use as many of my old Polly S, Polly Scale, Deka Lack, and Armory acrylic paints as possible. My Polly S paints were ones I bought in the early-to-mid 1980’s (really). My Deka Lack paints are ones that I purchased in West Germany (remember that?) around 1987. The Polly Scale paints were made after Testors bought them out, and my guess is that they date from the 1990’s (they were gifts Buck Surdu got for me slightly used from a gaming convention flea market). My Armory paints were all bought by me in 1996. All of these paints are viable, but they have lumps and clumps and do not always thin easily. I thought as a challenge, I would use as many as possible as theme colors, and add washes, inks, and glazes to enhance the models. Besides, they won’t be useful indefinitely. If you are interested in the history of Polly S , I did find this blog post that was interesting.
Additionally, I follow a couple of blogs that were inspirational for this project. One was imperial rebel ork’s post about his Western/sci-fi mashup. He has three chapters there. Also, our good inspirational friend Azazel from down under made a painting challenge for units for June, so this works and this is my entry (or at least one of them)! On to the theme colors…
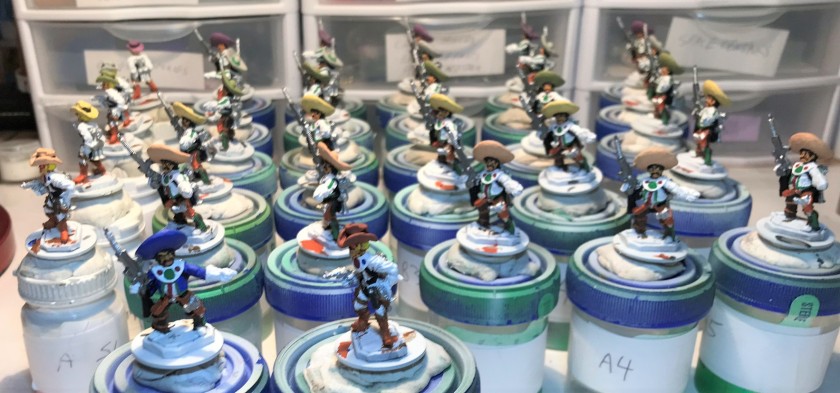
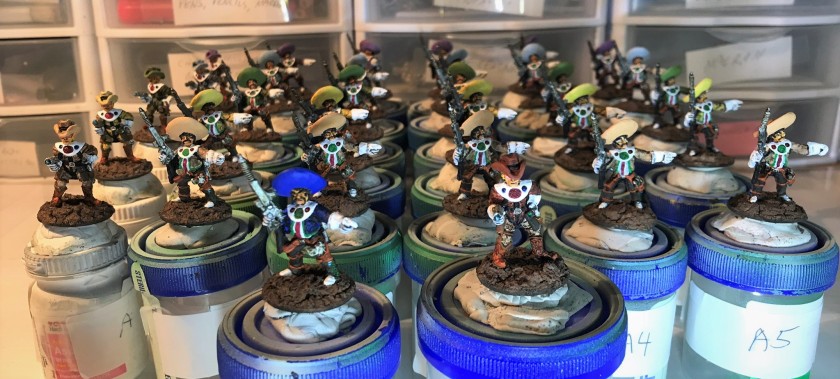
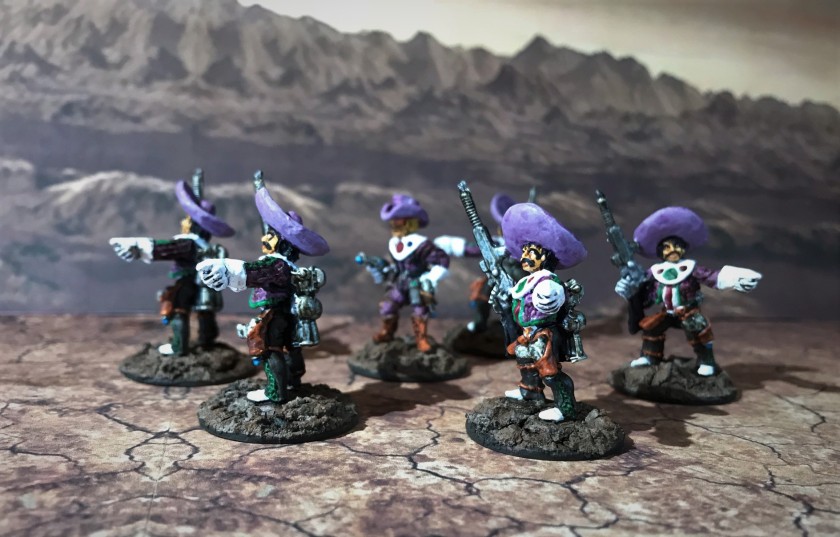
The platoon leader’s main color was Polly S “Venetian Dull Red”, while the platoon sergeant’s was Deka Lack “Blaü” (blue). for the teams’ main colors, the A team got Polly S “Desert Pink”, the B team got Polly Scale “German Armor Light Tan”; the C team got Polly S “Interior Green”, the D team got Polly Scale “WWII British Aircraft Gull Gray Light”; and the E team got Polly Scale “German Mauve”. The Travis figures also have US red, white, and blue on their collars, and the Armando’s have the colors of the Mexican flag (red white, and green). I list all of the paints, glazes, inks, washes etc. that I used for this project at the end of this post (only 55 this time!).
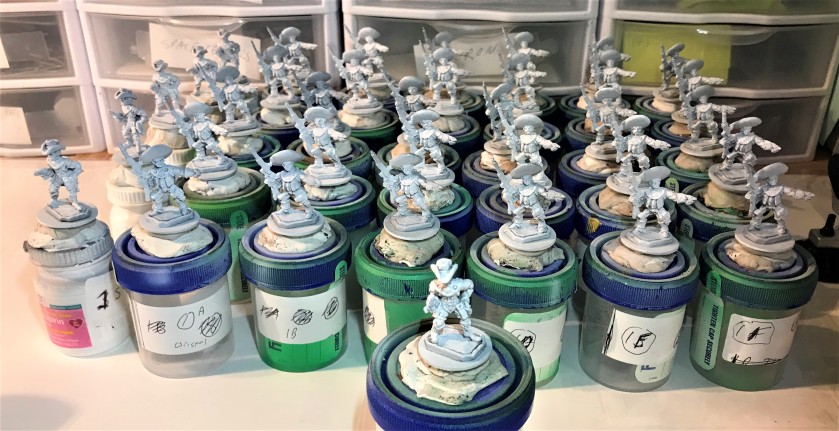
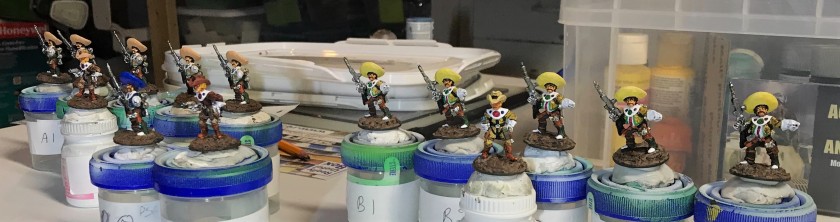
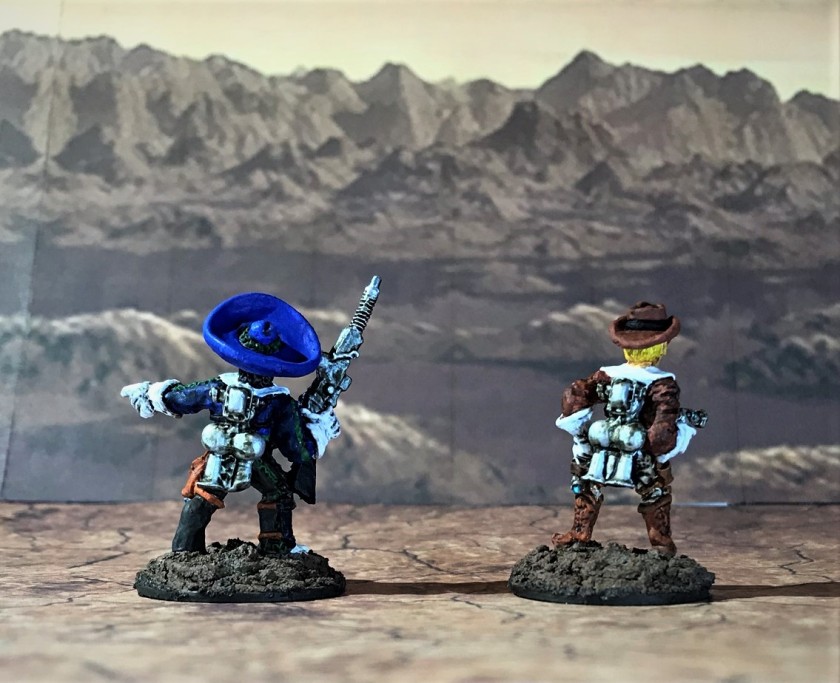
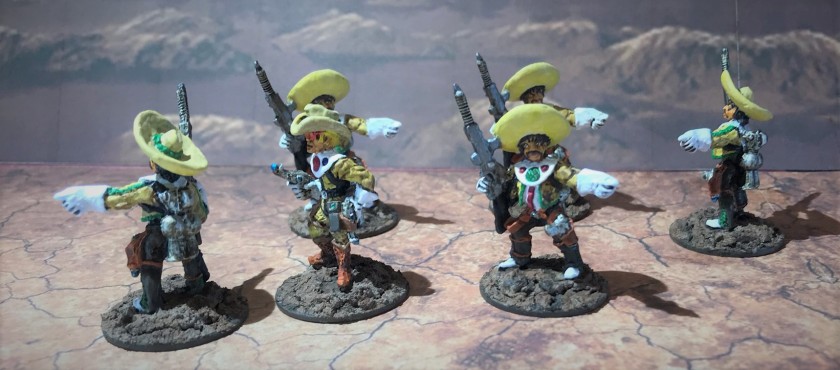
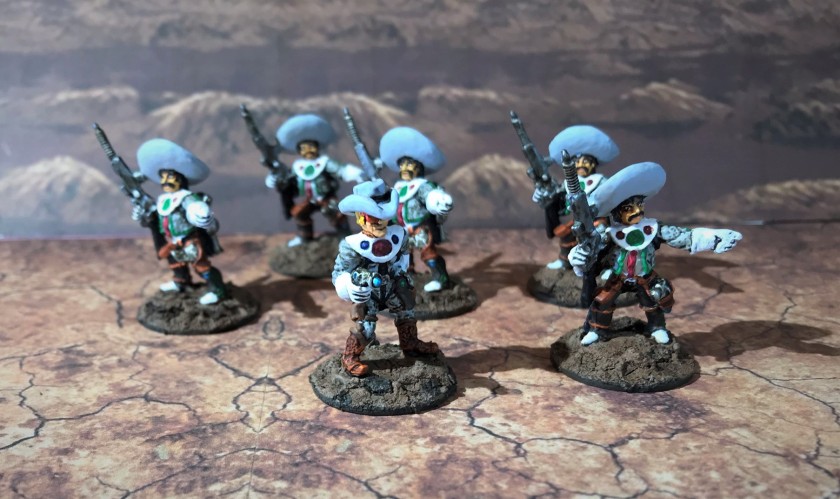
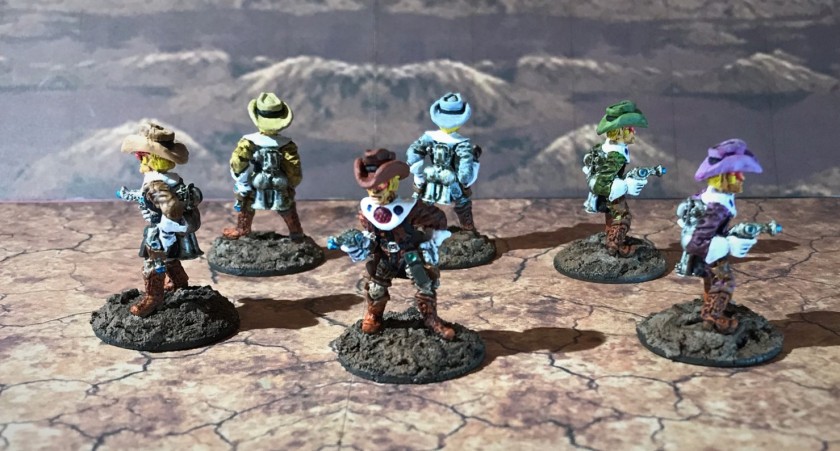
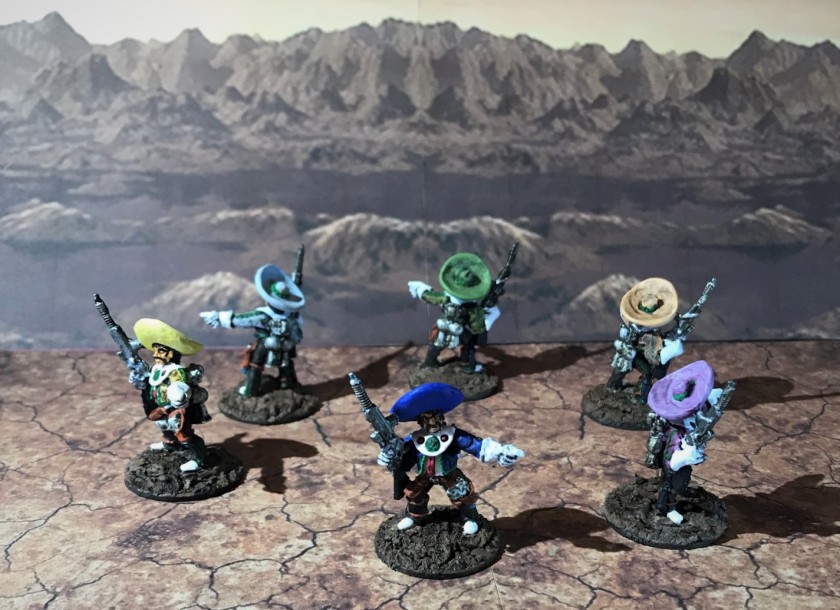
The Travis B. Crockett’s I got from Michael Thomas, unpainted.The Texican Space Rangers, primed for painting. I ended up with some reductions so I actually painted 32 for this unit.Here I started working on the heads and the theme colors. Some (not all) of the old paints I used are in front for fun.In the middle of the project. I did heads first, then legs, with torsos last.The platoon sergeant before washes and inks. This is an original, not a recast.The platoon leader early on – I cleaned him up substantially as the project continued.The command group, and Team’s A and B painted and awaiting varnish.The whole platoon finally painted and awaiting varnish.All varnished and ready to leave their specimen bottles!In the storage boxCommand Group frontal viewCommand Group, rear viewTeam ATeam BTeam CTeam DTeam EAll of the leaders (being the Travis figures). You can see the differentiating colors on the hats and uniforms, which I hope will aid on the tabletop for play.Examples of the different Armando figures
This was a fun project, though the older paints are much harder to use than modern ones. Still, I am glad that those oldies got a chance to be useful.
Thanks for reading, and I always appreciate comments and feedback in the comments section!
PAINTS, INKS, GLAZES, WASHES, AND FLOCKING USED:
Vallejo “Surface Primer – White”
Vallejo “Dark Flesh”
Vallejo “Medium Flesh Tone”
Citadel “Reikland Fleshshade”
Vallejo “White”
Vallejo Game Air “Black”
Vallejo “Brown Rose”
Polly S “Venetian Dull Red”
Vallejo “Dark Blue”
Polly S “Desert Pink”
Polly S “Venetian Dull Red”
Polly Scale “WWII German Armor Light Tan”
Polly S “Interior Green”
Polly Scale “WWII British Aircraft Gull Gray Light”
Polly Scale “German Mauve”
Vallejo Game Air “Moon Yellow”
Deka Lack “Blaü”
Polly S “Slime Green”
Vallejo Model Air “Signal Red”
Vallejo “Red”
Citadel “Auric Armour Gold”
Vallejo Model Air “Gun Metal”
Vallejo “Dark Blue”
Vallejo “Glossy White”
Polly Scale “WWII German Armor Dark Brown”
Armory “Leather Brown”
Armory “Prussian Blue”
Vallejo Model Air “Aluminum”
Vallejo Game Air “Dead White”
Vallejo Game Air “Beastly Brown”
Secret Weapons Washes “Just Red” (ink)
Citadel “Gulliman Blue” (glaze)
Citadel “Waywatcher Green” (glaze)
Secret Weapons Washes “Blue” (ink)
Secret Weapons Washes “Armor Wash” (wash)
Citadel “Agrax Earthshade” (wash)
Secret Weapons Washes “Parchment” (wash)
Citadel “Nuln Oil” (wash)
Citadel “Nuln Oil Gloss” (wash)
Citadel “Soulstone Blue”
Citadel “Waystone Green”
Citadel “‘Ardcoat”
Citadel “Agrellan Earth”
Citadel “Agrellan Badlands”
P3 “Bootstrap Leather”
Secret Weapons Washes “Sunshine” (wash)
Vallejo “Glaze Medium”
Vallejo Game Air “Wolf Grey”
Secret Weapons Washes “Stone” (wash)
Secret Weapons Washes “Purple” (ink)
Testors “Universal Acrylic Thinner”
Vallejo Mecha Color “Purple”
Vallejo “Flow Improver”
Vallejo “”Airbrush Thinner”
Vallejo “Matt Varnish”
Thanks again and feel free to let me know your thoughts!
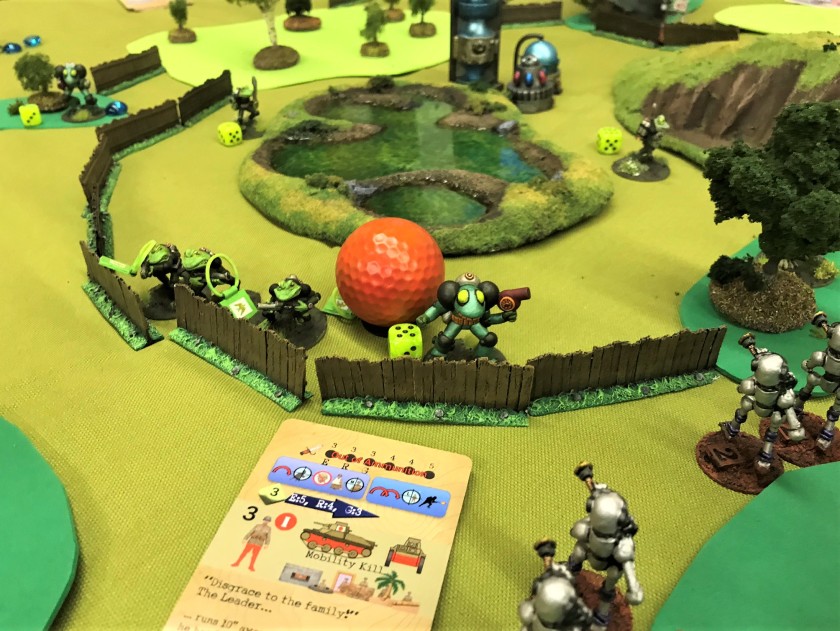
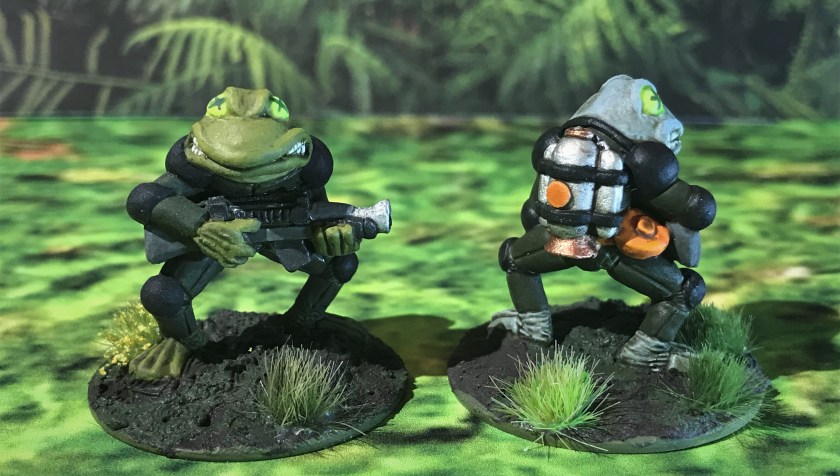
Last Saturday, May 19th, the Mass Pikemen held a gaming session in East Brookfield, MA. We were fortunate to have a fun game using the Combat Patrol™ card-based rules system – which I have adapted for use in retro sci-fi games using fun Old School miniatures. The ones here were from Archive Miniatures and Team Frog. The scenario involved an attack by the Mark III Warbots (two squads) on the peace-loving amphibian F.R.O.G. Commandos, who were once again defending their sacred pond from enemy desecration. This time, the Warbots brought along two new troop additions. One was another Archive Miniatures Juggerbot to act as the Warbot’s Platoon Sergeant. This improved command and control in support of the previously existing Juggerbot platoon leader. Secondly, this marked the first deployment for the death-dealing, flame-throwing giant robot known as Roberker.
The F.R.O.G. Commandos defended their pond’s enclosure with a couple of squads and the heavy weapons section, including the Dread FROGBOT.
In addition to our experienced players, we had a couple of new players, Mike Morgan and Chris Comeau, who quickly picked up on the Combat Patrol™ system.
The F.R.O.G. Commandos deploy. Roberker, the two Juggerbots, a Red Khang Robot, and the Red Warbot Squad move over the bridge. Roberker, in the rear, being a giant robot, just walked through the river
The Frogs quickly moved to counter the Warbot’s movements. The Dread FROGBOT with its short cannon and two chain guns arrived at the defensive outer wall, and was able to get off a couple of bursts, damaging several Warbots. However, the Warbots effectively closed and used a devastating plasma breaching weapon against the FROGBOT. Even though the fire was off center slightly, the FROGBOT’s left side was basically vaporized. Undaunted, the Frogs kept up their spirited defense with their assault rifles, holding the line.
The Warbots use a Plasma Beam Breacher, knocking out the FROGBOT.
A little to the Frog’s left, Roberker advanced and took fire, but not before spraying flaming death from its two nozzle arms. Several Frogs were fricasseed, but Roberker took several hits as he advanced.
The F.R.O.G. heavy weapon section gets a bit roasted by Roberker
Then the Frogs made a bold jet pack assault focusing on the golden Juggerbot platoon leader. They managed to damage the leader, however they actually killed two of their own in the crossfire as shown below. However, this proved to be a critical move on the Frog’s part.
The F.R.O.G. Commandos make a bold assault, damaging the Warbot platoon leader (golden Juggerbot), and unfortunately killing two of their own with friendly fire.
One of the modifications that I make to the Combat Patrol™ rules in retro sci-fi games is to have robots use the South Pacific Japanese decks, which have different morale results. The golden Juggerbot platoon leader, having been wounded, now had to make a morale check. Amazingly (and against all odds) he pulled the card that said the leader was shamed – and commits hari kiri – is destroyed, and is removed from the game. This pinned all of the attackers, reducing their advance significantly. Some of the Warbots, like the purple squad on the other side of the tabletop (played by Ellen Morin) did manage to rally, but it was a big turning point in the game.
Another interesting action at the end was the brave individual attack on Roberker by the F.R.O.G. leader, Captain Frog, armed with only a Frog Blade and a pistol. Captain Frog jet packed into hand-to-hand combat with Roberker, and despite the stiff odds, beat the giant robot. As Roberker was already severely damaged from the previous assault rifle fire of the Frogs, Captain Frog’s actions took out Roberker.
(This proved again the Buck Surdu theory that the first time a figure gets on the tabletop that it gets whacked!)
The purple Warbot squad advances through a narrow defile.
On the other end of the table, the purple Warbot squad made significant advances away from the other carnage, and were able to use their plasma ball breacher (in this case a ball of high energy plasma) to fire at the defenders. Even though the fire was slightly errant, as shown below, one Frog was vaporized, and the fence breached.
The Warbots fire a Plasma Ball Breacher (think flying ball of plasma fired like a rifle grenade, not like a putt!), opening the way to the pond. We use the card’s bayonet at the top left in Combat Patrol to show the direction of scatter if the target is missed, as was the case here.
At this point, the game was called. Clearly, I believe the Warbots were going to make it to the pond, but the F.R.O.G. Commandos defense was truly spirited and exemplary!
We are looking forward to the next Mass Pikemen Gaming Club session on June 23rd!
Thanks for looking – please share your feedback below in the comments section.
I was fortunate enough to get a couple of Archive Miniatures robots from the Star Rovers line that I could add to my Mark III Warbot Platoon for use in Combat Patrol™ retro sci-fi games. The first was “Roberker”, a Giant Robot (Archive #2010), which I had only seen before on Lost Minis Wiki and on David Wood’s blog. It is nearly 3½”/85mm tall, and was supposedly one of the largest robots on the market in 1978. It is armed with nozzles on its arms, so I think it is more or less a giant flame-throwing robot. Nevile Stocken commented on FaceBook that it was his creation, and inspired by Fred Saberhagen’s Berserker novels. The second was another late 1970’s Stocken creation, “Juggerbot” (Archive #2009 or Archive #2331), which I had a version of already, but only one, which I use as the platoon leader. I decided to make this one the assistant platoon commander/platoon sergeant.
This same good friend, David Wood (UK version), knew that I was on the hunt for these and graciously provided them so that I could augment my Warbots. Additionally, Azazel’s blog had put out an “April Assembly” challenge, that these two could certainly be participants.
The models are both challenges for assembly – so I needed to make sure that they were structurally sound for the tabletop. First, I will review Roberker, then Juggerbot. I list the paints I used at the end of this post for those interested.
Roberker
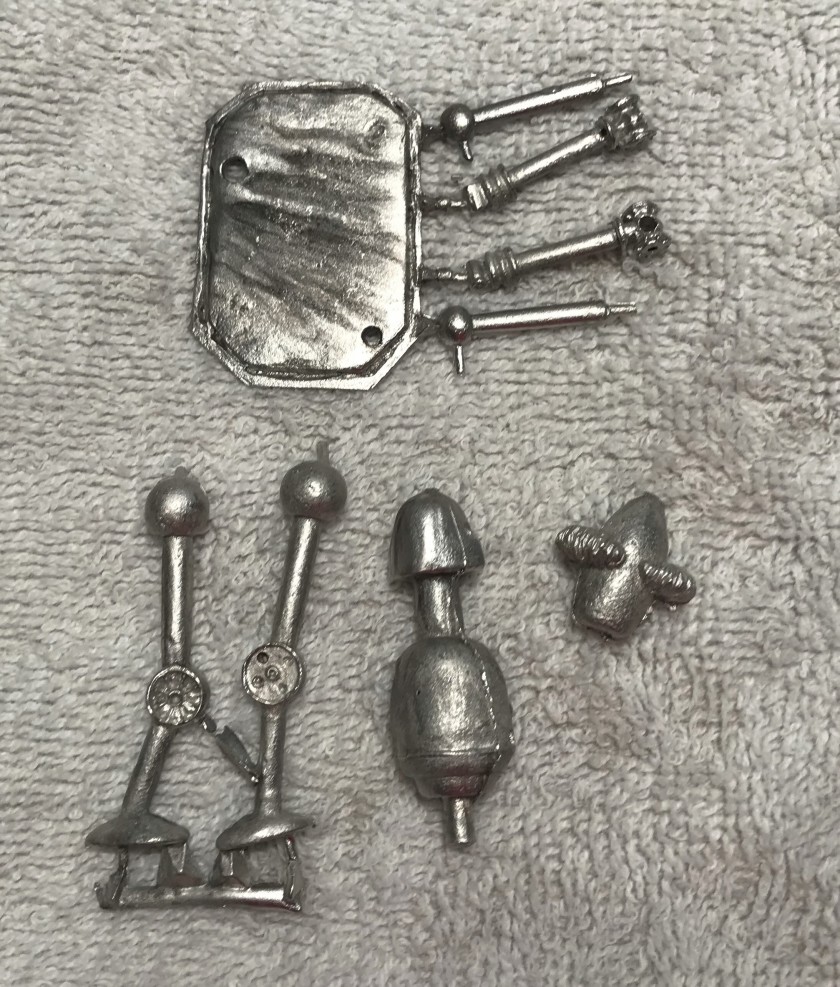
I trimmed and sanded the mold lines as best as I could. Roberker was described by David and Nevile as “a swine to pin”. I now know the truth of that very British expression. I spent most of a day drilling and pinning the arms, legs, and head. Using Gorilla glue, I made initial connections of the parts. Then, I used kneadatite (green stuff) in several places. Specifically, I needed to have strength for the spindly arms and legs. I augmented the pinning by adding a superficial kneadatite belt around the chest and shoulder areas, and by making sure that the legs and hips were married. Lastly, I made a strong base connection with the green stuff.
Roberker pieces after cleaningRoberker original baseFirst gluing of legs, torso, and headI then glued the arms, but saw that reinforcement was neededHere, you can see the kneadatite reinforcements that I made. This really made the model very strong.Roberker is no small robot!
I then based the figure on a 2″ steel washer, which is relatively heavy and will protect the model from being prone to tipping over. I then primed, painted, and varnished the model similar to the way that I did the Mark III Warbots. I did however want the figure to look like it had flames coming out of its head, and that it had a sooty appearance having torched many of its victims over the years. Also, for the hand nozzles, I went with a copper and verdigris look.
Roberker after airbrush primingRoberker painted and ready for varnishRoberker completed, front viewFour-way view of the model
I am very happy with how Roberker came out – and he will be a terror on the tabletop I am sure.
Juggerbot
As I said, this is my second Juggerbot. My first is the platoon leader and he is basically golden. This one was to be similar to the Mark III Warbots in color scheme and treatment. Here as well, I trimmed and sanded the mold lines as best as I could. I did also need to do a bit more work with the pinning and the green stuff here as well. That is because I wanted to have a slightly different positioning of the arms, which necessitated making a “vest” of green stuff that covered the shoulders and the top conic section of the robot.
Juggerbot as receivedMy original Juggerbot (the Platoon Leader on left) and his new assistant commander on the right in progress. Note that I was able to give the arms different positioning with the kneadatite “vest”Side view of the two JuggerbotsJuggerbot after airbrush primingPainted and awaiting varnishingThe completed new Platoon Sergeant Juggerbot, right side viewComing at you!Three way view of the new Juggerbot model
This model met my expectations – now the command and control of the Warbot platoon will be more robust.
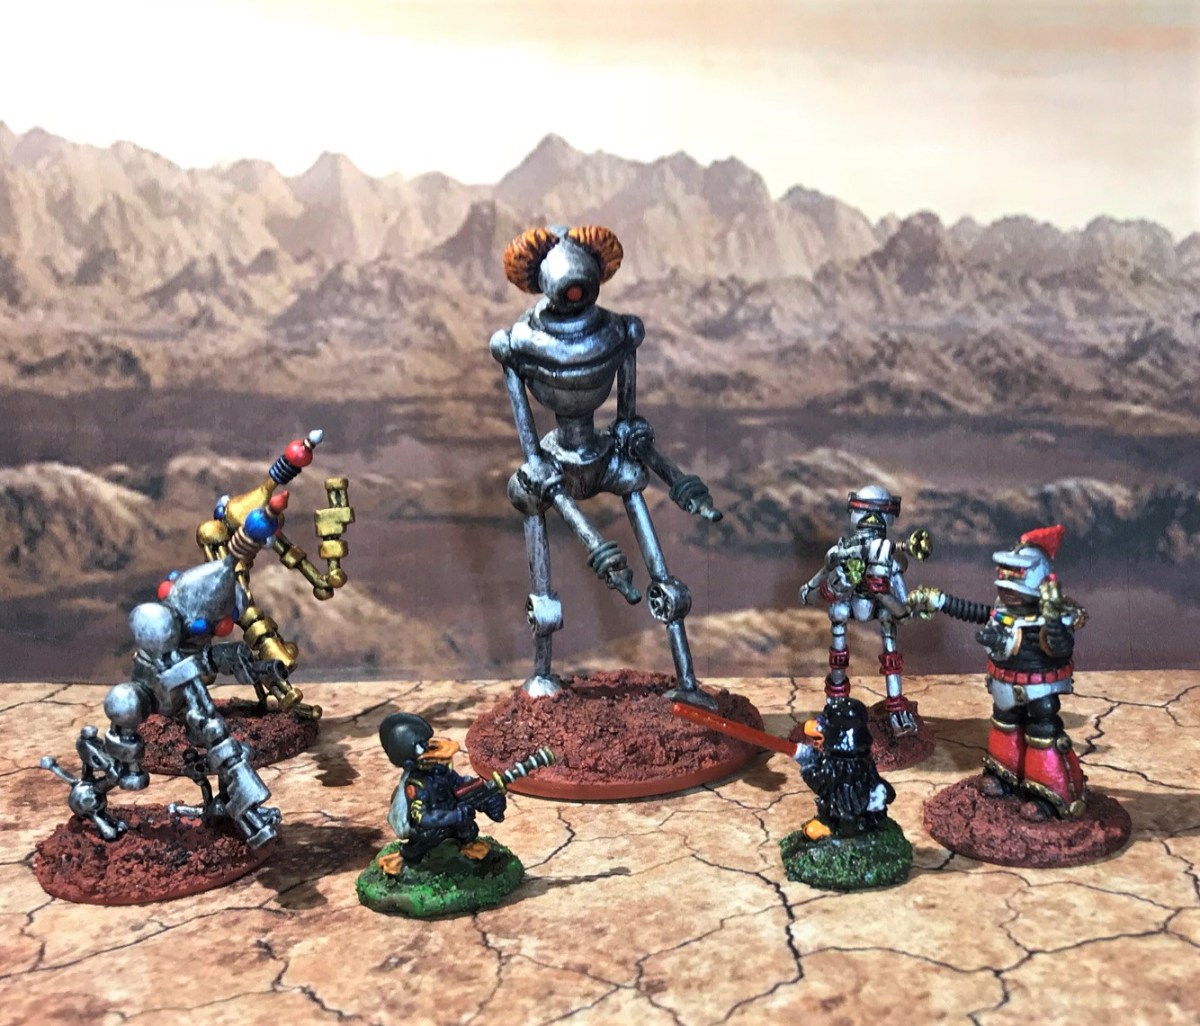
This shows the size of my different retro sci-fi figures. From left to right, the Warbot Juggerbot Platoon Sergeant, the Warbot Juggerbot Platoon Leader, SFC Mallard, Roberker, Duck Wader, a Mark III Warbot, and a Khang Robot Squad Leader. It looks dire for the two Star Ducks!
Thanks for looking – please let me know what you think in the comments section at the bottom.
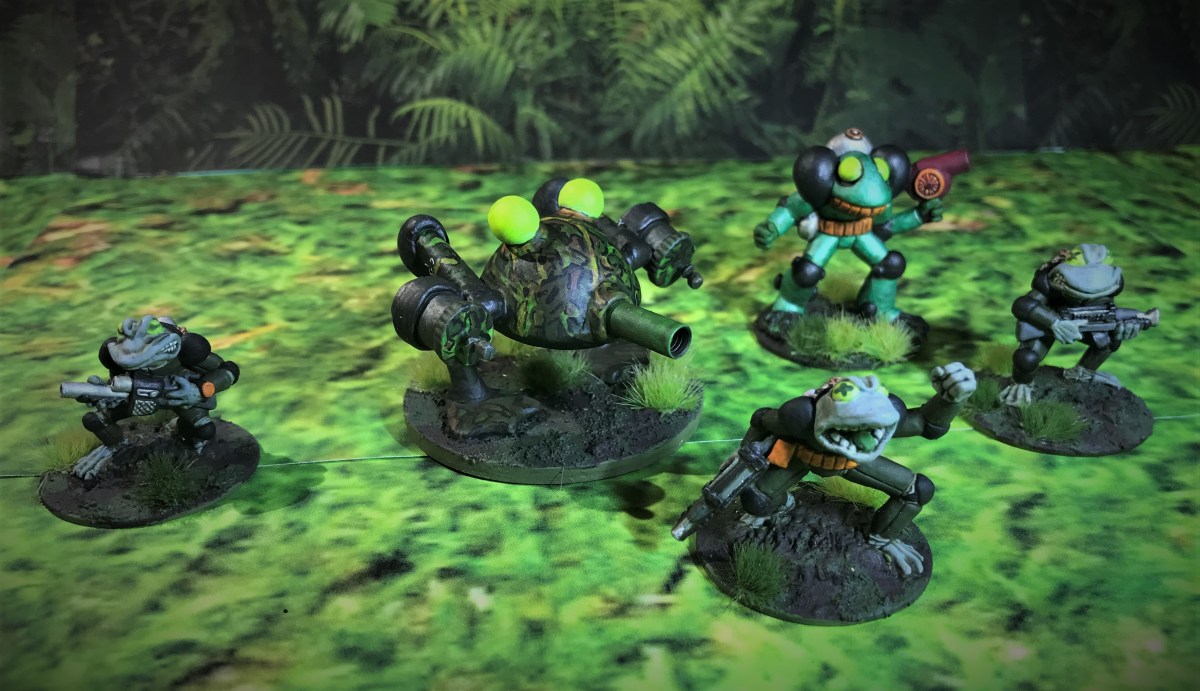
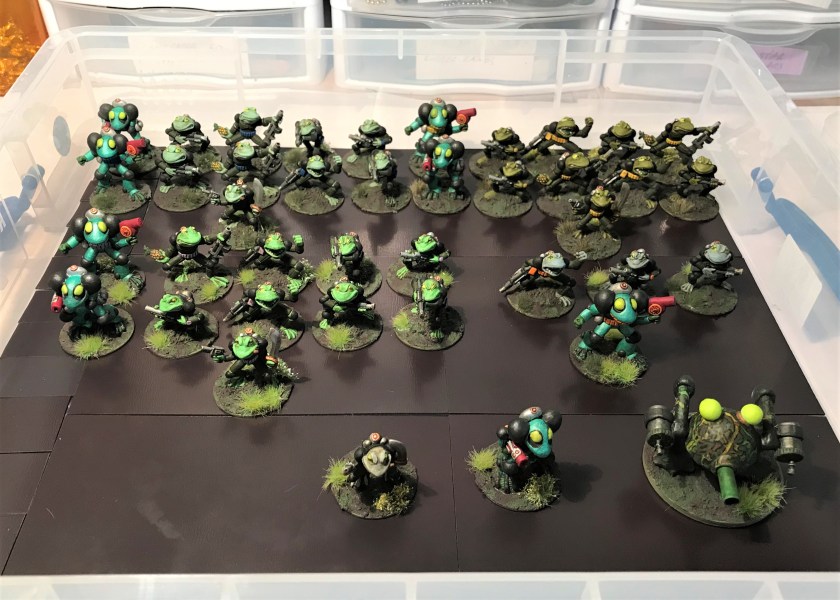
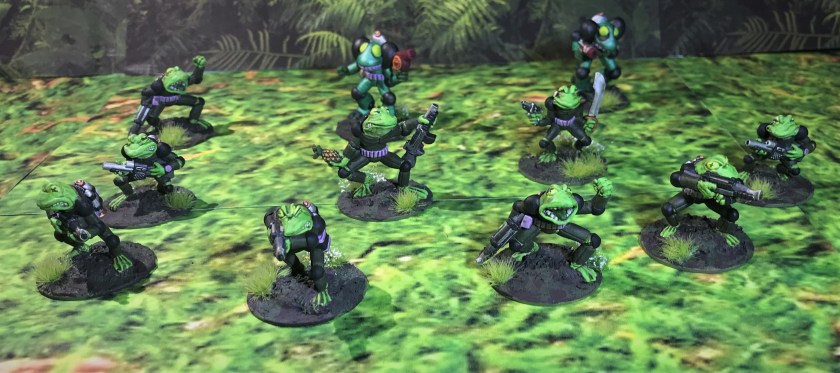
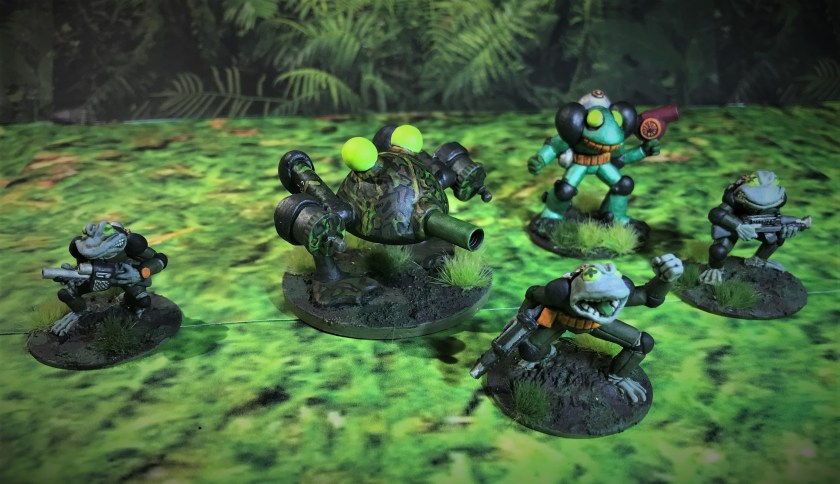
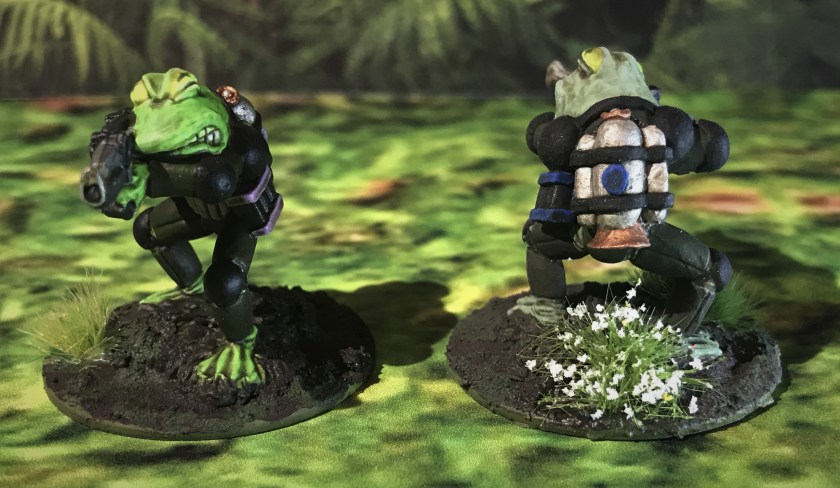
In the spirit of bringing more miniatures back from the commercial grave, I happily share with you my latest project – a F.R.O.G. Commandos platoon. This unit consists of 40 figures. All of them except 1 figure were made of metal. In the Critter Commandos universe, F.R.O.G. stands for “Federated Republics of GreenEarth”, one of several cartoon nations created by the Team Frog founder, Paul Arden Lidberg. None of these are currently available commercially.
The unit also includes a Frogbot (Crittertek). This project also enabled me to participate in a painting challenge “Squad March” put out by Azazel on his blog. This contest required a unit of at least 3 figures, and I am sure that this one qualifies! It did take up the month of March for sure.
I was able to do this because I managed to get another box of F.R.O.G. Commandos from Chris Palmer at BARRAGE in January. Originally, each box (a re-purposed VHS tape box no less) came with 8 figures and a d10. I had been slowly collecting many different figures from the line, but Chris’ addition of 8 frogs allowed me to create a platoon for Combat Patrol™.
I managed to successfully finish my project just in time for the end of March. I had come across figures from the Critter Commandos line, which was initially put out sometime between the late 1980’s and early 1990’s by the Team Frog Studios company. Later, the figures were also marketed by Nightshift Games. The figures are all creations of the late Steve Lortz, who also made the Star Ducks and other figures for Archive. I just love his stuff, they are a lot of fun. Also, when I was at West Point, I was in company F-4, whose mascot was a Frog (GO FROGS RIBBIT! was our cry). So I had another motivator here as well.
The photo below is what I had assembled for the project. On the top you see the Frogbot, but he was definitely not together as I will discuss later. The miniatures are around 28mm in scale.
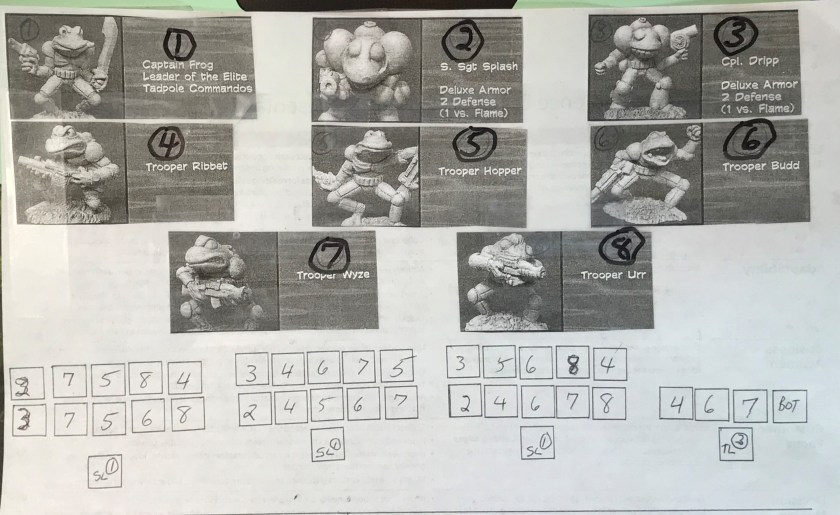
So I needed a plan – I decided that I did not want more than 1 figure per fire team to be the same figure, but as you see above, I had a hodgepodge collection. I worked it out as follows – this unit consists of 40 figures:
Command section (2 each – platoon leader and platoon sergeant)
Three full squads (11 each) led by a squad leader each consisting of:
Two teams of 5 (Team Leader and 4 F.R.O.G. Troopers)
1 Heavy Weapons/Recon section consisting of a Section Leader, 3 F.R.O.G. troopers, and a Frogbot.
My plan
It took a bit to clean and file all of these figures. They had some casting issues (mainly cracks) that I repaired with kneadatite (green stuff). I then moved on to the Frogbot, which was not a Lortz creation. I had bought it on eBay with a number of other Critter Commandos, and it deserves a few notes.
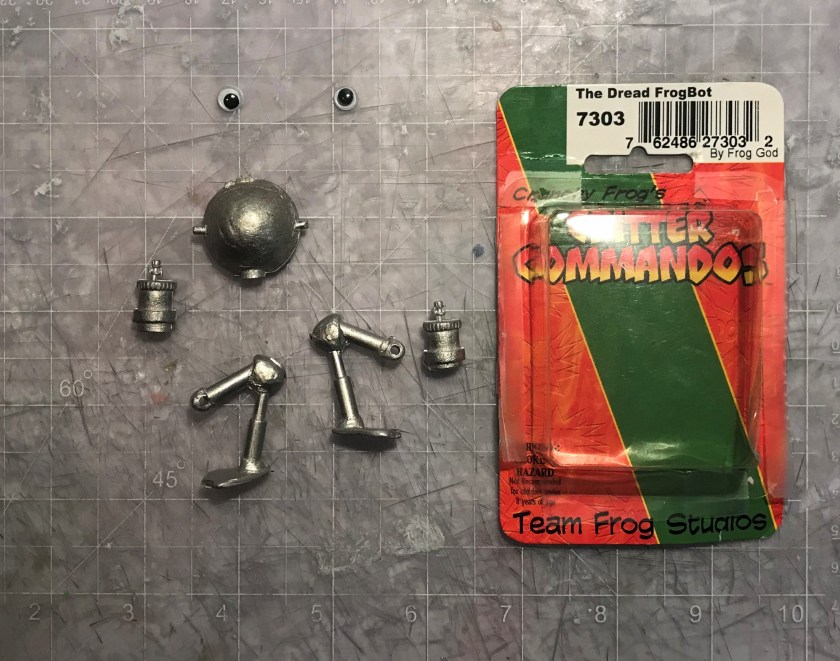
All I had for the Frogbot
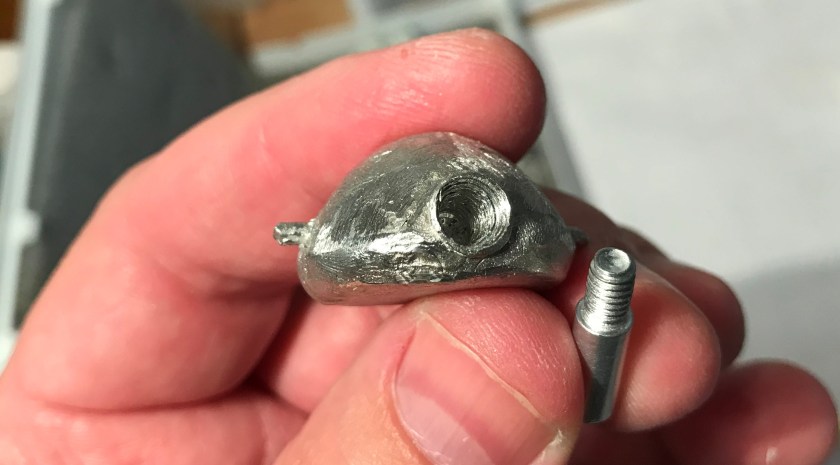
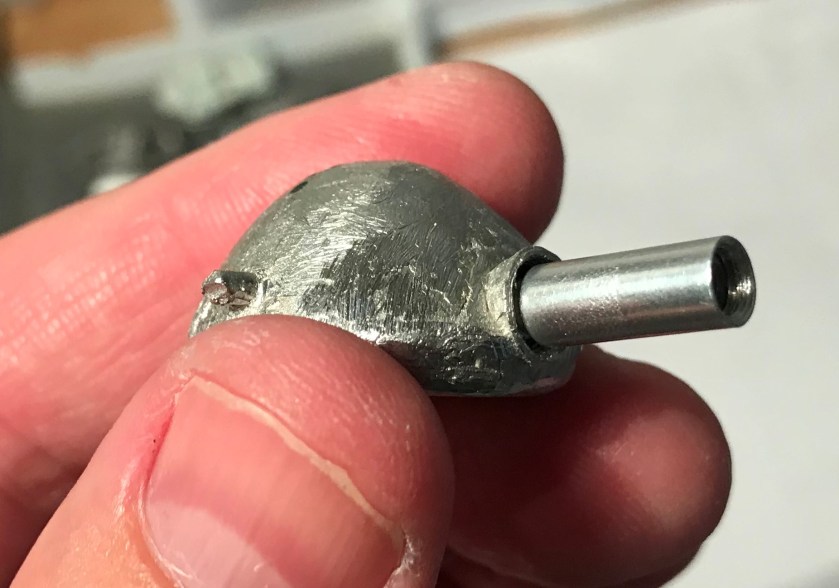
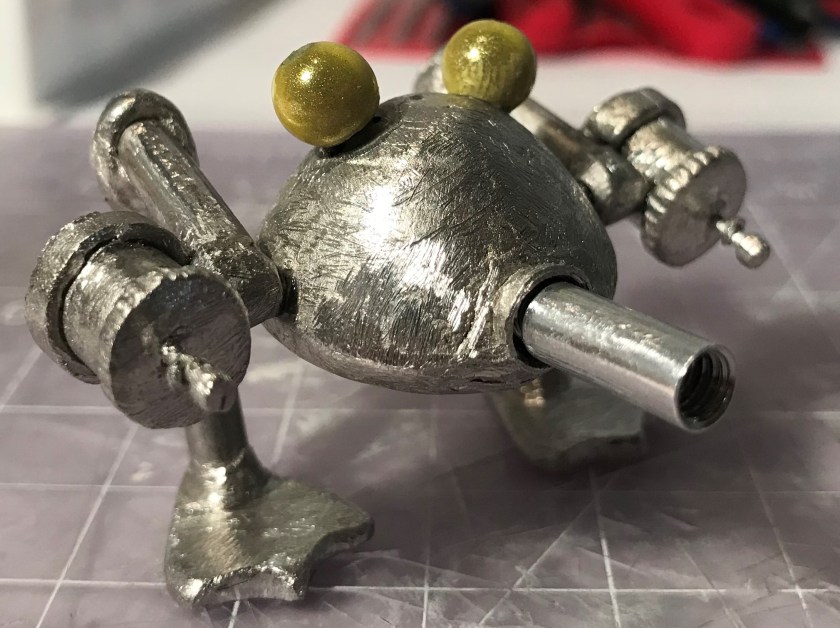
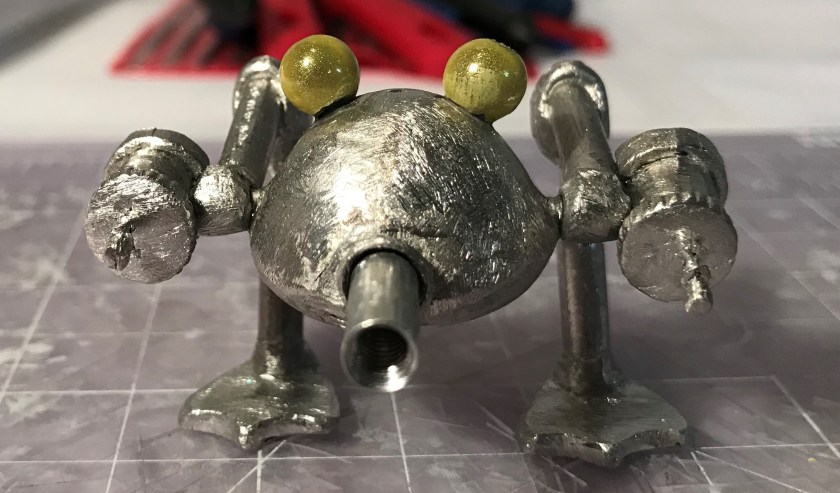
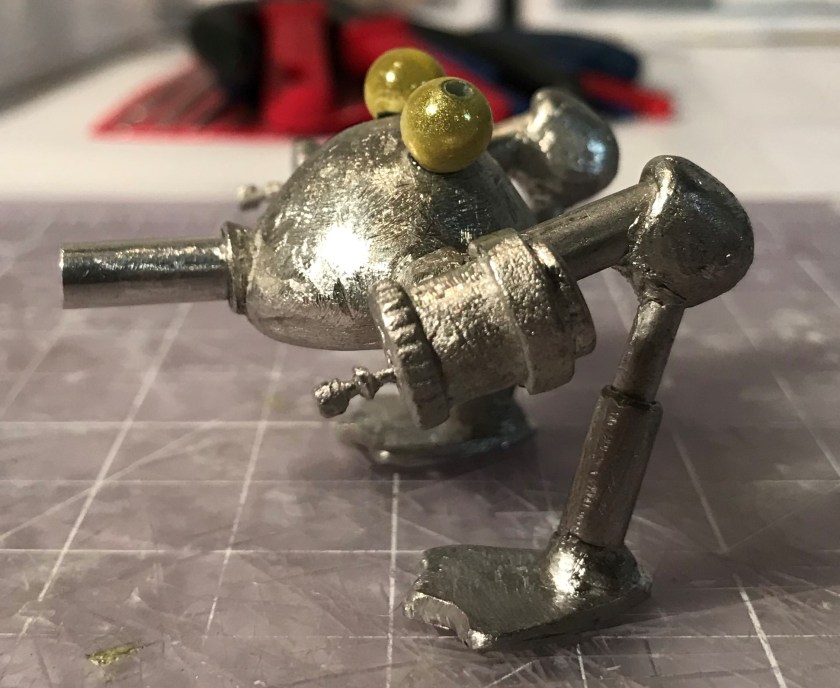
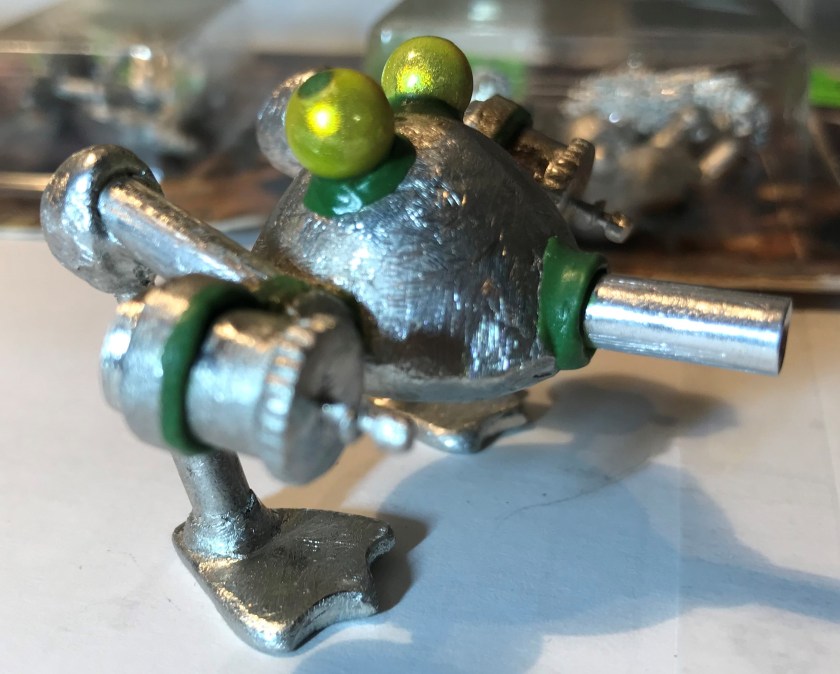
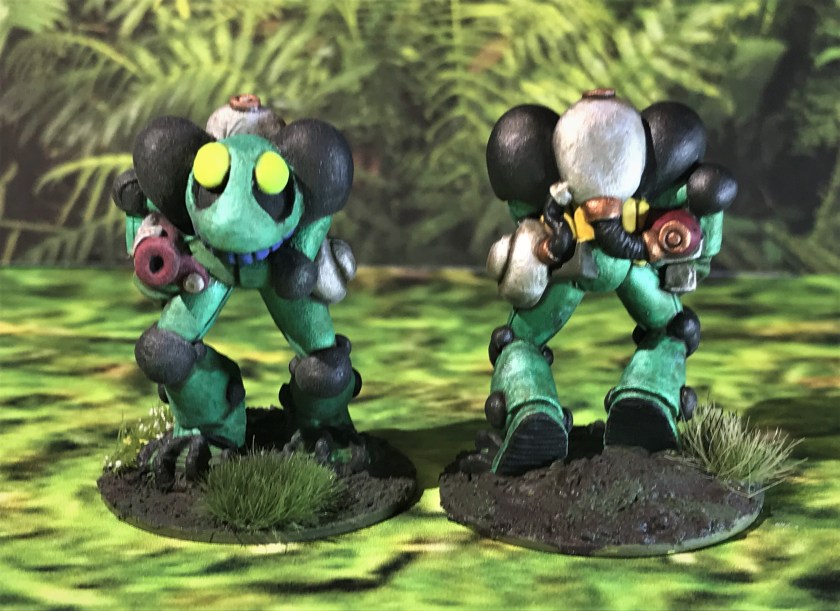
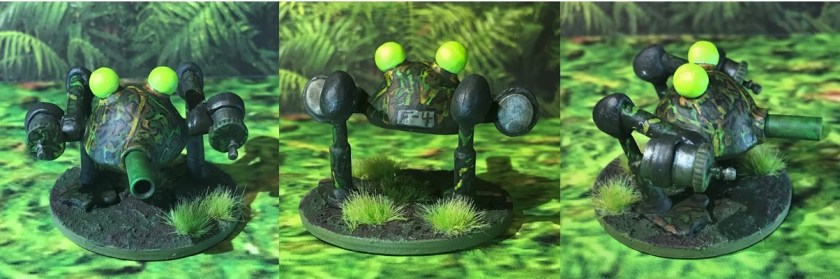
The kit was incomplete. There was no main gun, but there was a small hole in the front of the main body. Pinning was not possible because the legs were made of some kind of tubing., and the plastic “googly eyes” you see above would not meet my standards. Clearly, there needed to be some changes. First, I filed the main chassis down to remove as many casting crevices as possible. I then got a short bolt extender, and patiently reamed out the small hole to affix the extender as a main gun for the model.
The reamed out hole and bolt extenderMain gun – check!
Then I needed to make it look, well, froggy. The eyes were an issue, so I bought some cheap beads at Michael’s. Using some dollhouse hinge screws that I drilled into the Frogbot chassis as mounts, I affixed the beads as sensors/eyes after reaming them out slightly. Then I carefully glued the rest of the model together.
Assembled Frogbot
While I really was happy with the figure, the engineer in me thought that it was too structurally weak. So I used green stuff to reinforce the legs and chain guns, as well as to fill in around the eyes and create a mantlet for the gun.
Structurally reinforced Frogbot
I was now ready to prime the lot. I used my airbrush to prime the figures. Without going into painting detail here, I will show the figures and the progression of the project. I list the paints I used at the end of this post for those interested.
First, the lot before mounting on 1¼” washers and priming
I decided to give each sub unit its own different amphibian skin color and color for accouterments, while keeping the majority of the uniforms the same. This was to help with tabletop identification.
Command group got greenish skin and red for accouterments
First squad got greenish blue skin and dark blue for accouterments
Second got yellowish green skin and yellow for accouterments
Third squad got bright green skin and purple for accouterments
Heavy Weapons/Recon Section got grayish green skin and orange for accouterments
1st Squad base coatedSecond Squad base coatedThird Squad base coated
Once the painting was complete, I used Army Painter “Quickshade” (strong tone) to shade the models, followed by a coat of Vallejo “Matte Varnish”. I then highlighted the models, and then added another coat of varnish with my airbrush. I used Army Painter tufts (Jungle, Swamp, Woodland, and Meadow Flowers) to further assist in tabletop differentiation.
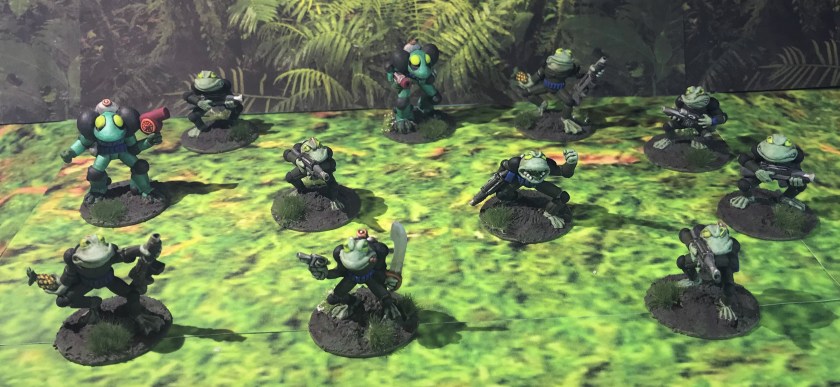
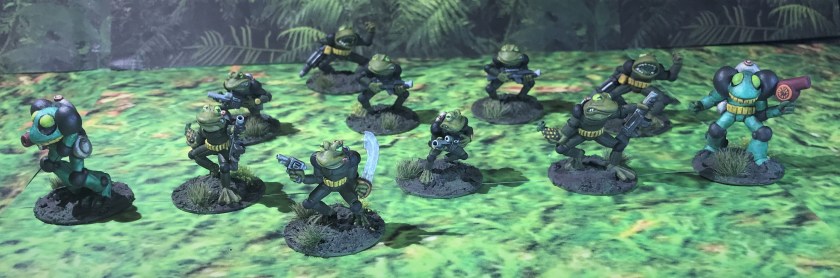
Heavy Weapons/Recon Section before shading and warnishingThe entire platoon in the box awaiting transportThe 4 leaders showing their different skin tones and accouterment colorsFirst SquadSecond SquadThird SquadHeavy Weapons Section
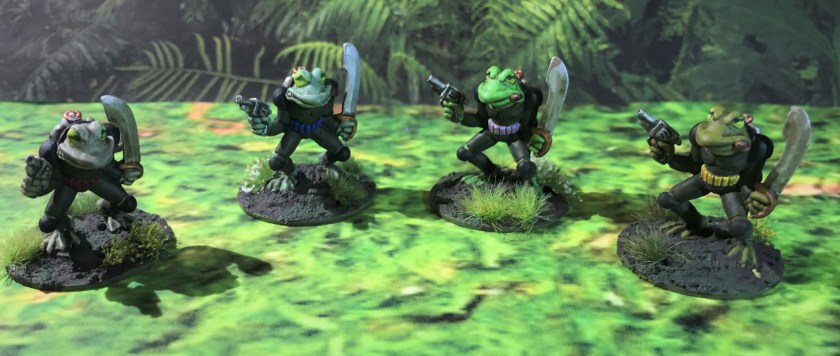
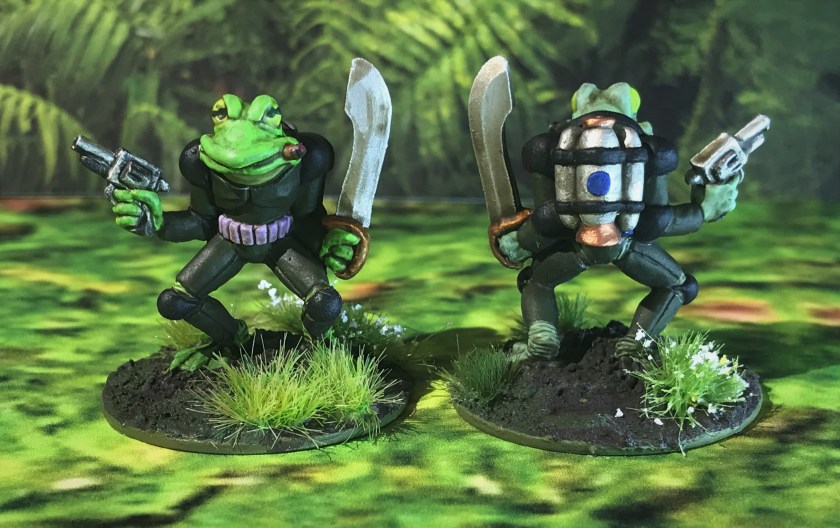
There were 8 different poses plus the Frogbot, so here are some front and back poses. You can see some of the differentiating features here as well.
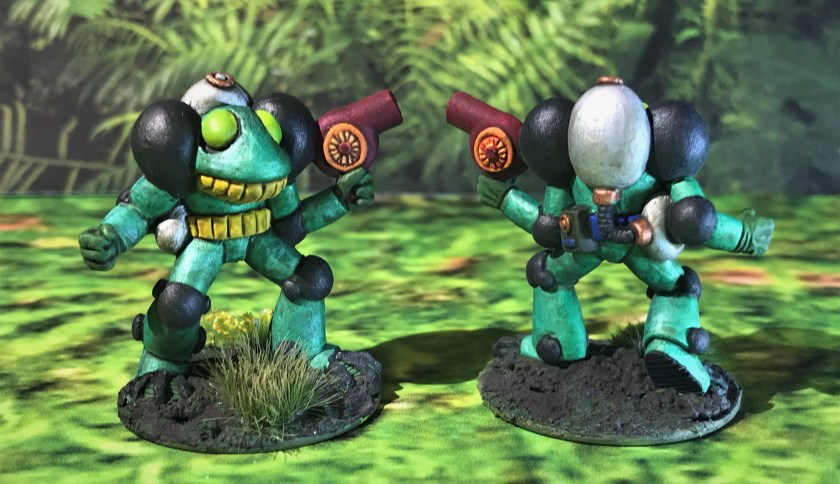
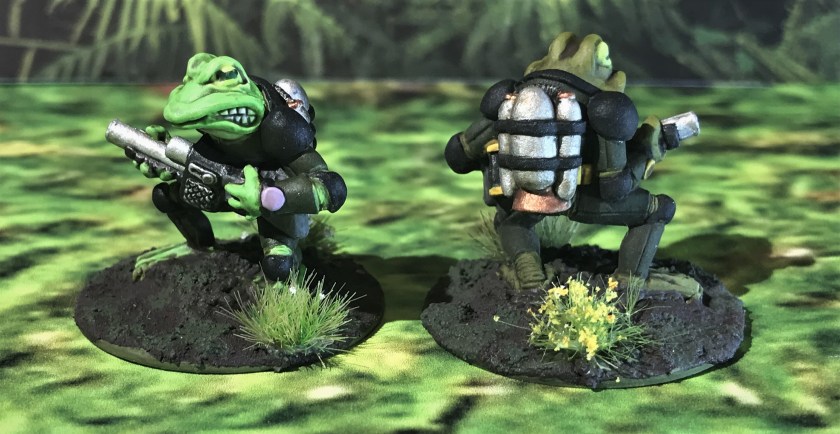
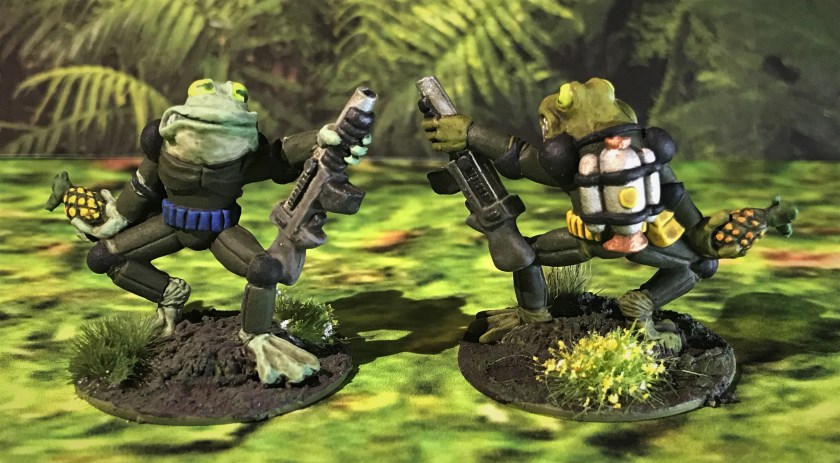
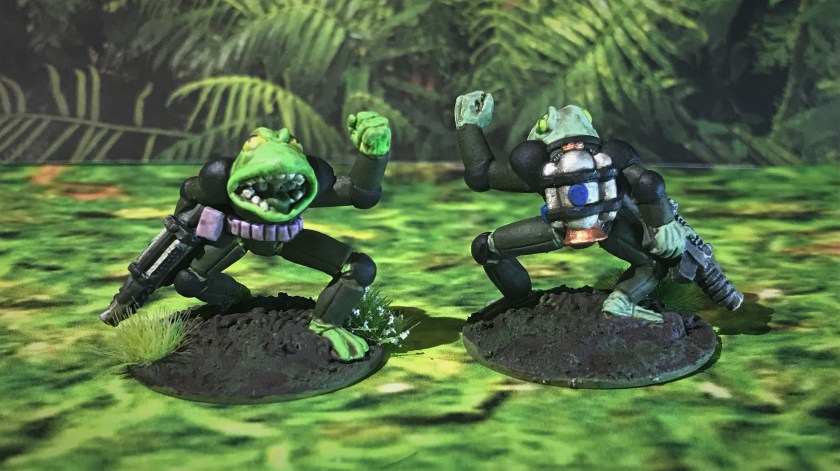
Figure 1 ” Captain Frog” with revolver and swordFigure 2 – “Staff Sergeant Splash” with flame throwerFigure 3 – “Corporal Dripp” with flame thrower looking like a hair dryerFigure 4 – “Trooper Ribbet” with assault rifleFigure 5 – “Trooper Hopper” with assault rifle and pineapple grenadeFigure 6 – “Trooper Bud” with assault rifleFigure 7 – “Trooper Wyze” with assault rifle and an antitank mineFigure 8 – “Trooper Urr” with assault rifleThe Frogbot. Note the middle photo with the shout out to “F-4” on the back. The camouflage pattern is inspired by Japanese WWII tank patterns.
I am very happy with this project, and hope that you enjoyed it as well.
Thanks to:
My wife (for putting up with me during this project – again)
Chris Palmer – for the box and inspiration!
Buck Surdu – for the inspiration and some old paints from Polly S
Dave Wood – for starting me on this hobby back when we were roomies
All my readers – for inspiring me and sharing their feedback!!
PAINTS AND FLOCKING USED:
Vallejo “Surface Primer – White”
Vallejo “Camouflage Olive Green”
Vallejo Model Air “Aluminum”
Vallejo Mecha Color “Light Green”
Vallejo Mecha Color “Deep Green”
Vallejo Mecha Color “Yellow Fluorescent”
Vallejo Game Air “Sick Green”
Vallejo Game Air “Beastly Brown”
Vallejo Game Air “Black”
Vallejo “Dark Blue”
Vallejo “Neutral Gray”
Vallejo Model Air “Steel”
Polly S “Interior Green”
Vallejo Model Air “Black”
Citadel “Retributor Armour”
Vallejo Game Air “Sun Yellow”
Vallejo “US Dark Green”
Citadel “Yriel Yellow”
Vallejo “Red”
Citadel “Imperium Primer”
Vallejo “Glaze Medium”
Vallejo “Thinner medium”
Testors “Universal Acrylic Thinner”
Citadel “Waywatcher Green”
Citadel “Coelia Greenshade”
Citadel “Athonian Camoshade”
Citadel “‘Ardcoat”
Citadel “Fire Dragon Bright”
P3 “Sulfuric Yellow”
P3 “Red Ink”
Vallejo “Yellow Green”
Vallejo “Sunny Skin Tone”
Vallejo Game Air “Moon Yellow”
Vallejo Mecha Color “Purple”
Vallejo Game Air “Escorpena Green”
Vallejo Mecha Color “Green”
Vallejo Mecha Color “Purple”
Vallejo Mecha Color “Green”
Vallejo Mecha Color “Green Blue”
Vallejo Model Air “Copper”
Vallejo Model Air “Gun Metal”
Vallejo Model Air “Medium Gunship Gray”
Polly S “WWII German Armor Dark Brown”
Vallejo “Japanese Uniform WWII”
Citadel “Nuln Oil”
Polly S “Venetian Dull Red”
Vallejo Model Air “Wood”
Army Painter “Quickshade – Strong Shade”
Vallejo “Matt Varnish”
Citadel “Stirland Mud”
Citadel “Lustrian Undergrowth”
Polly S “British Brown Drab”
Army Painter “Woodland Tufts”
Army Painter “Swamp Tufts”
Army Painter “Jungle Tufts”
Army Painter “Meadow Flowers”
Thanks again – please share your thoughts in the comments section!
I cannot make Cold Wars this year – but these are some great options for those attending! See below!
From Buck Surdu’s Blog
Buck F: 215: Hold as Long as Possible (1) Friday, 9:00 AM, 4 hrs, Players: 6 GM: Buck Surdu & HAWKS Sponsor: None, Prize: None Period: World War II, Scale: 28mm, Rules: Combat Patrol™: WWII. ItisthePhilippinesinearly1942. The Americans are retreating slowly toward Bataan. A platoon of infantry, along with a handful of Stuart tanks, must […]
Back in November, I was happy to have an extended game of Combat Patrol™ using resurrected Archive Miniatures Star Rovers figures (specifically, Star Ducks, Frinx, Aphids, and Mark III Warbots). My old West Point buddies Dave Wood and Buck Surdu made the trek up from Maryland, and my daughter Ellen and her fiance Chris Smedile joined us for a fun game which was described here.
The game was a blast – and afterwards I thought that I could make some improvements that would make play easier and improve the tabletop aesthetics. The retro sci-fi aspect brought in some new elements. In a WWII game, I would normally use small rubber bands to designate the status of a figure with regards to wounds, being stunned, or being out of ammunition. This is to eliminate a lot of bookkeeping which can bog down a game. I also use glass beads to represent morale checks. In a WWII game, this works fine as most figures can only take 3 wounds before they are incapacitated. However, in the retro sci-fi game, I added other elements. One of these was allowing the Star Ducks to use their jet packs three times per game. Another was the Mark III Warbots, which can take up to 6 or 7 wounds, and who may take critical hits (see chart below) that adversely impact their capabilities.
One issue with their high endurance this is that the Warbots can end up looking like they just arrived on Maui after getting several garlands of leis once the action gets going (see photo below).
Who just arrived in Maui?
I also introduced two breaching arc weapons and a plasma ball breacher that would be key elements of the Mark III Warbots capabilities. As a Army Engineer officer veteran, I thought that this would be fun, and I wanted some cool templates to represent these game elements. Lastly, I wanted to be able to have the casualties remain on the tabletop as a depiction of what happened during the game. This does not always work, so now I make casualty cards for my units that are sized to the figures size (I discussed this previously here).
So my list of improvements became:
Create casualty cards for each unit/figure (done)
Create templates for the plasma weapons (discussed in this post)
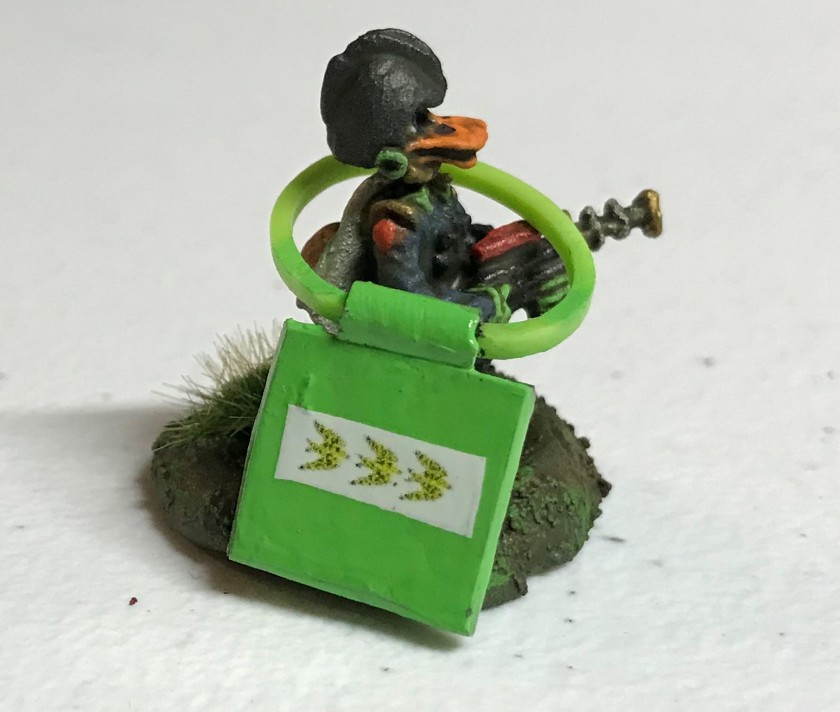
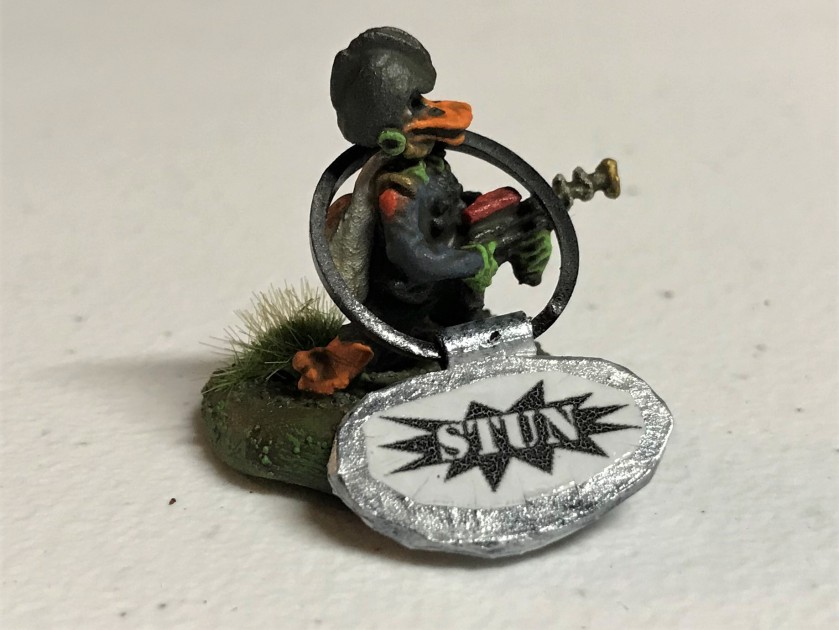
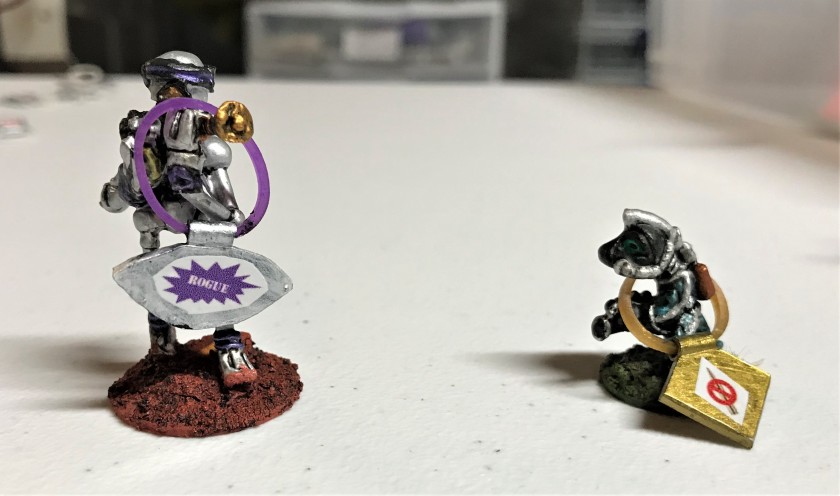
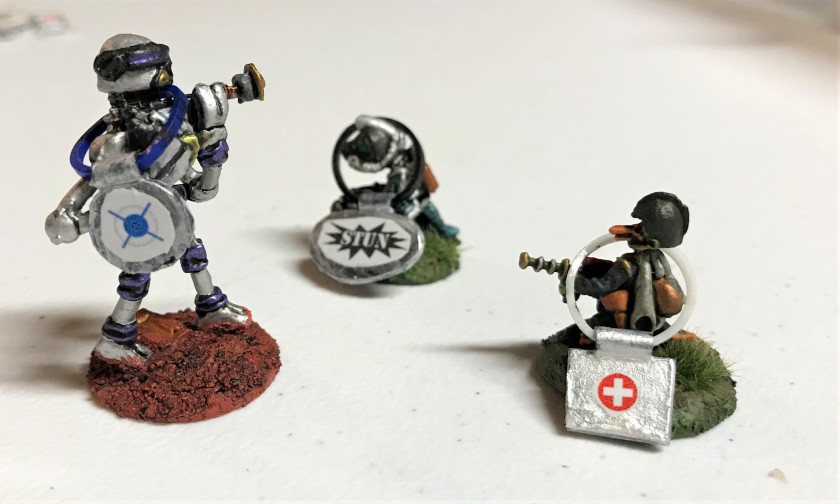
Create specialized markers (placards with decals) for use with retro sci-fi Combat Patrol™ games (discussed in this post)
With any new project, I like to try new techniques and learn from trying them out. Here, I decided to try to use my airbrush to do more than prime, base coat, and varnish. I also wanted to use my computer and make decals for the placards. I had not really done any of these things in this way before, so I was going into uncharted waters. I will first discuss the plasma weapons, and then the placards.
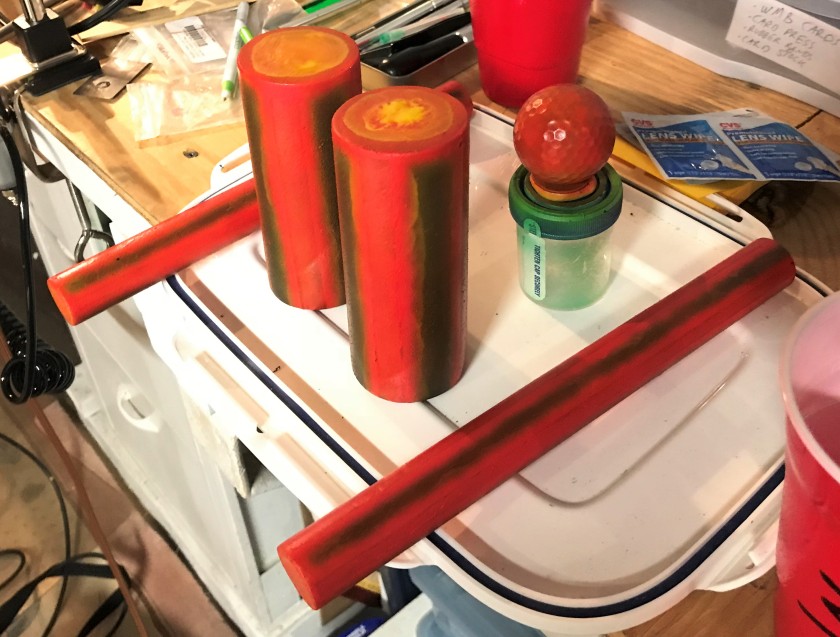
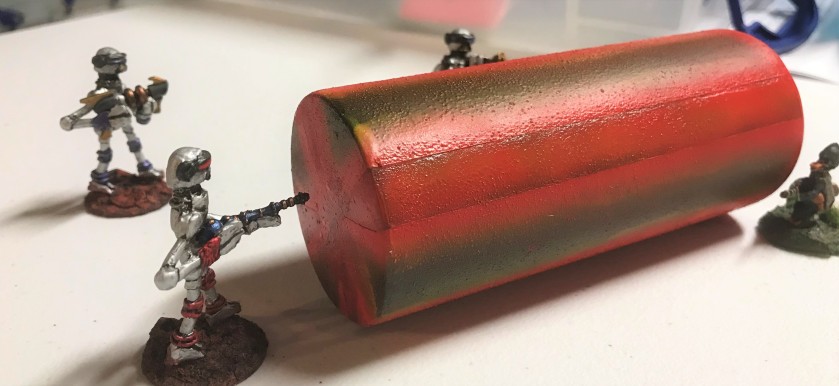
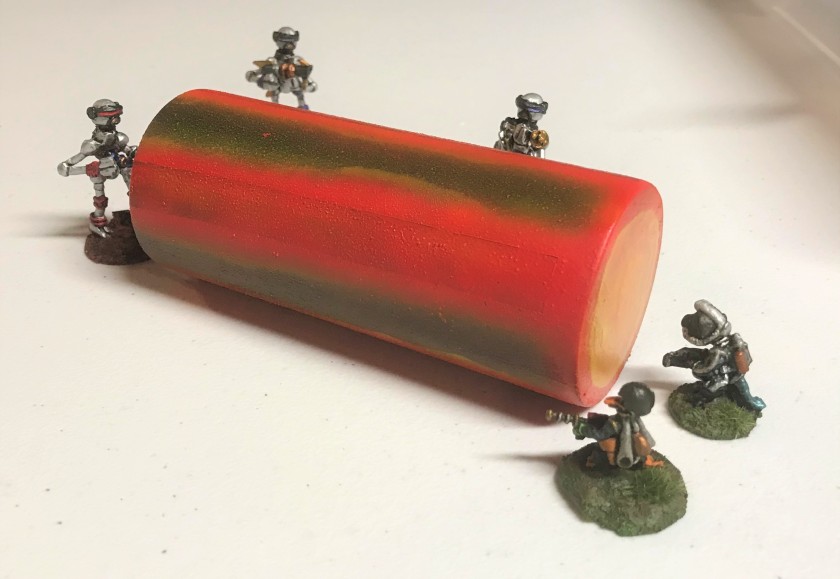
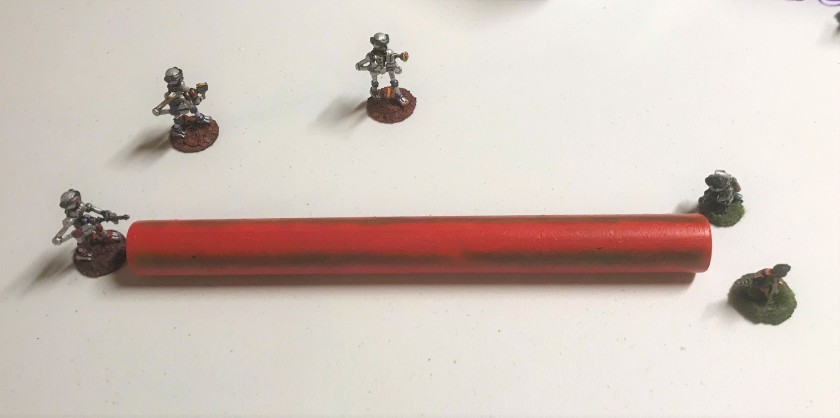
For the arc weapons and the plasma ball, I wanted something easy to sue that was durable and vibrant. The Warbots arc weapons can either shoot a 2″ cone (door-sized) for a distance of 5″, or fire a 1″ cone (window-sized) for a distance of 10″. This is to allow them to breach obstacles. The other weapon fires a plasma ball that can make holes (or dissolve stuff/enemies) – think of a really effective M203 grenade launcher. I found a some hardwood (oak or maple) dowels at Home Depot that would work well size-wise. As a golfer, I sacrificed one old Pinnacle for the plasma ball, and mounted it on a 1¼” washer (I don’t play Pinnacles anyways!).
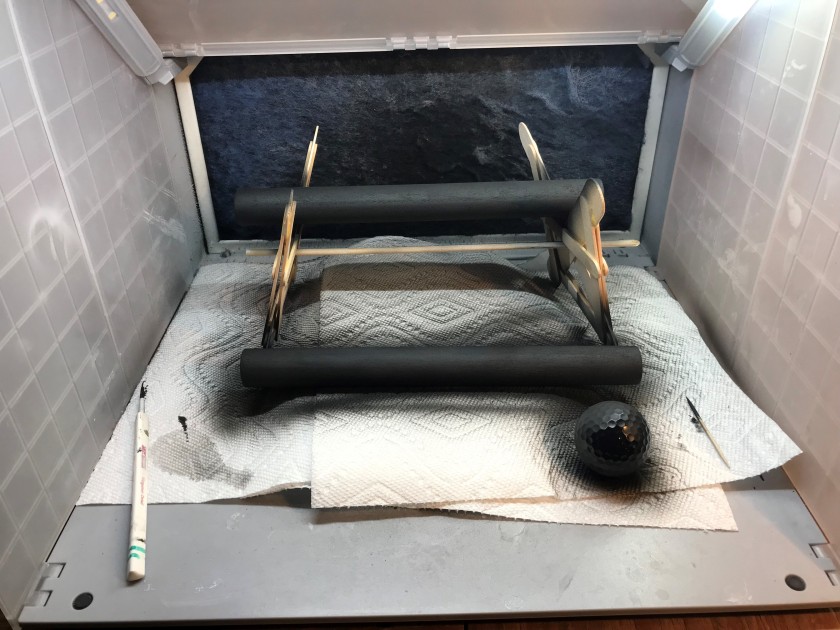
I used my circular saw and cut the dowels to size, and sanded them up a bit. Originally, I had thought I could use decals on them, but decided that I could not sand and varnish them enough for proper alignment and adhesion. Besides, this gave me the chance to play with my airbrushes. I gave them all a prime coat of Vallejo “Surface Prime Gray”, followed by Vallejo “Game Air Black”. I had some challenges with painting the longer templates due to their sizes and being too wobbly to reliably stand up for airbrushing. I made a cradle of sorts out of popsicle sticks that worked adequately – notwithstanding that I needed to be sure each coat was dry before I rotated them.
The dowel sanded and ready for priming5″ template after base coat applicationWorking through base coat application on 10″ template and ball
I used some Tamiya airbrush masking tape to make the center beam, and a crossing pattern where the beam would come out of the arc weapon. I started off with Createx “Brite Yellow”. I should have noticed that the label said “TRANSPARENT”! This took a few applications (that was a learning point). I then airbrushed Vallejo “Light Orange” closer to the masking and around the ends. I then removed the masking, and used Vallejo “Vermilion” on the beam centers and the cross on the ends. Lastly, I painted “Brite Yellow” on the ends and as edging on the beams (worked better). I did the same with the ball , but in a mottled pattern. They are not my best work, but they will serve the purpose.
Warbot Arc and Plasma Weapon templates completedFORE – Warbot on the left fires plasma ball at a Frinx and a Star Duck (he missed!)Warbot Arc Weapon (5″) in action, rear viewWarbot Arc Weapon in action, showing the end you don’t want to be onWarbot 10″ Arc Weapon
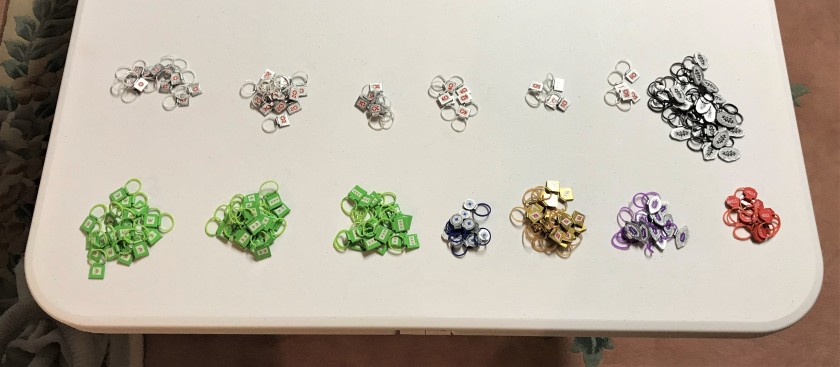
The greater portion of the work came with the making of the placards. I decided that I would make the following 185 placards made for use in Combat Patrol™ retro sci-fi. Why that many – well that was basically an educated guess based on most games that I have played.
50 wound markers
15 1-wound markers
15 2-wound markers
6 3-wound markers
6 3-wound markers
6 4-wound markers
4 5-wound markers
4 6-wound markers
25 stun markers
10 critical hit – optics/sensors markers damage for Mark III Warbots
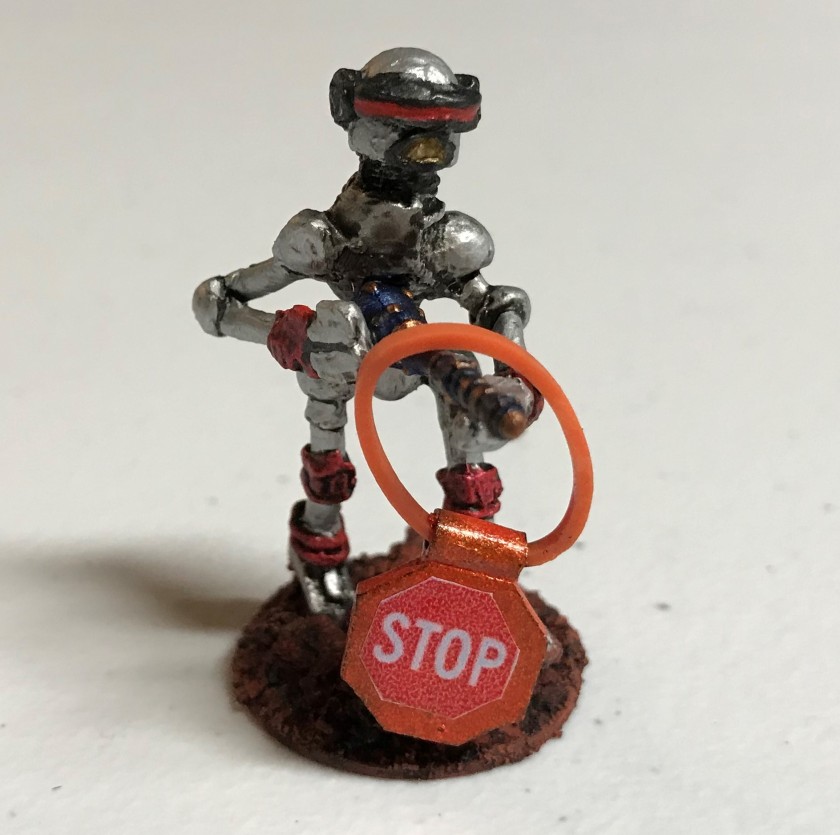
10 critical hit – mobility damage (“STOP”) markers for Mark III Warbots
10 critical hit – CPU damage (“ROGUE”) markers for Mark III Warbots
20 out of ammunition markers
60 jet-pack use markers
20 for one use of jet pack in the game
20 for two uses of jet pack in the game
20 for three uses of jet pack in the game
My first effort was to try to sculpt with Apoxie Sculpt and to use stamps. I was very unhappy with the product, as I thought they would be difficult to read and not reliably reproducible.
My first effort at placards – not good enough
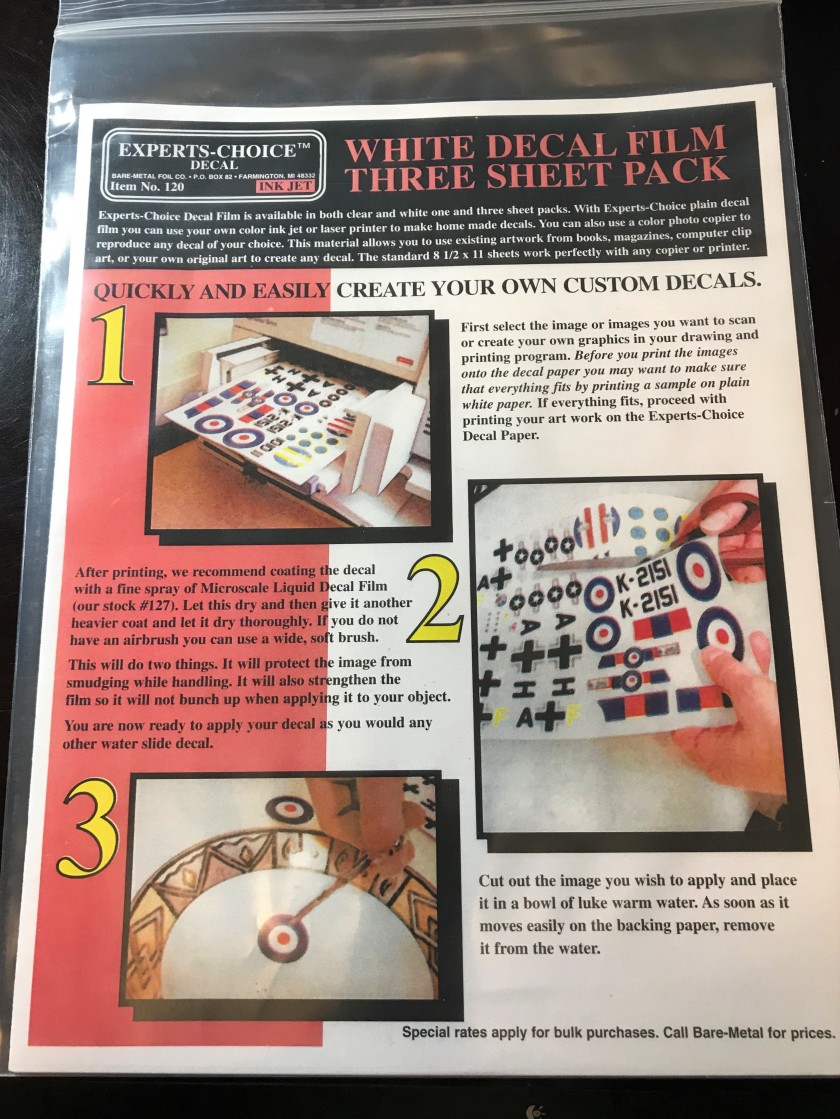
I then changed plans and decided to try to use polystyrene to see if that would work in conjunction with decals that I could print off on my HP Printer. I found a couple of decal products that I could print with – one was clear and from Testors and one white and was from Bare-Metal Foil Company. The Testors product has (6) 5.5″ x 8.5″ sheets, while the Bare-Metal Foil product was 8.5″ x 11″. I went with the Bare-Foil product for this as I thought it would be easier to print with and it had more space. I did notice that it had a white backing, which I thought would help with visibility once the decals were on the placards. Obviously, some uses would be better with a clear backing, so consider that.
I drew up some mock-ups out of paper to size my placards. I wanted them to have distinct colors (matching their rubber bands) and distinct shapes. Once I had the shapes, I designed the decals . I used Microsoft PowerPoint and Google to select images and shapes. This allowed me make a full landscape page image of the proposed decal. I would then save that PowerPoint slide as a JPEG, and insert that JPEG into a Microsoft Word document. I would then change the size of the JPEG (keeping the aspect ratio locked) and print off different sizes until they matched the mock-up placards. Once that was complete, I copied the requisite number of decals into the Word document, leaving adequate space for later removal by Exacto knife on the actual decal paper. I thought that one decal was adequate instead of double-siding the placards.
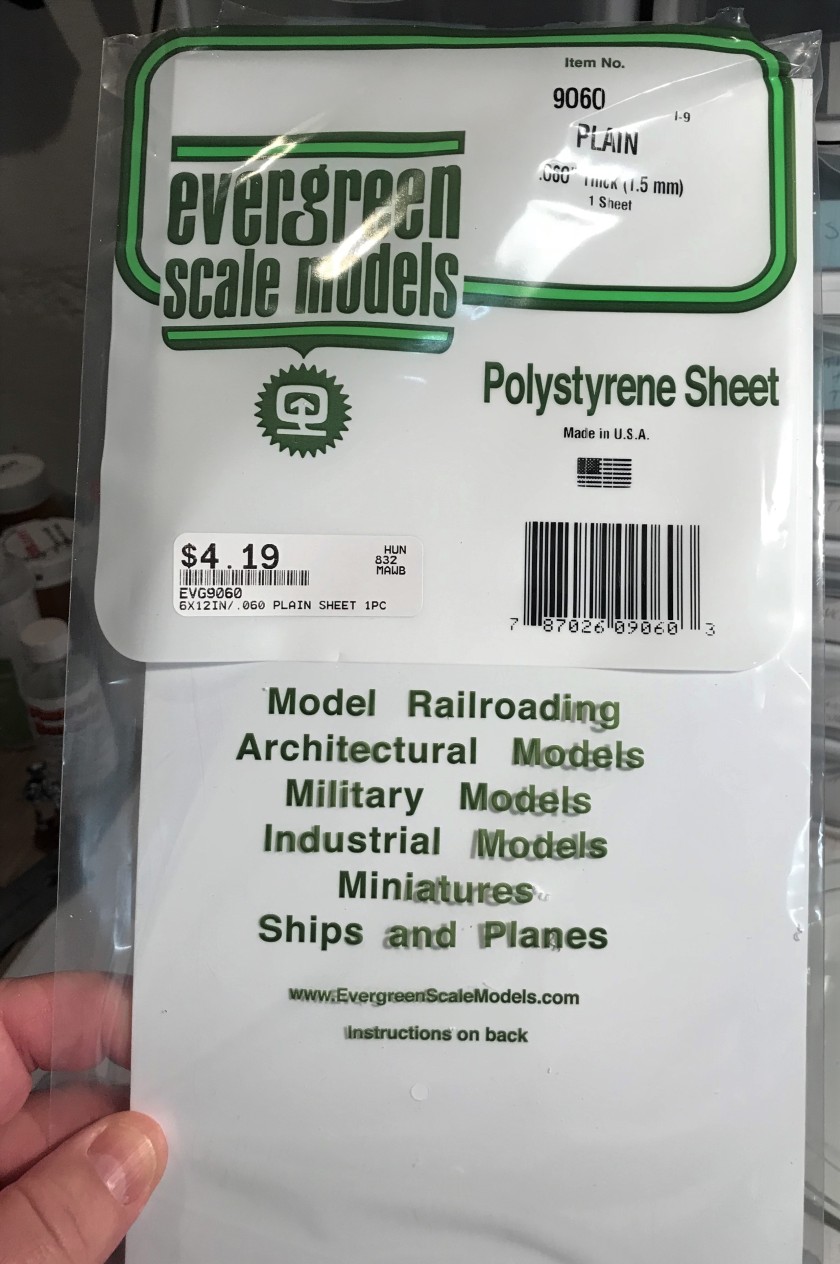
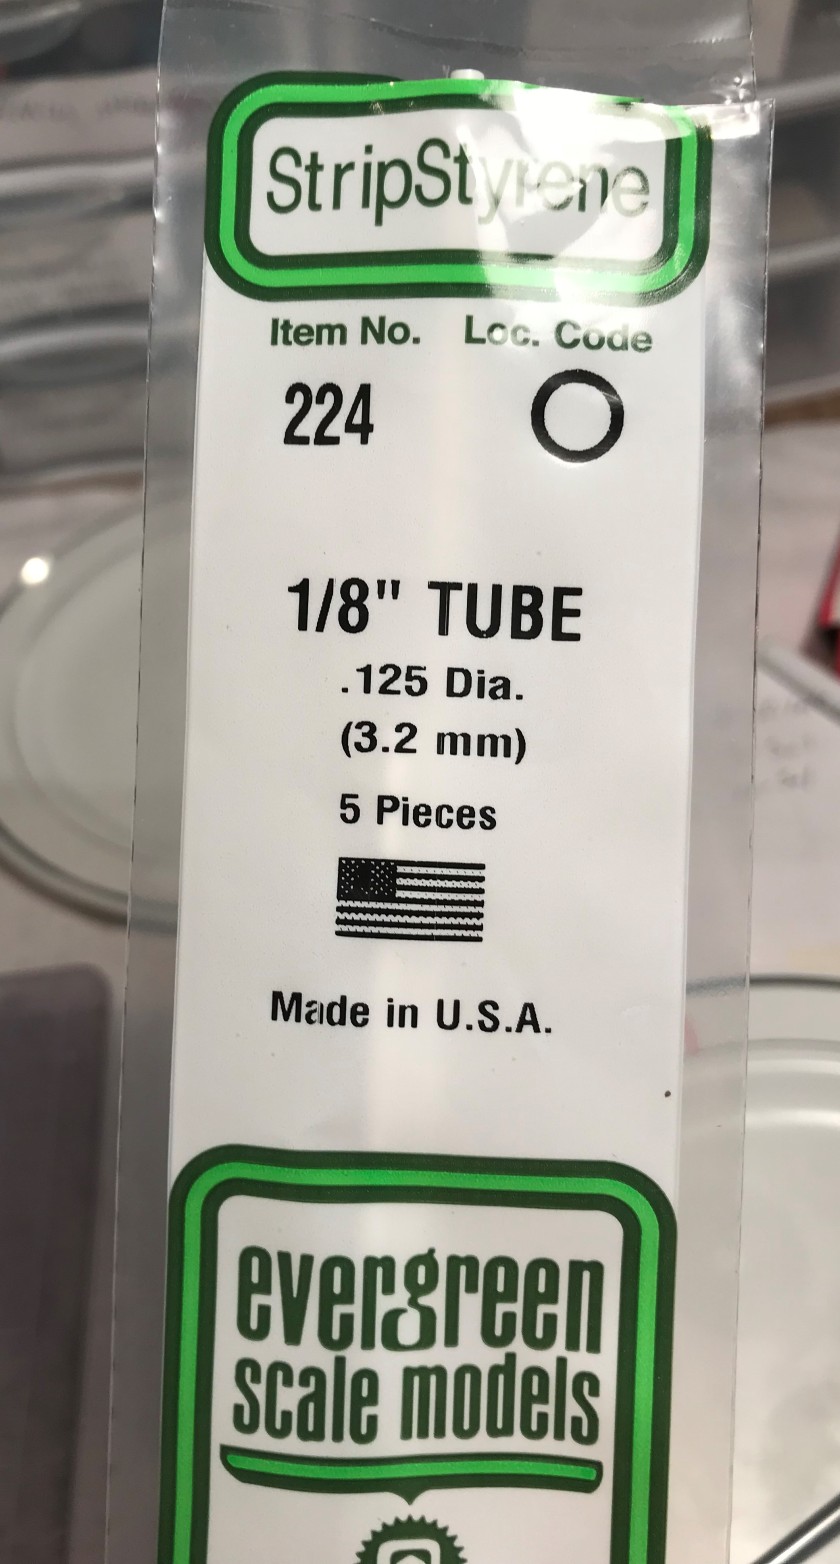
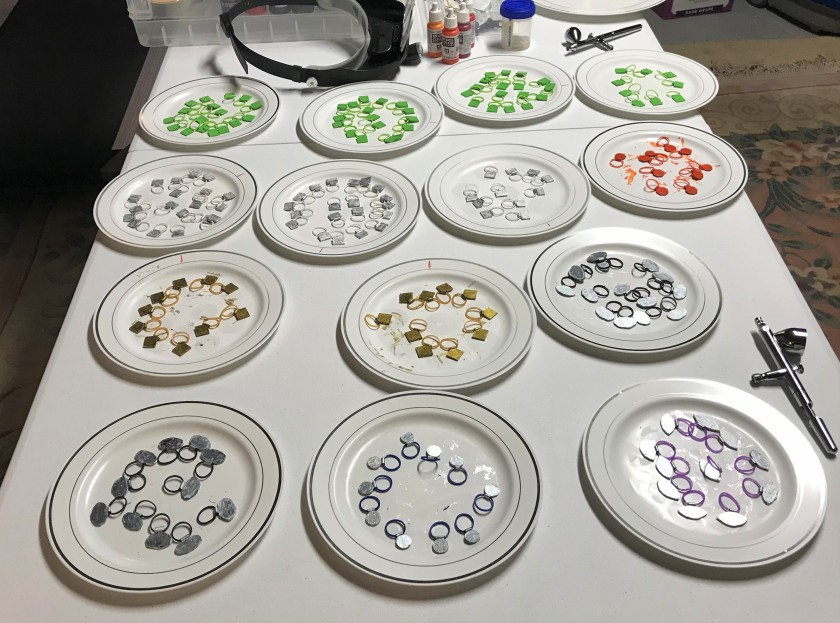
Before I could print off the decals, I needed the placards. I got .080″ thick Evergreen polystyrene sheets and 1/8″ tubes. These bond well by using Plastruct Bondene plastic solvent cement. I cut the shapes out with a template, and cut the tubes into 1″ sections. I then evenly split the sections lengthwise. Lastly, I cut the tubes into ¼” lengths. I took differently colored rubber bands, and slid them into the lengthwise cuts on the tubes. Then with the Plastruct Bondene, I attached the placards and the tubes. You do not need much of this stuff – and its good to hold the pieces together for a count of 10. I waited a few minutes, and reapplied the solvent over the attachment and the lengthwise cuts, sealing in the rubber bands as the cuts welded. The small rubber bands are the same as what we used before – they come from Michael’s and are used for some sort of young girls’ weaving crafts. I made 185 of these placards!
The solvent – be careful and read the label!Polystyrene SheetsPolystyrene tubes
Then came the painting of the placards. I should have used my airbrush to prime them, but I wanted to use up some Citadel “Imperium Primer” I has. Plus, they were a little awkward to paint due to their configuration. After priming both sides, I laboriously (again I should have airbrushed) hand painted the placards as follows:
Wound, Stun, Optics, and Rogue markers with FolkArt “Champagne” (metallic)
Mobility Damage markers with Createx “Pearl Copper”
Out of ammunition markers with Vallejo “Bright Brass” (metallic)
Jet-pack use markers with Americana “Apple Green”
Once painted, and having painfully learned my lesson in terms of not using airbrush paints, I used my airbrush to coat the placards with Vallejo “Mecha Varnish Gloss”. This helps the decals to slide on properly.
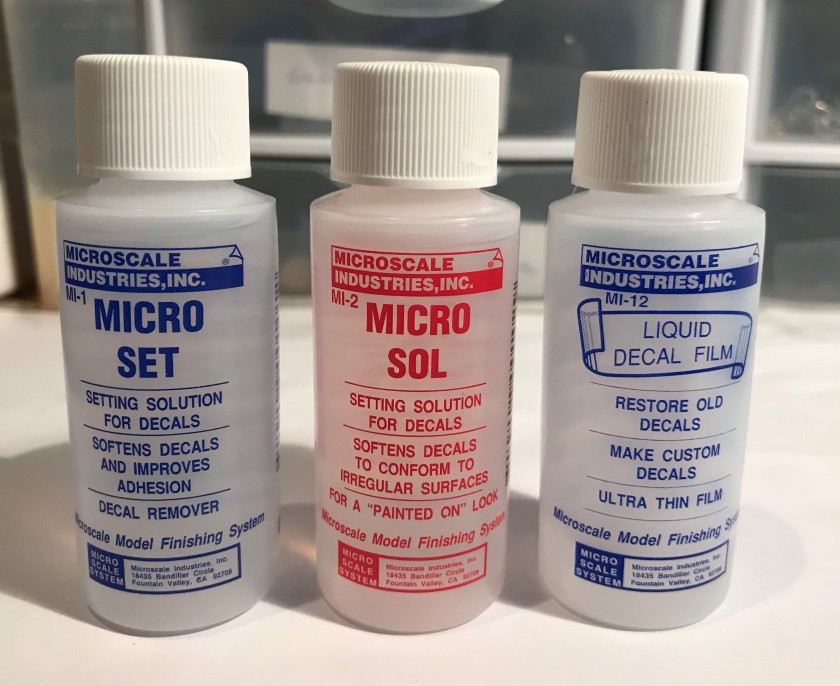
Printing off the decals was new for me. Apparently, there are several steps in addition to printing the decals! First, once you print the decals, you need to apply a couple of coats of a Microscale Liquid Film product (better done with an airbrush, but you can brush it by hand, allowing each coat to dry of course). This application protects the colors. Then the decals can be removed with an Exacto knife from the printed sheet and put into water, but wait, more stuff needed! You also need Microscale Micro Set applied to the surface prior to applying the waterslide decals. This product improves adhesion. then put on the decal, adjusting its location with a toothpick. Let this fully dry, and then another product, Micro Sol, is used to soften the decal and tack it down. Lastly, get the Microscale Liquid Decal Film back out, and put another coat on of that, and let it dry. This will log up any brush you use, so use an old one. Now the decal is protected! Again, repeat 184 more times…for this project.
My decal sheetMy printed decals after airbrushing with Liquid Decal FilmThe three magic decal solutionsPainted placards drying awaiting decalsCompleted placardsWound markers – these are 1/2″ x 3/8 “Star Duck with a placard indicating he has used his jet pack three times, which is the maximum per game that I allow. This one placard takes the place of three rubber bands.A stunned Star DuckA CPU-damaged (“Rogue”) Warbot faces off with a Frinx whose weapon is unfortunately out of ammunition or jammedThe Warbot on the left received a critical hit to its optics/sensors, and cannot engage as well with its weapon. The Frinx in the back is stunned, and the Star Duck on the right has one wound.This Warbot with an Arc breaching weapon has taken a critical hit and cannot move, limiting its ability to penetrate an obstacle.
I have organized all of these into really useful boxes with extra rubber bands (in case I don’t have enough placards for some reason). Hopefully I get to play test their use soon.
Thanks for reading – and I hope you find this helpful! Please let me know in the comments section dear reader!