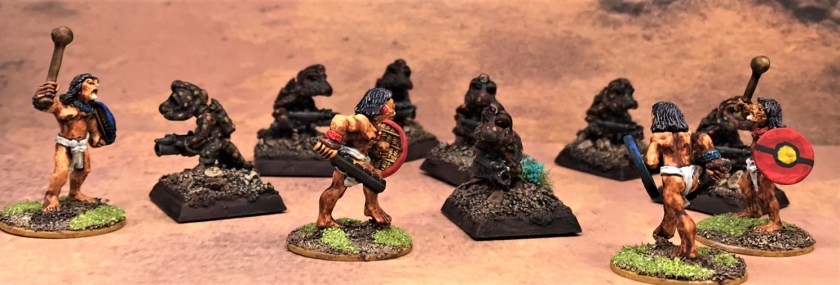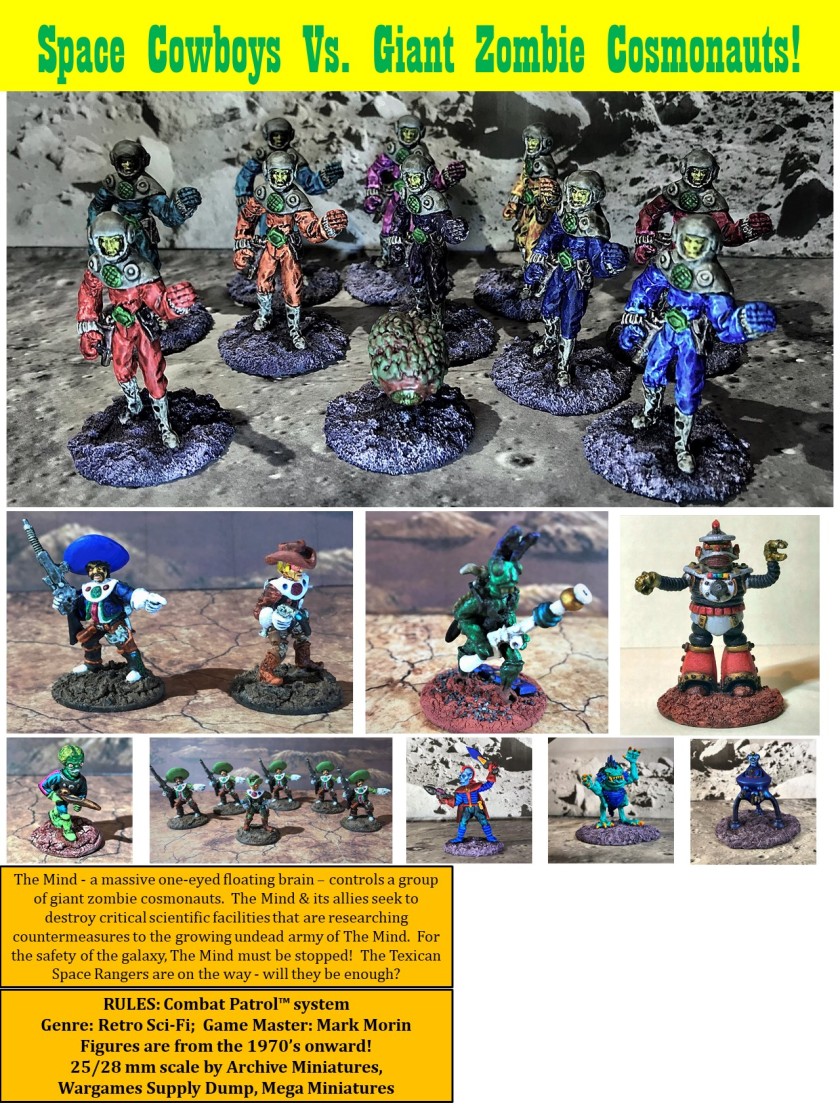
When one looks at the historical images of various Aztec warriors of the 16th Century, some of the most striking ones are those of the Jaguar Warriors. The Jaguar Warriors were true elite warriors, similar to the Eagle Warriors in having high and noble status in Aztec culture. They wore elaborately decorated suits (tlahuitli) that affected a jaguar-like look, replete with head-encompassing hardwood helmets (cuacalalatli) carved to be jaguar-like in appearance. Their spotted gaudy suits were worn over quilted cotton armor vests called ichcahuipilli, which provided a degree of additional protection to the Jaguar Warrior.
The Jaguar Warriors’ actual designation was cuauhocelotl. This was an elite warrior classification level that one earned by capturing at least four enemy warriors for use as sacrificial victims on the altar or as slaves. Aztec warfare valued capturing an enemy warrior over killing one outright in battle. Attaining Jaguar Warrior status had its privileges, such as being able to drink pulque (a fermented drink made from agave), and to have and keep concubines.
In battle, they were armed with atlatl (spear throwers), macuahuitl (obsidian-edged wooden clubs or broadswords), or tepoztopilli (obsidian-edged thrusting spears). As Jaguar Warriors are iconic in Aztec warfare, I knew I needed to have some for my Aztec forces for the upcoming launch of Buck Surdu’s Feudal Patrol™ game, especially for the supplement that I wrote for the Spanish Conquest I called Civilizations Collide. With all of their colorful suits and shields, so I was excited to paint some up and add to my troops that I have previously described in this blog.
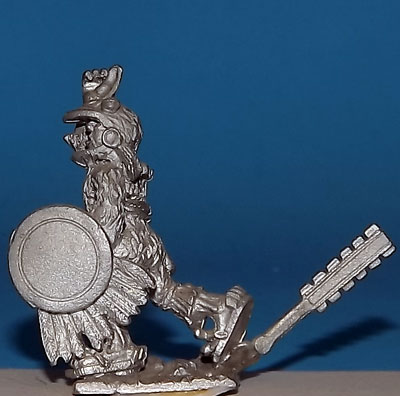
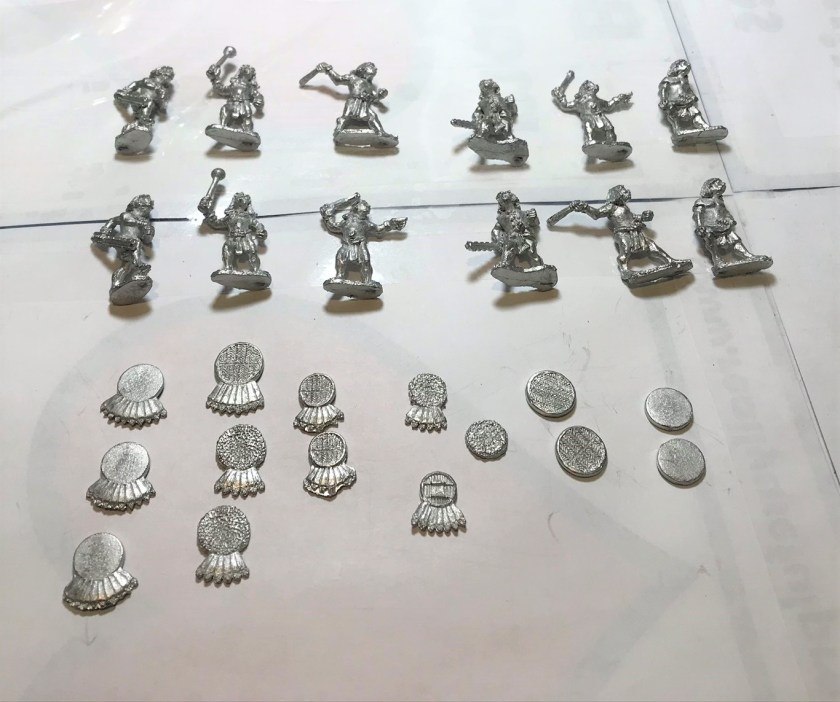
From Badger Games, I had purchased a couple of 28mm scale metal Wargames Foundry blisters: AZ012 “Heroes of Tenochtitlan” and AZ015 “Chimalpopoca’s Jaguar Warriors”. In AZ012 there were 6 figures – 3 Aztec veterans, 2 Jaguar Warriors, and a Warrior Priest. I would need at least 5 for the basic unit in Feudal Patrol™ (that being a Warband), so I thought that AZ015 would round that out as that blister pack was supposed have six Jaguar Warriors. Surprise – after opening it I found that there were seven! Bad news, however – the AZ015 blister pack had only 3 weapons, those being all atlatls in hands that needed to be mounted to arms – and only two of the 7 included figures were so designed. The other 5 figures were thus without weapons.
I contacted Badger Games and they were fantastically accomodating. They agreed to send me a pack of 8 Outpost Wargames Services Jaguar Warriors (AZ5), as well as another pack that I’ll describe in a future post. These AZ5 Jaguar Warriors come in various poses. Of note Badger also removed the AZ015 SKU from their website and contacted Wargames Foundry to advise them that every pack of AZ015 that they had had been similarly packed incorrectly. That’s exceptional follow through on their part and I appreciated that.
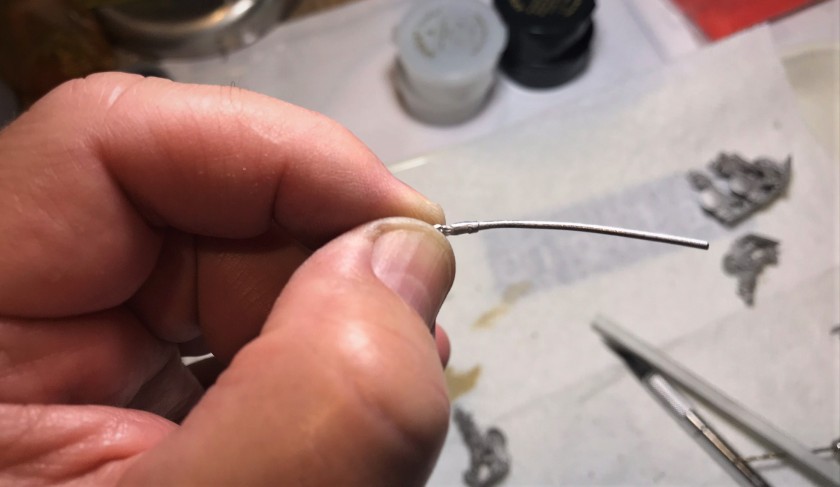
The downside was was that I had to wait another week+ to get going again on the project. When the OWS pack arrived, I was happy to see that there were two weapons (8 macuahuitl and 8 tepoztopilli) available for each of the 8 AZ5 Jaguar Warriors. This meant that I had plenty of extra weapons to arm the AZ015 Jaguar Warriors! All I needed to do was convert two AZ015 figures to hold an atlatl by cutting off their hands and replace with one of the three atlatls that came with the pack.

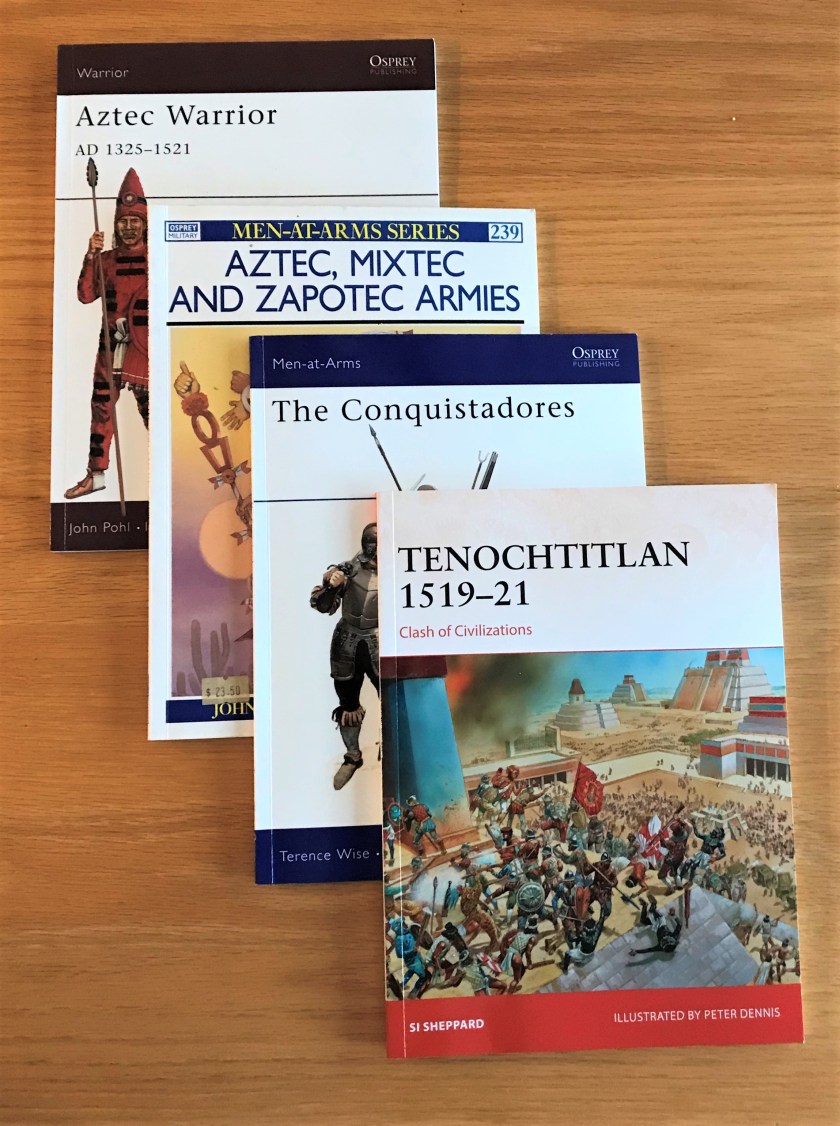
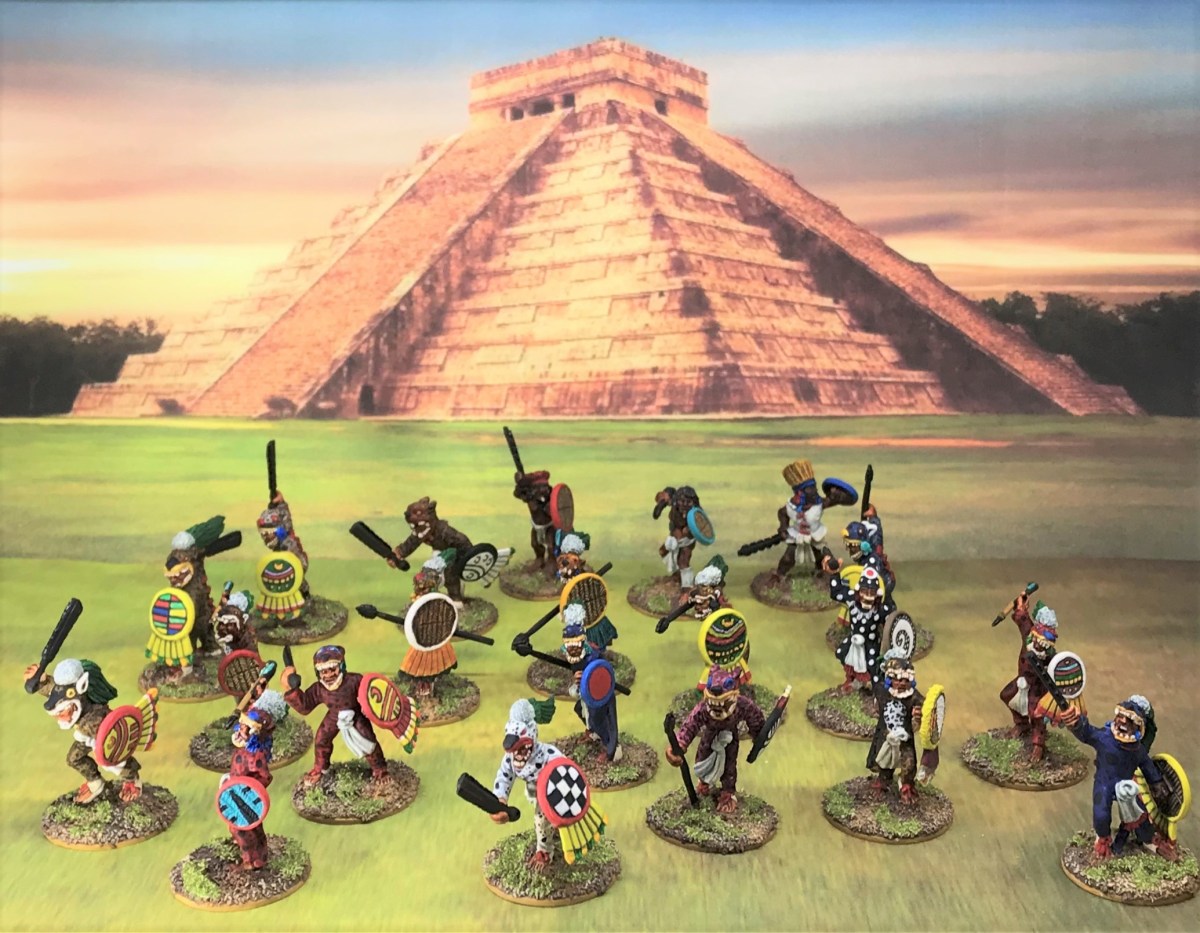
Now I had not 8, but 21 figures for this project, which was definitely not my goal at the start! Still, with this many figures, and permutations of shield design, weaponry, and colors, I needed a plan. So I made one – as shown below. Also, the WF and OWS sculpts were different of course, and I wanted a variety of Jaguar Warrior tlahuitli and cuacalalatli both for ease of play and to be historically accurate. The best resources were this were the plates in my Osprey books and two Steven’s Balagan blog posts (THANK YOU STEVEN FOR SHARING!). Both are phenomenal and invaluable (especially for shield design examples) – here they are:
Books:
- Pohl, John M. D. (1991). Aztec, Mixtec, and Zapotec Armies – Men-at-Arms.London: Osprey Publishing.
- Pohl, John M. D. (2001). Aztec Warrior, AD 1325-1521. Oxford: Osprey Publishing.
- Pohl, John M. D. (2005). Aztecs & Conquistadores. Oxford: Osprey Publishing.
- Sheppard, Si. (2018). Tenochtitlan: 1519-21.Oxford: Osprey Publishing.
- Wise, Terence (1980). The Conquistadores – Men-at-Arms.London: Osprey Publishing.
Steven’s Balagan posts:
As far as my painting plan, I should mention that I have a numbering system for all of my figures for Civilizations Collide. This system will allow me to have a points-based menu (like a “take-out menu”) for the gamers. At the beginning of a game, they will be able to use the menu choose how to spend their available scenario points by choosing specific troops for their side by checking them off on a menu that I will provide. I have an Excel spreadsheet with the figure values and designations that I will use to make the menu. Also, I will print out a disc to glue under each figure’s base with that information as well. This, I hope, will make the gaming experience better and very easy.
The pictures below show my initial organizational plan for arming the figures – I did have another corresponding Excel plan (not shown) where I planned the base colors and the specific shield designs for each of the figures.


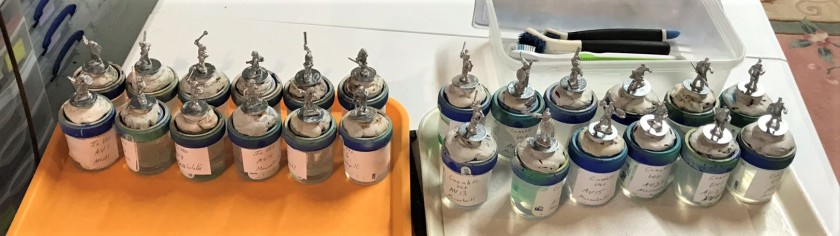
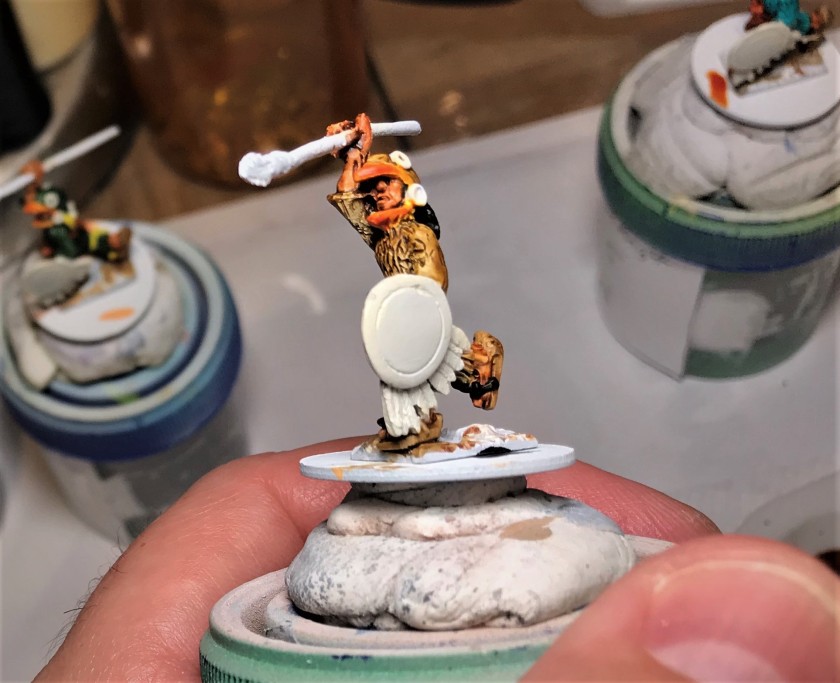
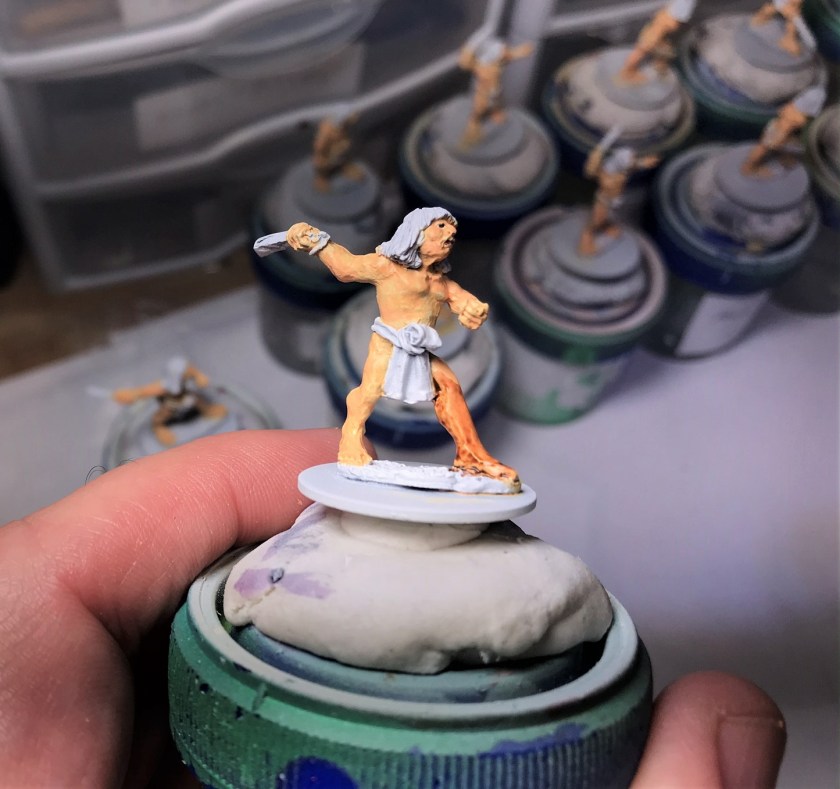
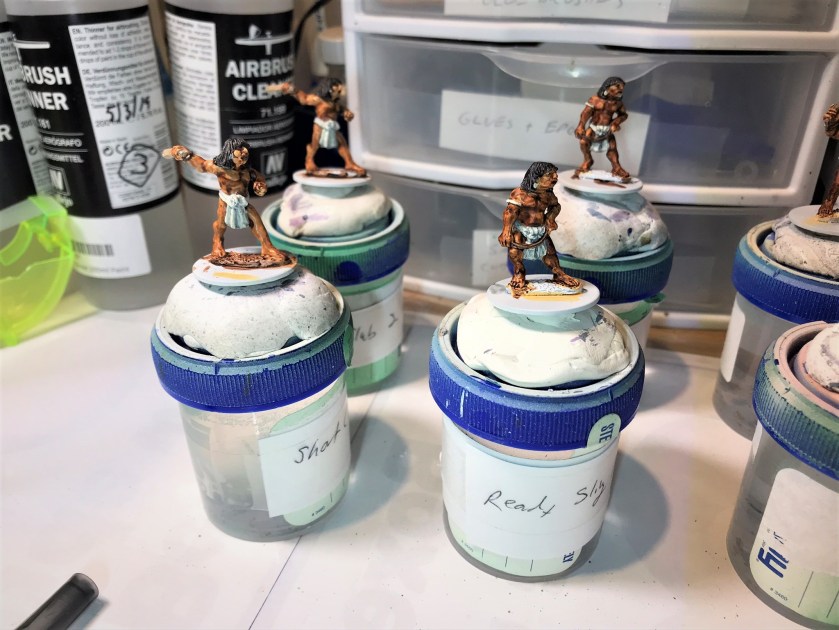
After I completed the plan, I mounted the figures in my usual way. I labeled the bottom of the washers under the figures with the figure number and I similarly labeled each of the specimen jars. I also organized the shields as shown below – plus I also had painted shields from previous projects available. I decided to first do their flesh and weapons, and then move on to do each figure in order and separately. This way I would gain experience (and hopefully improve) with painting the patterns on the tlahuitli and cuacalalatli, especially the jaguar-specific aspects. This approach did help me maintain focus on the figures. I ended up with fewer WIP pics, but this was a big varied project. Hell, most of these figures had not one – but two sets of eyes. It took about a month-and-a-half! Of course, the July 4th holiday weekend did keep me out of the painting mode – as did some golf.


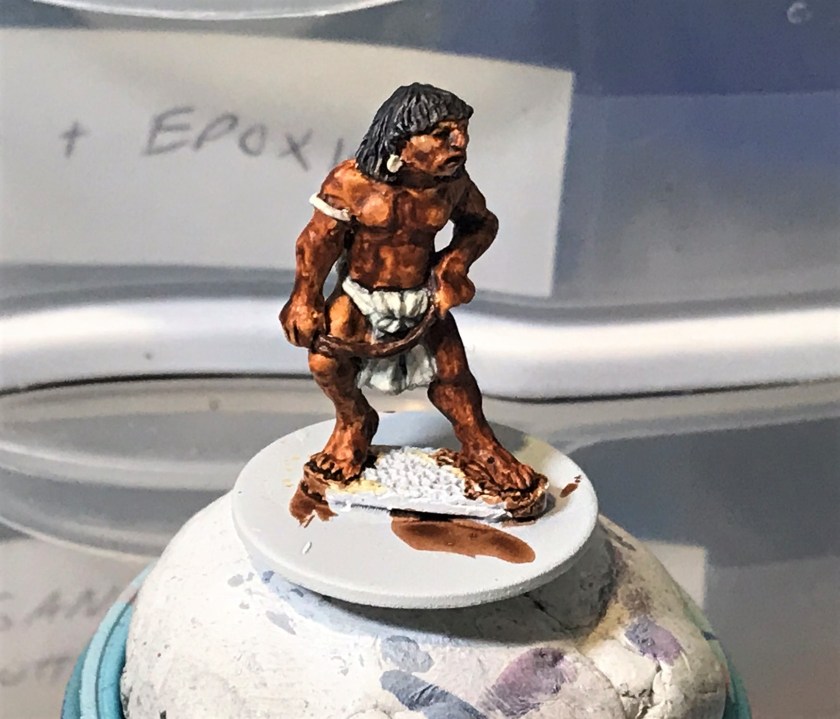
I did change my approach to the flesh painting a bit. Trying to get that right on dark flesh was a challenge. The list of paints I used was extensive given the breadth of the figures needs, but for flesh I mainly moved more to using Citadel “Darkoath Flesh” over a Vallejo “Sunny Skin base” with Vallejo Model Color “Medium Skin Tone” as highlights. I also experimented with Vallejo Model Color “Mahogany”.
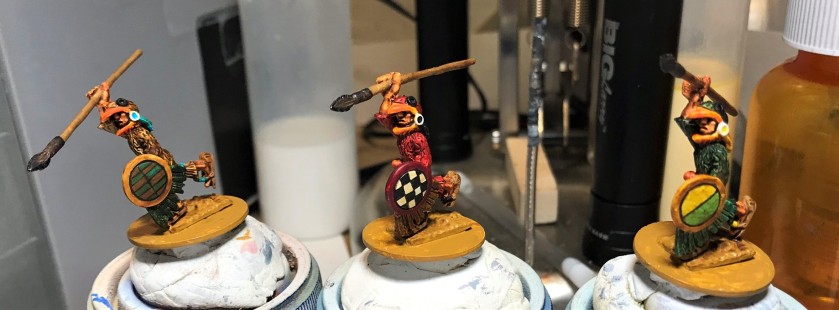
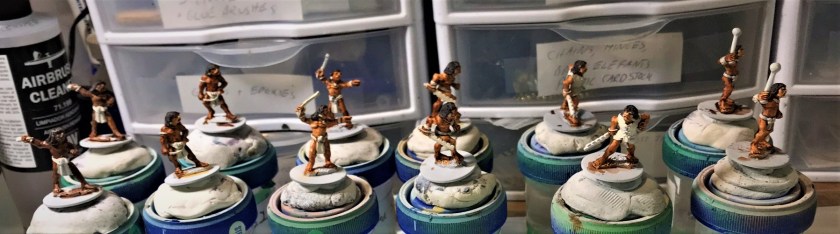
Below are some examples of mostly completed and unvarnished figures which were awaiting shields, flocking, and of course varnishing.


OWS Jaguar Warrior figures JA12 and JA13. The figures are the same pose, but I armed JA12 with a macuahuitl and JA13 with a tepoztopilli. Note that I also gave them both different painting schemes.
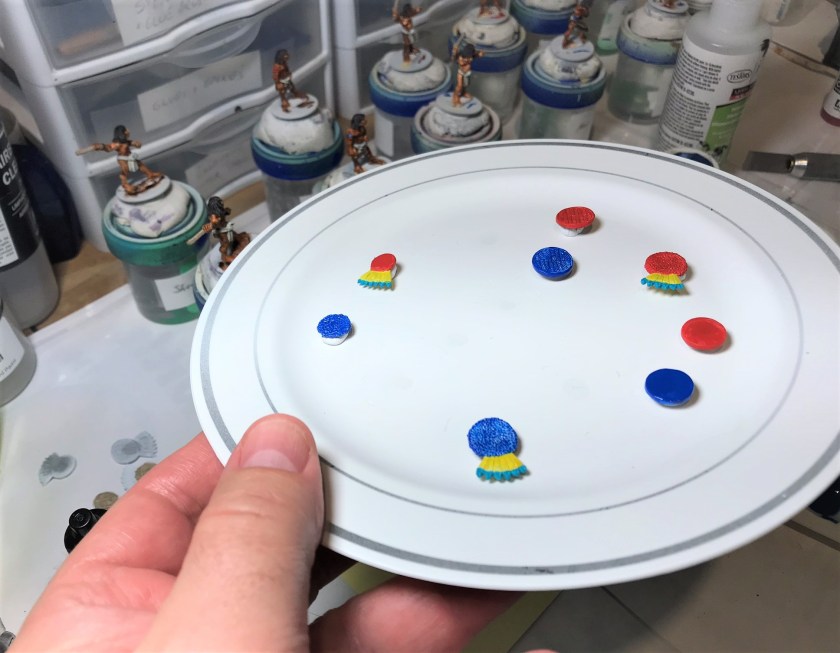
Painting of the figures was followed by my working on the shields. Using my plan I was able to finish them all after a few days and they are shown below with a ruler for scale.

I then mounted the shields, flocked the bases, varnished them, and applied static grass.

Now comes the fun part – sharing the final products. Each of the figures is shown below – and I gave each blister a different photo background.
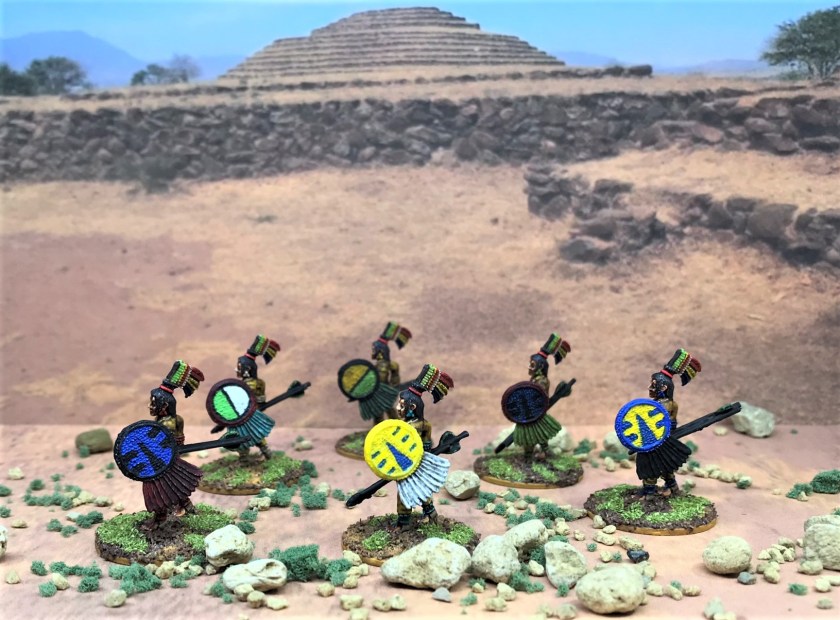
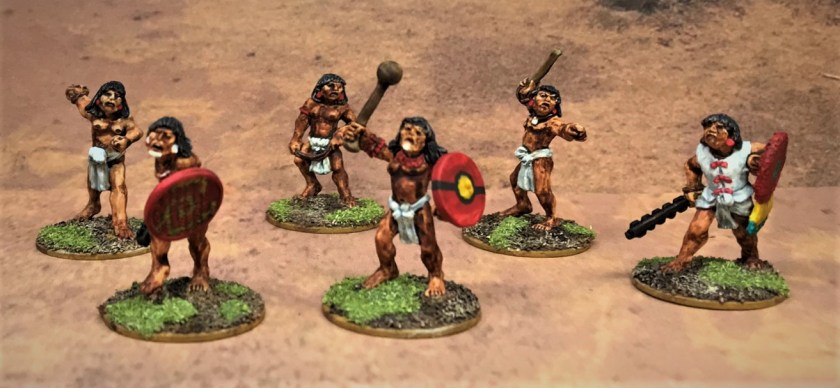
“Heroes of Tenochtitlan” (AZ012) Blister Pack (Wargames Foundry)
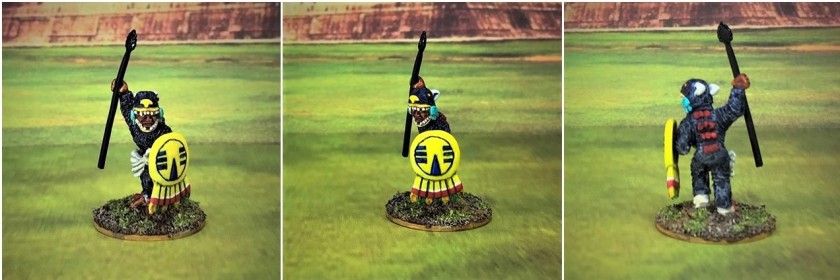
Aztec Veteran Warrior AV25

Aztec Veteran Warrior AV26

Aztec Veteran Warrior AV27

Jaguar Warrior JA1
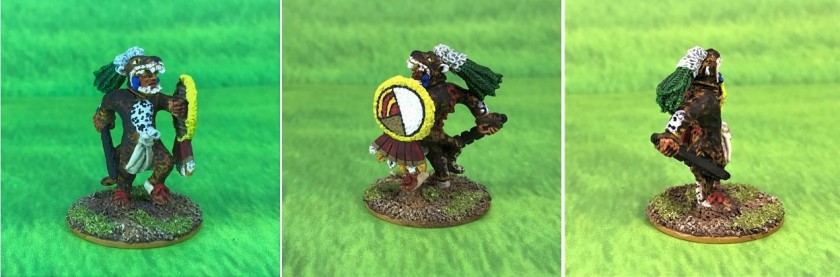
Jaguar Warrior JA2

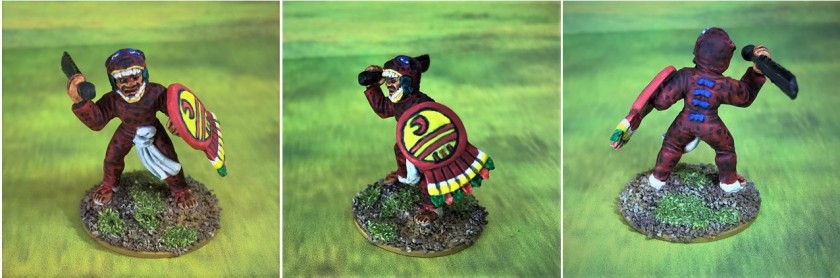
Warrior Priest AWP1

All of the “Heroes of Tenochtitlan” Blister

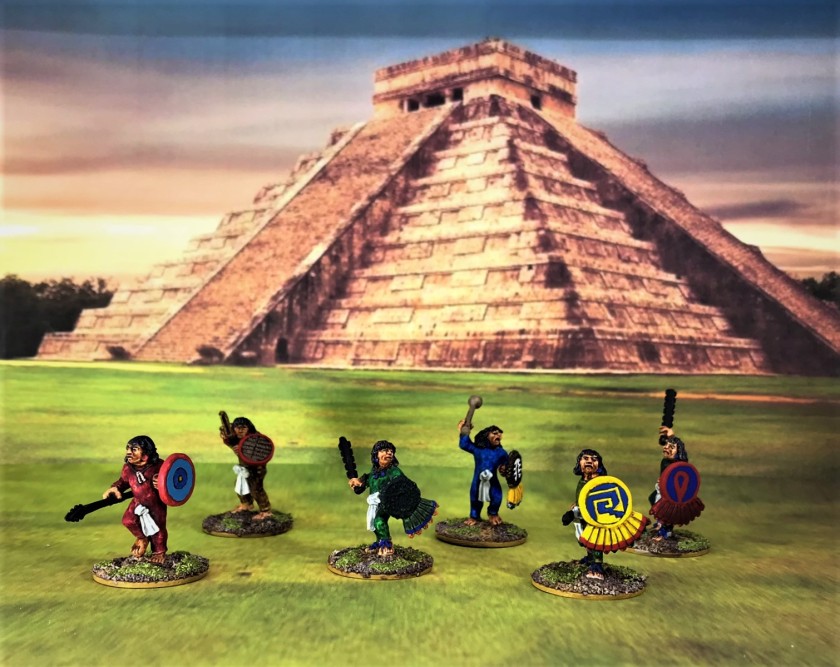
“Chimalpopoca’s Jaguar Warriors” Blister Pack (Wargames Foundry)
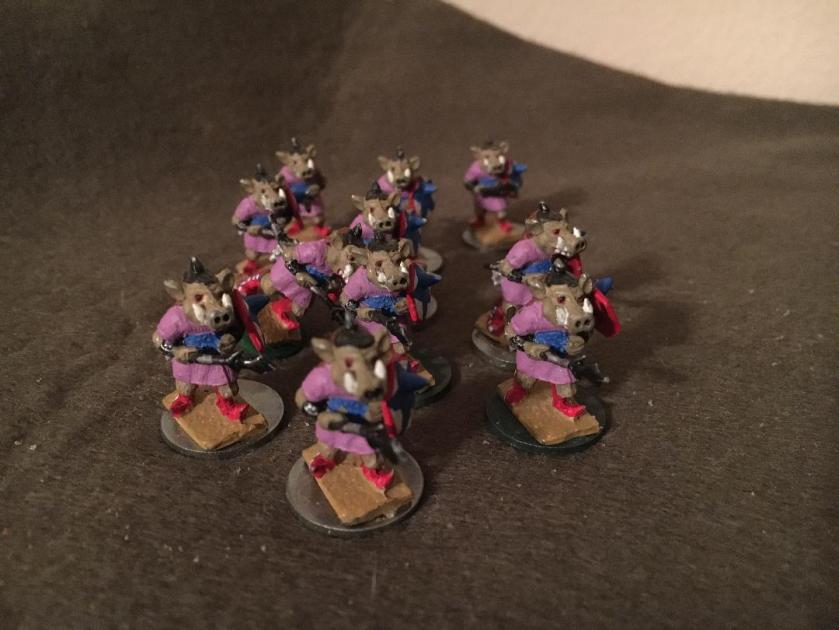
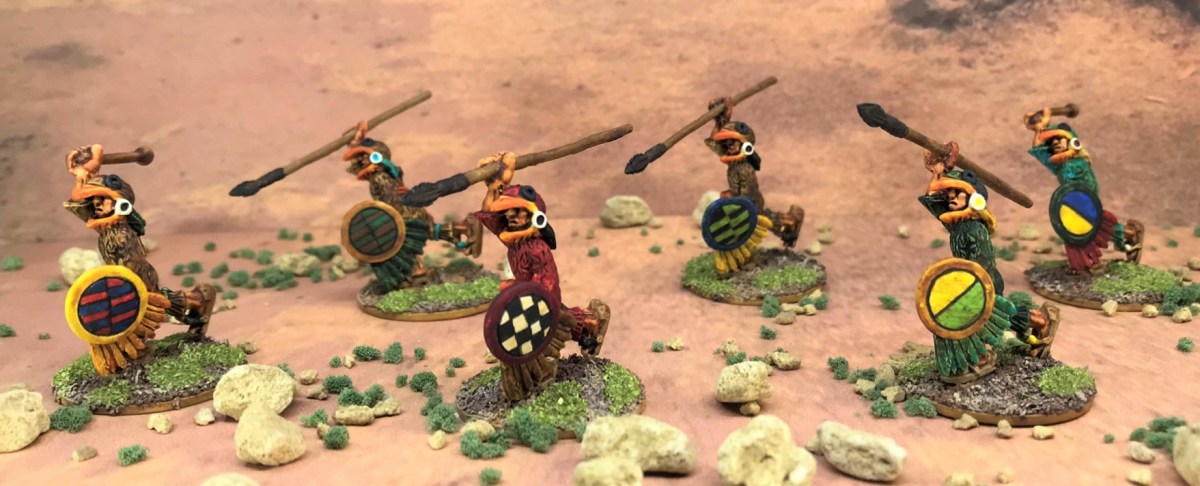
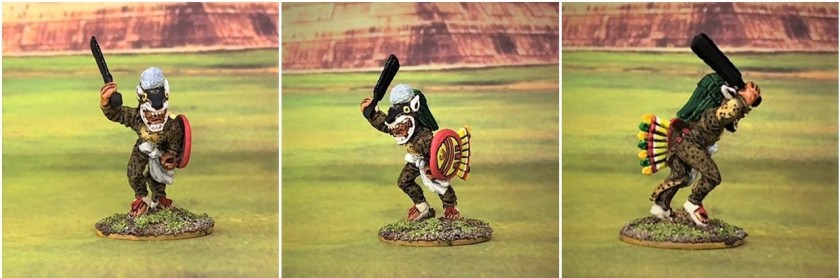
Jaguar Warrior JA3

Jaguar Warrior JA4

Jaguar Warrior JA5

Jaguar Warrior JA6

Jaguar Warrior JA7

Jaguar Warrior JA8

Jaguar Warrior JA9

“Chimalpopoca’s Jaguar Warriors” assembled

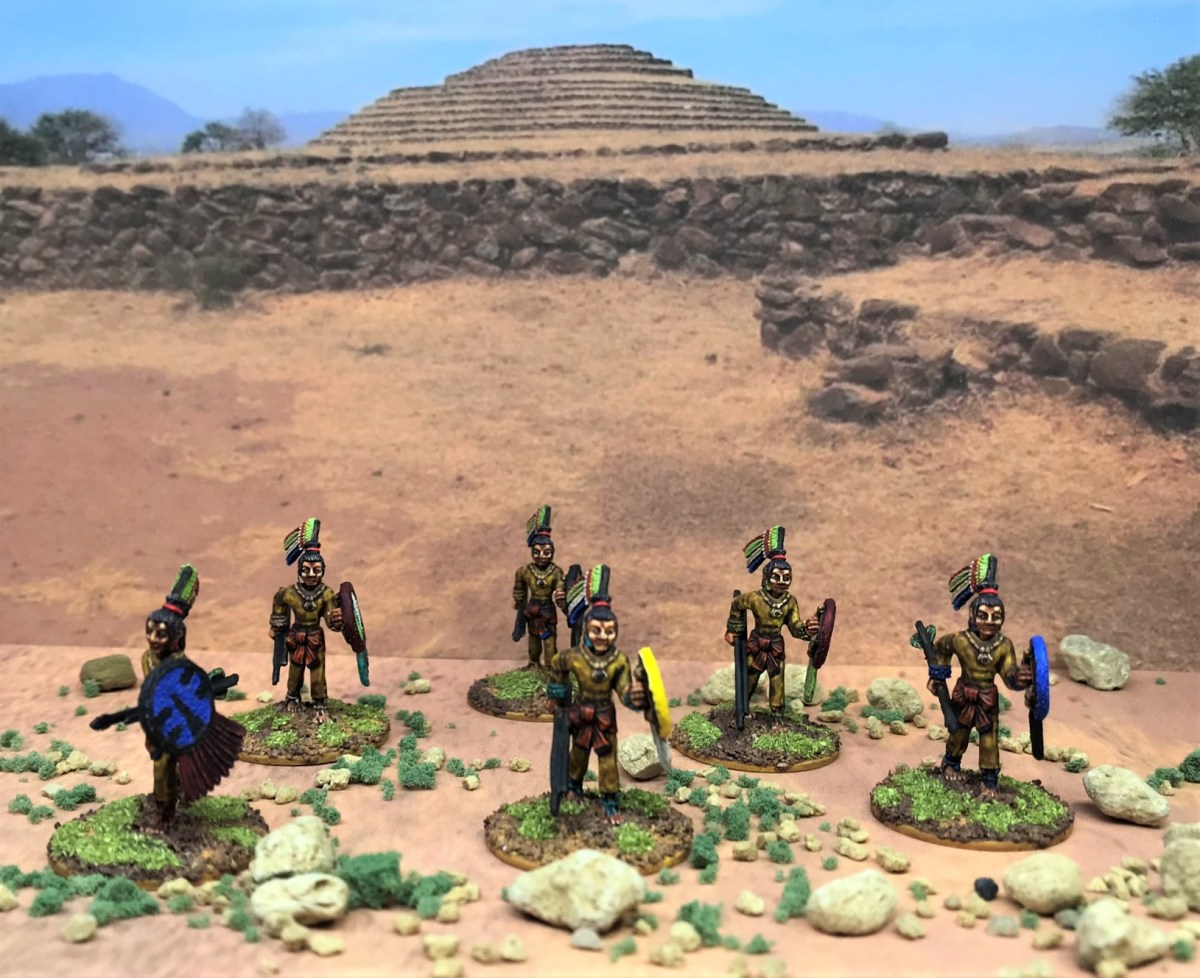
“Jaguar Warriors” Pack (Outpost Wargames Services)
Jaguar Warrior JA10

Jaguar Warrior JA11
Jaguar Warrior JA12

Jaguar Warrior JA13

Jaguar Warrior JA14
Jaguar Warrior JA15
Jaguar Warrior JA16

Jaguar Warrior JA17

“Jaguar Warriors” Blister Pack assembled

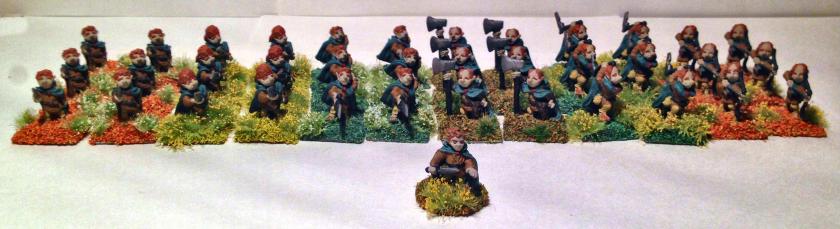
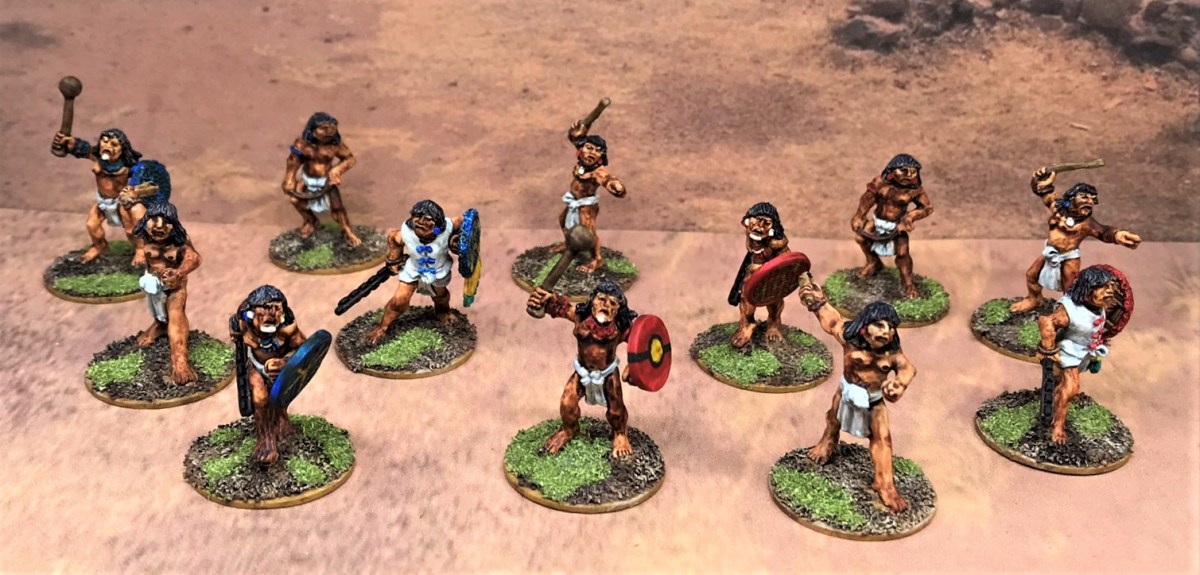
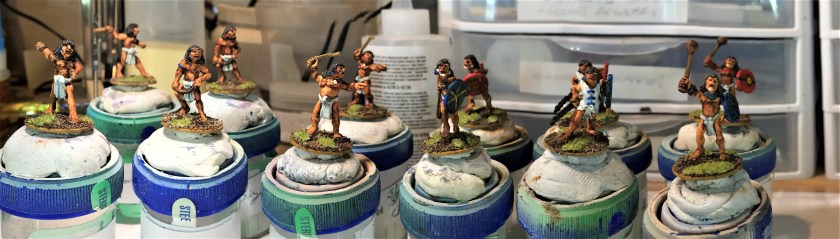
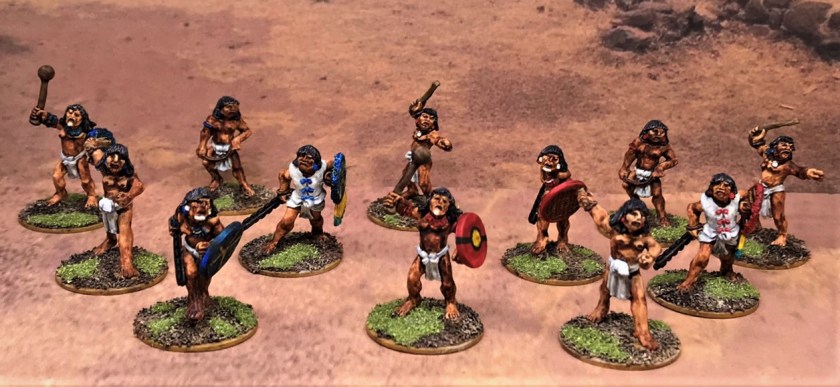
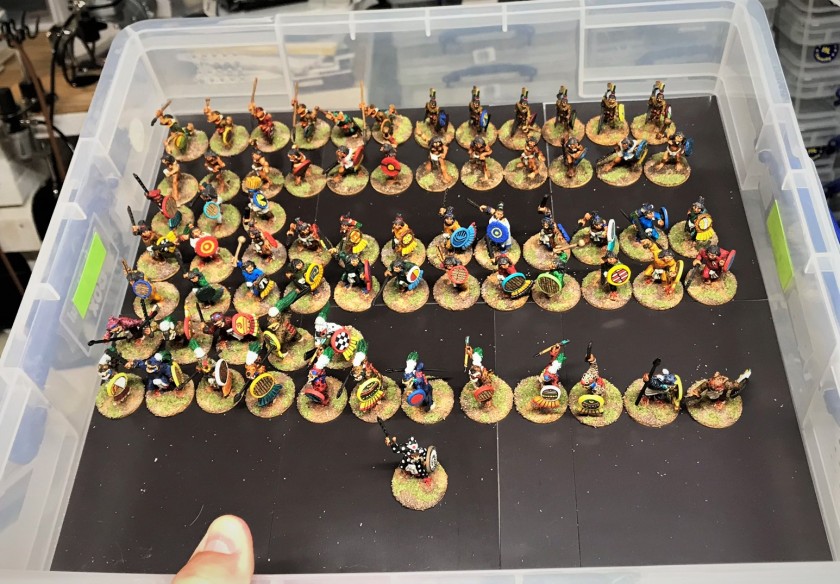
And next here you have all 21 gathered:

Hopefully you enjoyed the pics and this post – and if you have feedback, a favorite among these, or a least favorite – positive feedback or devastating criticism – I’m up for all of the above.
With many conventions cancelled, and even gaming club get-togethers not happening, it may be a while before these Aztecs get into a fight. I guess that just leaves more time to complete them – and eventually some Conquistadores and Tlaxcalans as foes.
This project hopefully counts as an entry for me for Azazel’s illustrious “The Jewel of July 2020: Community Painting Challenge” under the “Heroes” category – just that there’s 21 of them! By the way, it’s been mercifully extended until the end of August if you want in – check it out at the link.
I’m also reading this book as more research:

Until next time – take care and stay safe all!
Miscellaneous details and references for those interested:
Posts on Units for my 16th Century Spanish Conquest Supplement for Feudal Patrol™ – “Civilizations Collide”
- A June and July Jaguar Warrior Frenzy (plus some Aztec Veterans and a Warrior Priest to Boot) (this post) – 3 Aztec Veteran Warriors, 17 Jaguar Warriors, 1 Aztec Warrior Priest
- Doubling Down – Aztec Veteran Warriors – 24 Aztec Veteran Warriors
- Aztec Arrow Knights, Ral Partha circa 1988 – 6 Aztec Arrow Knights
- Aztec Eagle Warriors from Tin Soldier UK – 6 Aztec Eagle Knights
- Aztec Novice Warriors and a few Frinx – 12 Novice Warriors
Total figures to date for this project: 69 Aztecs
PAINTS, INKS, GLAZES, SHADES, WASHES, PIGMENTS, FLOCKING, GLUES AND MORE THAT I USED ON THESE AZTEC VETERANS, JAGUAR WARRIORS, AND THE WARRIOR PRIEST:
- Gorilla Glue
- 1/8″ x 1″ Everbilt Fender Washers
- E6000 Epoxy
- Poster tack and plastic plates
- Vallejo “Surface Primer – White Primer”
- Vallejo “Flow Improver”
- Vallejo “Airbrush Thinner”
- Testors “Universal Acrylic Thinner”
- Battlefront “Wool Brown”
- Vallejo Model Air “Weiss” (off-white)
- Citadel “Contrast Paint – Wyldwood”
- Citadel “Agrax Earthshade” (shade)
- Vallejo Game Air “Black”
- Vallejo Model Color “Sunny Skin Tone”
- Citadel “Contrast Paint – Volupus Pink”
- Citadel “Contrast Paint – Contrast Medium”
- Vallejo Model Color “Medium Skin Tone”
- Vallejo Model Color “Light Flesh”
- Citadel “Contrast Paint – Darkoath Flesh”
- Army Painter “Flesh Wash” (wash)
- Vallejo Model Color “Mahogany”
- Citadel “Contrast Paint – Warp Lightning”
- Citadel “Contrast Paint – Skeleton Hordes”
- Citadel “Contrast Paint – Apothecary White”
- Citadel “Contrast Paint – Basilicanum Grey”
- Citadel “Contrast Paint – Blood Angels Red”
- Citadel Air “Evil Sunz Scarlet”
- Battlefront “Chocolate Brown”
- Vallejo Game Air “Escorpena Green”
- P3 “Cygnar Blue Highlight”
- Vallejo Model Color “Glossy Black”
- Citadel “Contrast Paint – Terradon Turquoise”
- Army Painter “Red Tone” (wash)
- Citadel “Contrast Paint – Fyreslayer Flesh”
- Citadel “Carroburg Crimson” (shade)
- Vallejo Mecha Color “Turquoise”
- Citadel “Contrast Paint – Snakebite Leather”
- Citadel “Balor Brown”
- P3 “Sunshine” (ink)
- Citadel “Contrast Paint – Talassar Blue”
- Vallejo Model Color “White”
- Citadel “Contrast Paint – Nazdreg Yellow”
- Citadel “Contrast Paint – Ultramarines Blue”
- Citadel “Contrast Paint – Black Templar”
- Vallejo Game Air “Dead White”
- Citadel “Seraphim Sepia” (shade)
- Citadel “Yriel Yellow”
- Citadel “Drakenhof Nightshade” (shade)
- Citadel “Biel-Tan Green” (shade)
- Citadel “Contrast Paint – Flesh Tearers Red”
- Vallejo Game Air “Moon Yellow”
- Citadel “Nuln Oil” (shade)
- Citadel “Contrast Paint – Iyanden Yellow”
- Citadel “Contrast Paint – Aggaros Dunes”
- Vallejo Model Color “Light Orange”
- Citadel “Contrast Paint – Aethermatic Blue”
- P3 “Sulfuric Yellow”
- Citadel “Ceramite White”
- Citadel “Lamenters Yellow” (glaze)
- Citadel “Tallarn Sand”
- Citadel “Bloodletter” (glaze)
- Vallejo Mecha Color “SZ Red”
- Vallejo Mecha Color “Purple”
- Vallejo Model Air “Cockpit Emerald Green “Faded” ”
- Vallejo Mecha Color “Fluorescent Green”
- Americana “Desert Sand”
- Citadel “Steel Legion Drab”
- Vallejo Model Air “Satin Varnish”
- Elmer’s PVA Glue
- Army Painter “Brown Battlefields” (flocking)
- Vallejo “Dark Yellow Ochre” (pigment)
- Vallejo “Burnt Umber” (pigment)
- Vallejo Mecha Varnish “Matt Varnish”
- Army Painter “Grass Green” (flocking)
Thanks for looking!!