
As shown in my last post, I have started building forces of appropriate figures for tabletop wargames using the soon-to-be published Feudal Patrol™. These are Aztecs and other troops from the era of the Spanish Conquest in the 16th Century. This is a major project for which I eventually hope to have over 150 painted figures. I have a ways to go, as this project brings that total to a mere 18. Still, the journey of 1,000 miles begins with a single step…
I acquired a large lot of Aztec figures on eBay probably 4 or 5 years ago. Most of them 25mm scale, and from Ral Partha dating from around 1988. In the lot were also two baggies of 3 Aztec Eagle Warriors (#25 AZ4) – ostensibly 25mm as shown on the Tin Soldier UK website. I was not familiar with Tin Soldier UK, but they have a pretty nice range of figures worth checking out. Of course, 28mm is the scale that I am going for – and sometimes 25mm can work for 28mm. While I was waiting for my order of new 28mm stuff to arrive (which I received this week), I decided to paint up some of the older figures and see if they could work with my 28mm figures visually. To my eyes, the Tin Soldier UK Eagle Warriors looked close enough to 28mm to work.

The Aztecs had two main elite unit types – the Jaguar Warriors, and the Eagle Warriors (sometimes referred to as the Eagle Knights). There were also the lesser-known Arrow Knights, which I will post about next time. To be an Eagle Warrior, one had to have captured up to 20 enemy for sacrifice or equivalent deeds of valor (well, in the eyes of Aztec society anyways). They were full-time professional warriors and along with the other elites were equivalent to nobility among the Aztecs.
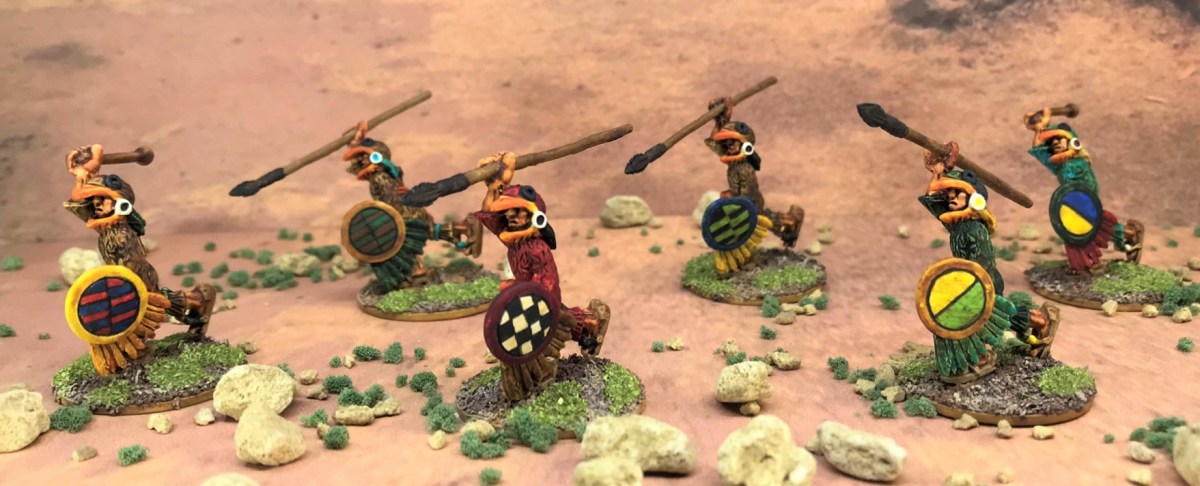
Normally, Aztec Eagle Warriors would be armed with melee weapons, in particular the macuahuitl obsidian-edged club/sword. All of these 6 had the same pose and were armed with tepoztopilli (obsidian-bladed thrusting spears). They also had the weapons in a throwing versus a thrusting pose. Therefore, I decided to go through the 25mm Ral Partha Aztecs that I had and see if I could get any macuahuitl or cuauhololli (round-headed club) as extra weapons. The extra Ral Partha macuahuitl were way too small and bendable, but there were some cuauhololli that would work. I ended up using two of the cuauhololli and four of the tepoztopilli as weapons for the six. My plan was to orient each of their weapons slightly differently and also to have different shield patterns and different colors for authenticity and ease of tabletop play.
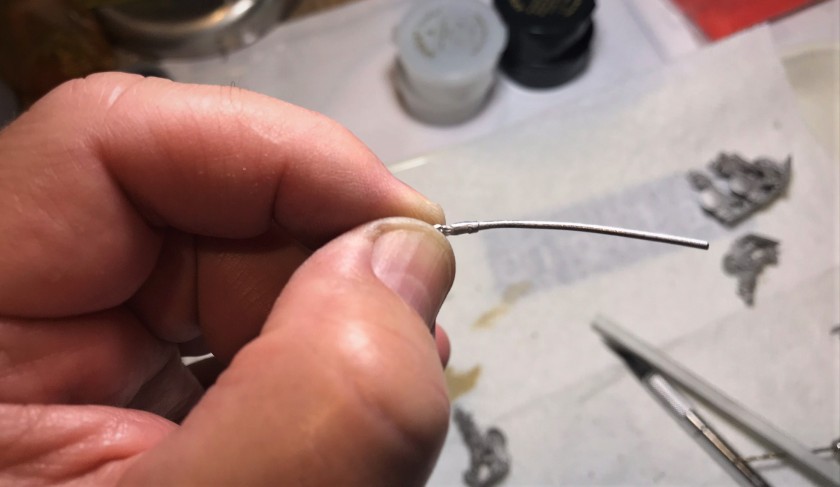
Now, as for the spaghetti-like tepoztopilli, they needed a solution as they were made from lead and were as floppy and vulnerable to bending as most leaden miniature spears are unfortunately, especially those from the 1980’s and earlier. The odd thing is that the model shown on the website indeed does have a macuahuitl instead of a tepoztopilli! My guess is that they redid the mold at some point as these model thrusting spears were too weak for use in gaming. In any case, I decided to try using a thin layer of Apoxie Sculpt on the shafts. Apoxie sculpt is easy to use and can be made more workable when used with wet fingers – and it gets hard as a rock when it cures in 24 hours. This process gave me much improved tepoztopilli, but still the underlying lead made them somewhat (though less) vulnerable to bend.
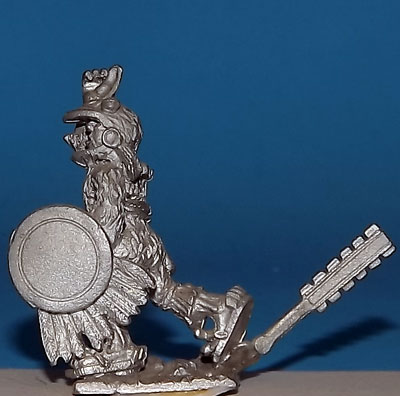


The models themselves were not too difficult to assemble. I did need to clean up the mold lines and the hands needed to be drilled out carefully to hold the weapons. I did pull out some of the molding rubber out of one model’s eyes, but overall I was happy with the quality of the castings. I definitely liked that the shields were not separate.
I made a unit plan as there were many ways to do the unit – and I wanted to have something to refer to along the way. In particular, one of my goals for this project was to give each Eagle Warrior a different shield design – and for that design to be historically correct. Over at Steve’s Balagan, I found his blog to be a wonderful resource for Aztec and other shields.

Most pictures that I have found on Eagle Warriors showed them in golden brown outfits – but some mention that there were possibly red, green, and blue ones as well. I decided to make three in golden brown, and then make the others in red, green, and blue. The accouterments and shields would also add to the differentiation on the tabletop. Unlike the novices, the pics that I saw of Eagle Warriors all had orange loincloths, so that feature was common here.


My next big challenge was painting designs on the shields. My handwriting is awful, and hand-drawing designs on shields has not been a strength for me – and these are tiny. I decided to let the engineer in me break out. I used an art template to trace a 9/32″ circle on a piece of paper, and then I cut that out. It proved useful in helping me to lightly sketch the designs on the shields in pencil – as guides for painting. I tried several designs that I saw on Steve’s Balagan blog.

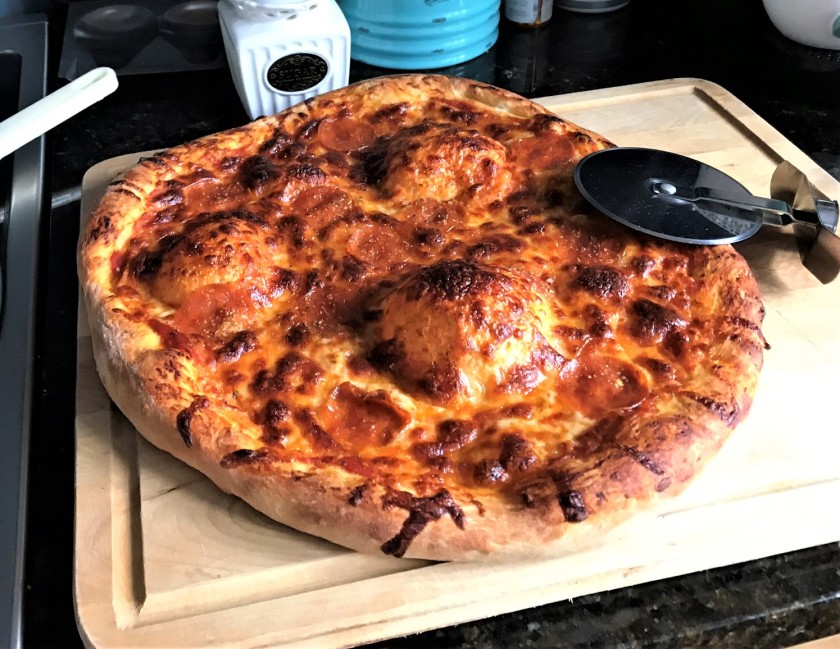
I wanted to get these done for the weekend, and my wife helped fuel my push with a home-made pizza (that tasted even better than it looked!).
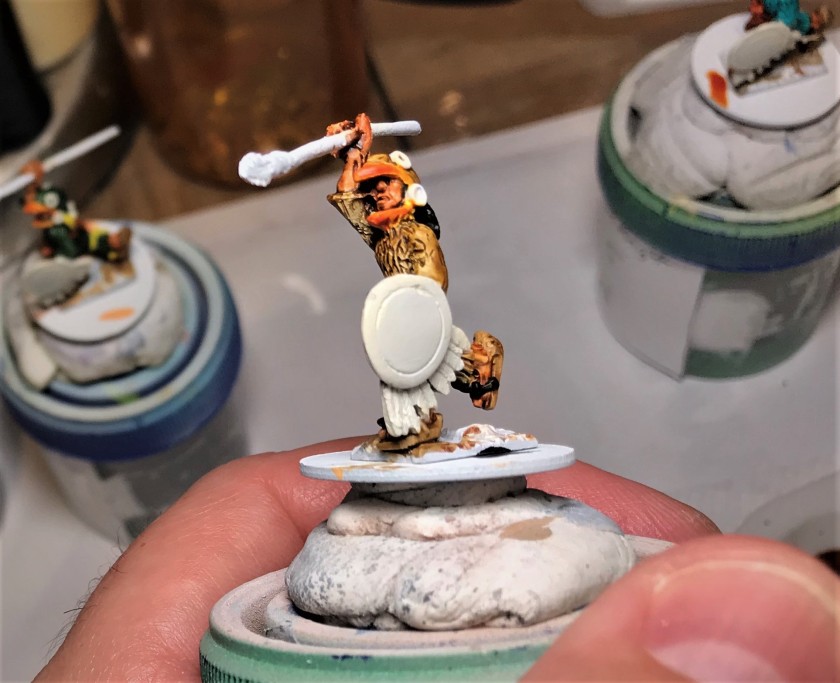
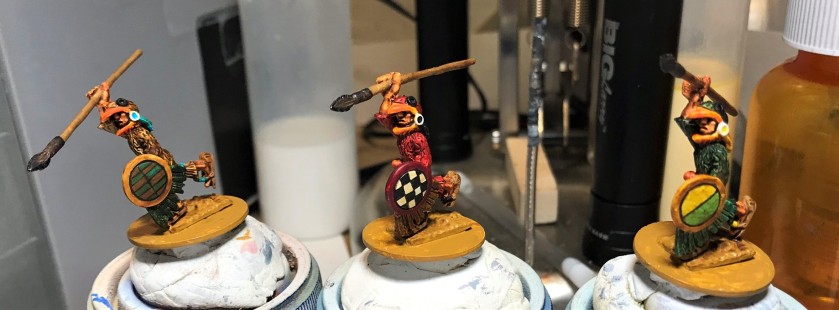
Below are a couple of WIP shots after I finished painting the shields – for me, this was a result that I was surprised to see.

On May 1, I finished them with flocking and varnishing, ending with some static grass (all the materials I used are listed at the end for those interested). This counts hopefully as my second entry into Ann’s Immaterium Painting Challenge “Paint the Crap you Already Own”.

Here are some close up and group shots of the project:
Eagle Warrior 1, with tepoztopilli:


Eagle Warrior 2, with tepoztopilli:


Eagle Warrior 3, with tepoztopilli:


Eagle Warrior 4, with tepoztopilli:


Eagle Warrior 5, with cuauhololli:


Eagle Warrior 6, with cuauhololli:


Lastly, a couple of group shots:


As for scale – here is a comparison between a 25mm Eagle Warrior and a 28mm novice warrior – I think they will be OK. Do you?

What do you think? Always wondering that – so let me know below in the comments section. Now it’s back to painting more figures during the lockdown and beyond…
PAINTS, INKS, GLAZES, SHADES, WASHES, PIGMENTS, FLOCKING, GLUES AND MORE USED ON THESE AZTEC EAGLE WARRIORS:
- Apoxie Sculpt (White)
- Gorilla Glue
- 1/8″ x 1″ Everbilt Fender Washers
- E6000 Epoxy
- Poster tack and plastic plates
- Vallejo “Surface Primer – White Primer”
- Vallejo “Flow Improver”
- Vallejo “Airbrush Thinner”
- Testors “Universal Acrylic Thinner”
- Vallejo Model Air “Weiss” (off-white)
- Battlefront “Wool Brown”
- Battlefront “Dark Leather”
- Citadel “Contrast Paint – Gryph-Hound Orange”
- Vallejo Model Color “Sunny Skin Tone”
- Citadel “Contrast Paint – Skeleton Horde”
- Citadel “Contrast Paint – Blood Angels Red”
- Citadel “Contrast Paint – Creed Camo”
- Citadel “Contrast Paint – Aethermatic Blue”
- Vallejo Model Color “Basic Skin Tone”
- Citadel “Contrast Paint – Fyreslayer Flesh”
- Citadel “Contrast Paint – Iyanden Yellow”
- Army Painter “Light Tone” (shade)
- Vallejo Mecha Color “Turquoise”
- Vallejo Game Air “Black”
- Vallejo Model Air “Moon Yellow”
- Vallejo Model Air “Armour Brown”
- P3 “Sunshine Yellow” (ink)
- Vallejo Model Color “Red”
- Vallejo Model Color “Black Grey”
- Vallejo Model Color “Sunny Skin Tone”
- Battlefront “Chocolate Brown”
- Vallejo Mecha Color “Brown”
- Citadel “Contrast Paint – Flesh Tearers Red”
- Vallejo Game Air “Escorpena Green”
- Vallejo Model Color “Dark Blue”
- Citadel Air “Evil Sunz Scarlet”
- Citadel “Contrast Paint – Wyldwood”
- Citadel “Balor Brown”
- Vallejo Model Color “Glossy Black”
- Citadel “Seraphim Sepia” (shade)
- Elmer’s PVA Glue
- Army Painter “Brown Battlefields” (flocking)
- Vallejo “Dark Yellow Ochre” (pigment)
- Vallejo “Burnt Umber” (pigment)
- Americana “Desert Sand”
- Vallejo Mecha Varnish “Matt Varnish”
- Army Painter “Grass Green” (flocking)
Thanks for looking – please let me know your thoughts and feedback!

Those look great Mark- very nicely painted. The weapons look better for being fettled like that too.
Cheers,
Pete.
LikeLiked by 4 people
Cheers Pete!
LikeLiked by 2 people
Love the old Tin Soldier stuff especially the 15mm fantasy.
LikeLiked by 4 people
Thanks David – nice to hear from you!
LikeLiked by 1 person
Looking good mate. Funnily enough my Aztecs are 15mm Tin Soldier, as are the Conquistadors and Samurai.
LikeLiked by 2 people
Thanks man – they made them in both scales (and still sell them).
LikeLiked by 2 people
I had the 15’s years ago and am reliving my youth by buying the army again.
LikeLiked by 2 people
Those who fail to learn from history are doomed to repeat it, eh? 😁
LikeLiked by 2 people
Totally… I had better watch our or I will be starting a 15mm Crusader Army next… 😂
LikeLiked by 1 person
Very nice and interesting discussion too. I certainly remember how fragile polearms were on those old lead miniatures and your Apoxie Sculpt work around is a great idea.
LikeLiked by 5 people
Thanks Ann. These were like old minifig soft!
LikeLiked by 2 people
Those look great, Mark! 🙂 And a good read too! I think the 25mm/28mm figures look fine together, but I don’t let things like that bother me too much. Lots of planning on the painting and shield designs has paid off. Funnily enough, I never use a drafting pen or the like to do lines and lettering on minis, since I can paint them better by brush (not much better mind you)! And thanks for sharing your pizza!
LikeLiked by 4 people
Thanks John, it was a new try on the shields and I wish I could paint them better freehand but maybe you use oils and that helps? I just came on this methodology so I’m happy with that – we’ll see if I can replicate it with other designs.
LikeLiked by 2 people
Well, the method looks good to me, so carry on! 🙂 Actually, for most work now I’m using Vallejo acrylics, even tanks, and only tend to use enamels where it’s a colour that I can’t get a Vallejo match.
LikeLiked by 3 people
Another very enjoyable post Mark. I do like your methodical approach and that you undertake so much research. Looks like you have a long way to go with this one so keeping busy shoild not prove to be a problem. Love the work on the shiepds and the black and white checked one has come out very well indeed. Great stuff.
LikeLiked by 3 people
Cheers Dave, I’m rather fond of the checkerboard shield too, will have to make that again.
LikeLiked by 2 people
Lovely work Mark, they look the business mate! love the vibrant colours, this is going to be one colourful army once finished.
Oh and please tell you wife that you, I’m now going to have to get something to eat! as she’s made me hungry, I’d say if I get fat it’s her fault, but sadly that ship has sailed!!
Cheers Roger.
LikeLiked by 3 people
Cheers Roger, I appreciate that you like them. Should be a lot of fun to paint – not a lot of camouflage to be sure!
I’m trying to keep from blowing up too, and I get her cooking every day! She’ll be tickled to hear what you said though!
LikeLiked by 1 person
Wives eh! where would we be without them?
McDonalds probably 🙂
Cheers Roger.
LikeLiked by 4 people
Love the individually shield designs. Useless info but the early GW Slann (now lizardmen) armies were based on Aztecs so had units of Eagle warriors etc so this invoked childhood memories.
LikeLiked by 3 people
Did not know that – interesting indeed!
Thanks for looking BTTH!
LikeLiked by 2 people
Great looking Eagle Warriors, mark (and the pizza don’t look too bad, either!) Interesting to see the way that you reinforced the spear shafts – I haven’t seen that method before. People I know who played a lot of historicals tended to replace them with wire, sometimes cutting and then pinning the spearheads on top. I’ve certainly got enough (unassembled) greeks with pre-supplied, (sharp!) wire spears that it gave me pause on assembling them too quickly so as to not give myself a grevious injury!
They certainly work as a colourful bunch that still manages to look like a unit that belongs together – again like Greeks, I suppose. I’m looking forward to seeing the next unit(s) for the Aztecs, and of course their eventual opponents! 🙂
LikeLiked by 3 people
Thanks Azazel – I definitely have a lead hill for this project, but I have a plan!
The thing I like about Apoxie Sculpt is that you can work it with a bit of water on your fingers. I don’t think I could have accomplished the same thing with kneadatite. And as I came up with the method on the fly, I have not seen it before either man!
Hoping to knock out a unit of 6 per week hopefully – that will take 24 weeks!
LikeLiked by 1 person
Lovely job mate, and very enjoyable research to boot! Talking of spears, I watched a Youtube vid of a guy who makes them with the nylon bristles from a yard brush – nice and flexible, very resilient. He just crimps the ends flat for the points!
LikeLiked by 2 people
Cheers Alex!
That’s something I heard about (the bristle spears). Here we call that a push broom btw! I usually just try to incorporate what was included in the kit (as you will see in my next Aztec post). It’s funny, but I always have a sense of channeling the sense of getting my “toys” out of the blisters so they can play – just like in the Toy Stories movies!
LikeLiked by 2 people
Great looking Aztecs Mark, loving your colour choices. Personally I don’t have a problem with models being a different height to each other, I find it looks more natural than all the same height
LikeLiked by 2 people
Thanks Dave and you’re right, from a distance it’s not too noticeable at all!
LikeLiked by 1 person
Love these mate , the work on the shields is so good ,very clever ! just a thought on the spears stuff ,like Azazel I to replace a lot of my spears and lances with wire ,and I to have seen the guy with the nylon bristles that Alex refers to and it seems like a great idea though I’m yet to try it. I’m not sure if it would work with the soft lead of these spears but back in the days when I was silver smithing if one wanted to strengthen a soft silver wire you would first place one end in some vice and with a pair of pliers gently twist it a few times and this would make it quite strong, any way mate just food for thought in the future when you really get into the real stuff and become a master dioramist !! Oh I can see a lot of potential mate ! and please mate no more photos of your lovely wife’s pizza as I don’t need to add any more weight !!
LikeLiked by 2 people
Thanks Pat. If these would have been spears I think I would have gone in a different direction like you mentioned. As these were big hand-launched javelin sized arrows, and I wanted each to hold two (and I feared sculpting the arrows), I ended up here! Still, I wonder about the silver example that you mentioned, and whether the lead would have been able to be strengthened like that – putting that thought in my mind for future use. I’m sure that the lead is ductile enough- ya definitely got me thinking Pat. And thanks for the kind words on the dioramas, I so admire the work of folks like you and Dave. I tend to think of my games as big dynamic dioramas that you can play with, so that is a goal!
And yeah, that pizza was epic! Cheers!
LikeLiked by 1 person
That’s it Mark , you can play with yours which makes them useful, mine are just good for collecting dust!😂🤣
LikeLiked by 1 person
Beautiful still Pat!
LikeLiked by 1 person
There isn’t a scrap of evidence for the Arrows, you know; you’d do better to turn them into other types. You’ll be spoiled for choice.
LikeLiked by 1 person
Thanks for taking a look. They’ll be missile troops no different than if I gave them atlatls.
LikeLike