British Armor and Some Blogs Worth a Look

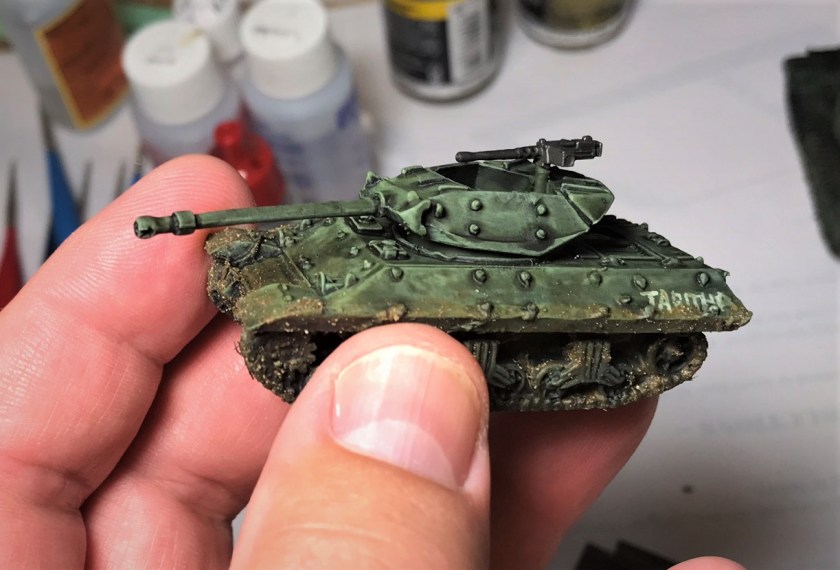
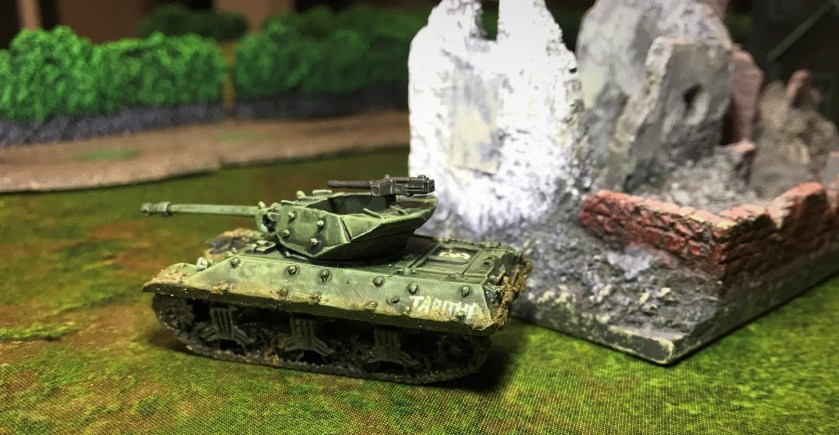
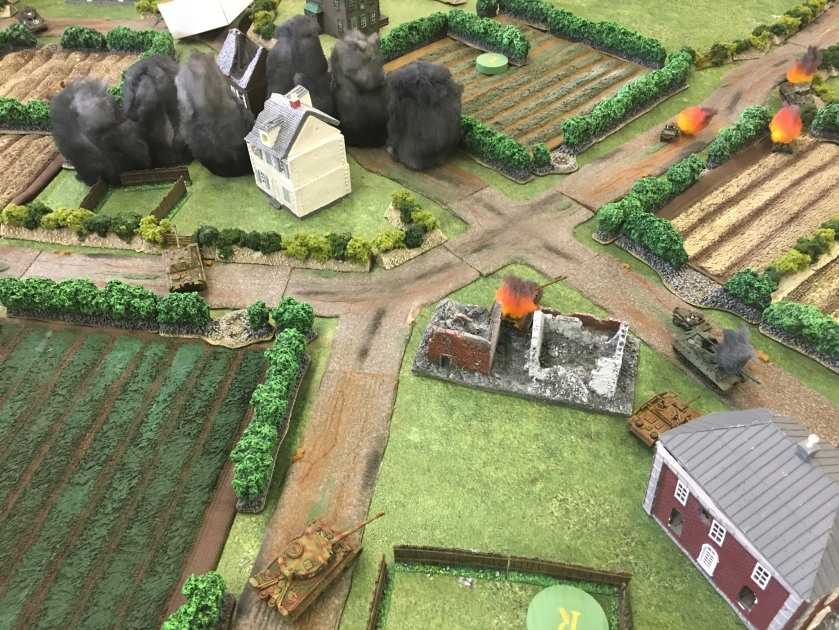
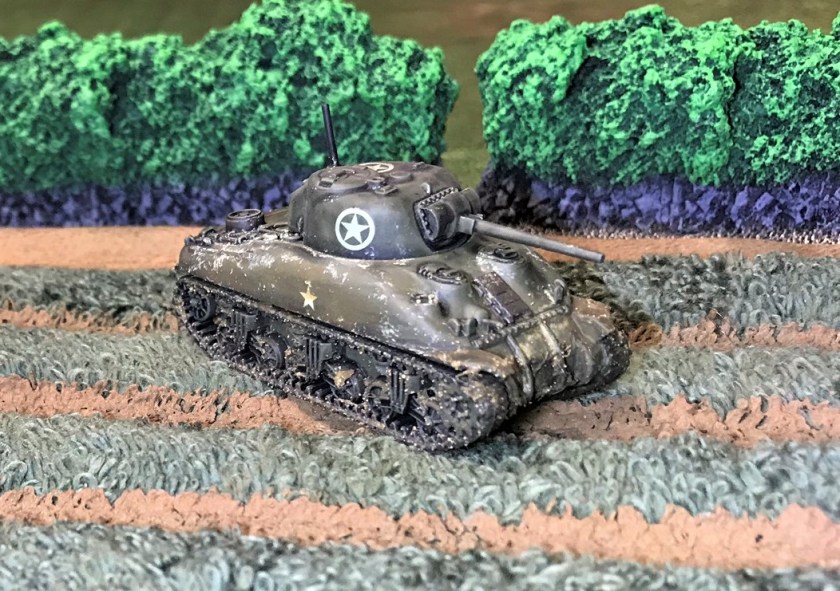
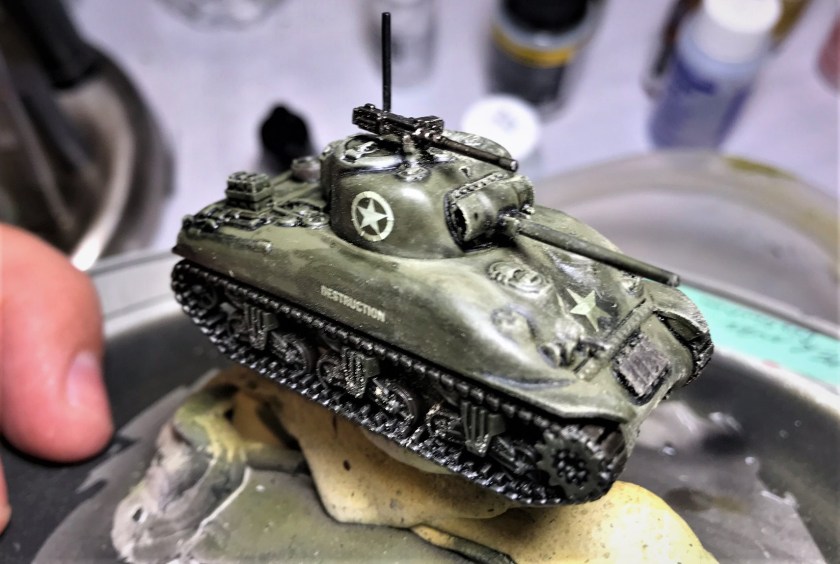
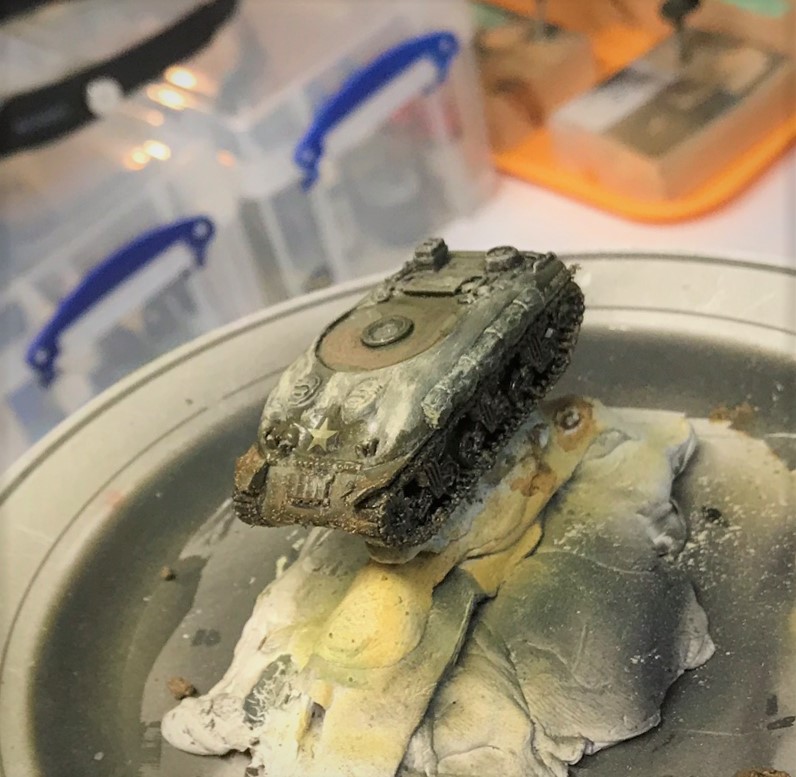
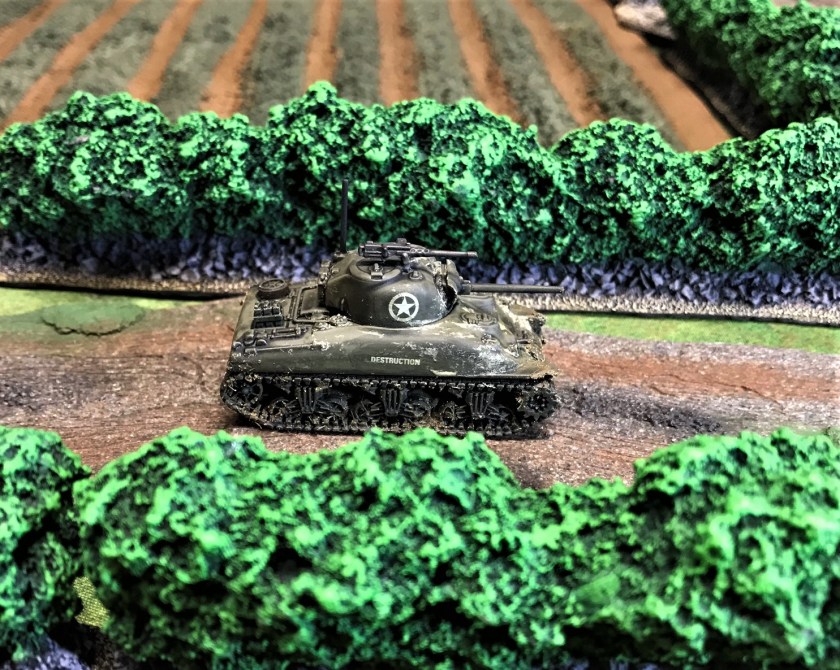
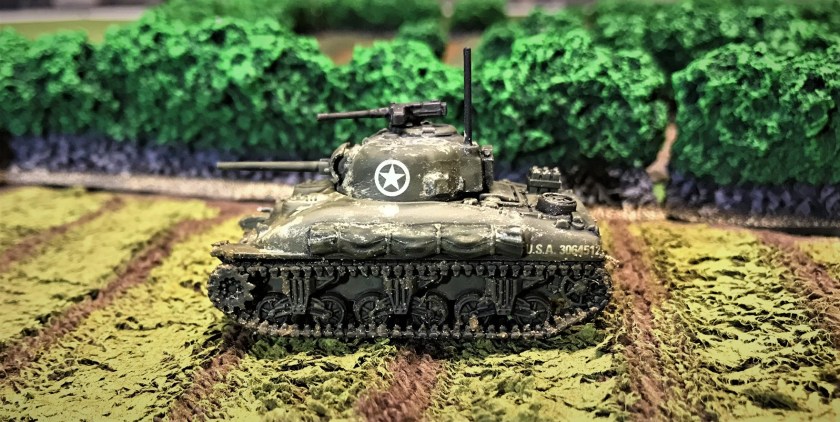
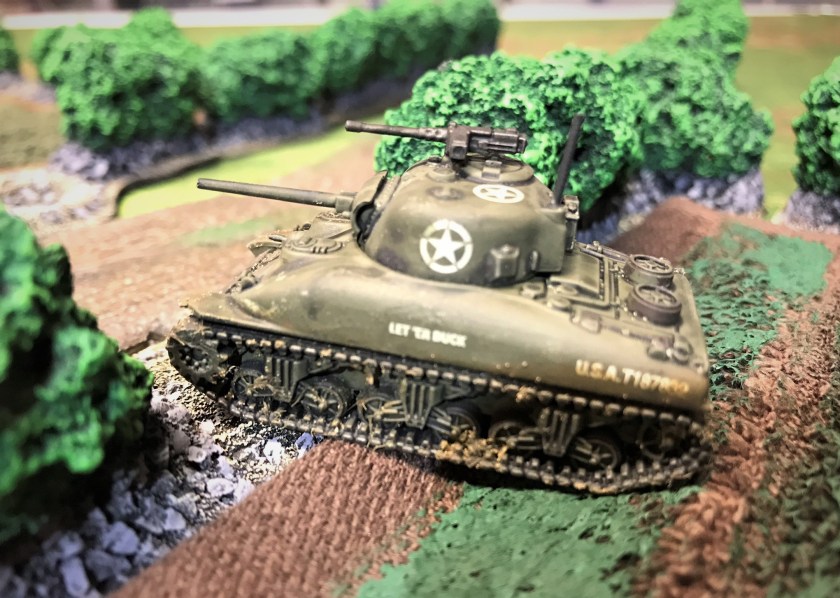
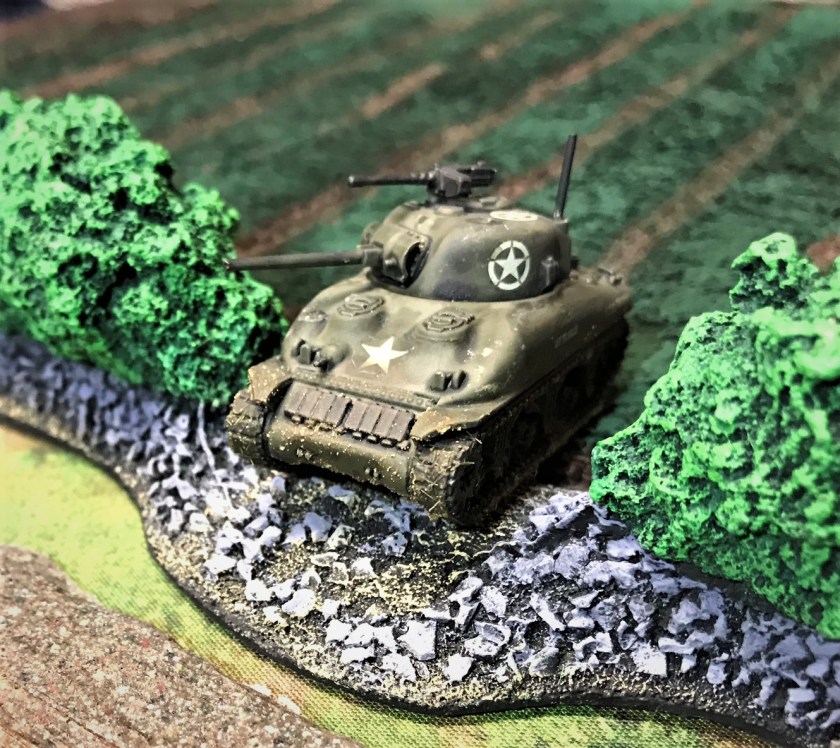
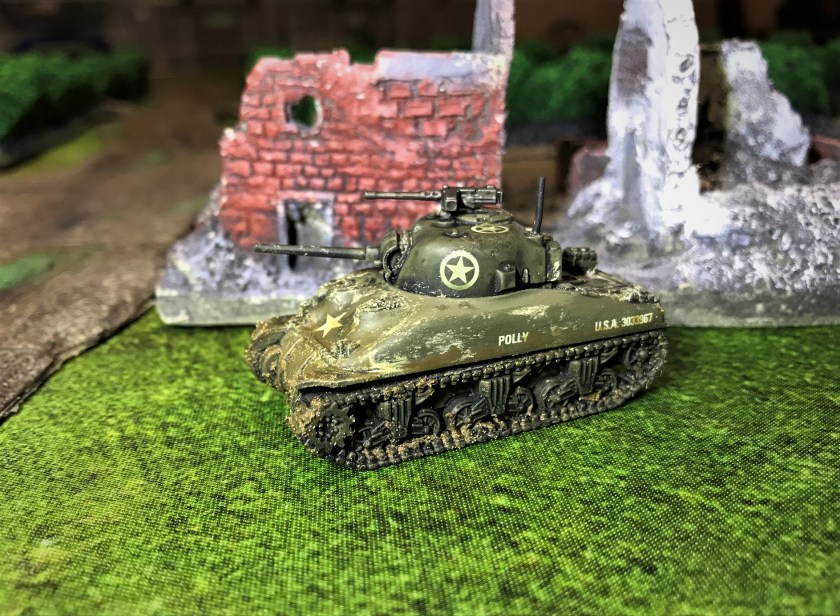
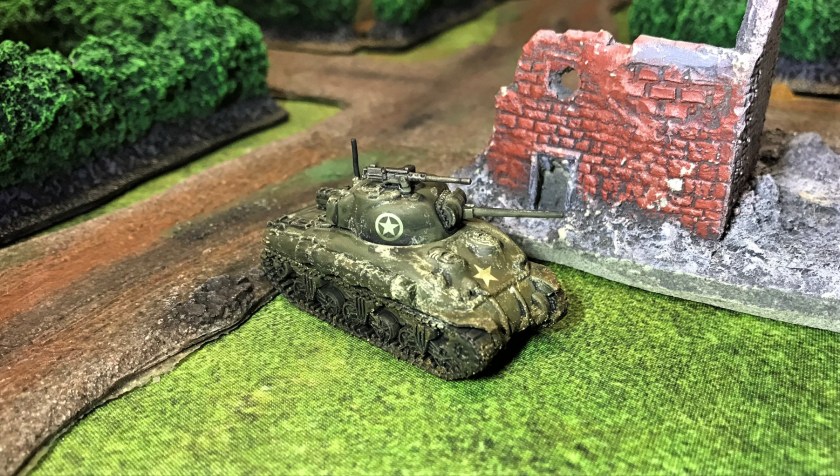
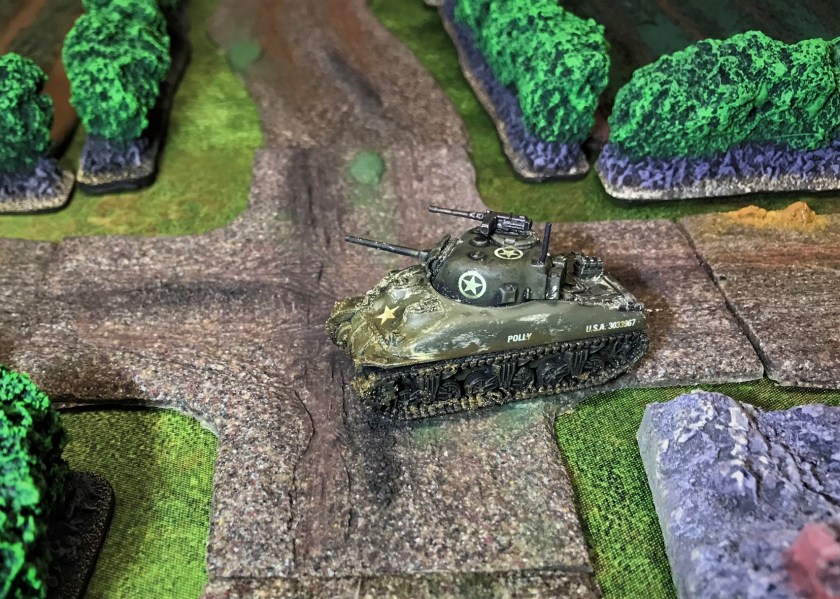
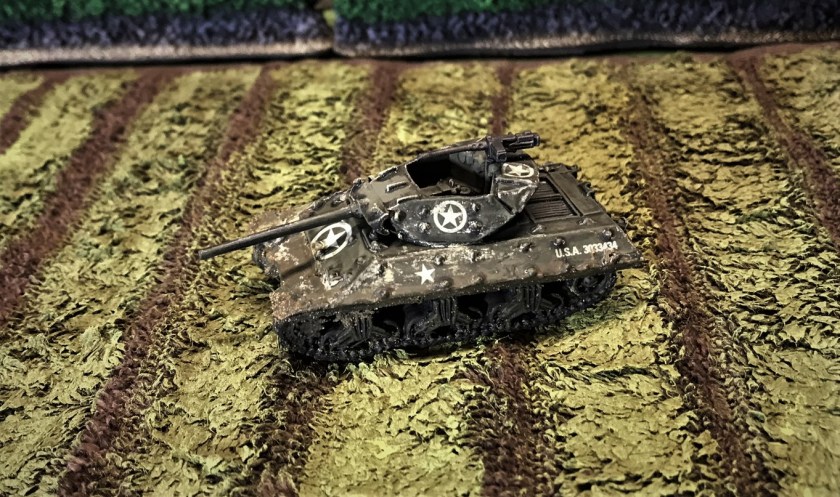
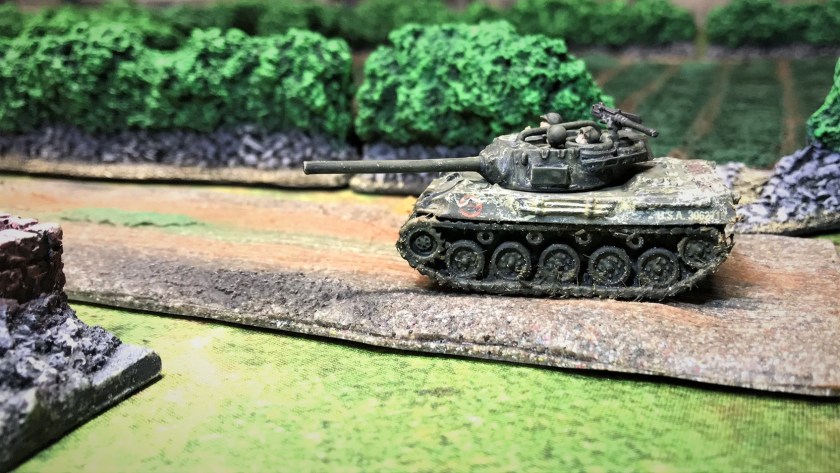
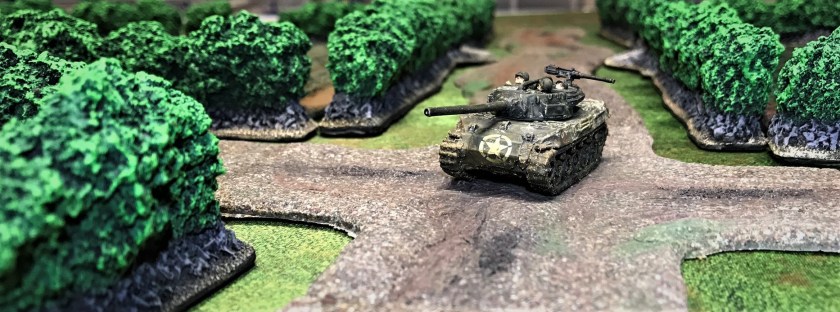
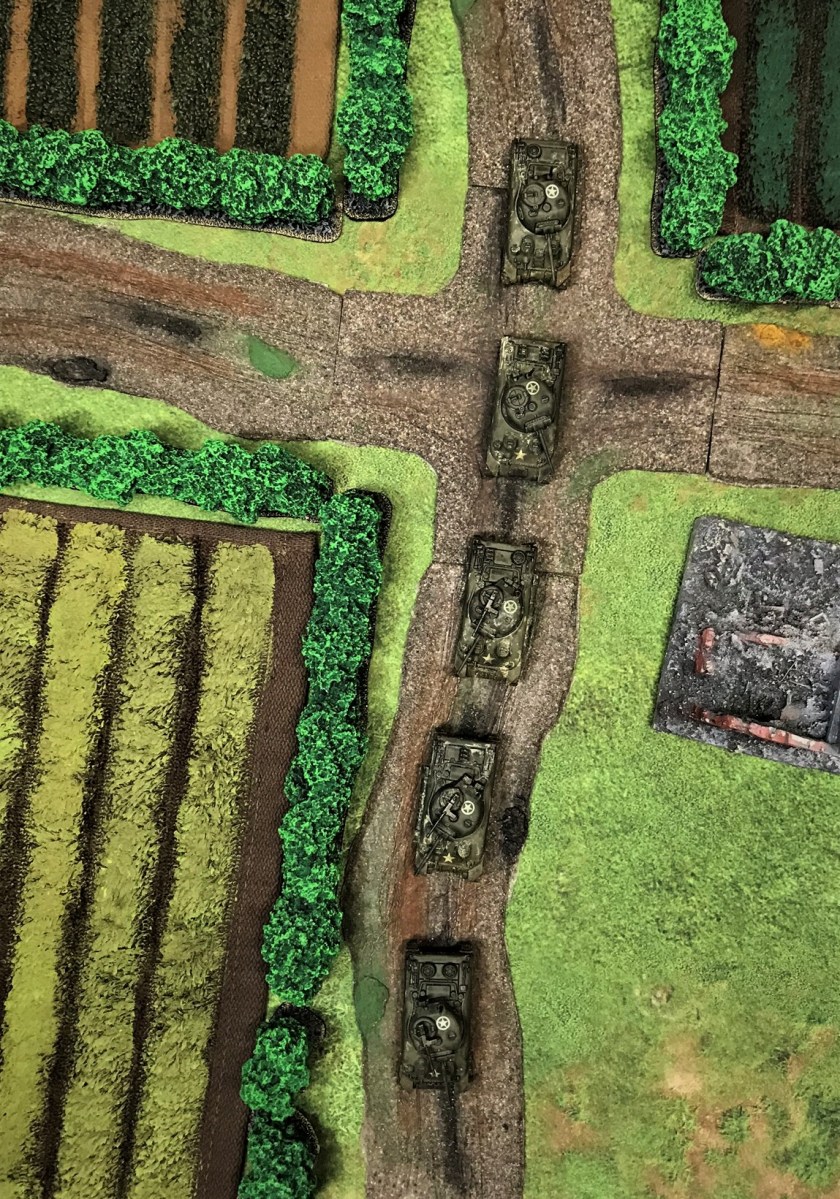
During the Allied breakout from Normandy in 1944, the British Army used several different tanks and tank destroyers.  Some were American-made, some were British-made, and some were conversions of American vehicles.  For my What a Tanker© Normandy Breakout Scenario, I had plenty of British Shermans, a couple of Fireflies, and a few Daimler Dingoes, but the available British vehicle menu needed some fleshing out.  Clearly missing were the Cromwell Mark IV cruiser tank, the Churchill Mark IV heavy infantry tank, and the M10 Achilles tank destroyer.  This project aimed to rectify that situation, especially as I plan to run the game at a few upcoming conventions (such as at BARRAGE and at the Mass Pikemen Gaming Club.

While looking at some images of these vehicles in my reference books, I came up with a new idea to incorporate into the project.  First – a brief segue.

I started this blog back in 2015, inspired by my friend Buck Surdu’s blog.  I was getting back into the hobby – and thought I’d share what I was learning about the gaming I was doing, the miniatures that I was working on, some history, and whatever I found interesting.  Since then, I have posted 143 times (this post is #144), have 139 followers (thanks to all and I am always happy for more so feel free to follow if you don’t already!).  I also learned of many others’ blogs and now I follow many of these.  Several  originate in the United Kingdom, Australia, and other Commonwealth nations.  They inspire and entertain me, and perhaps they will do that for you as well.  So, let’s get back to the idea I just mentioned.  Perhaps I could work in a few of those bloggers into these vehicles and have them be represented in a small way in this project and the future games I run.  More on that shortly…

Now, a few qualifying points.  Each of the vehicles you will see below has a link to a blog – BUT, these are not the only ones that I follow and my goal was not to leave anyone out.  However, I chose to include the following as ones that are among my faves, AND who have a connection to a place where, well, the Queen is on the currency (with two notable exceptions that I’m sure you’ll allow me).  Also, I wanted to use Battlefront decals to both make the tanks both easier to identify on the tabletop (these are small 15mm scale tanks) and have some connections to the bloggers.  Ease of identification on the tabletop is important, as most players have little knowledge of the history of the tanks.  Of course, there are experts somewhere who can correct me – and that’s not an issue.

Truly, I wanted to be as authentic as I could, but as I tried to research British tank markings, frankly, I got more confused!  The issue is not improved by any information about the decals from Battlefront.  US tank markings are pretty straightforward comparatively (IMO).  With 6 Cromwells here, I needed some variety!  You will see I used a number of decals from varying Commonwealth nations – and different theaters – incorrectly – and on purpose!  In addition to the decals, I varied spare road wheel and toolbox placements, as well as adding some freehand names to the tanks.  My freehand work is OK for the scale here I think – you can be the judge – I had to use a spotter brush and still make them look like a crew added the names.  Again, the decals I used below are not as historically accurate as possible, and that’s fine with me – they do accomplish the playability and blogger-linking goals I described.

So onto the project – I had 9 vehicles:

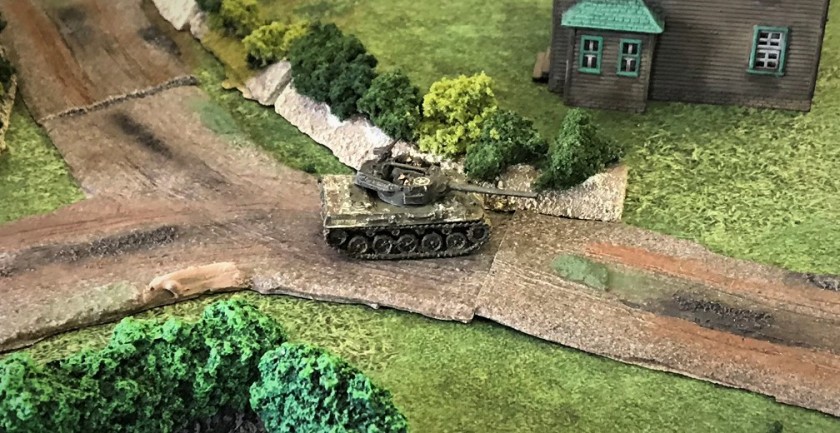
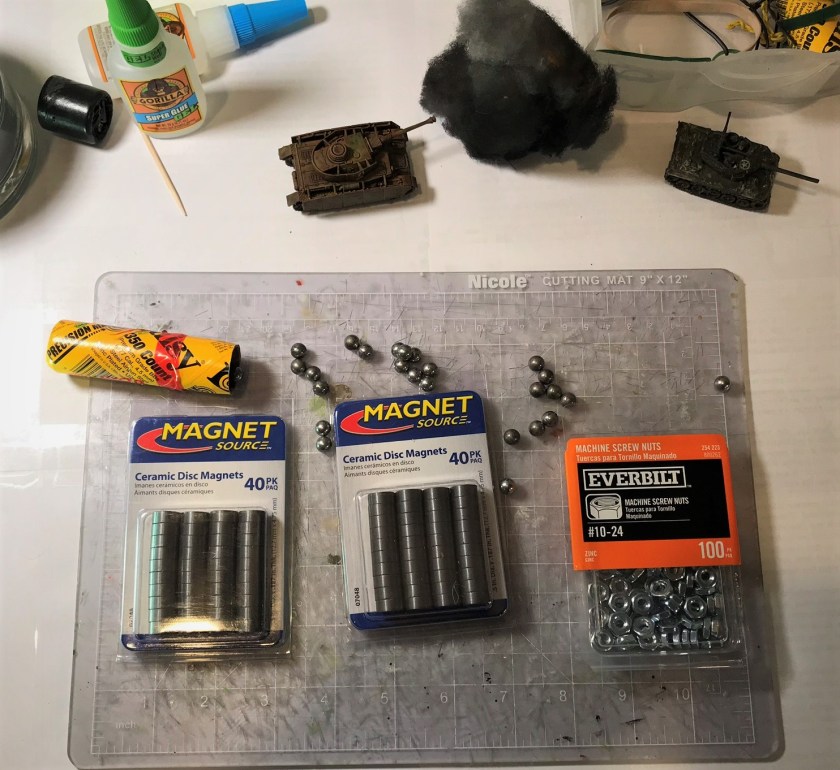
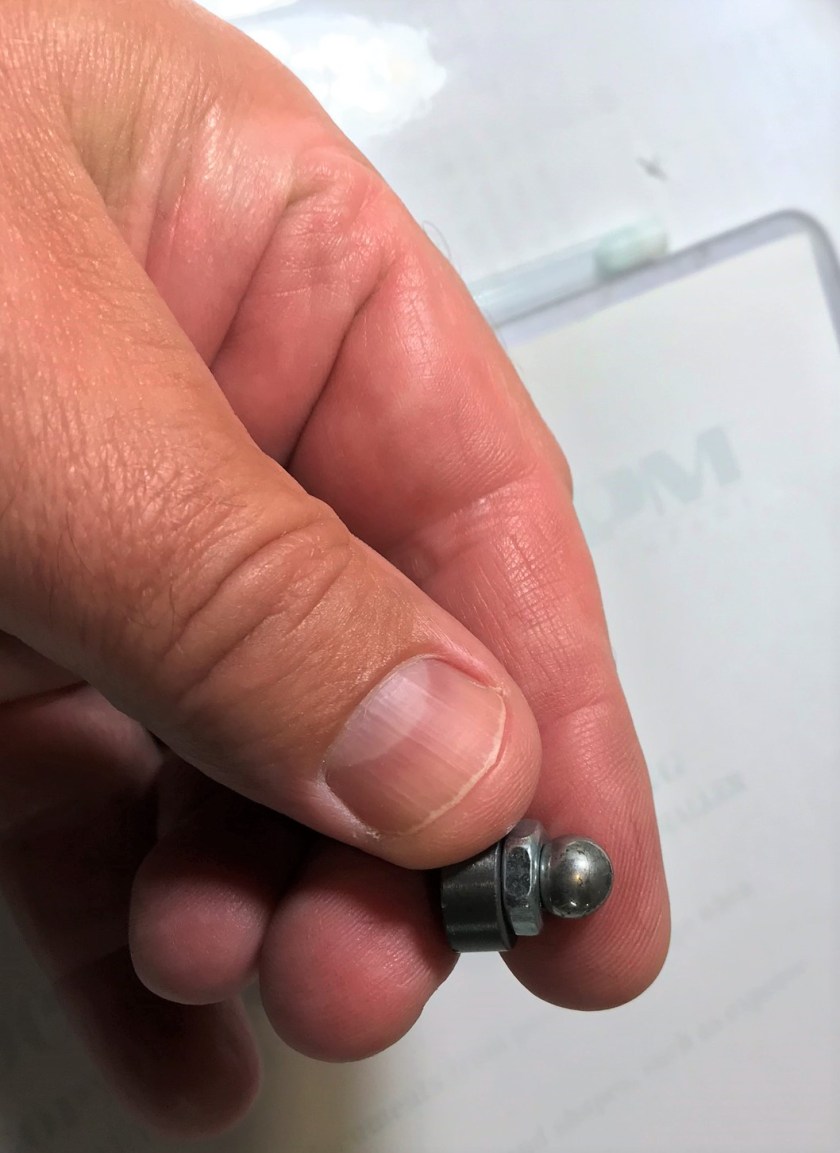
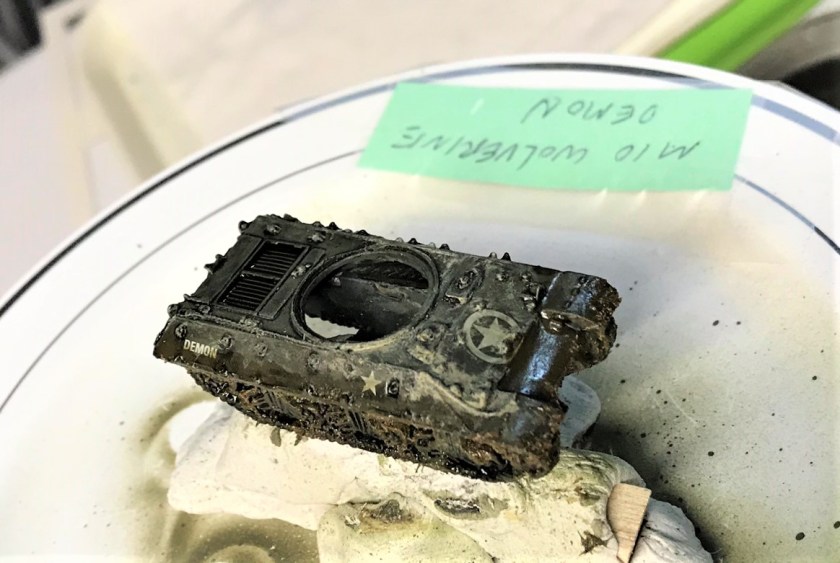
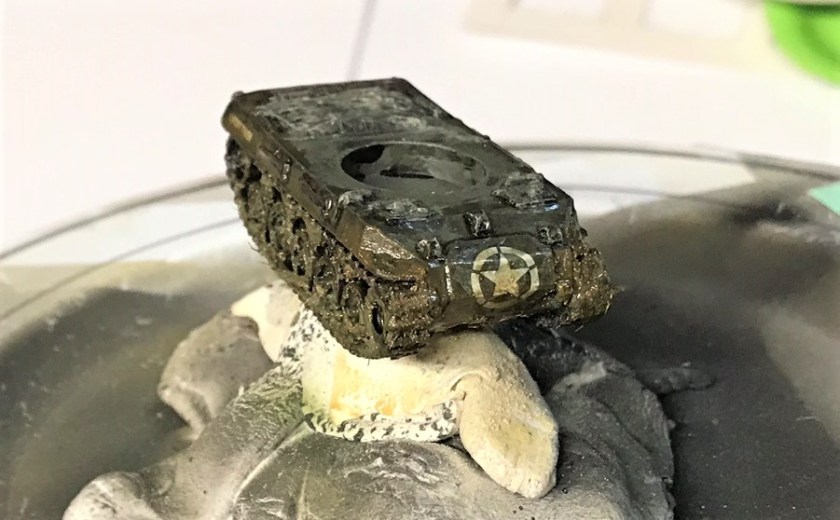
The Achilles had some casting defects that I remedied with green stuff.  I also gave them some leftover plastic .50 caliber machine guns as the ones they had were too bendy.  The plastic Cromwell’s got some BB’s in the hulls to add weight.  I tried to make the tanks a lighter green so as to match the other ETO British Shermans I already had.  I also added some radio antennae.

Now, in alphabetical order by name – and all linked blogs are worth checking out:

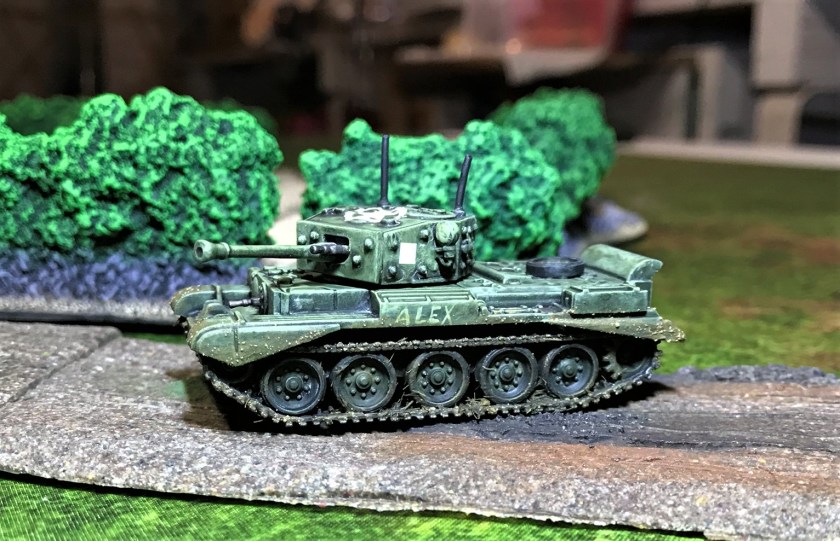
Alex

Alex’s blog can be found at Leadbaloony   He does a great job with terrain and older GW Space Orks (I believe from the late 1980’s to early 1990’s) that are painted unbelievably well.  I named a Cromwell Mark IV for him – it has a number 4 and solid white decals on the turret.  The red and white unit decal is (I believe) an older one from the 21st Tank Brigade, which I chose because Alex is a British veteran.

1 Alex done3 Alex front side on road2 Alex left side on road

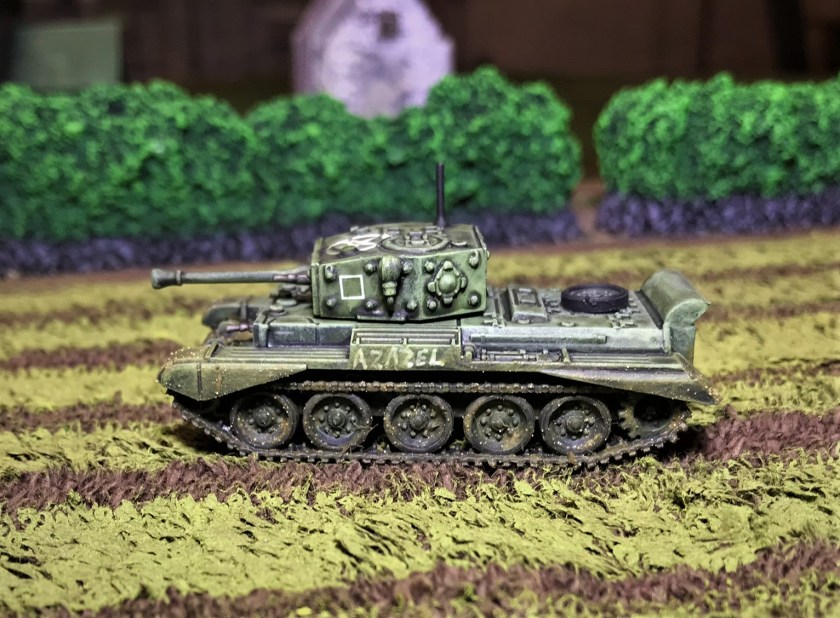
AZAZEL

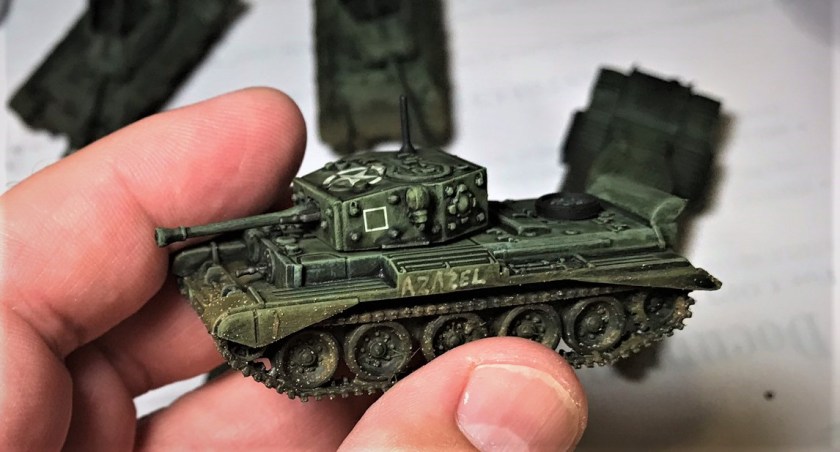
Azazel’s blog can be found at Azazel’s Bitz Box.  He is a fantastic painter and modeler and his interests run the gamut from terrain to 40K to Flames of War to board game minis and more.  He still finds time to run a monthly community painting challenge.  This July’s was “The Jewel of July ’19 Community Painting Challenge”, which included:

It’s for Vehicles. A Motorcycle or a Maus. A Starship or a Gaslands Car. A Panzer IV to a Kettenkrad. A Rhino APC or a Konigstiger or a War Rig or a M’ak I. (or M’ak II?)

This post is my second one for July’s challenge (here is my first).  The challenges are a always LOT of fun to see and he is a great guy for doing it month after month.  The Cromwell named for Azazel below has an open white square on the turret and a number 81.  As Azazel is an Aussie, I gave the tank an ahistorical 9th Division (Australia) decal with a lovely platypus on it.  The Aussies during the Normandy campaign were of course busy back in the Pacific theater fighting the Japanese, having already done their time fighting the Germans in North Africa.  I am sure that this Cromwell will acquit itself well.
1 Azazel2 Azazel front in field3 Azazel left side in field

IRO aka Imperial Rebel Ork

Moving on to yet another Aussie, IRO, his blog is Imperial Rebel Ork .  He is the master of kit bashing GW stuff into marvelous creations all his own.  He creates new worlds of wonder is all I can say – and I recommend you take a gander.  He also has a fine podcast he does with his buddy Warren (Waz), and its very funny and worth listening to (and not just because I made a promo on episode 14).  They do indeed need a lesson on American accents that originate outside of the Deep South!

His imagination is wonderful, and you never know what he will come up with next.  His Cromwell has a few markings that need explanation.  The turret has a couple of 3rd Infantry Division (UK)  triangle markings that I chose because I liked the look for the tabletop.  There is a number 75 on the tank, and the unit marker is a later 21st Tank Brigade one (I think).  I chose it because it had a devil/imp on it, and IRO is definitely that!

1 IRO2 IRO Cromwell front3 IRO Cromwell right side4 IRO Cromwell left side

John aka JNV aka Just Needs Varnish!

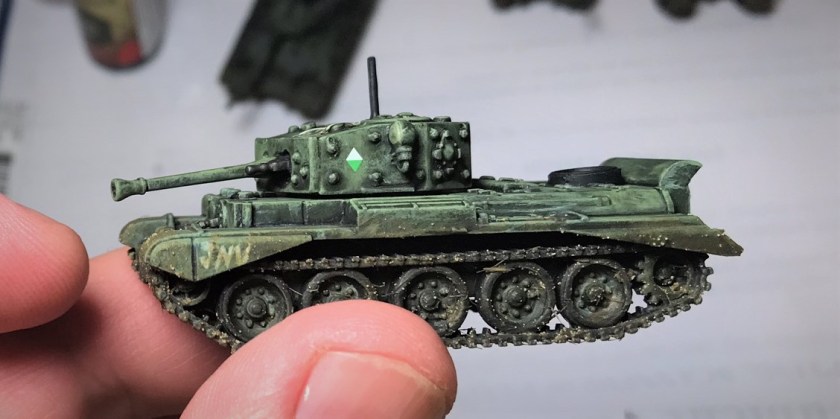
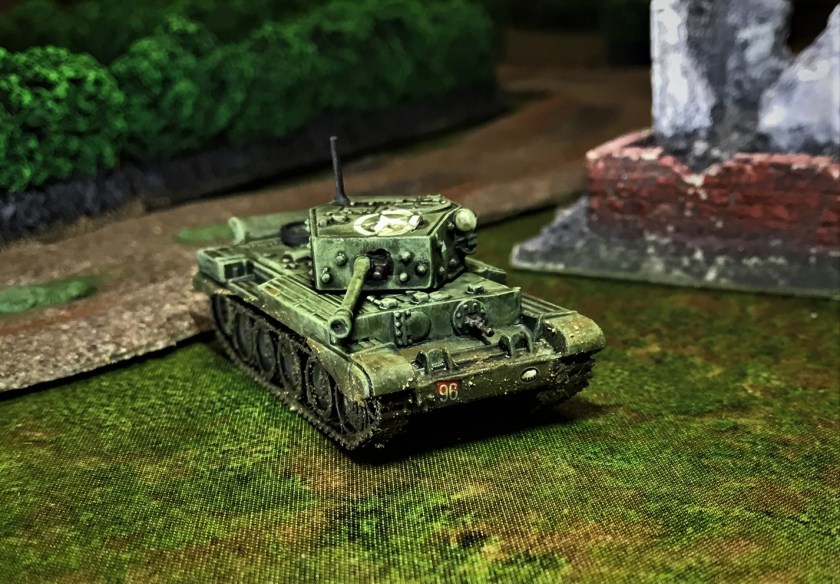
I find John’s blog Just Needs Varnish! very interesting and informative, PLUS the guy really know how to paint and create games.  His stuff ranges from WWII to lesser-known conflicts like the Paraguayan War and the War of Italian Unification.  He does his research, and I really like his attention to detail.  We are alike in that way I think.  Most importantly, John loves tanks too!

While John is a Brit, the tank with his JNV on it has turret markings for the 1st South African Infantry Division. As with IRO’s tank, these are of course not correct, but will visually helpful on the gaming table.  The tank has a 96 number on it, and a British 2nd Armoured Brigade insignia from North Africa on the hull front.
1 JNV2 JNV front3 JNV front in bocage4 JNV left side

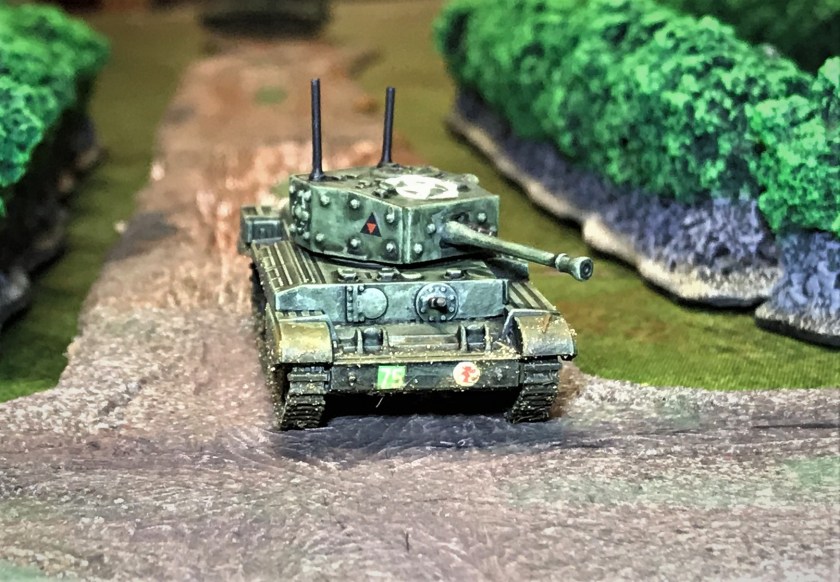
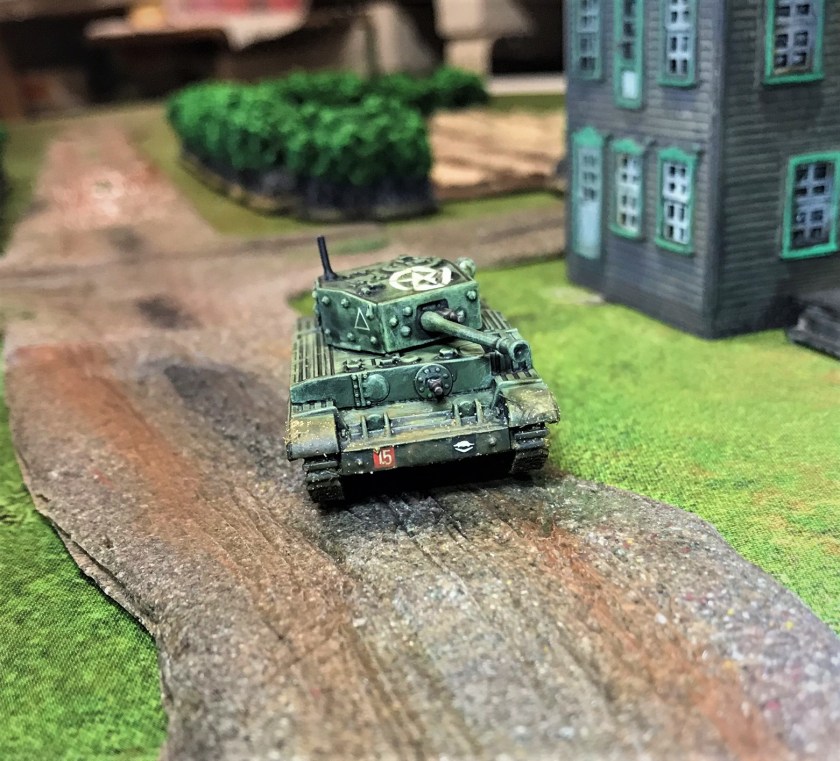
Pat’s 1:72 Military Diorama’s

Pat is a military modeler and not a gamer.  He has a lovely blog Pat’s 1:72 Military Diorama’s that details his work from the medieval era to the English Civil War to WWII.  His projects could be considered epic just from their size and scope, but the man does very high quality work too.  As I call it, great eye-candy – check him out!

Pat is also an Aussie.  His Cromwell has open white triangles on the turrets, and a number 15 on it.  It also has the same Aussie 9th Division platypus marking as Azazel’s tank.  
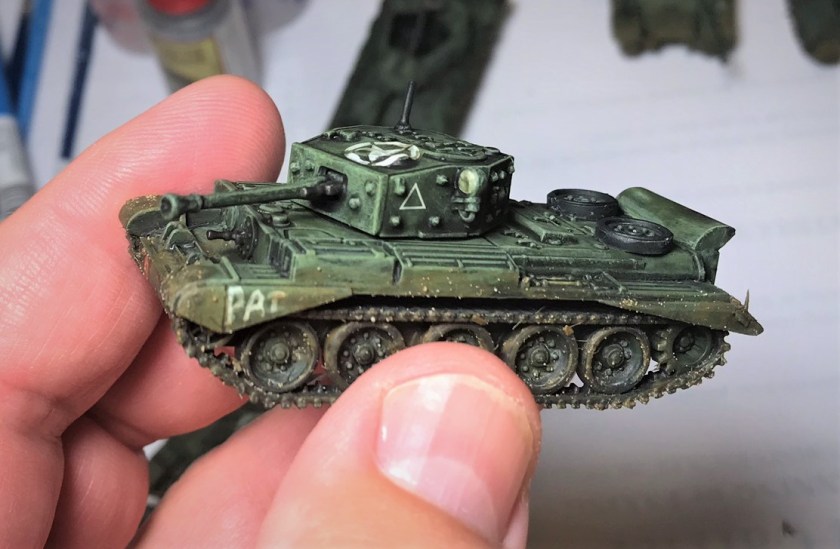
1 Pat2 Pat Cromwell left side3 Pat Cromwell front side

Per at Roll a One

Here is my first exception to the rule of having links to blogs of subjects of Queen Elizabeth – Per.  Per is Swedish, and I believe lives in the UK, so we’ll include him here.  His gaming blog is Roll a One which I follow on WordPress and on Twitter (though mine is also linked on Twitter I have little idea of what to do with mine on Twitter!).  Per creates truly massive games, most of which deal with Sweden in some way or another.  He has done WWII era what-if games with Swedish tanks, some unbelievable stuff for the Great Northern War in 6 mm, and lately some post-apocalyptic stuff that I really like.  Similar to Alex, he creates very immersive games.

Now I have no Swedish tanks like the Stridsvagn m/42 (but Per does) – and I wanted to include him as I like his stuff.  I’m also 1/8th Swedish, so I had a soft spot!  Per, I named an M10 Achilles for you – but with no decals.  Mainly this was because I could not find much in terms of references on such unit designations – and secondly because the model hull was not great for decals.  It did get (like all my British here) a star to keep them safe from the RAF and USAAF misidentifying them.  I did not buy a crew for this one.

1 Per2 Per left side Achilles

Pete at SP’s Projects Blog

Pete is another Brit with a fantastic hobby blog.  His is SP’s Projects Blog, and is quite good and has a number of interesting projects from terrain to vehicles to infantry.  I like Pete’s blog because he does a great job on his hobby work, and has a number of very interesting modern pieces.  He is also well versed in history, and writes some of the best battle reports on his Necromunda games.

Pete’s Cromwell has turret markings with an open red circle.  This is the only one I made that is resin and metal – the other 5 Cromwell’s were plastic.  It has a number 91 on it, and an insignia from the famous 7th Armoured Division – who was in Normandy!

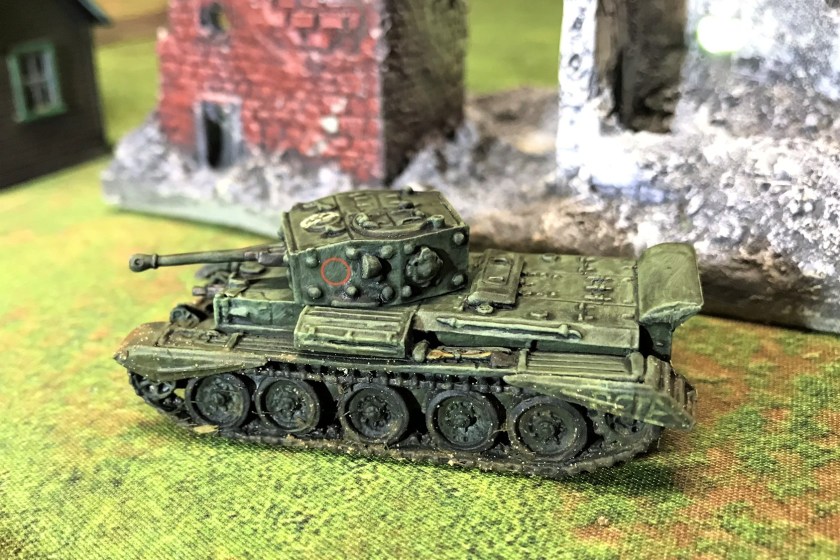
1 Pete2 Pete left side3 Pete front side

Tabitha

Now for a real exception – Tabitha is my granddaughter and only a bit older than 2½.  She’s not a Brit or an Aussie, but she does light up our lives.  I’m still waiting on her blog though…

Similar to Per, she gets an M10 Achilles named for her.  As she has Finnish heritage (through me and my daughter Ellen of course), in her stead I will recommend a full Finn –  Mikko – and his blog here.  Mikko’s blog is the wonderfully named Dawn of the Lead.   Mikko is into pirates and zombies (and maybe pirate zombies).  His painting is superb, check his stuff out.

Now back to Tabitha and her named Achilles.  Also – I did not buy a crew for this one either!

Me and Tabitha1 Tabitha2 Tabitha front Achilles3 Tabitha left side Achilles

TIM aka The Imperfect Modeler

Now last, but most definitely not least, may I present the last tank and blogger for this post!  TIM aka The Imperfect Modeler (neither are his real names – he is actually Dave).  His blog can be found here.  It might be a shorter list to share with you what he is not into in terms of modeling.  His dioramas and figures are 28mm to 54mm, and span the American West, WWII, fantasy, and much more.  They are amazing, and you are missing out if you have not seen his stuff.

Dave also has a skill with writing and his blog postings are also very amusing.  We are relatively close in age, and I appreciate especially his discussions on movies and music.  His painting is top-notch, and his dioramas are stunning.  It’s a shame he is not a gamer though, his tabletops would be mind-blowing.

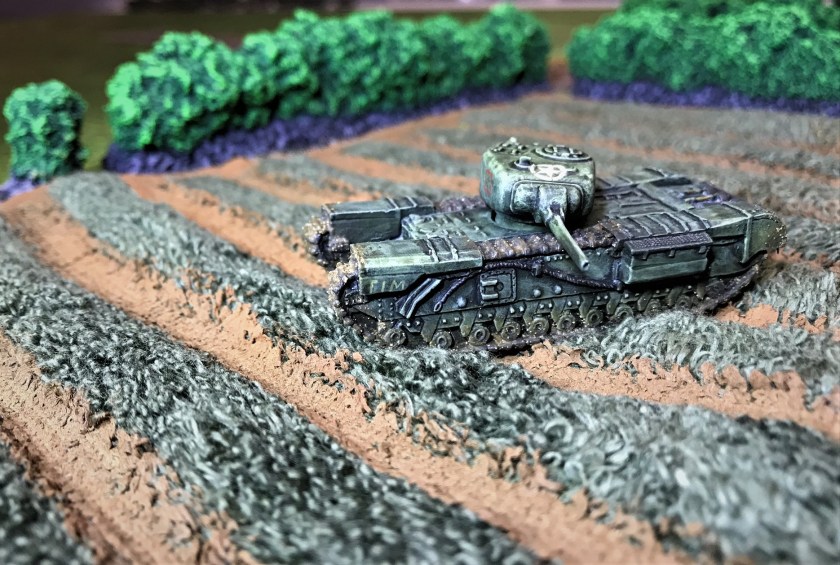
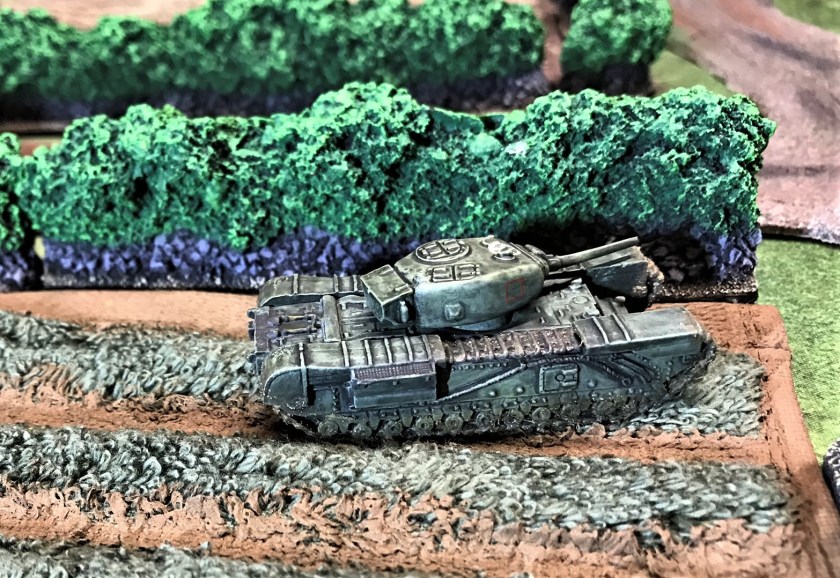
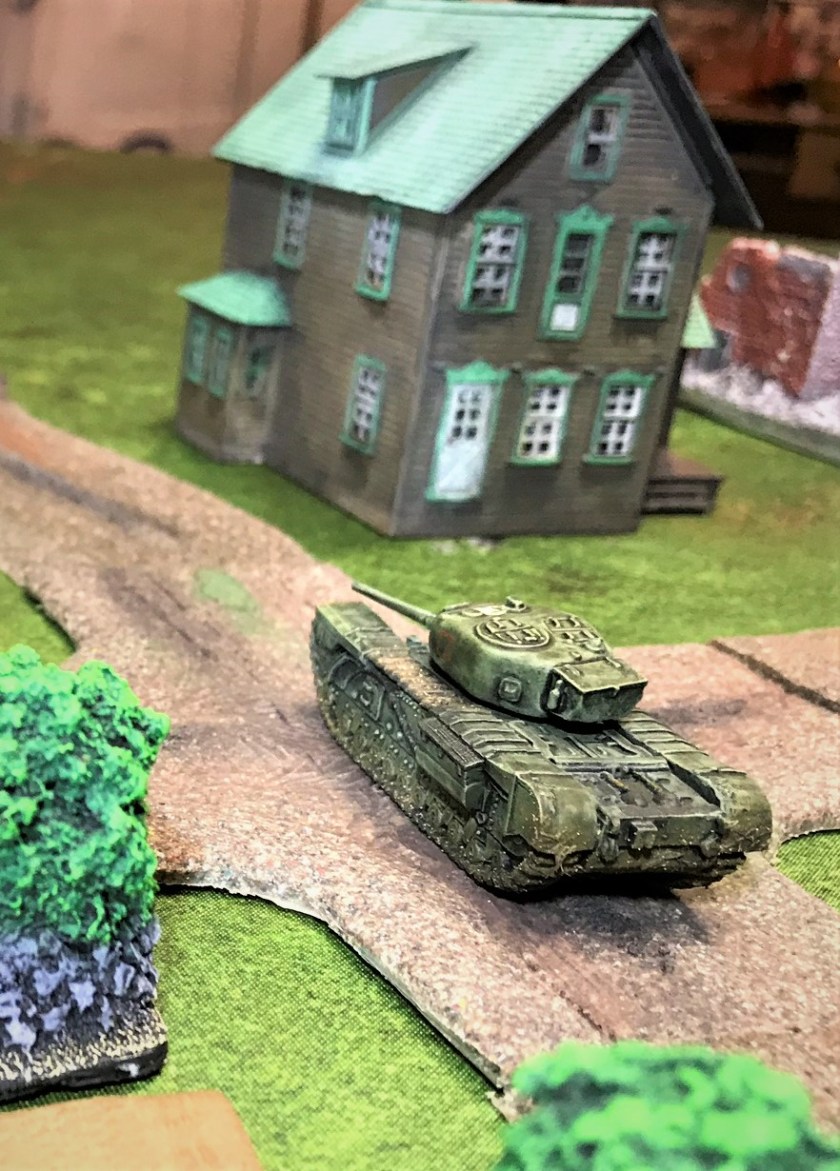
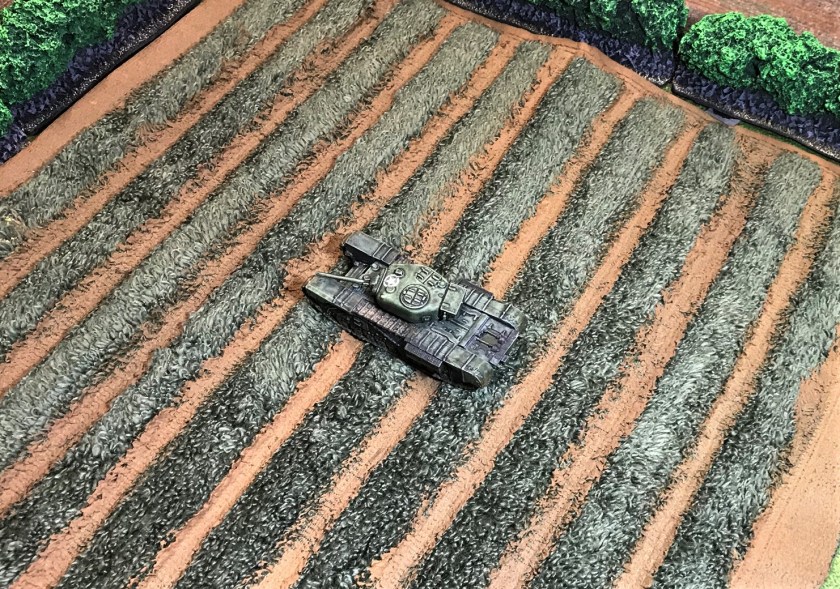
As Dave is a Brit, and a real man worthy of respect (just ask his wife), he gets the Churchill IV heavy infantry tank named after him.  It has turret markings of open red squares, and a number 71 (which was a good year for him I understand).  I chose the battleaxe symbol of the 78th Infantry Division for his tank (also not in Normandy, but worthy of Dave).

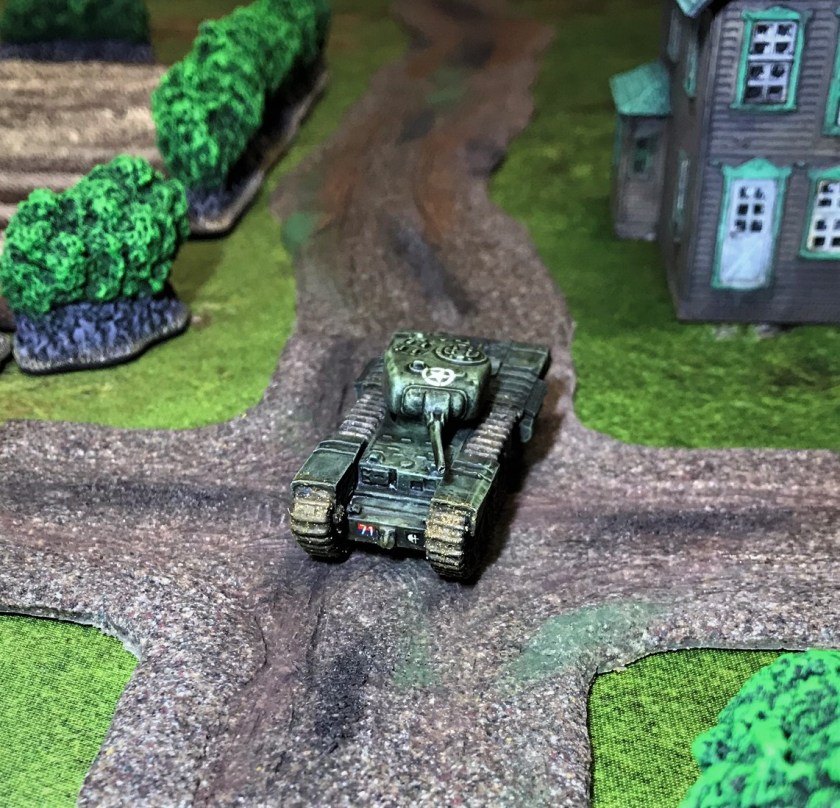
1 TIM2 TIM Churchill front3 TIM Churchill left side4 TIM Churchill left side in field5 TIM Churchill right side6 TIM Churchill rear view7 TIM Churchill top view

That wraps up the individual nods – please check them out!  I’ll conclude with a group shot, my new British tank menu for What a Tanker© and the paints and materials I used.  I hope you enjoyed this post, please let me know your thoughts, and I hope you found a new blog to enjoy!  Up next, more Americans!
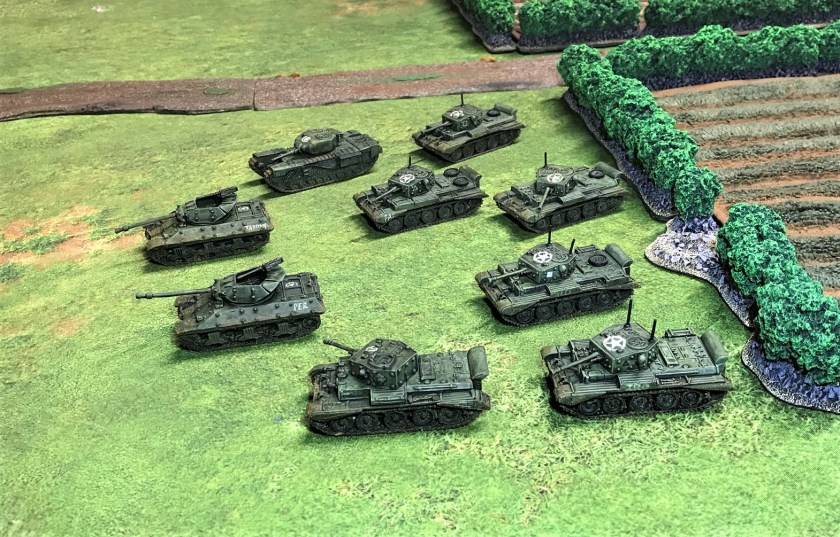
5 group side

British Tanker Menu

PAINTS, INKS, GLAZES, SHADES, WASHES, PIGMENTS, FLOCKING, GLUES AND MORE USED ON THESE VEHICLES:

  1. Gorilla Glue
  2. Daisy Air rifle steel BB’s
  3. Neodymium magnets (1/8″)
  4. E6000 epoxy
  5. Vallejo “Surface Primer – Black”
  6. Spare Battlefront plastic .50 cal machine guns
  7. Reaper MSP “Black Primer”
  8. Vallejo “Flow Improver”
  9. Vallejo “Airbrush Thinner”
  10. Vallejo Model Air “Olive Green”
  11. Vallejo “White”
  12. Vallejo Game Air “Black”
  13. Battlefront “Dark Gunmetal”
  14. Vallejo Model Air “Aluminum”
  15. Vallejo Model Air “Wood”
  16. Citadel “Typhus Corrosion”
  17. Citadel “‘ardcoat”
  18. Battlefront “Monty Shade” (wash)
  19. Army Painter “Military Shader” (wash)
  20. Vallejo “Surface Primer – Grey Primer”
  21. Vallejo “Gloss Varnish”
  22. Testors “Universal Acrylic Thinner”
  23. Decals from Battlefront
  24. Microscale Micro-Set
  25. Microscale Micro-Sol
  26. Microscale Liquid Decal Film
  27. Vallejo “European Mud” (Thick Mud)
  28. Vallejo “European Slash Mud” (Splash Mud)
  29. Vallejo “Crushed Grass” (weathering)
  30. Vallejo Mecha Varnish “Matt Varnish


Warbots Stopped at Mass Pikemen

On Saturday, July 27th, the Mass Pikemen met for our monthly gaming session – this time it was another go at “Attack of the Warbots“.  This game uses the Combat Patrol™ rules system, and the figures are Archive (from the late 1970’s/early 1980’s), Mega Miniatures (late 1990’s/early 2000’s), Wargames Supply Dump (now OOP), or my own creations.  The links below for each can tell you more about them if you’re interested.

04062019 HAVOC Attack of the Warbots Photo

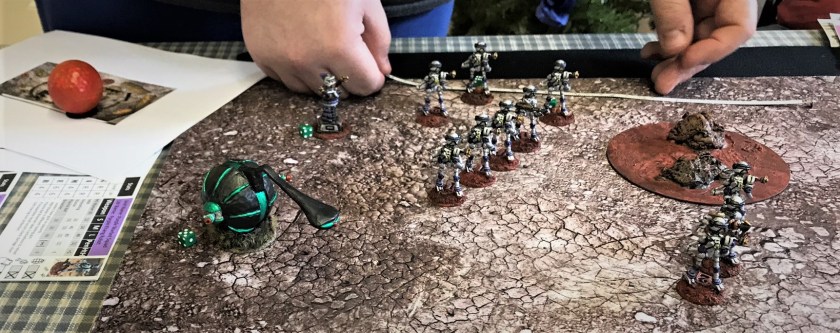
The Warbots, led by two Juggerbots and Khang Robots – supported by two Mark 1 Sphere tanks were attacking a defended wall on one end of the table.  Half of a Space Roo platoon and a squad of some Aphids looked to stop them and protect the wall.

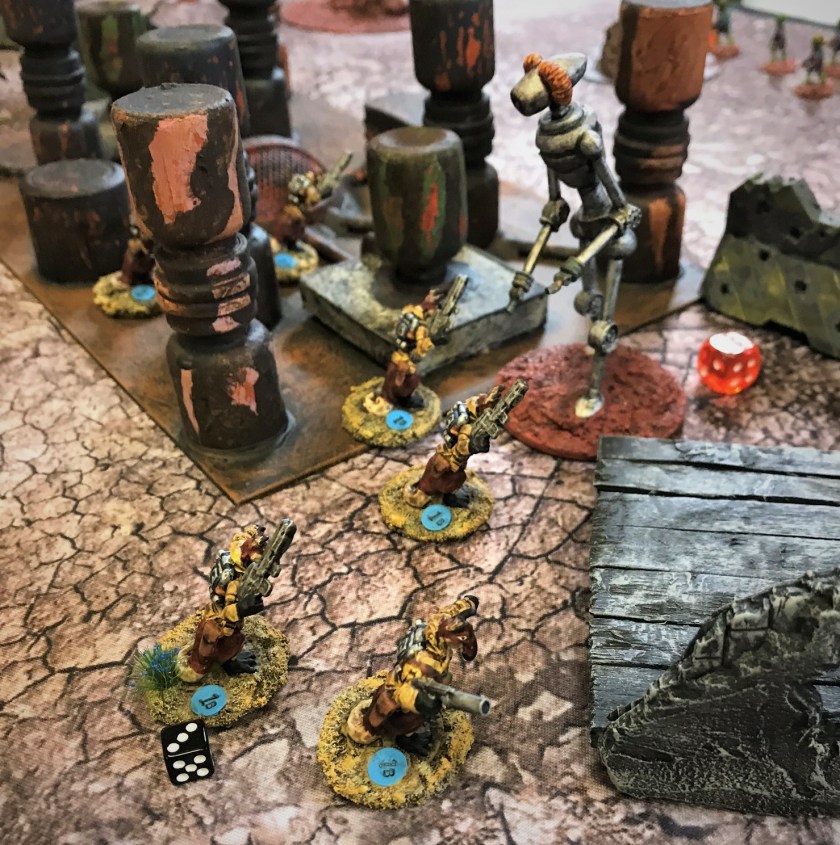
On the other end of the table, their Martian allies and a Roberker were attacking through some barriers and a ruined chemical plant as the Space Roos and Star Ducks responded.  Meanwhile, inside the compound, there was RT-22 (commanding some Robo-Servo guns that were around the compound) and helping a Space Dwarf Assault Squad to repair the captured Mark 1.  These were desperately attempting to repair a captured Mark 1 tank before the enemy stormed their repair facility.

The game went quickly once it started.

1 Randy maneuvers his Warbots
Randy advances his Warbots.  His Mark 1 did not get to activate.

On the first turn, the Mark 1 above did not get to activate as no “5” came up.  The Warbots chose not to pay one of their bonus chits to get a “5”.  This allowed Leif to jet pack up a Space Roo with an RPG – who got a lucky hit and destroyed the tank.

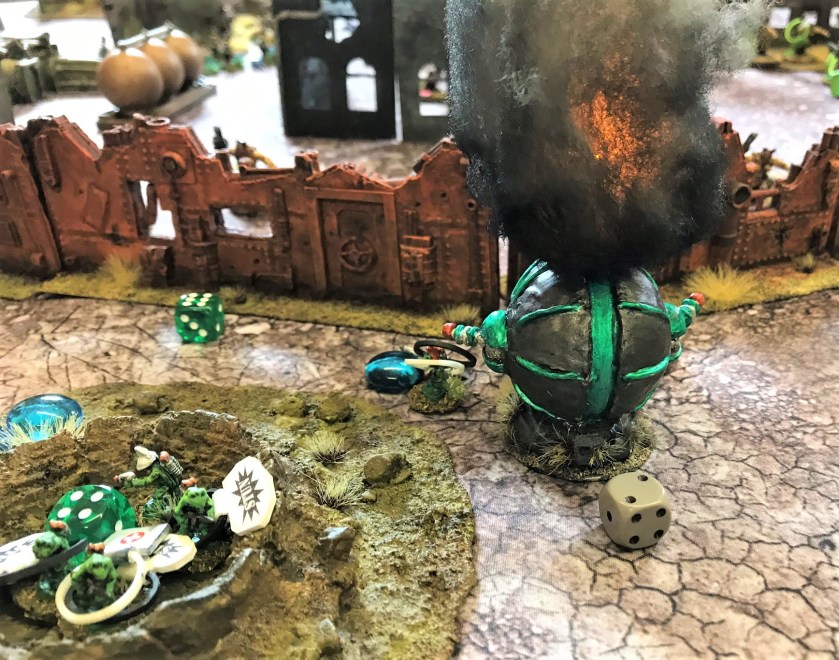
Christine’s Aphids meanwhile took heavy fire from the Warbots and Juggerbots, and were in danger of being wiped out.  The remaining Mark 1 approached the wall.  Leif jet-packed a lone heroic Space Roo over the wall to attack the tank with a satchel charge, only to stun it.  The Aphid Platoon Leader, Lt. Hemipteran, valiantly attacked the other side of the tank with a satchel charge, and the remaining Mark 1 brewed up from the explosion.

2 Chris uses Lt. Hemipteran and successfully destroys a Mark 1 with a satchel charge
The last Warbot controlled Mark 1 burns from the Aphid leader’s attack.

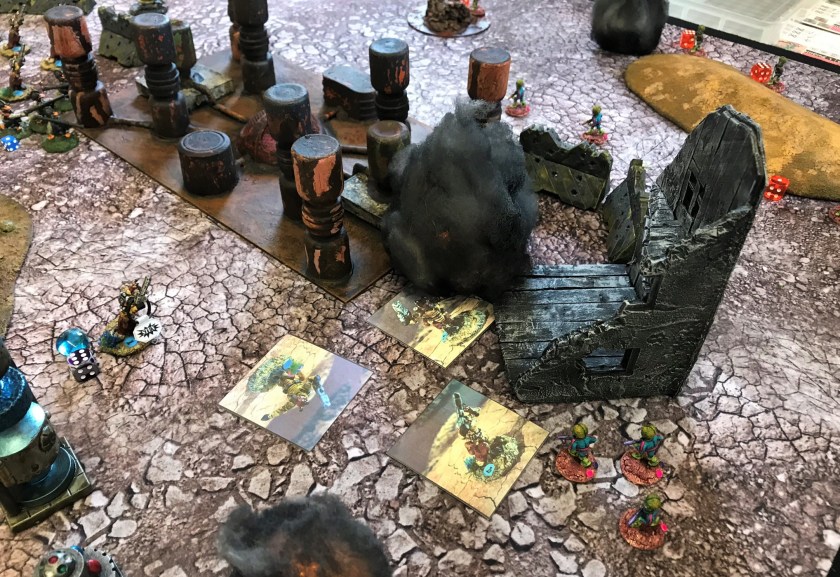
Meanwhile, on the other end of the board, Mike was making good progress with his Martians and his Roberker.  Unfortunately for Roberker, a lucky Space Roo bullet hit his CPU, causing him to go rogue.  In the game, a rogue robot attacks whatever he can see.  Luckily for the attackers, he went rogue at the enemy Space Roos (commanded by Leif), who were eventually able to put him down with rifle fire and some of Christine’s Mortar duck supporting fire (called down ON TOP OF the Space Roos position).  This was done with Leif’s approval – his Roos were valiant.  Of course, several Roos bought the farm here.

2 Mike Morgan moves up his Martians and Roberker
Mike moves up his Martians.
3 Leif counters Roberker with his Space Roos
Roos assault by the chemical plant right before Roberker goes rogue.
5 Mike Morgans Martians kill Space Roos
The Martians move up and shred the remaining Roos as Roberker burns.  The cards indicate casualties.

Meanwhile, the Warbots on the other end managed to fire a plasma arc weapon and breach the wall such that one of Chris’ Warbot figures could go through at a time.  Simultaneously, Leif successfully pulled some high cards and luckily repaired the captured Mark 1!

At this point, the game was called with a marginal victory for the Biological Alliance.  They would have had to get the tank off the table, and there were Warbot reinforcements coming.  My new ruined chemical plant had a lot of action!

I did not get a chance to take as many pictures as I’d like, but the game was very much touch and go.  Thanks to all the players and see you next month on Aug 24th for another What a Tanker© game.


Experimental Sci-Fi Chemical Plant Scratch-build Project

Sometimes you need to try new materials, new techniques, and change up your hobby projects to keep fresh.  My tabletop battlefield for my Attack of the Warbots game scenario (using the Combat Patrol™ rules system) needed some more ruined industrial terrain.  I also wanted to try some new painting techniques with chipping medium, as well as using some crackle paint.  The goal was to make something ruined, rusty, with some degree of verticality that would complement my tabletop.

As far as building materials, I had been saving different bits and pieces of this and that for a few years in anticipation of scratch-building something to meet that need.  I say saving, my wife says hoarding – (it’s not hoarding if the stuff is organized, labelled, and put away out of sight in drawers dear😁).  A previous employer had supplied us with kits that contained dummy vials (empty) that we could use to teach the process of reconstitution of the real thing.  At one point years ago, because the FDA drug labeling had changed, and the packaging that the kits had on them was no longer valid, we were ordered to throw them away.  I did, but threw the vials into a drawer.  I also had some oddly-shaped caps from body sprays, and a purloined cover from my wife’s blow dryer.  To be fair, the cover no longer stayed attached, so that was fair game.  I also had bits of polystyrene sheets and tubes, and leftover foam rubber pads (packing material) from something I no longer remember.  So basically, I had a lot of trash to work with.

As the community painting challenge (run by Azazel) that I participate in for July was “The Jewel of July ’19 Community Painting Challenge”, I thought I’d switch up from doing tanks and make a scenery piece.  The scenery qualifications were:

“It’s for the more impressive scenery pieces. A desert oasis or a (ruined?) temple or a bunker complex or a single bunker or a skyscraper or a Ferratonic Incinerator or a Kwik-E-Mart. A forest worth of trees or a jungle worth of plants.”

So, dear reader, you can be the judge of this project as a “jewel”, or not.  It will have some good points and some not – I hope that if you have some feedback (good, bad, or otherwise) that you share it so that I and others can learn.

Construction and Planning

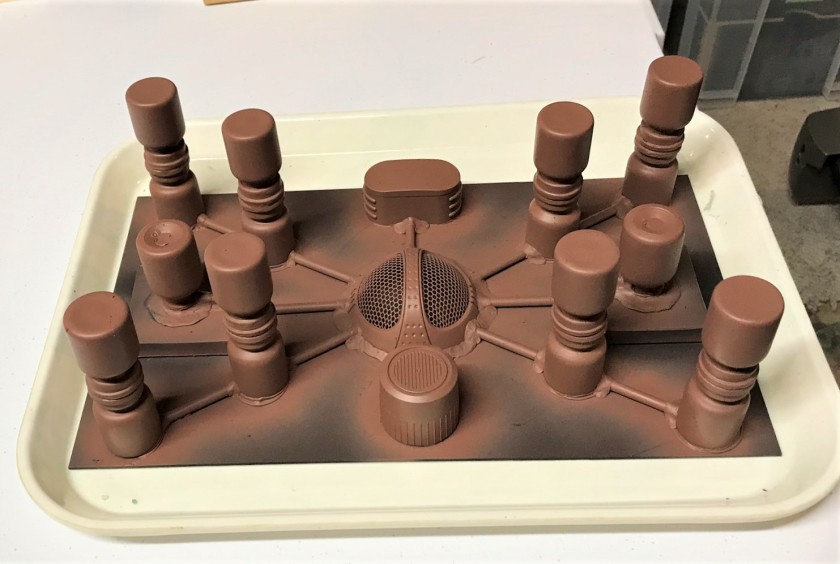
I assembled the assorted junk, and made a plan.  The glass vials I decided would work well glued together top-to-top as chemical tanks.  I had two vials that were plastic that I scuffed up, and I removed any paper labeling from all of them.  The blow dryer screen would be the centerpiece.  Using a leftover piece of polystyrene sheet (Evergreen #9060 – .06″ thick), I plotted out a chemical plant symmetrically.  I made two elevated concrete pads for the shorter vials with thinner polystyrene (Evergreen #9020 – 0.02″ thick) and the foam pads, and Plastruct Bondene.  For the vials, my epoxy of choice was E6000, though that did leave a lot of glue strings to clean up later.  The tubing was Evergreen 3/16″ #226, complemented by cut plastic straws.  Applying E6000 to the strws made them relatively solid.  I used green stuff as the piping joints.  The plan for the vials was to sequentially prime, apply rust paints, apply chipping medium, apply metallic paints, chip, and rust.  The bases were to be done using AK crackle paints, with washing and dry brushing.

0 hair dryer
The missing cover came from here.
1 Sci Fi plant scratch build unpainted
The assembled terrain piece, unpainted.
2 Sci Fi plant scratch build unpainted
A side view of the unpainted piece.  The smaller vials were plastic and held old normal saline.  All were ordered to be discarded.  This is how I did that.

Painting

I airbrush primed the piece with Vallejo Black primer, allowing 24 hours to dry.  Then I airbrushed it with Vallejo Model Air “Rust” (#71.080).

3 Sci Fi plant scratch build primed and base coated with rust
Airbrushed with a rust base.

I then applied a liberal coat of Citadel “Ryza Rust” and a different Vallejo “Rust” (#71.069) that I hoped would show a nice rust effect under the final color coats.  Then, I applied Vallejo “Chipping Medium” over the rust.  I was very unsure of the amount to use here, or the pressure with which apply it with the air brush.  Add to that the dry time, which I gave 24 hours – too much?  I don’t know.  Due to the terrain piece’s layout, it was also hard to get into all the areas with the chipping medium.

I then chose the final metallic colors for the vials, the pipes, the caps, and the screen. Those, and the other materials, you can see listed at the end of this post.  I applied a caot of gloss black to the base to assist later “crackling”.

6 Sci Fi plant scratch build after painting base gloss black and vials with colors
After applying the colors onto the vials.

At this point, I applied water with a stiff toothbrush to the vials, and that was supposed to cause the chipping.  It did some places, but not everywhere.  I had to resort to a toothpick in a lot of places, and that pulled ALL of the paint off.  As repair, I used Citadel “Typhus Corrosion” trying to simulate rusted leaking tanks.  I washed the vials with a light rust wash, and that turned the purple tanks pink/orange!  I went back to the Typhus corrosion and tried to compensate.

7 Sci Fi plant scratch build after chipping
After the chipping work.
8 Sci Fi plant scratch build after chipping inside after dried
After the chipping work – I tried to make it look pretty contaminated and old.

Then, I needed to add the two different crackle paints, along with washes and highlights.  Before that, I applied a gloss varnish to help the crackling effect and to help protect the chipping effects.  I knew I could use a matte varnish later to dull it up.

9 Sci Fi plant scratch build after crackle paint, drying in sun
Crackle paints drying in sun on the base.  Glossy vials…for now anyways.
10 Sci Fi plant scratch build after crackle paint dried with glossy varnish
After the crackle paint got a glossy wash.
11 Sci Fi plant scratch build after crackle paint washed with Nuln Oil Gloss
Close up – definitely need to remove the gloss.  But first, some dry brushing of the crackle paint was in order.
12 Sci Fi plant scratch build after crackle paint dry brushed
I sequentially dry brushed, washed, dry brushed, and washed the piece.

Finally, I airbrushed the piece with Vallejo Mecha Varnish “Matt Varnish”.  As I had foam rubber part of the piece, I needed to avoid any use of rattle cans to prevent a real chemical meltdown!

14 Sci Fi plant scratch build after matt varnish drying, top view
Using the heat of my driveway to dry the piece.
15 Sci Fi plant scratch build after matt varnish drying, side view
Complete and drying in the 90 degree sun.
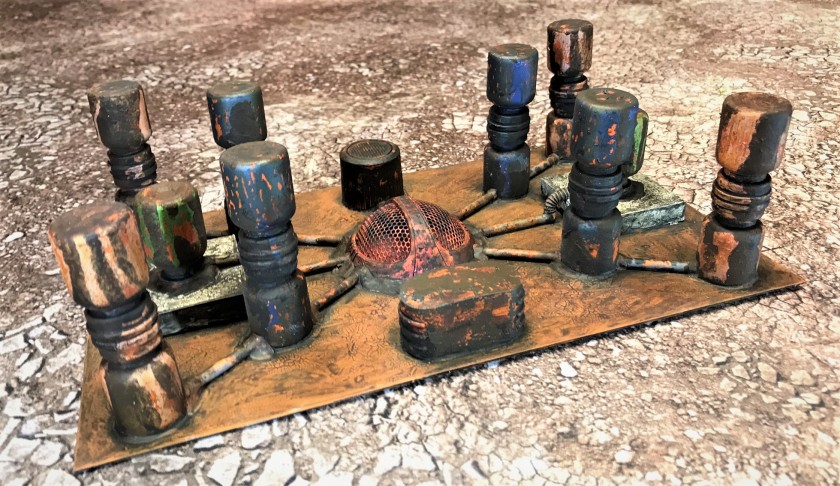
15 Sci Fi plant scratch build complete on mat
On the gaming mat.
16 Sci Fi plant scratch build complete on mat, center close up
Close up of the crackling effect and the screen.
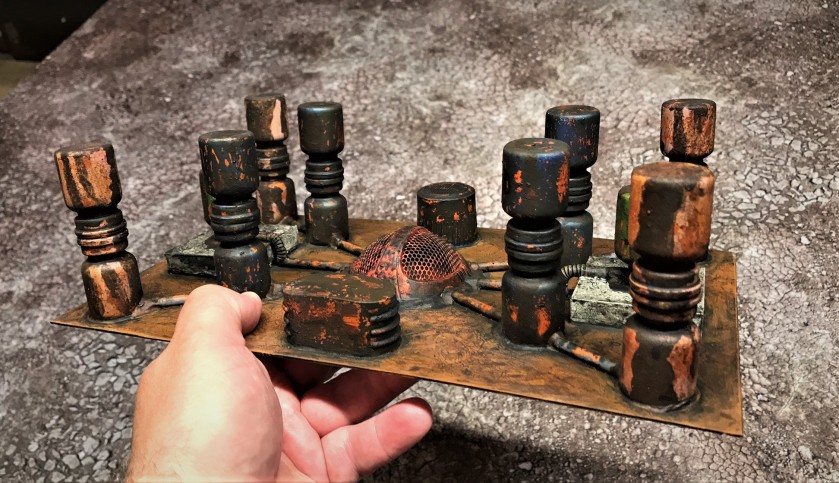
17 Sci Fi plant scratch build complete on mat, side close up
Corroded tanks.
18 Sci Fi plant scratch build complete on mat, side close up
Corroded tanks, opposite side.
19 Sci Fi plant scratch build complete on mat, end close up
The smaller tank and its pad.

20 Sci Fi plant scratch build complete on mat close up

21 Sci Fi plant scratch build complete on mat, Space Roos moving through
Space Roos reconnoiter in the plant.
21 Sci Fi plant scratch build complete on mat, Space Roos see Martians
Space Roos are surprised by Martians in the plant.
22 Sci Fi plant scratch build complete
Well, at least it is done.

So, do I have a “Jewel of July” here.  Maybe at least a garnet anyways.  I think this is OK for the tabletop, given that it was basically made of trash.  It hits the game tabletop today!

If you want to see a real “Jewel” – check out Alex’s piece here.  THAT is impressive!

Back to my project, I was somewhat disappointed at the Vallejo “Chipping Medium”.  I could not find much information on its use, and a lot of that was negative.  The AK crackle paints are very good in my opinion, and I will look to see if they have a chipping product.

Any feedback – especially any thoughts on my process and the product – is always appreciated.  As always, hope you enjoyed this post.

PAINTS, INKS, GLAZES, SHADES, WASHES, PIGMENTS, FLOCKING, GLUES AND MORE USED ON THIS PROJECT:

  1. Discarded dummy vials
  2. Hair dryer screen
  3. Body wash bottle cap
  4. Fragrance bottle cap
  5. Foam rubber packing pads
  6. Evergreen #9060 polystyrene sheet
  7. Evergreen #9020 polystyrene sheet
  8. Evergreen 3/16″ polystyrene tubes
  9. E6000 epoxy
  10. Plastruct Bondene
  11. Green stuff
  12. Vallejo “Flow Improver”
  13. Vallejo “Airbrush Thinner”
  14. Vallejo “Surface Primer – Black”
  15. Vallejo Model Air “Rust” (71.080)
  16. Vallejo Model Air “Rust” (71.069)
  17. Vallejo Model Air “Signal Red”
  18. Vallejo Mecha Color “Metallic Blue”
  19. Vallejo Mecha Color “Metallic Green”
  20. Vallejo Mecha Color “Purple”
  21. Vallejo Model Air “Med. Gunship Grey”
  22. Armory “Gloss Black” (used this 1996 paint up!)
  23. Citadel “Ryza Rust”
  24. Citadel “Typhus Corrosion”
  25. Vallejo “Chipping Medium”
  26. Vallejo Mecha Weathering “Light Rust Wash”
  27. Vallejo Mecha Weathering “Rust Texture”
  28. Americana “Black Tie” (satin)
  29. AK “Light and Dry Crackle Paint”
  30. AK “Dark and Dry Crackle Paint”
  31. Citadel “Nuln Oil Gloss” (wash)
  32. Citadel “Skrag Brown”
  33. Testors “Universal Acrylic Thinner”
  34. Vallejo “Gloss Varnish”
  35. Vallejo Mecha Varnish “Matt Varnish


Normandy Breakout Game of What a Tanker!

Quote of the day – ” An eighth of an inch can get ya killed in this game”, Mike Morgan.

As the D-Day commemorative events have passed, its important to remember that there was also a hell of a fight for the Allies to break out of Normandy after the landings in the weeks after June 6th, 1944.  D-Day is iconic, and deservedly so.  I wanted to honor the Allied struggle in the Normandy Campaign.

To this end, I have been designing a suitable “Normandy Breakout” What a Tanker© game scenario for my 15mm/1:100 scale tanks.  This game scenario would be one that I could run at a convention or at our club in around four hours.  My goals were to:

  • Create an interesting scenario that incorporates the appropriate German, US, and British armor that was involved.
  • Make the scenario easy enough for new players to pick up and challenging enough for experienced gamers to also enjoy..
  • Maintain the feel of individual tank command in the game, but add other combat forces differentially to each side to increase the historic reality and game action.
    • Add elements of reconnaissance and enemy force location uncertainty to the game.
    • Add elements of infantry, combat engineers, anti-tank guns, and artillery (HE and smoke) to the game.
    • Provide the Allies with naval gunfire support and air support, while the Germans get only a rare case of Luftwaffe support.
    • Add an element of communications breakdown.
  • Make the scenario one where each side faces various risk/reward choices that have ramifications to victory in the scenario.

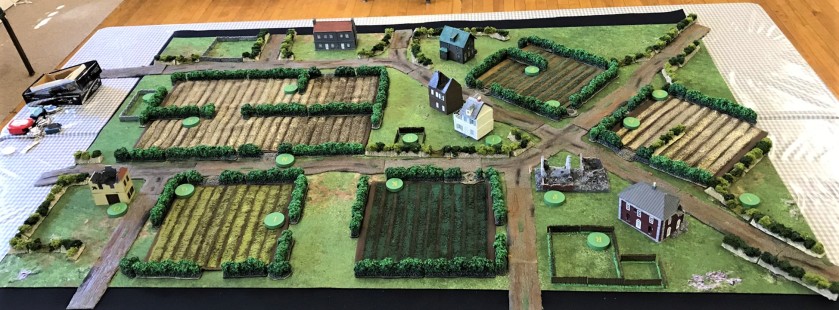
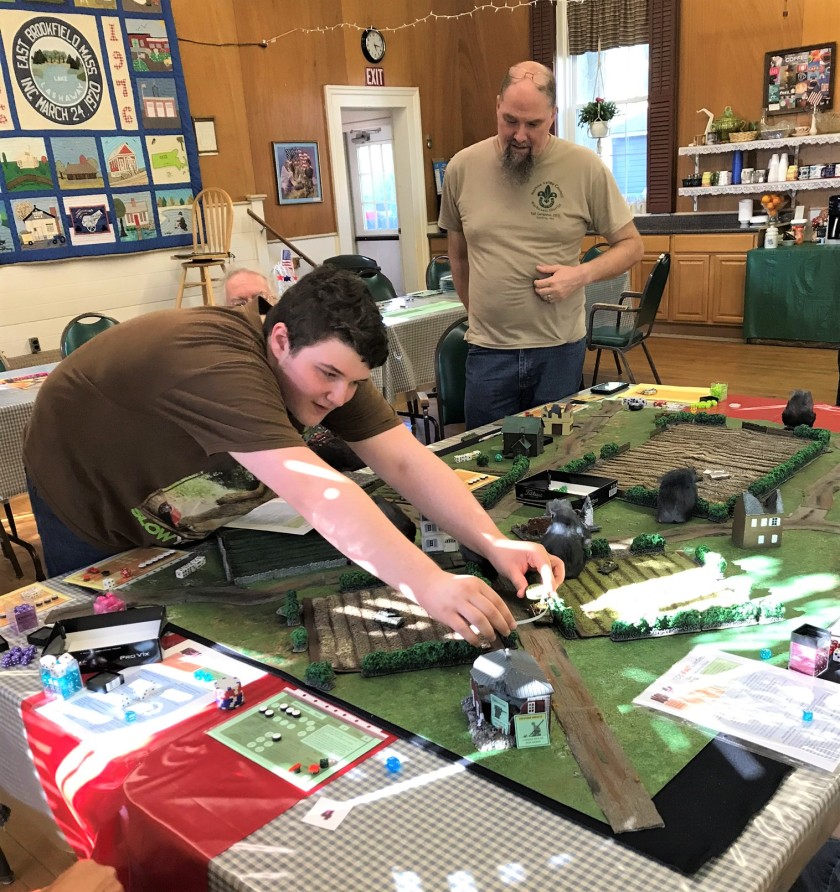
On June 29th, the Mass Pikemen gathered to play this scenario in East Brookfield, MA.  The tabletop set up was as shown here in the next two photos:

4a game table
Allies move on from the bottom edge.  Their mission is to cross to the other side.  Once the Allies cross, they score points and get a new tank to try to do it again.
4 game table
Same map – Allies move on from the left.

Rules and Scenario Modifications

The What a Tanker© rules are one of the best that I have seen in terms of a creating a tank crew experience in a fun and elegant way.  I have found that for a convention or single scenario game, modifications can augment the gaming experience.  In the rules, each tank crew on its turn rolls 6 D6 as COMMAND DICE.  These control what a crew can do, and as a tank takes damage, dice, and potential actions, are lost.  For the purposes of simplification for those unfamiliar with the game, here is basically what each COMMAND DIE does in the original rules:

  • 1’s allow movement
  • 2’s allow target acquisition
  • 3’s allow aim at an acquired target
  • 4’s allow firing at an aimed target
  • 5’s allow a tank to reload after firing
  • 6’s are WILD, and can be converted to any other die.

There is much more to the game, but this is the main action engine.  Certain tanks have special features/characteristics, like being “Fast”, which allows them to “convert” die to a “1”, or being “Low Profile”, which makes them more difficult to acquire by an enemy.  There are several vehicles that have features like these – and there are many others.

Here are my modifications to the rules for this scenario:

  • To keep the game moving, any vehicle touching a road could additionally convert one of its command dice to a “1” (a MOVE die).
  • I keep score in the game using poker chips.  Each side starts with 100 or 150 chips, depending on the number of players.  At end of game, high chip total wins.
    • Both sides choose their vehicles from a menu, and is charged chips equal to the value of each vehicle.  The starting vehicles must be chosen from different categories, such as “scout car”, “medium tank”, “tank destroyer”, “heavy tank destroyer”, or “heavy tank”.  See examples below of the menus.
    • Chips can be gained by:
      • Successful recon of potential enemy positions (gains two chips).
      • Destruction of enemy vehicles (gains point value of destroyed vehicle in chips).
      • Successful crossing of the battlefield (breaking out) by the Allies (gains chip value of vehicle that successfully crosses tabletop).
    • Chips can be spent to get:
      • Additional Bonus Attack Cards (cost two chips each).
      • New tanks or to get a better tank when you respawn a destroyed tank.
  • I added the category of “armored car” for machine-gun armed light reconnaissance vehicles such as the Daimler Dingo.  This allows them (at their peril) to fire at a heavily-armored vehicle and force them to button up, or have a chance of damaging other lighter vehicles.  There are no rules for armored cars in the original rules.  Some armored cars did have some anti-tank punch, and that is reflected in how I treat their offensive capability.
  • For vehicles that would have been more likely involved in traditional armored cavalry/scouting/reconnaissance roles instead of tank-to-tank combat, I created the characteristic of “recon“.  Recon vehicles could be armored cars, or light tanks like the M3/M5 Stuart.  Recon vehicles get two advantages.
    • The first is defensive.  To reflect the difficulty needed to acquire a well-hidden scout in cover, anyone trying to acquire a recon vehicle in any cover would need an additional “2” in addition to any other cover or vehicle feature benefit the target would get.  This advantage is lost in the open.
    • The second is offensive, in that a recon vehicle can convert any command die to a “2” – so they can acquire targets more easily.
    • The third is also offensive, and involves the use of Bonus Attack Cards as described below.  Each recon vehicle gets two Bonus Attack cards at the game start, and one free card per turn.  A recon vehicle can use two Bonus Attack cards per turn.
  • To represent the need for and the value of reconnaissance (and the uncertainty of knowing the exact locations of enemy positions), I use 18 wooden discs across the gaming mat.  These discs denote potential German positions.  At the beginning of the game, the Germans would secretly choose each of their vehicles and a deployed location.  This information is only known to the GM and the Germans.  Next, the Allies would choose their vehicles and deploy them openly on the deployment side of the tabletop – at positions the Germans would not have known when they made their selections.  German positions are only revealed if successfully reconned, or if the Germans move or fire their vehicles.  The Germans still roll their Command Dice, and can acquire targets and use Bonus Attack cards without revealing their locations.
  • To represent the other combat arms, I made and use the Bonus Attack Cards.  Each recon vehicle gets 2 cards to start the game and every other vehicle gets one.  Each turn, a recon vehicle gets a free card, and extra cards can be bought for two chips each for any vehicle.  A recon vehicle can use 2 Bonus Attack cards per turn, others just 1 per turn.  The target must still be acquired, and hit by rolling a “6” with two dice added together.  The decks for each side are different – and of course randomized when distributed.  The decks are built as follows:
    • 72 Allied “Bonus Attack Cards” made for my What a Tanker© Normandy scenario
      • 18 Infantry Assault Cards
      • 6 Combat Engineer Cards
      • 9 Anti-Tank Gun Support Cards
      • 6 Artillery HE Attack Support Cards
      • 9 Artillery Smoke Support Cards
      • 6 Artillery HE Attack Support Cards
      • 6 Air Support Cards
      • 6 Naval Gunfire Support Cards
      • 6 Commo Problem Cards
    • 72 German “Bonus Attack Cards” made for my What a Tanker© Normandy scenario
      • 18 Infantry Assault Cards
      • 6 German Pioneer Cards
      • 15 Anti-Tank Gun Support Cards
      • 9 Artillery HE Attack Support Cards
      • 9 Artillery Smoke Support Cards
      • 9 Artillery HE Attack Support Cards
      • 3 Luftwaffe (Air Support) Cards
      • 6 Funkprobleme Cards

Hopefully the following photos make these changes clear.

19 Discs
The wooden discs I used for secret German vehicle placement.
WaT Activation Letters
The Germans secretly write down their placements and share this with the GM.
20 Allied Bonus Attack Cards
Examples of my Allied Bonus Attack Cards – all are 1.5″ x 1.5″.
21 German Bonus Attack Cards
Examples of my German Bonus Attack cards – with some Deutsche thrown in for good measure.
Menu Example (2)
An example of the menu for the Germans.  All of the players (on both sides) had to pick vehicles from different categories at the start.  Later purchases and upgrades could be anything they wanted as long as they had the chips.
US and UK Menu (2)
The Allied vehicle menu.  I hope to augment this list with Cromwell and Churchill tanks and Achilles tank destroyers for the British.  The Americans will be getting an M18 Hellcat tank destroyer and some more Shermans.

Now I hope to share some photos of the game – and thanks to Mike Paine for sharing many of these.  Mike is a gaming legend in New England and it was wonderful to have him attend!

We had 6 players – and the game was hard-fought.  In the end, the Allies won 124-115.  It was close and a lot of fun for the players.

2 M10 from Mike Paine
Mike Paine took this shot of my M10 and added the tag!
3 Dingo's last moment from Mike Paine
The Daimler Dingo recons for German armor.
3a Dingo's last moment from Mike Paine
Unfortunate for the Dingo, he found Scott Howland’s hidden Marder III while he was in the open.
4 gamers
A lively game – Chris Burr makes a point to the GM (me).
4a gamers
The gamers watch Scott Howland and I try to hold my clipboard so the Allies can’t see the German dispositions.
4b Gamers
Ethan Howland maneuvers his Panzer IVH to hunt the M10.
5 SdKfz233 shoots Sherman
Mike Paine’s Sherman is ambushed in the flank by Chris Burr’s SdKfz 233.
5a Sherman and cards
Mike’s Sherman chases the SdKfz 233.
6 SdKfz233 hides from Sherman
The SdKfz hides along the hedgerow.
7 Sherman chases, Pz IVH shows up
Mike pursues, only to face Ethan’s Panzer IVH…
7a Sherman chases, Pz IVH shows up
Mike’s Sherman is attacked on two sides, and is knocked out (but the crew survived!).
8 M8 hides from Marder III and Panzer IVH
Mike Morgan took an M8 Greyhound after his Dingo got destroyed – and it tried to run by the Marder III.
8 M8 takes on Marder III
The Greyhound did not escape either.  Note the undiscovered potential position “K”.
8a Marder chases Stuart
Now the Marder III hunts an M5 Stuart.
9 M8 and smoke screen
Crossroad of carnage and smoke.
10 Tiger I
And then Ethan got a Tiger I.
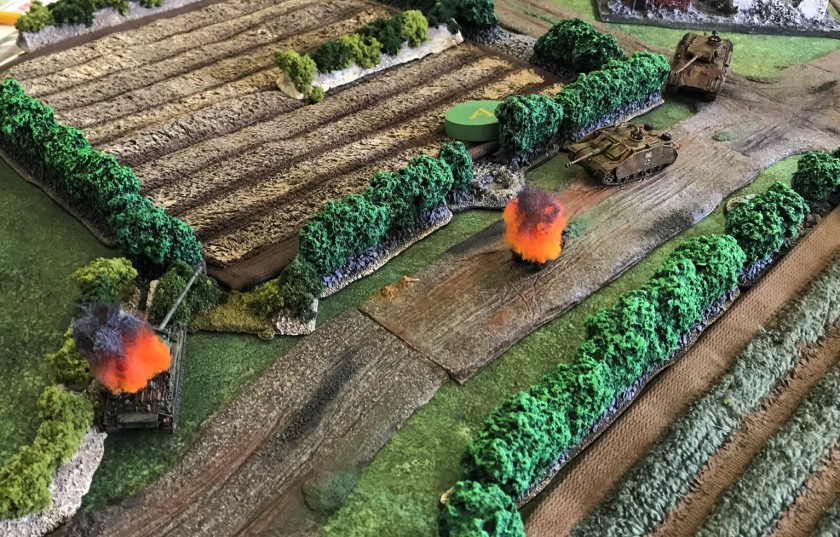
11 Artillery smoke and burning vehicles clog the crossroads
Allies dropped smoke rounds to try to save another Greyhound.
12 The Sdkfz 233 burns after being taken out finally - it did a lot of damage under Chris' command
After inflicting a lot of damage, the SdKfz 233 is hit and burns.
13 M10 and Firefly work together
A Firefly and Mike Paine’s new M10 attempt to cross the board.
14 Panther arrives and torches the M8 Greyhound
They both run into a Panzer IVH and a Panther D.
15 Firefly vs Tiger I
This Firefly is attempting to gain an advantage on the Tiger I.
16 Firefly vs Tiger I , Don't poke the Tiger...
It did not work – the Tiger dispatches the Firefly.
17 Another Firefly knocks out a Panzer IVH
The other Firefly knocks out the Panzer IVH.
18 StuG III knocks out M10 Wolverine, Firefly seeks vengeance
Lastly, a StuG IIIG took out Mike Paine’s damaged M10.

These shots are indicative that there was a LOT of action.  I plan to run this game again with more vehicle choices, probably at least at BARRAGE.  Thanks very much to the players!

The vehicles shown here were posted previously  – if interested here are the posts:

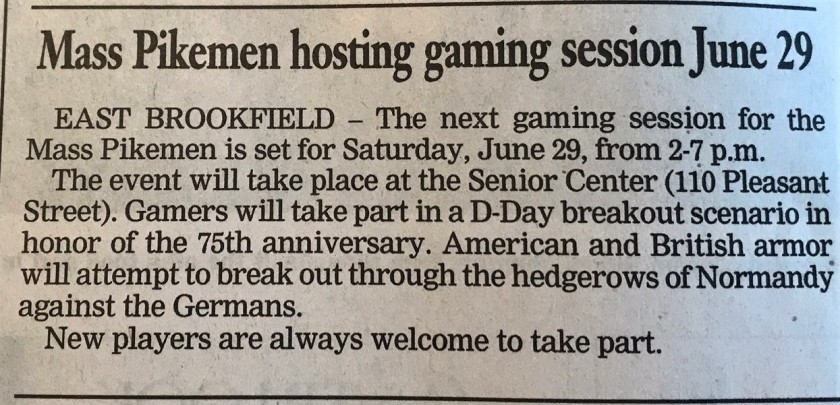
The next Mass Pikemen gaming session will be on July 27th at 2 PM at 110 Pleasant Street, East Brookfield, MA.  Join us!

If you have any feedback or questions about this post, please share them in the comments section – thanks!


Dingoes and Greyhounds for Normandy

In my last painting post, the Germans got some recon vehicles.  For my Normandy Breakout scenario for What a Tanker!©, I wanted some American and British scout cars.  I have some rules modifications and Bonus Attack cards for my games to up the action a bit – as well as to create a more rounded scenario – and recon is one of my additions that I will discuss and share in my next post.

I put some new edits to this post in blue!  Mea culpa and read on please!

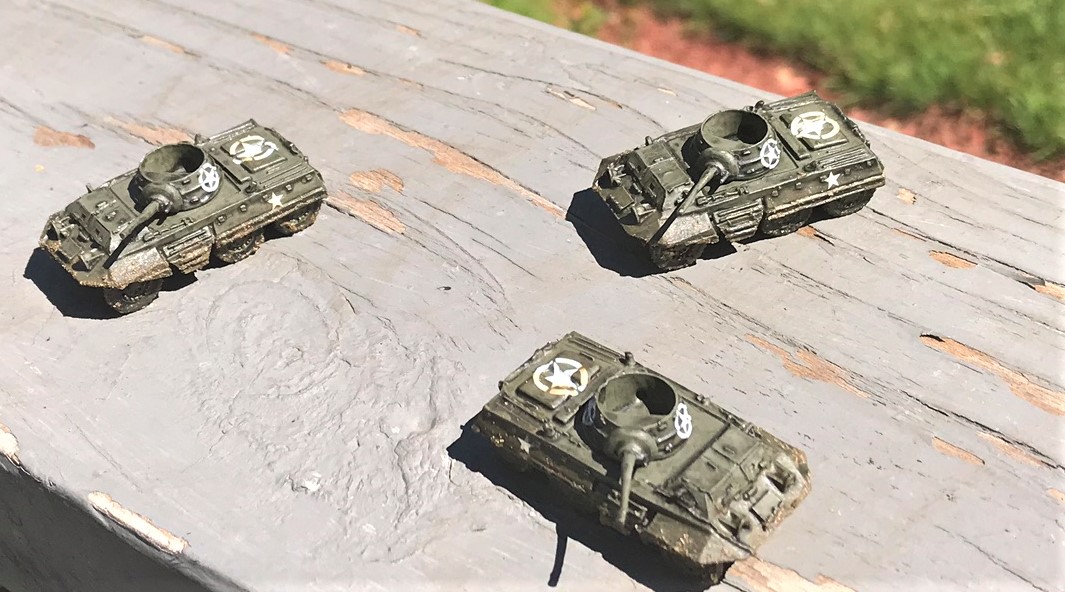
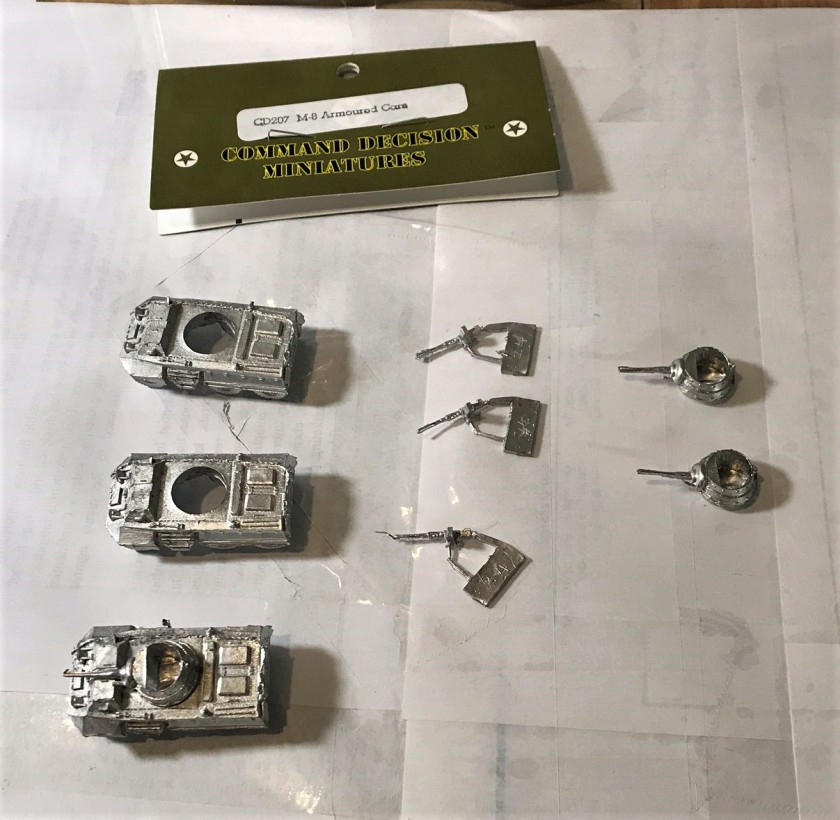
Back to gathering the models – I ended up with American M8 Greyhounds and Daimler Dingoes.  It was difficult to find suitable 15mm/1:100 scale models.  From Noble Knight Games, I found a couple of 3 Dingo blister packs of Battlefront Daimler Dingoes (#BR310 – now out-of-production).  I got these a few days before I was scheduled to run the Normandy Breakout game – so time was not on my side.  I built one pack for Normandy and will save the other one for North Africa.  As for the M8 Greyhounds, I ended up buying a three-vehicle bag from Old Glory of Command Decision models (#CD207).  All of these arrived the week of the game.  Tick tock….

1 Daimler Dingoes
This Daimler Dingo blister is OOP.

The Dingo trio came with bendy metal machine guns to mount on top, but I did not see these surviving tabletop play – or even being easy to mount.  I think the Dingoes work well as I completed them.  If I ever get a few Daimler Armored Cars, or any Humber Scout Cars, they would be easy and fun to add to the British forces.  The Dingoes’ crews of two were not very detailed, but I tried my best.  The Old Glory M8 Greyhounds did not come with crew, and I saw afterwards that you can buy crew separately from them;  however, by then it was too late for my schedule.  The M8’s also had machine guns, but these models are all metal.  The 37mm guns on the M8’s were spindly enough, so for the same reason as the Dingoes, I left off the large machine guns.

1a Daimler Dingoes
Dingo kit components – lots of wheels to mount.
2 M8 Greyhounds
My M8 Greyhounds just out of the bag.  One of the turrets has been placed on the bottom M8 for comparison.
3 Primed scout cars
I decided to prime the components and then assemble, especially with 12 Dingo wheels.  I used the Vallejo “Russian Green” primer – and that looked off.  I eventually painted them the proper olive drab.

CORRECTION:  I assembled the Dingoes incorrectly and fixed them – see notes in blue and at the end of this post! 

4 Finished Cars
I used some Battlefront decals for ease of tabletop identification on the Dingoes.  I am unsure as to the units – but they are indeed British/Commonwealth and super small.  All vehicles got some mud to weather them.

Normally, I set up my completed minis on a tabletop, but given that my game was coming up, I decided to take some shots of them in the sun on my deck railing (yes, the deck needs paint but will be replaced soon I hope!).  This is after all Massachusetts – stuff weathers naturally!

5 M8's on the deck
The three M8 Greyhounds.
8 Dingoes fixed
The three Dingoes (now with crews in correct position).
8a Dingoes fixed
OK, the Dingoes have a stubby front!
8b Dingoes fixed
My crews originally faced this way – and went into tabletop combat for one game like this.  To an American, this looked like the front, but it’s the back.  I got fooled by the view ports in back and the long back of the vehicle that looked like a hood to me.
8d Dingoes fixed
Side view of a proper Daimler Dingo.
8c Dingoes fixed
Now this is better!
7 All Scout Cars
All my Allied recon for Normandy in one shot.  Except these have the crews in backwards!!  Compare with previous shots.

The biggest challenge with these was their size, followed by the US stars on the M8’s for aircraft ID.  It was different for sure.

My next post will detail these vehicles’ experiences in their little battle last Saturday!  There was some action for sure.

Thanks for looking!  Any favorites?  Comments?  Always appreciate your feedback in the comments section!

PAINTS, INKS, GLAZES, SHADES, WASHES, PIGMENTS, FLOCKING, GLUES AND MORE USED ON THESE VEHICLES:

  1. Gorilla Glue
  2. E6000 epoxy
  3. Vallejo “Flow Improver”
  4. Vallejo “Airbrush Thinner”
  5. Vallejo “Surface Primer – Russian Green”
  6. Vallejo “Surface Primer – Black”
  7. Vallejo Model Air “US Olive Drab”
  8. Battlefront”Black”
  9. Army Painter “Military Shader” (wash)
  10. Battlefront “European Skin”
  11. Battlefront “Skin Shade” (wash)
  12. Testors “Universal Acrylic Thinner”
  13. Vallejo “Light Brown”
  14. Vallejo Game Air “Satin” (varnish)
  15. Battlefront “Battlefield Brown
  16. Battlefront “Dark Gunmetal”
  17. Appropriate decals from Battlefront
  18. Microscale Micro-Set
  19. Microscale Micro-Sol
  20. Microscale Liquid Decal Film
  21. Vallejo “Gloss Varnish”
  22. Vallejo “European Mud” (Thick Mud)
  23. Vallejo “European Slash Mud” (Splash Mud)
  24. Vallejo Mecha Varnish “Matt Varnish

CORRECTIONS!

Well, I am a bit embarrassed to say that when I built my Dingoes I put the crews in backwards. 

Yes, backwards. 

We even played with them last weekend and none of us, being Americans, knew they were wrong.  I should have paid better attention –  but I was able to correct the problem – luckily I had used E6000 epoxy to mount the crews instead of Gorilla Glue so they were easier to remove.  I did have to repaint them a bit and reapply varnish.  I have changed the pics above to reflect that!  My apologies to the British Army and the British Empire!  It was not a 4th of July joke!


I just wanted to do this!

For those of you who are modelers and or gamers, you know the feelings about your hobby work –  to do a good job recreating a scene, a vehicle, terrain, or just a figure such that others enjoy it.  I put this blog in the same category.  I understand that for better or for worse, I am putting myself out there and my creativity to be judged up or down.

This blog post will be a bit different in that its admittedly somewhat self-indulgent.  I am unsure as to how it will be received – but I hope that you enjoy it and that you can appreciate what this was for me and why I was doing this last weekend.

Last Saturday, the Historical Gaming Club of Uxbridge, MA, sponsored a road trip to the American Heritage Museum in Hudson, MA.  I have posted about this museum last year (you can read about it here).  It’s really great.  I unfortunately also signed up for a golf tournament an hour away and was disappointed in my planning.  I was however able to leave the tournament (my team lost by one stroke) after I was done and drive to meet the others (about 10 of us) at the museum.  And I brought two “friends”…

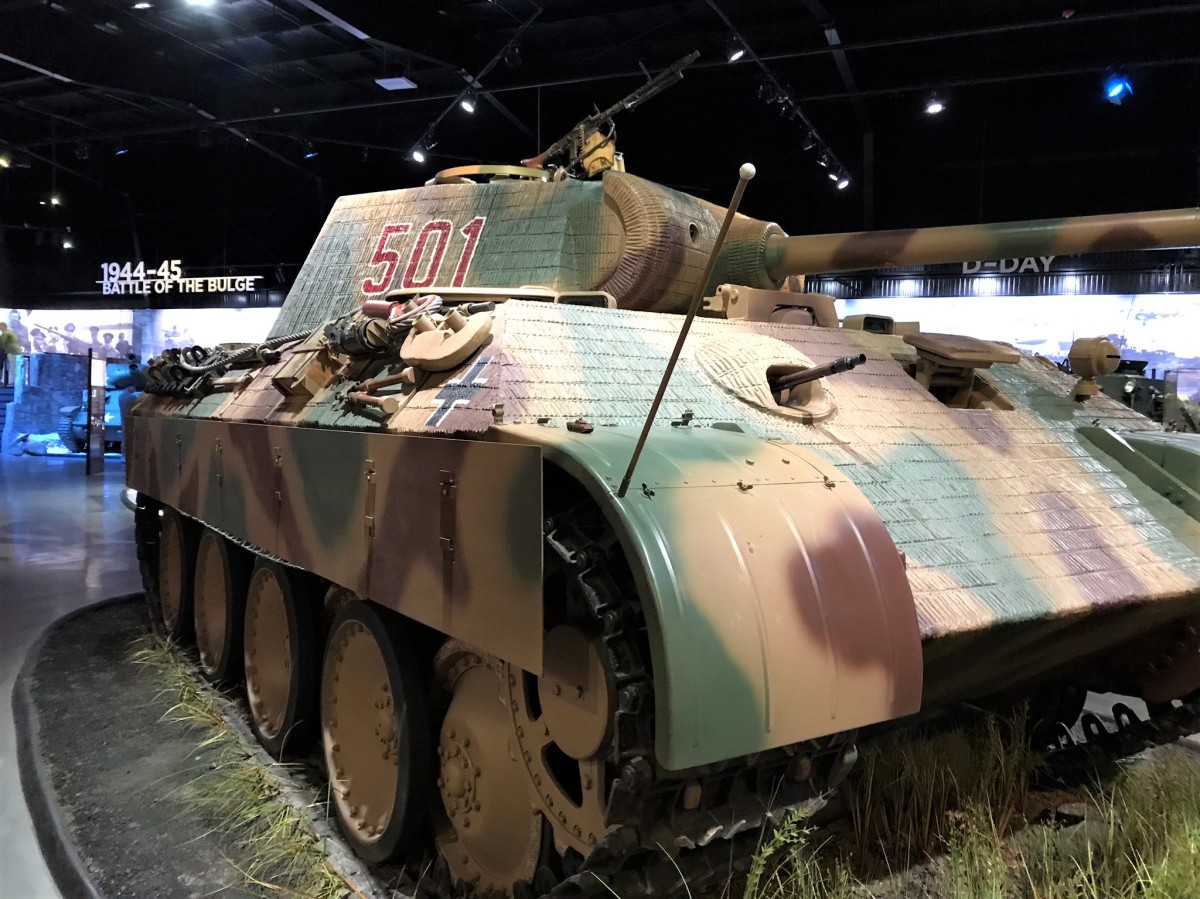
Followers of this blog know that I have been somewhat tank-heavy in hobby activities and gaming since last fall.  I thought that it would be cool to have the real Panther at the museum meet my 15mm/1:100 scale Panther.  And as my late grandfather Marcus C. Delaney drove an M24 Chaffee light tank in WWII, I wanted to hook up one of my M24’s with a real one too.

I just thought it would be a cool thing to do – and to give my models a connection to the real deal.  Of course, you can be the judge.

First stop was the Panther.

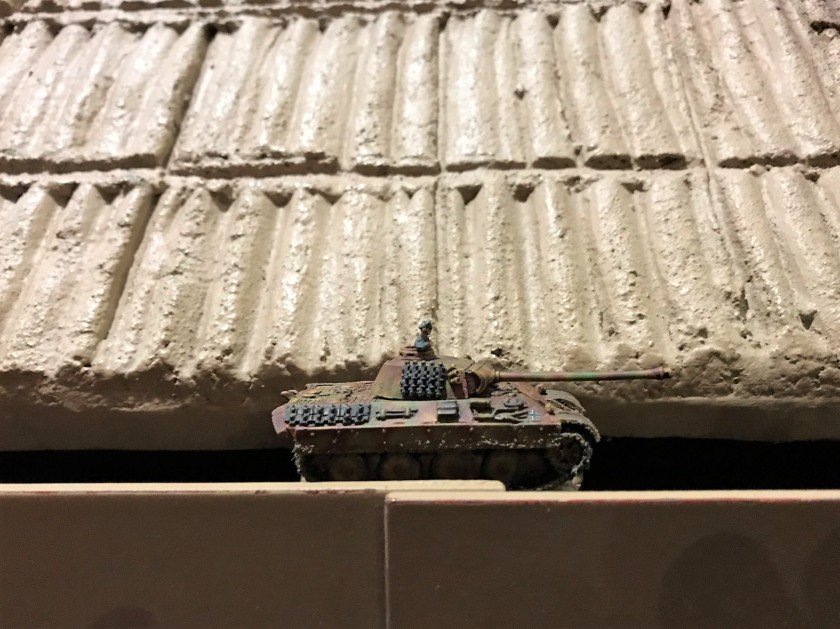
1 Big Panther, Little Panther
A real Panther and my  model – can you see it?
2 Big Panther, Little Panther close up
There it is!
3a on left fender
Impishly placing my Panther on the right fender.
3 on left fender
Both Panthers are now aiming at a T-34…but I don’t think mine has the needed gun velocity!

Then I moved over to the M24 Chaffee.

4 On M24 Chaffee side
Where is my model?
5 On M24 Chaffee side close up
There it is!
6 On M24 Chaffee side close up
On the M24 frontal armor.
7 me and both M24 Chaffee's
Trust me, we are all smiling.  Even my grandfather from above.

It felt good to do this, and I’m glad I did.  Now when these are in a game, I can say that they have been with the real thing, and in actual contact.

Would you do this?  Let me know in the comments section, and thanks for looking!

A Preponderance of Panzers – Chapter 2 – Scout Cars and Behemoths

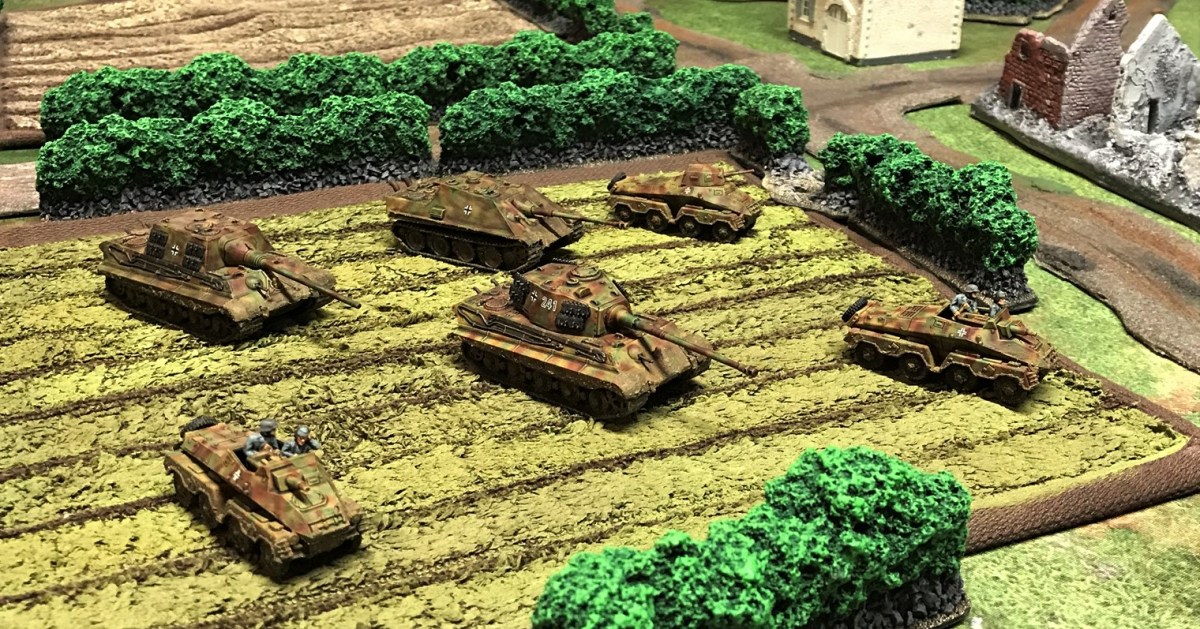
I could not create a proper WWII Normandy scenario for What a Tanker© games without the German forces having both some proper reconnaissance vehicles and some of their legendary monster behemoth tanks.  I acquired four kits to remedy this deficiency – all from The Plastic Soldier Company.  One was a PSC kit of 5 SdKfz 231 armored cars, while I also ordered three Zveda models – a Jagdpanther, a Jagdtiger, and a Tiger II (aka “King Tiger” or “Königstiger”) as shown below.   This blog installment picks up from my previous posting about German tanks and tank destroyers for Normandy.

1 boxes
My plastic kits – all bought from The Plastic Soldier Company.

The tanks were all single models, while the PSC kit allowed you to build either SdKfz 231, 232, 233, or 263 8-rad scout cars.  While I liked the idea of having a 232 or 263 with their iconic roof antennae, I decided not to build them as such for a couple of reasons.  First, the spindly plastic antennae did not look survivable as tabletop figures.  Secondly, if I built the antennae, the turrets would not work.  In the end, I built three SdKfz 231 (with the same 20mm autocannon as the Panzer II) and two turretless and open-topped SdKfz 233 (with the same 75mm gun as the Panzer IVD).  Two SdKfz 231’s would be for North Africa, with the remaining 231 and both 233’s being built for Normandy.  These scout cars, and the other tanks and tank destroyers here all could reasonably be used on either the Western or Eastern Fronts.  I will cover each type in order, and then some “eye candy “shots of the finished models.  I will also share a listing of the paints and other materials I used in the projects for those interested.

SdKfz 231’s and SdKfz 233’s (8-rad scout cars)

These are all 8-wheeled scout cars, and I plan on using them to add some recon aspects to my games.  They are very light, and as I was concerned that they would be knocked around very easily.  I added Daisy BB-gun BB’s to the 231’s, but the 233’s were open topped and that was not an option.  The 233’s did have crew that needed to be painted and mounted.

1 assembly and weights
SdKfz 231 showing my use of BB’s as ballast.
2 SdKfz assembled (2)
The group of 5, assembled, less crews for the 233’s.
2 crew SdKfz 233 painted
One of the crews.  I drilled, ahem, their seat areas, with a pin vise, and mounted them on toothpicks for ease of painting.  I removed most of the toothpick tips before mounting the crewmen and painted over their posteriors.  You can’t see them, but forever these will have a stick up their asses…

As you see above, my Iwata Micron-B was a wonderful tool to achieve the three-tone camouflage patterns.  I applied decals, weathered the vehicles, and varnished them.  The sun finally came out so I took a couple of shots on the deck.

6 SdKfz 233 complete on deck
Completed SdKfz 233 shot outside.
5 SdKfz 231 and 233 complete on deck
All three for Normandy catching some rays.

For the North Africa/DAK 231 models, I just washed and dry-brushed them to achieve a weathered look.  I did not give the DAK 233’s because I did not want to paint another 15mm crew!  These will work just fine.

2 SdKfz 231's for North Africa
Das Afrika Korps now has reconnaissance.

Jagdpanther

The lines on this tank destroyer are practically beautiful.  Though if I was in a Sherman seeing one, my opinion would certainly be different!  Only 415 of these were ever built.

The Jagdpanther model was the easiest to assemble of the three.  The boxes say you don’t need glue, but I recommend using modeling cement for sure.  It certainly helps to close gaps.  I also weighted the tanks and tank destroyers down with BB’s in their hulls.

1 Jagdpanther assembled
Assembled Jagdpanther
2 Jagdpanther painted
Mid-project.
3 Jagdpanther after decal
Before final weathering and varnish was applied.

Jagdtiger

This monster was quite impractical – yet one tough AFV.  It weighed nearly 72 tons, and had a number of mechanical challenges.  However, its 128 mm gun was more than enough to dispatch any other vehicle on the planet.  Between 70 and 88 were built – so they were rare.

1 Jagdtiger assembled
Assembled Jagdtiger model.
2 Jagdtiger painted
After initial camouflage applied.

Tiger II

If the Tiger was iconic, the second generation version Tiger II is a step up even higher.  Only 492 of these 68-ton behemoths were ever built, but they first saw action in Normandy.  This one has the Henschel turret (a few rarities had a Porsche turret).  Early Tiger II versions also had reliability issues, but these improved quickly.

1 Tiger II Assembled
Assembled model of the Tiger II.
2 Tiger II painted
After initial camouflage applied.  Note the droopy bow machine gun.  I used liquid decal film to “firm” it up.

Of course, these are all part of my planned Normandy breakout scenario – so I will now share some eye candy of these German models on that planned tabletop battlefield.

Eye Candy

3 AFV's with painting models
I thought I’d first share this – this is my painting area with the images I used to guide my painting.  The vehicles are below.

Here is the battlefield and a first play test of the scenario that I ran at the Historical Gaming Club of Uxbridge, MA.  The Americans can be seen here.

5 play test
First play test of the scenario.  Note the cards on the table – those represent possible German vehicle positions – which the Americans and British had to recon as they attempted their breakout through hedgerow country.  I appreciate the gamers’ feedback here – it was helpful, and the scenario was close – it went 91-89 in favor of the Germans.  You can learn about the club here.

I modified the previous tabletop, and my current set up is below.

So now some shots of the vehicles on the new tabletop set up!

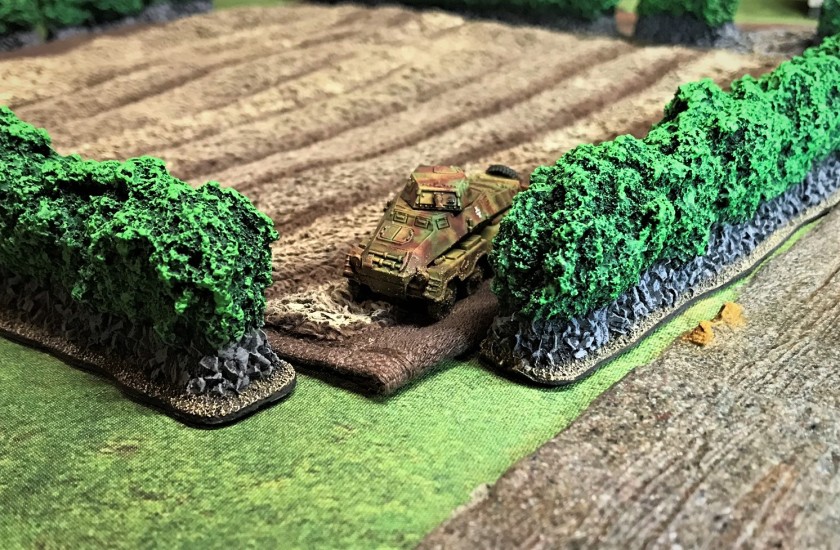
1 SdKfz 231 front Normandy
An SdKfz 231 recons.
2 SdKfz 231 right side Normandy
Right side of SdKfz 231.
3 SdKfz 233's reconning, front side, Normandy
Two SdKfz 233’s recon past a destroyed building.
4 Jagdpanther moving down road, frontal view
Jagdpanther advances down a French road.

11 Jagdtiger moving down road, right side

Right side of the Jagdtiger at a Normandy crossroads.

12 Jagdtiger hiding in field, left side
Left side of the Jagdtiger as it crosses a field.
13 Jagdtiger rear side
Rear shot of the Jagdtiger.  For all of these I tried Citadel’s “Typhus Corrosion” paint on the mufflers.  It’s a bit shiny in this shot due to lighting, but I think it worked well.
10 Tiger II moving by hedgerow, right side view
Right side of my Tiger II by a hedgerow.
9 Tiger II moving down road, rear view
Not great lighting – the turret is not “shiny” – but this shot shows the Tiger II from the rear.
8 Tiger II moving down road, left side view
Moving out!  Schnell! (sustained road speed was 24 mph!)
7 Tiger II moving in field, frontal view
Nice front shot of the Tiger II in a field showing the weathering/mud.  Also, the machine gun is “up” and no longer droopy.
6 Tiger II moving around corner, right side view
The best shot I have of the Tiger II.

If you want to get in on the action, here’s our announcement for our next gaming session on June 29th.  Or visit our Facebook page (and join if you’d like here).

2 New Leader

Thanks for looking!  Always appreciate your feedback in the comments section!

PAINTS, INKS, GLAZES, SHADES, WASHES, PIGMENTS, FLOCKING, GLUES AND MORE USED ON THESE VEHICLES:

  1. Gorilla Glue
  2. Testors Plastic Cement
  3. Daisy BB-Gun BB’s
  4. E6000 epoxy
  5. Aleene’s poster tack
  6. 1/8″ rare earth neodymium magnets
  7. Vallejo “Flow Improver”
  8. Vallejo “Airbrush Thinner”
  9. Vallejo “Surface Primer – Black”
  10. Testors “Universal Acrylic Thinner”
  11. Battlefront “European Skin”
  12. Battlefront “Skin Shade” (wash)
  13. Vallejo Game Air “Moon Yellow”
  14. Vallejo Model Air “Bright Brass”
  15. Battlefront”Black”
  16. Vallejo Mecha Color “Grey Green”
  17. Vallejo “Black Grey”
  18. Vallejo “Neutral Grey”
  19. Battlefront “Oxide Red”
  20. DecoArt “White Pearl”
  21. Army Painter “Military Shader” (wash)
  22. Vallejo Model Air “Dark Yellow”
  23. Vallejo Model Air “US Olive Drab”
  24. Vallejo Model Air “German Red Brown”
  25. Battlefront “Dark Gunmetal”
  26. Vallejo Model Air “Rust (71.080)”
  27. Microscale Liquid Decal Film
  28. Vallejo Model Air “Wood”
  29. Citadel “Typhus Corrosion”
  30. Vallejo Mecha Weathering “Oil Stains”
  31. Appropriate decals from Battlefront
  32. Appropriate decals from Armorcast
  33. Microscale Micro-Set
  34. Microscale Micro-Sol
  35. Vallejo Mecha Varnish “Matt Varnish”
  36. P3 “Bootstrap Leather”
  37. Vallejo Game Air “Black”
  38. Army Painter “Mid-Brown” (wash – desert models only)
  39. Army Painter “Soft Tone” (wash)
  40. Vallejo “Gloss Varnish”
  41. Vallejo “European Mud” (Thick Mud)
  42. Vallejo “Brown Mud” (Thick Mud)
  43. Vallejo “European Slash Mud” (Splash Mud)
  44. Vallejo “Crushed Grass”


My HUZZAH! 2019 Recap

The 10th running of the HUZZAH! wargaming convention was held last month from May 17th-19th in Portland, Maine.  It was ably run by the Maine Historical Wargamers Association.  There were a lot of games, including some run by friends from both the Maryland -based H.A.W.K.’s (Harford Area Weekly Kriegspielers) and the Historical Gaming Club of Uxbridge (Massachusetts).  Several members of the Mass Pikemen were also in attendance.  I missed the sign up to run a game, but I was nevertheless happy to make the trek to Maine, attend and play.

As I am catching up on my blogging, and as I did not get a chance to take many pictures of games that I was not involved in, this post will focus on the five games that I did participate in at the convention.  It will hopefully give a flavor of the games, and my experience – however slim compared with all the events that were run there.

Game 1  – “The Enchanted Valley; Rules – Blood & Swash/Thunder & Plunder

The first game was run by Eric Schlegel from the H.A.W.K.’s.  The scenario was “The Enchanted Valley” – a fantasy game in which you had a small squad, and you had to battle GM-run bad guys for treasure and points.  In my case, I had a squad of halflings (hobbits), and the figures were old Grenadier ones from the 1980’s.  I spent the game battling giant armed frogs and goblins, while other players were similarly battling other creatures.  The rules were Blood & Swash/Thunder & Plunder written by two friends of mine, Buck Surdu and Chris Palmer, and were the basis for their later set of rules – G.A.S.L.I.G.H.T.   You can read about these and other rules here (just scroll down).

1 The Enchanted Valley

2 The Enchanted Valley
Eric and Vickie await the start of the game
3 The Enchanted Valley
My squad – these are Grenadier halflings from the boxed set Halflings – which was issued in 1980 by Grenadier.  You can read about them here.
4 The Enchanted Valley
My squad stats.
5 The Enchanted Valley
Nice view of the board and some of the players, including Bruce Carson on the left and another H.A.W.K. Duncan Adams on the right.
6 The Enchanted Valley
The frogs I battled.
7 The Enchanted Valley
My hobbit leader dispatched a goblin leader and a few giant ticks.

I fared OK, but did not come out on top.  I think that there were close to 8 or 9 players.   I think that Eric and Vickie ran the game well and it was quite fun.

Game 2  – “Mortwald Under Siege: Zero Hour”; Rules – Warhammer 40K

Many of you who follow this blog are avid 40K players and GW miniature painters.  The minis that you assemble, convert, and paint are truly a sight to see.  Additionally, the terrain is very eye-catching.  Of course, I missed that whole era/genre of wargaming when it launched and as it grew.  I wanted to give this 40K game a shot, and I will likely give the game another shot at some time in the future.  But before I go on, I want to say that the following is not an attack on anyone who loves 40K – it’s just my experience with it at the HUZZAH! convention.

It was the absolute worst gaming experience that I have ever had.  Sorry, but it was.

The terrain was gorgeous, and the figures were well-painted.  The game scenario, unfortunately, had no story or reason as to why anything was there in terms of terrain or figures.  There were two tables next to each other, and mine had several newbies and some experienced players.  A couple of the GM’s were subbing (and admirably trying I will say) for another GM who could not attend.   But hurting their efforts was the fact that there were hardly any cheat sheets or charts available, and those that were were microscopic in font size.  Much of the game was spent figuring out the stats of the different space marine factions by either looking at the rule books or some players using a GW app on their iPads or iPhones.

The players on my side with whom I played also had a similarly negative experience.  What I remember about the game was that a large number of Plague Marines moved in, and over us (whoever we were – the figs were blue and some kind of space marine) with seemingly no way of effectively stopping them.  I don’t remember many strategic of tactical gaming choices we made except to move and take up defensive positions and try to shoot.  Was it balanced or play tested?  Who knows.  My memory of the game includes spending a lot of time looking at other people consulting rule books and devices, interspersed with being overrun by gloppy plague marines.  Oh yeah, there was the conversations on my side with teammates asking WTF multiple times.  I was told by someone I trust that this game was not typical – and that perhaps Kill Team is better.  Again, I’ll keep an open mind, but for beginners this game was definitely was not!  I also want the GM’s to know that we did not hold the experience against them at all – at least I did not.  It’s not easy to be a GM.

8 40k

One of the two tables  – not the one I played on.

9 40k
Table 1
10 40k
Table 1
11 40k
Table 2 – we were defending this side.
12 40k
We came, we were confused about the rules, the scenario…then plague marines wiped us out.

Just to be clear again, I follow several blogs whose authors do a great job on GW stuff.  I mainly tried to play because I have been inspired by their projects.  If you want to see some of their excellent painting and conversions of GW stuff, check out any of the following sites:

These guys give me hope to try 40K again…sometime.  This game finished off Friday at HUZZAH! for me.

Game 3  – “Clash at Palmer’s Island, Chesapeake Bay 1637”; Rules – Feudal Patrol™ (as of yet unpublished)

Duncan Adams of the H.A.W.K.’s ran this scenario on Saturday morning.  It featured Marylanders (my side) contesting the “illegal” occupation of Palmer’s Island by Virginians and some Indian allies.  The rules used were Buck Surdu’s soon to be published Feudal Patrol™, a card-based system similar to Combat Patrol™, but for eras/genres with more swords and arrows and matchlocks than modern warfare.  As a huge fan of Combat Patrol™, I was really looking forward to trying the system.  Here, it was a skirmish action.

The game went very well, with the players grasping the game’s concepts very quickly.  Also, I liked the changes on the cards for melee and missile weapons.  Our team’s matchlocks (and troop maneuver) held the day with a major victory.

13 Feudal Patrol
Game set up.
14 Feudal Patrol
Maryland militia move in for the assault.
15 Feudal Patrol
Duncan Adams ably ran this fun game.
16 Feudal Patrol
Virginia had Indian allies – shown here attempting to flank our attack through the woods.  
17 Feudal Patrol
A relief column of Virginians (upper right) kills one Marylander (forefront).  The Virginians are then taken quickly under matchlock fire as they exit the woods.
18 Feudal Patrol
Marylanders take out the Virginian leader as he less than bravely hid in the brush.
19 Feudal Patrol
This became a bit of a scrum afterwards, with casualties mounting and the Marylanders prevailing.
20 Feudal Patrol
Close up of some of the figures and terrain.
21 Feudal Patrol
The Indians made a flanking charge from the woods, but were beaten back.

Game 4  – “Battle of Hannut” with 28 mm tanks; Rules – What a Tanker

I have been very much into playing What a Tanker© by Too Fat Lardies since I attended BARRAGE last year.  I was very psyched to try this scenario, The Battle of Hannut, which happened in Belgium in 1940.  Christopher Boynton ran the game and did an excellent job.  There were 10 or 12 players.  His tanks were 28mm (I prefer 15mm but 28mm are fine and fun).  His tanks and terrain were very well painted.  The terrain and set up were cool as well.  I played on the French side and took a SOMUA.

Interestingly, Christopher had a few changes he made for the game.   First, for activation, he used a card-based system.  Second, he had everyone roll all of their Command Dice at the same time at the beginning of the turn.  Lastly, he allowed you to turn in all your dice for one you wanted if your roll was bad.  The card system was interesting, but really not too different than rolling dice, except that “banking” a six from the previous turn got you an additional card for activation that could be better than what you would have gotten.  I’m not sure I like all players rolling all the Command Dice at the beginning – it allows you to see what your adversary can do before you take your turn.  You also get to choose which Command Dice you lose if you take damage.  The house rule on converting all your dice into one desired action was interesting, but I would not add that as it helps damaged tanks too much.  It was different, but consistent for all players.

My SOMUA moved up quickly and was the target for no less than four German Panzers.  My armor absorbed the hits, but eventually my tank was knocked out – with the crew surviving.  I respawned as a new SOMUA, and rammed a Panzerjager 1.  The game ended there.  We achieved a minor victory for the French.  Thanks to Christopher for running a superb and fun game.

22 WaT Battle of Hannut
The Battle of Hannut set up.
23 WaT Battle of Hannut
My SOMUA attracts a lot of German attention (upper right).
24 WaT Battle of Hannut
Eventually, my SOMUA was knocked out.
25 WaT Battle of Hannut
Late in the game, I got to ram a Panzerjager I with my second SOMUA, doing minor damage to the German.  Christopher Boynton used the flame markers as “ACQUIRED” markers.

Game 5  – “Test of Honour Returns to Hanghai”; Rules – Test of Honour

The last game for Saturday was “Test of Honor Returns to Hanghai” using Mike Paine’s wonderful and extensive Hanghai tabletop.  Ted Salonich and Ryan MacRae split GM responsibilities as Chris Rett was unable to attend.  They did a marvelous job running the Test of Honour rules by Grey for Now Games.

I also finally got to game with Mike Paine, a true legend in the New England gaming community.  We were teams of three, and Mike faced off with us.  We had a back and forth, but in the last couple of turns we were beaten back soundly.

Thanks again to Ted and Ryan for running a fun game.

26 Test of Honor
Ryan (standing on the left) getting set up, while Mike Paine and his team wait for the game to start on Mike’s table.
27 Test of Honor
Mike Paine’s board is so much fun.
28 Test of Honor
Final scrum on the island – we were soon pushed back.

Game 6  – “Returning to Hanghai”; Rules – Mike Paine’s home brew rules

On Sunday morning, I had the chance to finally try Mike Paine’s Hanghai game.  It is a 1920’s pulp game, and it is a big hit at a convention with both young and old.  It was pretty much the same table as what we played Saturday night, but there were ships and planes and many other cool things all scattered everywhere.  The amount of work that went into the table is staggering.  You have to see it to appreciate it.

I took a naval crew in a gunboat – and I had a submarine.  My leader was Captain Nemo.  The goal of the game was to grab treasures and key items.  I was playing next to Eric Schlegel, and I decided to try to eliminate the competition, which led to counter-fire, with Eric getting the better of the exchange.  I ended up with only a submarine and one sailor, so with a long drive back home, I surrendered my sub to Eric with Mike Paine’s blessing.

Truly an epic game to try!  Thanks to Mike Paine!

29 Hanghai
My crew and gunboat.
30 Hanghai
Eric Schlegel’s forces return fire on me.
31 Hanghai
Mike Paine – master of Hanghai game.
32 Hanghai
The game attracted a lot of players, young and old.  The amount of terrain is unbelievable.
33 Hanghai
View of the harbor.
34 Hanghai
My gunboat and Captain Nemo – before Eric shot them all.

This was my first HUZZAH! but hopefully not my last.  By my count there were 117 games over the three day weekend, so this is a very small sample.  Thanks to the folks of the Maine Historical Wargamers Association for running a classy convention!

If you have any thoughts or feedback, please let me know below.  Thanks for looking!

A Preponderance of Panzers

For May, I was hoping to complete a diverse German 15mm/1:100 scale armored force to use for a What a Tanker© game D-Day scenario.  Last month saw my completion of a good-sized US force – and I already had an 11-tank British contingent of Shermans and Fireflies.

As for the Germans, last year I had bought and assembled a 5-vehicle Plastic Soldier Company StuG III kit that could be completed as either F8 or G variants.  I assembled and primed them, but put them aside, as they did not fit in with either my France 1940 or North Africa scenarios.  From Battlefront Miniatures, I had bought several resin and plastic models to include a Marder III, 7 Panzer IV’s (E, F2, and H’s), 2 Tiger I’s, and a Panther D.  Additionally, I was able to acquire a Battlefront Ferdinand/Elefant from Chris Rett in my gaming club – which was fortunate as this model is now out of production.  This made 17 tanks/tank destroyers available to assemble and paint, but too big a force for just a Normandy scenario.  Plus, from my research, the StuG F8 was more of an Eastern Front vehicle.  So, I decided to proceed to complete these 17 for two different scenarios, some for the Eastern Front and some for the Normandy scenario.

Researching the camouflage patterns for these two groups showed me very different patterns of painting – and in each case I would need to expand my skills and tools to be able to achieve a good historical representation of each vehicle.  In particular, I needed an airbrush that could do the finest lines and make these tiny tanks look appropriate.  I found a solution in an Iwata Micron B airbrush.   This was not inexpensive, but in the end turned out to live up fully to my expectations.  As an aside, I had been struggling to have enough time to finish all of these tanks in May.  Work this month had been hectic, I attended HUZZAH in Maine (more to come on that in a future post), Memorial Day ceremonies, and the Boston Bruins have been in the Stanley Cup playoffs (and now the finals!!) so my hobby time has been constrained somewhat,  Unfortunately I got a bit more time as I was unexpectedly laid off this week!  I am sure that if I did not have a job, I would not have bought the new Micron B airbrush, but who knew that would happen?  Not me, but at least I was able to finish these in time to be my second entry in Azazel’s “Mechanismo May” community painting challenge.

Given that I was so busy, I took fewer WIP photos than normal – so I decided that this post I will go through some points on assembly, then share in turn the Eastern Front vehicles, the Normandy vehicles, and lastly the paints and materials that I used.  This means the eye-candy shots will be interspersed this time throughout the blog.  As always, let me know your thoughts and feedback – and which one you like the most, if you are so inclined of course!  There are links on the headers and elsewhere if you want more background, albeit from Wikipedia.

Notes on Assembly

2 Tigers
Tiger I kit innards
3 Tiger and washers
I wanted more heft in my tanks – so I added steel washers to the Tiger’s. I filled the hulls afterwards with PVA glue.
6 Panzer IVH with ball bearings and BB's
I remembered that I had some ball bearings from Jeff Smith and some BB’s – so the Panzer IV’s got these and PVA glue on top as ballast.
4 Assembled grouping less Pz Iv's and some StuG's
Some of the tanks, some primed, some not yet.  The Elefant in front had been given an Elefant trunk and ears with green stuff by Chris Rett’s daughter.  I did my best to remove the excess kneadatite before repriming.

Eastern Front

Here are the vehicles I built for a future Eastern Front scenario.

StuG III F8

1 StuG F8 base coated
StuG IIIF8 base coated
2 StuG F8 painted red
I made three F8’s for the Easter front.  Two had the two-toned reddish/brownish camouflage.
3 StuG F8 painted 3 color
The third F8 I experimented with the Iwata Micron B to make a three-toned camouflage pattern.
4 StuG F8's in wheat field
The three StuG IIIF8’s completed deployed in a wheat field.
5 StuG F8's in wheat field left side view
Left side view of the StuG IIIF8’s
6 StuG F8's in wheat field rear view
Rear view of the F8’s.  I used the Vallejo “Thick Brown Mud” on my Eastern Front vehicles to simulate the effects of Mother Russia.

Panzer IVF2

This model was a resin/metal combination.

4 Panzer IVF2 complete right side
Completed Panzer IVF2, left side.
5 Panzer IVF2 complete left side
Right side of the completed Panzer IV F2.

Panzer IVH

3 all 3 Panzer IV H's
I painted one Panzer IVH in a reddish/brown two-tone, and the other two in a two-tone yellow/green pattern.  Here they are with different decals.  I tried Armorcast decals in addition to my Battlefront ones – and the sizes of theirs (crosses) work better for small areas like you see here.  Give them a look if interested.
4 all 3 Panzer IV H's in a field
Patrolling a field.
5 all 3 Panzer IV H's by a wheat field
Left side of the Panzer IVF2’s.  I also varied adding crew or leaving the tank buttoned up to make it easier for tabletop identification and play – in addition to the different decal numbers.

Tiger I

4 Tiger in wheat field left side
Eastern Front Tiger I, left side, crossing a wheat field.
5 Tiger acquiring target
This was a fun model – and the weathering products worked well.
5 Tiger in wheat field frontal view
Acquiring a Soviet target.
5 Tiger in wheat field rightside
Right side shot.
6 Tiger in wheat field rear
Rear angle on the Tiger I.

These are going to be fun to use and see used in future games.  I previously had built a Battlefront resin Tiger I for North Africa, and I must say that the plastic ones are really nice models too (less weighty of course – which is why I added ballast).  Of course, I was primarily focused on getting ready for the 75th Anniversary of D-Day.  So let’s get to those AFV’s!

Group Shots

Here are some group shots all of the German AFV’s for Eastern Front scenarios that I did this month.

1 Group shot 1 Eastern Front2 Group shot 2 Eastern Front

Normandy Campaign

Here are the Normandy Campaign tanks and tank destroyers I built this month.  These all have three-toned camouflage pattern, though I tried to be true to the examples I found in my research.

Marder III

This was a resin and metal model.  I painted the crew separately before adding them to the model.

4 Marder III complete right side
Marder III in ambush position.
5 Marder III complete left side
Left side view.
6 Marder III rear
Rear view showing Marder III crew.

StuG IIIG

This version had the “schürzen” spaced armor – which was also on the Panzer IVH.  All these are plastic models.

2 Stug G's by wrecked building
Advancing past the ruins.
3 Stug G's in field
Moving into ambush position by the bocage hedgerows.
4 Stug G's advancing down road
Moving up.

Panzer IVE

This model is the least powerful of the Panzer IV’s I built for Normandy, but it was deployed in Normandy and in good numbers.

3 Panzer IVE by building
The Panzer IVE by a building near a Panzer IVH – the Vallejo “Crushed Grass” worked well along with the “European Thick Mud” and the European “Splash Mud” for weathering.

Panzer IVH

I built two plastic Panzer IVH’s for Normandy.  The side armor (schürzen) were not easy to affix, and made painting a challenge on both these and the previous Eastern Front versions.  Their camouflage patterns were slightly different.

1 Panzer IVH's and Panzer IVE in field
The two Panzer IVH’s and the Panzer IVE (for comparison) on the right in the hedgerows.
2 Panzer IVH's facing front
Frontal view of the Panzer IVH’s for Normandy.
2 Panzer IVH's turn corner
Patrolling the ruined village.

Elefant/Ferdinand

I really enjoyed bringing this monster tank destroyer model back to the tabletop.  It is out of production, so I was very happy that Chris sold it to me for a song.

4 Elefant in field
Elefant right side.  
5 Elefant facing front
Nice view of the front – the crewman was already mounted when I got this model.  I prefer to paint them separately, but this worked out fine – they are just so tiny.
6 Elefant rear
Good look at the rear of the vehicle – I liked that it had the zimmerit on it too.

Panther D

I’ve been wanting to build a Panther since I saw the Panther A at the American Heritage Museum last year.  This is 30 miles from my house!

15A PANTHER
Beautiful restoration of this Panther

Mine is a Panther D, and it was a resin/metal model.

Note the road wheel on the turret.  It came in the kit, and I put it there as there was a nub to hang it.  Unfortunately, it interfered with the turret being flush on the hull.  Luckily, I was able to remove the road wheel.  As I had an extra track section, I was able to affix it over that space on the turret.  The model was also missing on of the two exhaust pipes – an iconic part of a Panther.  I was able to drill the resin hull and build a replacement with a cut-down paper clip.

3 Panther in field
Panther crossing an open field.
4 Panther left side
Nice left side view showing the muddy tracks.
5 Panther right side
Right side view with track section on the turret.
6 Panther acquiring target
Target spotted!  Schnell!  Feuer!

Tiger I

I think you’ll be pleased with this one!


3 Tiger in field left side
Left side of the Tiger I for a Normandy scenario.
4 Tiger in field rear side
Tiger I rear view.
5 Tiger in field right side
Right side view of the Tiger I.
5 Tiger in open acquring target
Nice frontal shot.

Group Shots

Here are some group shots all of the German AFV’s for Normandy that I did this month.

1 Group shot 1 Normandy Germans

2 Group shot 2 Normandy Germans

3 Group shot 3 Normandy Germans

Thanks for looking and I hope that you found this interesting !  I have more to do now – next up:

1 Next models

D-Day is only 5 days away!

PAINTS, INKS, GLAZES, SHADES, WASHES, PIGMENTS, FLOCKING, GLUES AND MORE USED ON THESE VEHICLES:

  1. Gorilla Glue
  2. Testors Plastic Cement
  3. Elmer’s white glue
  4. Steel washers
  5. Ball bearings
  6. BB gun BB’s
  7. E6000 epoxy
  8. Aleene’s poster tack
  9. 1/8″ rare earth neodymium magnets
  10. Vallejo “Flow Improver”
  11. Vallejo “Airbrush Thinner”
  12. Vallejo “Surface Primer – Black”
  13. Testors “Universal Acrylic Thinner”
  14. Battlefront “European Skin”
  15. Battlefront “Skin Shade” (wash)
  16. Polly Scale “WWII German Armor Dark Olive Green”
  17. Vallejo Mecha Color “Grey Green”
  18. Vallejo Model Air “Olive Green”
  19. P3 “Bootstrap Leather”
  20. Vallejo “Neutral Grey”
  21. Polly Scale “WWII Luftwaffe Uniform Gray”
  22. Vallejo Model Air “Panzer Dark Grey”
  23. P3 “Sulfuric Yellow”
  24. DecoArt “White Pearl”
  25. Army Painter “Military Shader” (wash)
  26. Vallejo Model Air “Dark Yellow”
  27. Vallejo Model Air “German Red Brown”
  28. Vallejo Mecha Color “Olive Green”
  29. Vallejo Game Air “Black”
  30. Battlefront “Dark Gunmetal”
  31. Vallejo Mecha Color “Light Rust Wash” (wash)
  32. Army Painter “Strong Tone” (wash)
  33. Vallejo Model Air “USA Olive Drab”
  34. Army Painter “Soft Tone” (wash)
  35. Vallejo Model Air “Rust (71.080)”
  36. Vallejo Model Air “Wood”
  37. Vallejo “Gloss Varnish”
  38. Vallejo Model Air “Bright Brass”
  39. Microscale Liquid Decal Film
  40. Microscale Micro-Set
  41. Microscale Micro-Sol
  42. Appropriate decals from Battlefront
  43. Appropriate decals from Armorcast
  44. Vallejo “European Mud” (Thick Mud)
  45. Vallejo “Brown Mud” (Thick Mud)
  46. Vallejo “European Slash Mud” (Splash Mud)
  47. Vallejo “Crushed Grass”
  48. Vallejo Mecha Varnish “Matt Varnish”


US Armor for 75th D-Day Anniversary

I am working on creating a Normandy scenario for a What a Tanker© game that I plan to run at a monthly gaming session at both the Mass Pikemen Gaming Club and the Historical Gaming Club of Uxbridge.  With the 75th Anniversary of D-Day coming up in little more than a month, I thought that would be appropriate. 

My challenge was that I really did not have enough historically-appropriate tanks and tank destroyers for such a scenario.  I did have 9 plastic British Shermans and 2 Fireflies that I bought on eBay that were well-painted.  I also had 2 resin Shermans and 2 resin Stuarts that I got from a guy who makes his own models and sells them already painted.  The British stuff came with a bunch of infantry that I sold, so the nice plastic British armor ended up costing me net only $1.40 each!  The US tanks were OK for the tabletop, and for the price (about $5-6 as I remember), a relative bargain – but I wanted better.  I also had no Germans for that theater, so that is part 2 of the project.  For this part, I am focused on five US vehicles.  Together, I will have enough to make a joint US/UK force.

Three of the five vehicles came from Battlefront and were metal and resin and some plastic:  one M3A1 Stuart (#US003); one M4A2 Sherman (#US045); and one M10 Wolverine tank destroyer (#US102).  The other two were M24 Chaffee tanks that did not make it to D-Day, but replaced Stuarts starting in the latter part of 1944.  These two were 3D printed models from somebody on eBay – and not great detail-wise.  But, the M24 was the tank my grandfather, Marcus C. Delaney, drove in Europe during WWII, so I thought I’d work on those at the same time.  I used many of the same research books that I have cited before – and I did not take pictures as these are more recognizable to most gamers and modelers.

Above, you can see the group – below is a group shot after assembly.

1 all assembled
Ready for paint – 2 M24 Chaffee’s, an M3A1 Stuart, an M4A2 Sherman, and an M10 Wolverine – with its crew on toothpicks.
2 turrets
Turrets mounted for painting.

I mostly used my airbrush for painting – and on the M24’s I tried to minimize the 3D printer lines with paints, washes, and weathering.  I decided to try a few Vallejo weathering products that caught my eye – I made a test of them first.  Of course, these are applied with a brush!

3 weathering
I thought the brown mud was too heavy, and the industrial splash mus was too thin – so I went with the other three.
3a weathering
I really liked these three – very nice weathering products.  The white labels on the top are what I do to help identify them in my supplies.
4 turrets painted
Completed turrets.

It’s now time to share some eye candy of the completed tanks and the tank destroyer.  Of course, I am also using these 5 as the first entry for a monthly painting challenge from Australia’s own Azazel – this being “Mechanismo May ’19 Community Painting Challenge“.

5 M3A1 front
M3A1 Stuart in the bocage.
6 M3A1 side
Side shot of the Stuart in a field.
7 M3A1 rear
Rear shot of the Stuart – it’s not as shiny as this!
8 M4A2 side
My M4A2 Sherman – “Deuces Wild”.
9 M4A2 front
Nice shot coming through the bocage – I really liked the mud and grass effects.
10 M4A2 rear
Rear shot – beware lurking panzerfausts!
11 M10 in field side view
Side shot of the M10 Wolverine cutting across a field into a gap in the bocage.
12 M10 in field side view
Another side shot – this was a very fun model to build.
13 M24's front
My two M24 Chaffee’s.  They won’t be at Normandy, but they will be later in the war.  I do like that I was able to give them some better texture with the weathering products.
13 M24's rear
Rear shot of the M24’s.  
13 M24's side
M24’s in convoy.  They were mostly used as scouts, and were used (and some are still used) by many different armies worldwide.  My grandfather told me many stories about his service driving one.
14 All US painted
My 5 US tanks for this project.
15 3 Shermans
For comparison, here you see three Shermans – from left to right – my M4A2, a plastic British Sherman I bought already painted, and the resin one I bought pre-painted on eBay.  
16 2 Stuarts
Here are the two Stuarts for comparison.  Mine is on the left – and the eBay resin one is on the right.  I will treat the resin ones as M5’s, which are better in What a Tanker
17 all Allied ETO
My complete ETO Allied vehicles – there’s a couple of Fireflies in there too.  I will use all of these except the M24’s for Normandy.

Now I have 18 US/UK vehicles for Normandy – which should be plenty.  I also know that some folks are bringing some DD Shermans and a couple of Churchill’s.  I have 6 German tanks and tank destroyers for Normandy and 11 for the Eastern Front (all about 60% completed), with 3 more to assemble (plus 5 scout cars).  That should be enough for a couple of fun games.  Stay tuned as I’m hoping to complete the Germans soon.

Thanks for checking this out – below are the paints etc.  Let me know your thoughts if you would!

PAINTS, INKS, GLAZES, SHADES, WASHES, PIGMENTS AND FLOCKING USED ON THESE VEHICLES:

  1. Vallejo “Flow Improver”
  2. Vallejo “Airbrush Thinner”
  3. Vallejo “Surface Primer – Black”
  4. Testors “Universal Acrylic Thinner”
  5. Vallejo Model Air “US Olive Drab”
  6. Vallejo Game Air “Black”
  7. Battlefront “Black”
  8. Battlefront “Dark Gunmetal”
  9. Battlefront “European Flesh”
  10. Battlefront “Skin Shade”
  11. Vallejo Model Air “Bright Brass”
  12. Vallejo “Base Grey Primer”
  13. Vallejo “Neutral Grey”
  14. Army Painter “Military Shader” 
  15. Vallejo Model Air “Wood”
  16. Polly S “Rust”
  17. Vallejo Mecha Color “Light Rust Wash” (wash)
  18. Gorilla Glue
  19. Vallejo Mecha Varnish “Gloss Varnish”
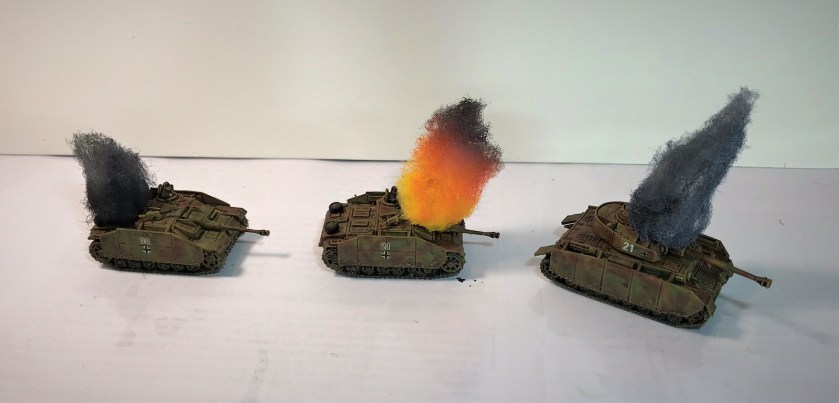
  20. Microscale Micro-Set
  21. Microscale Micro-Sol
  22. Microscale Liquid Decal Film
  23. Microscale Satin
  24. 1/8″ rare earth neodymium magnets
  25. Appropriate decals from Battlefront
  26. Vallejo “European Mud” (Thick Mud)
  27. Vallejo “European Slash Mud” (Splash Mud)
  28. Vallejo “Crushed Grass”
  29. Vallejo Mecha Varnish “Matt Varnish”
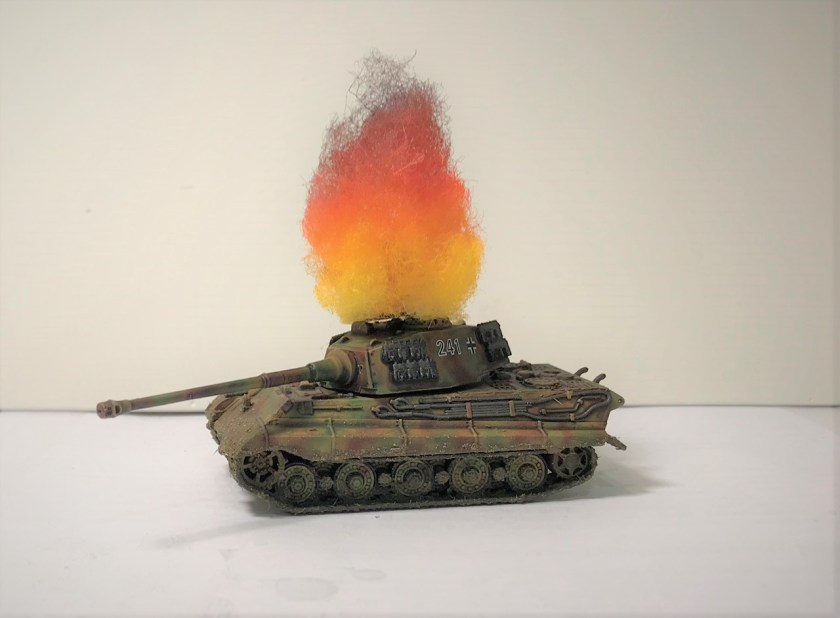
  30. Aleene’s poster tack


Man of TIN blog two

Toy Soldiers, Gaming, ImagiNations

Gisby's Gaming Blog

Miniatures gaming projects, products, and reviews

Carrion Crow's Buffet

Narrative Wargaming, Fiction and General Musings on the Universe

Despatches from Fort Syllabub

An account of fictional adventures on the North West Frontier - and other times and places, real or imagined

Man of Tin blog

Toy soldiers, gaming, Imagi-Nations

Zauberwurfs Blog

Ein Blog über Tabletop und Miniature Wargames.

Frank Tank Rants

musings of a fat old bloke on tanks and wargames

Dragons of Lancasm

Games, miniatures, painting, books and more games

Tiny Painted Heroes

The Adventures of a lifelong Tabletop Gamer, Game Design hobbyist, and full-time Software Engineer

Steve's Paint Brush

Grimdark model making and mini painting

Wargamesculptors Blog

Life, Golf, Miniatures, & Other Distractions

Dead Dick's Tavern and Temporary Lodging

Life, Golf, Miniatures, & Other Distractions

Guru Pig - the gaming Guru

Guru's thoughts on wargaming, life, and the universe!

Wisely lead... without a head!

History, Miniatures and Wargaming

Kuribo's Painting

Fallout Wasteland Warfare, Warhammer, and Hellboy Painting, Terrain, Dioramas, and Battle Reports

Don't Give Greg Ideas

Seriously, just don't

War Across the Ages, and other dark horrors

A discussion of miniatures collecting, painting and gaming.

Classic Warhammer 40K

Painting diary focused on Warhammer 40K 2nd ed., 5th ed. WHFB, related GW games, and miscellaneous whimsy

Colonel Mustard

WW2 Modelling in 1/72 Scale

Bogenwald

Random painting and terrain making.

Pat's 1:72 Military Diorama's

Scale diorama tips and ideas

Arcade Dreams

Building the Arcade Dream

P.B.Eye-Candy

Phil's 20th century wargame pages

SP's Projects Blog

A futile fight against entropy or 'Every man should have a hobby'? Either way it is a blog on tabletop wargames, board games and megagames

30mmdave

Wargaming Plausible reality?

The Imperfect Modeller

Miniature Figure Painting and Diorama Modelling

Double Down Dice

Painting miniatures and rolling dice!

Just Needs Varnish!

My ongoing wargames projects!

miniaturepopcorns

Sculpting some worlds

Despertaferres

Wargaming with the ability of a dull nine year old

Dawn of the Lead

Miniature wargaming and the occasional zombie

Rantings from under the Wargames table

Wargames, Figures, Sculpting and Converting Miniatures

Simple as War

Miniatures & Terrains

Buck's Blog

Life, Golf, Miniatures, & Other Distractions

IRO aka Imperial Rebel Ork

- I model - therefore I am -