TotalCon 40 is an annual gaming convention that is held in Marlborough, MA at the Best Western Conference Center. There are events for miniature games, board games, RPG’s, and much more. Attendance is well over 1,000.
This year it was held between February 19th and 22nd of 2026. I usually run several tabletop miniatures games there. This year was no exception. I ran eight 4-hour games across the 4 days.
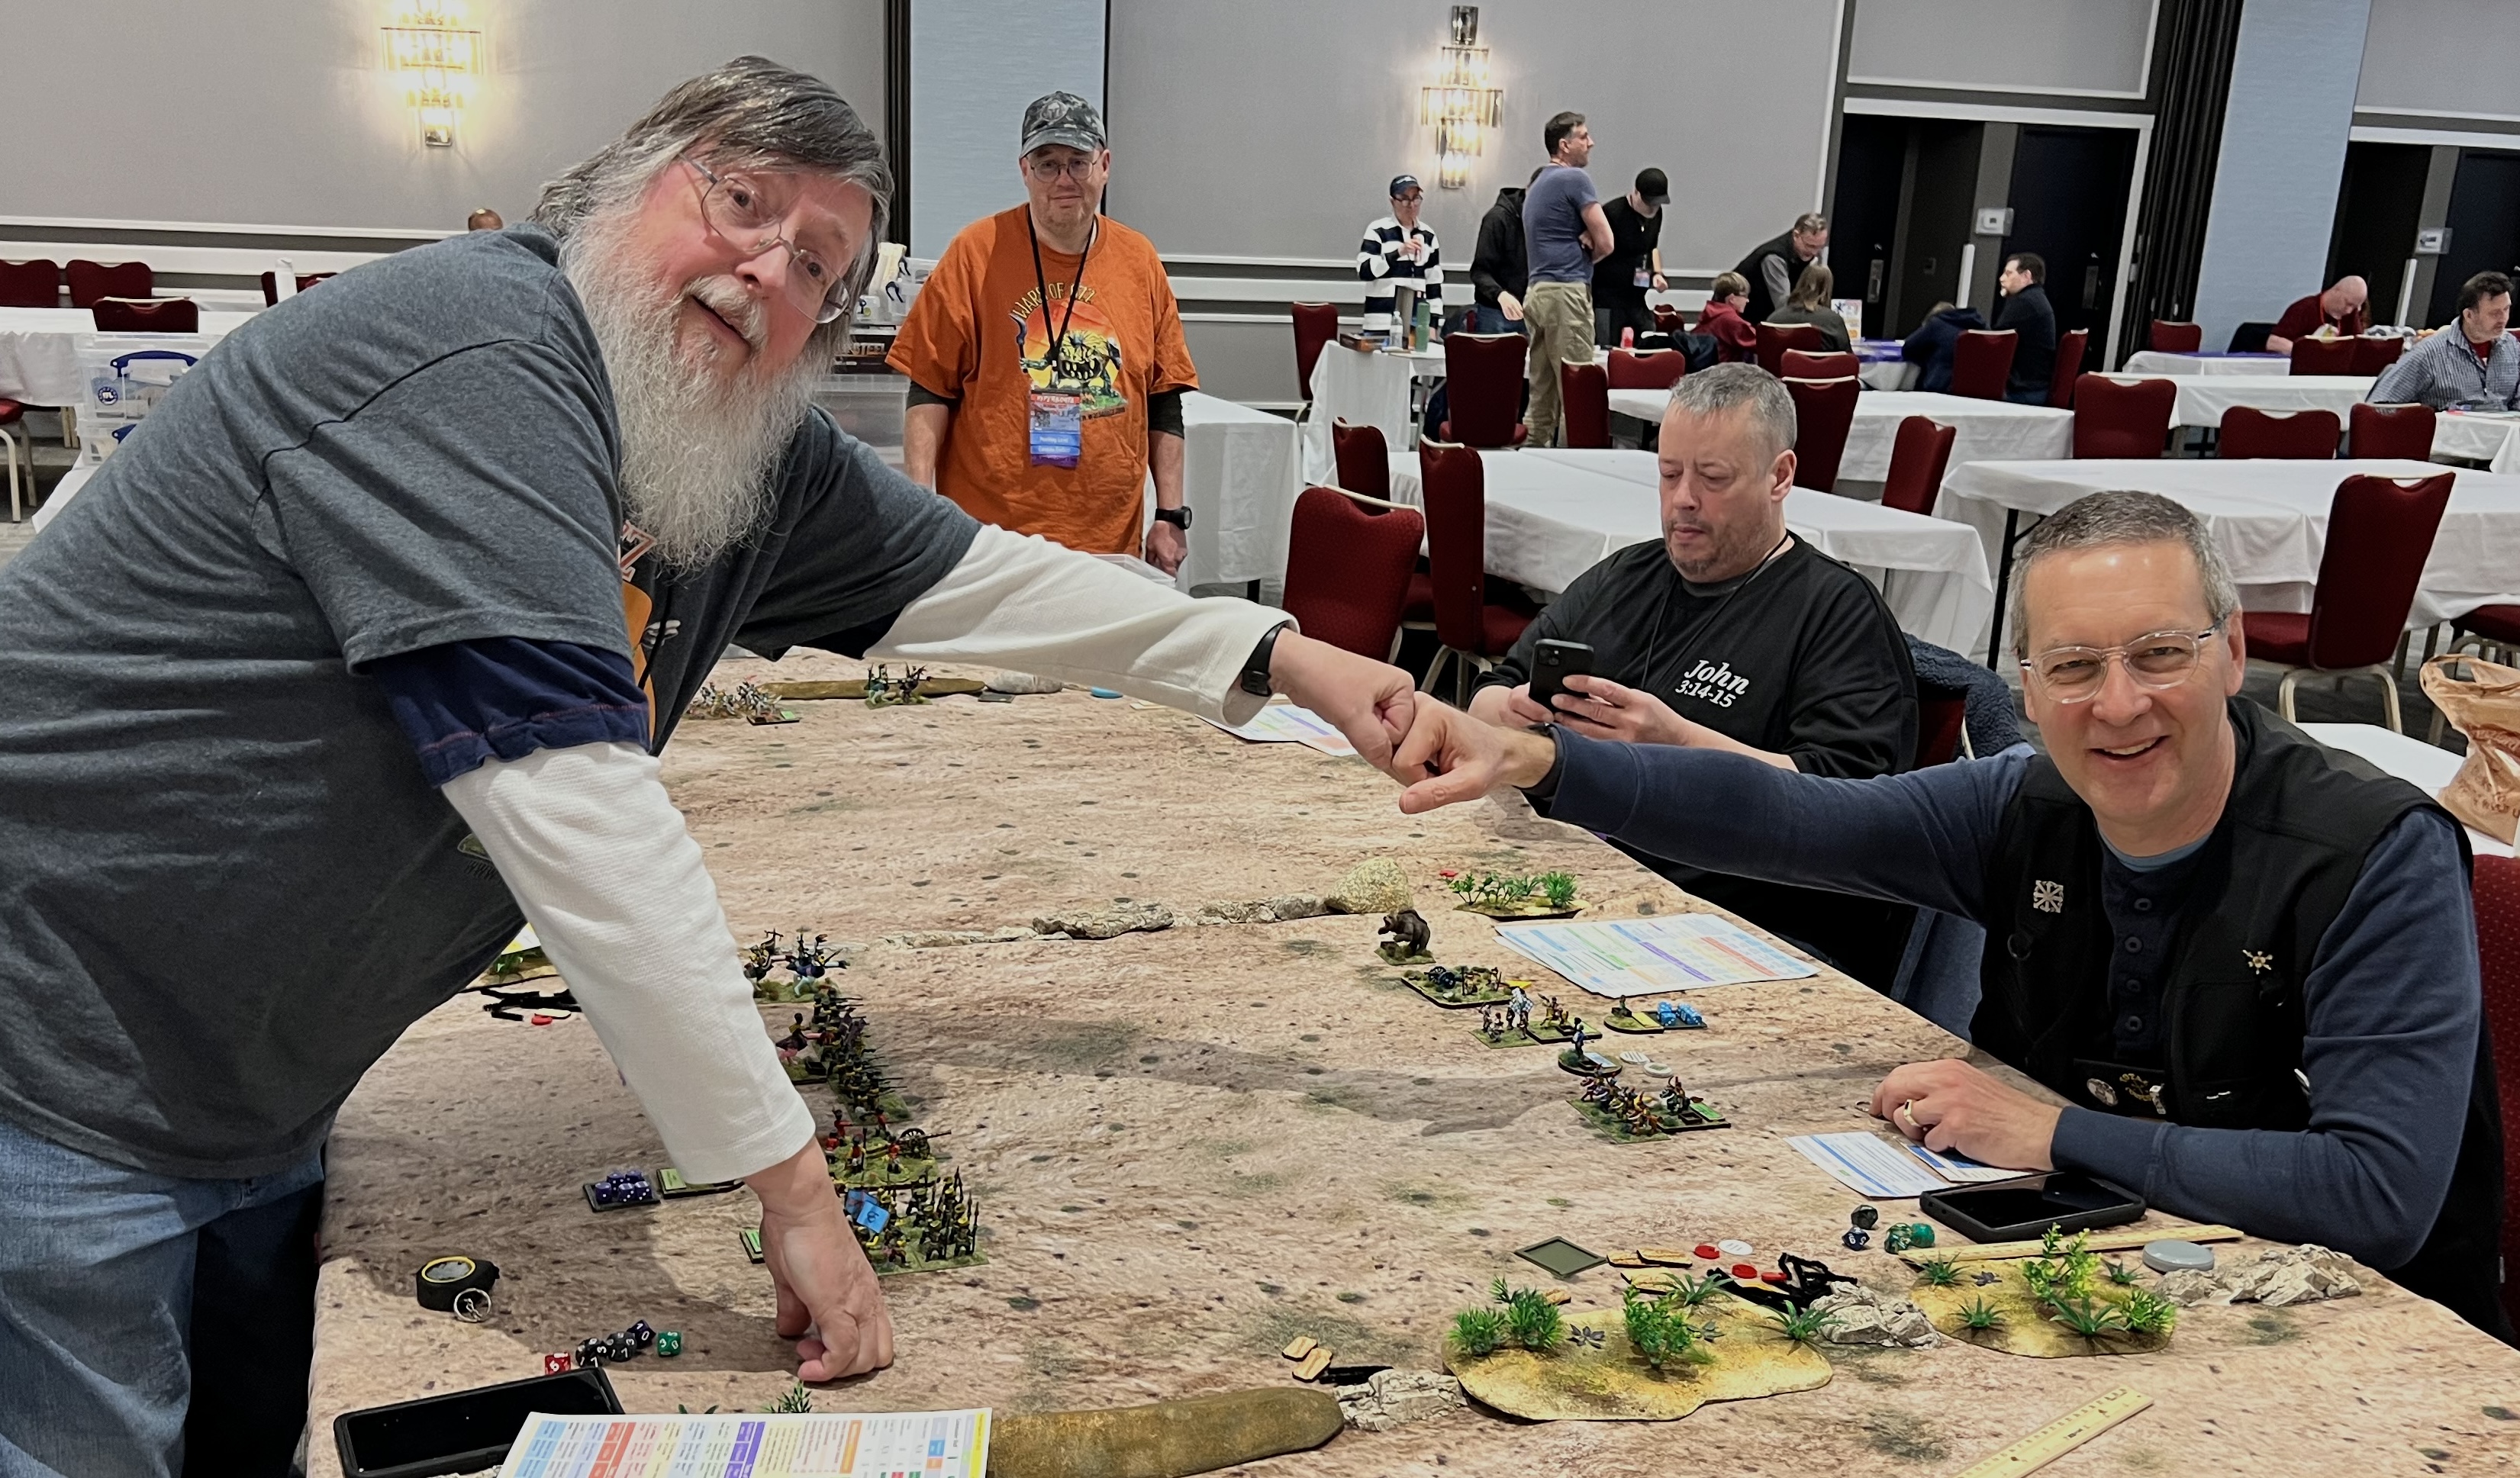
Several players who participated in my games are eager to see some game shots. Not to disappoint, his post will be picture heavy and text light!
On Thursday of every TotalCon, there is a large flea market in an adjoining room to the main hall. From Friday to Sunday, I get a very big table in that room. Because of the flea market’s need for space, I settle for a smaller footprint on Thursday. That smaller table was fine for two games (afternoon and evening).
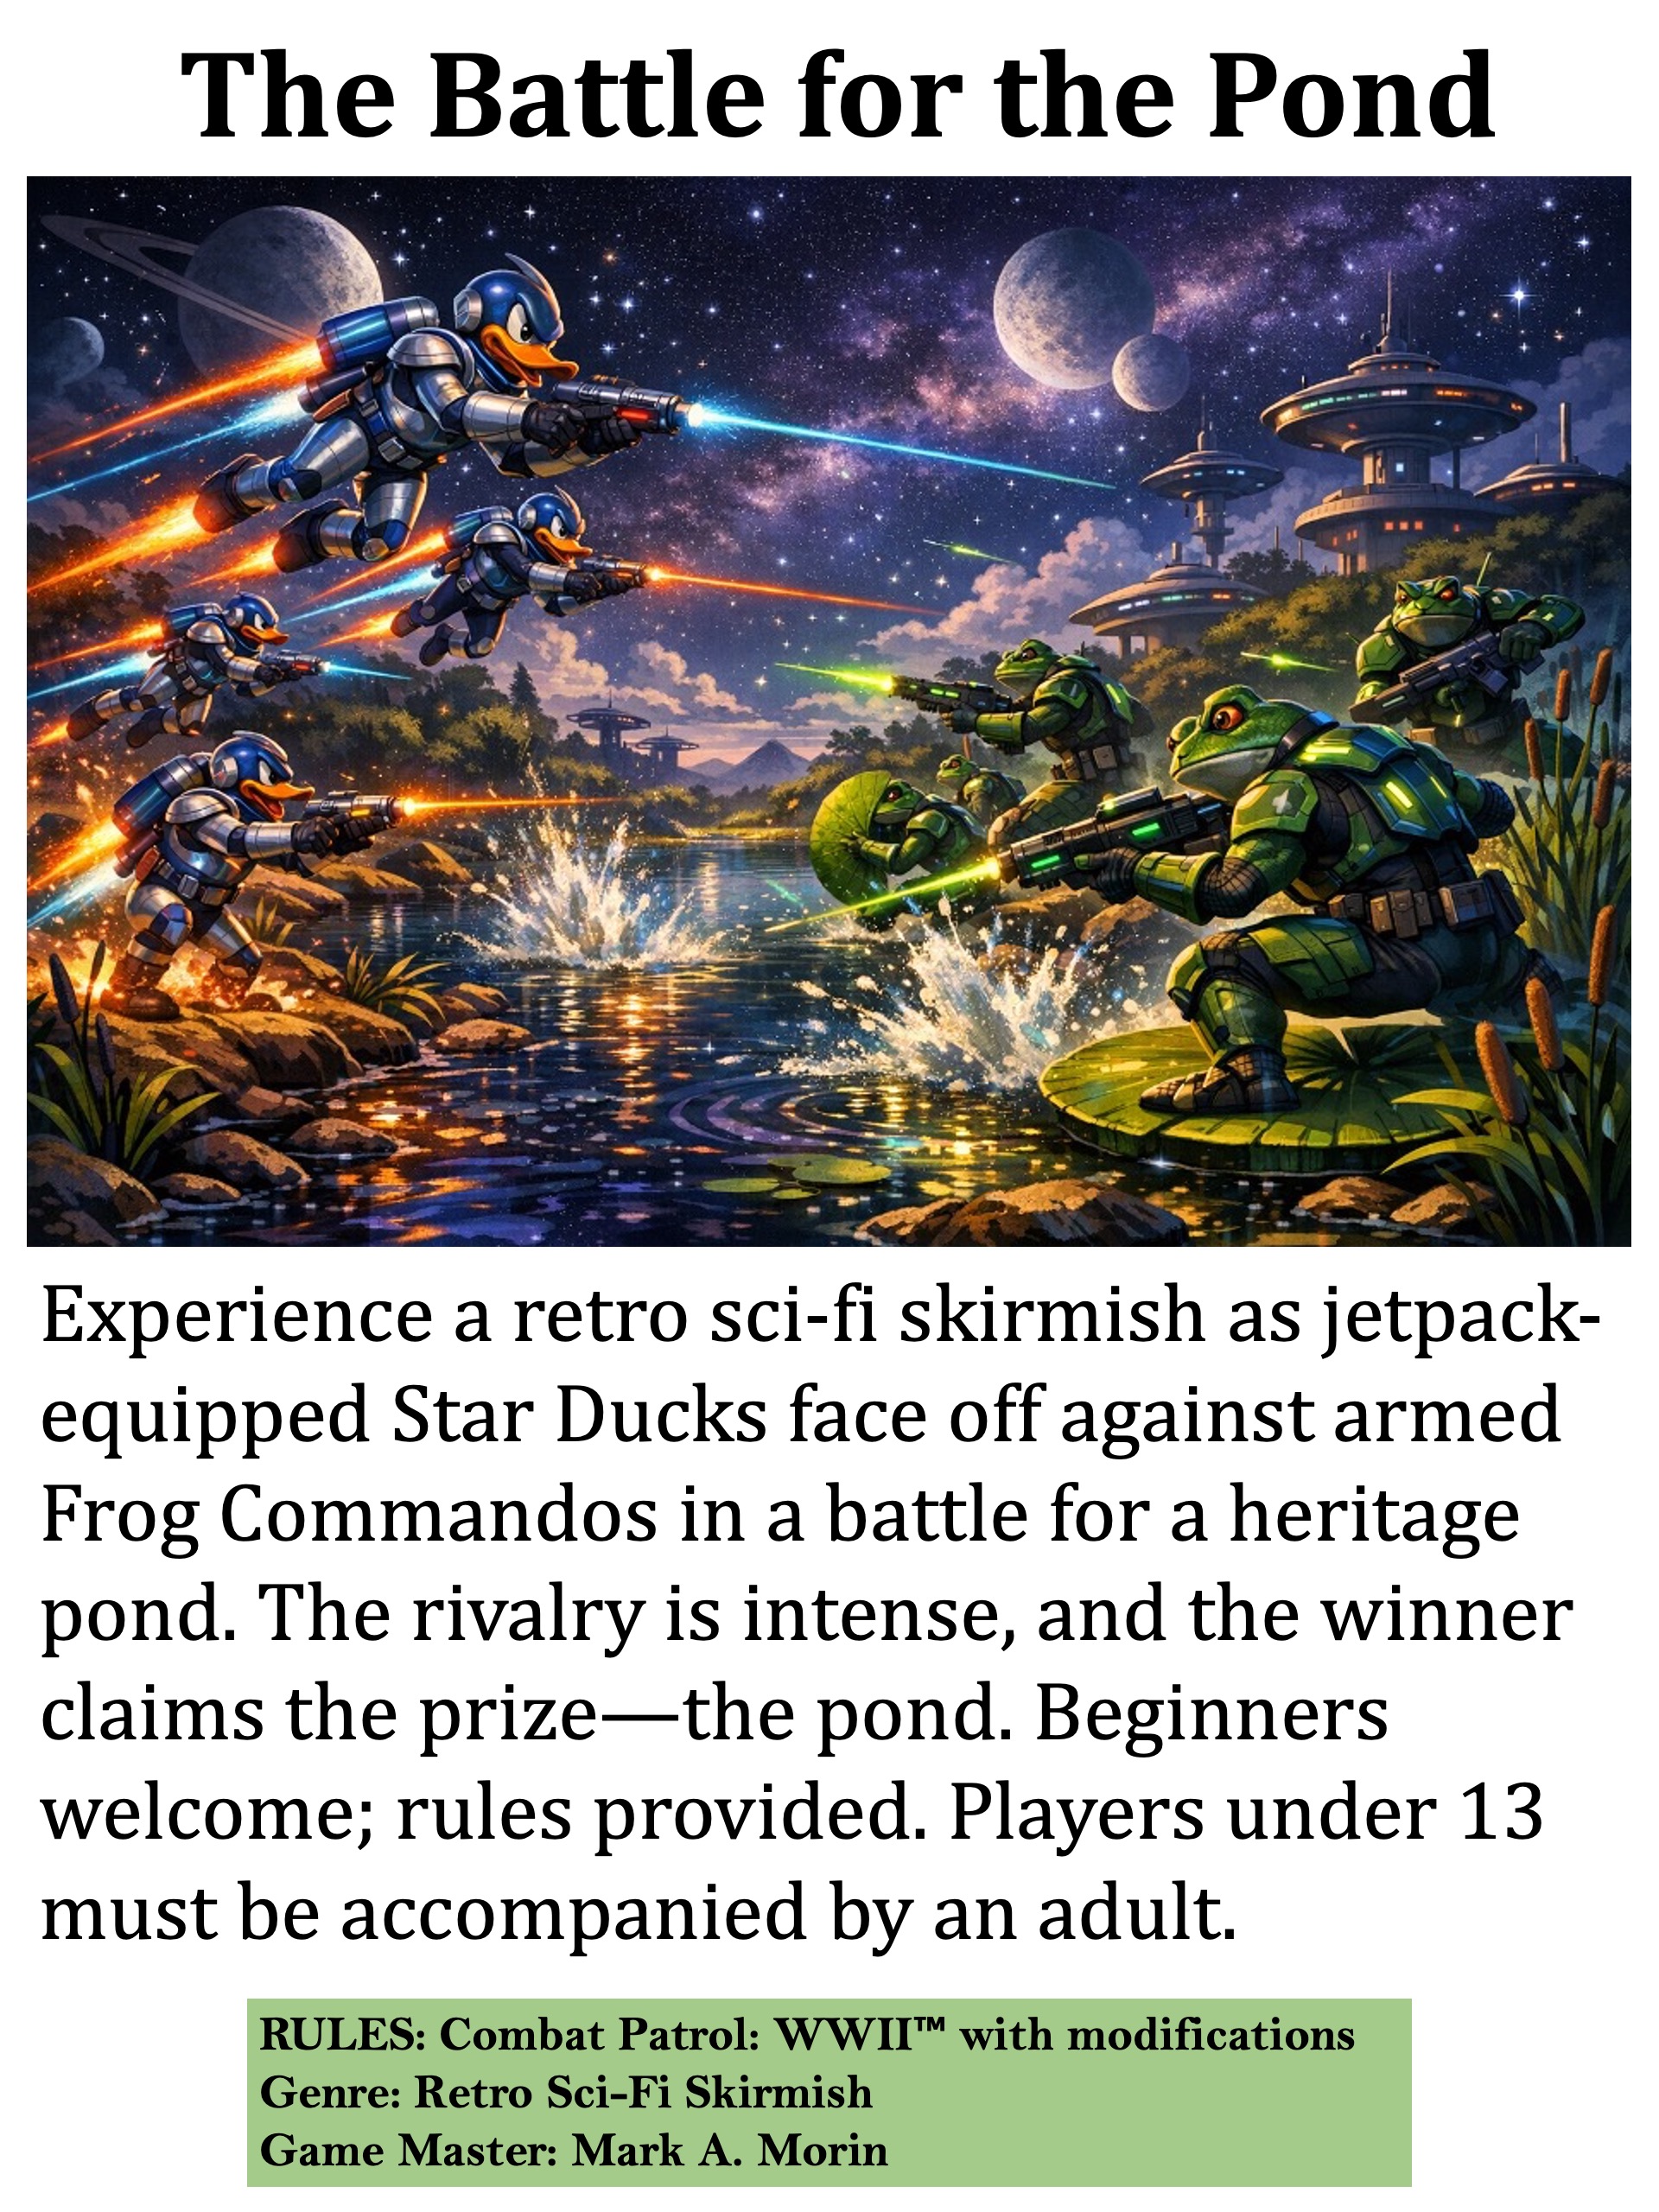
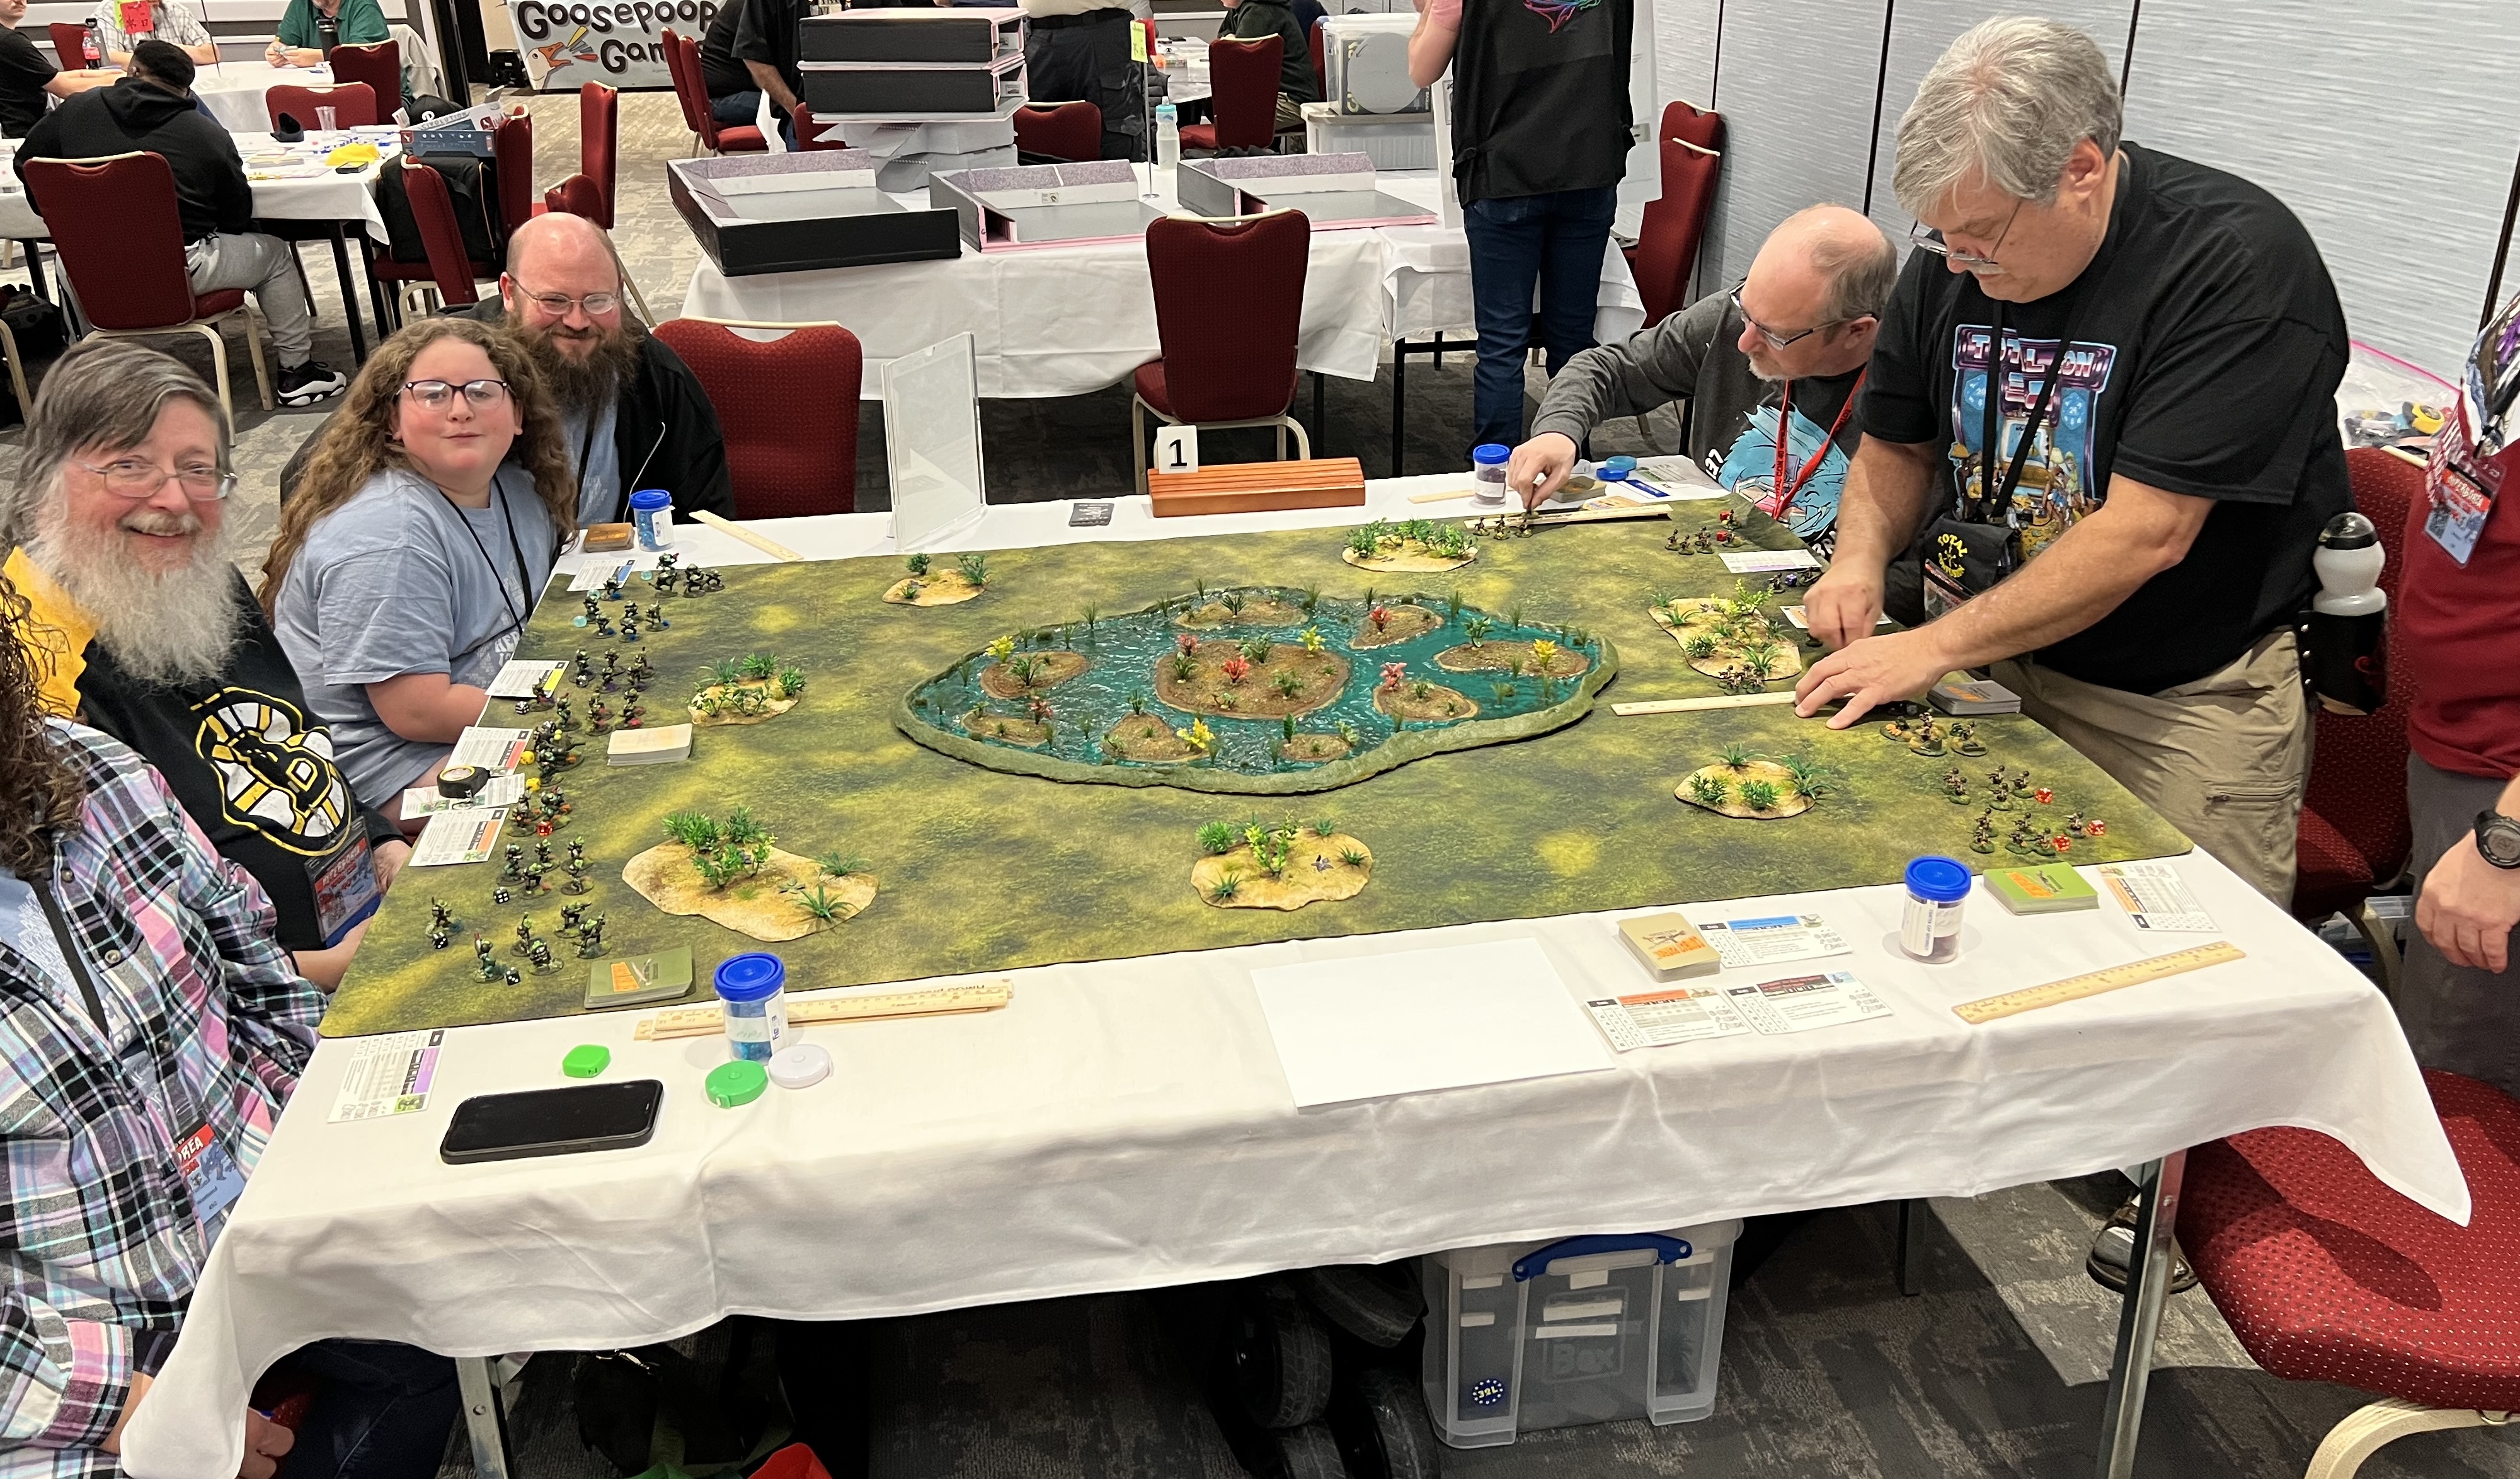
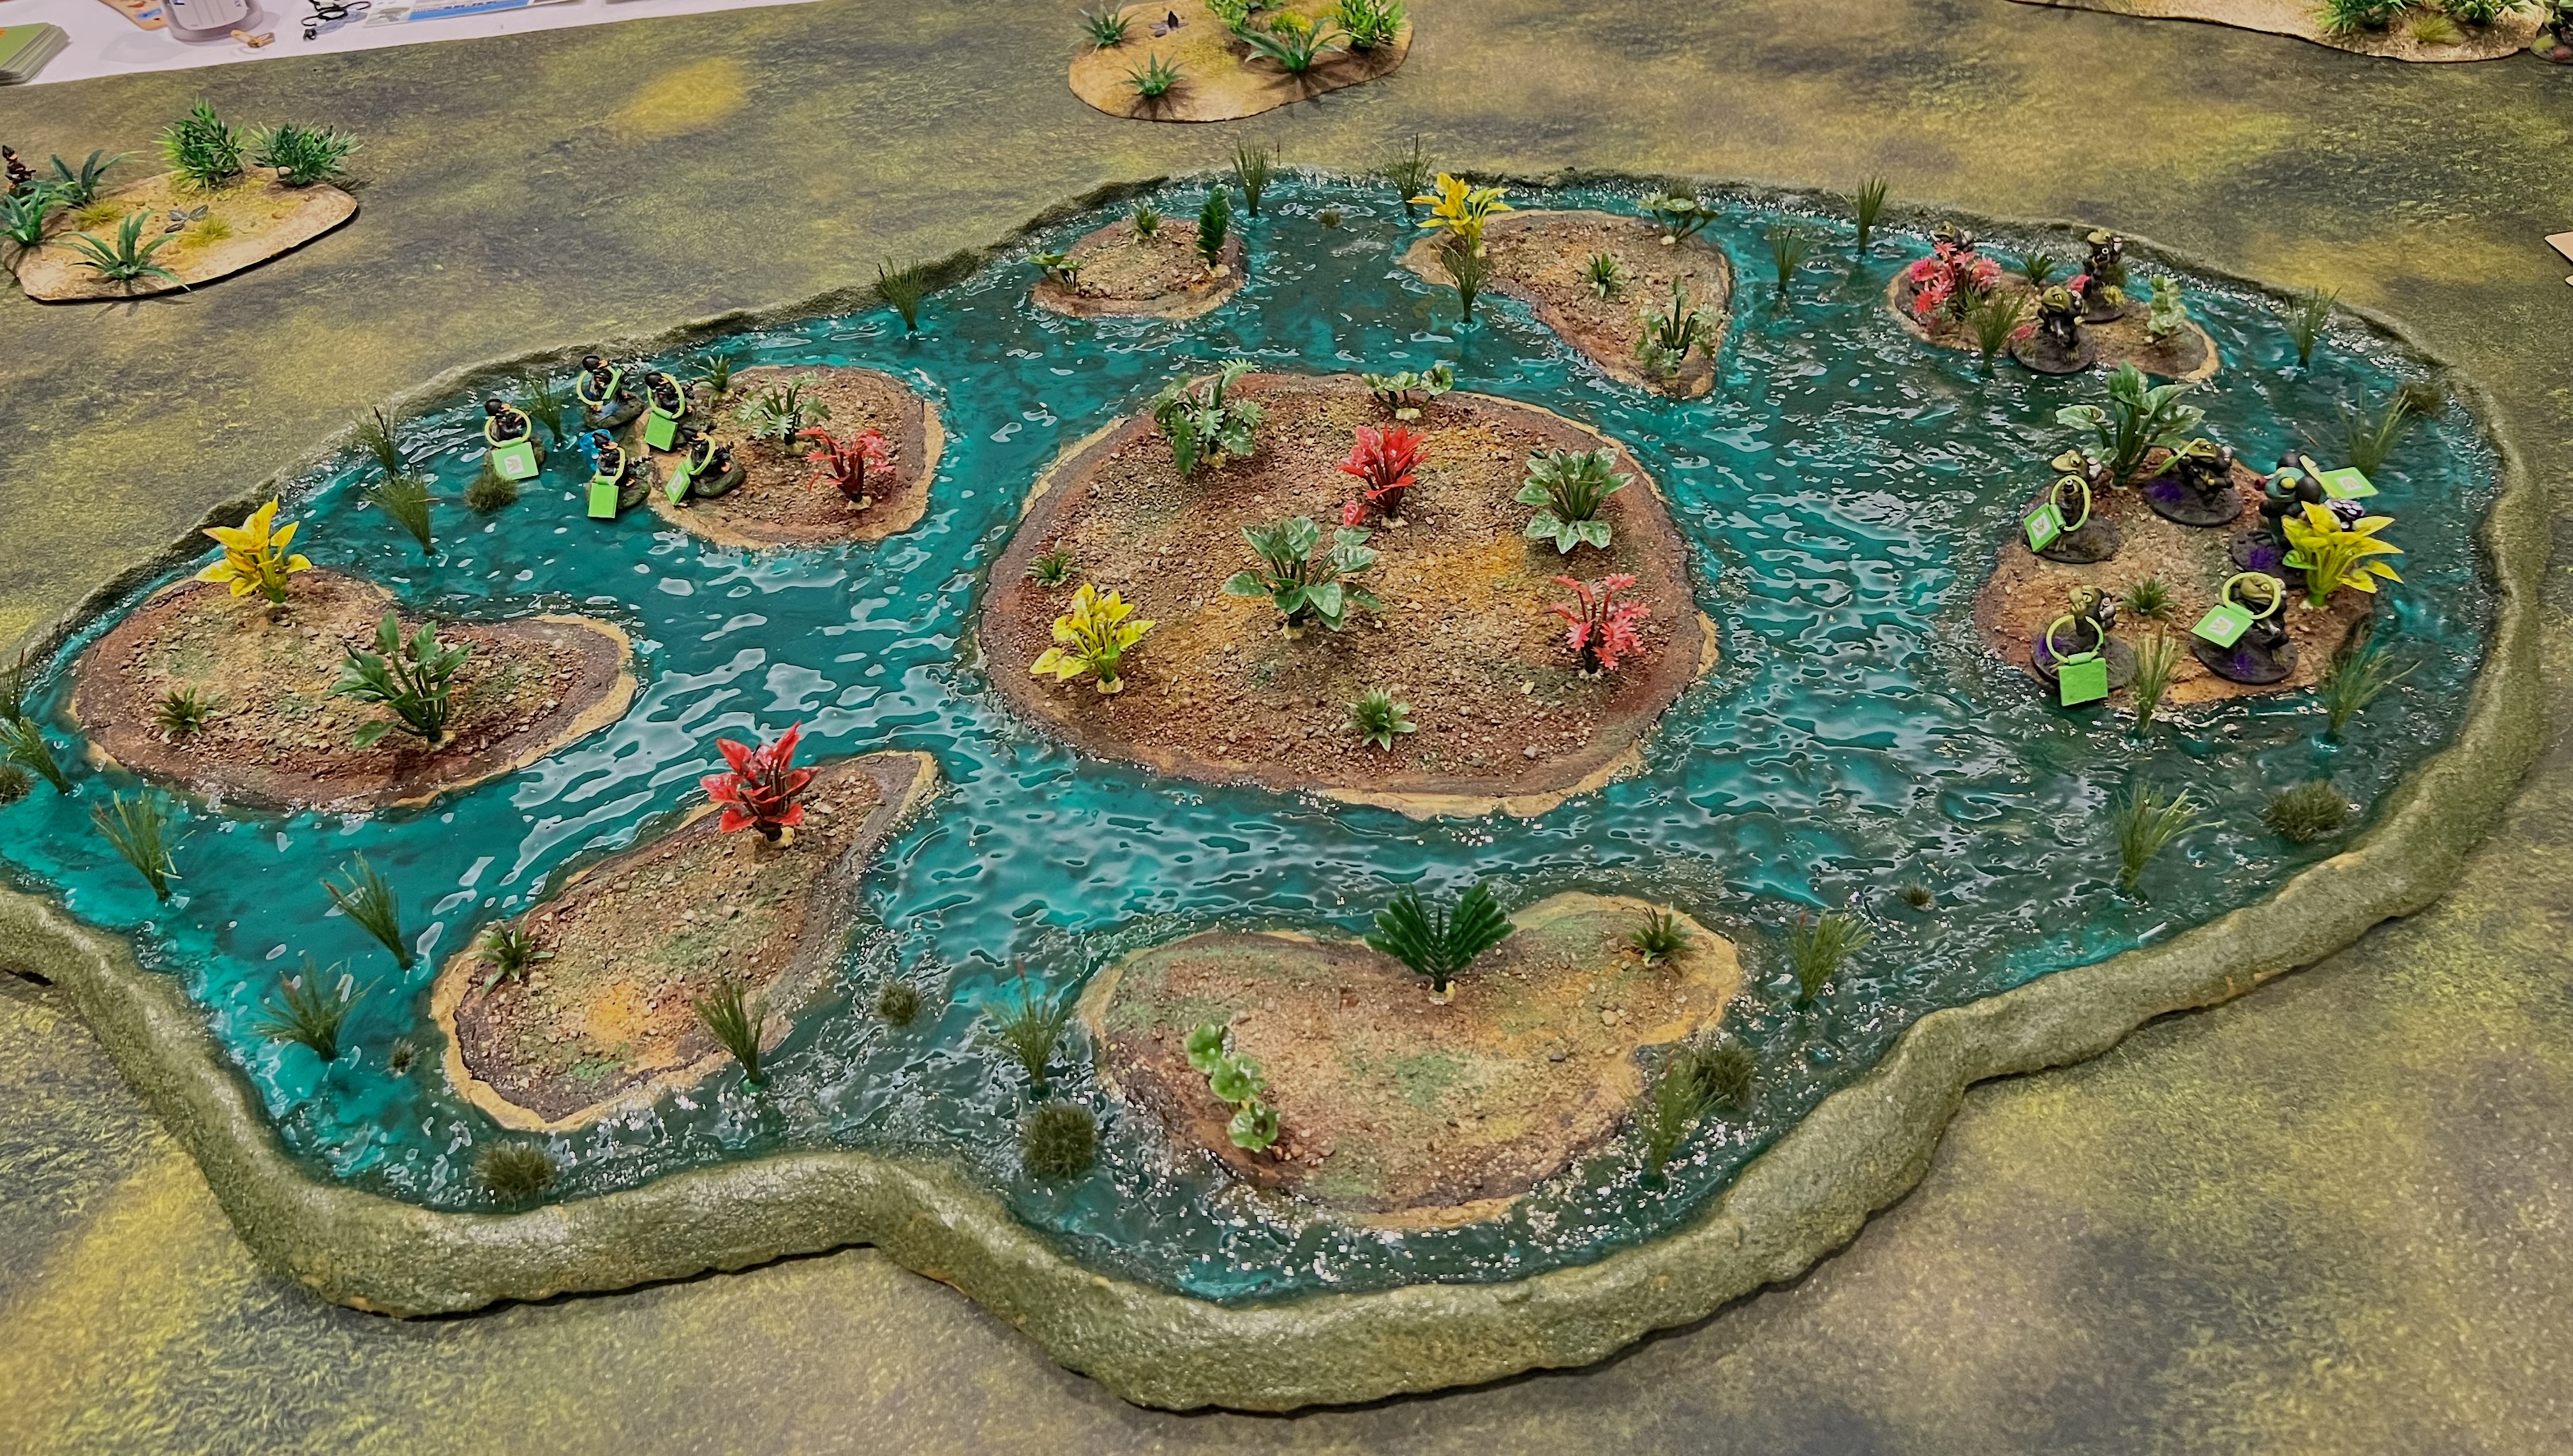
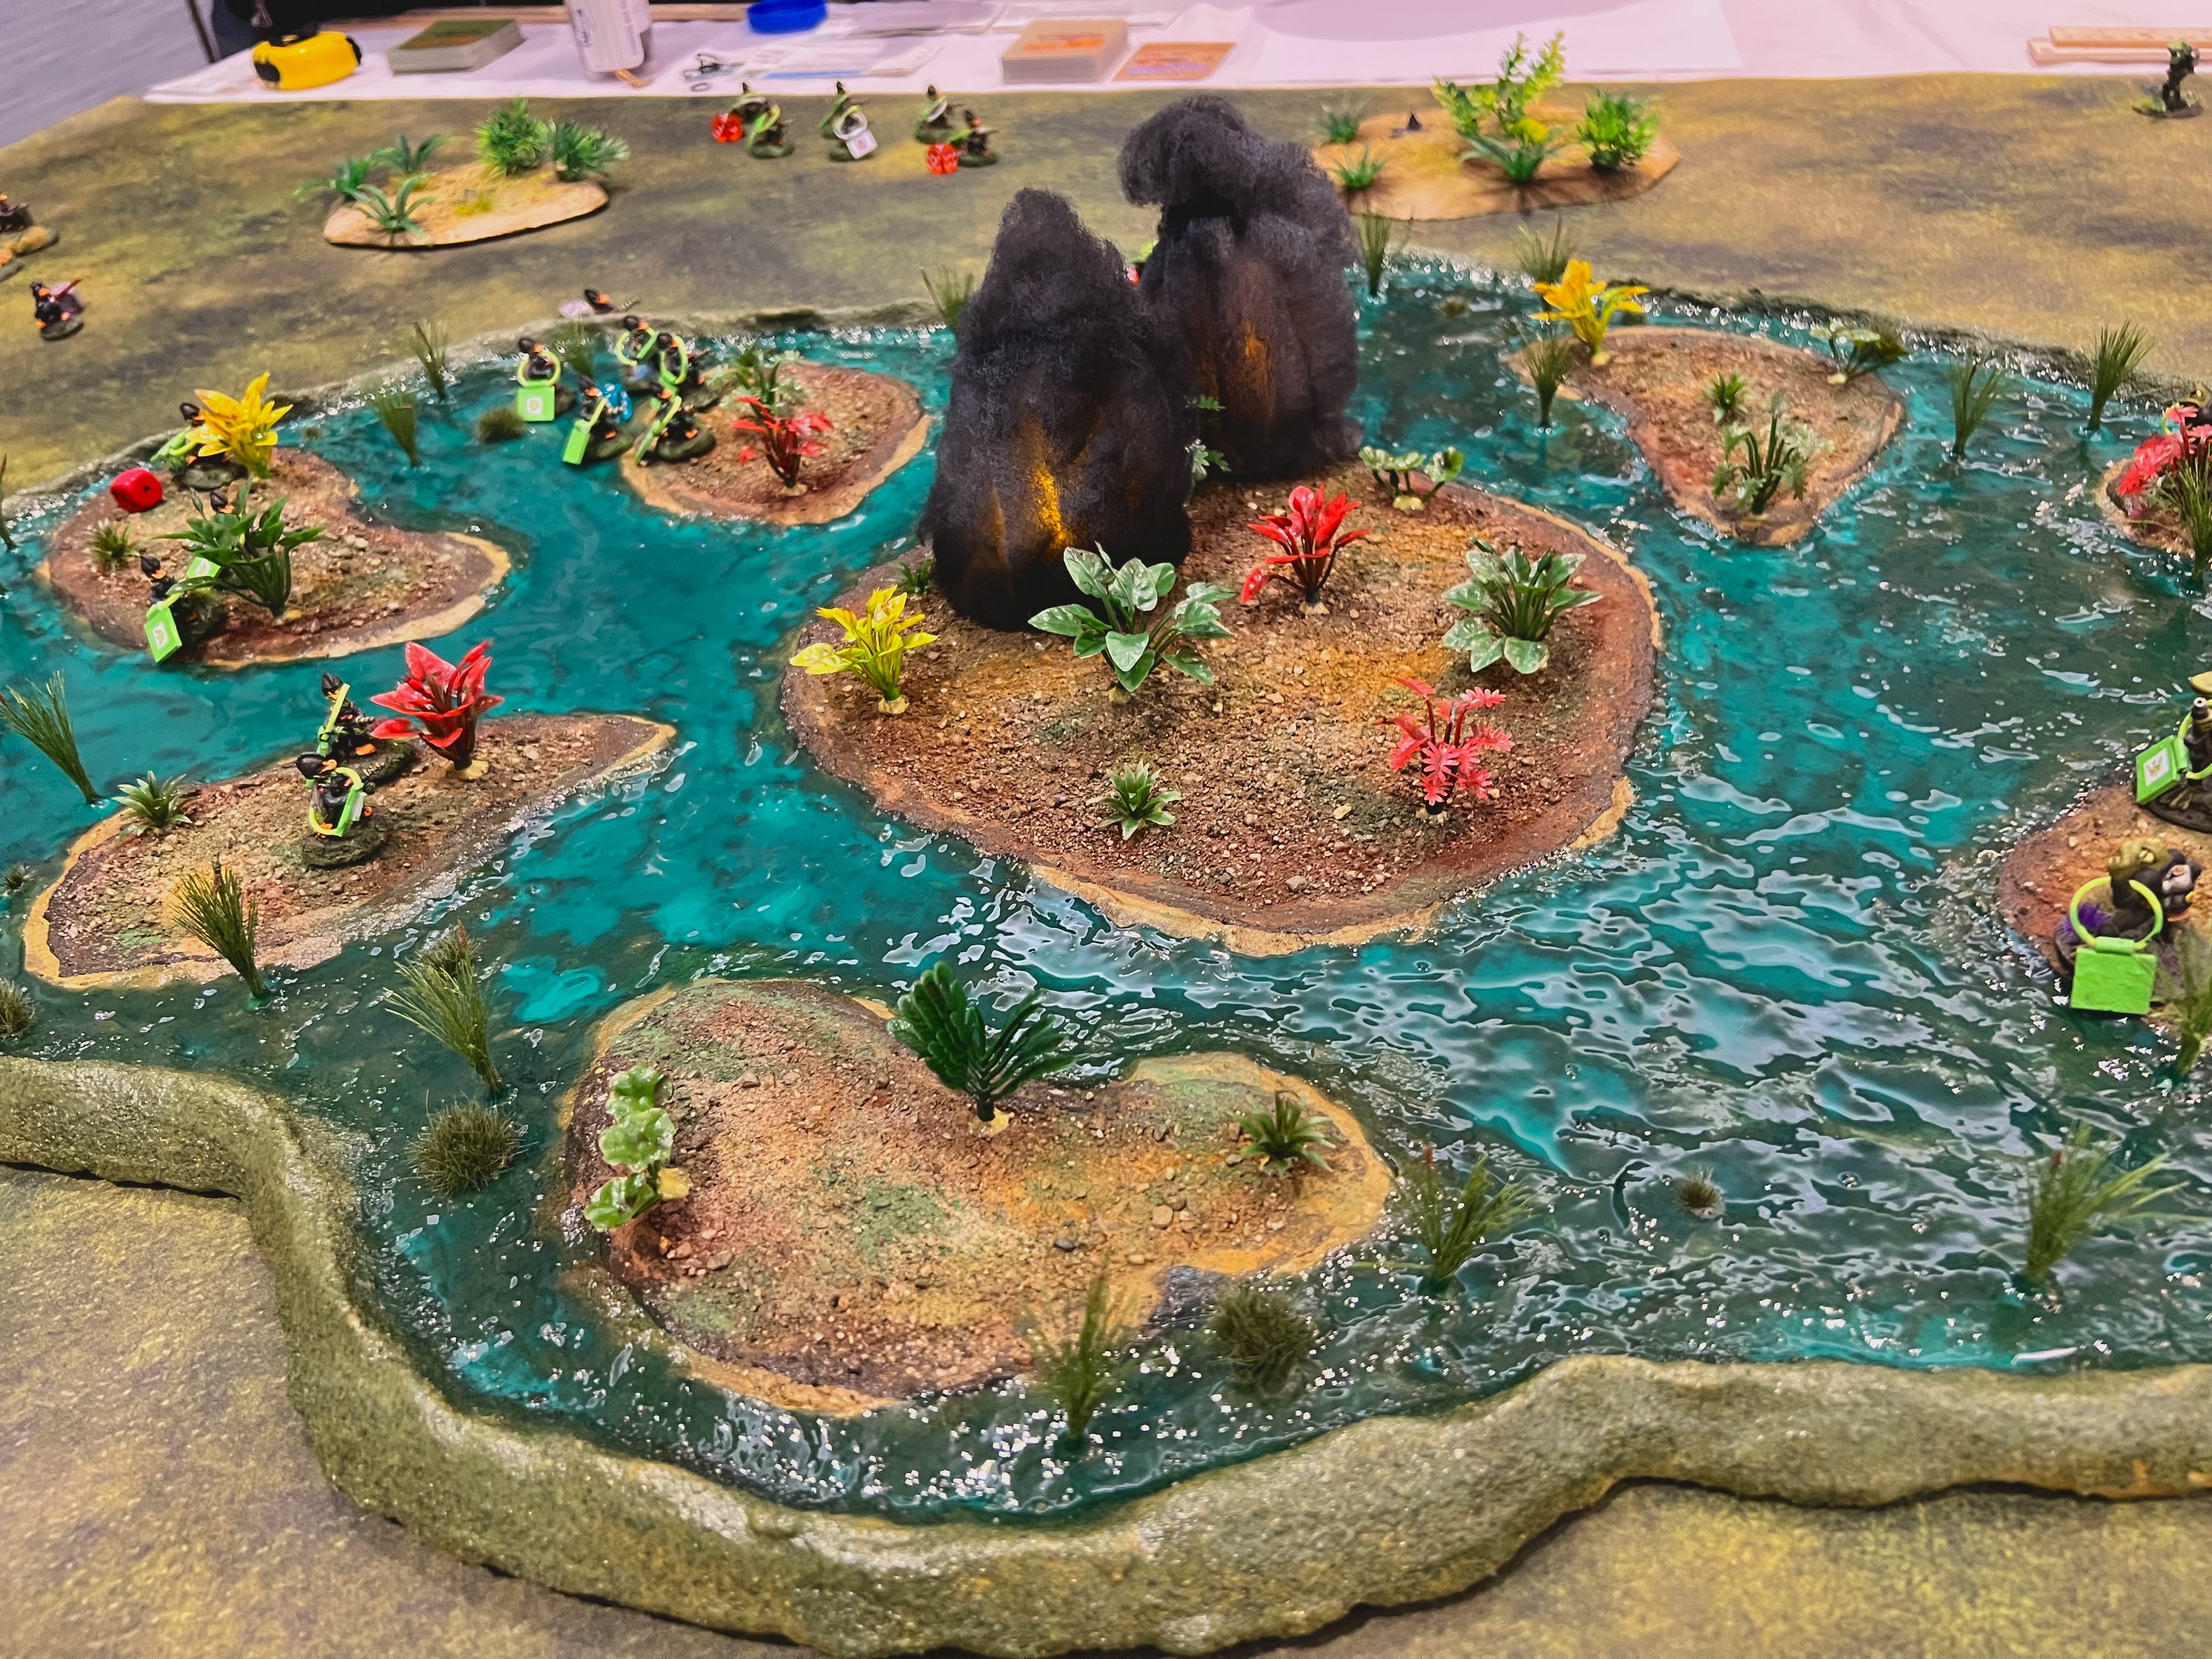
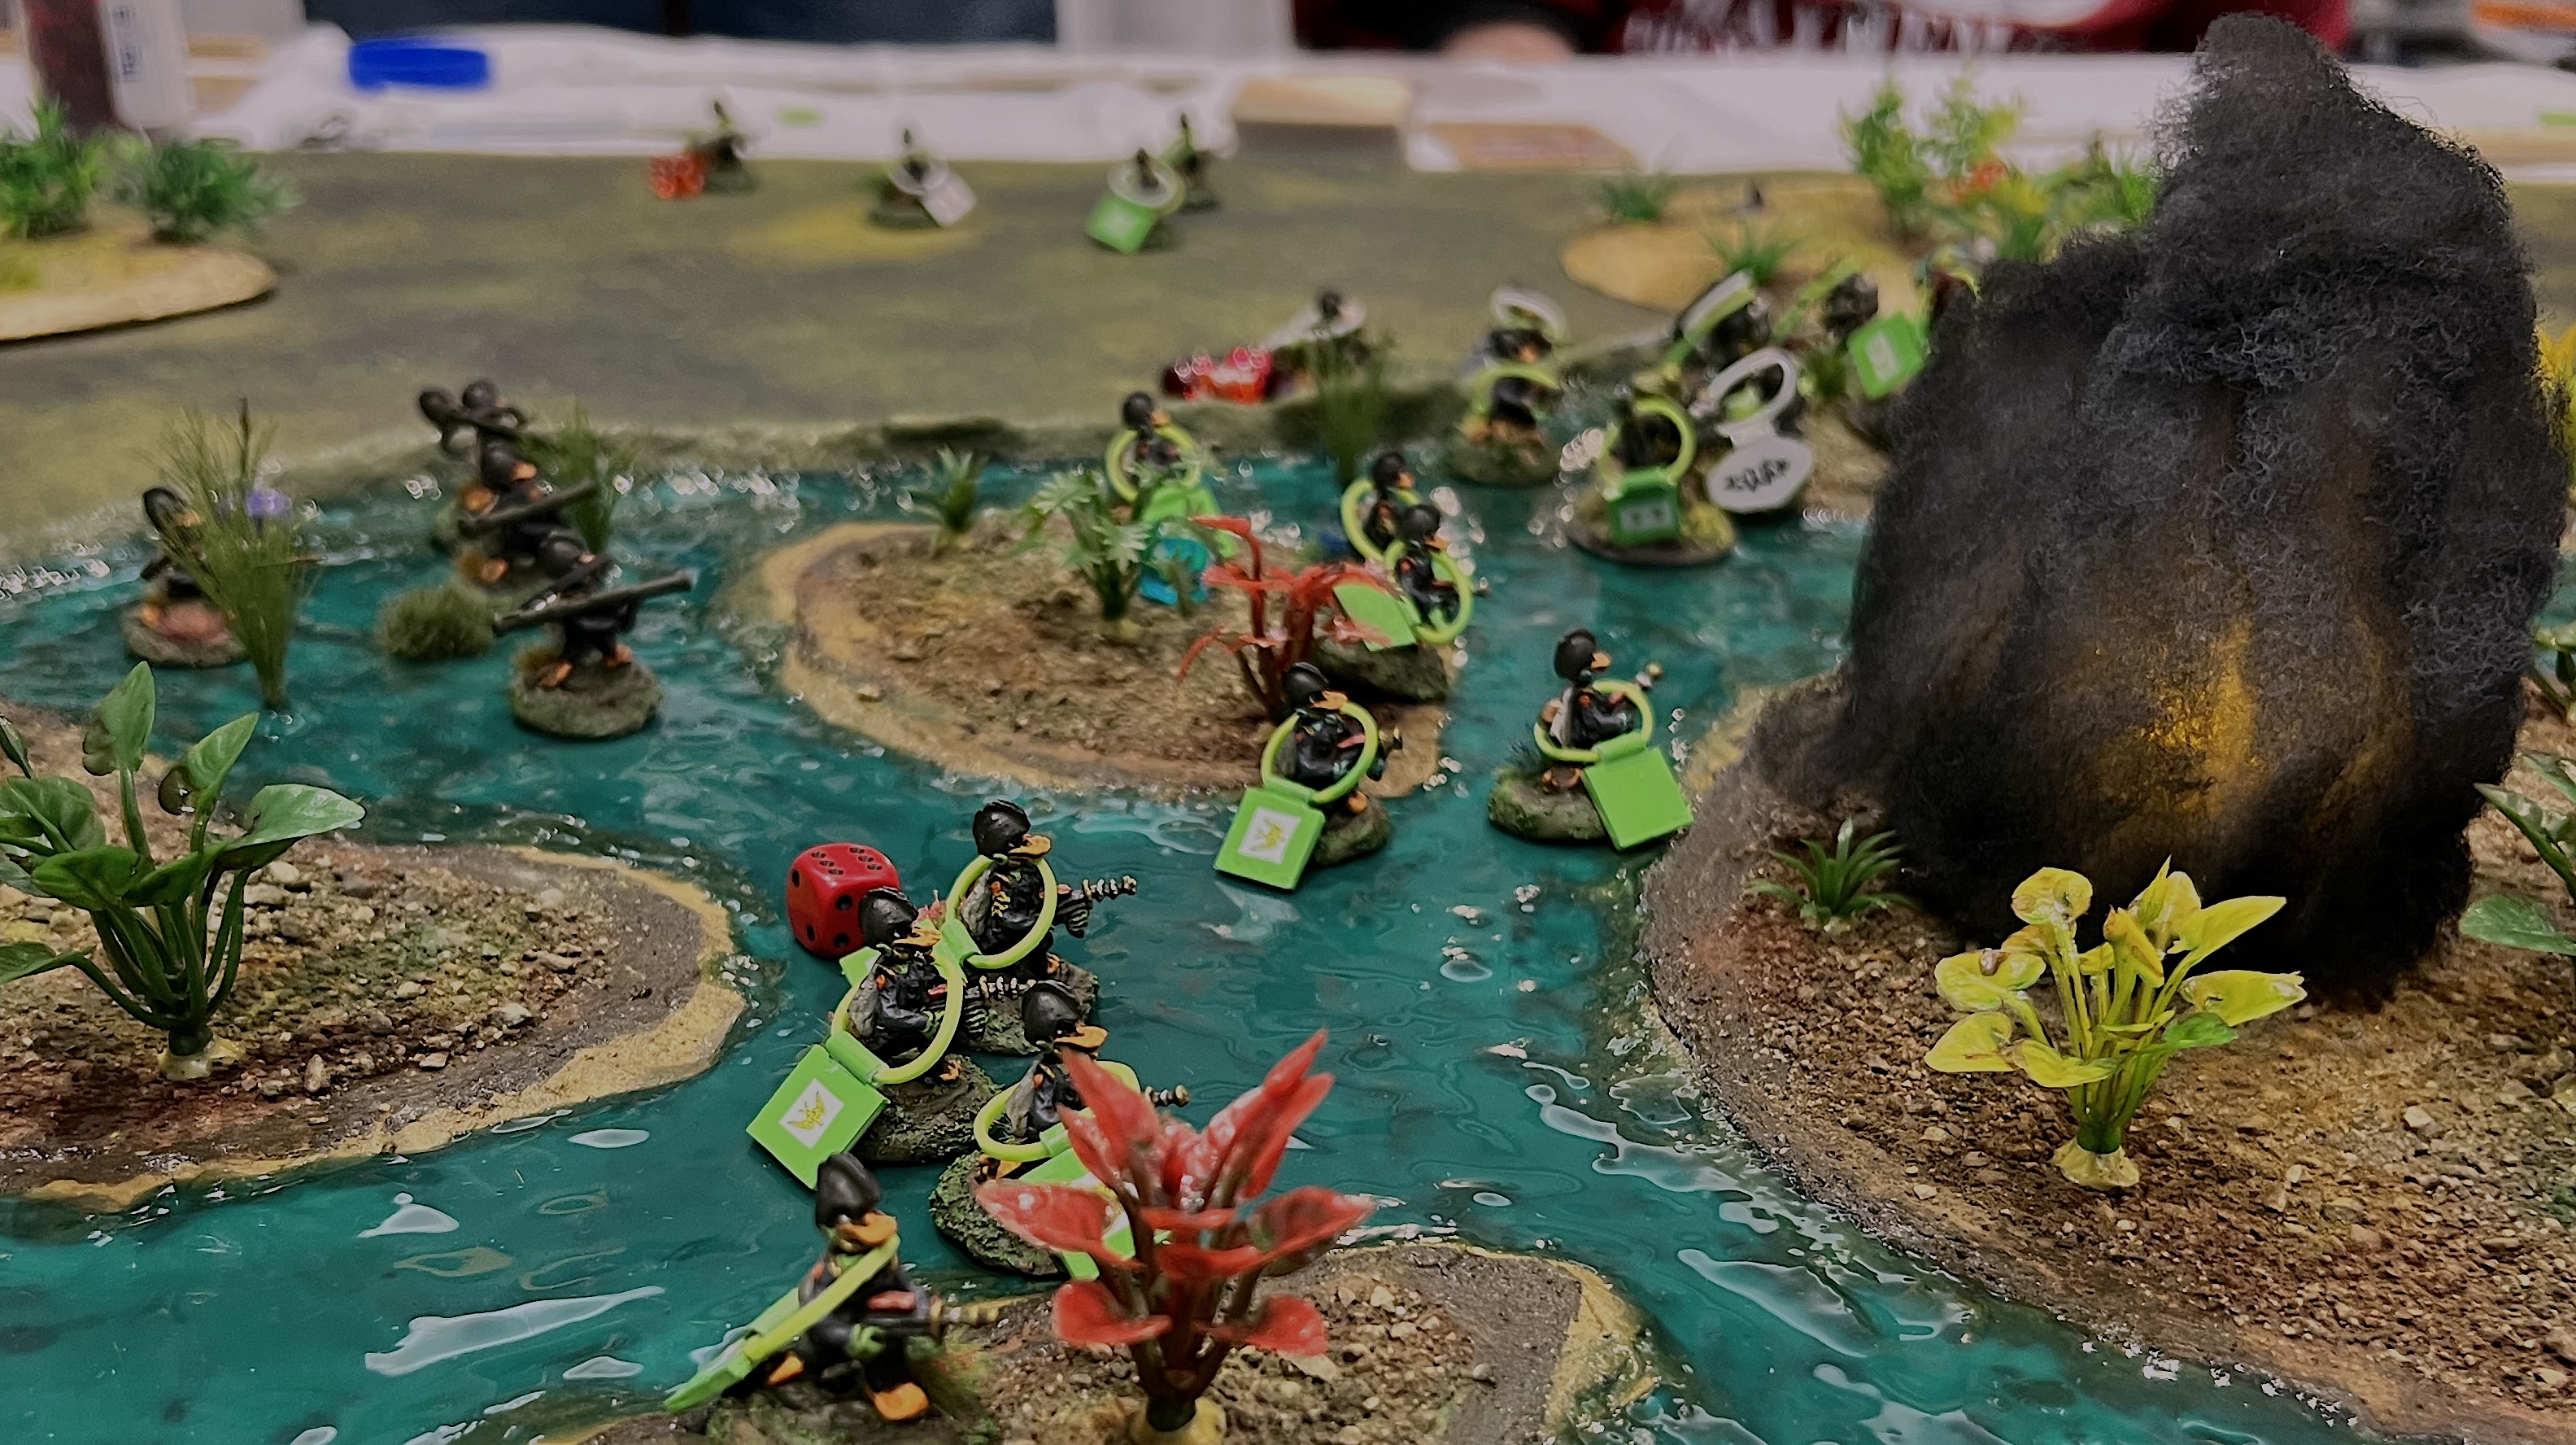
Battle for the Pond
This was a Combat Patrol:WWII retro sci-fi game using the pond that I described in my last post.
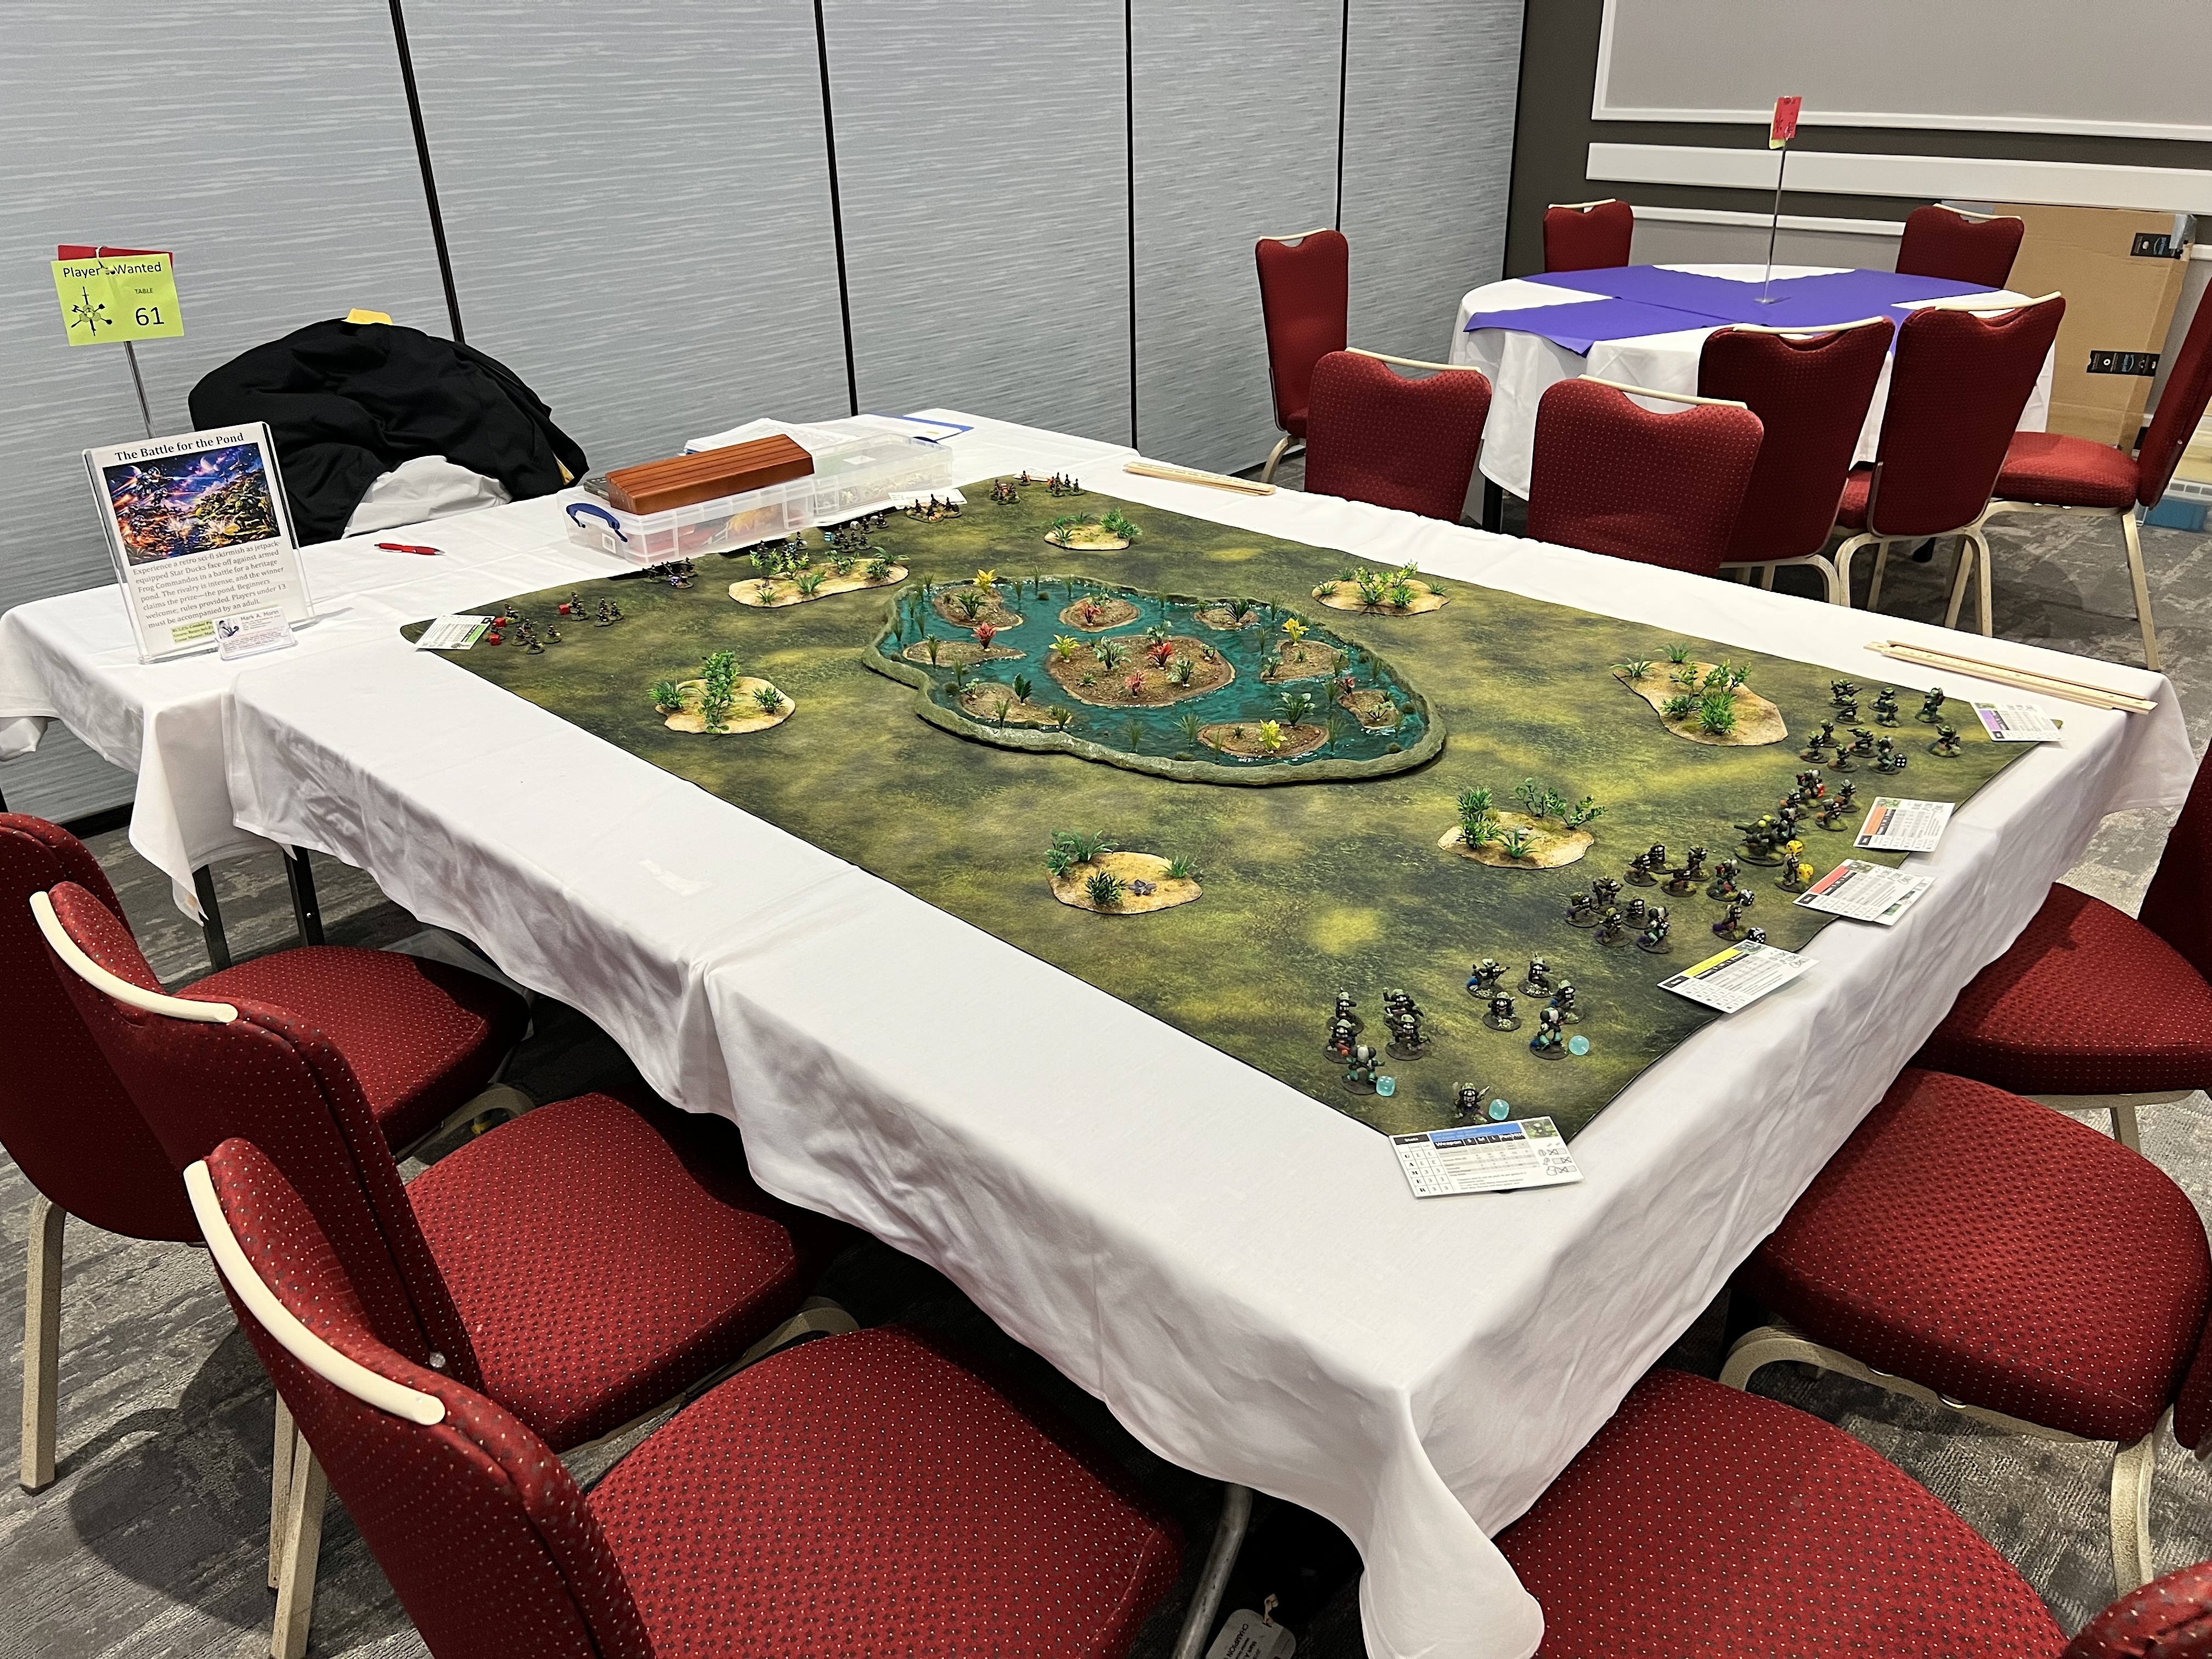
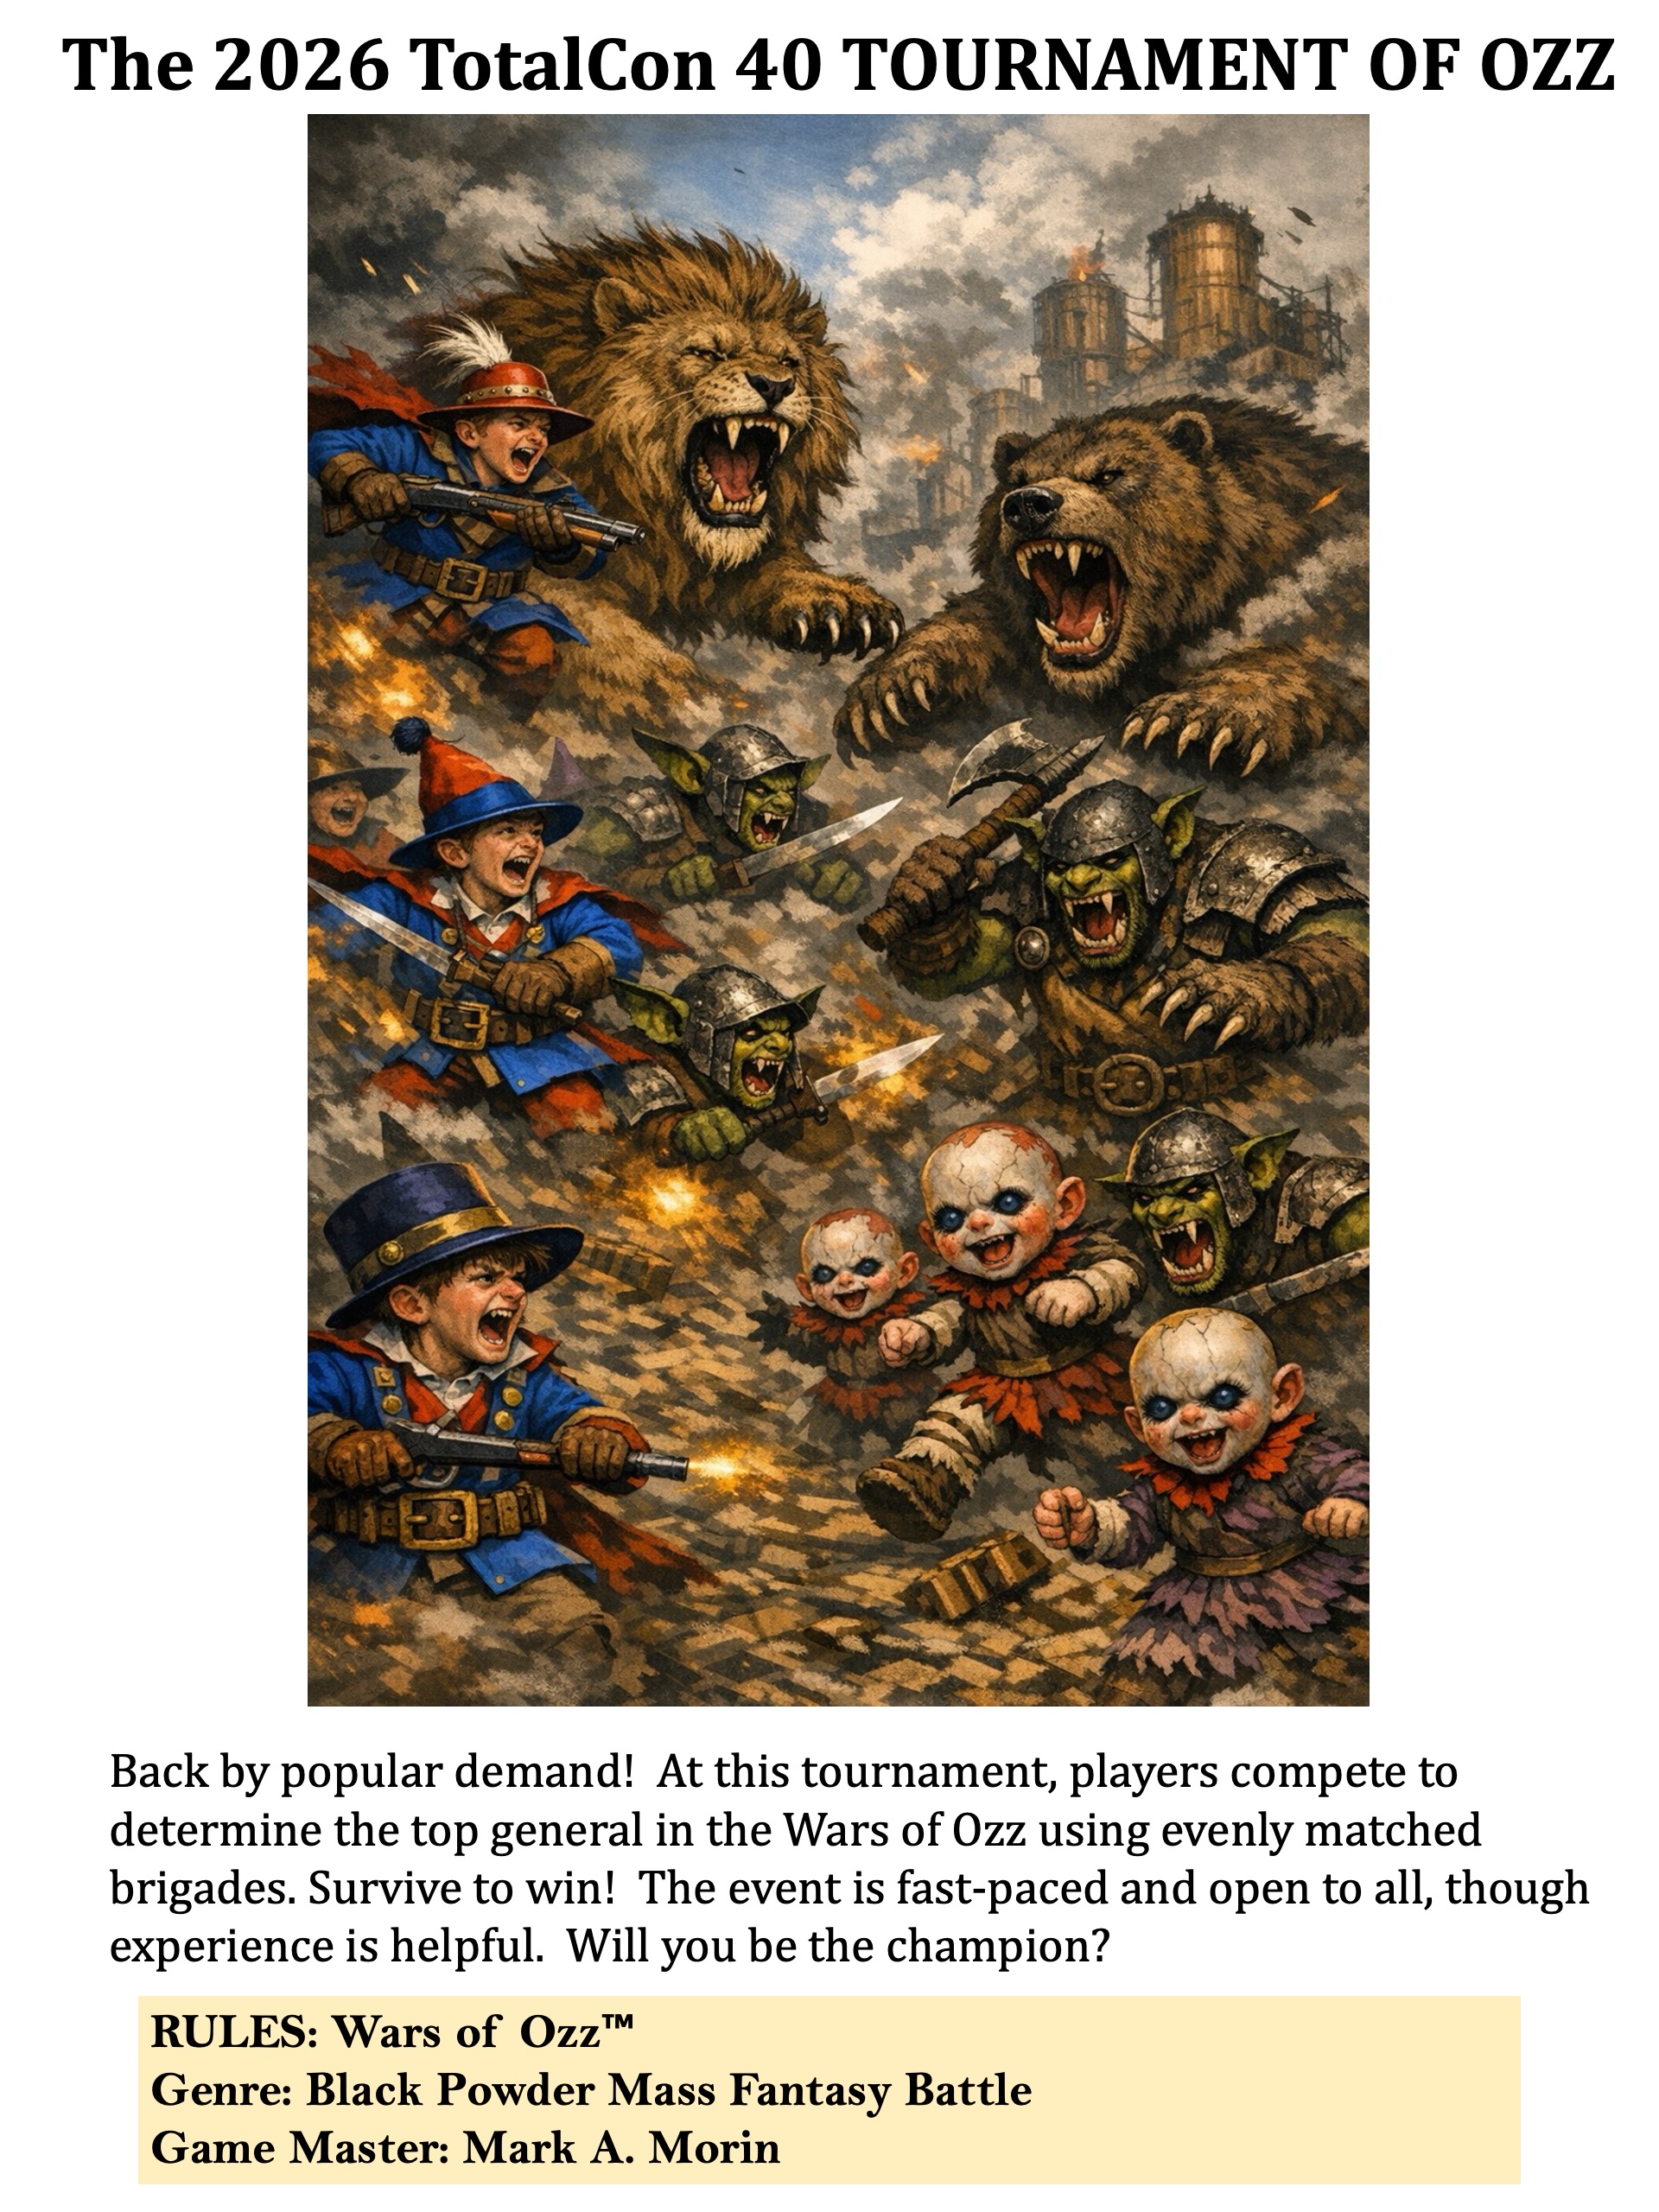
My game flyer.The tabletop set up for action. The F.R.O.G. Commandos are on the near side, with the Star Ducks on the far end. The Star Ducks are Archive Miniatures Star Rovers figures from the late ’70’s/early 80’s. The Frogs are Critter Commandos figures from the early 1990’s.The Star Duck players move up.The Star Ducks use one of their two jet pack moves to occupy islands. In the game, control of the smaller islands was worth 5 points. Controlling the largest island earned players 10 points.The Frogs were also jet packing. The Star Ducks used mortars to lay down a protective smoke screen against their automatic weapons fire.In the end, the luck of the cards deserted the Frogs, with almost every island in Star Duck control.
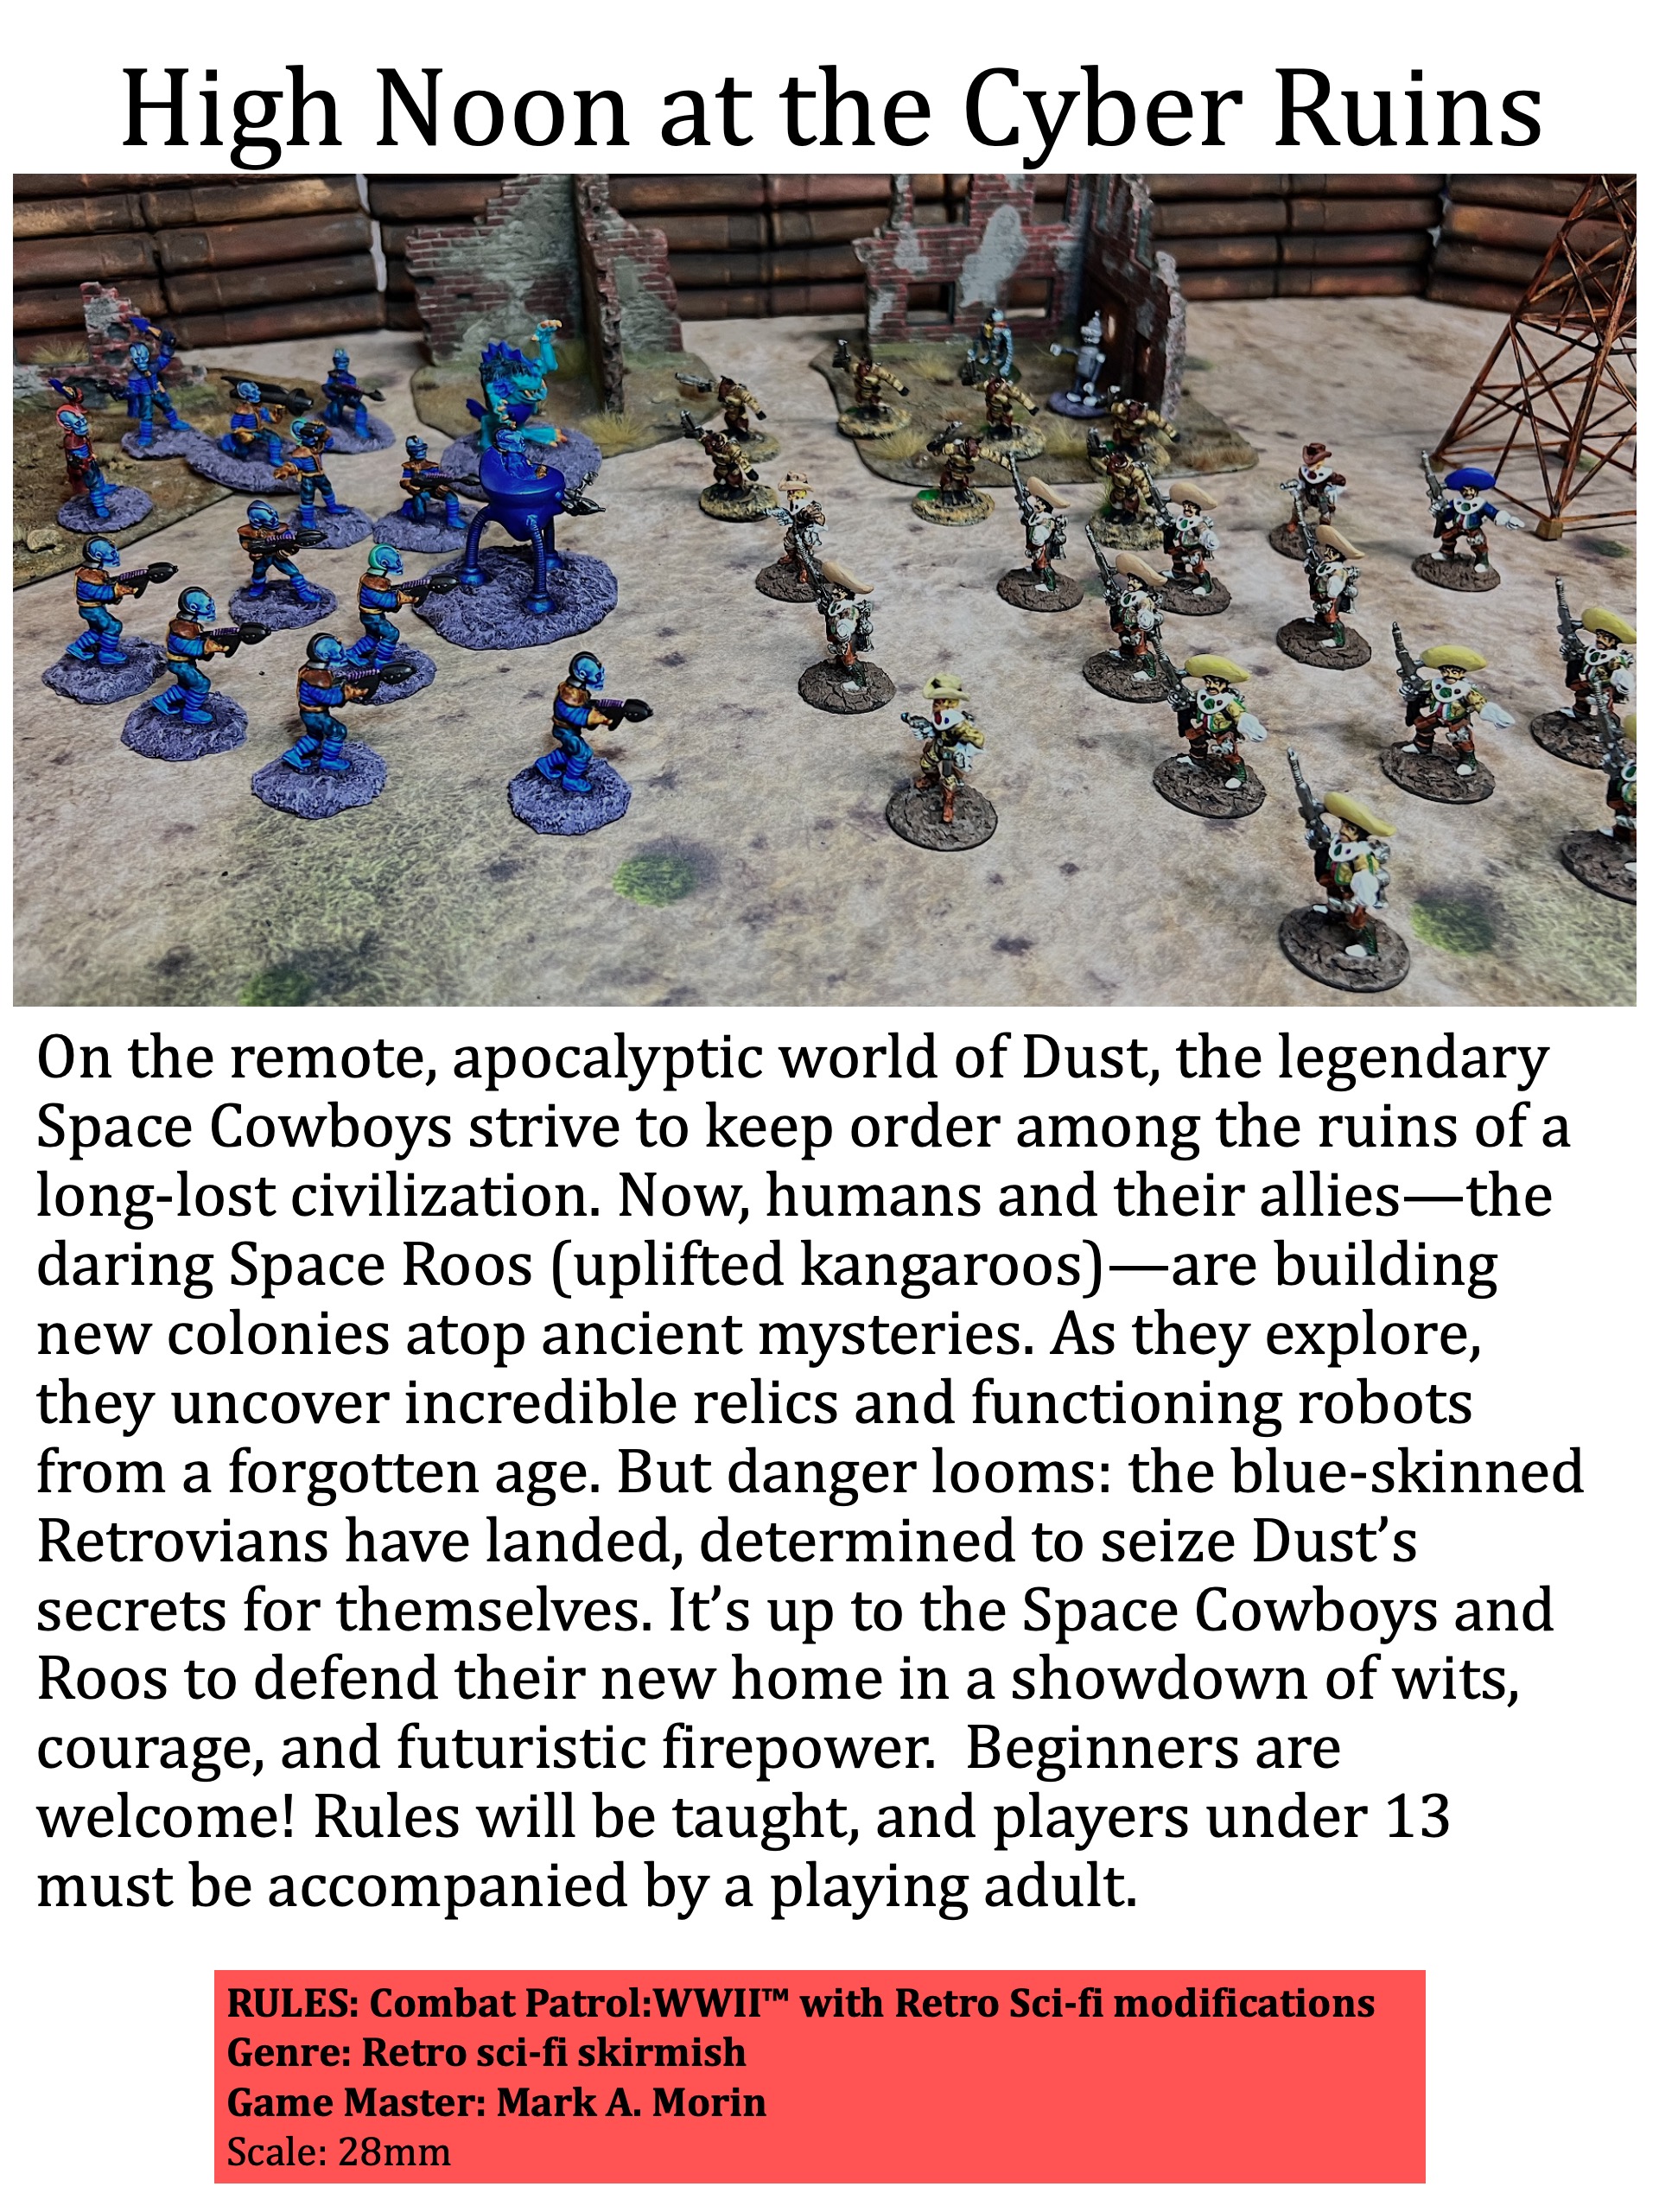
High Noon at the Cyber Ruins
I ran this Combat Patrol retro sci-fi game at Cold Wars, but on a bigger table. I used a different mat and adapted the game to a smaller footprint.
Game flyer.
To win the game, both sides get credit (victory points) for inflicting enemy casualties and finding hidden ancient robots.
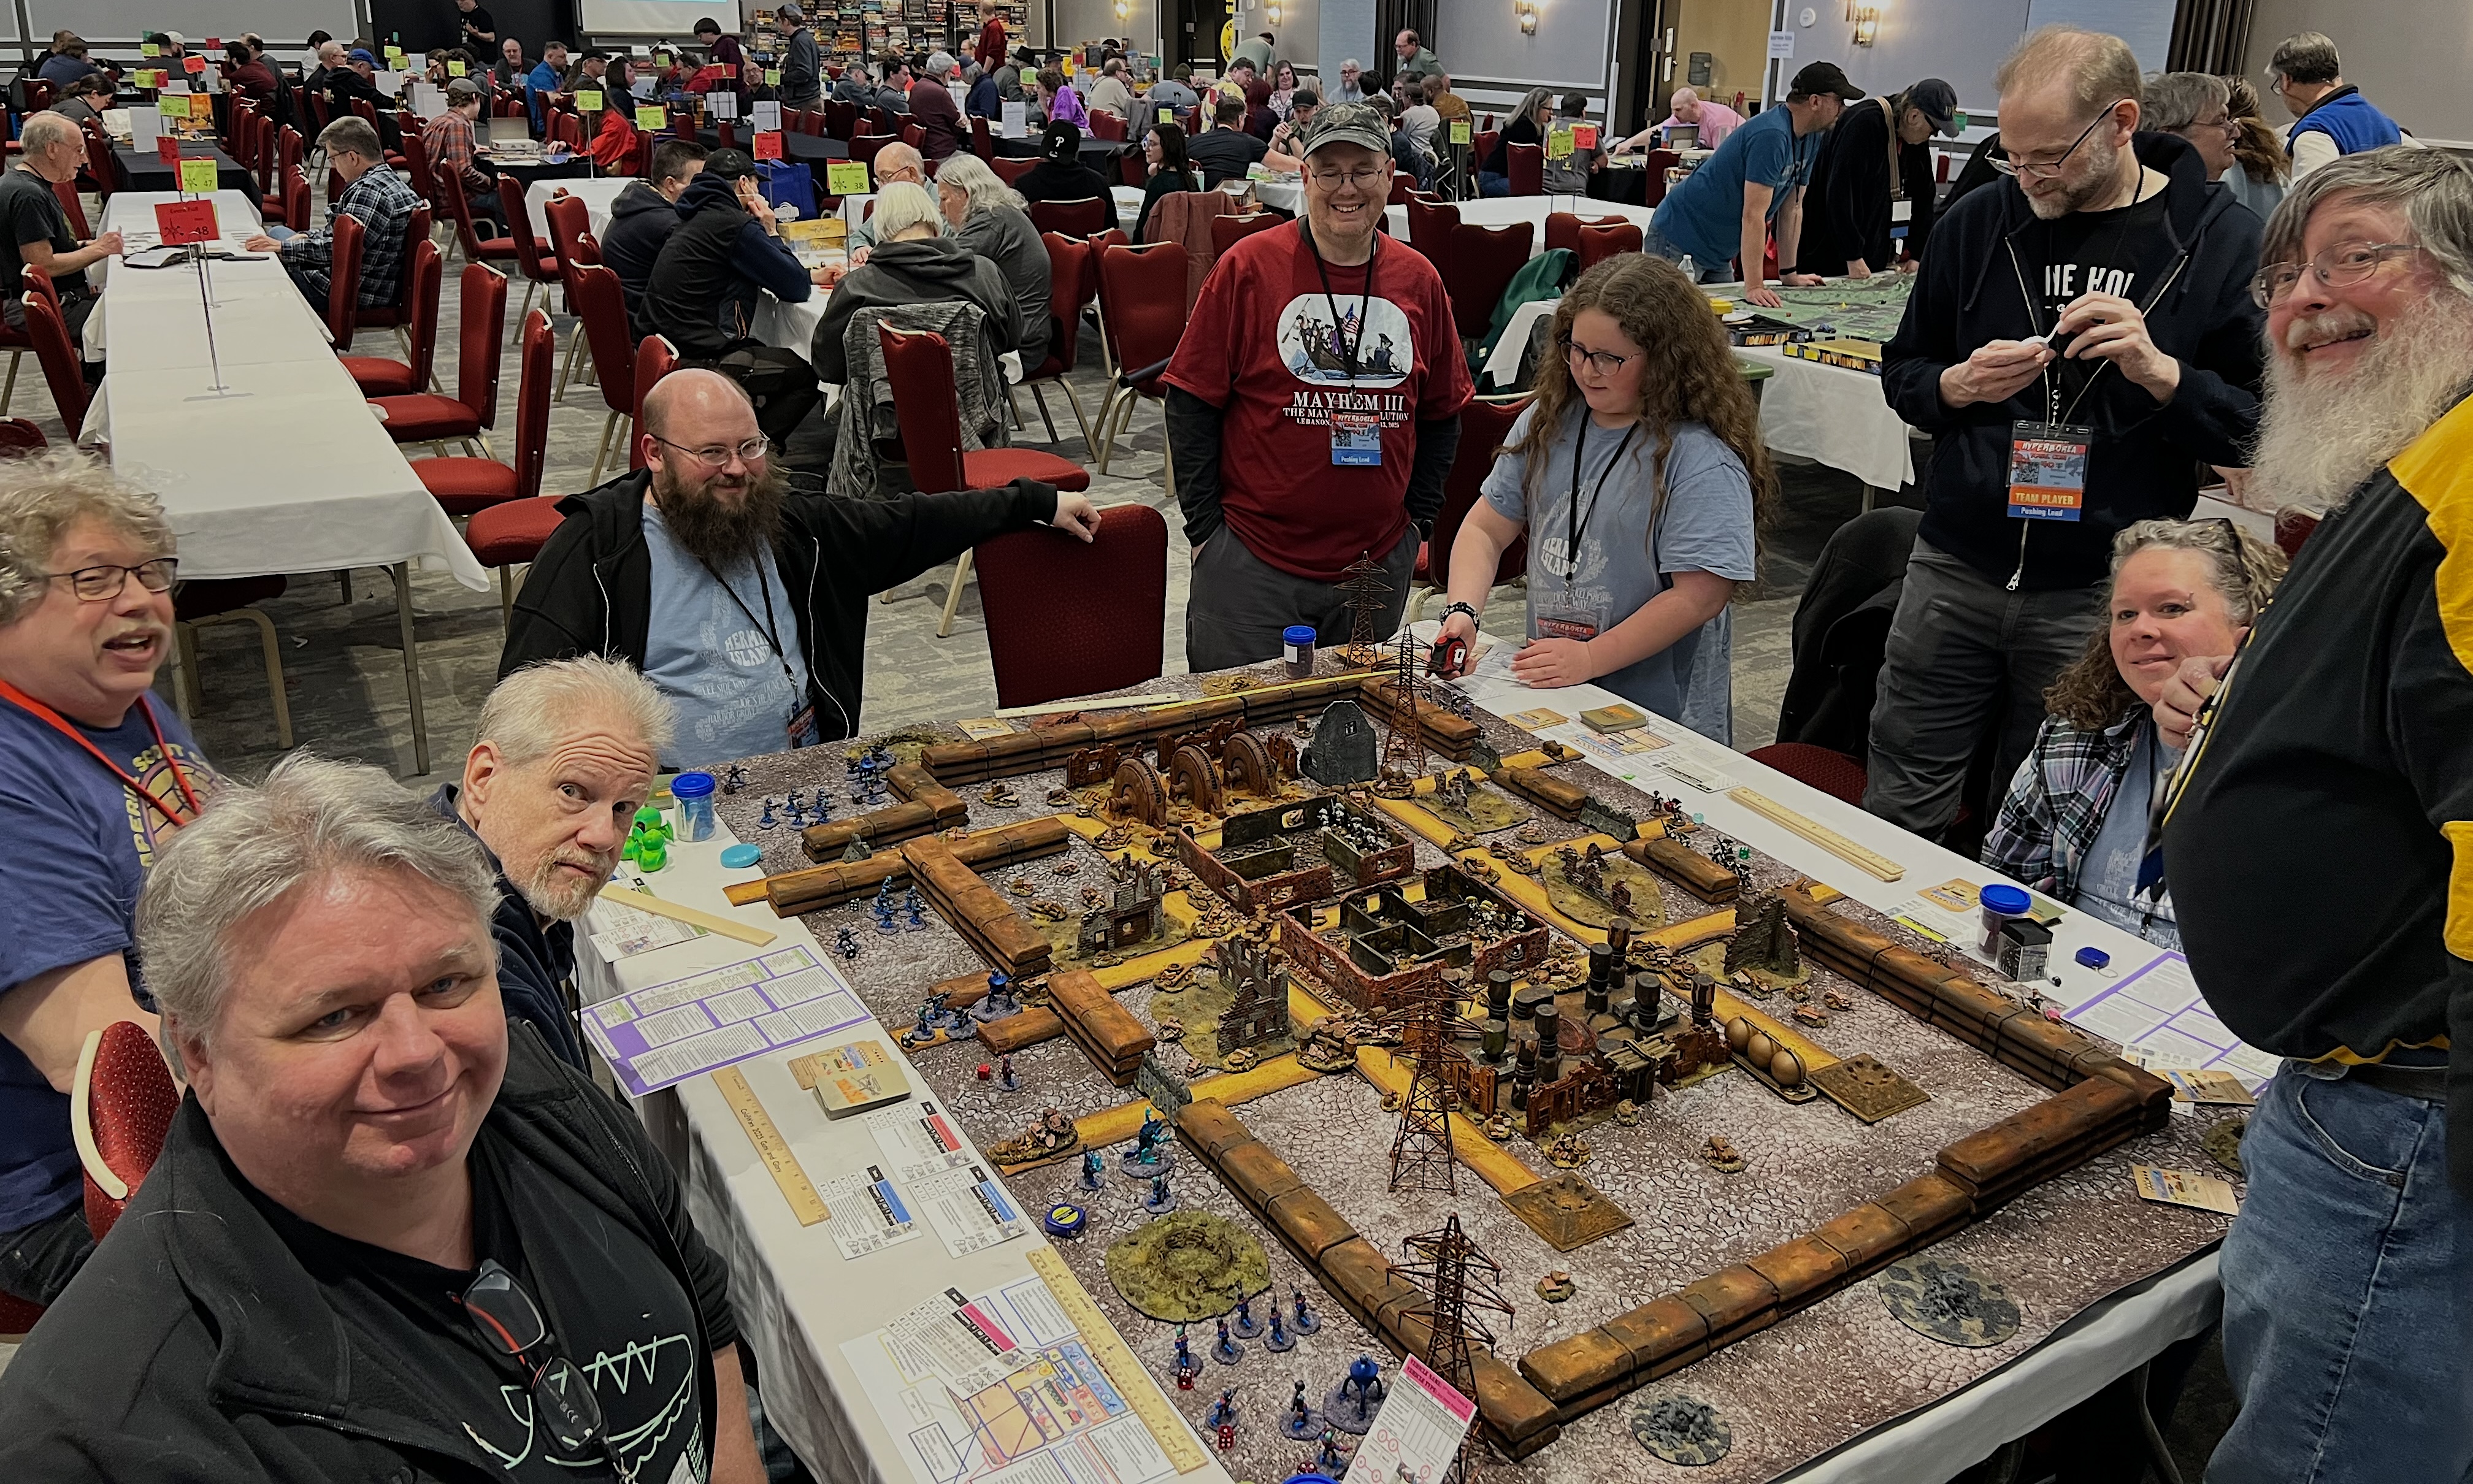
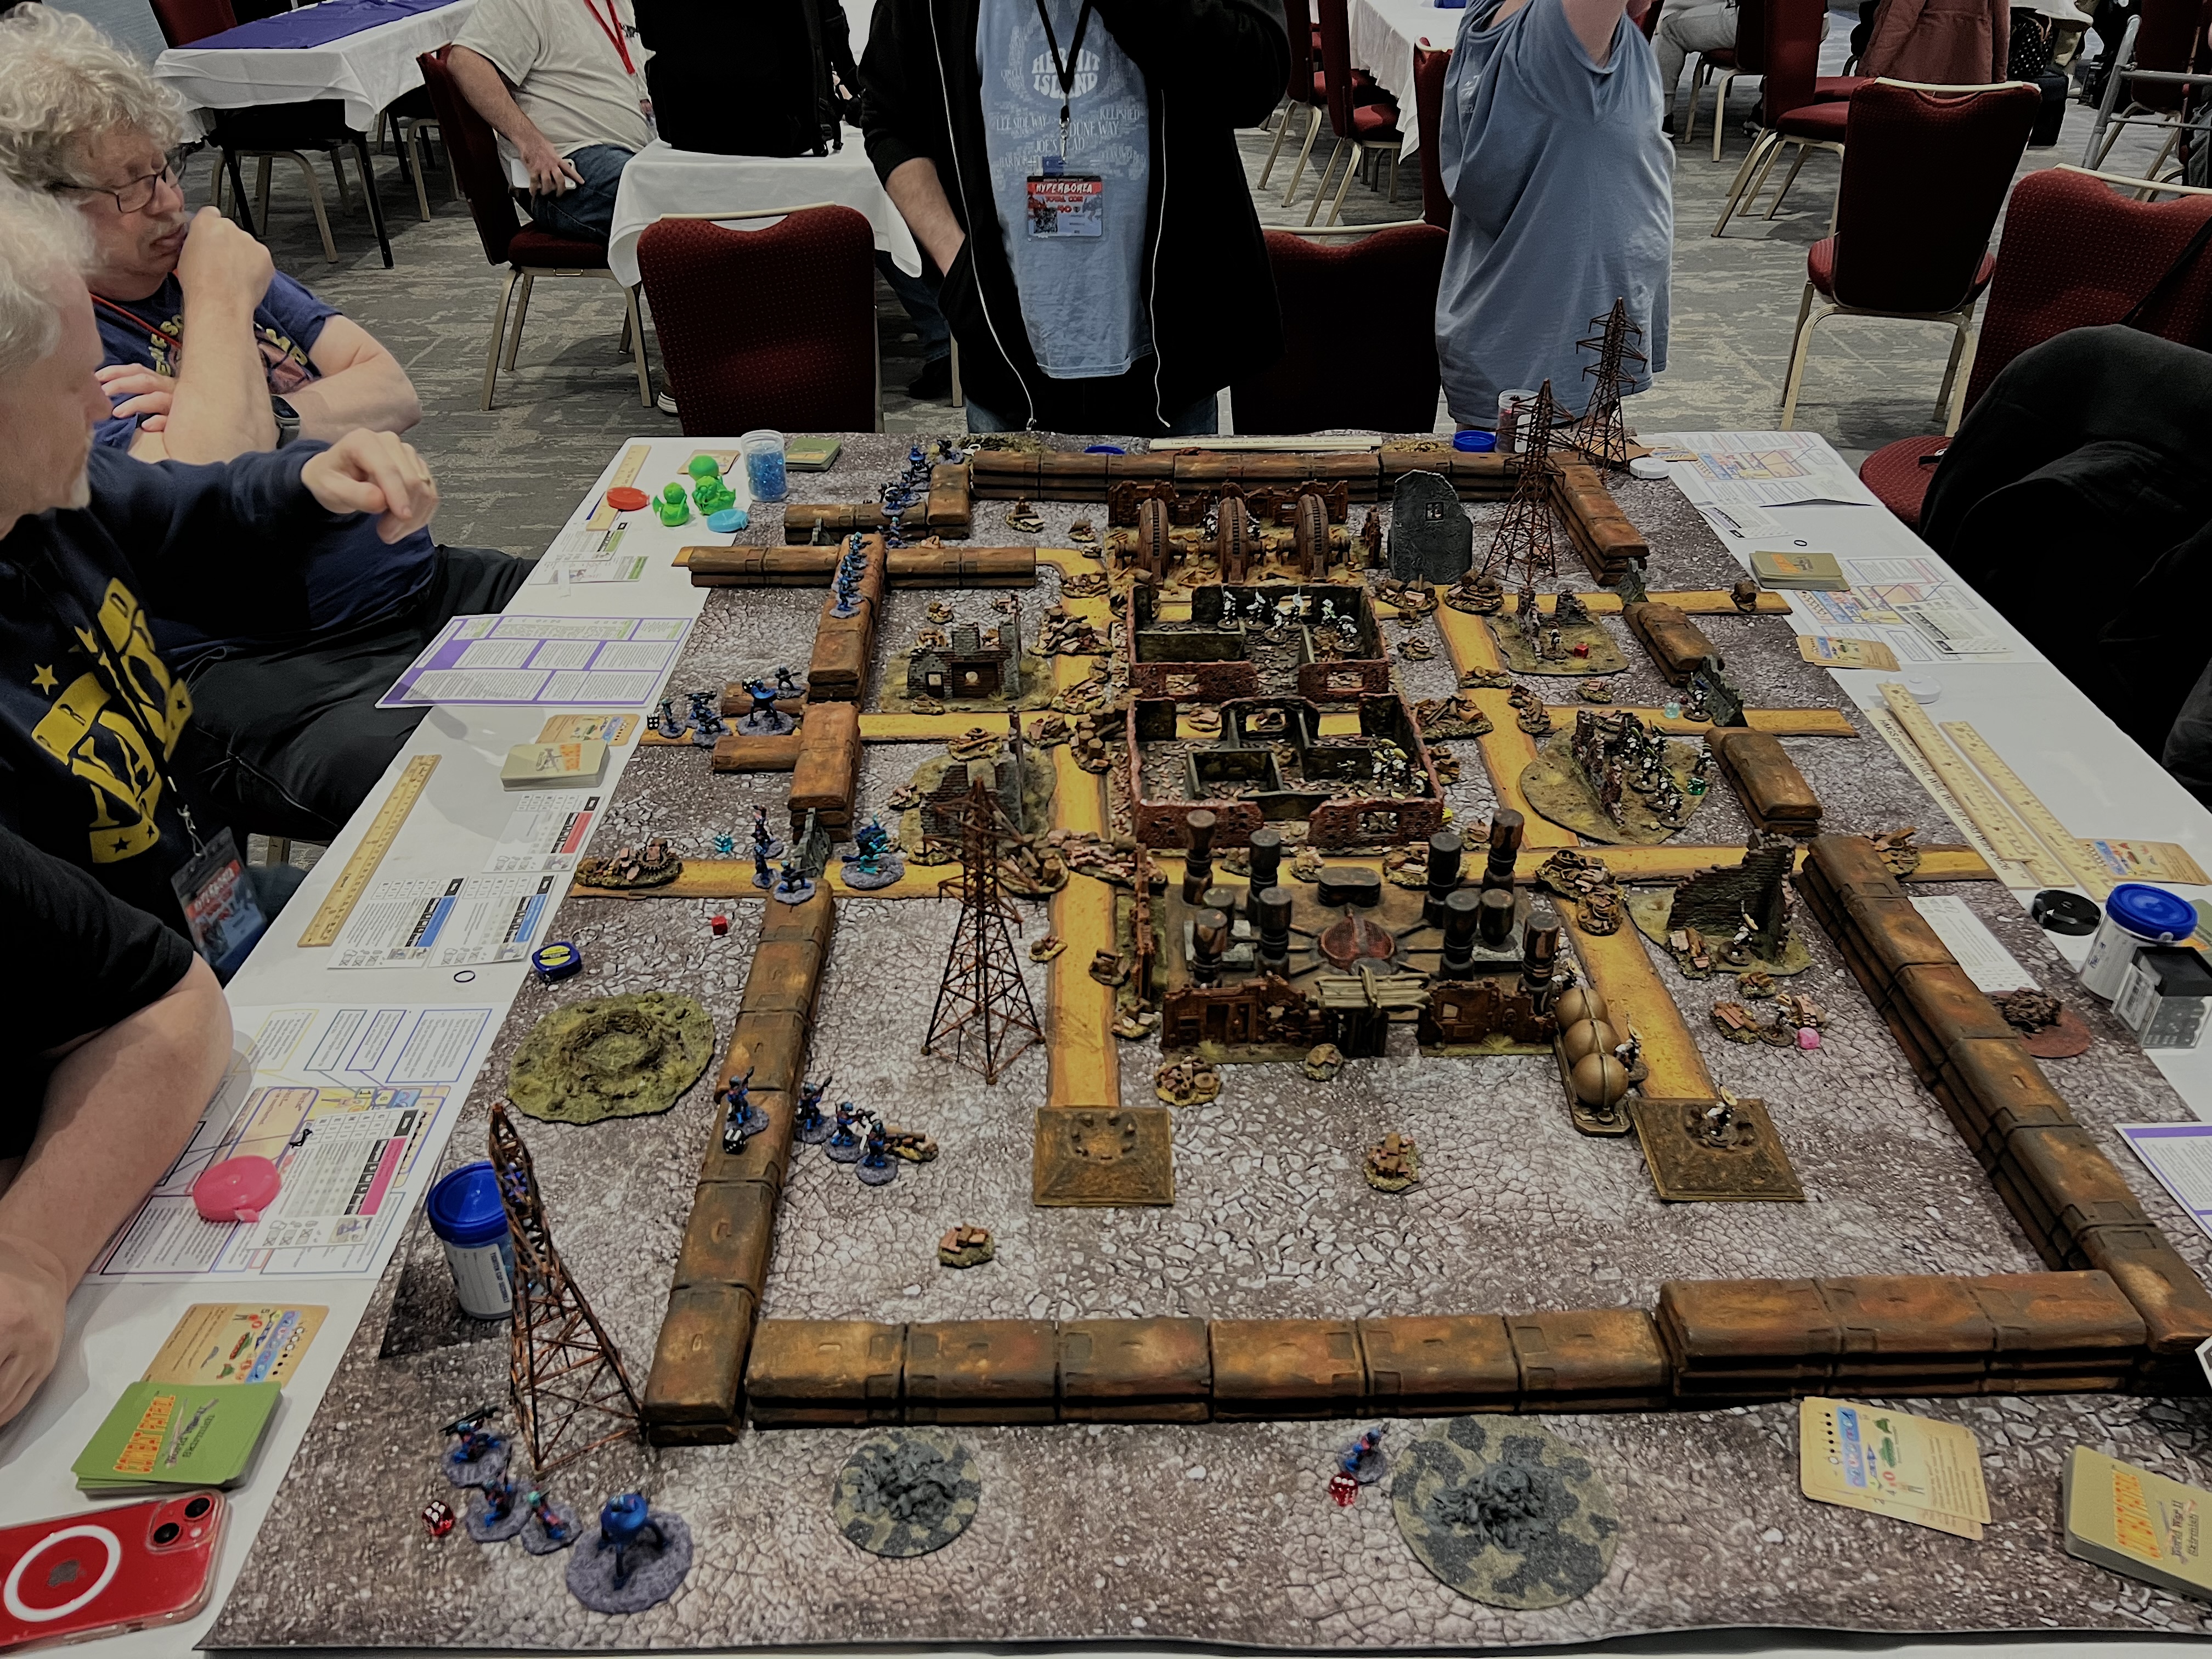
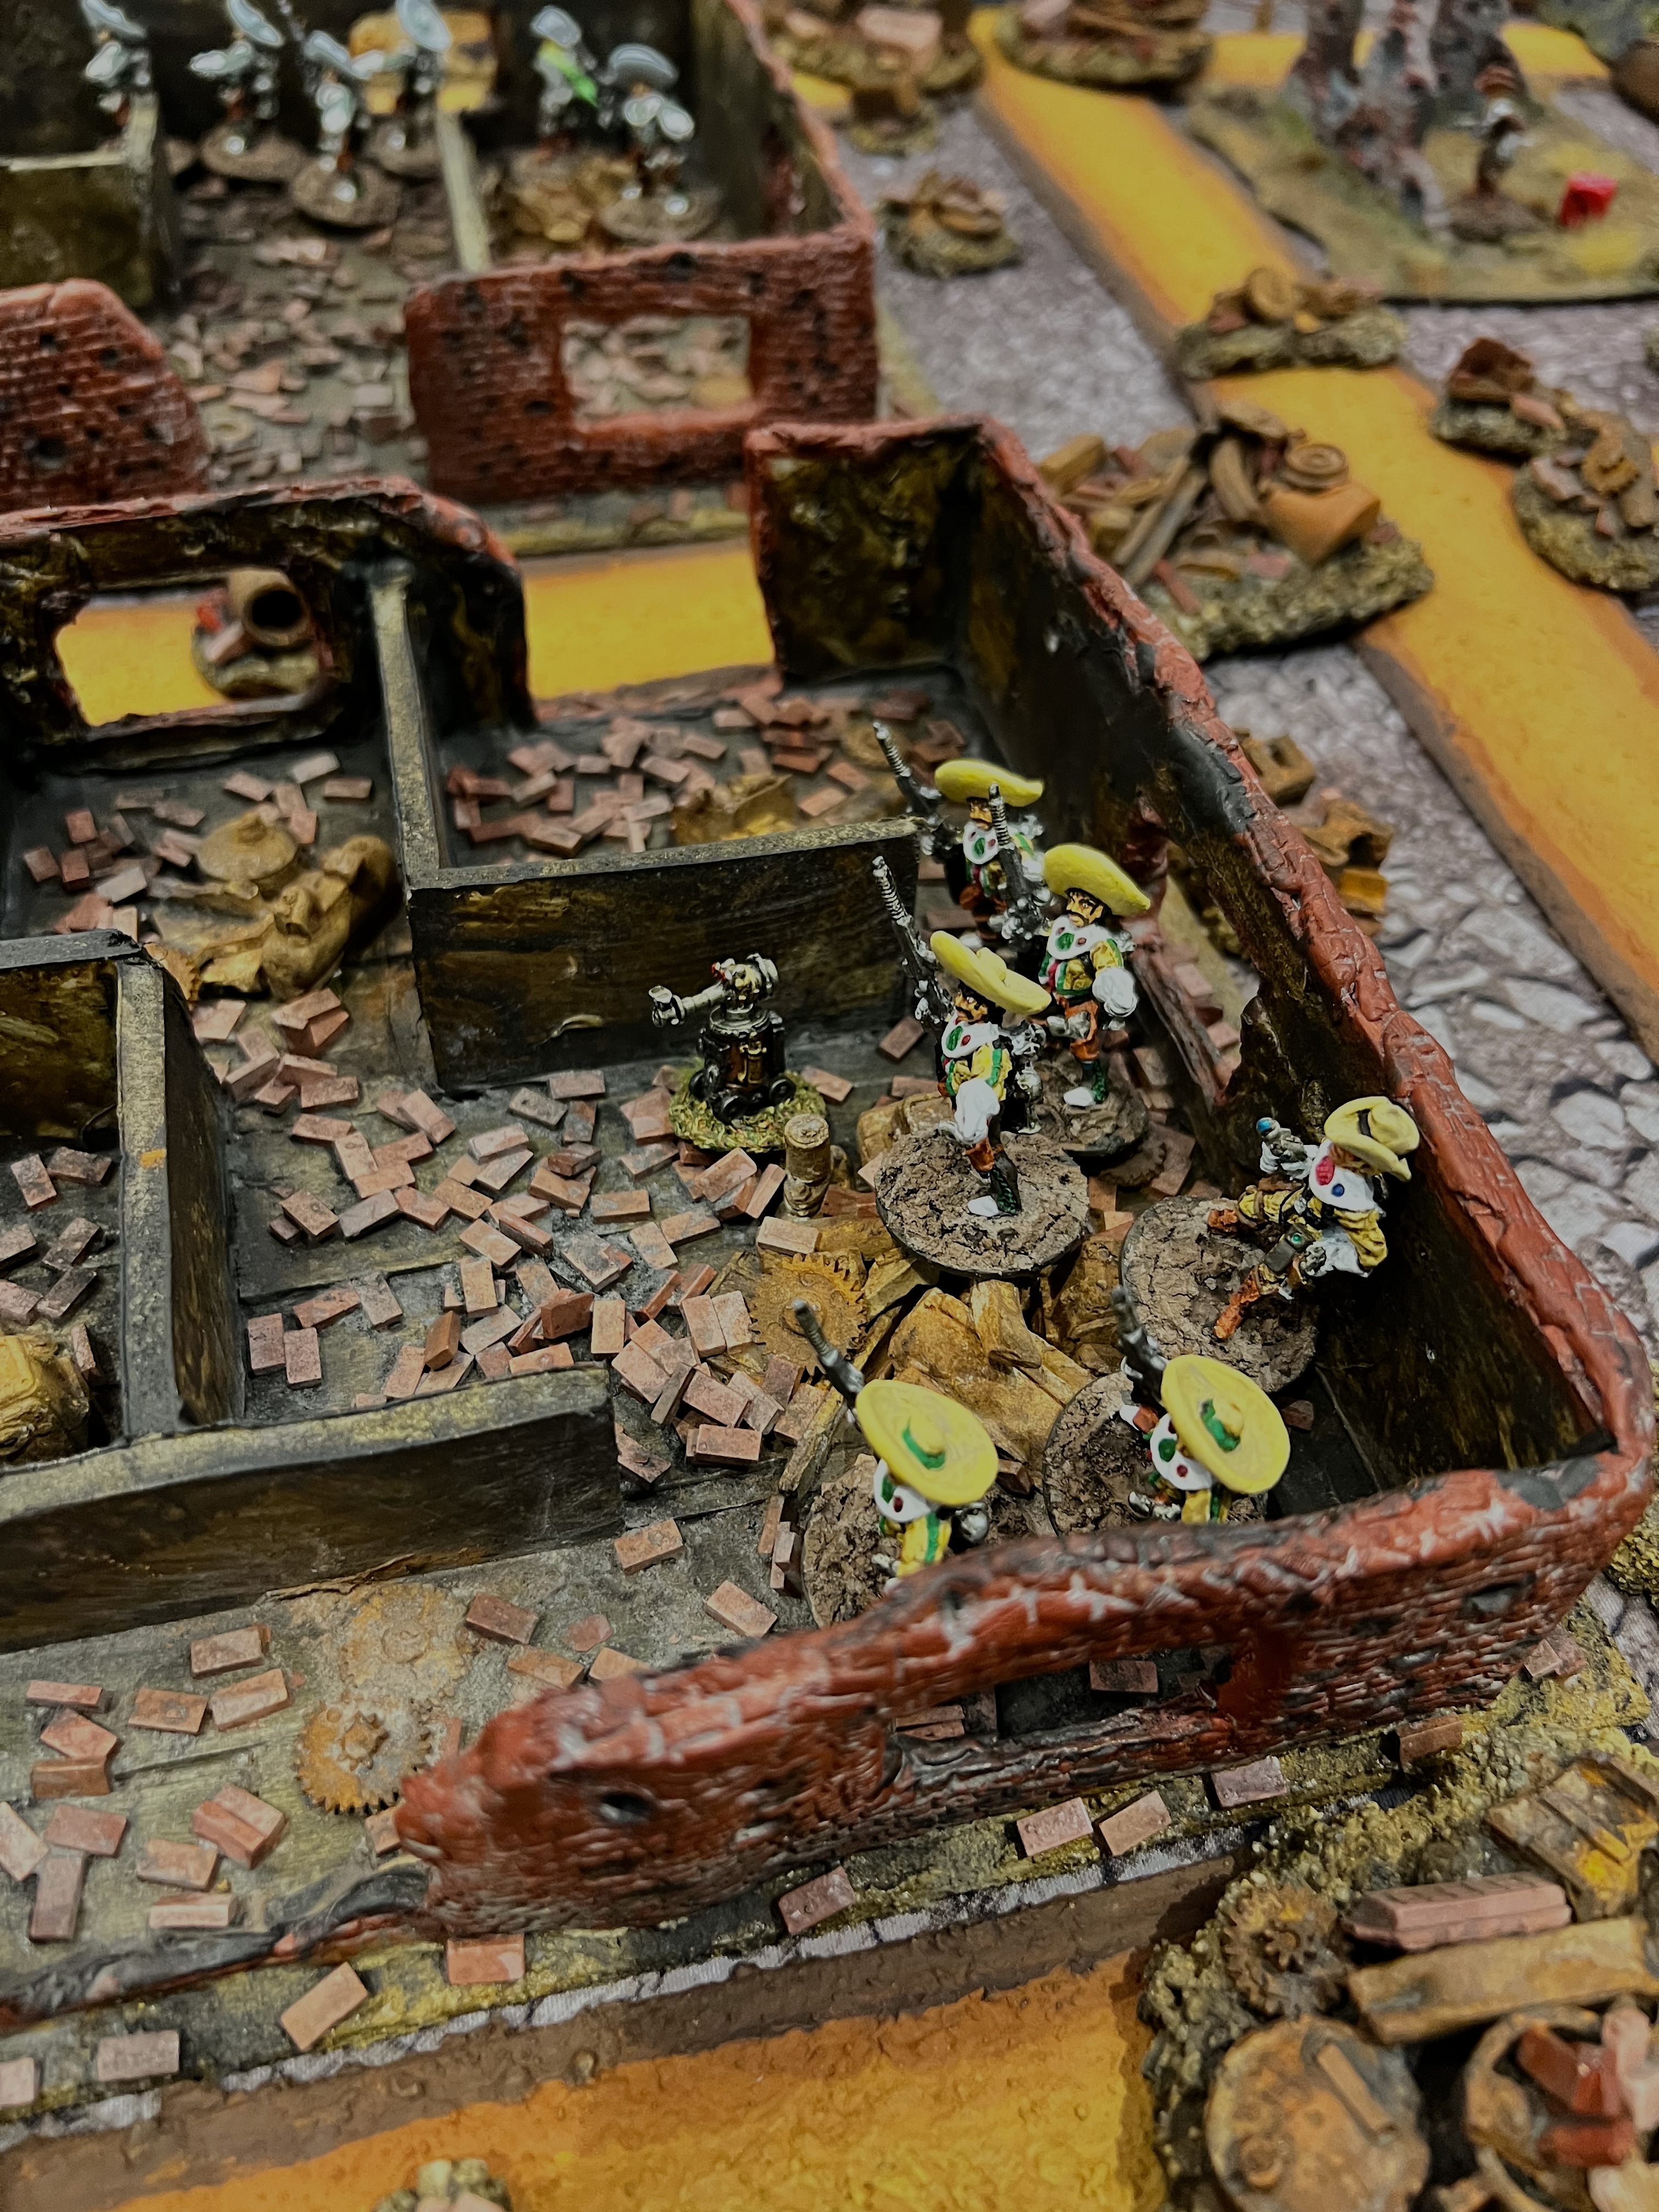
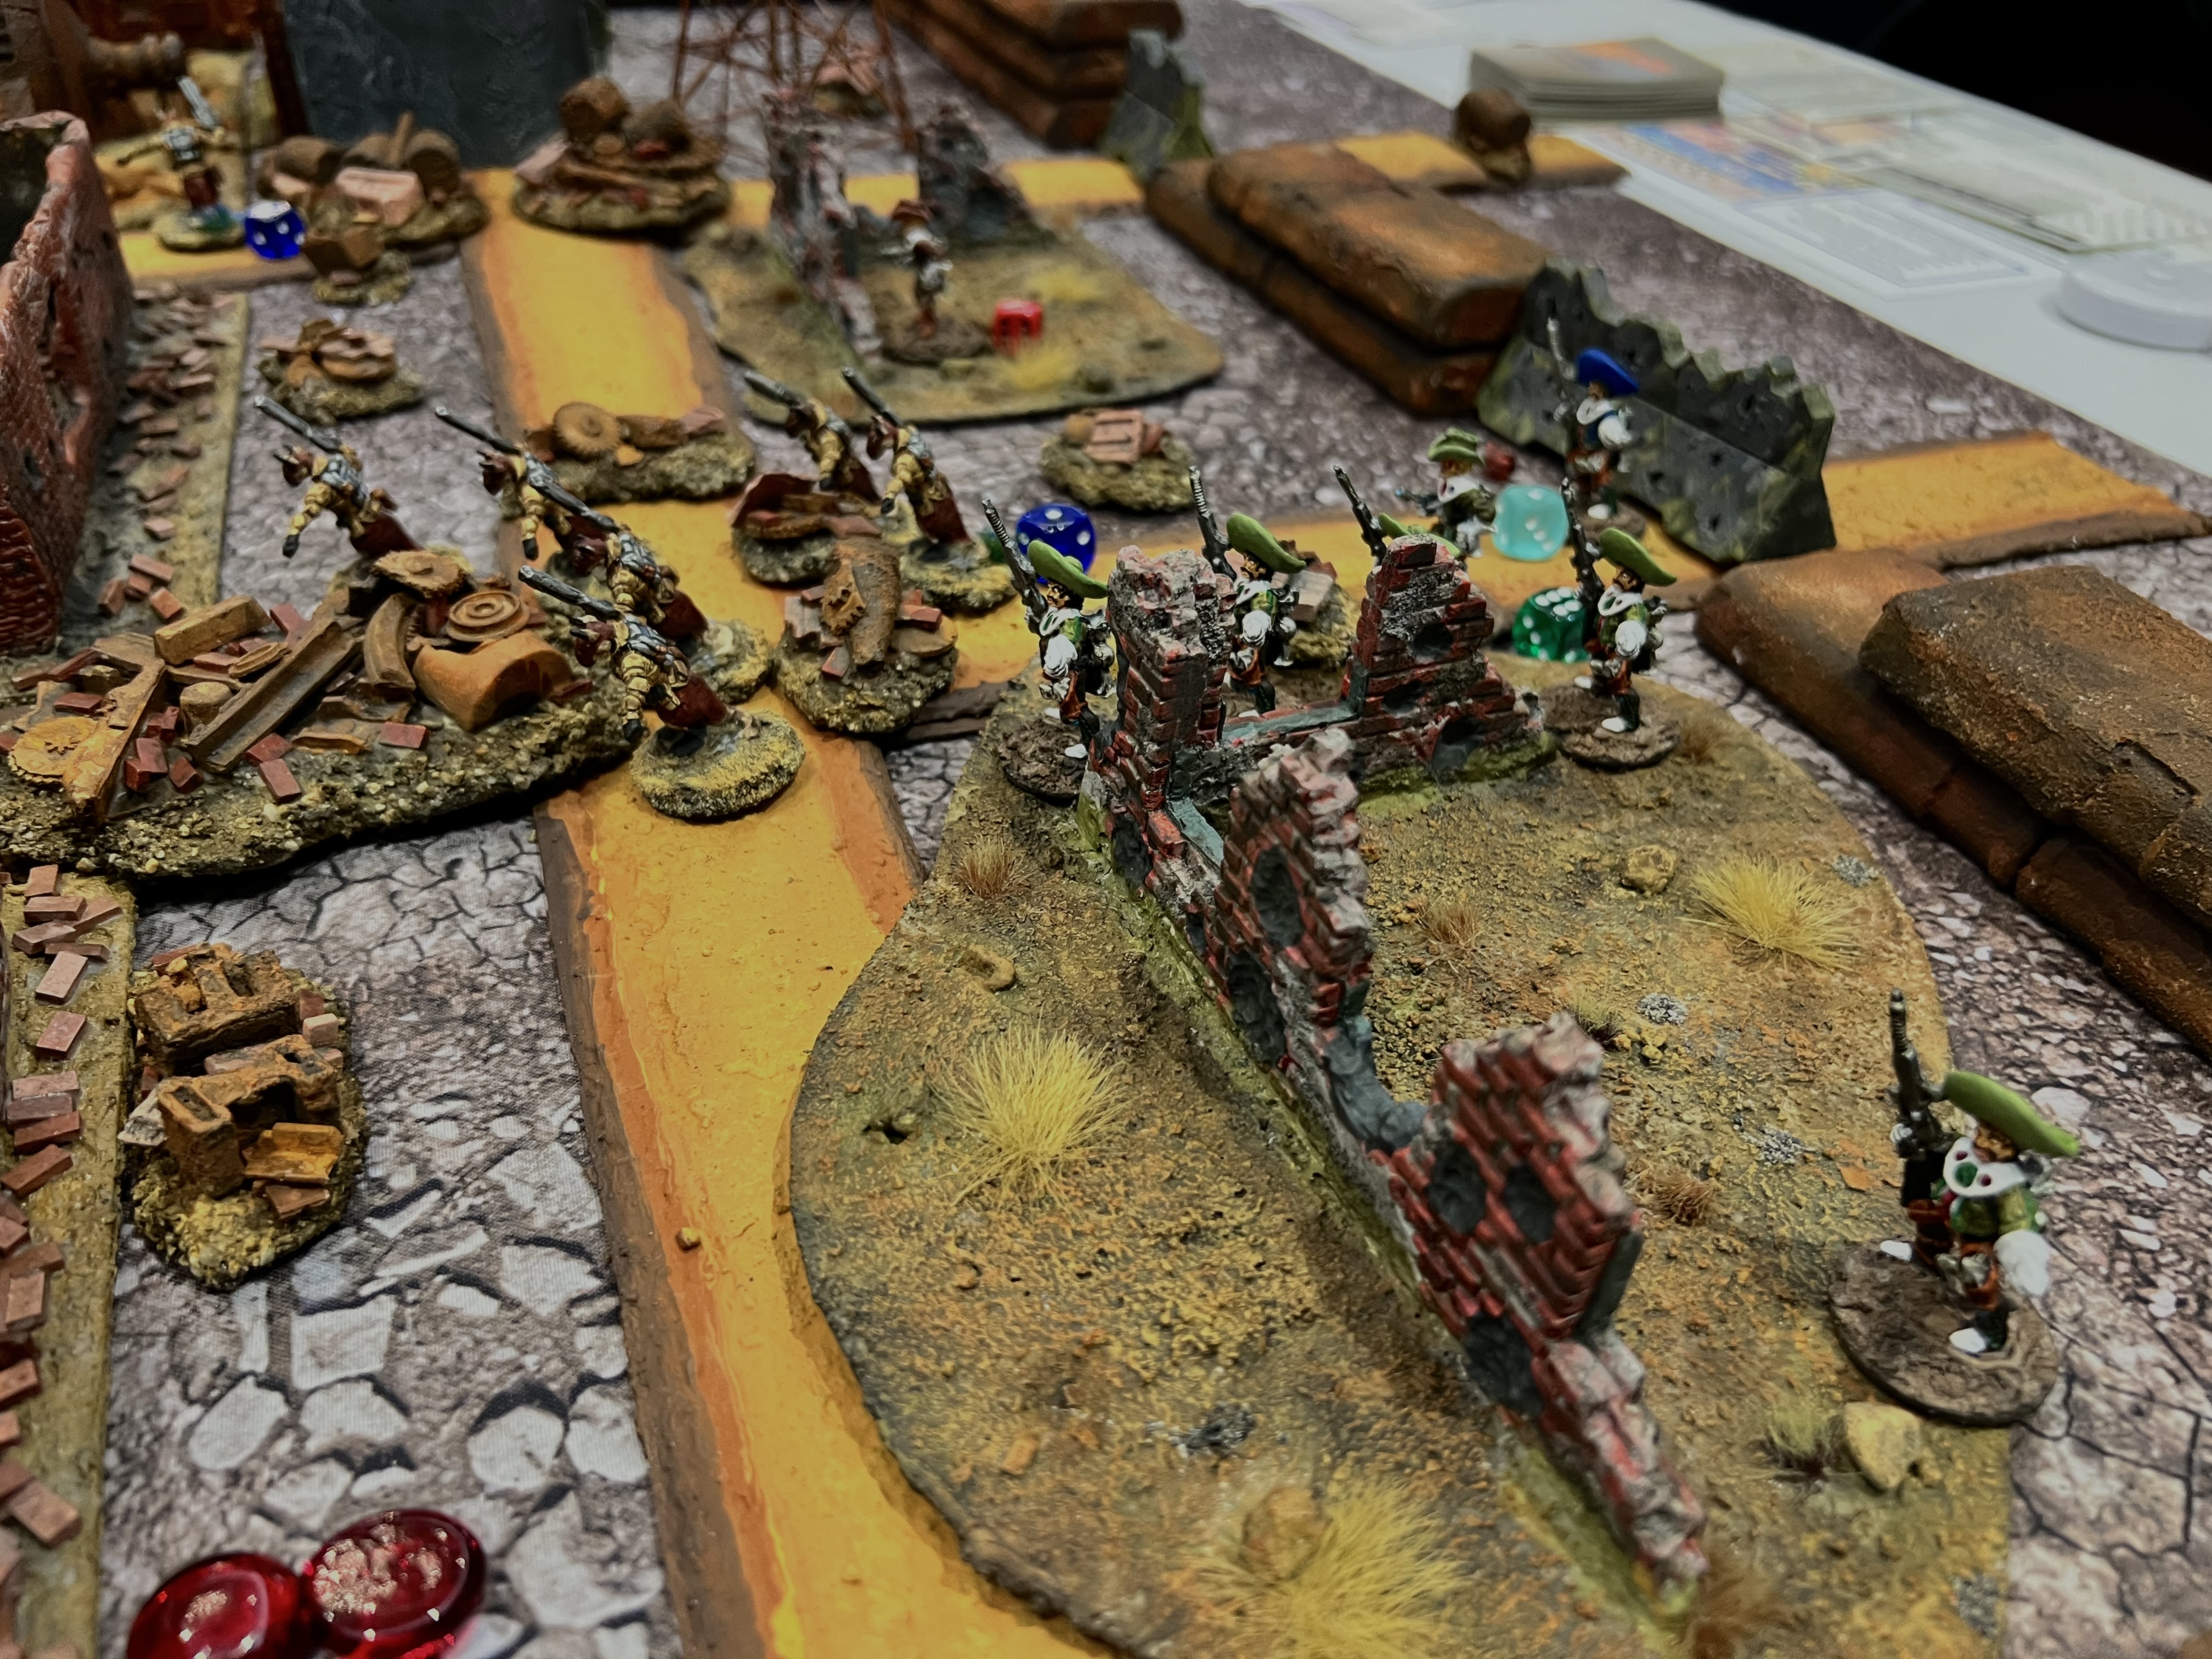
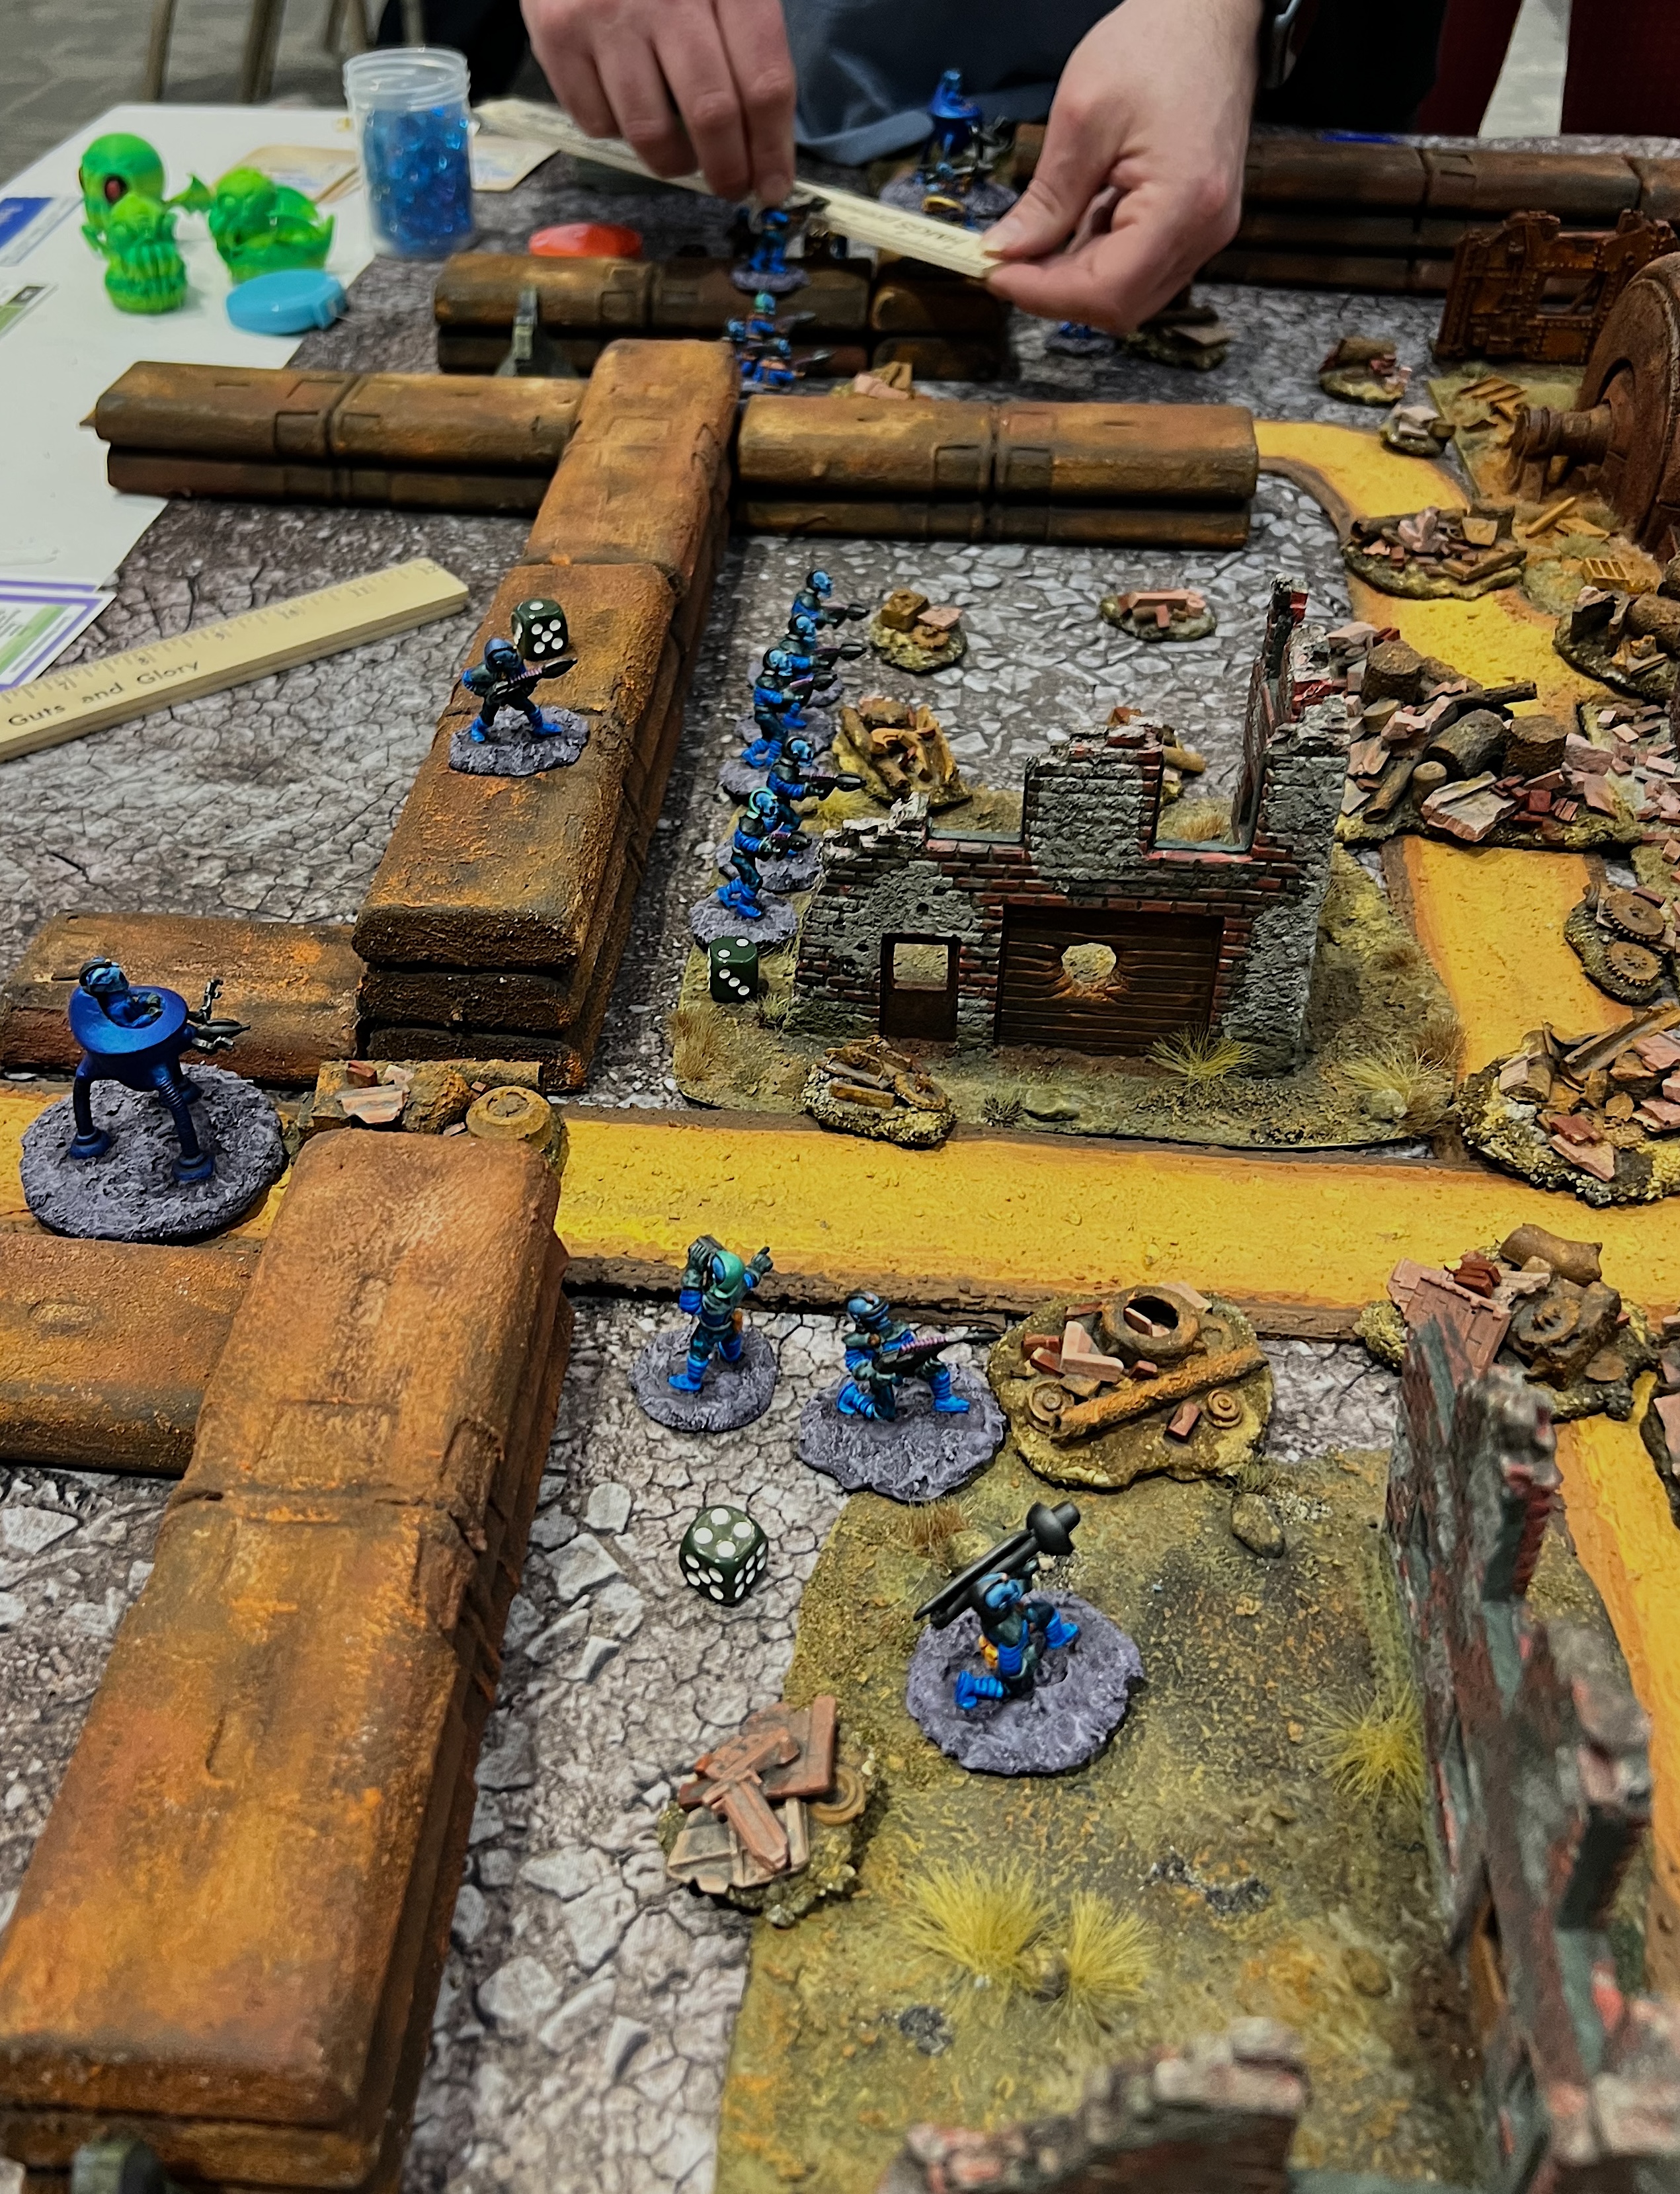
The game was definitely full!Retrovians and Space Cowboys move into the ruined city.The Space Cowboys find a robot (an Archive Robot Cook) and get it to join their side.Reinforcements arrive! Here come the Space Roos.Retrovians take cover under fire while trying to clear the walls.Retrovian infantry move into the city.
In the end, the casualties on both sides were high. But, the Space Cowboys possession of robots allowed them a narrow 15-10 victory. That wrapped up Thursday’s games.
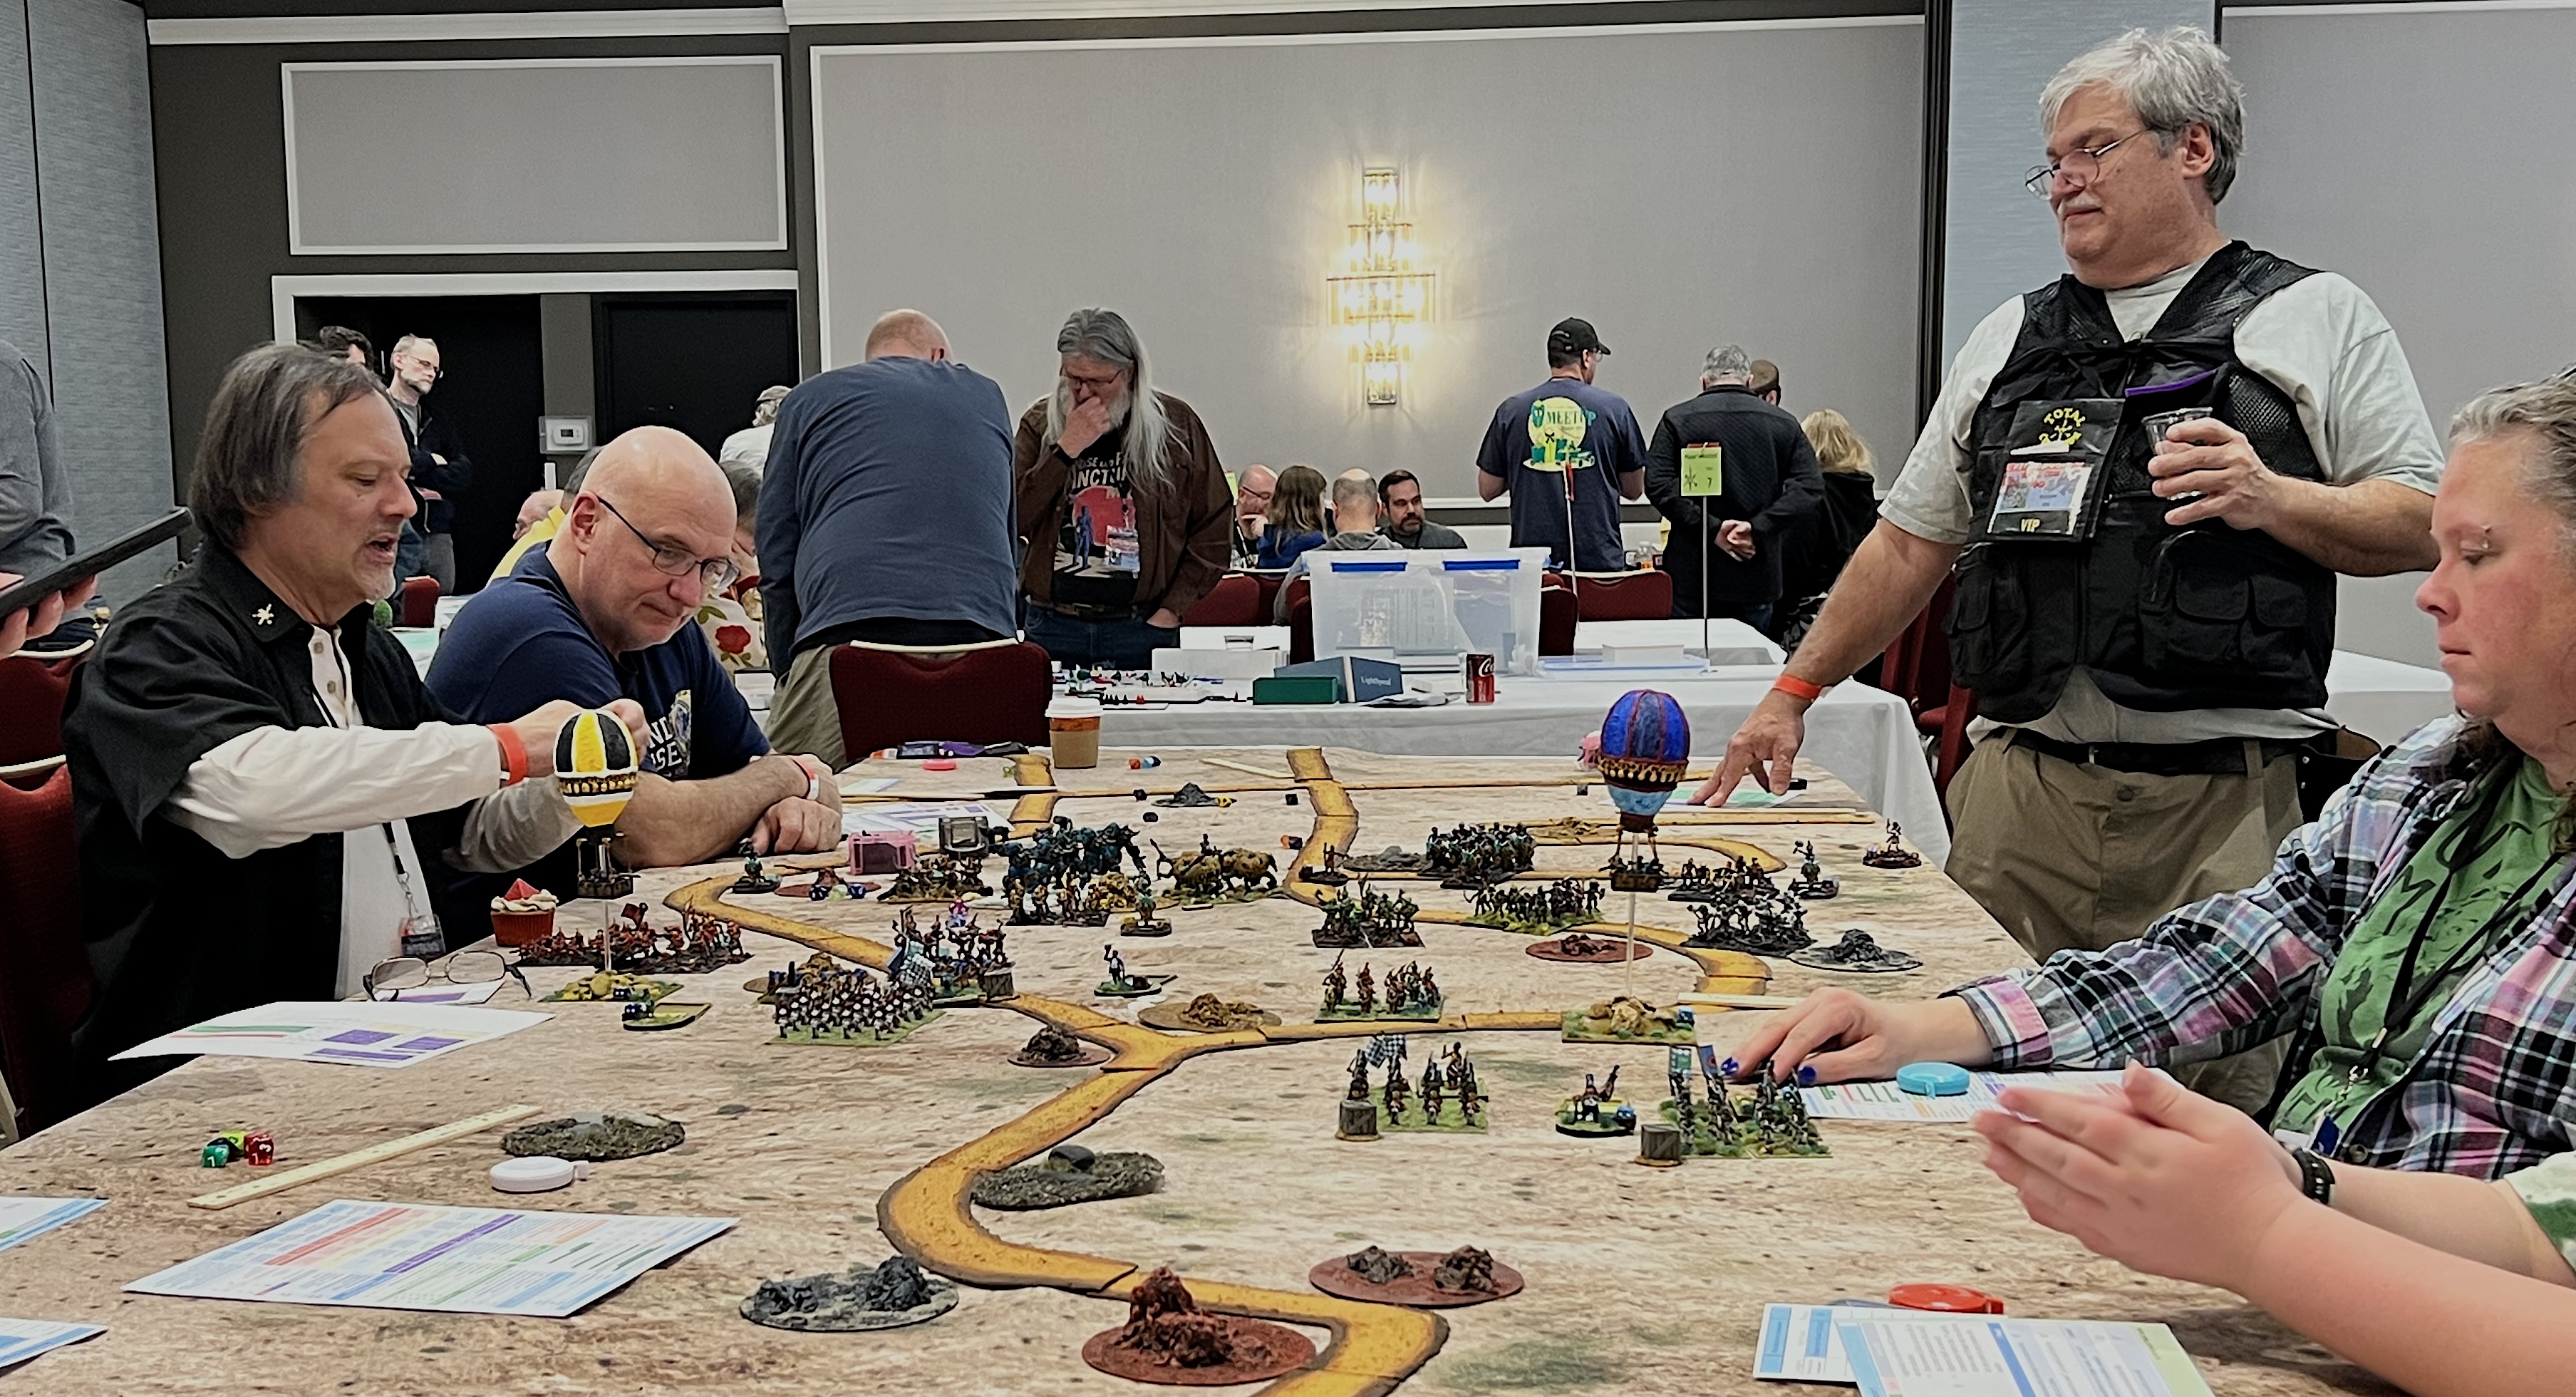
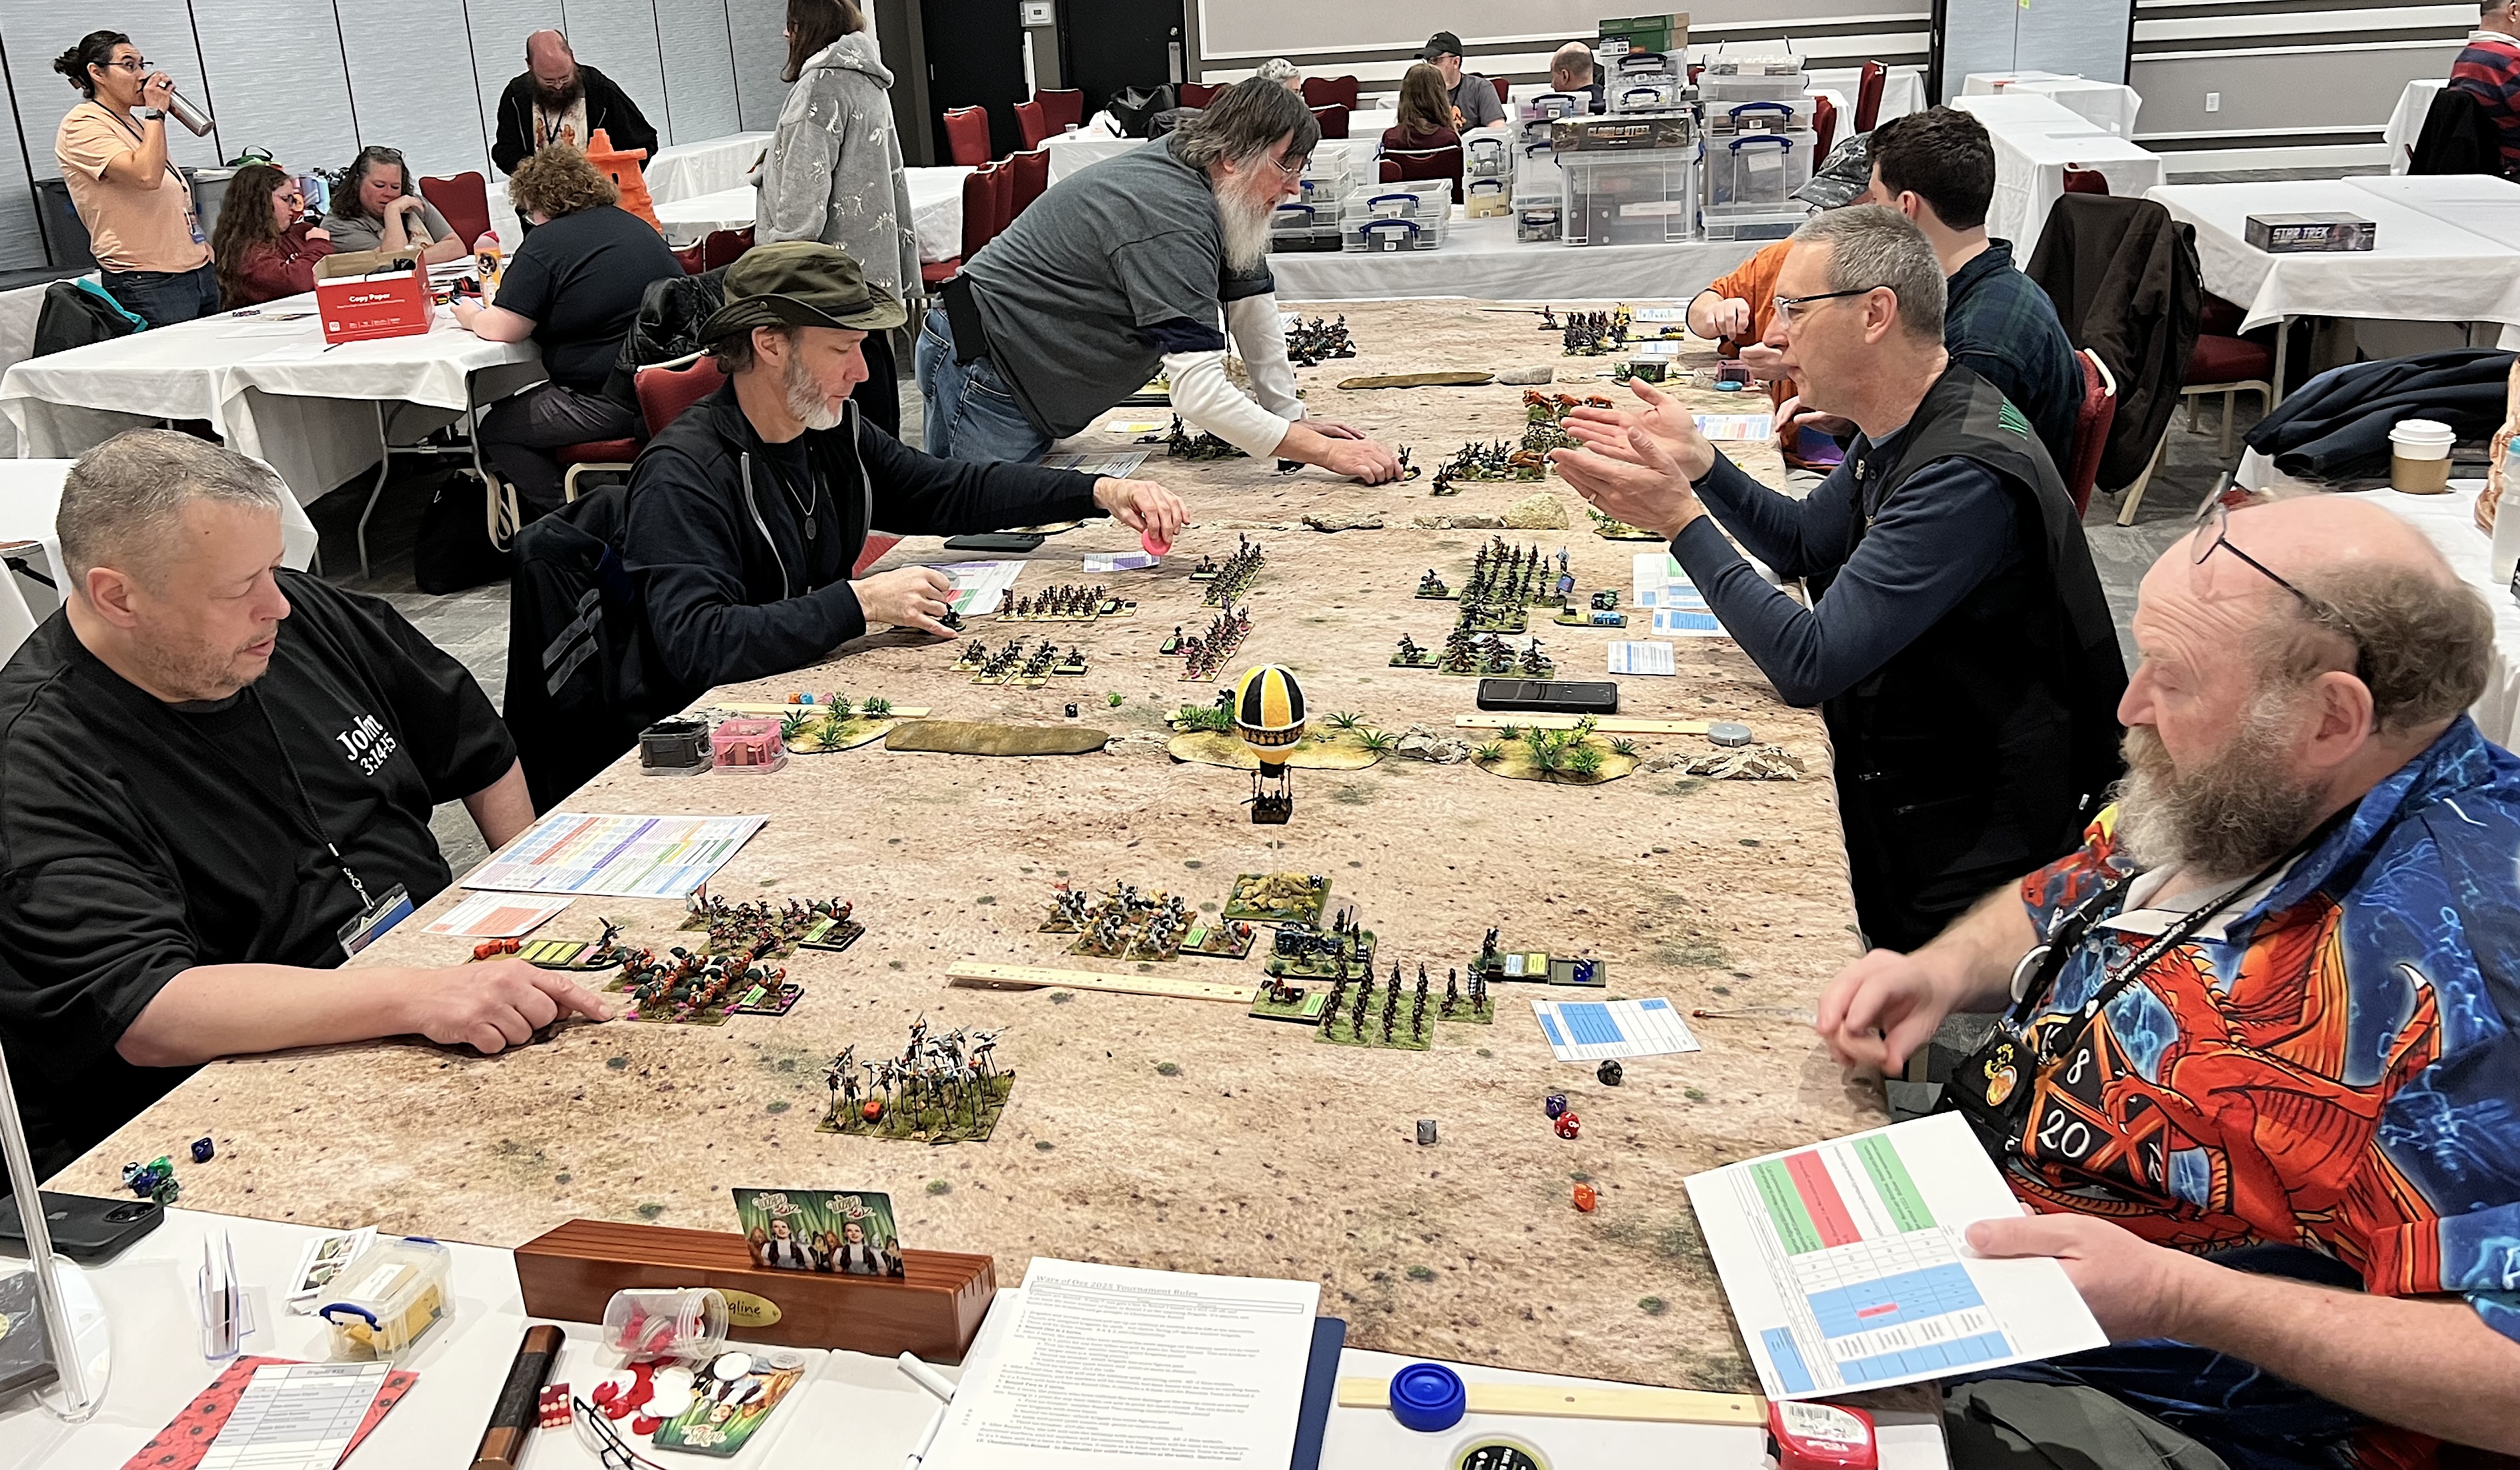
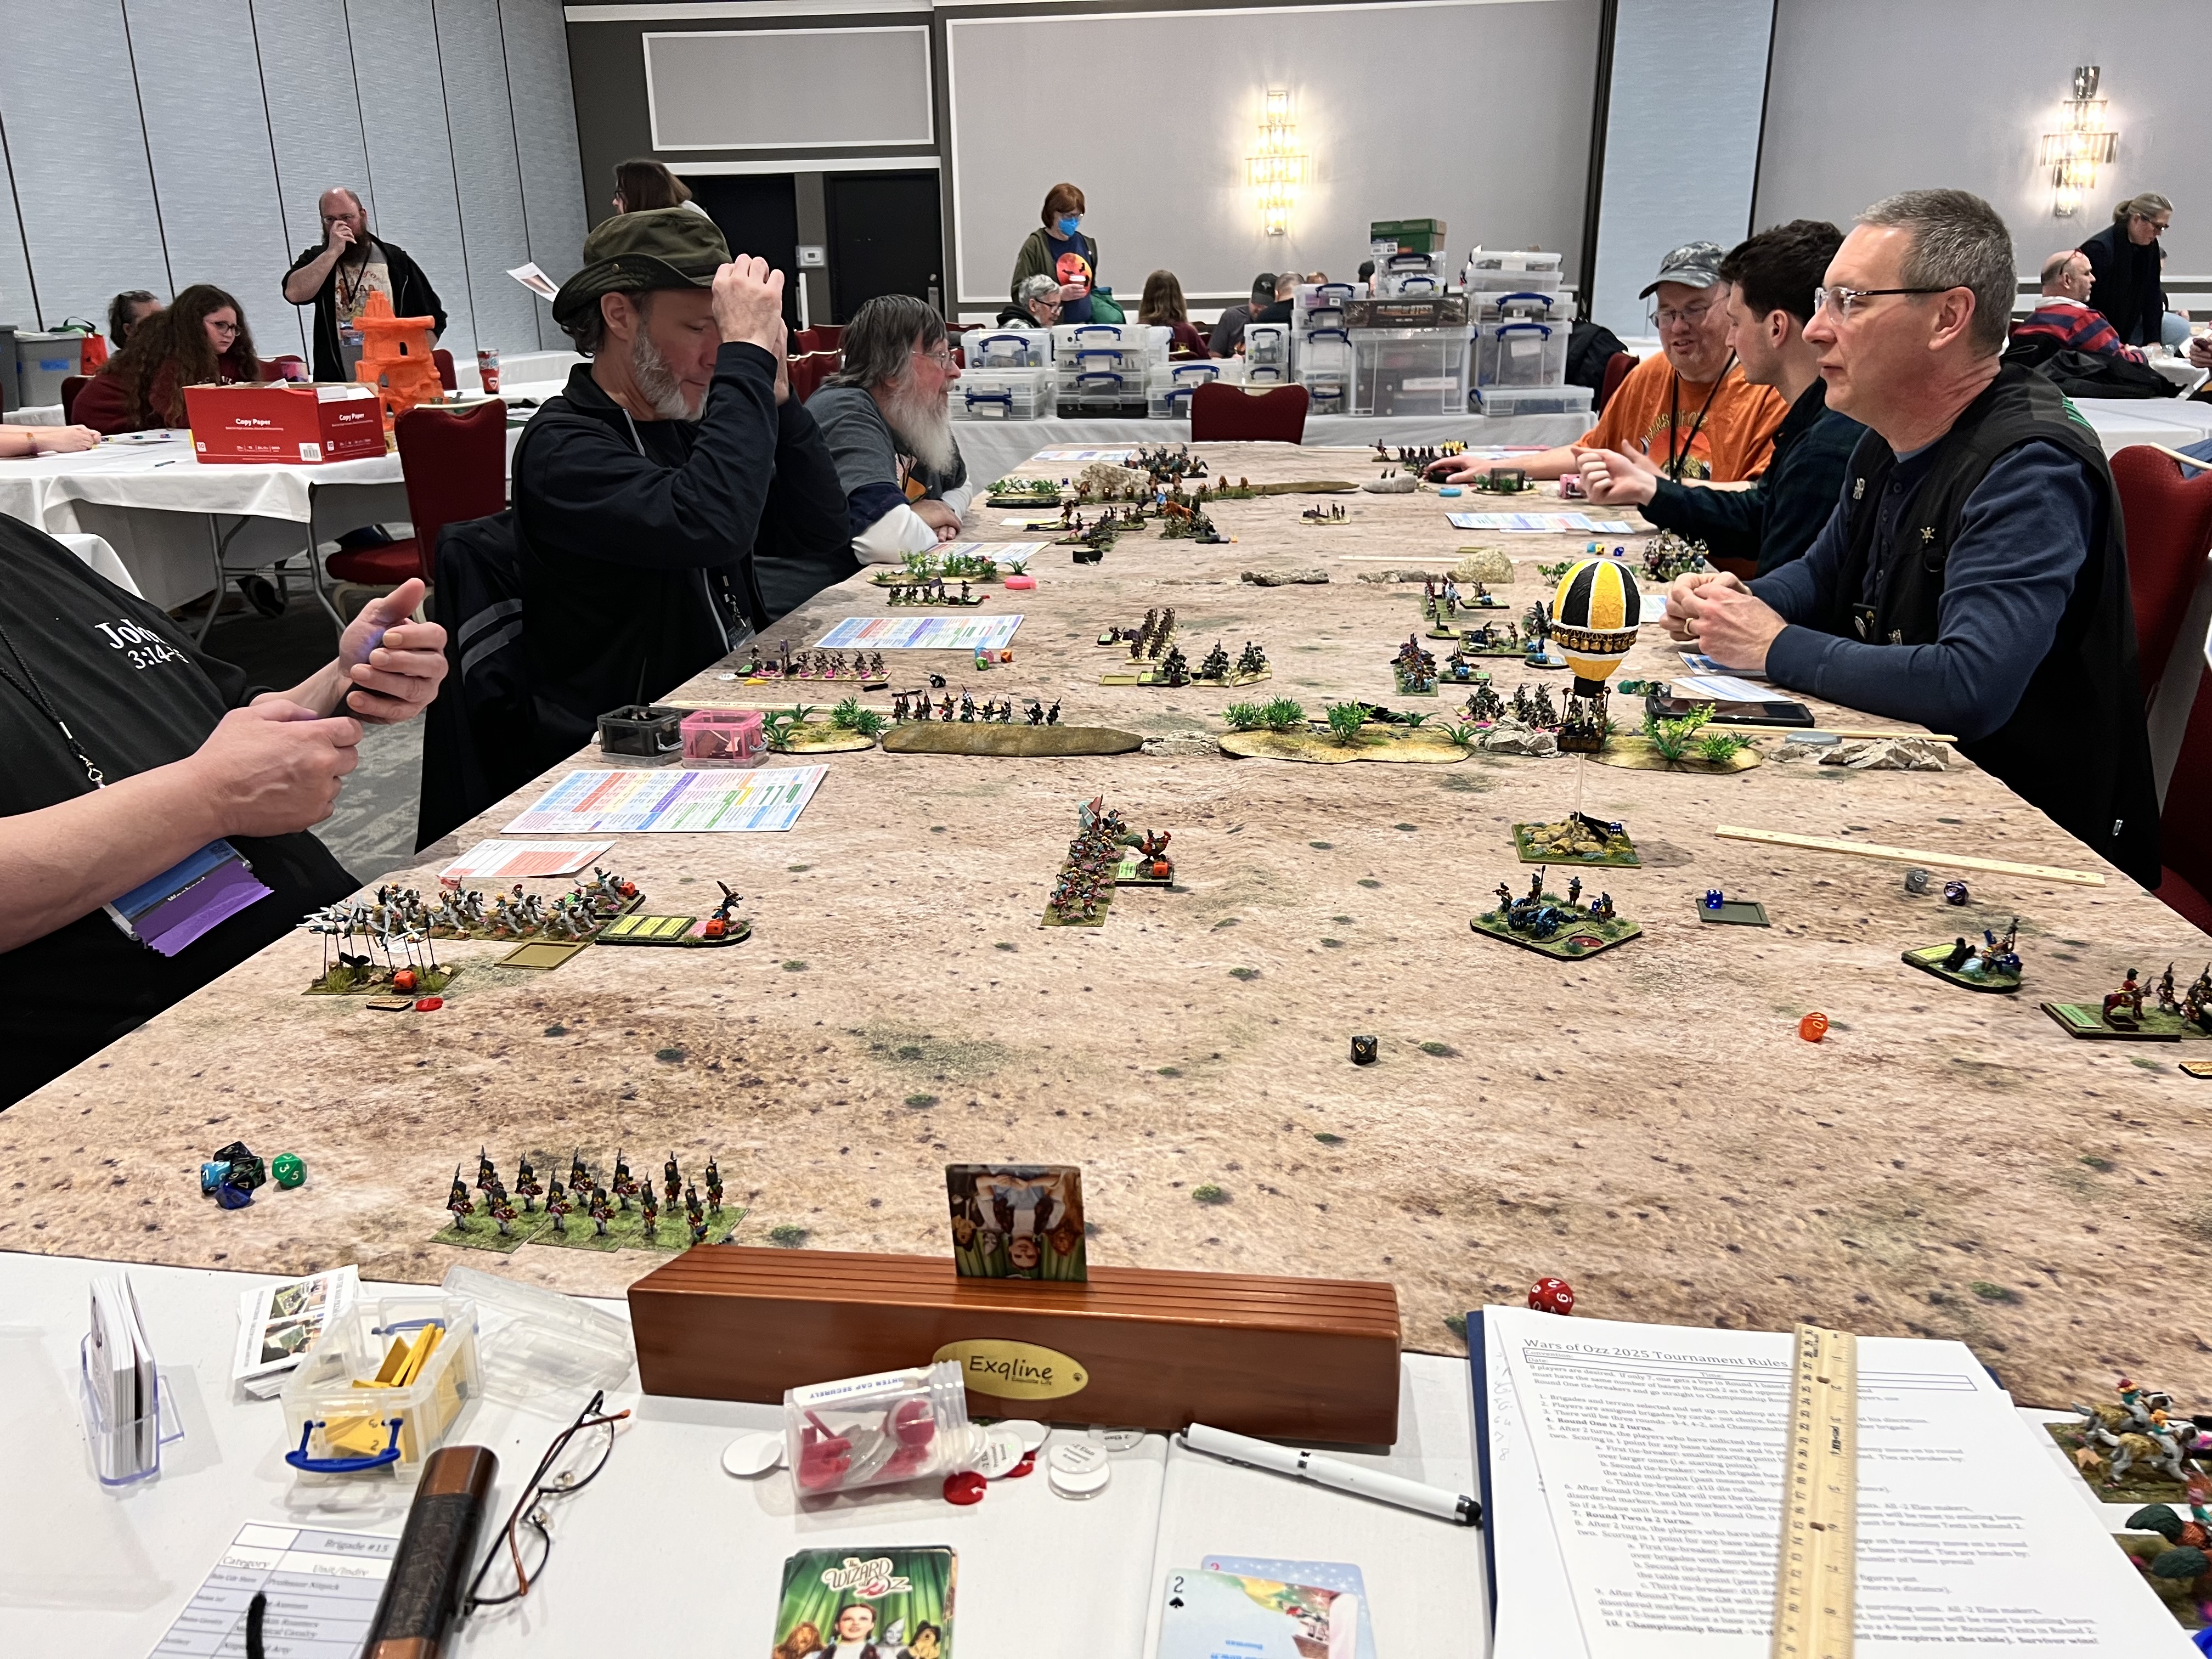
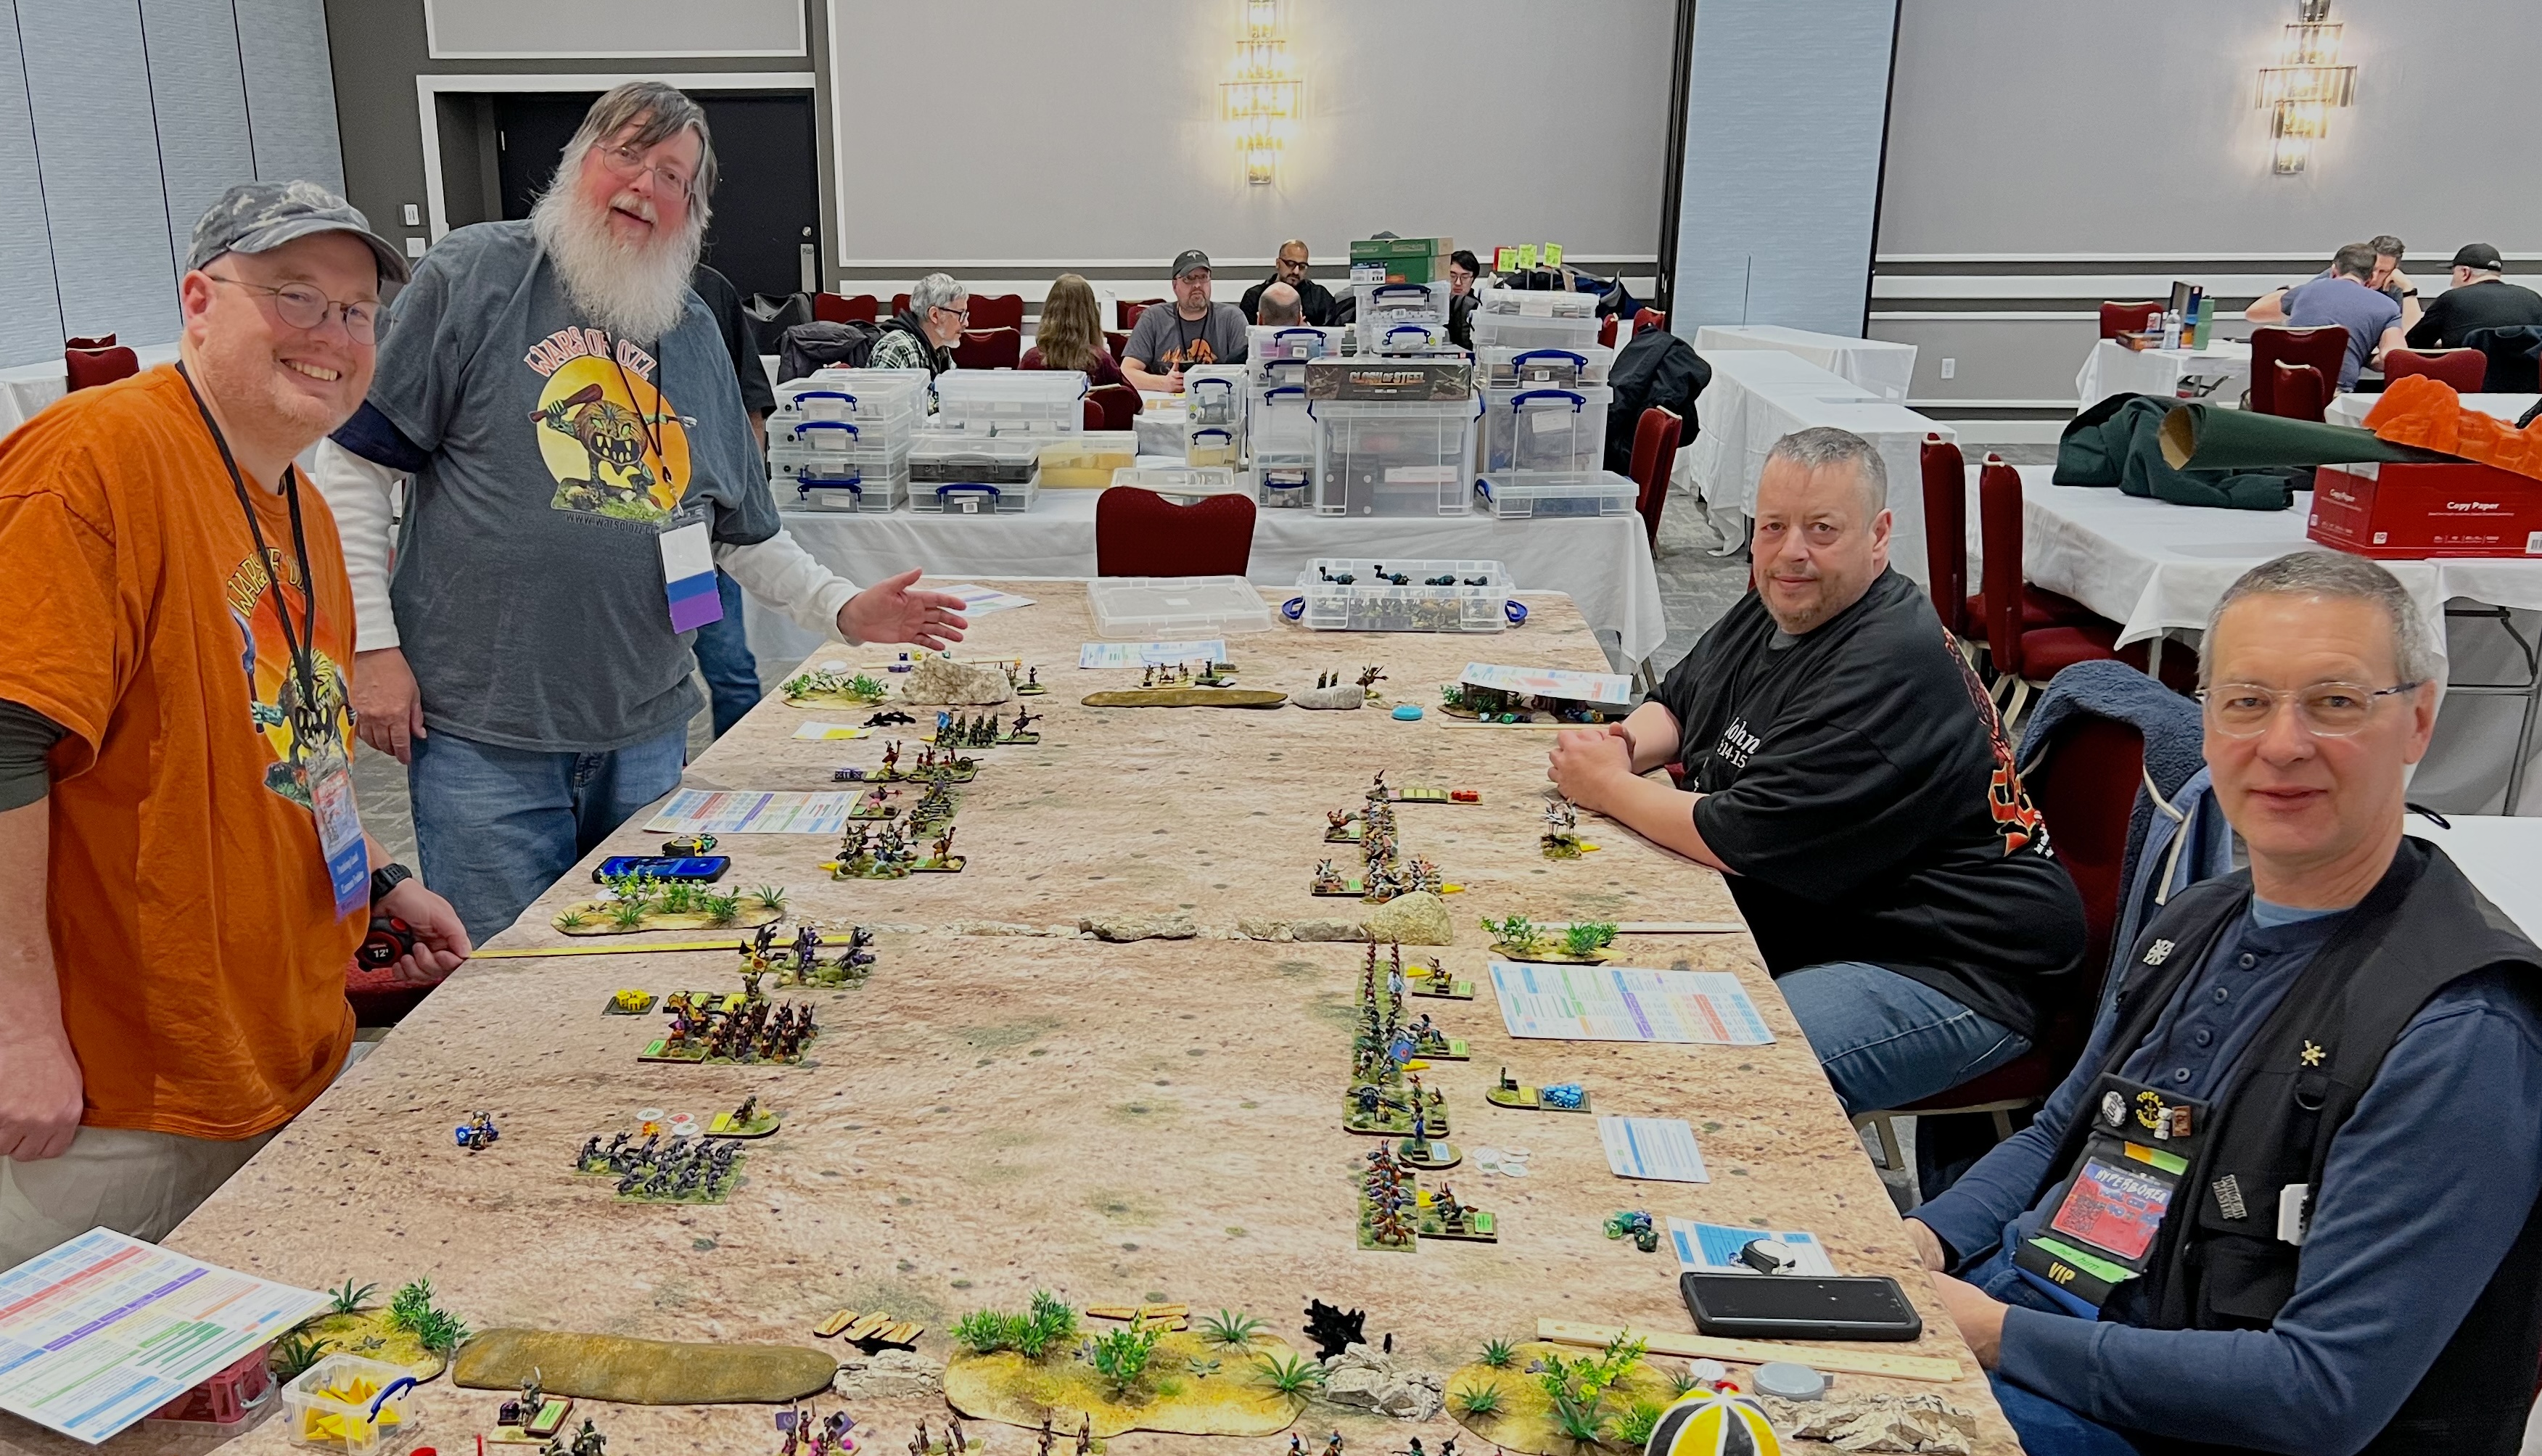
I decided not to run a Friday morning game this year. Last year, resetting the flea market room took too much time. It interfered with my morning game setup. Instead, I had plenty of time to move everything into the “big room” and set up on the “big table”. My first game was a Wars of Ozz game. It was titled “The Great Munchkin Heist”. I had also run it at Cold Wars. This time I had an even bigger table than I had there!
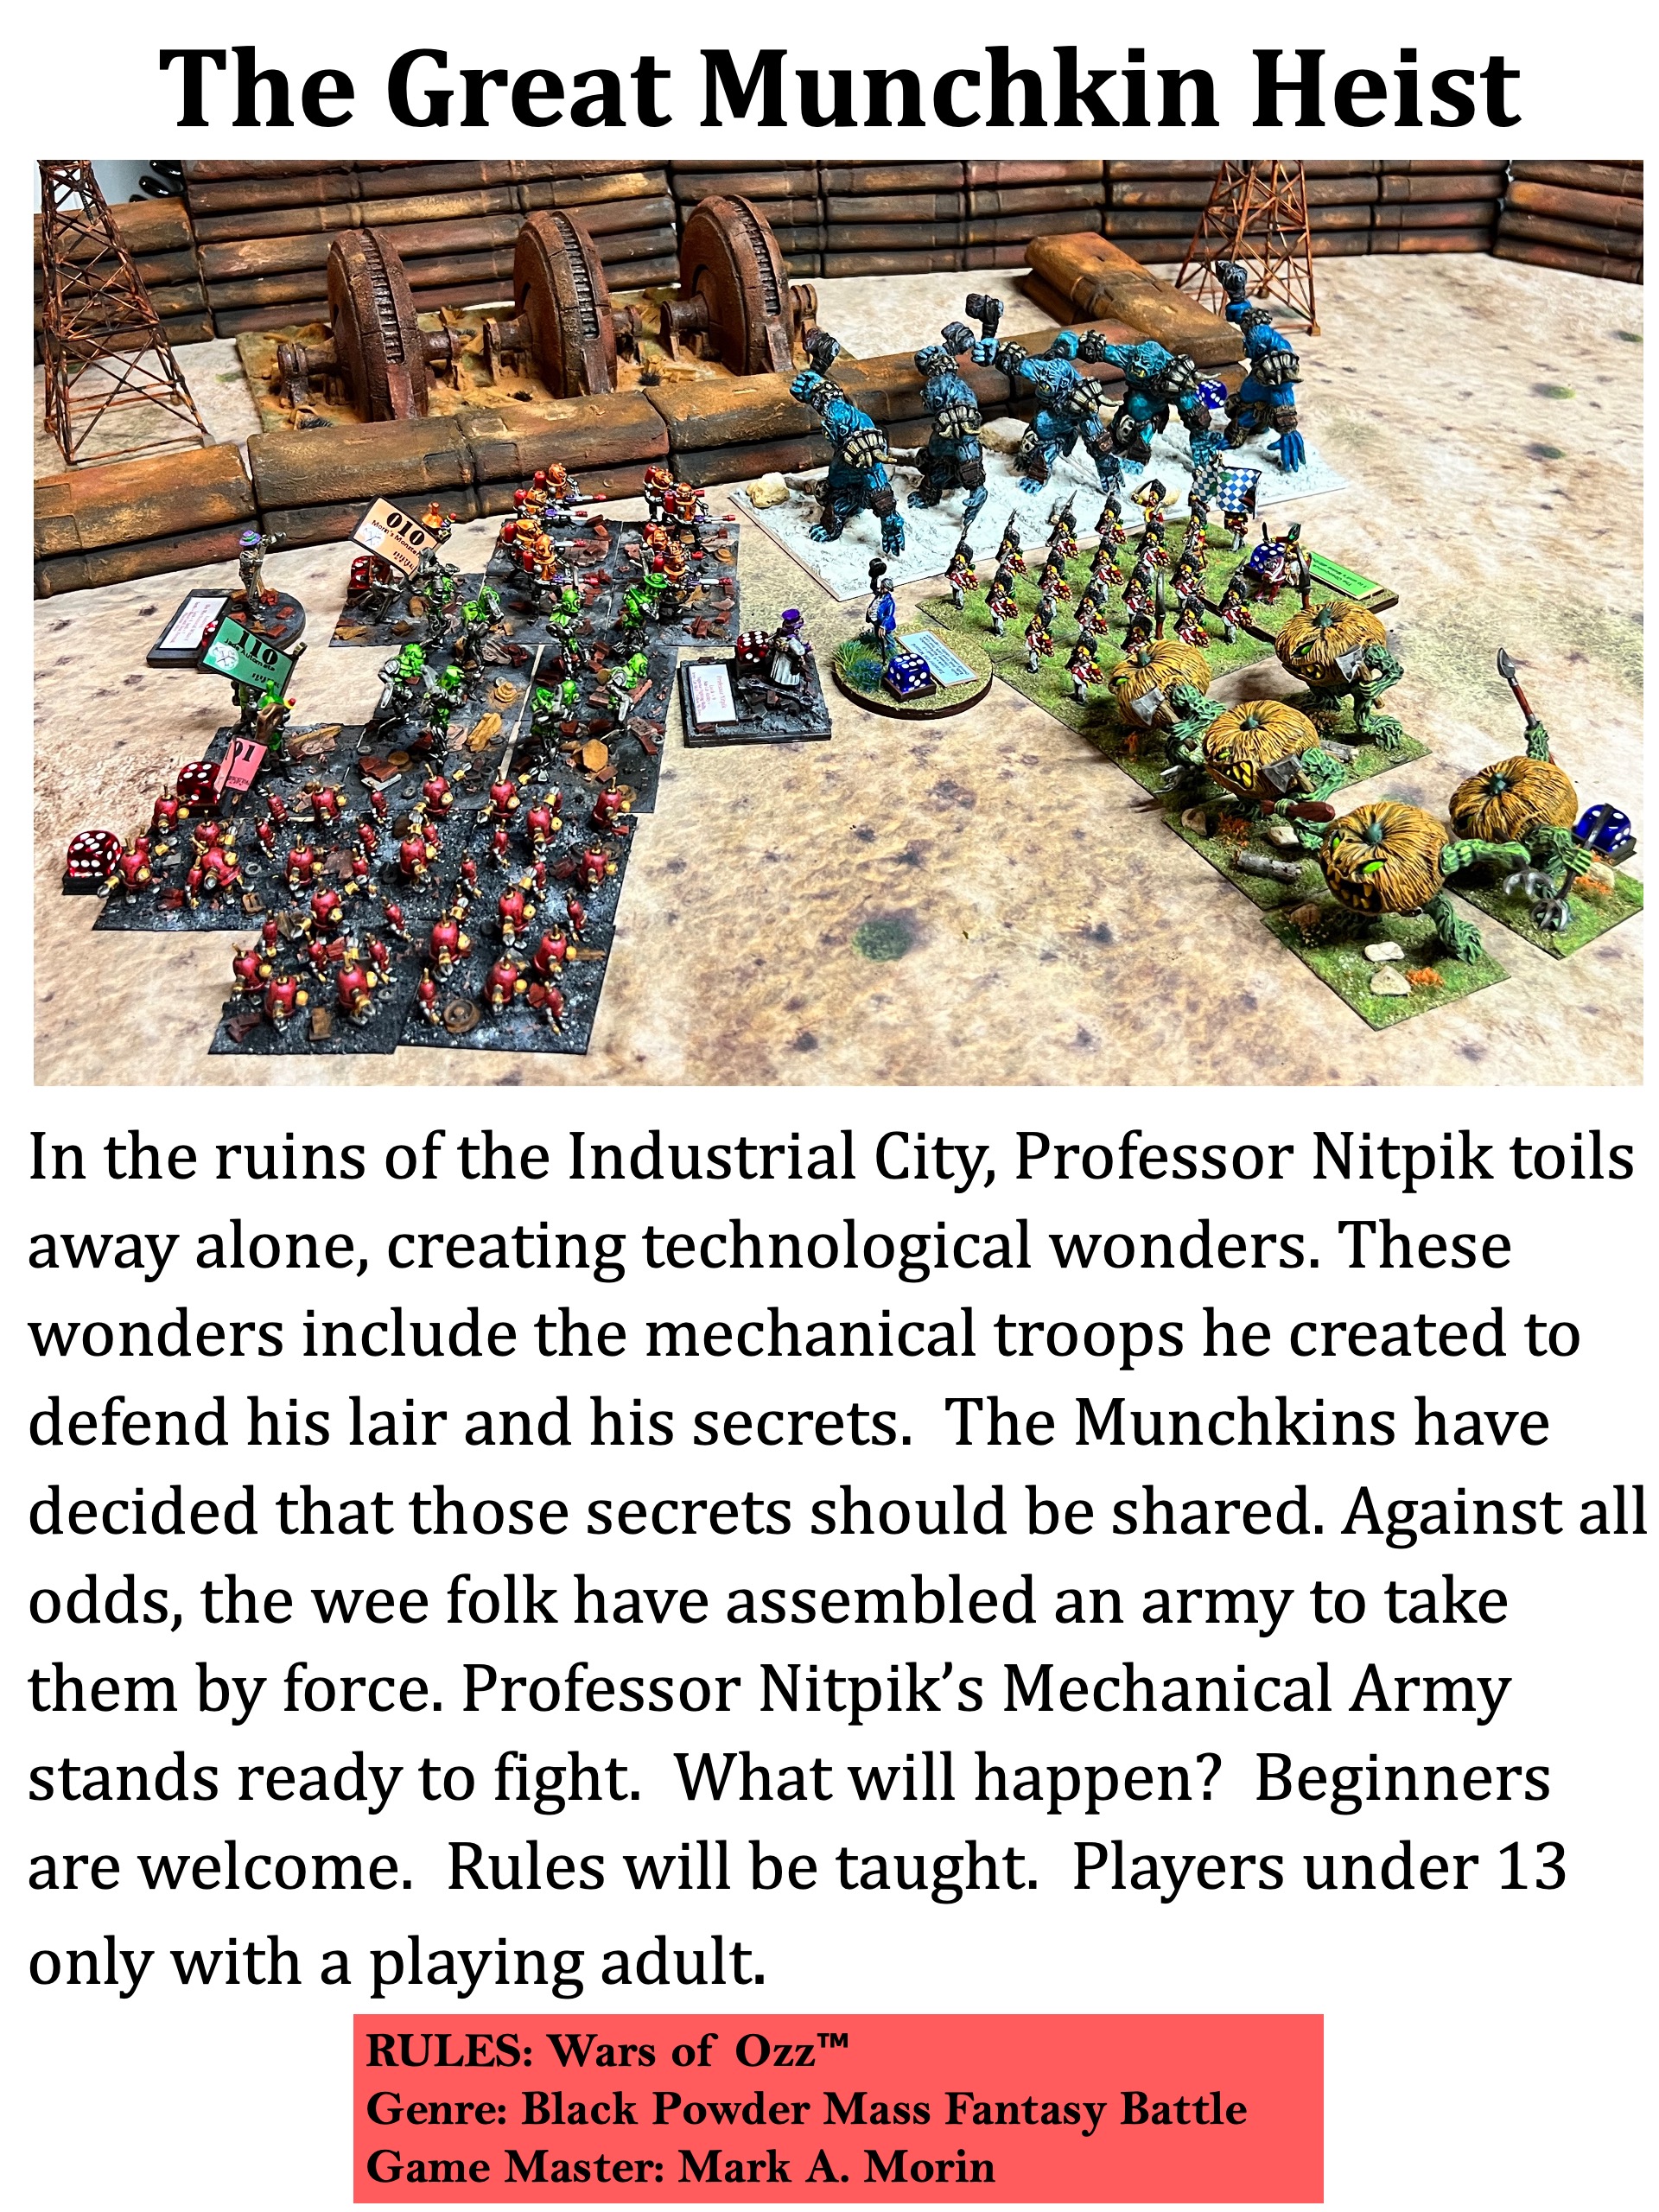
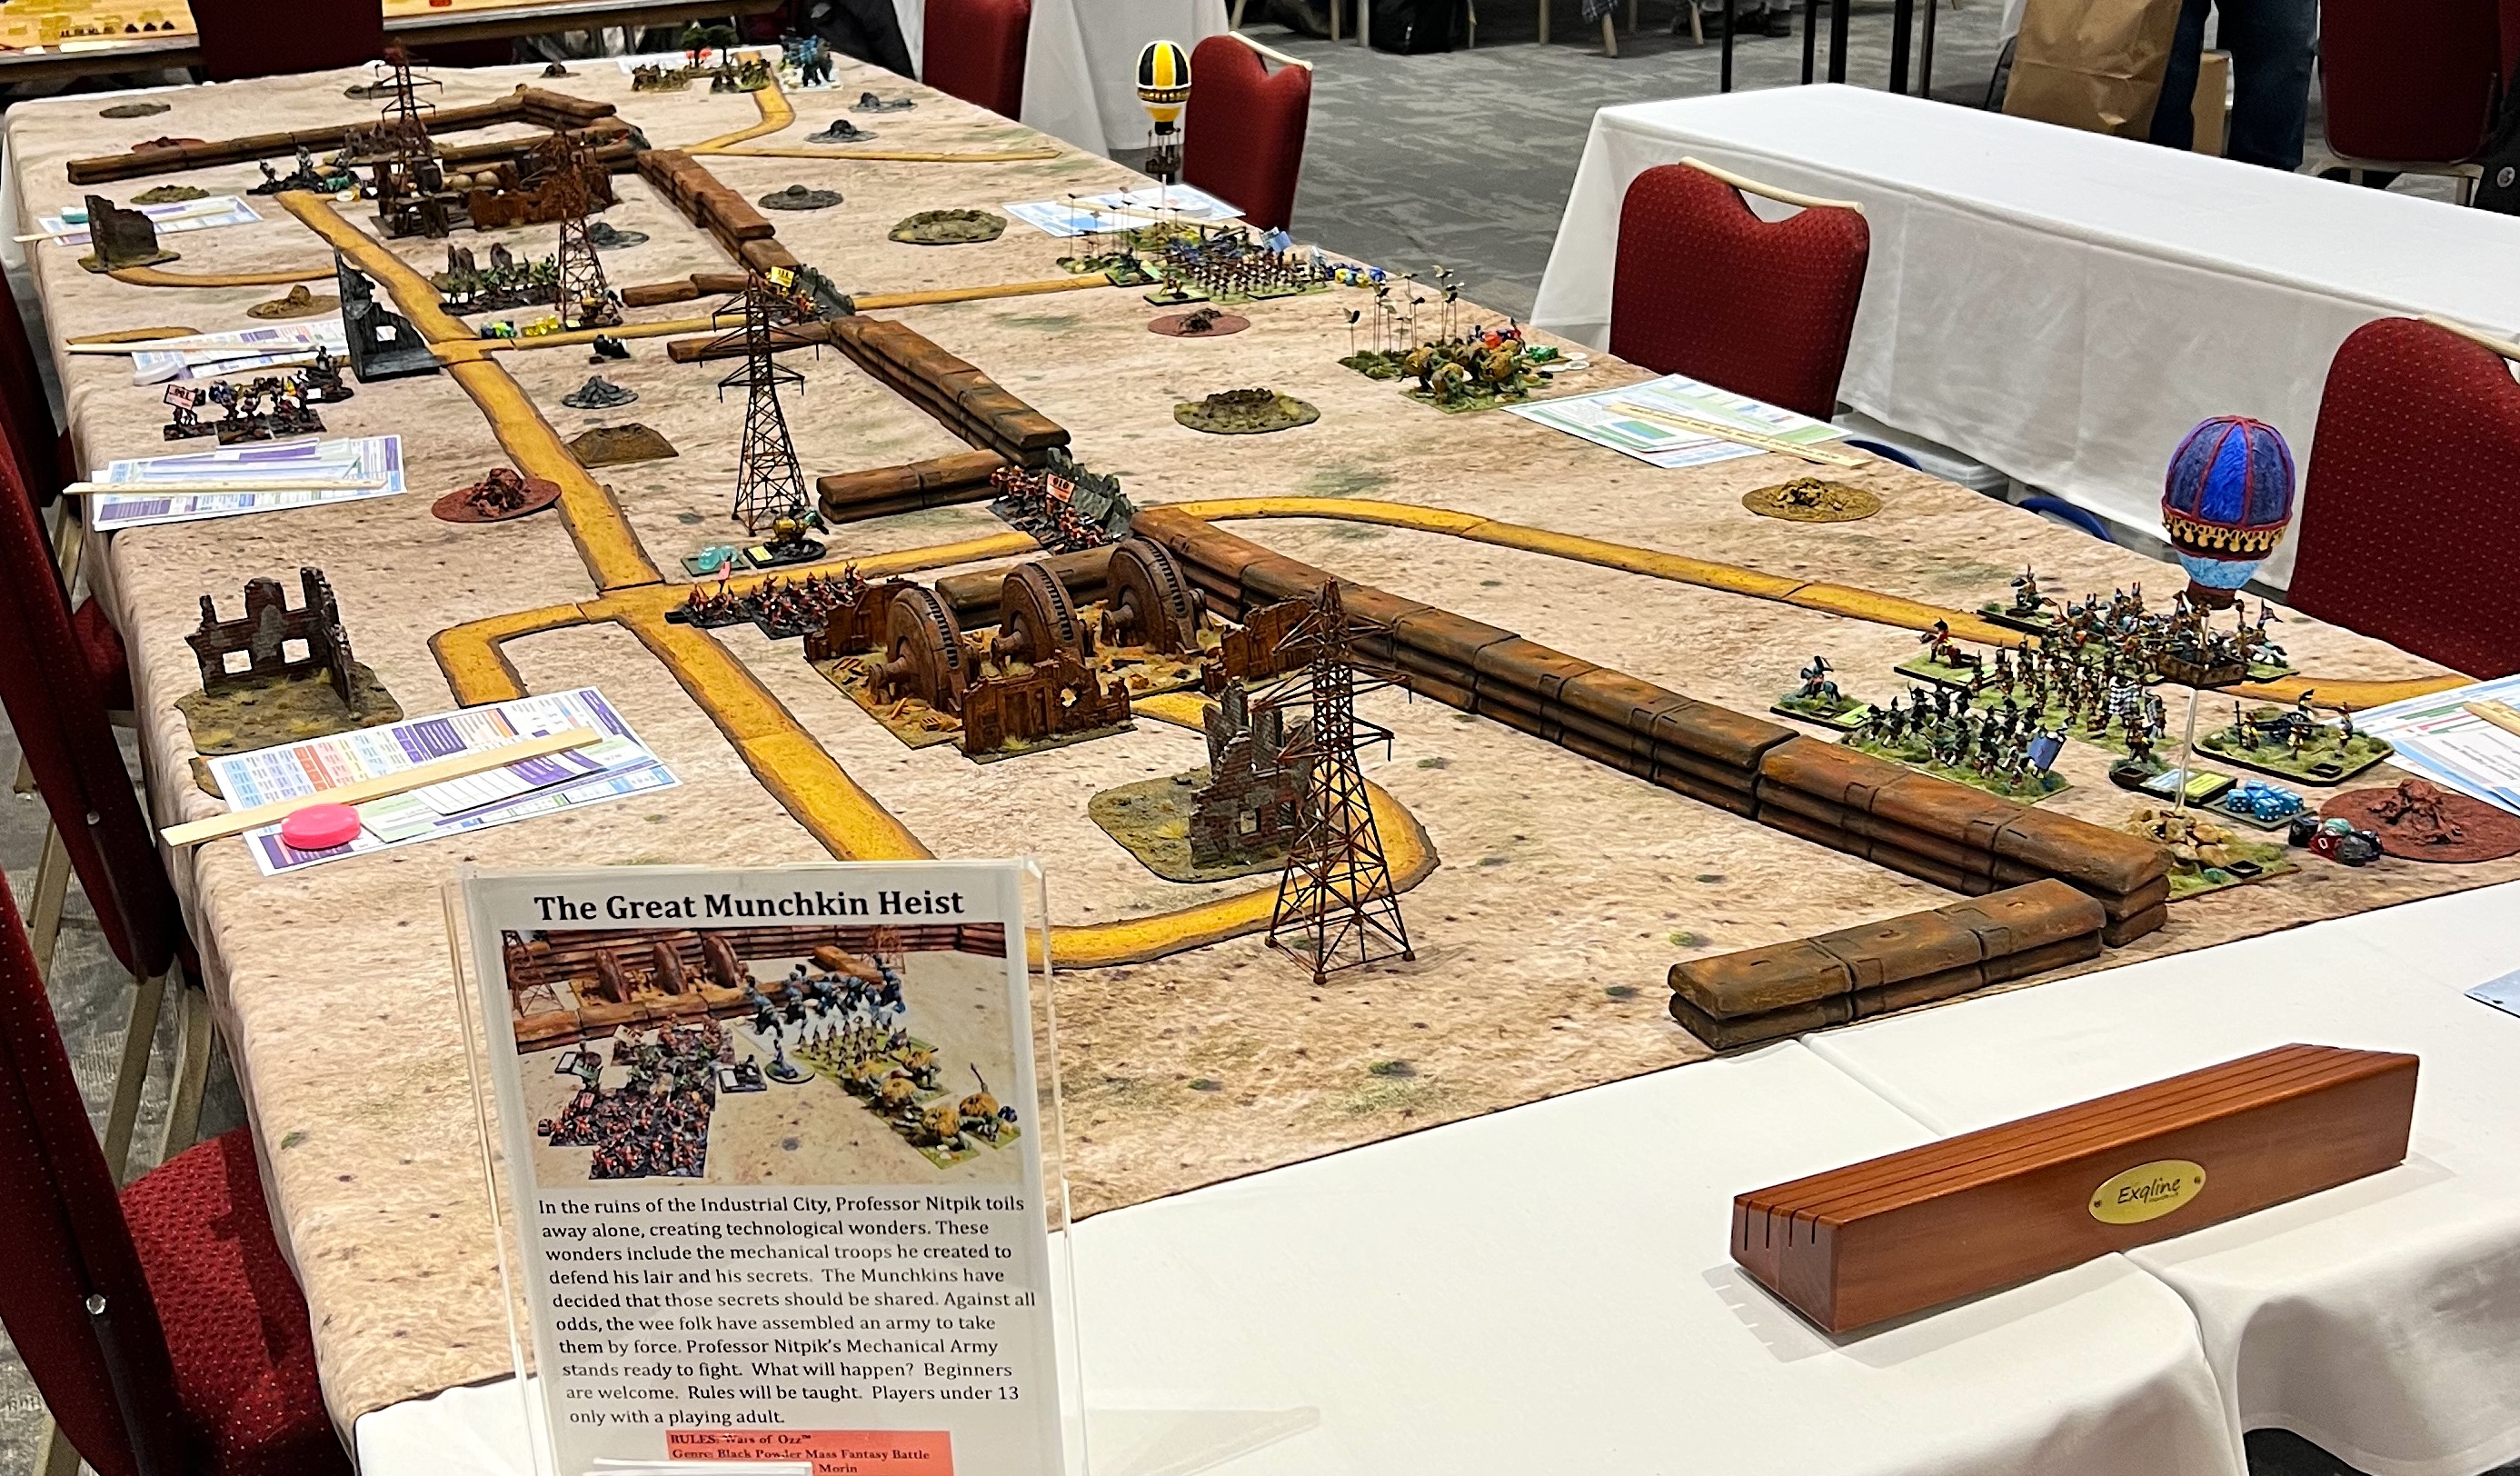
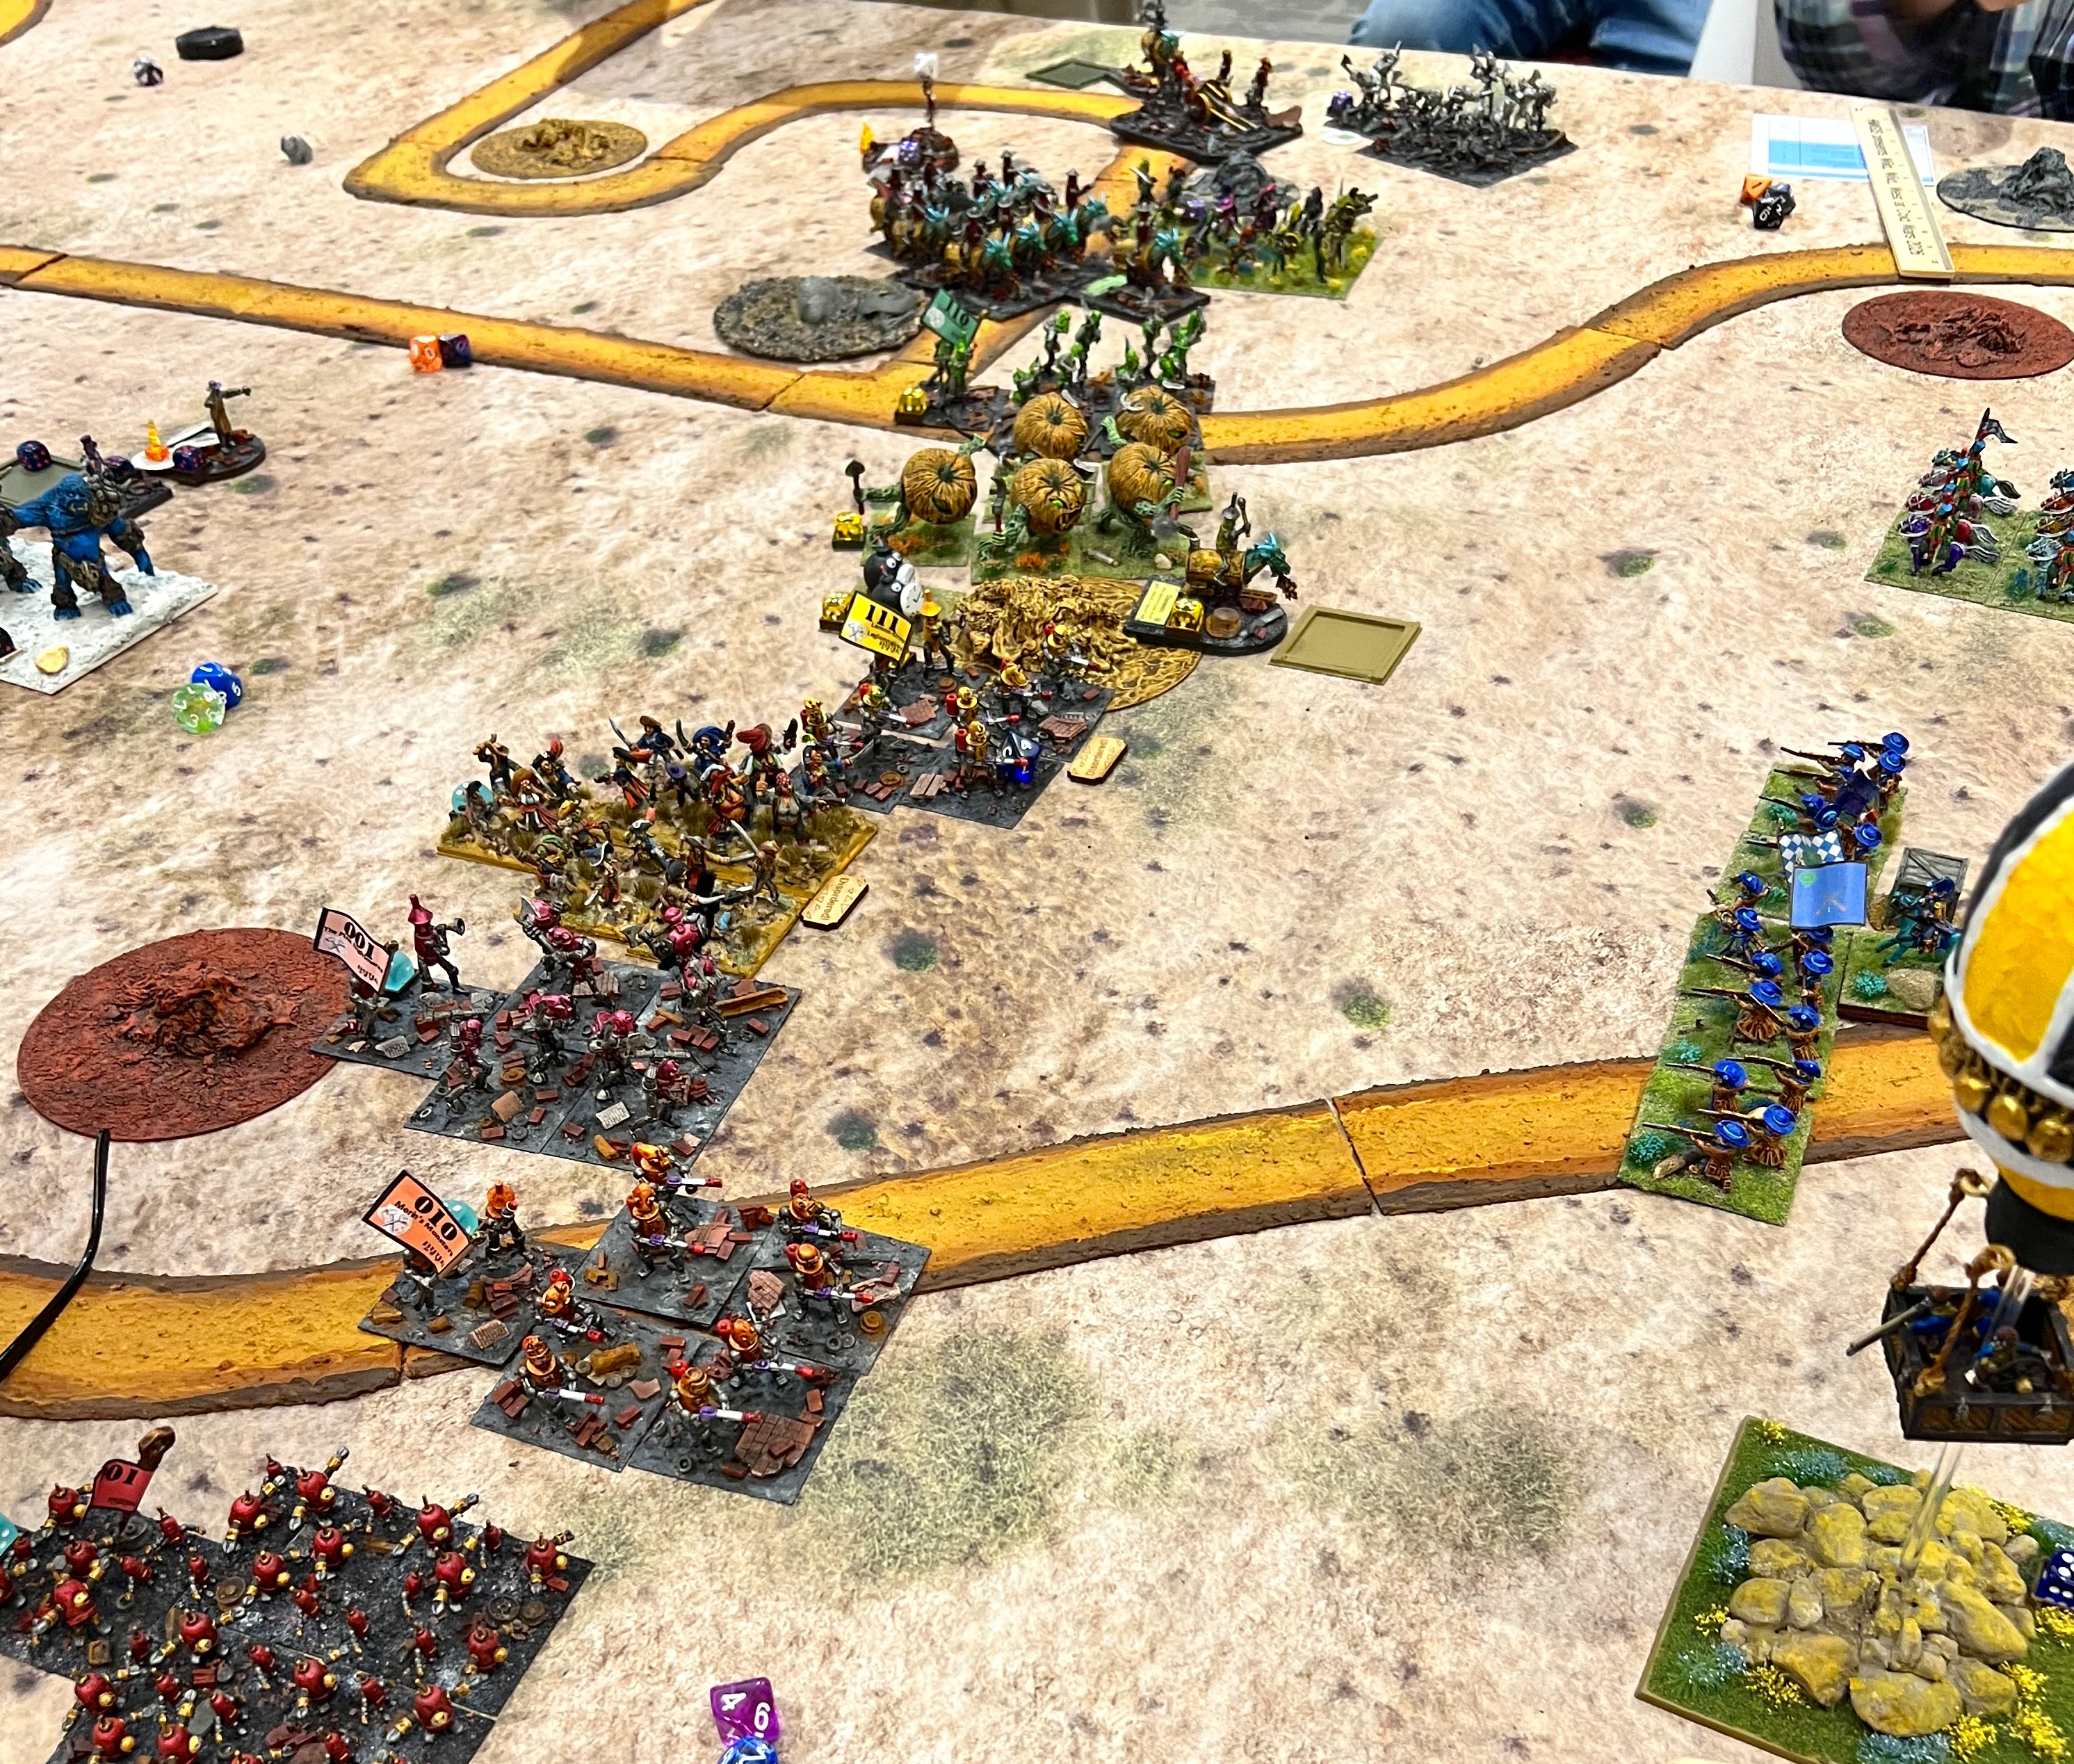
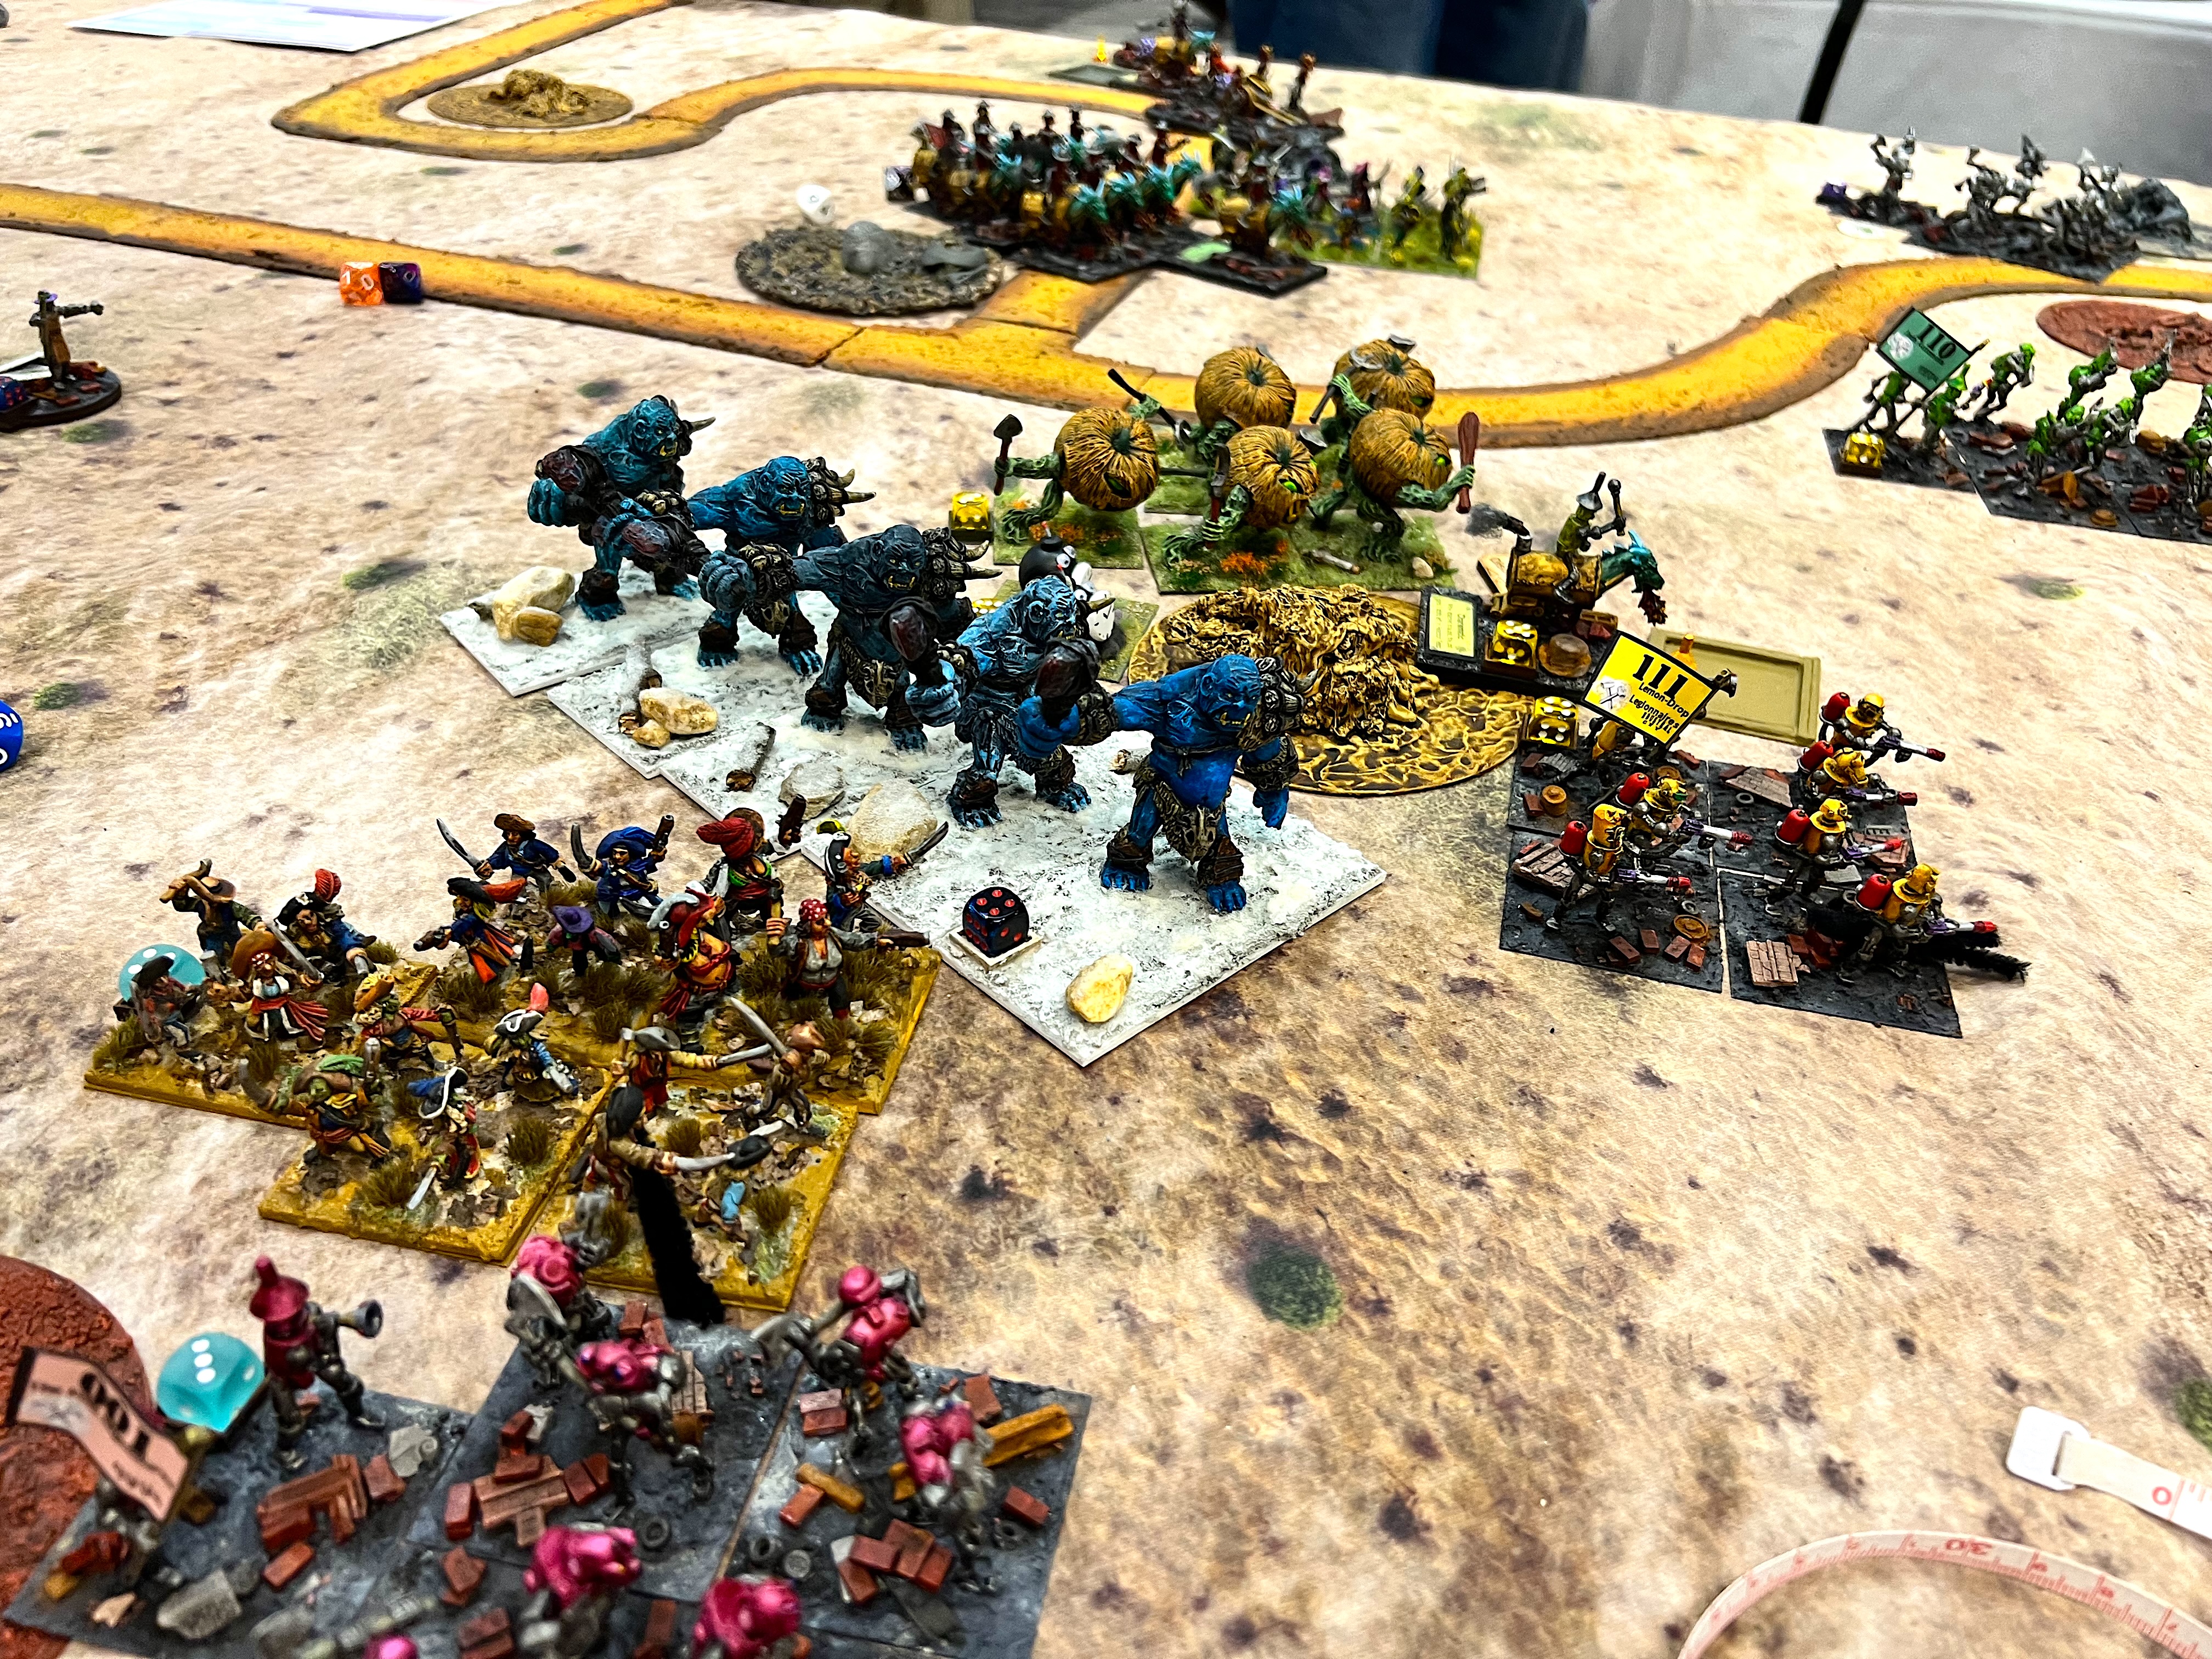
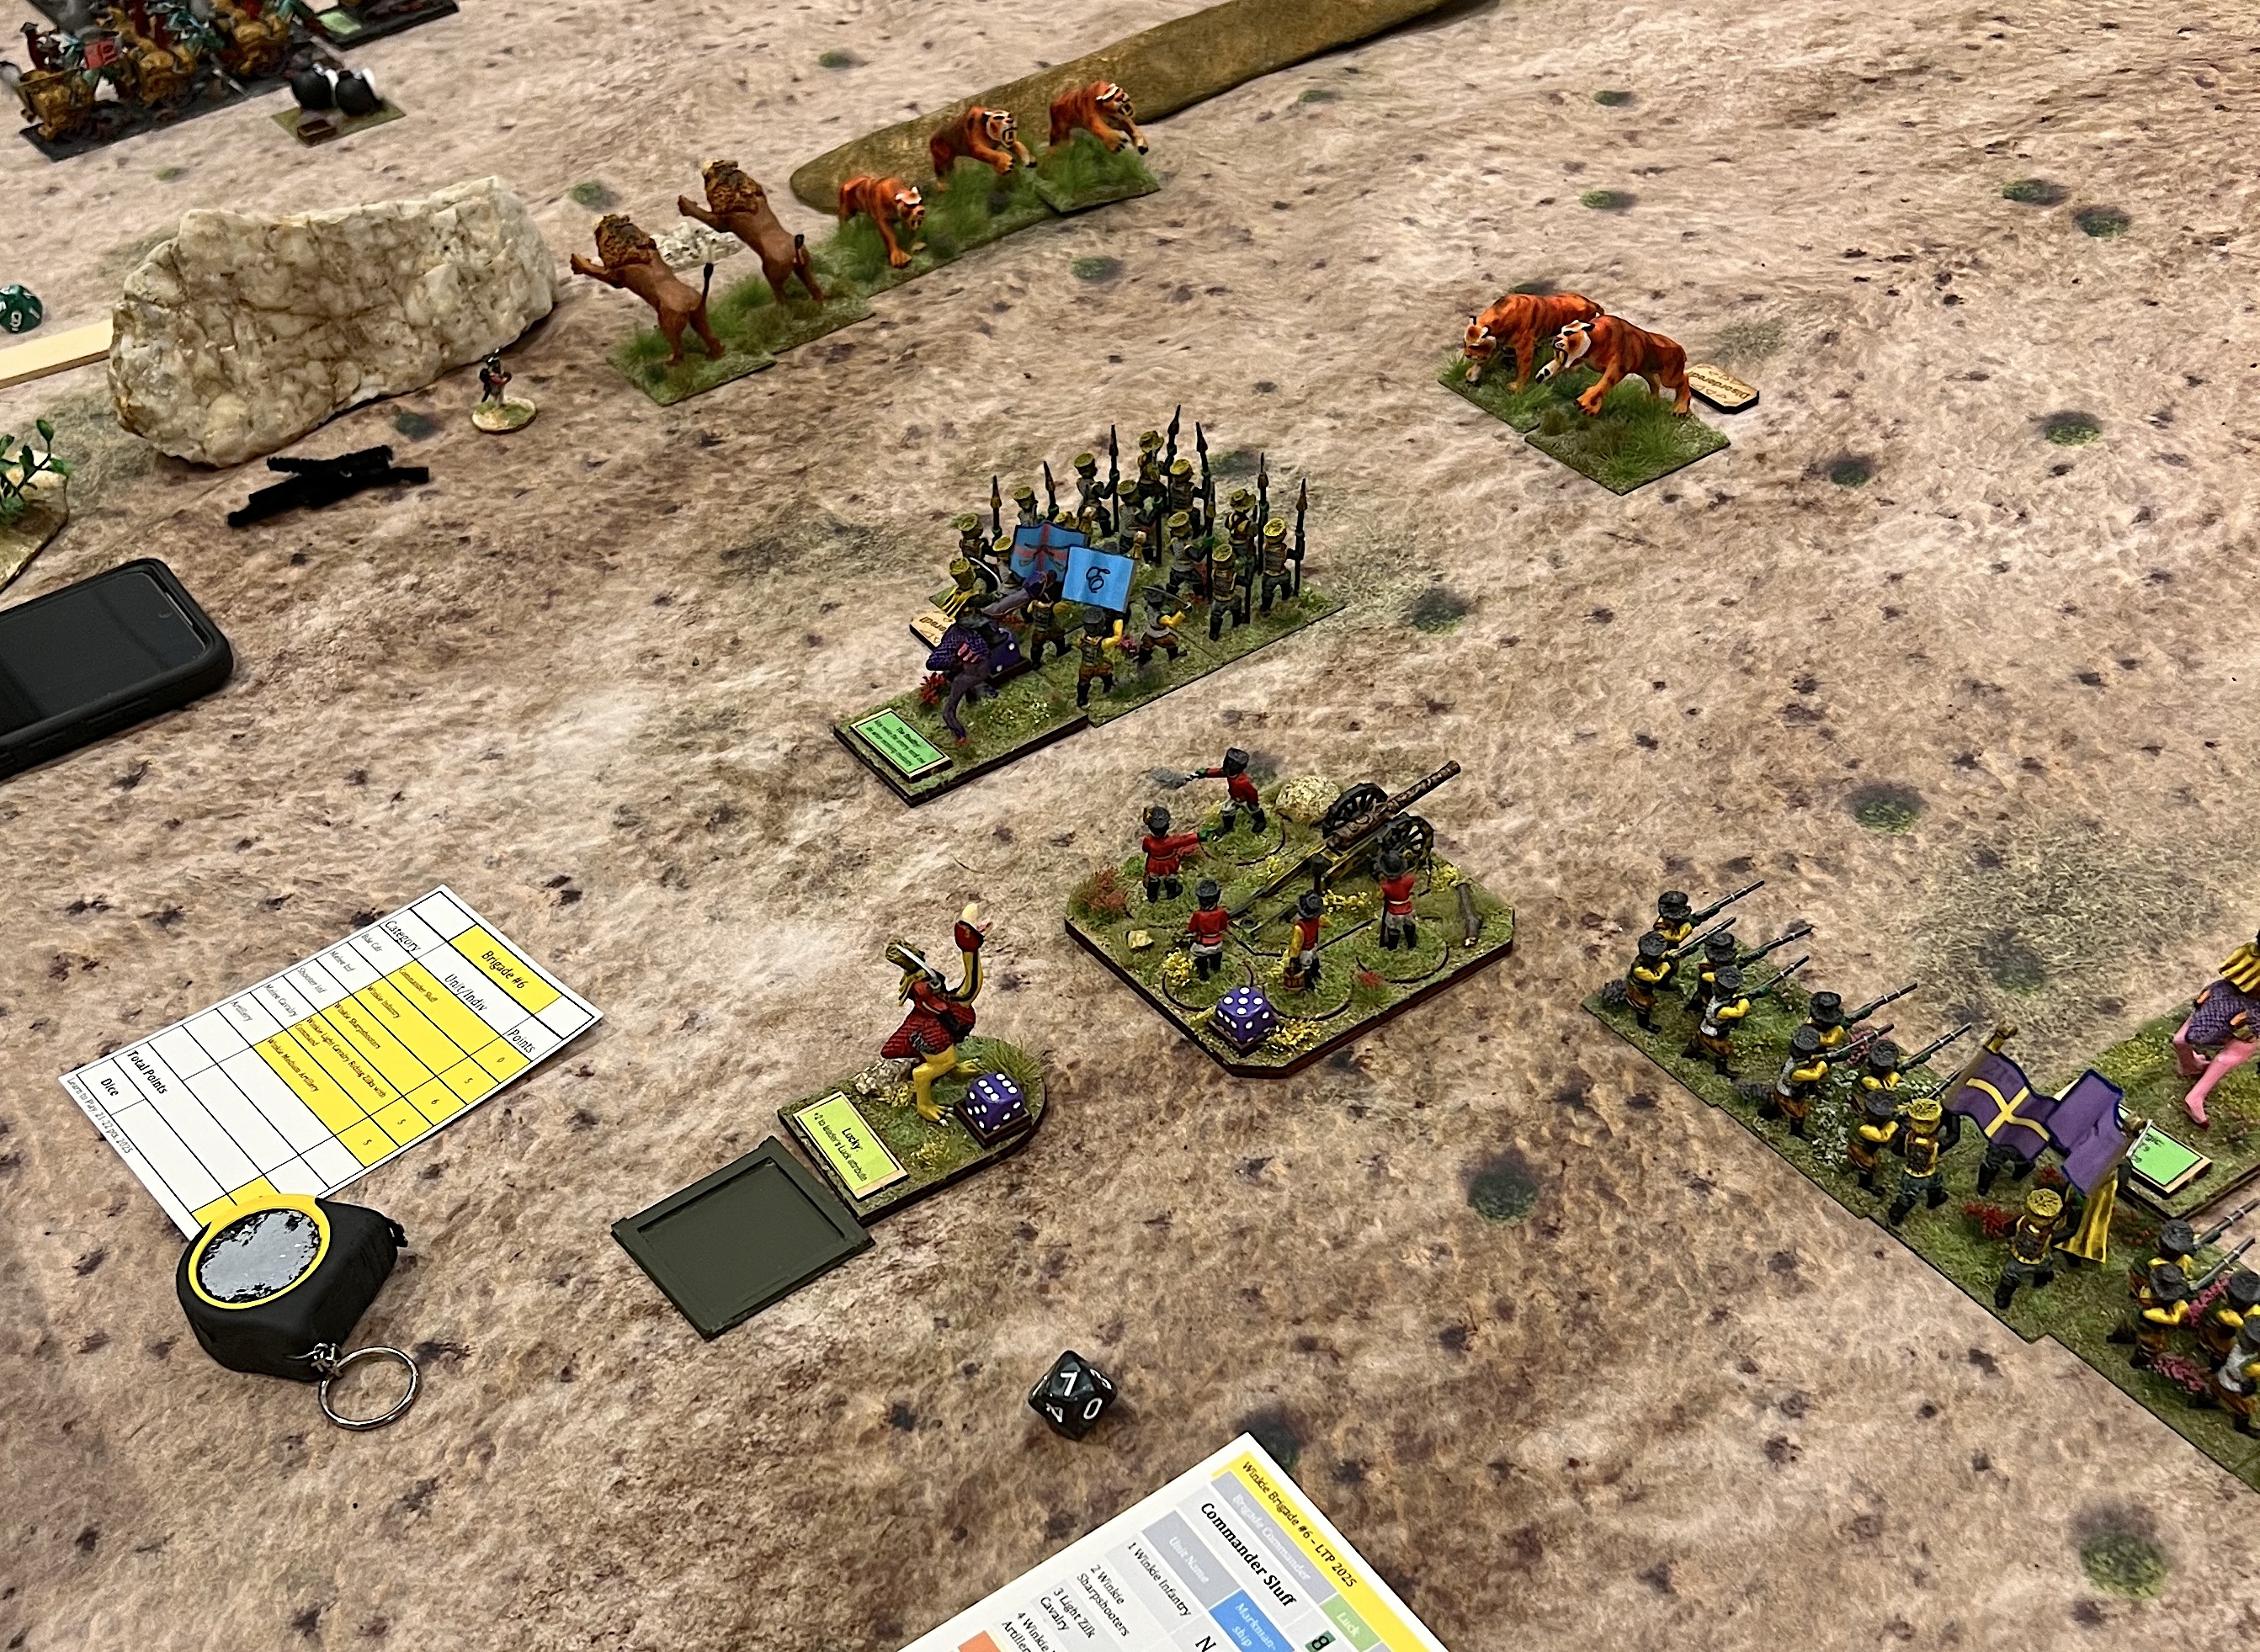
The Great Munchkin Heist
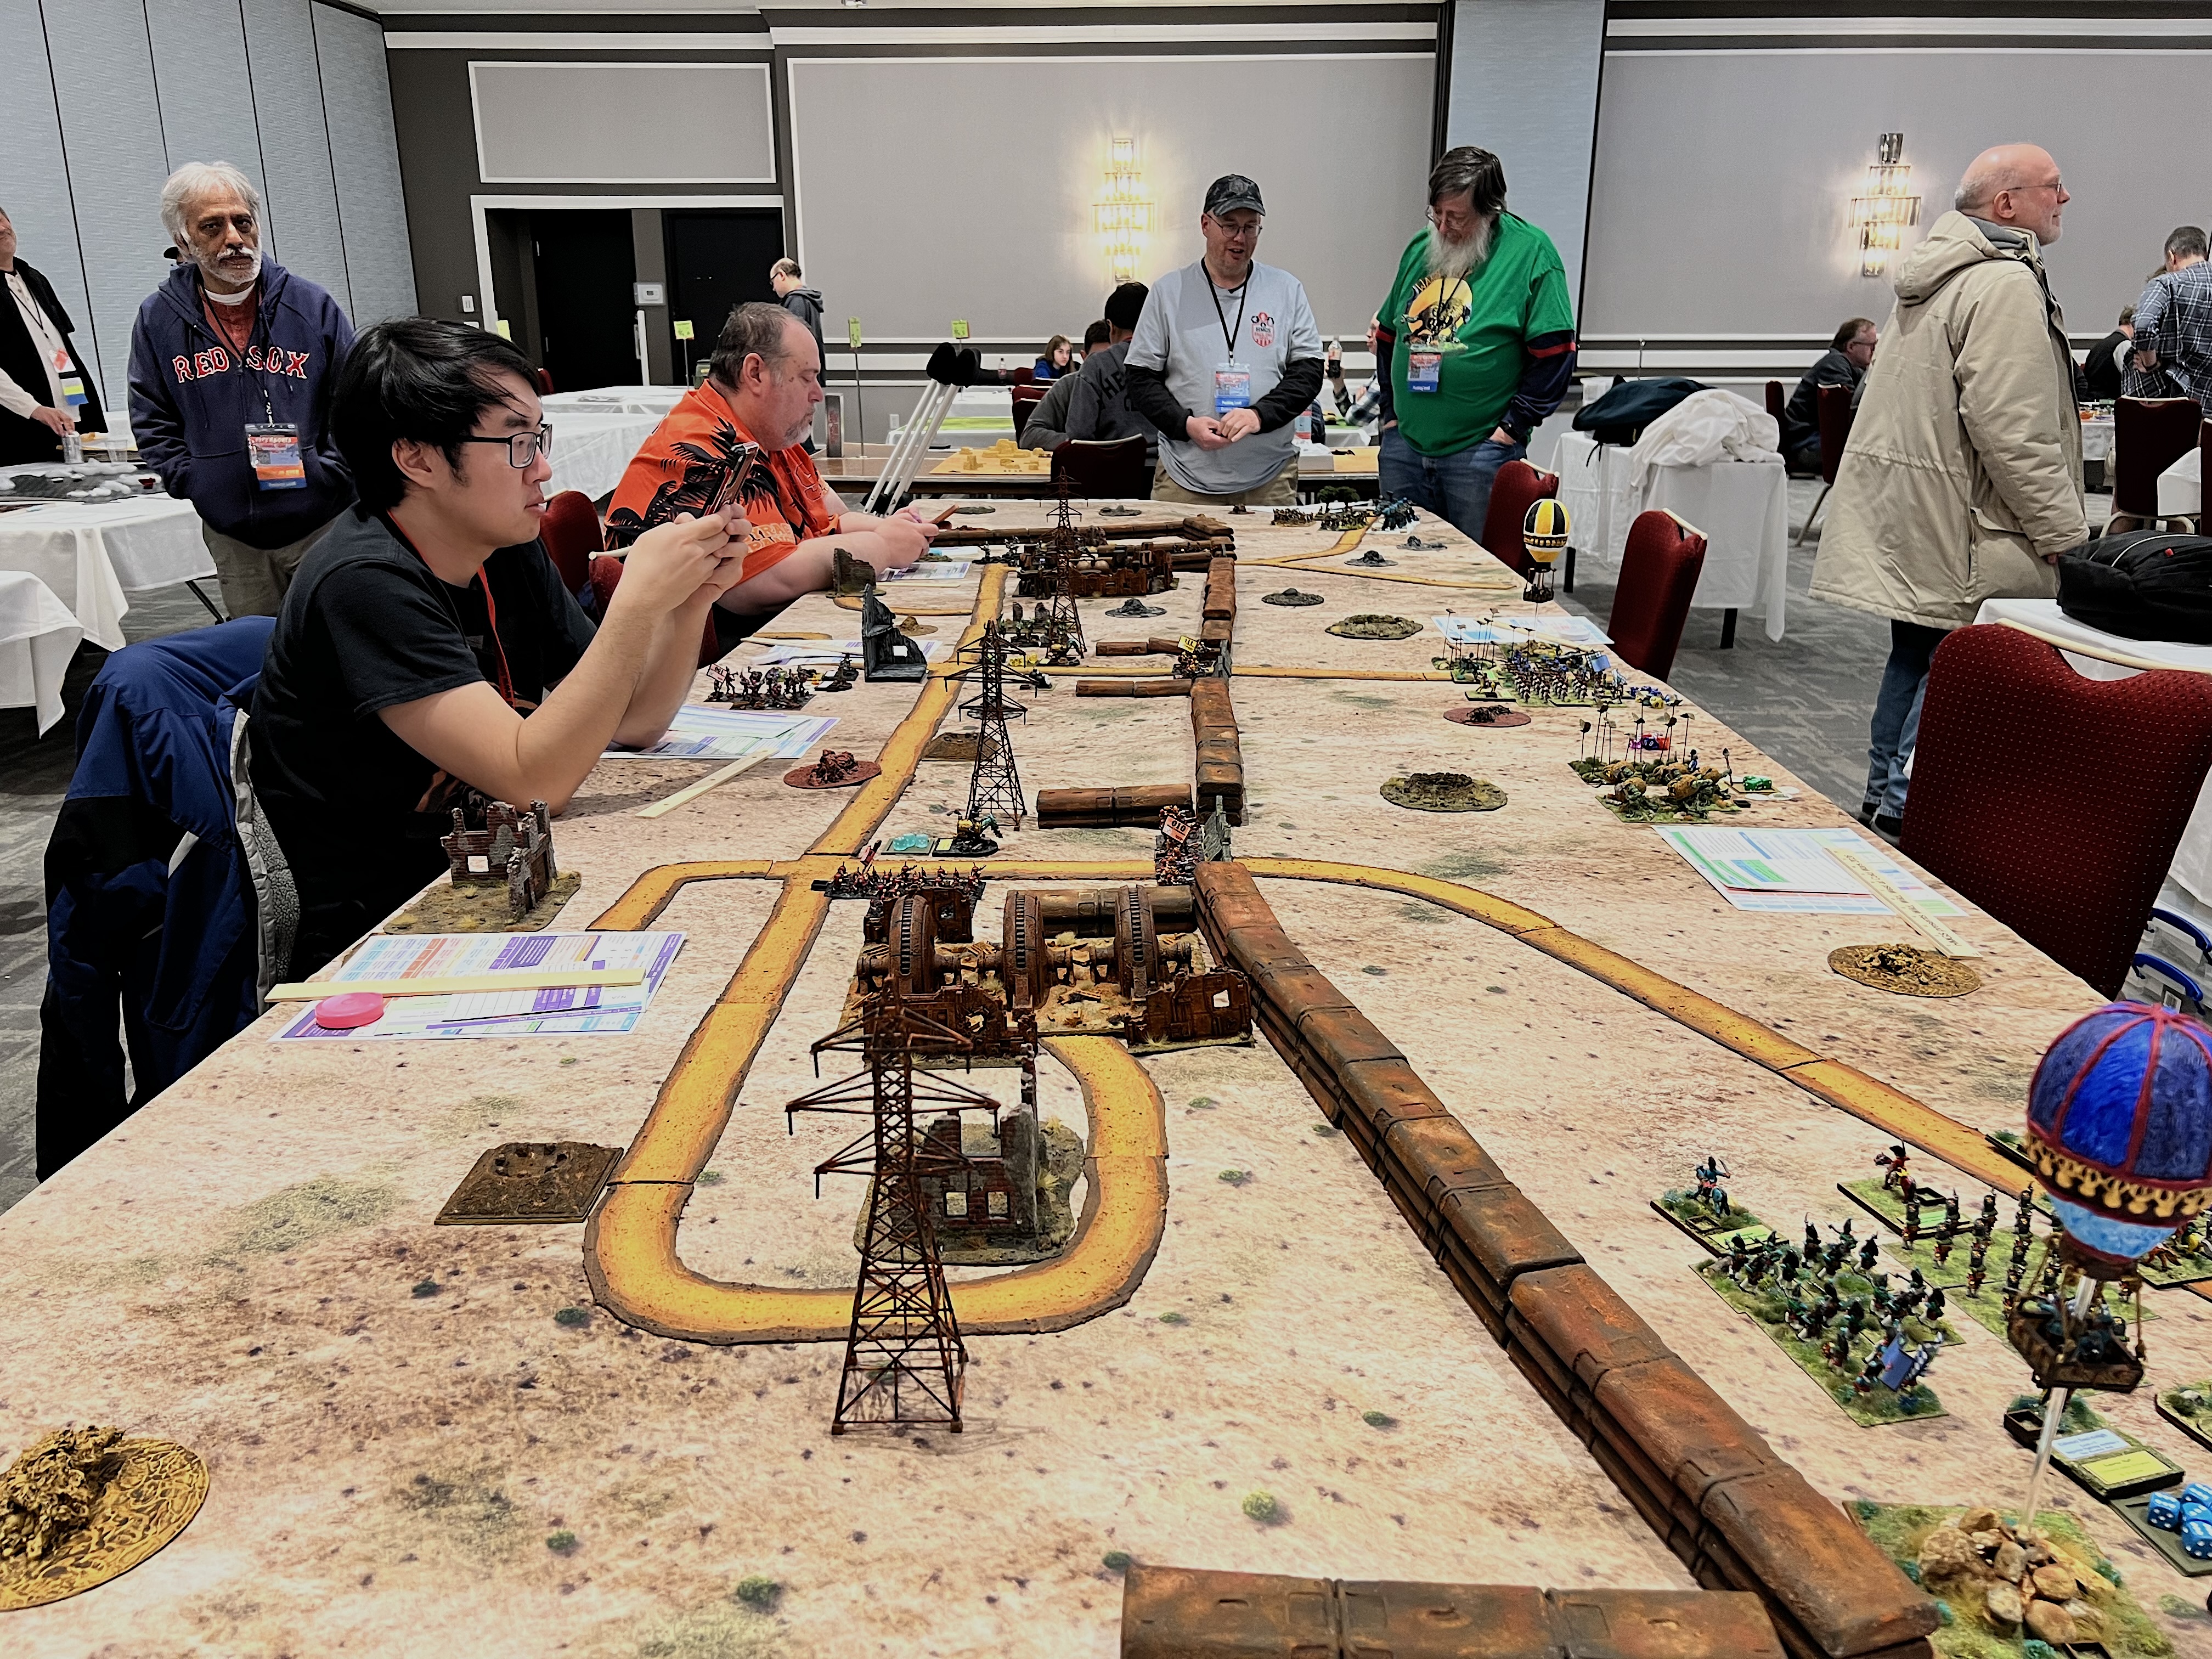
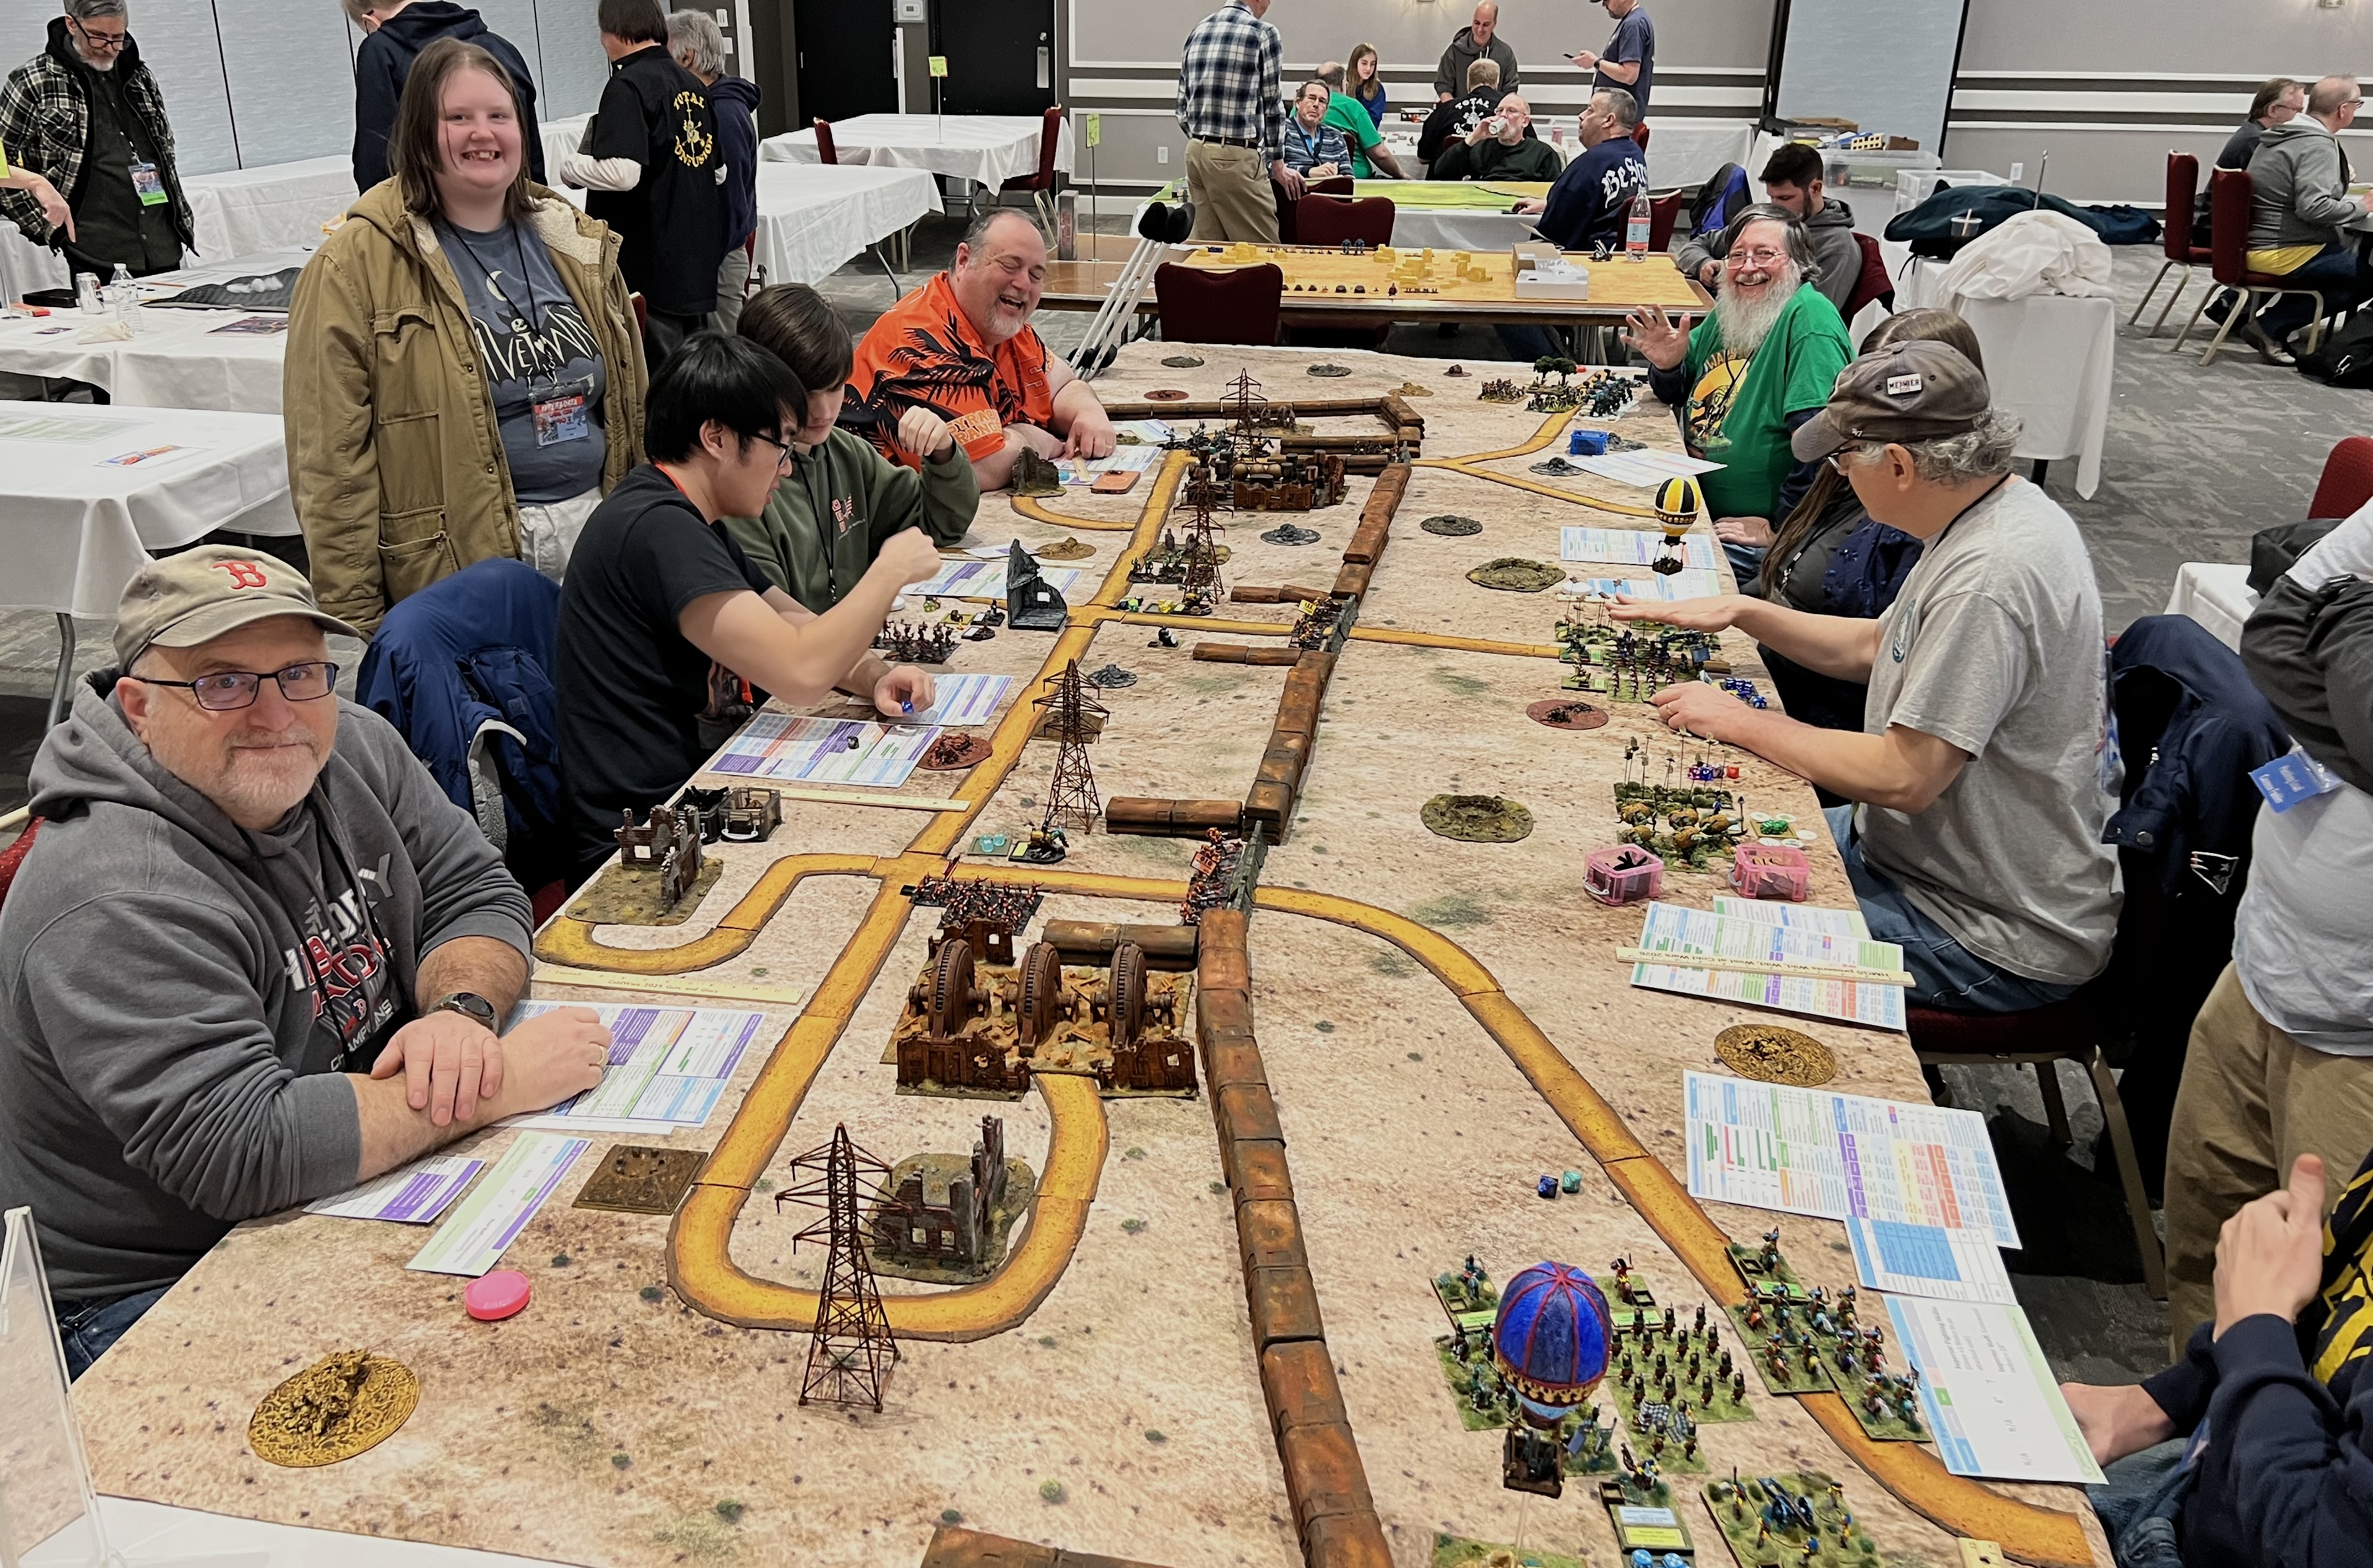
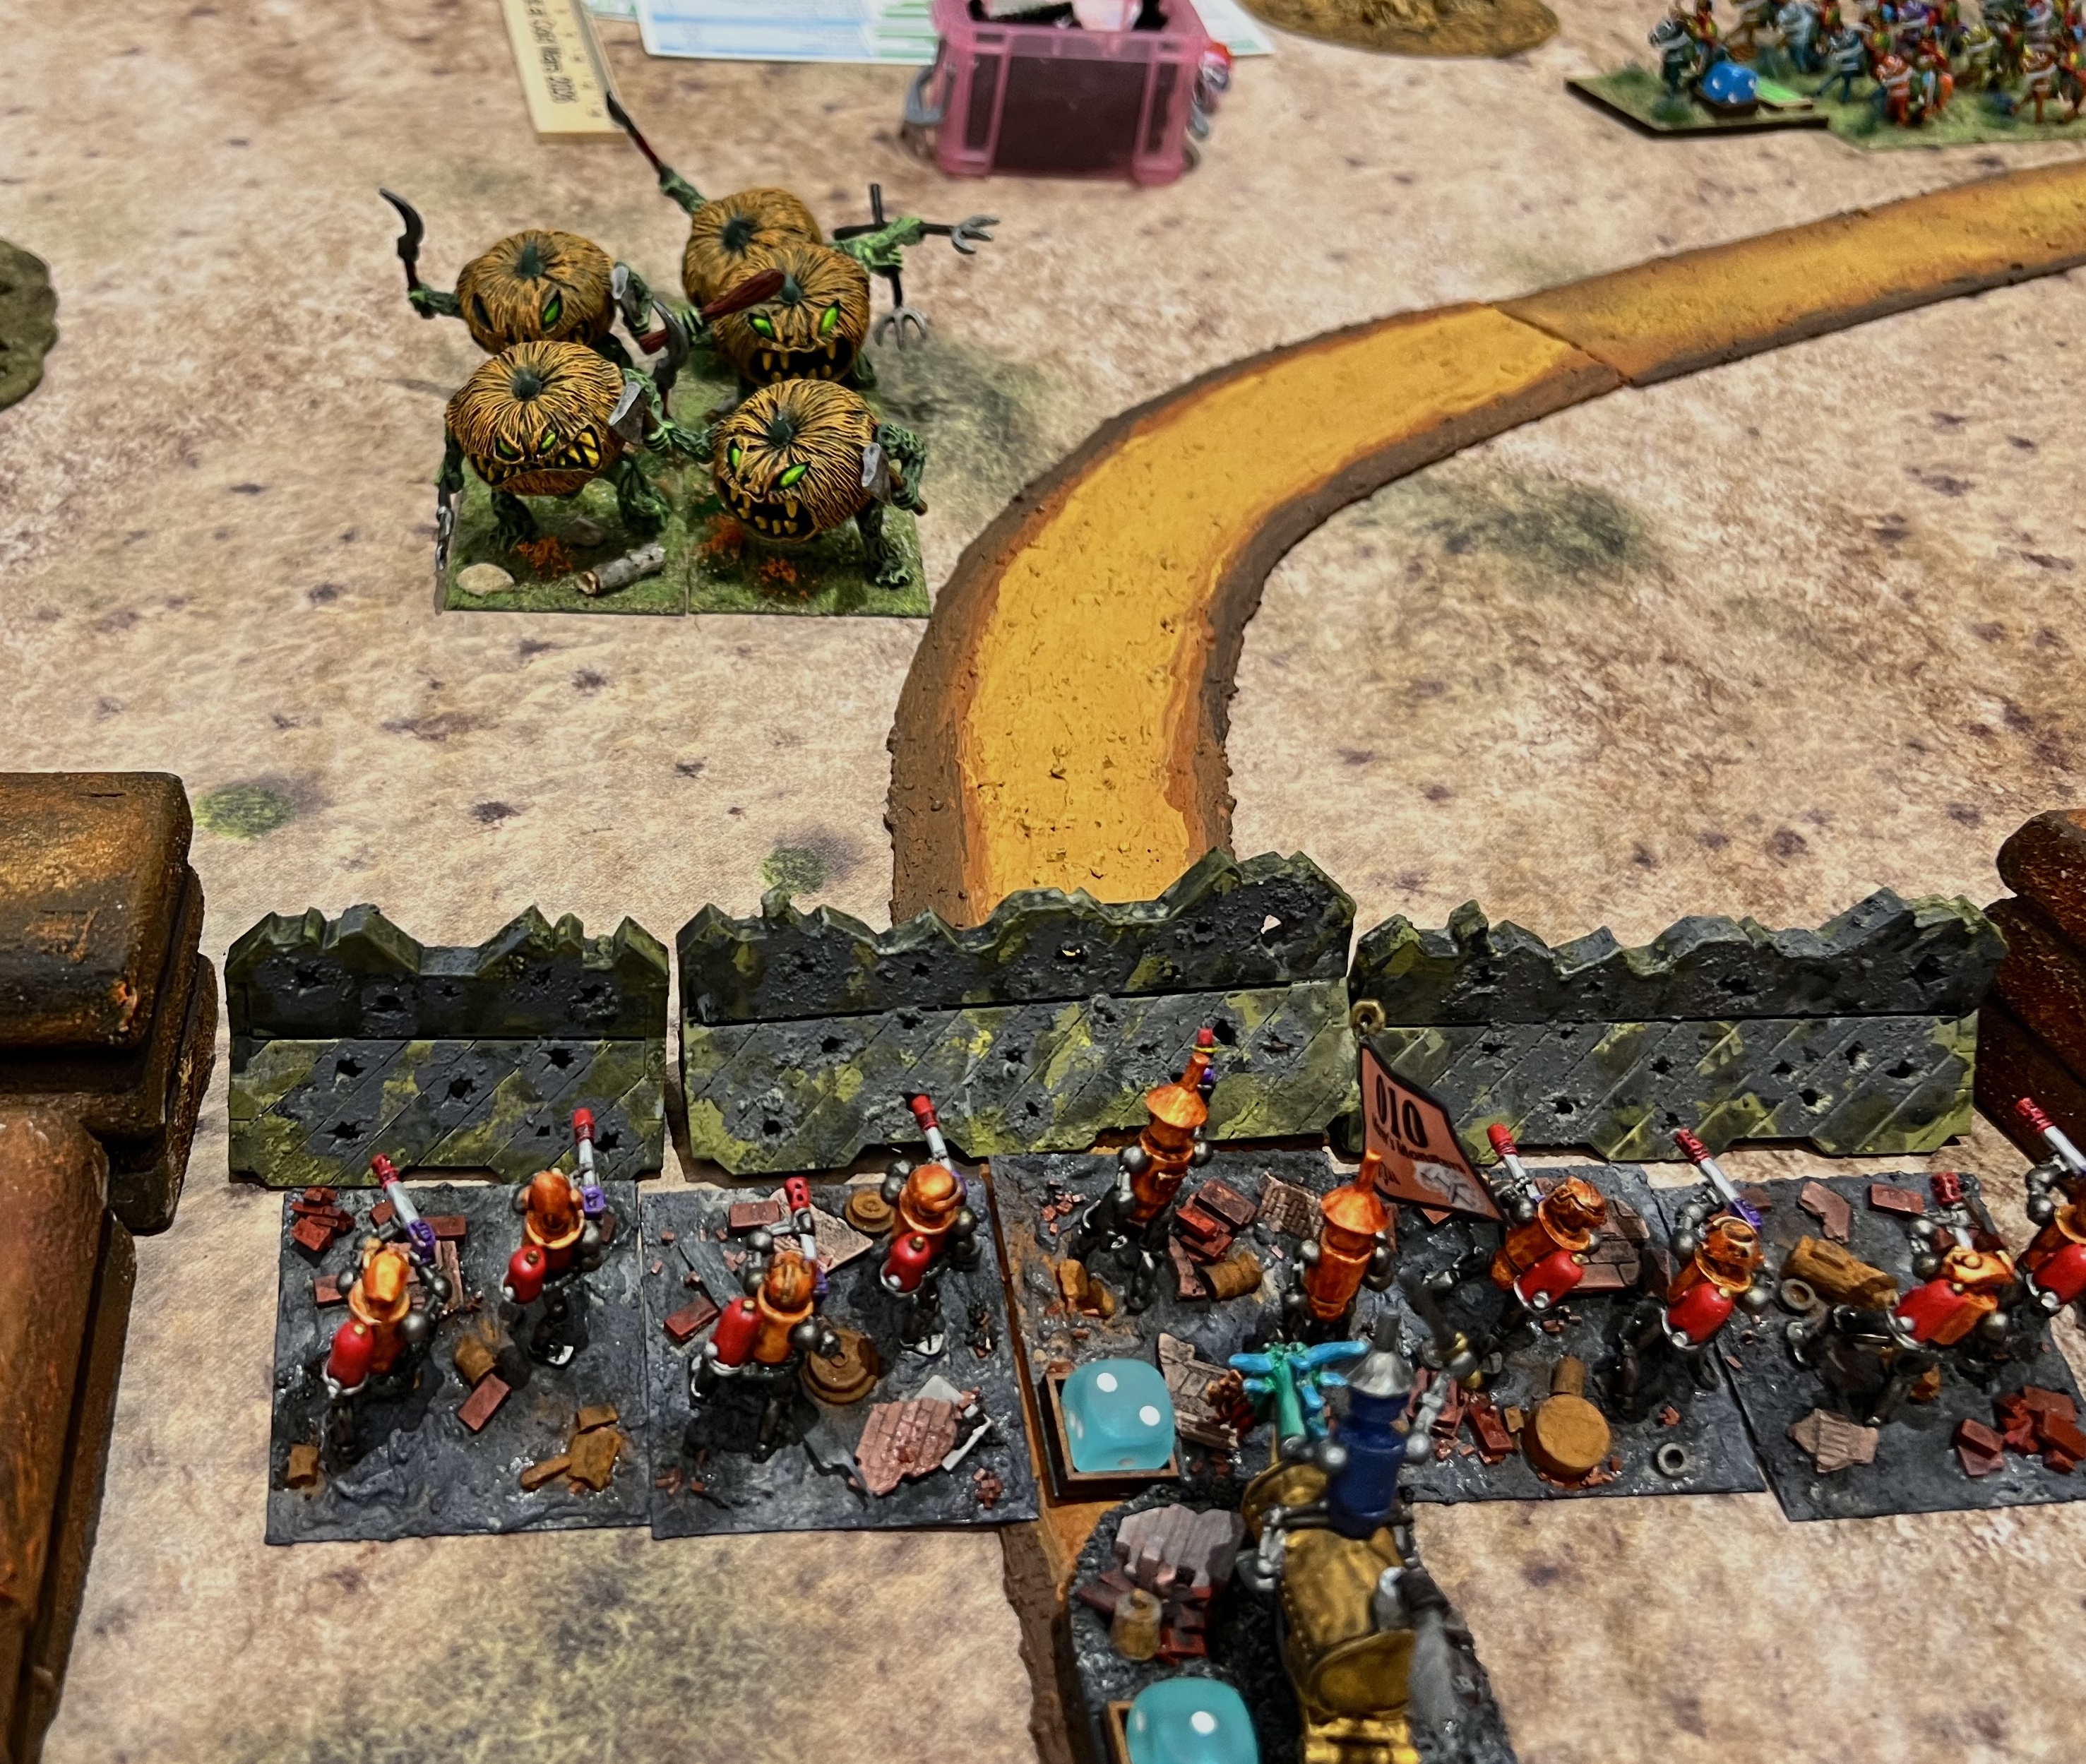
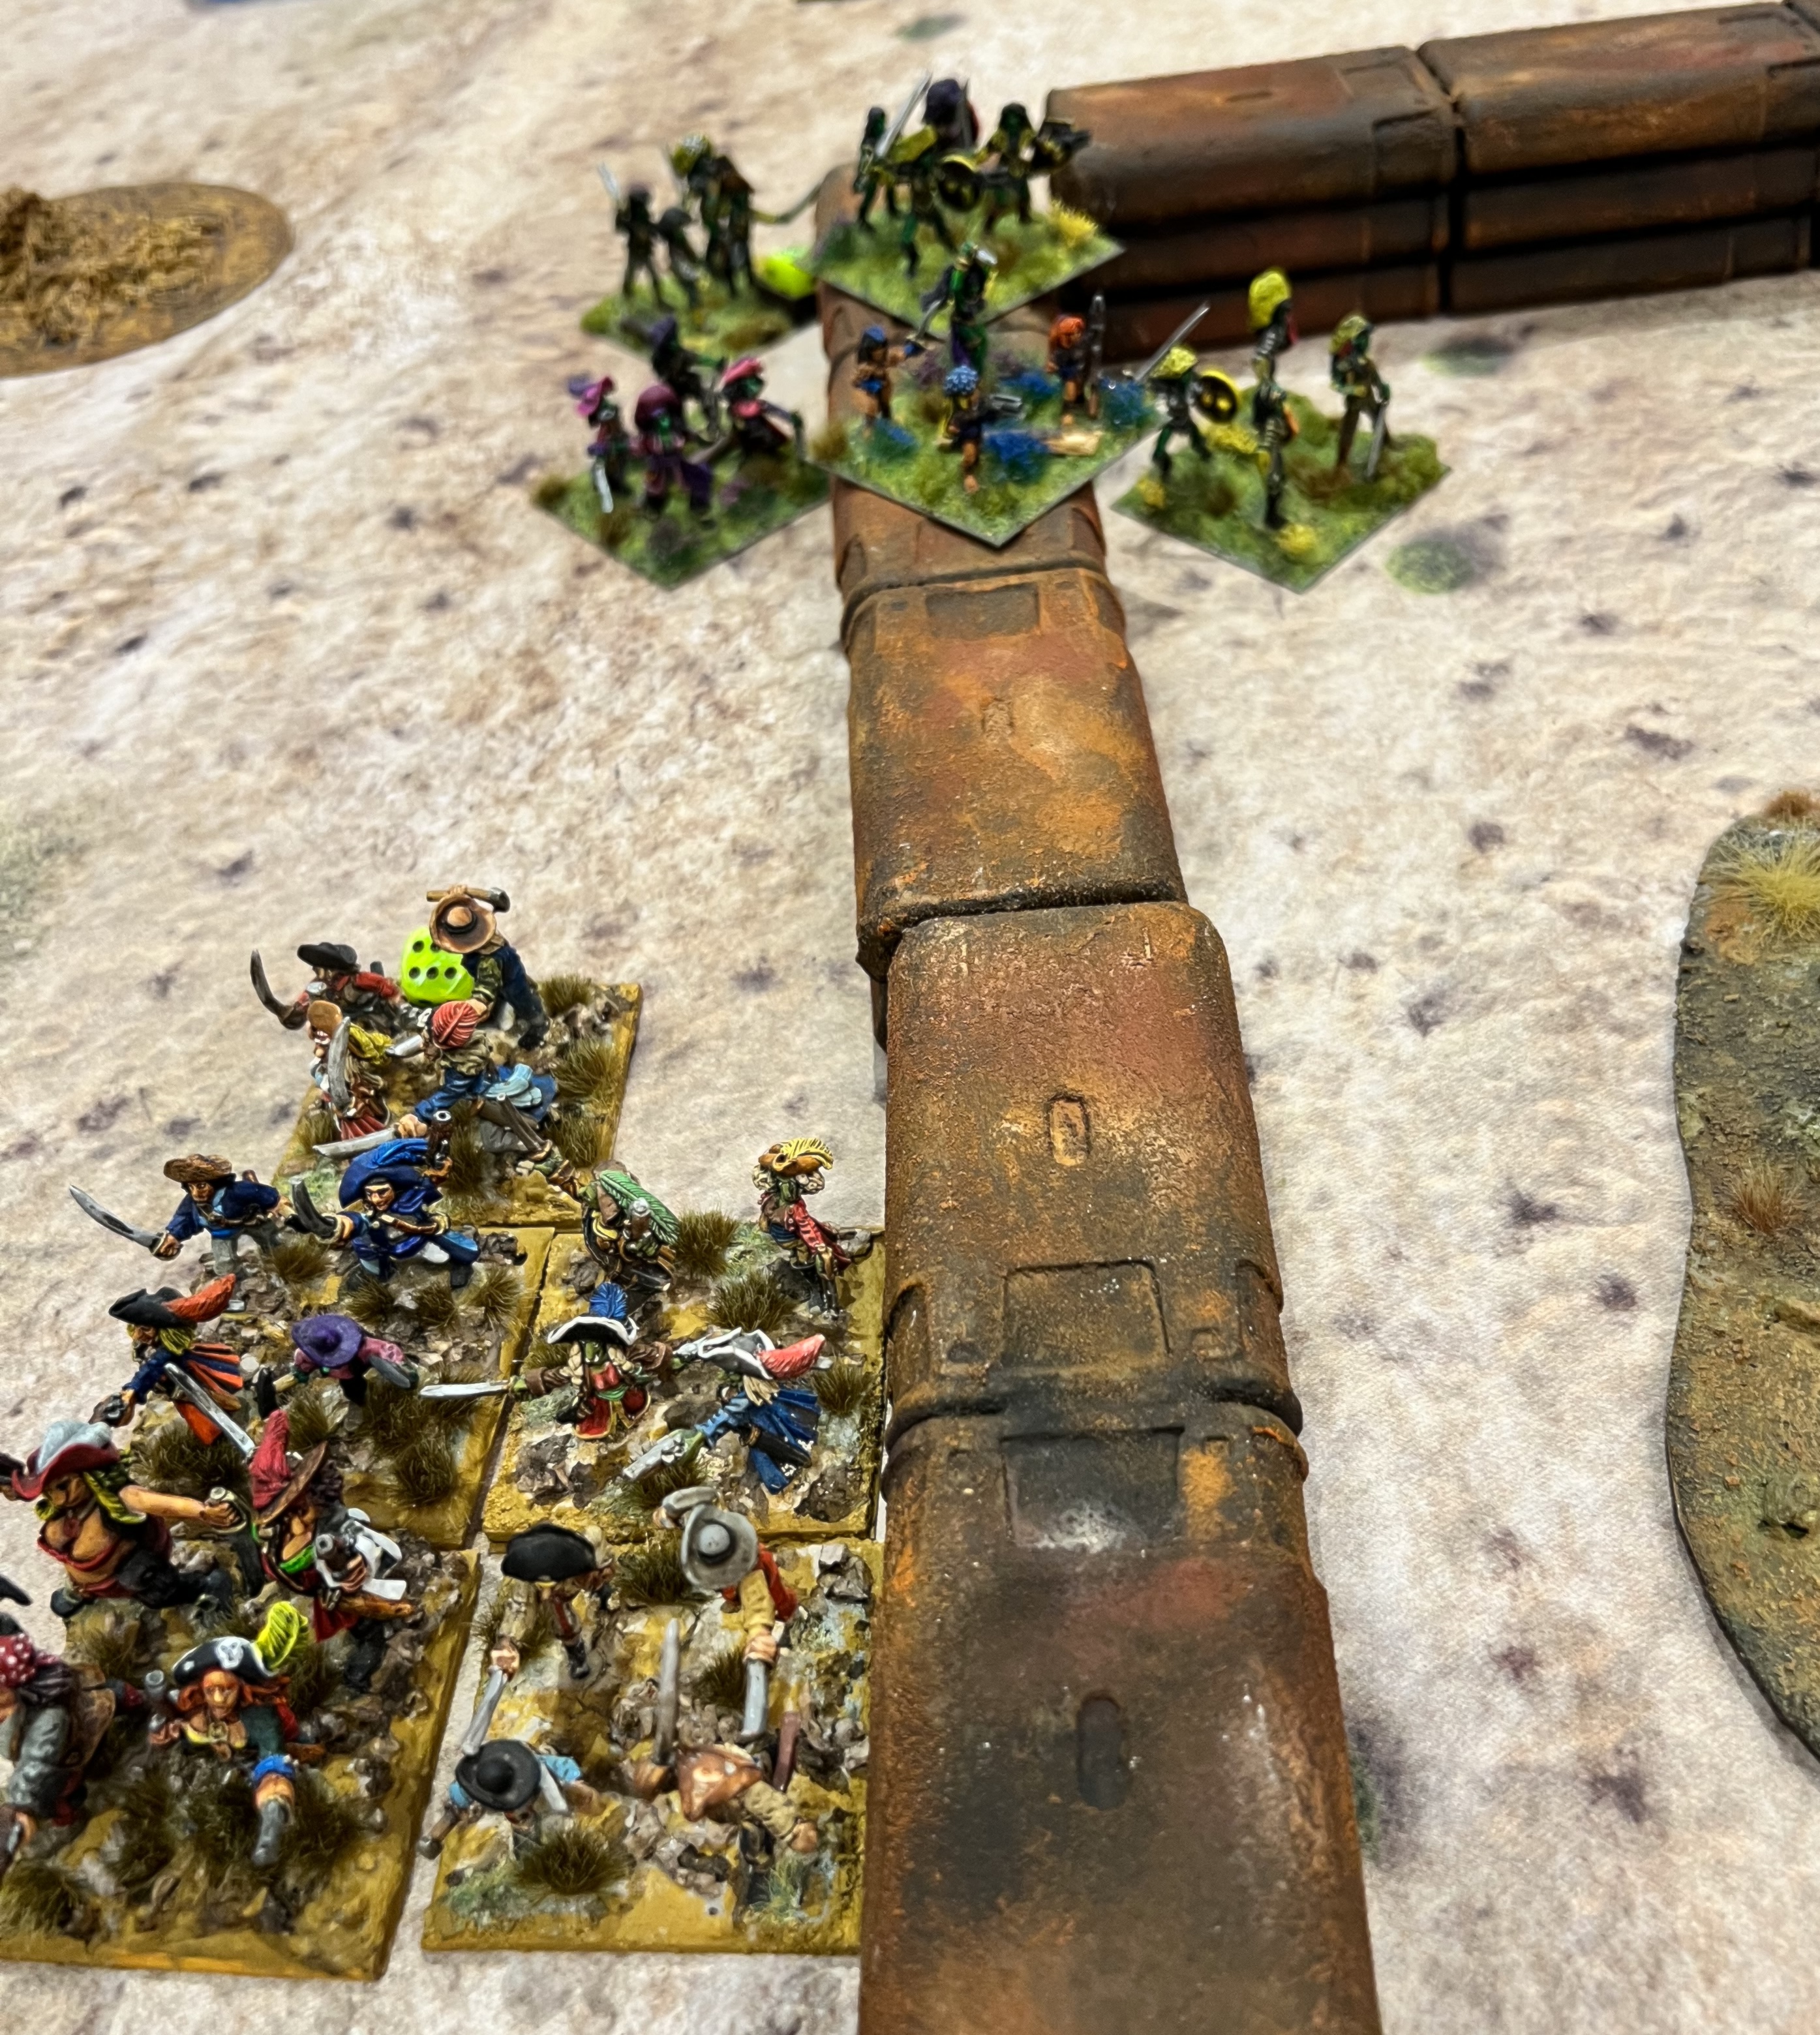
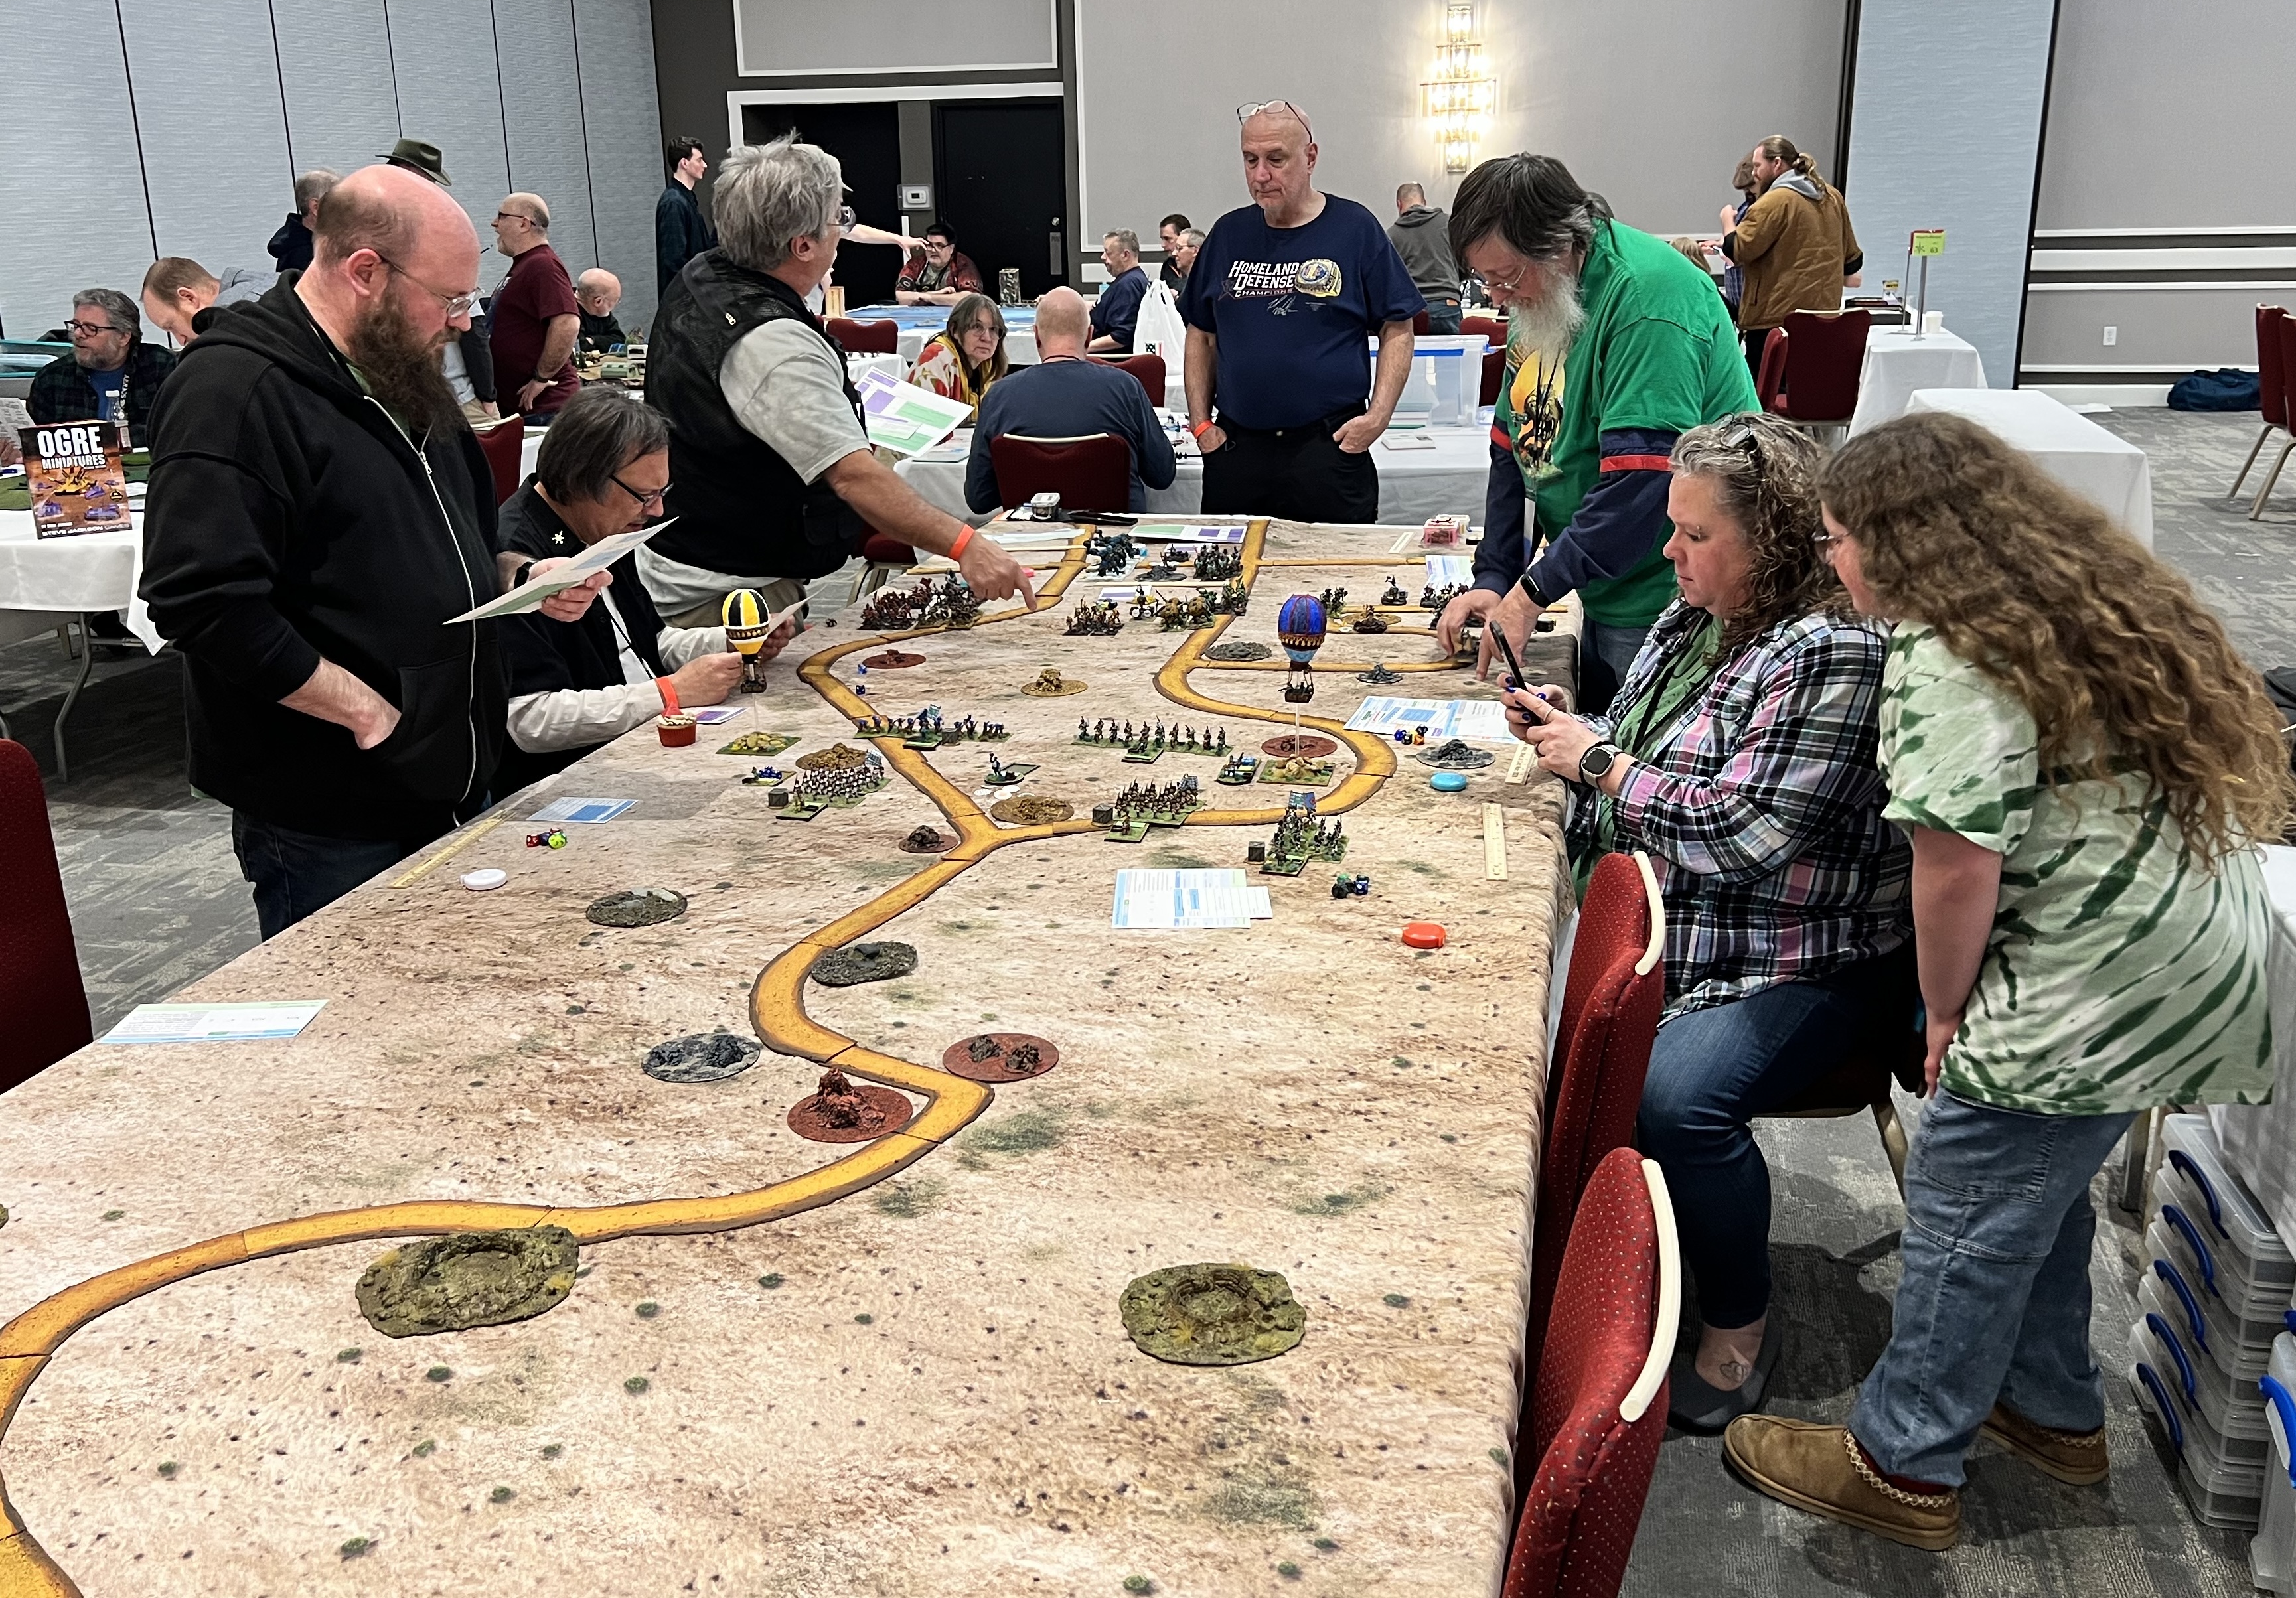
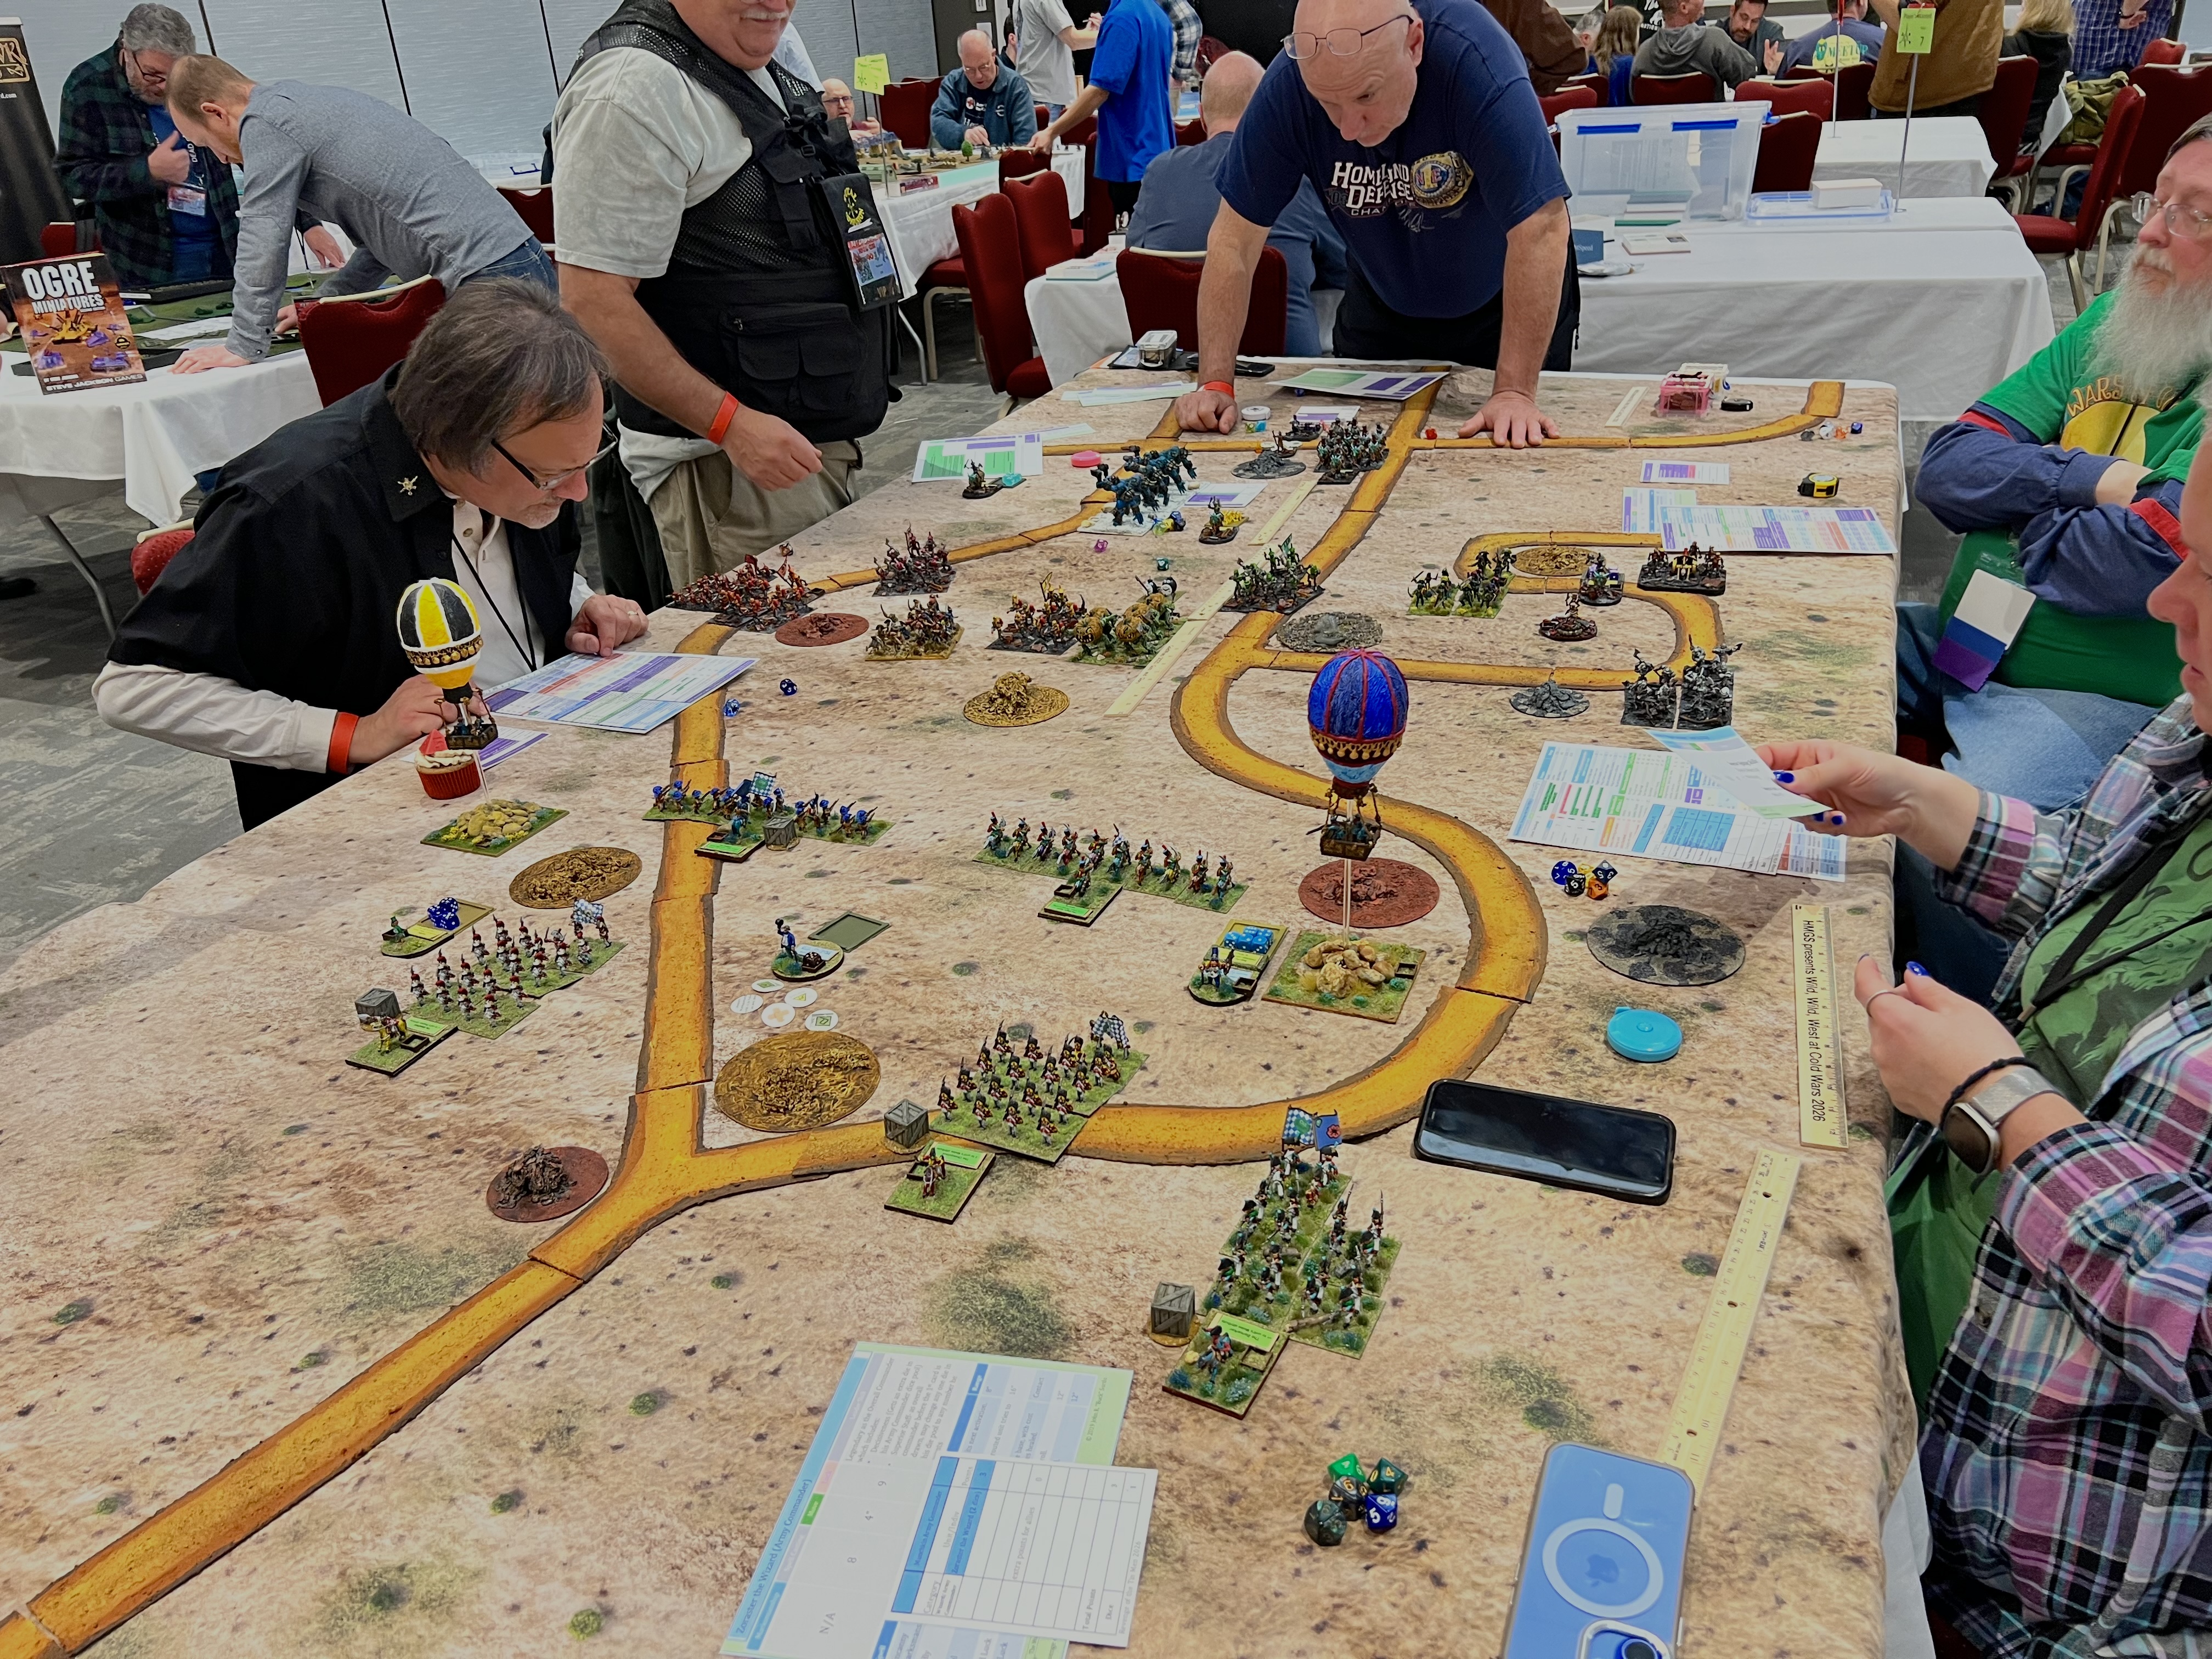
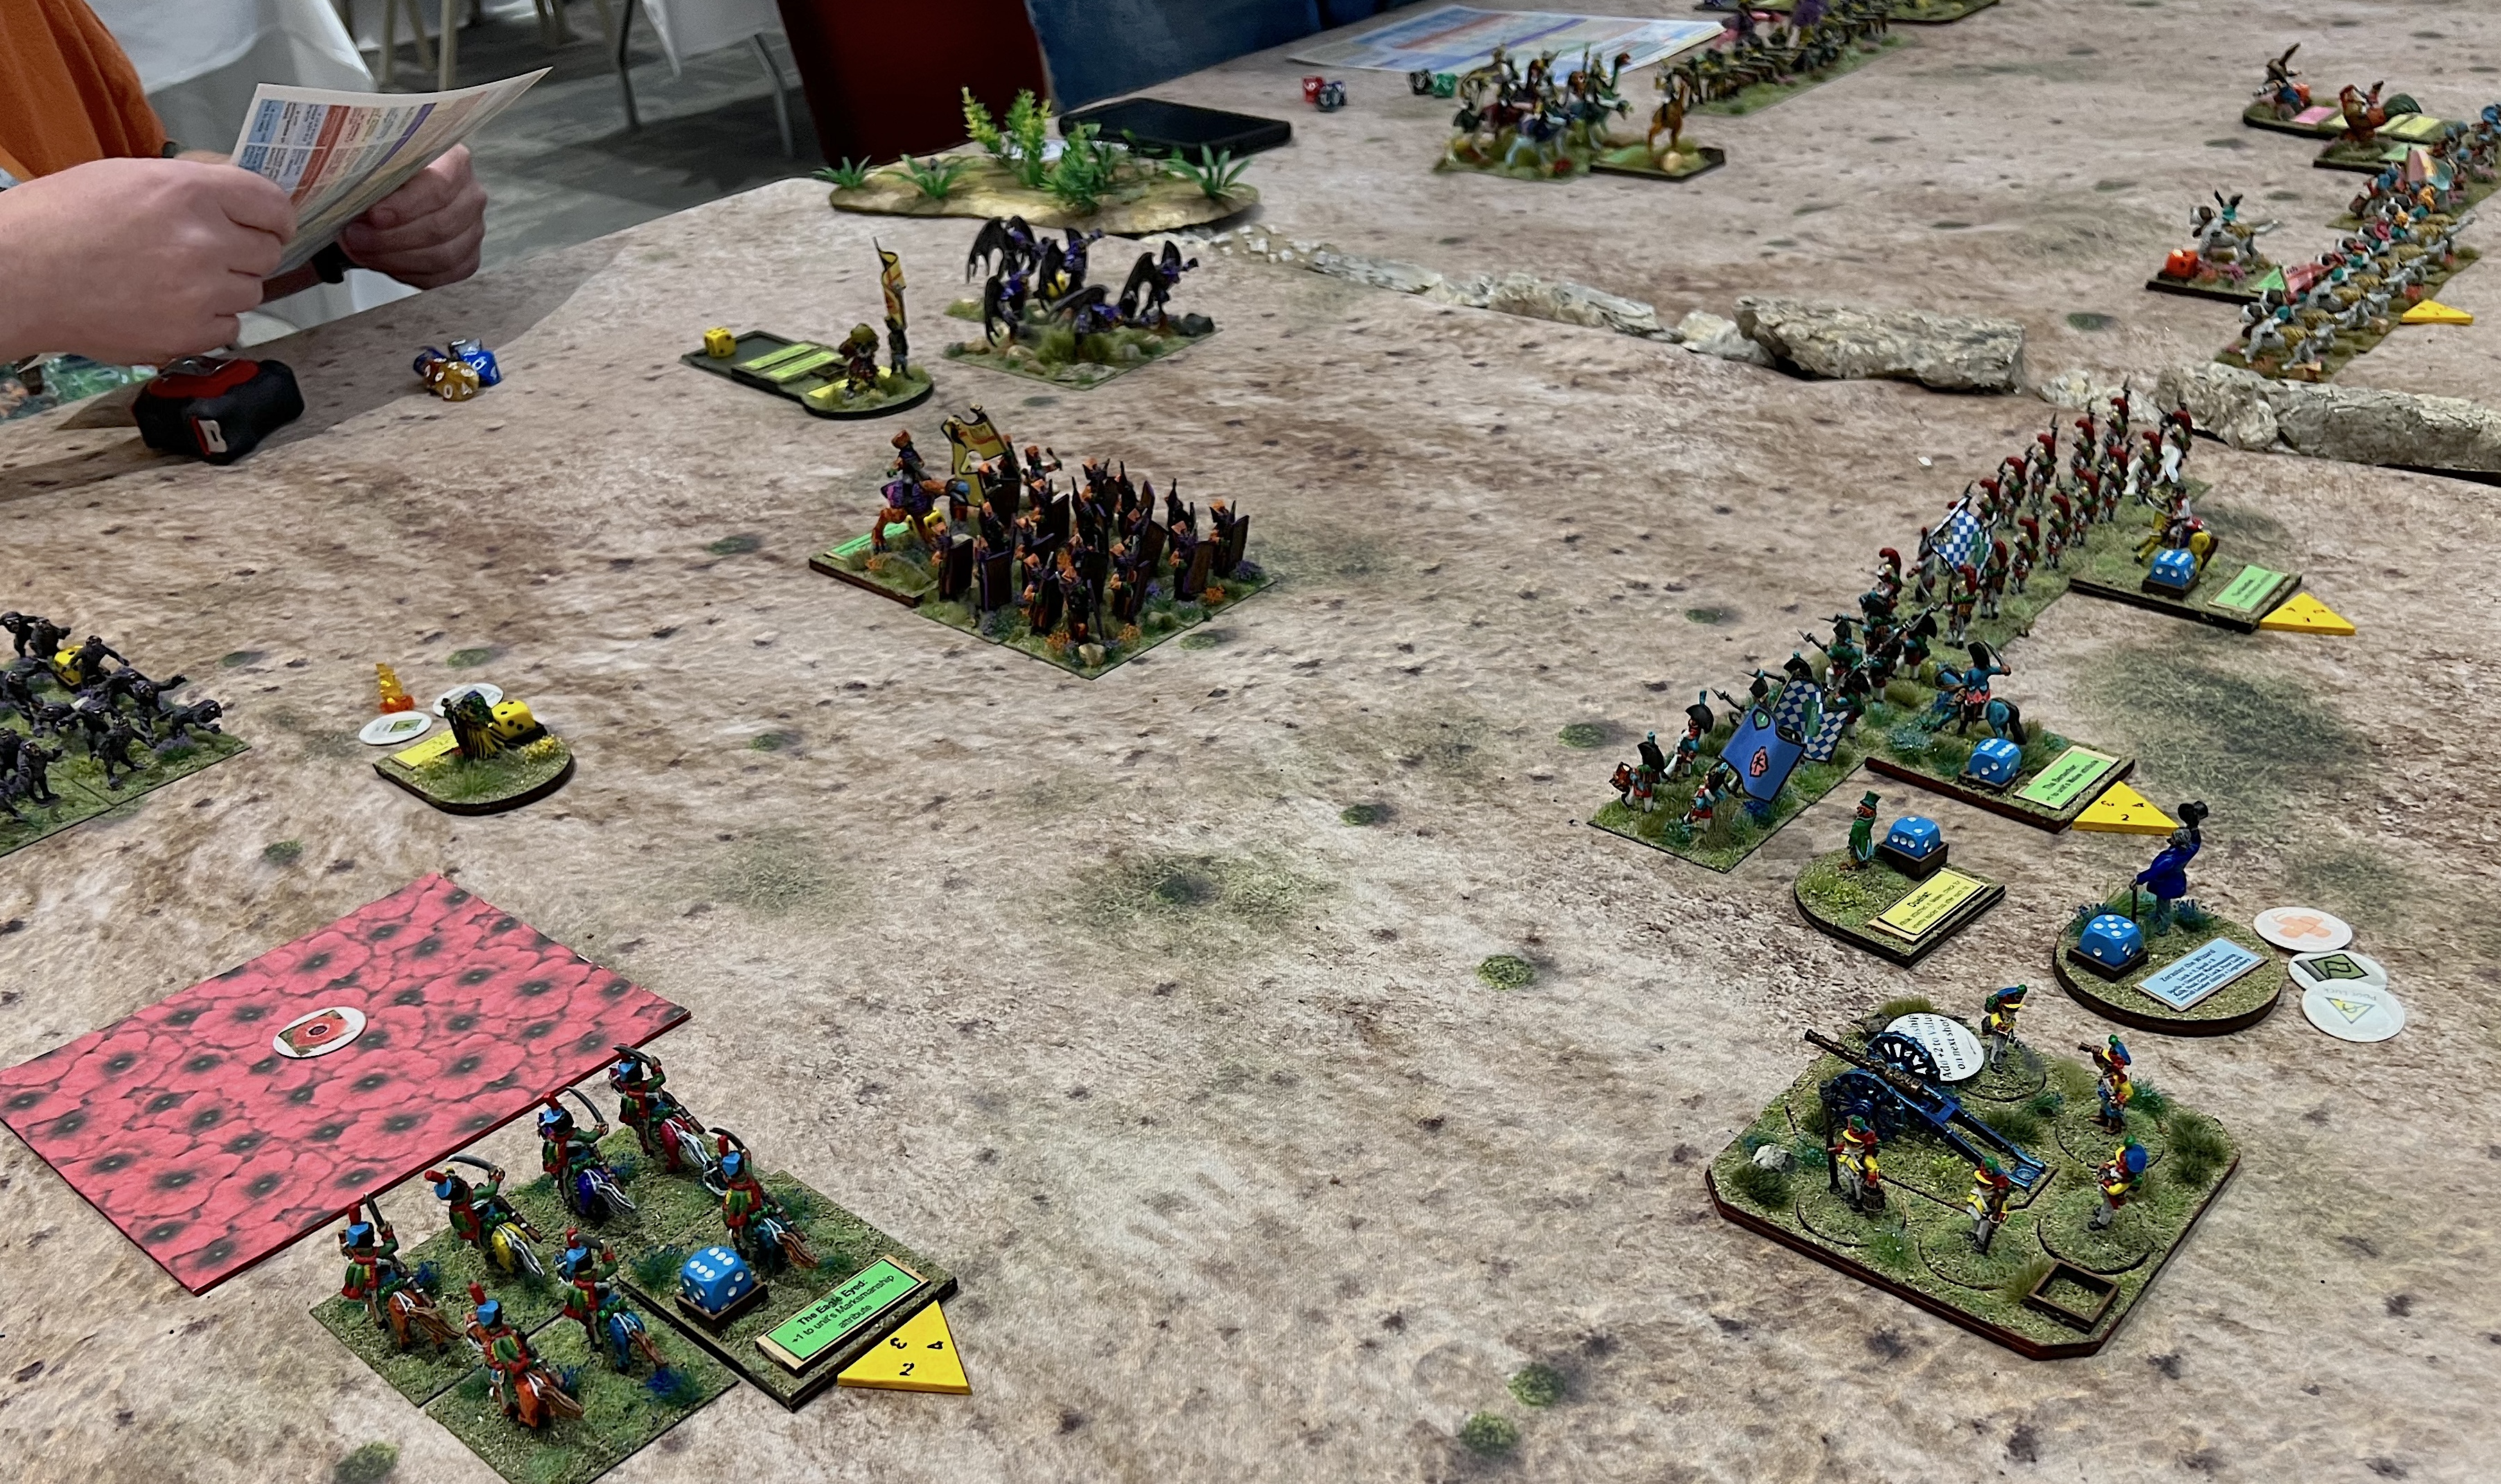
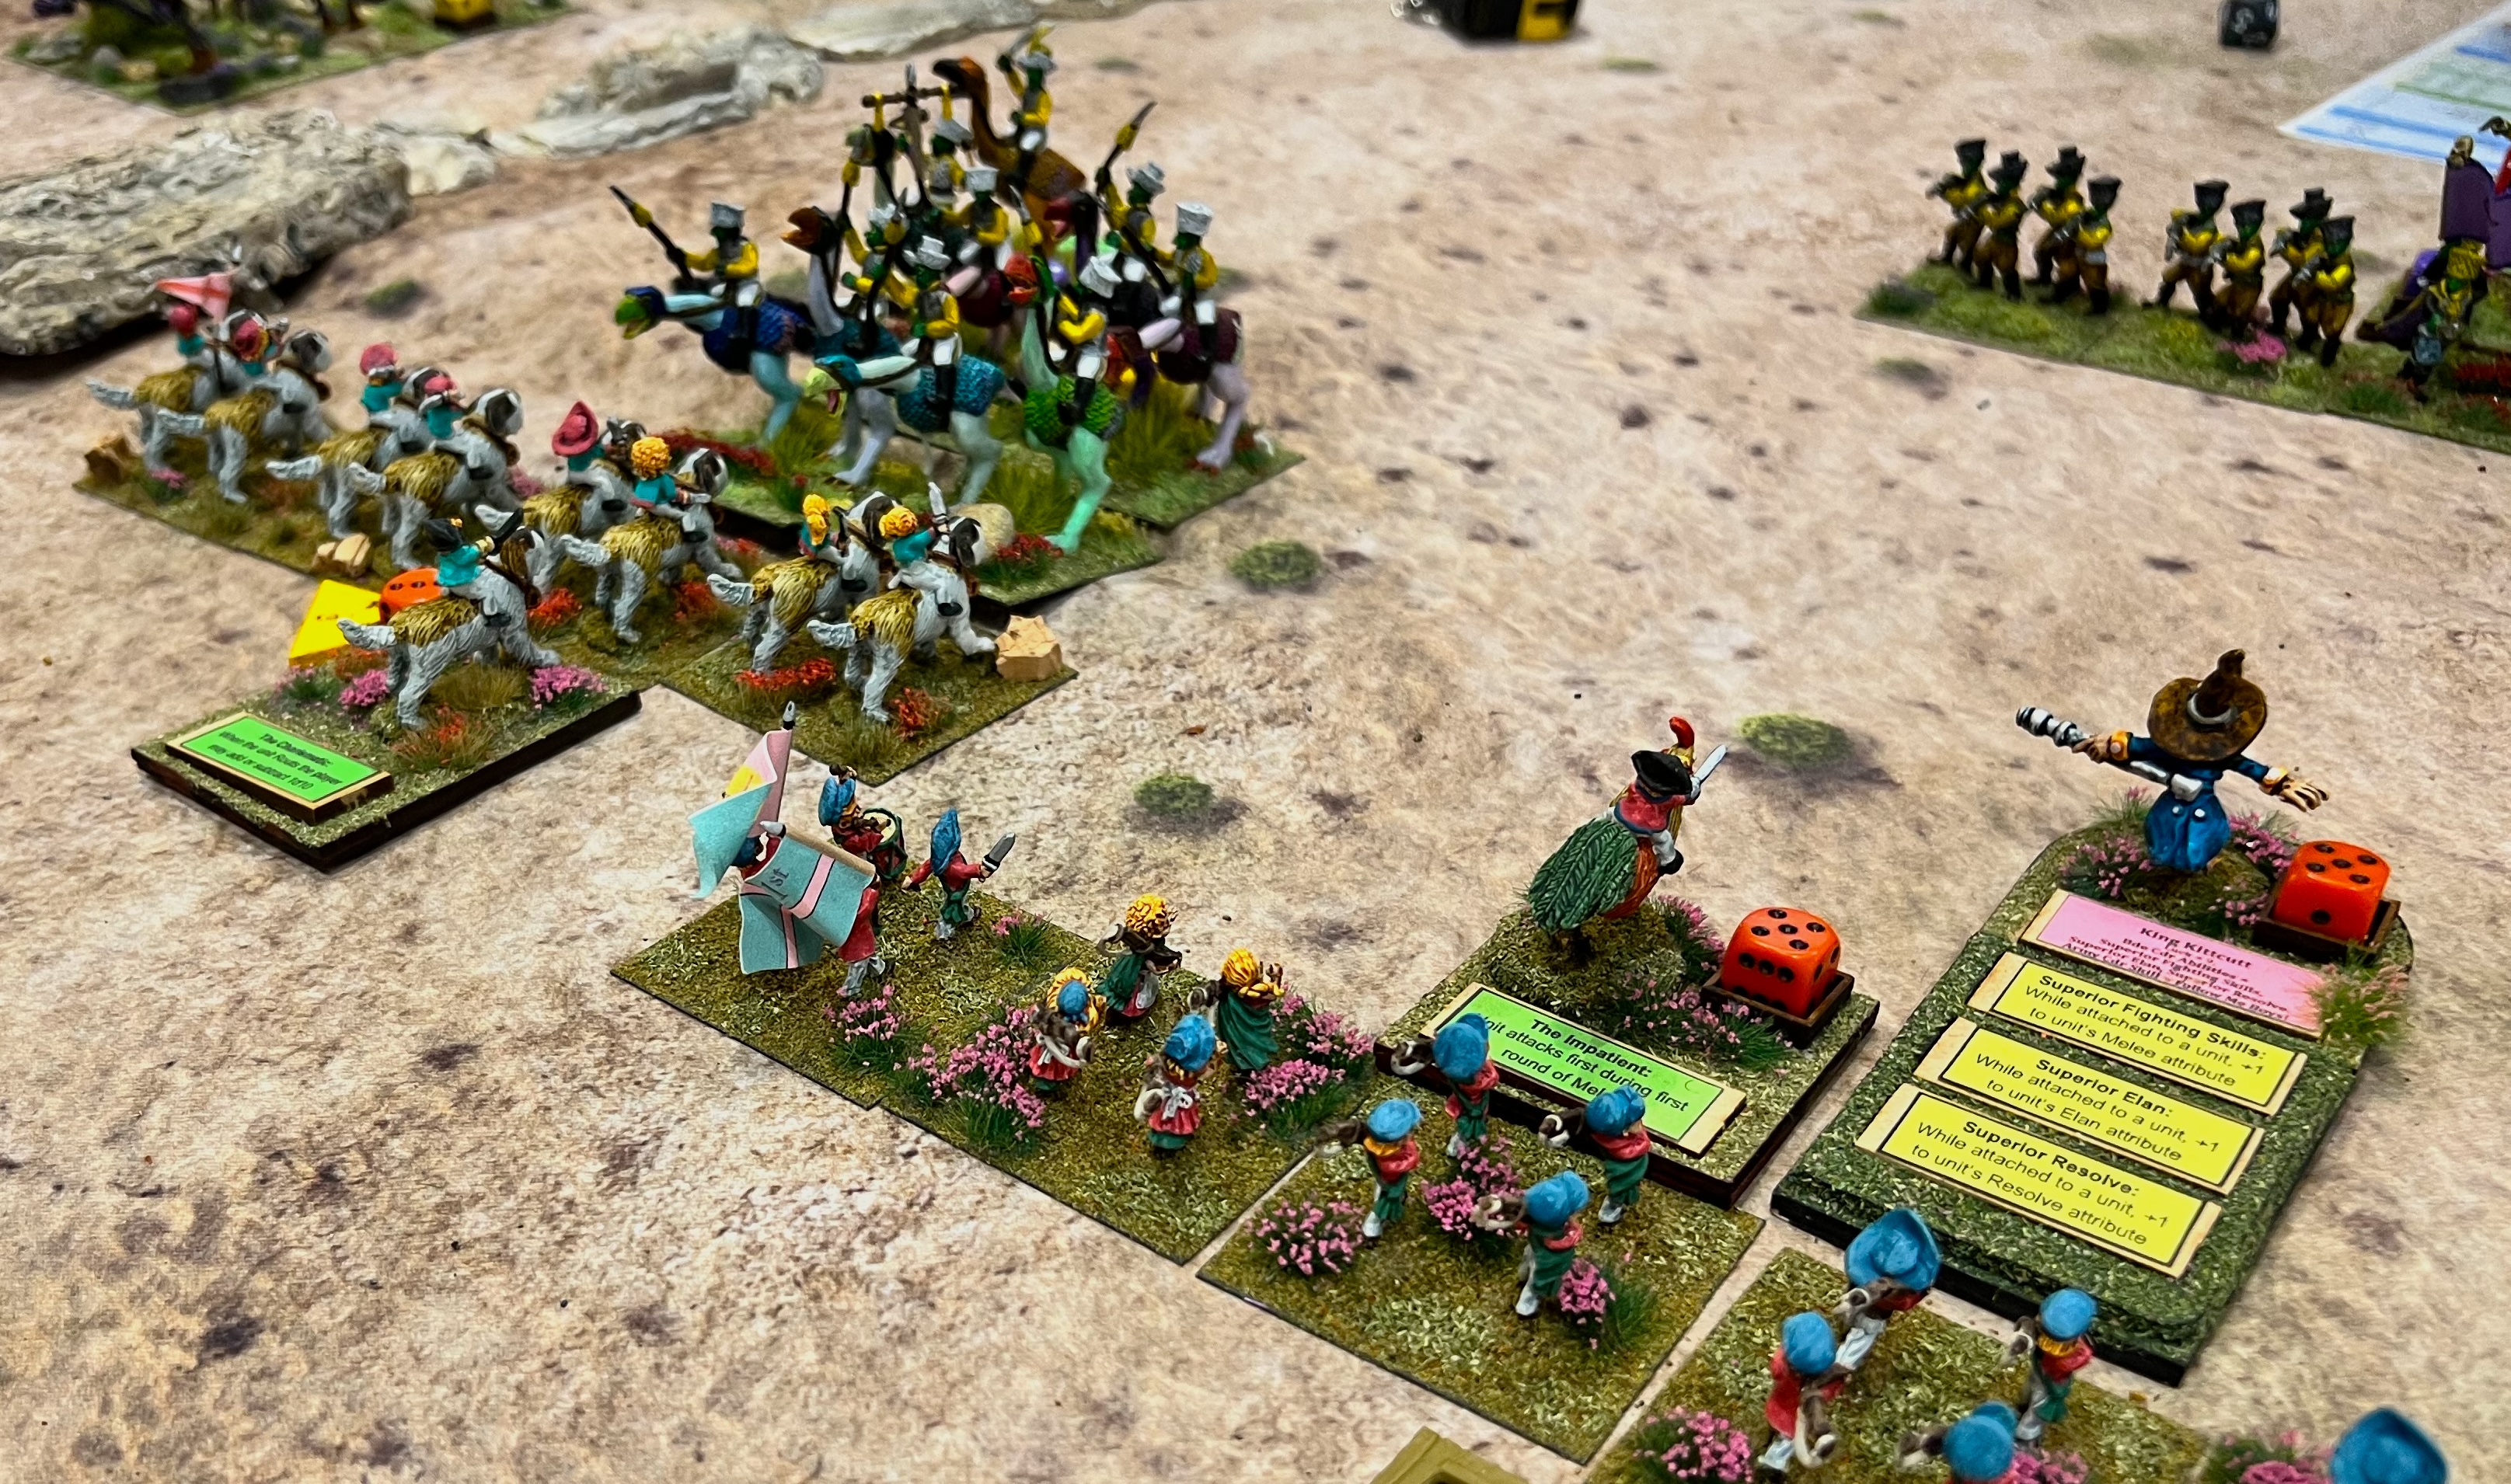
The game set up – I loved creating this panoramic expanse!Players arrive – once again demand to play was high!1st Munchkin Brigade set upThat’s a full game!Nitpik’s “Morin’s Monsters” armed with napalm blasters hope to cook up some Great Pumpkinheads.A regiment of Great Owls (Munchkin allies) overflies the Lemon Drop Legionnaires and hits them in the rear!Jinjur regiments (female pirates and Munchkin allies) breach the wall.The Munchkins breach the western gate and their light cavalry pours through to look for technological treasures.In the center, two axe-wielding Nitpik regiments have had enough of the Munchkins. The Jade Automata and the Pink Nightmare regiments charge over their defensive wall. Their counterattack wipes out the Munchkin artillery and drives two Munchkin infantry regiments from the game.Another view of that mechanical counterattack.Meanwhile, the cleaver Jinjur pirates locate some of Nitpik’s technological wonders in a wrecked building.
The game ended – in a dead tie 23-23! A real nail-biter to be sure!
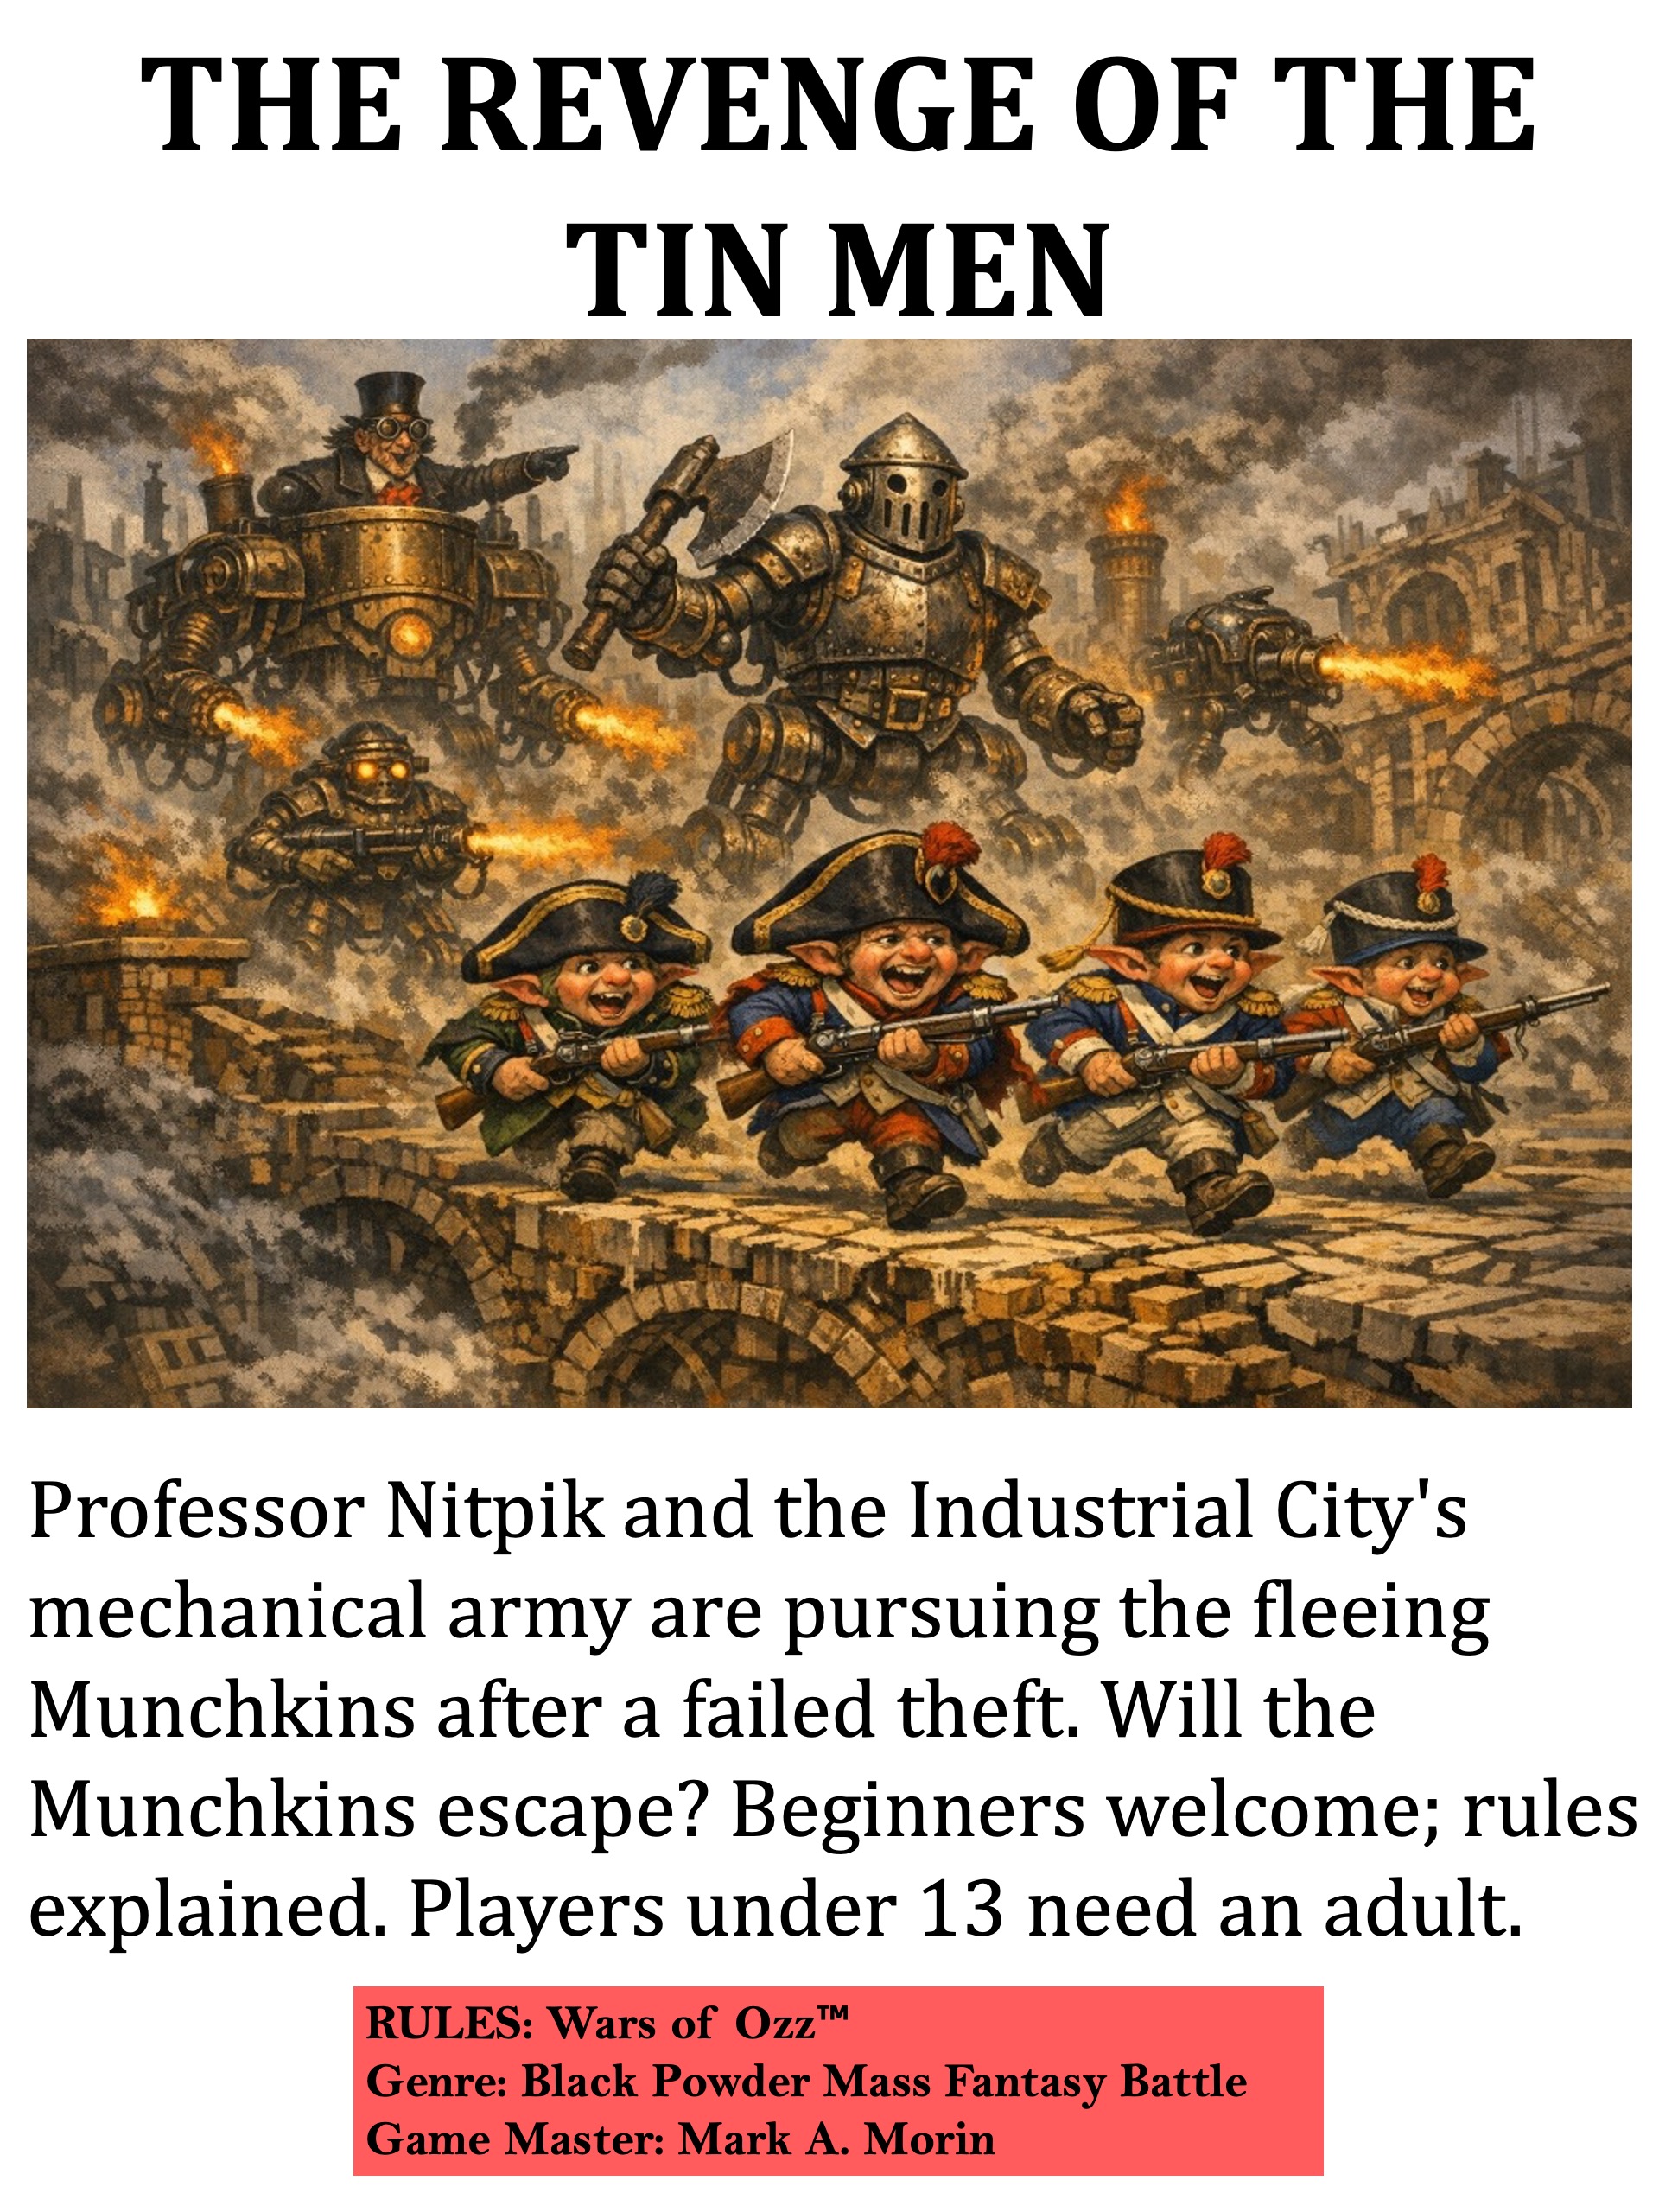
The next game builds on this one. The Munchkins have found technology, but welshed on their agreement to share! Thus, they betrayed their allies. As a result, their former allies have jumped over to the Nitpik side. The Munchkins are fleeing to safety, with Nitpik in hot pursuit.
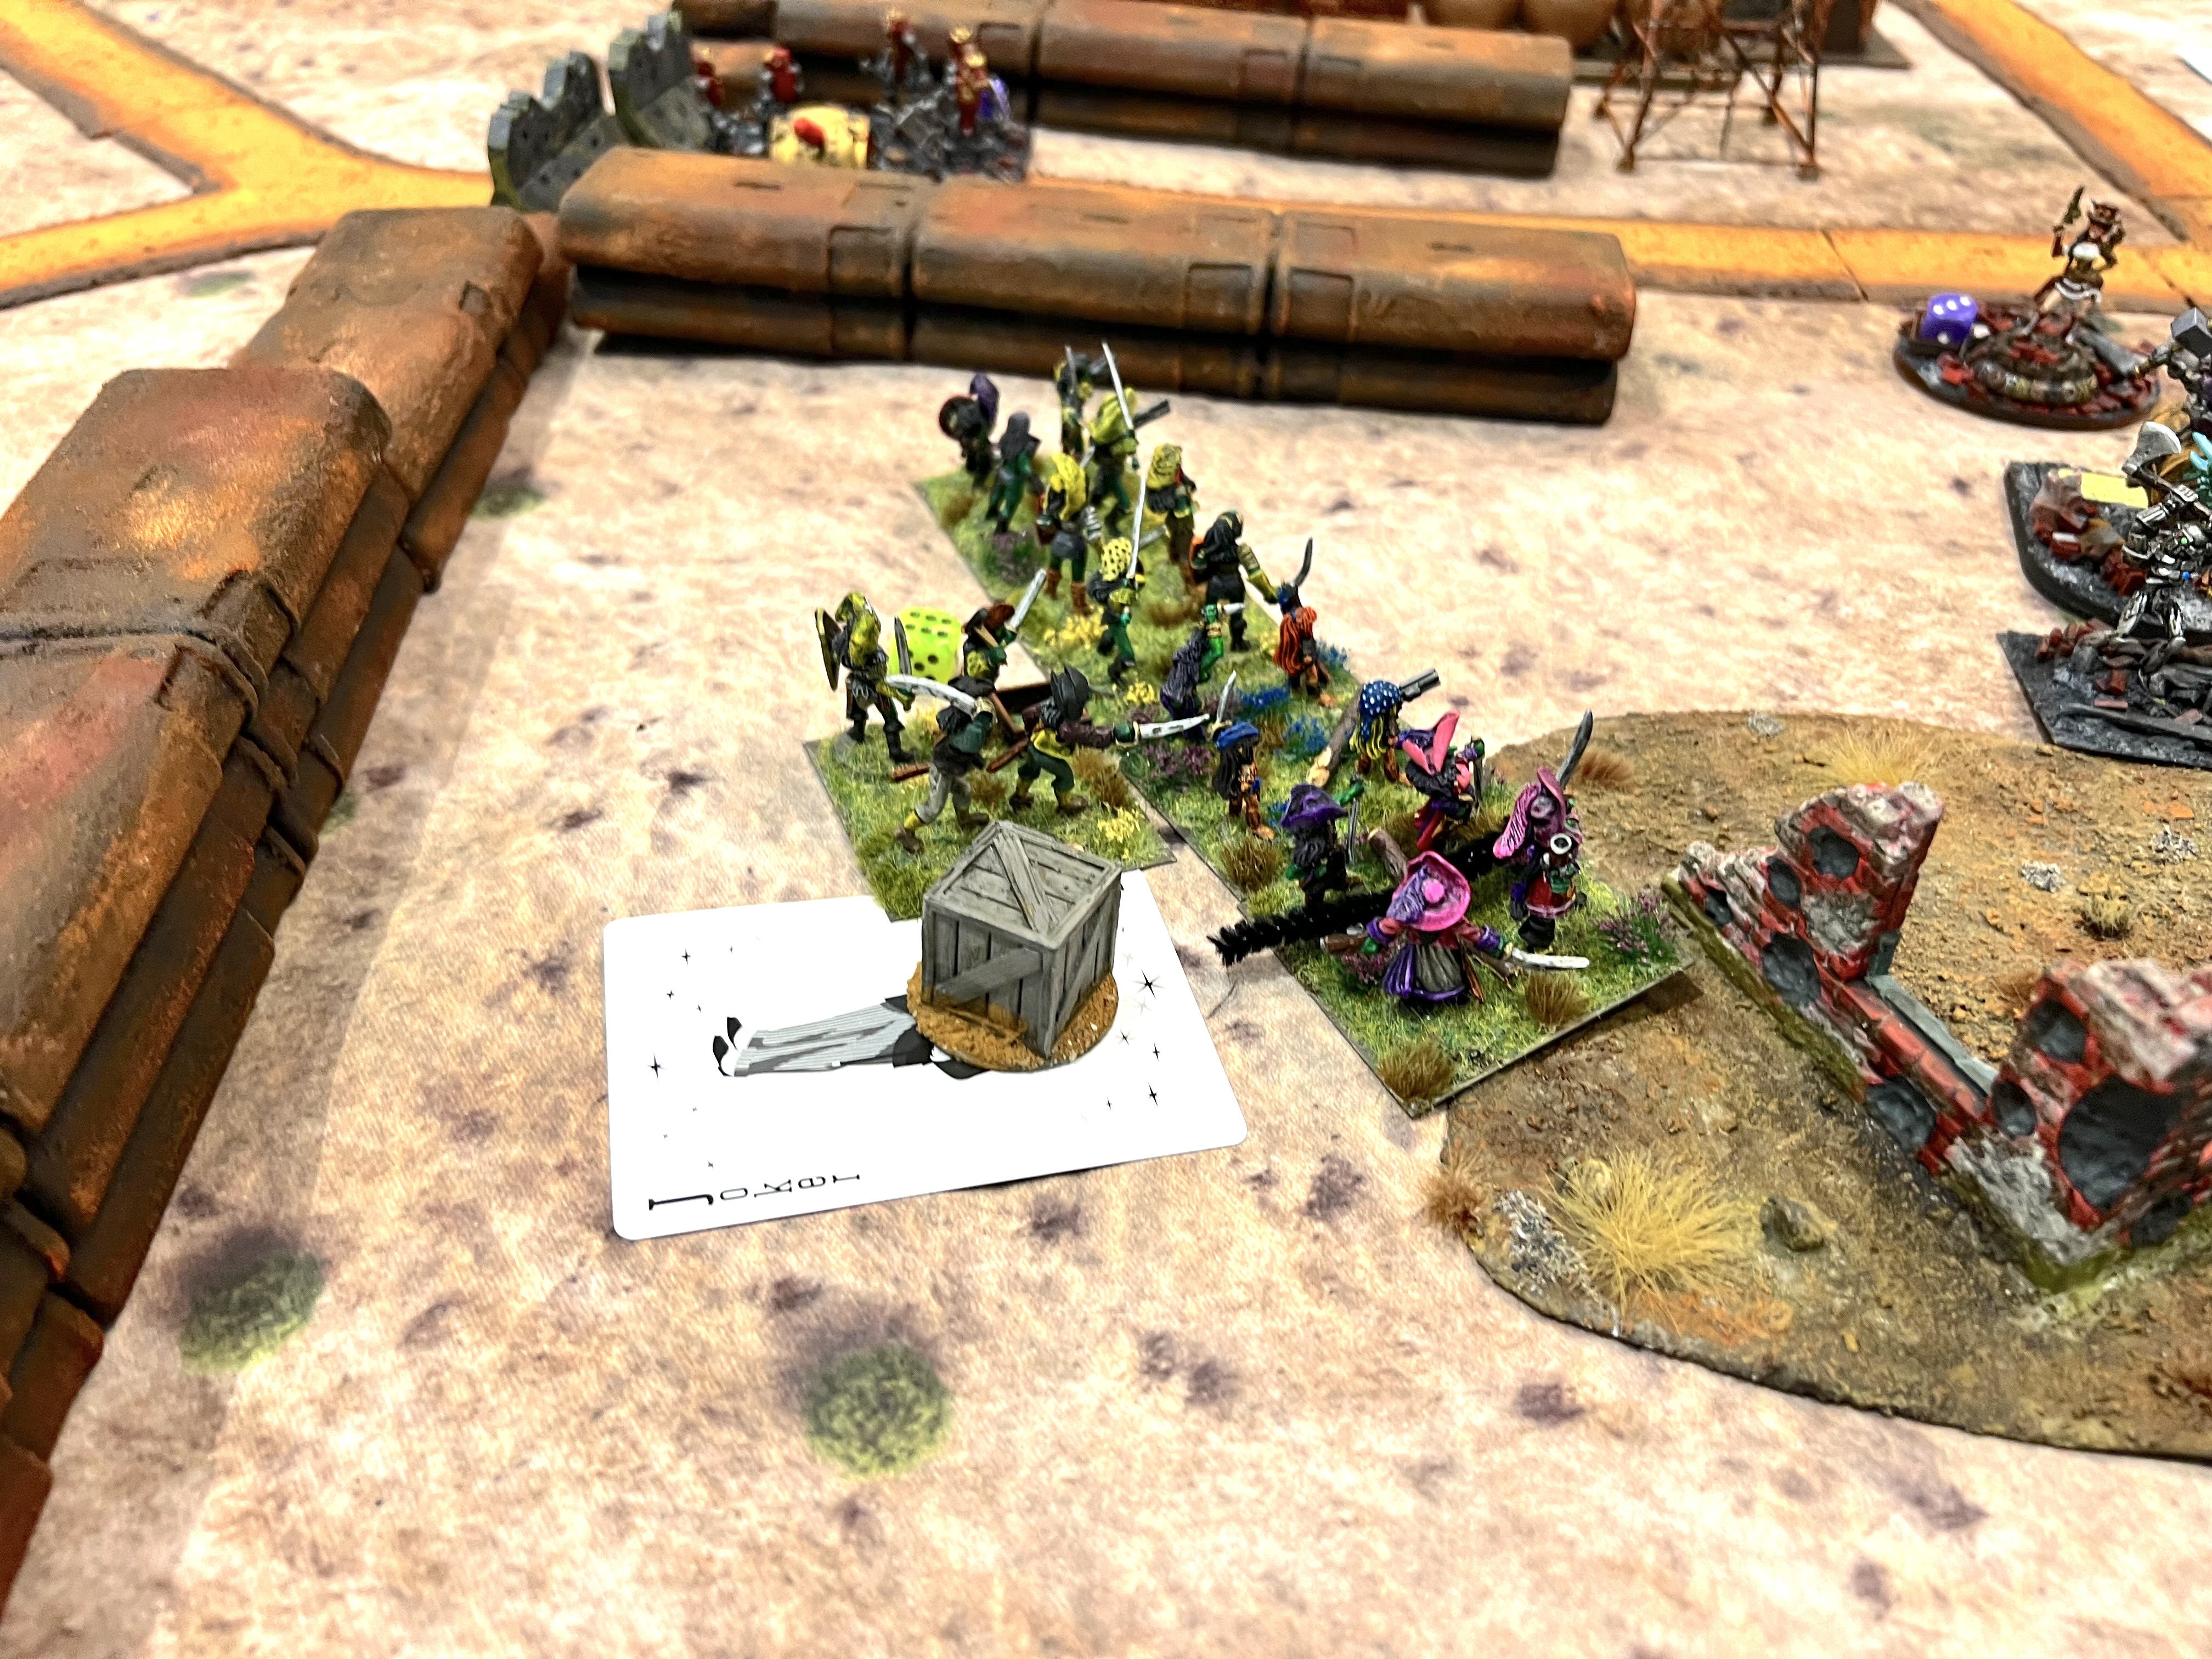
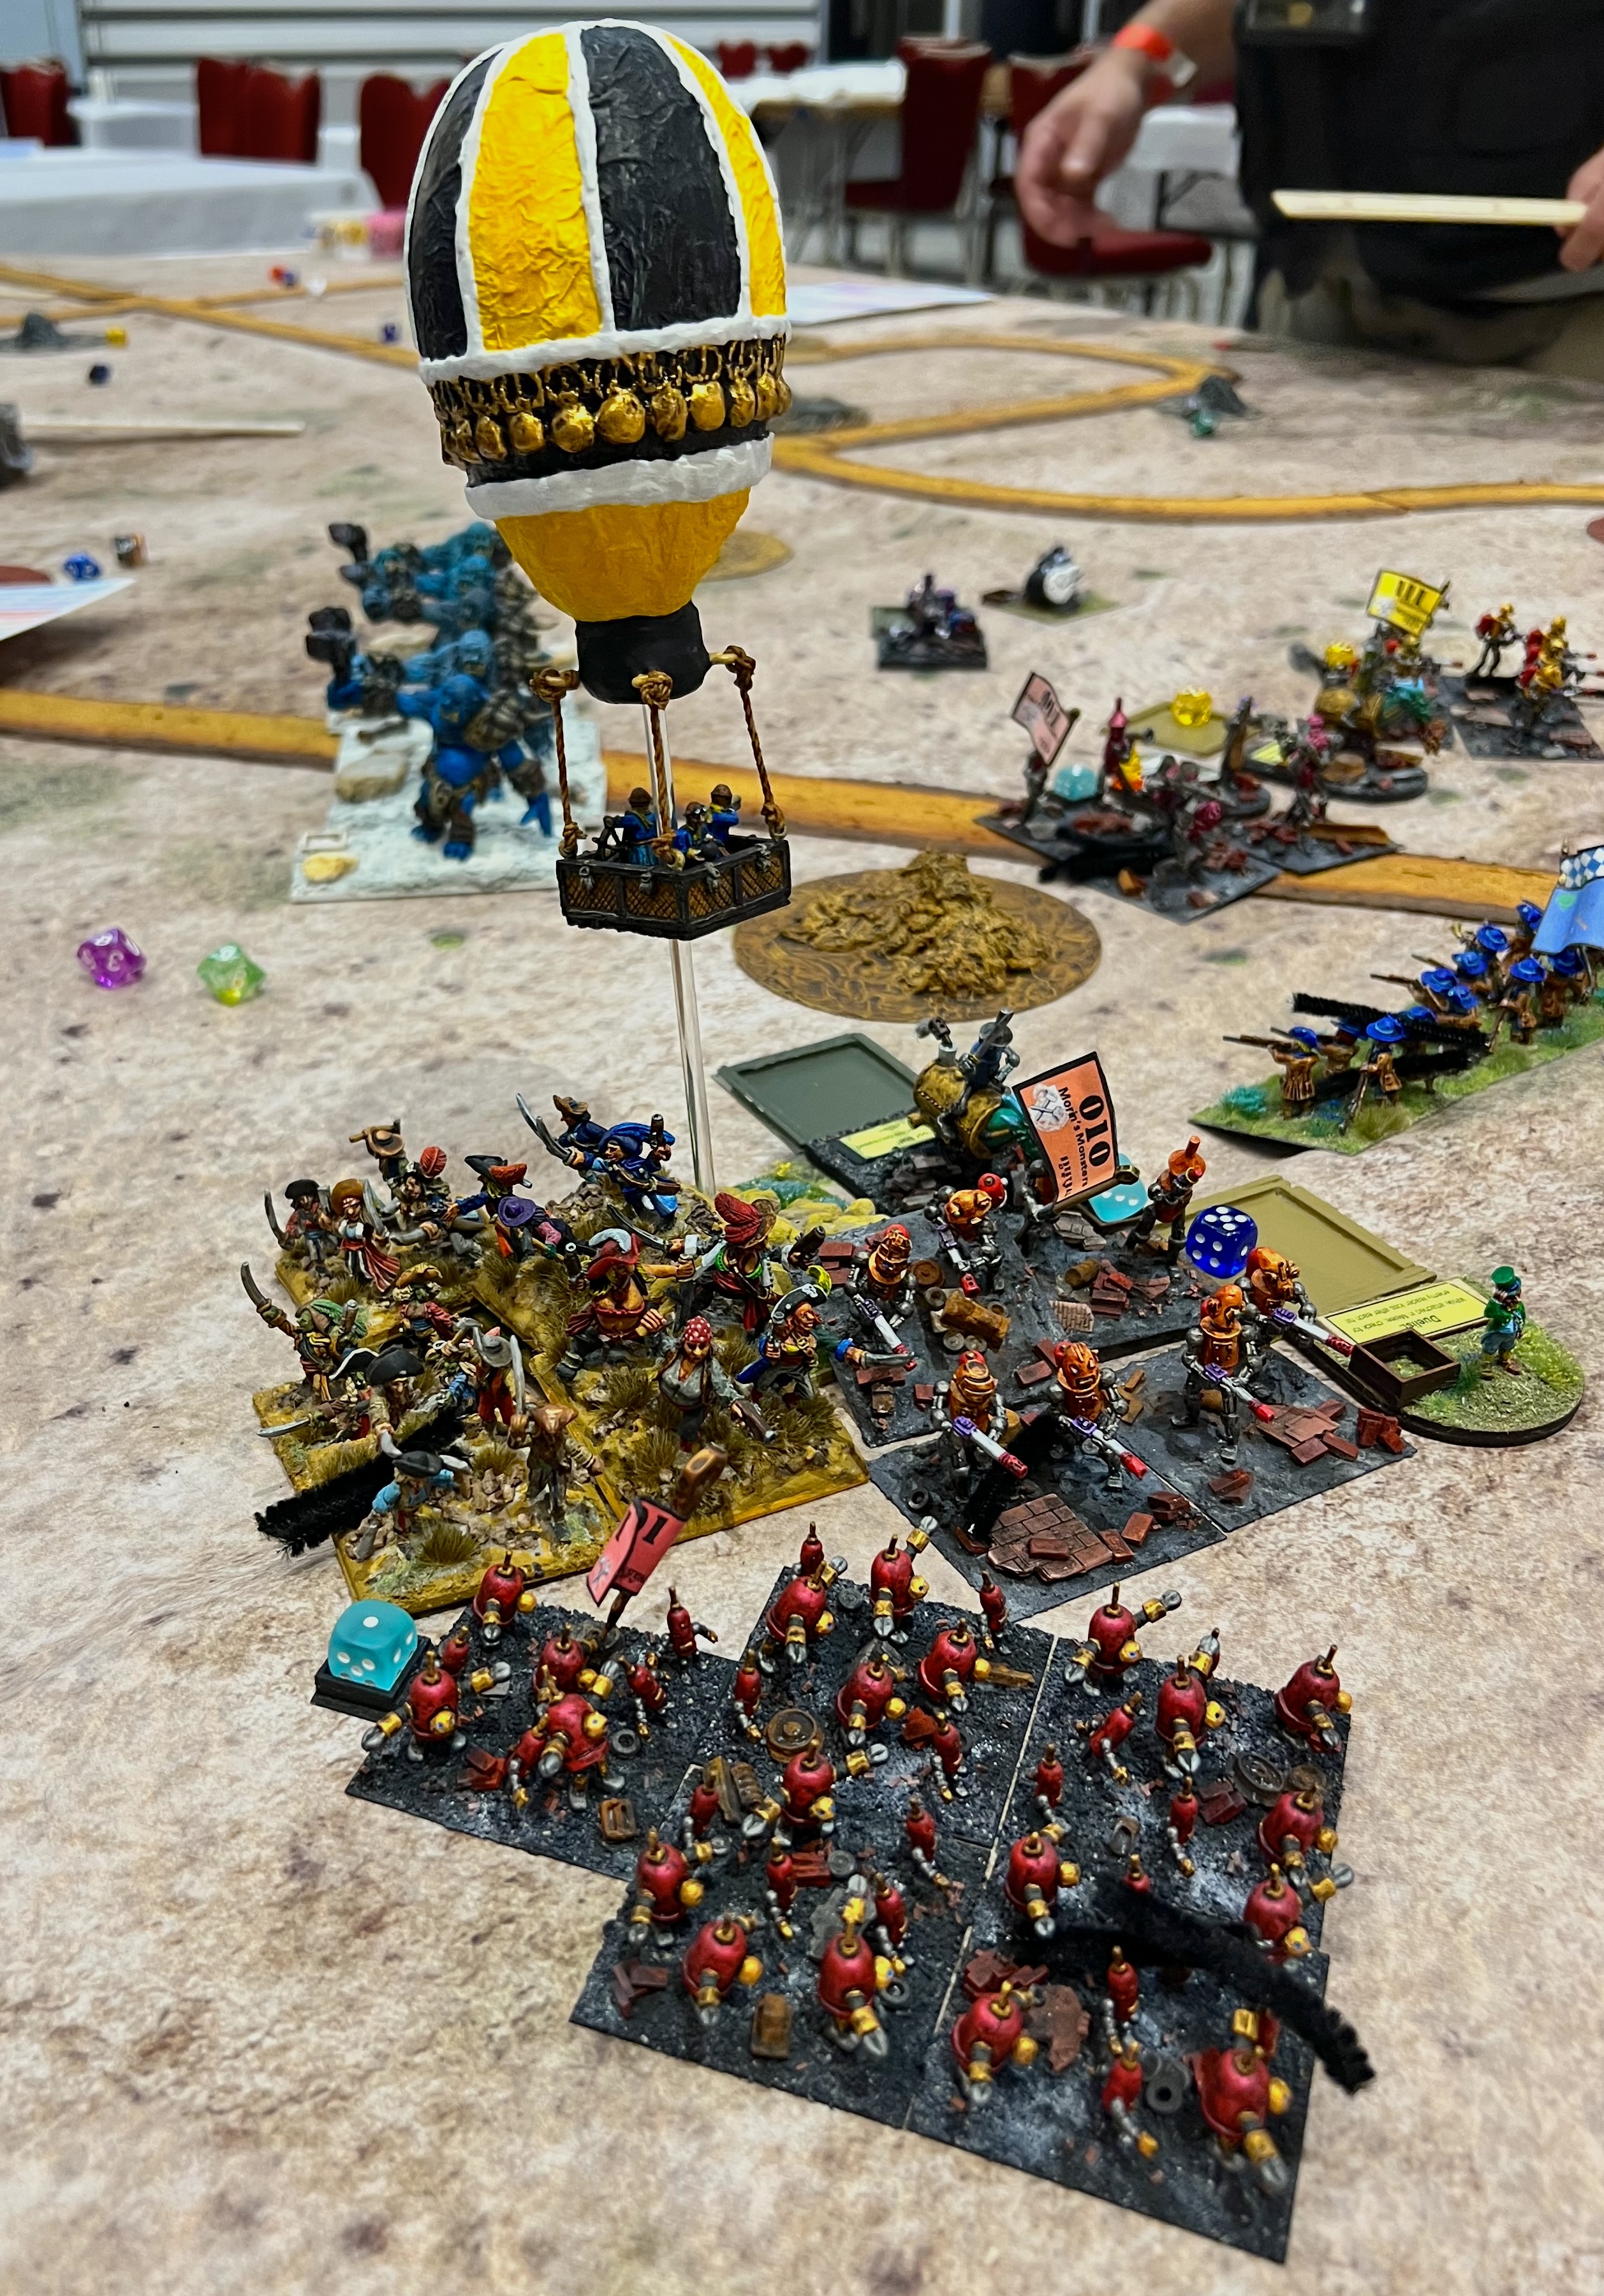
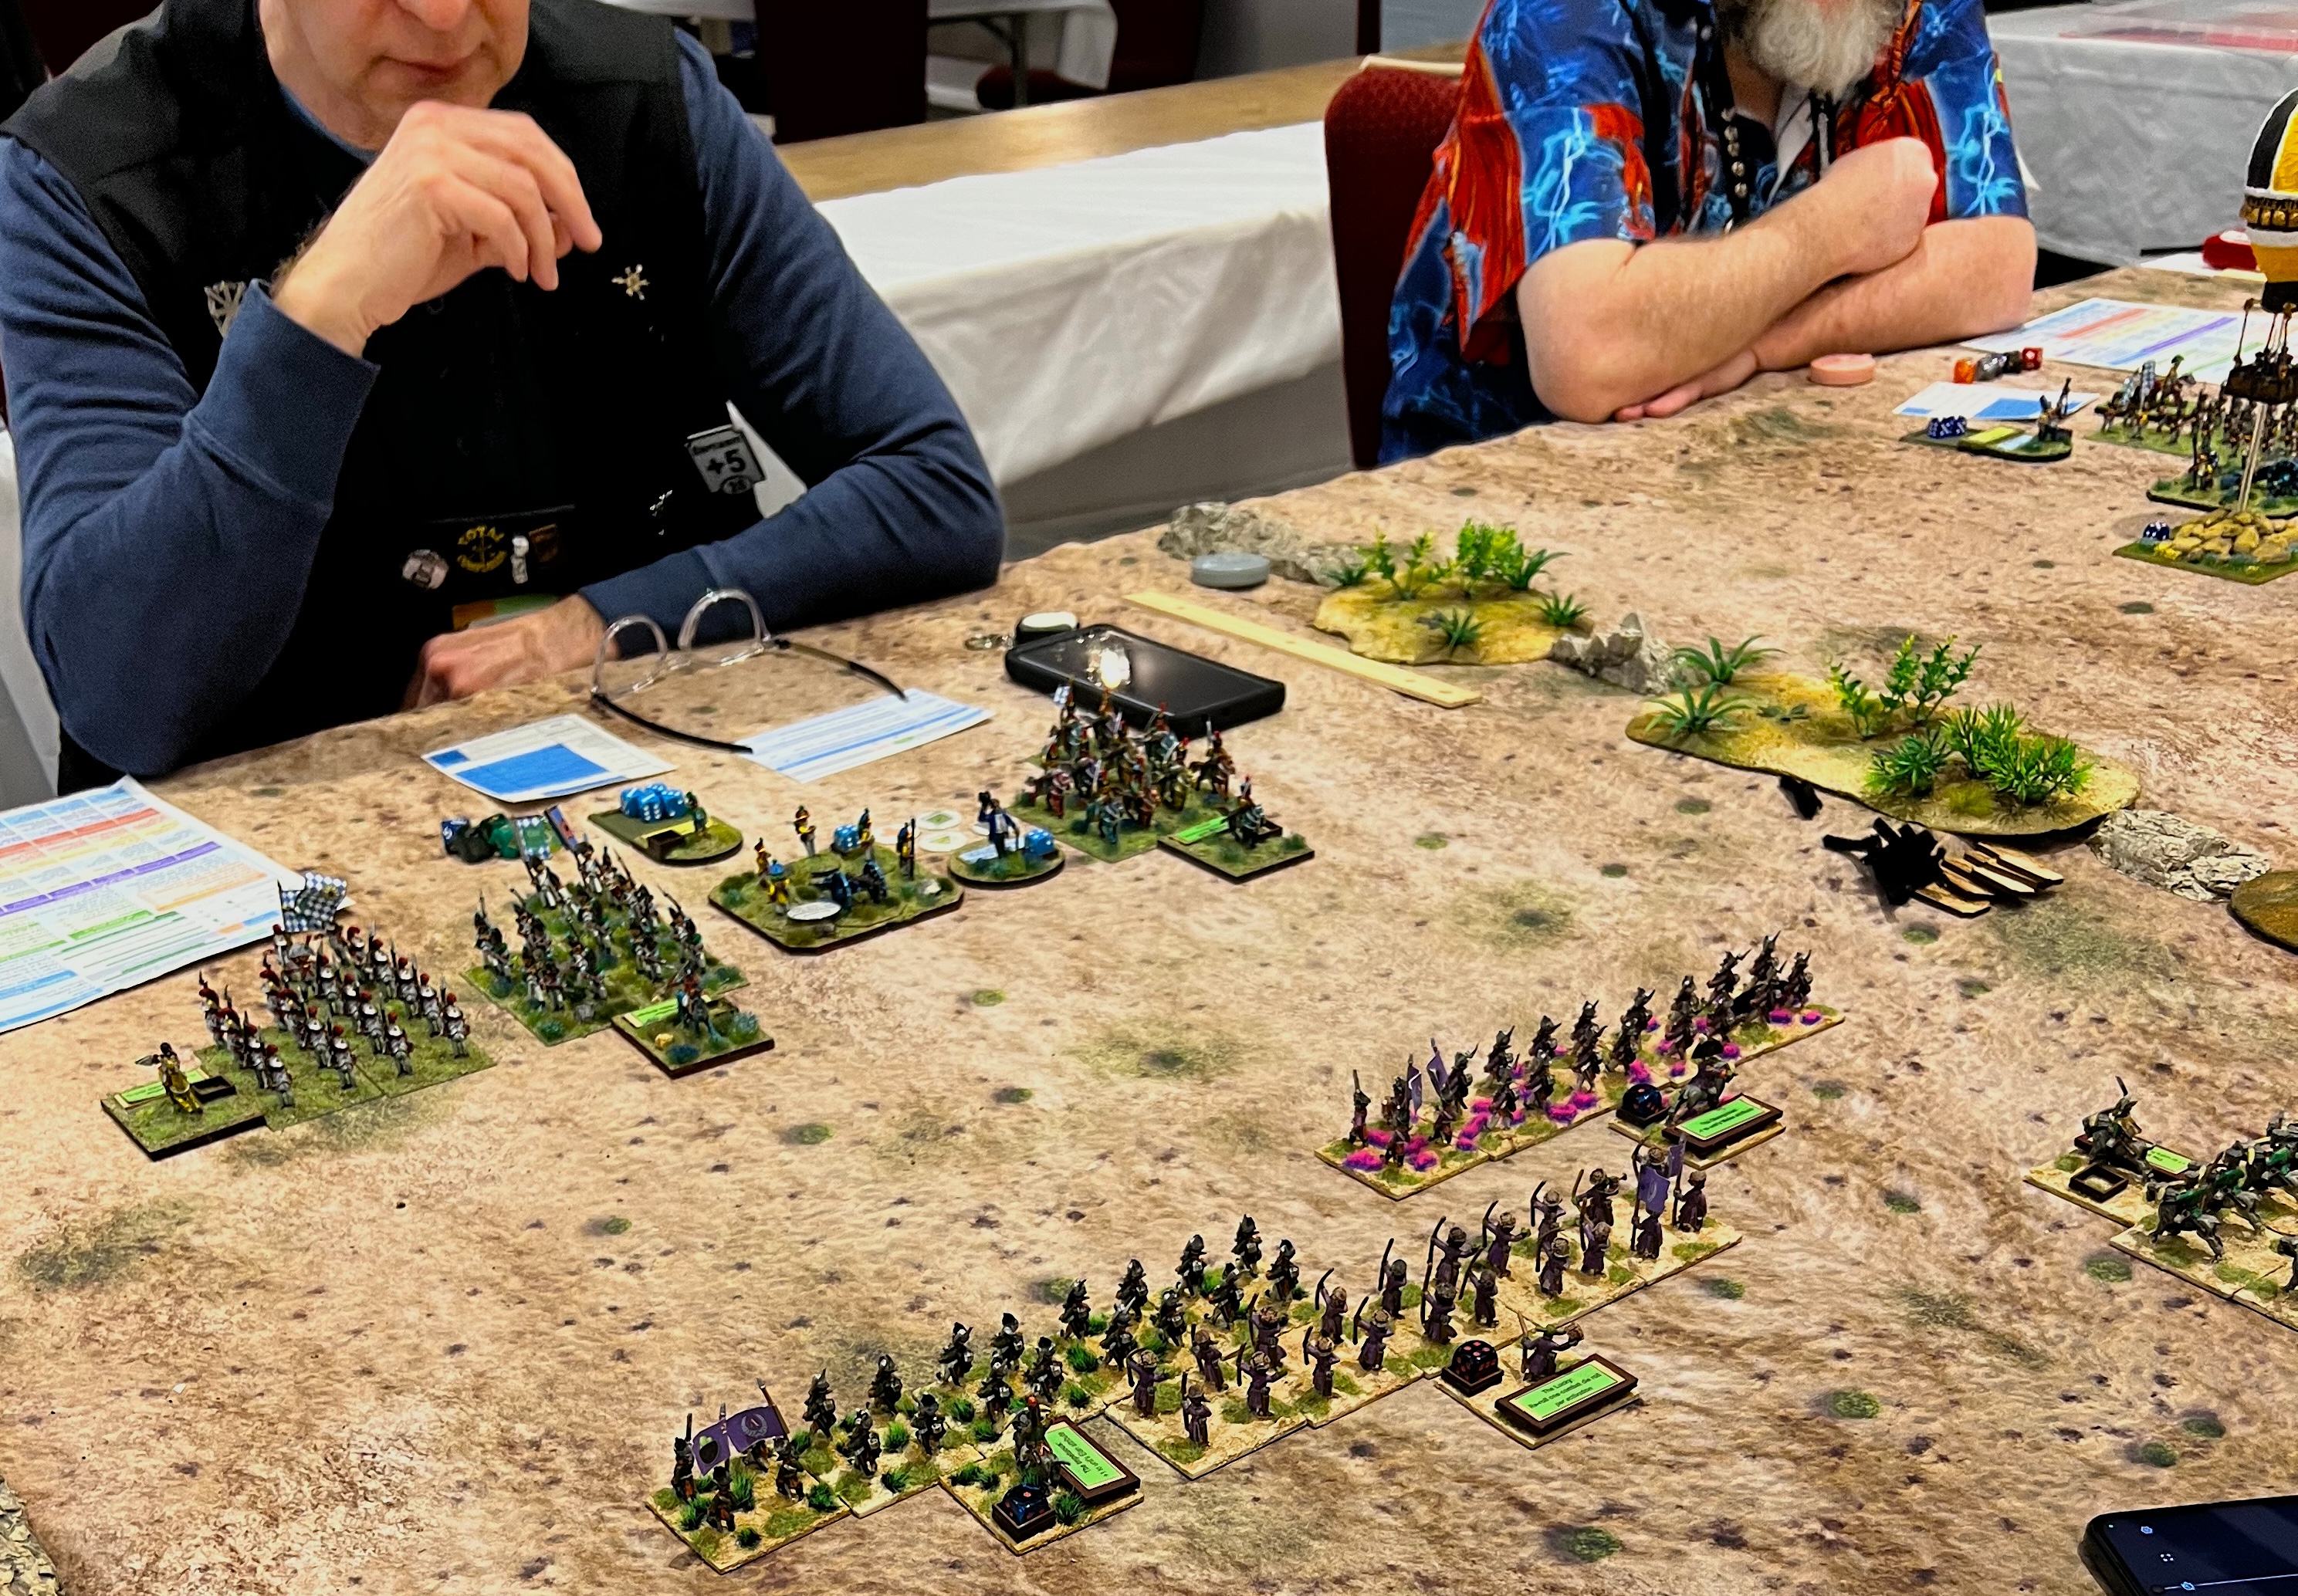
Revenge of the Tin Men
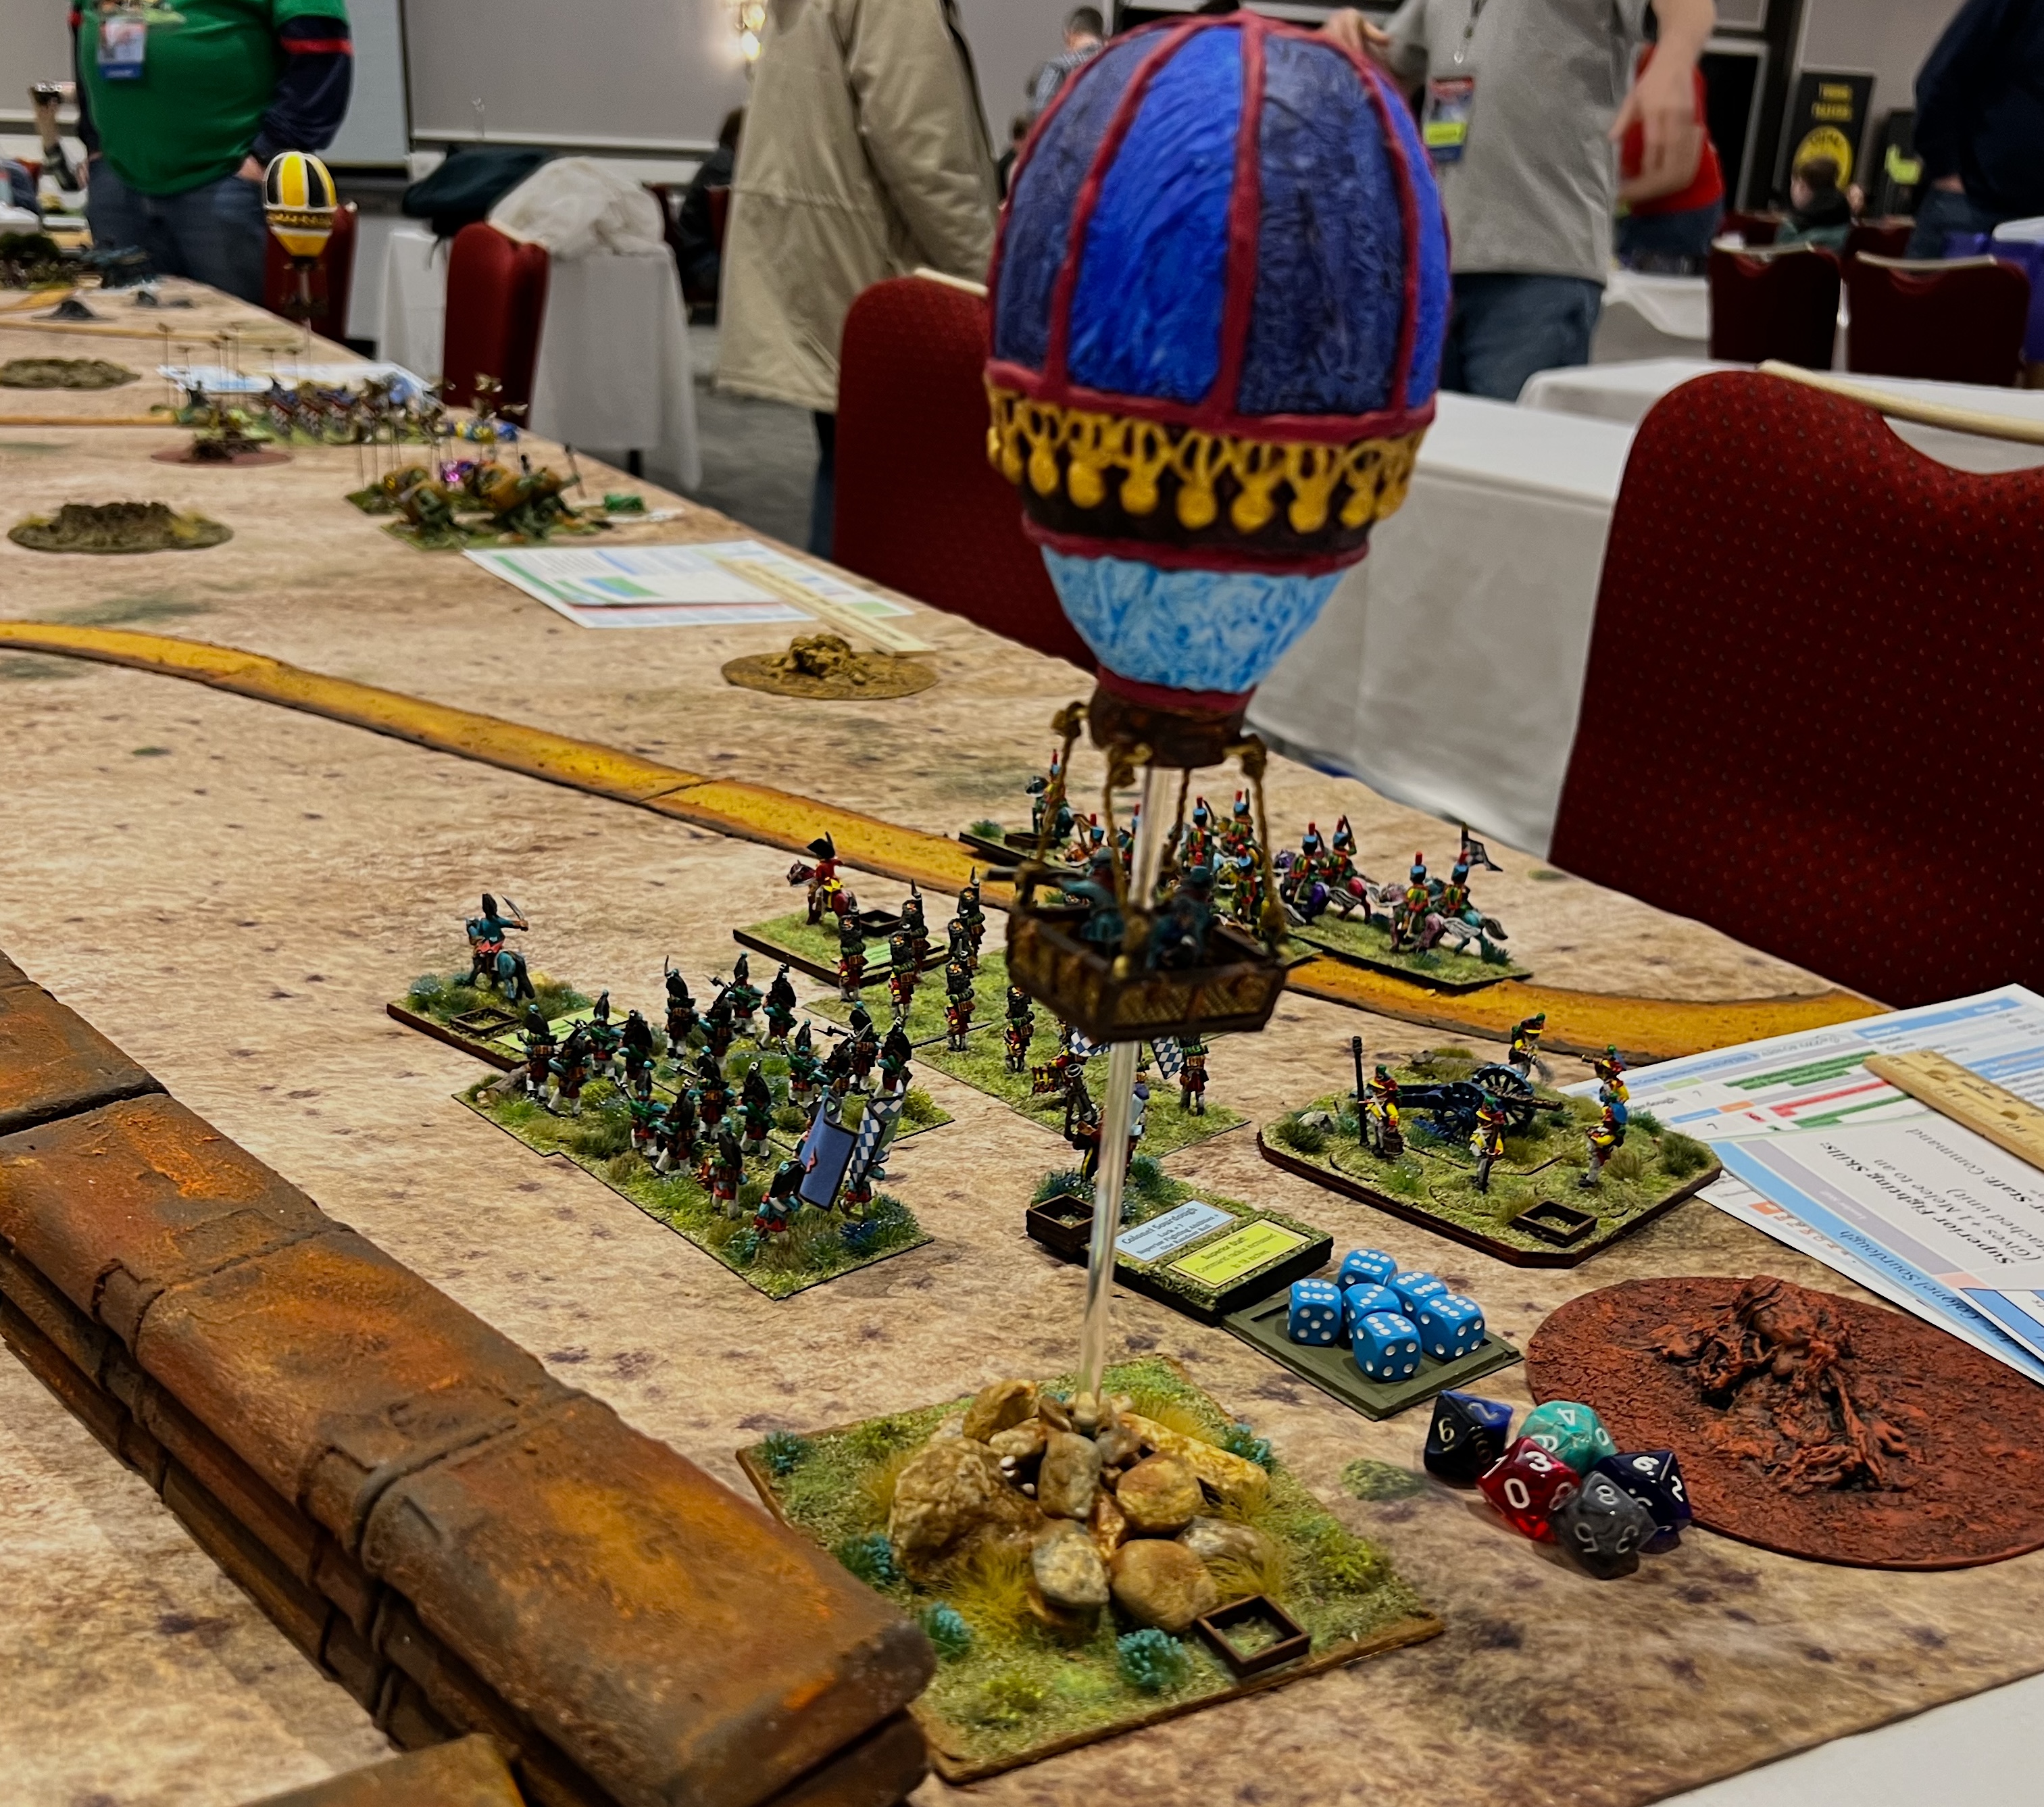
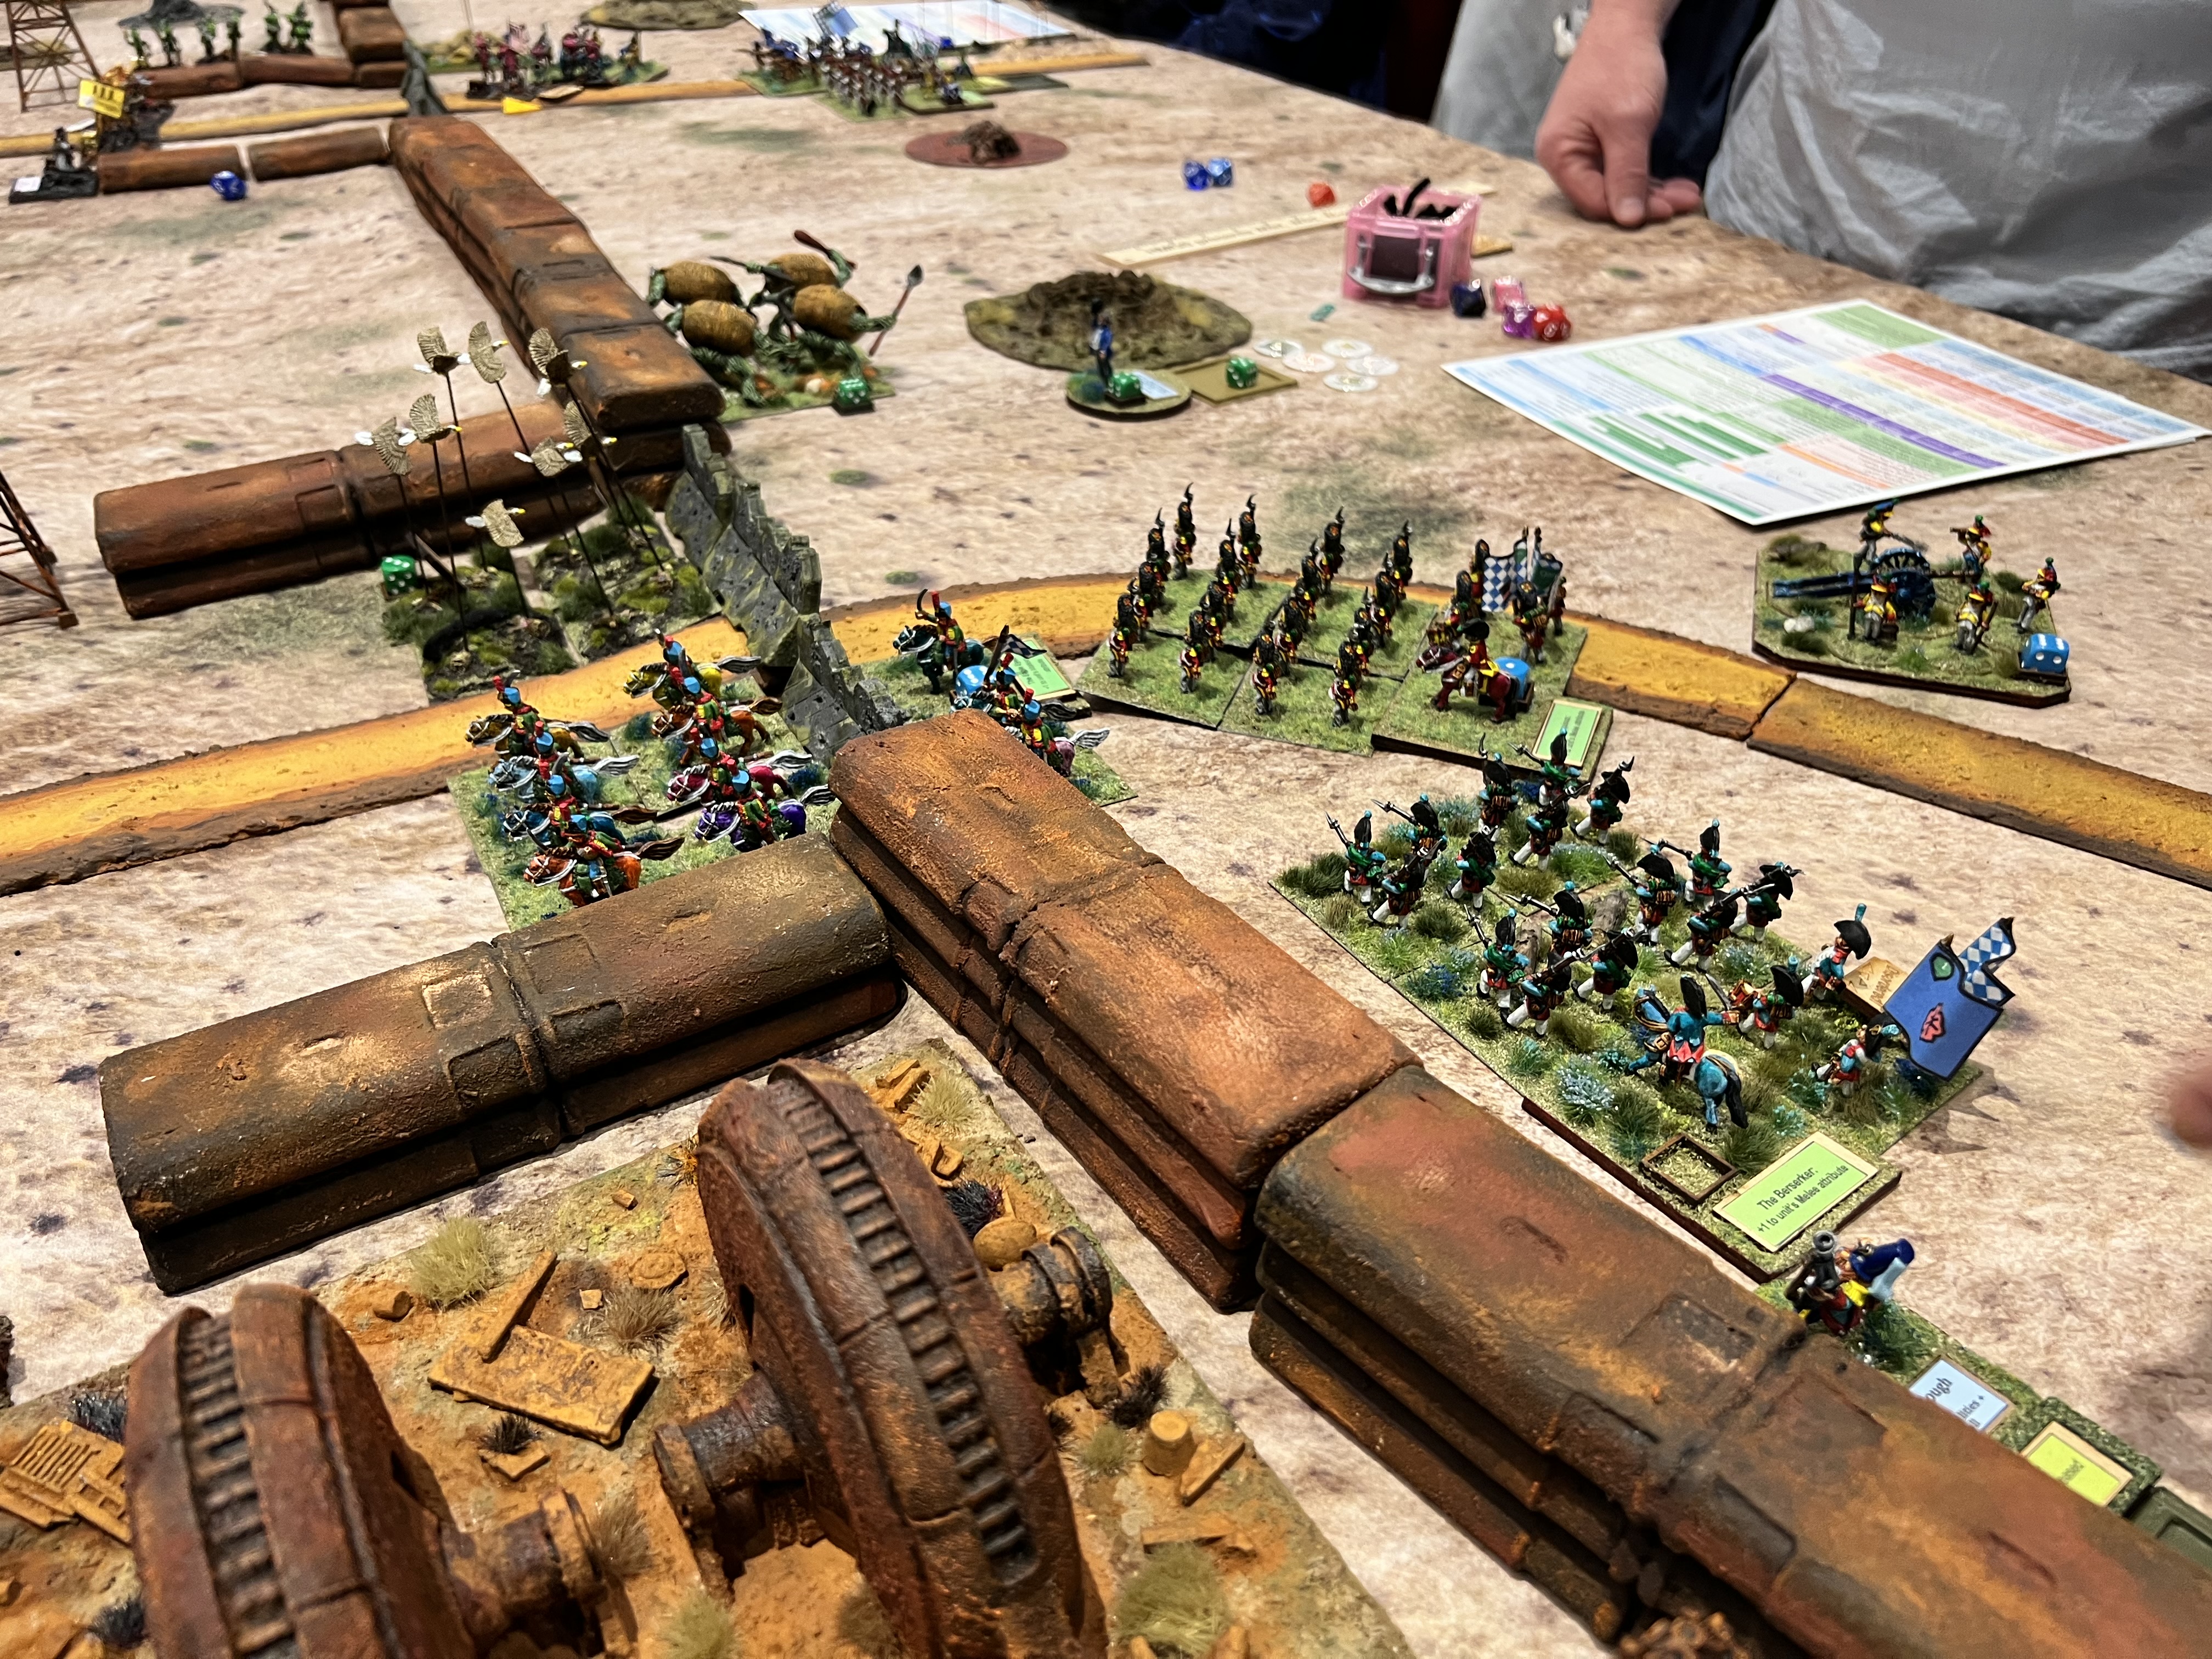
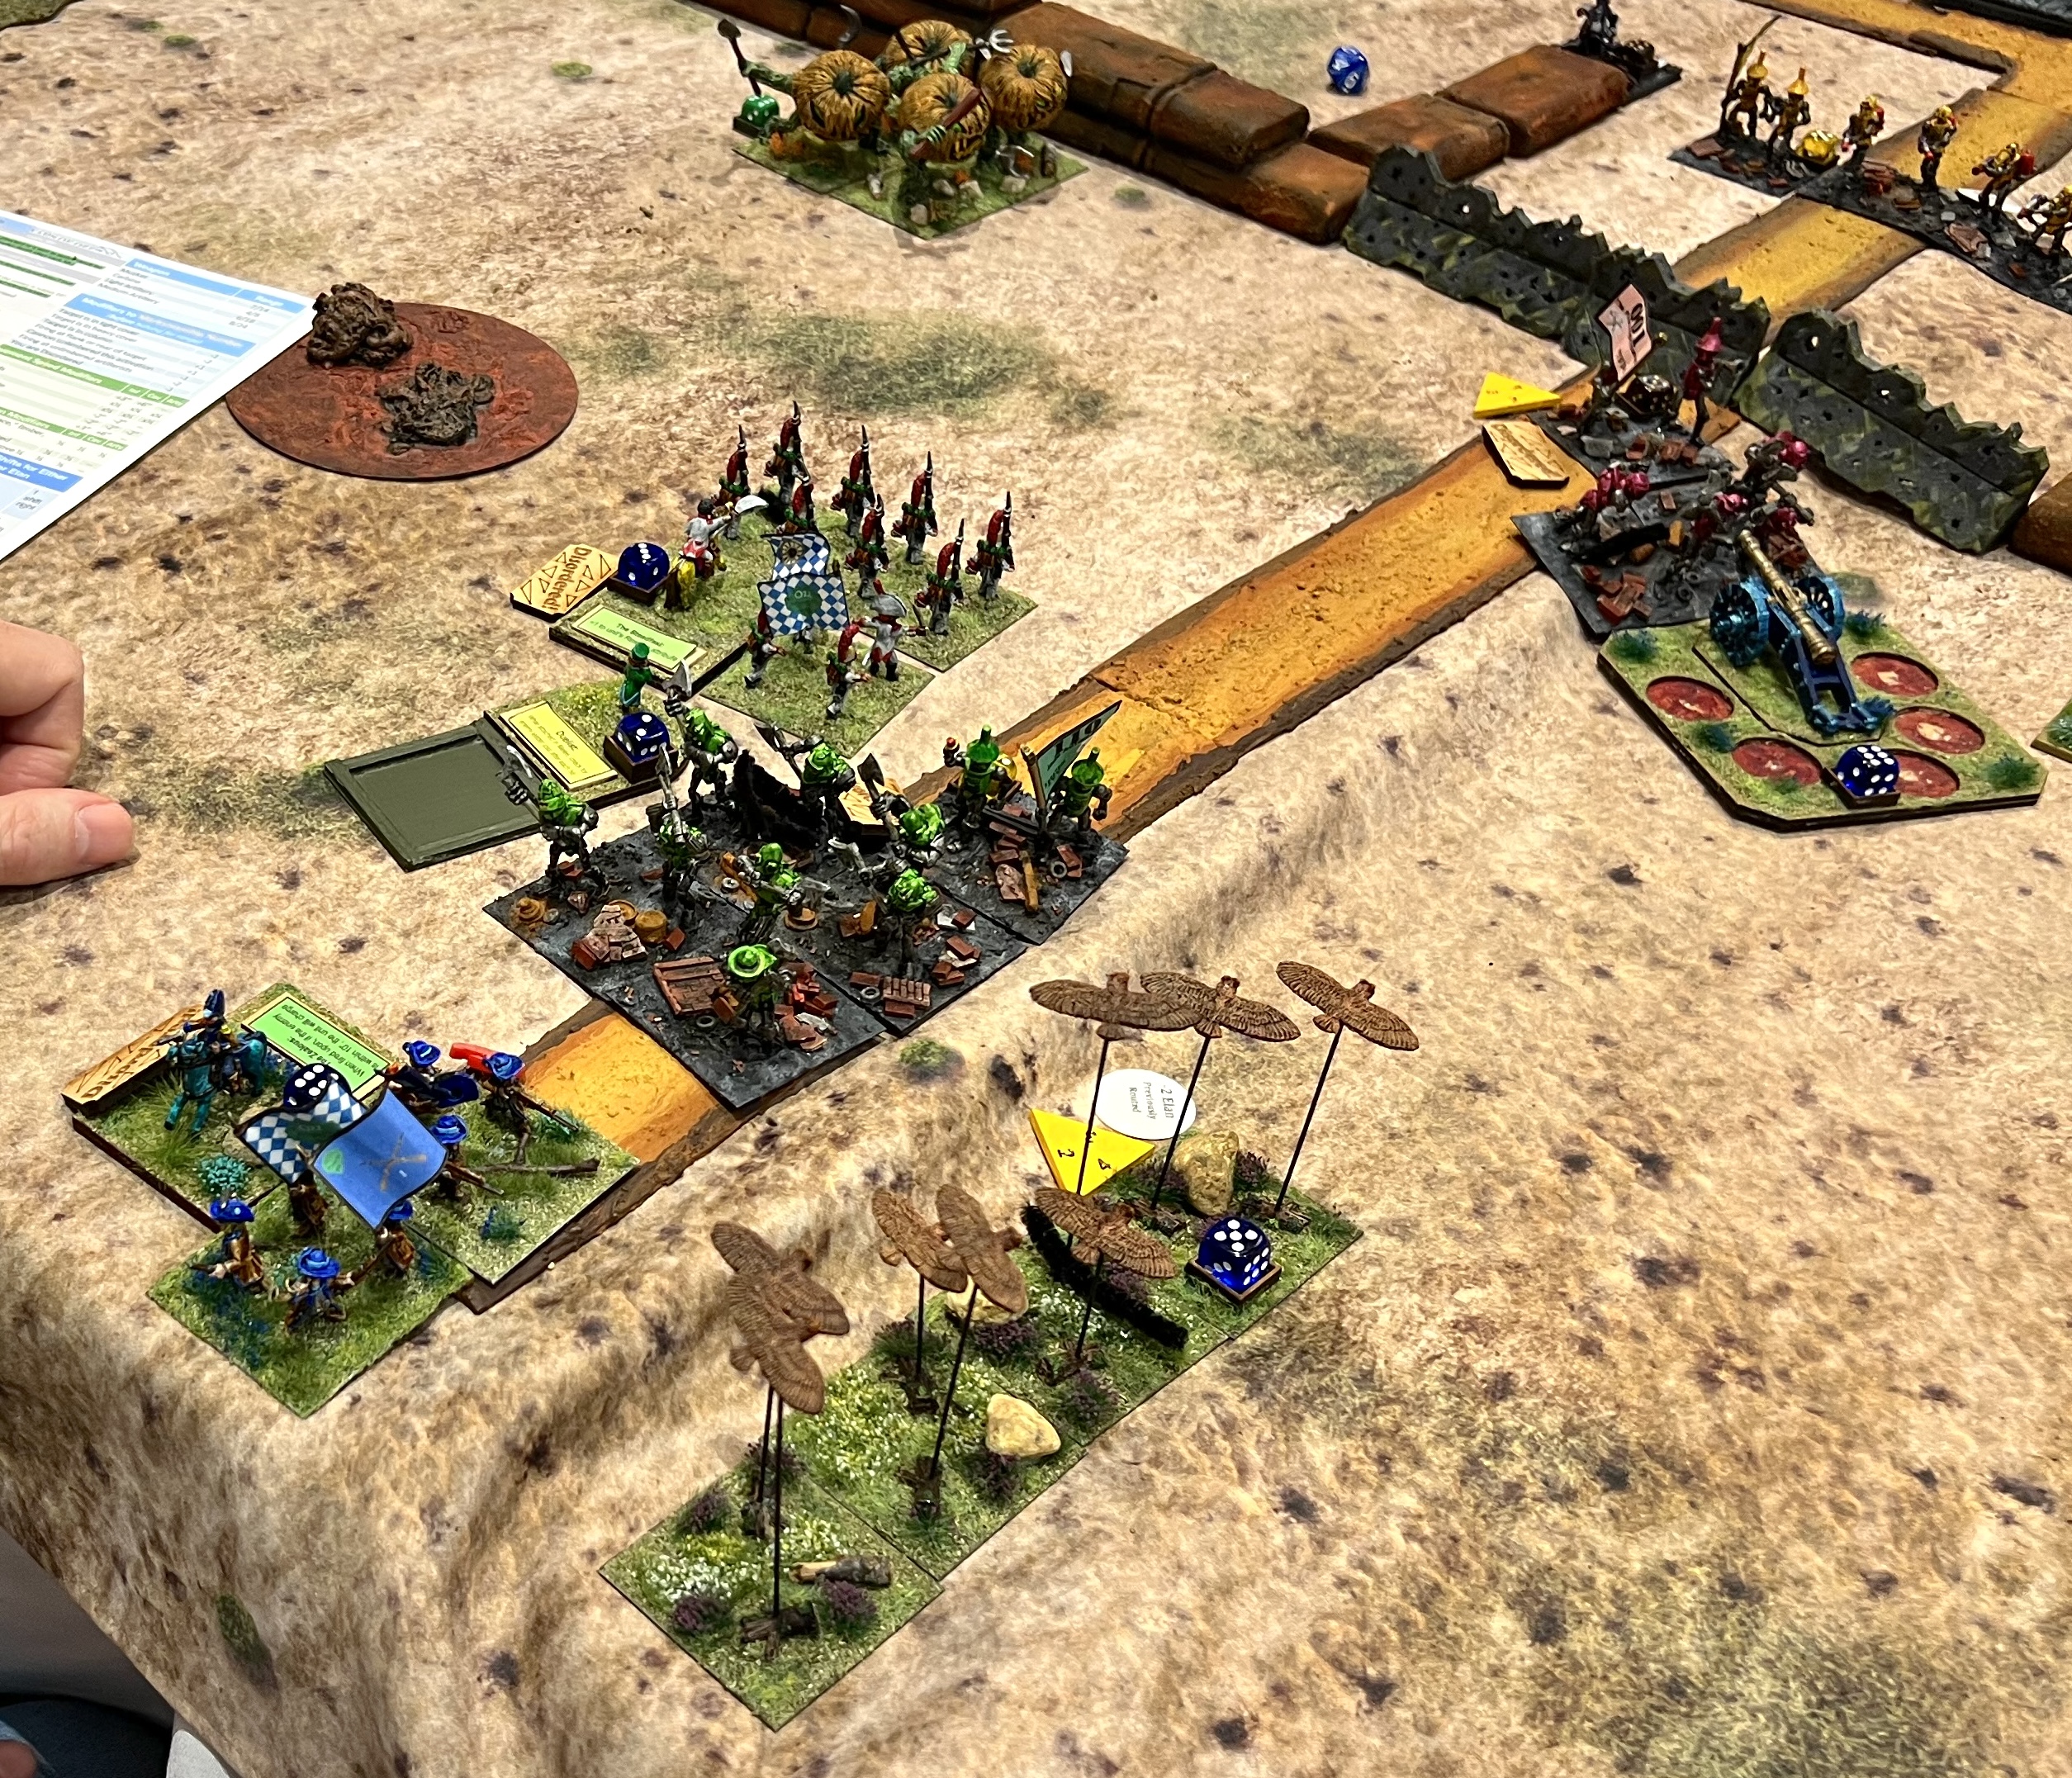
Another big game! The players plan.The Munchkins have 4 heavy crates of technology carried by 4 regiments. The crates slow down the Munchkins. The little folk need to cross a line with the crates safely to gain victory points. Additionally, each Munchkin base that escapes the Nitpik pursuers gets a point. Nitpik gets points for recovering crates and for eliminating Munchkin bases. The Munchkins have set up a delaying picket line of light cavalry and sharpshooters between the two balloons. This is to give those fleeing a chance to escape the Nitpik and allied horde.On the right, the Munchkin picket line. On the left, the pursuers!There were many Nitpik pursuers. This included those who switched alliances, like Frost Ogres, Great Pumpkinheads, and Jinjur pirates. Traffic control became a challenge as they tried to catch the Munchkins.The pursuers coordinate their movements.The Munchkin Aerostat frustrated several Nitpik regiments. As they tried to advance, the Aerostat laid down effective disruptive musketry on the mechanical men. Nitpik cavalry broke through and tried to run the Munchkins down. Several crates were lost as the Munchkins routed in disarray.The game ended with this scene showing Sam disappointed. The Munchkins nearly won the game. Her unit only needed 1 more inch to cross the line of the crater with the crate. So close! (well played though Sam!!) In the end, Nitpik won a VERY narrow 12-10 victory.
That wrapped up Friday night. The next game would happen Saturday morning set in North Africa.
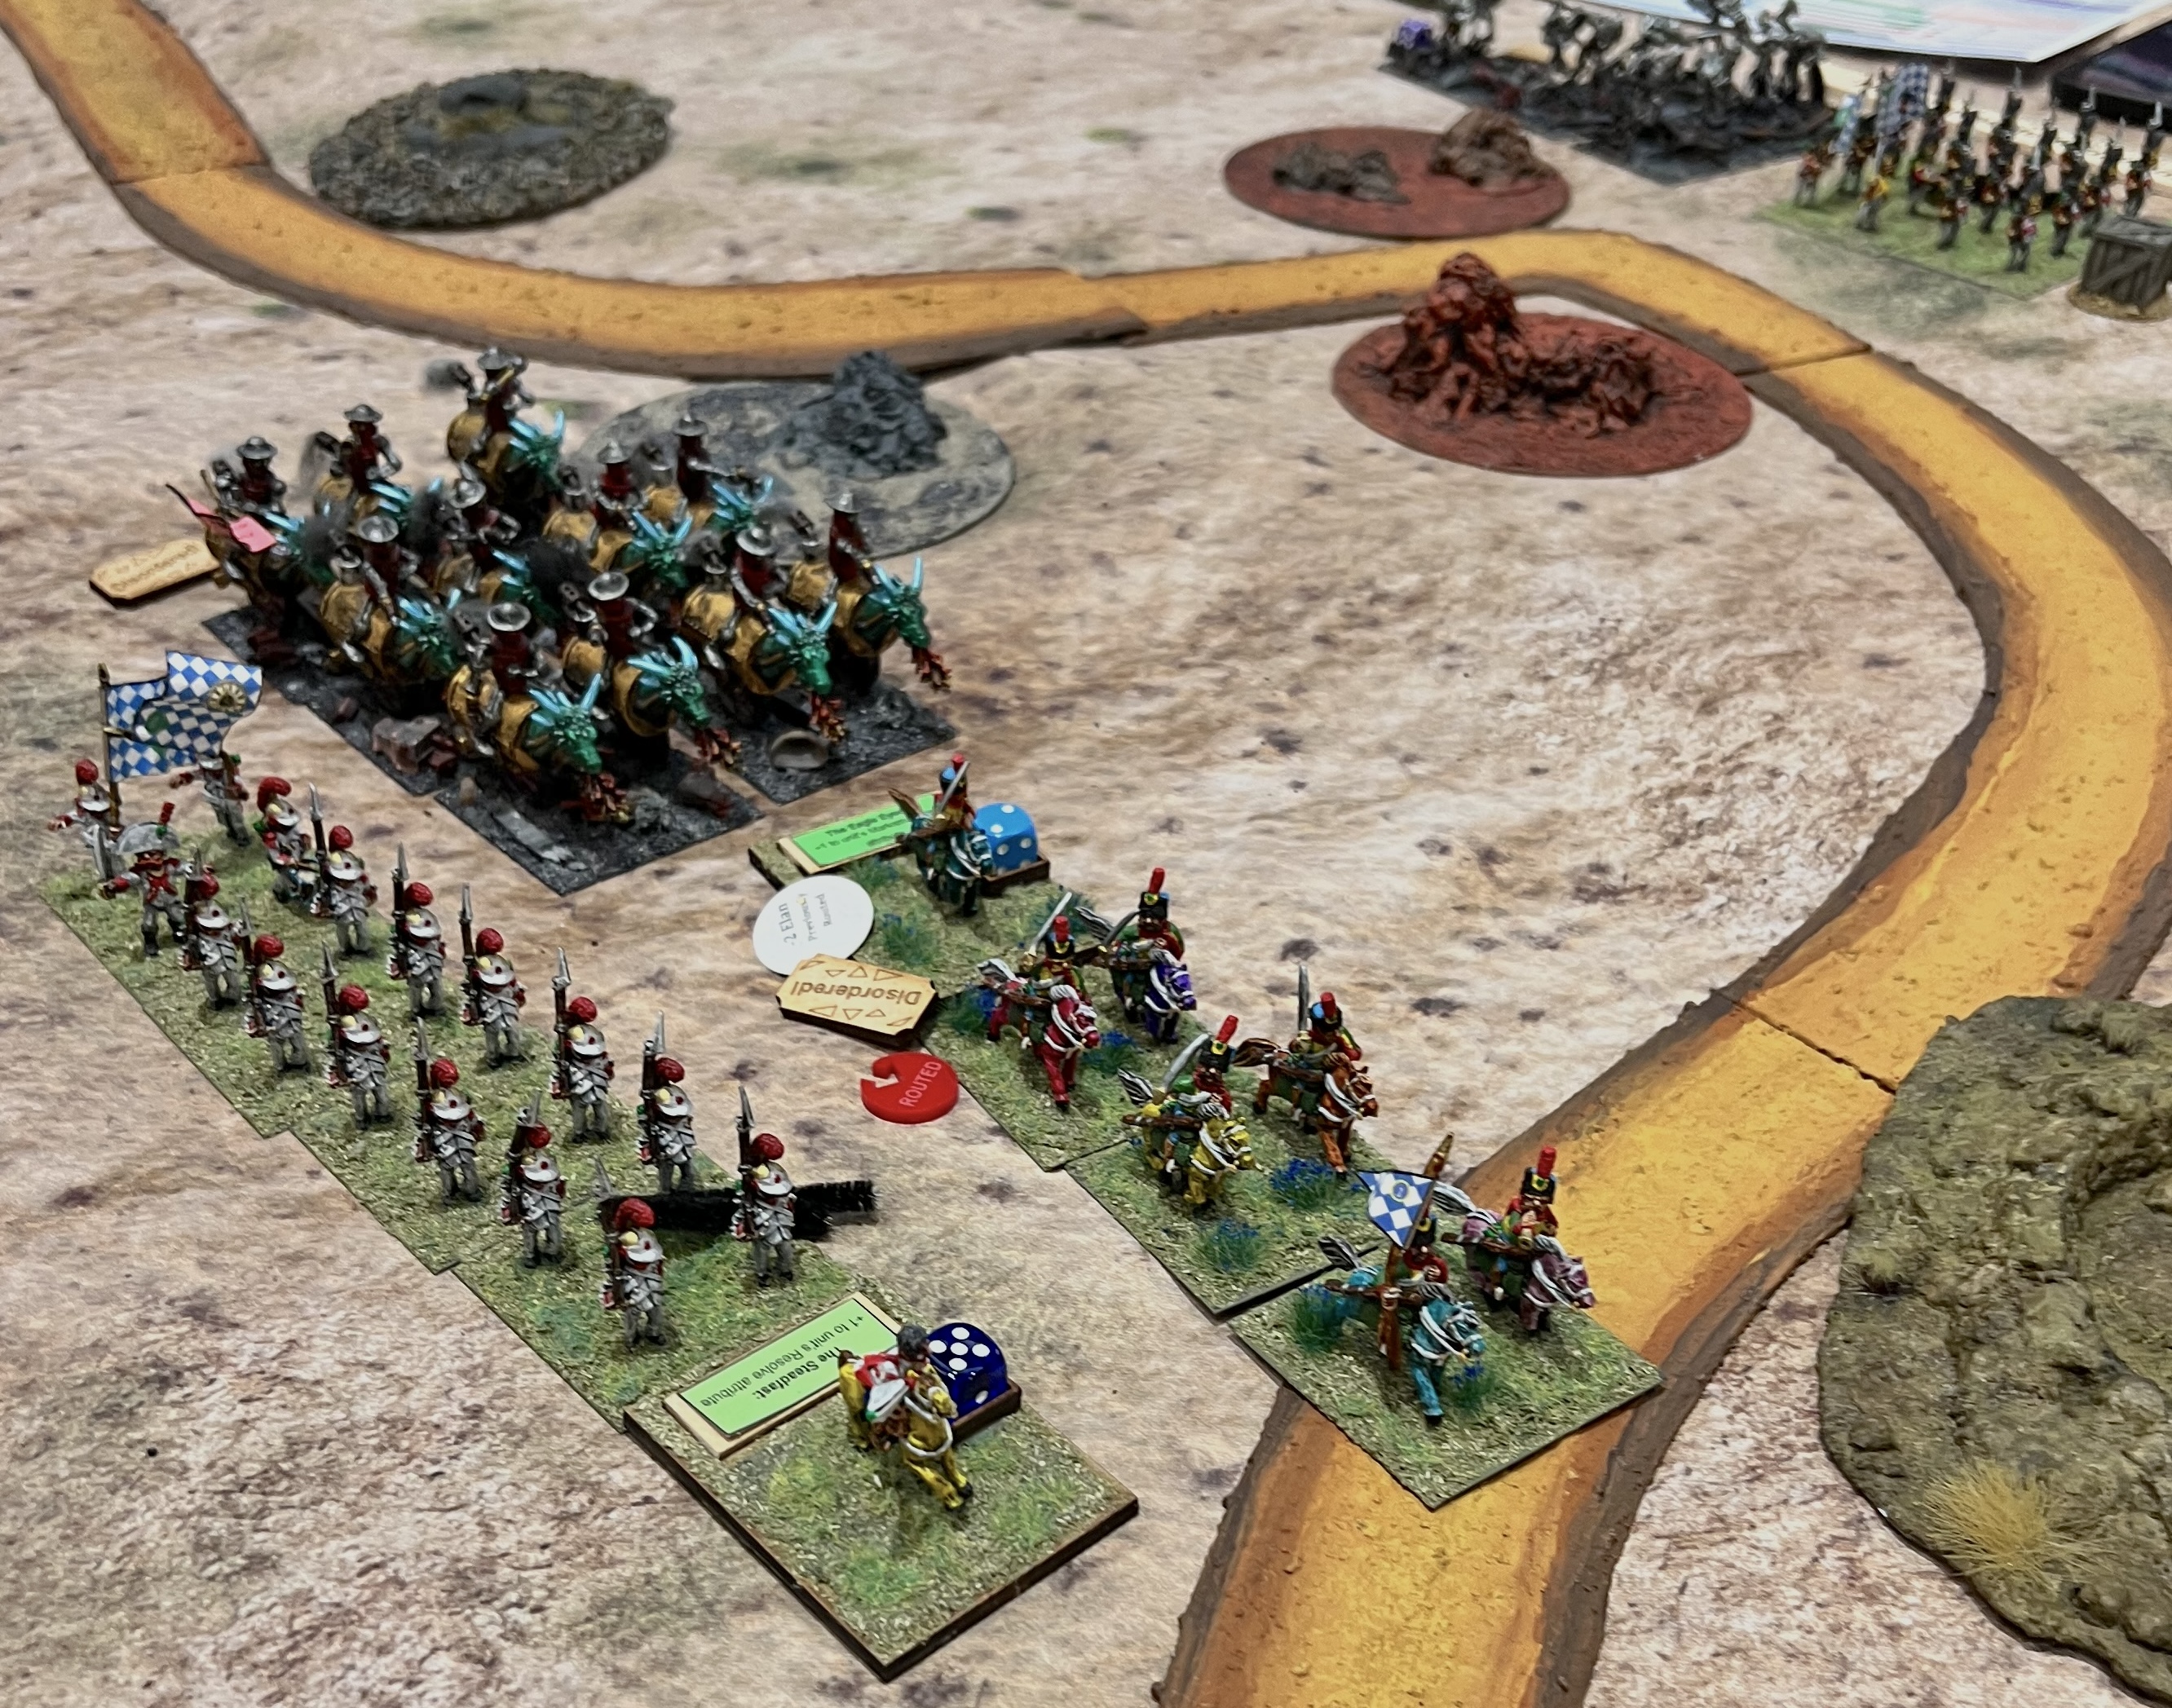
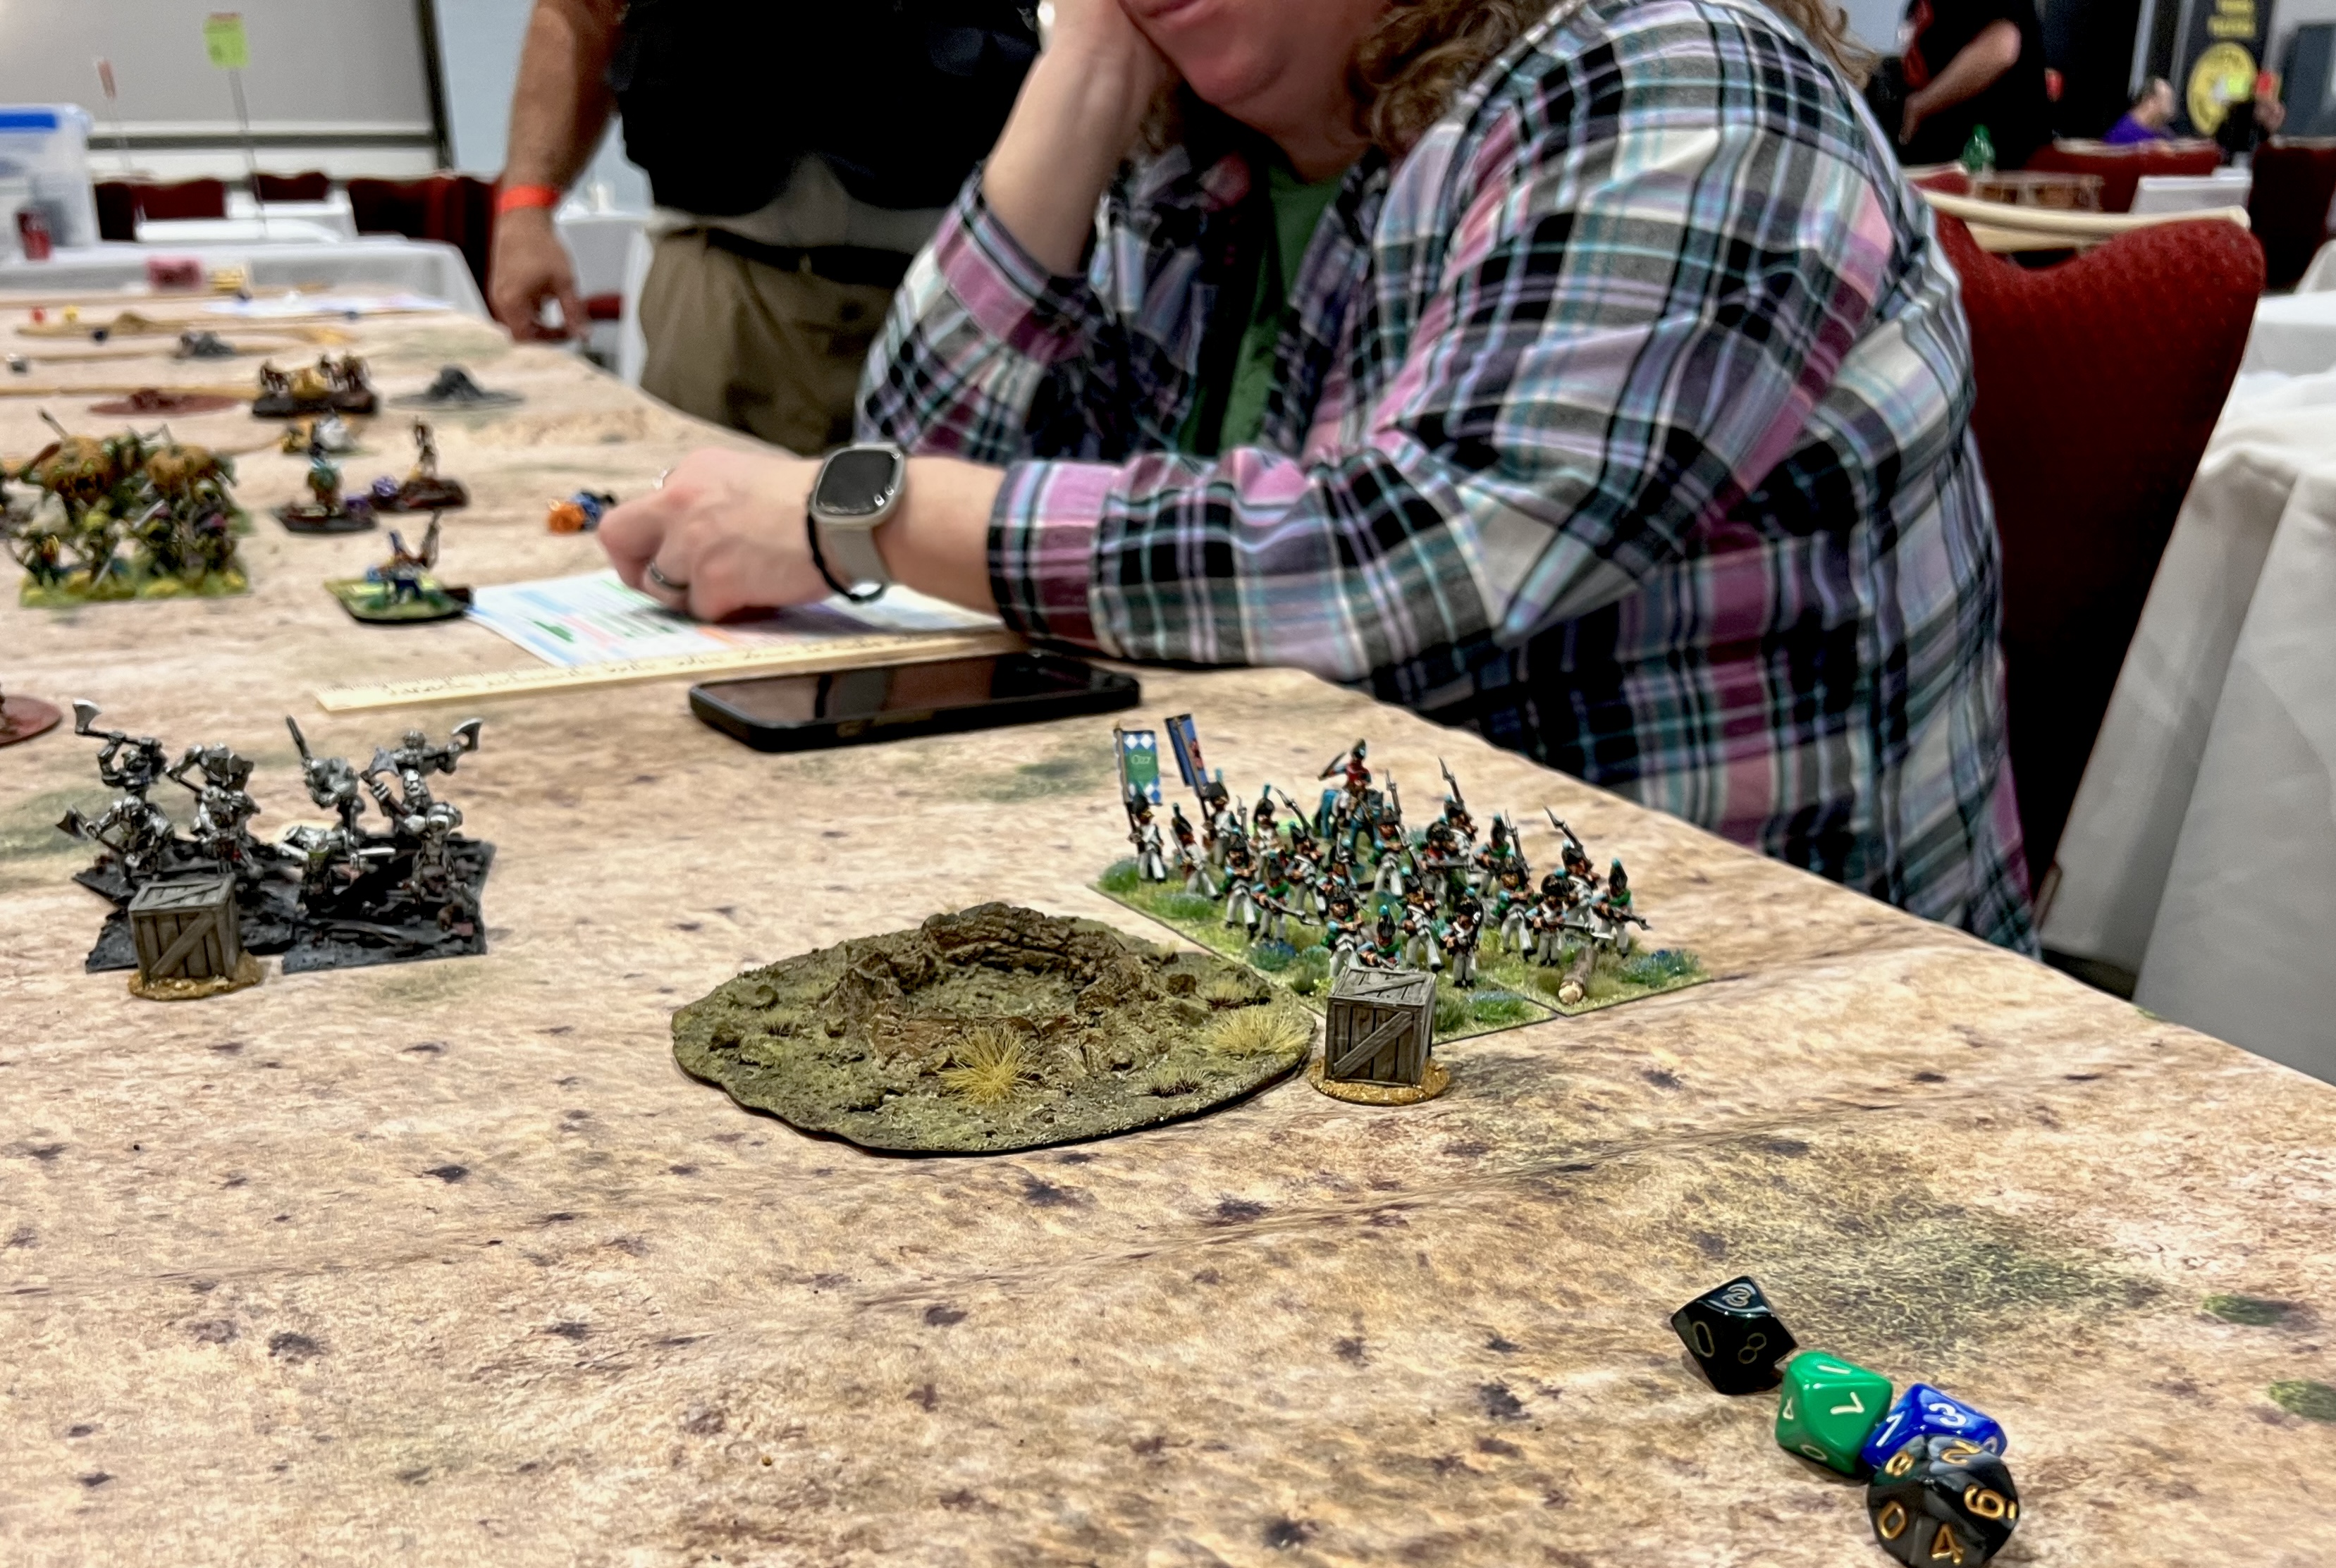
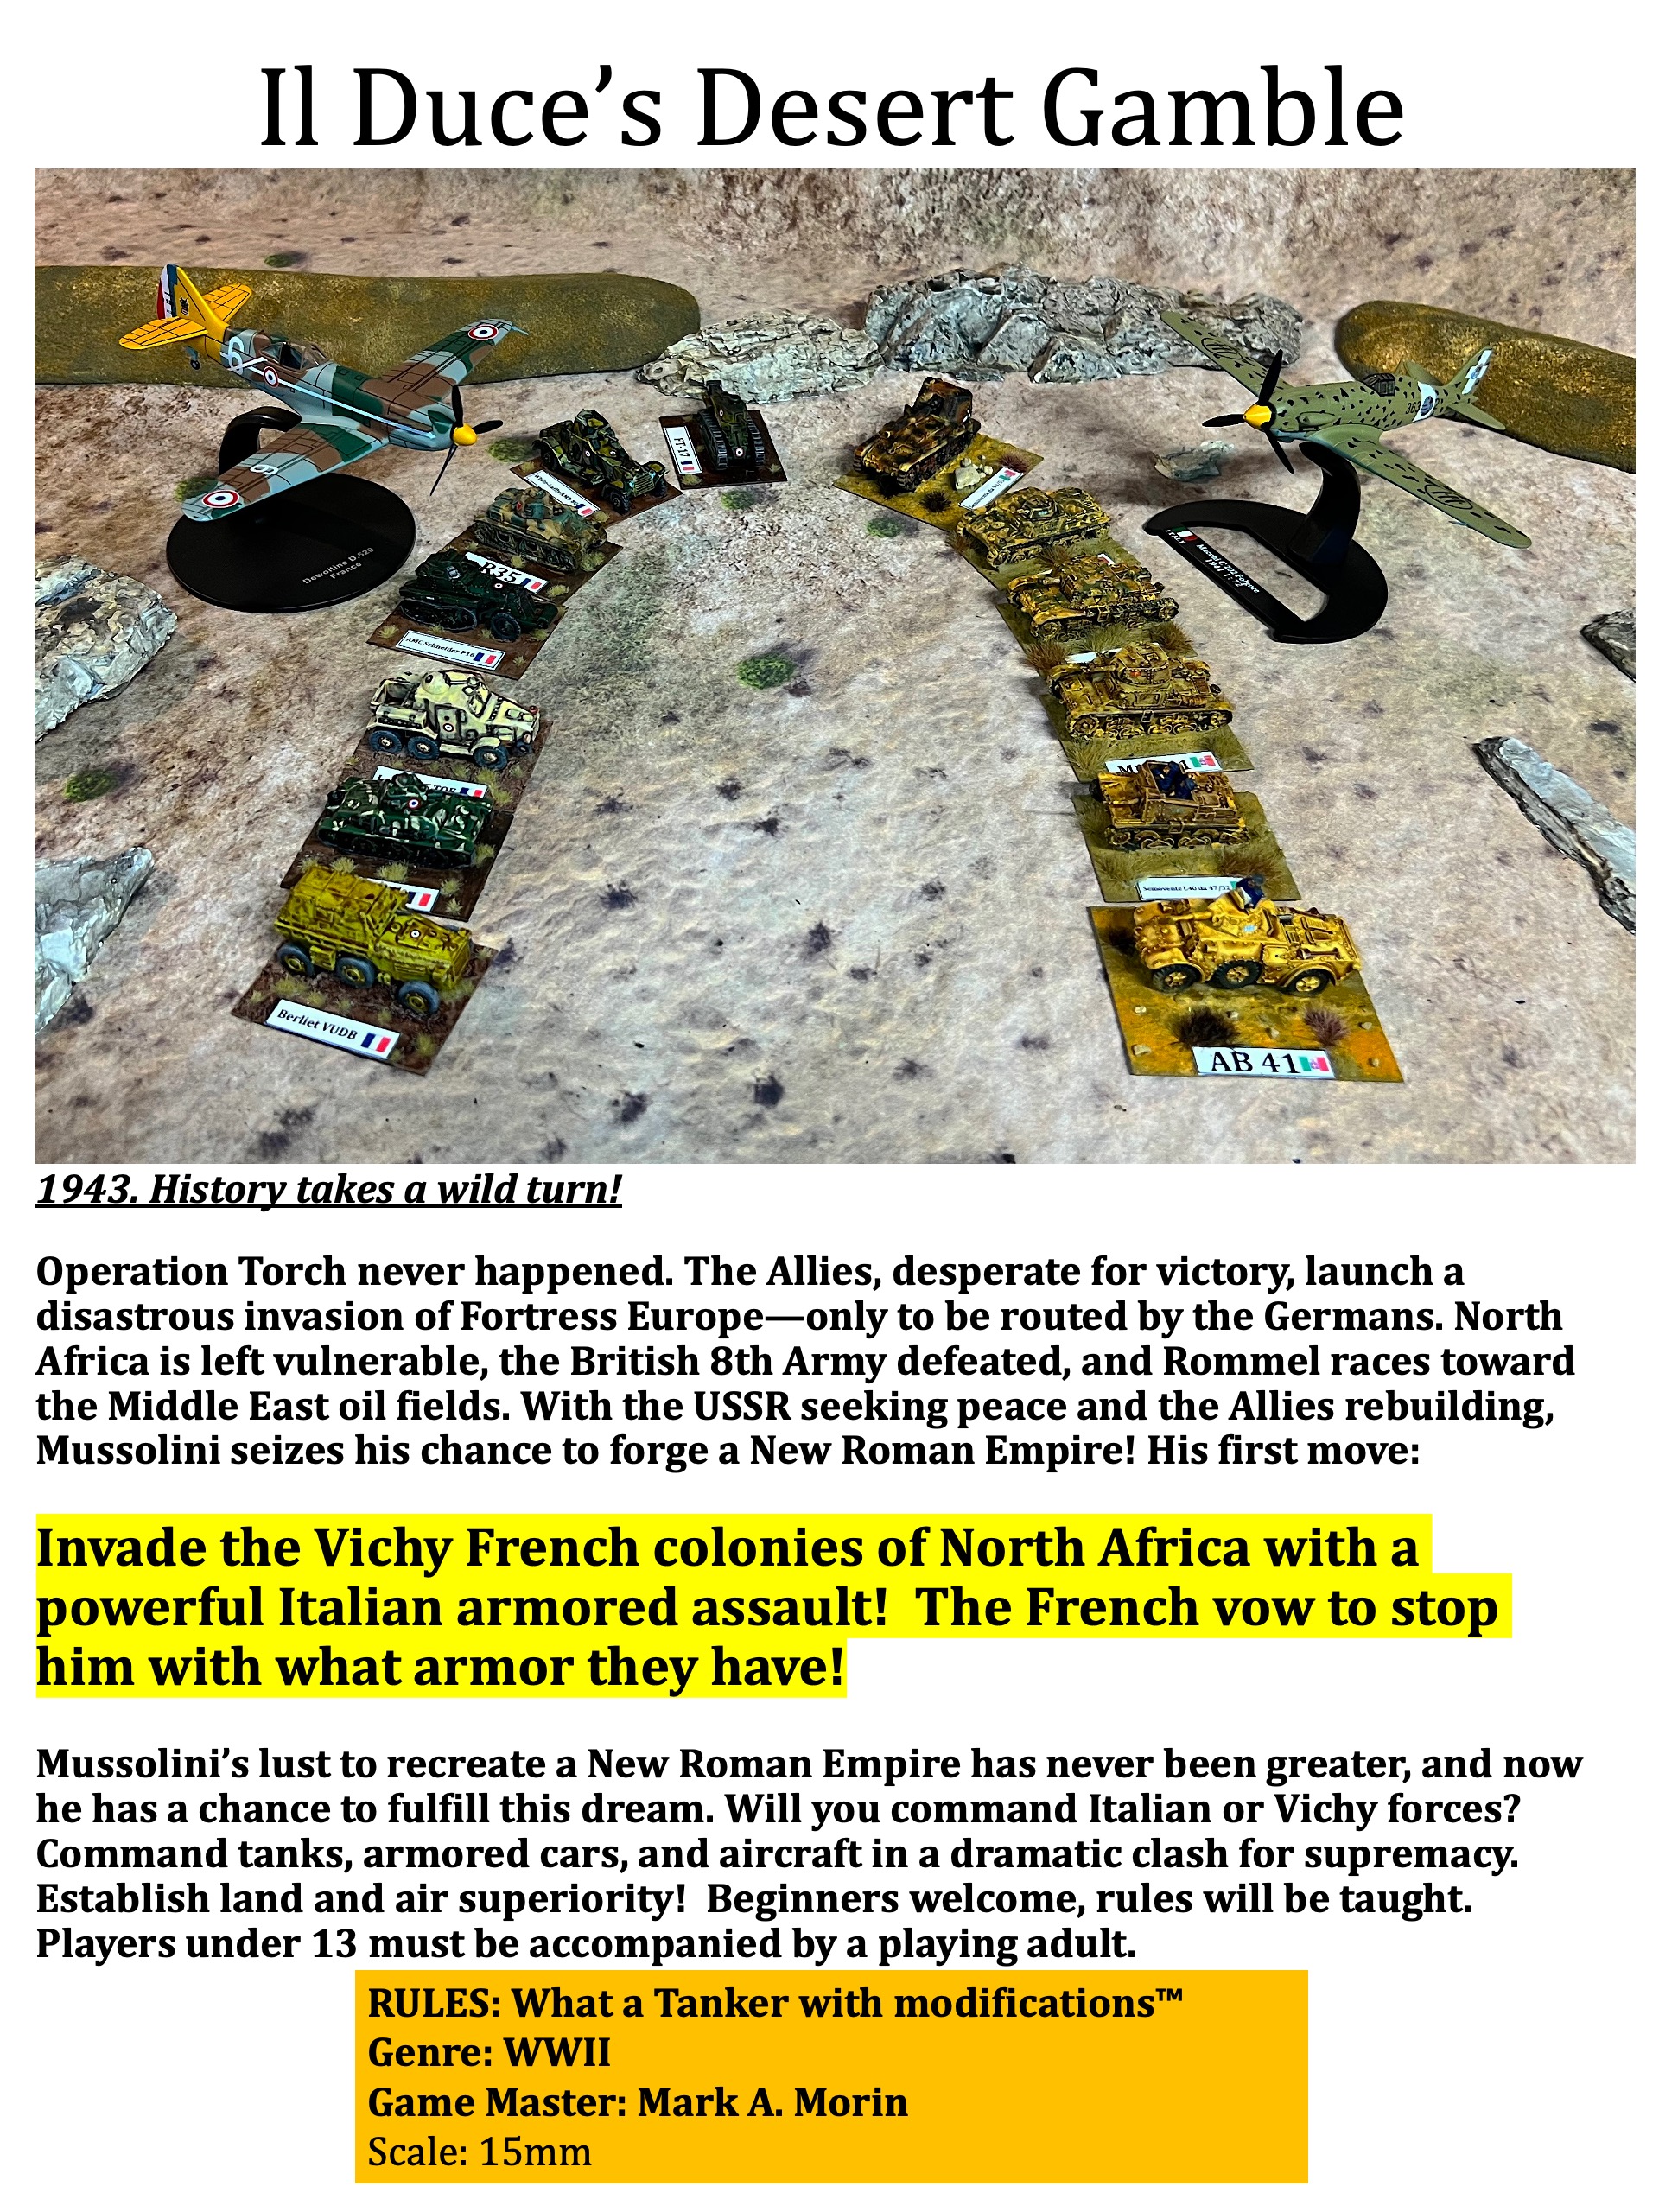
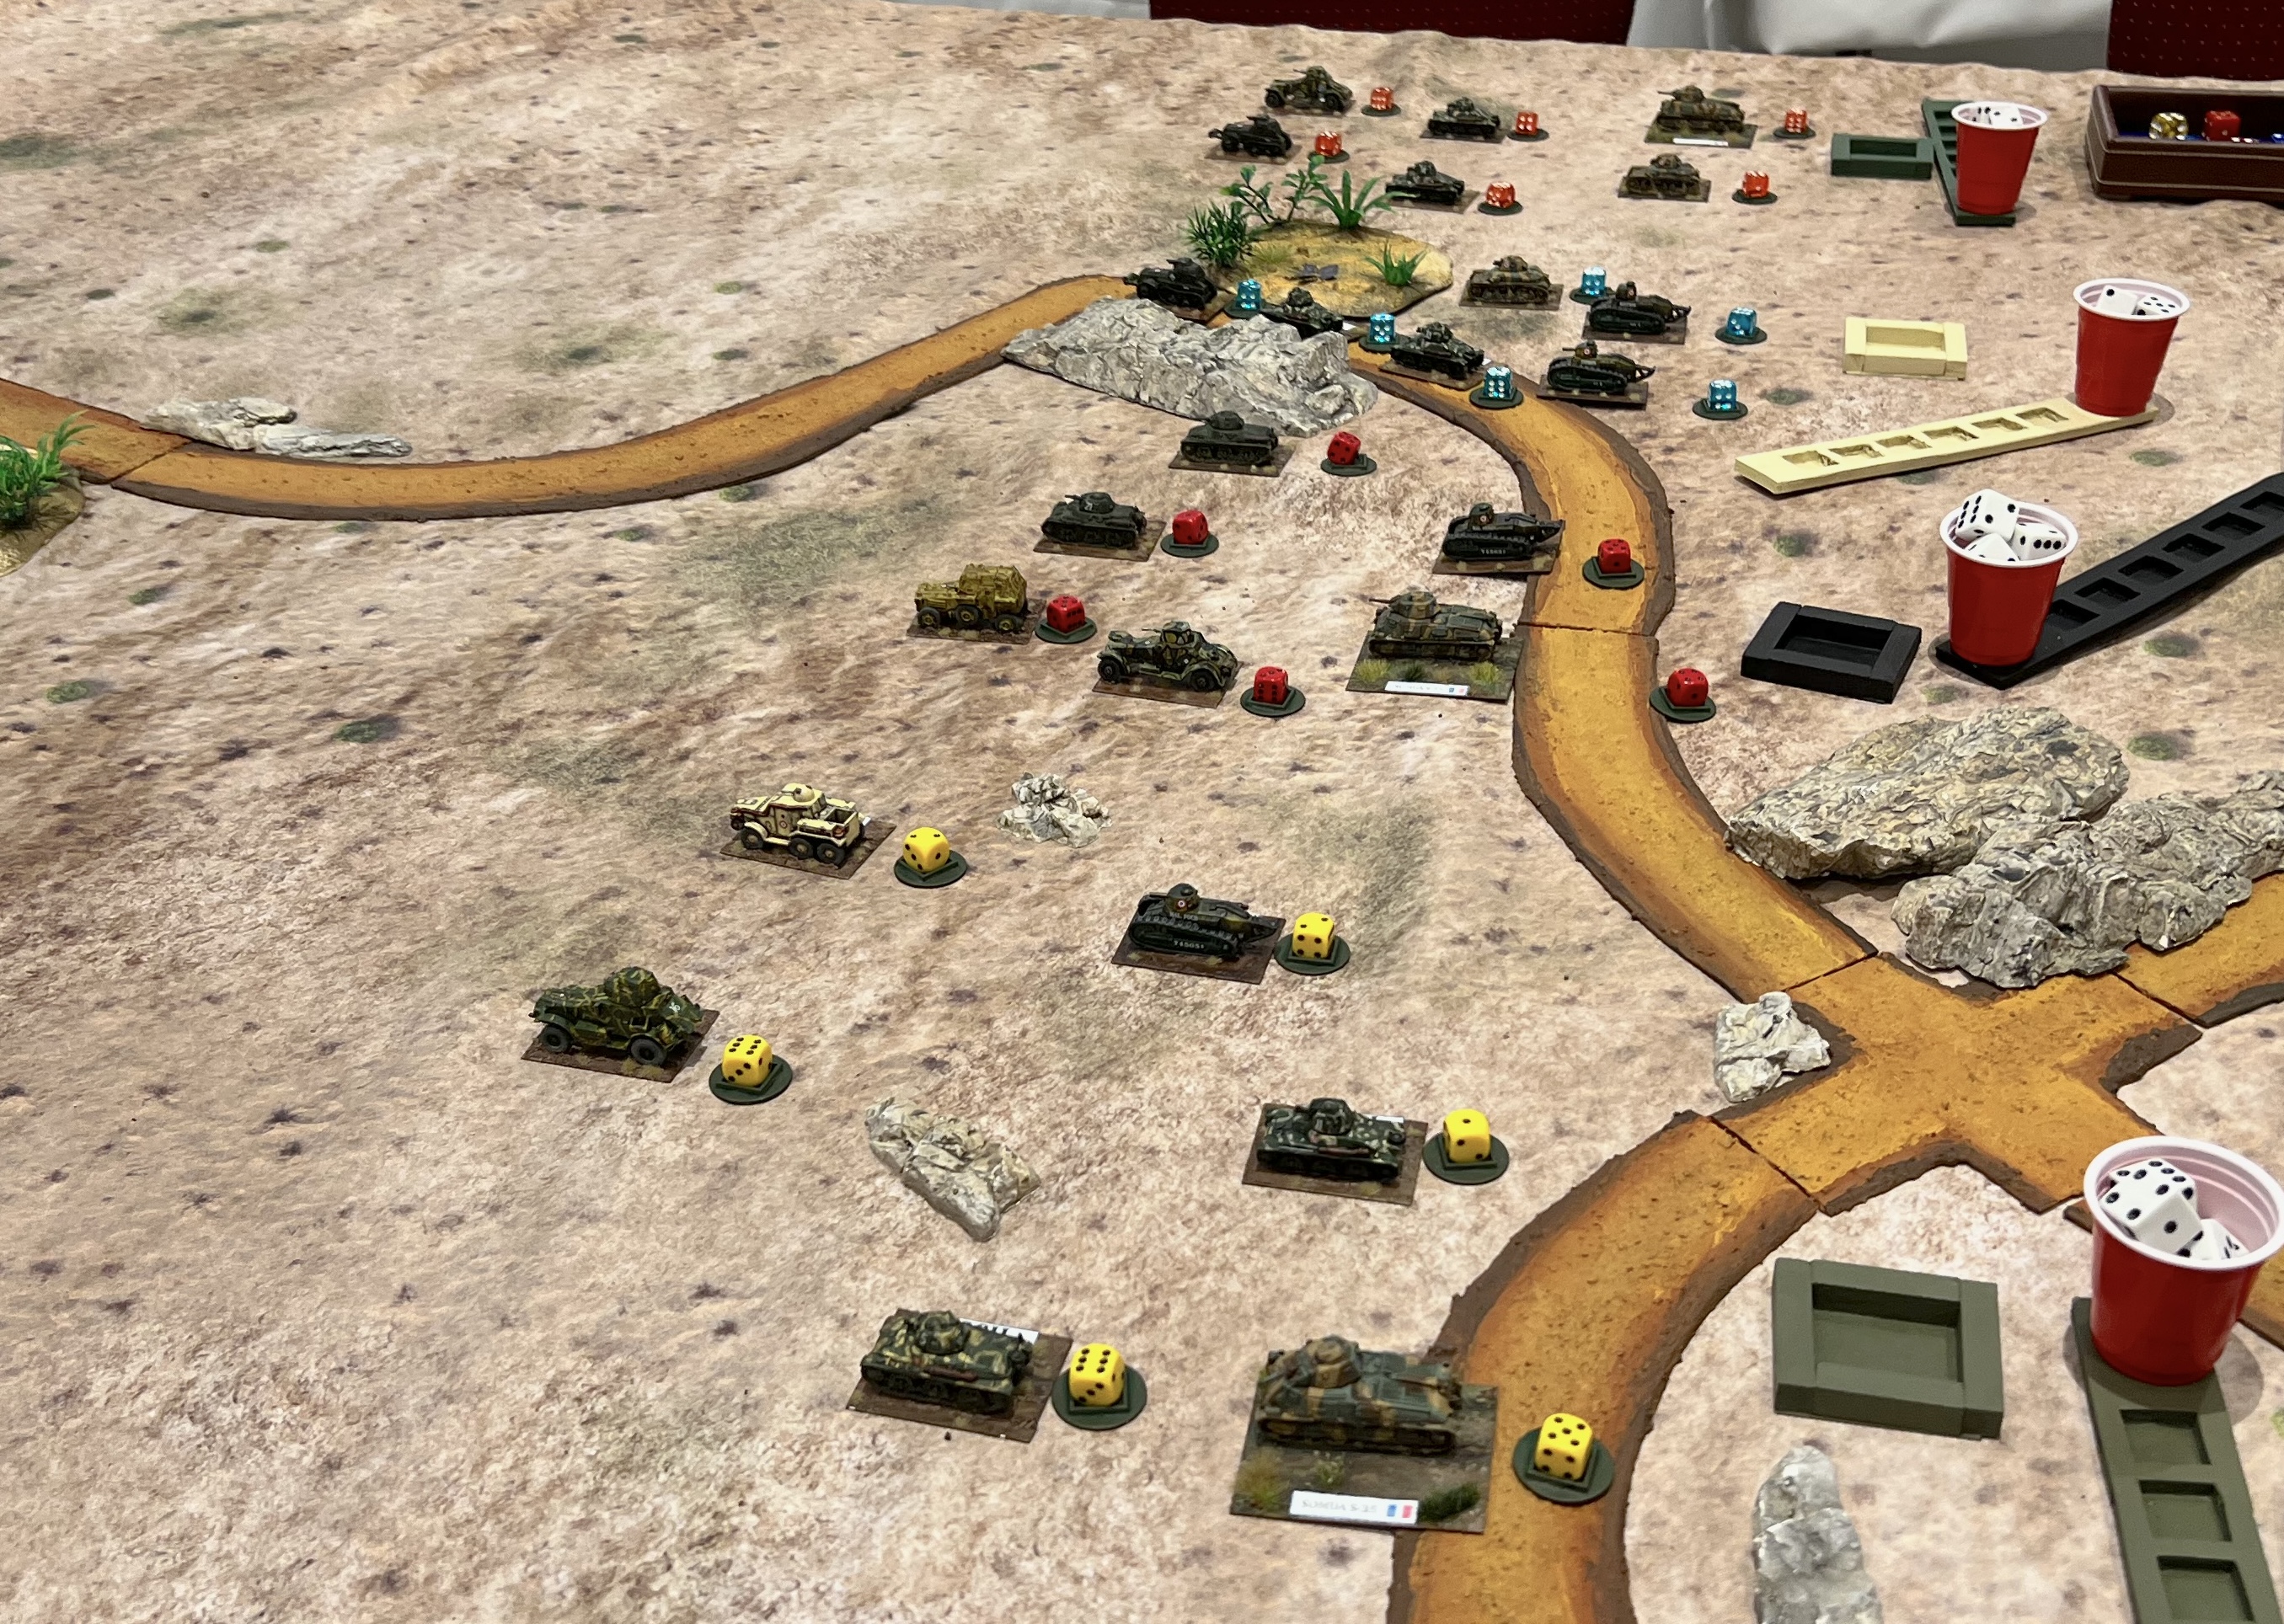
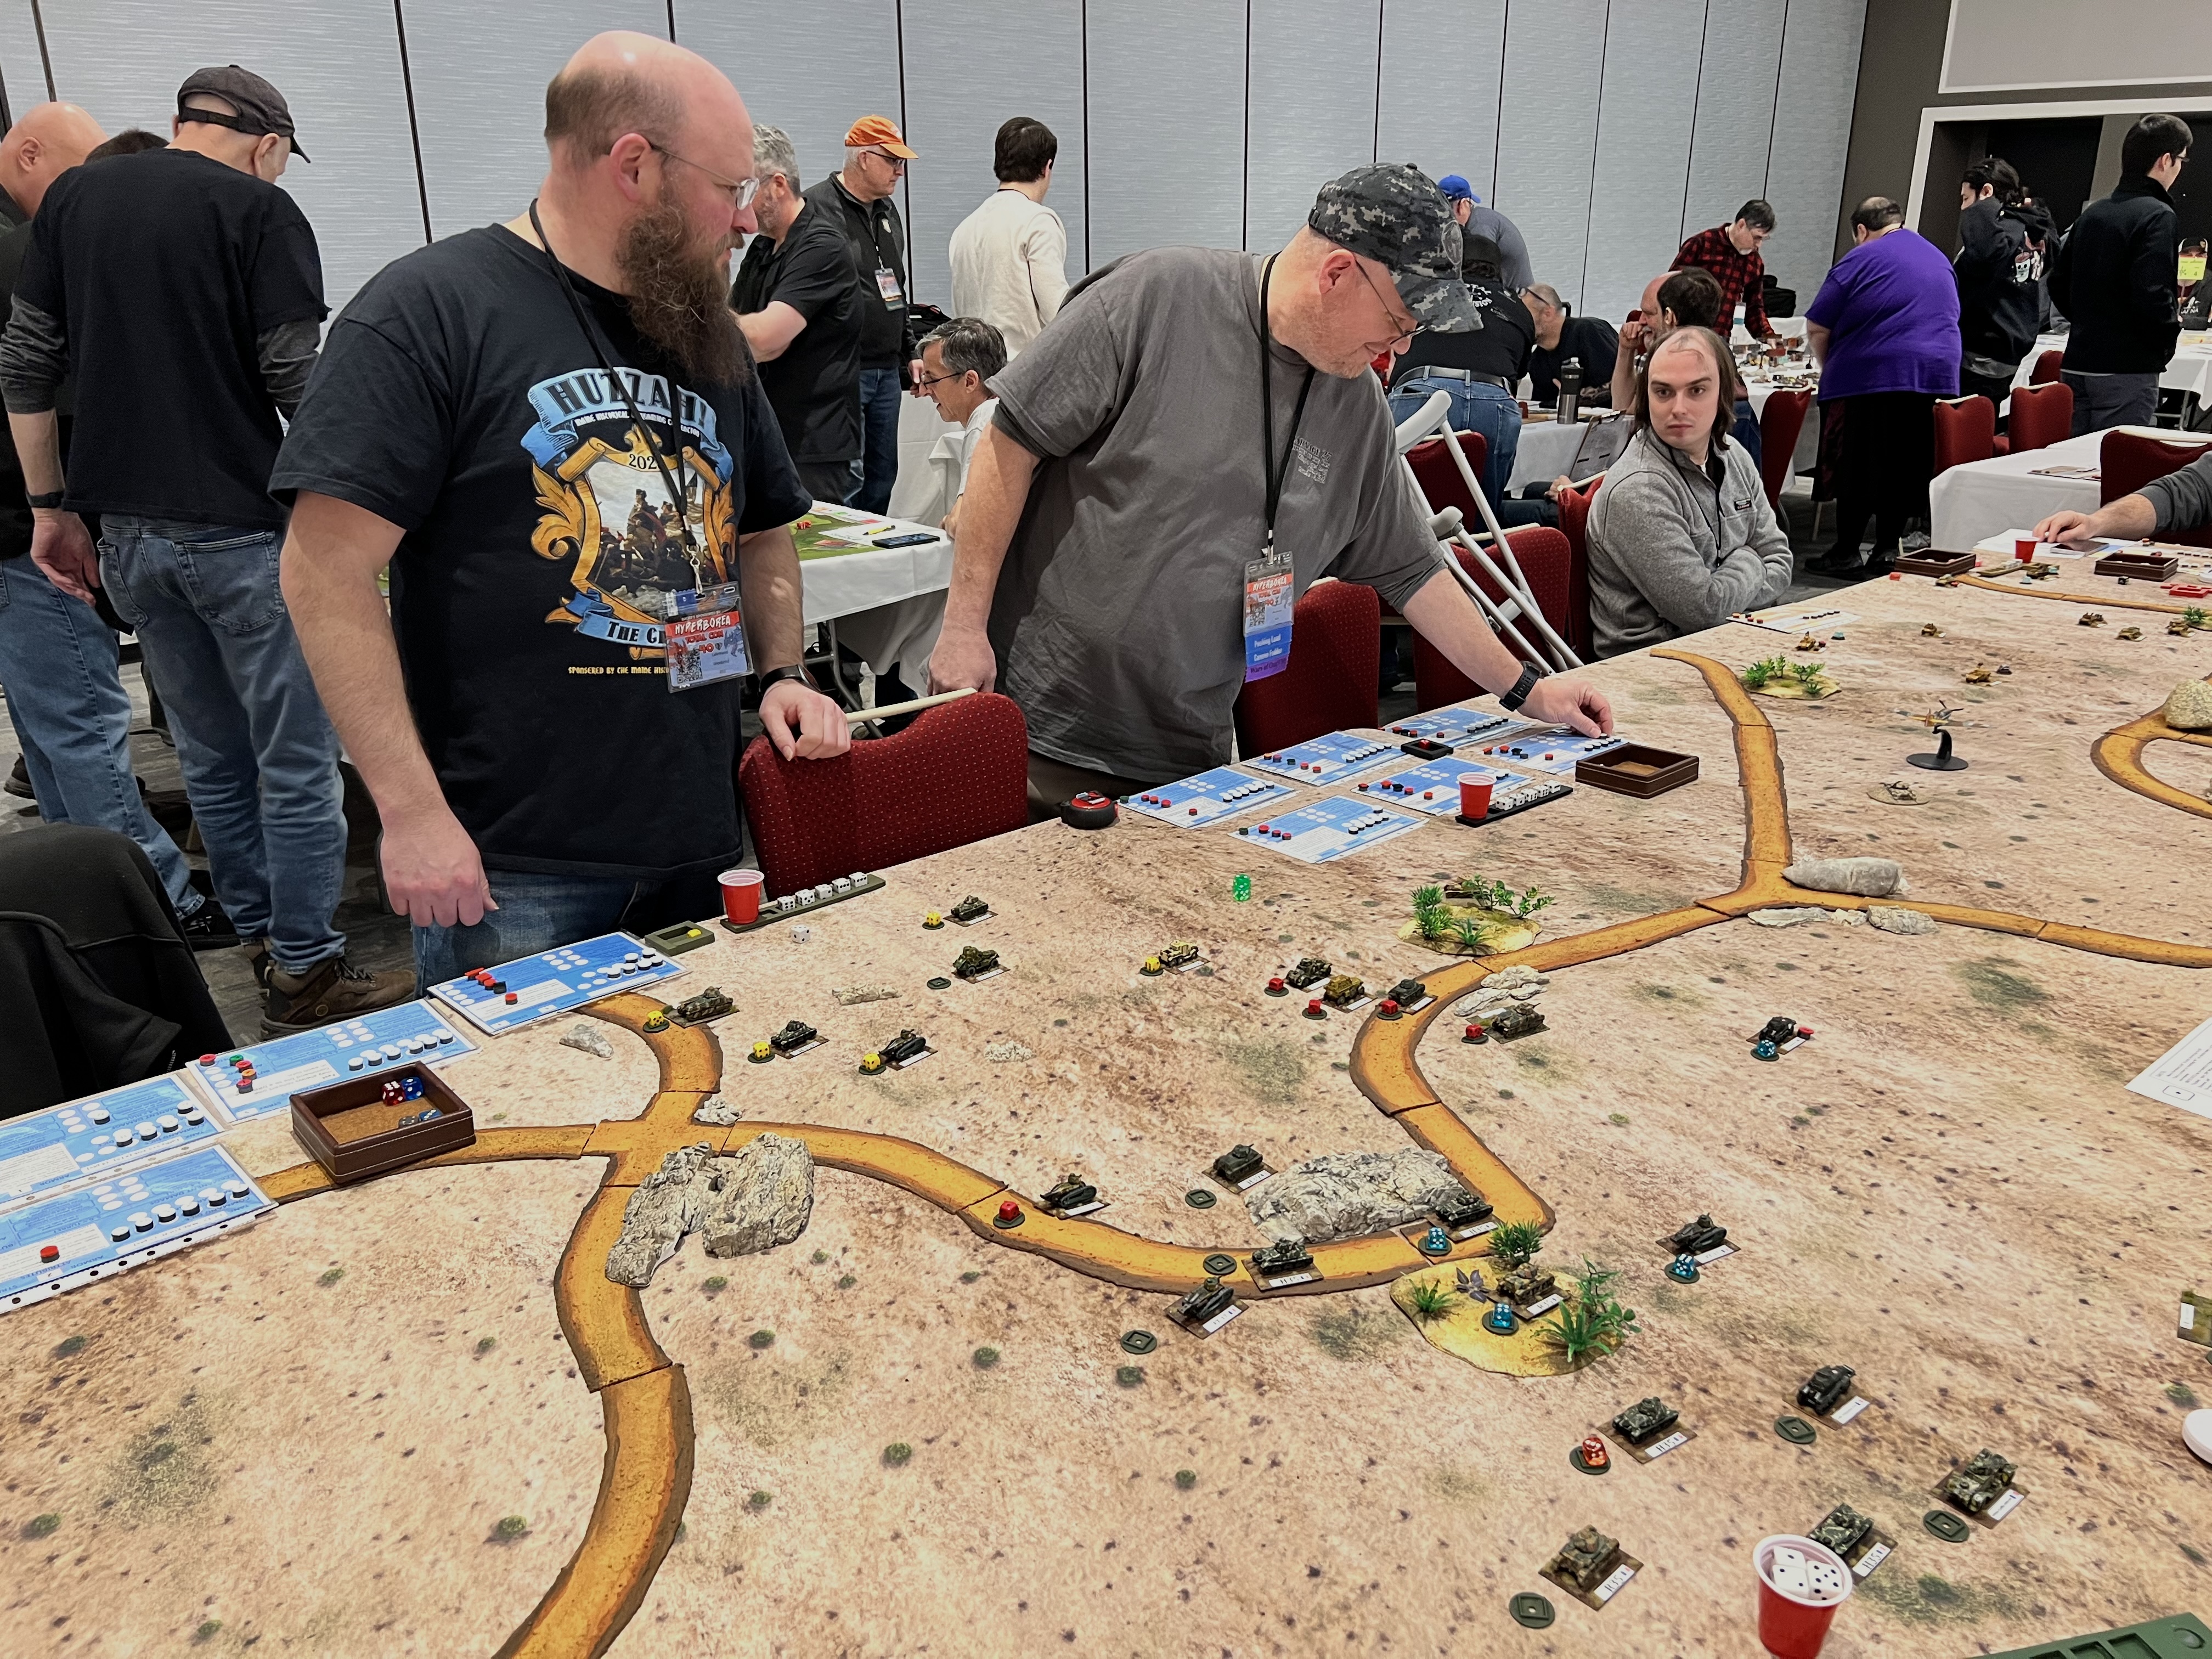
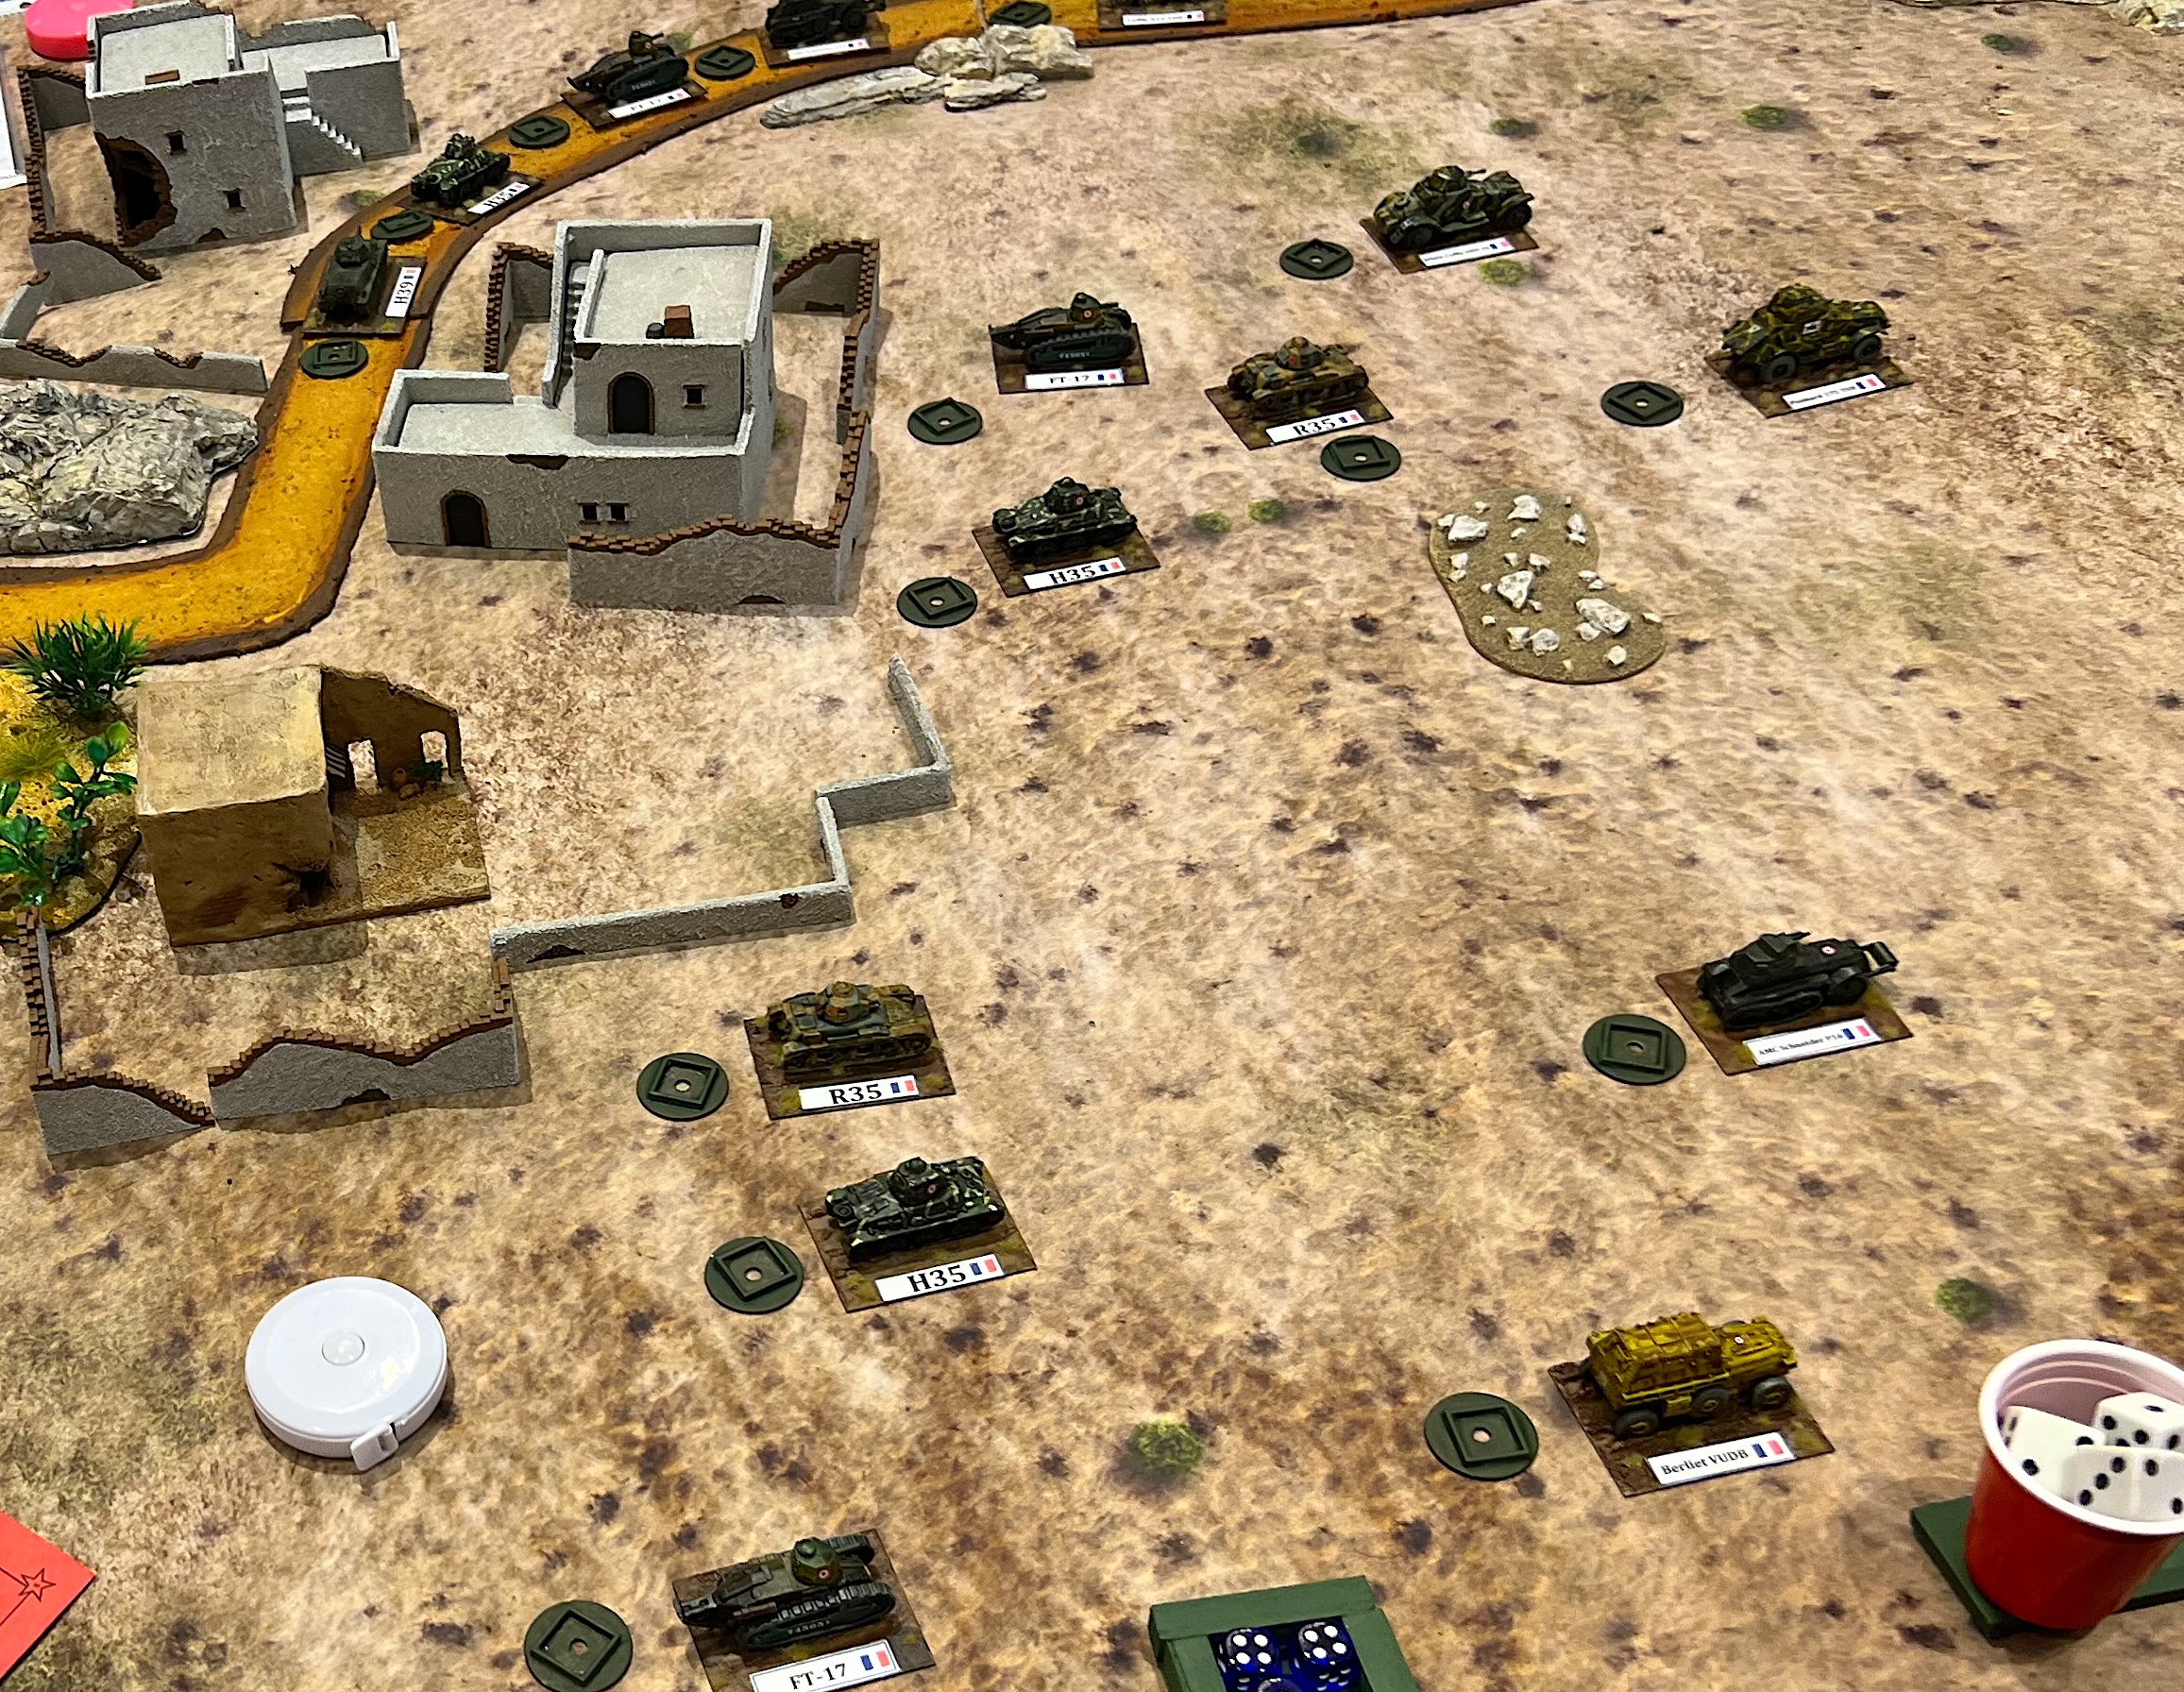
Il Duce’s Desert Gamble
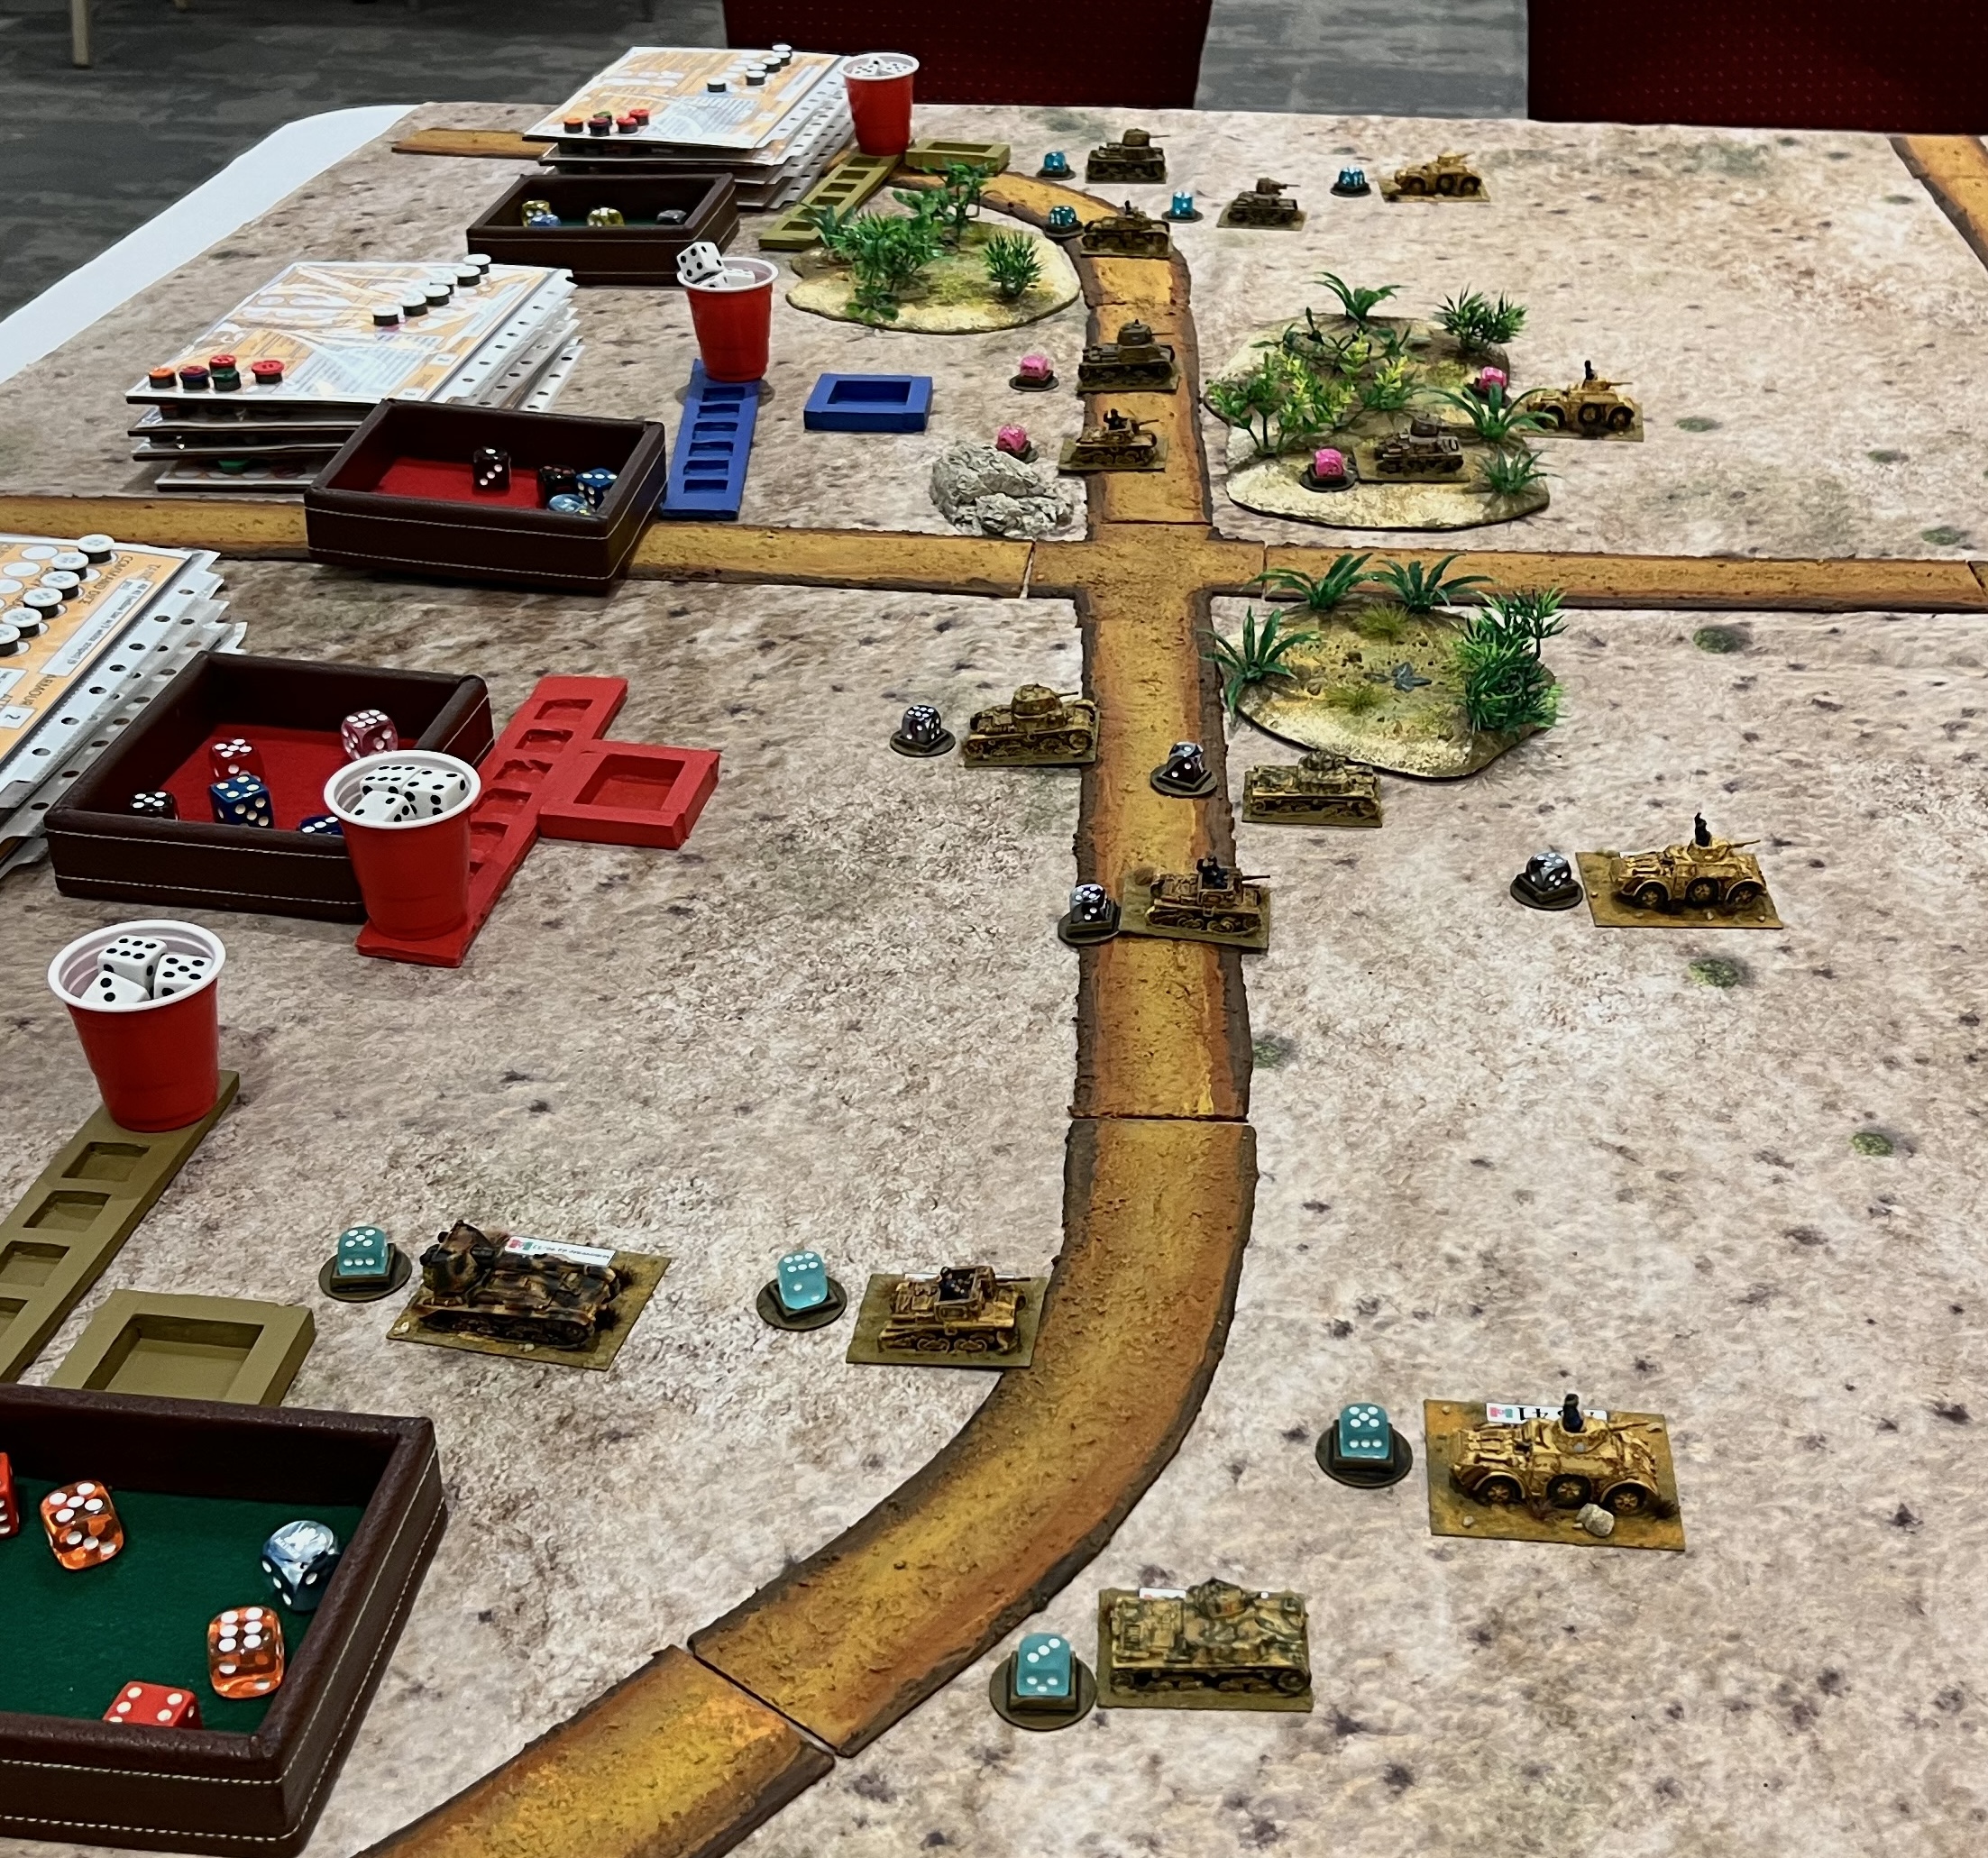
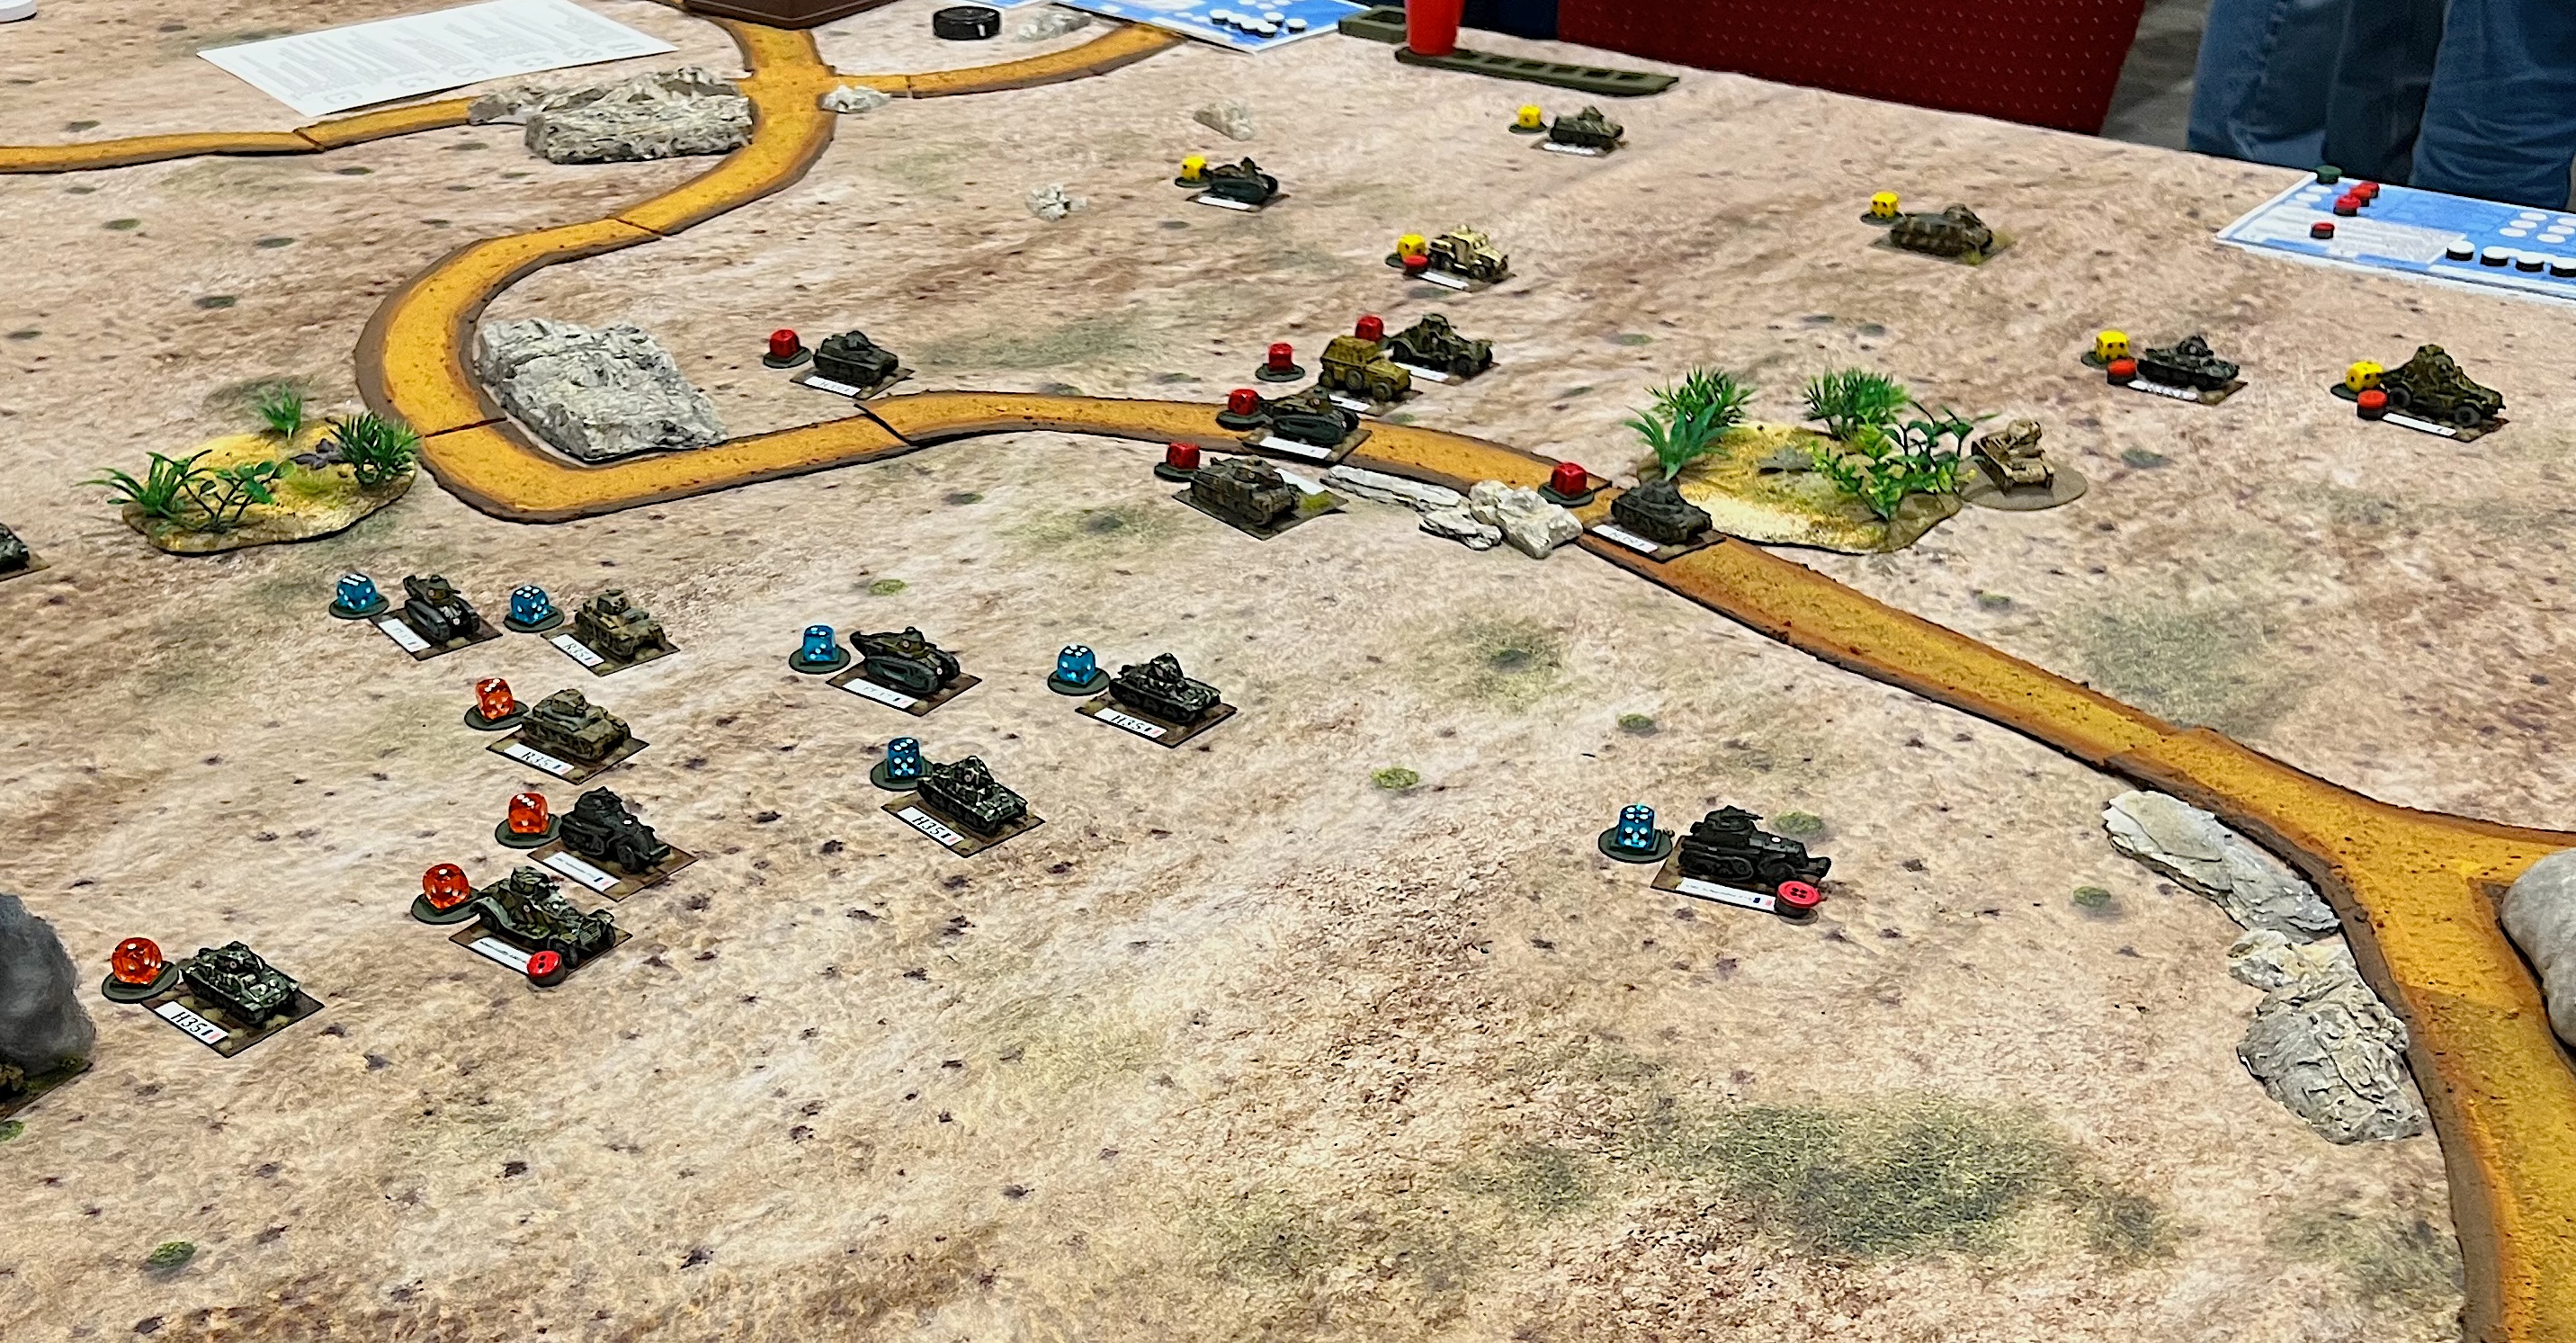
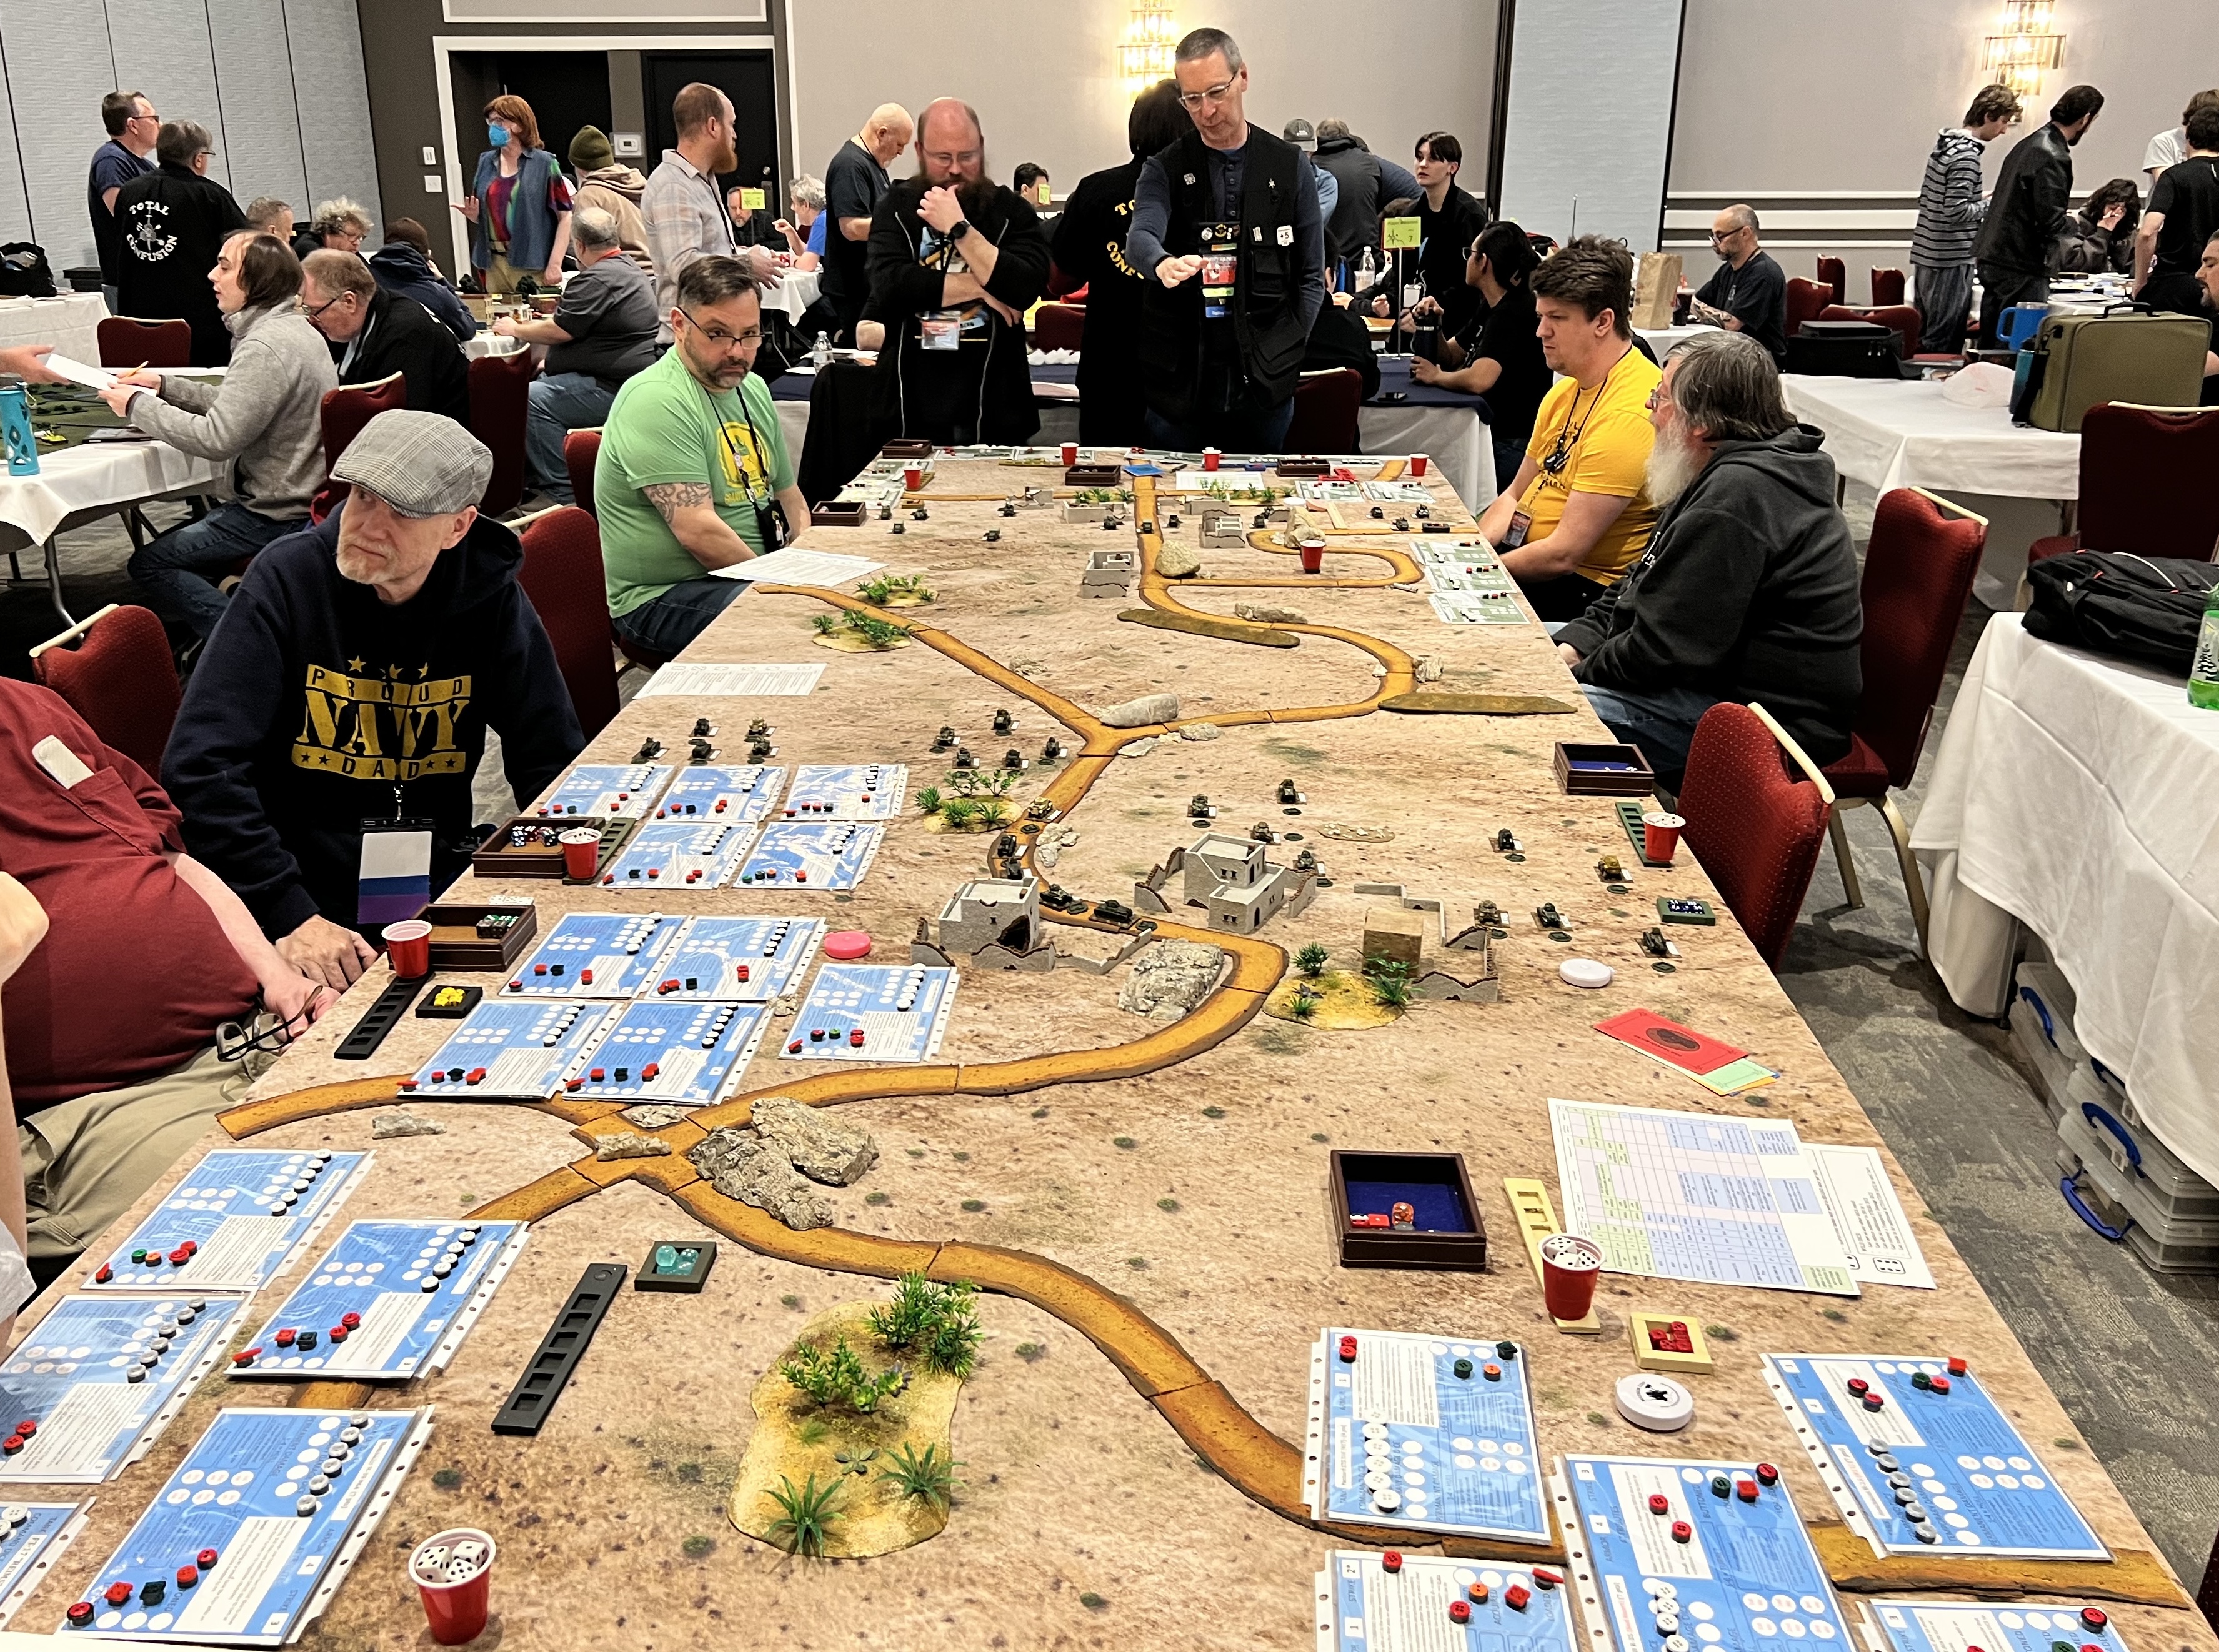
This what-if modified What a Tanker scenario also filled up quickly as well.
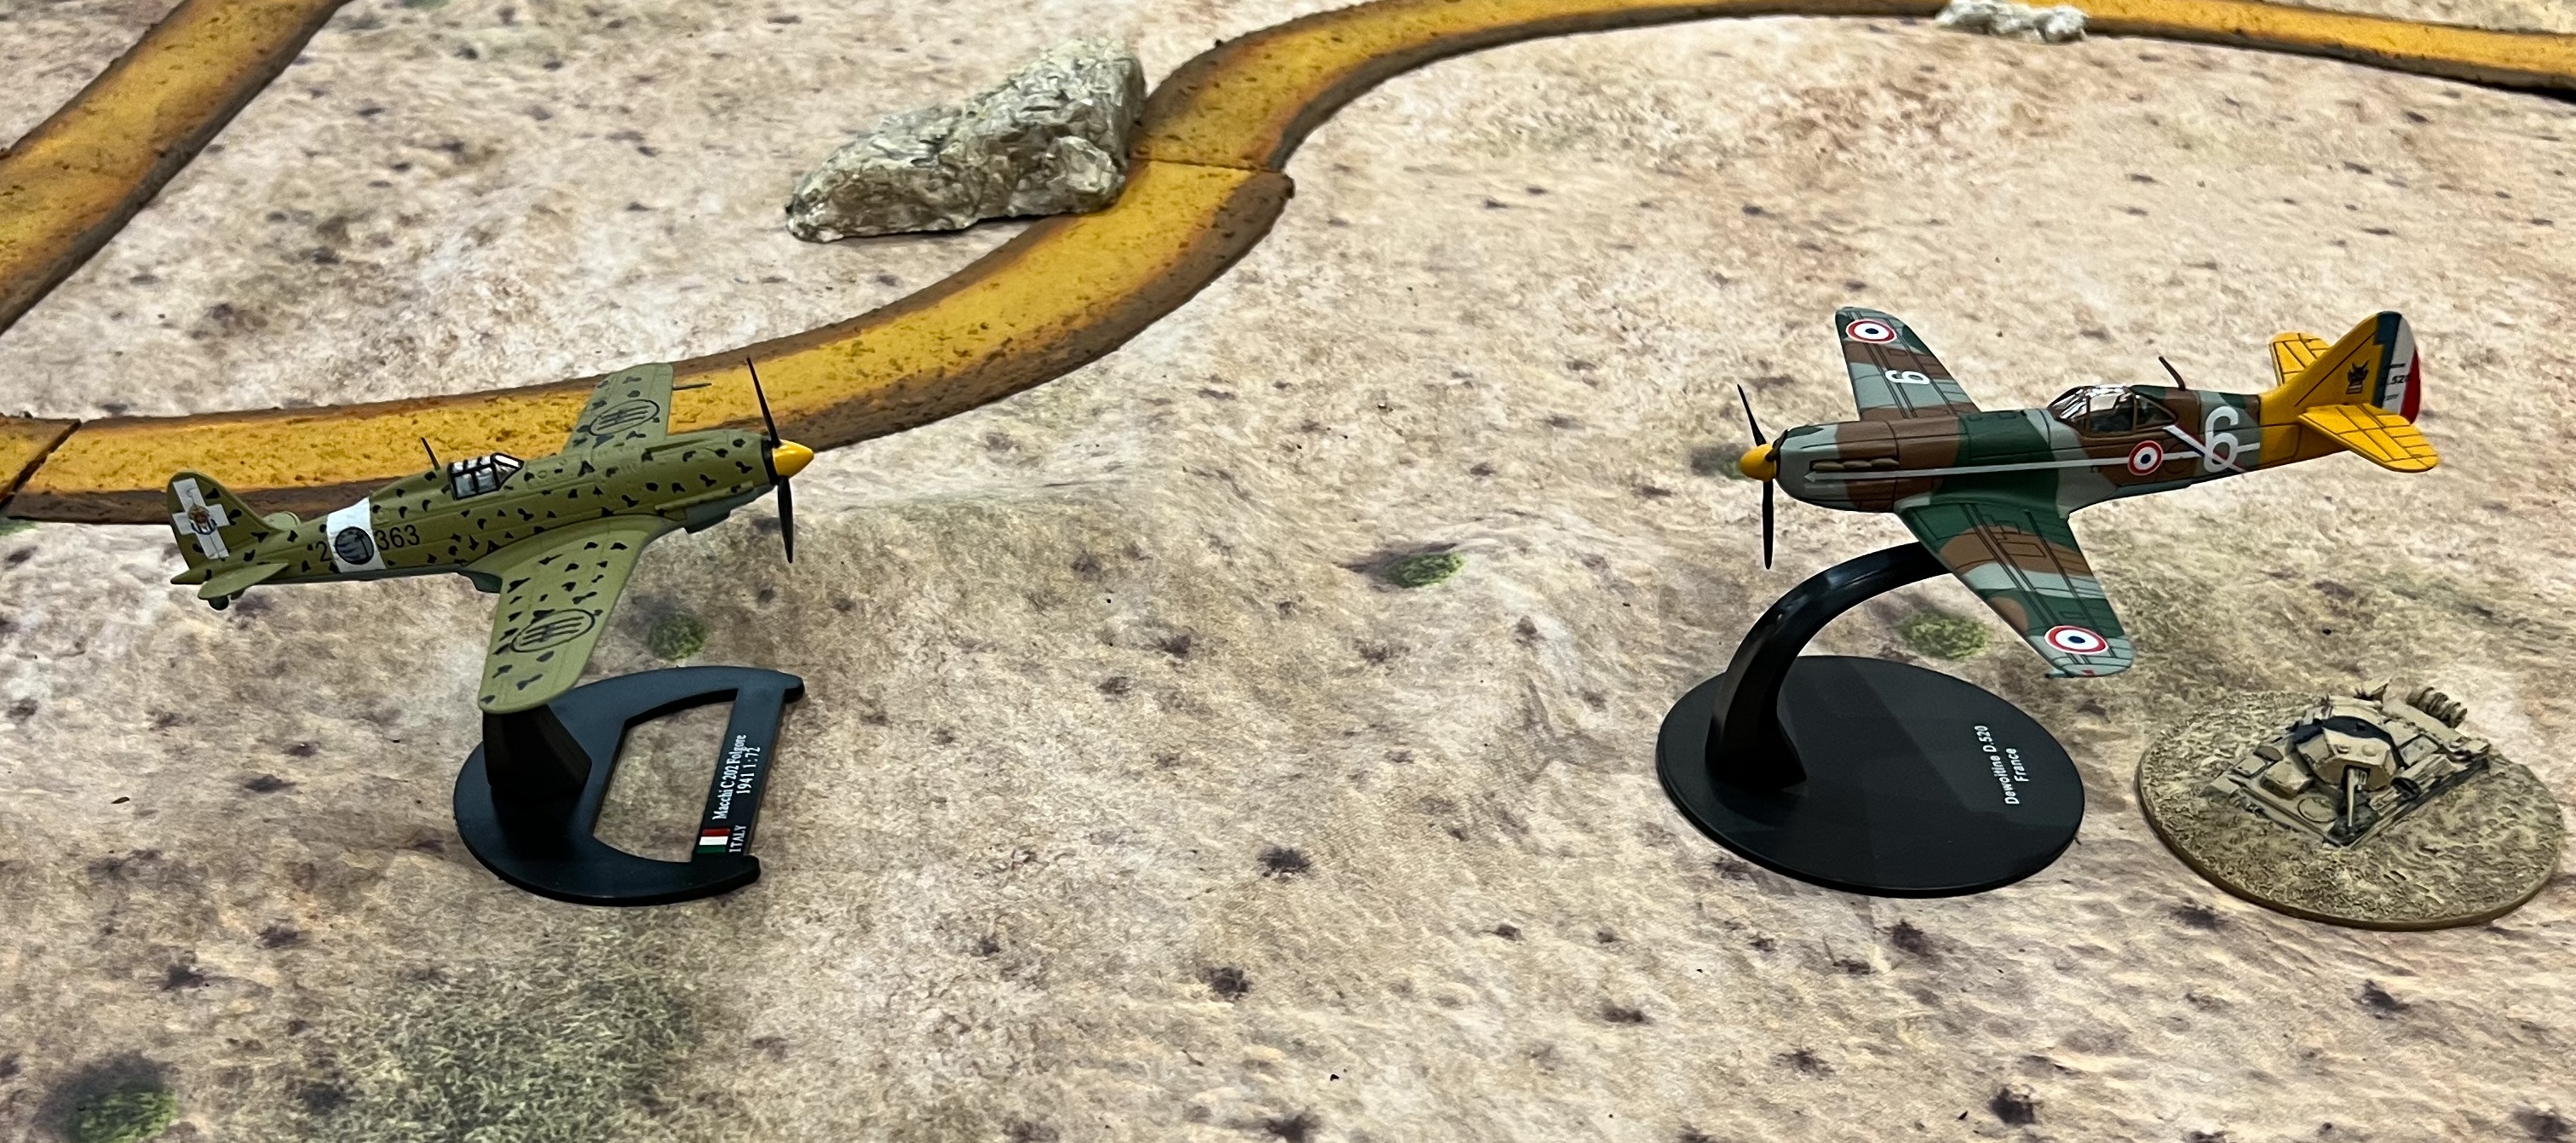
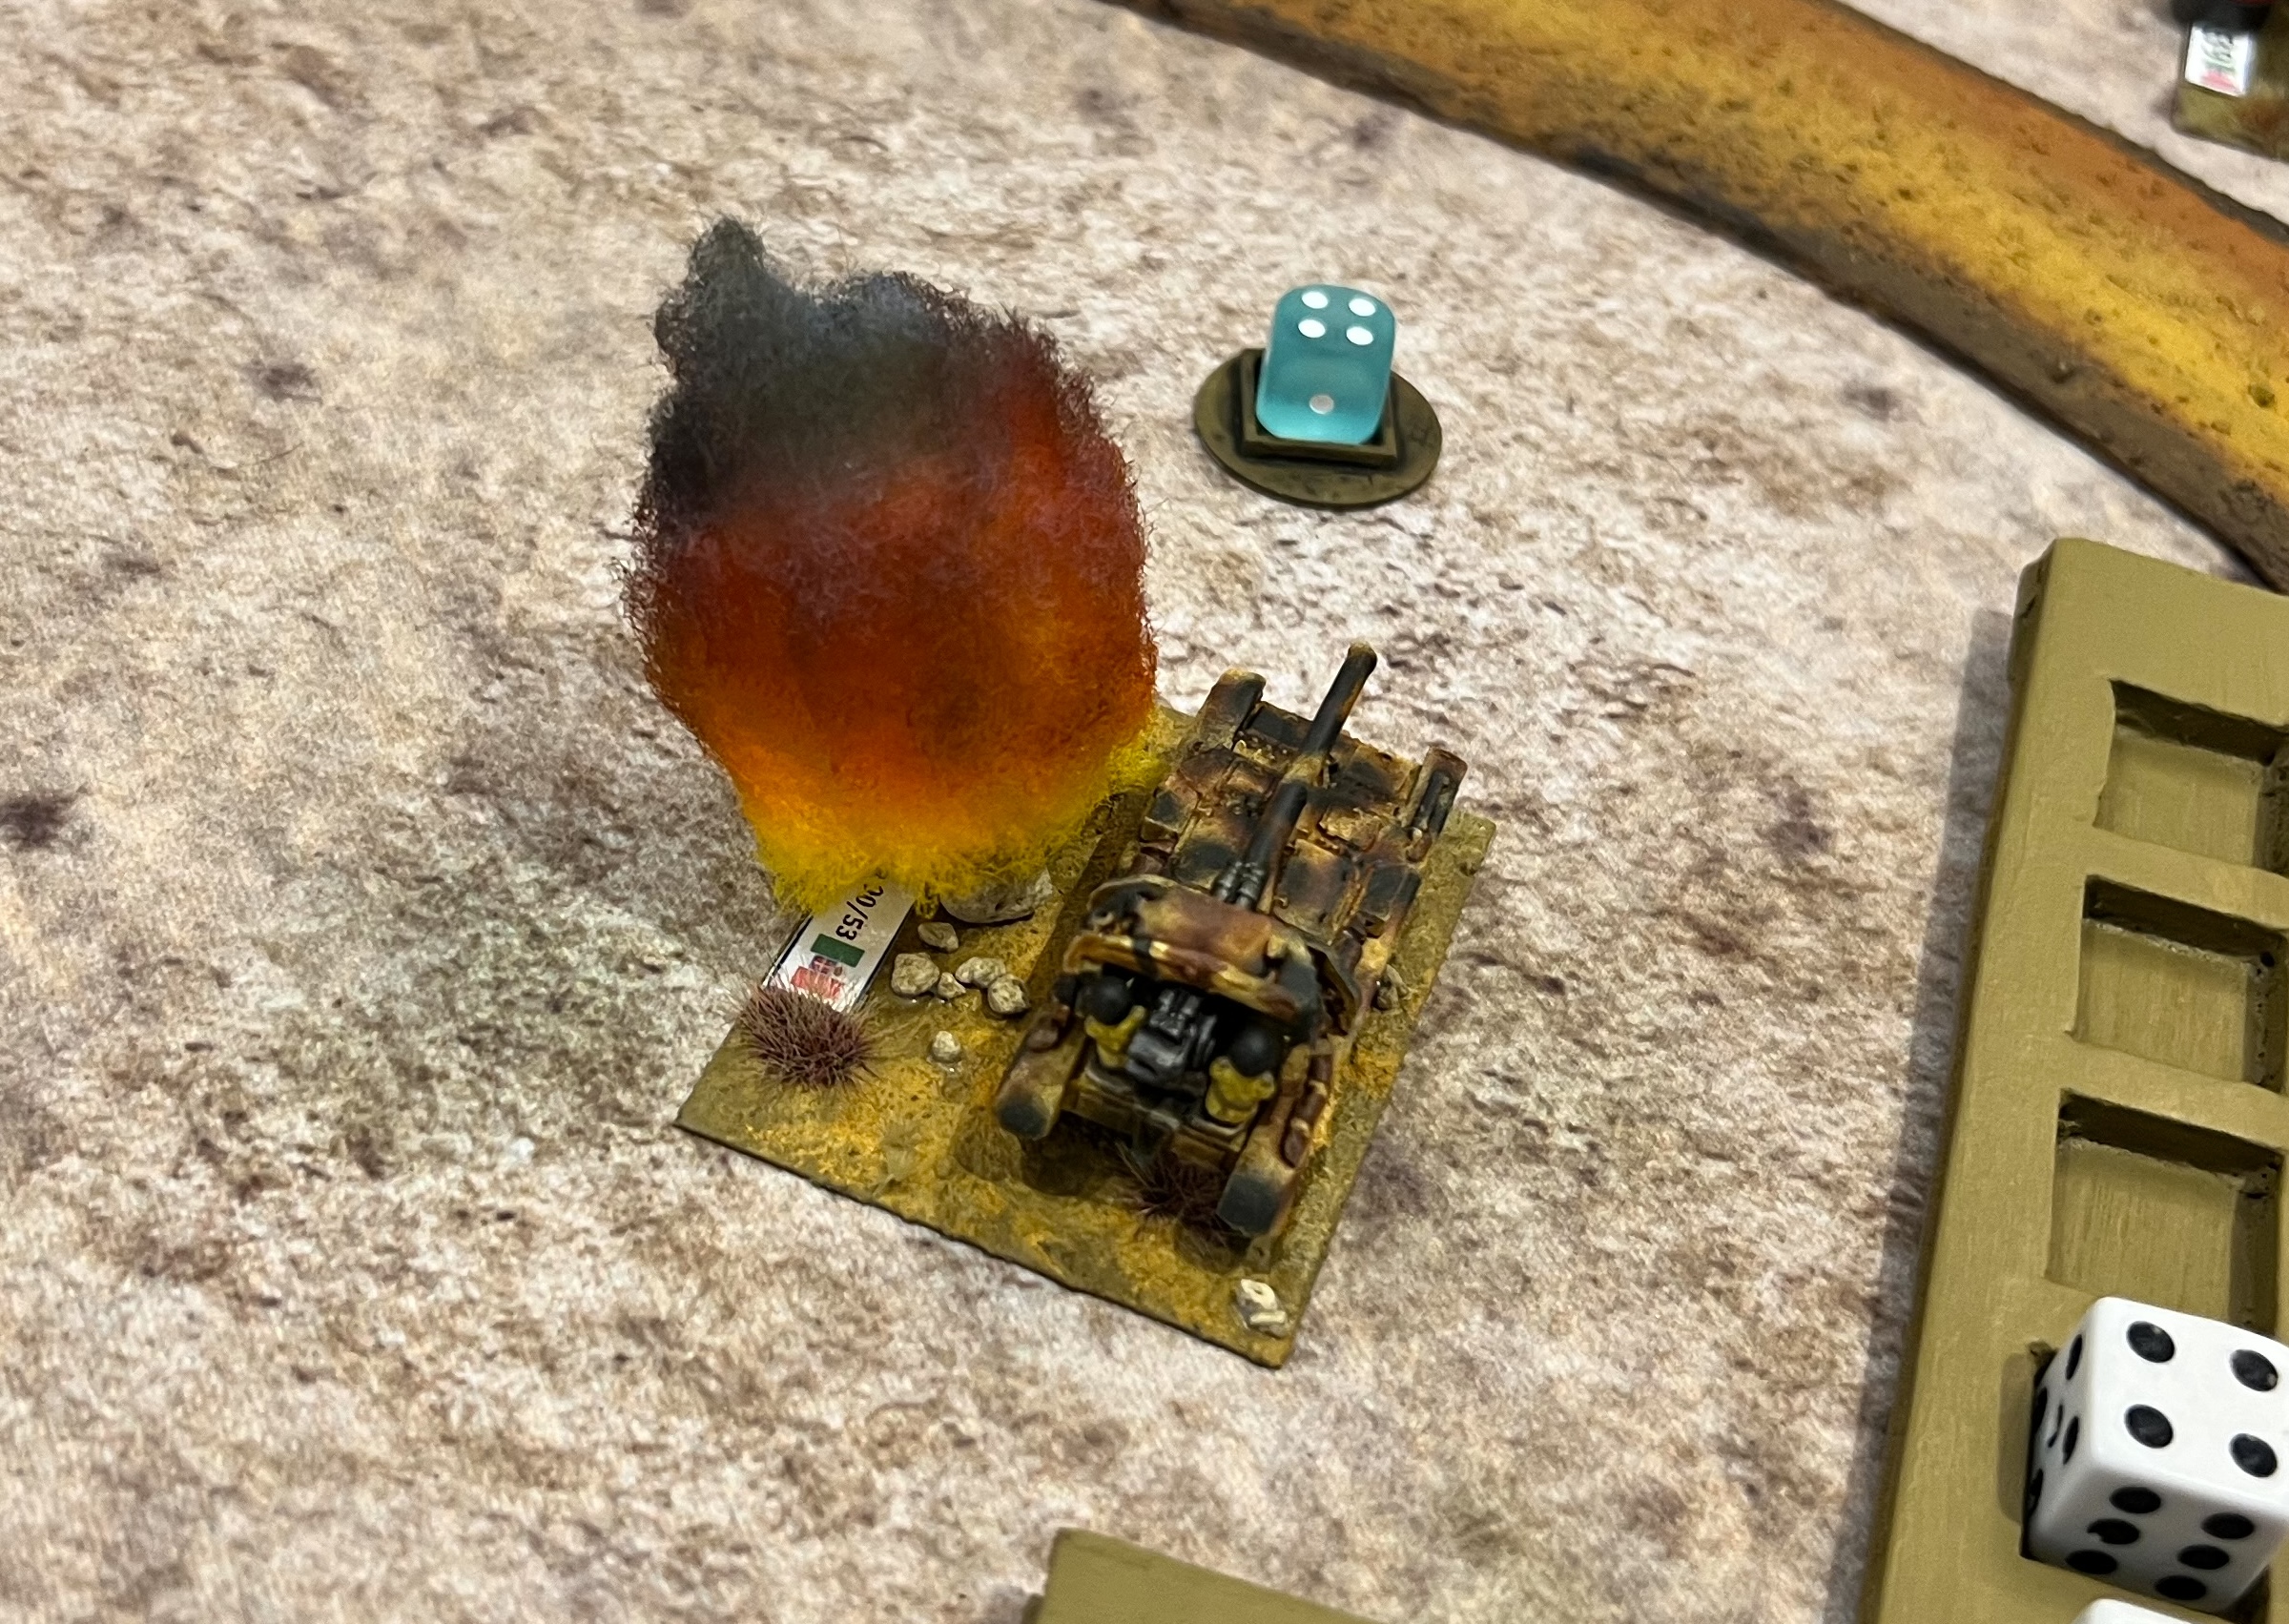
Vichy French armor facing the Italians.Royal Italian Army armor facing the French.The players plot their moves.An Italian Macchi C.202 Folgore (Italian “thunderbolt”) dogfights a Vichy Dewoitine D.520.Leif smiles as he records temporary damage on his tank. The damage was caused by Leif’s very bad dice rolling for a very old and worn out French FT-17!A Vichy SOMUA S35 knocks out an Italian Semovente 90/53.French forces advance.
The game ended with Vichy winning 540-440.
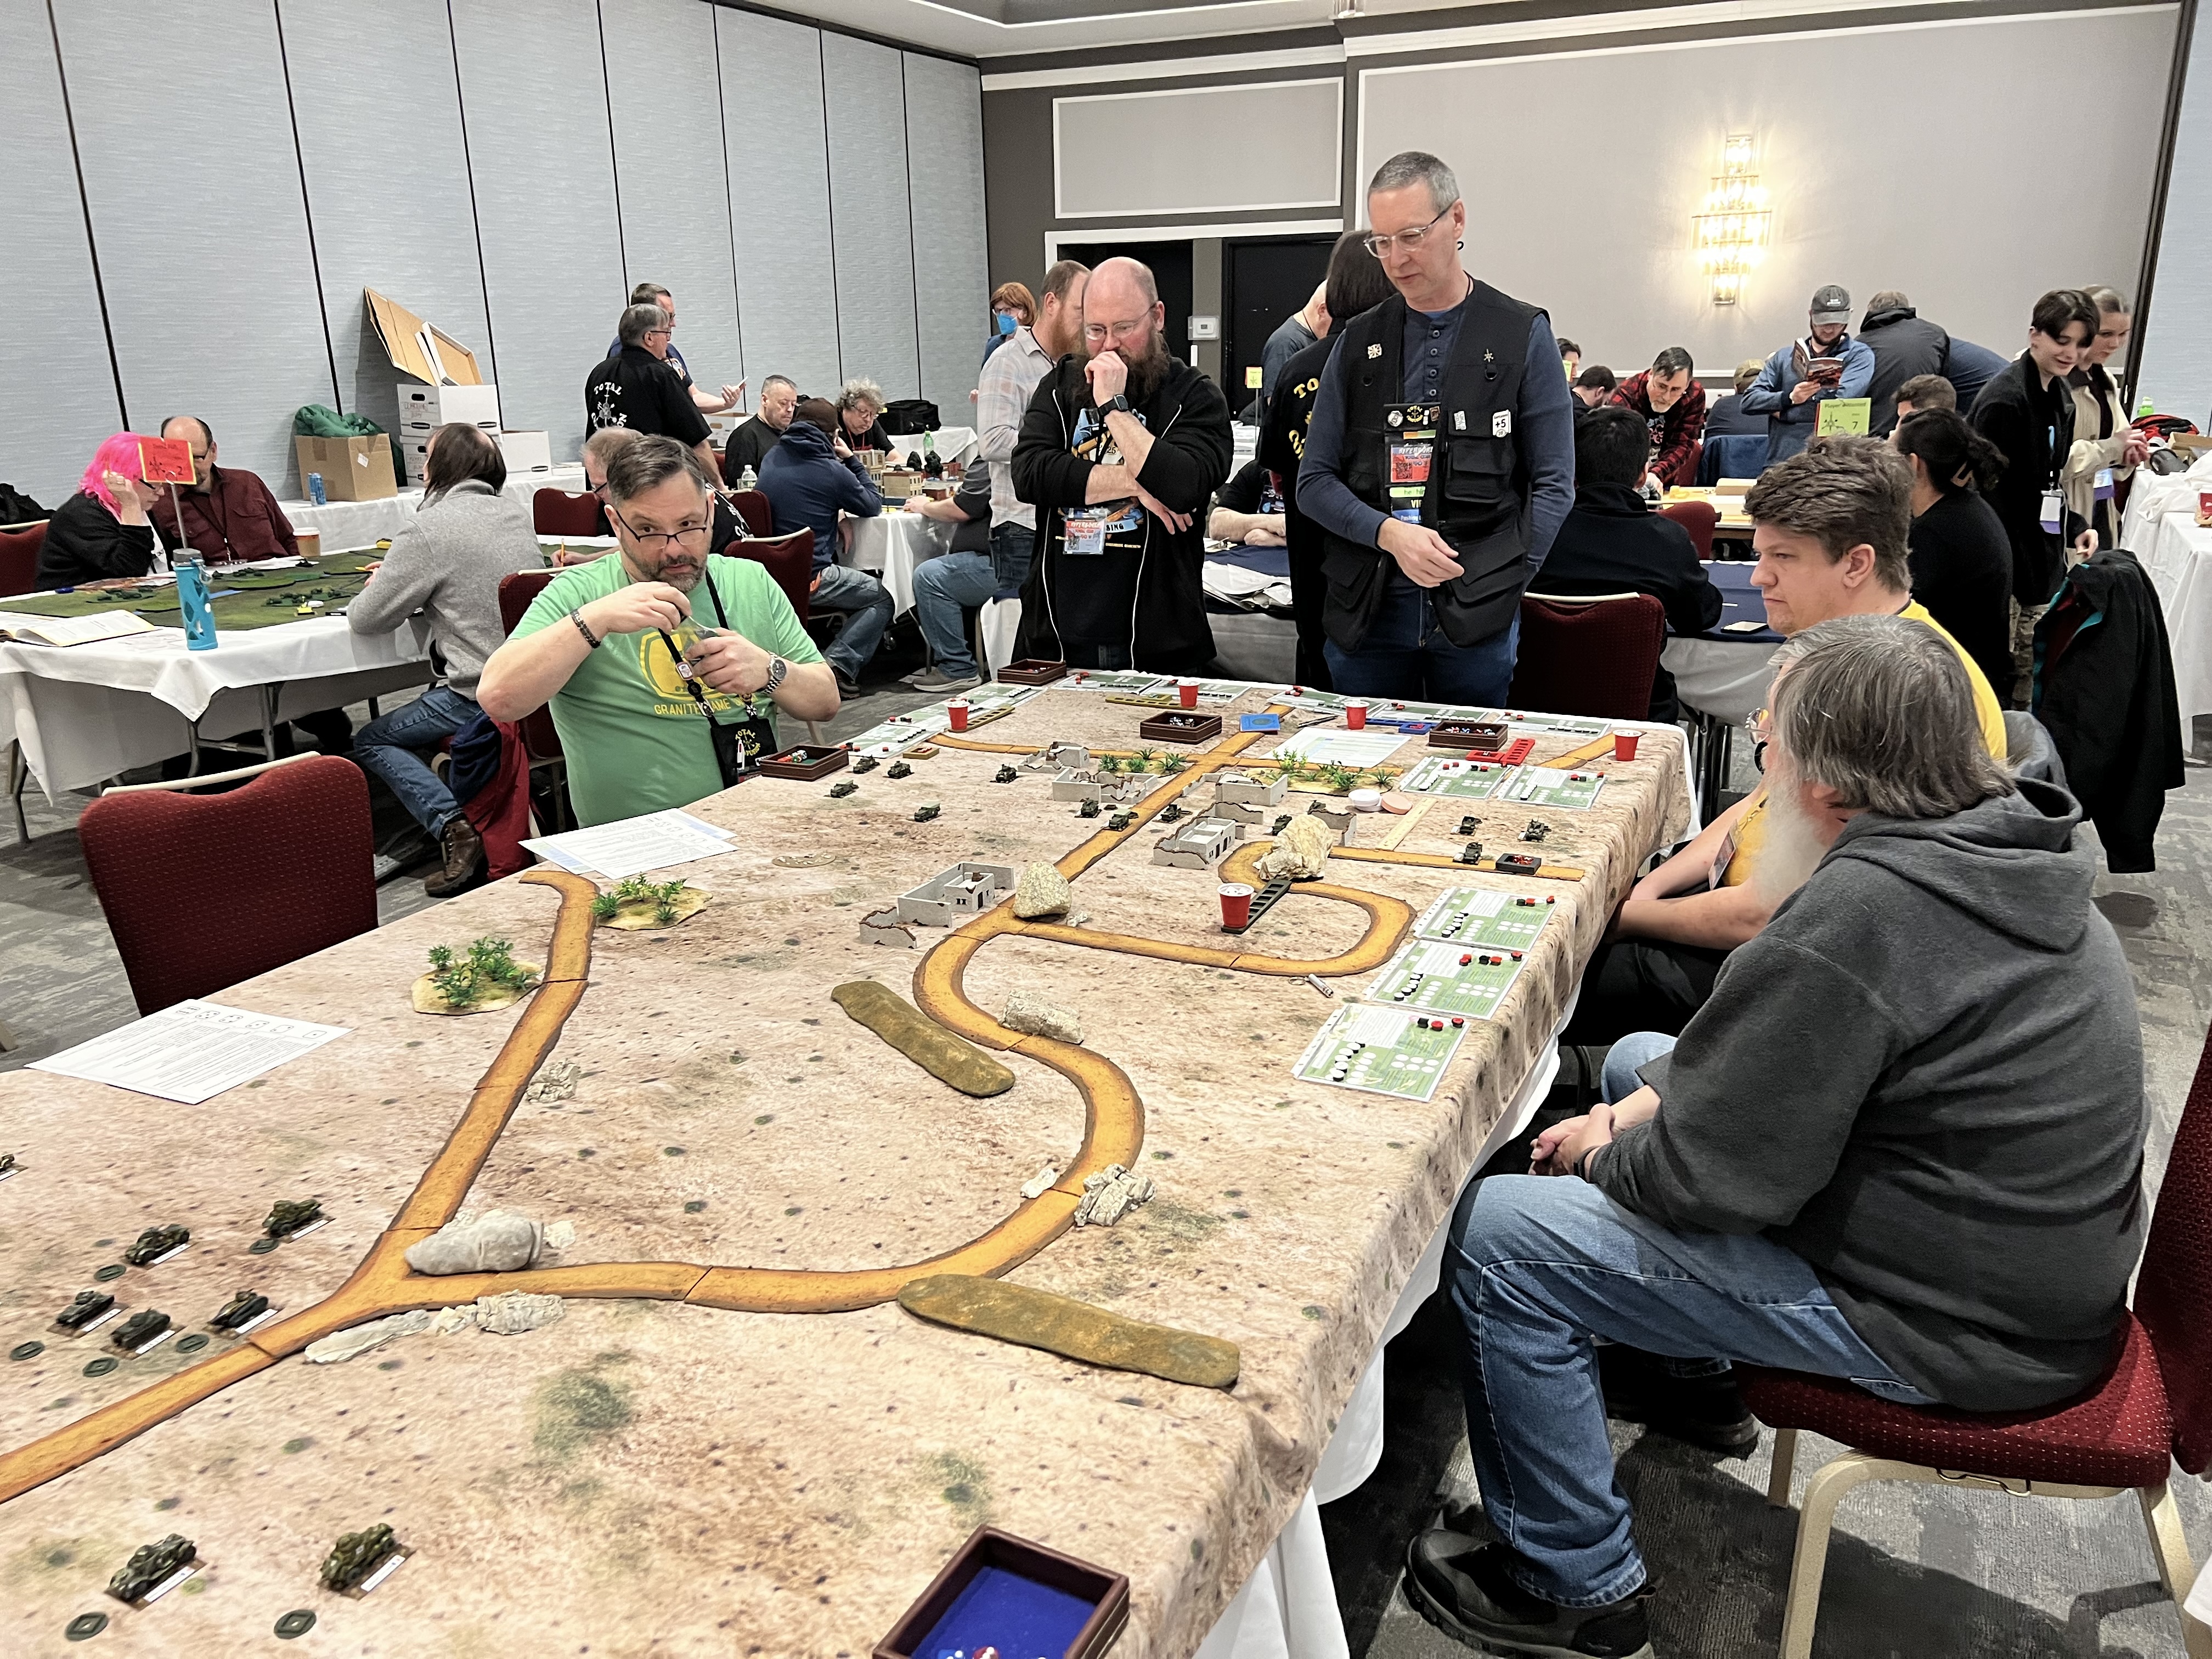
For Saturday afternoon, I ran Operation Torch: Vichy Mounts an Armored Counterattack. This was also a modified What a Tanker game.
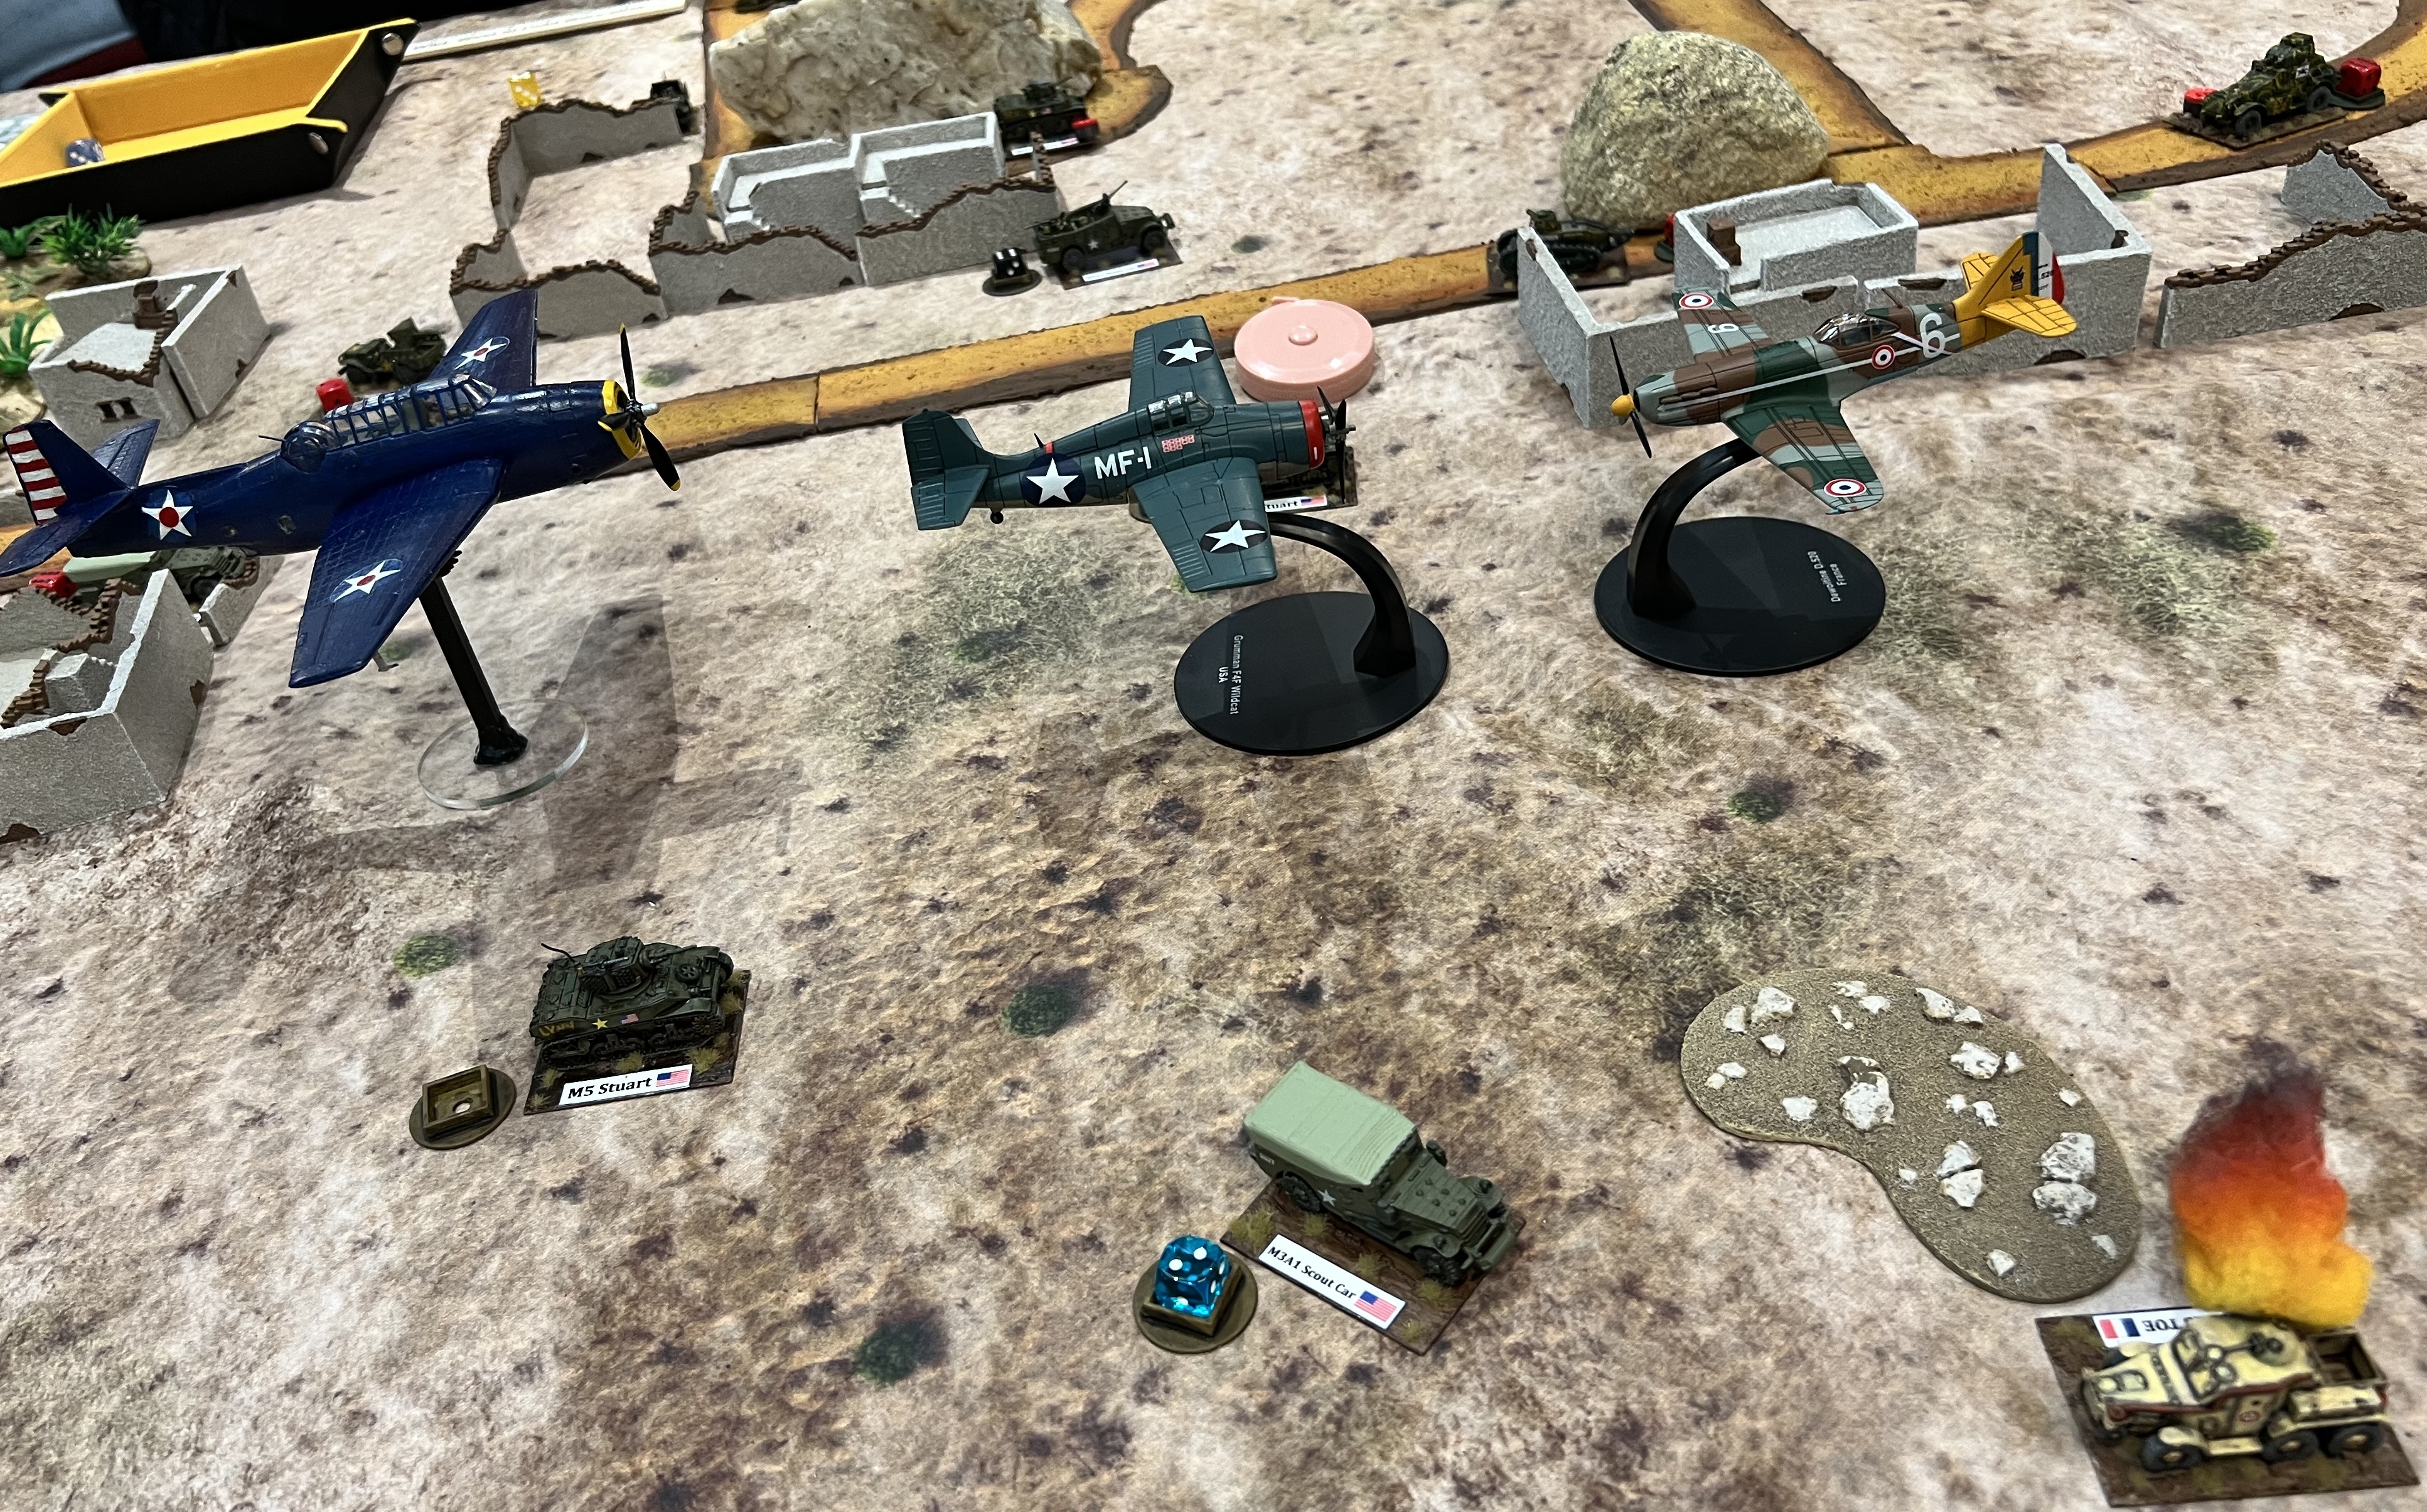
Operation Torch: Vichy Mounts an Armored Counterattack
The Vichy players plan their assault.The American players are ready!The Americans watch as the Vichy French get closer. They have plans of getting air cover and naval gunfire on the French!Knowing this, the French spread out to avoid massing a big target.Mal considers his next move.Aircraft are deployed, but the US Navy rules the skies. This allows for the Avenger to call in naval gunfire from the USS Savannah. This destroys multiple Vichy vehicles.
The US air superiority and naval gunfire carried the day – with the US winning a significant victory.
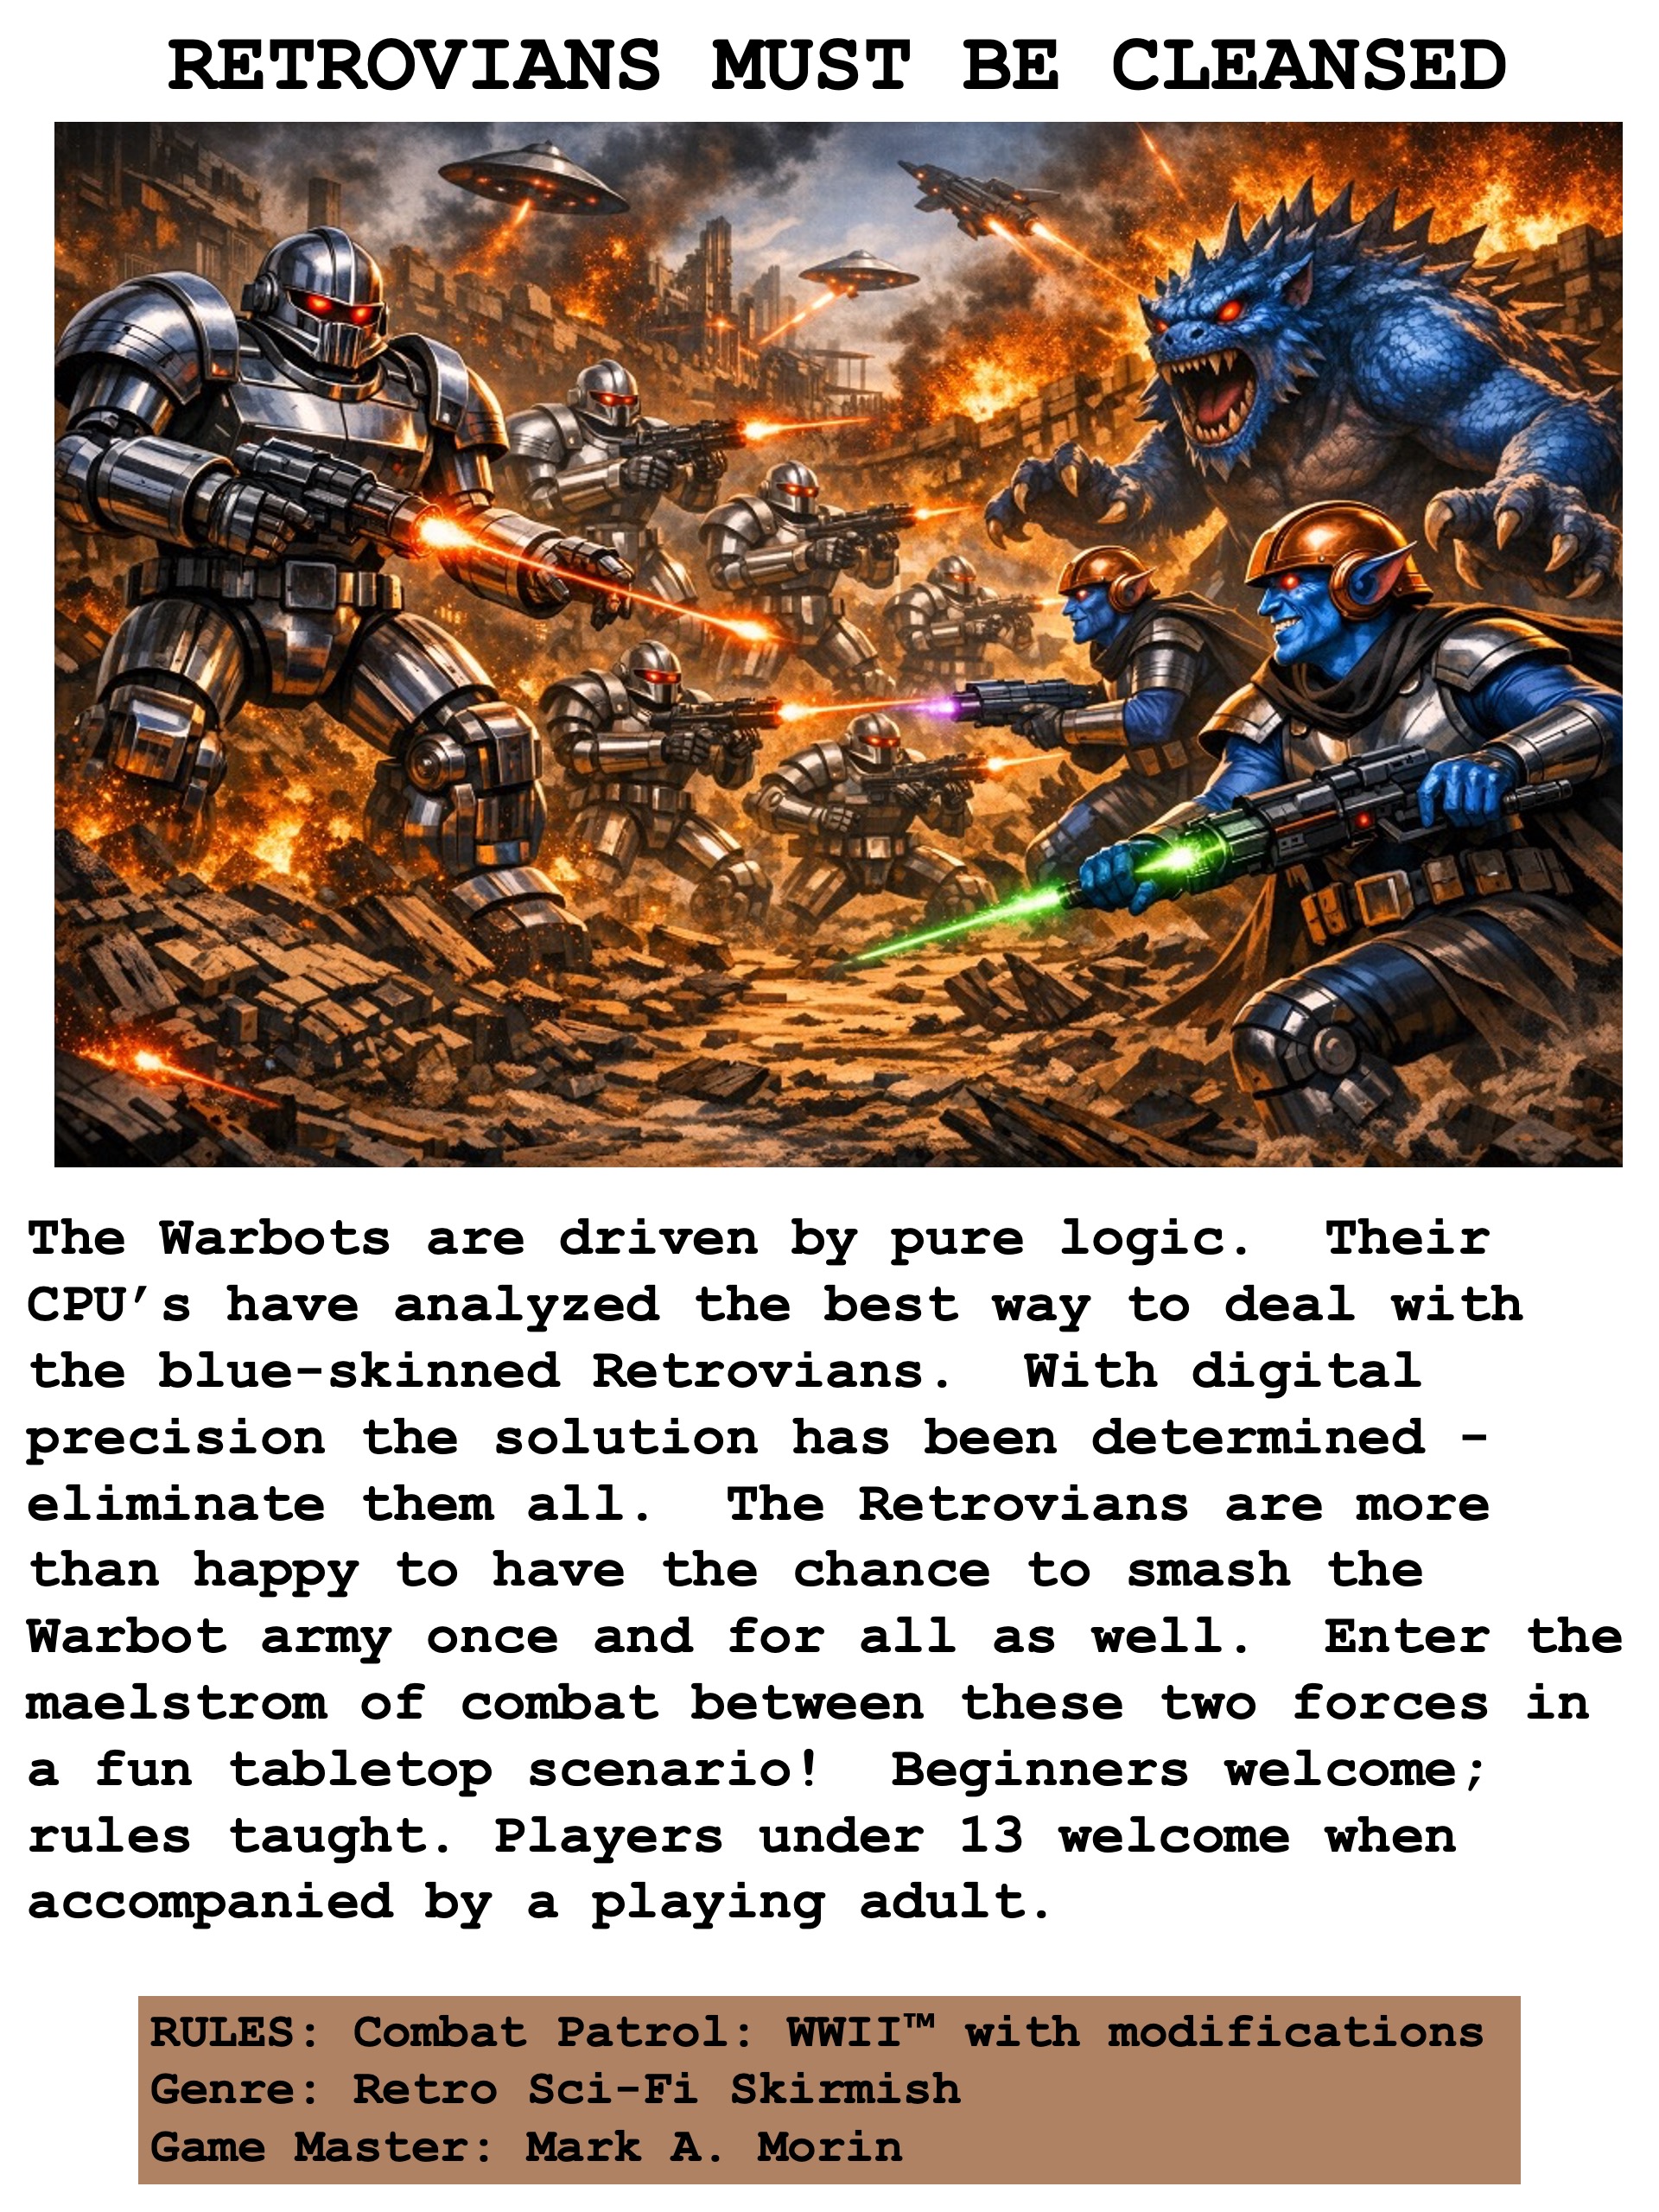
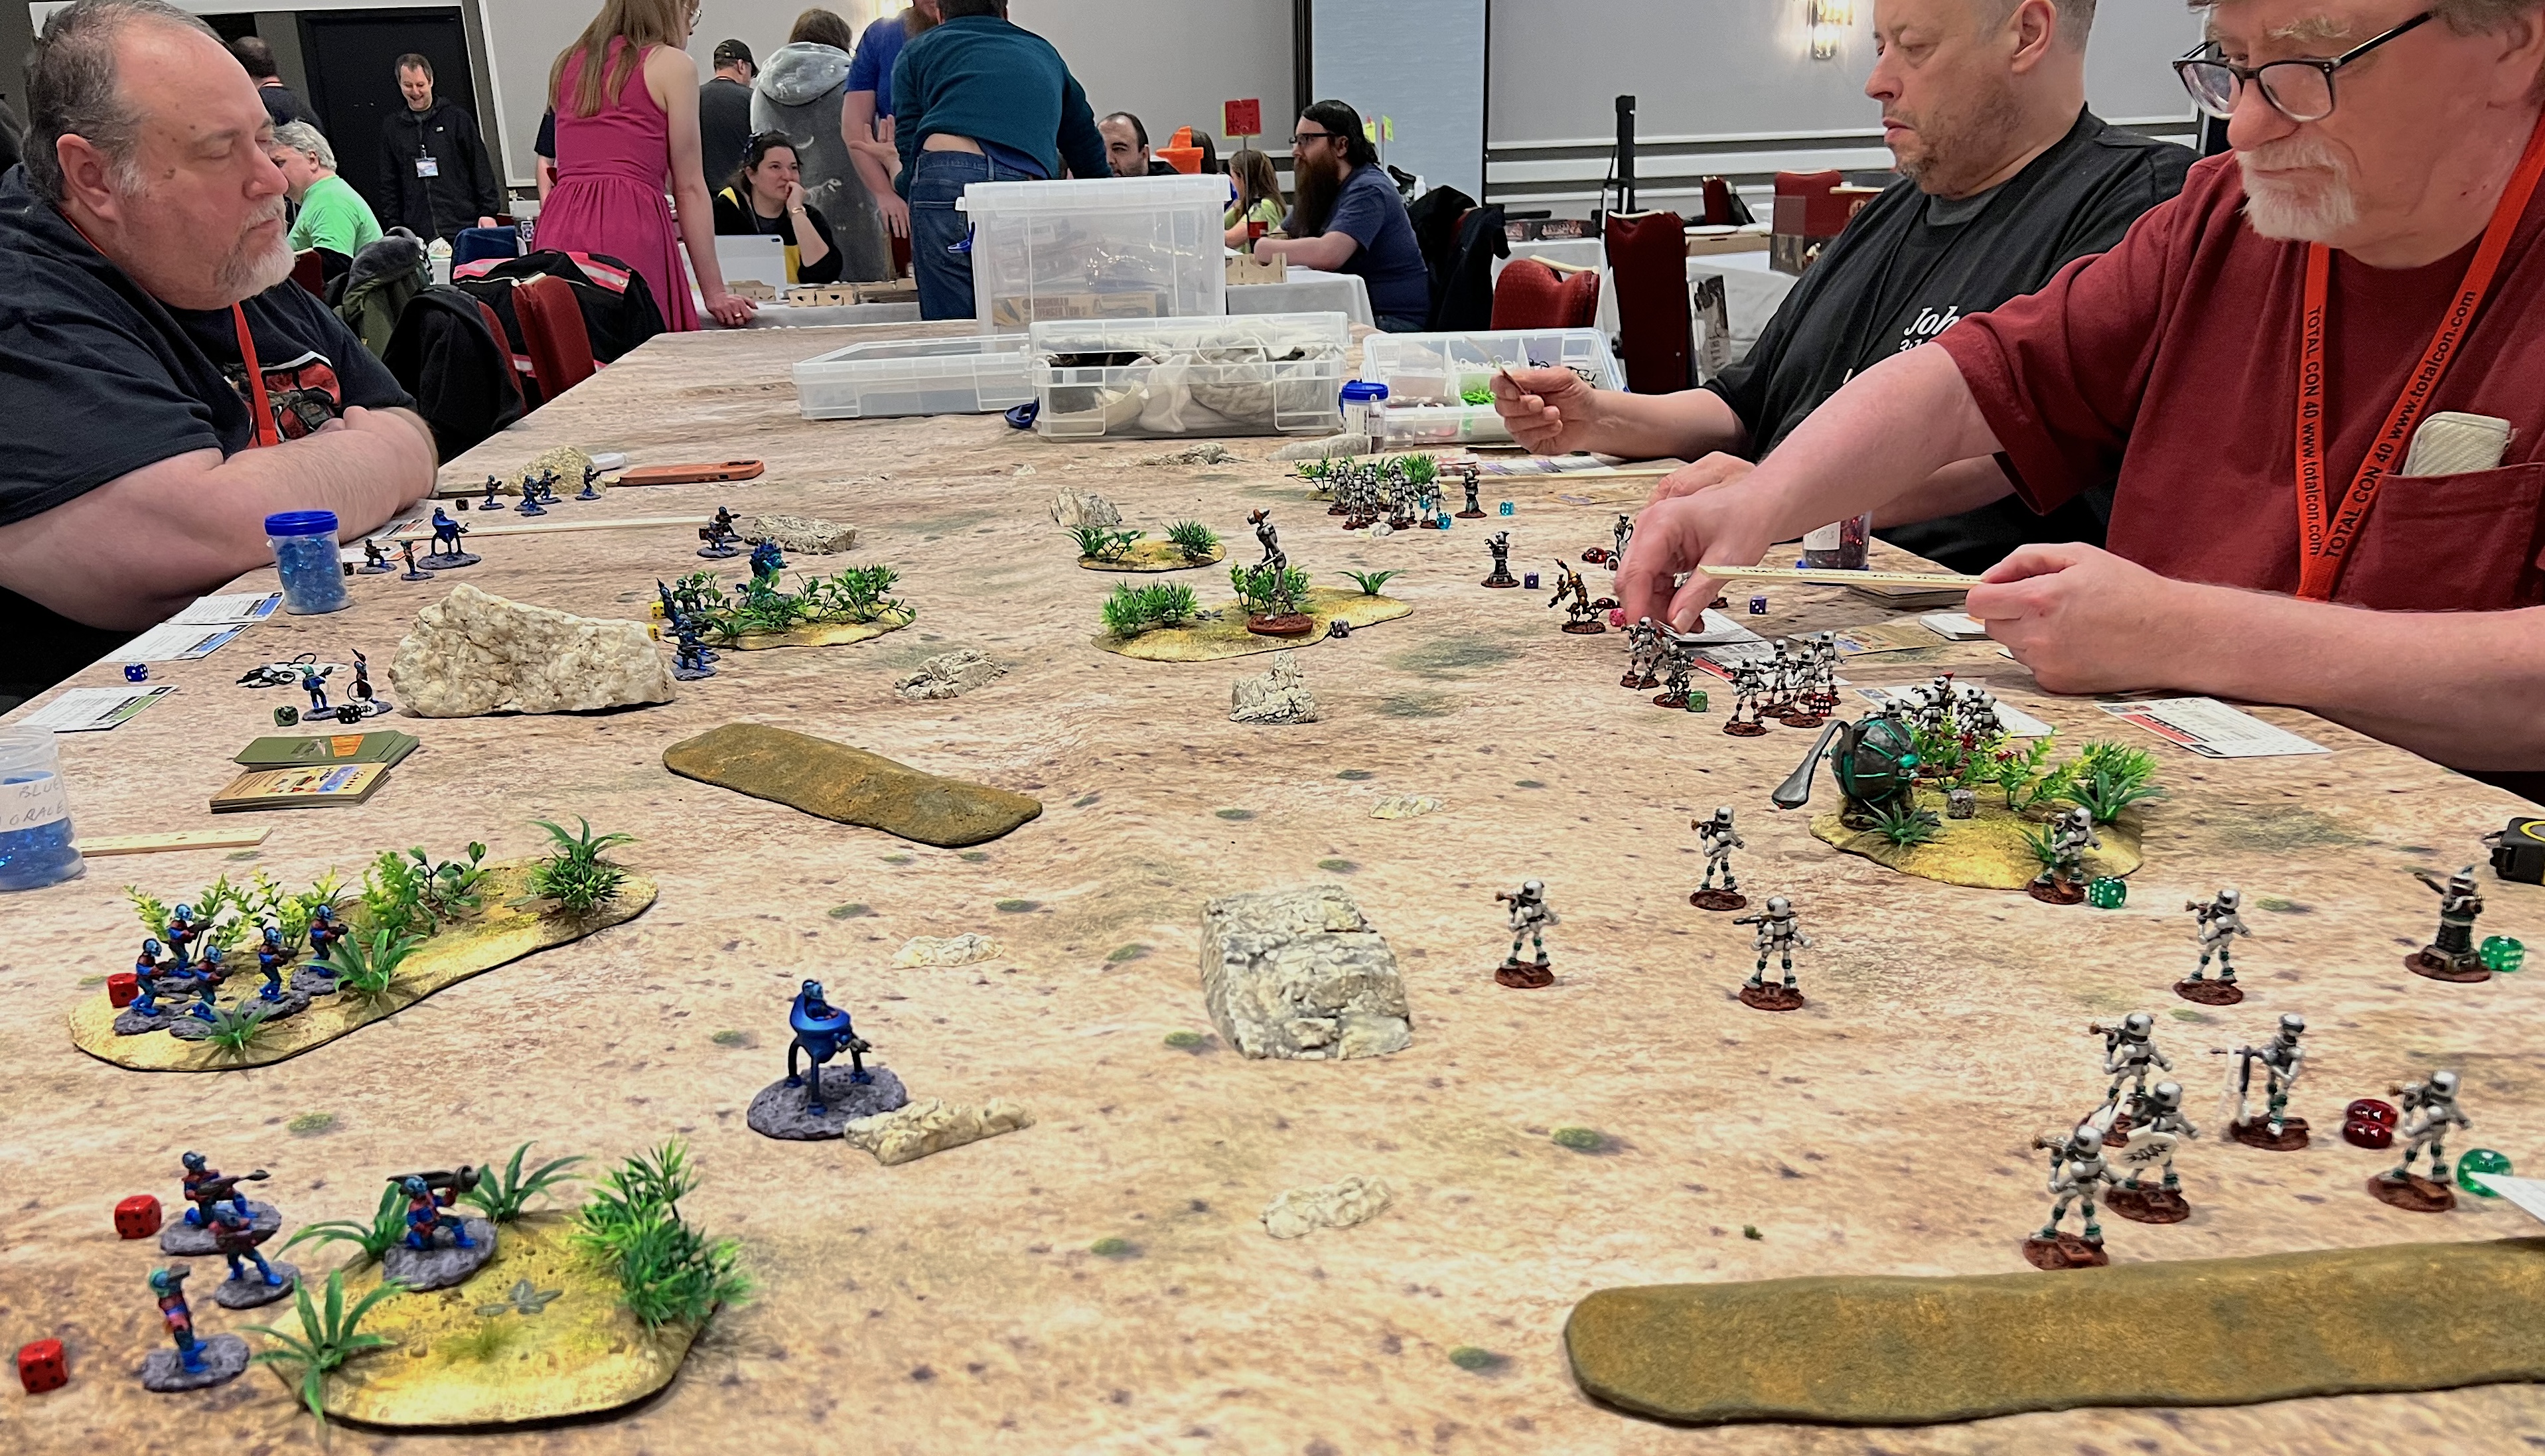
RETROVIANS MUST BE CLEANSED
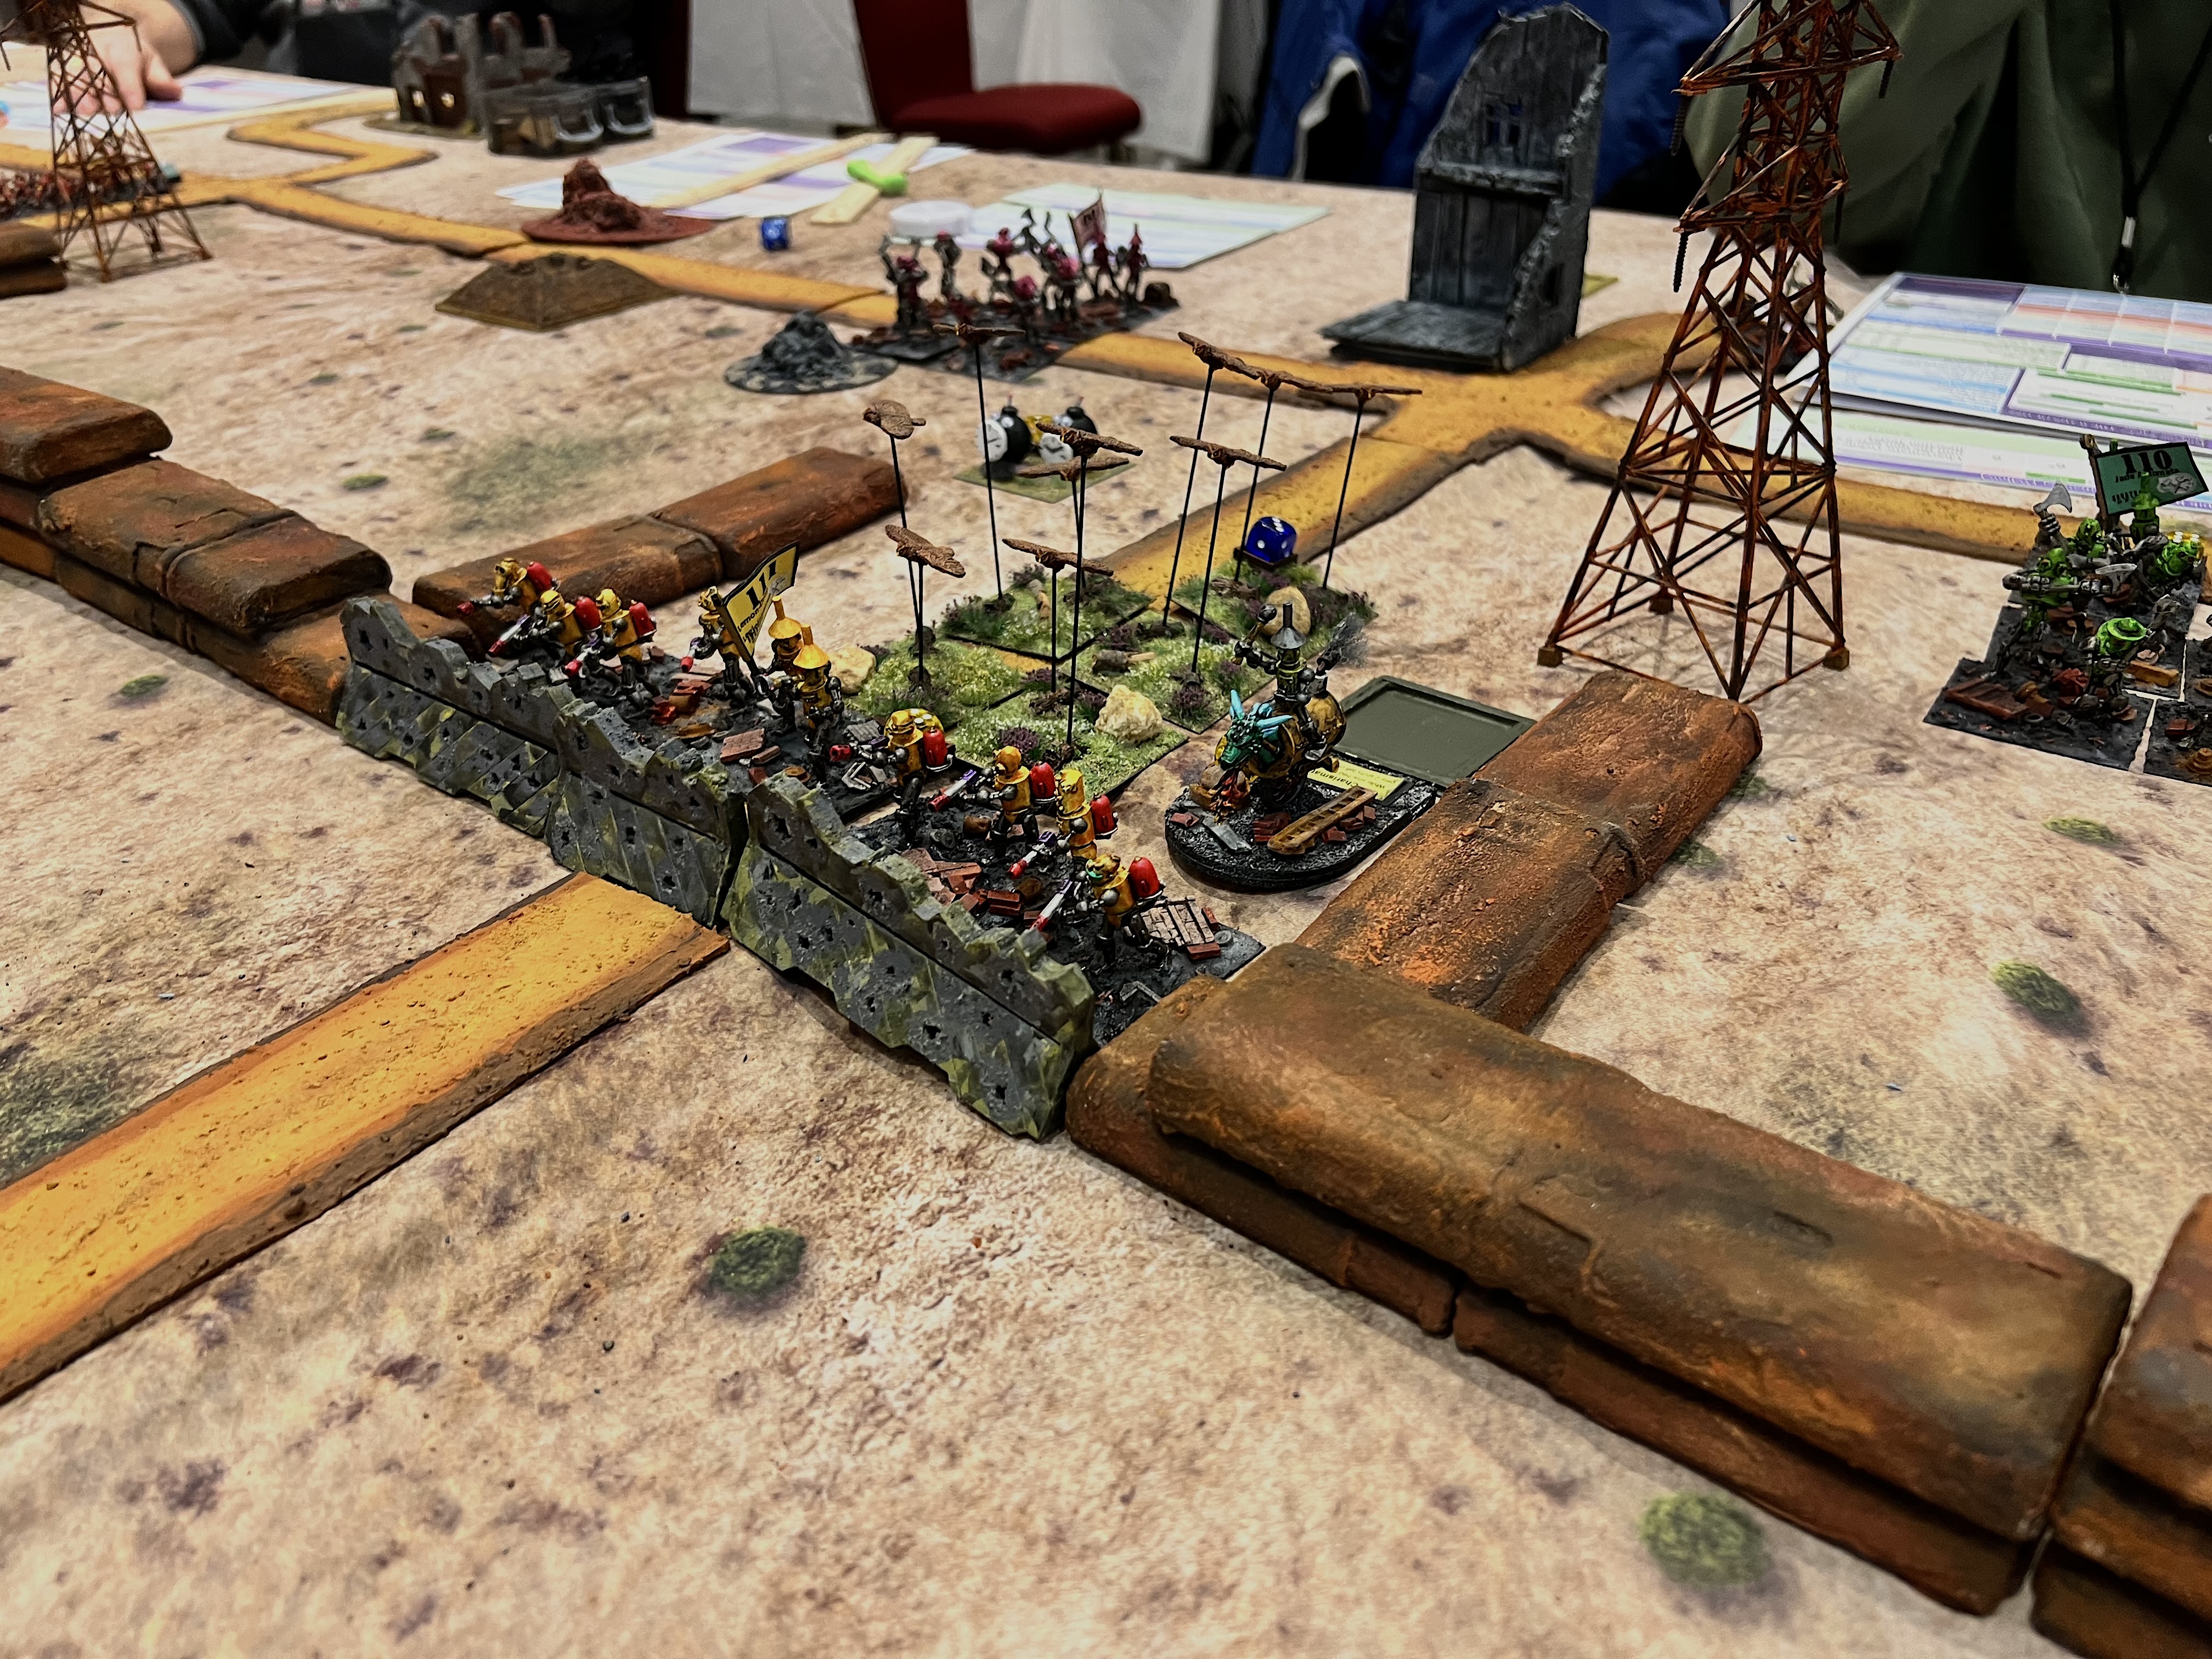
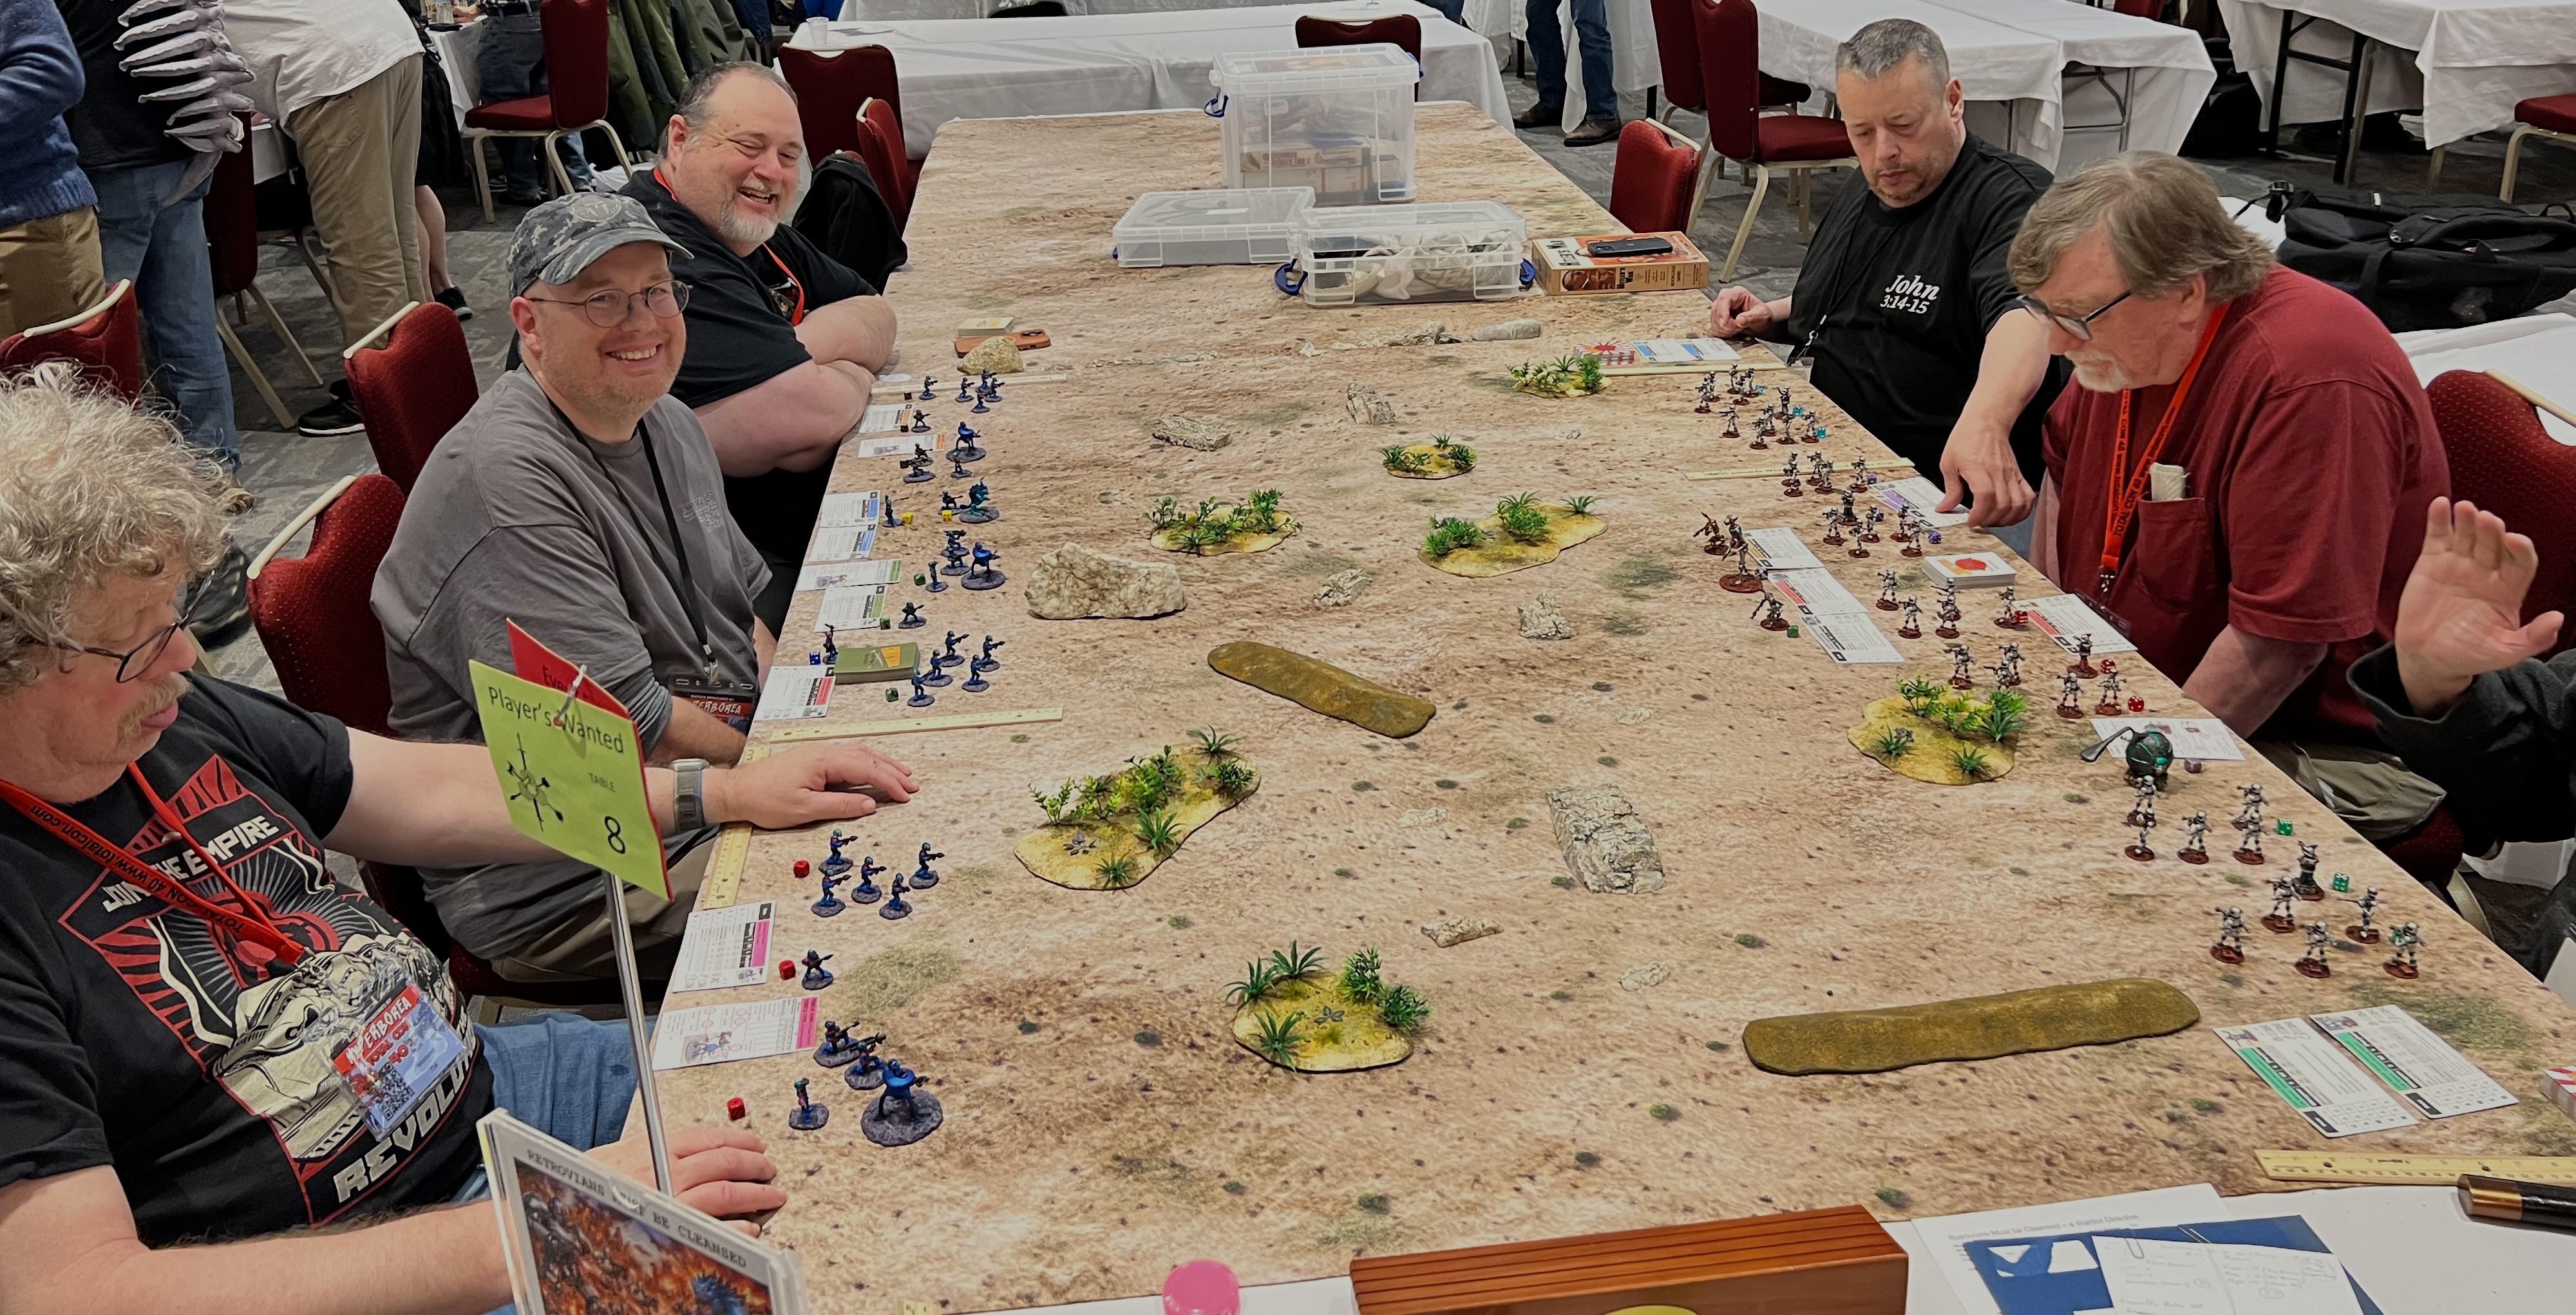
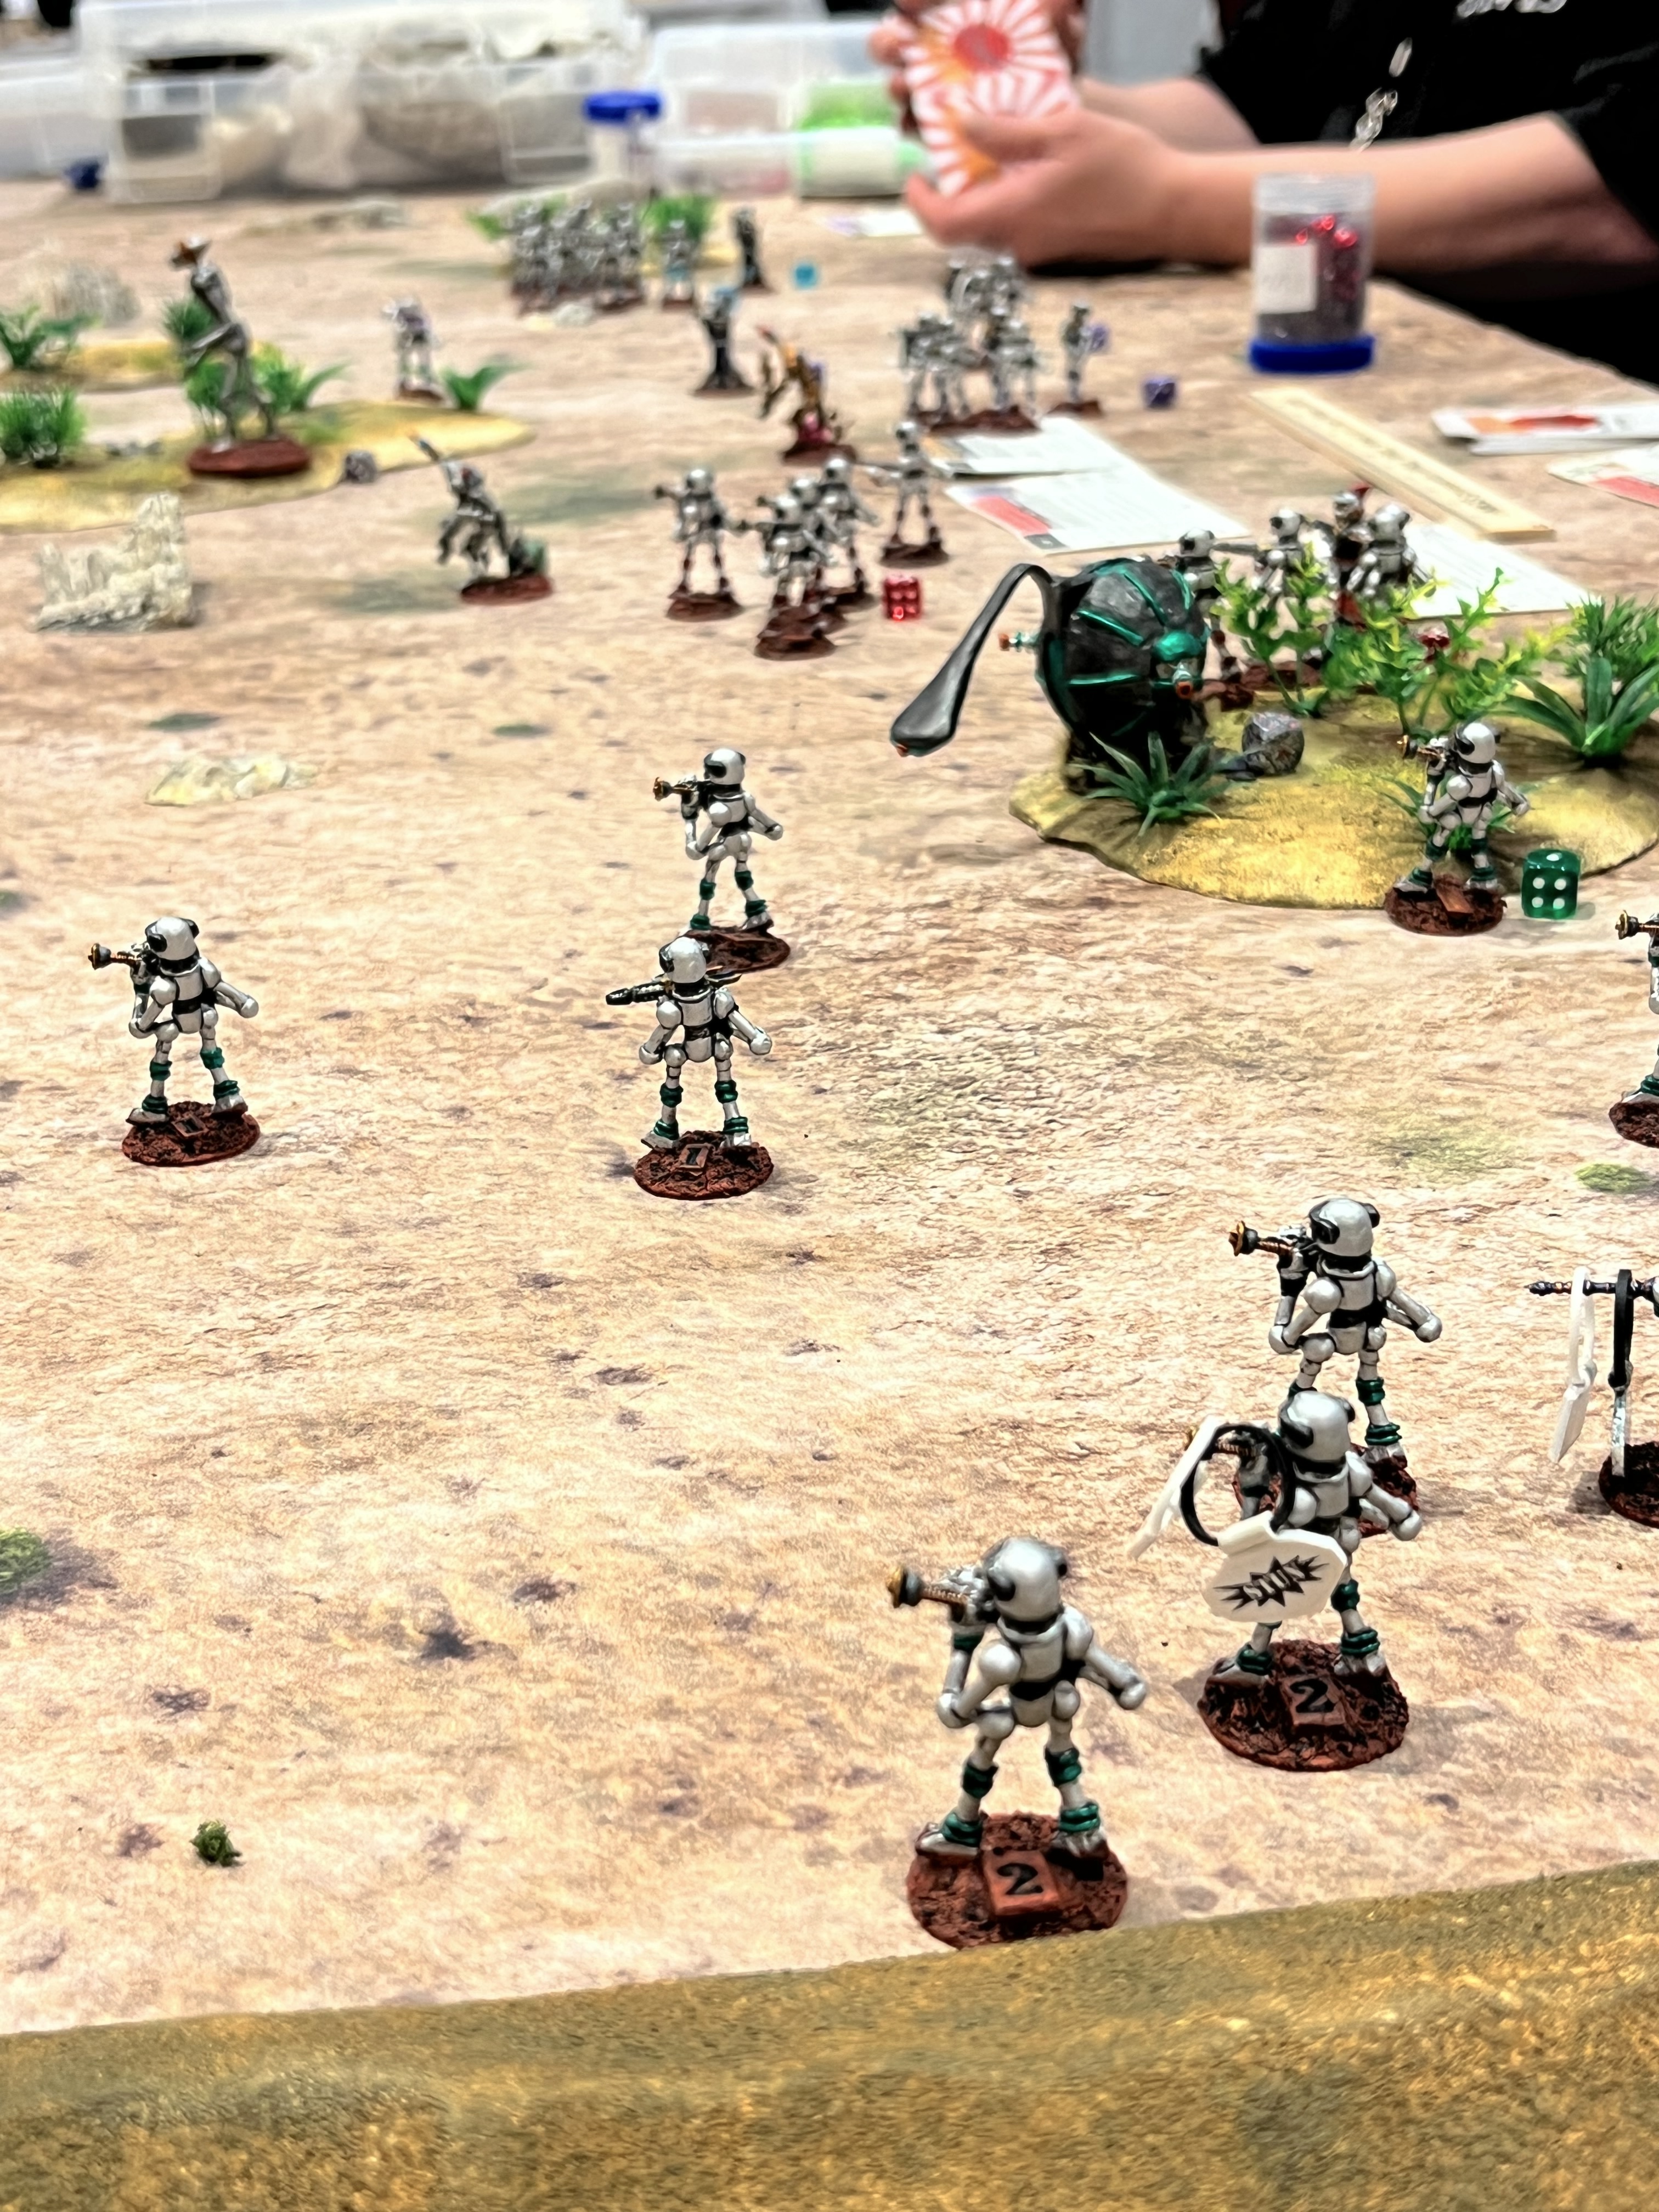
Saturday night’s game was upon me, and I had decided to run another Combat Patrol retro sci-fi game. This time, the Retrovians would face the Archive Star Rovers Warbots. They would also confront my own creation – the Mark 1 Sphere tank.
Happy Gamers at the start! Retrovians are on the left, Warbots on the right.A Retrovian Bra’sheer tripod moves out front of its infantry. The Mark 1 takes up a supporting position as the Warbots march forward to glory.The Mark 1 safely delivers machine gun fire from its sponsons. Meanwhile, the Warbots also take fire and are stunned.
I did not take many pictures of this game. I do believe that the Warbots wore down the Retrovians. Yes, they were “cleansed”. It was nice to see these figures back on the tabletop.
This was the penultimate game for me of TotalCon 2026. I headed off to my room. I was ready for the 2026 TotalCon “Tournament of Ozz” on Sunday morning.
I had 7 out of a possible 8 players. At random, one player got a “bye” in round one. The match-ups were done at random and 7 different 21-point brigades were assigned at random. Inflicting the most damage on the enemy was the victory condition to move forward in the tournament. Tie breakers were also in play if that was needed.
Glory on the Line!
In Round 1 – the match ups were:
Impkins (Ken) versus Munchkins (Eric)
Munchkins (Bob) versus Gillikins (Dave)
Winkies (Brad) versus Gillikins (Jacob)
Winkies (Leif) got the round 1 bye
Round 1 begins!Brad’s Winkies devastate Jacob’s GillikinsBob’s Munchkins get into a shooting match with Dave’s Gillikins.Round 1 winds down.
The Round 1 results were:
Impkins (Ken) defeated Munchkins (Eric)
Munchkins (Bob) defeated Gillikins (Dave)
Winkies (Brad) defeated Gillikins (Jacob)
Winkies (Leif) got the round 1 bye
Yielding the semifinals as:
Impkins (Ken) versus Winkies (Brad)
Munchkins (Bob) versus Winkies (Leif)
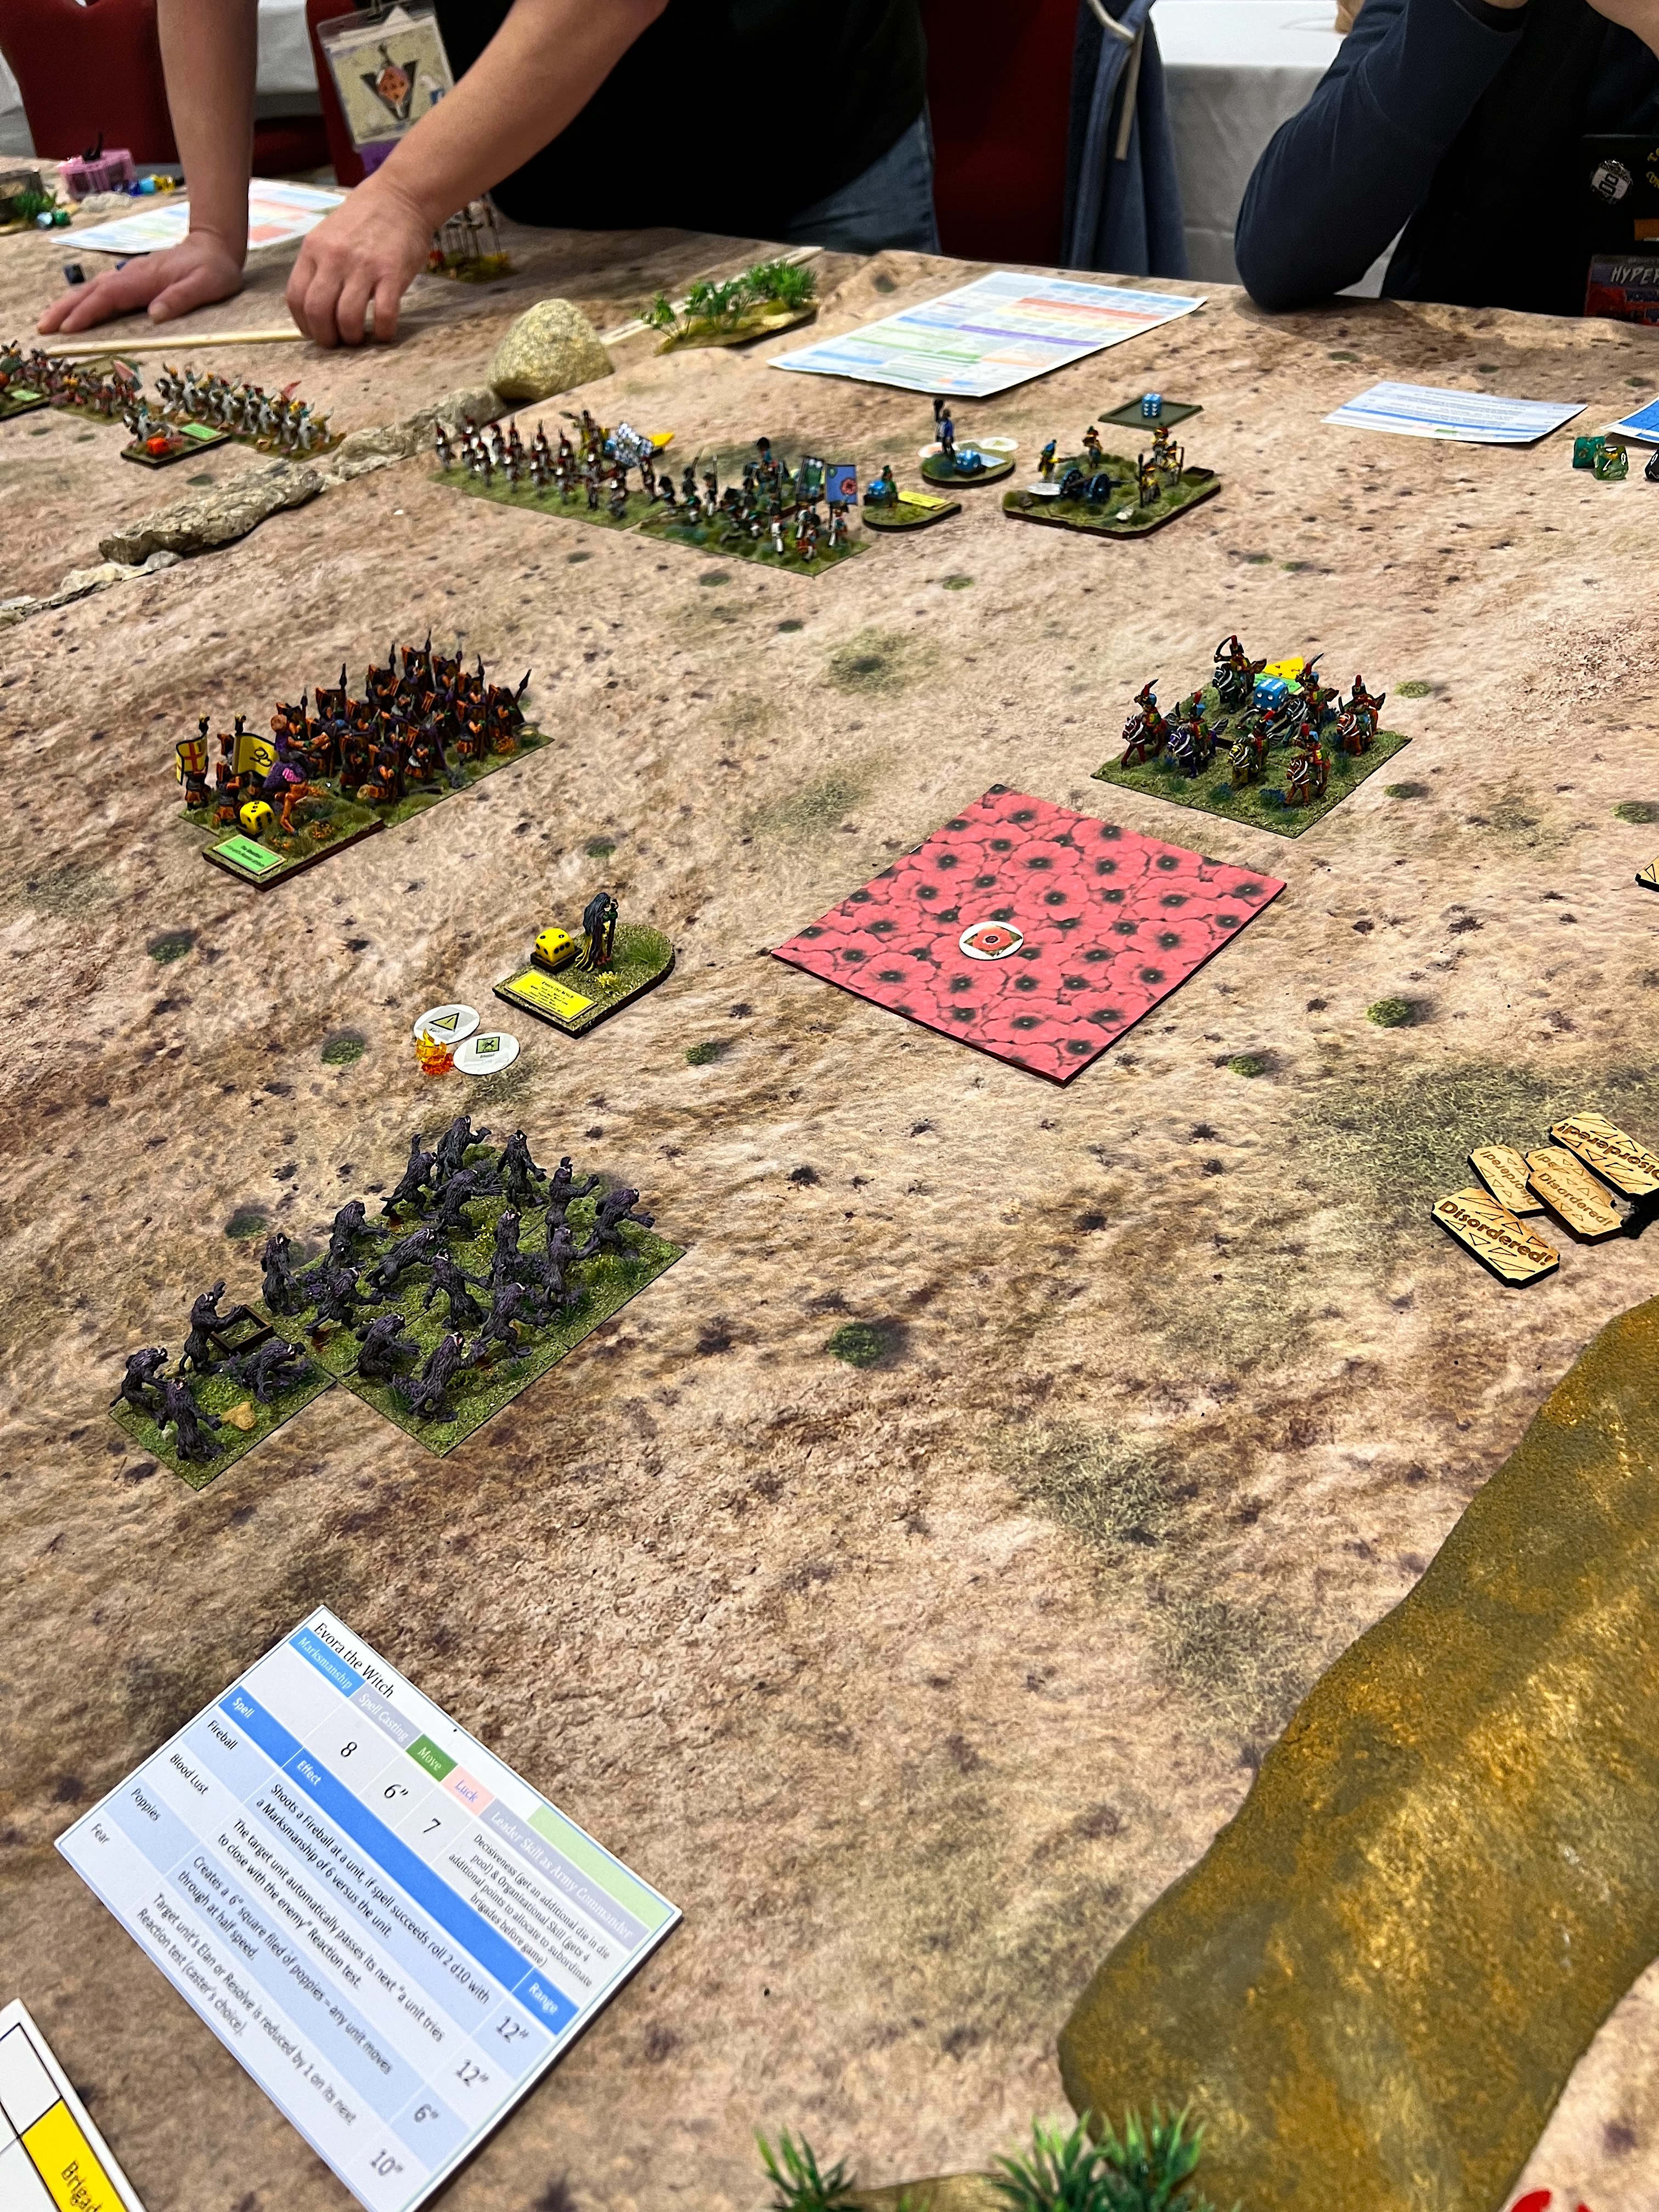
The semi-finalists!Leif casts a poppies spell to thwart Bob’s cavalry,Bob’s Munchkins prepare to unleash musketry on Leif’s Winkie Guard. They would rout!Meanwhile, Ken’s Impkins got hit hard by Brad’s Winkies.
The Round 2 (semifinals) results were:
Winkies (Brad) defeats Impkins (Ken)
Munchkins (Bob) defeats Winkies (Leif)
Yielding the FINALS as:
Munchkins (Bob) versus Winkies (Brad)
Brad and Bob get ready to rumble!
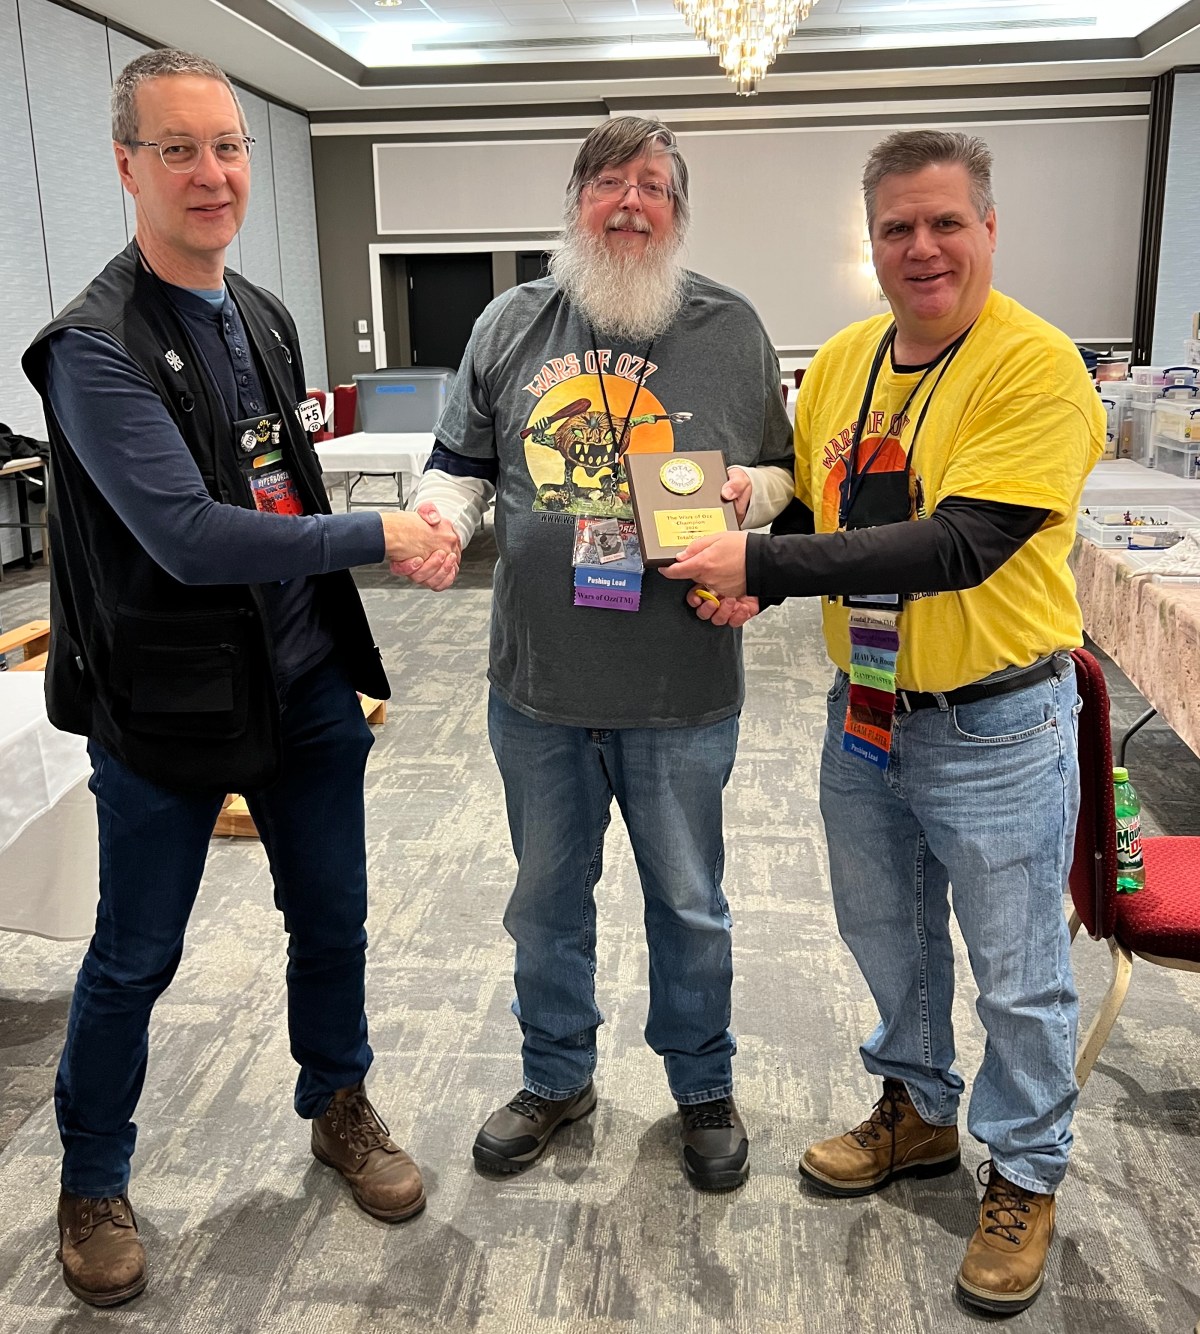
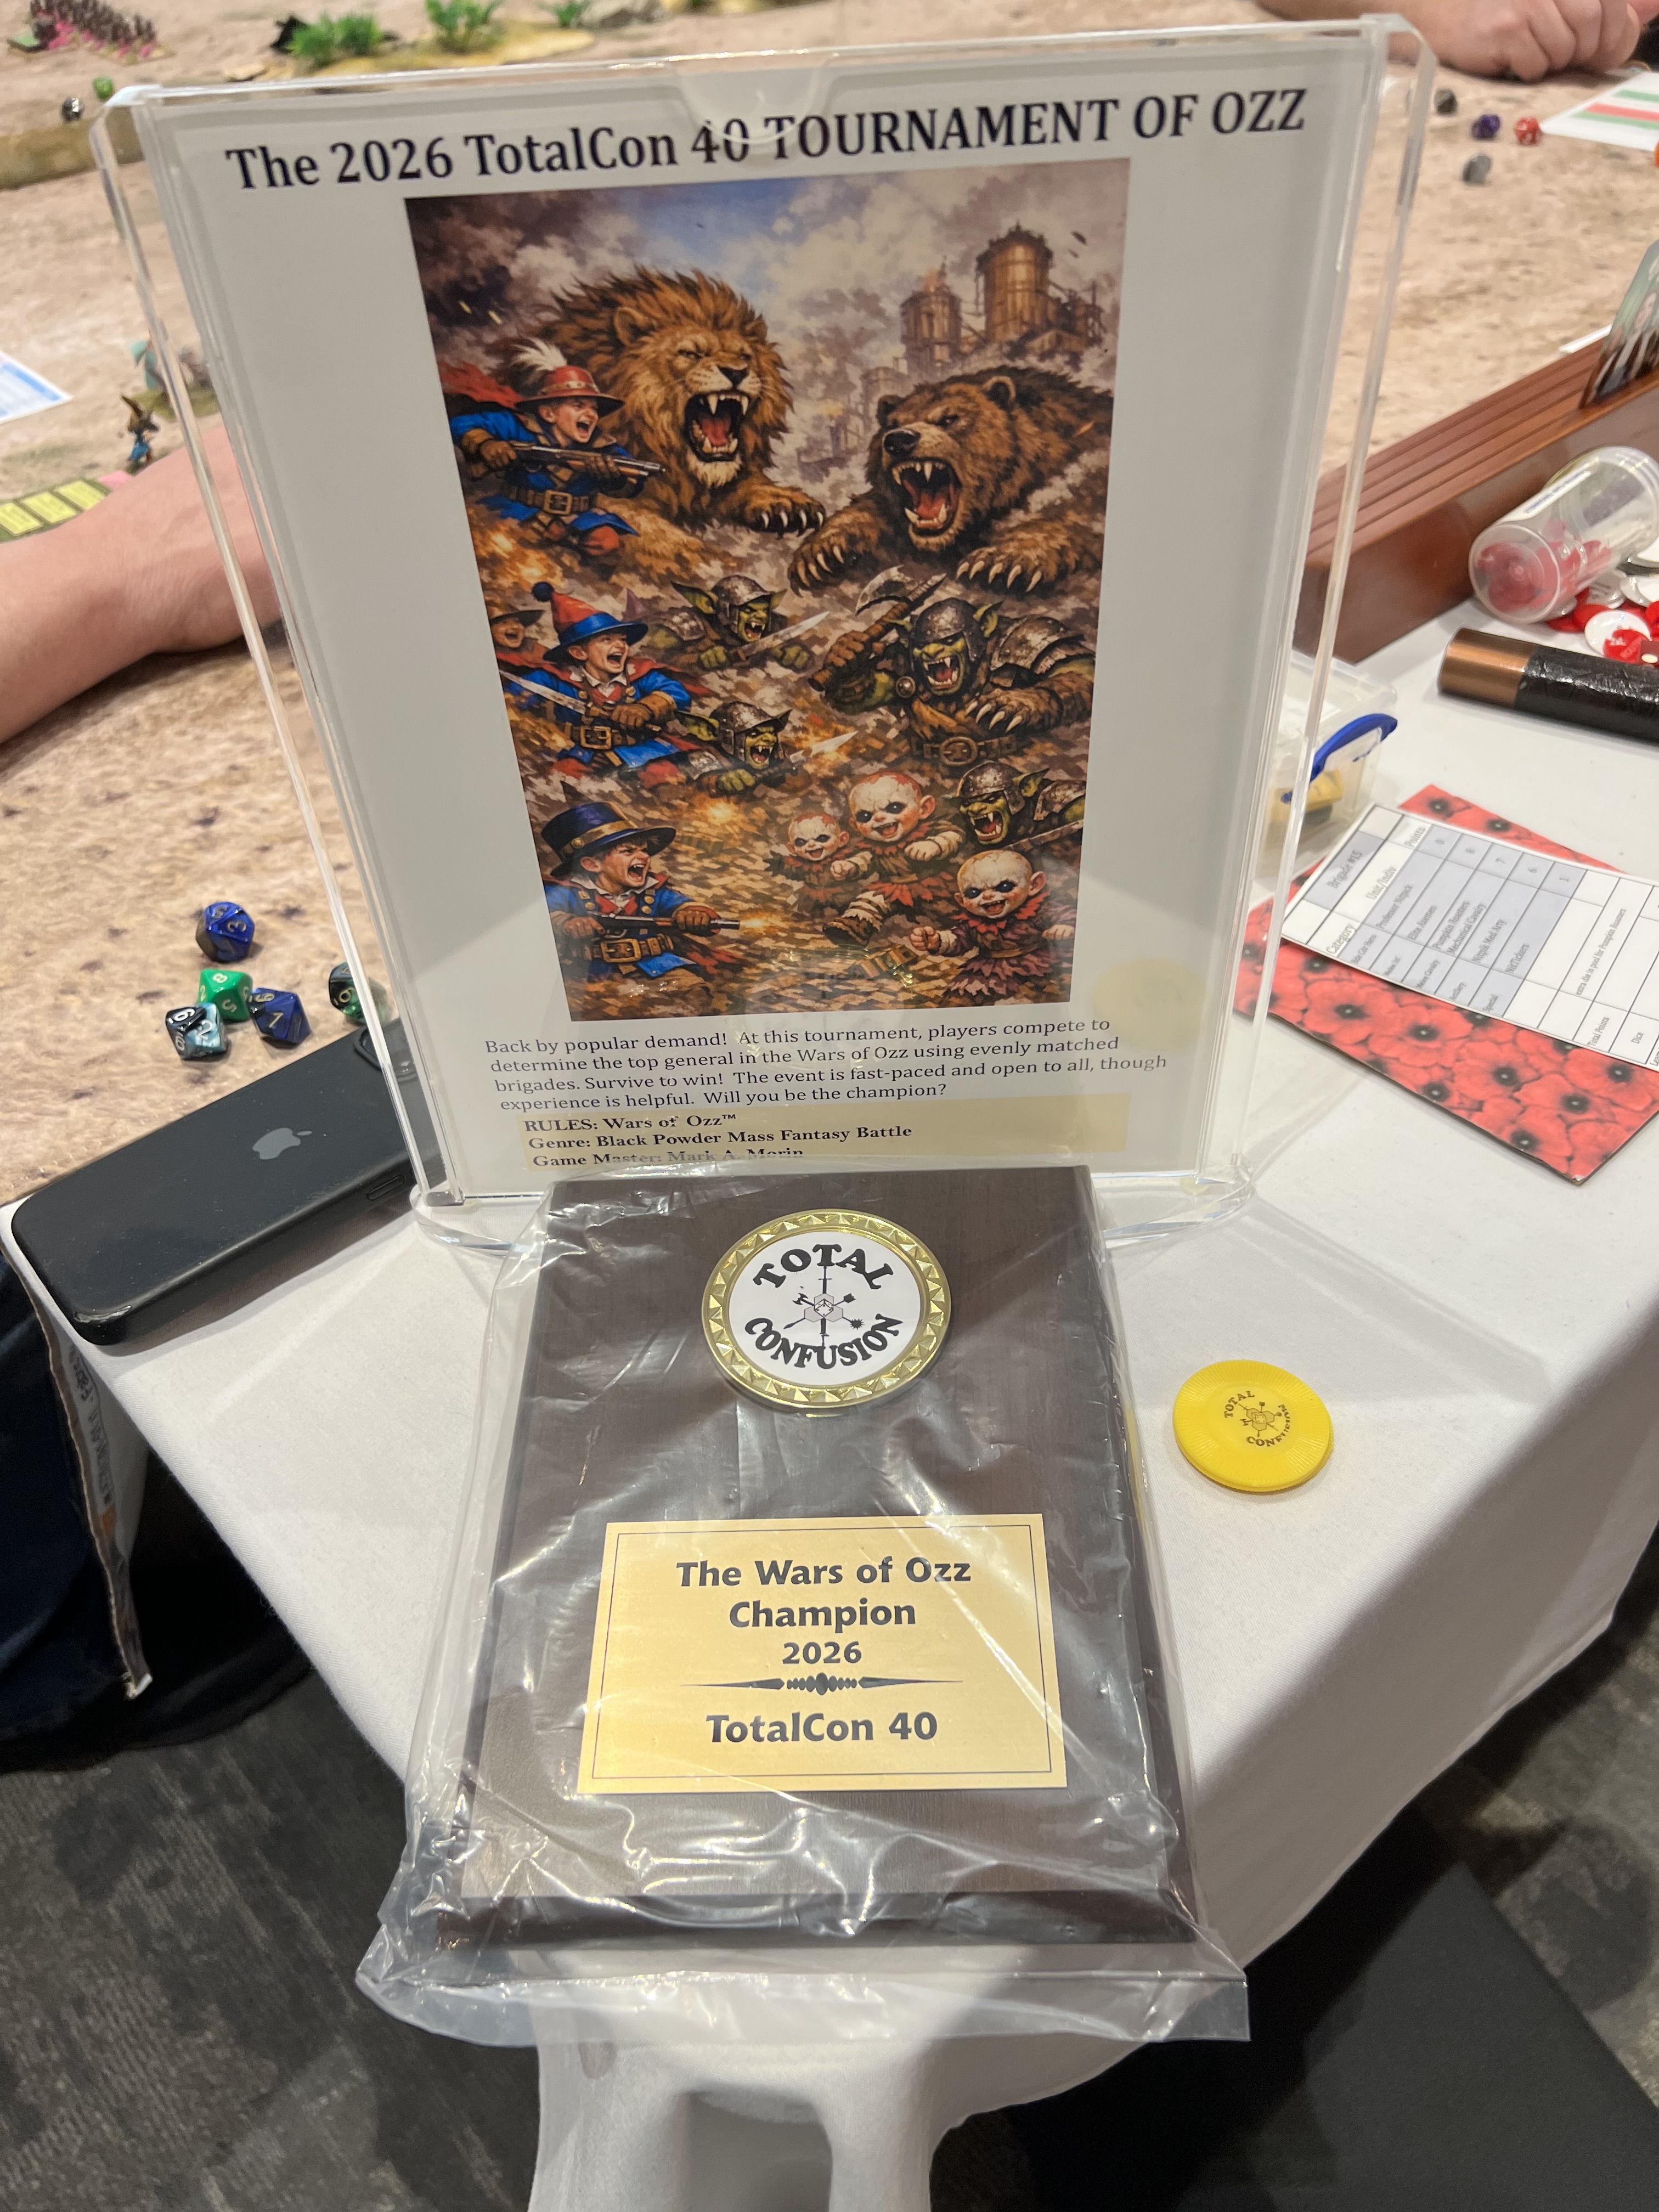
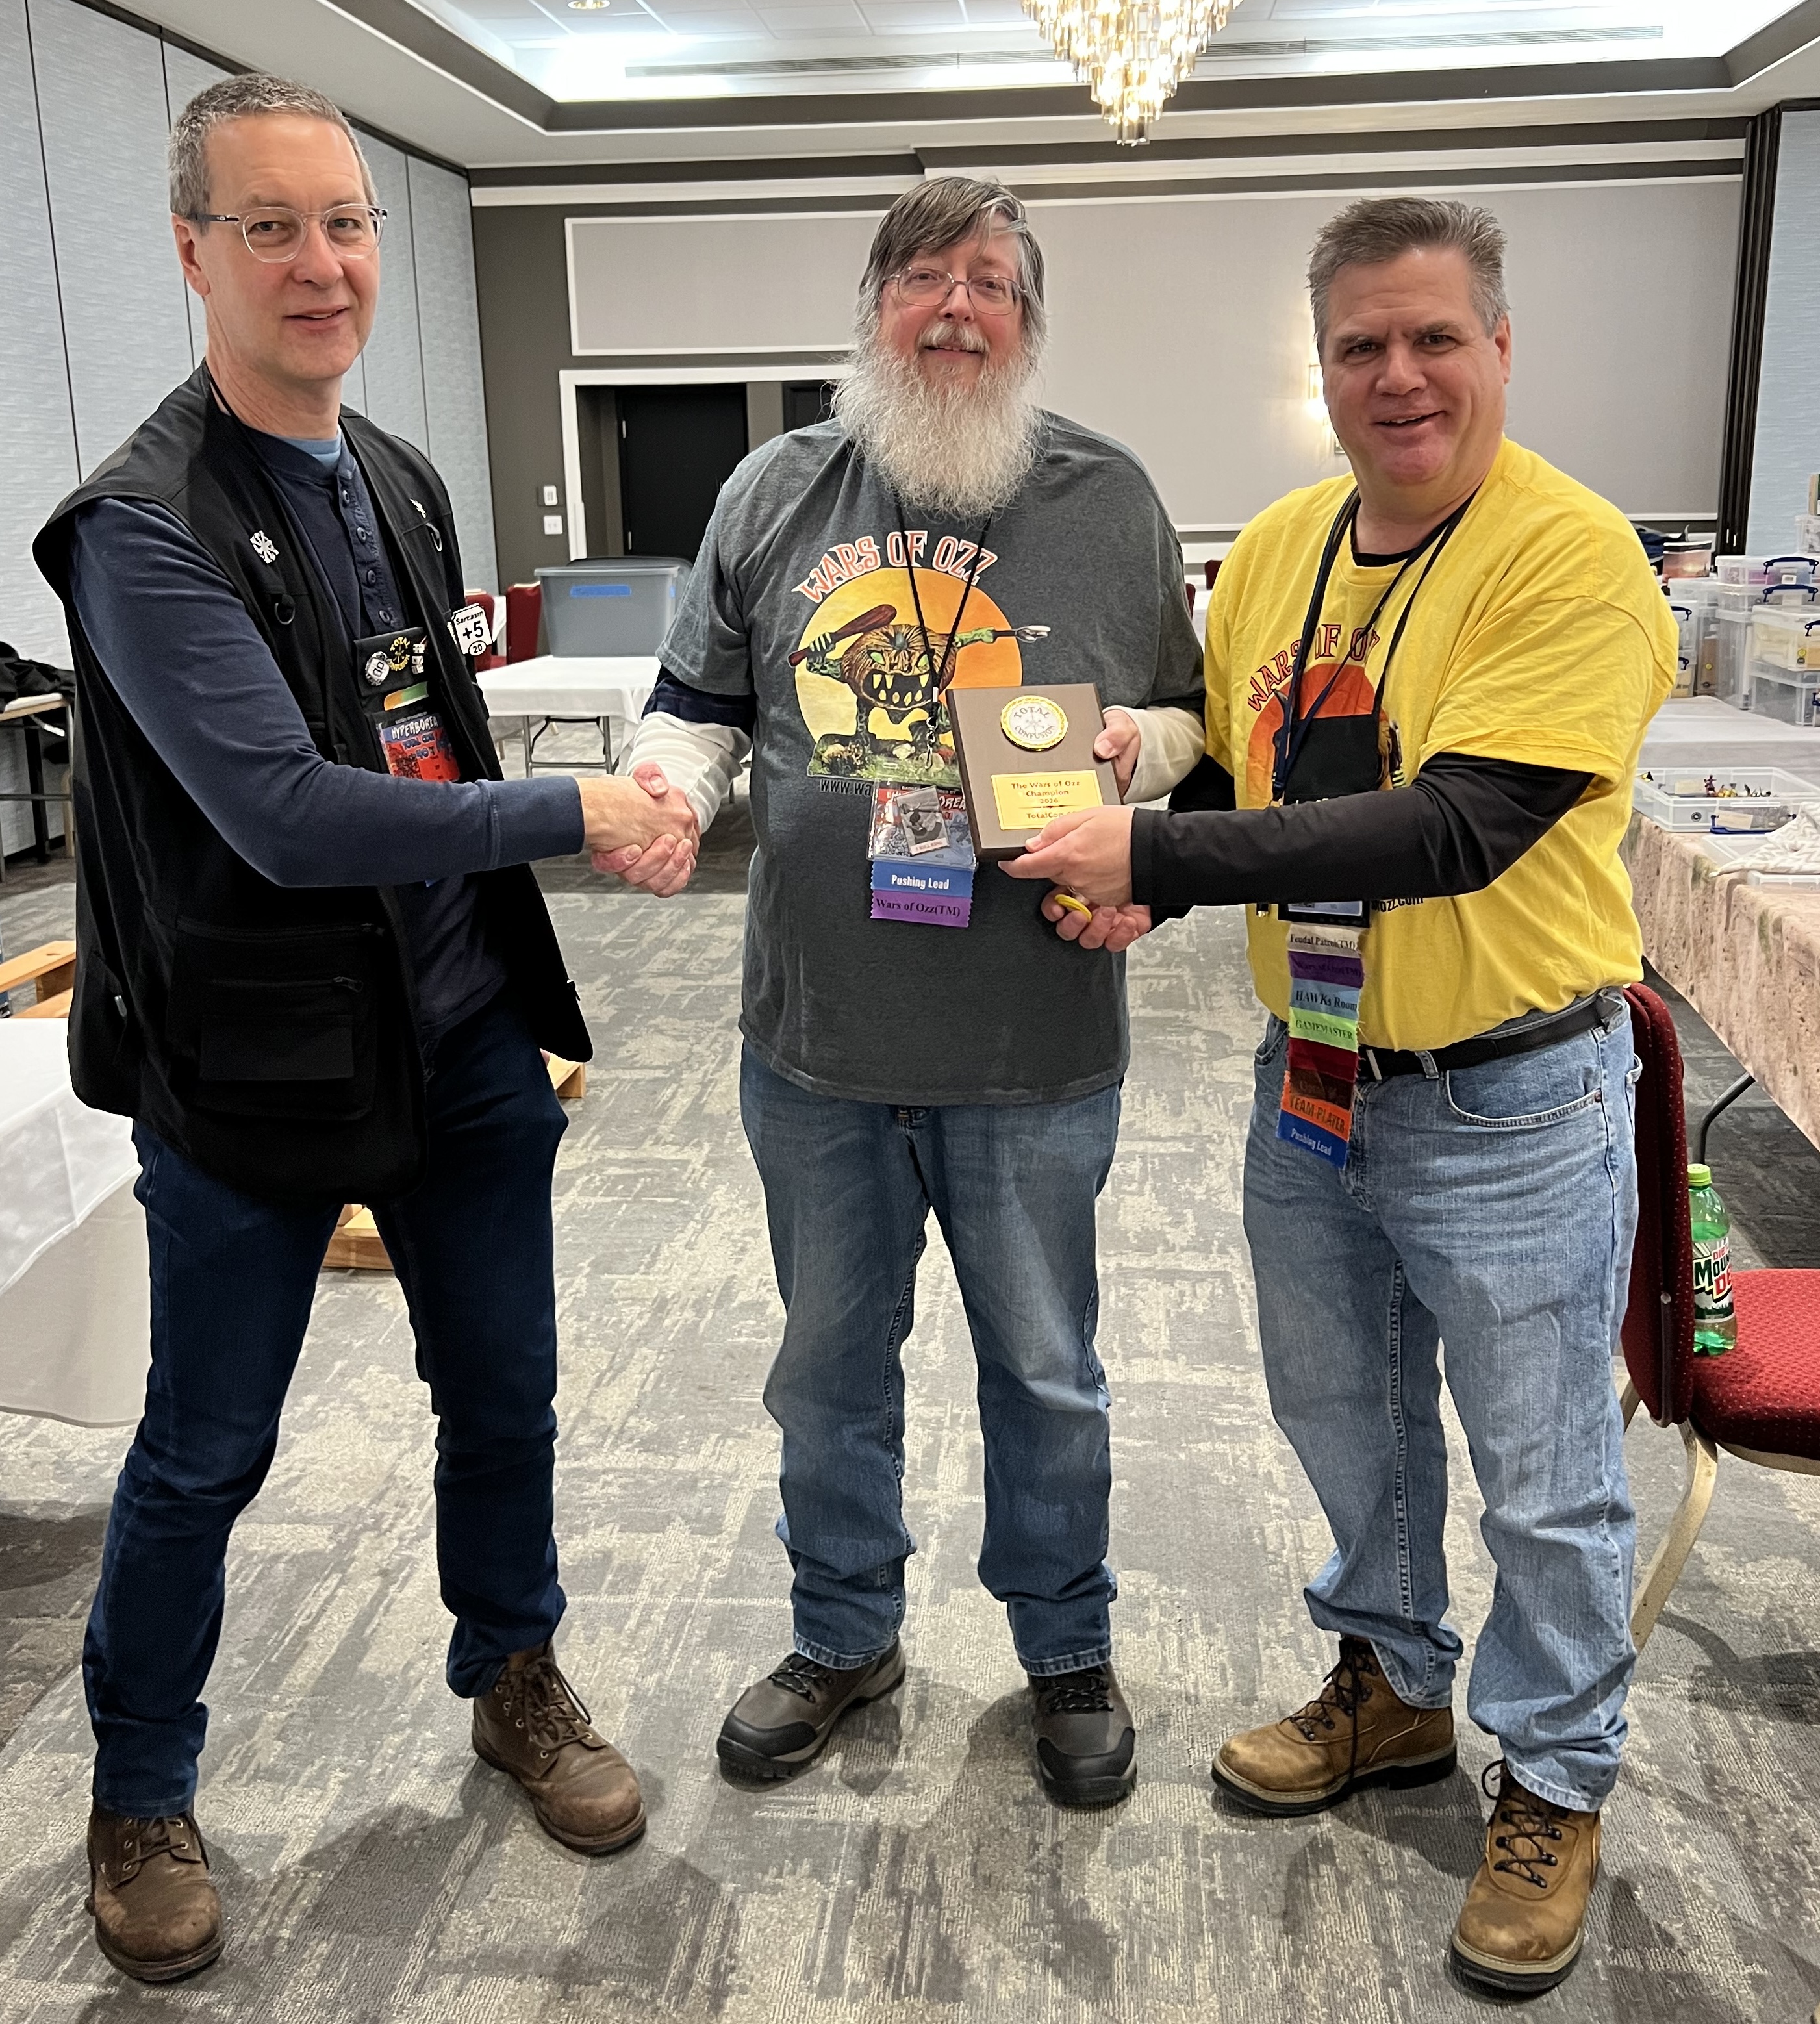
In the end, Brad outlasted Bob – though it was close! Congratulations to Brad as the 2026 TotalCon Wars of Ozz Champion! Congrats to Brad!
The 2026 runner up Bob, the 2026 champion Brad, and your happy GM.
Thank you to all who helped me at the convention. Special thanks to Leif and Brad.
I also want to extend a very special thanks to Bryan Clauss, Steve Parenteau, Kevin Baumann, and the entire TotalCon staff. They do a magnificent job running a great convention! BIG THANKS!!
Lastly, a few areas that you can check out if you dare:
I am happy to begin the 2017 blogging season with a very complicated project. While I began work on this project in December, I had been thinking about it since last May.
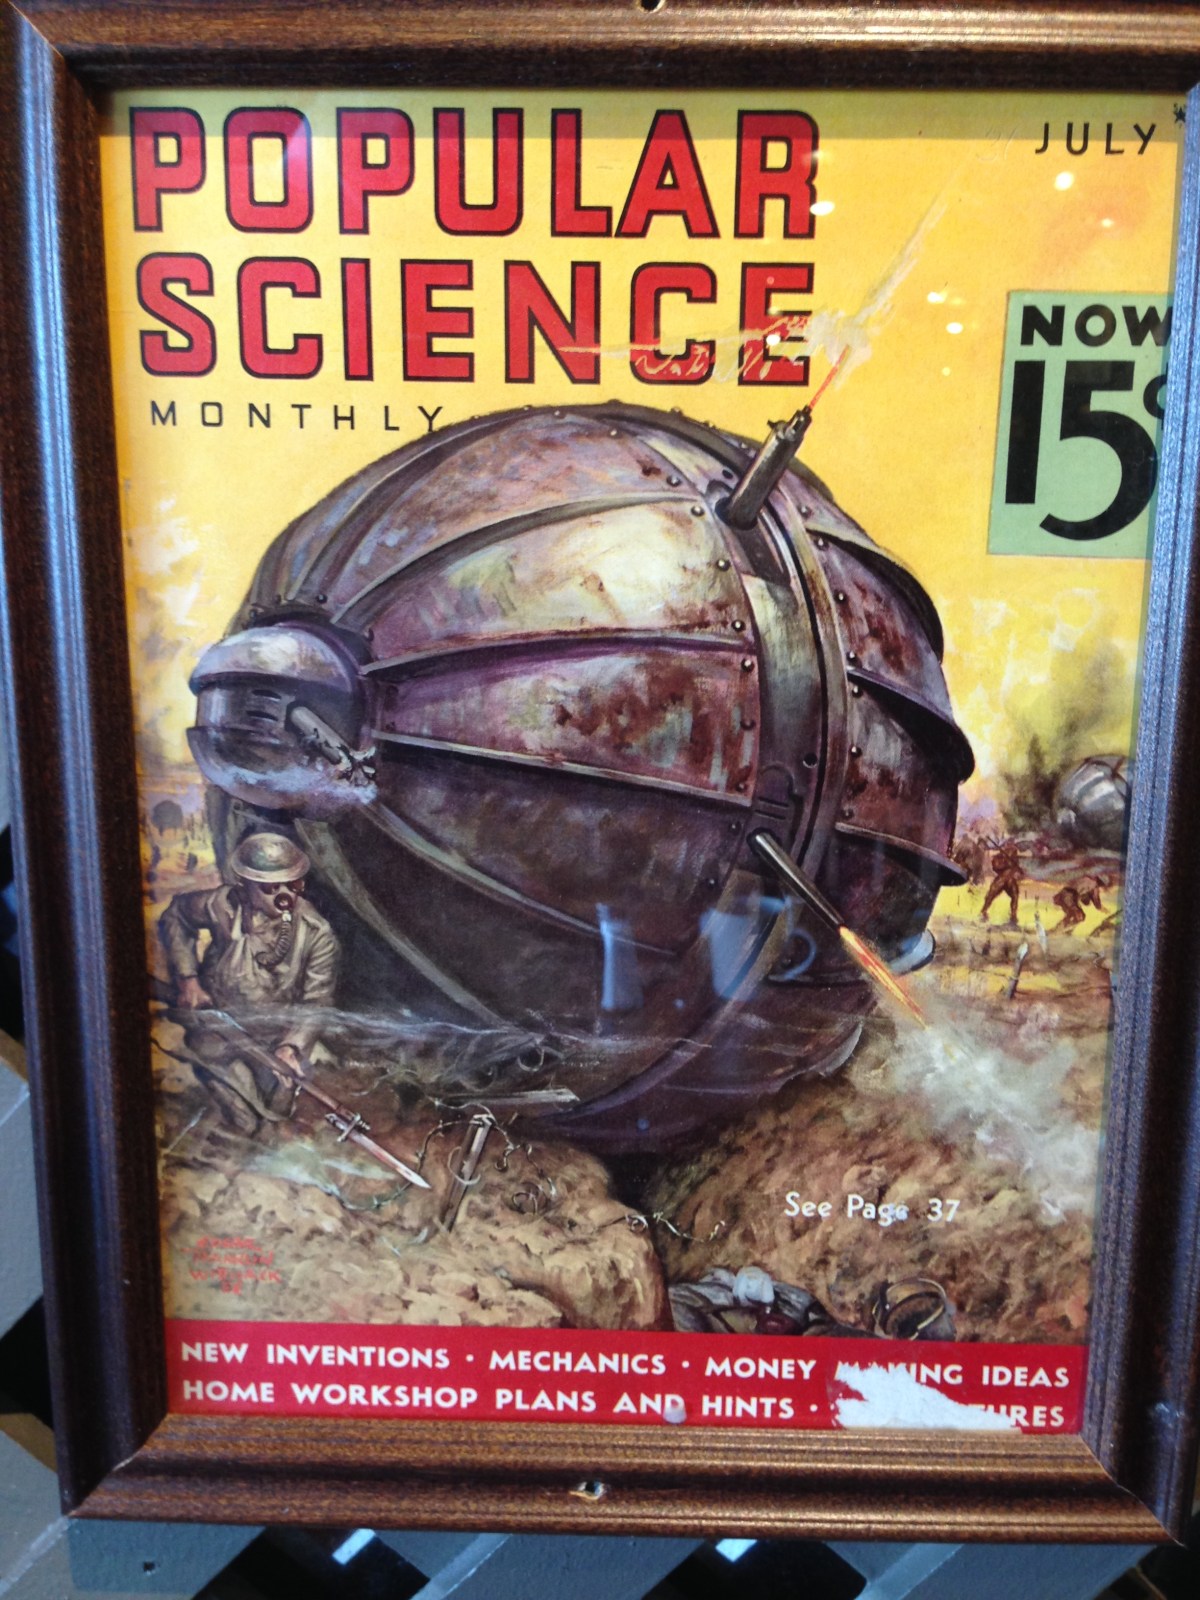
So what happened in May 2016? I was traveling for work, and sat down in a Cracker Barrel in Connecticut for breakfast (Uncle Herschel’s with a sweet tea of course). For those of you who have never been to a Cracker Barrel, there are always old photos and curios all over the walls. I looked to my left, and saw this on the wall:
What started this journey
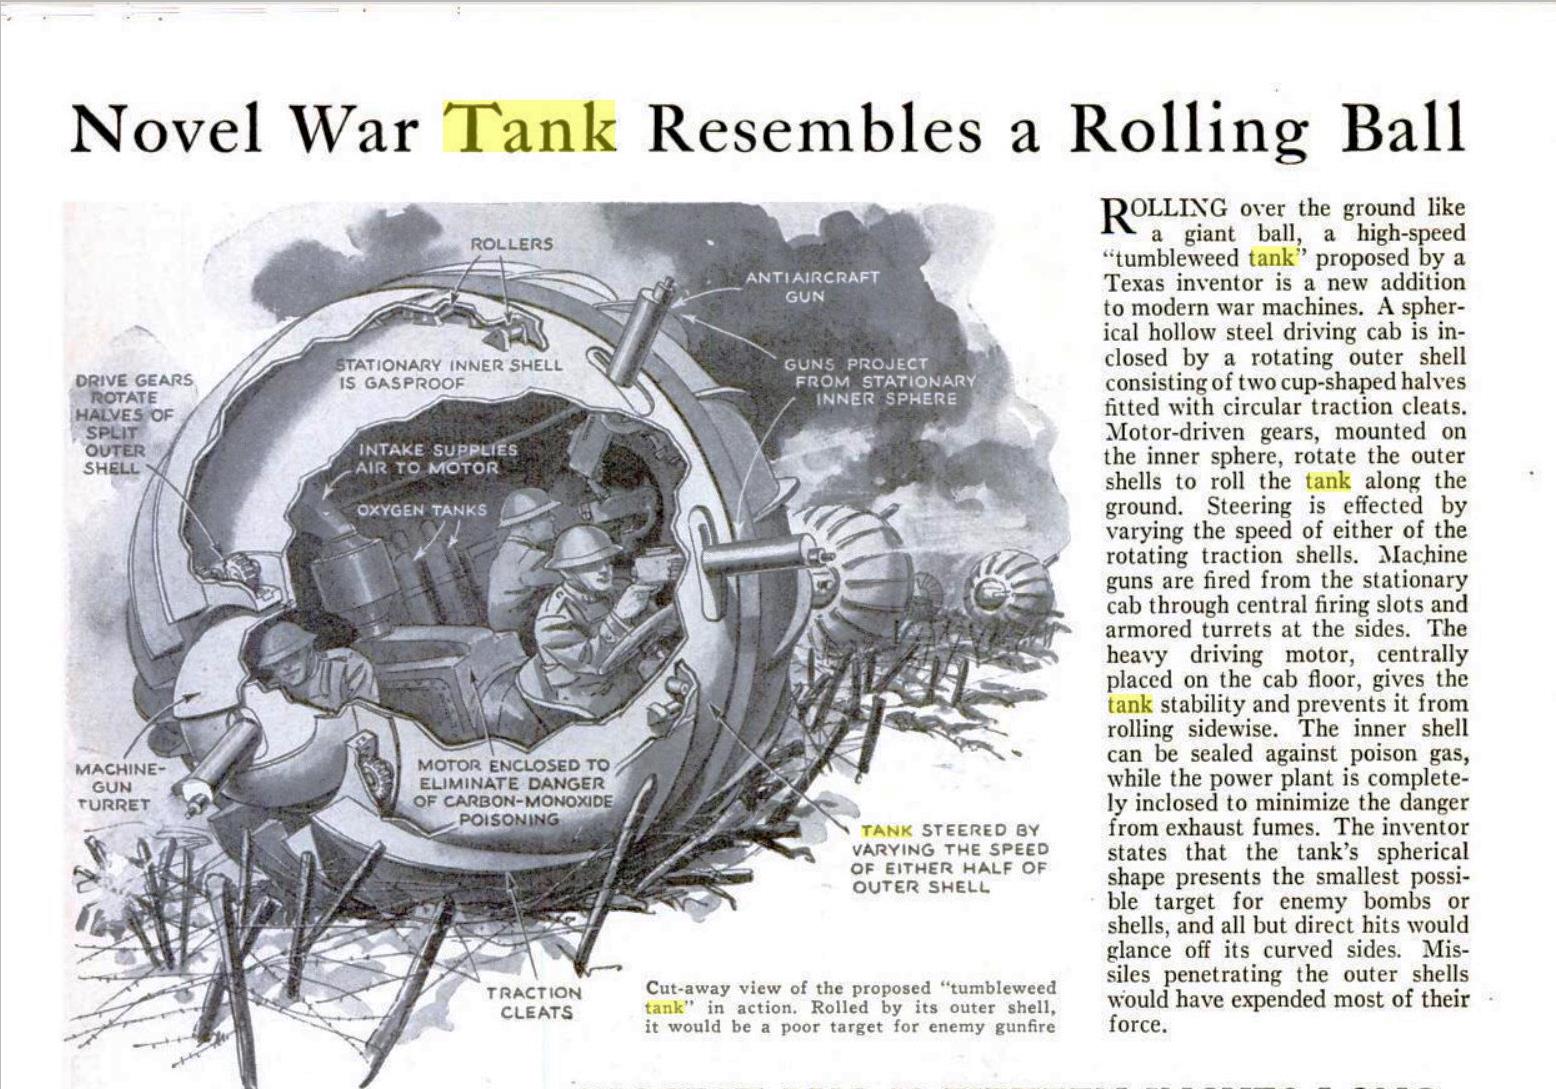
I was amazed at this and wanted to dig in more and learn the date of this issue of Popular Science magazine and see what the article said. The article was just a paragraph with another picture – here is the link and a shot of the July 1936 article on page 37.
The page 37 article
The concept of the “tumbleweed tank” tank was one of two outer shell halves rotating independently on rollers over a solid stationary sphere. More or less, the outer halves acted as the vehicle’s treads. I do not believe that anyone ever tried to build this as a combat vehicle, but I still found the concept fascinating and worthy of a project.
During the intervening months, I conceived of an idea that I could make a model of the tank, build a mold, and cast it for tabletop wargaming. As I have been building units of Star Rovers figures for sci-fi Combat Patrol™, my first thought was to make a retro-sci-fi tank, probably for the Frinx. I was not enthusiastic about the weapons design as shown in the magazine – machine guns alone would make this a very boring retro sci-fi tank. I also considered making it modular – so that I could adapt different weapons for it.
While thinking about it, I wanted to have a great sphere – and my sculpting experience is at best weak to nonexistent. I have seen a few blogs that I follow where folks are sculpting their own figures, and that helped to inspire me. As I also cast – this was a chance to go from beginning to end with the project. But what to use?
The answer came easily to me as a golfer – a golf ball! That would be an easy thing to work with and would afford me a chance to see what works. I had an idea that I wanted it to be armed with ray guns in the side sponsons. I had not decided on the main weapon, when I had a brainstorm – 1953’s War of the Worlds Martian Heat Rays!
1953 movie poster
The Martian ship
So with this plan, I went forward to try to create my new Mark 1’s (what else to call them!). I thought that I could learn from the project (and I have). I used a “Line ’em Up” golf accessory to create lines on a used Callaway golf ball, and drilled a ½” hole in the side of the ball on two sides. I like the Callaway for this as it has hexagonal dimples.
First drill hole into the Callaway
After this, I used a Plastruct 2mm x 4.8mm styrene strip to size up the gap between the ball halves. I used my Dremel to cut the outer surface of the ball – it ended up being messy and needed a lot of Exacto knife work. The Dremel cutting blade tends to melt the outer ball cover – another lesson learned
After cutting the chassis ridge with my Dremel
I then needed to create the tread ridges. I used an Exacto knife to carve small channels along the lines for the treads. This took a lot of cutting! Using some old plastic membership cards, I cut out each tread, sized them to the holes, and glued them in with super glue.
Tread ridges cut from plastic membership cards
I then drilled a ¼” hole for the attachment of a main weapon – which I would cast separately with the sponsons in a single mold. To build a base for the model, I used three 1¼” washers, and glued them together with wood glue. I then covered them with Apoxie Sculpt, leaving a hole to mount the ball to the base with a wood screw through the washer. This ended up being a base that I feel in the end was a little too tall, but usable, and castable.
A Callaway golf ball converted into the tank chassis
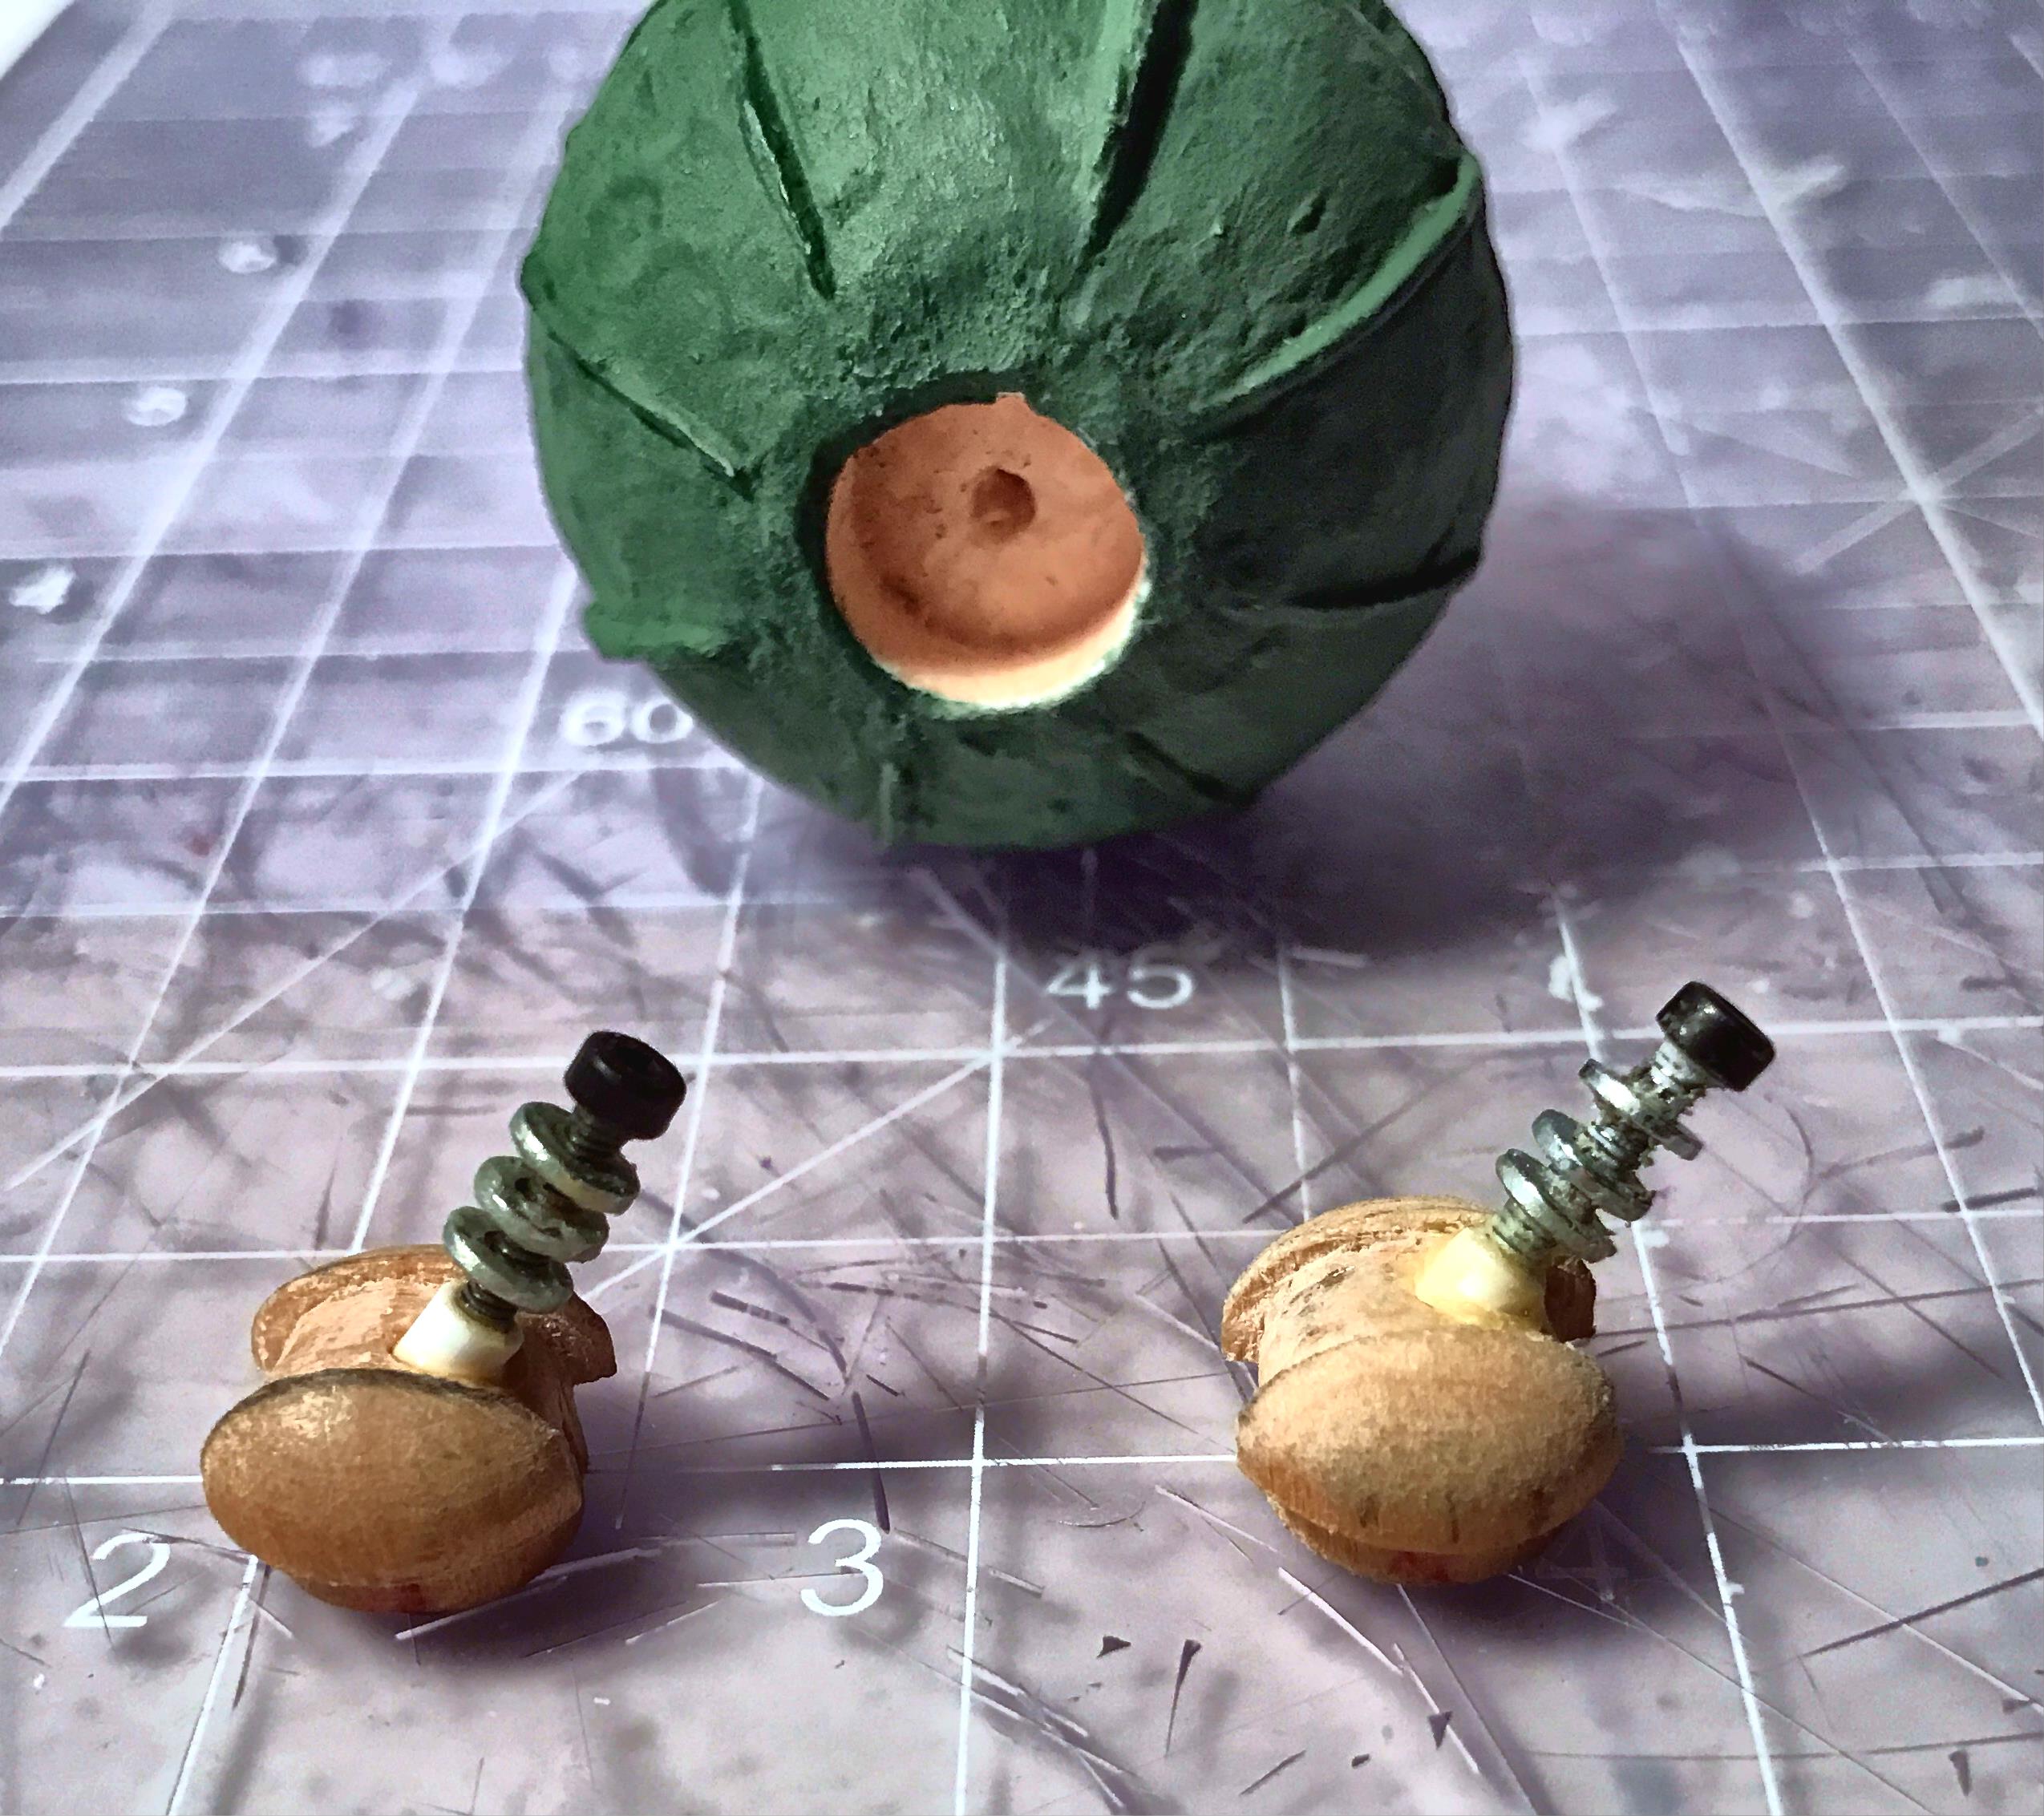
I originally was going to use Milliput or Apoxie Sculpt for the sponsons – when I discovered these ½” Button Plugs from Lara’s Crafts – which were the right shape and fit perfectly into the holes on the sides (got lucky here). I bought a set of Niji woodcarving knives (which I wish I had when I was carving the treads and the middle gap!) and used them to make the sponson shells. After trial and error (where I learned the hard way that I needed to wear a cutting glove with these very sharp knives), I carved two sponsons and sanded down the middle slots.
Making the button plugs into sponsons
I initially thought that I needed to smooth out the golf ball dimples and the tread cuts, so I first tried with Apoxie Sculpt, with poor results. My next attempt was with Citadel “Liquid Green Stuff”, which was better, but I think was an unneeded step.
The master figure and sponsons mid-project
I drilled a 1/8″ hole in the sponson shell, and mounted a short piece of Evergreen Scale Models strip styrene 1/8″ tube. For the ray guns, I turned to the use of model airplane parts. I used two Dubro products – a 2mm socket head cap screw with three 2 mm flat washers superglued to it. To line up the washers evenly, I found that using toothpicks on both sides and underneath to define the gaps and make the washers relatively parallel worked well. I inserted the guns into the ends of the styrene, after coring out the ends of the styrene rods for a better fit. Eventually, I primed the sponsons black with Citadel “Imperium Primer”, as I wanted there to be less tackiness to the Quick-Sil from the wood.
Nice view of the ray guns in the sponsons
Another view of the ray gun sponson
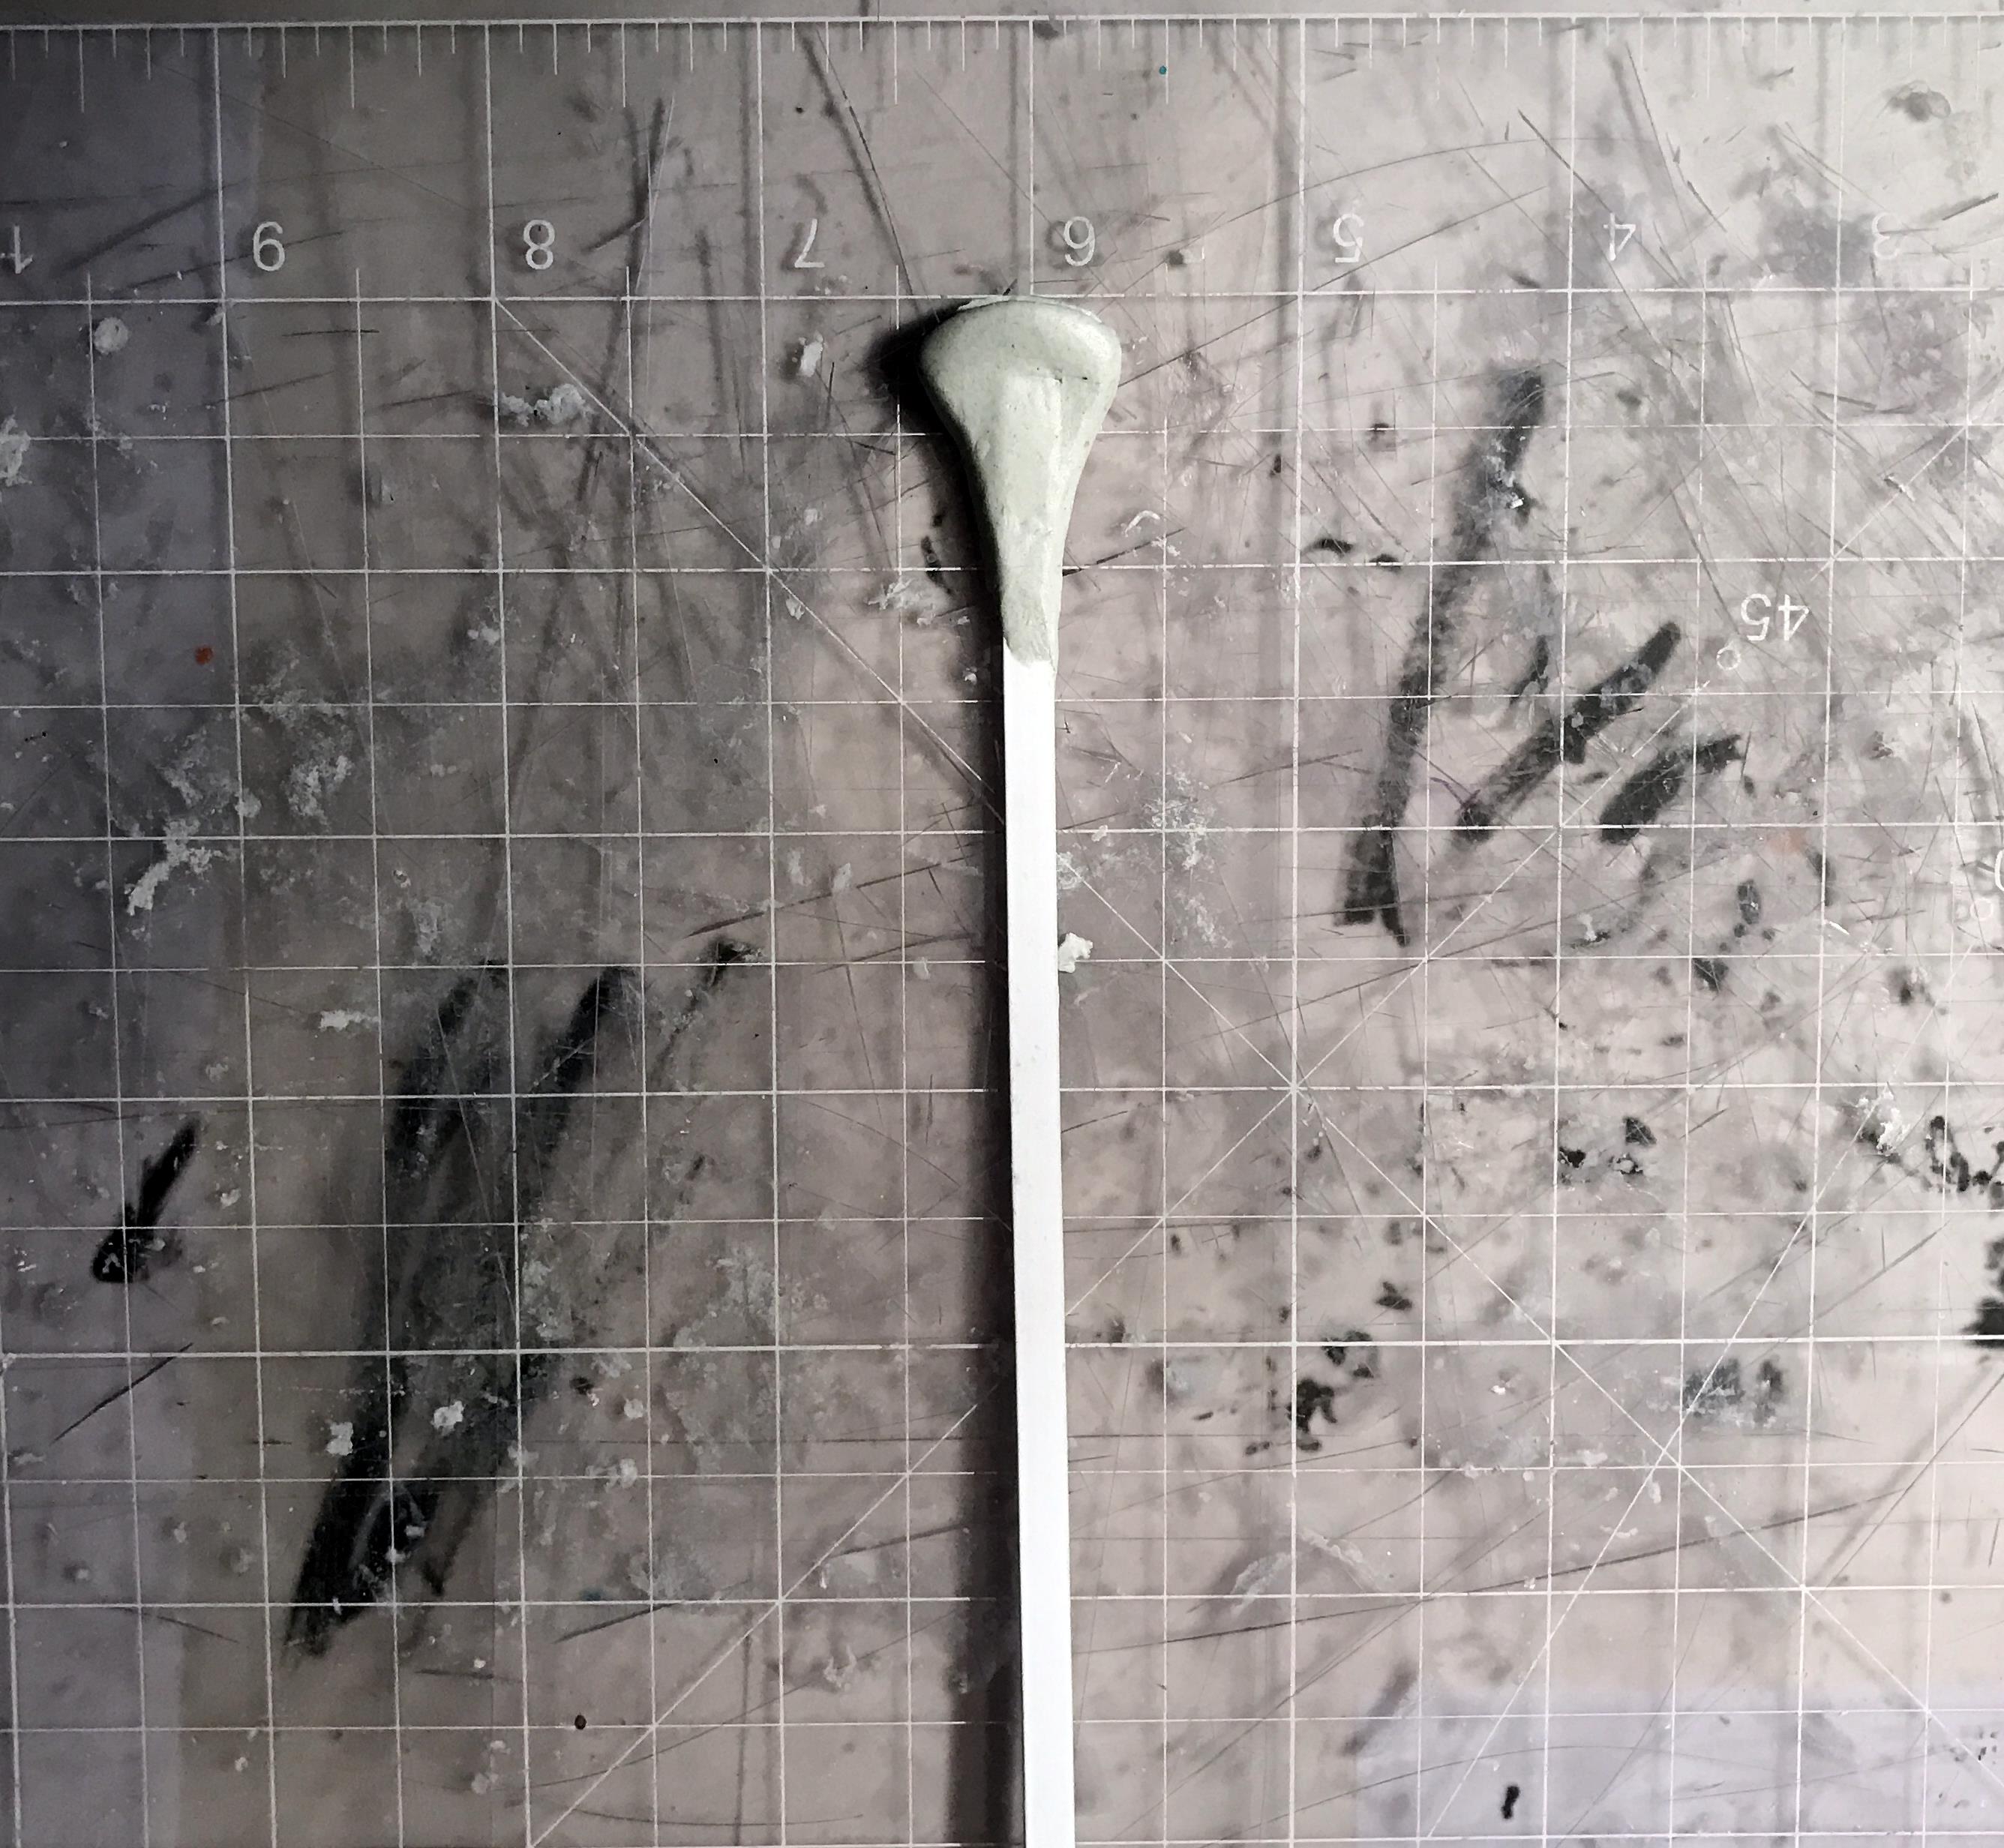
I then moved onto the main weapon, the heat ray. In the 1953 movie, the heat ray was rectangular, leading to the distinctive head. I eyeballed the length, and designed the head. I sculpted it in two stages, with the “eye” section being attached to the neck, which itself was on the Plastruct strip styrene.
Designing the heat ray – this worked!
Initial heat ray sculpt on styrene strip
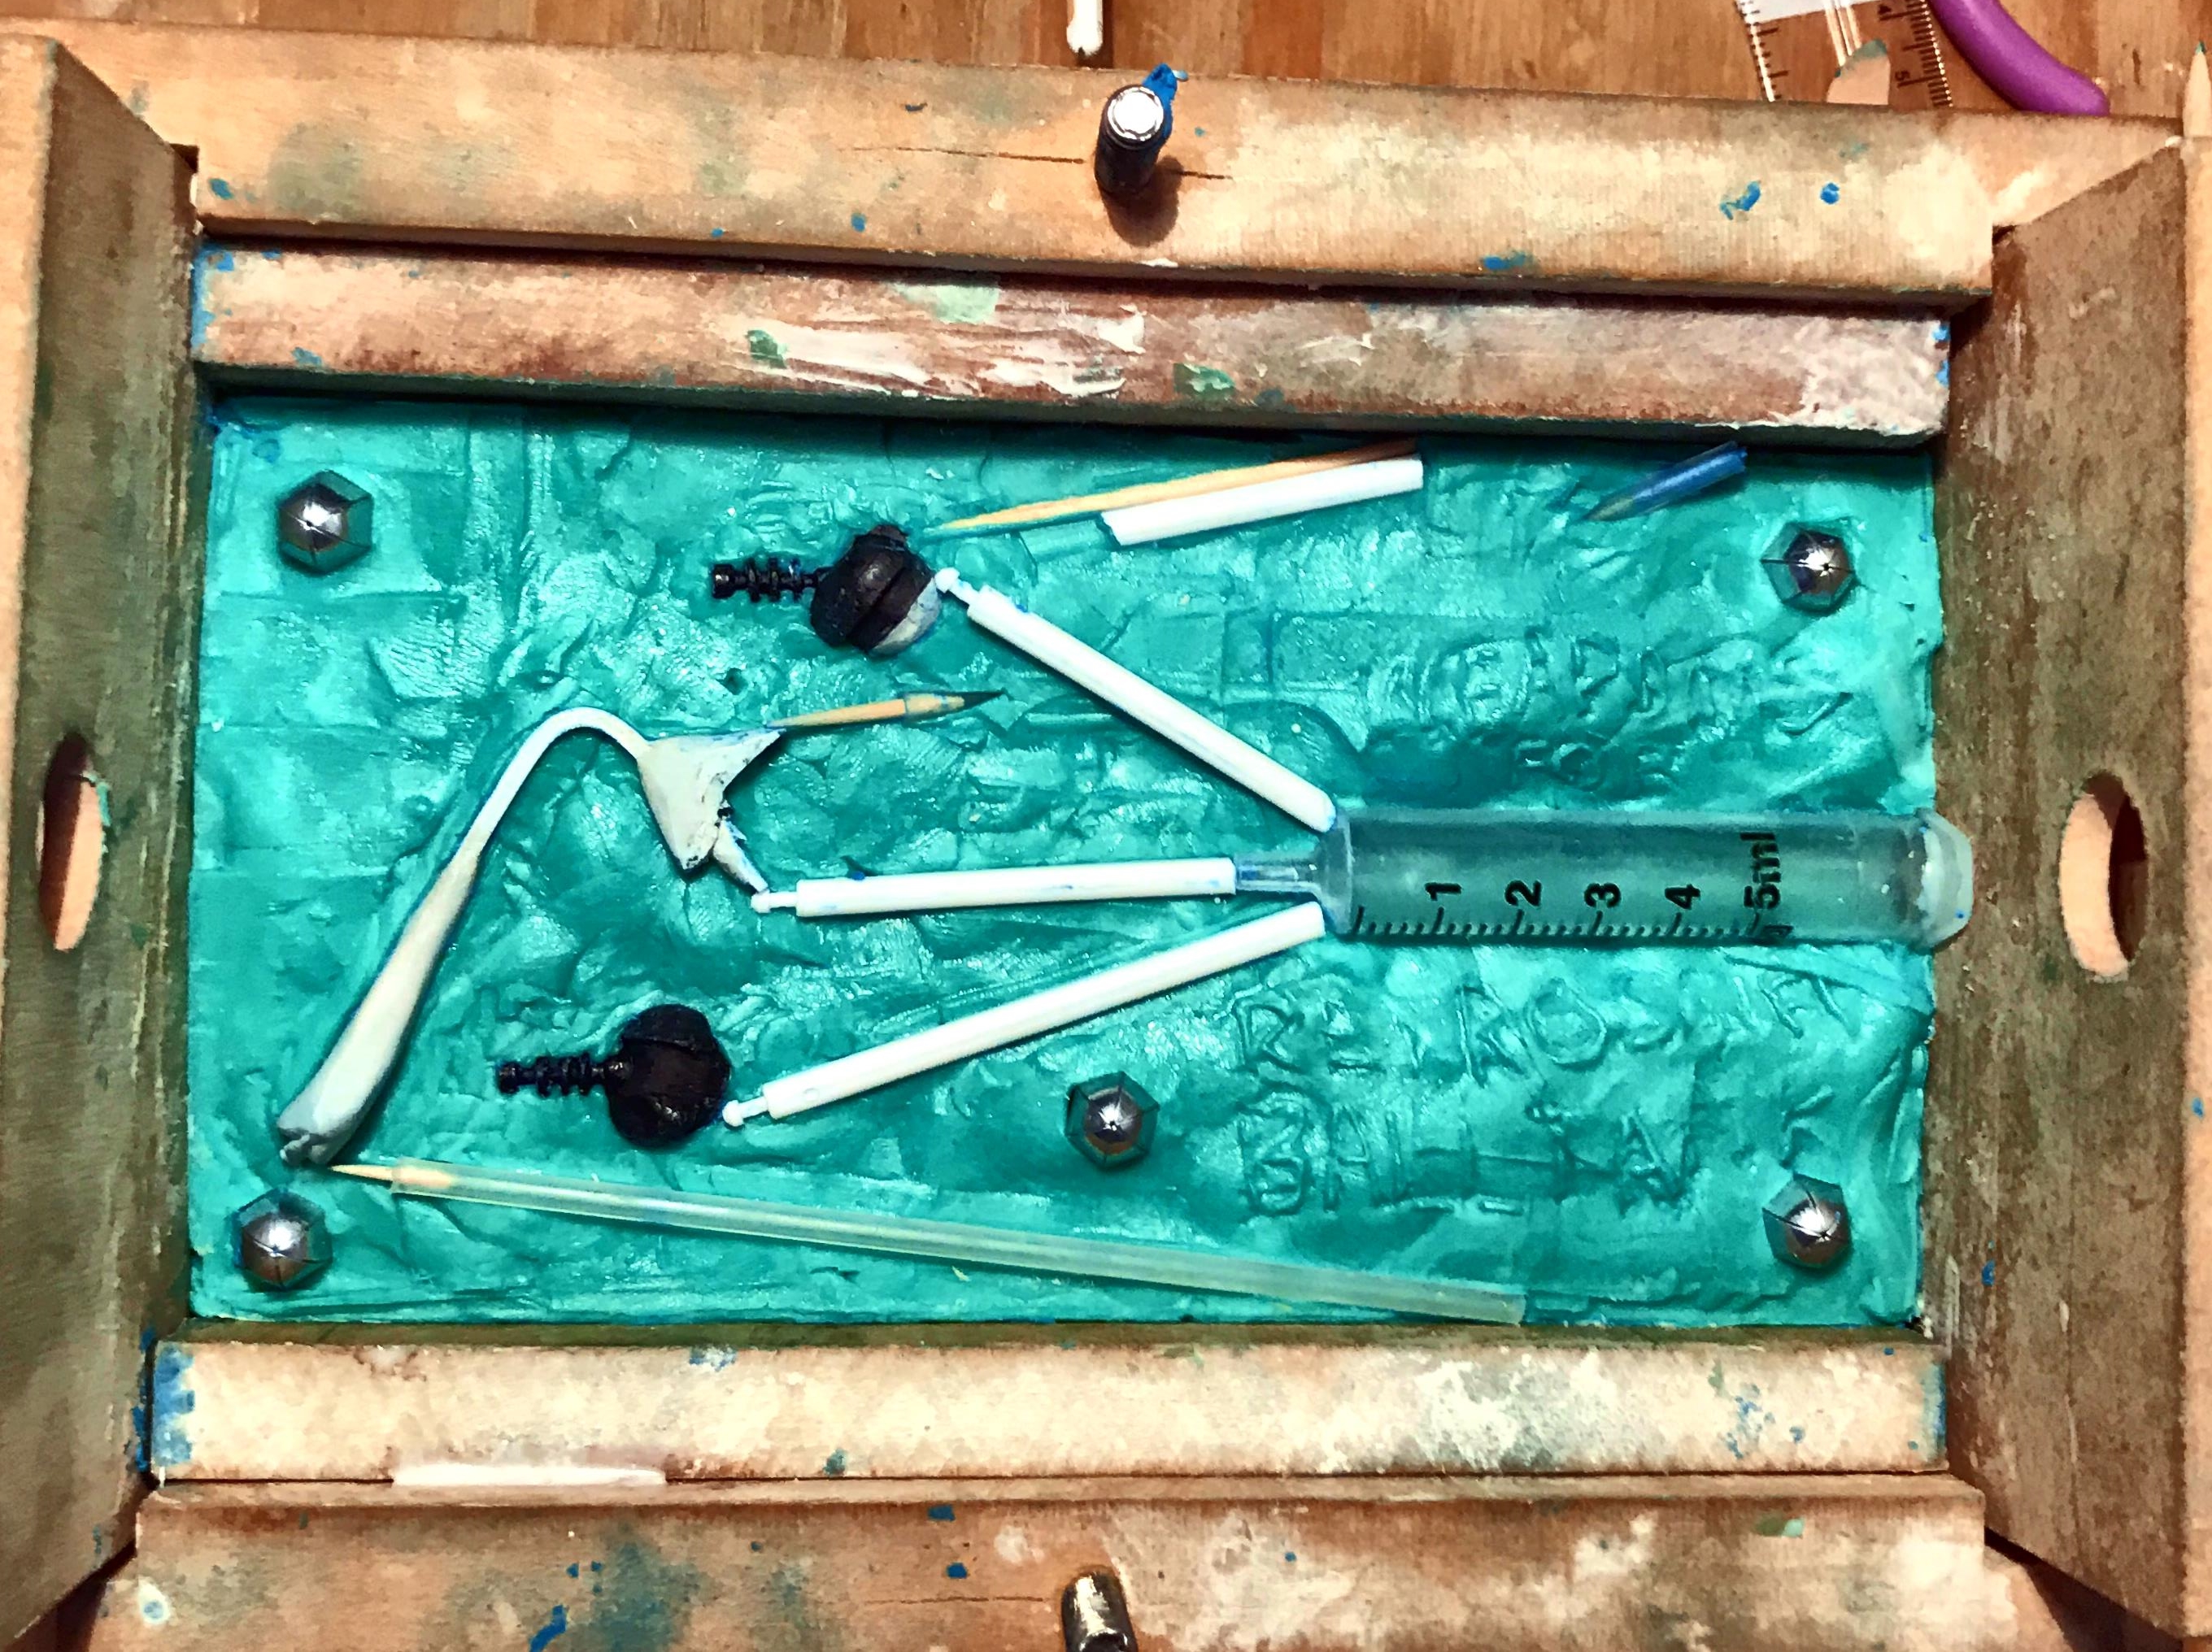
I cut the styrene strip to size, and used more Apoxie Sculpt to make a mount that would fit into the main weapon recess. After it hardened, I saw that I would have to bend it in my mold, or otherwise I would have a very turtle-like appearance. As the styrene is flexible, this was not a problem. I made two two-piece molds with Castaldo Quick-Sil – one for the chassis and one for the weapons. I also tried some new innovations with venting with the use of some more model airplane parts – in this case flexible fuel lines that I cut for venting. As you can see below, I bent the heat ray in the mold to my desired shape.
Weapons mold before Quick-Sil
After first half molded
Chassis mold before Quick-Sil
Chassis mold after first half molded
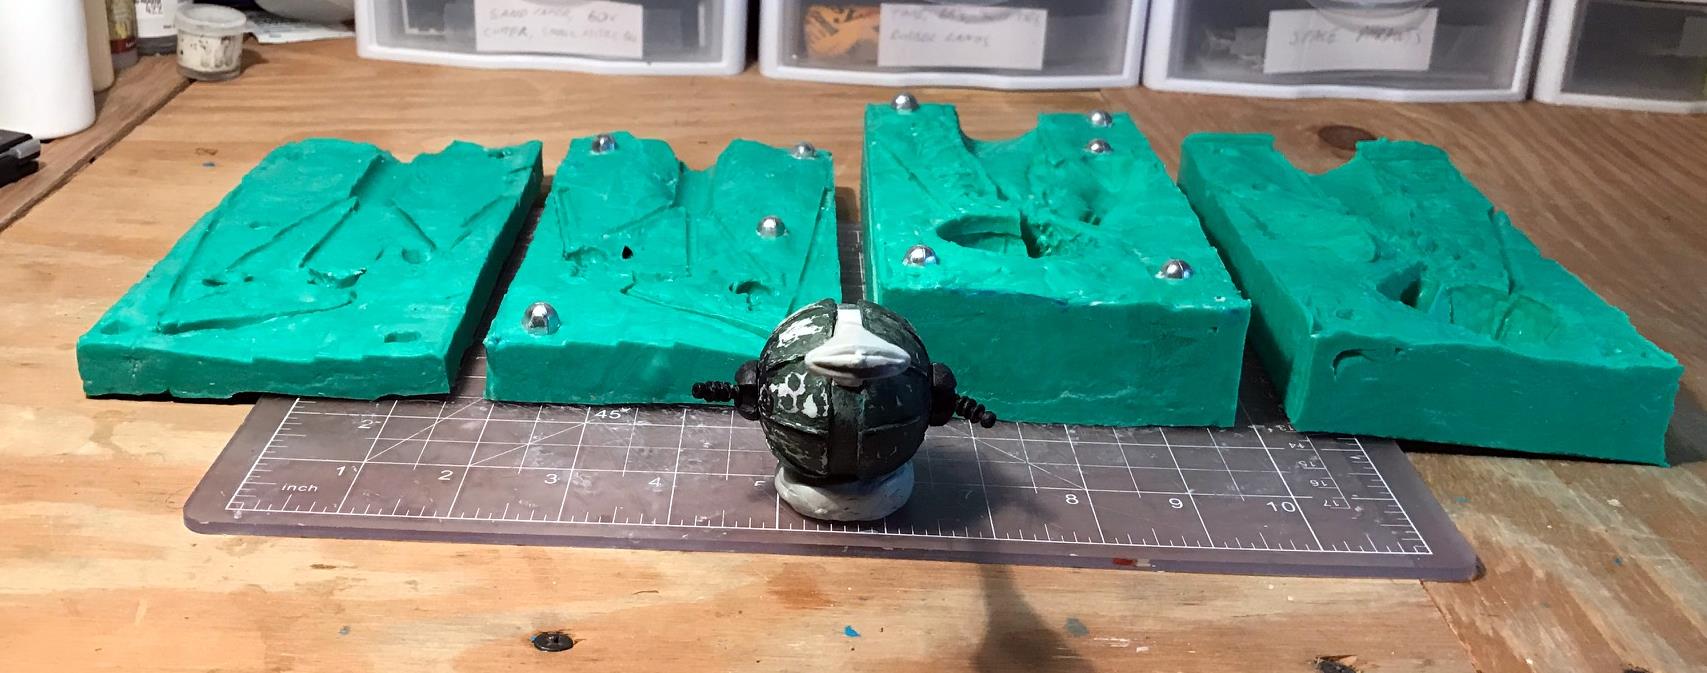
In the end, the mold for the weapons worked very well, needing little work on the finished weapons. However, the chassis mold had a few issues. First, I knew as a golfer that golf balls compress when struck. What I did not realize was that there would be a strong interaction of the flattish sponson holes and the pressure exerted by the curing Quick-Sil on them at 90° angles. As a result, the cast ball would be visibly compressed somewhat. Additionally, the flow was not perfect – leading to my needing to add Apoxie Sculpt to the finished models’ chassis. Lastly, because the mold for the chassis was thick, and the casting was large, it took a long time to cool, and used a lot of metal (see phots for weight below in the blog). Unfortunately I discovered this when I opened the mold once and the metal flowed out! I will incorporate these lessons learned into the Mark 2’s.
The master and the molds
Shrinkage! Was he in the pool? (Apologies to George Costanza and Jerry Seinfeld)
I managed to successfully cast two chassis, and decided to use the master as well as I already had the mold. So I cast three sets of weapons, and assembled three tanks in total. I used some Apoxie Sculpt to fill in the gaps in the back where flow was less than ideal -and this worked fine. Next, I mounted the assembled tanks to a 1 5/8″ steel washer for magnetic storage in my gaming boxes.
Assembled tanks
I then primed the tanks with Citadel “Imperium Primer” – I must say I like this as a brush primer – it’s a nice product.
Primed tanks
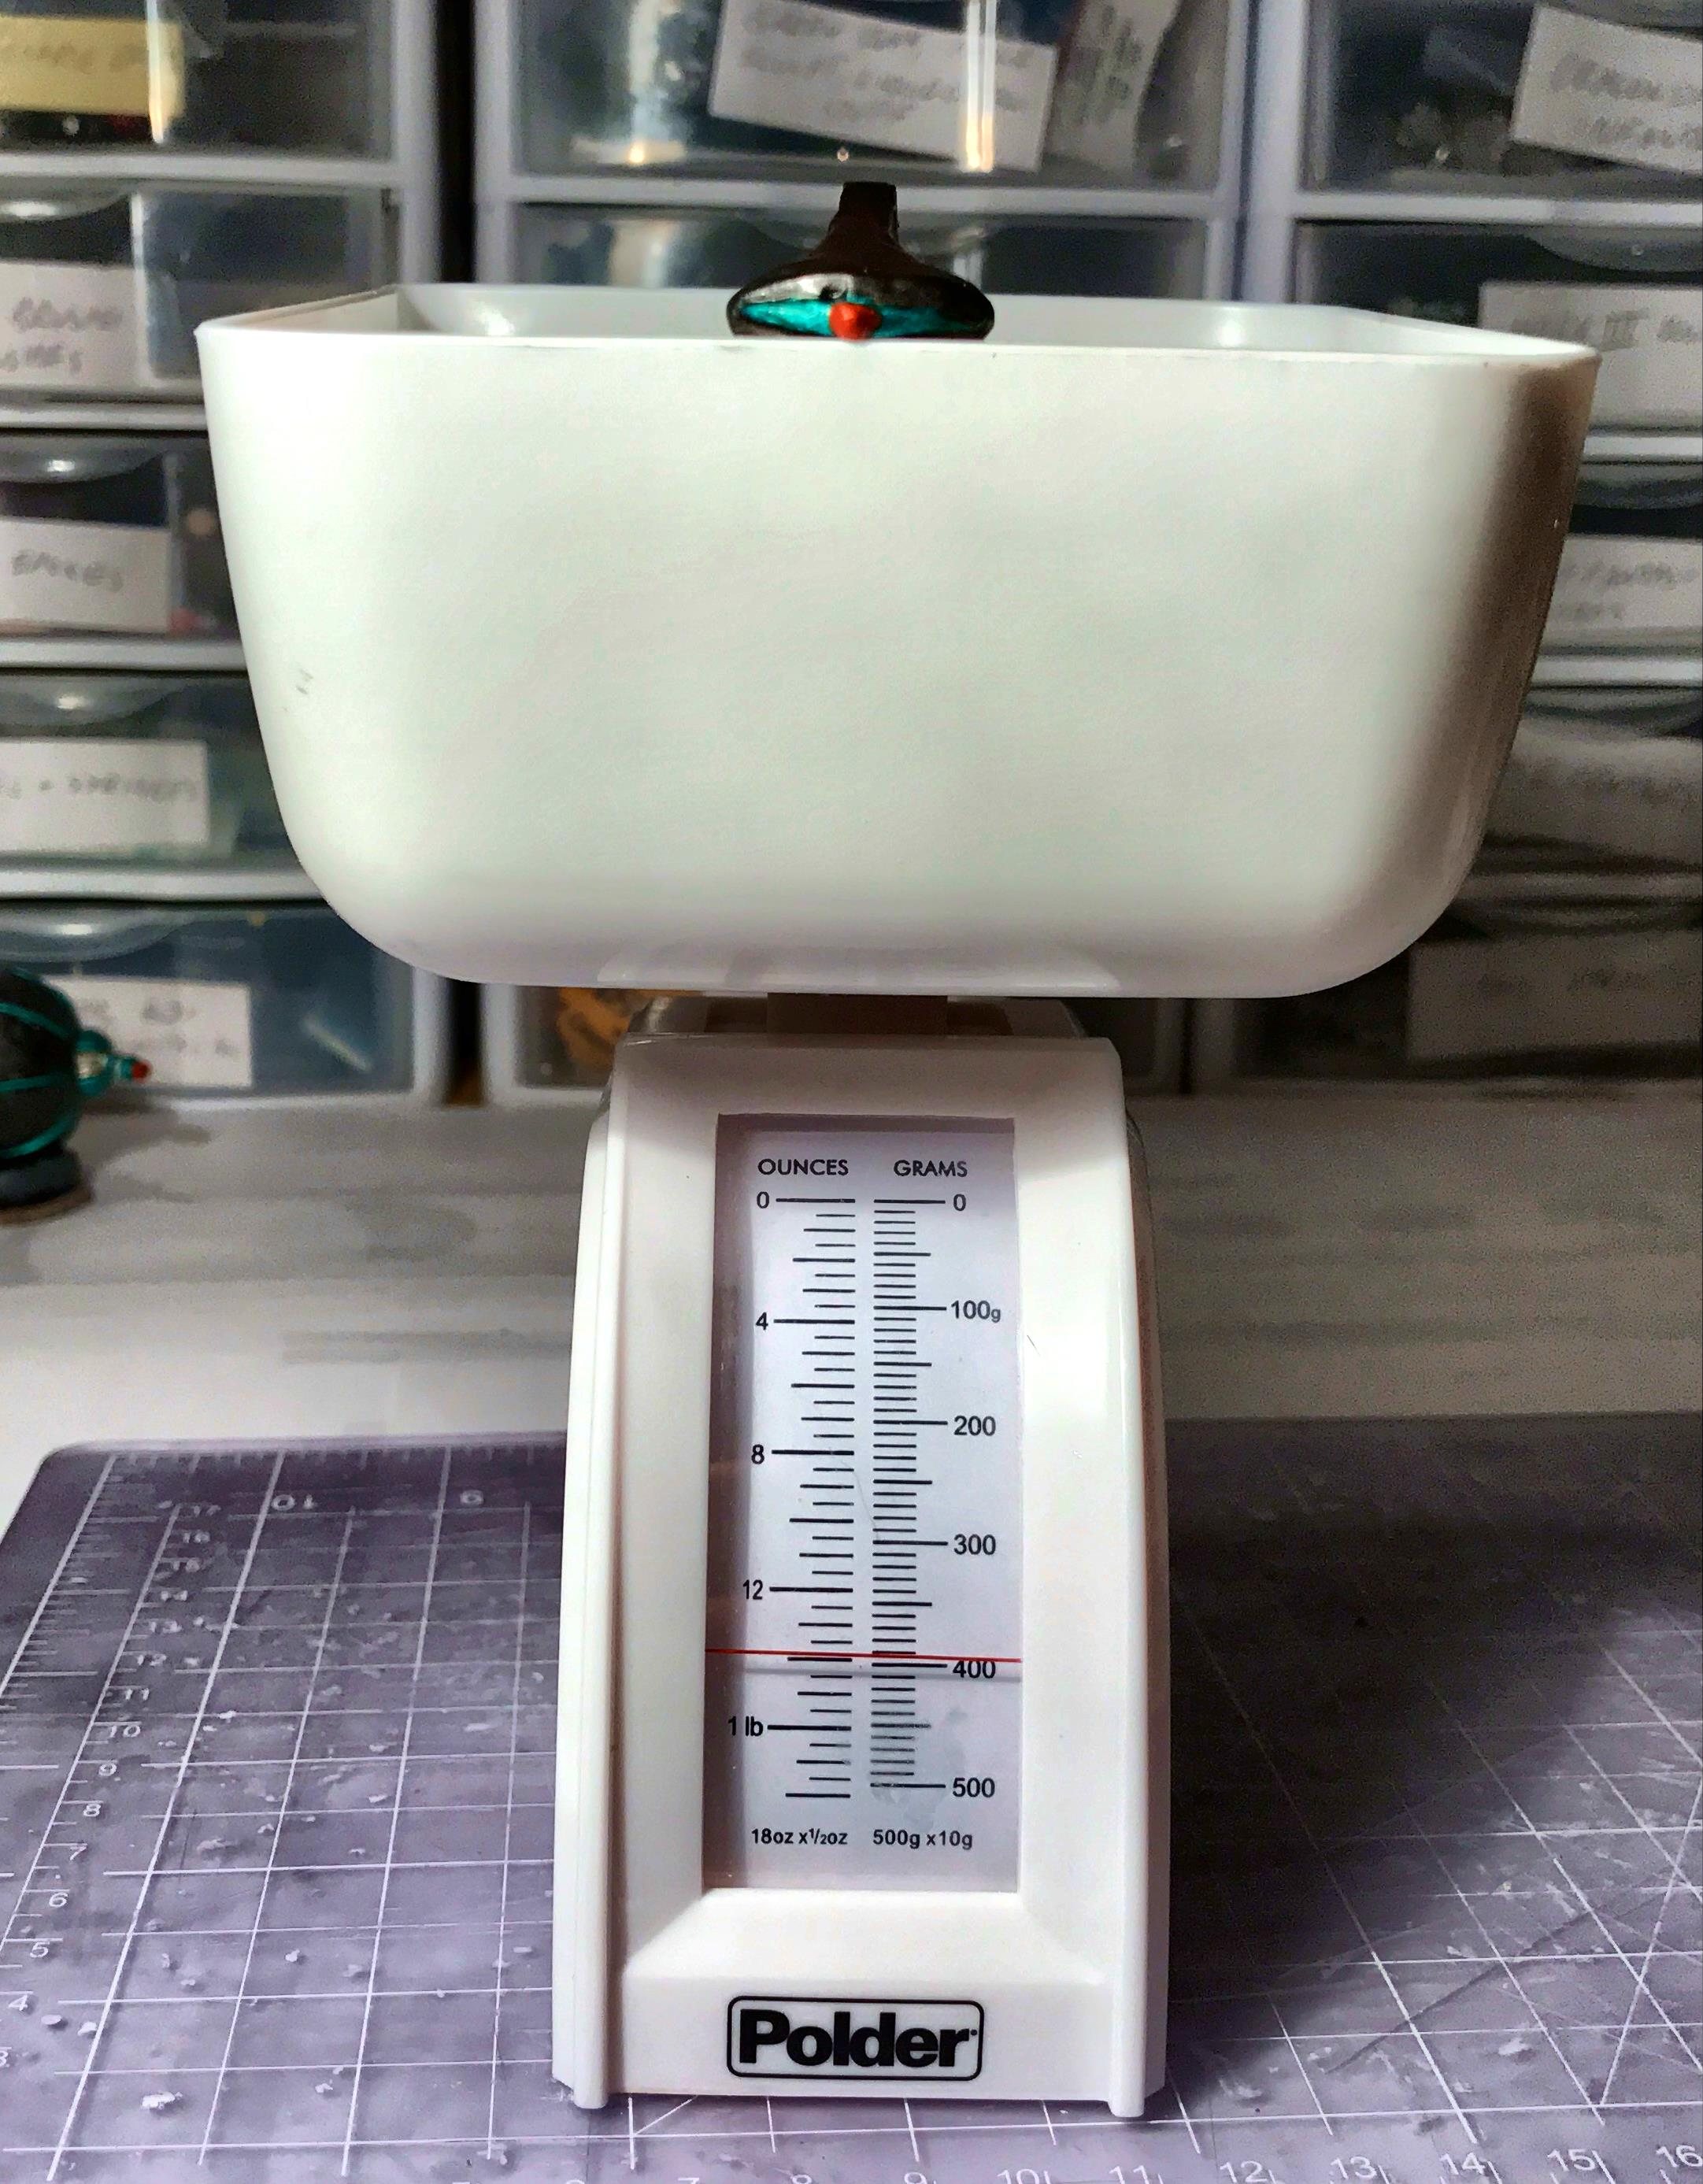
After priming, I moved on to painting them. Painting these proved to be challenging, especially the fully-cast models, due to the weight of the models. The metal ones weighed about 14 ounces, while the master weighed in at 4 ounces!
I used Citadel “XV-88” on the base and the chassis gaps. For the chassis and the heat ray, I based with Tamiya “Gun Metal”. I used several light coats and had a shiny finish to deal with – but a smooth one. The trick with Tamiya is a wet brush and a lot of shaking and shaking again. I then used another Tamiya metallic, “Chrome Silver” to paint the sponsons, the tread ridges, and the business end of the heat rays. I painted the tips pf the ray guns and the “eye” of the heat ray with “XV-88” and Citadel “Gehenna’s Gold” in anticipation of future colors. The base I gave an application of Americana “Ebony”.
After base coat
I then used my new Citadel Technical paints. Remember that the Martian craft had orbs that were glowing green. To recreate that feel, I applied two coats of Citadel “Waystone Green” to the sponson tops and bottoms, the tread ridges, the chassis gaps, and the main portion of the heat ray. I also painted the first and last rings of the ray guns with this technical paint. I wanted the slot of the sponson to be a bit darker – and Secret Weapons Washes “Armor Wash” helped me to achieve that look. For the tips of the ray guns and the “eye” of the heat ray, Citadel “Spiritstone Red” gave a nice focal character to the weapons.
After highlights
To accent the green, I shaded areas around the “Waystone Green” with Citadel “Nuln Oil GLOSSY”. As I was going to dull down the overall shiny paint job, I thought this would work better – and I think it did. I drybrushed the bases with Citadel “Mechanicus Standard Gray”, and then applied a light flocking with Army Painter “Ash Grey” on the washer alone.
Ready for varnish!
I was now ready to varnish, and for the first time I used Army Painter’s “Anti-Shine” matte varnish. This is an aqueous varnish. I liked it, and am excited as varnishing in New England in the winter is always a logistical challenge. I uses 2 parts varnish to 1 part water, and applied with a fan brush lightly. It came out nice and smooth. After it dried, I sprayed the models with Testors “Dullcoat” is my cellar bulkhead after I got it warm enough. This enabled venting of the fumes outside after I was done and kept my wife from killing me when she got home!
To finish the models, I needed to deal with the elevated bases. Using a lot of Army Painter “Wasteland Tuft” applied with white glue, I was able to create an image of the tanks plowing through grass. They are heavy though, but sturdy.
This is a heavy model!!! In English and metric units!
The master weighs a lot less!
Here are some close up photos of the final product.
Run!
Convoy!
Nice group shot
I am very happy with how these came out. If I get enough interest, I may offer some for sale as kits. Certainly, these are my first real creations from conception to creating to molding to casting to painting. I learned a lot, and I am sure that my next iterations will be better.
They will be an excellent part of my Frinx forces for Combat Patrol™!