My ultimate goal is to have an excellent game that I can run at conventions or club meetings. I now have that, but will probably add some Marder III’s, M3 Grants/Lees, and M4 Shermans to be complete.
I will share here both the Italian vehicles and the Panzer IVD – and some of their in progress photos. Then, you will get a chance to view some eye candy shots! Because I have been very busy seeking new employment (and it looks good on that front!), I was able to finish the tanks and run a couple of play tests before I could finish this post. So there will be a few shots of the play tests I have been running with these tanks. I also share the materials and research used at the end for those interested.
This tank is basically the M13/40 with a better engine and slightly better armor.
M14/41 in blister
Cleaned up and ready for assembly
Assembled tank
I used a painting scheme that attempted to match the one example in the Bovington museum.
M14/41 primed and base coated
Prepped for camouflage
After camouflage paint – a little lighter than I wanted
After applying decal and varnish, but before adding weathering powders.The completed M14/41 tank model next to one in the book.
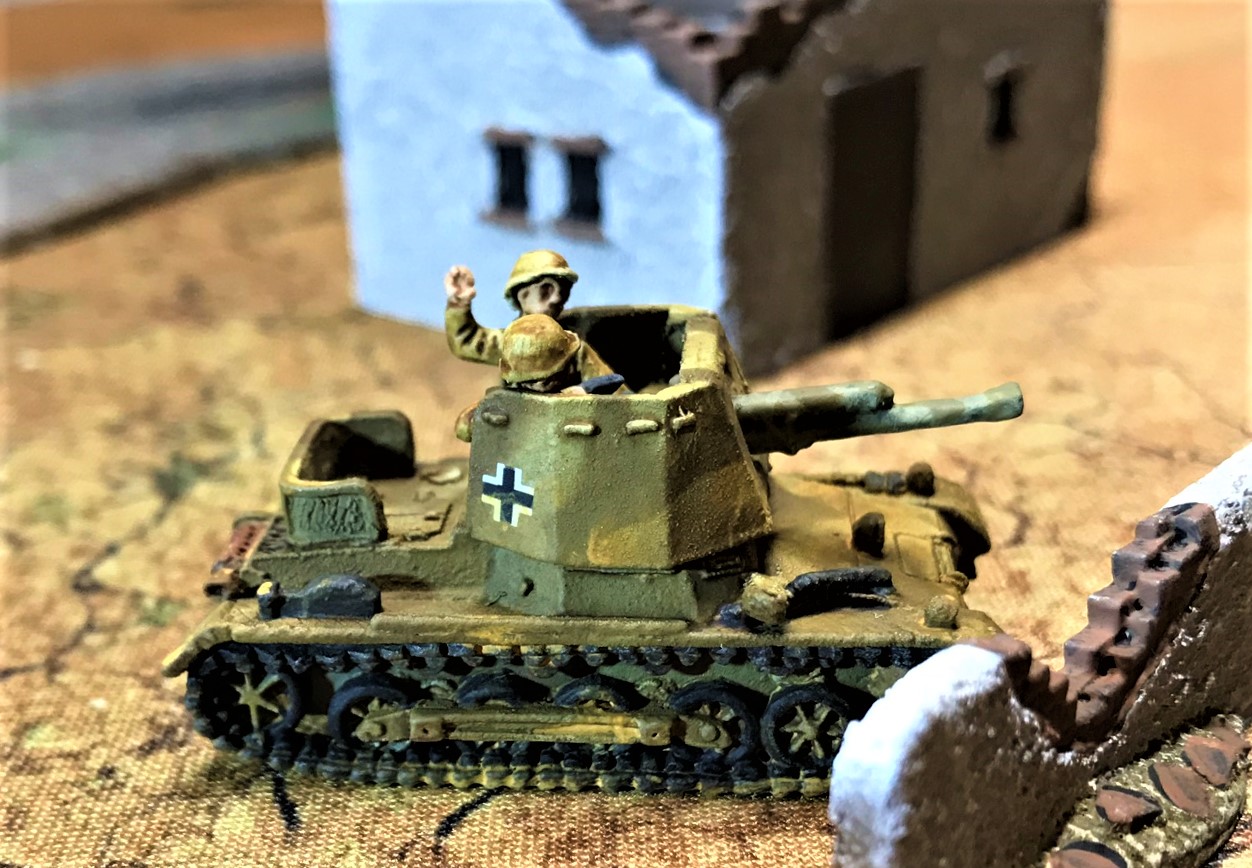
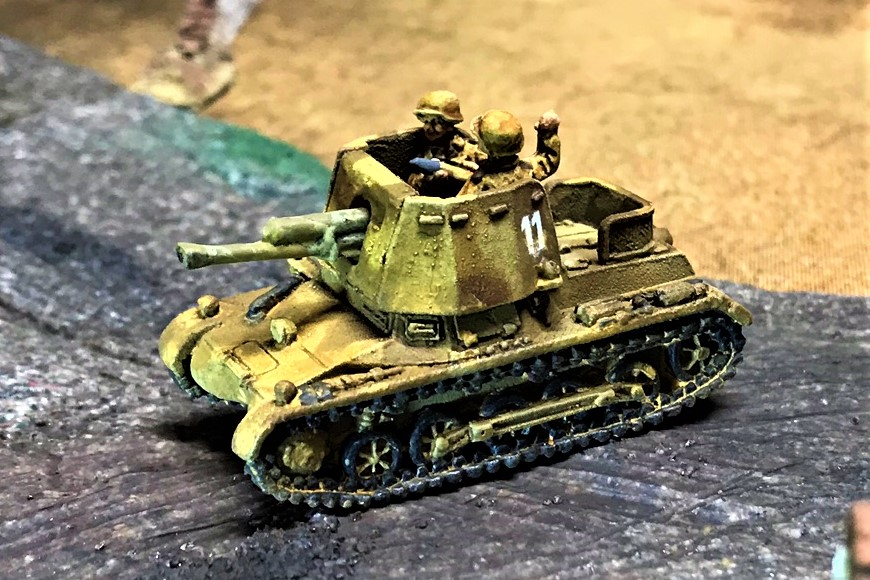
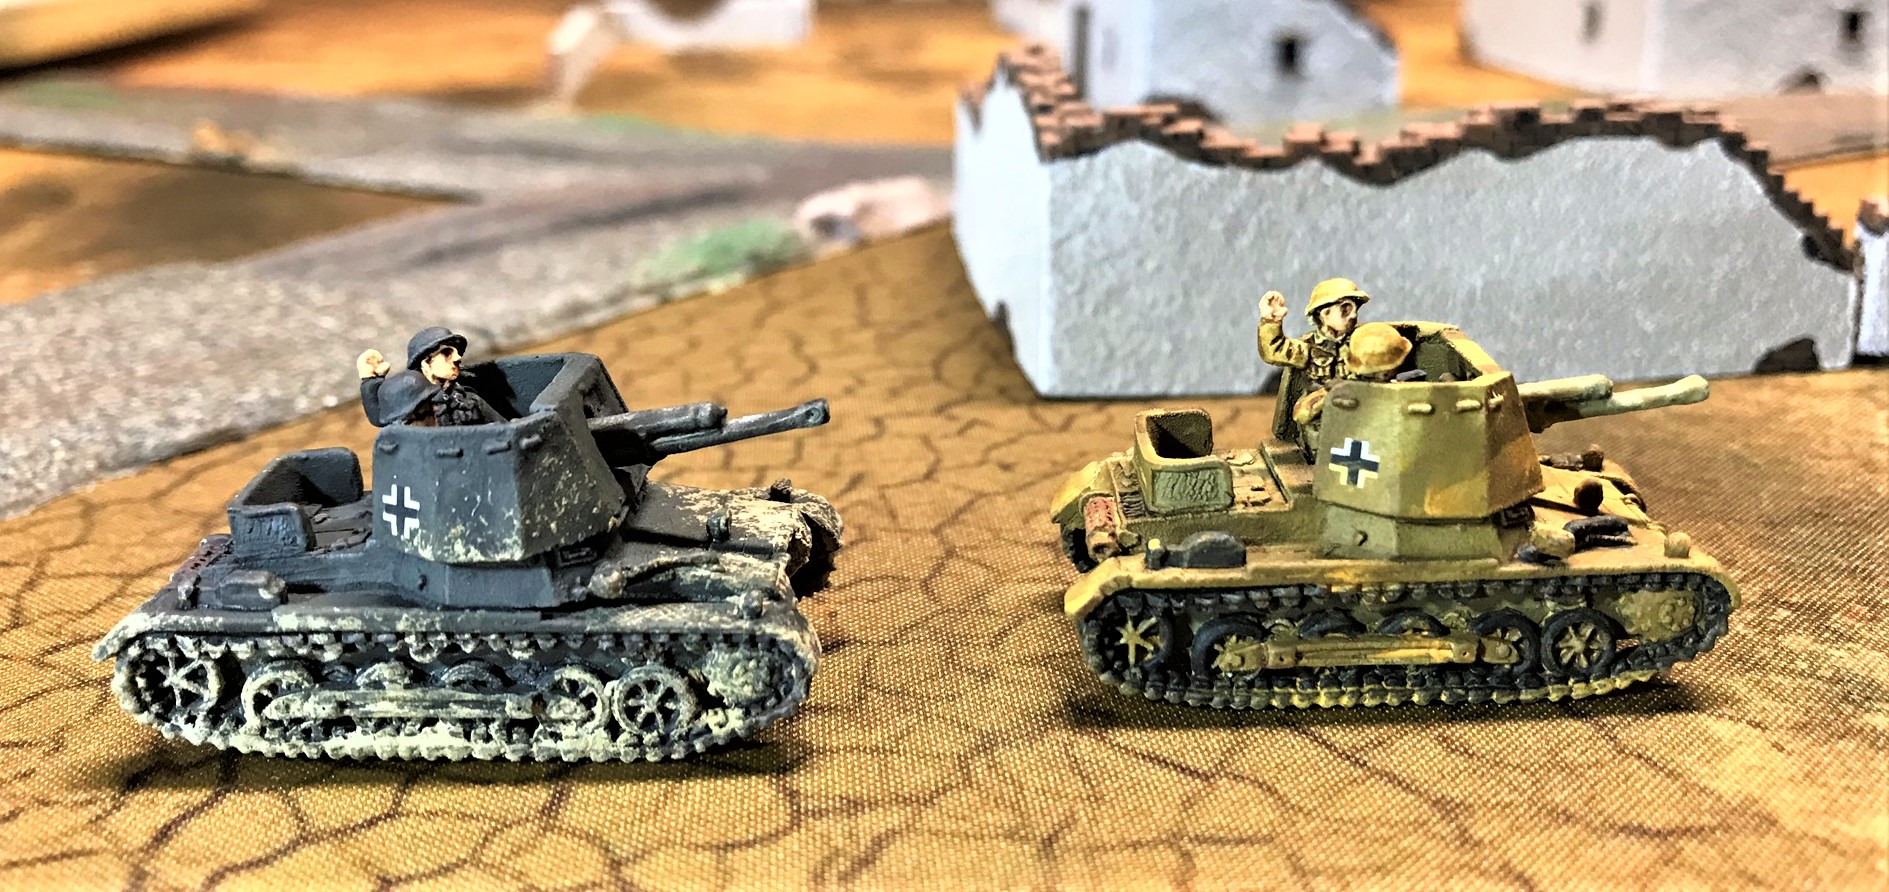
Semovente 47/32
In the WaT rules, this vehicle is interesting. It is small (tougher to hit), low profile (tougher to acquire), fast (can move every turn), and a tank destroyer (can aim easier). It also is, like the Panzerjager I, open-topped, so never buttoned (and more vulnerable). Each blister had two vehicles, and I bought two at the 50% off sale!
Semovente 47/32’s in blisters.
Ready for assembly.
The tiny tank destroyers primed and base coated.
Close up after decals
With the book example
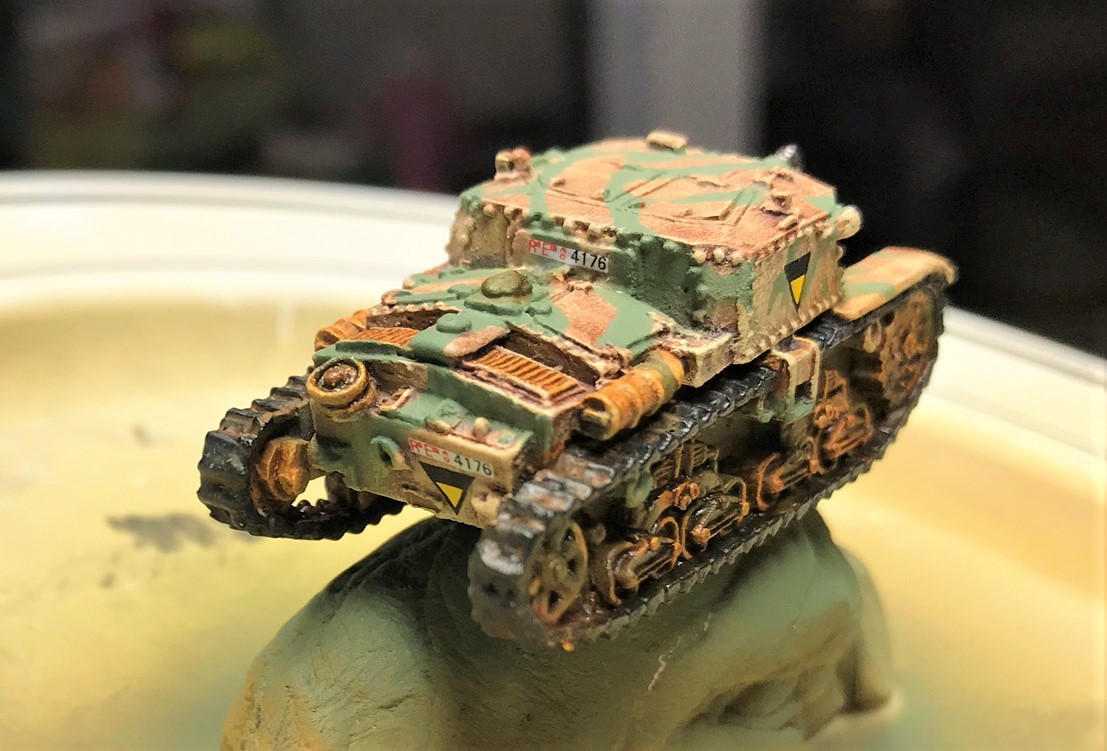
Semovente 75-18
I had two of these, with one being a command model (carro comando), that had a range finder (called a goniometer). I used a slightly different camouflage scheme with these and love the triangle vehicle marking decals that these got.
The two 75/18 types in their blisters
Components – with useless instructions (wrong model).
Primed and base coated
Prepped for camouflage
After adding crew and decals
Hey, matching licence plates!I used this color scheme, and went with the decals anyways.
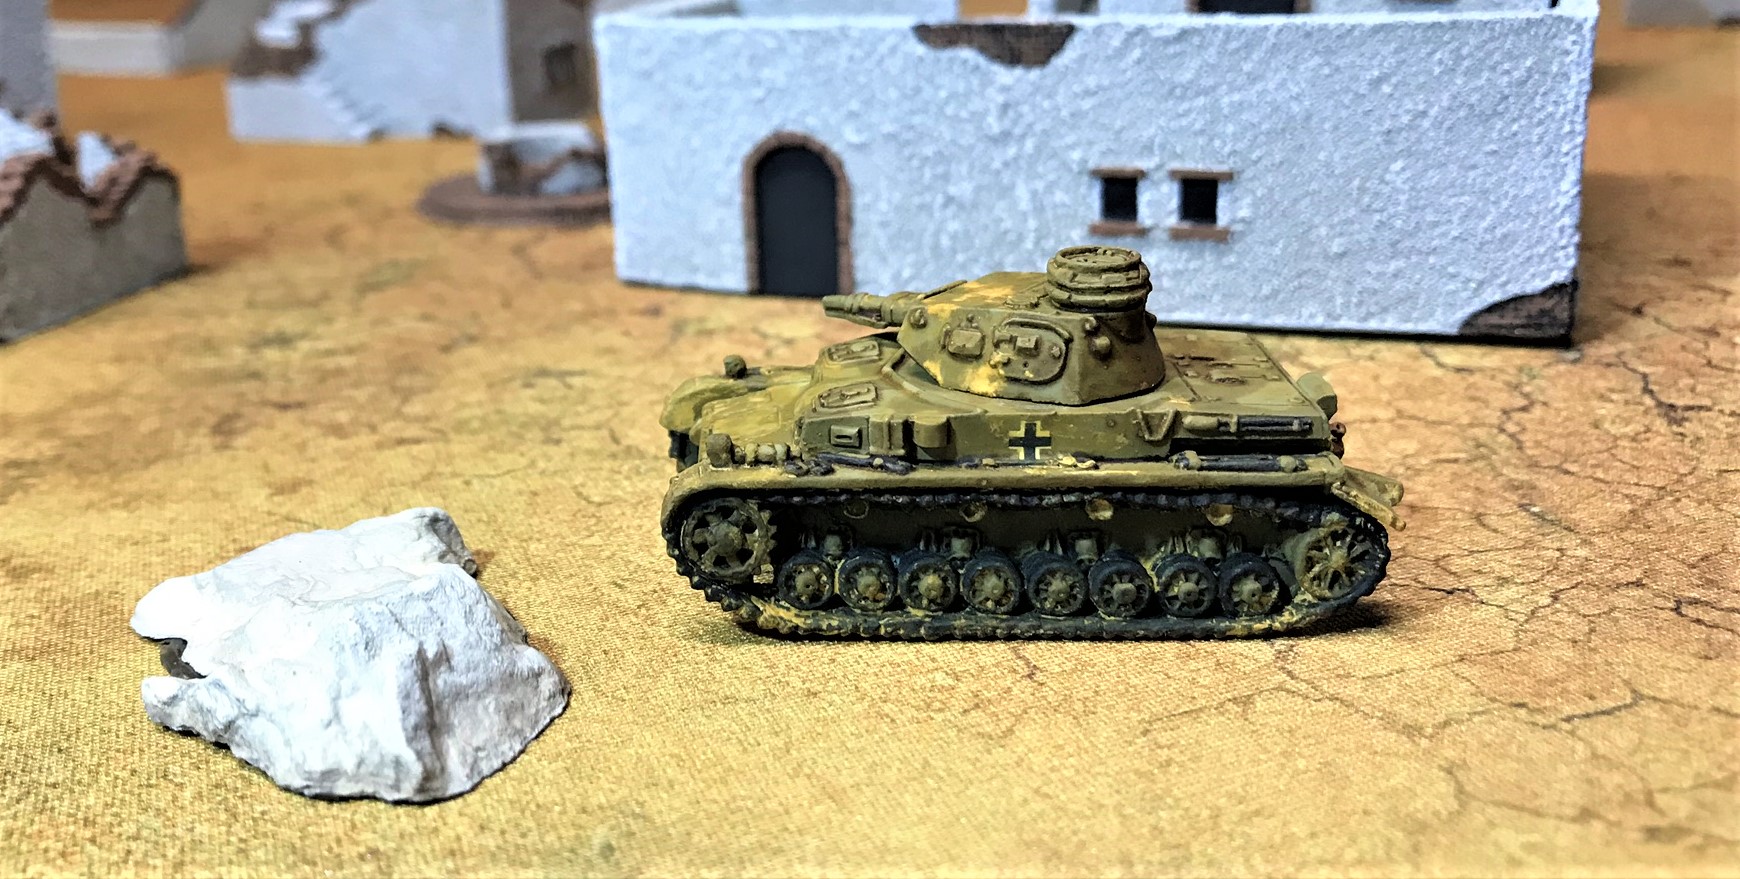
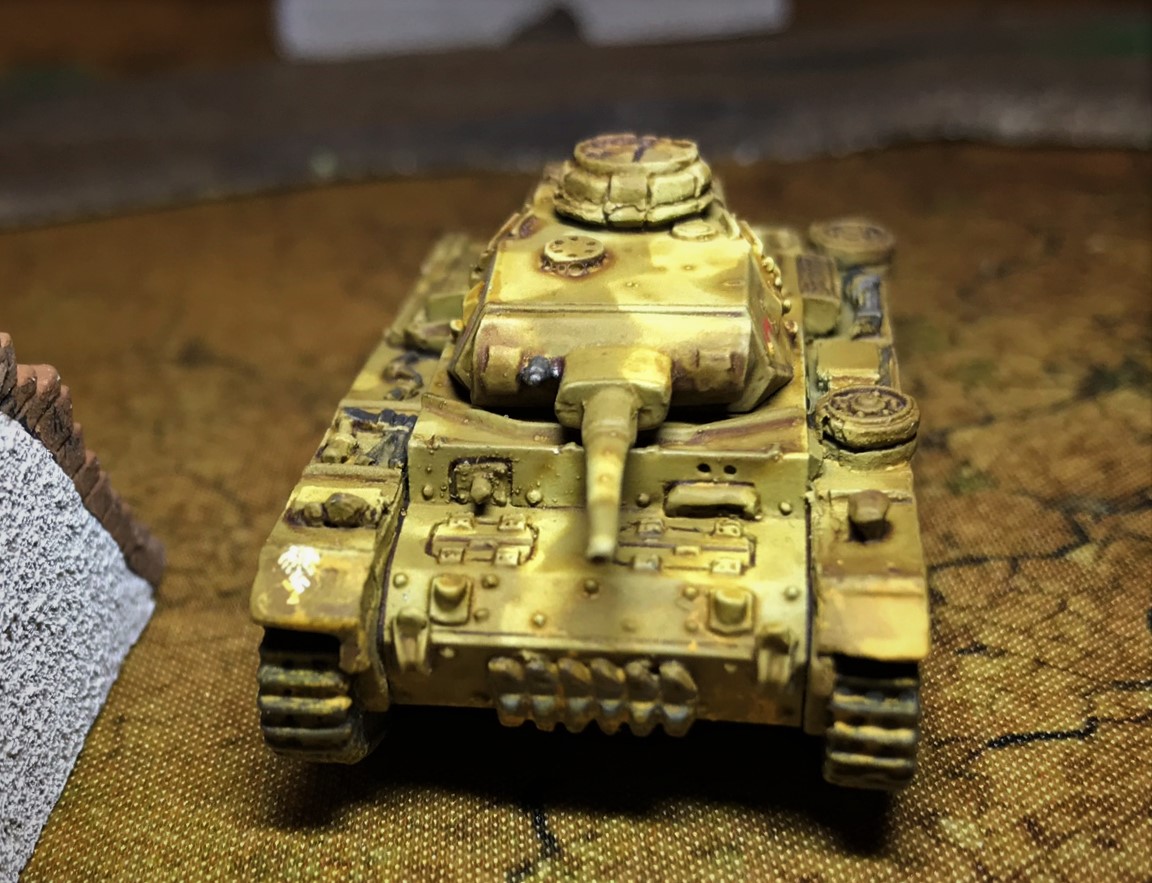
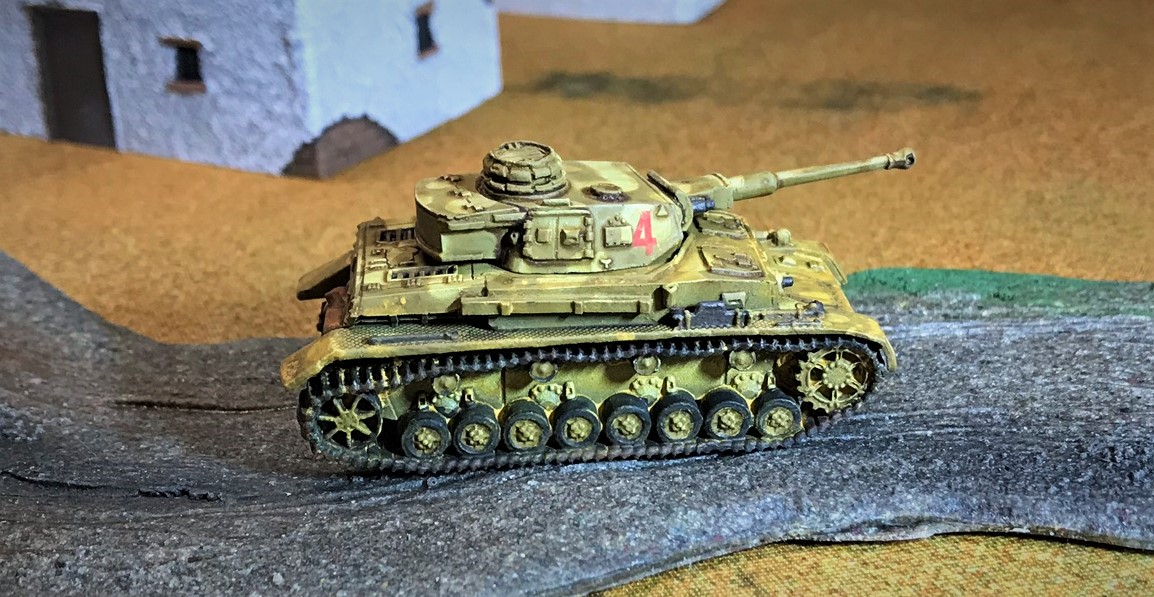
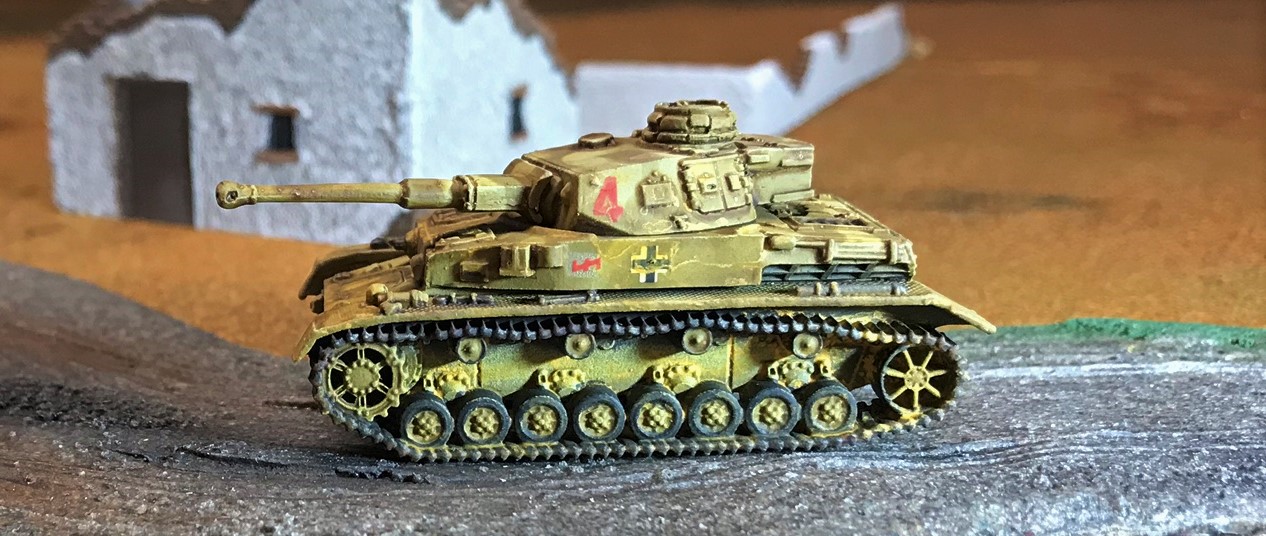
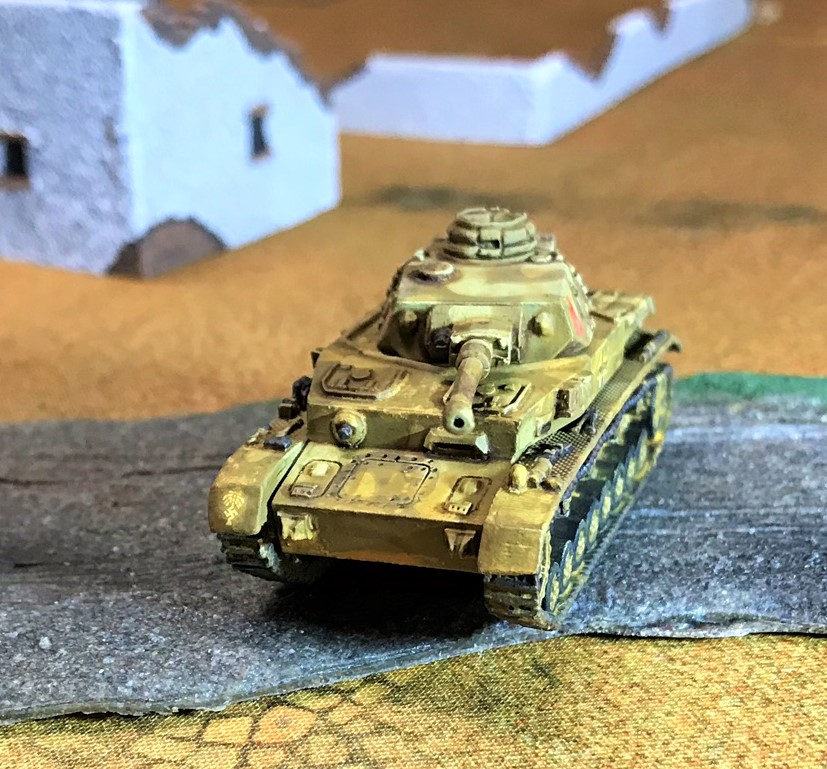
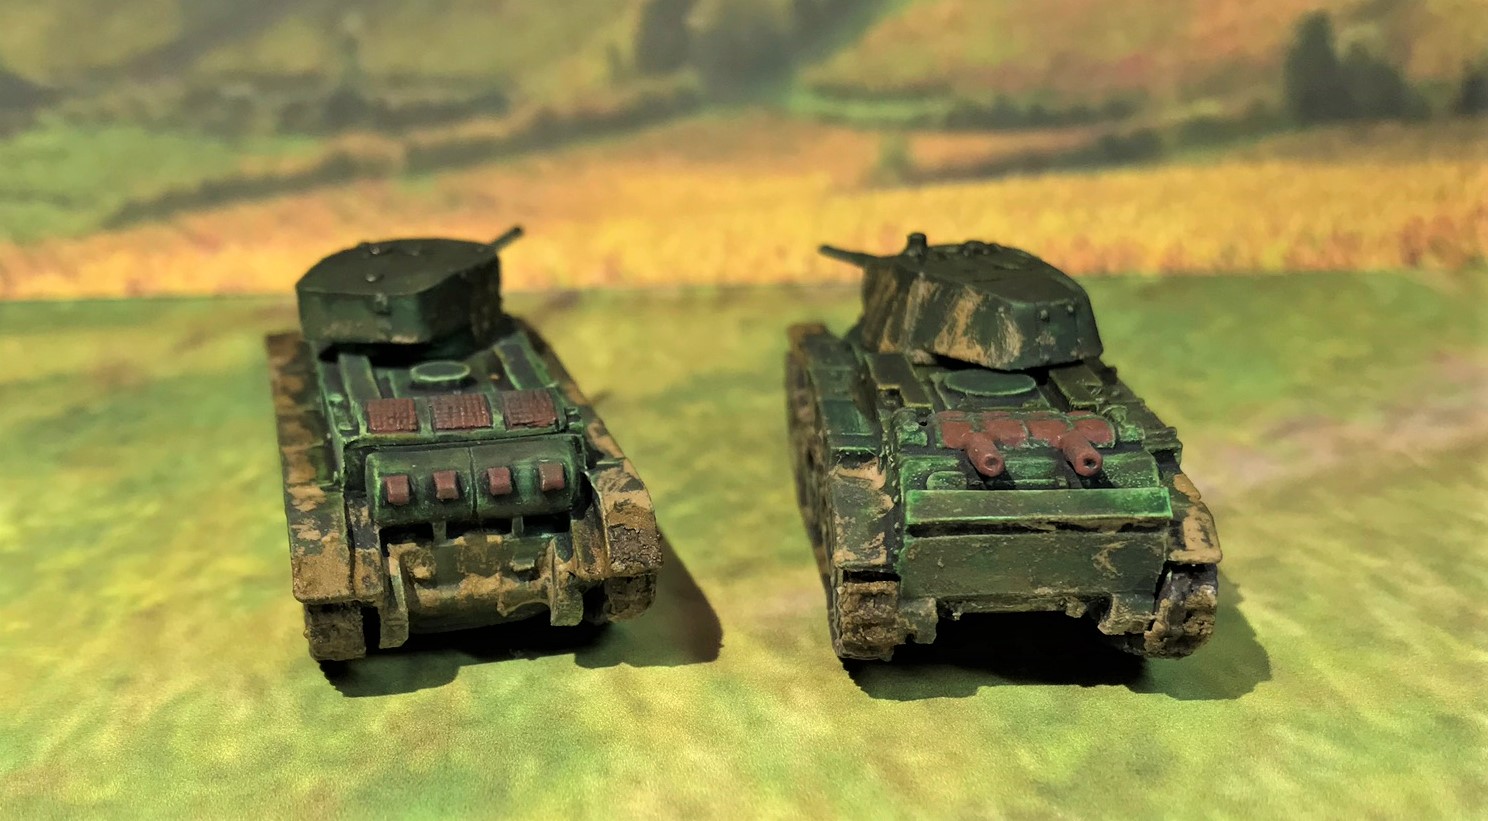
Panzer IVD
My previous Panzer IVD did not make the last project group as it came with two left tracks. Battlefront sent me a replacement, and I plan to use the defective one soon as a wreck project.
In the blister
Ready fir assembly
Had to pin the main gun.
Assembled Panzer IVD
Italian Repainting
For my Wargame Model in Ohio tanks, I decided to give them a makeover with paint and decals so that they were less different than the newer Italian vehicles. They are still not perfect, but I decided to stick with what I have done with them now.
My repaint of the other Italians
I hope you liked the in progress stuff above – and now…it’s Eye Candy time!
Eye Candy
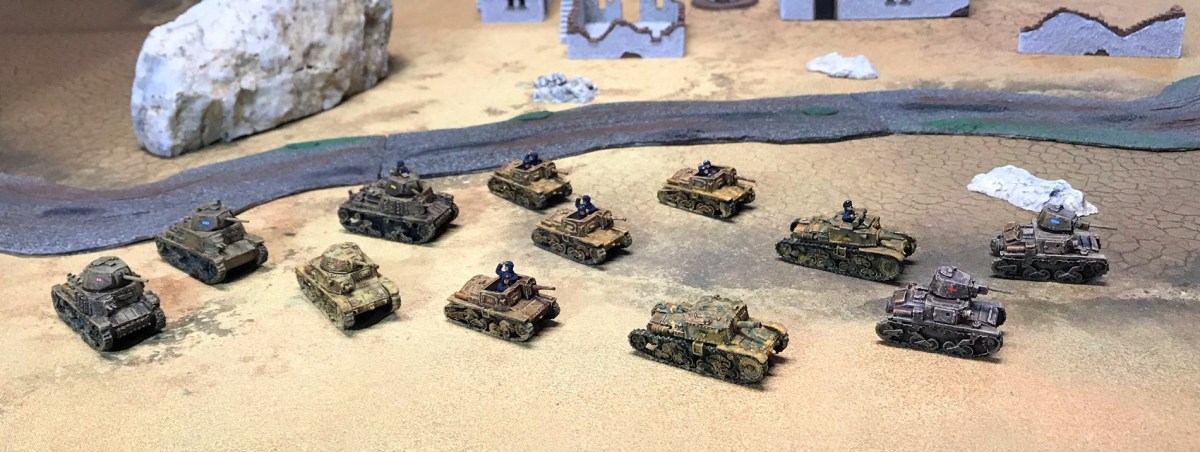
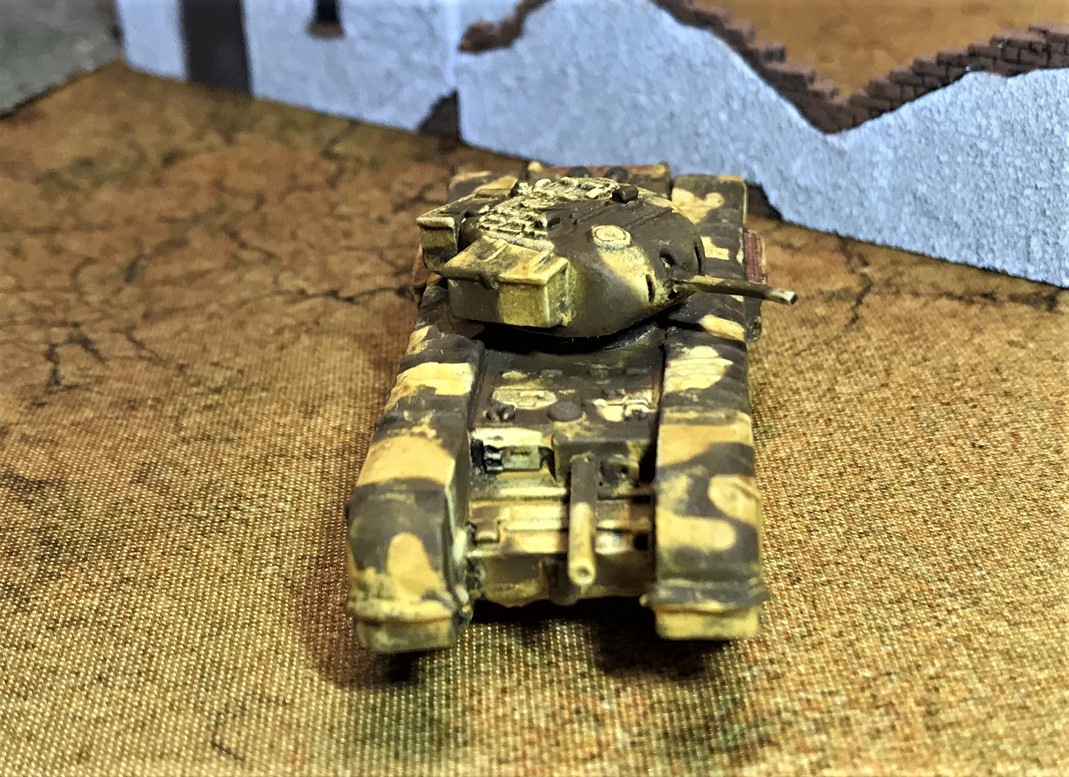
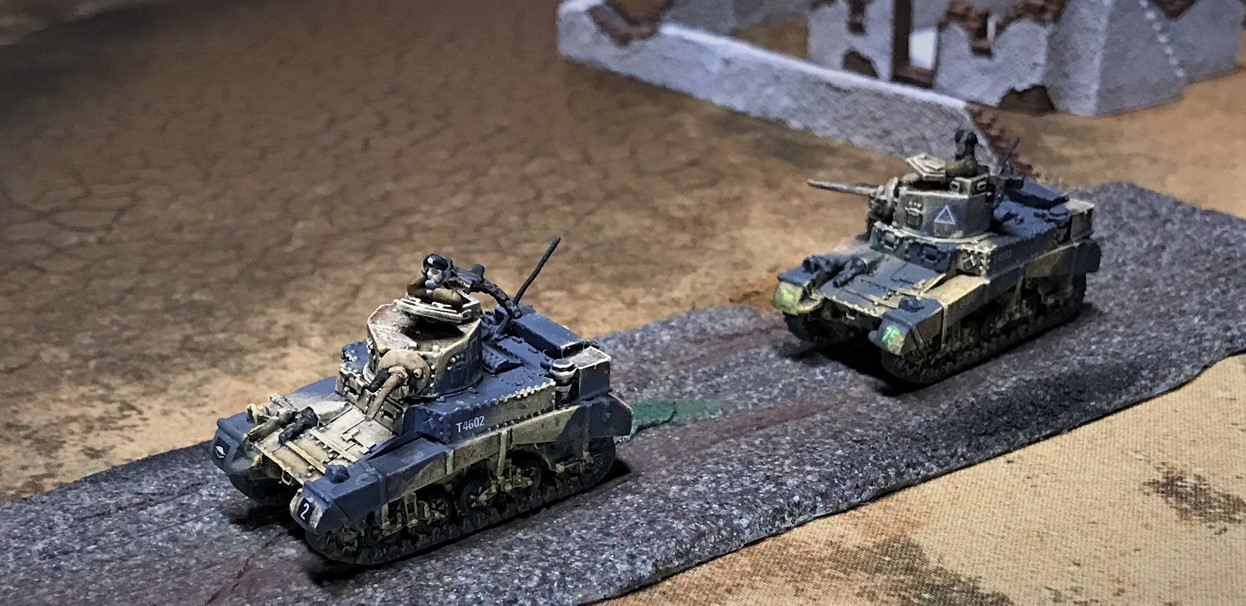
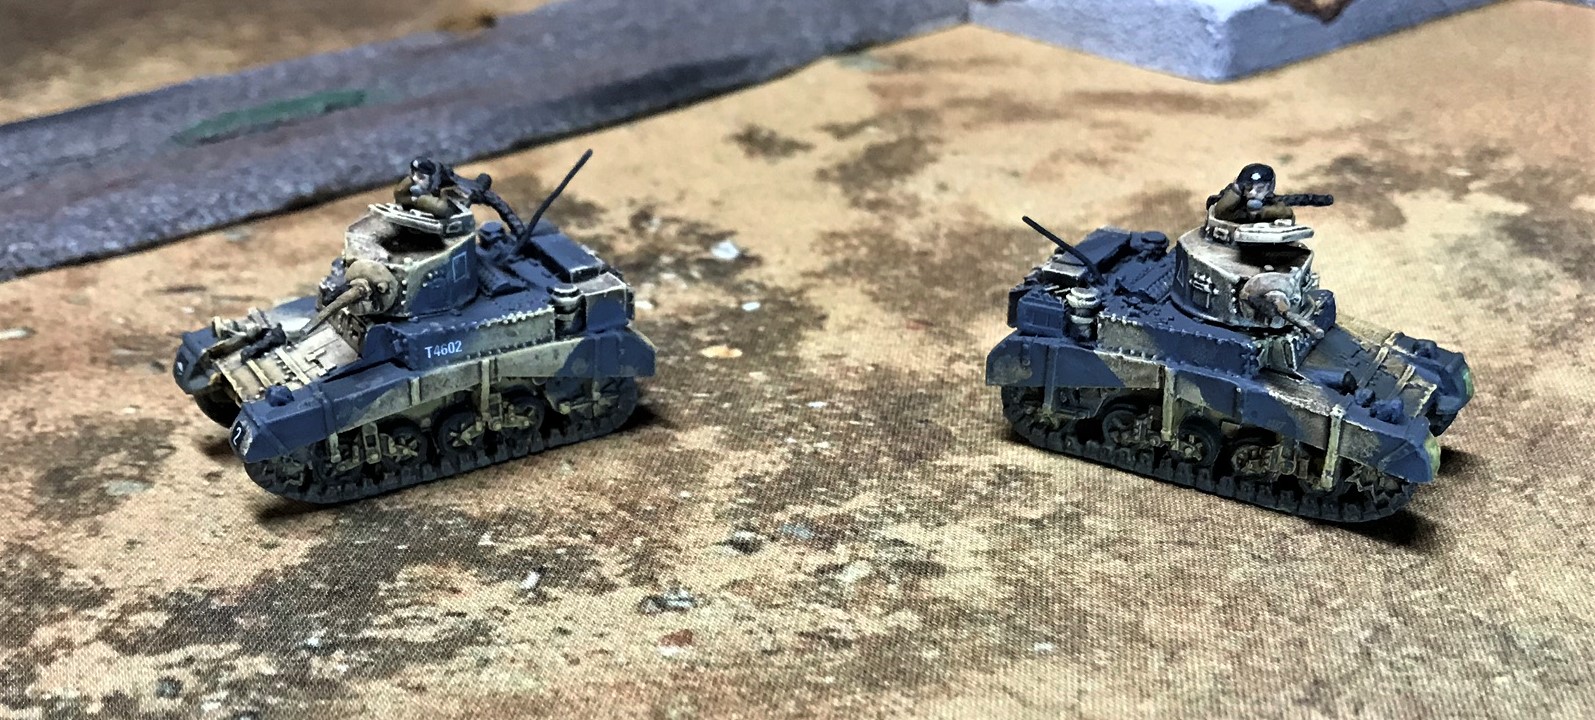
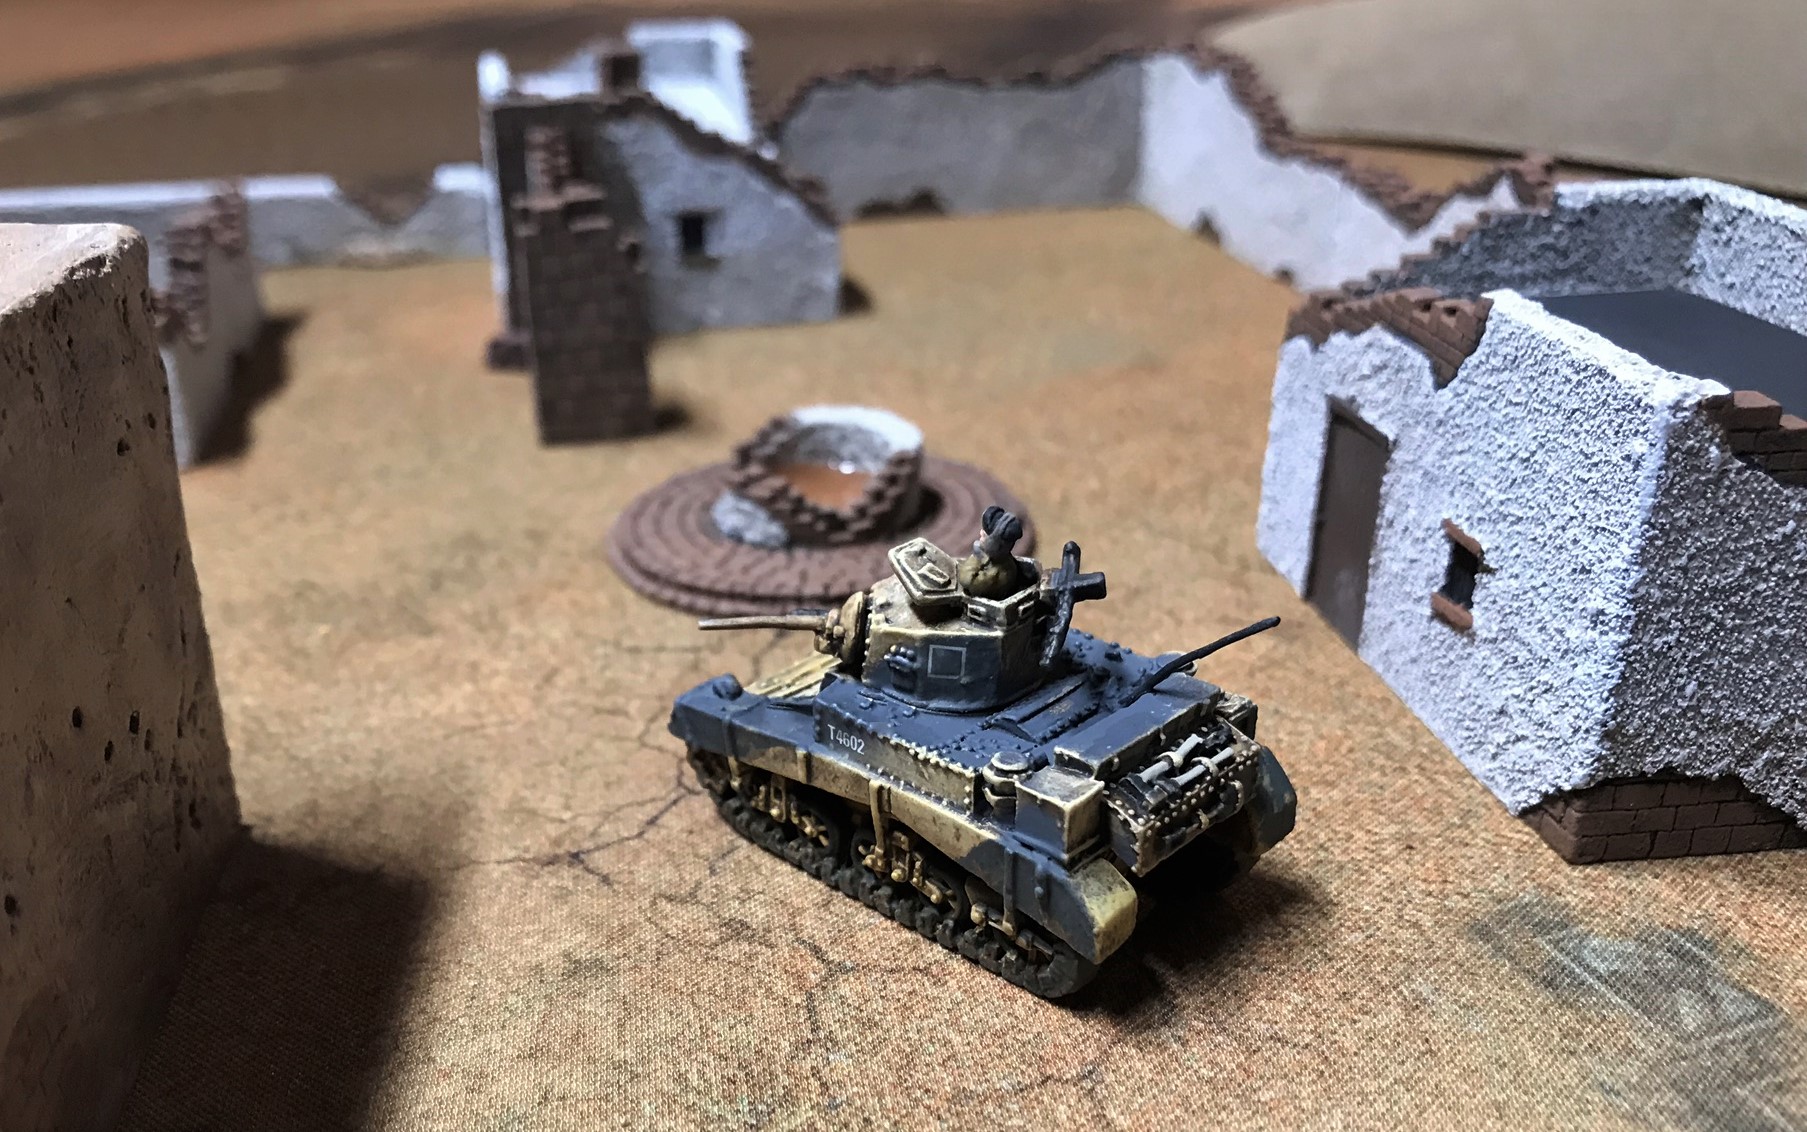
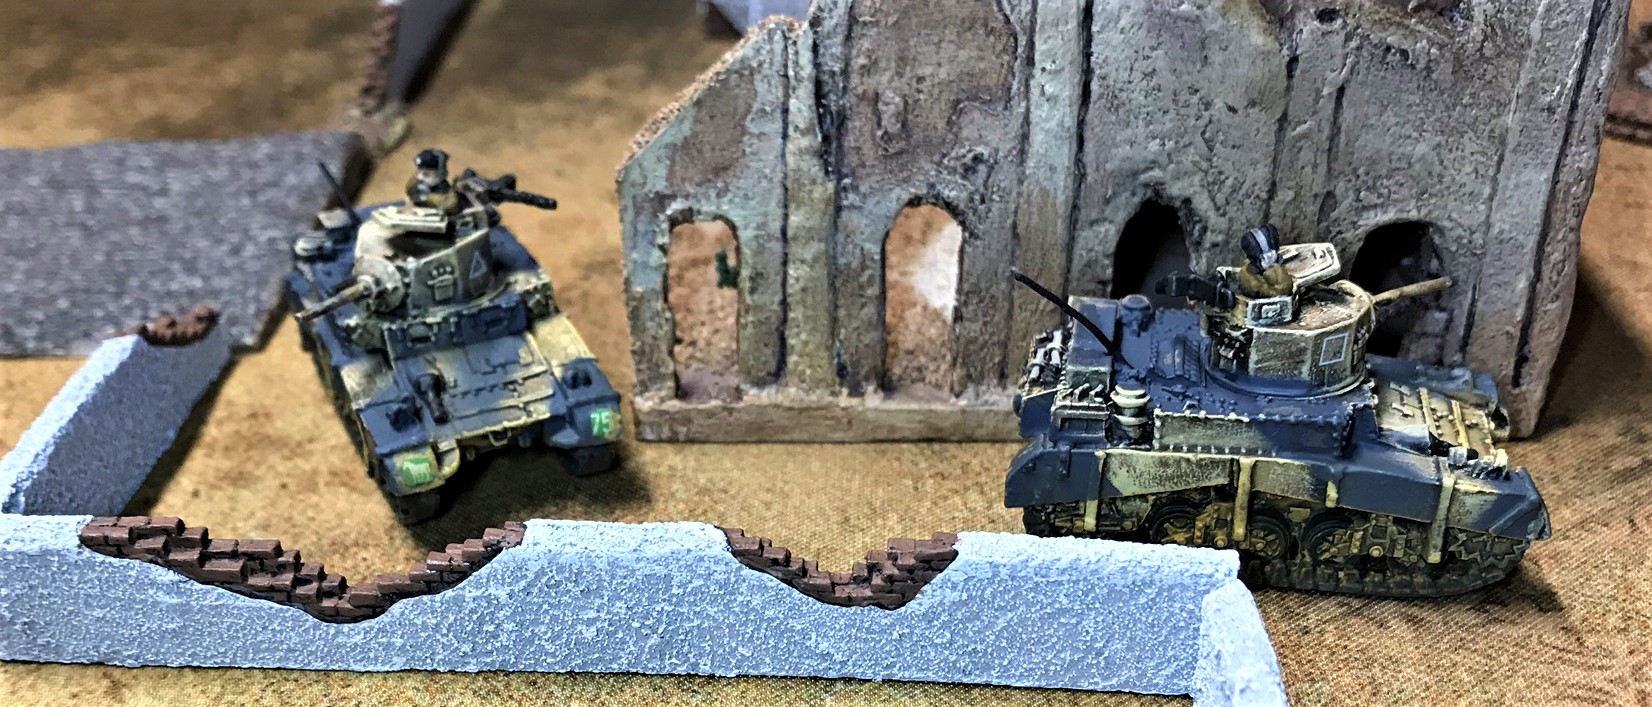
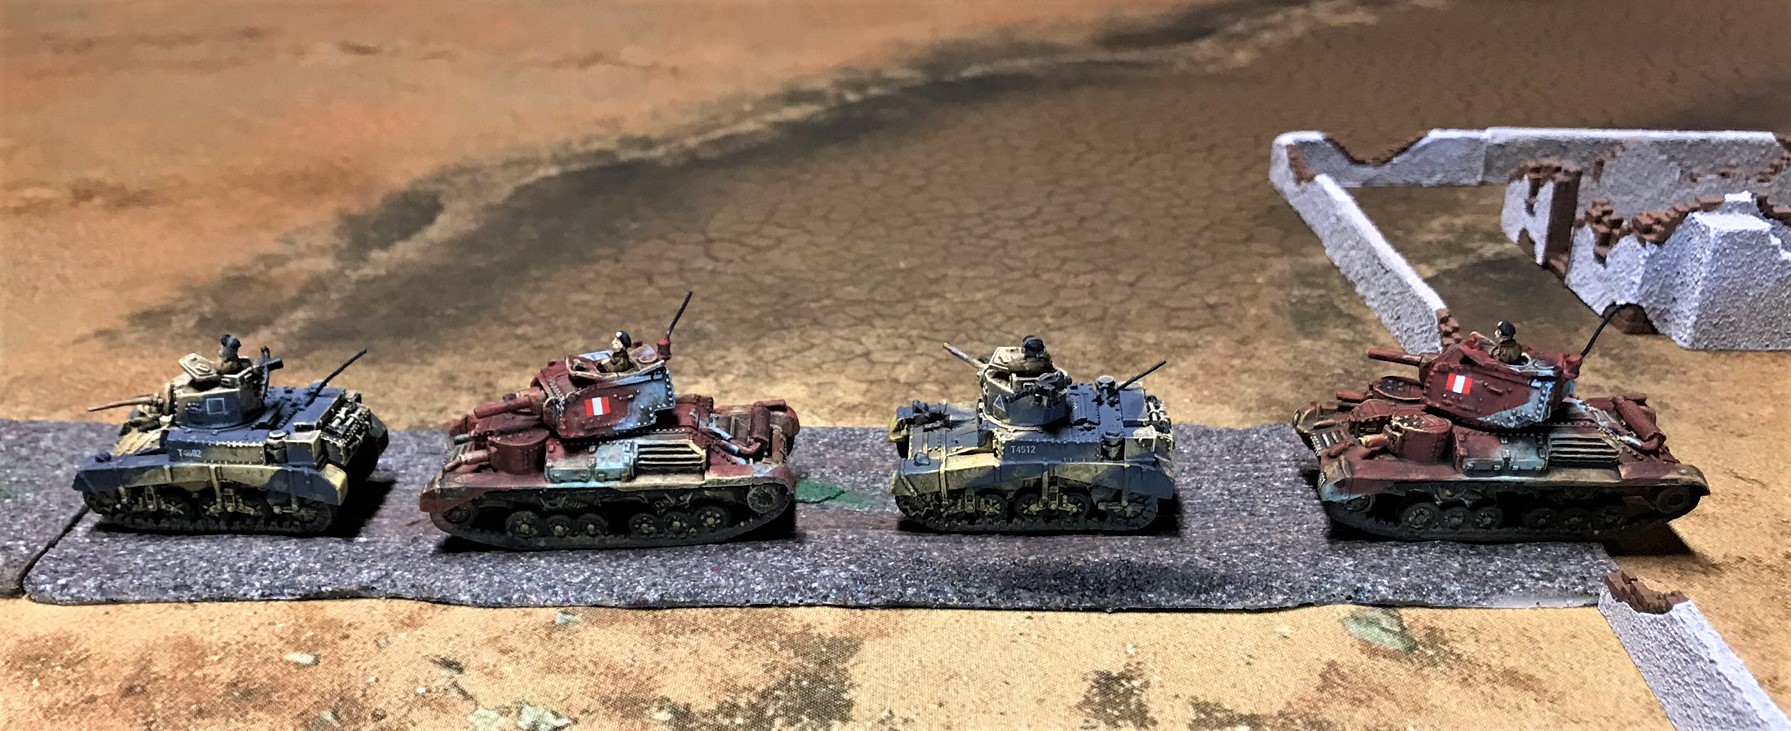
Front view of M14/41.Left rear view of M14/41Right side view of M14/41 on the roadLittle Semovente 47/32’s in a convoyFront left view of Semovente 47/32Rear right view of Semovente 47/32Semovente 75/18 right side view.Left front view of Semovente 75/85Rear view of the Semovente 75/18 tank destroyerIn comparison, here is the Semovente 75/18 Carro Comando version from the backSemovente 75/18 right sideSemovente Carro Comando 75/18 right side. Note the goniometer on the top in front of the crewman.The two versions of the Semovente 75/18’s togetherPanzer IVD left sidePanzer IVD left sideRear view of the Panzer IVDItalian Group shot!
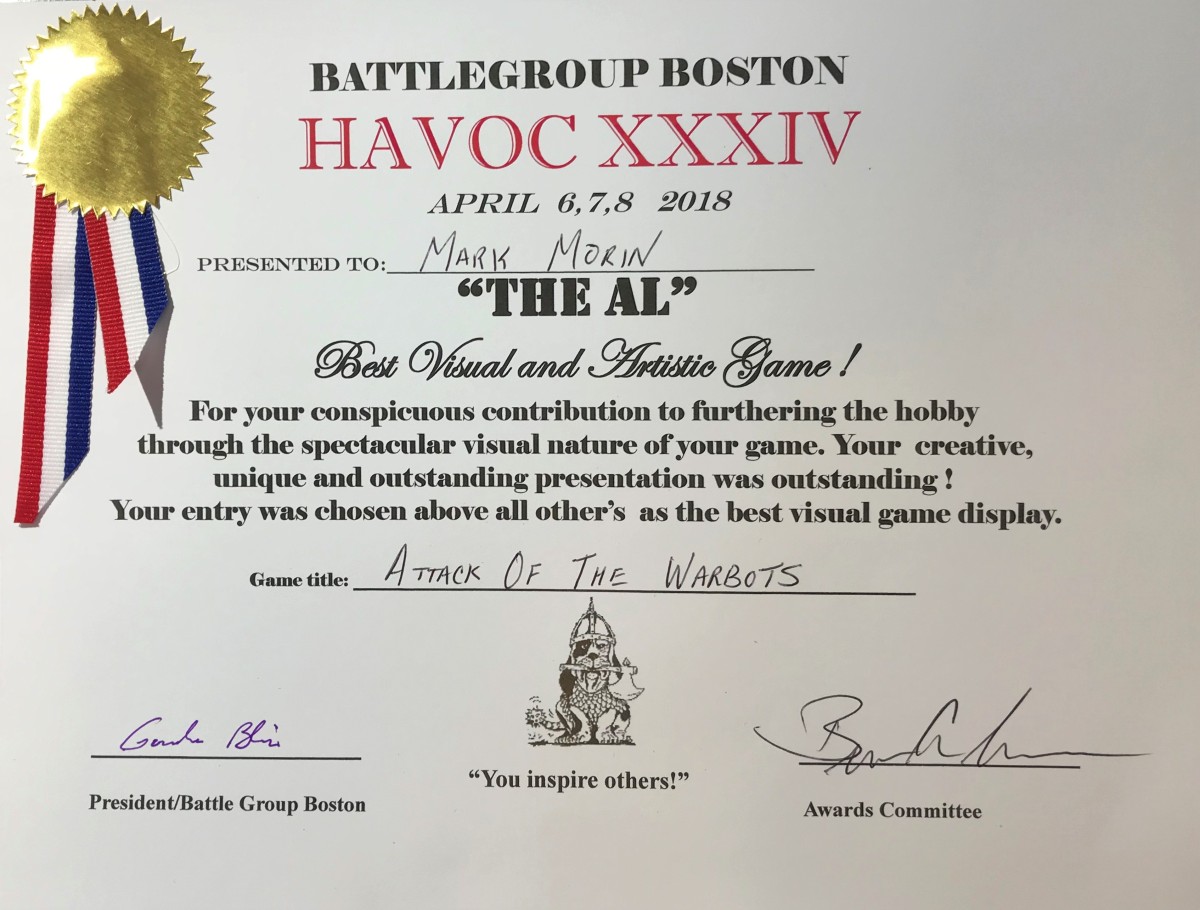
Lastly, I am thankful to Chris Rett, Ryan MacRae, Frank Ramsay, and Mike Morgan for helping me to start to play test the scenario and rules tweaks that I will use to make this work at HAVOC in April for up to 10-12 players. Here’s a few shots!
At Great Stories in Uxbridge, MA – Chris, Ryan, and Frank have fun. The Brits made a comeback and won here under Chris’ command.Mike Morgan maneuvers his Brits to a narrow victory at my house.One of my innovations – Kill Ring Cards!
Thanks for looking – and I hope that you found this post interesting and fun. As I add more tanks/tank destroyers, I will share them. I also hope to add better pics from future games.
Please let me know your thoughts and feedback – as always – in the comments section!
PAINTS, INKS, GLAZES, SHADES, WASHES, PIGMENTS AND FLOCKING USED ON THIS TANK GROUP:
Vallejo “Flow Improver”
Vallejo “Airbrush Thinner”
Vallejo “Surface Primer – Black”
Citadel “Imperium Primer”
Battlefront “German Camo Orange Ochre”
Testors “Universal Acrylic Thinner”
Vallejo Model Air “Base Grey”
Army Painter Quickshade “Mid Brown” (wash)
Battlefront “Dry Dust”
Vallejo Model Air “German Green Brown”
Battlefront “Monty Shade” (shade)
Army Painter Quickshade “Strong Tone” (wash)
Battlefront “Army Green”
Battlefront “Dark Gunmetal”
Battlefront “Panzer Gray”
Vallejo “Neutral Grey”
Vallejo Model Air “Green Brown”
Vallejo Model Air “Light”
Vallejo Model Air “Cam. Grey Green”
Battlefront “Black”
Battlefront “Battledress Brown”
Vallejo Mecha Color “Light Rust Wash” (wash)
DecoArt “White Pearl”
Army Painter Quickshade “Light Tone” (wash)
Battlefront “European Skin”
Battlefront “Skin Shade” (shade)
Vallejo “Dark Flesh”
Vallejo “Dark Prussian Blue”
Vallejo “Dark Yellow Ochre” (pigment)
Vallejo “Light Slate Grey” (pigment)
Vallejo “Light Sienna” (pigment)
Vallejo “Desert Dust” (pigment)
Citadel “Nuln Oil” (wash)
Gorilla Glue
Vallejo Mecha Varnish “Gloss Varnish”
Microscale Micro-Set
Microscale Micro-Sol
Microscale Liquid Decal Film
1/8″ rare earth neodymium magnets
Appropriate decals from Battlefront
Vallejo Mecha Varnish “Matt Varnish”
Aleene’s poster tack
Sponges
Thanks for looking and for sharing your feedback!
ONCE MORE – ON MY RESEARCH MATERIALS
As for research materials, I used the same ones as I cited before – but for completeness here they are in case you are interested (you can find them on Amazon):
One by Jean Restayn:WWII Tank Encyclopaedia, 1939-45
One by the Smithsonian/DK: Tank: The Definitive Visual History of Armored Vehicles
One by Michael Green:Axis Armoured Fighting Vehicles of the Second World War (Images of War)
One by Robert Jackson:Tanks and Armored Fighting Vehicles Visual Encyclopedia
I would again easily recommend all of these books as really good resources for gamers and modelers.
I finished a total of 17 tanks/tank destroyers this month. These were all 15mm scale and from Battlefront Miniatures. Thirteen of these were for North Africa, while four would augment my forces for my France 1940 scenario. The largest single number were nine Panzer II variants. I had purchased a box of five Panzer II’s previously, and built one for France 1940, but the box was short one tank guns. Battlefront made good on this, and sent me another entire box of five tanks! This allowed me to convert an extra British A10 gun I had lying around into one for a Panzer IIC. It’s not perfect, but should work on the tabletop. I also had a Panzer IVD from Battlefront, and discovered that it had two left tracks. Battlefront has done right by me on that too, and replaced that entire tank as well. I will probably take the extra Panzer IVD and make it into a wreck later on. So this post will review these 17 tanks I built and painted:
2 Panzerjager I’s (one for France 1940 and one for North Africa)(15mm/1:100 scale), from Battlefront Miniatures (#GE100)
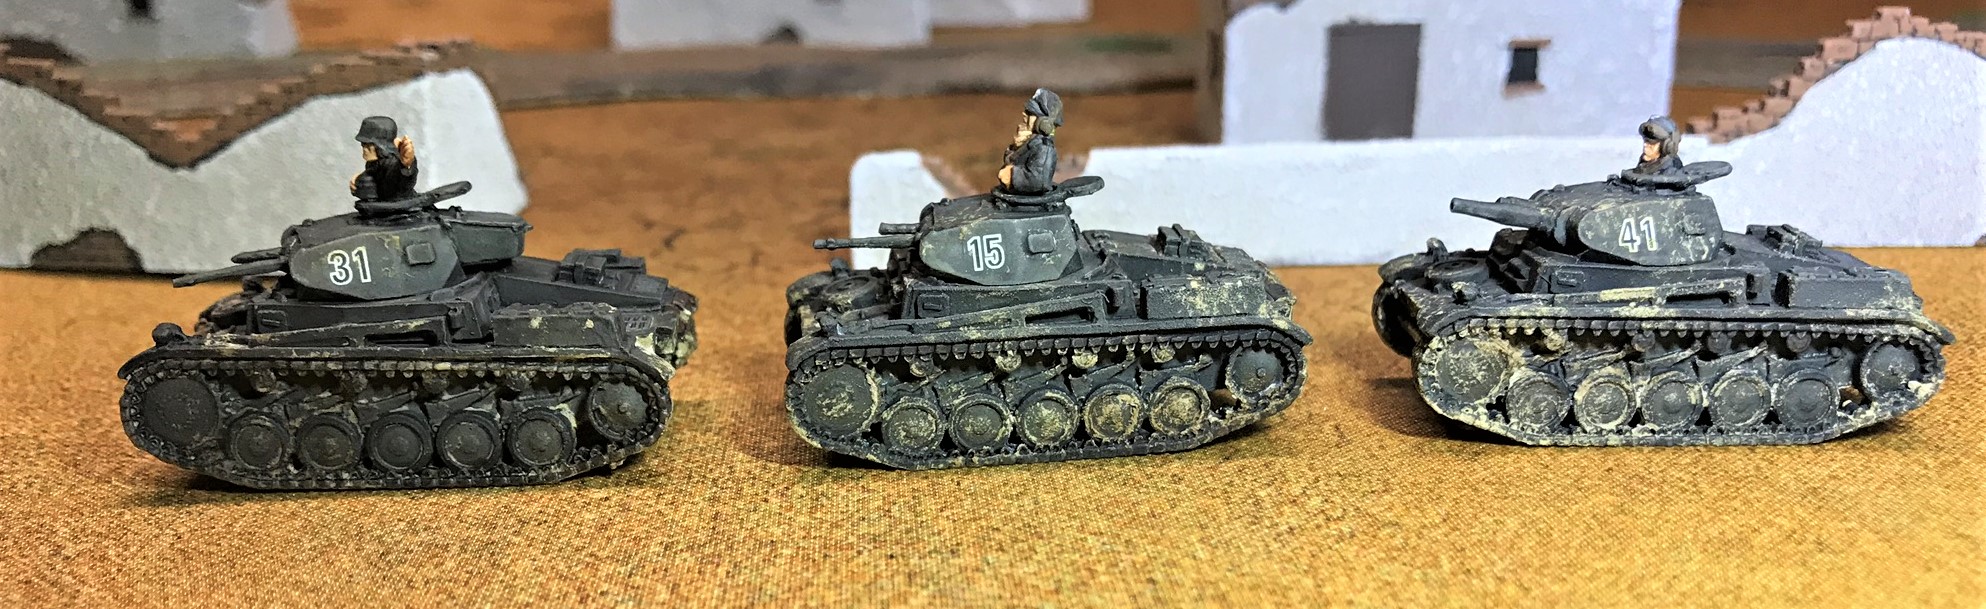
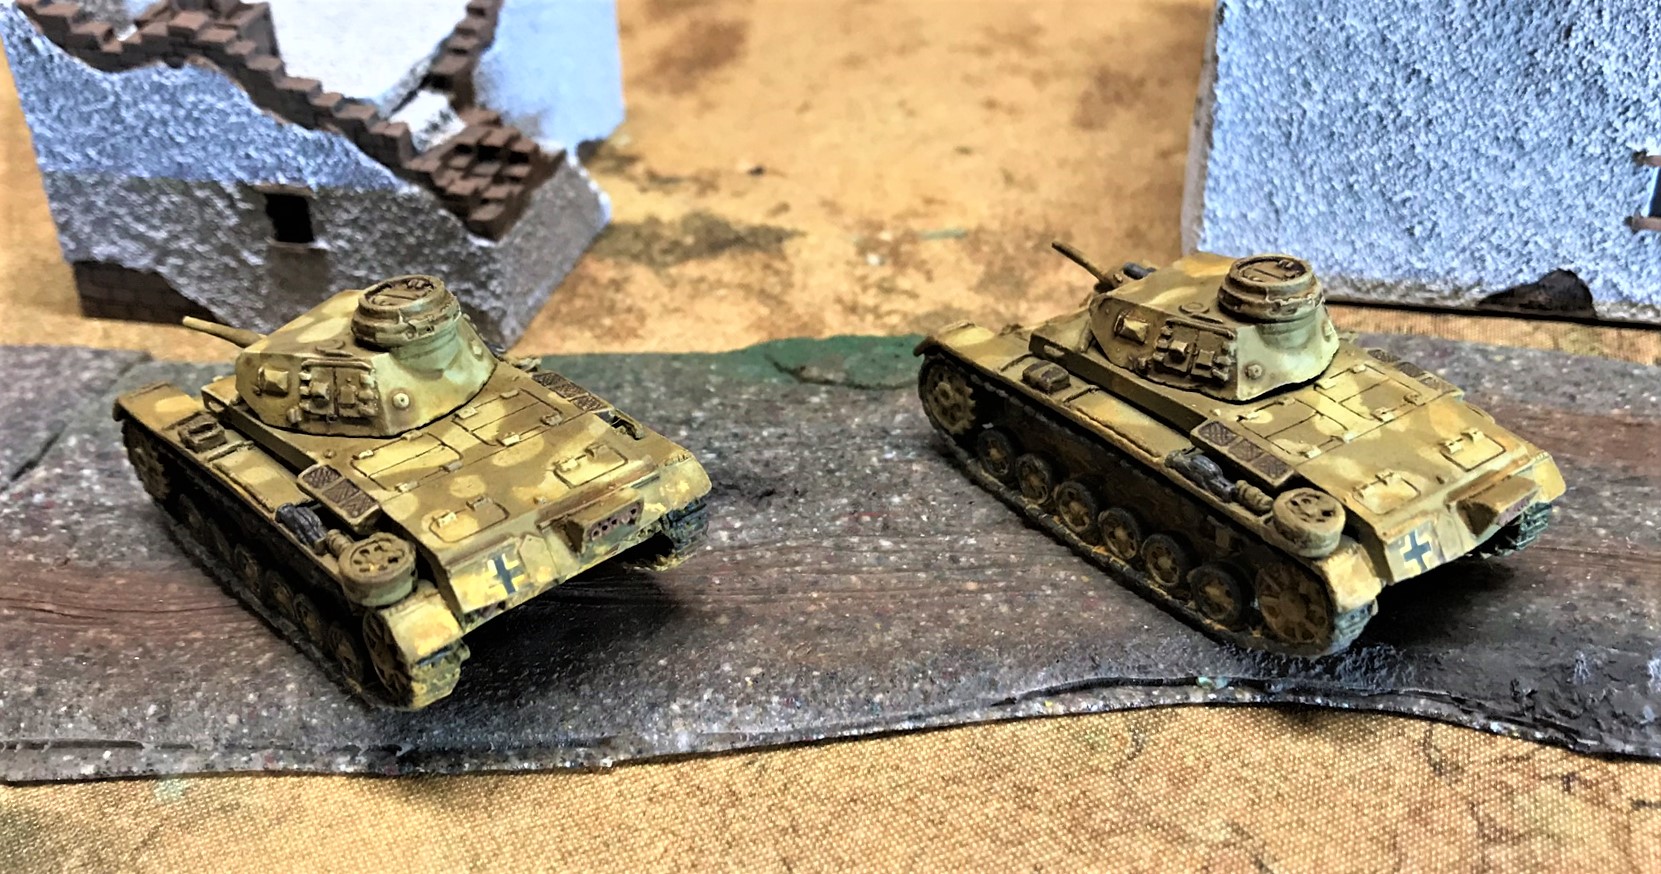
3 Panzer IIC’s (15mm/1:100 scale), from Battlefront Miniatures (#GBX108) for France 1940
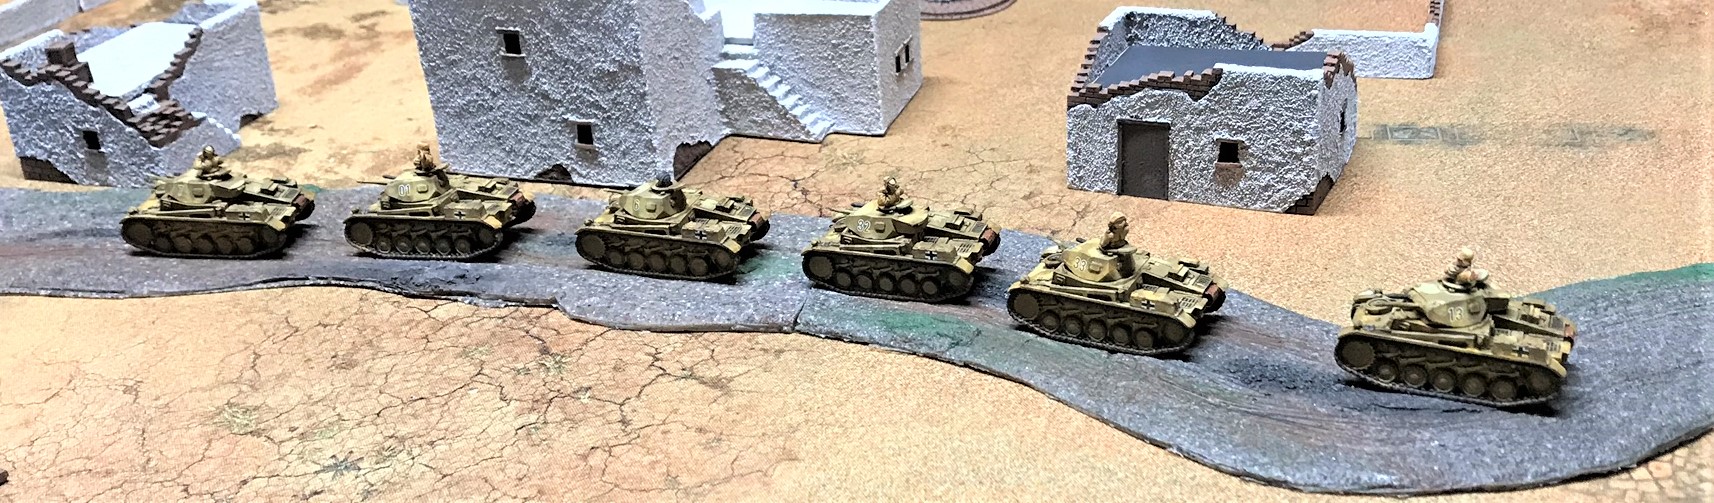
6 Panzer IIF’s (15mm/1:100 scale), from Battlefront Miniatures (#GBX108) for North Africa
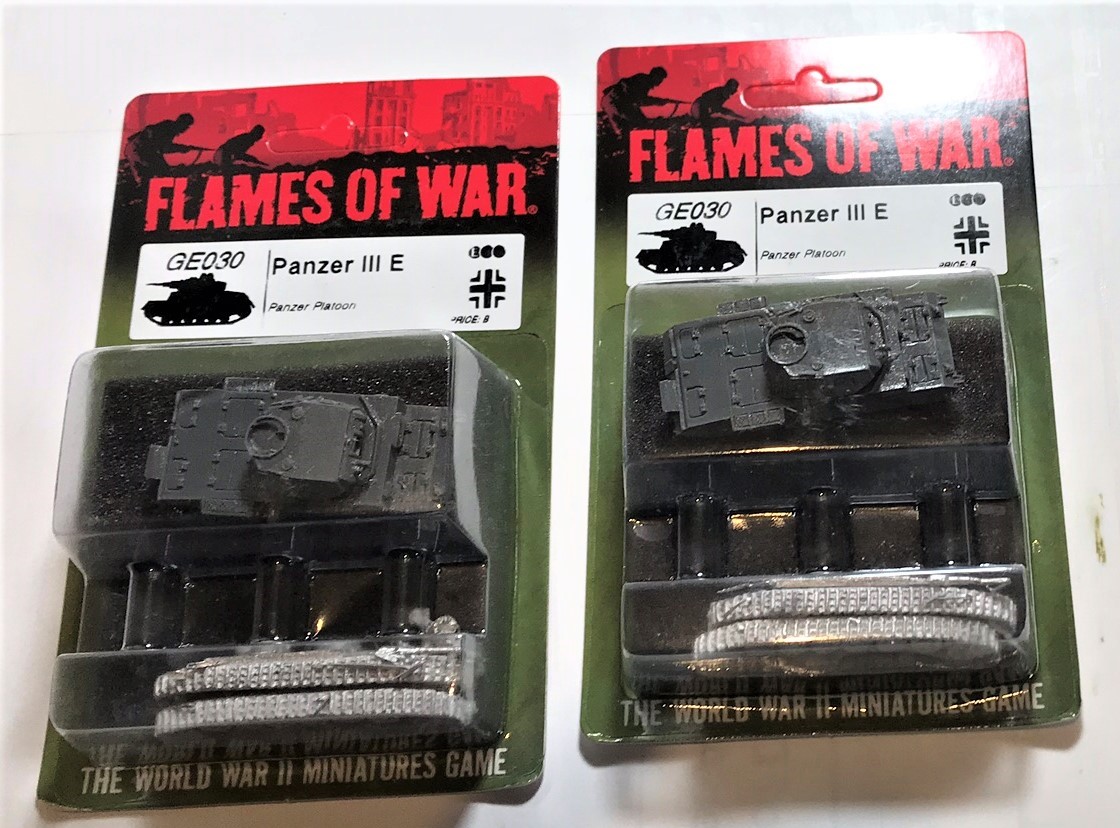
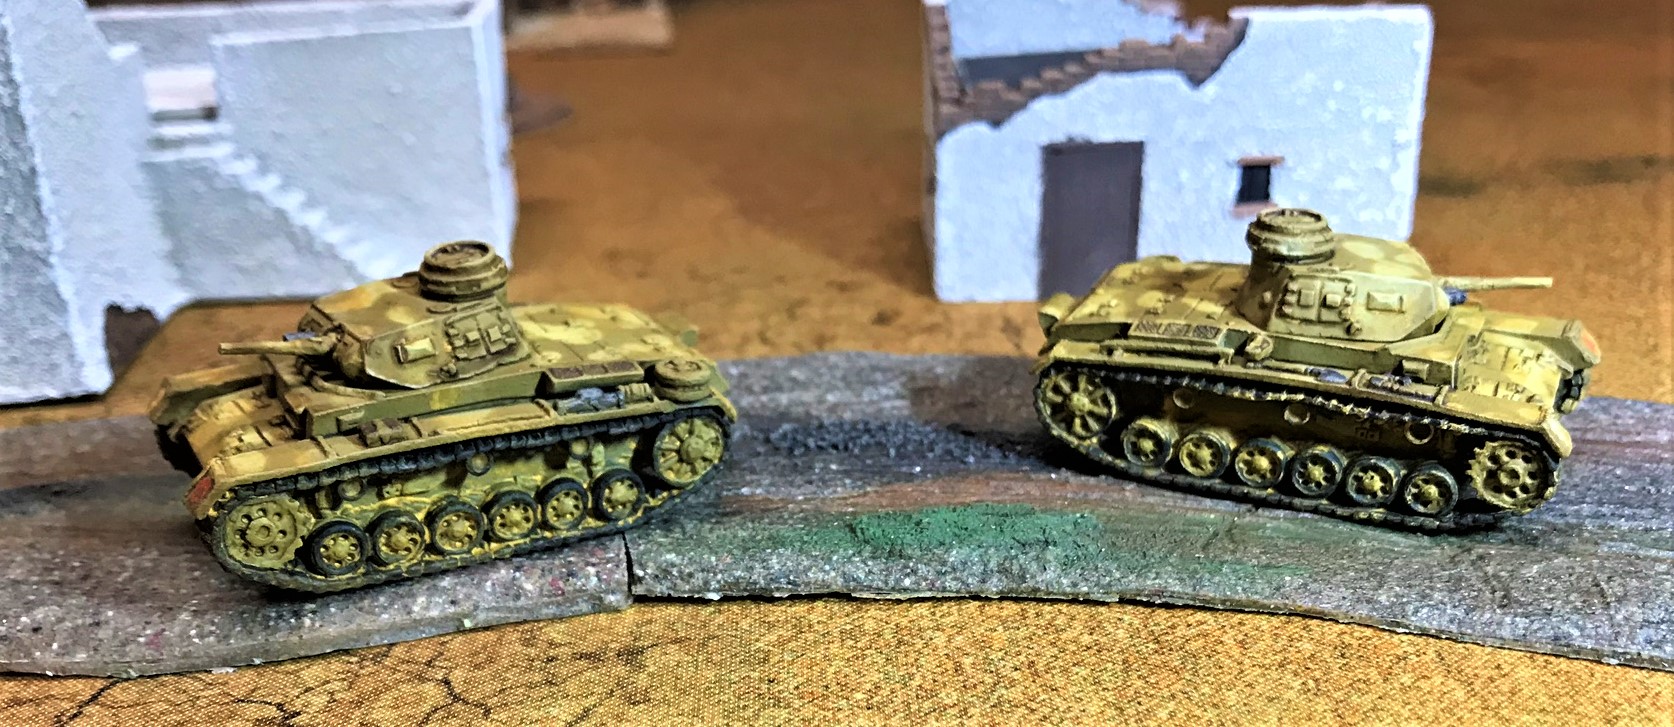
2 Panzer IIIE’s (15mm/1:100 scale), from Battlefront Miniatures (#GE030) for North Africa
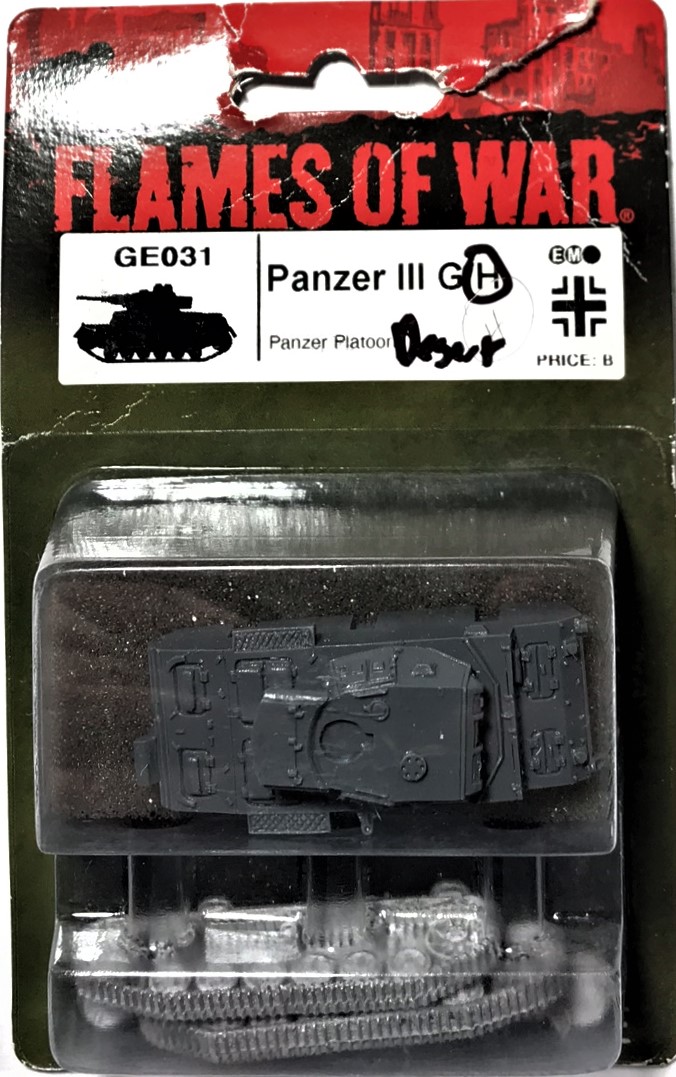
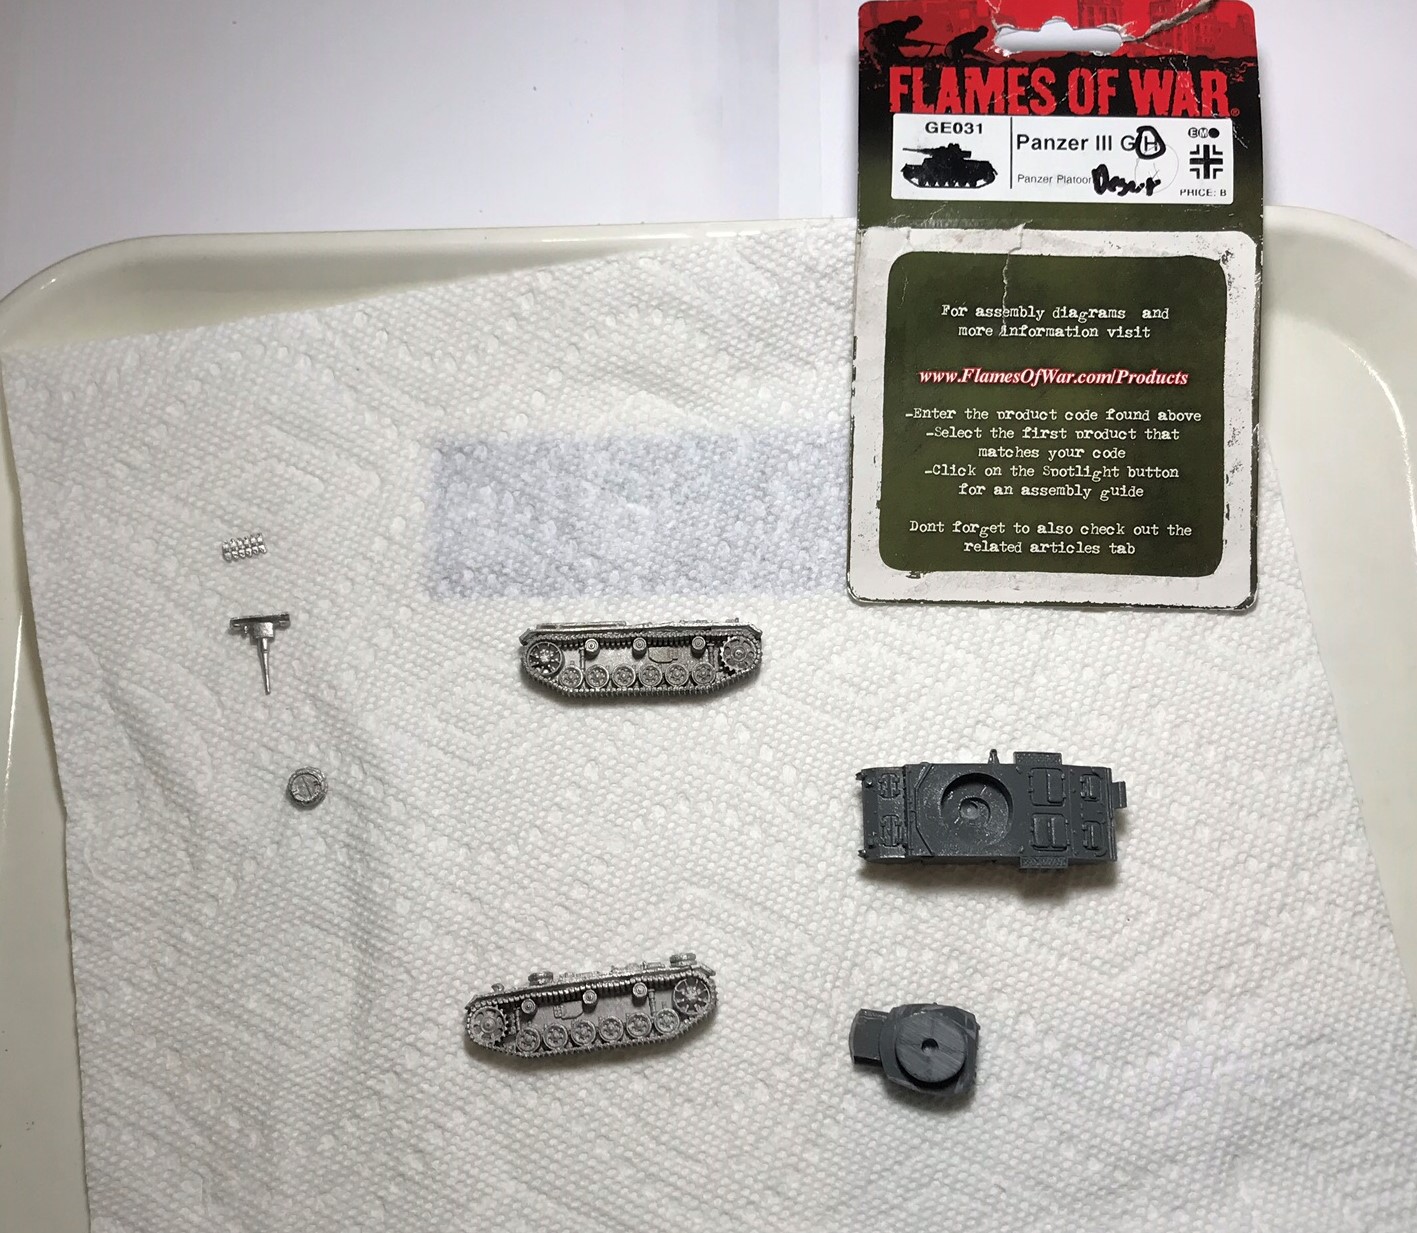
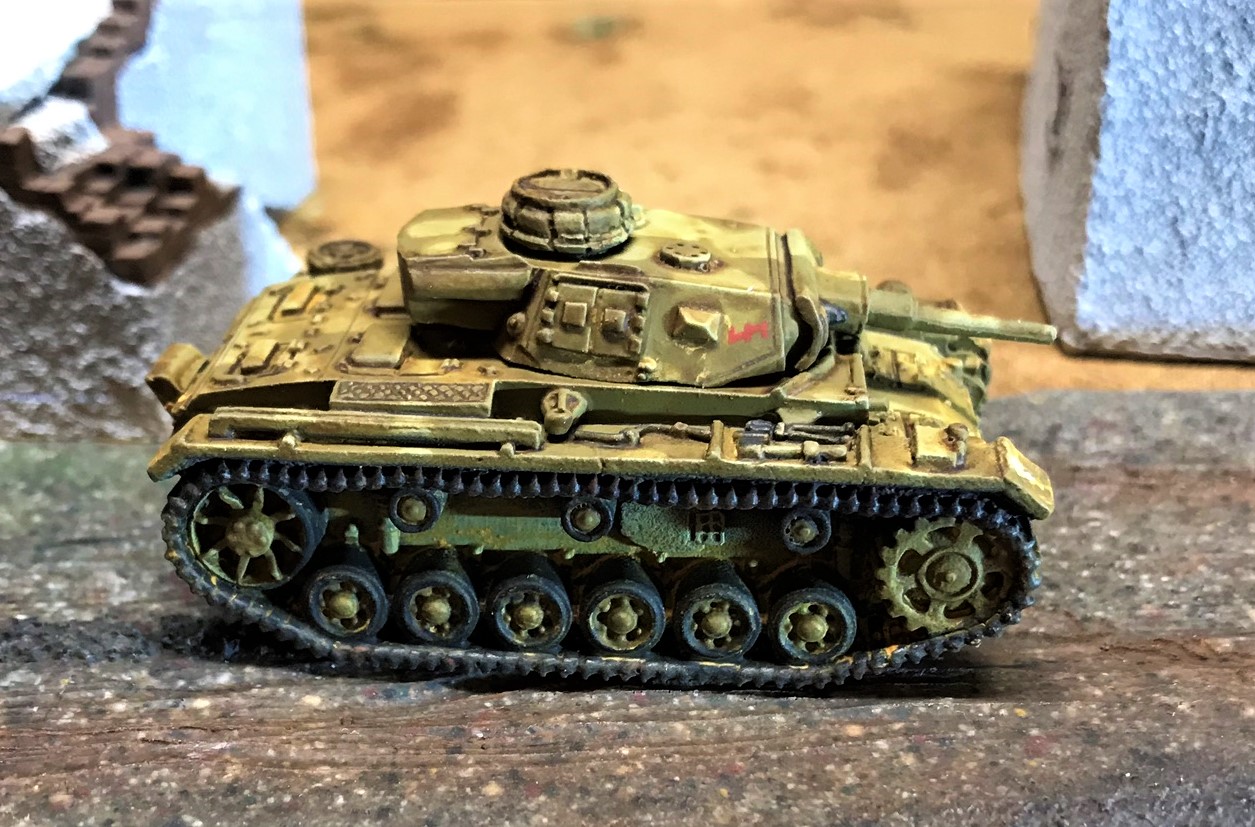
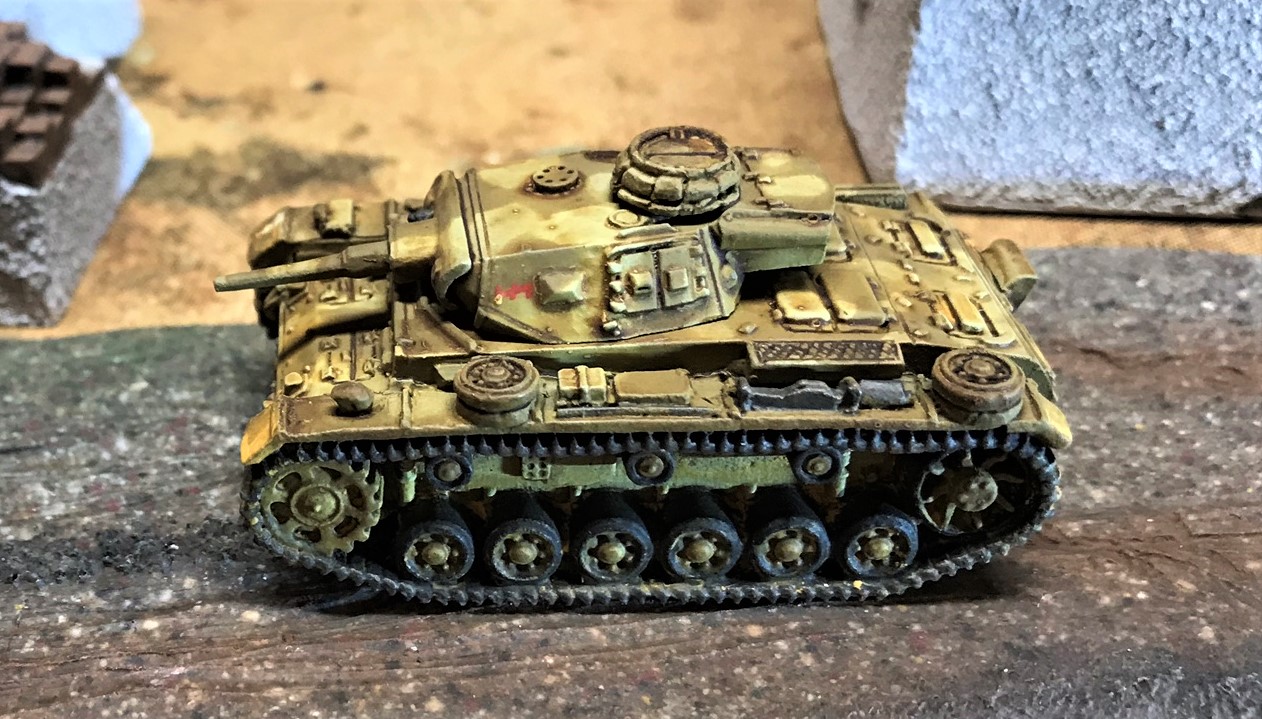
1 Panzer IIIH (15mm/1:100 scale), from Battlefront Miniatures (#GE031) for North Africa
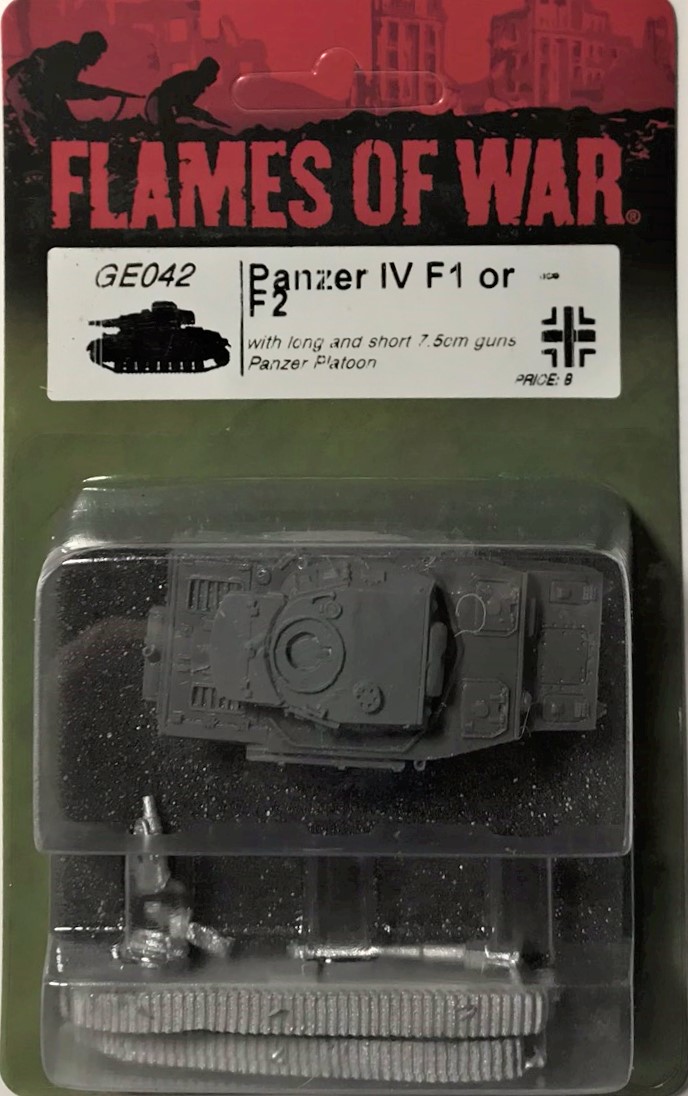
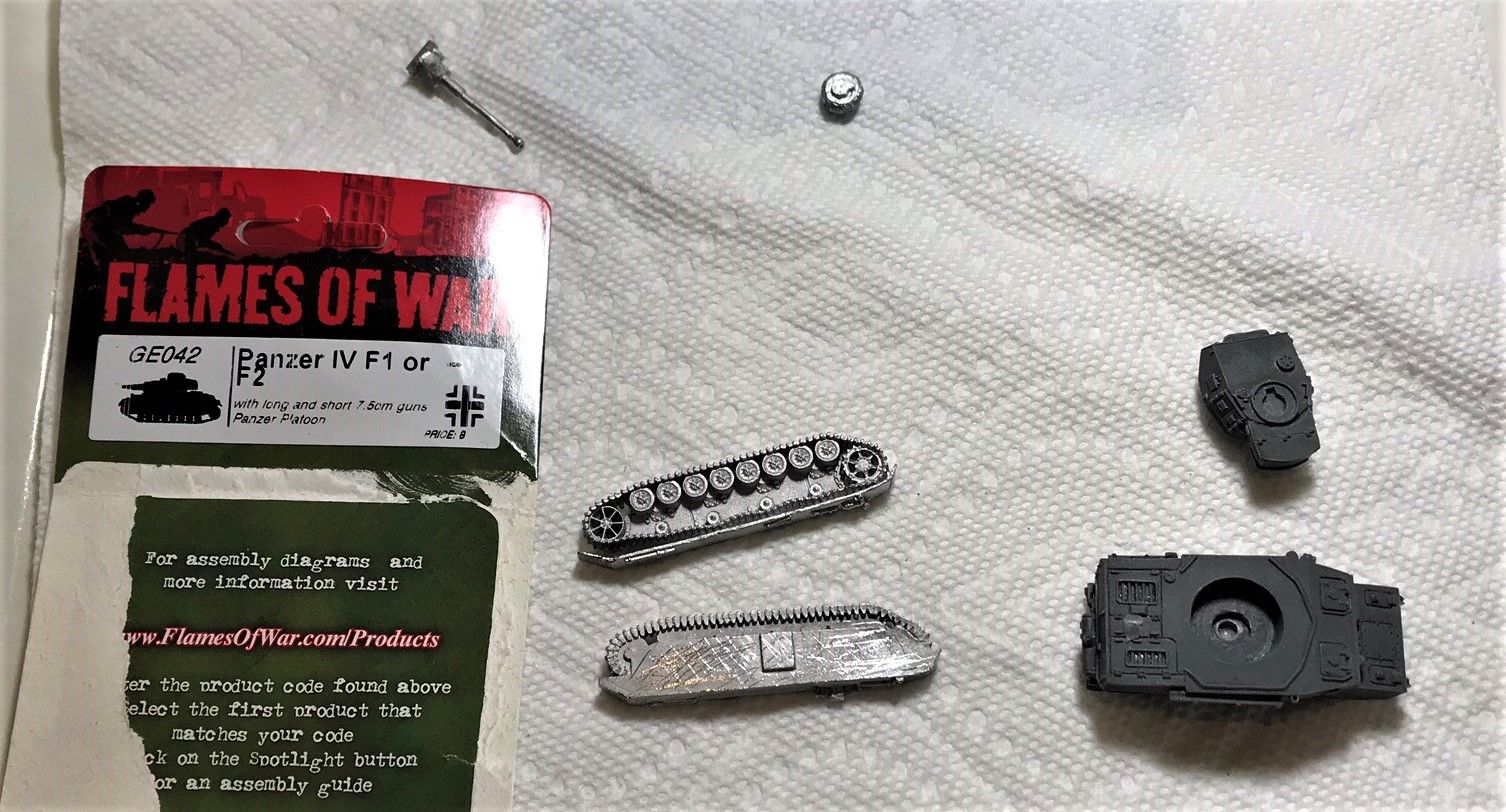
1 Panzer IVF2 (15mm/1:100 scale), from Battlefront Miniatures (#GE042) for North Africa
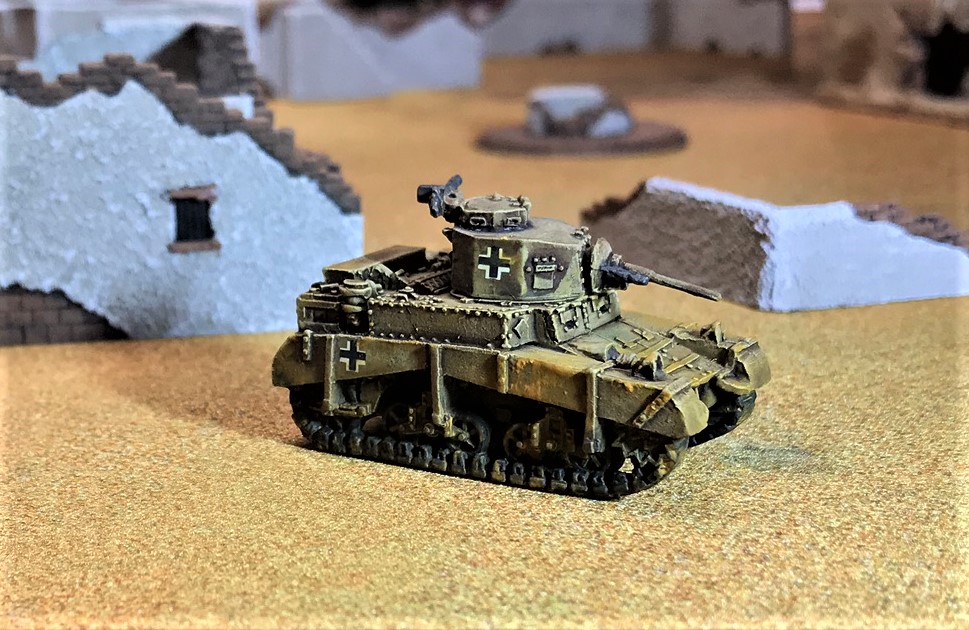
1 M3 Stuart “Honey” tank (15mm/1:100 scale), from Battlefront Miniatures (#BR006) – one captured by the Germans for use in North Africa
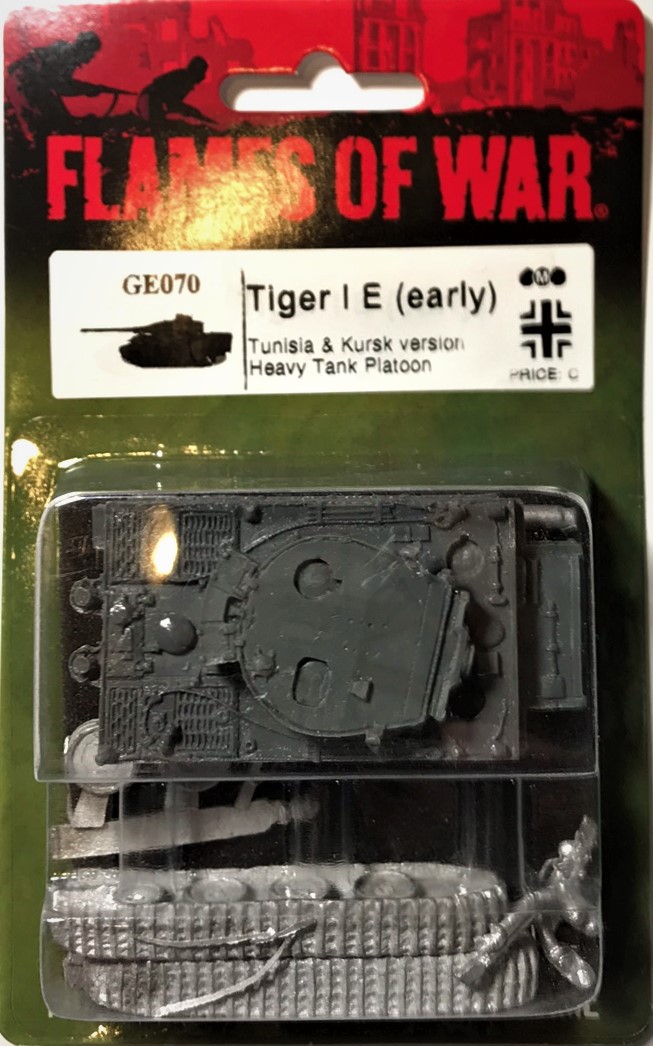
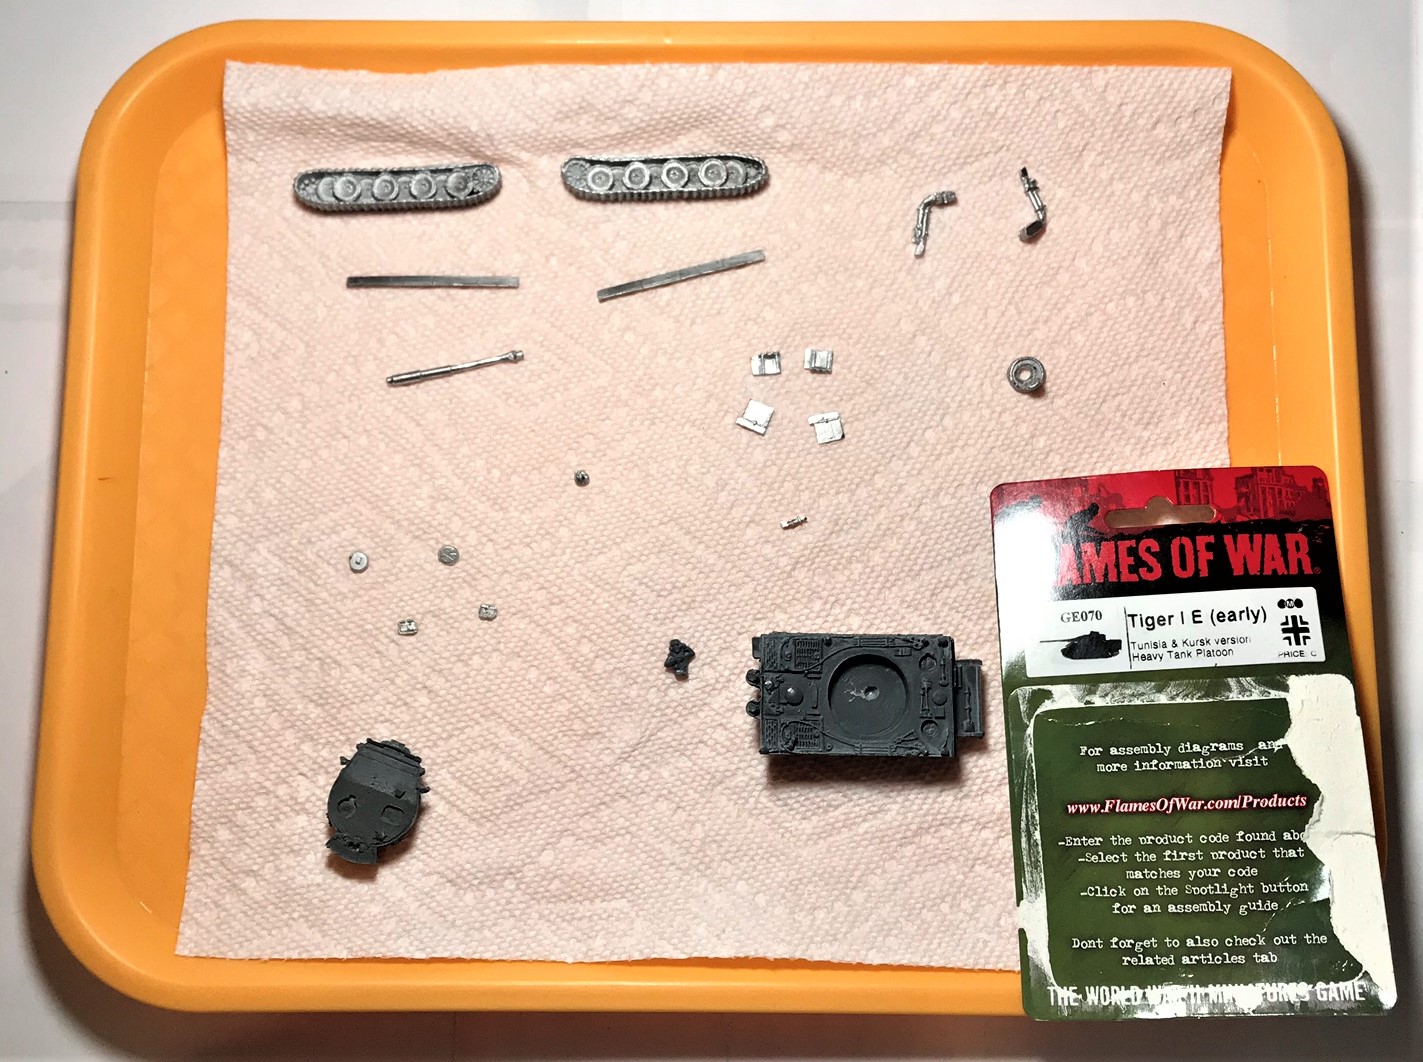
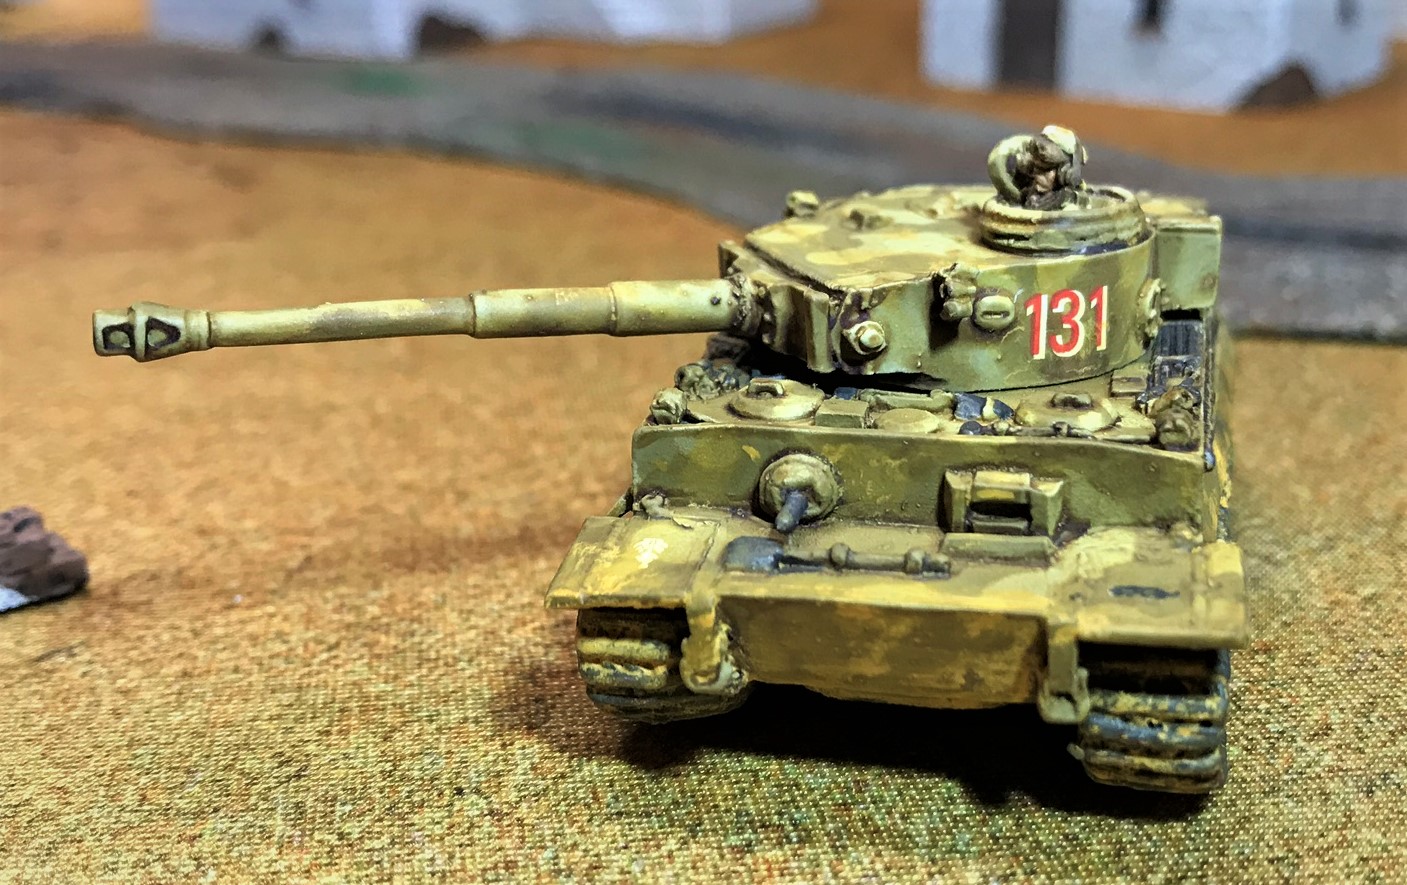
1 Tiger I(15mm/1:100 scale), from Battlefront Miniatures (#GE070) for North Africa
I will review each briefly, and give bigger shots in the eye candy section. Of course, I list the paints and other materials I used at the end for those interested. And there were 61 decals!
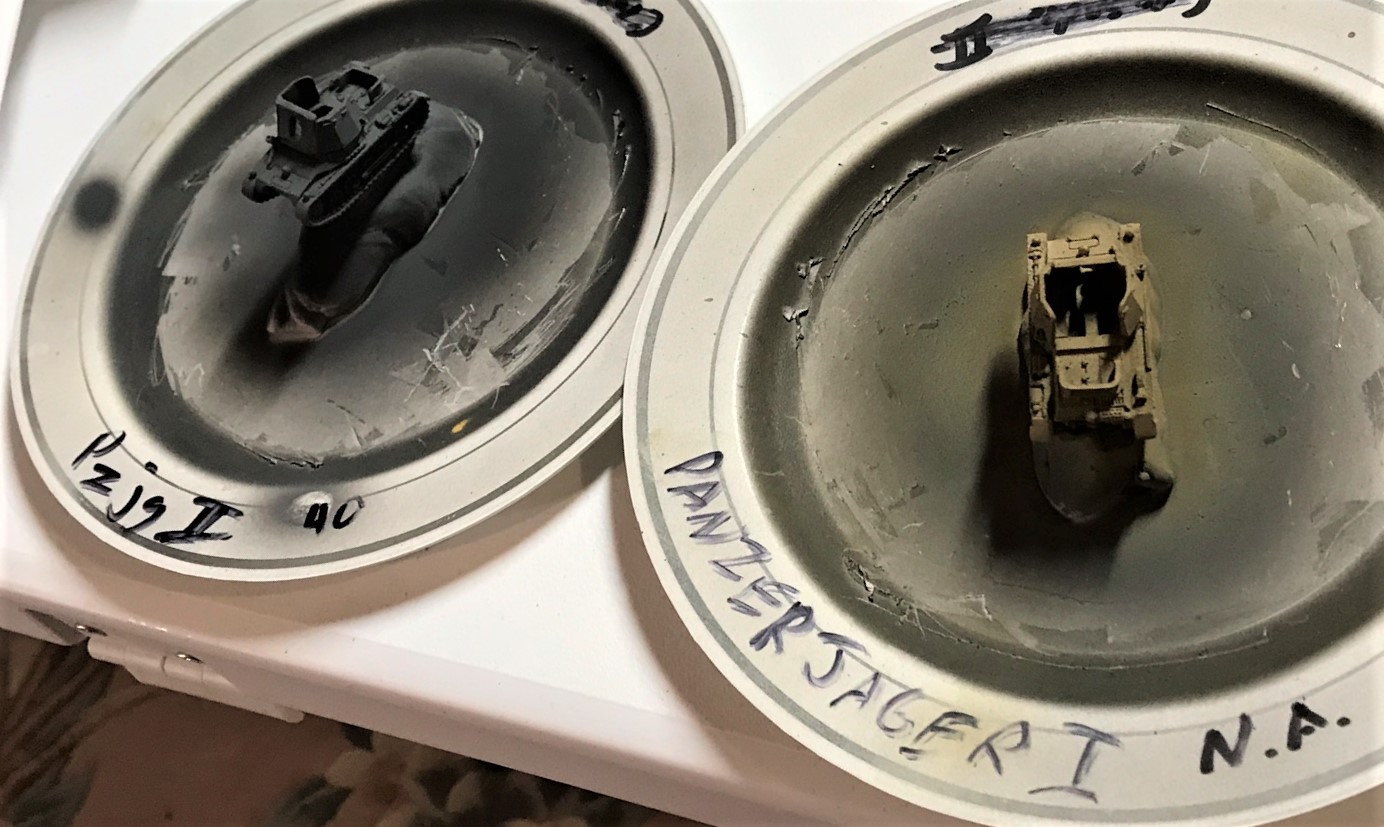
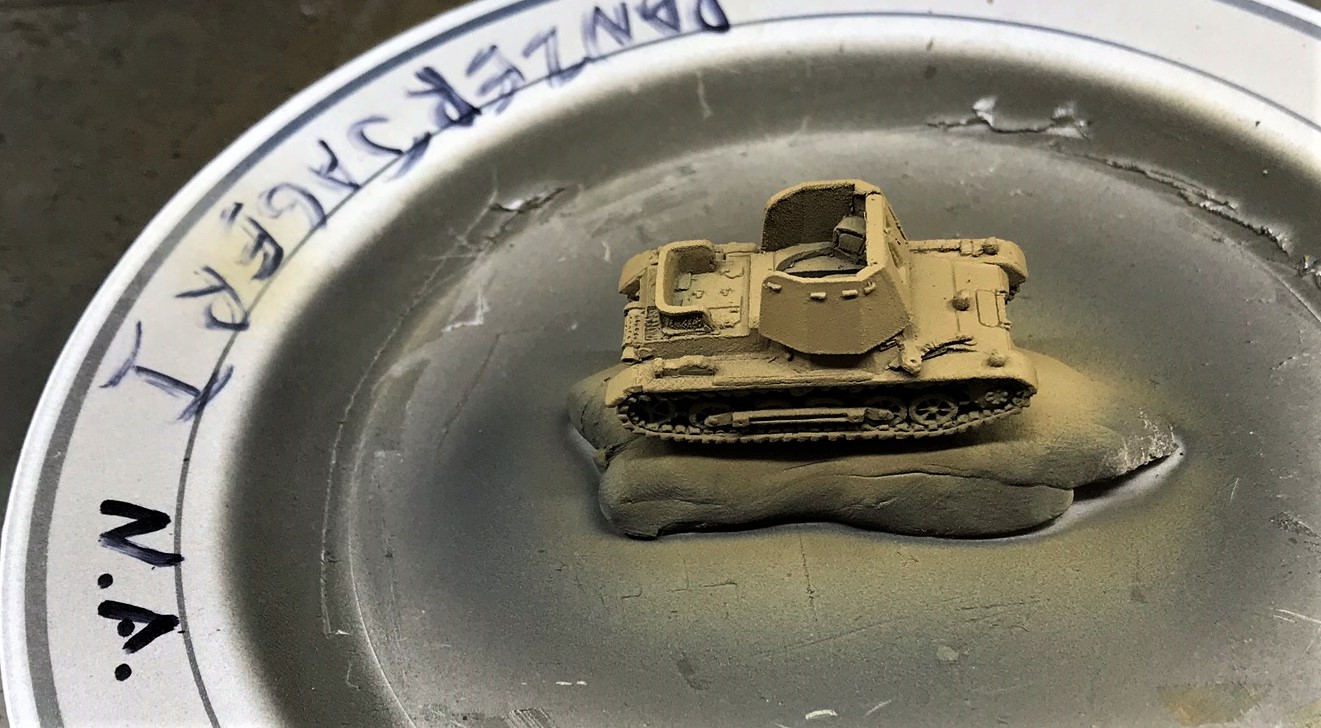
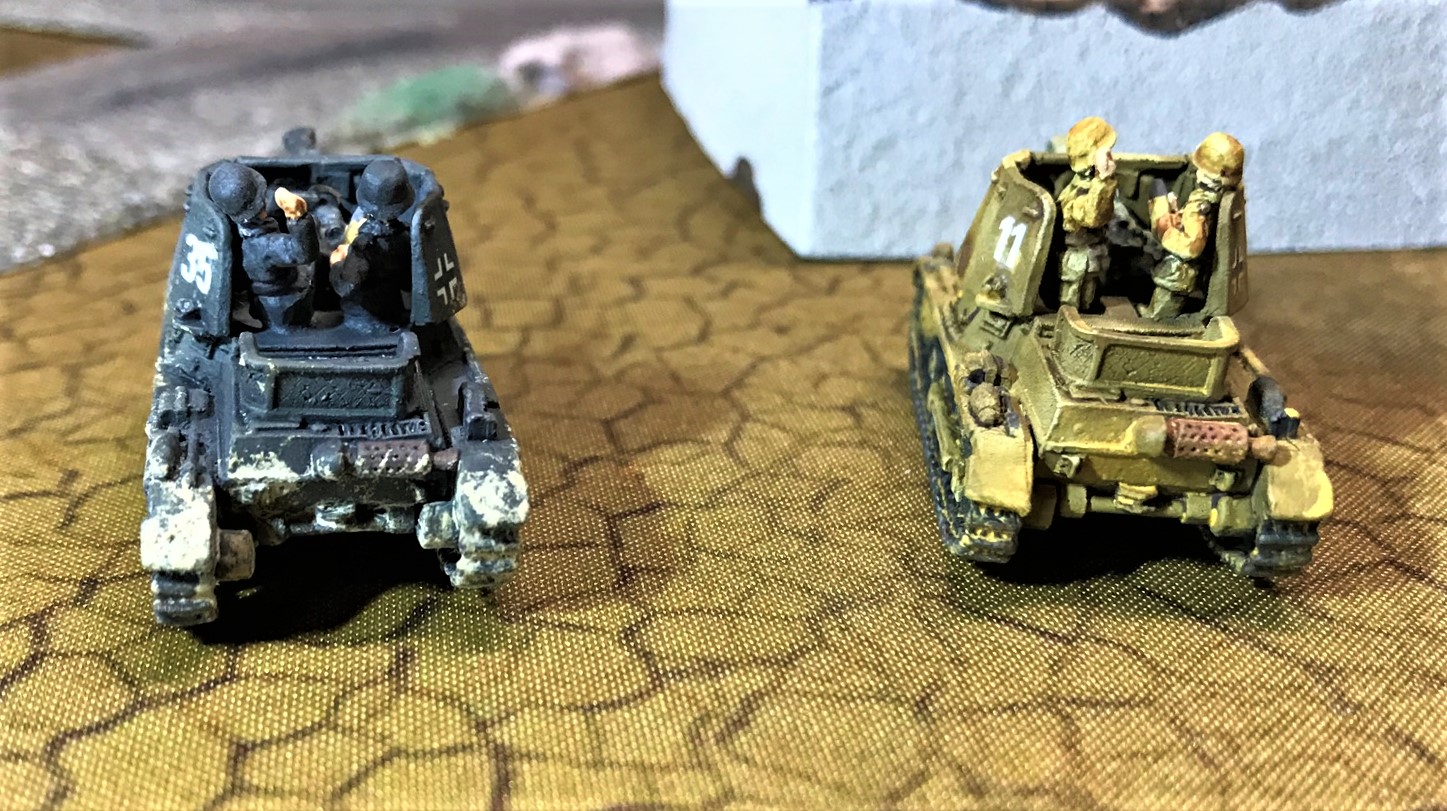
PANZERJAGER I’S
The two Panzerjager I’s base coated
Close up of North Africa Panzer IIF
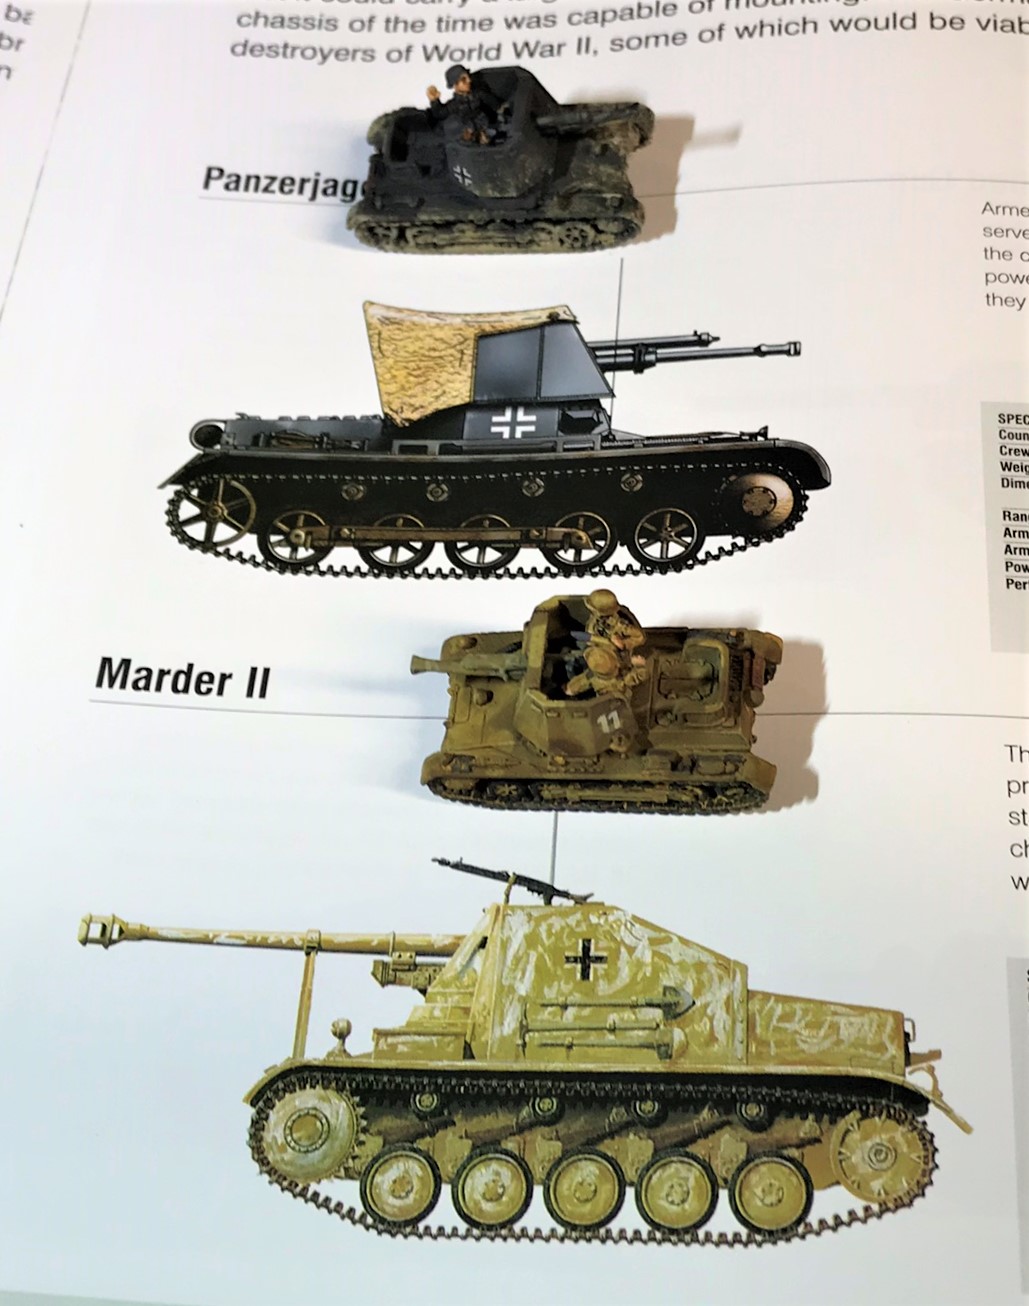
Images that I used for modeling.
In the end, I chose a camouflage pattern for my Panzer Army Africa version similar to what you see on the Marder II image.
PANZER II’S
There were nine Panzer II’s!
A10 gun conversion
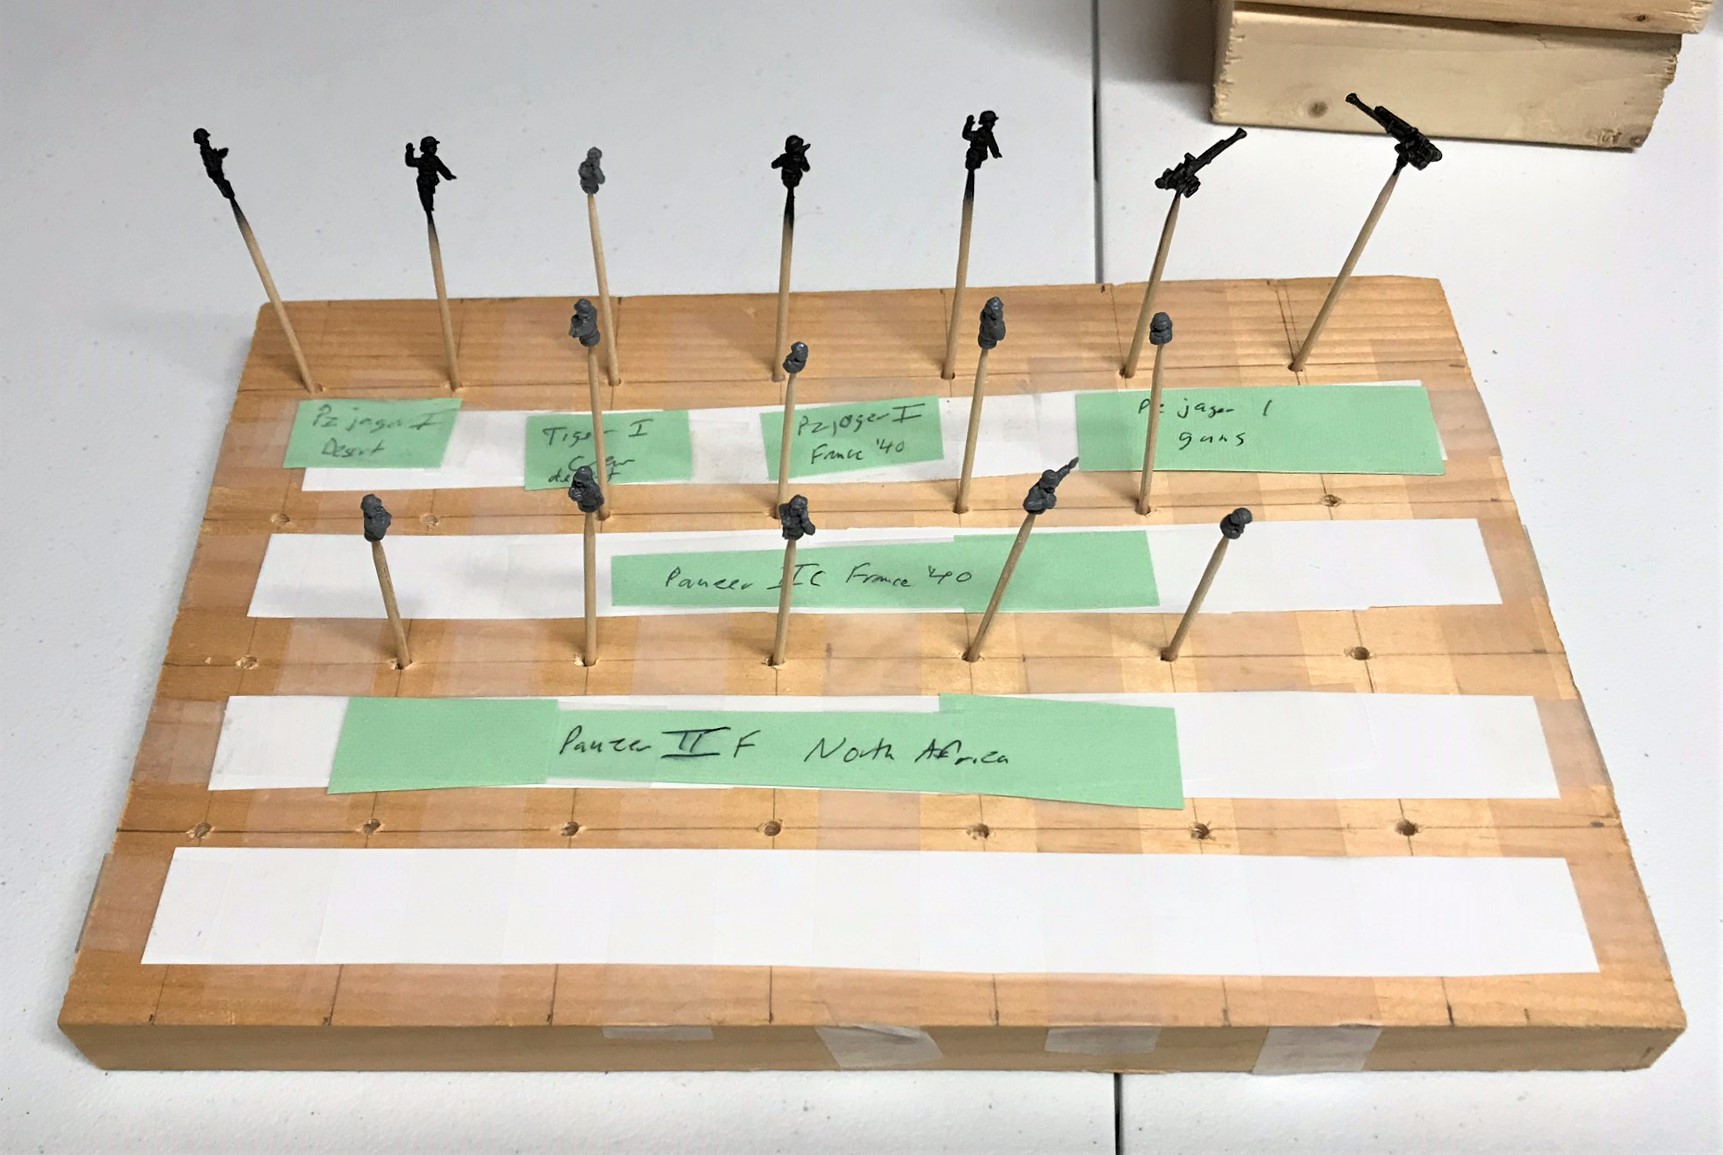
How to paint a bunch of crews!
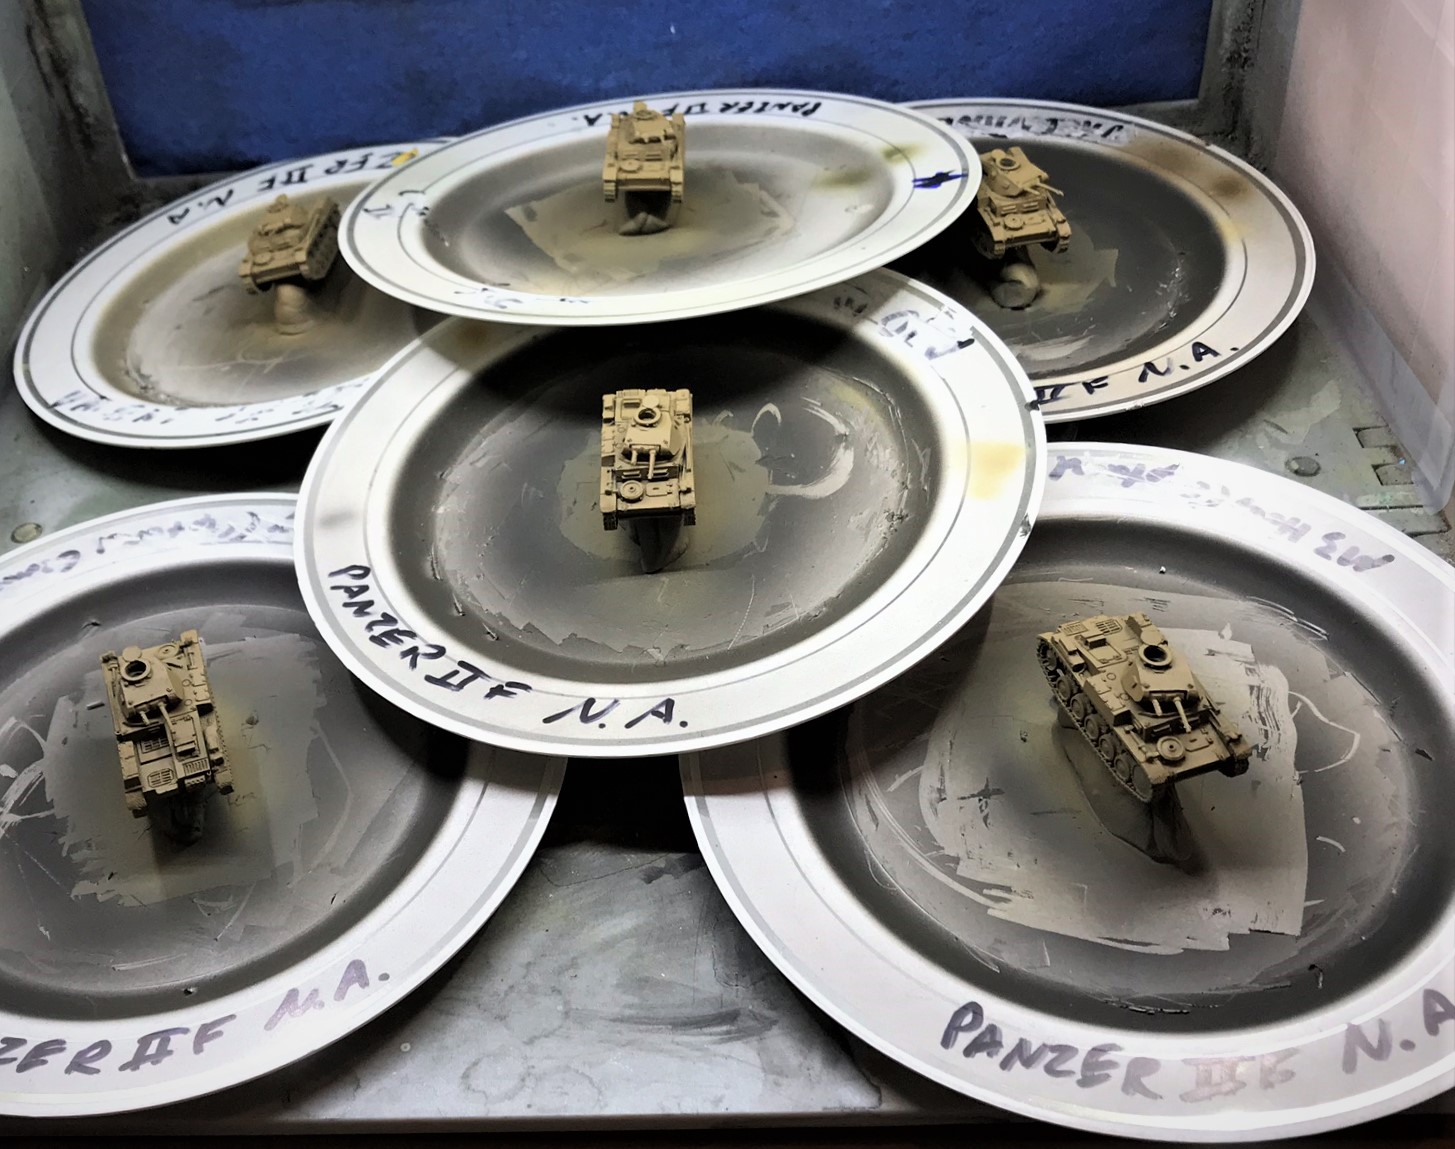
In the spray booth – 6 Panzer IIF’s.
Close up of crews in turrets.
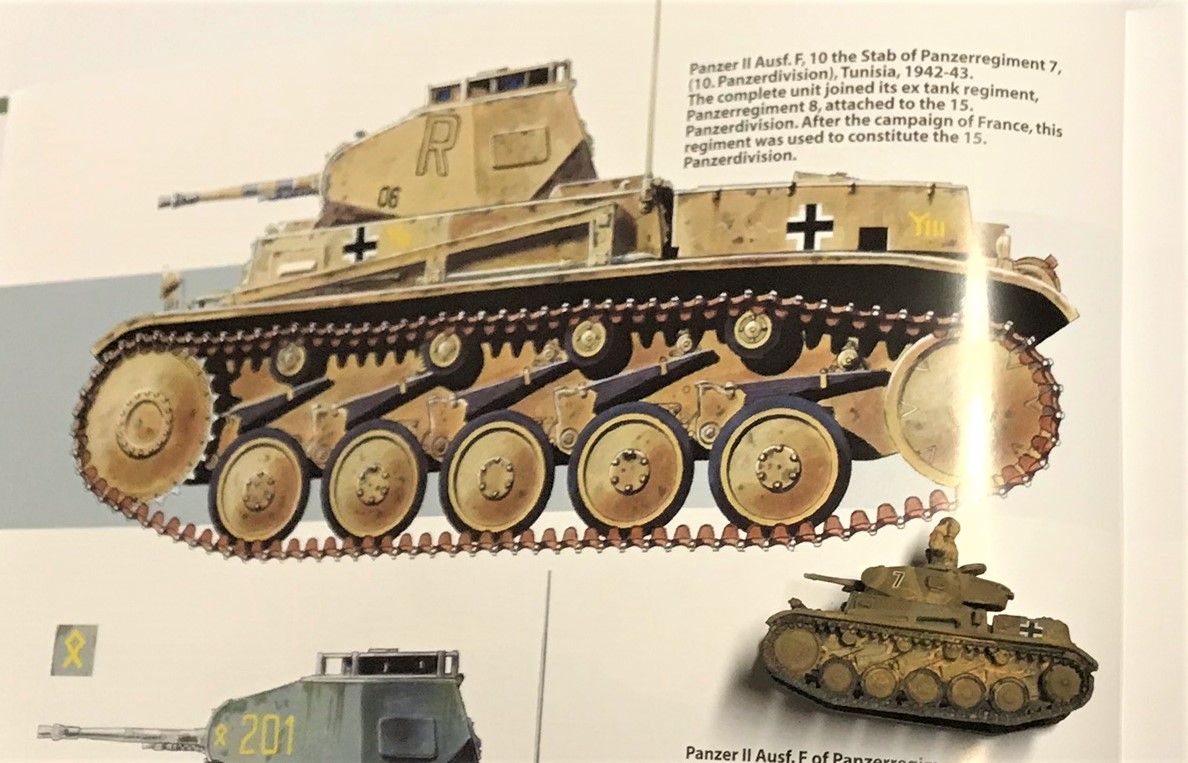
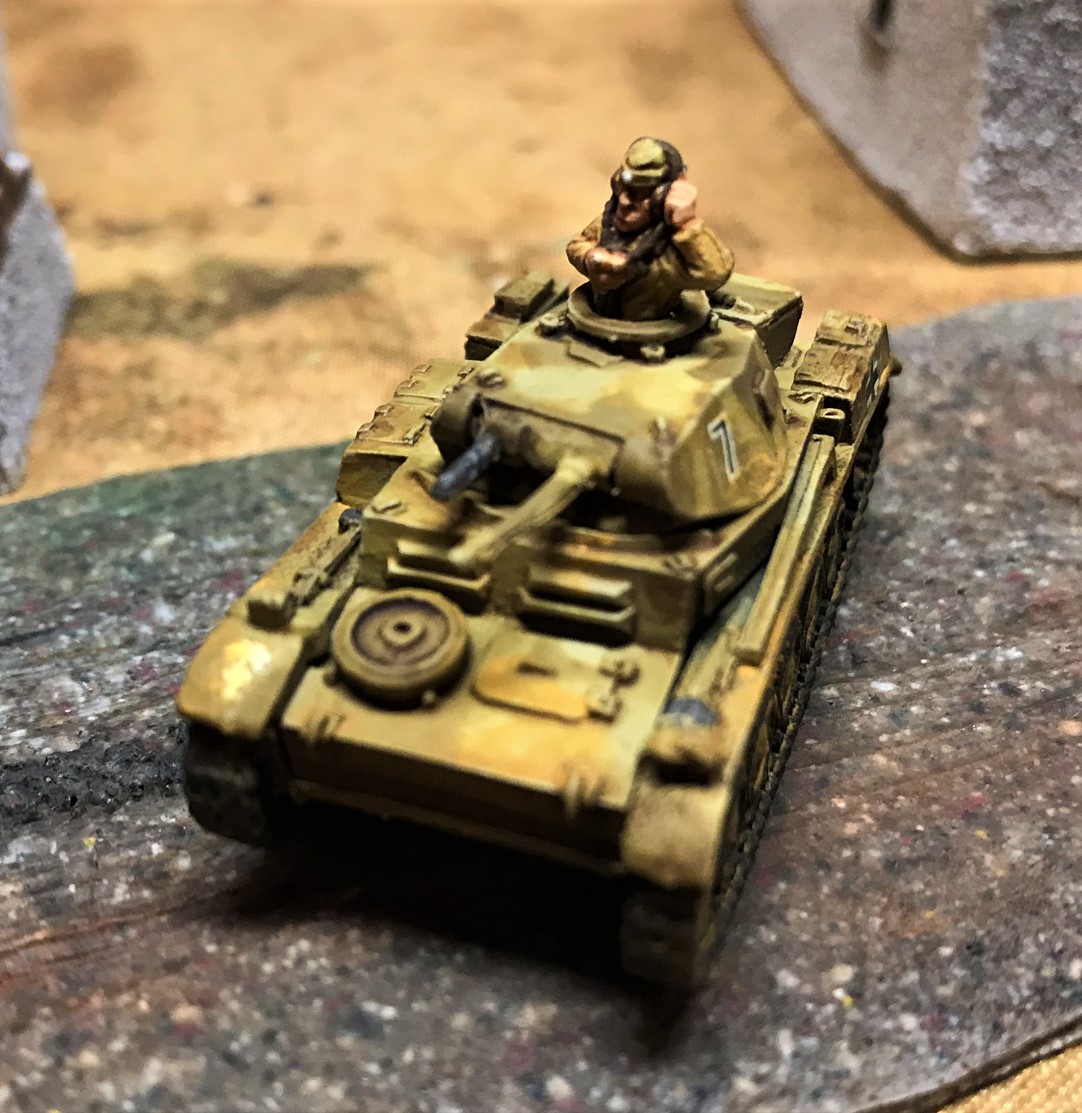
I modeled my Panzer IIF on this image.
PANZER IIIE’S
I had two unpainted Panzer IIIE’s left over from France 1940. They were not easy to put decals on – so that was minimal.
Panzer IIIE in blister
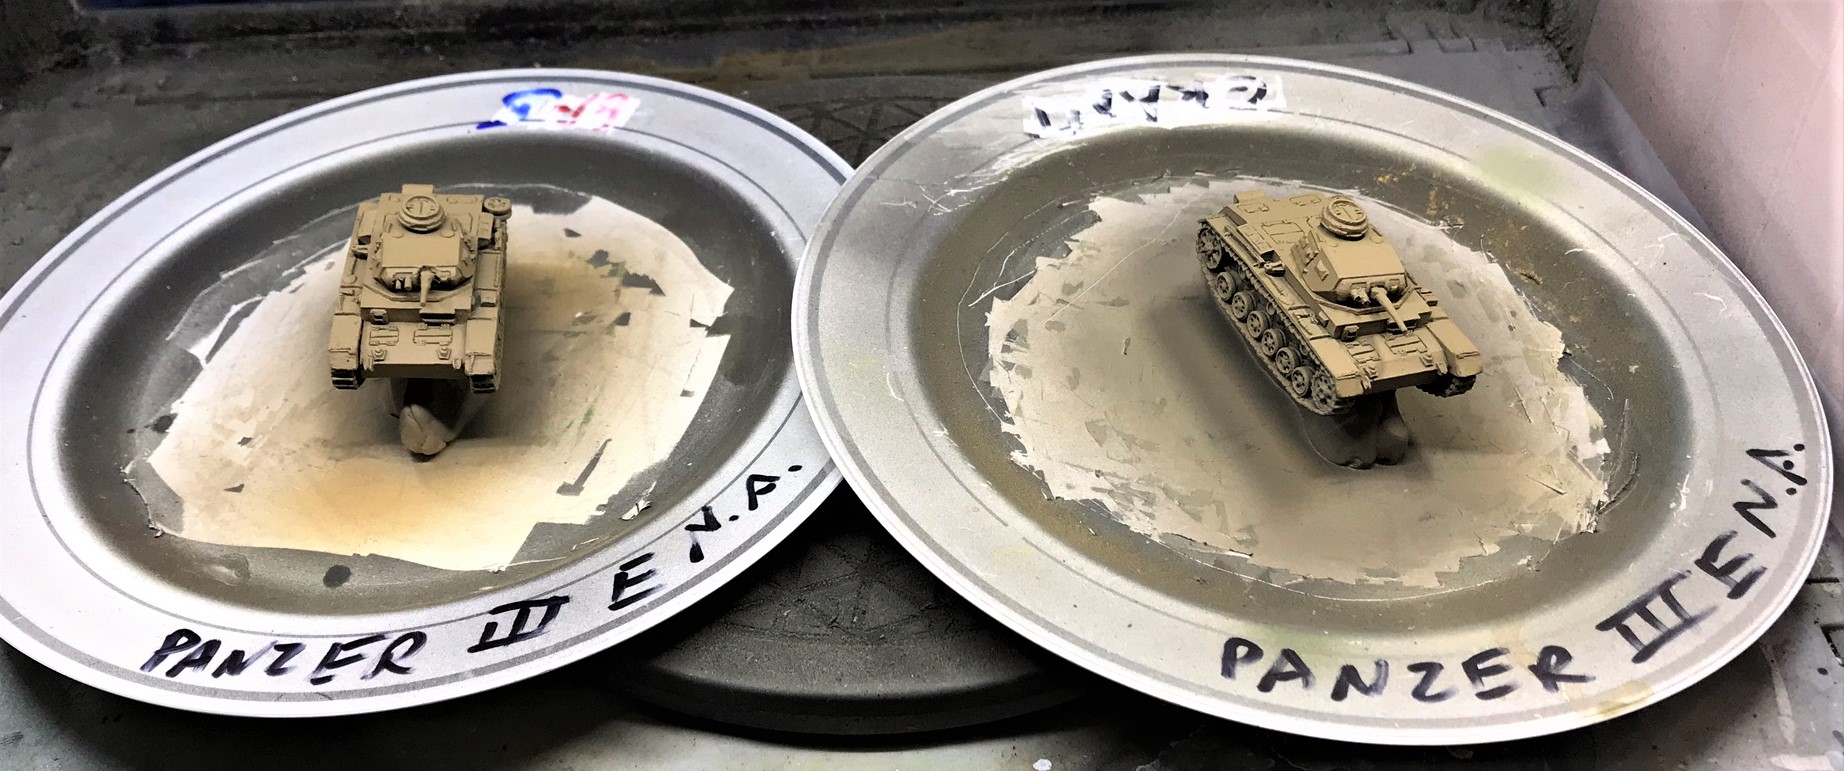
Base coat applied
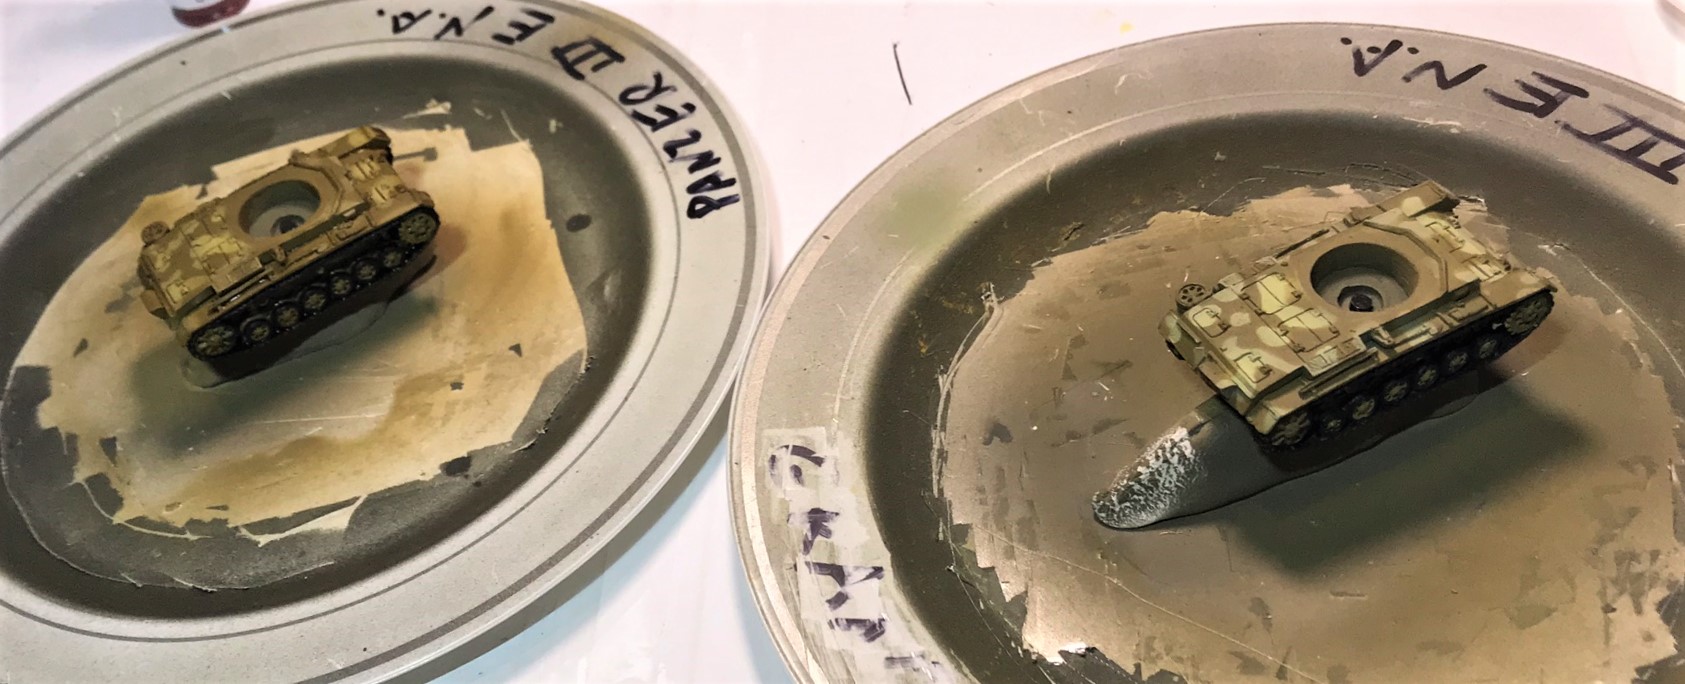
After camouflage applied.
Close up of camouflage.
PANZER IIIH
Panzer IIIH in blister.
All cleaned up for assembly.
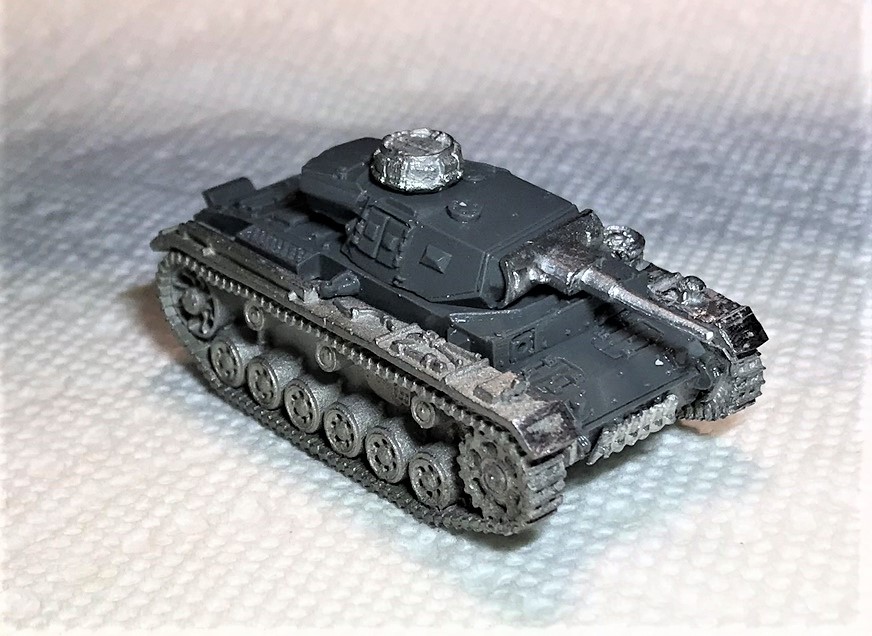
Panzer IIIH assembled
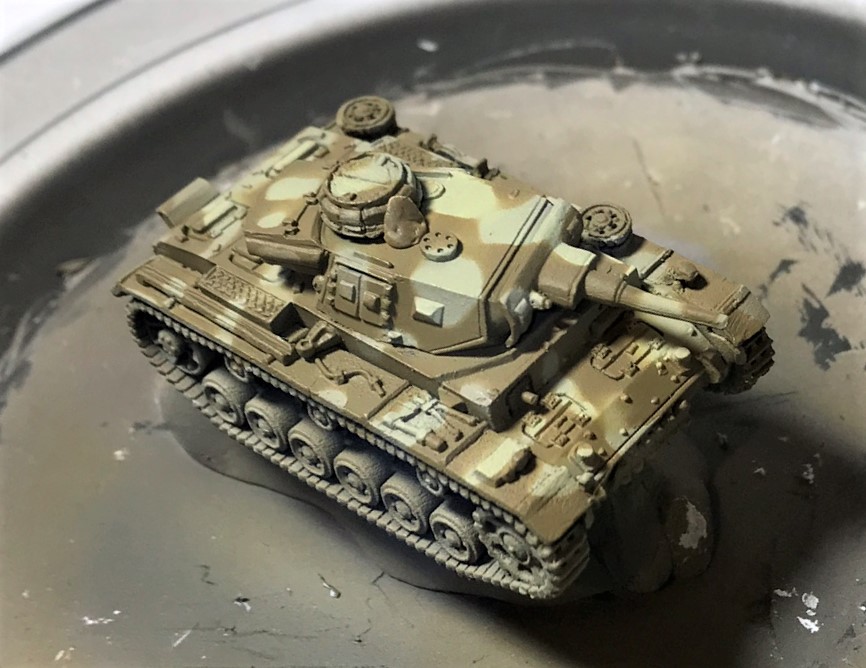
After camouflage applied.
PANZER IVF2
Panzer IVF2 in blister
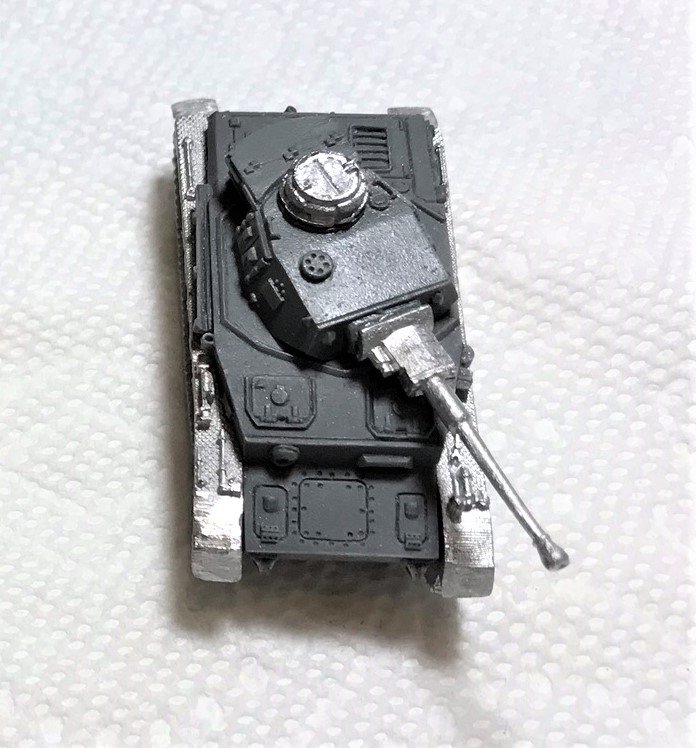
All cleaned up, ready for assembly
Assembled!
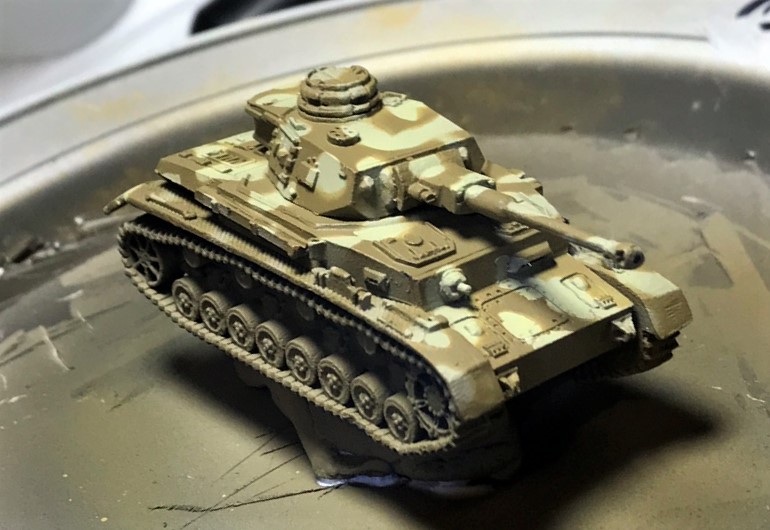
After camouflage – Panzer IVF2.
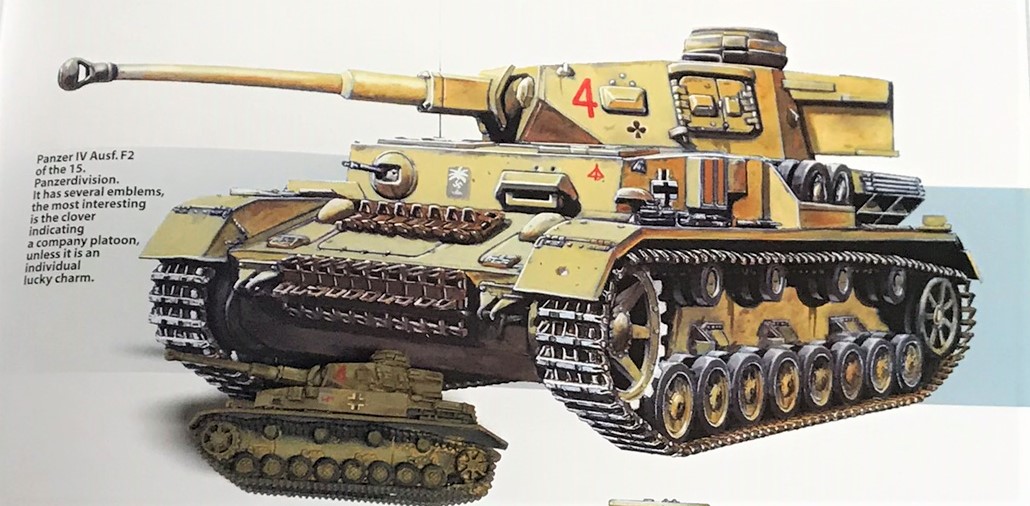
I modeled this tank on this image.
CAPTURED GERMAN M3 STUART “HONEY”
The Germans did a good job of recovering all kinds of AFV’s in North Africa. This included enemy vehicles – so I decided that an M3 Stuart would be a good addition.
I saw this and had to give the Germans a little American-made steel.
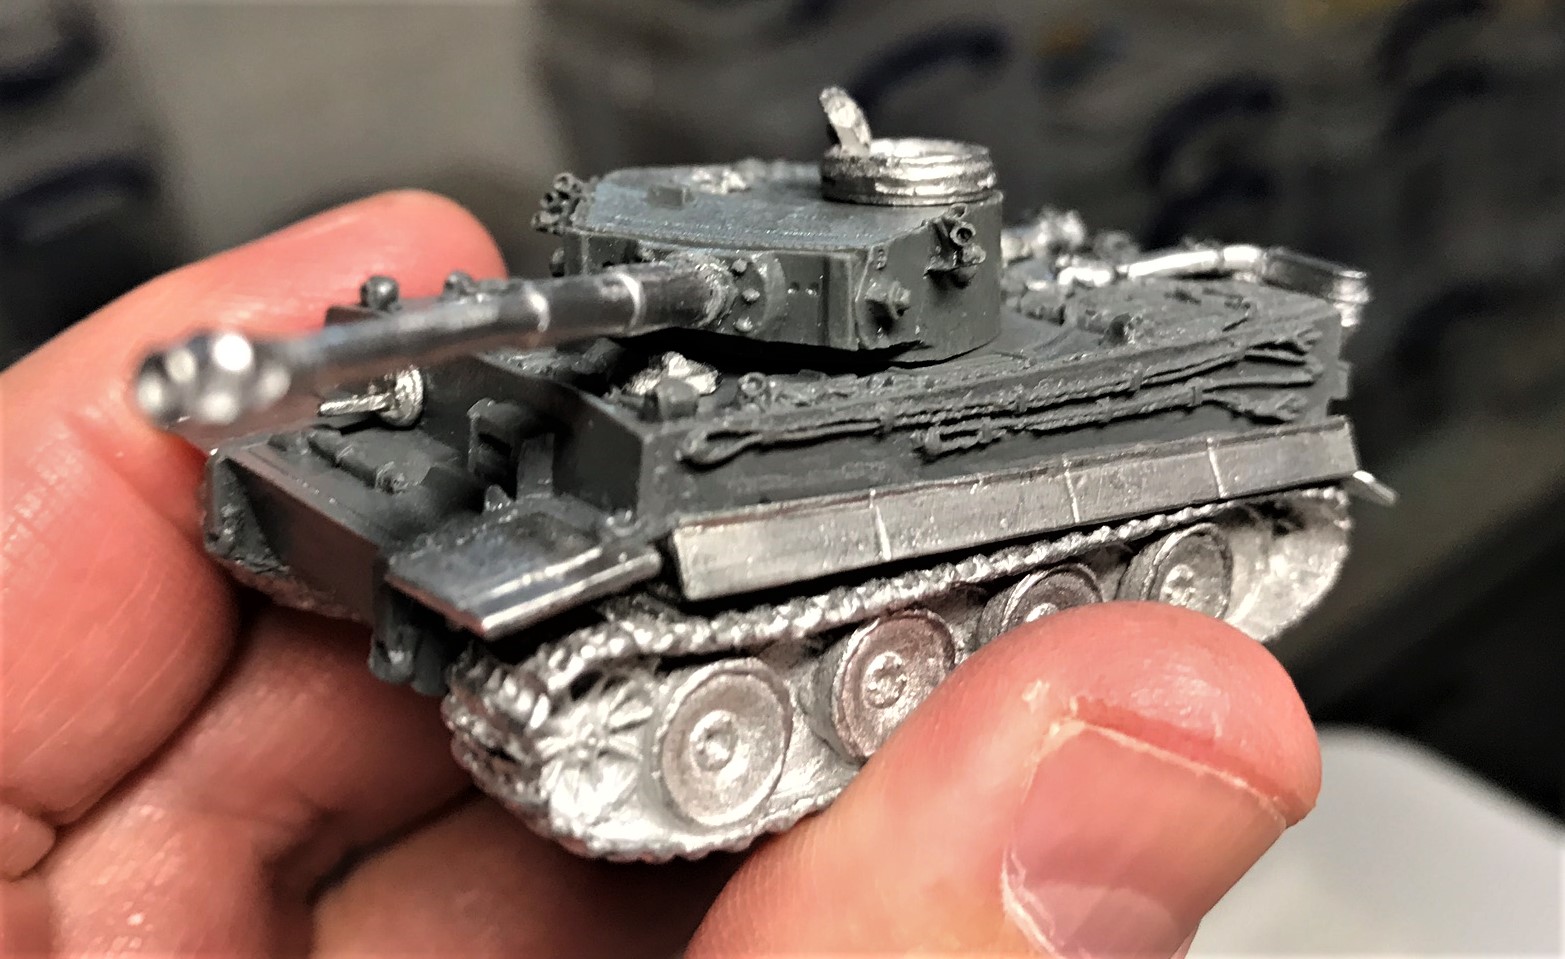
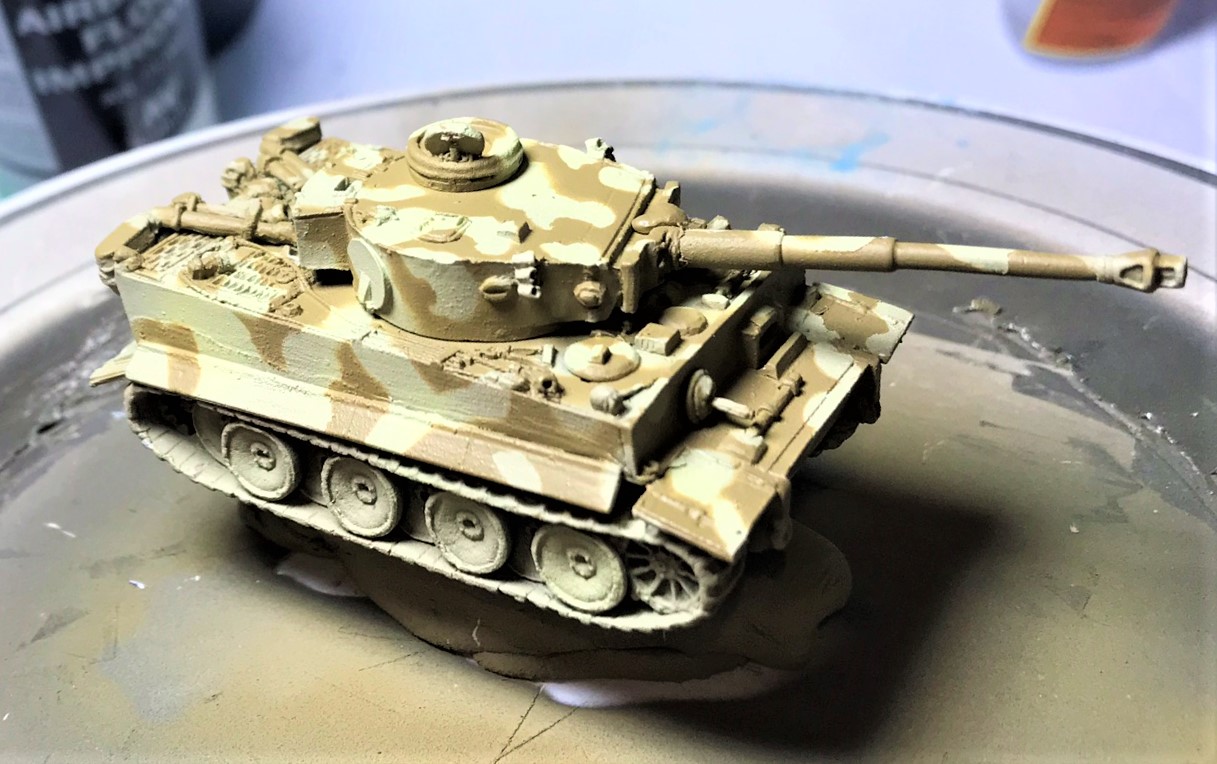
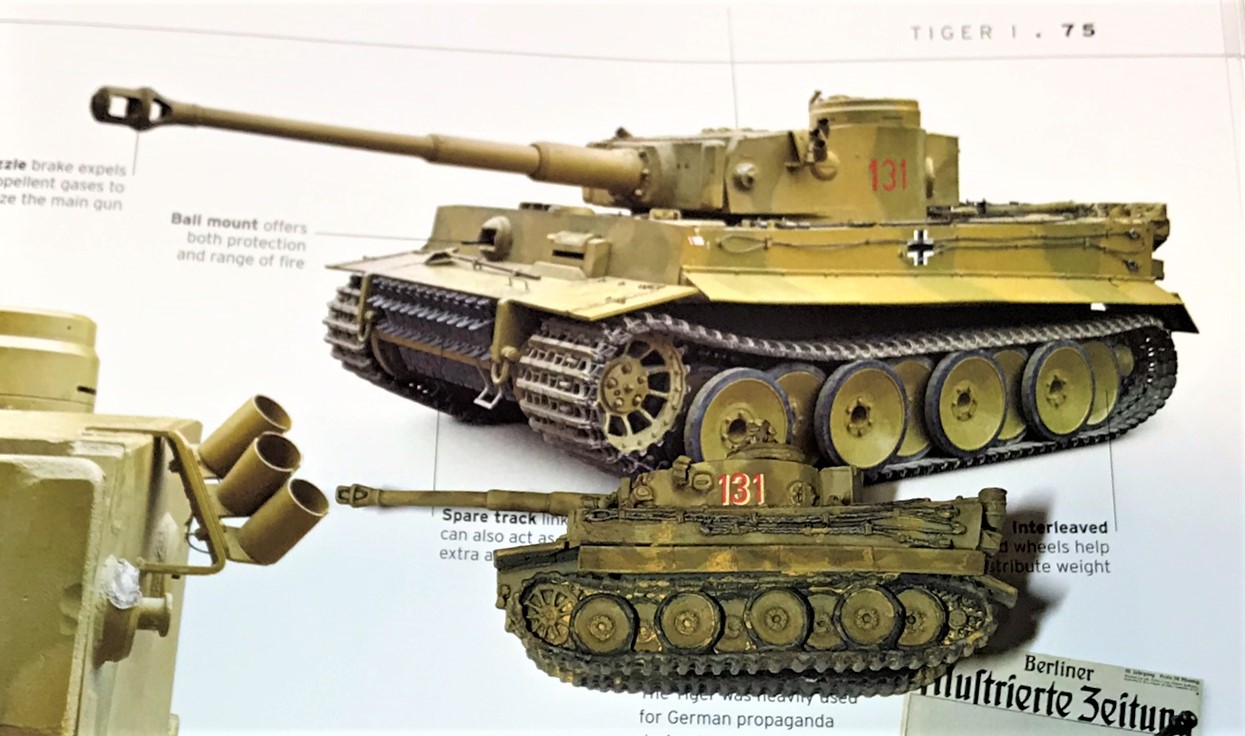
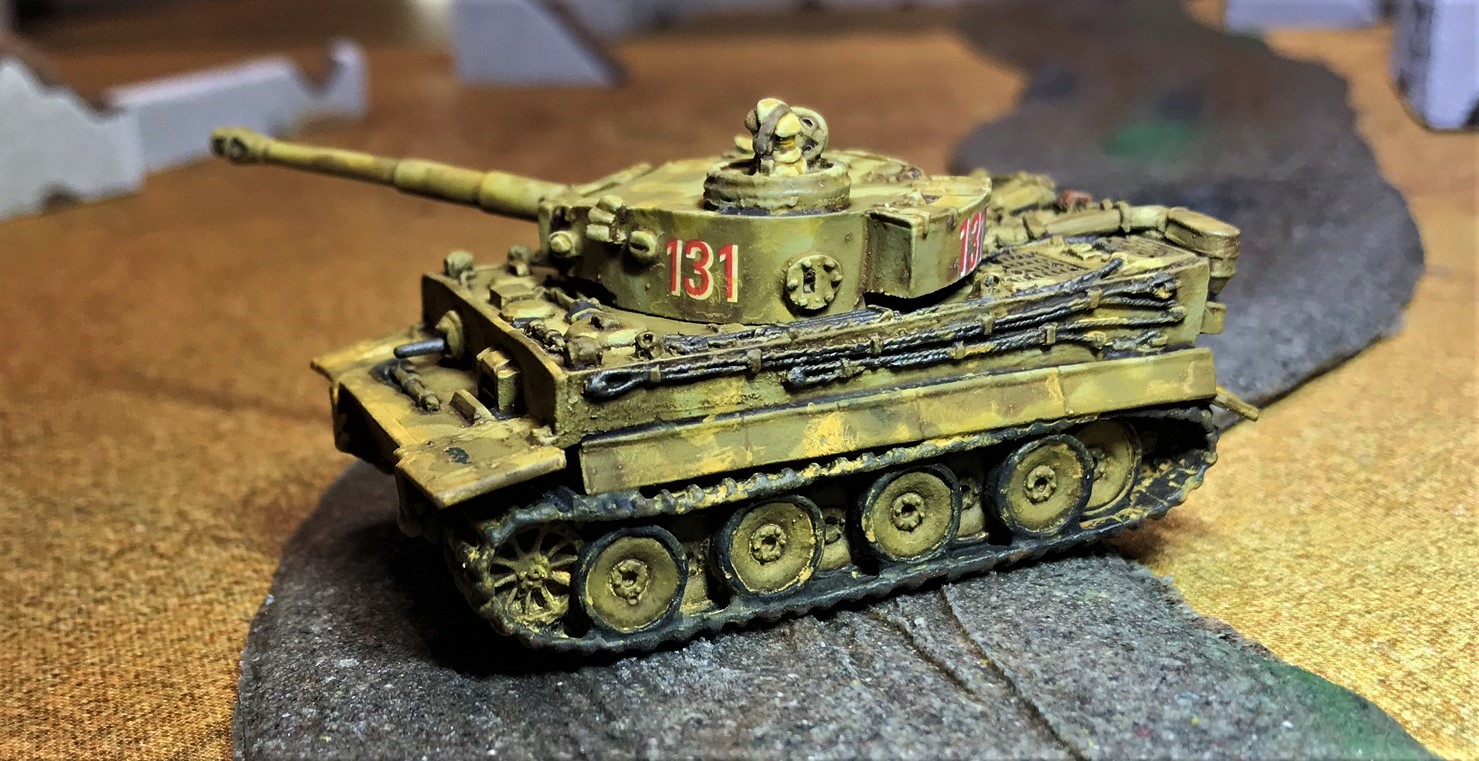
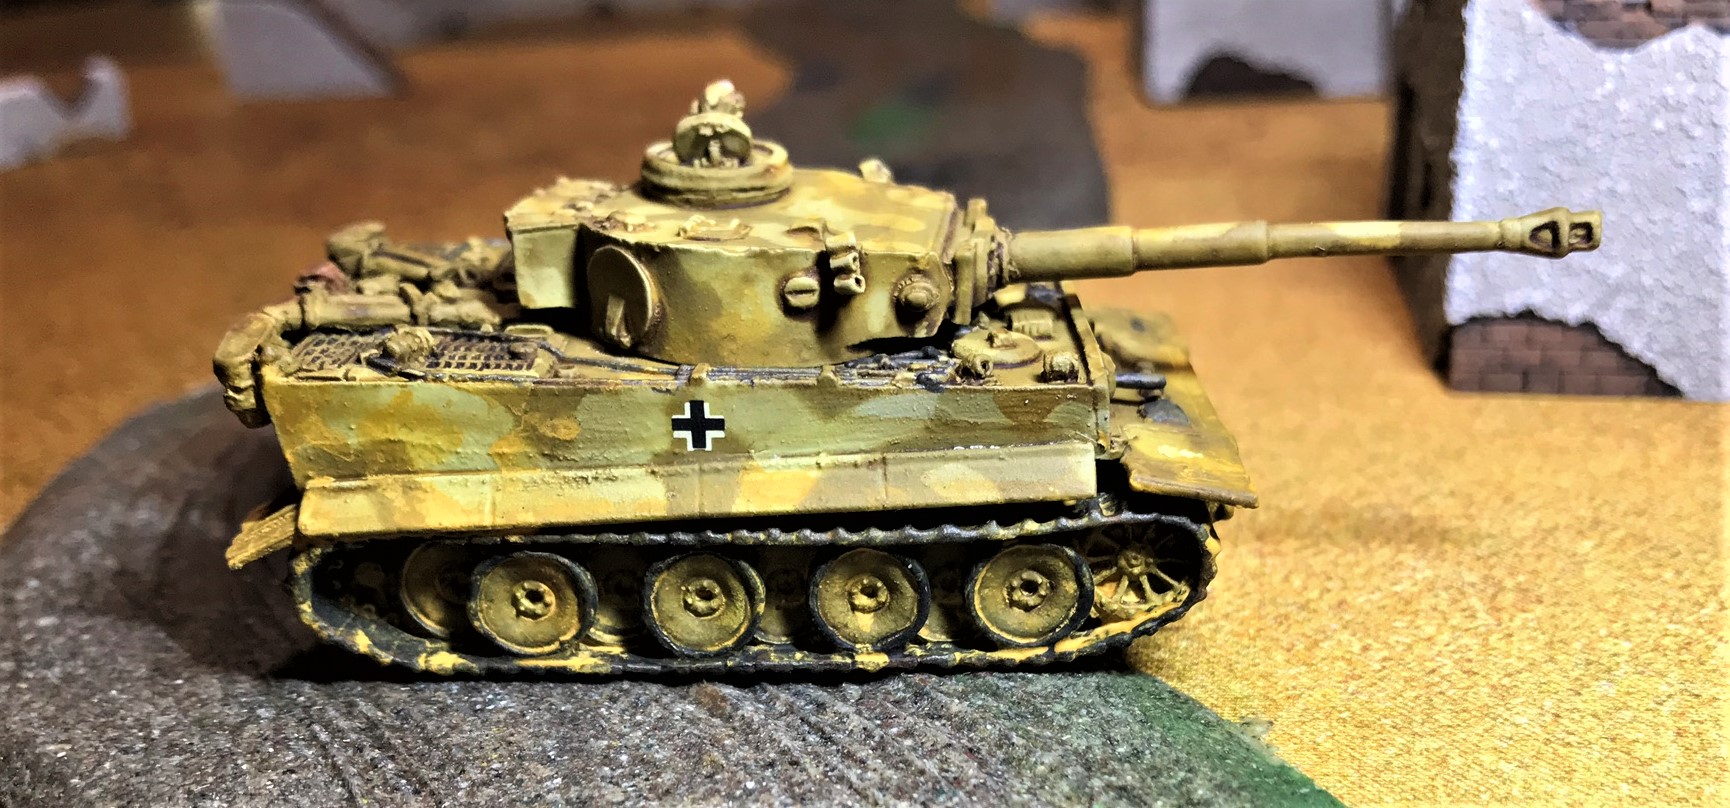
TIGER I
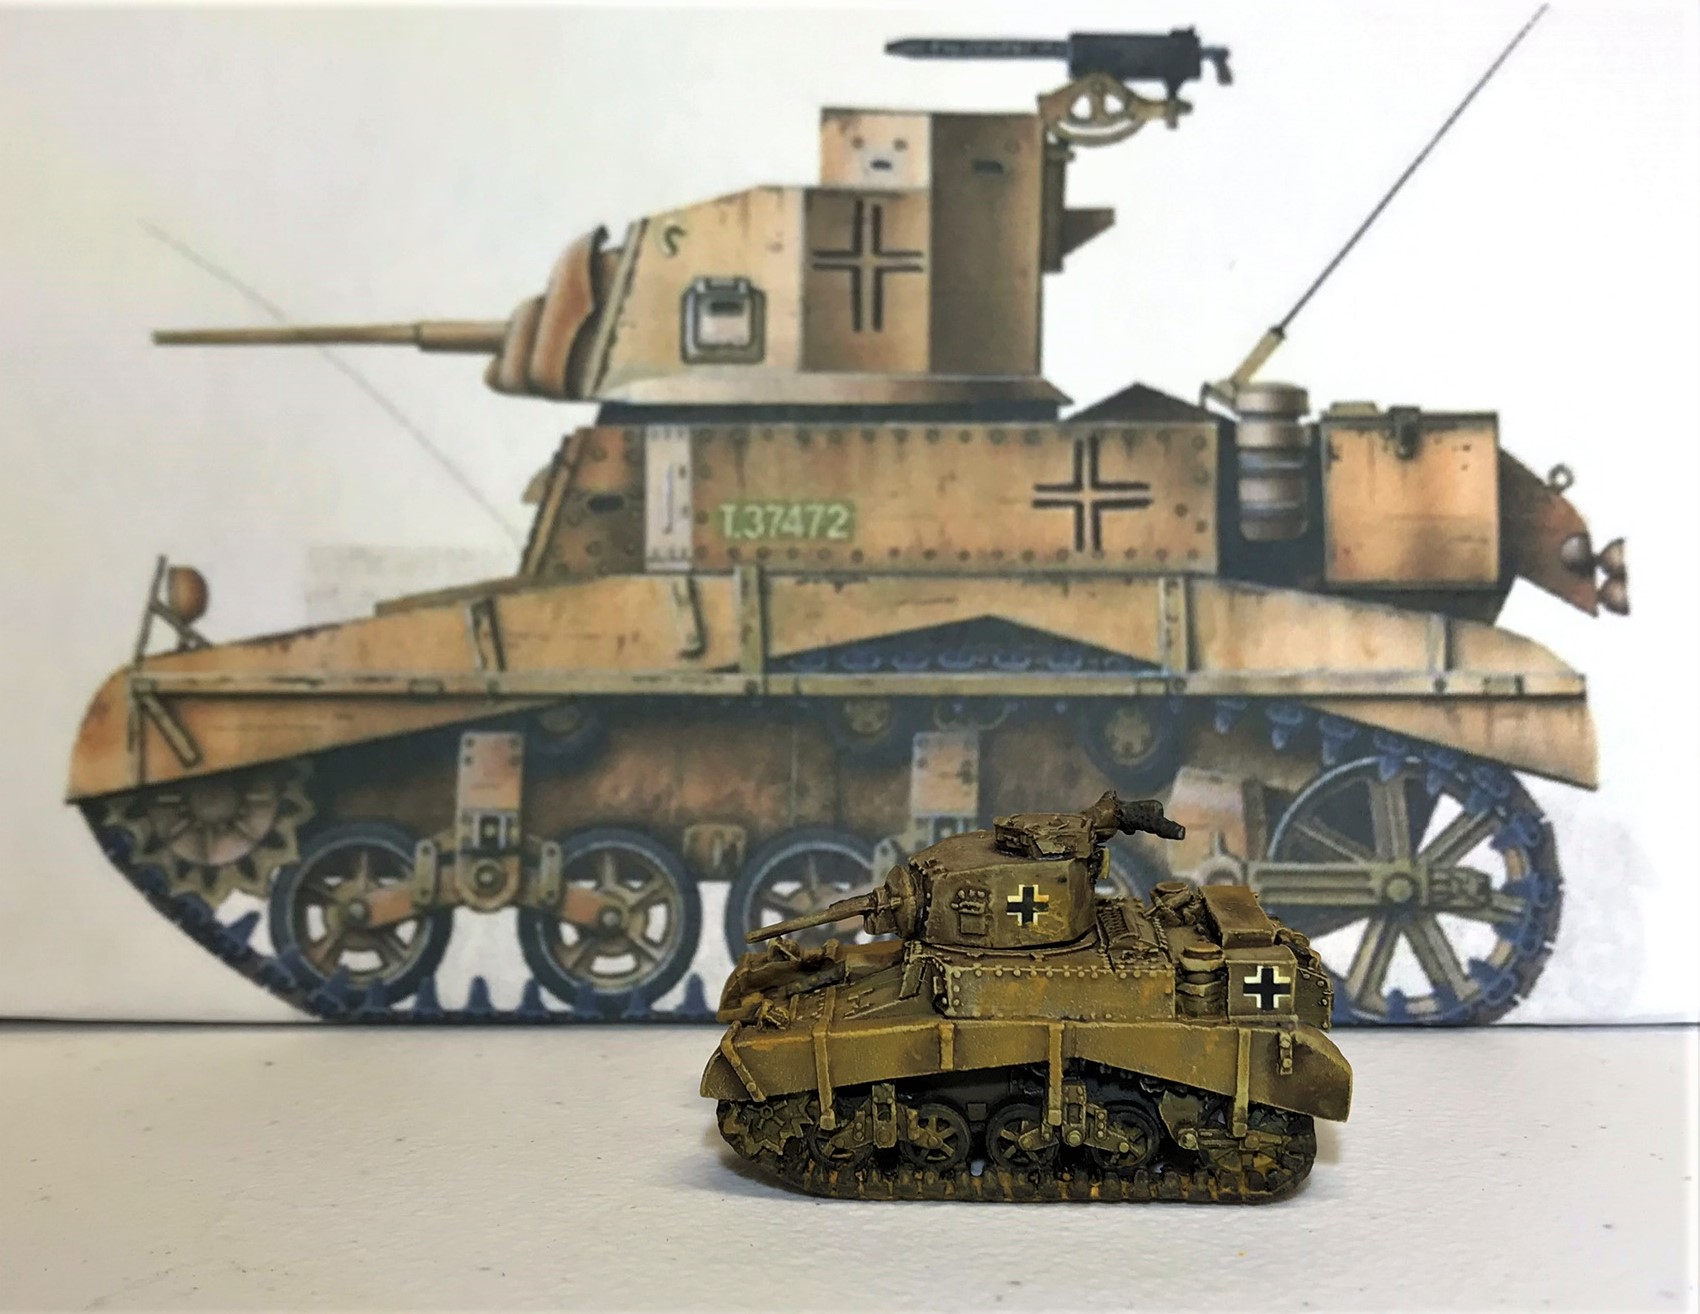
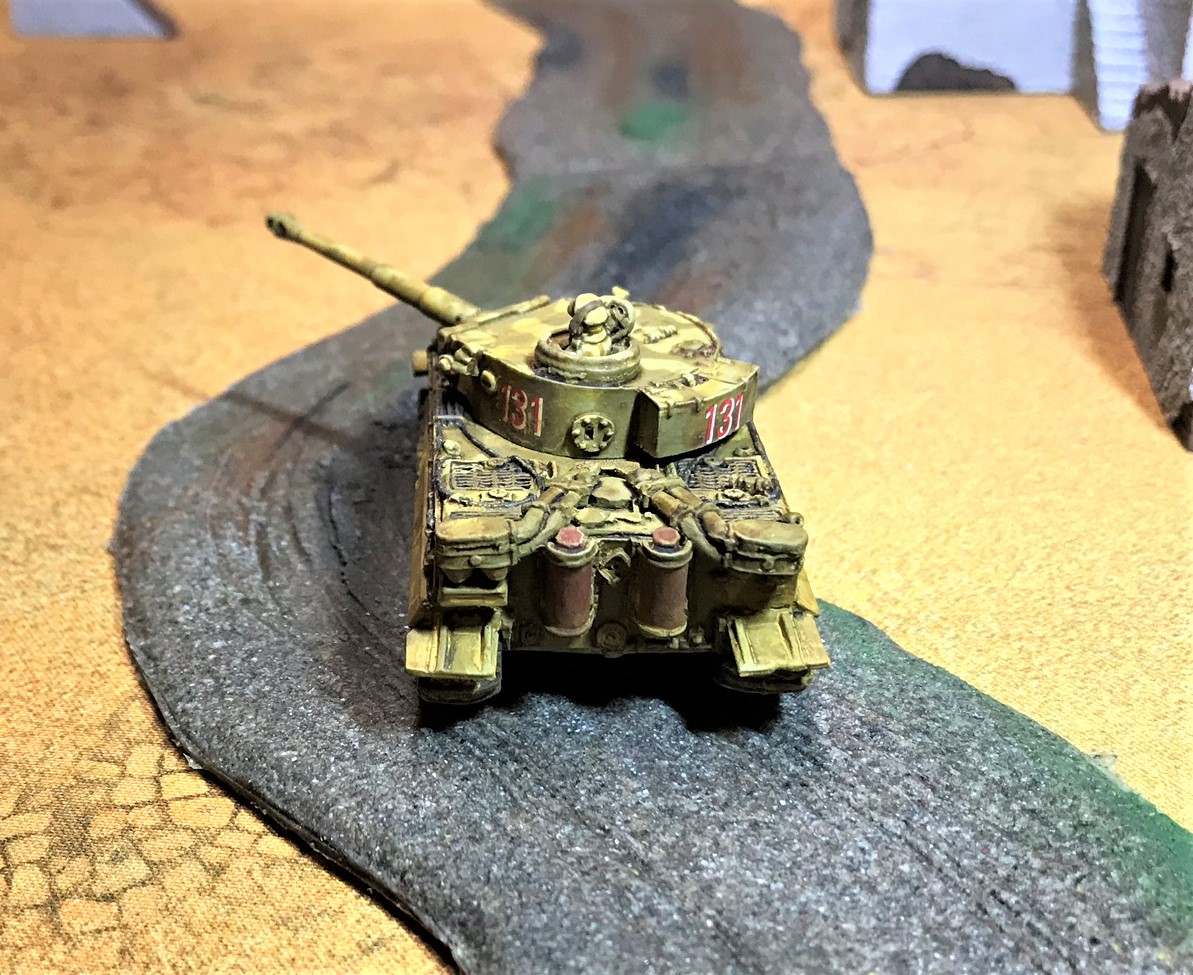
The last tank that I will share here is the centerpiece of the collection – a true behemoth – the early Tiger I. I modeled this one on the famous #131, which was captured virtually intact by the British in 1943 in Tunisia. A lucky British AP round lodged in the Tiger’s turret ring, and its crew abandoned it. Today, it is the only functional Tiger I on the planet and is at the Bovington tank museum.
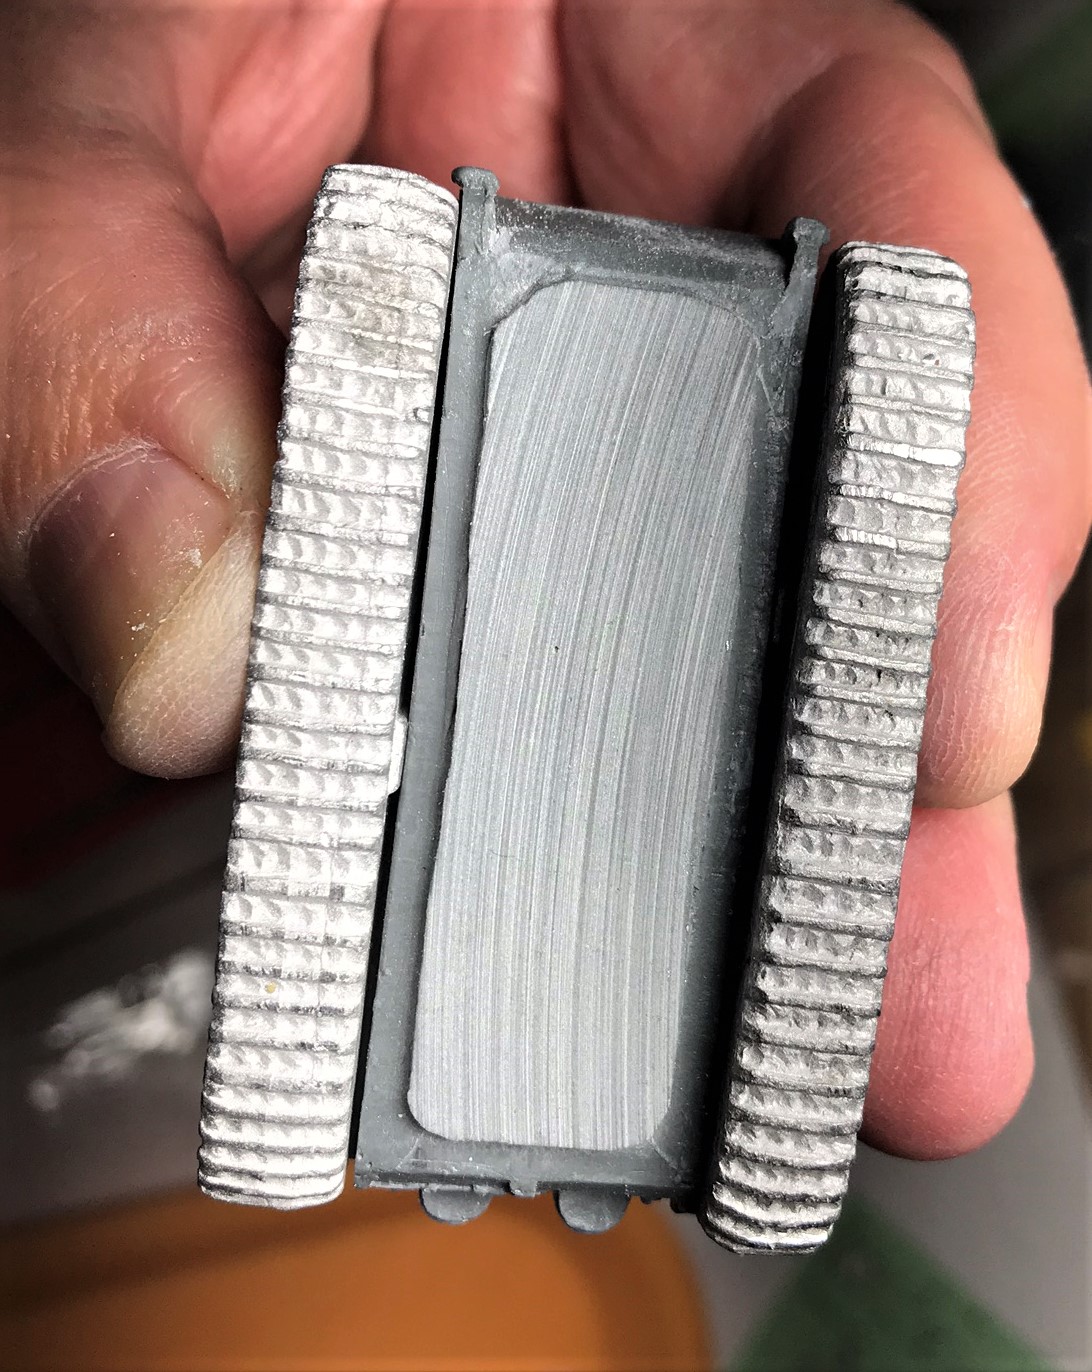
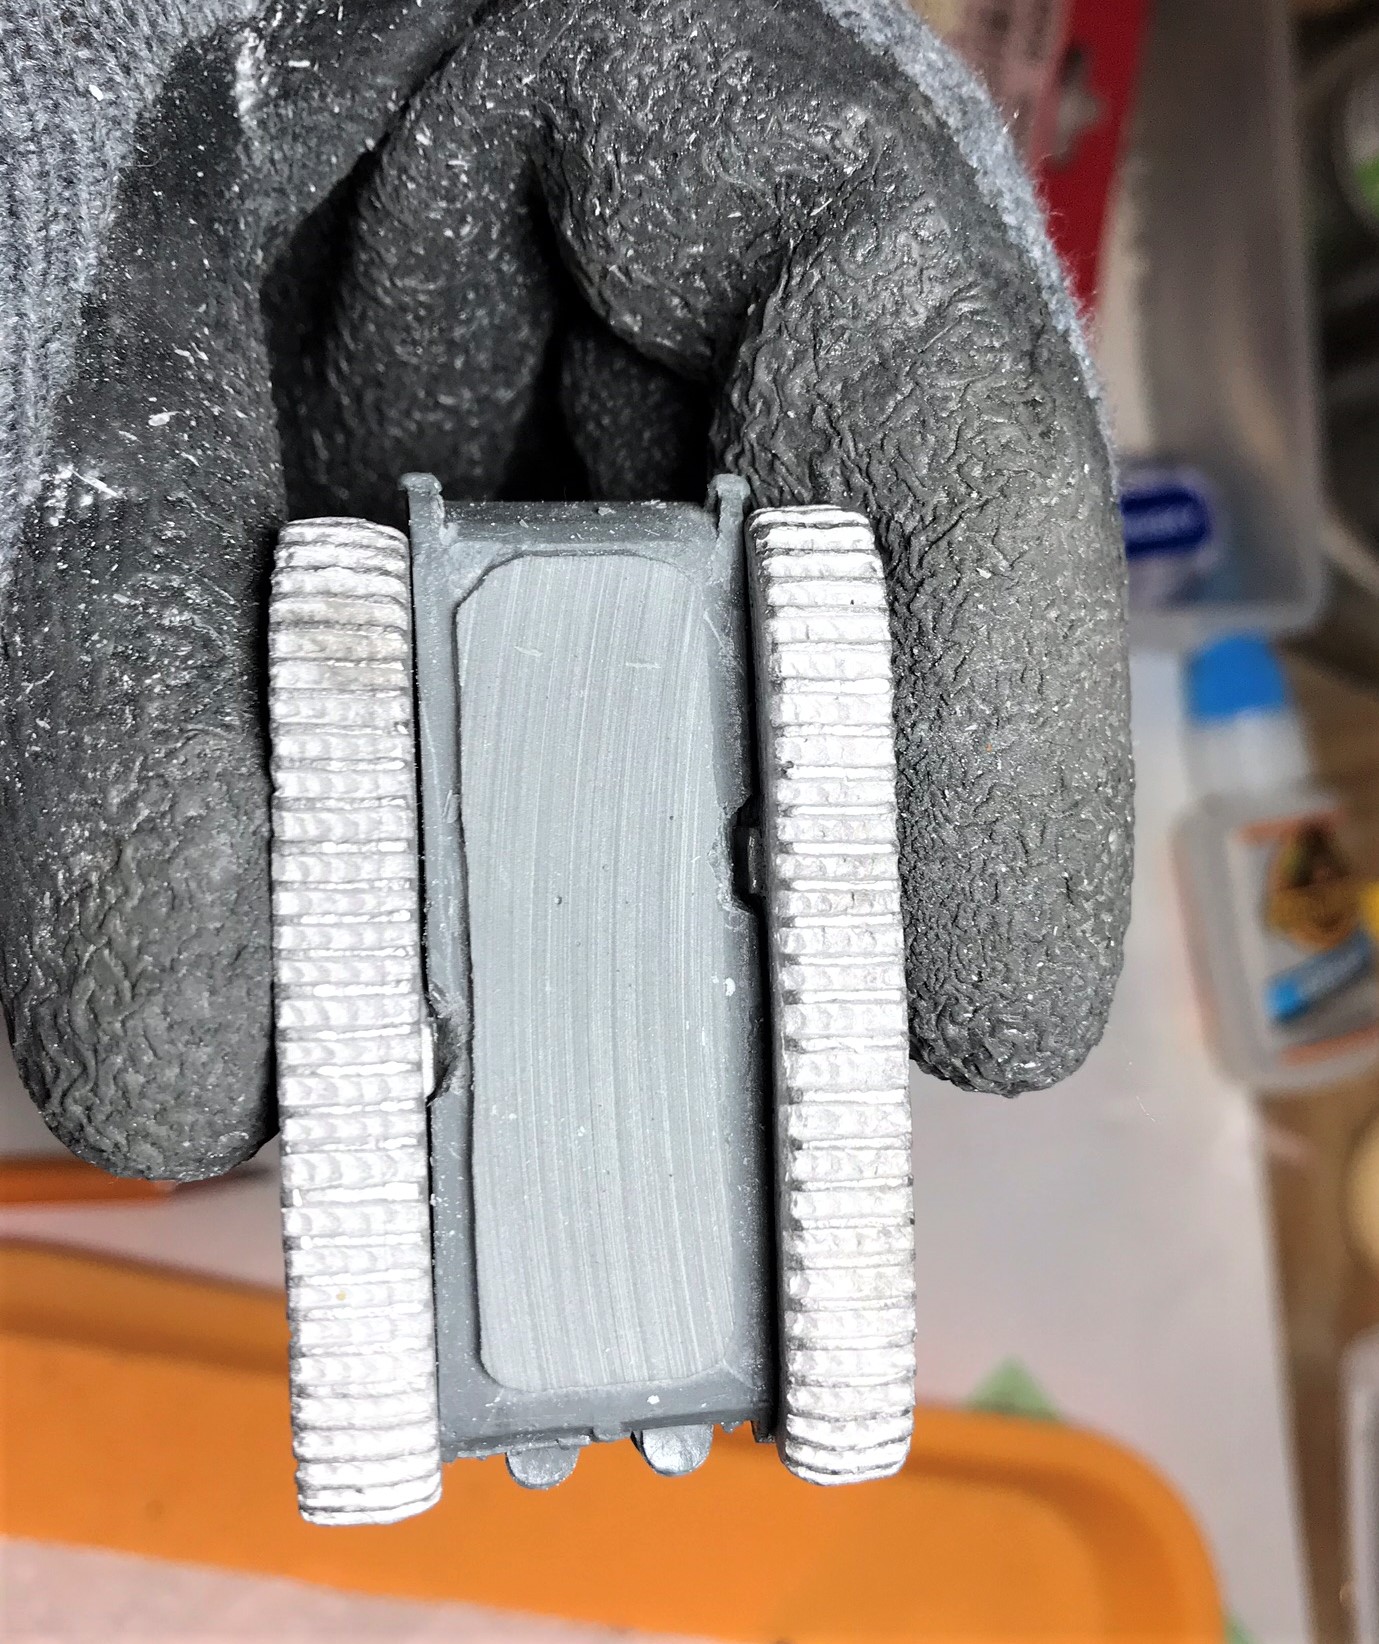
Assembly of this model was NOT easy. There were 21 pieces and no assembly instructions, which is amazing given that Battlefront has assembly instructions for much simpler models. I also had issues with getting the tracks to fit the hull as there were no slots for the detents on the metal tracks.
My Tiger I in its blister
No track slots? Grrrr…
Lots of surgery and filing…
I got the tracks to fit – note the protective “cut gloves”
Lots of little bits for a big tank.
Assembled.
This was a tough build.
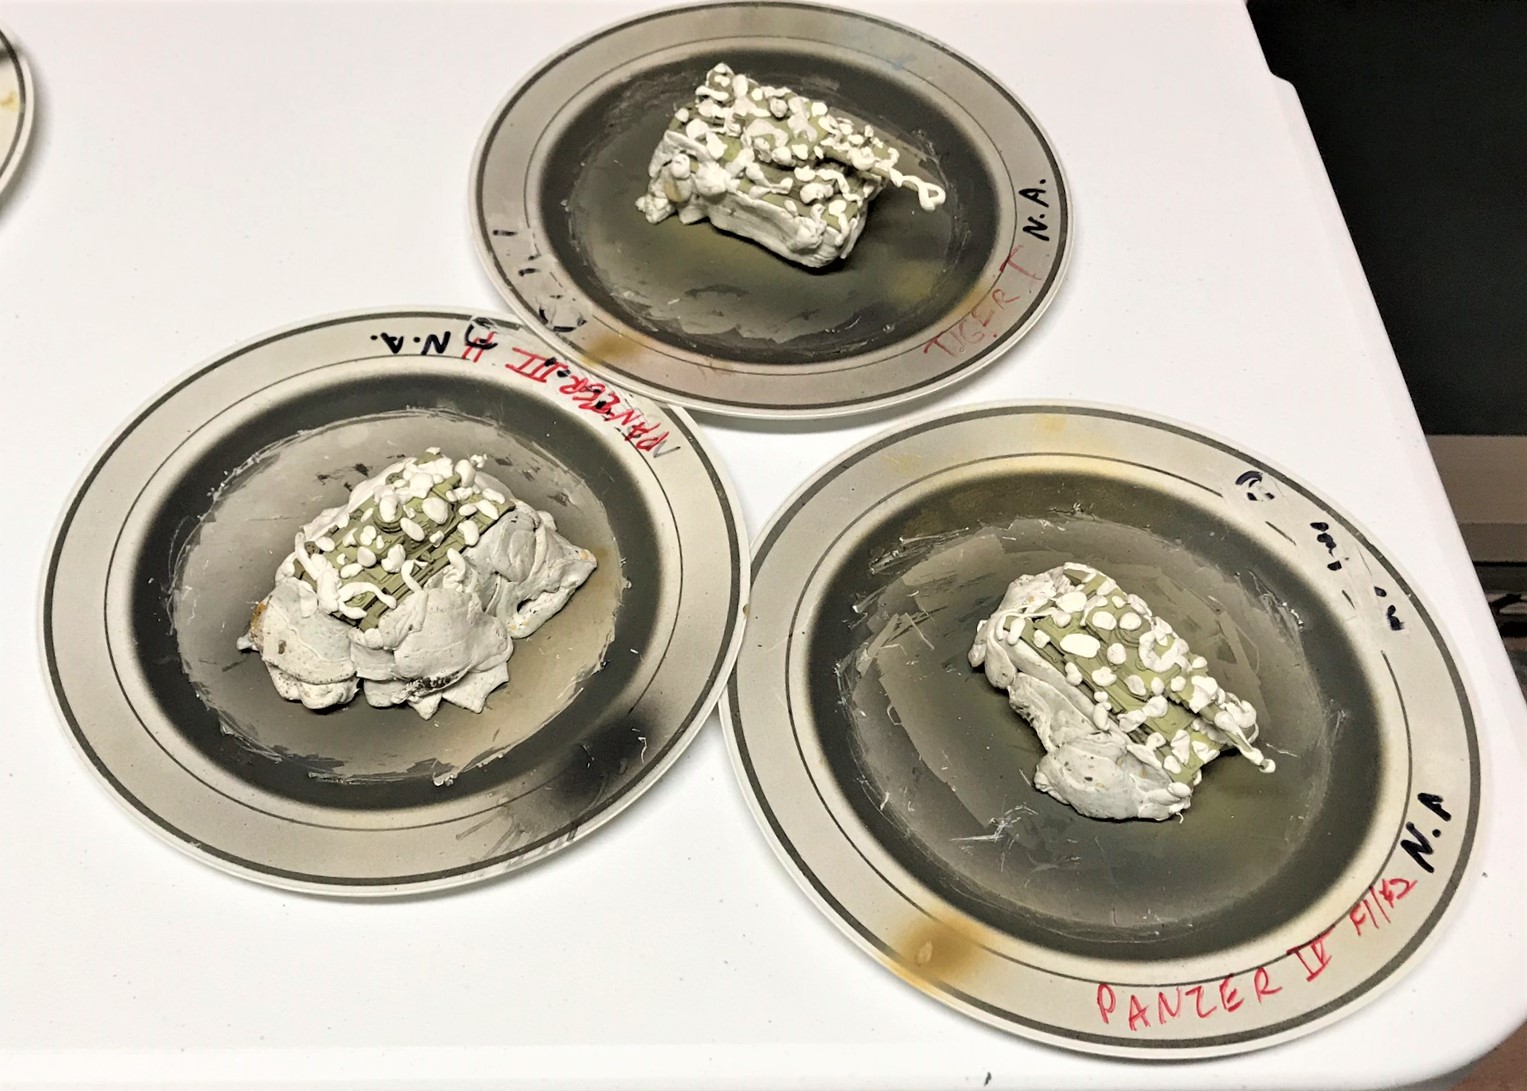
How I camouflaged tanks by using poster tack.
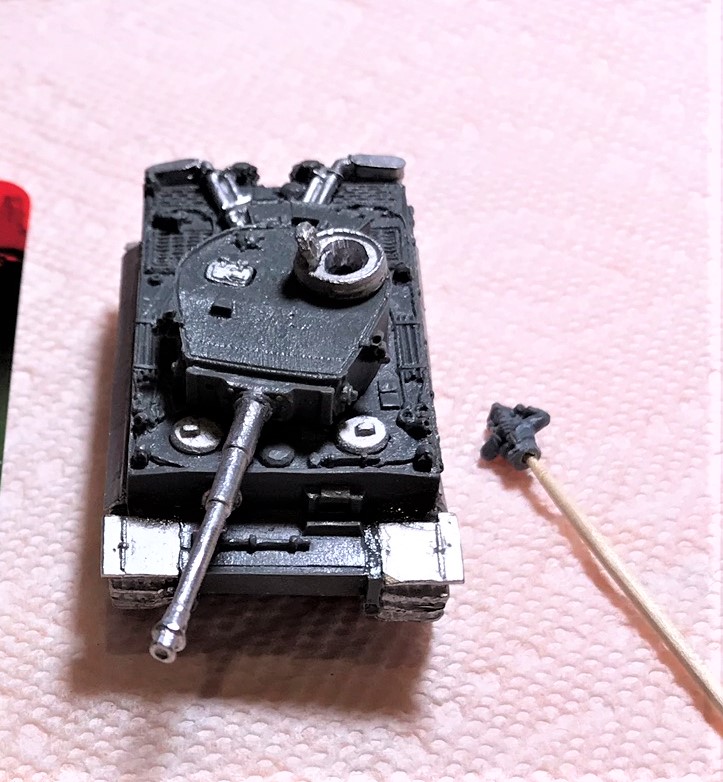
Tiger after the poster tack removed.
Turret close up after decals and crew added.
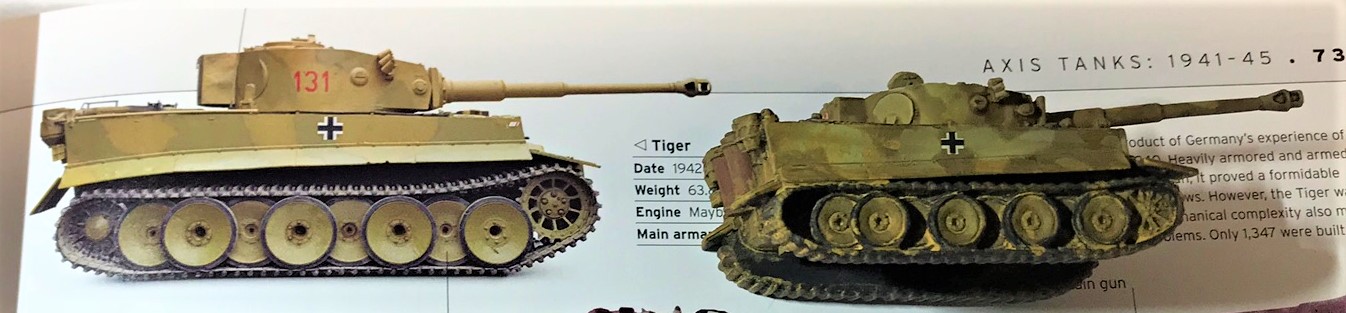
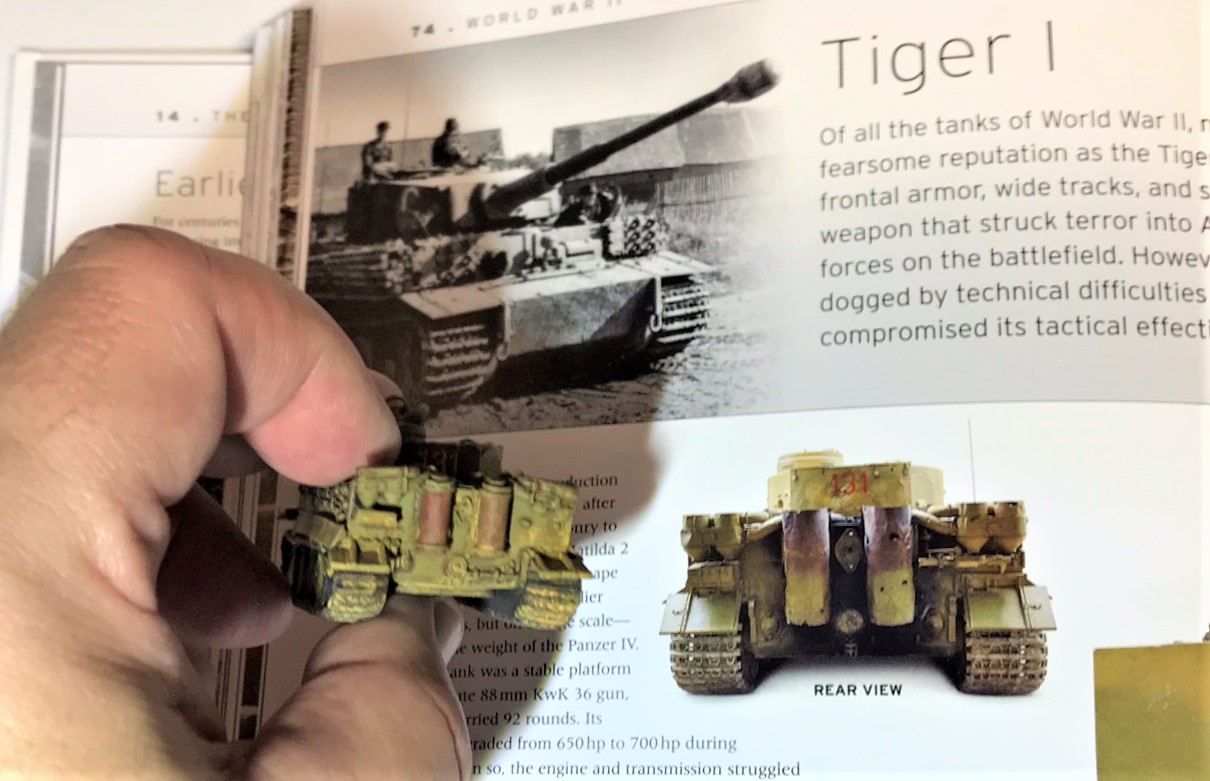
One of the three images I used to finish the model.
The second image showing the rear of the actual Tiger 1 #131.
The third image.
I wanted to install a radio aerial, but in the end I decided that it was impractical due to the size of the model and the likelihood of future damage. I also wanted to include this Tiger as my “centerpiece model” in the January monthly painting challenge that I participate in – run by Azazel (whose blog is well-worth following).
So now, its time for…
EYE CANDY!
Panzerjager I, right side
Panzerjager I, left side.
I completed two Panzerjager I’s – one obviously needs to get a paint job for North Africa!
Rear view showing the crews of this early tank destroyer.
The three Panzer IIC’s that will be for France 1940. The one on the far right has the converted gun.
The six Panzer IIF’s for North Africa.
Panzer IIF convoy.
Front close up of Panzer IIF.
The two Panzer IIIE’s.
Rear view of the Panzer IIIE’s.
Panzer IIIH, right side.
Panzer IIIH, left side.
Front view of Panzer IIIH, with nice view of DAK decal.
Panzer IVF2, right side.
And the Panzer IVF2, left side.
Front view of the Panzer IVF2.
Captured German Stuart “Honey”.
Other side of the German Stuart.
AND THE TIGER I!
Tiger I, left side.
Tiger I, right side.
Tiger I, rear view.
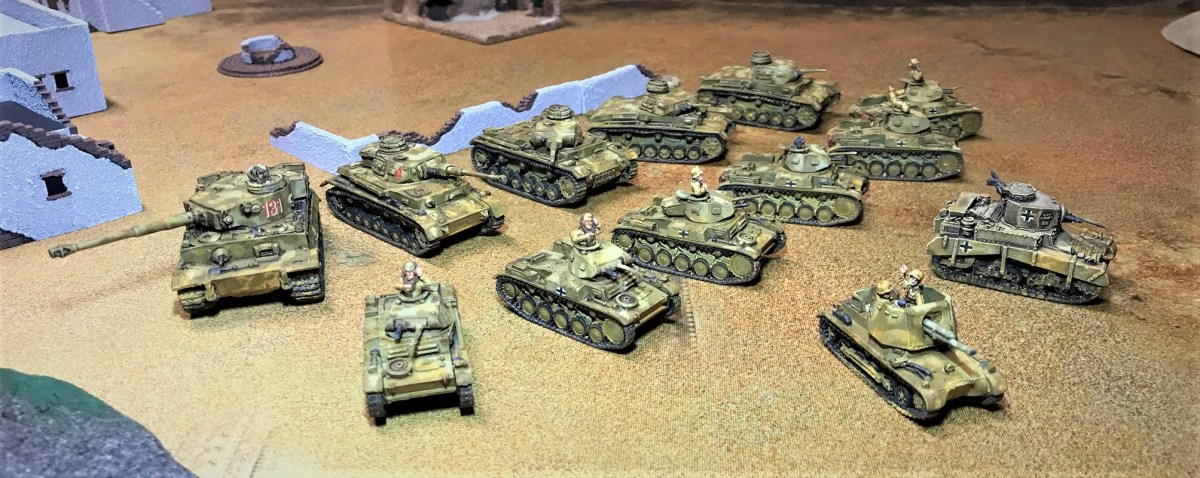
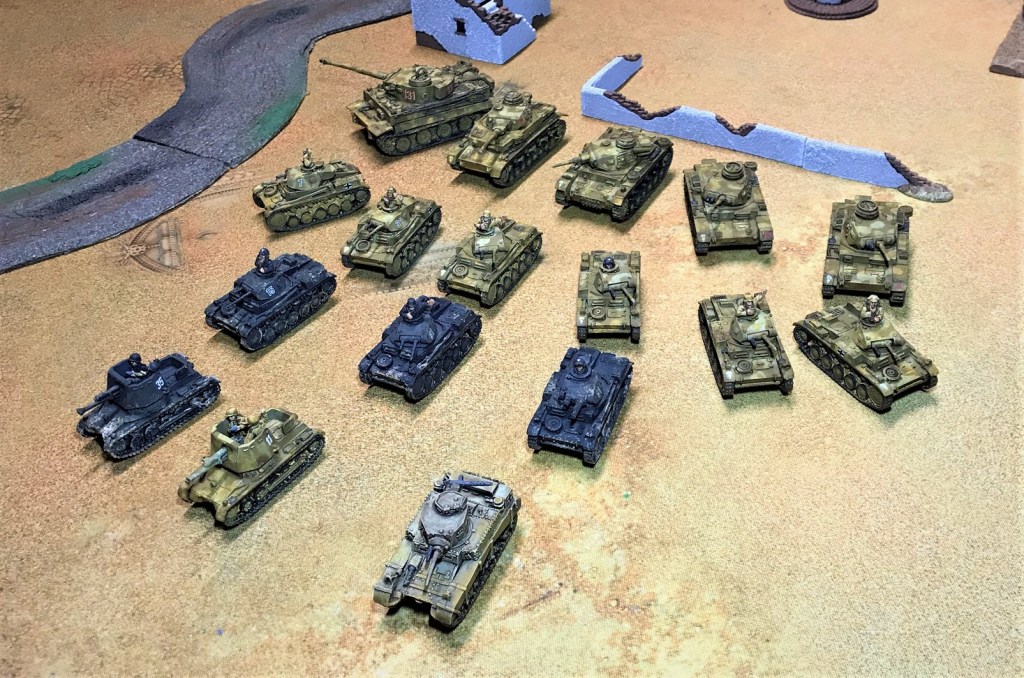
German motor pool! The 13 German tanks for Panzer Army Africa.
All 17 German tanks for January! Bigger motor pool!
This was a big project – and now on to the Italians (and my replacement Panzer IVD).
I thank you for looking and hope this was enjoyable for you. What tanks are your two favorites (I know the Tiger I will be a big favorite!). Please share your thoughts and any feedback in the comments section!
PAINTS, INKS, GLAZES, SHADES, WASHES, PIGMENTS AND FLOCKING USED ON THIS TANK GROUP:
Vallejo “Flow Improver”
Vallejo “Airbrush Thinner”
Vallejo “Surface Primer – Black”
Testors “Universal Acrylic Thinner”
Battlefront “Dark Gunmetal”
Secret Weapons Washes “Armor Wash” (wash)
Battlefront “Panzer Gray”
Vallejo Model Air “Base Grey”
Vallejo “Neutral Grey”
Vallejo Model Air “Green Brown”
Vallejo Model Air “Green Brown”
Vallejo Model Air “German Green Brown”
Vallejo Model Air “Light”
Vallejo Model Air “Cam. Grey Green”
Vallejo Model Air “Bright Brass”
Battlefront “Boot Brown”
Battlefront “Dry Dust”
Battlefront “Black”
Battlefront “Oxide Red”
Army Painter Quickshade “Light Tone” (wash)
Battlefront “European Skin”
Battlefront “Skin Shade” (shade)
Vallejo Game Air “Moon Yellow”
DecoArt “White Pearl”
Army Painter Quickshade “Mid Brown” (wash)
Army Painter Quickshade “Strong Tone” (wash)
Vallejo “Dark Yellow Ochre” (pigment)
Vallejo “Light Slate Grey” (pigment)
Vallejo “Light Sienna” (pigment)
Battlefront “Rommel Shade” (shade)
Battlefront “Bradley Shade” (shade)
Citadel “Agrax Earthshade” (wash)
Citadel “Nuln Oil” (wash)
Gorilla Glue
Vallejo Mecha Varnish “Gloss Varnish”
Microscale Micro-Set
Microscale Micro-Sol
Microscale Liquid Decal Film
1/8″ rare earth neodymium magnets
Appropriate decals from Battlefront
Vallejo Mecha Varnish “Matt Varnish
Aleene’s poster tack
Sponges
Thanks for looking and for sharing your feedback!
ON MY RESEARCH MATERIALS
As for research materials, I used the same ones as I cited before – but for completeness here they are in case you are interested (you can find them on Amazon):
One by Jean Restayn:WWII Tank Encyclopaedia, 1939-45
One by the Smithsonian/DK:Tank: The Definitive Visual History of Armored Vehicles
One by Michael Green:Axis Armoured Fighting Vehicles of the Second World War (Images of War)
One by Robert Jackson:Tanks and Armored Fighting Vehicles Visual Encyclopedia
I would easily recommend all of these books as good resources for gamers and modelers.
I’ll cover each of the types individually, then some eye-candy shots at the end for your (I am hopeful) enjoyment. Of course, I will list my paints and materials at the end for those interested. I used my airbrush and standard brushes on all of these.
A10’s and A13
I finished three more cruiser tanks – two A10 Mark IIA’s and one A13.
A10 in the blister, as we say, a BAHGIN
A10 Assembled
A10 prepped for assembly
I find that cleaning, filing, and general preparation of these models does take a bit of time. I know that washing the resin parts is very important. My last step in cleaning the resin involves a gentle brush wash/application of isopropyl alcohol (rubbing alcohol to some of you) to it. This has been helpful I think – you just need to let that dry before handling or you may leave fingerprints on the resin. I also added radio antenna aerials with 24 gauge wire if the model would withstand the drilling and mounting process structurally. Sometimes, I just could not add one without damaging the model.
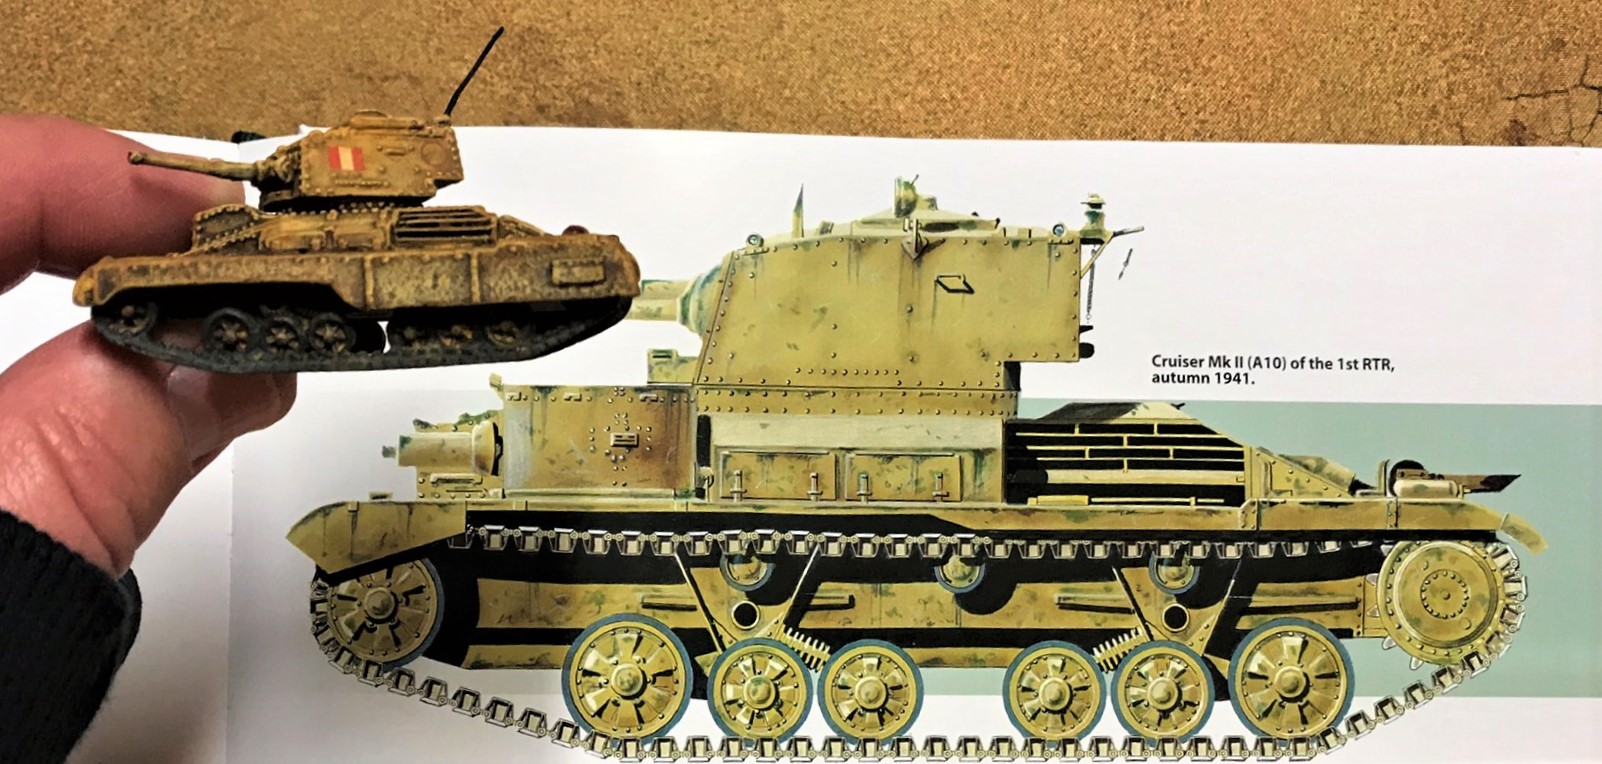
One of the two A10’s as completed. I went with a sandy look compared to the Caunter scheme I used on the A9’s, mainly for tabletop identification. This is what I was aiming for, but of course I add pigments and dirty up my tanks! Note that either the book or my model has a different skirt, possibly because mine were A10 Mark IIA’s.
During the war, compared to the A10’s, the A13’s were much faster due to the Christie suspension and a better engine. Combat wise, they were not much better, and are not better in the game rules either. They are adequate foes for Panzer II’s and some Italian light AFV’s.
On all of my tanks I tried to use different FoW decals that seemed to make sense – they are so small! Of course, getting the decals to look sand-worn was important, and the pigment helped. Getting the decals to conform to the curved surfaces took many slow applications of Micro-Set, Micro-Sol, and Liquid decal film. Our hobby blog-guru Azazel mentioned using barely-moist sponges to lightly apply pigments, so I gave that a shot, especially on the decals. While I think I got a darker look, it did made the decals look less out of place, and I liked the effect.
My A13 and the painting scheme that I went with, minus the remnants of the blue Caunter camouflage pattern – as I thought that bluish tinge would be nearly impossible to see at 15mm scale.
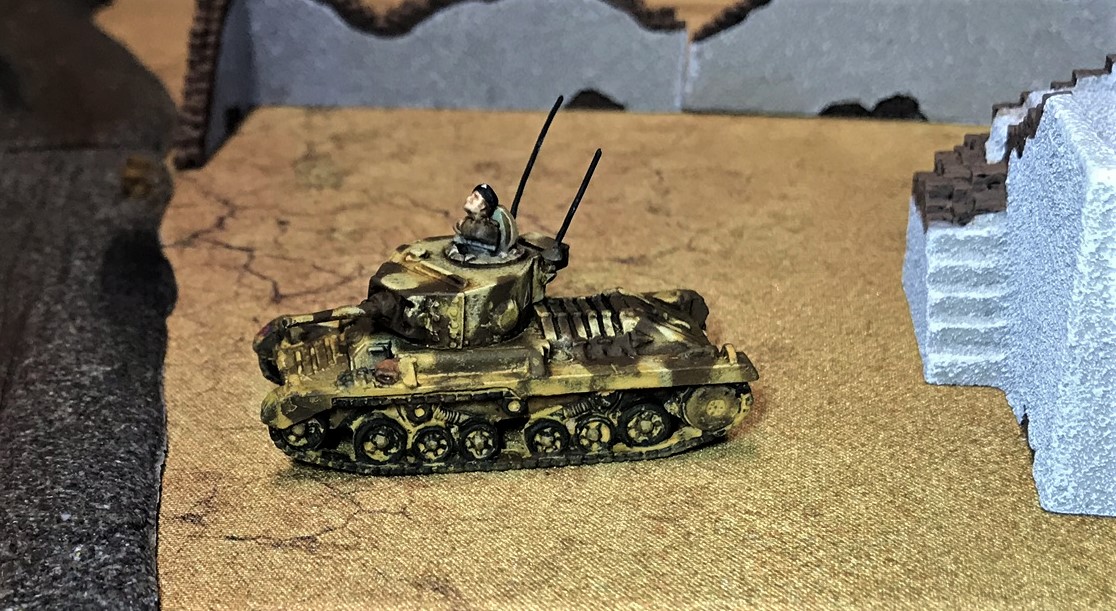
Valentines
I picked up the two Valentine infantry tanks on sale at two different hobby shops. The track treads were a bit different. Of note, the Valentine II needed significant reinforcing with green stuff to come together as it was either poorly designed or not well made.
Valentine II in blister another Massachusetts “BAHGIN”
Valentine III in blister
Valentine II assembled
Repair work on Valentine II
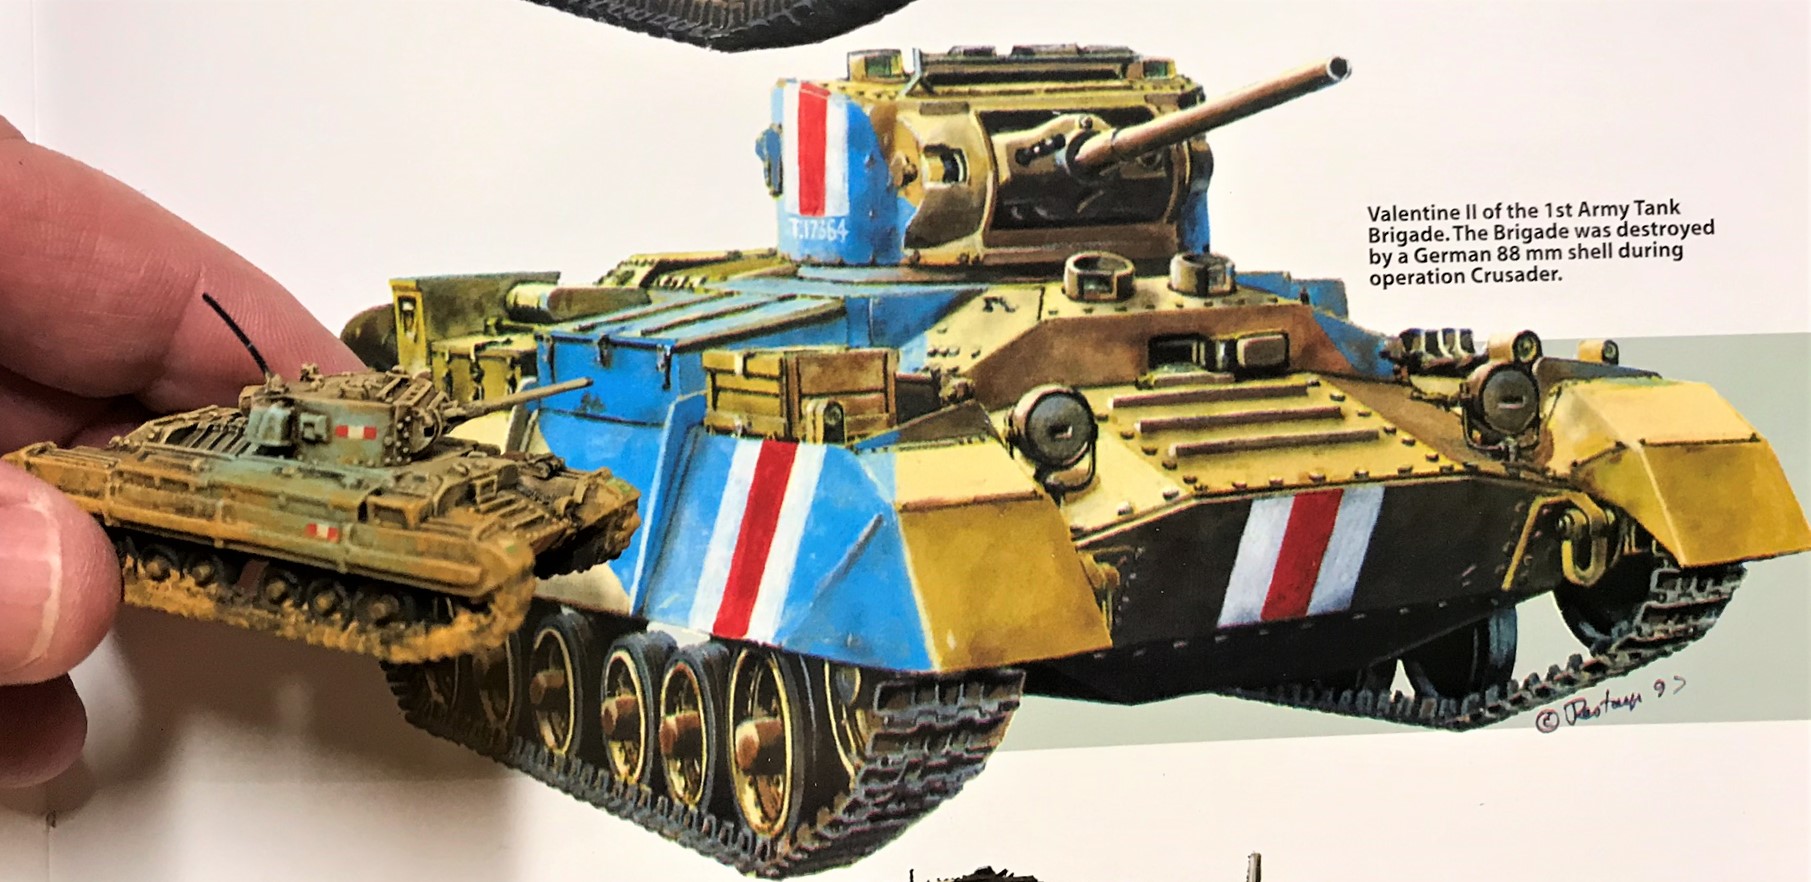
For the Valentine II, I chose a Caunter camouflage scheme that was more bluish than what I had done previously with the A9’s or the Honeys. That would help on the tabletop as well – and the biggest difficulty was masking the appropriate parts of the tank for airbrushing the blue.
Valentine II masked for airbrushing the blue Caunter camouflage scheme.
I am not sure how effective the blue scheme was in WWII combat, but as the British abandoned it my guess is not very. Still, it does look striking and different.
My Valentine II versus its model in the book. The red and white markers were too small for me to mask and paint, so I went with decals. Also, the sides of my model differed a bit as well. I chose to have a lighter blue – it was tough to bring myself to paint that bright of a blue on a tank!
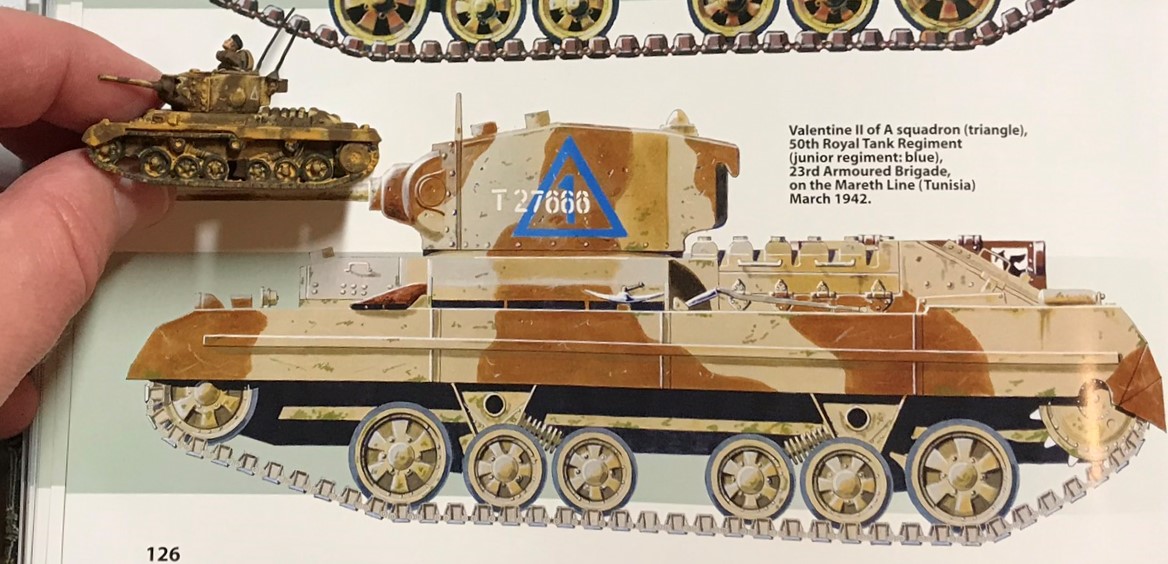
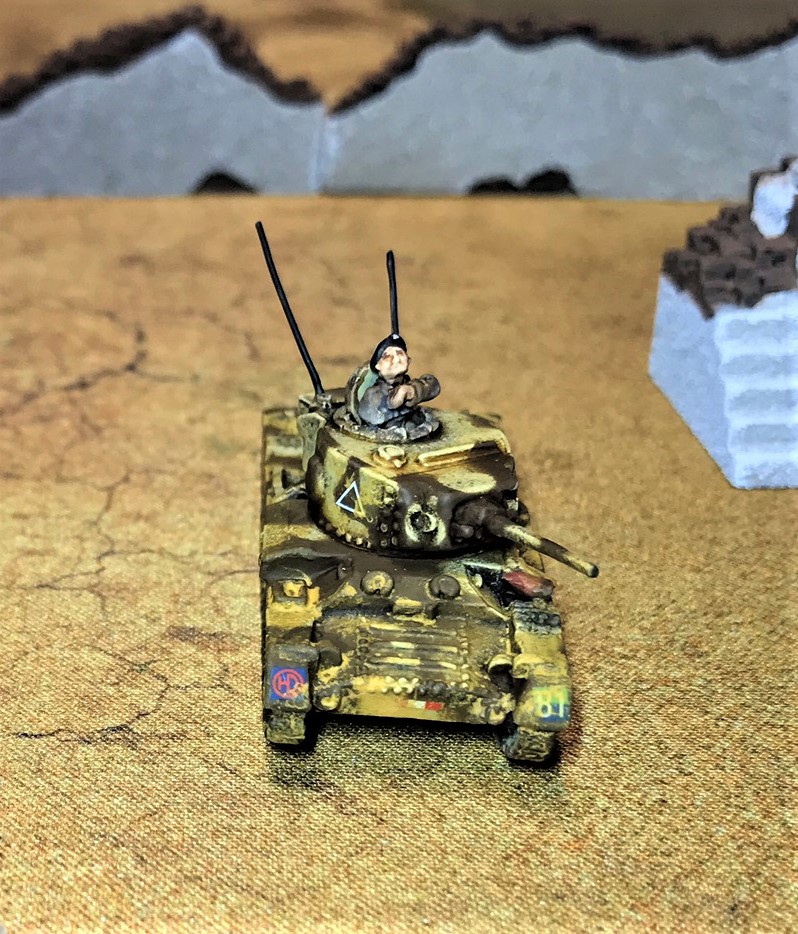
For the Valentine III, I went with a camouflage scheme that was more brown and sand. I also added two aerials to this one.
The Valentine III and the paint scheme I emulated. Once again, my pigment use darkened it, but in the eye-candy section below, you can see it better.
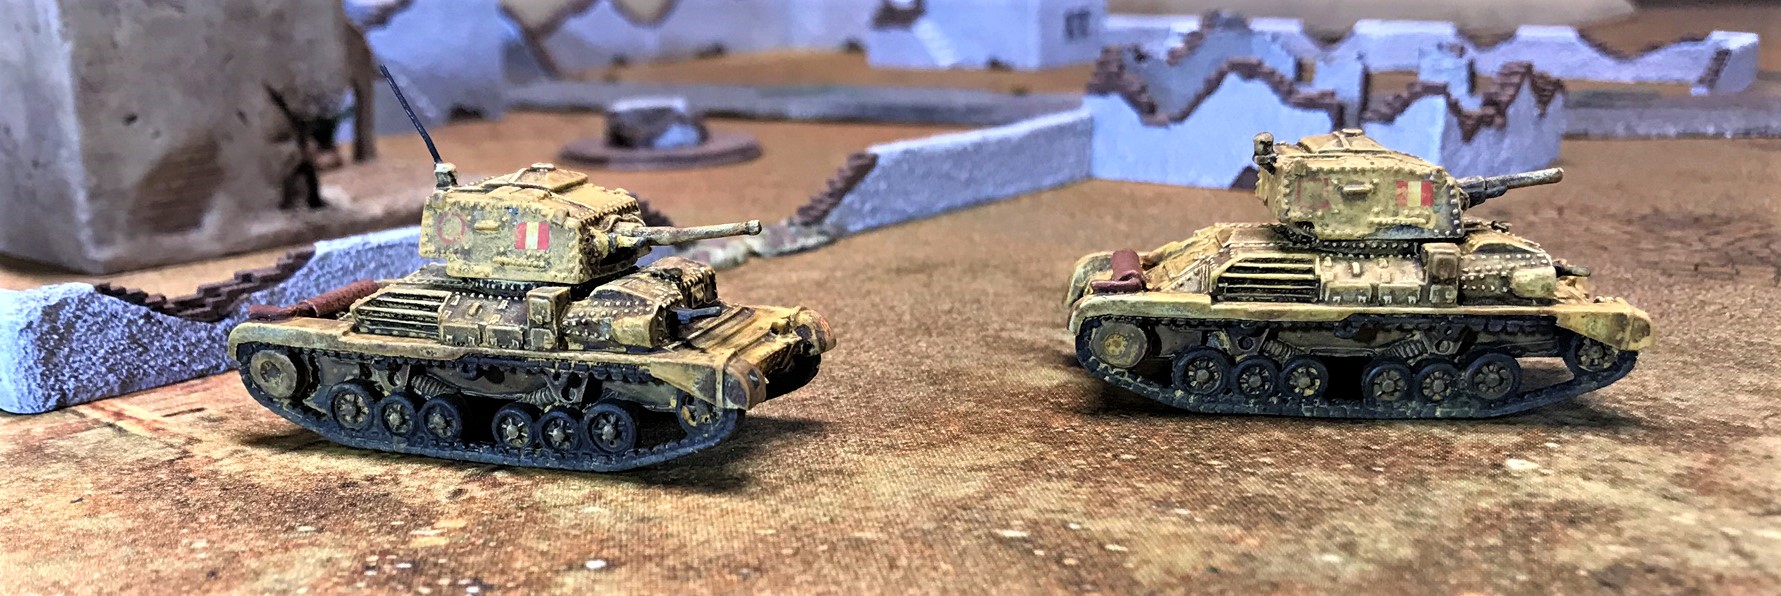
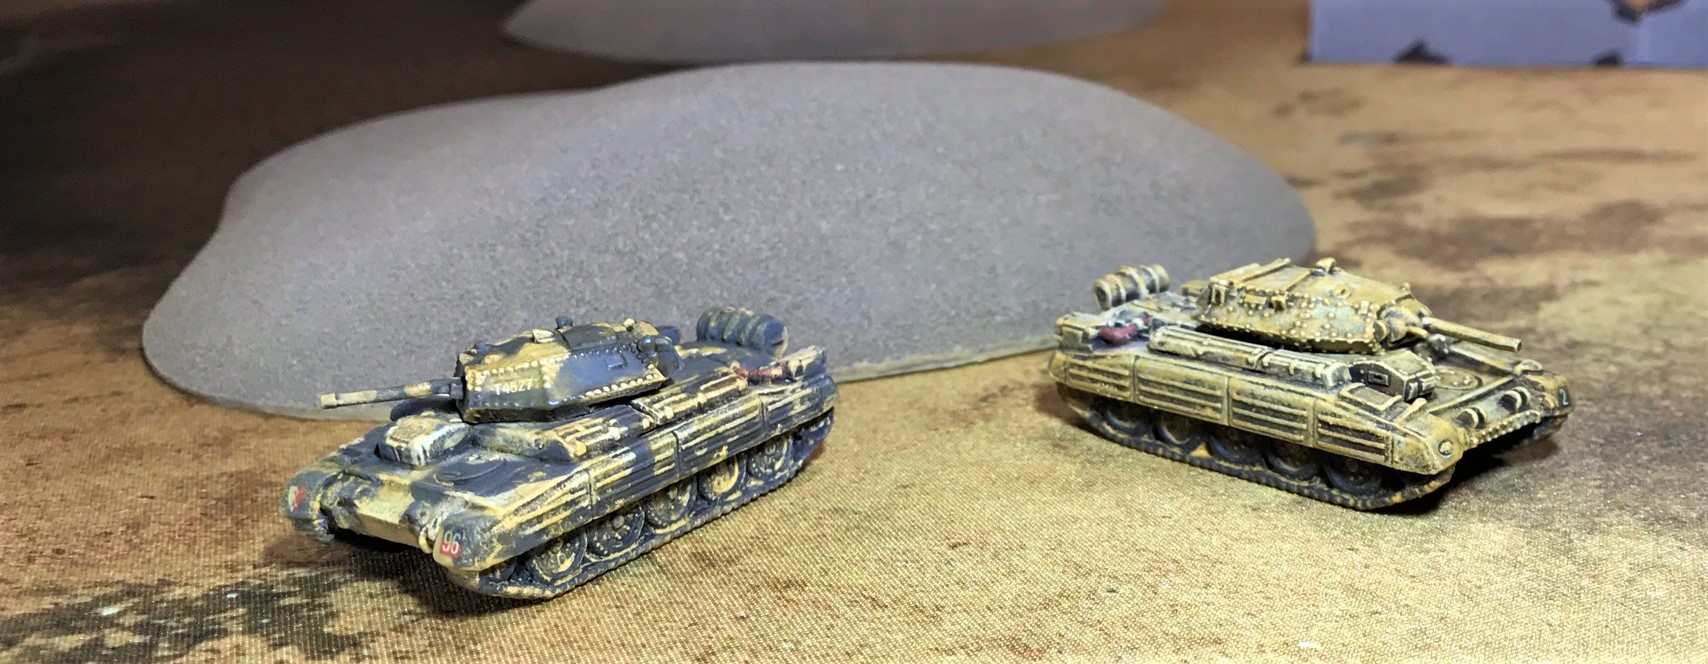
Crusaders
I definitely wanted to have a couple of Crusader cruiser tanks in my force. They do look good, though in combat their armor was not effective enough against their Axis counterparts.
My two Crusaders in blister
Crusaders assembled
Base-coated and ready for final work
I decided to use two different painting schemes here as well. The earlier Crusader II would get a sandy look, while the Crusader III would get a brown camouflage pattern.
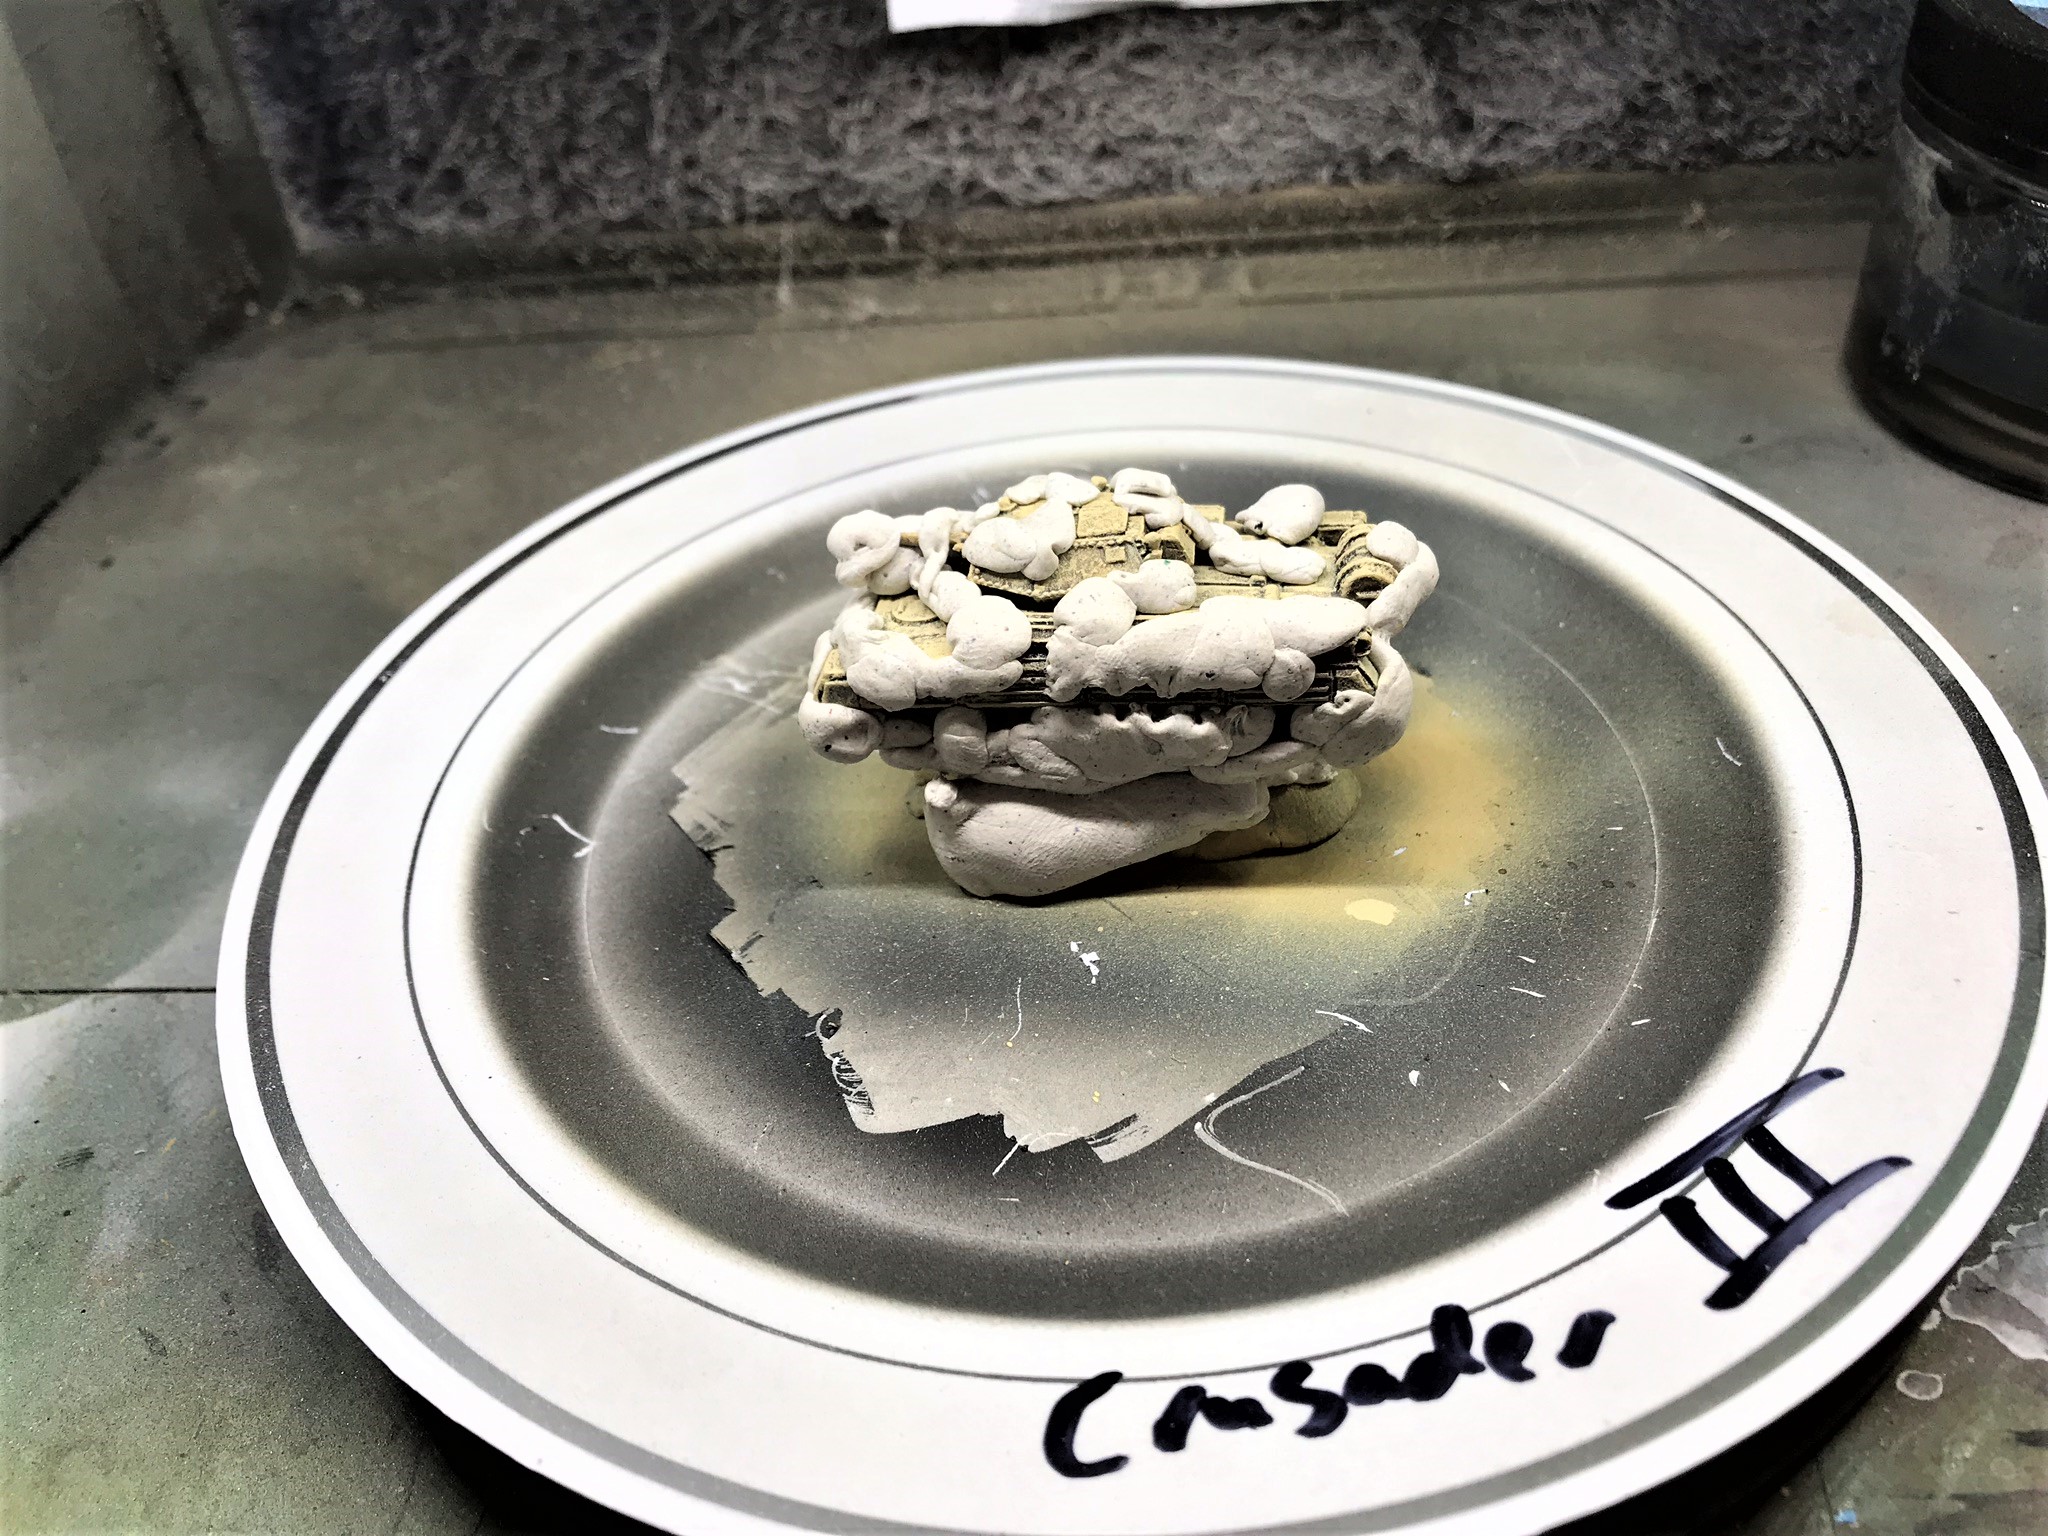
My Crusader III awaits the airbrushing of the brown camouflage. Poster tack works great for this kind of masking.
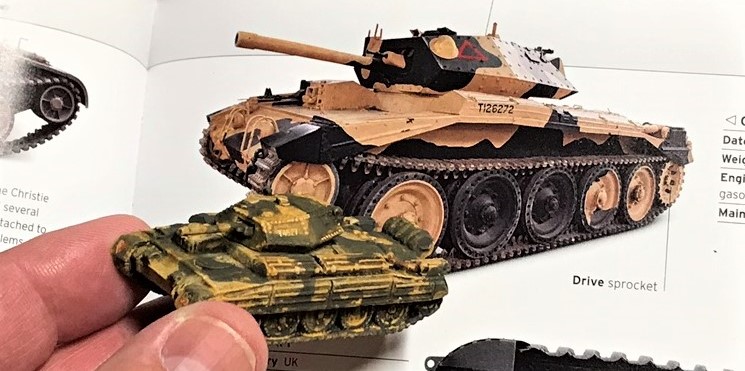
The finished Crusader II and the book version.
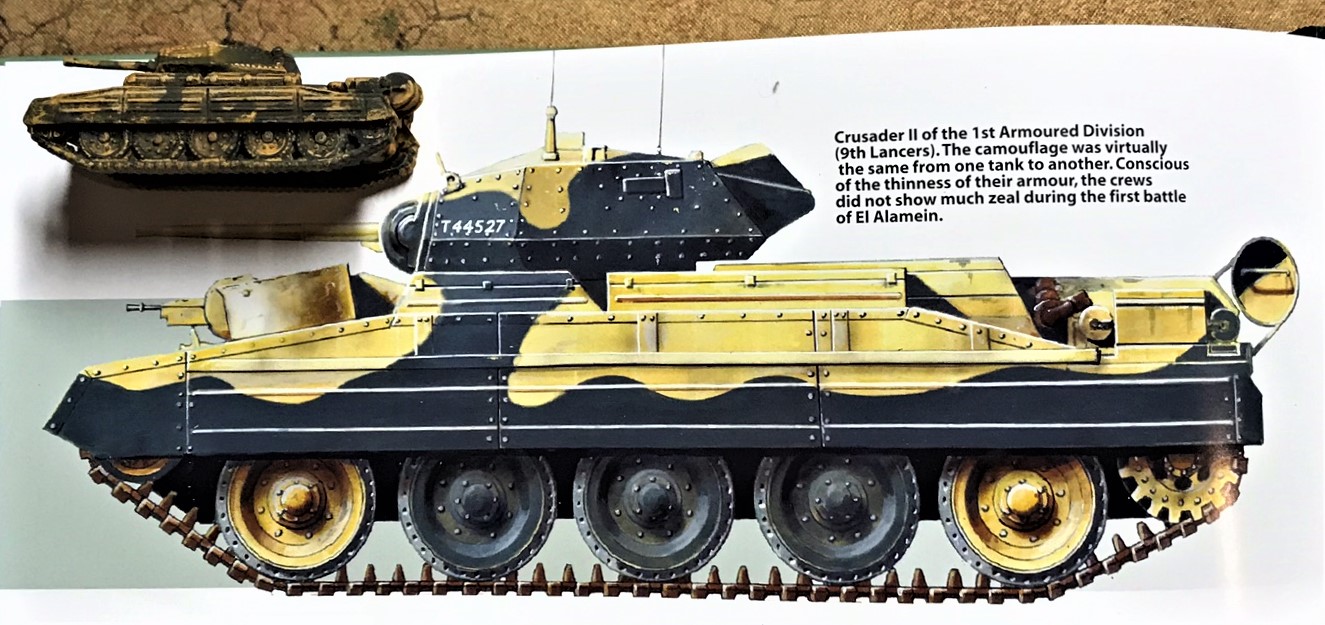
The Crusader III was for me a mix of two images – first this one…
and secondly this one. Again, I want dirty tanks that look like they have been driving in the desert and not off the show room/museum floor.
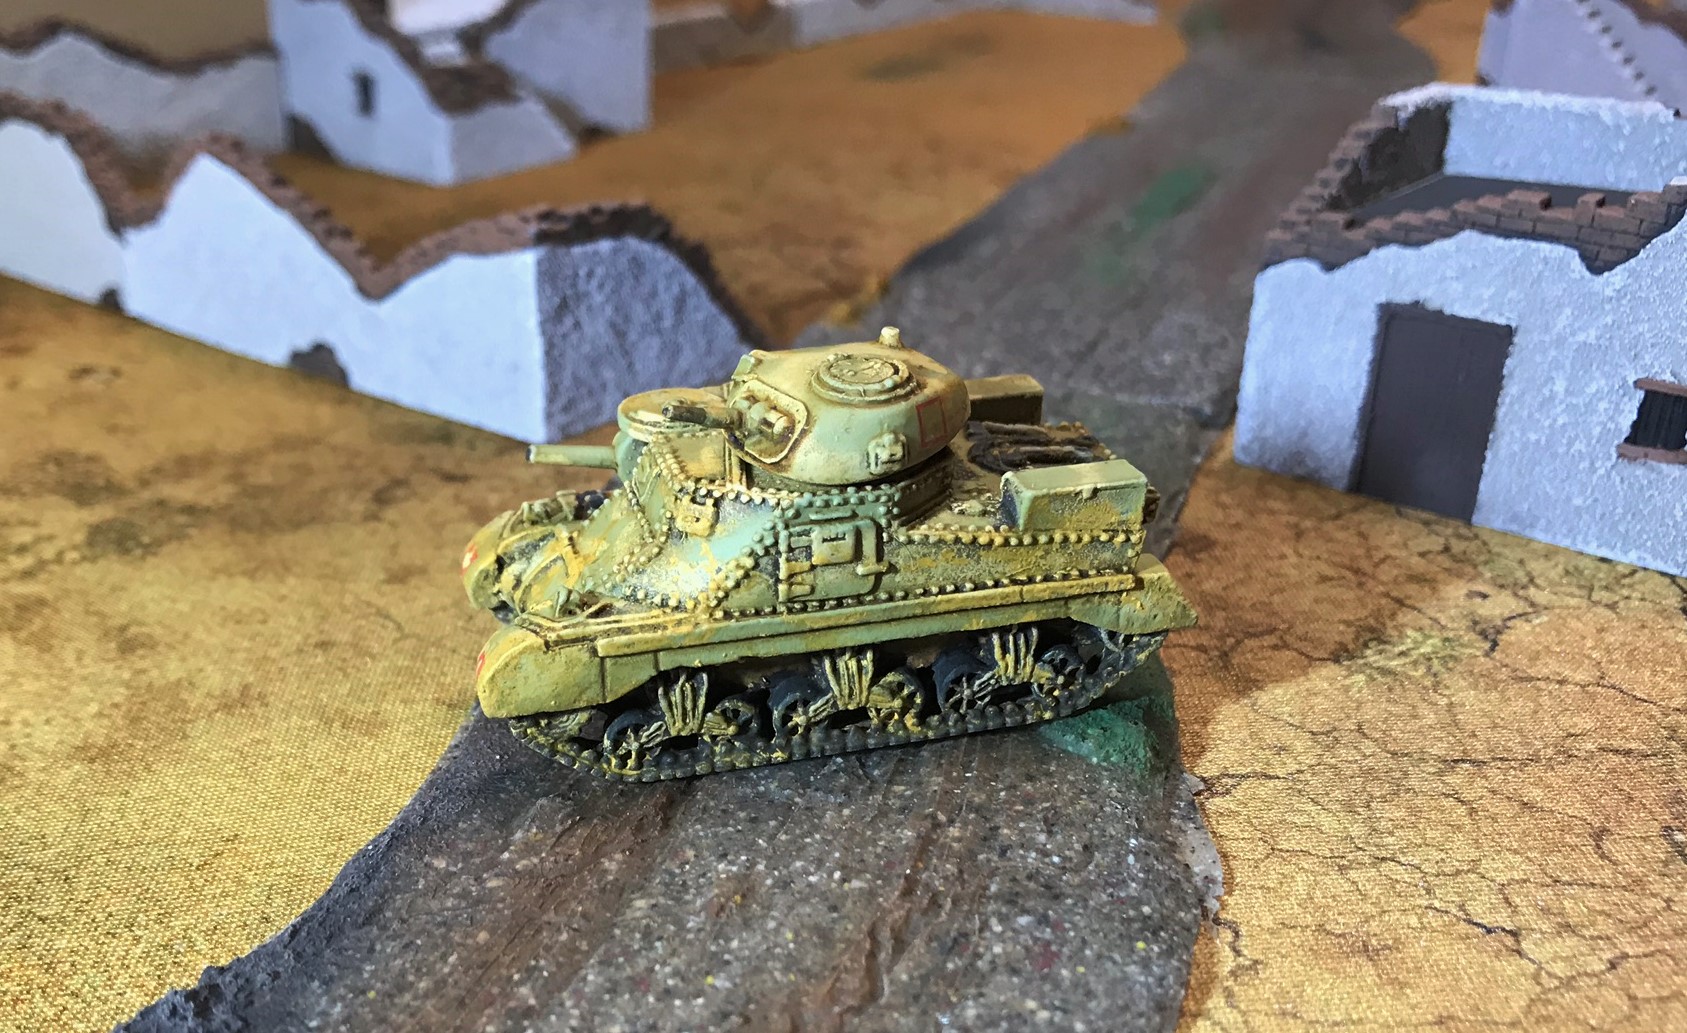
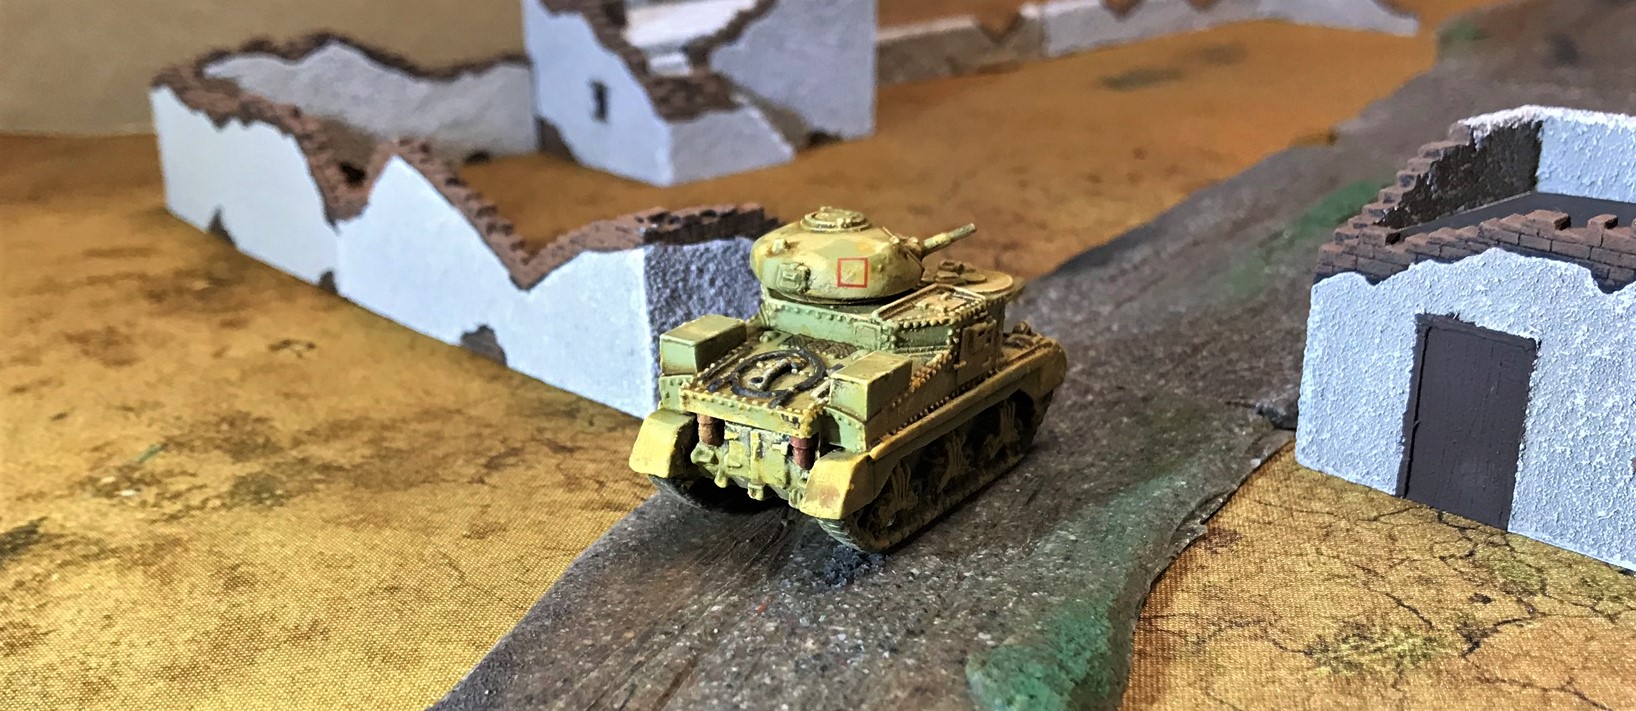
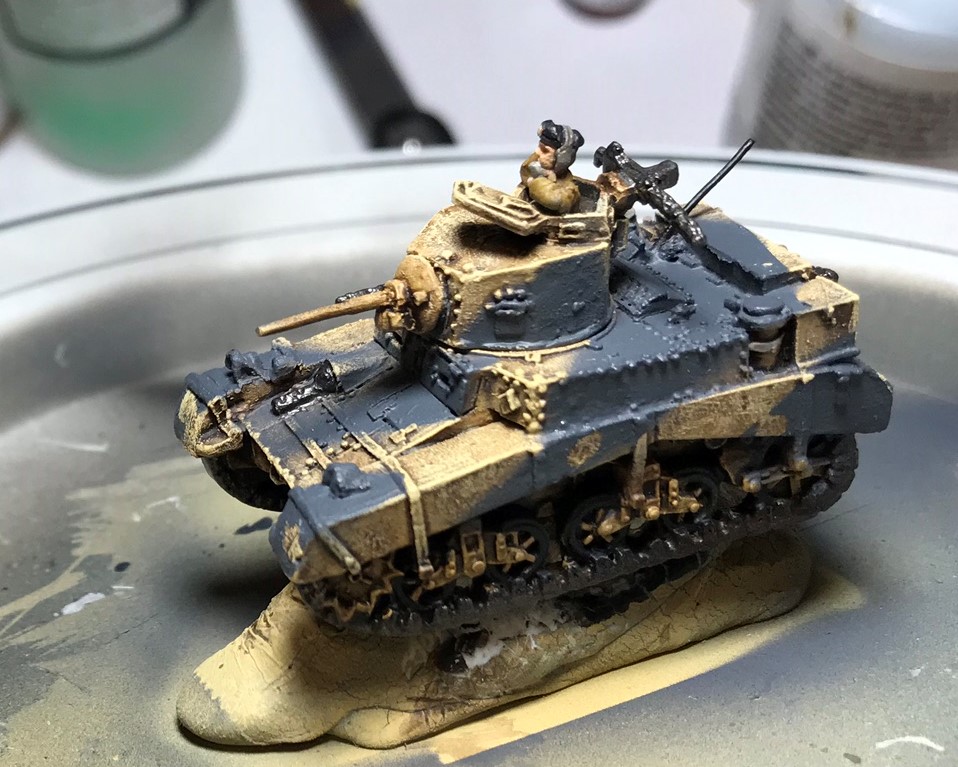
M3 Grant
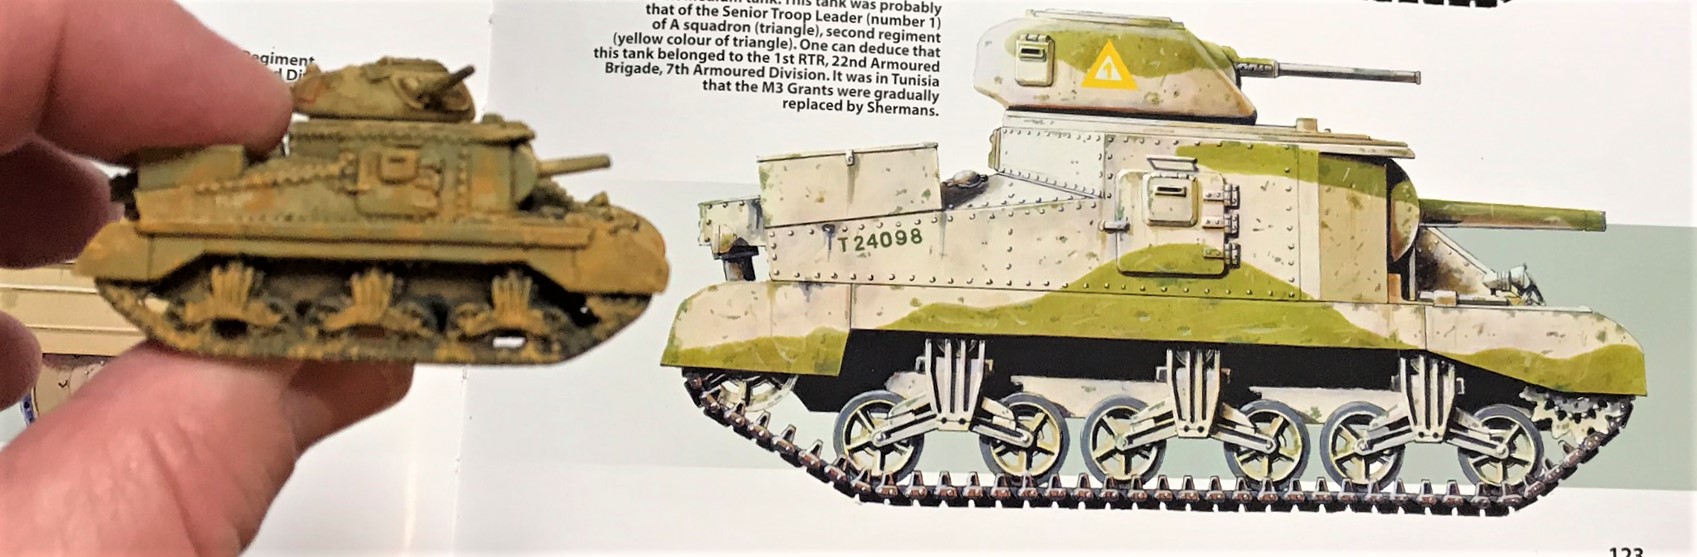
The British were not happy to get American tanks at first. They did invent the tank after all in WWI, and they were proud of them. They wanted the US to build British designs, but with the risk of the UK losing the war early on, we Americans balked and said we would only build US designs. That way, if the British lost, we would not have our factories tooled for non-American designs. One of these was the light tank M3 Stuart, another was the medium tank M3 Lee. To placate the Brits, a different and more rounded turret was made than that of the American M3 Lee, and that is the major difference between a Grant and a Lee. So, my tank is a Grant. In doing my research, it was interesting to learn that the sponson-mounted 75mm gun was more prized (eventually) because it had an HE round. That meant that the Grant 75 was far better able to deal with anti-tank gun crews, like the dreaded 88mm, than a solid shot AP round would have been. In the turret, a 37mm gun was the main anti-tank weapon (though certainly the sponson gun was used in that role as well).
The M3 Grant in blister
Assembled, base-coated, and dry brushed – needs camo and washes
If the chassis looks familiar, yes, it was used as the basis for the M4 Sherman as well.
My Grant with its model – the light green was interesting to apply – better pictures in the eye-candy section below.
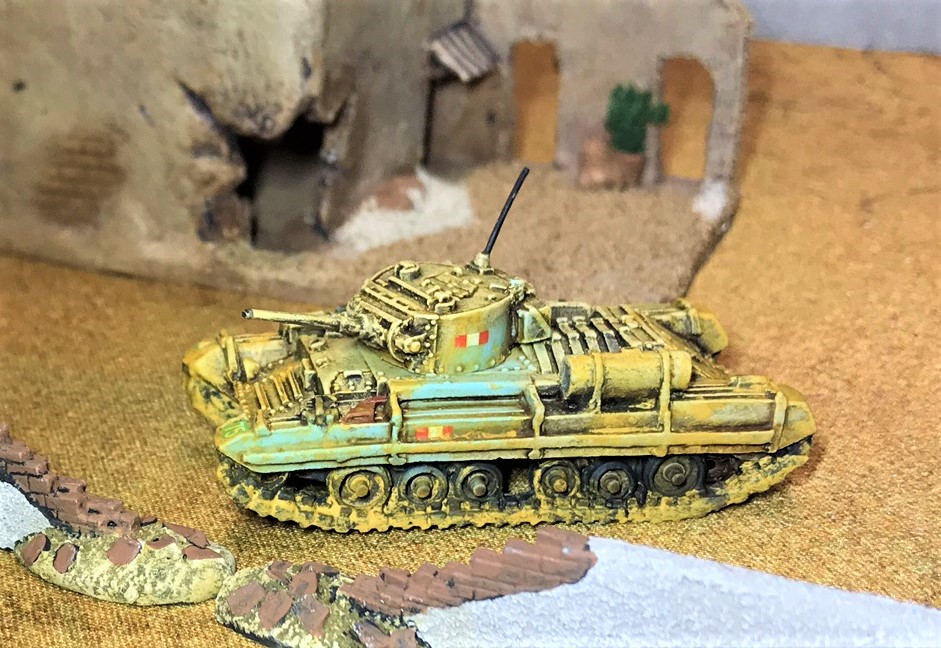
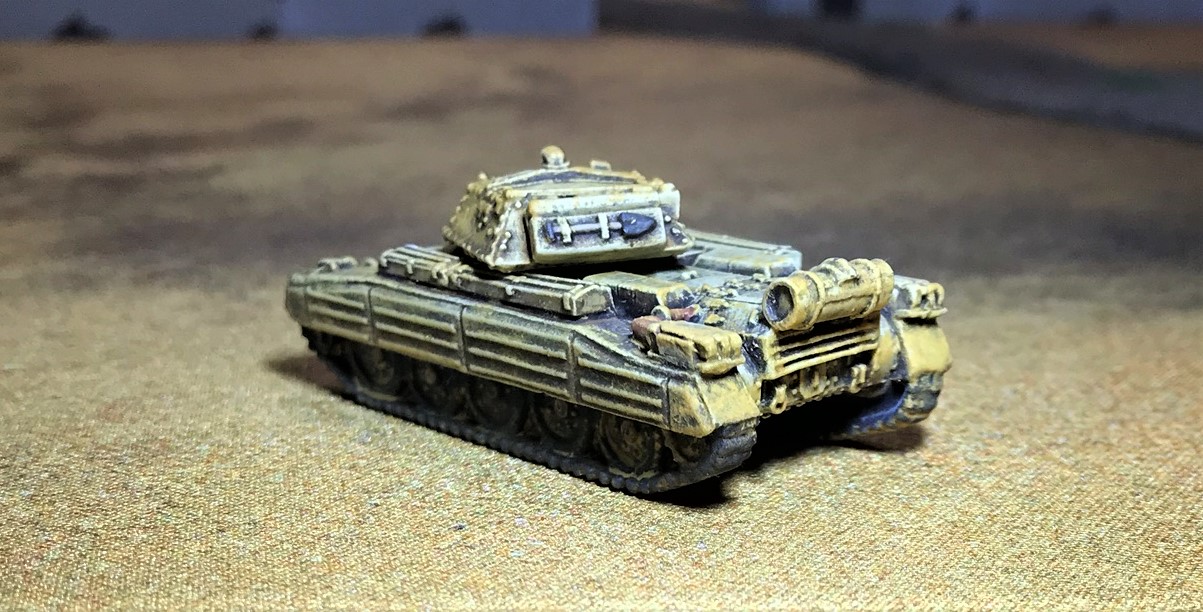
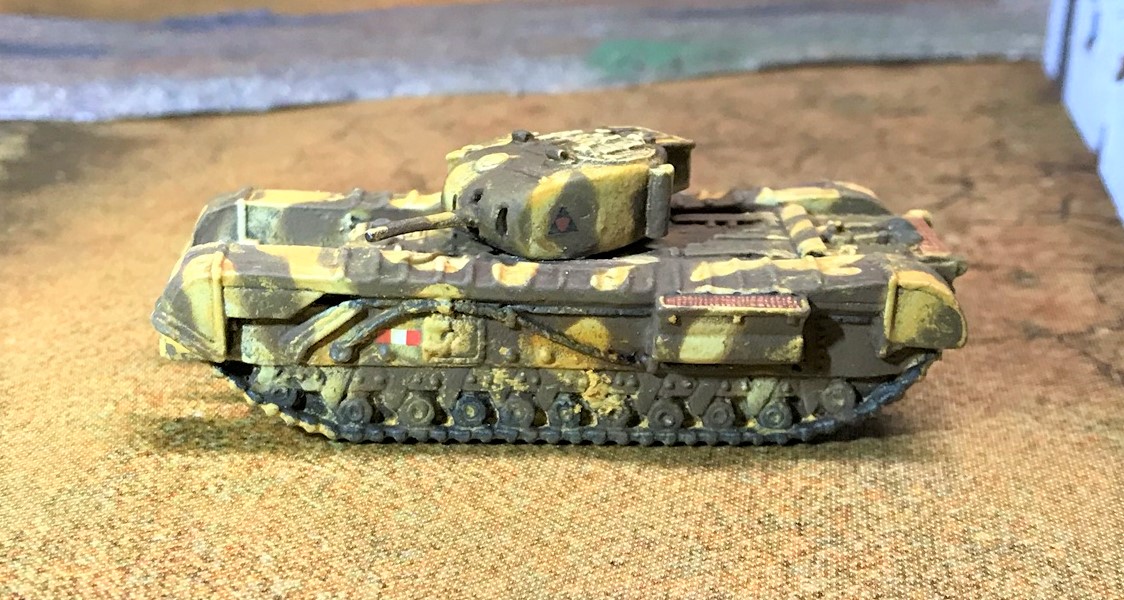
Churchill Mark II
The Churchill infantry tank made its unhappy debut in the costly Canadian forces raid at Dieppe (these were Churchill Mark I’s). The Churchill Mark II was first used by the “Kingforce” detachment (6 Churchill II tanks) in North Africa in October 1942, and Churchills were used in that theater and in Western Europe throughout the rest of the war.
The Churchill in the blister – I chose to make it a Churchill II as the Mark I was only at Dieppe.
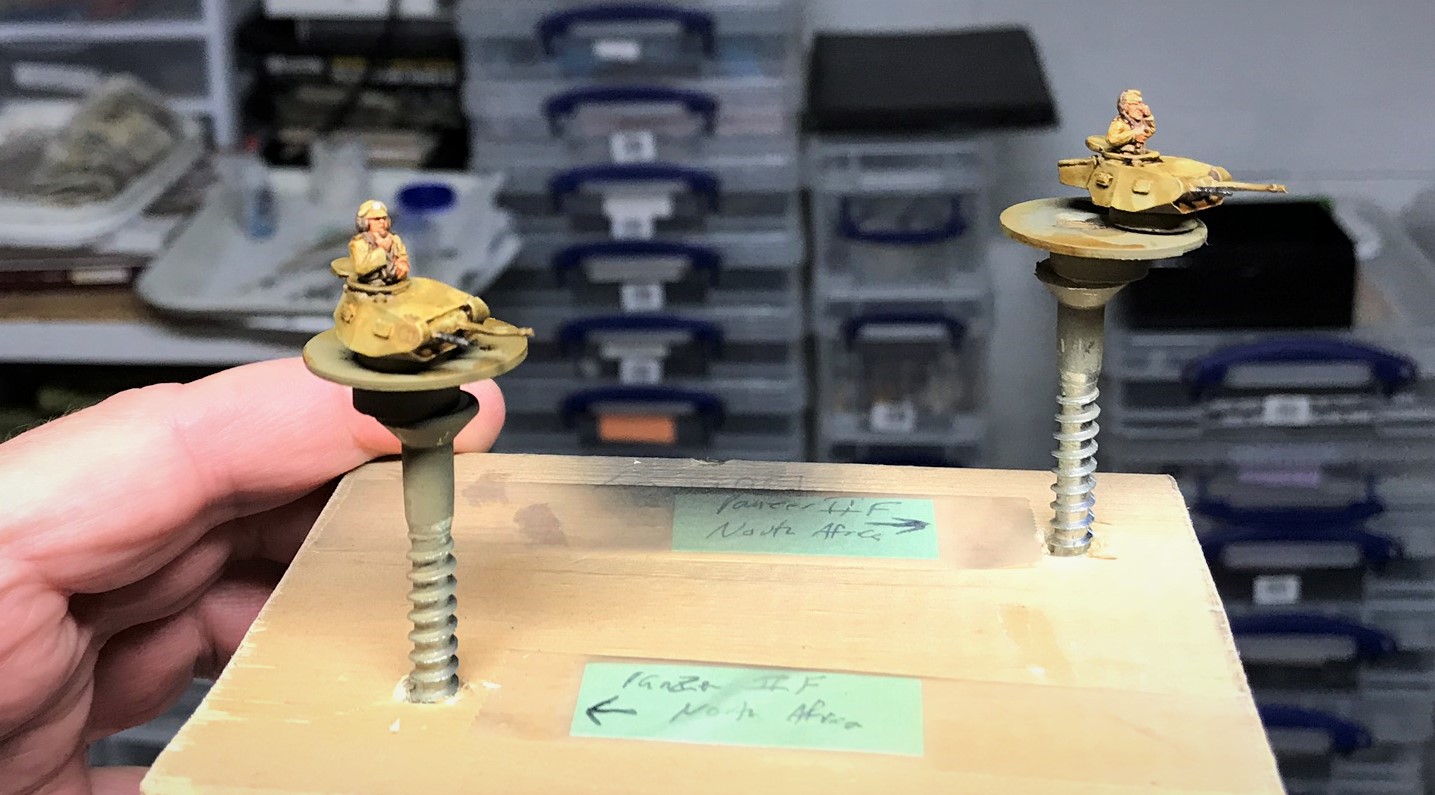
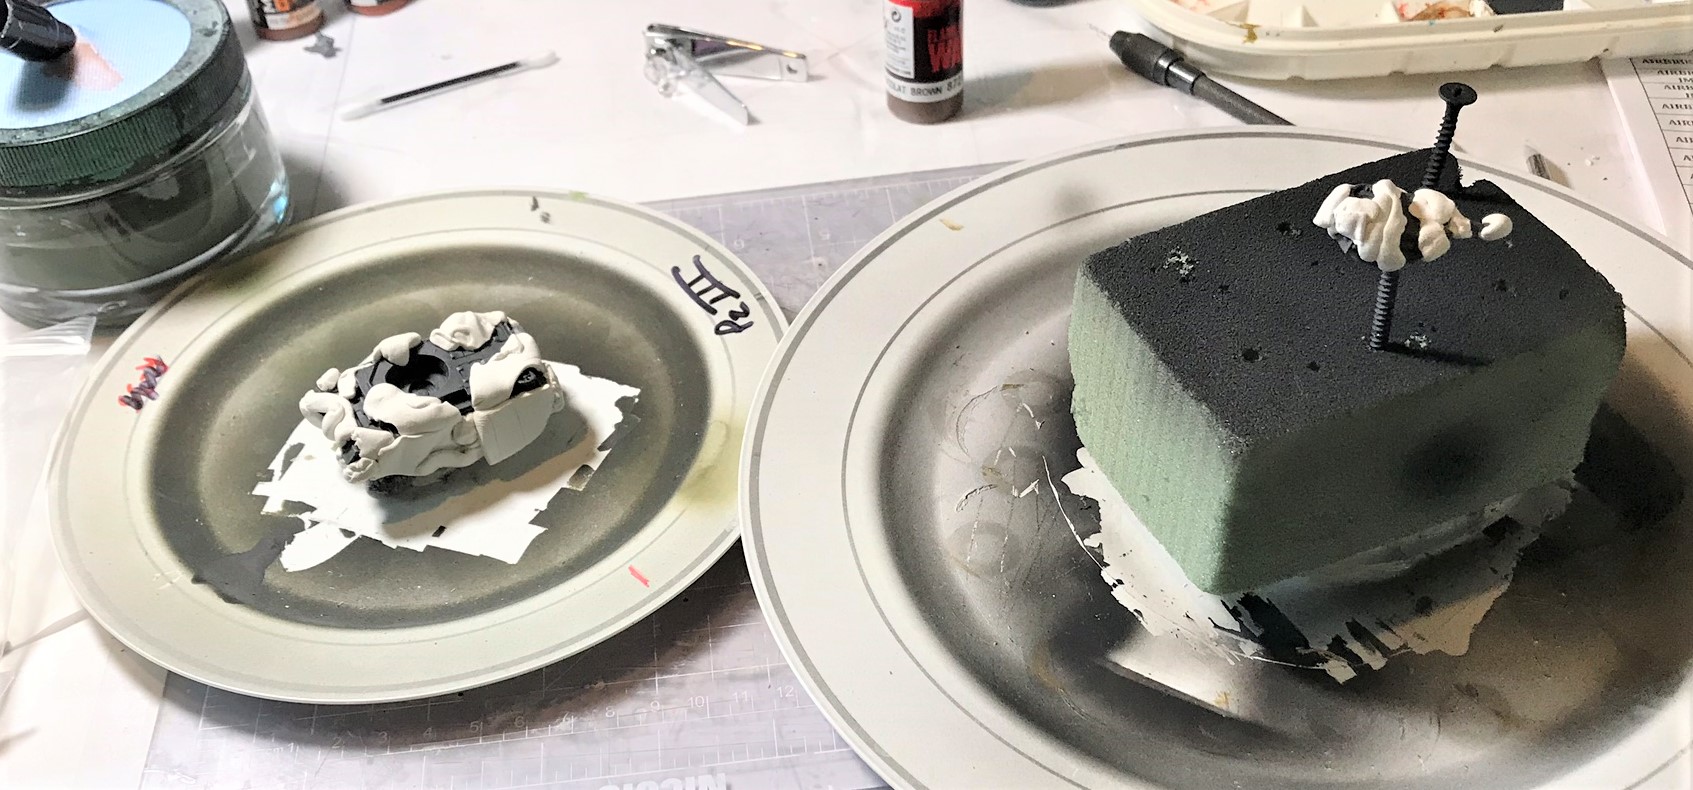
How I started painting the turrets – I later transitioned my approach to using drill holes in wooden blocks instead of styrofoam. That approach worked much better. The #14 2″ screw held a magnet and a steel washer, and the magnetized turret stayed on top for painting.
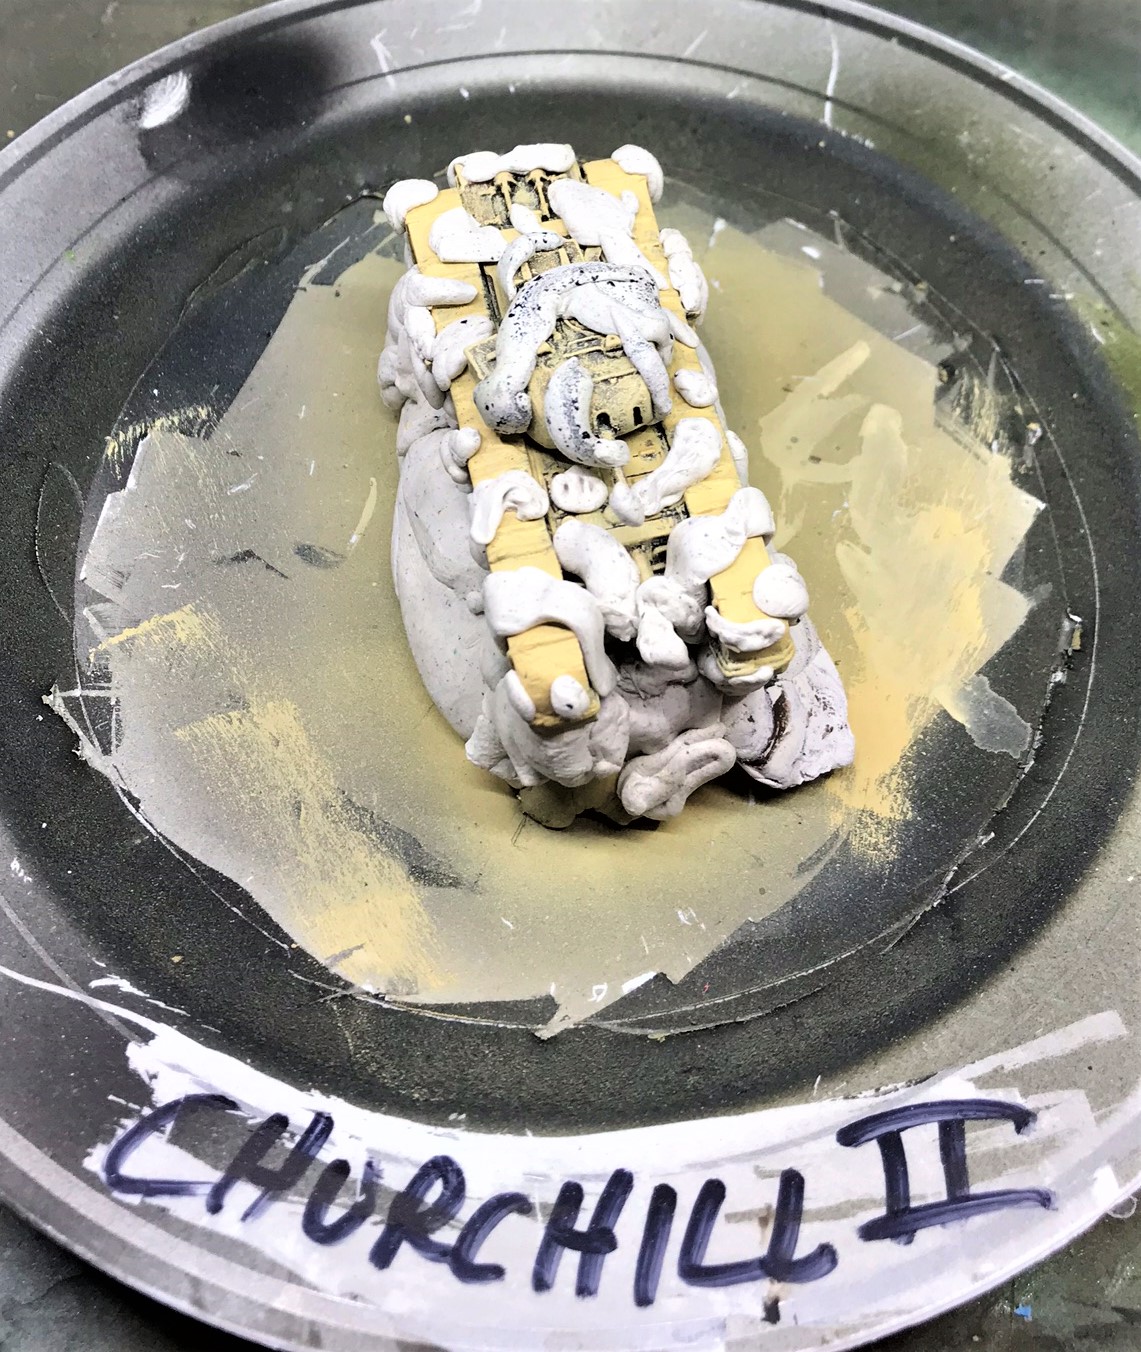
I then masked this big behemoth (for 15mm). The effort on this tank took some doing – I needed a lot of poster tack.
Churchill tank awaits its desert camouflage paint job.
What I was going for – and again more dirty on mine.
Now my force was – as you Brits out there might say – “proper” in terms of game-worthiness.
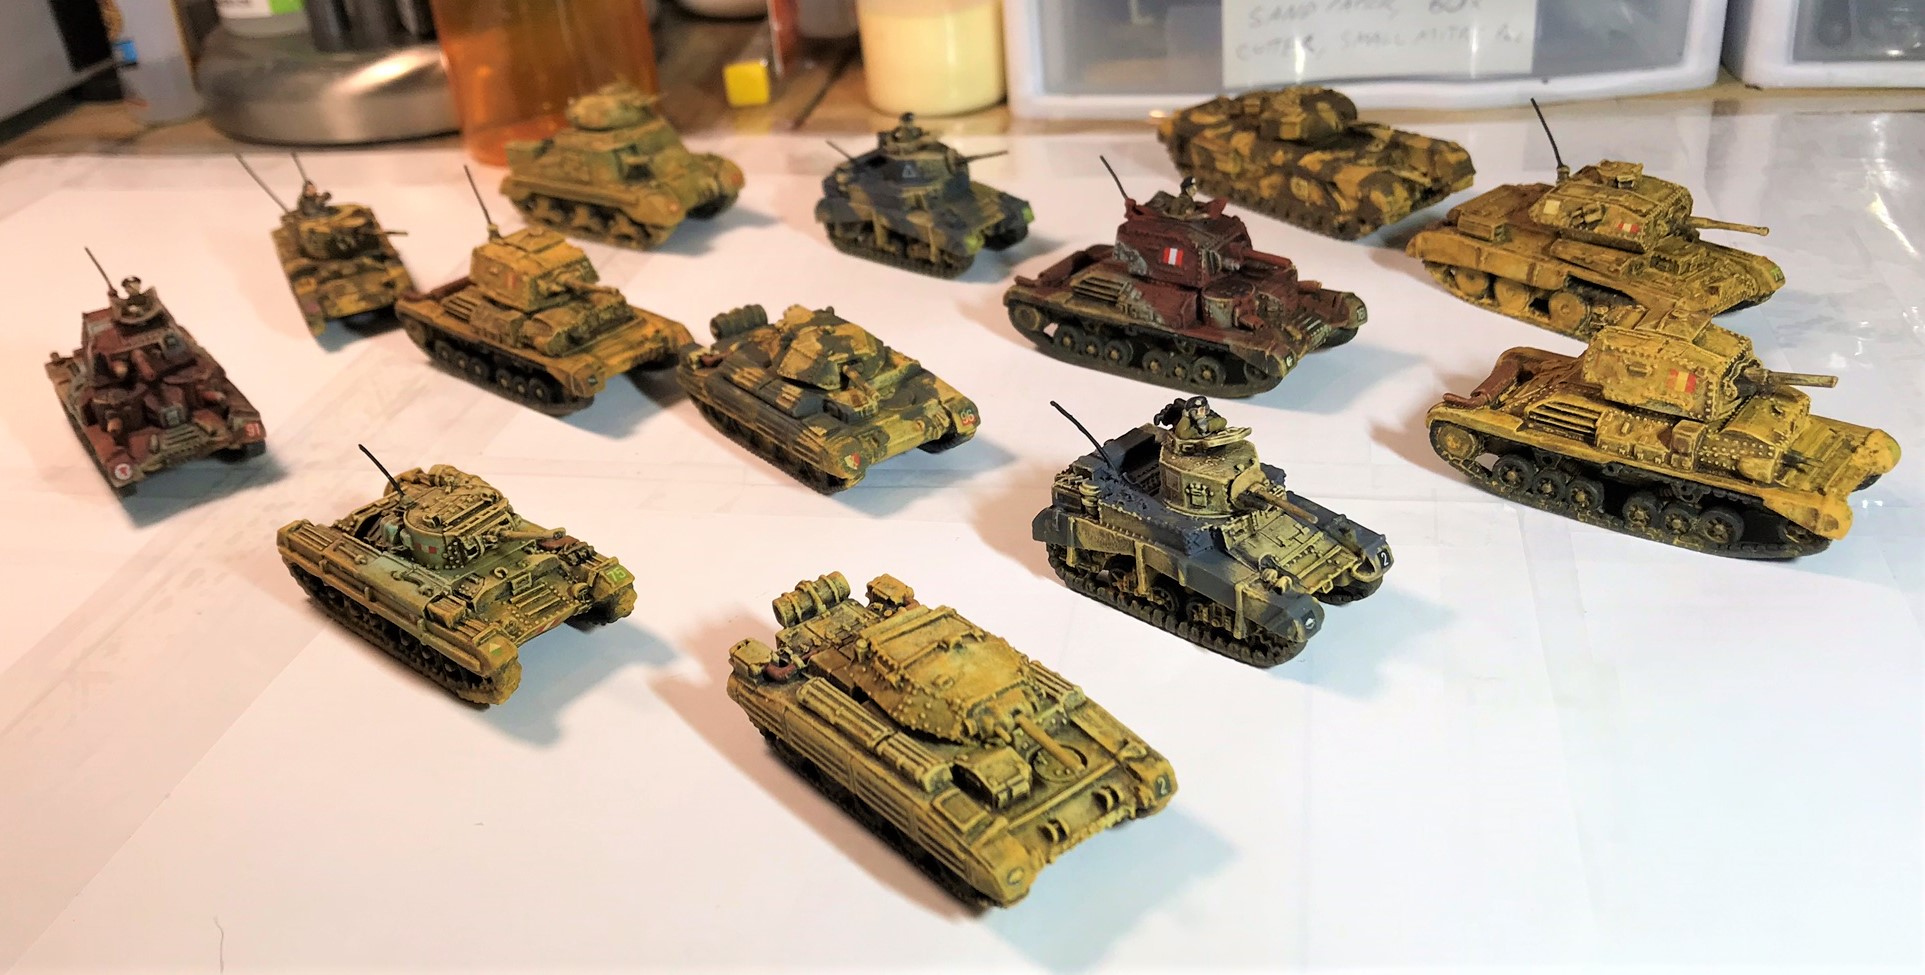
All of the 8th Army tanks I painted since November.
That concludes the history/what-I-did section – now for the…
Eye Candy
Right side view of the two A10’s.
Left rear view of the same A10’s approaching the village.
The A13 patrols a village.
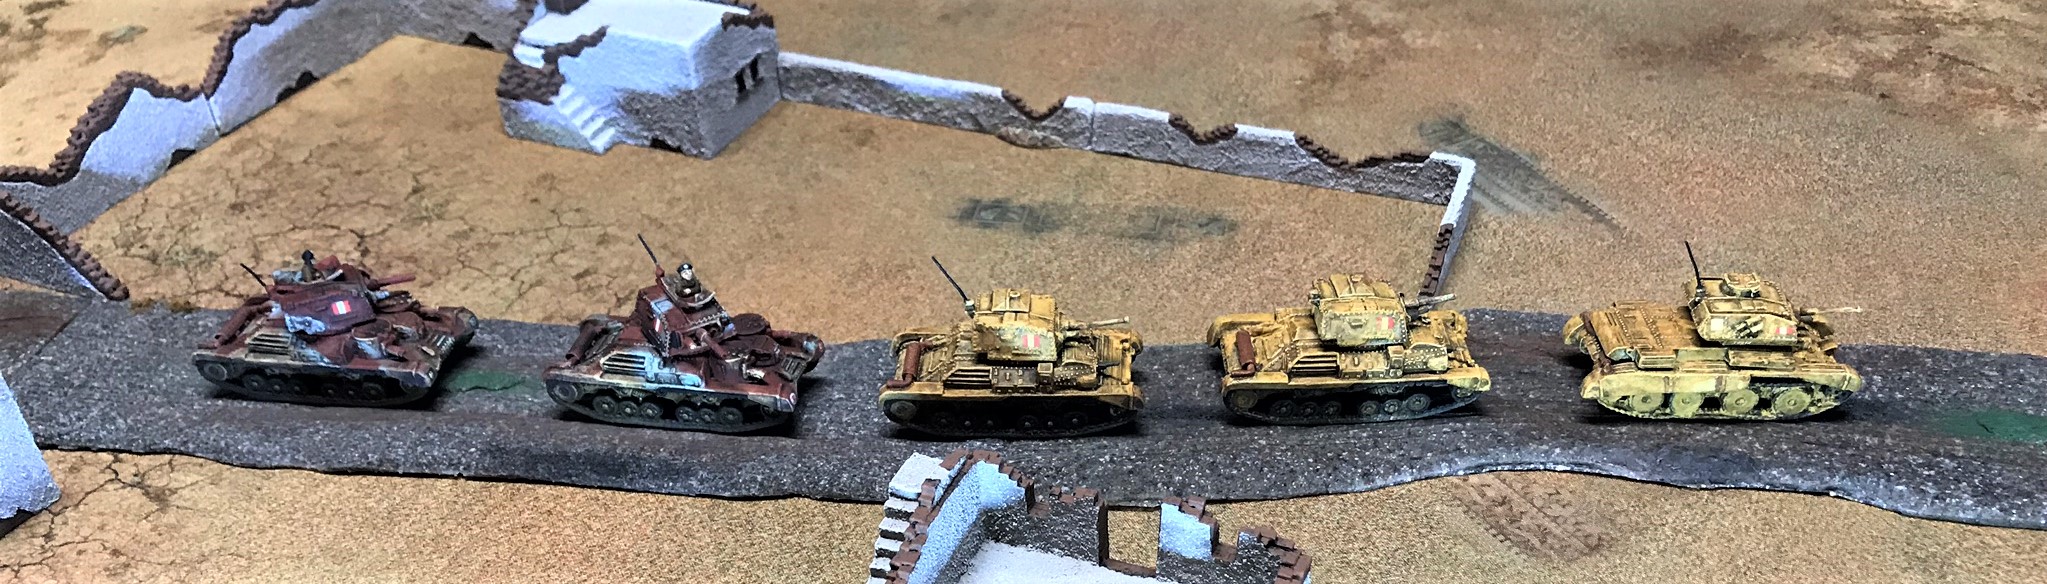
Just for fun, I lined up all of my early Cruiser tanks in a convoy.
The Valentine II, with its blue Caunter camouflage scheme, guards a well.
Opposite side view of the Valentine II. I do like the muted appearance of the blue. The decals were practically microscopic to work with!
The Valentine III with its brown camouflage pattern approaches a road.
Head on view of the Valentine III. For perspective, the front of this tank is little more than an inch wide, so this image is 3-4 times the size of the model.
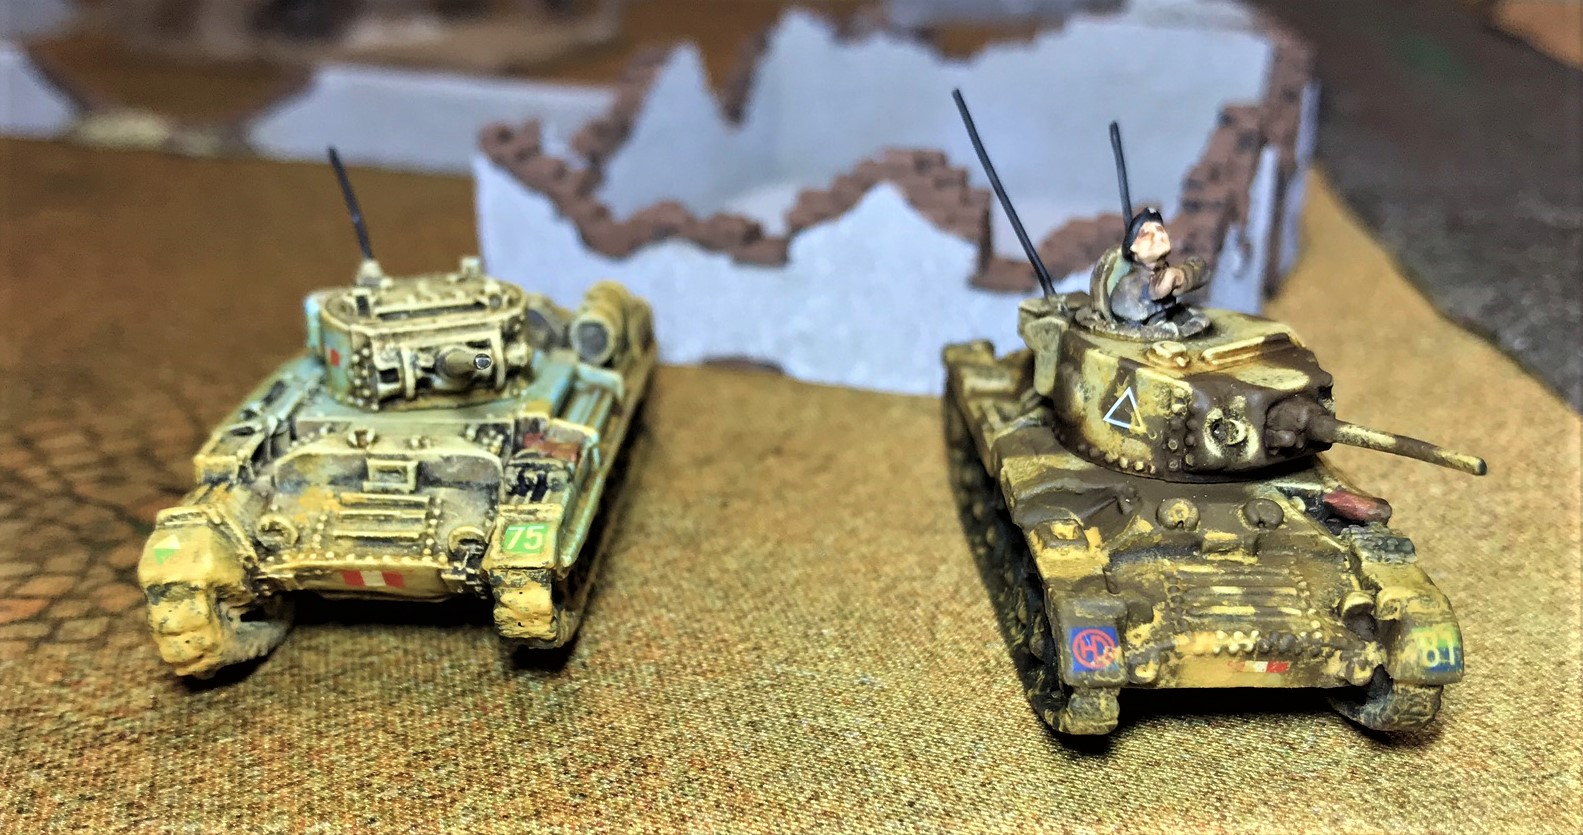
My two Valentines (soon to be a romantic comedy perhaps on the BBC?).
Nice view of the fronts of the Valentines. I had a bit of a concern with the tracks of the Valentine II on the left . As you can see they are a slight bit off – and this was the one Valentine that I needed to reinforce during assembly. Again, these are the things you notice when your picture is 3-4 times the size of the model!
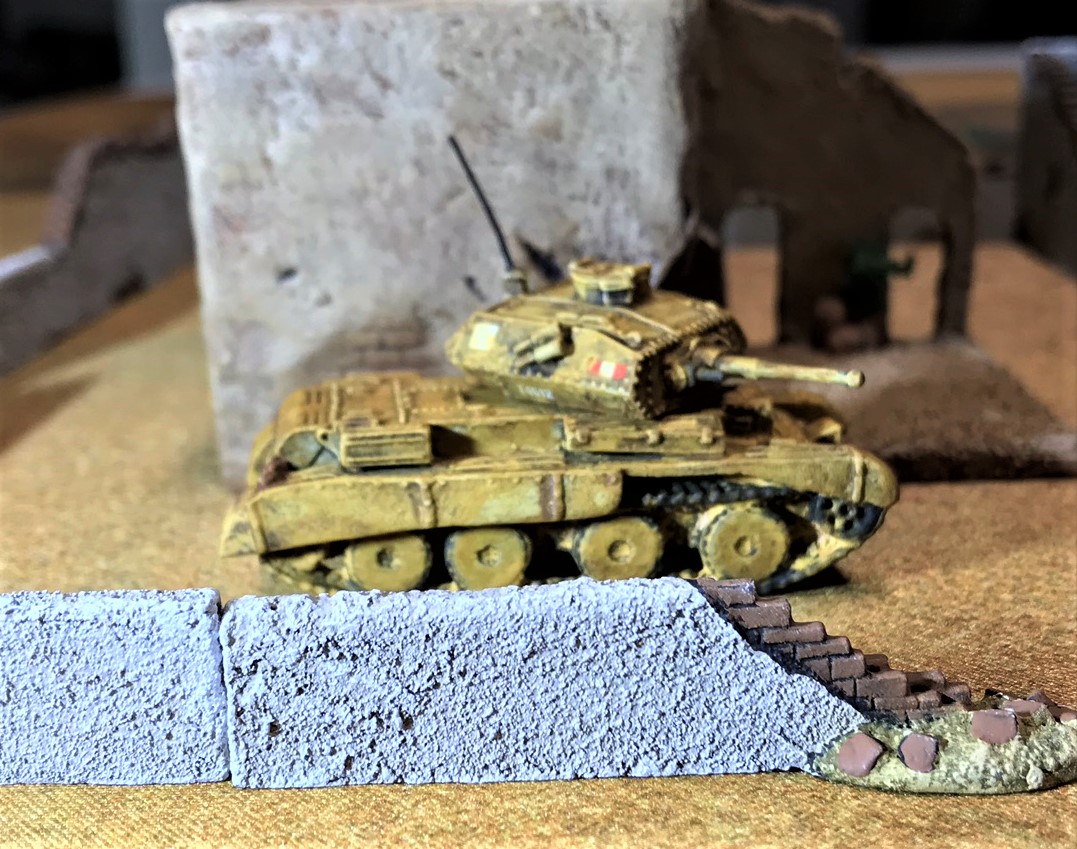
Crusader II right side view.
Crusader II left rear view.
Left side view of my Crusader III with its camouflage scheme.
Right rear view of the Crusader III.
The two Crusaders, not caped like Batman and Robin though…and this is not Gotham City…
Frontal view of the M3 Grant. As a nod to its possible Canadian forces use and/or manufacture, I gave it a Canadian unit marking. Many of the Grants were made in Montreal, at a locomotive plant. AND I did this as a Bruins fan (its a hockey thing)!
The light green camouflage is a little more visible here. I did not want it to be overwhelming, but it is tough to photograph.
Entering the village.
My Churchill II, left side.
Right side of the Churchill II. The camouflage painting on this and the others was fun.
Front view of the Churchill II.
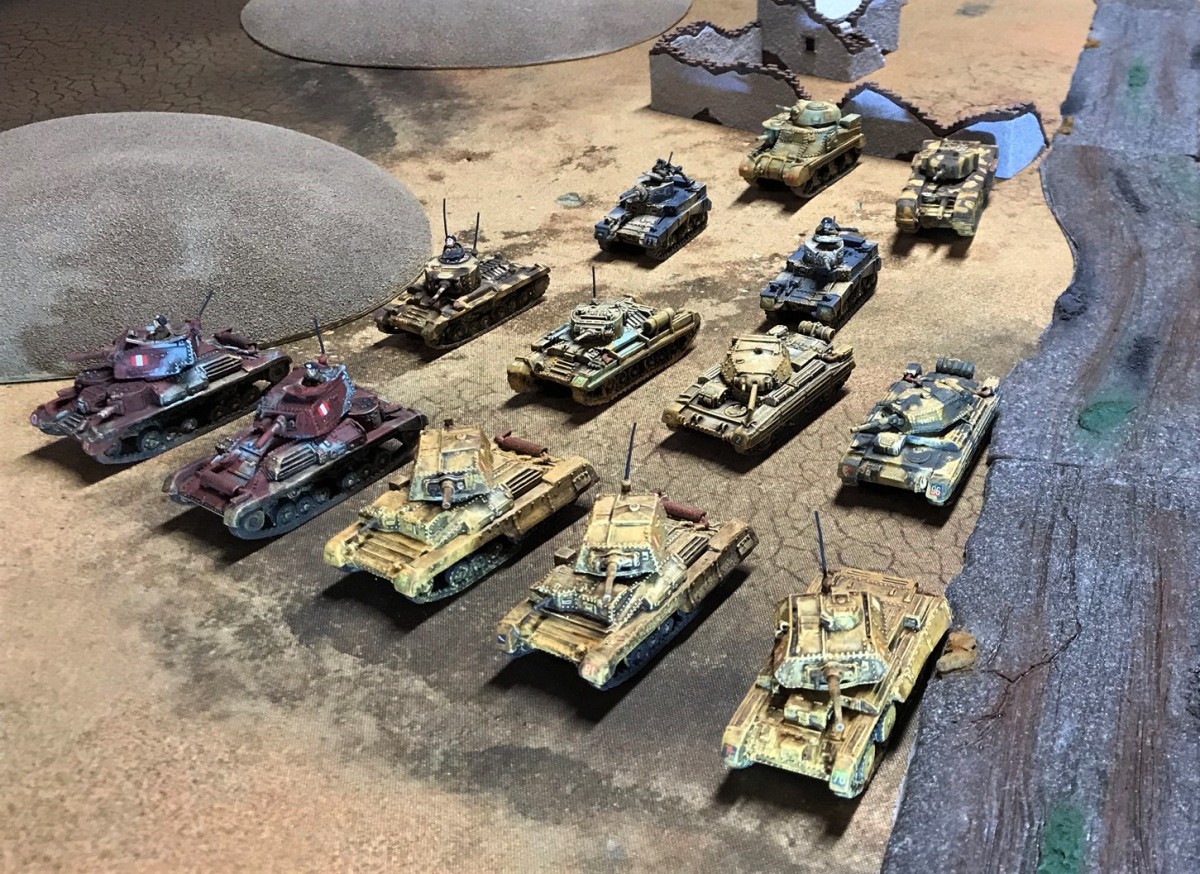
For even MORE fun, I convoyed all of my painted 8th Army tanks.
Is this a motor pool or what? Nice group shot – my Matilda II’s did not make the shot, but I only touched them up so they hardly deserve to be in this shot. Still like them though, but they are kind of adopted…
Now it’s onto the Germans and Italians – which I hope to finish soon. But never soon enough…
Thanks for looking, and I very much hope that you enjoyed seeing these. Any favorites? Feedback? Winning lottery numbers? Please leave me your thoughts in the comments section!
PAINTS, INKS, GLAZES, SHADES, WASHES, AND FLOCKING USED ON THIS TANK GROUP:
Vallejo “Flow Improver”
Vallejo “Airbrush Thinner”
Vallejo “Surface Primer – Black”
Testors “Universal Acrylic Thinner”
Citadel “Imperium Primer”
Battlefront “European Skin”
Battlefront “Skin Shade” (shade)
Vallejo “English Uniform”
Battlefront “Crusader Sand”
Vallejo “Desert Sand”
Battlefront “Worn Canvas”
FolkArt “Champagne”
Battlefront “Black”
Citadel “Agrax Earthshade” (wash)
Citadel “Nuln Oil” (wash)
Vallejo “Dark Sand”
Battlefront “Dry Dust”
Battlefront “Wool Brown”
Battlefront “Boot Brown”
Battlefront “Rommel Shade” (shade)
Battlefront “Bradley Shade” (shade)
Battlefront “Dark Gunmetal”
Battlefront “Dark Leather”
Battlefront “Oxide Red”
Battlefront “Tommy Green”
Gorilla Glue
Green stuff (kneadatite)
Tamiya masking tape
Vallejo Mecha Varnish “Gloss Varnish”
Microscale Micro-Set
Microscale Micro-Sol
Microscale Liquid Decal Film
1/8″ rare earth neodymium magnets
Appropriate decals from Battlefront
Vallejo Mecha Varnish “Matt Varnish”
Vallejo Mecha Color “Sky Blue”
Aleene’s poster tack
Vallejo Model Air “Blue Grey”
Secret Weapons Washes “Armor Wash” (wash)
Vallejo “Dark Yellow Ochre” (pigment)
Sponges
Army Painter Quickshade “Light Tone” (wash)
Thanks again for looking and for sharing your feedback!
RESEARCH MATERIALS
As for research materials, I used the same ones as I cited before – but for completeness here they are in case you are interested (you can find them on Amazon):
Two by David Fletcher:
British Battle Tanks: British-made tanks of World War II
British Battle Tanks: American-made World War II Tanks
One by Jean Restayn:
WWII Tank Encyclopaedia, 1939-45
One by the Smithsonian/DK:
Tank: The Definitive Visual History of Armored Vehicles
One by Michael Green:
Axis Armoured Fighting Vehicles of the Second World War (Images of War)
One by Robert Jackson:
Tanks and Armored Fighting Vehicles Visual Encyclopedia
I would easily recommend all of these books as good resources for gamers and modelers.
Poker chips were used for accounting and for tallying the score. Points/chips were awarded for tank kills, and for having your tank at the end of the game on the enemy side of the river. If your tank was knocked out, you re-spawned as a tank of the same value on the next turn, and the side of the player who killed you got chips equal to the value of the destroyed tank. These chips could be used in several ways. The team with the most chips would win, and chips could be used to purchase another tank, a tanker card, or upgrade an existing or re-spawning tank. Alternatively, you could keep the chips towards your victory points.
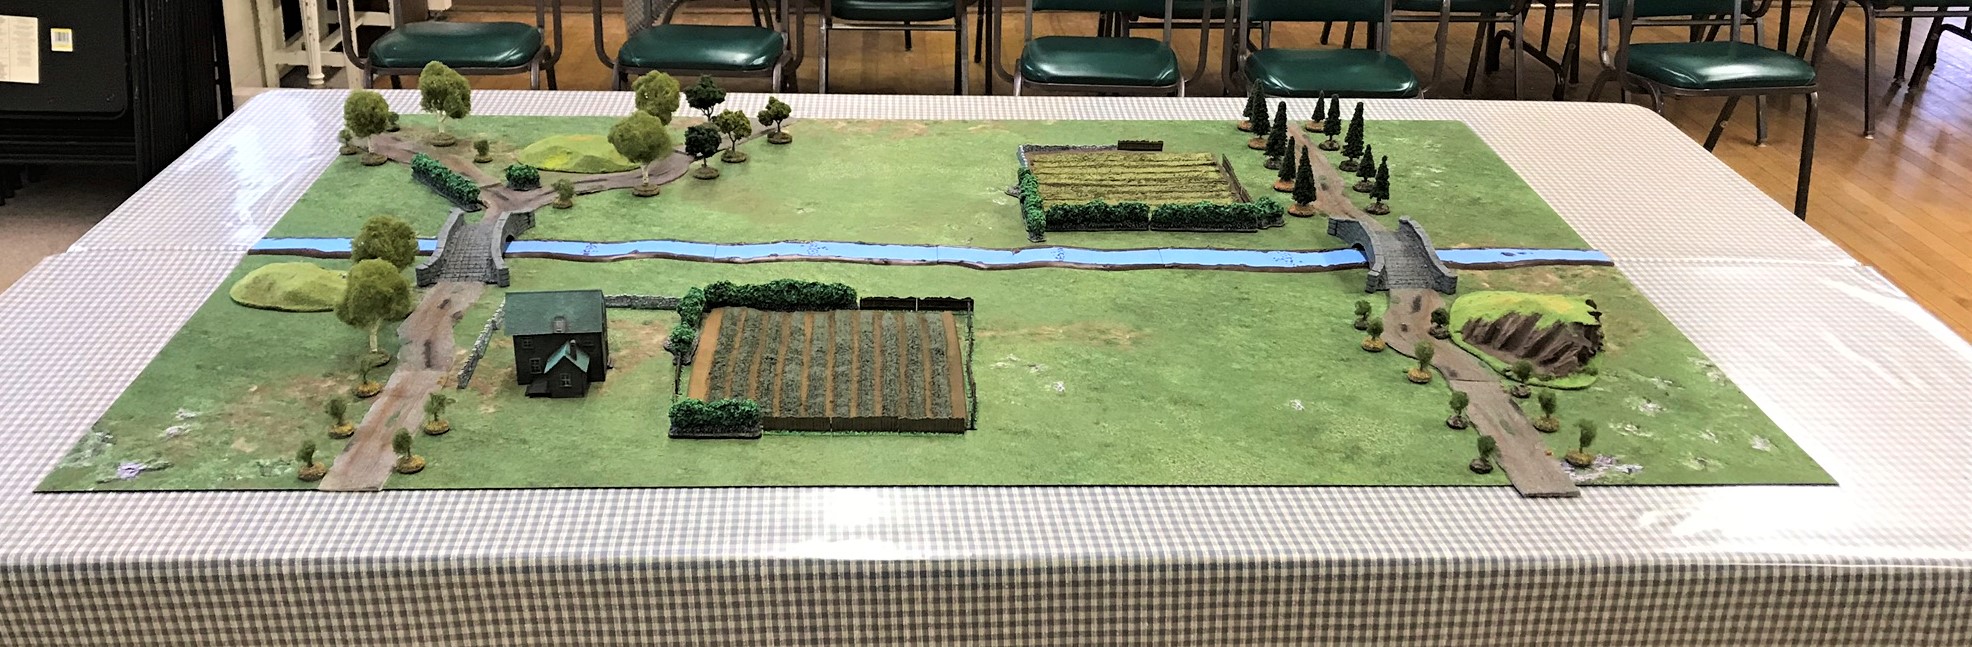
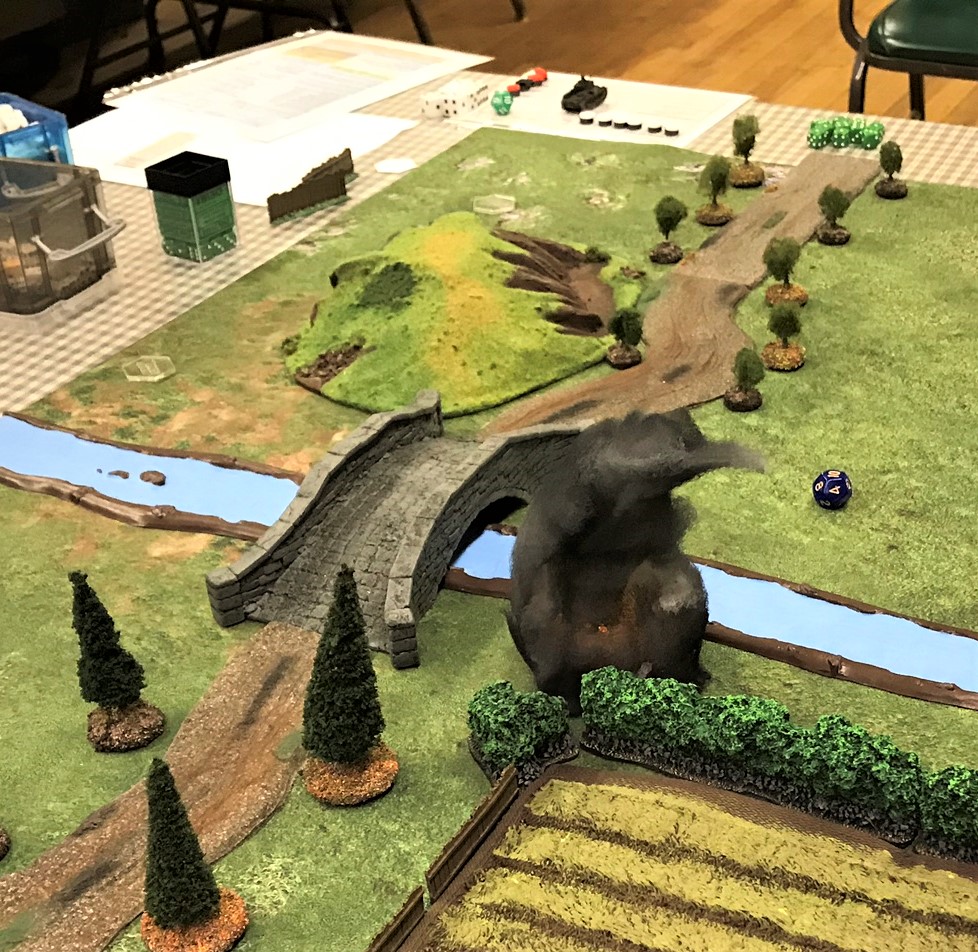
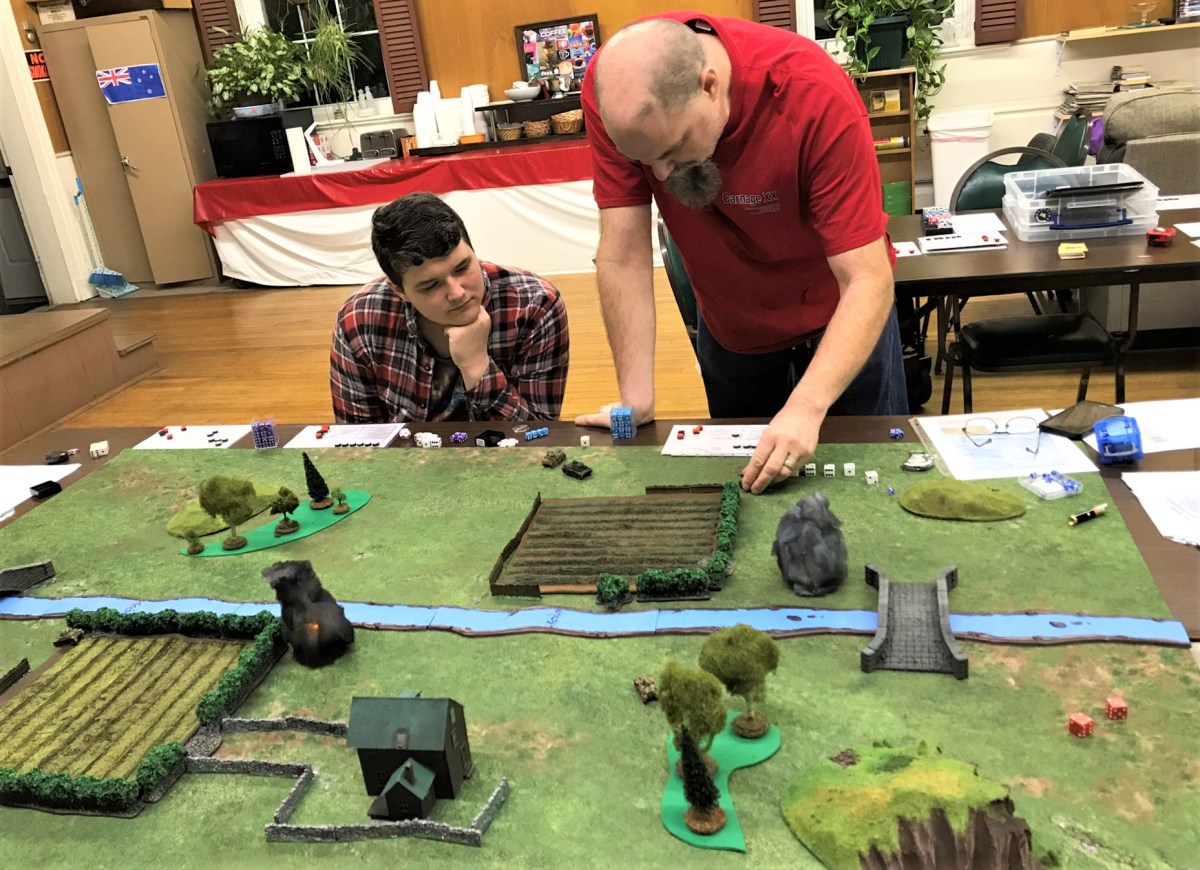
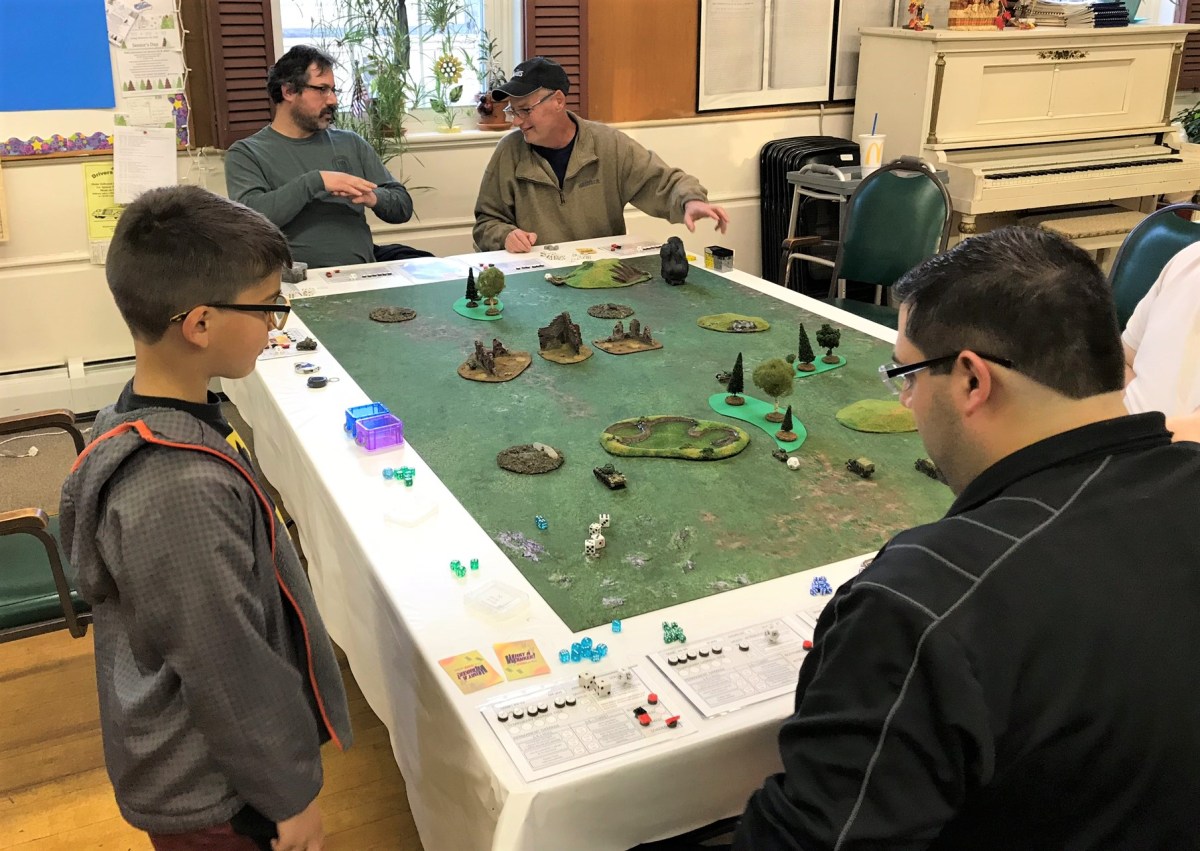
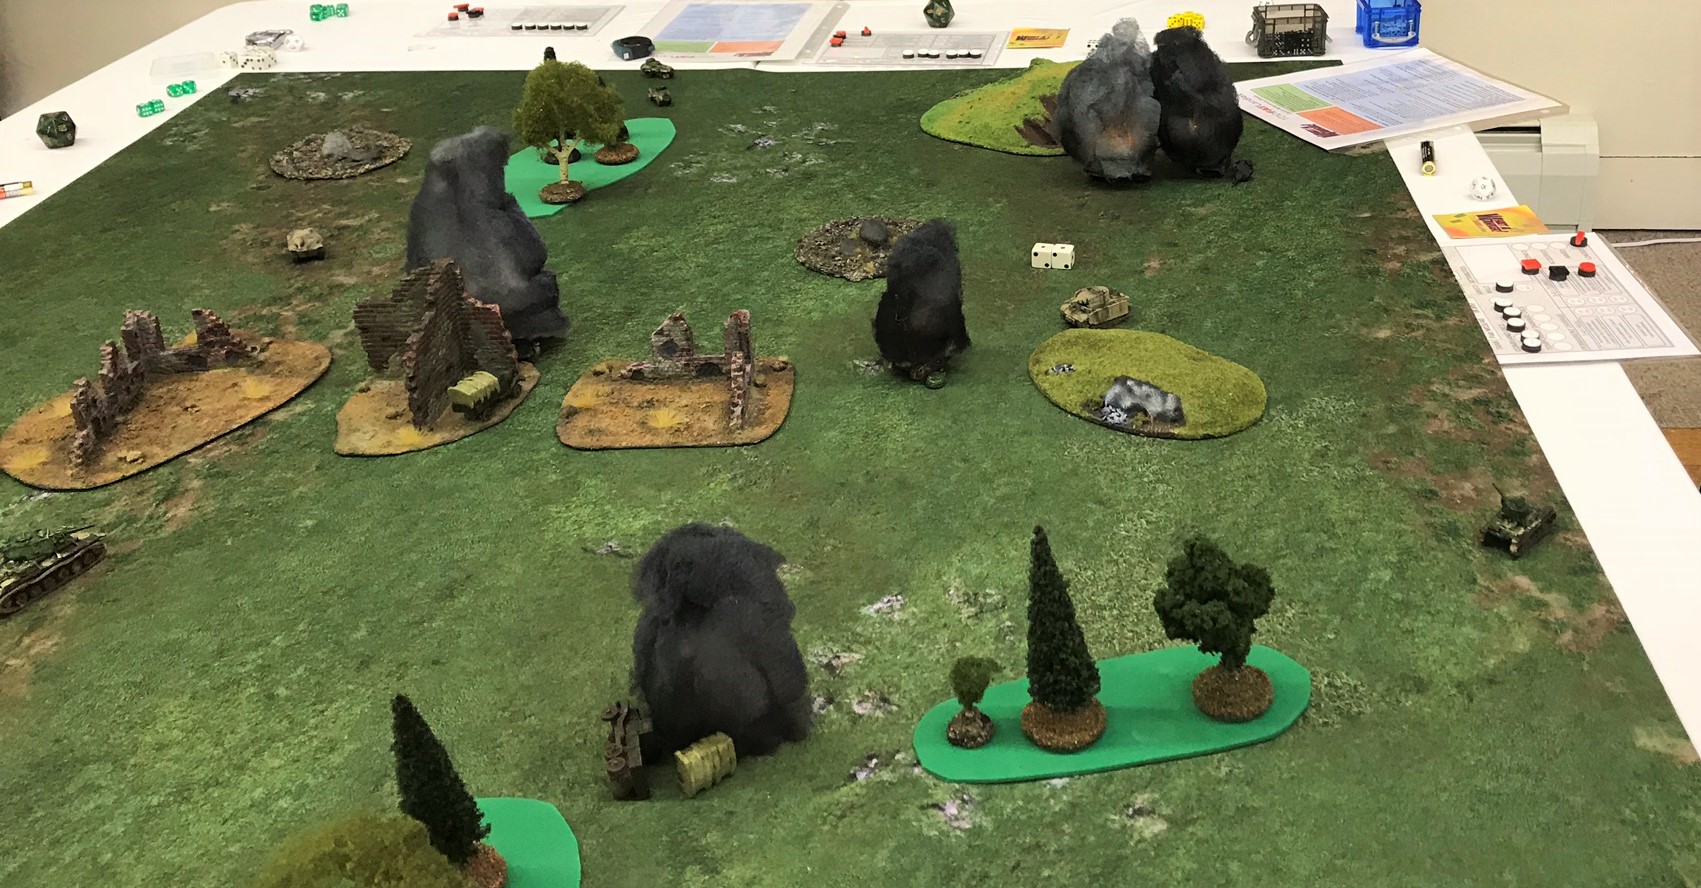
The game tabletop – with some changes (notably roads) from the last run of the scenario.
The game table before the battle.
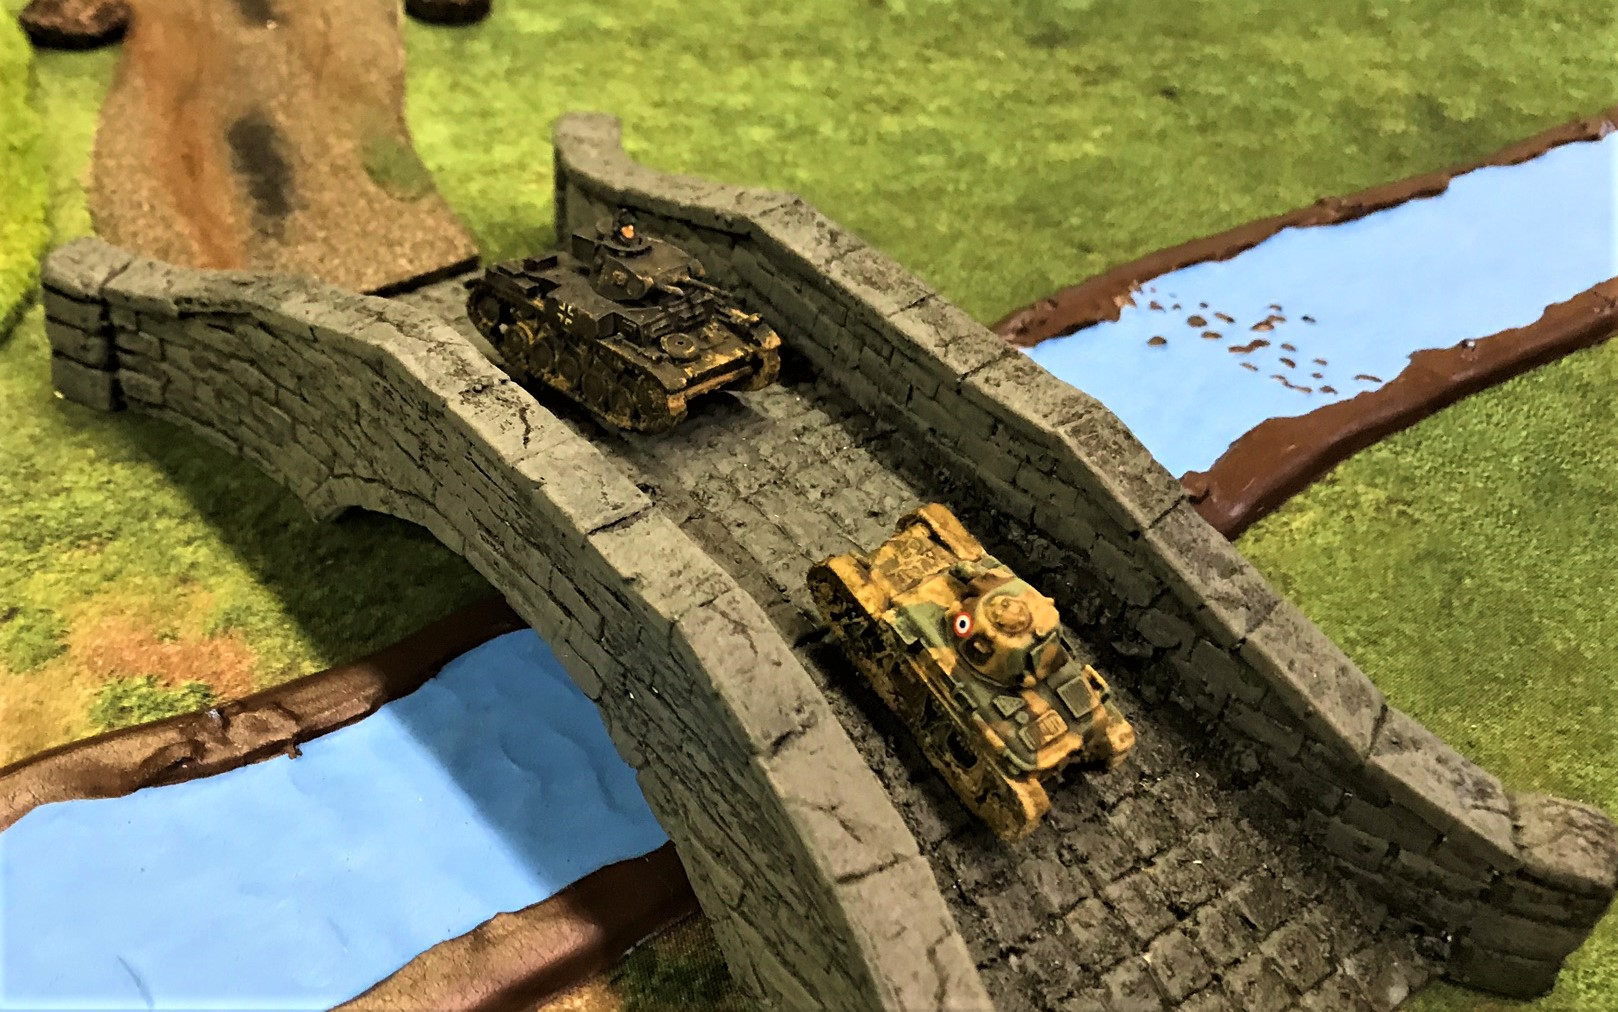
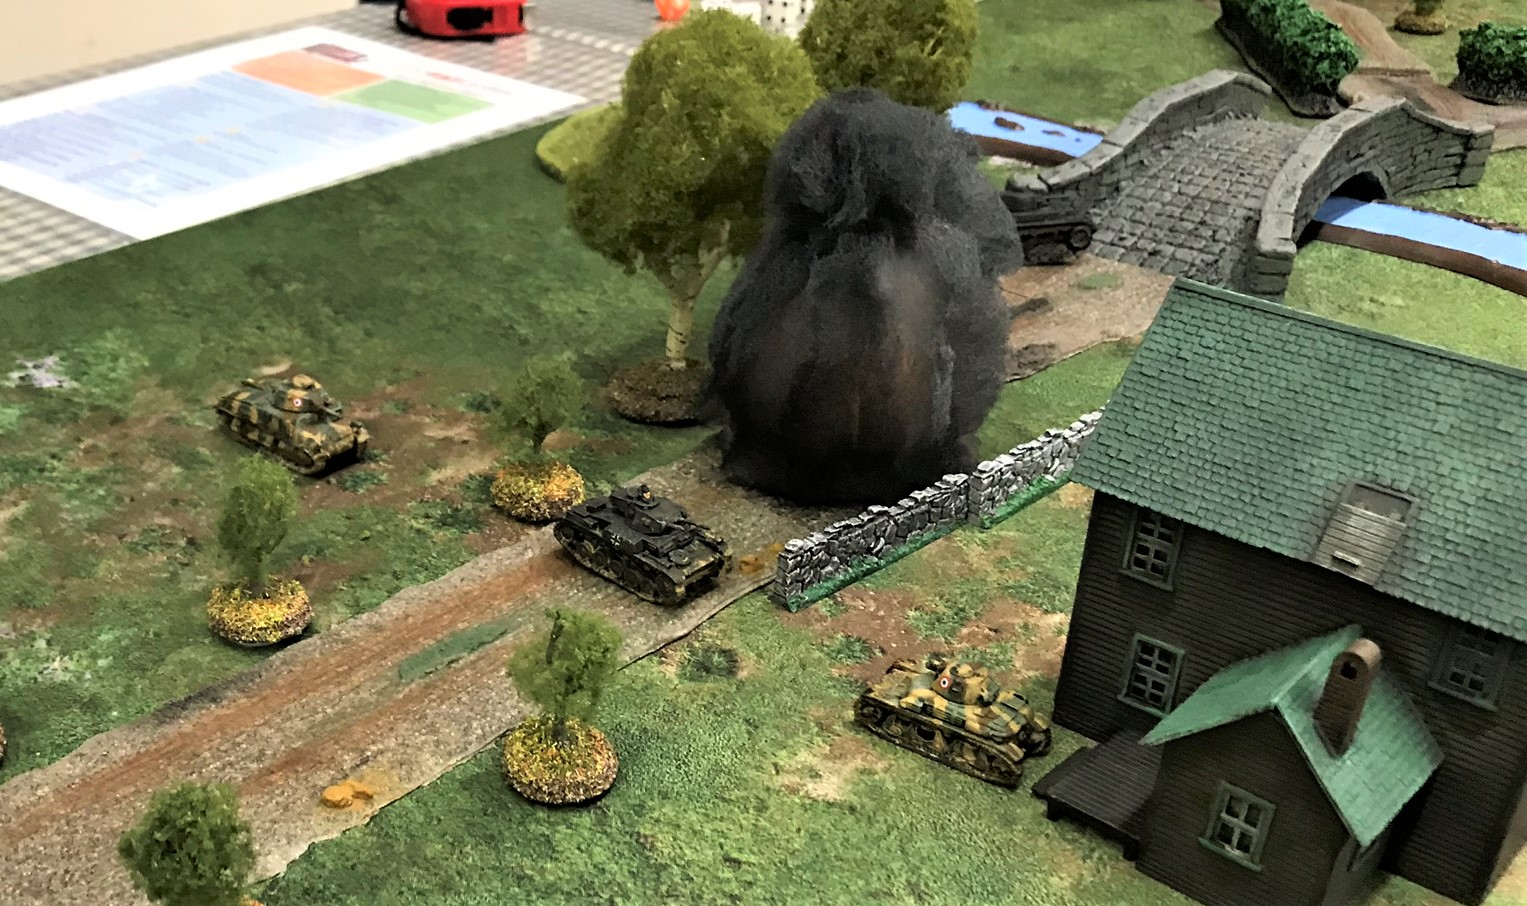
On one flank, a shootout occurred between a Panzer IIC and an R35 over a bridge on the French left flank. Initiative and the dice rolls went to the French R35, with the Panzer IIC taking temporary damage and being pushed back to its starting point, without damaging the R35. The German light tank barely managed to survive, exited the board, and re-spawned on the opposite flank to join the battle there. The little R35, a slow tank, had a long drive to rejoin the fray there.
This bridge ain’t big enough for both of us…
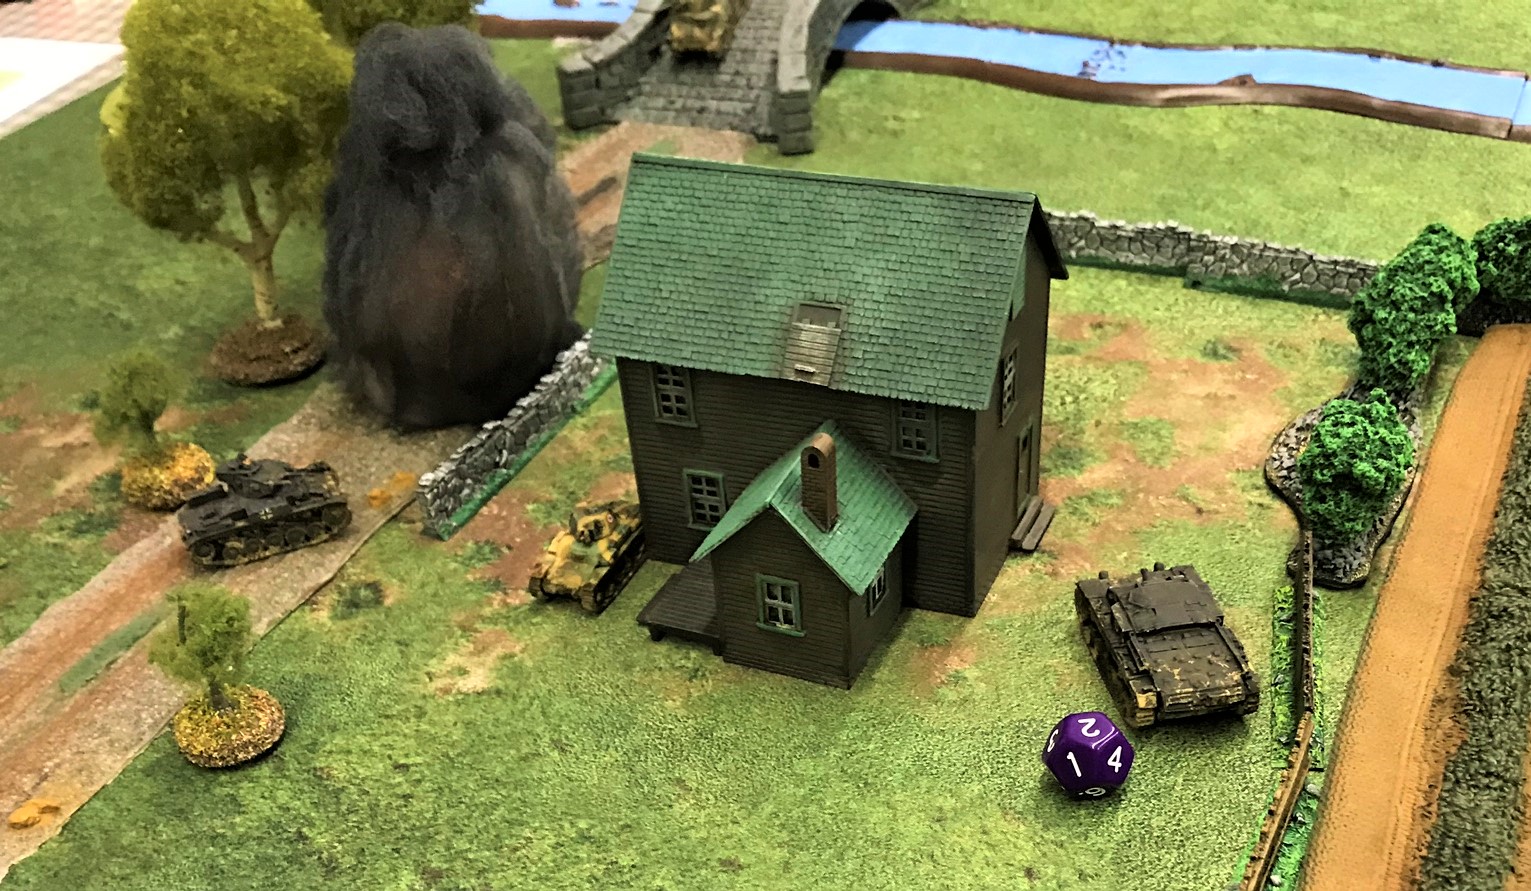
On the other flank, the other French R35 took up position at base of the other bridge. Eventually, it got a few flank shots on the opposing Panzer IV, causing damage, and pushing it back. The R35, smelling blood, advanced over the bridge, and took up a protected position by the farmhouse. The Panzer IV had lost most of its command dice, and was heavily damaged. Eventually, the R35 knocked it out. At this time the newly-re-spawned Panzer II from the other flank deployed nearby, as did the StuG. The Panzer IV was also re-spawned here, and the R35 was in deep trouble. The new French player got his SOMUA S35 and hurried to relieve the R35. The battle eventually became one of both sides driving around the farmhouse and trying to get advantageous shots.
The R35 takes up position, and would hit the Panzer IV in the side multiple times. Eventually it would cross the river and take up position by the farmhouse…
…where it would finish off the Panzer IV.
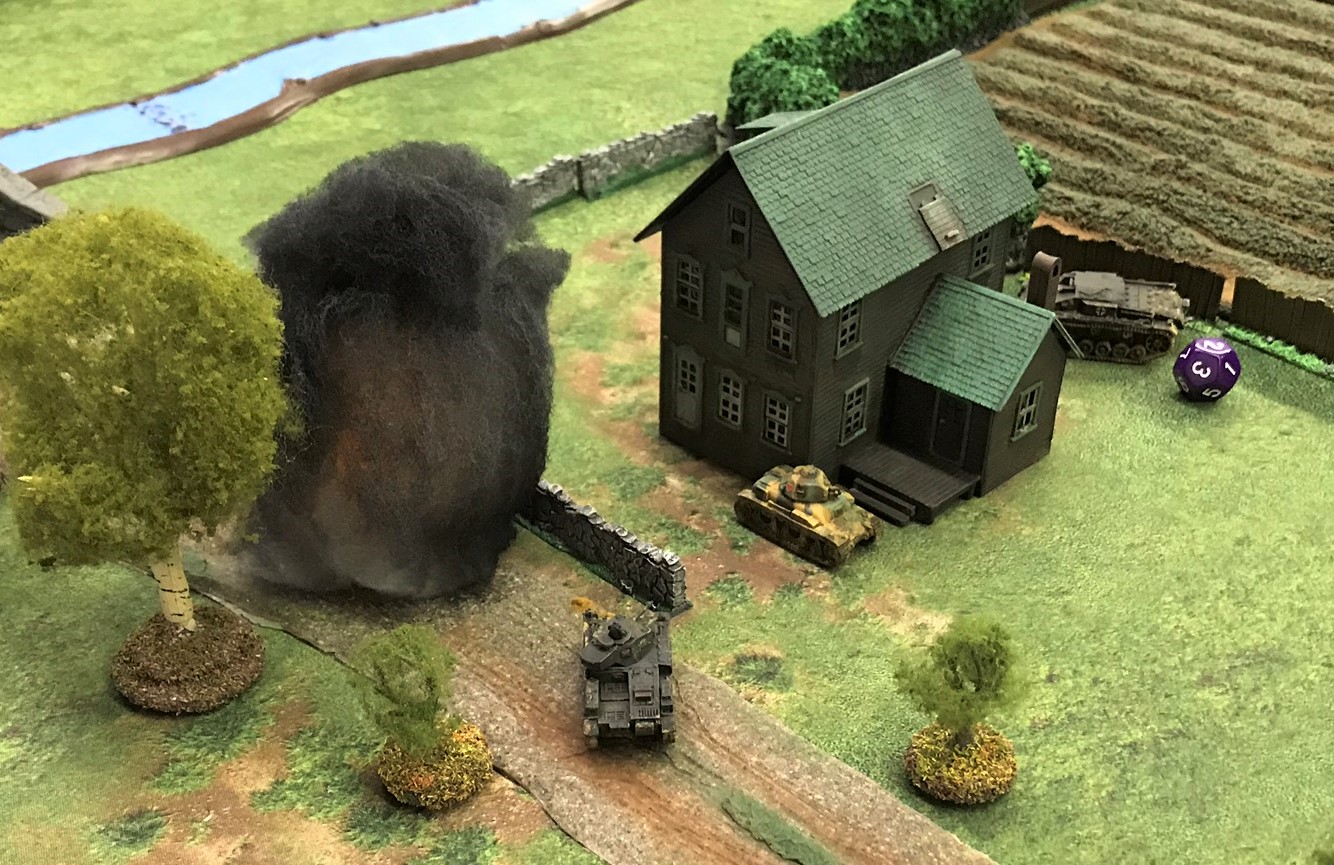
Seeking revenge, a StuG III and a re-spawned Panzer II surround the R35.
Things are looking desperate for the R35.
Here comes the cavalry in the form of the SOMUA S35, a fast cavalry tank. The StuG is forced to take its aim off of the R35, and joins the re-spawned Panzer IV to face off against the SOMUA.
The Panzer IV got first activation, and missed the SOMUA! The SOMUA then drove like a bat out of hell, taking up position behind the Panzer II that was menacing the R35.
The tables turn as the SOMUA gets behind the Panzer II.
The Panzer II got activation next, and decided to avenge its comrade. A flank shot destroyed the R35. The next turn arrived with the SOMUA getting activation first, and lit up the Panzer II. The Panzer II re-spawned on the other side of the board, hoping to get some victory points by driving to the other side of the river. However, the R35 player re-spawned as well, and decided to use some of the French poker chips to get an upgrade, a heavy tank – the Char B1 bis – to confront this action.
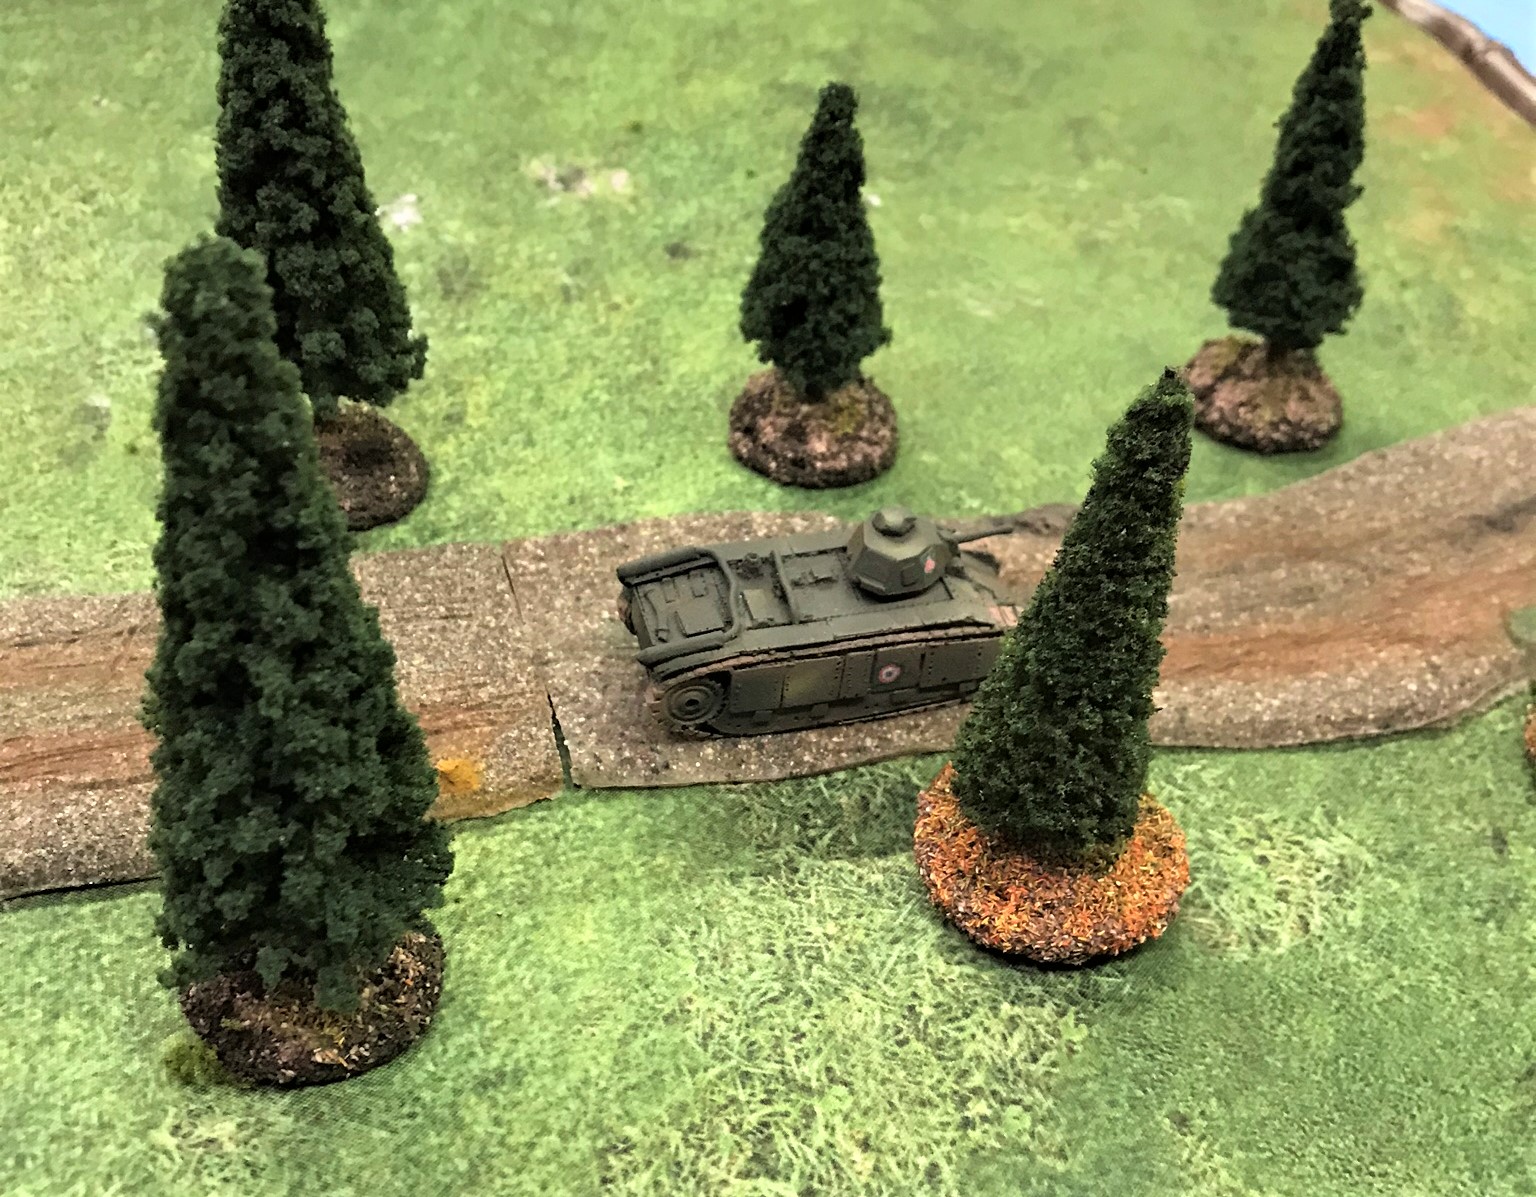
Here comes the Char B1 bis!
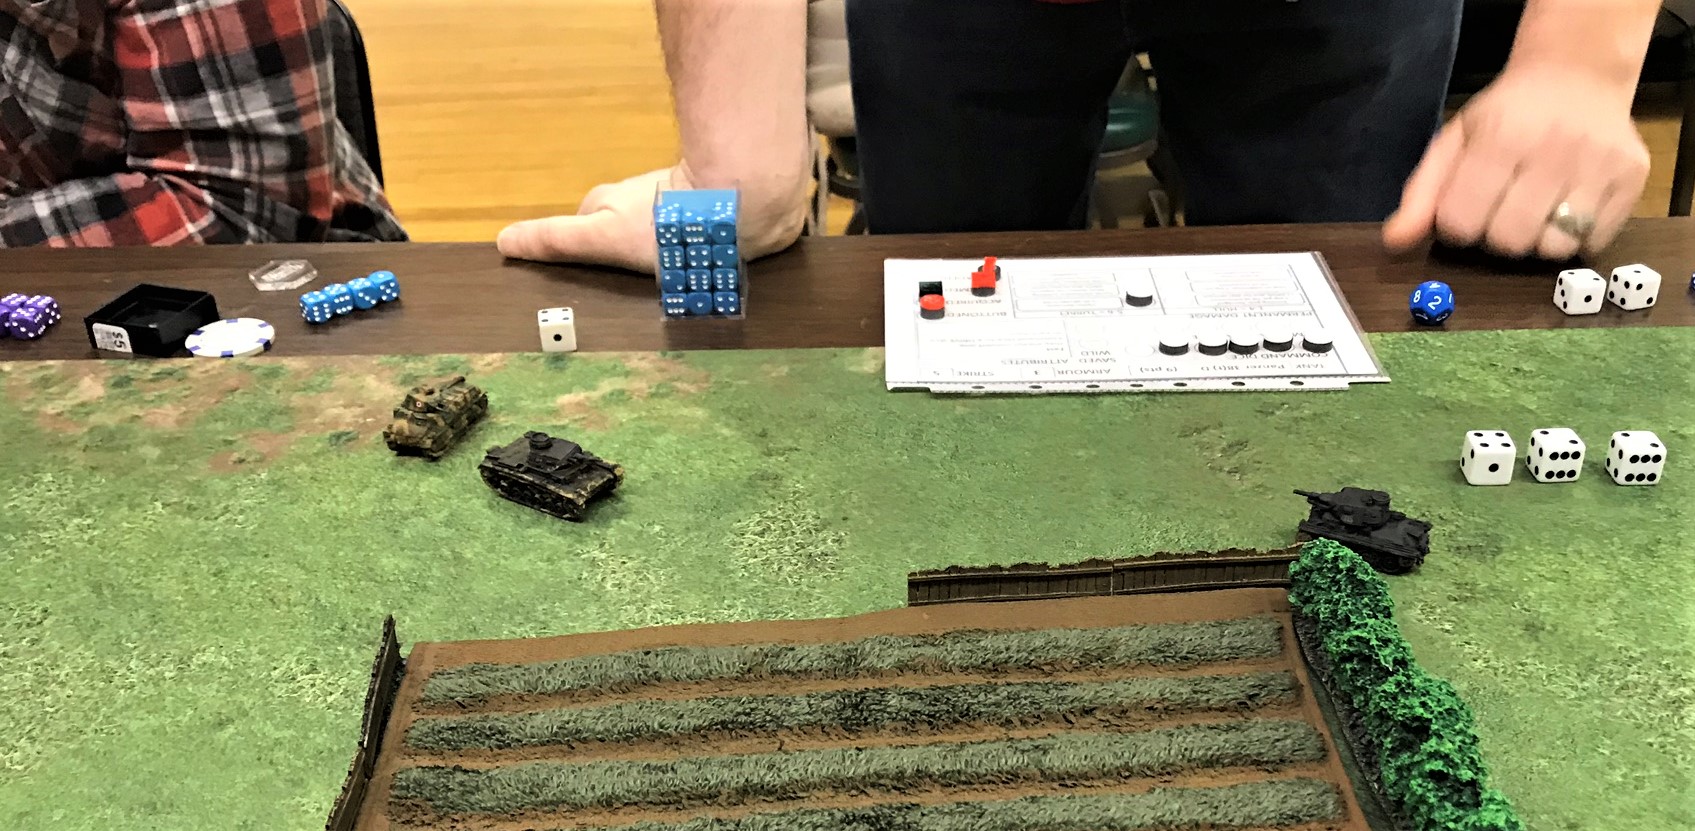
The Panzer II crossed the river at a ford by the bridge, and turned to face the Char B1, who had crossed the bridge. As you see below, the Panzer II rolled a “10” for activation, while the Char B1 rolled a “7”, so it activated first.
(A side note here – in the rules, D6 are used for activation, but I have found that this leads to way to many “dice-offs” and slows play. Instead, I use D12’s, and if a player banks a command die “6” for the next turn’s activation, he/she gets to add two to the roll, so the math works out the same as the original game).
Back to the standoff between the German David and French Goliath…the Panzer II hits the Char B1 with a double -six roll, allowing it to get two extra strike dice – great news for the Panzer II. Unfortunately for him, the Char B1 is very heavily armored, and the hit fails to do any damage (well, maybe the paint).
The face-off!
The Char B1 returned fire, and you can guess the results…
The Panzer II is destroyed by the Char B1 bis.
The surviving R35 finally made it to the other side of the board and took up position behind the StuG, who was more concerned with the SOMUA. The R35 rolled well, the StuG did not, and the German assault gun brewed up into a ball of flame and smoke. This left the Germans with only a Panzer IVD, and even with re-spawning, the game had gone too far in the French team’s favor. The final score, with all the points for being on the other side of the river, kills, and purchase debits, was 58-14 in favor of the French. I think the scenario is still balanced, but in the end maneuver and use of terrain both really matter in this game, and the French did better job of both in this game. They also got some bad luck for sure. I may add some points to the German side the next time I run this scenario.
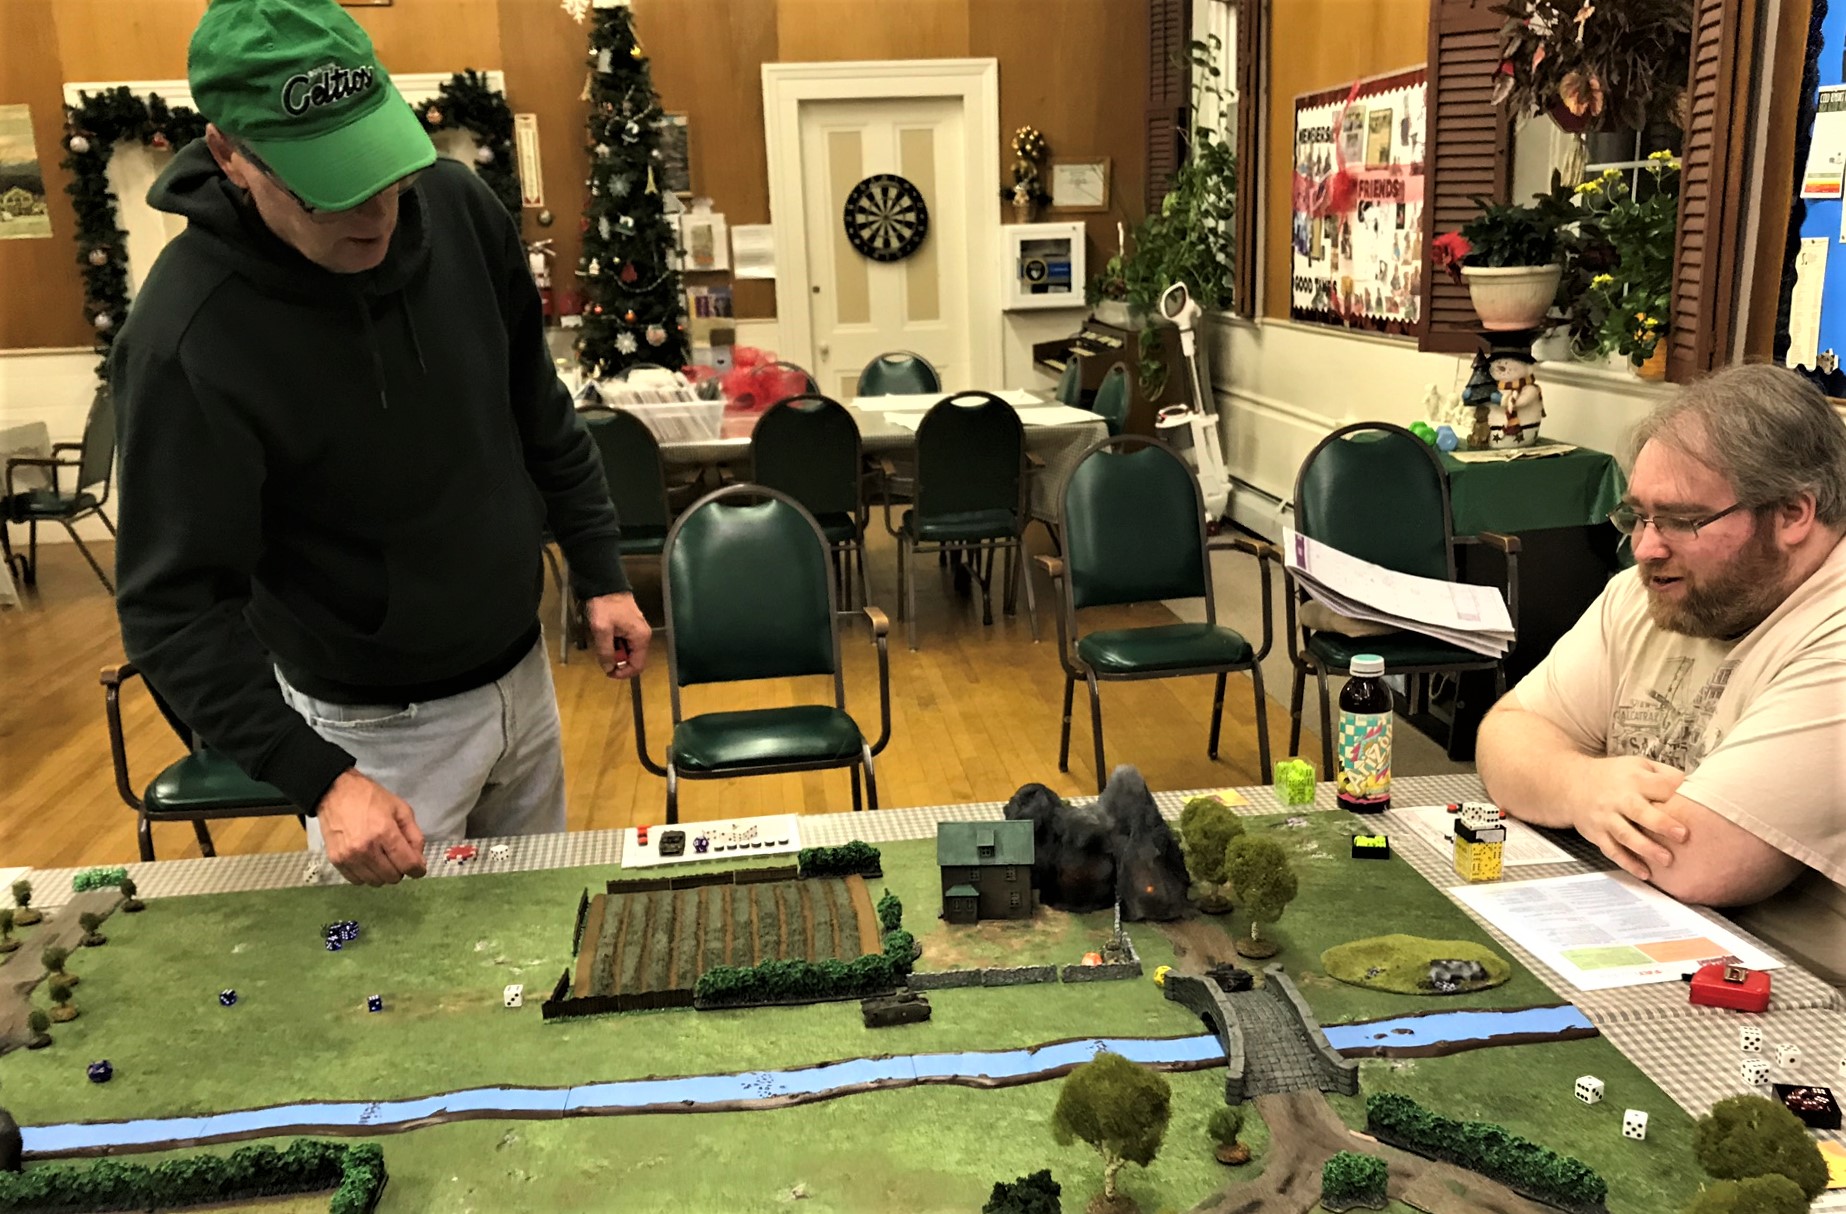
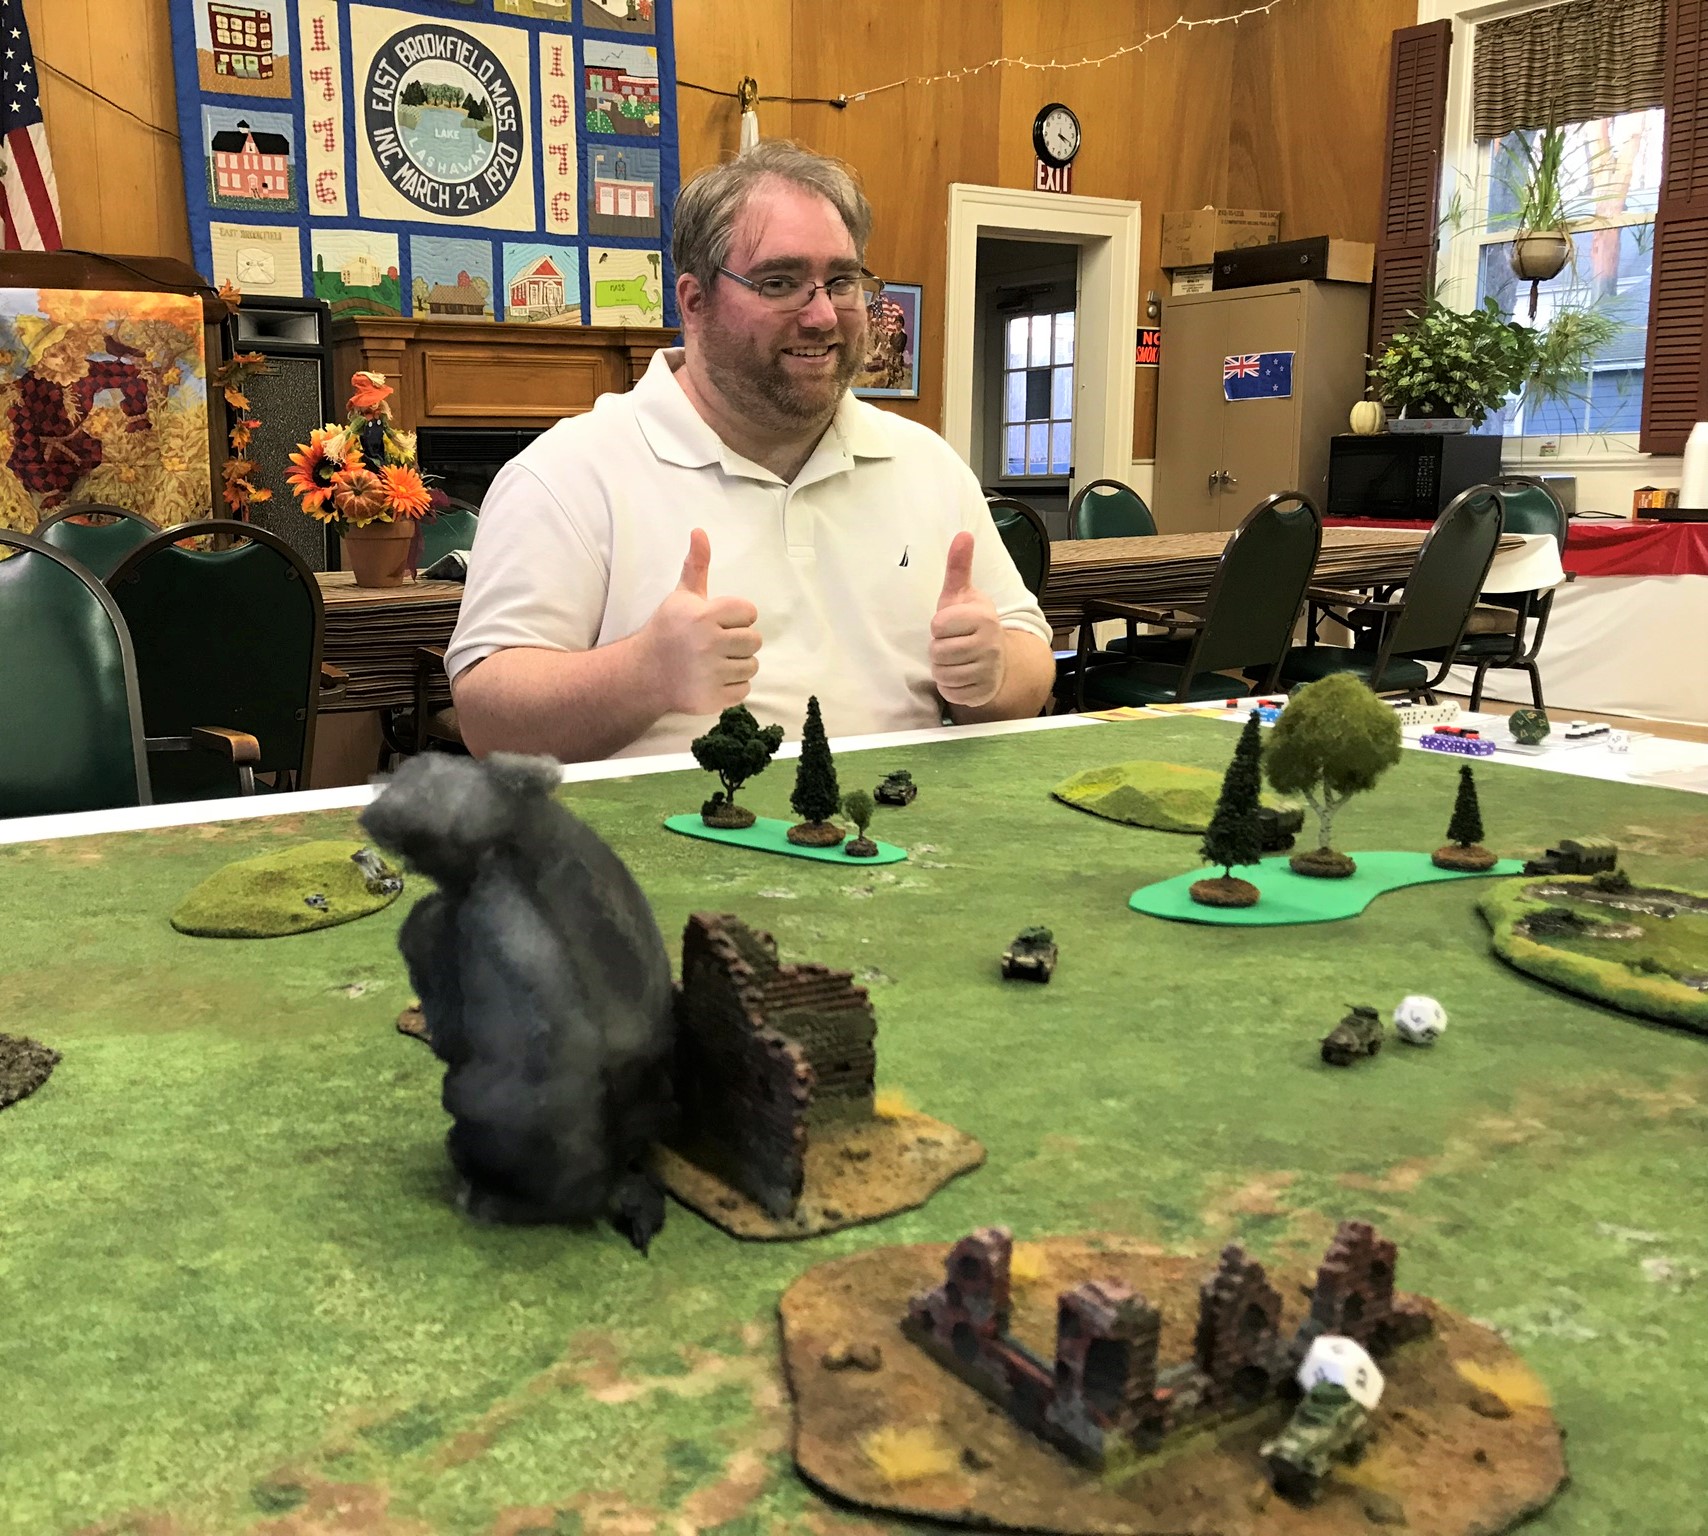
Mike Morgan and Chris Smedile survey the battlefield.
Hope that you enjoyed this post! Please let me know your feedback in the comments section!
The next Mass Pikemen game will be on February 16th at 2 PM at the East Brookfield MA Senior Center (110 Pleasant Street), East Brookfield, MA. We will be having a GASLANDS game run by Jared Burns.
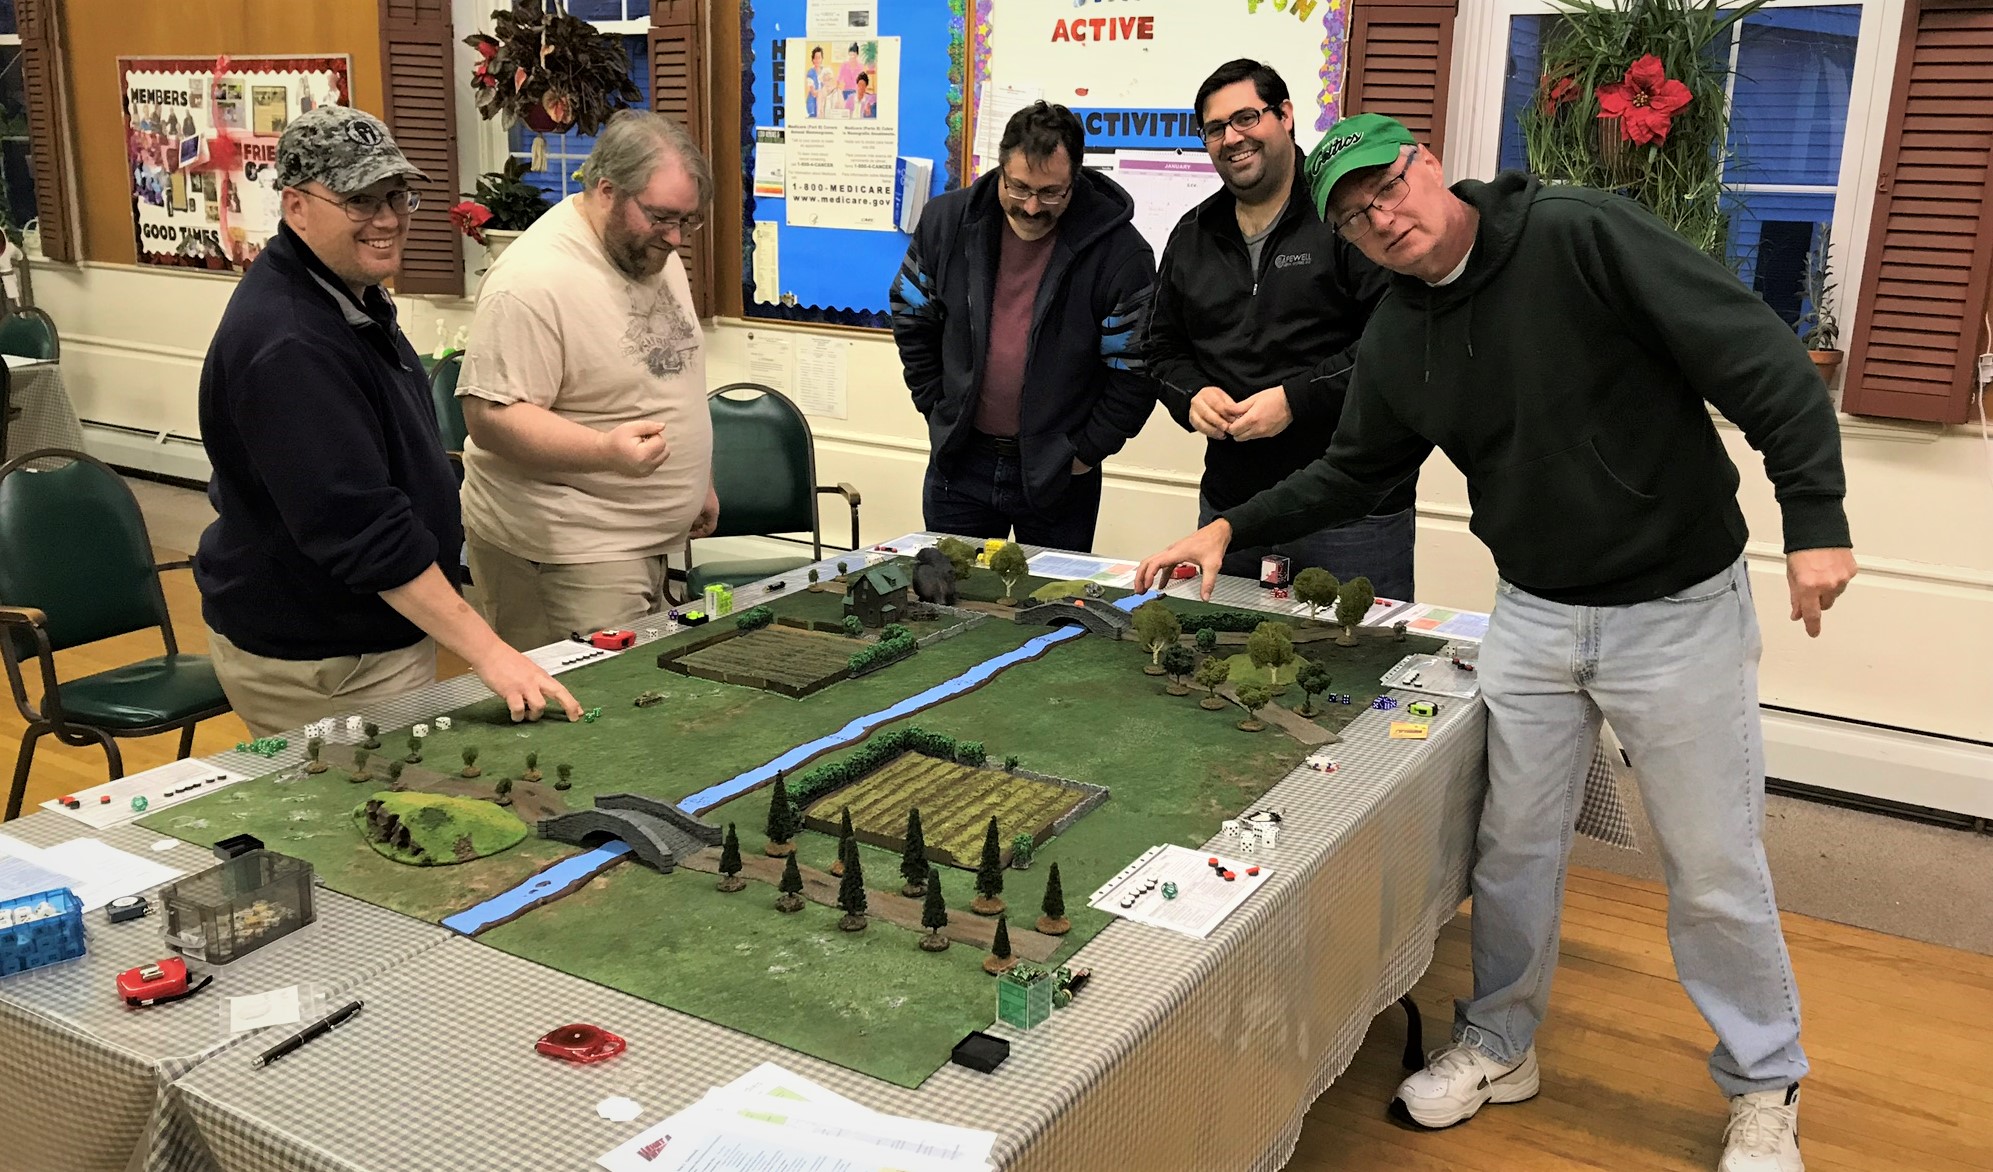
Leif Magnuson, Chris Smedile, Chris Comeau, Jared Burns, and Mike Morgan having fun at Mass Pikemen!
Some of the items on the activity list below could be fairly called double-counting, but hey, no blood no foul! I tend to count projects in terms of their distinctive nature, ie the building/assembling/creating processes to me are different than painting, as is converting figures. I did not cast anything this year or make any molds as I still have plenty of figures to paint, and my hope is to knock out more of them in 2019, as I will not need to make as many game pieces/game aids.
This list, which is a separate page on my blog, helped me to stay focused. The adding of the hyperlinks that you see on the items below helps me to review past projects as prologue for future ones.
Thanks for checking this out – and good luck to all in 2019! Hope I keep you amused and entertained!
2018 Total Projects: 2,036
244 figures painted
0 figures cast
47 figures assembled
33 terrain pieces made or assembled
28 terrain pieces painted
10 figure conversions
867 creations or components sculpted or scratch-built
0 molds made
807 game pieces/game aids made and/or painted
January: 91 projects
Creations/components sculpted or scratch-built (91):
2 A9 Cruiser Mark I tanks (15mm/1:100 scale), from Battlefront Miniatures (#BR020)
1 A10 Cruiser Mark IIA (Desert) tank (15mm/1:100 scale), from Battlefront Miniatures (#BR023)
1 A13 Cruiser Mark IVA (Desert) tank (15mm/1:100 scale), from Battlefront Miniatures (#BR026)
1 Valentine III tank (15mm/1:100 scale), from Battlefront Miniatures (#BR061)
1 Crusader II tank (15mm/1:100 scale), from Battlefront Miniatures (#BR032)
1 Crusader III tank (15mm/1:100 scale), from Battlefront Miniatures (#BR034)
1 M3 Grant tank (15mm/1:100 scale), from Battlefront Miniatures (#BR100)
1 Churchill II tank (15mm/1:100 scale), from Battlefront Miniatures (#BR070)
5 M3 Stuart “Honey” tanks (15mm/1:100 scale), from Battlefront Miniatures (#BR006) – Brits will get two, I am saving one for future Soviet Lend-Lease, one for future captured German use in North Africa, and one as an American M3 for future captured Japanese use in Burma or the Philippines.
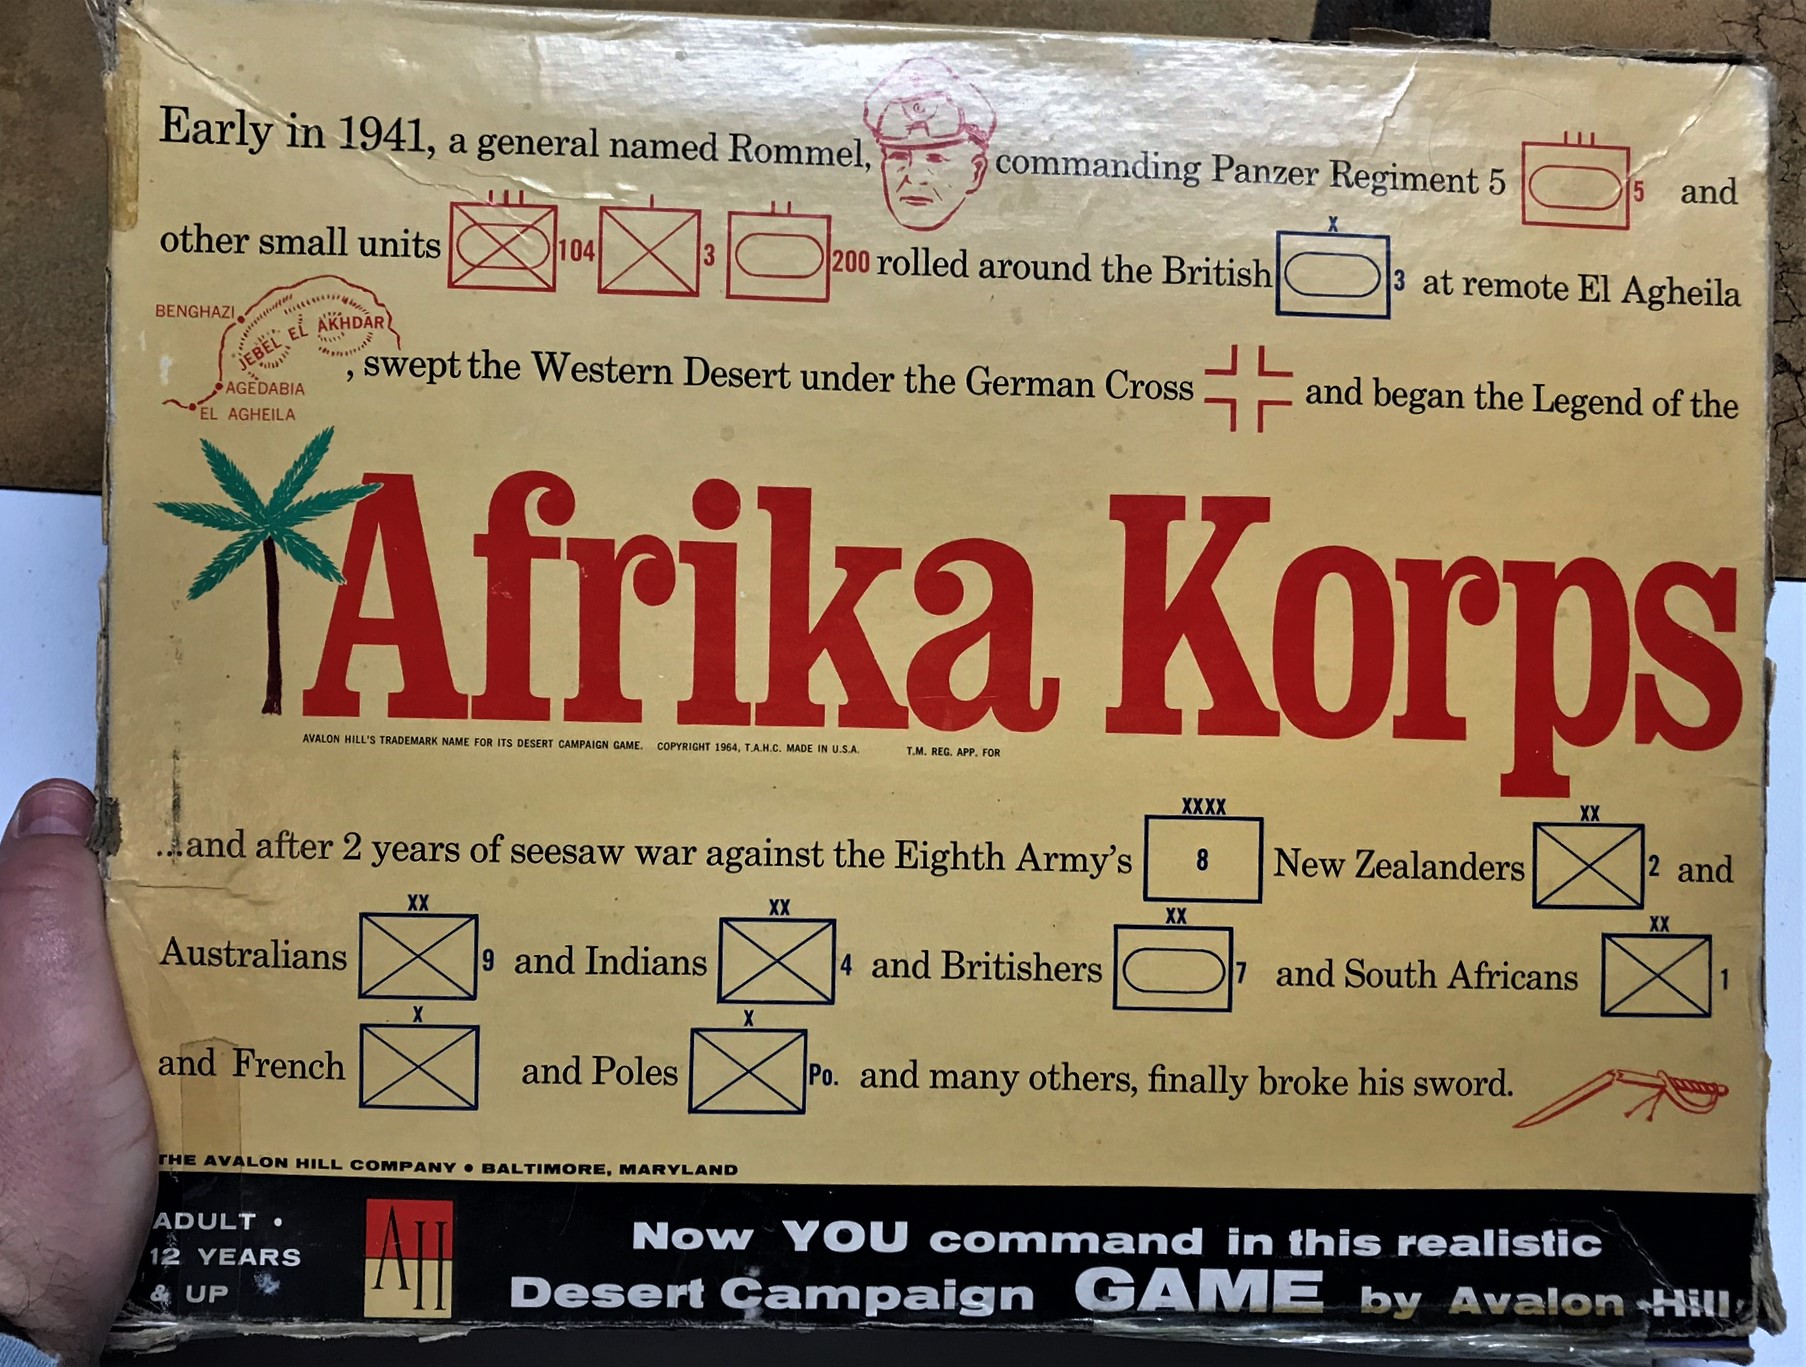
I played this game many times, and of course it uses cardboard counters to represent divisional and brigade-sized units. Avalon Hill did publish Tobruk in 1975 as well, and I also have that (second hand), but I never played it (a common fate held by many of my AH games as finding opponents was not easy back then for a teenager). So I have wanted a tank-on-tank game for a while.
To research these tanks (and other future tank projects), I bought several books from Amazon that I found very useful as background information and for modeling purposes. To be sure, many of the images are conflicting, but my guess is that the differences represent actual historical differences in camouflage schemes. The books I got (and you can find them on Amazon) were:
Two by David Fletcher:
British Battle Tanks: British-made tanks of World War II
British Battle Tanks: American-made World War II Tanks
One by Jean Restayn:
WWII Tank Encyclopaedia, 1939-45
One by the Smithsonian/DK:
Tank: The Definitive Visual History of Armored Vehicles
One by Michael Green:
Axis Armoured Fighting Vehicles of the Second World War (Images of War)
One by Robert Jackson:
Tanks and Armored Fighting Vehicles Visual Encyclopedia
I would easily recommend all of these books as good resources, and they will be my sources for this and future tank projects. Again, these 4 are just the start of my 8th Army tank build (never mind I still need to get to Panzer Army Africa!).
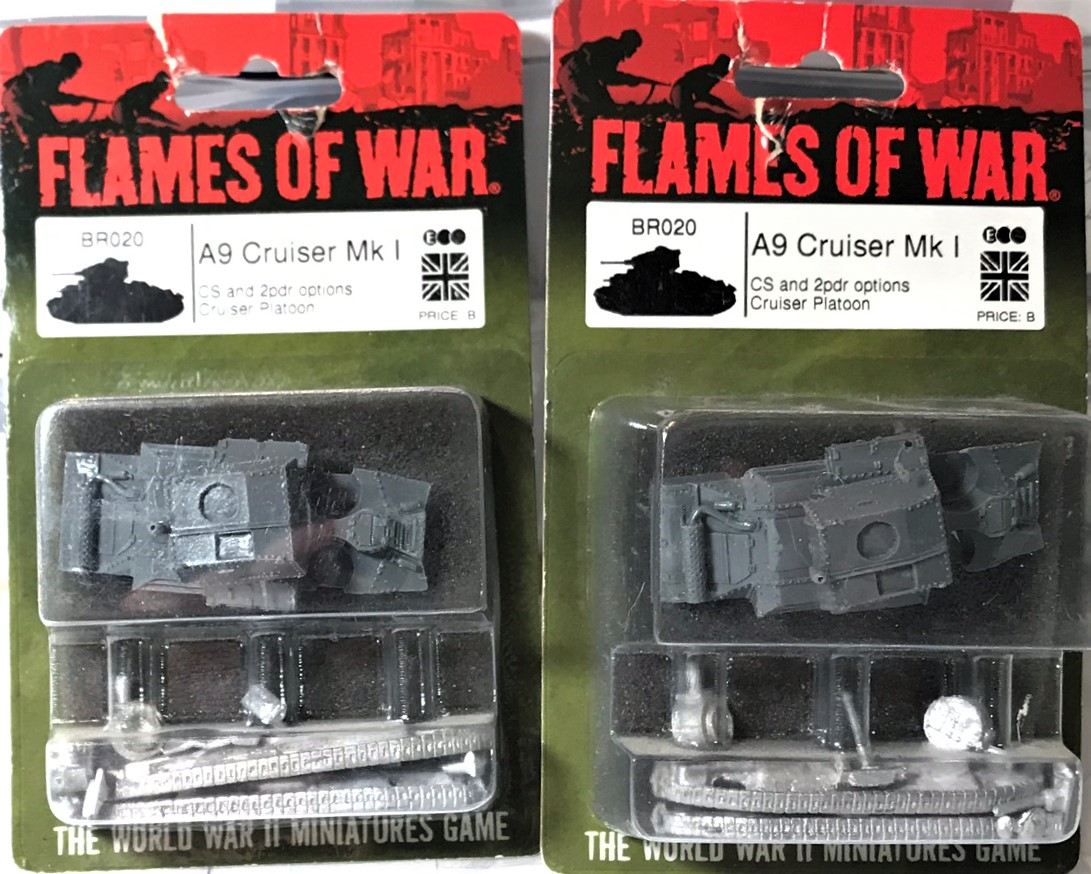
A9 Cruiser Mark I Tanks
The first pair I worked on this month were A9 Cruiser Mark I tanks. These were involved in the Battle of France and were in the desert in North Africa in 1940-41. The British tactical doctrine had infantry tanks (to support infantry) and cruiser tanks (to engage other tanks). That doctrine failed to impress the Wehrmacht. Still, the British crews fought bravely and eventually better tanks arrived from the UK and the US. The A9’s were not great, and one of the few that if captured that were not reused by the Germans. For a camouflage and painting scheme, I used a picture of an A10 Cruiser Mark II with a Caunter camouflage scheme (see below), and differentiated the two with some Battlefront decals. I wanted to use units that I could identify, but in the end I went with the ones that you see.
The pair in the blister
A9 Mark I Cruiser frontal view
Rear view of assembled A9’s
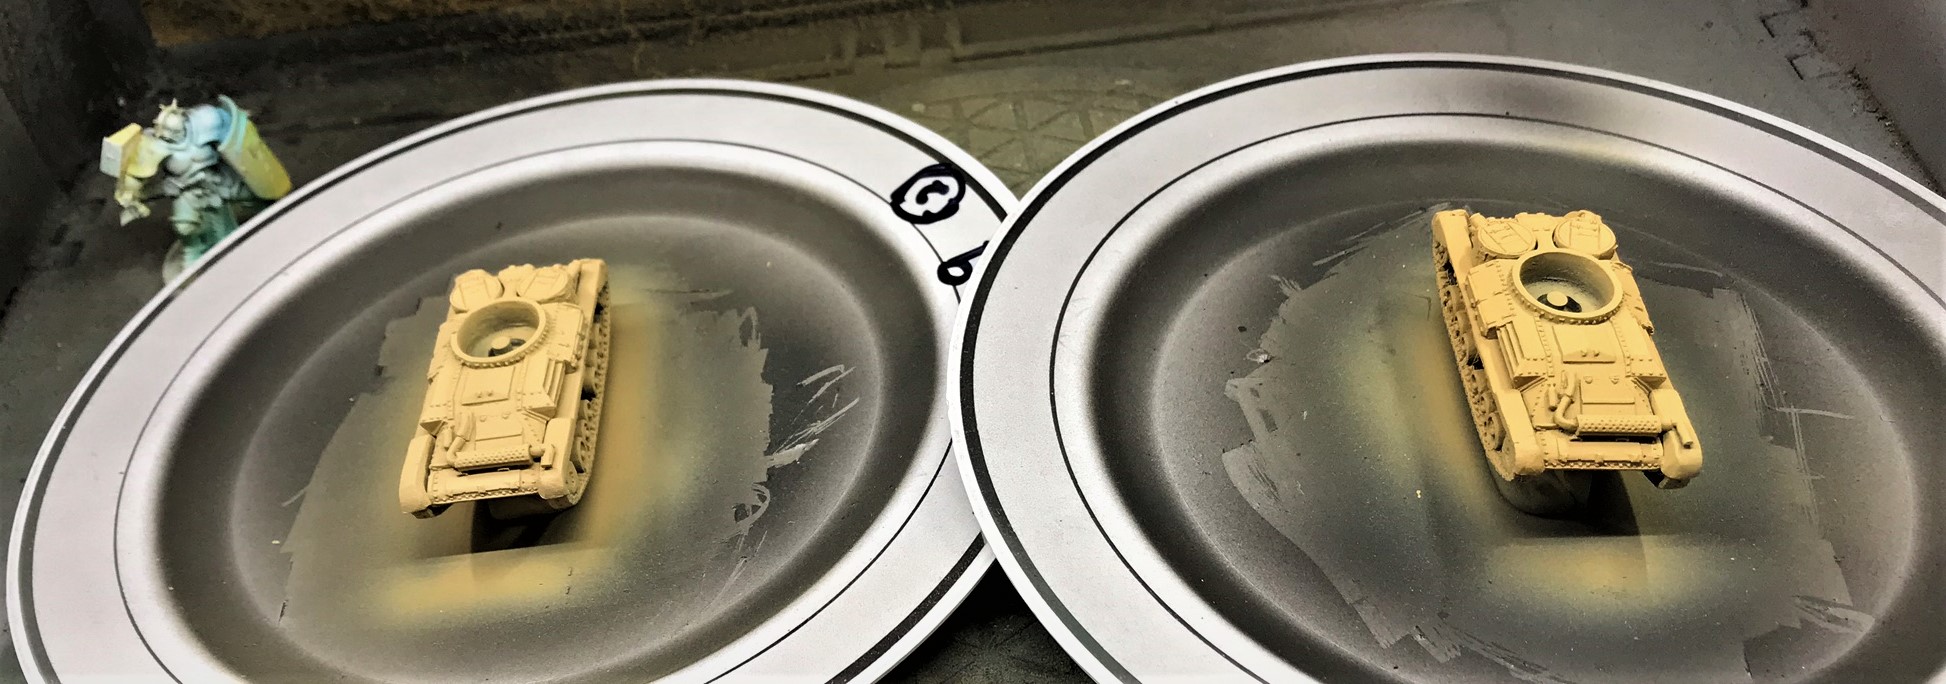
I used plastic plates and later poster tack to move around the tank chassis
As you can see, I drilled out the crew bases and glued them to toothpicks for ease of painting. I initially ran out of Battlefront “Crusader Sand” and used Vallejo “Desert Sand” which was too German-looking. I found a conversion table and switched to Vallejo “Dark Sand” which was a better match. I mounted the turrets to washers, affixed to magnets, affixed to large screws in styrofoam. Later, I would switch to using holes in wood for better durability (the styrofoam was not sturdy enough to hold the #14 screws, magnets, washers, and turrets!).
On left, Vallejo “Dark Sand”, on the right, Vallejo “Desert Sand” which I thought was too panzer-like.
After a good wash!
Close up of washed hull
Turret close up after wash
I drilled out holes for the radio antennae and used 24 gauge wire for the aerials.
After dry brushing.
Masked for Caunter camouflage
After second Caunter color added over mask
The masking I used was a combination of Tamiya tape and Vallejo “Liquid Mask”. This was my first use of the Vallejo mask, and I will be judicious in its future use. It does ruin the brush you use, and at this scale (15mm) its not a really useful way to create chips. Lesson learned – I was able to wash over the patches I put the mask on and it did give the tanks more of a dirty look.
I used this source…
for this camouflage scheme.
Not a bad match – it was an A10 in the book, but I liked the scheme and I have other plans for my A10’s – stay tuned. You can see more photos of the A9’s in the eye candy section below!
M3 Stuart “Honeys”
The M3’s came in a box of five, but I only wanted a couple for the North Africa scenarios. The rest will be going to the Soviets (as a Lend-Lease), the Germans (captured in North Africa), and the Japanese (captured in the Philippines). The painting scheme was mainly the same except for the grayish Caunter scheme.
The 5 M3’s unassembled.
And now assembled! The crewed ones are British.
Ready for priming.
M3 after priming, base coat, and wash.
Similarly, the turret.
I used a different resource for the camouflage, and I like the way it came out.
Awaiting spot washes, and decals, and varnishing.
I used this source…
to come up with this!
So now they were all done – and it’s time for some glory pics!
Eye candy
It’s eye candy time!
A9 Cruiser Mark I’s in the village.
Nice frontal view close up – you can see the details pretty well for such a small model.
Nice view of the left sides.
Nice view of the right sides and the backs of the tanks.
A9 in a defensive position
Heading out to find Germans and Italians.
M3 Stuart “Honeys” on the road.
Nice side view showing the grayish Caunter scheme and the decals. I used different ones for ease of identification on the tabletop.
As discussed, I will be adding more British cruiser and infantry tanks to my 8th Army fleet.
I am dedicating this post to all my British and Commonwealth friends!
I hope you enjoyed seeing these and reading this post. Do you have a favorite tank? I appreciate hearing your thoughts and feedback in the comments section below. Thanks for looking, and Happy New Year to you all!
PAINTS, INKS, GLAZES, SHADES, WASHES, AND FLOCKING USED ON BOTH TANKS:
Vallejo “Flow Improver”
Vallejo “Airbrush Thinner”
Vallejo “Surface Primer – Black”
Testors “Universal Acrylic Thinner”
Citadel “Imperium Primer”
Battlefront “European Skin”
Battlefront “Skin Shade” (shade)
Vallejo “English Uniform”
Battlefront “Sherman Drab”
Battlefront “Crusader Sand”
Vallejo “Desert Sand”
Battlefront “Worn Canvas”
FolkArt “Champagne”
Battlefront “Black”
Citadel “Agrax Earthshade” (wash)
Vallejo “Dark Sand”
Battlefront “Dry Dust”
Battlefront “Wool Brown”
Battlefront “Boot Brown”
Battlefront “Rommel Shade” (shade)
Battlefront “Bradley Shade” (shade)
Battlefront “Dark Gunmetal”
Battlefront “Dark Leather”
Battlefront “Oxide Red”
Gorilla Glue
Vallejo Liquid Mask
Tamiya masking tape
Vallejo Mecha Varnish “Gloss Varnish”
Microscale Micro-Set
Microscale Micro-Sol
Microscale Liquid Decal Film
1/8″ rare earth neodymium magnets
Appropriate decals from Battlefront
Vallejo Mecha Varnish “Matt Varnish”
UNIQUE TO THE A9 MARK I CRUISER TANKS:
Vallejo Mecha Color “Sky Blue”
Vallejo Game Air “Red Terracotta”
UNIQUE TO THE M3 STUART “HONEY” TANKS:
Aleene’s poster tack
Vallejo Model Air “Blue Grey”
Secret Weapons Washes “Armor Wash” (wash)
Thanks again for looking and for sharing your feedback!
Each team was given poker chips to represent available points to choose and deploy their tanks. In this scenario, each had 25 points to choose three tanks. If a tank was destroyed, the winning team would get that many points in chips – which they could use to either upgrade a deployed tank, buy a new tank, or purchase a Bonus Card. The destroyed tank would respawn in the game. There was a river in the middle of the board, with roughly equivalent terrain on both sides of the board. I said that any tank on the opposite side of the river at the game’s end would count for two times as many points for victory. This gave each side an incentive to move forward.
For initial forces, the Germans chose two Panzer IVD’s (2 for 14 points) and a Panzer 38(t) (one for 9 points), leaving them with 2 chips extra. The Germans passed on choosing a Panzer IIC. The French chose two R35’s (2 for 14 points) and one SOMUA S35 (1 for 10 points), leaving them with one extra chip. While there were StuG IIIA and Char B1 bis vehicles in the inventories, I did not allow either to be chosen initially for reasons of play balance.
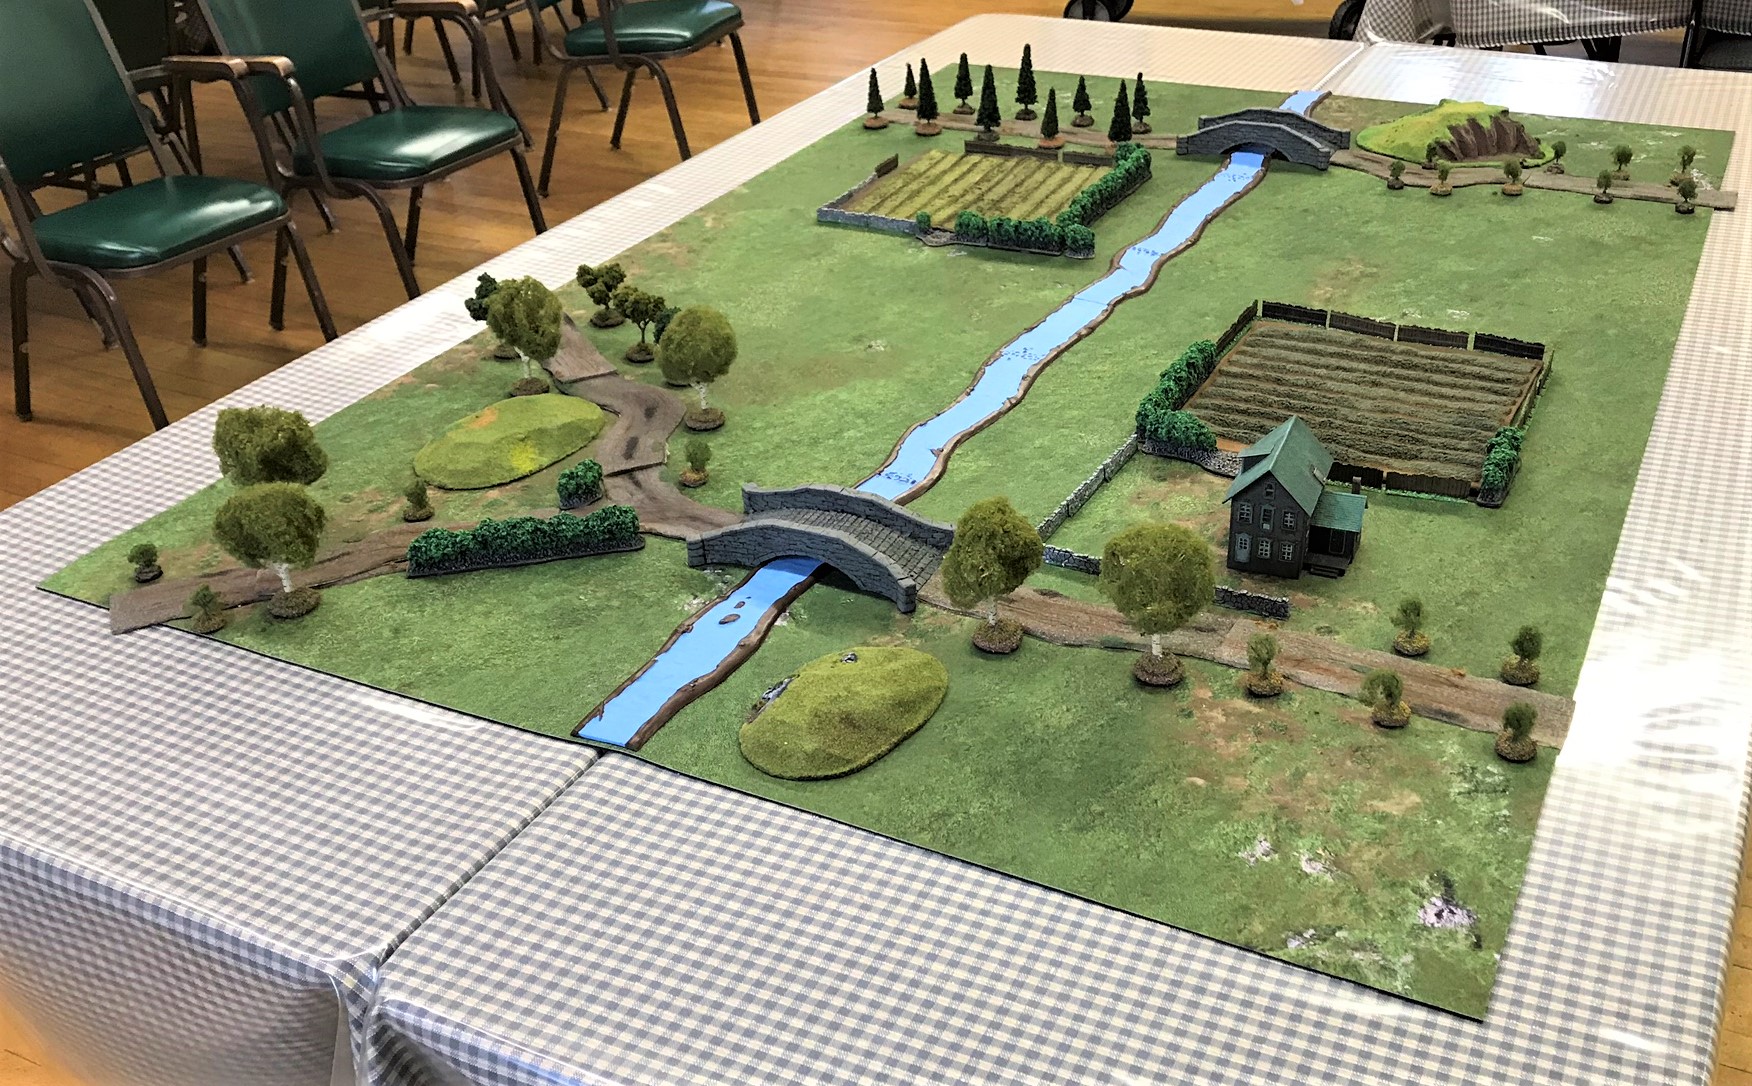
The game board set up. The Germans chose to enter on the right side.
The Germans initially deployed from here, with the French deploying on the opposite side.
In early action, a Panzer 38 (t) was knocked out by a flank shot from one of the R35’s as it hid on the left behind the bocage. A Panzer IVD and the other R35 watch it burn.
The previously successful R35 runs behind the bocage. Another Panzer IV crosses the river at a ford (minor obstacle), but by this time it had been hit multiple times and was down to one Command Die…
…and the French SOMUA rolled this! An example of the French Command Dice rolls. Each 6 is a Wild card and each 4 is a firing die. Basically, this allowed the loaded French SOMUA to fire 3 times in that turn, contributing to the demise of the Panzer IVD. Unfortunately, the Germans’ rolls were hardly ever this good during the game.
The previously mentioned unlucky Panzer IVD burns on the left by the bocage. Scott and Ethan Howland are maneuvering another Panzer IVD and a Panzer 38 (t) against the SOMUA S35.
The SOMUA activates, and moves to the rear of the Panzer IVD, but is unable to get off a shot. The Germans were able to subsequently knock out the S35 in their only kill of the day.
On the left French flank bridge, a duel went on between a Panzer IVD and an R35. The French were lucky and activated first, hitting the German in the side. Subsequently, the German reoriented, but was hit again and forced back.
The Panzer IV was dispatched by the intrepid two man crew of the R35.
At that point the game was called. The French crossed one R35 to the other side of the river and got 14 points. The final score was France 38, Germans 12. It was a good rolling day for the French and a bad one for the Germans. The best tanks did not get to deploy, but both sides needed to use terrain well, and they did. It was nice to have some new players (Leif, Ethan, and Scott), thank you for coming. Everyone had fun, and I will run this scenario again.
Score Breakdown:
French 38 chips:
1 chip left over from initial deployment (1 chip)
Two Panzer IVD’s knocked out (14 chips)
1 Panzer 38 (t) knocked out (9 chips)
1 R35 on the other side of the river at game’s end (14 points)
Germans 12 chips:
2 chips left over from initial deployment (2 chips)
1 SOMUA knocked out (10 chips)
Our next session will be on January 5th at 2 PM at 110 Pleasant Street, East Brookfield, MA. Please follow us on FaceBook at the Mass Pikemen Gaming Club.
My focus continued to be on early war vehicles. I had enough forces for an early Eastern Front game between the Axis (Germans and Italians) and the Soviets, but I wanted to have more variety in terms of tanks available. My KV-1 platoon needed some help, so I added some BT-series tanks.
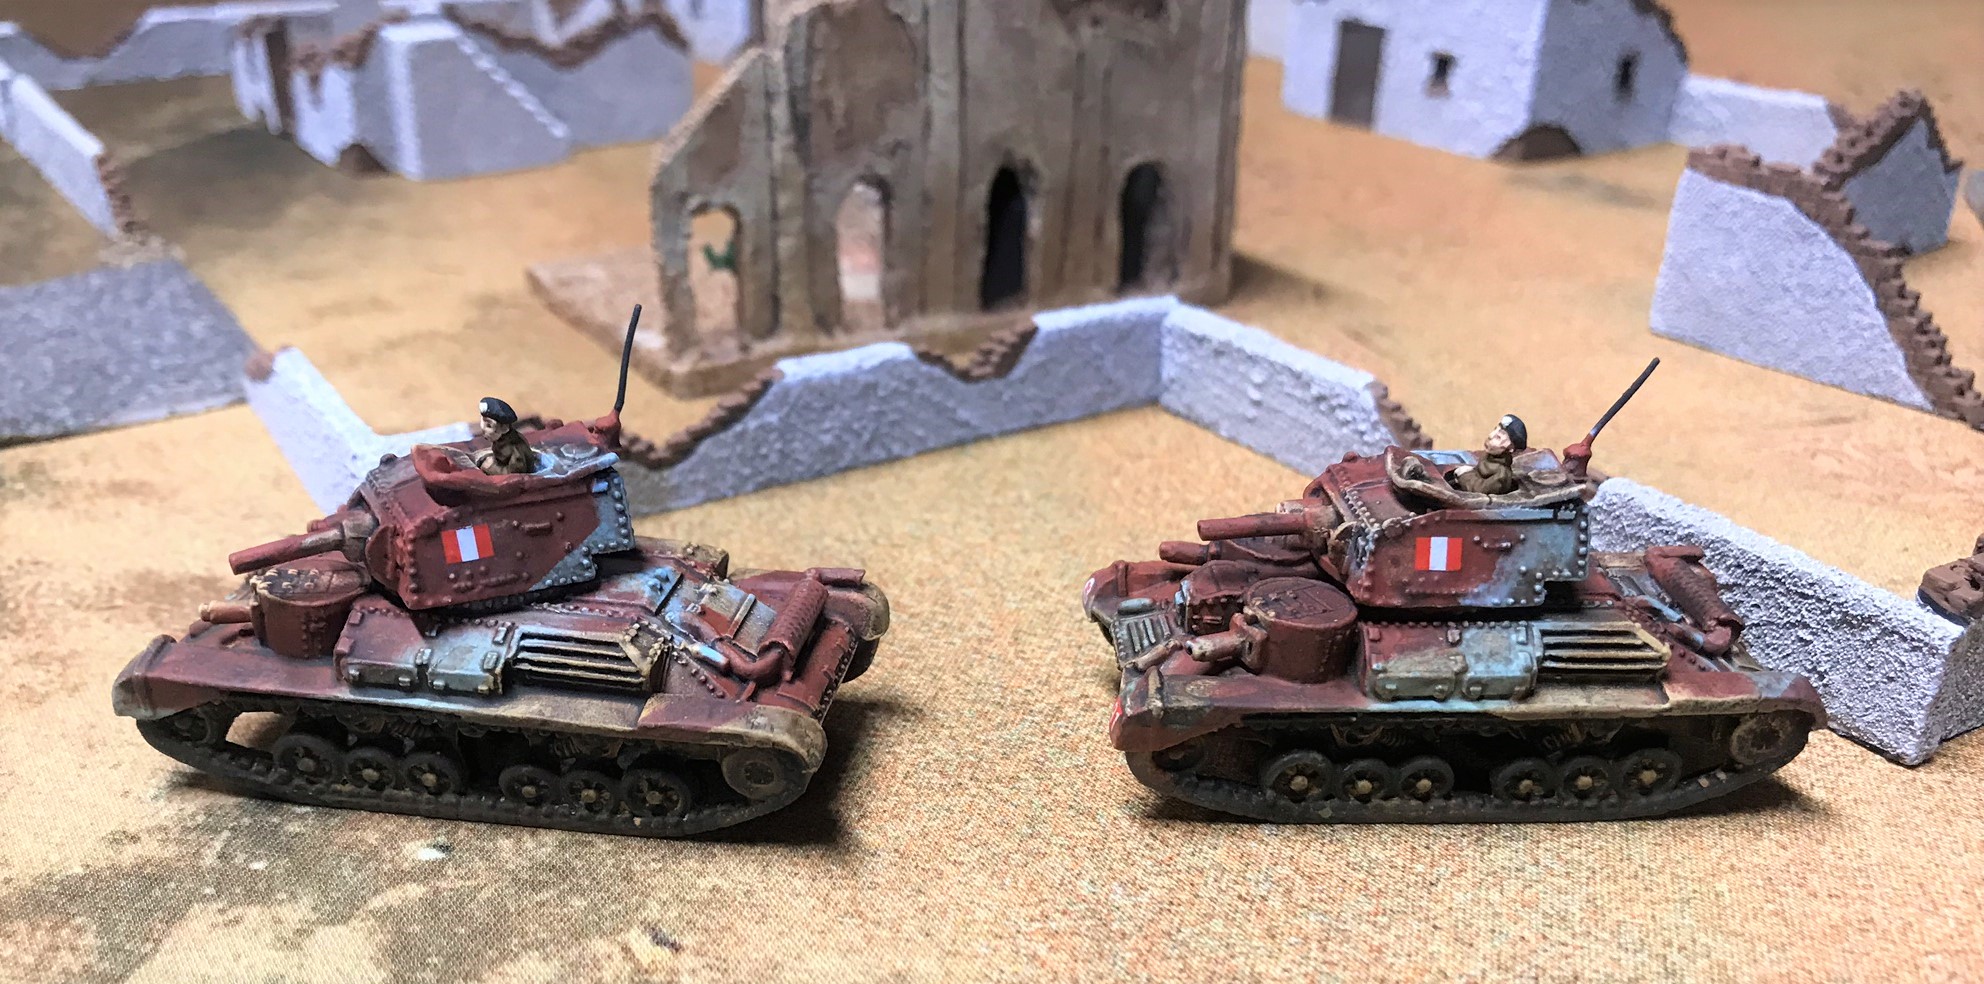
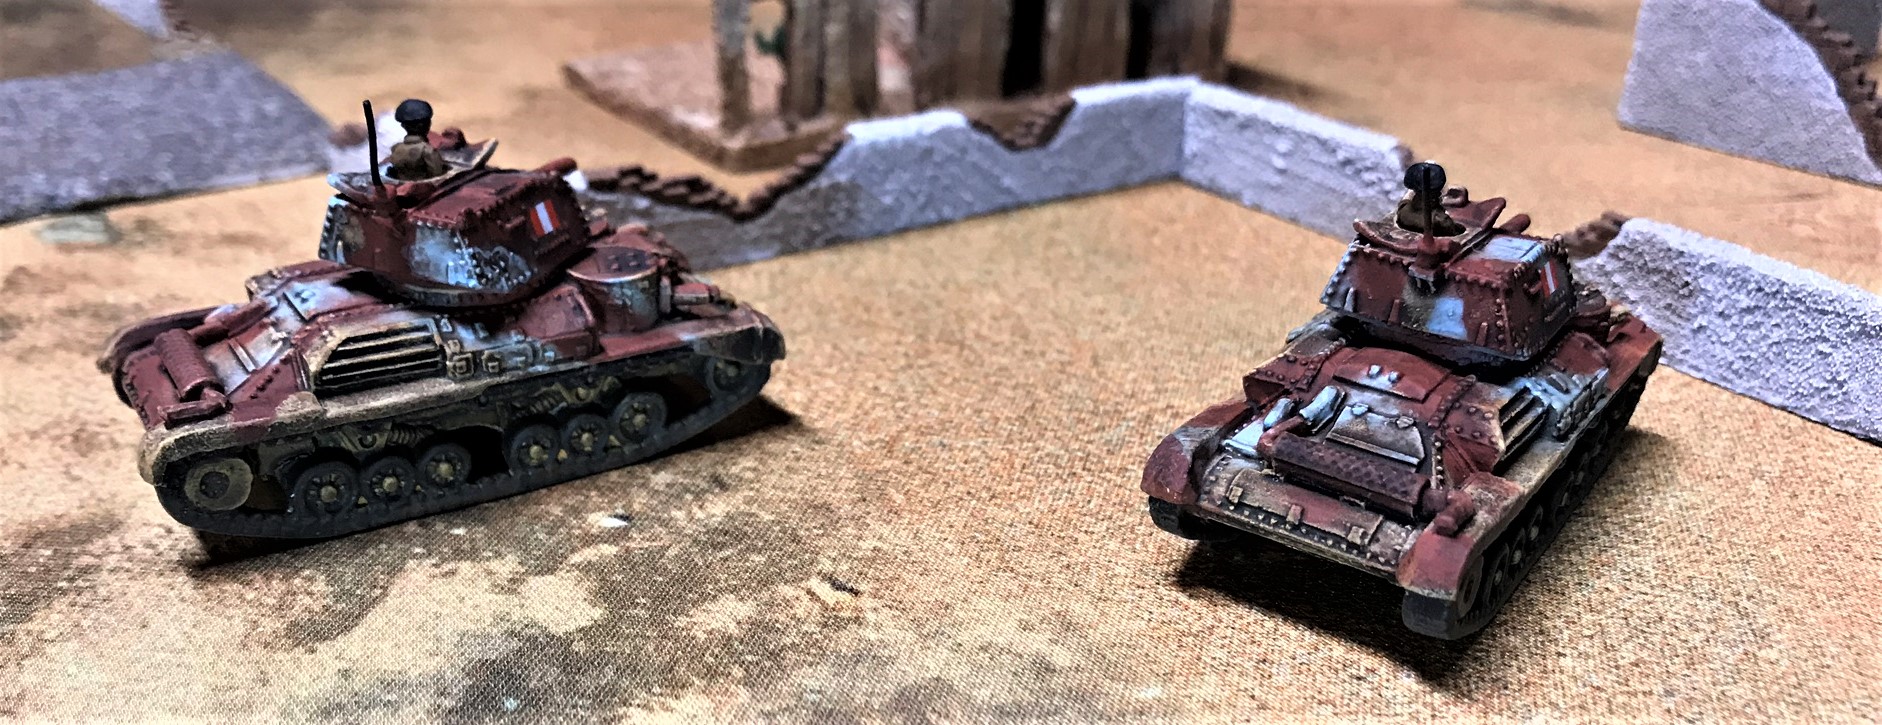
My other goal was to build German and French forces for a France 1940 scenario. For the Germans I added a Panzer IIC, a Panzer IIIE, and three StuG Ausf A assault guns to my fleet. For the French, I added two Renault 35’s and three SOMUA S-35’s. All of these came from the Flames of War line from Battlefront Miniatures. I really like their tanks, even though I don’t play Flames of War! I think that I can get some crossover between the early-war German forces for such a scenario and use some on the Eastern Front. Long term, I am also planning on designing a North Africa scenario for the British and the Germans, and some of the figures I got from Battlefront will serve nicely after I paint them in desert colors.
Regarding colors, I also acquired some of the Battlefront paints so as to understand the colors that they recommend. The current Battlefront “Colours of War” line mixes sets of 20 ml and 12 ml dropper bottles, as compared with Vallejo’s 17 ml bottles. It appears that at least some of their paints may have been made by Vallejo, at least in the past. I found them to be good paints that worked well either thinned in an airbrush or a regular brush. At the end of this post, I will share the paints and materials that I used for those interested.
In this post, in order I will discuss the Soviets, the French, and the German models I worked on in November. I also am submitting these as part of a Mechanical November community painting challenge run by Azazel (which is very fun to be a part of – check him out!).
Soviet
BT-5 & BT-7 in Blister
Priming the BT’s undercarriages
Painted up and needing weathering
The two Soviet tanks that I added were the BT-5 and the BT-7. An advantage of adding these will be that they also were used against the Finns in the Winter War and against the Japanese at Nomonhan in 1939 and during the Soviet Invasion of Manchuria in 1945. So, I can use them in different scenarios for sure. I followed the same procedure to paint these as I did my previous early war Soviet tanks.
For assembly, I again chose to magnetize the turrets by drilling out the hulls and the turrets and using rare earth magnets. I weathered all of the tanks, as I prefer my tanks to be muddy. I also left the crews out, as I did not like the way they fit in the turrets. Of note, their Christie suspensions (an American invention) would be reproduced with the T-34 series.
I have always had an affinity for the French Army, as I have a French name (albeit of French-Canadian extraction), speak French, and spent time with three different Regiments du Genie (Engineer Regiments) back in the 1980’s.
SOMUA prepped for drilling and magnetizing the turrets
SOMUA’s assembled
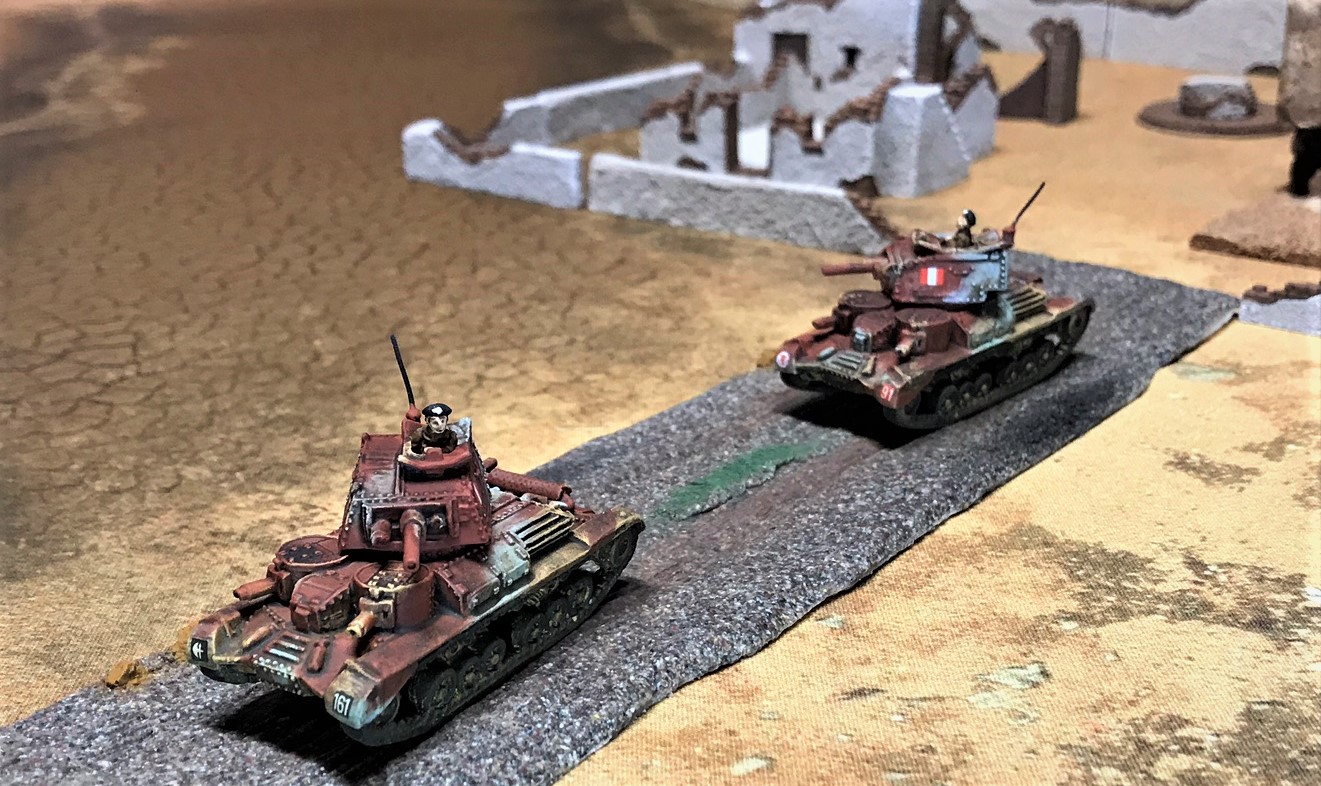
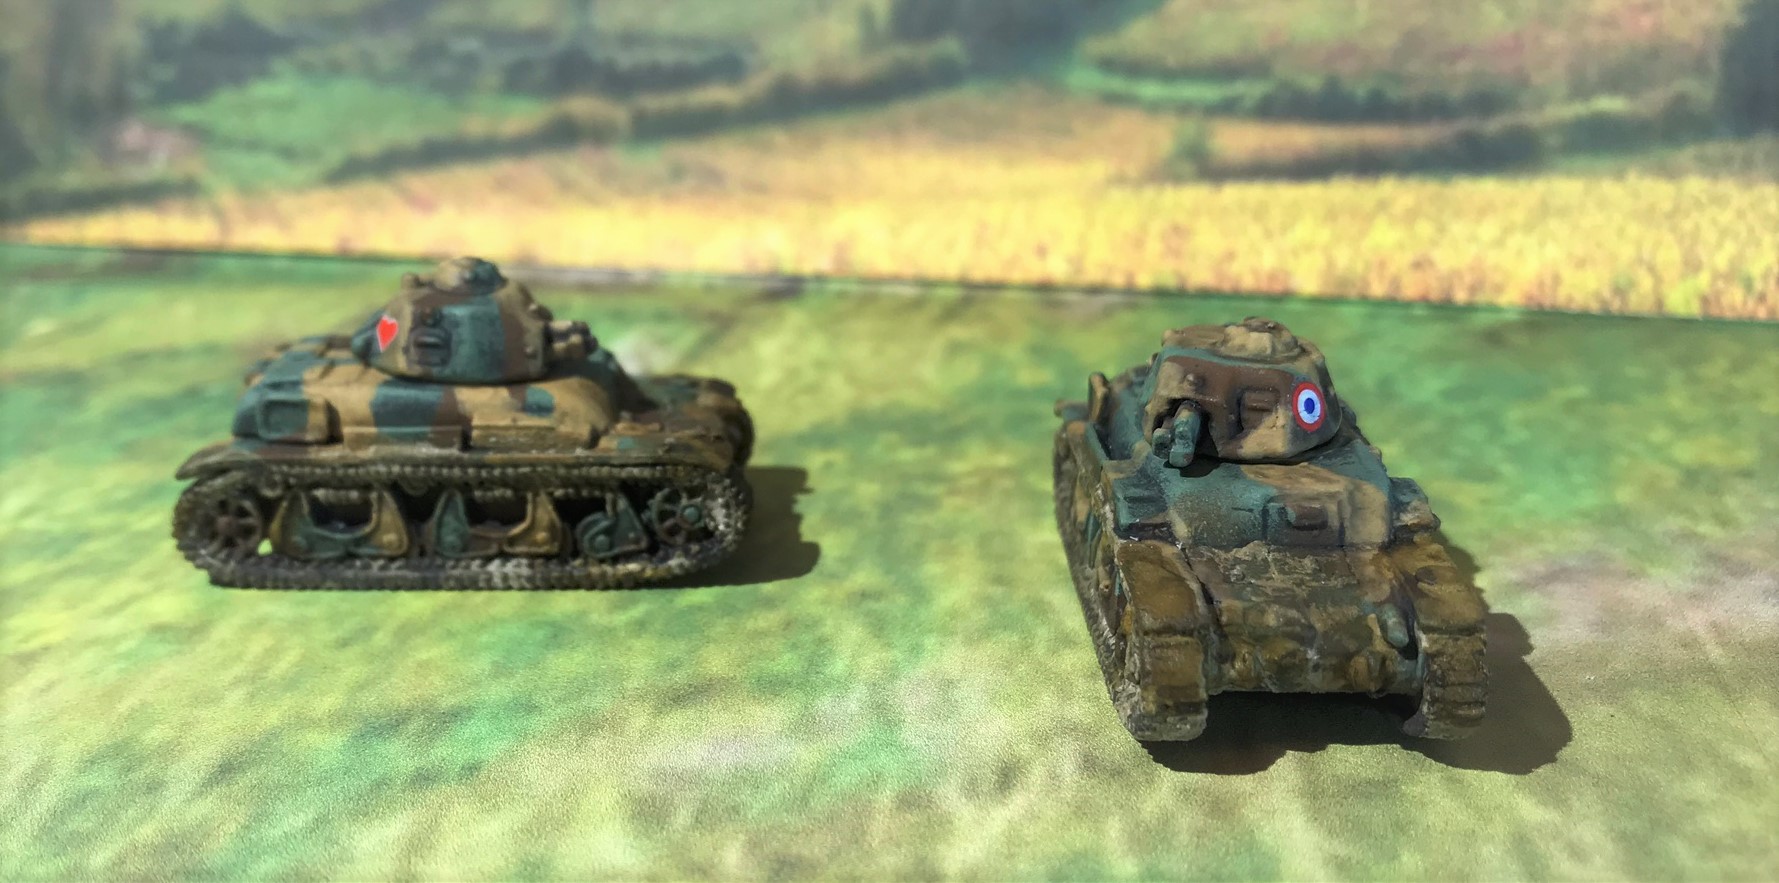
R-35’s in the blister – tiny 2-man tanks!
Assembling and painting these would require new uses of poster tack, plastic plates, and wood screws. This allowed me to both safely handle the tanks in production but also to get the right look of the camouflage. I decided to leave the crews out, as I had little confidence that they would survive the tabletop for very long as the models were designed.
I also got to play with some decals from Battlefront. These did require retreatment with Liquid Decal Film from Microscale Industries before I used their other products to affix their decals. I could not believe that the French roundel decal came in two pieces (the blue dot was separate and had to be affixed after and onto the red-ringed white circle). That was annoying!
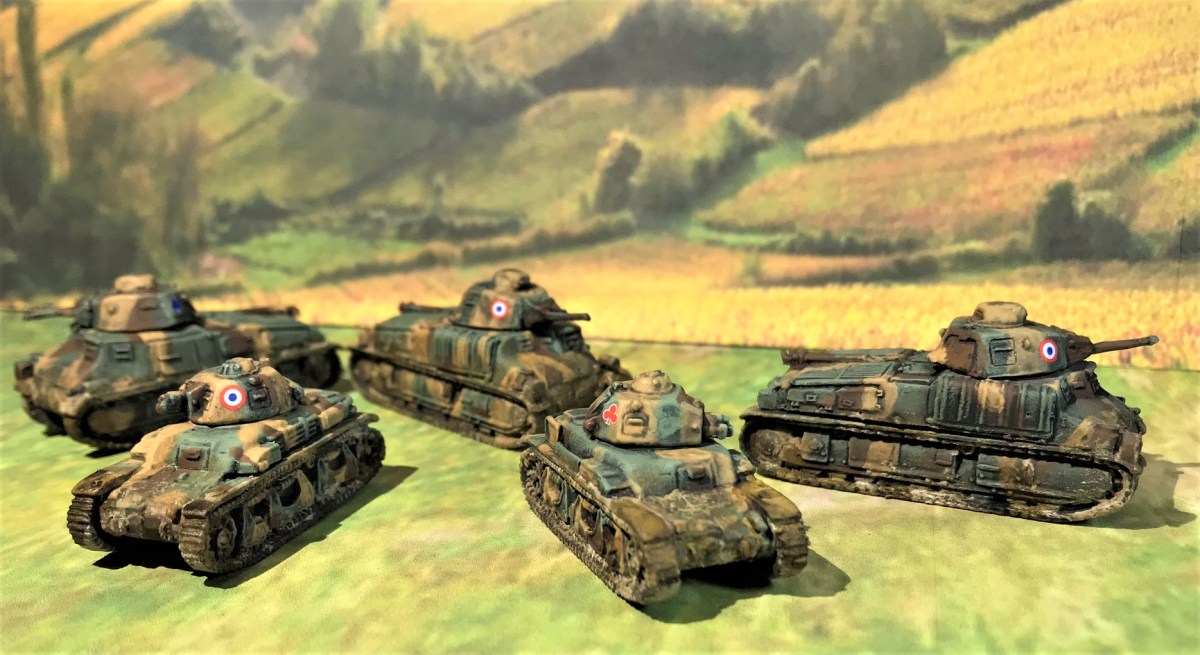
My new French tanks with my old Char B1 bis tanks
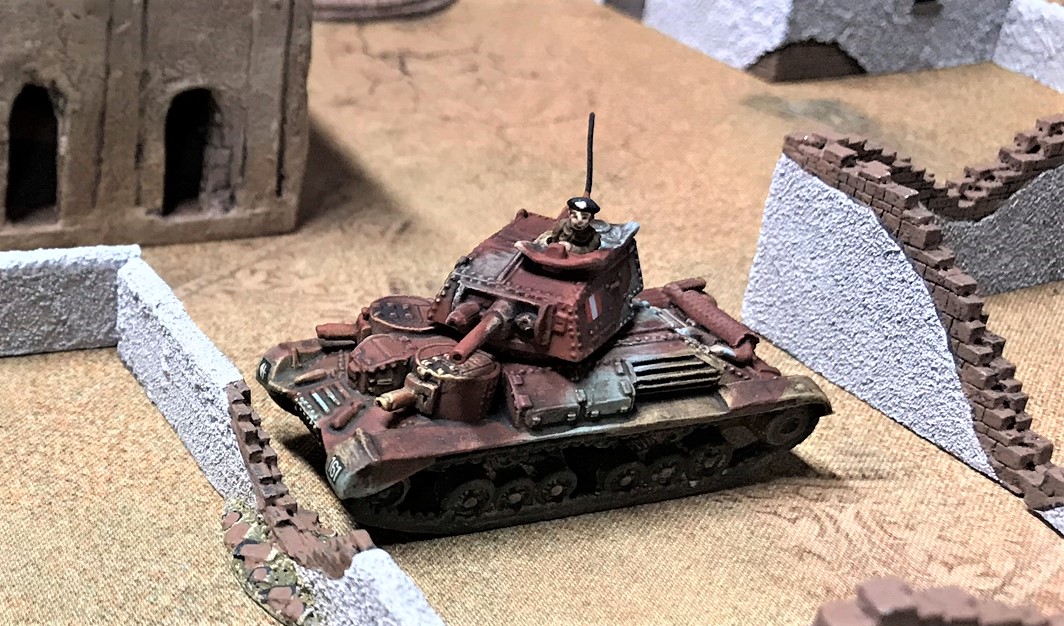
The three SOMUA S35’s, frontal view
SOMUA side view showing the card-suit designations on the turret backs
Renault R35’s
Nice group shot
German
For the Germans, I chose to use the Panzer IIC, the Panzer IIIE, and the Sturmgeschutz Ausf A. The Panzer II’s came in a box of 5 – but was missing one tank gun. Battlefront has promised to make this good (and I expect it soon). I chose to make one of the Panzer II’s a France 1940 candidate, saving the other four for a North African scenario that I will complete later on. The Panzer IIIE came in three separate blisters. Ironically, the Panzer IIIE was the worst of the Germans to assemble. One gun was almost split, and the turrets were nearly three different sizes. There were a lot of mold lines to correct as well, especially on the tracks.
I repaired the one gun with green stuff, and chose it for the France 1940 group, saving the other two for North Africa. Lastly, historically it seems that very few StuG III’s made it to North Africa. Therefore, I added all three of the assault guns for my France 1940 scenario.
Panzer II’s prepped.
The Panzer IIIE blisters
The StuG Ausf A box.
Assembled/repaired Pz IIIE’s
Assembled StuG IIIA.
How I mounted the turrets
Mounted turrets for painting
Pz II and III primed
StuG IIIA’s base coated
The Panzer IIIE prepped for camouflage
Panzer IIC complete, left side
Panzer IIC, left side. The 14 is for my wife – her and my lucky number!
Rear view of the tiny Panzer IIC.
The Panzer IIIE completed. The brown camouflage doesn’t really show up as well here (so I guess it works!).
Panzer IIIE opposite view
Sturmgeschutz III Ausf A, frontal view
Sturmgeschutz III Ausf A, left side view
Sturmgeschutz III Ausf A, right side and rear view
My Germans for the France 1940 scenario
I was glad to have finished these in time for our club’s monthly session (which I will post about shortly). I will be adding more to my fleet, but in the meantime, I hope you enjoyed these. Do you have a favorite?
I appreciate hearing your thoughts and feedback in the comments section below. Thanks for looking!
PAINTS, INKS, GLAZES, WASHES, AND FLOCKING USED:
COMMONLY USED ON MULTIPLE TANKS:
Vallejo “Flow Improver”
Vallejo “Airbrush Thinner”
Testors “Universal Acrylic Thinner”
Battlefront “German Camo Black Brown”
Battlefront “Dark Gunmetal”
Vallejo Mecha Color “Green”
Battlefront German Camo Black Brown
Vallejo “Surface Primer – Black”
Vallejo “Burnt Umber” (pigment)
Vallejo “Light Sienna” (pigment)
Vallejo “Light Slate Grey” (pigment)
Vallejo “Natural Umber” (pigment)
Vallejo Mecha Color “Light Rust Wash” (weathering)
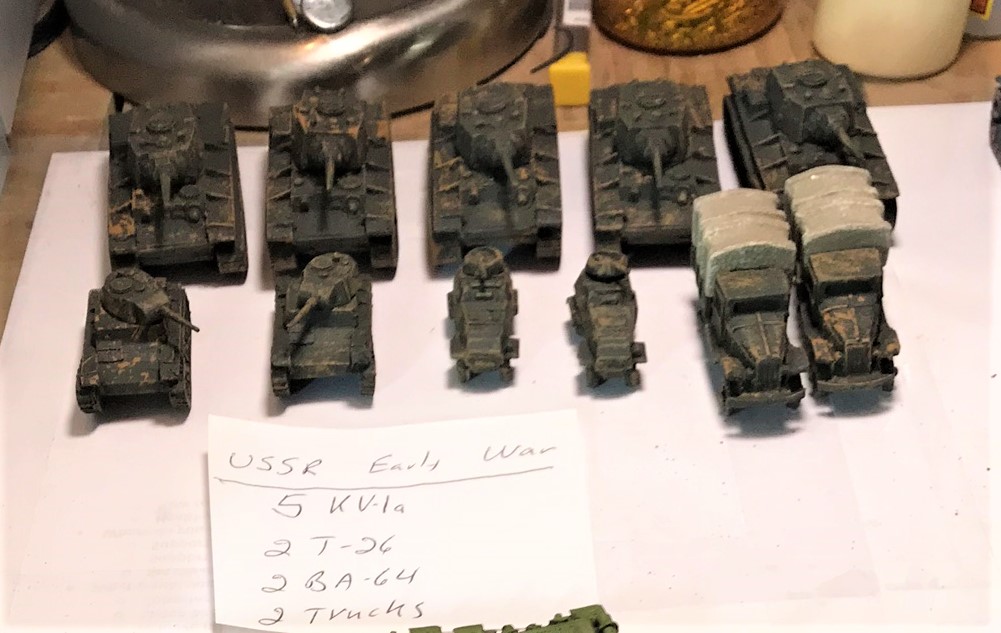
On November 10, 2018, the Mass Pikemen held their monthly gaming session with a game of What a Tanker set on the Eastern Front in 1942. The scenario was a 1942/1943 one where a Soviet force consisting of 1 KV-1a heavy tank, 2 T-26 M1939 light tanks, 2 BA-64 armored cars, and a couple of Gaz trucks was surrounded and needed to break out through the Axis lines. It was my first chance to get all of my recently painted tanks on the tabletop.
Initially opposing the Soviets was a German force consisting of 2 Panzer IVd tanks and a 1 Panzer 38(t) tank. Reinforcements were staggered for the Axis, and they consisted of a 1 Panzer IIIN tank, a Hetzer tank destroyer (Jagdpanzer 38), and an Italian M13/41. It was imperative for the Soviets to exit the other side of the board with the KV-1 and the two trucks as quickly as possible.
The Germans moved on first – and one of the T-26’s was able to early on get a couple of shots in on one of the Panzer IVd’s, with the second one knocking it out. This was a fun event for 7-year old Jack Burns who was playing in his first war game ever. He was so excited to knock out the German tank.
The Panzer IIIN moves on the board as a reinforcement. The second Panzer IVd takes advantage of its burning comrade’s smoky wreck.
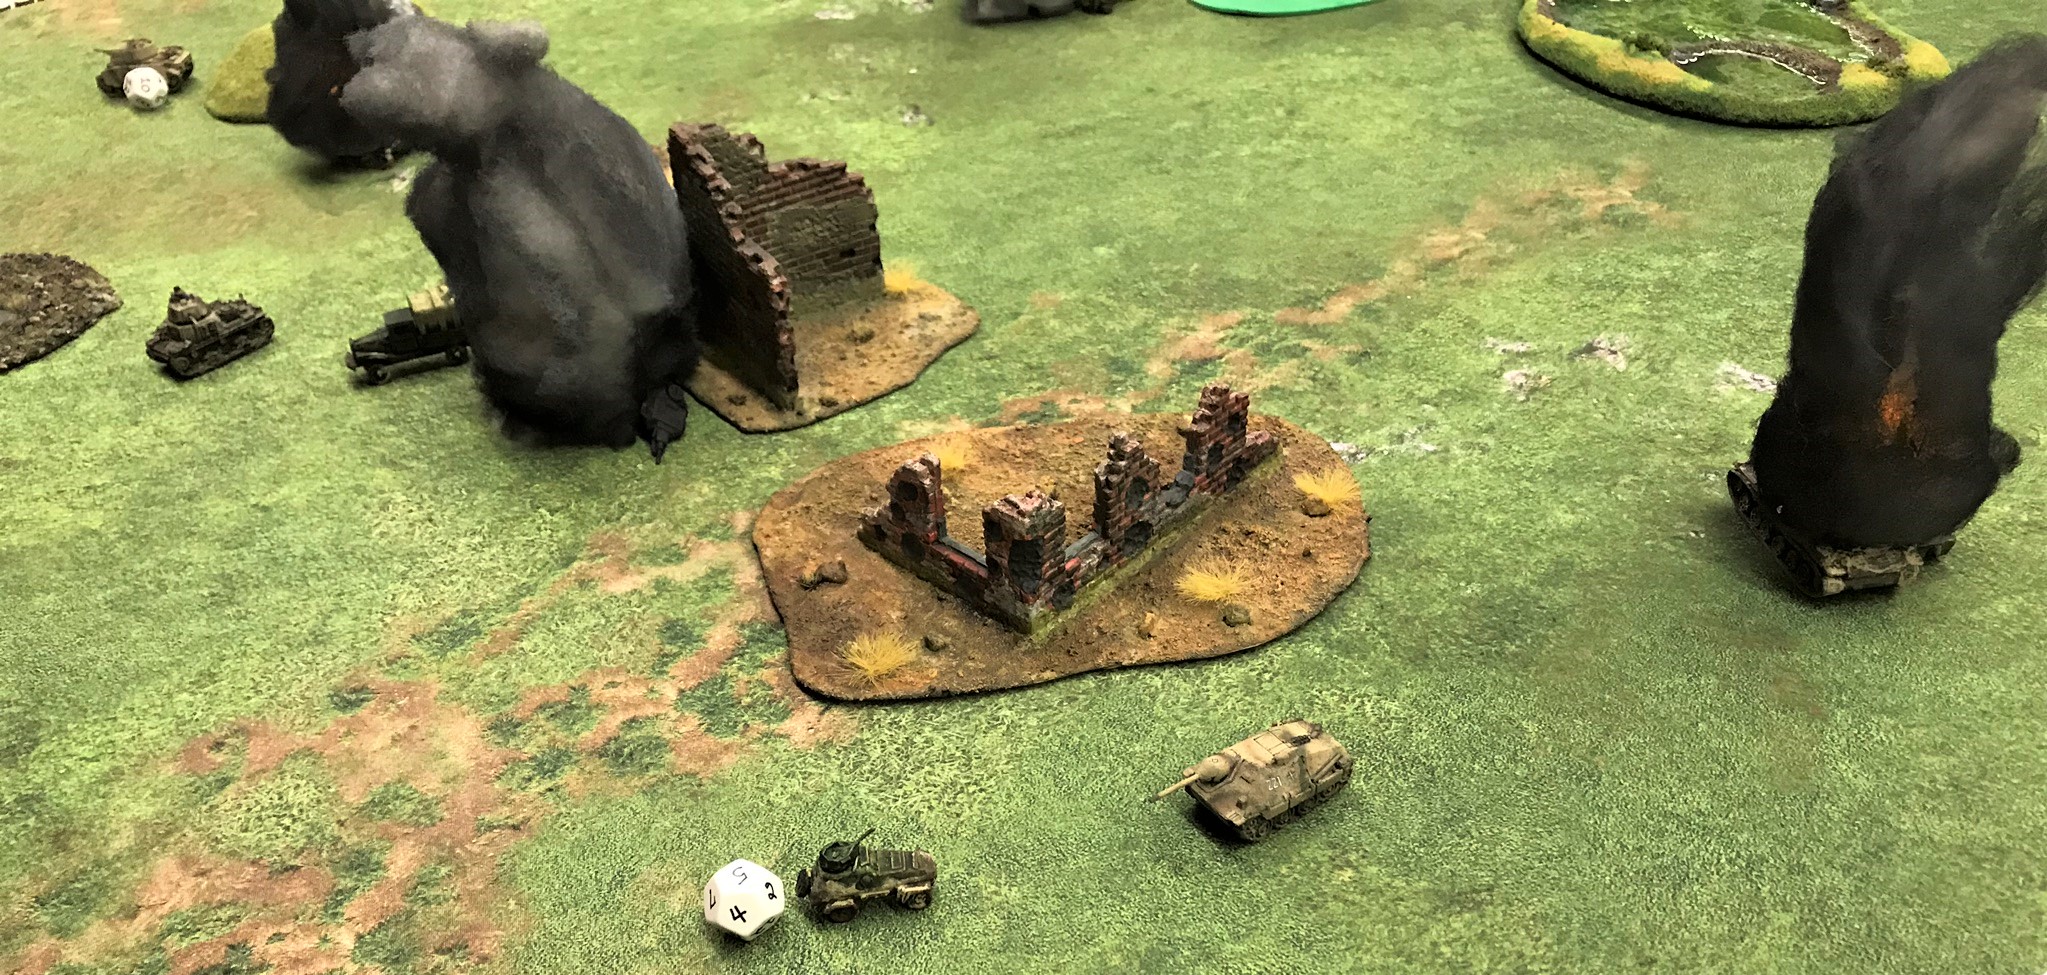
The Soviets KV-1a was slow to move forward, and the T-26’s outran it. The Panzer 38(t) moved up to the ruined factory and took aim at one of the T-26’s in the open. It fired, and missed the Soviet. Returning fire, the T-26 hit and knocked out the Panzer 38 (t). Two down for the Axis! Shortly after this, the other Panzer IVd peeked out from behind its brother, only to suffer the same fate from the plucky T-26. Three down now!
Chris Smedile, Jared Burns, and Jack Burns advance their vehicles. The Panzer 38 (t) is behind the wall in the center in a good defensive position, facing the T-26 that was to knock it out.
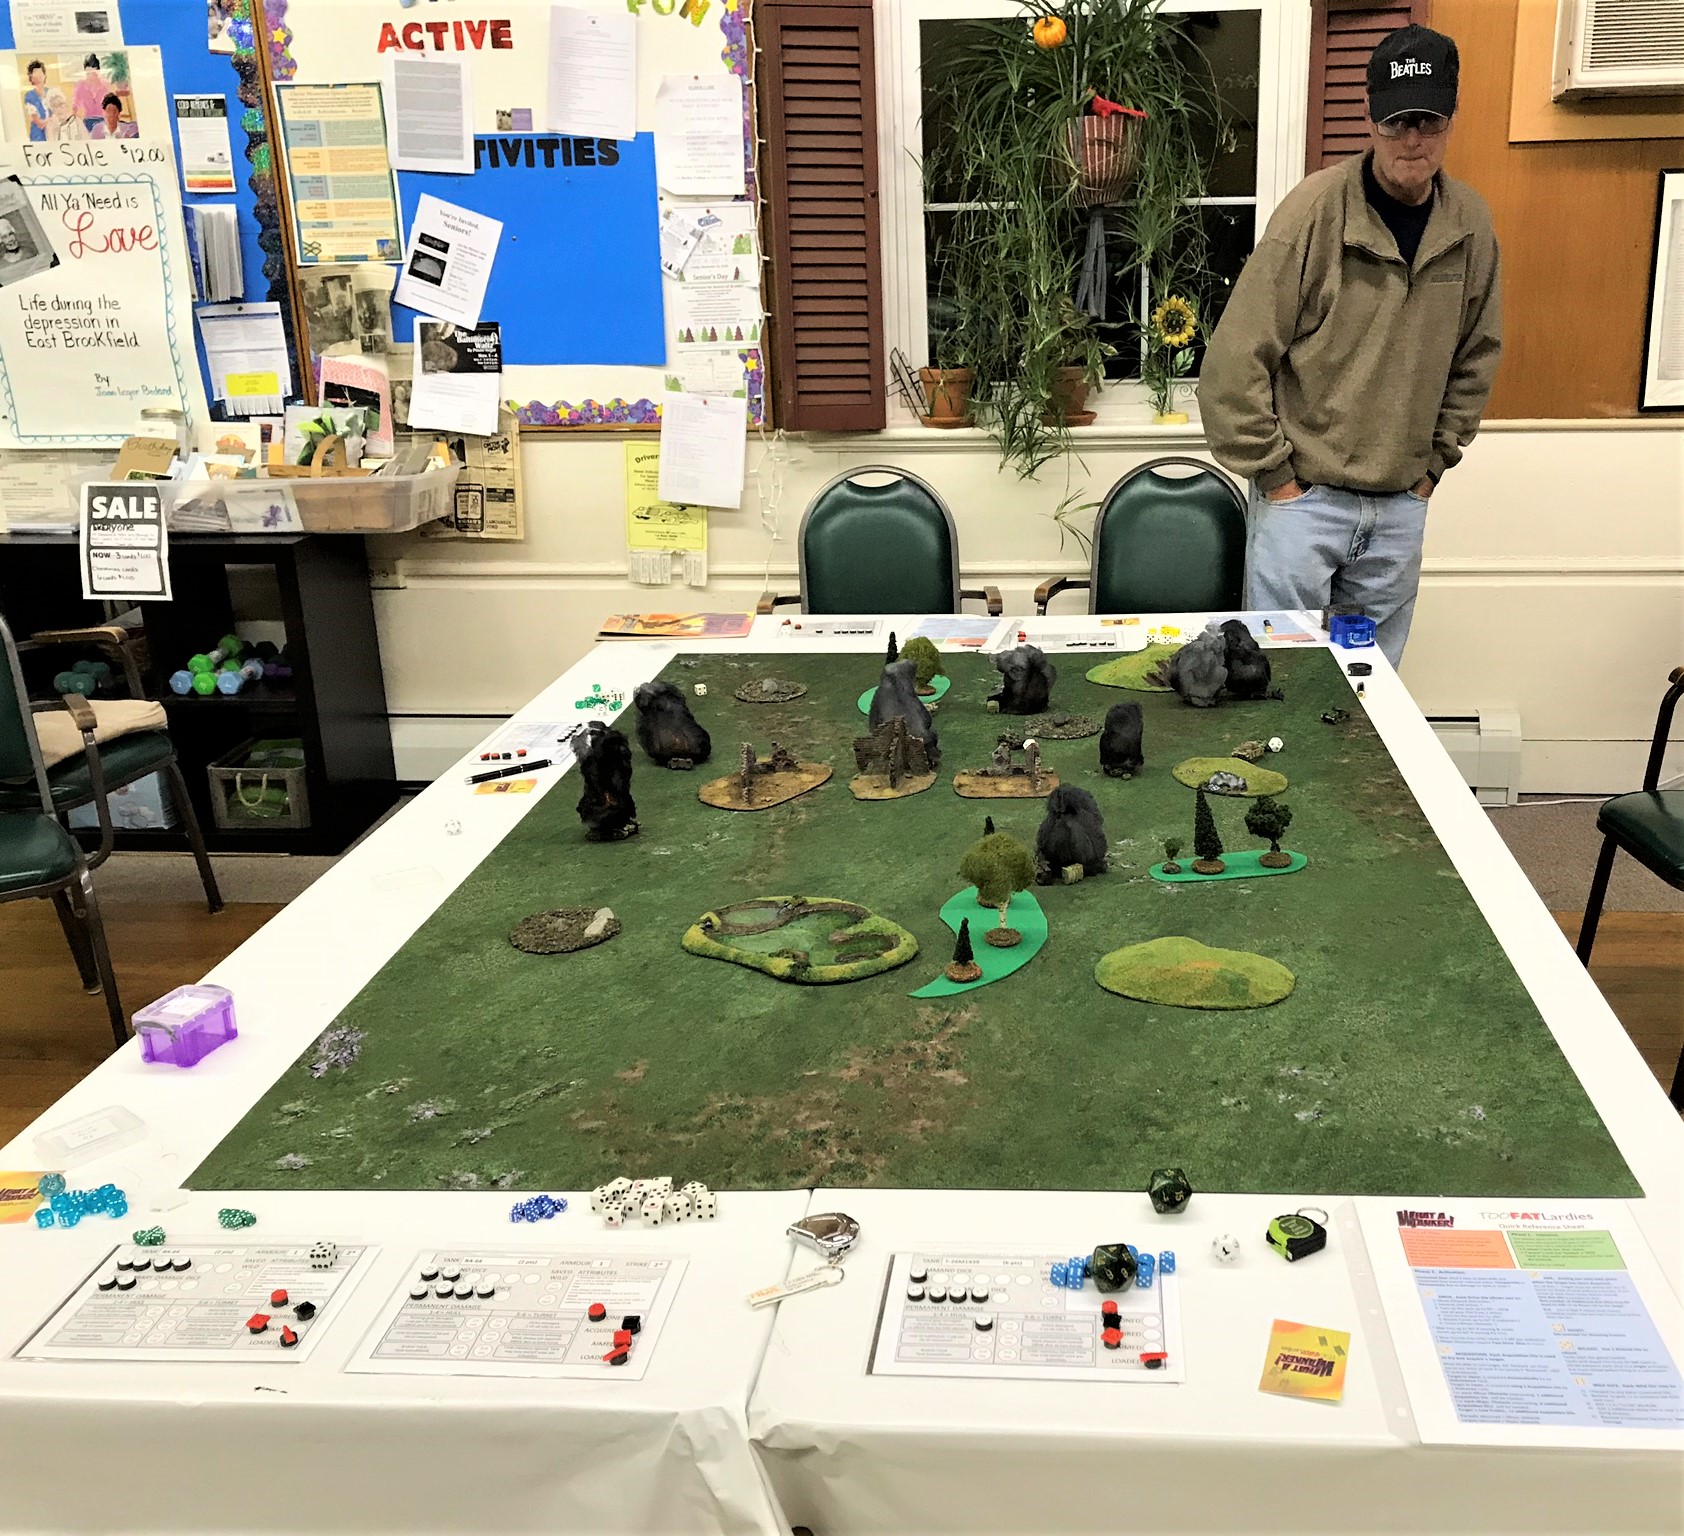
Chris Comeau and Mike Morgan (and later myself) played the Axis. This view shows the length of the board the Soviets needed to cross. Each fighting vehicle had a magnetic dashboard, and its own colored dice. Command Dice were always white though.
Let me add a side note here on my rules modifications for this scenario. What a Tanker does not have rules for either armored cars or trucks. I modified them here for the armored cars, which I made Fast (easier to always move), and Small (tougher to hit). For their Armor, I only gave them a 1, which meant that any hit from a tank gun would very likely be enough to kill the BA-64. As the BA-64 only had a machine gun, I gave them 2 modified Strike dice. The modifications were twofold. First, their range was 24″ (half that of the tanks). Secondly, the BA-64’s would hit on a 6, but the only likely result of such a hit would be to force the target to button up if it was not already. If the BA-64 player rolled double-6’s, I would allow 2 strike dice. So the BA-64’s were harassers at best. I had the Gaz trucks move last, with 2 D6 of movement (no command dice). If they were hit, they were destroyed.
Chris celebrates his second kill, while the Panzer 38 (t) burns. You can see here behind the BA-64’s a D12, which I used for initiative rolls instead of D6’s and re-rolling for ties. It worked much easier and was much less confusing.
Back to the battle!
At this low point, they got reinforcements in consecutive turns. First, the Panzer IIIN came on in turn 2. In turn 4, the Axis got the Hetzer and the M13/41. The tide of battle was turning.
The Hetzer ignores the BA-64 and sets out to hunt the KV-1a.
The Panzer IIIN moved up to the hill, awaiting the T-26 and a truck. The German successively took both out, leaving the Soviets only with one T-26, one truck, the KV-1a, and the BA-64’s. The M13/41 rolled badly, and hid behind the Panzer IVd wrecks for better dice rolls, even taking humiliating fire from the BA-64’s that caused it to have to button up.
In the foreground, a Gaz truck burns. The crew of the Panzer IIIN behind the hill looks at the burning T-26 in front of it. In the left center, the Panzer 38 (t) burns, as do 2 Panzer IVd’s in the right rear. On the left, the showdown between the lumbering KV-1a and the Hetzer is about to begin.
The Hetzer moves fast, and tried to move around to the rear of the KV-1a. It succeeded, and missed with its initial rear shot. The KV-1a immediately turned the tables, turning 180°, and rotating its massive turret towards the diminutive tank destroyer. The Soviet again got initiative, firing not once, not twice, but three times – and unbelievably missing on all three attempts! The saving grace for the Hetzer was its Small characteristic, which meant the KV-1a needed a “7” instead of a “6” to hit.
The Hetzer then got initiative and rolled its Command Dice well enough to fire but not to maneuver towards the Soviet behemoth’s vulnerable rear. It decided to take a chancy shot at the frontal armor of the KV-1a. It got 5 hits on 7 dice (needed a “5” or “6” to hit). The Soviet player got zero saves, and the KV-1a was knocked out.
The KV-1a burns on the right, while the Hetzer and the M13/41 hunt the last truck (on the left). The BA-64 attempted a ramming attack on the Hetzer to give the truck a chance to escape.
The BA-64 ramming attack did nothing to the Hetzer, which dispatched the armored car with one shot. Meanwhile, the Italian M13/41 took out the last truck. The surviving BA-64 was destroyed by the Italian, leaving the Panzer IIIN and a damaged T-26 in a showdown. With the loss of the trucks and the KV-1a, the game was called an Axis victory.
Mike Morgan victoriously surveys the smoky battlefield.
The game was a fun one for winners and losers, with highs and lows for both. Next time, I will probably give the Soviets a second KV-1a.
The next Mass Pikemen’s gaming session will be on Saturday, December 1st from 2-8 PM, at 110 Pleasant Street in East Brookfield, MA. This is a change from our previous 3-9 PM time slot. We will be playing What a Tanker again!
Please join us, and share your thoughts and feedback in the comments section below!
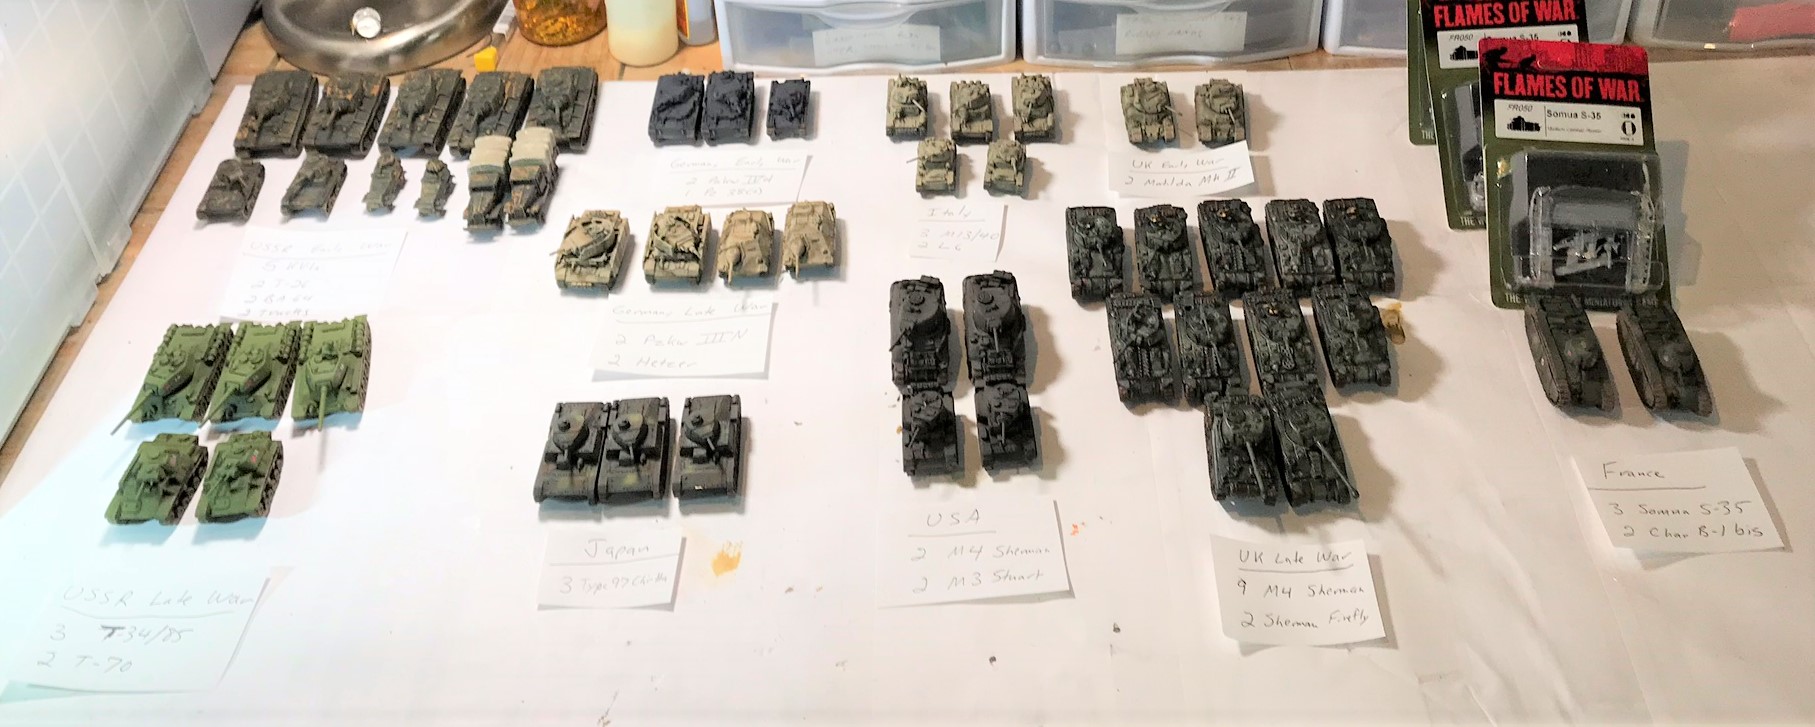
I have been working on getting a fleet of tanks for the What a Tankergame from the Too Fat Lardies company. It’s a great game and has been a true hit with my gaming club, the Mass Pikemen. I have been working on building up a flexible group of tanks, and so far I am up to 71 tanks in 15mm/1:100 scale – not including ones needing assembly and painting.
My sources have been eBay, hobby stores, and Facebook. If I waited to paint them all, I would never do another project, so finding some mostly painted resin (and reasonably priced) models from Wargame Models in Ohio has helped shorten the process. Mostly I just washed and varnished the ones I have gotten from WMIO.
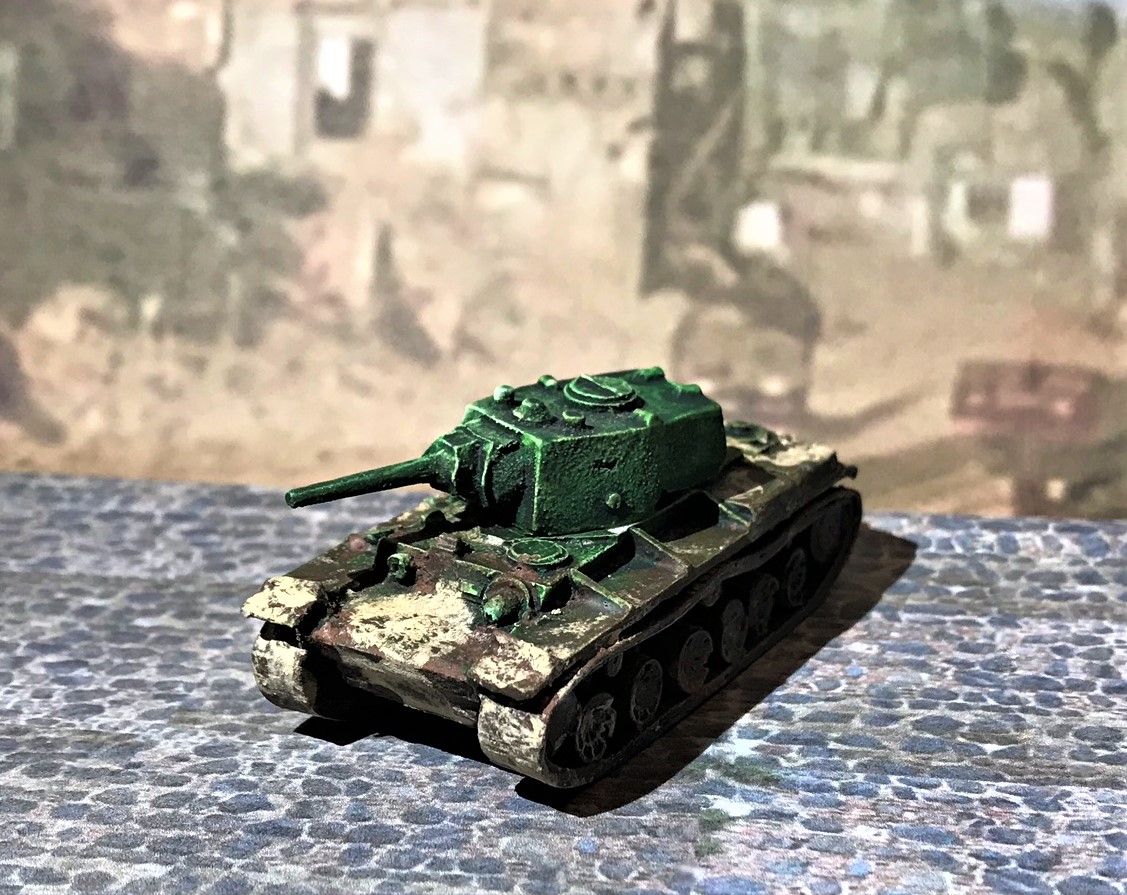
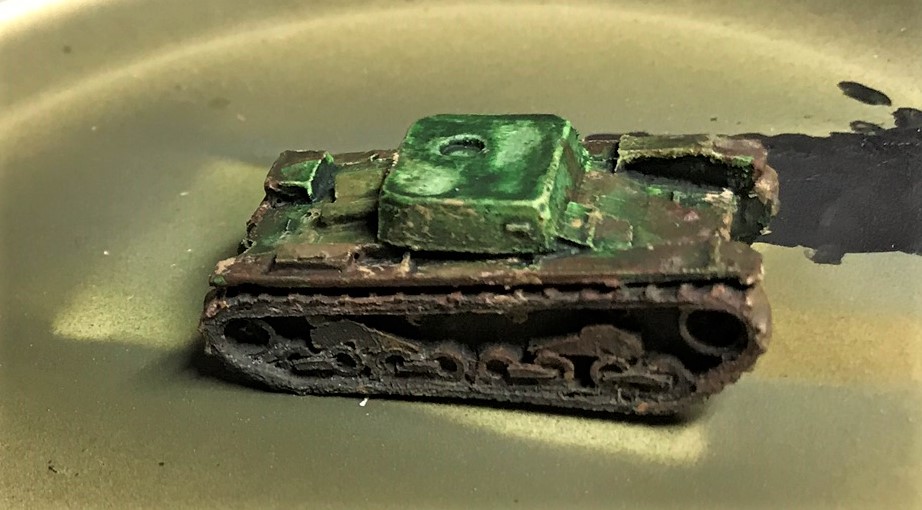
One group acquisition was from another source on eBay – it was a resin Soviet KV-1 platoon consisting of 5 KV-1’s heavy tanks, 2 T-26 light tanks, 2 BA-64 armored cars, and 2 trucks. I do not know the manufacturer. They had been given some sort of dark brown coating with splashes of lighter brown. They color-wise did not look particularly like Soviet tanks from 1941. This platoon is the main subject of this blog post.
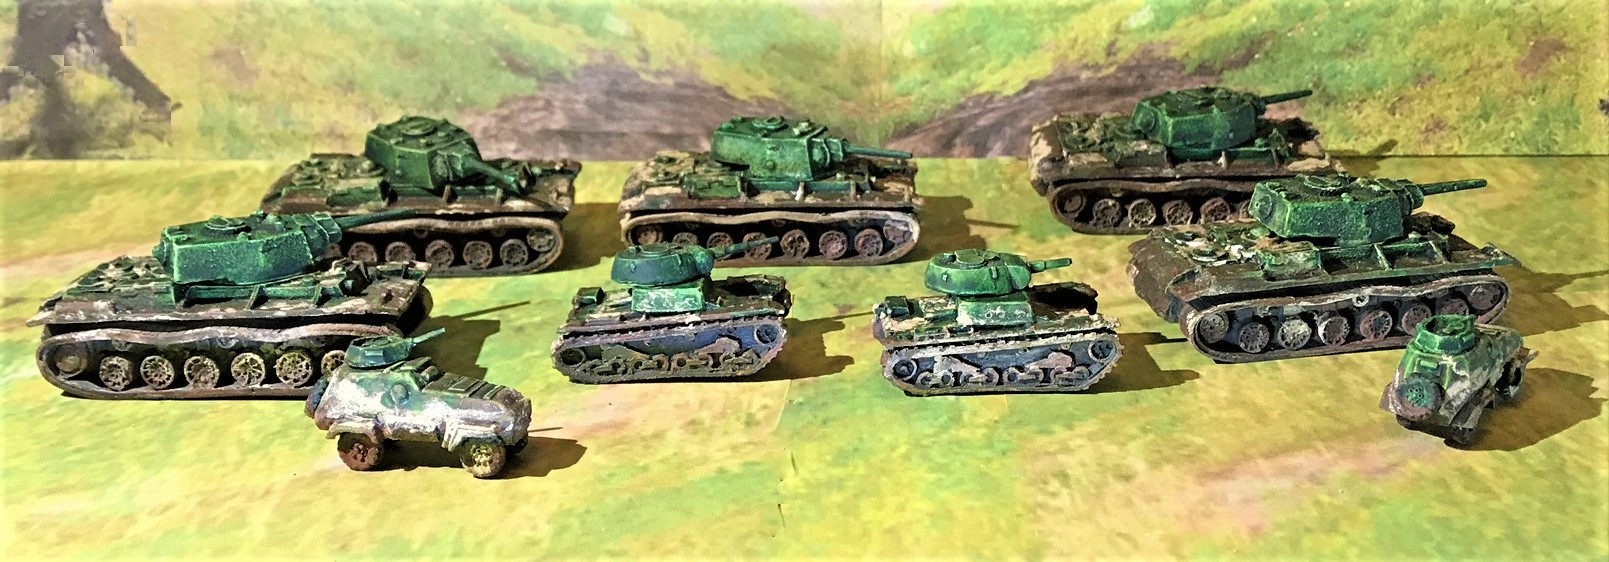
My tank fleet grows – the KV-1 platoon is in the upper left.
The platoon as I got it in the brown colors. I decided to make the heavy tanks as the KV-1a version. All of the turrets were not magnetized, which I did do as well as part of this project.
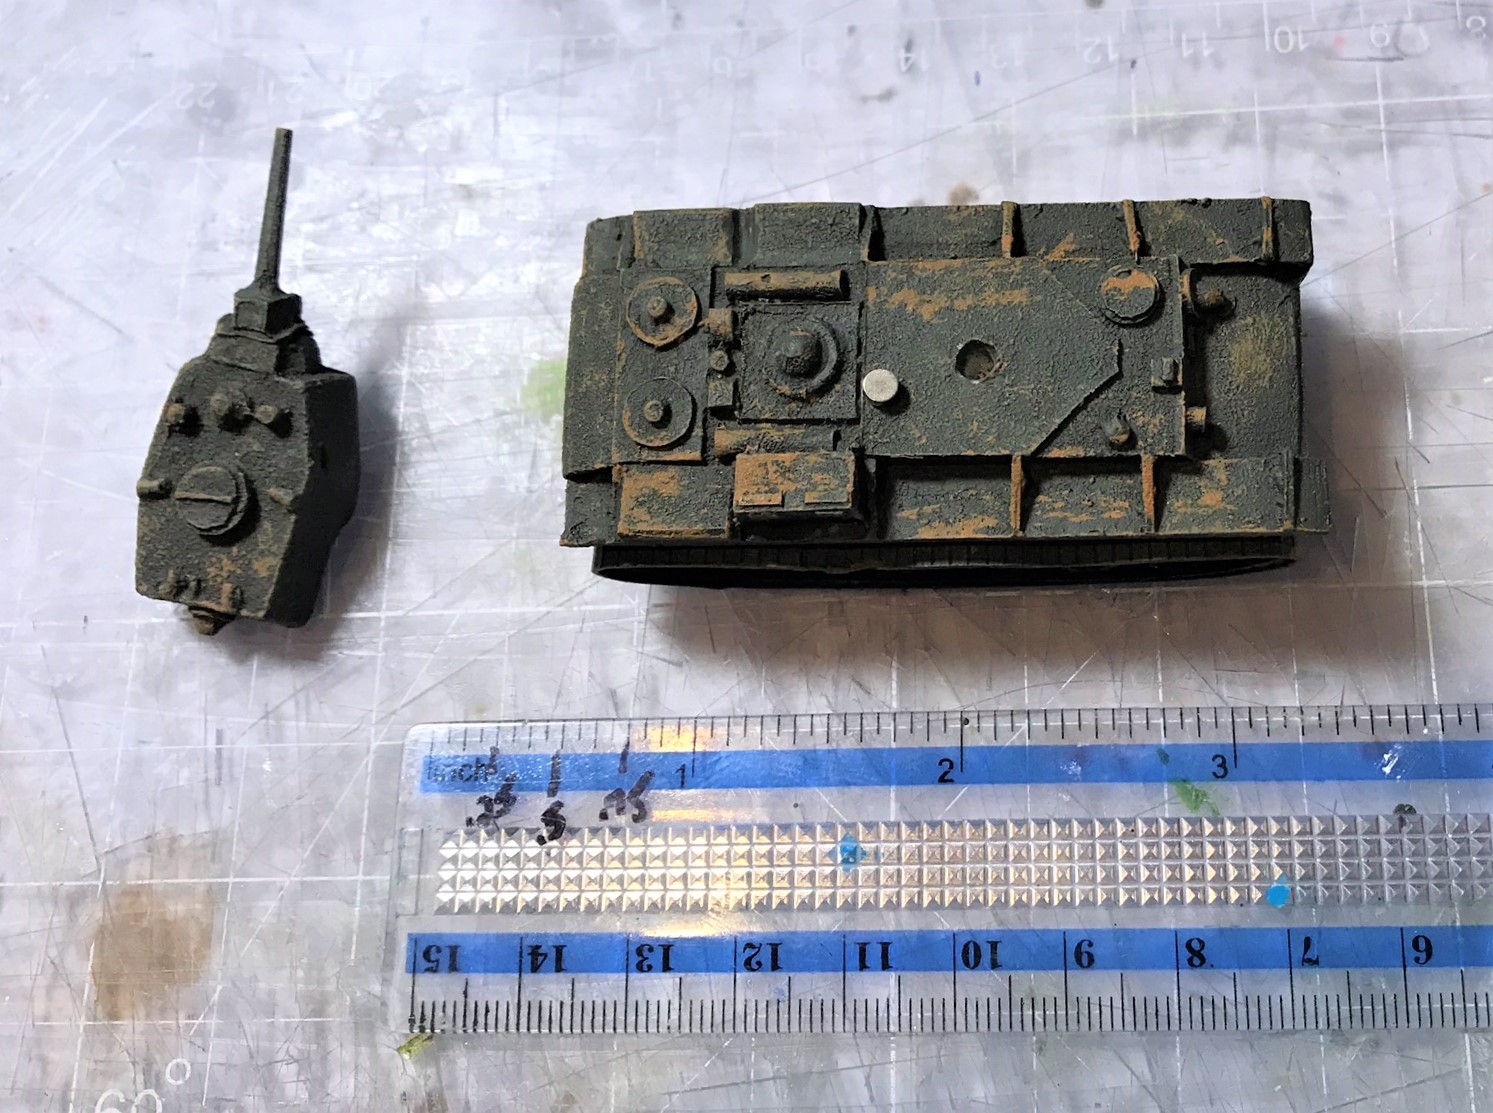
I removed the resin post on the turret and drilled out 1/8″ holes in it and widened the preexisting hole in the hull. I got some nice neodymium 1/8″ x 1/16″ magnets for magnetizing from totalElement.com.
It was necessary to use a Sharpie to mark one end of the 1/8″ magnets such that I inserted them in the correct alignment (I did not want the turrets “blowing off” prematurely!). I glued the magnets into the holes with Gorilla Glue.
Each turret originally had this post that I removed and drilled underneath.
Magnetized K-V1a turret
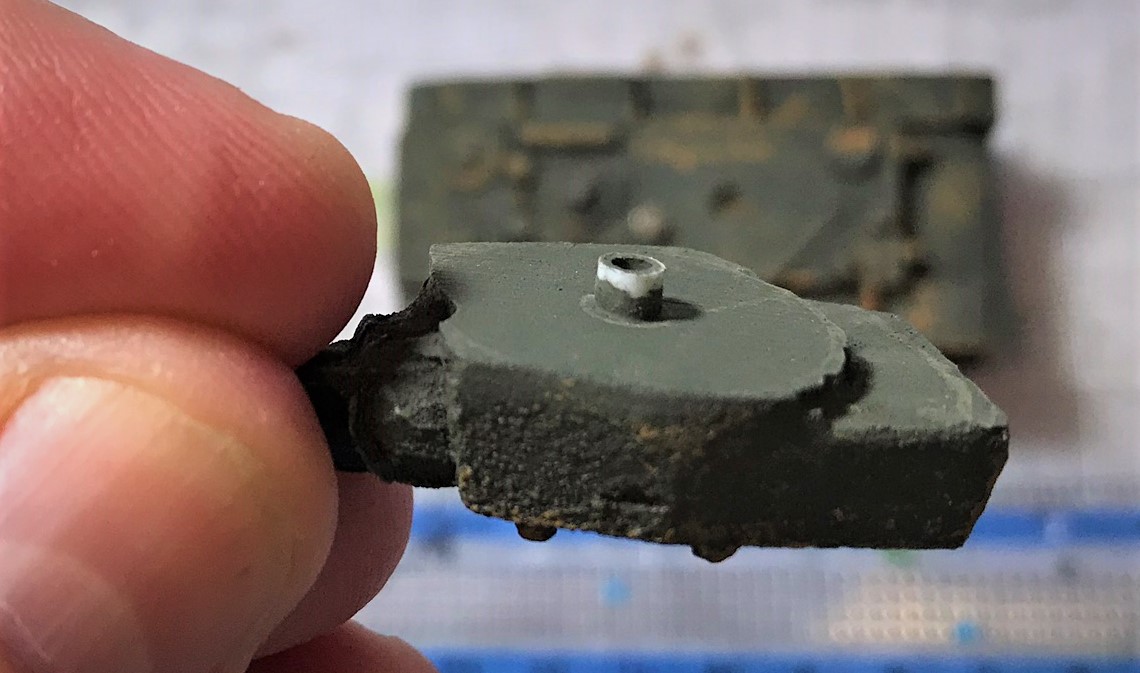
BA-64 turret showing my repair of the gun. It was thin resin. The other resin gun broke later as well so these are not sturdy.
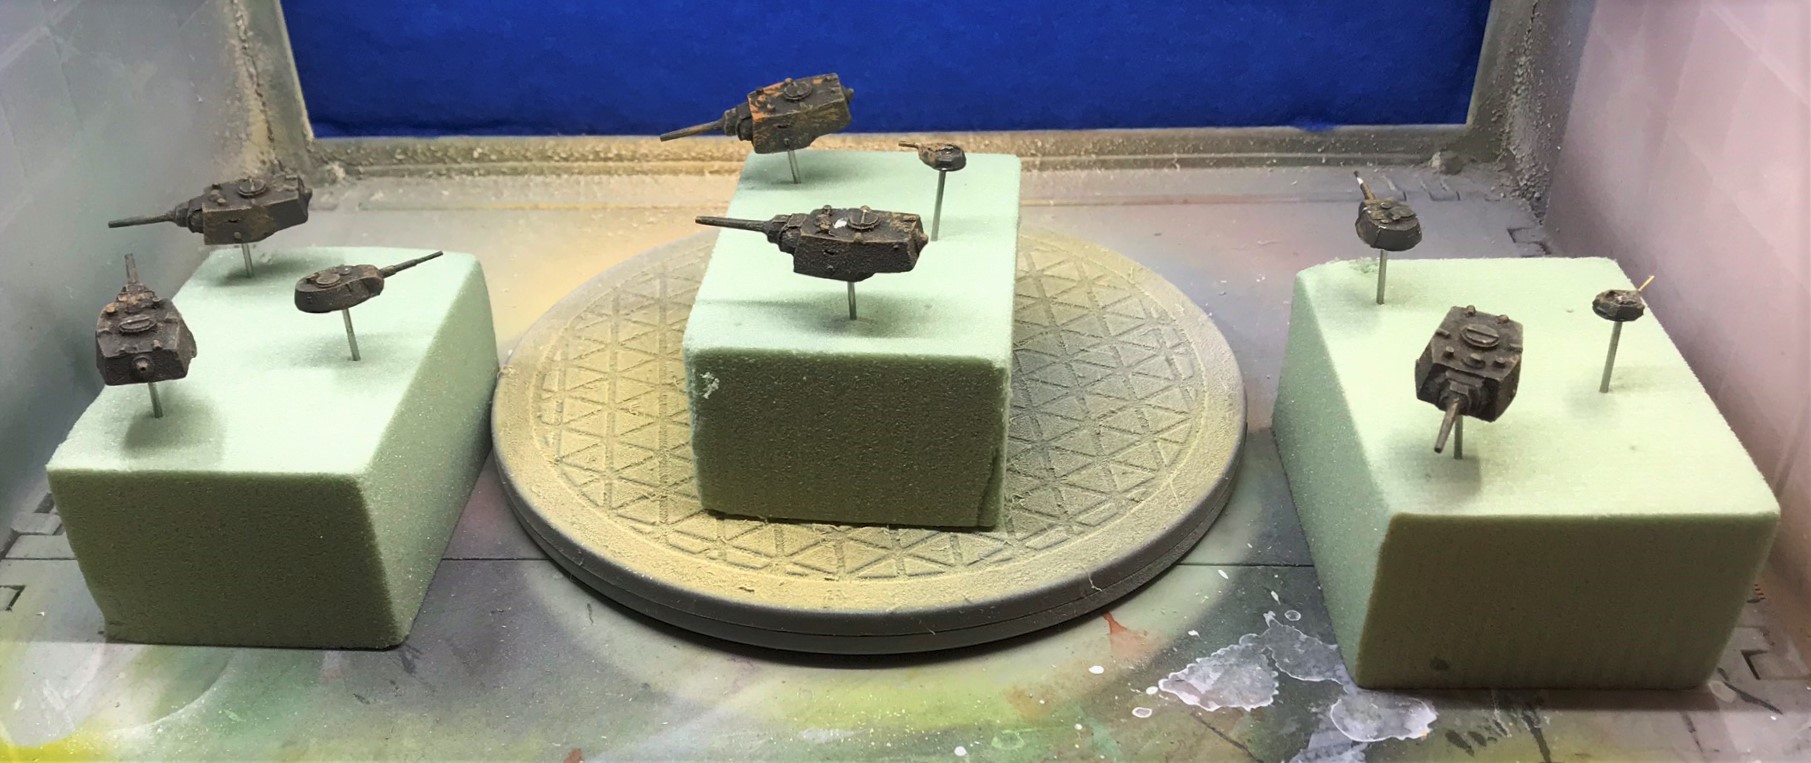
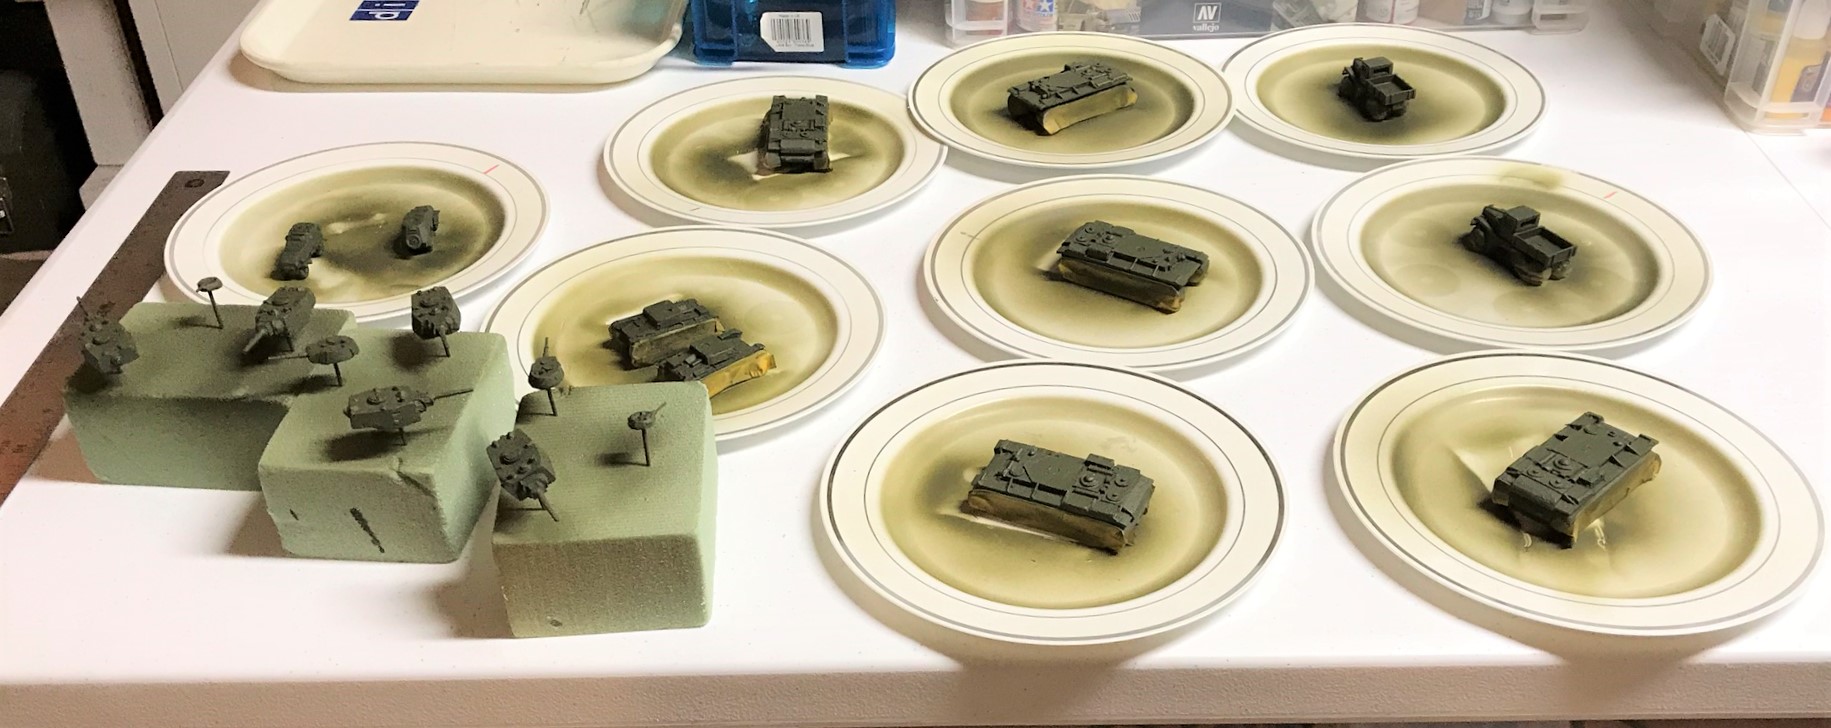
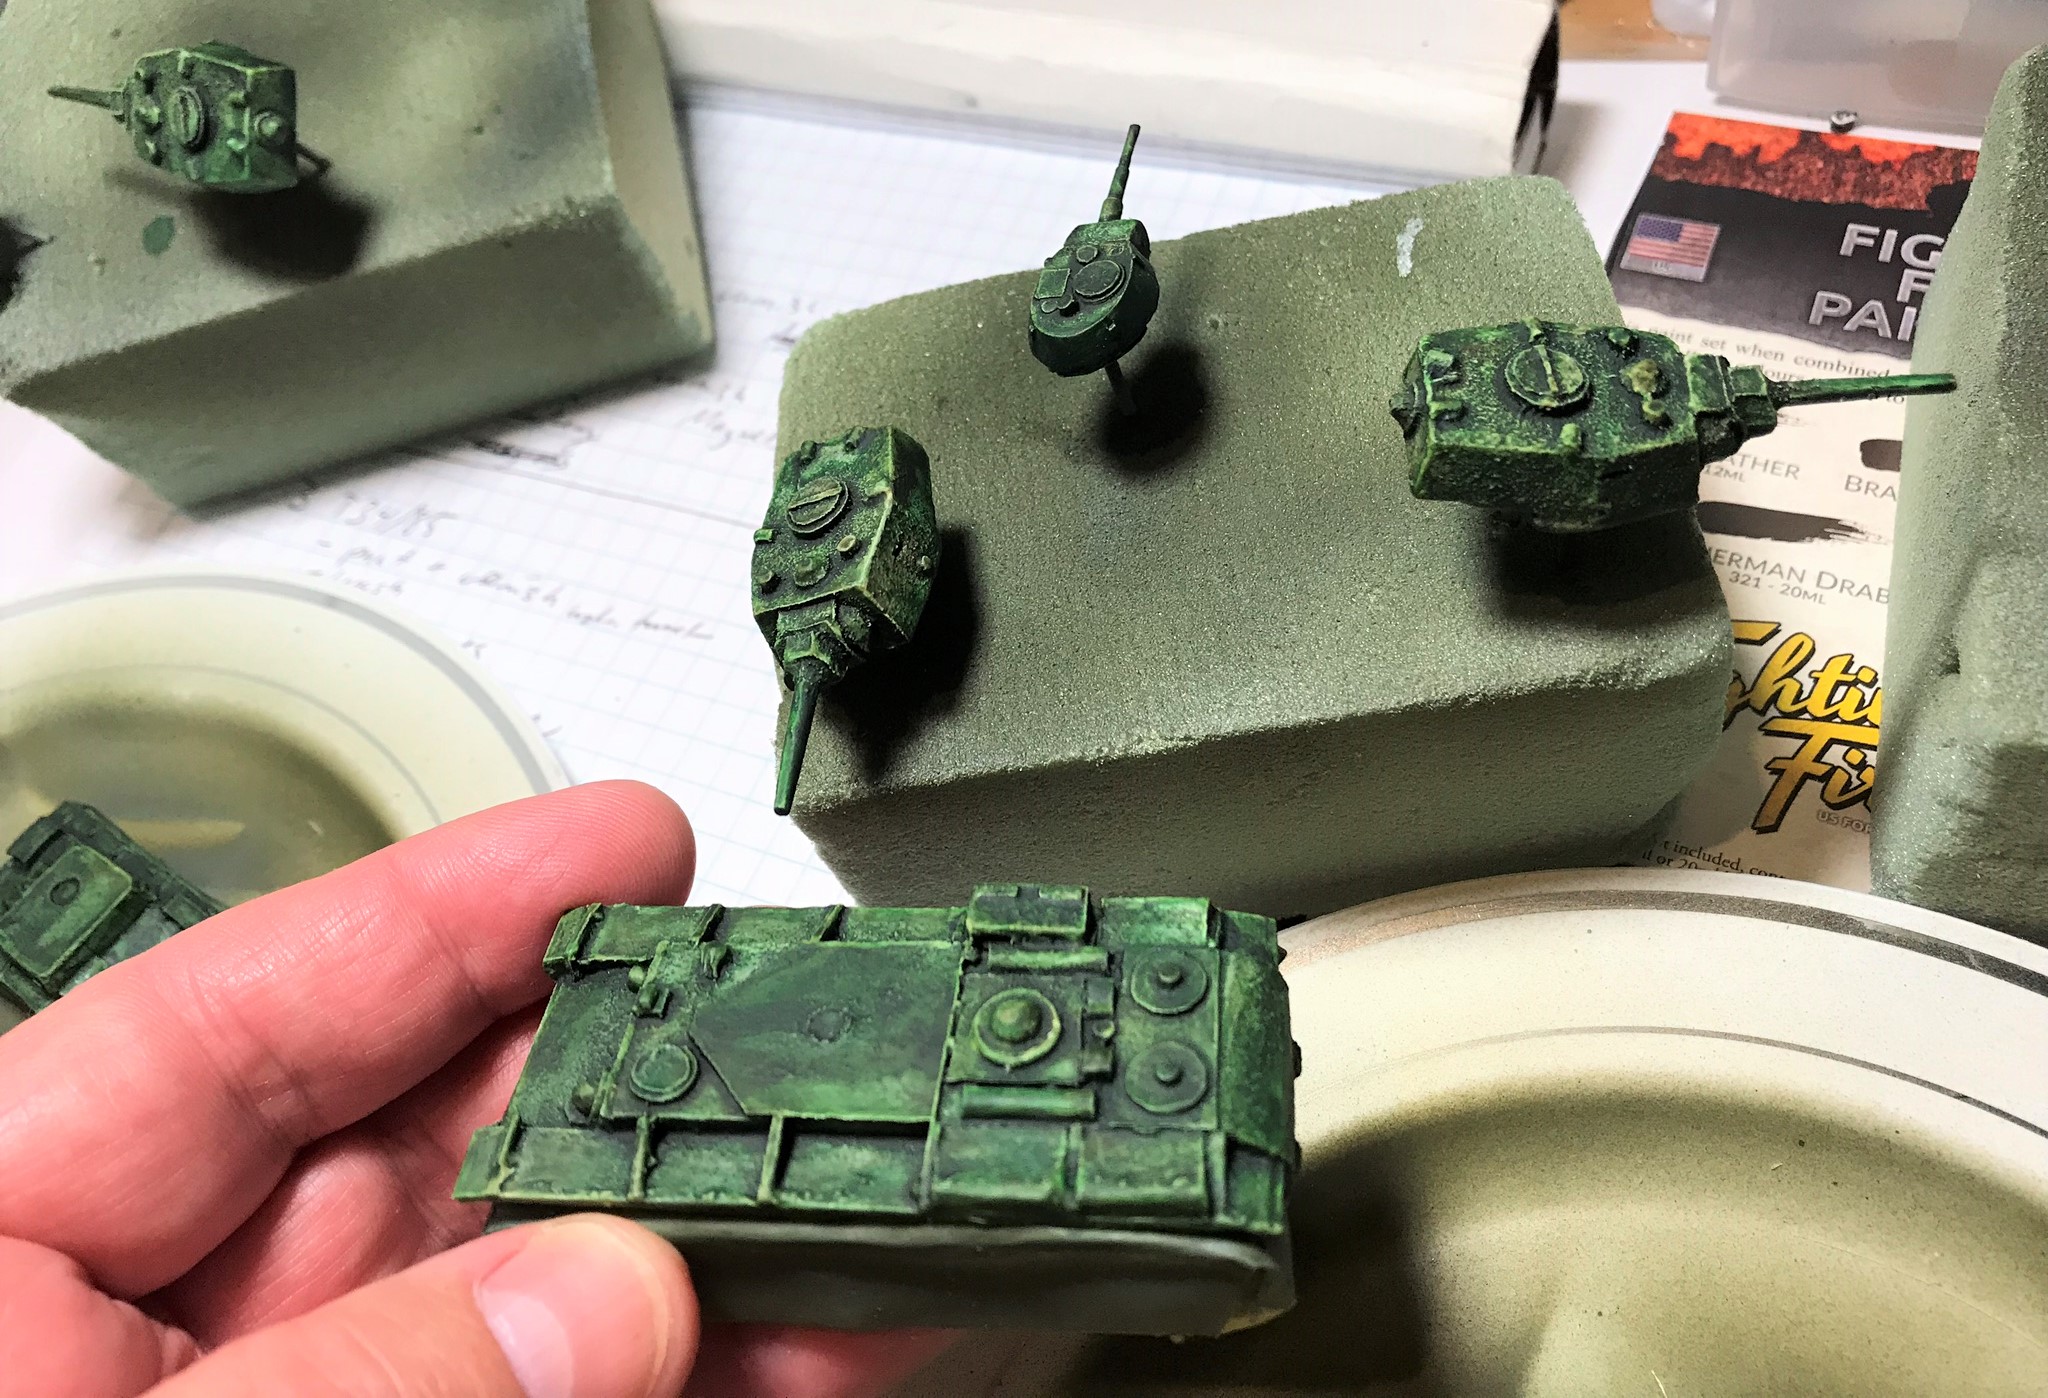
I needed to find a way to paint the figures without damaging the paint, and tanks were new to me. I decided to take advantage of the magnets on the turrets here. I used small nails inserted into styrofoam blocks (the kind used for flower crafts). For the hulls, I masked the tracks for secondary painting, and such that I could hold them safely.
How many turrets can fit on the head of a nail?
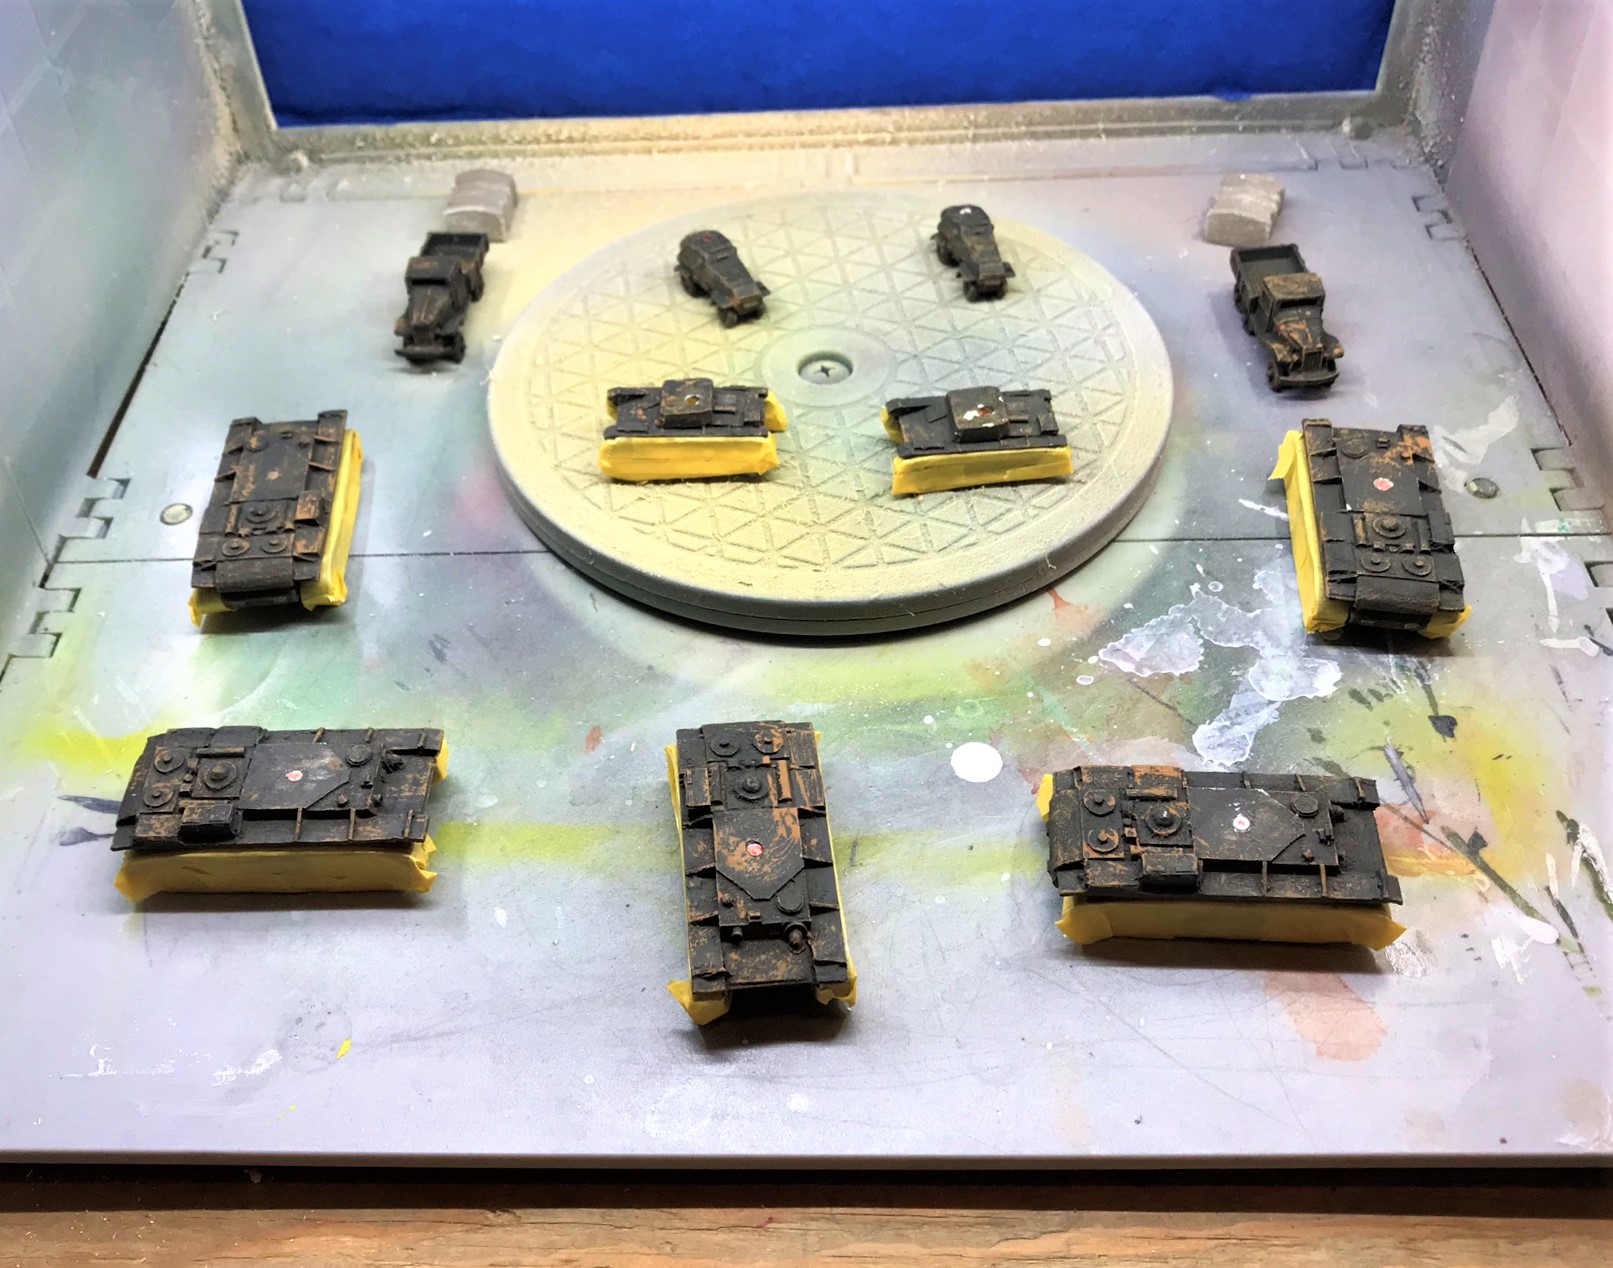
The hulls masked for priming.
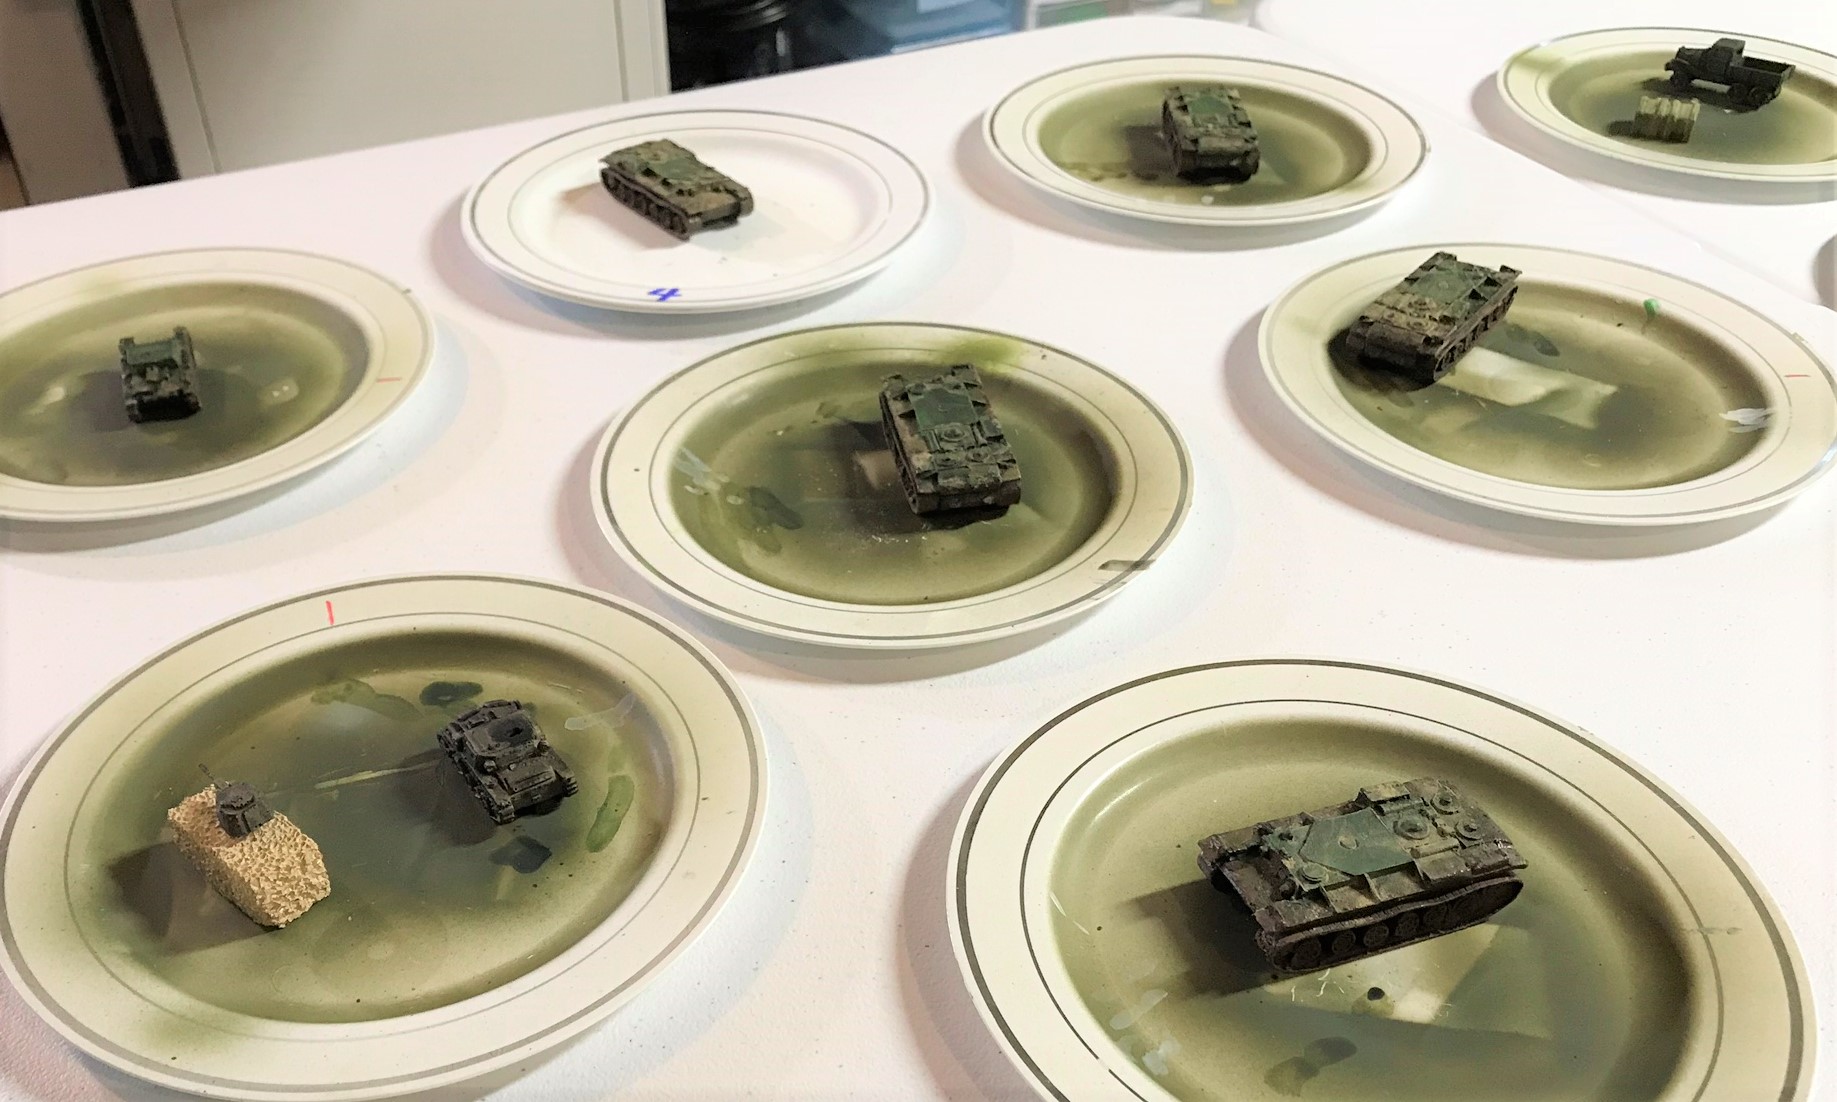
I airbrushed/primed the figures with Vallejo “Surface Primer – Russian Green”.
The platoon primed.
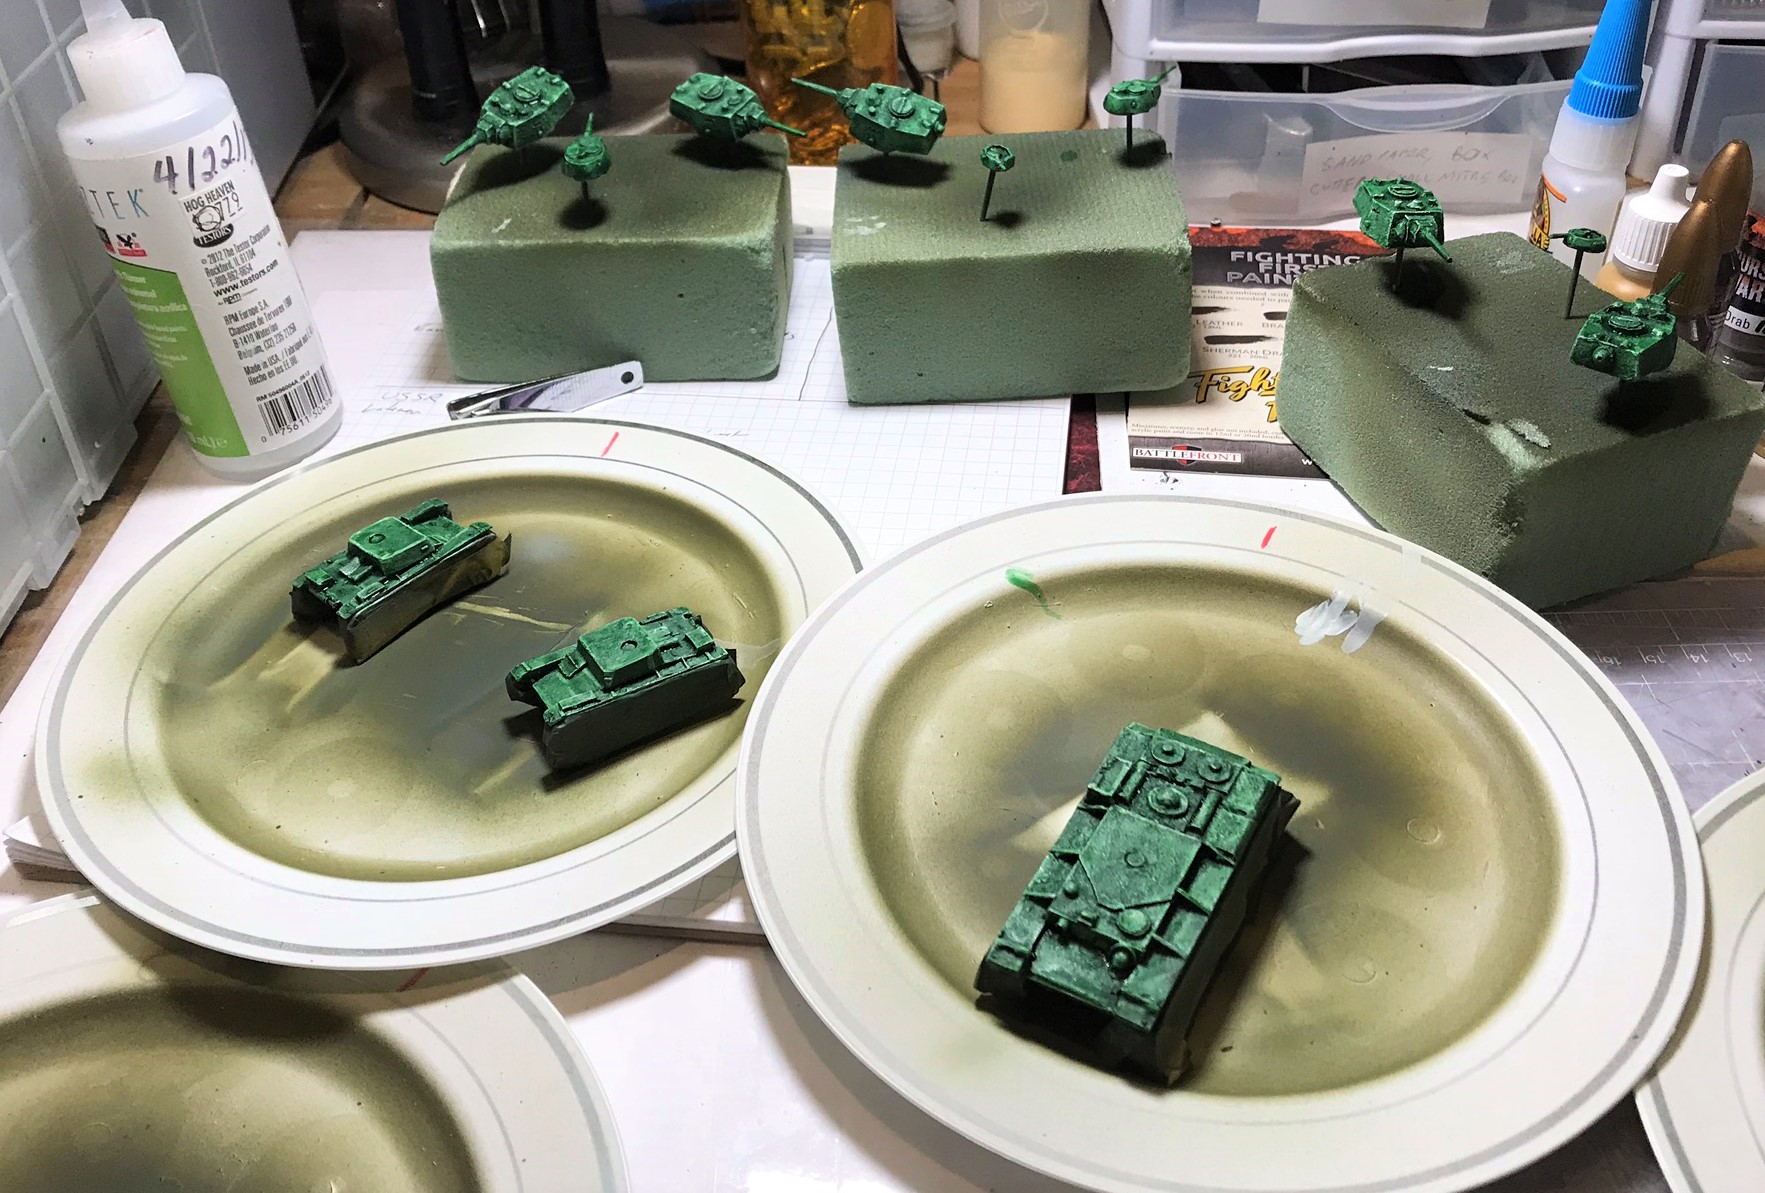
I then gave the figures an airbrushed base coat with a thinned coat of Vallejo Panzer Series “Camouflage Olive Green”.
The platoon base coated.
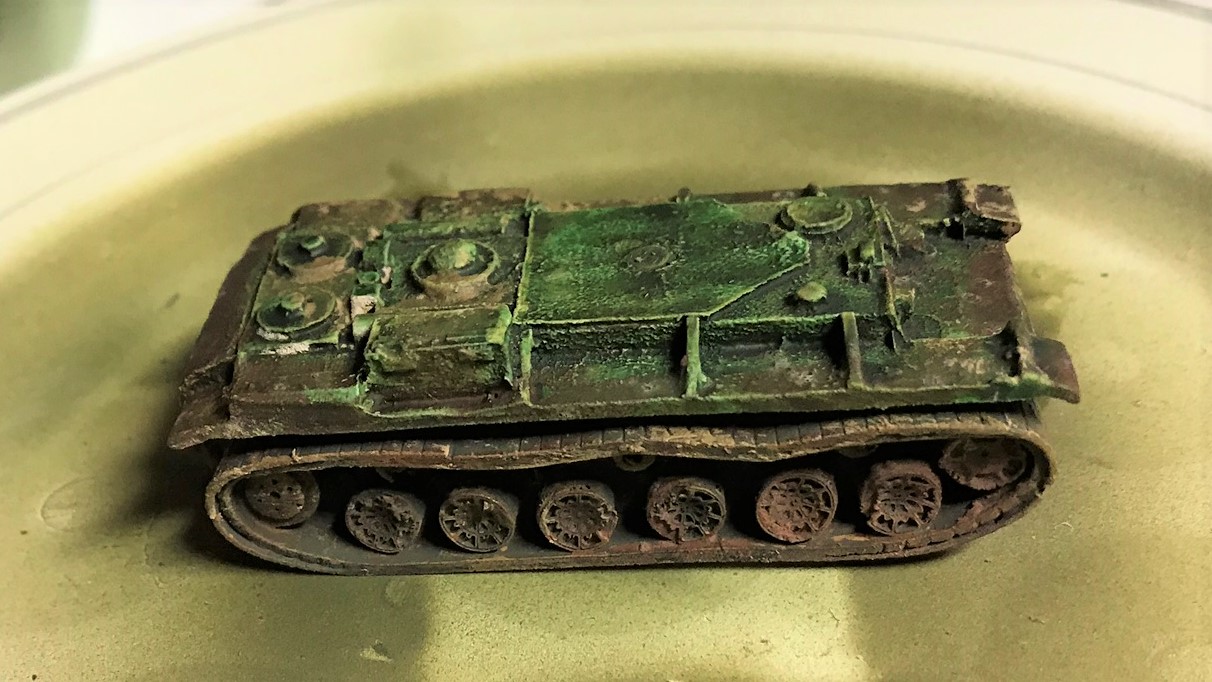
Close up shot of one of the KV-1a hills after base coating.
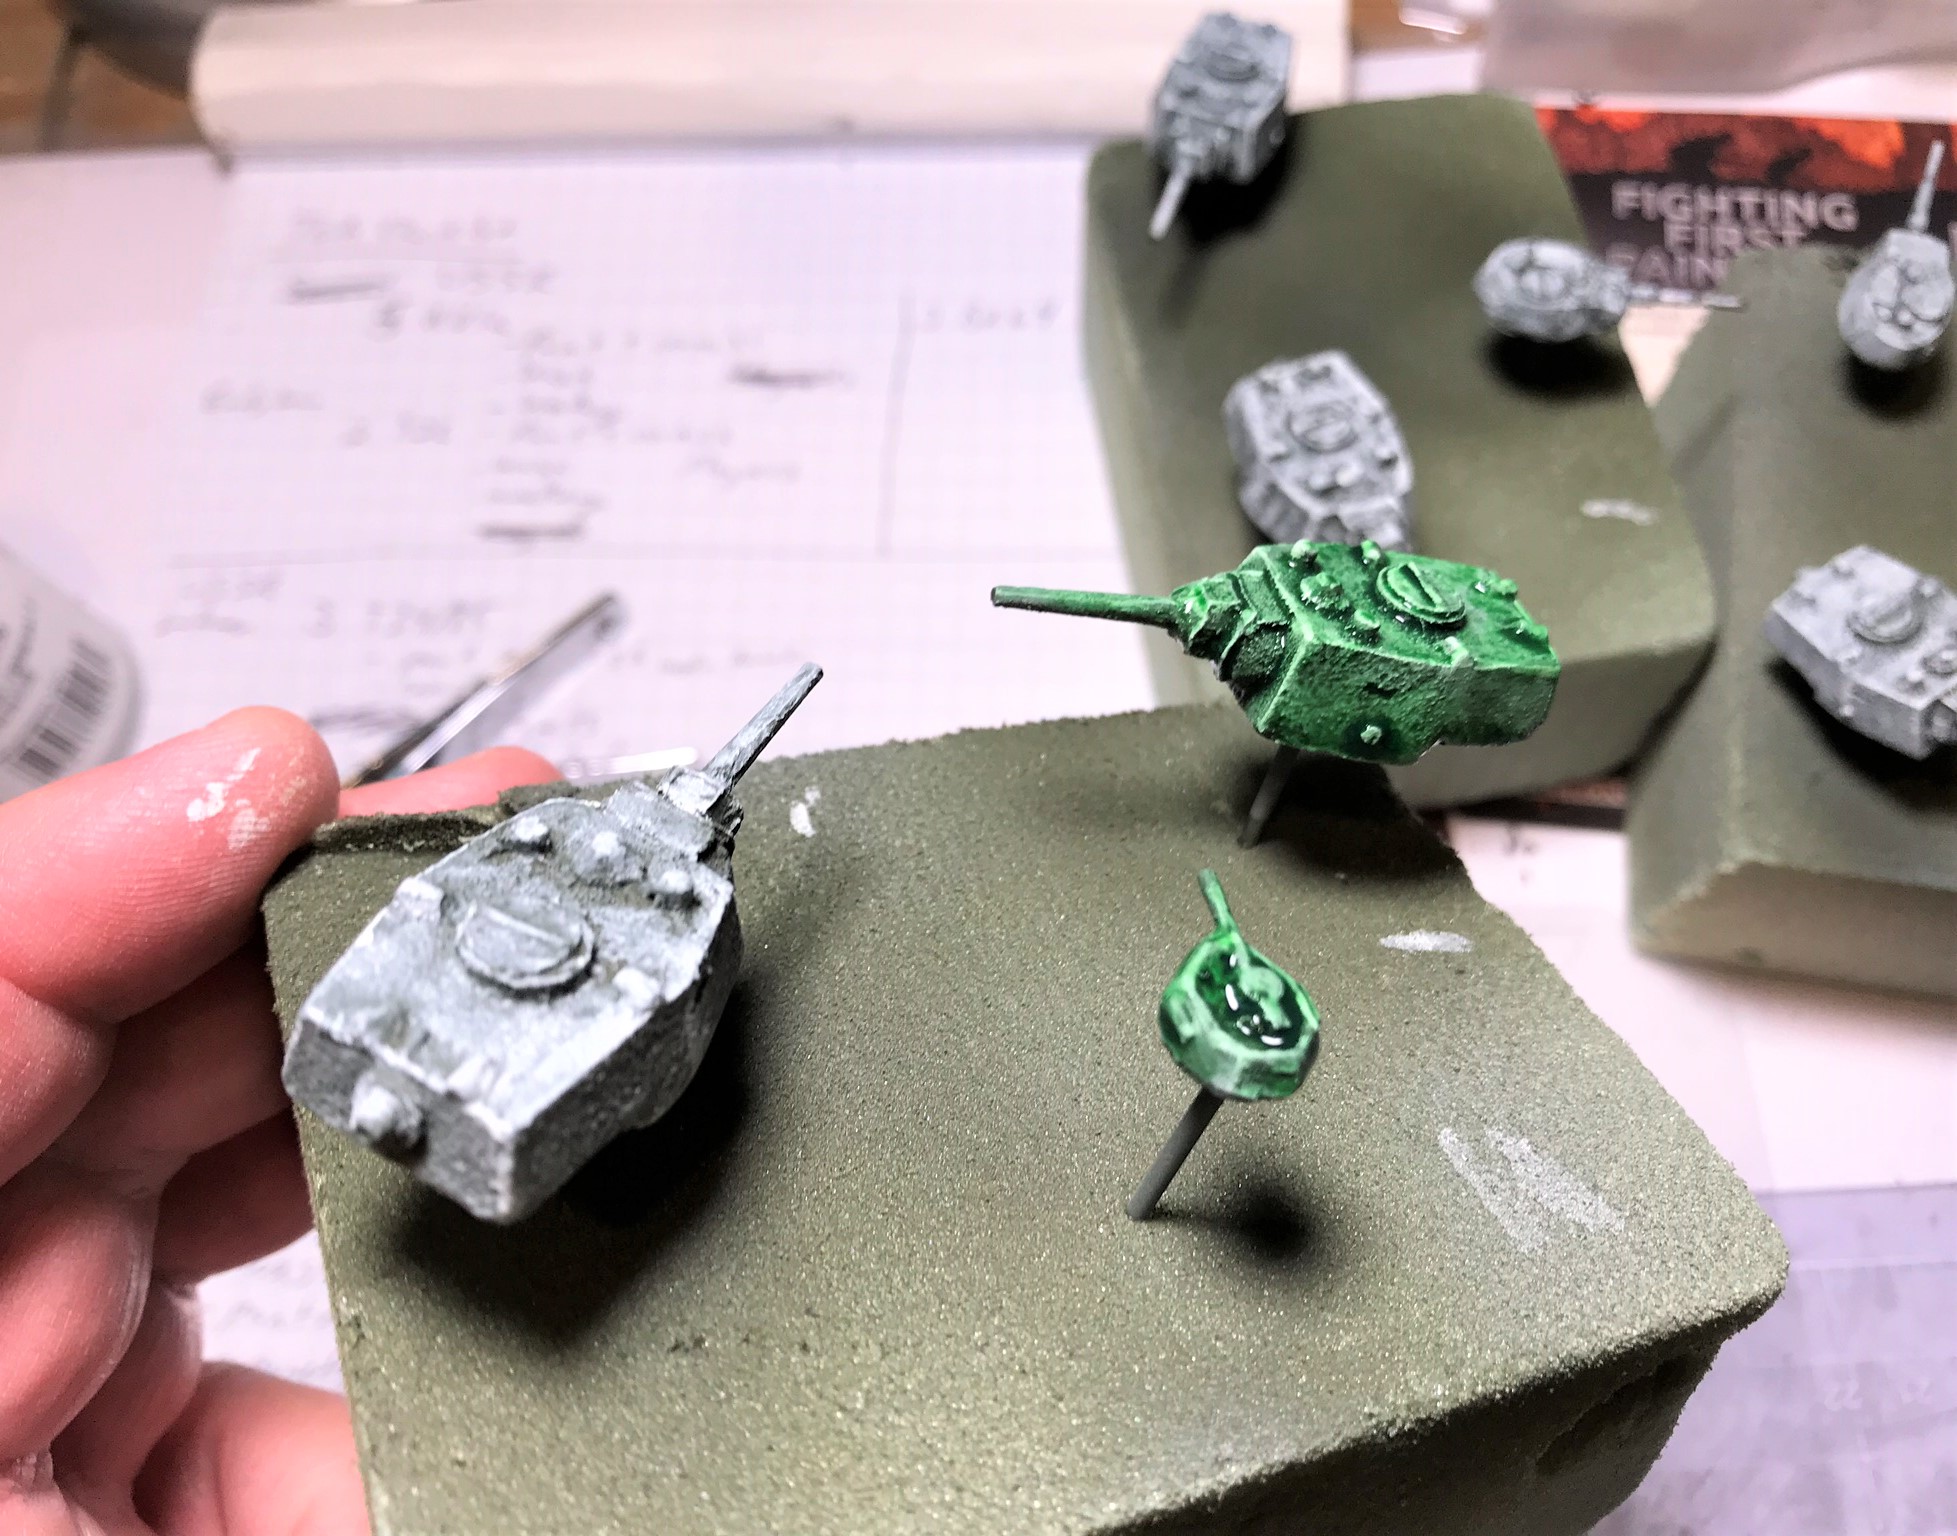
These looked too drab, and not very Soviet green looking. I moved on to adding Vallejo Mecha Color “Green” with a light airbrushing. Next, I used a brush to dry brush Vallejo Mecha Color “Light Green” on the figures. I was able to then give the figures an appropriate light green by using Citadel “Biel-Tan Green” as a shade. It worked!
Contrast the before shading (turret on left) and after (turret on right). The light green helped give depth to the shaded turrets and hulls. I darkened everything with an additional shade – Citadel “Athonian Camoshade”.
Before the “Athonian Camoshade”…
…and after adding the darker shade.
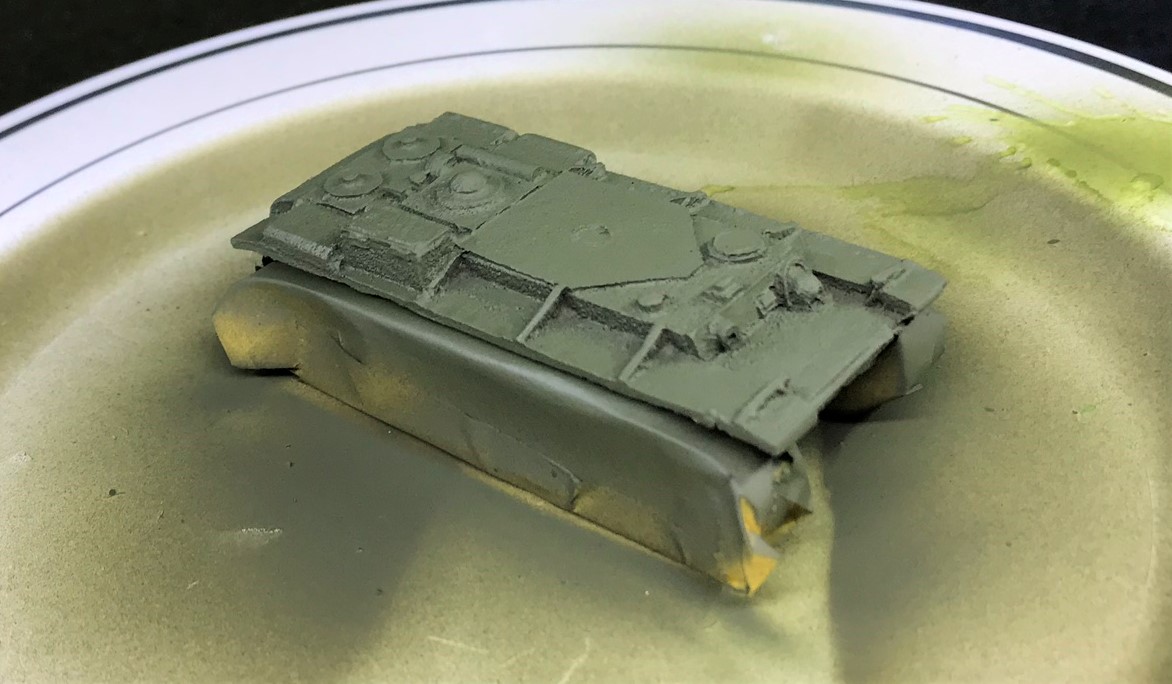
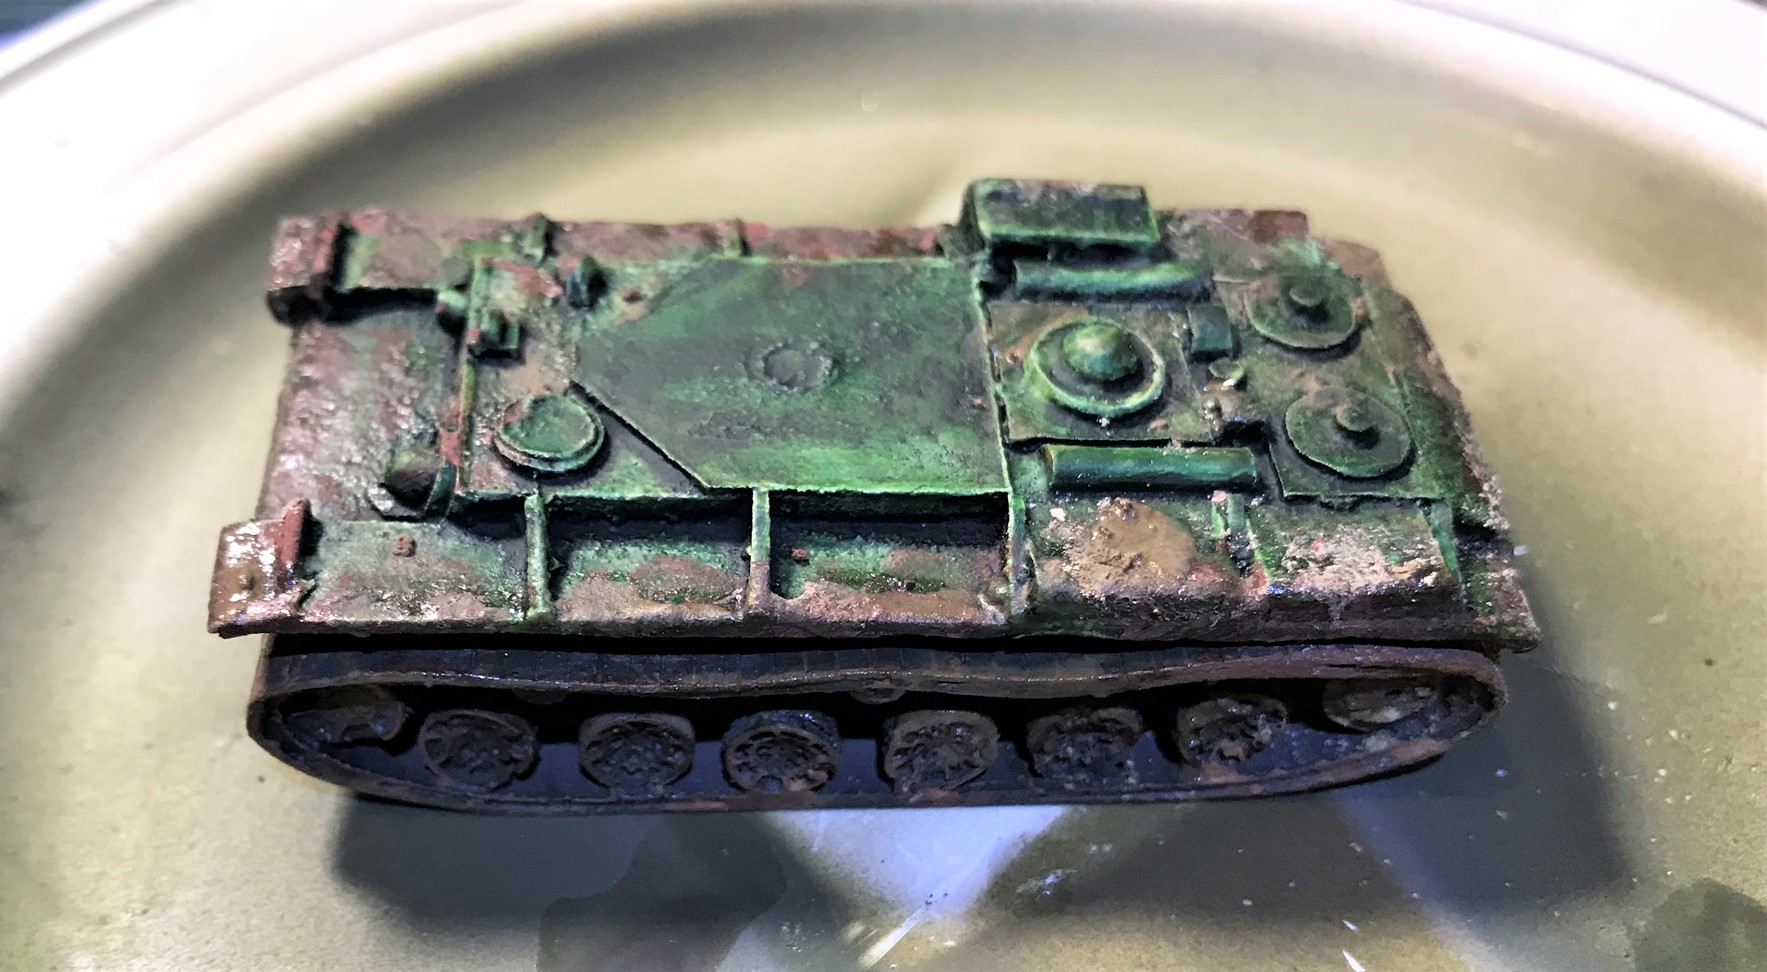
At this point, I removed the masking and painted the tracks. I then wanted to add some mud, dirt, and dust with pigments. I used several Vallejo pigments and binders (all listed at the end of this post). These models are small, (about 3″ long by 1½” wide by 1¾” high so I wanted to give enough weathering without overwhelming them.
An in-progress pic of weathering one of the hulls.
All of the weathering done and the vehicles ready for varnish.
KV-1a hull varnished.
T-26 hull varnished.
The platoon nice and dirty with the mud of Mother Russia.
This was my first attempt at painting any WWII tank models. I think I can do better, but early war Soviet tanks are pretty simple, as they had not usually added any markings. It will not be my last, and I am hoping that I get better with more tries. This project also is my first submission for Azazel’s November Community painting challenge – Mechanical November ’18. If you have not checked out his blog, it’s worth a look. Also, my next few posts will showcase tanks, so I hope you enjoy.
Now for some eye candy!
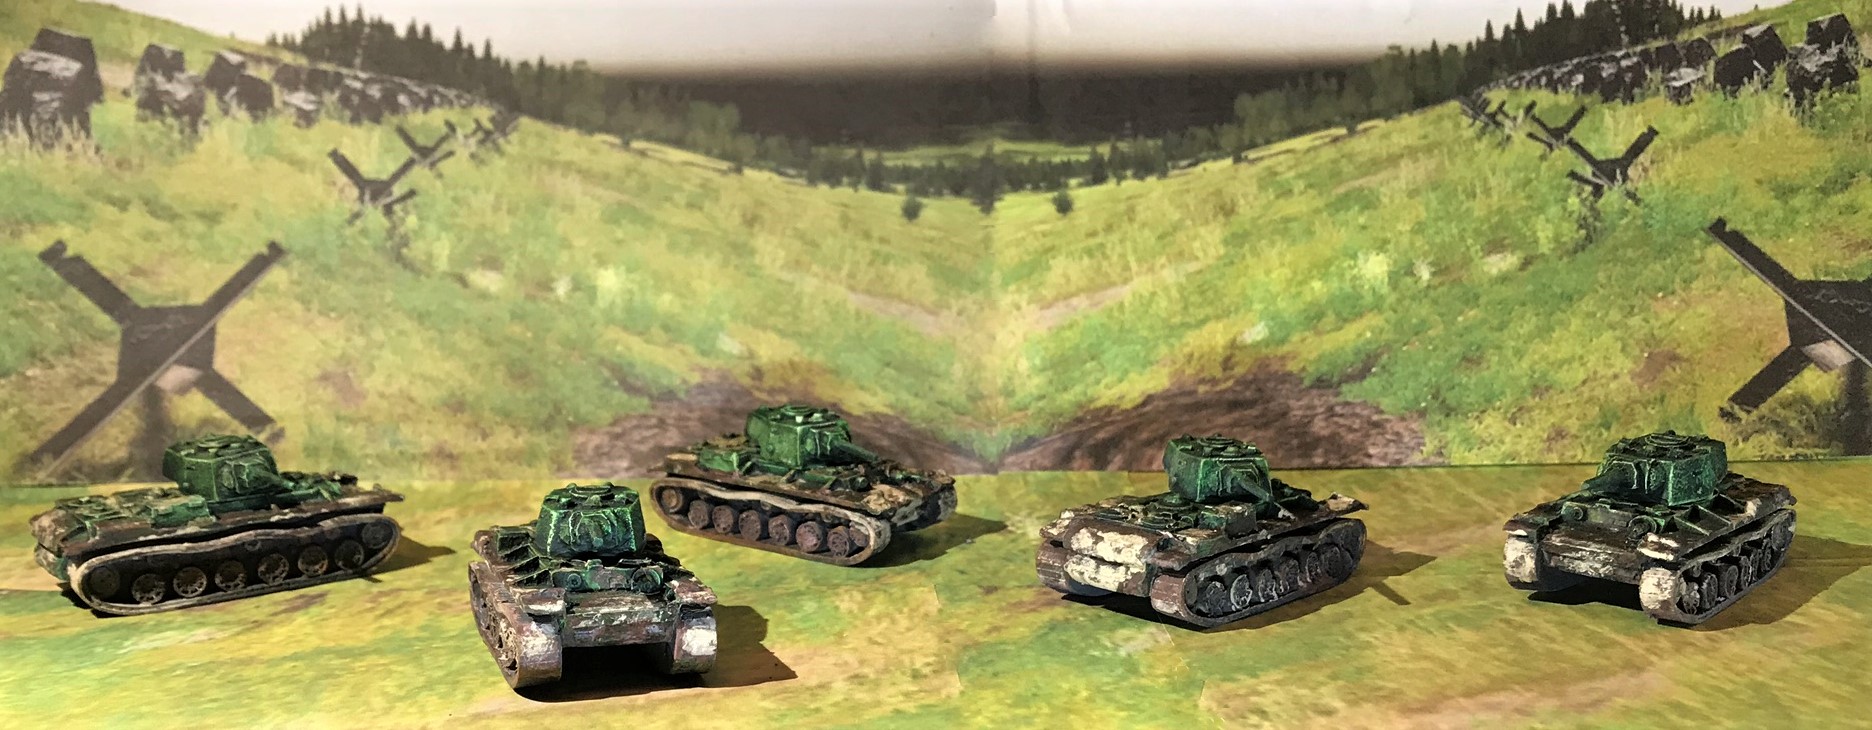
All five KV-1a’s with different angles to view. Ignore the giant tetrahedrons please!
Front view
Rear view. I “mudded” them up a bit here.
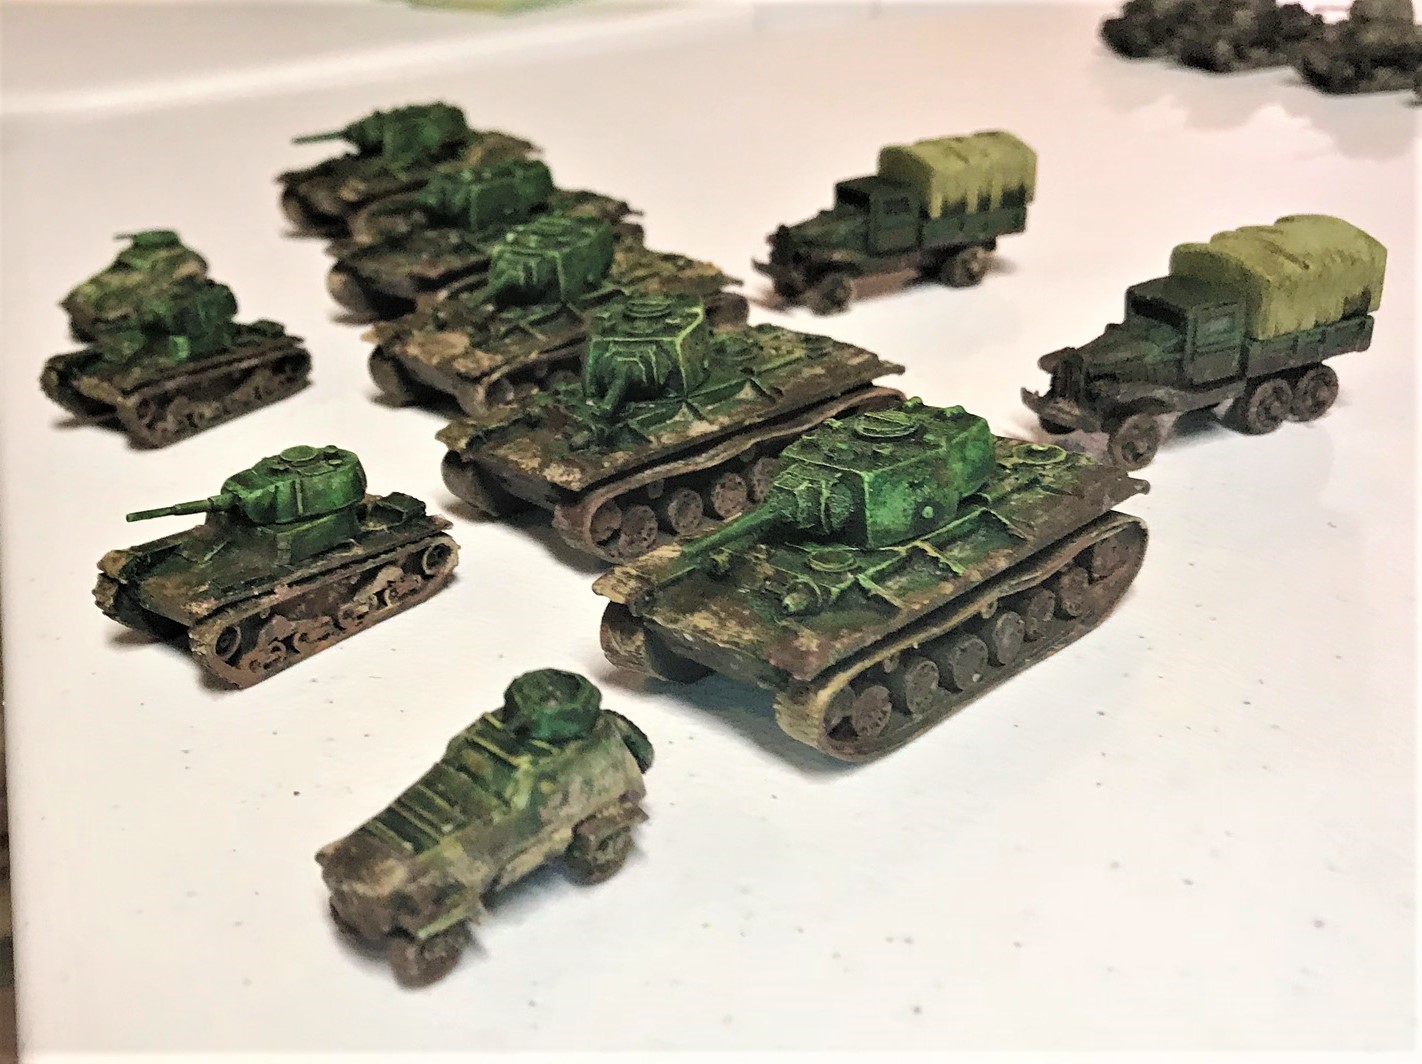
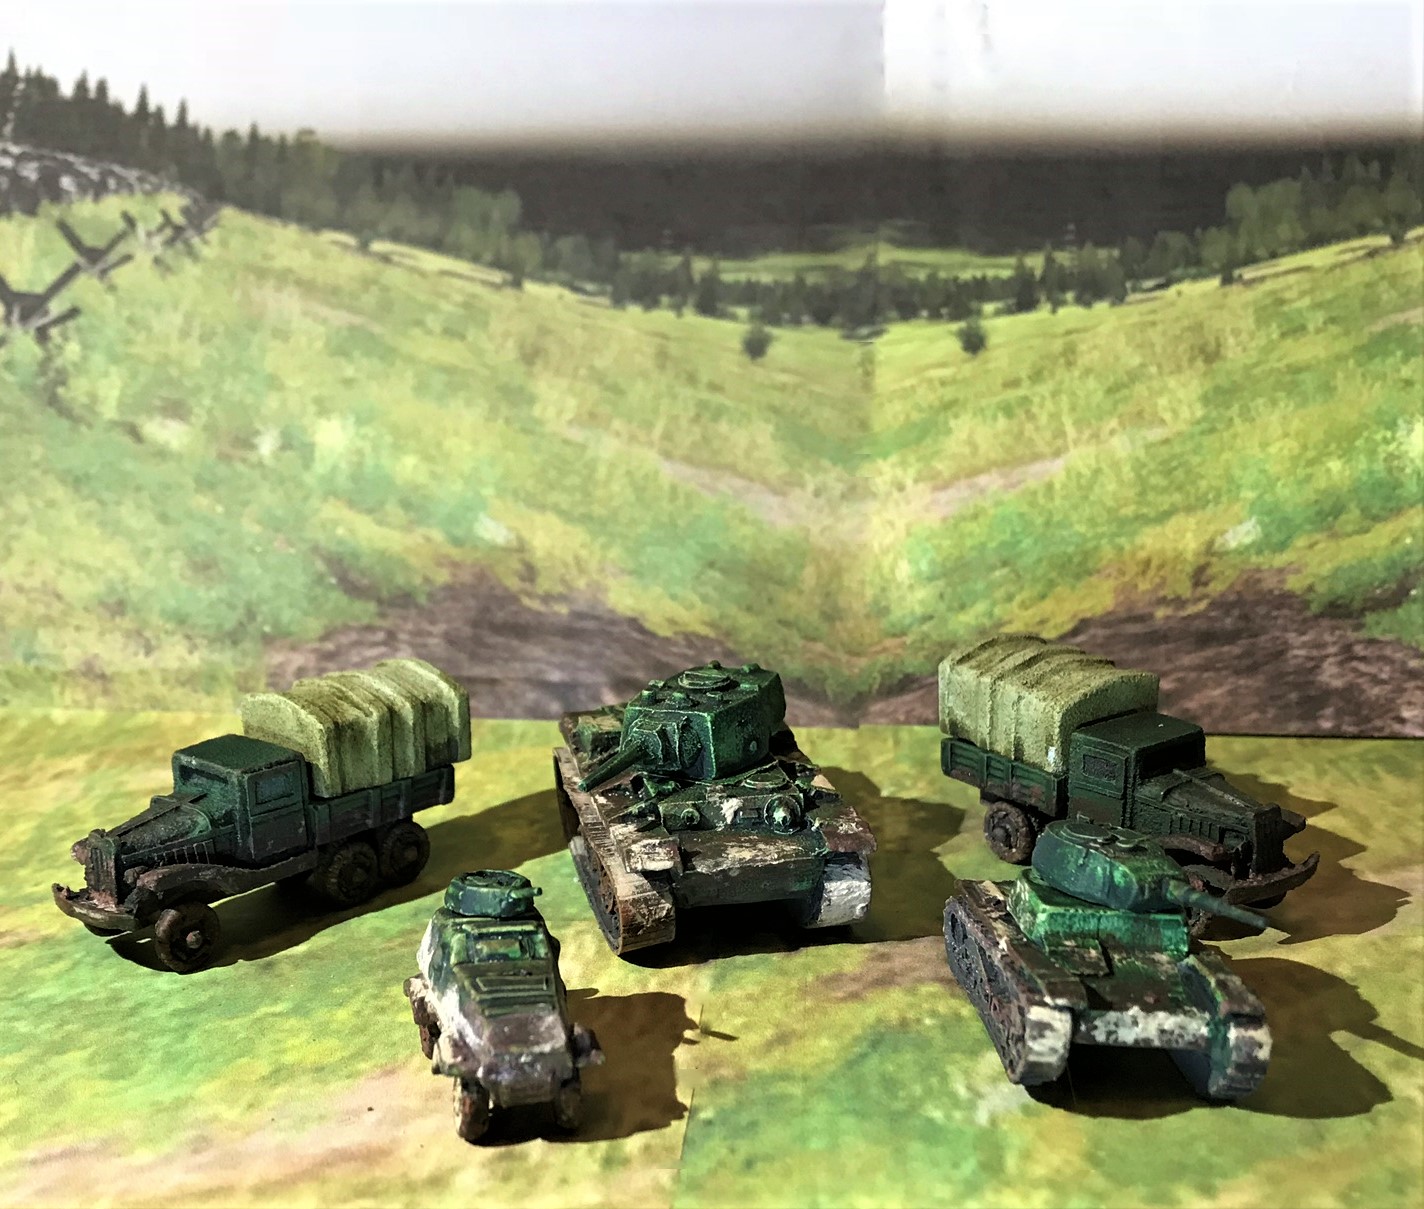
The combat vehicles move out.
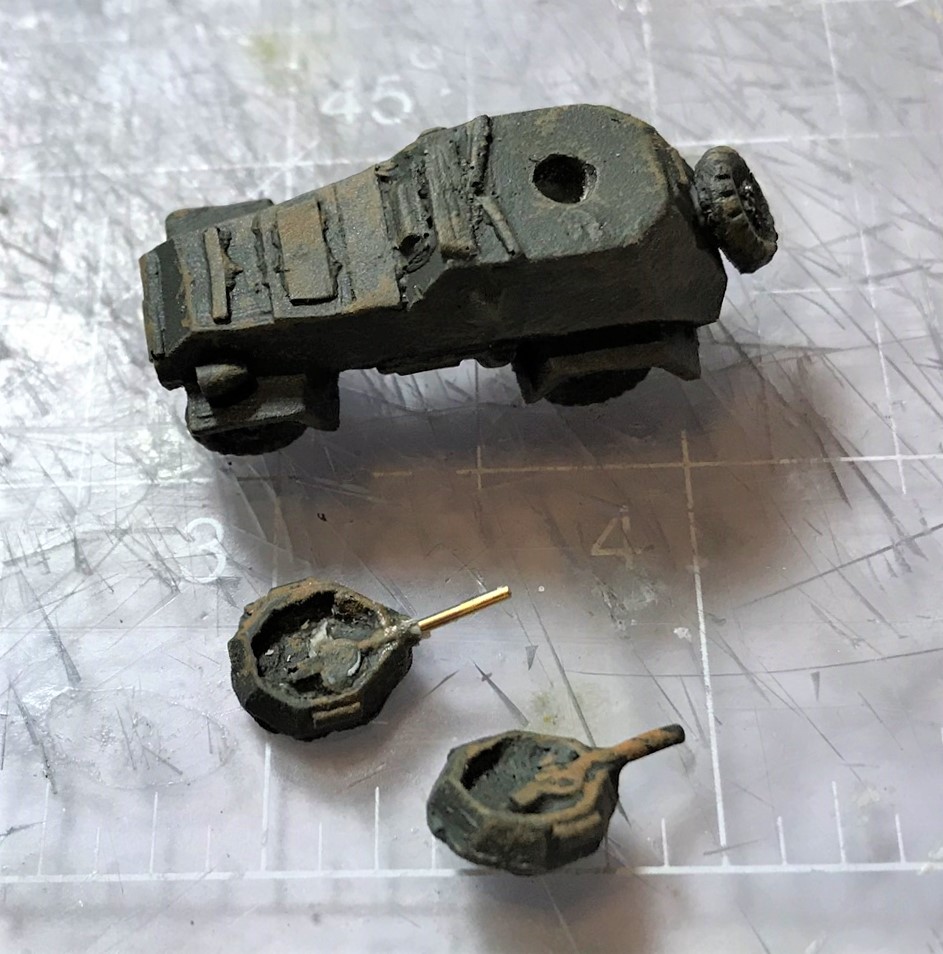
One of each AFV I painted plus 2 trucks.
KV-1a in an urban setting.
T-26 in town (what’s left of it anyway).
BA-64.
I hope that you enjoyed this post. Please let me know your thoughts and feedback below in the comments section.