At the center of Aztec life was their religion, which drove many of their cultural, military, political, and economic practices. The Aztecs had over 200 deities, of which the chief one was Huitzilopochtli, the patron god of the Mexica and of their capital Tenochtitlan. He was also the Aztec god of war.
In trying to replicate an appropriate Tenochtitlan cityscape for 28mm games of for Feudal Patrol™ games in Mesoamerica (using my Civilizations Collide supplement), I have been building and painting multiple types of resin and MDF buildings. This plan by necessity would be clearly downsized from the original, but should have the flavor of the era and location. The painting below from LFIllustration is one that I saw recently on my Pinterest feed. It that gives an idea of what I have been going for conceptually in terms of the cityscape, the farms, the causeways, and more if dealing with Tenochtitlan and its environs circa 1519-1521.
I really like this picture – note the war canoes by the causeway. This appears to be a depiction of Cortes’ arrival at Tenochtitlan and his meeting Montezuma II for the first time. Of course, the causeways would later play a major part in Cortes’ forces escape from and later return to (and conquest of) Tenochtitlan.
In order to motivate myself to get through my terrain building as efficaciously as possible, In mid-March I devised “Mark’s Aztec Building Challenge Contest”. This was to reward my followers with a guessing contest as to when I would finish all of the terrain in the challenge – as well as to give me impetus to getting through all I was setting out to do. As I wanted like terrain and building pieces to be matching/similar in color and texture, and I needed several paints, I did end up having some materials delays – and others that I have described previously as well. But finally, I have finished all of the pieces in the challenge! I will be posting the winners on a separate and subsequent blog post that will shortly follow this one, so I am adding a bit more suspense to the contestants – but not too much. I just felt I should give this piece its own due, and do a separate contest wrap-up.
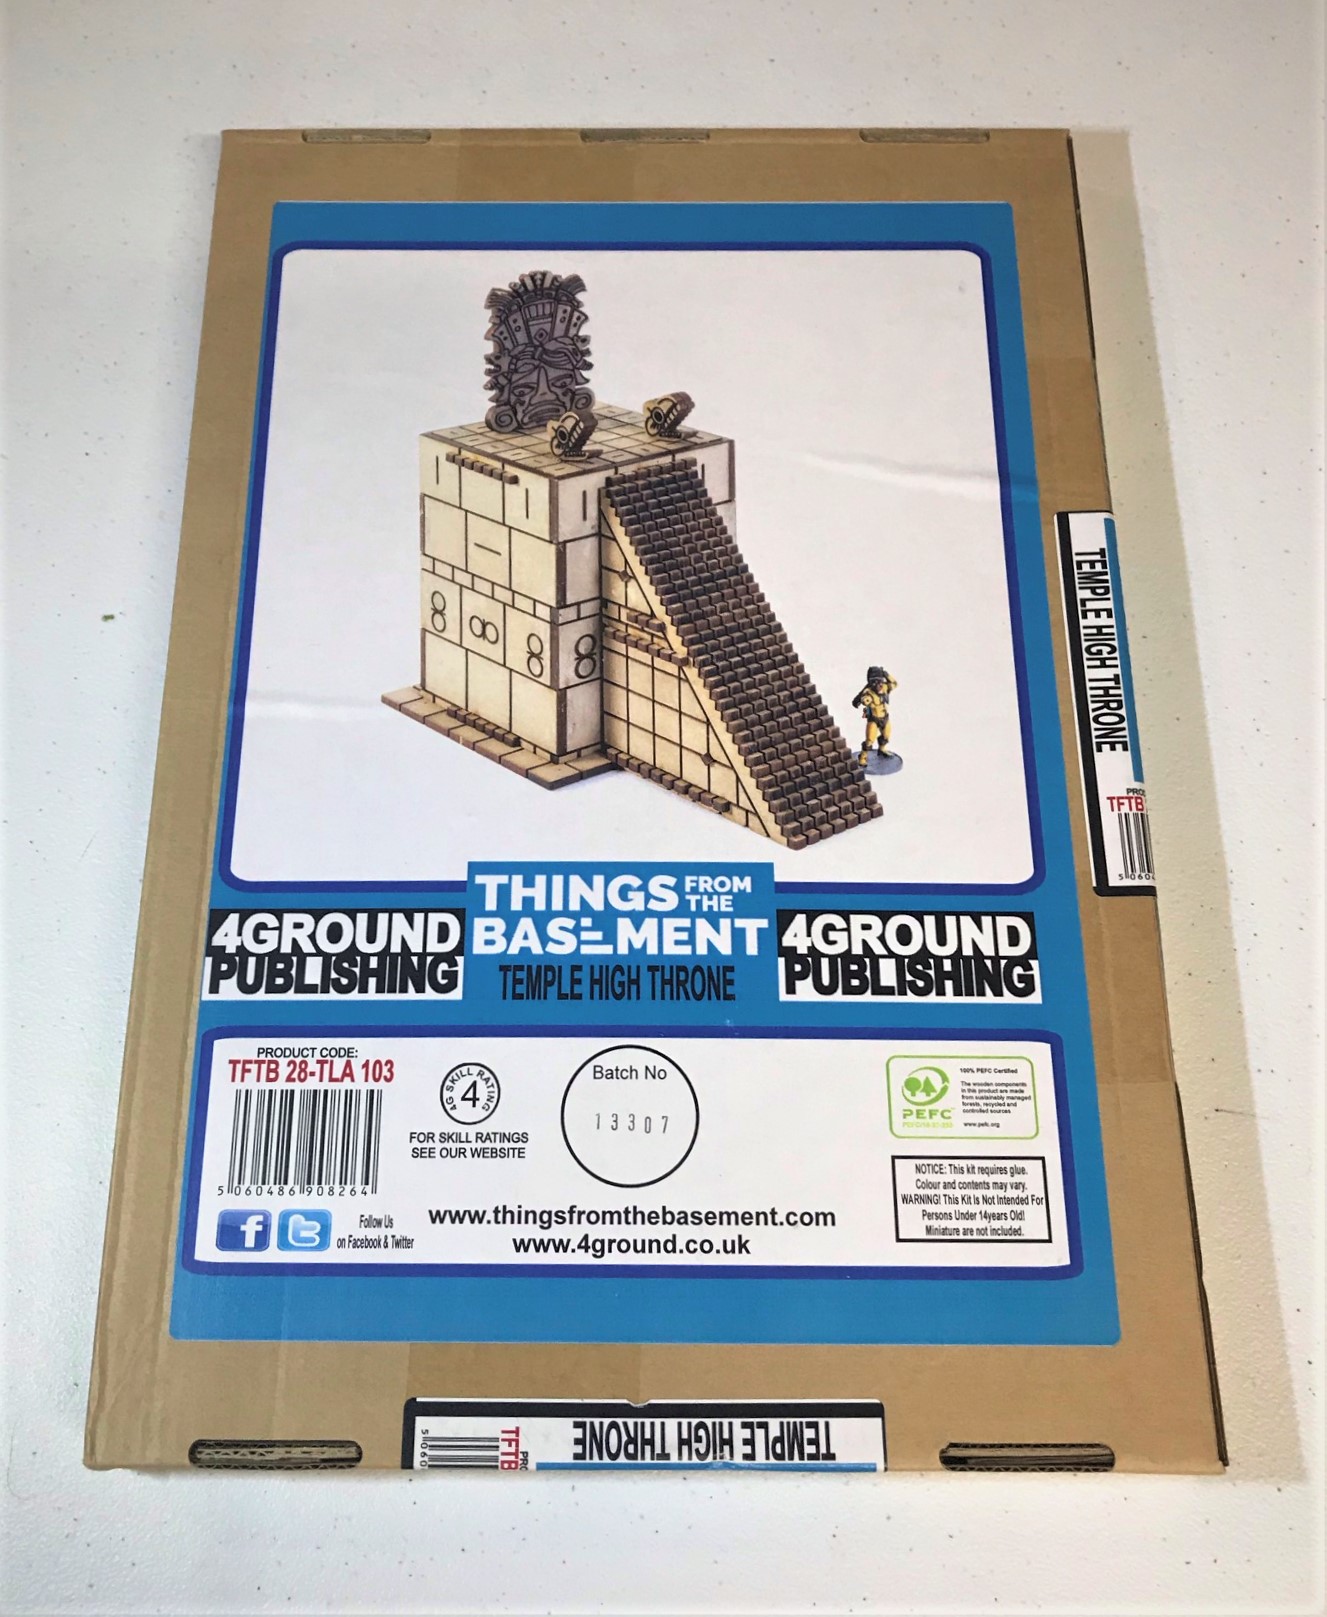
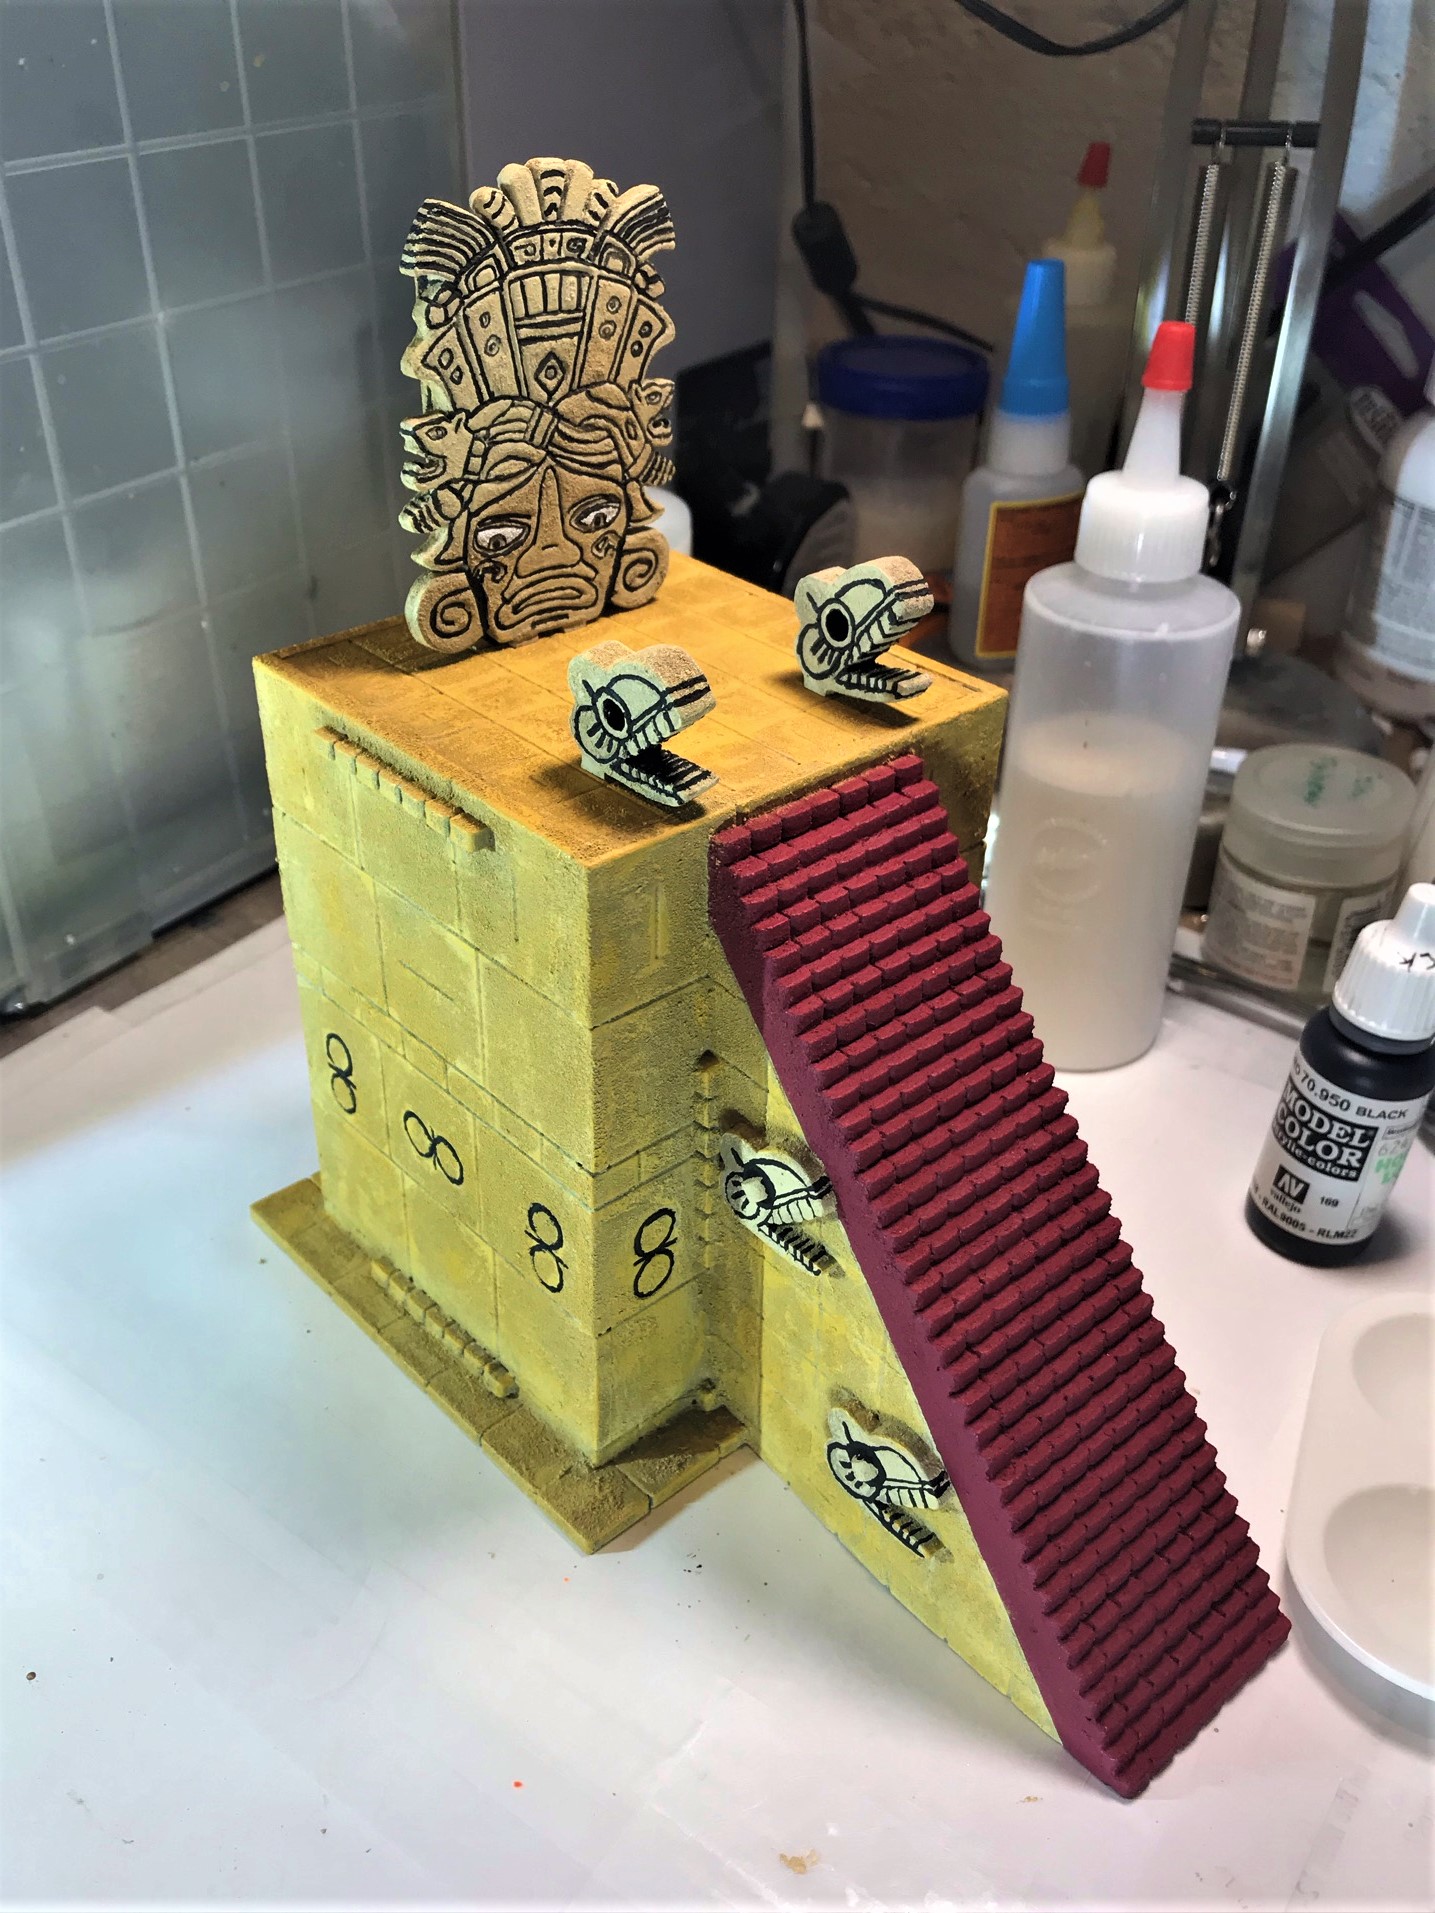
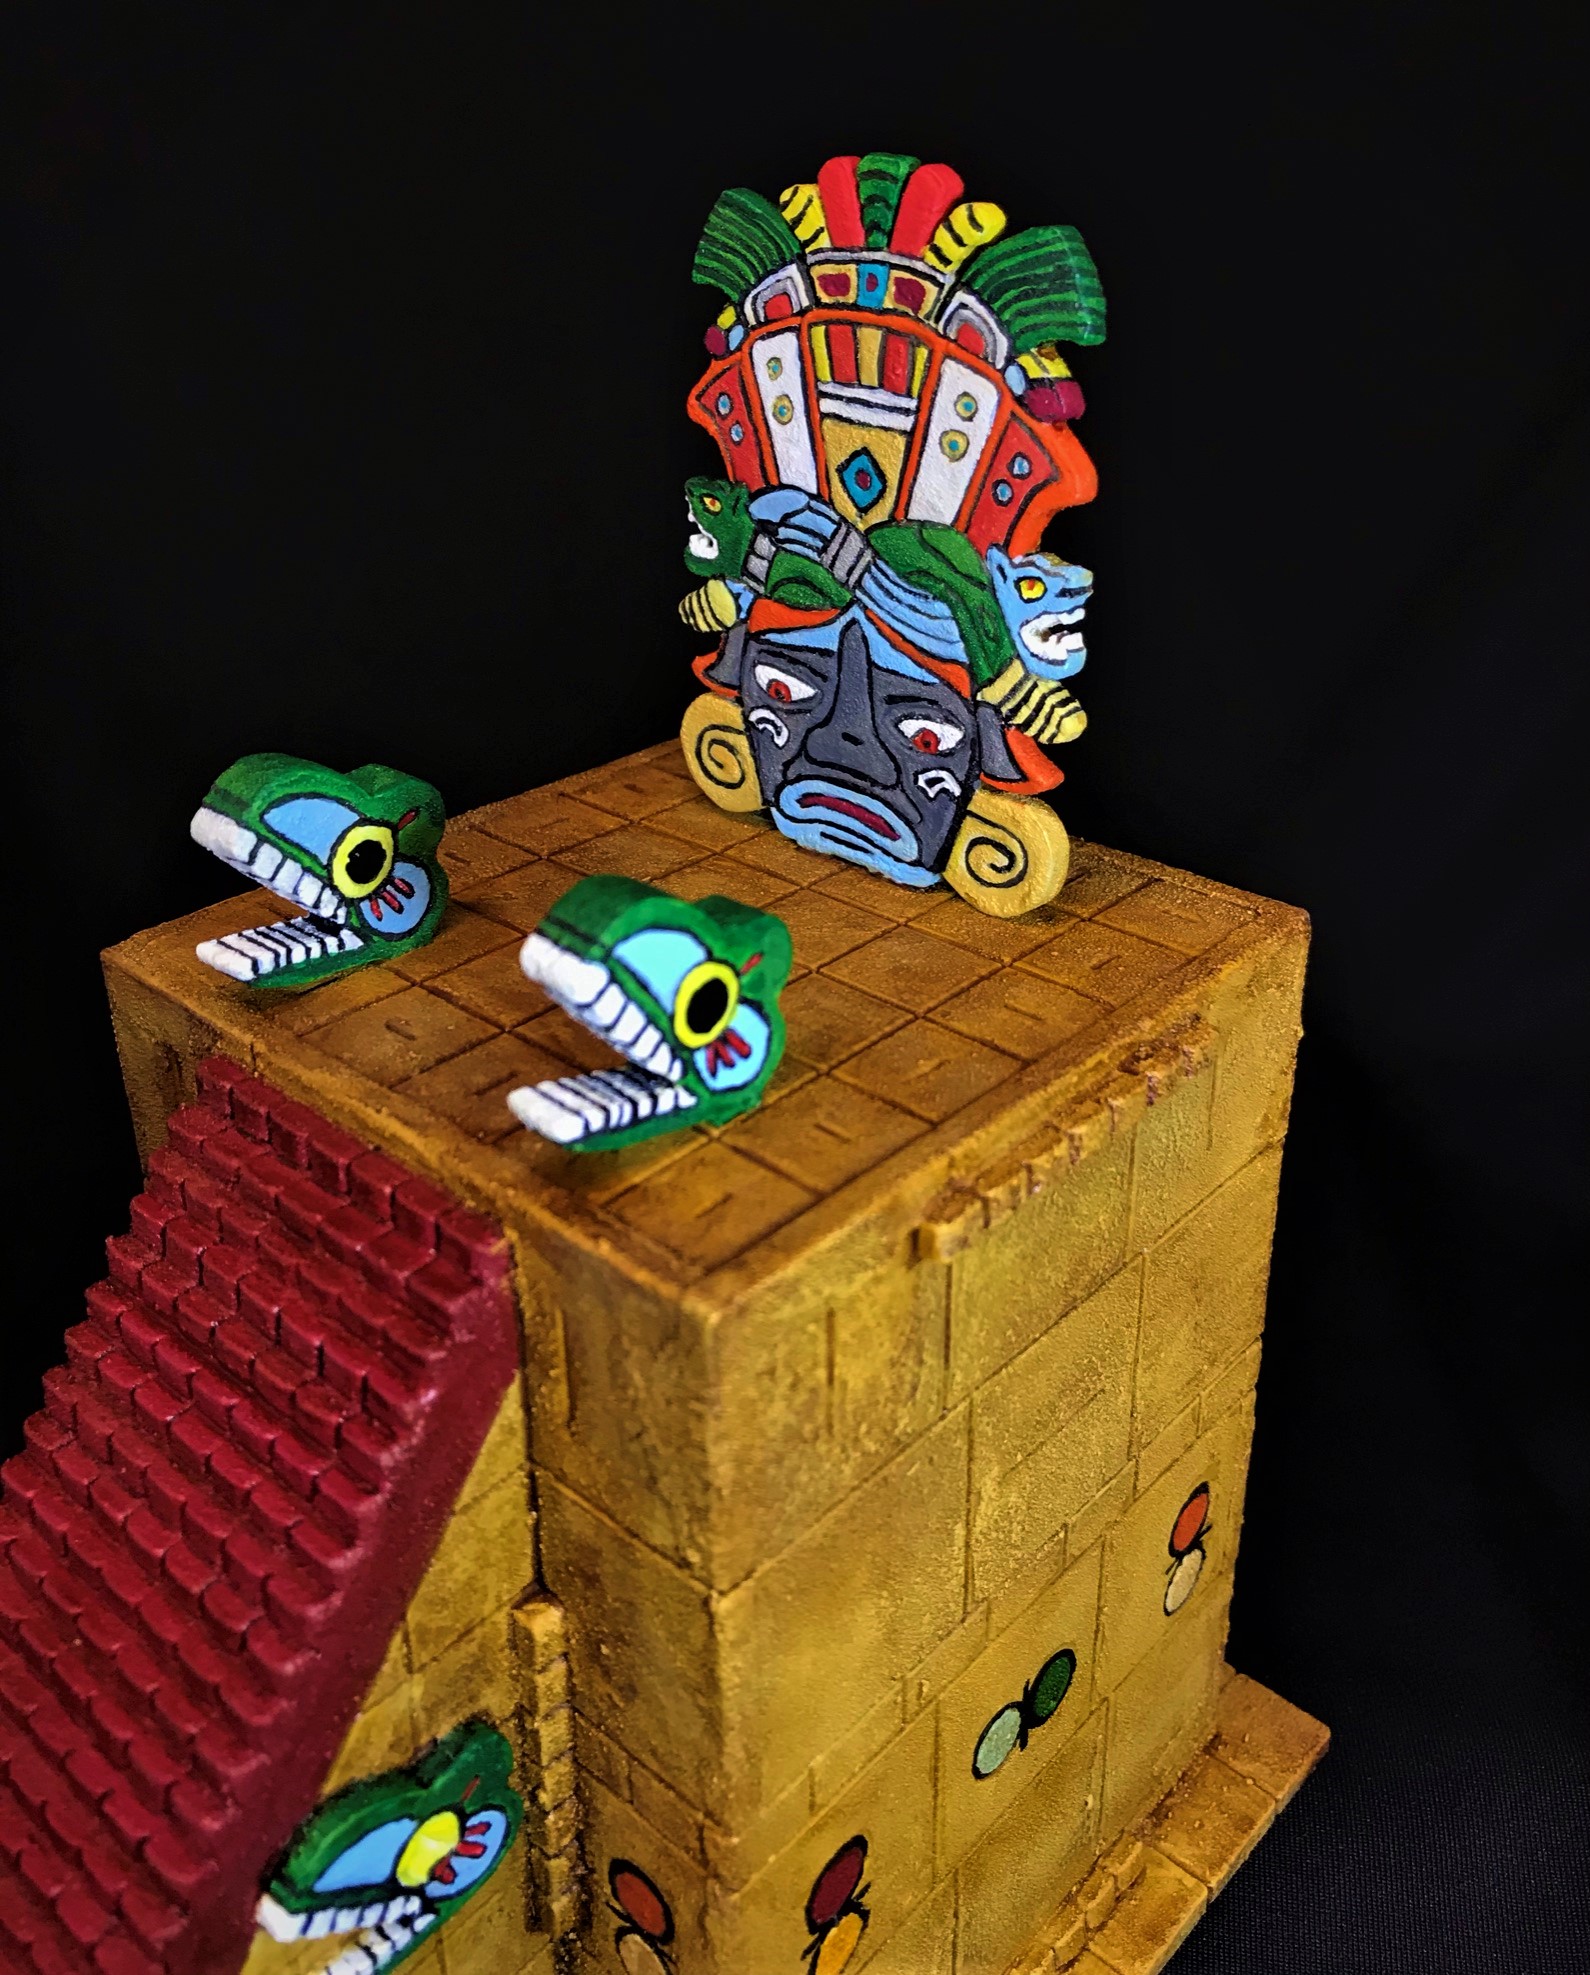
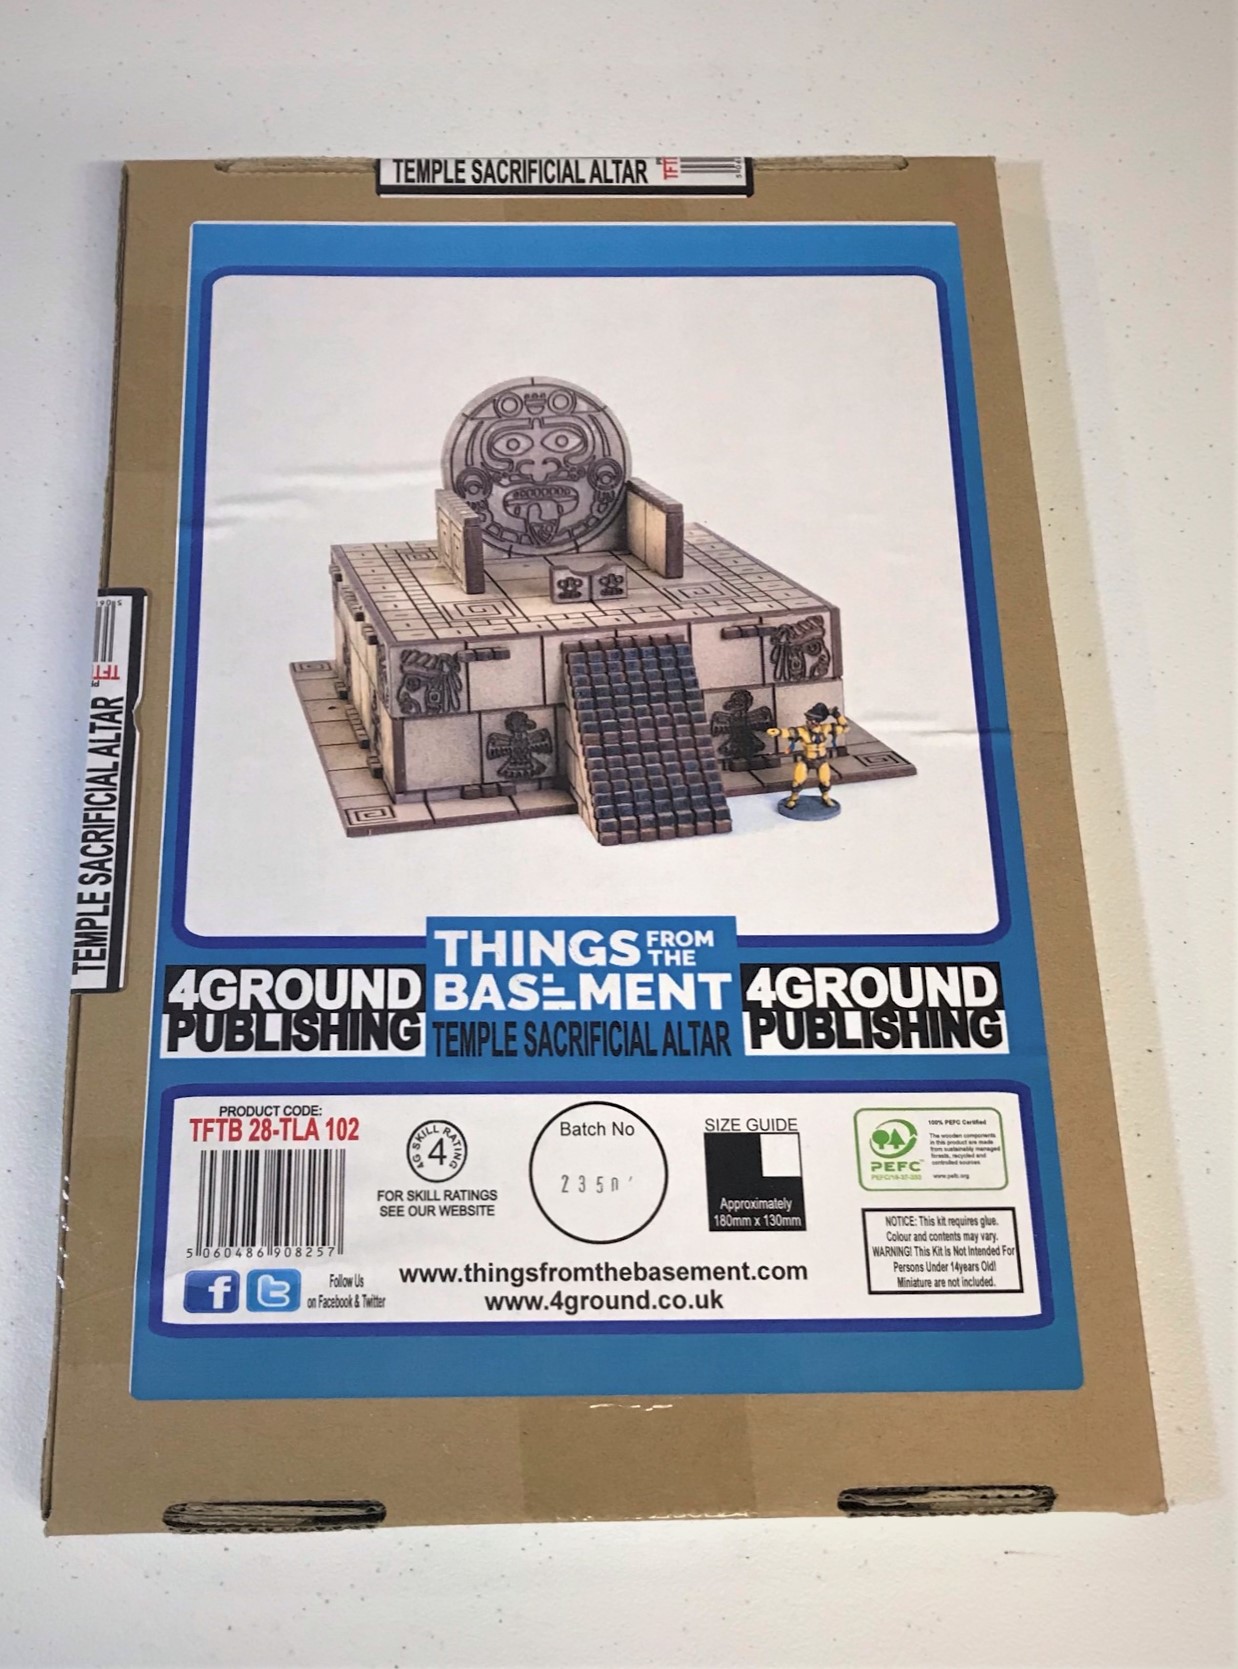
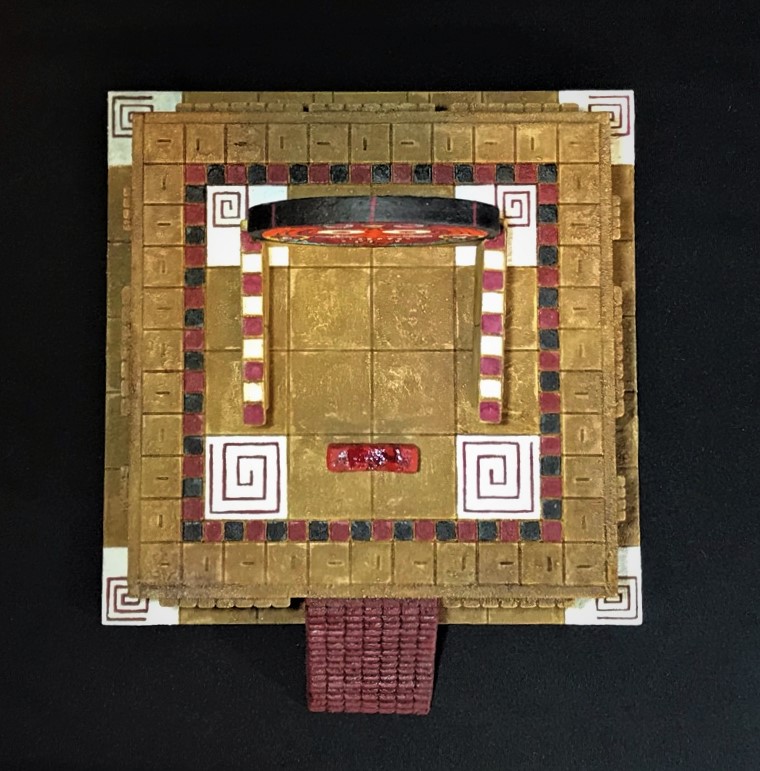
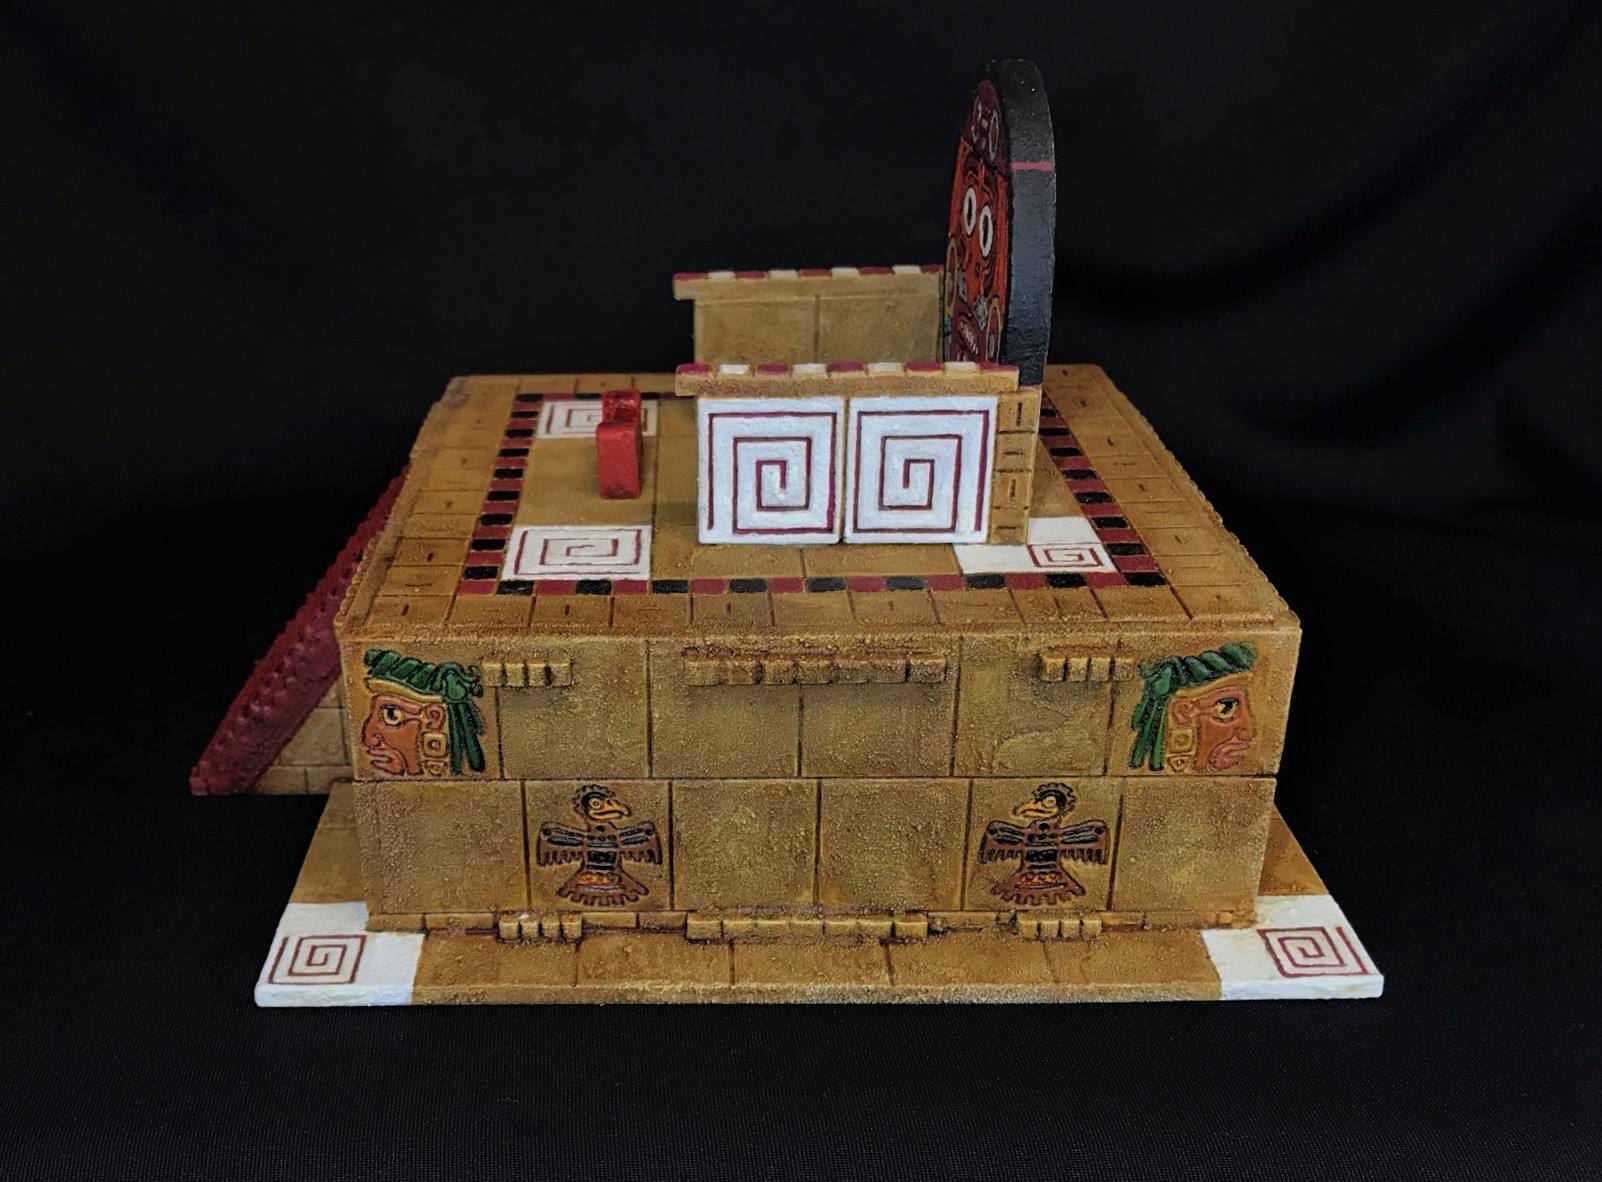
So, you ask, what piece is it? Why, it’s “Temple High Throne”. It is another MDF kit. This one, like my previous Aztec MDF, also came from from Things From the Basement via 4Ground via Badger Games – you can see it here. Basically, it is a high raised platform, and as such, Montezuma II would have this platform as his throne overlooking Tenochtitlan in the temple complex. It is adorned with serpent/snake heads and a giant idol image of Huitzilopochtli. Overall, the kit was of good quality and I enjoyed building and painting it. I will have to add some rules about the steepness of the steps with regards to both movement up and down and melee combat.
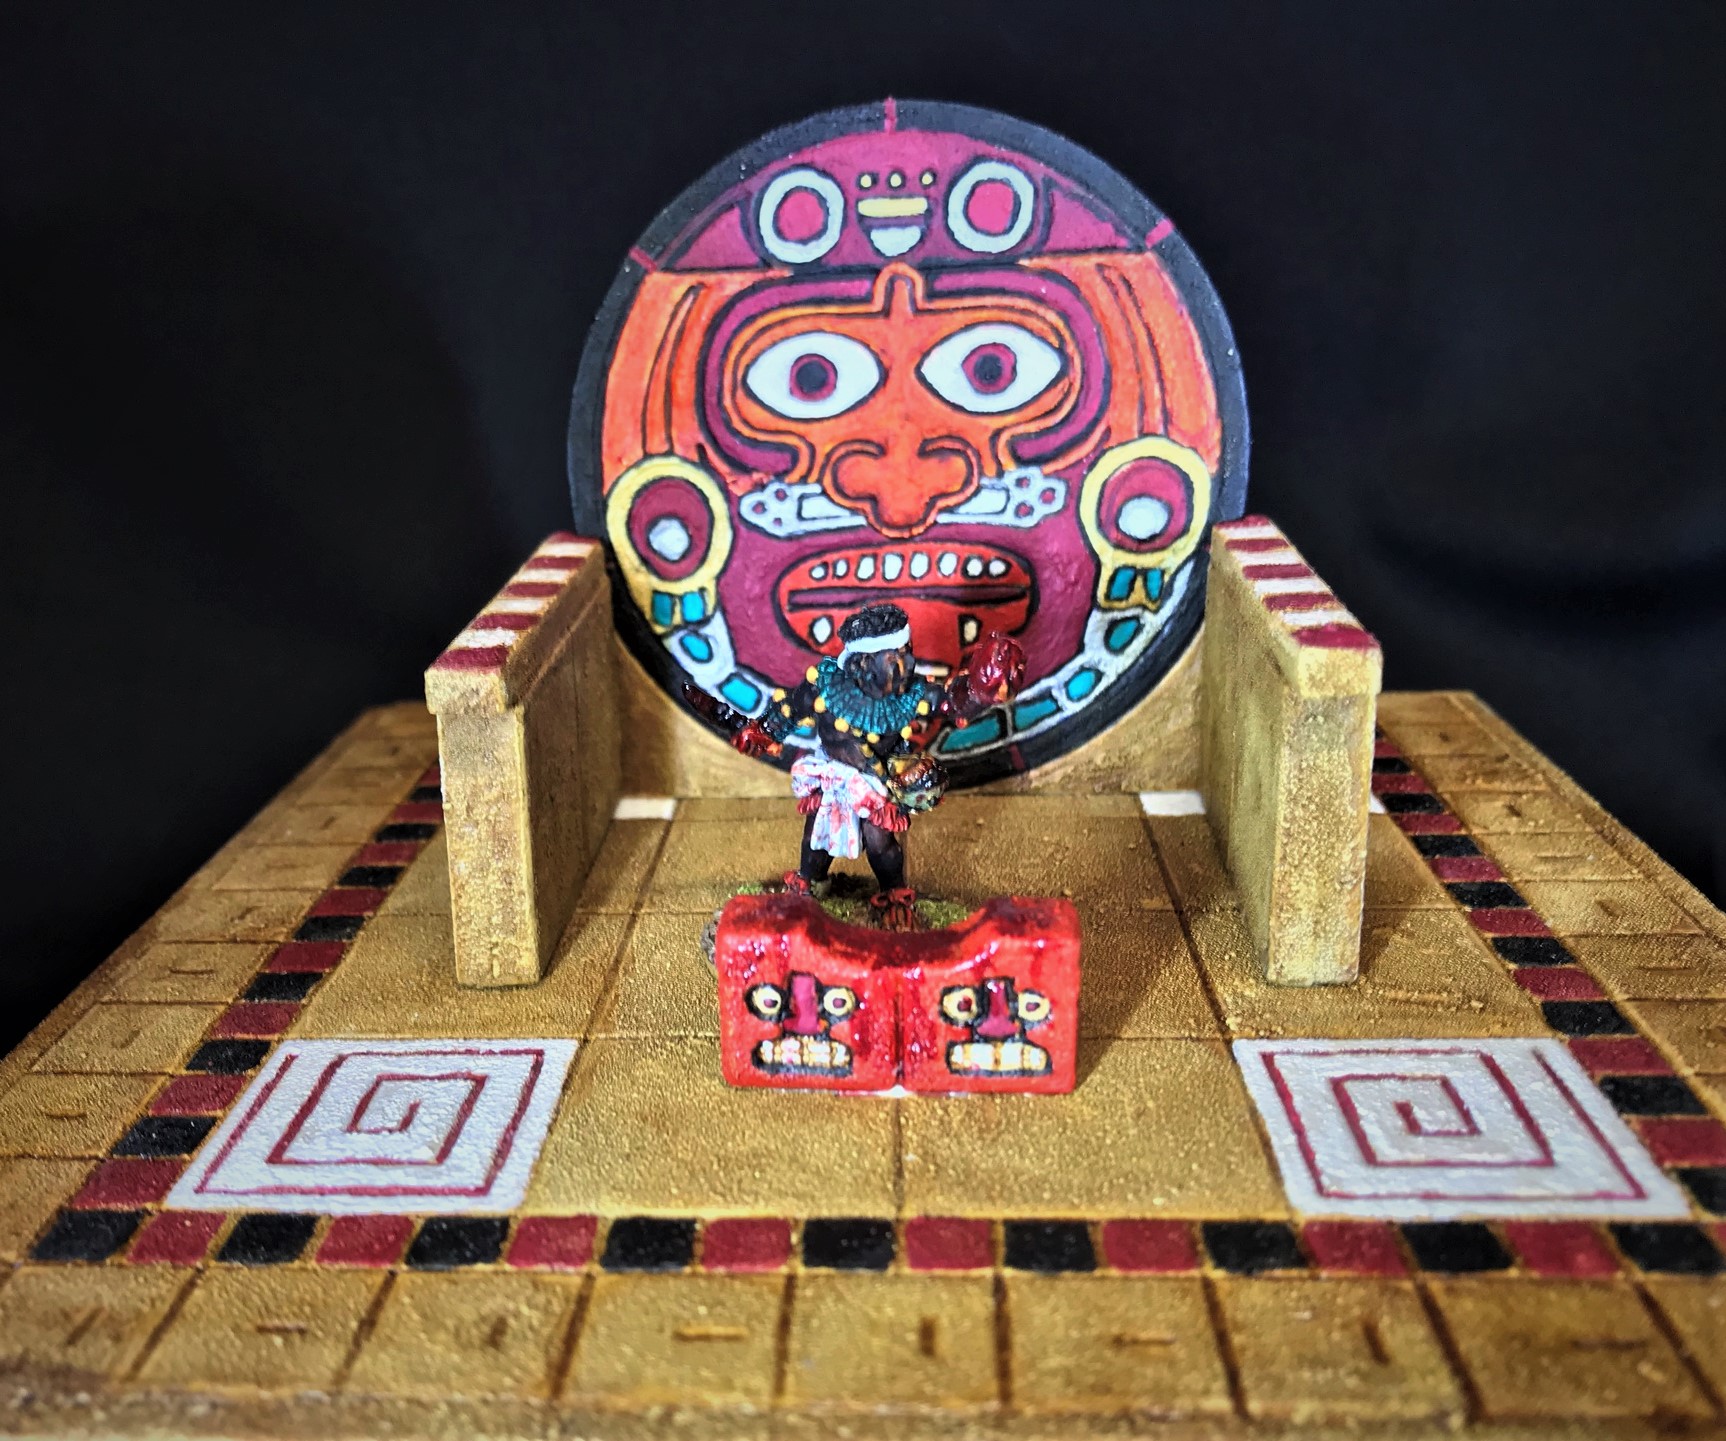
I built and painted parts of the kit contemporaneously with the Temple Sacrificial Altar for economy of effort. I will go over some WIP and share some eye candy after that. As is my practice, I list the materials I used is at the end of this post for those interested. Also, as Huitzilopochtli is – at least to me – quite monstrous – and physically quite large here as well, I am adding this bad boy/building to the painting challenges being run by Angry Piper over at Dead Dick’s Tavern And Temporary Lodging called “Monster Mayhem 2021” (subject to his assent of course). I found the image below on line and used it as the basis for my painting of the large Huitzilopochtli idol. It’s a bit different than the others I have seen, but I thought it would be a good general guide.
Huitzilopochtli – I can spell this pretty easily now! I liked the charcoal and sky blue-colored face paint.The kit box.
I cleaned off the MDF with a moist microfiber cloth,
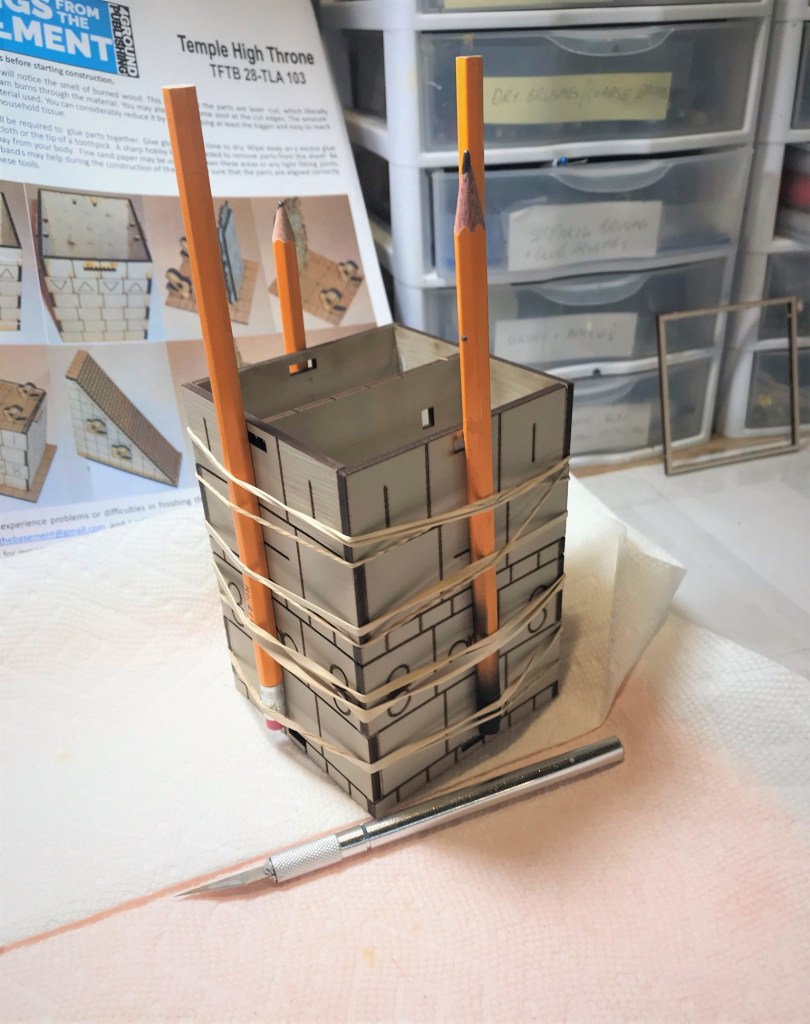
I used pencils and the tower top to aid with gluing. This helped keep glue off of the rubber bands.
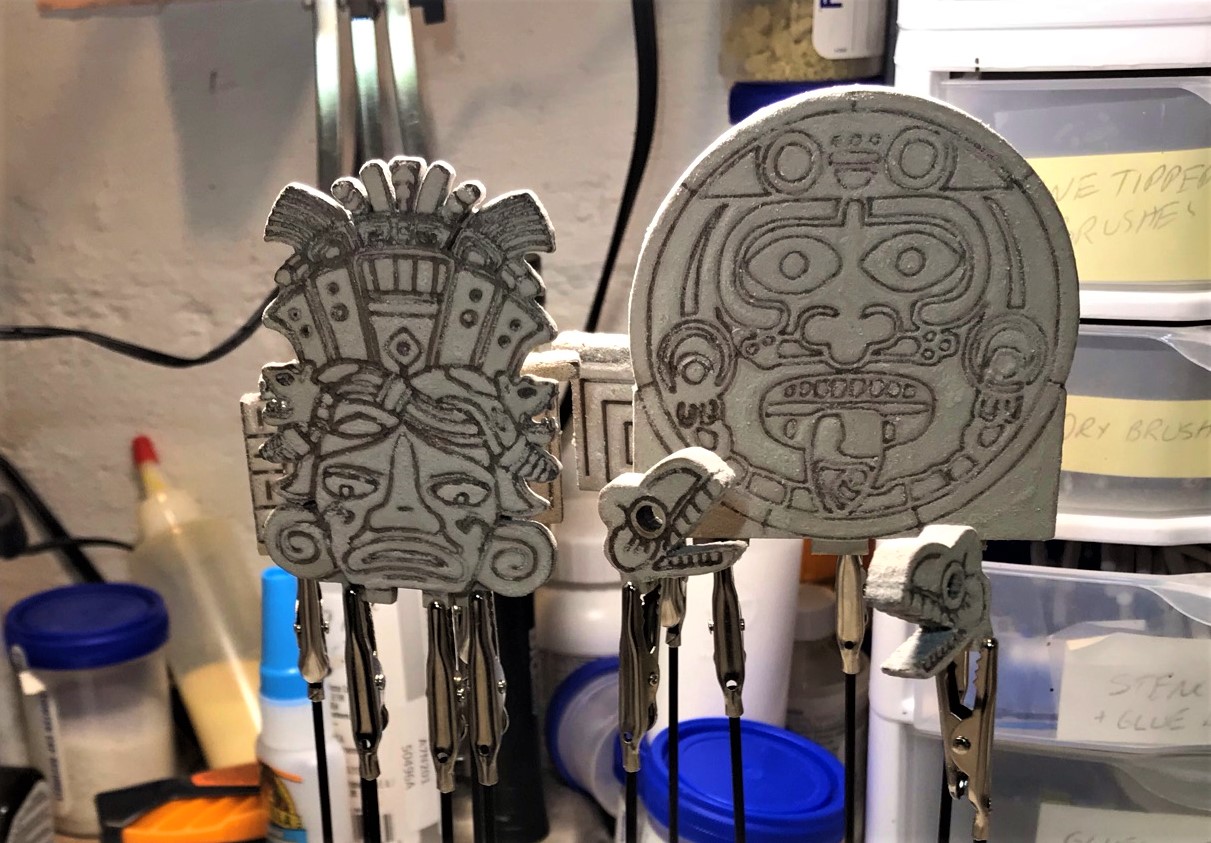
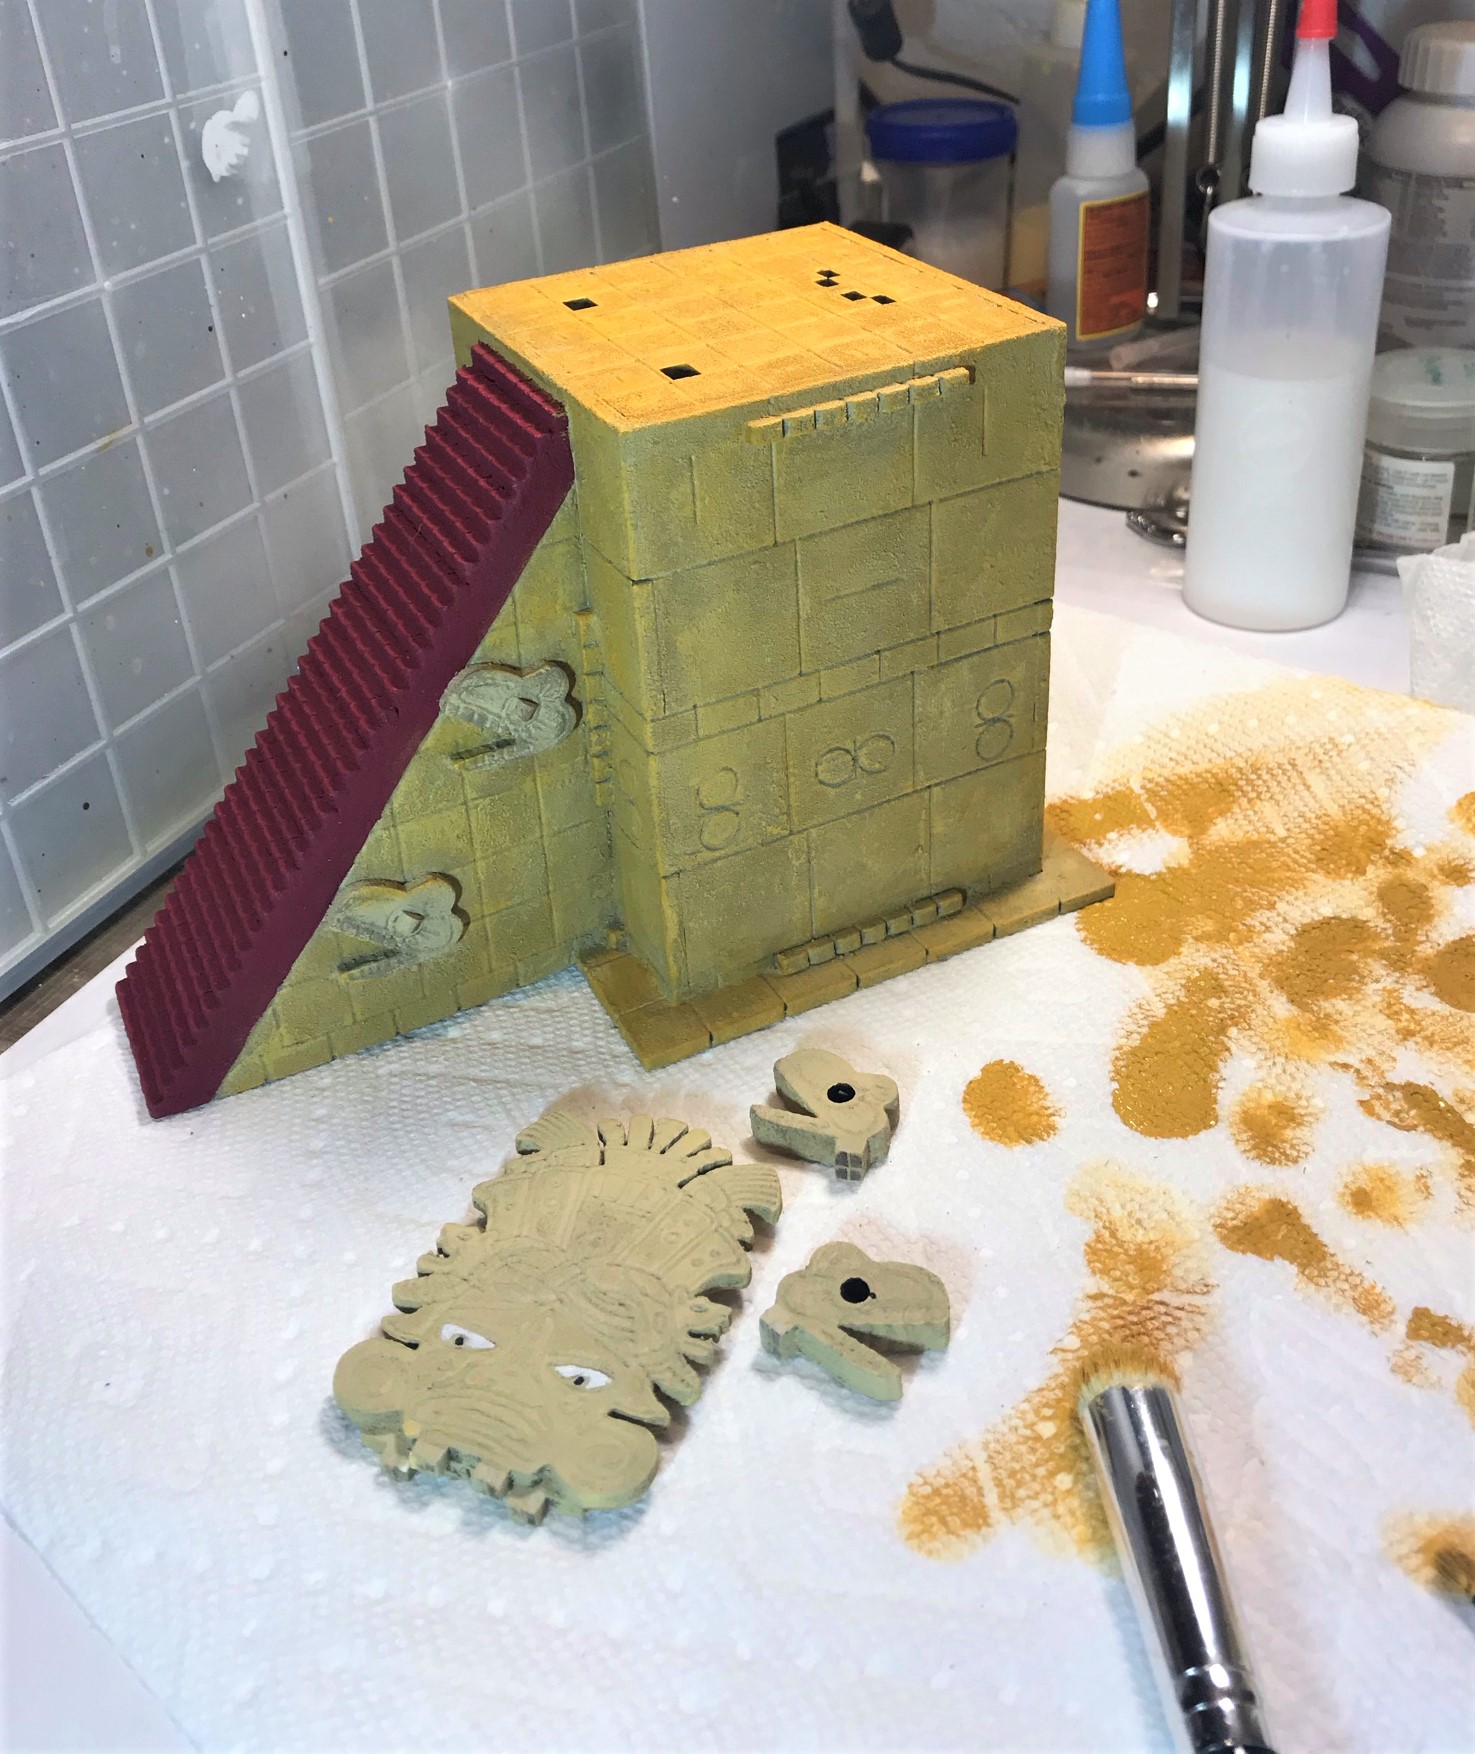
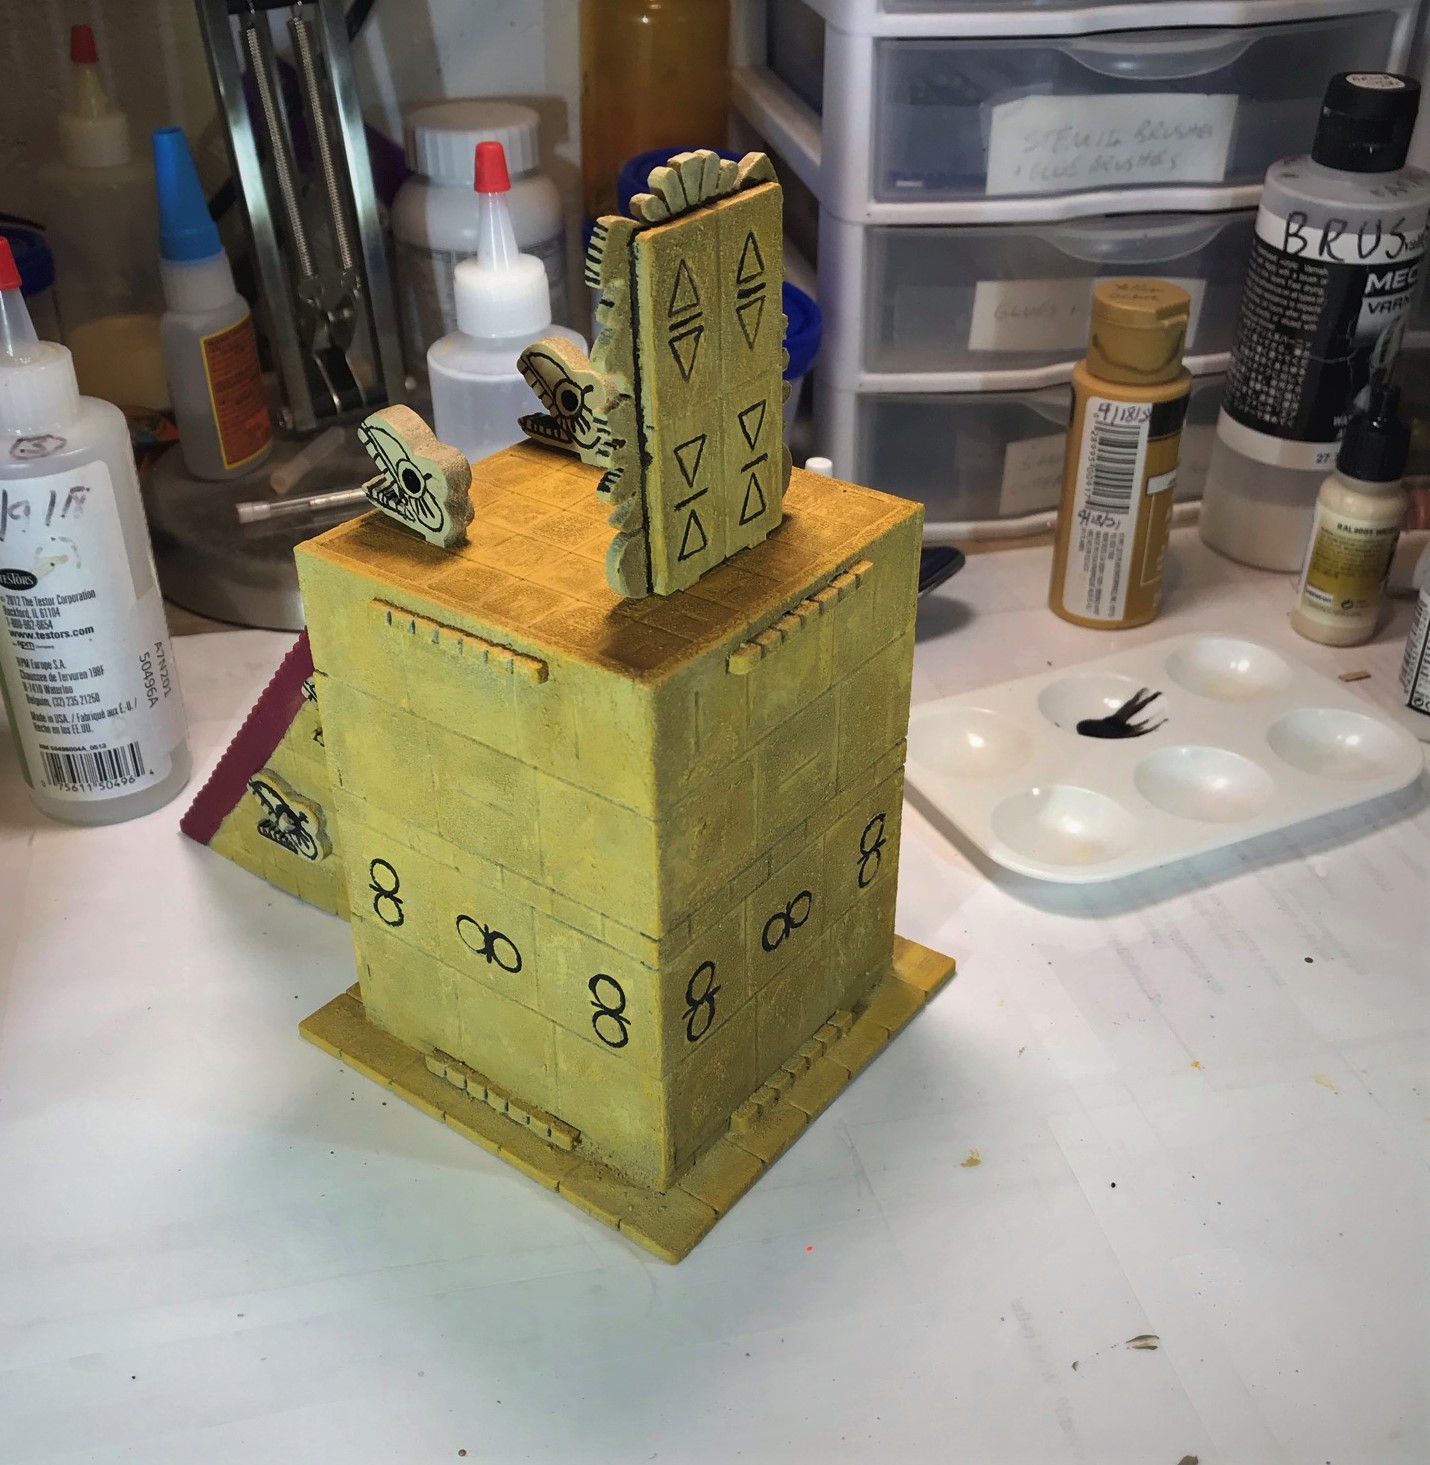
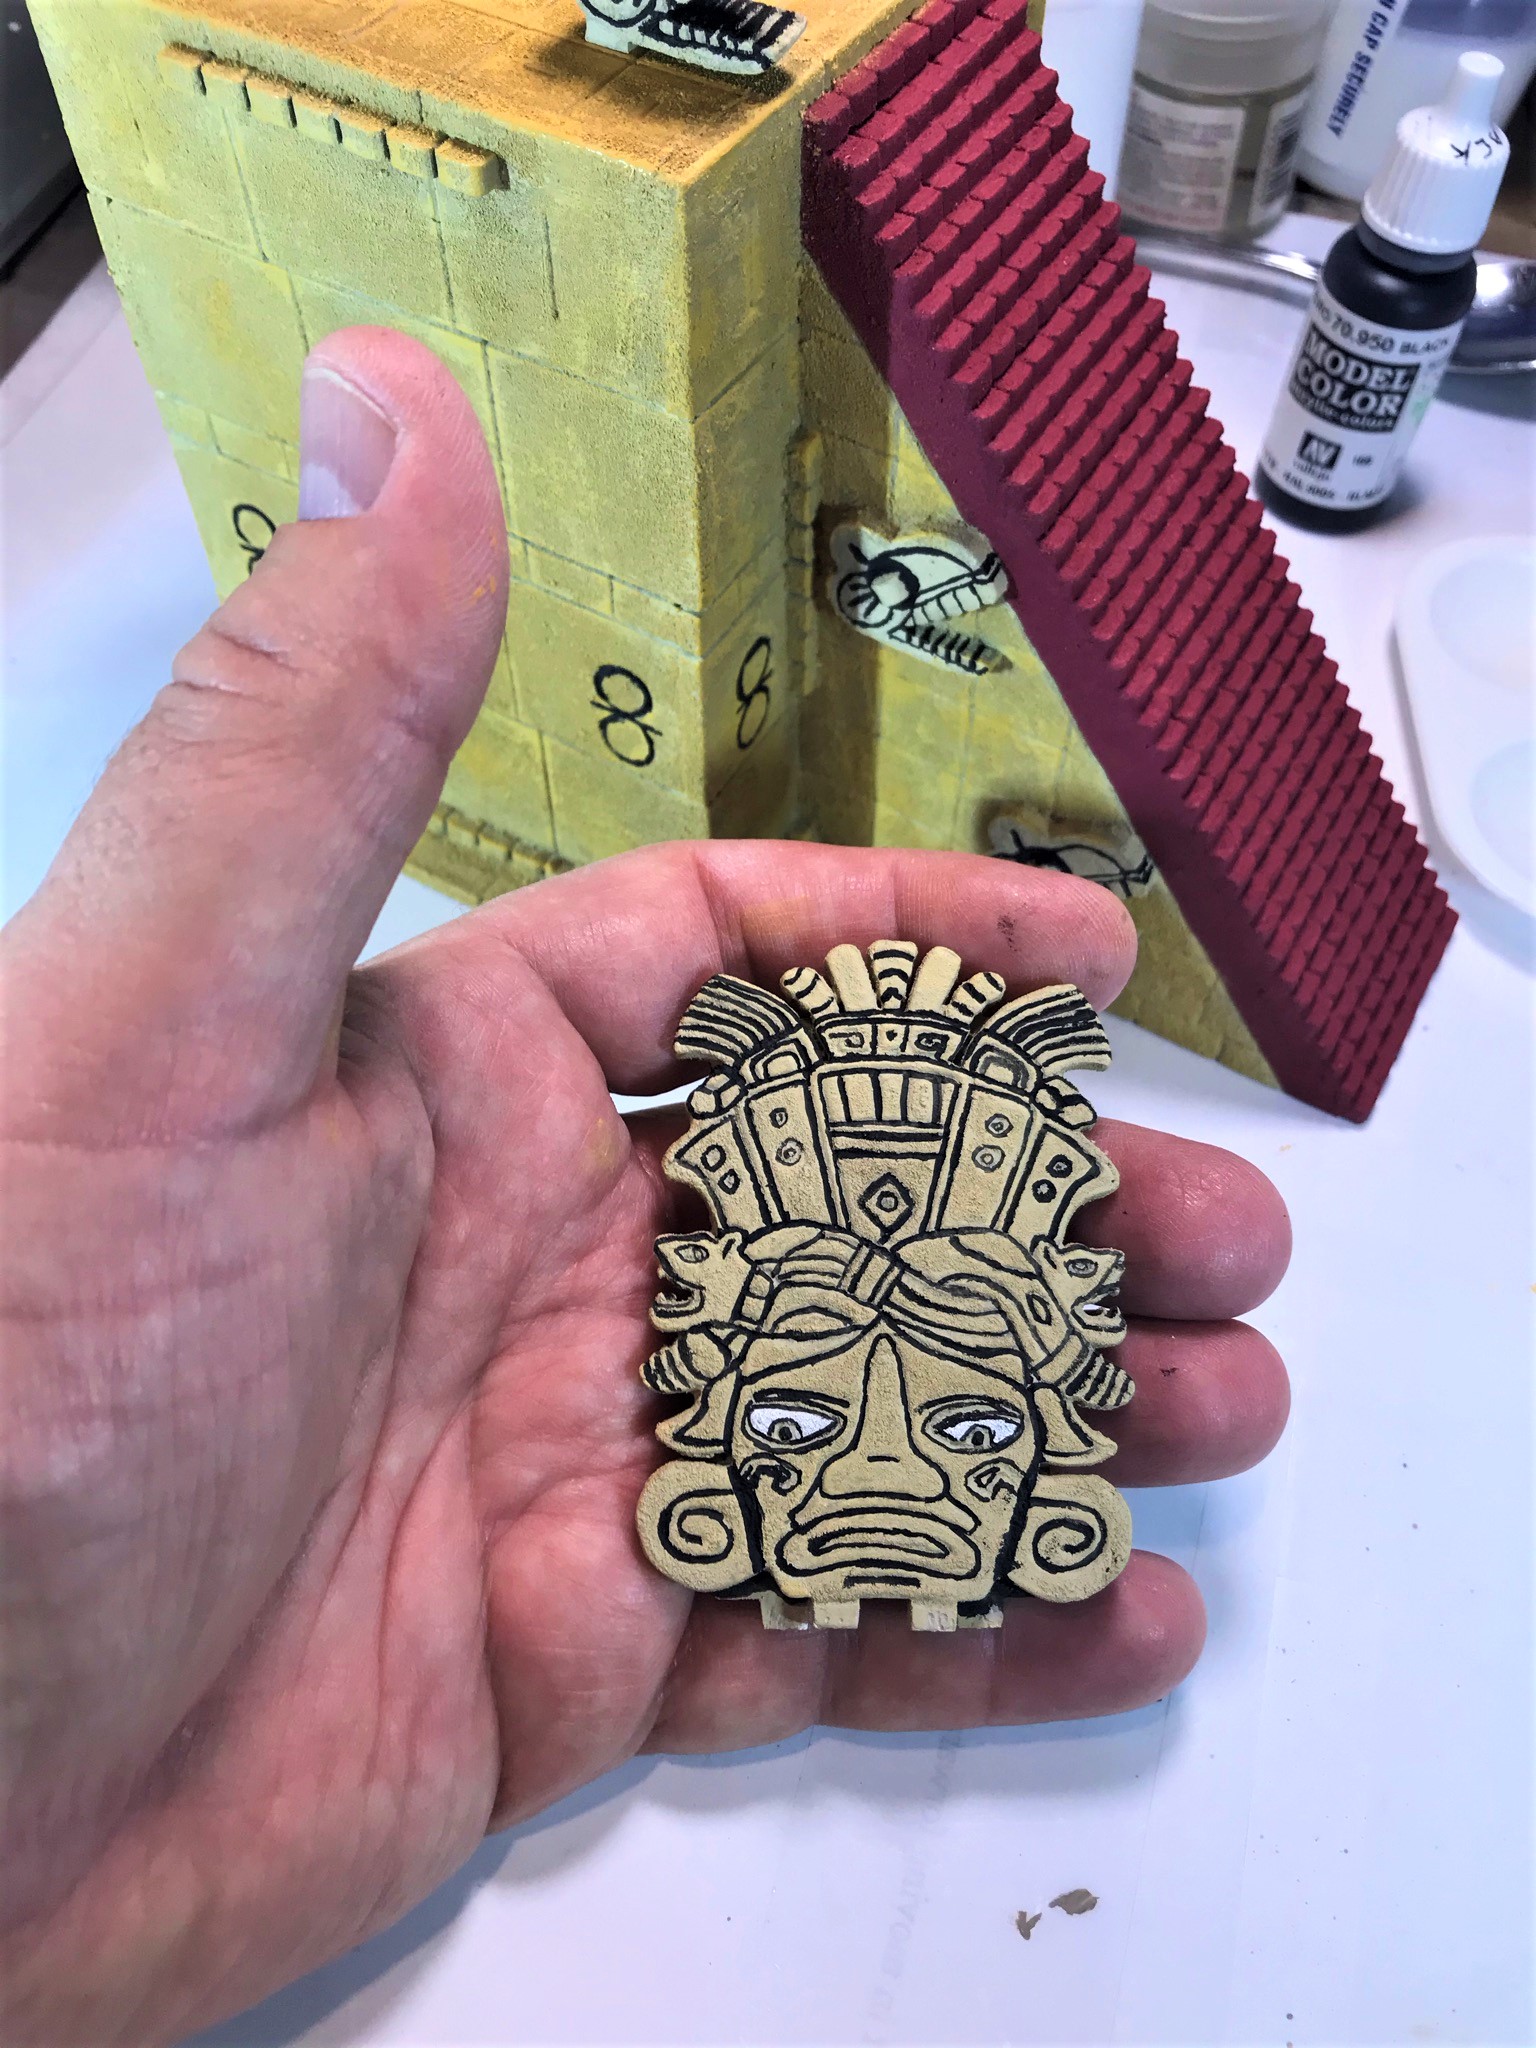
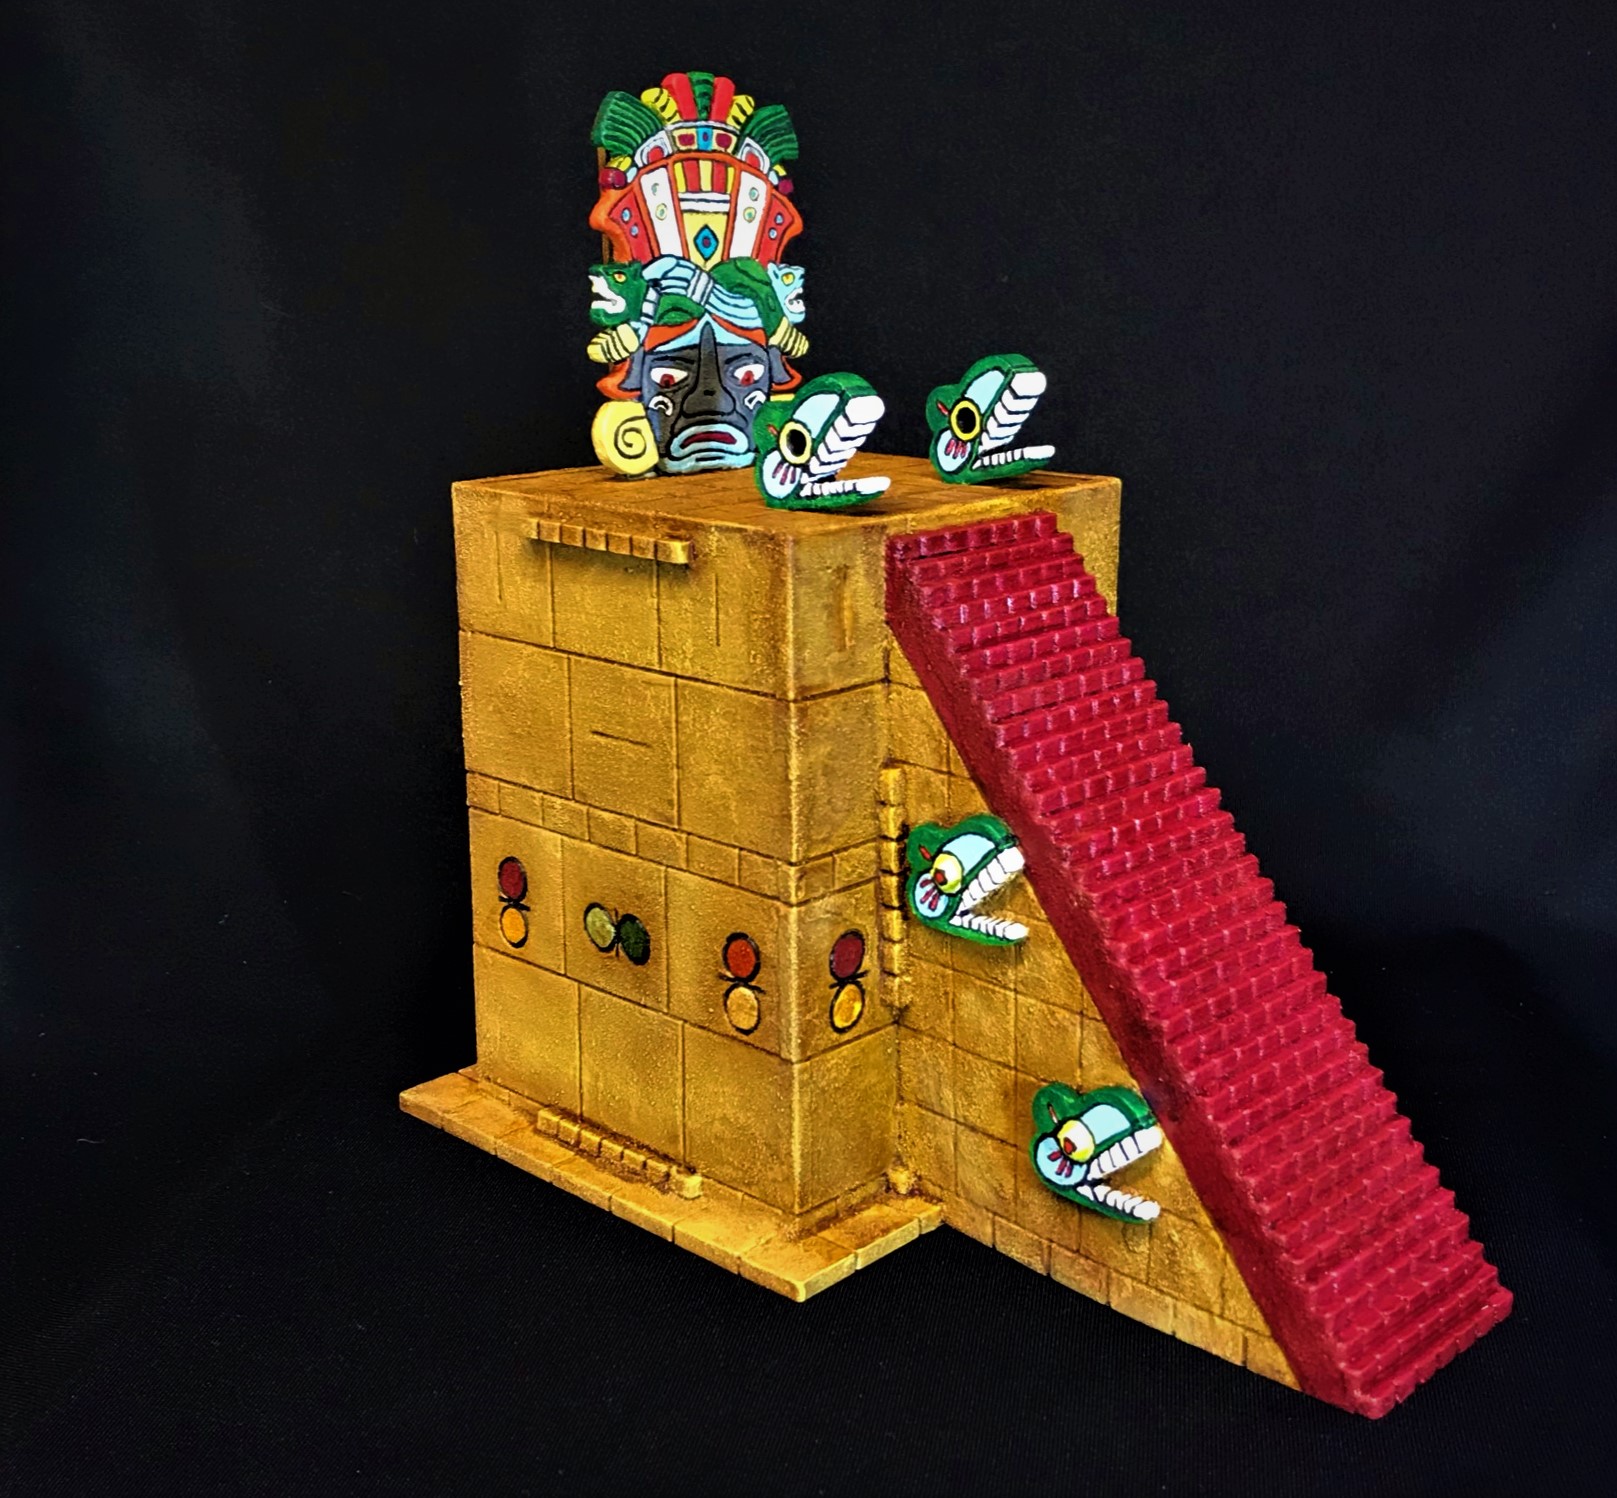
Early building of the model.The model all glued together with the top idols just dry-fitted for planning.The idols and the serpent heads were then given their chinchilla dust treatment. The idol face on the right is described in my last post.I started multiple serial dry brushing and tone applications as you see here. I also decided the circle colors on the tower should match those of the Huitzilopochtli image, and that the serpents/snakes should as well. The chinchilla dust gives a great result to the dry brushing and tone applications.As the chinchilla dust surface of the dusted model is quite rough and porous, I painted in the idols’ lines in the MDF with relatively thick black paint. While this felt like “paint by numbers”, I did find it gave a sufficiently primitive look while making later color choices more effective for me.The rear view of the model shown above.A close up view of Huitzilopochtli’s idol face after I lined it. I decided that I would paint the front and sides of the idol, basically treating it like a billboard in terms of color application.Early painting of the idols and circles but before toning it all down on the sides. I did apply a diluted brush matte varnish to the idols as I wanted them to pop and not be dulled down by the tone. I thought that some poor Aztecs would have been enslaved to keep the idol paints fresh. You can tell me if that worked or not conceptually.A face only a mother could love, and maybe not even then. The brush on varnish is still moist here.
After all the painting, I glued it together. A challenge was the Huitzilopochtli idol due to its height and its thinness. Both prevented using rubber bands during the gluing process, but I think it worked out ok. Now, I will share some eye candy shots of the completed model.
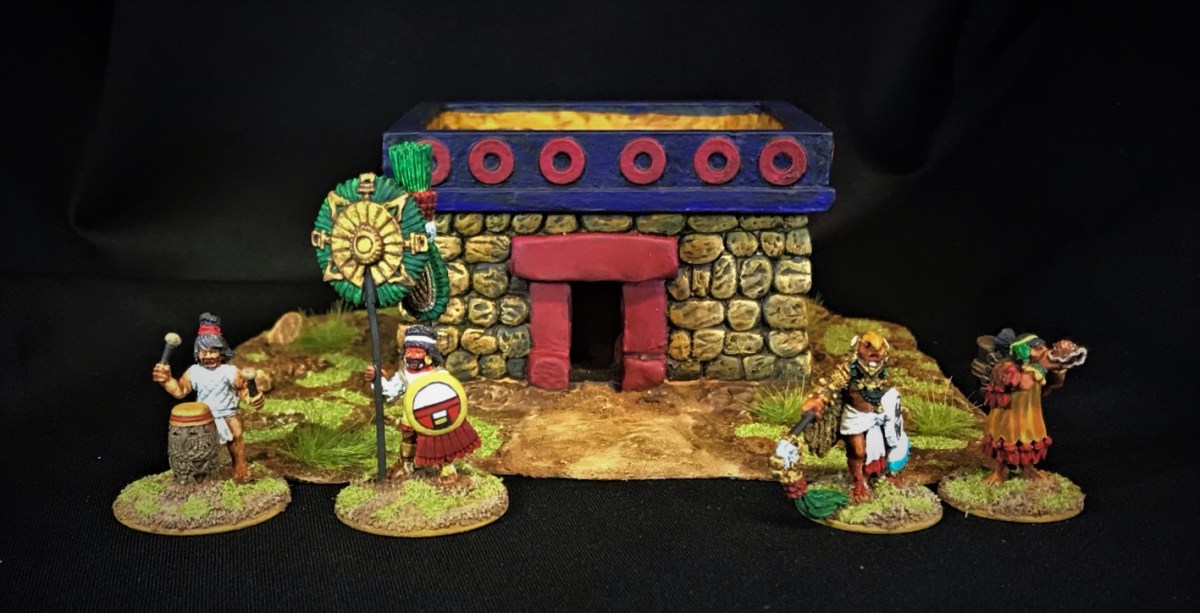
Front left side.Back side.Front right side.Aztec Temple High Throne – close up shot of the top.Montezuma, and an Aztec Captain and his conch blower signal the troops to muster…And the Jaguar Warriors answer the call!
Thank you for taking a look. I have a few more buildings and some other stuff coming up for this project, as well as a rules update, but I’m pretty happy with the progress. I will share those shots on the next post, and eventually I hope to have a nice shot of all the terrain on the tabletop – I’m just not there yet. But, my gaming club is back LIVE on June 5th, so I’m close!
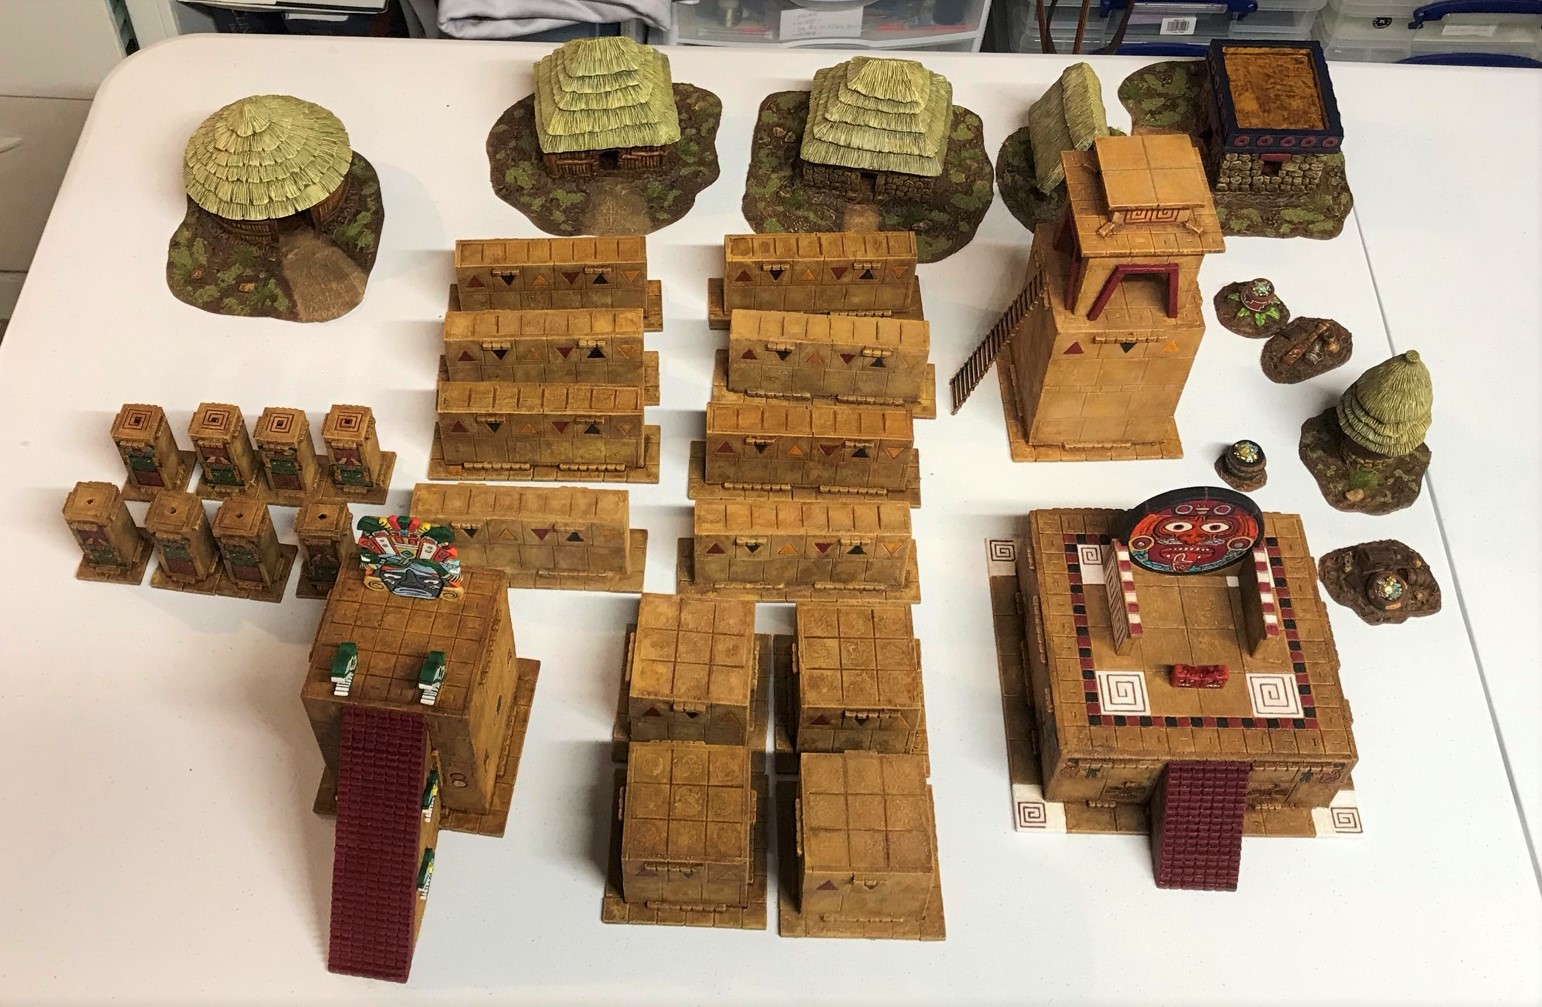
All my terrain so far.
For all of my previous posts on games, units, and other projects for my 16th Century Spanish Conquest supplement for Feudal Patrol™ – “Civilizations Collide” – please see this page.
PAINTS, INKS, GLAZES, SHADES, WASHES, PIGMENTS, FLOCKING, GLUES AND MORE THAT I USED ON THIS MODEL
Historically, the Aztecs and their Empire were well known for dominating Mesoamerica prior to the arrival of the Spanish. One of the more gruesome aspects of their way of making warfare involved the priority of capturing their enemies for both slavery and human sacrifice. A lowly commoner’s only way to ascend the social hierarchy in Aztec society was be a warrior who captured many enemy of perceived value (in other words not easy marks).
So, it became obvious that a suitable sacrificial altar-type building to drag these poor souls to their sad end would be necessary for games based in a city like Tenochtitlan. Obviously, in 28mm scale, I can only try to approximate the elements of a cityscape on a 6′ by 4′ tabletop, but the Aztecs would have had a place for ritual sacrifice as part of one.
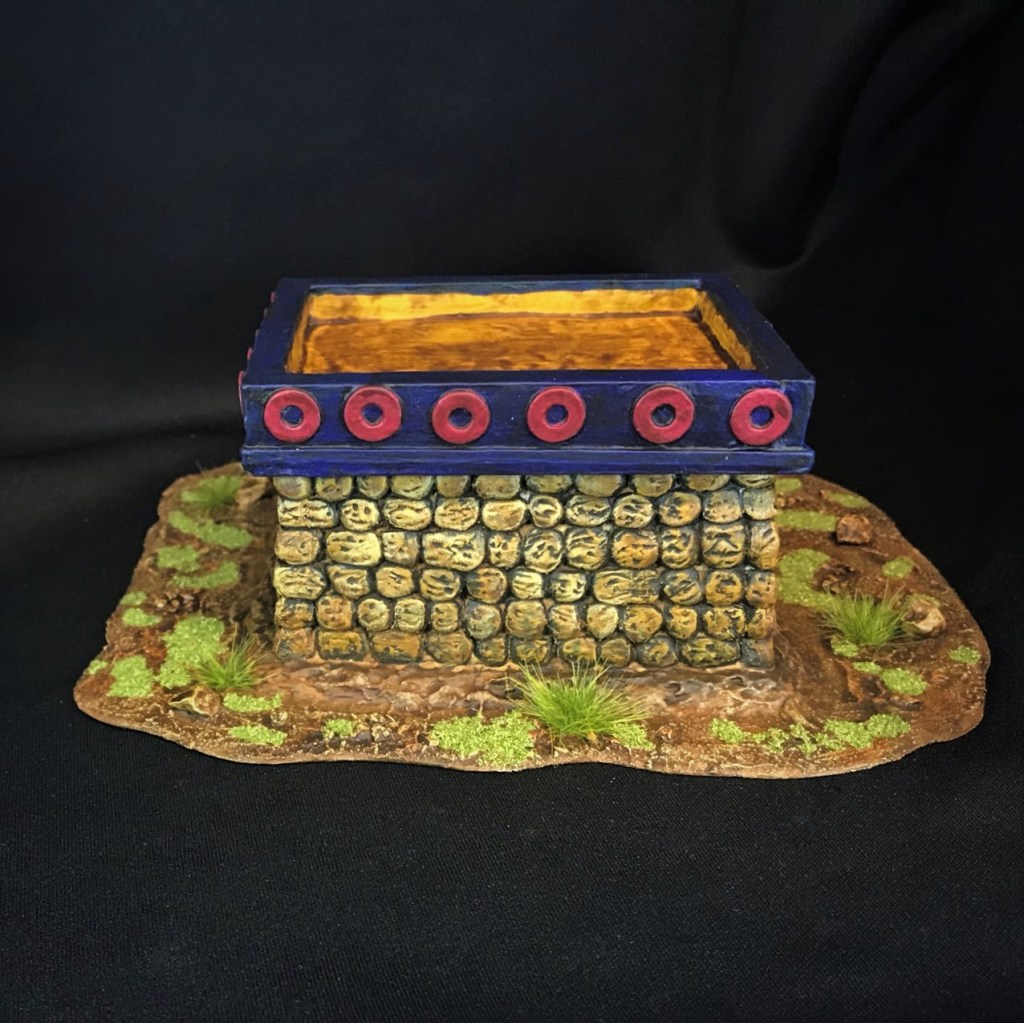
In this post I will share my latest – and largest to date – MDF kit build for Feudal Patrol™ games in Mesoamerica (using my Civilizations Collide supplement). It is called Temple Sacrificial Altar and is scaled for 28mm figures. It has a large idol overlooking a small altar on a raised platform. This one, like my previous Aztec MDF, also came from from Things From the Basement via 4Ground via Badger Games – you can see it here.
The kit in its box.
This is part of “Mark’s Aztec Building Challenge Contest” (which you will read more about shortly in this blog post), as well as being part of not one but two painting challenges being kindly run by a couple of great bloggers. The first is “The Summer Solstice Painting Challenge” from Ann’s Immaterium. Its supposed to be an entry that you consider your “best”, and as I think you’ll see I think this building is one I feel qualifies – and this is my entry. The second is from Angry Piper over at Dead Dick’s Tavern And Temporary Lodging called “Monster Mayhem 2021”. As the idol on the building is pretty monstrous, and Angry Piper concurred – it’s my entry here too!
On to the project – the kit was an enjoyable build but much more detailed than previous attempts – so it took longer. Plus, as you’ll see, I had to do some circling back on the paint job. It happens. I did also dust this baby up with chinchilla dust again – and thanks again to The Imperfect Modeler (TIM) for introducing me to Chinchilla dust. There are a few WIP shots this time as well.
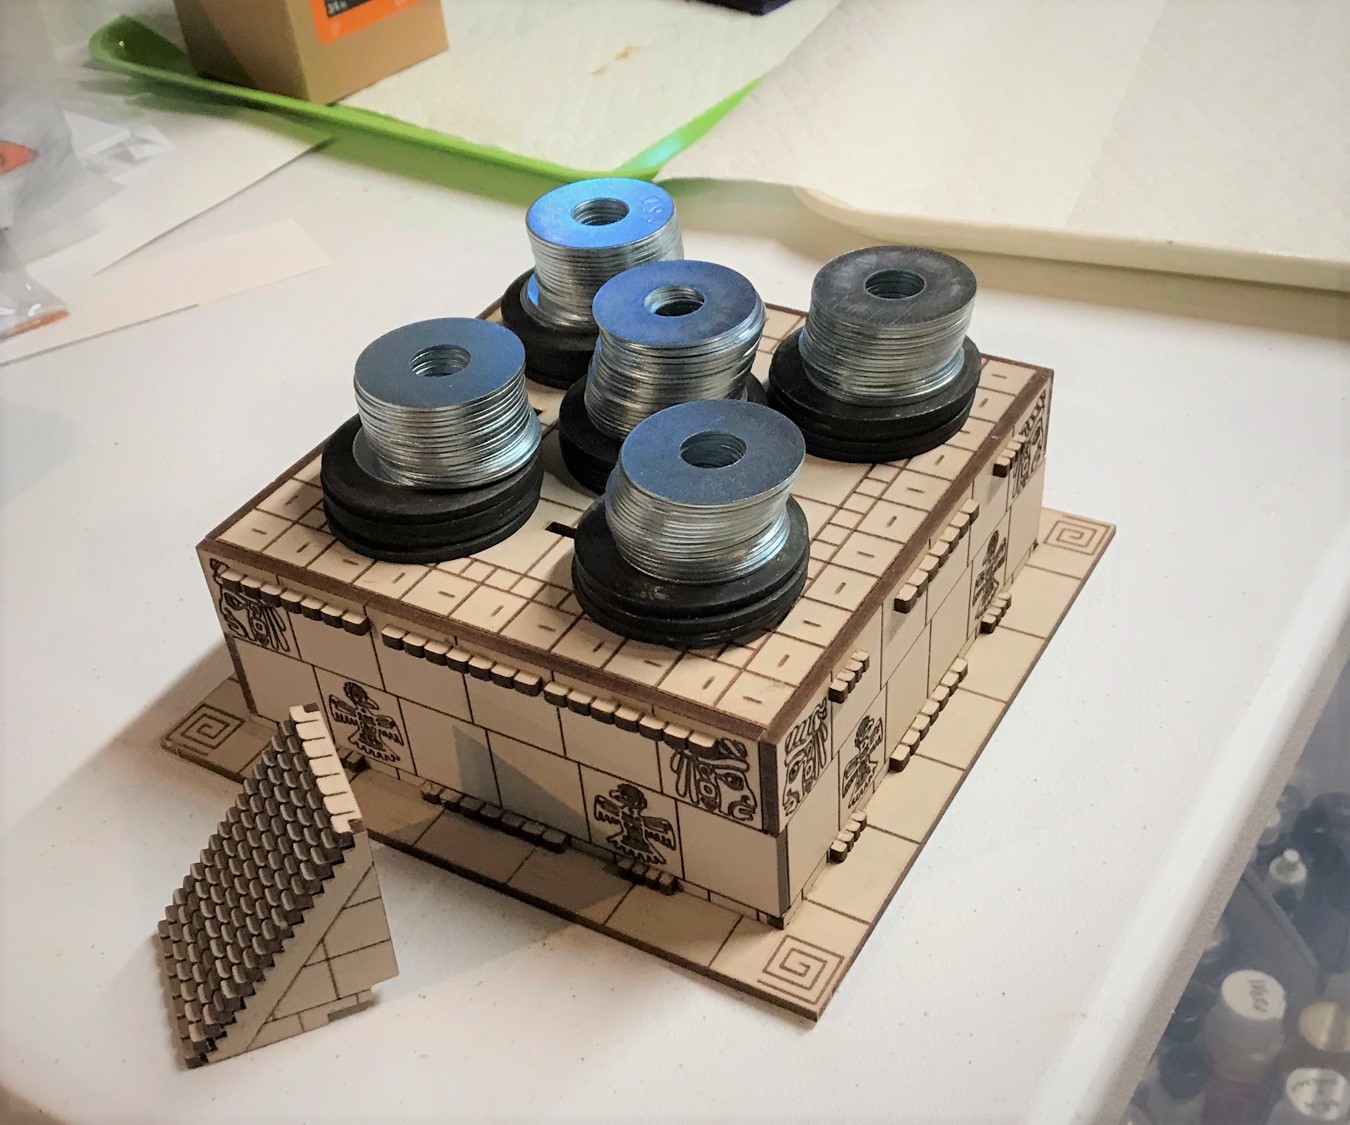
I started by wiping down the kit with a moist microfiber cloth.Assembly was pretty easy. After earlier using rubber bands to secure the walls and stairs while they were being glued together, I used large washers to secure the top while it was being glued.Next I dusted up the idol here (the dragon heads are for the next project) and the base.Using my airbrush, I base coated everything.I added the stairs and began painting. The model pieces are dry-fitted here and not glued yet. Here you see my initial – yes INITIAL – color choices for the idol. That would change.
Thanks to Pinterest, I got an image on my feed – of course on the day after I painted it – that would, well, make me somewhat aggravated but also allow me to take a new direction. The idol face apparently comes from an Aztec calendar – and the reddish image I saw on my feed fit my concept much better than what I originally chose.
My original paint scheme and a printed copy of the one from Pinterest – I had to redo!
And the second option is done.
Repainting the idol.
I found that lining the recesses with black paint helped greatly. As the chinchilla dust is very absorptive (especially on MDF), I mostly used somewhat thicker paints – even craft paints with the brush. Otherwise, you can get some capillary effects. My list of the materials I used is at the end of the post.
More or less a repeat photo with the new idol shot – plus the little sacrificial altar dry fitted to the base.I ended up using the white and red and black scheme you see here on the model. You also can see the highlighting of the chinchilla dust. I did find that I needed to go over the highlighting again with Army Painter Light Tone (the initial highlighting was over a toned-down base coat) – but I liked the final outcome.
I secured the final assembly as shown her with rubber bands while glue set – plus another on top of the idol (not seen here).
Back of the model view.
Final assembly.
It took me from the end of April to complete this model. I had some needed supplies finally arrive, allowing me to proceed. And I think now I’ve single-handedly bought the world’s supply of Army Painter “Light Tone”.
An aside as it affects how the contest challenge is proceeding. I had several delays beyond the supplies and repainting that I described, such as, well, golf, and mundane medical issues. Not that my game has been any good mind you! As for medical stuff, count my final COVID-19 jab that knocked me down a bit the next day (AND it was also at a golf tournament – bad call to schedule that on my part), plus a series of allergy/sinus issues, and a nearly broken toe (got a bit lucky with a bad bruise) – all causing me to slow down a bit. Oh yeah, multiple meetings and a town hearing to get (hopefully) approval to tear down and build a garage. And I still need another hearing! I hope to post on that IF AND WHEN I get approved.
Without further ado, let’s look at the final completed model and some Warrior Priests checking out the new digs.
Front view.Top view. Note the bloody altar with a little BFTBG.Detail of the front and the altar. There were two golden eagles and two faces on each side of the model. I also stuck with the red and white symbols on each corner.Right side.Rear of model.Left side.This Wargames Foundry warrior priest has the heart of a poor Conquistador – who was apparently already dragged away.All my Warrior Priests (and a Priestess) checking out the new building. All are from Wargames Foundry, and you can see their stories here, here, and here.
All that I have left in the contest challenge is this model below. FYI, some work has been started.
Thanks for looking and I hope that you found this post enjoyable to read and check out. As always, please do let me know your thoughts in the comments section !
For all of my previous posts on games, units, and other projects for my 16th Century Spanish Conquest supplement for Feudal Patrol™ – “Civilizations Collide” – please see this page.
PAINTS, INKS, GLAZES, SHADES, WASHES, PIGMENTS, FLOCKING, GLUES AND MORE THAT I USED ON THIS MODEL
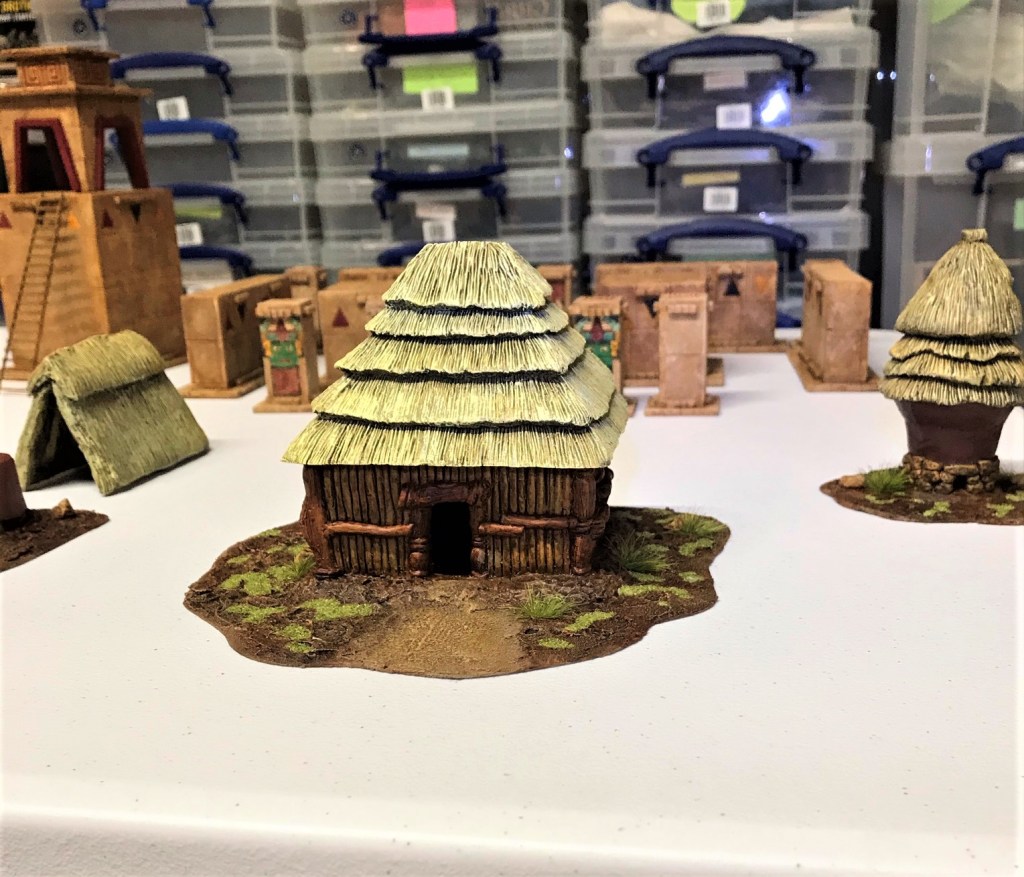
This post will cover the Aztec resin terrain/structures from Acheson Creations that I have recently finished for my Feudal Patrol™ games in Mesoamerica (using my Civilizations Collide supplement). I purchased 6 structures from the company, and they were kind enough to throw in some scatter terrain that I believe will prove to be quite useful. The six buildings plus the 4 scatter pieces are all part of “Mark’s Aztec Building Challenge Contest“, as are all of the MDF I listed in the original contest post. While the buildings in this post would be probably more suited to a rural setting versus a cityscape, I think that the scatter terrain will be useful in several gaming ways.
Originally, my plan was to do finish all of the MDF structures first, and then move on to the resin ones. That concept did not pan out as I ran out of some key items for the MDF. The MDF need to match exactly so that visually the collection makes a nice panorama.
So, those shortages moved me onto the resin, which I had luckily prepped for priming back in March. I thought Acheson had made the recommendation to prime with Rustoleum “Painters Touch Ultra Cover Flat Black” – a rattlecan – something I usually avoid. (Now that I looked back at his website, that recommendation is not there?) Anyways, I got another delay in priming as the Massachusetts weather also did not play nice (it’s been cold and we even got 6″ of snow on April 16th).
I thought it prudent – prior to priming them – to give all a thorough scrubbing and washing. I also saw a need to install 1/8″ neodymium magnets for the resin structures with roofs – to make them more stable (and stay on the buildings during games). This would be useful on the tabletop and yet keep them easy enough to open up for gaming. I used different patterns for the magnets as you will see below – so the roofs won’t end up on the wrong buildings in error.
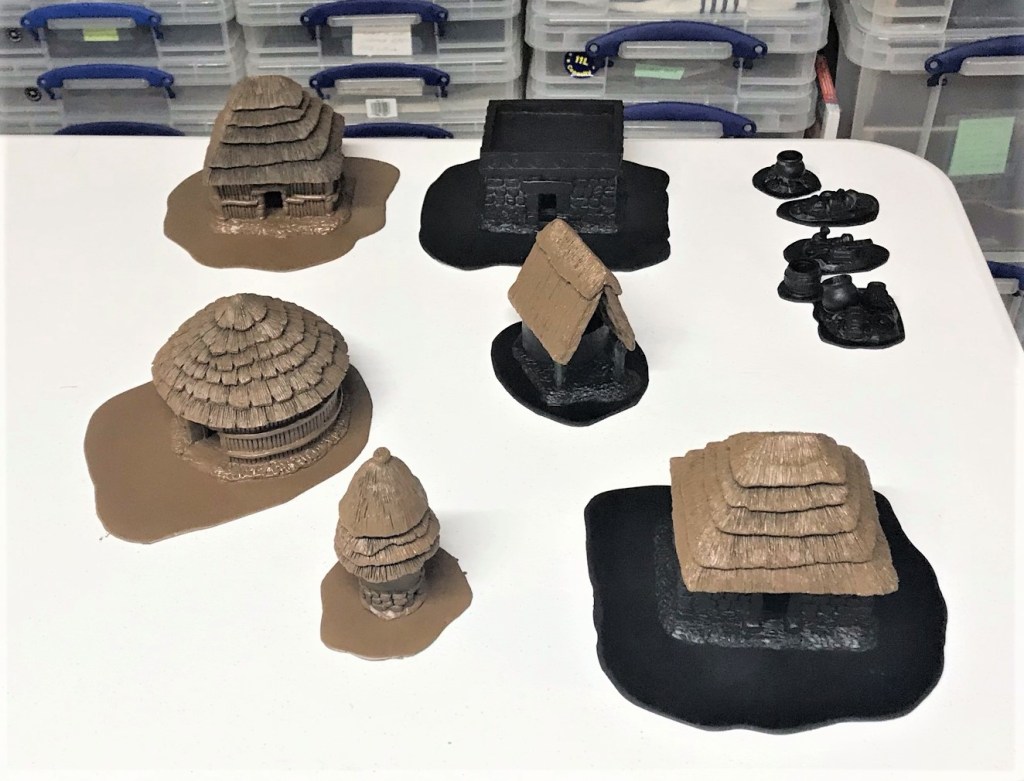
Subsequent to washing, I based these pieces back in March on 1.5mm sanded styrene card – so as to appear more flush with the tabletop. When the weather finally cooperated (one day), I primed them all with that flat black and then sprayed a coat of Army Painter “Leather Brown” over the pieces that would be lighter or brown. This group of pieces all needed different paints – I am listing what I used by type at the end of this post (this helps me remember for future consideration and projects but you may find it useful too). As I started them all before April began, these will be 10 more entries in the April painting challenge from Ann’s Immaterium called Ann’s “Paint the Crap You Already Own” challenge.
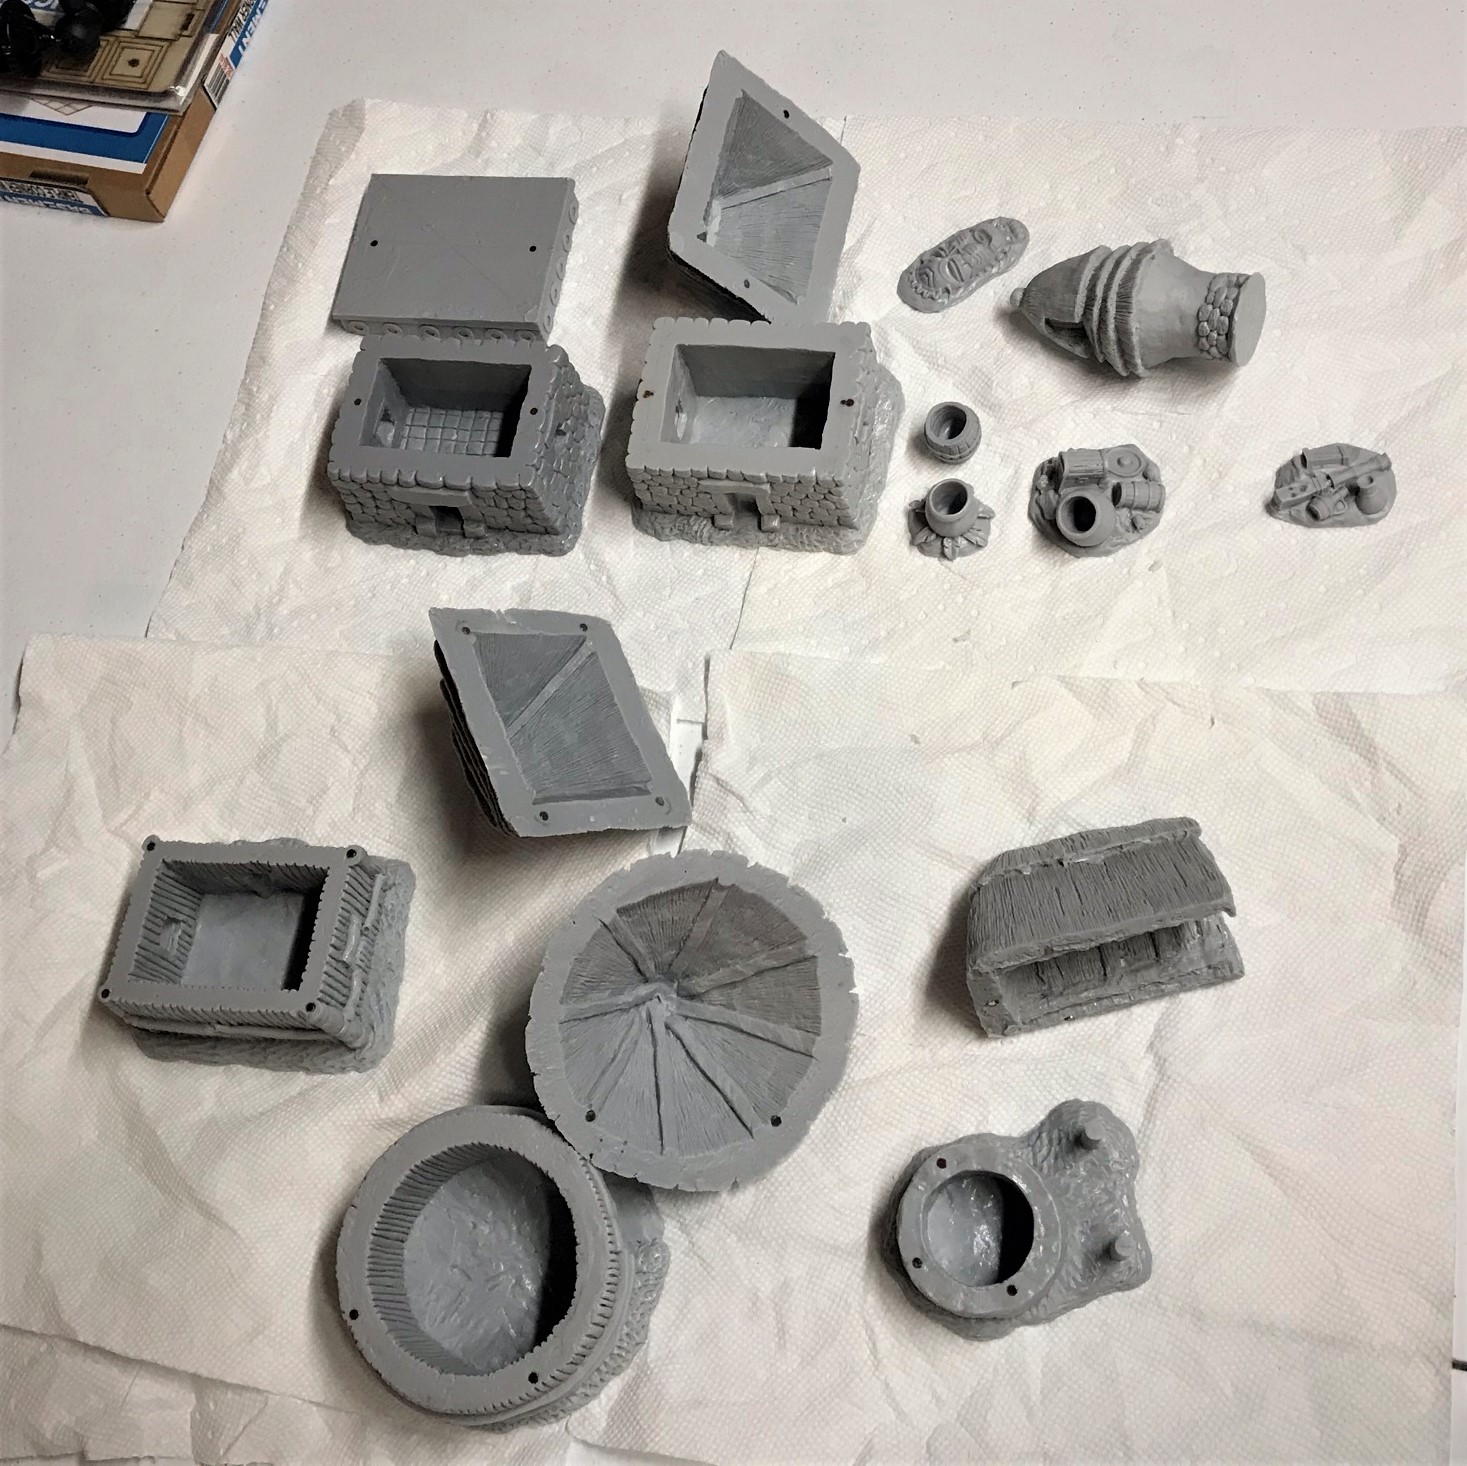
The pieces washed and with neodymium magnets installed. I would also have to figure out how to paint and finish the inside of the roofs so that I could mount them for the roofs’ exterior painting. I would mount all of these on styrene card.
The pieces mounted on styrene card and primed.
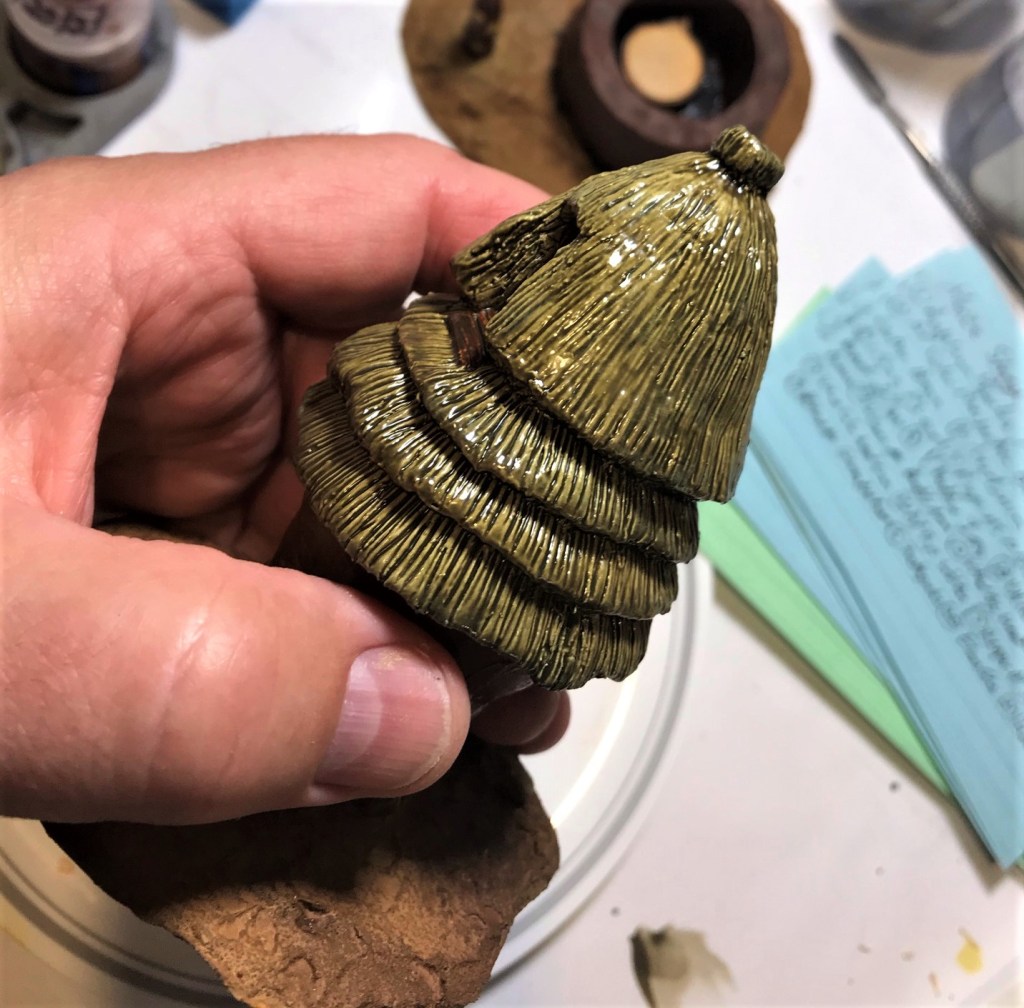
One major difference here with these pieces versus how I have painted previously is my use of Army Painter “Soft Tone” (the “dip”) applied with a brush. This is an oil-based product, which I do not employ usually, mainly as I hate the need for cleanup with paint thinner. However, I thought that it would be a good use for the stuff that I bought back in 2017 – especially on the thatched roofs as it would both shade and provide a varnish-like protection. I could then dry brush over them with abandon and dull the dip’s shine with a final matte varnish.
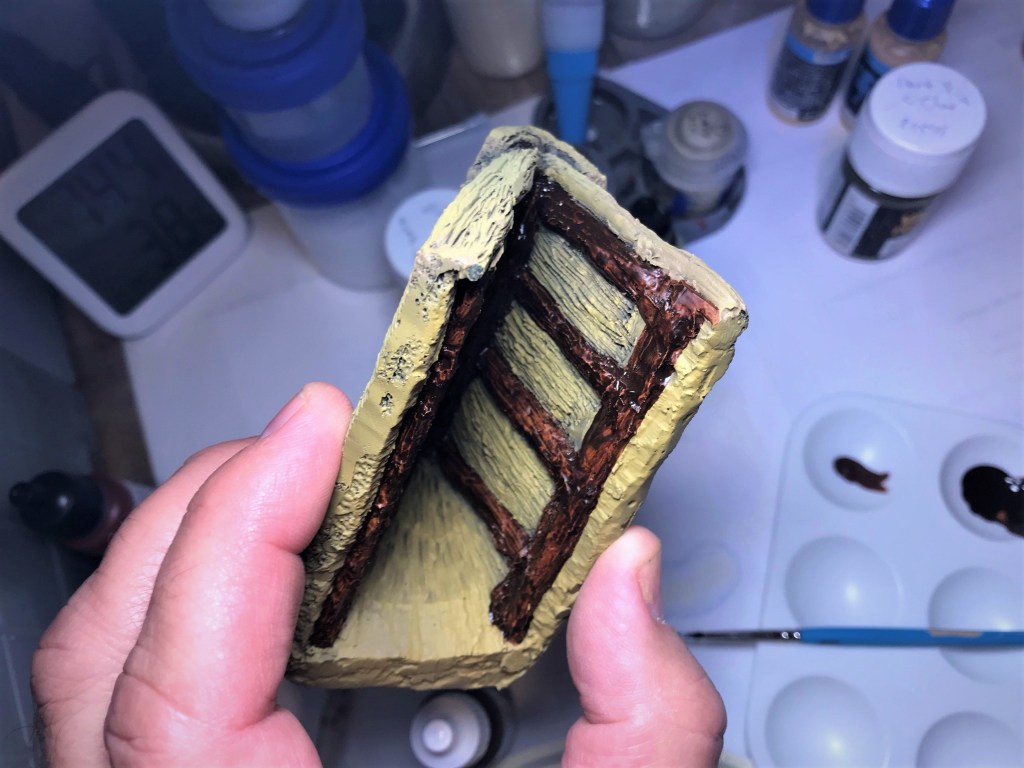
I would need to finish the roofs’ interiors prior to the outside – and I basically treated them as separate pieces to be worked on.
Below, you will see I broke each of the pieces out so you can get an idea of the transformation. I must give a shout out to TIM of The Imperfect Modeler who graciously gave me some excellent advice for these pieces.
Cuezcomatl Granary Structure
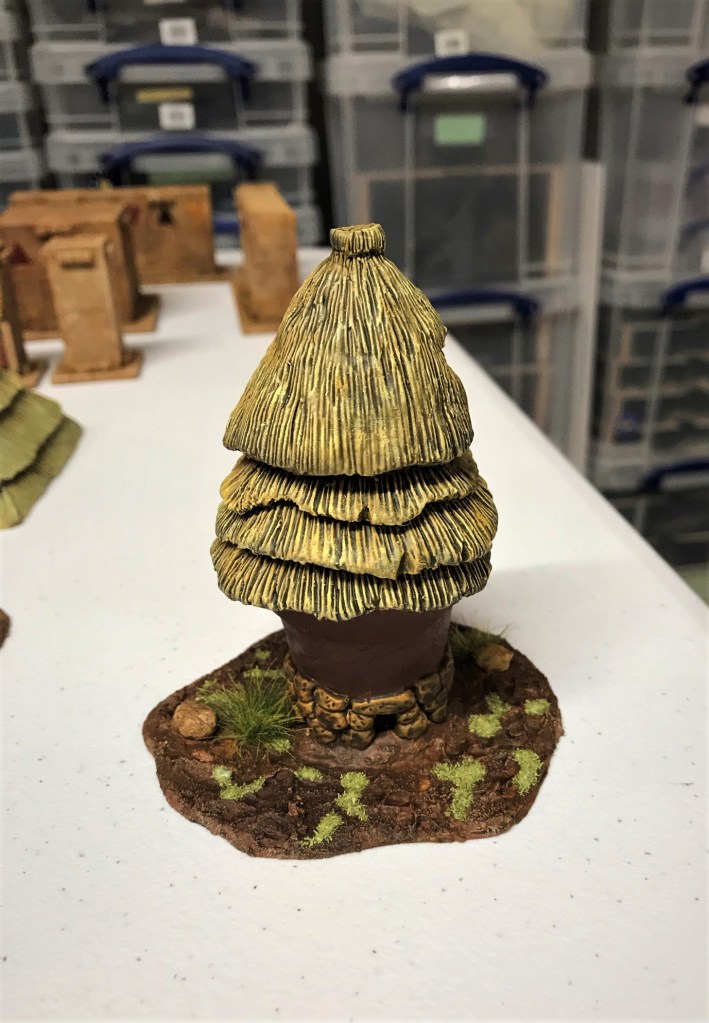
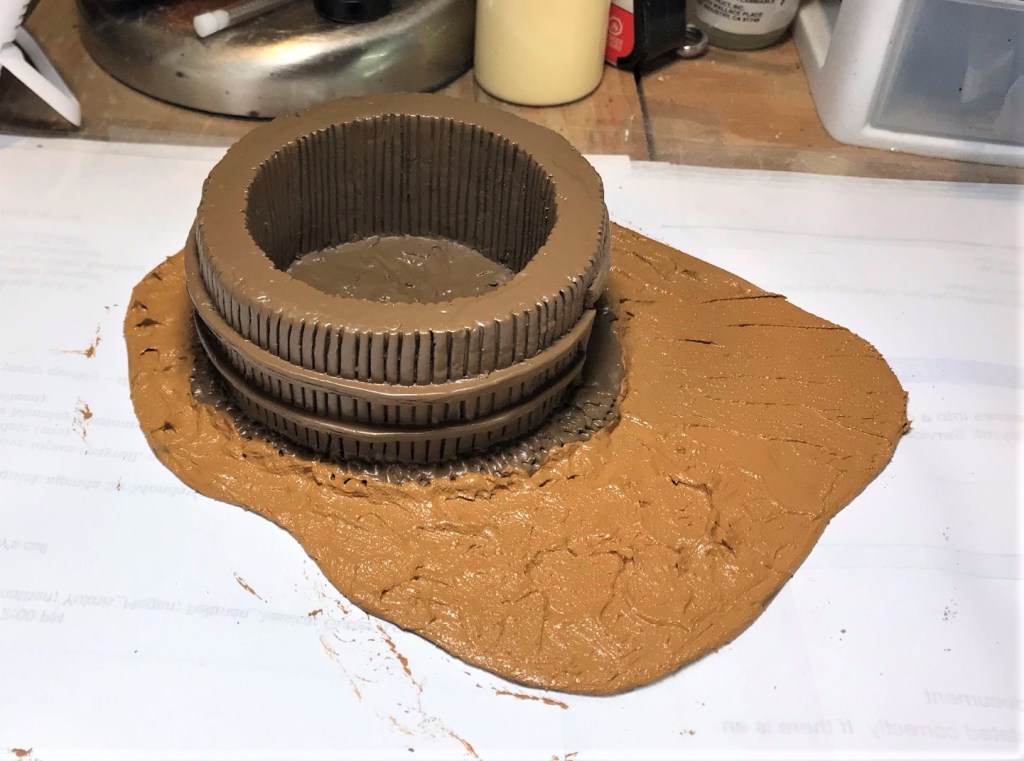
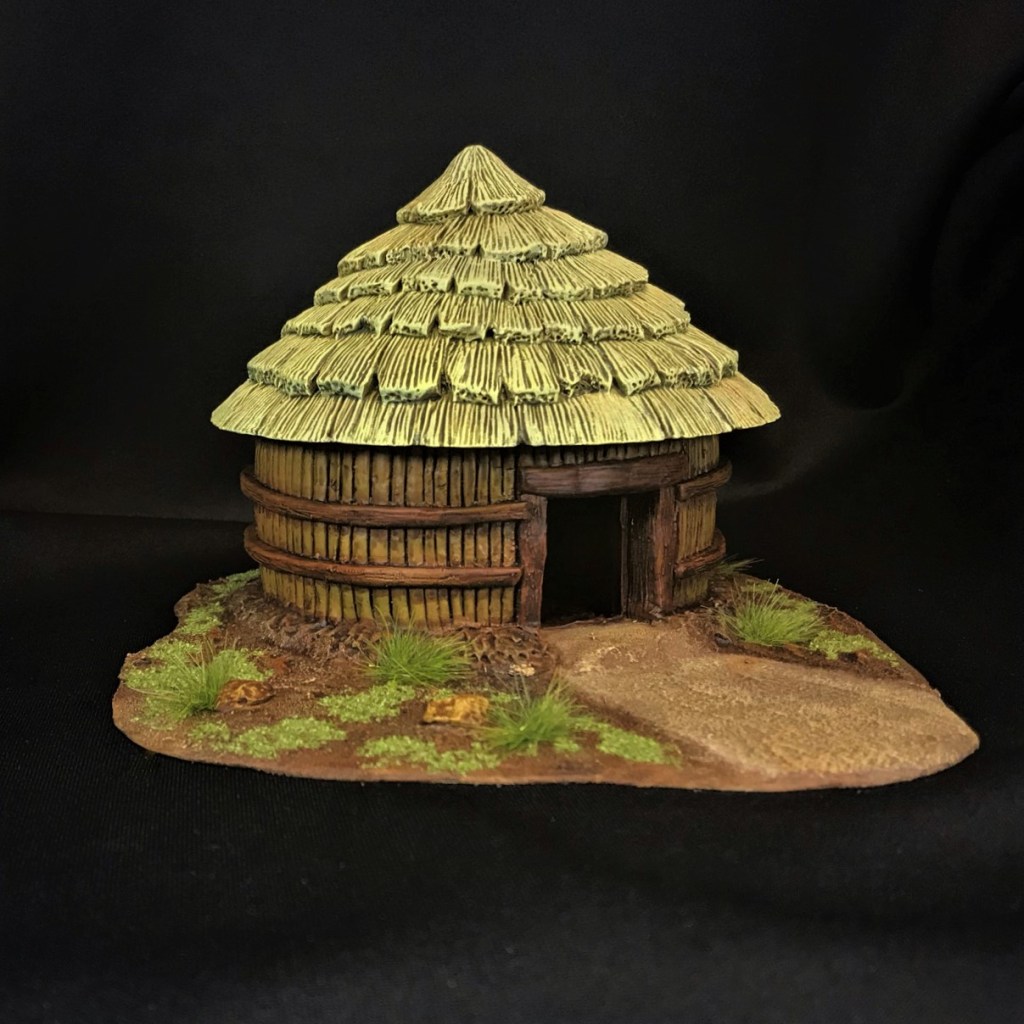
The term cuezcomatl refers to a granary storage structure that was used in Mesoamerica before the arrival of the Spanish and even up to today in some rural areas (see reference here). The model was interesting to paint, and working on it also helped me to prepare for the other thatched roofs. In the end, I decided to use Army Painter Soft Tone (the “dip”) with a brush. This allowed me to both get some good detail shading as well as to protect the model. I can see this model being useful as a terrain piece, as well as an objective marker. The Aztecs were quite avid practitioners of raiding their neighbors for food as well as captives (or anything else that they wanted to take), as were all Mesoamerican peoples of the era. The Aztecs were just more adept at the practice.
Unprimed and on its card base
Primed
Added texture to the base
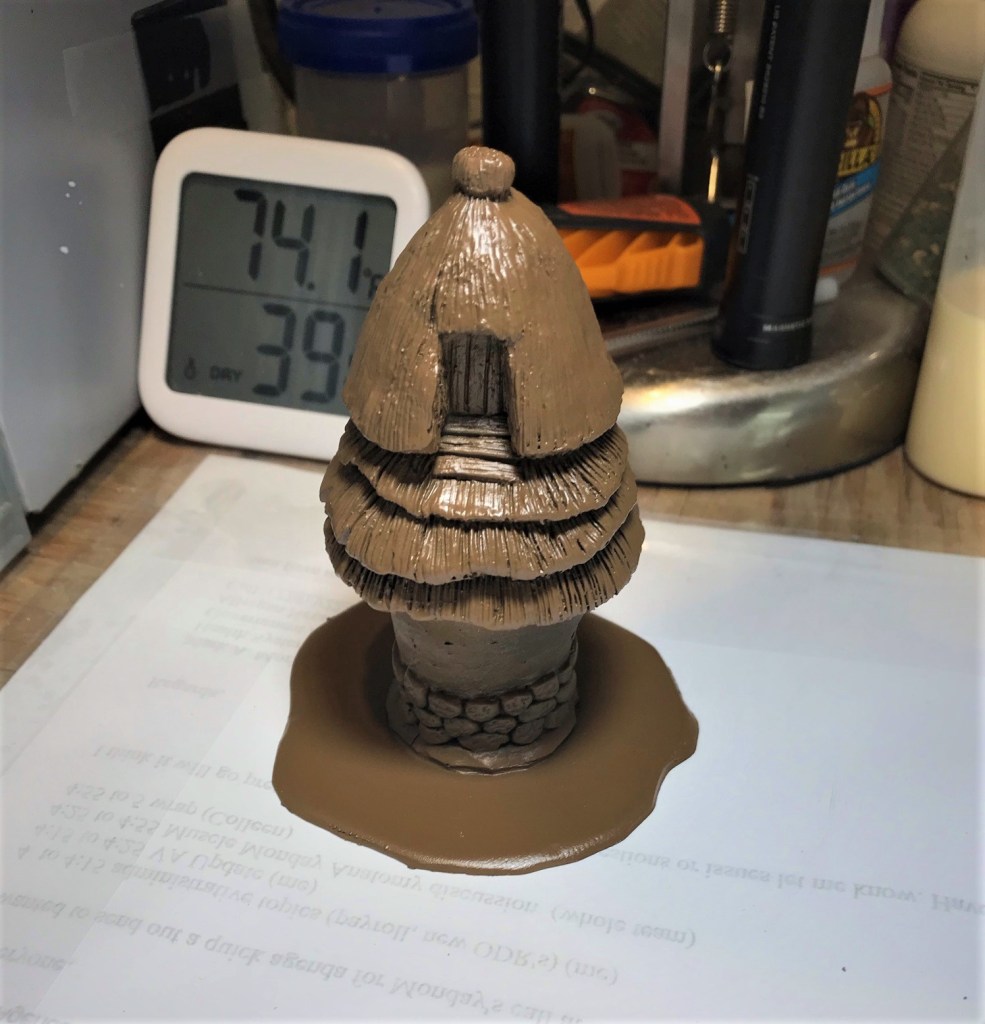
I base coated the piece, then used the dip as a shade, then later I did a lot of dry brushing
The finished terrain piece
Progress on the Cuezcomatl
Cuezcomatl Granary Structure (door side)
Cuezcomatl Granary Structure (back side)
Jaguar Warriors seize an enemy cuezcomatl
Maize Storage Structure
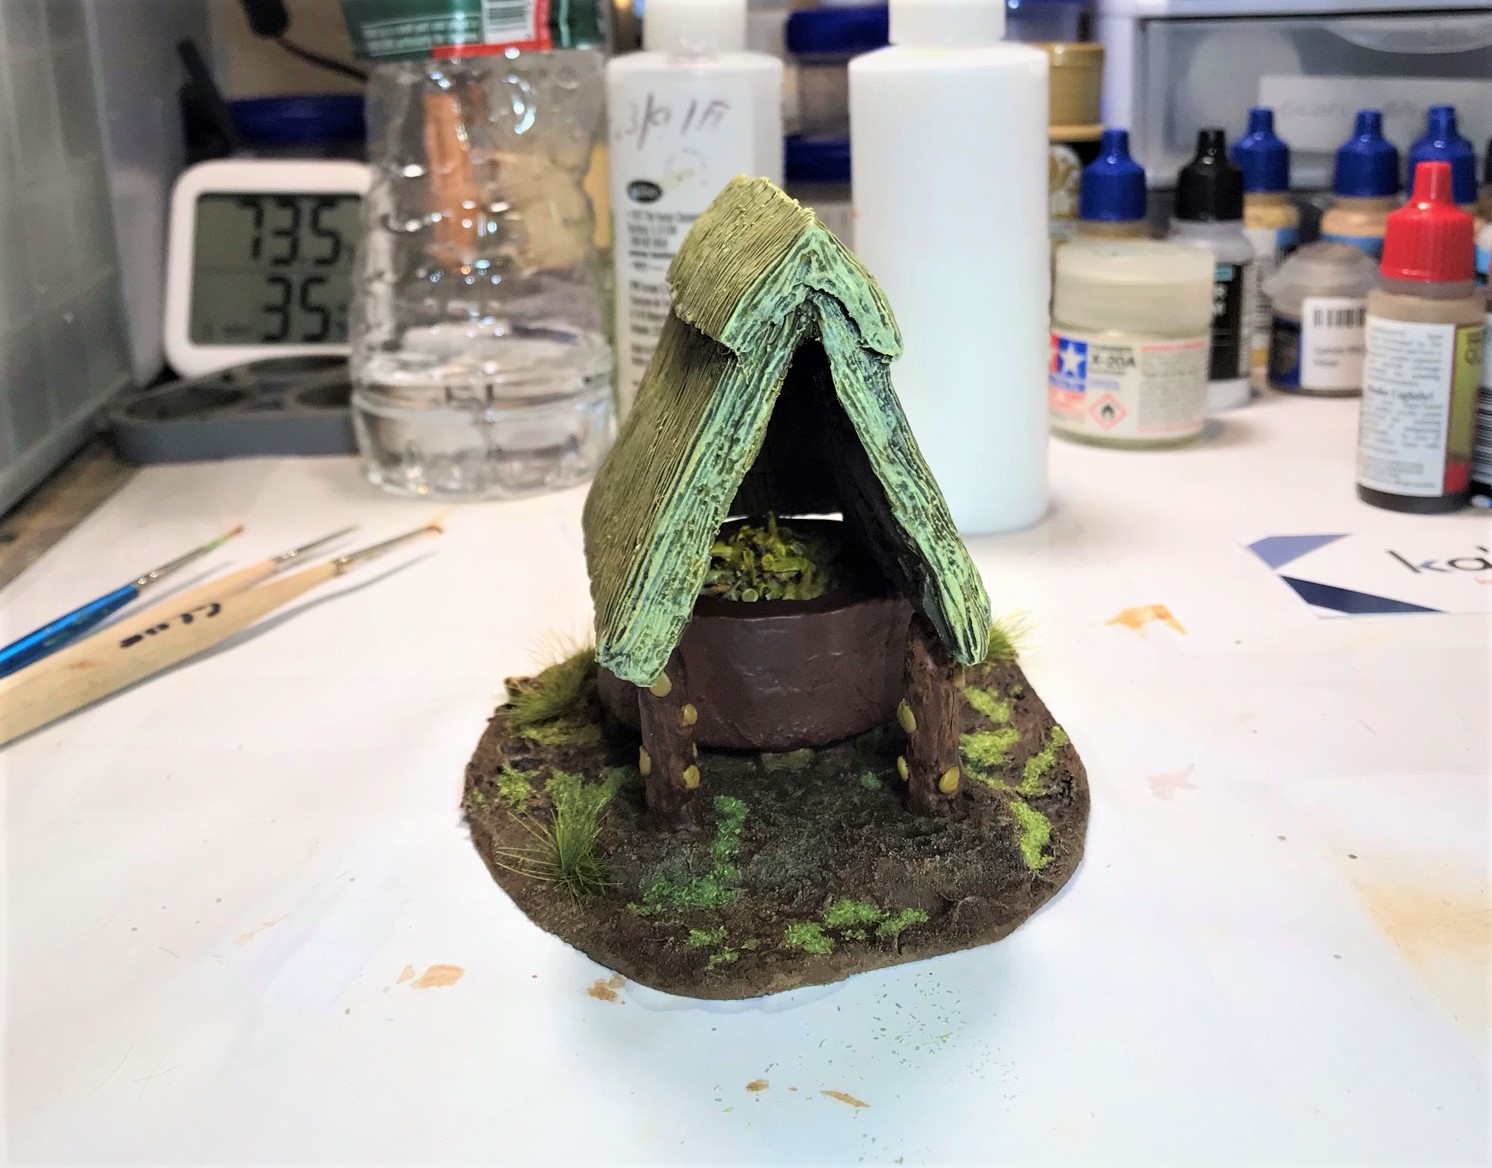
This piece had a few areas that I worked to improve upon. One was to fill an open storage well with “maize” – or at least something that could approximate it. Another was to convert the dowel-like smooth front pillars into a more convincing-looking pair of period wooden supports. The pillars did have a slight wood grain, but I wanted to make them more rustic. Lastly, I did need to do some drilling and magnet installation so as to allow the piece to stay together. As with all of the other pieces here with separate roofs, I needed to finish the inside of the roof (including up to varnishing) before I finished the outside.
Similar to the cuezcomatl piece, this one can serve as both terrain and an objective marker due to the food storage bounty.
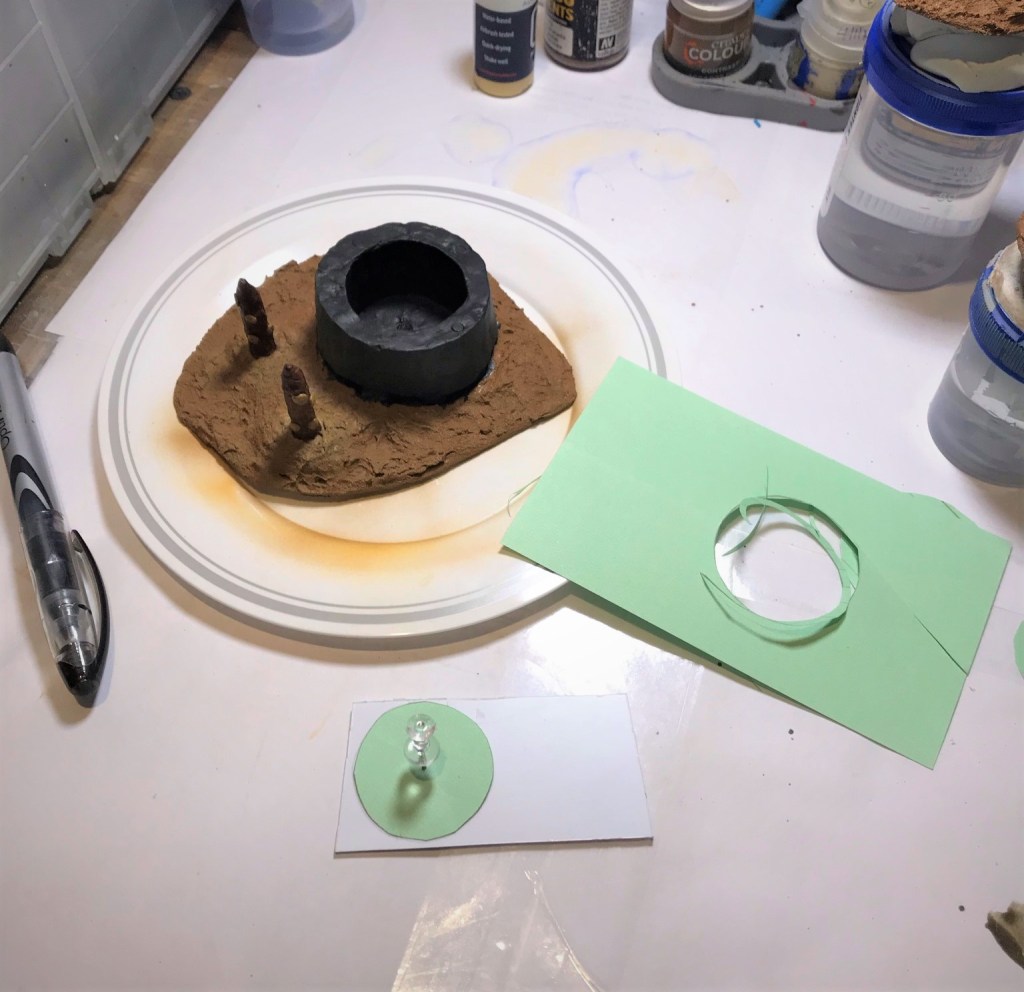
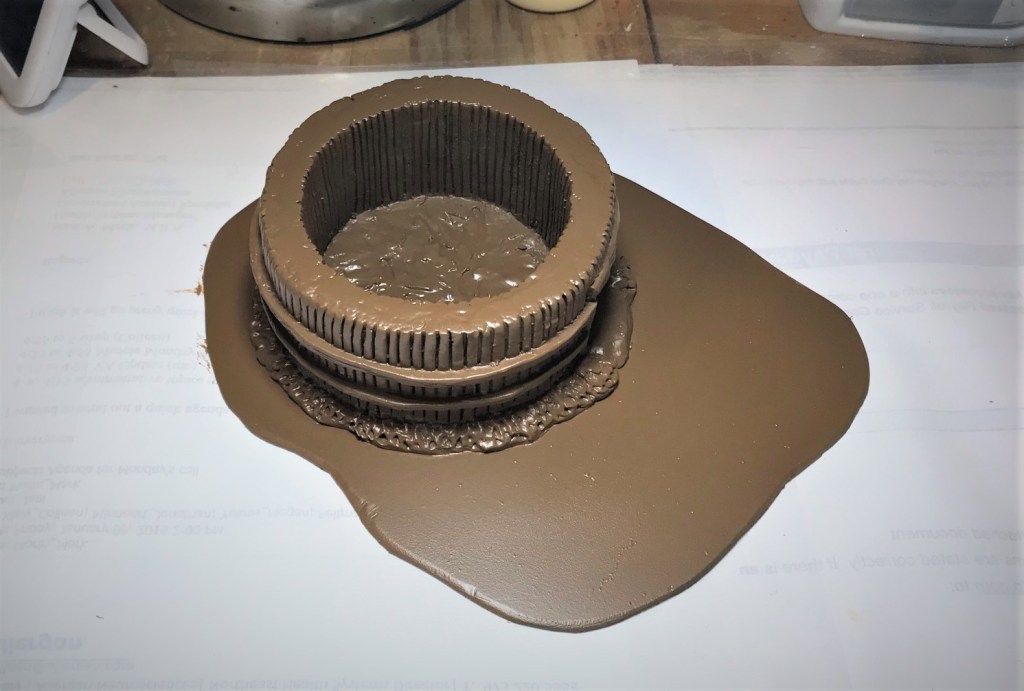
The base of the Maize Storage Structure primed. Note the altered sculpted posts.
After adding the Vallejo texture.
The underside and inside of the roof – I needed to drill carefully for the magnets.
Made a template out of card for a base for the maize.
I wanted the base to fit.
Used shaved and cut toothpicks as maize. This is a test to see how many I would need.
Used a piece of birch wood to support the card.
I made a paper form to hold the toothpick shards and PVA glue to make a “maize mass”.
The maize well and the maize mass drying.
The finished piece with roof off.
The maize building process I used broken out.Structure completed.
With roof off showing maize
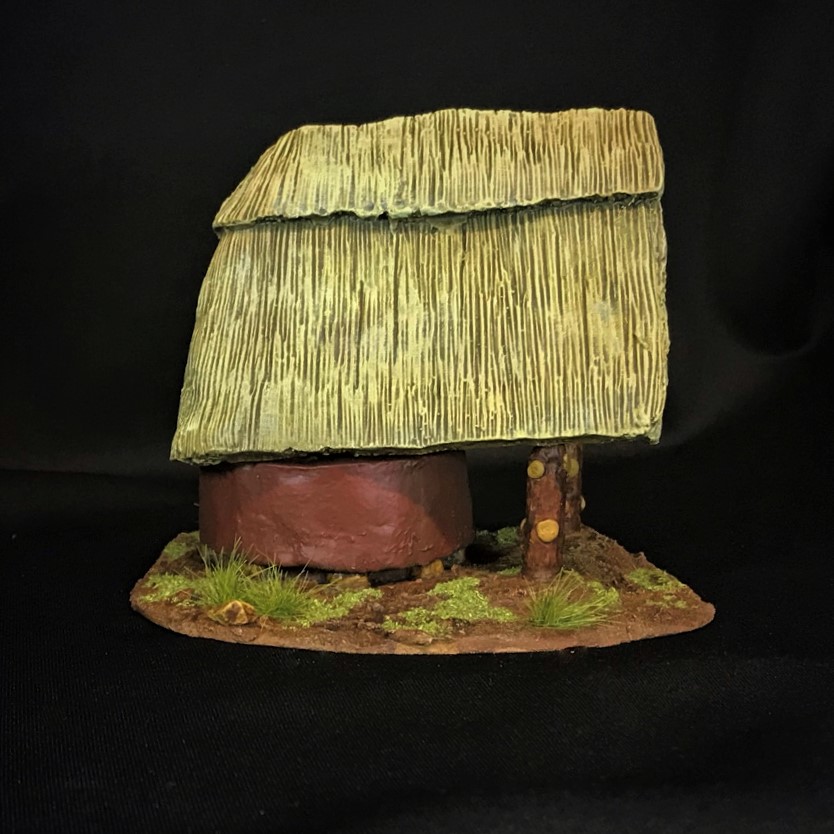
Back of piece
Left side
Right side
Aztec Veterans defend the maize.
Aztec Peasant/Farmer’s House
I had three peasant houses – this is the first one.
The piece with magnets installed and on the styrene base awaiting priming weather
Primed with black and then brown.
Main painting completed prior to final shading.
Completed and united with its roof.
Progress on the Aztec Peasant/Farmer’s House
Right side
Back side
Left side
Front – showing pathway of chinchilla dust.
Novice warriors defend a peasant’s house – maybe not even theirs at the beginning of the day!
Huaxtec House
The Huaxtec were a people who lived near the east coast of Mexico. They were related to the Maya and were conquered by the Aztecs. I found this structure to be quite striking visually and I have to imagine that it was somewhat common. In any case, it was different than the others, so I thought it worth adding. The only issue that this piece presented was that the roof size did not line up as easily for the magnets – but enough to make a couple work enough to keep the roof on.
You can see the two magnetic positions that I could drill.
Primed.
Added Vallejo texture to the base.
Finished bottom.
Finished with the roof.
Huaxtec House progress
Finished front view of Huaxtec house.
Back view.
The Aztecs pillage the Huaxtec House.
Aztec Stone House
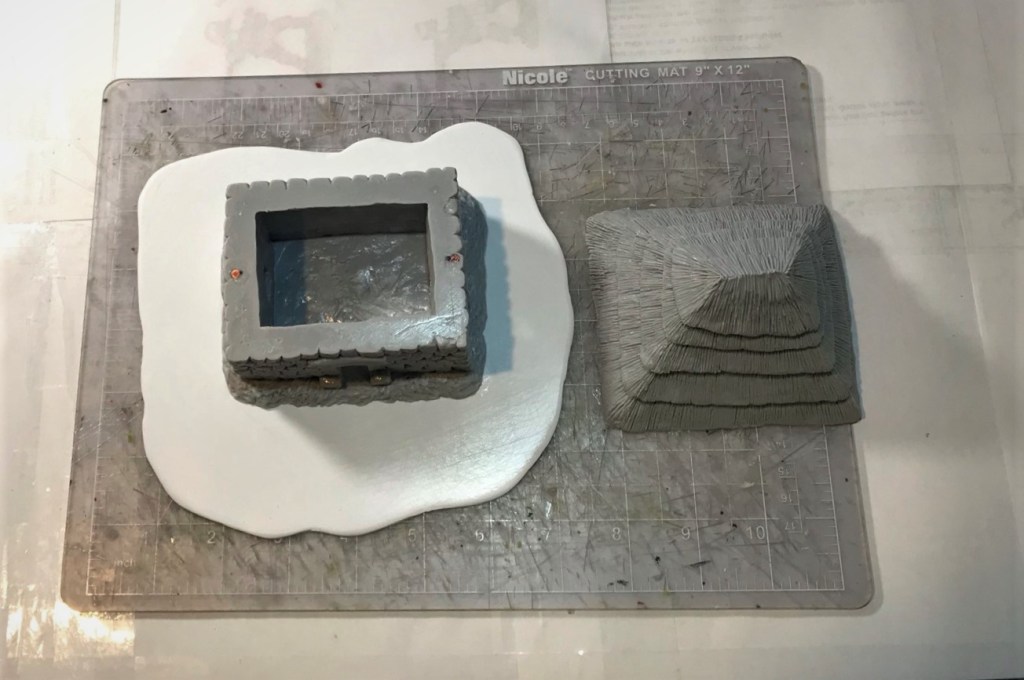
The third type of house is an Aztec Stone House. This is one of the two stone houses in the group. I decided that I would go for more of a sandstone or light limestone look for these.
An example of how I created a template to make sure that the roof and building magnets lined up.
On styrene base showing magnets installed
Primed in black
Added Vallejo earth texture
After pigments and early base dry brushing
Aztec Stone House progress
Right side
Back side
Left side
Front of Aztec Stone House
Aztec Veteran and Novice Warriors deploy from the stone house
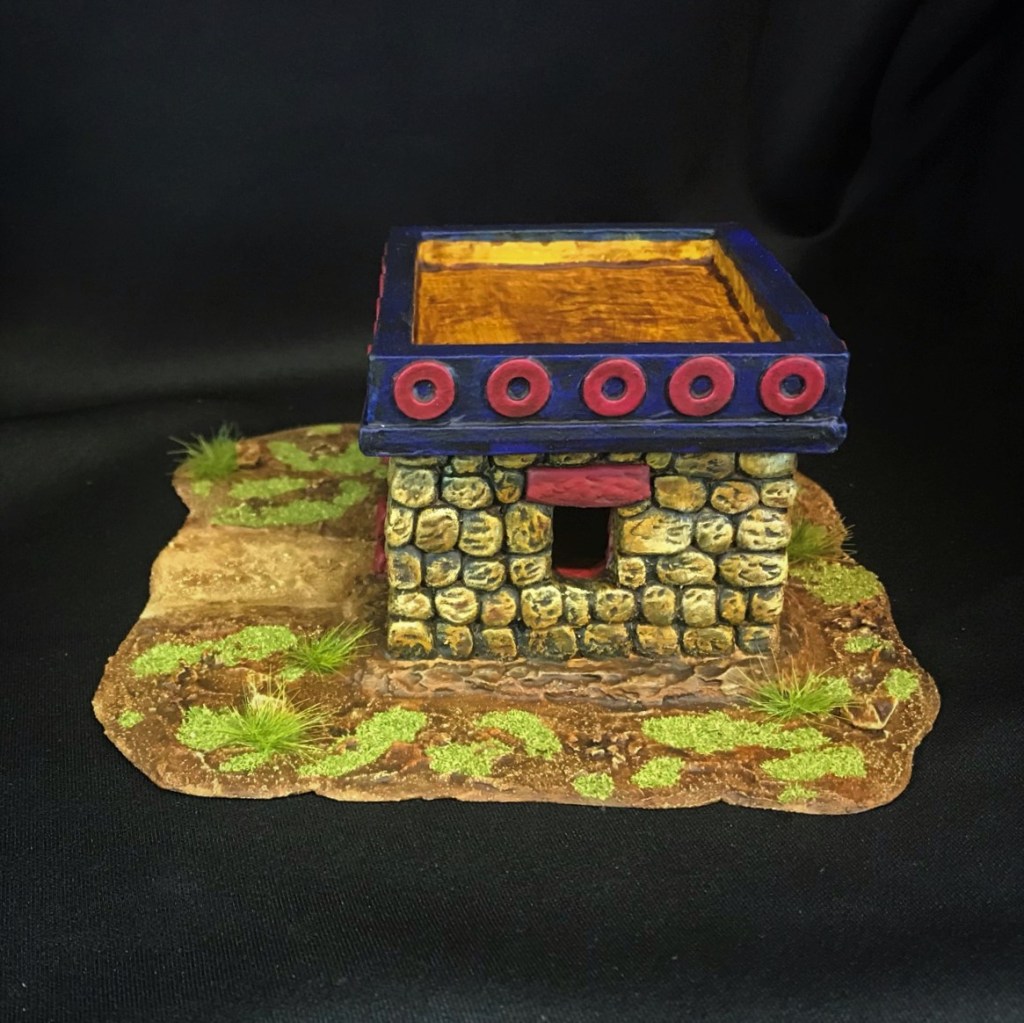
Aztec Noble’s House
The Aztec Noble’s house had an interesting roof and a bit of opportunity for some color.
Using a template with thumbtacks to align the roof and magnets
Magnets installed and structure based
Primed
Added Vallejo texture to the base
After adding some talus, chinchilla dust, I dry brushed
Aztec Noble House progress
Left side
Back
right side
Front of Aztec Noble’s House
The Aztec Snake Woman (General) and a Noble Captain depart for battle.
Miscellaneous Scatter Terrain
It was a nice surprise to get this scatter terrain. I used all of it except one – which was an African mask. I based it and primed it but did not paint it. As I will not likely use it, it will be another (5th!) prize in “Mark’s Aztec Building Challenge Contest“.
These will be nice treasure markers for the games. I played with some shiny (and tiny) beads (from Japan) and Swarovski glittery crystals from Michaels to make the treasure and fill the pots over some steel BB’s. I also had a chance to do some minimal Aztec freehand work on the pots.
Cleaned and based freebies – the mask on the right is another prize in the contest now.
Primed and based textured.
The leafy pot that I added the freehand to – loosely based on a design I saw online.
This marker had bones, skulls, a treasure chest, and more.
Some larger gold and silver items.
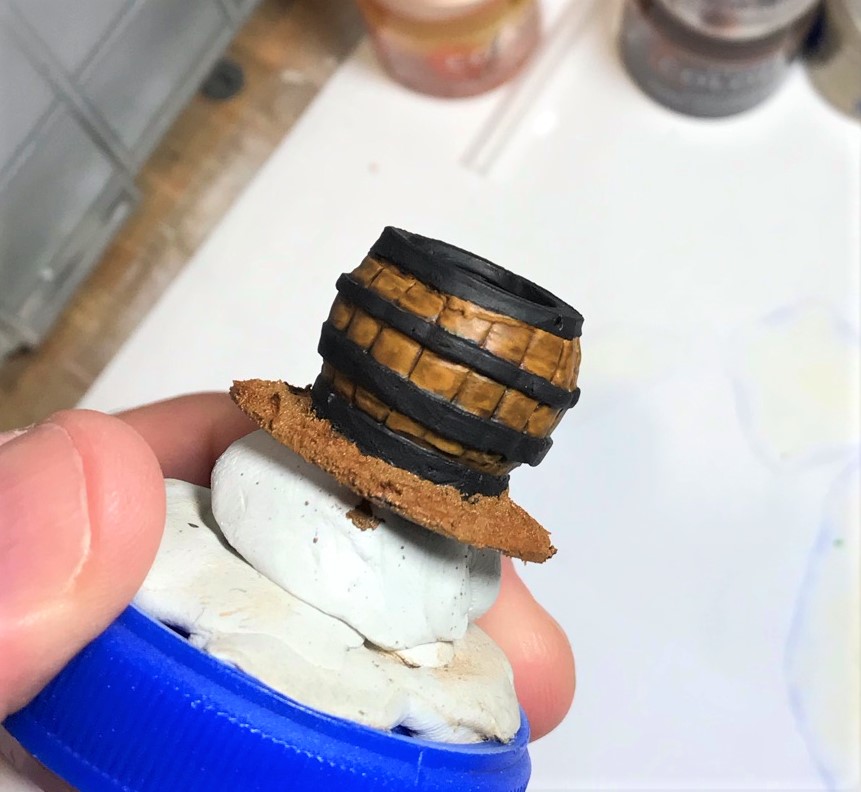
A barrel – I was going to make it a water barrel but made it full of treasure instead.
Tiny little beads – gold (2 sizes), silver, and turquoise.
Treasure!
Scatter Terrain progressThe Leafy Pot treasure. Why is it on leaves? You got me – I don’t know!
The “Bones” treasure marker, replete with two skulls, a partial skeleton, a barrel, a pot, a treasure chest and an old sack. The gold staff treasure – with a treasure chest, a silver carafe, a gold vase, and a large gold staff of some type.Top view of the treasuresElite Warriors – Cuachiqueh (“Shorn Ones”) – protect Montezuma’s gold.
That rounds out my pieces for April. I now have just two more pieces of MDF left for the contest – though I do have more planned terrain and structures – keep following!
Coming up next – these last two MDF.
I’d love to hear any feedback on these – and I did use a different photo set up as well – so let me know on that too if you want. Getting my last “jab” this weekend, as well as trying to play in two golf tournaments – so when will I get done and end the contest…who knows?
As far as Acheson, I must give them a very positive review on these resin pieces. Check out their stuff here. Their offerings and ranges are quite extensive across many periods. The sculpting is good and the details are nice, and the extras they threw in were very cool too. And other than the freebies that they threw in, I have not been paid by them in any way.
Thanks for looking and please let me know what you think in the comments section!
For all of my previous posts on games, units, and other projects for my 16th Century Spanish Conquest supplement for Feudal Patrol™ – “Civilizations Collide” – please see this page.
The next sections are references on the paints I used – mainly for me – so skip the rest if you are so inclined. Thanks for looking and I hope that you’ll let me know what you think about these models.
PAINTS, INKS, GLAZES, SHADES, WASHES, PIGMENTS, FLOCKING, GLUES AND MORE THAT I USED ON THESE STRUCTURES AND PIECES:
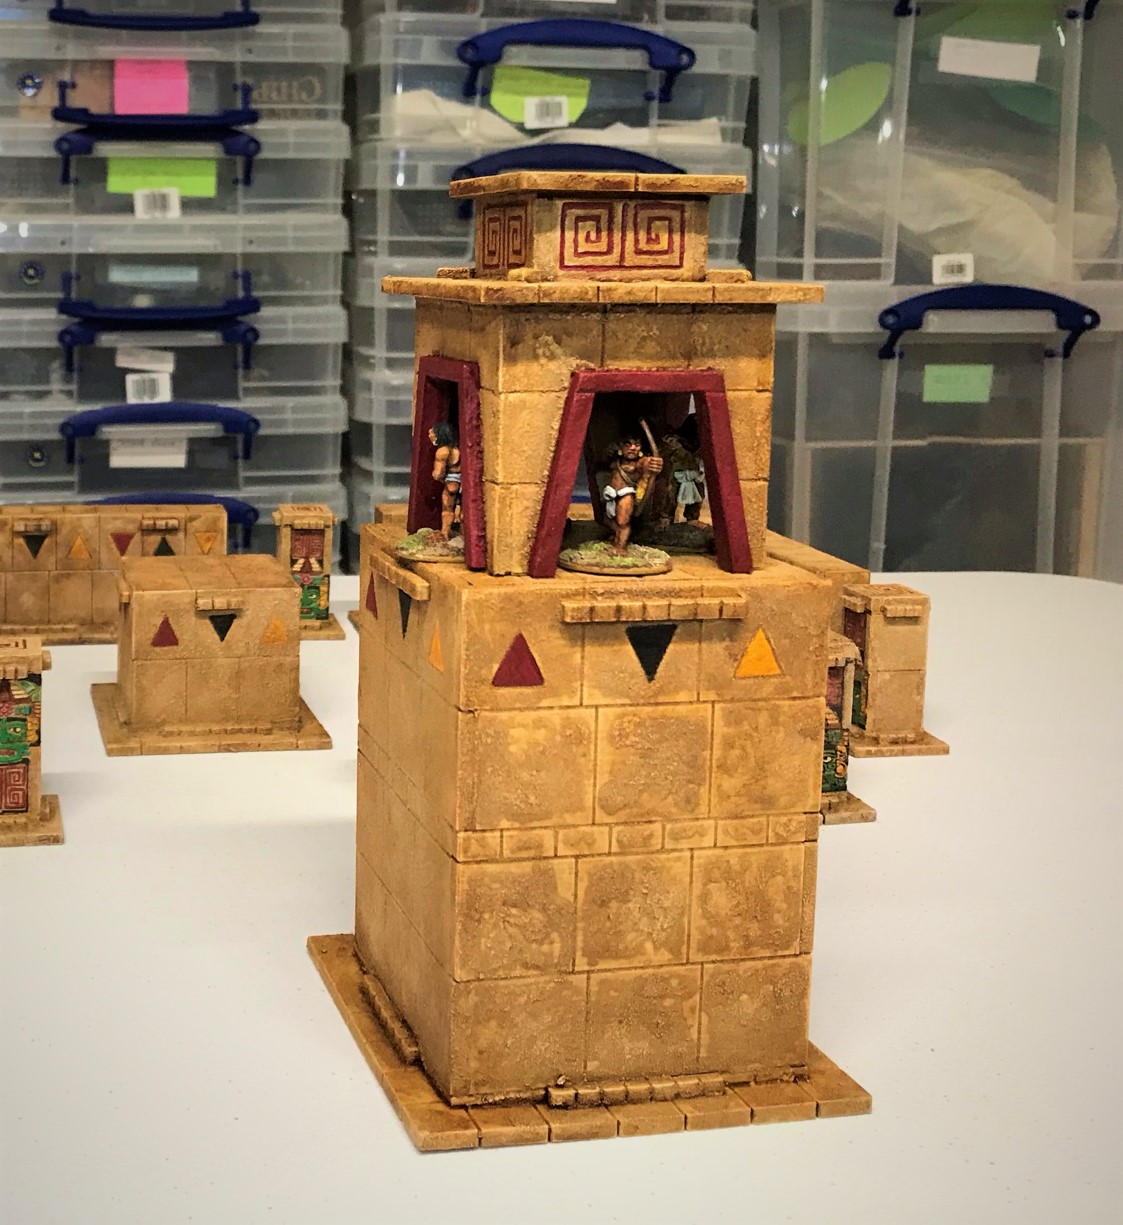
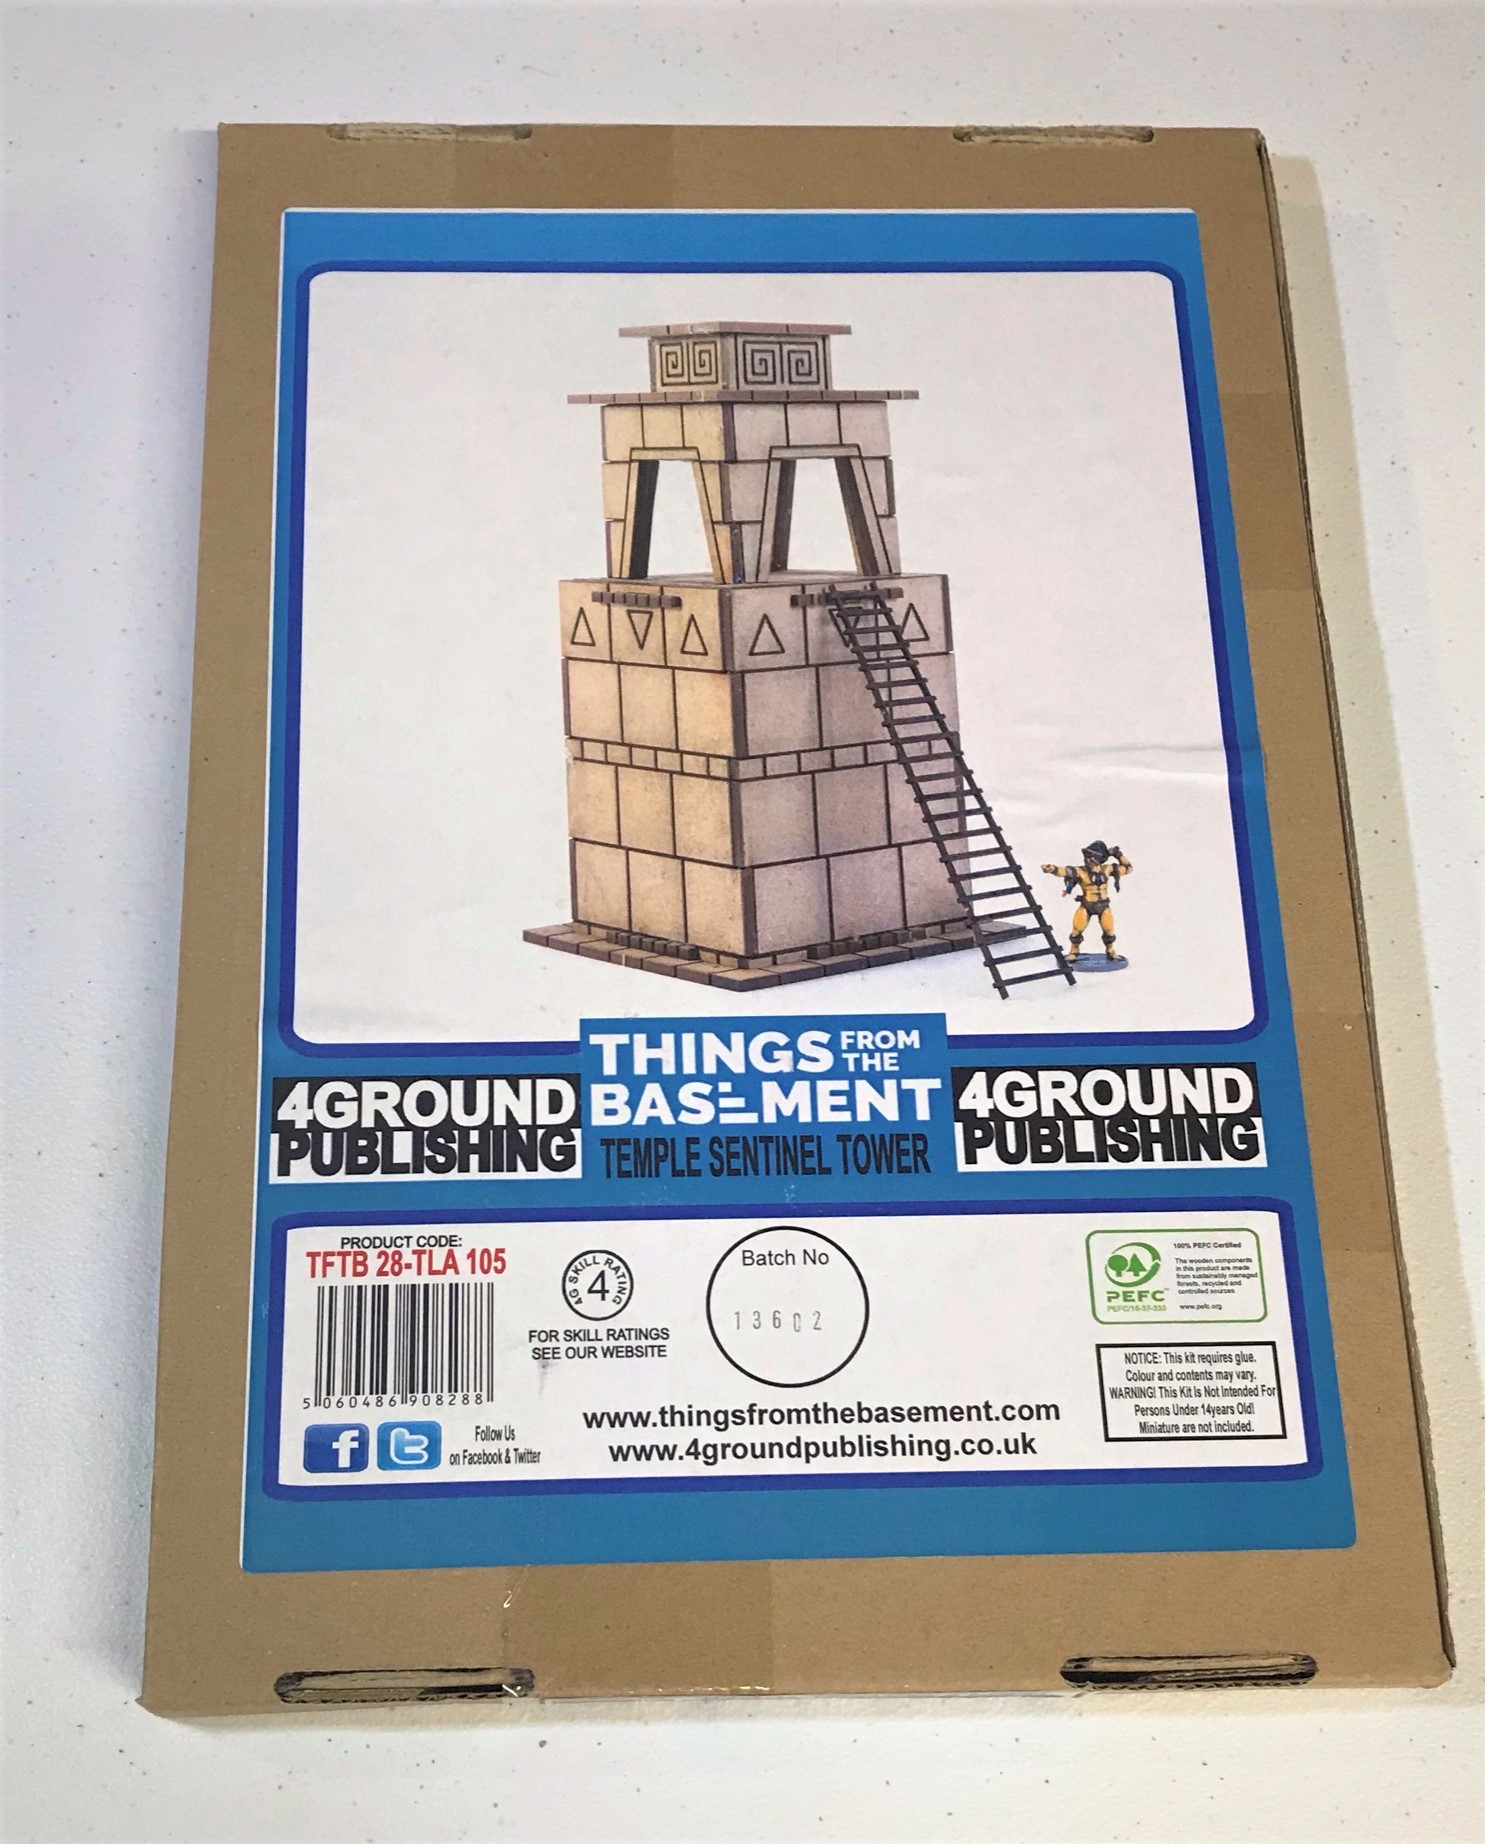
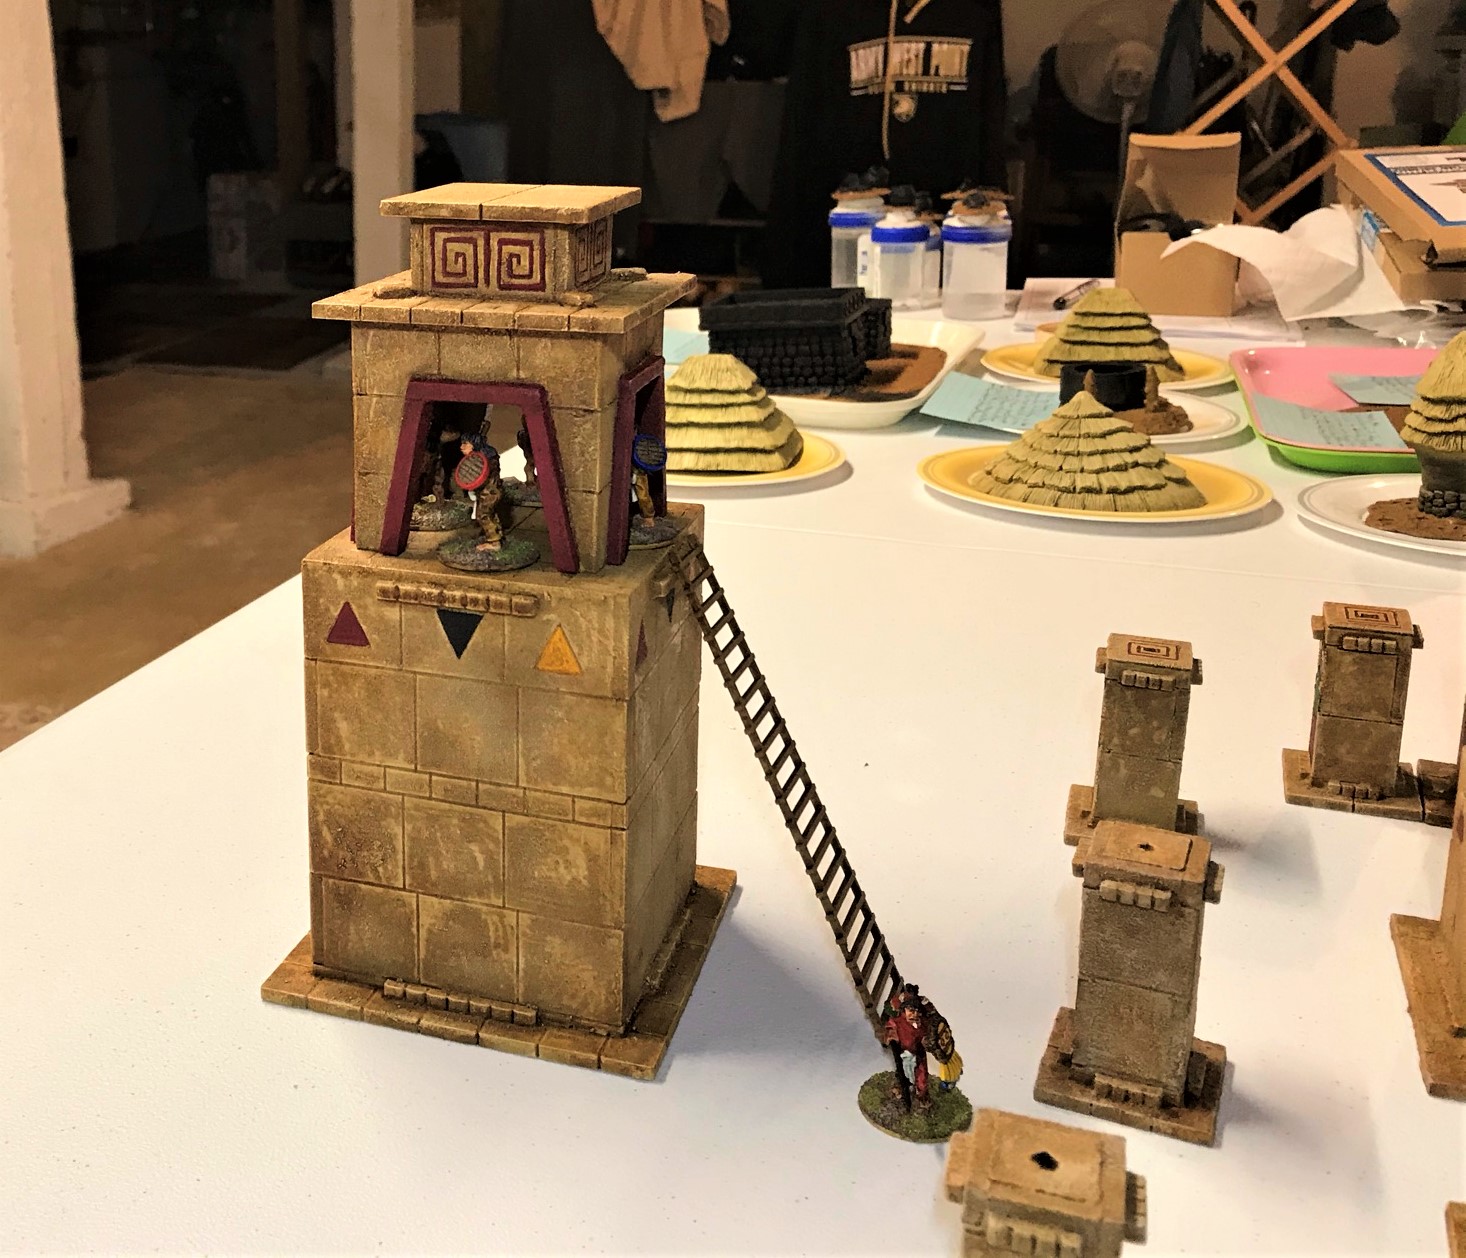
In this post I will share my latest MDF kit build for Feudal Patrol™ games in Mesoamerica (using my Civilizations Collide supplement). I was able to finish off another Aztec-inspired MDF kit. This one also came from from Things From the Basement via 4Ground via Badger Games (see it here). It is called Temple Sentinel Tower and is scaled for 28mm figures – and is just what it is described as being – a Temple Sentinel Tower which would be a nice piece of high ground for some missile troops.
It was an enjoyable kit to build. This one had a few challenges for the build as I needed to make sure that I could paint the inside of the tower as well as dust it up with chinchilla dust as I have been doing. I want all these cityscape Temple structures to match in character – and in color and texture. Basically, as you will see, I broke the kit into two parts until final assembly.
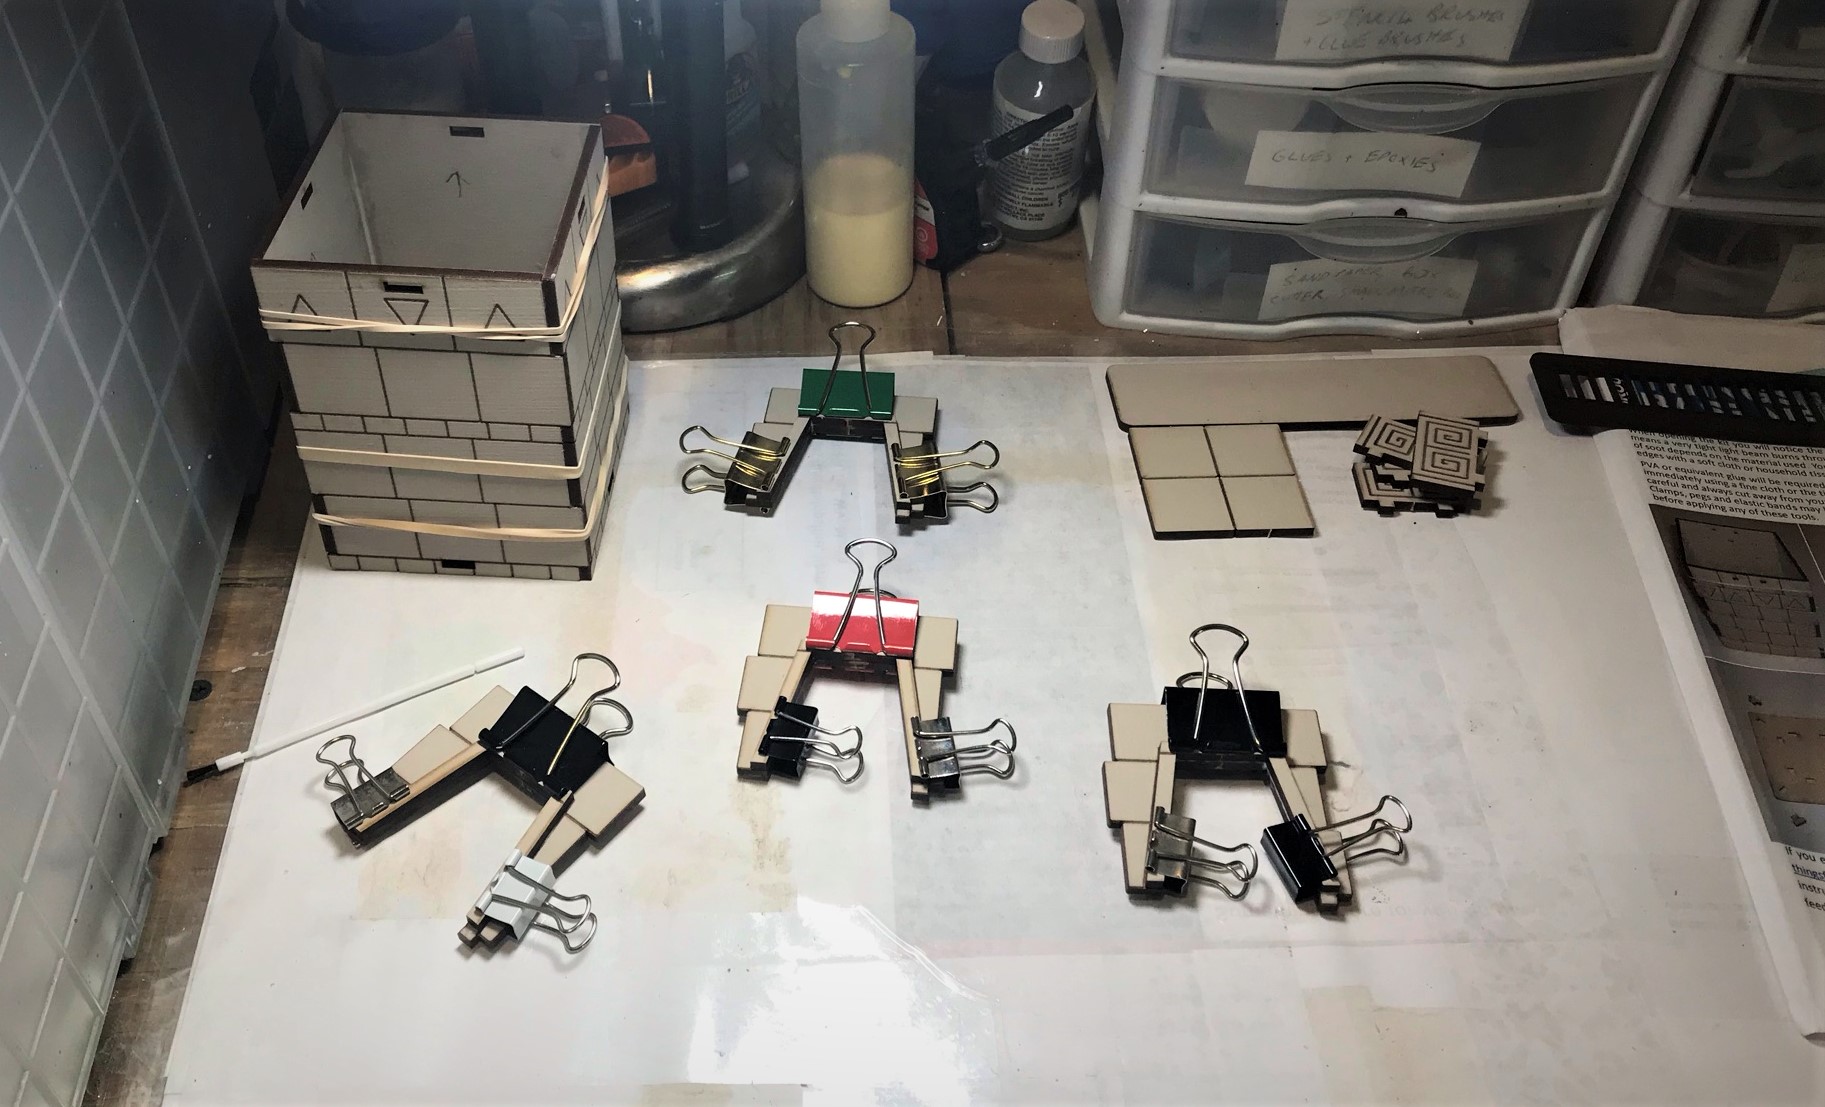
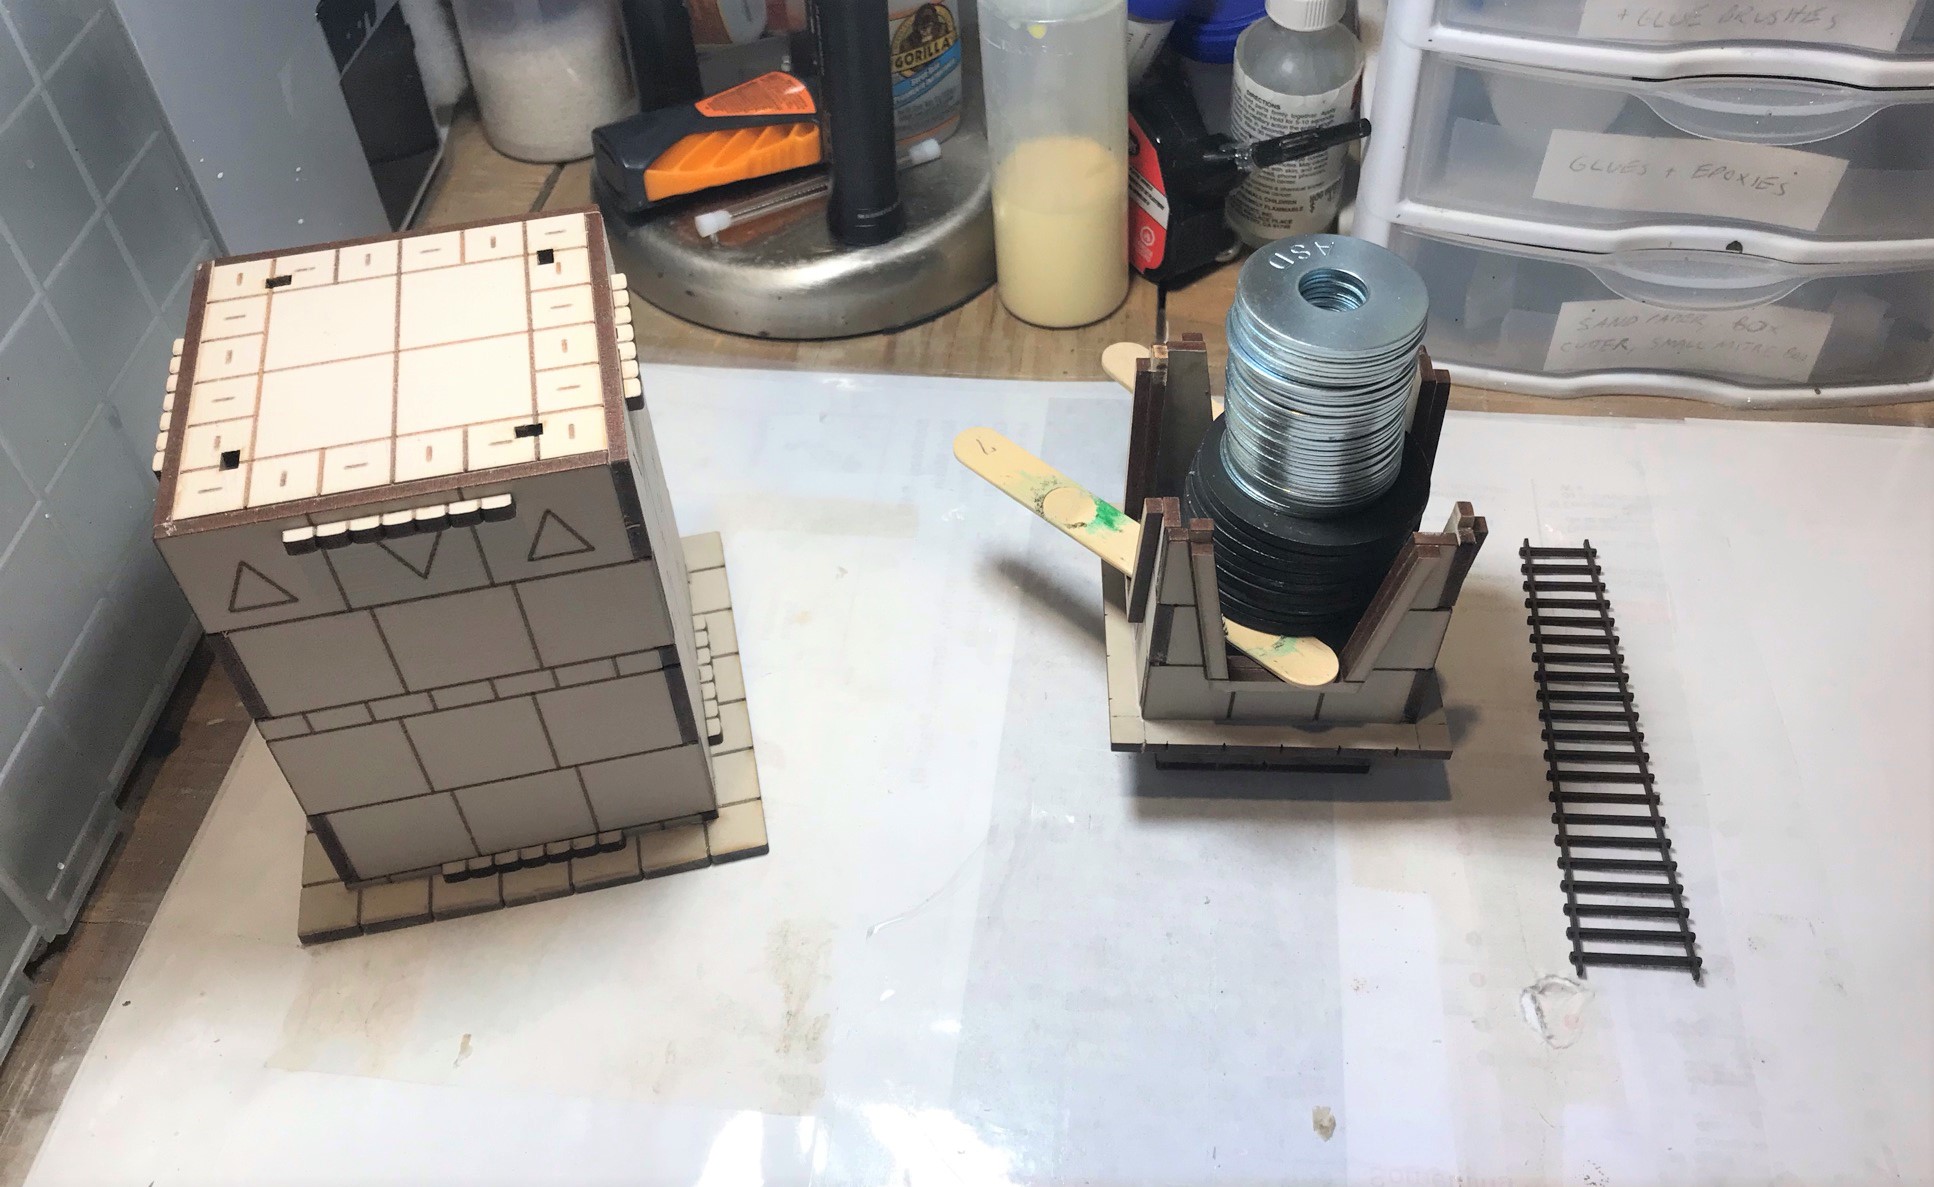
The kit after wiping down with a moist microfiber cloth. The instructions were good.First day of assembly and setting up with PVA, rubber bands, and clamps.The lower tower section is on the left – and the top here has been left to work on separately with paint and chinchilla dust as I have previously described (see this page). Having steel washers around held as weights with PVA gluing.The tower sections awaiting base coating after dusting up with the chinchilla dust and watered down PVA slurry.The sections after the base coat was applied and the dry brushing of the textures. The red, black, and yellow colors were painted after the dry brushing.
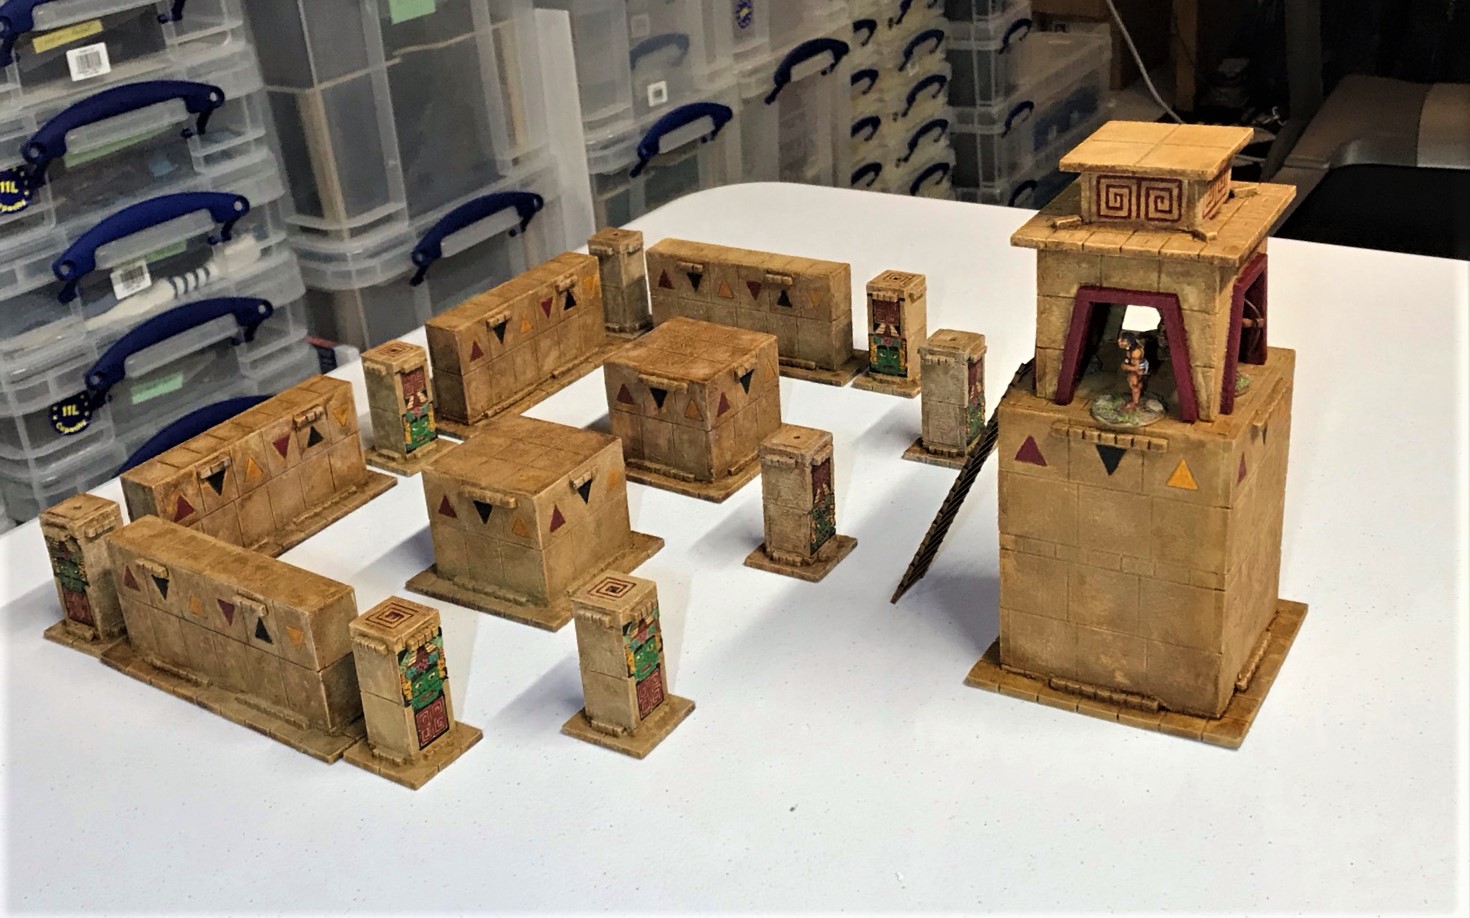
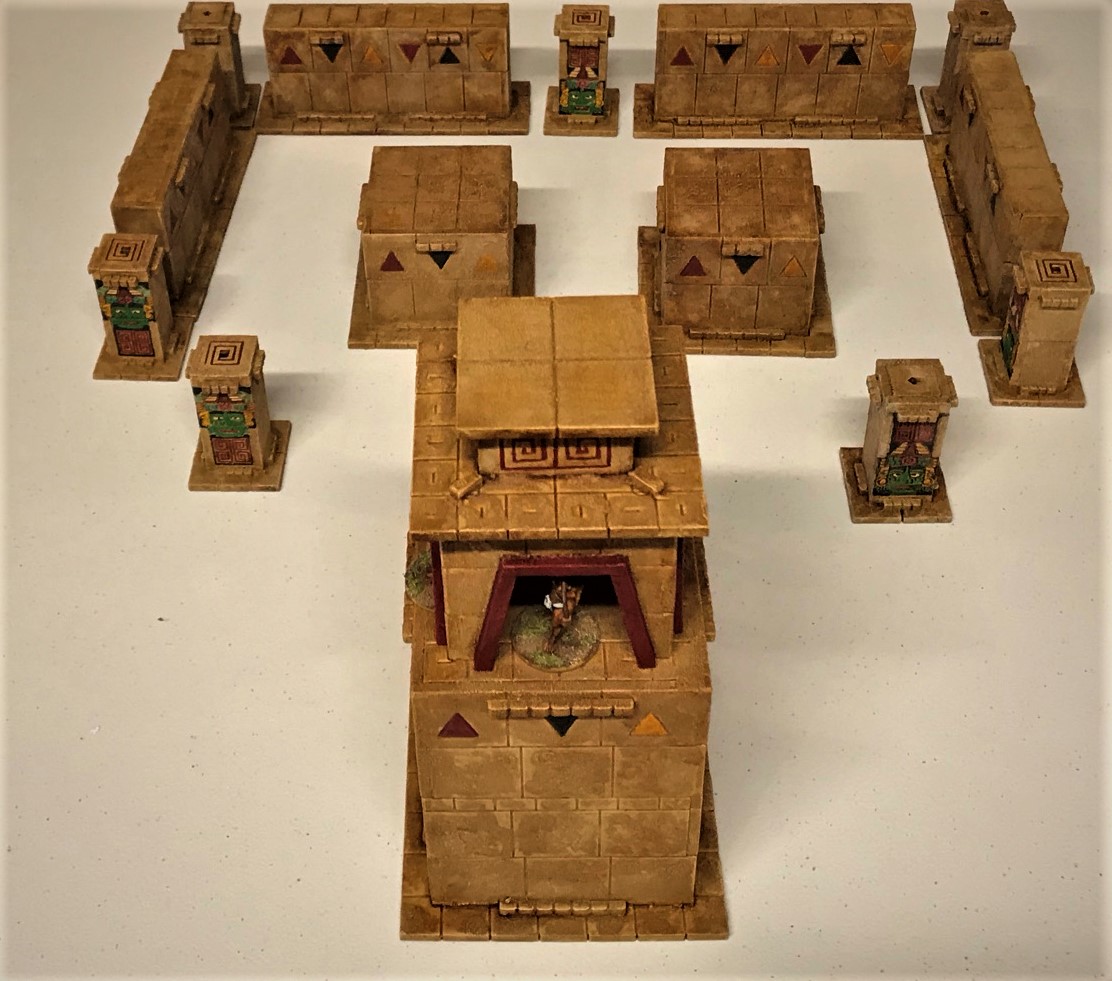
The finished Temple Sentinel Tower next to my previous MDF builds. I put a few missile troops up in the tower as examples.Different angle view.An Aztec veteran with an atlatl peers out while a macuahuitl-armed comrade guards the ladder access. A sling-armed novice is at the top of the ladder.A close up of a bowman (front) and another slinger (left) in the tower.
I think this came out well – what do you think?
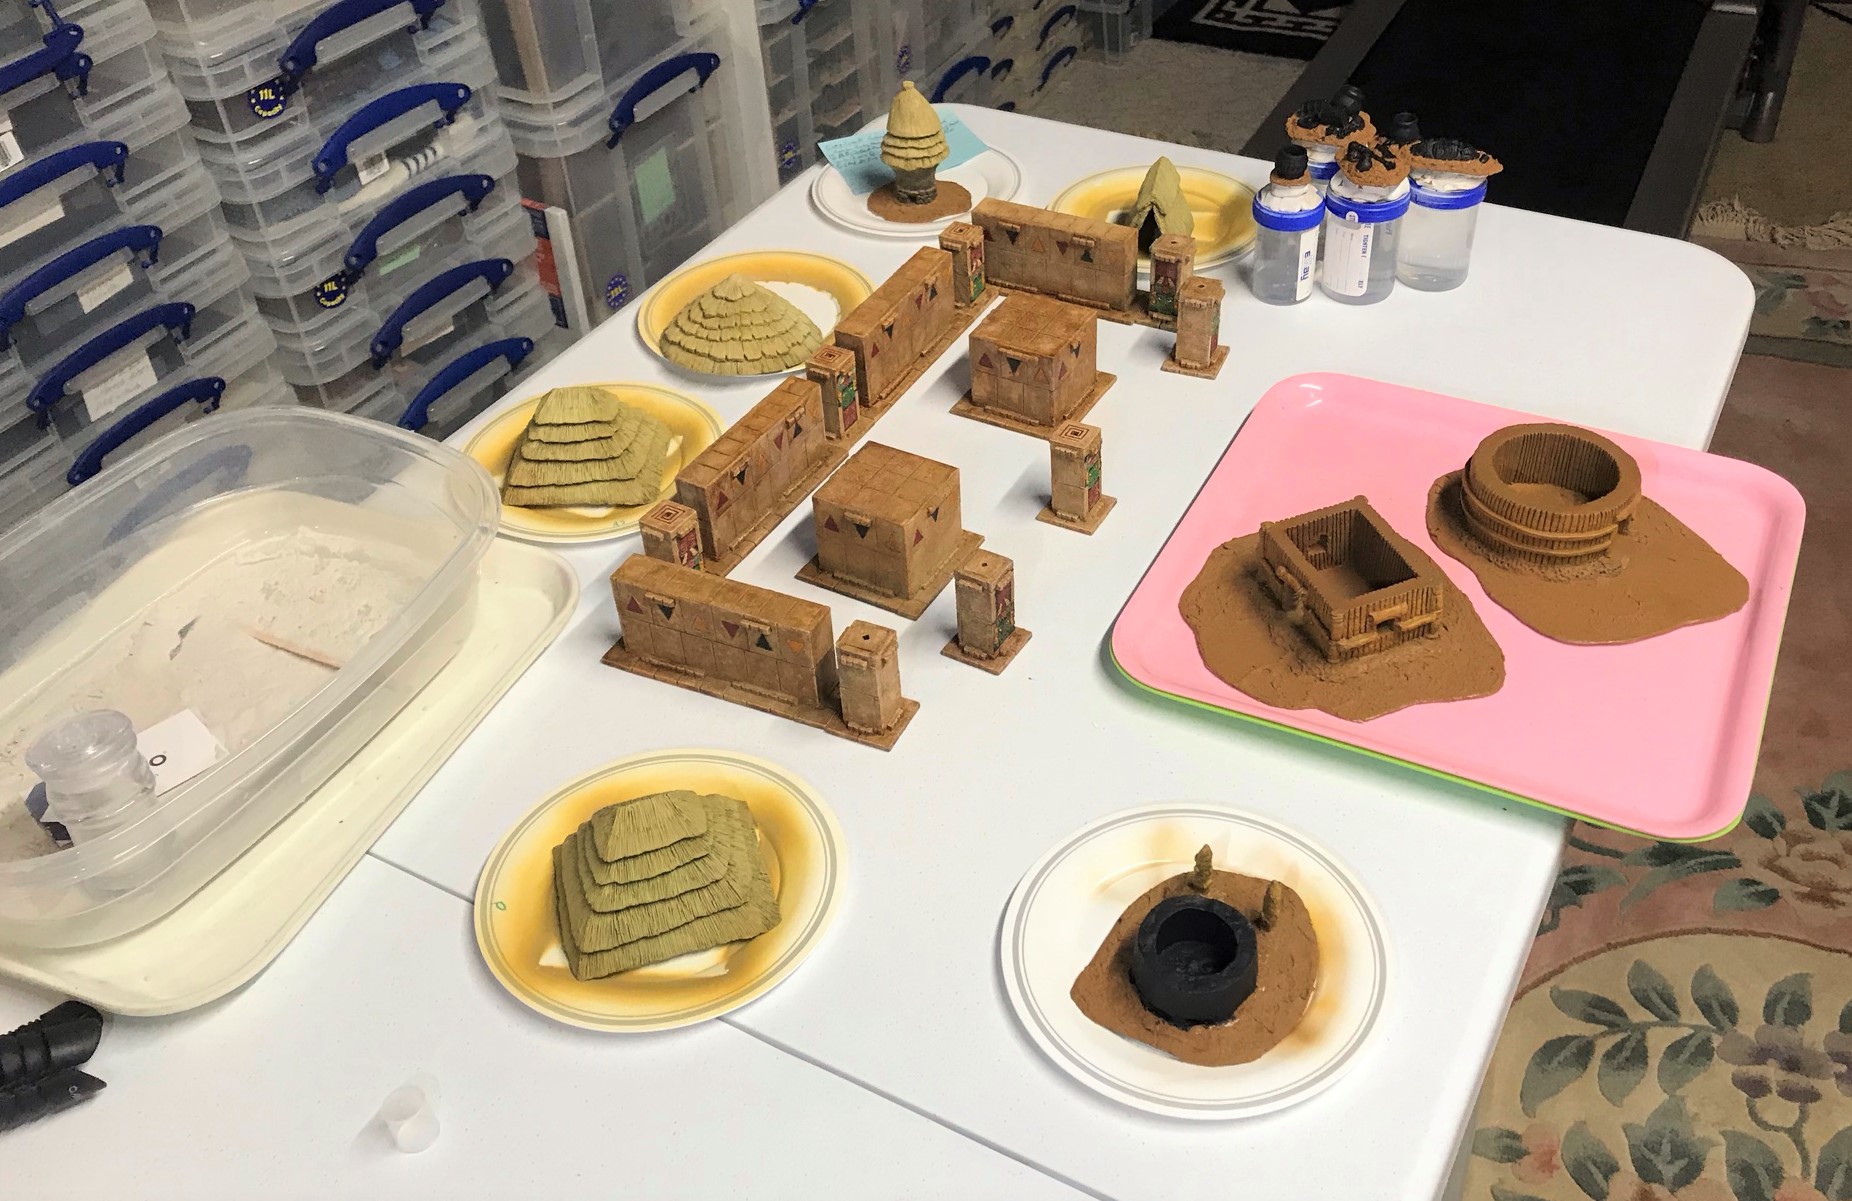
For the other pieces in the building contest, I was also able to airbrush a decent base coat on my remaining resin structures, as well as to start on the ground cover on their styrene bases.
The remaining resin structures – I have a good start on them.
This now leaves me with two more MDF builds – the Temple High Throne and the Sacrificial Altar – in addition to the resin. These are going to take a back seat to finishing the resin pieces. This is because as I have more paint on order to properly finish them similarly to my previous MDF kits. I have found that I’m going though a good amount of paints and washes (chinchilla dust and MDF can be thirsty).
My remaining MDF kits!
I have also tried to show you, dear readers, the progress in my challenge in a non-award-winning video on IGTV and Instagram (well it hasn’t won yet, so there’s hope…).
My main communications channel is THIS BLOG! But, I’m just trying to keep up with the young ‘uns like IRO. It’s a bit of an unscripted thing – so enjoy! Without any further ado – here is the video link live from my cellar (that I cannot put on WordPress without paying more $$).
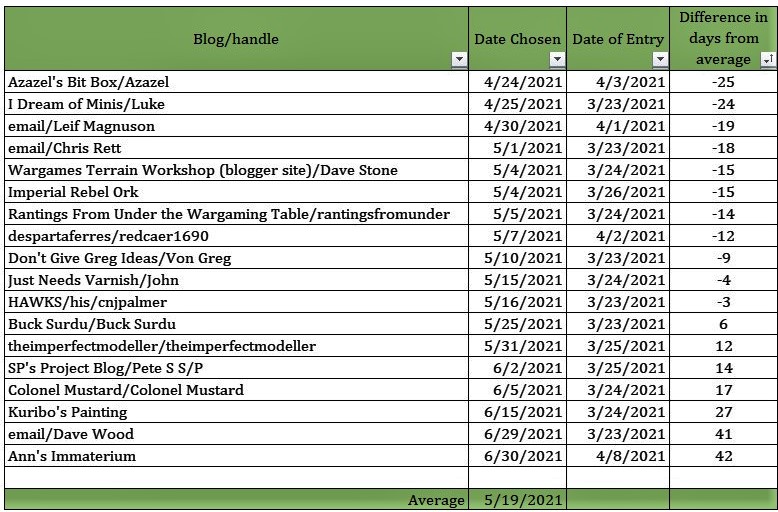
So as for the contest – I have a shot below that shows the range of guesses:
We’ve got American, Aussie, and Brit entries (what’s up with the rest of the world?). Thanks to all for entering and best of luck – and follow my progress (and your chances) here! The average is May 19th, with Azazel the earliest on 4/24/2021 and Ann the latest on 6/30/2021. Hell, your guesses are as good as mine at this point for sure.
A couple of small side notes. I was quite surprised and happy to see that 4Ground featured my work on their Facebook page – here is that Facebook link – and much thanks to our pal Kuribo who let me know on the blog that he saw it. Also, this marks my 30th post on this subject – and while I’m happy about the progress I’ve made – the listing of all the posts is getting to be a bit much (never mind approving all the WordPress pingbacks that this generates).
So, I’ve added a new selection on my main menu (“Gaming & Hobby Areas of Interest”), and under that will be individual genre selections. I’ve started with a page with a list of and links to all of my Mesoamerican posts called “Aztec, Conquistador, and Mesoamerican Hobby Projects Posts” – and I will (over time) be augmenting it with other stuff, such as retro sci-fi, France 1940, Normandy, etc. But I won’t get to that for a while – I’ll be focusing here on the Aztec stuff! I’ll still add the paints and materials section as before, mostly for my own references.
Thanks for looking and I hope that you can check out the video link and no matter what – let me know what you think of the tower – or my accent – or my graying hair – or whatever.
For all of my previous posts on games, units, and other projects for my 16th Century Spanish Conquest supplement for Feudal Patrol™ – “Civilizations Collide” – please see this page.
PAINTS, INKS, GLAZES, SHADES, WASHES, PIGMENTS, FLOCKING, GLUES AND MORE THAT I USED ON THESE PIECES:
This blog is titled “Life, Golf, Miniatures, and Other Distractions” – and it’s not often that it’s about anything but miniatures. This post will definitely concern miniatures – but as the title suggests, a few other things are going to get added in after the miniature stuff.
Why you ask? Well, the long and short of my current predicament is that a member of my household is near the end, and I need to deal with the ramifications of that. It’s sad, but it’s time.
Oh, sorry, not a person, it’s my PC that is on its last legs – and it is already quite legless.
My PC has had multiple thermal shutdowns over the last few weeks – while in sleep mode! Argh! I decided that I would need to get a new desktop before I lose all my hobby work (plus everything else that is on the thing). I prefer a PC over a laptop, though I still look at WordPress on my iPhone and my iPad. I just compose on a PC. Anyways, I will be without a computer shortly – so I needed to get a post in. Therefore this post will cover some miniature stuff first and some fun (I think) extras – I hope that they will be somewhat interesting for you.
Plus, this is my largest list of hashtags ever (I think so anyways).
In my last post, as part of “Mark’s Aztec Building Challenge Contest” (which you should enter soon by the way!) I discussed how I assembled and painted 8 Temple Columns for my Aztec games of Feudal Patrol™ using my Civilizations Collide supplement. I had moved onto the MDF kits over my resin stuff as temperatures had been too cold here in Massachusetts to use rattlecans to prime outside. I truly enjoyed building and painting the MDF of my last post, and I certainly still have a love for using chinchilla dust.
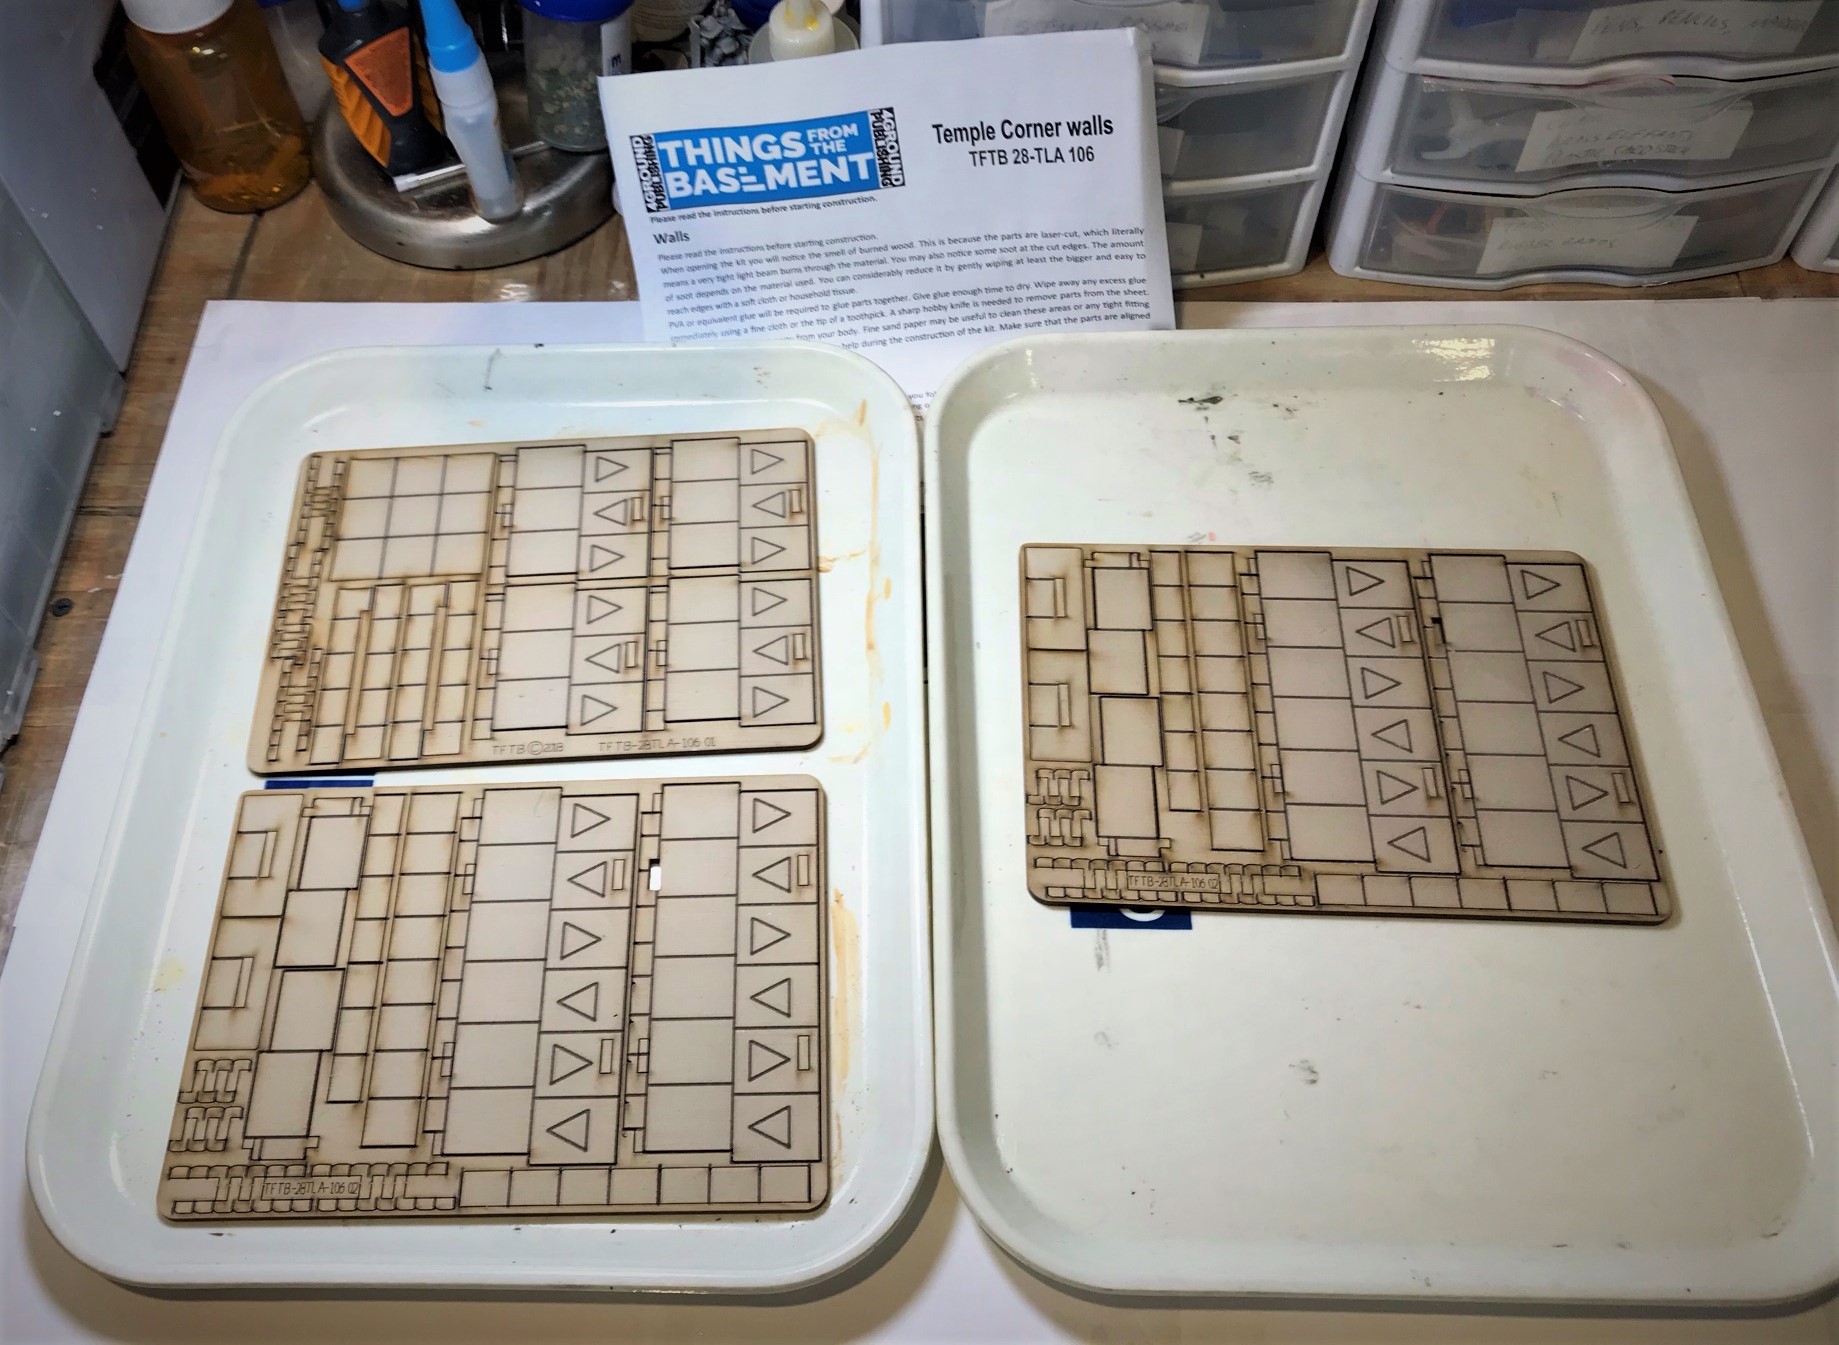
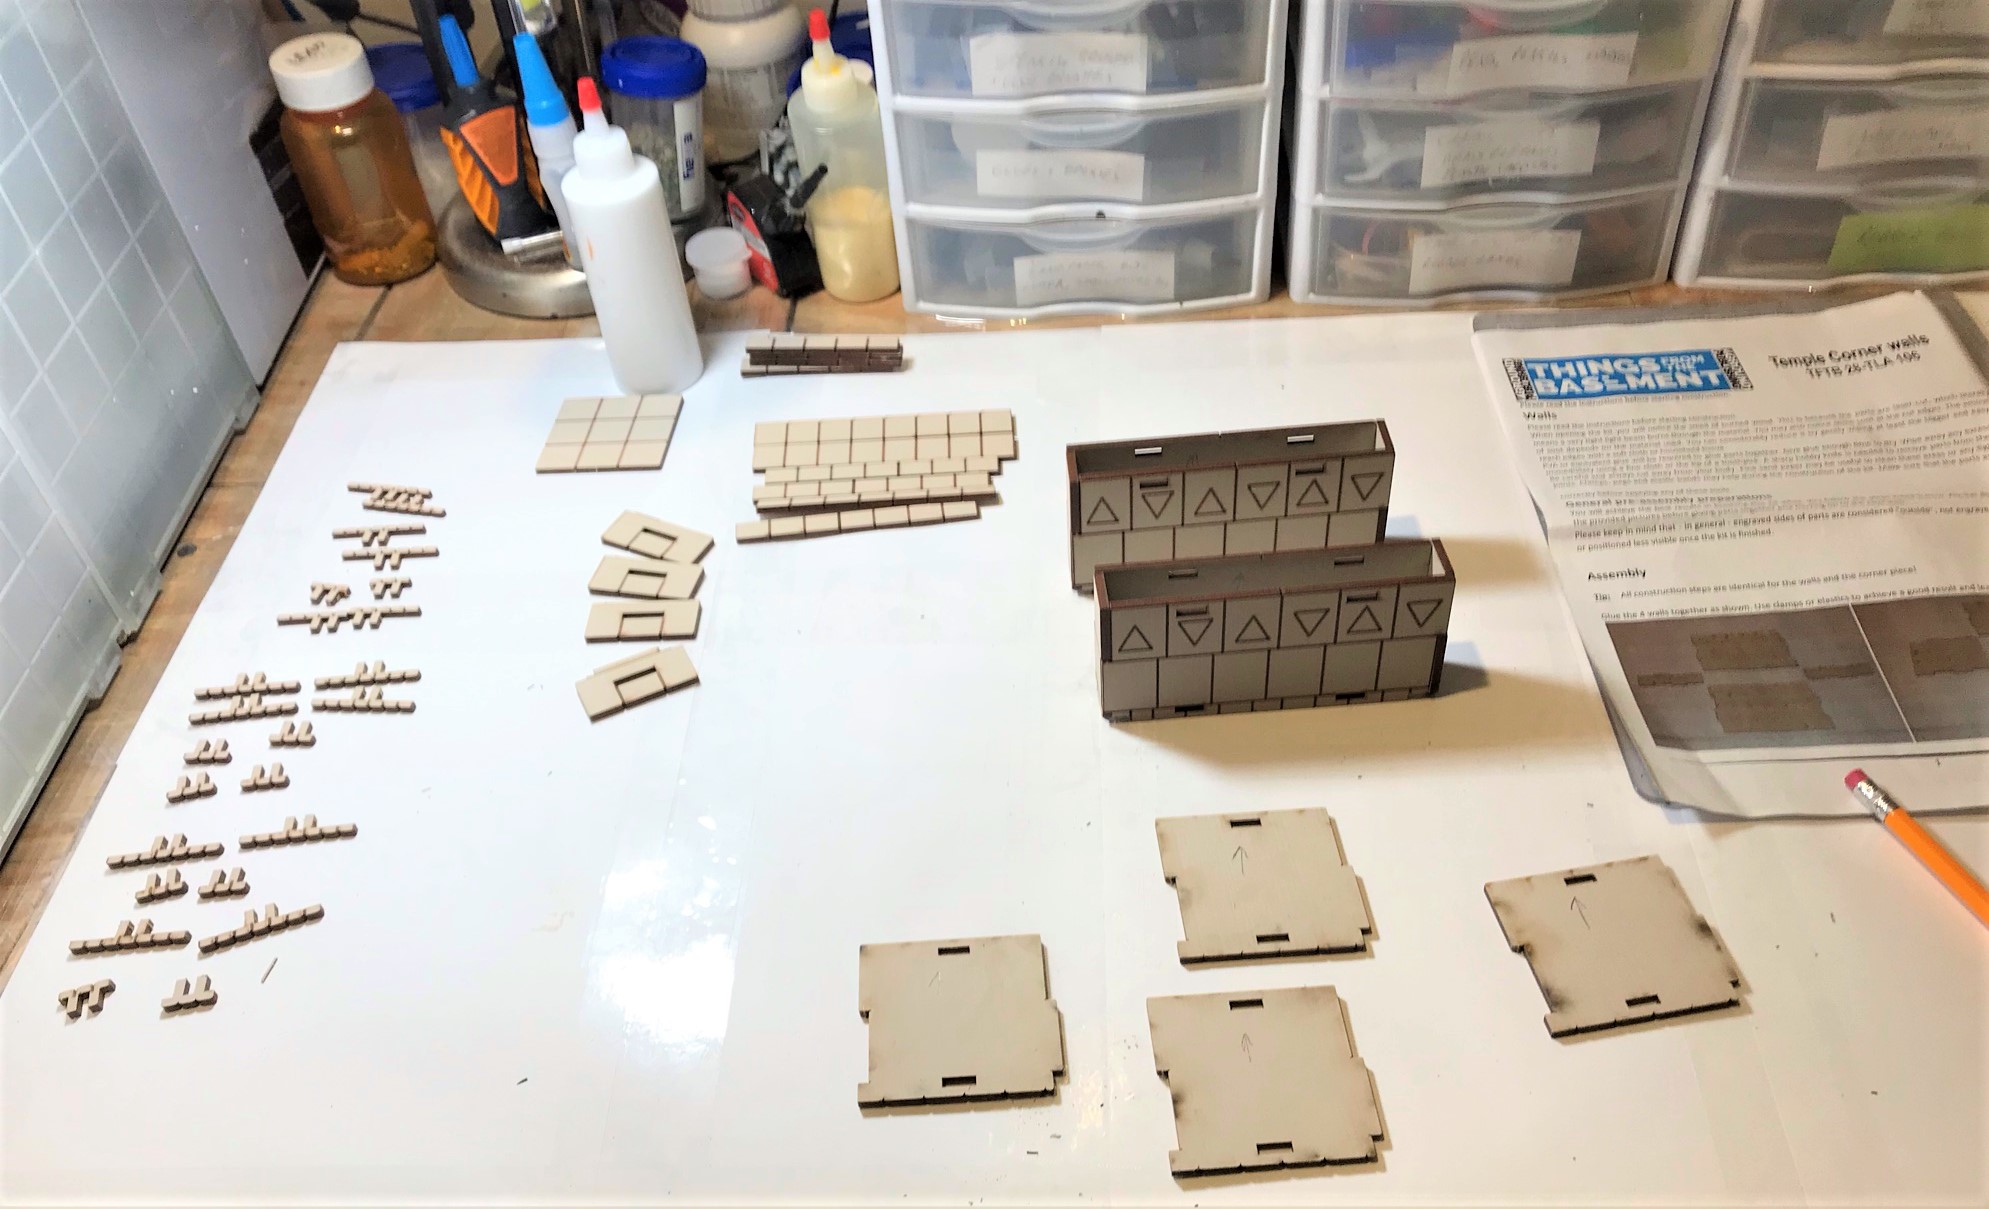
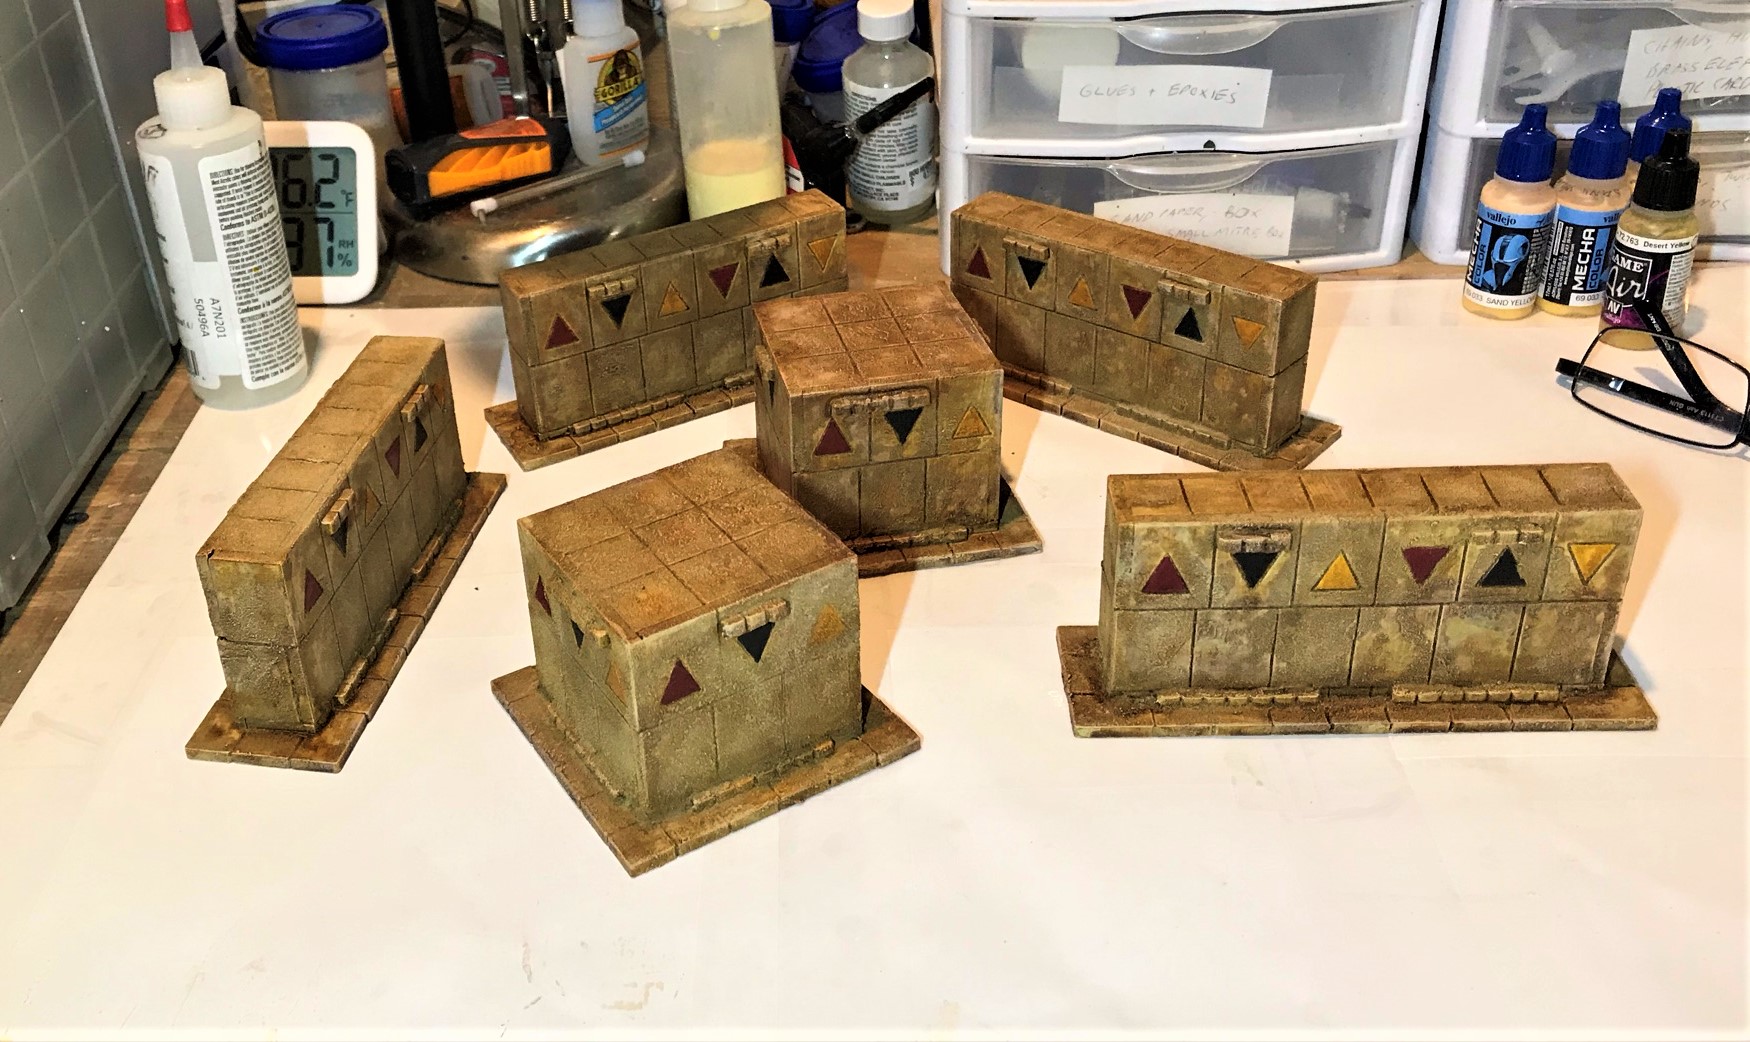
My next MDF effort would be two kits of the “Temple Corner Walls” – from Things From the Basement via 4Ground via Badger Games (see it here). Each kit had one square pillar-like structure and two walls – six in total. The kits are very nice and pretty easy to work with in my opinion. I basically used the second approach from last time – assemble first, then dust up with the chinchilla dust and paint them.
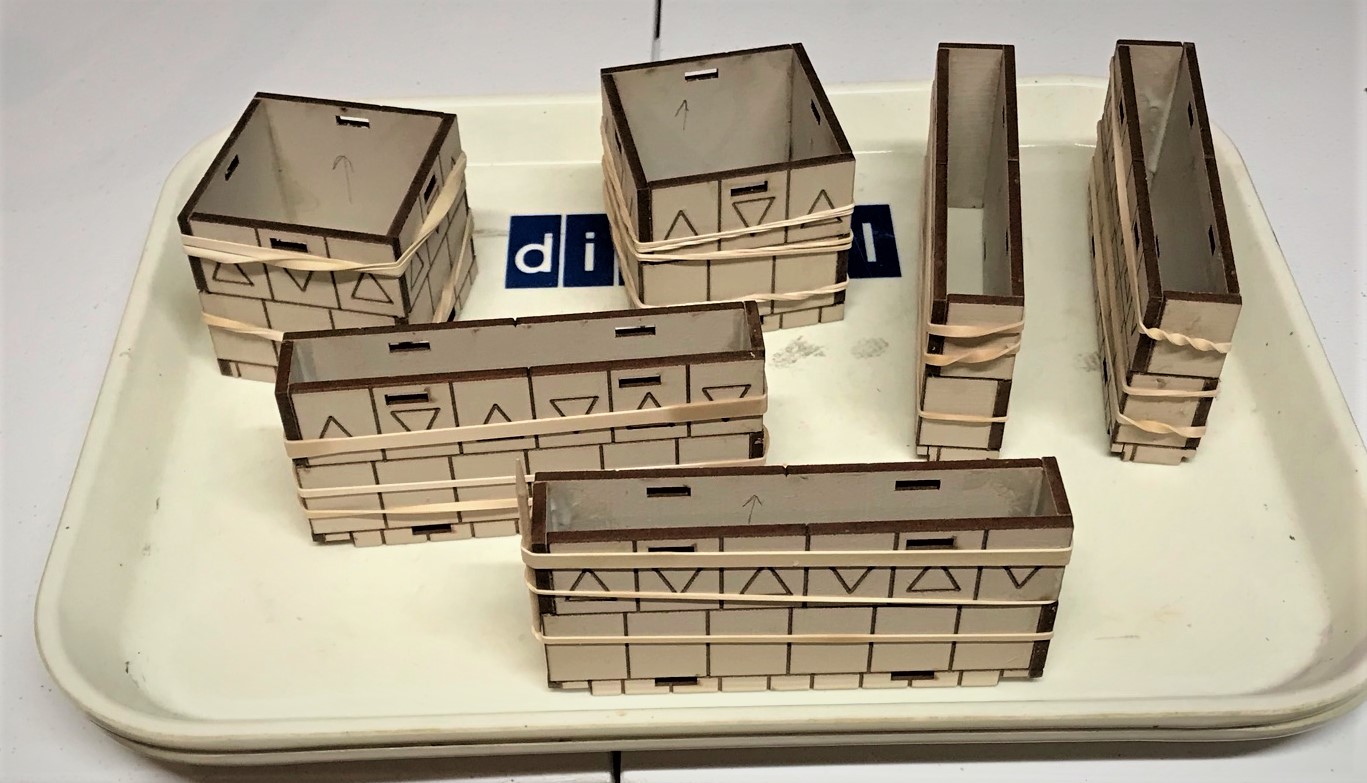
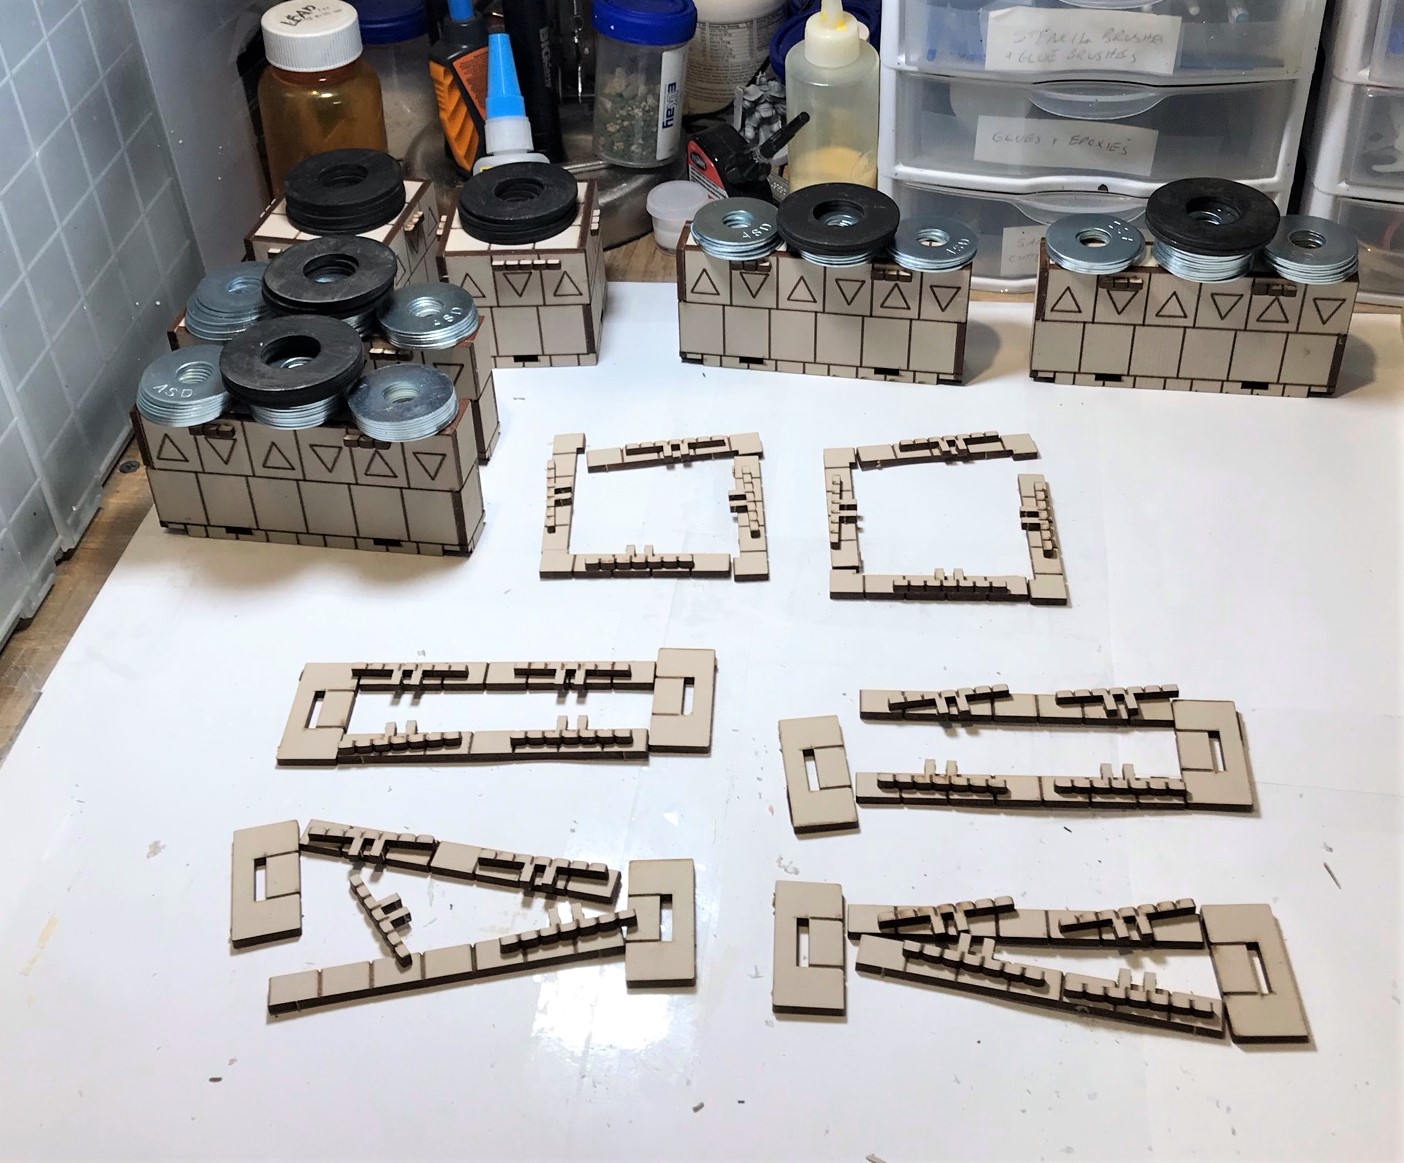
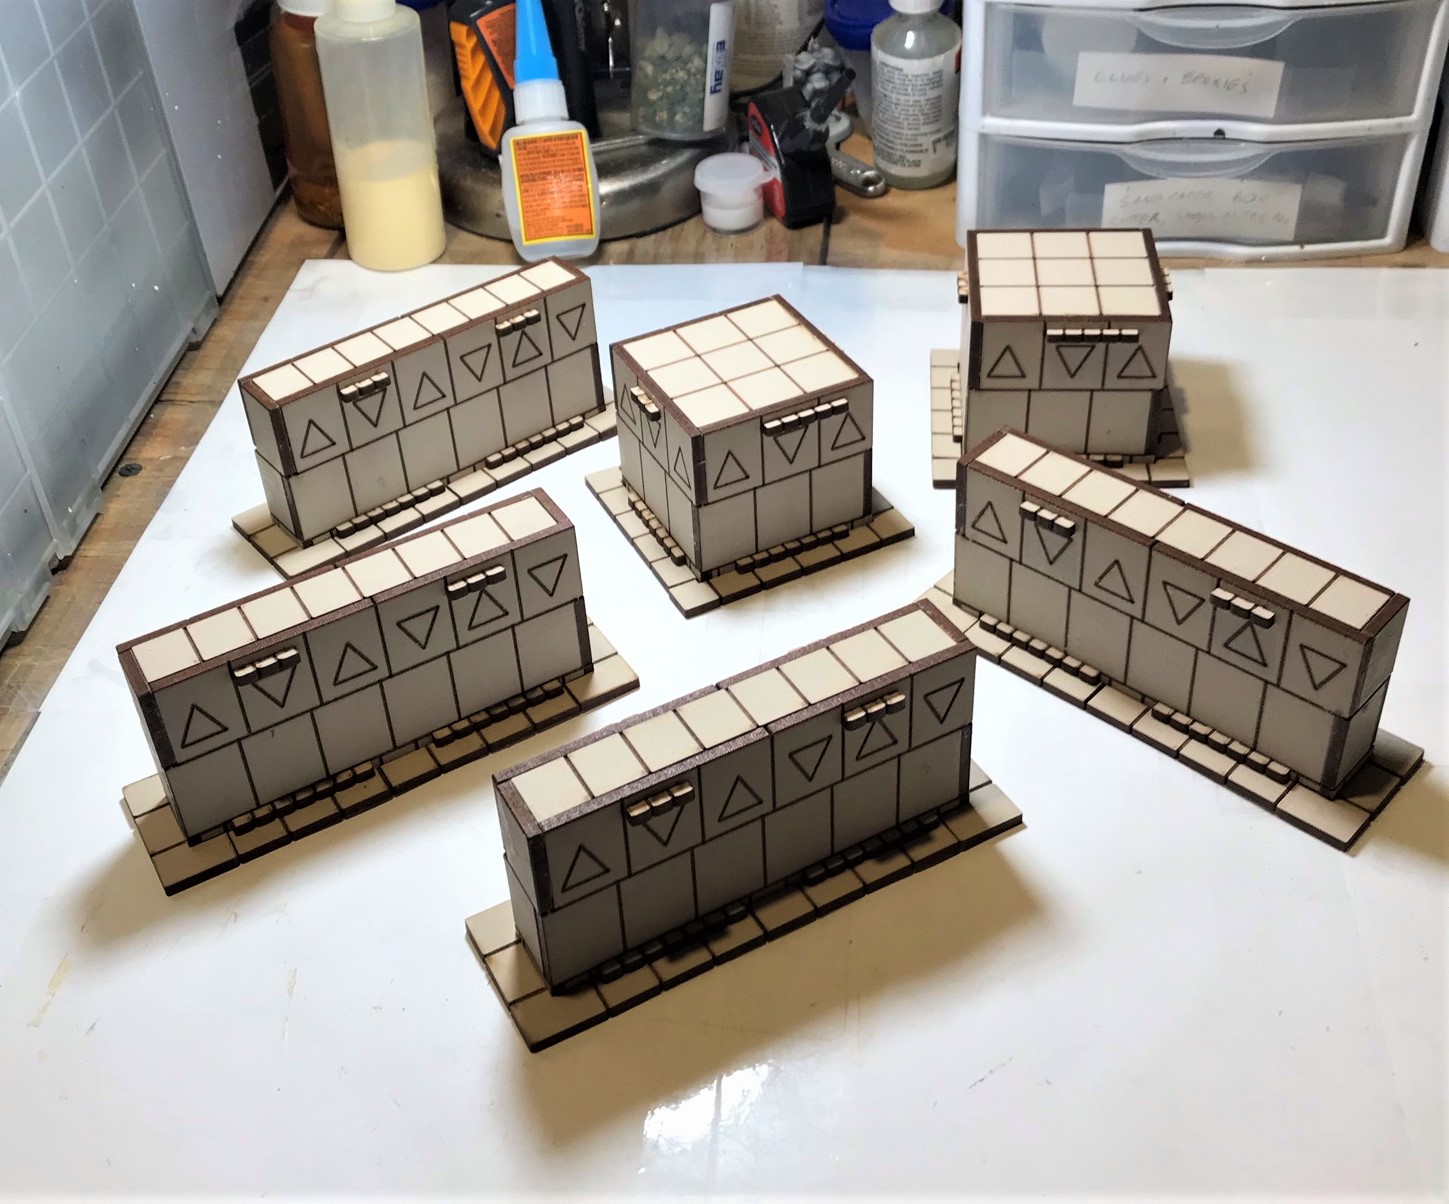
An example of one kit out of the bag after cleaning it off with a moist microfiber cloth.I have found with these MDF kits that it helps to dry fit first and organize the parts. Here you also see that I put an “up” arrow on the inside of the walls to help make sure that I did not assemble anything upside down.I assembled the wall sections first and let the PVA dry overnight.The next day, I added steel washers as weight to get the wall tops to glue flush to the previous step’s work. Then I glued to the bases (with the weights again).All of the “Temple Corner Walls” assembled and ready to get dusted up and painted.Here you see my early dry brushing after dusting – I use three colors to dry brush. I decided to paint the triangles in a red, black, and yellow pattern. You can see the paints that I used at the very end of this post.After I dry brushed the structures, I toned down the dry brushing with Army Painter “Light Tone”. Between the “thirst” of both the MDF and the chinchilla dust, I ended up using the better part of two bottles of the AP tone. Here, these are all complete.
I tried to use my spray booth again for some shots here but I did get some weird shadows and alternatively unwanted shine that I did not like. So I went with what you see below. I’ll need to investigate a light box (maybe).
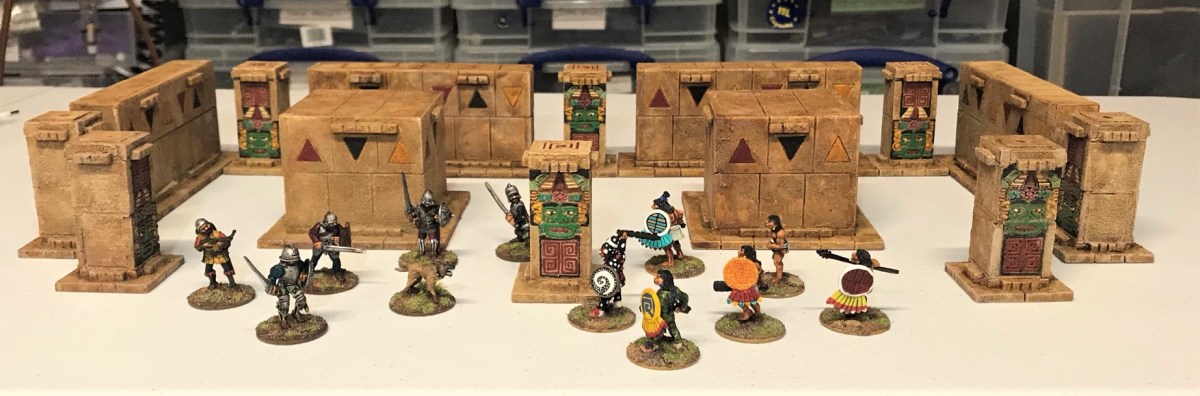
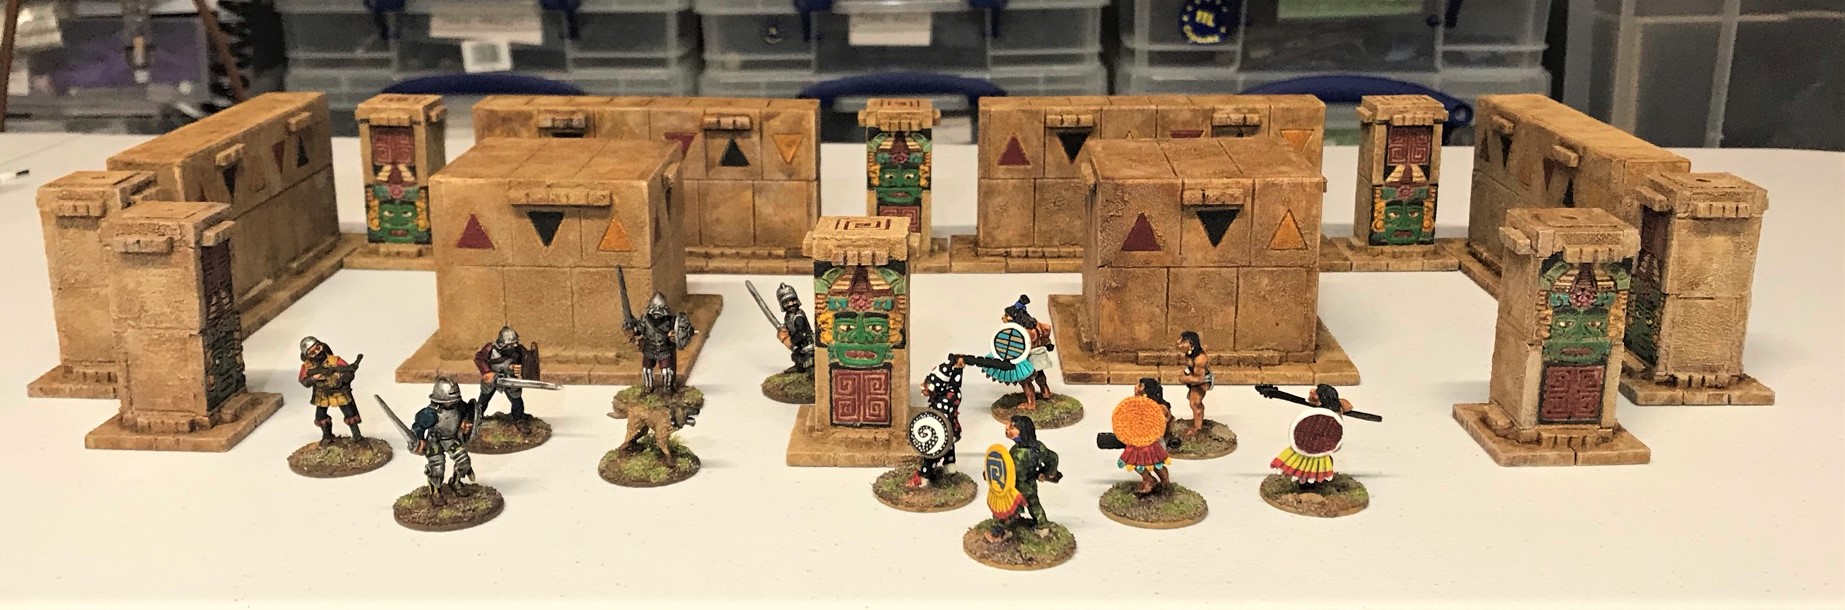
Here you see a fight among the “Temple Column Walls” (this post) and the “Temple Columns” (from my last post) between a squad of Conquistadores (and a wardog) against an Aztec squad and a supporting warrior priest. I think that I was successful at getting all to blend in well.
So, the Temple Corner Wall structures of this post are part of two “challenges”. The first is mine as mentioned earlier – “Mark’s Aztec Building Challenge Contest” – in which I will give away free prizes to blog followers for being the closest to guess how long it will take me to finish all these buildings. The second is from Ann’s Immaterium, and is called Ann’s “Paint the Crap You Already Own” challenge. These definitely count there – and I hope there will be more for this April challenge.
I have ordered some more “Light Tone” – and with my remaining MDF I’ll need it. In the meantime, as an update – it warmed up here this week so I was also able to get my outside priming done – see below!
I was able to prime this week! I can now vary what I decide to complete.
I also am planning an update to my Civilizations Collide supplement, which will have rules for the falconet and some new scenarios (in addition to an overall update). So that might slow up my progress, as also golf might (haven’t played yet this year though). I also have been – wait for it – GAMING!
Well, remotely anyways. I was lucky enough to play in a Combat PatrolTM game last Saturday via Zoom with Sally4th’s Chris Abbey. Chris (in the UK) set up a James Bond game based on the 1977 film The Spy Who Loved Me that he called “Nobody Does it Better” (Carly Simon song of the movie). It featured the scene in the bad guy’s (Stromberg) supertanker interior hold (that held a captured US sub). The action focused on the scene where escaping British, Russian, and American crews fight the Stromberg goons to stop a nuclear launch. We had US and UK players – and I had James Bond. Our objective was to advance up the gantry and throw a satchel charge at the control room doors and blow it open. We had a lot of twists and turns in the game – James Bond’s satchel charge misfired, and so did a Stromberg flamethrower that would have fried him. A last second satchel charge throw from the Americans missed, but the explosive charge slid up to the door and blew it! Success! Notably, I had invited our blogger buddy TIM who got to watch the game – and it was fun to share the experience with him.
Take a look at the tabletop below – amazing!
The tabletop before the game.Chris Abbey GM’s the game exceptionally well. We were moving up the gantry on the left – the control room was in the center of the far end.
I also had two other nice surprises. The first was in the mail from Buck Surdu – who sent me a couple of Wars of Ozz shirts. I did get in the Kickstarter for it (and the figures are available from Sally 4th and Old Glory in the US) -and the next project I plan to do is paint these figures.
Love these shirts and I will be happy to be wearing them at future gaming events! I won’t be bringing Caesar (our nearly 27 year old cockatiel) – he hates dice.
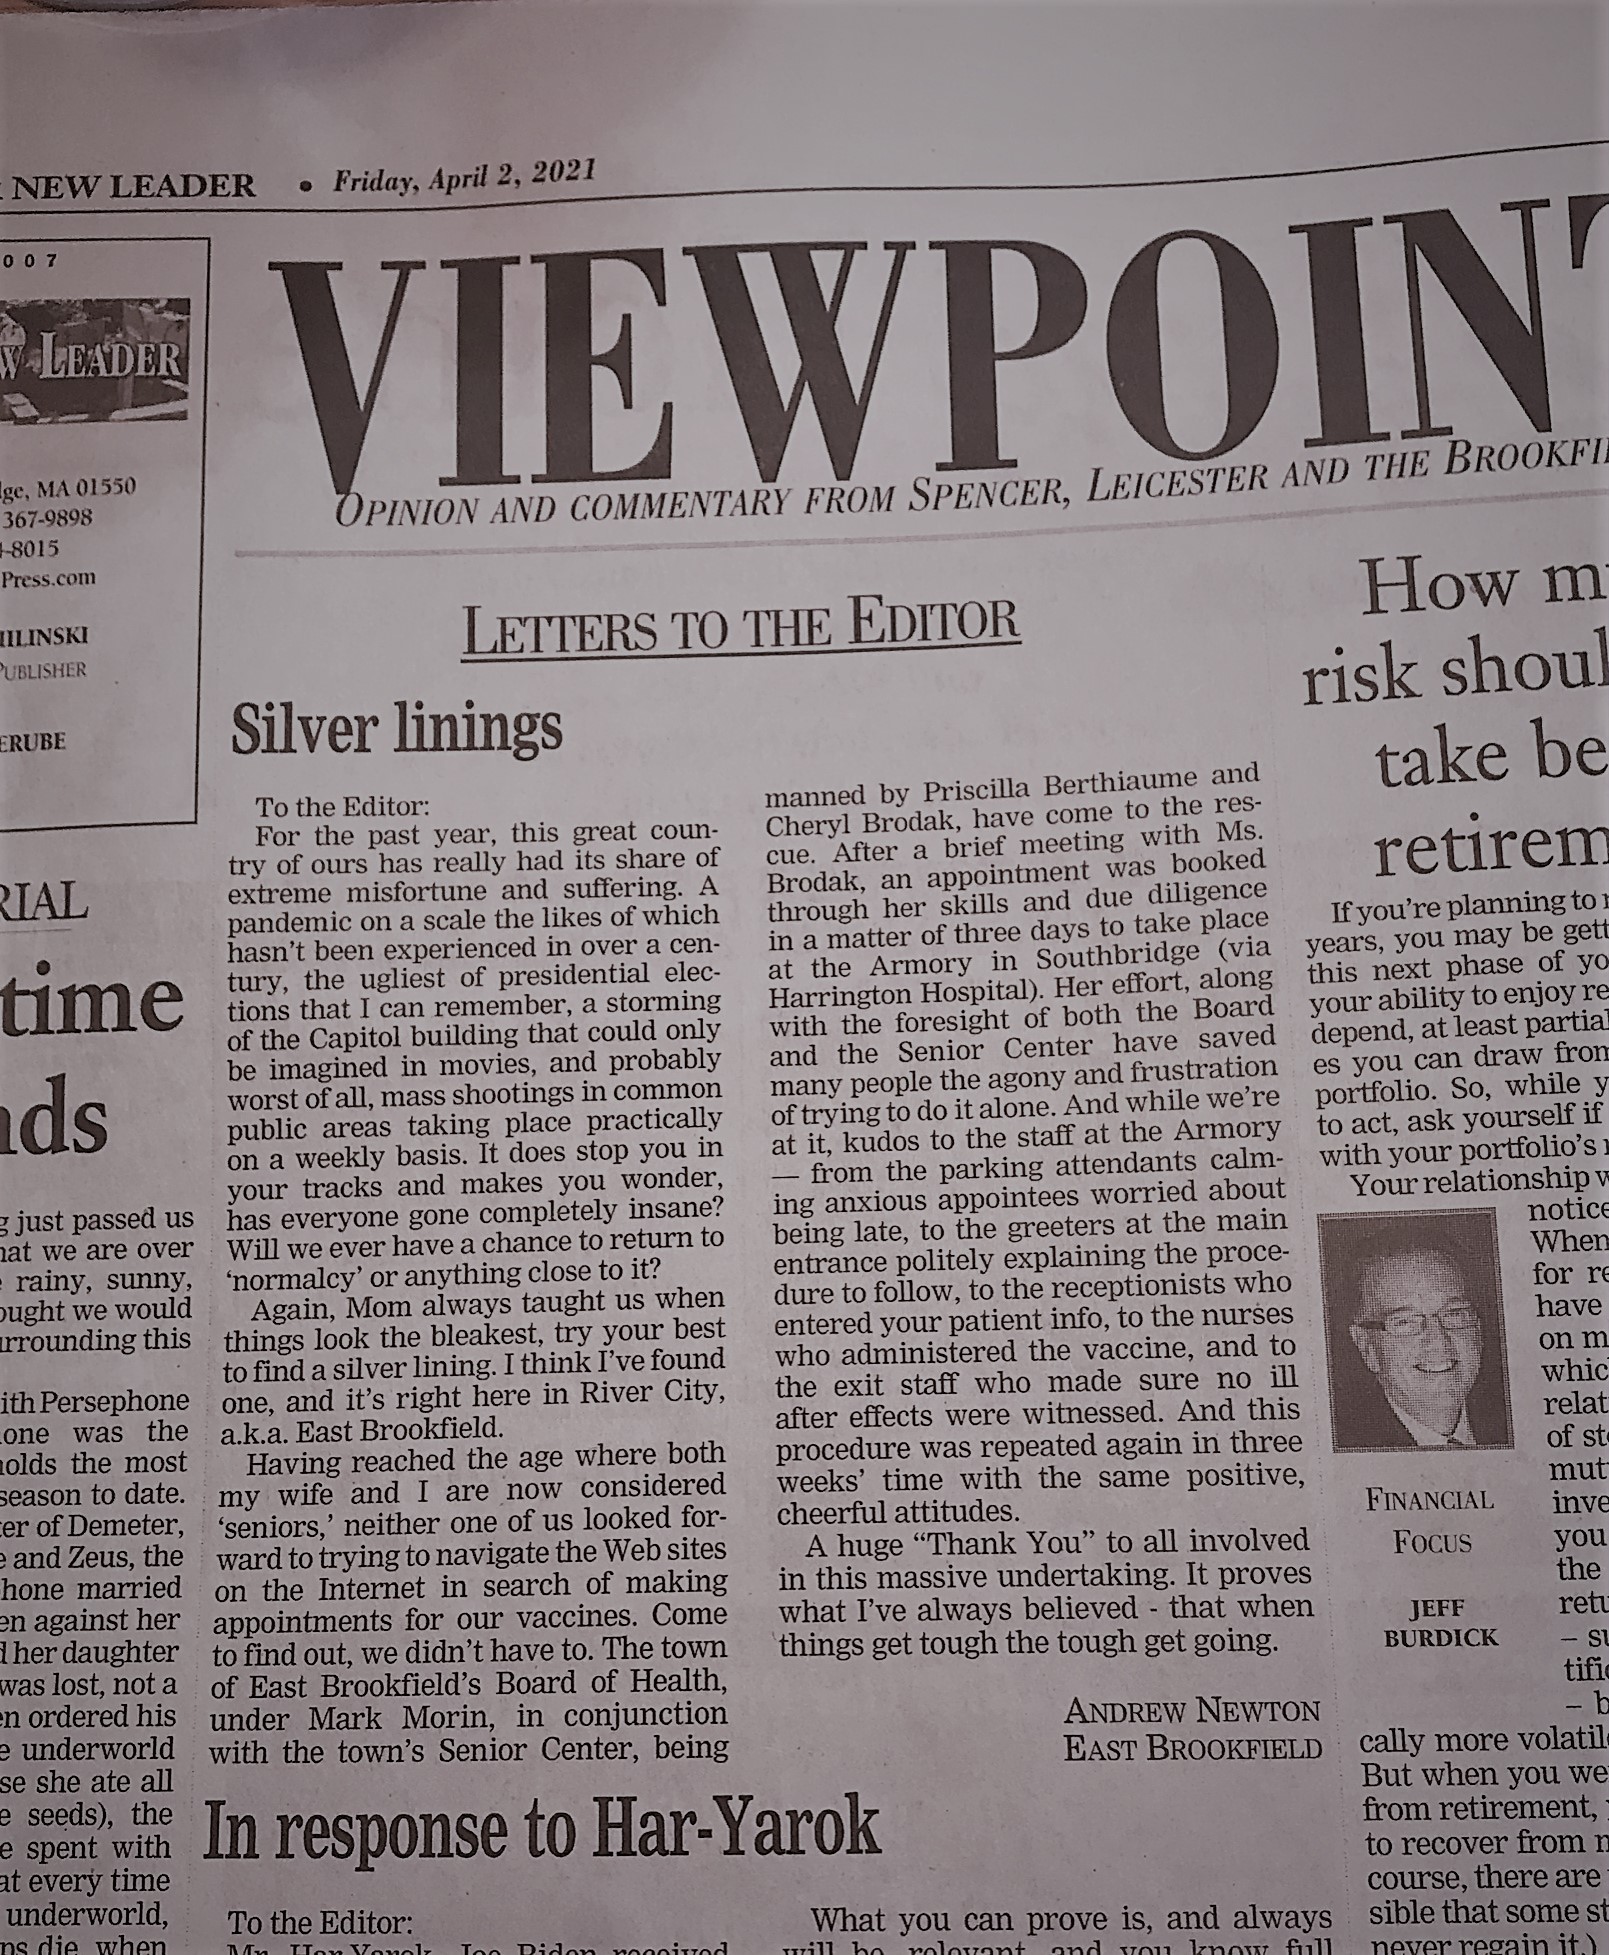
The second surprise came in our local weekly newspaper (see below). I’ll let Andy Newton’s words speak for themselves, but given the last few months, this was a heartwarming bonus for us.
From The Spencer New Leader
And though my computer is a problem, I did get the email from the Commonwealth of Massachusetts that has allowed me and my wife to get our first “jabs” this weekend! Take that COVID-19!
So, until my computer situation is better – I’ll be painting and following up on my iPad. Maybe I’ll be back this weekend – in any case, let’s discuss this post! So feel free to let me know your thoughts and comment – and to enter the contest. Take care all and thanks for looking!
Miscellaneous details and references for those interested in that sort of thing:
Previous posts on games, units, and other projects for my 16th Century Spanish Conquest supplement for Feudal Patrol™ – “Civilizations Collide”
Aztec Temple Corner Walls (Plus Some Life & Other Distractions Stuff Added In) (this post)
Perro de Guerra (Conquistador War Dogs). 13 figures total: Outpost Wargames Services #CONS6 “War Dogs” (8 war dogs); Eureka #100CON13 “Dog Handler and Dogs” (1 dog handler/pikeman and 4 war dogs)
Conquistador Foot Command, Crossbowmen, and a Couple of Officers. 11 figures total: Outpost Wargames Services #CONC1 “Conquistador Foot Command” (a leader, a banner bearer, a drummer, and a bugler); Eureka #100CON04 “Crossbowmen” (5 crossbowmen); and Eureka CONC1 “Conquistador Officer” and an unknown SKU officer (2 officers)
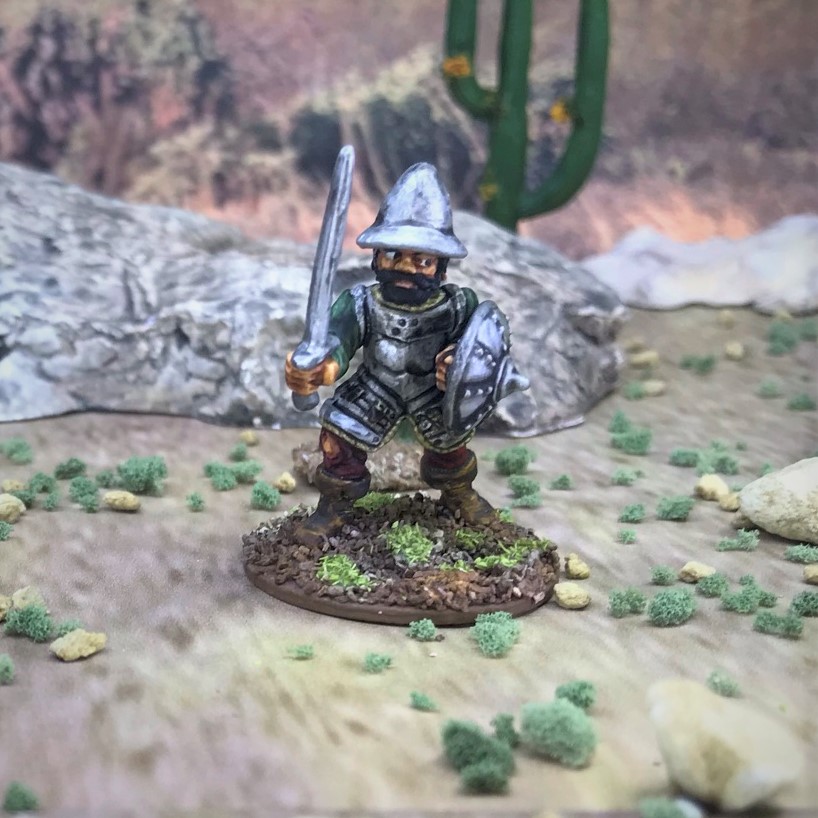
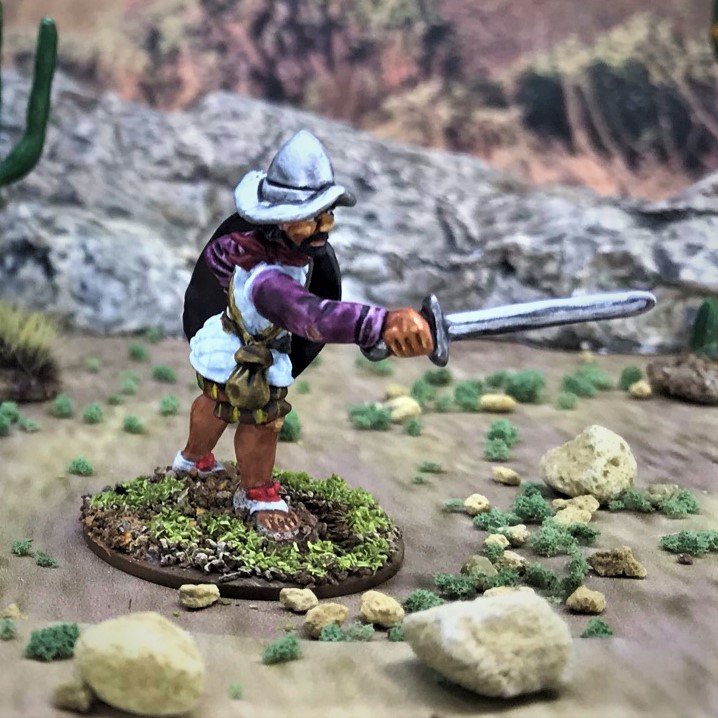
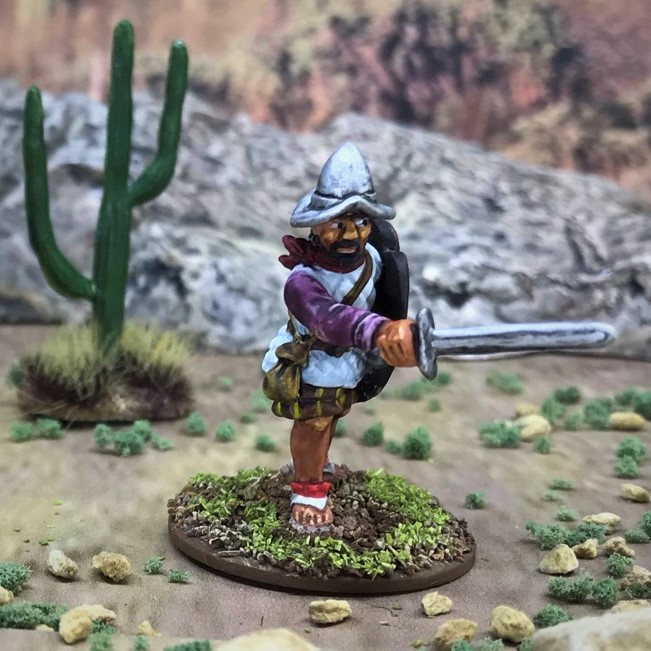
Wait you say – Mark, did you not just finish a group of Sword and Buckler Men (SABM) on your last post? Yes, but those eighteen were from Wargames Foundry, and the eight that this post will describe are from Outpost Wargame Services (via Badger Games). These would round out my SABM for Civilizations Collide scenarios for games of Feudal PatrolTM . AND these are part of “Mark’s Conquistador Conquest” – so I know some of you are entered and wondering how that is going. All I’ll say is that it’s going well.
Back to the figures, they are metal, 28mm, and came in eight different poses. Six of the one-handed sword-armed figures needed assembly with sword arms and shields, and two had two-handed broadswords (they will of course get no shields but will have a more deadly blade). These figures came with eight shields as well – but these included shields were far too large to be considered “bucklers“. Therefore I replaced them with six better-sized Wargames Foundry shields. The figures are certainly “chunkier” and not at the quality of the previously-completed SABM that were Mark Copplestone sculpts. Still, this group of eight will bring my available SABM figures to 26. Additionally, this brings my project total to over 200 figures.
As I am stretching to finish the project and the blog posts about it, I did not do many WIP shots – and I did basically follow the same processes that I have done previously. Some of the figures here (and some future ones) were amenable to some amount of batch-painting, which has been helpful. I also do want to keep folks a bit in the dark on the contest’s progress until I can declare the winners officially. I MUST give another nod to Steven Thomas’ blog post on Conquistador painting – it and Osprey books were of great value – thanks to all the authors.
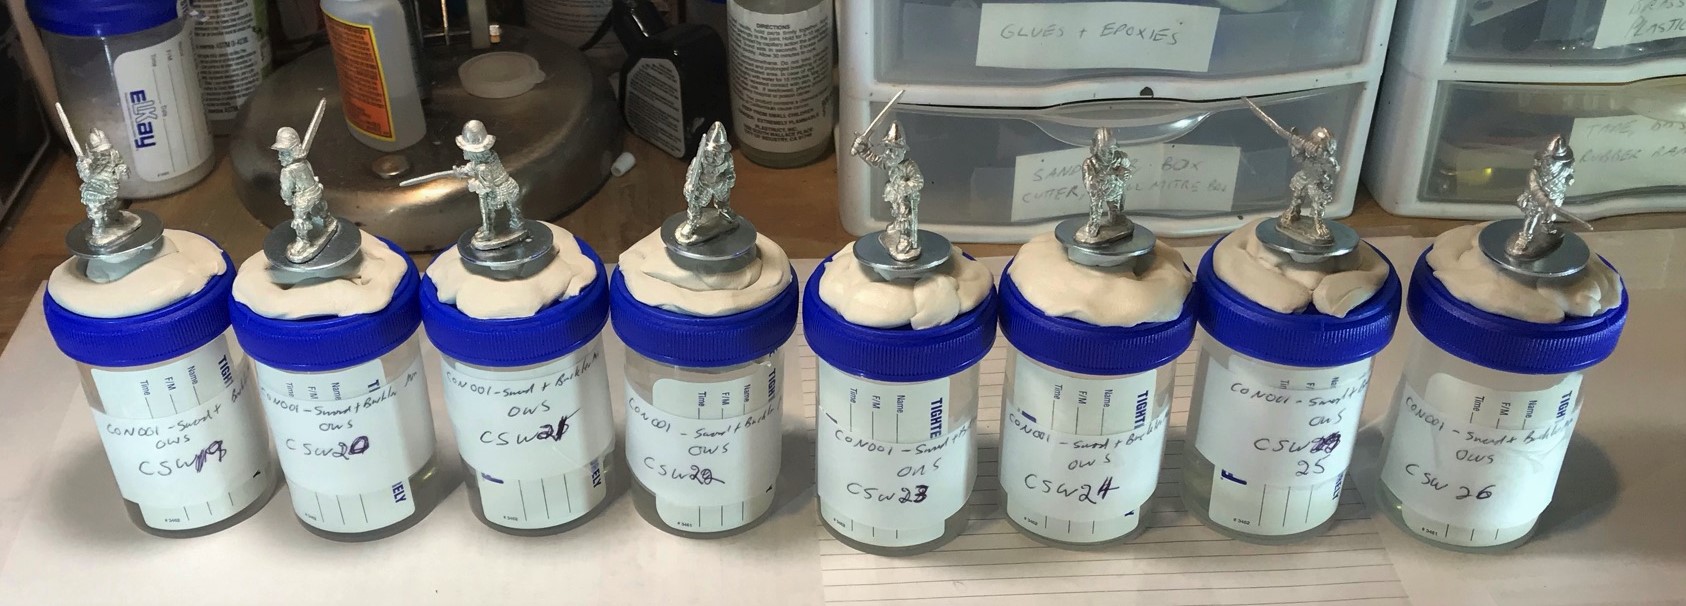
As a reminder, I started off with these like this:
The OWS SKU CON001 assembled (less shields which I mounted later) and mounted on poster tack on specimen jars for painting.
And my only WIP shot was this one:
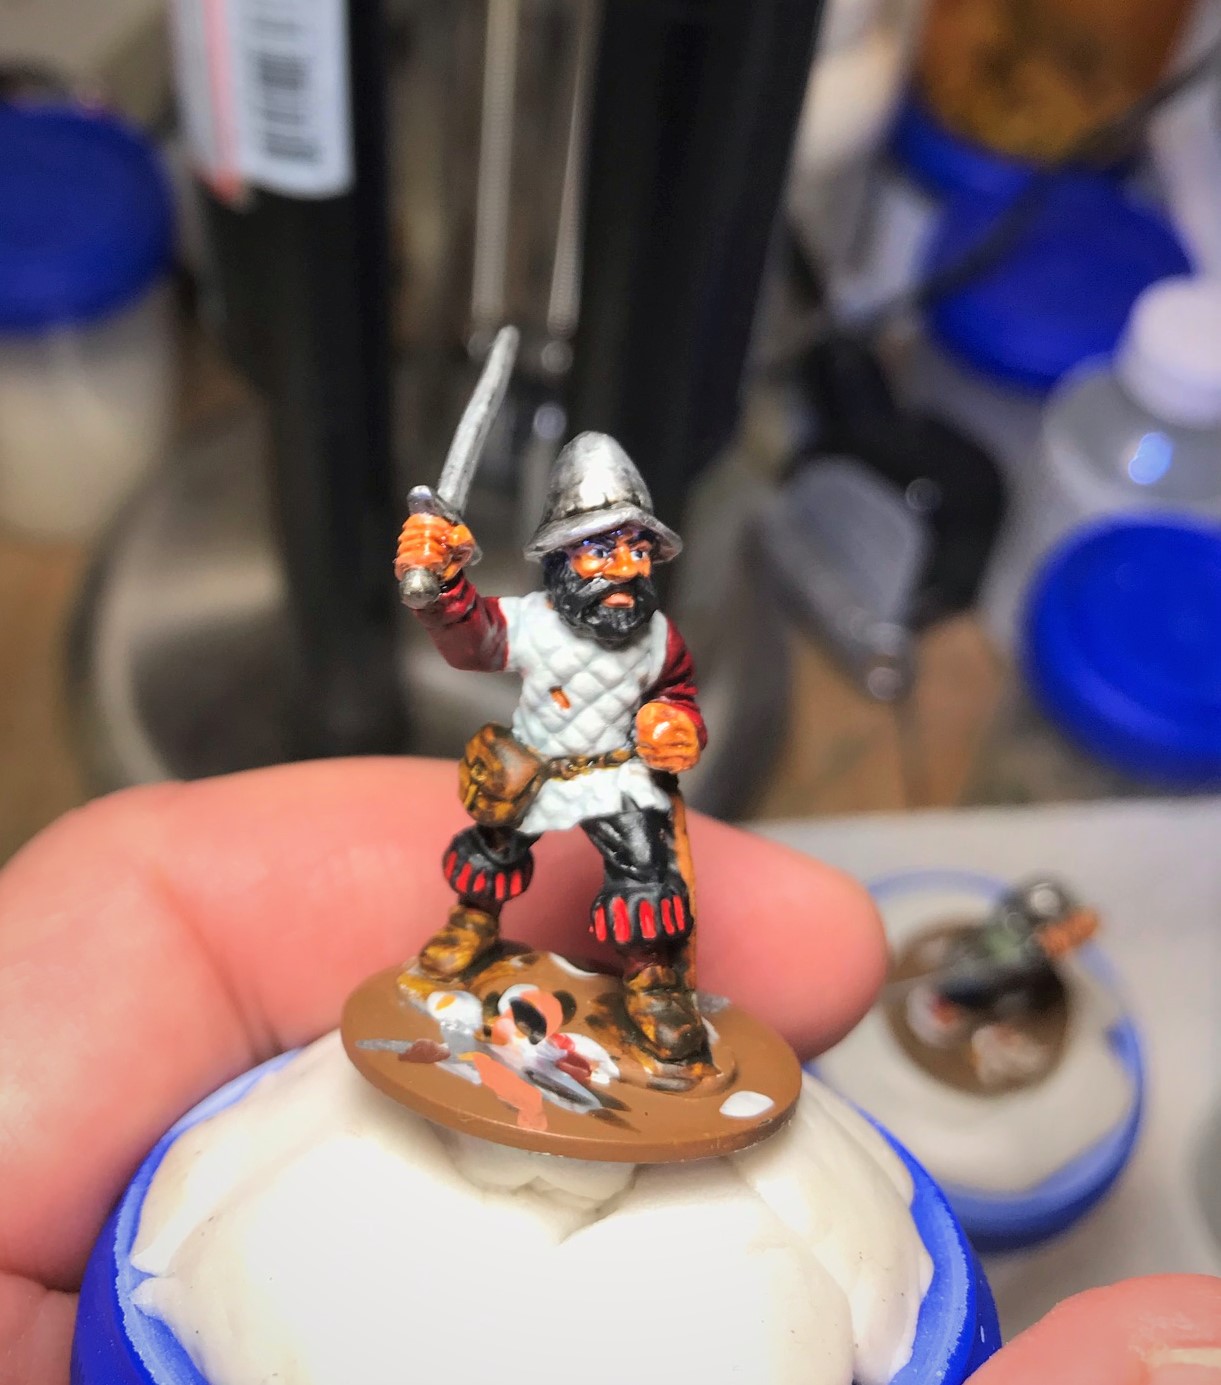
Here you see this figure (CSW23 seen below as well) before I applied varnish, mounted the shield, and finished the figure.
So let’s get to it! Continuing on my previous numbering system, these figures are numbered CSW19 to CSW26. Click on any of the images for a bigger view.
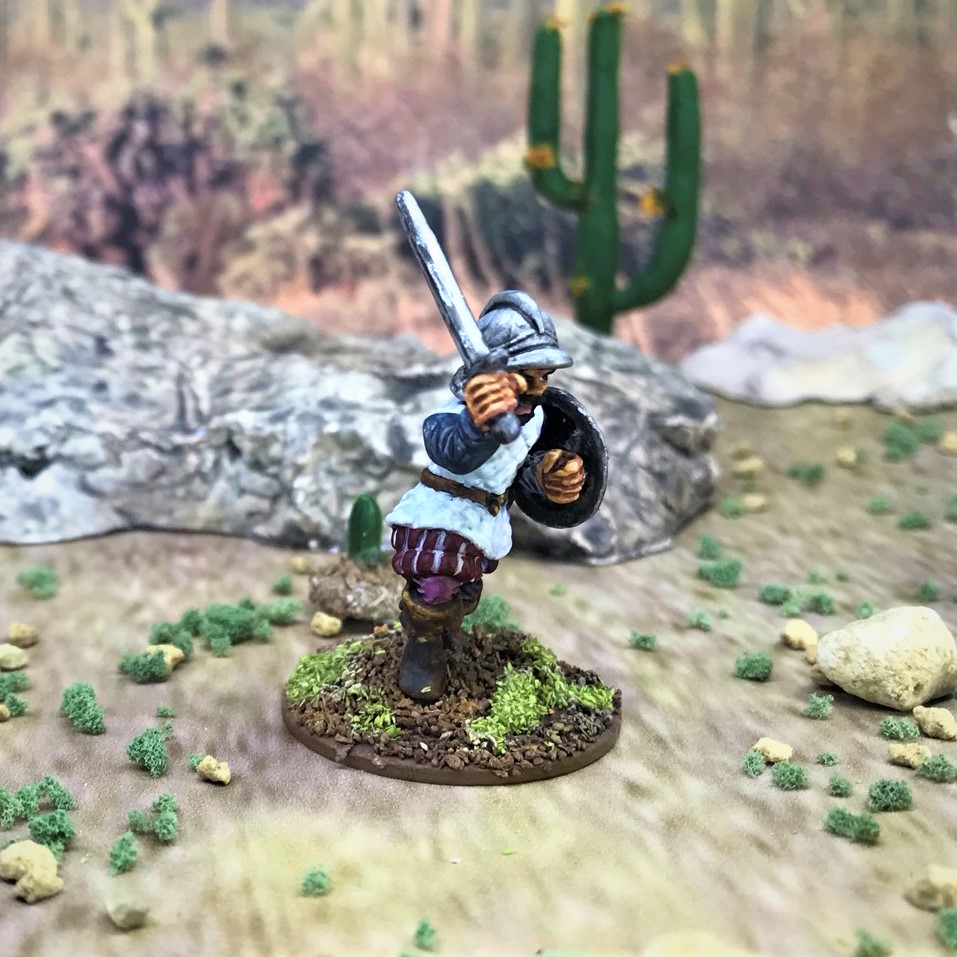
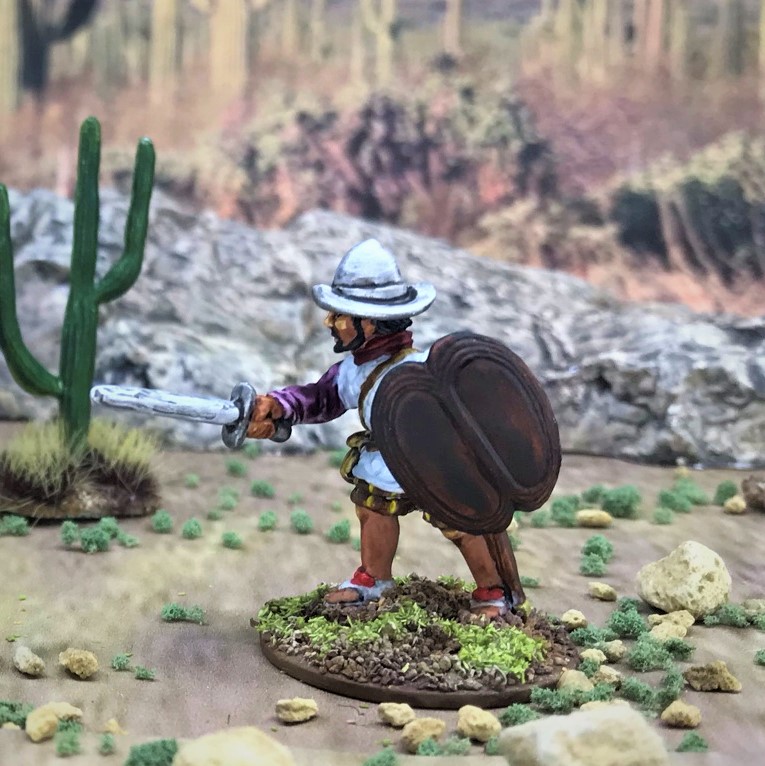
CSW19
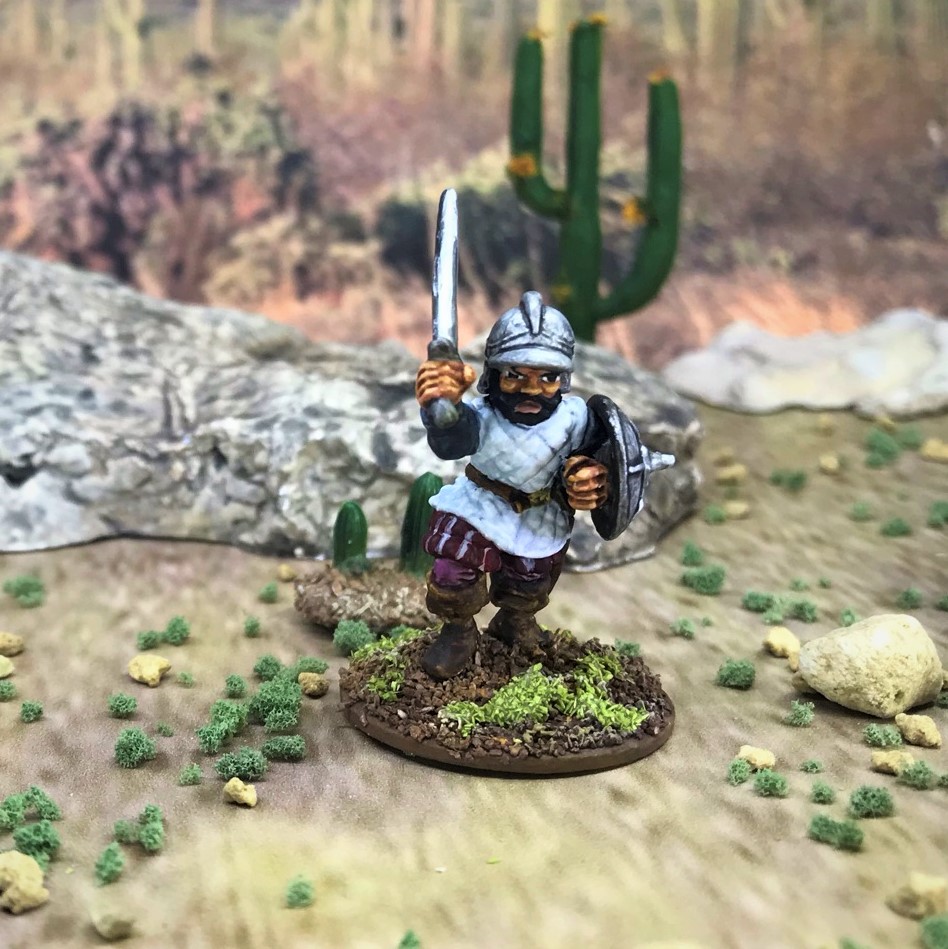
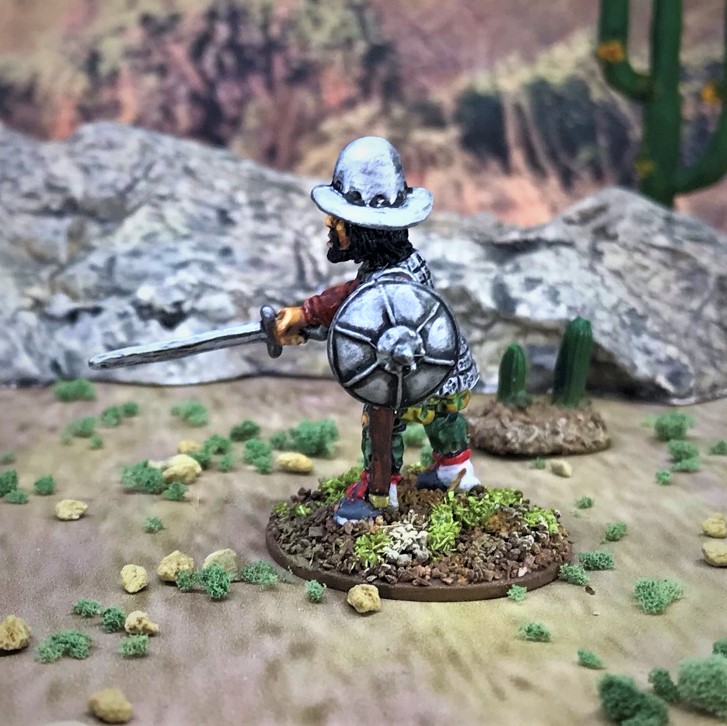
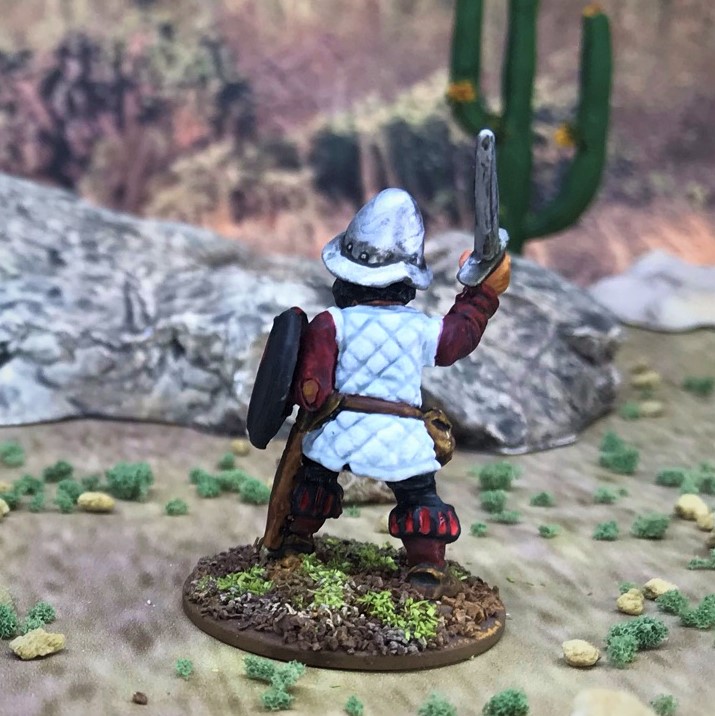
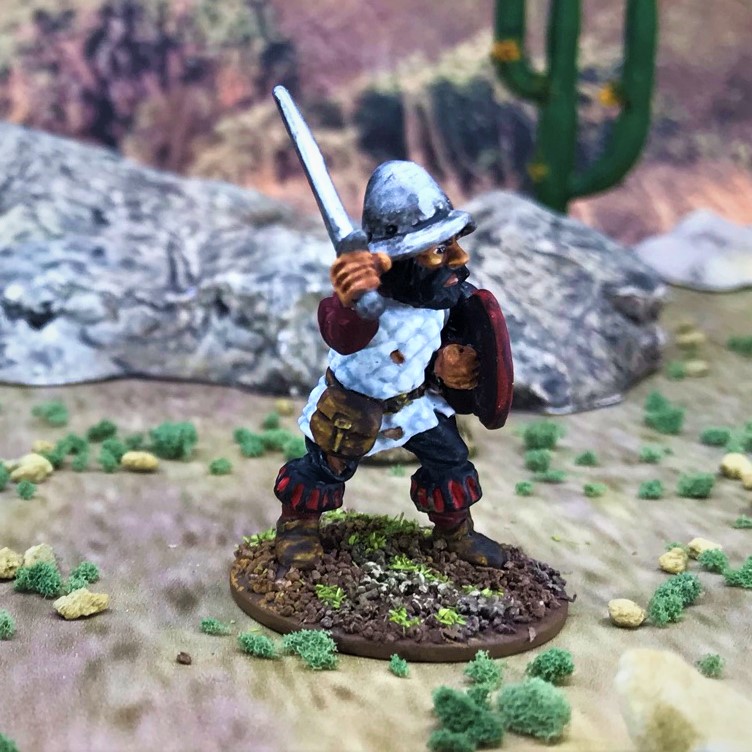
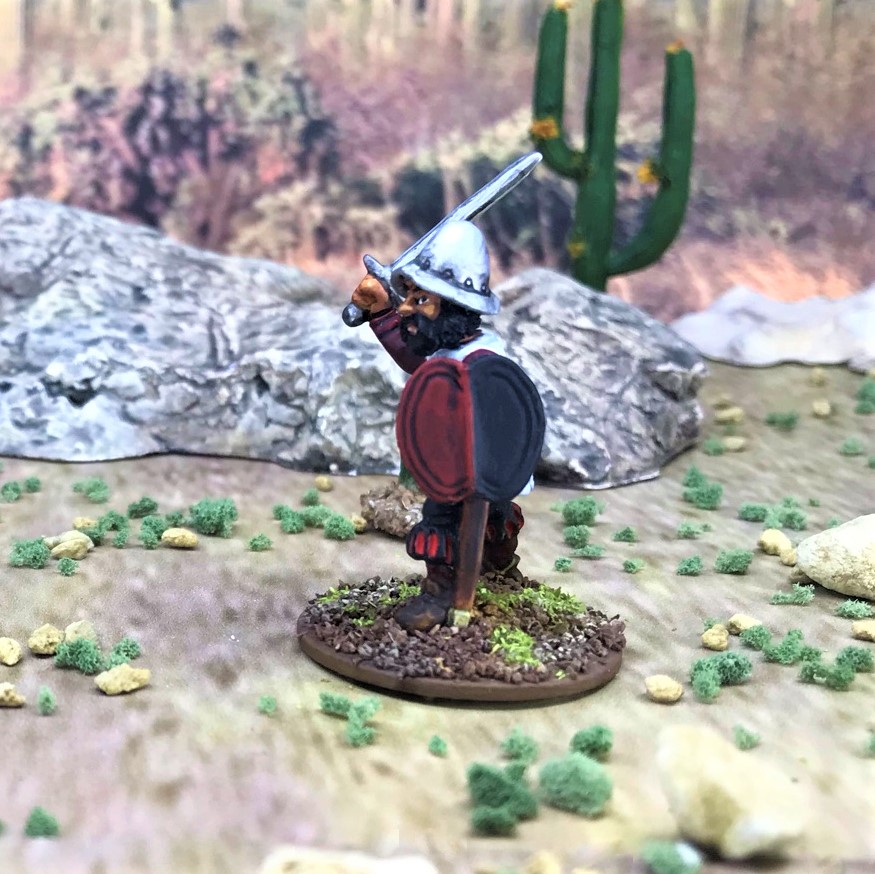
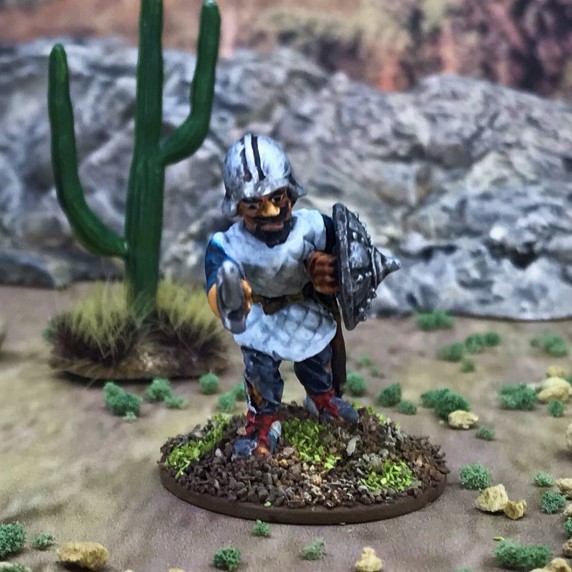
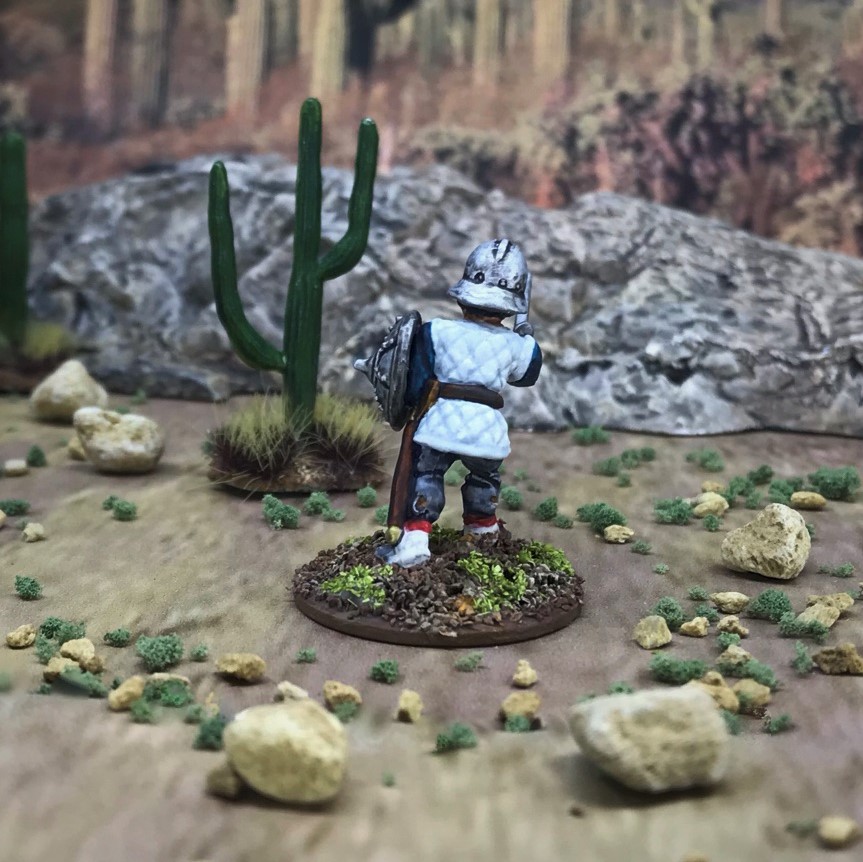
This Sword & Buckler man has a round bucker (rodela) from my excess Wargames Foundry shields. He has adopted the ichcahuipilli braided cotton armor favored by the Aztecs and Tlaxcalans.
CSW20
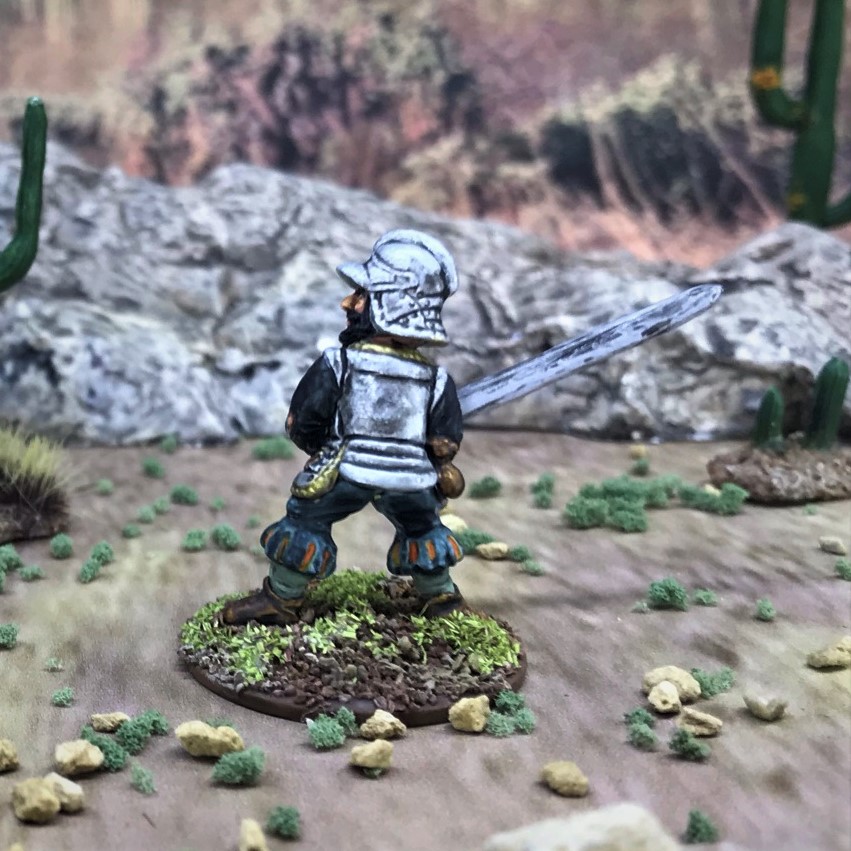
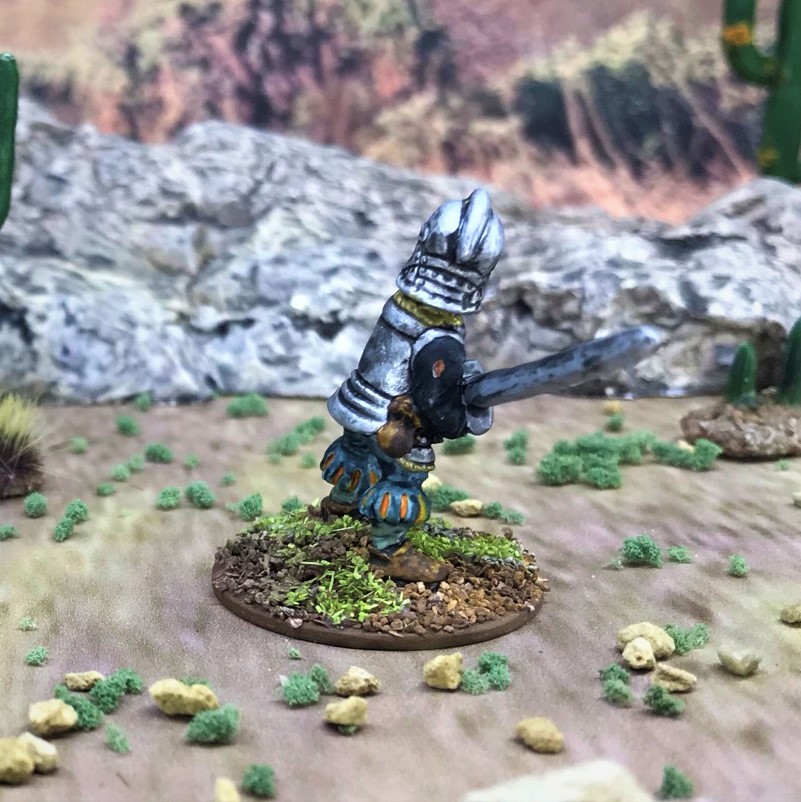
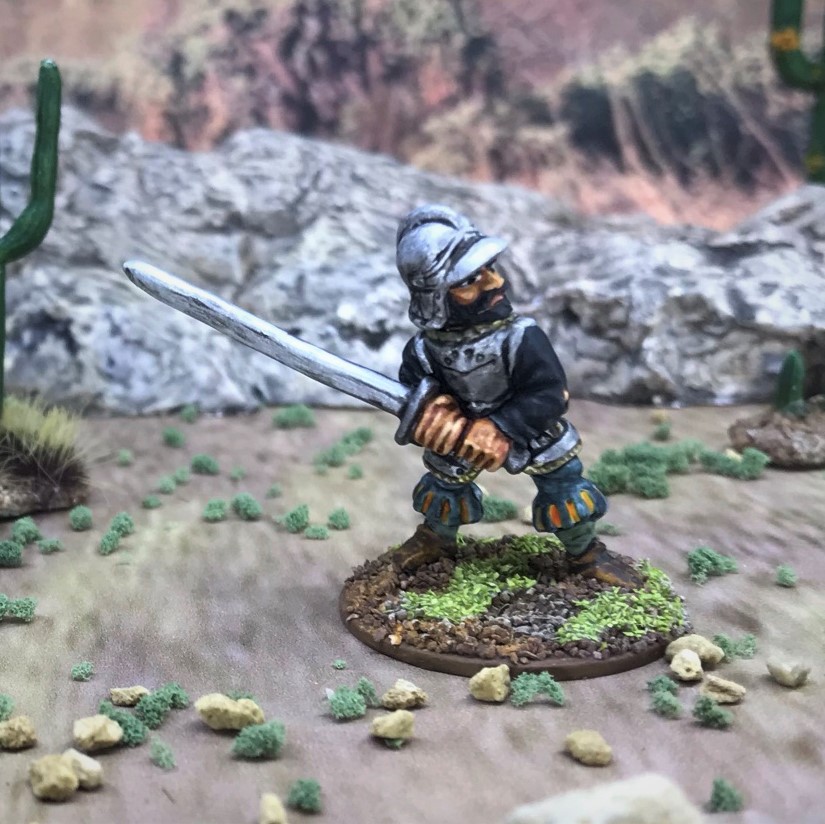
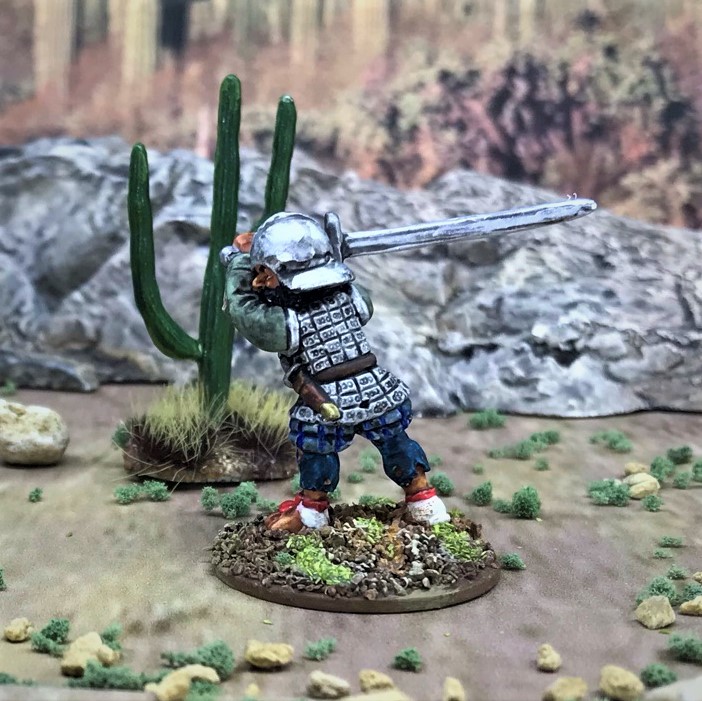
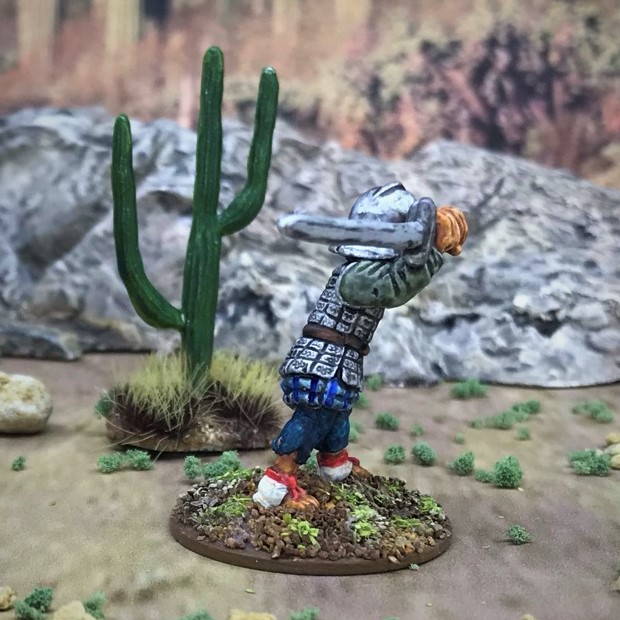
This was one of the two figures in the SKU armed with a broadsword. He can do more damage, and has decent plate armor protection.
CSW21
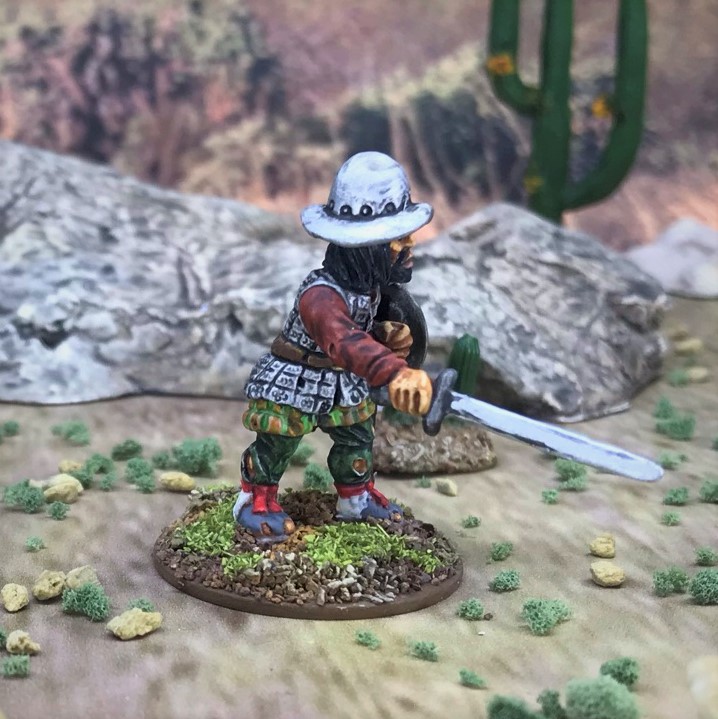
Another SABM with a WF rodela shield and decent mail armor. He has adopted Aztec sandals over his socks – not a great fashion look IMO – and these are wearing out like his clothes are overall. He has a scurvy dog look!
CSW22
This SABM has good plate armor and a WF rodela.
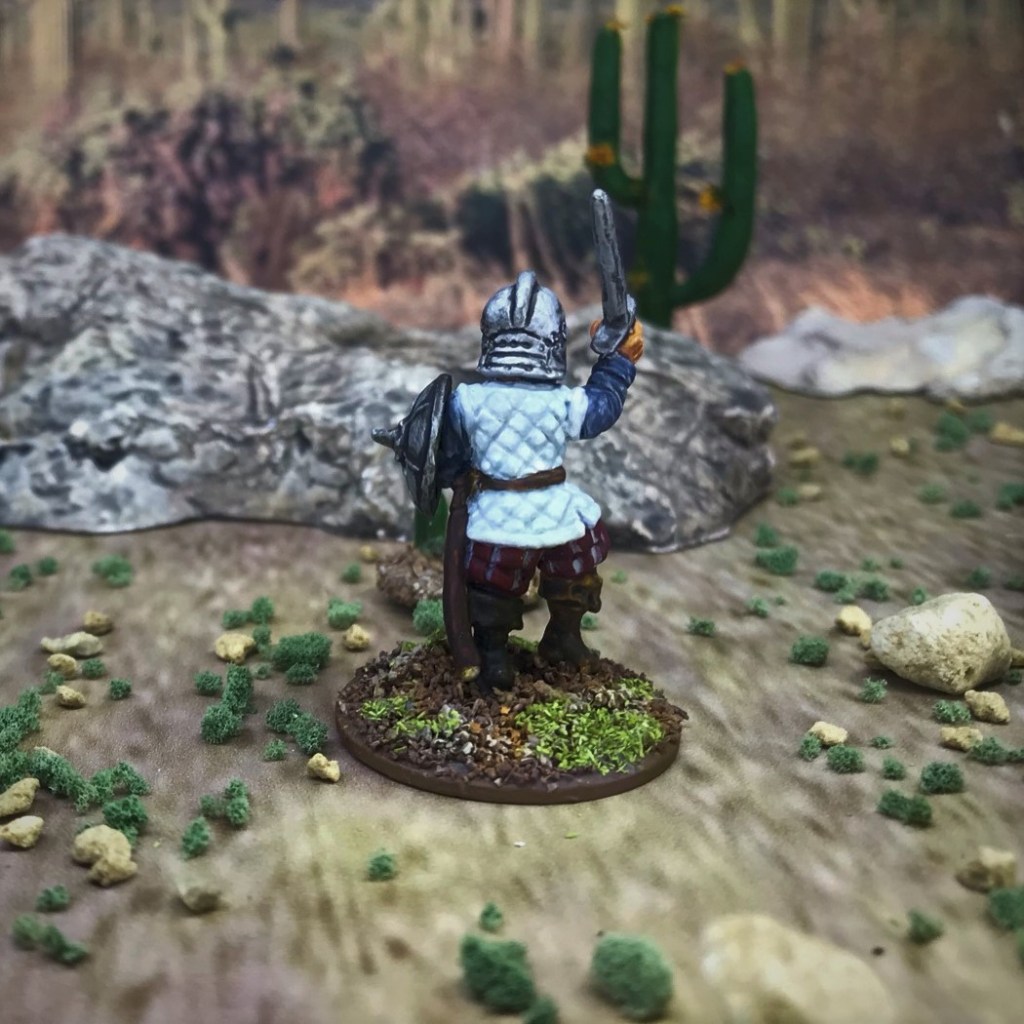
CSW23
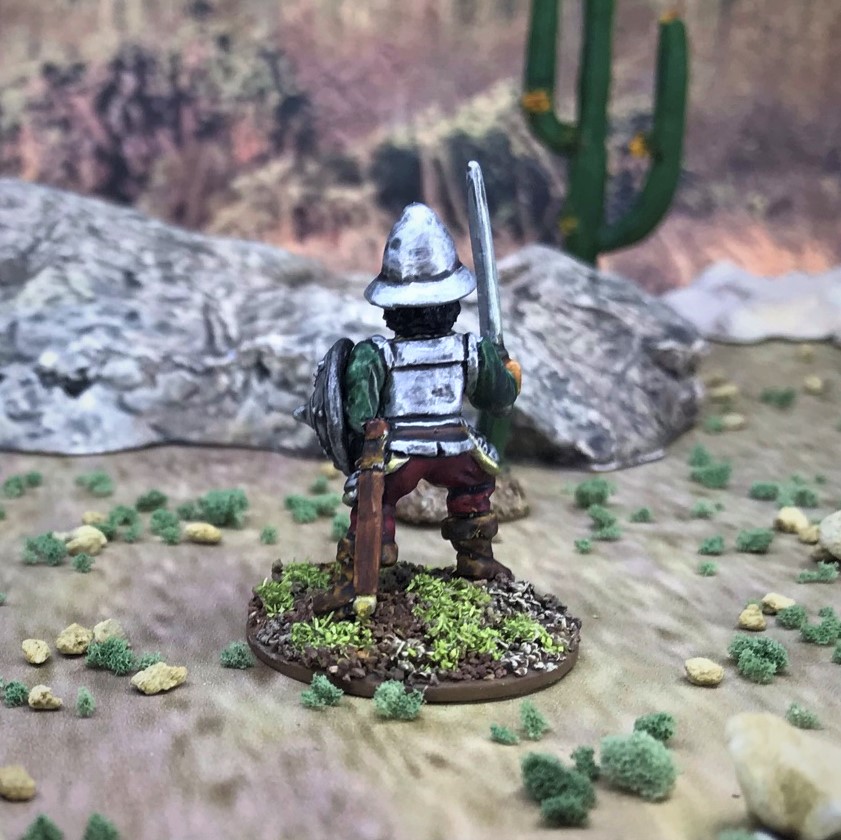
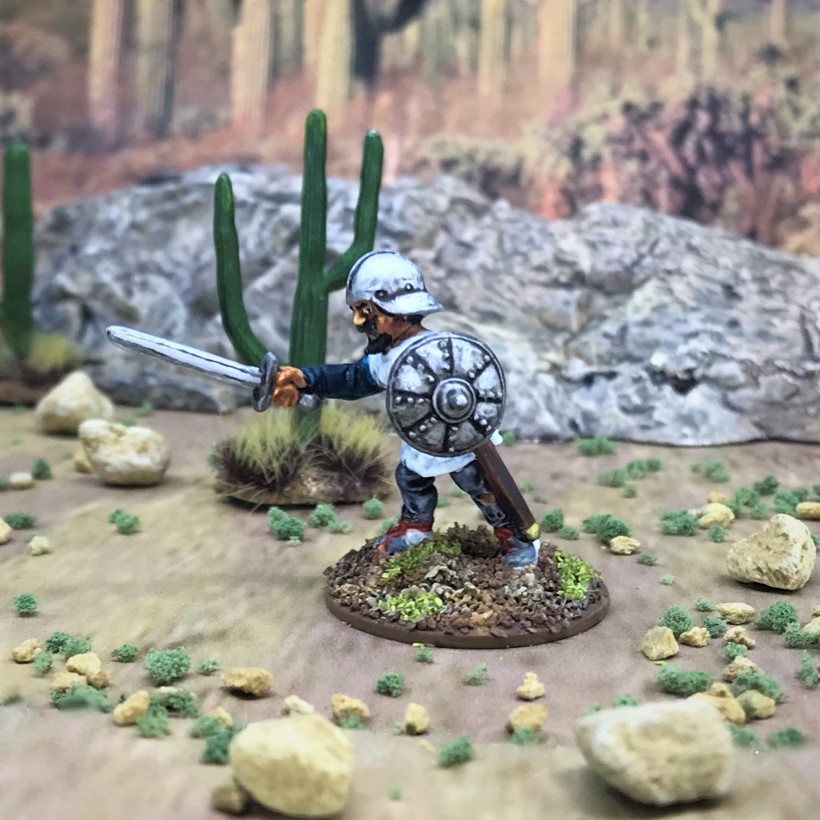
This SABM has also adopted the braided cotton armor of the Aztecs, and carries a WF adarga (kidney shaped shield).
CSW24
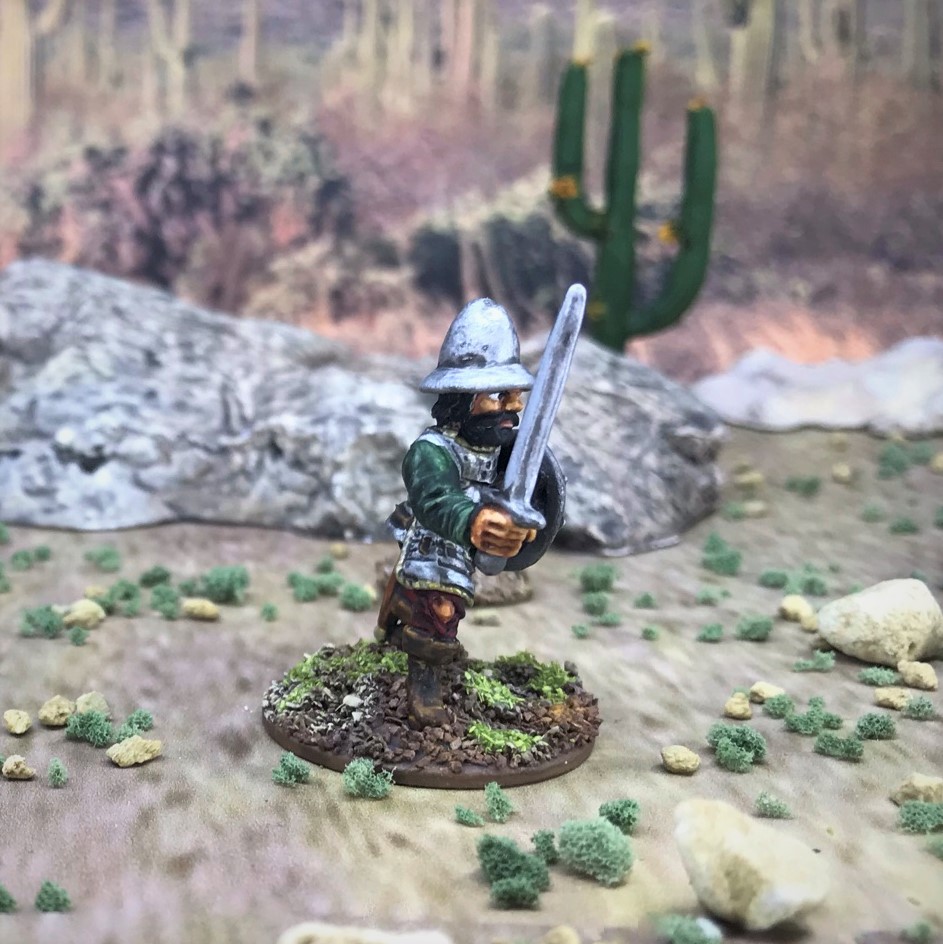
Here is another SABM with braided cotton armor and socks and sandals. He has a steel WF rodela.
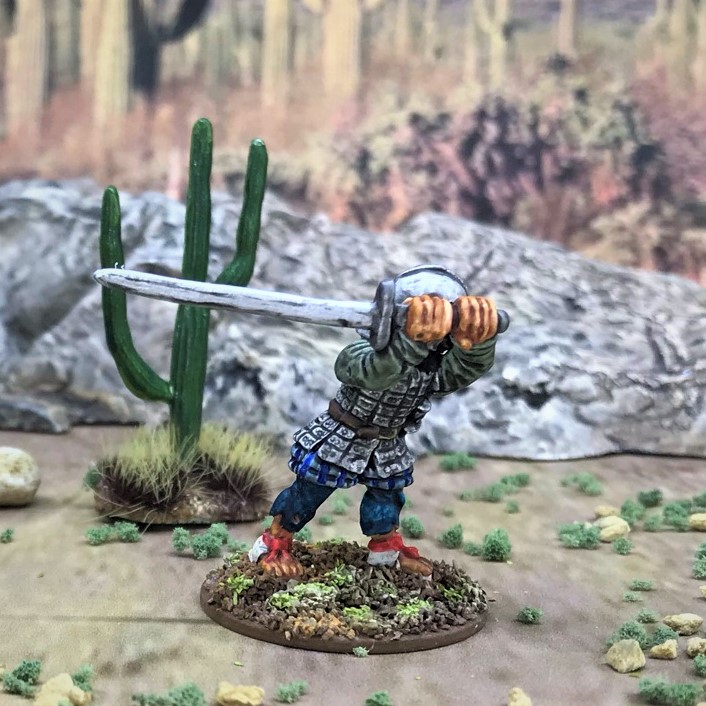
CSW25
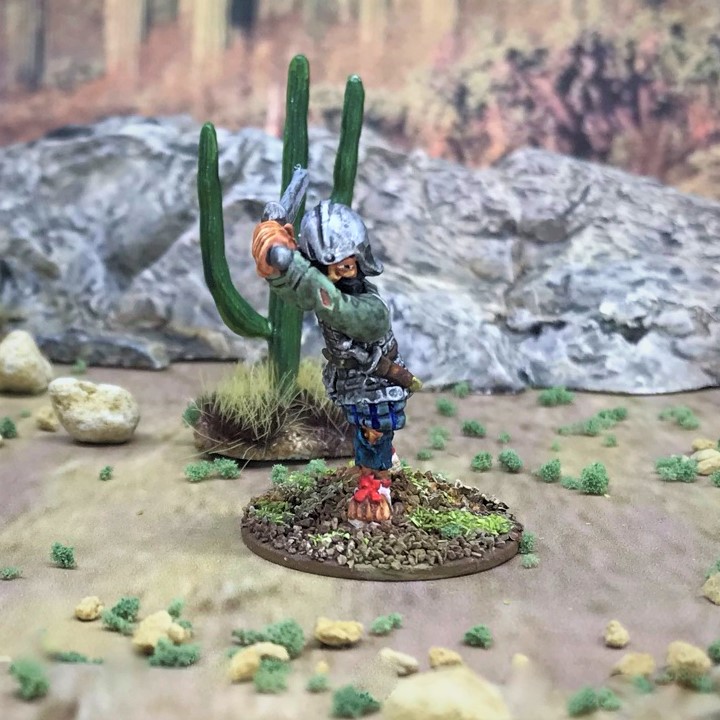
The second figure armed with a broadsword wears sandals and (thankfully) no socks. His mail armor should provide him good protection even without a shield.
CSW26
The last of the group, with sandals, braided-cotton armor and an adarga.
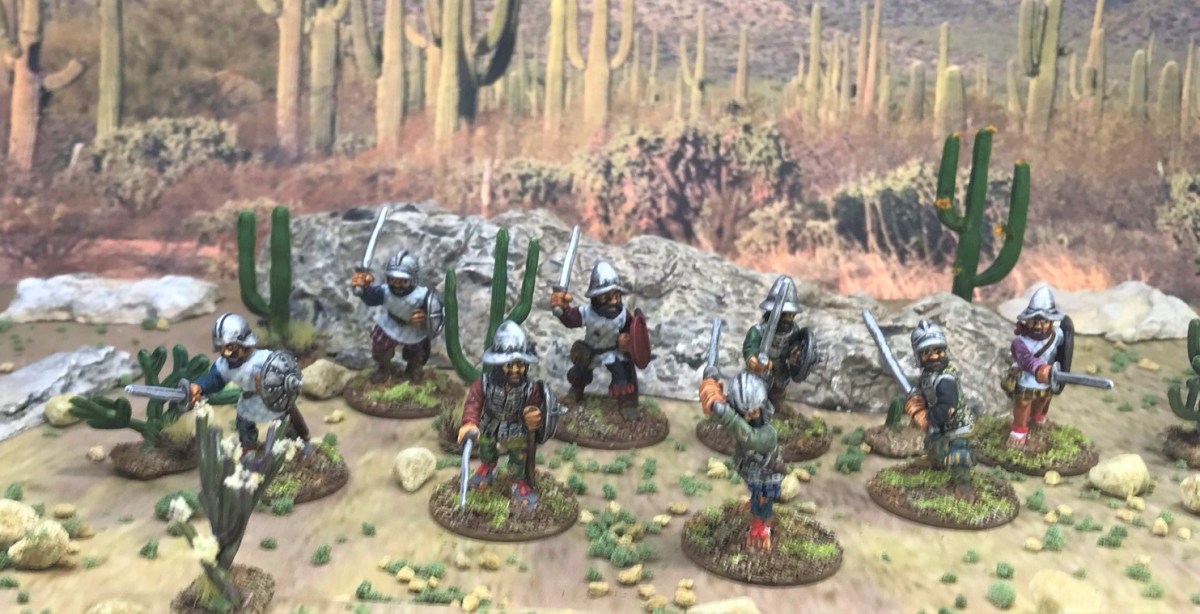
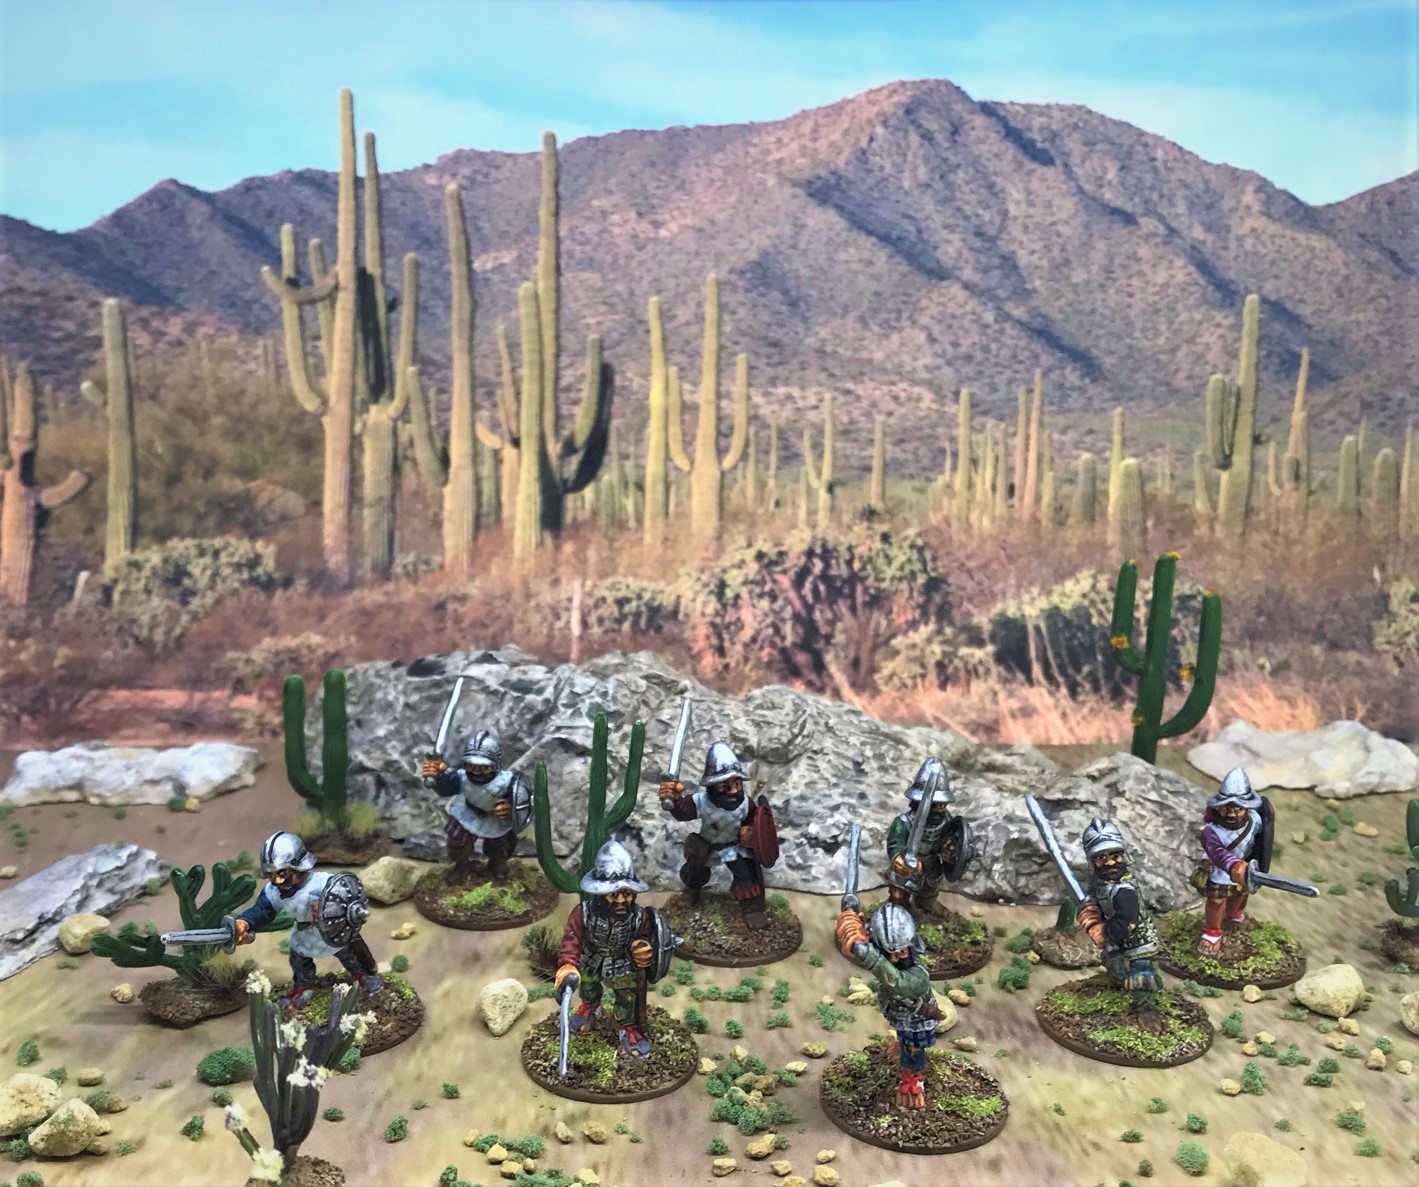
Group Shot
I thought a quick comparison with the Wargames Foundry figures would be helpful – see below:
Comparison of similar Outpost Wargame Services and the Wargames Foundry SABM figures.
A couple more points – this group of eight also counts as yet another entry into Dave Stone’s Painting Challenge “PAINT WHAT YOU GOT CHALLENGE”. Next up will be a falconet and crew, and then I’ll share the cavalry and dead horse markers. If and when I’m able to (or if I did already 😉) finish my personal challenge contest , I’m going to announce the winners. Then, if I do finish before the end of February I will try to take a one-figure break to complete a female figure for Alex’s Fembruary painting challenge. Then possibly I might run a similar guessing challenge to “Mark’s Conquistador Contest” for the terrain that I have – and yes, if I do, I’ll be giving away prizes. Interested? Stay tuned…let me know your thoughts about this post!
Total figures completed to date for this project: 203 figures: 109 Aztecs, 32 Tlaxcalans, 62 Spanish Conquistadores (27 more to go in Mark’s Conquistador Contest!)
Miscellaneous details and references for those interested in that sort of thing:
Previous posts on games, units, and other projects for my 16th Century Spanish Conquest supplement for Feudal Patrol™ – “Civilizations Collide”
More Conquistador Sword and Buckler Men (this post). 8 figures total Outpost Wargame Services #CON001 “Sword and Buckler Men.
Perro de Guerra (Conquistador War Dogs). 13 figures total: Outpost Wargames Services #CONS6 “War Dogs” (8 war dogs); Eureka #100CON13 “Dog Handler and Dogs” (1 dog handler/pikeman and 4 war dogs)
Conquistador Foot Command, Crossbowmen, and a Couple of Officers. 11 figures total: Outpost Wargames Services #CONC1 “Conquistador Foot Command” (a leader, a banner bearer, a drummer, and a bugler); Eureka #100CON04 “Crossbowmen” (5 crossbowmen); and Eureka CONC1 “Conquistador Officer” and an unknown SKU officer (2 officers)
Total figures completed to date for this project: 203 figures: 109 Aztecs, 32 Tlaxcalans, 62 Spanish Conquistadores (27 more to go in Mark’s Conquistador Contest!)
PAINTS, INKS, GLAZES, SHADES, WASHES, PIGMENTS, FLOCKING, GLUES AND MORE THAT I USED ON THESE CONQUISTADOR FIGURES:
I have always wanted to be part of a putting together rules for a tabletop wargame. Now, I can officially say that I can check off that box on my life’s “To-Do” list – at least in a smallish way.
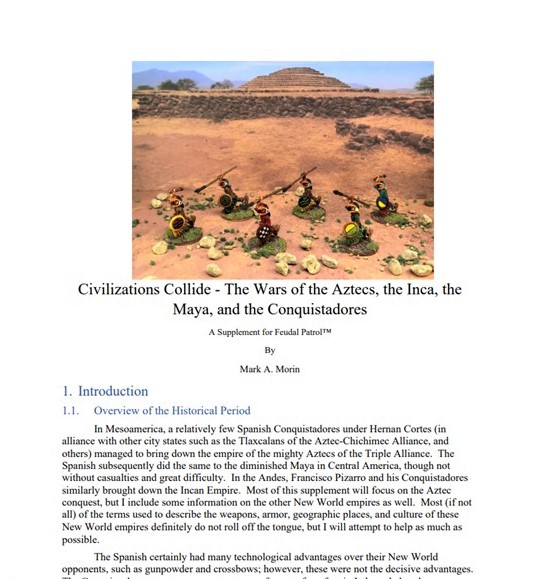
Feudal Patrol™– Buck Surdu’s rules for “Skirmish Miniature Gaming in the Ancient, Medieval, and Fantasy Periods” is now available commercially. In the US, it can be bought from On Military Matters website here. It is also being sold in the US by Noble Knight Games website here. In the UK, it is being sold by Sally 4th on their website here.
It is a fantastic skirmish system, similar to his Combat Patrol -WWII™and Albedo Combat Patrol™ systems. Unlike many other games, the Combat Patrol family has eliminated the clutter of multiple charts and markers with the use of specialized playing card decks. The decks in each game enable players to resolve movement, melee, missile fire, morale, cover protection, and more all from a single 50 card deck. Feudal Patrol™ is appropriate for periods when melee dominated warfare instead of firepower – so the 16th Century and earlier, as well as being adaptable for fantasy gaming. To be clear, I am not totally unbiased. I have been friends with Buck for nearly 40 years since our cadet days at West Point, and I did participate in several playtests of these rules and helped as I could.
As for a good review of Feudal Patrol™ by a more neutral party, there is a fine one on the BoardGameGeek website by Scouter (Brian Ivers) that you can see here. You can see that this is a game worth checking out. Here’s a snippet from the review:
Overall an Excellent effort by Buck and his band of Tabletop warriors. The cards and rules were purchased by me under a pre order program through On Military Matters. The rules were produced by Sally4th, a wonderful company out of the UK. Noble Knight games are also a US conduit. The amount of support available for this product is excellent, this can be found on both Buck Surdus web site as well as Sally4th. And Google Groups IO page. Buck has produced an excellent You Tube video introduction to Feudal Patrol. https://youtu.be/SlpLbMdgVv8
My official copy of the rules arrived in early November! The book looks great, and the layout inside is equally nice.The inside cover. Thanks for the shout out Buck! BTW, the “Ma’k” is a nod by Buck to my Massachusetts accent that I will never lose.
Buck asked me if I was interested in writing a supplement for the rules. I was very interested and thought it would be a fine opportunity to check the box I wrote of above. I also wanted to develop a skirmish game for the Spanish Conquest as the period and the garb of the period was fascinating to me. So I agreed, and did a lot of research on the period, and developed my supplement to Feudal Patrol™ that I called “Civilizations Collide”. That supplement is a FREE download – and I hope all who read this will download it and please take a look (after all it’s free! – did I mention that?). Plus it has a lot of pics of the miniatures that I have painted up (and more will come in this blog of course!
As readers of this blog know, I have been also actively painting figures for the period from many companies. You may want to get started – so as a help, here is my list of what I have found available:
Naismith and Roundway sells some (I have not bought any yet) here – 25mm
Even the old Ral Partha (which I have), now sold by Iron Winds Metals, has some here – 25mm
All of these are still commercially available. I do prefer the 28mm over the 25mm, but I do use both
Thanks for checking this out and a real big thank you if you downloaded the supplement! More to come!
Miscellaneous details and references for those interested in that sort of thing:
Posts on games, units, and other projects for my 16th Century Spanish Conquest supplement for Feudal Patrol™ – “Civilizations Collide”
Civilizations Collide – The Wars of the Aztecs, the Inca, the Maya, and the Conquistadores is now available as a FREE Download for Feudal Patrol™ – plus a Feudal Patrol™ review! (this post)