I have been working on getting a fleet of tanks for the What a Tankergame from the Too Fat Lardies company. It’s a great game and has been a true hit with my gaming club, the Mass Pikemen. I have been working on building up a flexible group of tanks, and so far I am up to 71 tanks in 15mm/1:100 scale – not including ones needing assembly and painting.
My sources have been eBay, hobby stores, and Facebook. If I waited to paint them all, I would never do another project, so finding some mostly painted resin (and reasonably priced) models from Wargame Models in Ohio has helped shorten the process. Mostly I just washed and varnished the ones I have gotten from WMIO.
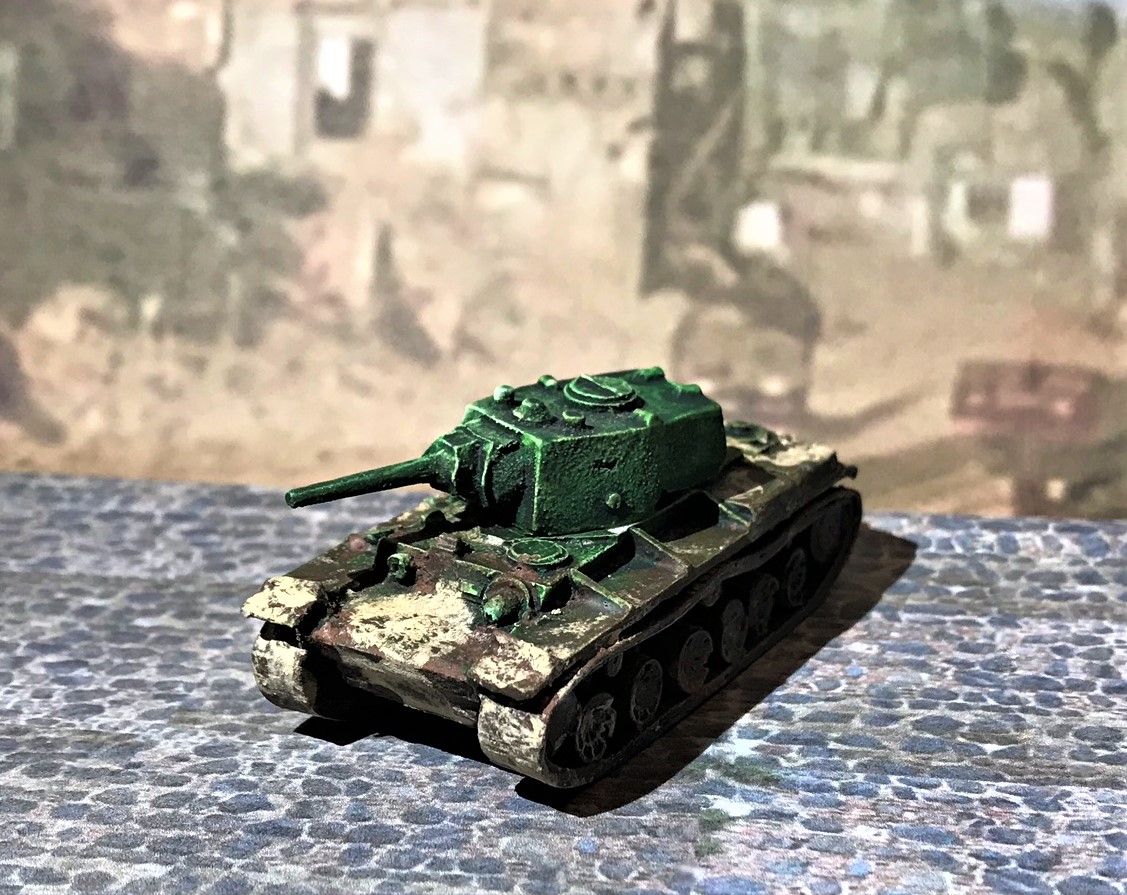
One group acquisition was from another source on eBay – it was a resin Soviet KV-1 platoon consisting of 5 KV-1’s heavy tanks, 2 T-26 light tanks, 2 BA-64 armored cars, and 2 trucks. I do not know the manufacturer. They had been given some sort of dark brown coating with splashes of lighter brown. They color-wise did not look particularly like Soviet tanks from 1941. This platoon is the main subject of this blog post.
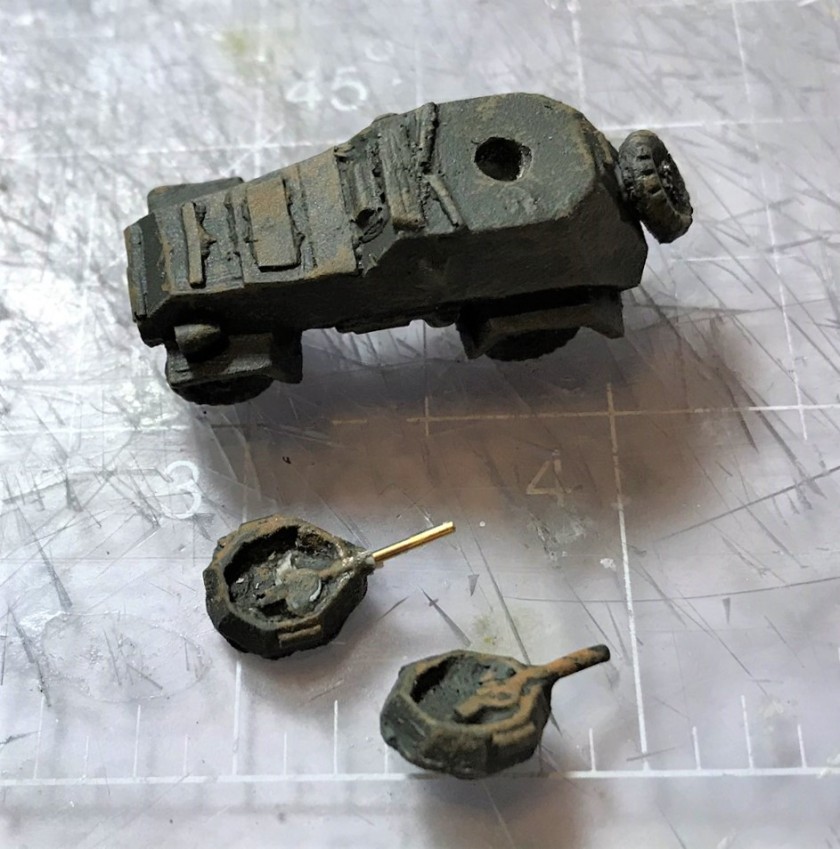
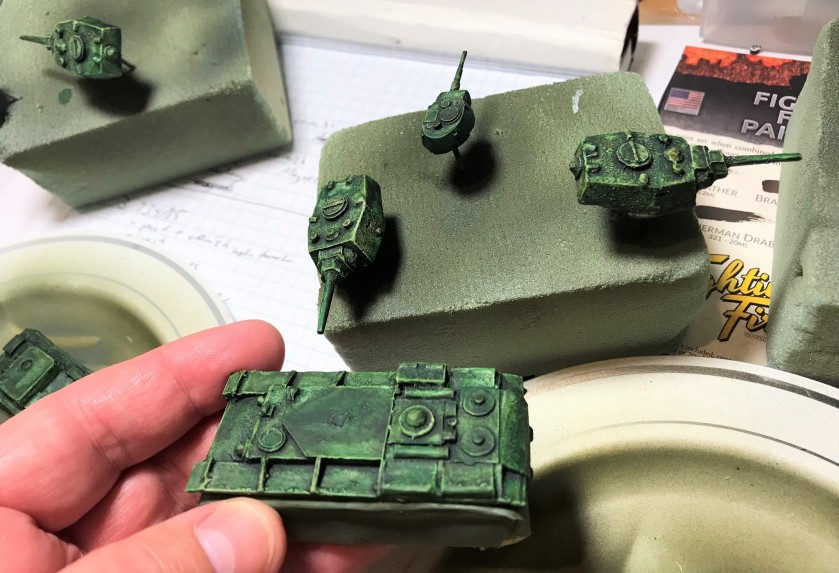
My tank fleet grows – the KV-1 platoon is in the upper left.The platoon as I got it in the brown colors. I decided to make the heavy tanks as the KV-1a version. All of the turrets were not magnetized, which I did do as well as part of this project.I removed the resin post on the turret and drilled out 1/8″ holes in it and widened the preexisting hole in the hull. I got some nice neodymium 1/8″ x 1/16″ magnets for magnetizing from totalElement.com.
It was necessary to use a Sharpie to mark one end of the 1/8″ magnets such that I inserted them in the correct alignment (I did not want the turrets “blowing off” prematurely!). I glued the magnets into the holes with Gorilla Glue.
Each turret originally had this post that I removed and drilled underneath.Magnetized K-V1a turretBA-64 turret showing my repair of the gun. It was thin resin. The other resin gun broke later as well so these are not sturdy.
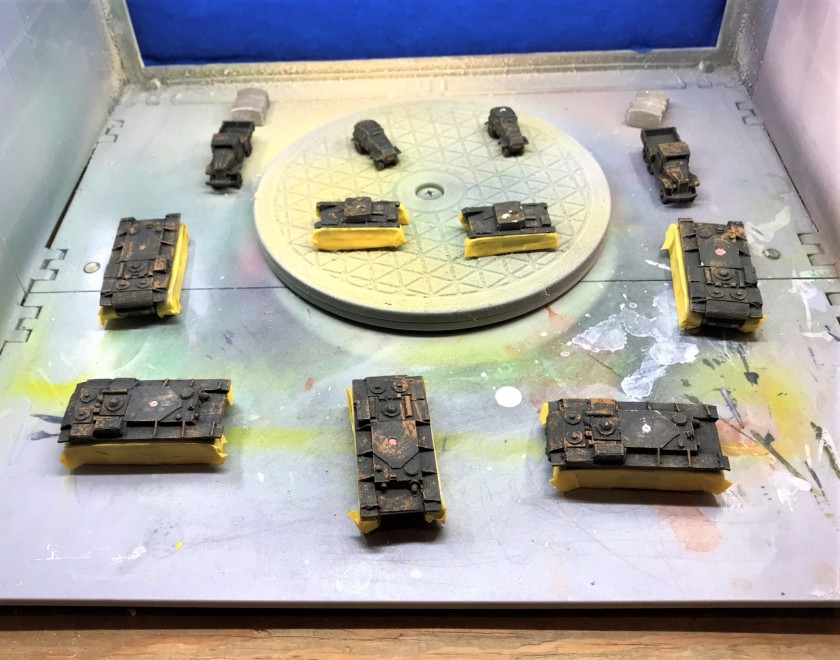
I needed to find a way to paint the figures without damaging the paint, and tanks were new to me. I decided to take advantage of the magnets on the turrets here. I used small nails inserted into styrofoam blocks (the kind used for flower crafts). For the hulls, I masked the tracks for secondary painting, and such that I could hold them safely.
How many turrets can fit on the head of a nail?The hulls masked for priming.
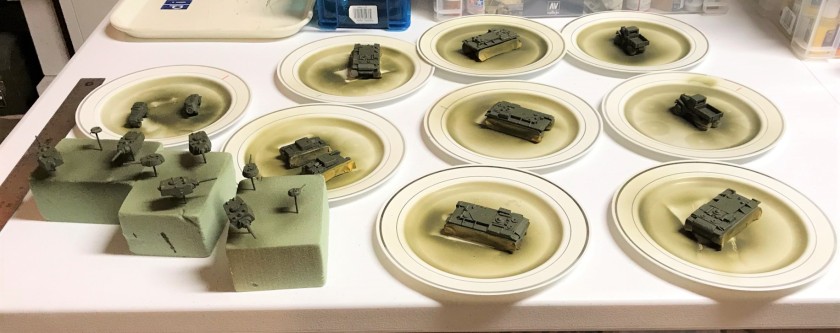
I airbrushed/primed the figures with Vallejo “Surface Primer – Russian Green”.
The platoon primed.
I then gave the figures an airbrushed base coat with a thinned coat of Vallejo Panzer Series “Camouflage Olive Green”.
The platoon base coated.Close up shot of one of the KV-1a hills after base coating.
These looked too drab, and not very Soviet green looking. I moved on to adding Vallejo Mecha Color “Green” with a light airbrushing. Next, I used a brush to dry brush Vallejo Mecha Color “Light Green” on the figures. I was able to then give the figures an appropriate light green by using Citadel “Biel-Tan Green” as a shade. It worked!
Contrast the before shading (turret on left) and after (turret on right). The light green helped give depth to the shaded turrets and hulls. I darkened everything with an additional shade – Citadel “Athonian Camoshade”.Before the “Athonian Camoshade”……and after adding the darker shade.
At this point, I removed the masking and painted the tracks. I then wanted to add some mud, dirt, and dust with pigments. I used several Vallejo pigments and binders (all listed at the end of this post). These models are small, (about 3″ long by 1½” wide by 1¾” high so I wanted to give enough weathering without overwhelming them.
An in-progress pic of weathering one of the hulls.All of the weathering done and the vehicles ready for varnish.KV-1a hull varnished.T-26 hull varnished.The platoon nice and dirty with the mud of Mother Russia.
This was my first attempt at painting any WWII tank models. I think I can do better, but early war Soviet tanks are pretty simple, as they had not usually added any markings. It will not be my last, and I am hoping that I get better with more tries. This project also is my first submission for Azazel’s November Community painting challenge – Mechanical November ’18. If you have not checked out his blog, it’s worth a look. Also, my next few posts will showcase tanks, so I hope you enjoy.
Now for some eye candy!
All five KV-1a’s with different angles to view. Ignore the giant tetrahedrons please!Front viewRear view. I “mudded” them up a bit here.The combat vehicles move out.One of each AFV I painted plus 2 trucks.KV-1a in an urban setting.T-26 in town (what’s left of it anyway).BA-64.
I hope that you enjoyed this post. Please let me know your thoughts and feedback below in the comments section.
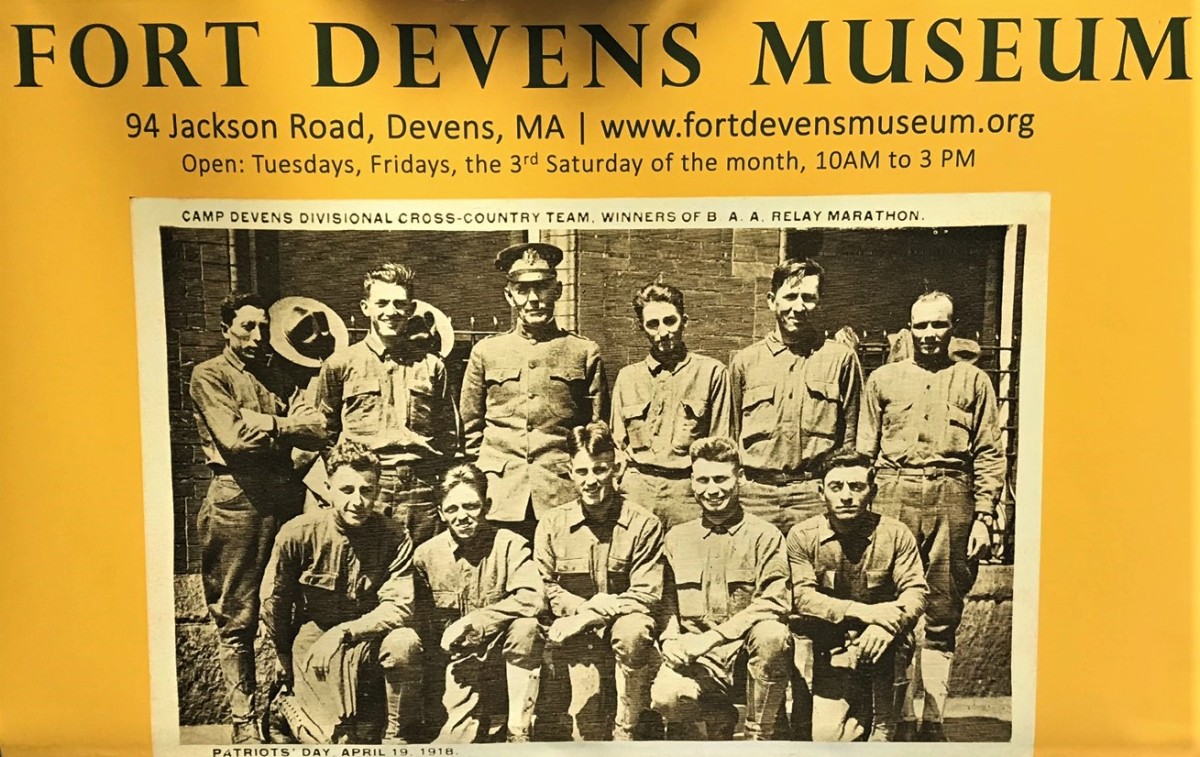
On October 20th, there was a Devens game day at the former Ft. Devens in Massachusetts. I was interested in attending for a couple of reasons. First, I am trying to get to more gaming events in the area. Second, I was stationed at Fort Devens while I was a member of the 39th Engineer Battalion (Combat) from 1989-1992, so I was intrigued to see the post again in its new configuration. Fort Devens was closed as an active duty US Army post in the 1990’s, and Massachusetts has redeveloped the post by bringing in a lot of industry. Still, some of the post is used by the reserves. In fact my old battalion area seems to have been saved and redeveloped for the reserves. That area is all fenced off now and I did not want to photograph the area and draw unwanted attention to doing so! Other buildings and barracks areas are untouched since closure, with actual trees growing out of the edifices yielding an apocalyptic/Walking Dead look. This blog post is a bit late, but I did get wrapped up in the baseball ALCS and the World Series, which were both won by the great Boston Red Sox!
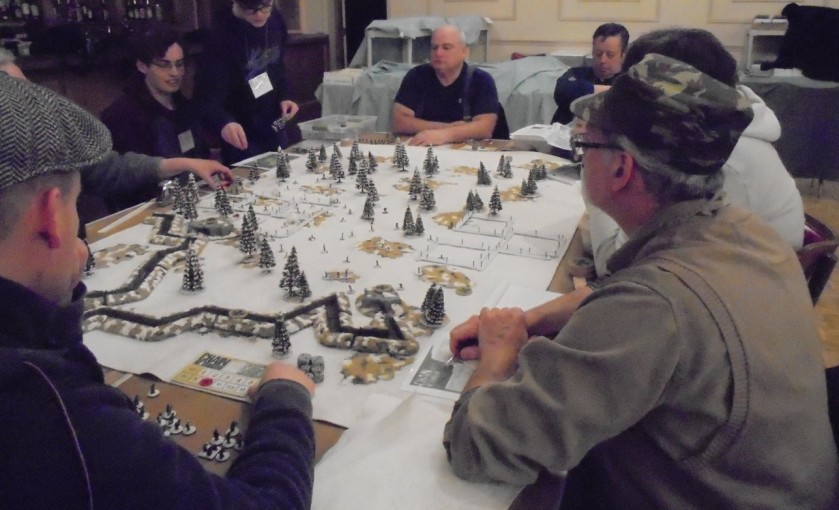
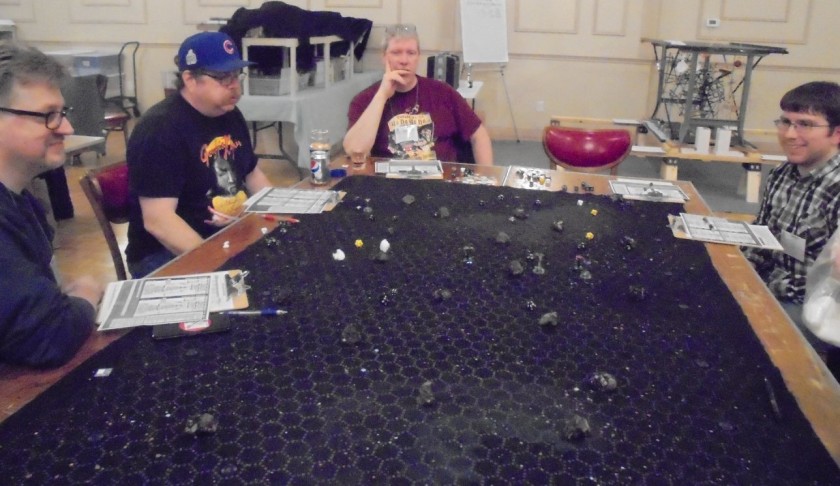
The actual game sessions were held at the Fort Devens Museum. There were three games there – a WWI game, a naval game, and a pulp game. I did not get any pictures of the naval game but you can read about in an excellent post here. I focused on playing a WWI game (given that it is close to the centenary of the end of that conflict). The board is entirely scratch built, and I believe the rules were “Trench Warfare”, but I am not sure. The game master, Bill, did an excellent job, and I wanted to share his board as it was excellent. The event clearly tried to recruit younger gamers, which was admirable for growing our hobby.
Starting side for the Allies. From far to near, the attackers were US Marines, British, and French. It was a bit ahistorical but a fun game. While I commanded the French, I had two British tanks – a Mark IV and a Whippet.Another view of the Allies starting positions.A truly beautiful scratch built table. Bill (the game master) is pictured here standing. He did a nice job creating a trench works system with 2′ x 2′ modular sections.Some of the German forces – they were to engage the USMC is a series of bloody hand-to-hand battles.Advancing my poilus and tanksAn engaged group. Bill kept the game moving (unlike the actual WWI)!The Germans move up, and get hit by very lucky hits by my French 75mm artillery.The hand-to-hand battleTaking out the forward observation posts and then getting torched by a German flamethrowerGerman artillery disables my Mark IV
The game ended in a draw, but I enjoyed it a lot.
There was also a pulp game that I did not play in, but that looked interesting.
Pulp Alley GameDruids and Nazis? And Stonehenge?
Lastly, I looked around the museum and looked for anything related to my old unit. The only thing I saw was a donation from a former lieutenant from the 1977 time frame. I do think I could find a few things myself. Interestingly, I am a local, and the 39th had members who for the most part live in other parts of the country. I do commend the museum for trying to resurrect the posts history from WWI until closure.
The only mention of the 39th
My thanks to the folks who set up this event and to the folks at the museum!
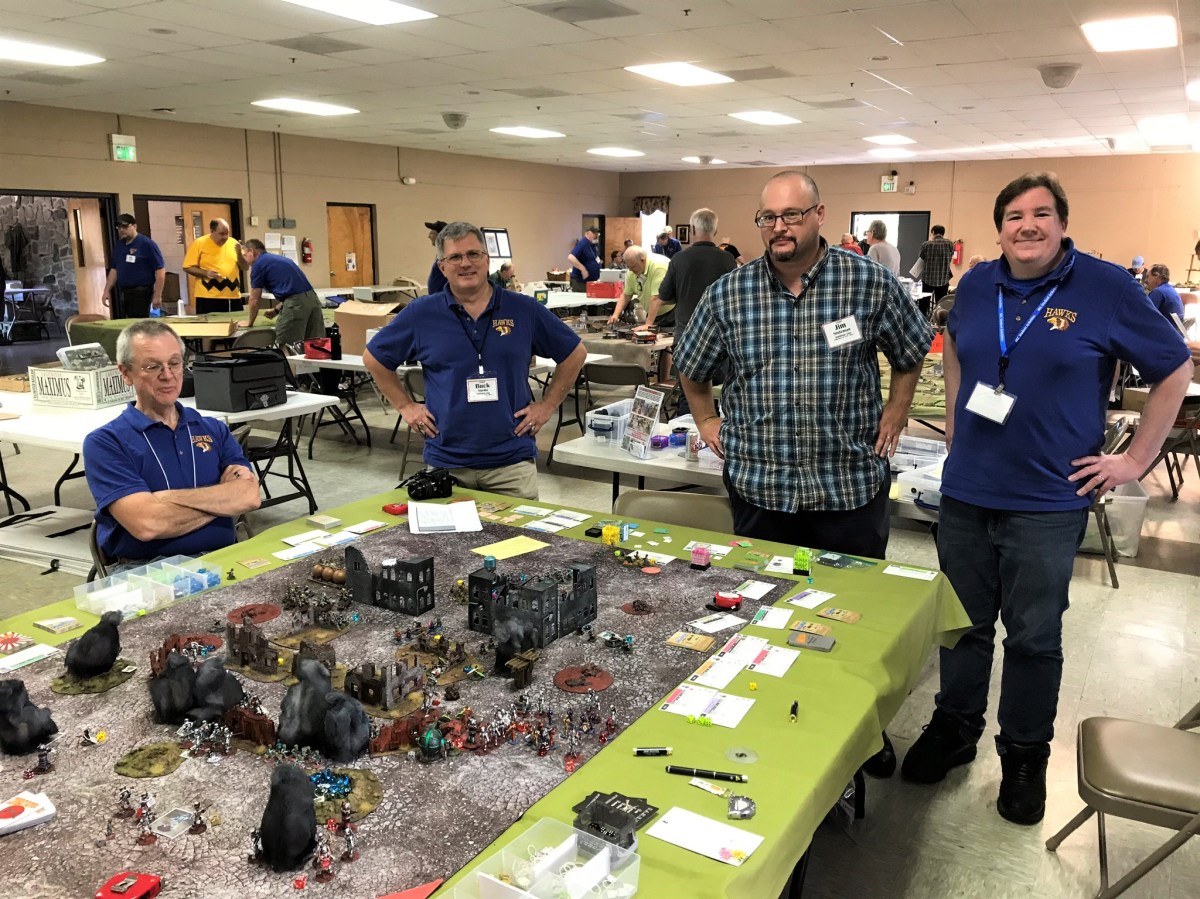
Many of you who follow my blog have read about Buck Surdu, my good friend and author of multiple wargaming rules systems. Of course, he is a fellow West Pointer so that’s in his favor! He is a major shaker and mover in the H.A.W.K.’s (Harford County Weekly Kriegspielers) in Maryland, and has been involved with BARRAGE for years.
Little Wars TV interviewed Buck, and I thought some of you would find this interesting.
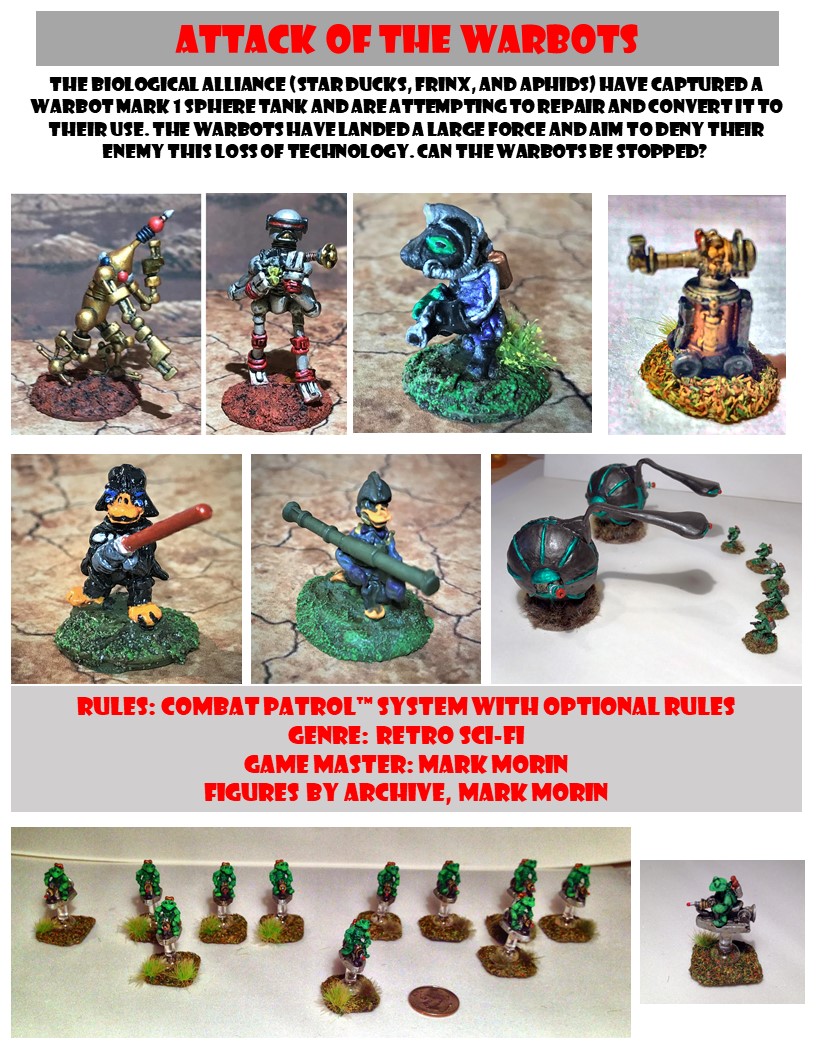
The H.A.W.K.’s held their BARRAGE convention in Havre de Grace, Maryland at the end of September 2018. They had over 70 gaming events, and it had been on my “hoping to attend” list for most of 2018. Also on my wish list was to be able to run my “Attack of the Warbots” game using the Combat Patrol™ card-based system. I was hoping to attend but was unsure (for several reasons) up to a week beforehand as to whether I was going to be able to go or not. In the end, the stars aligned, and I also got to run my game! Box checked!
There was a lot going on here – and I saw a lot of great games. The following is just a snippet, through my eyes, of the experiences that I had. The games and the game masters that I saw did an incredible job. Truly impressive. Certainly, the H.A.W.K.’s put on a great gaming convention and my kudos to all of them and the other game masters.
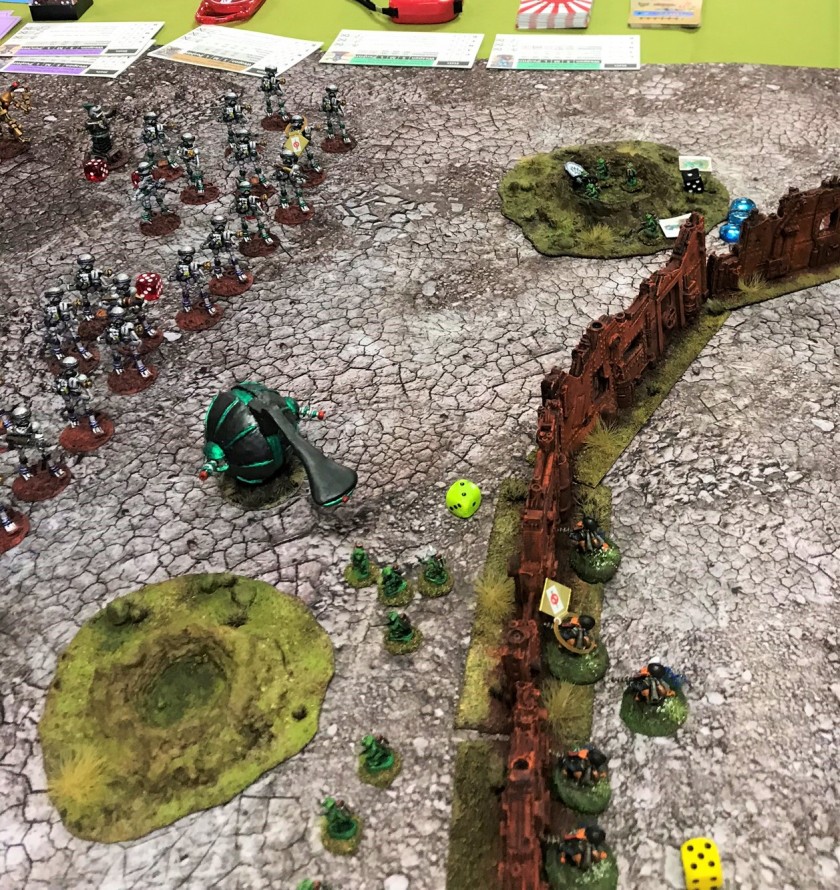
I started on Friday with running my latest iteration of “Attack of the Warbots” with my Archive, Mega Miniatures, and Wargames Supply Dump figures, all of which are OOP. I had seven players, with three on the Warbot side, and four on the defending side. Of note, I was lucky to have had as players both Buck Surdu (my old West Point buddy and the author of the Combat Patrol™ rules) and Dave Wood (my old West Point roommate who introduced me to tabletop gaming in 1982). I also had the good fortune to have Greg Priebe playing alongside Buck – and Greg wrote the Star Wars supplement for Combat Patrol™. Buck is very fond of ducks (in a good way of course), and was in command of Duck Wader and some Star Ducks, while Dave was on the Warbot side with a couple of Mark 1 Sphere tanks. Greg commanded the Aphids and the Frinx. A few other players were there but I did not get their names (sorry). The Warbots needed to recapture a lost Mark 1 before the defenders could repair it and get it off the board.
My flyer for the “Attack of the Warbots”Game set up from the attacking Warbot side. I got set up early, which is why there seems to be an empty hall, but it filled up quickly.Early action – the defenders gained the initiative and the Red Warbot squad on the left of the photo took casualties from effective Star Duck and Aphid fire. The Warbots smartly maneuvered a Mark 1 tank to attempt to breach the rusty steel wall defenses.Closer view of previous action showing Aphids in a bad place.Aphids strike back! They get a critical hit on a Red Warbot’s power plant, triggering a catastrophic explosion (smoke plume), which damaged several of its nearby comrades. This made this fire team have to make multiple morale checks (as shown by the red beads). One of these pinned the team in place for the remainder of the game. As the critical hit catastrophically destroyed the smoky Warbot, that plume would restrict line of sight for that pinned team as well!Dave Wood prepares to destroy the wall with his Mark 1’s Death Ray, and……the wall is breached, frying a few defending Star Ducks.Roberker moves towards the breach.Meanwhile, on the other flank, Duck Wader used a Force Leap to engage the Green Warbots in melee. He was able to give the Aphids on that side a brief respite. Wader got initiative again before the Warbots, and was able to Force Leap back to safety after damaging several Warbots with his light saber.Back on the right, the Warbots get one of their two Mark 1’s within a few inches of the building where the captured tank was being repaired. SSG Canvasback (yes, he has a name!), the 2nd Squad Leader, fires his Quackers Repeating Blaster and got a lucky hit, knocking out the tank’s left auto cannon sponson. This allowed enough suppressive fire cover for the Star Duck Squad led by SSG Gadwall to close assault the tank with satchel charges……and successfully knock out the Mark 1!! Roberker, a giant flame-throwing robot was following closely behind, but another critical hit from Greg Priebe’s Frinx immobilized the giant robot, stalling the attack.At the same time on the left flank, Duck Wader again Force-leaped over the wall into the midst of the Green Warbots, and launched a Force-Blast attack. This sent waves of destructive energy through the closely-crowded Warbots. Many were damaged, and one even had a power plant explosion, which caused even further damage to that team and multiple morale checks due to a second explosion. These morale checks eventually disrupted the attack as the Green Warbots either ran off the table, or got into a massive traffic jam at the breach. Here, you see Duck Wader after he had dispatched the Warbots. He was wounded, but had wreaked havoc on the Warbots.At this point, the other Warbot tank was immobilized, and the game was called as a defenders’ victory. It was a near-run thing as the defenders were unlucky in rapidly repairing their captured Mark 1, but they would have been able to complete the repairs. Here are some of the happy defenders – Rob Dean, Buck Surdu, Jim Stutzman, and Greg Priebe.
I then turned into a player, and decided to try a Lion Rampant game ably run by Philip Jones. We were the Vikings who had seized prelates, monks, and treasure in a raid, and were trying to escape to their longship, while being pursued and blocked by Welsh troops.
“Llandaff is in flames, the bishop and his monks carried off- but the men of Glywysing have the Vikings trapped between two forces as they try to get back to their ships. Will they break through or will Bishop Cyfeilliog be rescued?”My forcesOur initial deployment – Welsh would block us and harry us from the rear.The Welsh harry from the rear and Dave Wood prepares for battle.Vikings moving out.Crossing the river and all looks good……until Welsh forces combine to slow and stop us.A monk escapes!
Our casualties mounted! The game points were tallied, and rightly called for the Welsh. I did find the system fun, and Philip ran the game in a very fun way.
After this, I was walking around, and was recruited for a “What a Tanker” game run by Brian Lipscomb. It was set in North Africa, 15mm scale, with the British set against the Germans and Italians. Brian asked if I wanted to have a German or Italian tank. Being a sucker for a challenge, I of course said Italian. I was given a Fiat M13/40 tank.
My M13/40 tank sheet. Brian did a nice job with using magnets for managing data on the sheets.I am pursuing a rear shot on a British Stuart “Honey”. He slipped away, for the moment…Don Hogge pursued me in his Crusader II to take the pressure off the Honey. Don shot at me and missed. I rotated, fired, and smoked his tank.This allowed me to renew my approach on the Honey. I got hit with minor damage to my running gear. I returned fire, and got the Honey with my first shot. That’s two tanks! Later, I finished off a Matilda II for my third kill (on the deep left) – and all this with an Italian M13/40!
Needless to say, I really enjoyed this game and the mechanics. Brian is a superb GM. More on that in a bit…but this was a fun way to end Friday!
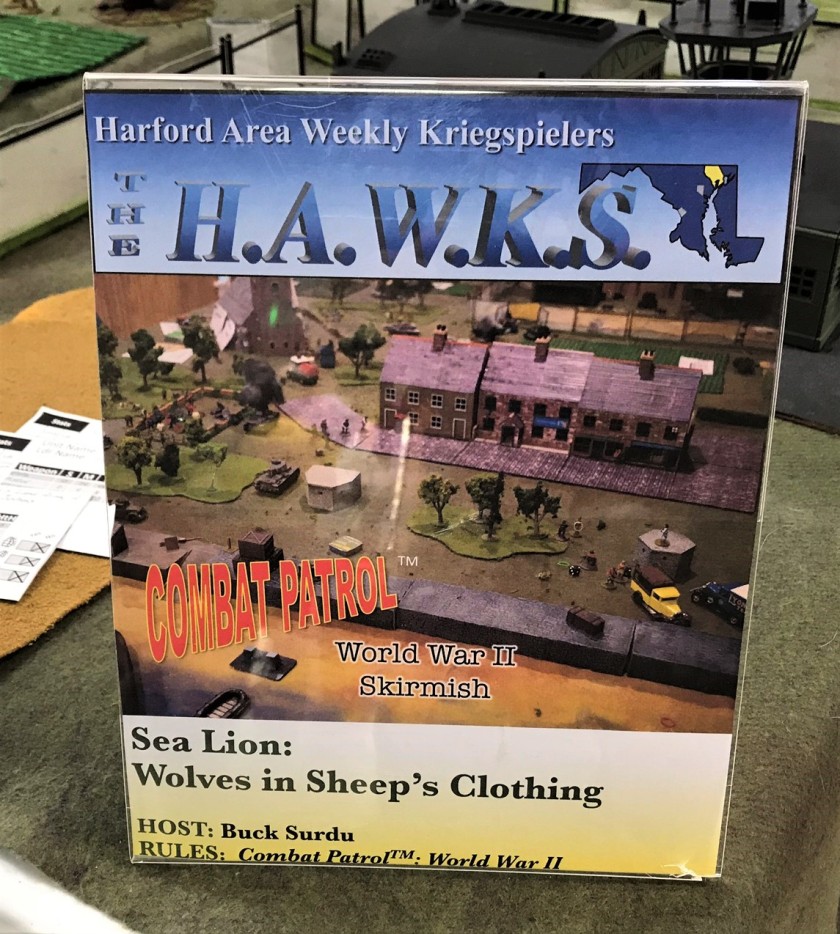
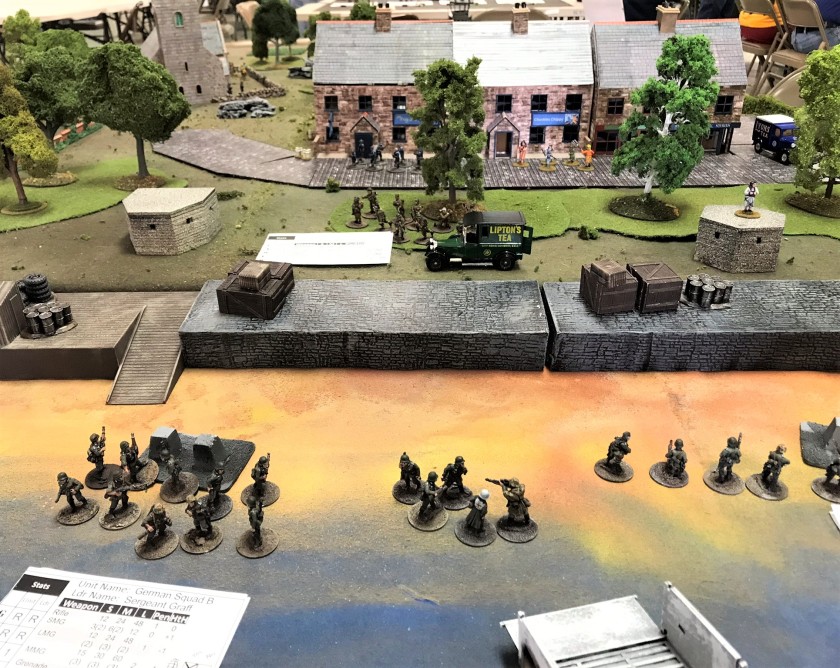
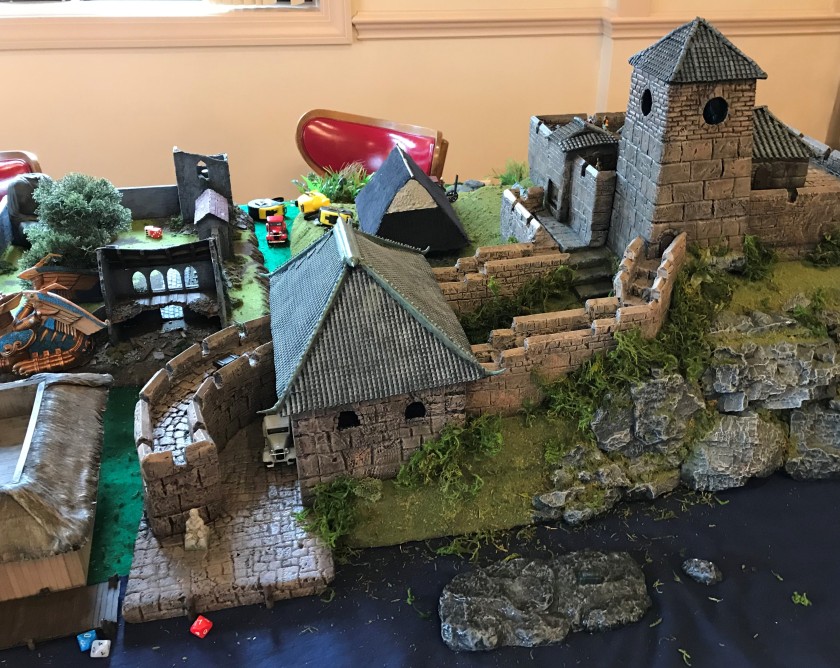
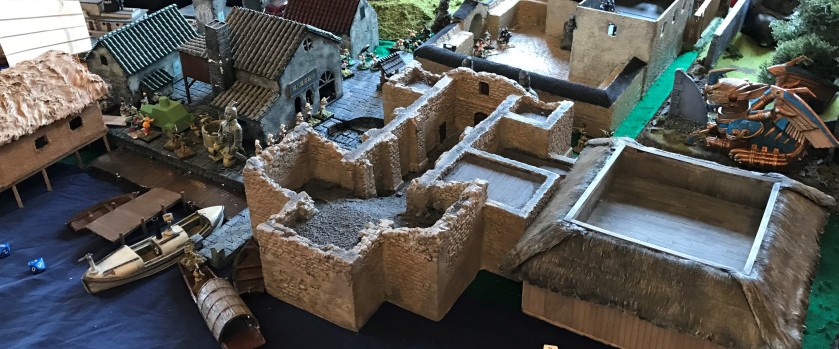
On Saturday, I had really looked forward to playing Buck’s Sea Lion game. There weren’t enough players, so it was called, BUT I wanted to share the unbelievably beautiful game set up. Buck will run this game at Fall In and you can read about a play test of the game here.
Rear of the tableSome Women’s Land Army troopsGreat scenery – these are the Germans assaulting the beach.Another view of the beach and wharves. Landing craft in front held two 35(t) tanks, and a Panzer III.Nice bars with British sailors and folks hanging out…or are they?
So again, I wandered around, and saw another Brian Lipscomb “What a Tanker” game, this time set on the Eastern Front. After Friday, I was happy to give it another go. I was teamed with two others who had not previously played the game. We had a certain number of points, so I volunteered to take a lesser tank (a T-70 light tank) so that they could have better ones – in this case a T-34 and an SU-76.
Love what he did with these data sheets and the magnets! This is for the T-70.I maneuvered alongside the T-34 and put the killing round into a Panzer IV. Kill #4 for the weekend.
At this point, Don Hogge and Buck Surdu visited the table put up a dollar each for anyone to kill me! Talk about motivation! We were being outmaneuvered by the Germans at this point, so I moved back and used my kill points to upgrade my T-70 to an SU-85.
My upgrade to an SU-85.
The scenario that Brian devised also had infantry (controlled by him as the GM and using a random events chart) – with the town as an objective. I used the SU-85 to hammer the German infantry as Soviet infantry was arriving. I killed four stands and got a bunch of kill points. I reminded my teammates that I had started off as a T-70, and they gave me one extra kill point, which allowed me to get a monster ISU-152. At the same time, the Germans were reinforced with a Jagdpanther and a Sturmgeschutz III.
My last upgrade – the ISU-152.
Immediately I maneuvered the ISU-152 to hit more infantry. The Germans decided to try to get me with their Jagdpanther and the Sturmgeschutz III. I moved my tank destroyer next to a building to face the Jagdpanther down the main street. He fired.
He missed!
I returned fire and destroyed the German tank destroyer.
My ISU-152 nails the Jagdpanther. Kill #5 for the weekend.Jagdpanther burns.
At this point, the Sturmgeschutz III was maneuvering to get a flank or rear shot on me. As the ISU-152 is very heavy and slow, I was only able to spin to face the Sturmgeschutz III. It was a question of initiative – and I got it, hit the German assault gun, and got kill #6 for the weekend (and the $2 bounty on me!).
Kill #6!
I then participated in a play test for a near future warfare scenario using cyber warfare with the Look Sarge No Charts system. It was run by Dave Wood and was interesting to do.
Dave explaining the system.Assault on the hill.
Every BARRAGE there is a pickup WWI air combat game that is a hoot. I’ve never managed to get a kill in the game before, but I did this year as a German. Eventually, I got shot up and had to glide home.
WWI fighter game – I had the red plane in the center.
The last tabletop game that I played in was a First Boer WarCombat Patrol™ game. I was on the Boer side and we had to defend our wagon from being seized by the British. The game was fun, but there was a low point. We had a couple of players from New Jersey who vanished mid-game without so much as a notice that they were leaving. I think they hated defending. Anyways, we struggled on and ended up winning the game. The other players were great sports, and were great company.
Boer War game
After this game at the end of the con, I got to play in the traditional LARP pirate game. I had a nerf crossbow (treated by the GM as a musket) that took out Buck with a shot to the glutes. My weapon later misfired, and the resultant damage took me out. That LARP is always a fun game though!
The flea market presented many vendors and items for sale. I grabbed a Verdun game that I had last played with a gaming club in Monterey, CA in 1985! I’m not sure when I will get to play it, or with whom, but it was OOP in 1985, so a nice find! Buck and I visited the Verdun battlefield in 1987 or so, so it was nice to get this game here.
I must congratulate again the H.A.W.K.’s on a well-run con. Little Wars TV attended and filmed so you can see more of the convention here.
Thanks for looking and as always, I love any feedback!
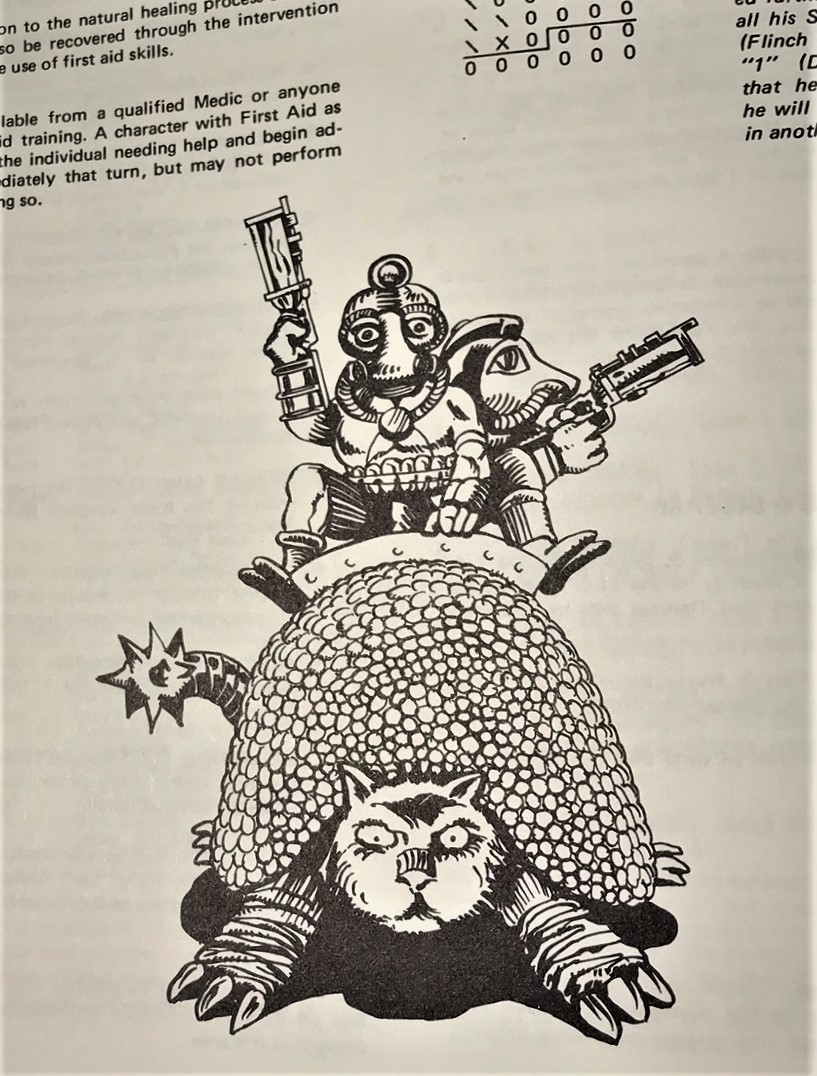
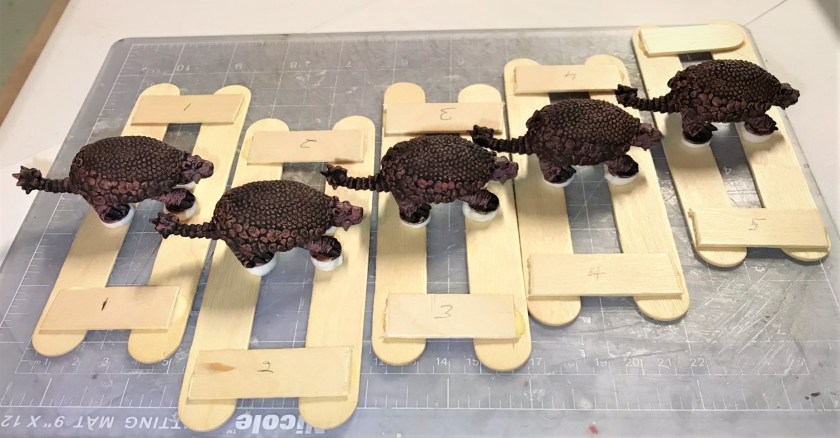
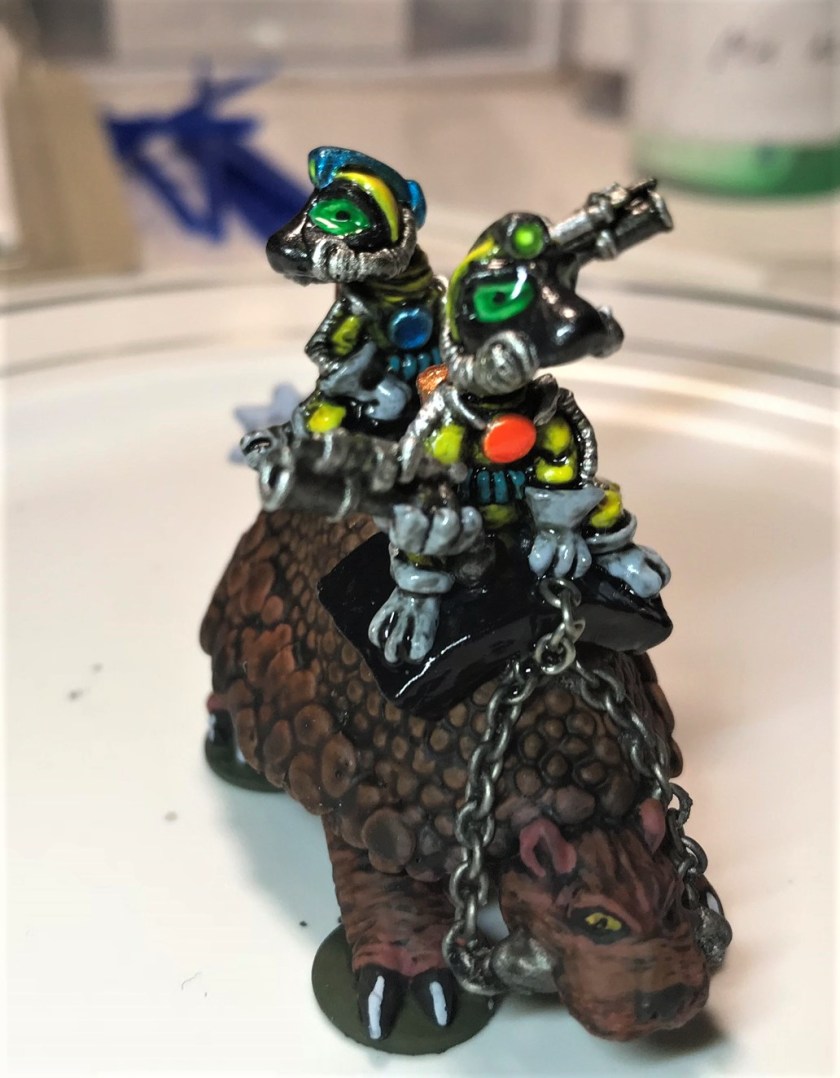
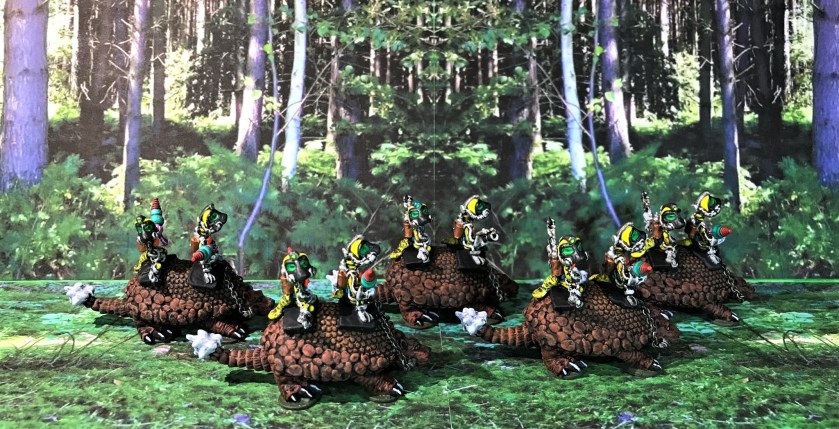
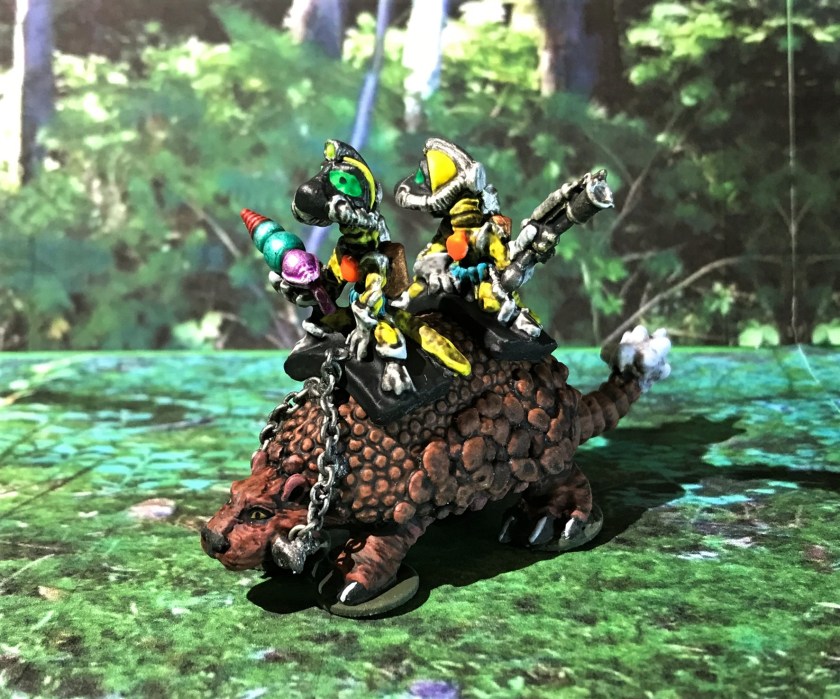
The Power-Armored Frinx are back, and this time as cavalry riding glyptodons into battle! The Frinx were a creation of Archive Miniatures back around 1977 or 1978. They are a smallish lizard-like race, often wearing power armor.
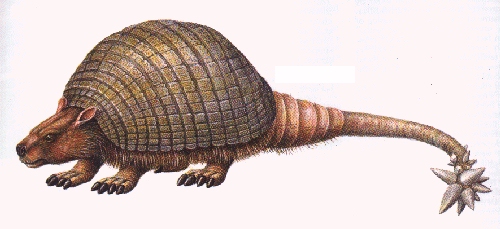
Glyptodons on the other hand were very real and existed from the Ice Age until about 11,650 years ago (give or take). They were prehistoric cousins of the modern armadillo, only they were mega fauna – and were as big as a Volkswagen bug. Plus, there is that massive spiked tail to consider. Why Archive put these two together is anyone’s guess, but the combination is indeed quirky and fun.
Artist conception of a glyptodon – as big as a car
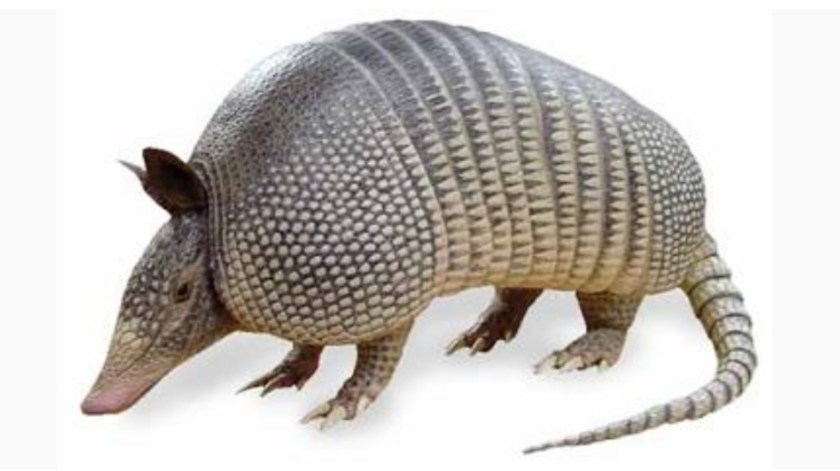
For you non-US folks, this is an armadillo. It’s about the size of a cat or small dog. None are around me in New England, but I saw plenty as road kill when I lived down South.Sketch of Power-Armored Frinx on Glyptodon from page 3.10 of the Star Rovers Module 1 rules
As a Frinx backgrounder for those interested, I have previously written several posts on the venerable Frinx, going back to my casting of their infantry in February 2016 (here), my painting and figure conversions of my Power-Armored Frinx infantry platoon in February 2017 (here), my May 2017 discovery and acquisition of an original Star Rovers RPG (here), and my casting of the Power-Armored Frinx on Glyptodon (Archive #2042) in July of 2017 (here). So this journey has already been 2½ years in the making. Phew!
Interestingly, the 1981 Archive catalog that came with my Star Rovers game does not have the #2042 listed, despite the drawing shown above being in the rule book. My guess would be that the kit was uneconomical to produce and/or difficult to produce well. I document several these issues in my casting post – but originally the kit contained no less than 11 pieces as shown below. As reference, the scale of the set is 25mm to 28mm.
Original Power-Armored Frinx on Glyptodon kit
I made my own modifications to this particular set and made molds to recreate the kit. It is indeed rare and given that it was already OOP by 1981, there cannot be many of these around. I thought they would serve well in a traditional cavalry role for my Frinx platoon. I cast several and shared with Buck Surdu (who graciously provided me the original you see above so that we both could have some). Buck did a great job painting seven of my recasts of these back in 2017 which you can see here.
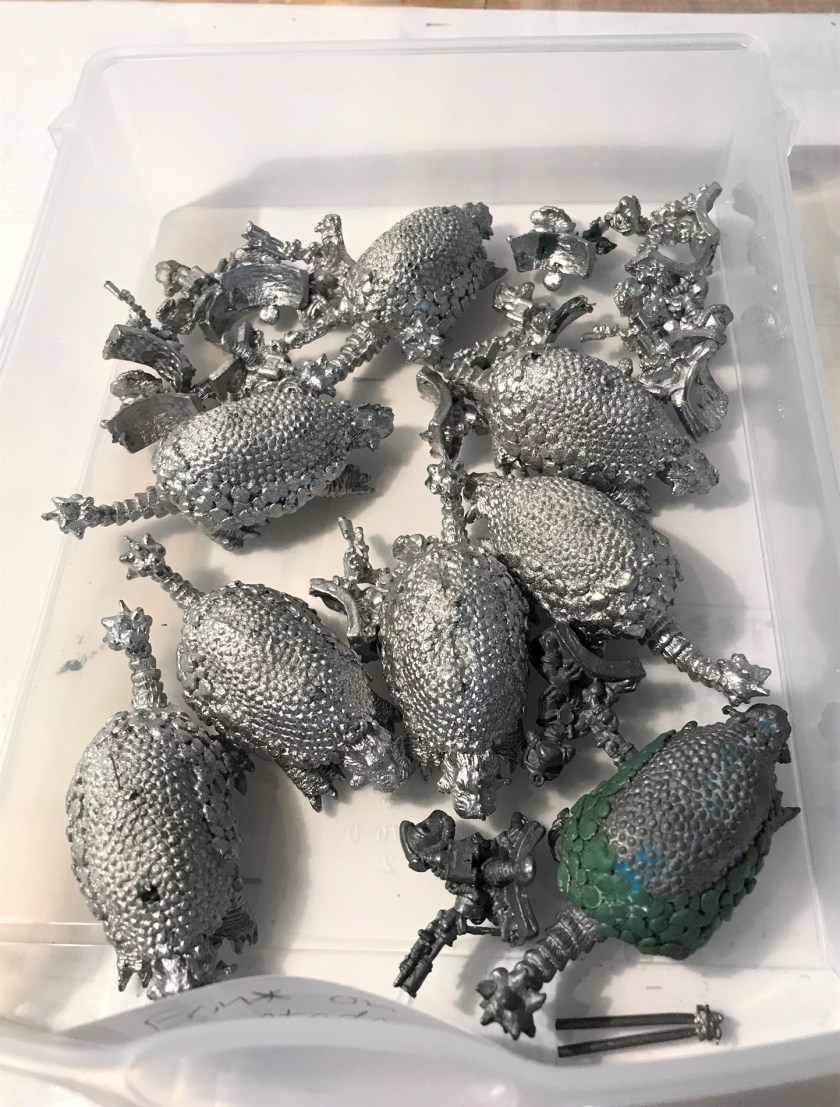
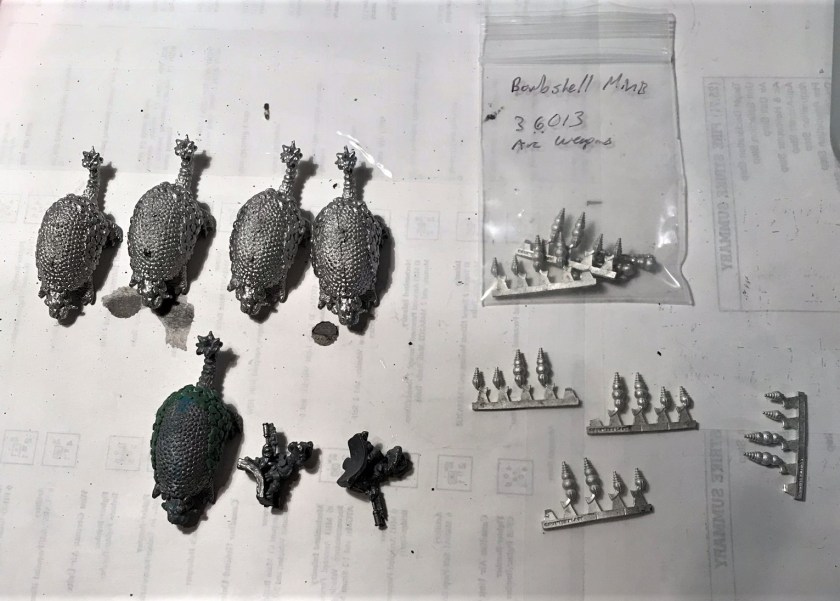
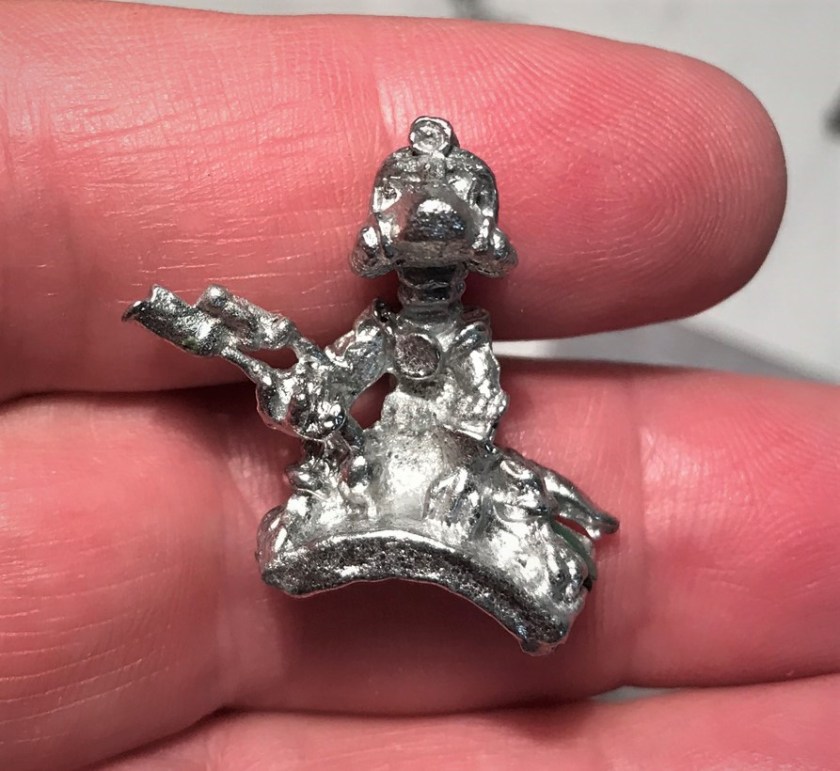
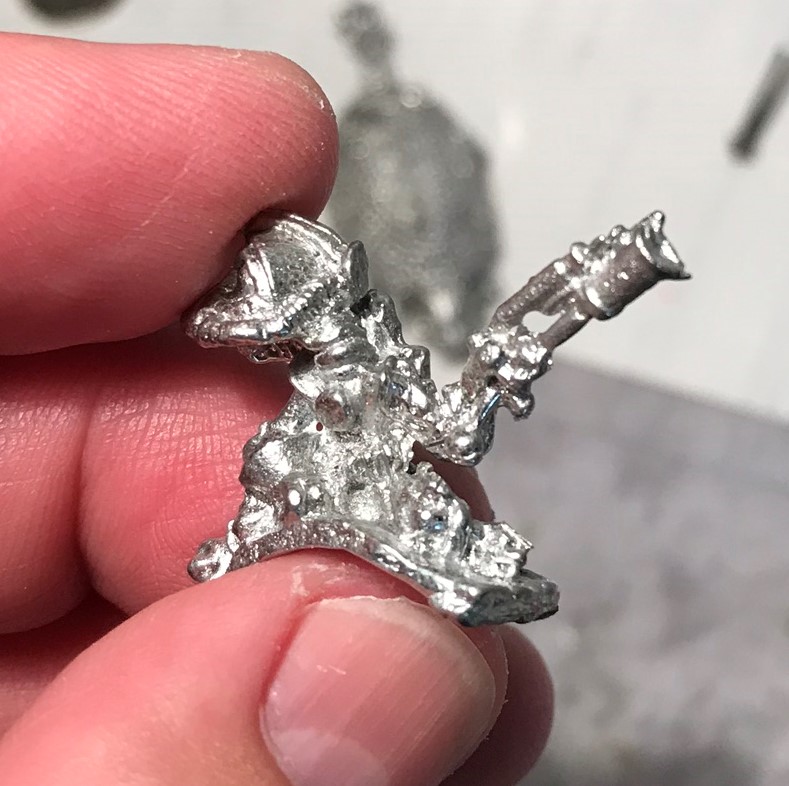
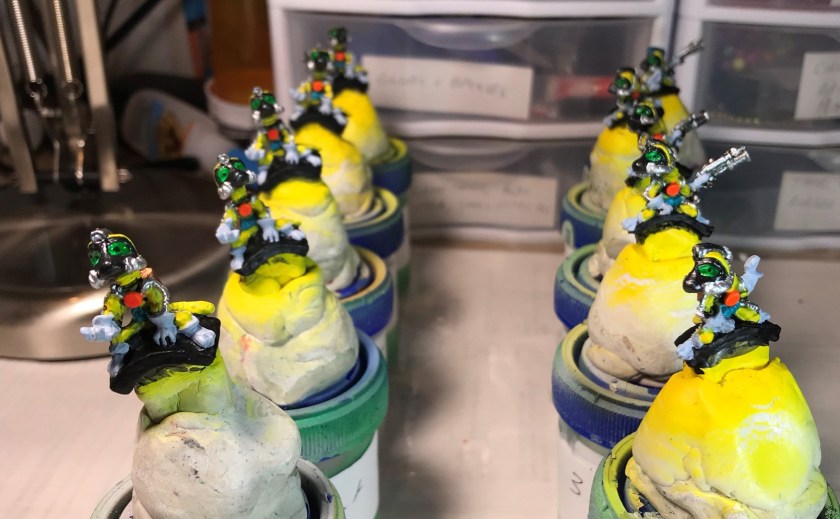
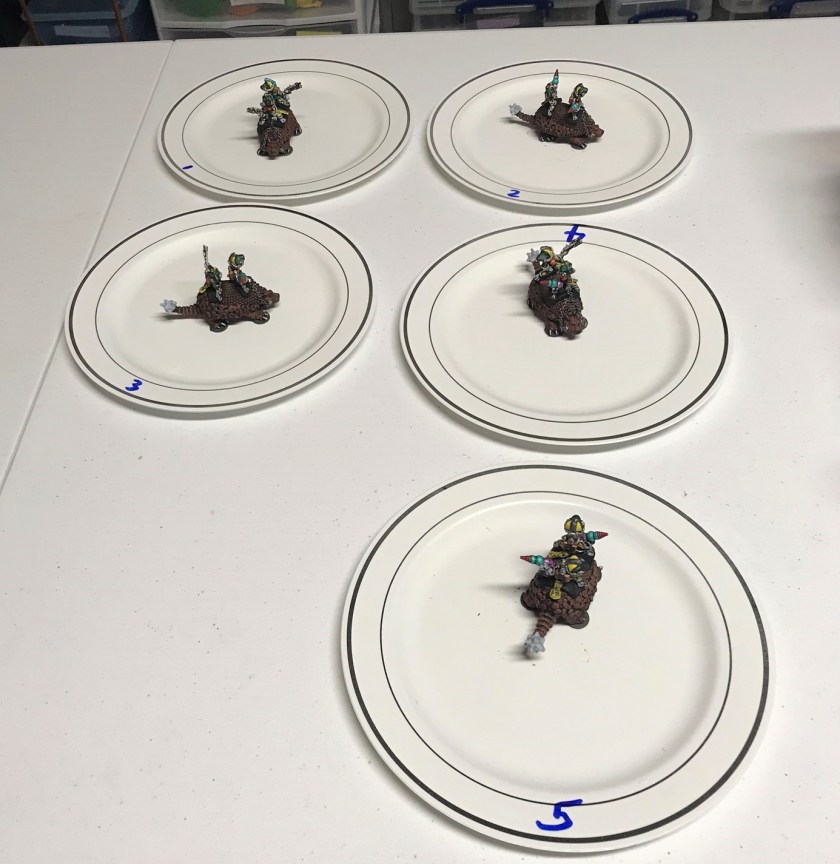
This month to add to my Frinx forces I managed to finish 5 Power-Armored Frinx on Glyptodons (let’s call them PAFOG for short!) models. As shown above, each set has two Frinx riders on a glyptodon. I chose 5 because I felt that 10 Frinx riders would be a good number for a cavalry squad in either the recon or screening role in my Combat Patrol™ games. It also would give the unit enough punch if deployed as a mobile counterattack force. I sorted out what figures that I had, and chose the ones I would use for the cavalry squad. Some of the riders’ weapons were not very well cast, so I converted these weapons. I used Bombshell Miniatures sprues of Arc Weapons (#36013) to replace six of the blasters. My initial plan is currently to give these weapons better capabilities versus robot foes, which should prove interesting given that I have a lot of robots now.
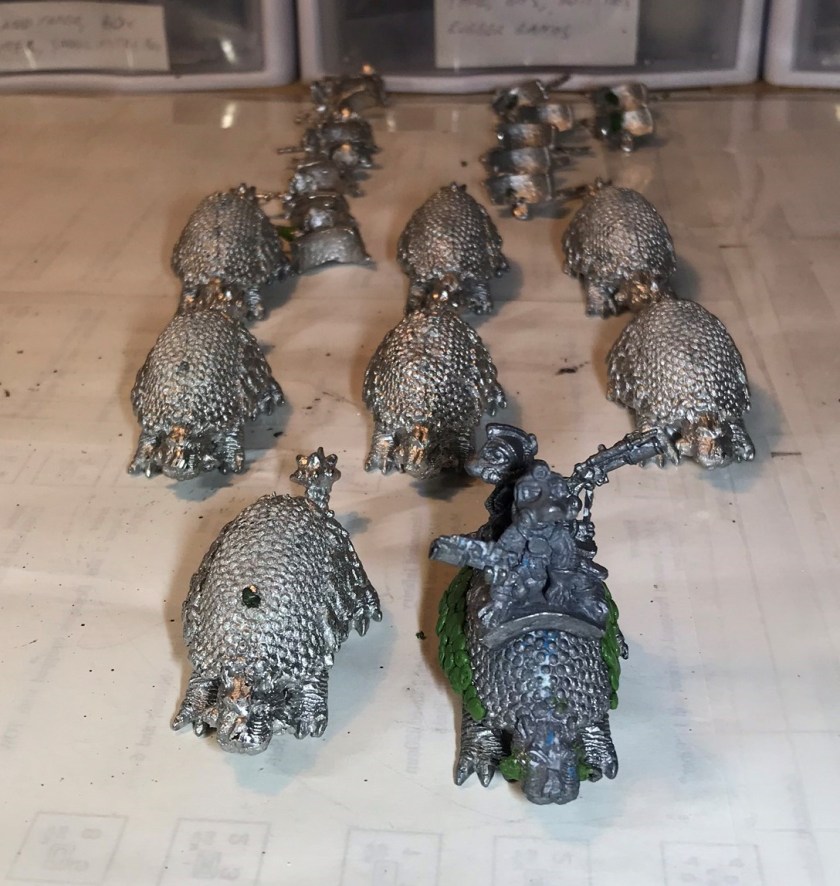
My initial assortment of PAFOG before I cleaned the chosen 5 – you can see that I still had modeling clay on the original on the bottom right.Boot camp time – must select the best for the cavalry!The final five plus the Bombshell Miniatures Arc Weapons. I decided to use the largest arc weapons that you see here as their sizes worked well.Washed and ready for priming. As you can see, the details are much less crisp than I would like. His weapon was replaced with an arc weapon. This is the front rider (recast).This is the back rider (recast).
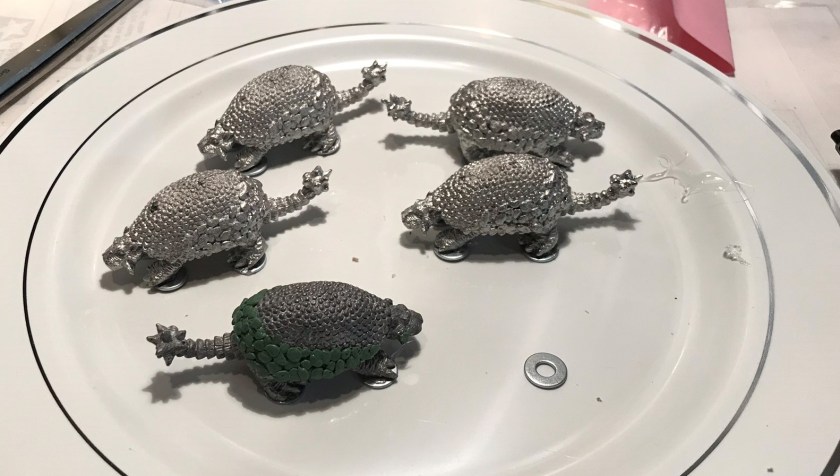
In order to make these Frinx “pop”, I needed a plan. Clearly, my painting was going to do a lot to overcome the plainness of the riders. I also needed to figure out how I was going to base them for painting and handling – unlike other Archive Miniatures these had no bases. These are also very heavy (solid lead/tin). The feet of the glyptodons were not level, so choosing the right basing was a big quandary for me for several reasons. I tried several approaches in my mind, but eventually chose to emulate Buck’s choice and use washers. I did choose smaller ones than Buck did – using #8 steel washers and E6000 epoxy under each foot, allowing for hardening overnight.
On their washers for an overnight set.
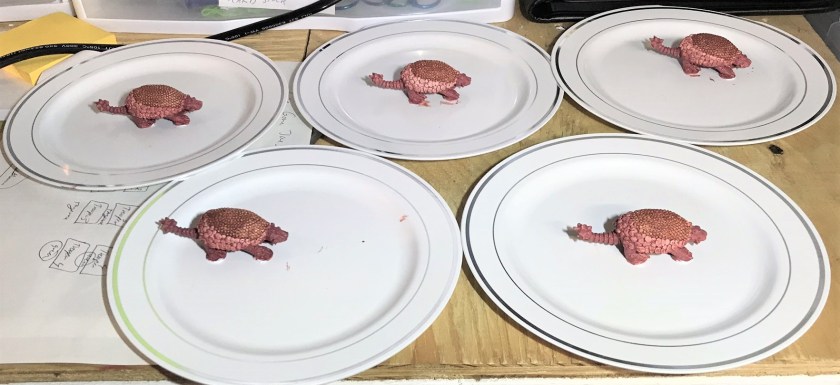
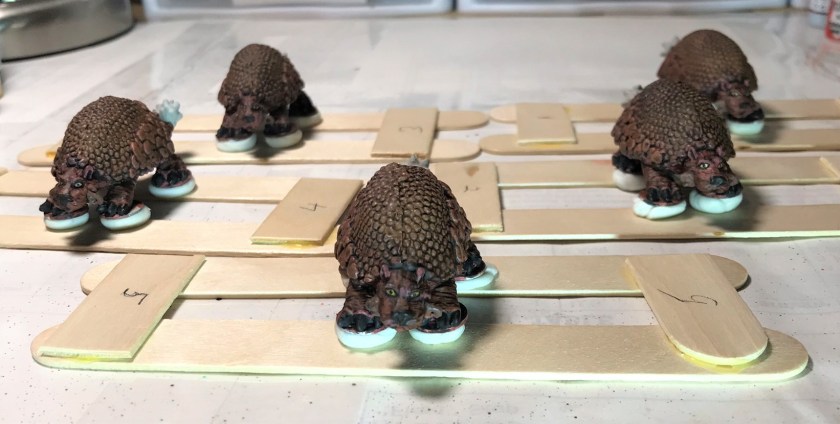
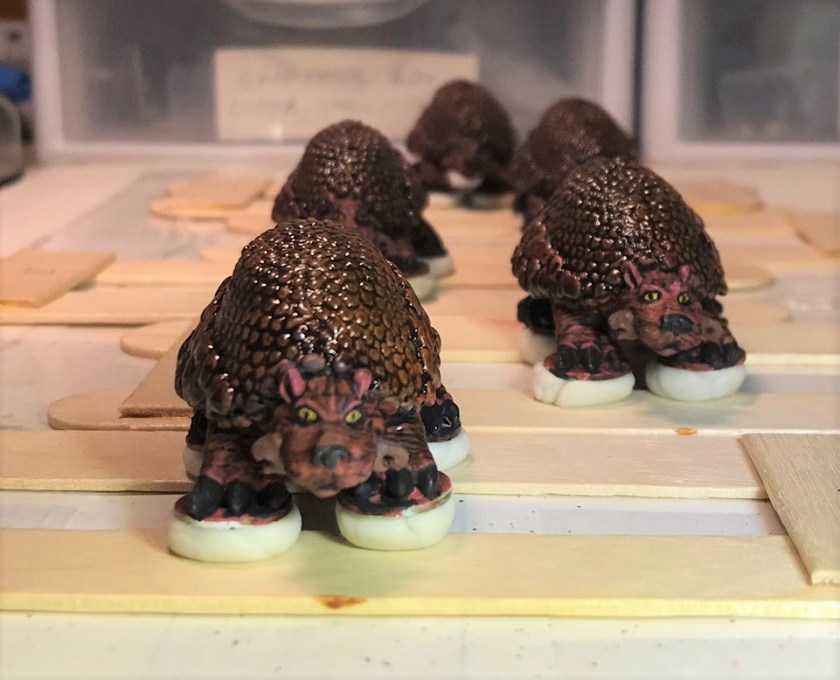
Once they had set, I began by priming the bottoms, letting that cure, and then doing the tops. My goal was to make the bottoms reddish brown, leading to a more brownish top as the drawing of the glyptodon above shows. It was not easy! I had to do a lot of handling of the paint jobs and eventually I moved them to popsicle stick frames with poster tack, which was good for a temporary, if imperfect, solution.
Early stages of priming and base coating of the glyptodons.Eventually I mounted the glyptodons on these temporary frames for painting – still not ideal.
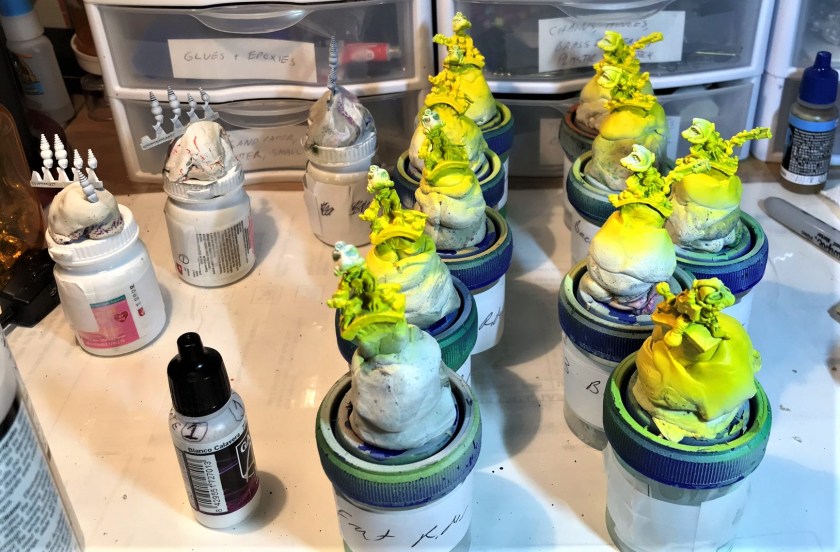
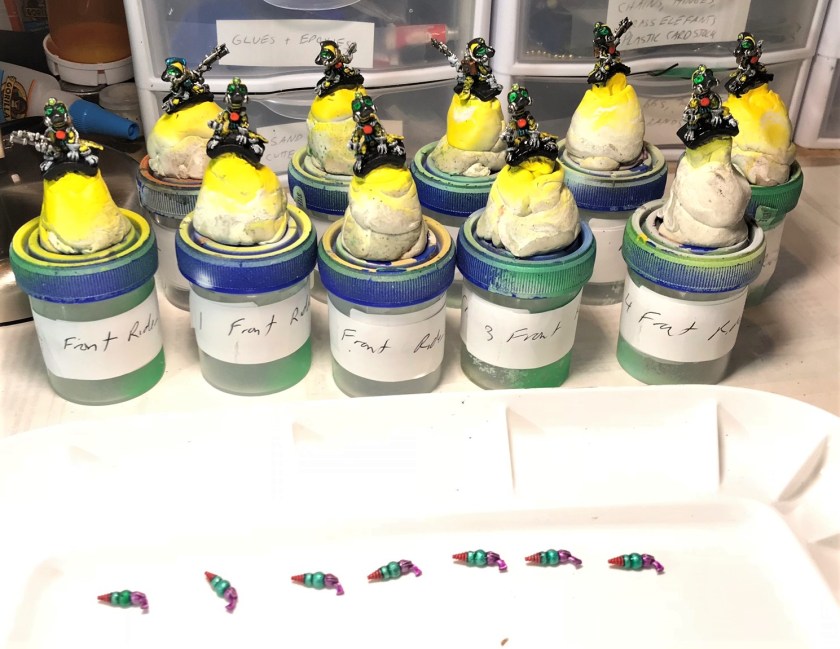
After carving away 6 defective metal weapons, I mounted the riders on poster tack mounds on specimen jars. The saddles really did not present me with many other options for mounting them for painting.
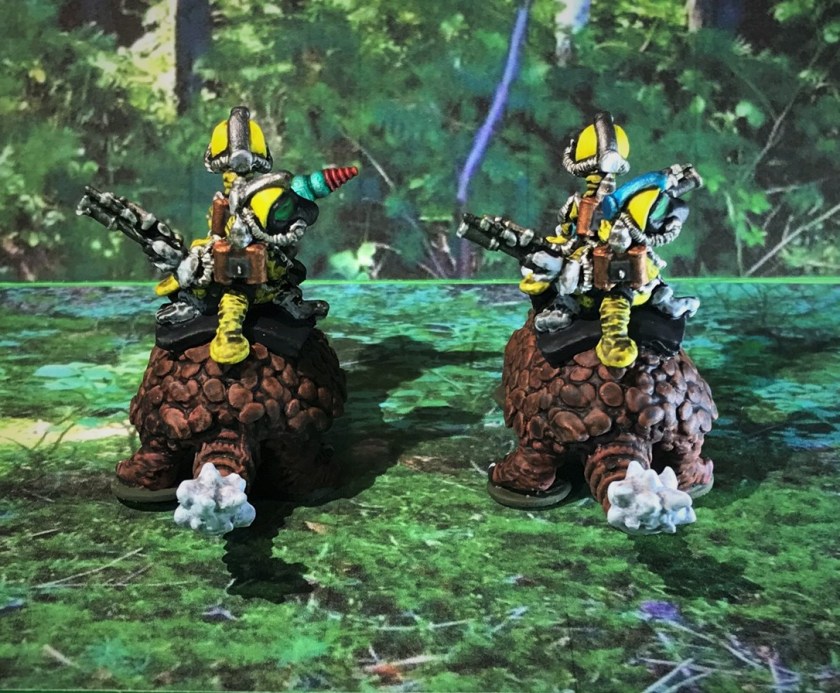
As for a color scheme, I decided to go with the branch color of the US Army Cavalry (now Armor), that being yellow. Besides, yellow is a difficult color to pull off, so I thought it would pose a nice additional challenge. I primed them, and subsequently airbrushed the riders with Vallejo Game Air “Moon Yellow” as a base coat. I then used Reaper MSP “Grey Liner” over the riders to help show me what parts I could paint to bring out the best details. This step really was useful.
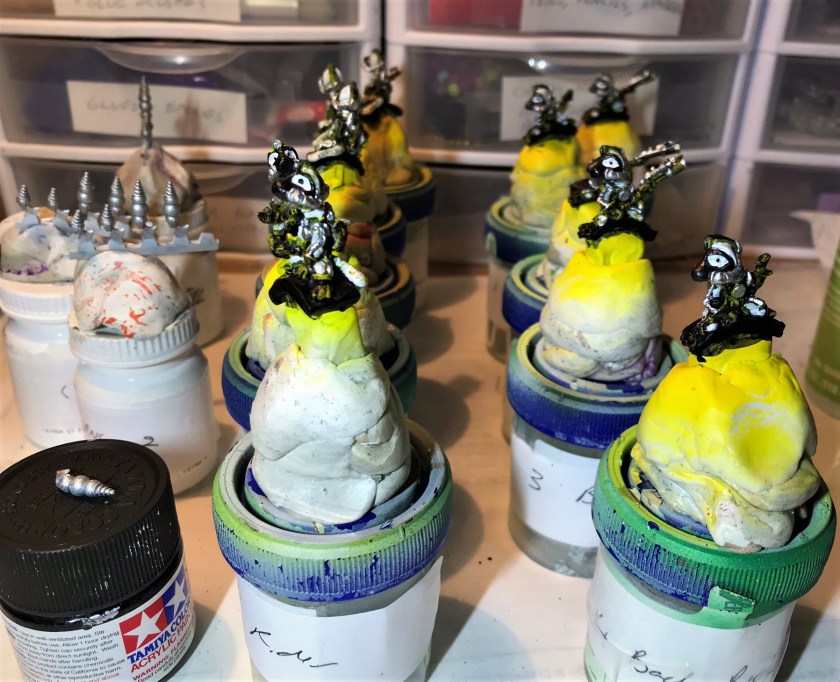
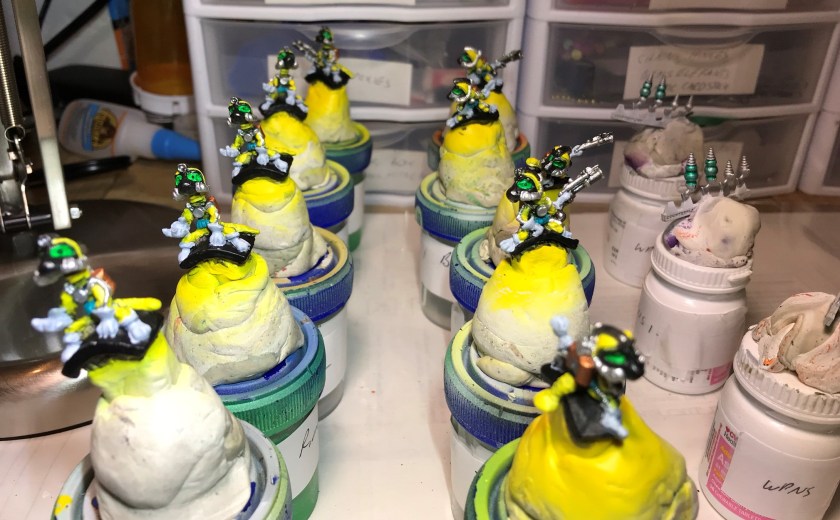
Frinx riders after airbrush the primer and base coat.Early stages of painting the ridersAdding some metallics to the riders and inks to the arc weaponsPainting completed for riders – awaiting a wash applicationThe 10 riders washed and waiting for their weapon conversions. I converted 6, and yes, I painted an extra arc weapon just in case! I primarily used inks on the arc weapons over a chrome base coat for a retro sci-fi look. After this, I applied a gloss varnish to them.
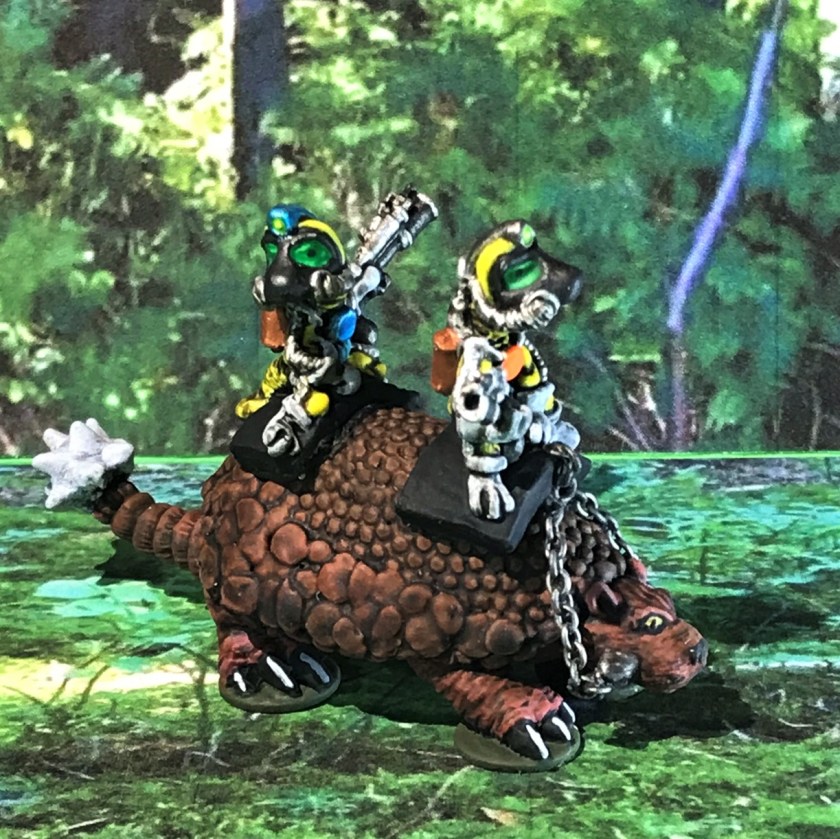
It was time now to return to the sturdy mounts – and I had gotten to the point that I was happy with my painting on them. However, what was missing was a set of reins for each glyptodon. When I cast them, I did use the original bits in their mouths, but the original reins were totally inadequate in my view.
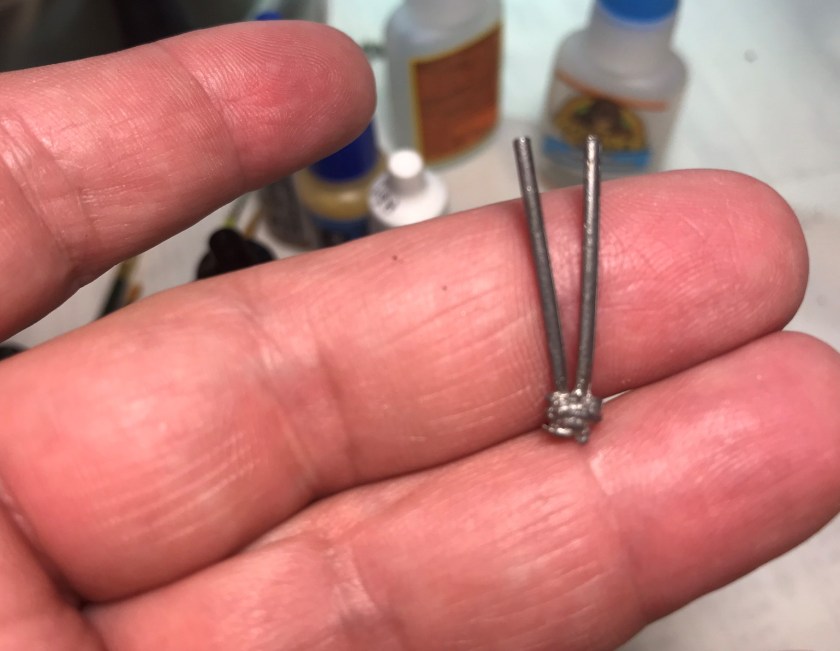
I decided to make reins from the smallest jewelry chain I could find. Figuring out how to affix the chains was a lot of trial and error on one of the extra unpainted glyptodons that I had. I tried using wire, thread, as well as just hooking the chain to the mounts – all for naught. Then, a light bulb went off – toothpicks!
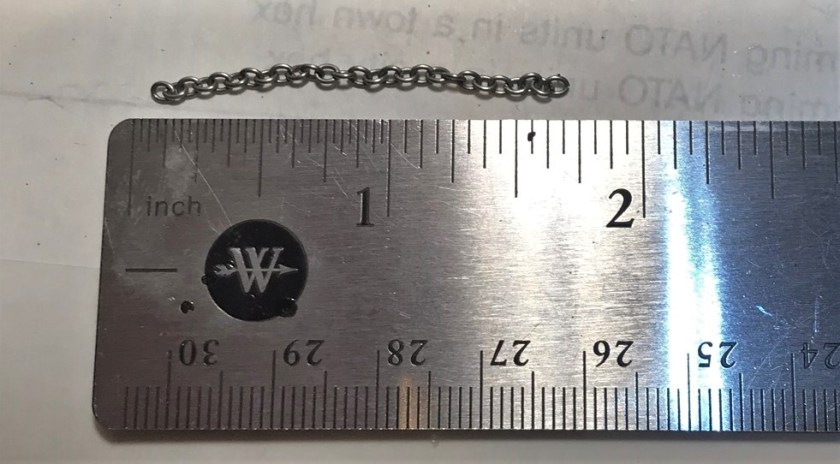
I determined that I needed 27 links for the main chain loop for the reins. I threaded the last chain link through a wooden toothpick. I then inserted the toothpick into the bits by the mouths. I used a push pin to slide the link into position on the toothpick, and applied a very small amount of Gorilla Glue on the wood/chain/bit connection. After the glue dried (often with the assistance of a hand held hair dryer), I snipped the toothpick with a sprue cutter as close as I could to the bit. The net effect was like a tent peg and a rope, securing the chain to the glyptodons’ bridle bits. I repeated the process on both sides, then tack glued the chain at the top and above the ears to make a loop. Then I dry brushed the chain with Tamiya “Gun Metal X-10” and let it dry. Lastly, I applied Citadel “Nuln Oil” to the chain.
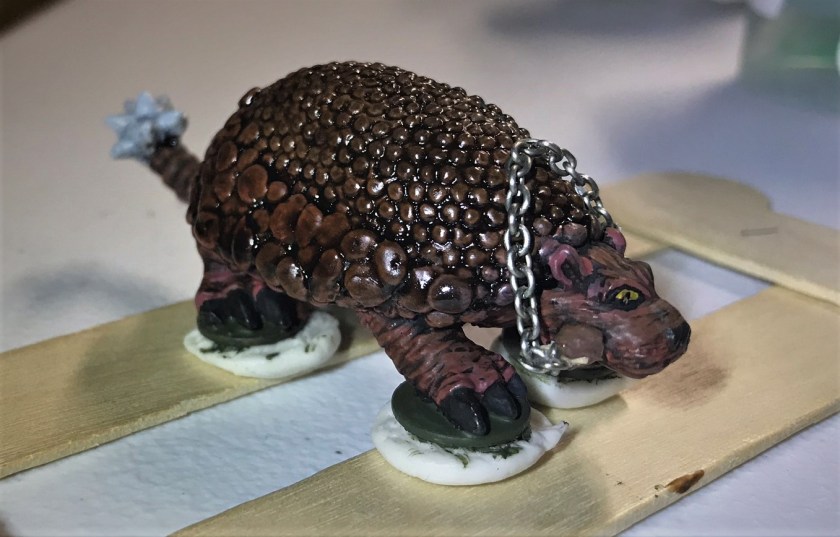
Painted glyptodons before final wash application and addition of reins.I applied Citadel “Agrax Earthshade Gloss” on the back, expecting the later matte varnish to dull it down. Still need reins!These are the original reins – not acceptable!Time for some jewelry making, I mean rein making (sounds weird huh!).27 links, no more no less!He looks a bit like he needs an orthodontist. This is how I mounted the chains into the bits.Main chain loop mounted, before painting it and the bits.
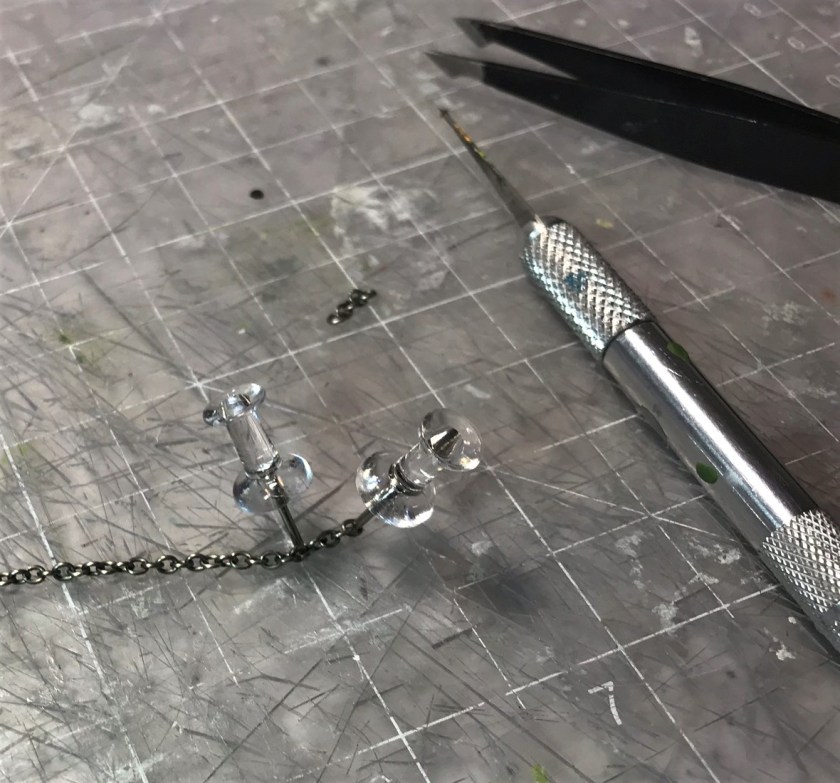
After this, I removed the glyptodons from the frames in order to give the mounts a matte varnish airbrush treatment. Then I mounted the riders to the mounts with E6000 epoxy, and let it harden. I wanted to connect the chains to the front riders hands. For this I needed a massive 4 links of jewelry chain per model, push pins, and patience. I used Gorilla Glue, push pins, and the blow dryer to get the additional chain segments in place. I then applied the same painting and wash techniques to the 4 links.
4 links, no more, no less! I used push pins to help as I cut the links.
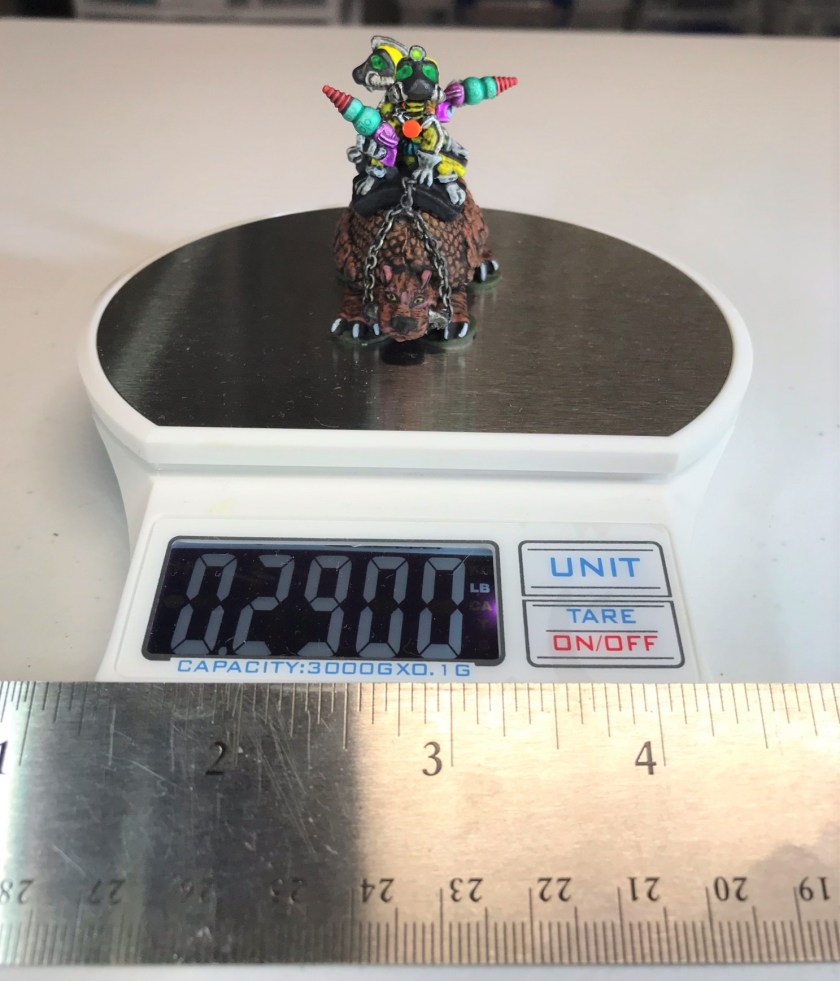
The glossy riders on the matte glyptodon with the new chain attachment which has not yet been painted. Subsequently, the whole PAFOG got a couple of matte varnish coats.After final varnish of an airbrush matte coat.For you metric system users, an idea of the weight and size of the model as completed.For us in the USA, its a mere 4.64 ounces of heavy metal goodness…not a quarter pounder I’d eat by the way…
The PAFOG squad project was now complete – except that I needed to make corrals for them as they are so heavy as to slide in my other Frinx box. No worries, as I want them to survive for many future games, and I’ve done that for other outsized figures
This project also counts for me in a community painting challenge that my Australian friend Azazel has sent out for July 2018. It is for a “Jewel” project – and given all the work that went into these from acquisition to casting to conversion to final painting – I’m confident that these will meet the requirement!
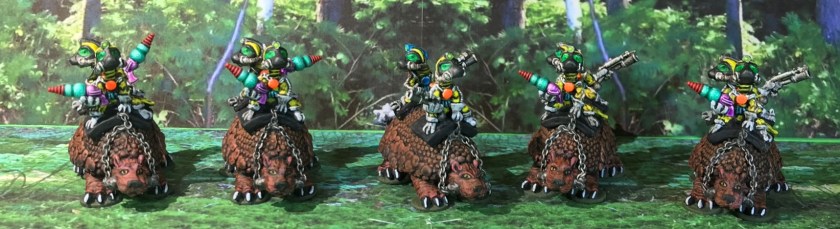
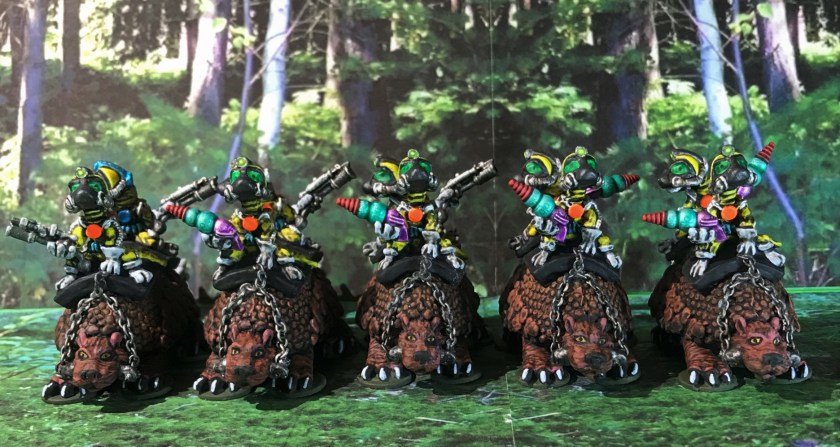
The eye candy follows, and hopefully you will find these as cool as I did. I always appreciate your feedback dear readers – let me know your thoughts and suggestions. Thanks for looking!
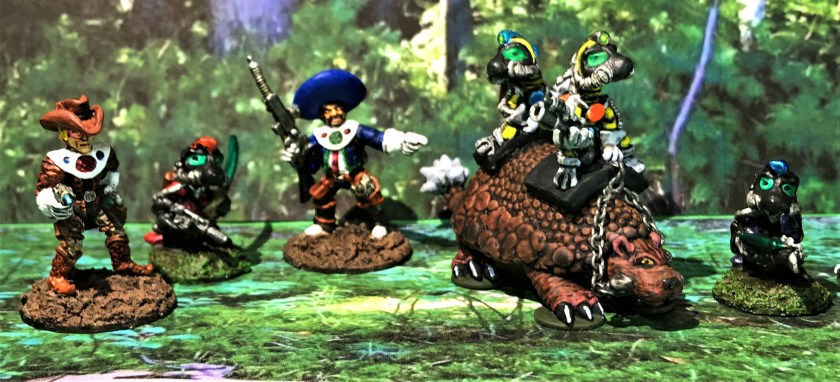
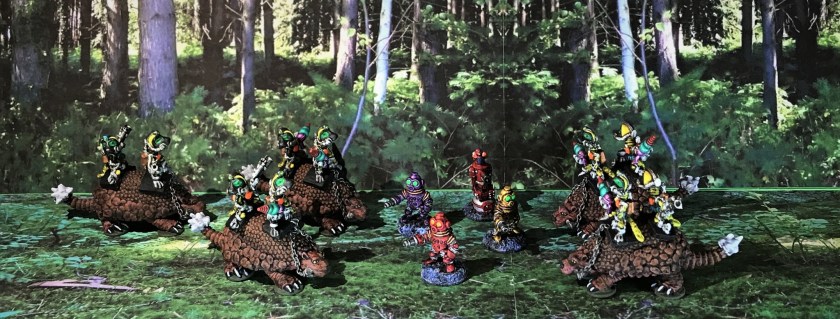
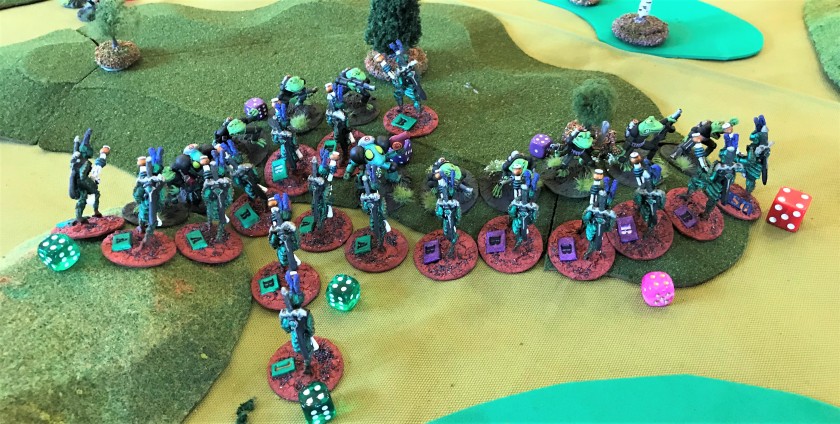
Frinx, form up!Move out!This is the section leader’s mount. The section leader has blue markings. These figures are the originals and have the original weapons. In a Combat Patrol game, they will draw two cards for movement. Between the power armor and the glyptodon’s armor, they should have some ability to take damage.A good view of the back ends where the bony spiked tails are found. Here, on the right is the section leaders mount, and on the left is a mount with one Frinx armed with an arc weapon and the other with a blaster.Nice group shot – note the conversions with the arc weapons.Close up of the right side.A conference with Lt. Ma’k (the Frinx platoon leader in red), some Frinx Amethyst Squad infantry, and the Texican Space Rangers.Surrounding the Space Dwarves in a final charge!
For those interested, here is the list of the paints, etc. that I used in this project.
PAINTS, INKS, GLAZES, WASHES, AND FLOCKING USED:
Citadel “Imperium Primer”
Vallejo “Surface Primer – White”
Vallejo “Flow Improver”
Vallejo “”Airbrush Thinner”
Testors “Universal Acrylic Thinner”
Vallejo Game Air “Beastly Brown”
Vallejo Game Air “Dead White”
Vallejo “Red”
Vallejo Game Air “Moon Yellow”
Vallejo “Black Grey”
Citadel “Agrax Earthshade” (wash)
Reaper MSP “Grey Liner” (wash)
Vallejo Game Air “Black”
Vallejo Model Air “Black (metallic)”
Vallejo Mecha Color “Yellow Ochre”
Vallejo Mecha Color “Brown”
Vallejo Model Air “Rust 080”
Citadel “Ceramite White”
Tamiya “Chrome Silver X-11”
Tamiya “X-20A Thinner”
Vallejo Mecha Color “Turquoise”
Vallejo Model Air “Medium Gunship Gray”
Tamiya “Copper XF-6”
Tamiya “Gun Metal X-10”
Vallejo Game Air “Wolf Grey”
Citadel “Hexwraith Flame”
P3 “Green” (ink)
Citadel “‘Ardcoat”
Secret Weapons Washes “Just Red” (ink)
Citadel “Soulstone Blue”
Vallejo Game Air “Fluorescent Red”
Citadel “Nuln Oil Gloss” (wash)
Secret Weapons Washes “Purple” (ink)
Vallejo Mecha Color “Yellow Fluorescent”
Vallejo Mecha Color “Sand Yellow”
Citadel “Seraphim Sepia” (wash)
Polly Scale “WWII British Aircraft Gull Gray Light”
Finding a gaming convention that is close by to my home has been somewhat frustrating for me over the last few years. Since I returned to the hobby, I have attended a few BARRAGE events in Maryland , but that’s it.
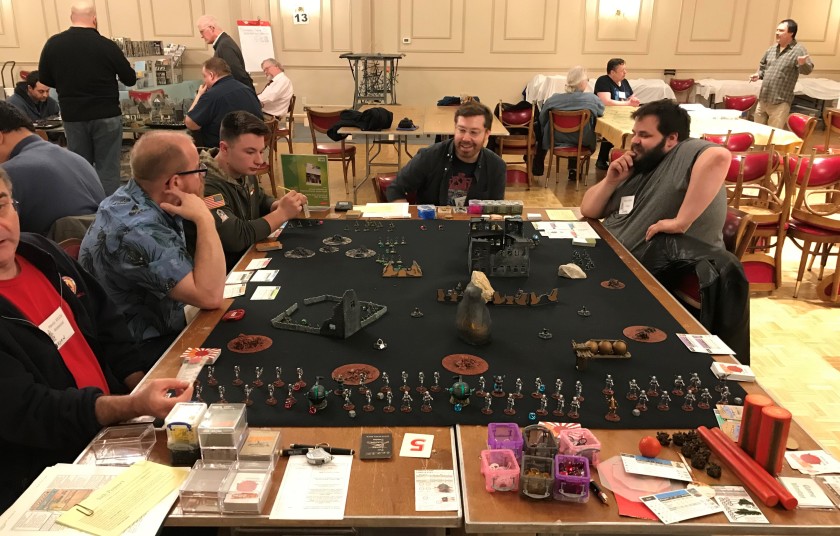
Imagine then that there was a con 15 miles from my home AND that they have been having it for 34 years (and I never knew!). The event was the three-day (Friday night, Saturday, and Sunday) HAVOC convention, run annually by Battlegroup Boston. This year was HAVOC XXXIV, and I learned of it through the New England Wargame Groups List page on FaceBook. It ran from April 6-8, and I am really glad that I could attend, but it was a last-minute decision. I was also hoping to let folks know about our group, The Mass Pikemen’s Gaming Club in Central Massachusetts.
Back in March, I went to the HAVOC web page, and I also saw that they were looking for game masters. I needed to wait to see if I could attend. Ultimately, I was able to not only attend the event, but to run two retro sci-fi games using the Combat Patrol™ system. The first game I ran was on Friday night. It was “Attack of the Warbots” using figures from the Archive Star Roversline from the late 1970’s (Mark III Warbots, Star Ducks, Aphids, and Power-Armored Frinx) along with my Mark 1 Sphere tanks). There were also some Wargames Supply Dump Robo-Sentry guns acting as stationary defenses.
In this blog, first I’ll discuss the two games I ran, then share some photos and eye candy of some of the convention.
My flyer for the game
I managed to get 7 players for the game, which was great. I did not get as many pictures as I would have liked as I was running the game. The players really had a great time and there was a lot of action. No one had ever seen these figures before, and the mass of the Mark 1’s surprised them all! I used a number of Armorcast sci-fi structures as well on the board, and they worked great.
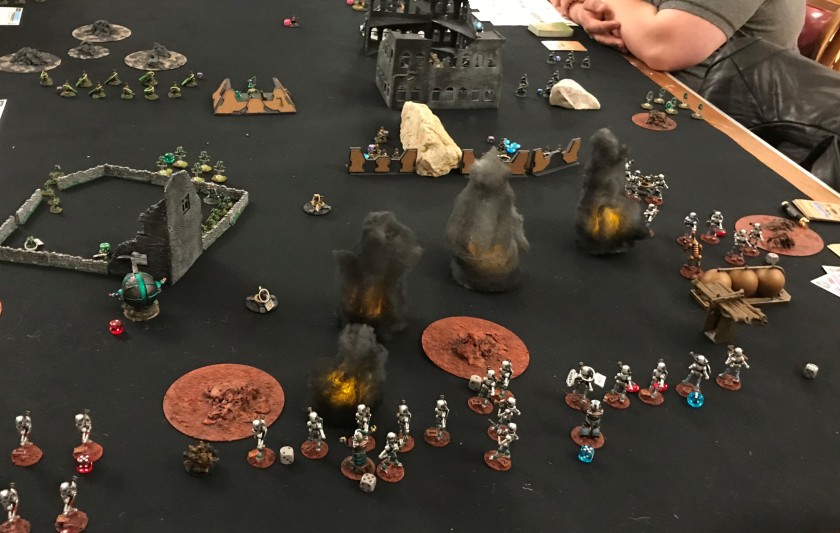
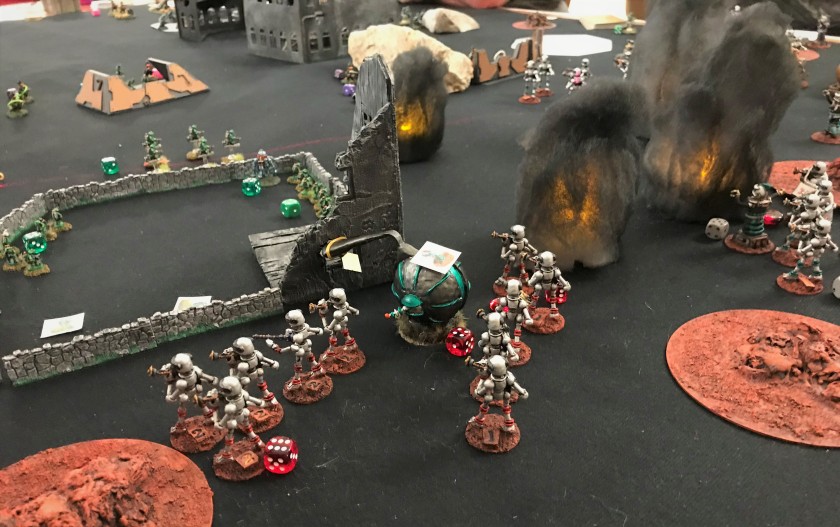
The Warbots make their assault. Their goal was to recapture a Mark 1 Sphere tank behind the building on the right center (which the Frinx were attempting to repair for their own use). A Robo-Sentry gun has been taken out by the Warbots and burns in the middle.Frinx anti-tank fire from the factory’s 2nd floor knock out a Warbot Mark 1 Sphere tank between the slag mounds, and more Robo-Sentry guns burn. The remaining Mark 1 prepares to use its Death Ray on the Aphids on the left. The Mark 1’s attempt to fry the Aphids fails and its weapon malfunctions. Seizing the opportunity, the Aphid platoon leader leaps onto the tank from the second floor and attempts to destroy it with a satchel charge.The satchel charge attack failed to penetrate the Mark 1. Frinx bazookas then hit the tank while the platoon leader was on top of it. The Mark 1 was immobilized by this AT fire, but the Aphid platoon leader was killed by the same attack. Note the card on the tank – I use cards with pictures on them to denote casualties for infantry.
While all this was going on, the Warbots on the right closed with the Robo-Sentry guns and the Star Ducks defending the wall. In this game, I have the Warbots use the Japanese Combat Patrol™ deck, which has different morale results. A morale card result caused one Warbot team to make a Banzai charge at the last surviving Robo Sentry gun, which was jammed. This enabled the Star Ducks to hit the team with direct fire. When the Banzai charge was over, another morale check caused this same team to flee the game, stifling this assault. The Frinx just got their captured tank fixed as the game was out of time. Due to the casualties inflicted by the Warbots, I called the game a draw. The players all were highly excited by the game and loved the ease of use of the Combat Patrol™ decks for all aspects of the game.
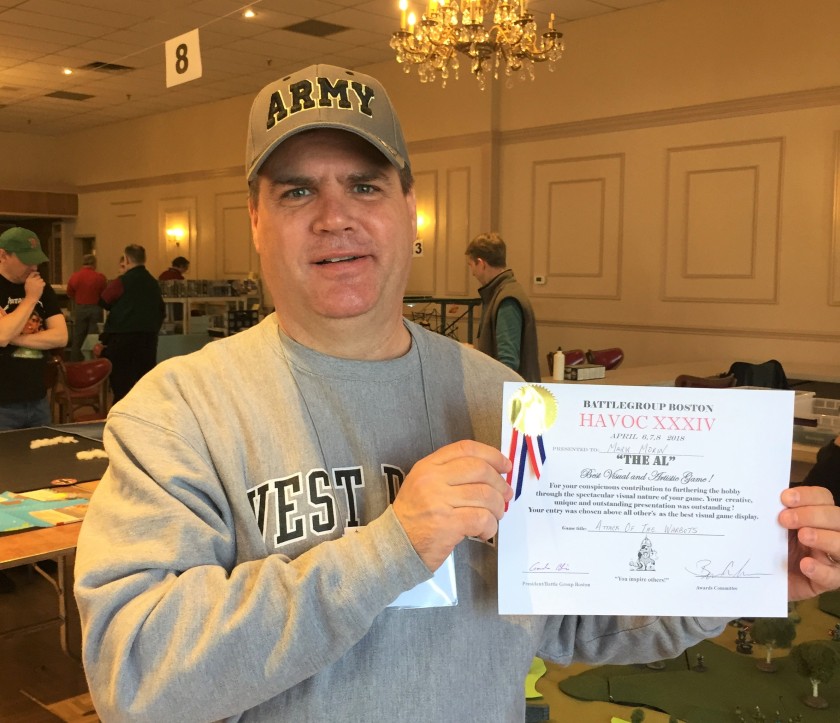
Unbeknownst to me at the time, my game was nominated for the “Al Award”. From the HAVOC website, this is “presented for the game with the most stunning visual appeal. Our crack team of experts (expert team of cracks) will vote on the game that made us say “Wow!”.” I was honored to be nominated, but even more so to win! Thanks so much for this to Battlegroup Boston! A great con it was to be sure – and I felt very welcome here by all the club members.
A true honor! Thanks so much Battlegroup Boston!
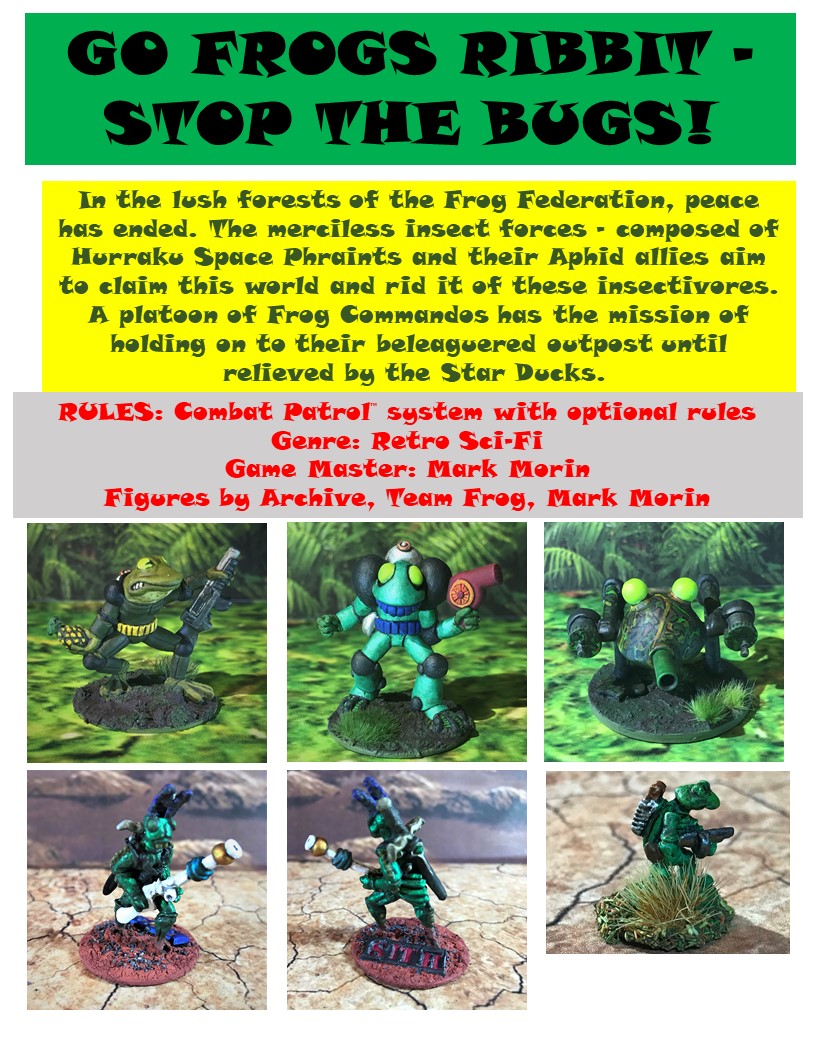
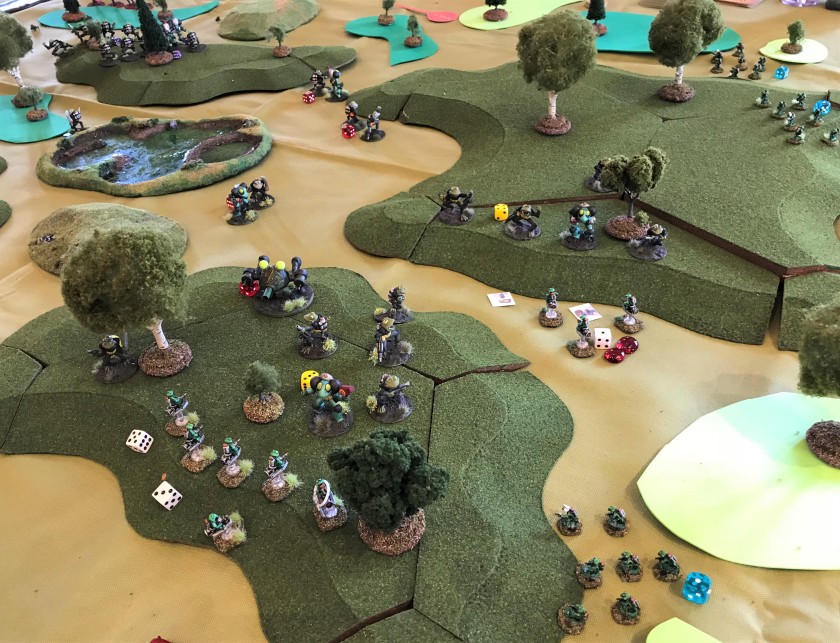
The second game I ran was on Sunday, which was “GO FROGS RIBBIT – STOP THE BUGS”. It was a battle between the F.R.O.G. Commandos (with Star Duck reinforcements) and two Archive Star Rovers foes – the aforementioned Aphids and the Hurraku Space Phraints. So, basically, it was insectivores versus insects, albeit big bugs. The Frogs were defending a wooded area between two rivers and specifically their sacred pond. The insects’ objective was to seize the pond, and to dispatch as many amphibians as possible along the way with extreme prejudice.
My game flyer for this game
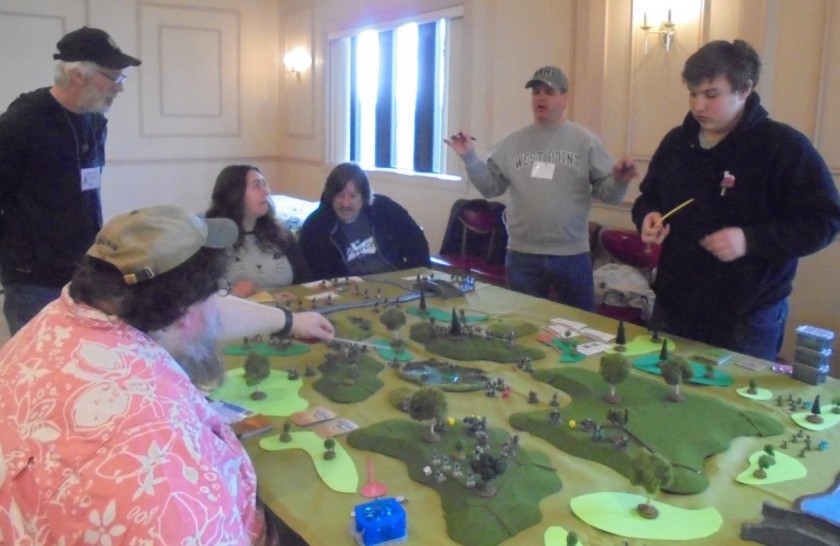
I ended up with four players for this game – one for each attacking bug side on opposite sides of the board. Star Ducks would reinforce the Frogs as a special event card was pulled during the game. The Frogs would use the regular decks, while the bugs would use the Japanese decks. The Space Phraints also had a Sith. Here again, the players quickly adapted to the Combat Patrol™ deck. All were new to the game.
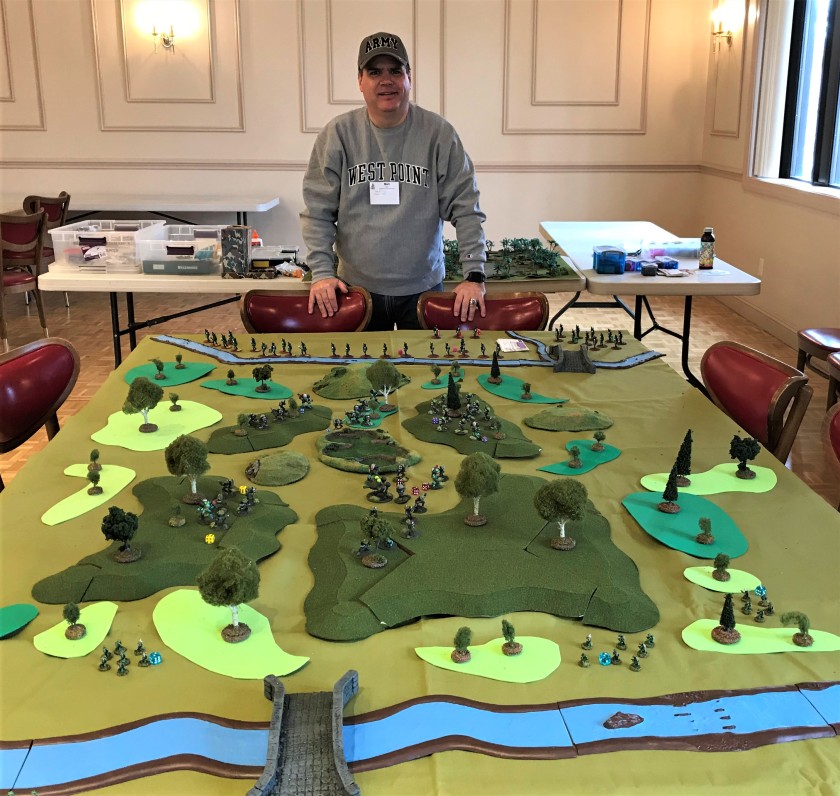
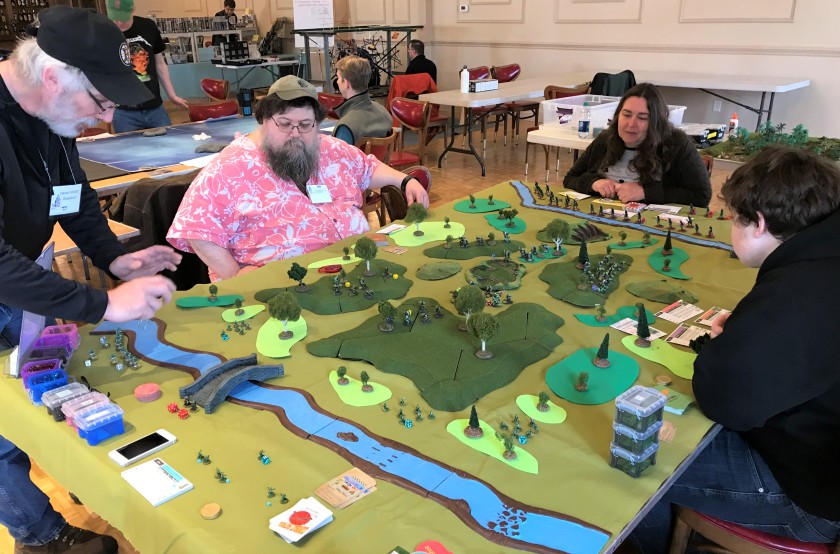
My set up – Aphids attack from the south, Space Phraints from the north. Terrain posed a challenge for the attacker because their long range weapons advantages were nullified.The players listen as I brief – photo by Mike Paine
The Aphids got into the fray first with their Grav Cycles, while the Aphid infantry and the Space Phraints advanced.
Aphid Grav Cycles prepare to jet across the river
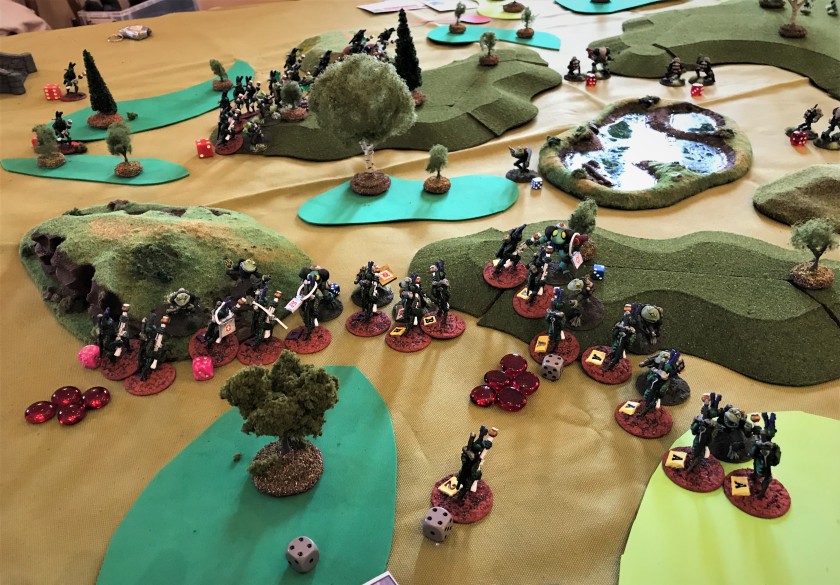
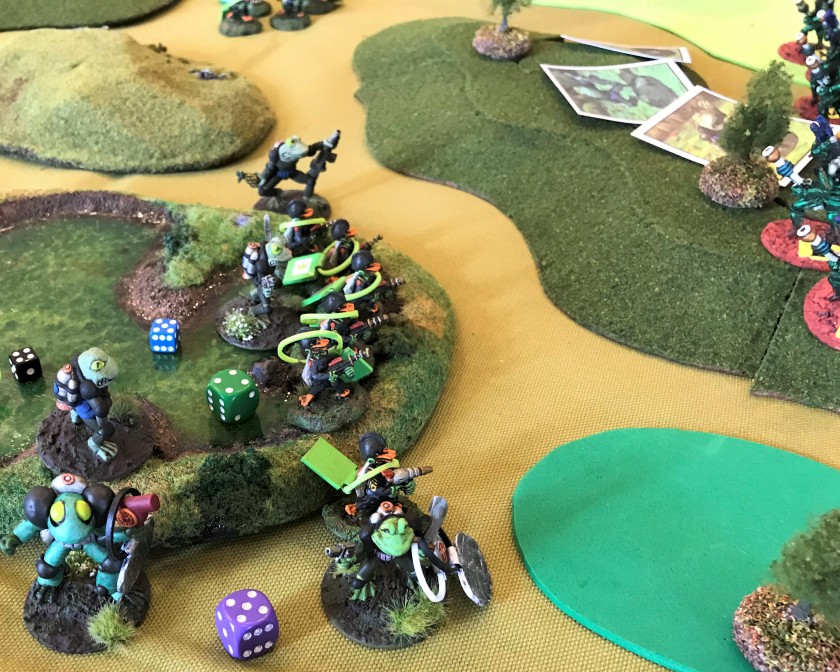
The Aphid Grav Cycles charge into the two 2nd squad Frog positions (two teams by the yellow dice). The Frogs prepare to respond with Frogbot’s chain guns, their assault rifles, and a flame thrower. The Aphids attacking on the right have begun to take heavy casualties.Aphid attacks are torched. The leader of the one on the right lost all of his troops and ended up committing ritual suicide from a morale check card.
The Aphids however did effectively draw the Frogs to their attack, weakening the side facing the Hurraku Space Phraints. This would have consequences.
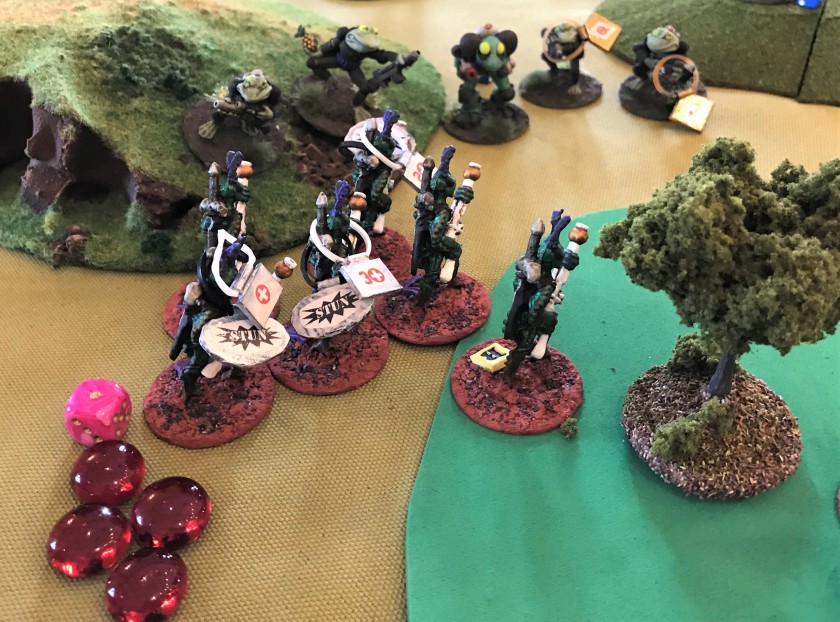
The Frogs 1st Squad maneuvers towards the Hurraku1st Squad’s assault rifles inflict heavy damage on the advancing Hurraku Space Phraints. The red beads represent morale checks for the HurrakuThen the Frogs used their flamethrower on them…
At this point, the Hurraku gambled and turned the tide of battle. Linda (the Hurraku player) decided to take advantage of her Sith’s power of “Rage”. This ability causes a Banzai attack. This also removes all stun markers from her troops while they charge at the enemy and engage solely in hand-to-hand combat (or just melee as we are talking about bugs and Frogs). The Hurraku also all have the same activation number until the banzai charge ends, resulting in a true mass attack. Here (in melee) the Hurraku have an advantage as they are very tough fighters. They also move fast normally, and the “Rage” improves that movement by a factor of two.
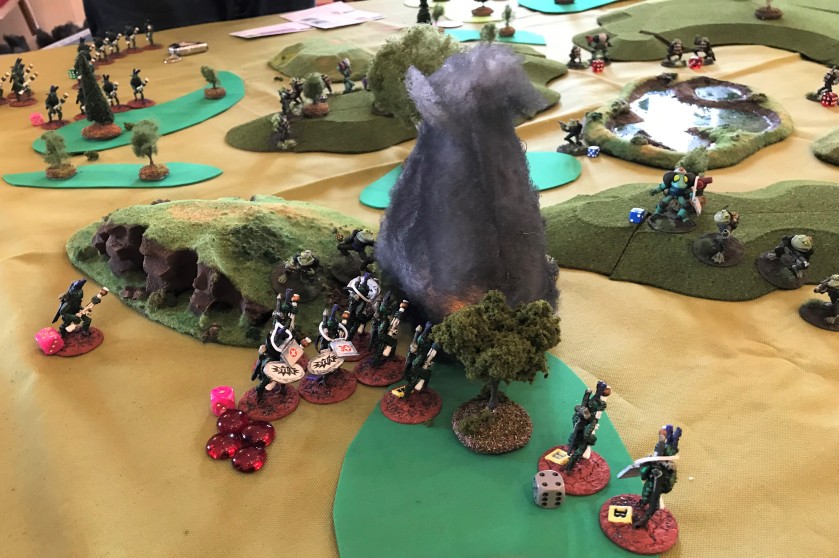
BANZAI! TO THE POND!The other flank is swarmedThe Frogs are devastated by the assault. Cards denote dead Frogs. Blue beads represent morale checks for the Frogs, which were mounting up quickly. During a Banzai charge, attackers do accrue morale checks, but are not stunned. They also activate all at the same time. The attackers would end their charge after a special card is pulled from the Action Deck – so it can go on for a while. In this game, it never ended.
At this point, a Star Duck squad jet packed in as reinforcements, but it was not enough. They jet-packed in to defend the pond.
Star Ducks reinforce Frogs for a last standA Hurraku Space Phraint reaches the sacred pond and wins the game
The players here had a good time and were good sports. The tide swung from one side to the other. In the end, the “Rage” Banzai charge was decisive.
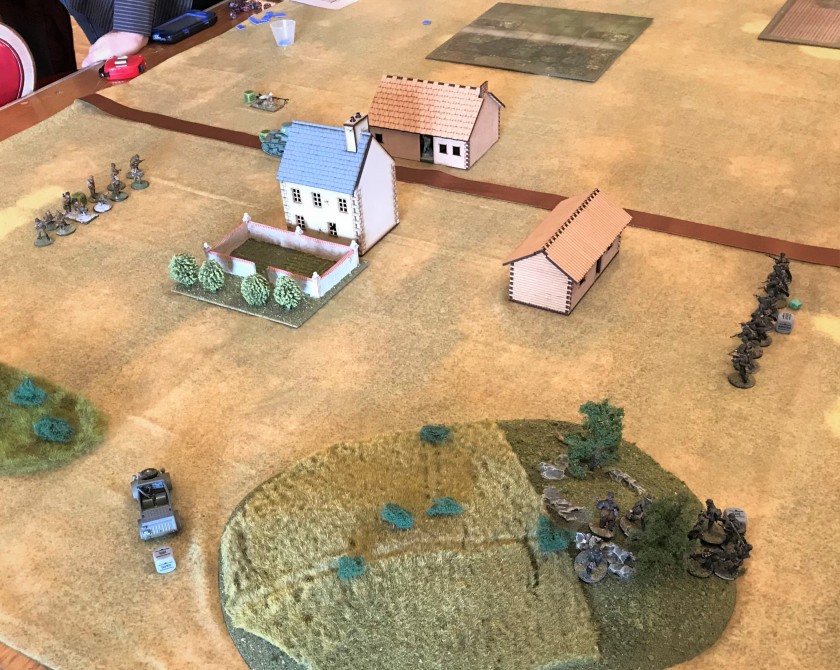
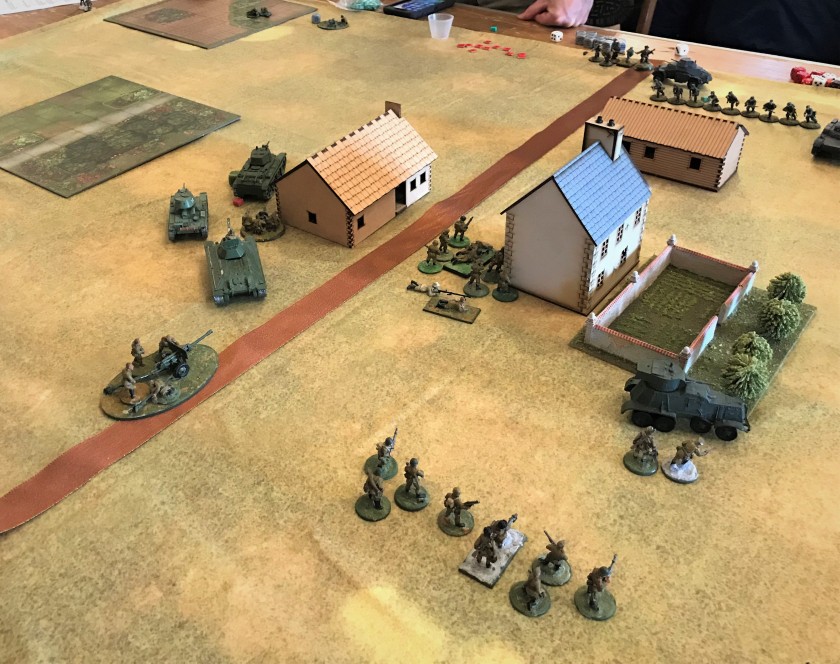
I will now share some photos of the two games I played on Saturday morning and afternoon (I did not play Saturday night). I played a Bolt Action scenario run by Friedrich Helisch. The scenario was a 1941 German attack on a Russian-held village. David Shuster was on the Russian side, while Friedrich and I played the Germans. This was my first try at Bolt Action.
The battle begins as Germans move towards the village
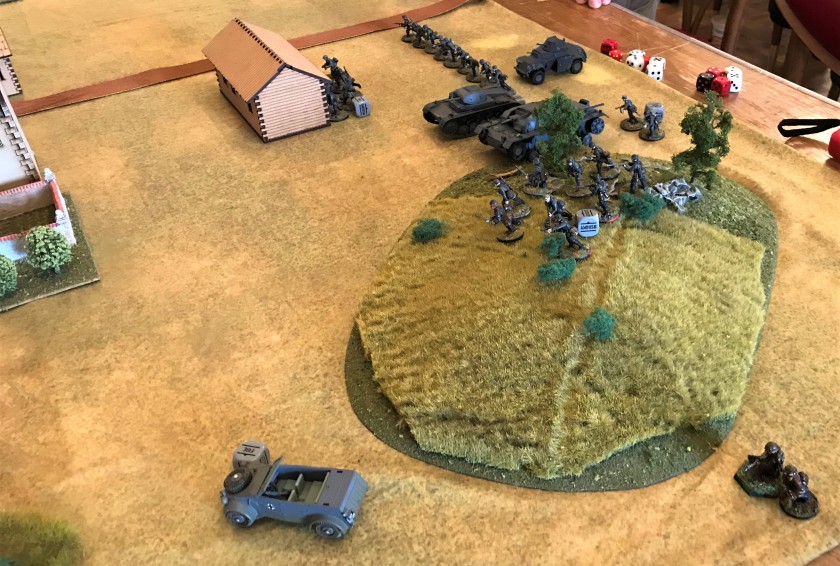
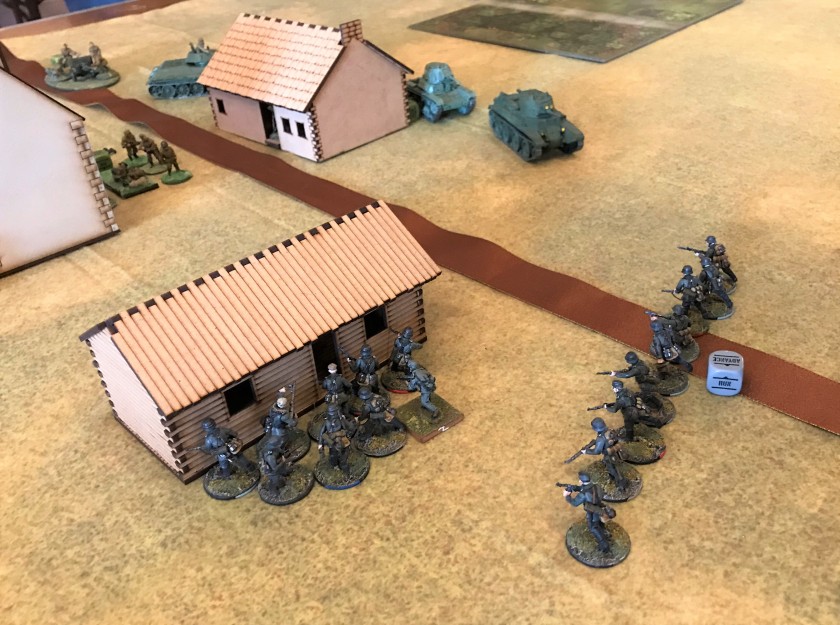
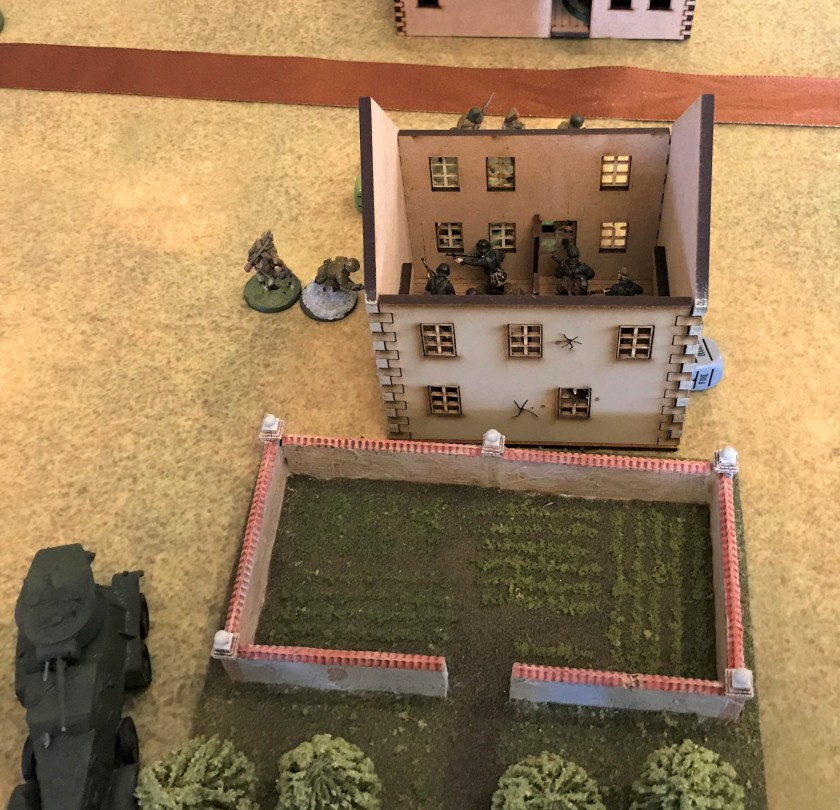
David Shuster moves his Russians upView from the Russians sideGermans successfully storm the first building
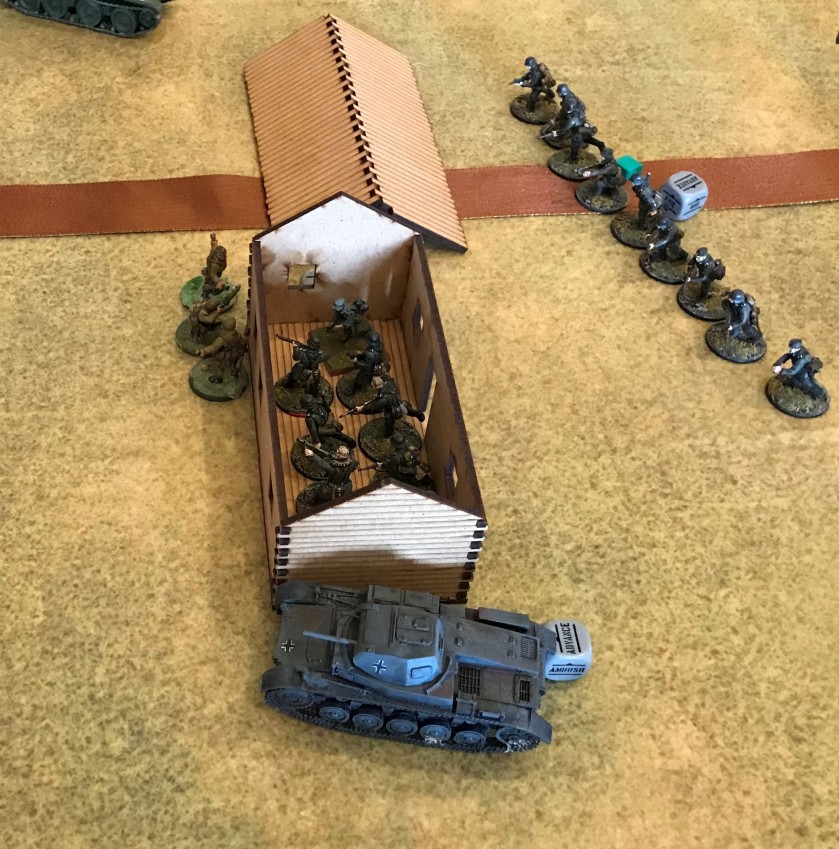
Germans successfully take the second buildingThe Sturmgeschutz is hit
This was a points-based game, and our taking of the second building allowed us to win by 1 point, so it was very close. As for the rules, I am on the fence, but more than willing to try them again at some point in the future.
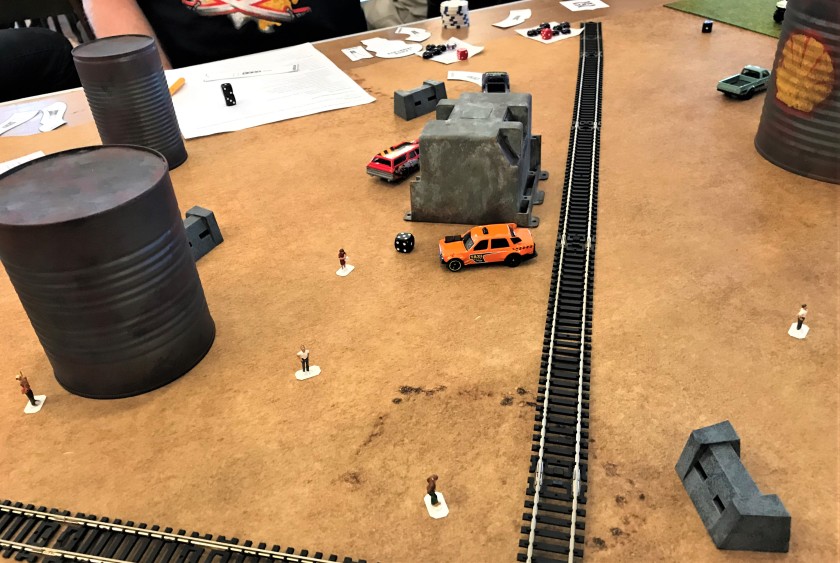
The second game I played was a Gaslands scenario. I had heard this was an interesting game and thought I’d try it out. In this game you get so many points to choose and arm 2-3 vehicles (performance car, regular car, and pickup truck). The goal is to run over (3 points) or shoot (1 point) pedestrians (in homage to Death Race 2000) instead of the usual zombies on the game board. You can attack your opponents, but their destruction does not get you points (you do eliminate the competition). The movement is very much like X-Wing.
I played with two other players, who chose to max out two vehicles, while I did three lesser-armed vehicles. I chose to go after the competition and eventually had one of two vehicles to be the last on the tabletop. However, at this point the game masters deploy invulnerable Monster trucks to hunt you down and end the game. I just missed my last pedestrian which would have tied me for first. The game masters (Michael Eichner and Erich Eichner) did a nice job, and this was a fun game. The table looked great too.
The game starts – I had the red carsAfter using a flamethrower on a white car, I t-boned the orange one, but flipped over the structureGame play – photo by Mike Paine
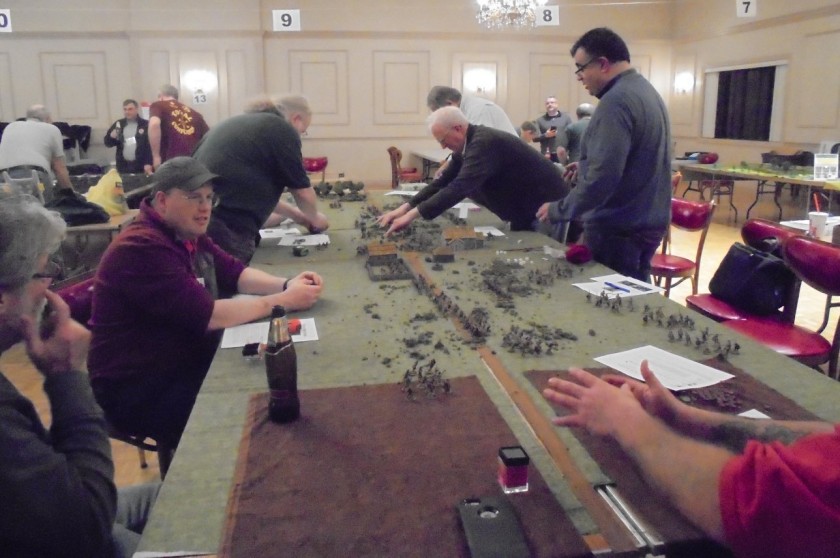
I thought that I should share some photos of the rest of the con. I did not get to see as much as I would have liked, but there were a lot of very cool games. Kudos to all the folks at Battlegroup Boston, as well as the GM’s and players! Please share your thoughts in the comments section – thanks for reading this blog!
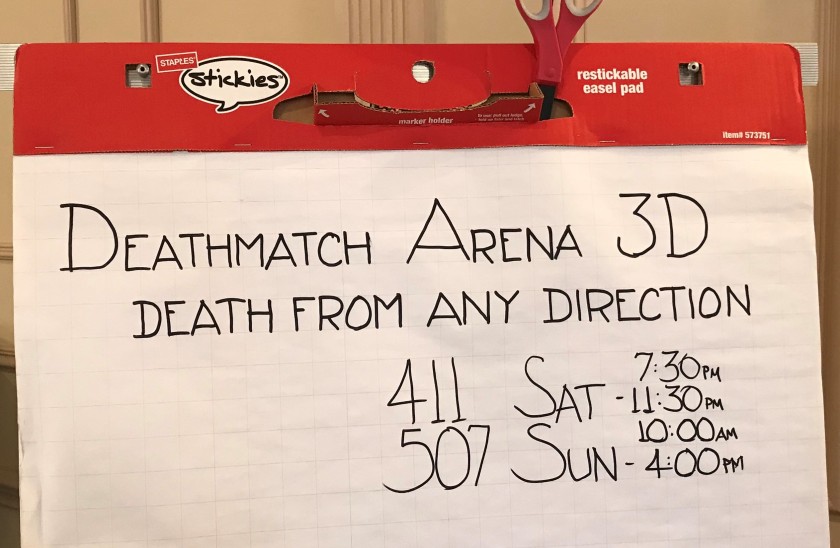
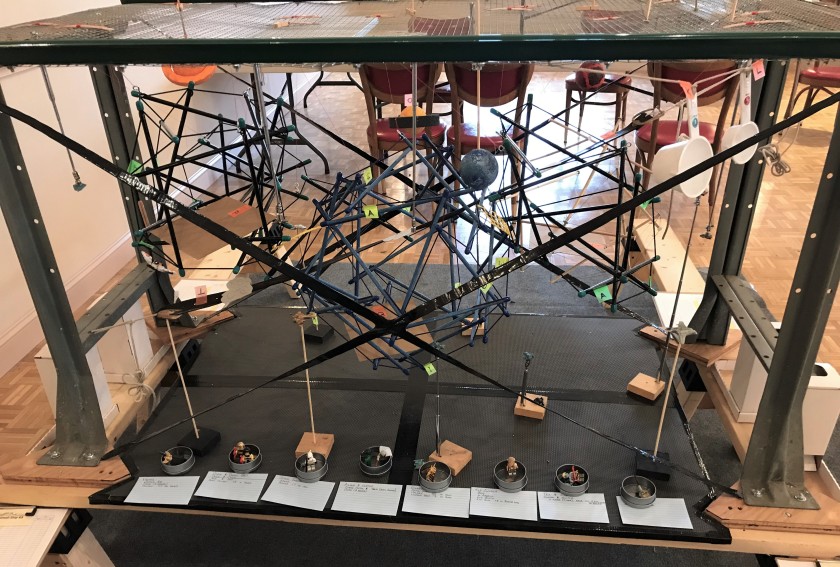
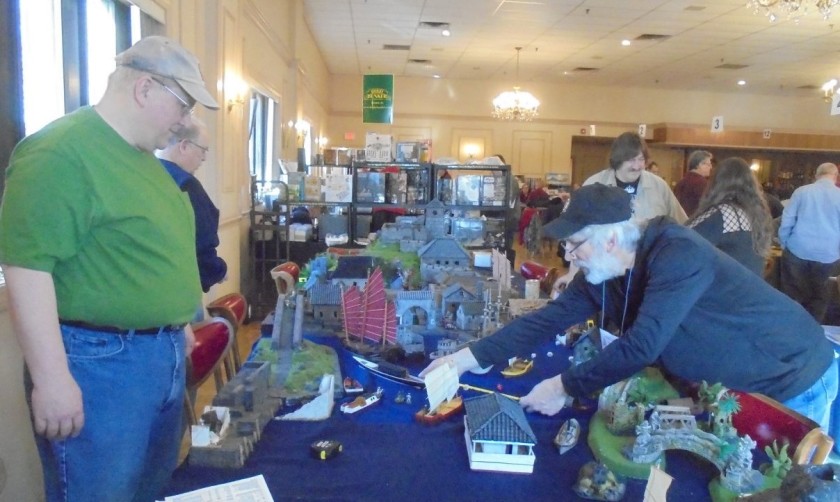
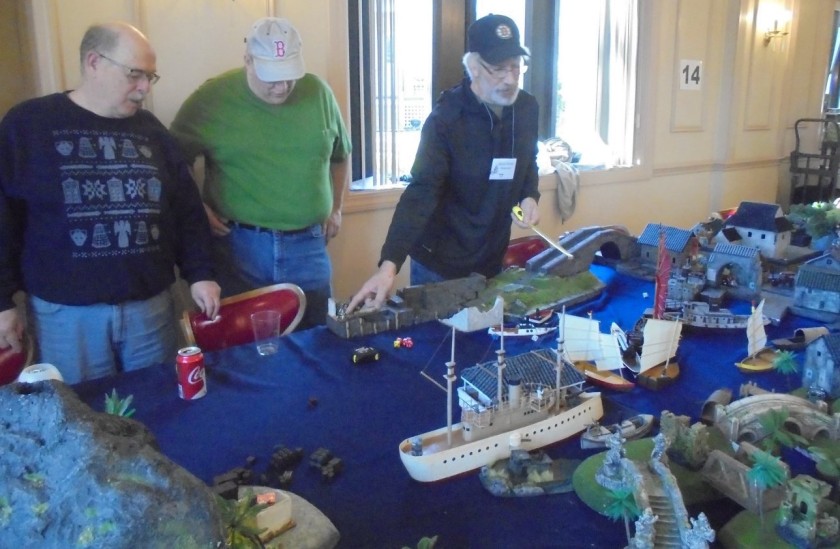
A view of the con Saturday morning. There were two rooms.Tim Allen had a magnificent home game using LegosThe Deathmatch Arena 3D gameCharacters from Deathmatch Arena 3DLion Rampant game (big game!) run by Richard F. Wareing – photo by Mike PaineThomas Ballou ran a Battle of the Hurgen Forest scenario – photo by Mike PaineBruce Carson ran a Silent Death Smash game – photo by Mike PaineMike Paine’s immense game – spectacular! Eye candy for this below, some I borrowed from Mike Paine with permission
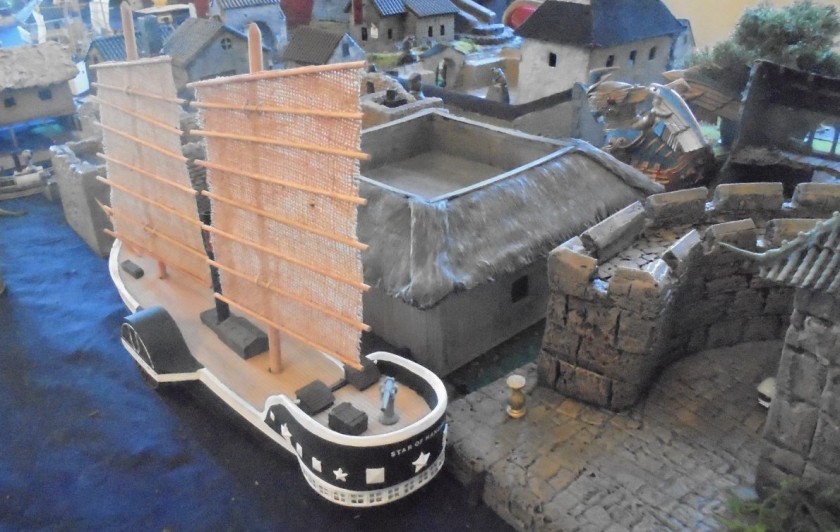
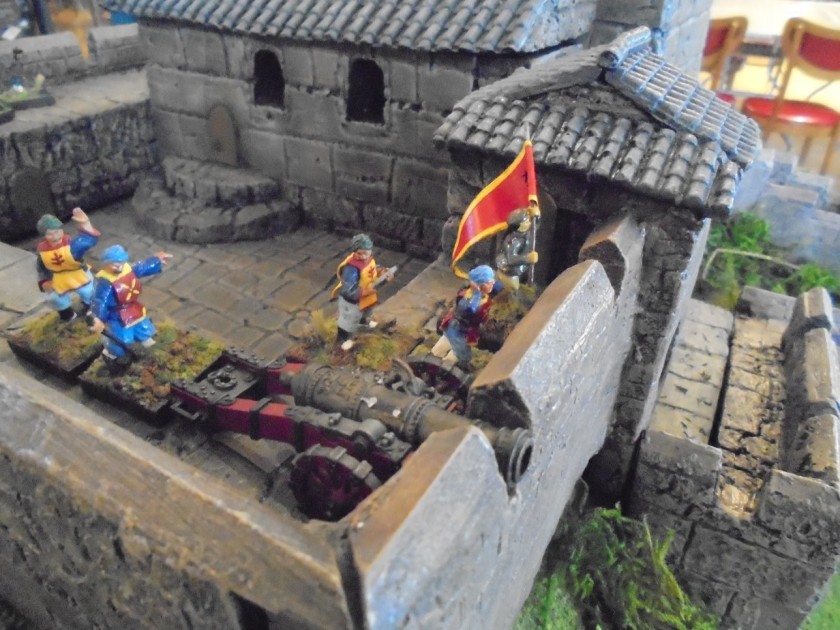
Game play – photo by Mike PaineNice sampan -photo by Mike PaineBeautiful terrain, so complex – photo by Mike PainePhoto by Mike PaineGame play – photo by Mike PaineChinese bombard – photo by Mike Paine Nice American gunboat – photo by Mike Paine
I cannot make Cold Wars this year – but these are some great options for those attending! See below!
From Buck Surdu’s Blog
Buck F: 215: Hold as Long as Possible (1) Friday, 9:00 AM, 4 hrs, Players: 6 GM: Buck Surdu & HAWKS Sponsor: None, Prize: None Period: World War II, Scale: 28mm, Rules: Combat Patrol™: WWII. ItisthePhilippinesinearly1942. The Americans are retreating slowly toward Bataan. A platoon of infantry, along with a handful of Stuart tanks, must […]
Buck Barrage planning and preparations continue. Barrage 2017 will be held 19-20 January 2018. (Yes, Barrage 2017 will be held in January 2018.) Our inclement weather day will be the following weekend. Take a look at http://www.hawks-barrage.org to see all the great games on offer. While the schedule is filling up, there is room for […]
This is from Buck Surdu’s blog – nice addition to the Combat Patrol rules!
Announcing the Release of the South Pacific Supplement for Combat Patrol™: World War II. Like all the previous supplements for Combat Patrol™, this supplement is FREE to download as a .pdf. Why a South Pacific Supplement? Fighting in the South Pacific during World War II was unique compared to other theaters, even other parts of…
I am a lover of history, and of course love the dramatized series Vikings on the History Channel. It takes some dramatic license of course, but is fun.
Lately, the History Channel has added Real Vikings as an add-on show. It’s pretty good as you get to get some interesting facts and stories about the Vikings while seeing some of the European sites that they lived in and raided.
I’ve always been curious about my relationship to the Vikings and other races in history genetically. I am ¼ Irish, ¼ Finnish, 3/16 French Canadian (the French origins of Morin seem to be more from Normandy), 1/16 Micmac tribe, 1/8 Swedish, and 1/8 Italian (near Naples). Clearly the Irish side would have Celtic ancestry, but there were a lot of Vikings in Ireland – and I believe every major city in Ireland, or most of them, started out as Viking settlements during their raiding period. The Normans certainly were of Viking ancestry, and Swedes were pretty much as well (along with Norwegians and Danes). So I am pretty sure that Viking DNA is in me from the Irish, the French, and the Swedes, but what of the Finns?
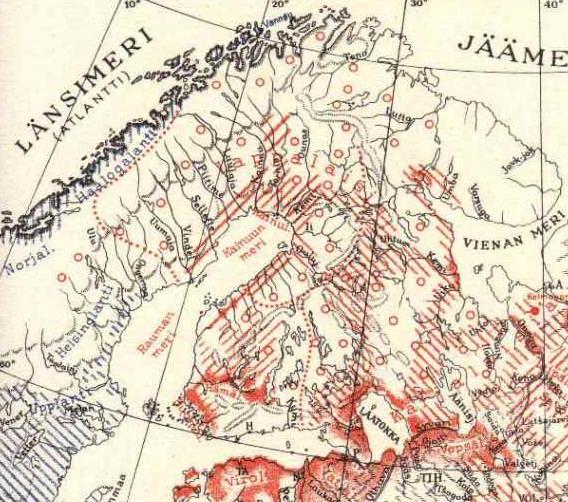
The article below by Kristian Ola (Wilpuri) on the website All Empires is very interesting. She does a very nice job in English (I believe she is a Finn). Basically, she discusses the Finnic and Ugric tribes that lived in the Finnish peninsula during the Viking Age and how they interacted based upon the archeologic record. I have a better appreciation now of how the Finns (and their ancestors) really got stuck between the Swedes and Russians going back to the days of the Vikings. Curiously, during the Cold War, the Finns did not explore much of their history of that time so as not to alienate the USSR. In any case, I thought this was a good read.