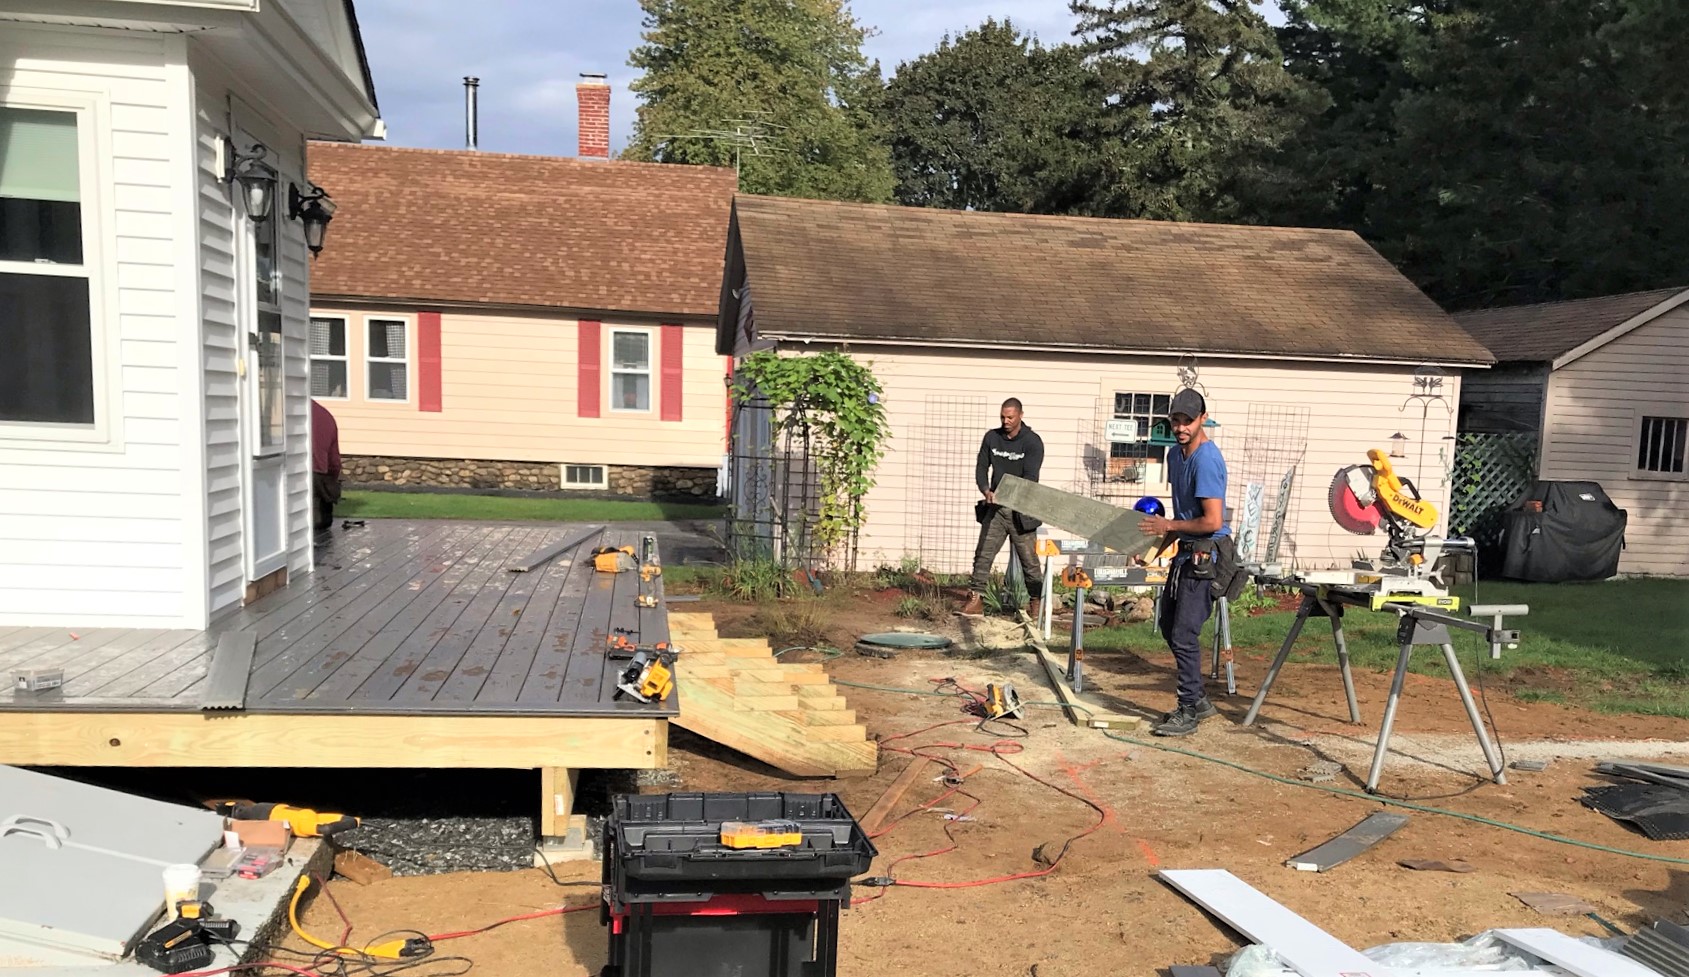
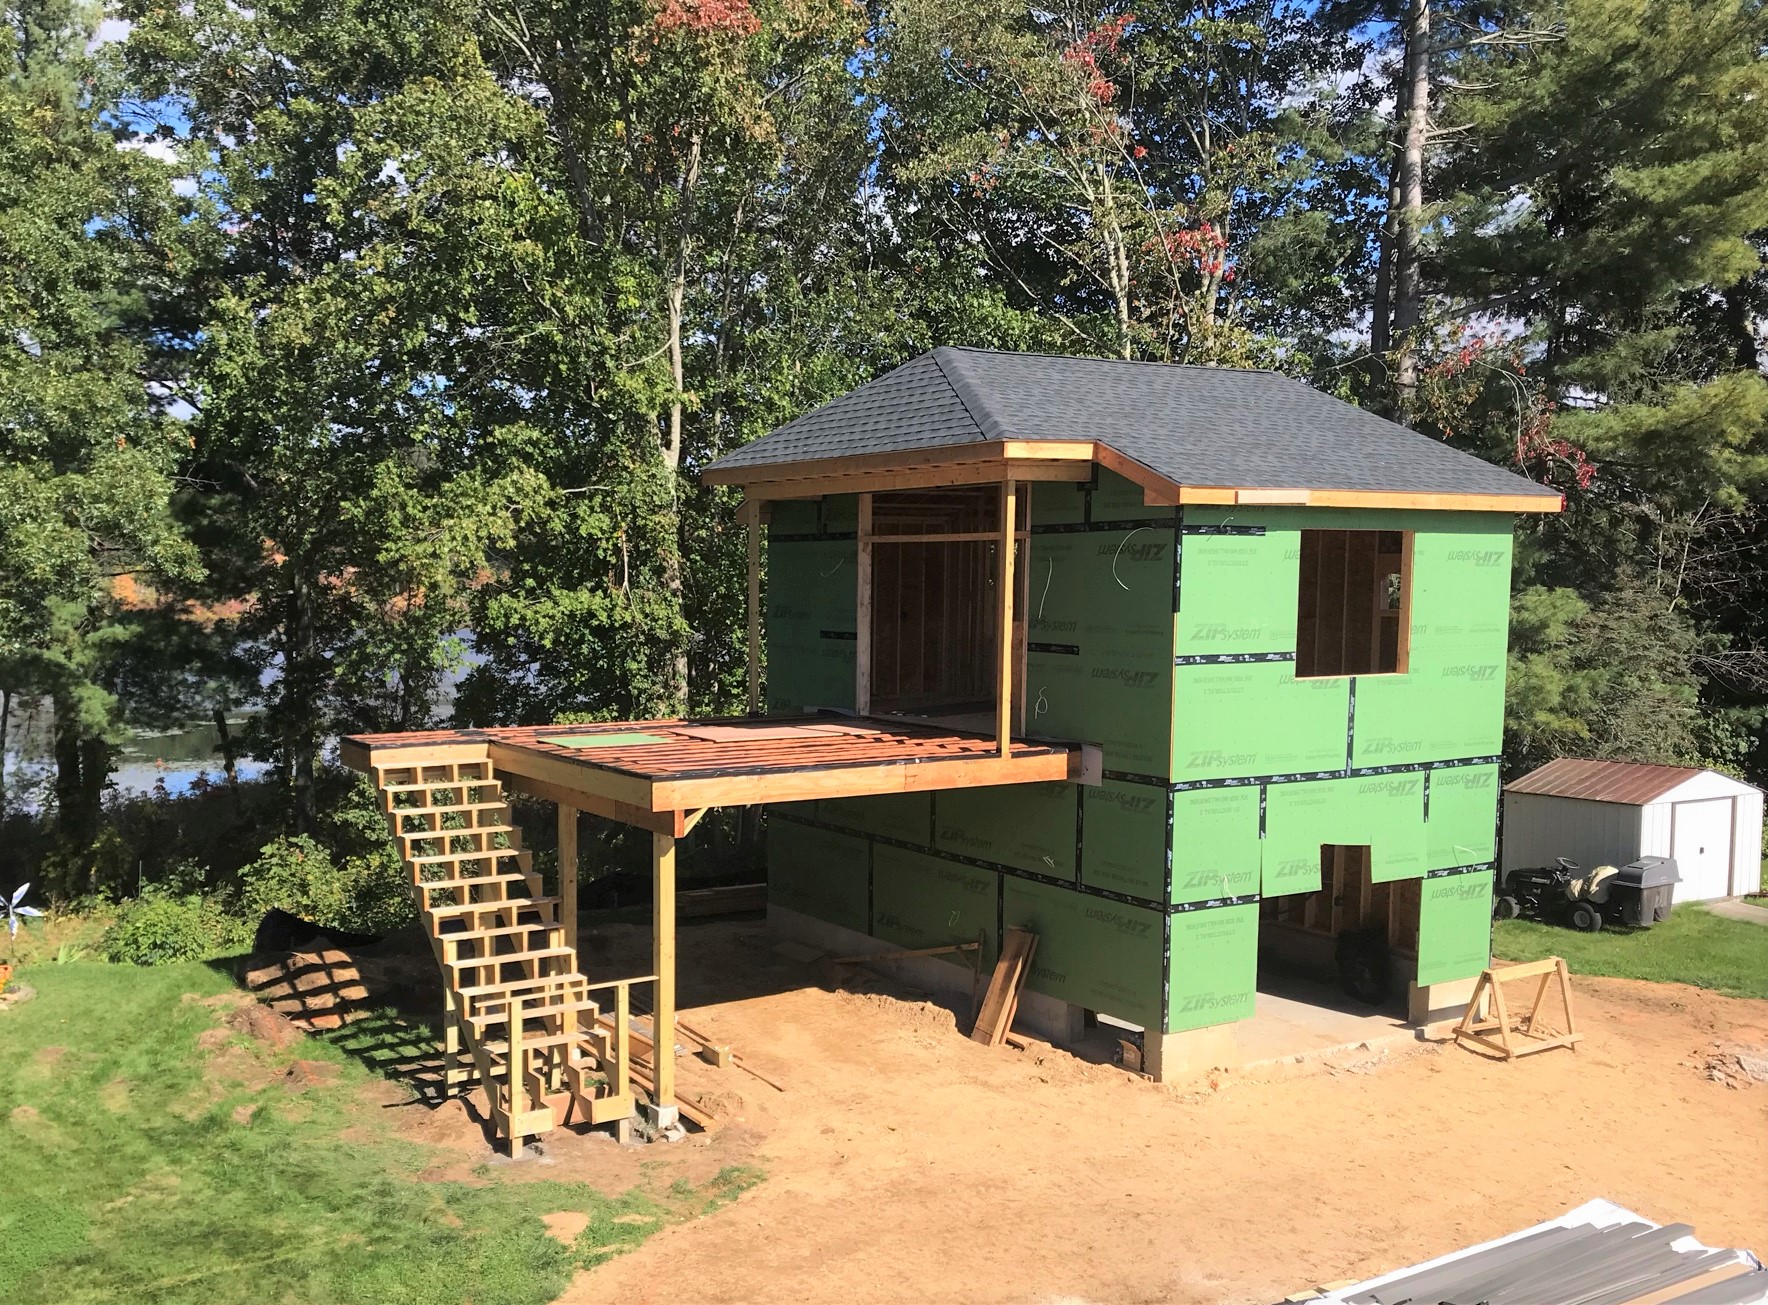
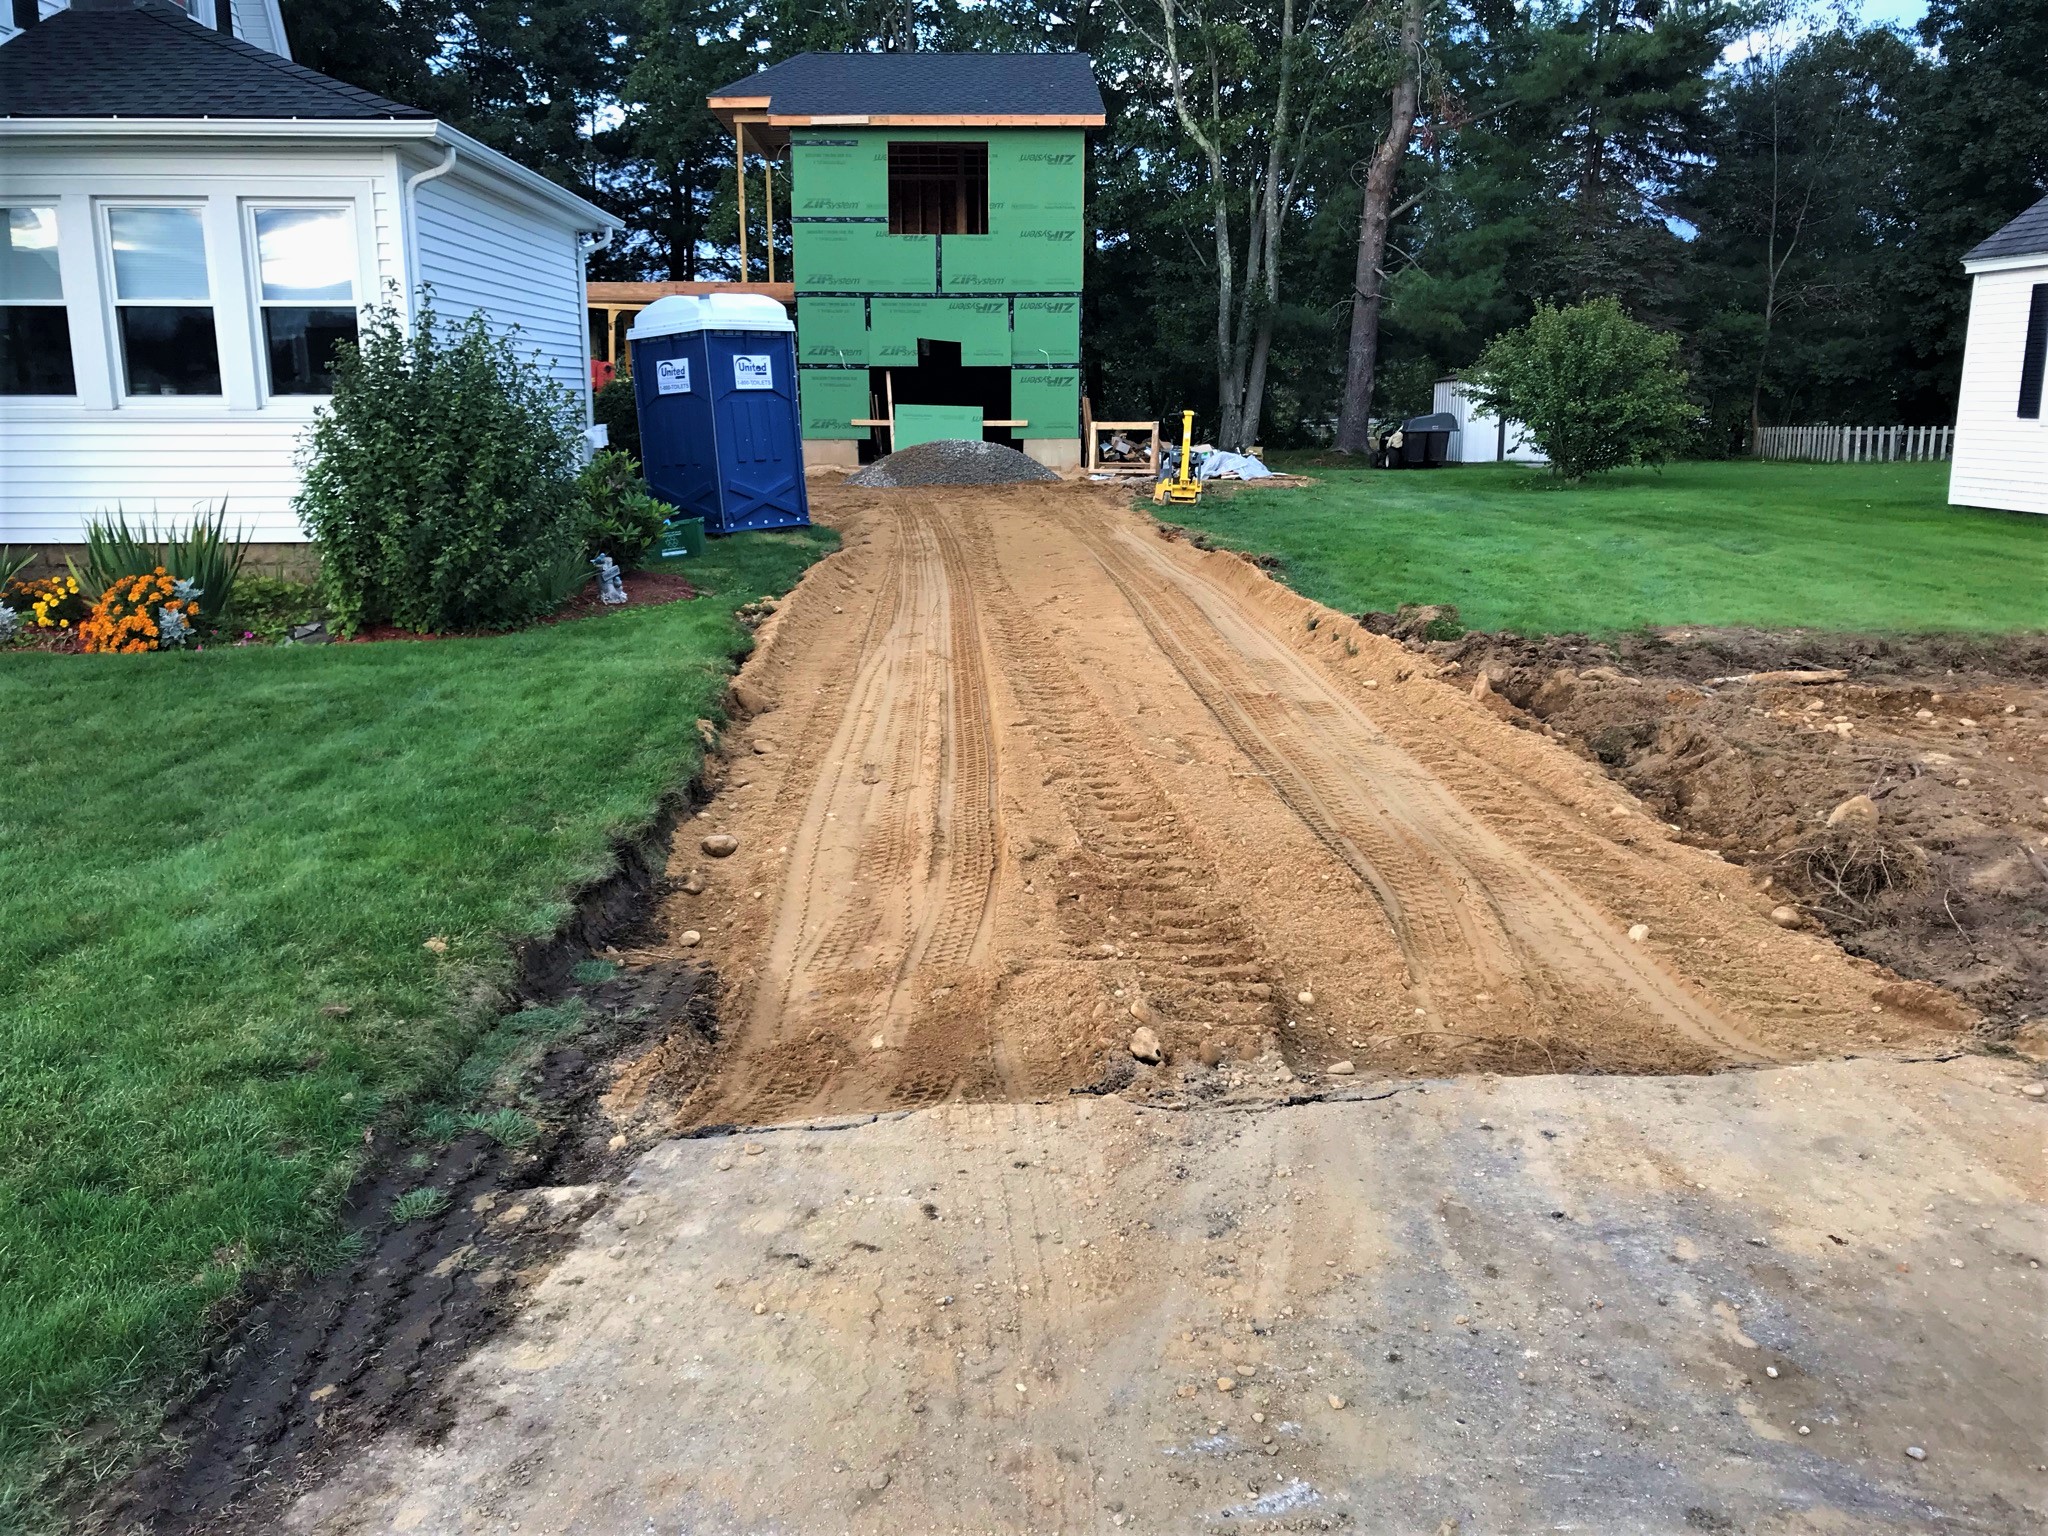
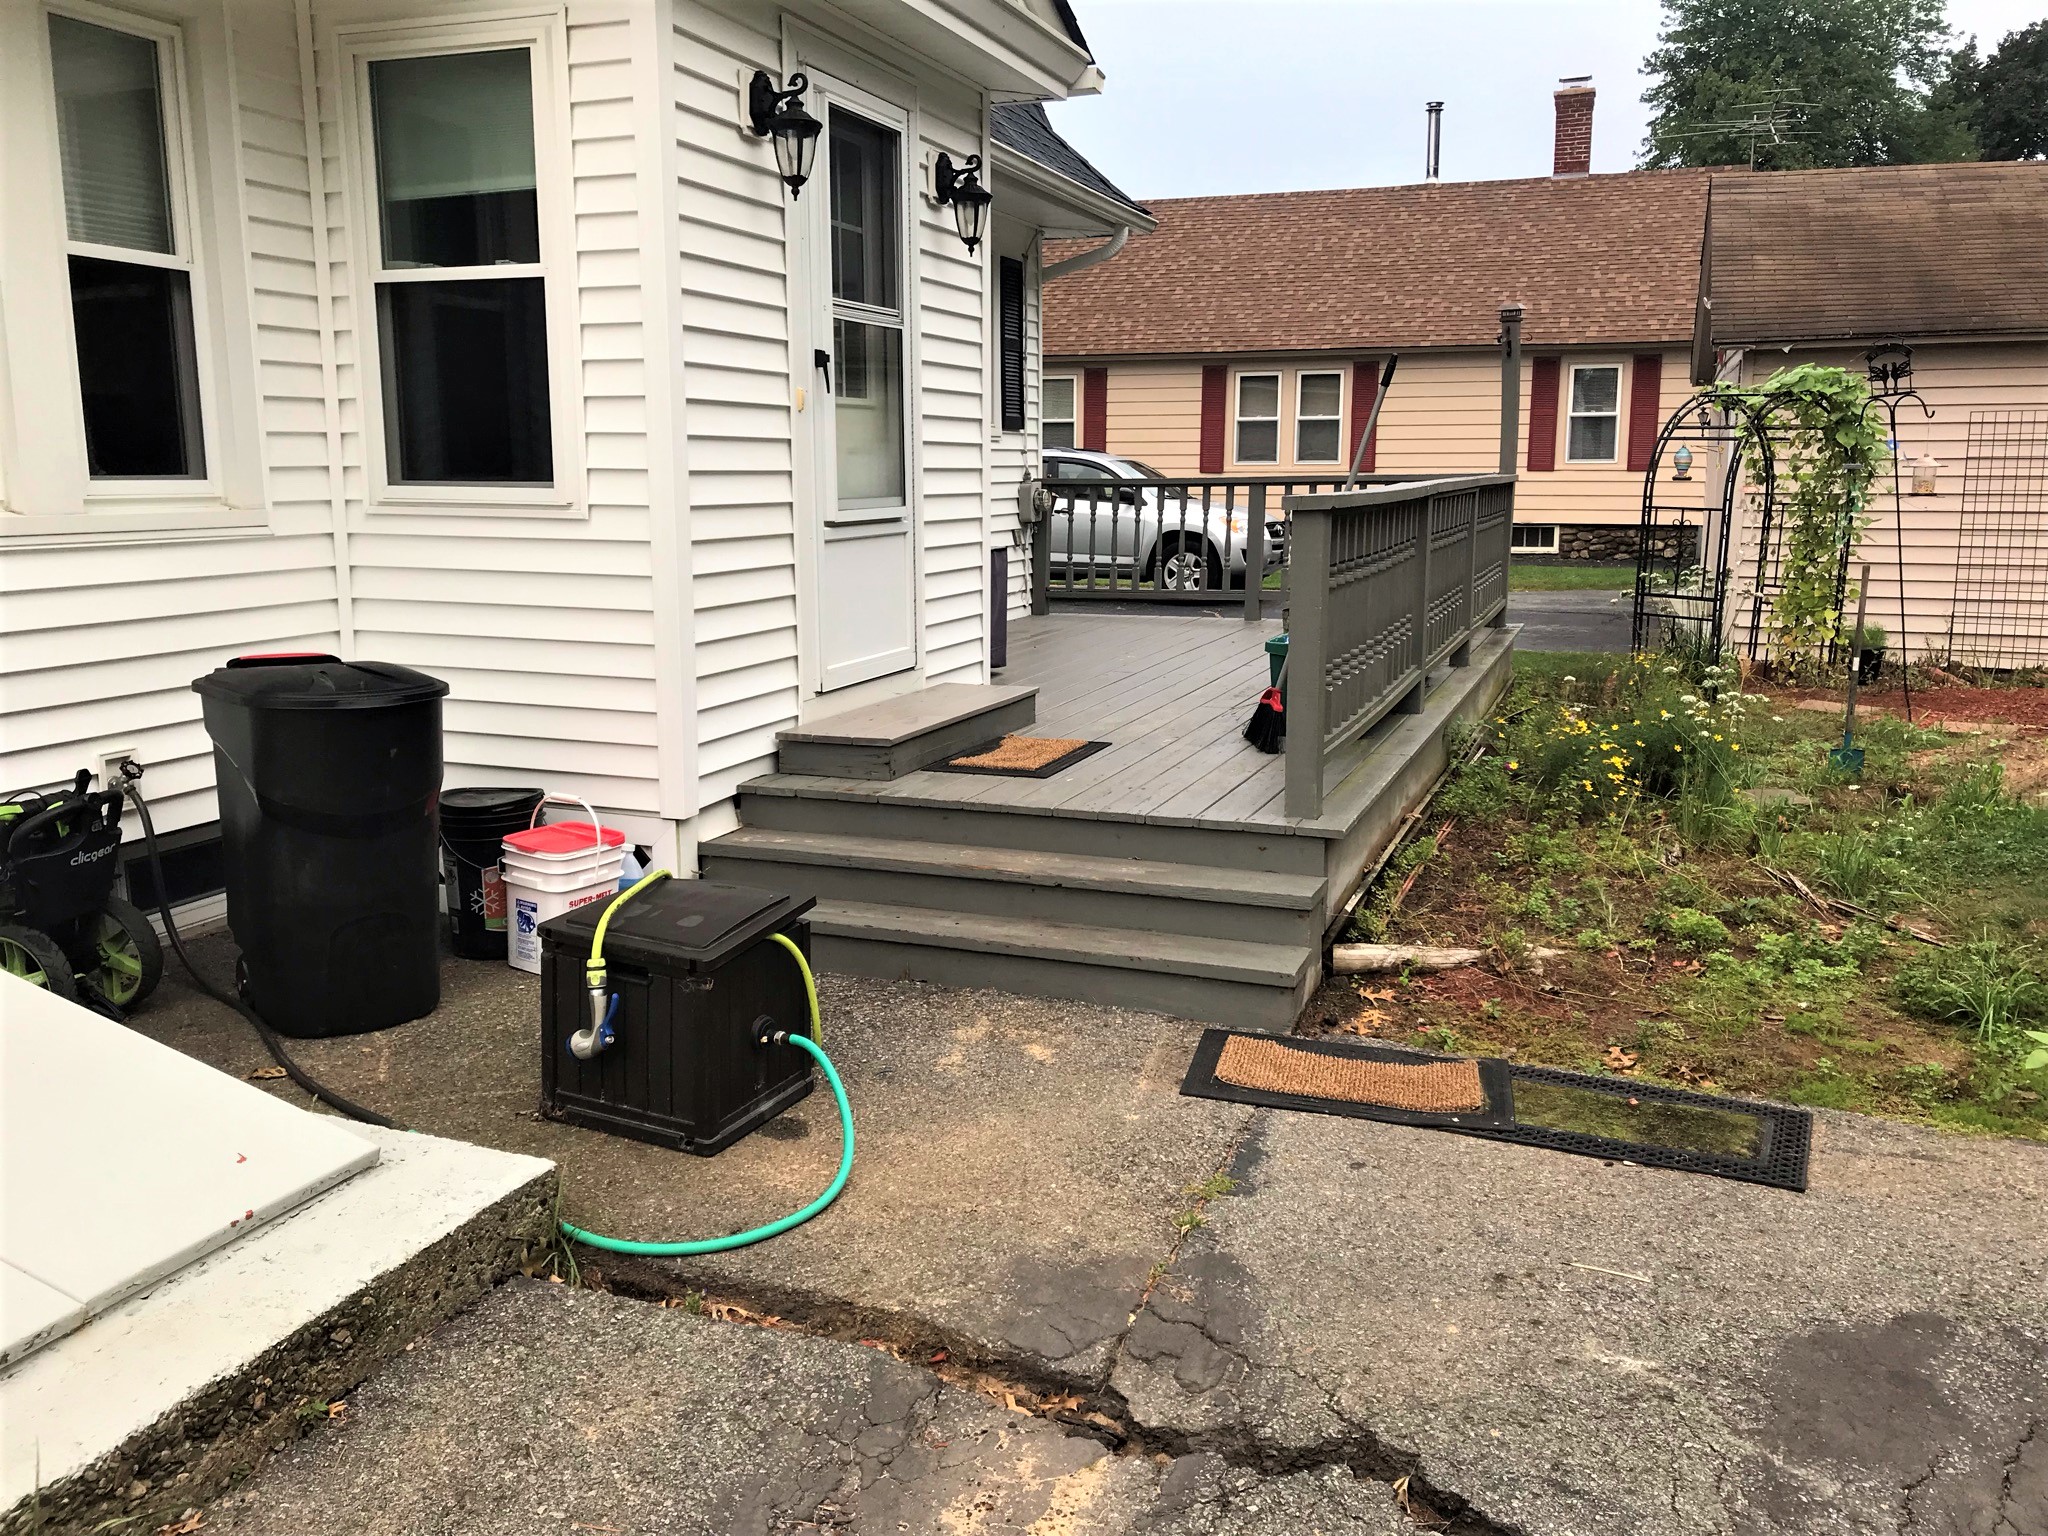
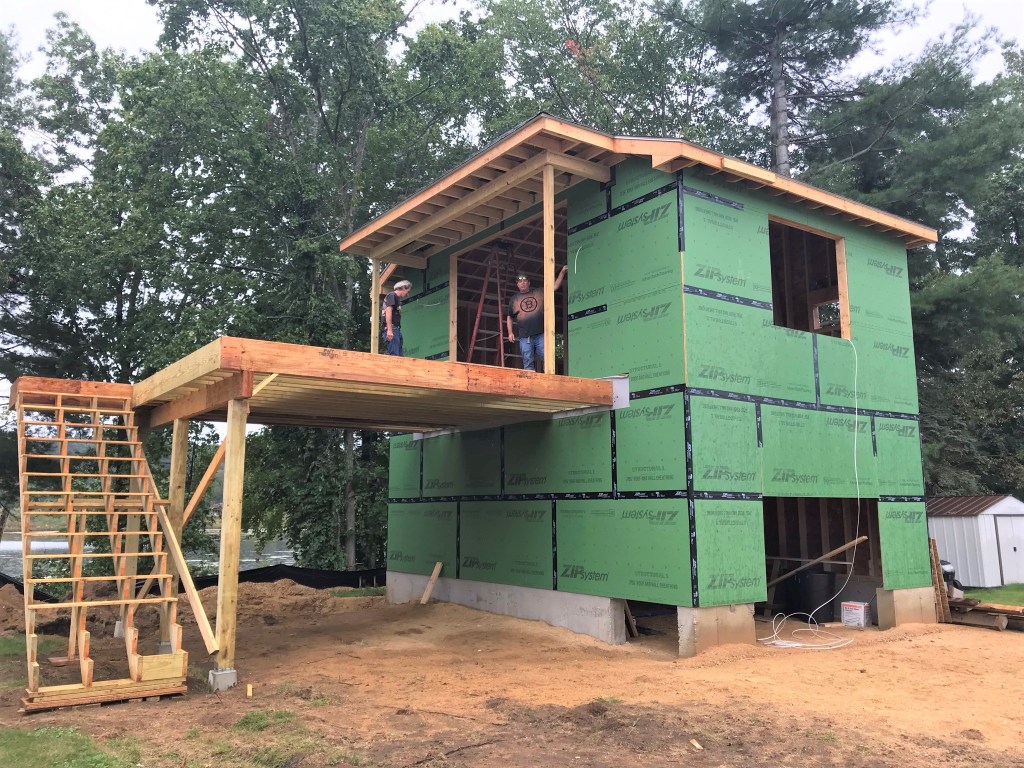
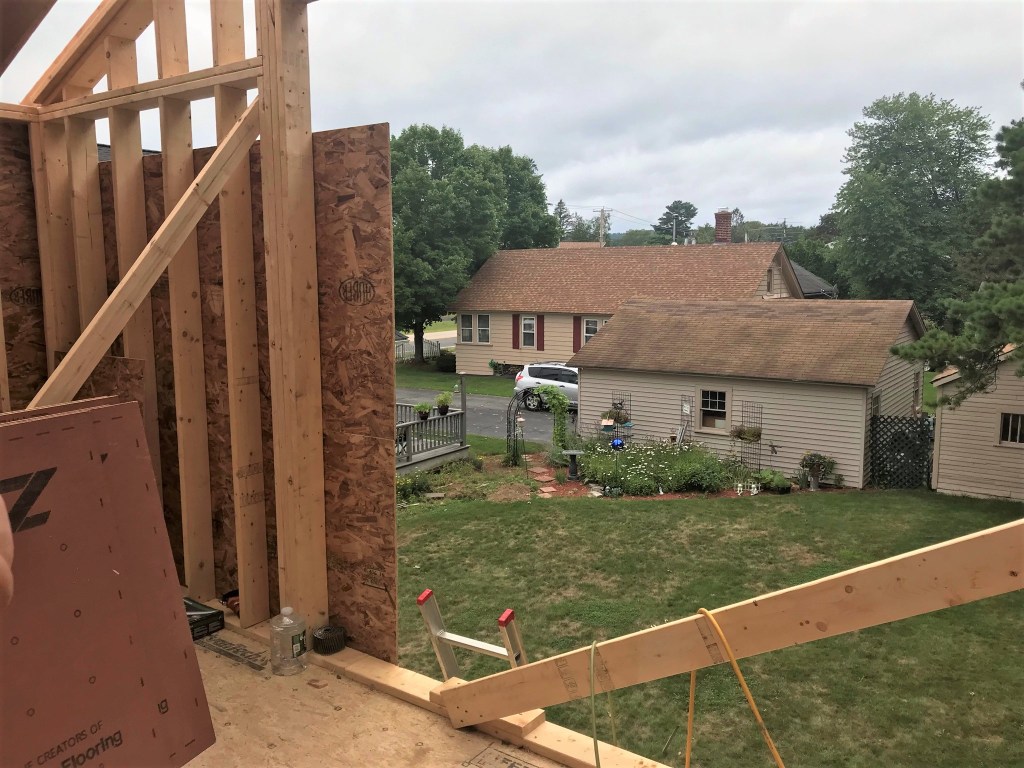
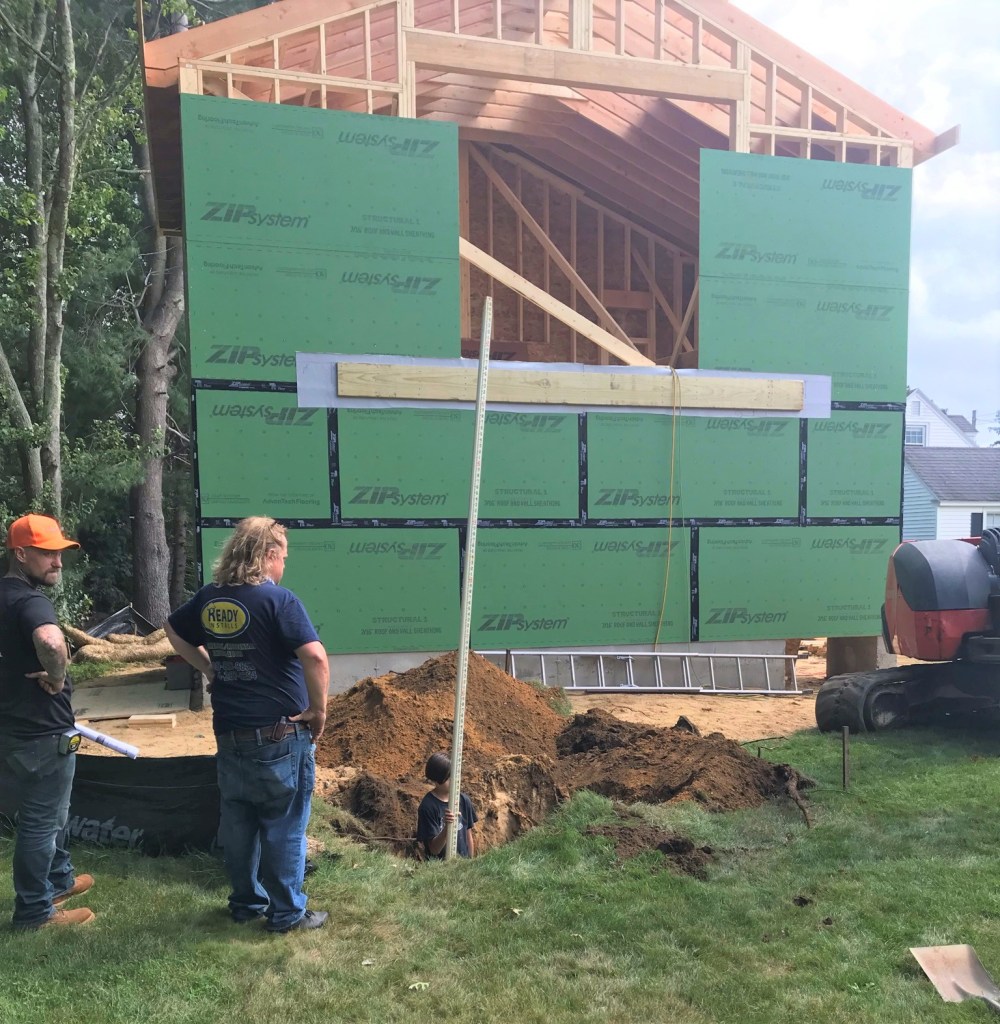
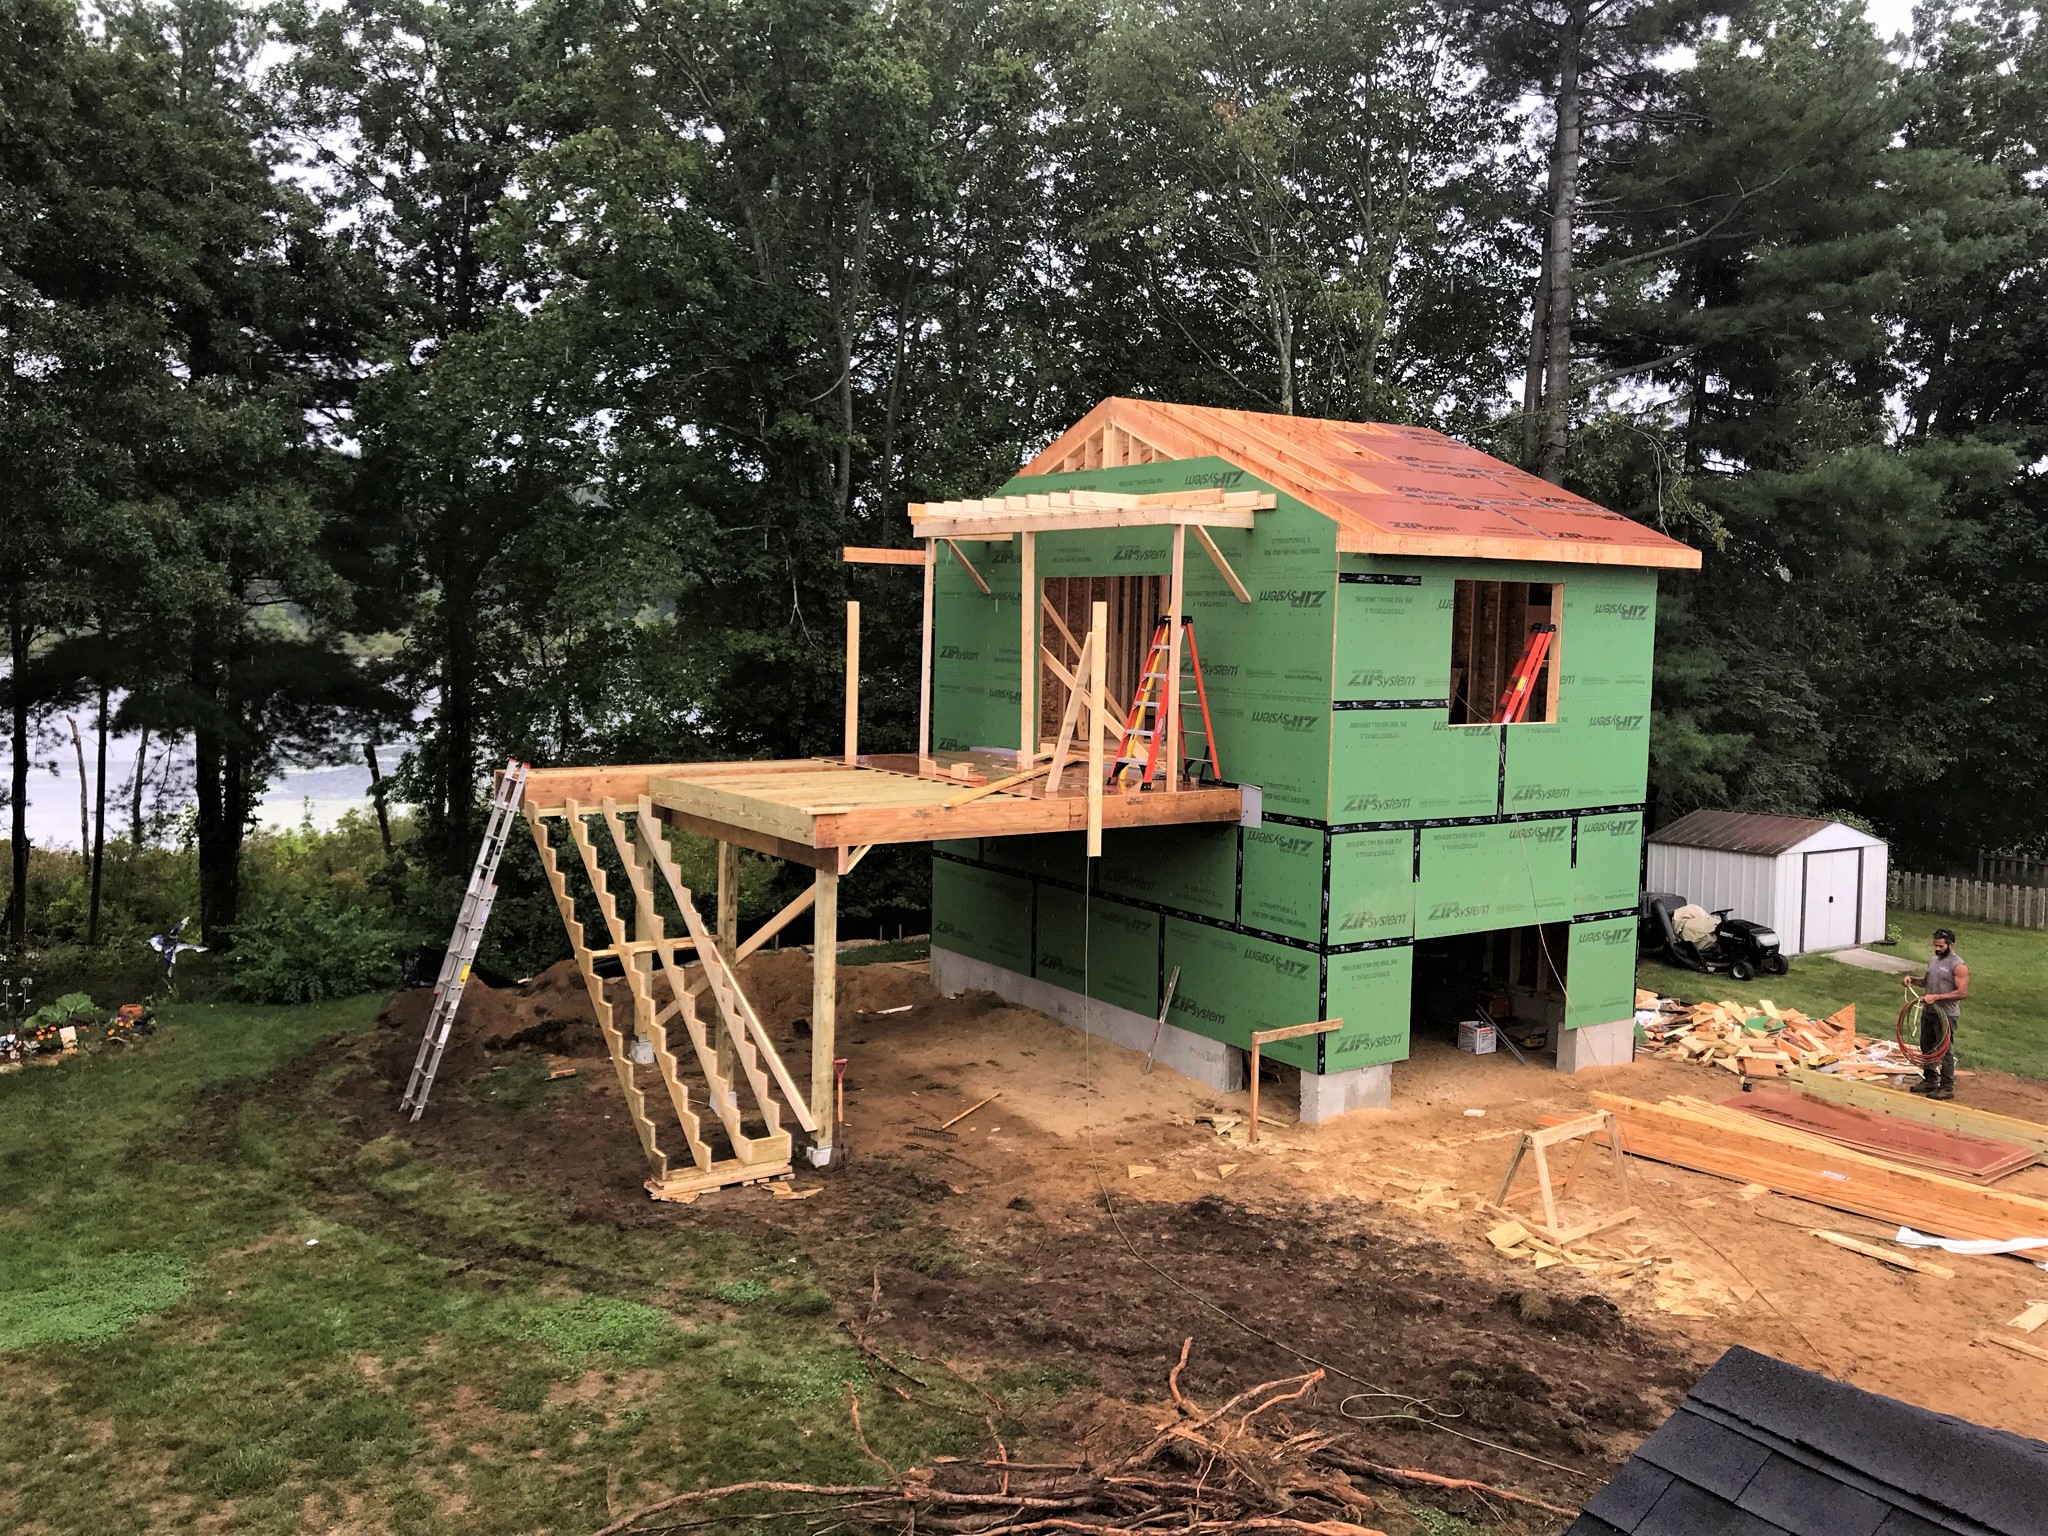
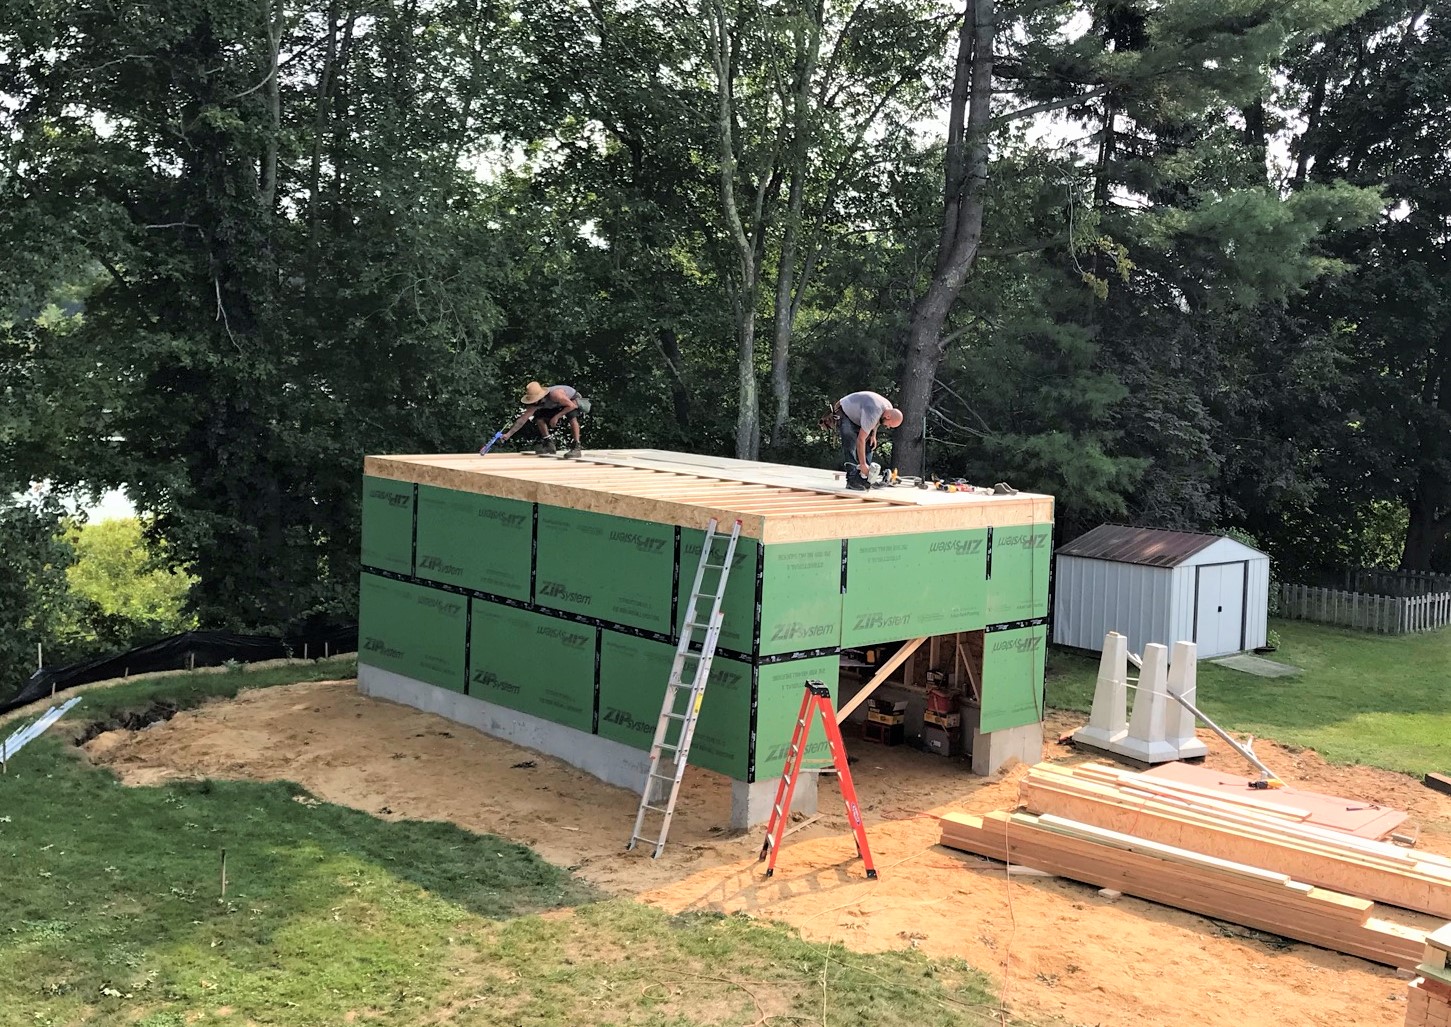
Lucky week 13 was October 10-16 on the project. Some really beautiful progress – though the delay in windows and doors has kept interior work from progressing. Therefore, for this post I have mostly deck updates plus a few hobby tidbits at the end for my dedicated hobby crowd.
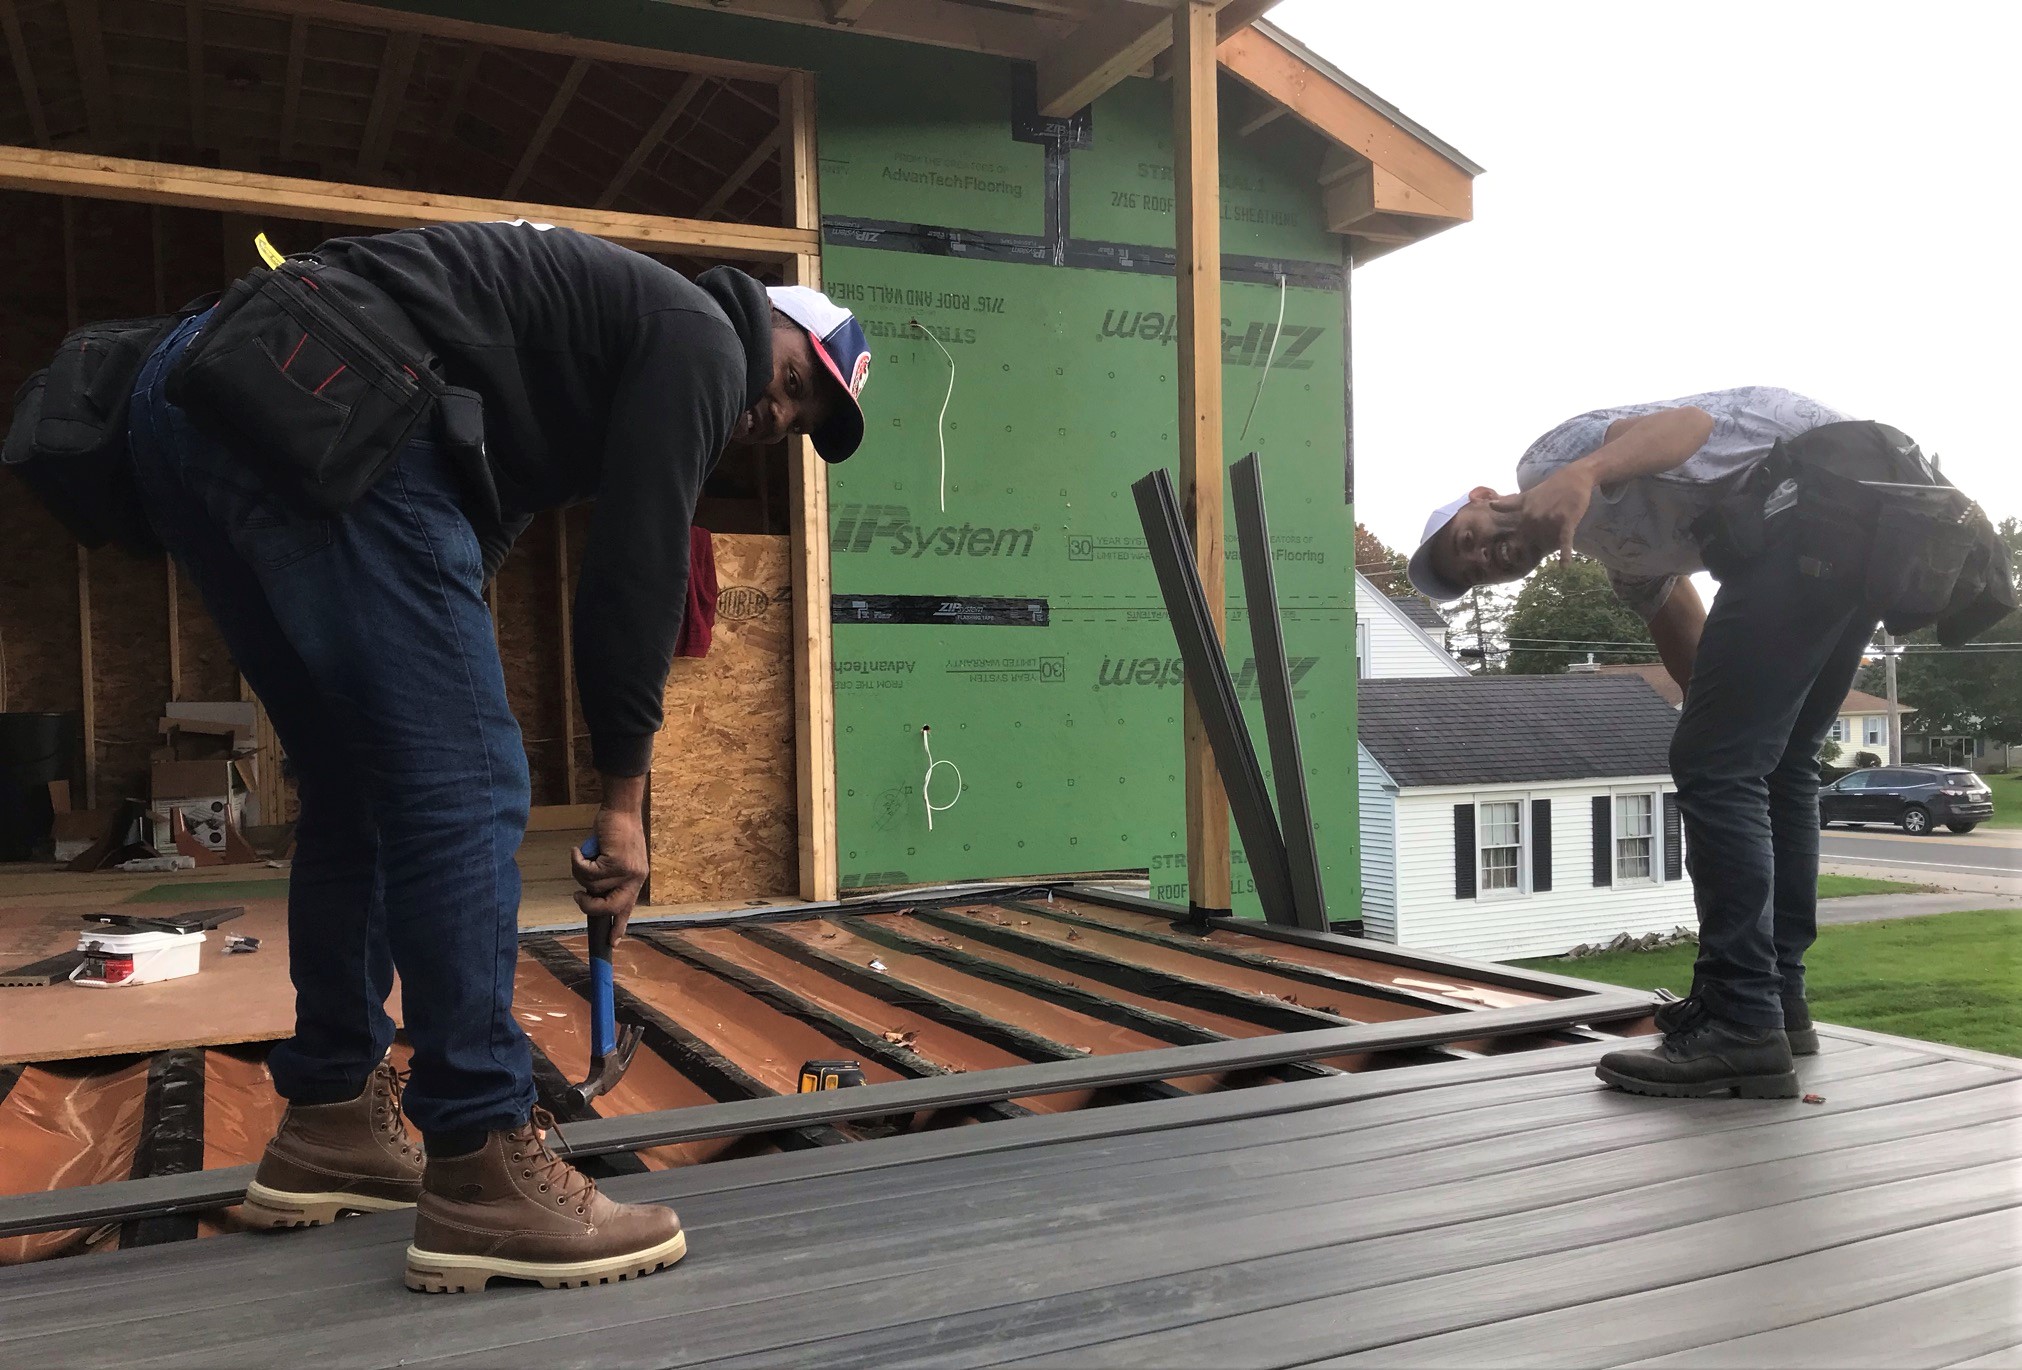
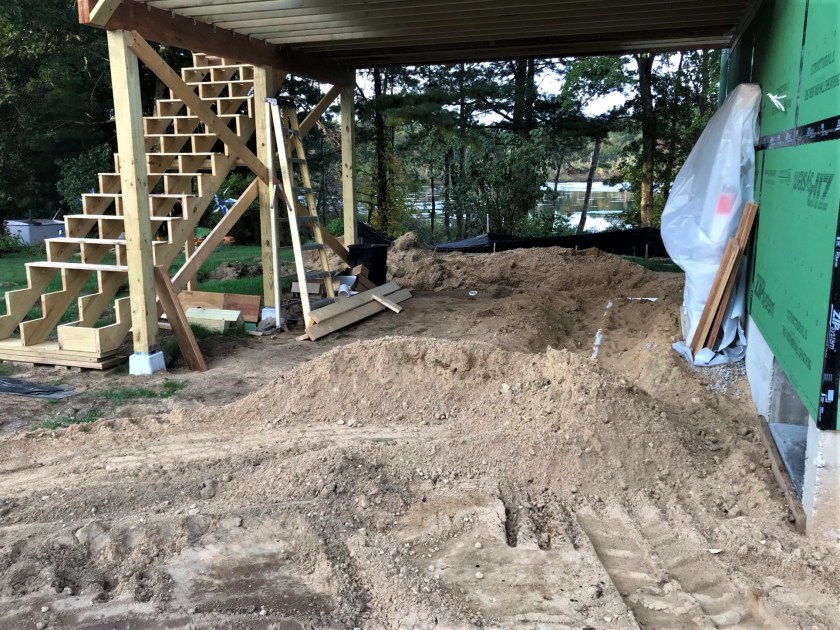
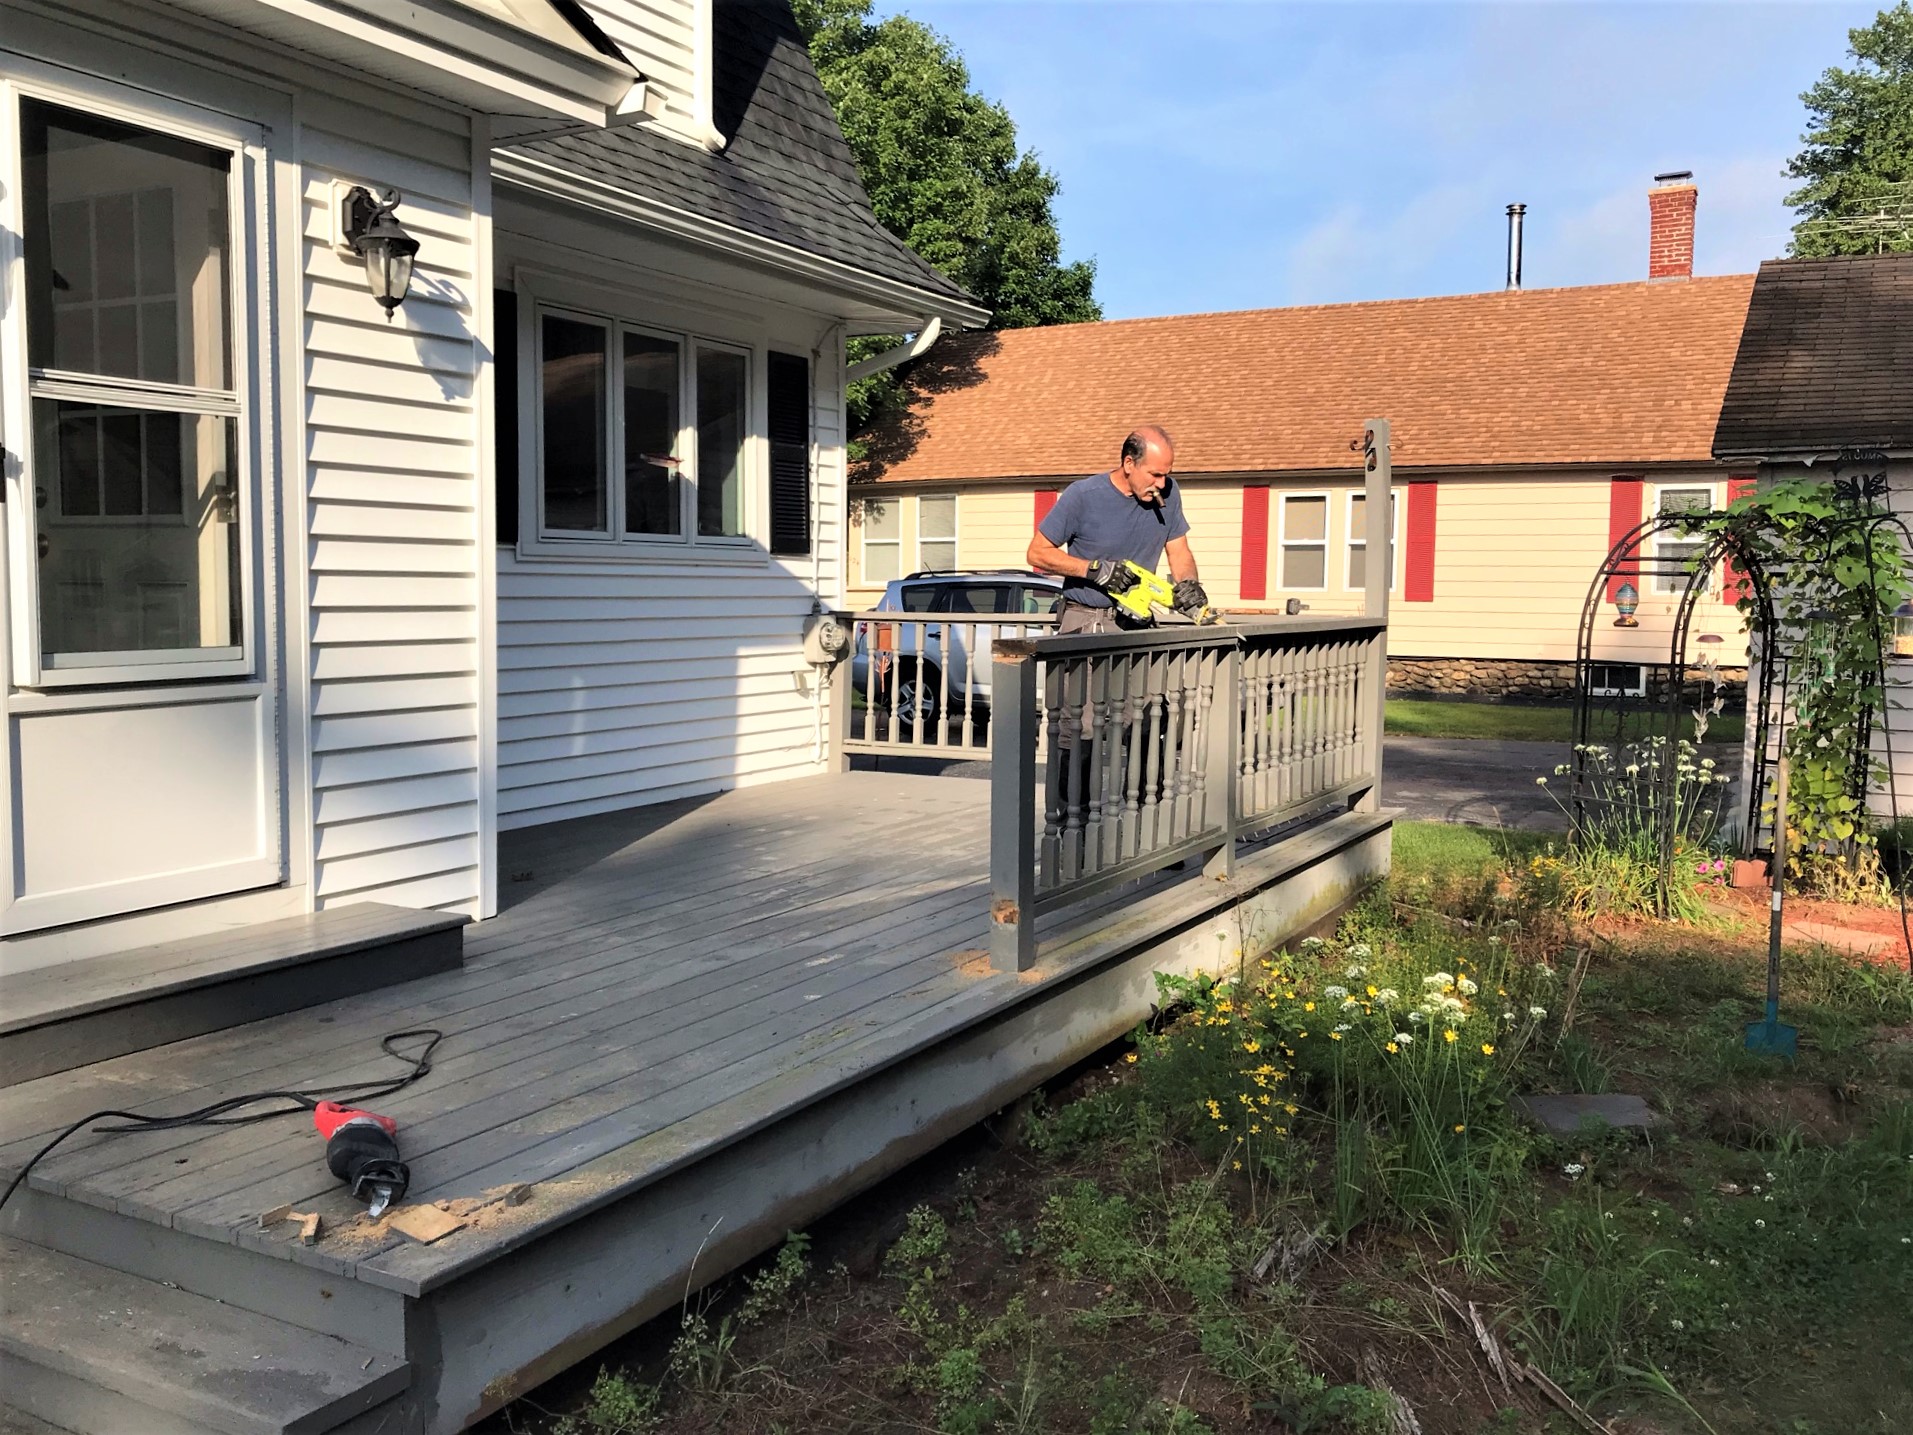
On Monday, deck proceeded on the deck stairs and fascia.
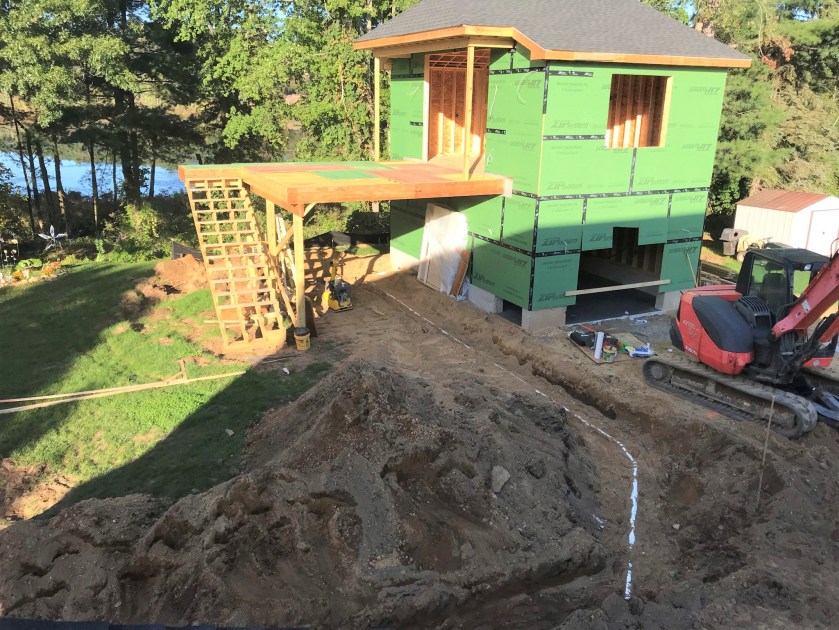
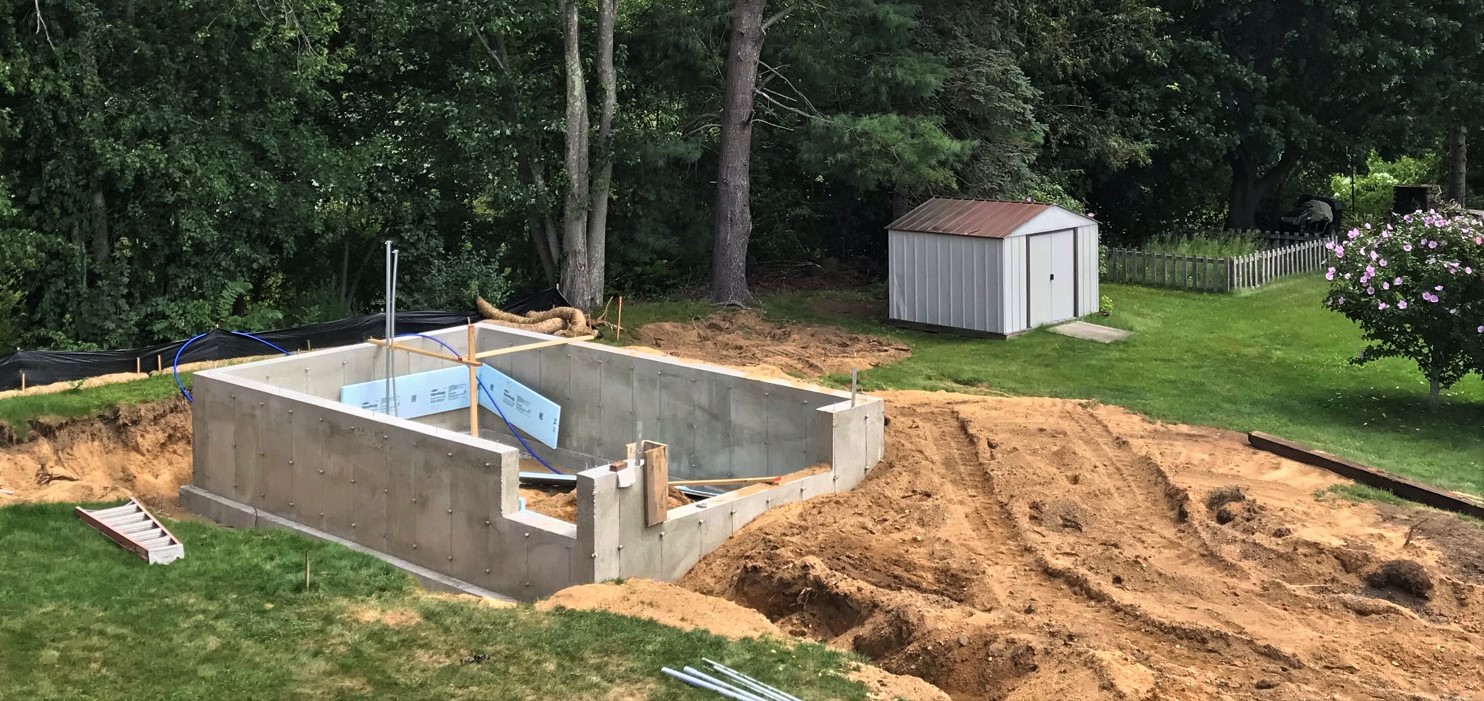
Cutting up and moving up PVC fascia for the garage deck. Decking being enthusiastically installed over the Trex rain gutter system you saw last week.Monday progress at the end of the day.
On Monday, our new Weber gas grill was delivered from Home Depot. It’s for natural gas so we can avoid the hassle of propane tanks in the future (though Lynn wants to use both). This is to be mounted on the new gas line on the back deck. We also got a nice drip mat and a cover for it. On Tuesday, Lynn and I put it together with the help of the manual and the Weber app. The process took us just under 4 hours (Weber says it should take 90 minutes – no way), and we worked well together to get it done. That means we are still happily married and no murders occurred or were even contemplated – which can be side effects of joint assembly! Of course, we can’t use it until the gas line is put in for it from the house.
Happy wife, happy life – and the new grill.
The rest of Tuesday saw work on the stairs to the garage deck and the deck itself.
Deck and stair work on Tuesday.End of day progress on Tuesday.
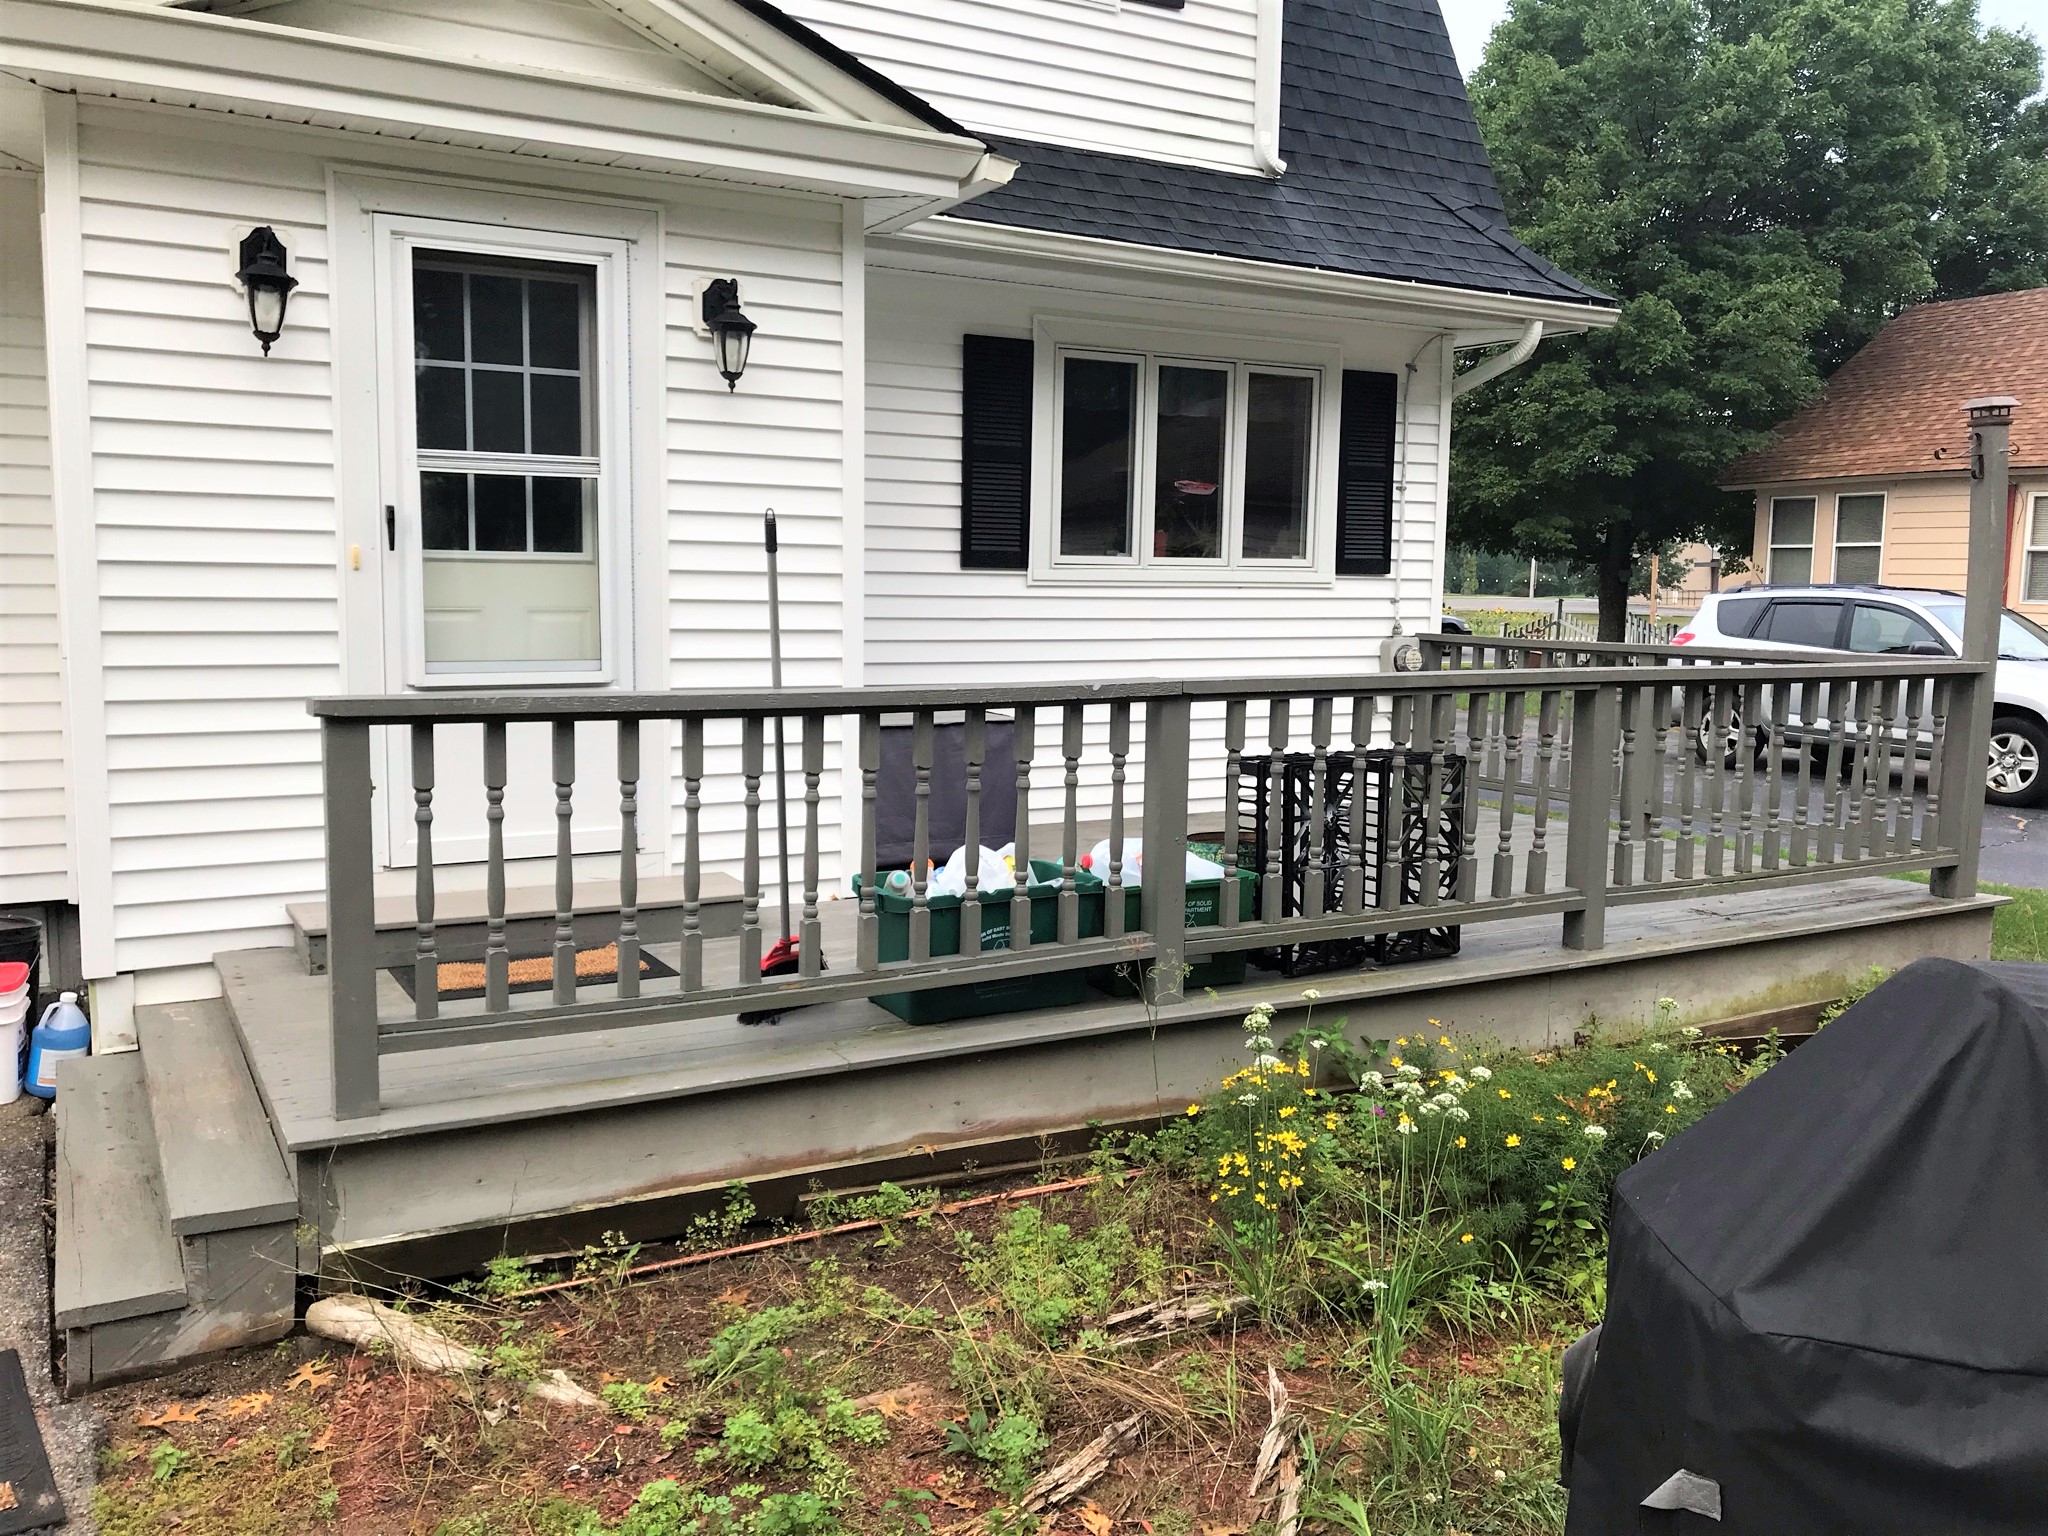
Wednesday saw more of the same.
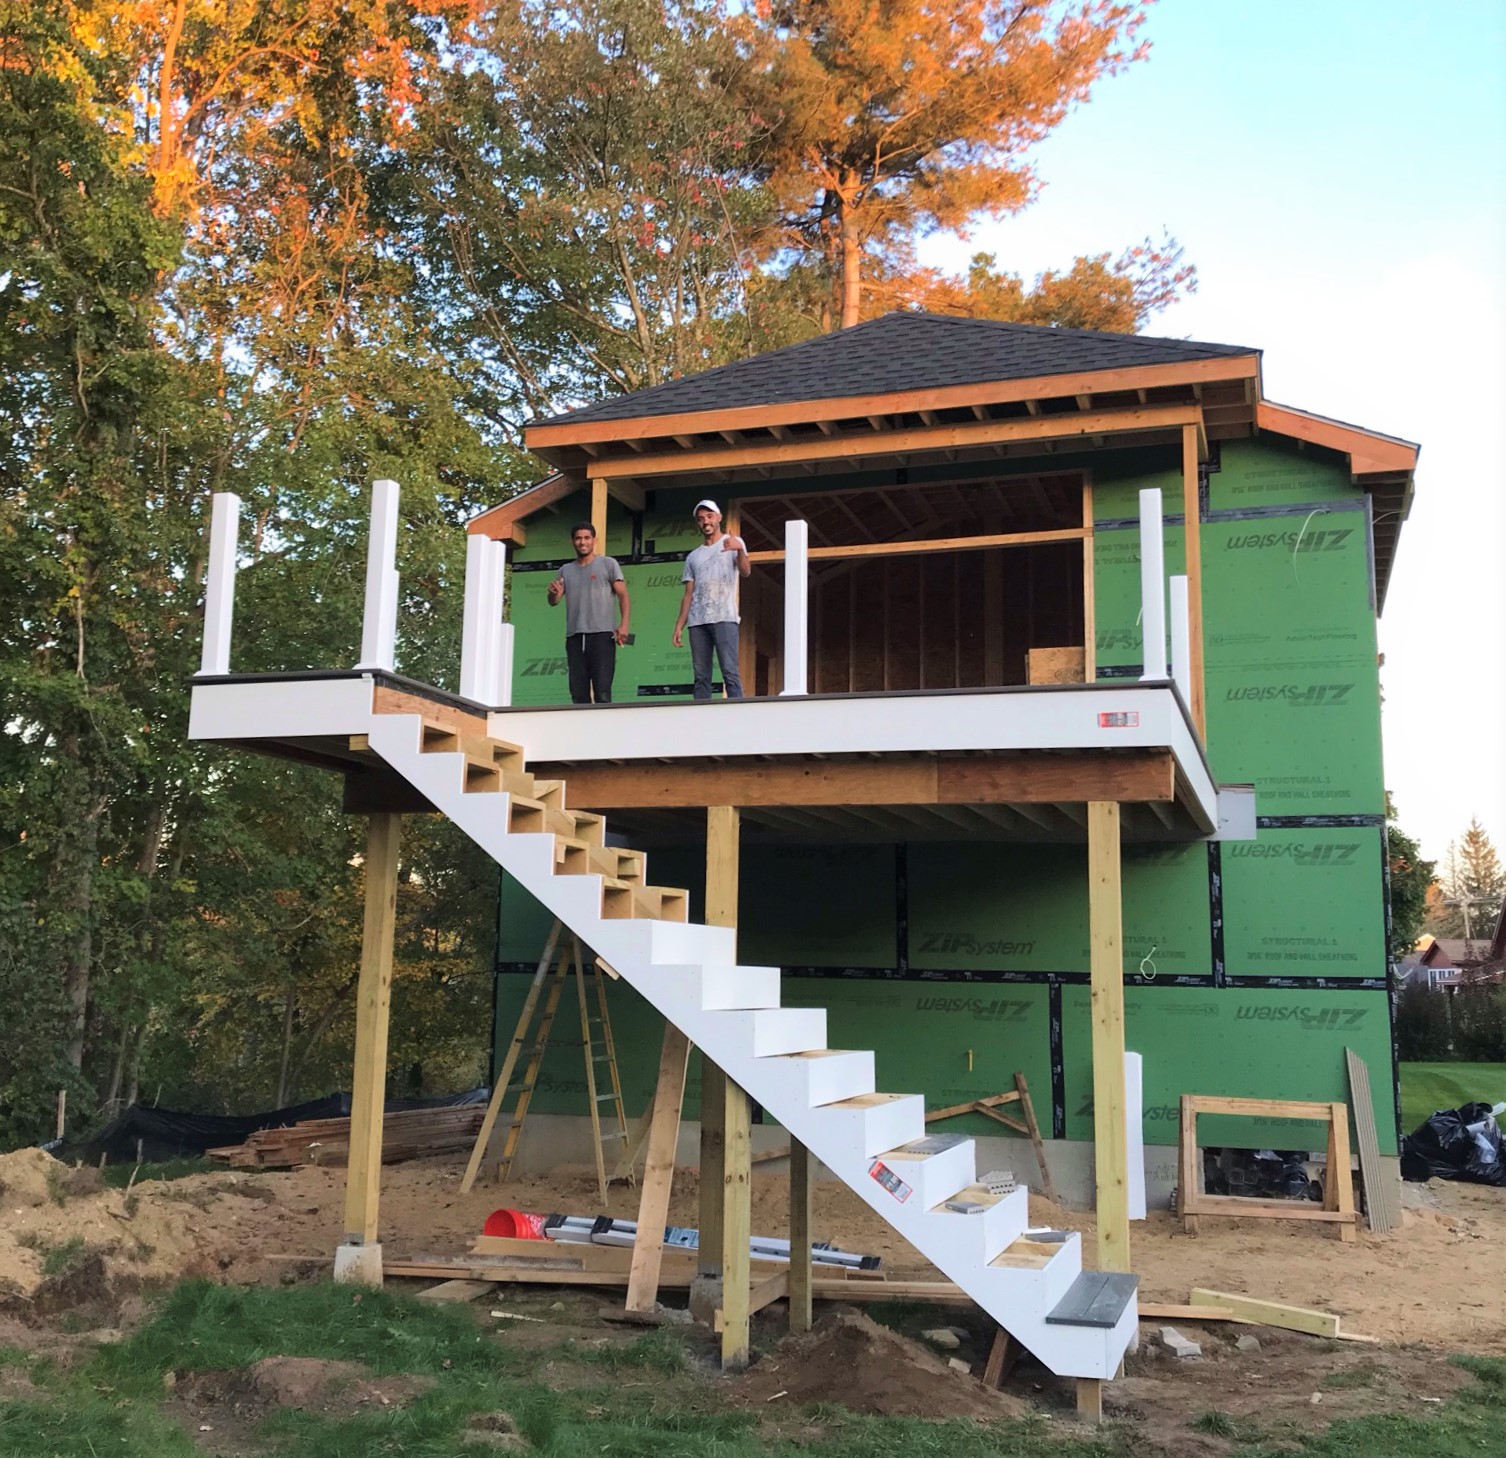
Morning work Wednesday.Now we had stairs all the way up on Wednesday!
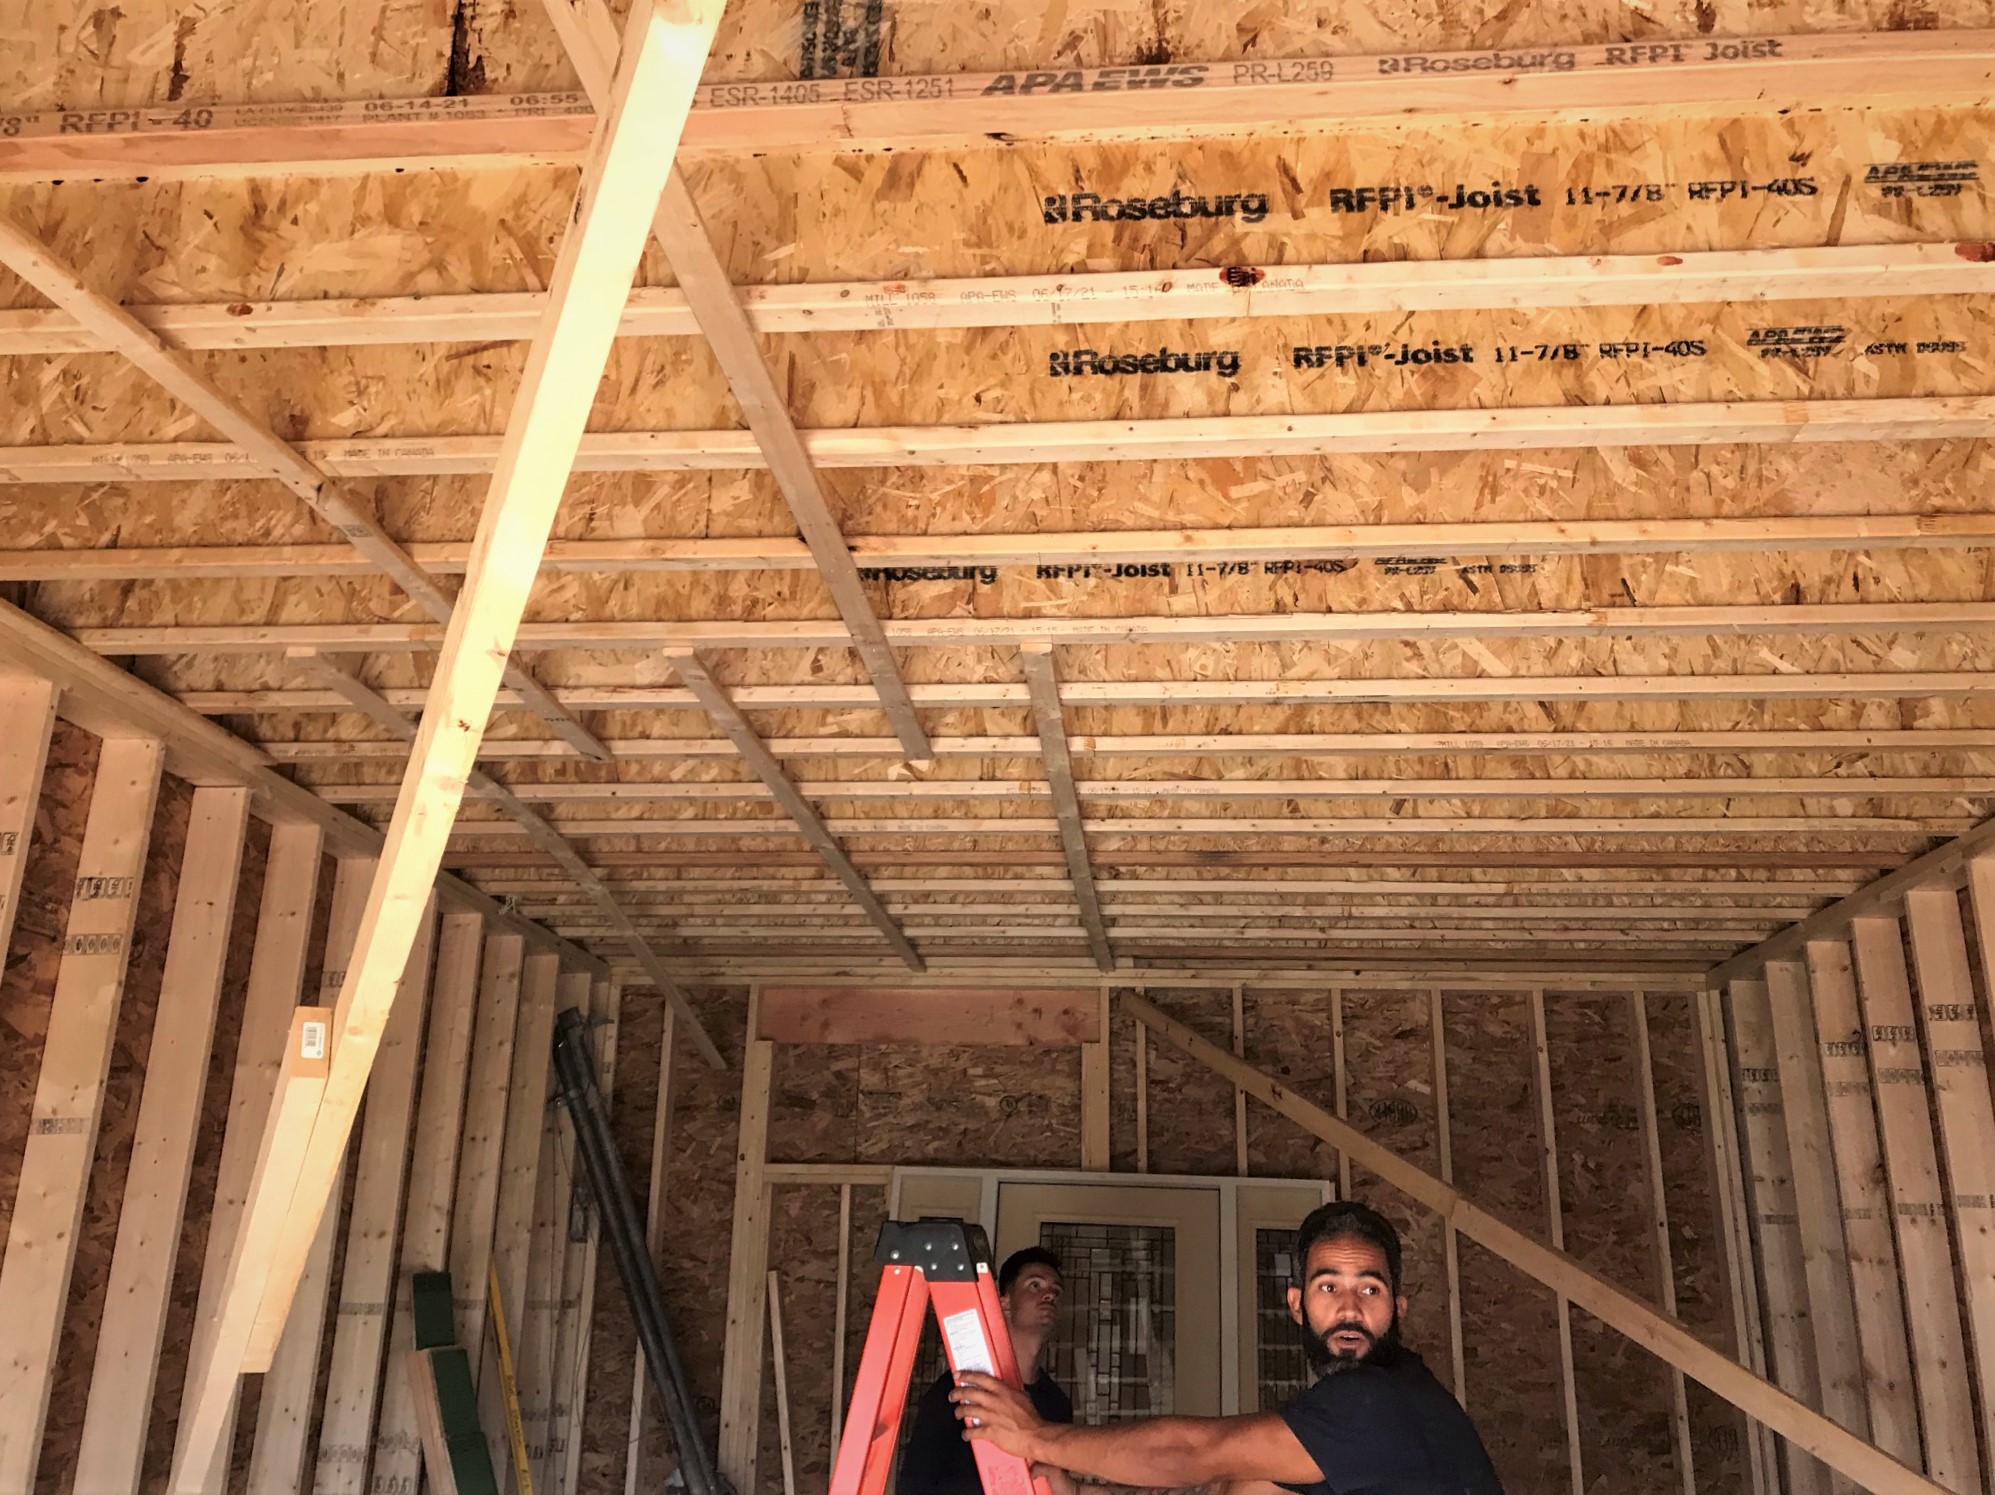
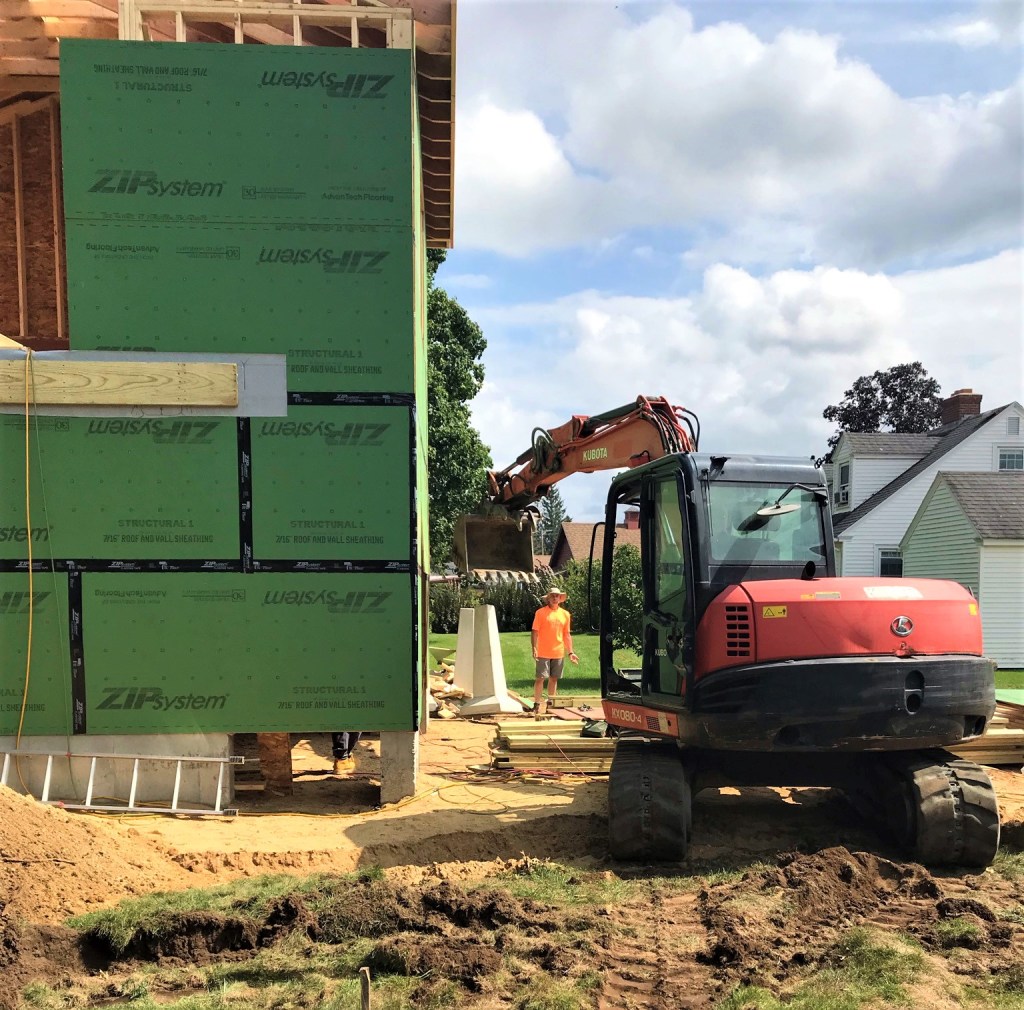
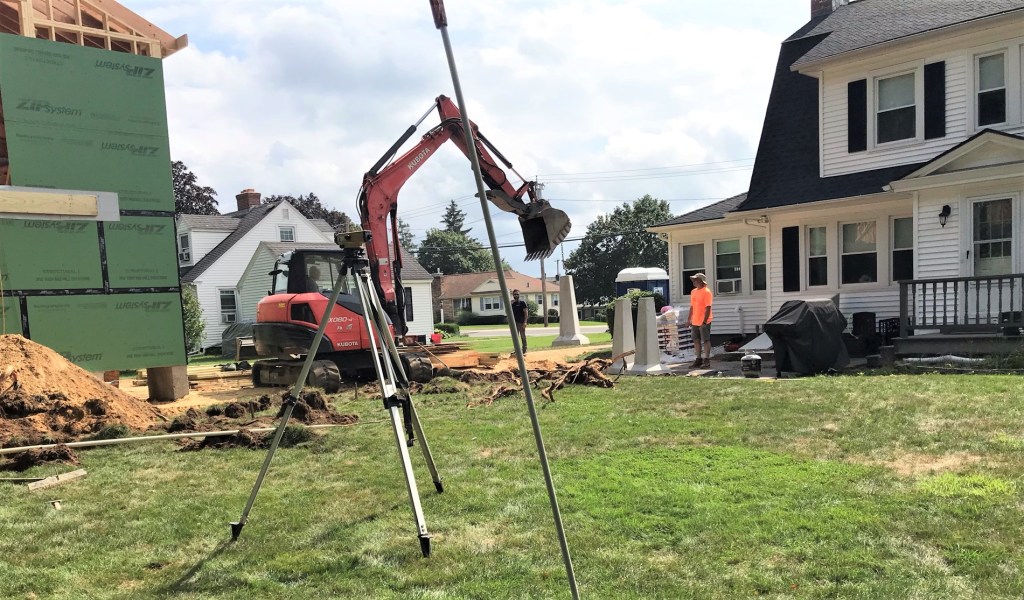
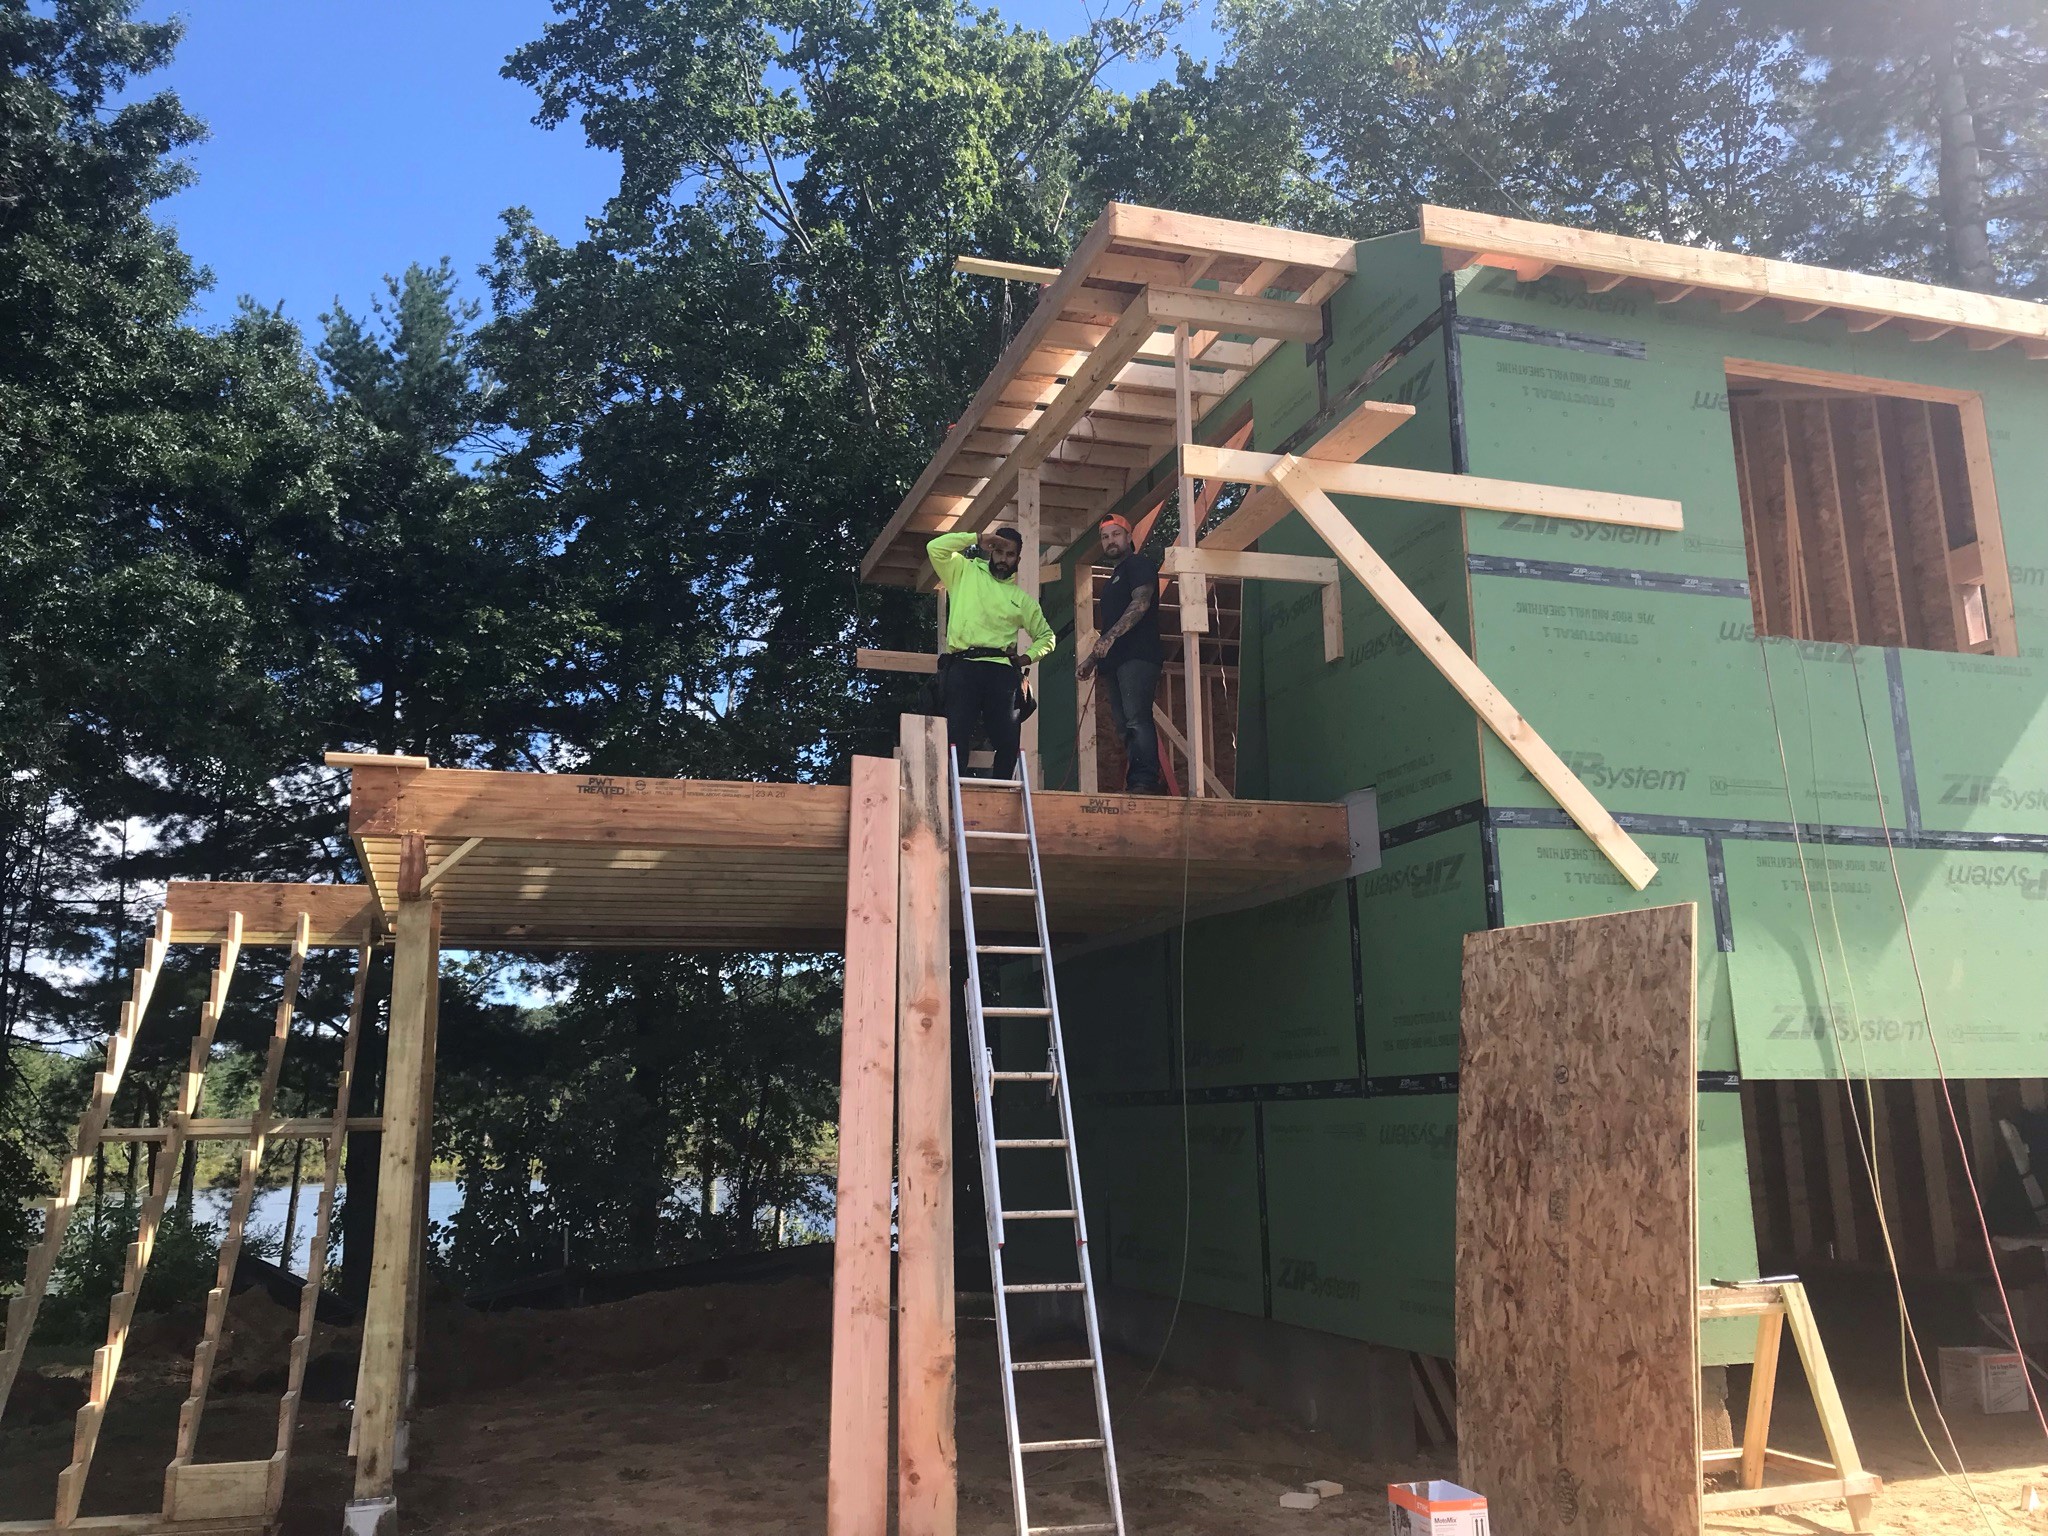
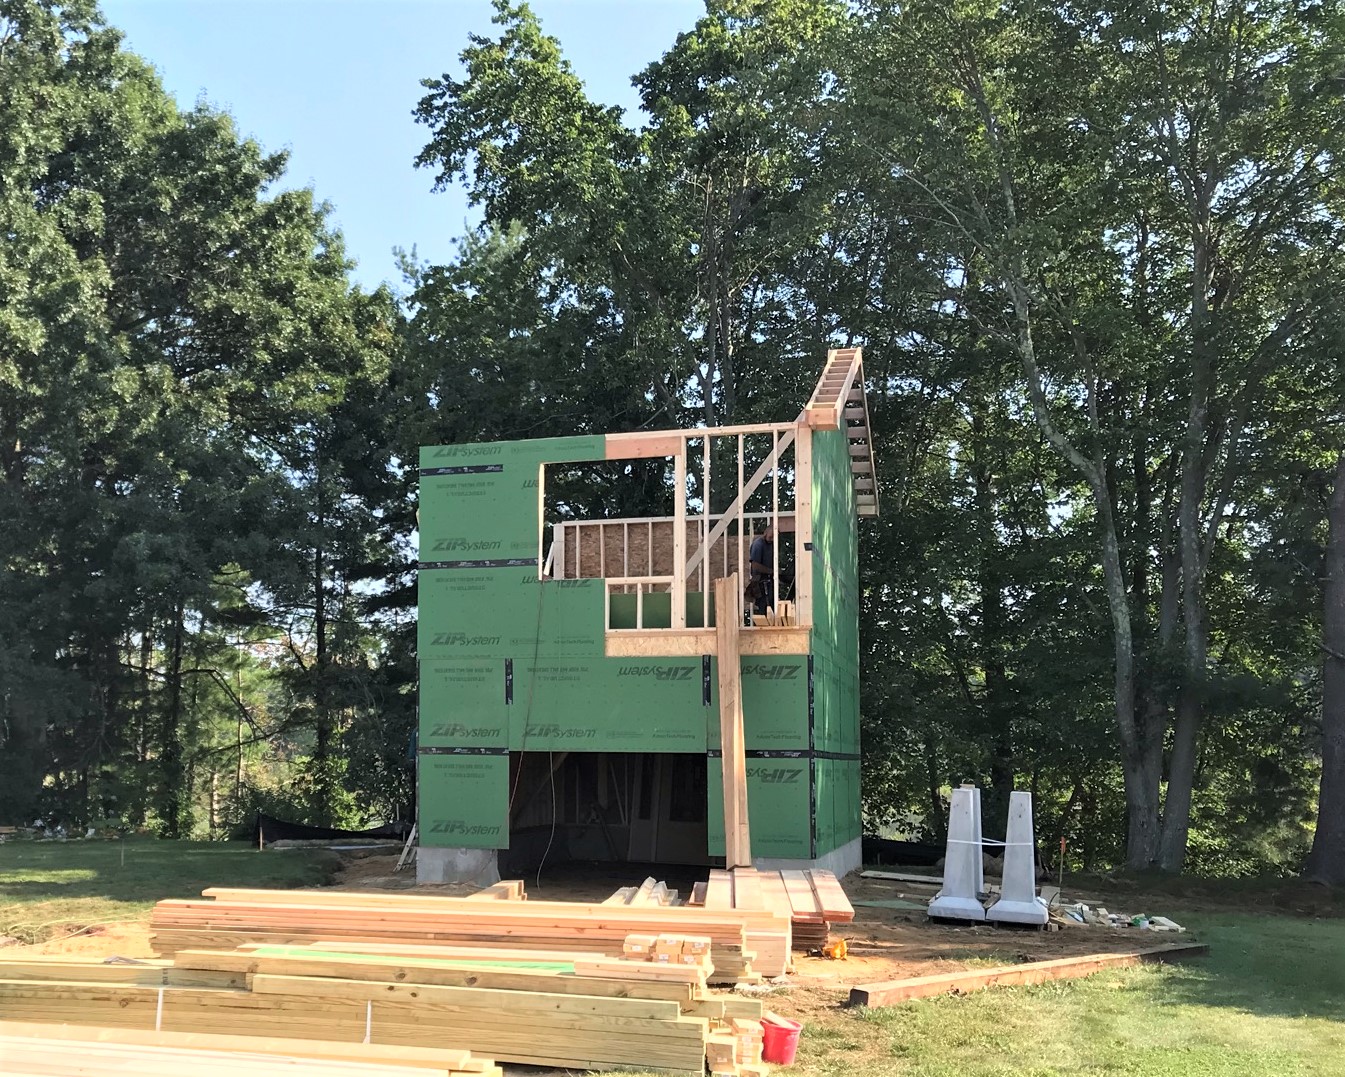
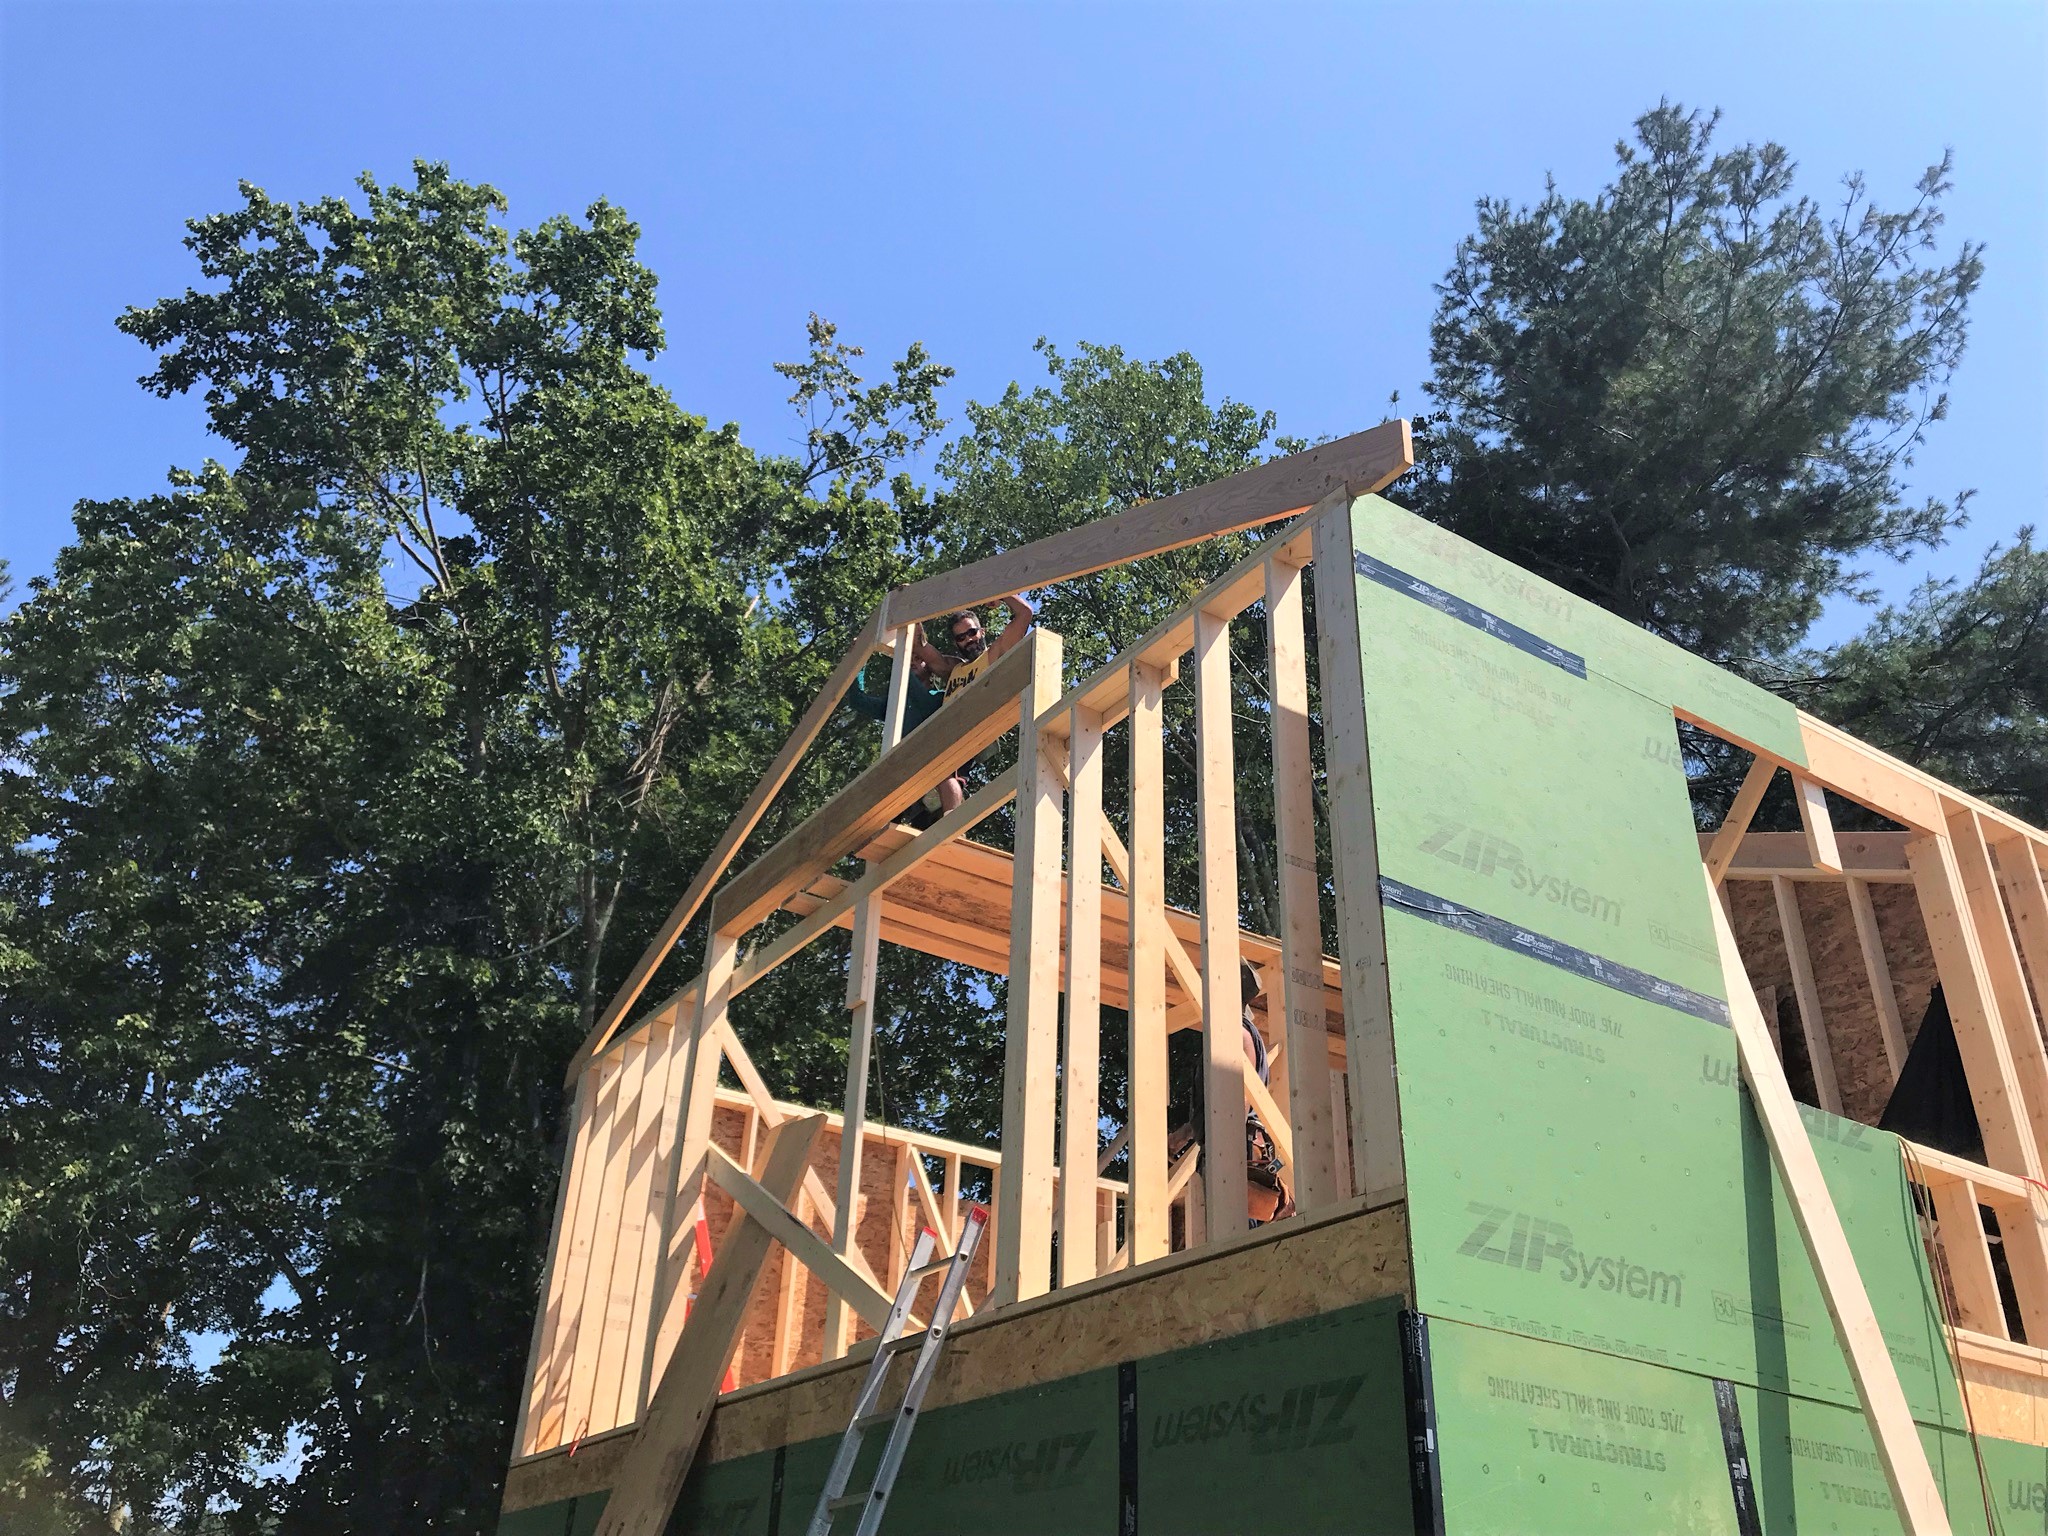
Thursday saw a couple of things happen. First, Jonny Victor got a boom truck in and all the blue board got delivered – though work on it can’t start until – yes – windows and doors are in. At least this saves time climbing the new stairs.
Boom truck delivery of blue board upstairs. Some went below as well.
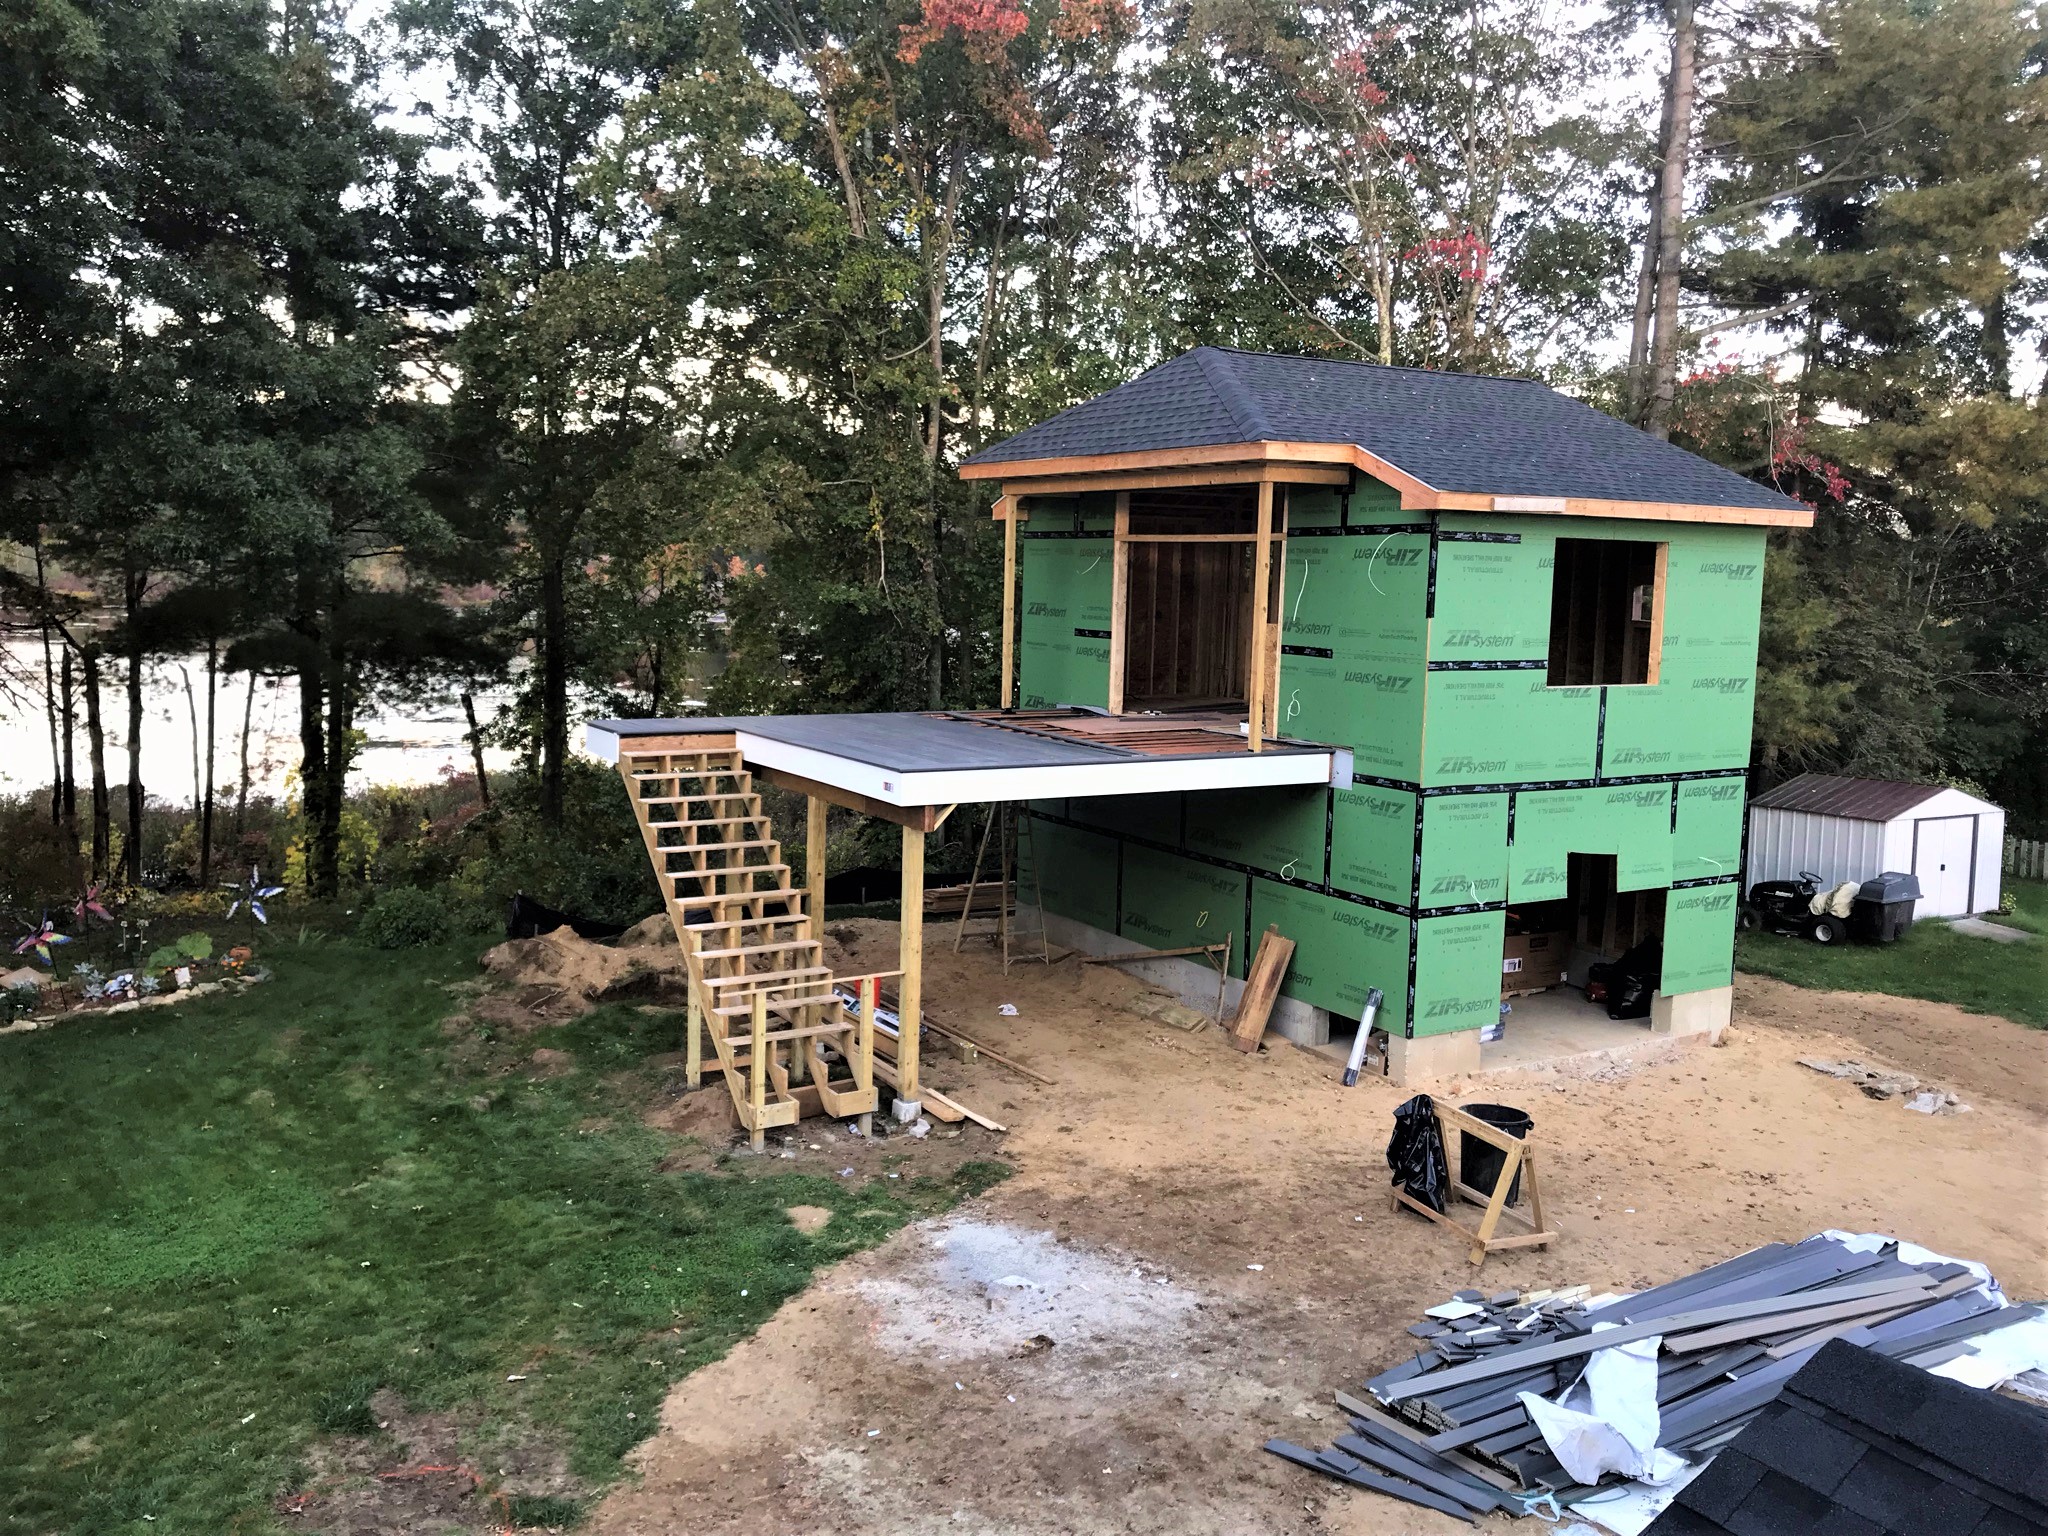
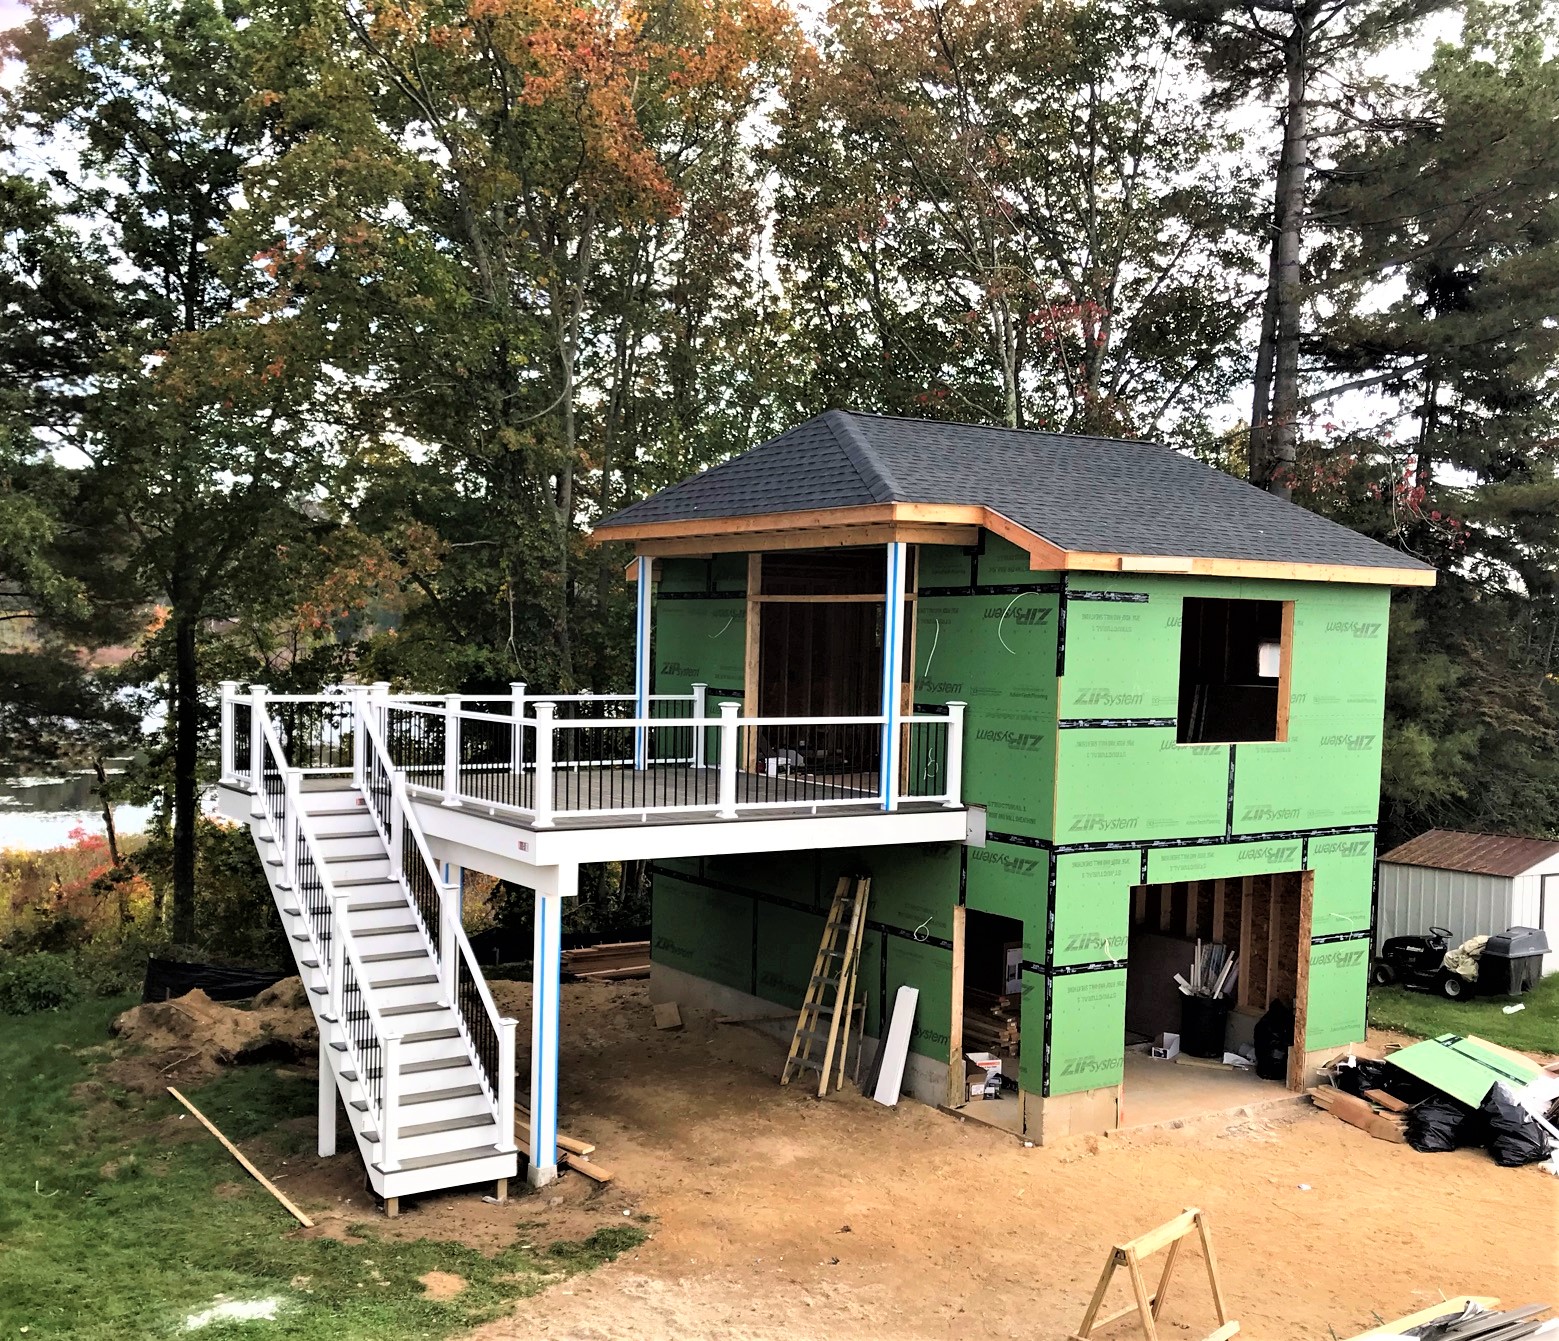
The deck and stairs just got more attractive as the week went on.
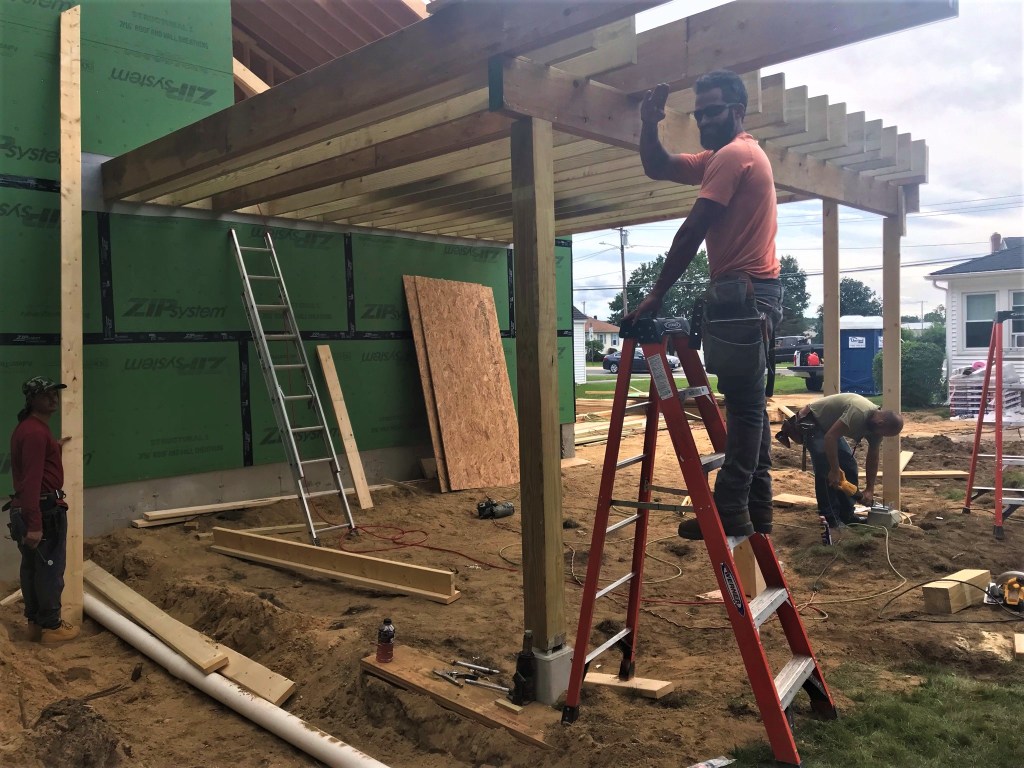
Work began on the columns sheathing.Different angle view, Thursday mid-day.View from the back mid-day Thursday.
It was too dark to get a good shot of the total work – but Friday came and the fog, but it looked like this below.
Happy Friday morning showing fog and Thursday progress.
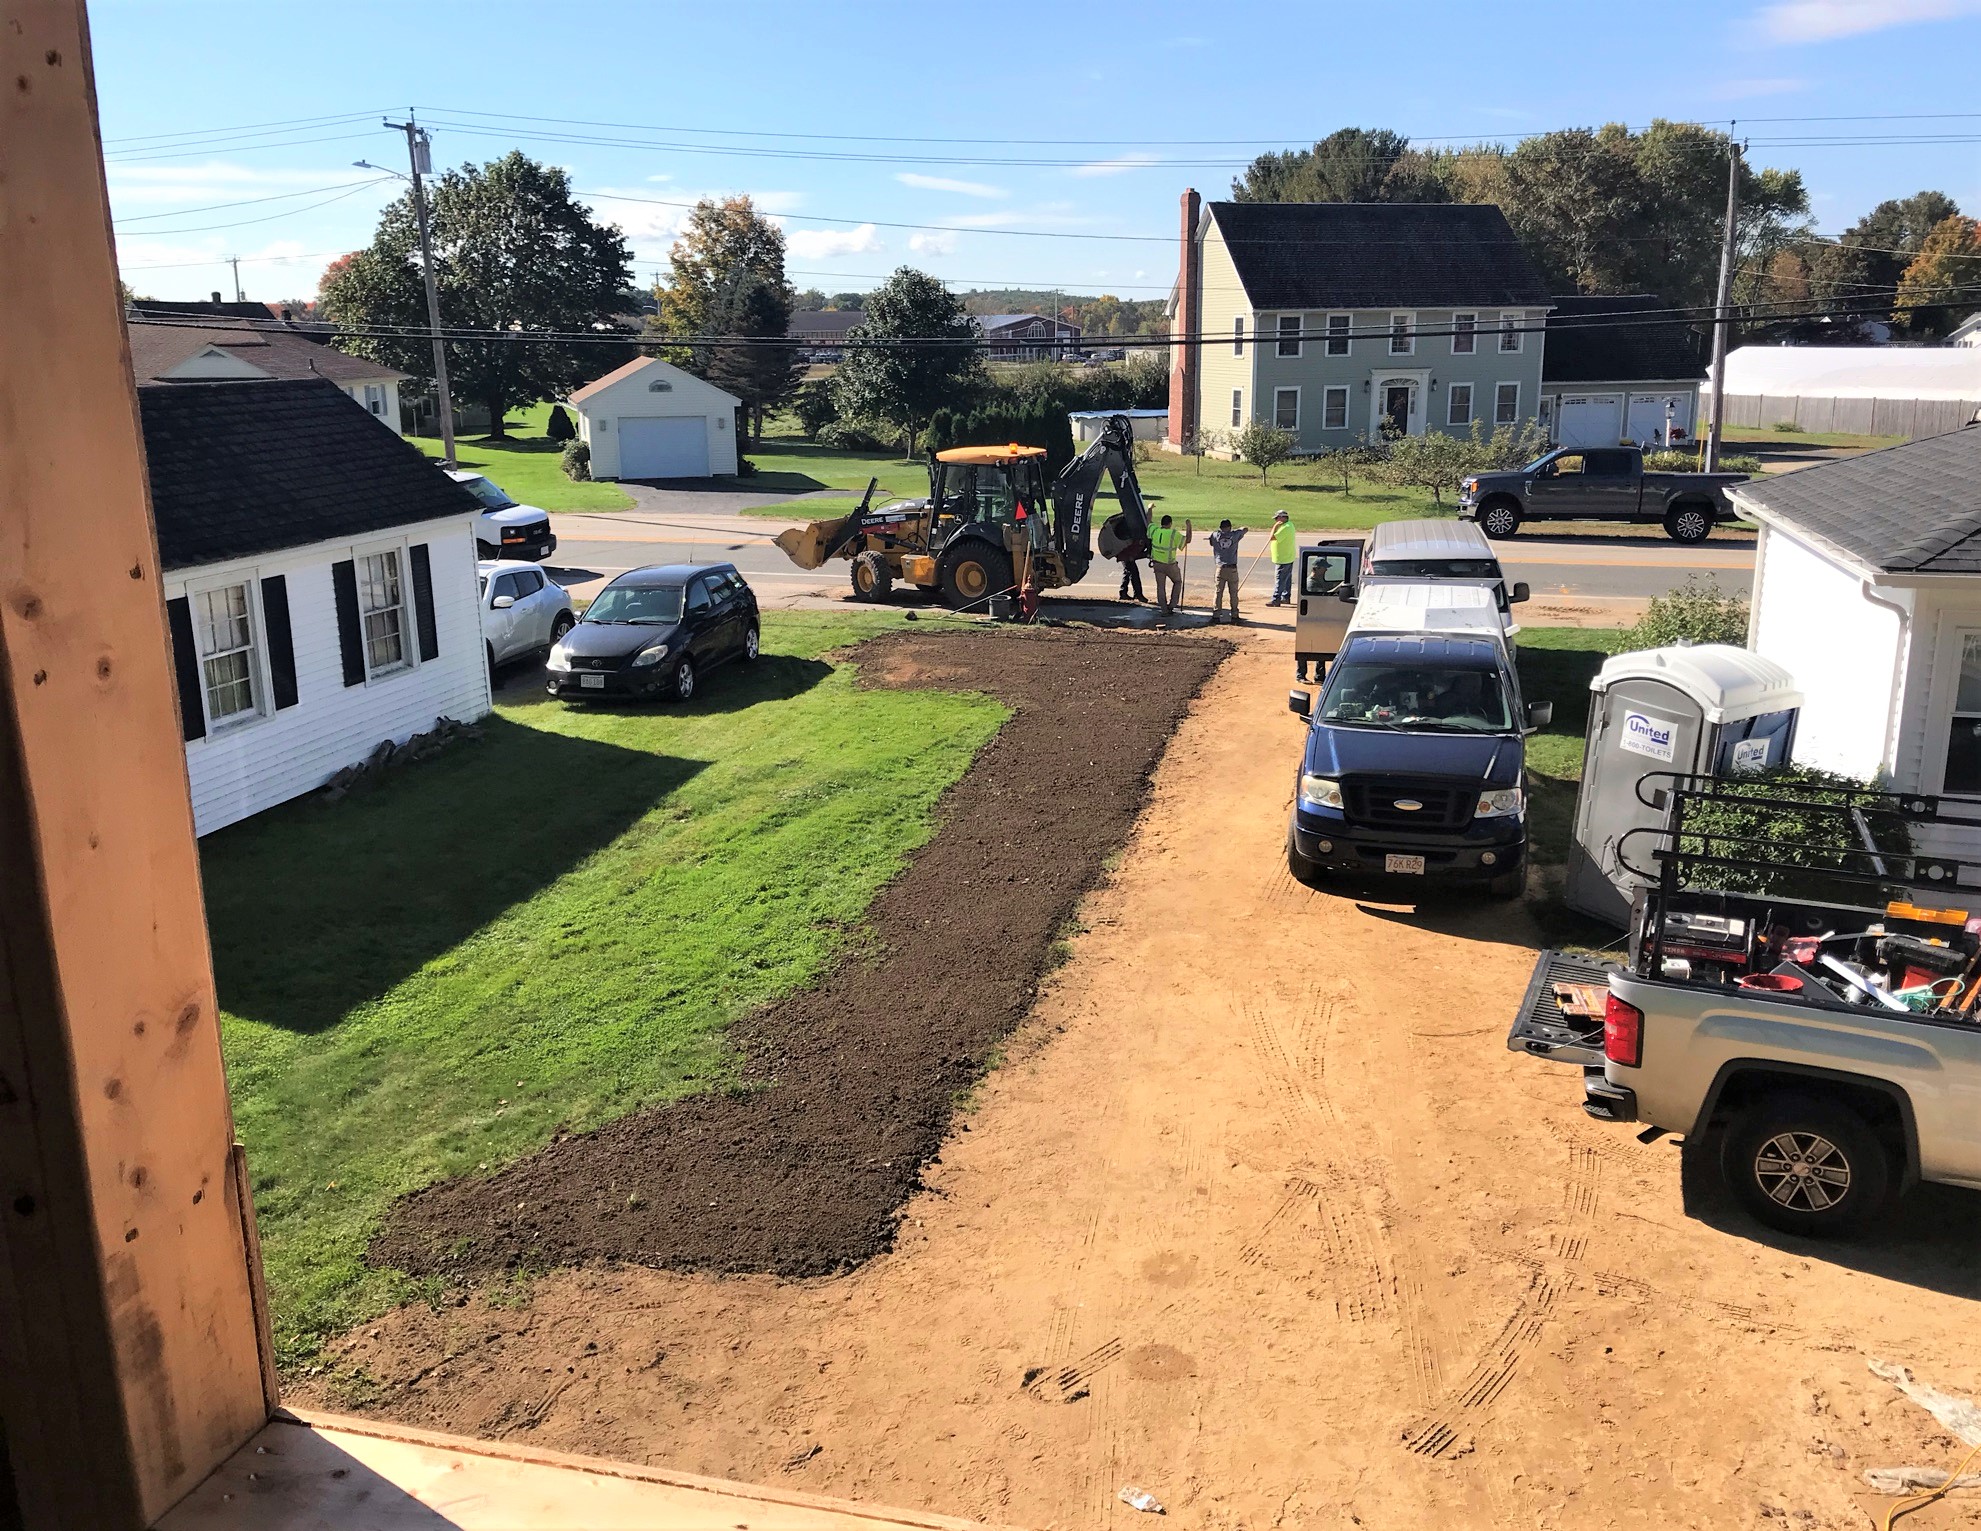
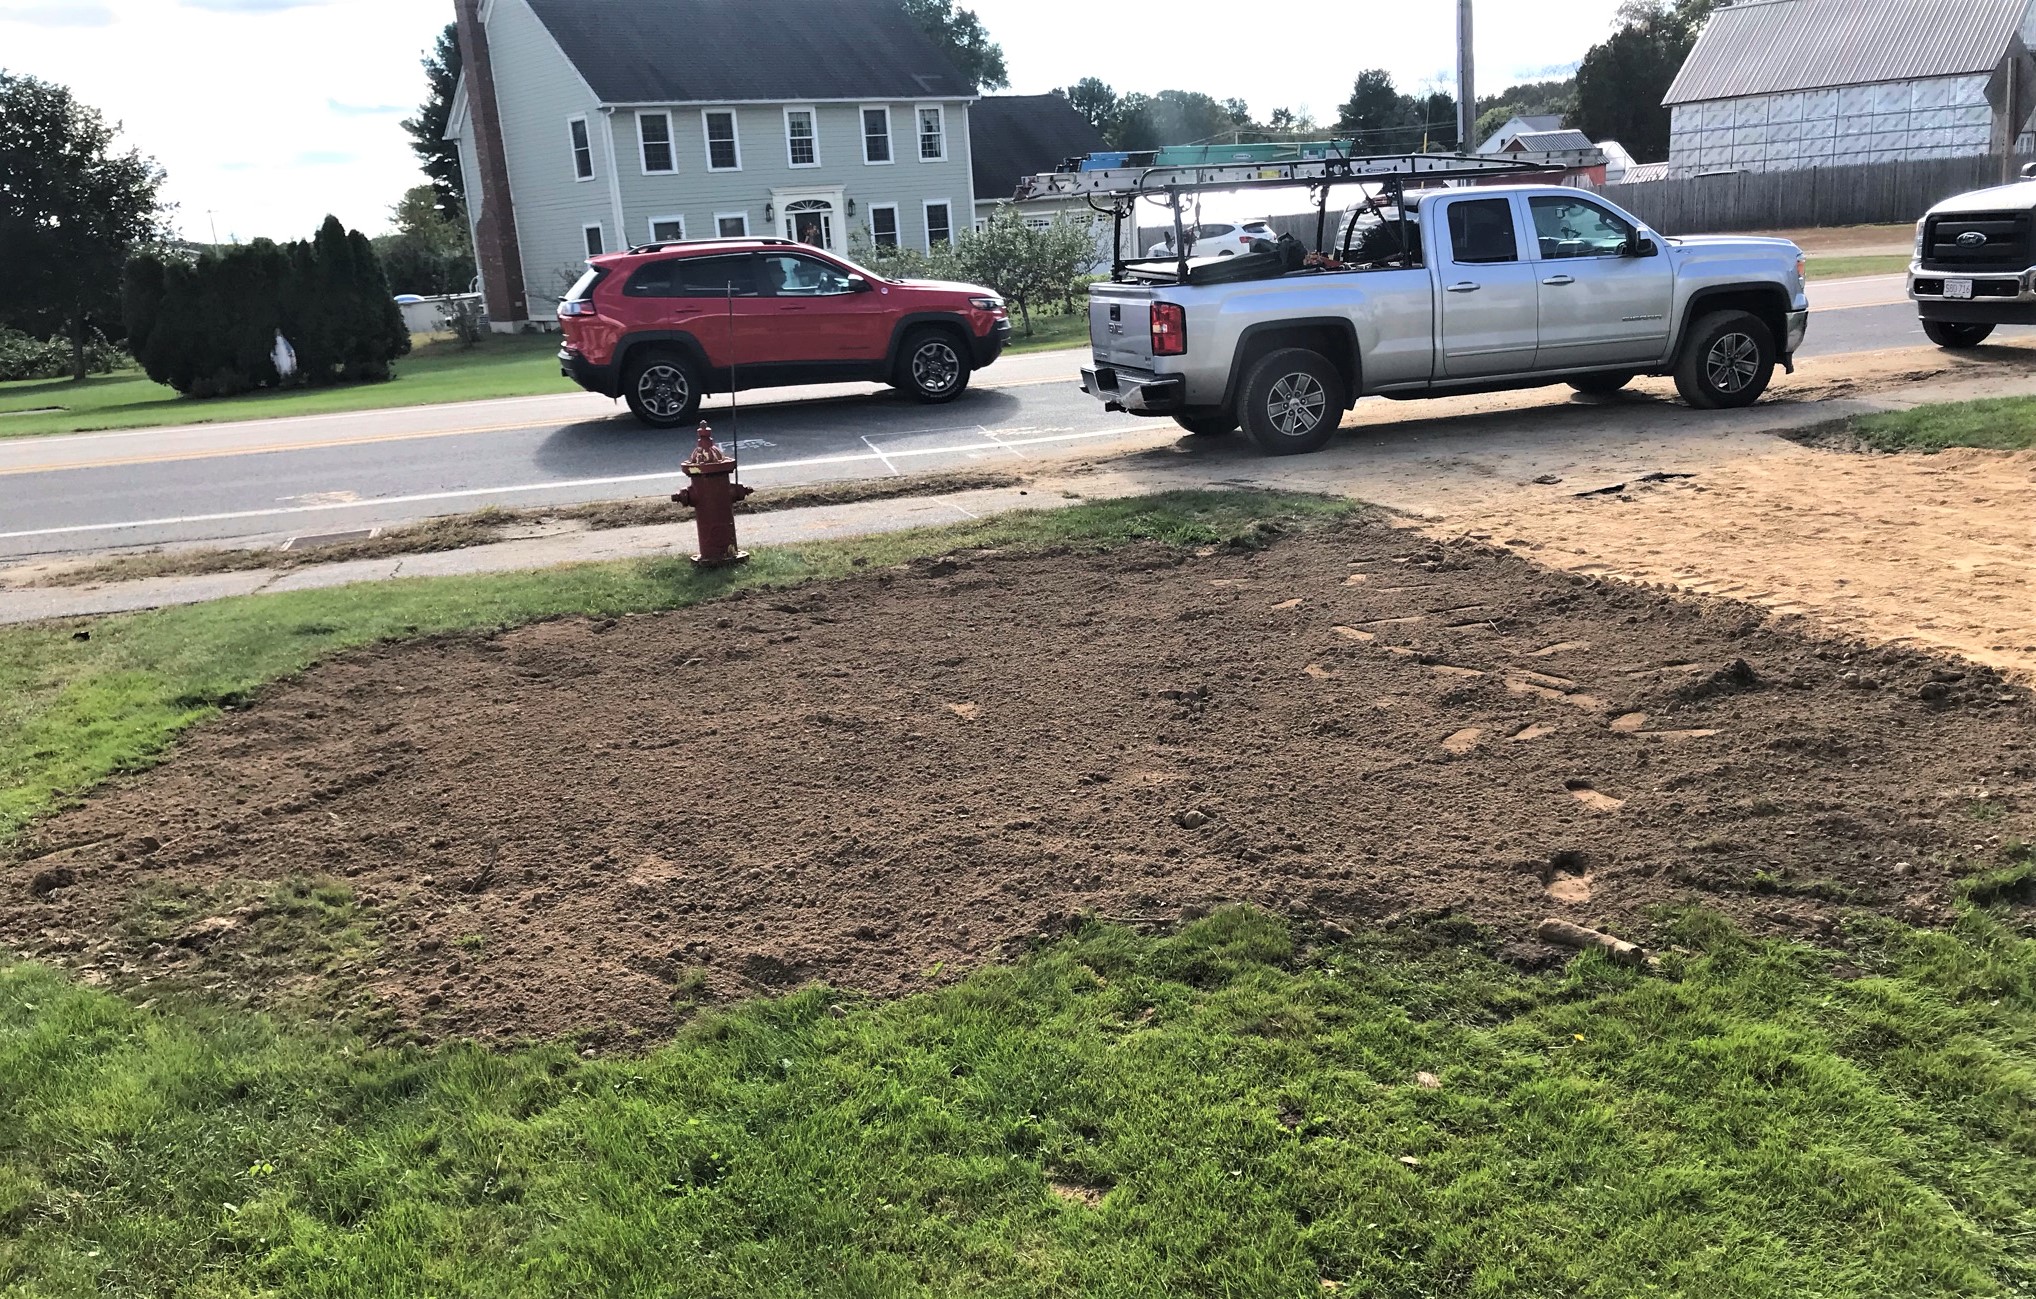
National Grid showed up and added loam and seed to the gas line excavation of last week.
National Grid repairing over the gas line excavation to the garage.
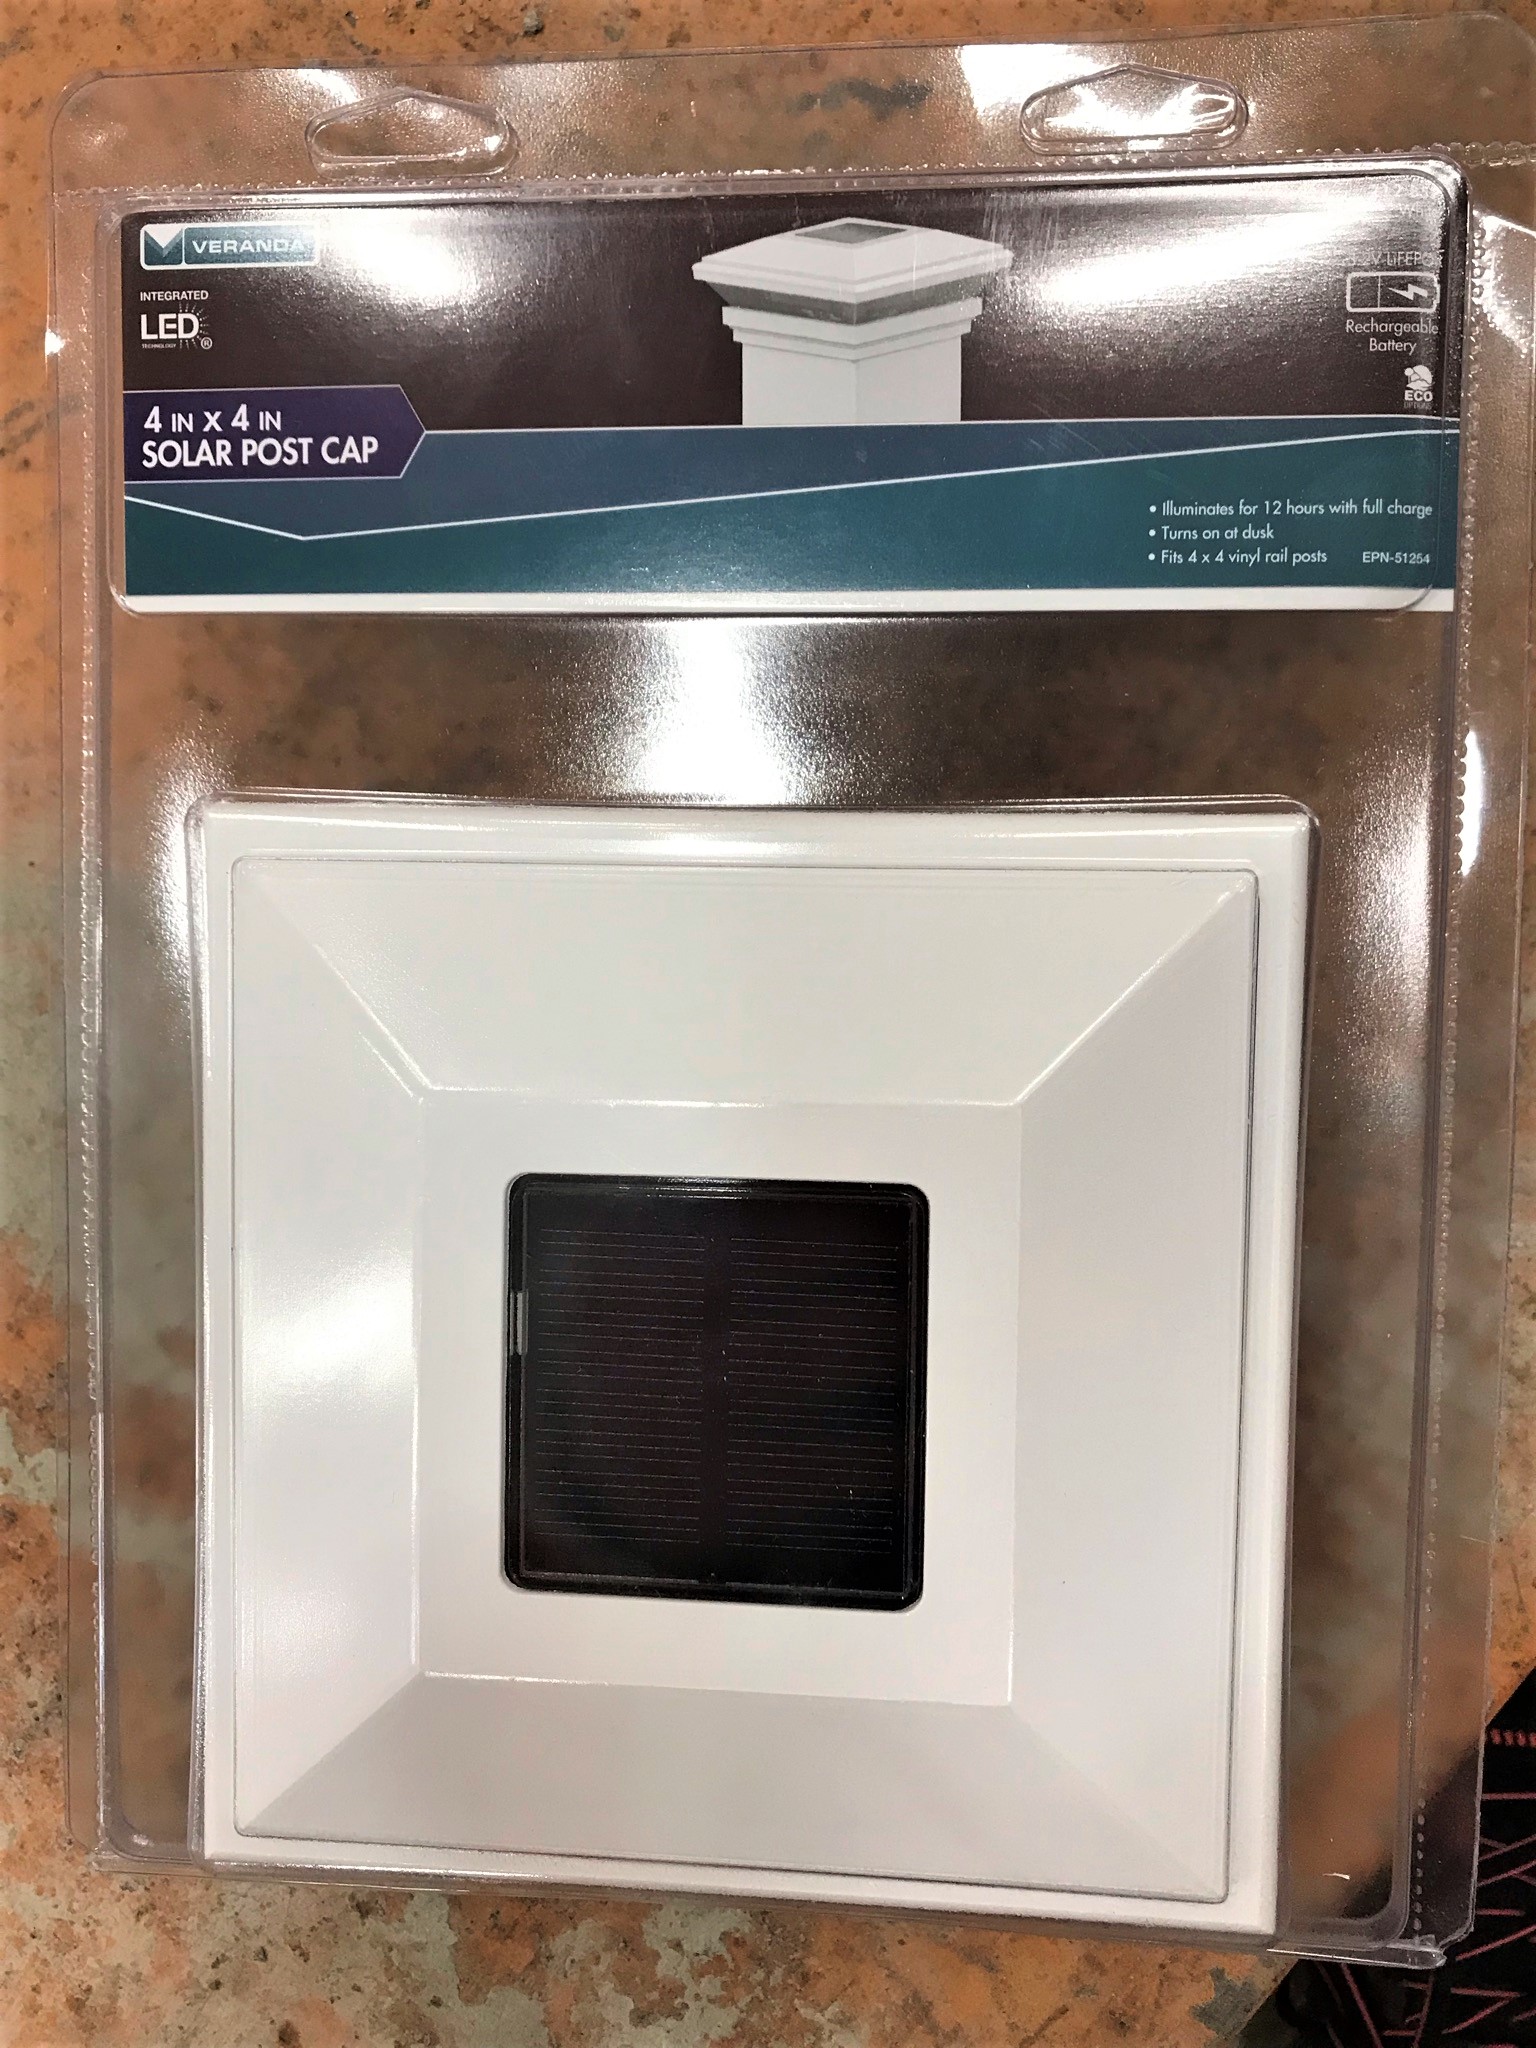
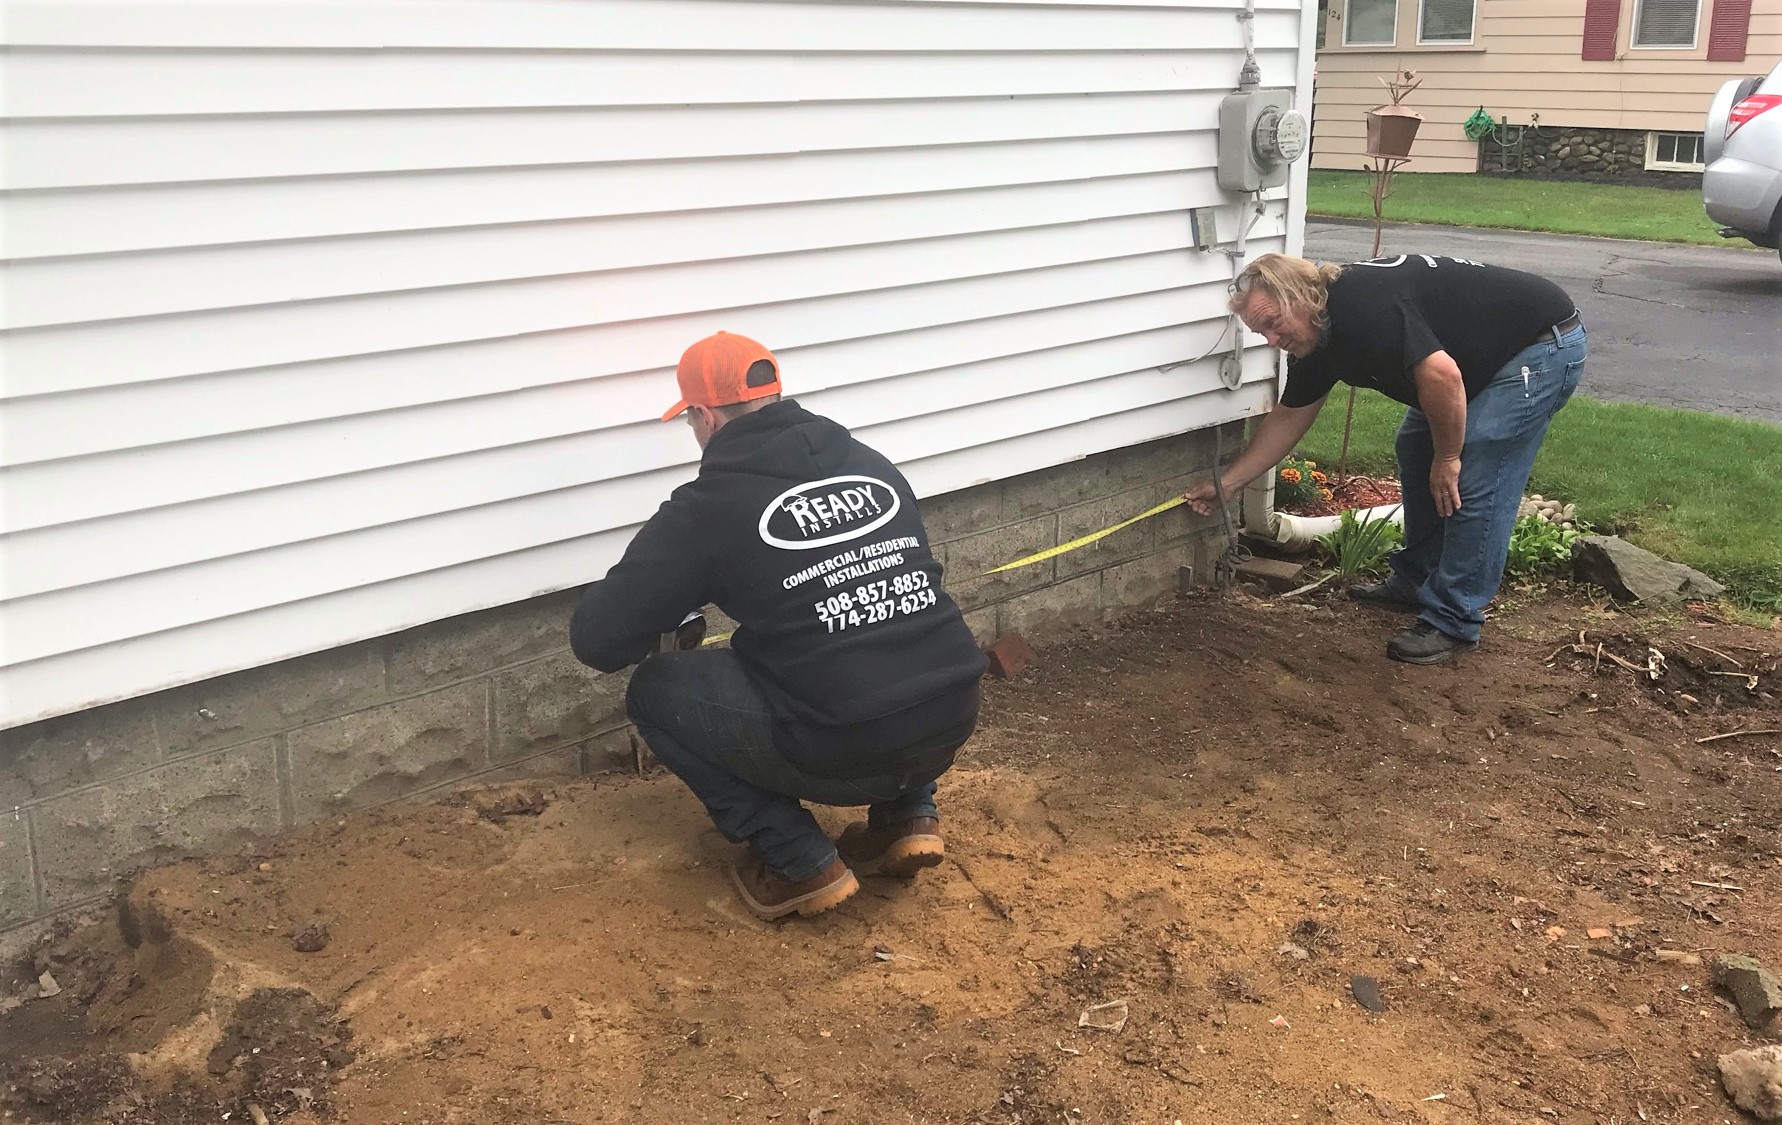
Our plumber was prepping to do some work, and asked about a vanity size. We also needed another solar cap for the deck posts (they are solar and are really cool at night – no pic yet as we needed 1 more). So, off to Home Depot for both and some more shelving for the cellar.
Before we left for Home Depot, this was the progress. You can also see the new grill on its new home.
More Home Depot shopping – last of the solar caps and the small vanity for the upstairs bathroom.
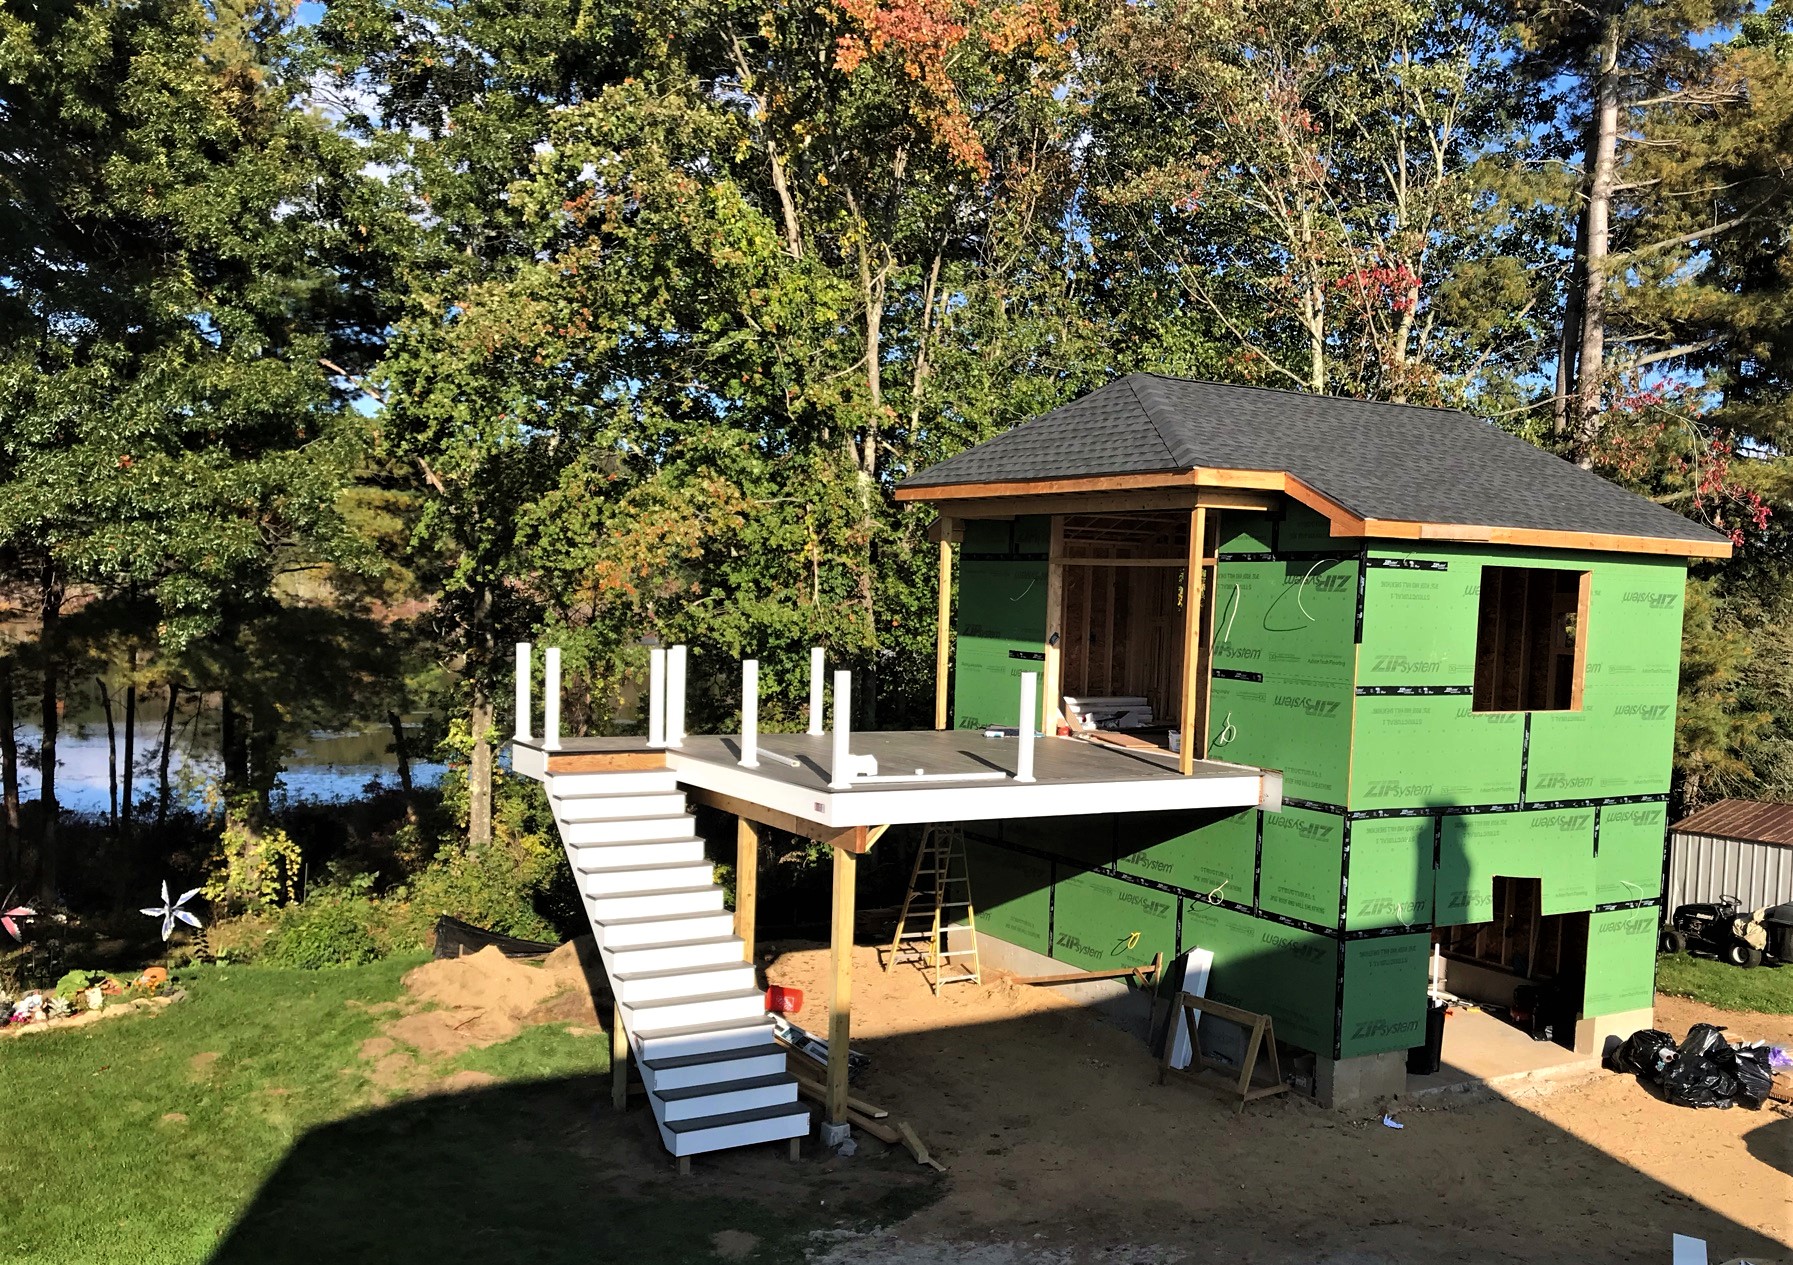
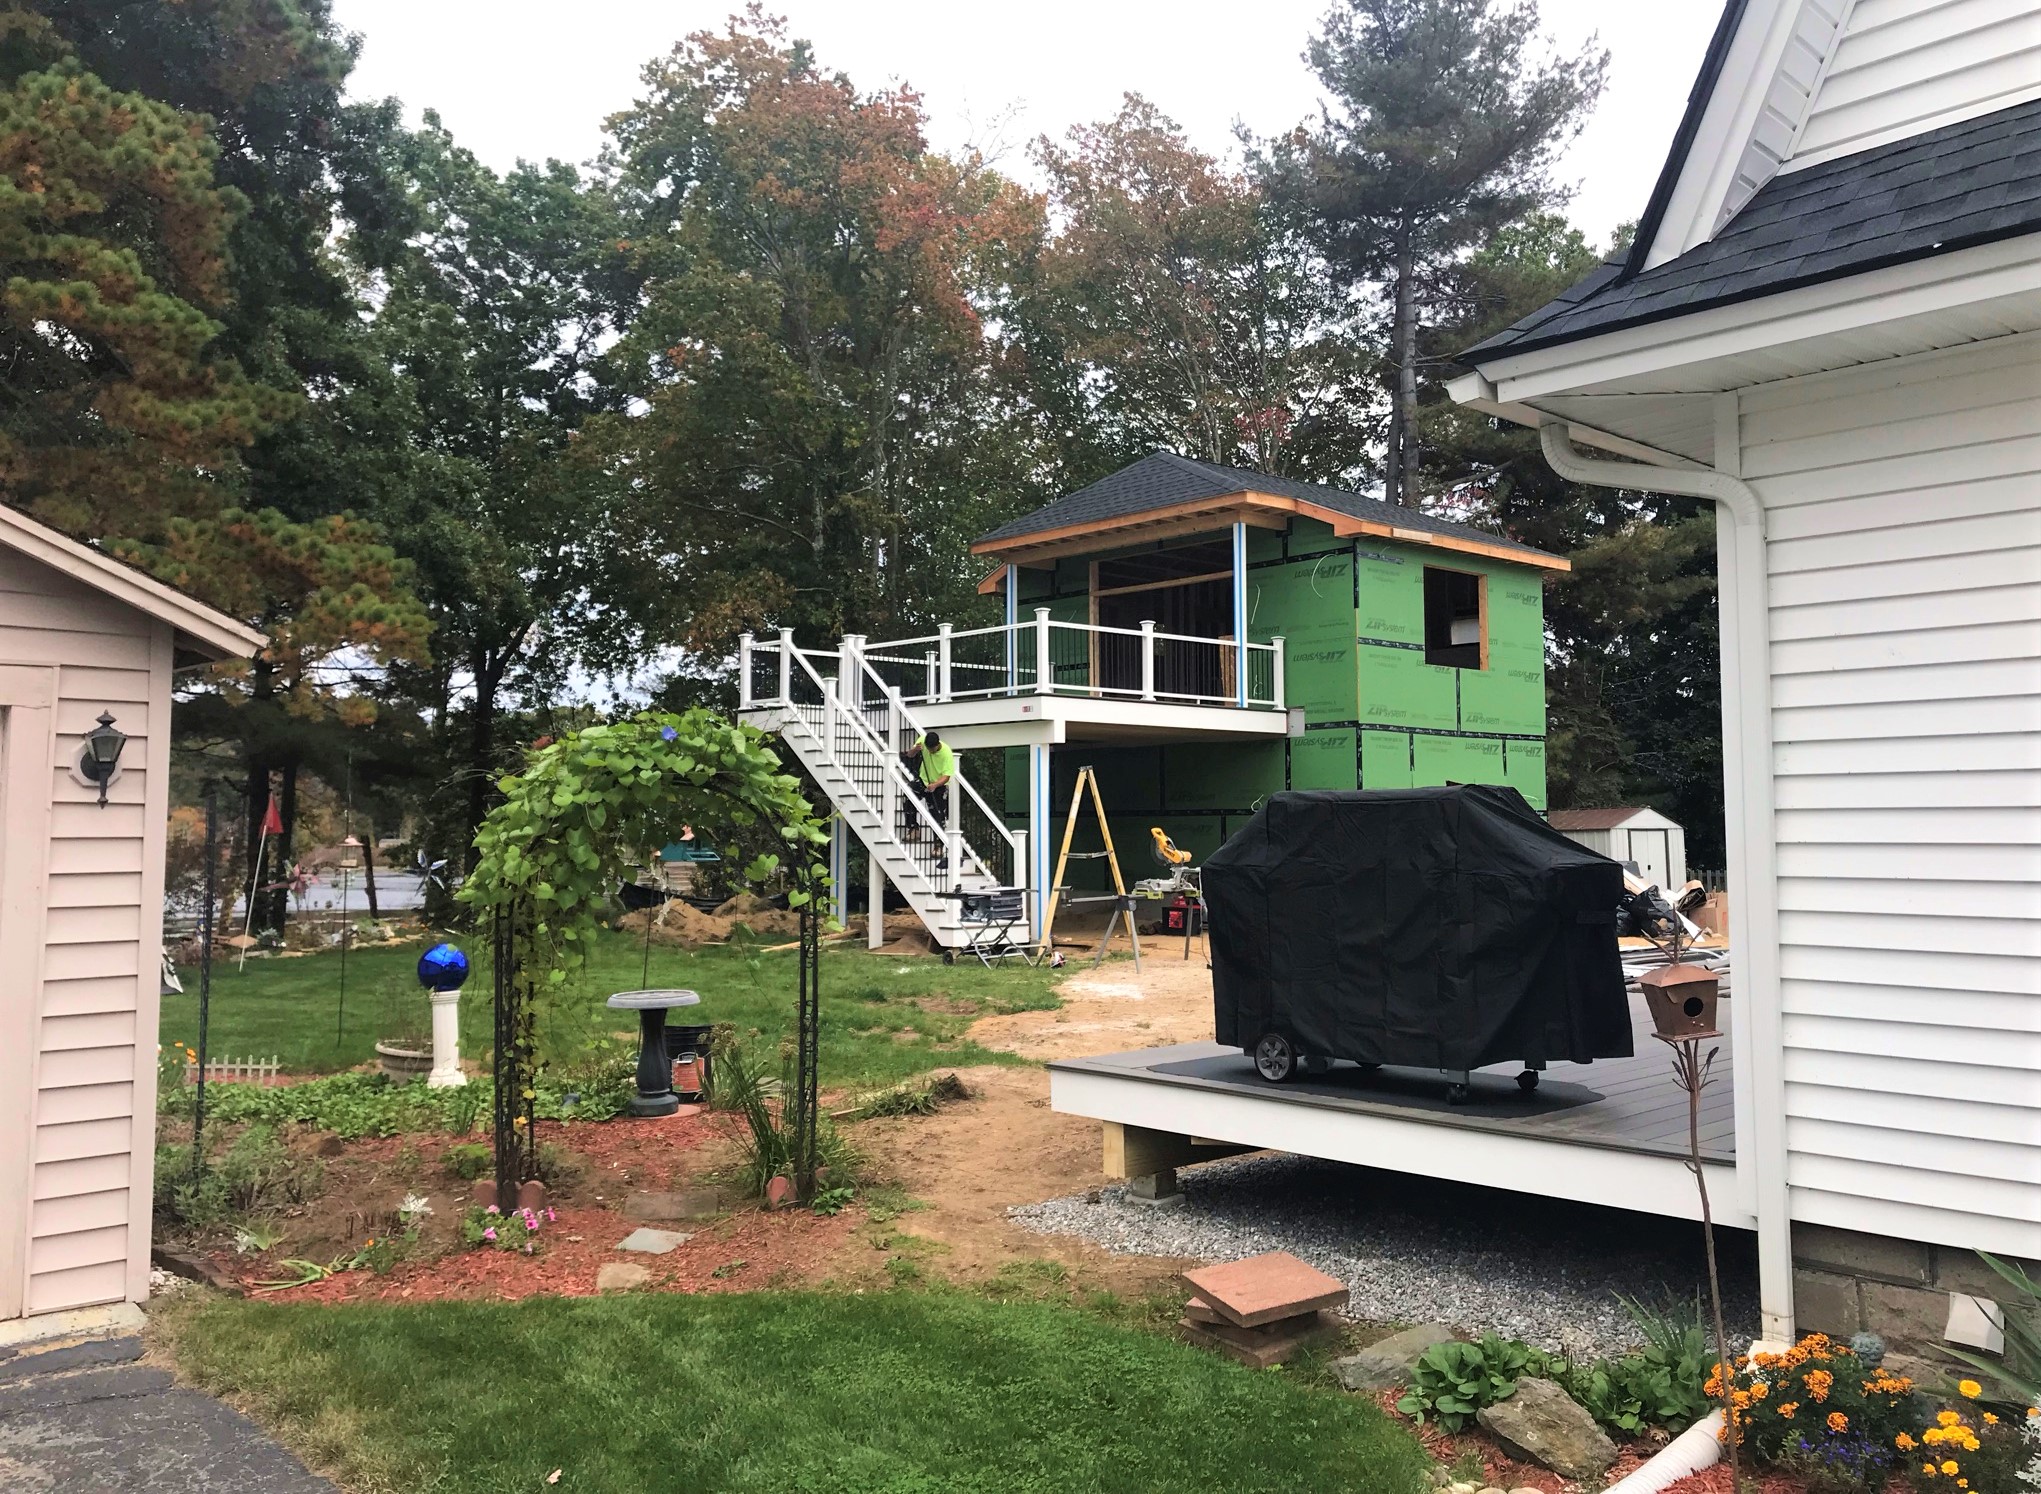
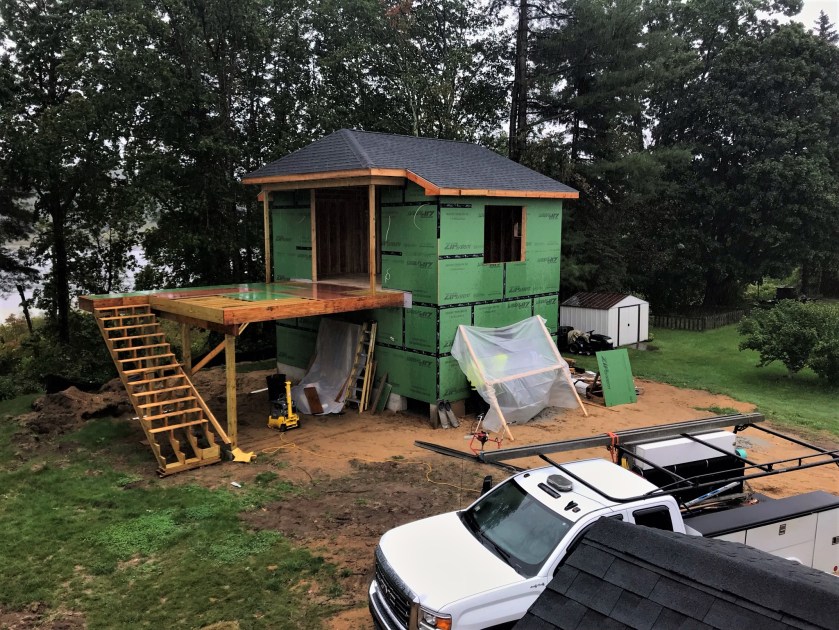
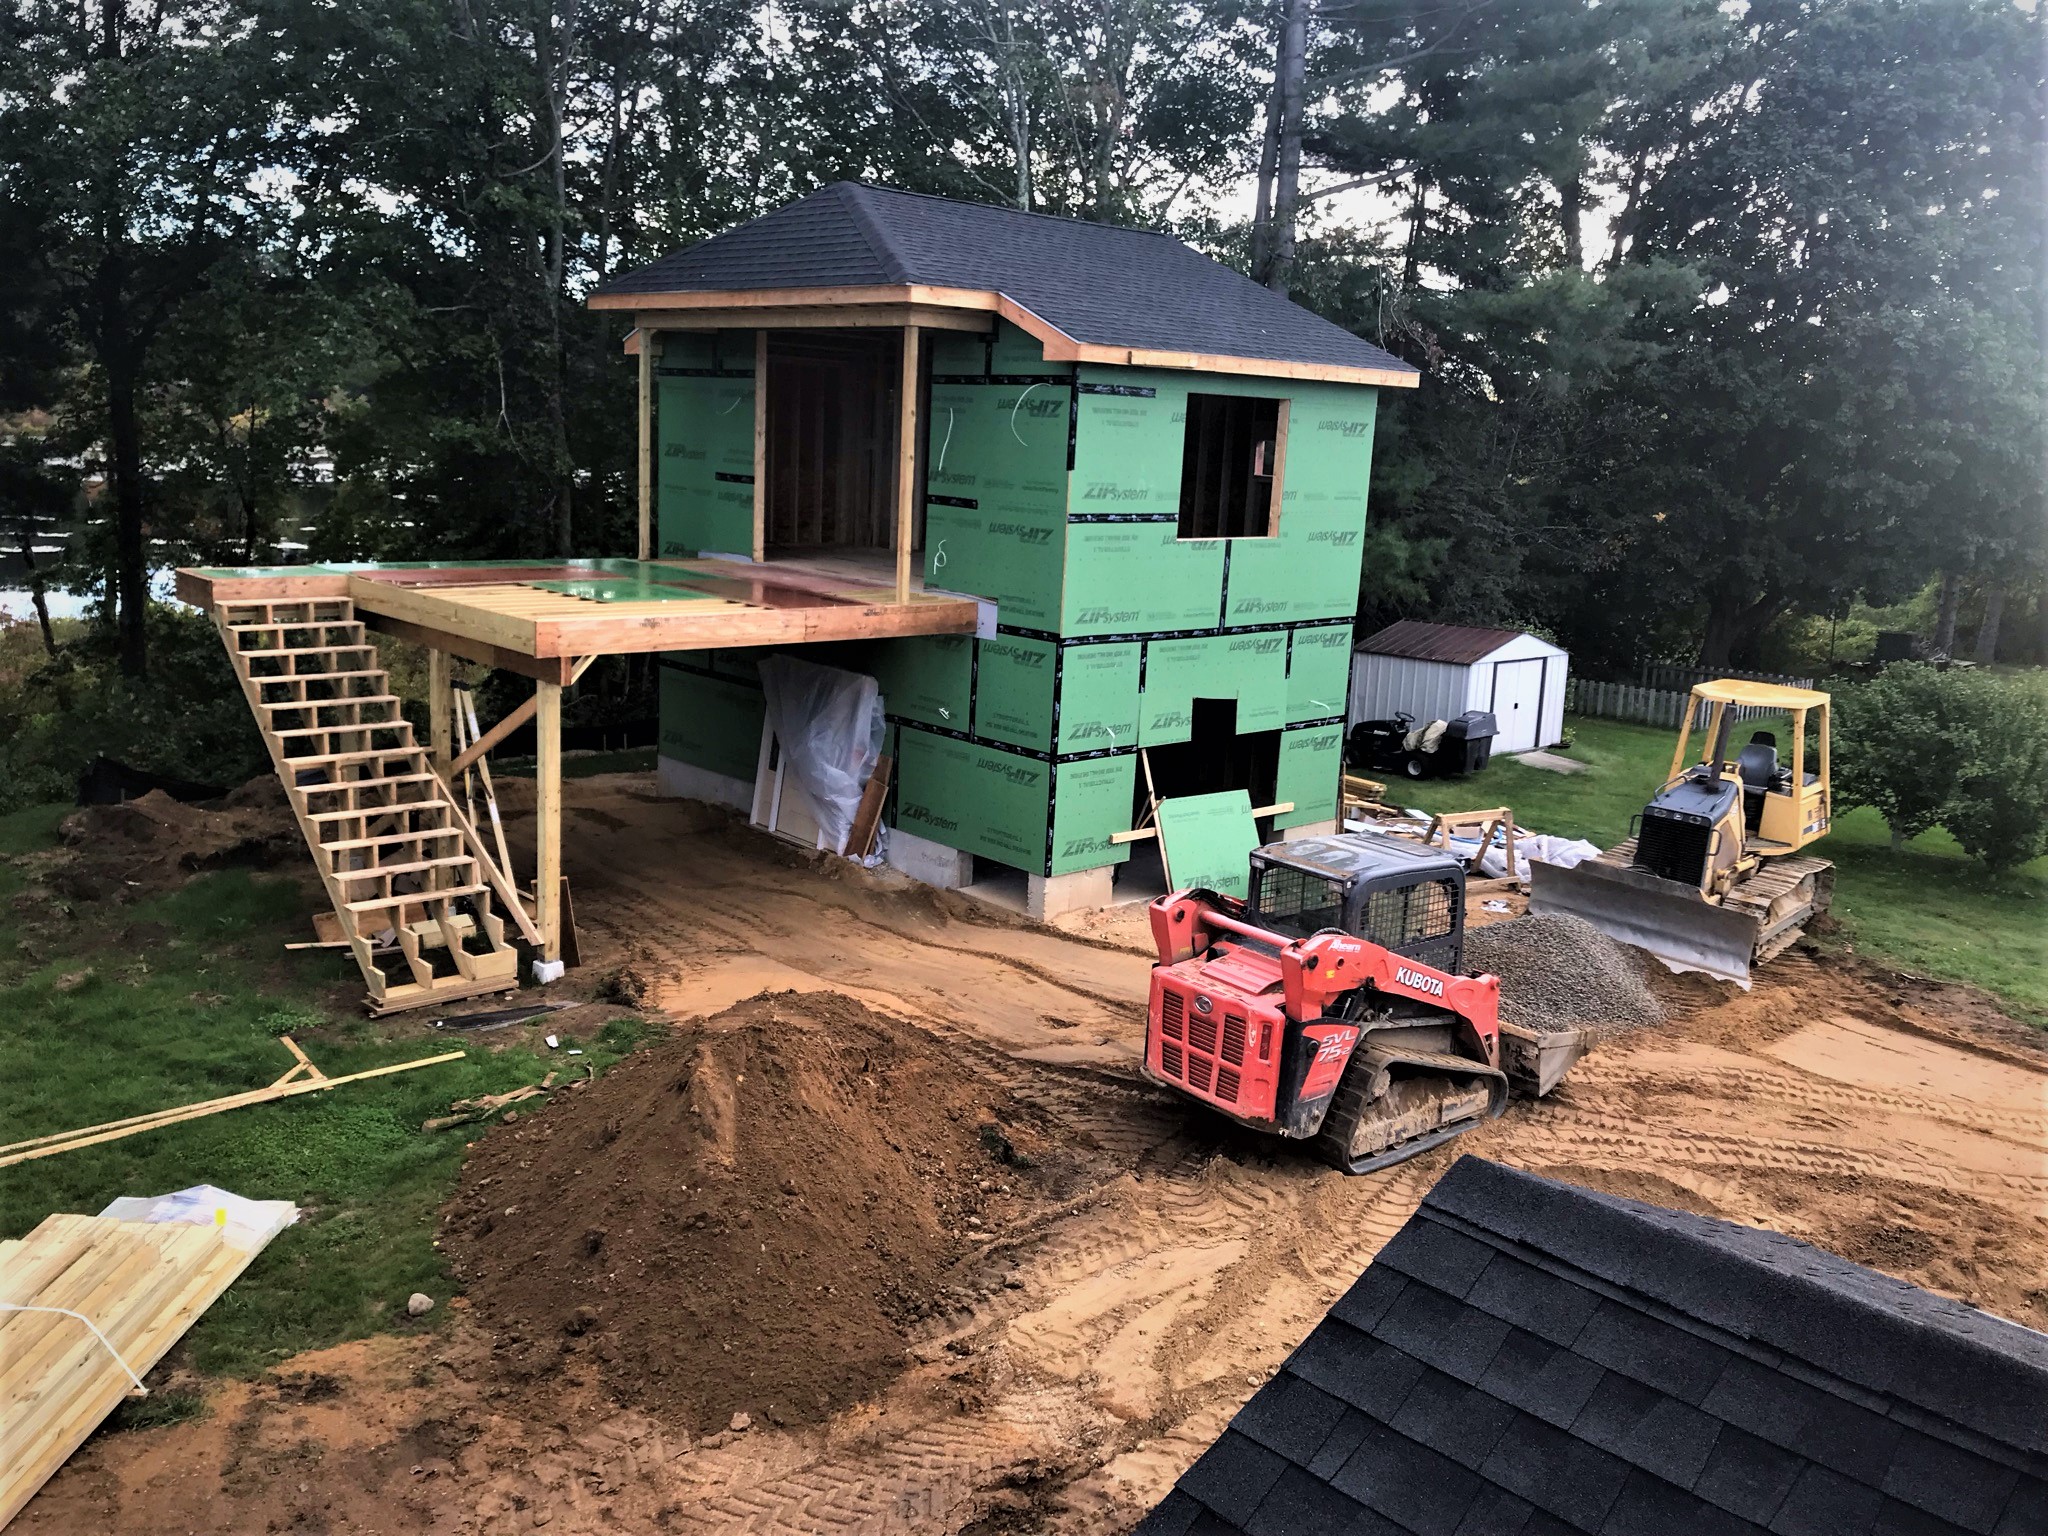
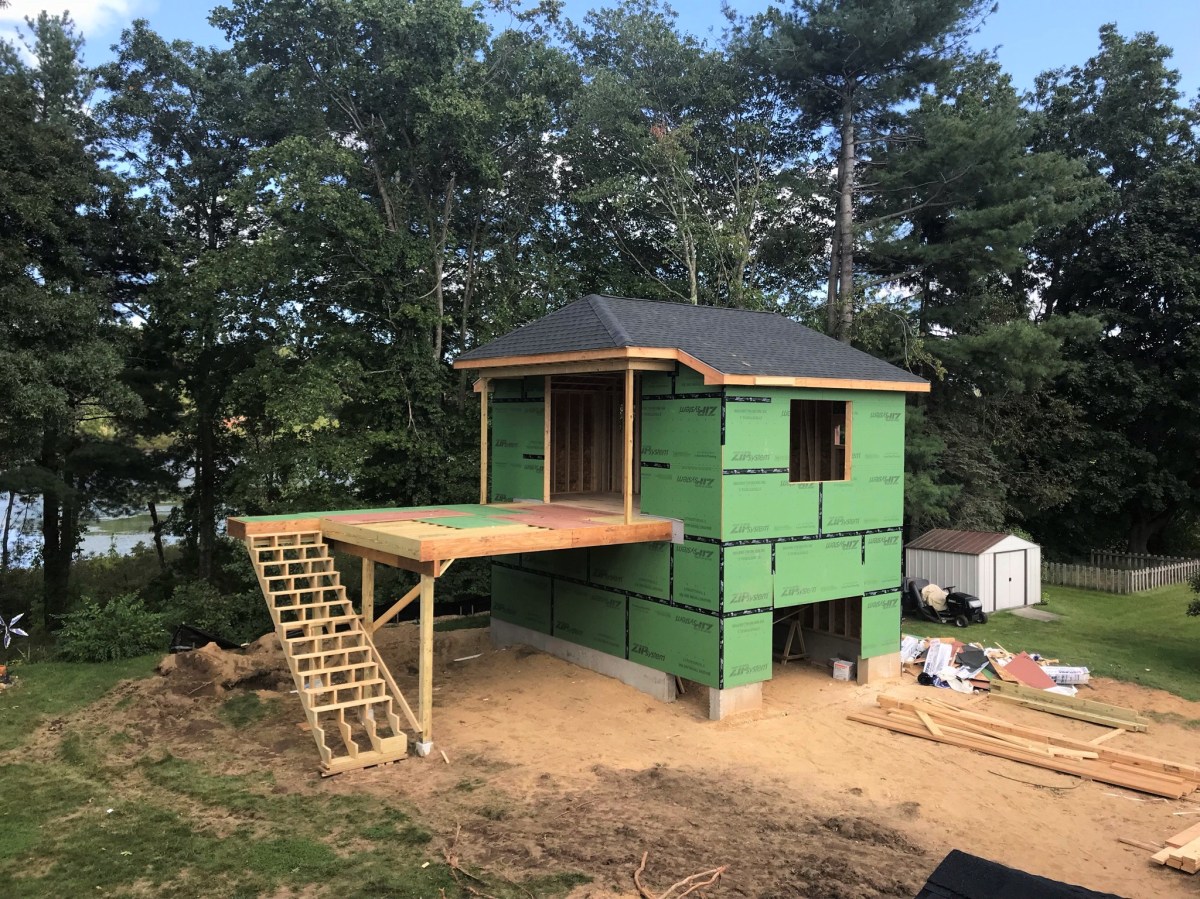
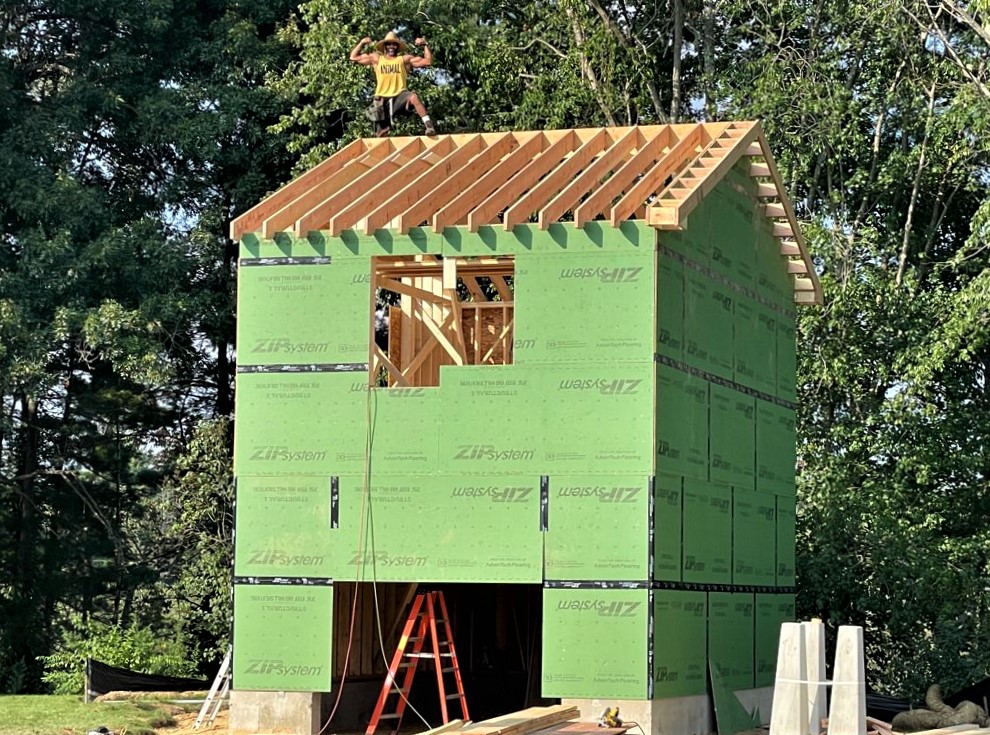
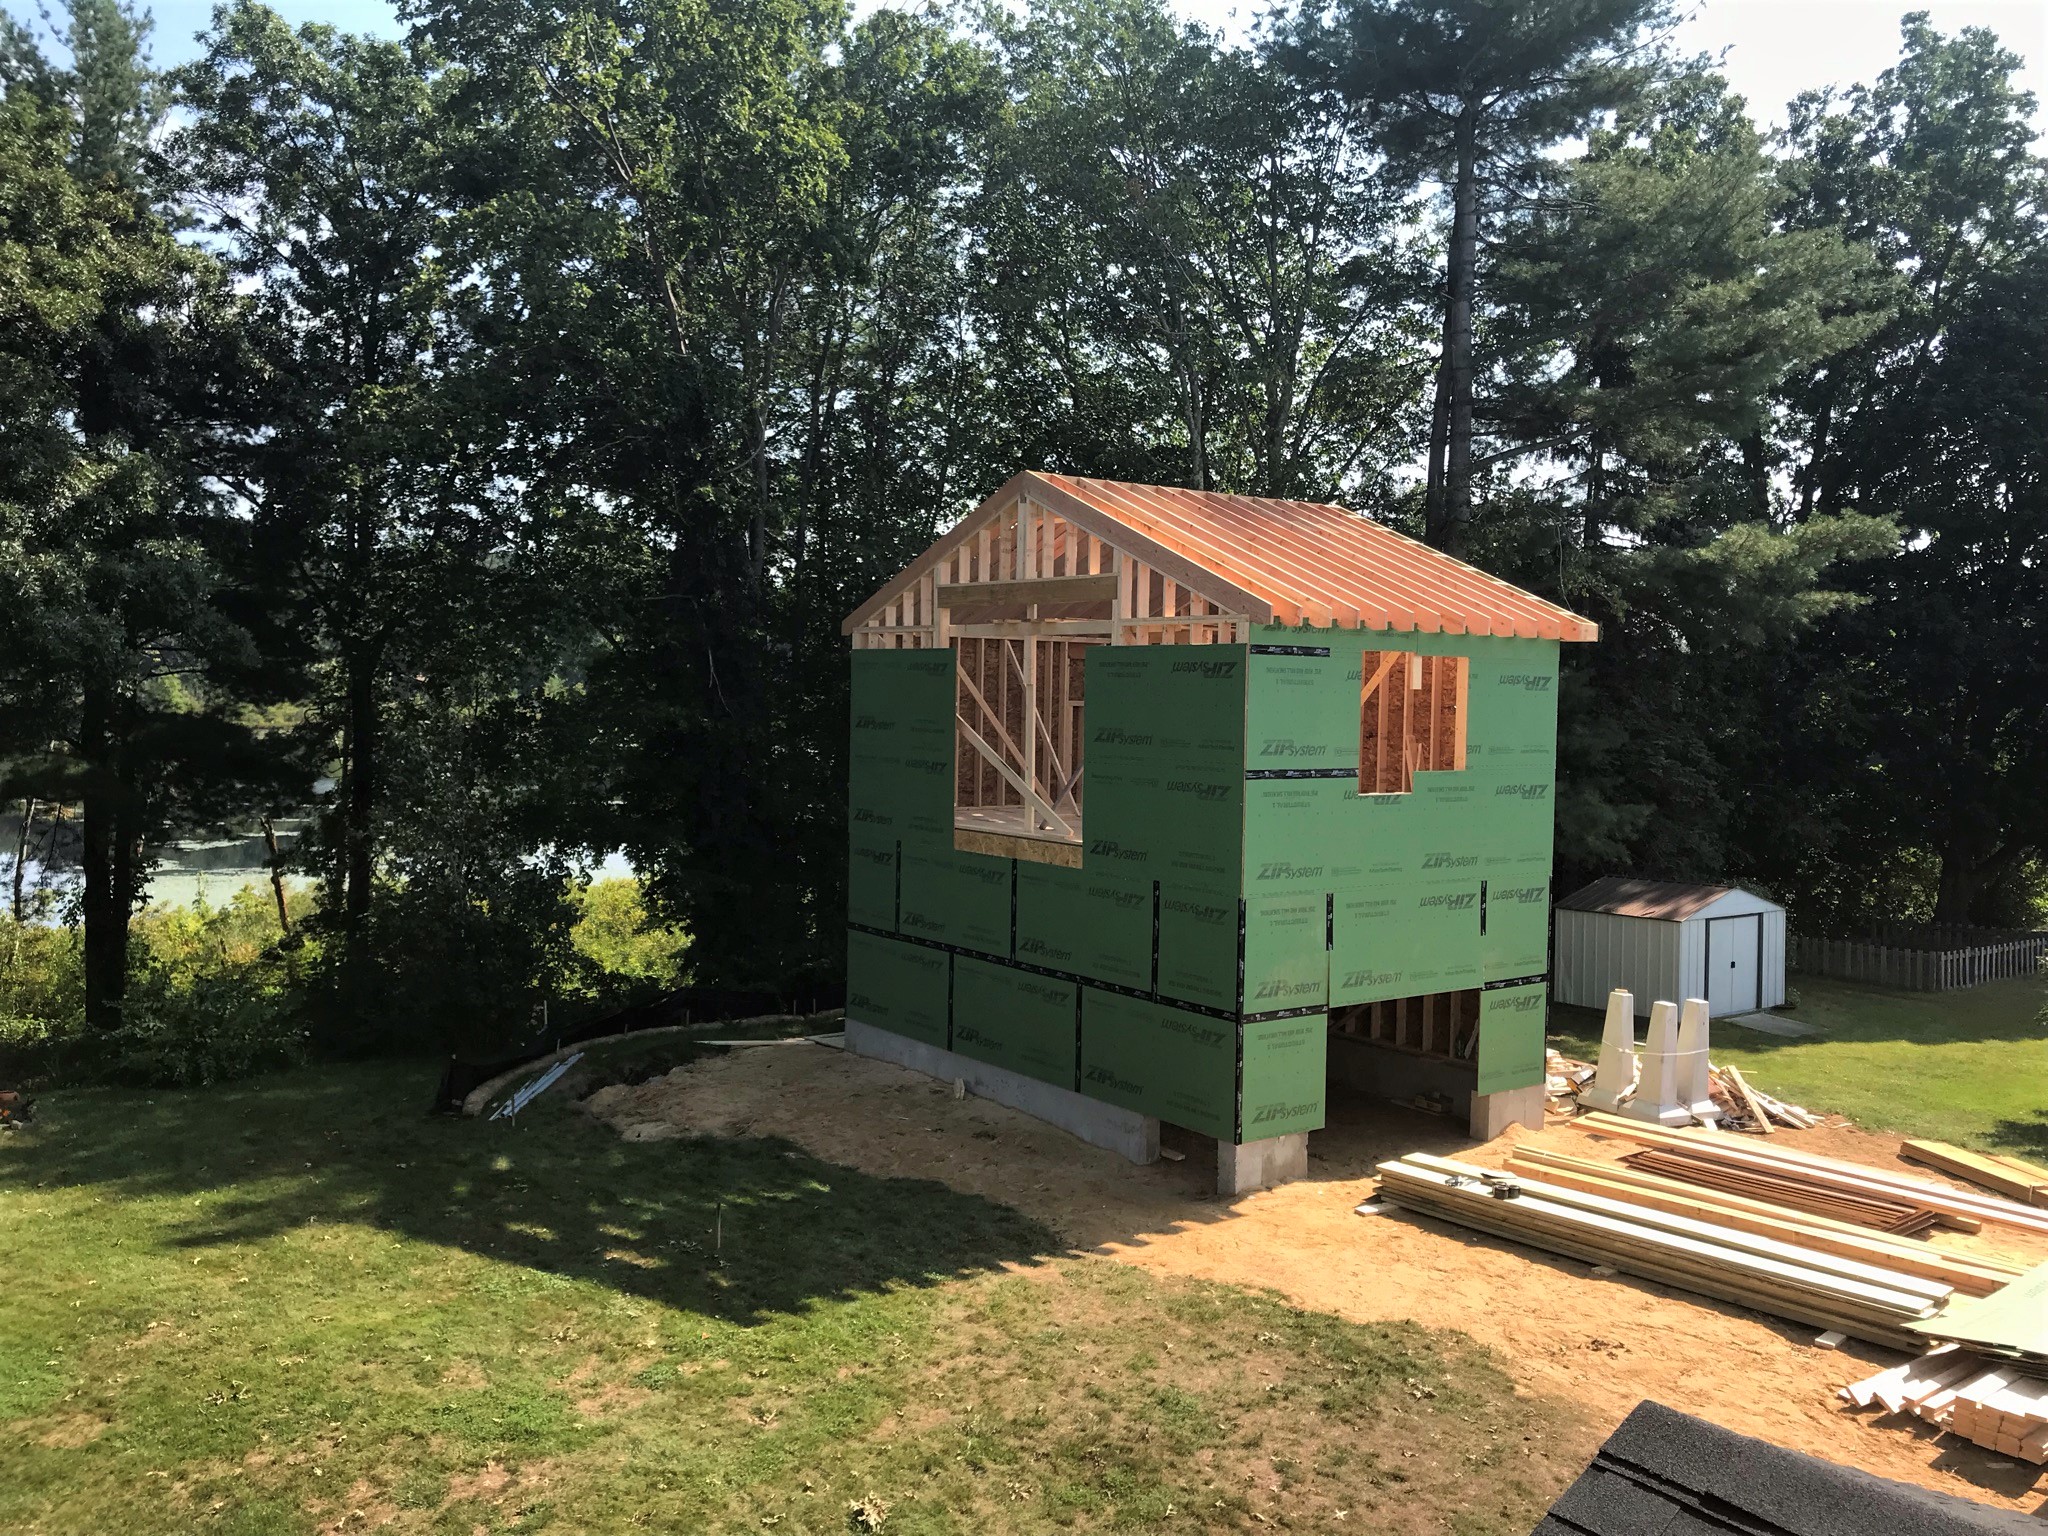
On Saturday, I got to get a shot of the completed work. Not only is it amazing, but the views from it are as well. The deck height is higher than our home’s second story windows.
Week end progress!
Now, I mentioned I would add a couple of hobby items. Well, I have a few – three to be exact.
First, I was able to finish writing the update to my Civilizations Collide supplement for Feudal PatrolTM. This is a way to wargame the Spanish Conquest and do it quite historically. I am working on a book of scenarios for that too. When either is available for download, I’ll share that.
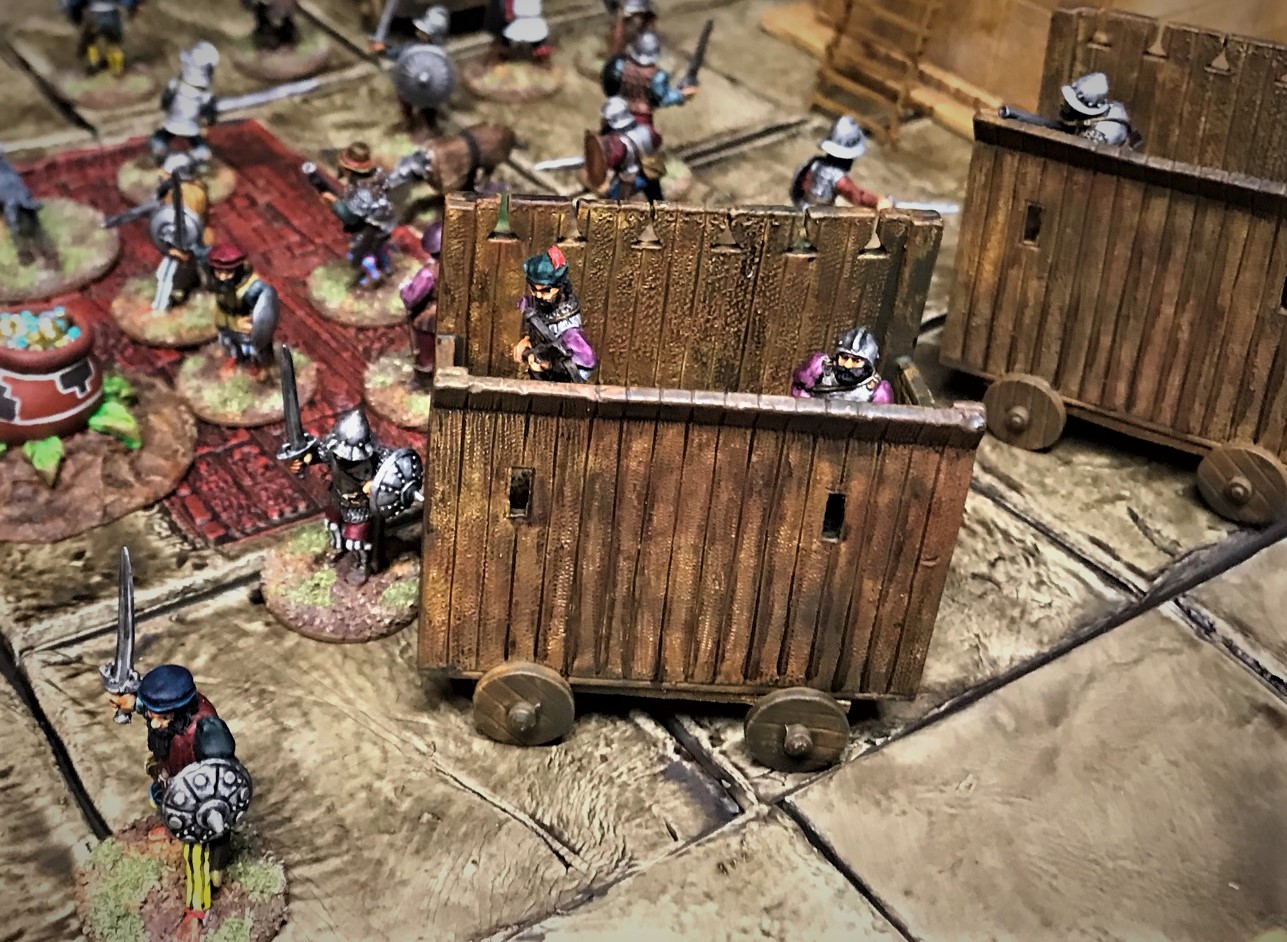
Second, as I was working on the supplement, it became clear that I needed to have a way of tracking damage on Cortes’ war wagons, as after enough Aztec slings and arrows and more have hit them, they would disintegrate into scrap lumber. I saw these nice Litko markers and got 4 for my war wagons.
Just in case you missed what a war wagon is!These markers count down from (or up to) 20 – which is the amount of damage each war wagon has before they got into combat in one game scenario.
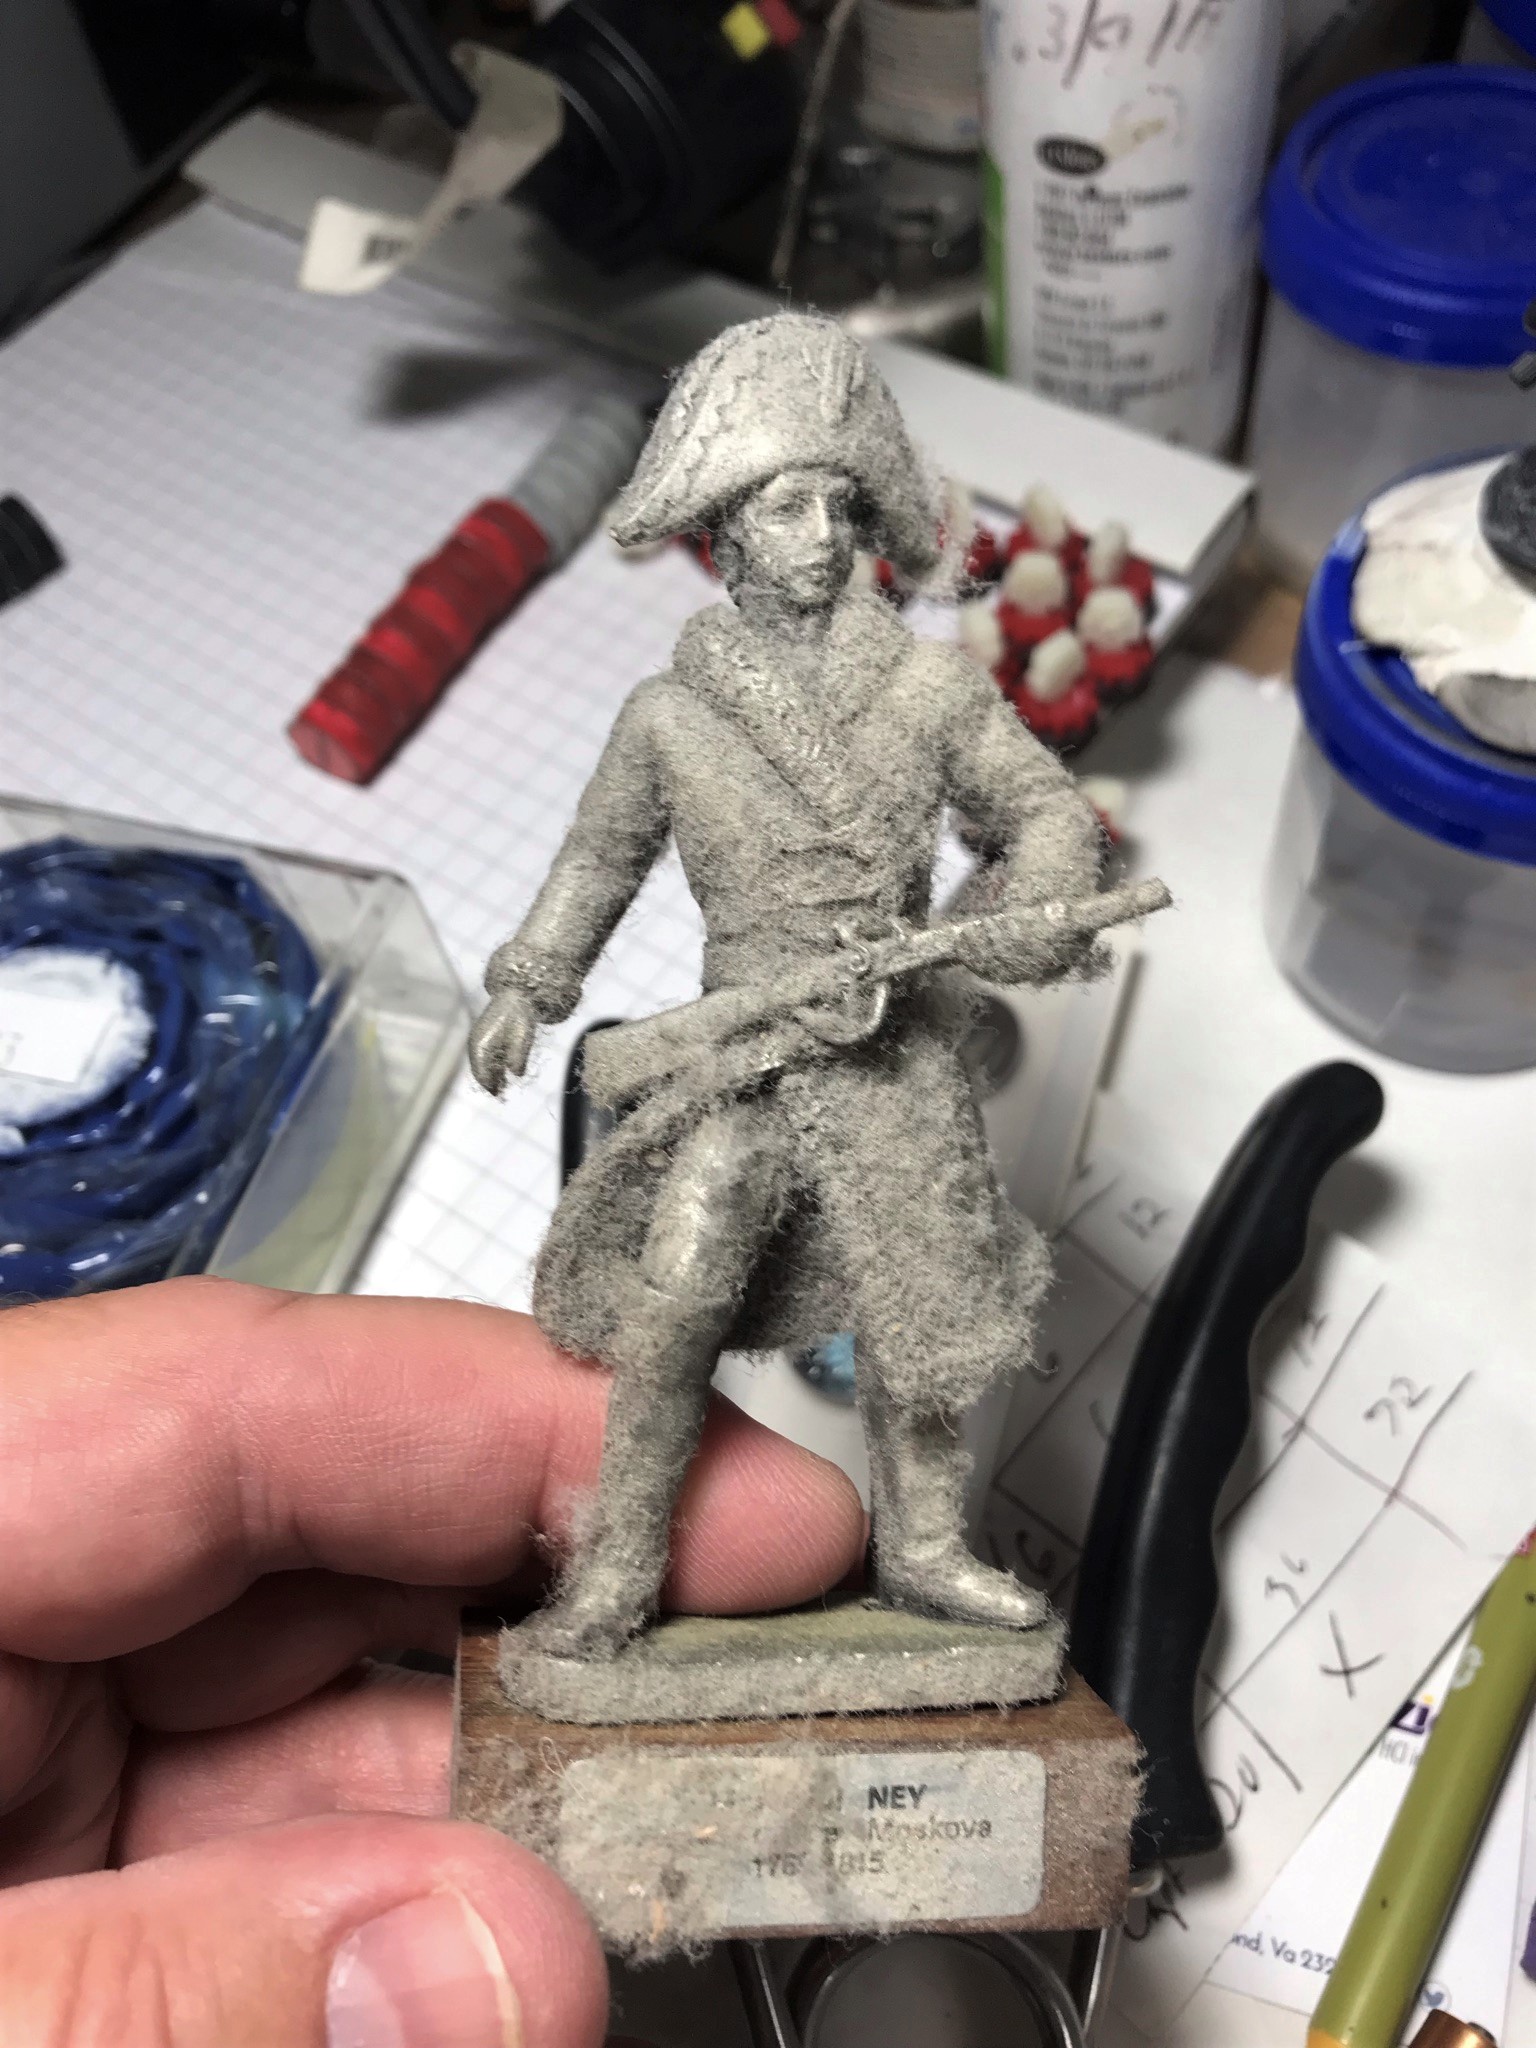
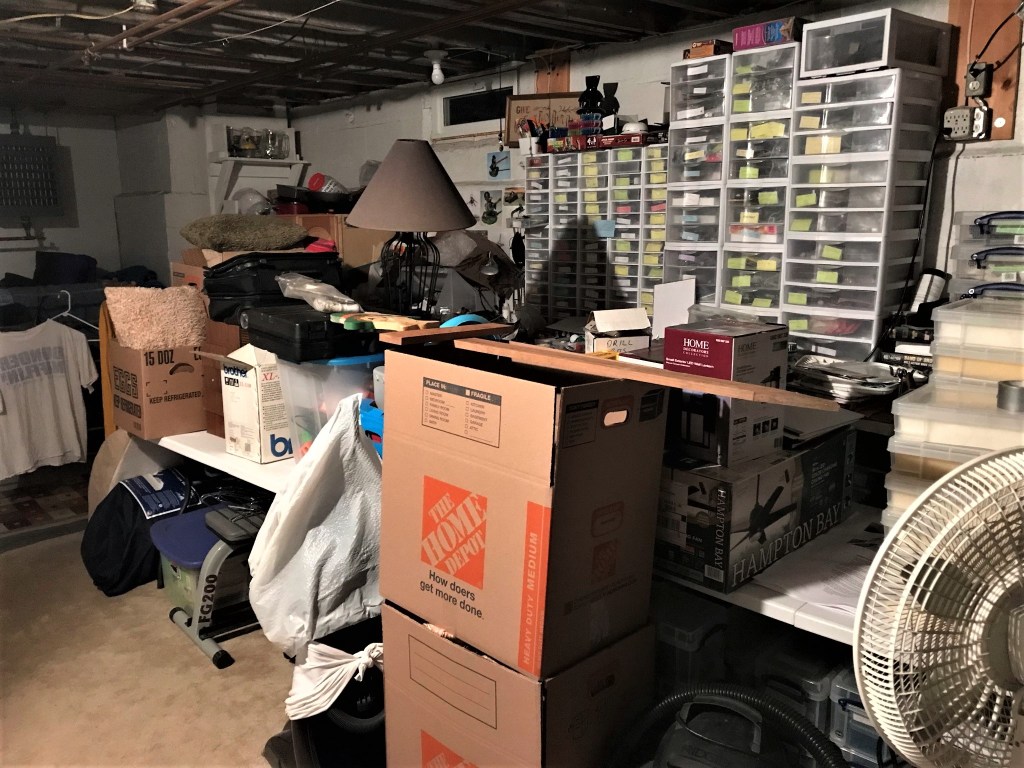
Lastly, I mentioned that we also have gotten shelving from Home Depot and have been assembling them and redoing storage in the cellar. We have put together 3 of these, 1 of these, and 1 of these. The last one replaced an old particle board printer stand that had been used for laundry soap, bleach, etc. It was messed up, and had a storage area under it. In the storage area were a couple of yearbooks from junior high I had not seen in a while, plus under the stand was a big lint-encrusted pewter figure of Marshal Michel Ney, the Bravest of the Brave, that I bought in France in the 1980’s! I was always fascinated by his story. However, I had zero idea how he ended up there.
Come, see how a Marshal of France can gather lint and dust!
Buck suggested that he would be a cool giant for a Wars of Ozz game, and Chris Palmer suggested that he could be a moss giant. I thought maybe a lint monster…but no, I’ll clean him up and put on a shelf as is.
Anyways, next week should have even more progress on the project – so thanks for looking and hope you found this interesting. Now I have blogs to read! (likely yours).
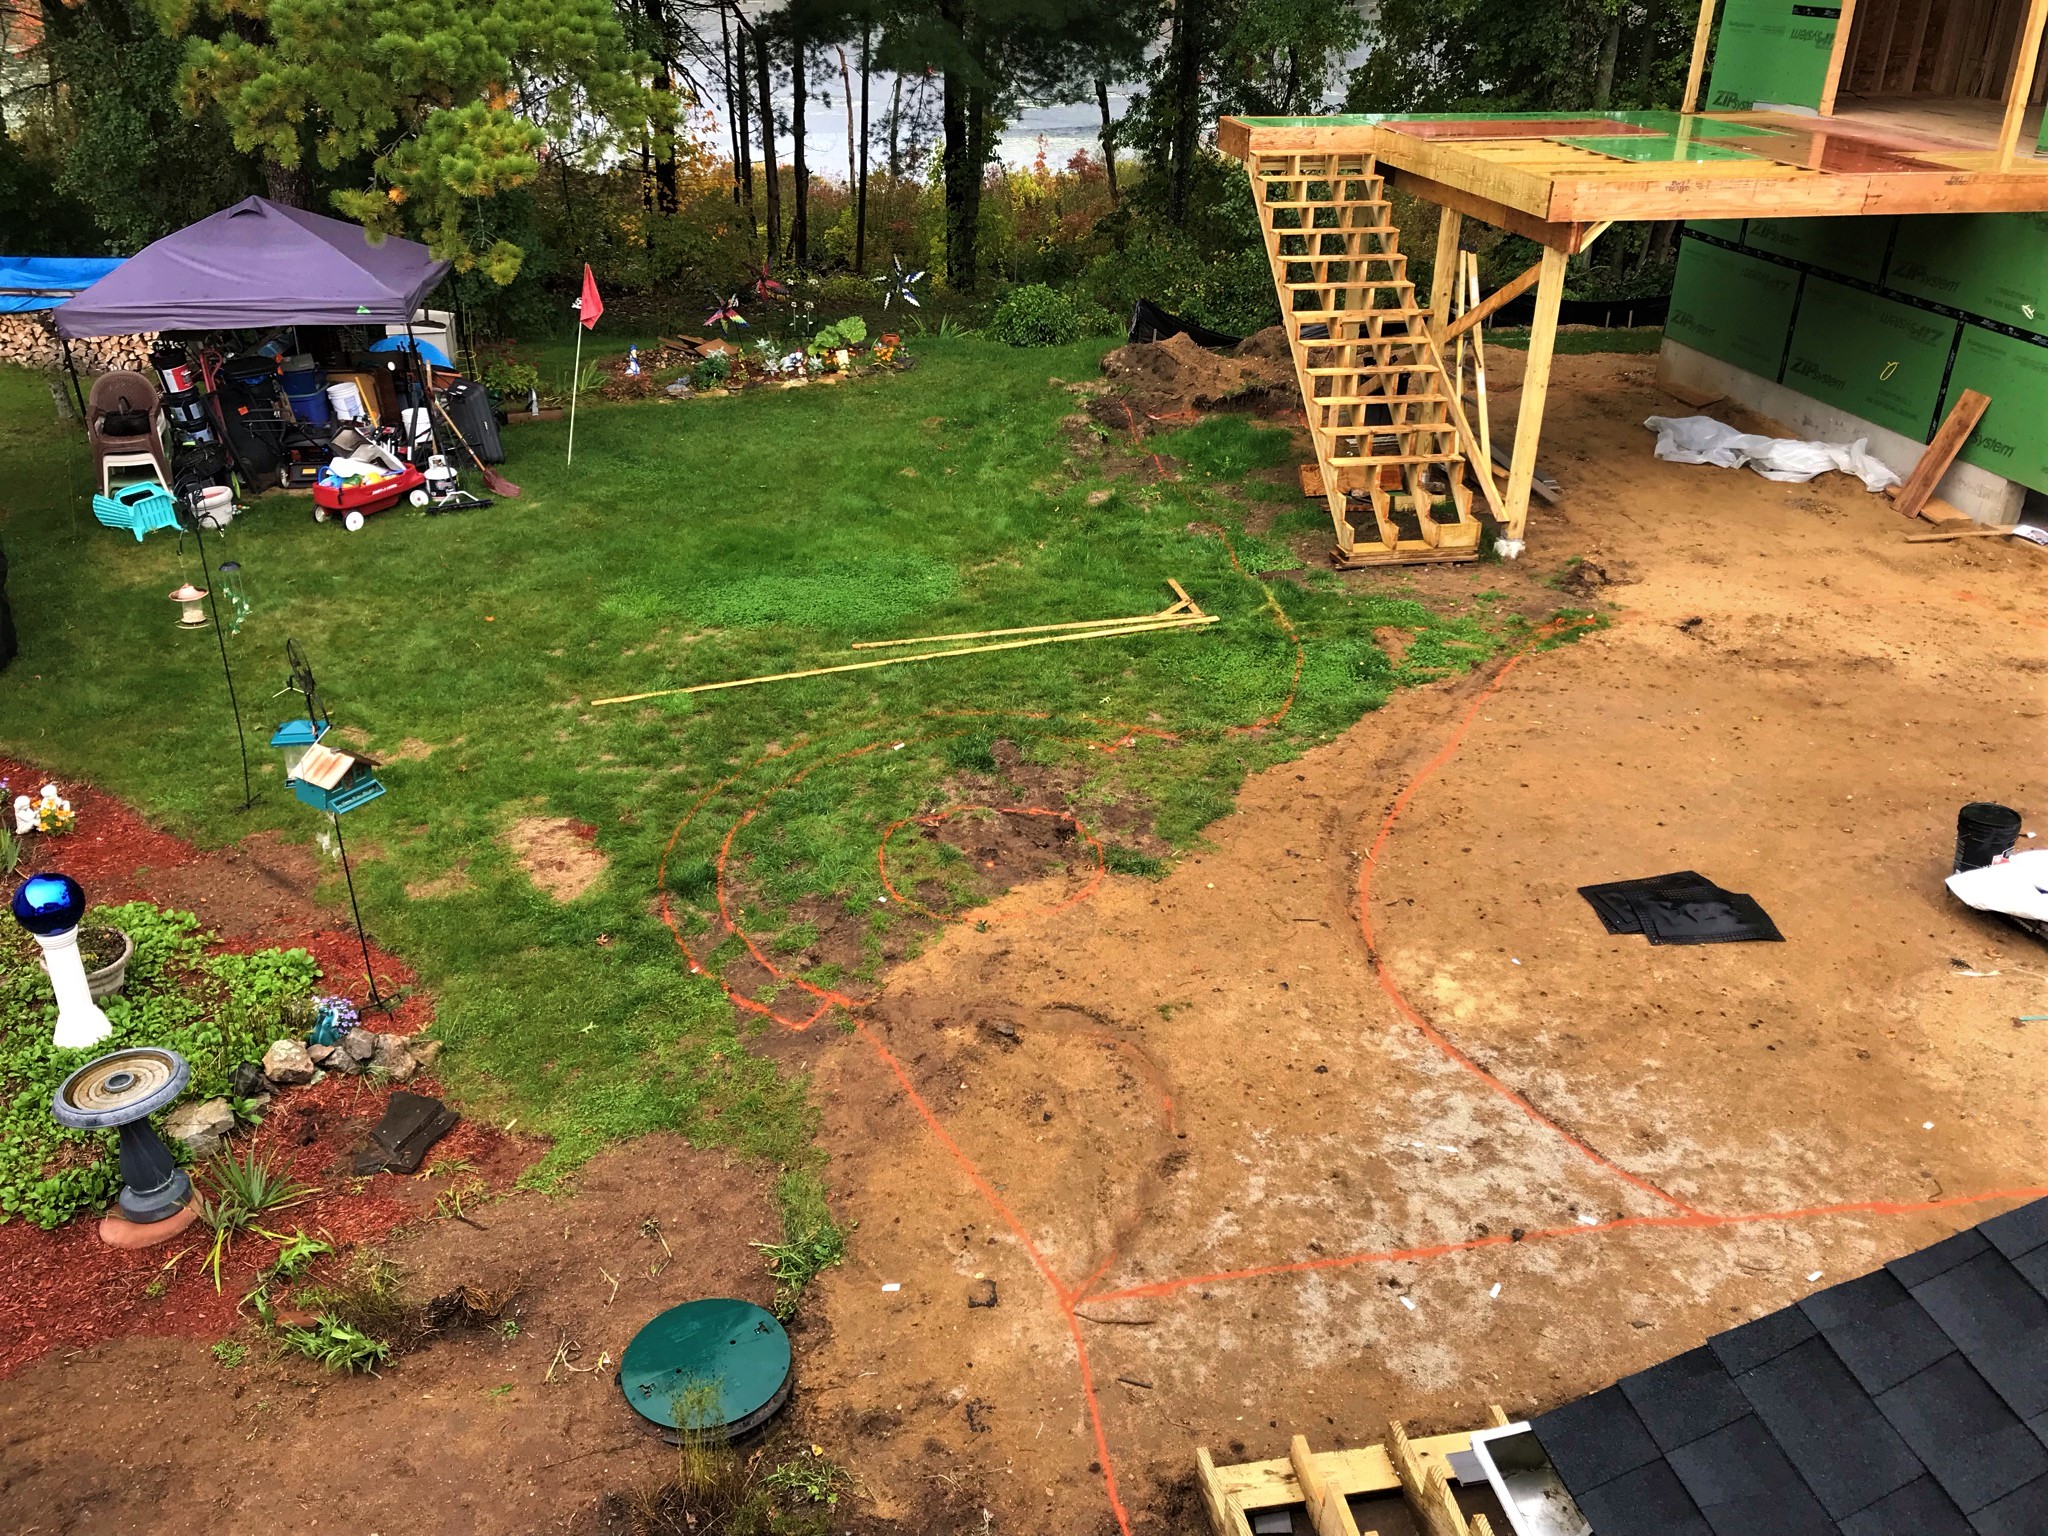
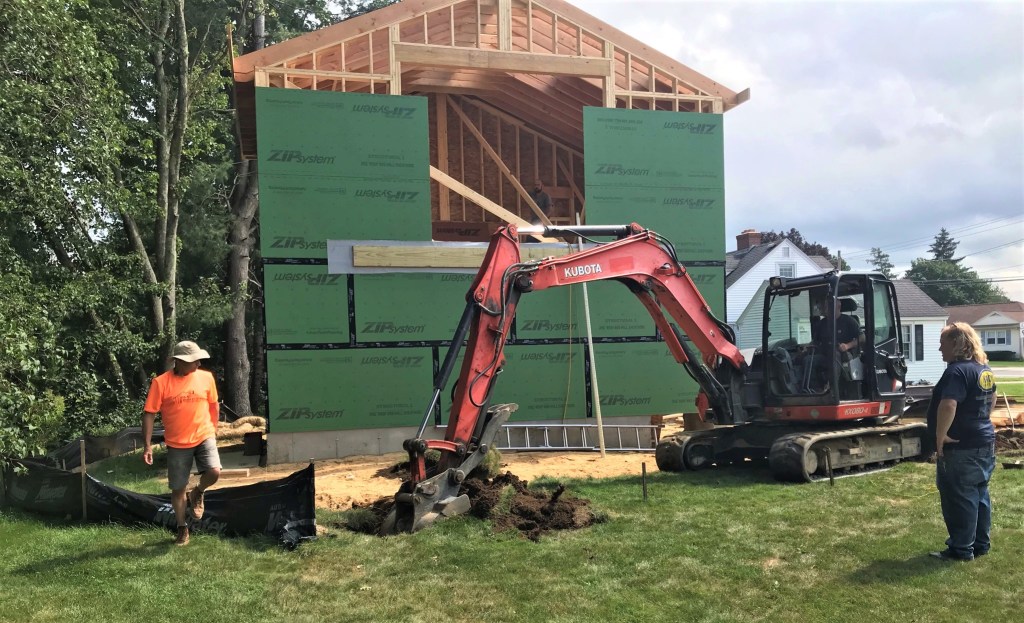
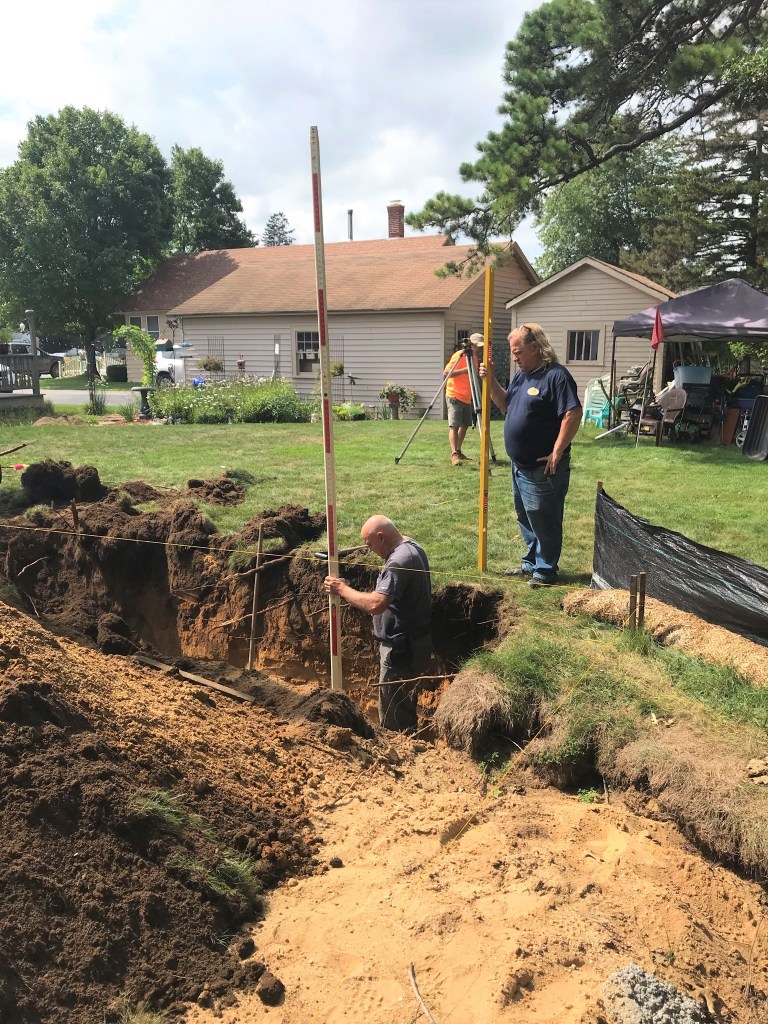
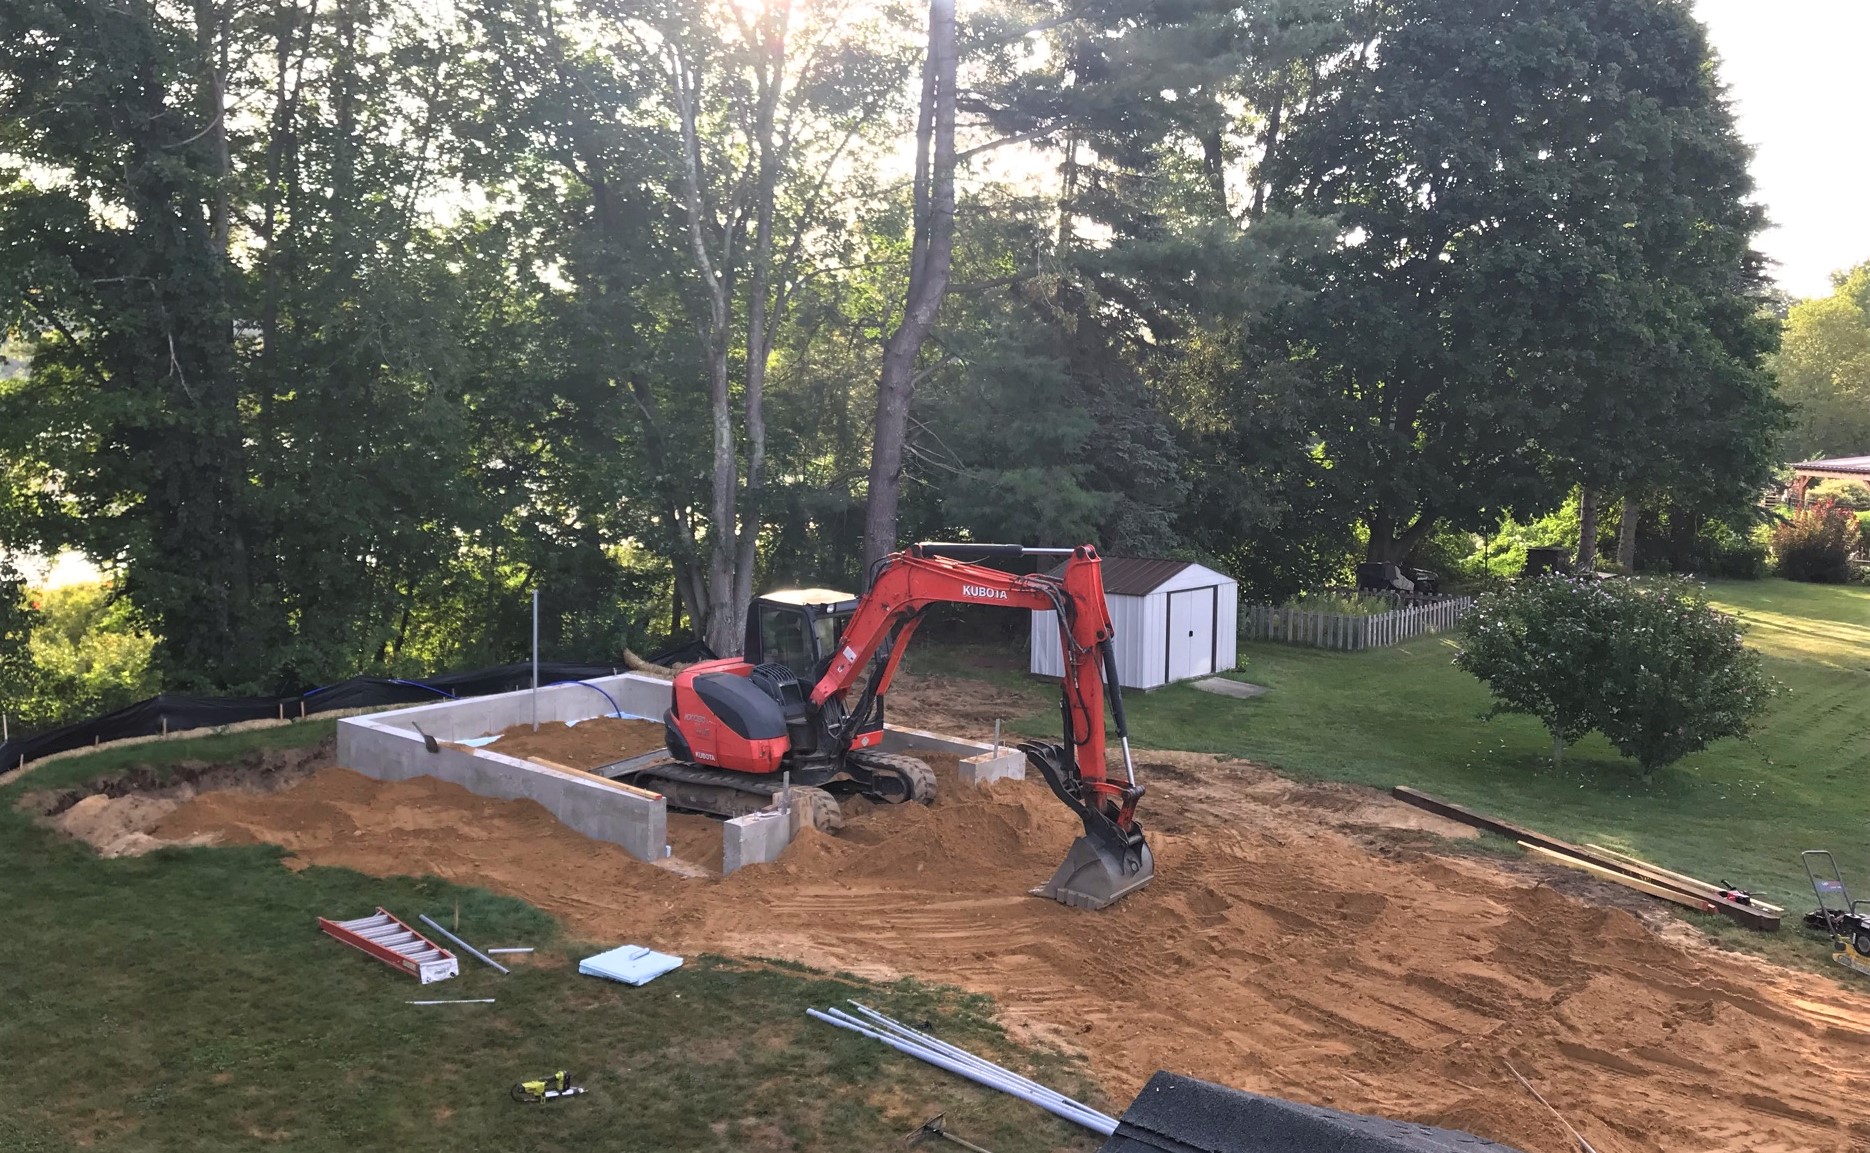
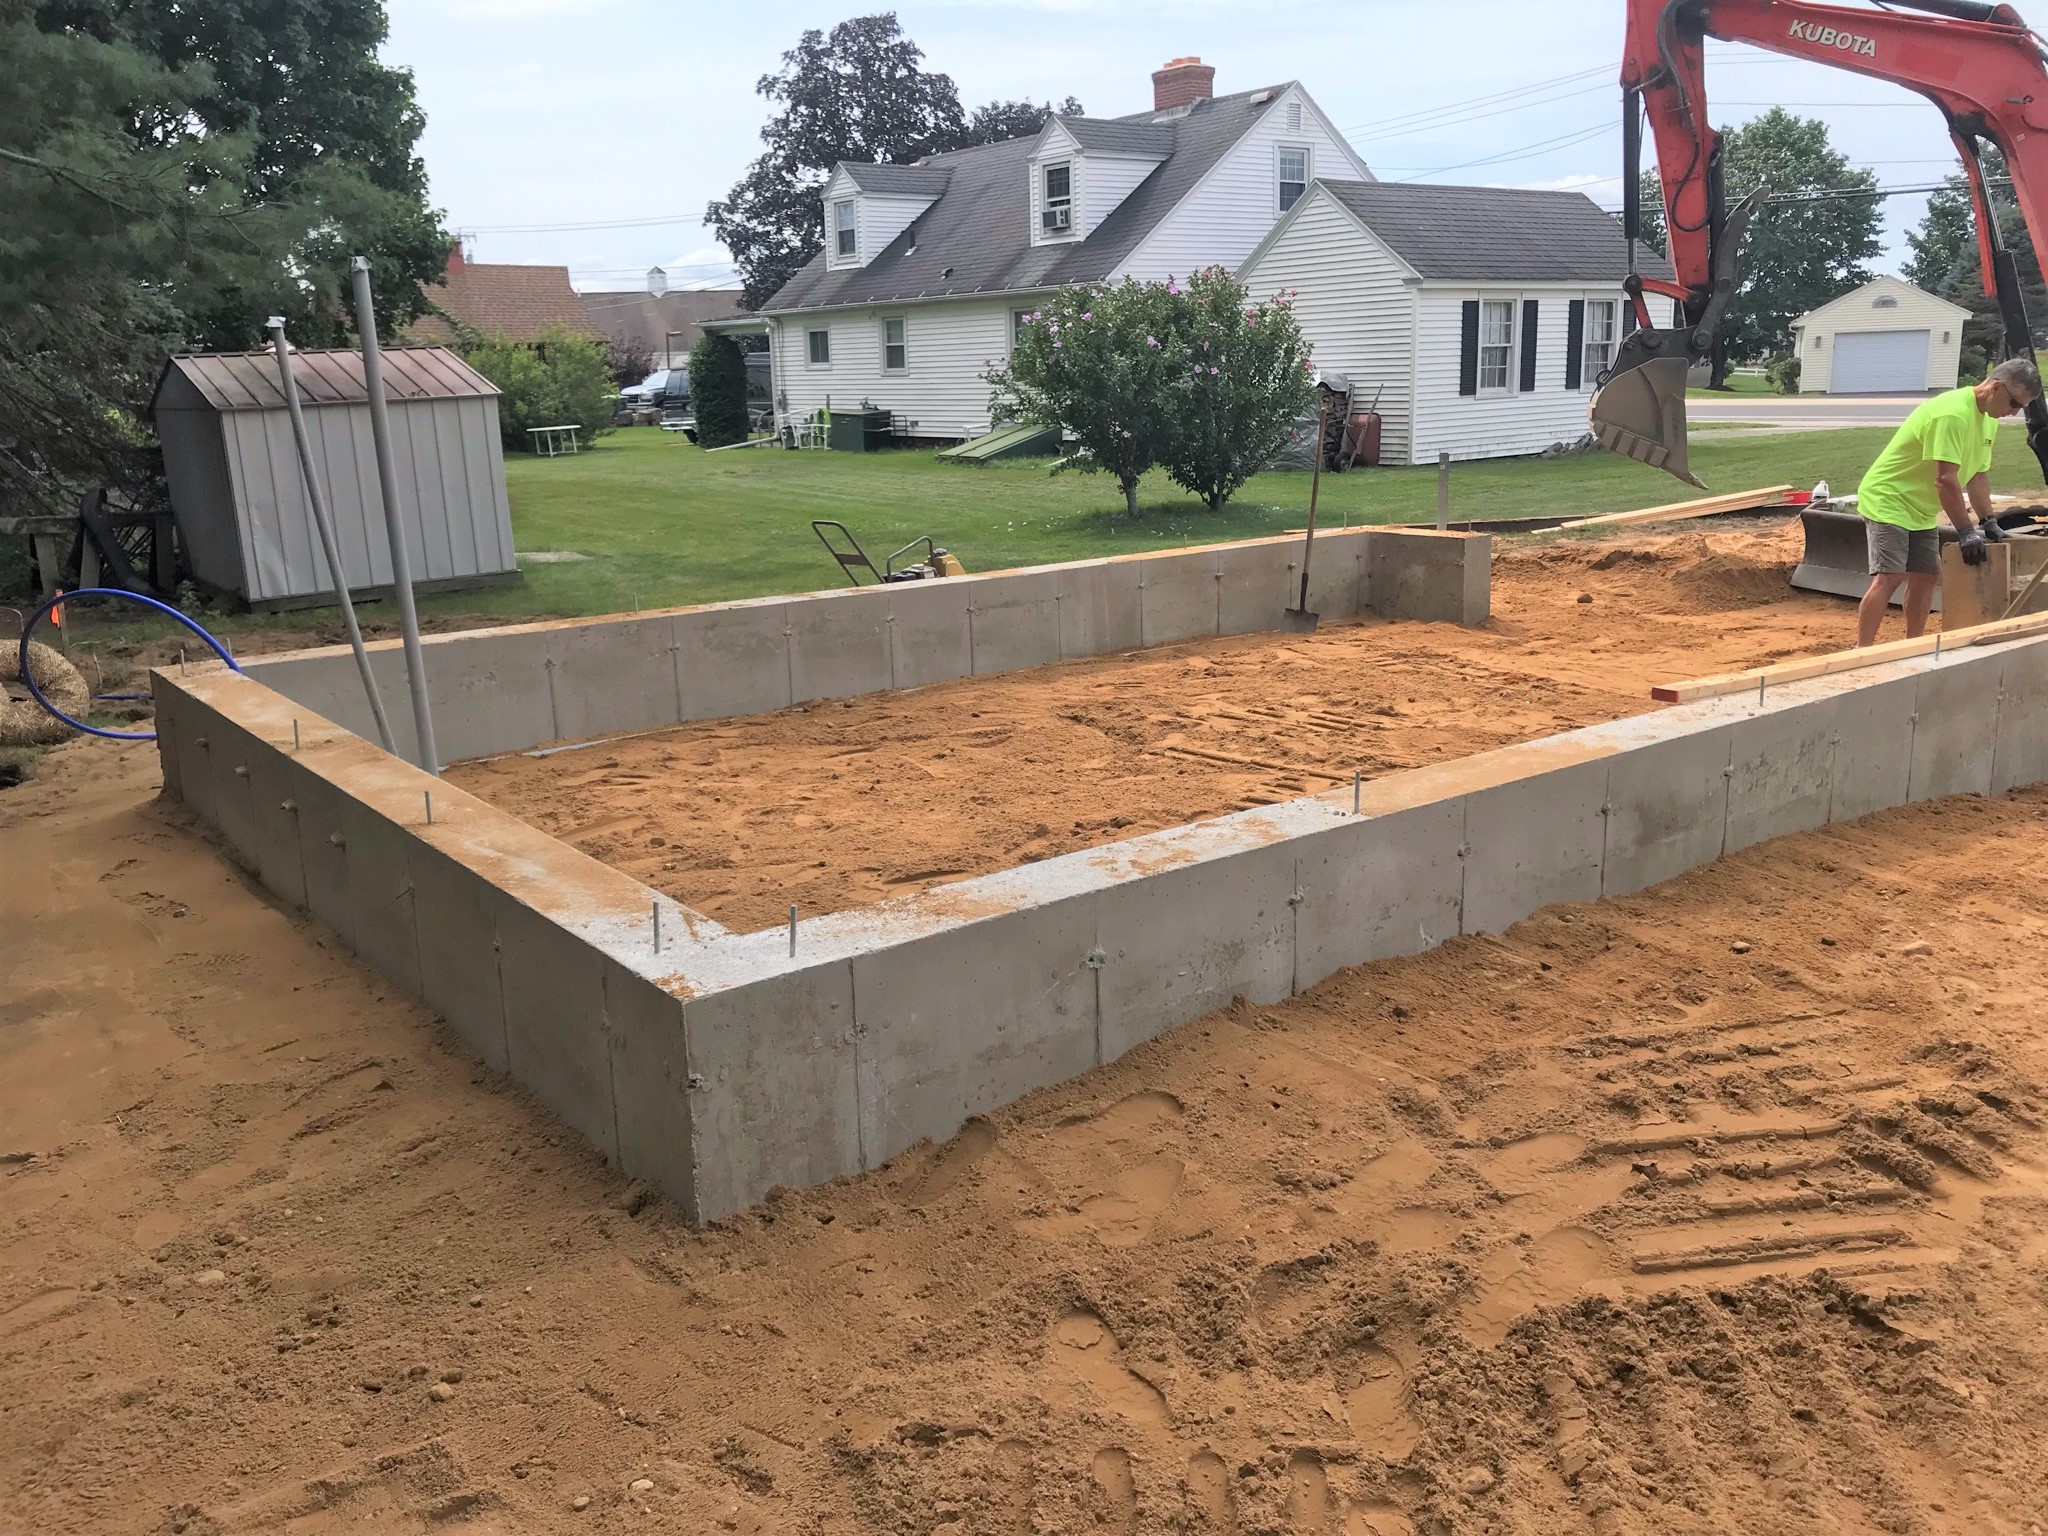
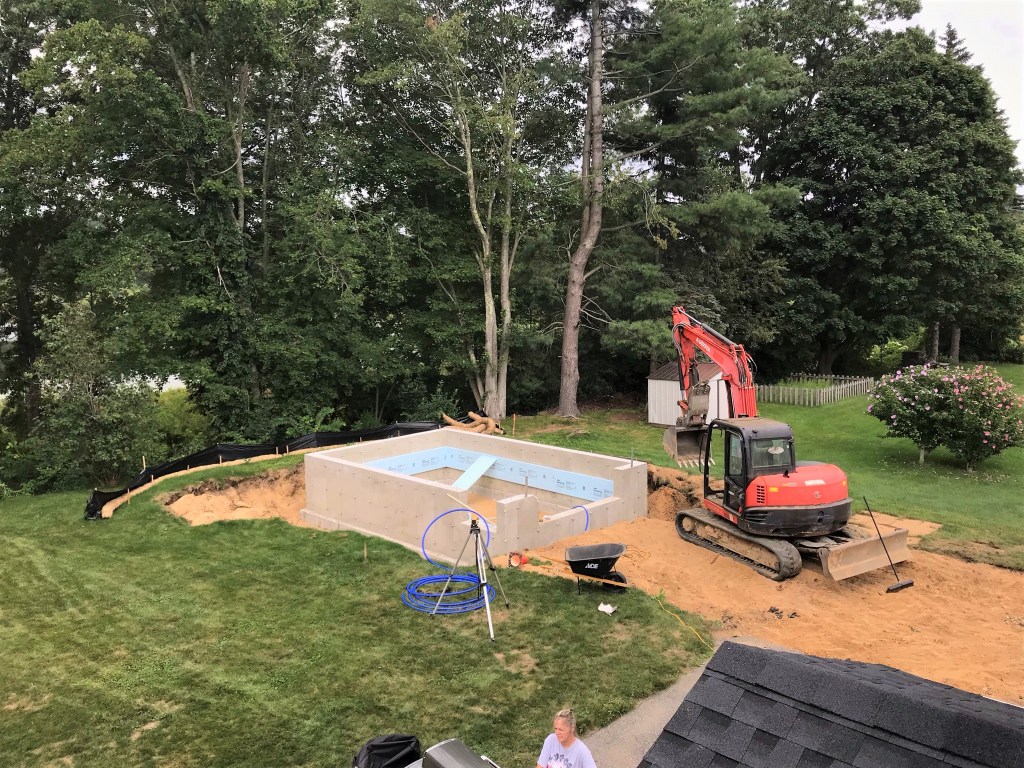
Week 12 saw work being done on both decks, and well as connection to the National Grid gas line. We also had Evandro Rodrigues from E&V Masonry (who works with Ready Installs) come out to lay out the paving stone areas and the proposed gas fire pit. They also placed the concrete floor in last week.
It’s a bit difficult to see, but the spray-painted orange lines designate the plan for paving stones. These patio stones will go under the garage deck and stairs, then connect to the house deck. The gas fireplace will be the round circle here.
Work continued on the house deck as you can see below.
The house deck in progress.
The garage stairs were stabilized and set up for decking.
The stairs being braced and supports added.Close up of previous shot.
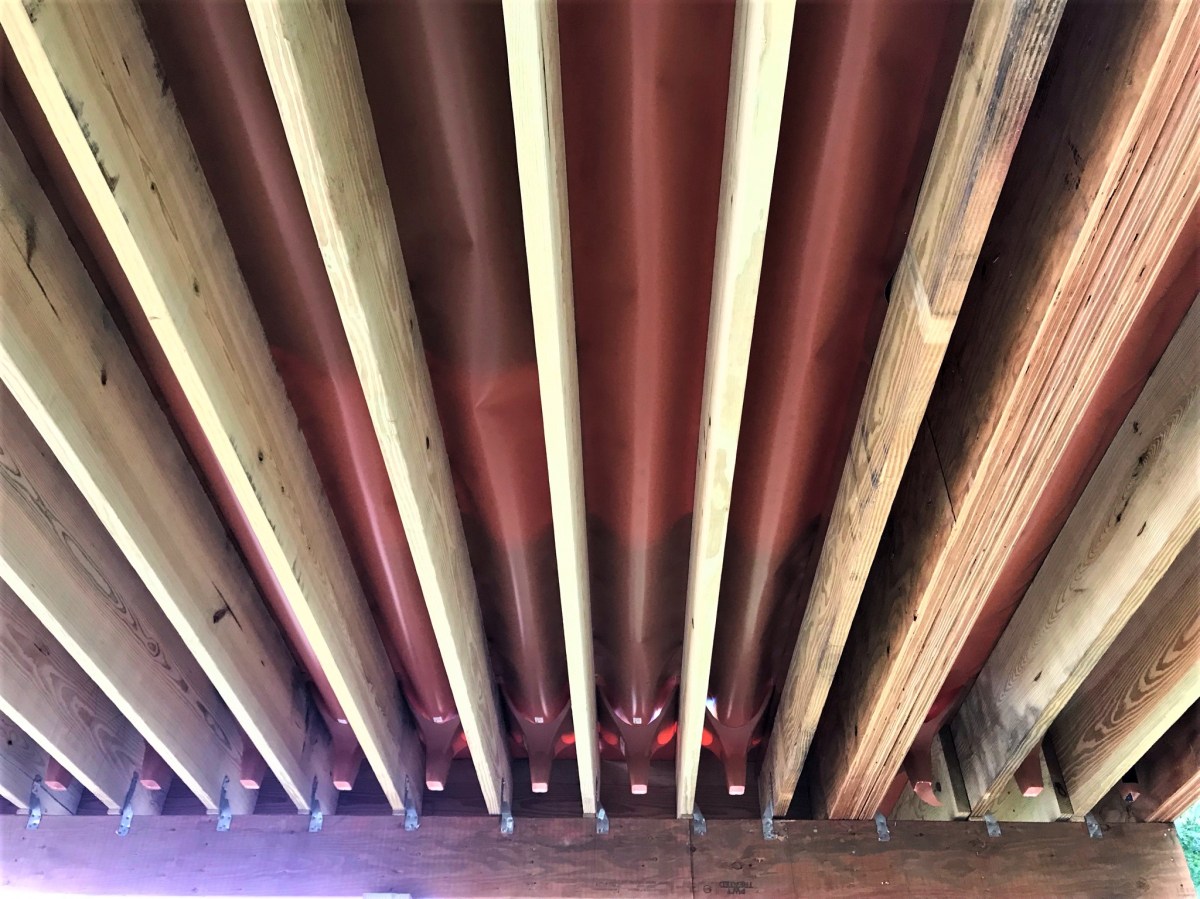
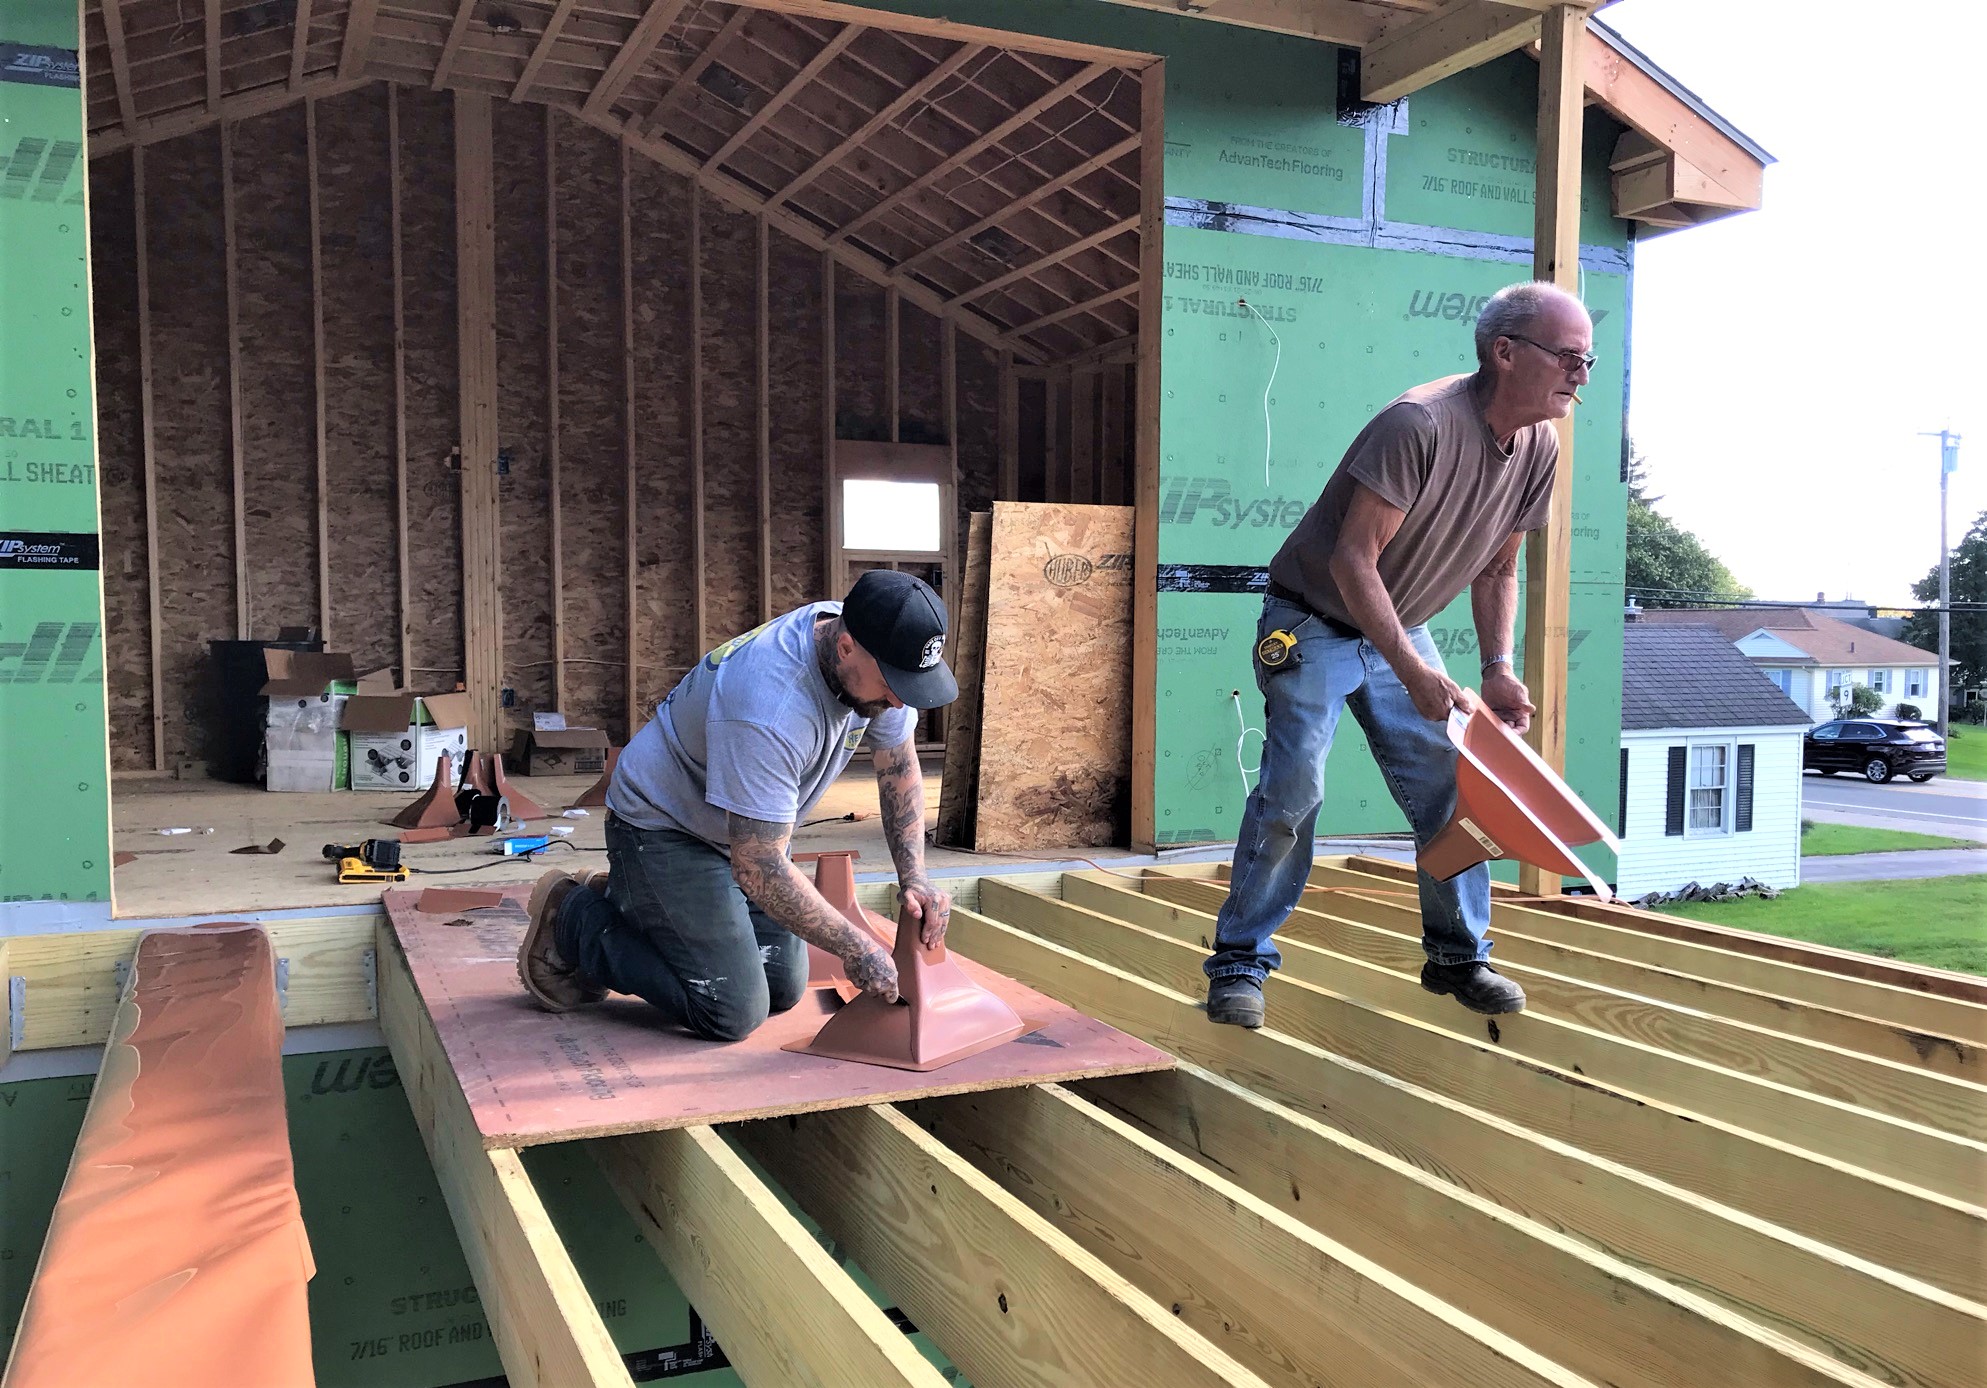
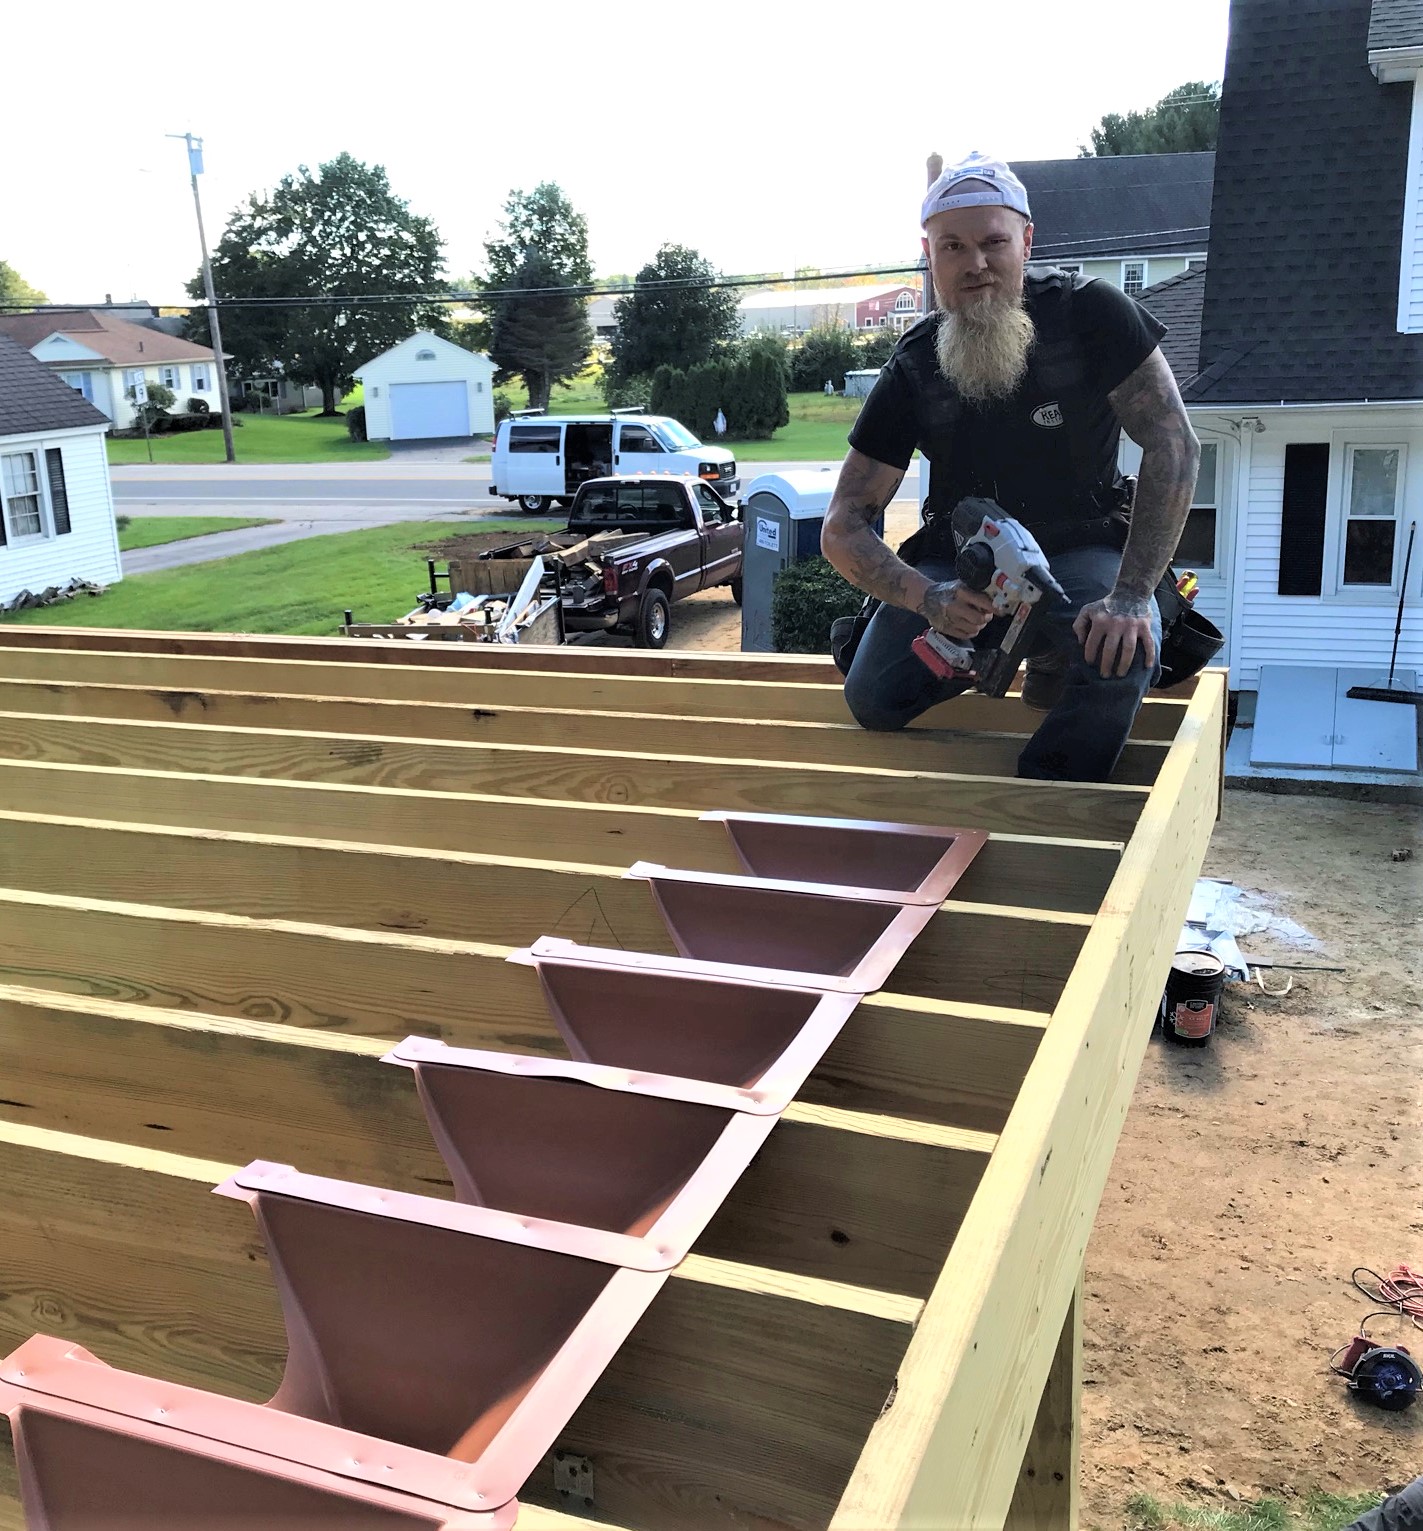
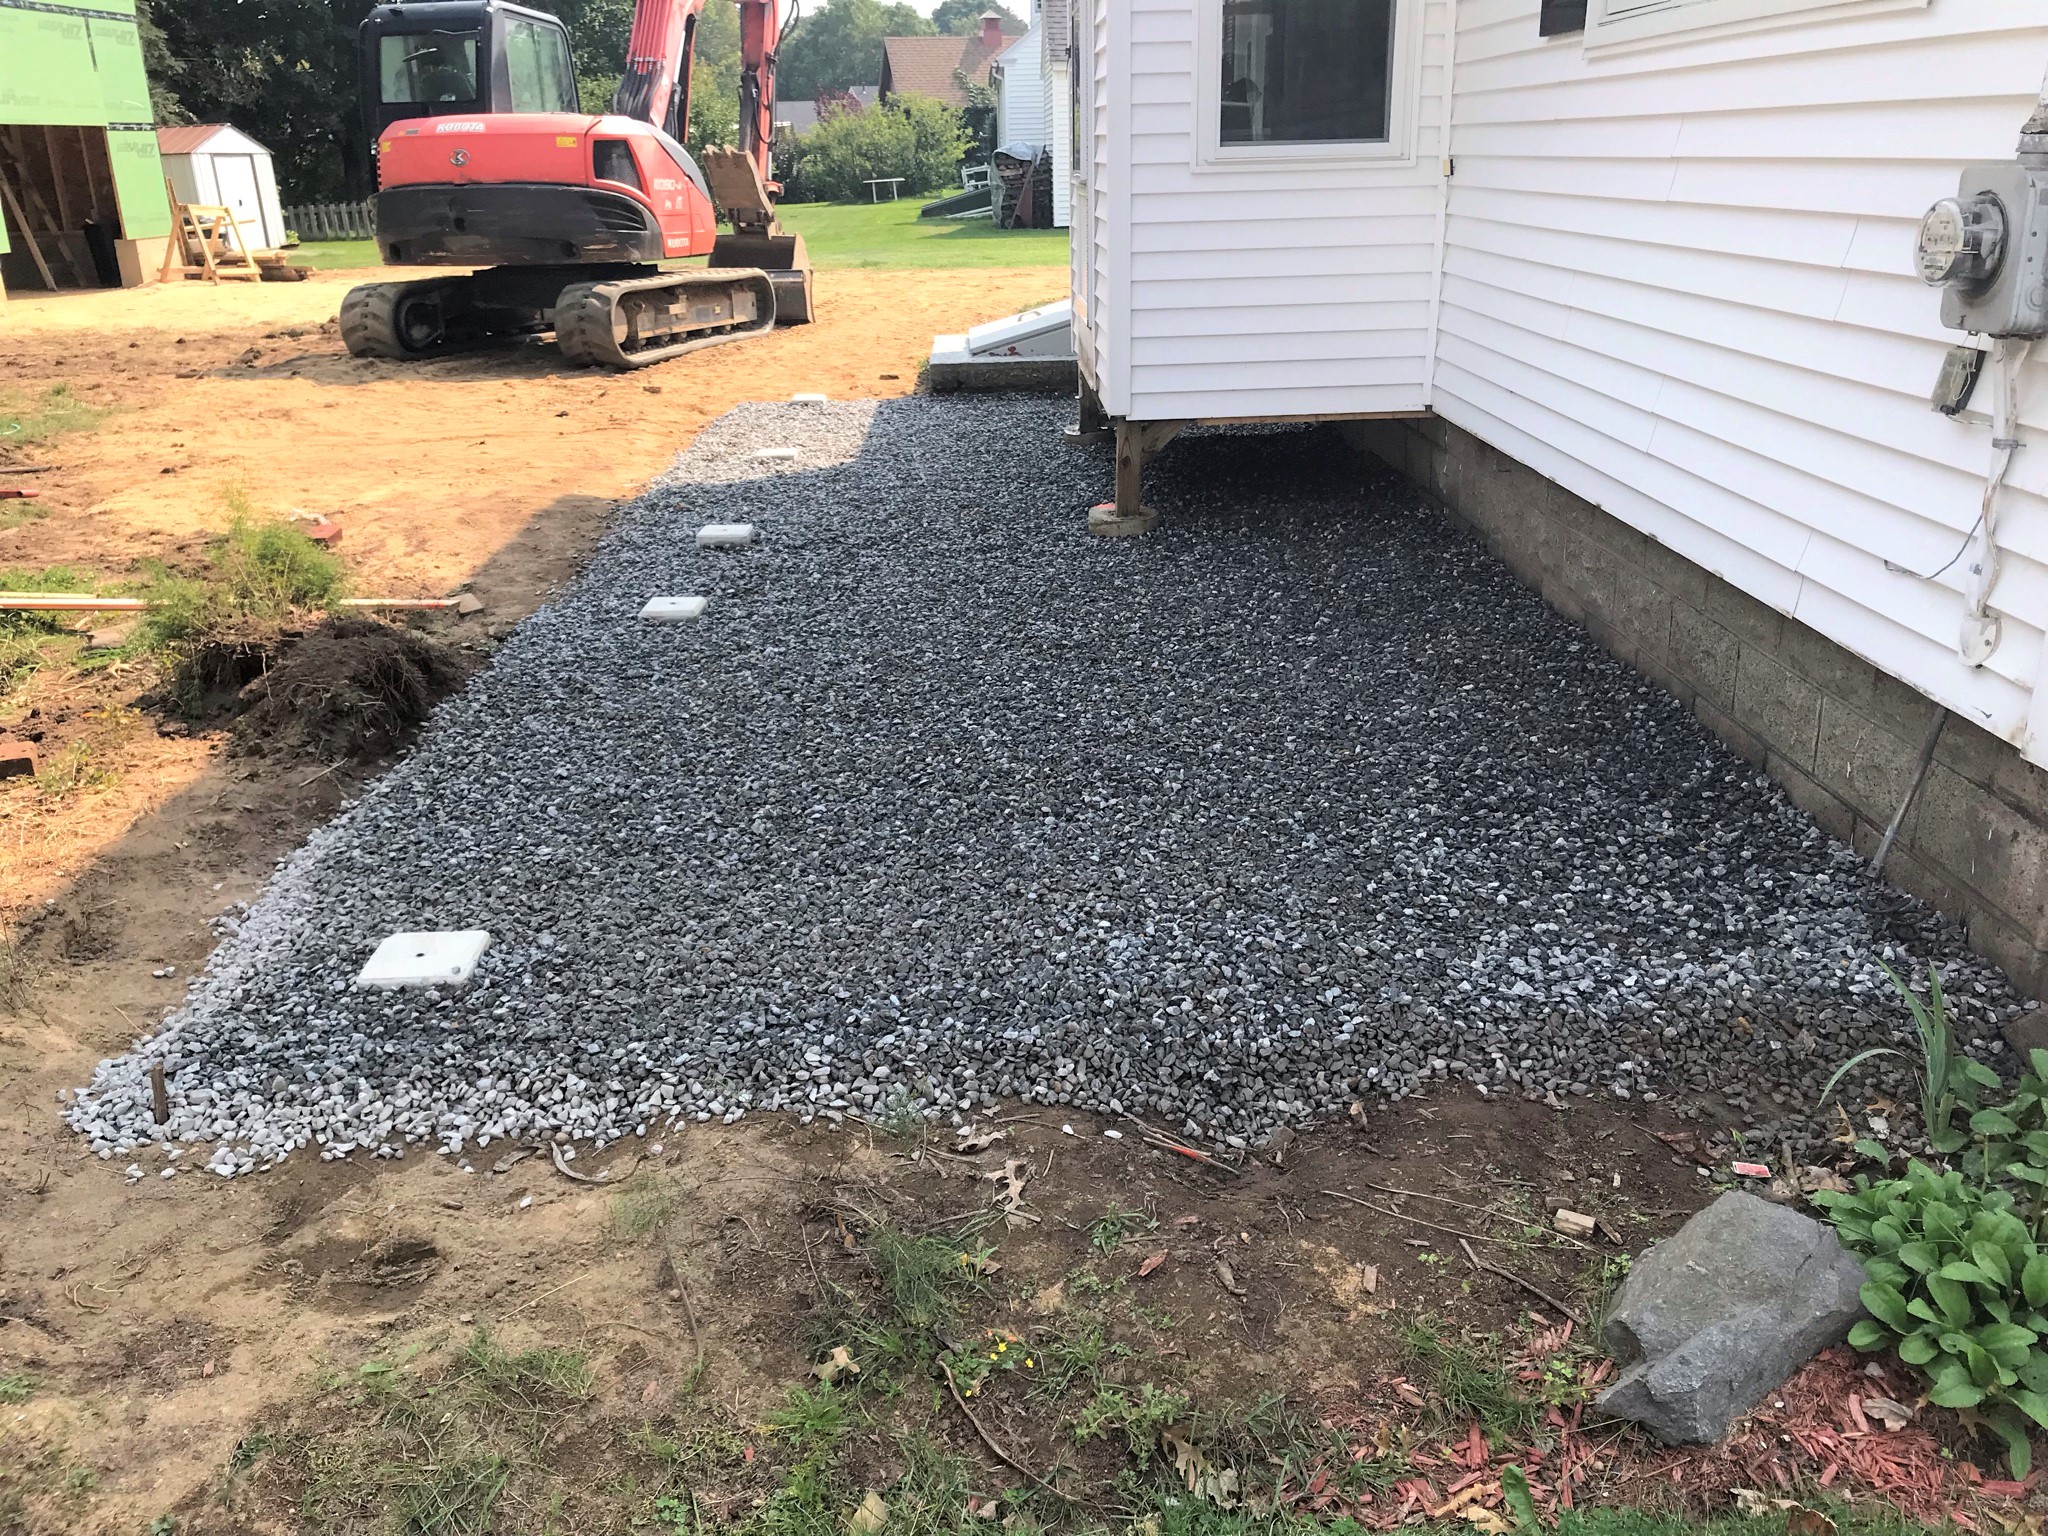
On the garage deck, the Trex rain gutter system was installed. This will keep the patio underneath dry. It will feed into a gutter under the downspouts.
The downspouts fit between the joists (with some help).Jon and Will prep the downspouts for Josh.Josh Victor stapling in the downspouts.
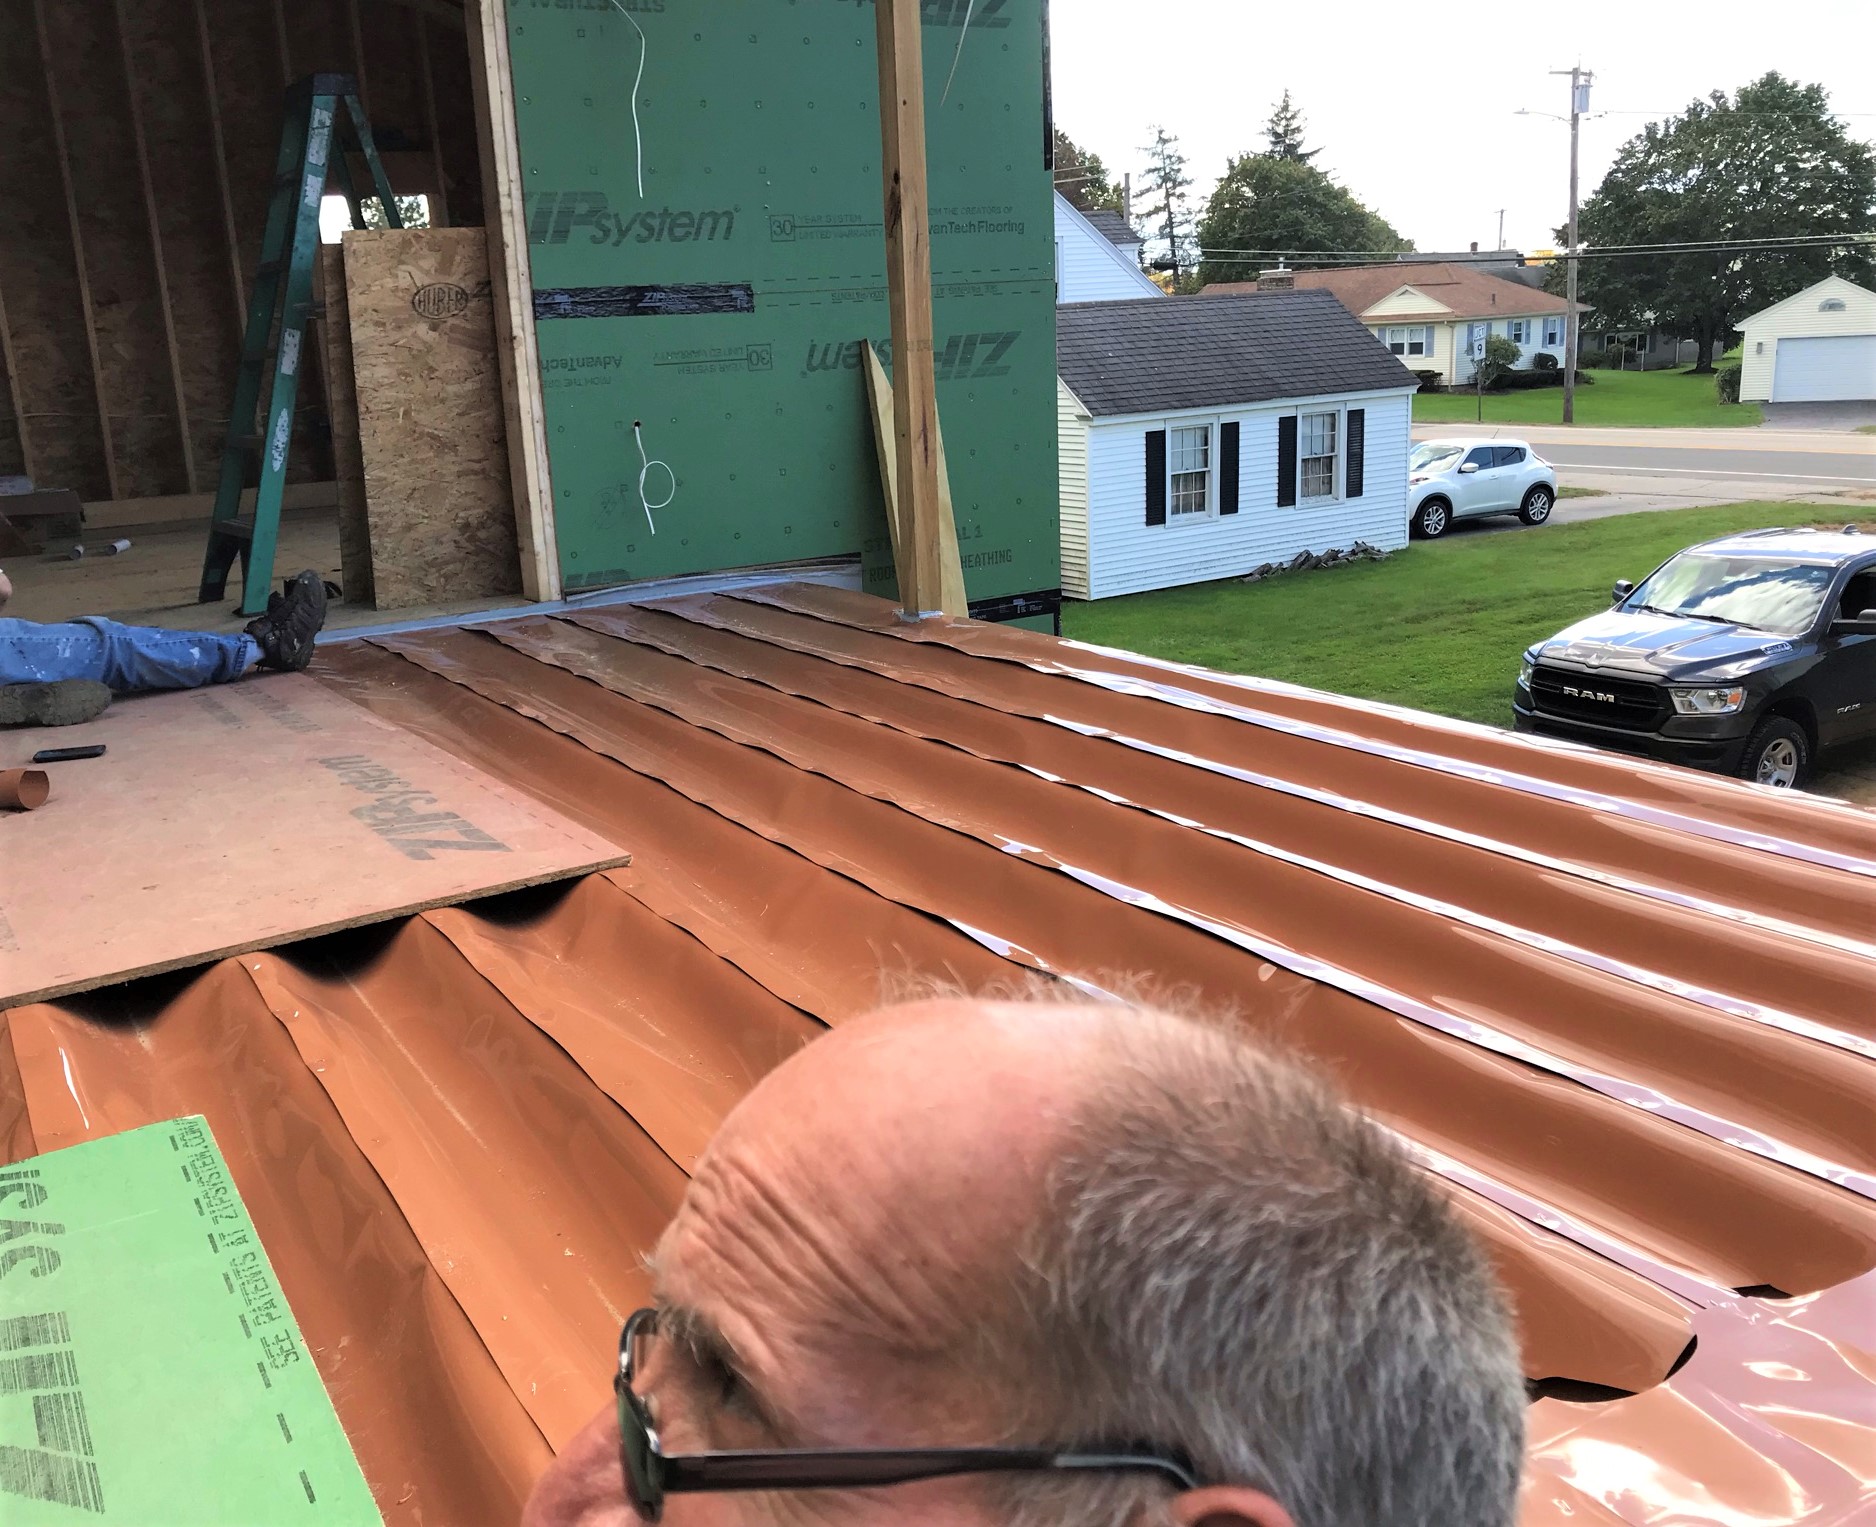
After the downspouts were in, the membrane that will carry the water to them is installed with the proper slope and sealed.
You can see the membrane here (and Will’s head).Top view of the deck.Underneath view.
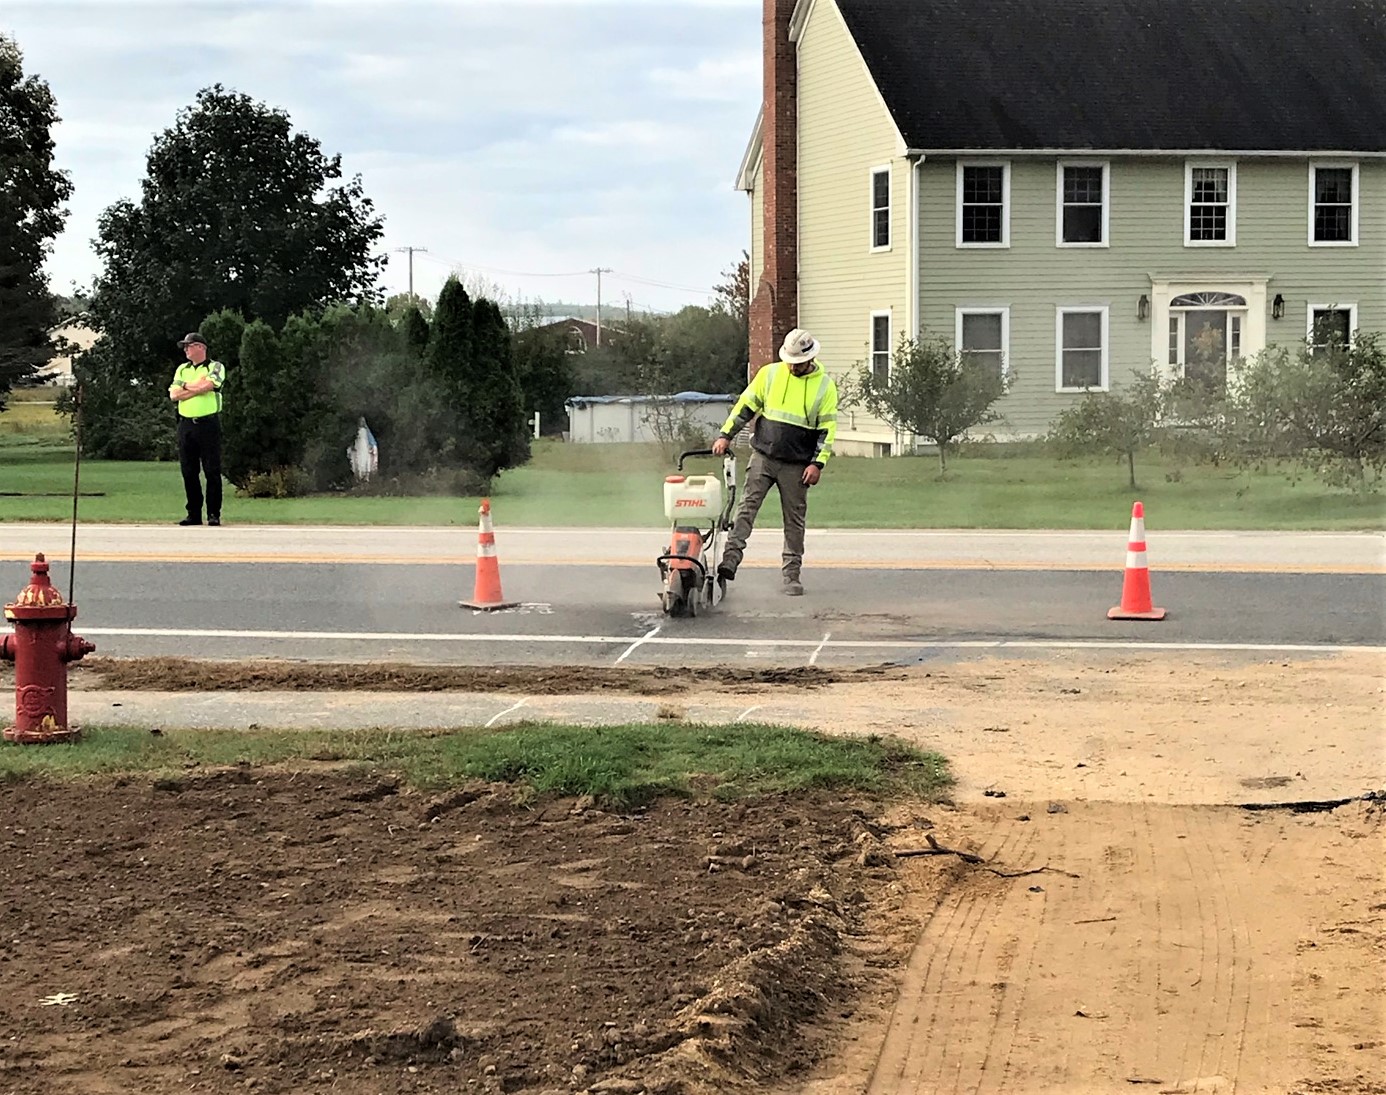
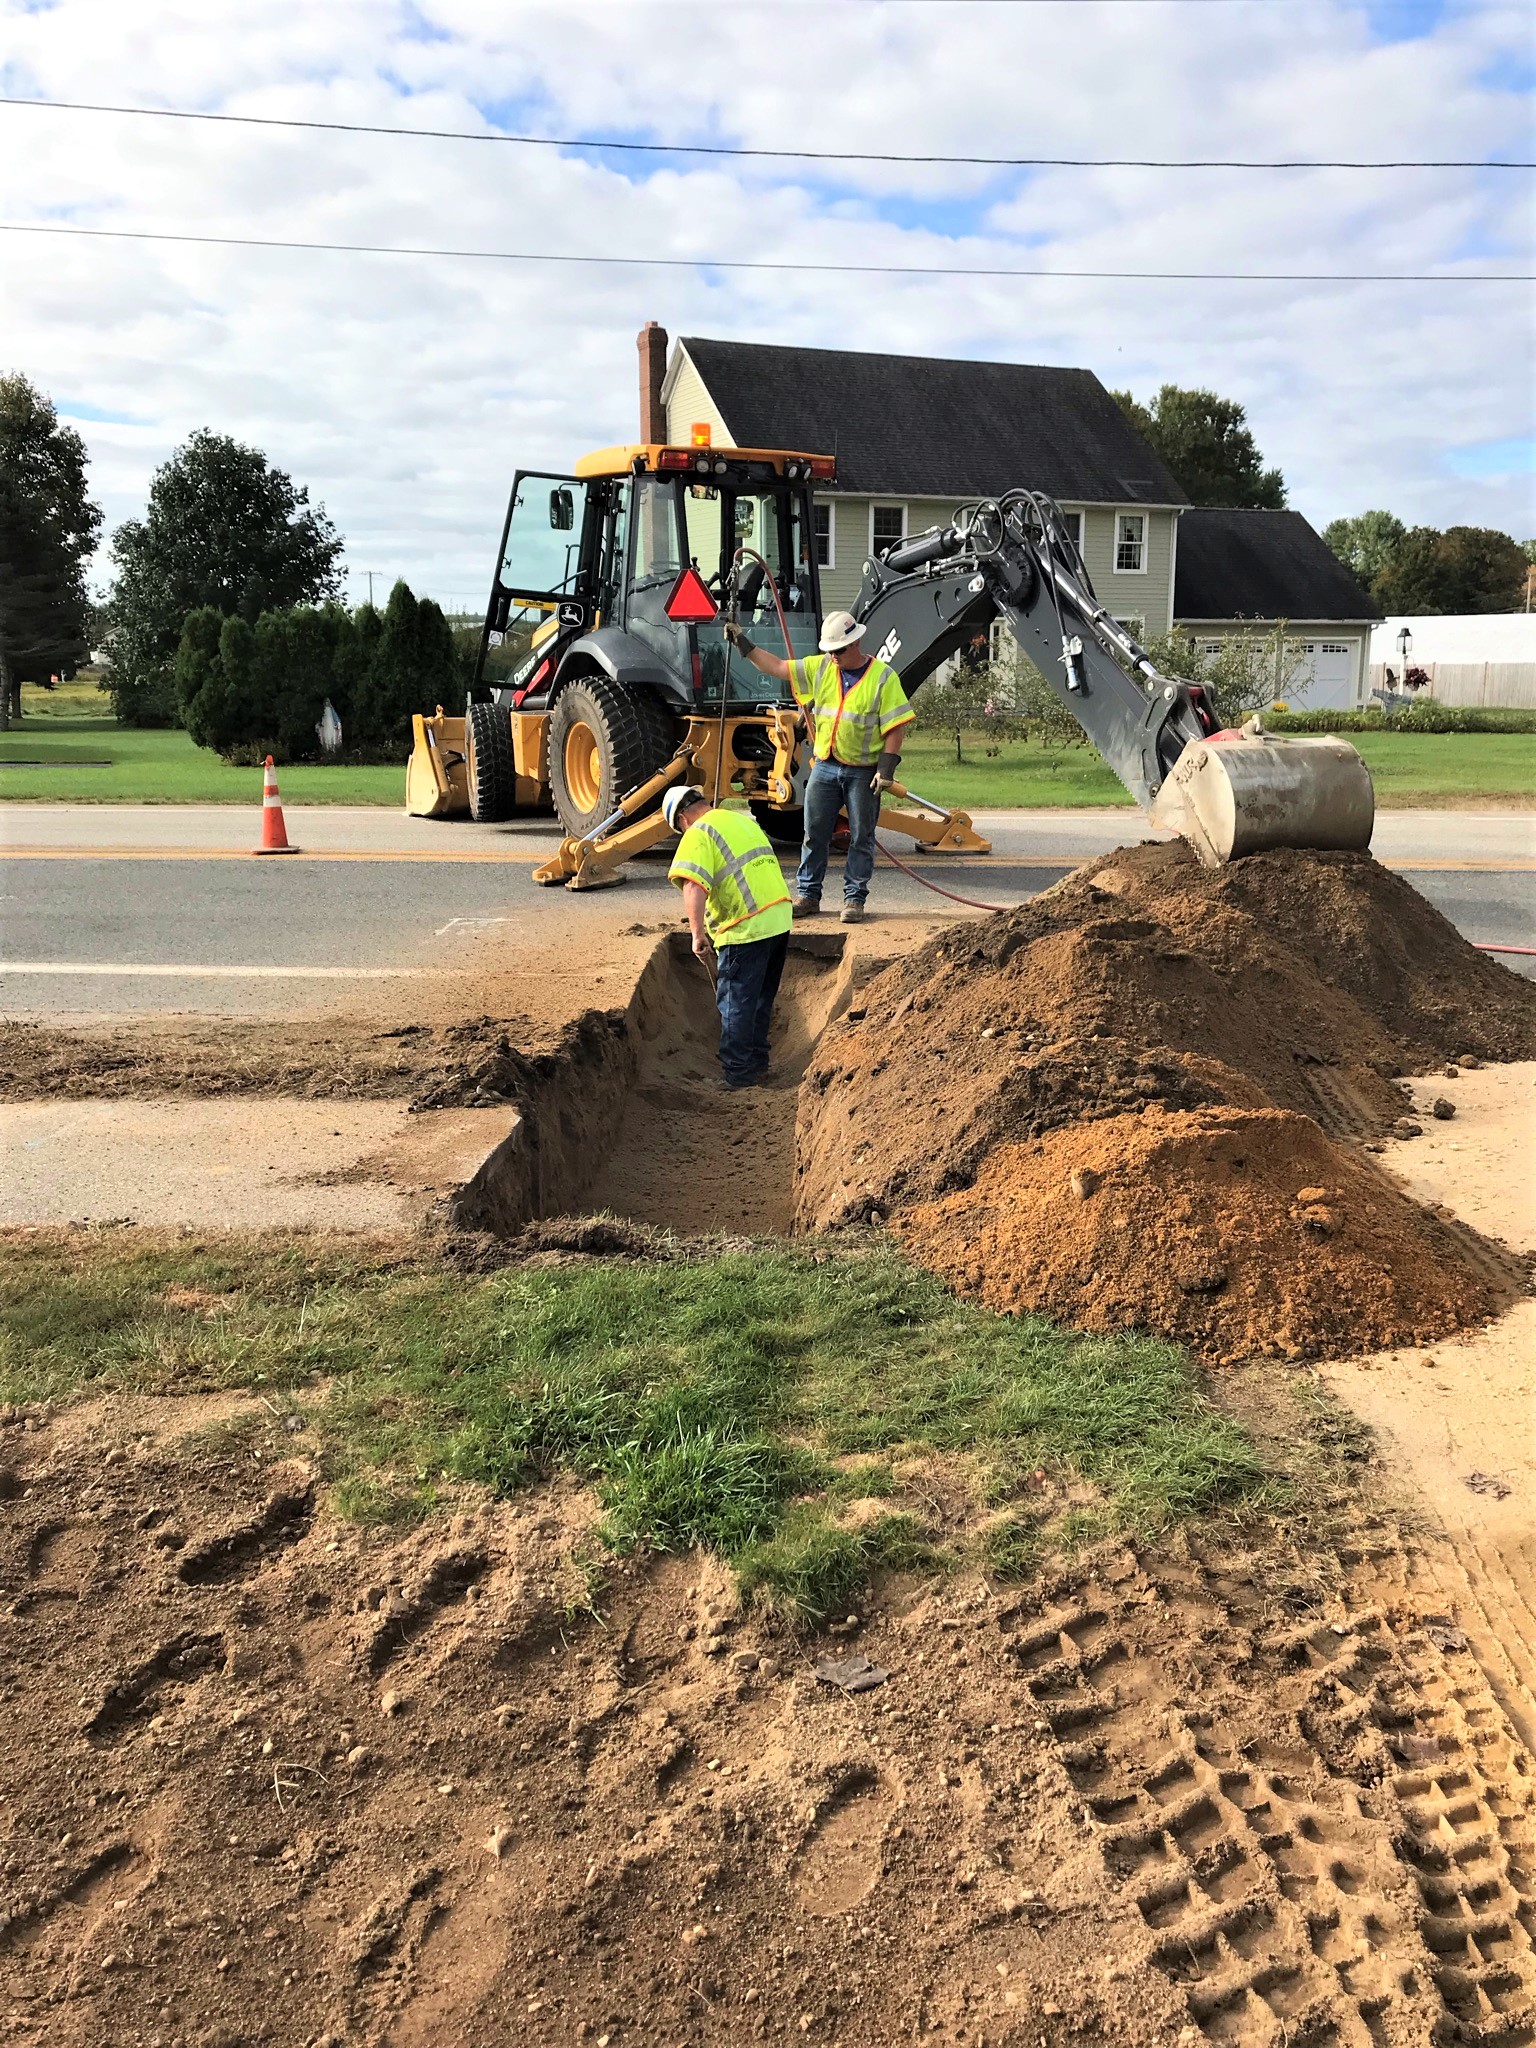
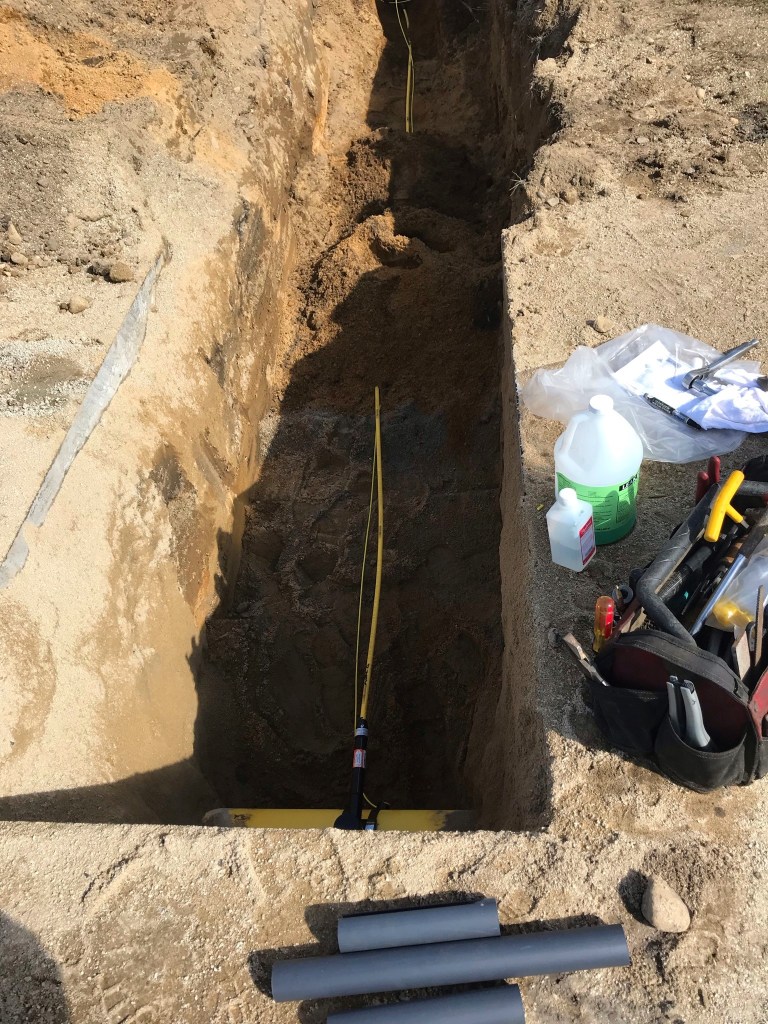
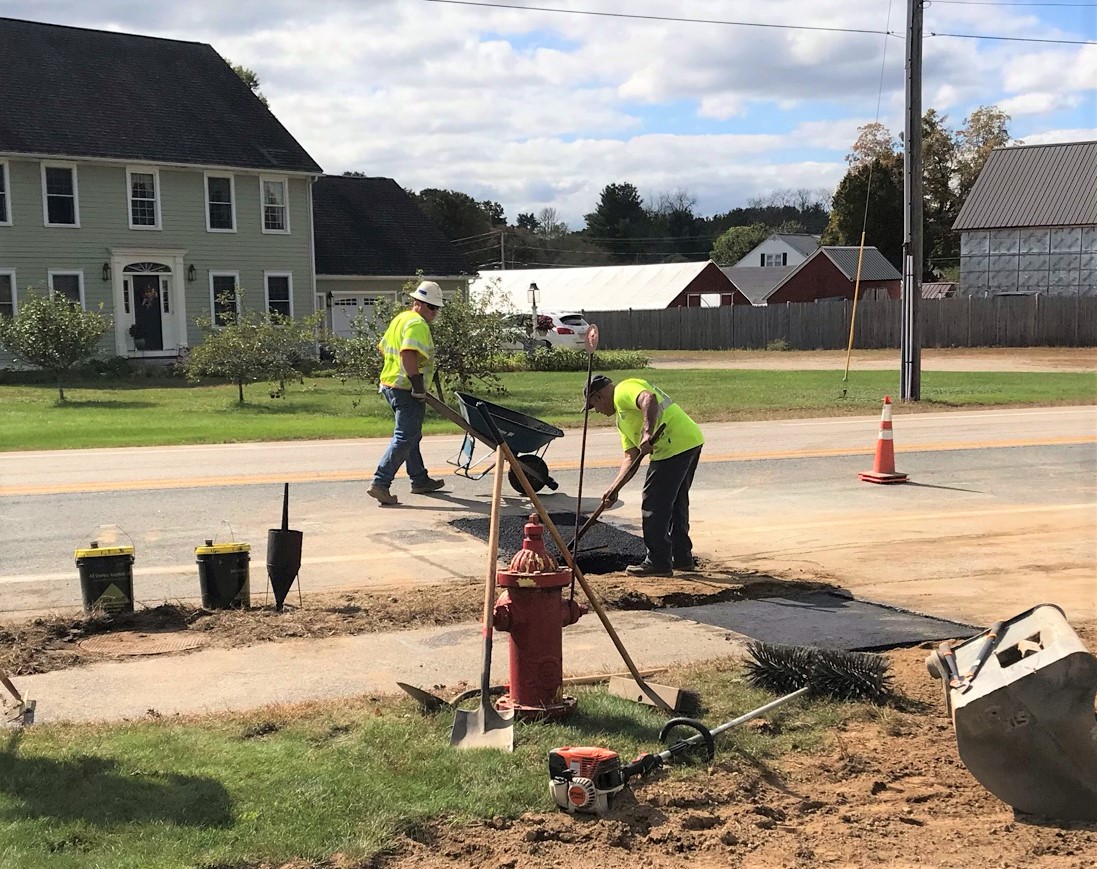
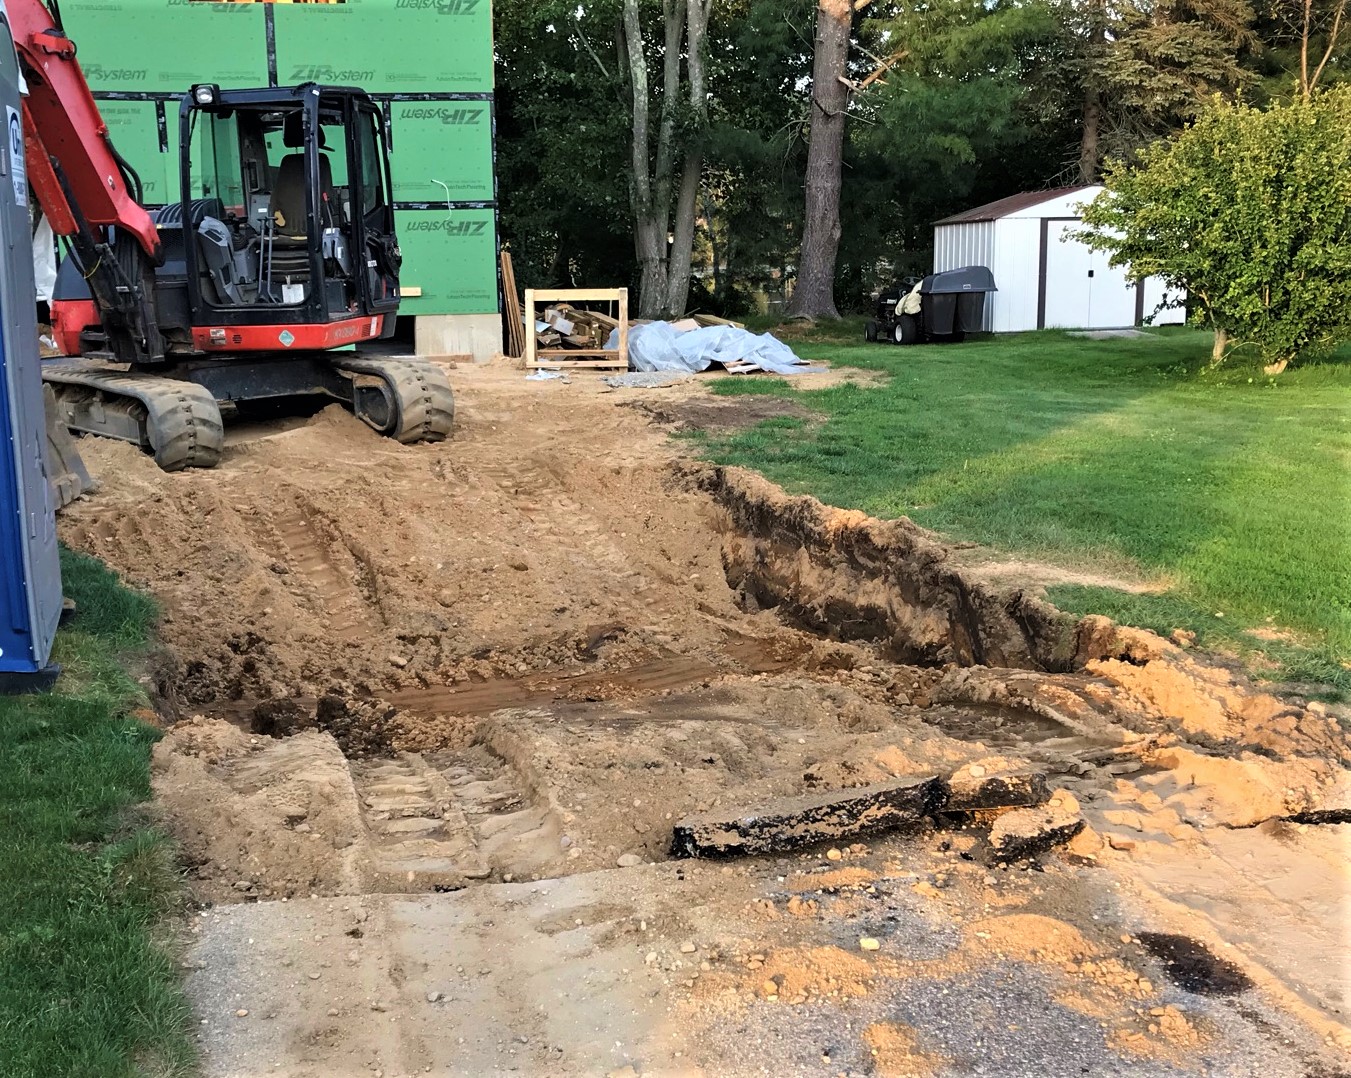
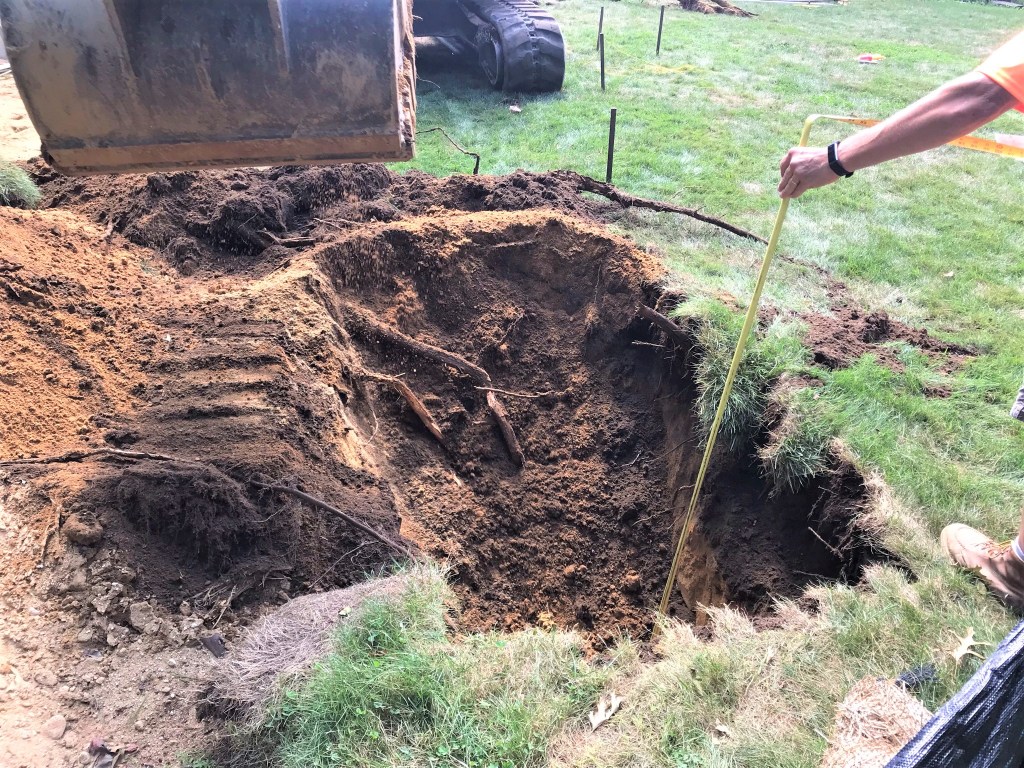
Friday was a very active day, as National Grid came in to excavate and place the gas line. We also had deliveries for the finishing of the garage deck and stairs.
National Grid begins cutting the street and sidewalk to excavate for the new gas line.Cut that asphalt!There’s a gas main here somewhere……found it!
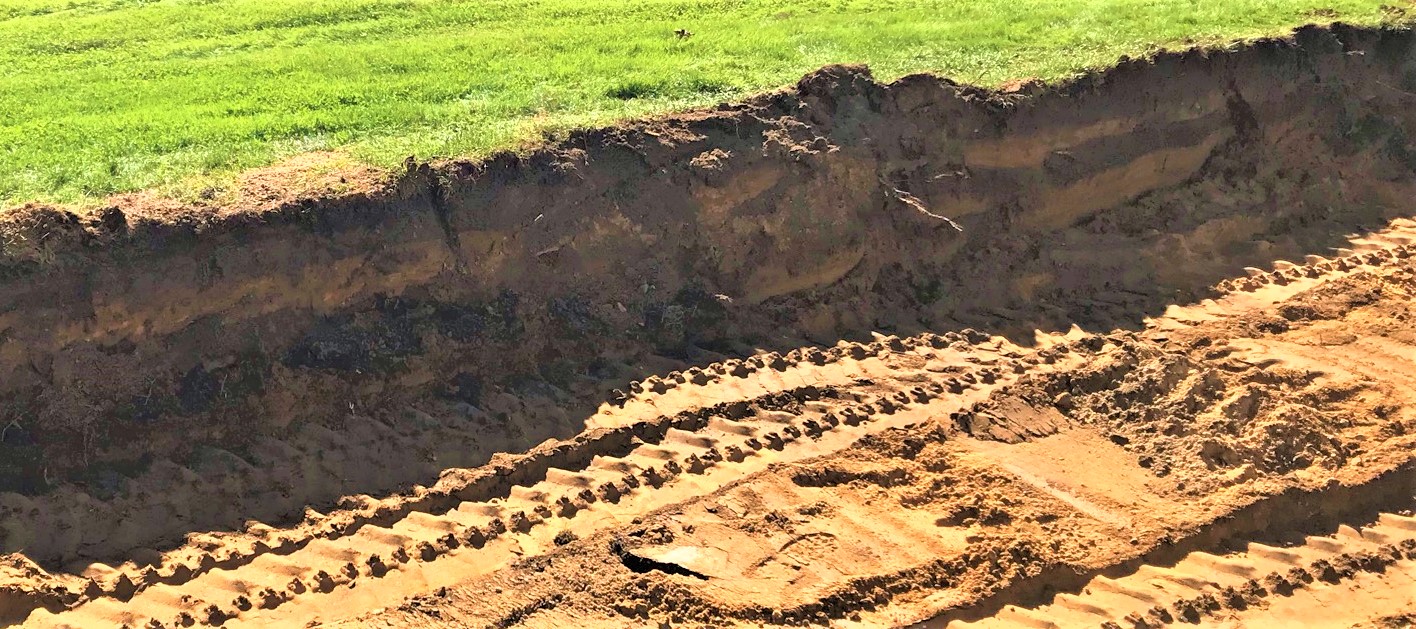
The line went from the street to the back of the garage along the driveway. This will be a second line we will have, and will provide gas for the heating of the garage as well as the future fire pit. Below you’ll see some shots of the trenching, connecting, and the asphalt repair.
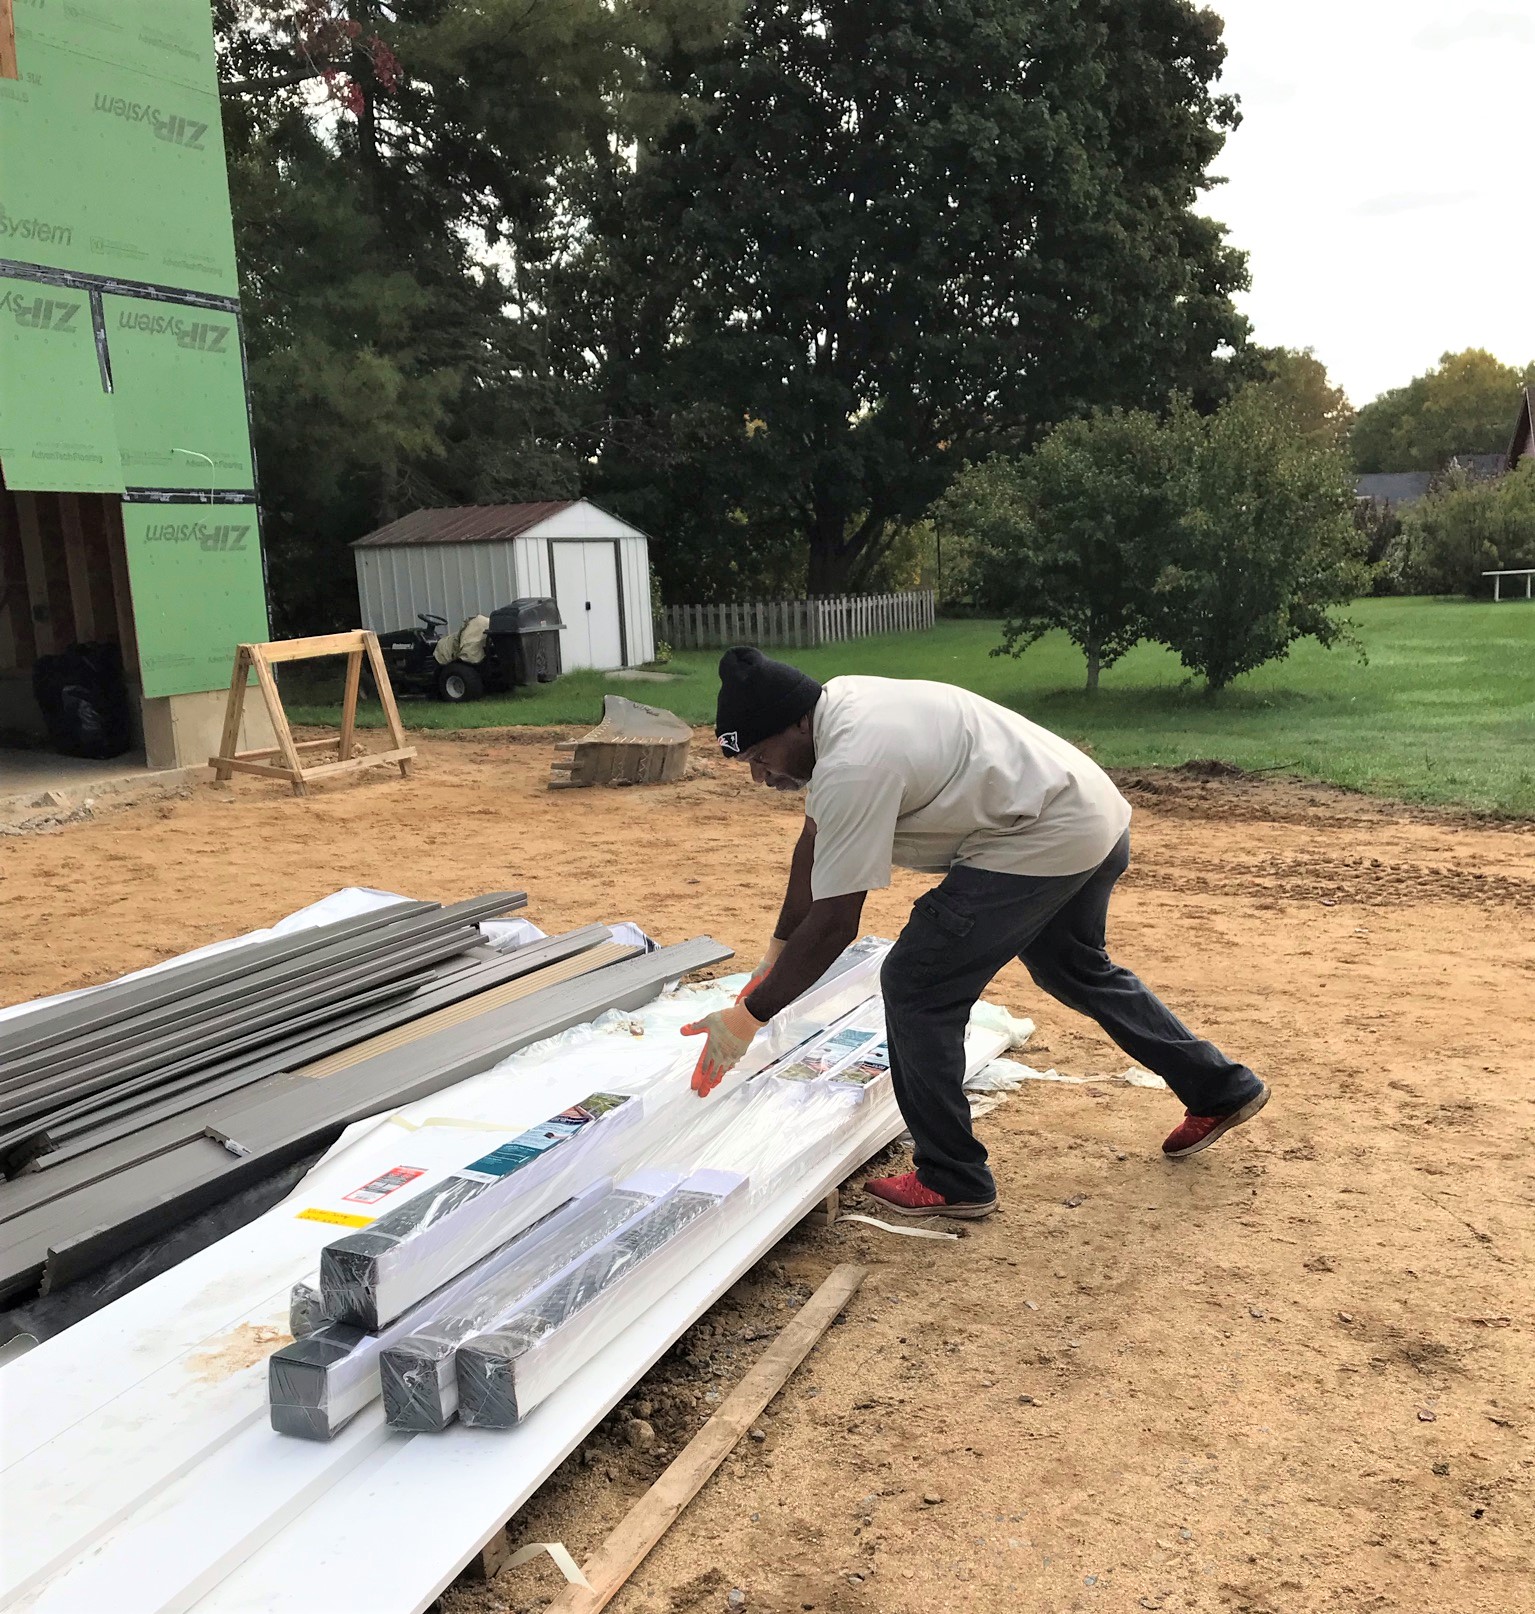
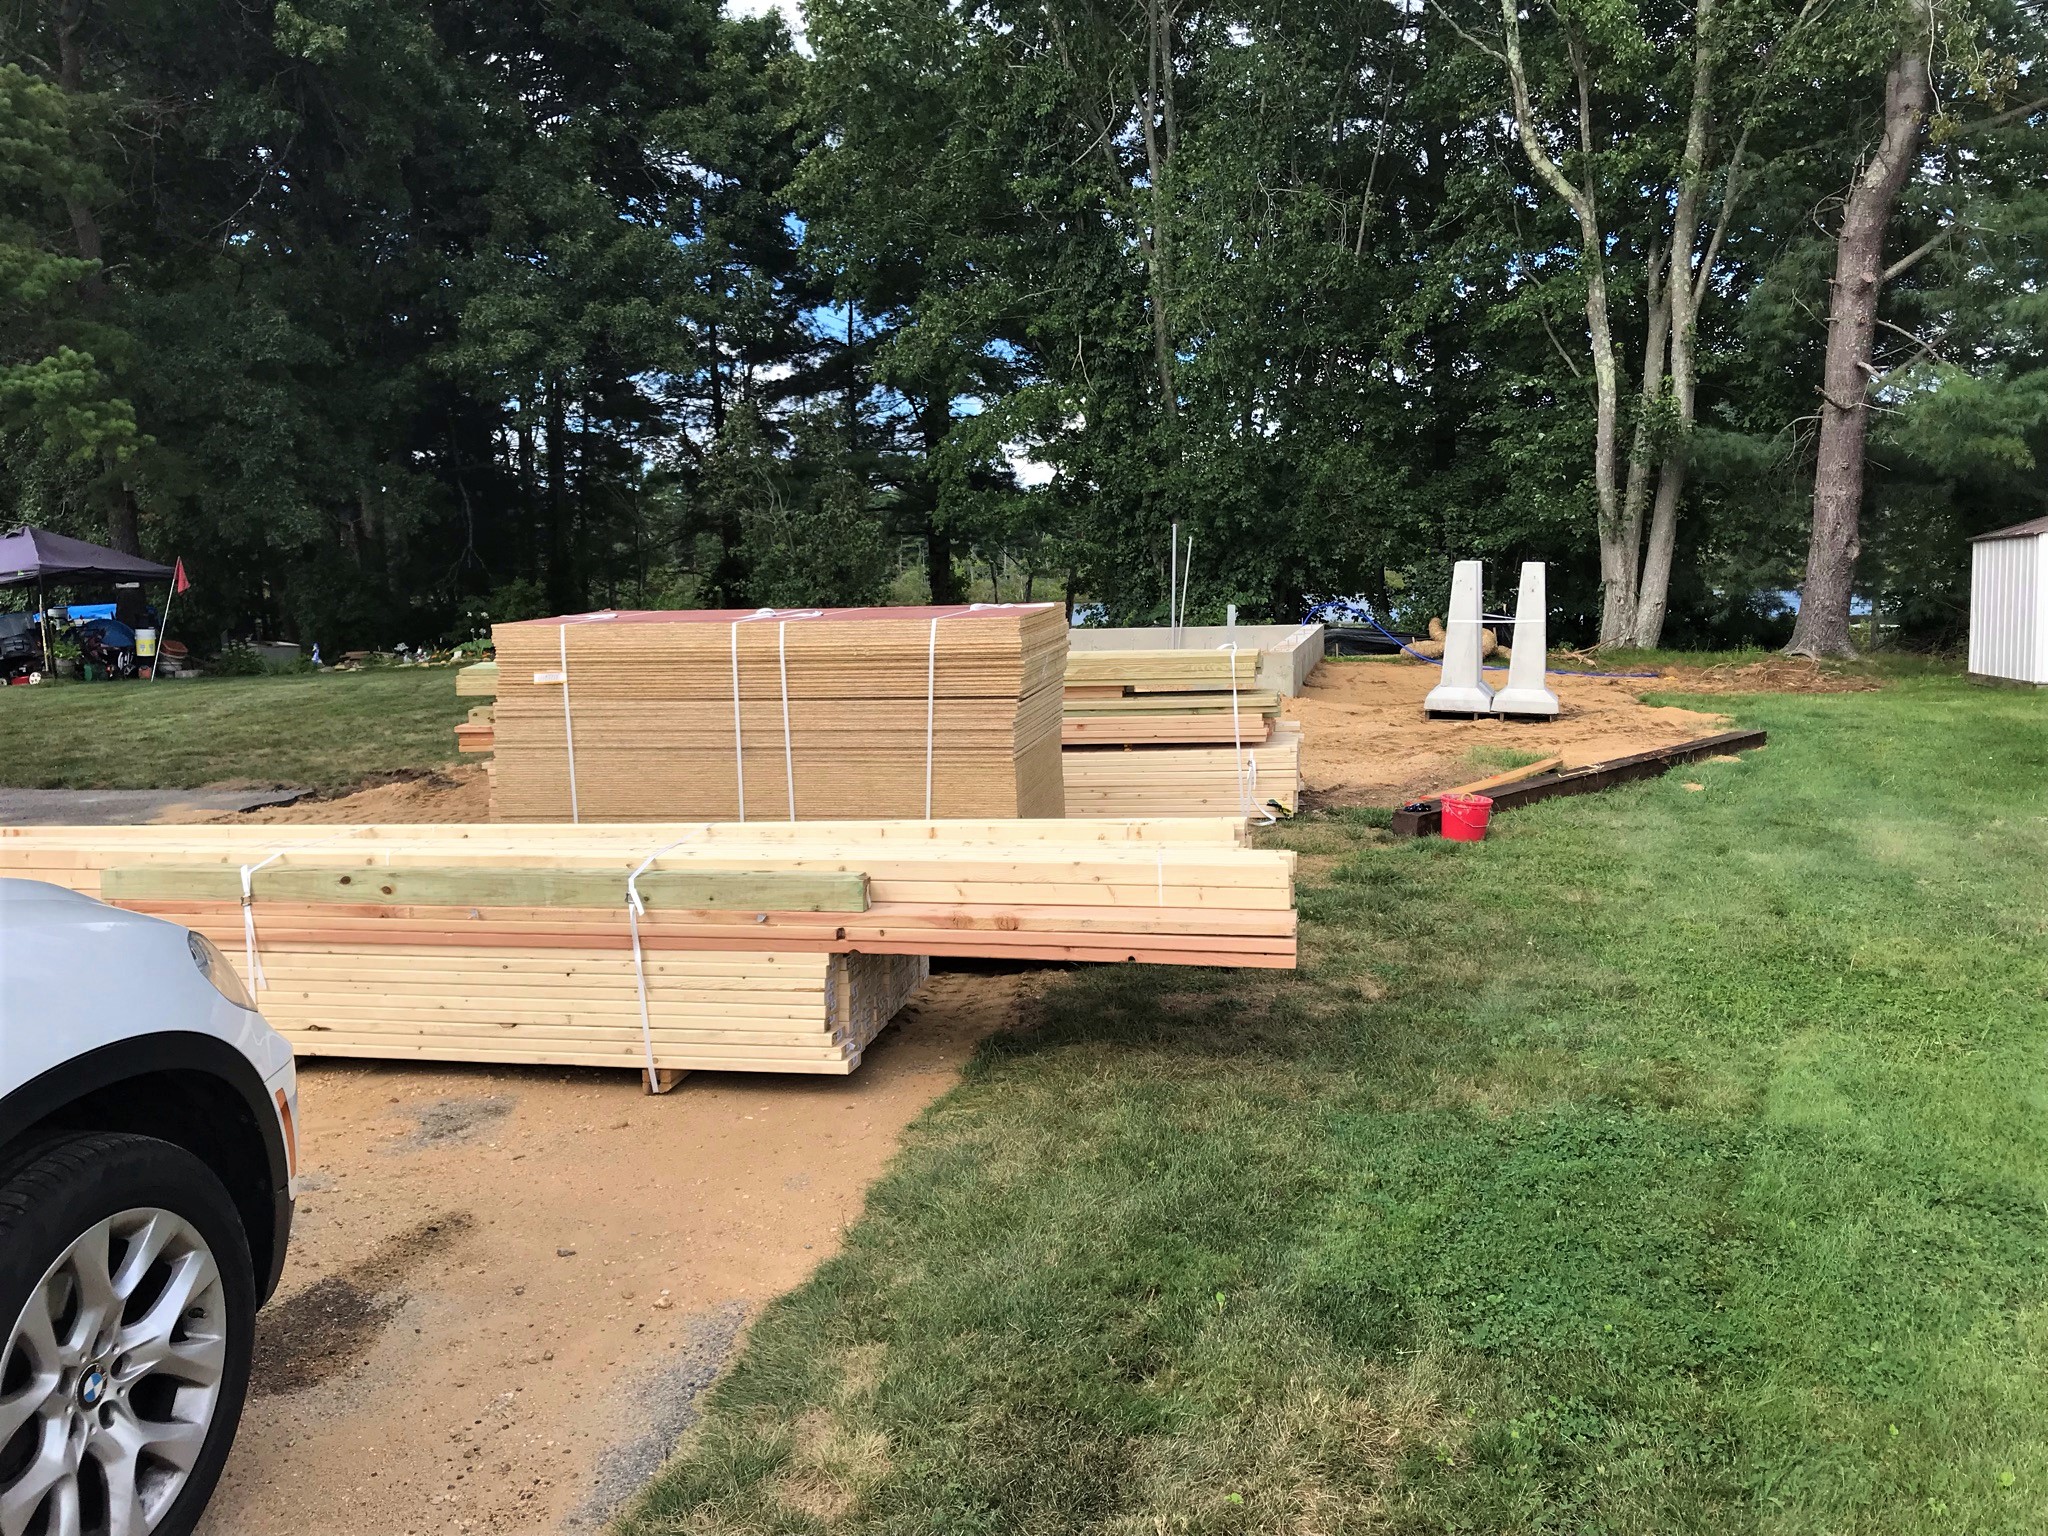
At the beginning of all this, Home Depot and Jonny Victor delivered a lot of the materials for the following week’s work – mainly for the garage deck and stairs.
Deck materials for week 13!
As a side note of interest (well I found it cute), I’ll add the following. My daughter works in a hospital as a radiation therapist with cancer patients – and has early hours two weeks a month. I help, as she drops my granddaughter Tabitha off with me at 6 AM (which for a 4 year old is pretty early). I get her breakfast and generally have good quality time with her before I bring her to preschool. While waiting to get dropped off at 8 AM, the following happened – watch my granddaughter here enthralled with her “sparkly pants”. I admit, she makes a good case for them…
Anyways, back to the project! There is still a lot of work to go, but this was a busy week indeed. Hopefully, I’ll be able to share an even more active week on my next update. Thanks for looking and feel free to throw in your two cents (or whatever the equivalent is in your currency) in the comments section.
And I hope you enjoy your fashion choices as much as Tabitha does!
The project continues! Although I was so late with Week 10 that I decided to combine weeks 10 and 11. As you will see from this post – a lot went on from September 19-October 2, 2021. Some of it involved construction, some not – as you will see. I’ll do my level best to make this interesting by including not only some construction photos, some other stuff, to include golf and a bit of hobbies!
There are a lot of pictures here – click on any of them for a bigger view.
Let’s start with electrical work and some progress around the cellar. Wait, the cellar? Why there? Aren’t you building a new garage and house deck Mark? All valid questions that I am presupposing that you may be asking! So let me attempt clarification.
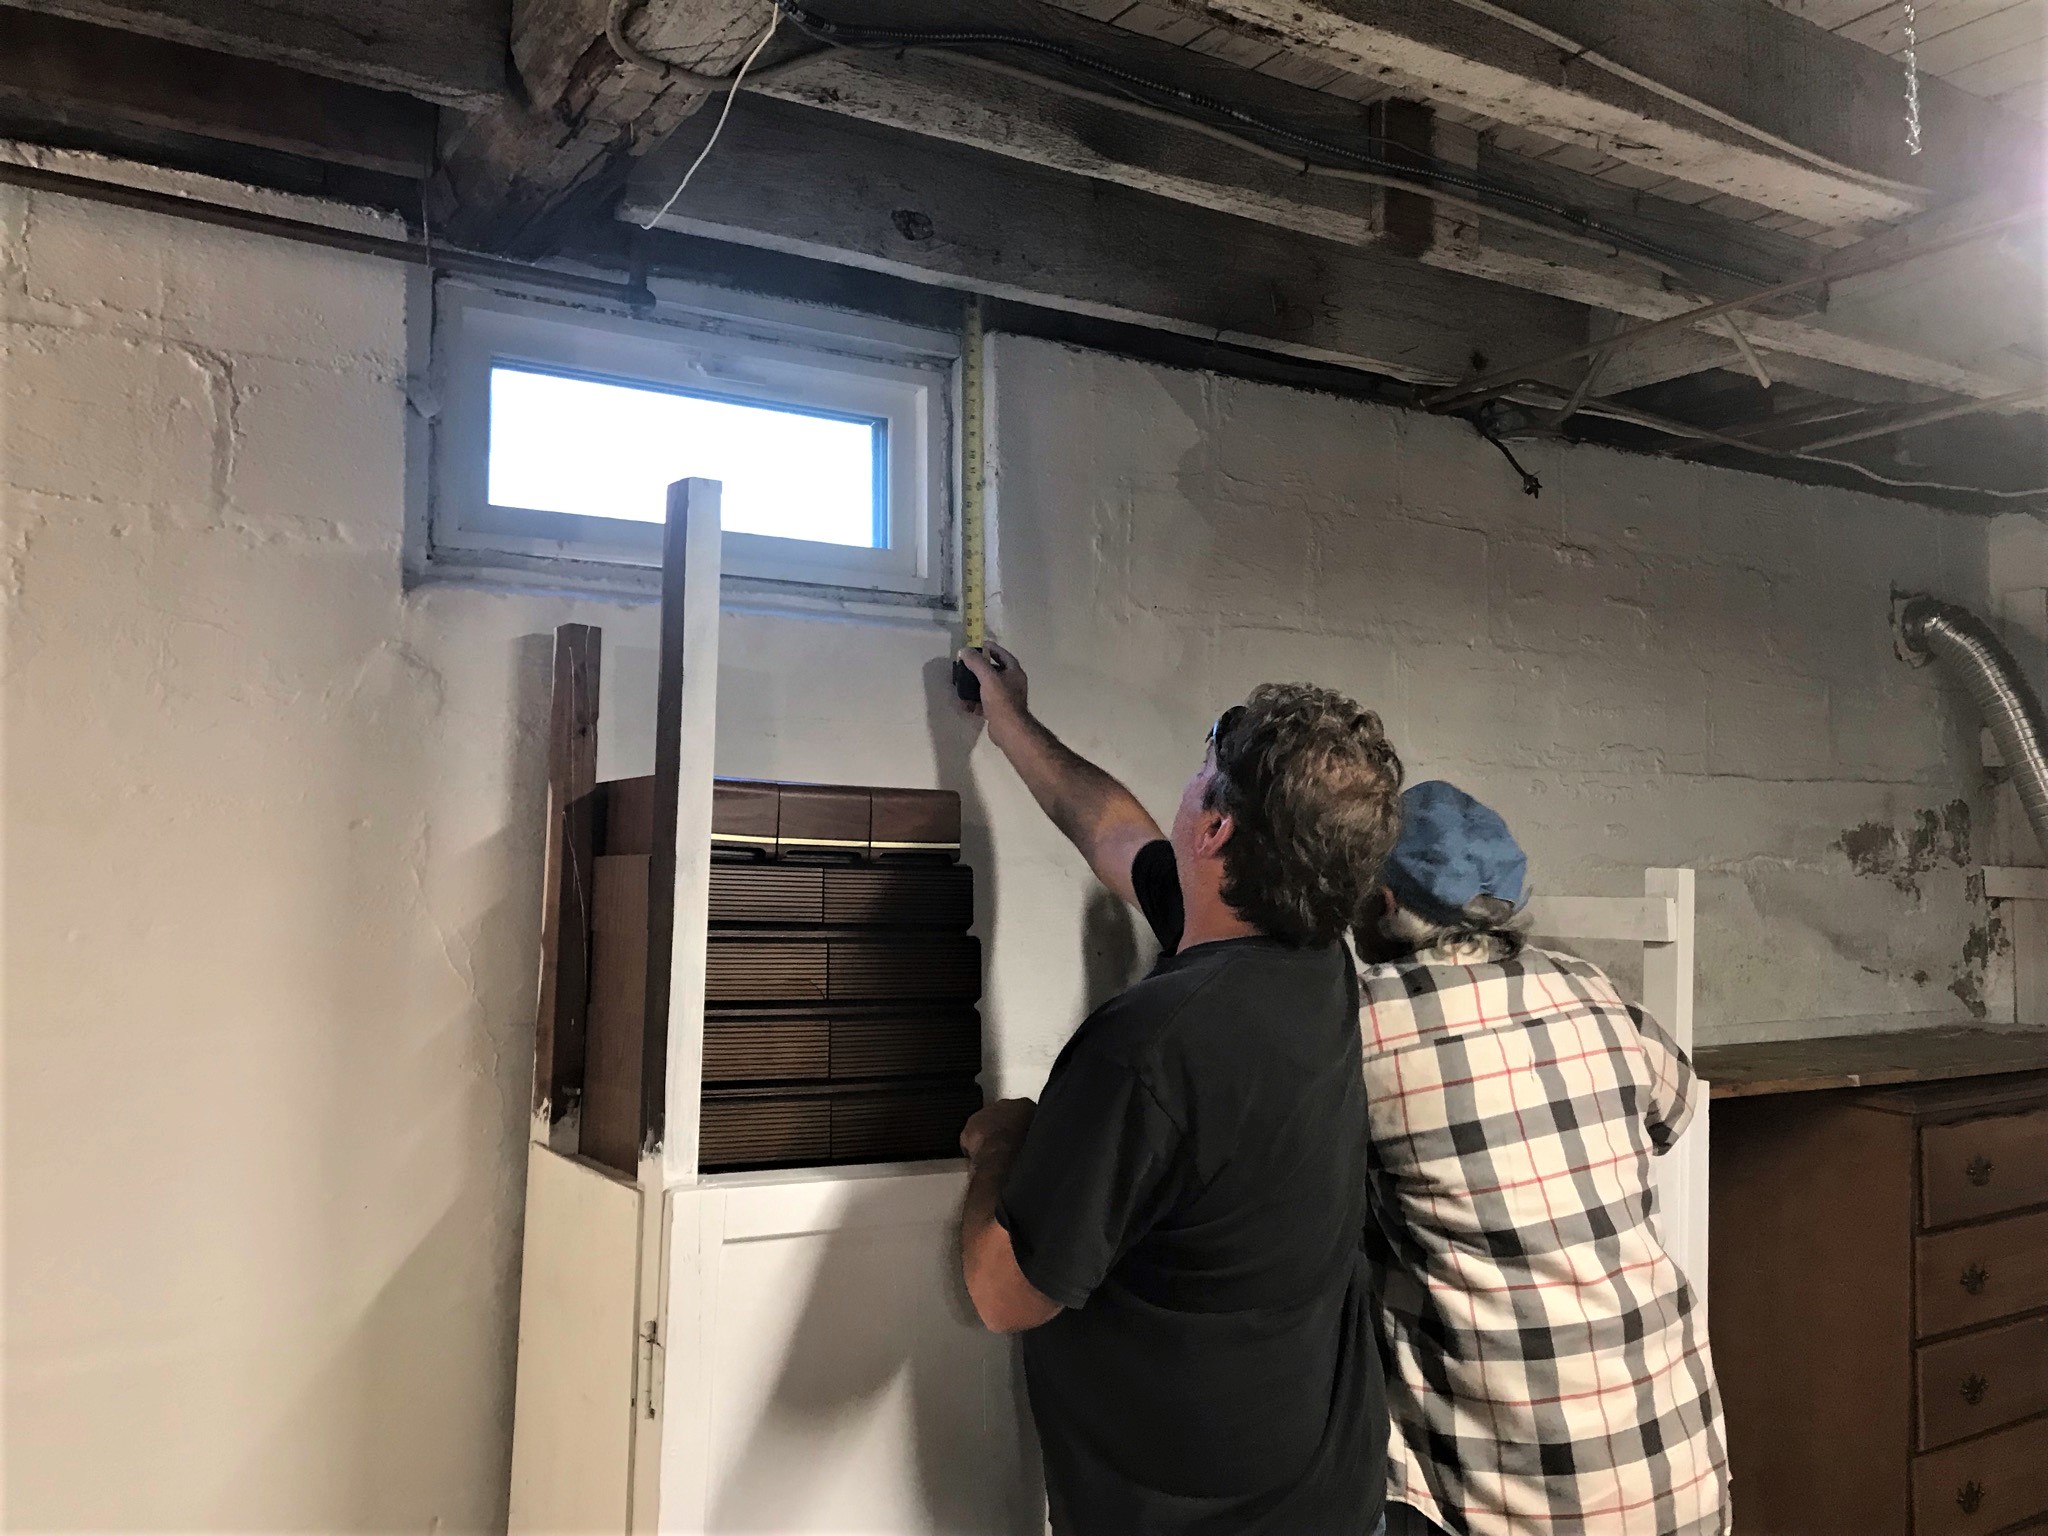
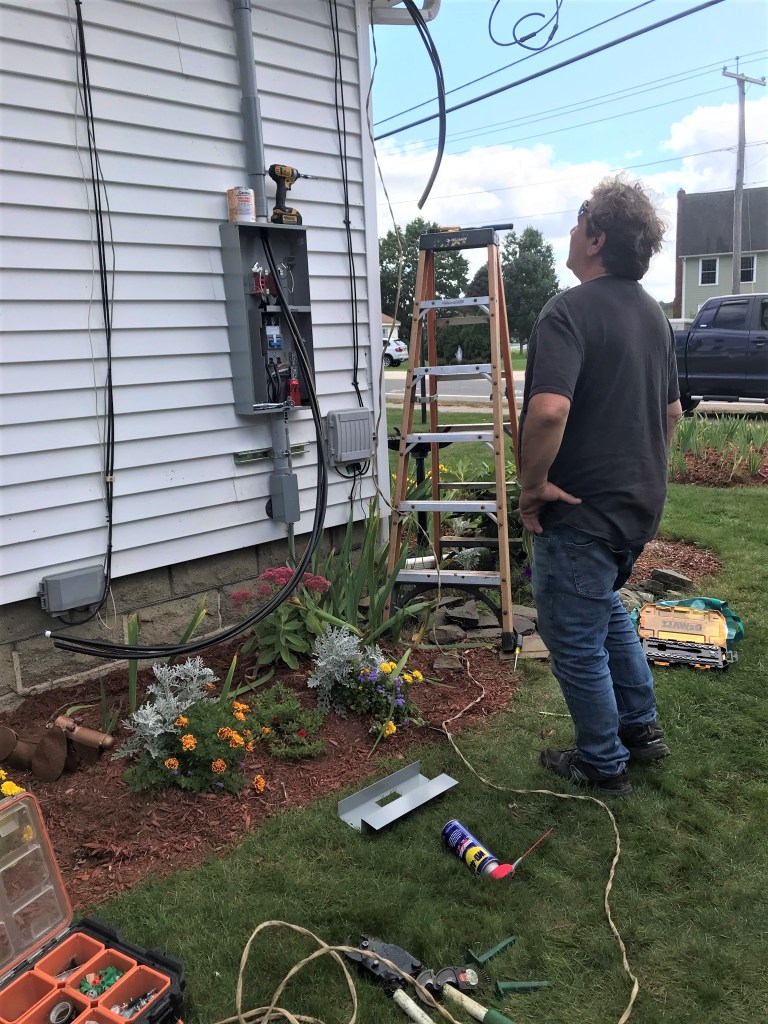
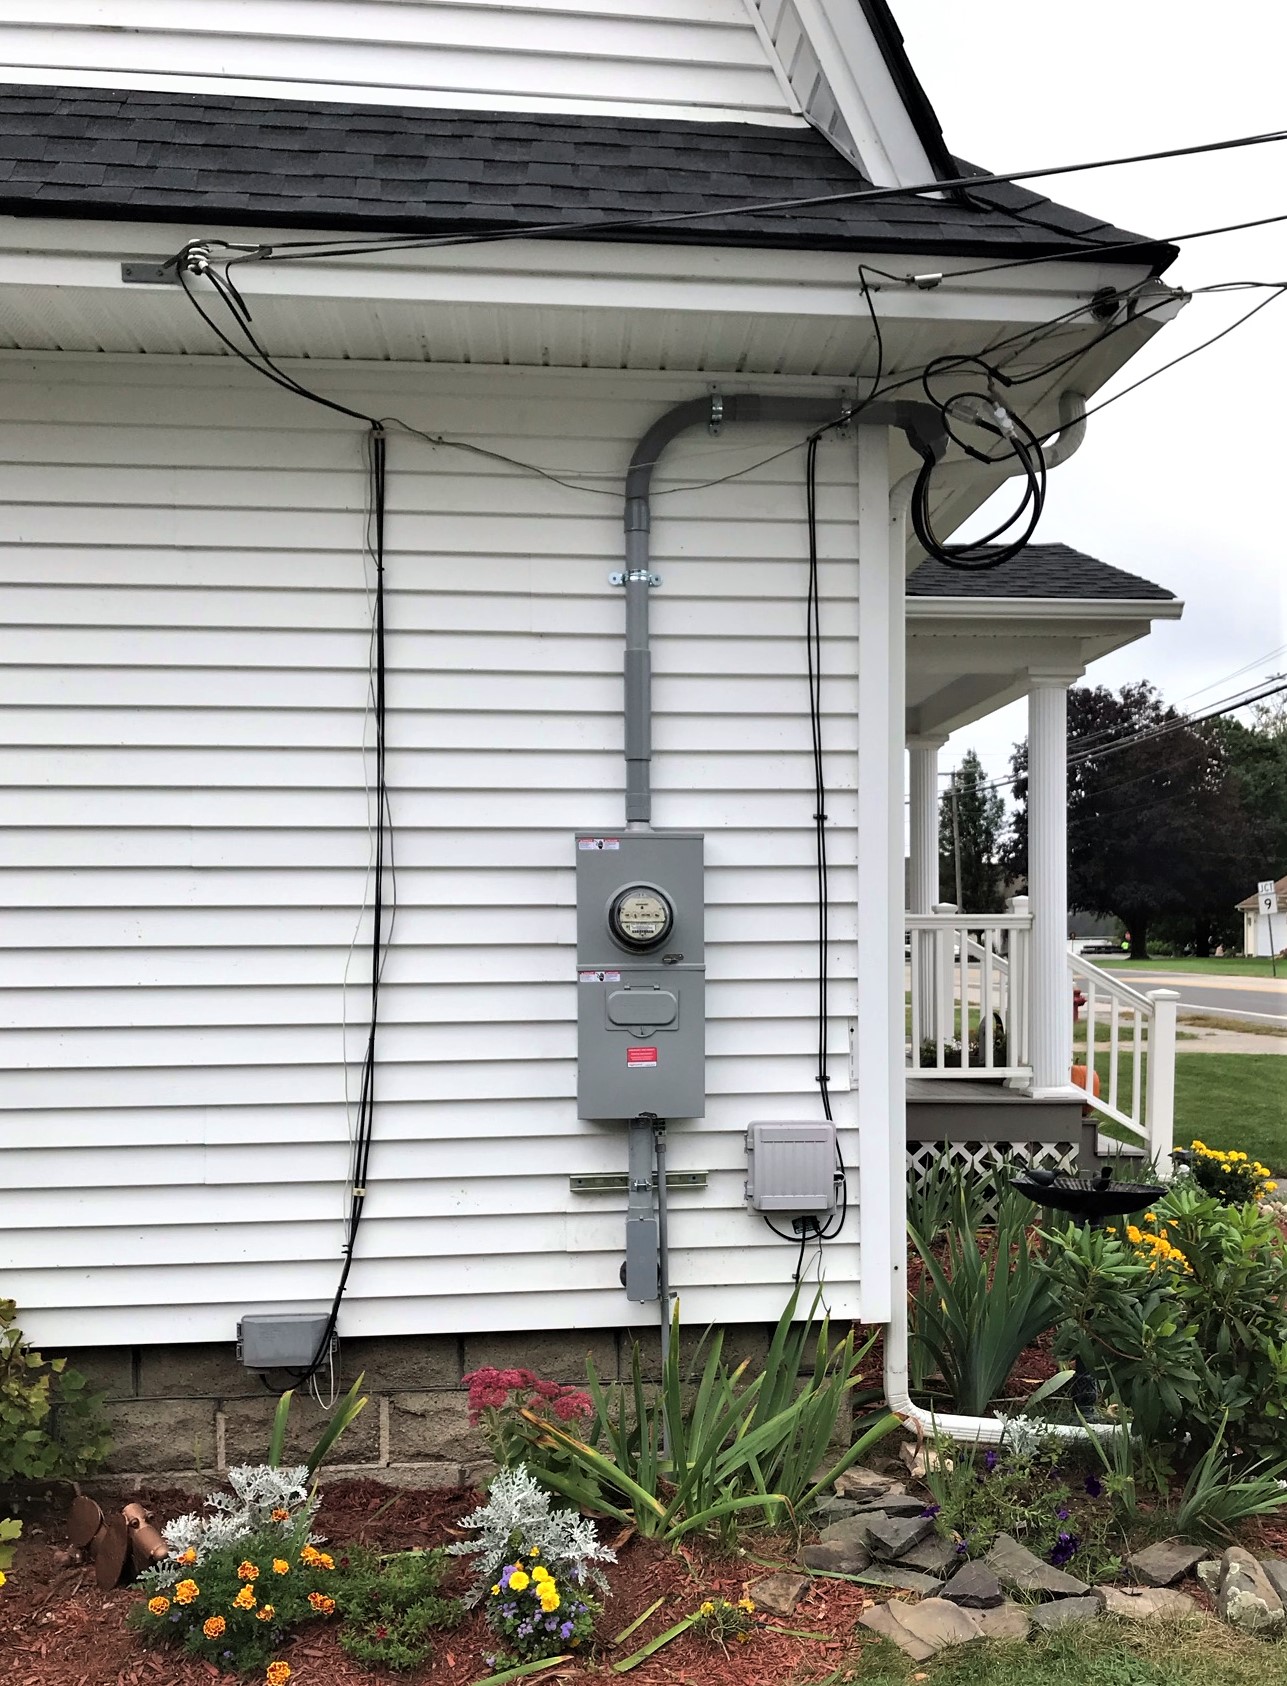
To power the new building, I needed to get the service upgraded from 100 amps to 200 amps. Our electrical service meter and box was in the back of the house over the old (now removed) house deck. Previously, electrical power came from the National Grid pole out front on the street to the house then went along the soffit and into the cellar at the back right-hand corner of the house if you will. The plan was to make this bigger and better by moving the meter and building a new box for it at the front left corner of the house. A new hole had to be drilled for the new power cable, and that needed to be run to a new replacement distribution box in the basement. This work occurred on September 21st.
Here you see he old distribution box mounted on whatever lumber the previous homeowner had available – back in the 50’s? 60’s? – to include a piece of trim! We had a series of shelves built by the previous owner long ago (probably 40+ years) along this wall. We had put an old bureau (left over from my childhood actually) under the shelf planking that was attached to the monstrosity that the distribution box was mounted on. The dryer vent snakes up to the wall as you see.Here you see the electricians (Mike and Paul) trying to determine the sill height to drill for the power cable by using the window as a reference for outside. The actual hole would be far to the left. The other end of the old shelving/cabinet that I referred to above is seen here on the wall under the cassette cases (future yard sale items).
Drilling the new sill access.
Heavy duty cable!
Drilling through the old sill was a bitch. The sill was quite thick – 13″ – and made of solid oak. The hole drilling destroyed two hole saw bits.
The view through the sill access hole from inside. This was 13″ of solid oak. Mike Astrella (electrician) can be seen here peering through the other side.
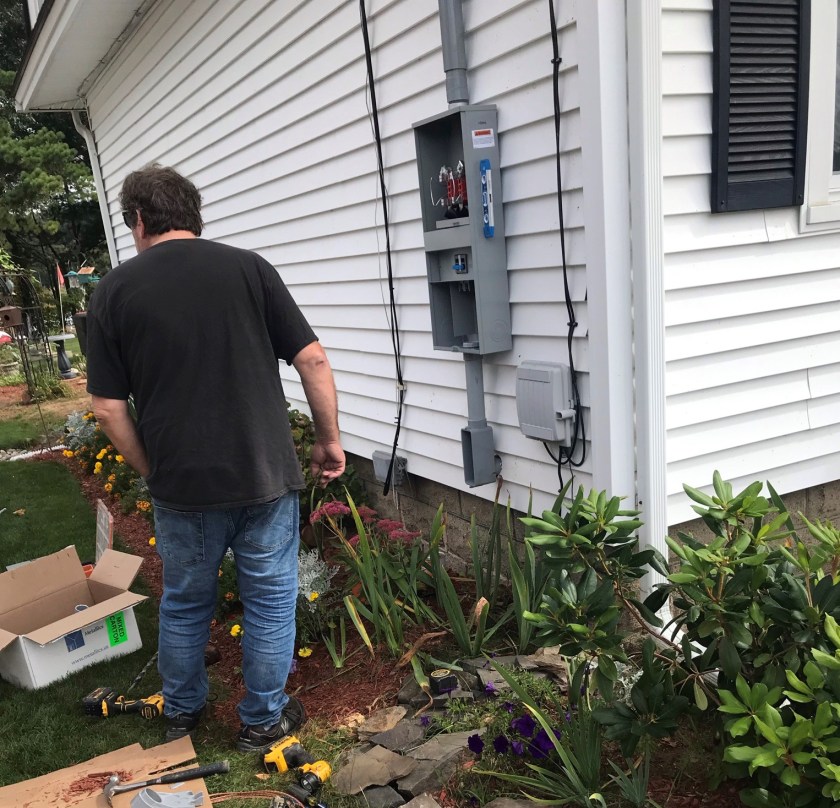
Outside, work went on the new meter box and running the cable and hooking it up to the power grid.
First the box was mounted and secured.
Power cable being pulled through.
Completed. The box on the left is an old Verizon landline box (now removed) and the one on the right is our Spectrum cable line.
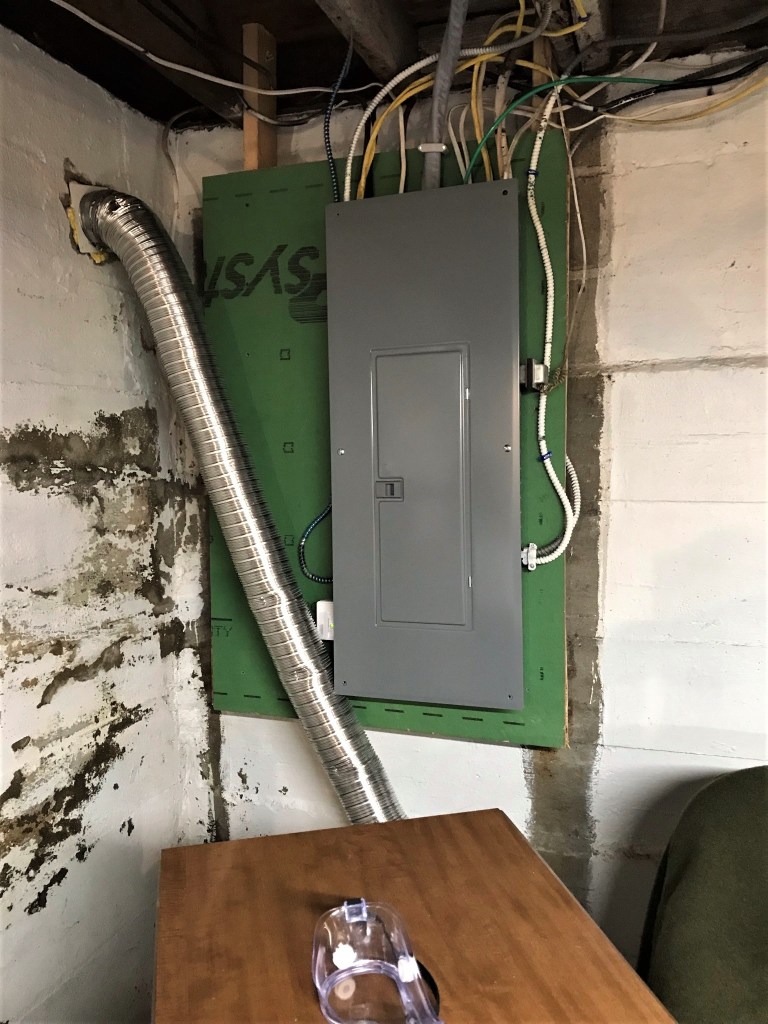
Back in the cellar, the old distribution box mounting monstrosity was removed and a new sheet of plywood and some lumber from the garage build was used to build a suitable mount. The new configuration is bigger and we will need to move the dryer to the wall to the left of the distribution box so that the vent hose is not right next to it. But, as we were using the old the shelves I never got around to paint it as you can see – and it looked like hell.
New box.
New distribution box opened.
The inside electrical work . You can see how ugly the flaking paint was.
Also, I need to back up a bit. It had been necessary for me to clear a lane along the wall for the electricians to run the power cable prior to their starting work. After I did that, I got a good chance to look at the wall and the crappy homemade shelving/cabinet. I noticed a lot of old paint flaking on the wall near the dryer vent and some puckering where I had painted the corner in the front left of the house. The puckering was due to efflorescence, not water leaking, even with the excessive rain we have had this summer. An old dry well that I had built over a decade ago in the front left corner of the house was no longer doing its job, so the rain water outside the basement wall was not properly draining – leading to the efflorescence bubbling up behind the paint. We decided that the shelving cabinet needed to go and the wall repainted.
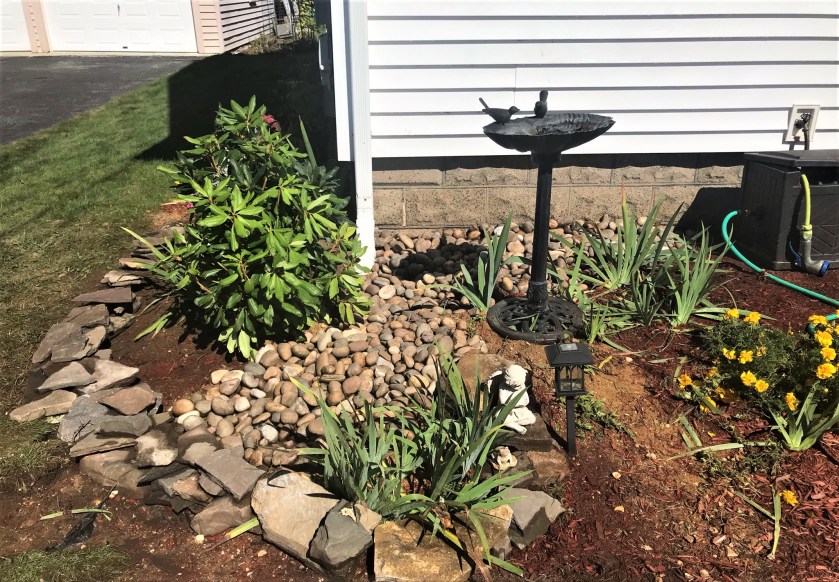
Before I did that, I rebuilt the drywell. When I originally built it, I had dug down about 3 feet and hit sand, so I had then assumed that the soil was free-draining. When I dug this time, I went a bit deeper, and to my surprise I found that there was yet another soil layer under the sand. This one was a loamy clay – that does not drain well. So, I dug down another 3 feet and backfilled it all with sand from the excavations in the backyard. I replaced the downspout extensions and doubled the length. The we covered the area with a filter fabric and then covered that with river stones.
Dry well excavation (would have been a good infantry fighting position)
Repaired dry well.
Dry well repair
I then spent the time to take down the shelving/cabinet with my wife. She was able to recycle the doors as shelving in another section of the cellar. I scraped off any flaking paint and exposing any efflorescence. Then, I used a mildly acidic product, Drylok Etch, across the wall to clean and prep for painting with bright white Drylok Extreme (both from Home Depot). This took a while, but came out well. We are taking the opportunity to clear out some stuff and have a yard sale this weekend to get some new homes for some good stuff we don’t need anymore. Plus, I can’t do any hobbies as you can see below!
Wall done
Opposite angle on wall
Yard sale needed to get to my hobby bench!
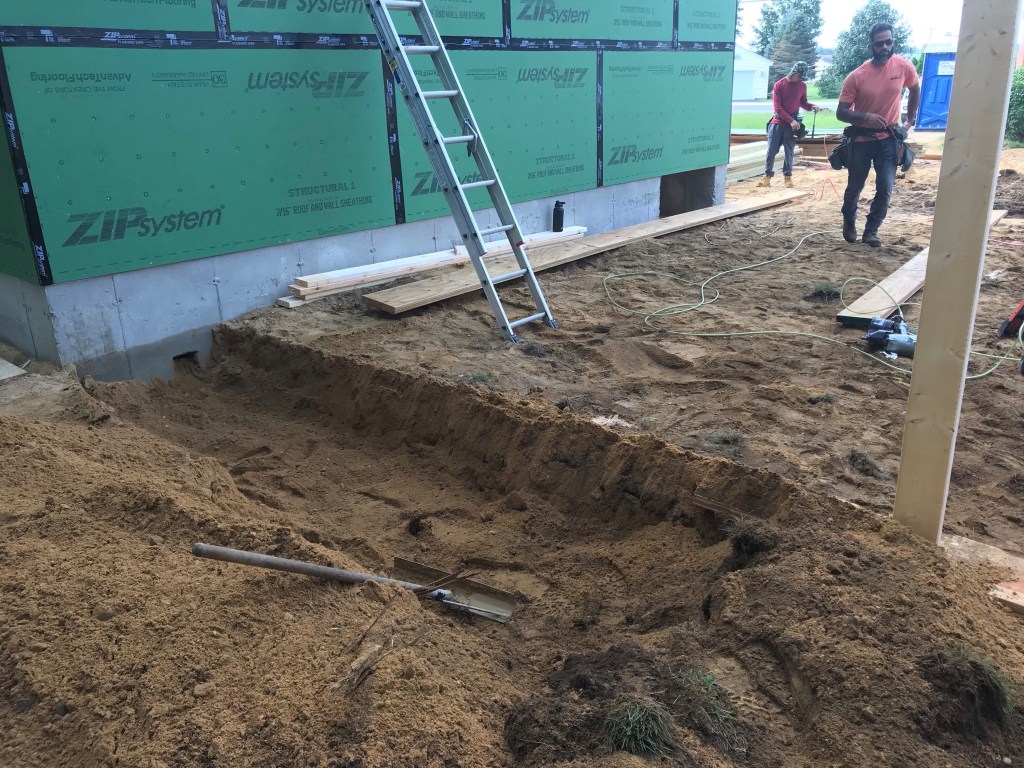
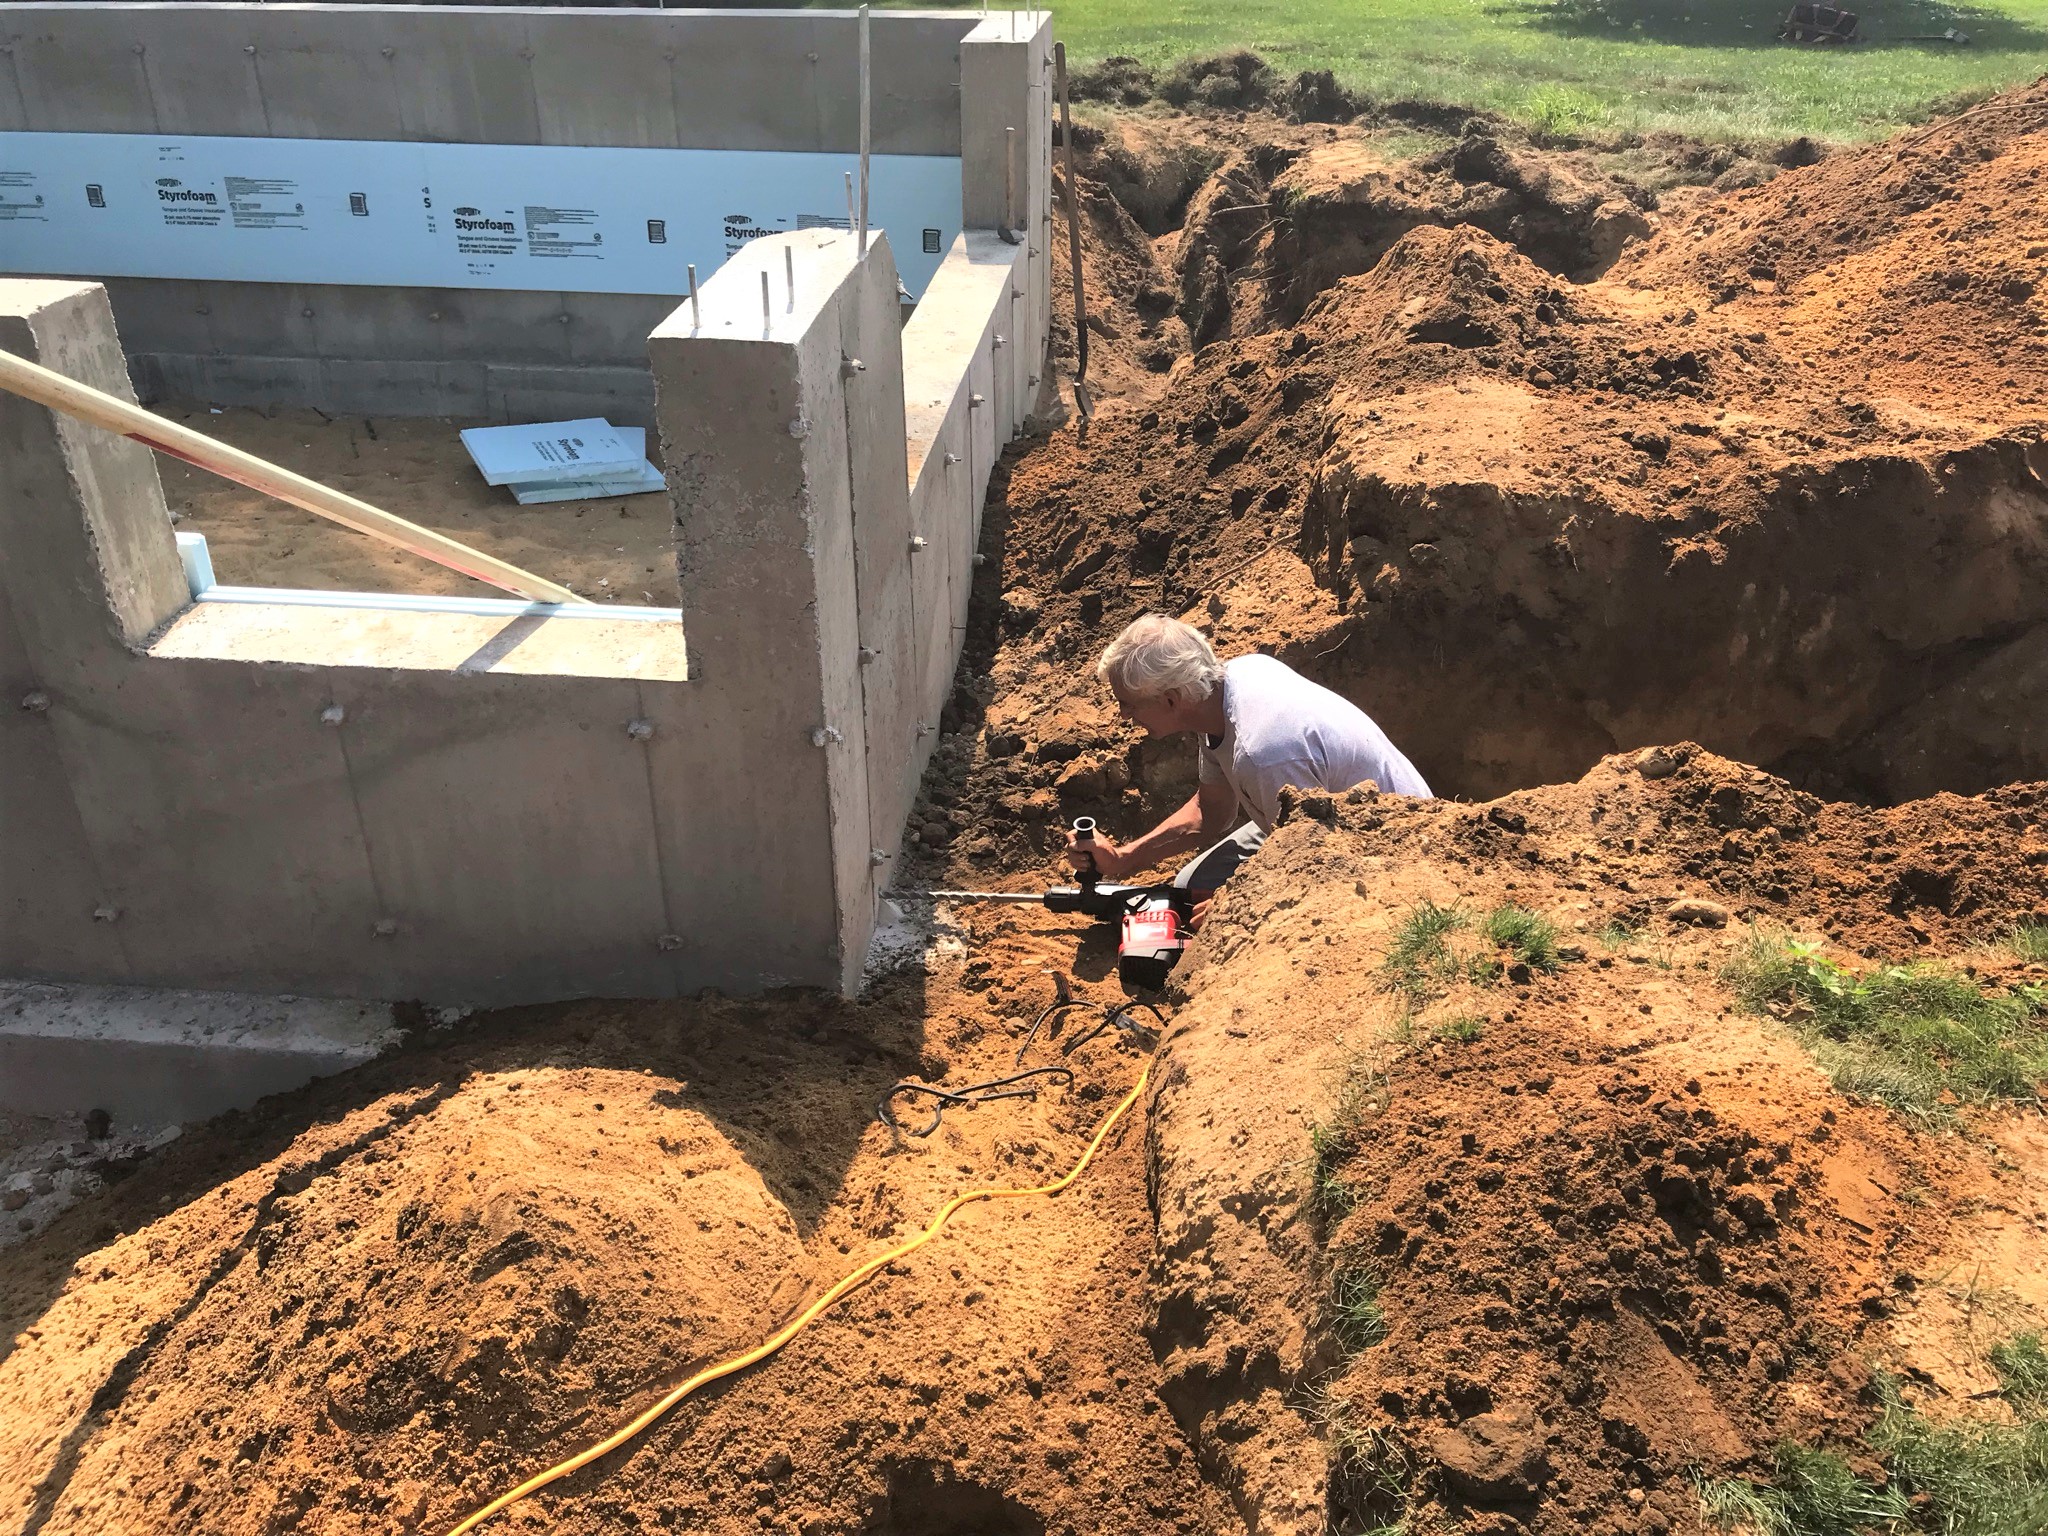
Back in the garage, the septic line was stubbed up in the floor with a cleanout.
A very exciting septic line beginning…
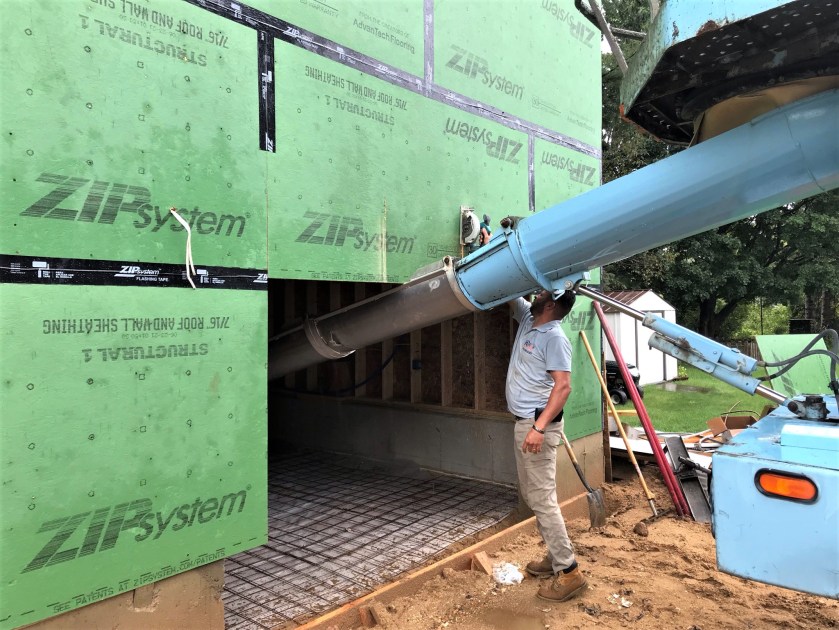
On the 24th, it was time to place the concrete floor in the garage. I say “place” and not “pour” because that was drilled into me in the US Army Corps of Engineers as the appropriate terminology – and that stuck.
Prepping the garage door entrance for concrete.
Steel!
The crew arrived early and was ready to go.
Installing the vapor barrier (ok a sheet of plastic over the compacted sand).
The plastic is secured, and the steel is wired together.
Placing steel on vapor barrier.…the concrete truck chute cannot extend far enough into the garage.
Evandro cuts a slot.
And on the other side..
…et voila, access!
Getting access for the concrete truck.
This was no problem as this plywood will be removed eventually when the door is installed.
Concrete truck delivering.
Working the concrete.
Then the sky opened up…
…necessitating a temporary rain cover.
Final finishing.
Concrete work.
Because of the many rain days, Andy Cormier arranged to get help to finish off the septic line installation.
Finding the tank!
Line ready for backfill
View towards the tank.
Septic line work.
Ready for backfill.
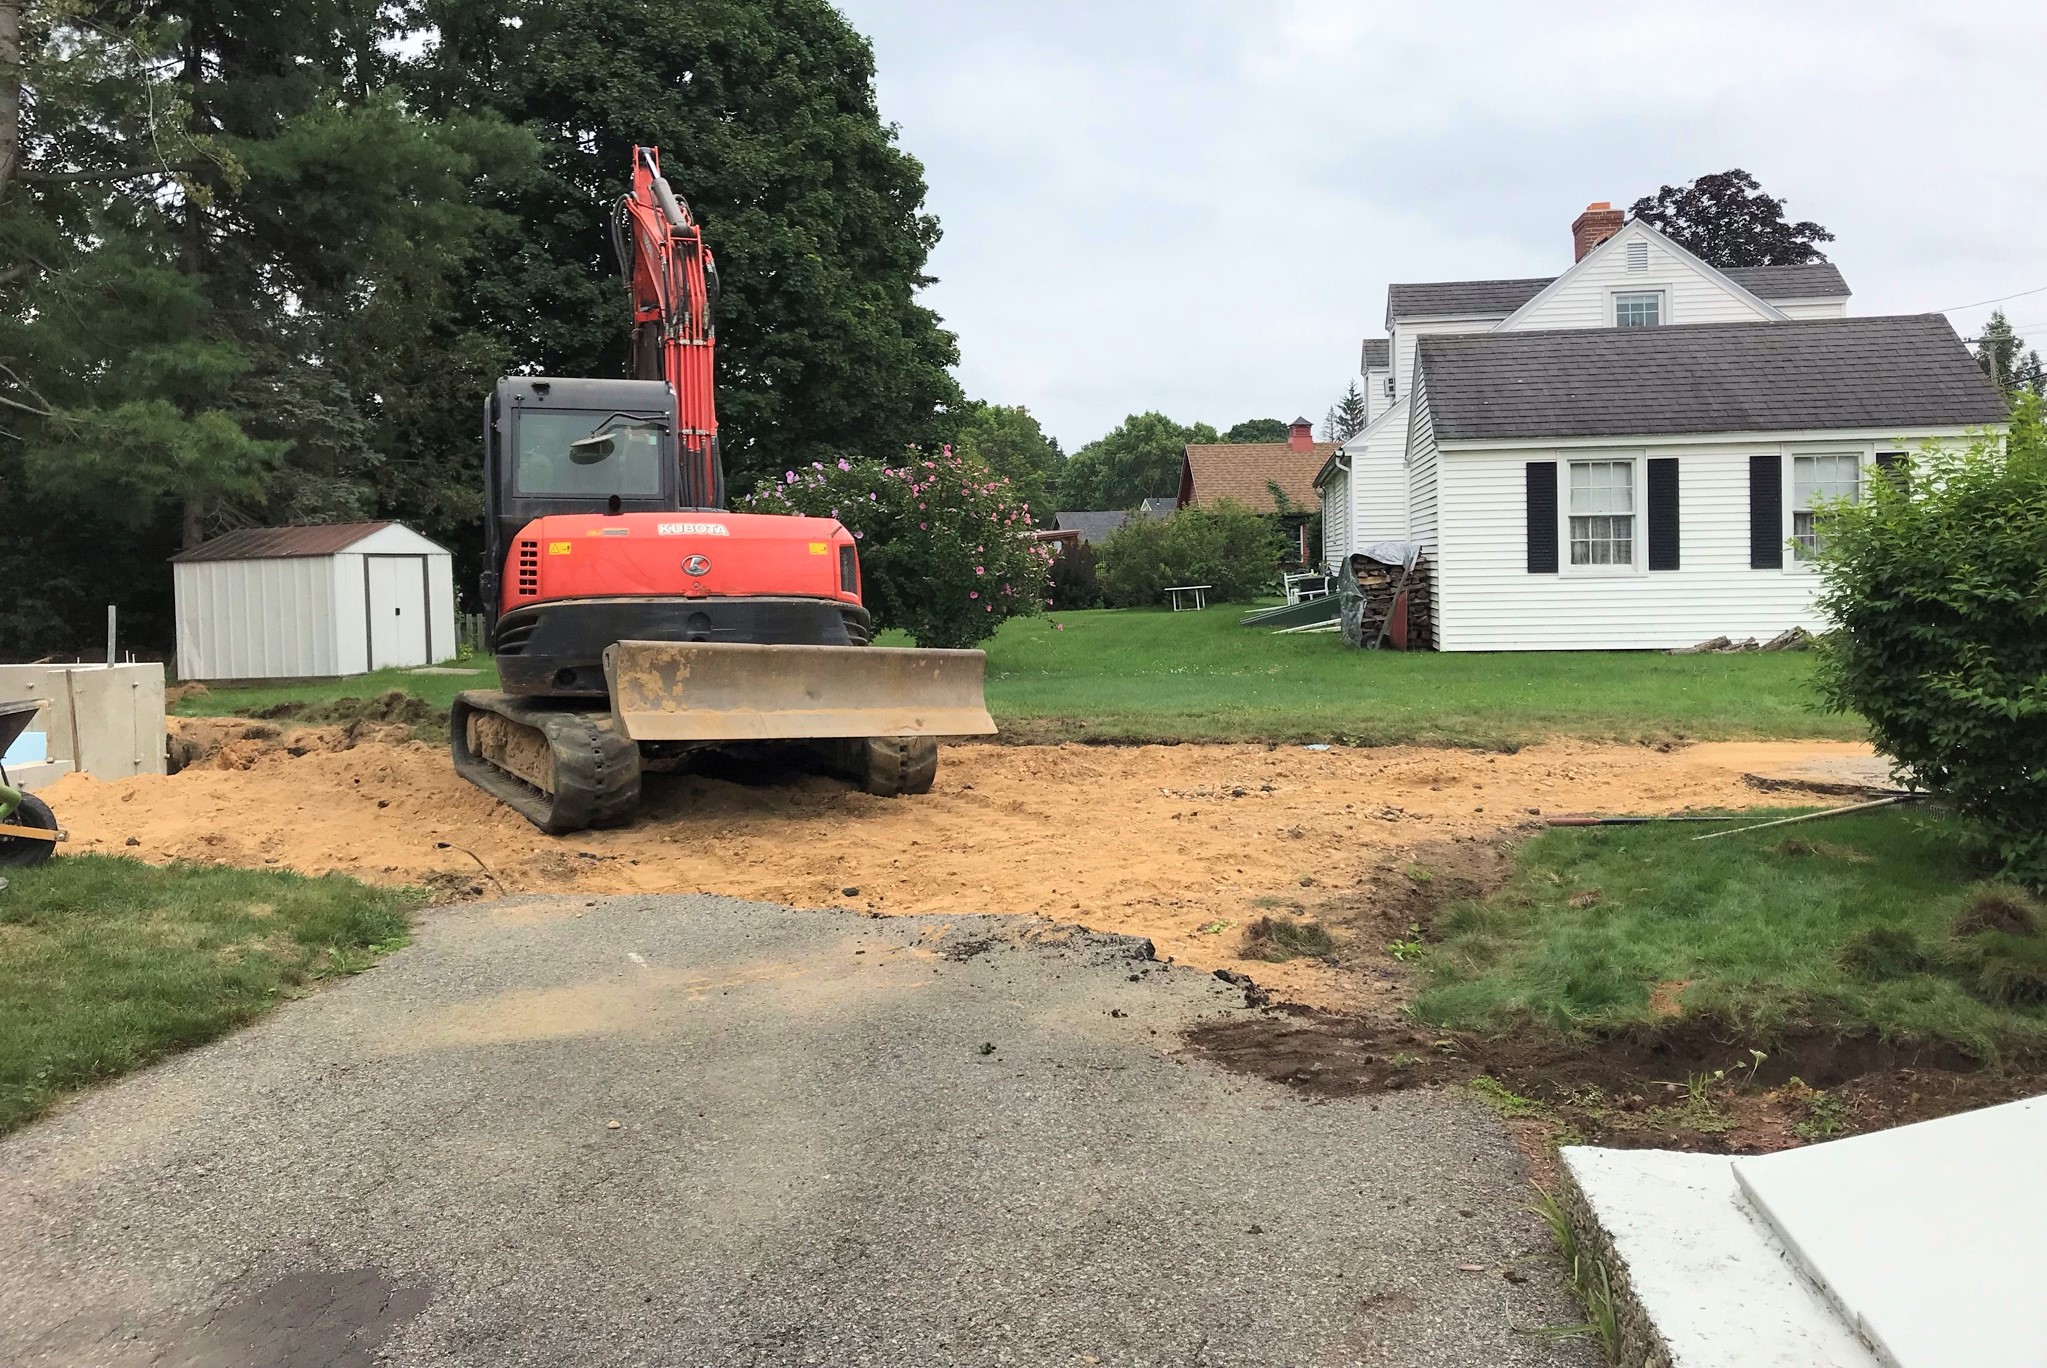
Having the septic line in the ground and attached to the septic tank allowed for its backfilling as well as work to proceed on the driveway excavation.
On Monday, September 27th, Lynn and I participated in the annual West Point Society of New England’s annual charity golf tournament, along with our friends, Lisa and Jim Kularski. This year, the beneficiary was Homes for our Troops. It was a nice break while construction work continued.
Me, Lynn, Lisa, and Jim. The sign is a hole sponsorship I did for the charity event.
When we returned home, there was a lot of dirt moved around. It turned out that the soil under the driveway had the same layering issue that I found in my dry well excavation – so a lot had to go, and be replaced with clean fill.
Excavation showing the soil cross sectionBetter view of the soil layers.
Most of the septic line was backfilled.
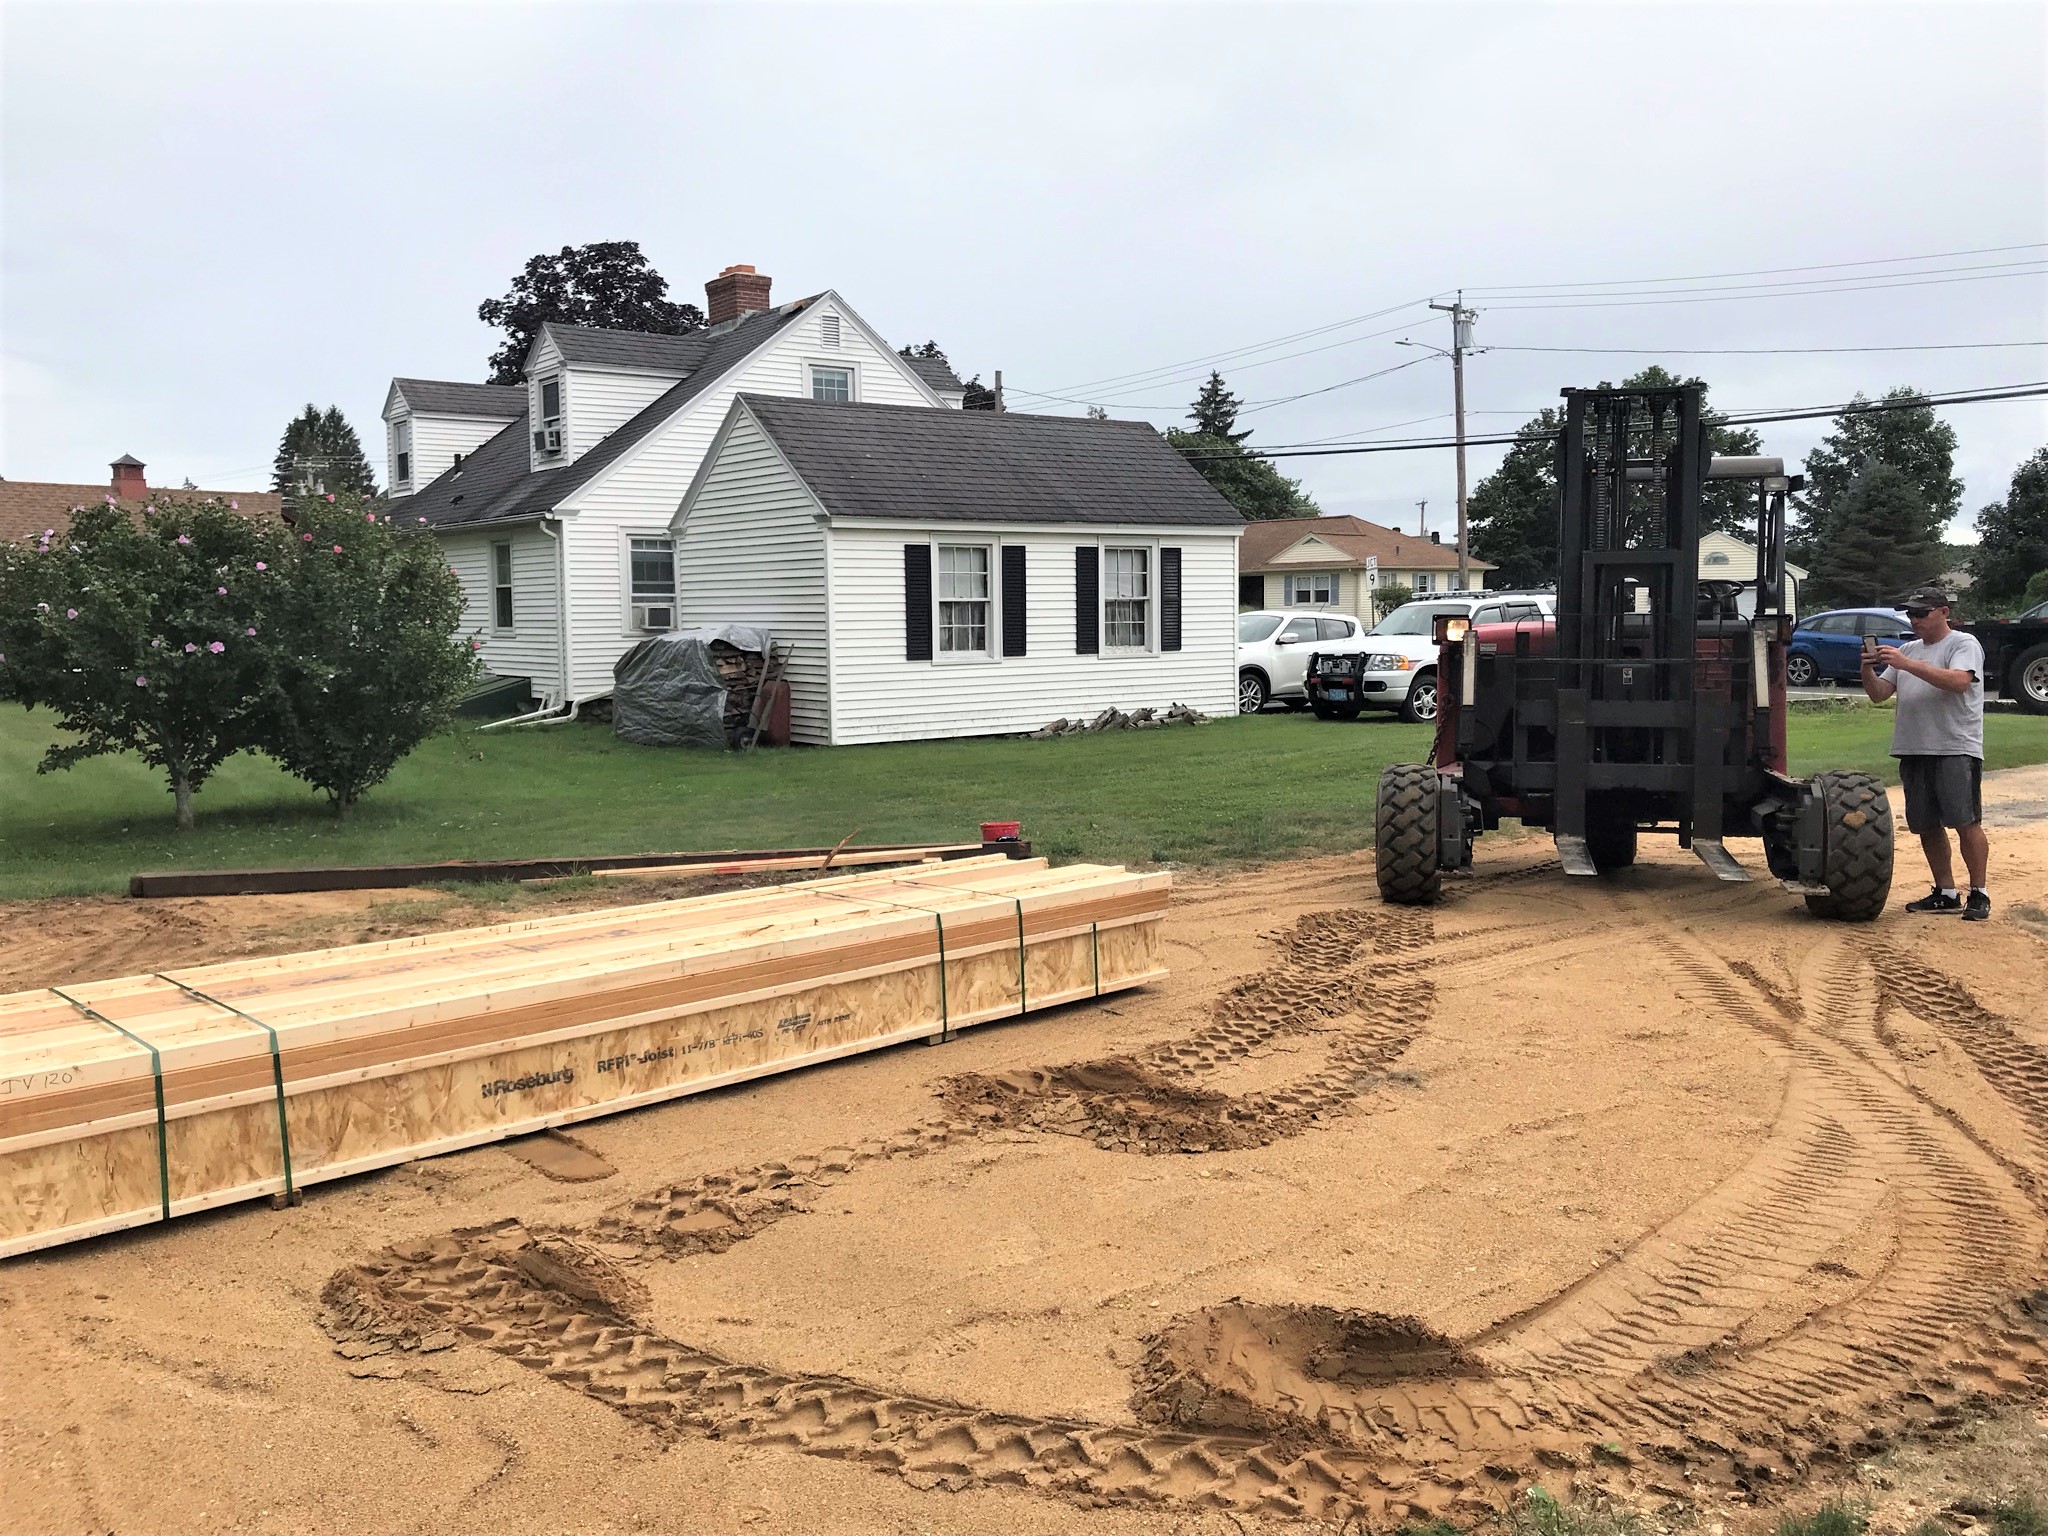
Of course, Tuesday the 28th brought yet more downpouring rain. Therefore, earthwork and any other work could not happen. We only got a delivery of deck material for the house deck.
Deck lumber delivery.
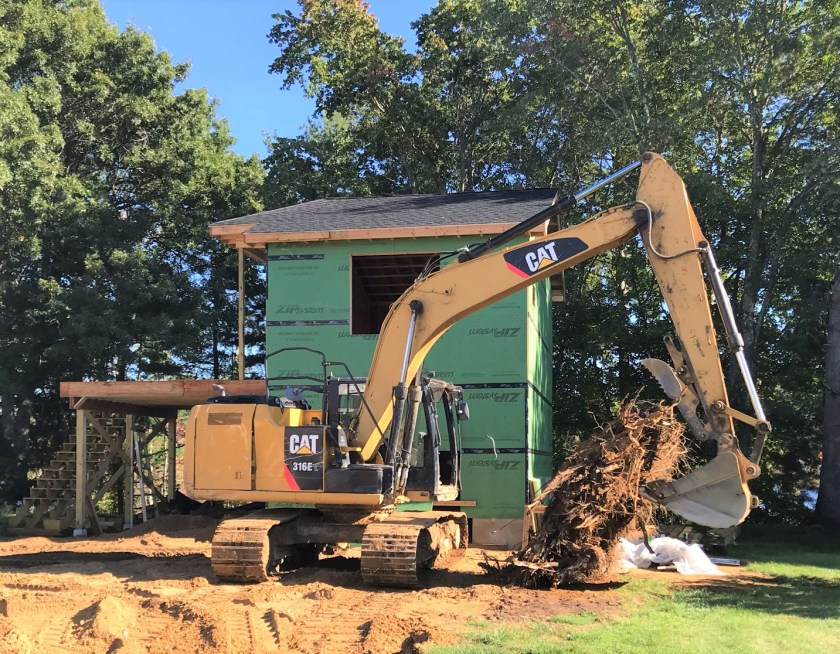
On Wednesday the 29th, the skies cleared and work could proceed. The driveway was excavated and brought to grade. Old asphalt, and interfering roots and stumps (including a 4-5 ton maple tree stump) were removed in this process.
Asphalt removal
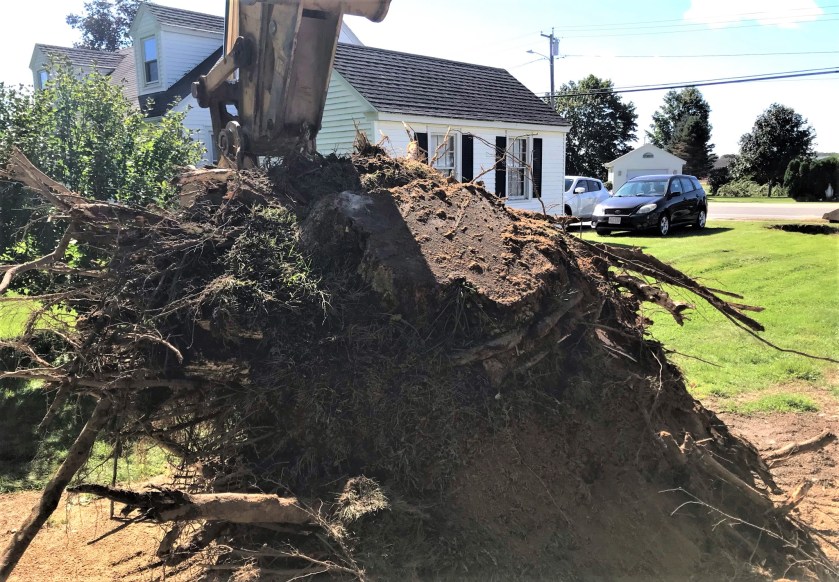
Massive stump!
This was a huge stump with a lot of roots under the old driveway. Andy had to bring in a bigger machine to take care of it.
At the end of the day, the driveway was filled, and all the holes were filled in.
Driveway base in.Top view.No more stump.
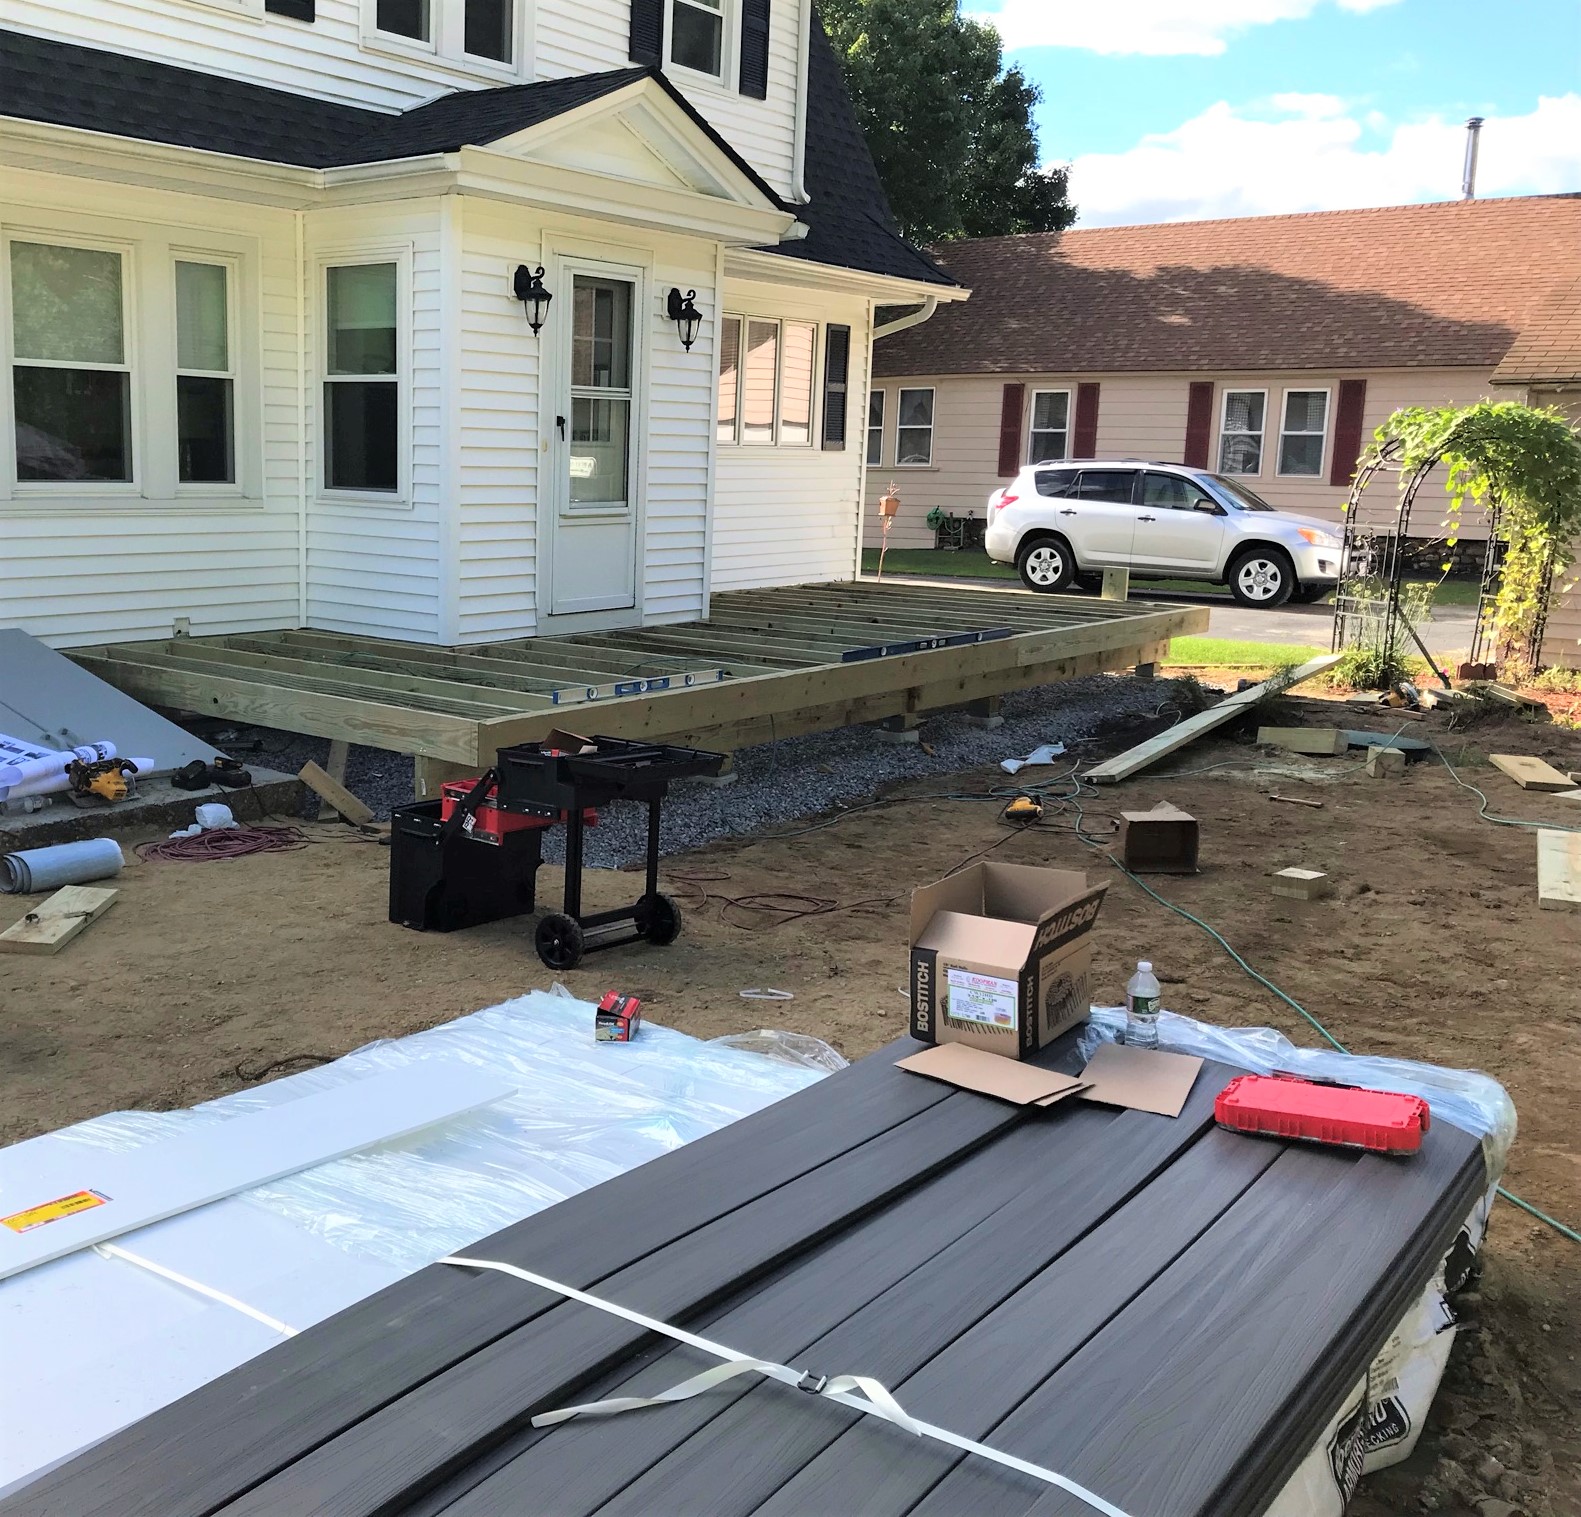
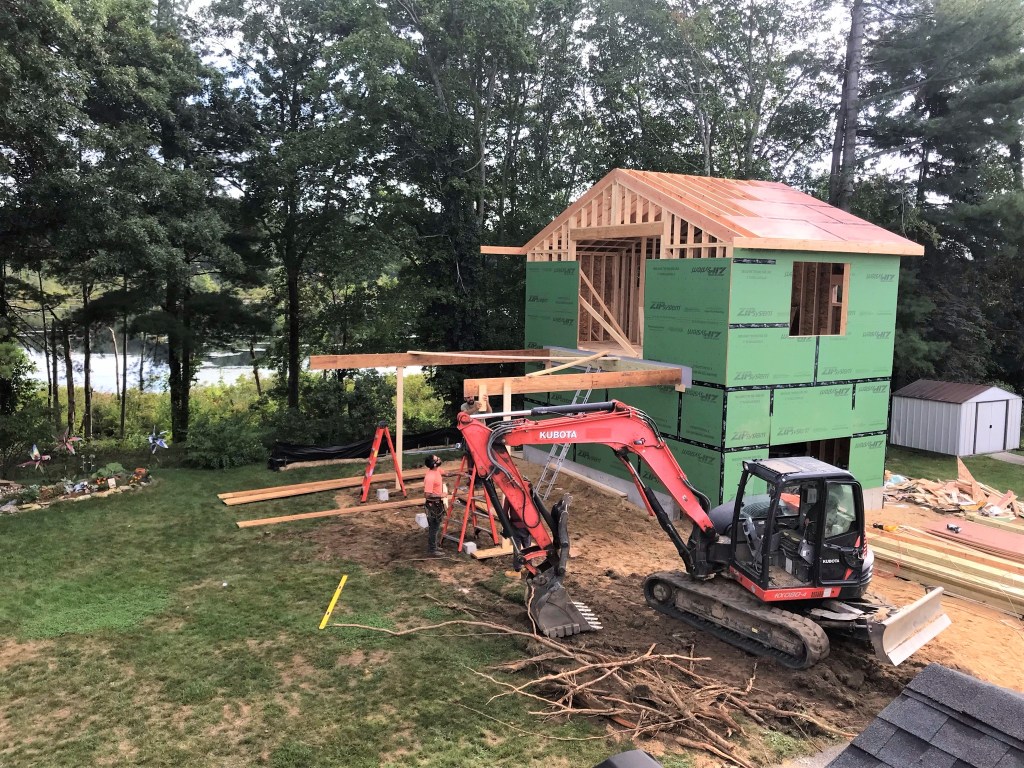
The next work skipped a day (rain), and that involved the framing of the replacement house deck. This was October 1st. Jonny also got ready to install the rain gutter system for the garage deck.
Jonny prepping for the under-deck rain system installation.
House deck framing begins.
Deck framing on October 1st.
To make up lost time to rain, work continued on the deck on Saturday the 2nd. This weekend I had not one but two competitive golf tournaments. The first was on Saturday which was the Finals of the Tour of the Brookfields. If you are on Facebook, the group link is here. I am a member of the committee. My team was in the lowest division, but we did not come in the top three. Still, congrats to the winners!
Better luck next year.
After the tournament, I returned to see progress on the house deck.
Saturday progressDifferent angle view.
So, a lot of progress was made over the two weeks!
(Lastly, I previously mentioned a couple things that I need to circle back to – the first being the Sunday Founder’s tournament at Quail Hollow Golf and Country Club (where I am a member). This was an individual event and I played better, but not well enough to be the winner (only one male and one female winner out of dozens of players so no big deal). However, back during the annual club championship (a two-day 36-hole tournament of individual medal play from the back tees) on July 31-August 1st – I was able to play my best golf of the year (98/88 for a net 2 over par for the event) and win the D flight against 11 others. So Sunday, I got my reward.
In my office!
What you see here left to right is a comic statue that belonged to my grandfather Marcus (a WWII vet who gave me a love of golf), my unlucky conquistador “Franco”, my trophy, and as it’s October, my Halloween mini-diorama with Ral Partha 25mm figures of classic monsters from the 30’s Universal Studios movies.
Ah, but I digress – week 12 is well underway and I will have much more to share. I hope that you enjoyed this and thanks for looking!
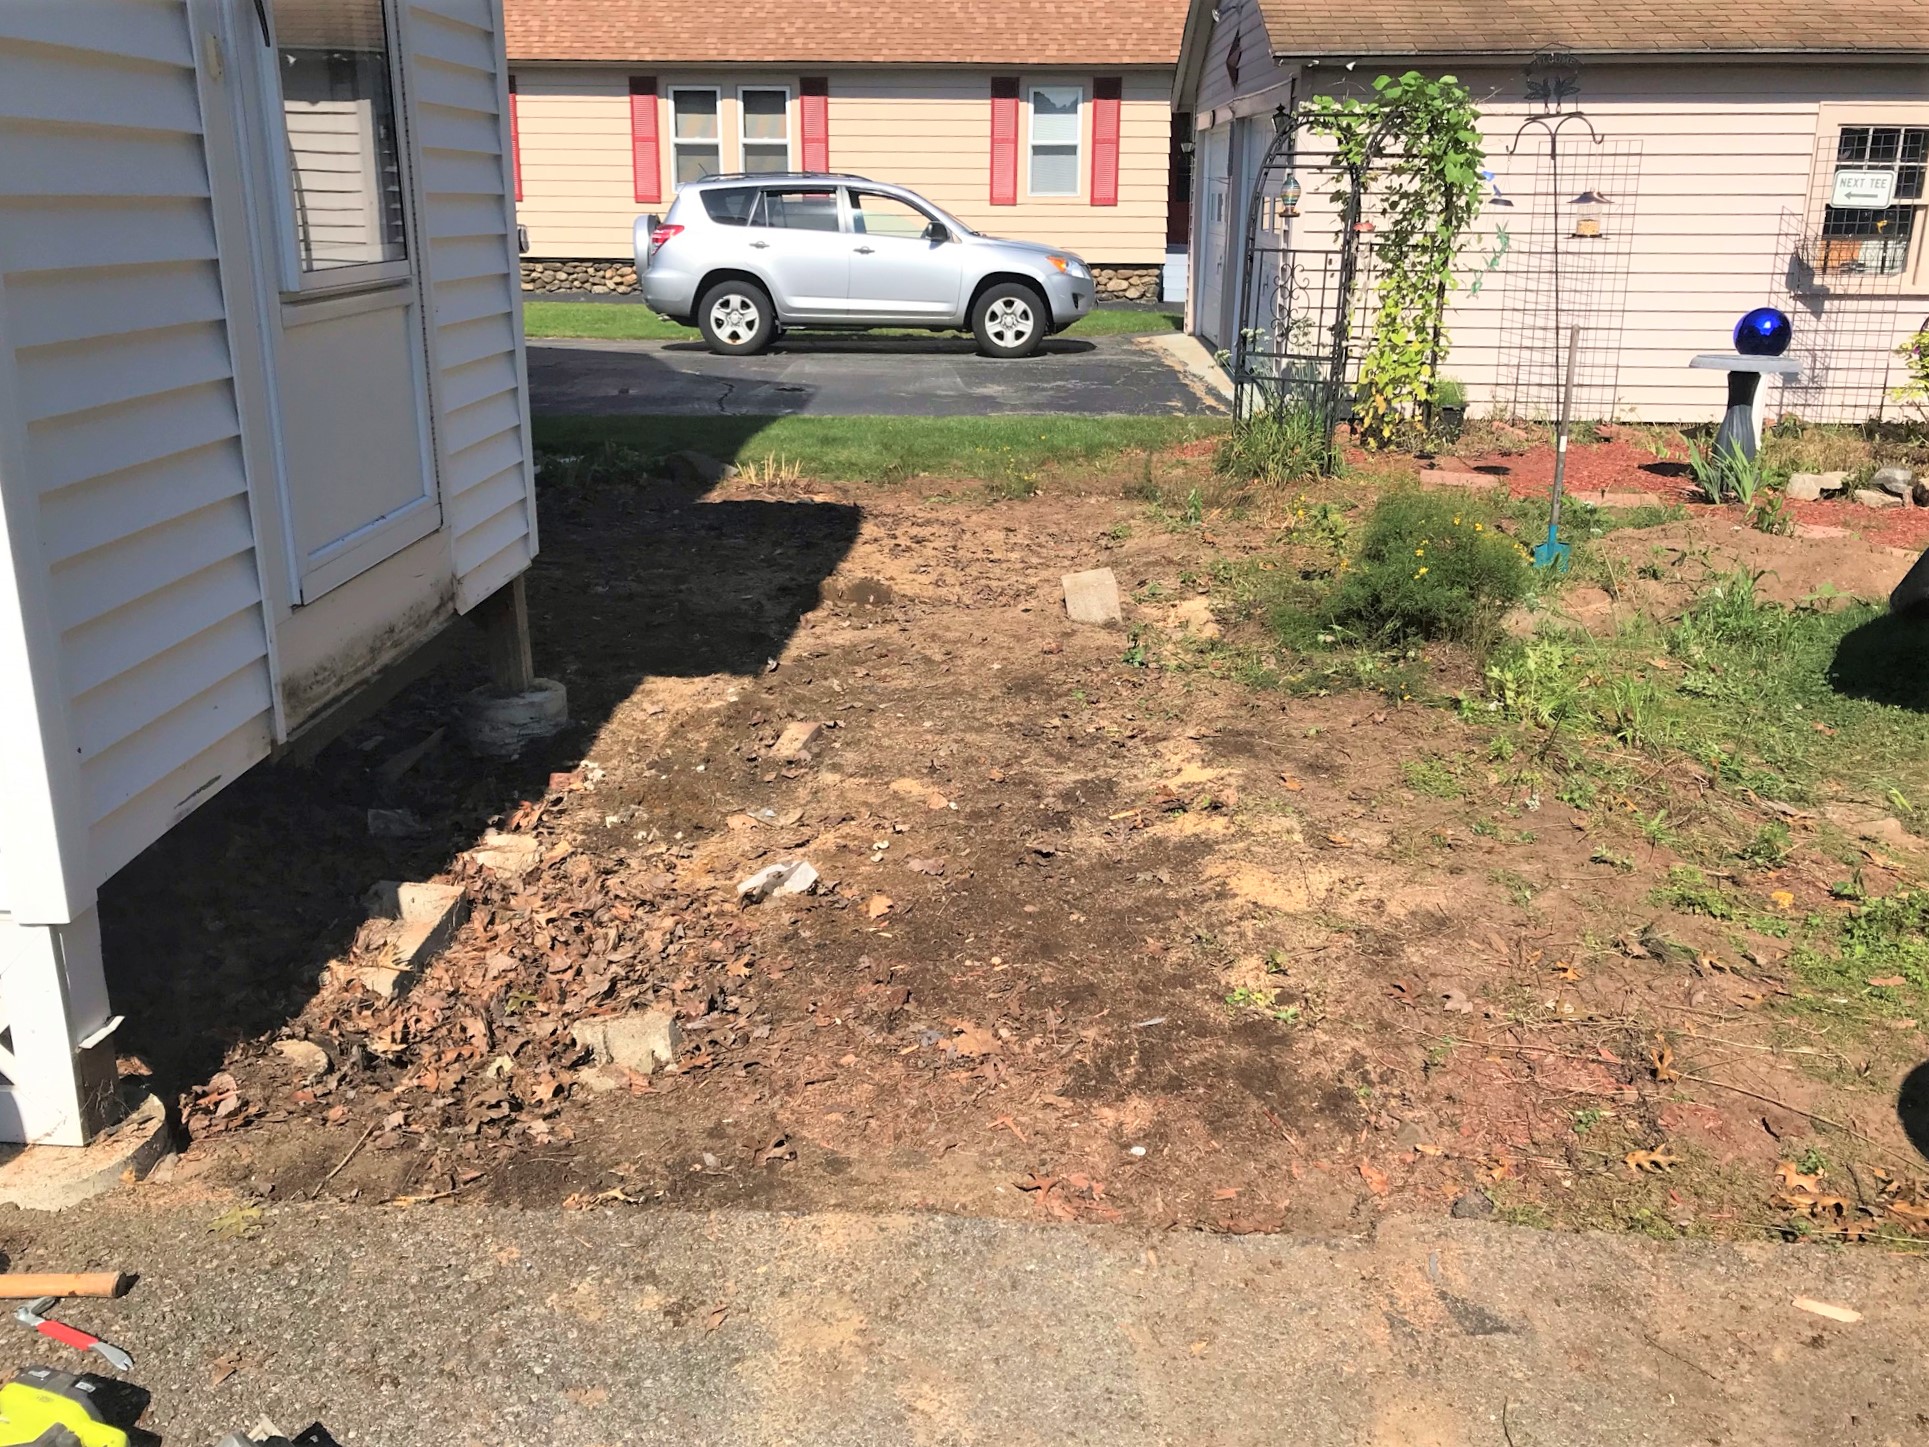
Last week (September 12-18, 2021) was unfortunately the slowest progress week to date. Gravel was spread under the new house deck location and some more asphalt was removed there as well. We also got our first plumber visit and a lot of action is happening that is not actual construction.
For example, we were able to get a visit from Door Systems of Worcester so that we could evaluate options and order a garage door. The bad news is that that door will take 3 months to arrive. COVID-19-related delays are a factor beyond anyone’s control.
The Victors measure for the gravel.The gravel is placed.
This week should prove to be more active – Andy Cormier is back from vacation, so digging will recommence on the sewer line and the driveway. And much electrical work will be happening, with our service upgrade (needed for the new building demands and more) as well as some plumbing too.
Thanks for staying with me. I turned 59 this week, so I still believe that this project will get done before I turn 60!
Tabitha got me some practice foam golf balls – her favorite color – purple. Well, she also likes pink, but I’m glad she didn’t go down that route!
The project continues into week #8. This week, with Labor Day on Monday, was a short one, but work did get done. If you remember, this project also includes work on our back yard, driveway, and back deck. This is the deck attached to the house – as opposed to the one attached to the garage. It will be bigger and more functional than the current one. Foot traffic into the house will be rerouted and the driveway reconfigured here.
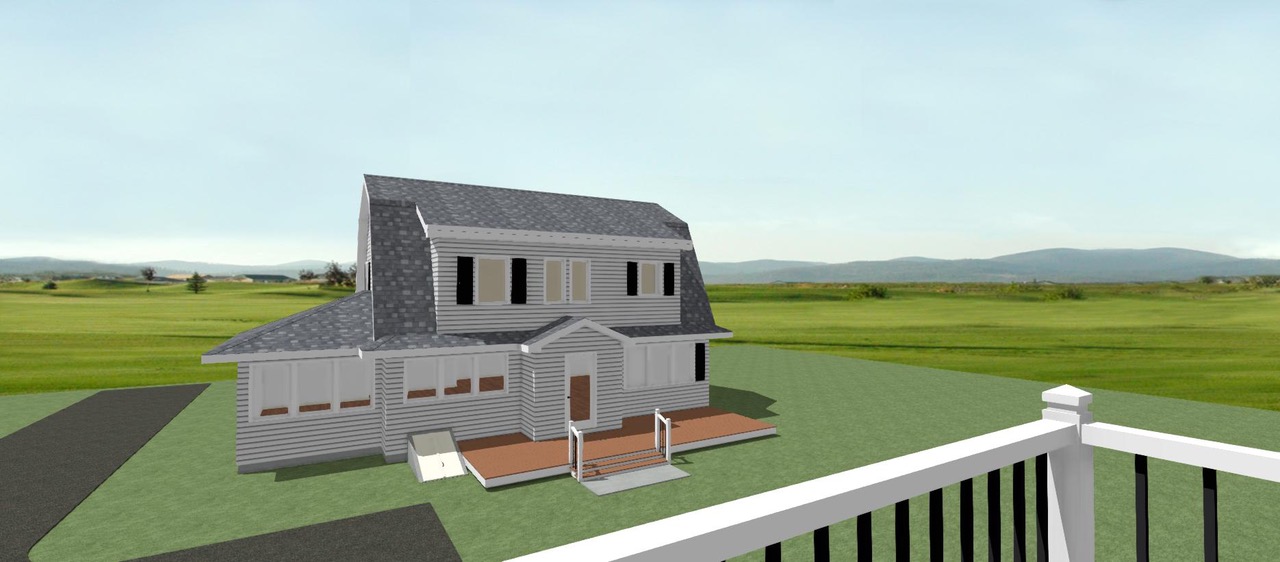
A longitudinal view of the existing house deck on Tuesday. Access will be rerouted as you will see below.Lateral view of the existing house deck on Tuesday. We had some flowers here but did not really do much gardening-wise here this year as the renovation was coming. I say “we” but that is Lynn’s purview – not mine…she does that work (as she would tell you). She’s actually superb at landscaping. And mowing the lawn – but that’s because she forbids me to do it. Seriously! The plan for the house deck as seen from a CGI view of the new deck off of the new garage building – though the decking color plan is for gray not brown. In addition to the new access means to the back door, we also will be adding paving stones to make walkways connecting the two buildings (not shown here).
Given the amount of previous work done, there was a need to reorganize the site a bit on Tuesday September 7th and Wednesday September 8th. Excess materials were returned for credit and site trash and leftover pieces of “stuff” (shingles, lumber, plywood, etc.) were picked up and carted away.
Tuesday morning saw Ready Installs loading up the excess roofing shingles for credit.
On September 9th, work on the back deck went into high gear. It was removed and carted away.
Rail removal on the house deck.The decking is removed and now the joists and end plates are ready to go.Deck is gone!
Surprisingly, there was an old asphalt landing under the dirt here that I found while removing a decades worth of leaves that had blown through the lattice found a home under our mudroom!
Cleaned up and ready for the piers. Note the old found asphalt landing.Lateral view with deck removed.View towards the new garage building.
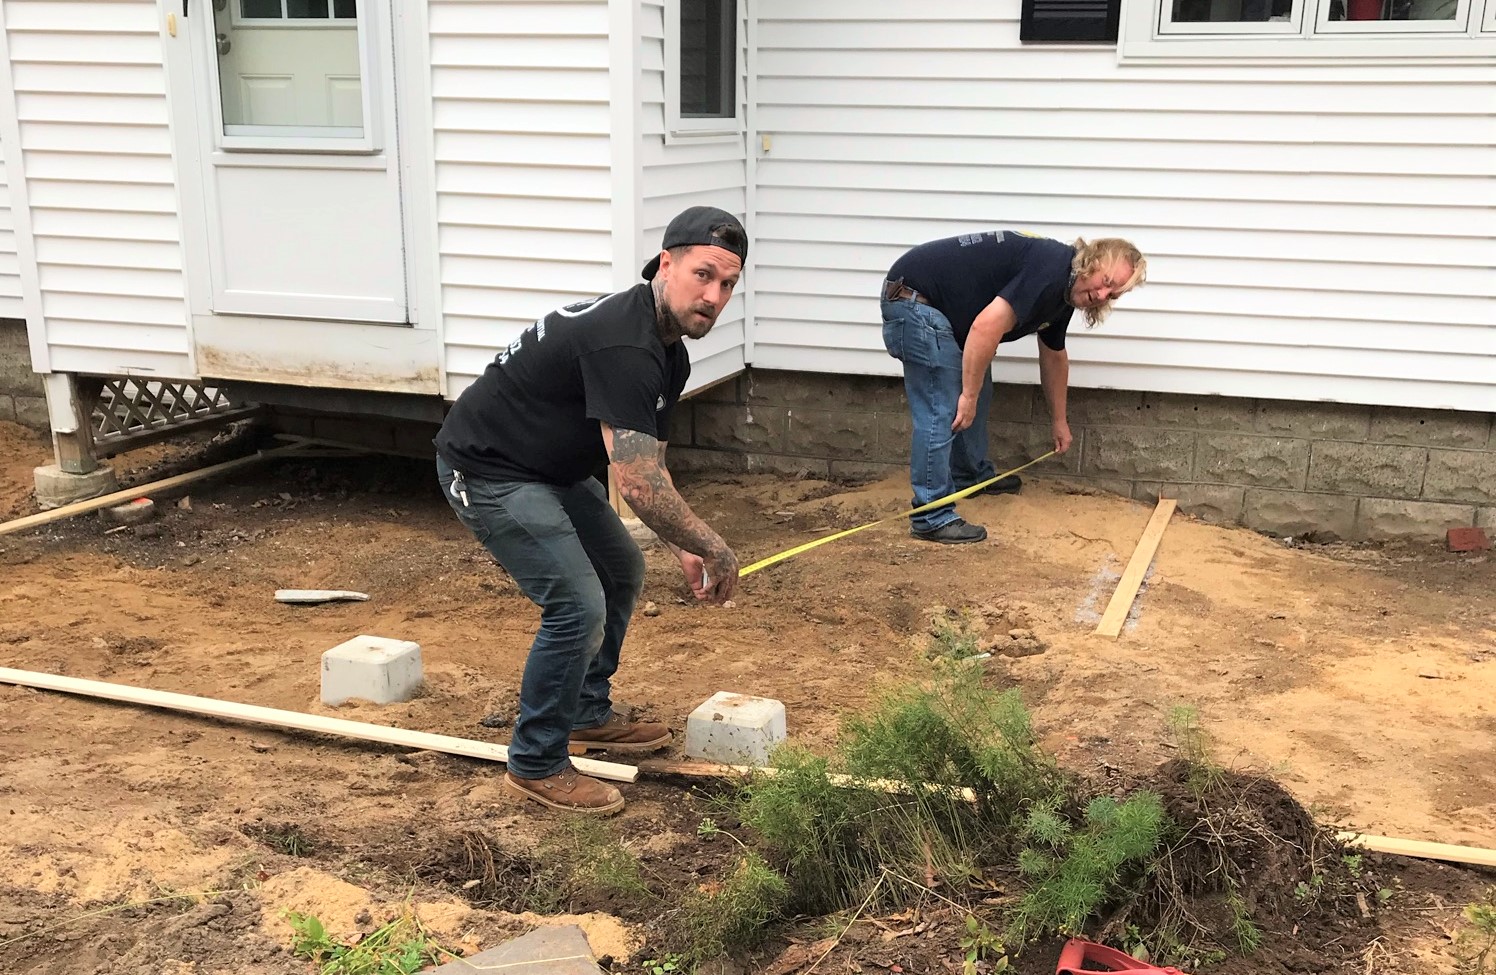
On Thursday September 9th, the father and son team from Ready Installs (Jon and Jonny Victor) measured for the new piers for the house deck. Later on Thursday, it rained a lot – AGAIN.
Measuring for the house deck piers. Care had to be taken to avoid the outgoing septic line.
Meanwhile Mike Astrella (electrician) was busy getting light positions chosen, as well as working on the rough electrical for both the upstairs and downstairs of the new building.
Selecting light locations and rough-in wiring
On Friday, I made a few supply runs to Home Depot in Auburn and EW Electrical Wholesalers in Worcester to get overlooked electrical supplies and materials.
Hitting Home Depot!
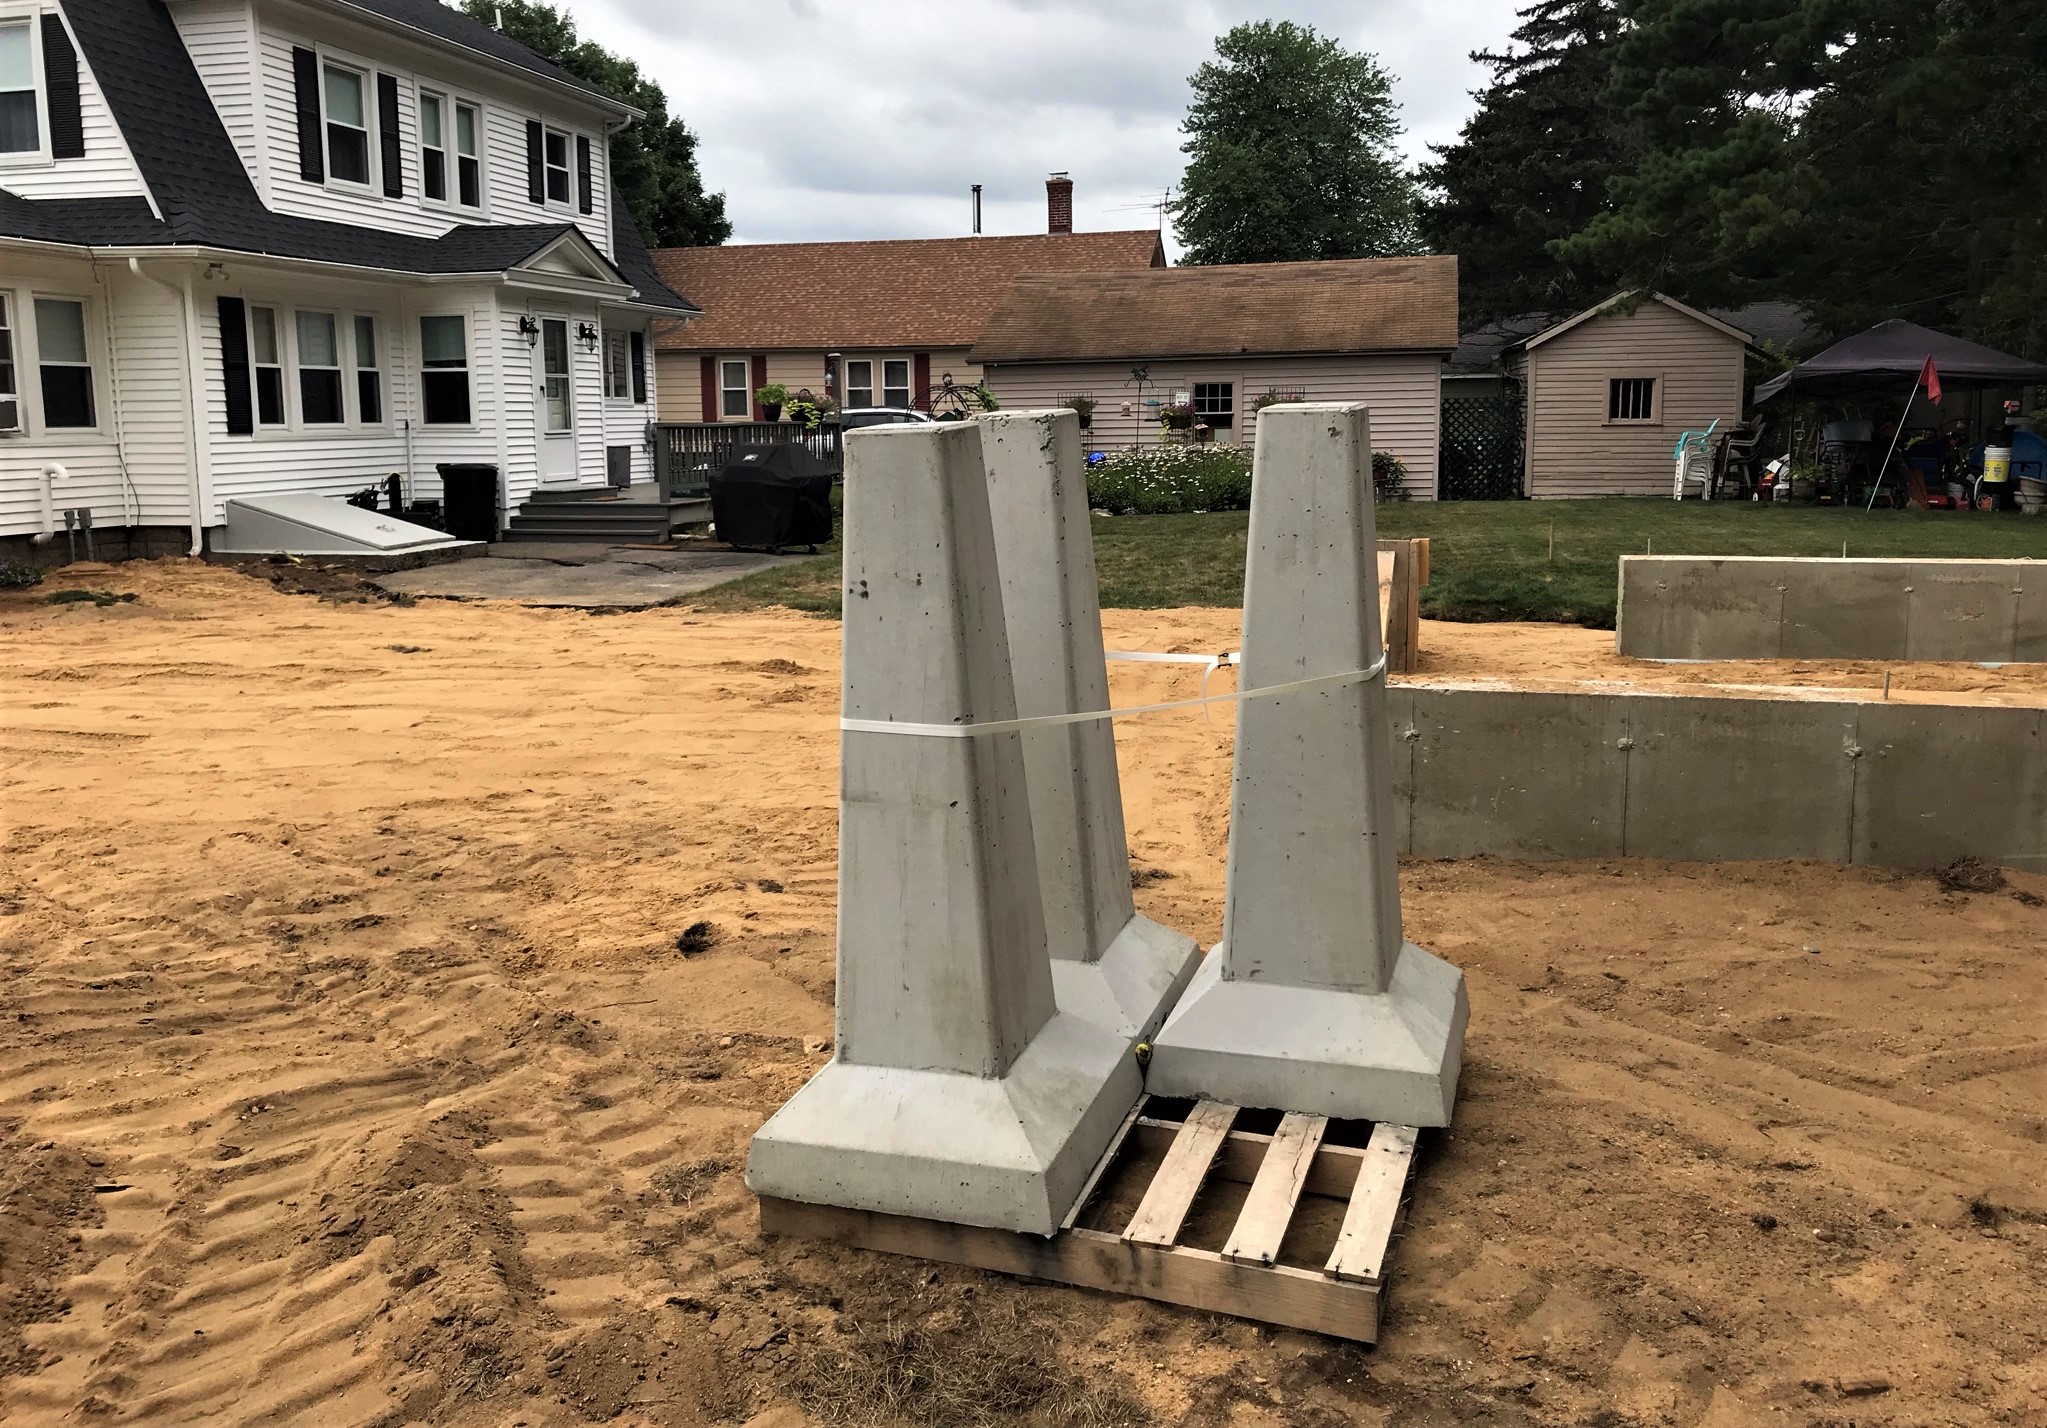
Also on Friday, the house deck piers arrived.
Piers being moved to the back by Cormier’s crew. This view is from the new building so you can tell it’s quite tall.
On Saturday, September 11th, the piers were installed and backfilled.
Some asphalt removal, and the piers are in.
That’s the progress for the week of September 5-11. We are getting there. Hope that you are enjoying these summaries!
Wow – we are almost two months into this building project now. This week (August 29 – September 4, 2021) was REALLY busy as you’ll see below. My photos focused on the more active stuff – so I hope you find them and the continuing saga of this project interesting.
First, I was able to get some shots on the interior work on the second floor.
Braces on rafters
Our ceiling with no roof – yet
View towards the future front window
View towards the future 16′ x 16′ deck
A few shots from the second floor
Jon and and Jonny Victor (the father and son team of Ready Installs) showed up early to check out the project’s progress.
Jonny checking out door height.
Next, the first order of business on Monday, August 30th, was to get the deck header up. This involved installing an ice-water barrier (which the crew decorated with a muscle-man drawing of Raphael as it will never be seen again), and nailing the header.
Ice water barrier up
Header nailed in over barrier
Getting the deck header in
Inside the garage, work on installing furring in the ceiling went on.
Early furring work in garage
At this point, we had a need to get some construction synchronized dance going. To start the deck we needed get the piers in for the deck – which required excavation and careful measurement. Also, the septic line needed to be started. Andy Cormier returned with his excavator and crew to do this. There were quite a few roots in the ground from a previously removed pine tree.
Staking out the deck location
Andy begins digging for the piers
Checking depth
Jon Victor watches as the hole depths are verified by Andy and his grandson
View of the excavation
Getting ready to exactly place the piers
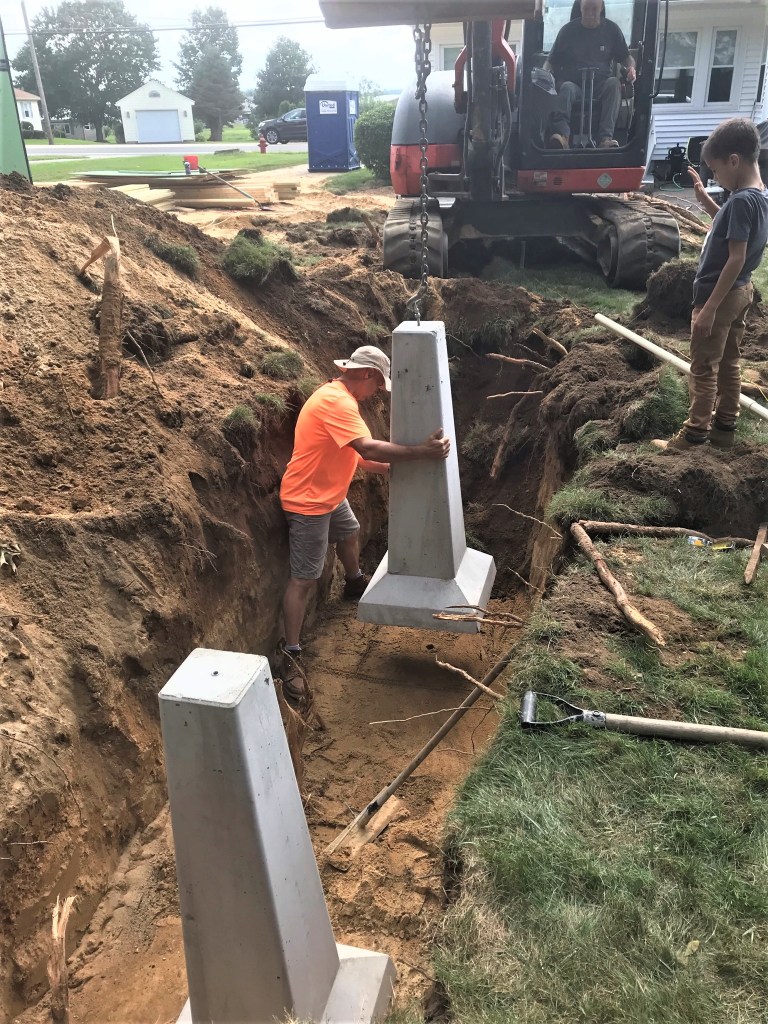
Pier excavation activities
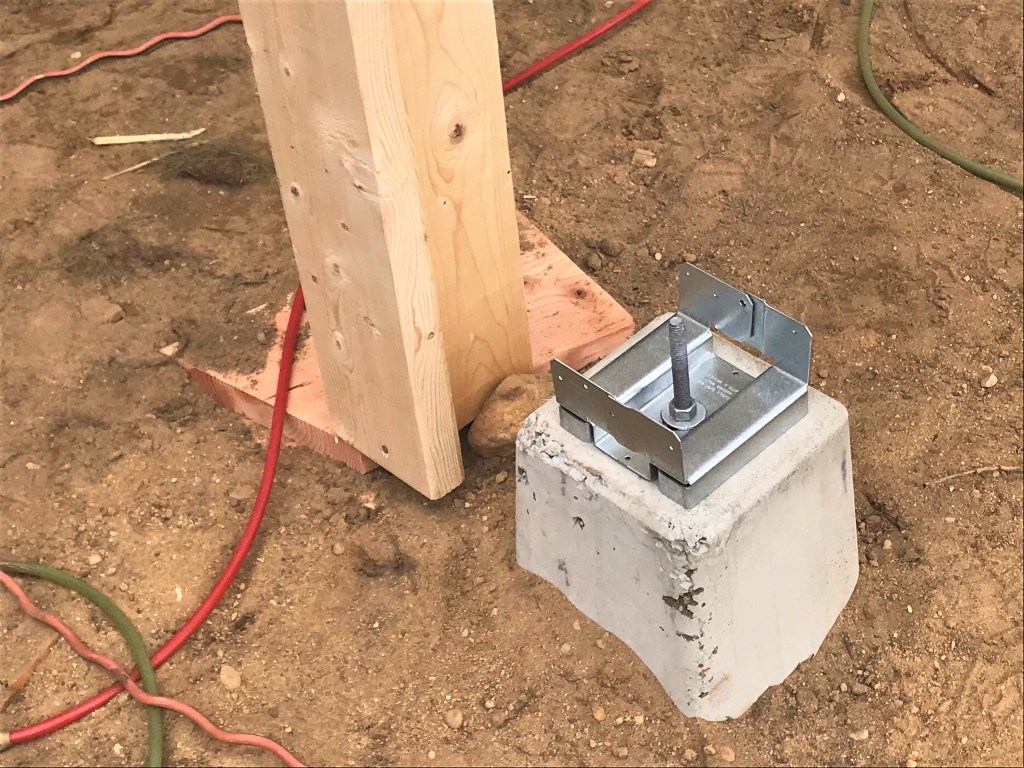
Once the trench was right, each 600-lb. pier was put in, and checked for accurate placement.
Picking up the first pier
All three piers moved to the last chunk of asphalt in the driveway.
Moving the first pier
Guiding the pier in
Last of the 3 piers going in
Pier installation for the deck
After this, Andy backfilled the trench.
Monday August 30th progress.
On Tuesday, August 31st, work continued apace. The framing of the deck began as well as work on a septic line and more.
Deck framing beginning.
Septic line excavation
Septic trench
Septic line into garage floor
Septic line work.
When Andy was safely done, work could get going on the deck supports. Temporary supports were used and then the main deck supports were attached to the piers.
Temporary deck supports going up
Raphael and crew making it happen
Permanent column attachment next to a temporary support
Getting the deck supports upThe sun sets on Tuesday’s progress.
Wednesday saw more of the same – deck progress. I was out so I did not get as many photos. The crew had to wrap it up early as the remnants of Tropical Storm Ida were coming with heavy rain predicted Wednesday-Thursday.
The crew here is framing up the deck roof overhang as Jonny gets the stairway landing area identified and cleared.A shortened day (Sep 1st) with progress on the stairs and the deck area clear here.
Ah, but the rain came heavy – BUT – it was only overnight and gone by the morning of Thursday September 2nd – so happily work could continue on the deck and second floor in preparation for Saturday roofing.
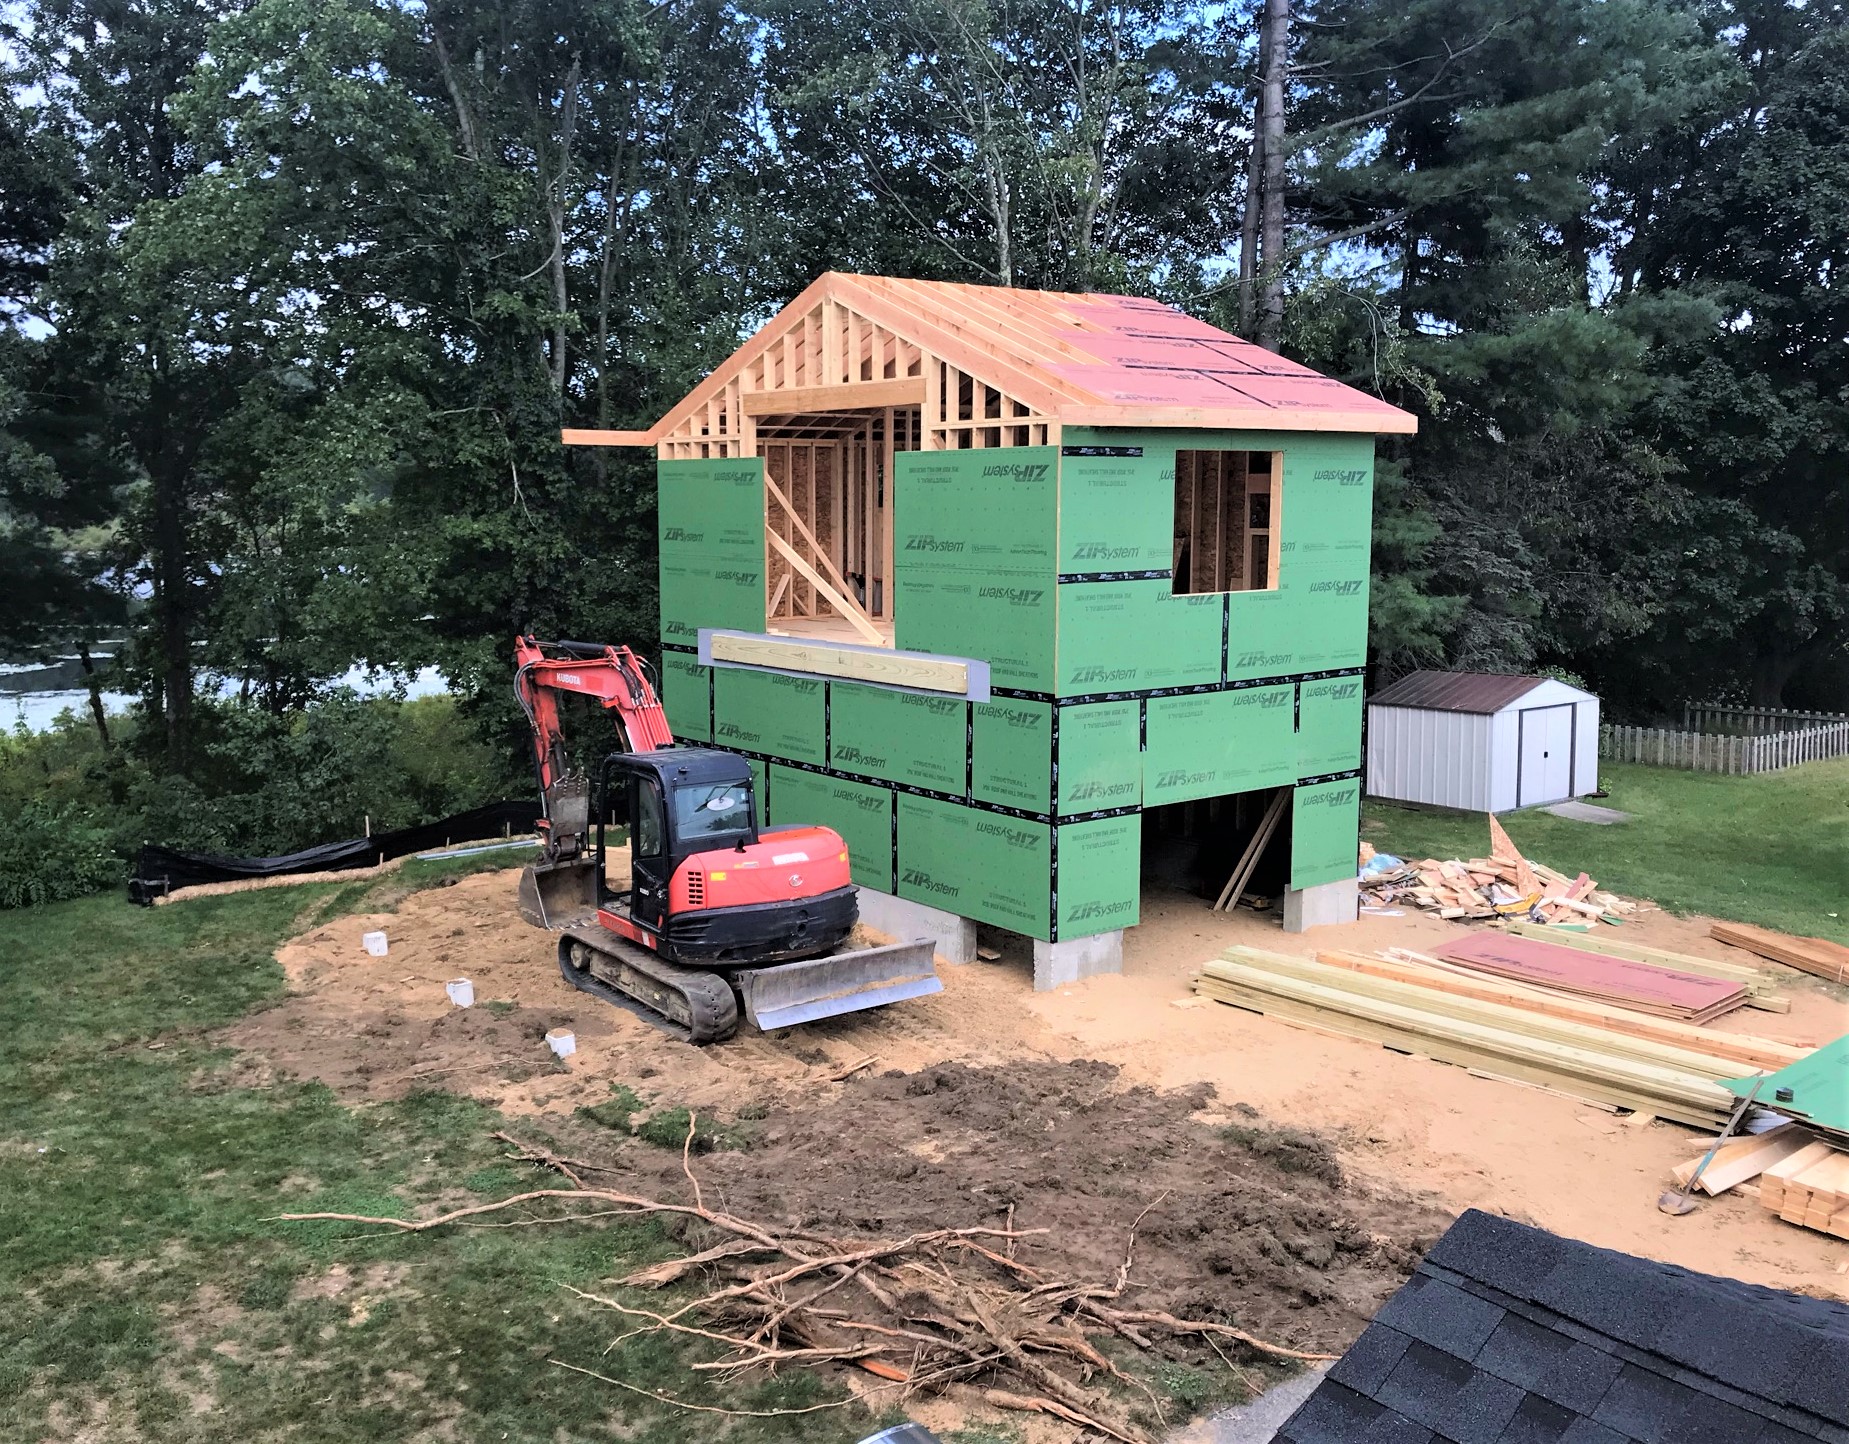
Yay – work can go on!Interior framing progress.View of the stair stringers and temporary cross bracing.Thursday mid-day progress was strong – deck roofing overhang was nearly done.End of day Thursday had the roof all enclosed and ready for the roofers. The boards on the deck are temporary supports for the crews.
No construction happened Friday as the roofing crew was going to hit the ground running on Saturday. And hit the ground early they did at 7 AM!
Sun coming up on the roofing crew on Saturday, September 4th.
The roofing crew was done in 4 hours – and now we are ready for another good week. We did also work o Saturday with one of Jon’s patio specialists to define what our patio would look like and that should be very exciting and gorgeous – but you’ll have to wait to see that (like us).
All roofed in!
Thanks for taking a look here – and what do you think of the progress so far? We have a good ways to go, and as the Starks (and EVERY New Englander) says, “Winter is Coming”…so we are certainly wanting sooner than later.
For those of you who are wondering if I will EVER get back to hobby stuff, I will. I am using some time to rewrite and add onto my Aztec supplement for Buck Surdu’s Feudal Patrol™ in Mesoamerica (Civilizations Collide). New and improved (I hope).
Also, I am writing a good number of scenarios too. Plus, golf season is winding down in the next six weeks, so that’s happening too.
Last week (August 22-28, 2021) was a stop-and-go affair for the project. As I mentioned in my last post, Tropical Storm Henri hit us with wind and rain Sunday-Monday, so progress on work was delayed until Tuesday the 24th.
At that point, things went fast as you’ll see below – until Friday. There was a crack three-man crew of Raphael (supervisor), yet another Raphael, and Enrique who arrived and worked like men possessed. This despite that the weather was really hot all three days – mid-90 degrees Fahrenheit (32 to 36 Celsius for you metric folks). There is really no shade either in our yard.
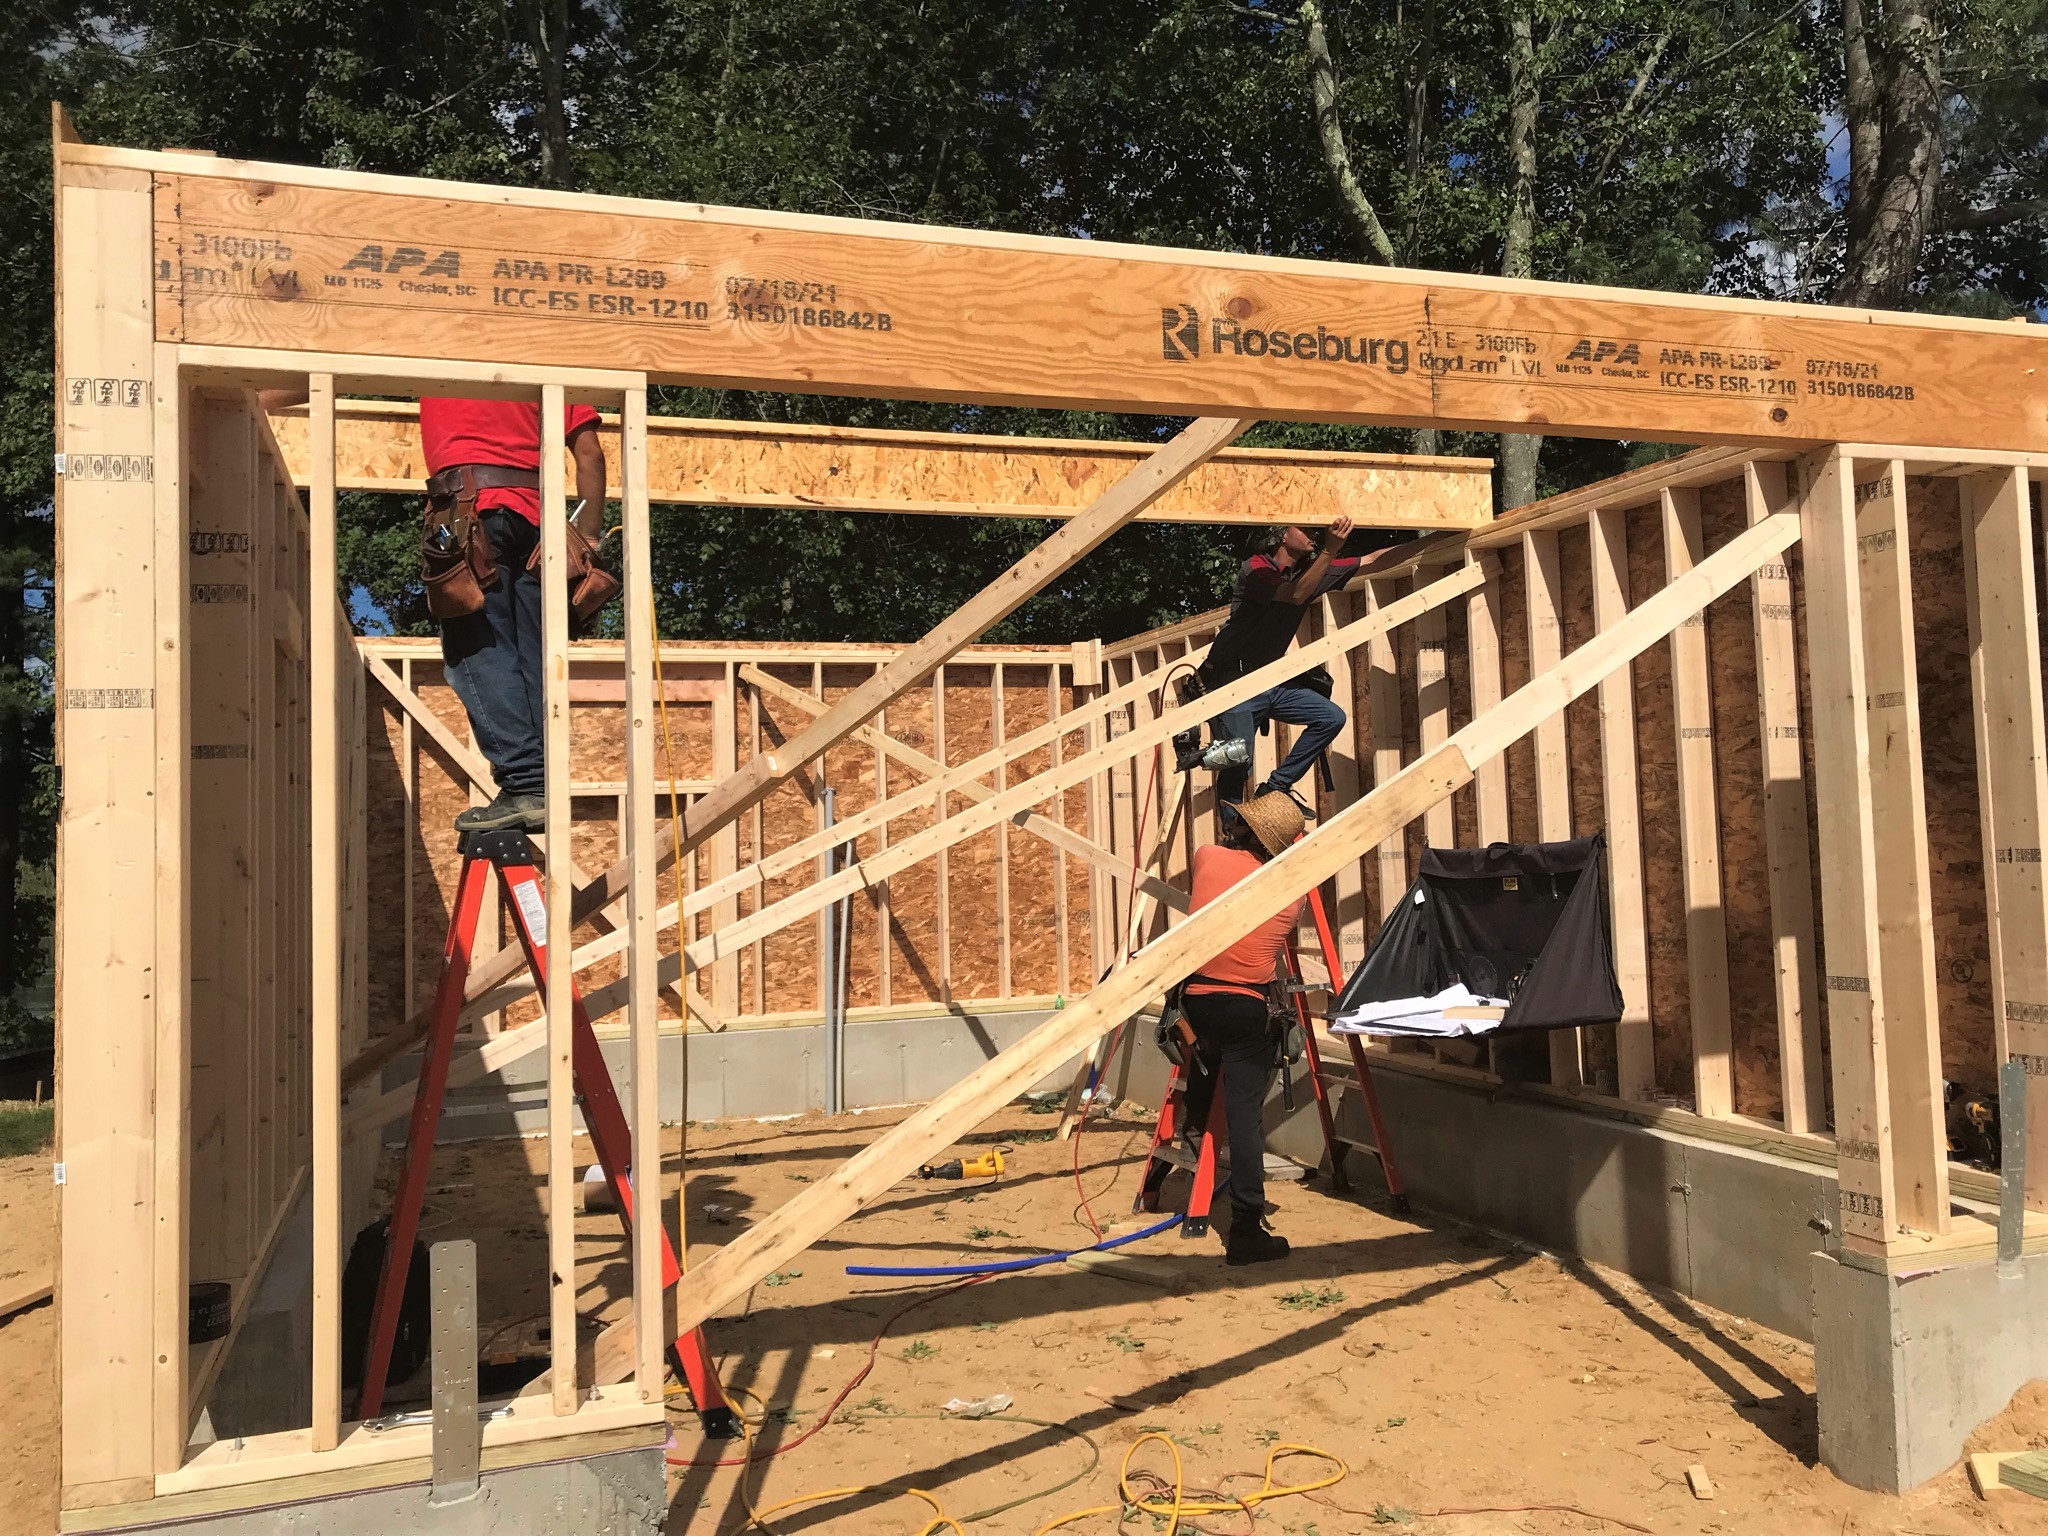
Putting on the sill and building the first garage wall.
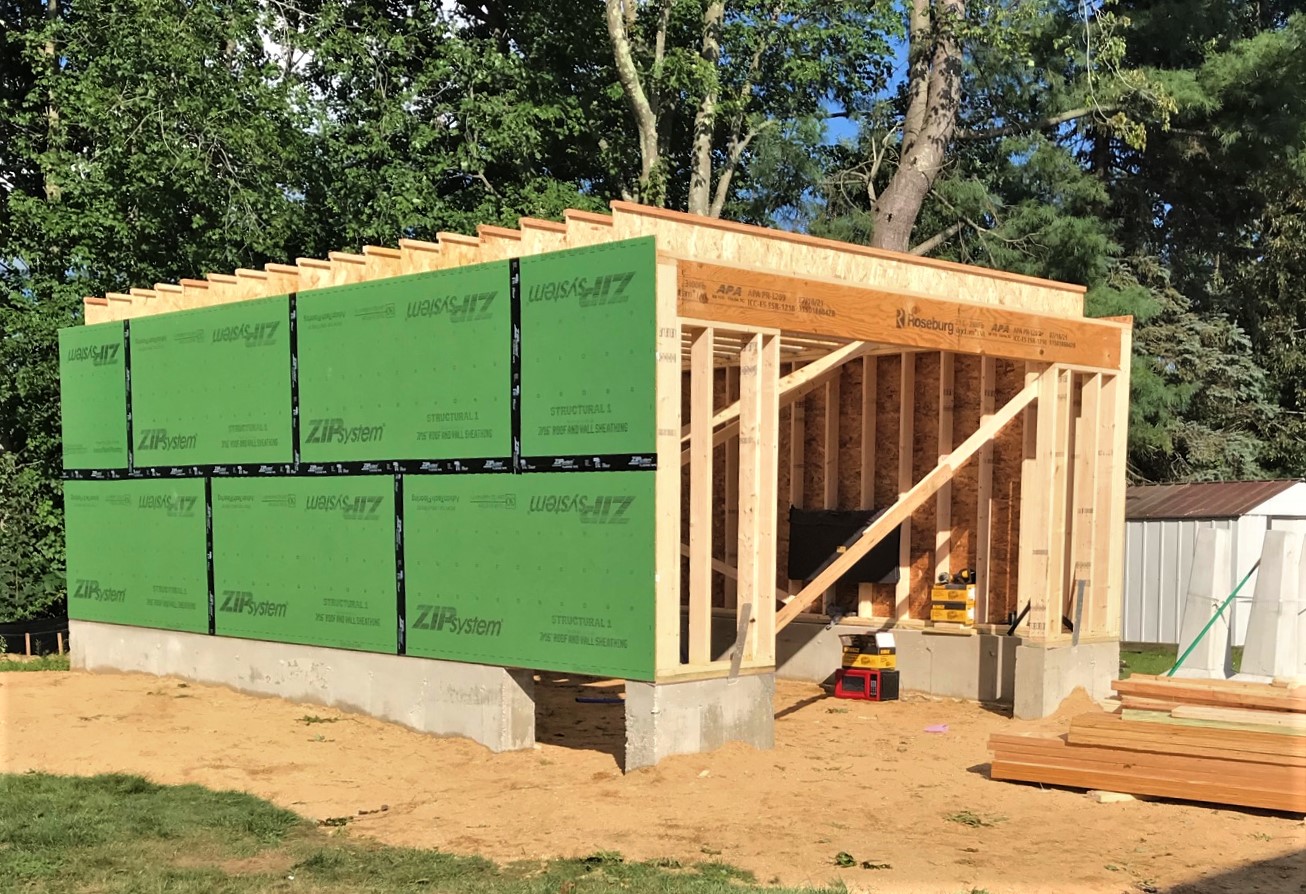
Walls went up quicklyThe two Raphaels mug for the camera after getting up the first LVL beam. On the left is the supervising Raphael.Another view of the beam going up showing the ZIP system sheathing and tape. Soon, three garage walls were framed and sheathed. Here you see Raphael in front, Raphael in the middle, and Enrique in the back.Bracing was set, and then the first of the second-story floor joists was installed on top of the garage walls.More floor joists were to follow.At the end of Tuesday the 24th, this was the hard-won progress. Again, it was HOT.On Wednesday the 25th, work began early on the second floor flooring.We also got a delivery of more lumber…and a porta-potty!Work started on the second floor gables and walls.Raphael handles a sheet of sheathing with ease.
Looking at the back of the garage
Looking out the front
The garage interior at least now provides some shade!View from the street as the first gabled wall goes up.Closer shot of the first second floor gabled wall. There is going to be a pretty tall ceiling in that room.The hot sun sets, revealing Wednesday the 25th’s progress.
More second floor walls up
Good view of the side where the deck will be
Thursday morning more progress on the second floor was made.The deck side wall went up plus the strong LVL beam that will go over the glass doors. Again, did I mention it was HOT? AGAIN?Close up view of the second floor deck/door side.Raphael strikes a pose as the rafters take shape! The man has some guns!
At the end of the day, here below was the progress for the week – on Thursday.
Progress at the end of August 26th.
Friday the project got held up as we needed to get the deck piers excavated – and the excavator did not make it to the site. Also, the pre-fabricated concrete deck piers would need to be moved to the other side of the building, and they weigh about 600 lbs. each. Ironically, the heat broke Thursday night and Friday was nice and in the 70’s. But it is August, so….the heat will be back, even in September. Of course it could snow in October…
I’m looking forward to more progress coming during the week of August 29th to September 4th. Stay tuned!
Has it been 5 weeks already? Still, we are indeed anxious to get this building up!!
Ready Installs and Cormier Homebuilding were busy this week. We also had Mike Astrella and his crew doing some electrical work. Moving forward for sure.
Backfilling the foundationMore sand for backfillingMike Astrella working on conduitsDrilling out hole for septic accessBackfilling progress – and repair on foundation chip.Concrete piers for the deck came on Wednesday. Deliveries would start to accelerate.Close up view of chip repair. Looks good!Wednesday progress.By Wednesday, this was the view of the progress from upstairs in the house.
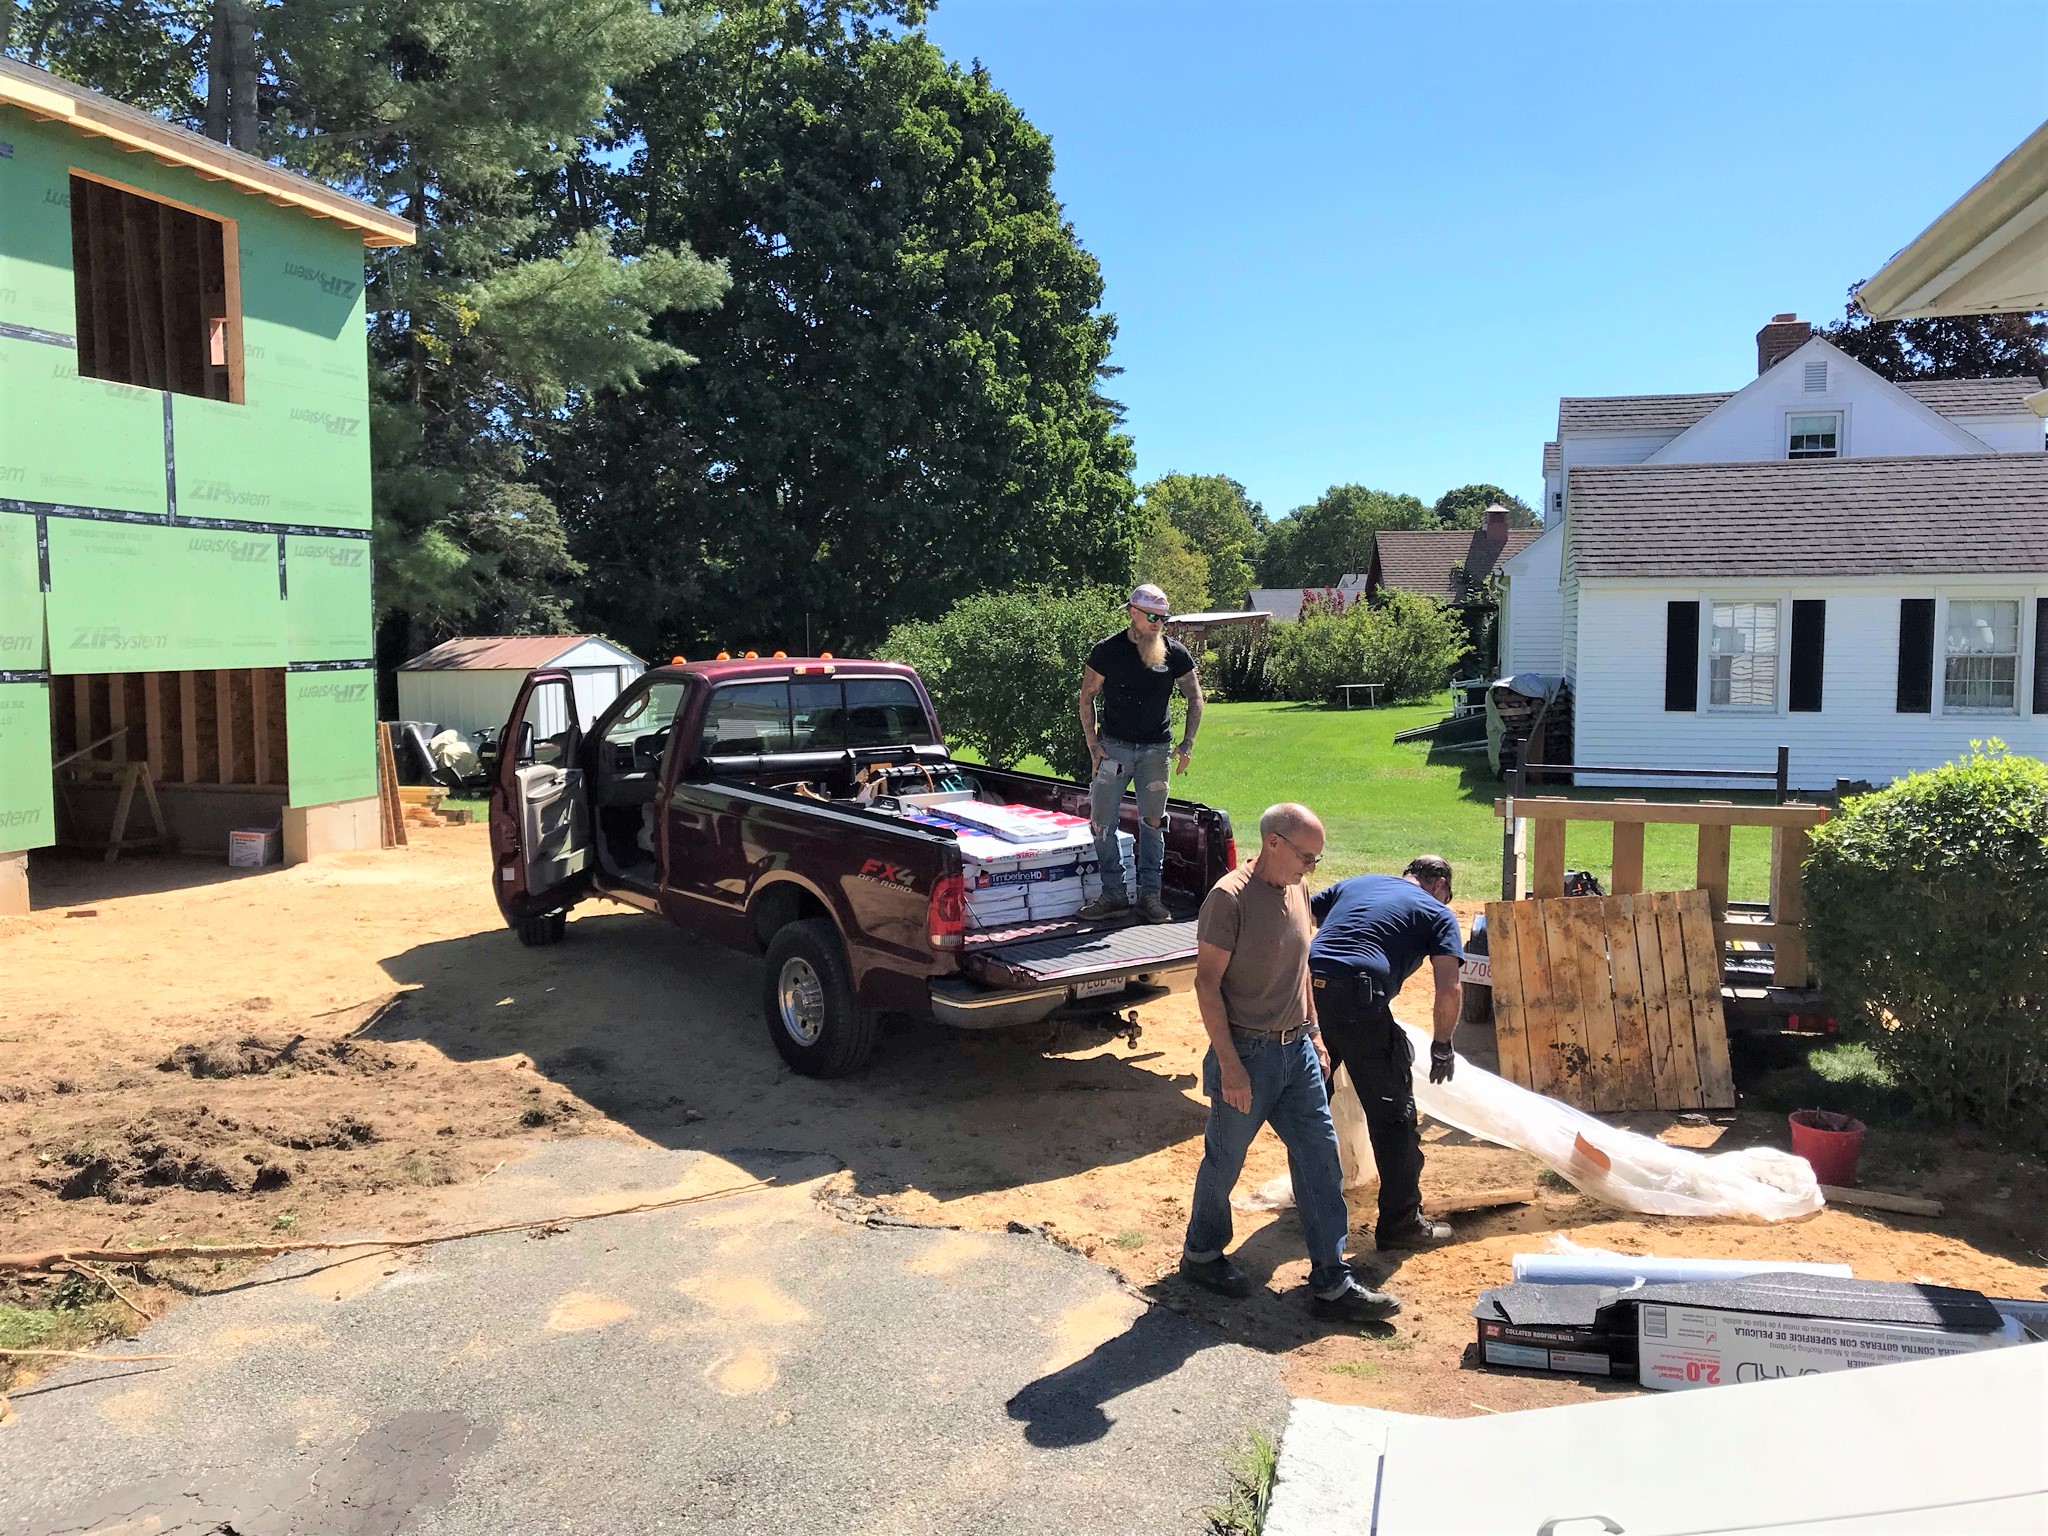
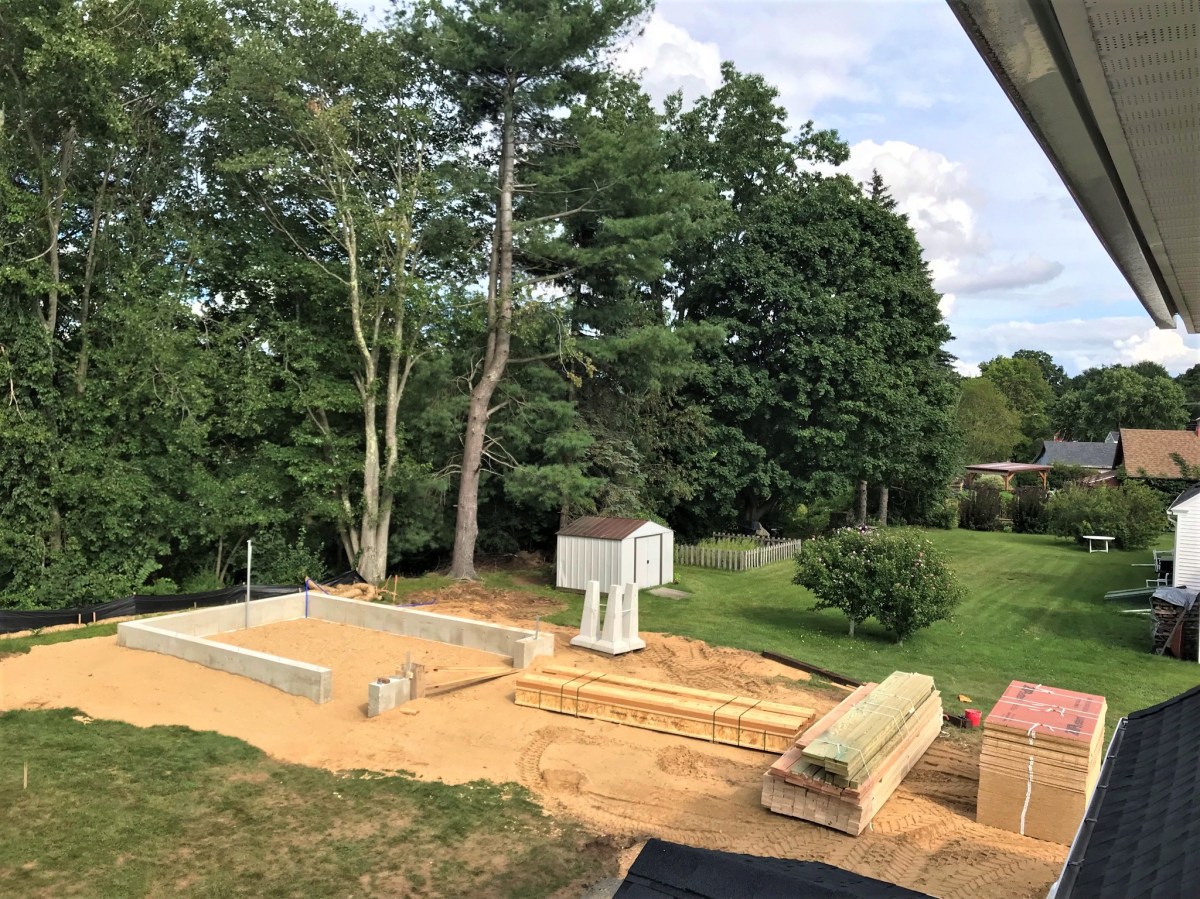
Friday and Saturday would see more deliveries. Some lumber is still on back-order, but not too much.
Friday saw a delivery of lumber – mostly LVL’s and floor joists.Saturday saw a BIG delivery of even more lumber.Lots of lumber!End of week – here we are progress-wise.
With any luck, Tropical Storm Henri (which hit us Sunday with rain and wind and will affect us through Monday) will not cause any delays this week.
Hope you are enjoying these posts – and this journey.
Yes! It’s finally time for the FINAL REVEAL of my Aztec cityscape. It’s been a labor of love – to recreate this tabletop for gaming. What game you ask? Why of course – Buck Surdu’s Feudal Patrol™! I wrote the gaming supplement for Feudal Patrol™ games during the period of the Spanish Conquest. The supplement involves the Conquistadores, the Aztecs, the Tlaxcalans (and more Mesoamericans who fought the Aztecs), the Maya, and the Inca (in South America). I called it Civilizations Collide, and it’s a free download from Buck’s website or from Sally4th in the UK. If you have not checked this excellent game out – do it!
This is Part 5 of my series on “Building an Aztec Cityscape”. There are a lot of background history and WIP details in these posts that for brevity I won’t repeat here. However, if you have missed the other parts, they are listed below with their links:
Building an Aztec Cityscape – Part 5: Tenochtitlan – THE FINAL REVEAL (this post)
As for wargaming the period of the Spanish Conquest 500 years ago, I want to be clear. It was brutal to be sure, and as I have stated often, there were no good guys on any side. I did not aim to glorify any aspect of the time, but to raise awareness and knowledge of it through wargaming.
From the start of this project, I wanted to create a unique and hopefully stunning tabletop for these games. I had a vision of creating a nice cityscape – an encompassing panorama that I had not seen anyone else do at any convention. Also, the cityscape needed to facilitate a fun gaming experience, so visually, I felt that had to go big. I had already painted 230 figures for the period. I had built many buildings too. Therefore, I wanted something that had the “flavor” of Tenochtitlan. However, with the tabletop designed for 28mm skirmish figures, (about 1″ tall), building a true-to-life and historically accurate Tenochtitlan would have required a gymnasium-sized playing area. I have seen stunning photos from SALUTE in the UK that were for 15mm gaming, but that scale went far beyond what I envisioned – or what was feasible for me. For travel to gaming conventions, the cityscape needed to be able to be broken down and transported easily. It needed to be useful for multiple games. This post will reveal my solution, for better or for worse.
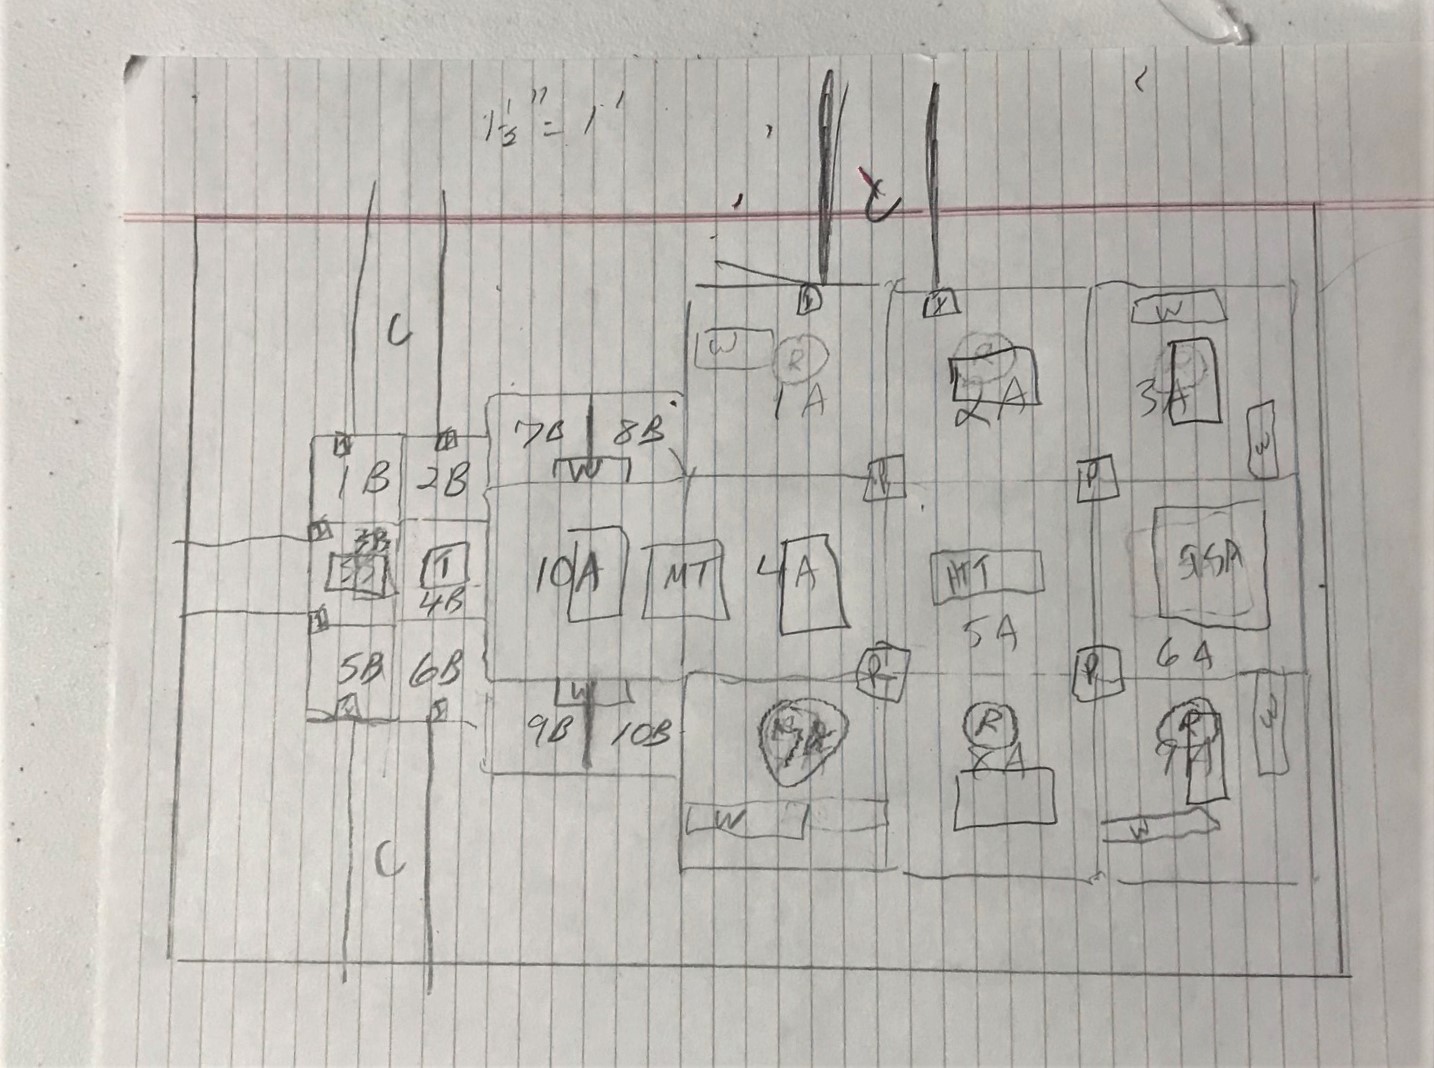
I started out with historical research into several sources, and thinking about what I wanted and what I could do. After I had my initial concept, I then refined it into the two plans that I put on paper below.
First rough draft of the plan.Then, I refined the plan.
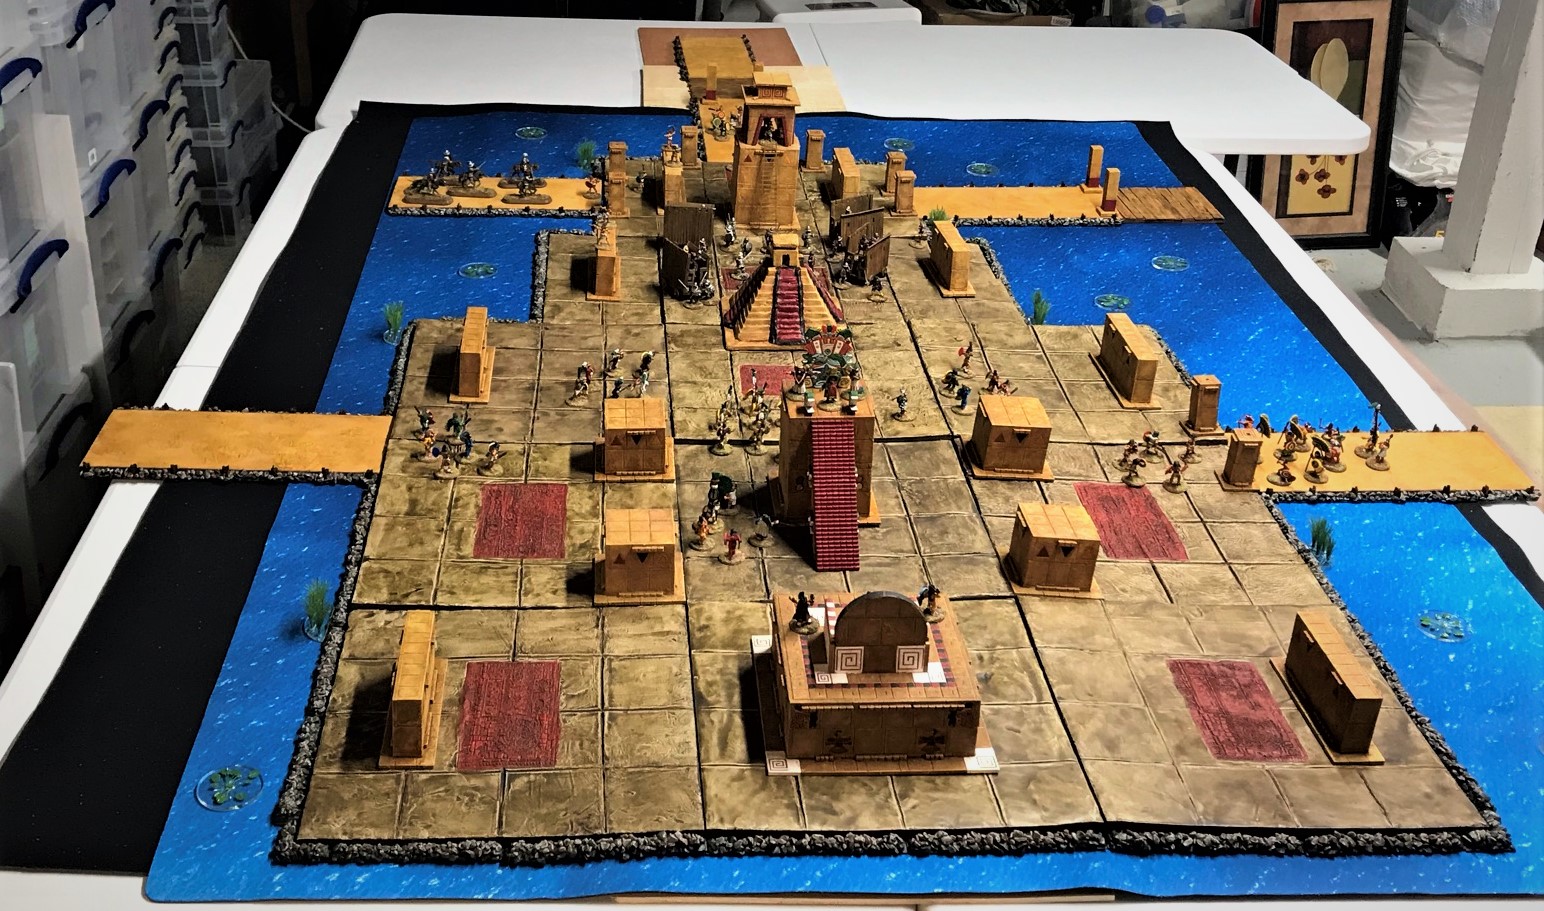
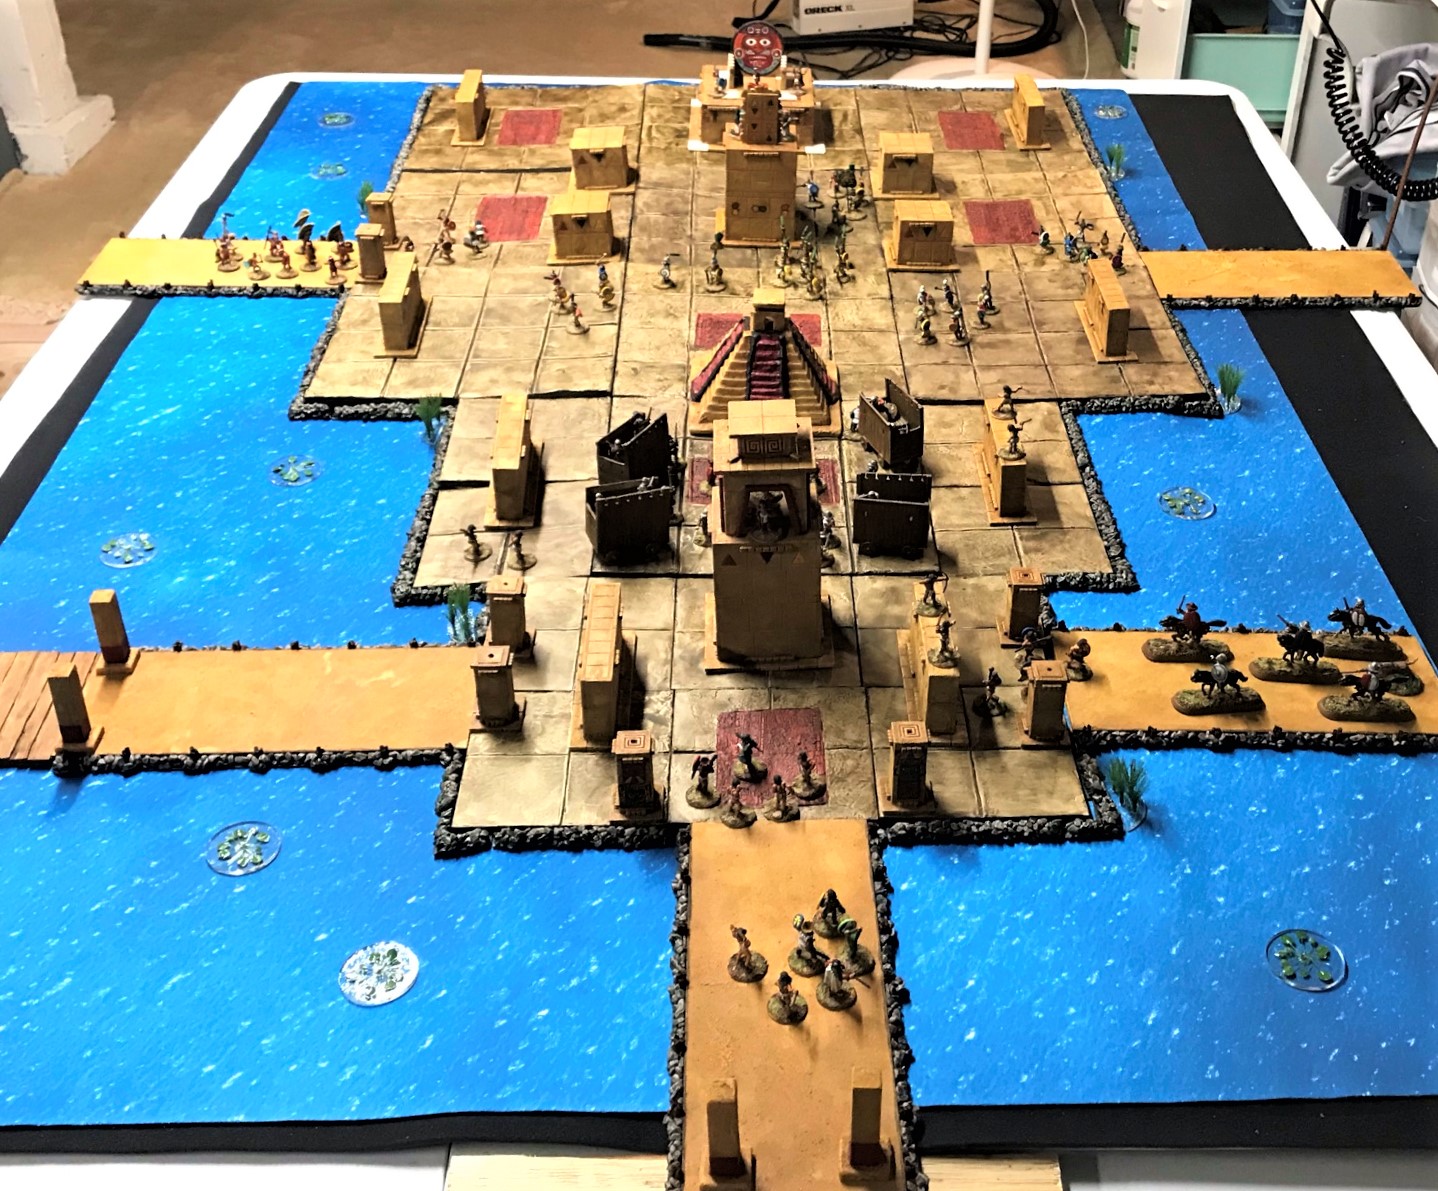
The previous posts describe in more detail how I got here. So, let’s show some eye candy – and I will be posting on the Combat Patrol Facebook page and sharing a link to my IGTV page where you can view a video of the cityscape.
Here I set up some figures on the cityscape – many of these images were shown in previous posts – but here you get to see the whole thing!
Ta daa! Click on the images for a bigger view.End view – the mat is from FLG.Opposite lengthwise viewAngled view from the end.
As before, this is DEFINITELY (I think anyways) my last entry into Dave’s Season of Scenery Challenge! Thanks Dave for running the challenge and letting me be part of it. At least it’s the last part of the cityscape posts.
I also want to especially thank my wife for tolerating this bit of my madness. And of course I thank my old West Point comrades Buck Surdu and Dave Wood, Greg Priebe, Chris Palmer and the HAWKS, Chris Abbey at Sally4th, Dave at The Imperfect Modeler (especially for the chinchilla dust tip), GED at Gringo 40’s, IRO (for inspiration), Joerg Bender at Things From The Basement, the Uxbridge Historical Gaming Club and the Mass Pikemen Gaming Club.
A SPECIAL THANKS TO ALL the bloggers listed below who have taken the time to encourage me over this project. I am indebted to you all – you kept me focused, and motivated.
I’m not an award-winning videographer – but I hope that you enjoy the video.
What’s next? I will be going to my first HISTORICON and bringing both my cityscape and my rural tabletop. I will also be adding the two naval types (brigantines and war canoes) to the next version of my Civilizations Collide supplement – along with new scenarios and scenario-specific rules. I hope that you will like these. Yes, I have more work to do!
Please let me know your thoughts in the comments section – and thanks for looking!
For all of my previous posts on games, units, and other projects for my 16th Century Spanish Conquest supplement for Feudal Patrol™ – “Civilizations Collide” – please see this page.
The fourth week of the project (through August 14th) saw some progress, as well as some headaches. I’ll let the pictures below help to tell the story.
View from the house
Looking from my normal parking spot on the driveway
This is where the project was early morning Monday, August 10th. By Tuesday, August 10th, we started to see some dirt moving.
On Monday, serious work began on moving dirt. More of the old driveway was removed, as was some overburden. Unfortunately, on the previous week, one of the less-experienced excavator operators hit the new foundation and chipped off a piece.
AAARGH!
That was not pleasant to learn or see. It’s repairable, but felt awful as it’s brand new. As this week was about digging a trench for the water line and a second trench for the power and coax cables – and would require digging close to our house foundation – the owner of the company doing the subcontractor work for the excavation (Andy Cormier), took charge of the digging. That was a relief as having an excavator hit the house would have been a nightmare.
This is Tuesday, August 11th. Andy is digging the electrical/cox cable trench. More of the old driveway was removed and some cracked as you see here to the left of the open cellar bulkhead. It will all be repaved anyways.
While Andy digs, Frank drills a hole in the foundation for the electrical & coax conduits. You can see the “ding” on the foundation’s car door above his head on the photo on the right.The electrical/coax trench being dug.Setting up a form to repair the chipped edge.
Here the water line trench is started (separate and distant from the other electrical/coax conduit trench for obvious reasons).Electricians work on the conduits in the foundation. My wife Lynn is inspecting above!Long view of the trenches – looking very WWI in the back yard…At the end of Wednesday, August 11th, the water line was in and its trench was backfilled. The electrical and coax cable conduits were inside the foundation and ready for backfill there too.
At this point, it became a waiting game for the wiring inspector, as both the conduits in the remaining trench, and in the foundation, needed to be inspected before being backfilled. We lost time as he did not come until Friday morning. As Andy was not sure as to when he would come, he had moved his excavator to another job site. This would delay the backfilling. Also, the wiring inspector wanted thicker conduit installed where it attached to the house (schedule 80 versus schedule 40), in case it was struck buy something. He also wanted more sealing where it went through the siding. Therefore the electricians had another task for the following week’s work.
The end of the electrical/coax cable trench by the house on Friday.
While construction was on hold, Saturday was a big day as it involved Massachusetts having a “tax-free weekend”. This is when – as a “gift” from the legislature – businesses can sell items up to $2,500 with none of the 6.25% Massachusetts sales tax applied. While I wish that we had been allowed to start this whole project a couple of months sooner, this was a boon. I am purchasing all of the project materials so as to get the points on my credit card. This requires some degree of management on my part. I had spent the week working with Ready Installs and their vendors to line up as much as I could get to be ordered on that weekend. A few items (mainly big doors) did not qualify, but a lot did. One of the biggest orders would be from The Home Depot store in Shrewsbury, which is about 45 minutes away. I also knew that there would be a LOT of people and contractors thinking similarly about the tax-free weekend. So, I got up before 4 AM, got myself ready, and was the first in line before the Home Depot opened at 6 AM on Saturday. No worries as getting up early is my norm. I got the order – and all the other orders in – and saved a substantial amount of money overall.
Yes, I am awake…hell, the sun’s almost up even…The project at the end of the week. The next week will hopefully show more progress!
That’s Week Four, ending August 14th (for those non-US folks – our calendars end on Saturday). Looking forward to more progress in Week 5.
Thanks for looking! FYI – for those of you also following my Aztec project – the BIG REVEAL is coming very soon! If you are not, you should take a look here at the first installment – there are four now and one more to go.