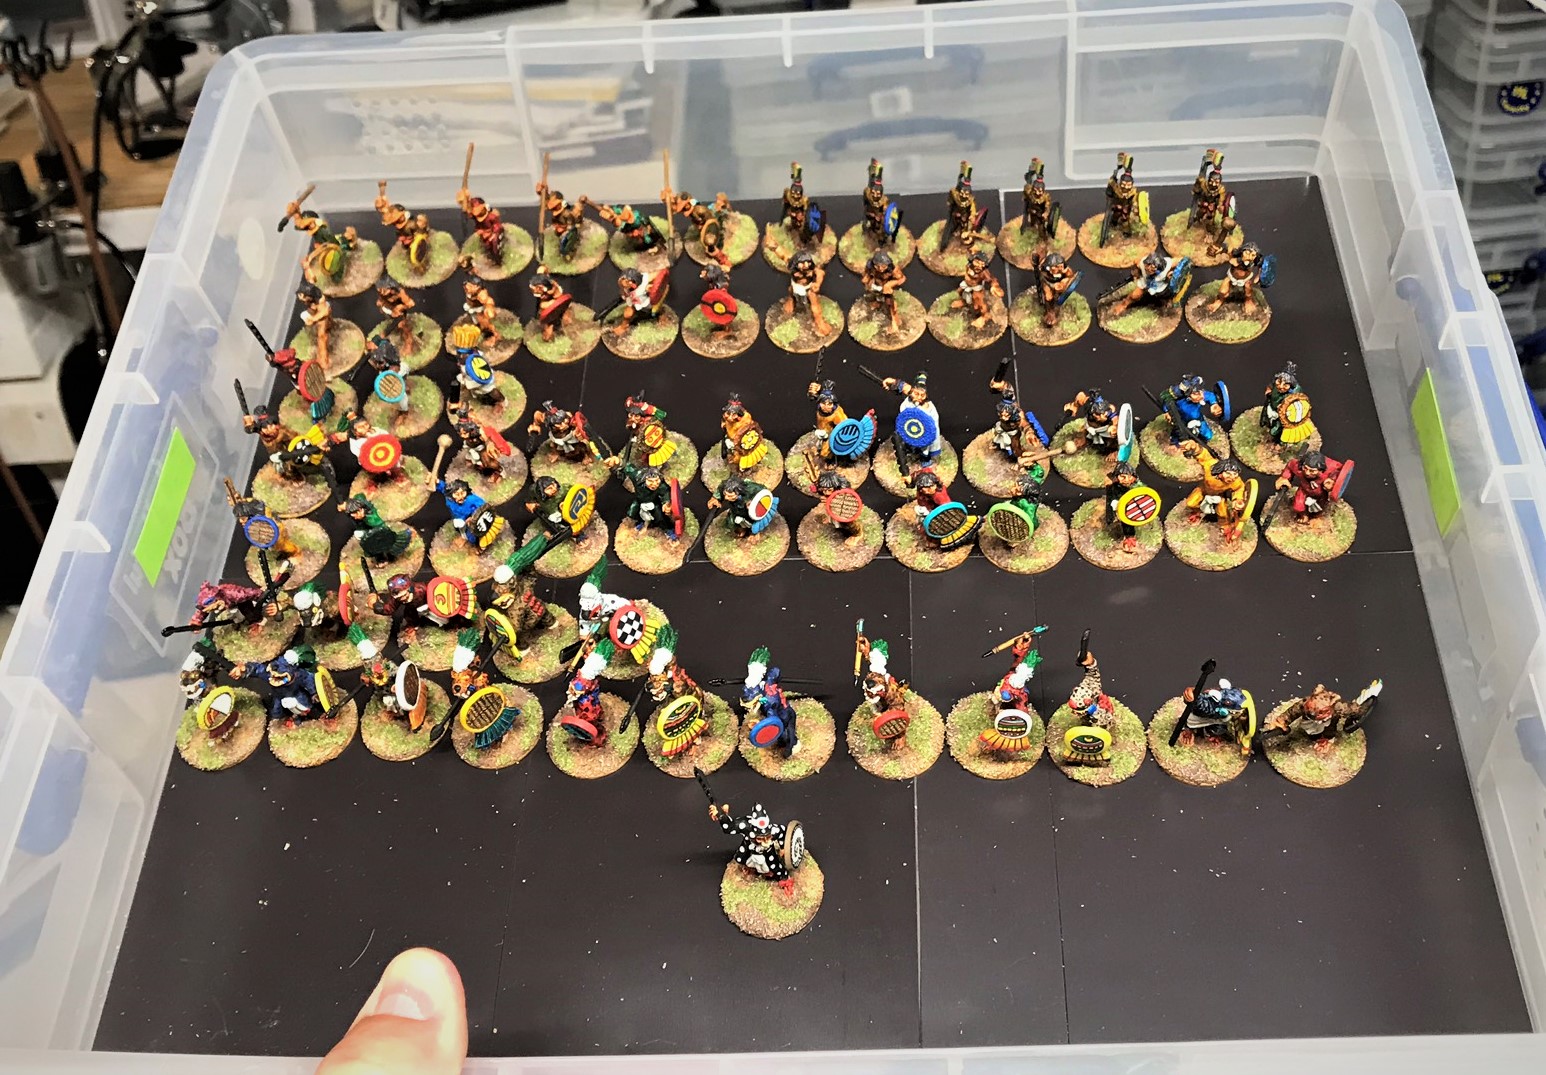
Well, not exactly…more like into one of my storage boxes to await a future game…but now that I have your attention, welcome!
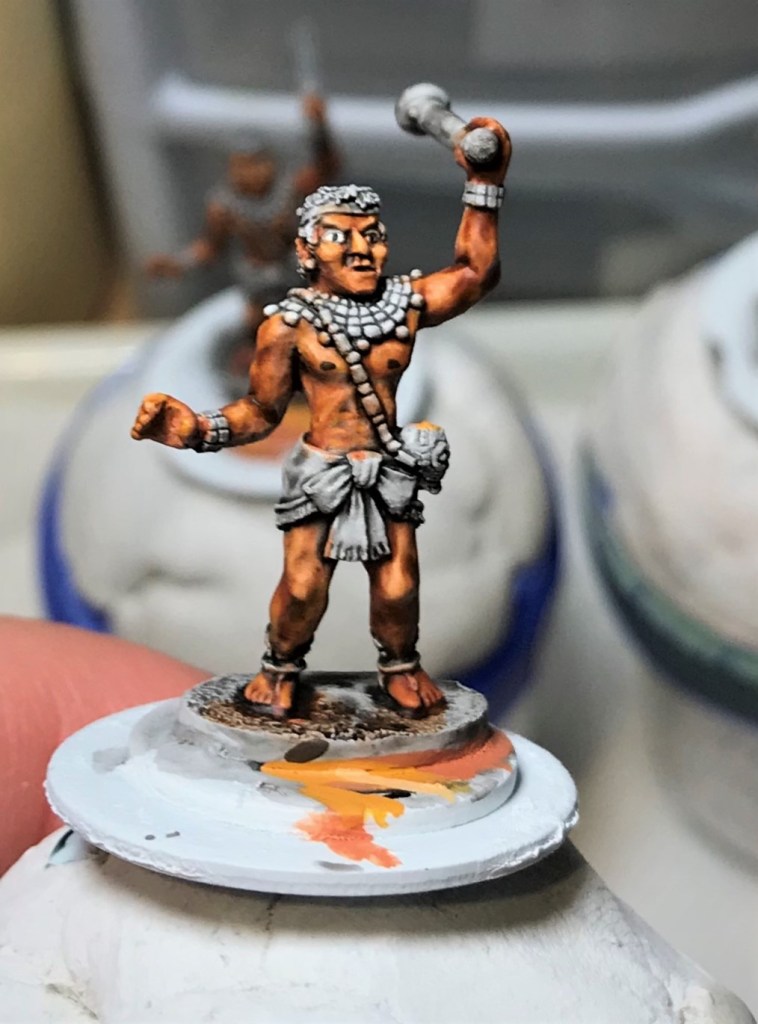
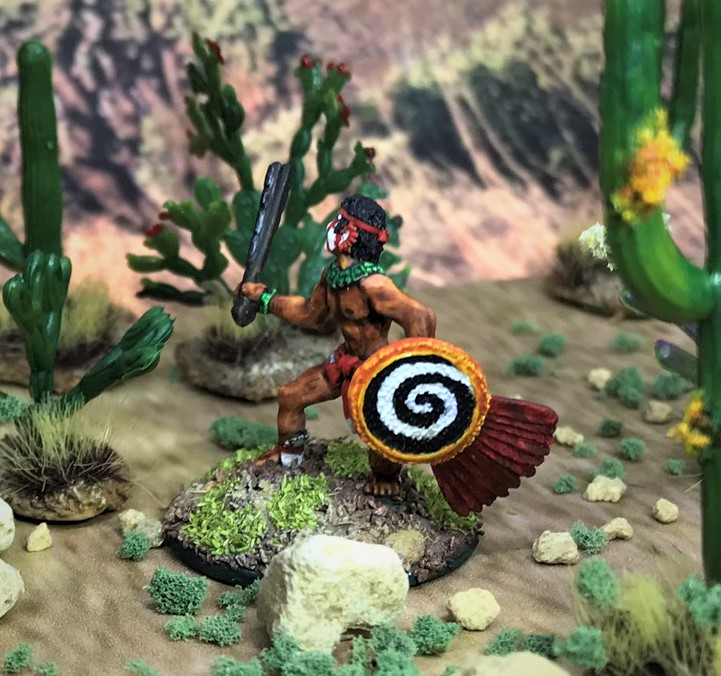
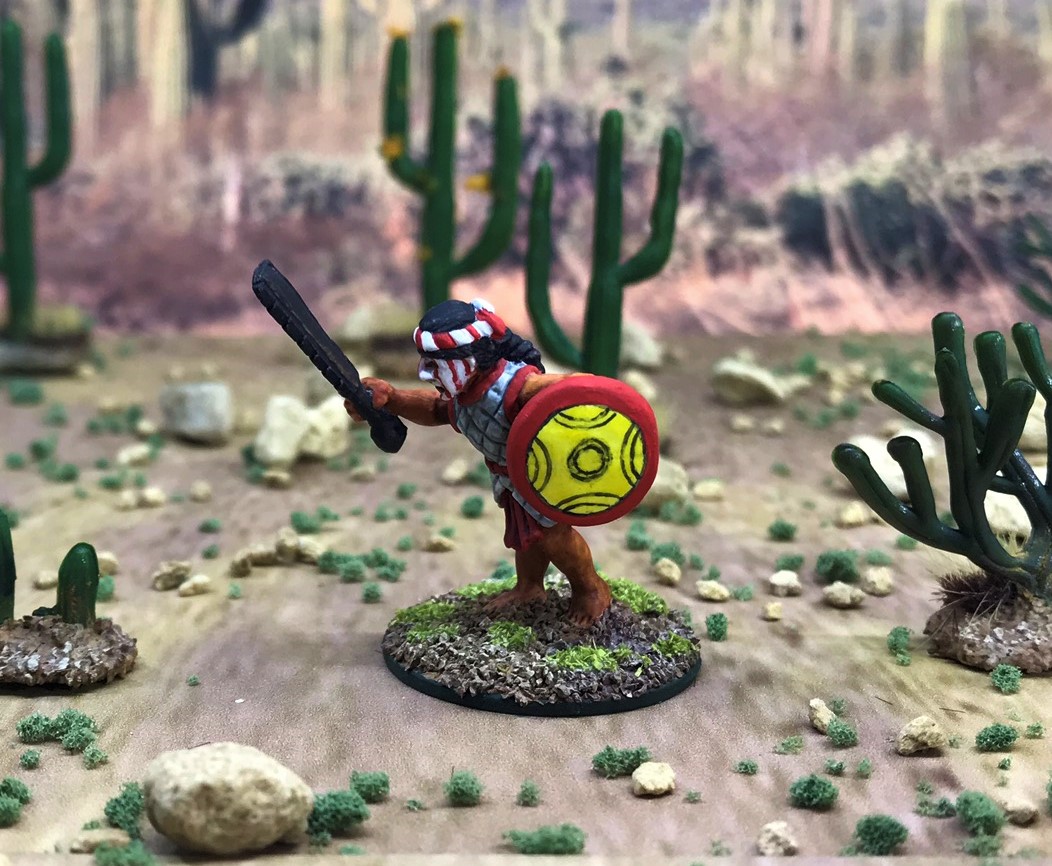
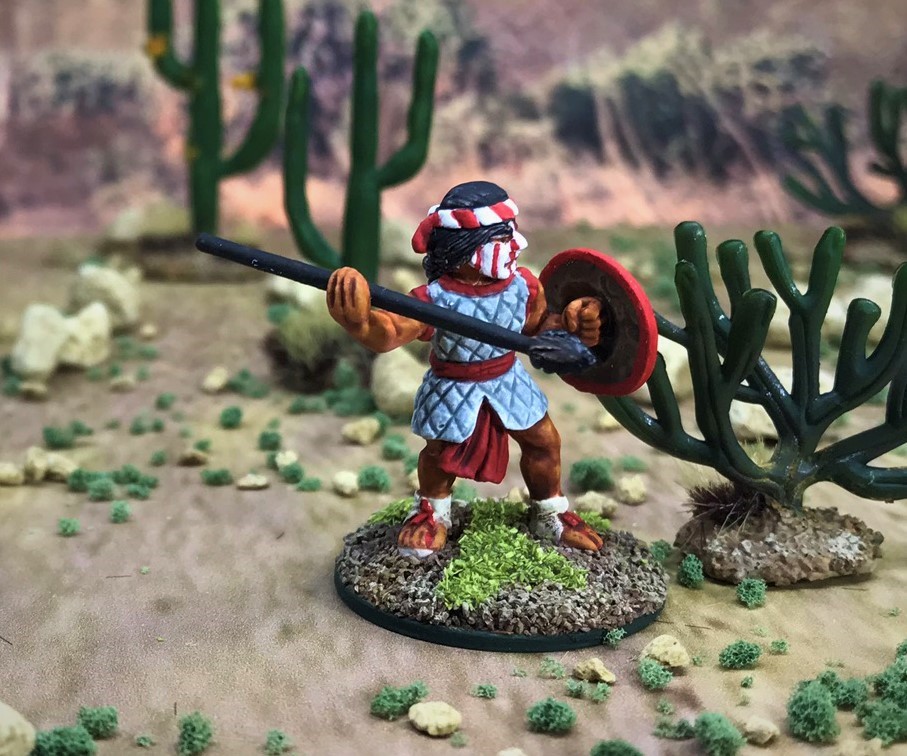
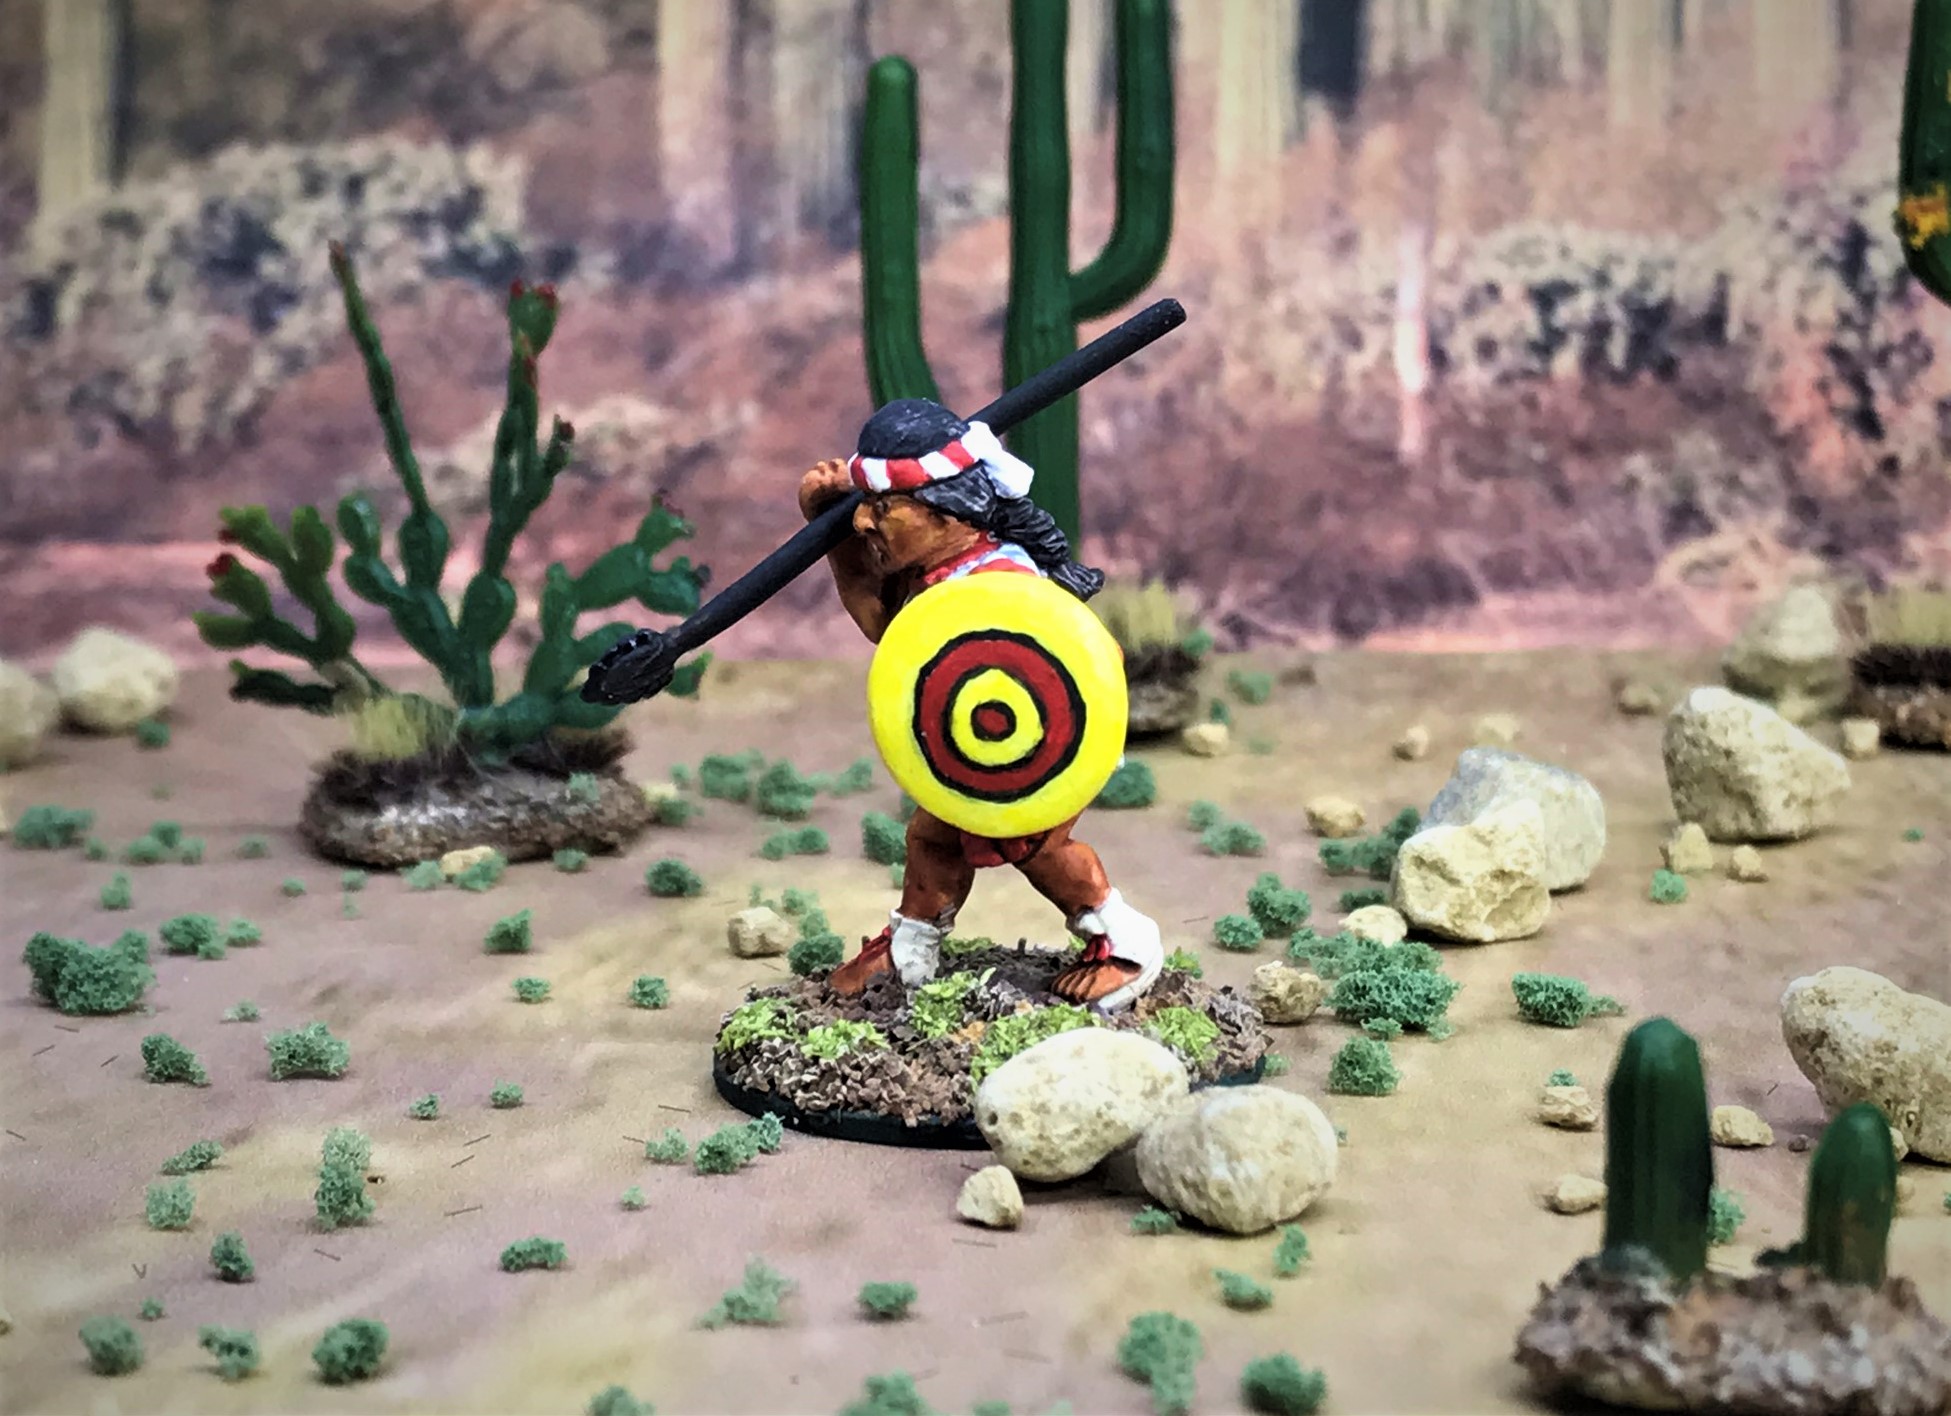
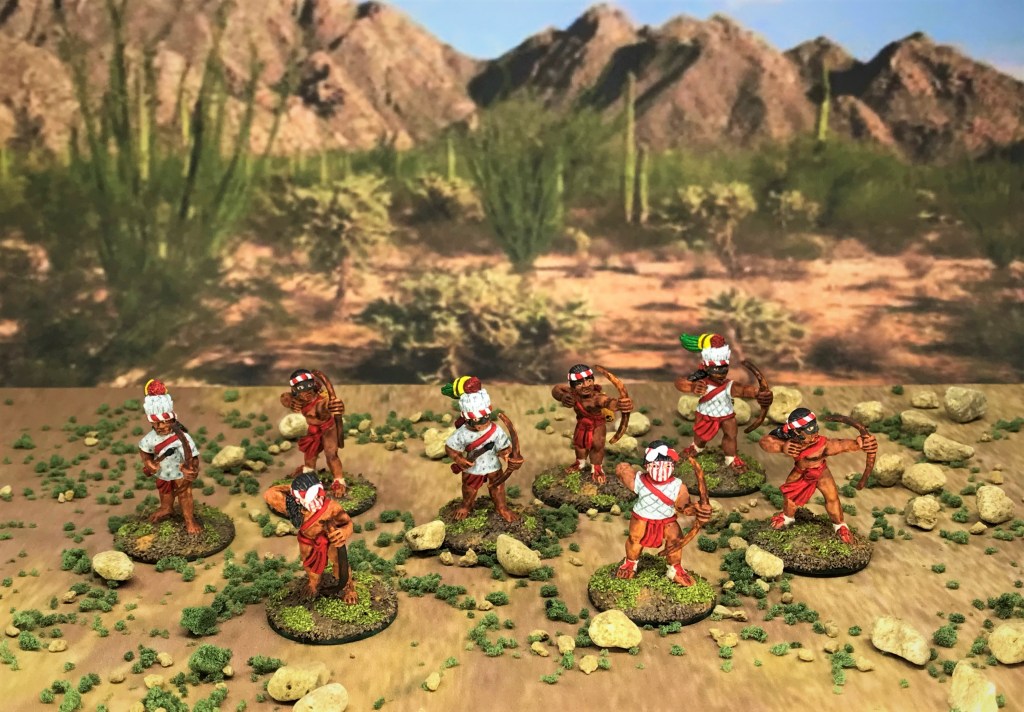
A completed slinger from this project. Nine of the 18 figures that I will discuss and display here are armed with slings. In my game, these Aztec slingers are very accurate – and very dangerous. Most Aztecs learned how to take small game with slings from a very young age. The Conquistadores described taking many grave injuries and casualties from slingers like these.
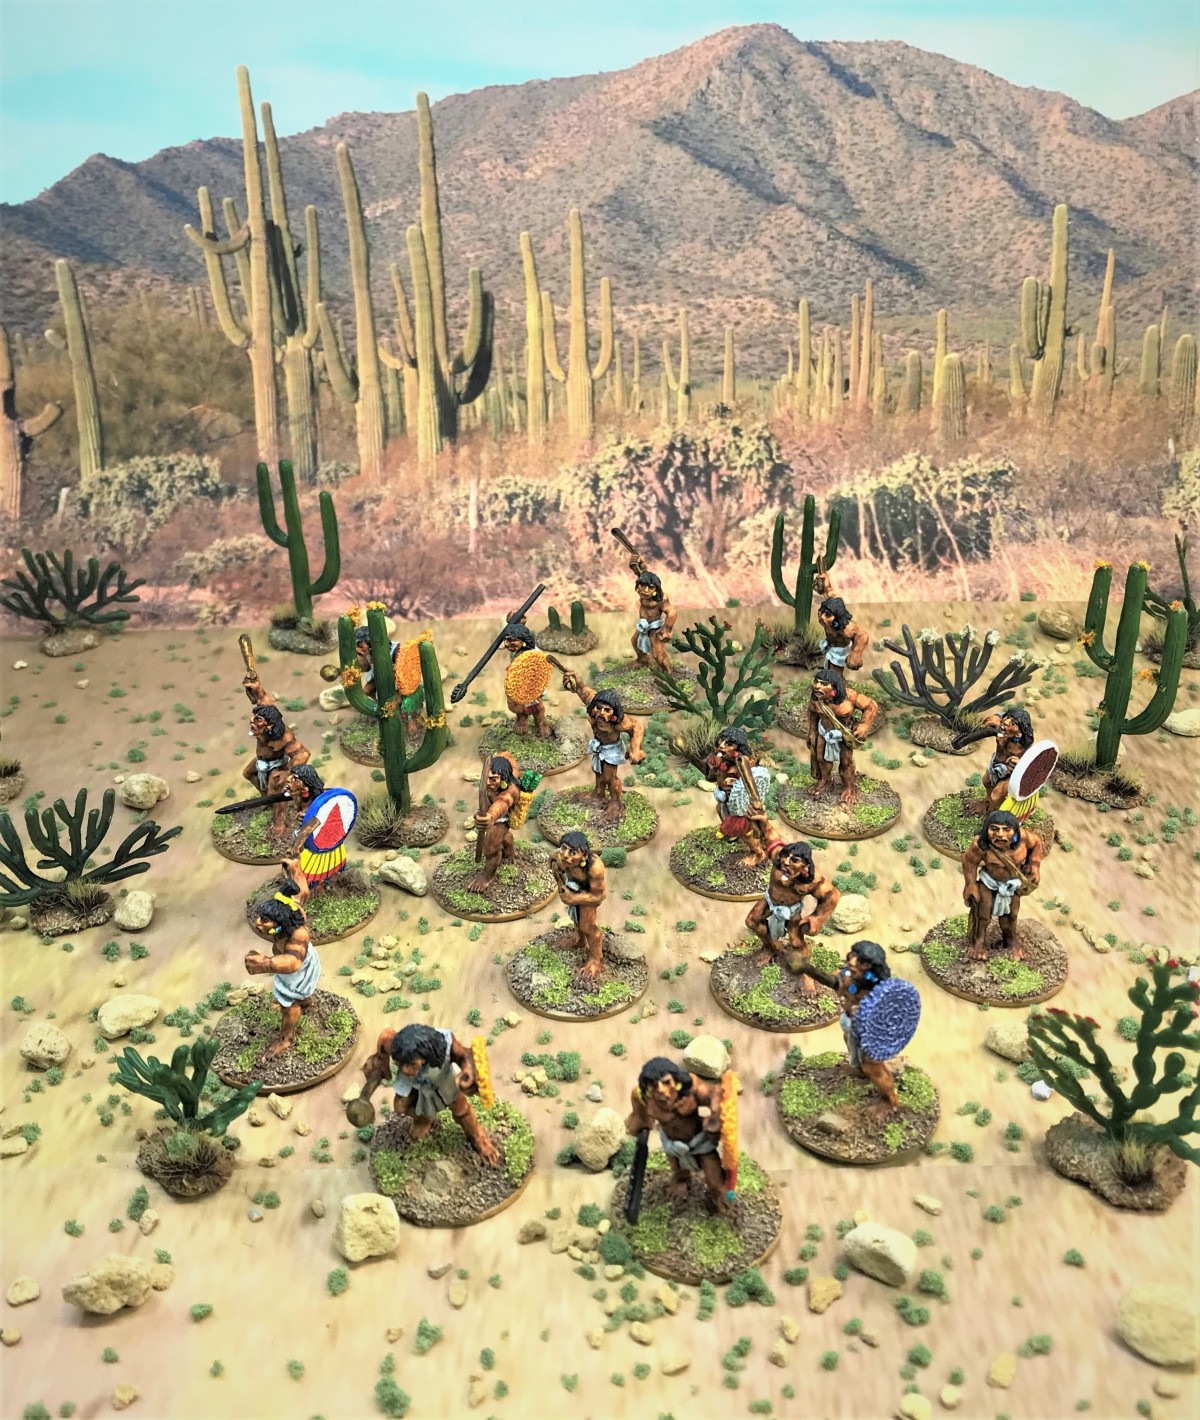
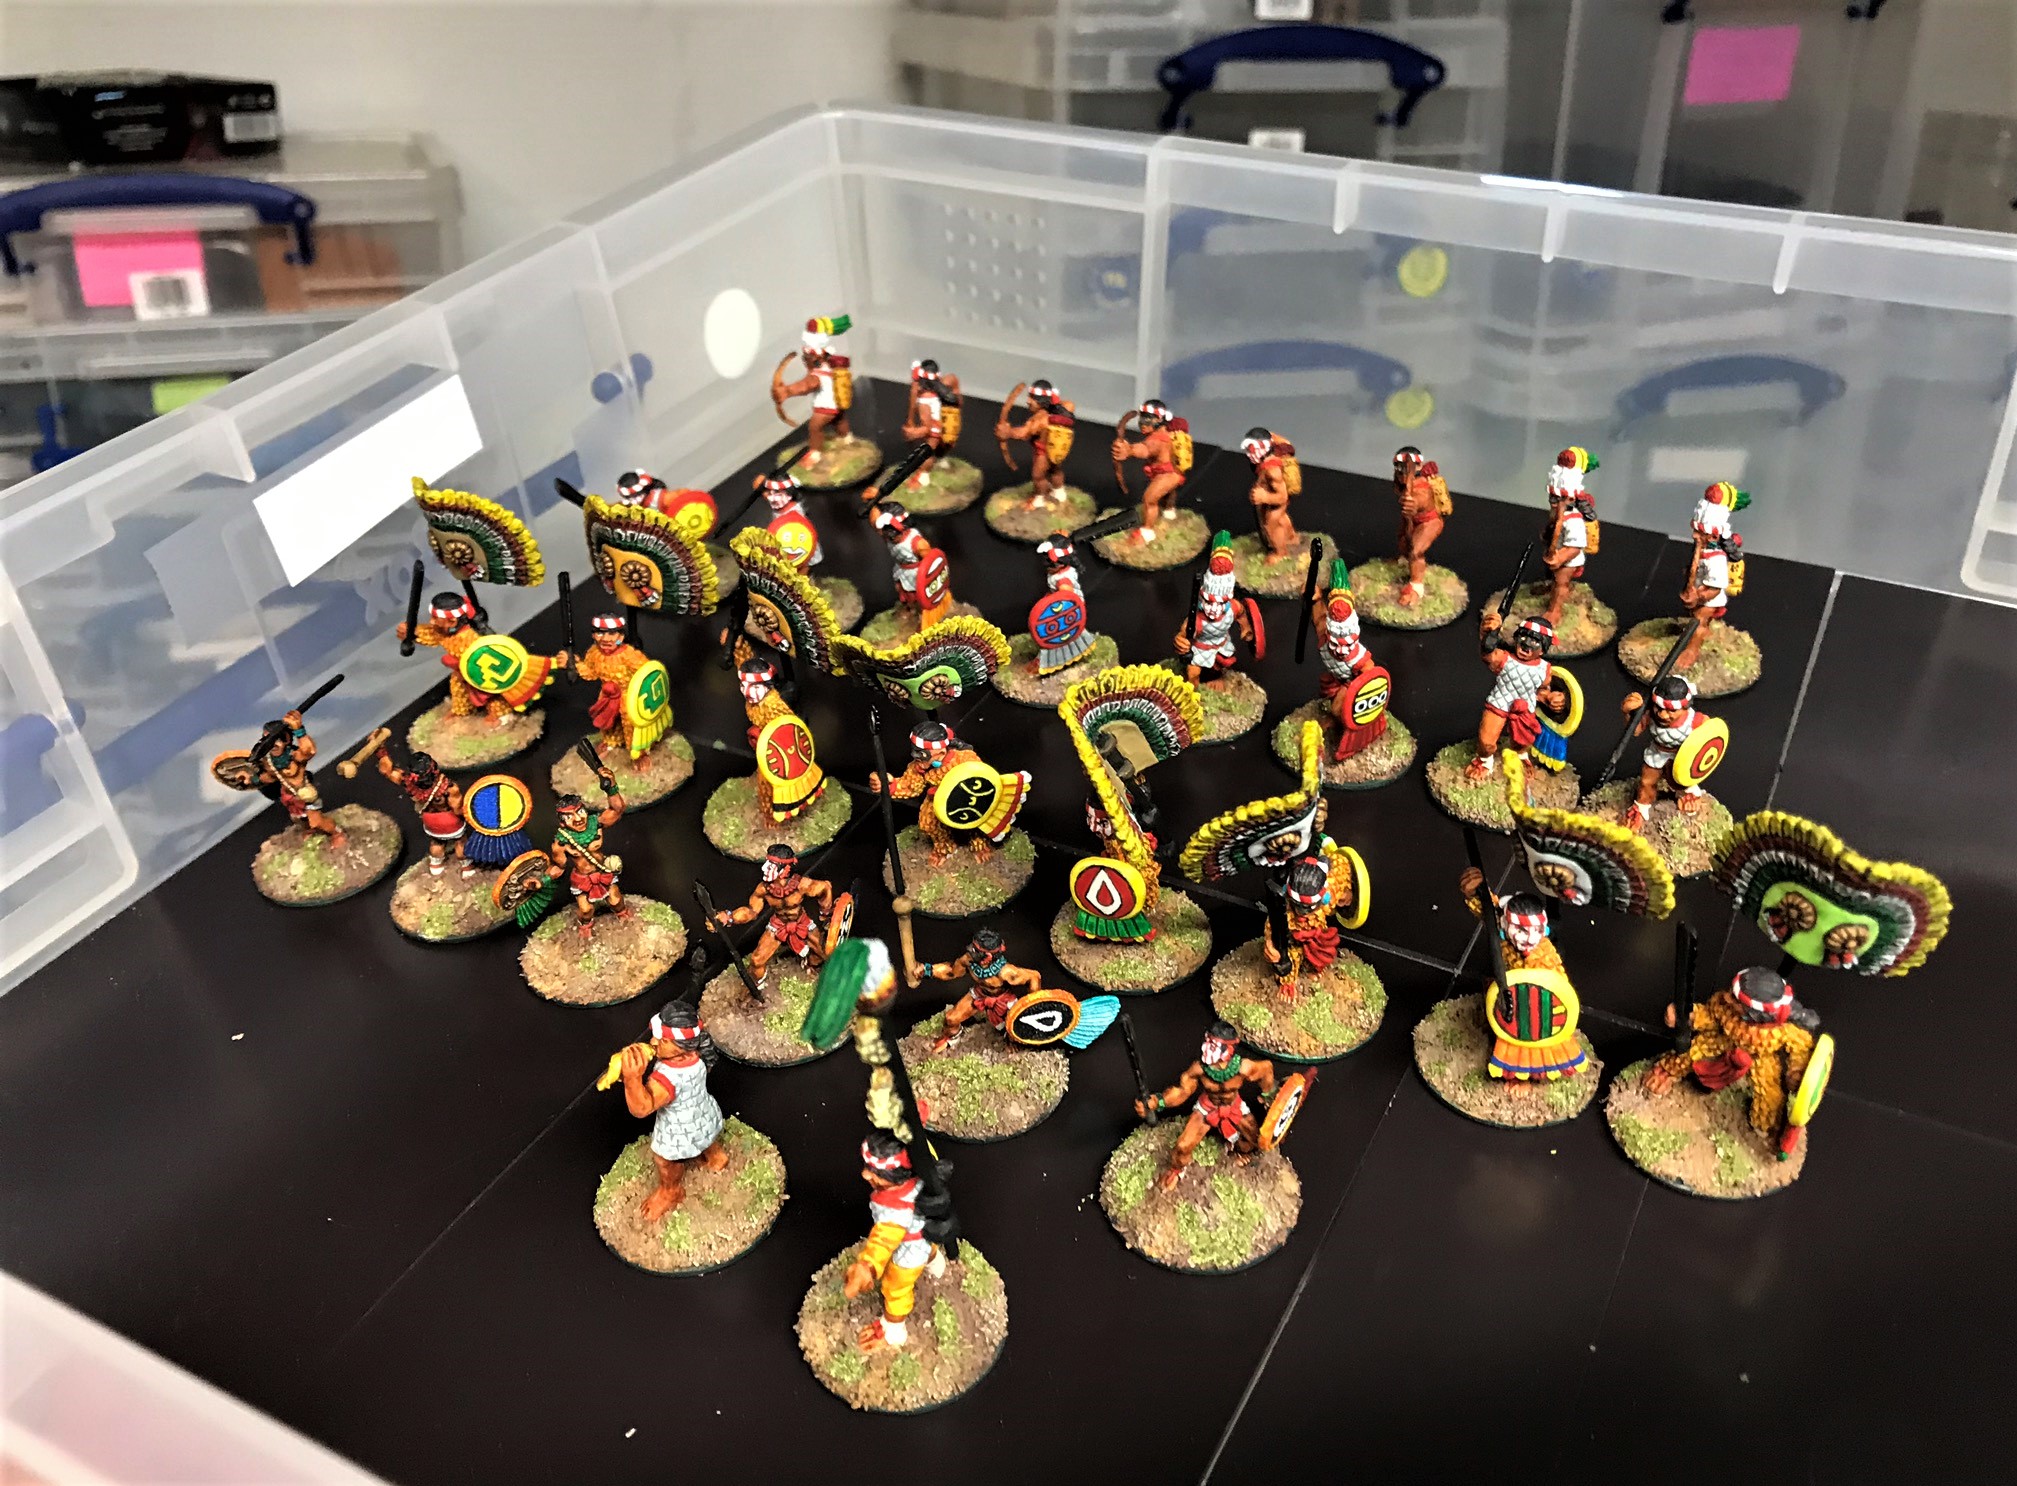
I just finished adding 18 Aztec Novice Warriors to my forces for games of Feudal Patrol™ – using the “Civilizations Collide” supplement that I have discussed previously on several posts (you can see list of these posts at the end of this post if you’d like to see what you’ve missed). I had needed to add some more novices to pair up with veterans for the game. Aztec veteran warriors would have novices attached to them for training and development in the tactics and techniques of Mesoamerican warfare. Aztecs preferred capturing their enemies versus killing them – after all, they wanted live captives for sacrifice.
Under veteran tutelage, novices would try to capture enemy warriors. Their success at this would allow them to gain rank as well as increased Aztec societal and cultural prestige (depending upon the number and quality of the captured enemy warriors). This increase in rank would also be shown by the warriors having the right to wear different and fancier uniforms. Of course the captured warriors would be most often sacrificed alive on the altar of Huitzilopochtli in the Aztec capital of Tenochtitlan.
Returning to the gaming project, I now have figures for 30 novices and 27 veterans, which should put me in good stead game-wise. These figures came from Badger Games and were manufactured by Wargames Foundry. The 18 figures discussed here came from two blisters of AZ016 “Novice Warriors I” and one of AZ028 “Novice Warriors III”. All were sculpted by Josef Ochmann. I previously painted up 12 from AZ018 “Novice Warriors II” that I posted about here. These were similar to those models, and most of this group are armed with slings. Unfortunately, for the non-slingers, there were no other weapons in the AZ028 blister, just shields. Not a problem, as I had some Outpost Wargames Services extra weapons and some extra shields already painted up for any non-slingers (Badger also sells OWS). I am sure that Badger would have taken care of it if I let them know (they are great), but I had the situation under control.
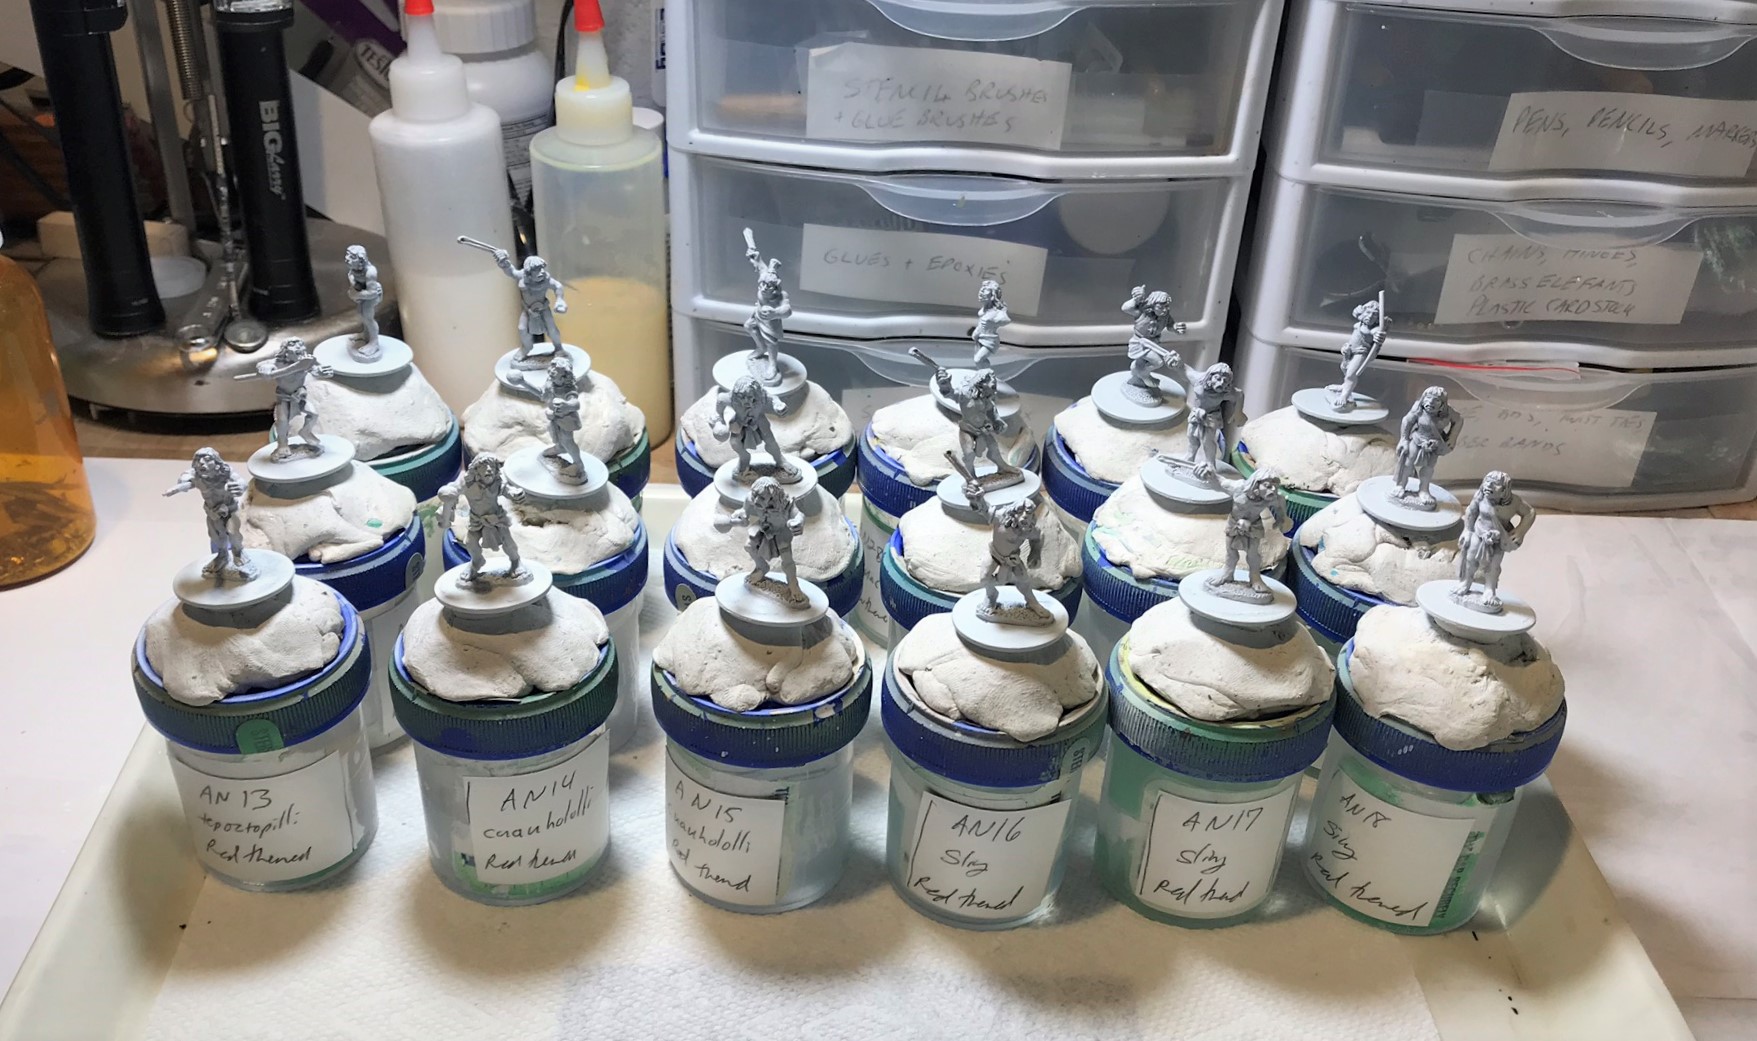
I must say that the Foundry mold lines here on some of the models were a greater problem than those I have painted before from OWS. I tried my best to fix what I could without destroying the figures, but there’s only so much one can file away before the cure becomes worse than the disease. I am going to jump right into some pictures and then as usual some references for those interested in that sort of detail.
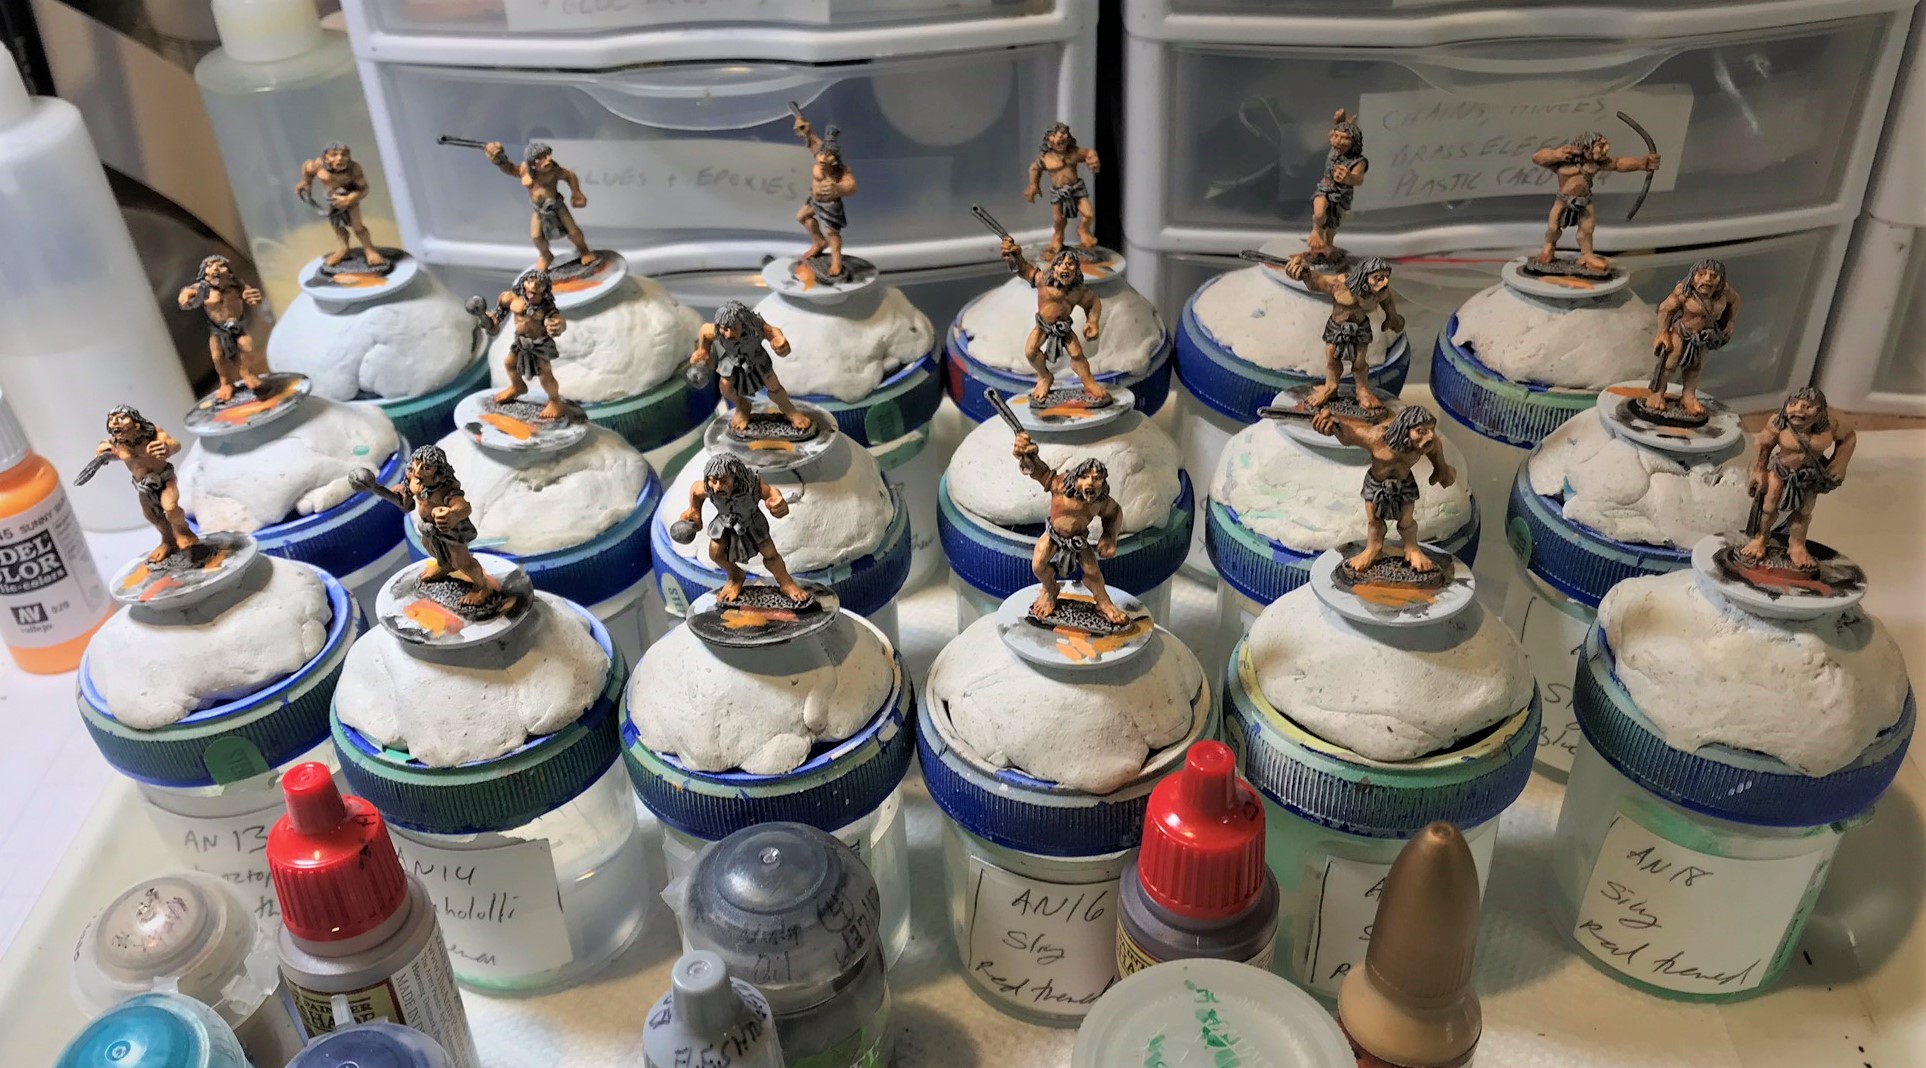
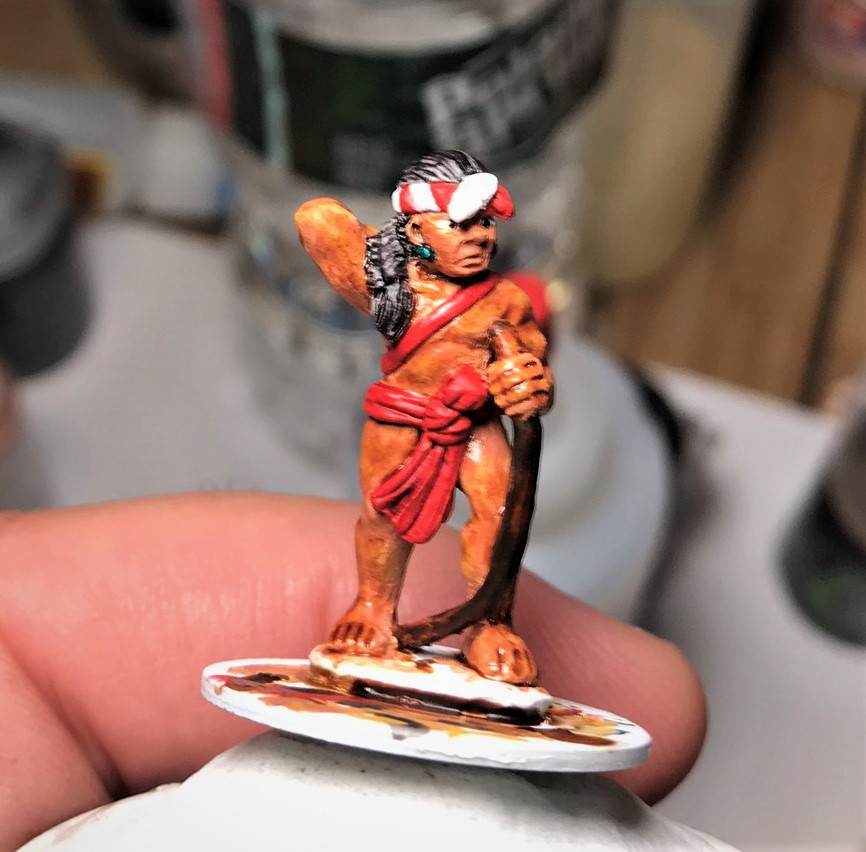
Mounted and ready for painting.Early flesh tone work.Completed.Completed and removed from the specimen jars – ready for eye candy!
Because I had bought two 6-figure blisters of AZ016, I wanted to paint them differently enough so that they would be interesting on the tabletop. I will show the similar poses together, and then the single poses.
I have numbered my novices AN1 to AN30, with this project concerning AN13 to AN30.
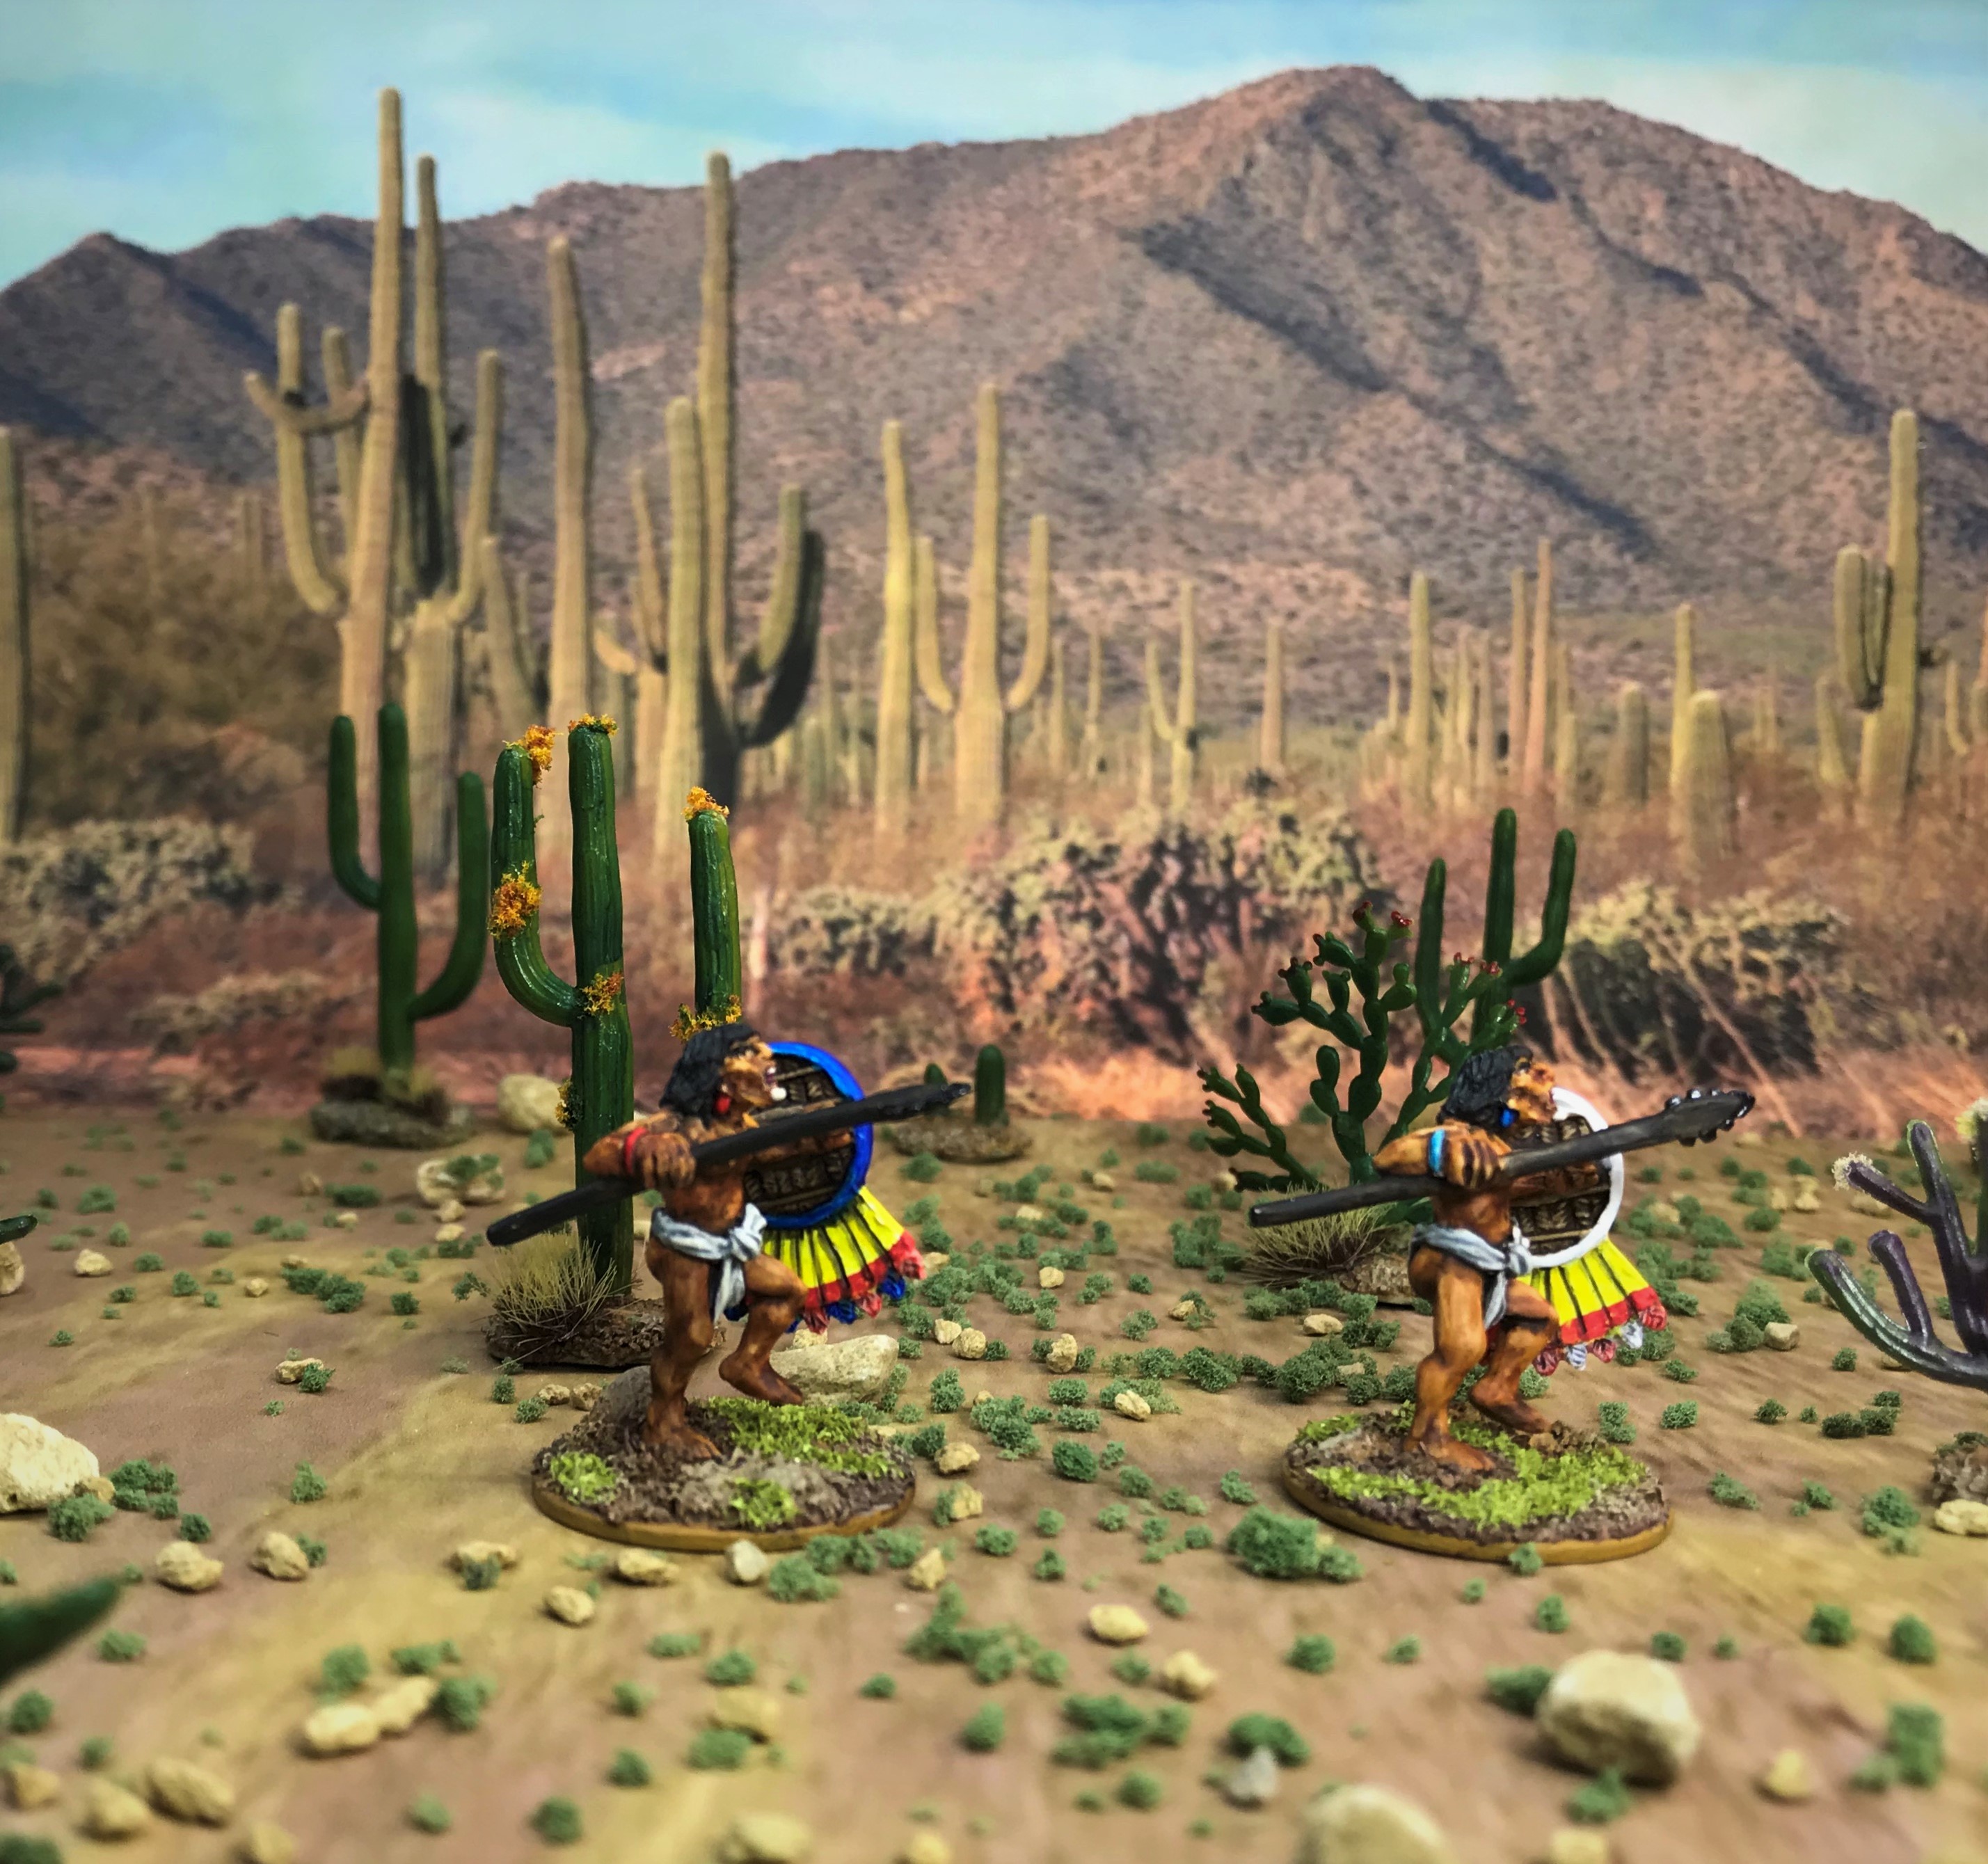
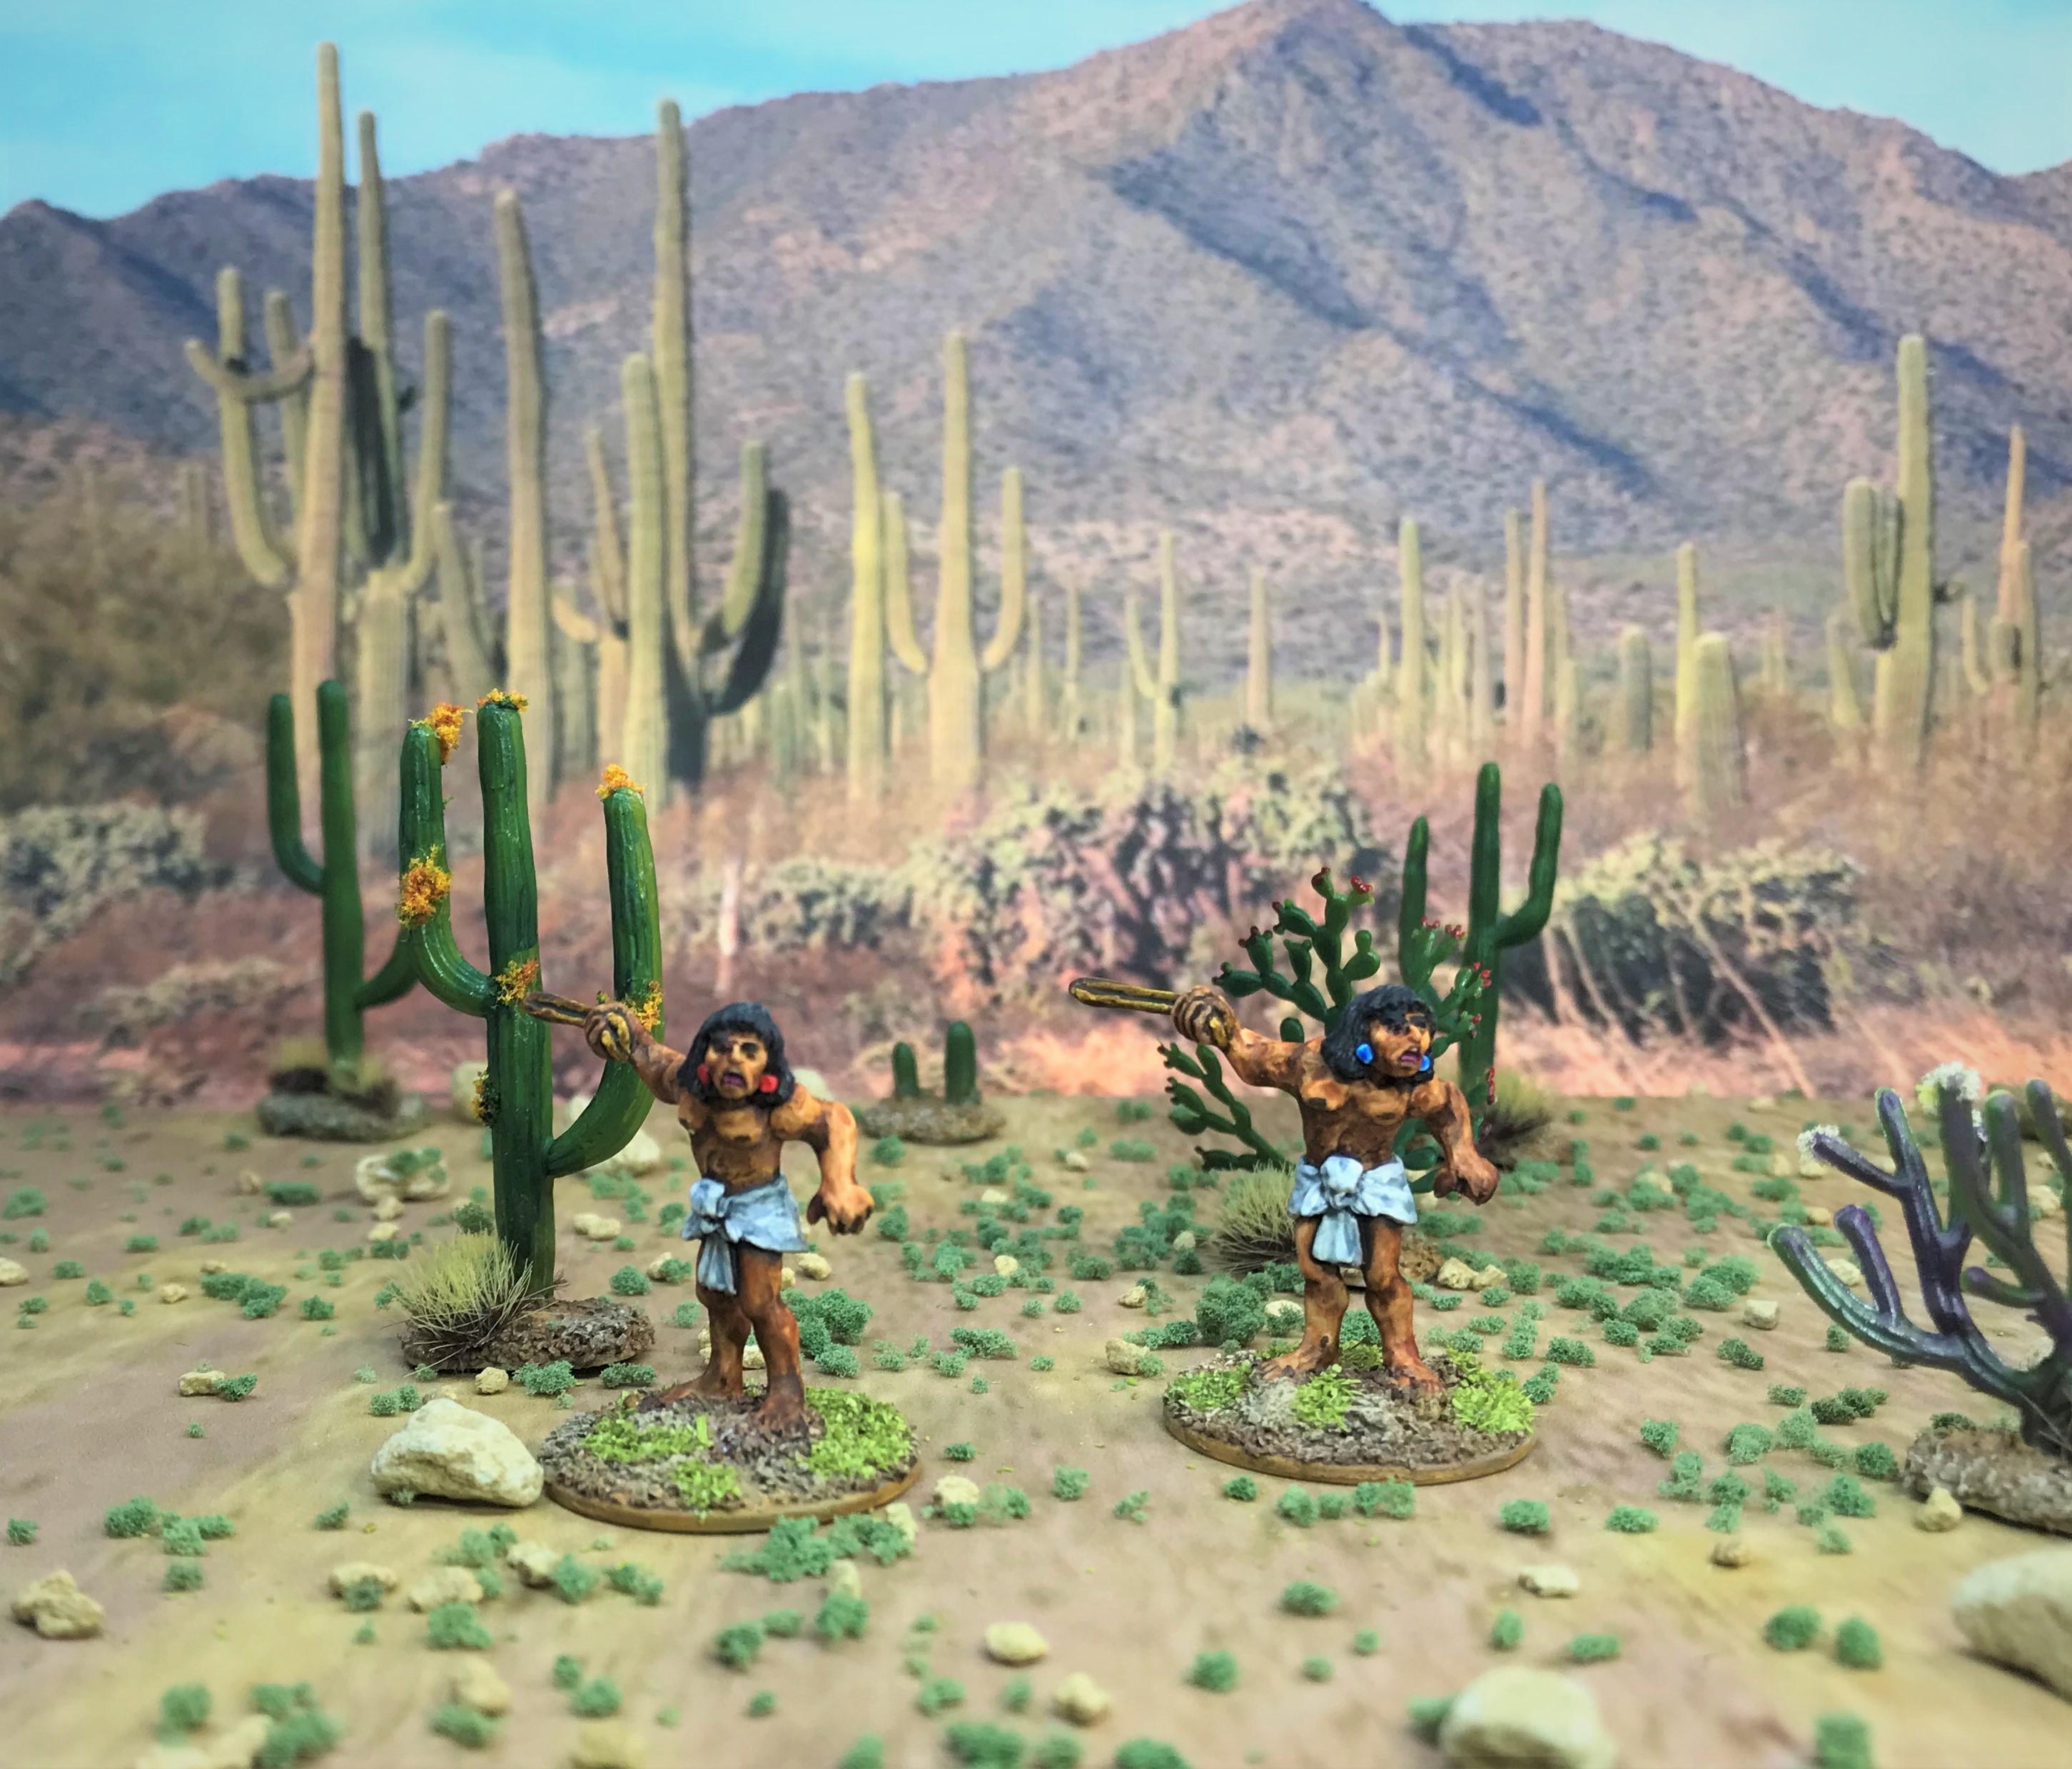
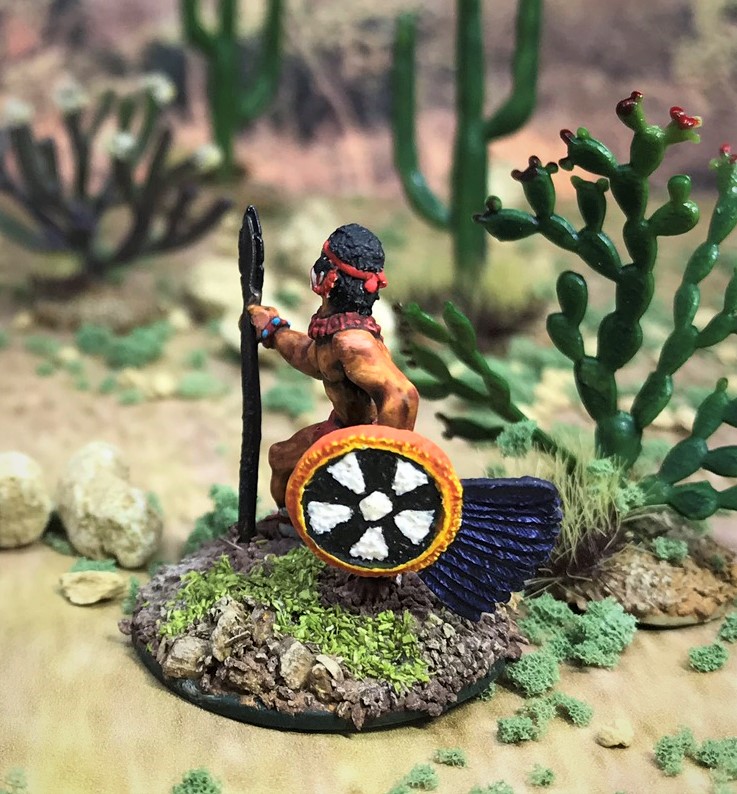
AN13 and AN19 – armed with a tepoztopilli (obsidian-edged thrusting spear pronounced tay-pose-toe-pee-lee) and a shield, but no other armor.
AN 13 and AN19 figures from the front.AN13 and AN19, the view from the side.
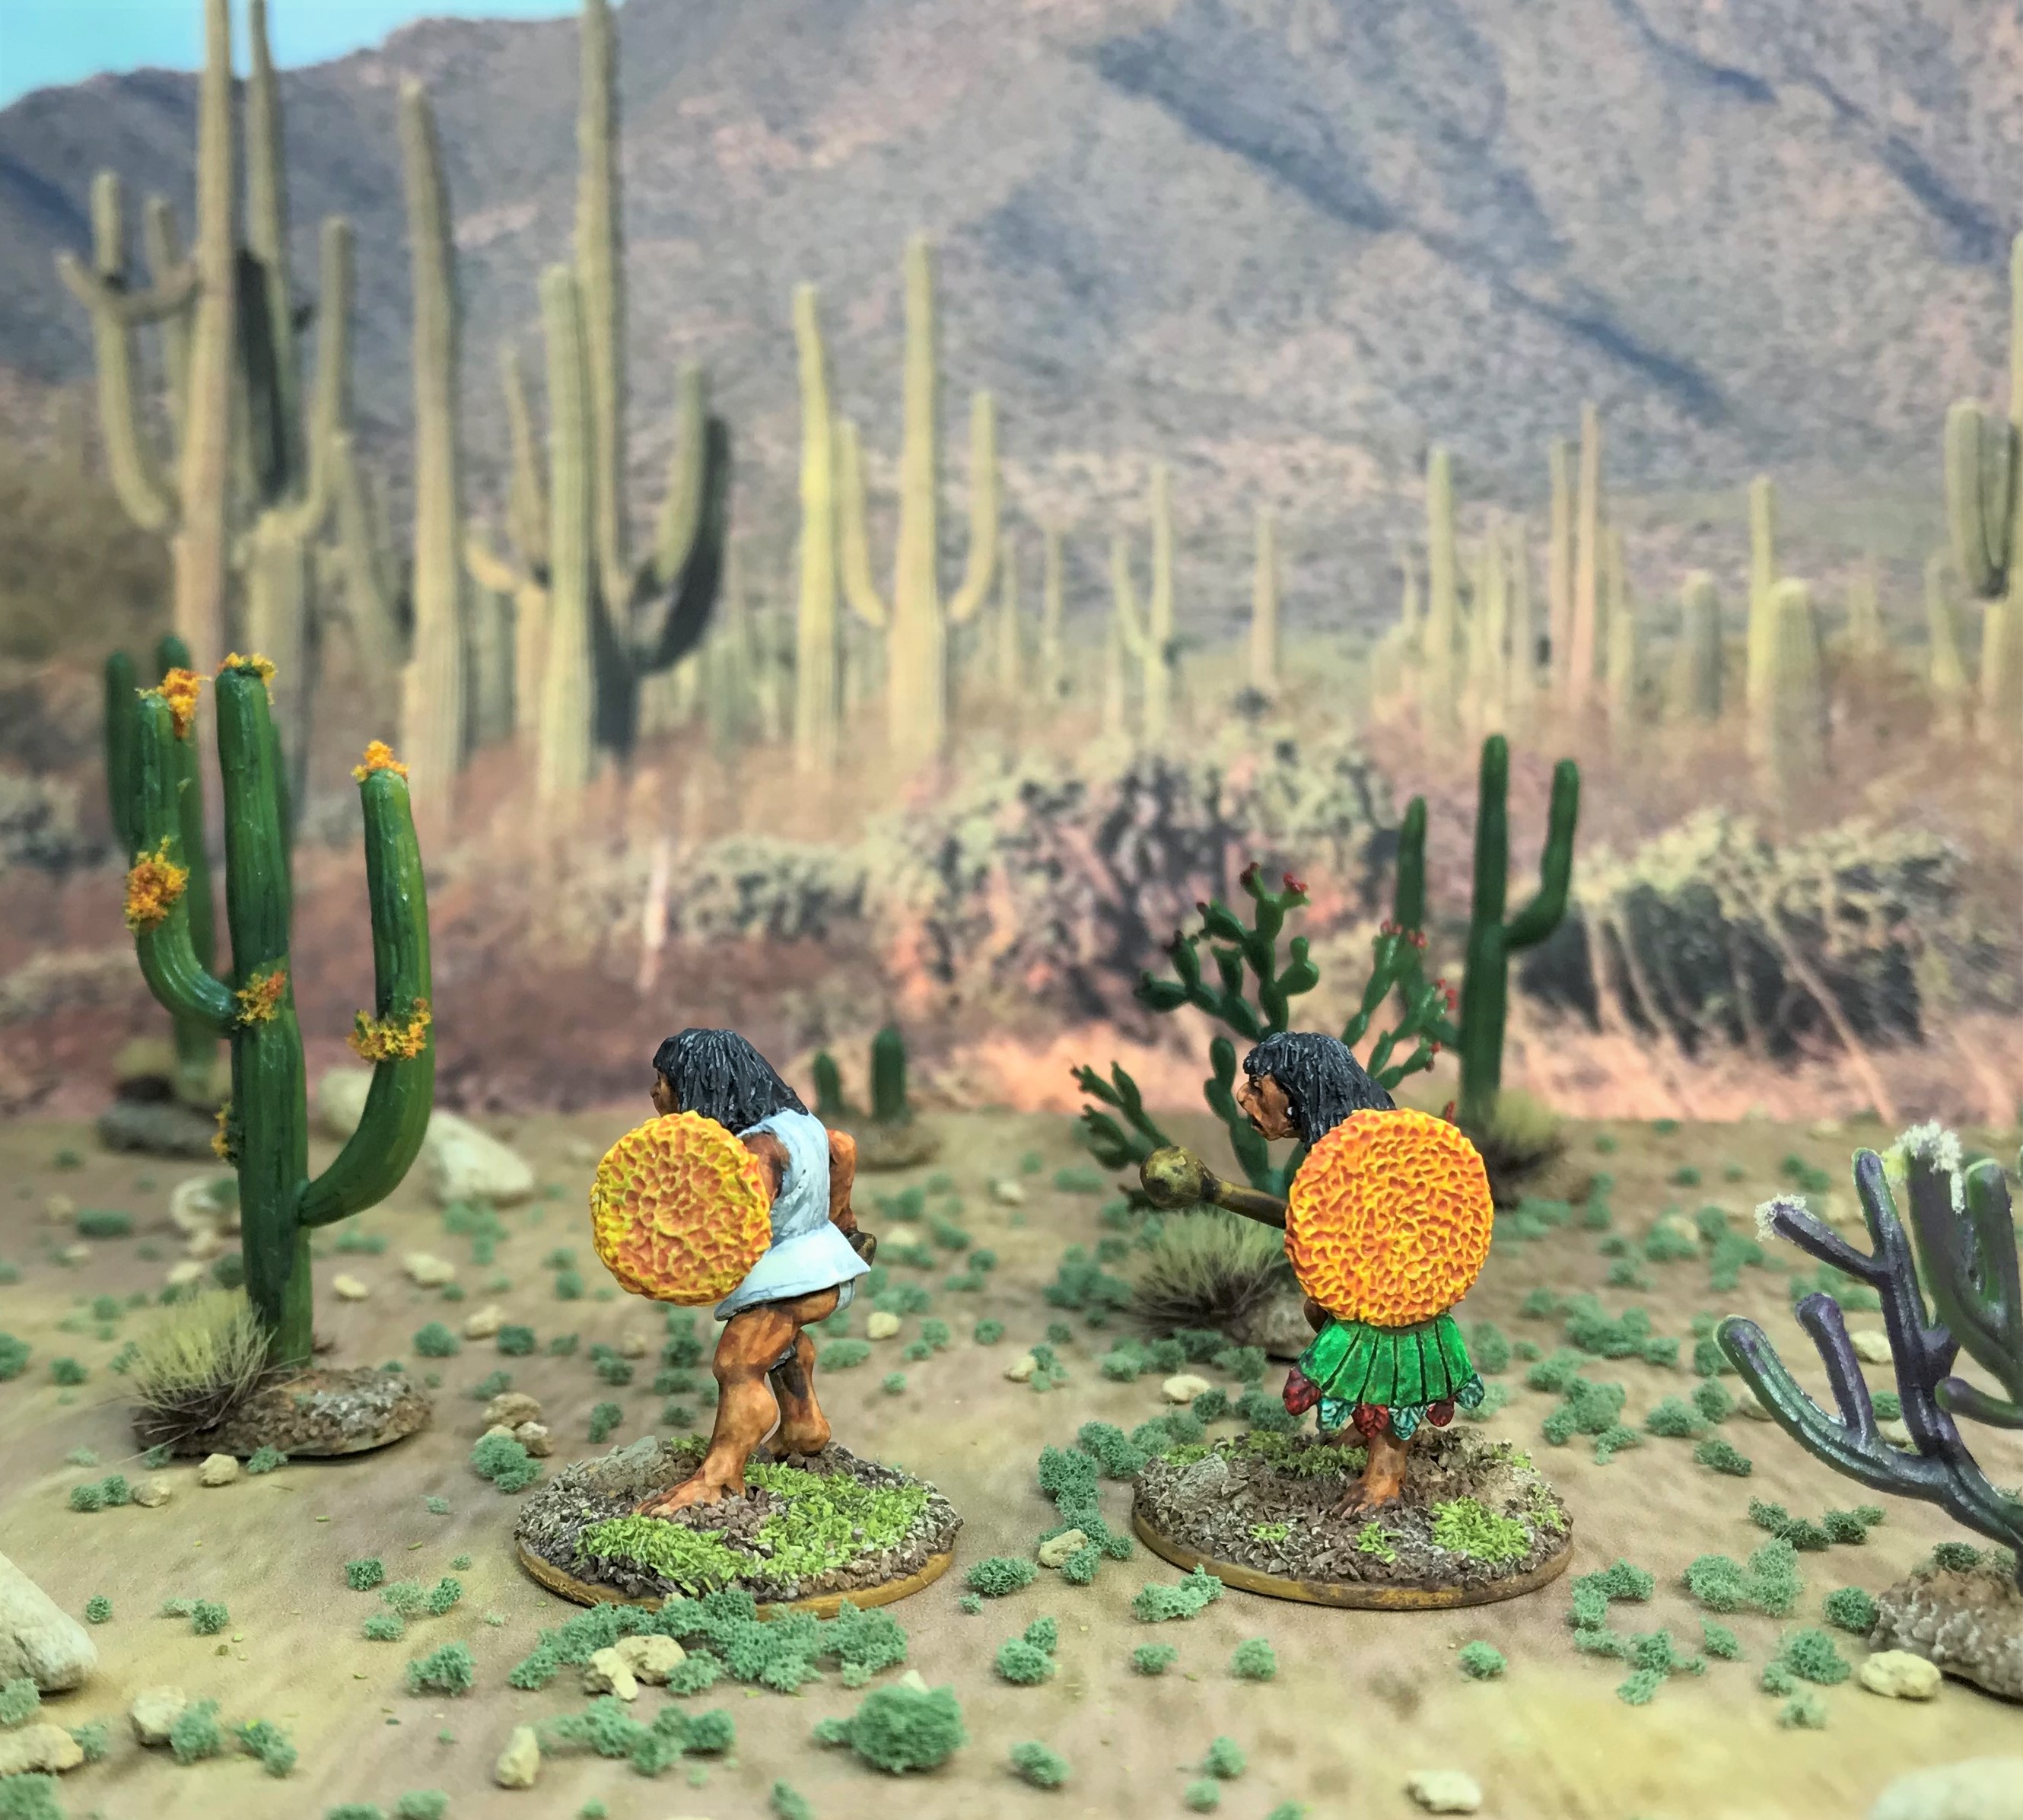
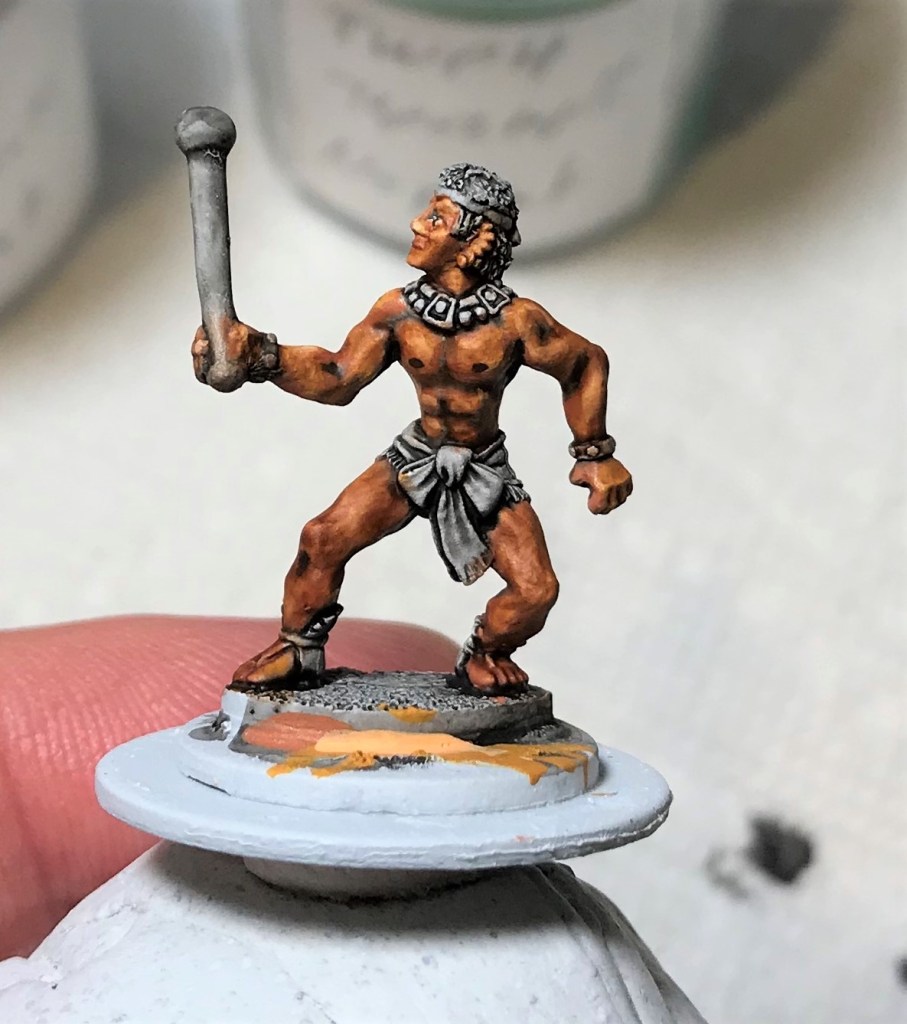
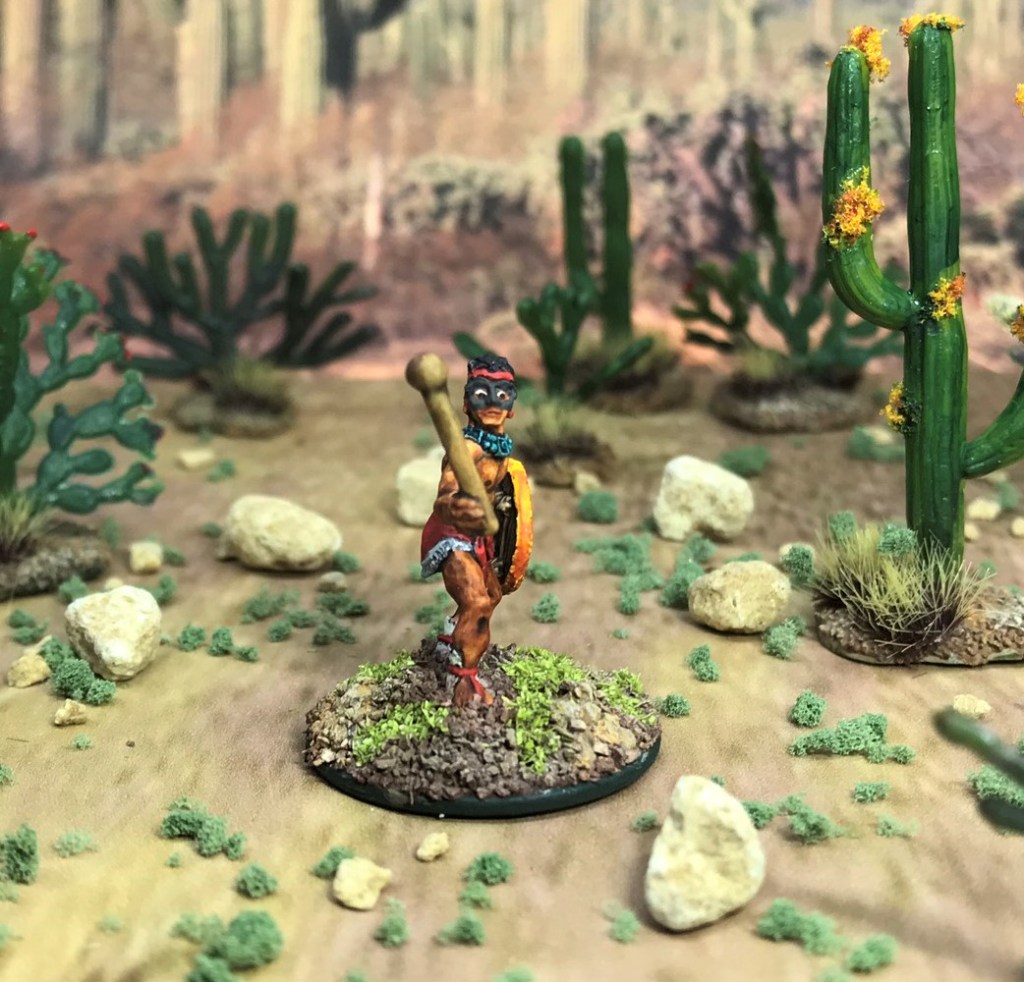
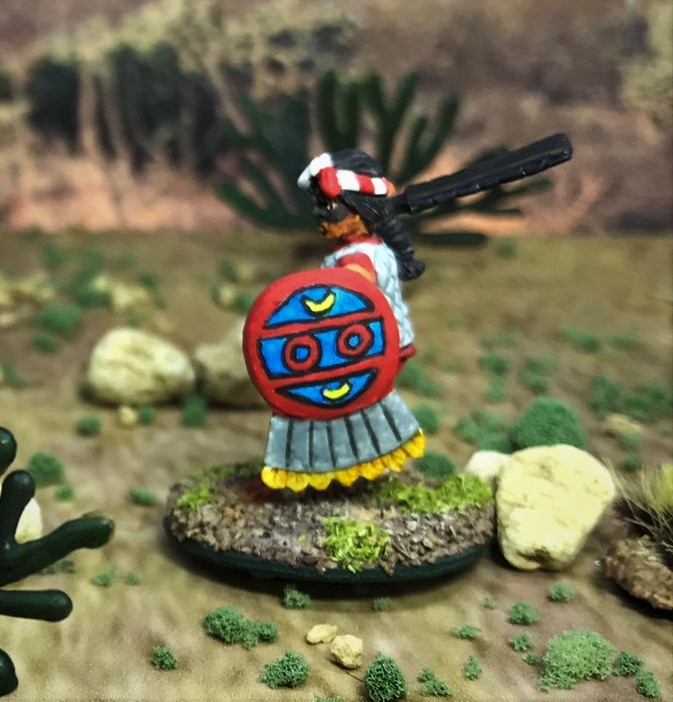
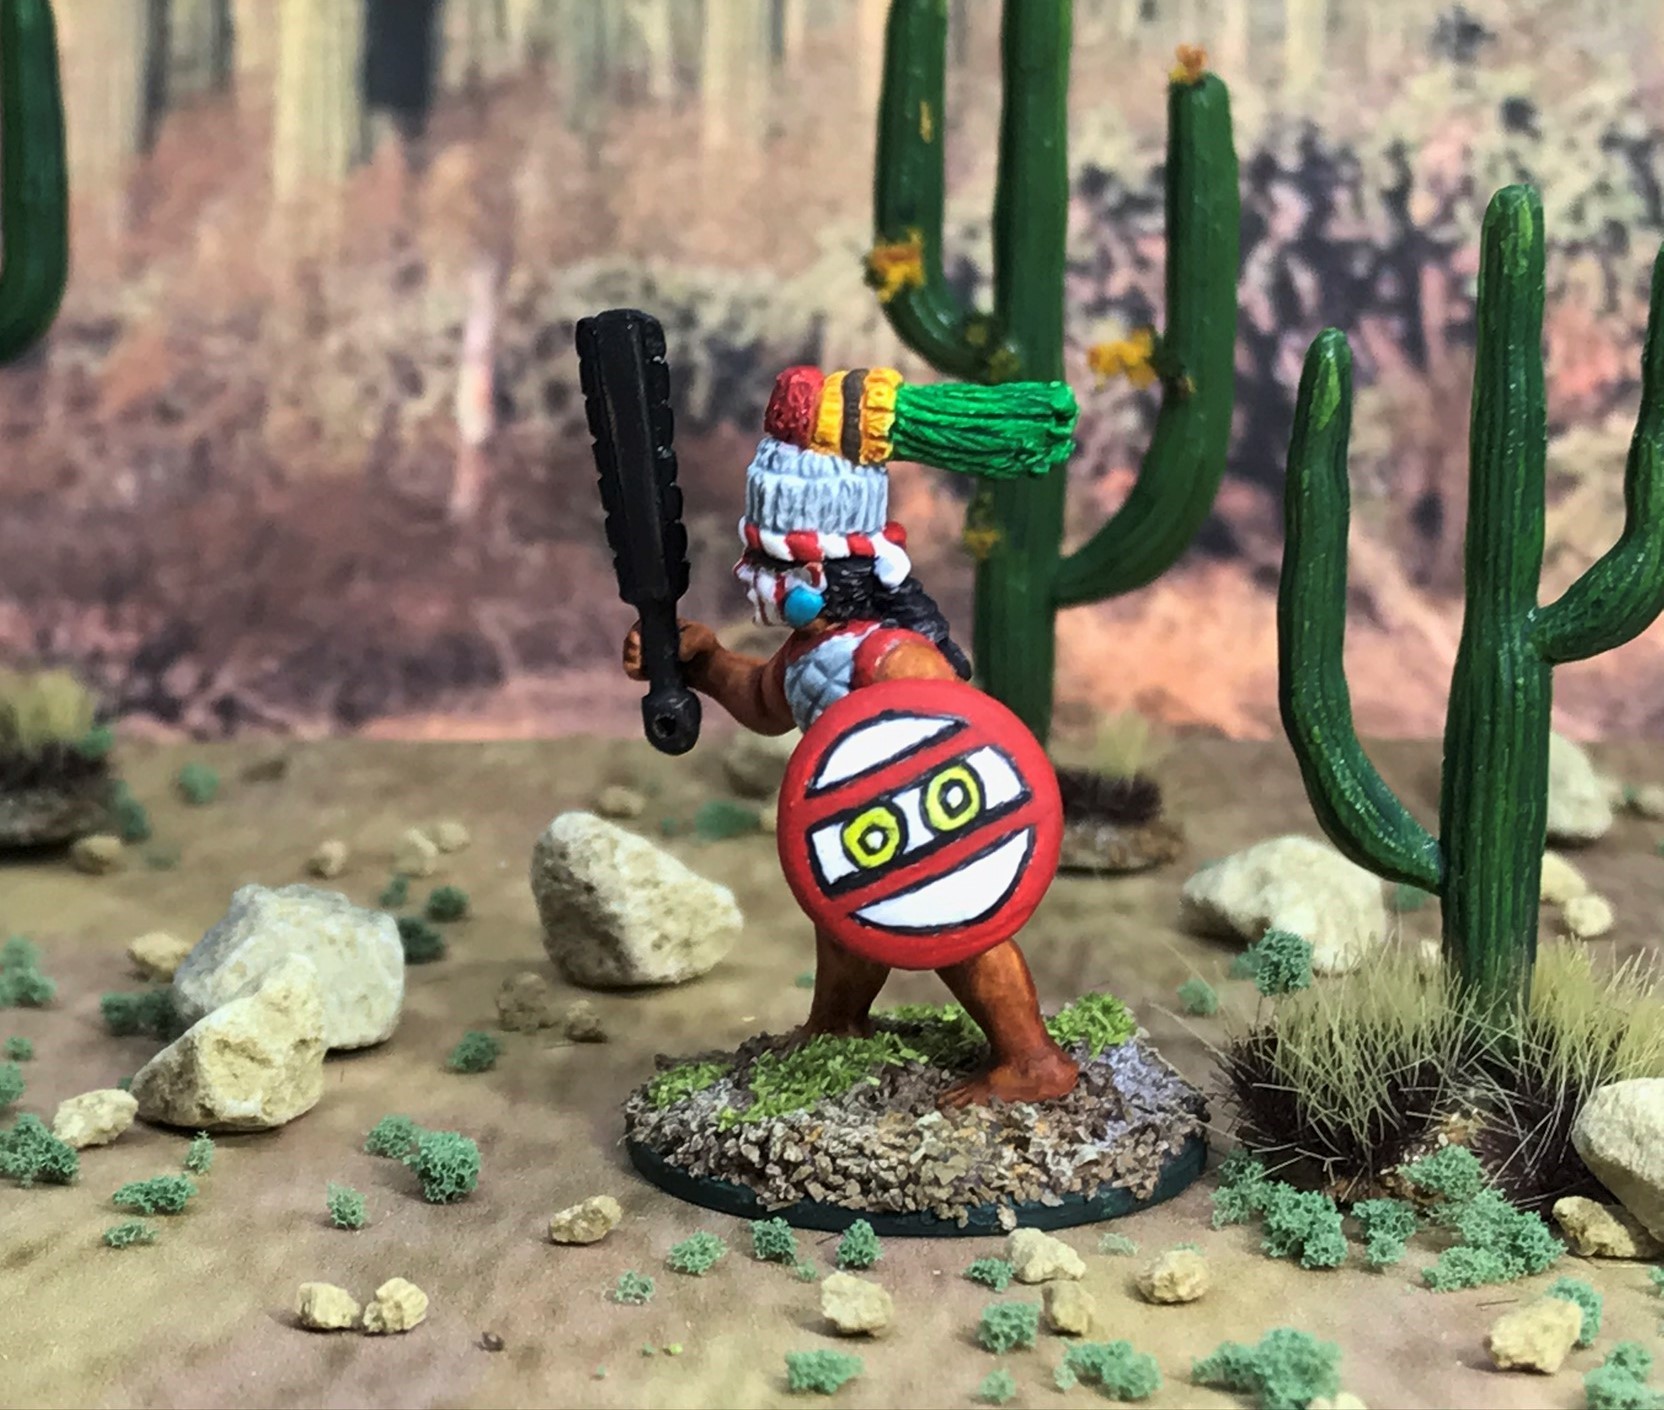
AN14 and AN20 – armed with a cuauhololli (round-headed wooden club – pronounced kwa-ho-lolly) and a shield, but no other armor.
AN14 and AN20 from the front.AN14 and AN20, reverse angle. As these are all novices, I did not give them overly fancy shields.
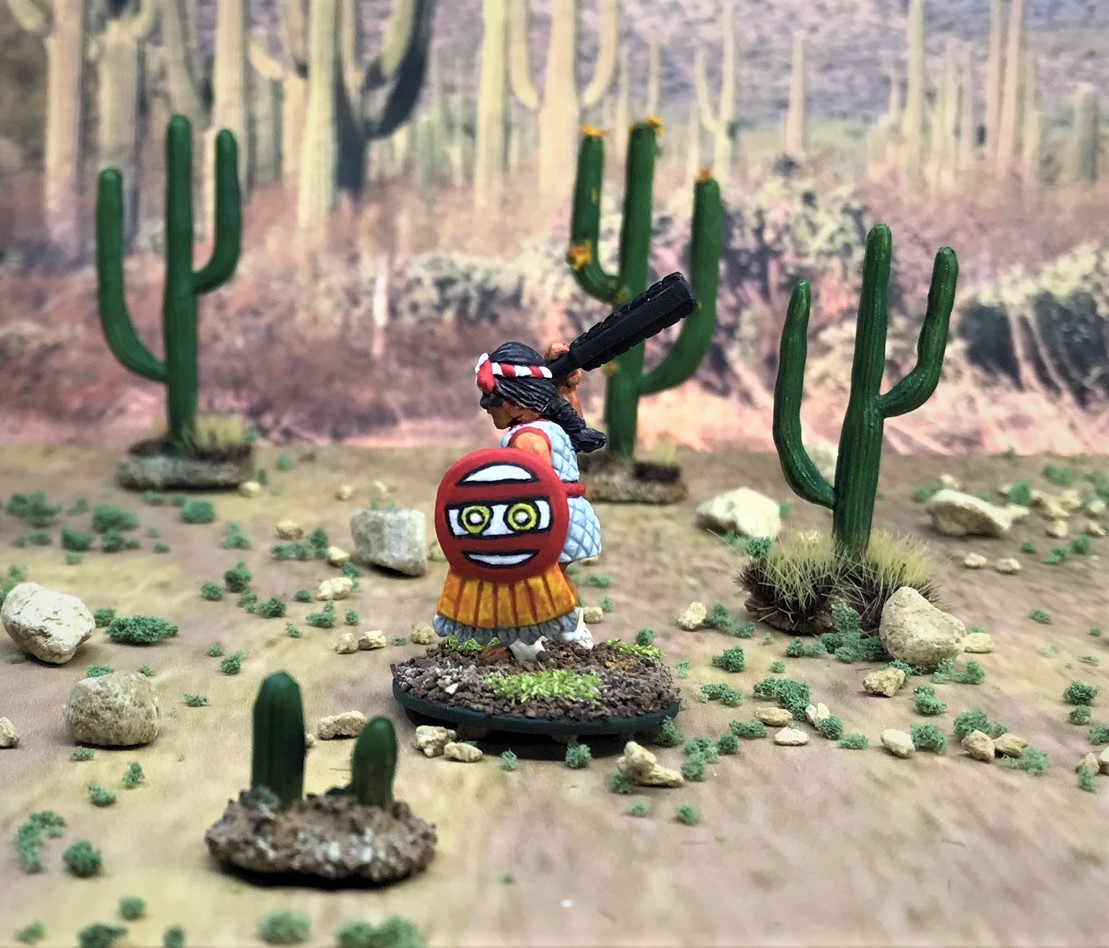
AN15 and AN21 – armed with a cuauhololli (round-headed wooden club) and a shield, and quilted cotton armor called ichcahuipilli (pronounced each-ca-we-pilli).
From the front, AN15 and AN21. I painted the shields and ichcahuipilli drawstrings differently.AN15 and AN21 from the shield side. AN21 has feather frets on his shield.
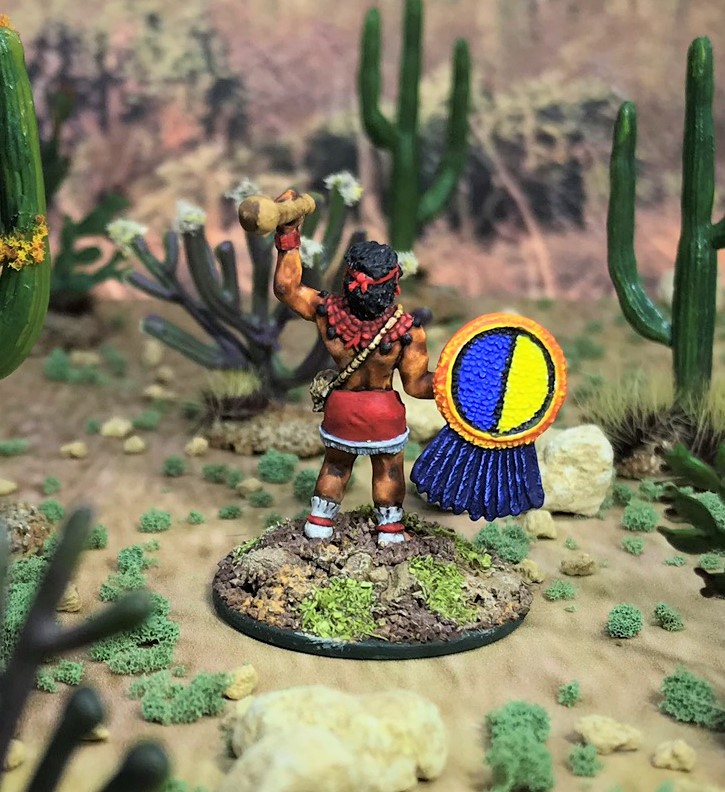
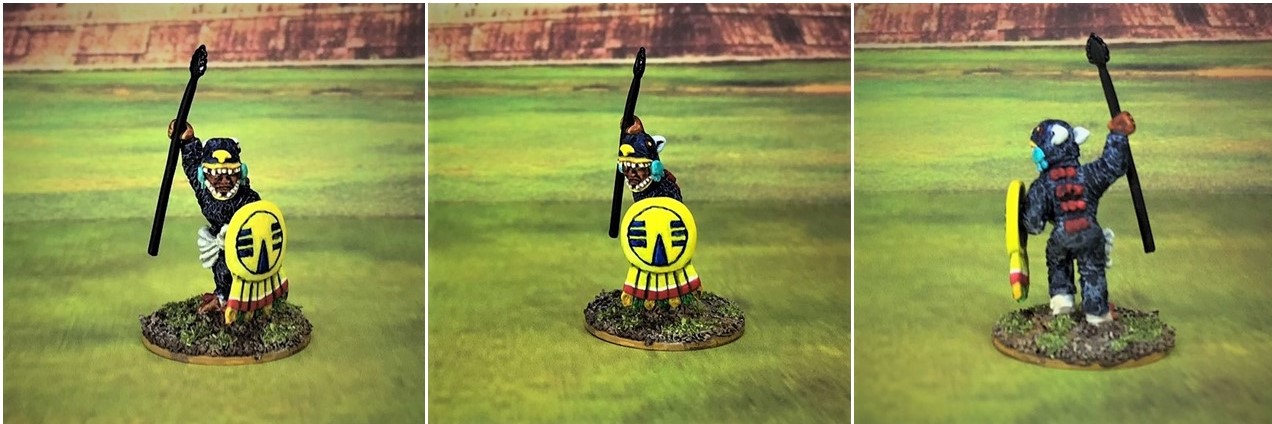
AN16 and AN22 – armed with slings, no shield, and no armor.
AN16 and AN22 looking very choreographed from the front. Note the blue and red arm rings and earrings as differentiators for the tabletop.AN16 and AN22 looking no less choregraphed from the back!
AN17 and AN23 – armed with slings, no shield, and no armor.
AN17 and AN23 looking a bit more ominous than the previous pair of slingers. I did not like the size of these figures’ left hands. A shield could have hidden that but I did not think that having slingers should be so equipped. AN17 and AN23 reverse view.
AN18 and AN24 – armed with slings, no shield, and no armor.
AN18 and AN24. These were my favorite sculpts from the AZ016 blister. I really thought the faces were great.AN18 and AN24, reverse view.
AN25 – armed with a sling, no shield, and no armor. This is the first figure from the AZ028 blister.
AN25 looks for a target.AN25 reverse angle.
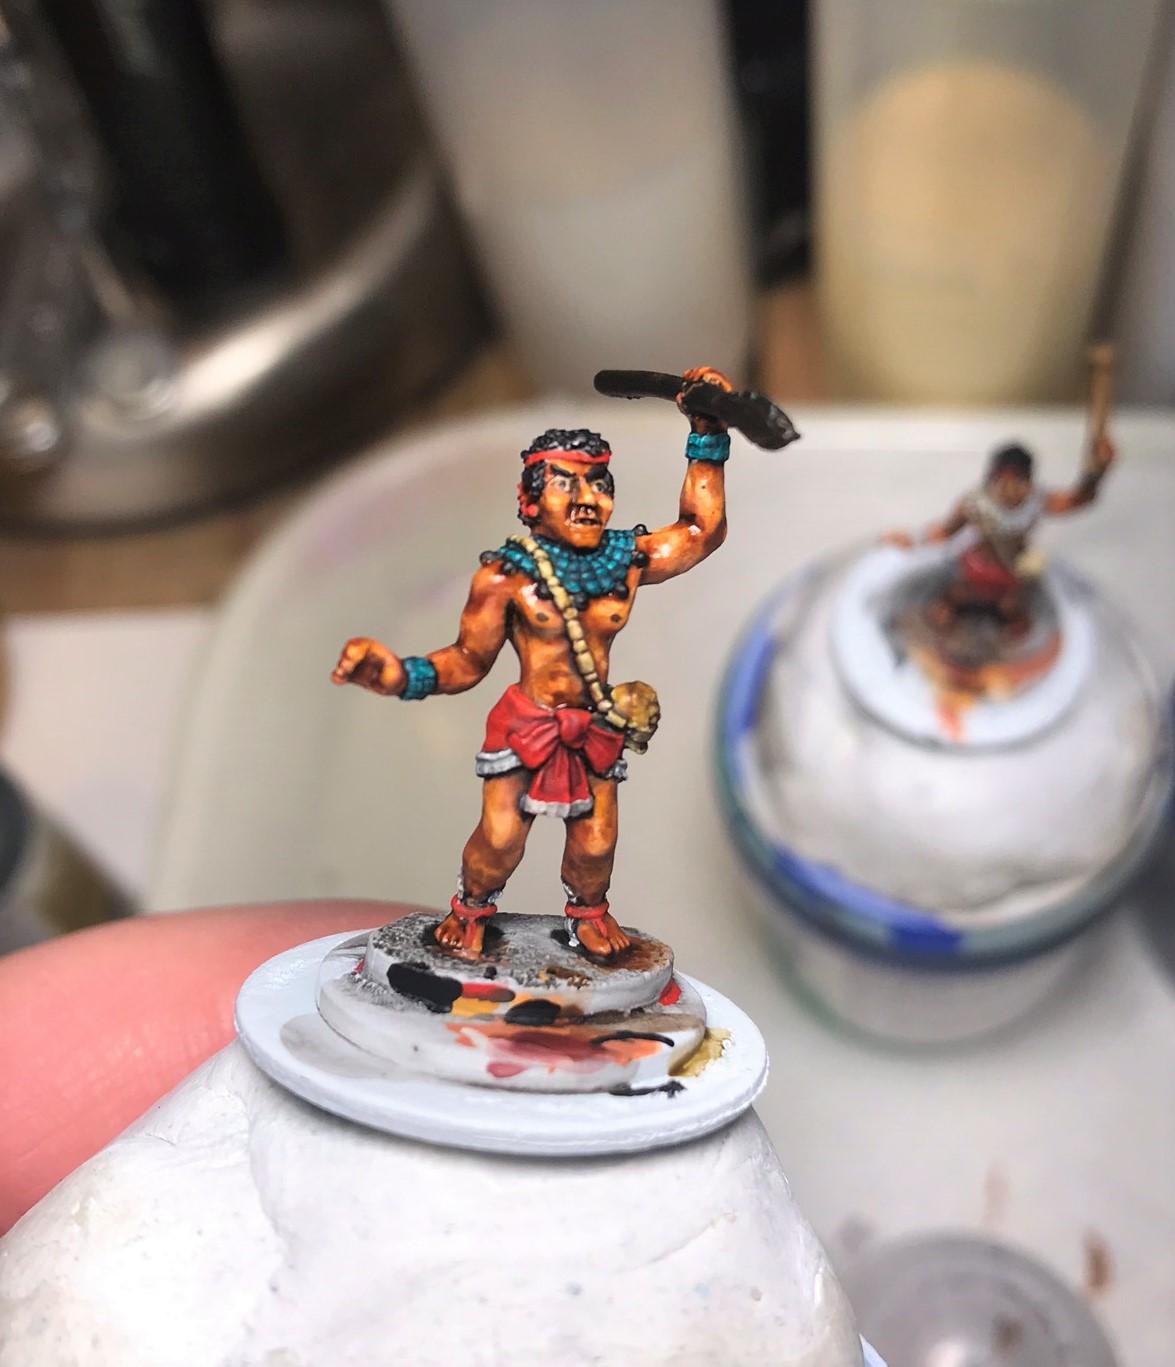
AN26 – armed with a sling, no shield, and no armor.
AN26 from the front. The figure is similar to, but not exactly the same, as AN17 and AN23, but I am hoping that the yellow earrings will stand out on the tabletop.AN26, reverse angle.
AN27 – armed with a sling, no shield, and no armor.
AN27 from the front, with some yellow color for his hairband and earrings. I liked the sculpting of his face too.AN27 from the back side.
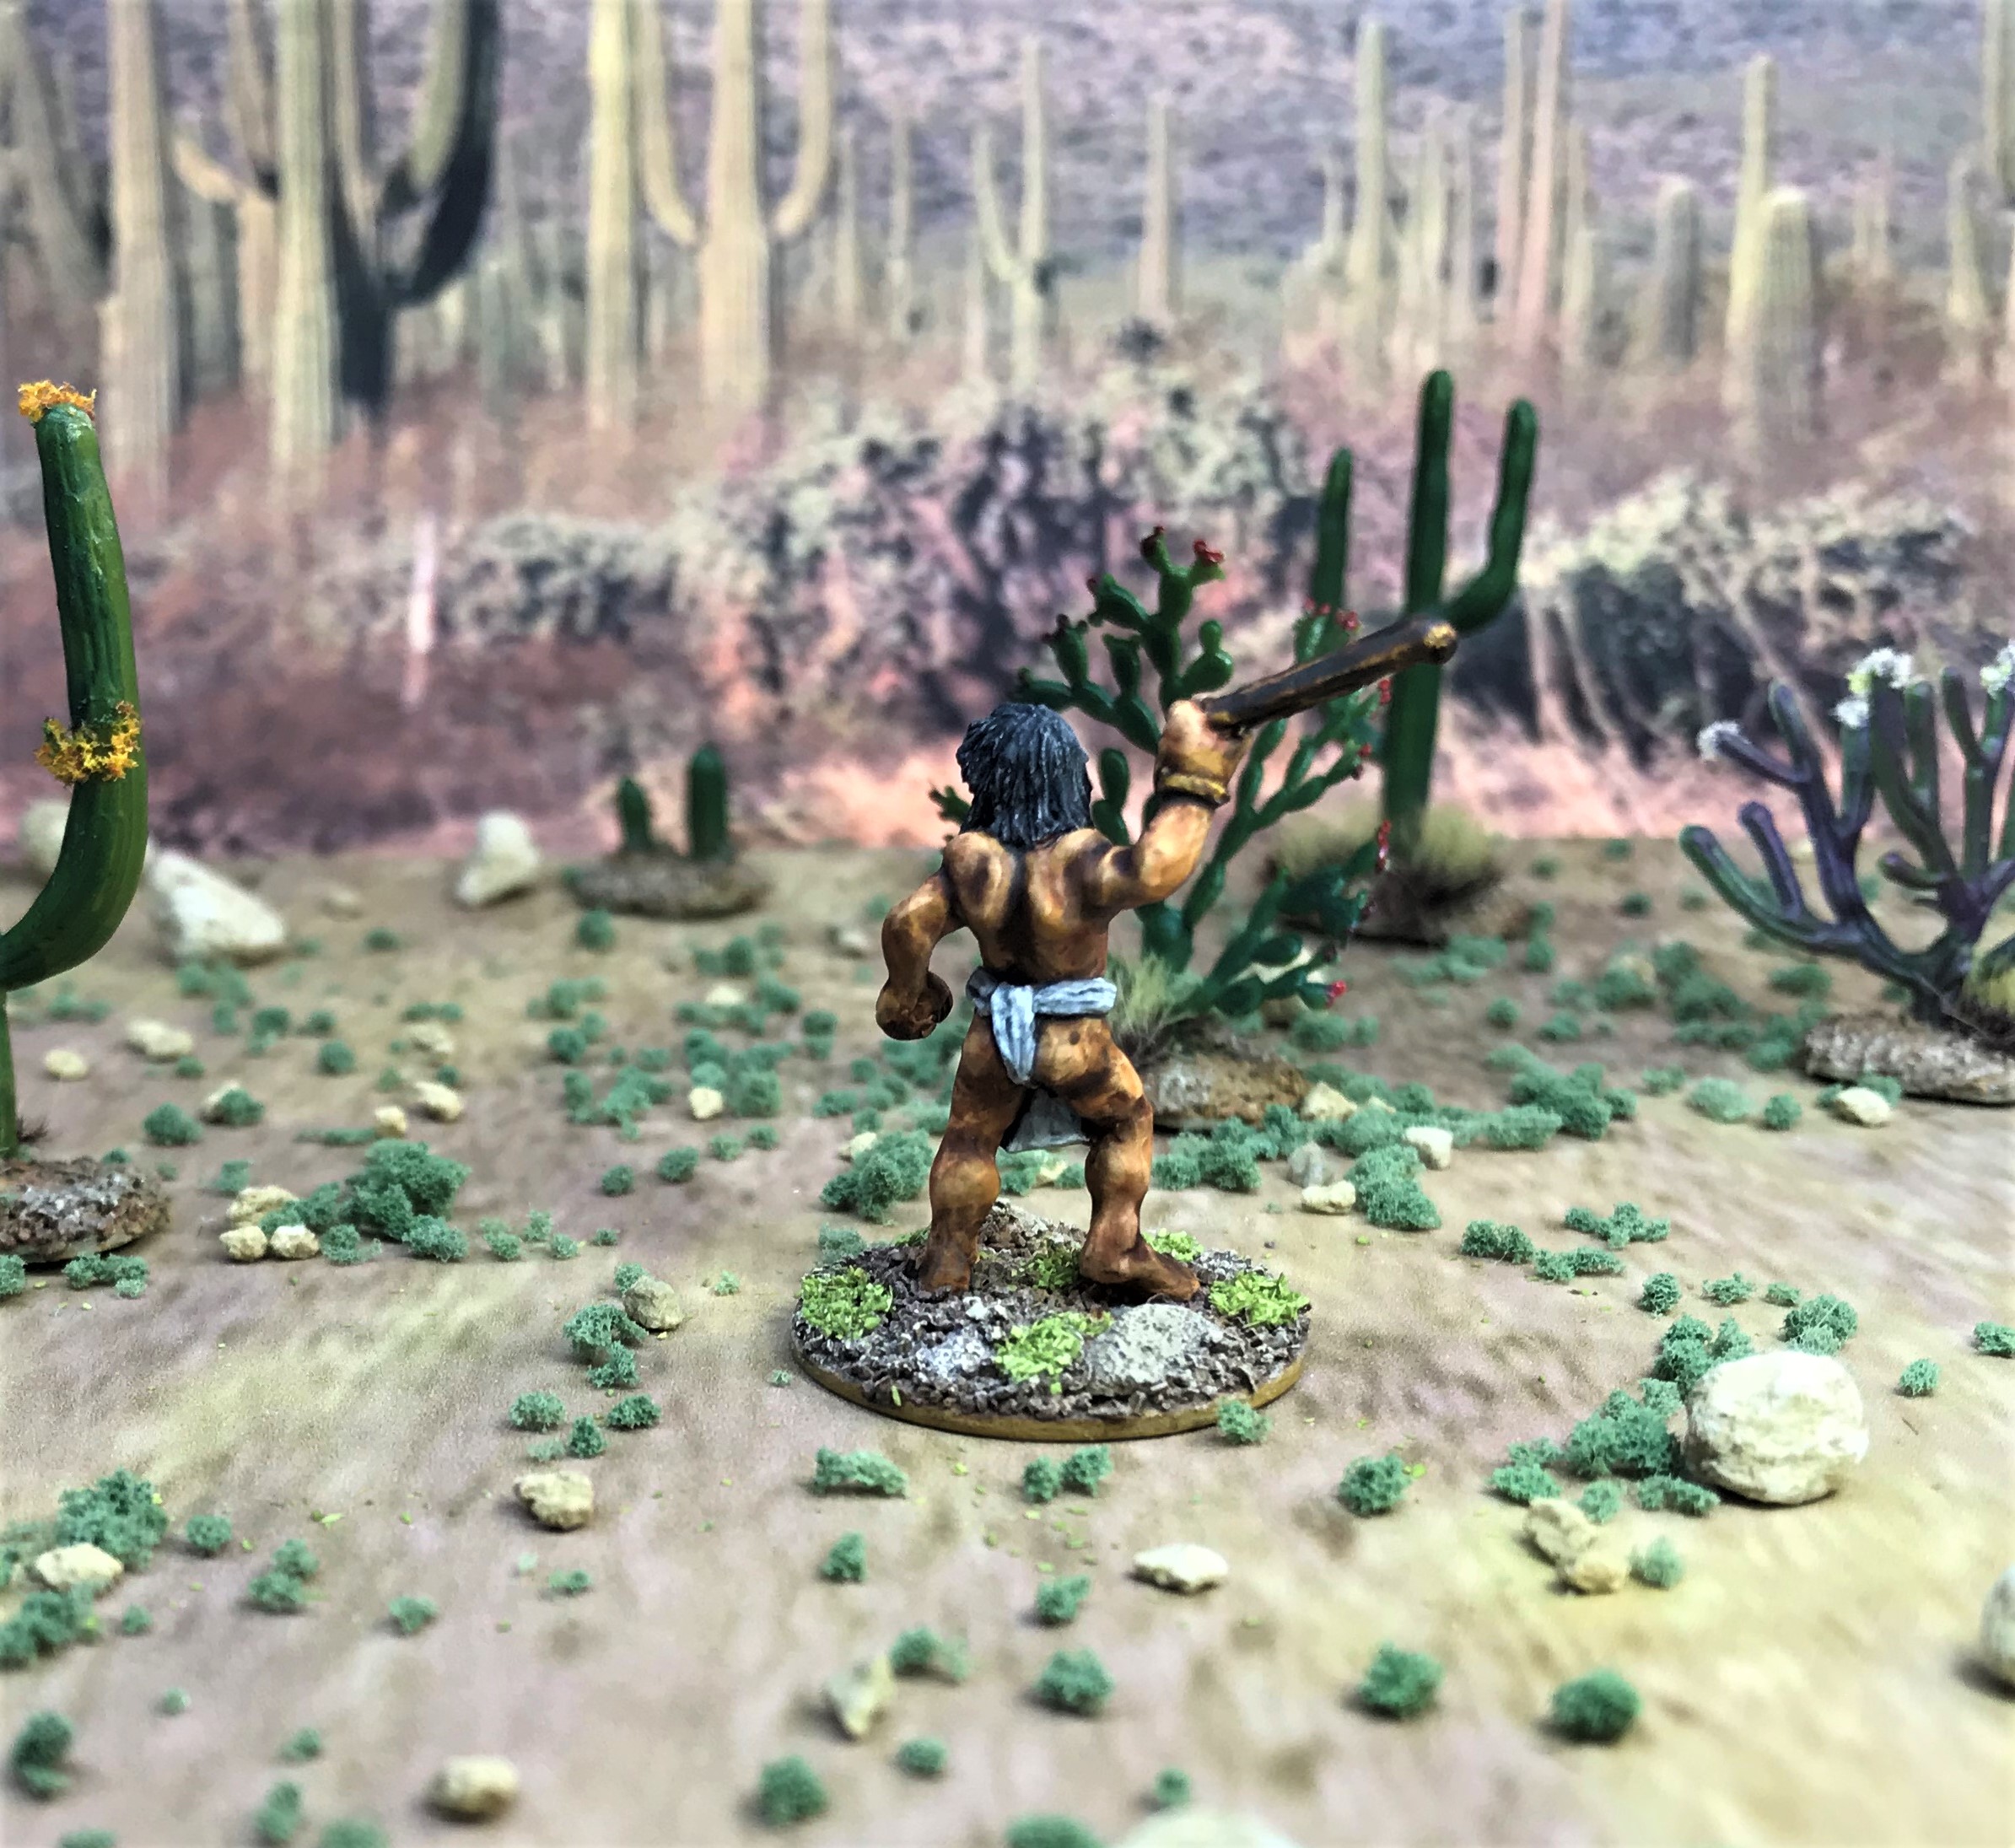
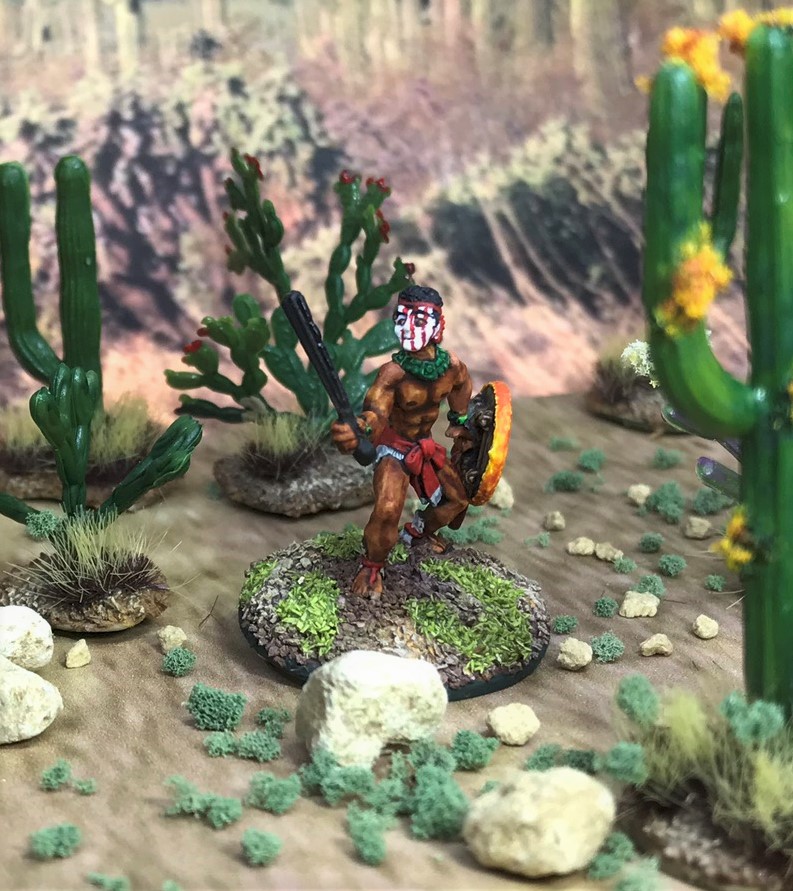
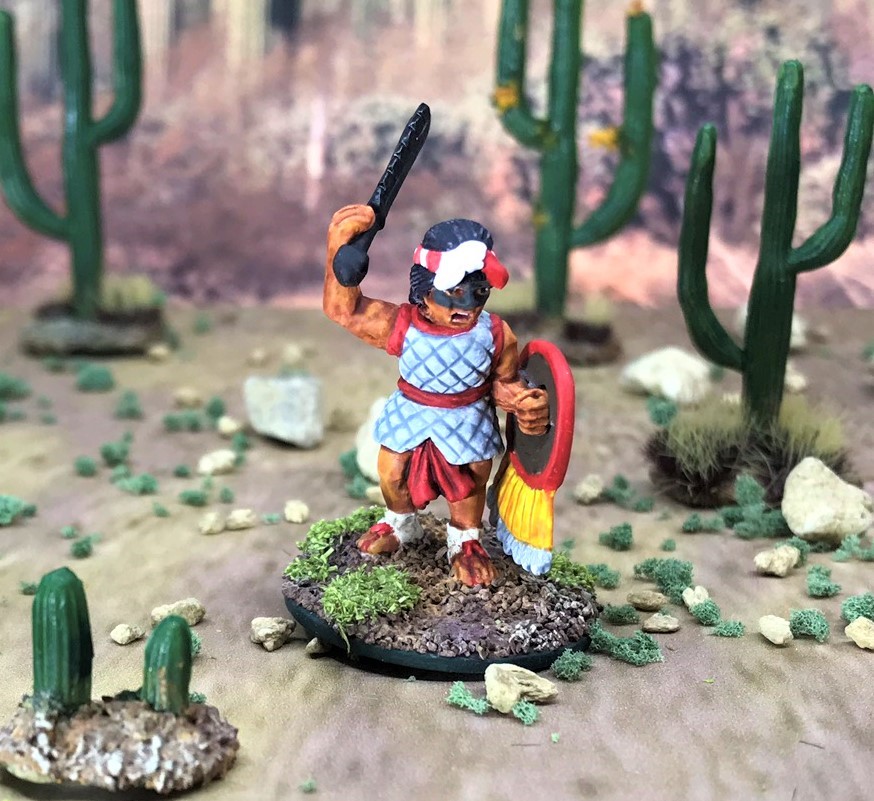
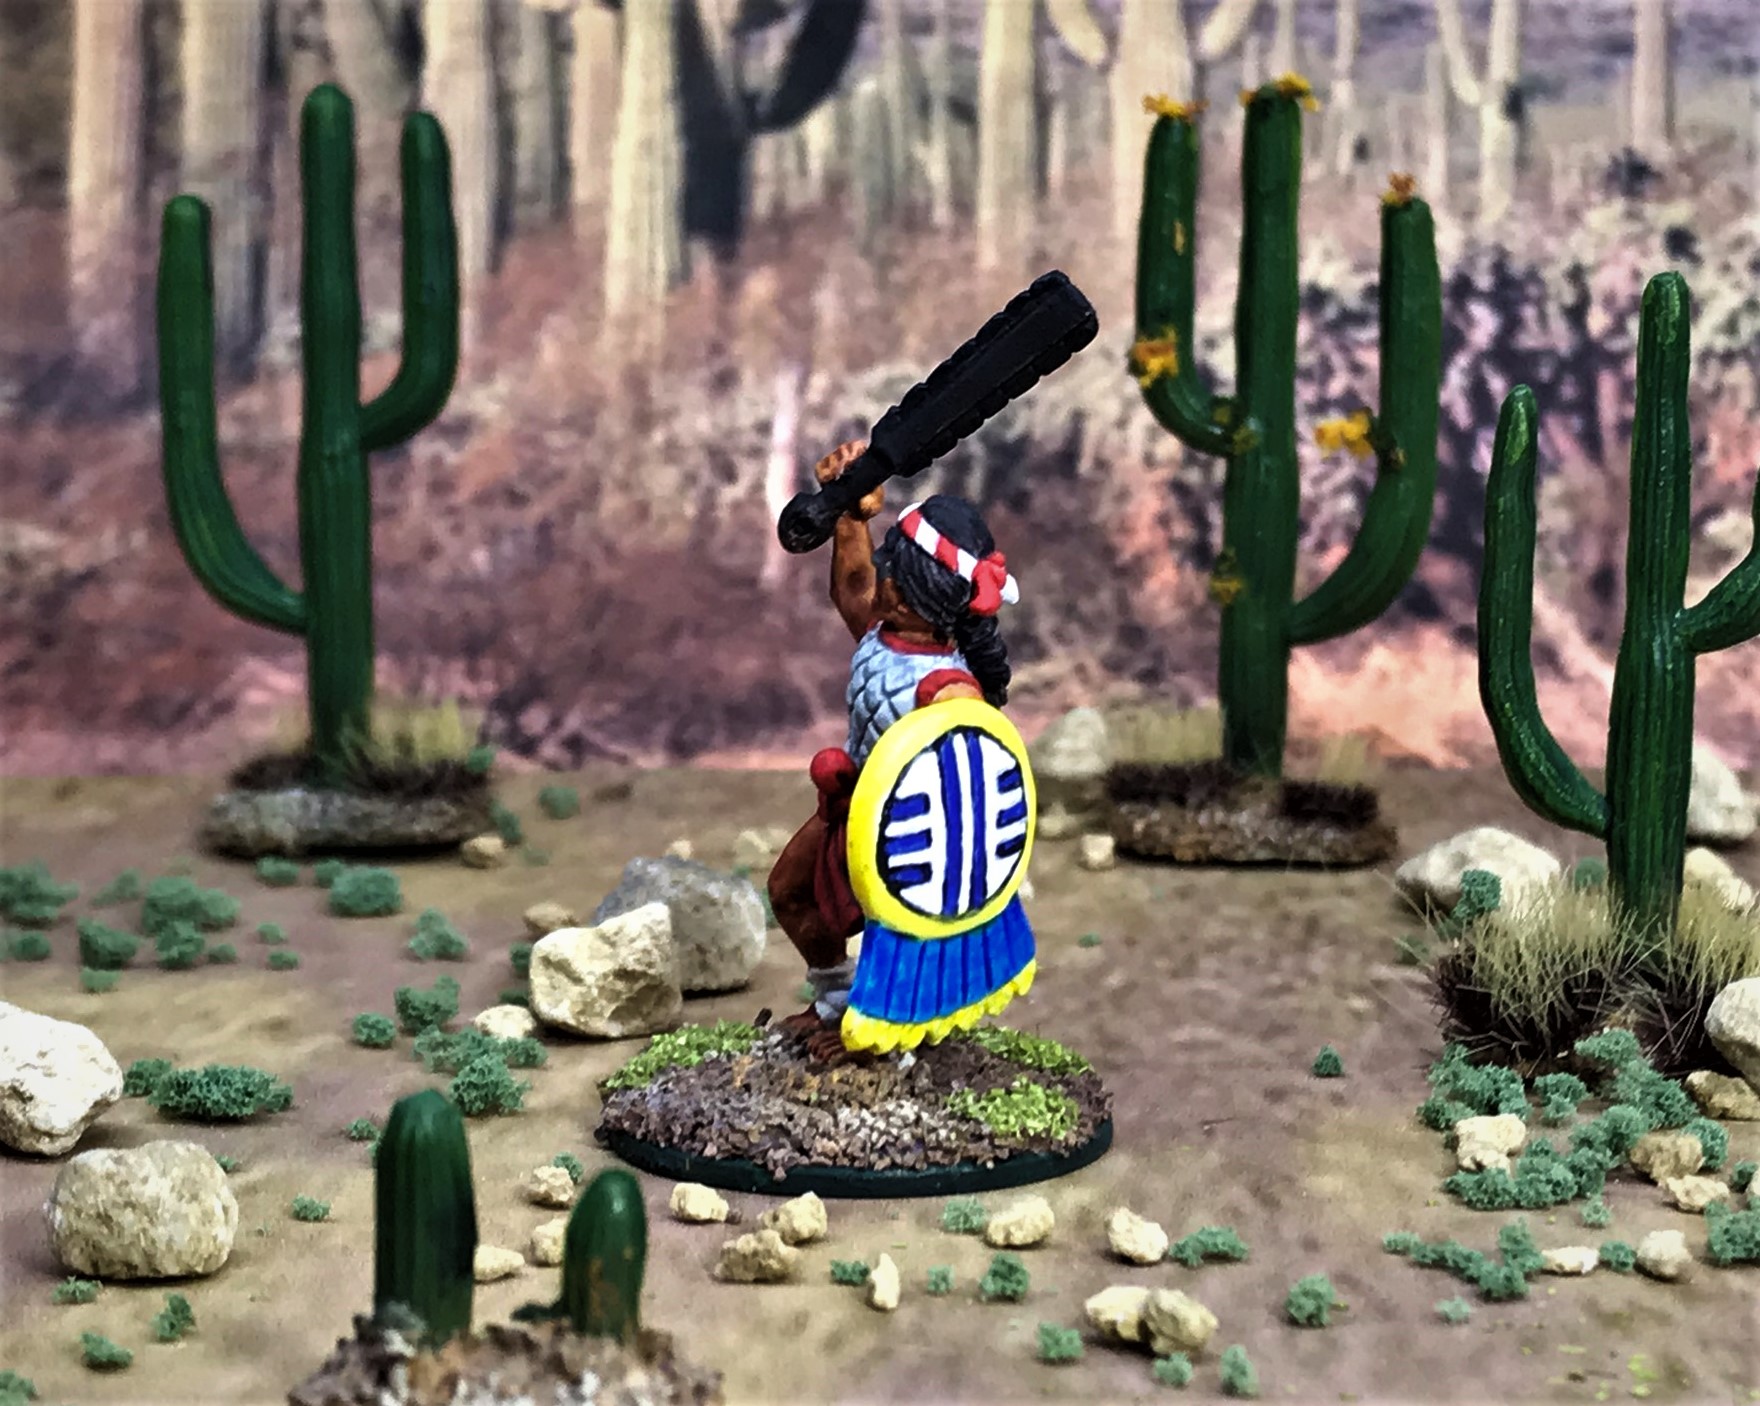
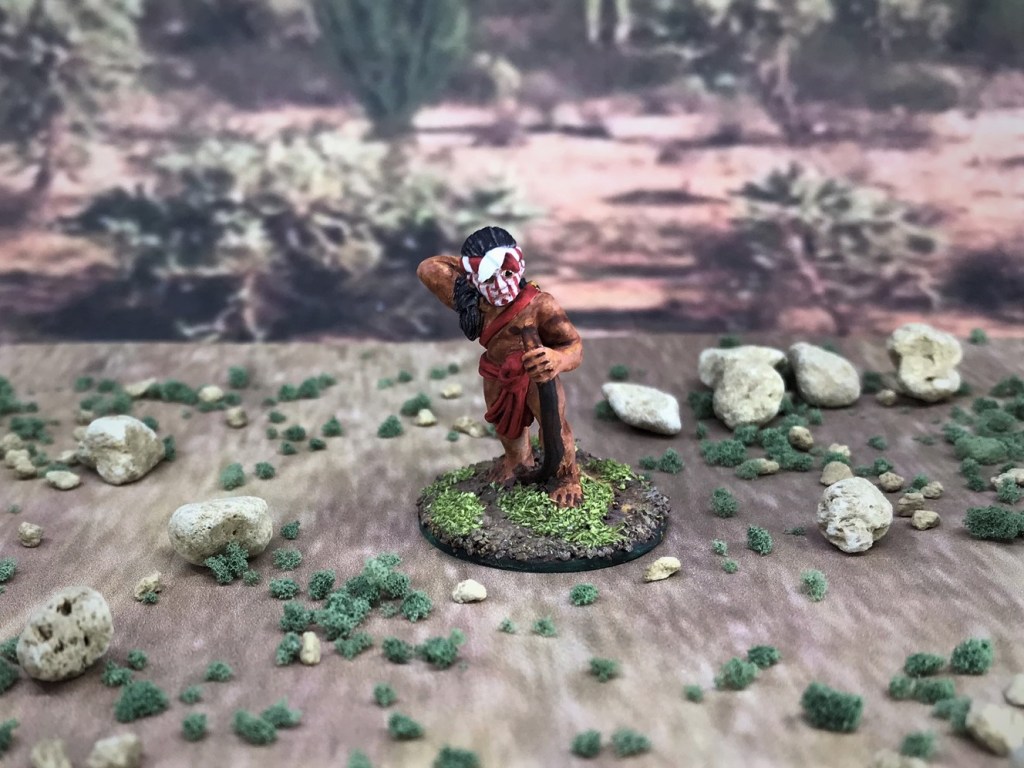
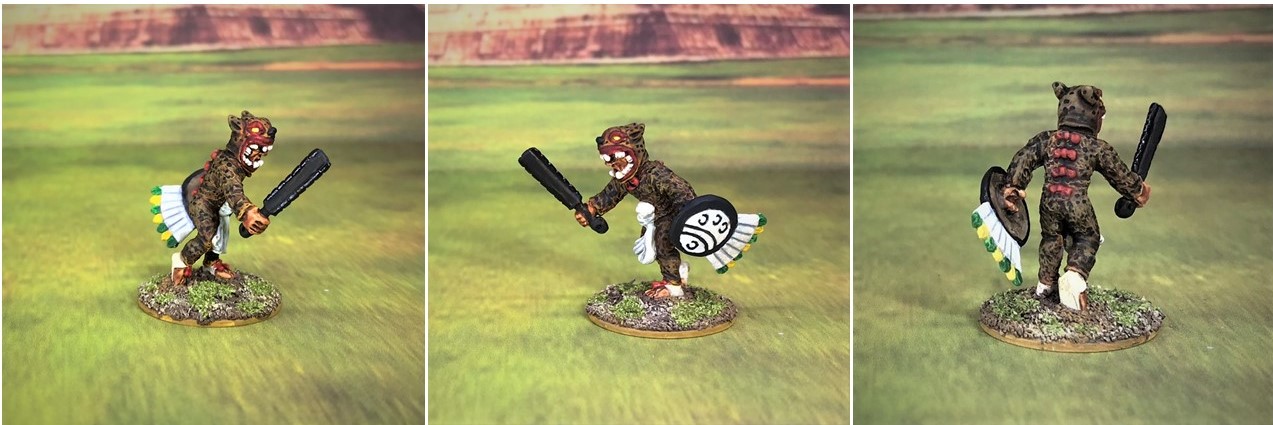
AN28 – armed with a macuahuitl (an obsidian-edged club/broadsword), a shield, and no armor.
AN28 from the front, moving to attack. This is the only figure in this group to be armed with the common macuahuitl (pronounced ma-kwa-wheat). The macuahuitl came from a previously painted OWS kit. You can see an interesting video on this weapon later in this post.AN28 from the side, ready to hack and slash.
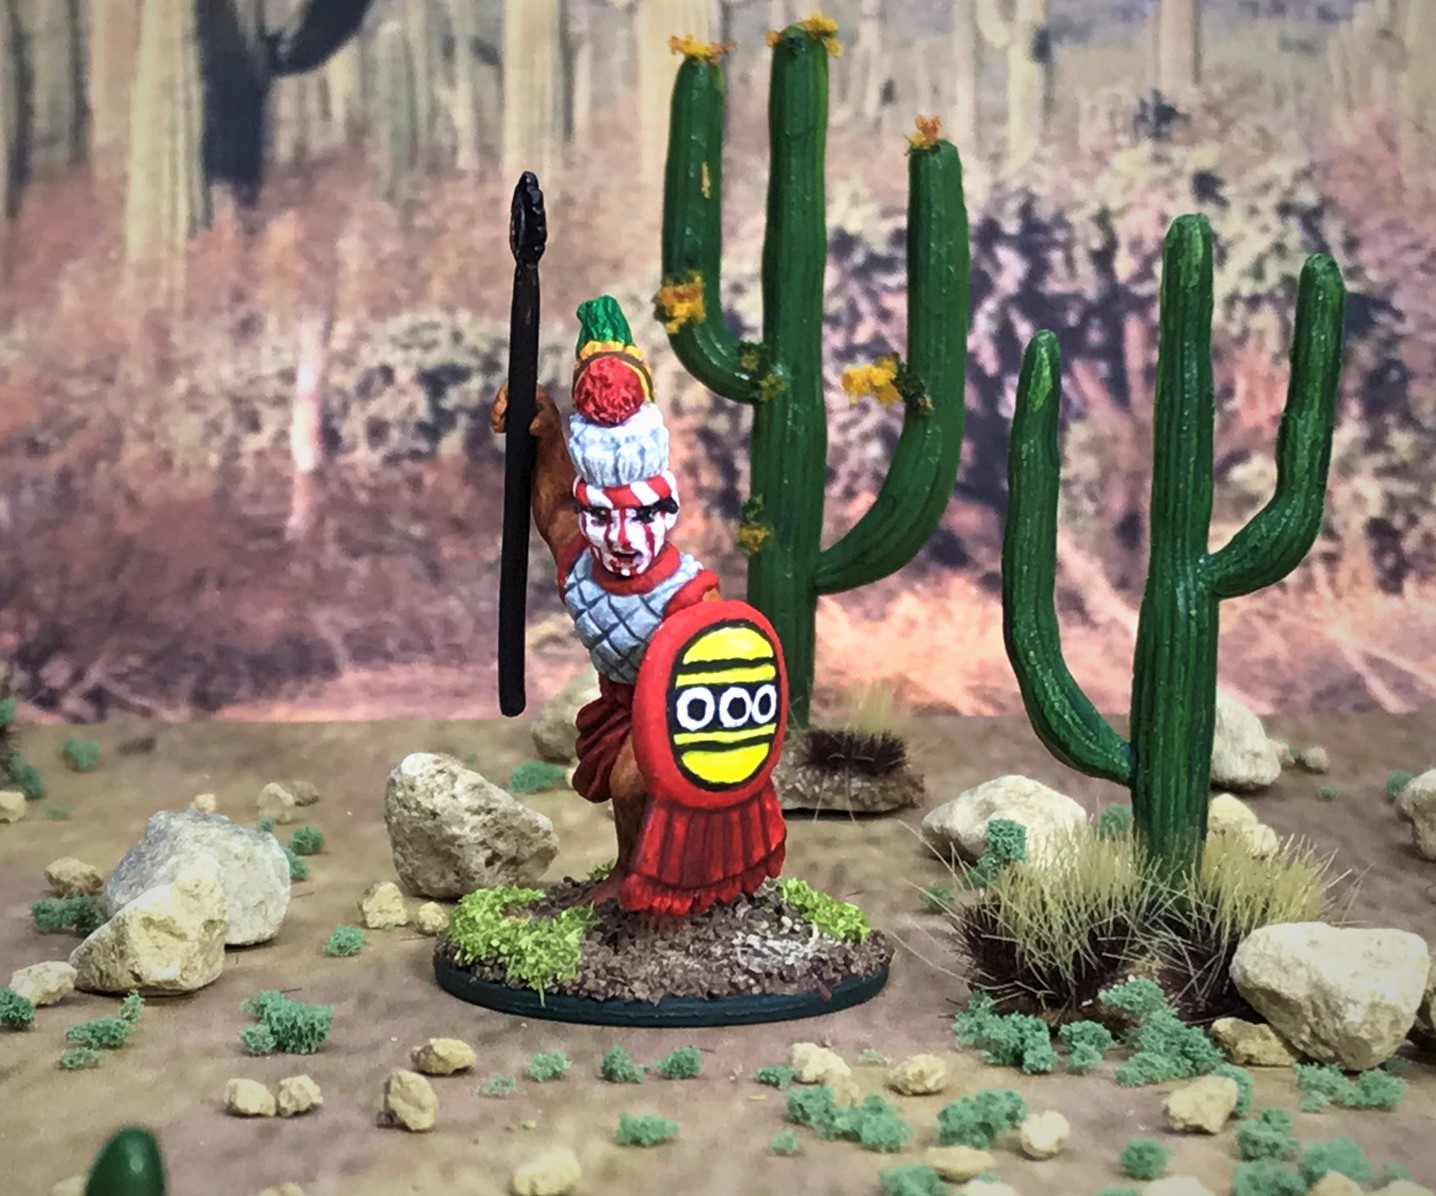
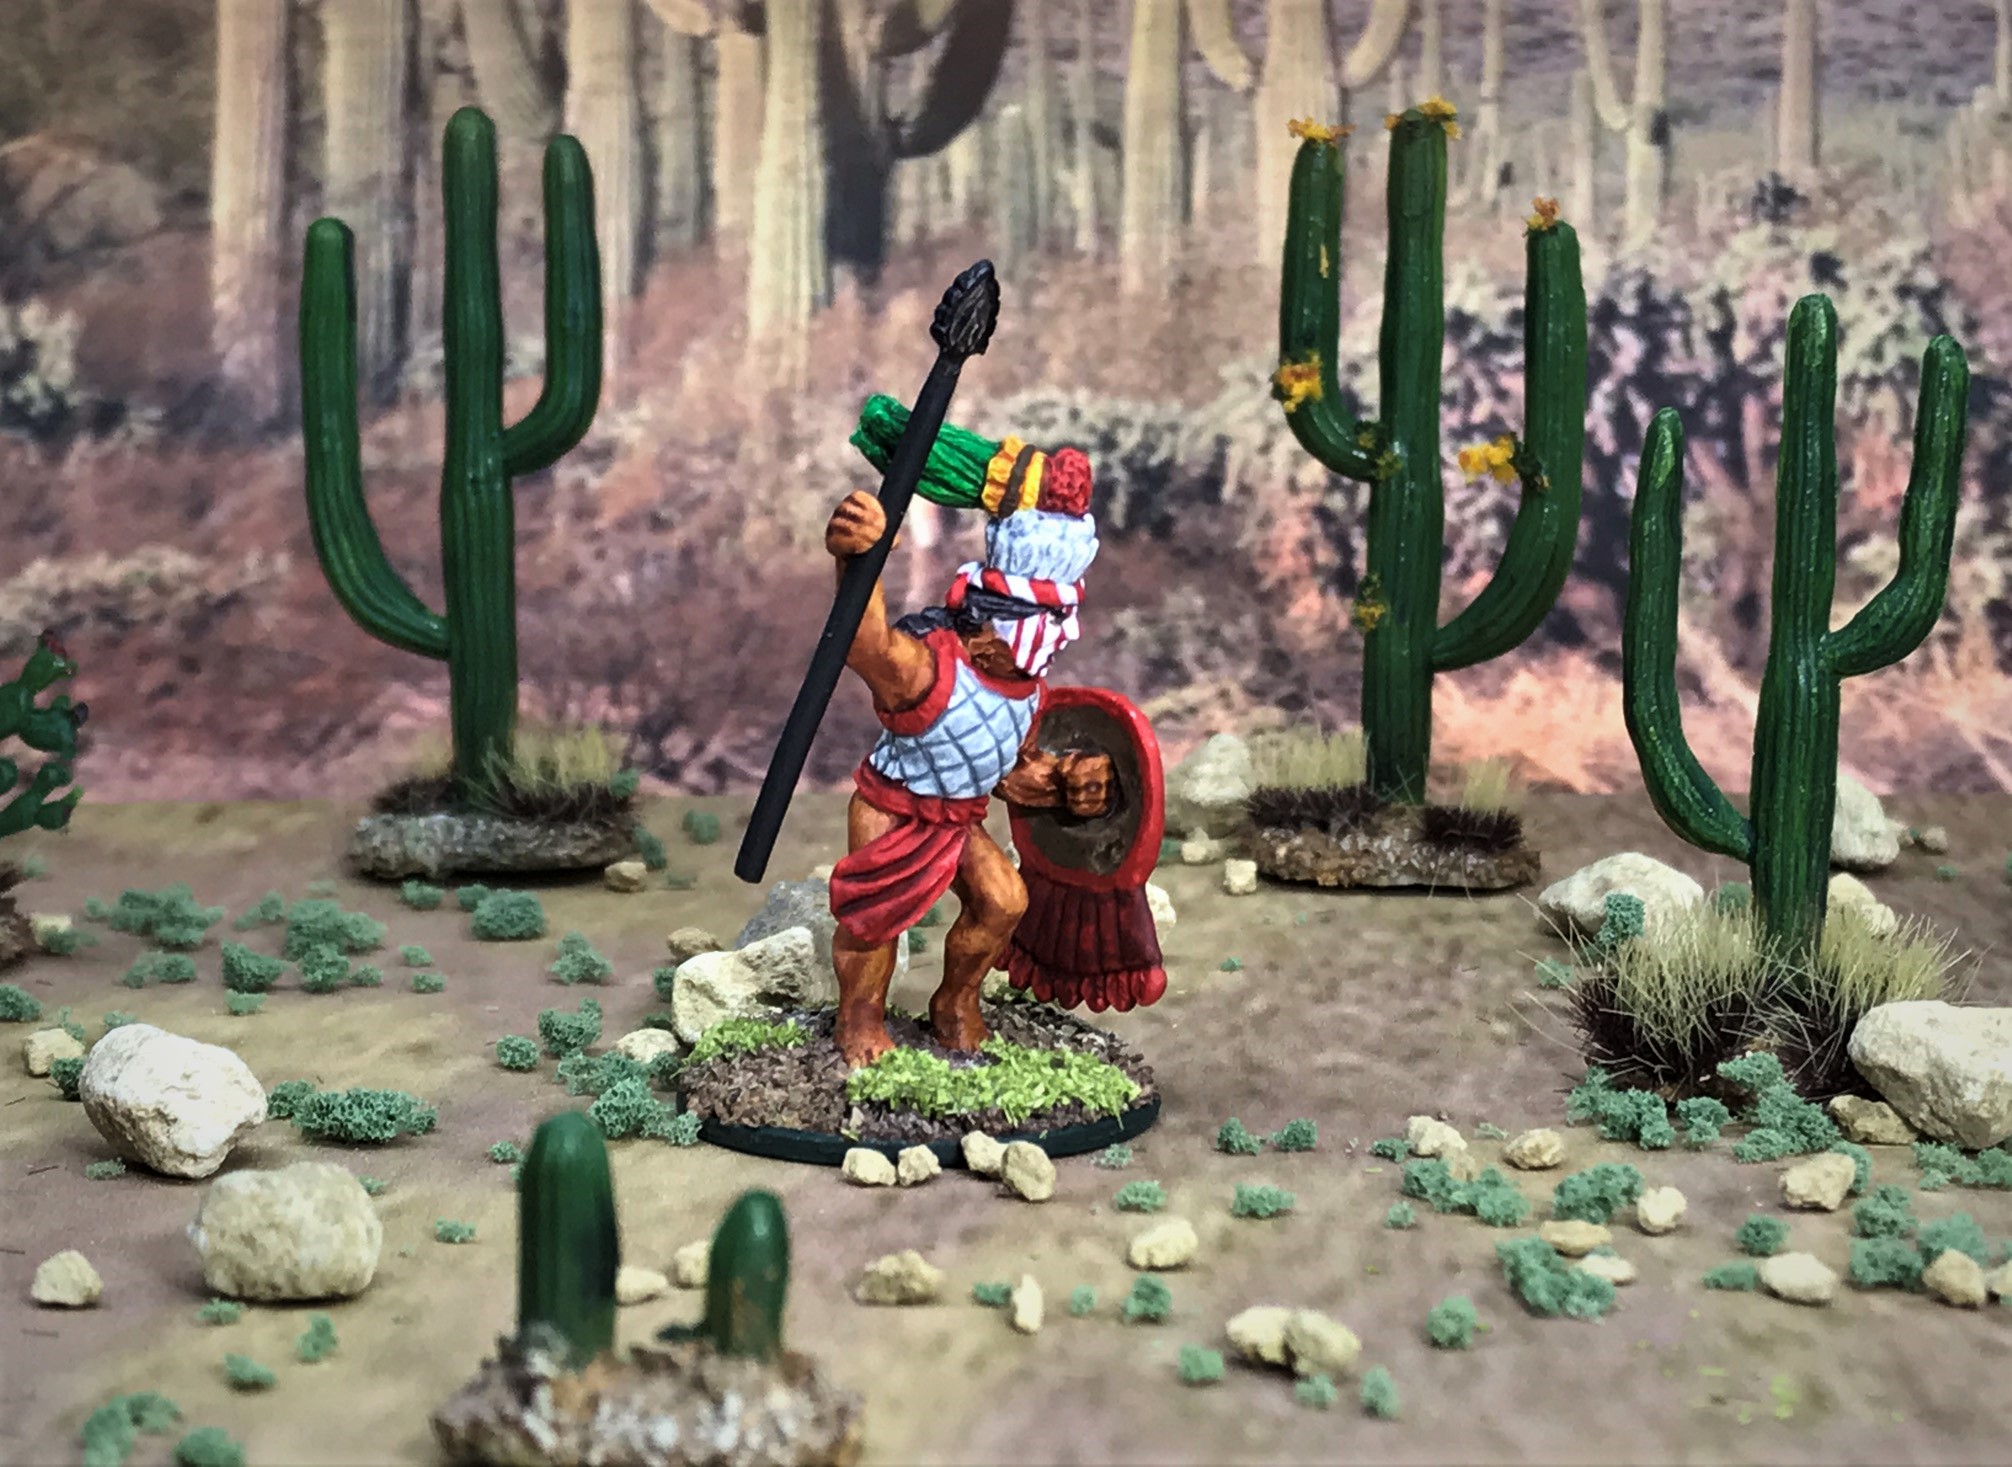
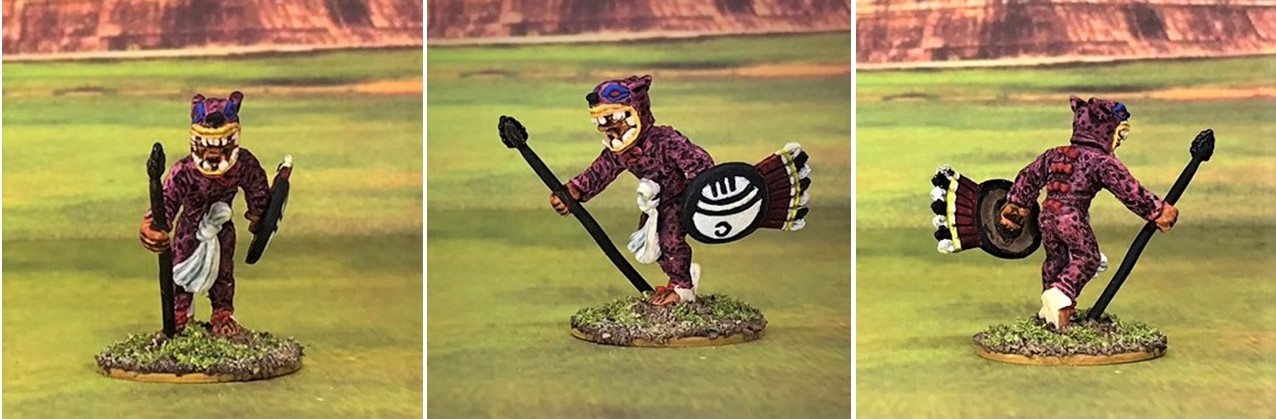
AN29 – armed with a tepoztopilli and a shield, and quilted cotton armor (ichcahuipilli).
AN29 front. This was my least favorite figure of all of these – I just did not like the face, though here it looks ok. The weapon is also from OWS.AN29 from the side.
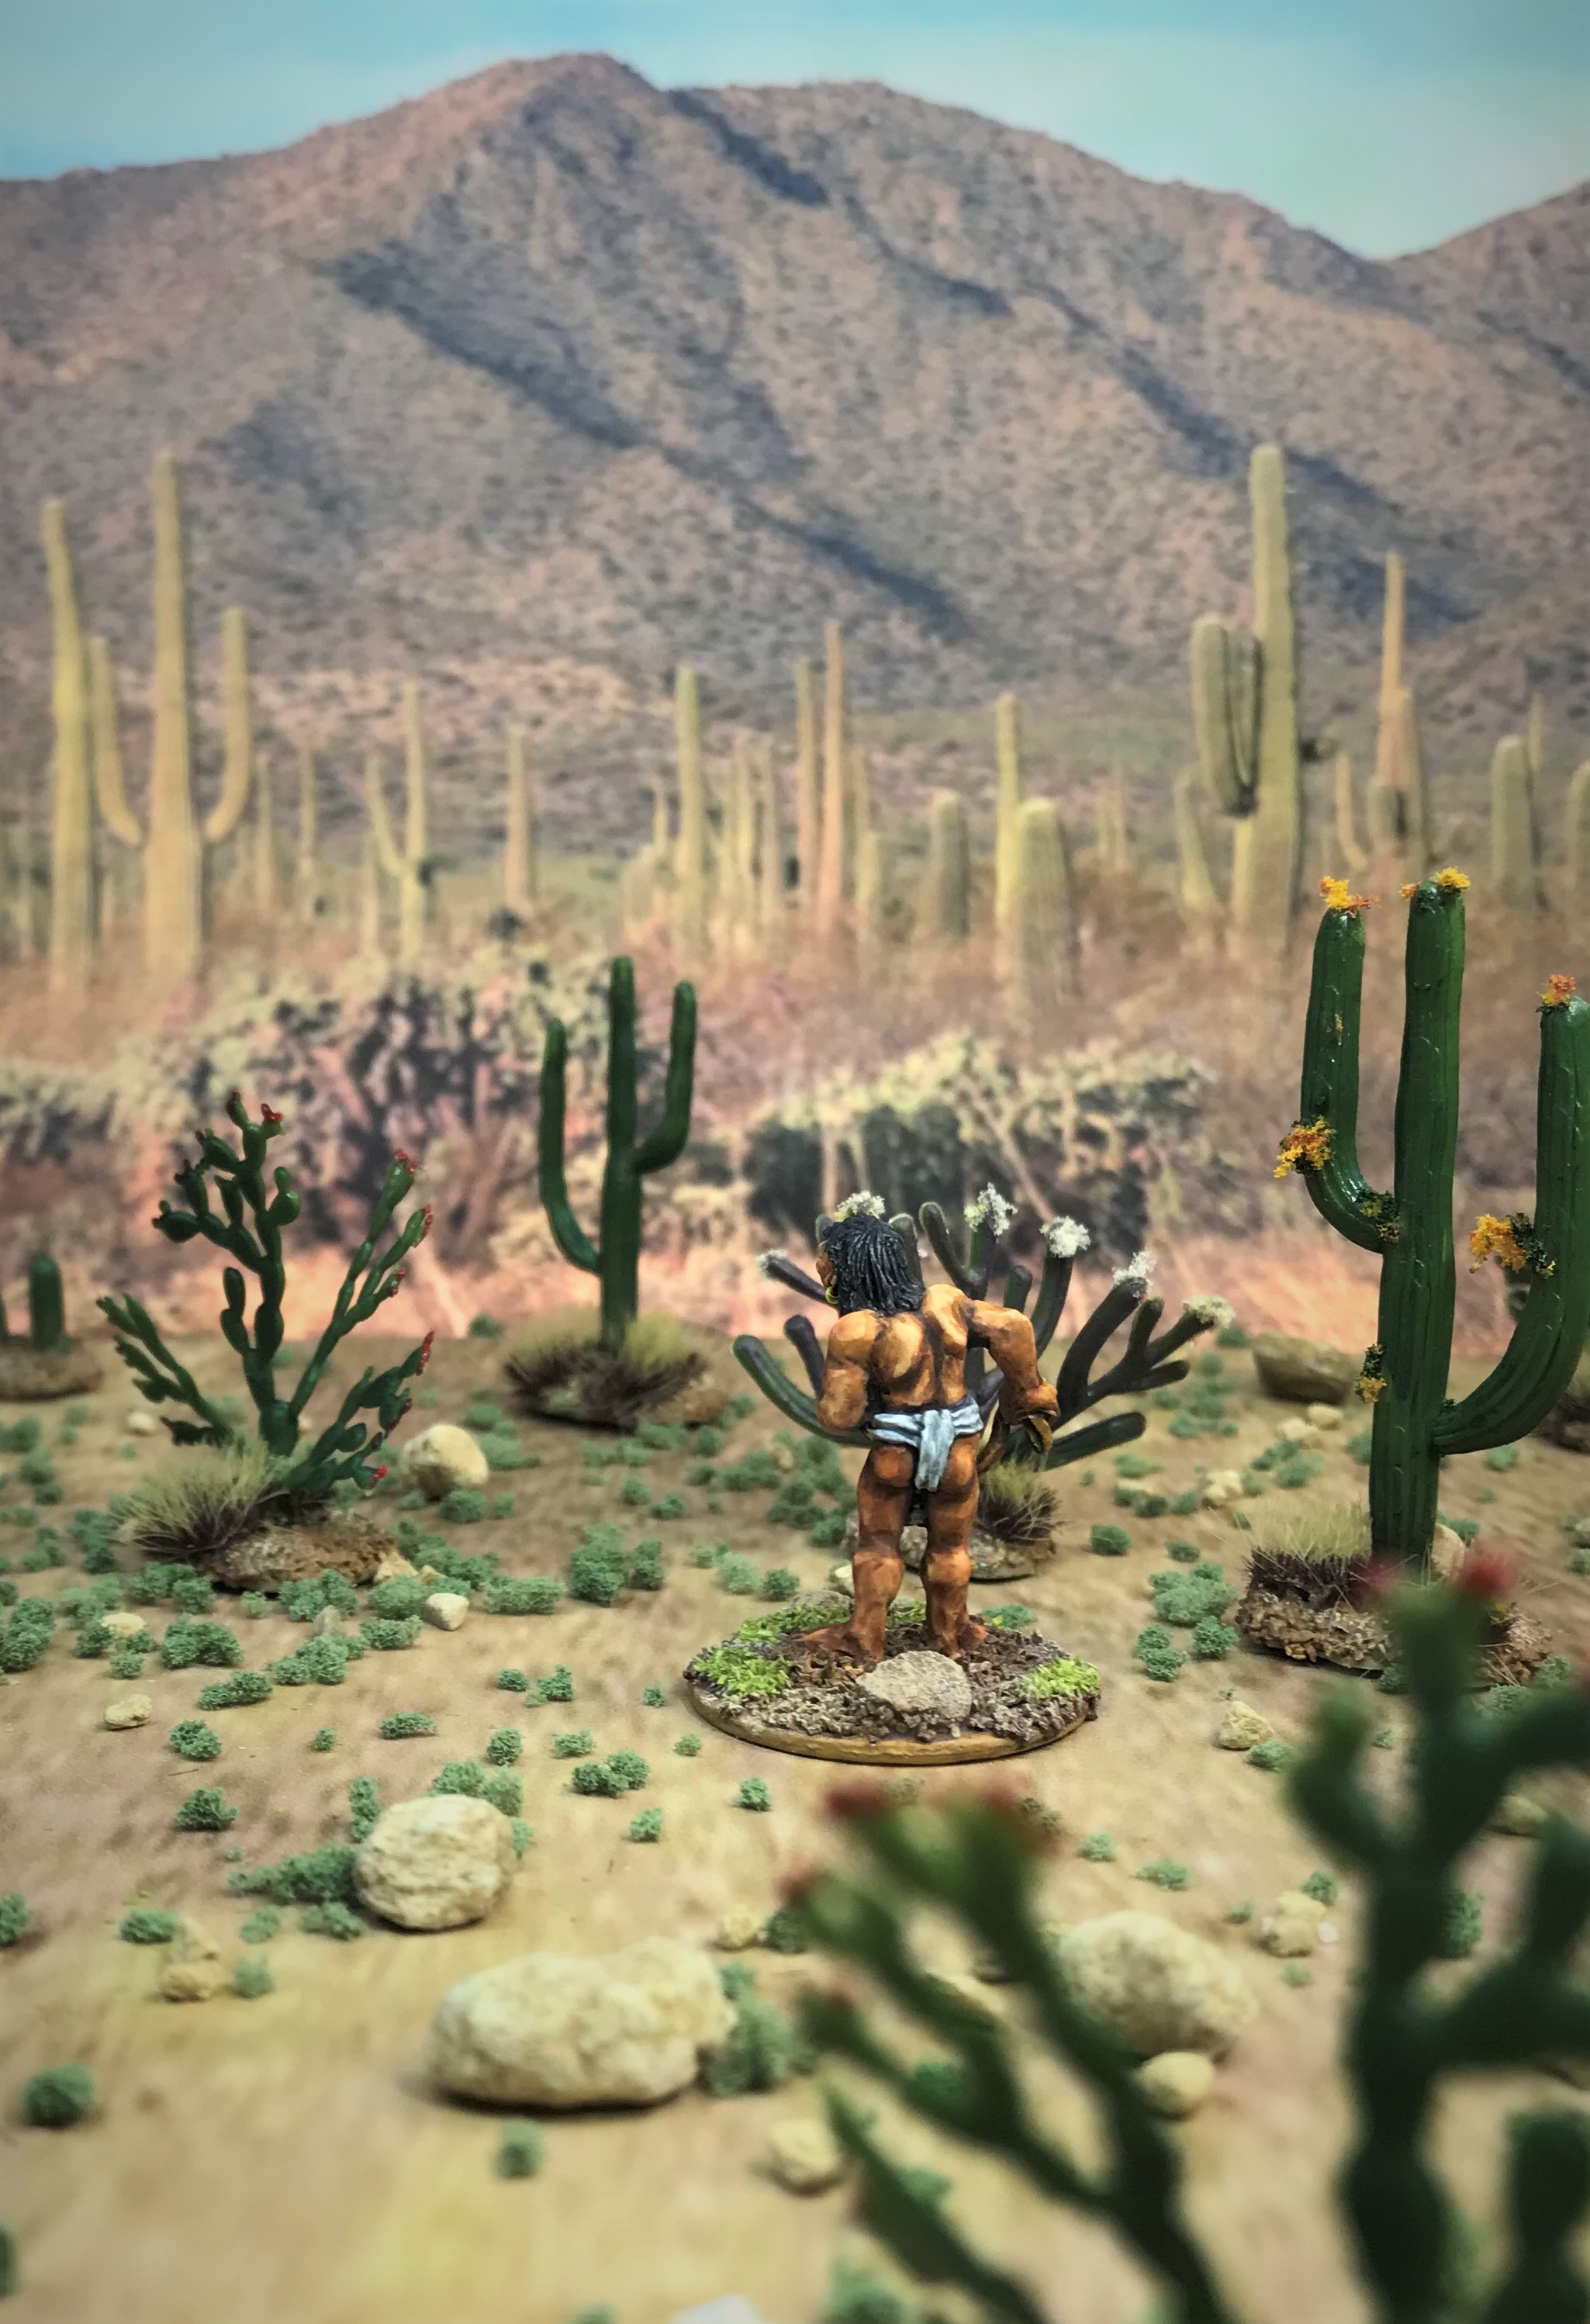
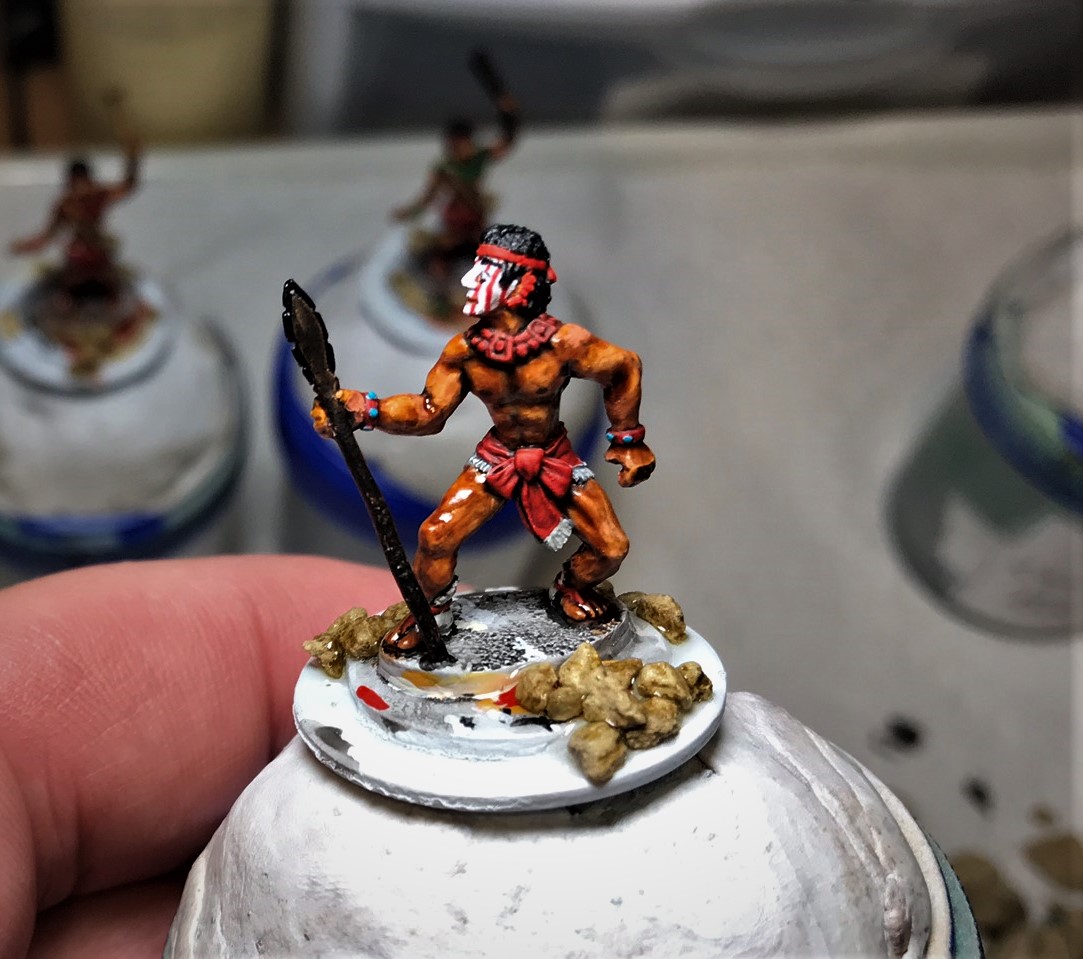
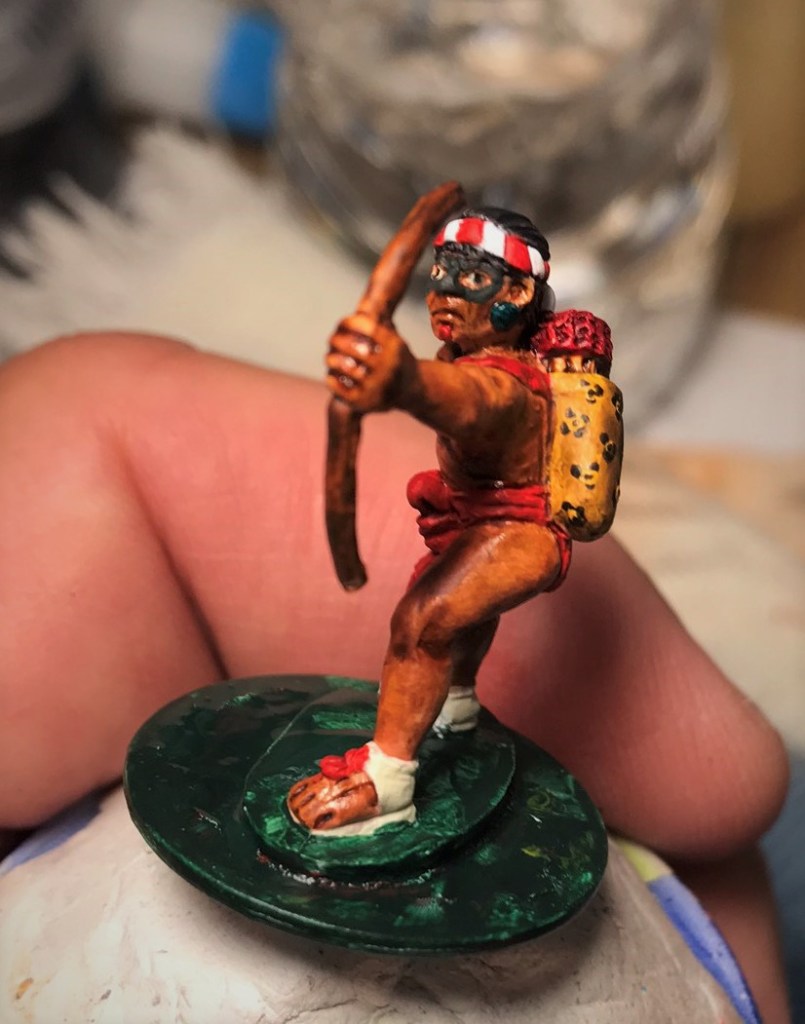
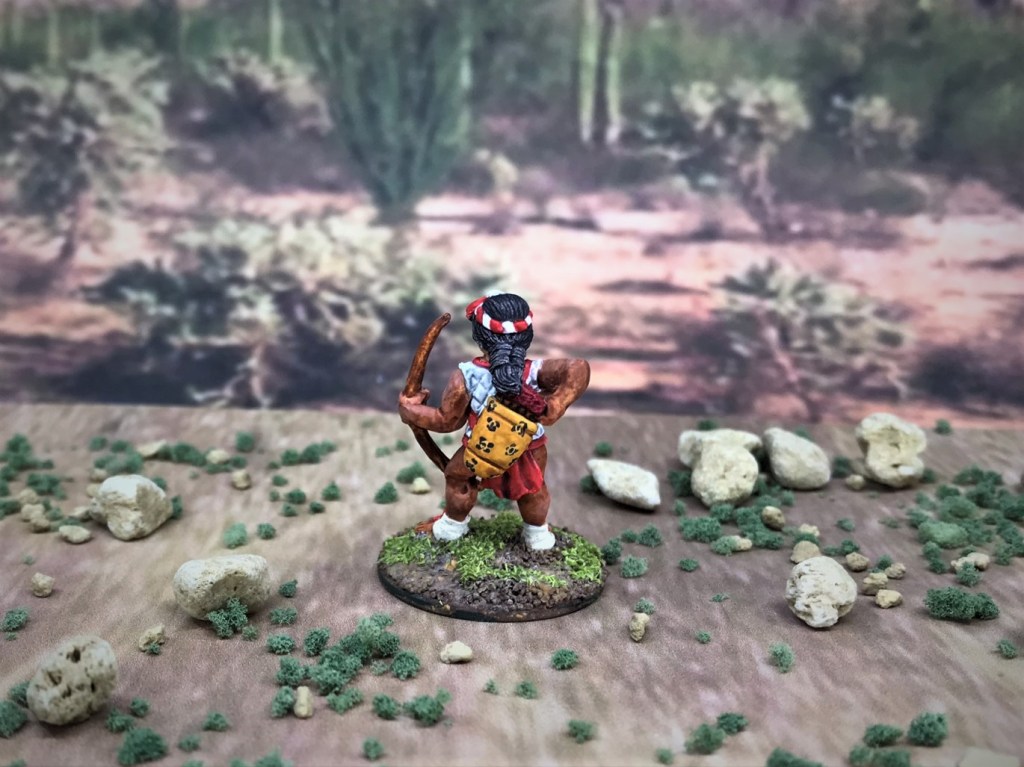
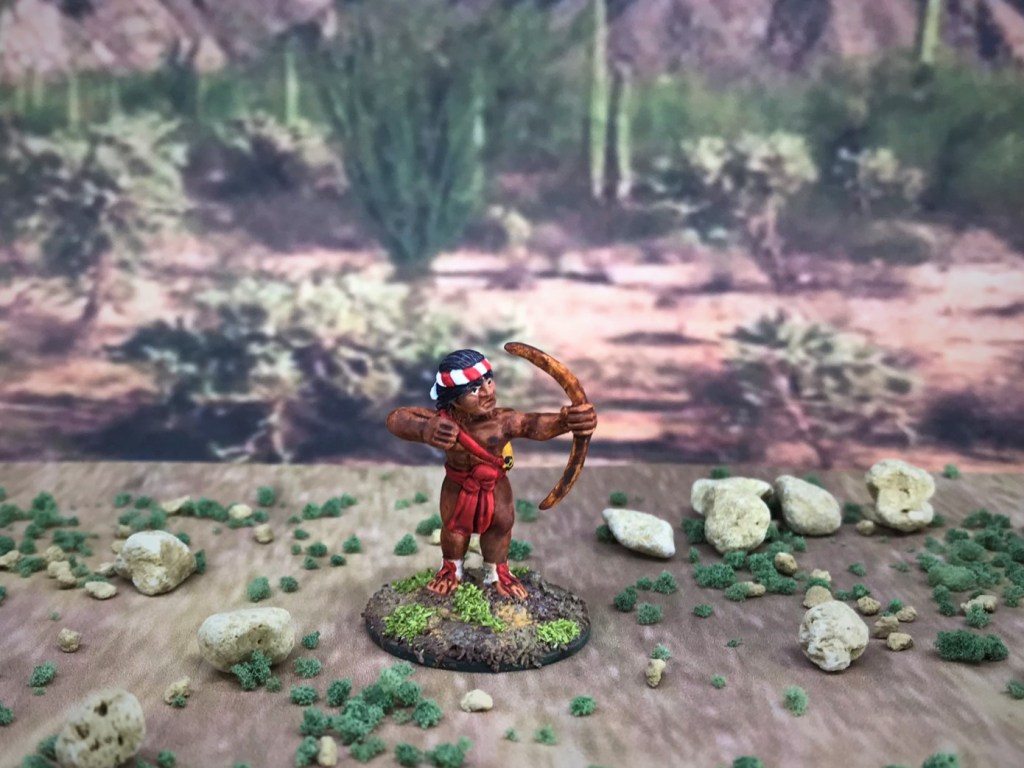
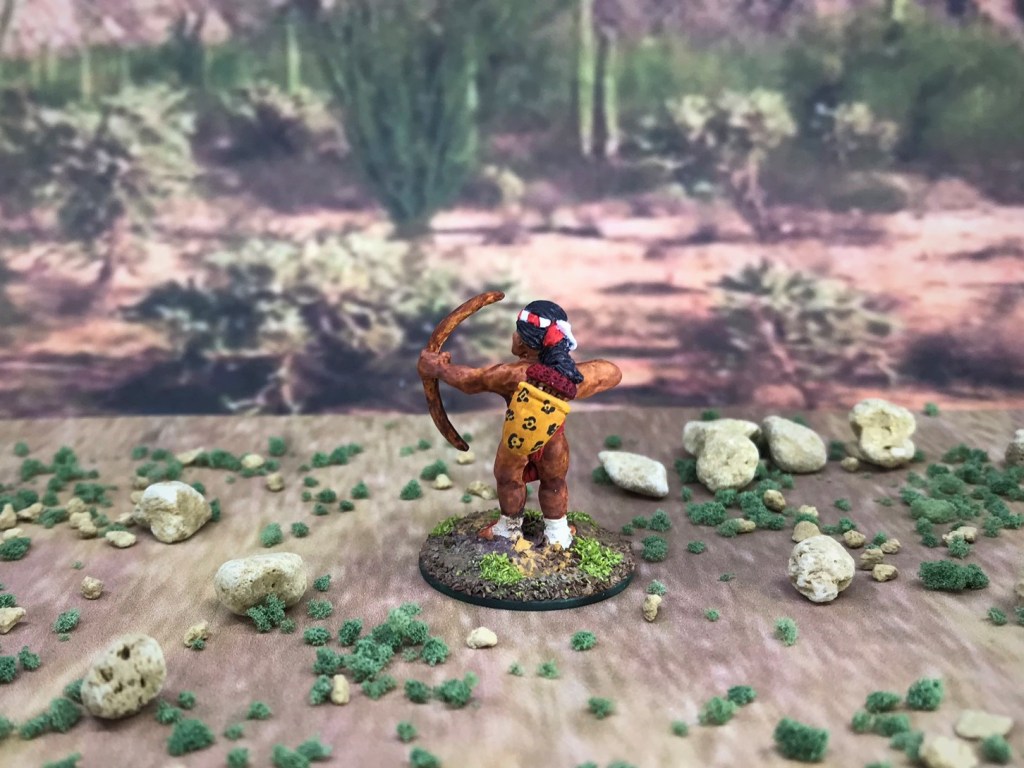
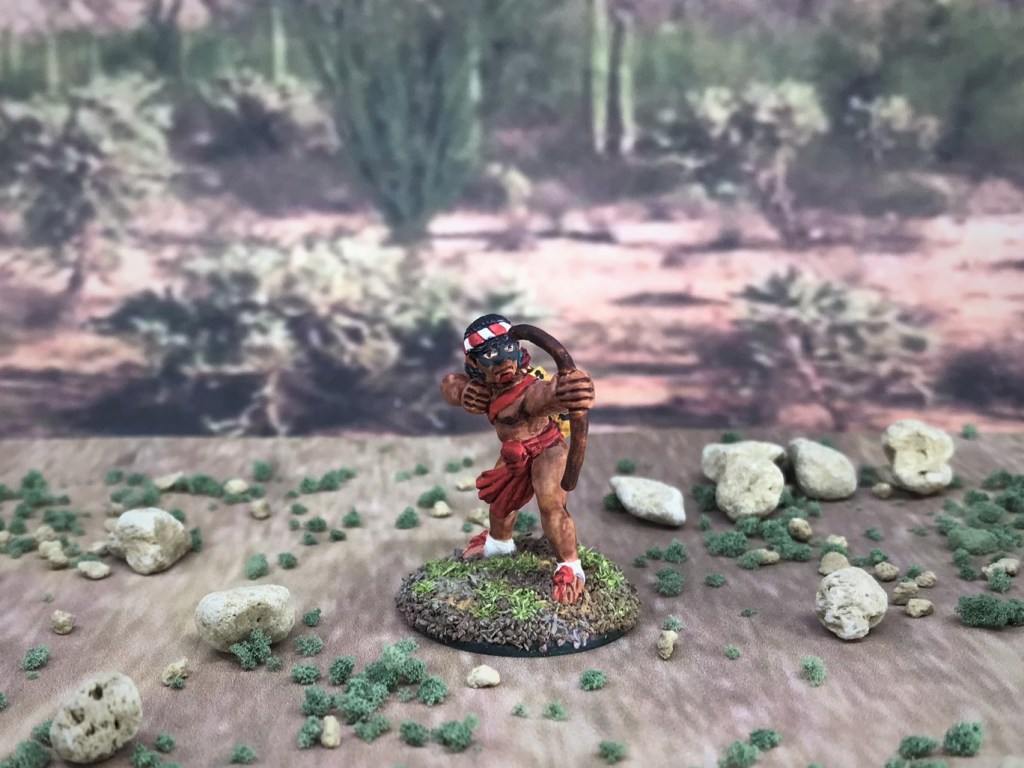
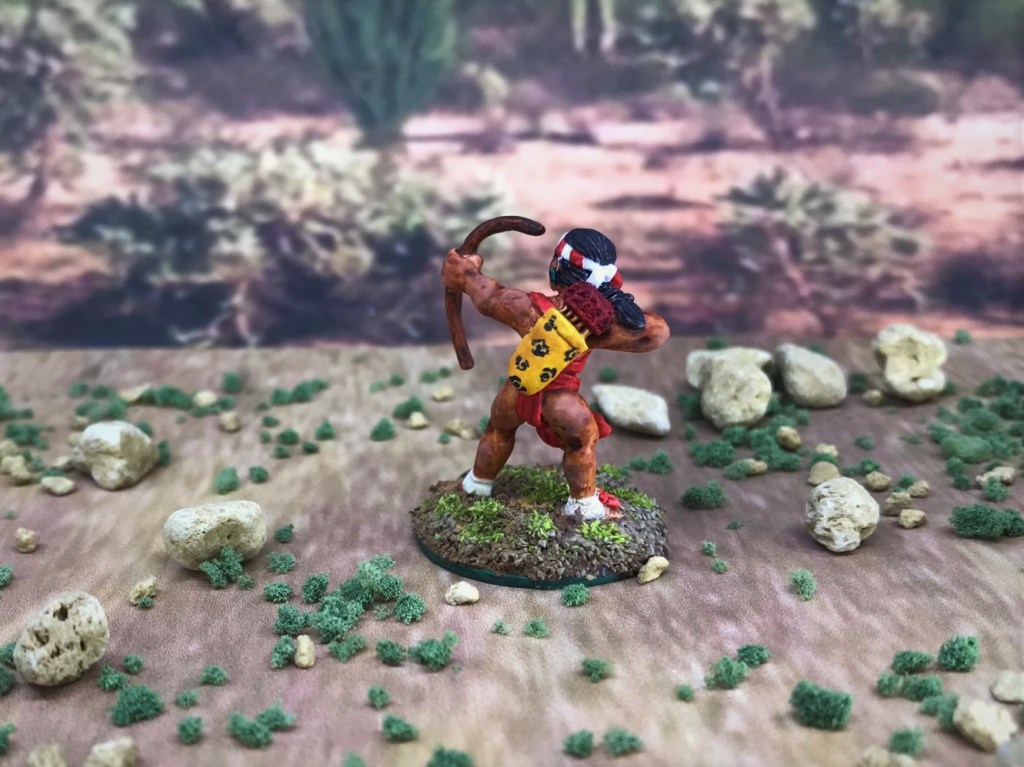
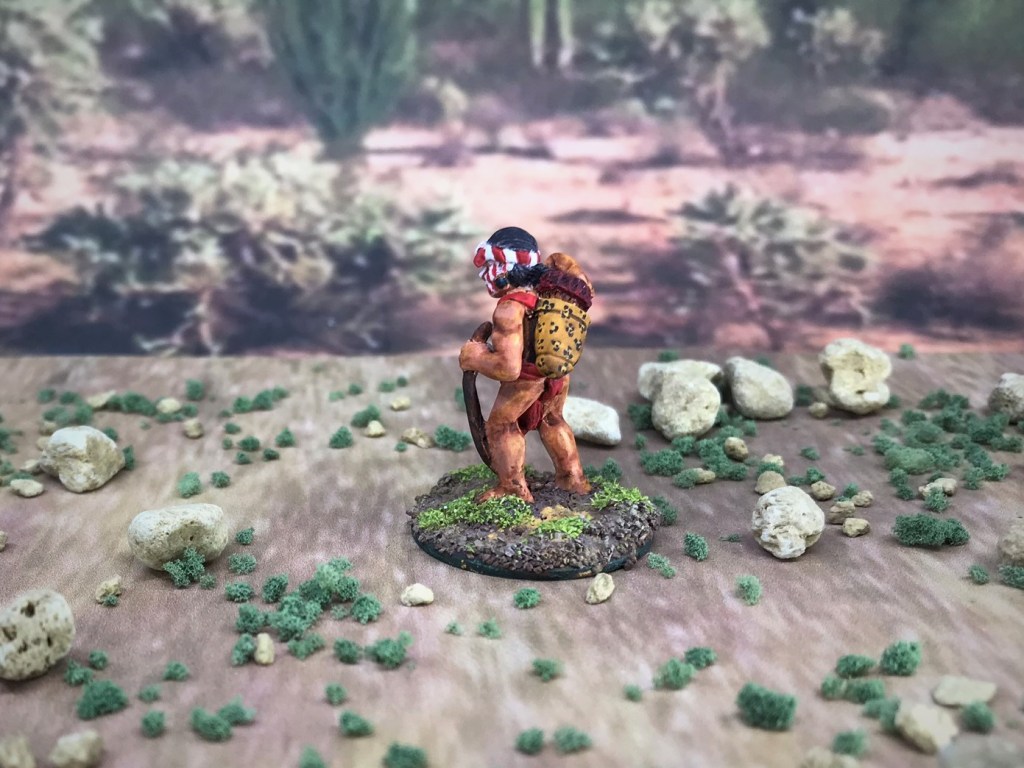
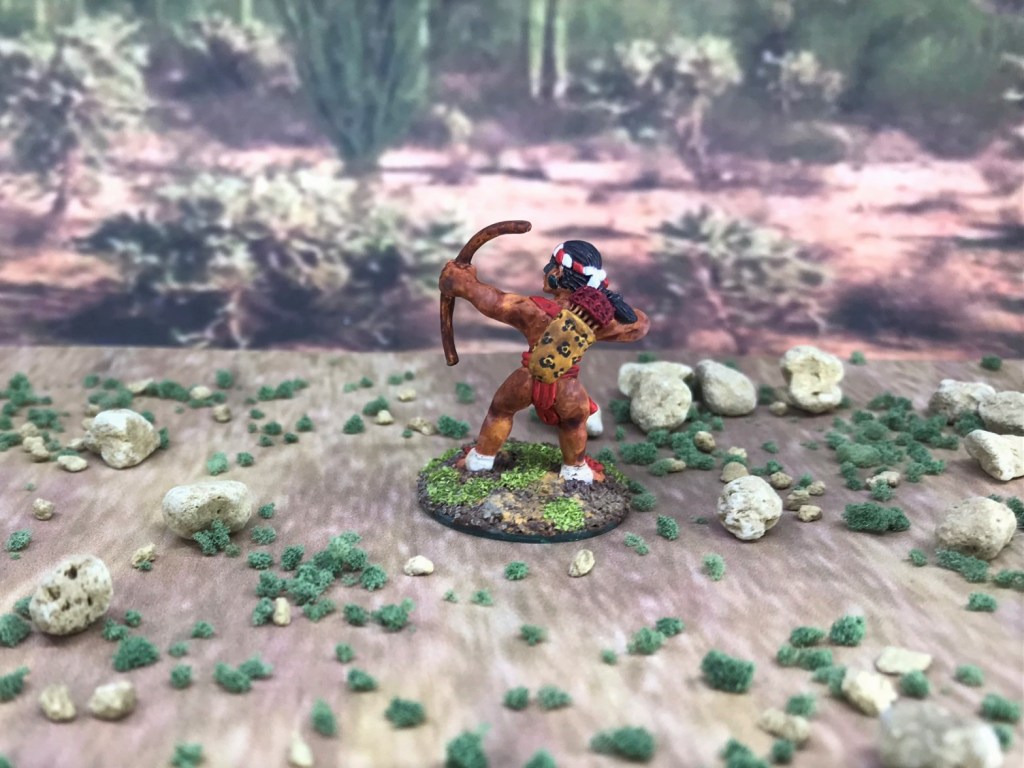
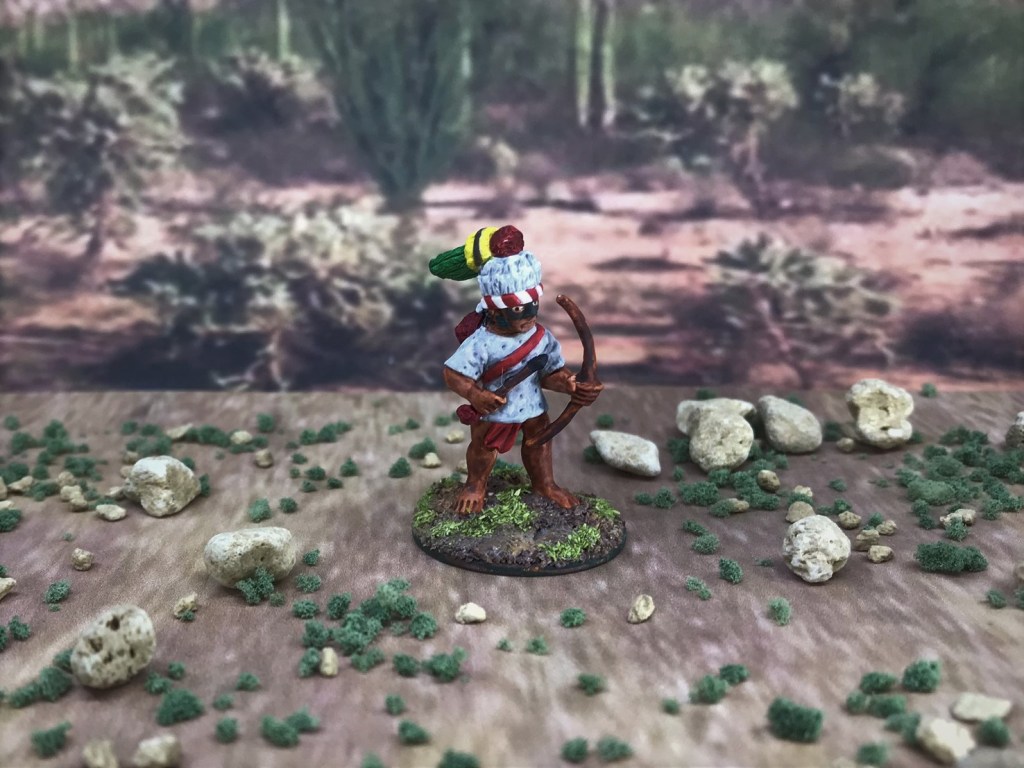
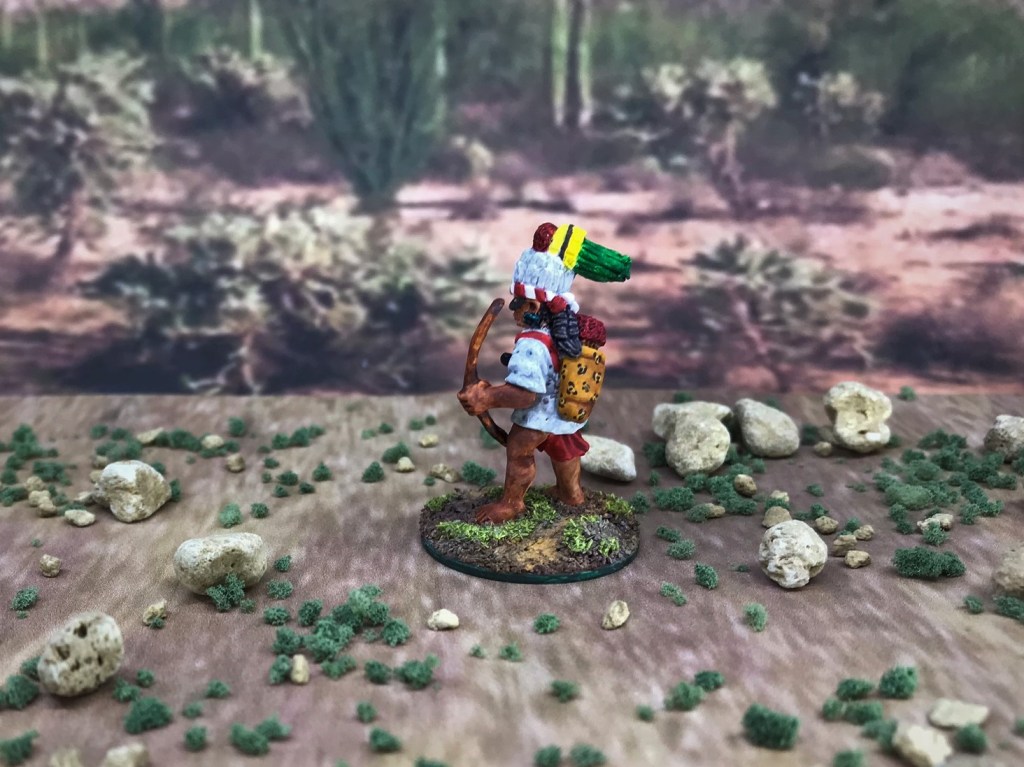
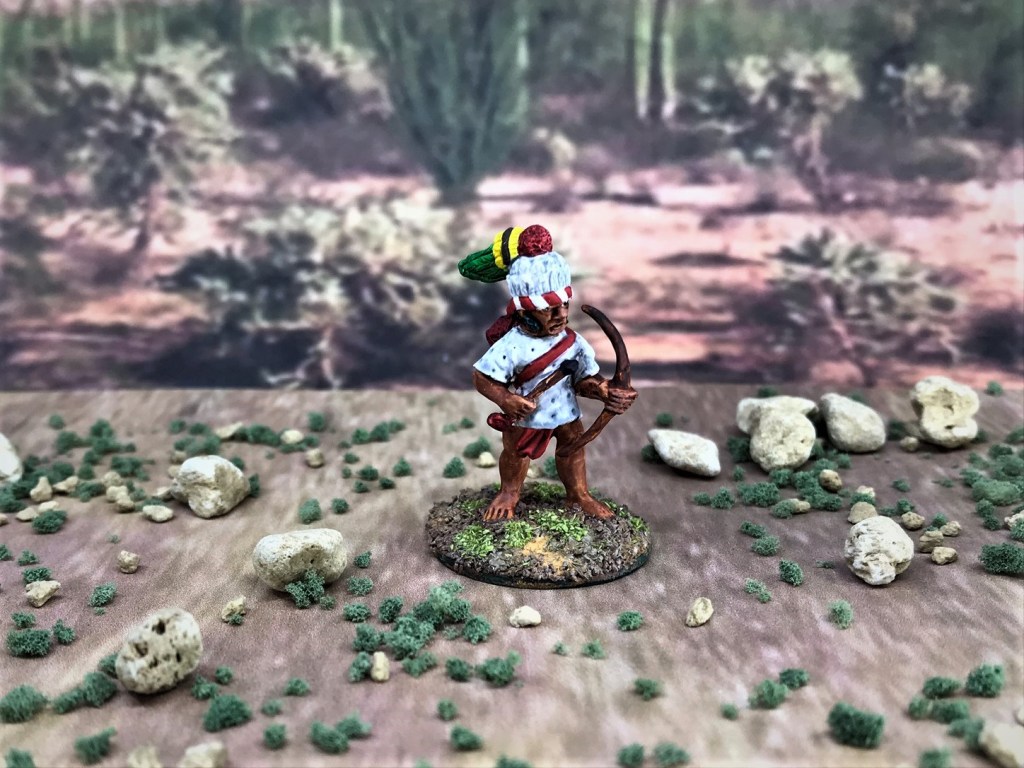
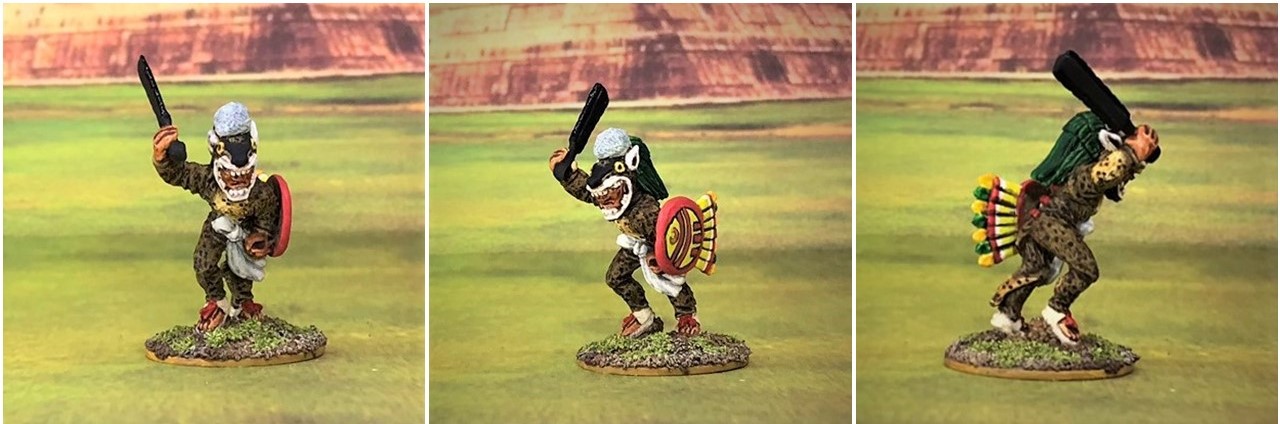
AN30 – armed with a bow, no shield, and no armor.
AN30 from the side. I really liked this figure, plus he is now the only Aztec I have with a bow. Bows were much more the choice of peoples like the Tlaxcalans (as shown here), but Aztecs did use bows at times too.AN30 showing the side with the quiver.
That’s a lot of troops – and this month (October 2020) I have painted 42 in total after adding these 18 – a record for me. And I still have 2 days left, but likely this is it for October. I am nearly through what I need to paint for the Aztecs – then I can move on to the Spanish.
And as for the video I promised, here it is below. A group in Baltimore built a macuahuitl. I found it interesting, even though they did not know the correct pronunciation of macuahuitl! There’s obviously an old gamer there as shown by the paints used. Enjoy!
That’s all for this post. I’d be interested in your thoughts on this post and the project in general. Let me know in the comments section, share this post if you’d like, and as always, thanks for looking!
Project production to date – 121 figures…and counting!
Miscellaneous details and references for those interested in that sort of thing:
Posts on games, units, and other projects for my 16th Century Spanish Conquest supplement for Feudal Patrol™ – “Civilizations Collide”
18 Aztec Novice Warriors for Feudal Patrol Walk into a Bar (this post) – 18 Novice Warriors
Please let me know your thoughts and feedback in the comments section – I really appreciate learning any impressions or thoughts in general (or specific) that you have.
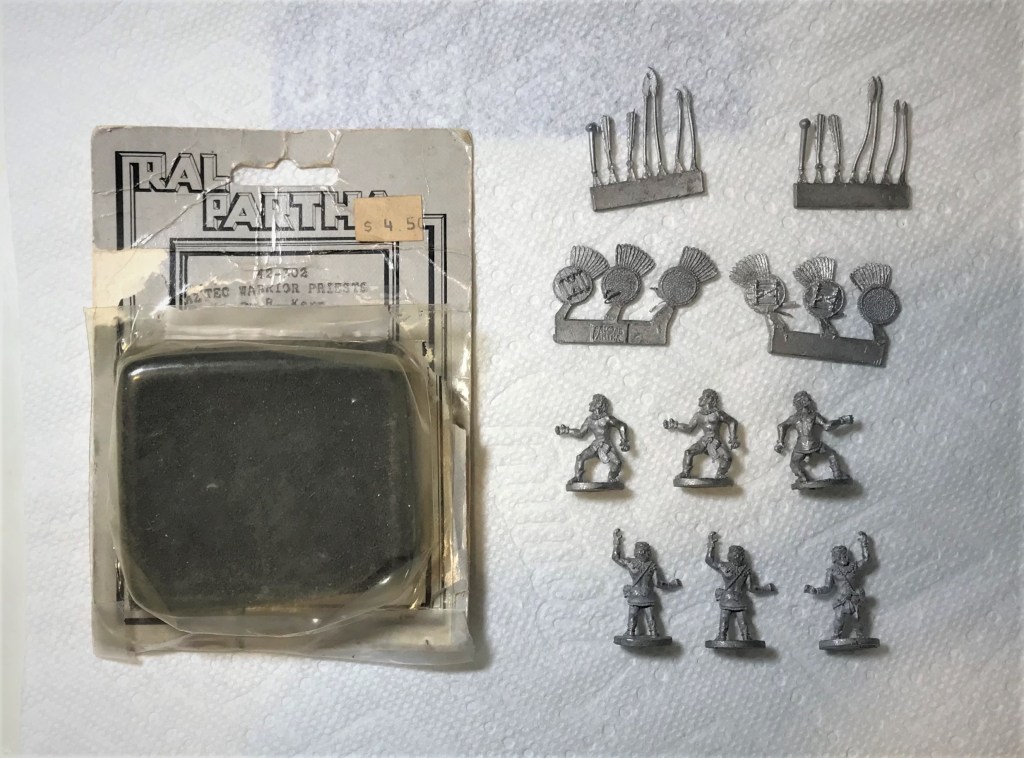
Ral Partha had a historical line of 25mm figures that were cast and sold back in the 1980’s. One of them was the “1200 A.D” line, which included Aztec figures, and one of their blister packs was “Aztec Warrior Priests”. It had 6 figures with two poses. Also supplied were 3 different weapons, and shields for each figure.
On my previous post on Tlaxcalans, I mentioned that I needed to have some warrior priests for their army. Unfortunately, I could not find a suitable 28mm version for the Tlaxcalans. I do have some Wargames Foundry Aztec Warrior Priests in the painting queue but they were not going to be right as Tlaxcalans in my view.
I did have (among several other blisters from that era) a single blister pack of 6 figures of Ral Partha 42-302. Now these were Aztecs, not Tlaxcalans, and 25mm size, not 28mm. Generally 28mm figures are 1:61-1:68 range, and 25mm figures are 1:68-1:71 range in scale. So from a gaming distance, I think that they will work. I have already incorporated other 25mm figures such as the historical Eagle Warriors from Tin Soldier and the ahistorical Ral Partha Arrow Warriors into my Aztec forces for the upcoming launch of Buck Surdu’s Feudal PatrolTMskirmish tabletop war game. (as a side note – my Civilizations Collide supplement will cover this period, and will be a free download from the website).
Getting back to filling the Tlaxcalan ranks with some Warrior Priests – I chose to paint the 42-302 figures up in Tlaxcalan colors and war paint. It allowed me to make use of the figures – which have been waiting 32 years to be painted anyways – and to not add any more to my unpainted stuff. Sometimes you just have to find a way to liberate the unpainted hordes! When they get deployed in my supplement, Warrior Priests are add-on troops that get individually attached to units. They have the ability to help keep a unit they are attached to from breaking morale, and also can cause a defeated non-Spanish enemy to be more likely to want to flee the battlefield.
Contents of Ral Partha 42-302
Ral Partha 88 on base
Ral Partha 88 on weapons/shields sprue
This blister pack was waiting 32 years to be painted
The six figures were more than enough to round out my Tlaxcalans. It’s always a challenge to go smaller than usual in painting, and these figures were no exception. One initial issue was the height, which I “leveled” by adding a 3/4″ x 1/8″ small washer on the 1″ washer base. This was to make the height disparity less noticeable. I also gave the somewhat pliable weapons a light coat of Gorilla Glue to stiffen them up a bit
Primed, mounted, and ready for painting.
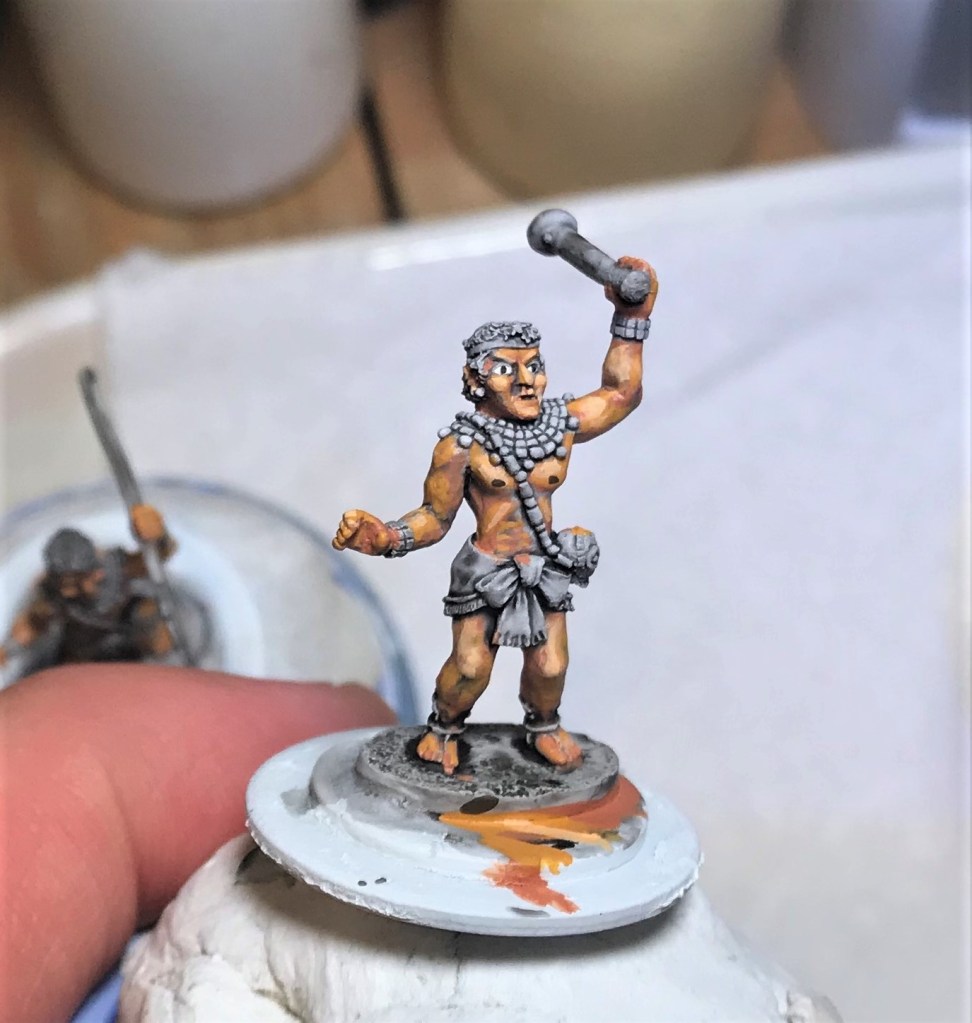
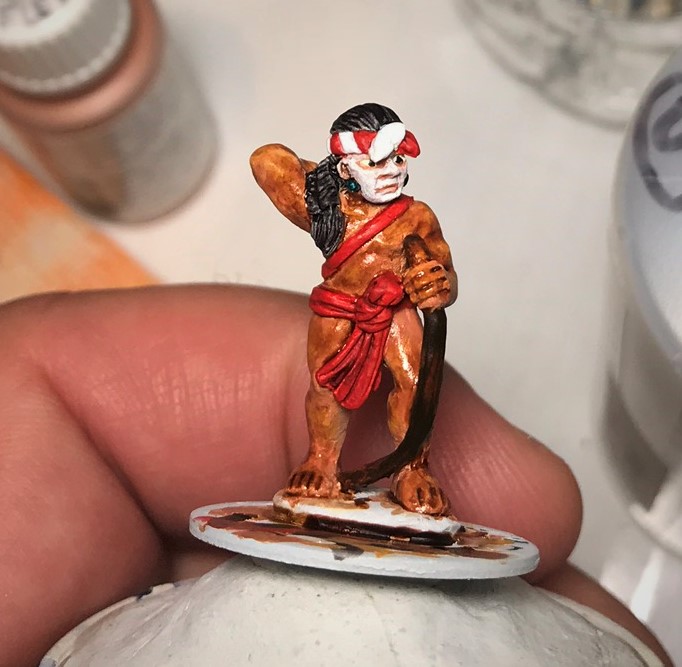
A second challenge was capturing the delicate details on the figures. Here, I decided to steal an idea I have seen on Chris Palmer’s blog on the H.A.W.K.’s combined blog site – that is to prime figures white and use a dark wash over that to help with details. I think it helped – see the examples of WIP below.
The wash showed details that I could better shade and highlight
This worked well under the contrast paint.
Here is a second example:
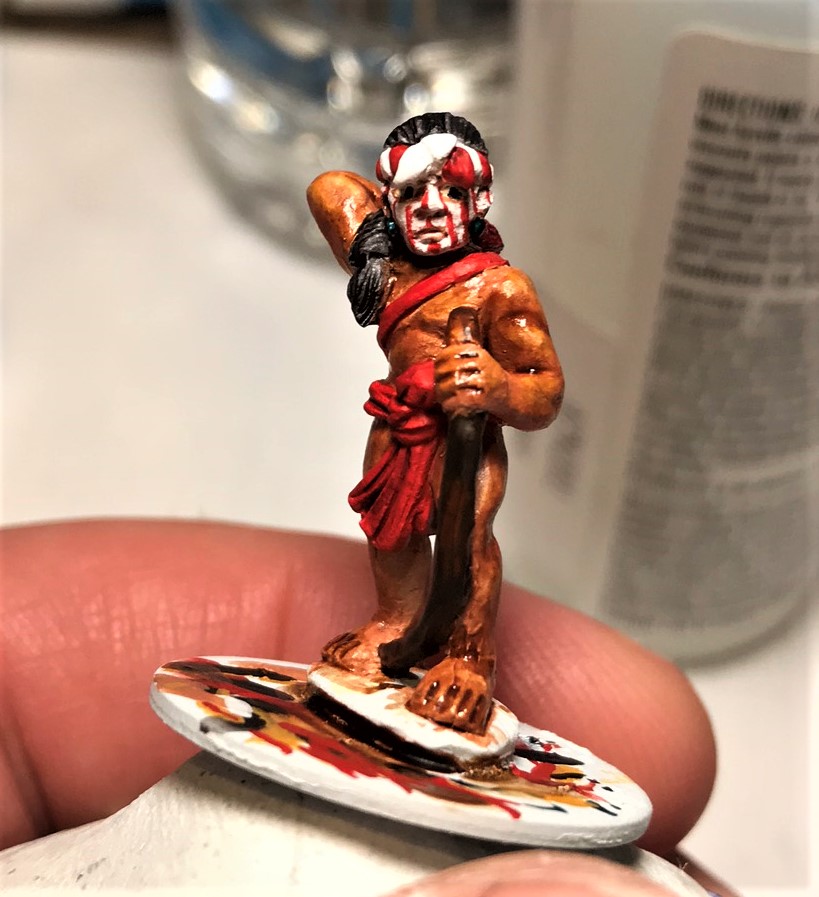
The Tlaxcalans favored red loincloths and headbands – so those were easy to add. The war paint design mix that I used was similar to my previous group – a red-striped over white design or a black mask (or none at all). As for shield, I perused Steven’s Balagan and my Osprey books for inspiration (while modifying the colors a bit).
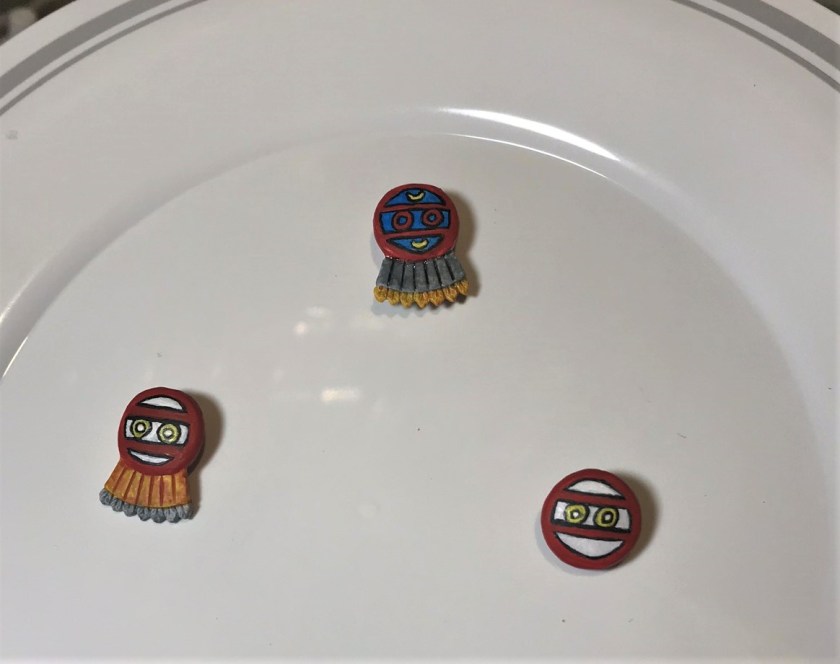
The shields as completed – I used different contrast paints for the feathers and denoted on the plate (because I might forget when I went to paint the other sides!).
Three of the models had a lovely little (ok, tiny) engraved skull at their waists on a bone necklace. I was unaware of this engraved skull aspect of Mesoamerican “art”. You can see a modern interpretive example from Amazon here and shown below:
Maybe not a Mother’s Day present…
I tried out my new Army Painter drybrush (the smallest one) and was very happy how well it performed, especially on the skulls. The bristles are round and it is just the right stiffness. Here is the link and the photo below if you are interested:
I bought this set and liked them.
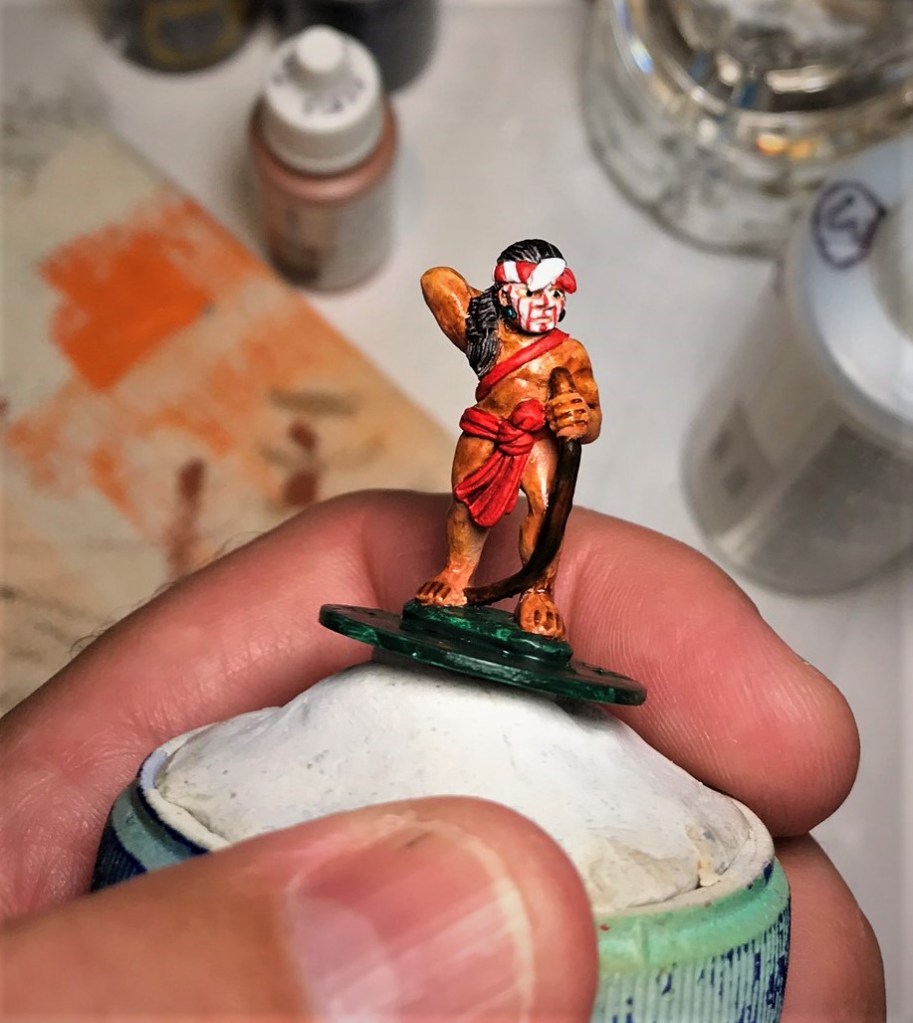
Back to painting the models, my goal was to get a nice blending on the flesh before varnishing the figures. They do end up shiny from the Army Painter Flesh Wash, but with matte varnish the shine goes completely away.
Before varnishing – a bit shiny. You can see the extra washer here too.
Once I added the extra washer, you could see that the elevation on the base could pose a flocking issue – such that it would look “rounded” under the flocking. To deal with this, I glued some very small pieces of modeling talus on the washers to more or less camouflage the underlying round shapes. I would leave some of that exposed as well once flocked.
A model with the added talus pieces.
So let’s see the finished models! As usual, I gave each a number for future reference and creation of gaming aids:
Eye Candy
TWP1 – armed with a tepoztopilli (obsidian-edged thrusting spear), and no war paint. Interestingly this pose of the two types in the blister was a lefty!
TWP2 – armed with a cuauhololli (round-headed club), with no war paint.
TWP3 – armed with a macuahuitl (obsidian-edged club/sword), again no war paint.
TWP4 – armed with a tepoztopilli (obsidian-edged thrusting spear), and the red-stripes-over-white war paint. This pose of the two types in the blister was right-handed!
TWP5 – armed with a cuauhololli (round-headed club), wearing the black mask war paint.
TWP6 – armed with a macuahuitl (obsidian-edged club/sword), and the red-stripes-over-white war paint.
I think that they can safely share the same gaming tabletop!
Here are the three left-handed figures together.Here are the three right-handed figures together.All of Ral Partha 42-302.
This project also allowed me to help with one of my favorite websites, the Lost Minis Wiki, which is a fantastic resource for OOP stuff, especially from the 1970’s and 1980’s. Here is the entry photo for this blister.
So, my Tlaxcalan forces are done – I have now 32 figures for their army. When added to the 71 Aztecs that I have done, that brings me to over 100!
All of my Tlaxcalan troops.
Thanks for taking a look – below you’ll find my updated details list for the overall project and this particular one (paints, etc. used).
Miscellaneous details and references for those interested:
Posts on games, units, and other projects for my 16th Century Spanish Conquest supplement for Feudal Patrol™ – “Civilizations Collide”
Total figures to date for this project: 103 figures: 71 Aztecs, 32 Tlaxcalans
PAINTS, INKS, GLAZES, SHADES, WASHES, PIGMENTS, FLOCKING, GLUES AND MORE THAT I USED ON THESE TLAXCALAN WARRIOR PRIESTS:
Gorilla Glue
1/8″ x 1″ Everbilt Fender Washers
1/8″ x 3/4″ Everbilt Fender Washers
Plastic plates
Poster tack
Vallejo “Surface Primer – White Primer”
Vallejo “Flow Improver”
Vallejo “Airbrush Thinner”
Testors “Universal Acrylic Thinner”
Citadel “Nuln Oil” (shade)
Vallejo Model Air “Weiss” (off-white)
Vallejo Game Air “Dead White”
Vallejo Game Air “Black”
Army Painter “Tanned Flesh”
Vallejo Game Color “Bronze Fleshtone”
Vallejo Model Color “Sunny Skin Tone”
Citadel “Contrast Paint – Darkoath Flesh”
Battlefront “Chocolate Brown”
Army Painter “Flesh Wash” (wash)
Citadel Air “Evil Sunz Scarlet”
Citadel “Contrast Paint – Wyldwood”
Battlefront “Sicily Yellow”
Citadel “Contrast Paint – Black Templar”
Vallejo Model Air “Tire Black”
Citadel “Contrast Paint – Terradon Turquoise”
Citadel “Contrast Paint – Skeleton Horde”
Citadel “Contrast Paint – Contrast Medium”
Battlefront “Wool Brown”
Army Painter “Red Tone” (shade)
Citadel “Agrax Earthshade” (shade)
Vallejo Model Color “Glossy Black”
Citadel “Contrast Paint – Blood Angels Red”
Citadel “Contrast Paint – Iyanden Yellow”
Citadel “Contrast Paint – Apothecary White”
Citadel “Contrast Paint – Warp Lightning”
Citadel “Contrast Paint – Aethermatic Blue”
Citadel “Contrast Paint – Akhelian Green”
Citadel “Contrast Paint – Ultramarines Blue”
Citadel “Contrast Paint – Leviadon Blue”
Secret Weapon Washes “Sunshine” (ink)
Citadel “Ushabti Bone”
Citadel “Seraphim Sepia” (shade)
Vallejo Model Color “Dark Blue”
Vallejo Model Air “Moon Yellow”
Vallejo Game Air “Satin Varnish”
Vallejo Mecha Color “Turquoise”
Citadel “Caliban Green”
E6000 Epoxy
4Ground small talus pieces
Elmer’s PVA Glue
Army Painter “Brown Battlefields” (flocking)
Vallejo “Dark Yellow Ochre” (pigment)
Vallejo “Burnt Umber” (pigment)
Citadel “Steel Legion Drab”
Citadel “Tallarn Sand”
Citadel “Karak Stone”
Americana “Desert Sand”
Vallejo Mecha Varnish “Matt Varnish”
Army Painter “Grass Green” (flocking)
Please let me know your thoughts and feedback in the comments section – I really appreciate learning any impressions or thoughts in general (or specific) that you have.
The Tlaxcalans were a Nahua people that were at a constant state of war with the Aztecs of the Triple Alliance for decades. The Aztecs never fully conquered the Tlaxcalans, as they found them to be a far more useful source of slave labor, sacrificial victims, and resources than as a vassal state. The Aztecs were able to take these captives and supplies by allowing the Tlaxcalans to merely exist – and by challenging them repeatedly to a series of “Flower Wars”. Flower Wars were basically ritualized arranged gang-like “throw downs” where usually the Aztecs would emerge victorious, as they were a larger and far more powerful empire based in Tenochtitlan. Certainly, with this level of abuse, there was no love lost between the Tlaxcalans and the Aztecs.
Into this theater of conflict came a new revolutionary factor in the early 16th century. Hernan Cortes and his Conquistadores arrived in Mesoamerica in February of 1519. In September of that year, he encountered the Tlaxcalans and briefly fought them – as the Tlaxcalans were unaware of who the Conquistadores were or from whence they came. Both sides came to peace terms relatively quickly after some tough fighting – during which mutual respect was gained for their respective courage and capabilities in battle. The Tlaxcalans informed Cortes of the vast riches (especially in terms of gold) of Tenochtitlan and their emperor, Montezuma II. The Tlaxcalans happily joined the Spanish on their march to Tenochtitlan and indeed were staunch allies for them. Indeed, without the Tlaxcalans who formed the bulk of Cortes’ forces, the Spanish would never have been able to defeat the Aztecs during their conquest of New Spain.
I have been working on building Aztec, Tlaxcalan, and Spanish forces for the upcoming launch of my rules supplement for Buck Surdu’s Feudal PatrolTMskirmish tabletop war game. My supplement will be a free download from the website and will be called Civilizations Collide. The supplement will cover many aspects of the Spanish Conquest to include the Aztecs, the Inca, the Maya, and more. Back in August, I began to work on the Tlaxcalans. I was working on my Tlaxcalan Archers, (which you can read about here), and quickly realized that the level of detail that I wanted to achieve on these figures could not be achieved if I was to work on too many at a time. Therefore, I broke up the project into two phases. The first phase was the completion of the 8 Tlaxcalan Archers. For the second phase – which this post concerns – I had 18 figures, all from Outpost Wargames Services via their US distributor, Badger Games. Eight were from TX2 “Tlaxcalan Novice Warriors in Padded Vest”; eight were from TX3b “Elite Warrior in Feather Costume”; and two were from TXC01 “Tlaxcalan Captain and Conch Blower. These are all 28mm in scale and metal. Still, this two-phase approach took me a lot longer than I had expected to take to finish these – primarily as there were (as you will see) multiple shields, weapons, and backbanners to paint and assemble. As source materials I used both multiple Osprey books and especially the two blog posts from Steven’s Balagan blog on Tlaxcalan painting and especiallyhis post on shield painting and design. These are fantastic resources and I recommend them highly for anyone interested in the period in addition to the Osprey books. I also recommend Badger Games as a source for these figures as well as those they sell from other manufacturers.
I will generally show some WIP stuff and discuss some of the aspects and challenges of the project and how I dealt with them. I’ll end with a recap of where the overall project progress is now, and what paints and stuff I used here. I did not take as many WIP shots as I normally do because while I have tackled more figures at a time previously, this project phase kept me very busy (and as this was during golf season, that took some hobby time too!). If WIP shots are not for you, just scroll down to the “Eye Candy” section to see how they all came out. With all of the photos – just click on them if you want a bigger view.
TX2 “Tlaxcalan Novice Warriors in Padded Vest” WIP Shots
The TX2 baggie of Novice Warriors as received
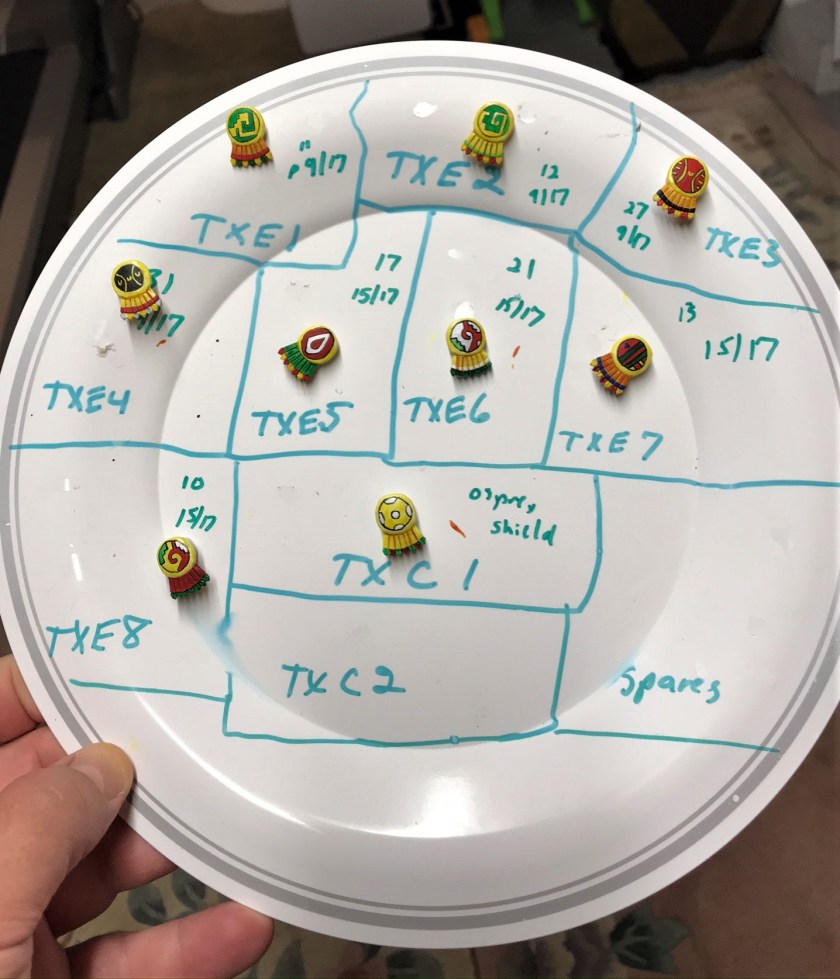
The painting plan for the Tlaxcalan Novices. I did find that I needed to change the weapons selection after painting as some of them did not fit quite well into the figures’ hands or did not look as good. I chose specific shield designs from Steven’s Balagan and the Osprey books. The numbers you see are applied to the base bottoms and help with my ability to make game menus and aids later on.
Here you see the novices mounted on 1″ steel washers on specimen jars with poster tack for ease of painting. I also labeled them (and all the figures) with their numbers, their future weapons, and their planned shields. The Tlaxcalan Archers behind them were completed in phase 1 (a previous post described them.
I chose to try to paint all of the separate components (figures, shields, weapons) before assembly. I did find that I had a bit of difficulty getting certain the weapons to fit easily to some models so I ended up switching between issuing a macuahuitl (broadsword/club-type with obsidian edges) or a tepoztopilli (obsidian-edged thrusting spear) for a few. I should have tried to widen the figures’ hands a bit more than I did. Certainly, I think using Citadel “Apothecary White” contrast paint on the white ichcahuipilli (quilted cotton vest armor) was a big win.
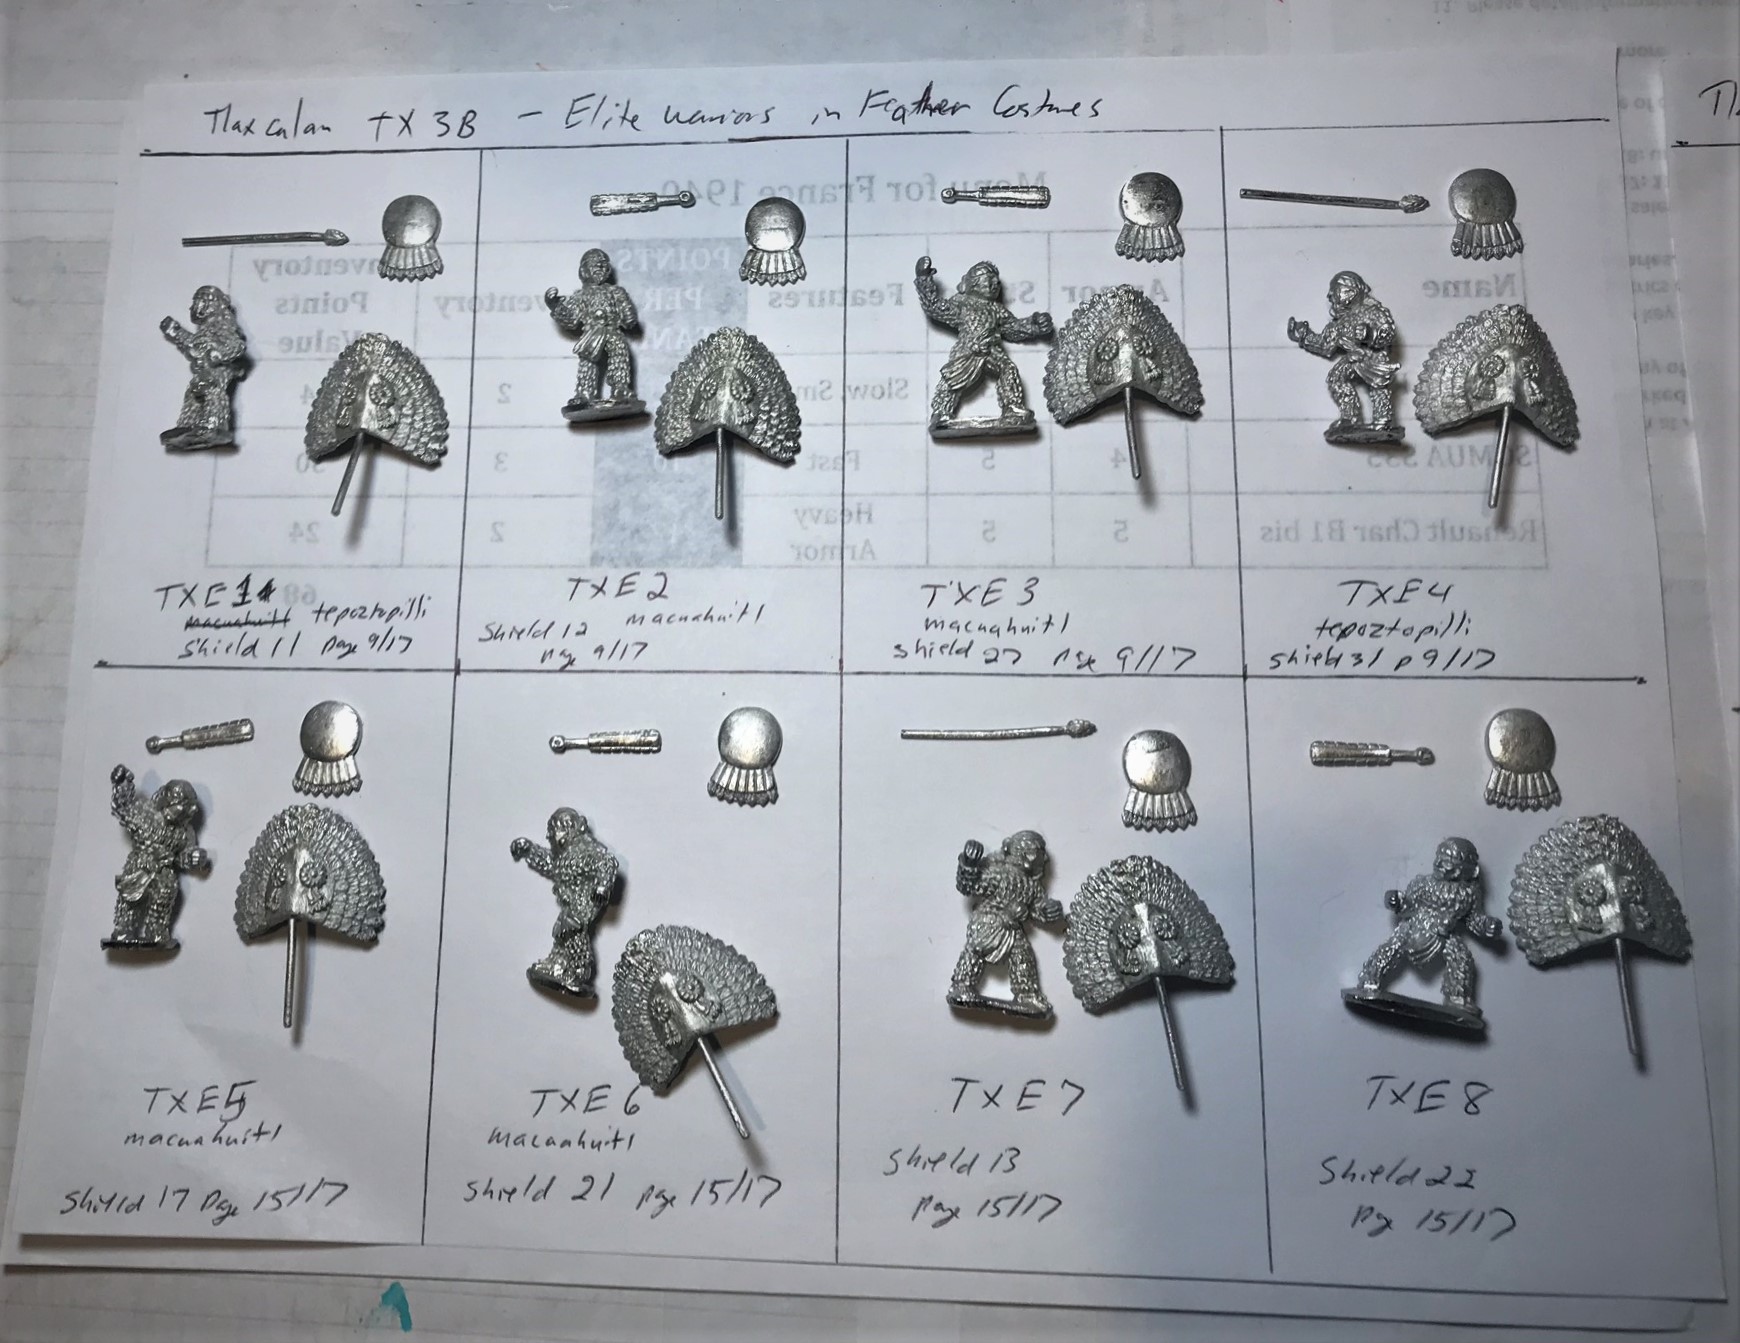
TX3b “Elite Warrior in Feather Costume” WIP Shots
The TX3b as received.
Tx3b painting and assembly plan
I used a plastic plate for getting to both sides of the shields and macuahuitls.
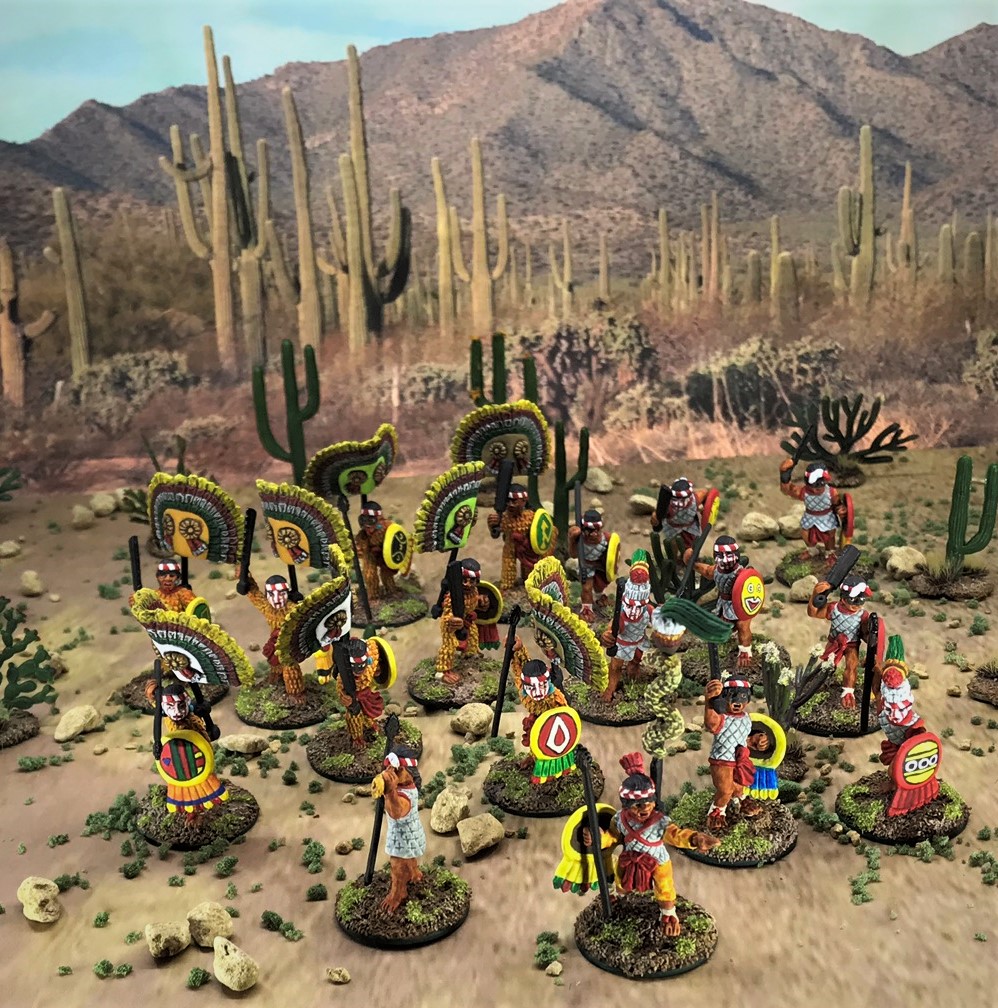
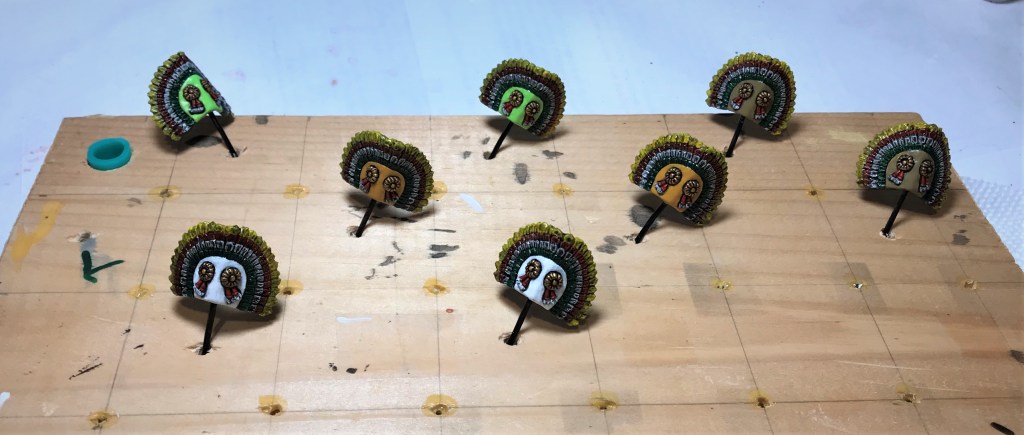
The Tlaxcalan Elites would be a bigger challenge – primarily because in addition to the figures, weapons, and shields, each had a huge (and relatively heavy model-wise) feather backbanner. I ended up using a wooden jig to hold them during the project in between painting colors. According to my research, there were other types of backbanners – and even this type (TX3b) was supposed to have the white egret backbanner as an option. All I had were 8 of the same type of backbanners- so I diverged a bit with color selections on the center section to aid with tabletop identification. I also decided to paint them a bit differently. I used Citadel “Nuln Oil” as a wash immediately after priming white. This allowed me to get better shading – especially with subsequent uses of contrast paints on the feathers. After I painted the backbanners, I applied a satin varnish to preserve the brighter colors as I used a final matte varnish at the end of the assembly. Clearly, between the costume and the feathered backbanner, these elites had a lot of “battle plumage”! Historically, fighting in melee with the backbanner on must have been tough. I do wish I had had one of the egret backbanners, but not enough to buy any more…yet.
My painting holder/jig for the backbanners – this is early in the project.
Here the backbanners are done and ready to be assembled onto the figures.
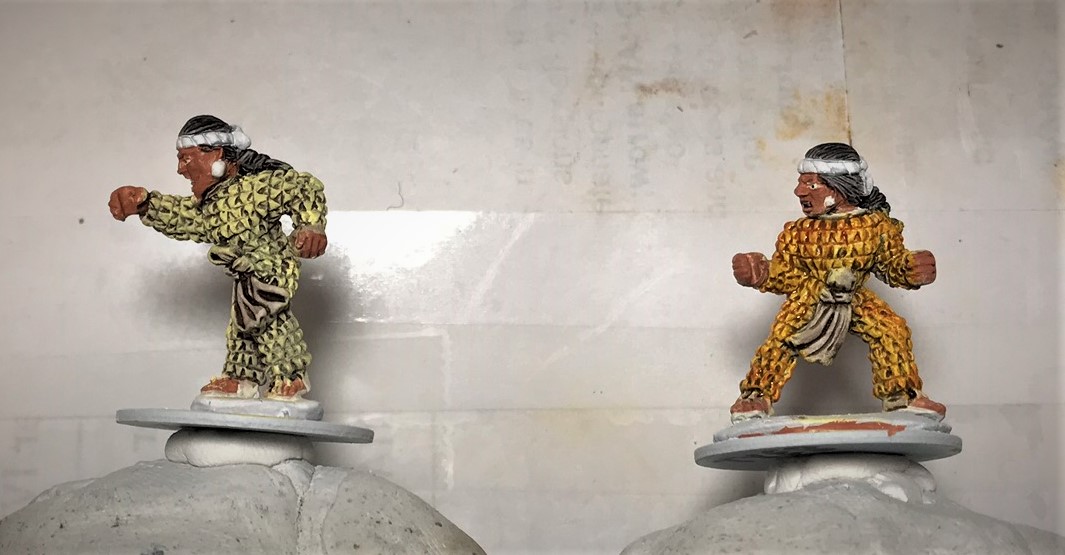
I did paint the elite figures a bit differently as well. I find that dry brushing over contrast paints leads to too much abrasion and wear on the contrast-painted areas. These Tlaxcalan elites have a nice feathered costume, and I wanted to bring that aspect out. So, I painted the figures’ flesh first, then similarly applied Citadel “Nuln Oil” as a wash. Then I dry brushed the costume with Citadel “Hexos Palesun”, followed by an wash-like application of Citadel “Iyanden Yellow” contrast paint thinned with Citadel “Contrast Medium”. My only change going forward would be to paint the flesh base after as of course I had to cover up some errant dry brushing.
Left is an elite figure after dry brushing but before adding the contrast paint. The right one has had the contrast paint added as I described above.
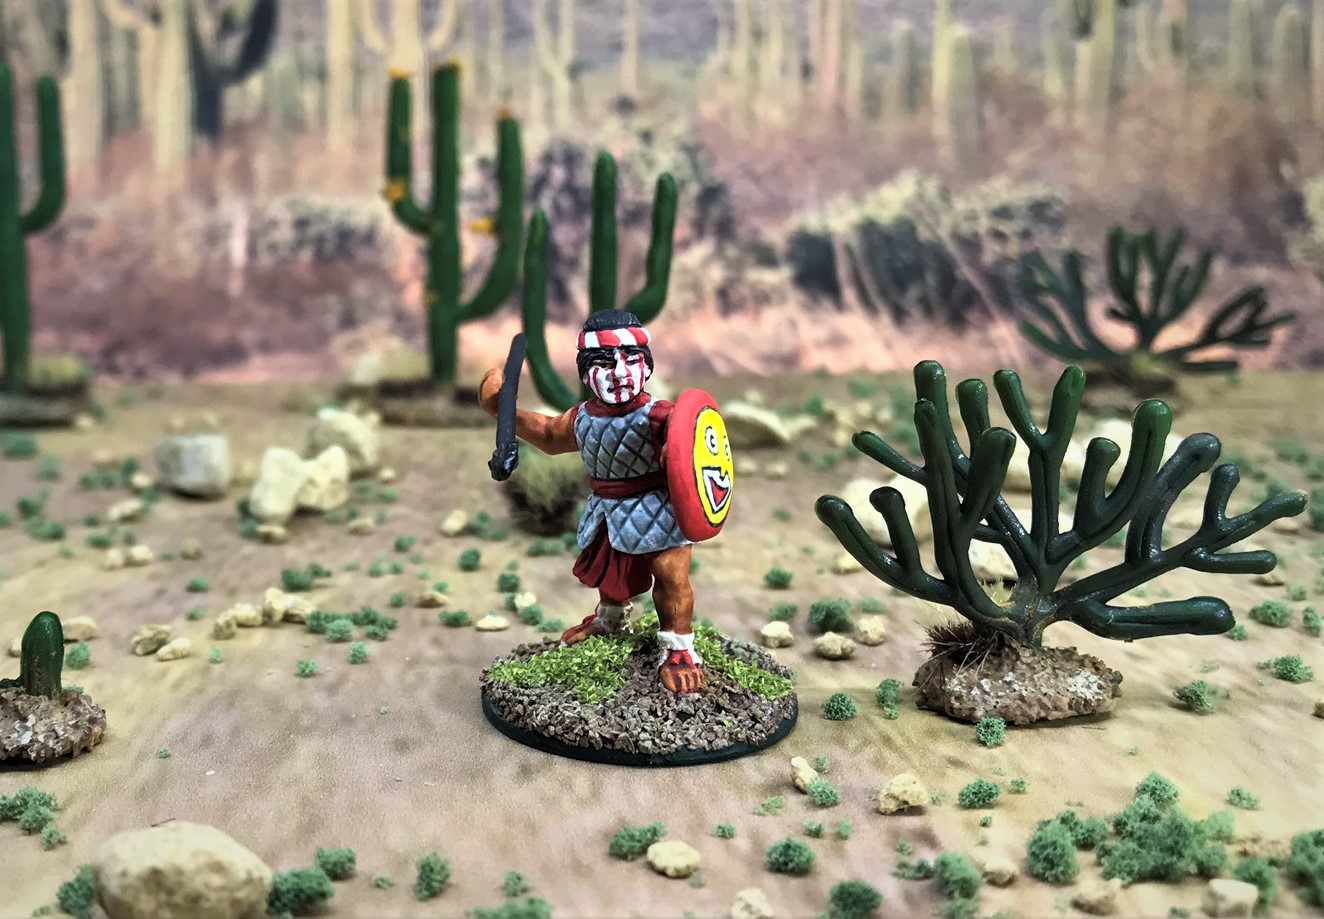
A finished Tlaxcalan Elite figure – more to see in “Eye Candy” below.
TXC01 – “Tlaxcalan Captain with Conch Blower”
Finally, I wanted to add some leadership for the group. For painting, I followed a similar path as described above for the elites and the novices.
TXC1 as received. I ended up giving both a tepoztopilli (spear).Gotta have a plan!Fast forward – and the Captain completed. I do like the way he came out – and more eye candy below.
Notes on Painting Shields, Assembly, and Basing
As discussed, this project took a lot of time on details. Each figure had its own distinctive shield design. After free-handing these, I used a satin varnish similar what I did on the backbanners.
To me, this is small!
My fave shield design – though maybe mine is too happy?
Steve’s Balagan was invaluable.
The Elite and Command Group’s completed shields
The shields were affixed with a “sandwich” of E6000 epoxy and Gorilla Glue. The weapons were attached with Gorilla Glue. Assembling the backbanners was trickier. They weighed a lot, and I wanted to make sure that they would be set up for both tabletop survival and looking good. I used Gorilla Glue on them, and then finished off the mount with green stuff. This necessitated yet another wait for curing. I primed the green stuff black and left it black as I liked it better than the brown I originally planned. Better yet, it is solid, and will support the figure as it is picked up!
Figures painted – need weapons, shields, backbanners, and bases flocked and finished!
The top mount is done with green stuff and the bottom is mid-application.
After the green stuff has been sculpted.
As for basing, I probably do too much, but I think bases are so important. This time I did the bases before affixing any weapons, shields, or backbanners. I used Army Painter Brown Battlefields with PVA (Elmer’s) glue. I then add two kinds of Vallejo pigments with Vallejo airbrush thinner. Once that is dry (again a wait) I drybrush the base with four different shades of tan. After varnish, the last step is to add some static grass with PVA, and gently vacuum that mix (once a bit tacky) so that the grass gets a little frilly.
The absolute last thing I do after final matte varnish is added and static grass is to highlight the obsidian-edged weapons with some Vallejo Model Color “Glossy Black”.
DONE!!! Now let’s do some eye candy!
Eye Candy
For shots here, I got a new background from previous posts – and added some cacti that I had flocked and washed. Hope it adds to the shots!
Tlaxcalan Novices
TXN1 – has the red-striped-over-white war paint and is armed with a macuahuitl.
TXN2 – has the red-striped-over-white war paint and is armed with a tepoztopilli. Also has the “thick-lipped” shield.
TXN3 – has the black mask war paint and is armed with a macuahuitl.
TXN4 – has the black mask war paint and is armed with a macuahuitl.
TXN5 – has the red-striped-over-white war paint and a different head cover, and is armed with a macuahuitl.
TXN6 – has the red-striped-over-white war paint and a different head cover, and is armed with a tepoztopilli.
TXN7 – has the black mask war paint and is armed with a macuahuitl.
TXN8 – has no war paint and is armed with a tepoztopilli.
Tlaxcalan Elite Warriors
TXE1 – has no war paint and is armed with a macuahuitl. The center of his backbanner is tan.
TXE2 – has no war paint and is armed with a macuahuitl. The center of his backbanner is yellowish-tan.
TXE3 – has the red-striped-over-white war paint and is armed with a macuahuitl. The center of his backbanner is yellowish-tan.
TXE4 – has the black mask war paint and is armed with a tepoztopilli. The center of his backbanner is light green.
TXE5 – has the red-striped-over-white war paint and is armed with a tepoztopilli. The center of his backbanner is tan.
TXE6 – has the black mask war paint and is armed with a macuahuitl. The center of his backbanner is bright white.
TXE7 – has the red-striped-over-white war paint and is armed with a tepoztopilli. The center of his backbanner is bright white.
TXE8 – has no war paint and is armed with a macuahuitl. The center of his backbanner is light green.
Tlaxcalan Command Group
TXC1 – Tlaxcalan Captain, with no war paint, armed with a tepoztopilli. His backbanner has a serpent on it.
TXC2 – Conch Blower, with no war paint, armed with a tepoztopilli.
Tlaxcalan Command Group
Next up I need to add some warrior priests for the Tlaxcalans – and I have some old Ral Partha ones that will do the trick – I hope – stay tuned!
Miscellaneous details and references for those interested:
Posts on Games and Units for my 16th Century Spanish Conquest Supplement for Feudal Patrol™ – “Civilizations Collide”
Total figures to date for this project: 97 figures: 71 Aztecs, 26 Tlaxcalans
PAINTS, INKS, GLAZES, SHADES, WASHES, PIGMENTS, FLOCKING, GLUES AND MORE THAT I USED ON THESE TLAXCALAN NOVICE AND ELITE WARRIORS AND THE COMMAND GROUP:
Gorilla Glue
1/8″ x 1″ Everbilt Fender Washers
Plastic plates
Poster tack
Vallejo “Surface Primer – White Primer”
Vallejo “Flow Improver”
Vallejo “Airbrush Thinner”
Testors “Universal Acrylic Thinner”
Citadel “Nuln Oil” (shade)
Battlefront “Wool Brown”
Citadel “Contrast Paint – Wyldwood”
Citadel “Contrast Paint – Contrast Medium”
Army Painter “Tanned Flesh”
Vallejo Game Air “Black”
Citadel “Agrax Earthshade” (shade)
Citadel “Contrast Paint – Basilicanum Grey”
Citadel “Contrast Paint – Volupus Pink”
Vallejo Game Air “Dead White”
Citadel Air “Evil Sunz Scarlet”
Vallejo Model Air “Weiss” (off-white)
Citadel “Averland Sunset”
Vallejo Game Color “Bronze Fleshtone”
Vallejo Model Color “Sunny Skin Tone”
Citadel “Contrast Paint – Darkoath Flesh”
Army Painter “Flesh Wash” (wash)
Army Painter “Red Tone” (shade)
Citadel “Caliban Green”
Vallejo Model Air “Tire Black”
Citadel “Contrast Paint – Apothecary White”
Citadel “Contrast Paint – Blood Angels Red”
Vallejo Model Air “Moon Yellow”
Citadel “Contrast Paint – Warp Lightning”
Battlefront “Chocolate Brown”
Citadel “Biel-Tan Green” (shade)
Citadel “Seraphim Sepia” (shade)
Citadel “Contrast Paint – Iyanden Yellow”
Citadel “Hexos Palesun”
Vallejo Game Color “Livery Green”
Citadel “Auric Armour Gold”
Citadel “Nuln Oil GLOSS” (shade)
Citadel “Contrast Paint – Terradon Turquoise”
Citadel “Contrast Paint – Snakebite Leather”
Citadel “Hexwraith Flame”
P3 “Sunshine” (ink)
Secret Weapon Washes “Blue” (wash)
Vallejo Model Color “Dark Blue”
Citadel “Contrast Paint – Talassar Blue”
Vallejo Game Air “Escorpena Green”
Vallejo Model Air “Cockpit Emerald Green ‘Faded’”
E6000 Epoxy
Elmer’s PVA Glue
Army Painter “Brown Battlefields” (flocking)
Vallejo “Dark Yellow Ochre” (pigment)
Vallejo “Burnt Umber” (pigment)
Citadel “Steel Legion Drab”
Citadel “Tallarn Sand”
Citadel “Karak Stone”
Americana “Desert Sand”
Green Stuff
Reaper MSP “Black Primer”
Vallejo Mecha Varnish “Matt Varnish”
Vallejo Model Color “Glossy Black”
Army Painter “Grass Green” (flocking)
Thanks for looking!!! Please let me know your thoughts and feedback in the comments section – I really appreciate hearing what you think.
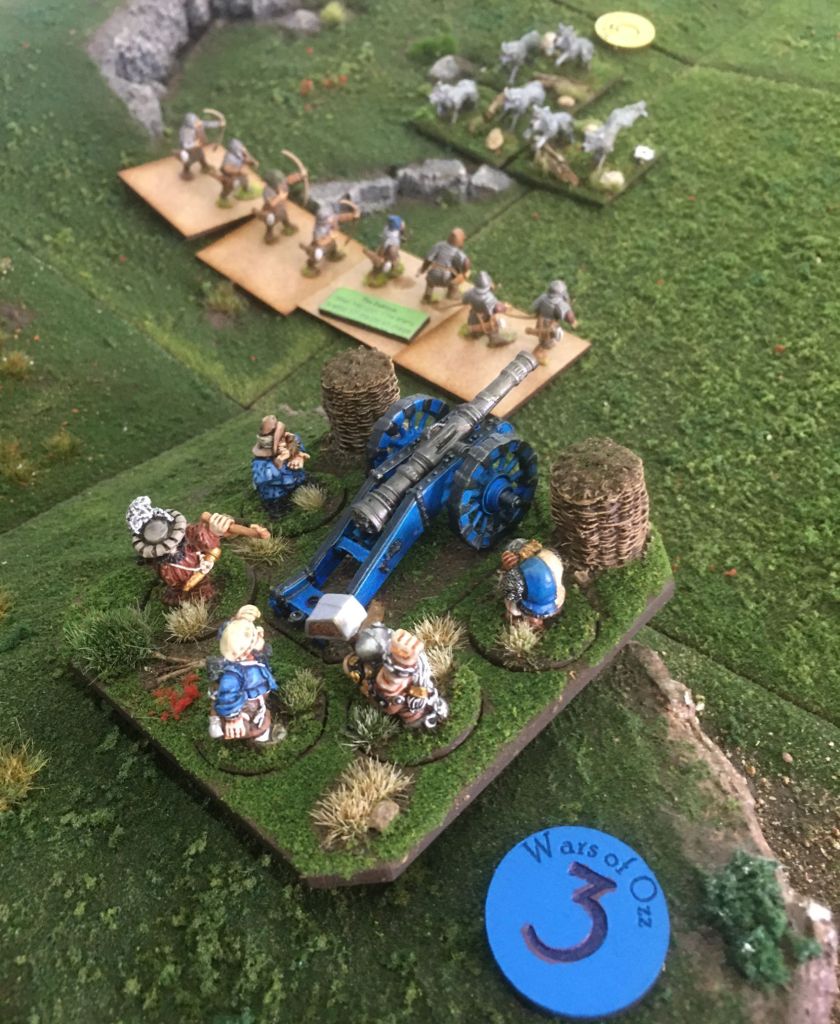
Last Saturday, we ran a playtest of the Wars of Orcs and Dwarves (WOOD) using Zoom. Chris Abbey from Sally 4th in the UK ran the game at his home – and his blog post on the game link is below. WOOD is an in-progress adaptation of the Wars of Ozz rules for fantasy battles.
It was a fun game and I (in Massachusetts) played on the Orcs and Goblins side with Greg Priebe in Maryland and Jim in North Carolina. We were fighting Dwarves led by Buck Surdu (in Florida) and Chris Palmer in Maryland. We purchased our troops unbeknownst to each other, and chose our deployment area first as we bought fewer points worth of troops. This also gave us a recon advantage. I was on the open end of the battlefield and Greg/Jim were on the wooded area. I threw my forces headlong (and somewhat piecemeal and unsupported) at Buck’s forces with the goal of tying him down – and allowing my allies to close to the road. While I took heavy casualties, the strategy worked well enough to gain a minor victory and for our orcs, great orcs, ogres, and goblins to feast on dwarves! As my wolves had routed, there was more for them anyways!
I think the rules system (Wars of Ozz) is quite good, and the new WOOD adaptation will allow me to use many of my old fantasy figures on the tabletop again. Plus I am really looking forward to playing Wars of Ozz! Below are a couple of Chris’ photos – his blog has more.
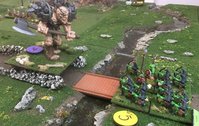
My wolves attack Buck’s dwarven arches on turn 1.
My Goblins face a Giant at the end of the game.
Here is Chris Abbey’s blog post link worth a look – check it out and let me know what you think!
The time had come for me to get some opponents painted up to oppose the Aztecs of the Triple Alliance from Tenochtitlan (now Mexico City). In this case, these opponents are the Tlaxcalans, a Nahua ethnic group that never was conquered by the Aztecs. They did briefly fight Hernan Cortez and his conquistadors before allying with them against their longtime-hated enemy, the Aztecs. They were noted as being a major part of Cortes’ forces, and for having excellent archers. In my Tlaxcalan figures, have a group of veteran archers, a group of novices, a small command group, and a group of elite warriors for games of FeudalPatrol™ using my supplement called Civilizations Collide. All will eventually be shared here. They all are 28mm scale metal models from Outpost Wargames Services acquired from Badger Games in the US.
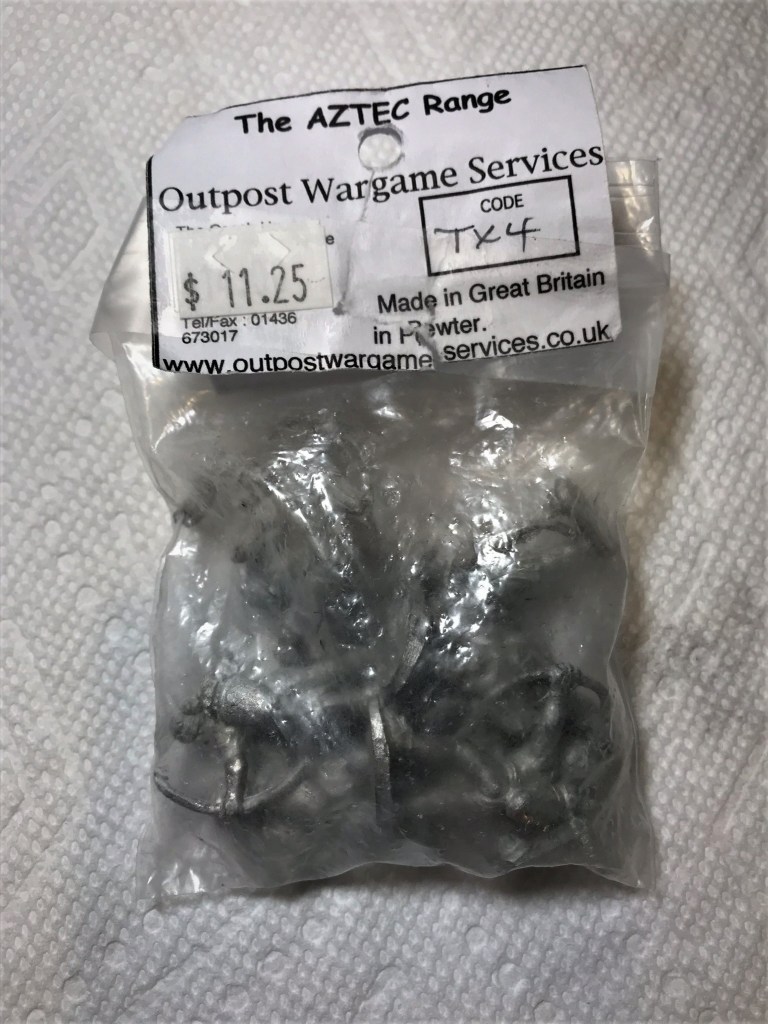
After the Zoom play test that I had described here, it was time to get some Tlaxcalans into the fray! I start her with TX4 “Tlaxcalan Archers”, an 8 figure set.
The TX4 “Tlaxcalan Archers” baggie of 8 figures as received from Badger Games.
I chose to start with these archers as they had no shields to paint (time saver) – but also because the Tlaxcalans had a couple of very interesting types of war paint on their faces. From the Osprey plate in one of my books, one style resembled a black “superhero mask” around the eyes. The other one was a series of fine red stripes on a white background. Not all Tlaxcalans had war painted faces, so I could mix in some regular tanned skin as well. Given that some of the 8 figures were similar, this would aid in tabletop differentiation as well. Lastly, painting this unit would allow me some good practice on the faces with war paints as well as the common color themes of the Tlaxcalans according to the Osprey plates (which themselves were based on the various historical codices of the period). I chose to paint 4 figures with the black mask war paint, 2 with the white and red-striped painted war paint, and 2 with no war paint at all.
It would be appropriate for me to make a few more points on paints here. While I do list all the paints that I used at the end of this post for those interested (and for me when I forget and want to know I ended up using when I have another similar future project!), I want to share a few key items.
First, I tried a new tanned flesh paint that I really liked – Army Painter “Tanned Flesh”- and it worked well. I thinned it appropriately as a base coat and used other lighter paints, contrast paints, and washes over it as shades and highlights. Second, I also want to give credit to Faust at Double Down Dice as I had not tried Citadel “Gore-Grunta Fur” for wood – as I did here for bows. I had seen his work on his blog here and was impressed enough to give it a shot. Third, I used Citadel “Averland Sunset” and Vallejo Model Air “Black” to recreate a slightly different color pattern on the quivers to represent them being made from jaguar hides. And lastly, I gave the steel washers a different color – Citadel “Caliban Green” – than the tan undercoat that I had given the washers under my Aztecs. It only shows on the rim of the bases, but I think will help with tabletop differentiation. Many of the poses are similar, and a few are the same (6 poses and 8 figures).
I assign each figure a number – which helps with the painting plan as well as for later when prepping for games. The numbers go on a spreadsheet and are also on the bases of the figures. I did drop the dash though!
Overall, I loved the figures, but painting them was a bit more challenging than I had thought. The main difficulties were around getting the flesh to where I was happy (again working with a new flesh tone), and the bright reds, black hair, and dark flesh next to bright whites – especially on the headbands. You can judge my efforts, though I did not do as many WIP shots here. You can click on all the images here for a better view.
Before warpaint…
Add white…
Add tiny stripes…
And you have the mask done!
The sequence of face painting that I used for the striped war paint.
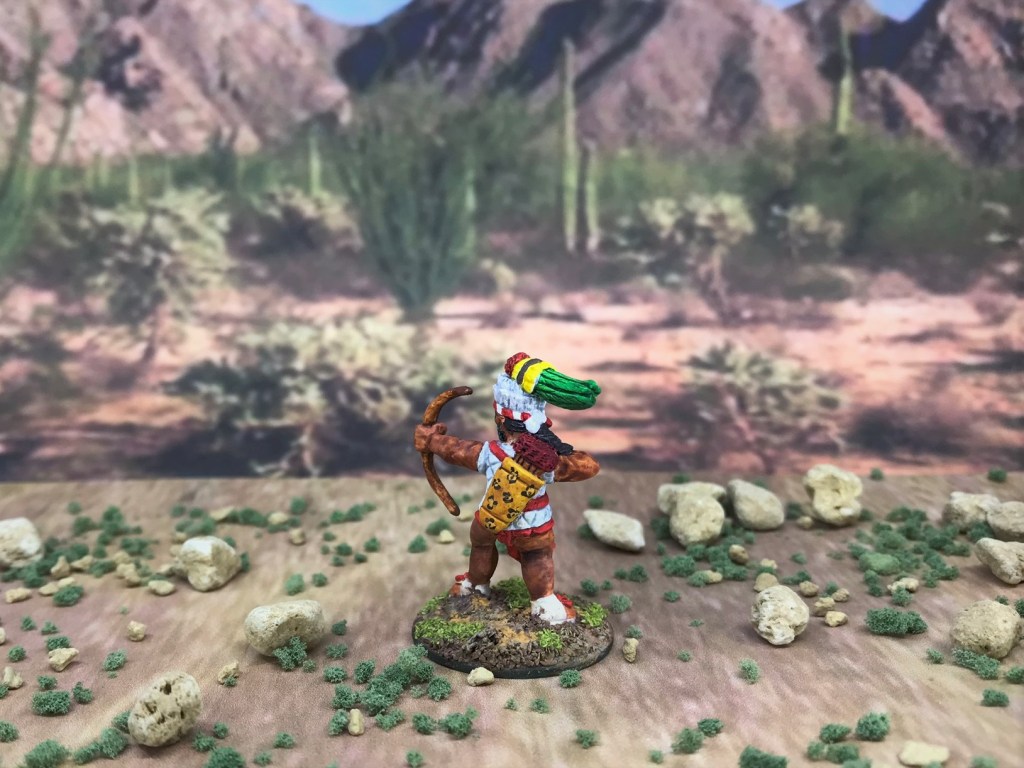
Here you see the black mask war paint and the effort on the jaguar-hide quiver. In the game, I give the Tlaxcalans a high rate of fire with their bows.
So let’s get a look at the completed models!
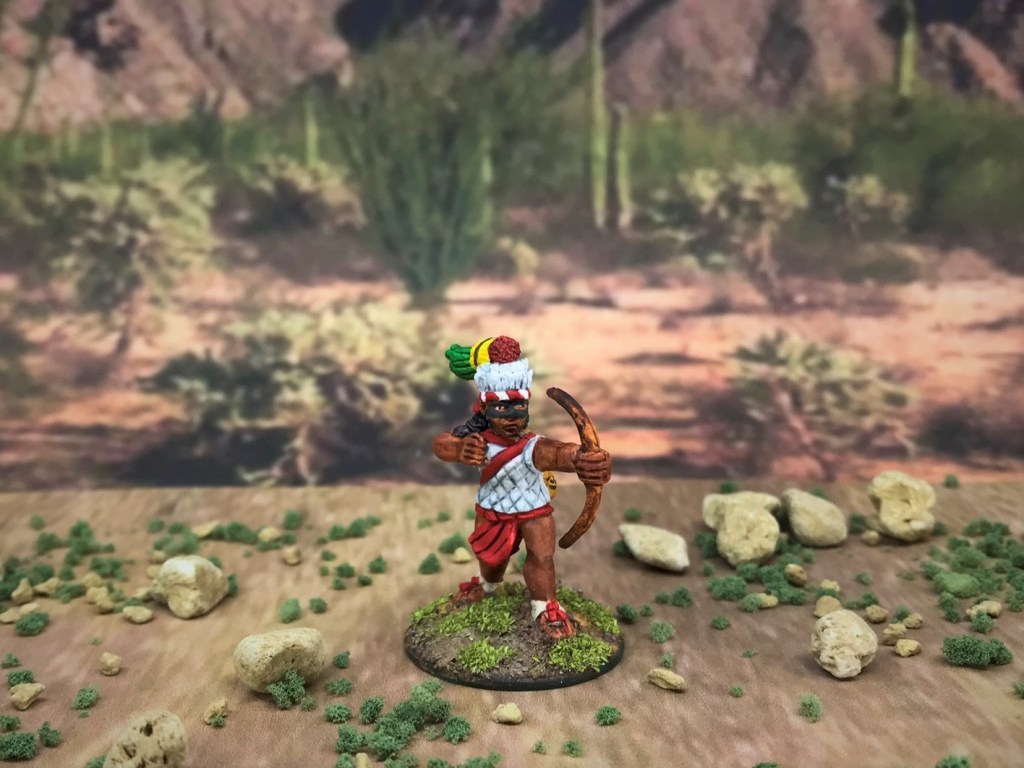
TXB1 – has quilted armor (ichcahuipilli), a feather-decorated helmet, and the black mask war paint.
TXB2 – has an ichcahuipilli, but no helmet and the red striped war paint.
TXB3 – has no armor, no helmet and no war paint!
TXB4 – also has no armor, no helmet but does have the imposing black mask war paint.
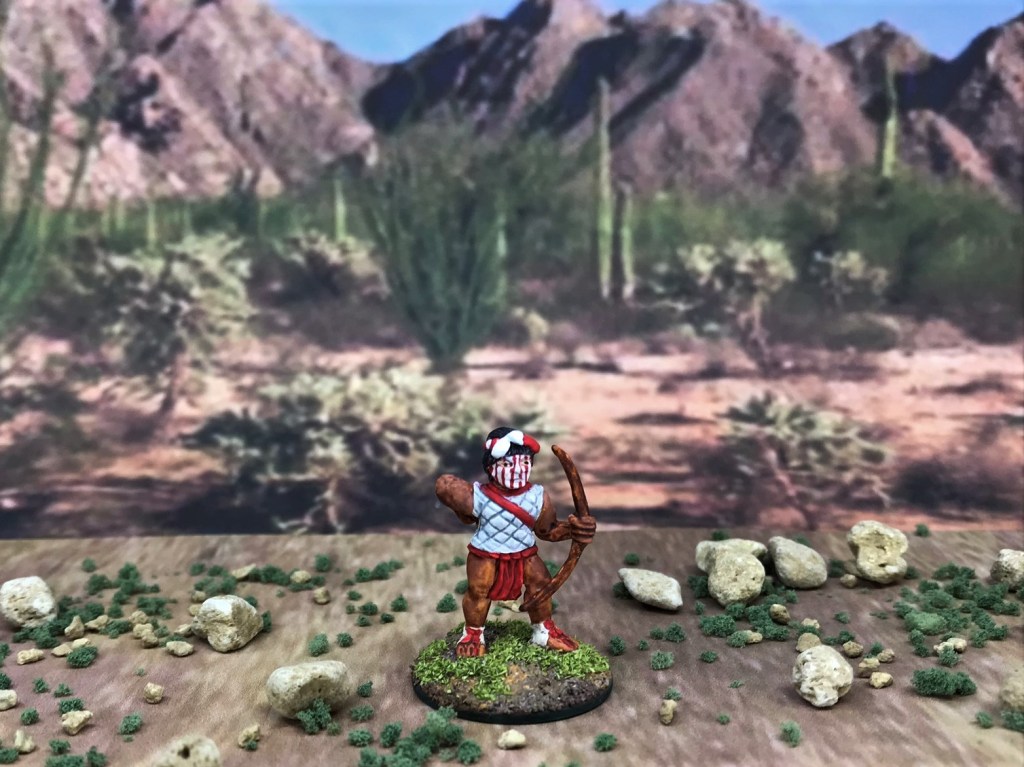
TXB5 – also has no armor, and no helmet but does have the stylish white and red-striped war paint!
TXB6 – yes, he’s painted exactly the same as TXB4! Why? I guess I have no good reason!
TXB7 – a slightly different pose from TXB1. Has quilted armor (ichcahuipilli), a feather-decorated helmet, and the black mask war paint.
TXB8 – this is the exact same pose as TXB7. Has quilted armor (ichcahuipilli), a feather-decorated helmet,but no war paint.
Close up shot of the completed TXB5
Close up shot of TXB1.
All 8 figures assembled for battle
I hope that you found this post enjoyable. Let me know – and stay safe out there!
Miscellaneous details and references for those interested:
Posts on Games and Units for my 16th Century Spanish Conquest Supplement for Feudal Patrol™ – “Civilizations Collide”
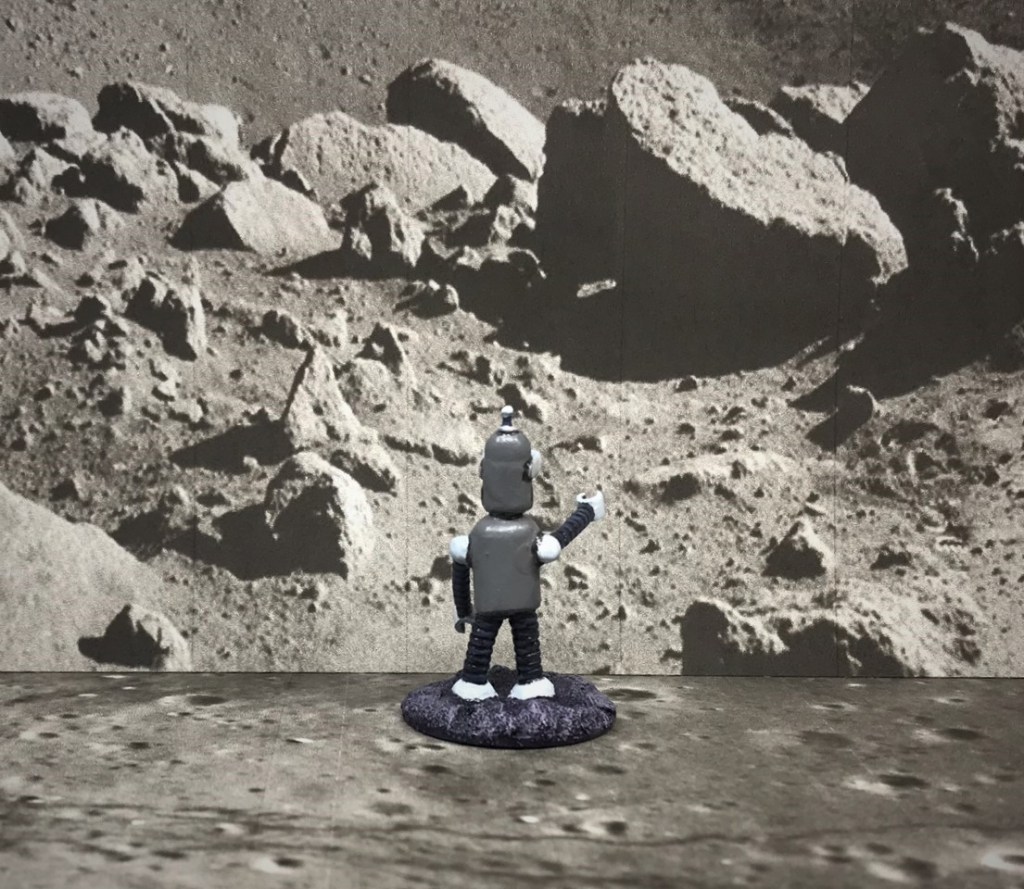
I decided that I needed a short break from building and painting Aztecs – for at least long enough to paint one miniature anyways. This one is called “Folder Bot 3000” from Armorcast Terraform Terrain Ltd.’s “Robot Townies” collection. There are a number of unusual robots and Futurama-inspired lookalikes there. I bought this Folder Bot 3000 on a lark when I got some other terrain stuff from Armorcast a few years back. I do like robots and I do like Futurama and Bender, so I got this one.
(Oh hell, its really supposed to be Bender Bending Rodriguez – aka Bender – so let’s call him that !).
The figure stayed on my painting desk in its baggie as I worked on many other projects. This is definitely not my usual practice as I really had no place to properly categorize and put him away for a future game. It was finally Bender’s time…
The figure differs from Bender a bit – his chest “door” hinges are on the right, while the cartoon version’s are on the left, but otherwise it’s similar enough.
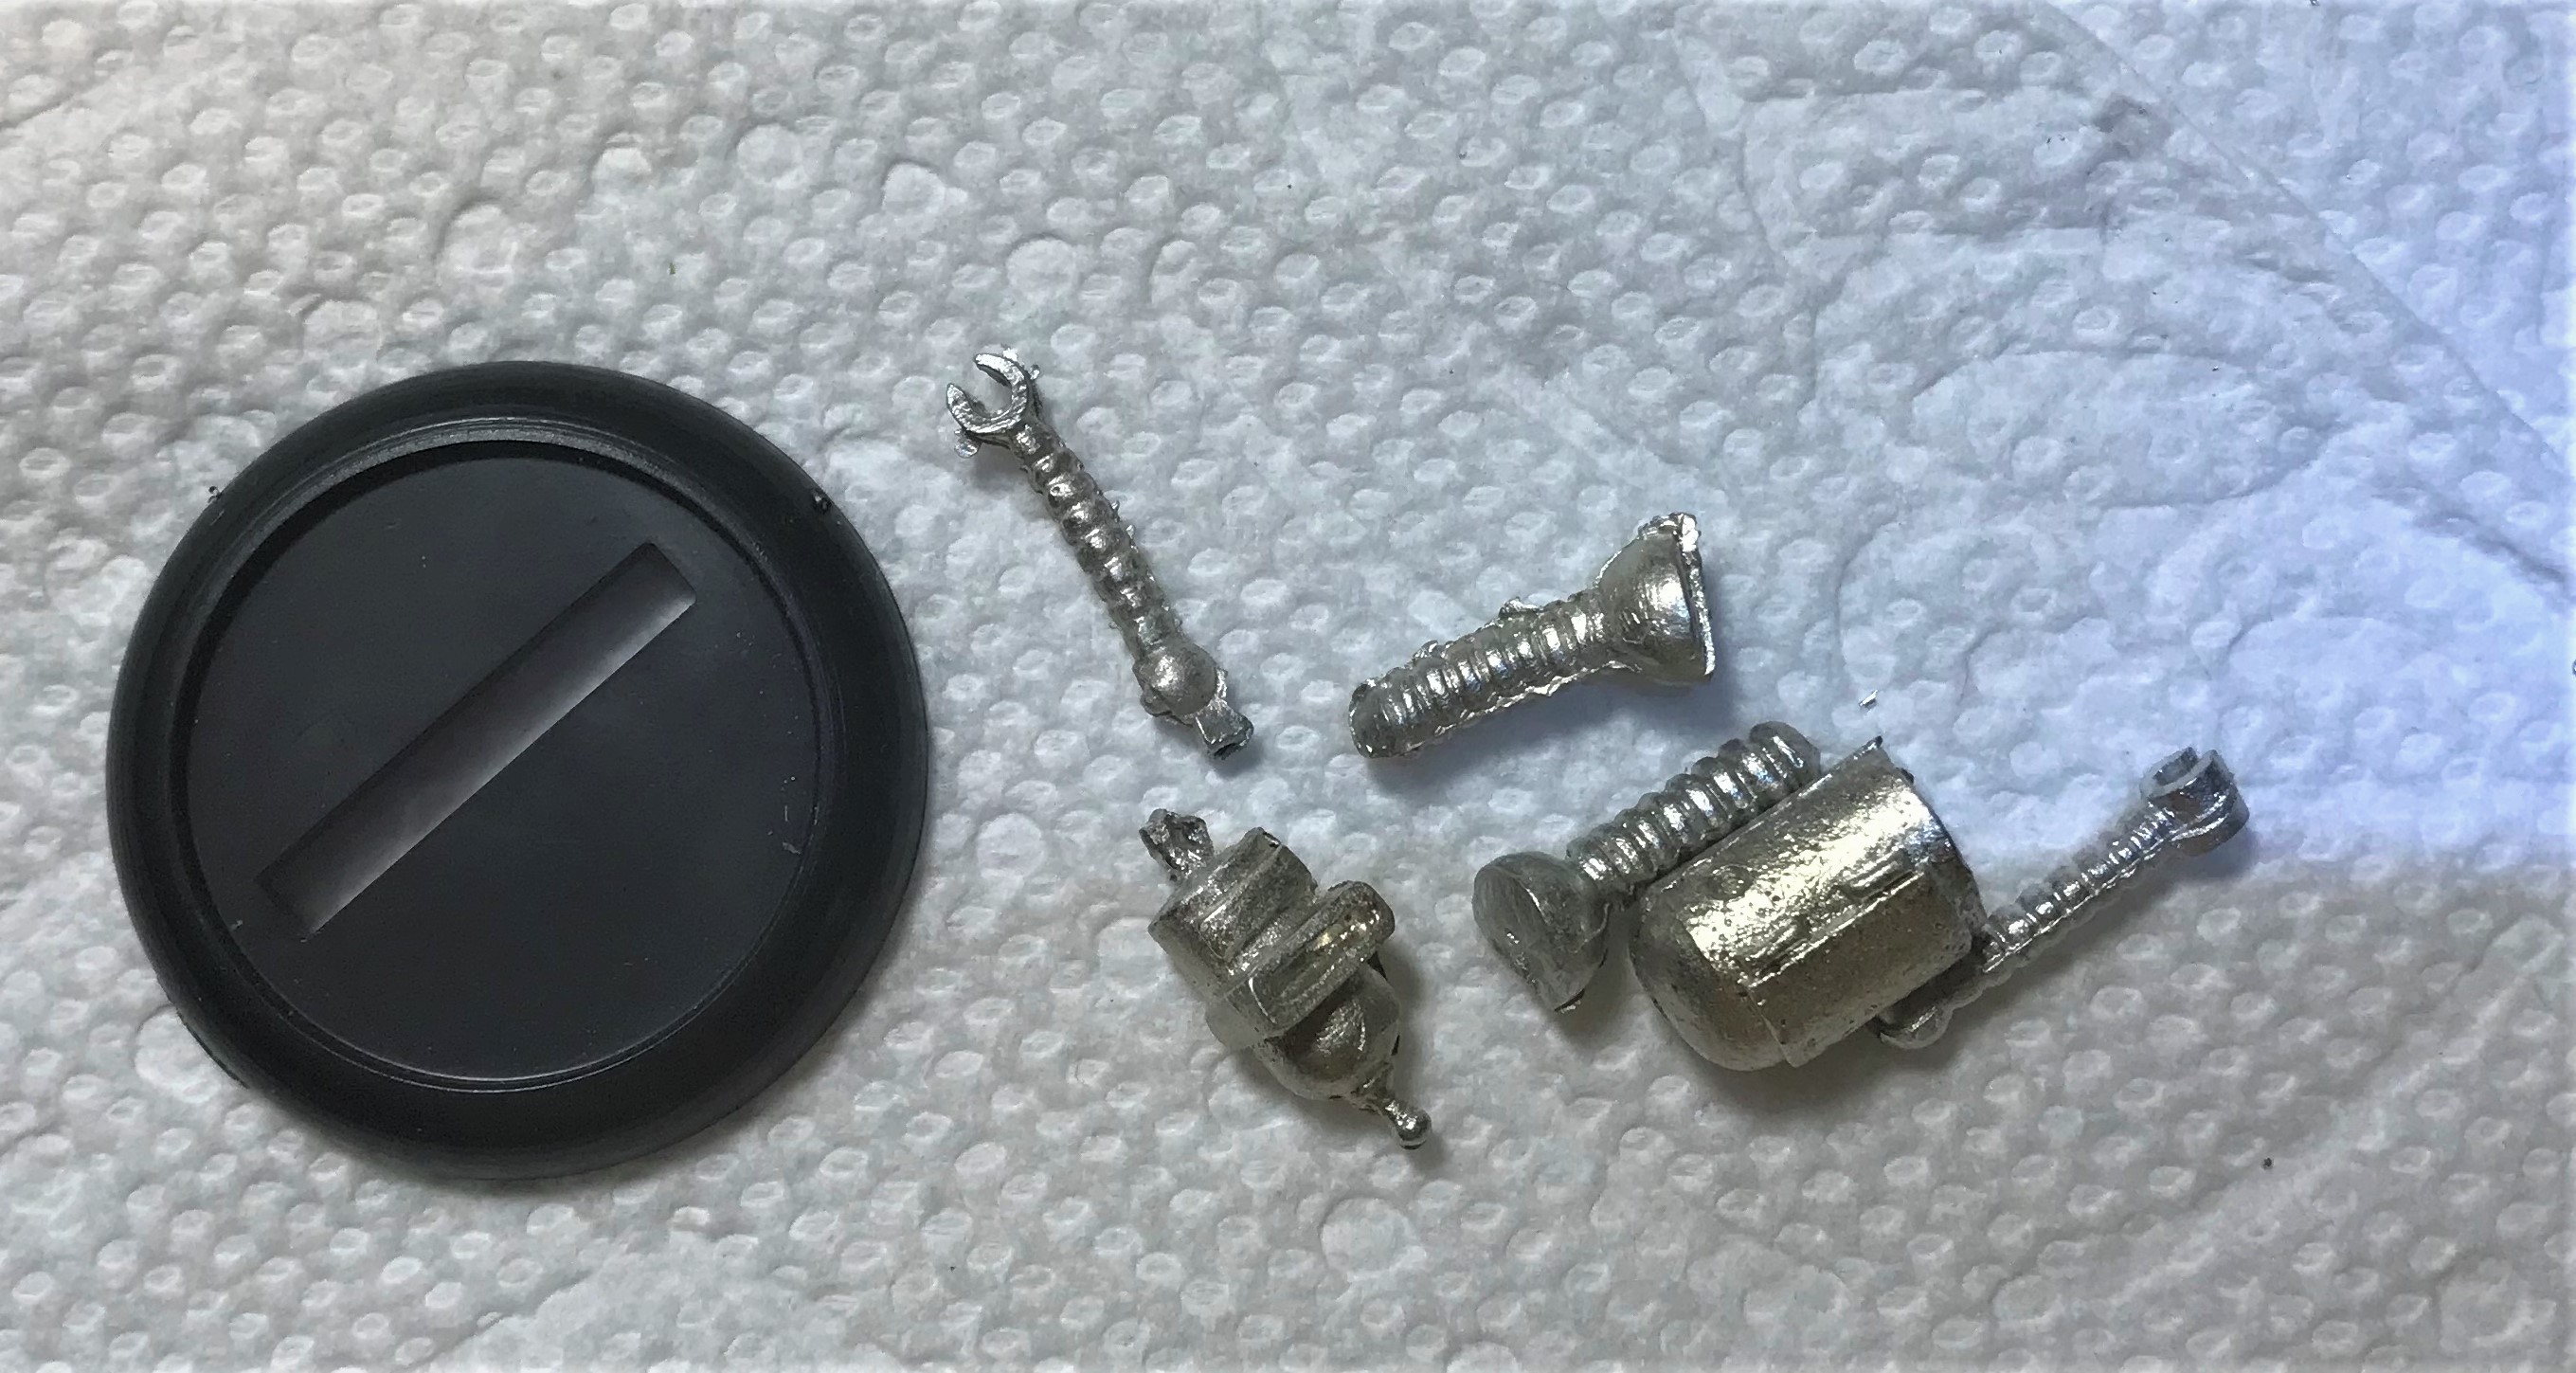
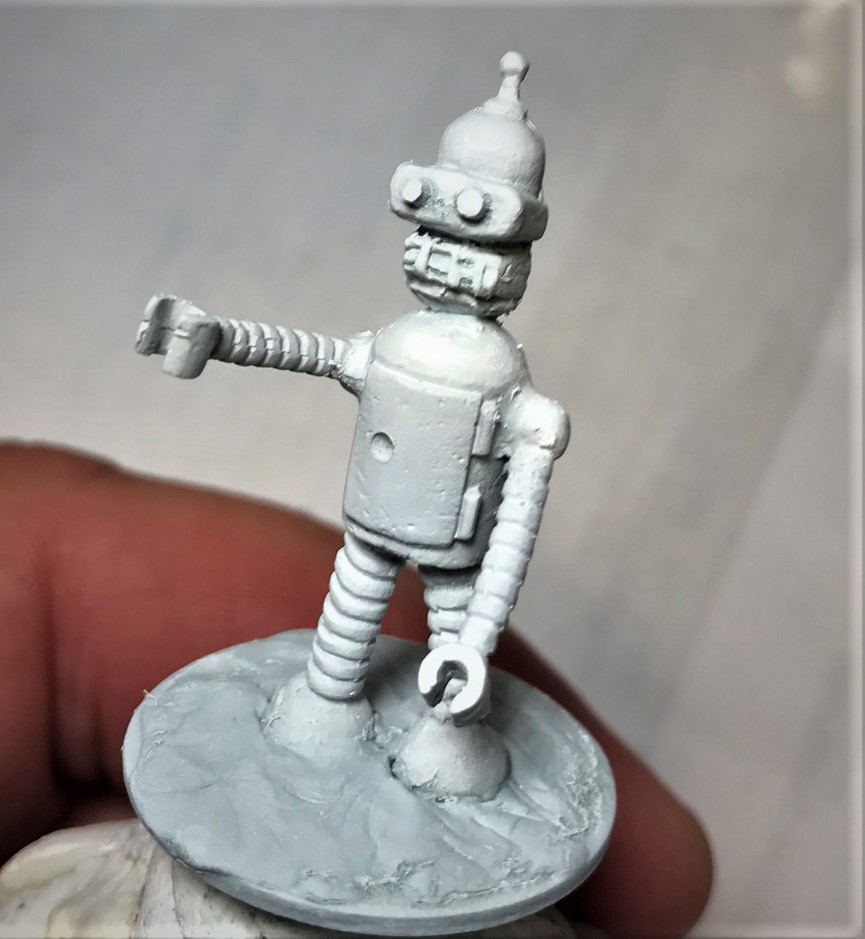
The Folder Bot 3000 figure as received. The casting quality was a bit off of what I had expected. For example the figure’s legs and arms did not line up perfectly during the casting process – leading to misalignments of the limbs’ rings. There was some flash and some pitting on the head, necessitating some filing and filling on top of the needed drilling and pinning of the arms, legs, and head.
The figure as assembled. I used E6000 epoxy as I wanted a strong bond on the components, but this proved to be a bit of a mess. I have a love/hate relationship with E6000 as it needs a day to cure properly and sometimes it goes where you don’t want it to go. Here, it needed to be removed from other robot surfaces that needed to be smooth. It does clean up with an Exacto blade and tweezers, but its a pain, and because its clear, you don’t always see it all.
I used a 1″ steel washer to mount the figure in lieu of the plastic base. After I assembled the figure, I saw that there were gaps under the arms and they were not fully affixed. There were also some pitting on the figure’s head and back, necessitating my using green stuff as a remedy. In retrospect, I should have just used green stuff to assemble him.
I also saw that the figure just had an empty slit for the “eyes”, and a tiny flat space for the “mouth”. Anyone familiar with Bender knows that he has very expressive “eyes” and a wavy three-lined electronic “mouth”. One of my goals in painting him was to make him as “cartoony” and 2-D as possible. There was no way that I was going to be able to paint the eyes in the slit effectively or to freehand paint the wavy mouth as the figure was then.
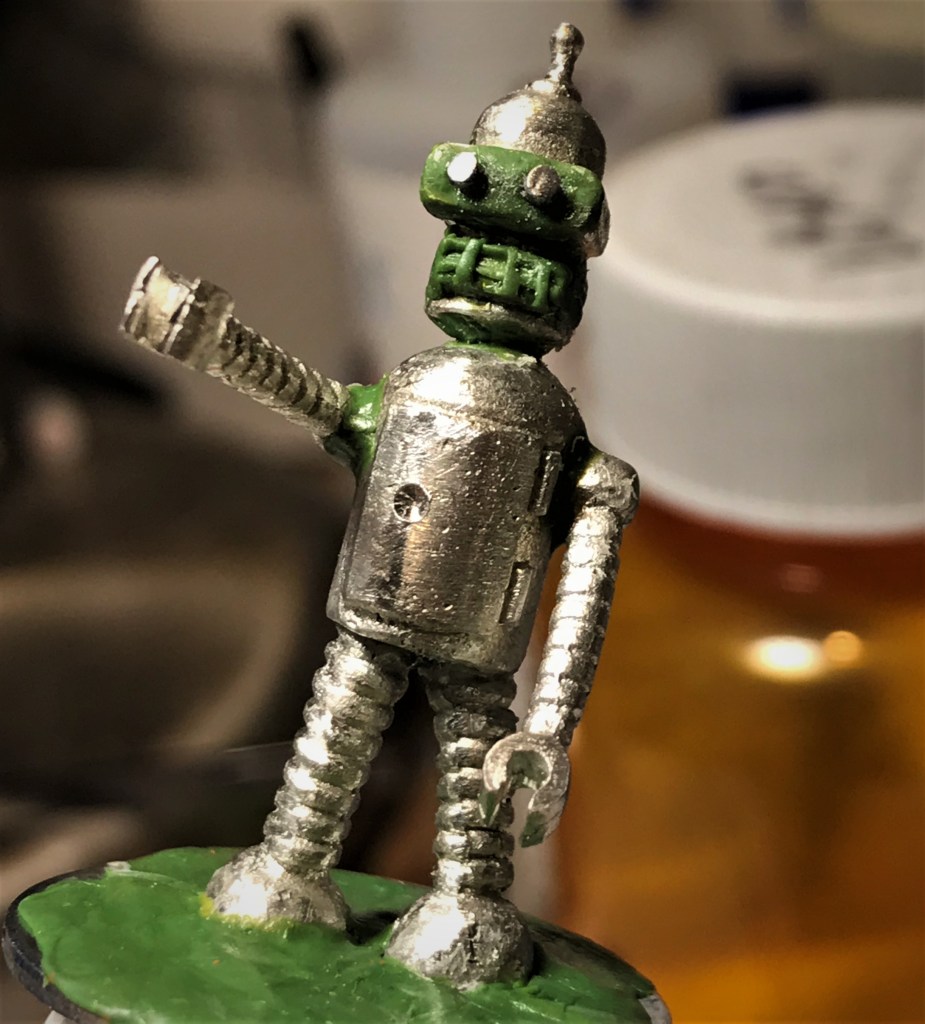
I decided to try to sculpt the eyes and the mouth with green stuff. I admire people like Roger at Rantings From Under the Wargame Table who are much better at sculpting with green stuff than I am (as shown by his efforts here). Undaunted, and inspired by Roger (but a little worried), I used green stuff to fill the slit, make eye holes, and to try to sculpt the “waves” on the mouth. The result I achieved is shown below.
Here is Bender after I had filled in the gaps on the limbs and head, smoothed/filled pits, and sculpted the eye holes and the mouth “waves”.
I was not happy with the “eye holes” and did not think that I could paint them as “expressive” like in the cartoon. I also did not think that the handle on his chest was big enough – so I used a pin vise to drill out all three. I then carefully cut and filed pieces of paper clip and glued them into the eye holes. This seemed better to me visually – and would be far easier to paint.
Bender after drilling out his chest and fixing his eyes.
As I mentioned, I wanted a cartoon-like miniature. This meant that I would by necessity be limiting any highlighting or excessive shading. Therefore, I also decided that this would be a good opportunity to try to use the Vallejo “Metal Medium” that I had bought to try over two years ago to mix with paints to create a metallic finish that would be in line with the cartoon. This would hopefully prevent me from needing to use any actual metal paints. he would have some shiny aspects, but hopefully not excessive.
I was now ready to prime and paint old Bender.
Bender after priming.
In line with my painting approach, I decided to wash the primed figure with “Nuln Oil” to give myself a better idea of where to apply the paint/metal medium mixtures. The wash really showed the casting misalignments on the legs and arms, and where some of the errant E6000 had gone. No worries, as I knew that I could both remove the more egregious excess epoxy and hide the casting errors as I painted. I used three different shades of gray, adding the Vallejo “Metal Medium” in a 50/50 mix (all the paints used are listed at the end of the post for those interested).
Bender after the wash – you can see the misalignments and excess epoxy issues that I described.
The painting was fairly straightforward. I used the darker colors on the limbs to hide the misalignments. The mouth was just OK, given how I had to sculpt it. I used some “Nuln Oil GLOSS” on the limbs to accentuate their ring-like construction.
Bender painted but before final base work and varnish. At this point I found a bristle or hair embedded in the paint on the back of his head that required fixing (ugh).
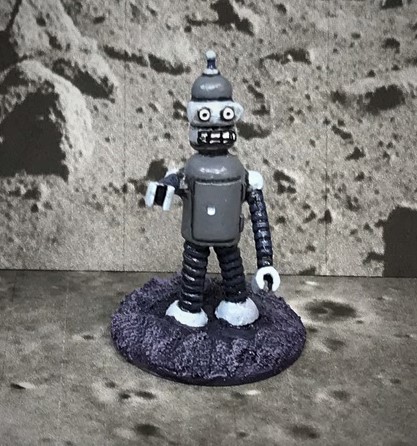
Bender with the image I took from the internet as a general guide.
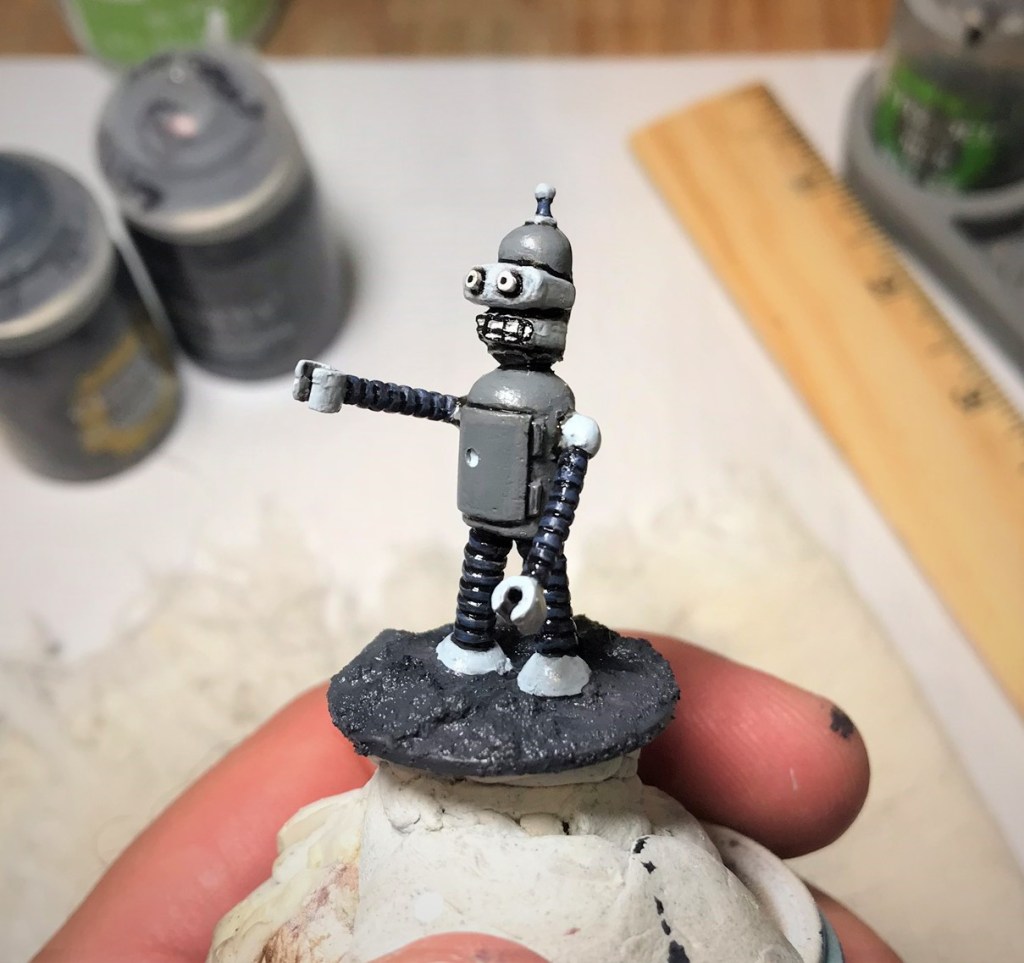
To finish him up, I used a Citadel texture paint (“Astrogranite debris”) on the base and the added a a few colors by dry brushing similar to what I did with my Retrovian platoon. Lastly, I added a satin varnish as I wanted his paint job protected but not too matte.
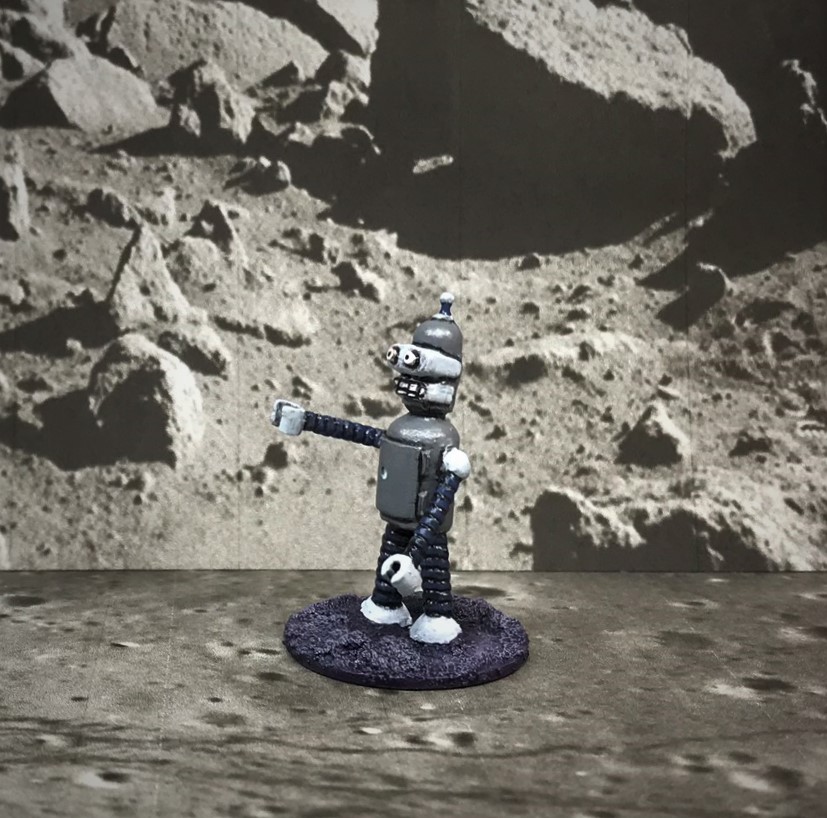
Bender completed.
Right side
Back view
Left side
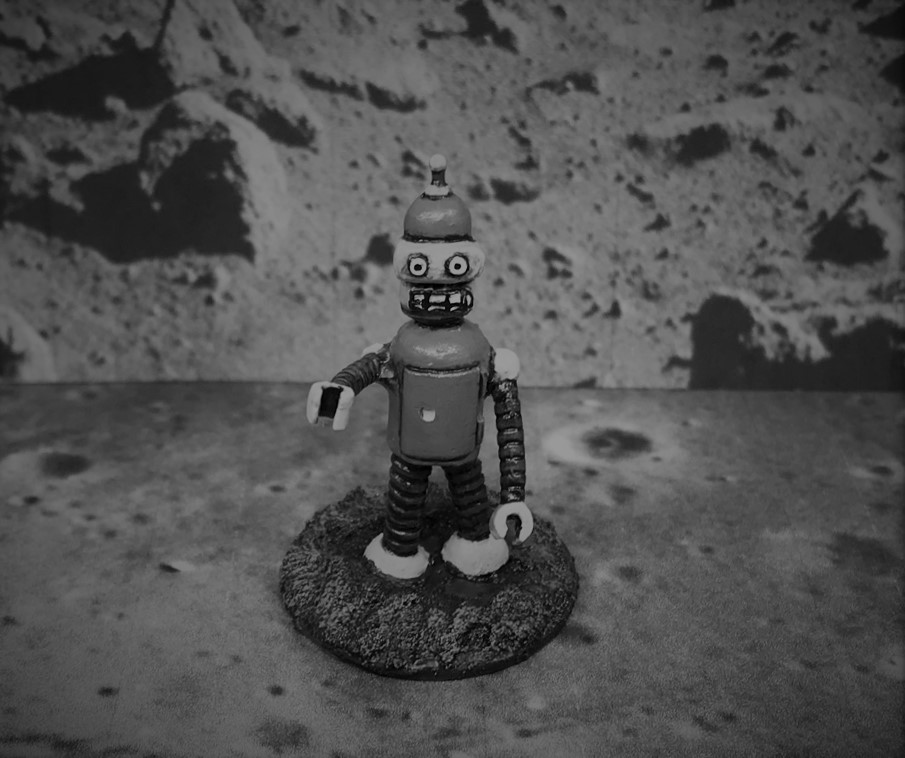
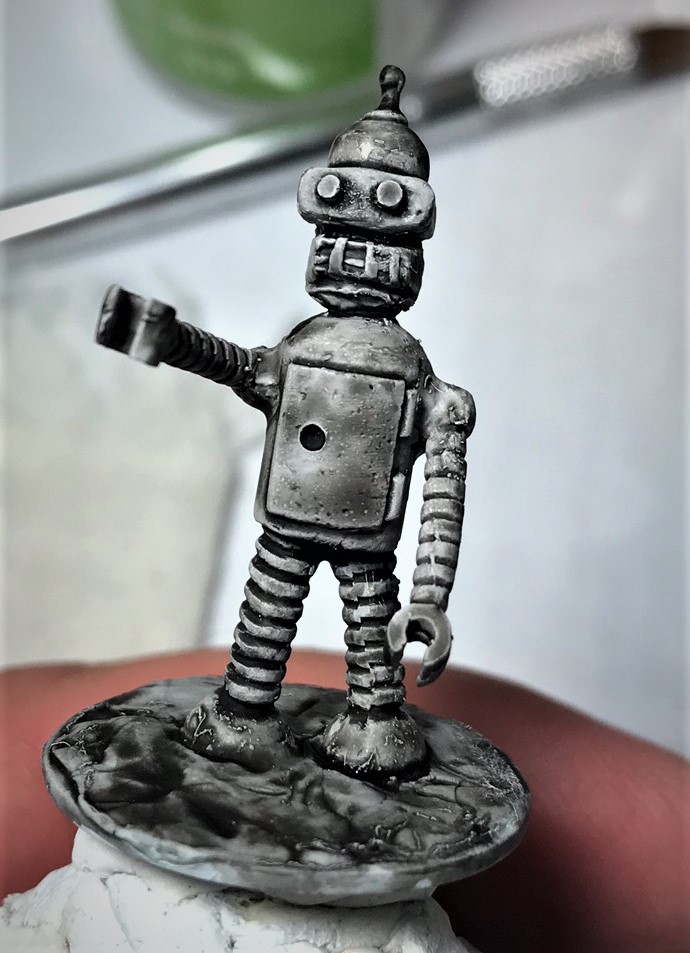
If there were no colors but grey, he’d look like this in an old movie serial!
This guy is not my best work, but not my worst. At tabletop distance he looks fine, and hopefully will put a smile on some gamer’s face. I just needed a change for a bit and the work on this little guy provided that for sure. I’ll probably use him in a retro sci-fi game of Combat PatrolTM at some point. I could have sculpted a cigar or a beer battle or two for old Bender, but I decided that was a bit too much for me.
And if Bender does not like that…
Thanks for looking – I am entering this small project into Azazel’s extended July/August community painting challenge in the “hero” category – cartoon robot division (I just made that last part up). Please feel free to comment below – always appreciated.
PAINTS, INKS, GLAZES, SHADES, WASHES, PIGMENTS, FLOCKING, GLUES AND MORE THAT I USED ON THE “FOLDER BOT 3000”:
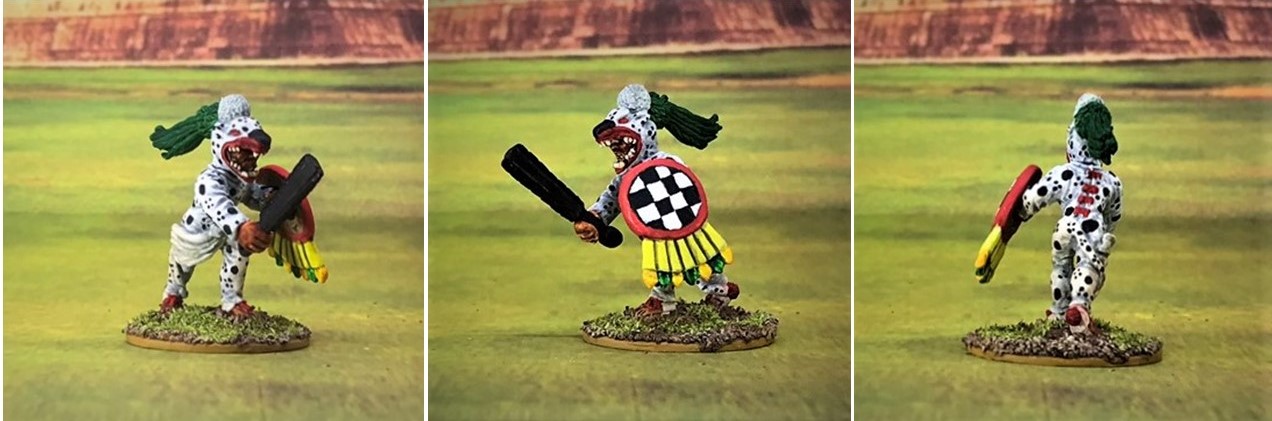
An army needs a leader! My Aztecs troops will be used in skirmish warfare games of Feudal Patrol™ (check out these two links on the game here and here).
Feudal Patrol™ will launch very soon (very exciting!).
In the game, the basic unit is an Element of 5 figures, including a front-line leader. Up to four Elements will constitute a Warband, and up to four Warbands will make up a Battle Group. Similarly, up to four Battle Groups will constitute an Army. Most games will never be composed of an Army as the system is designed for skirmish level war gaming. Still, it could be used for big battles effectively.
At the highest level of course was the “huey tlatoani” or “Great Speaker” – the emperor of the Aztecs. Under him as the head of the War Council and the supreme field commander was the Cihuacoatl, also called the Snake Woman”. This was not a woman – but always a man – despite the name. Cihuacoatl was also a goddess of fertility and childbirth in Aztec mythology. Yes, it’s a bit confusing, and I’ll leave that right there.
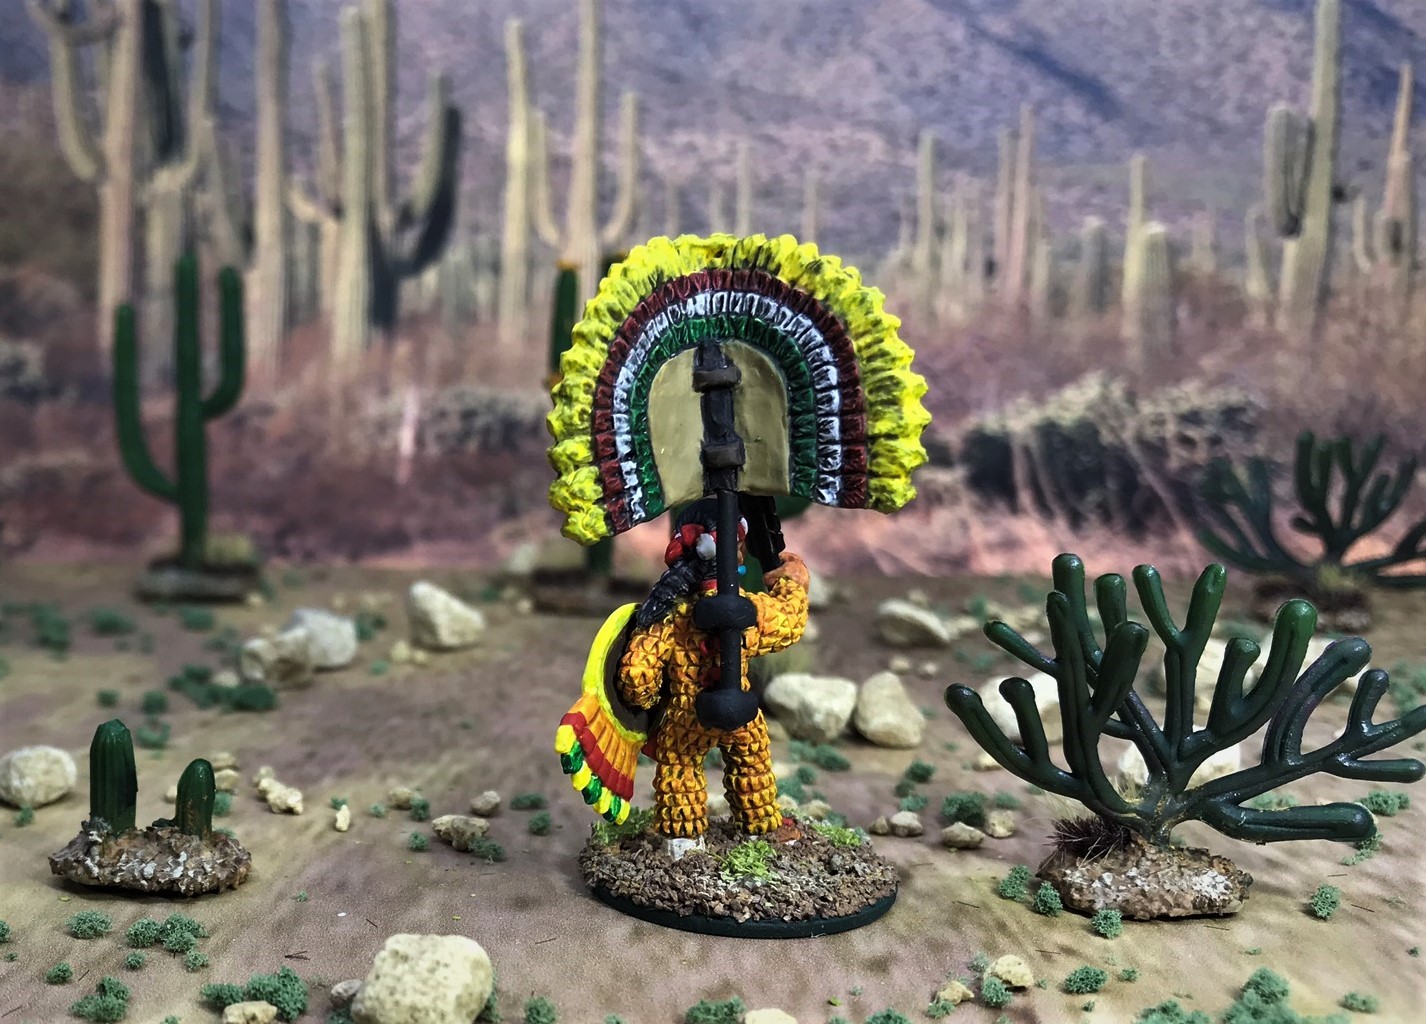
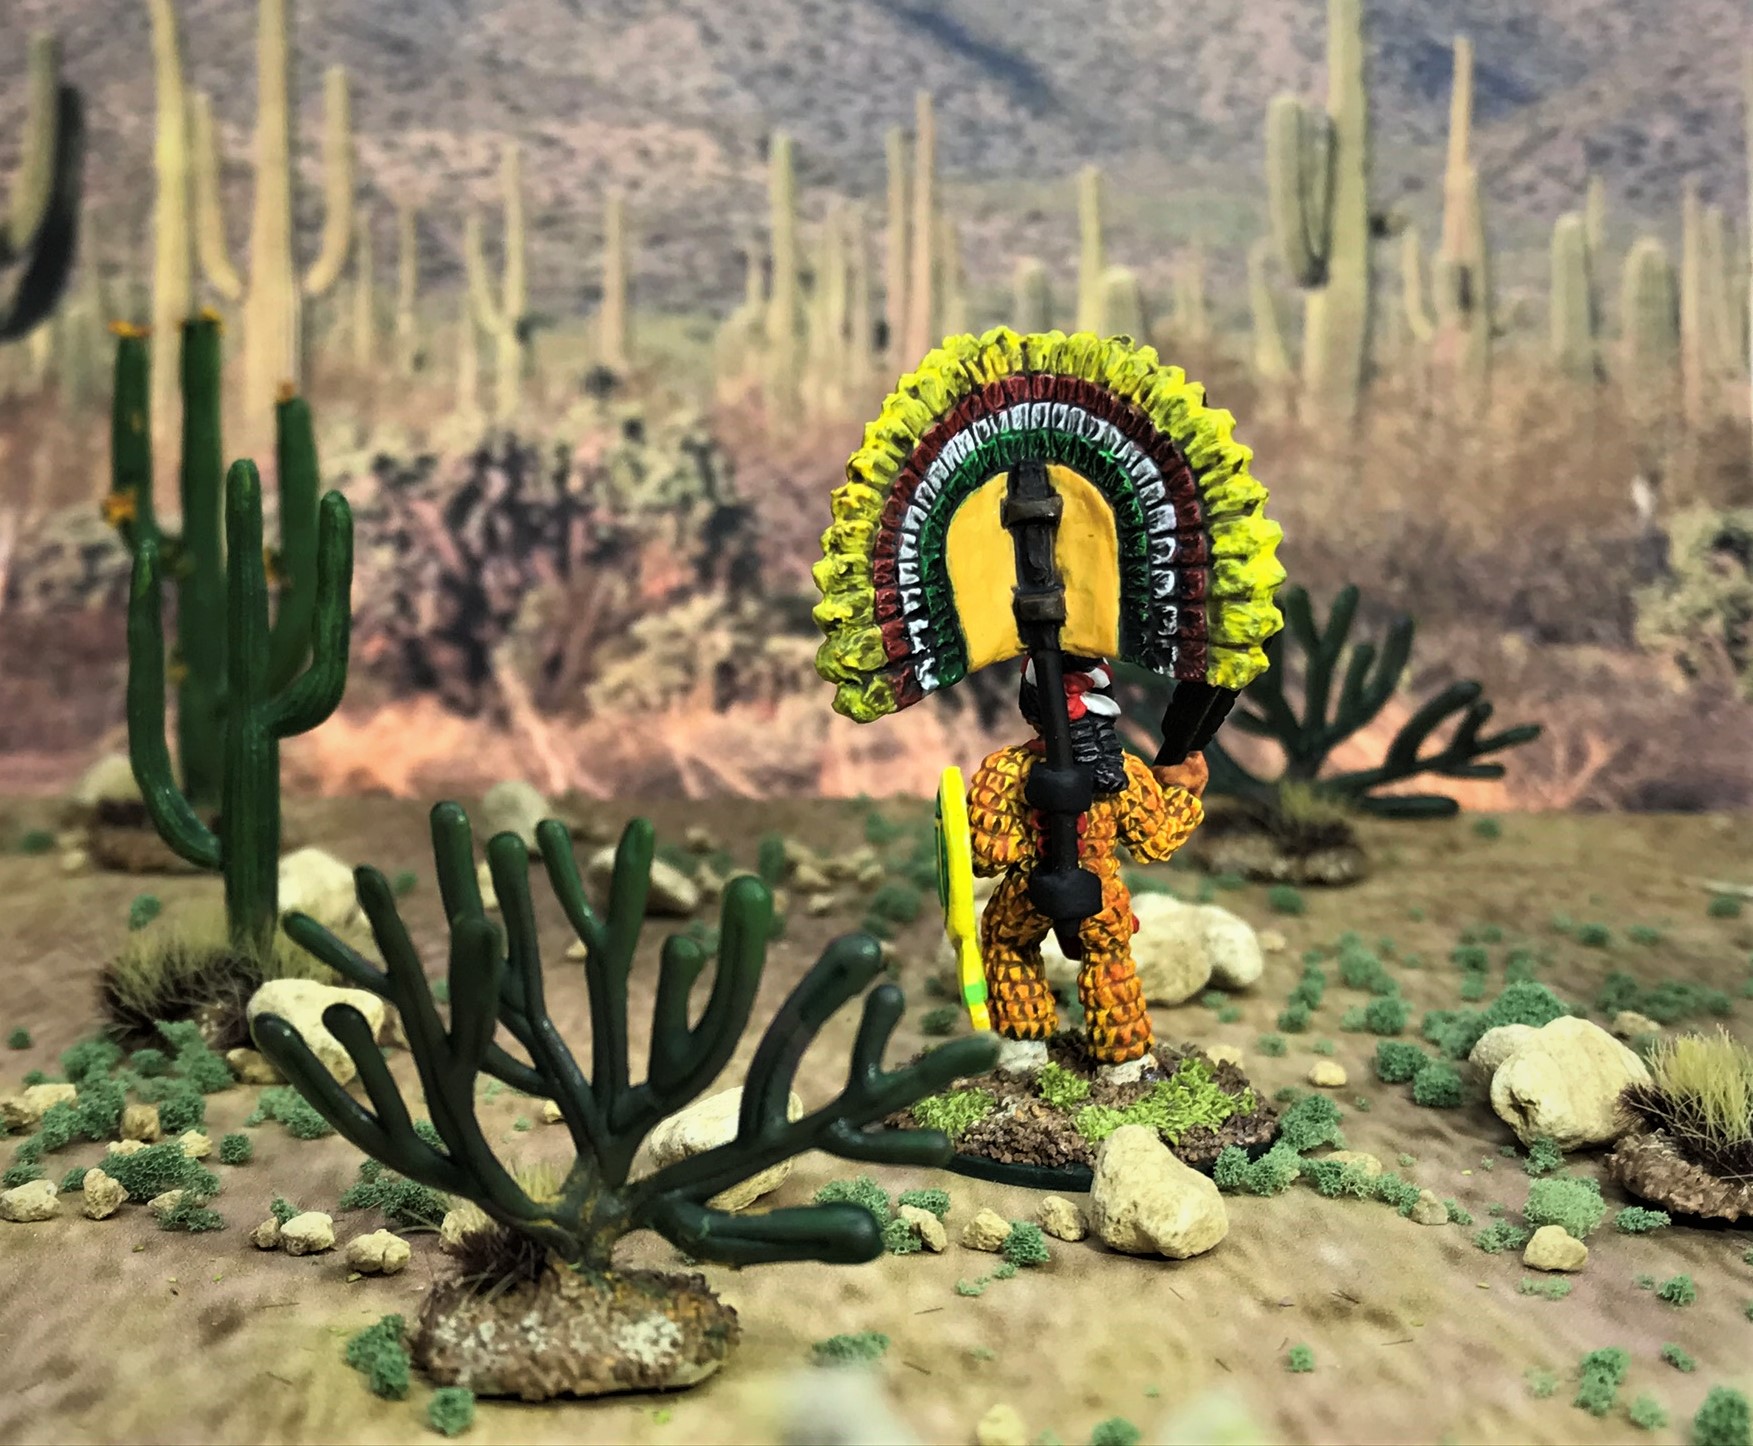
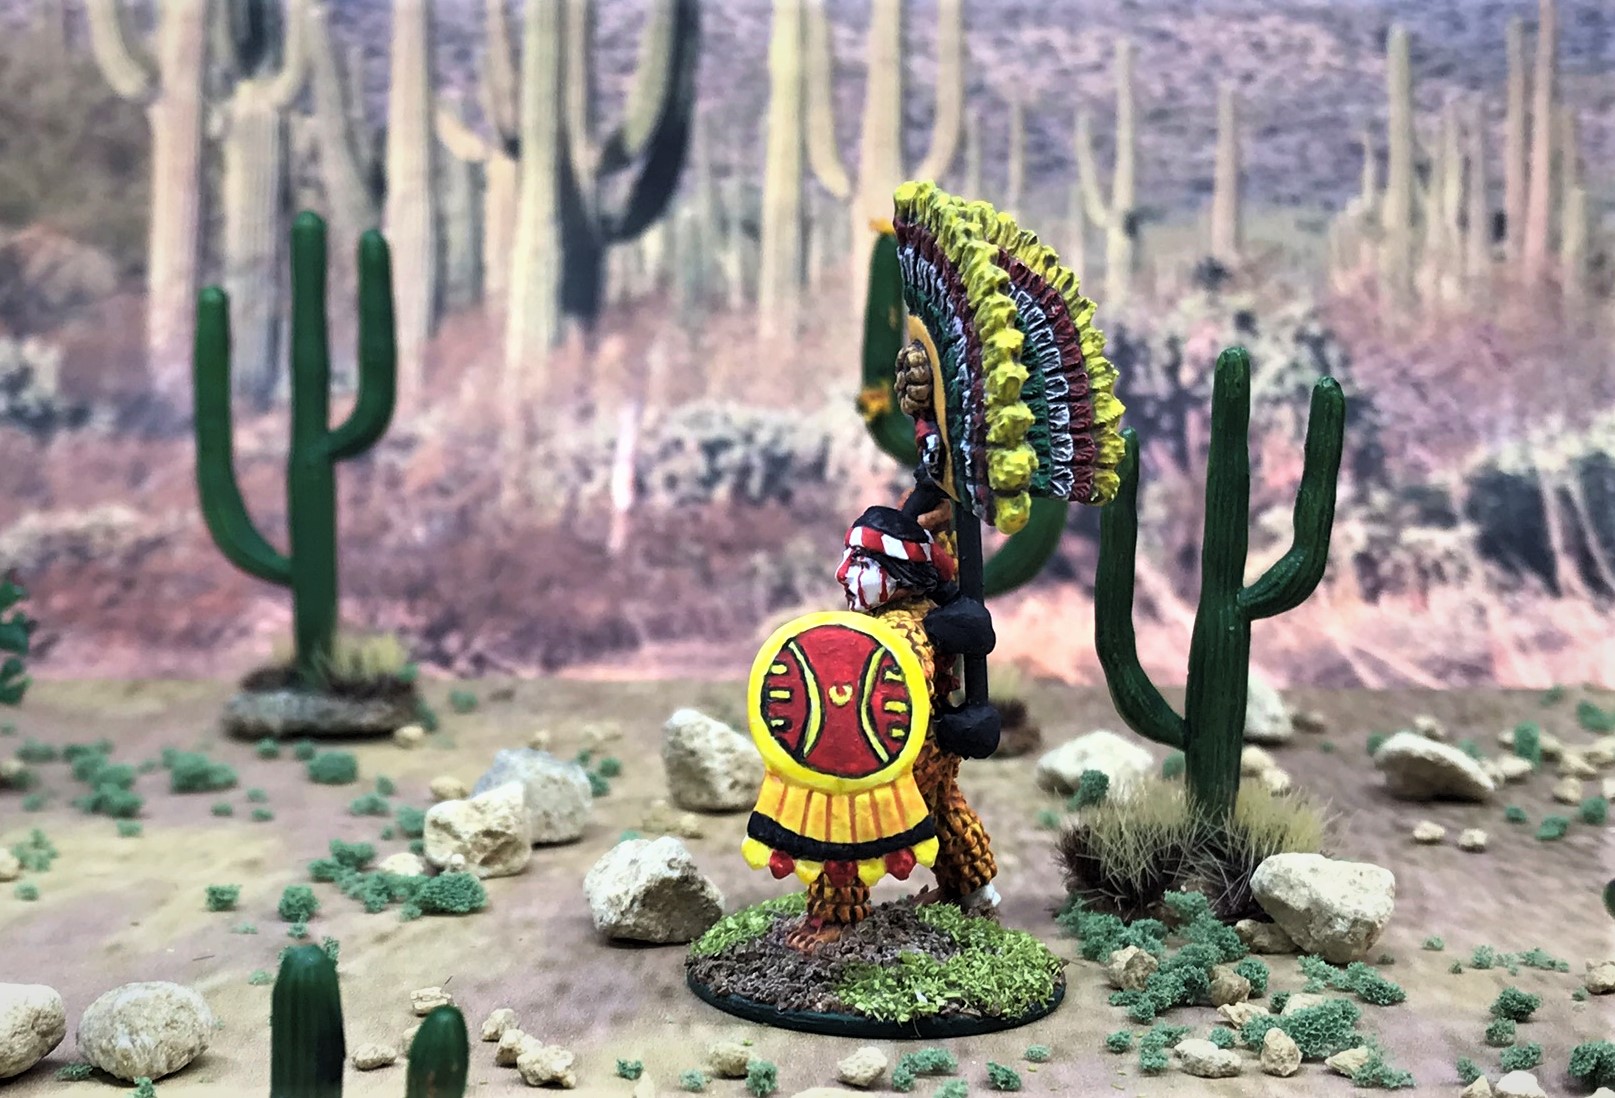
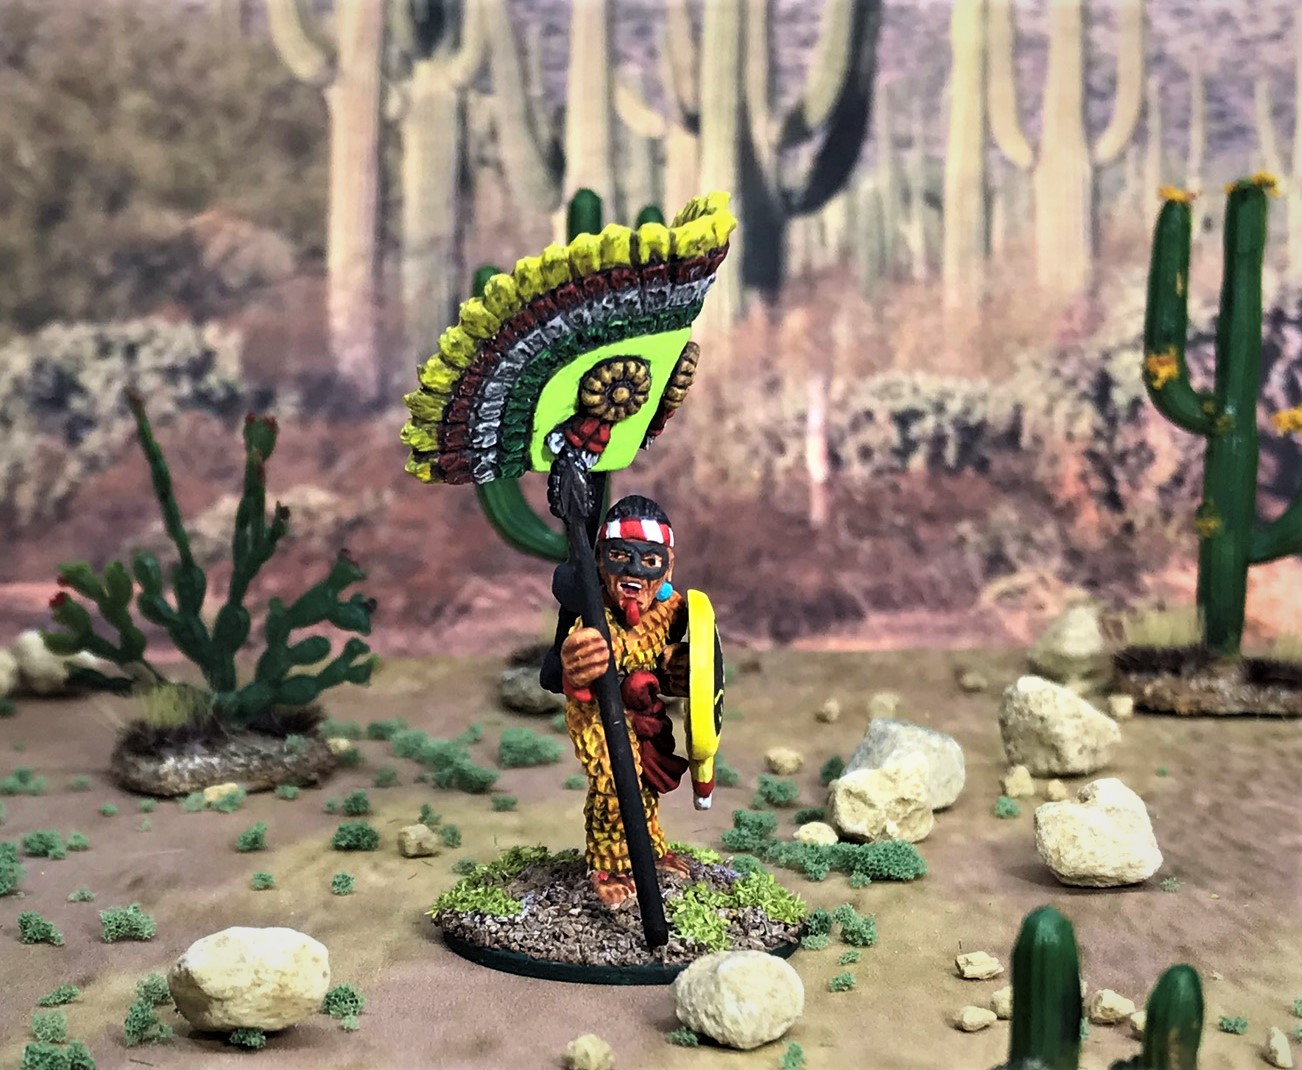
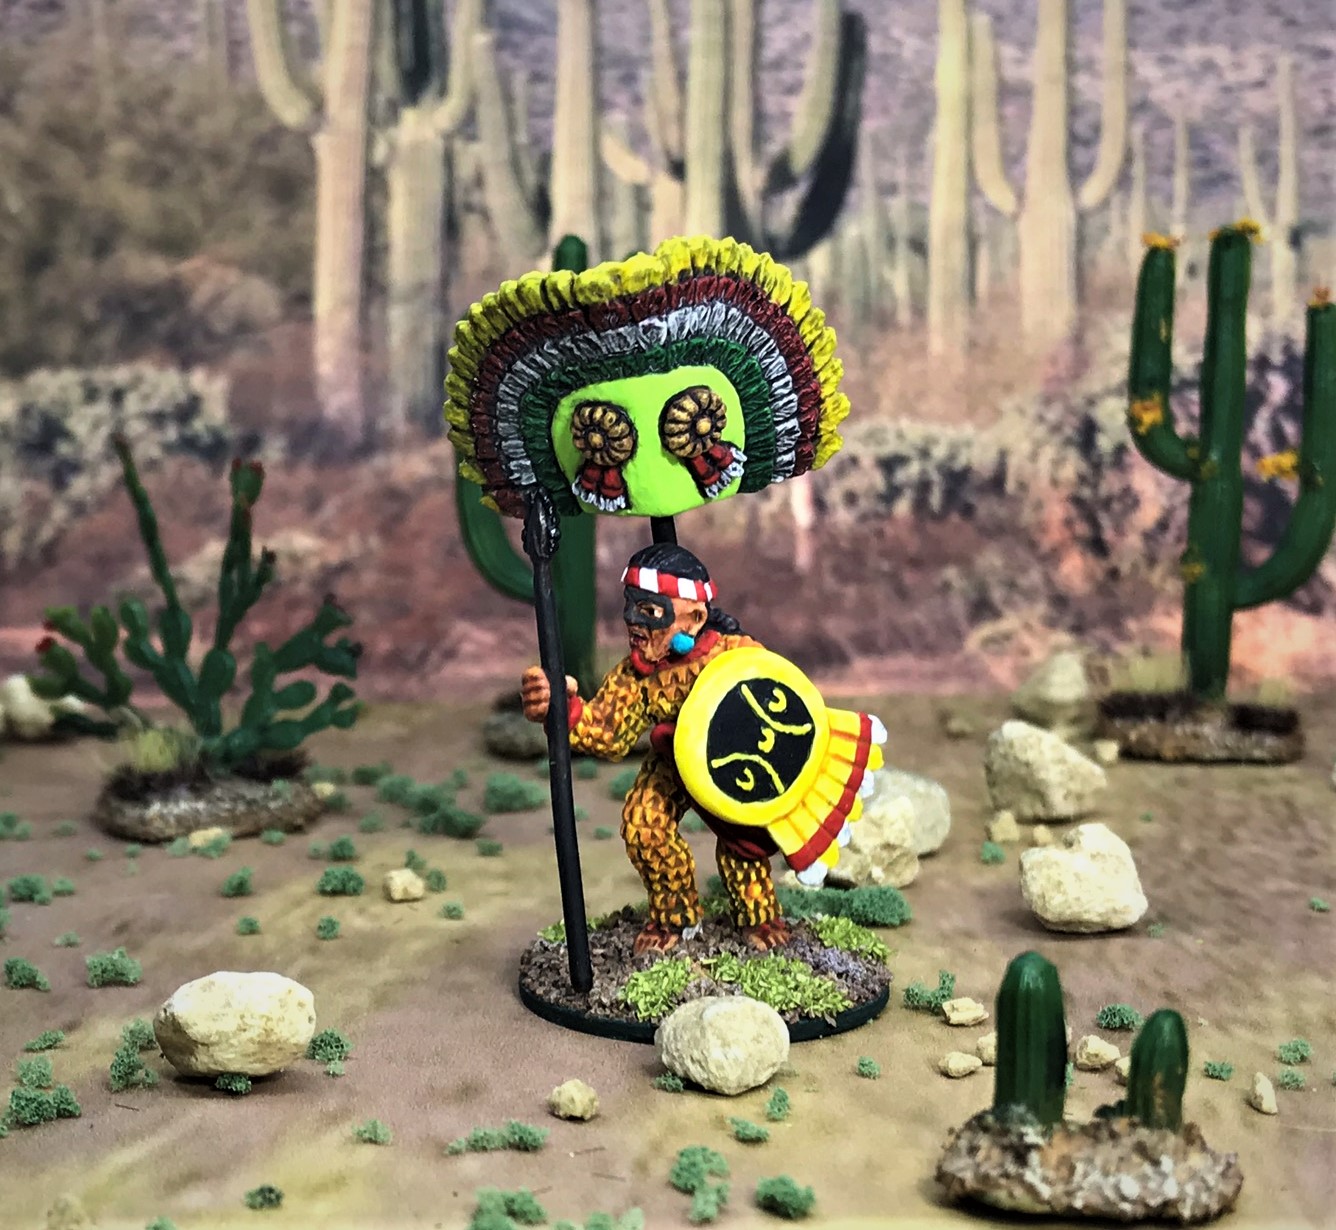
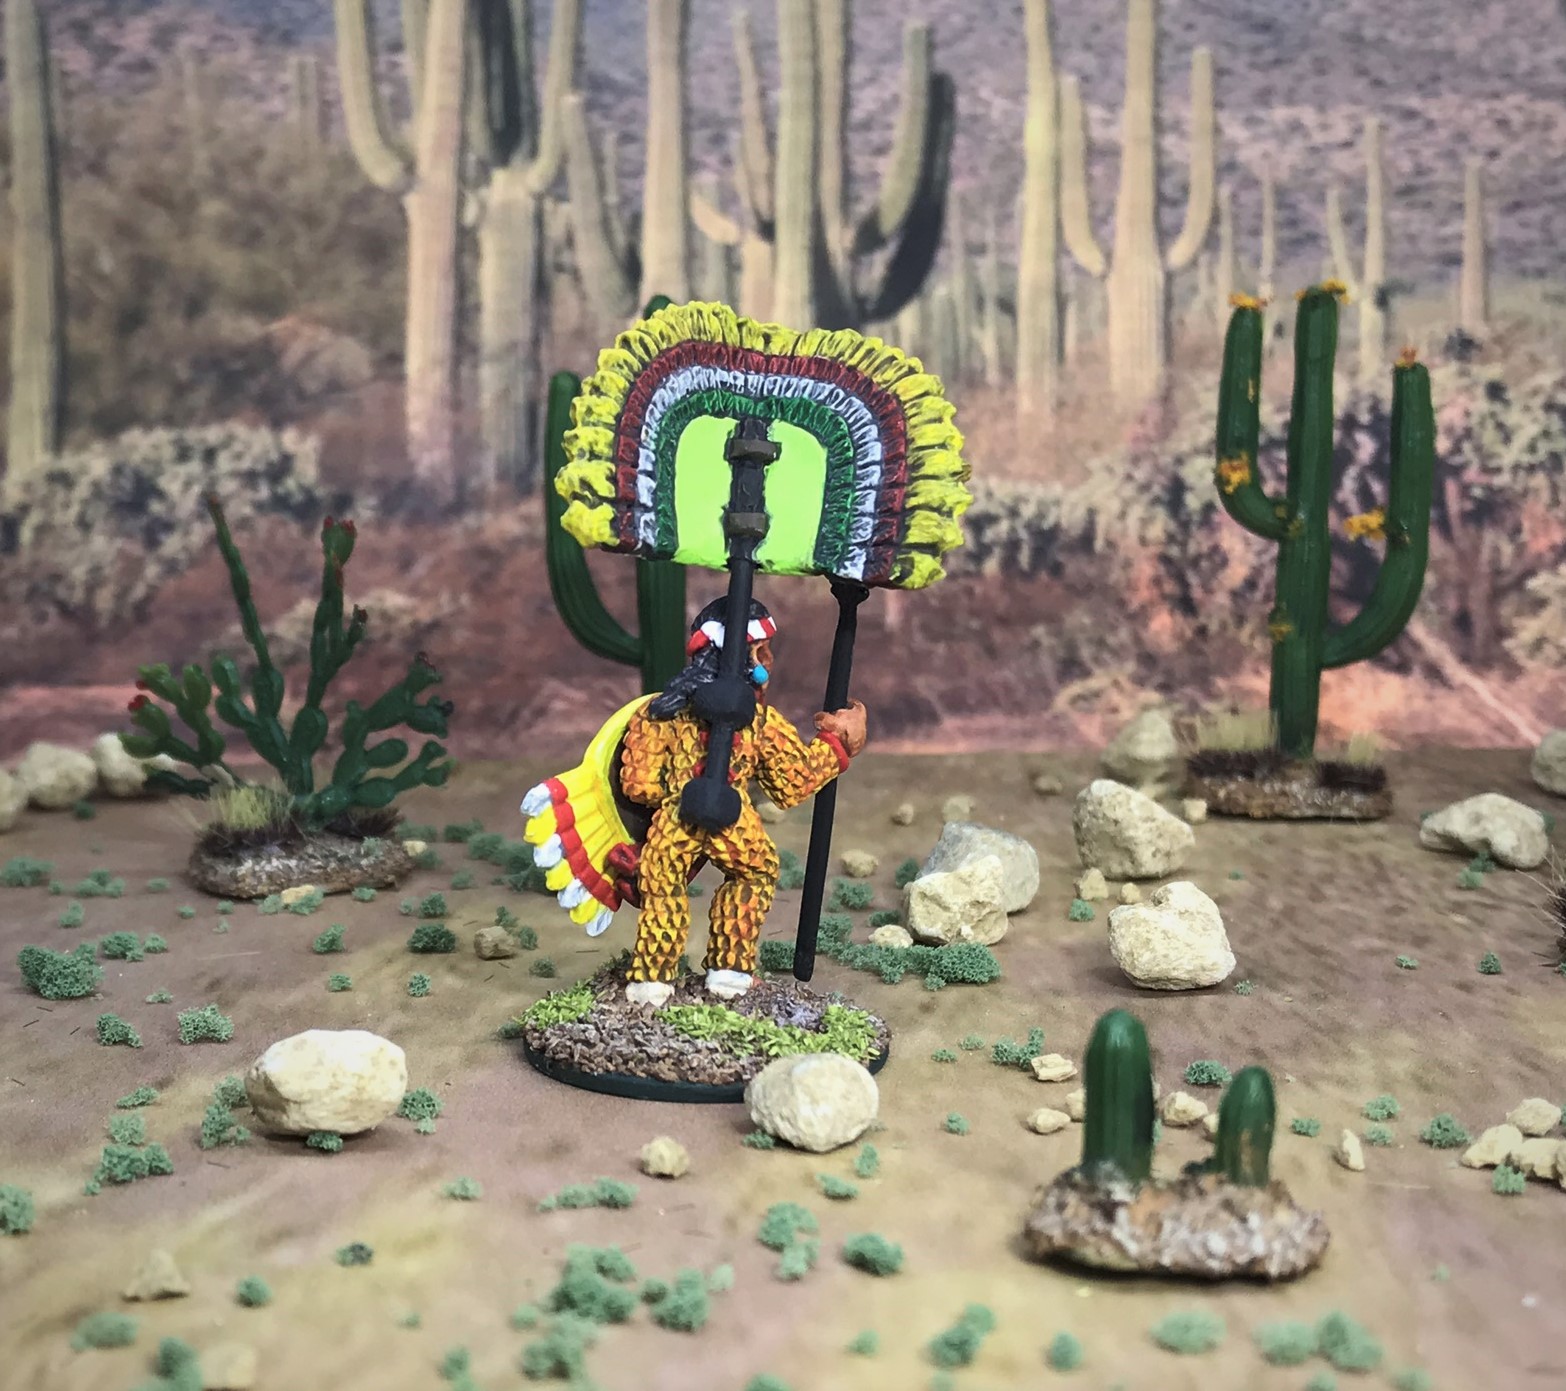
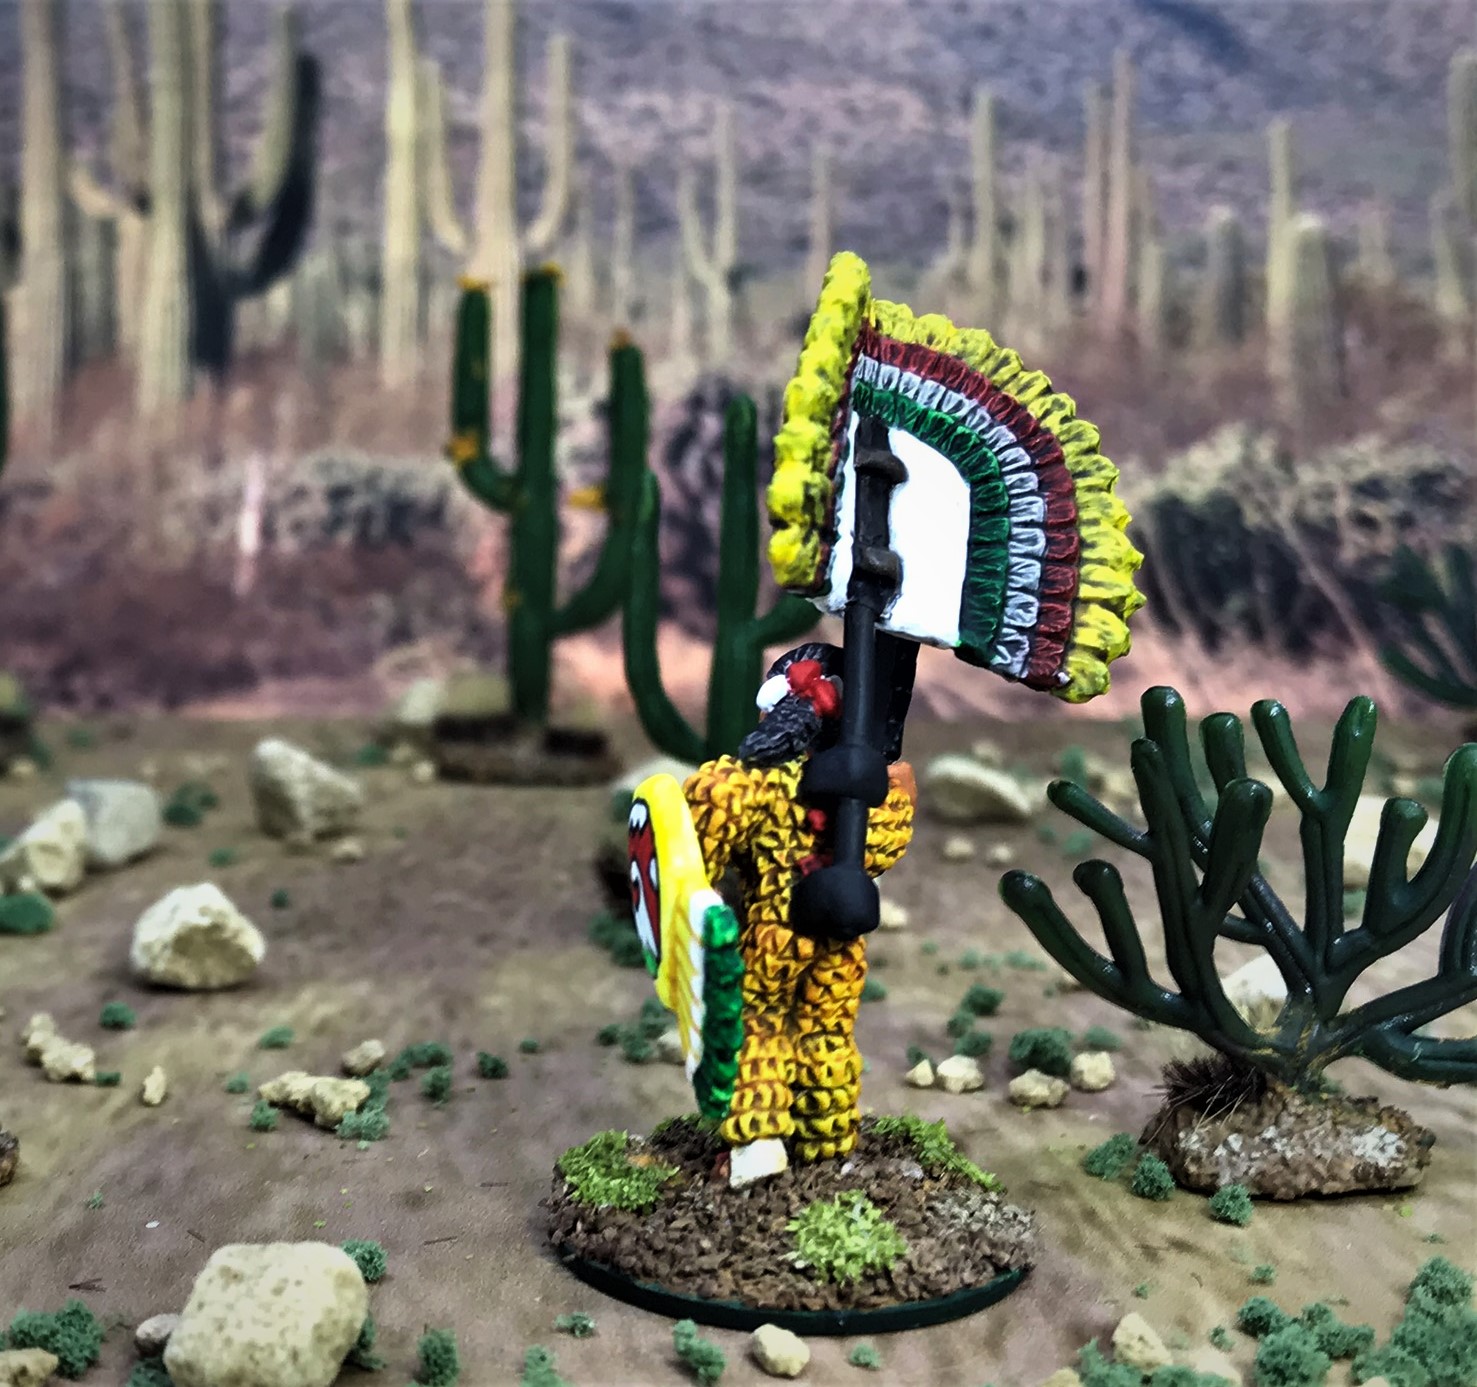
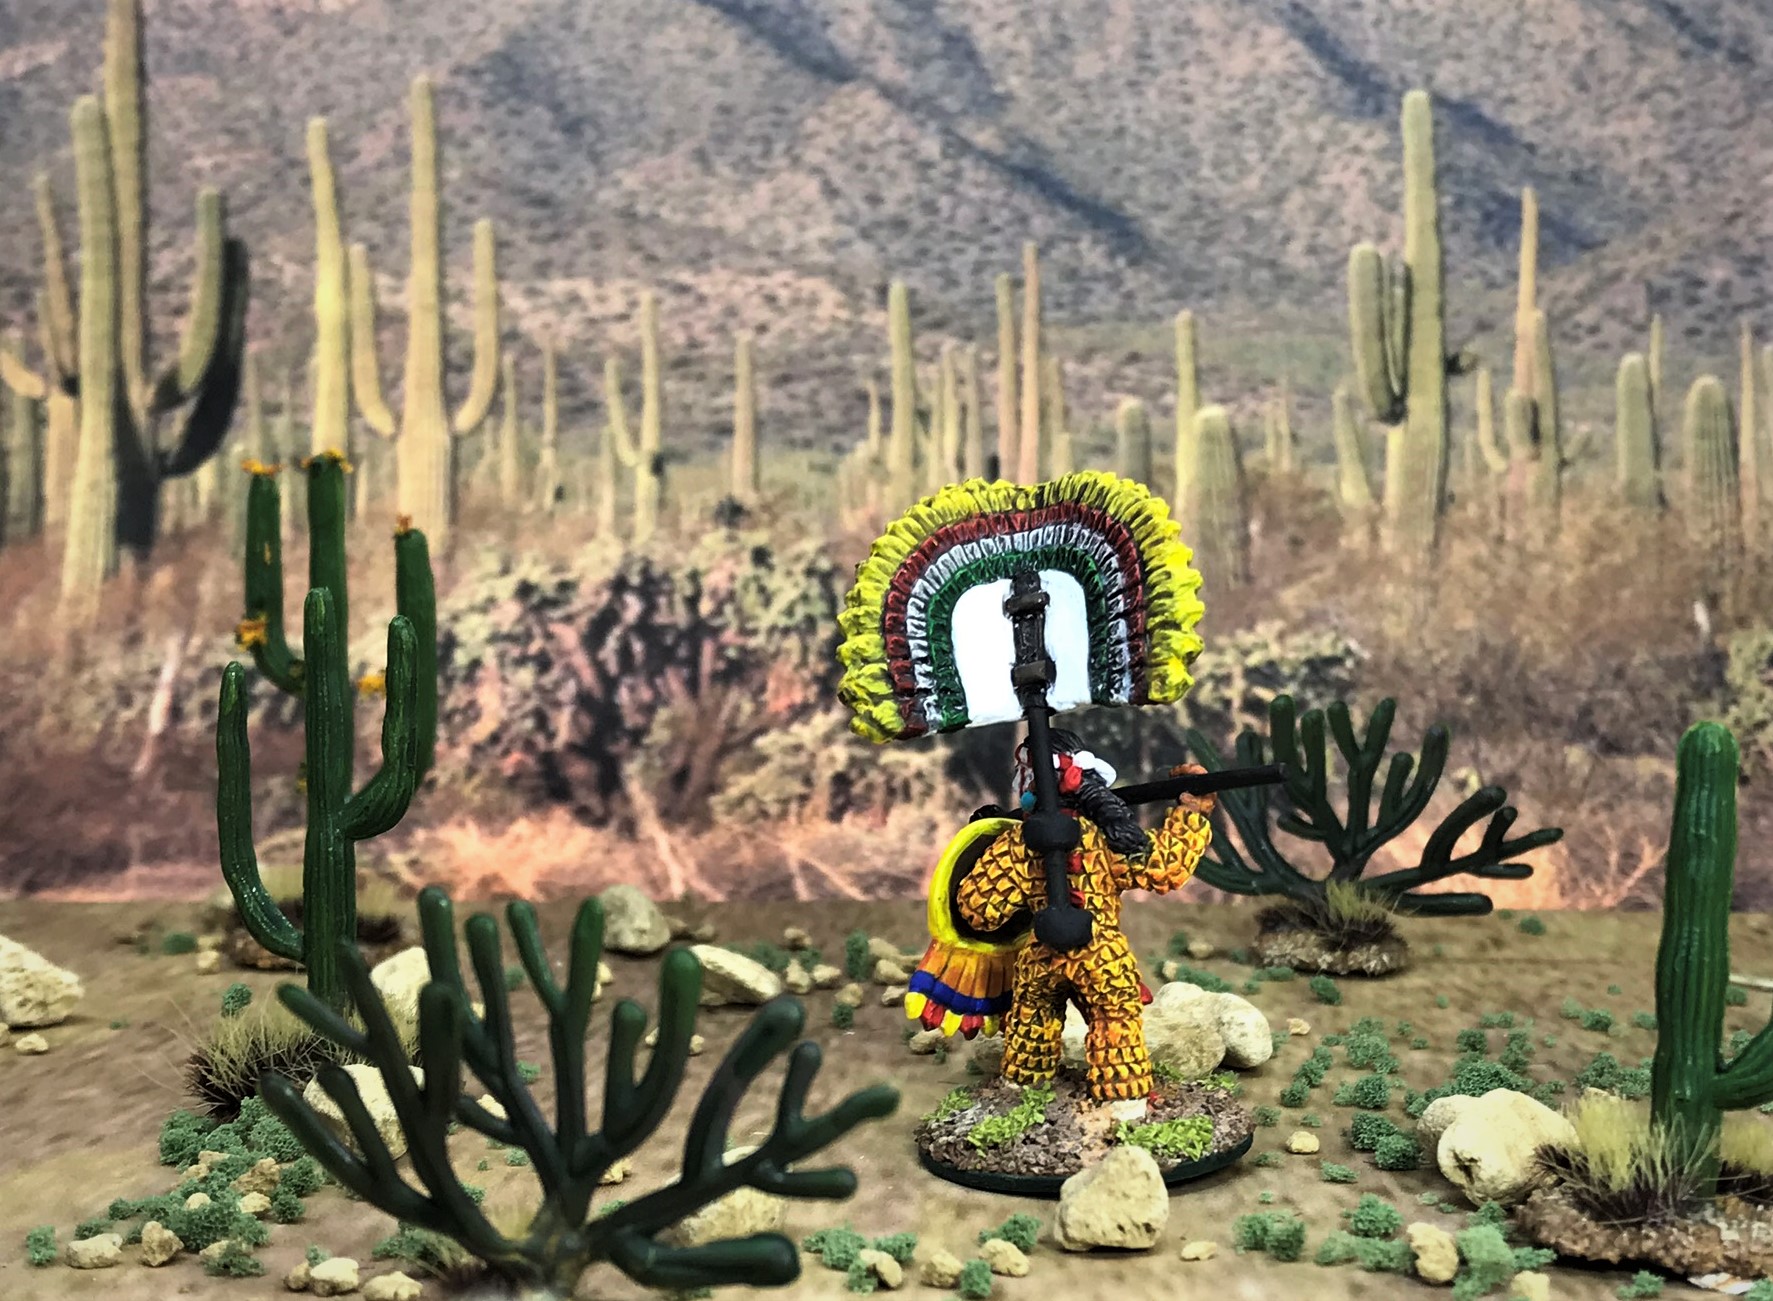
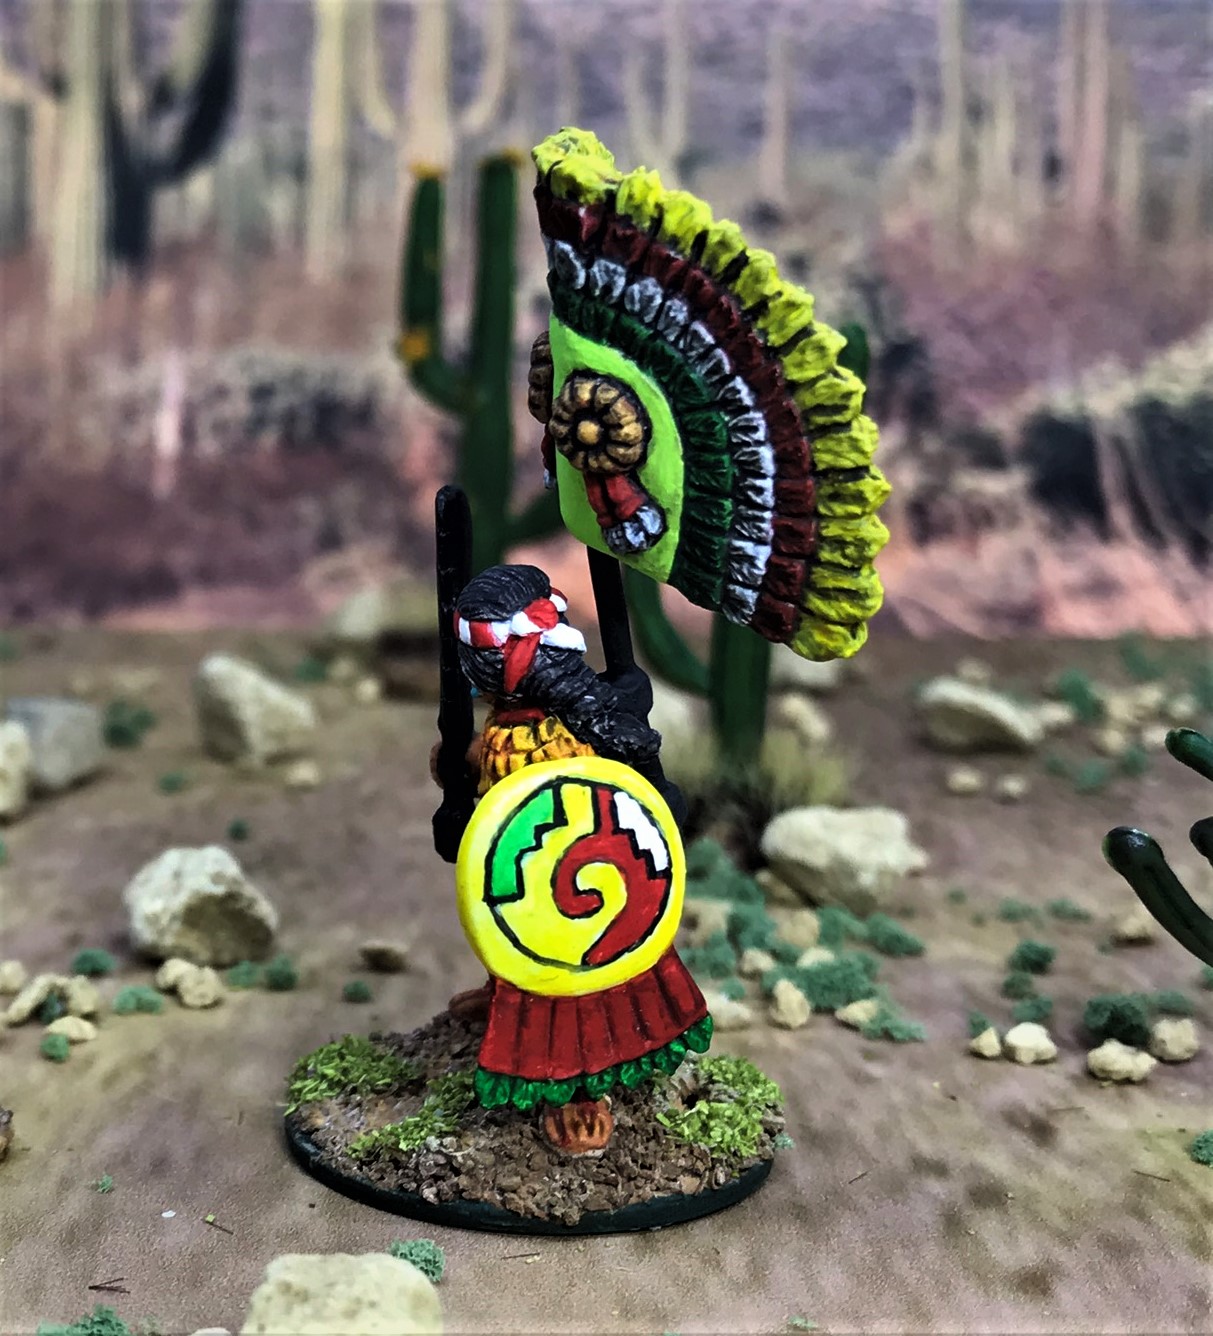
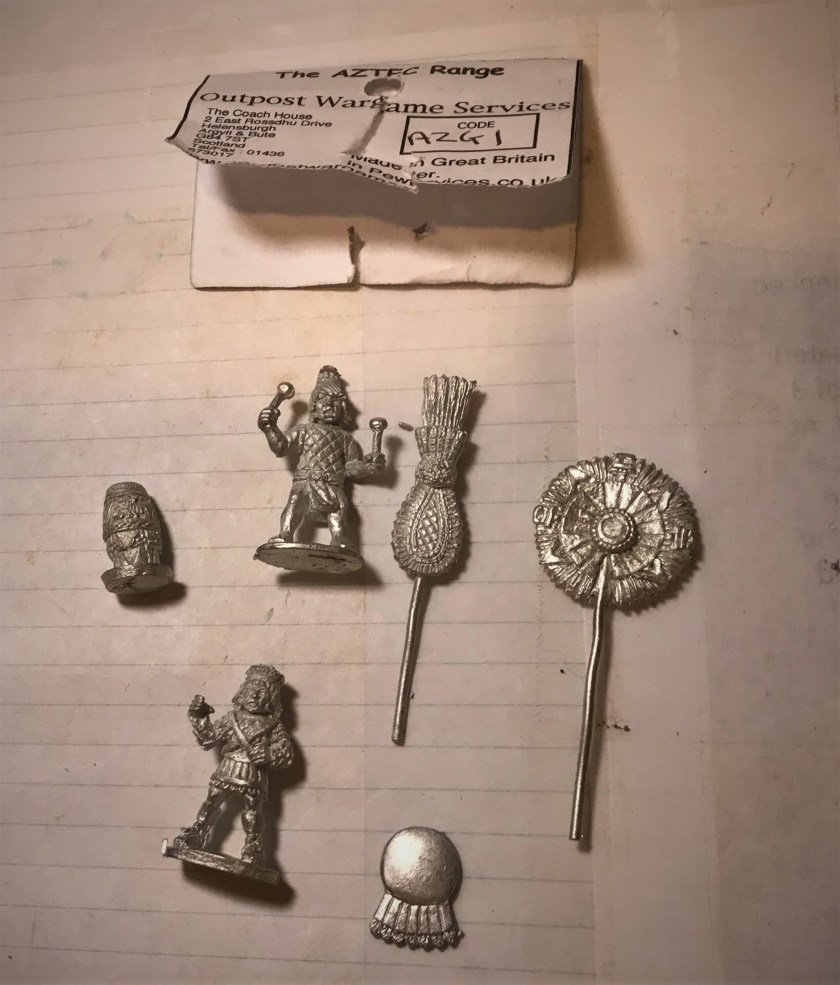
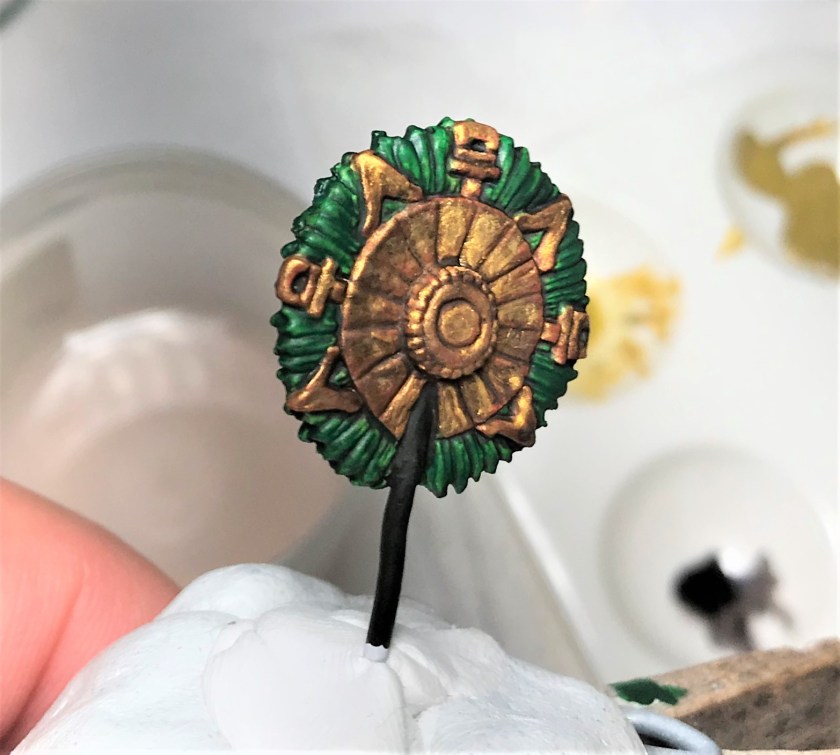
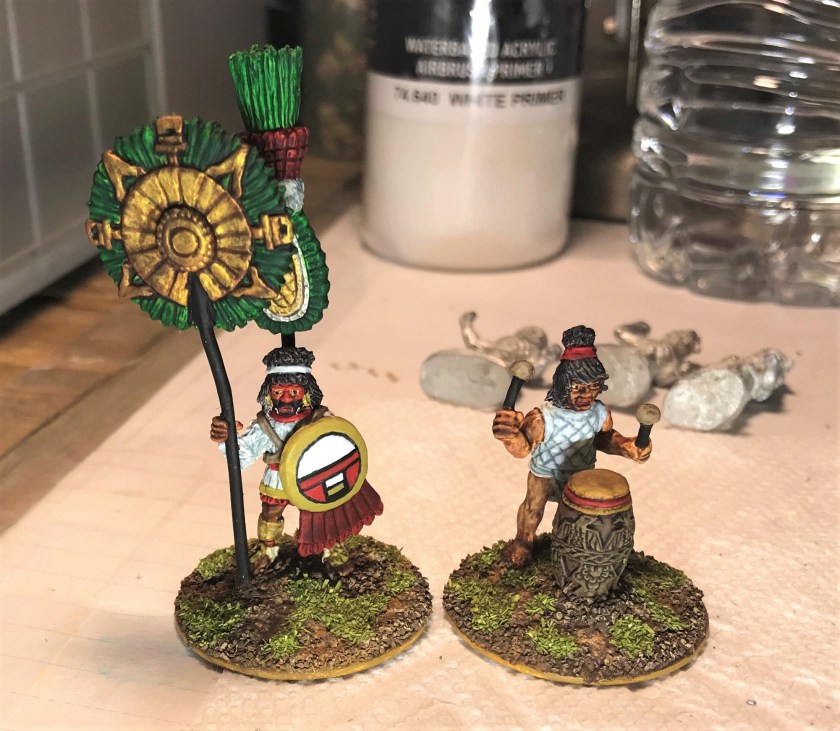
As I previously posted, Badger Games was kind enough to offer me an Outpost Wargames Services baggie of OWS AZG001 – General as Snake Woman priestess w/drummer. It consisted of an Aztec/Mexica General replete with back ornament and a standard of Quetzalteopamitl (serpent of precious feathers). Back in the day, both were adorned with lots of gold and quetzal feathers. A wonderful image is found on plate A of Pohl’s Aztec, Mixtec, and Zapotec Armies. It was a nice chance to work on two figures at a time instead of 21!
The model was fairly straightforward, though I needed to make a rig of clothespins, poster tack, and specimen bottles (seen below) to paint the back ornament and the banner. Mold lines were easy to deal with on these, and the details were nice.
As received in baggie…
Hmmm, how to handle for painting?
Here you can see the set-up I used to paint the set. The old clothes pins worked well as shown.
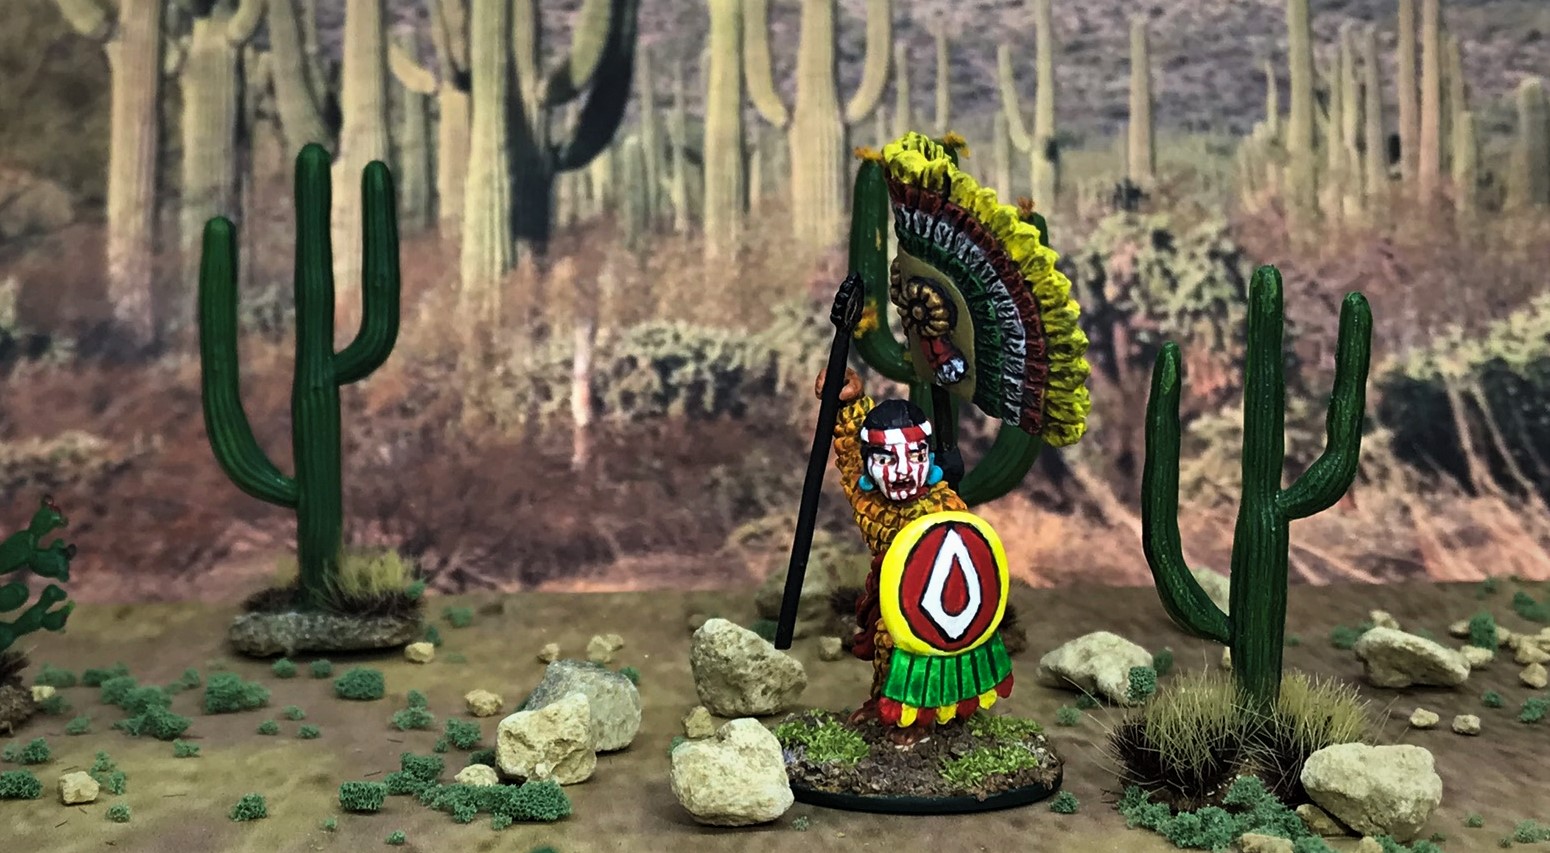
The challenges here necessitated using slightly larger washers as bases – and 1.25″ washers along with some smaller ones and some plastic card were needed (a list of materials is at the end of this post for those who are interested). As far as painting, care had to be taken with the components so as to not damage them during the build as well as to protect their paint jobs. A little varnish along the way helped here. The other major challenge was on the generals face painting. The details (such as the white markings on the lower blackened part of the face) here were the smallest I have ever attempted on 28mm figures.
Back ornament
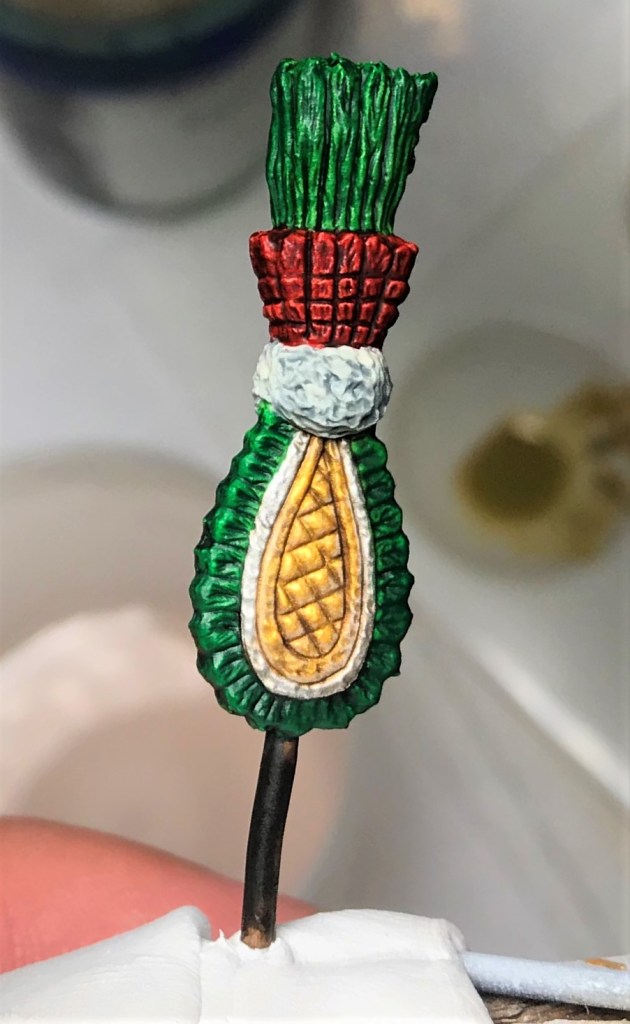
Quetzalteopamitl banner
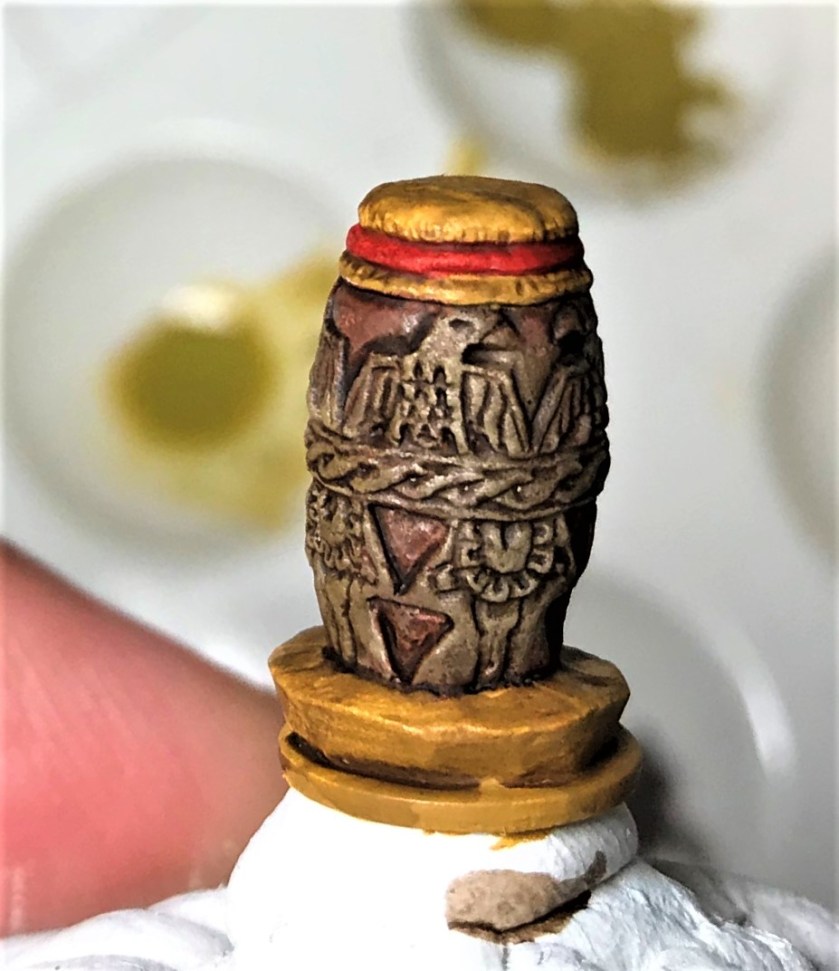
Drum
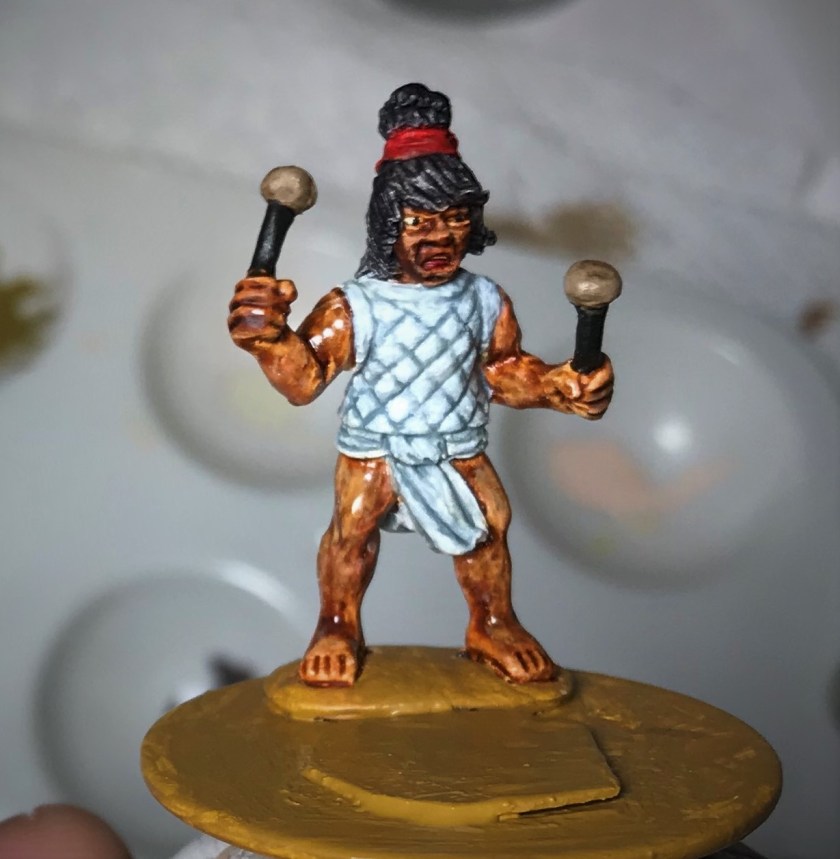
Drummer – the matte varnish would take care of the shiny flesh wash
I wanted the warpaint to look as if it was over flesh – so I painted the face first, then painted the warpaint designs (including the tiny white circles and dots).
Various components in mid-project states.
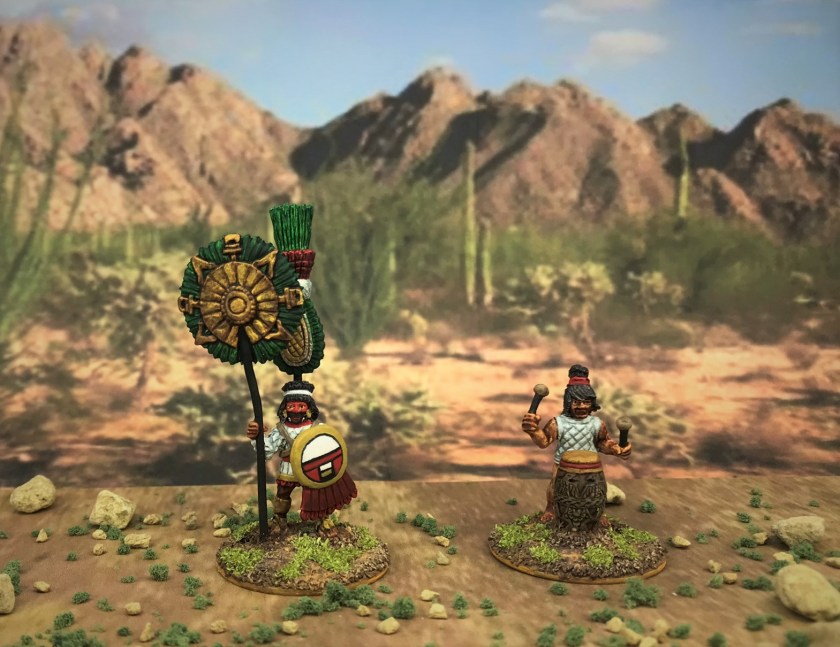
Aztec Snake Woman
Drummer
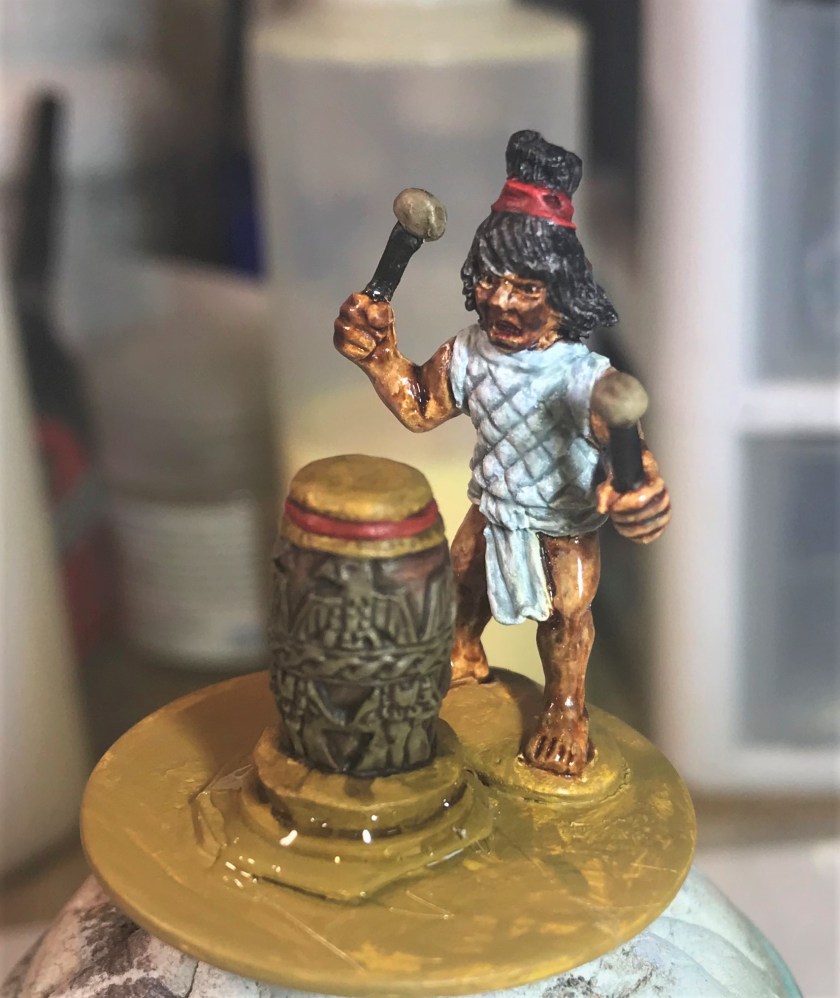
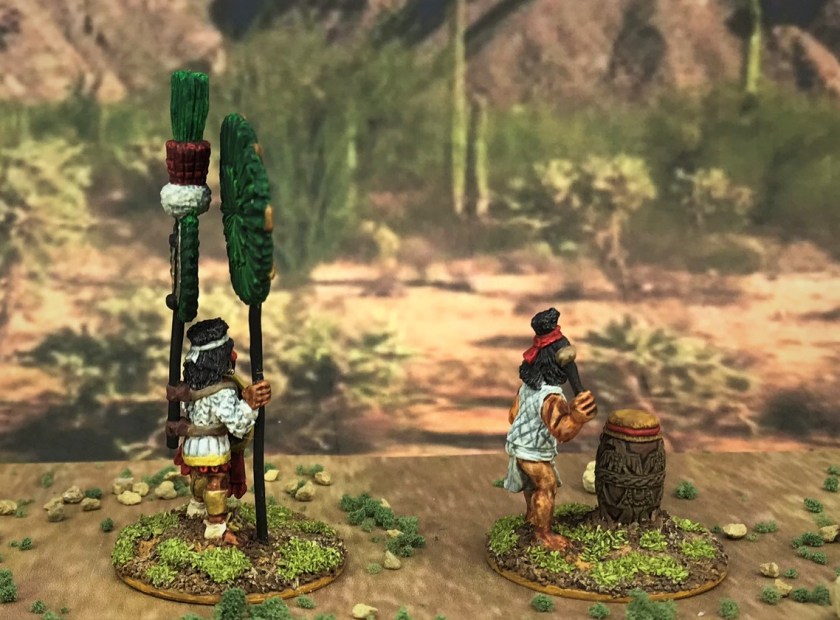
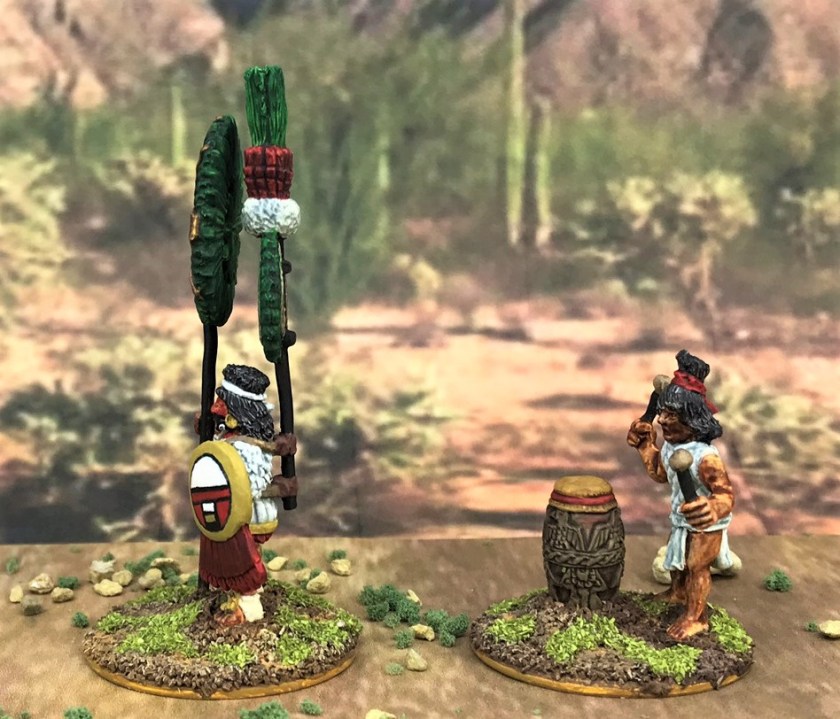
After assembly and awaiting the E6000 epoxy to harden overnight.The figures complete and ready for some eye-candy shots.Frontal shotBack shot – you can see the back ornament mounting here.Right side – I really enjoyed painting the drum for some reason!Left side shot. The shield design is from the Osprey plate, which in turn had its basis in the Codices. The back ornament and the banner helped with command and control of troops, as did the drum of course.
I hope that you found this interesting. I am moving on to working on other troops – and A GAME (remotely run) next week with players in 3 US states and the UK – more to follow soon!
Until next time – take care and stay safe all!
Miscellaneous details and references for those interested:
Posts on Units for my 16th Century Spanish Conquest Supplement for Feudal Patrol™ – “Civilizations Collide”
Aztec Snake Woman and Drummer (this post) – 1 Aztec General and 1 drummer
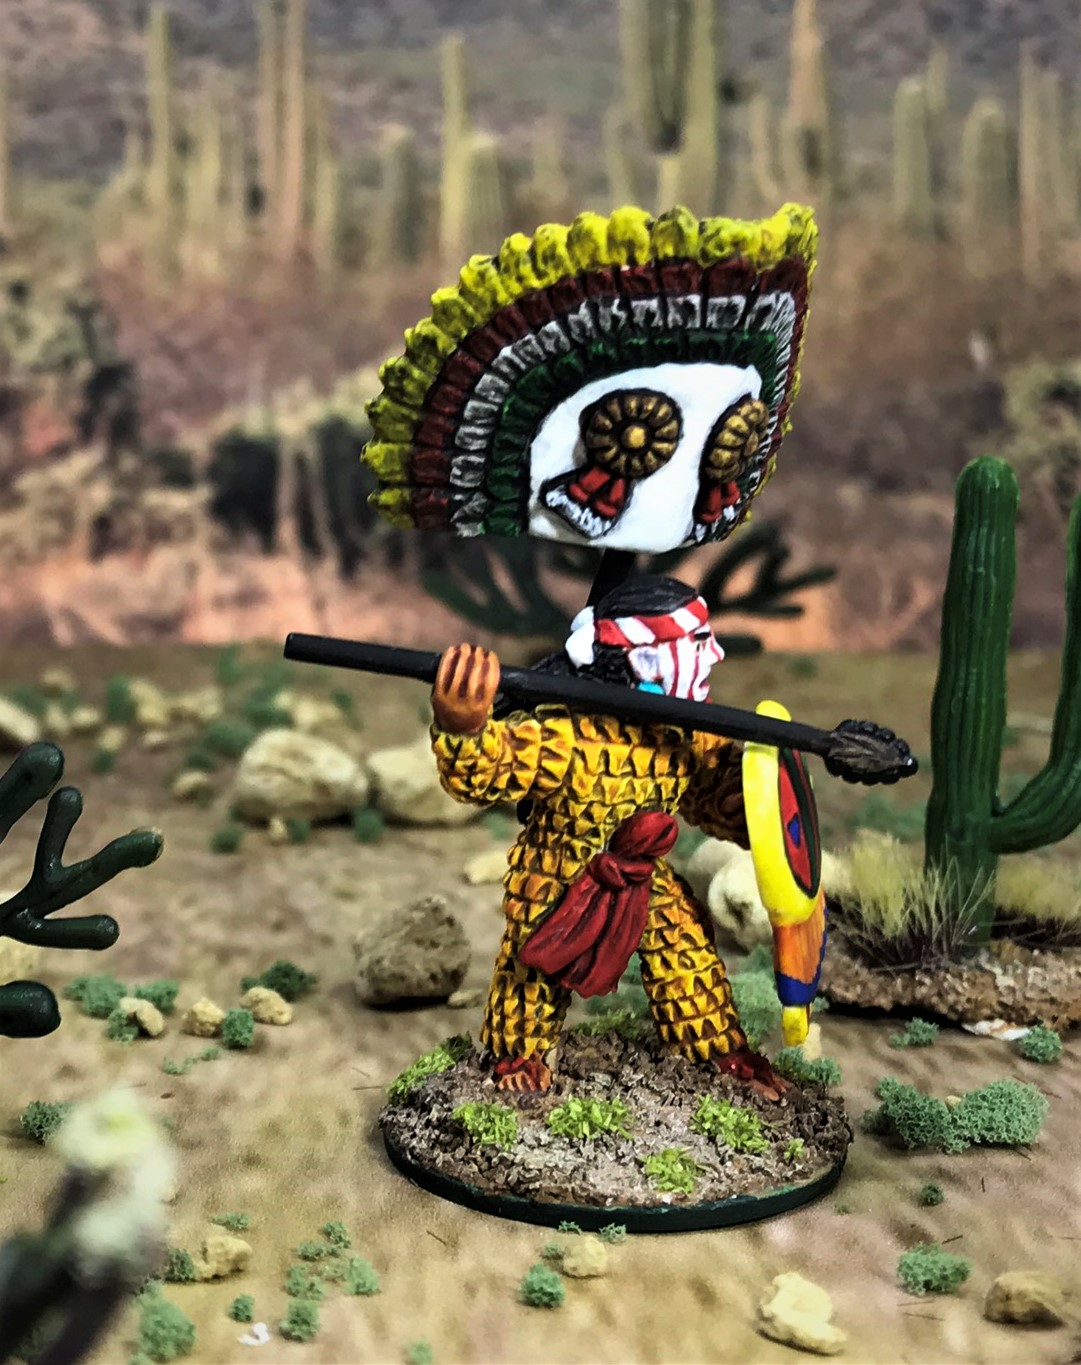
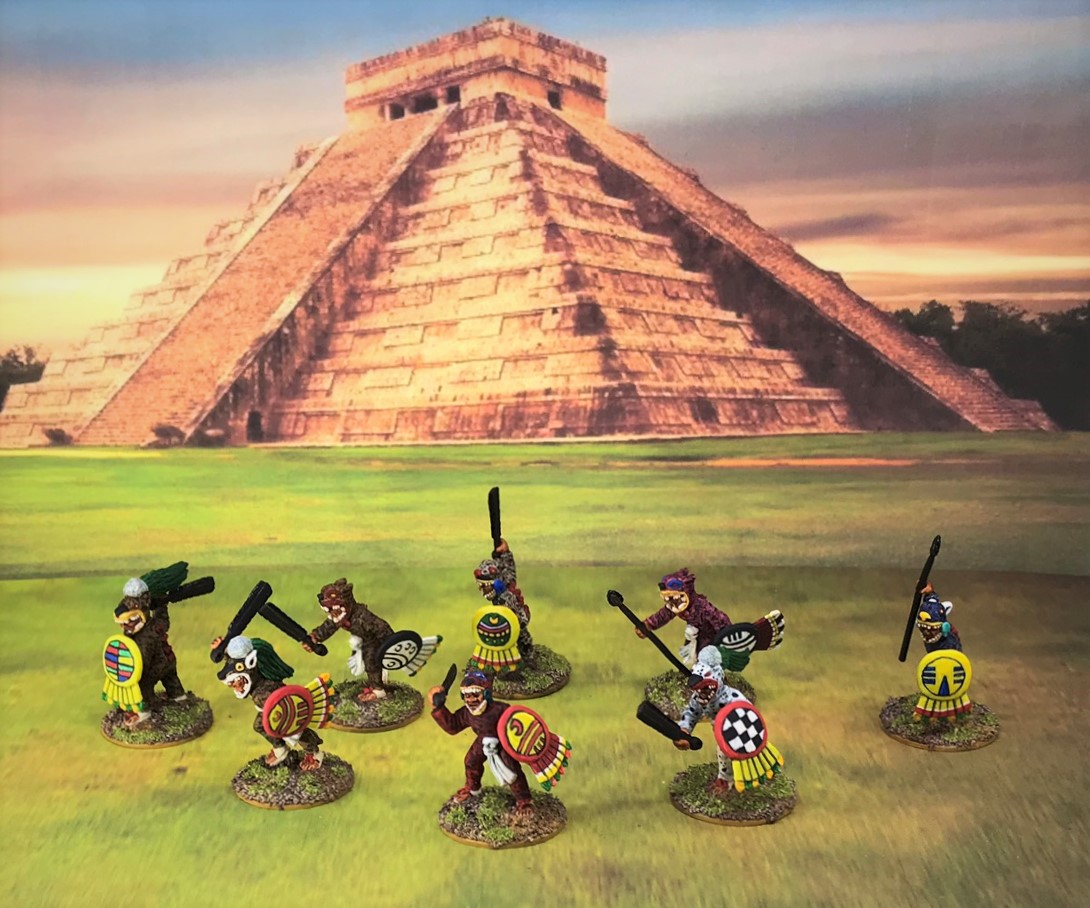
When one looks at the historical images of various Aztec warriors of the 16th Century, some of the most striking ones are those of the Jaguar Warriors. The Jaguar Warriors were true elite warriors, similar to the Eagle Warriors in having high and noble status in Aztec culture. They wore elaborately decorated suits (tlahuitli) that affected a jaguar-like look, replete with head-encompassing hardwood helmets (cuacalalatli) carved to be jaguar-like in appearance. Their spotted gaudy suits were worn over quilted cotton armor vests called ichcahuipilli, which provided a degree of additional protection to the Jaguar Warrior.
The Jaguar Warriors’ actual designation was cuauhocelotl. This was an elite warrior classification level that one earned by capturing at least four enemy warriors for use as sacrificial victims on the altar or as slaves. Aztec warfare valued capturing an enemy warrior over killing one outright in battle. Attaining Jaguar Warrior status had its privileges, such as being able to drink pulque (a fermented drink made from agave), and to have and keep concubines.
In battle, they were armed with atlatl (spear throwers), macuahuitl (obsidian-edged wooden clubs or broadswords), or tepoztopilli (obsidian-edged thrusting spears). As Jaguar Warriors are iconic in Aztec warfare, I knew I needed to have some for my Aztec forces for the upcoming launch of Buck Surdu’s Feudal Patrol™ game, especially for the supplement that I wrote for the Spanish Conquest I called Civilizations Collide. With all of their colorful suits and shields, so I was excited to paint some up and add to my troops that I have previously described in this blog.
From Badger Games, I had purchased a couple of 28mm scale metal Wargames Foundry blisters: AZ012 “Heroes of Tenochtitlan” and AZ015 “Chimalpopoca’s Jaguar Warriors”. In AZ012 there were 6 figures – 3 Aztec veterans, 2 Jaguar Warriors, and a Warrior Priest. I would need at least 5 for the basic unit in Feudal Patrol™ (that being a Warband), so I thought that AZ015 would round that out as that blister pack was supposed have six Jaguar Warriors. Surprise – after opening it I found that there were seven! Bad news, however – the AZ015 blister pack had only 3 weapons, those being all atlatls in hands that needed to be mounted to arms – and only two of the 7 included figures were so designed. The other 5 figures were thus without weapons.
I contacted Badger Games and they were fantastically accomodating. They agreed to send me a pack of 8 Outpost Wargames Services Jaguar Warriors (AZ5), as well as another pack that I’ll describe in a future post. These AZ5 Jaguar Warriors come in various poses. Of note Badger also removed the AZ015 SKU from their website and contacted Wargames Foundry to advise them that every pack of AZ015 that they had had been similarly packed incorrectly. That’s exceptional follow through on their part and I appreciated that.
The downside was was that I had to wait another week+ to get going again on the project. When the OWS pack arrived, I was happy to see that there were two weapons (8 macuahuitl and 8 tepoztopilli) available for each of the 8 AZ5 Jaguar Warriors. This meant that I had plenty of extra weapons to arm the AZ015 Jaguar Warriors! All I needed to do was convert two AZ015 figures to hold an atlatl by cutting off their hands and replace with one of the three atlatls that came with the pack.
The Wargames Foundry AZ015 “Chimalpopoca’s Jaguar Warriors” improperly packed blister as received. As a side note, Chimalpopoca was an Aztec emperor in the 15th Century.
Now I had not 8, but 21 figures for this project, which was definitely not my goal at the start! Still, with this many figures, and permutations of shield design, weaponry, and colors, I needed a plan. So I made one – as shown below. Also, the WF and OWS sculpts were different of course, and I wanted a variety of Jaguar Warrior tlahuitli and cuacalalatli both for ease of play and to be historically accurate. The best resources were this were the plates in my Osprey books and two Steven’s Balagan blog posts (THANK YOU STEVEN FOR SHARING!). Both are phenomenal and invaluable (especially for shield design examples) – here they are:
Books:
Pohl, John M. D. (1991). Aztec, Mixtec, and Zapotec Armies – Men-at-Arms.London: Osprey Publishing.
Pohl, John M. D. (2001). Aztec Warrior, AD 1325-1521. Oxford: Osprey Publishing.
Pohl, John M. D. (2005). Aztecs & Conquistadores. Oxford: Osprey Publishing.
As far as my painting plan, I should mention that I have a numbering system for all of my figures for Civilizations Collide. This system will allow me to have a points-based menu (like a “take-out menu”) for the gamers. At the beginning of a game, they will be able to use the menu choose how to spend their available scenario points by choosing specific troops for their side by checking them off on a menu that I will provide. I have an Excel spreadsheet with the figure values and designations that I will use to make the menu. Also, I will print out a disc to glue under each figure’s base with that information as well. This, I hope, will make the gaming experience better and very easy.
The pictures below show my initial organizational plan for arming the figures – I did have another corresponding Excel plan (not shown) where I planned the base colors and the specific shield designs for each of the figures.
The WF “Heroes of Tenochtitlan” AZ012 blister figures initial plan. The “AV25” for example means that it was an “Aztec Veteran #25”. JA1 means “Jaguar Warrior #1”, and so on. I later changed the Warrior Priest designation to AWP1.
The AZ015 WF “Chimalpopoca’s Jaguar Warriors” blister showing OWS weapons, the conversion of JA9 and JA9, and all the shields to paint from both WF blisters.
The OWS AZ5 pack of 8 and their shields. I found both these and the WF sculpts to be fun to paint. As this post goes on, you can be the judge of their different styles.
After I completed the plan, I mounted the figures in my usual way. I labeled the bottom of the washers under the figures with the figure number and I similarly labeled each of the specimen jars. I also organized the shields as shown below – plus I also had painted shields from previous projects available. I decided to first do their flesh and weapons, and then move on to do each figure in order and separately. This way I would gain experience (and hopefully improve) with painting the patterns on the tlahuitli and cuacalalatli, especially the jaguar-specific aspects. This approach did help me maintain focus on the figures. I ended up with fewer WIP pics, but this was a big varied project. Hell, most of these figures had not one – but two sets of eyes. It took about a month-and-a-half! Of course, the July 4th holiday weekend did keep me out of the painting mode – as did some golf.
Mounted for painting
Early painting of flesh
More early flesh painting
I did change my approach to the flesh painting a bit. Trying to get that right on dark flesh was a challenge. The list of paints I used was extensive given the breadth of the figures needs, but for flesh I mainly moved more to using Citadel “Darkoath Flesh” over a Vallejo “Sunny Skin base” with Vallejo Model Color “Medium Skin Tone” as highlights. I also experimented with Vallejo Model Color “Mahogany”.
Below are some examples of mostly completed and unvarnished figures which were awaiting shields, flocking, and of course varnishing.
WF Aztec Warrior Priest with a macuahuitl
WF Jaguar Warrior JA4 with OWS tepoztopilli
WF Jaguar Warrior JA5 with atlatl
WF Jaguar Warrior JA8 with atlatl – this was a conversion
OWS Jaguar Warrior figures JA12 and JA13. The figures are the same pose, but I armed JA12 with a macuahuitl and JA13 with a tepoztopilli. Note that I also gave them both different painting schemes.
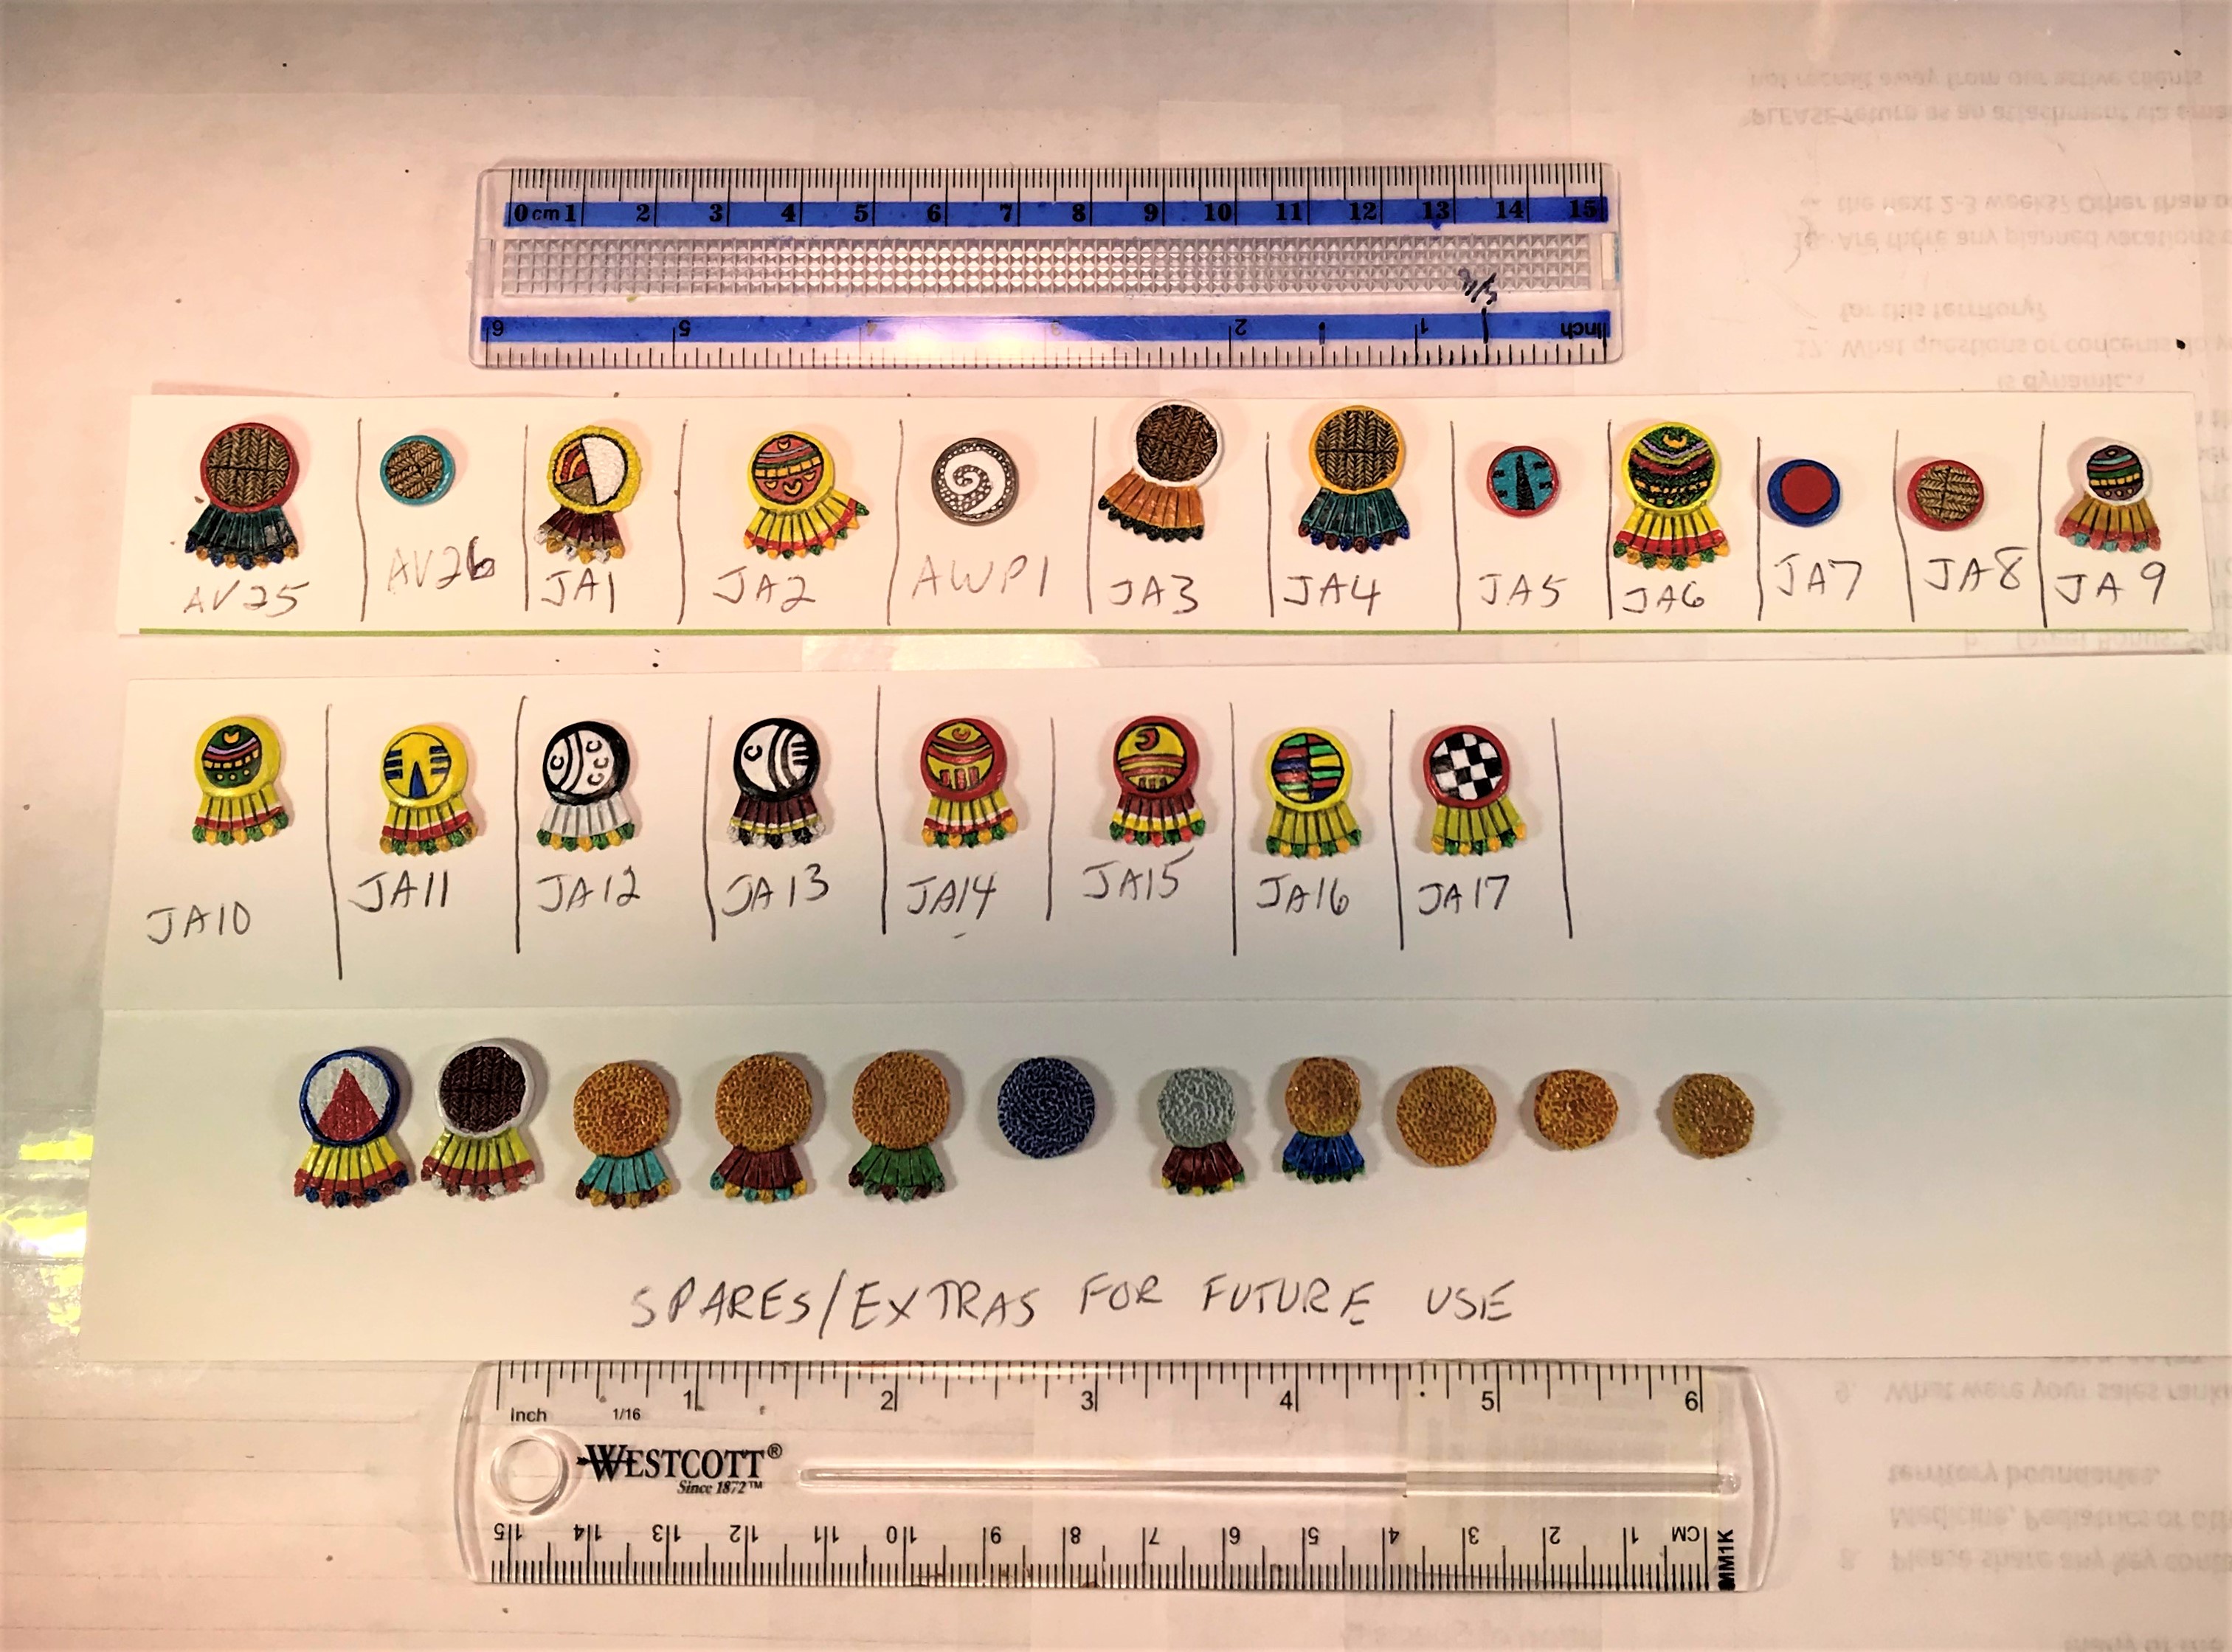
Painting of the figures was followed by my working on the shields. Using my plan I was able to finish them all after a few days and they are shown below with a ruler for scale.
I then mounted the shields, flocked the bases, varnished them, and applied static grass.
All ready to get off the painting mounts.
Now comes the fun part – sharing the final products. Each of the figures is shown below – and I gave each blister a different photo background.
“Heroes of Tenochtitlan” (AZ012) Blister Pack (Wargames Foundry)
Aztec Veteran Warrior AV25
The first of three Aztec Veteran Warriors in the blister. I experimented with darker skin tones on this figure. The background photos are of a young Mexican cornfield.
Aztec Veteran Warrior AV26
This Aztec Veteran Warrior was a more interesting sculpt for me than the previous one.
Aztec Veteran Warrior AV27
This was the only figure of all of these that had an already-affixed shield.
Jaguar Warrior JA1
I looked to create a true jaguar coloring with this figure, though he came off a bit dark. in these photos.
Jaguar Warrior JA2
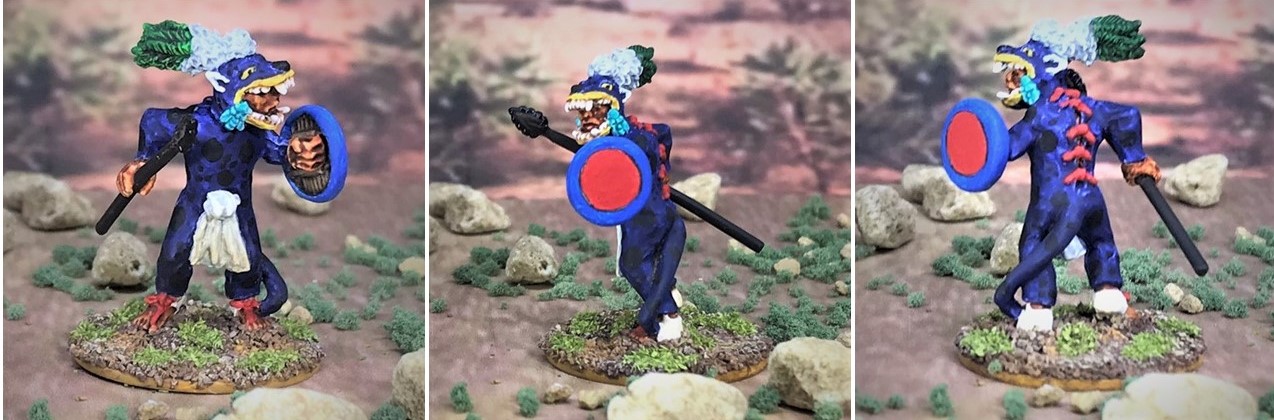
The blue and spot patterns were from an Osprey plate. The shield was one of the more difficult freehands to do. The blue color is purposefully dark as were the Osprey images.
Warrior Priest AWP1
I enjoyed painting this guy and his shield. Again, the details came from an Osprey plate. The white-dotted tlahuitli and shield were supposed to be emblematic of the stars in the night sky. Warrior Priests have special rules in my supplement and in general help keep an attached unit in the fight longer (better morale). I have more of these to do – eventually…
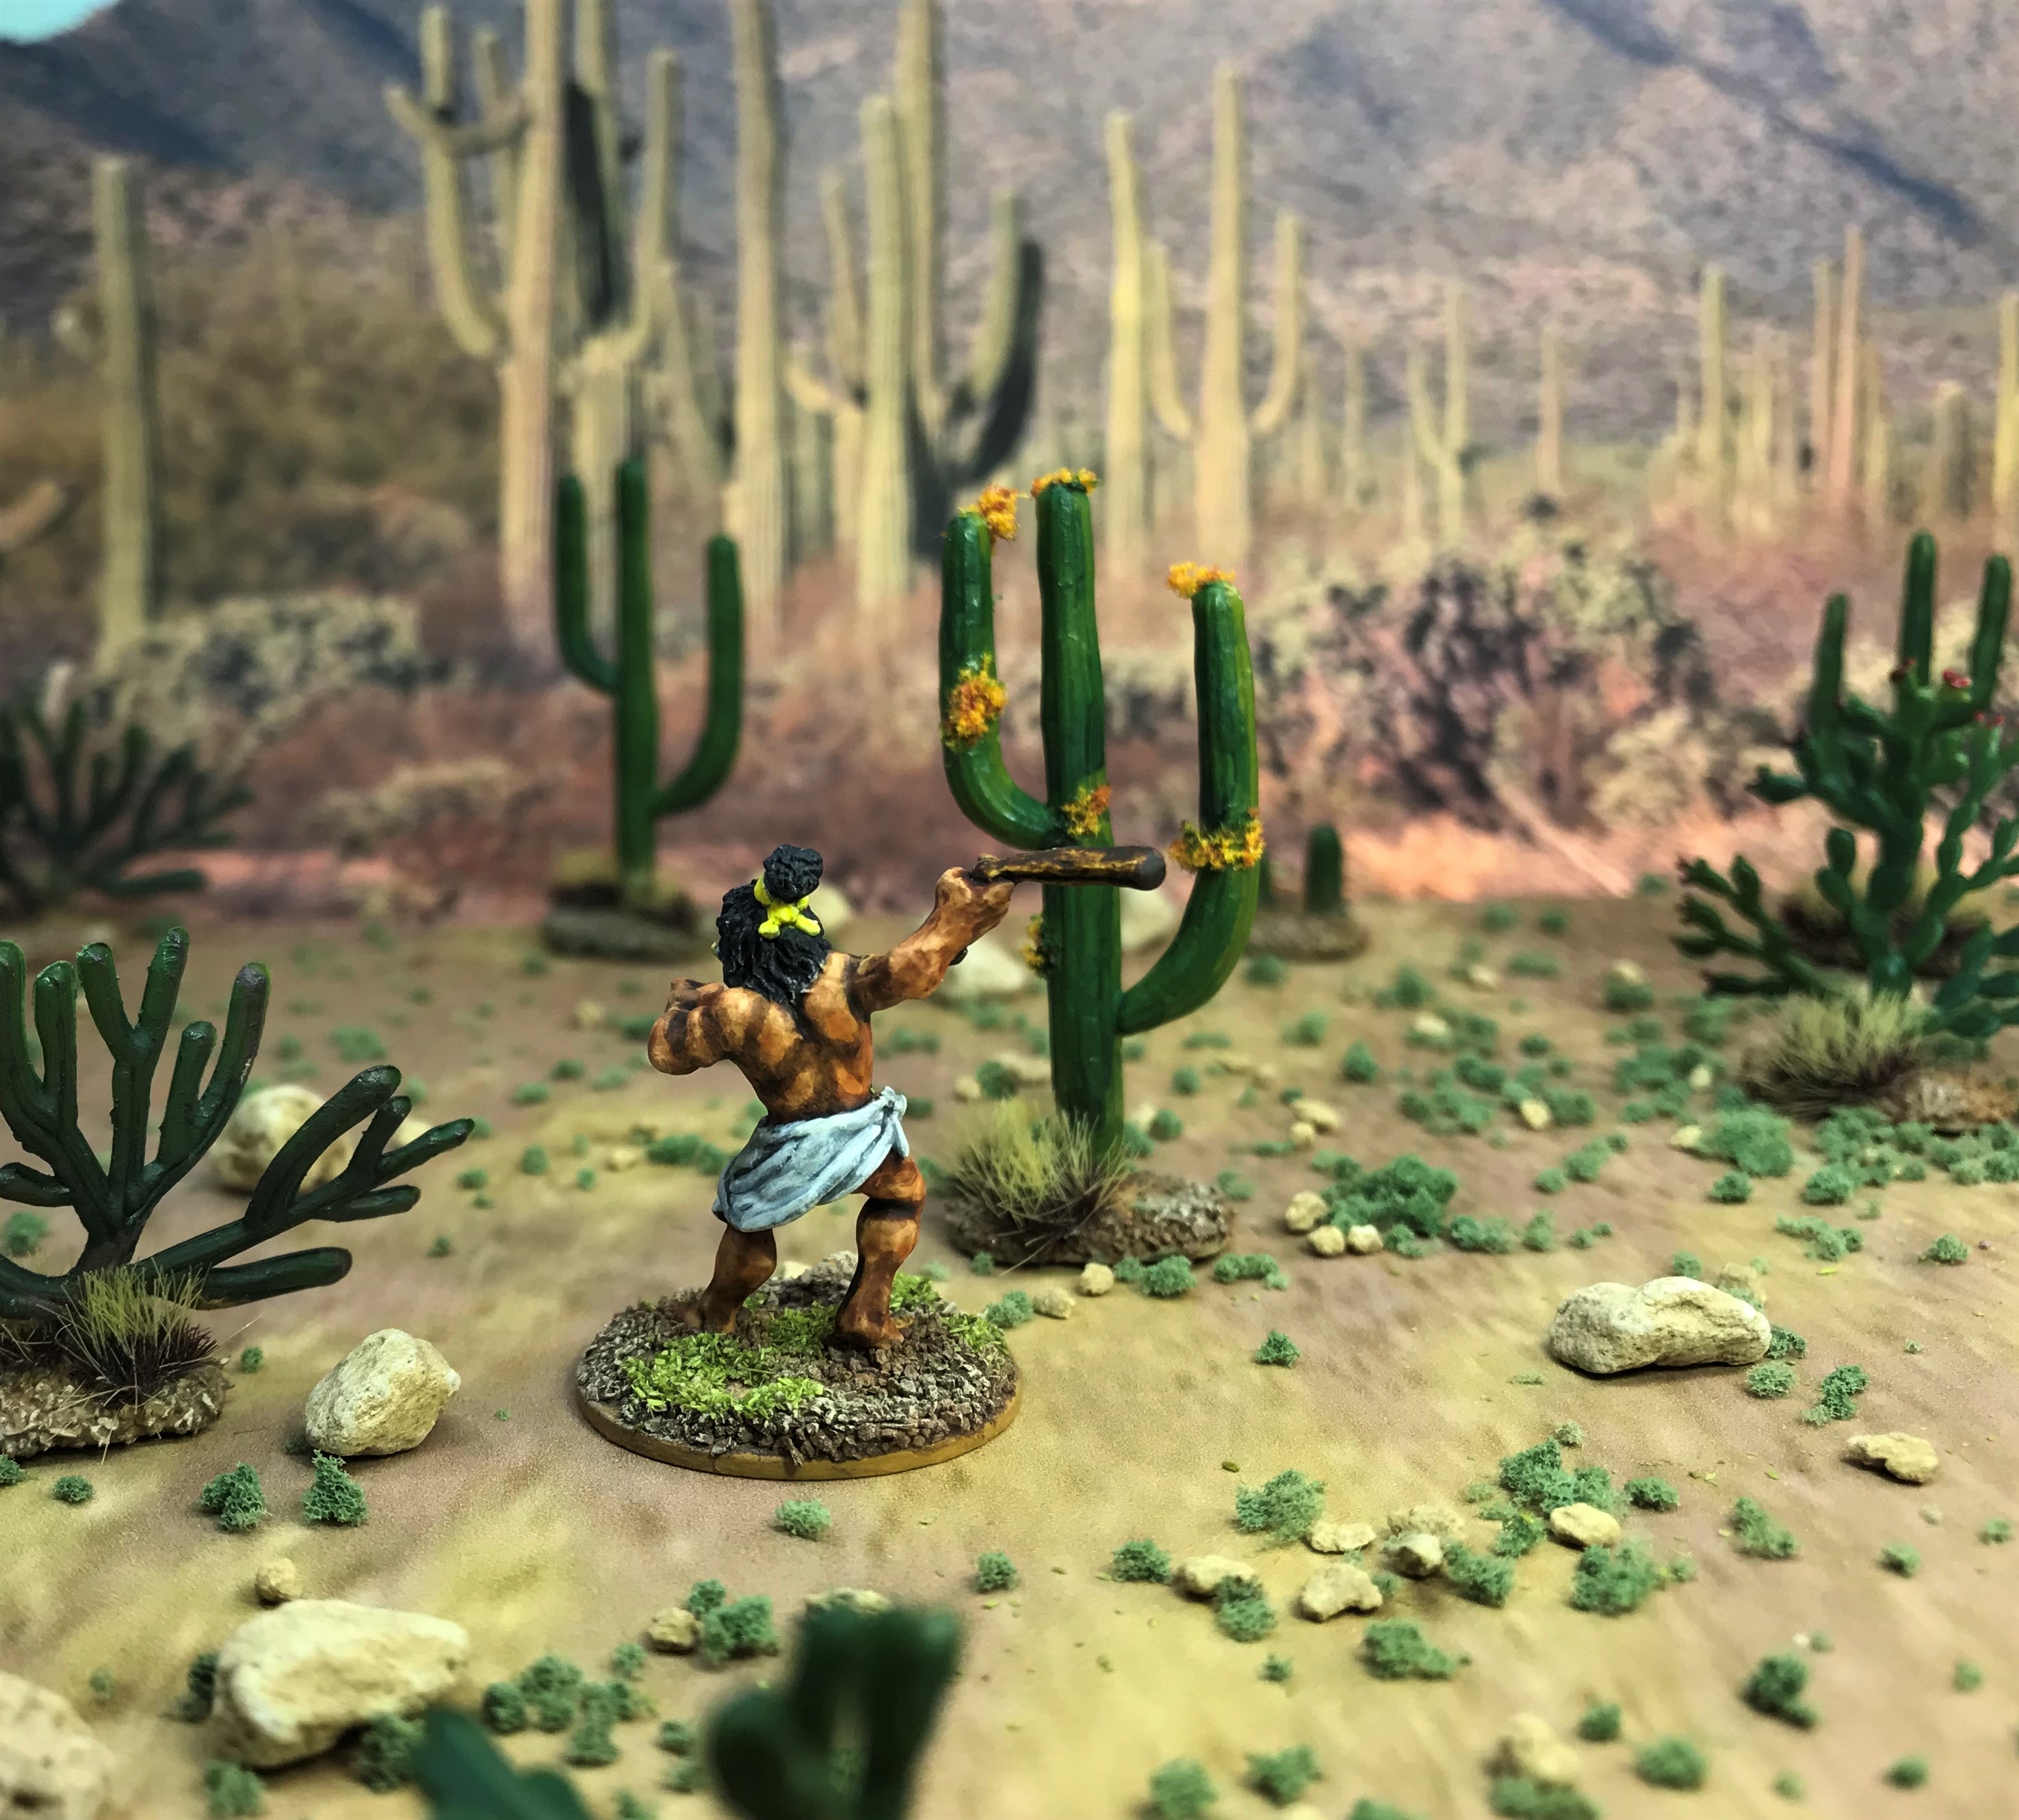
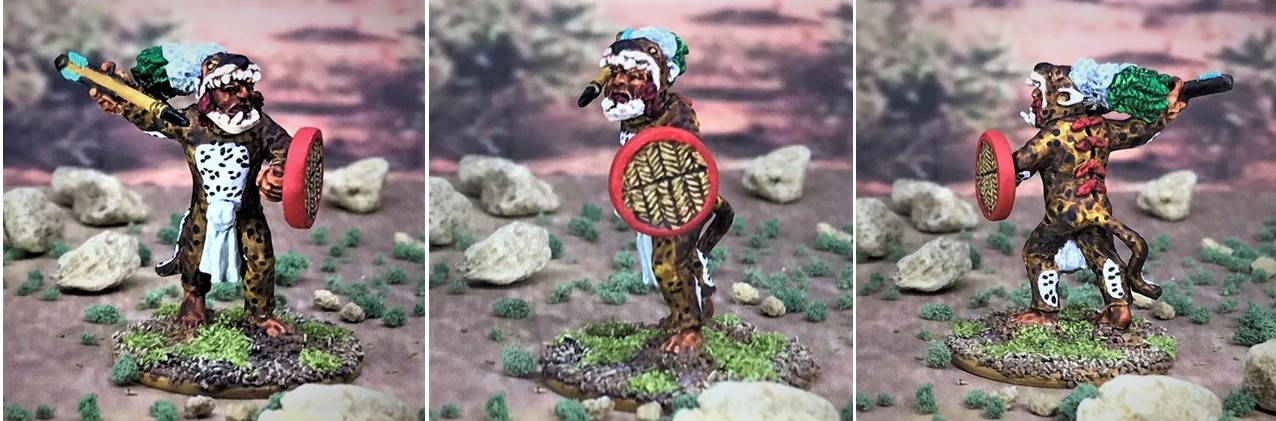
Some shields were simple wicker-covered designs like this one has. The background for this blister is a Sonoran Desert shot. The rosettes (jaguar spot patterns) were a challenge on all of these figures.
Jaguar Warrior JA4
I tried a lighter base on the tlahuitli here.
Jaguar Warrior JA5
Another Osprey plate-inspired base color. I love his facial expression.
Jaguar Warrior JA6
Painting a complex design on a wicker-type shield is definitely harder! The OWS tepoztopilli’s definitely worked well with the WF figures.
Jaguar Warrior JA7
Another blue-themed WF figure with a simple shield and OWS tepoztopilli.
A lighter pattern with the OWS shield. These shields were smooth and easier to design and paint patterns. The sculpts have their own distinct character – less fine detail than the WF ones, but no less visually impressive to me. However, I did really find the OWS sculpts to have easier tlahuitli to paint as they were far more amenable to dry brushing and shading. The background photo for all of these is an Aztec temple.
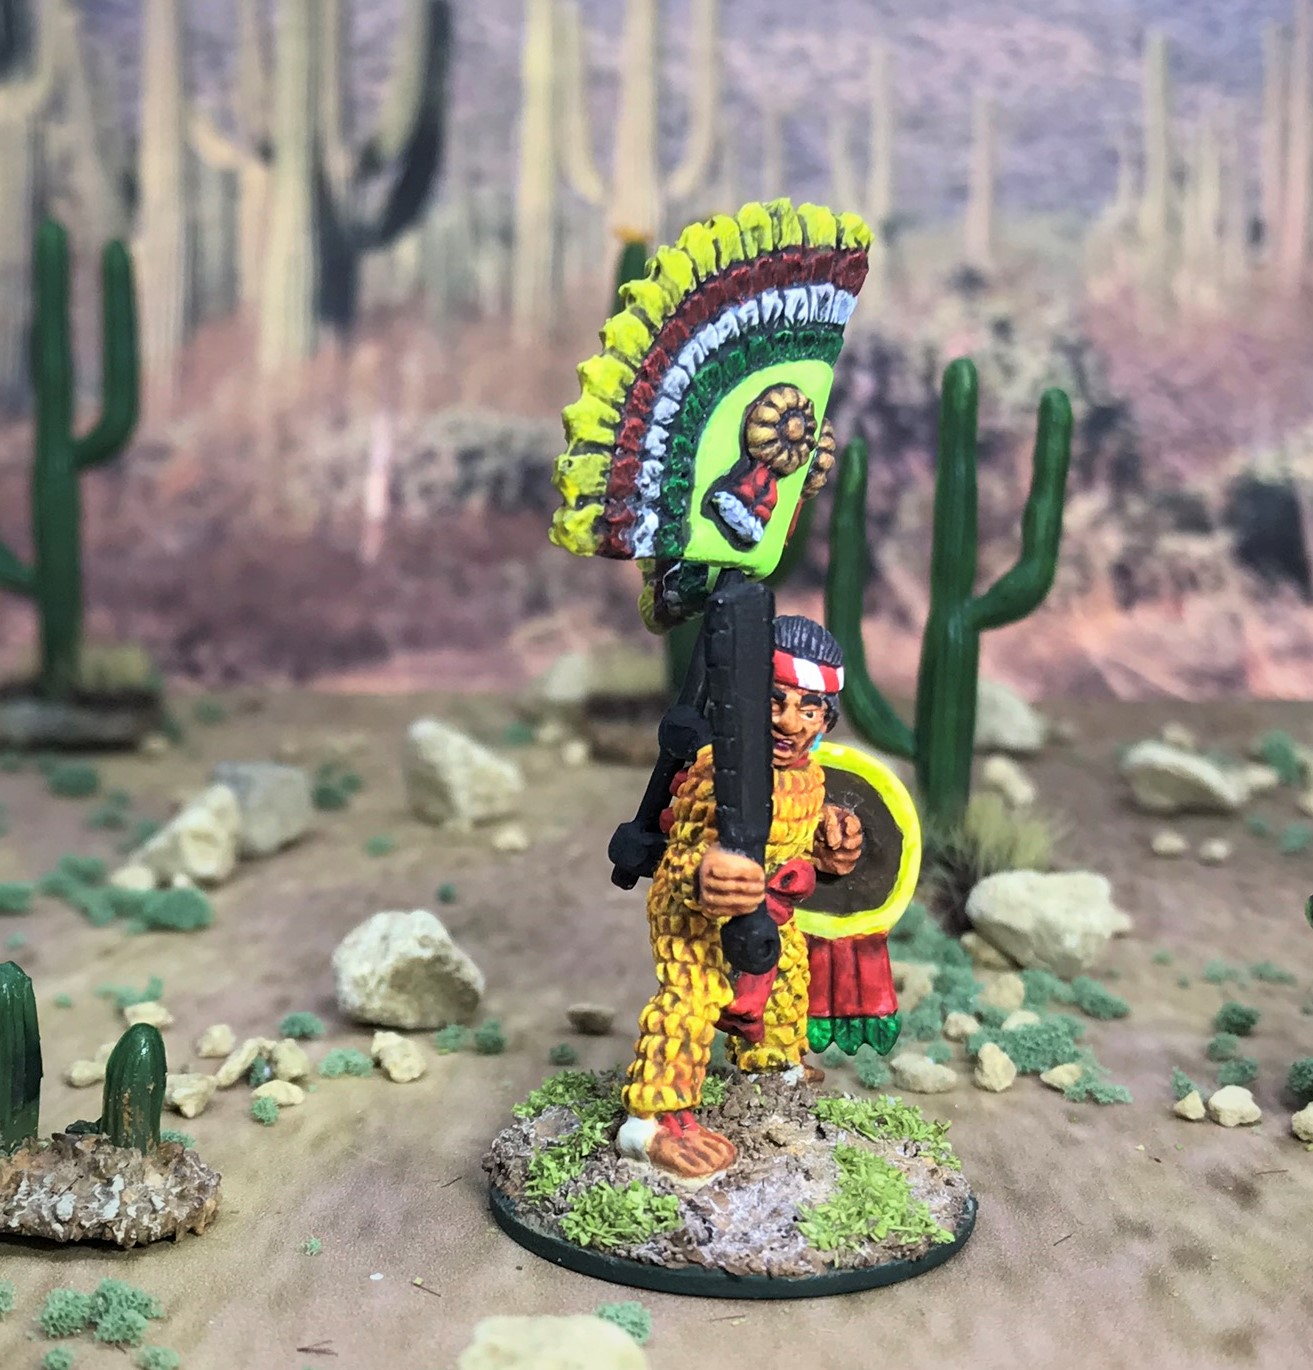
Jaguar Warrior JA11
One of the fun aspects here was being able to use so much yellow on most of these. Yellow is a tough color to use (I find) on minis, and it’s a common color for the Aztecs shields and tlahuitli. JA10 and JA11 are the same sculpt – I just added different weapons and used dissimilar paint and shield schemes.
Jaguar Warrior JA12
This sculpt seemed to be almost more dog-like with its cuacalalatli (hardwood helmet).
Jaguar Warrior JA13
JA12 and JA13 are the same sculpt, with different colors, weapons, and shields.
Jaguar Warrior JA14
I liked his charging into action pose! I wonder if the tails cased problems in melee for those who had them?
Jaguar Warrior JA15
Another red-themed warrior.
Jaguar Warrior JA16
Just two pics here as he’s one of the few with his shield facing front. Got the shield design from multiple places.
Jaguar Warrior JA17
More like a snow jaguar – but an available pattern. Checkerboard shields are fun!
“Jaguar Warriors” Blister Pack assembled
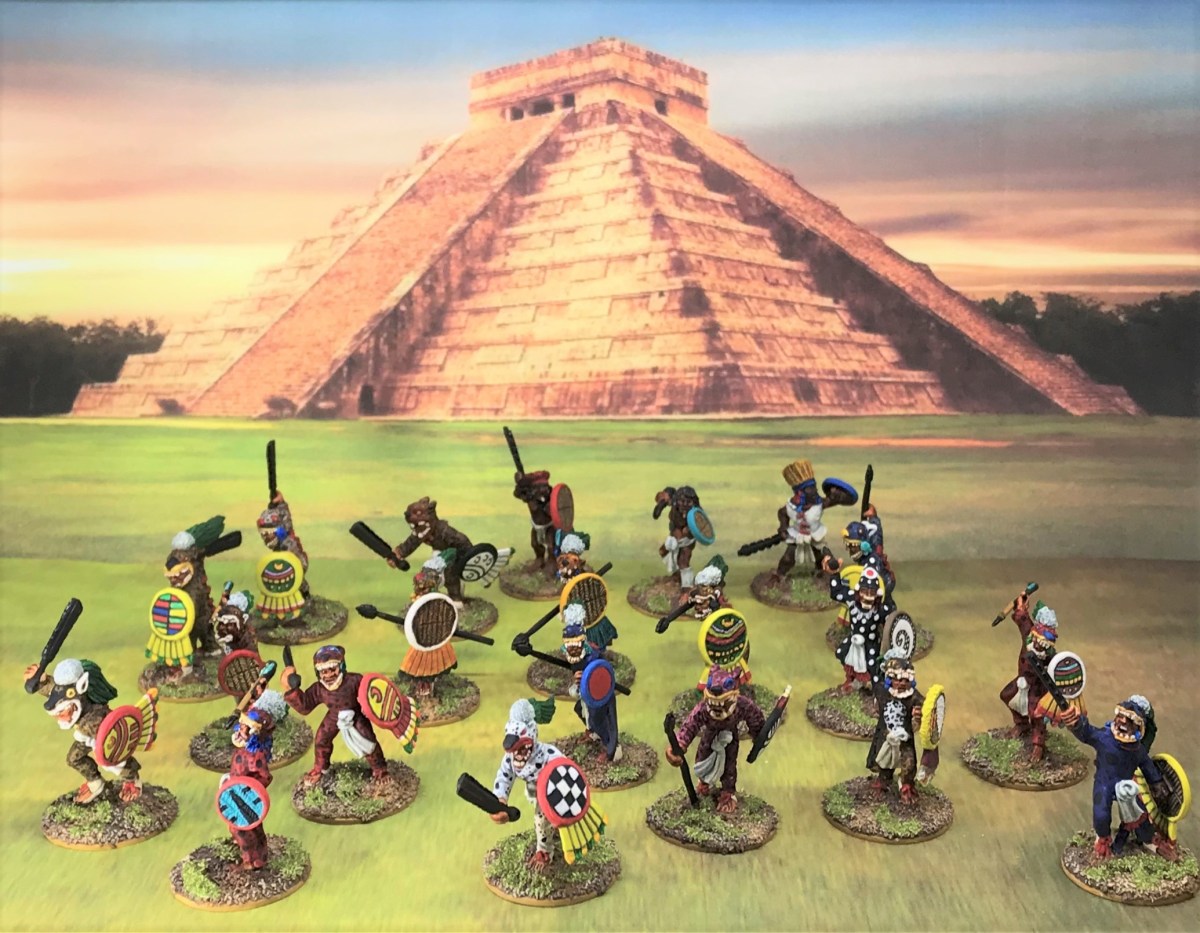
And next here you have all 21 gathered:
Hopefully you enjoyed the pics and this post – and if you have feedback, a favorite among these, or a least favorite – positive feedback or devastating criticism – I’m up for all of the above.
With many conventions cancelled, and even gaming club get-togethers not happening, it may be a while before these Aztecs get into a fight. I guess that just leaves more time to complete them – and eventually some Conquistadores and Tlaxcalans as foes.
This project hopefully counts as an entry for me for Azazel’s illustrious “The Jewel of July 2020: Community Painting Challenge” under the “Heroes” category – just that there’s 21 of them! By the way, it’s been mercifully extended until the end of August if you want in – check it out at the link.
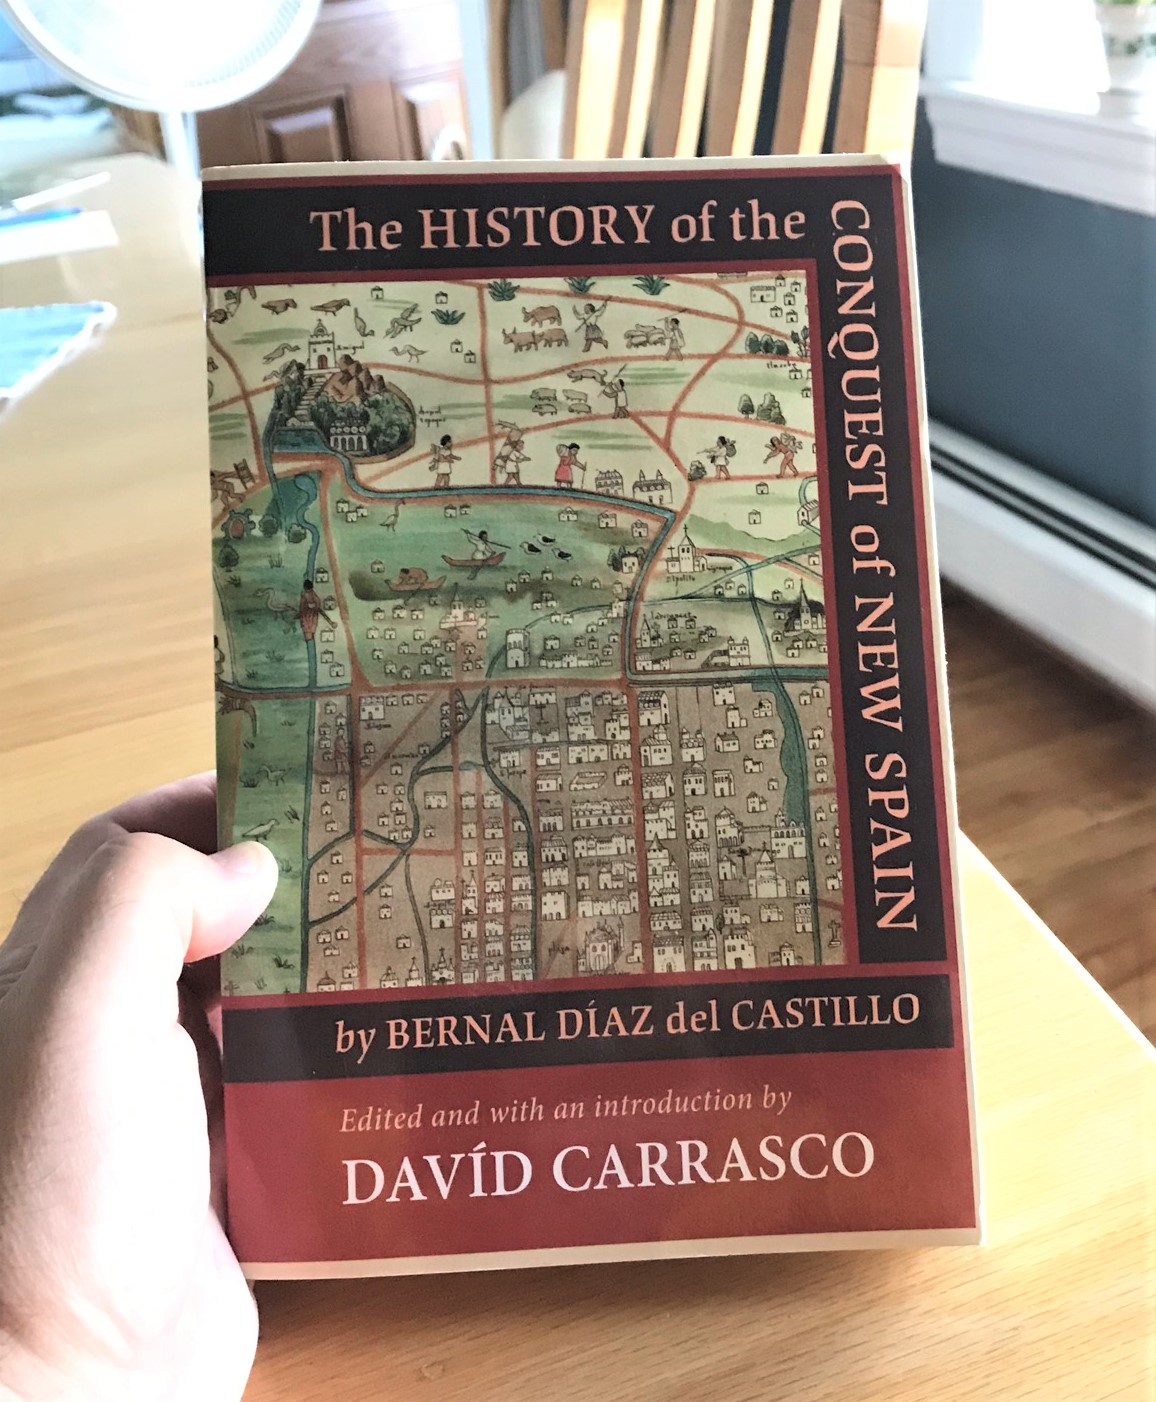
I’m also reading this book as more research:
Until next time – take care and stay safe all!
Miscellaneous details and references for those interested:
Posts on Units for my 16th Century Spanish Conquest Supplement for Feudal Patrol™ – “Civilizations Collide”
A June and July Jaguar Warrior Frenzy (plus some Aztec Veterans and a Warrior Priest to Boot) (this post) – 3 Aztec Veteran Warriors, 17 Jaguar Warriors, 1 Aztec Warrior Priest
Last weekend I had a lot of fun being on the Imperial Rebel Ork podcast. It was a lot of fun, and I really appreciated the opportunity. Though the Imperial Rebel Ork himself (aka IRO) apologized for the audio quality – I thought it was fine. Hell, we had to have our chat over quite a few miles:
All 10,463 of them.
The podcast is fun (and NOT just because I was lucky enough to be on it). Here is the link where you can access the podcast on Apple – though it’s on other platforms as well:
And of course IRO has an excellent blog that is well-worth following – he’s amazingly creative.
If you listen to the podcast (and YOU SHOULD 😁), it’s clear that there are some background details of our discussion that might be of some interest to you. Basically, it’s about how I got into the hobby back in 1982 or 1983, and how I got back into it in 2015, plus where I’m at now. So, I will share some anecdotes, pics, and links that many of you may not have seen before.
I described how I was a traditional board game wargamer – I really got my first wargame – Avalon Hill’s Afrika Korps – probably when I was 10 or 11. Others followed, like Waterloo, and War at Sea. Finding opponents was not easy – most of my friends and family thought these games to be uninteresting at best. Later, at West Point, fate got me as a roommate the irrepressible Dave Wood – who was a wargamer as well! We spent hundreds of hours playing the aforementioned games, but also especially Victory in the Pacific and Panzer Leader.
My first wargame – and I still have it ready to play after nearly 50 years.
Always loved this classic.
Dave Wood and I played these games hundreds of times.
A great platoon level game with decent realism. I even acquired the France 1940 expansion.
A major influence on my hobby was to come through Dave – and that was an introduction to Buck Surdu, who was at West Point in the class behind me and Dave. Buck had already written and had published his own sets (sets – not a set) of rules for different wargames. My first meeting with Buck was when Dave brought me up to a session that Buck had set up in the Department of Foreign Languages classroom – it was a giant fantasy miniature battlefield covered with old 25mm Ral Partha, Grenadier, Minifig, and other miniatures. This was set up on desks put together and covered with old US Army OD blankets as mats. I had never seen anything like this before – and I was stunned – and hooked. Buck had written the rules for the game as well. Before long, both Dave and Buck were lending me figures to paint for them as I wanted to try that too.
The first units I painted for them still exist! One was a group of Minifig halflings that Dave had that he let me paint for him. I did not really know anything about painting with highlights, washes, or dry brushing back then. Kindly, Dave gave them to me a few of years ago that I described here. I flocked their bases and varnished them, but left them unchanged otherwise.
The Halflings!
A second unit was one I painted for Buck – a group of pig-faced Orcs that I think were from Minifig. I decided to give them a pretty gaudy paint job – with a Captain America theme. They were the “All-American Orcs”. Buck still has them and took a couple shots to show them to you in all their ancient “glory”:
The All-American Orcs
Mind you, these were painted before my class graduation in May 1984, but I used no varnish back then so there are chips, and no flocking (washers were enough for me then) – but I’m happy to see them again, and humbled that Buck has kept them around.
Another unit (that I don’t have pictures of but Dave has somewhere) was a punk/new wave blue, red, and green mohawk-wearing group that I called “Paddy’s New Wave Bar and Grill Conscript Militia”. Yup, that was a thing back then.
Also, I, Buck, Dave, Doug Morris (’85), and another ’84 classmate Ken Thrasher also had Sunday night campaigns of Tunnels and Trolls (a role-playing game that competed with Dungeons & Dragons back in the day). The campaign I ran focused on a Balrog wizard who had dimensionally transported himself to the US in the 1960’s – and used LSD and other drugs – and then returned to rule a mountain lair replete with monsters, traps and puzzles with a 1960’s theme. The Balrog’s name? Why Purple Haze of course…
And I still have this too!
After graduation, I still puttered around with painting my own figures, as well as casting some in Prince August molds using – of all things – fishing lead weights. I was deployed to Germany, and got to host Buck and a friend of his in 1987 for a couple of gaming weekends and a side trips to Paris via Verdun. They were stationed in Italy. Buck recently shared this blast from the past with me – a big game using Buck’s Fantasy Miniature rules with some edits that I made. You cannot see a lot, but I made the game analogous to a Bastogne 1944 scenario – with sprites, dwarves, halflings, orcs and more. We used stuff like lichen and Styrofoam as terrain.
Me and Buck’s friend Mike at the game in Hagenbach, West Germany. I am wearing my 249th Engineer Battalion (Combat Heavy) t-shirt. I still have the card table in the back!
Buck, myself, and my daughter Ellen. I was a single parent 1LT in Germany. Ellen was 2 here. Now she’s a mom with a three year old!
Then my hobby activities slowed to a crawl. I was a divorced single parent, then remarried, then divorced, then remarried…in the Army, then out…in many parts of the US, then more this and that…fast forward to 2015…
I had always saved all my miniatures and paints. I knew I would eventually get back to the hobby, but when? Well, a chimney fire required us to move a lot in the cellar during a rebuild, and my wife was moving my minis – and I said, “I’ll take care of them”. Next thing I know I’m painting again, gaming again, and blogging about it starting back in 2015. My first project was “The Nightmare Legion”, which only took more than three decades to complete – and was the subject of my first blog post in March of 2015,
Myself, Buck Surdu and Dave Wood at “Ma’k Con” (in my basement) back in 2017. If the hobby is a crime, these are my bad influences!
On the podcast, IRO discussed a few aspects of my hobbying that you may not have seen before if you are a relative newcomer to the blog. So, here are a few links if you want to take a gander if you’d like some context:
I hope you enjoyed this romp down memory lane in conjunction with the podcast – if you have similar memories, or completely different ones – feel free to comment.
Oh yeah, if I follow or comment on your blogs, or you on mine, you all inspire me.
This looks to be an exciting new game! My buddy Buck Surdu has teamed up with Old Glory and Sally 4th on this project – the link is here. It launches on June 27th, 2020.
There’s a great description at Beasts of War here’s a snippet from that page:
Wars Of Ozz Kickstarter Coming Soon
The idea is that the rules here take Baum’s world and give it a little bit of a post-apocalyptic Earth twist. Things then get even more quirky with the addition of the “Madness Bomb” which got dropped into the mix during the “Last Great War” where survivors were mutated and chaos reigned until the Wizard finally arrived.
This then all distills down into a new mass battle game with miniatures sculpted and cast by the team at Old Glory. All of the miniatures are cast in lead/tin and are you’ll be able to buy armies to build up your mass of troops as well as characters to lead them into battle.
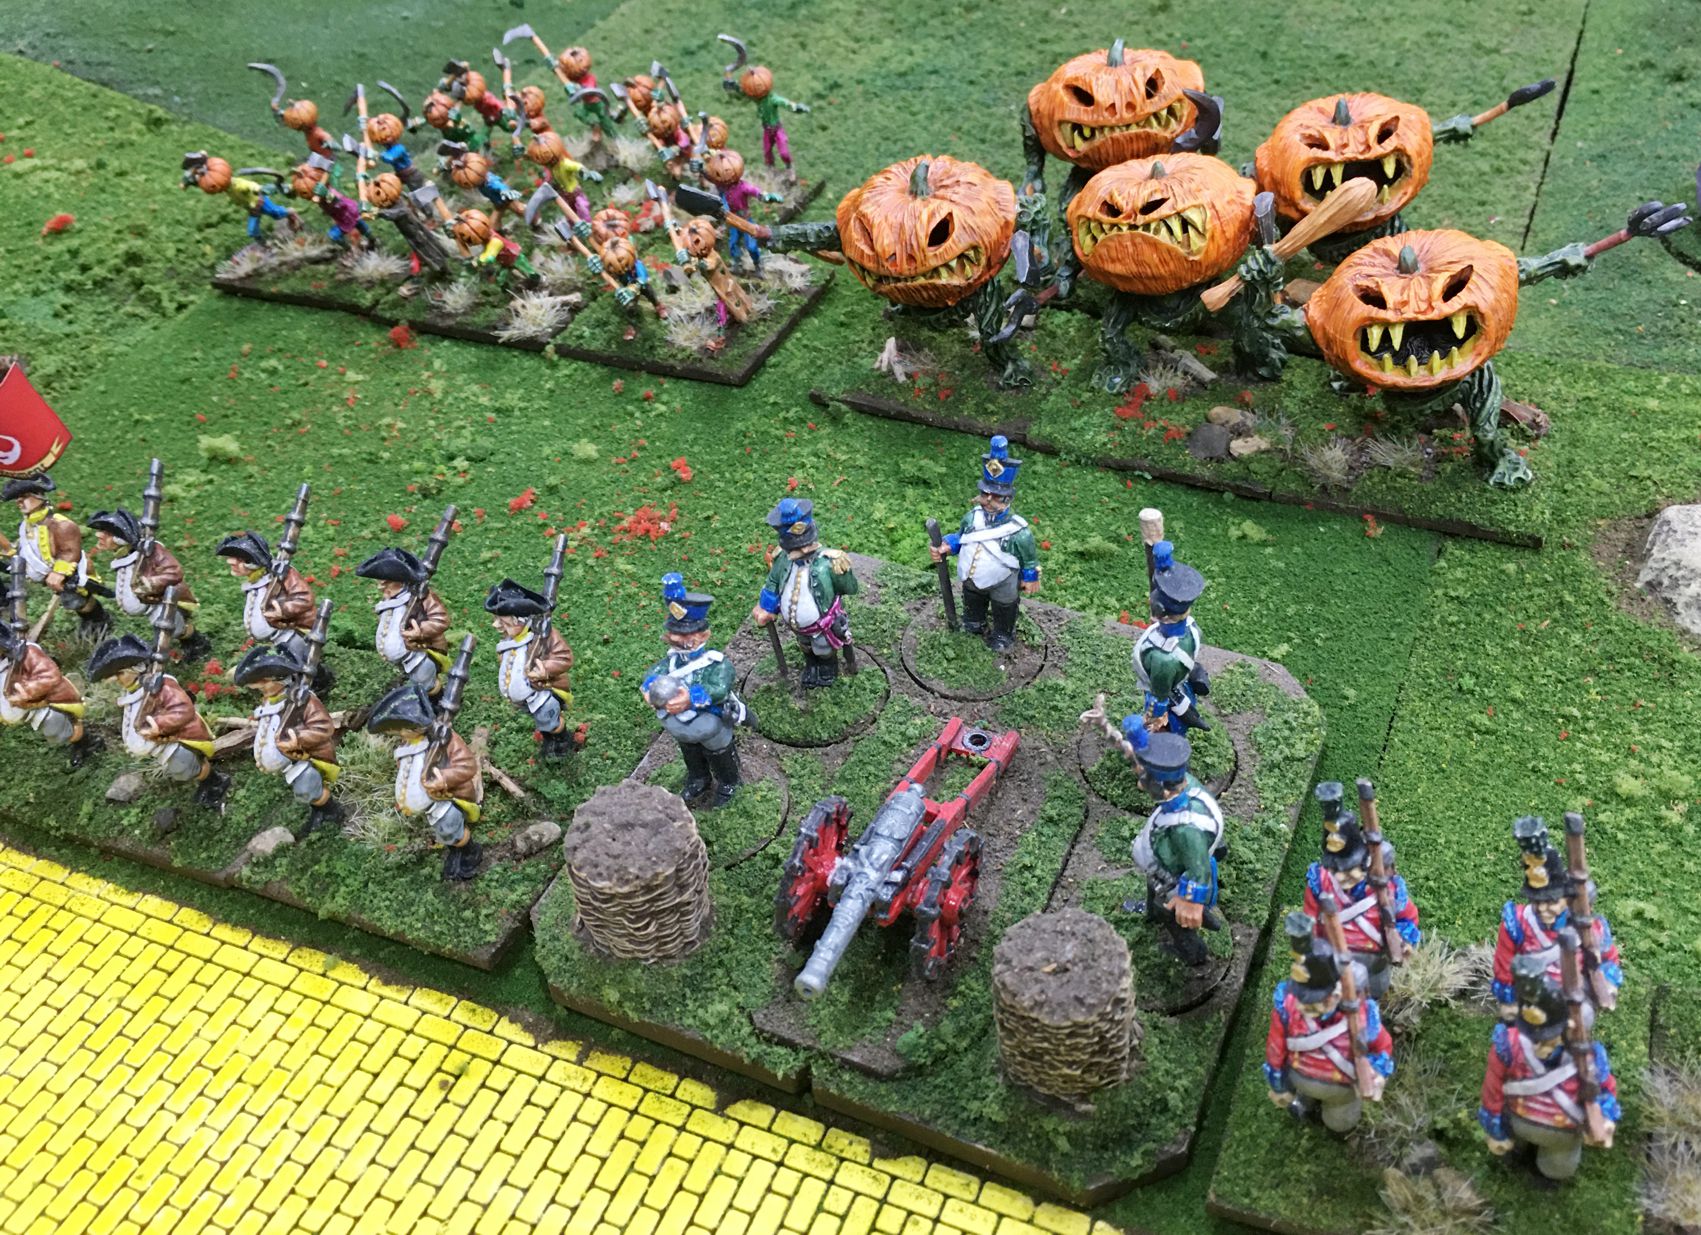
There is more there to check out, and the miniatures look amazing. Here’s a shot of the Pumpkin Men:
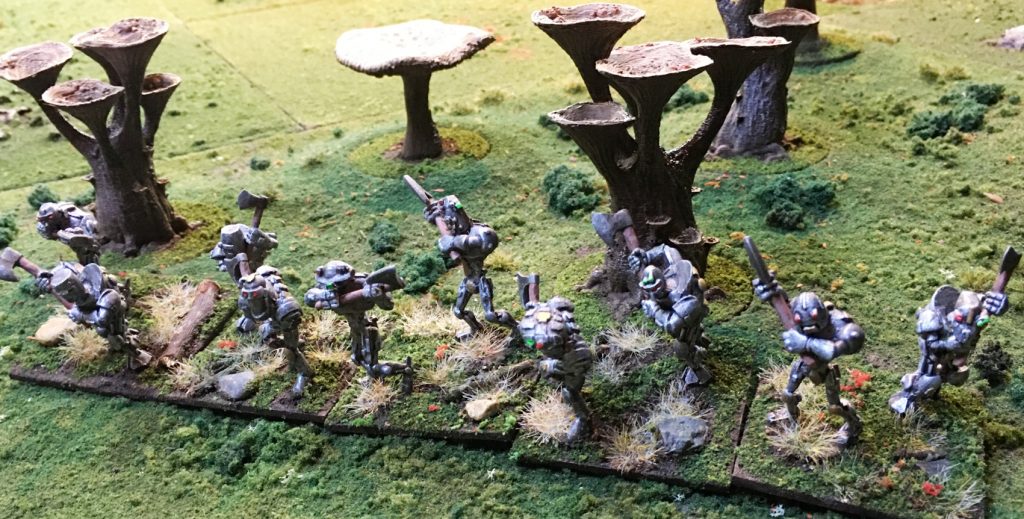
I love the Tin Men:
And whatever these are – they look cool!
Just to be clear, I have no financial stake in this whatsoever, though I will likely be diving in to get some of this stuff, as well as the rules.
Thought my followers would enjoy checking this out, what do you think?


