Greetings wargamers and hobbyists! Yes, I do actually have a post for you that is not golf-related! It’s been a while as my last hobby post was back in March, and now its mid-June. Mea culpa, mea maxima culpa…but I do love golf so…and its summer…
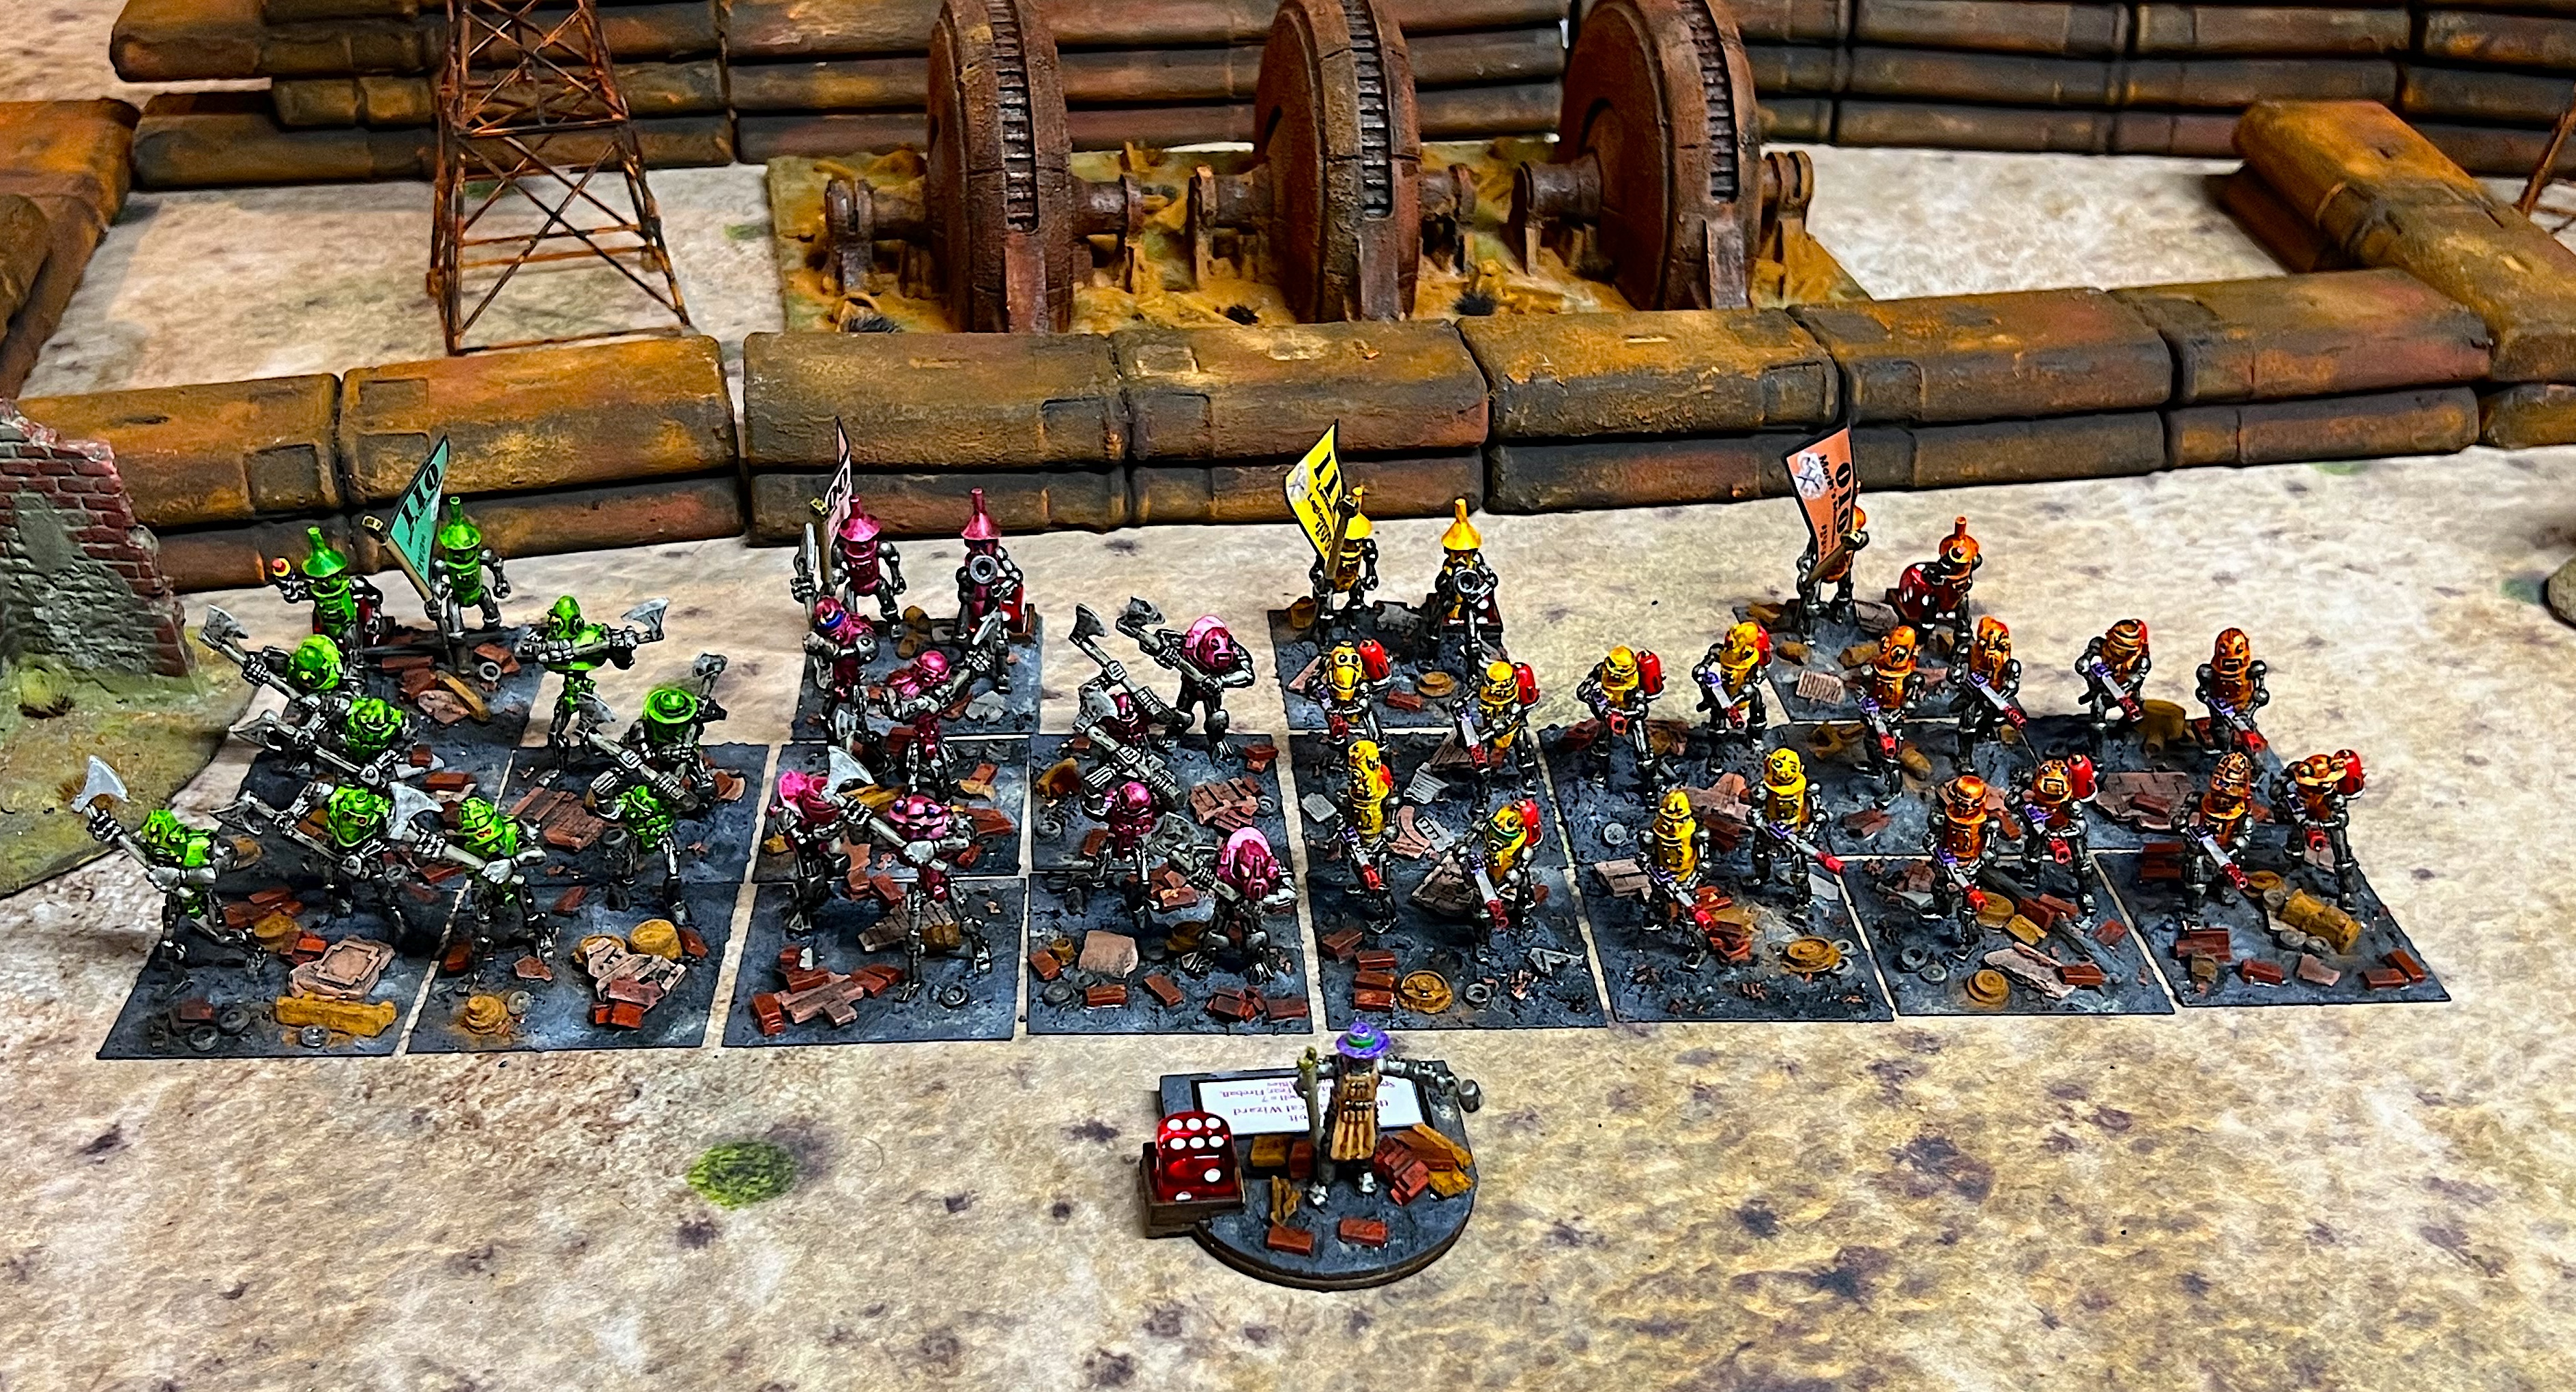
In any case, back in April, I did actually paint up several regiments of Professor Nitpik’s Tin Men. I made these to use at the MHWA HUZZAH! convention in May up in South Portland, Maine. My total production was 80 figures in 5 regiments. As you might expect, painting up that quantity in a month took a lot of time – and that left blogging in the lurch.
I’ll be sharing each regiment below in turn, plus some shots of the HUZZAH! games that I ran in May. Of course, I’ll also share details of the paints, flocking, etc. that I used on the figures.
All of the Tin Men figures come from the Wars of Ozz website. All are 28mm in scale, and metal. The bases that I used are 2″ square for size reference. Five bases make up a regiment. Most of the Nitpik regiments come in sets of 20 figures. However, I only base two figures per base – so one SKU is good for two regiments of either the ones armed with axes or the ones wielding plasma blasters.
The exception would be the mini-swarm, which has 40 tiny robot/tinmen figures. Those I based 8 figures to a base.
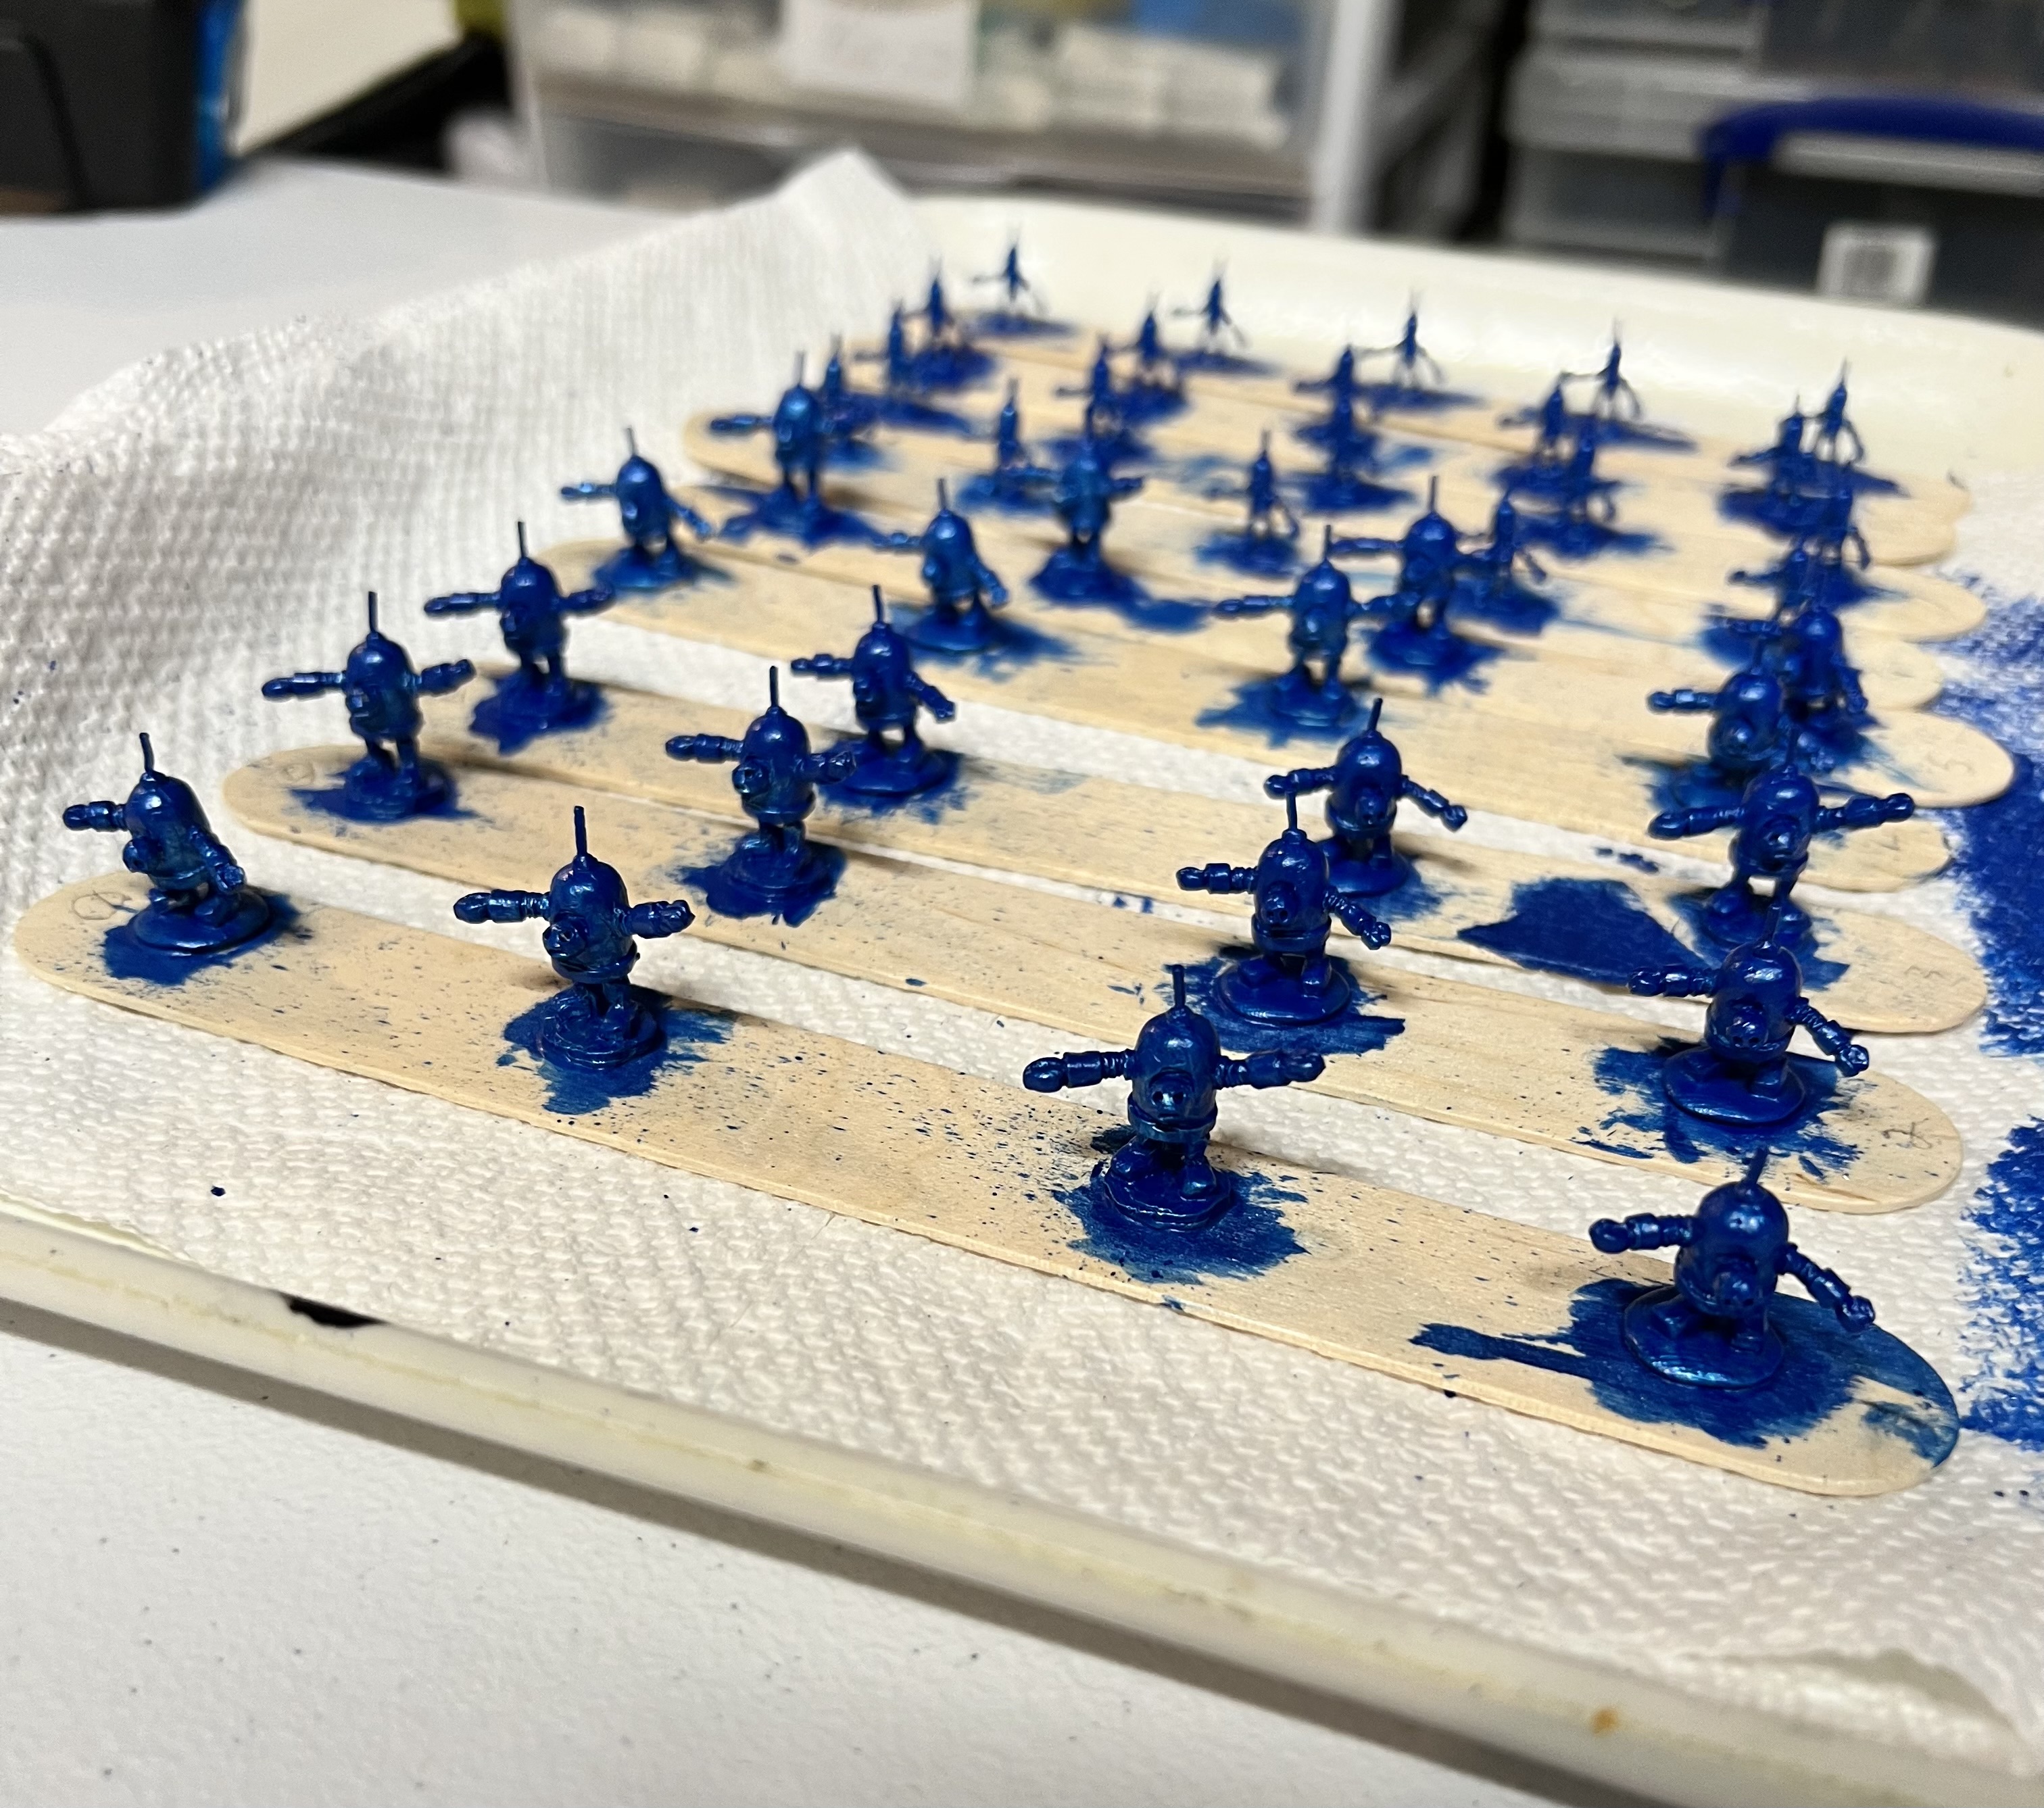
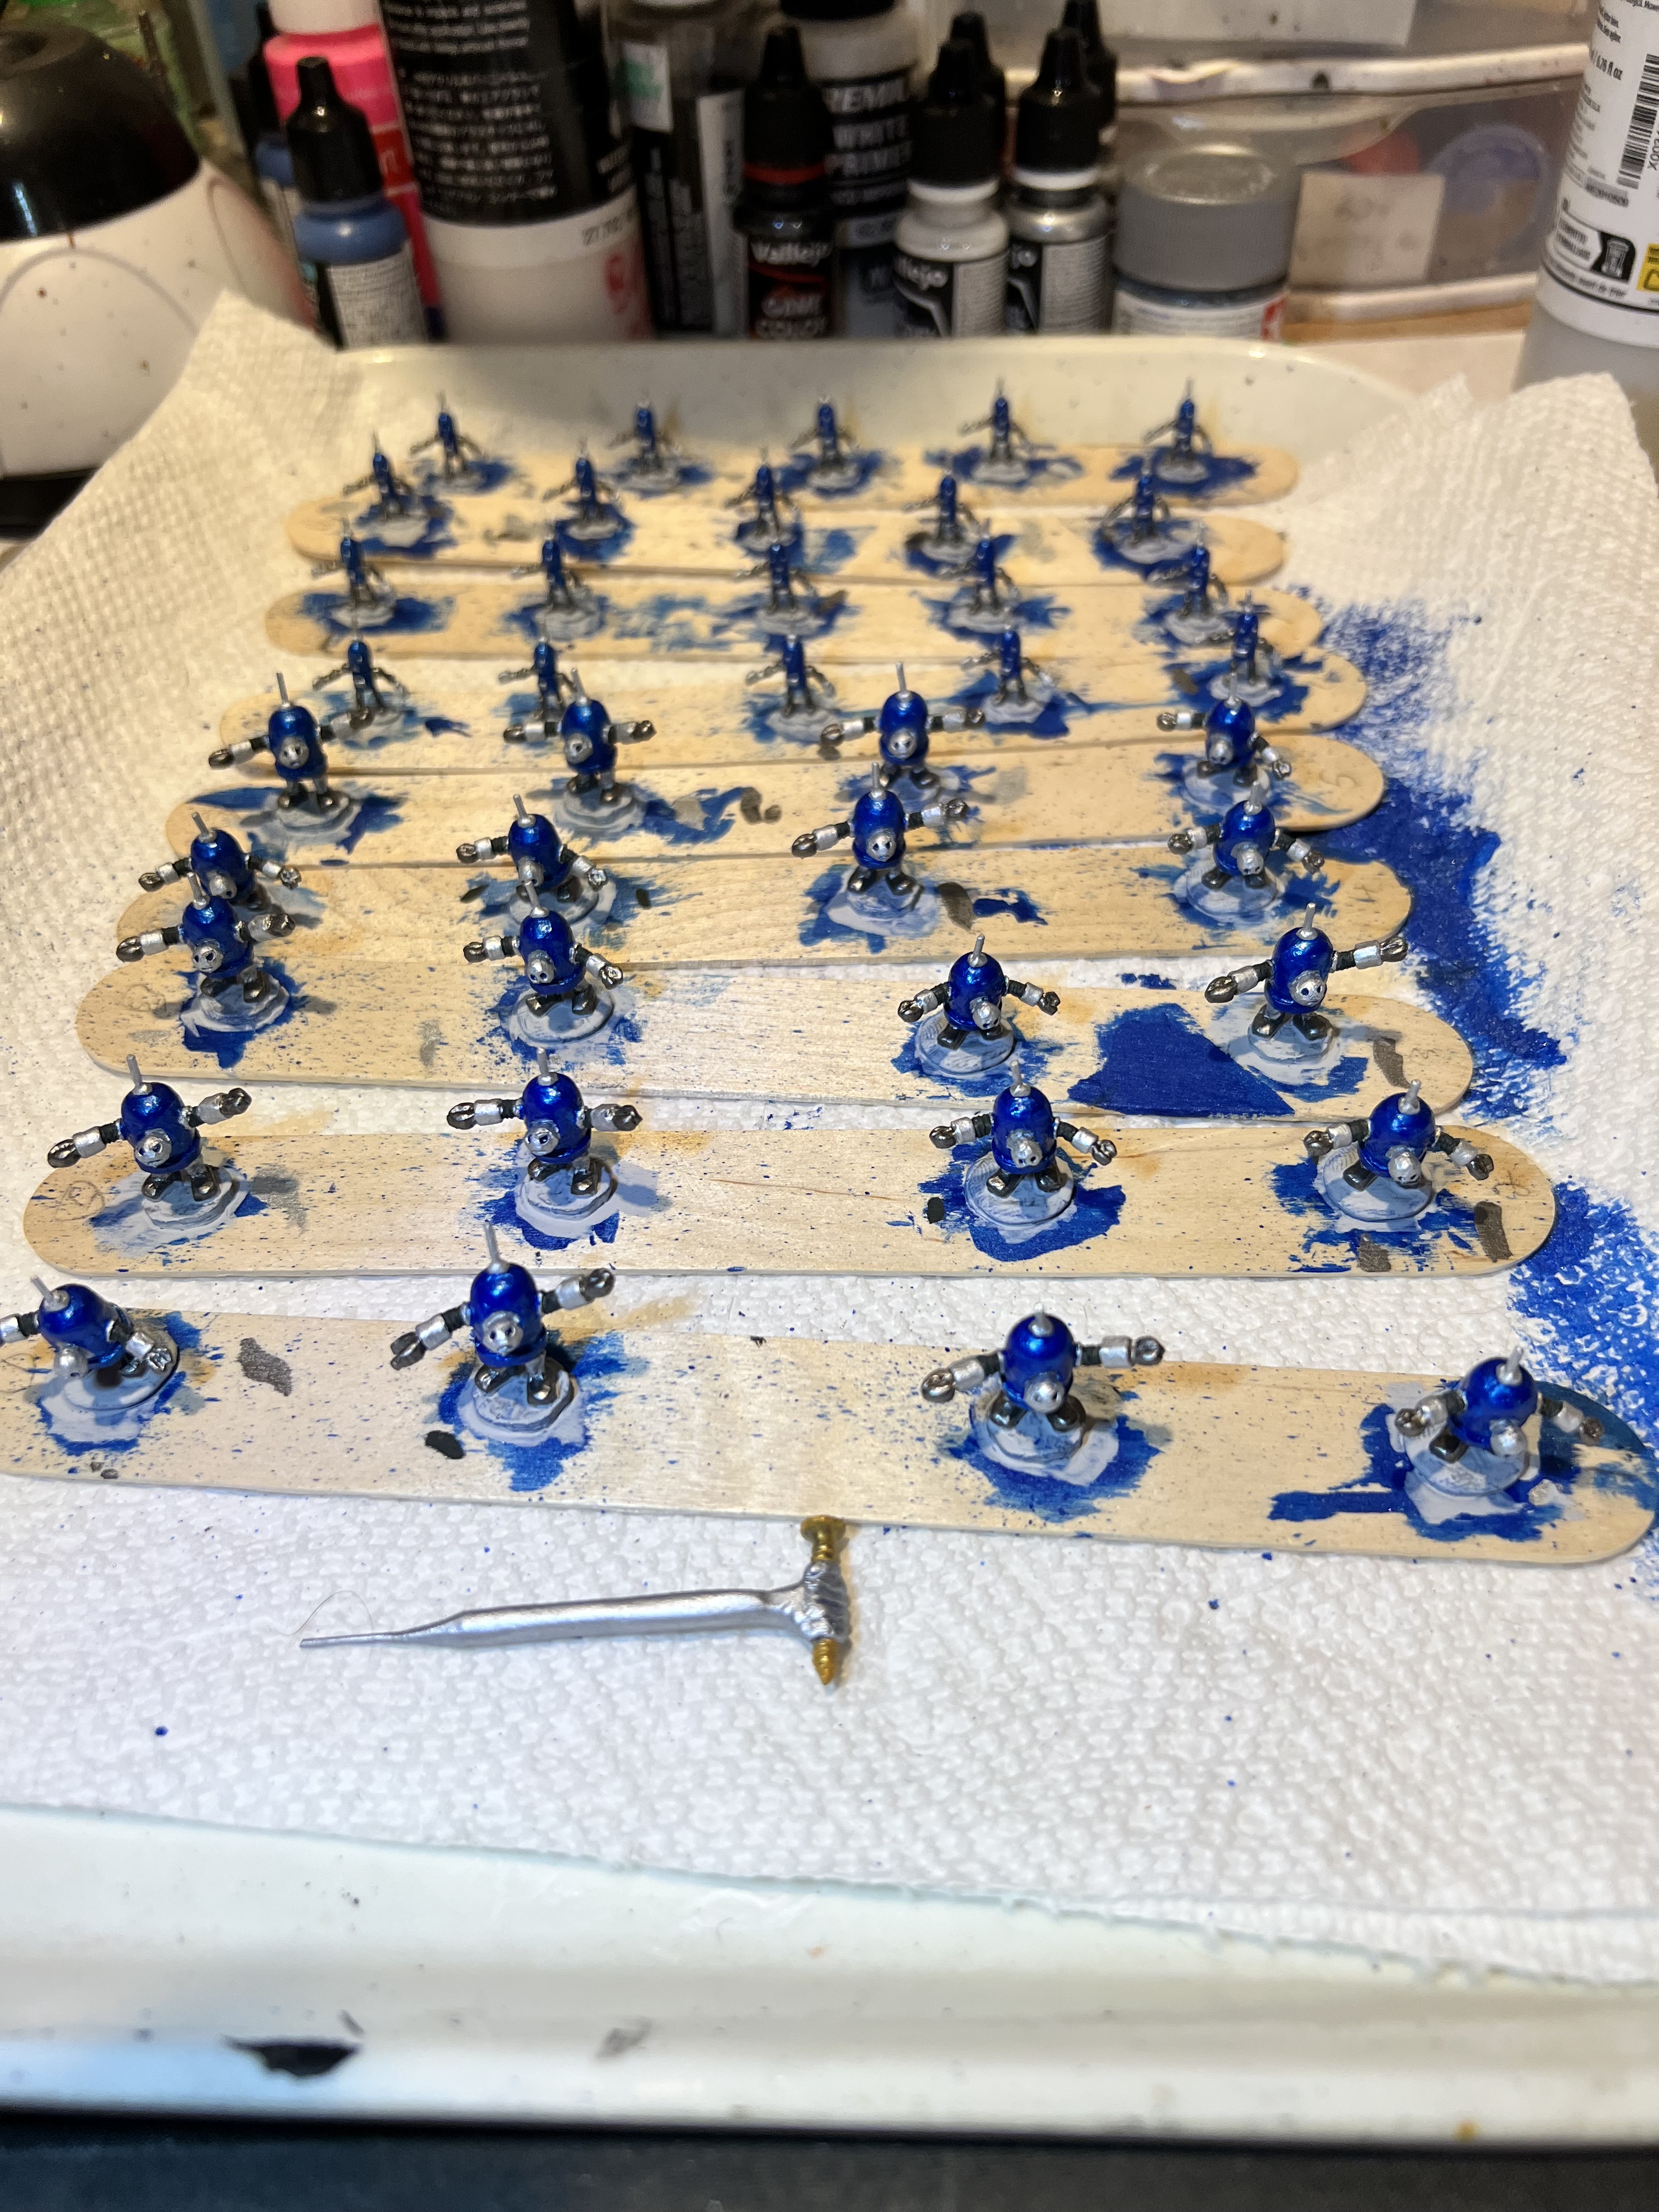
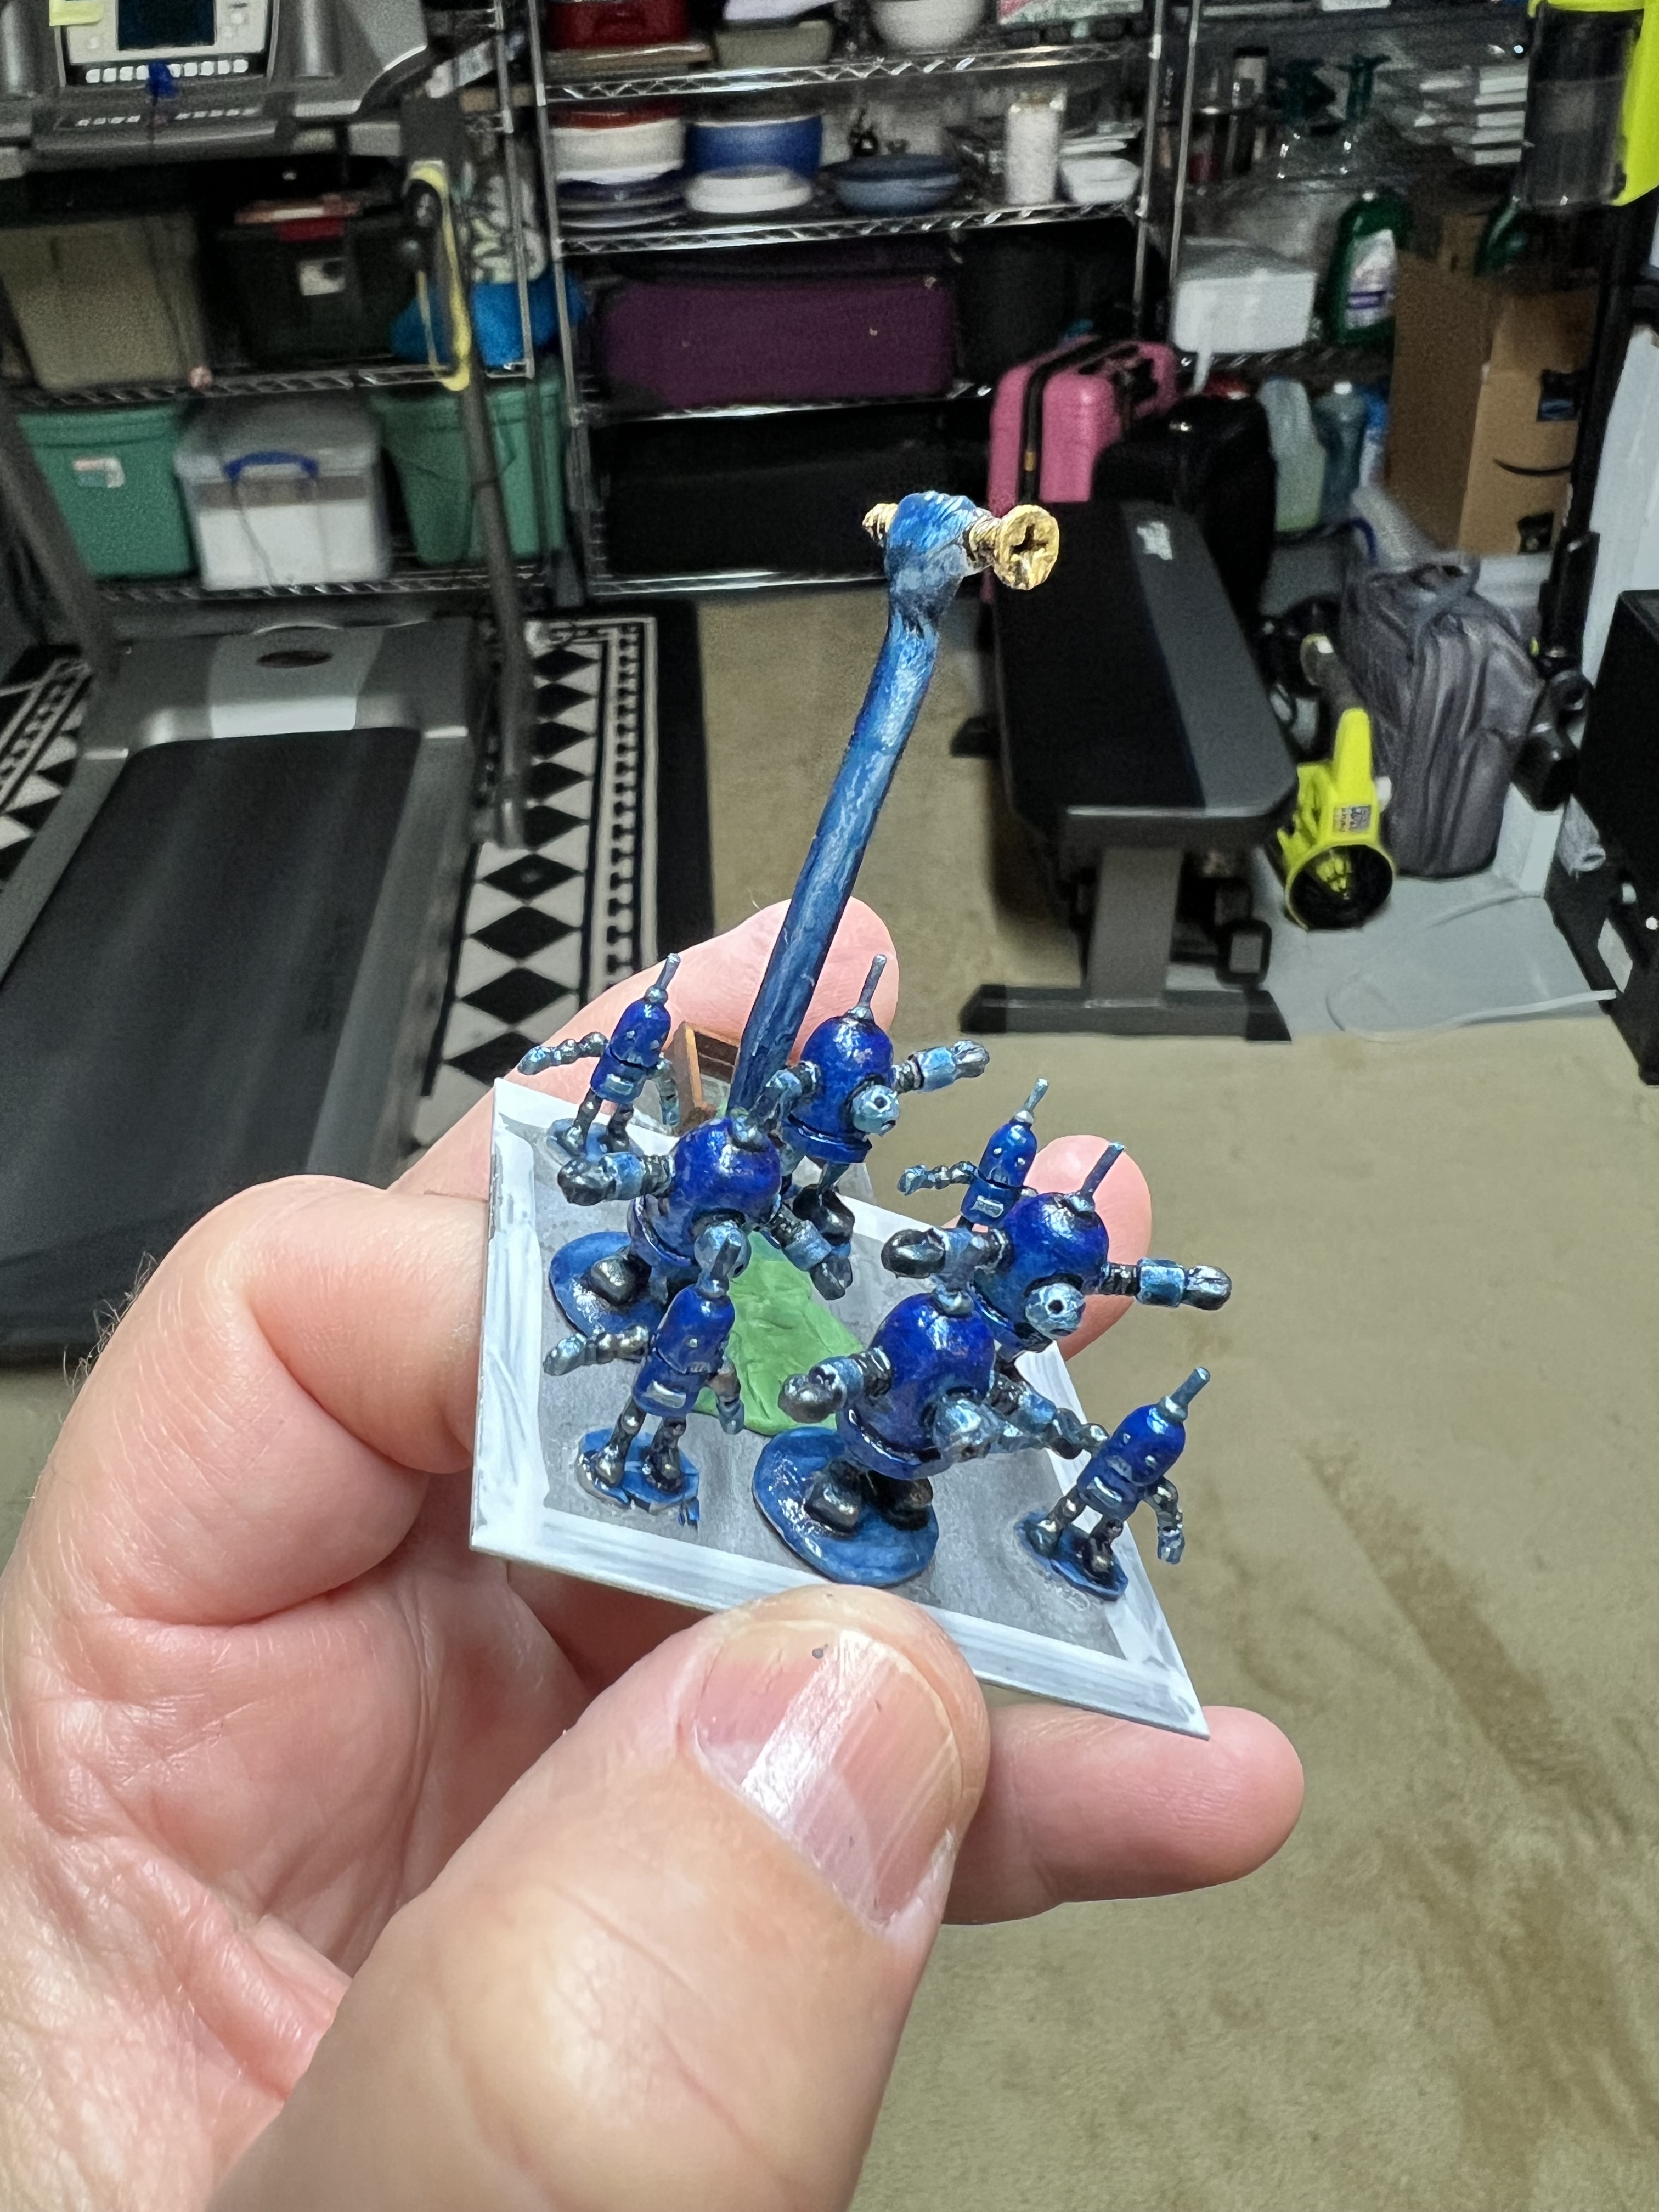
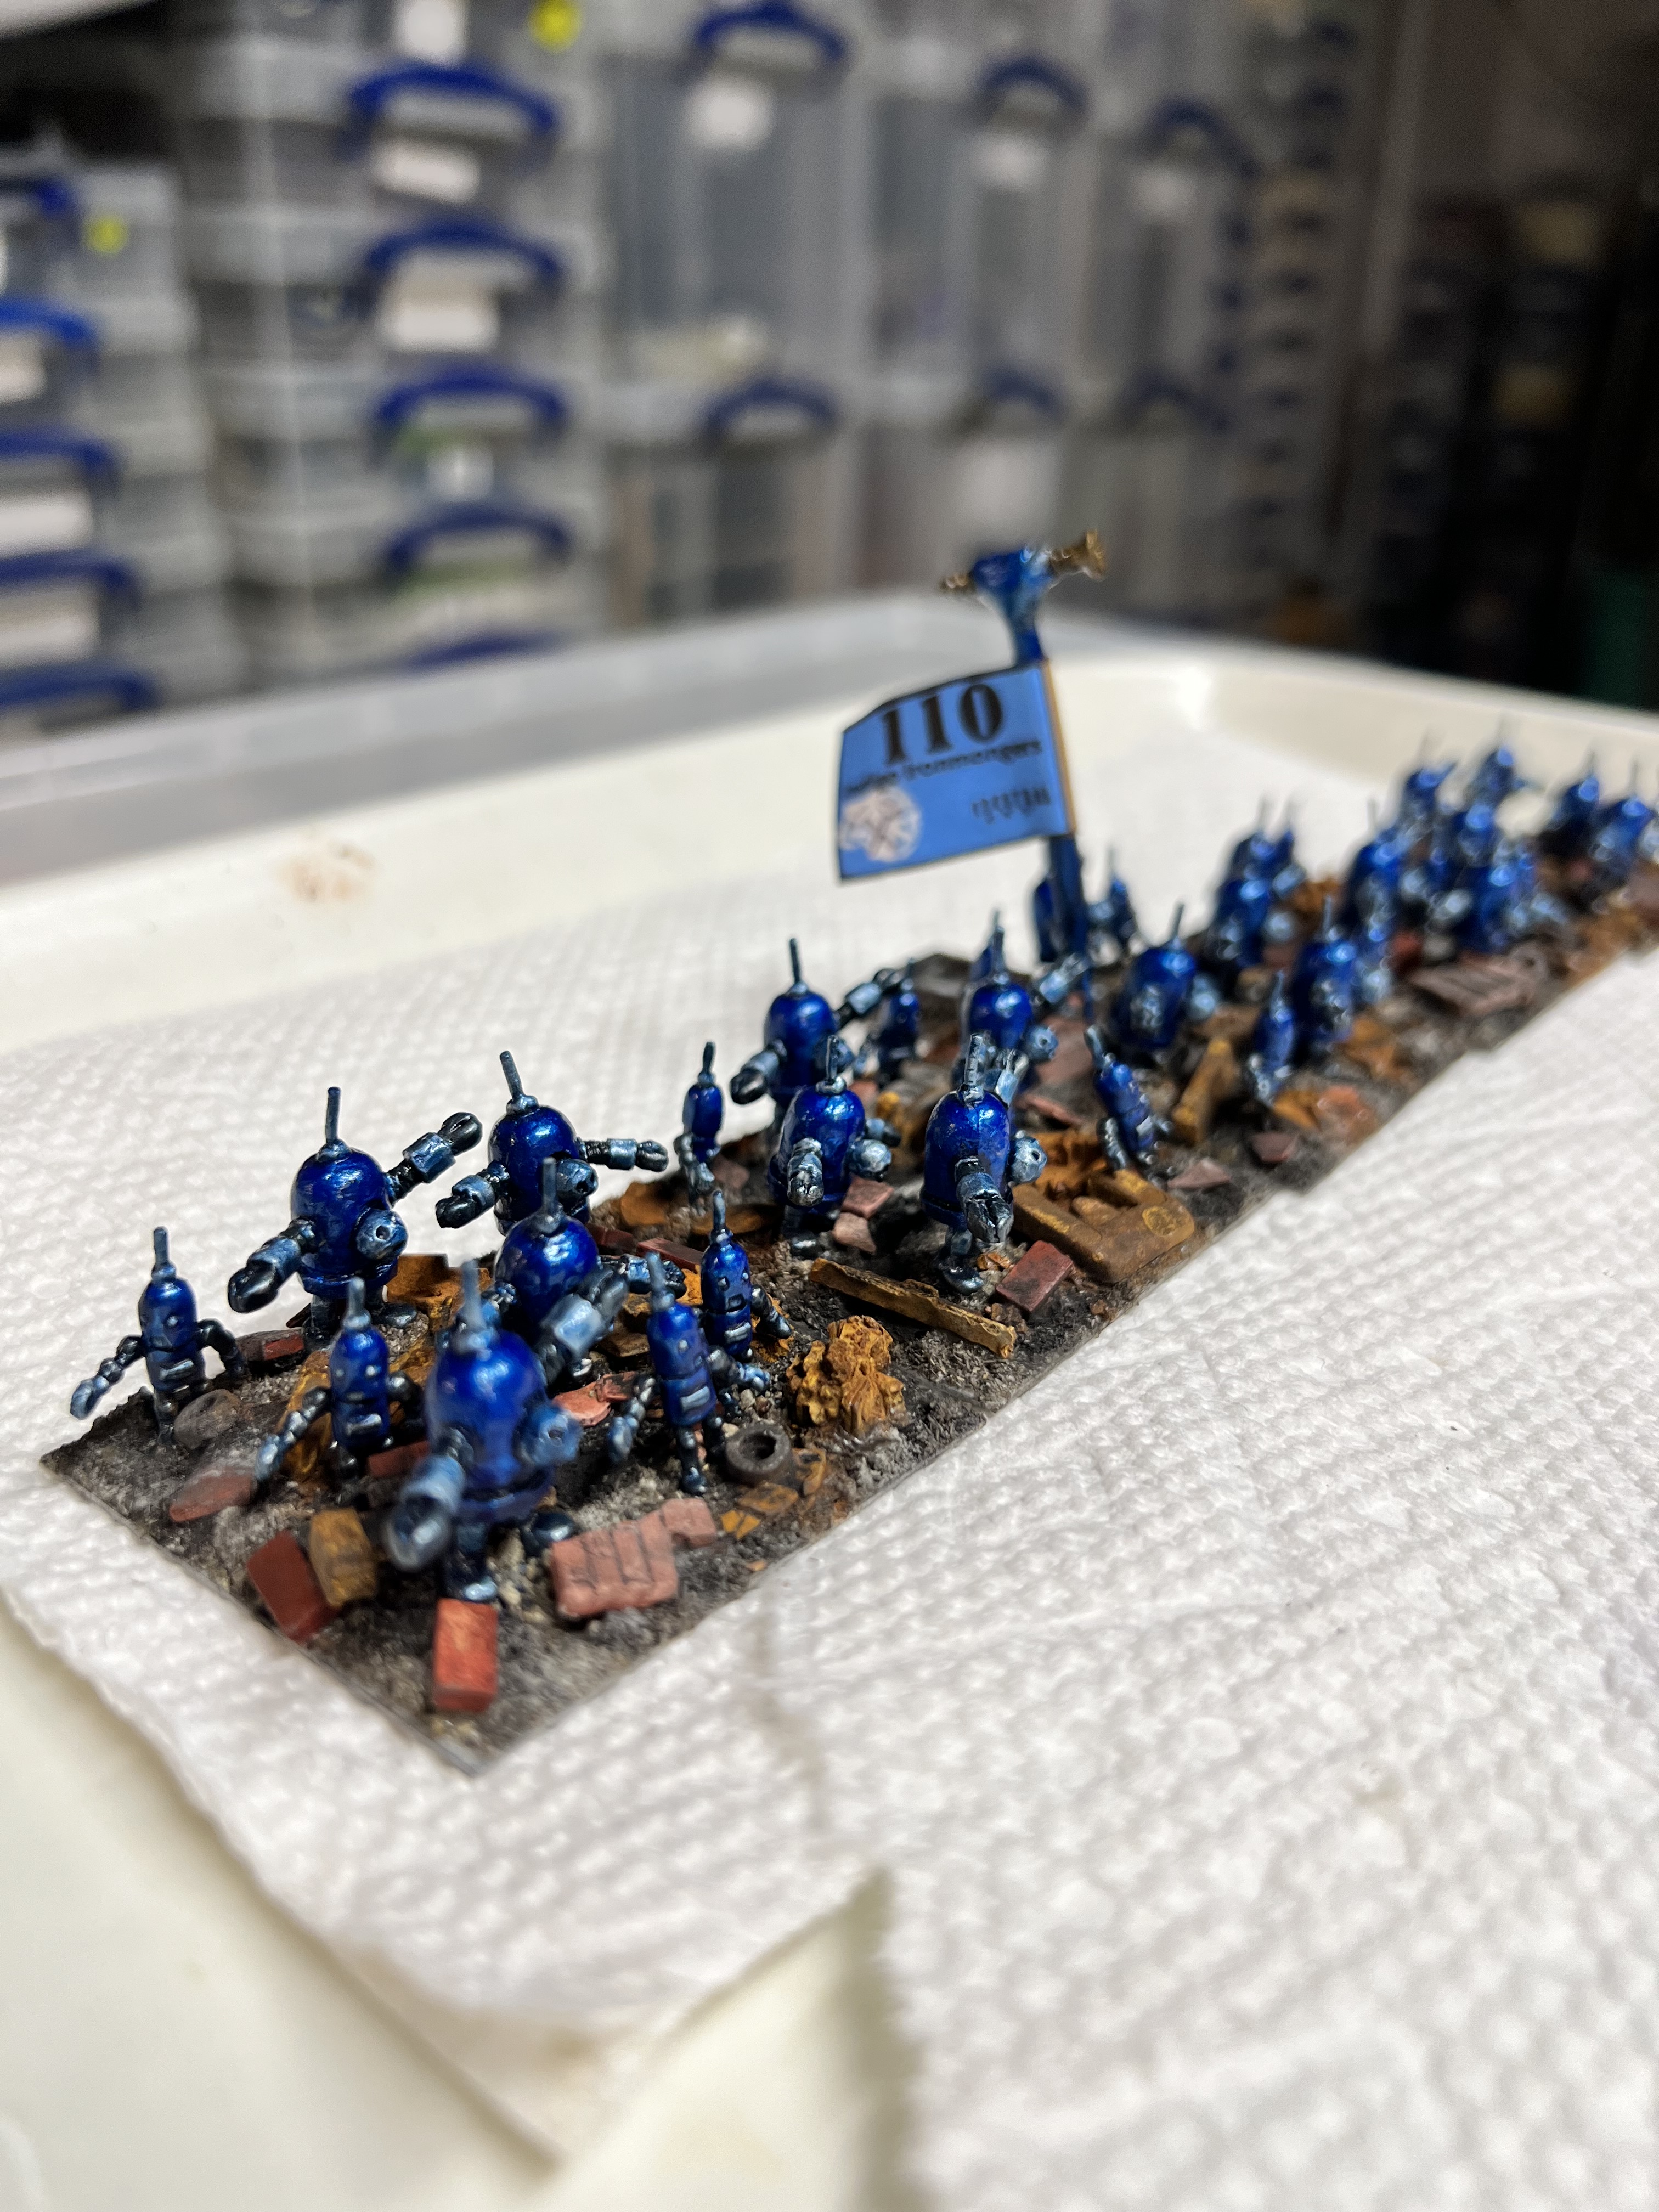
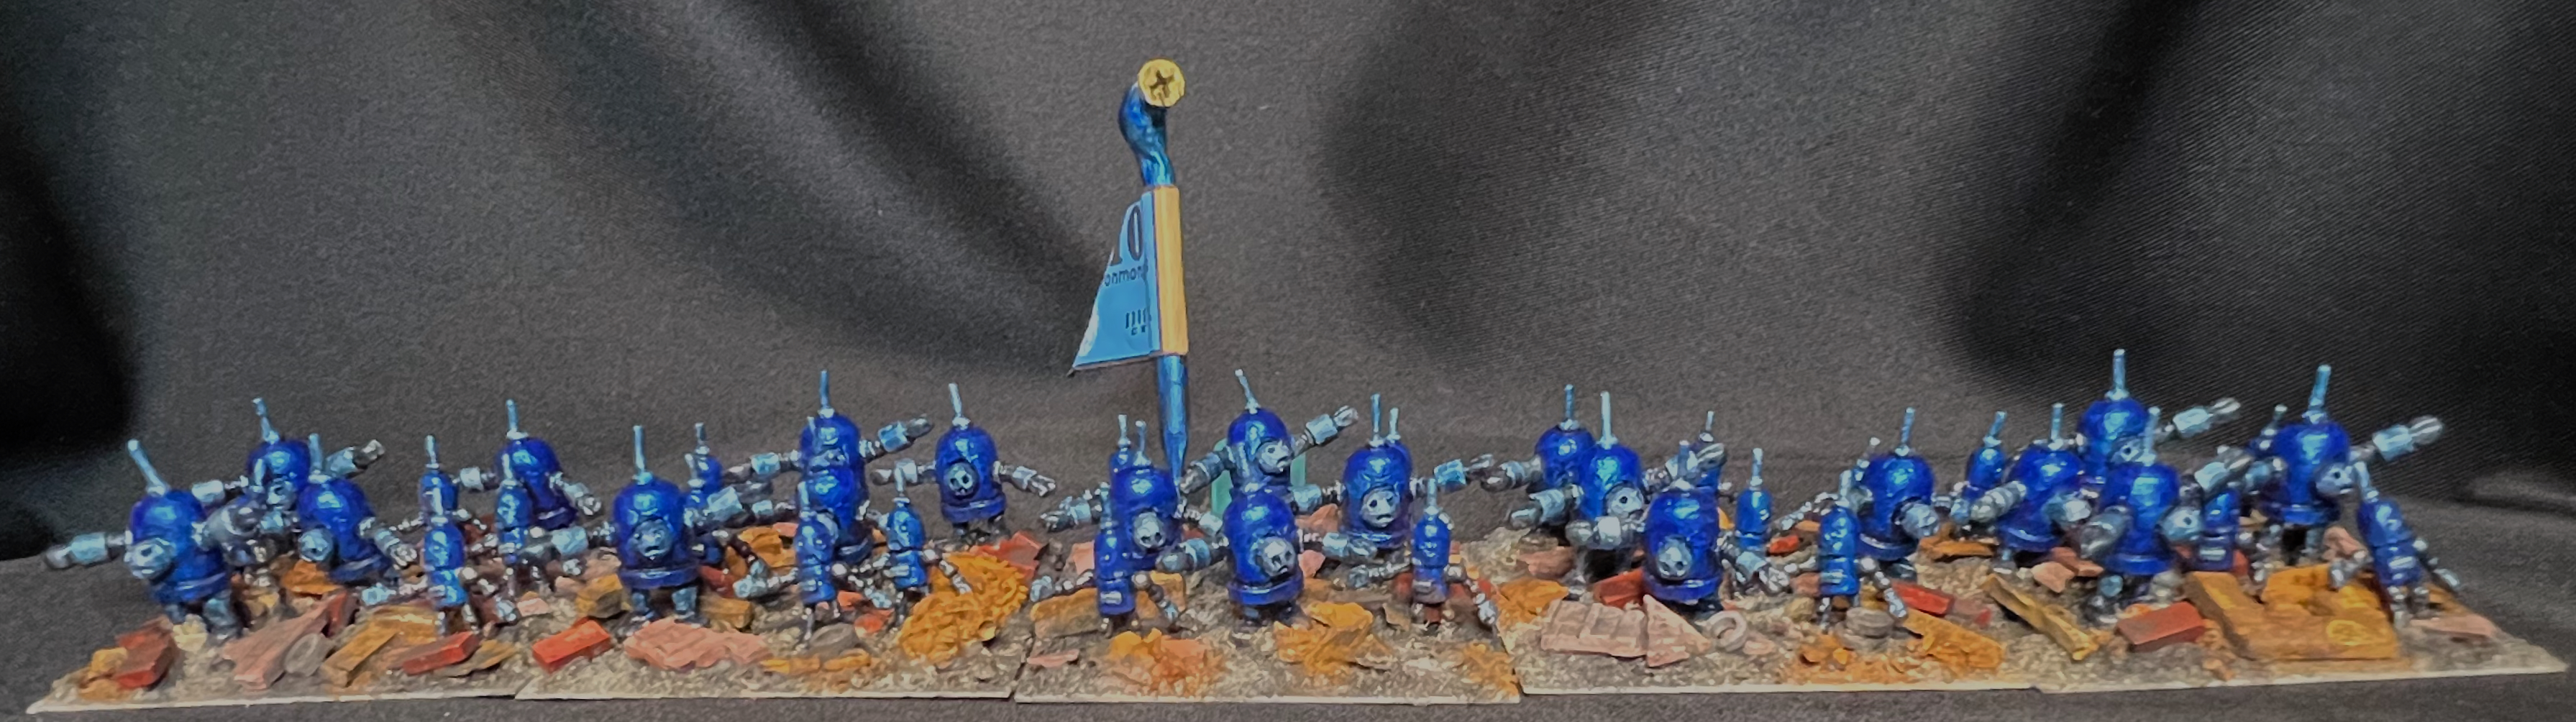
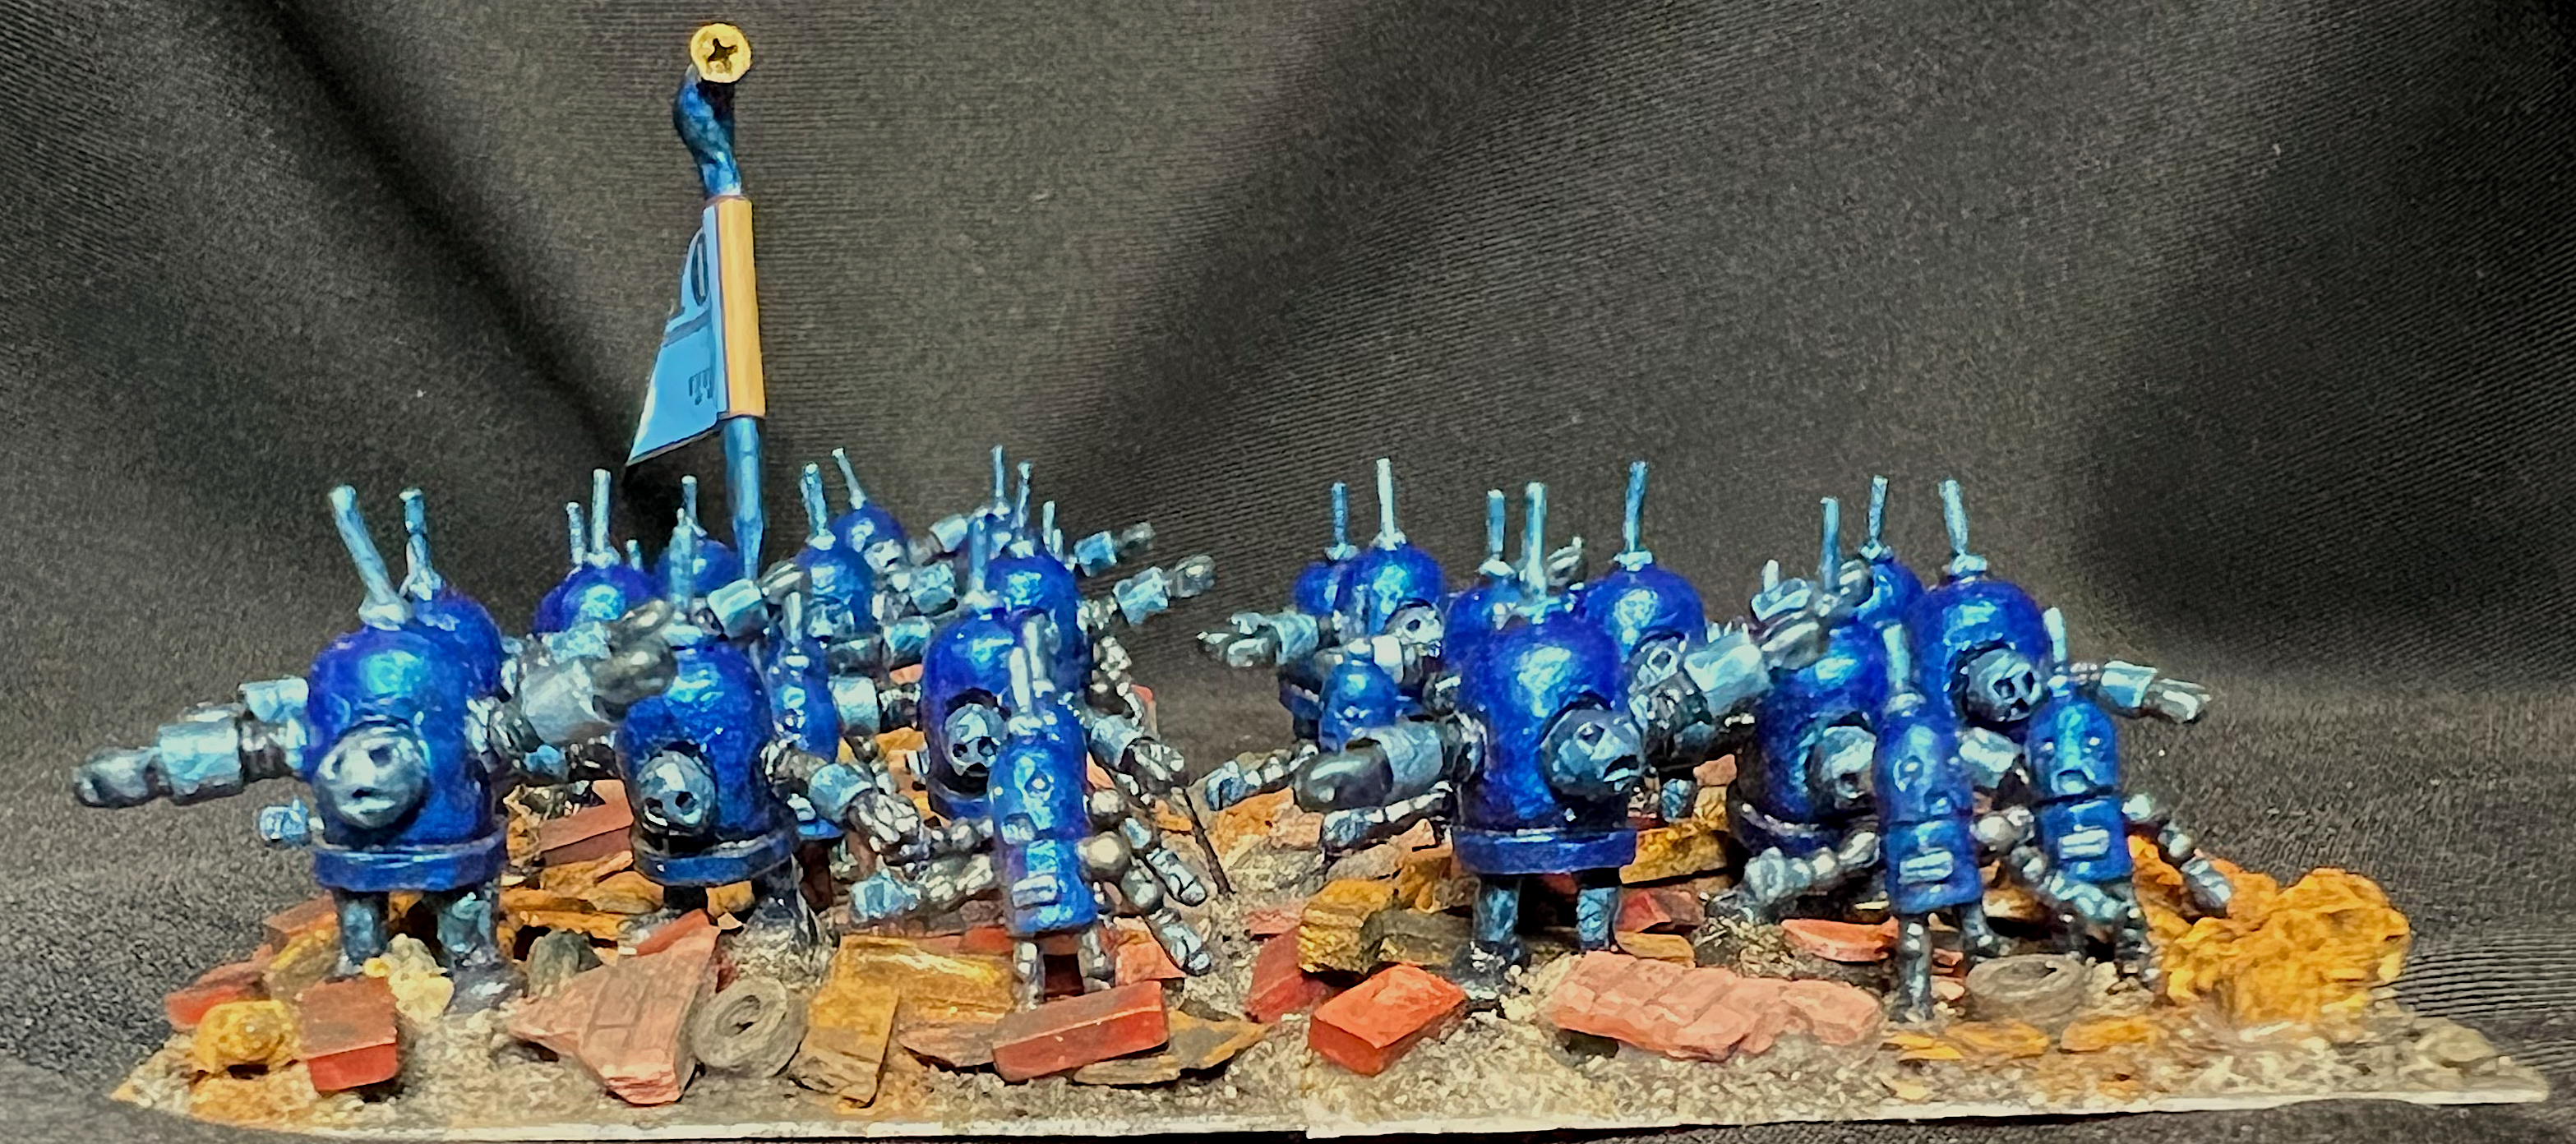
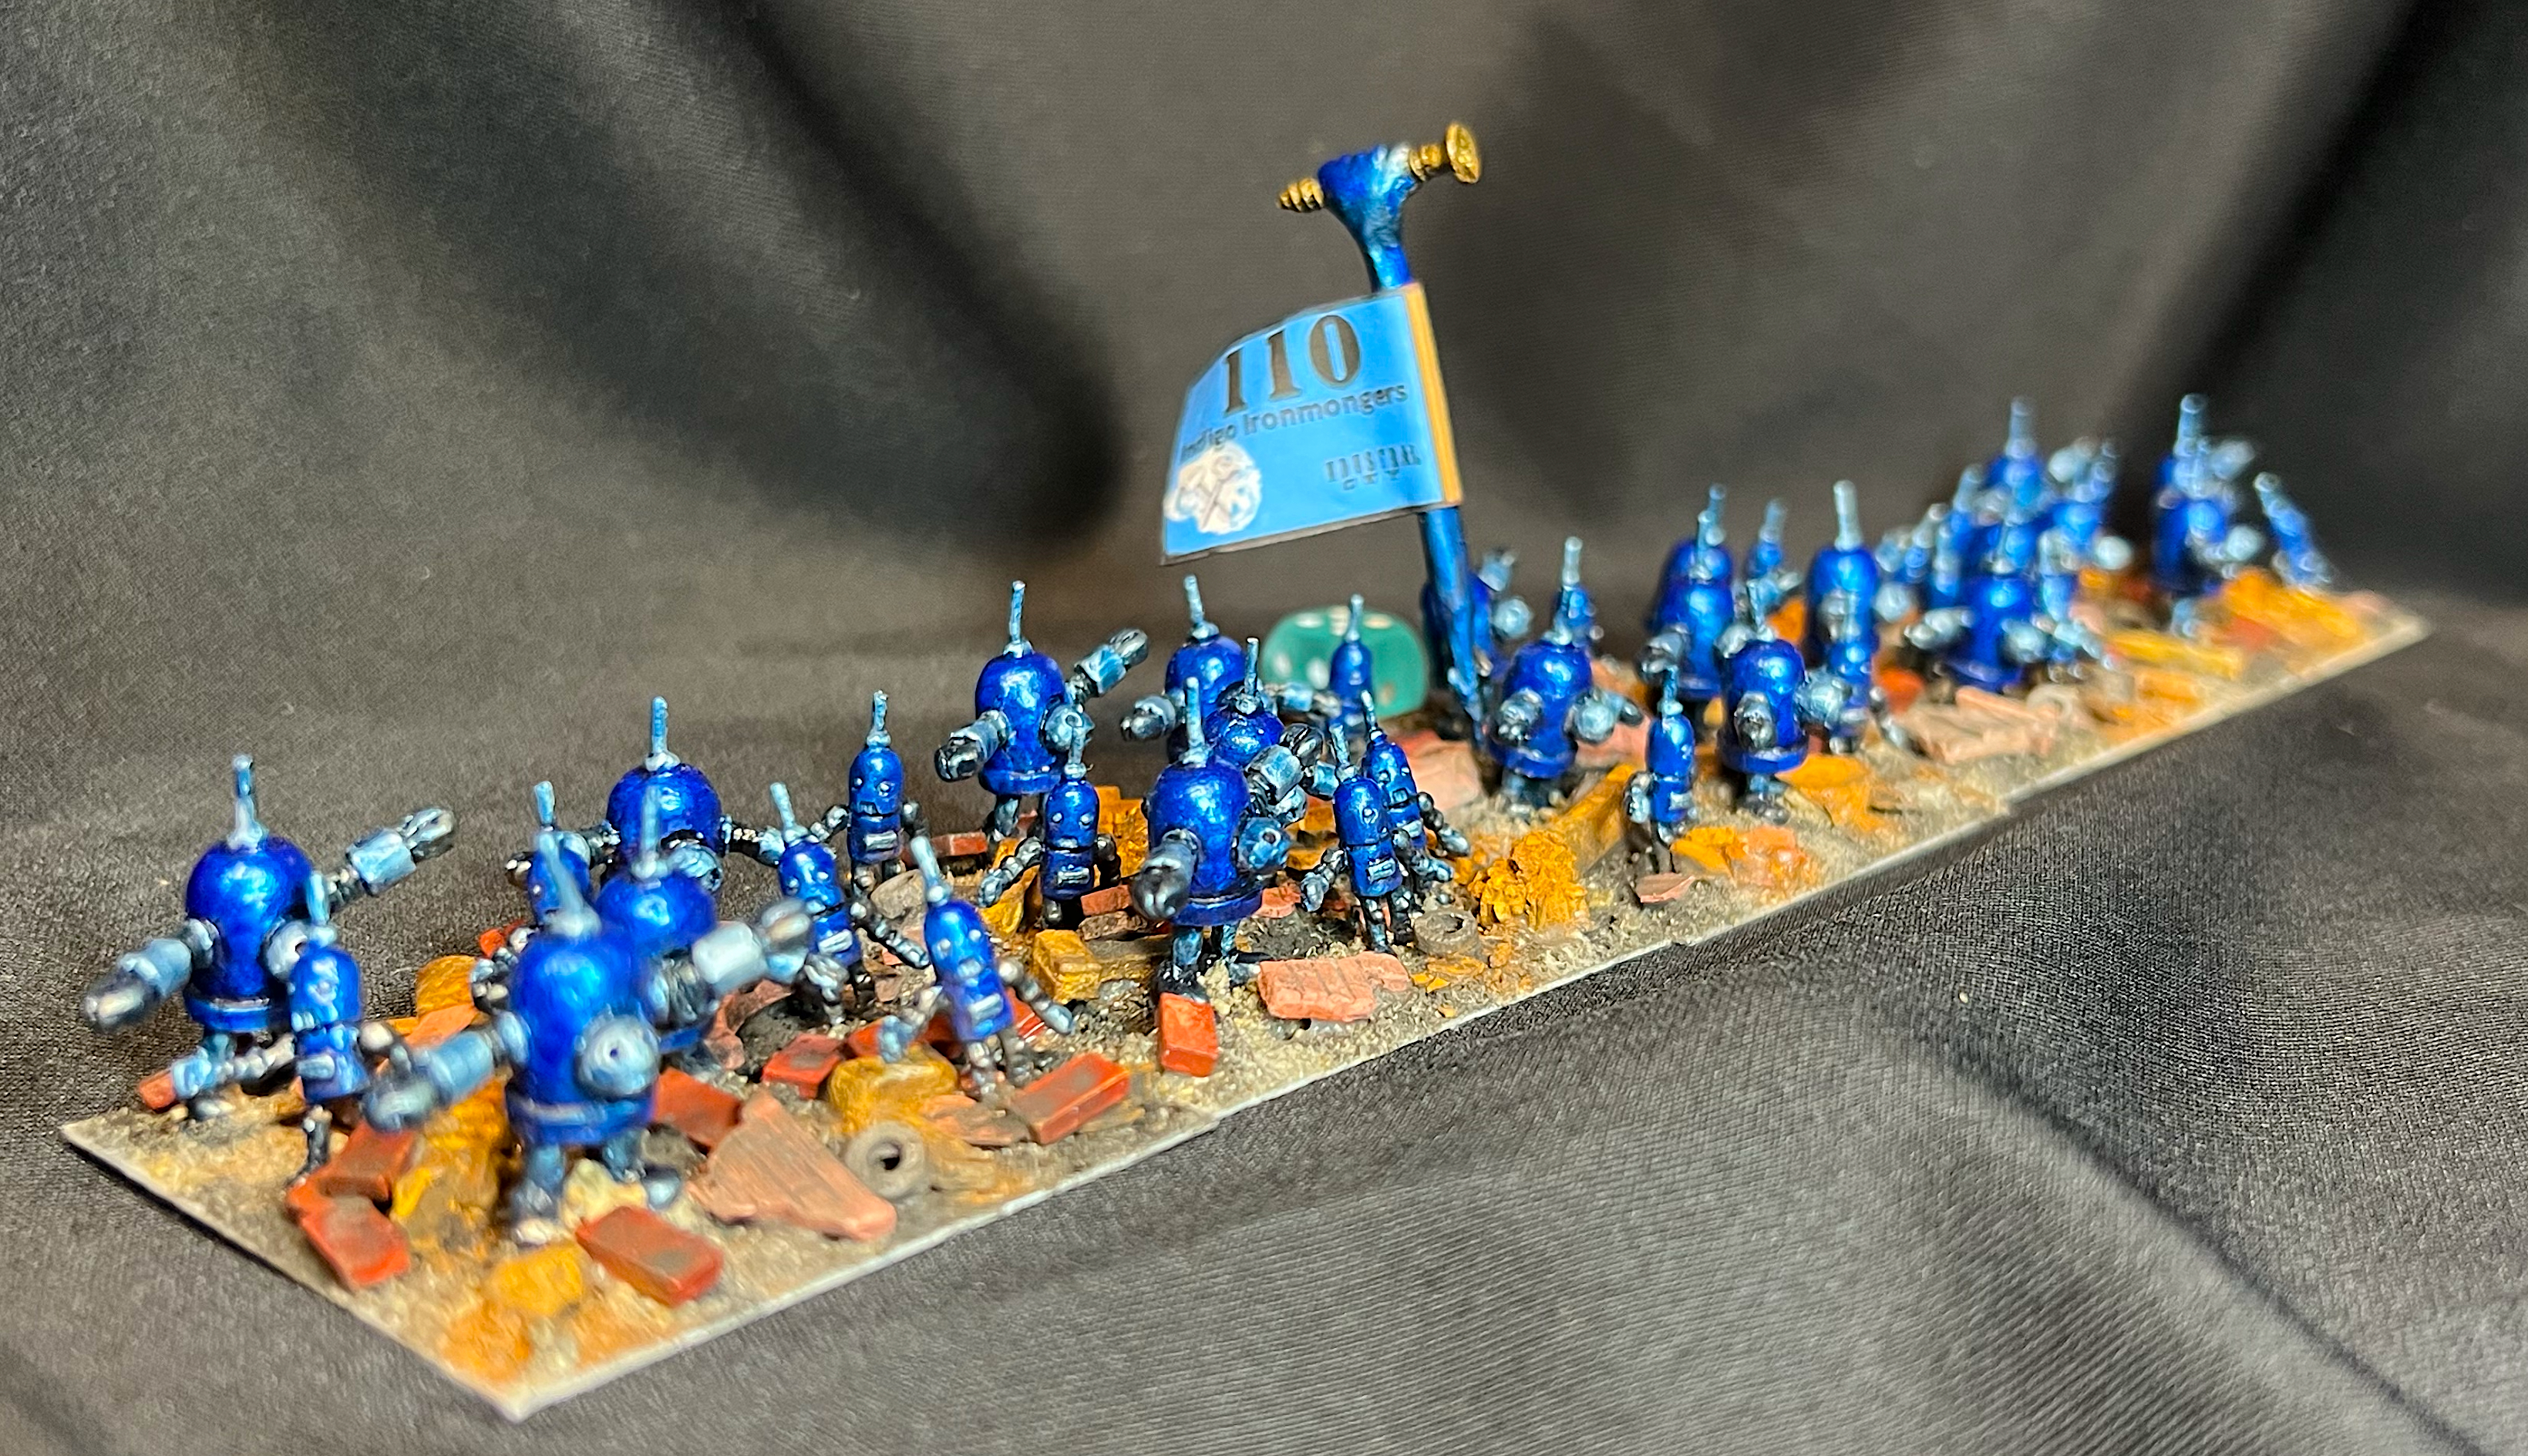
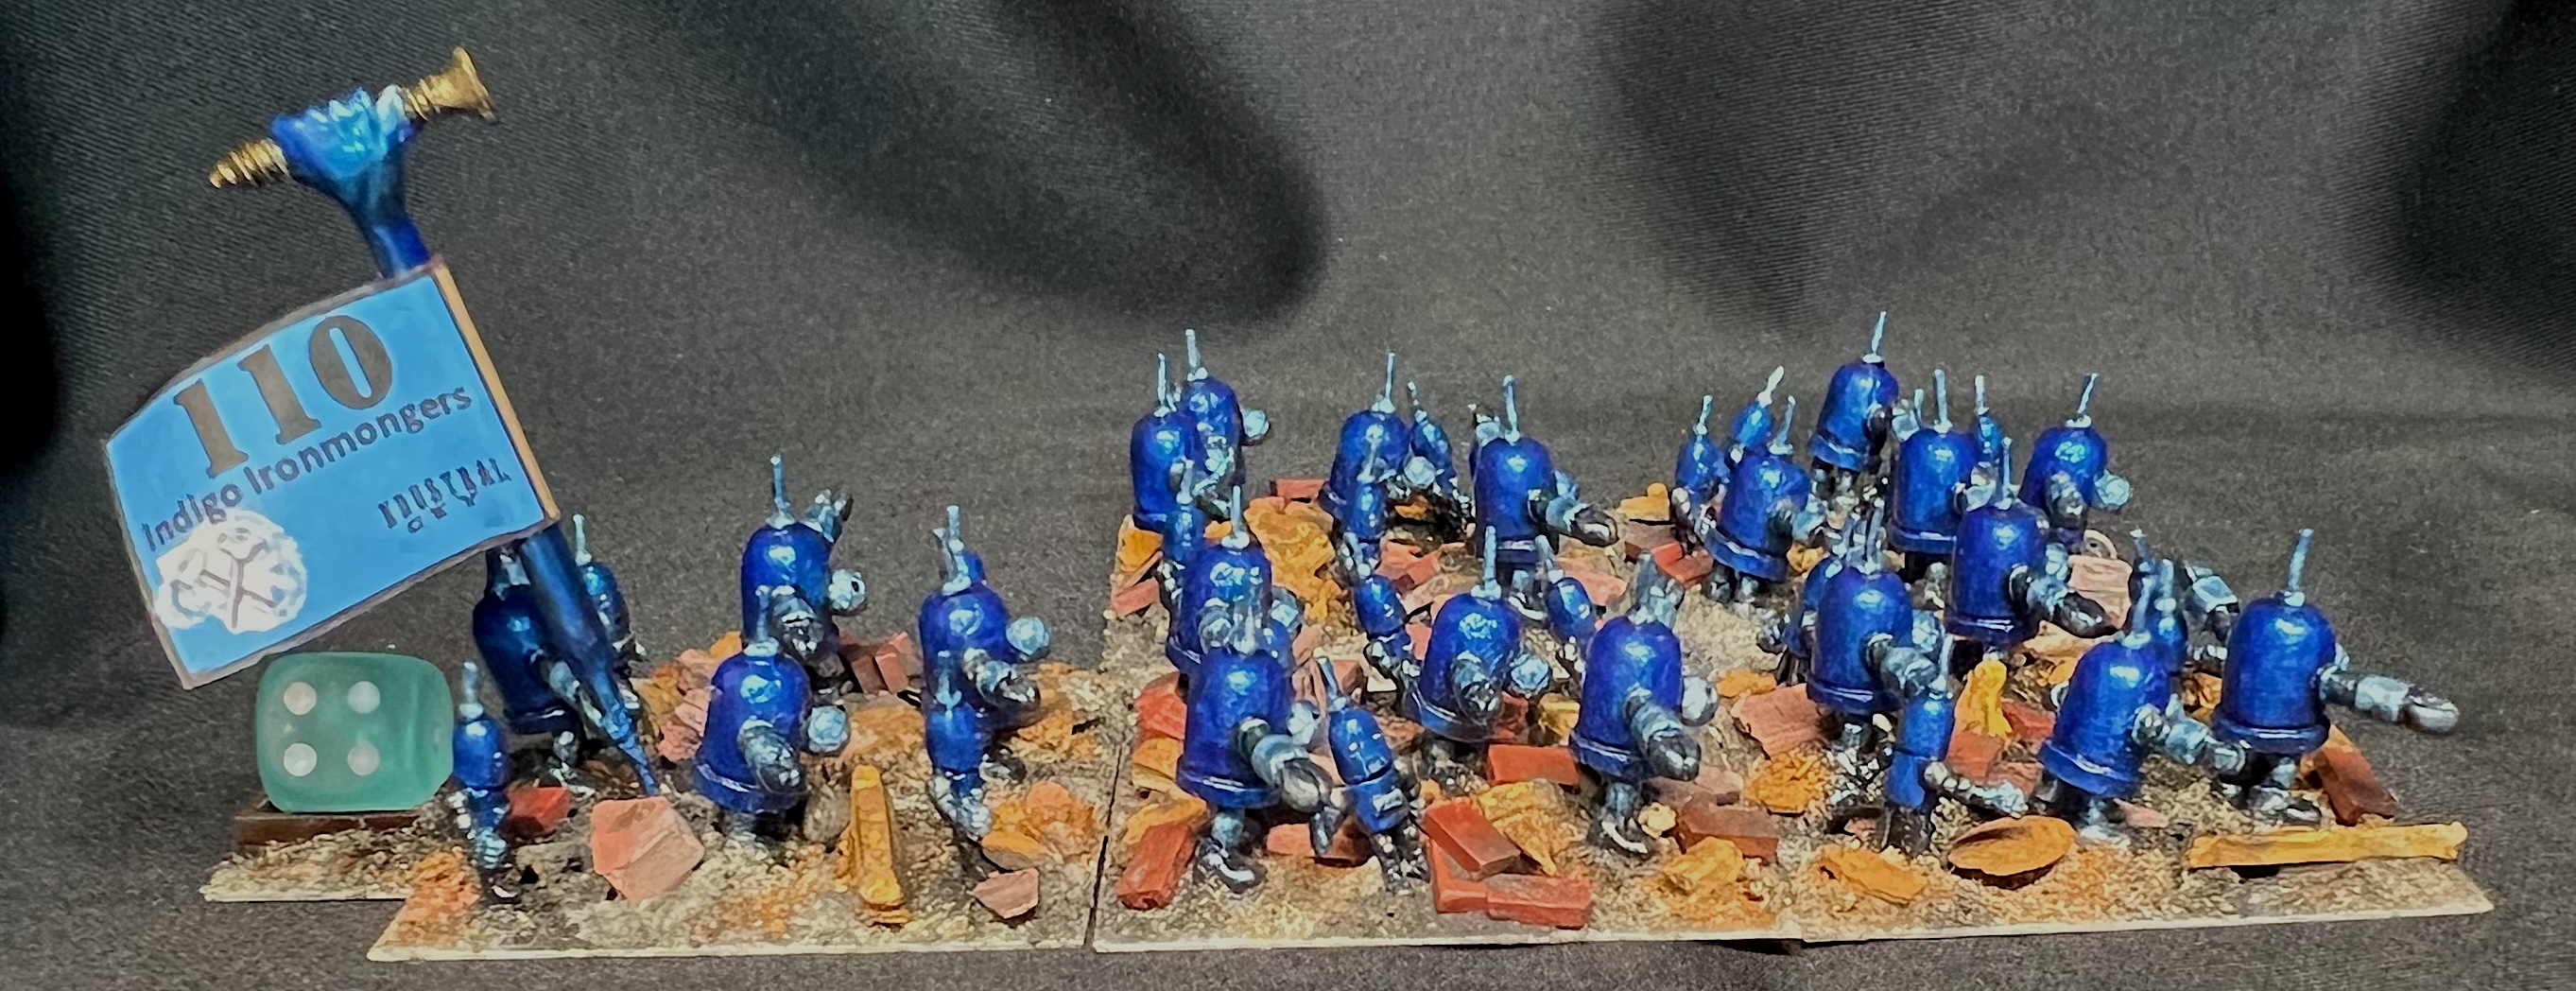
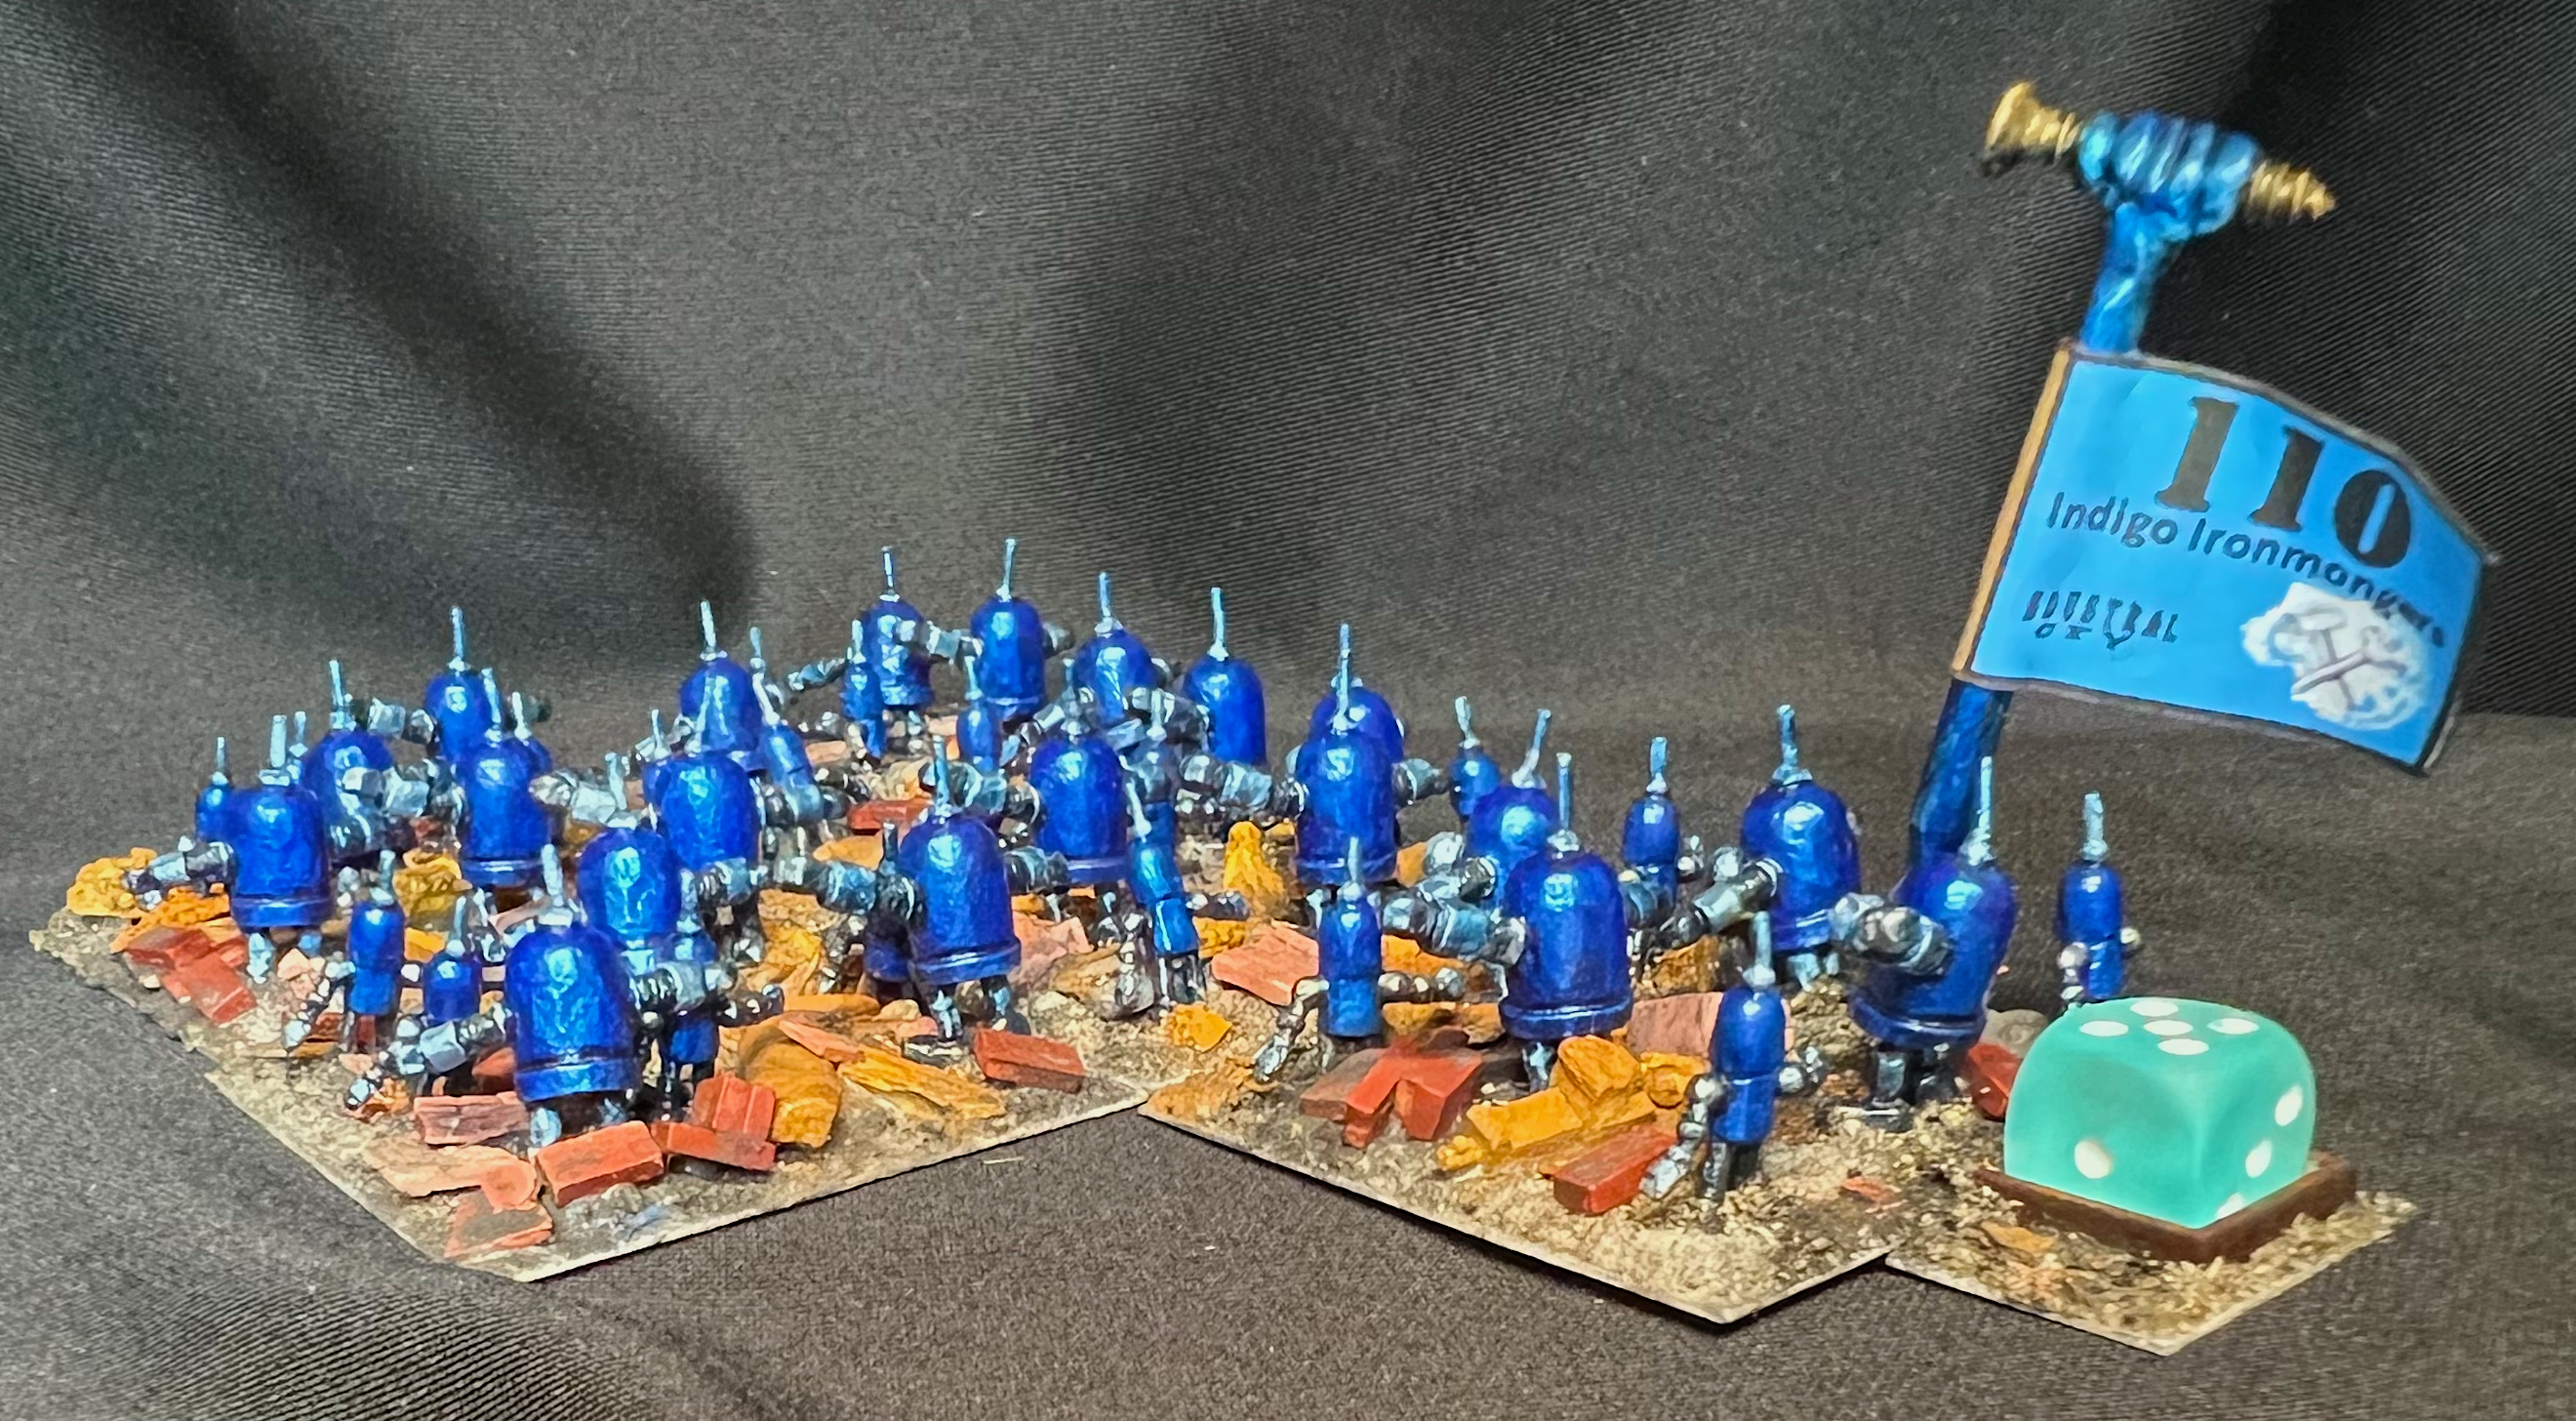
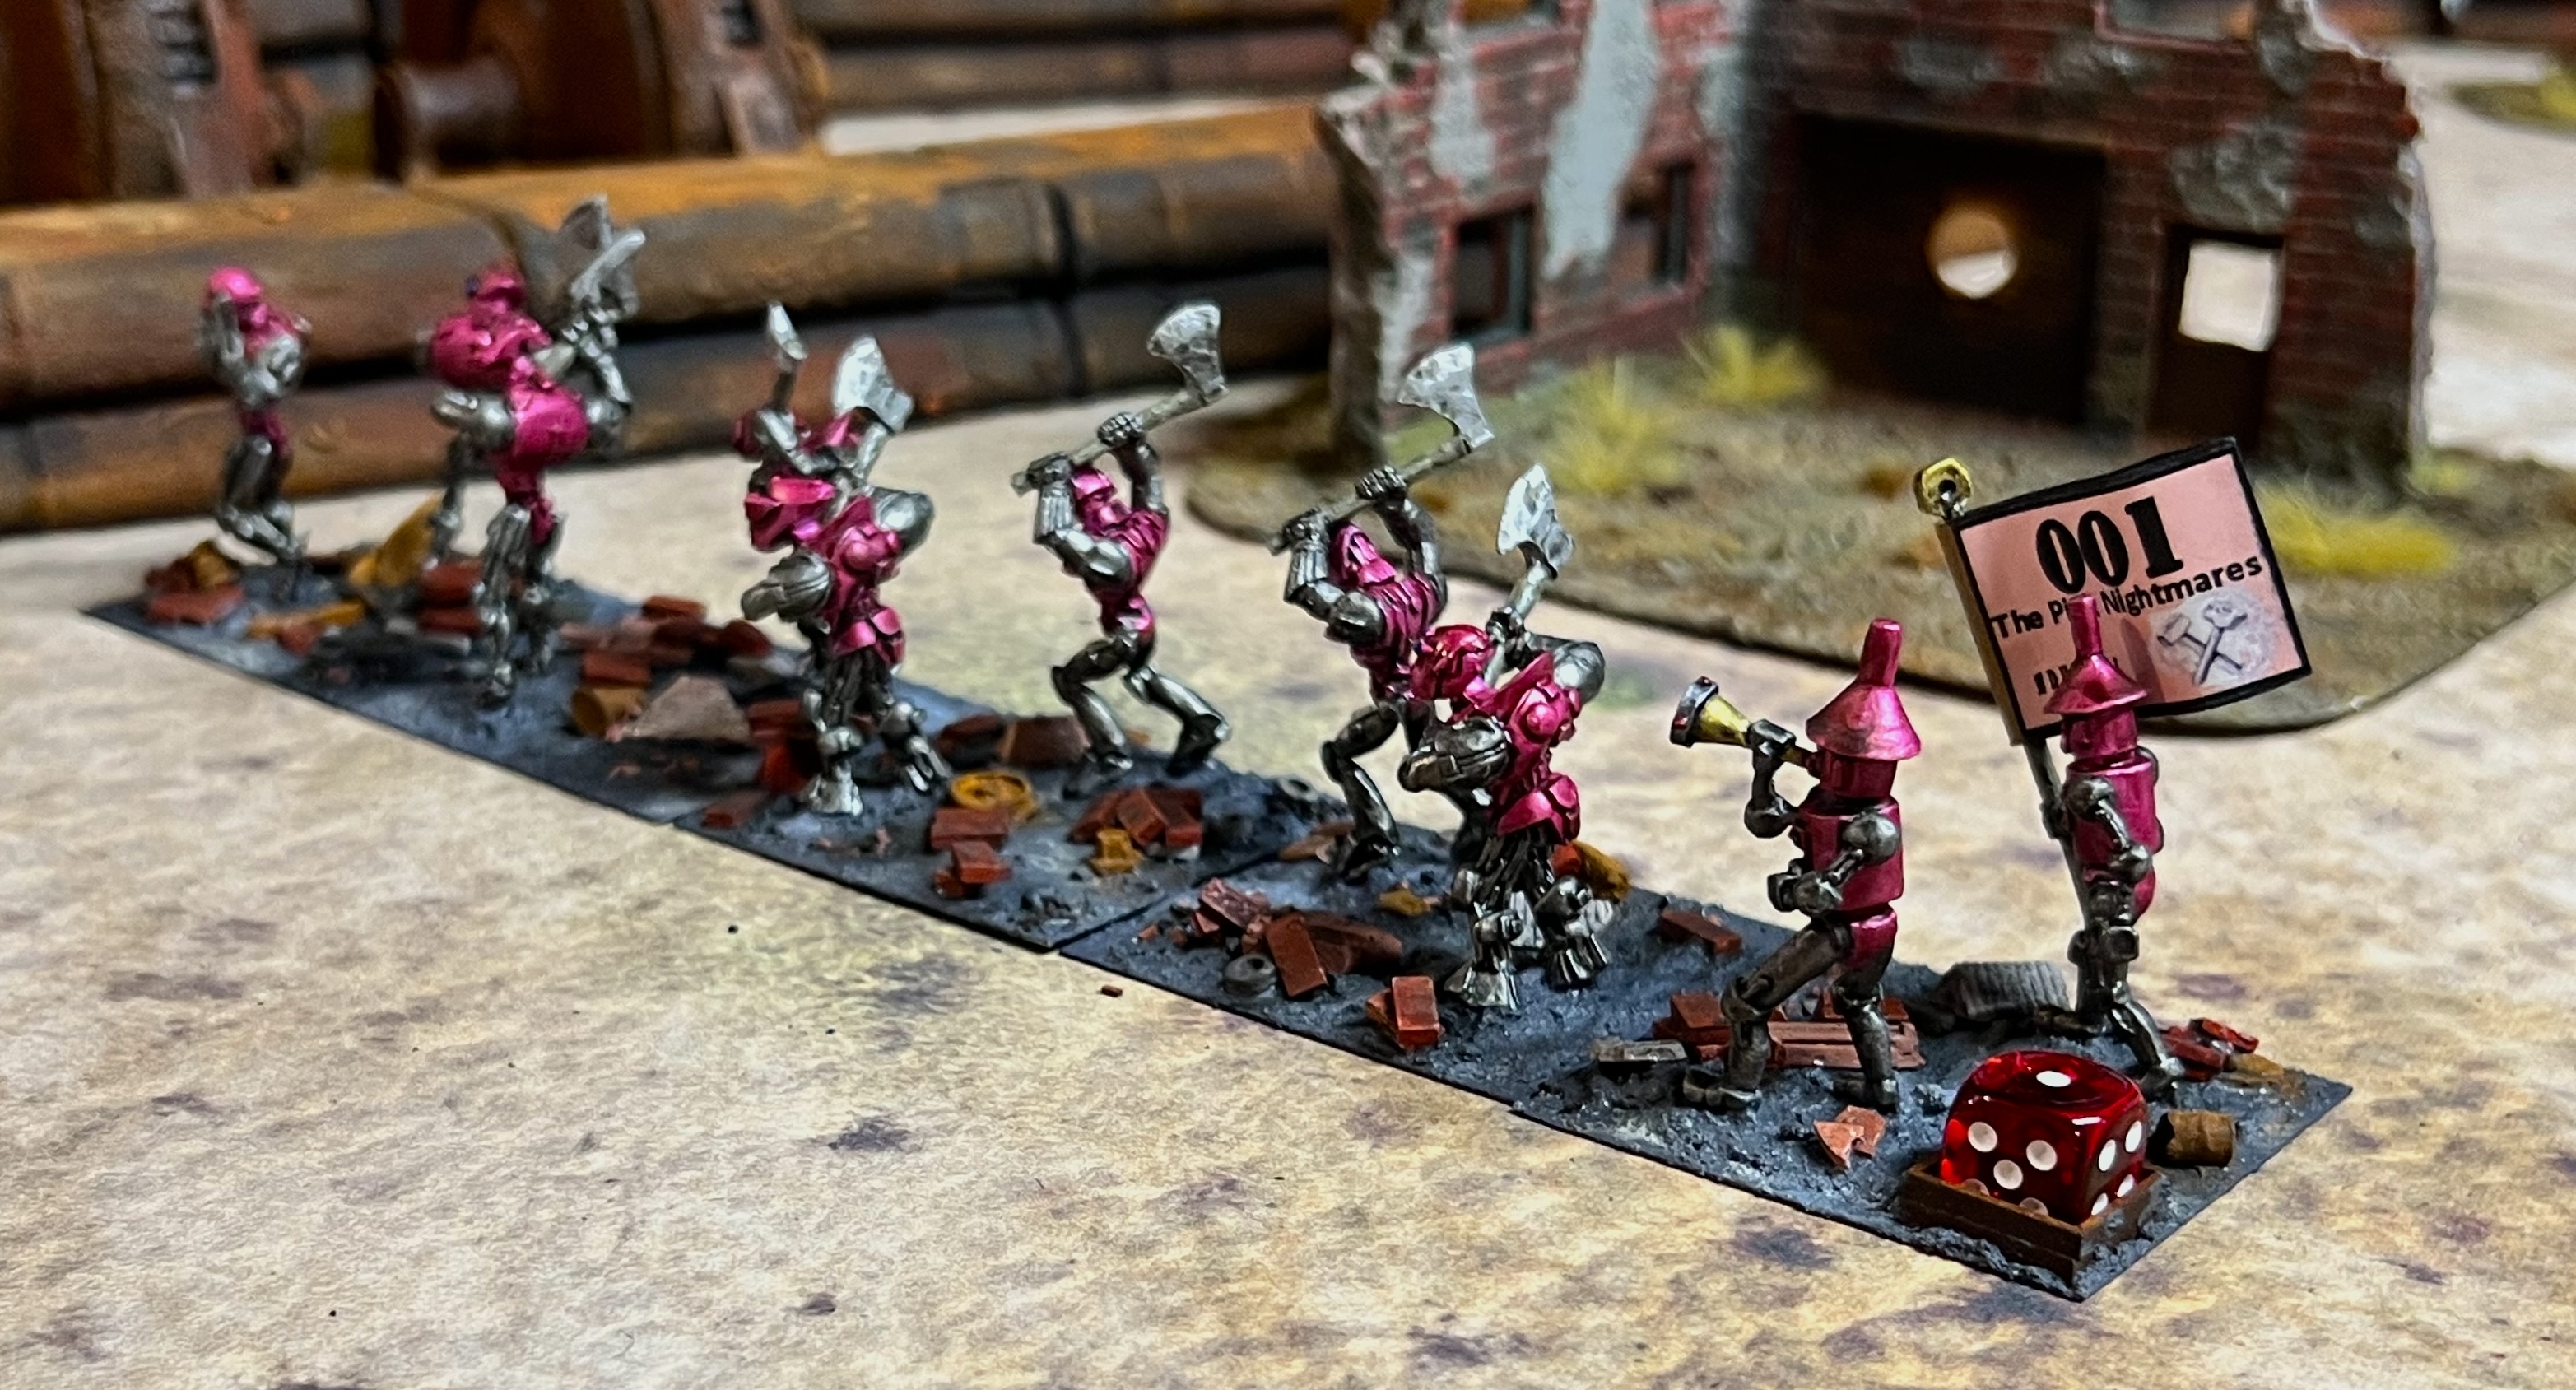
So on to the Tin Men! The first up I’ll share is a regiment type that I previously completed in a red/gold theme and posted here. I finished that one in April 2025, and did not assign it a name other than “001”. I had another one to paint up in a different color. It is the 40-figure “OZZ-542, Mechanical Mini Swarm with pulse blasters”. I went with a blue and chrome look to differentiate the regiment from 001. I also gave this one a name instead of a number as Buck Surdu had been kind enough to provide me with personalized regimental battle flags to match my names. I also made the flagstaff’s top with a screw instead of a nut. He did that for all of these. The name I chose was “The Indigo Ironmongers”.
The Indigo Ironmongers
First, some WIP photos:
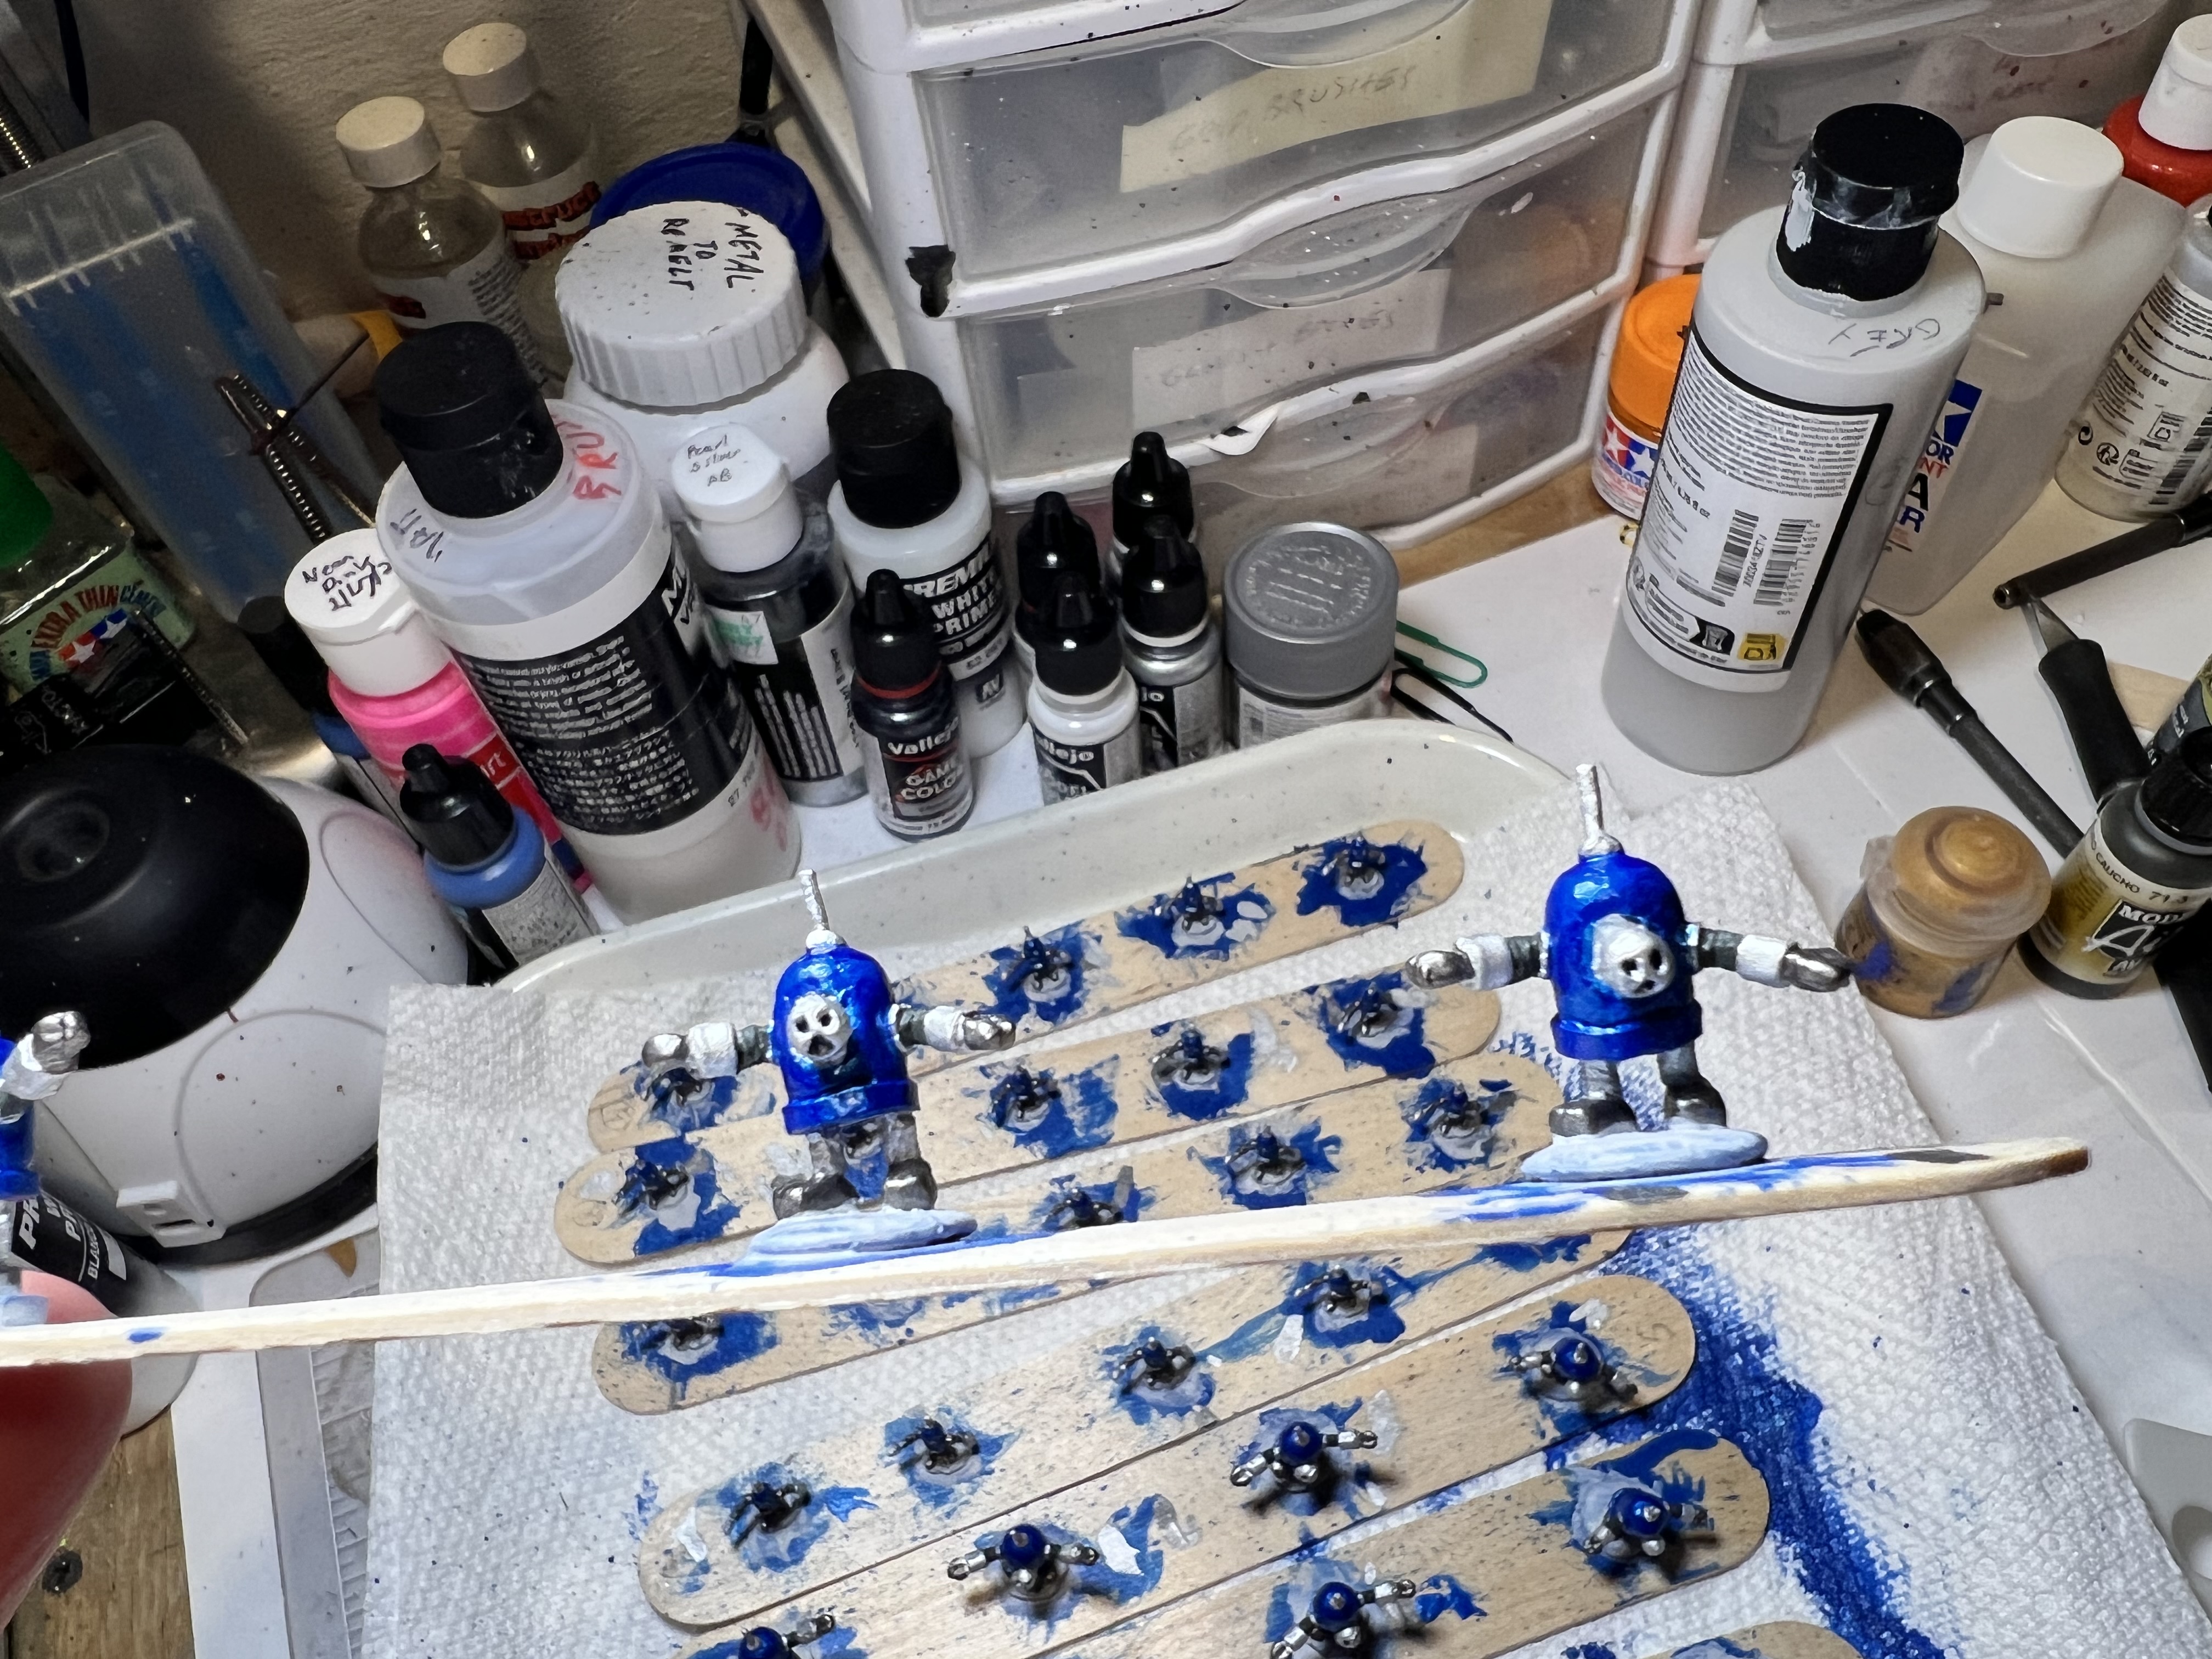
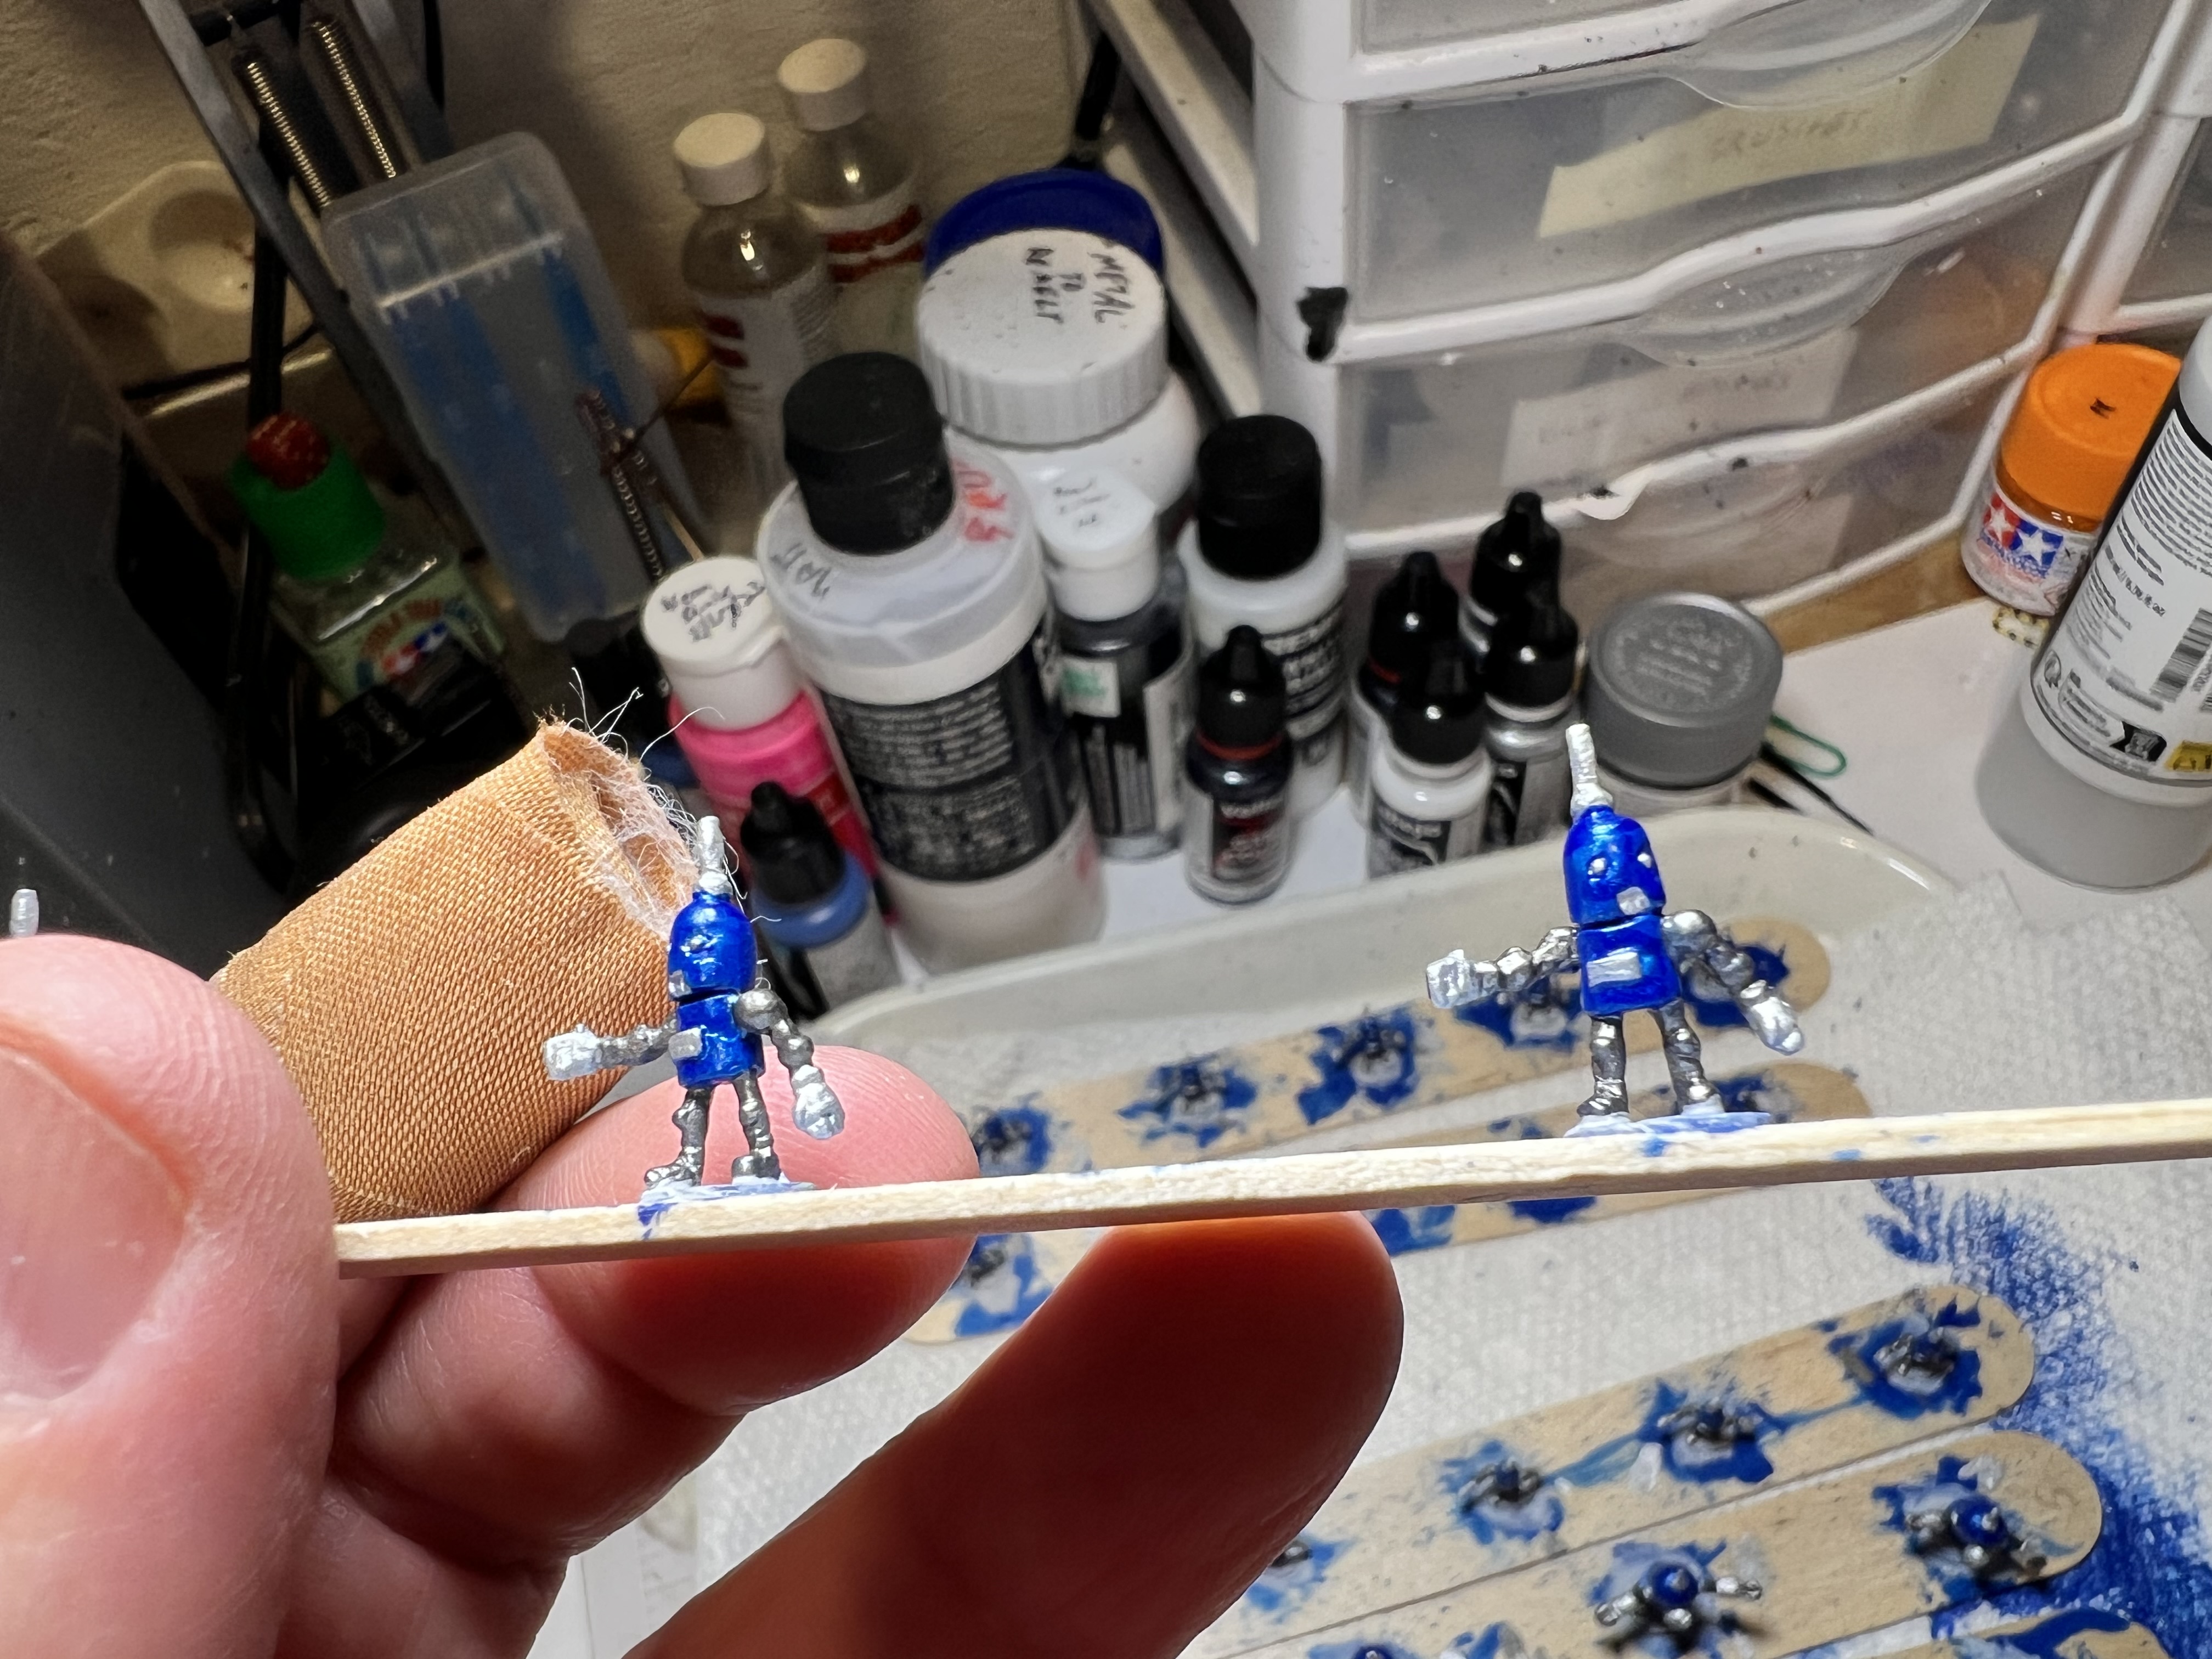
My flagstaff I made/sculpted.An easy dark blue prime followed by pearlized blue paint.Adding the chrome and gunmetal paints to the limbs and “faces”.WIP close up. These are the larger robots.These are the smaller ones. Very tiny.Command stand WIP.Based!
Here are some eye candy shots of the Indigo Ironmongers from a few differnt angles:
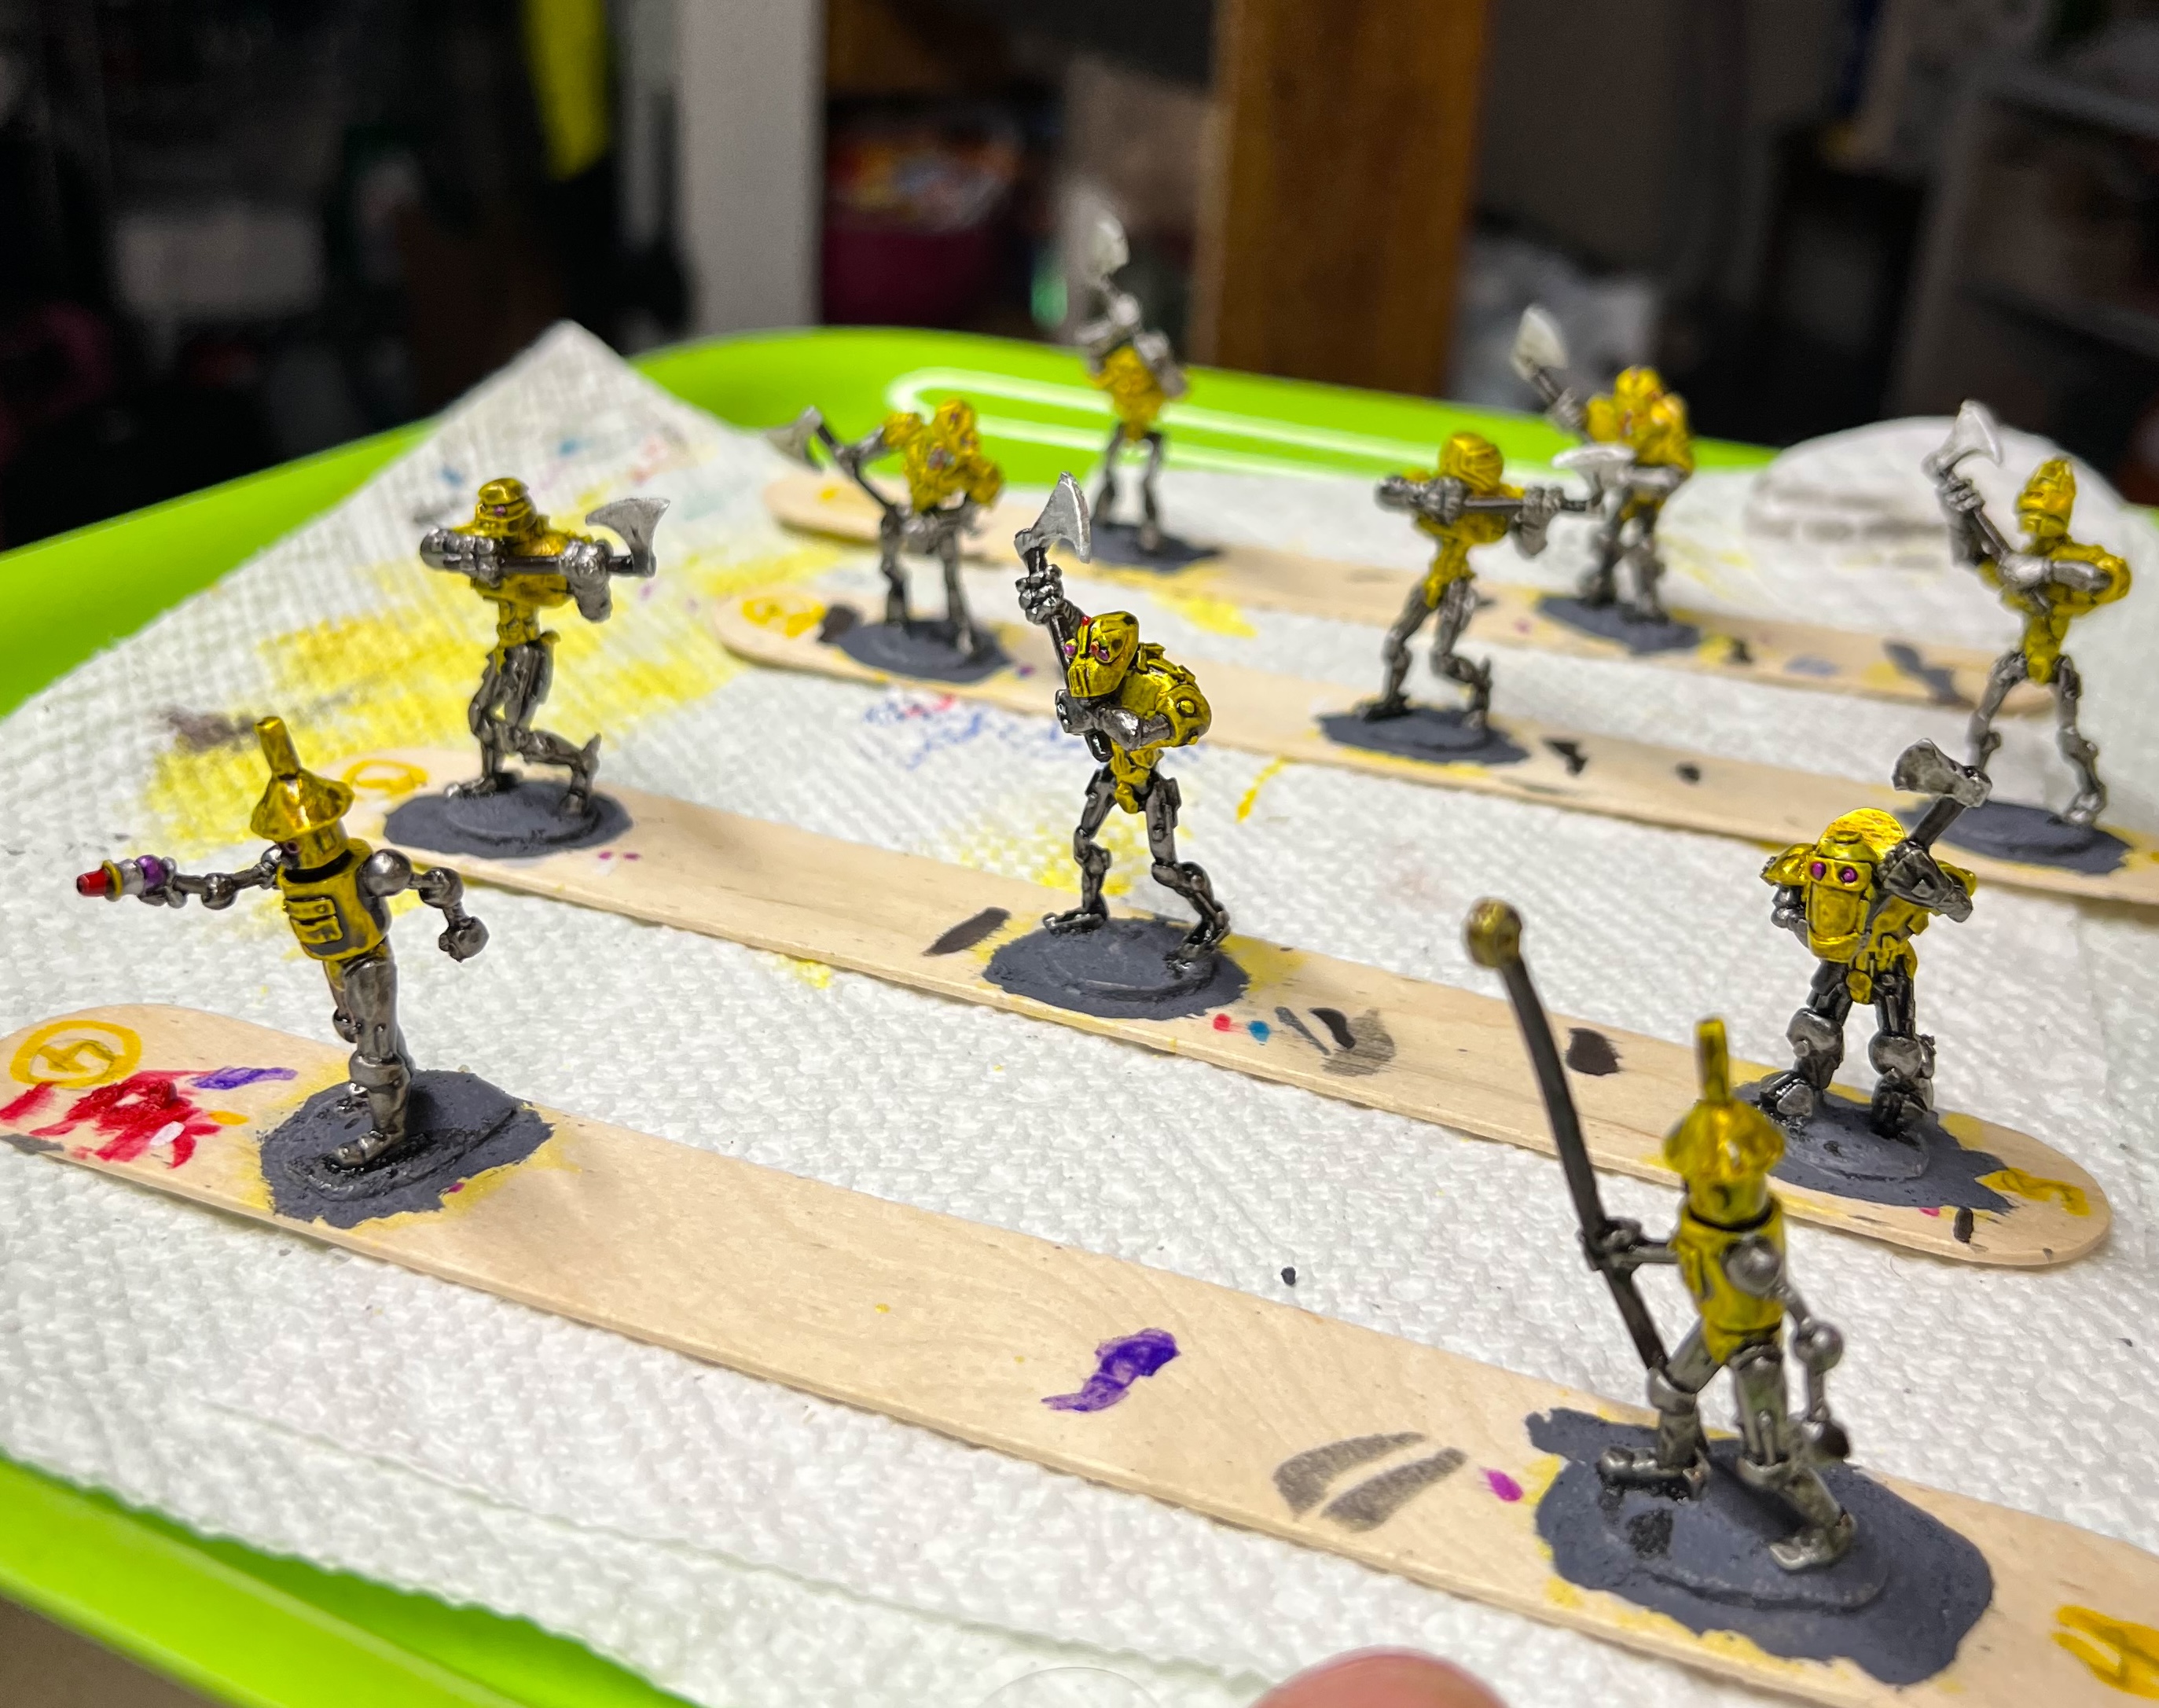
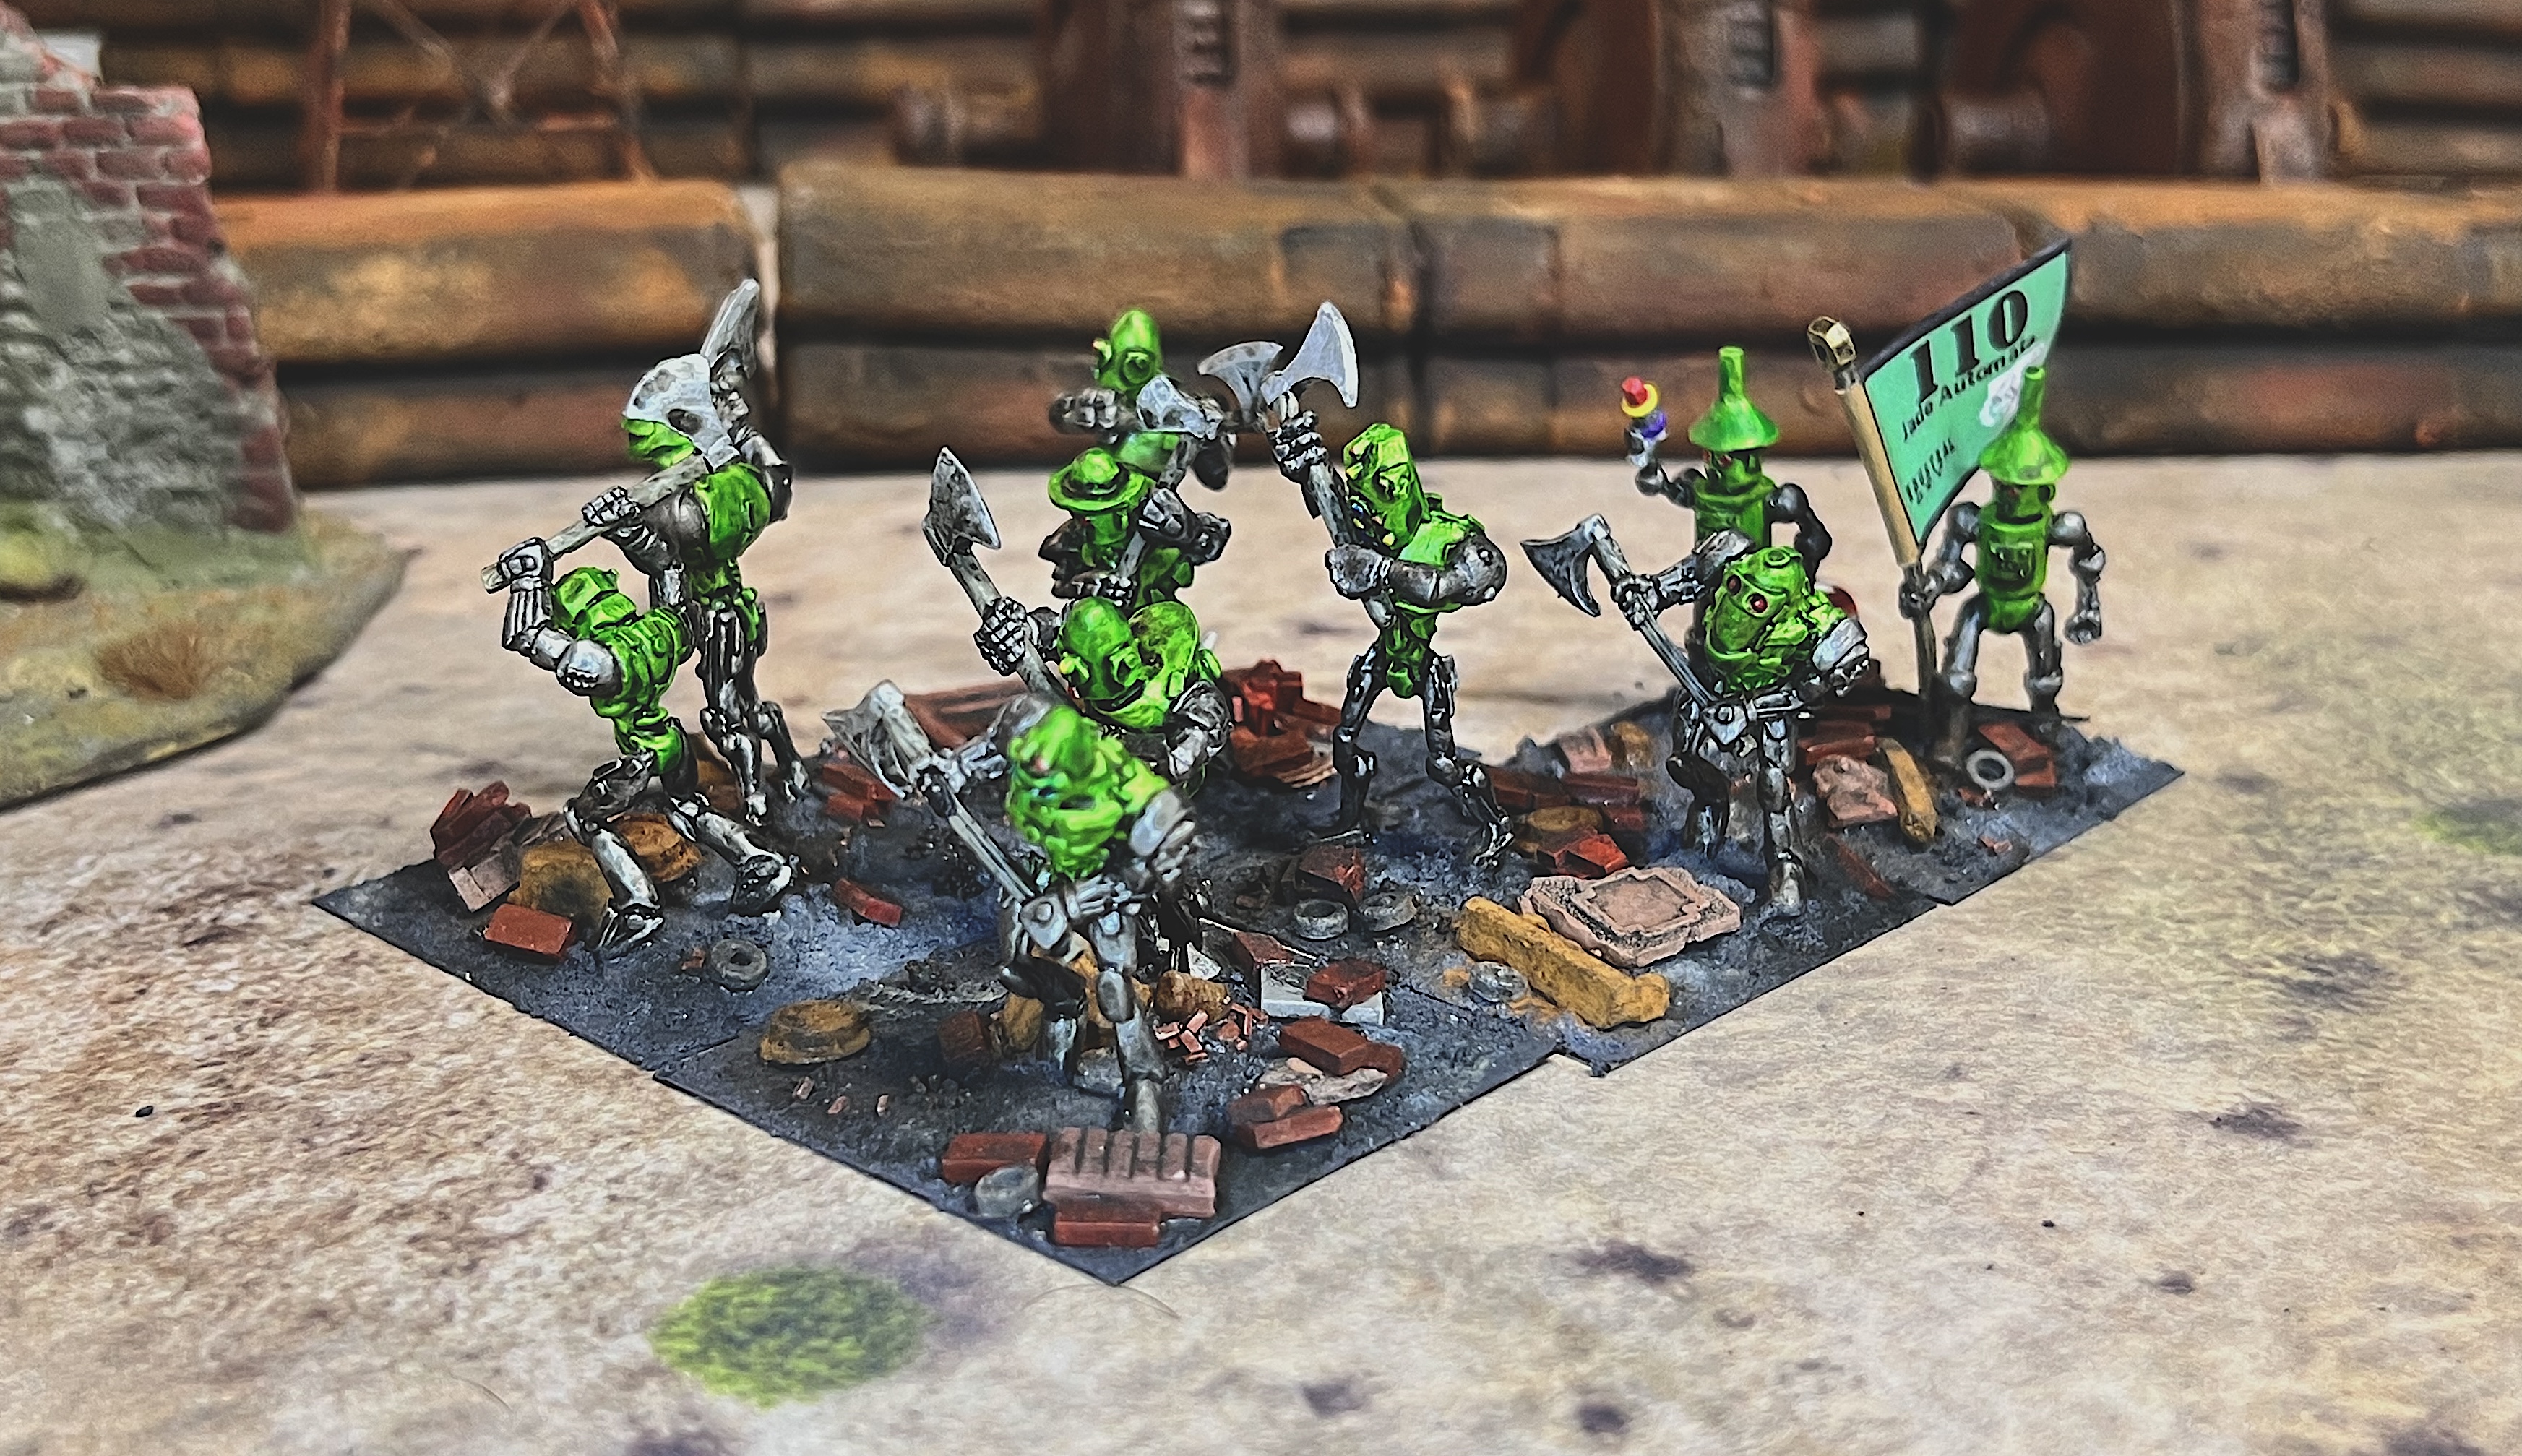
Next up are the two regiments of mechanical axemen. These are OZZ-511, “Professor Nitpik’s Mechanical Axe Army with Command“. I already had three previously painted axemen regiments that you can see here and here. The first of these is:
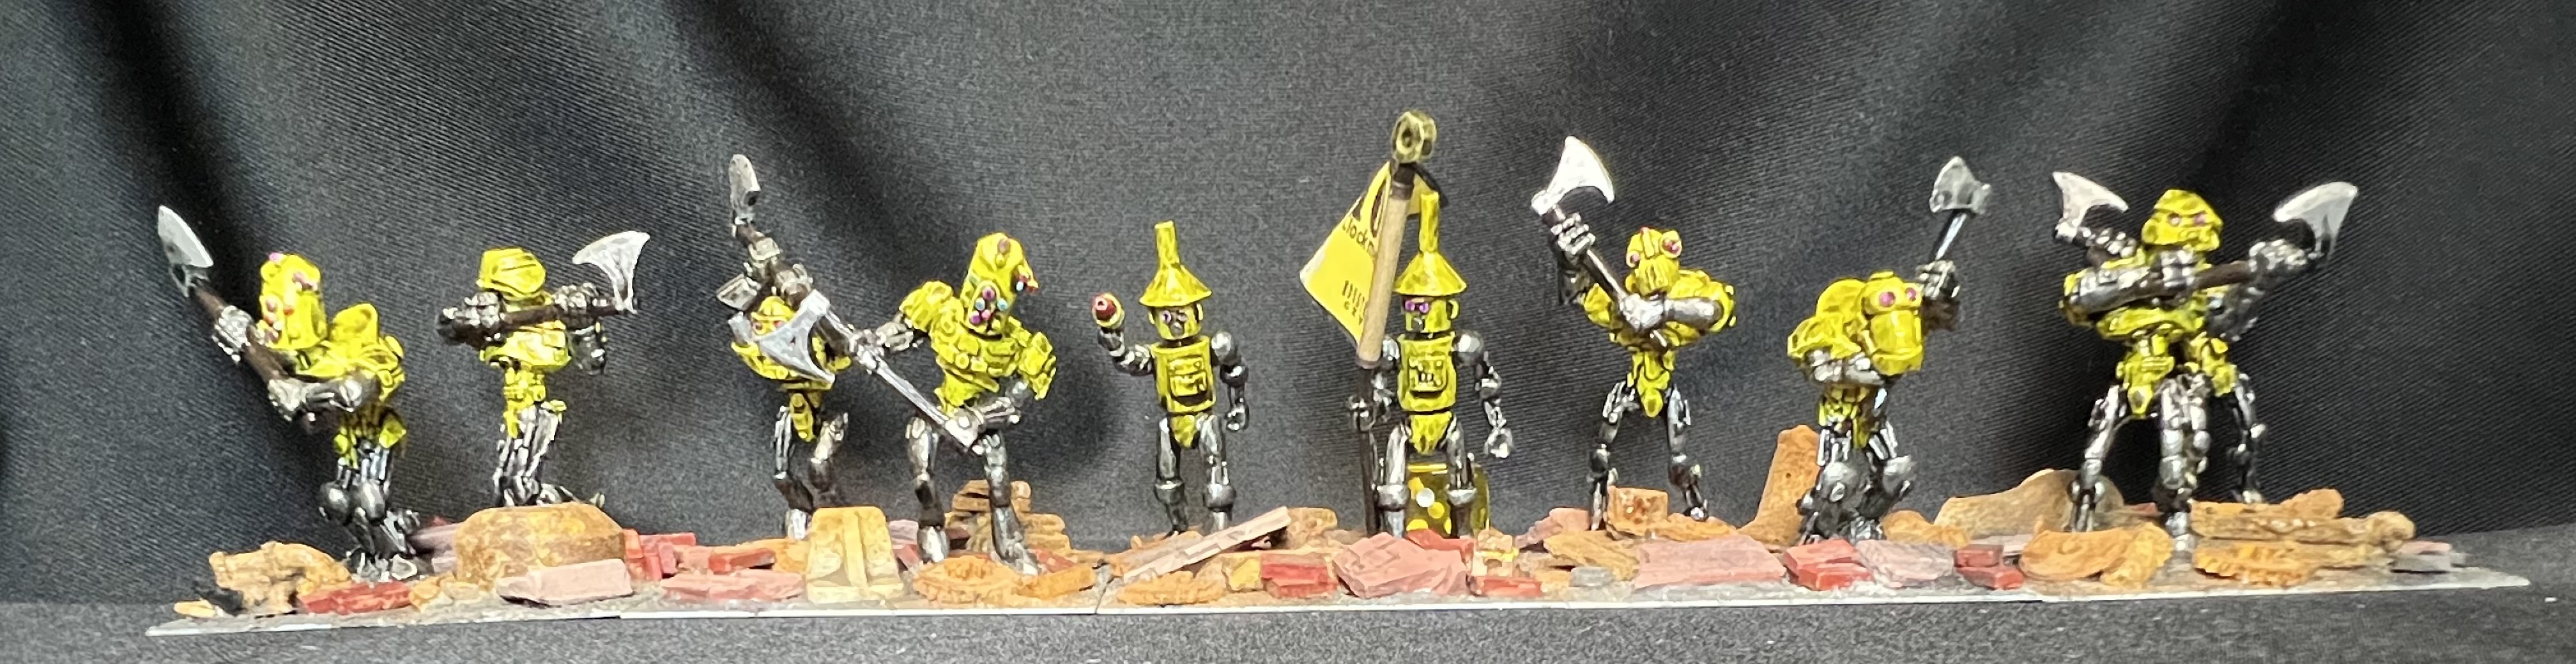
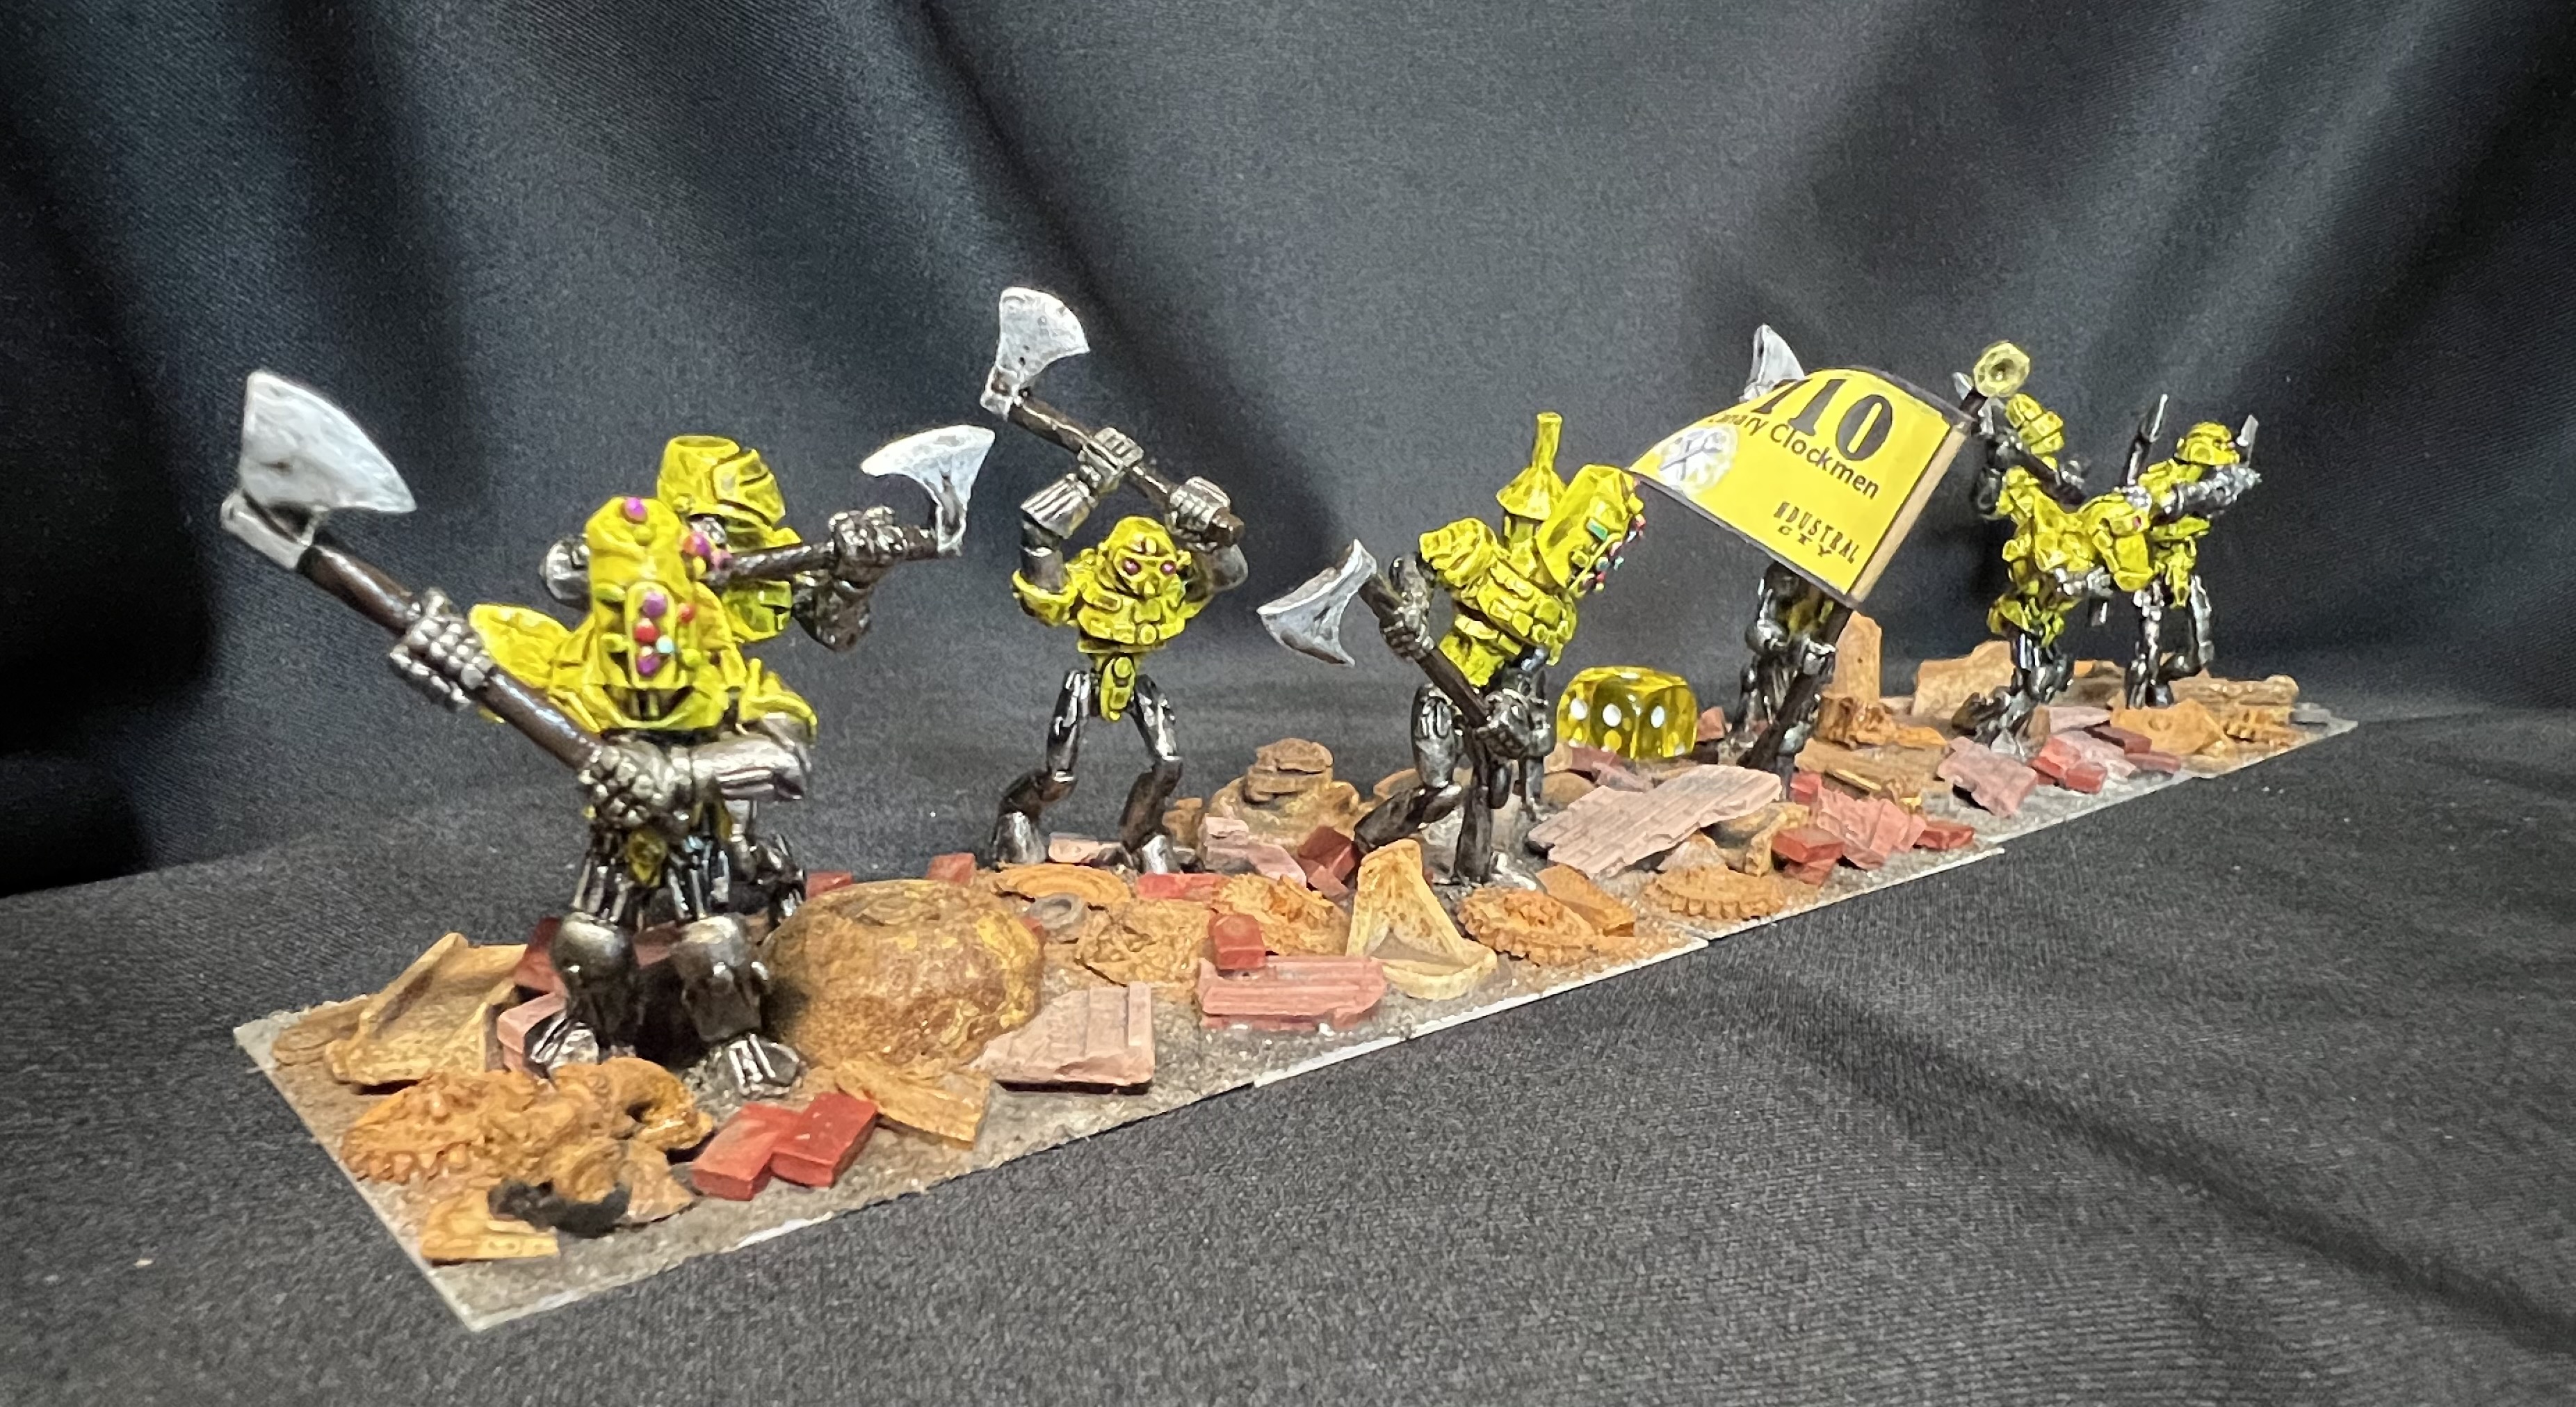
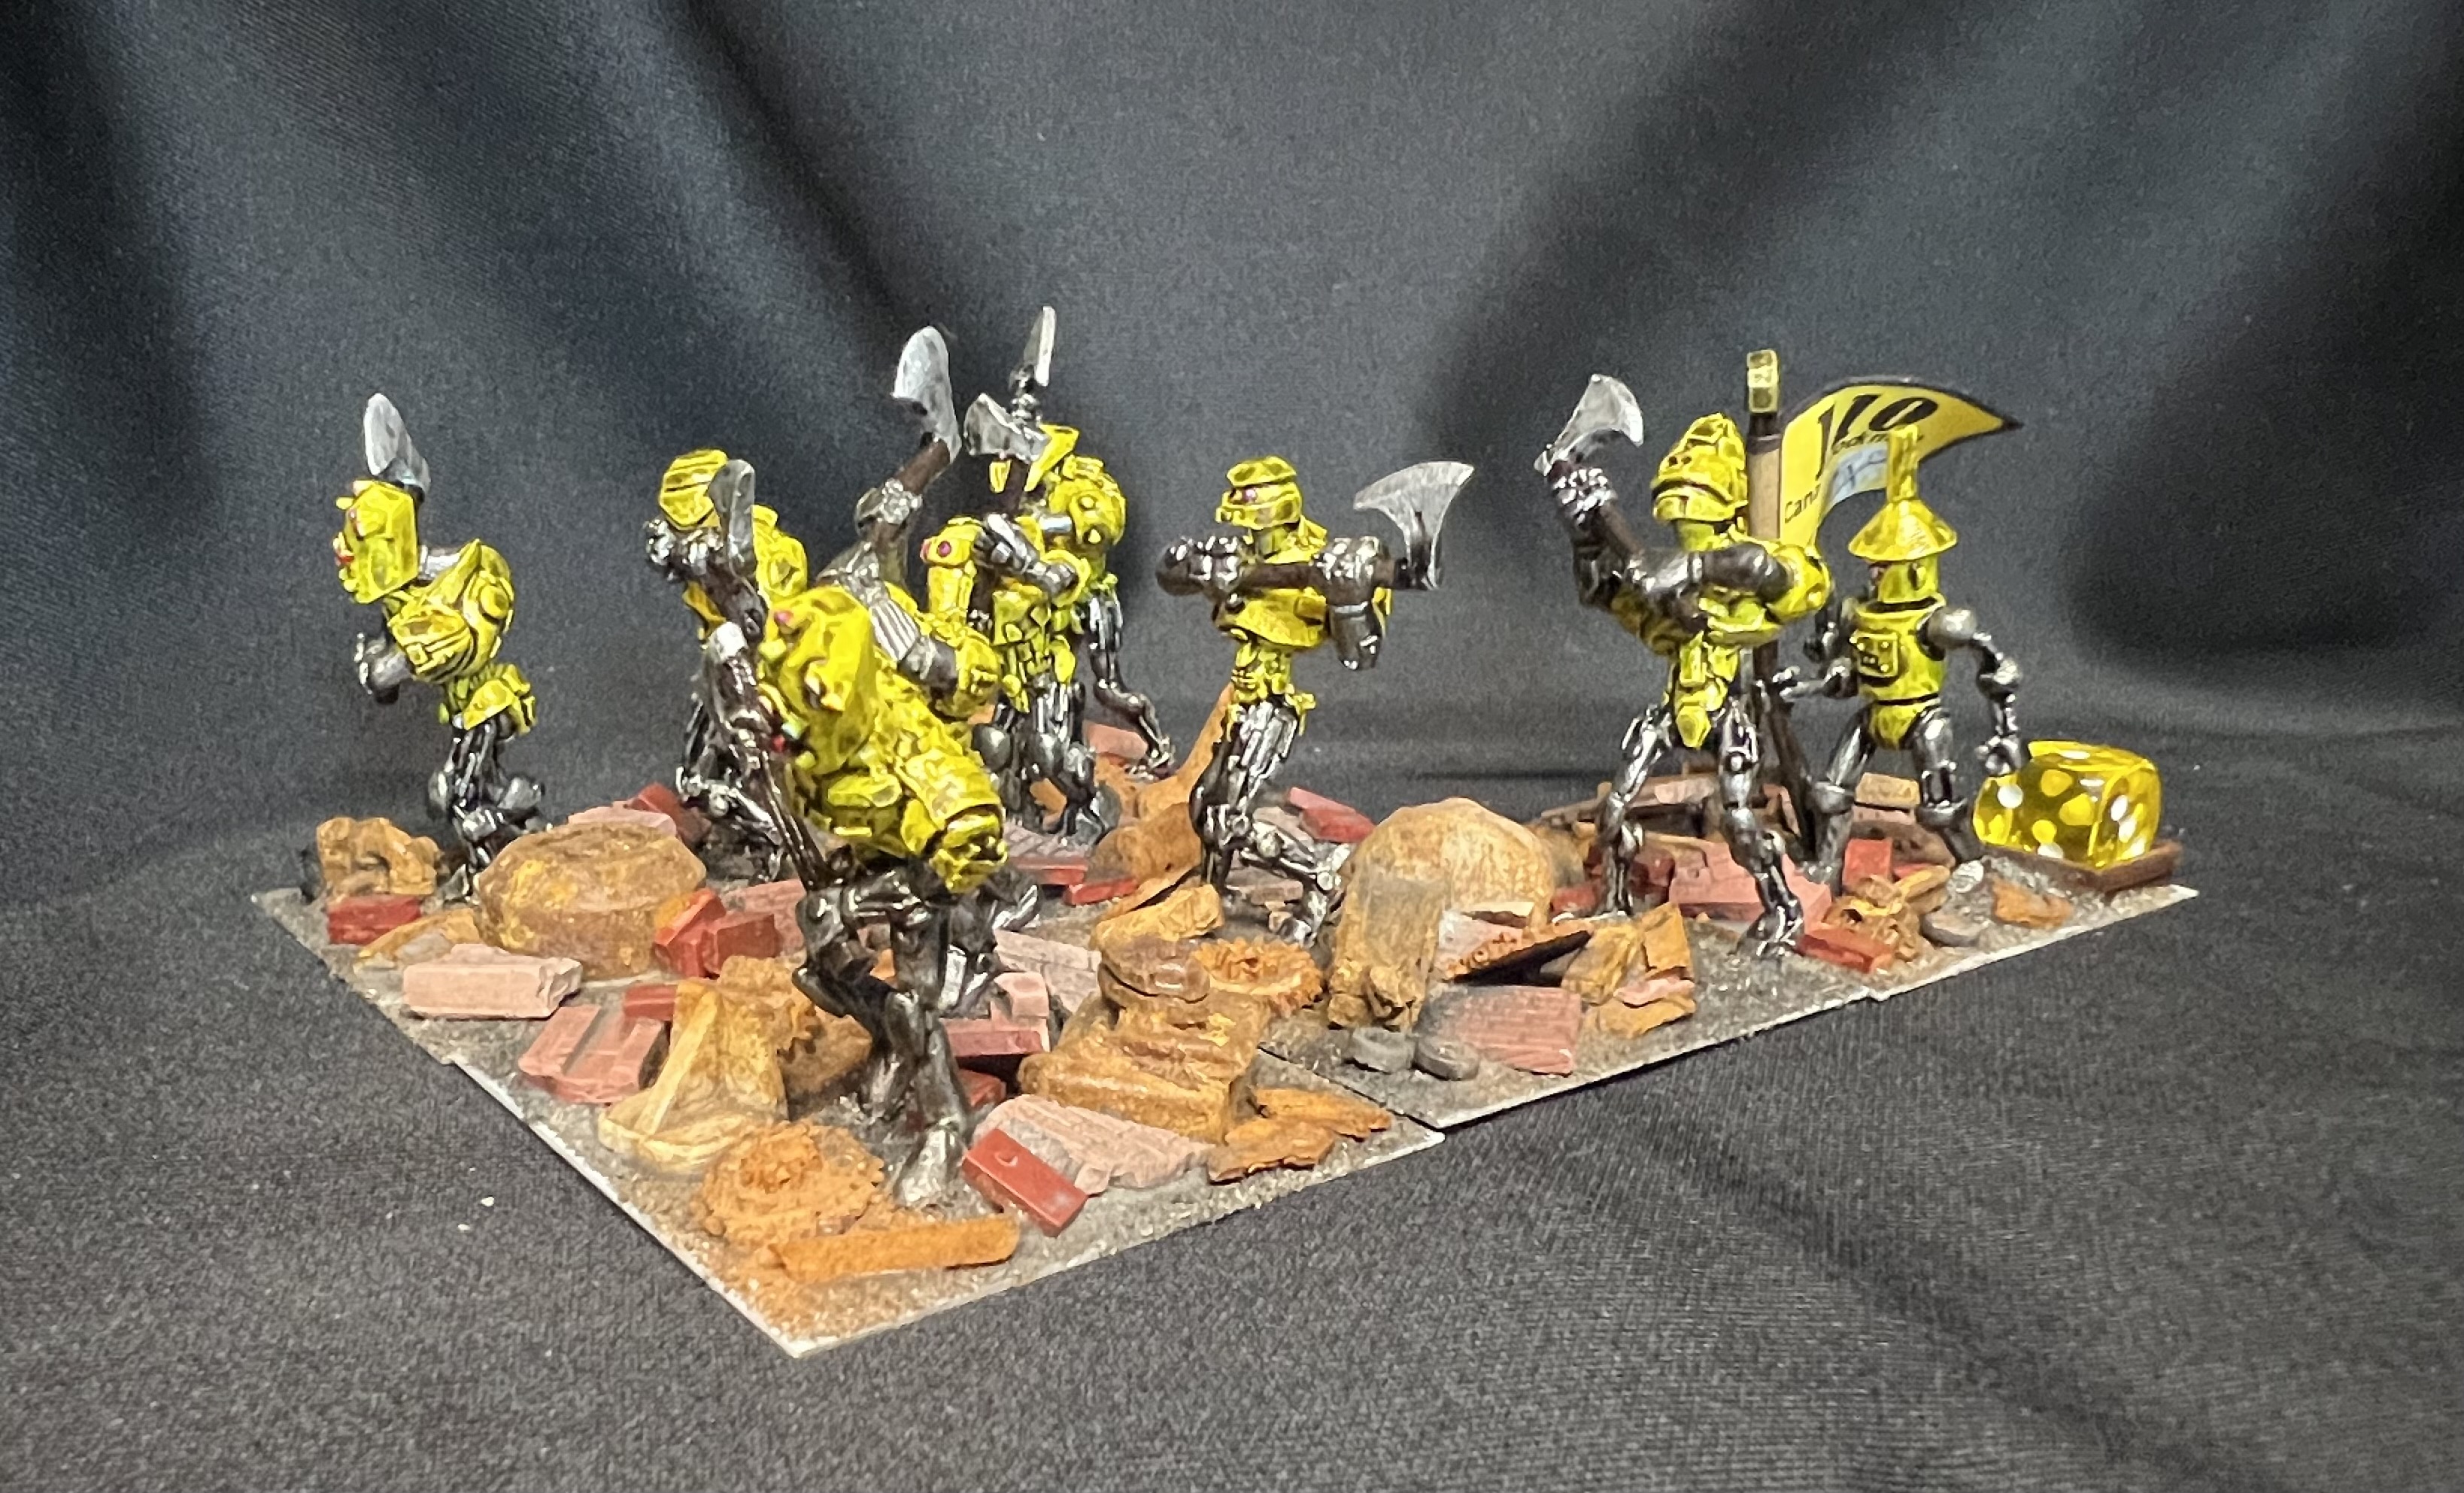
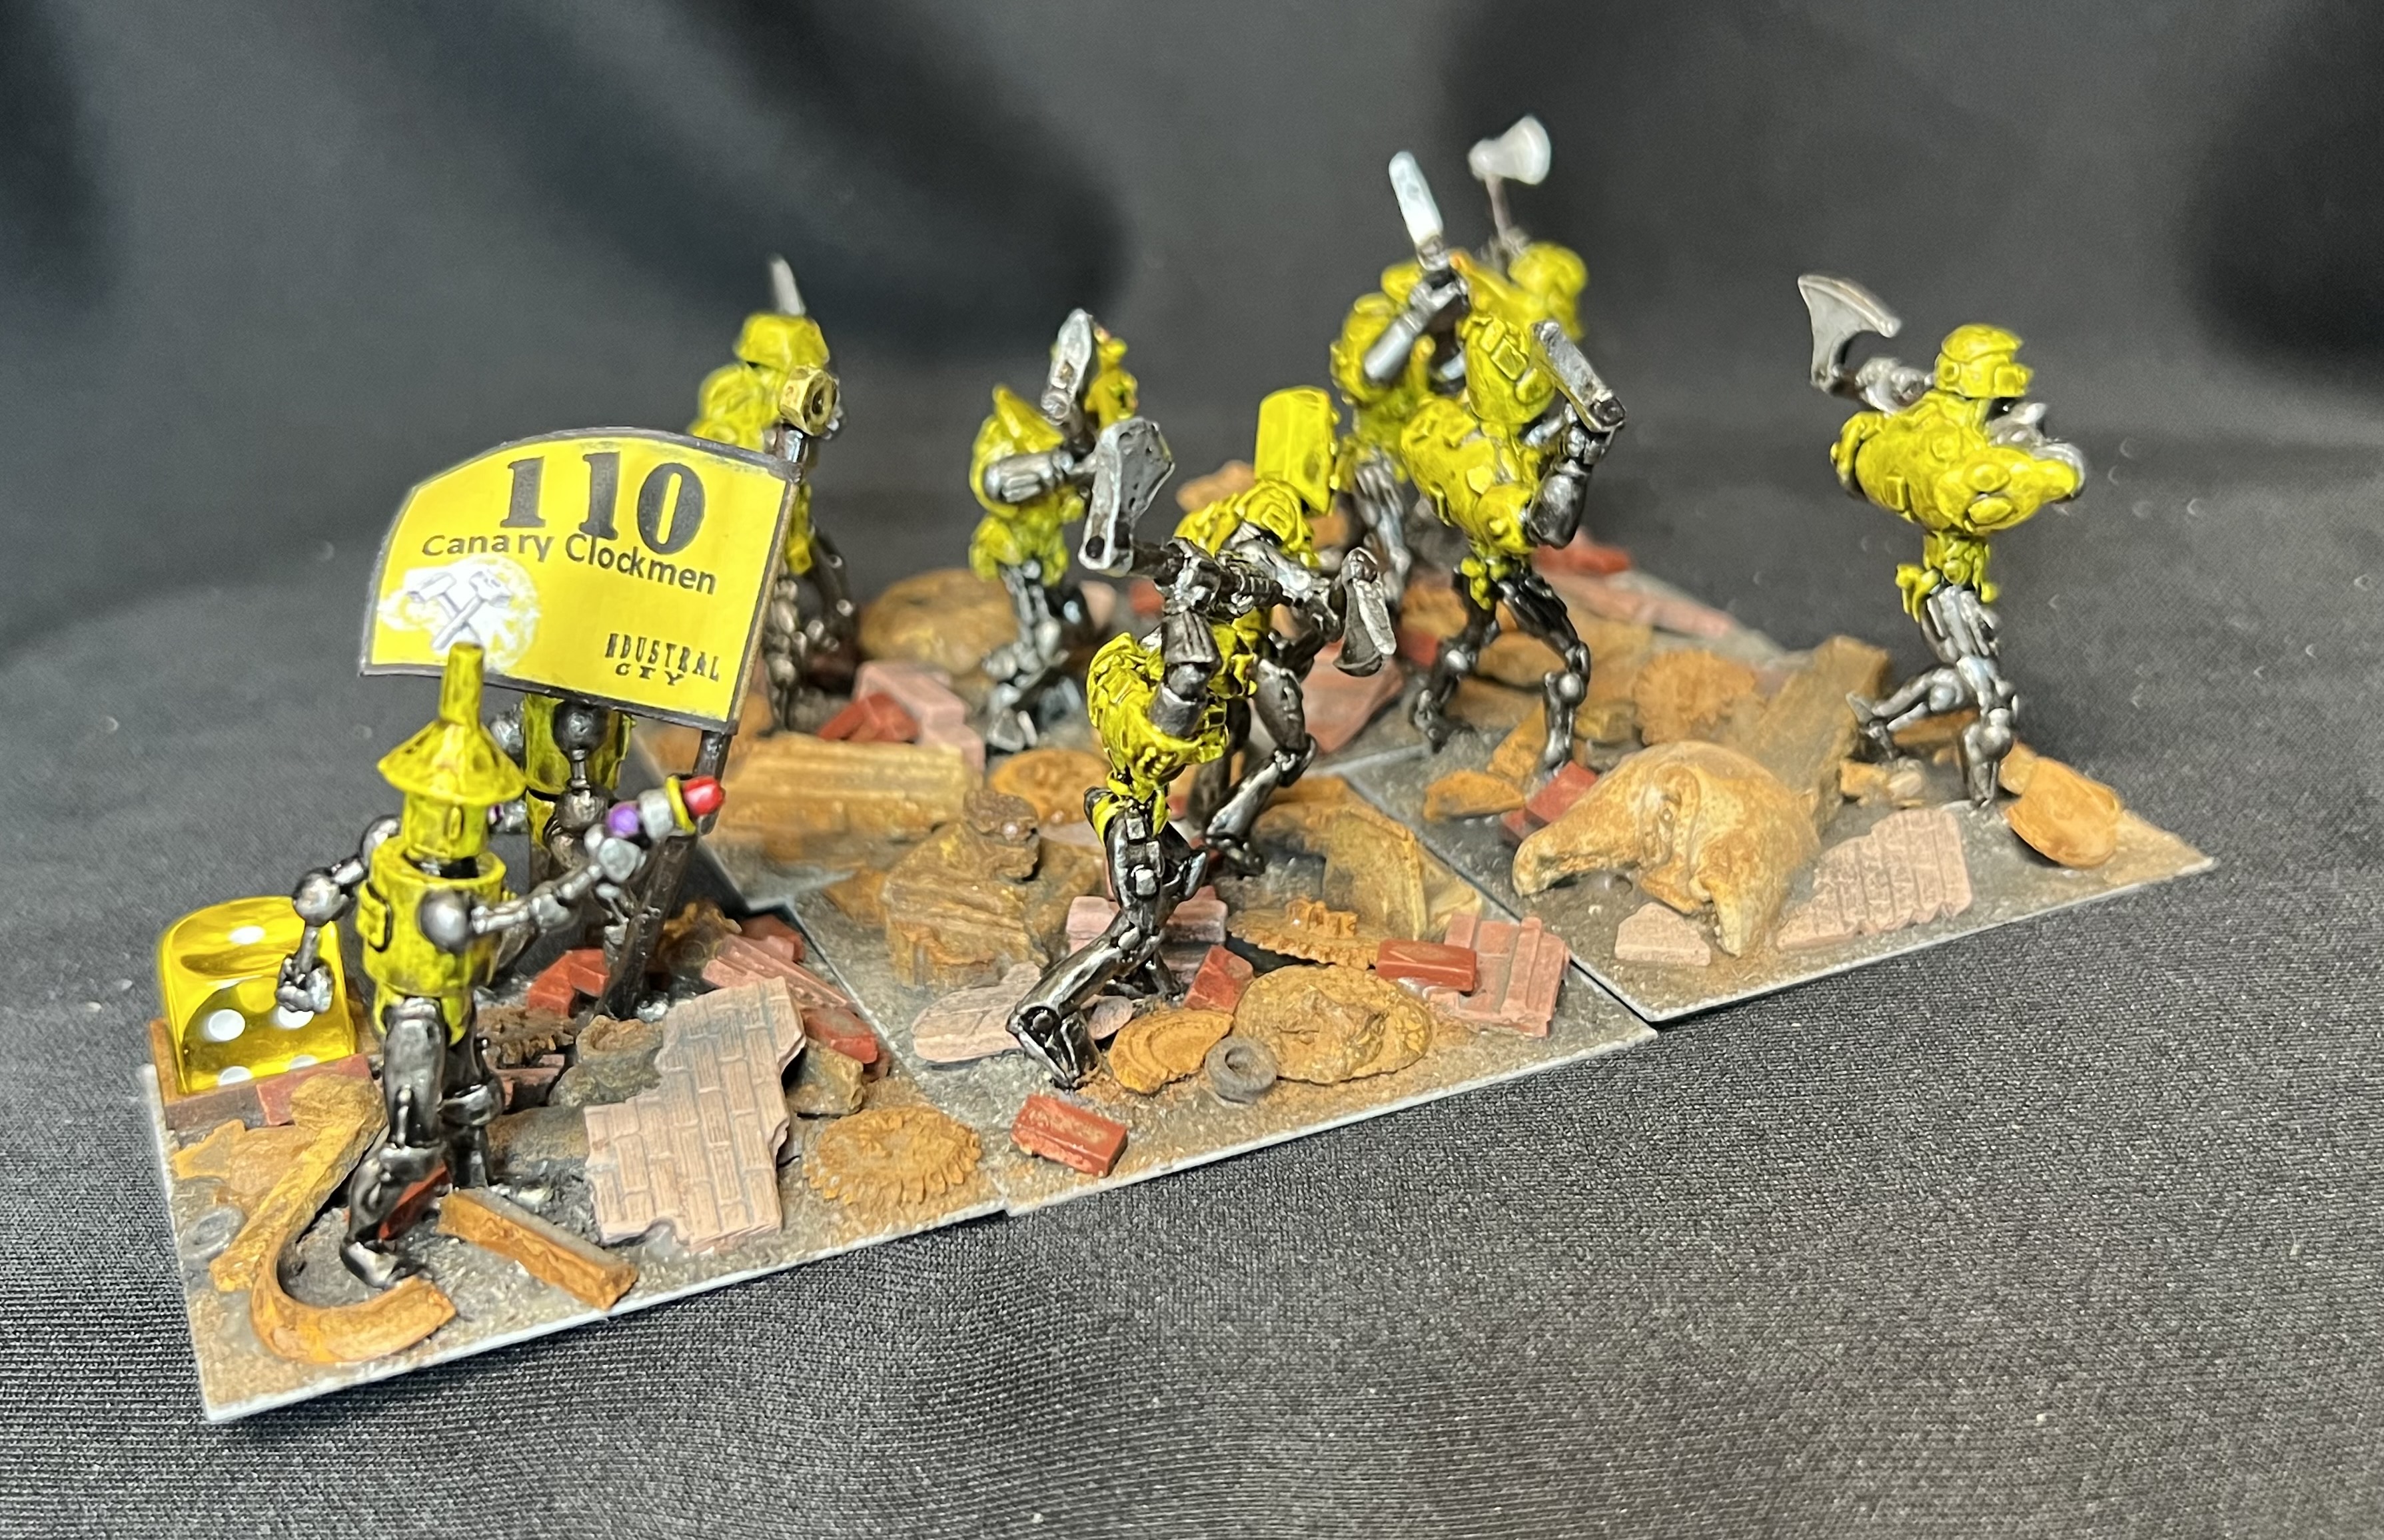
The Canary Clockmen
I just have 1 WIP shot below. Again, I went with pearlized paints, with an oily wash (seals must be bad!).
WIP shot.
Now some Canary Clockmen poses:
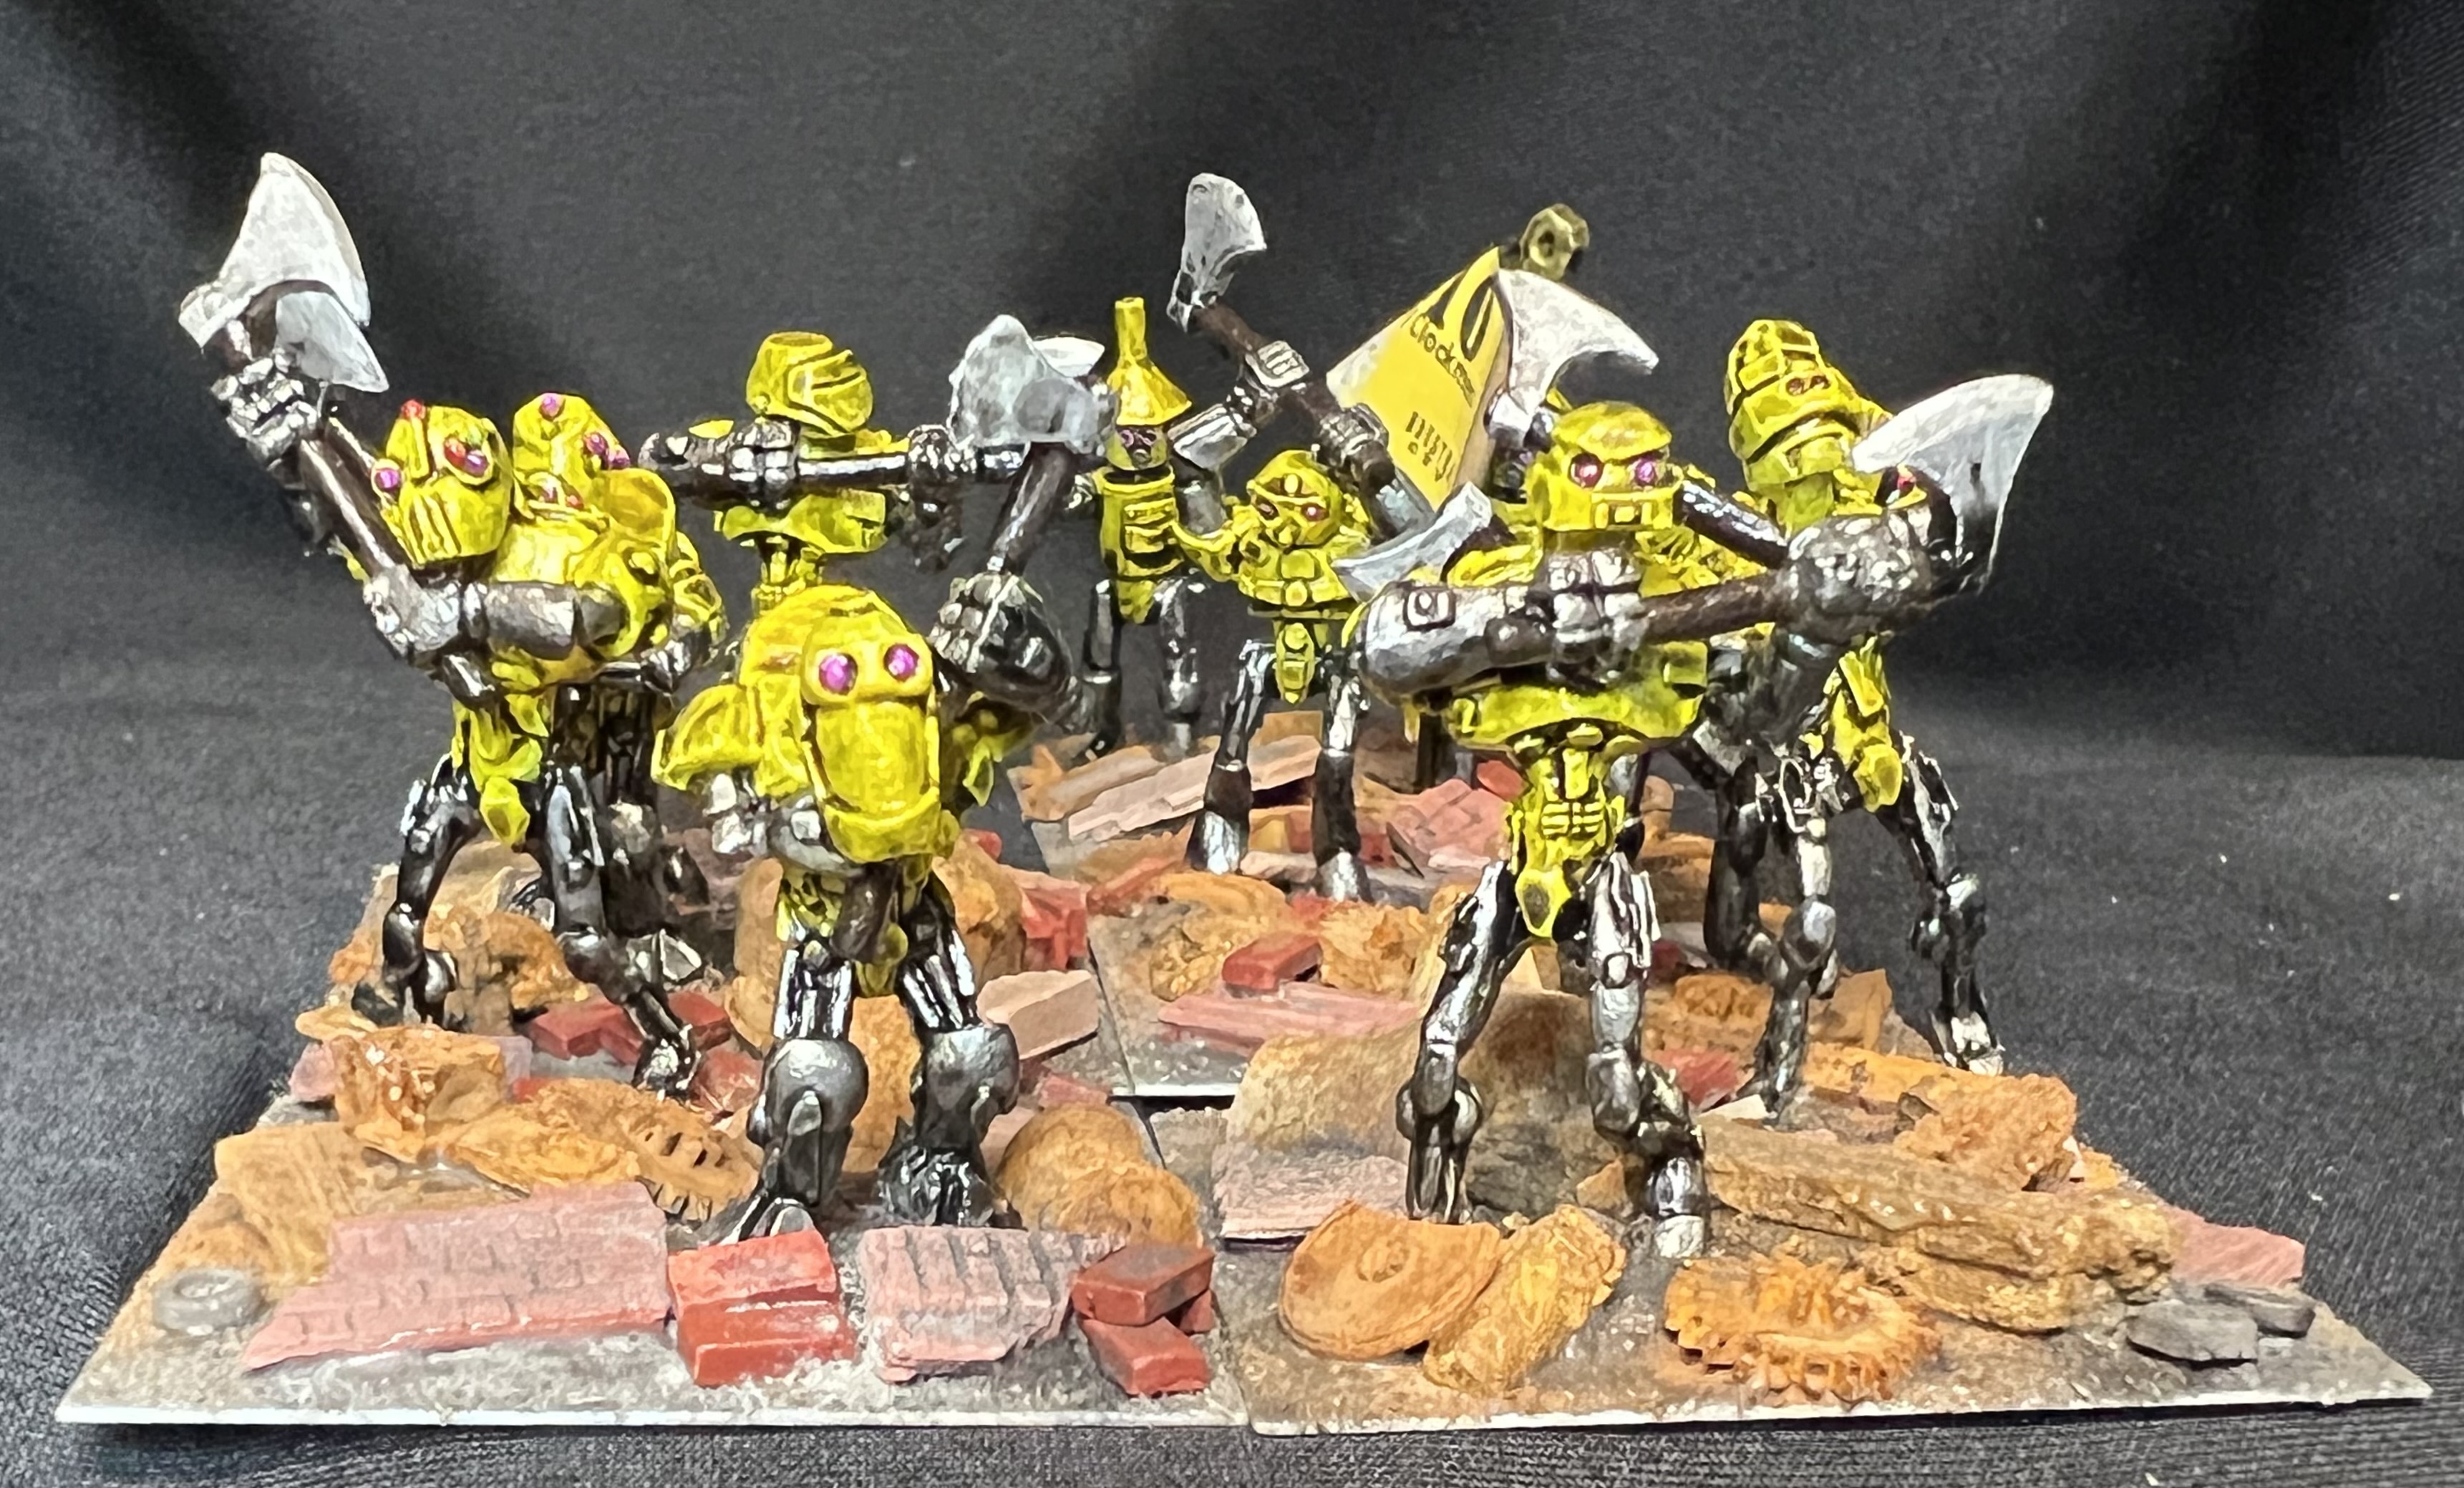
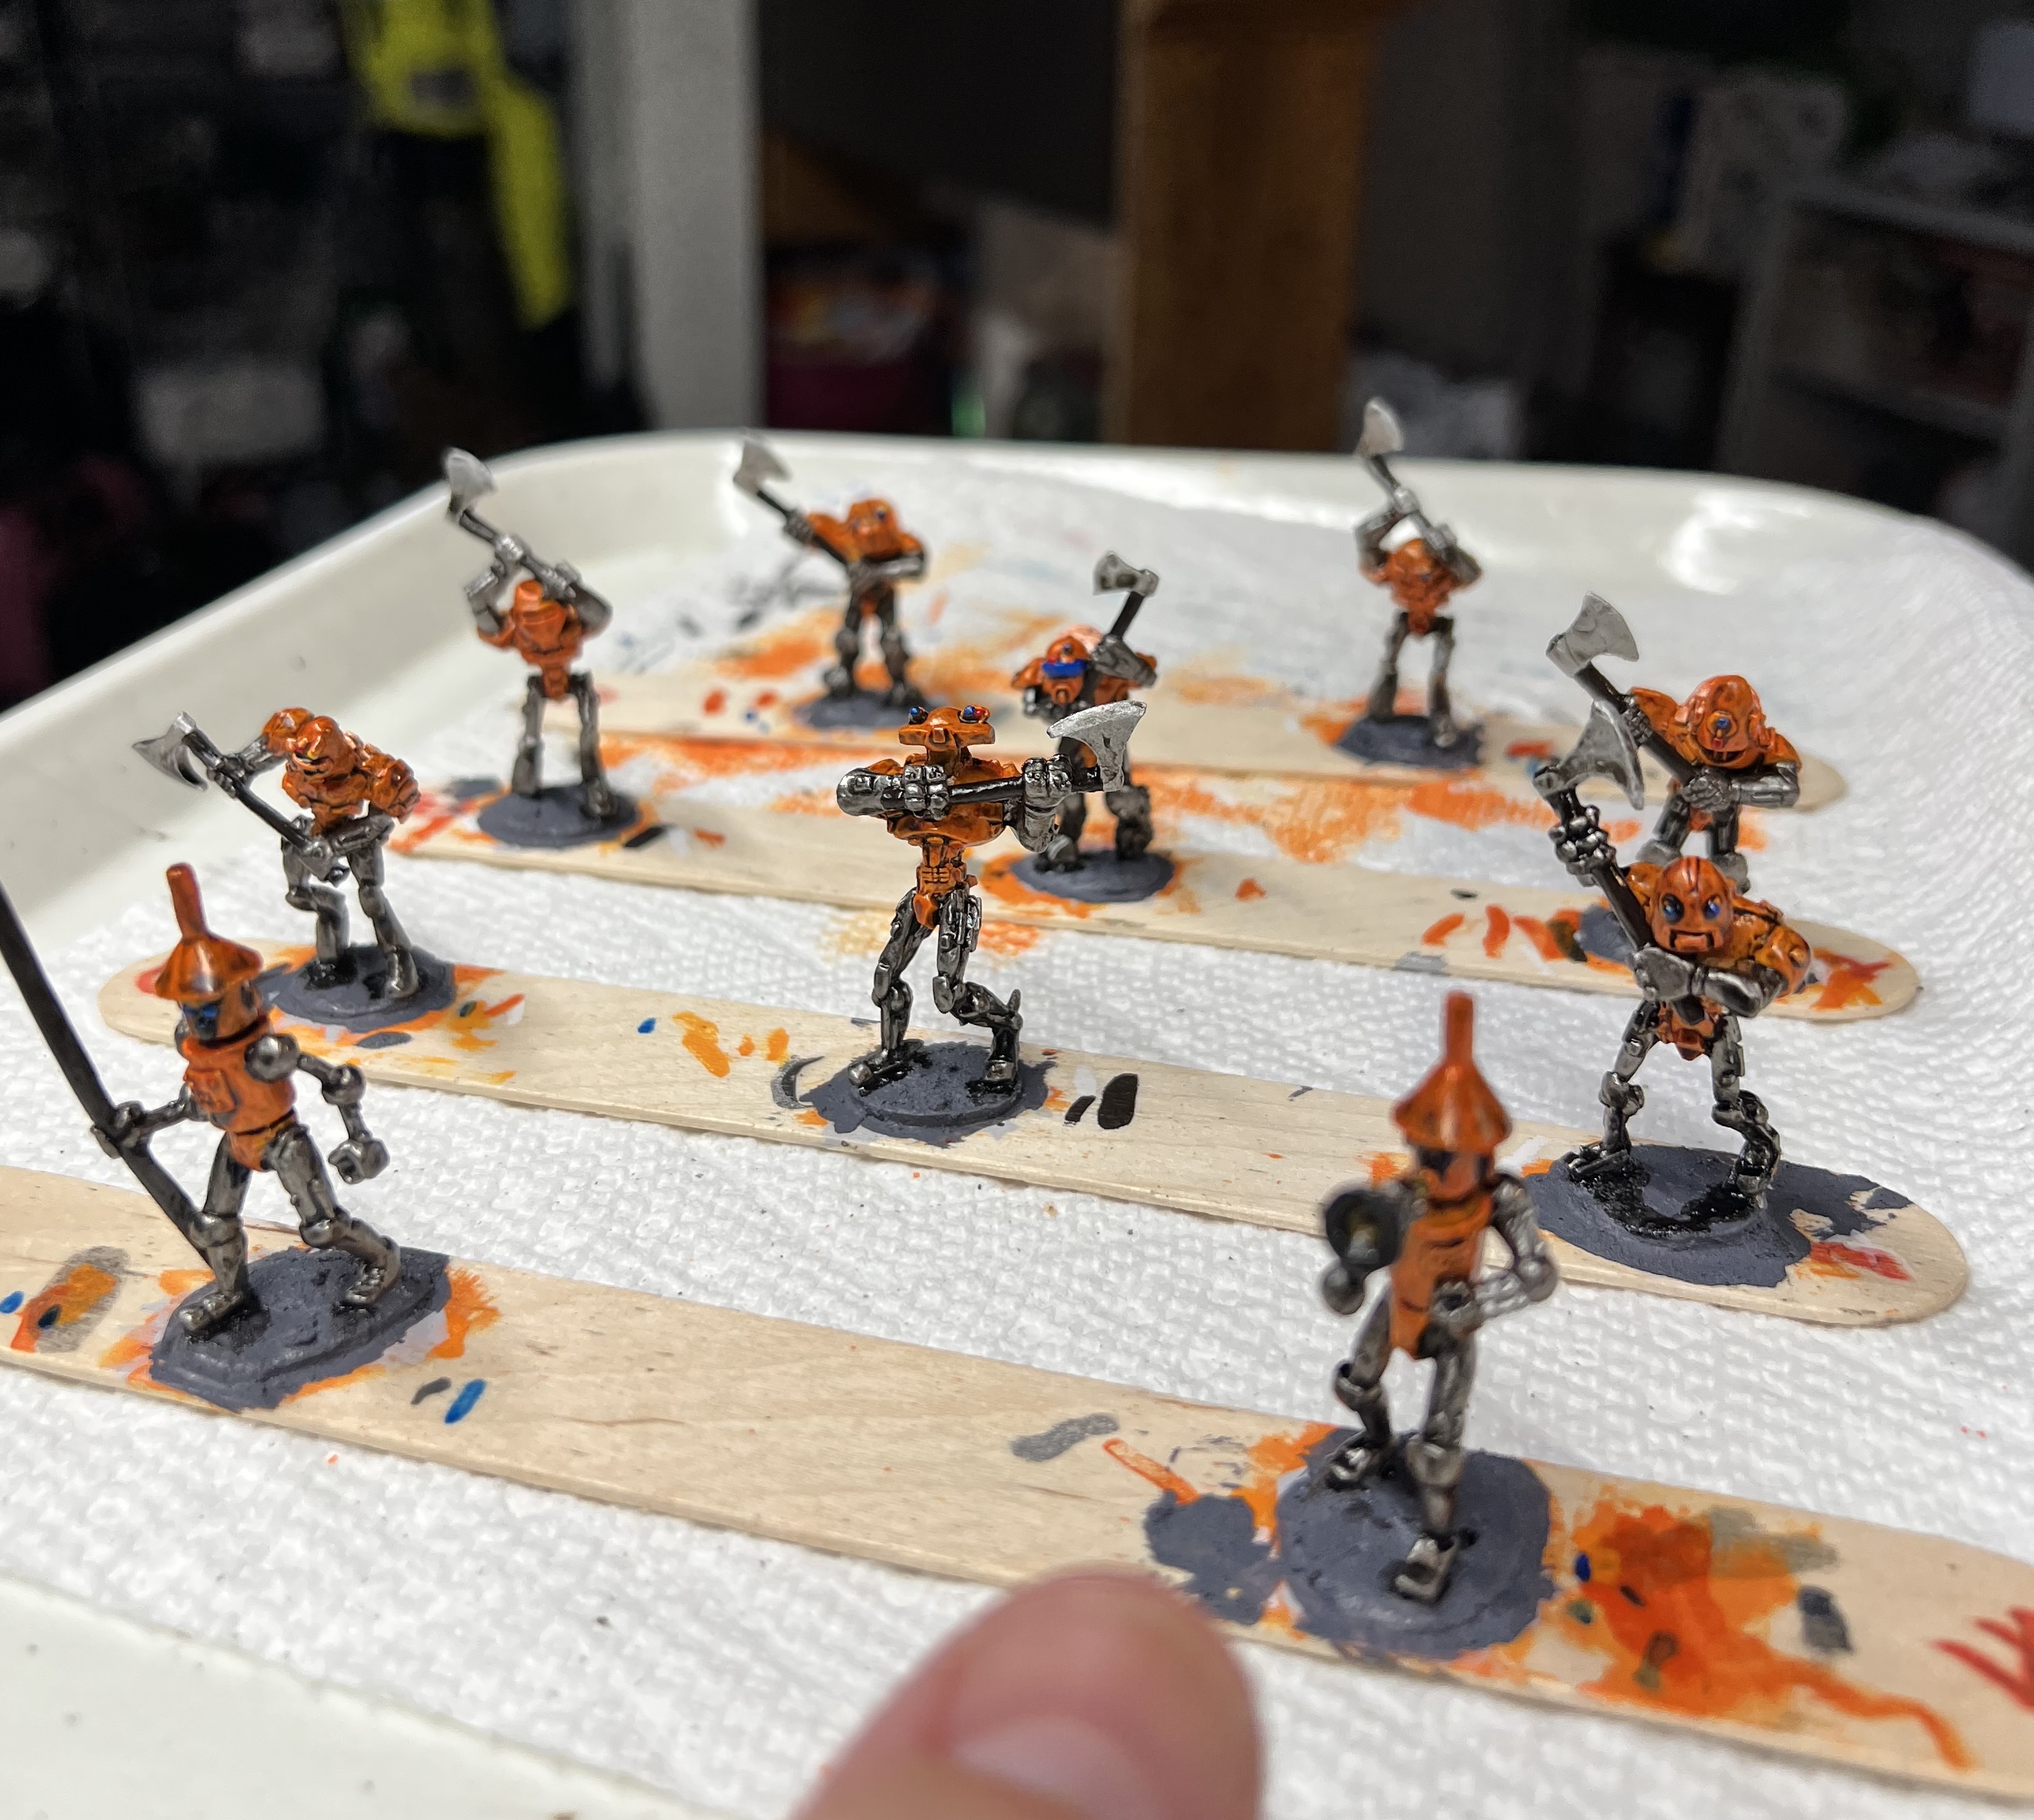
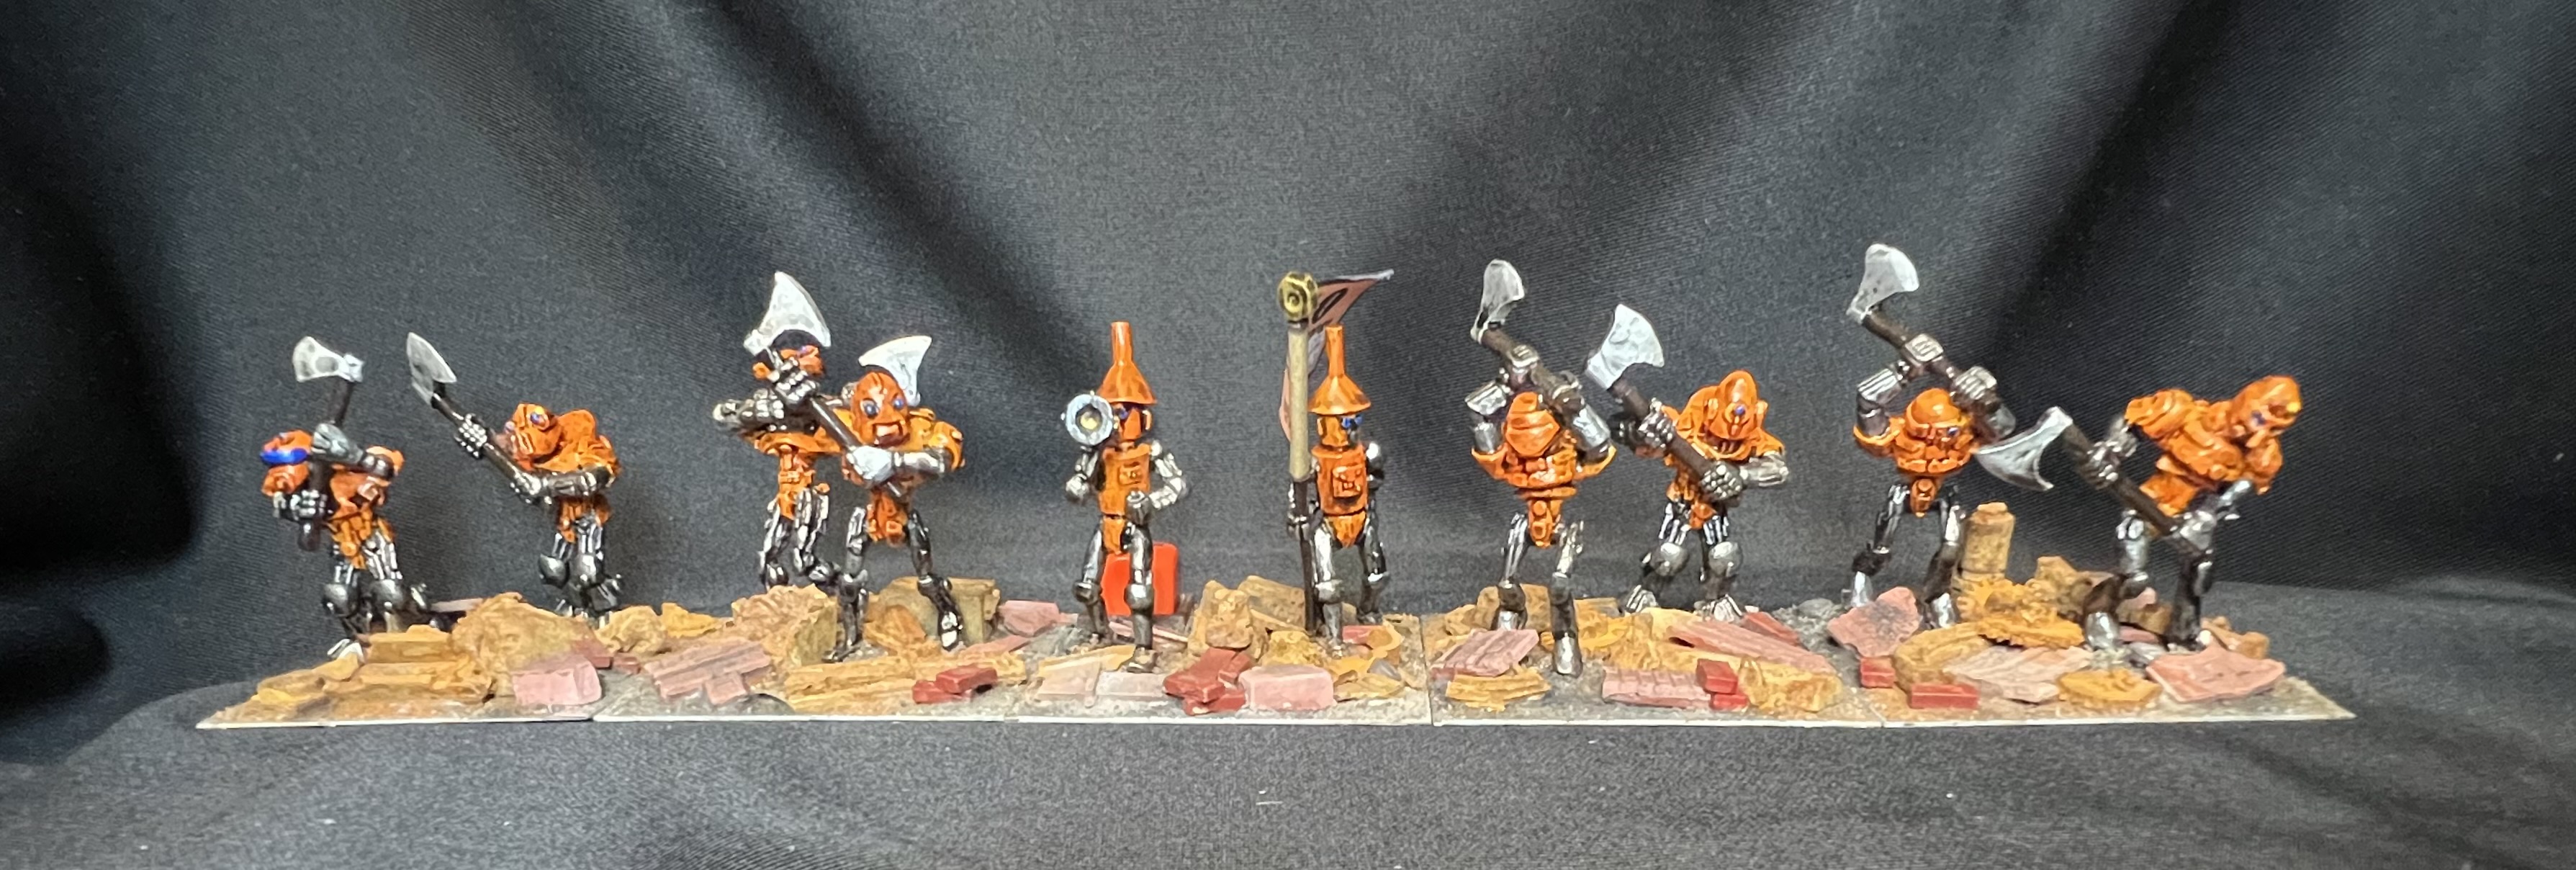
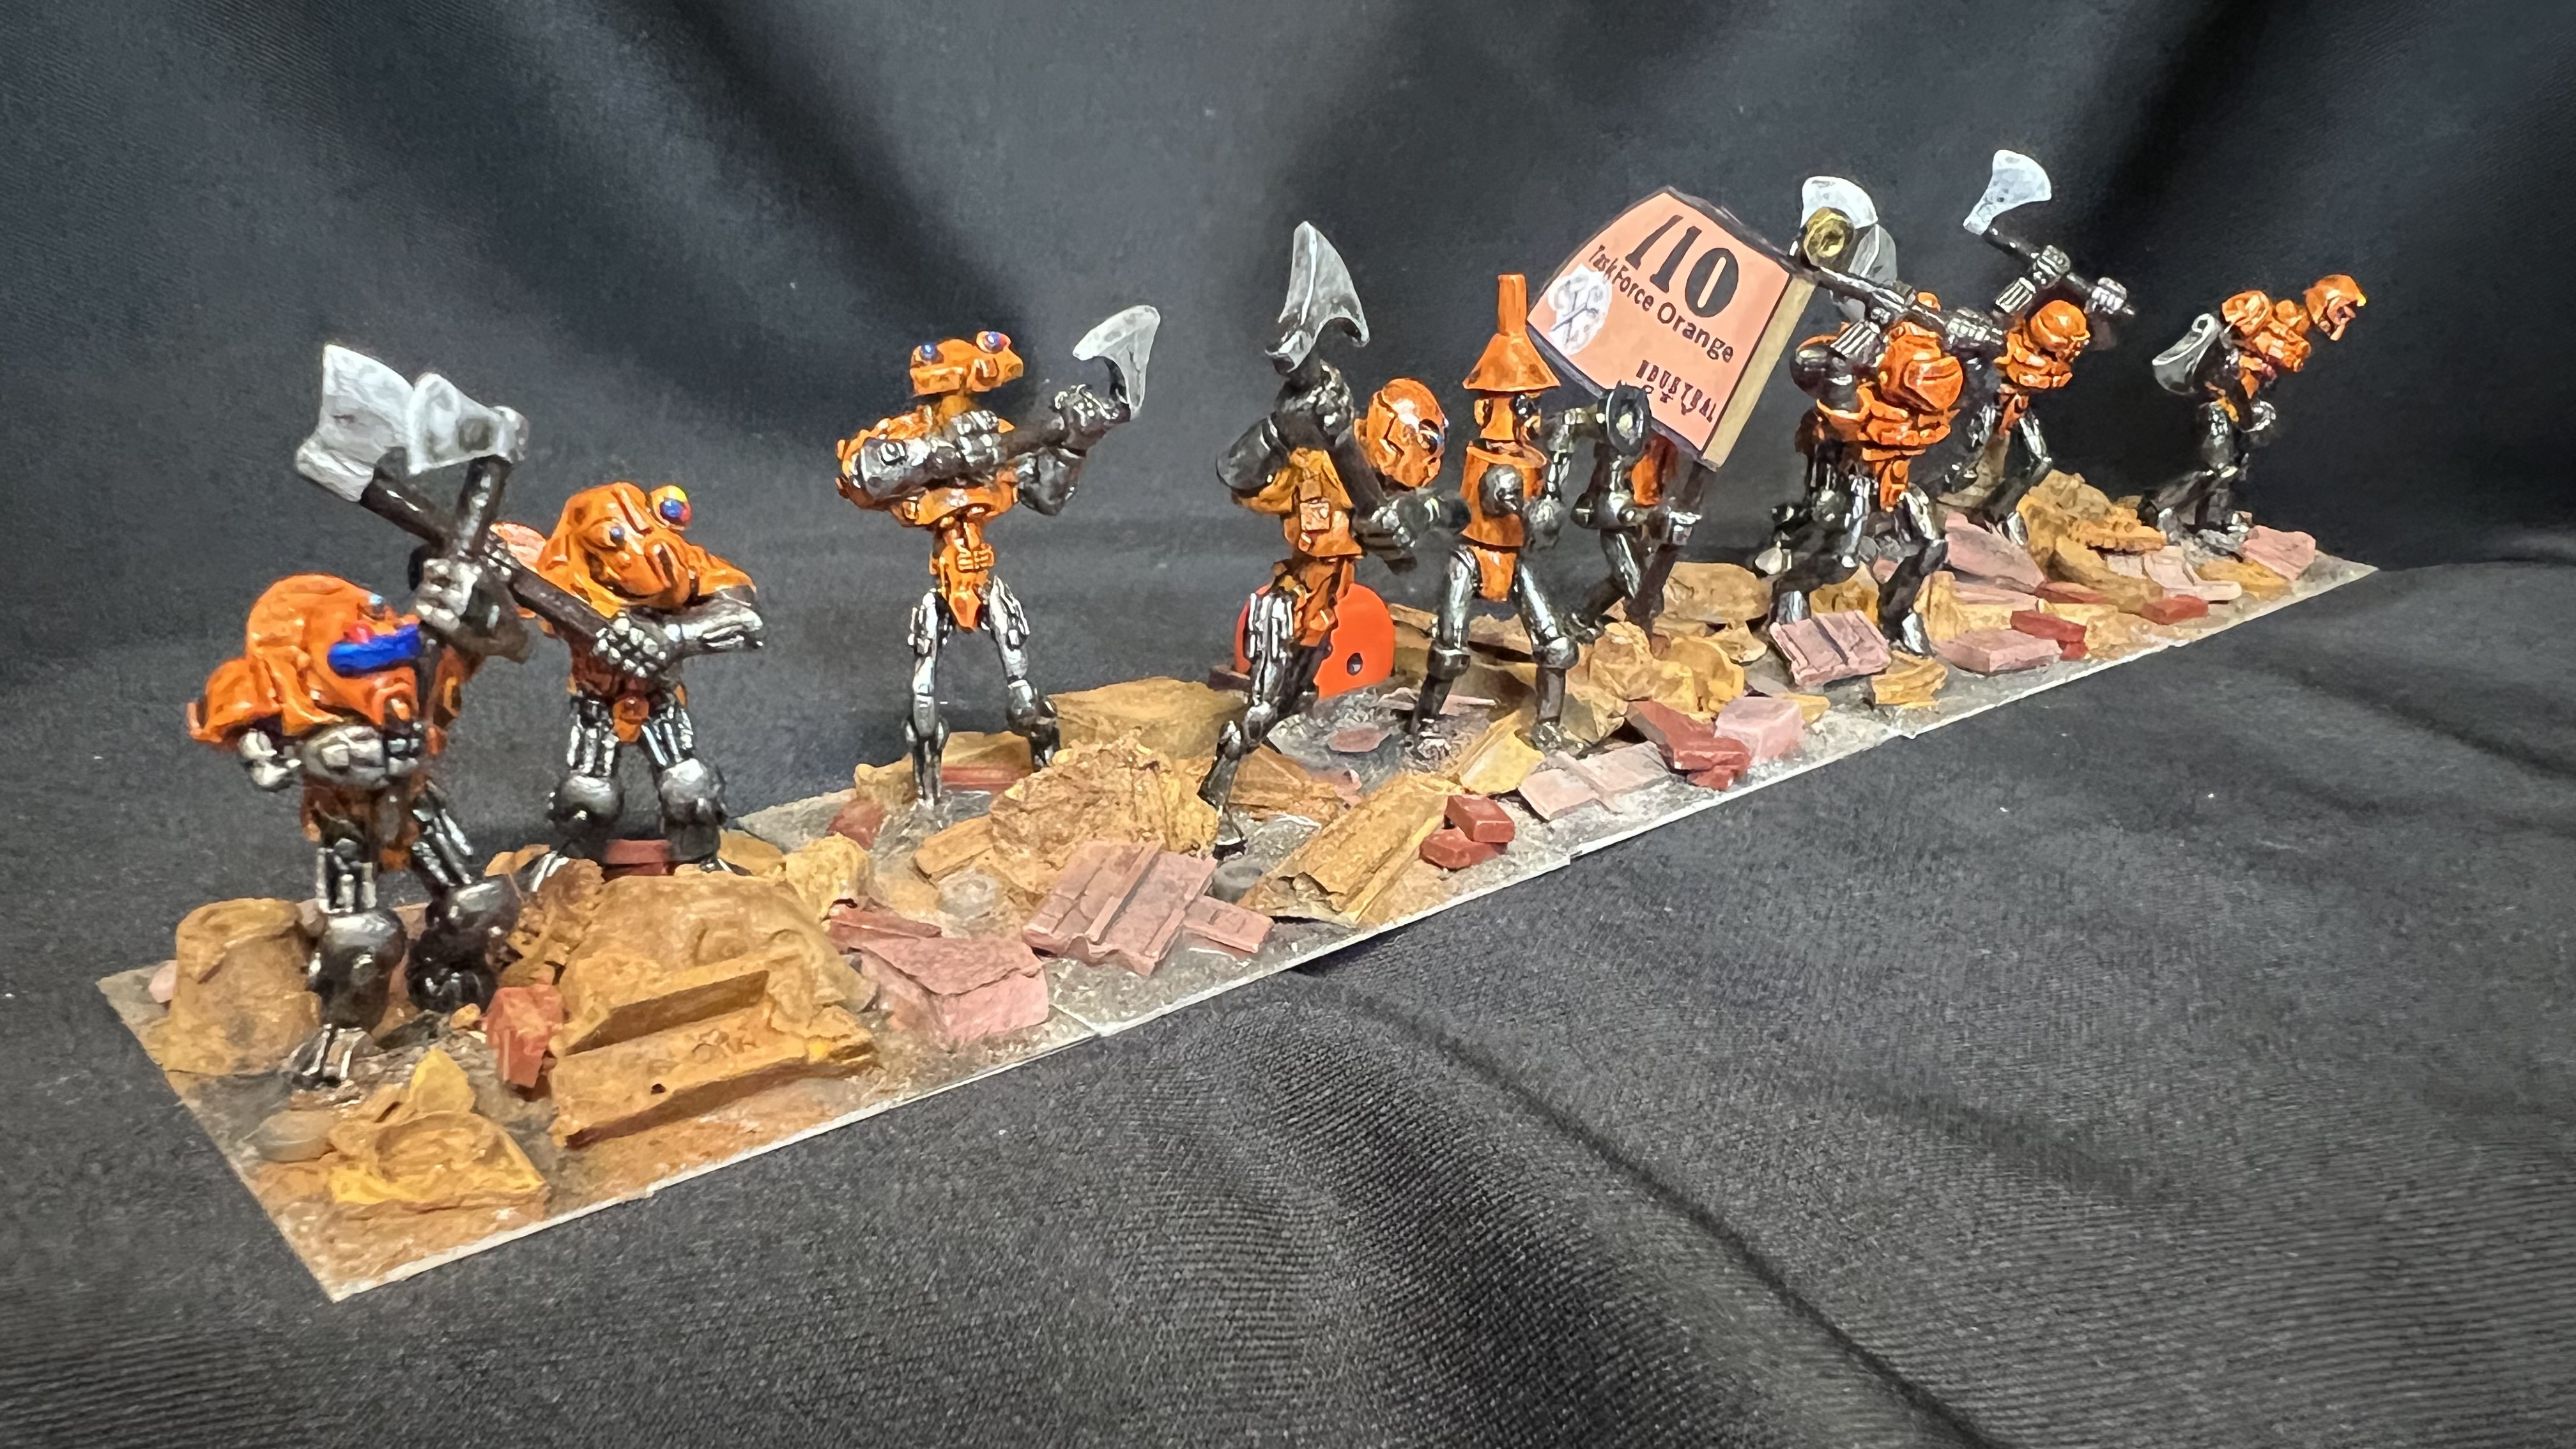
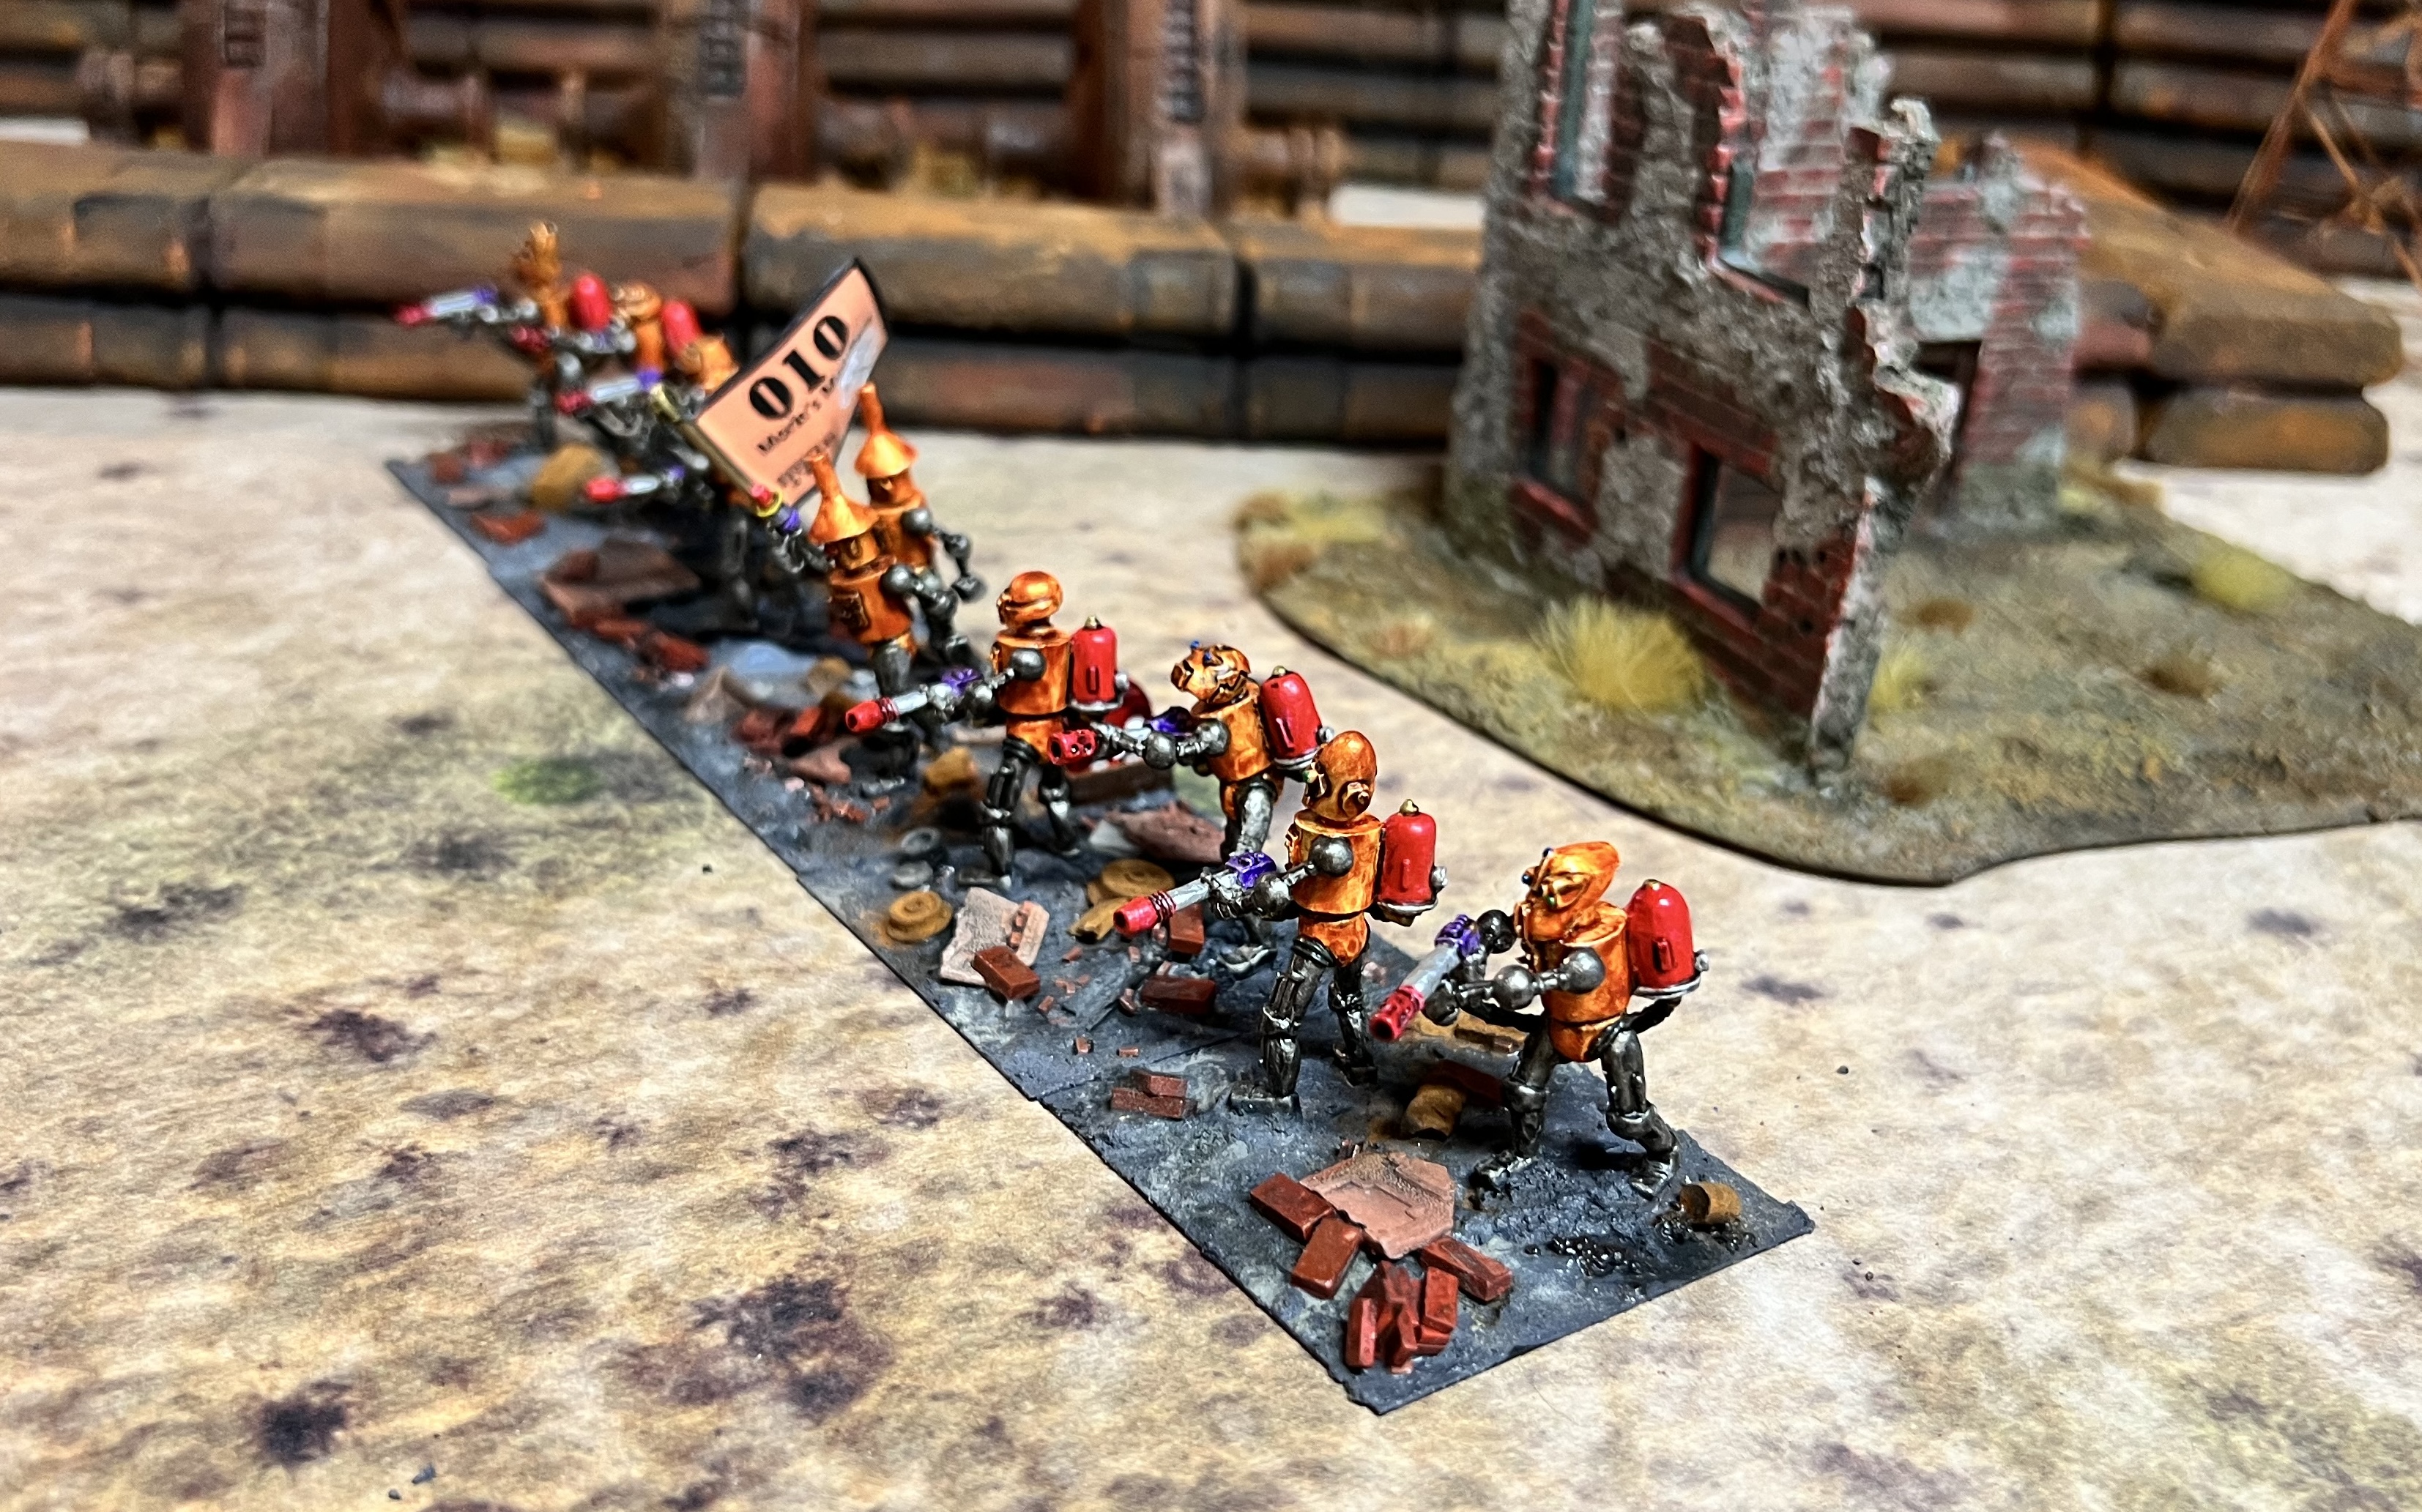
The other regiment is an orange-themed melee unit, also armed with axes.
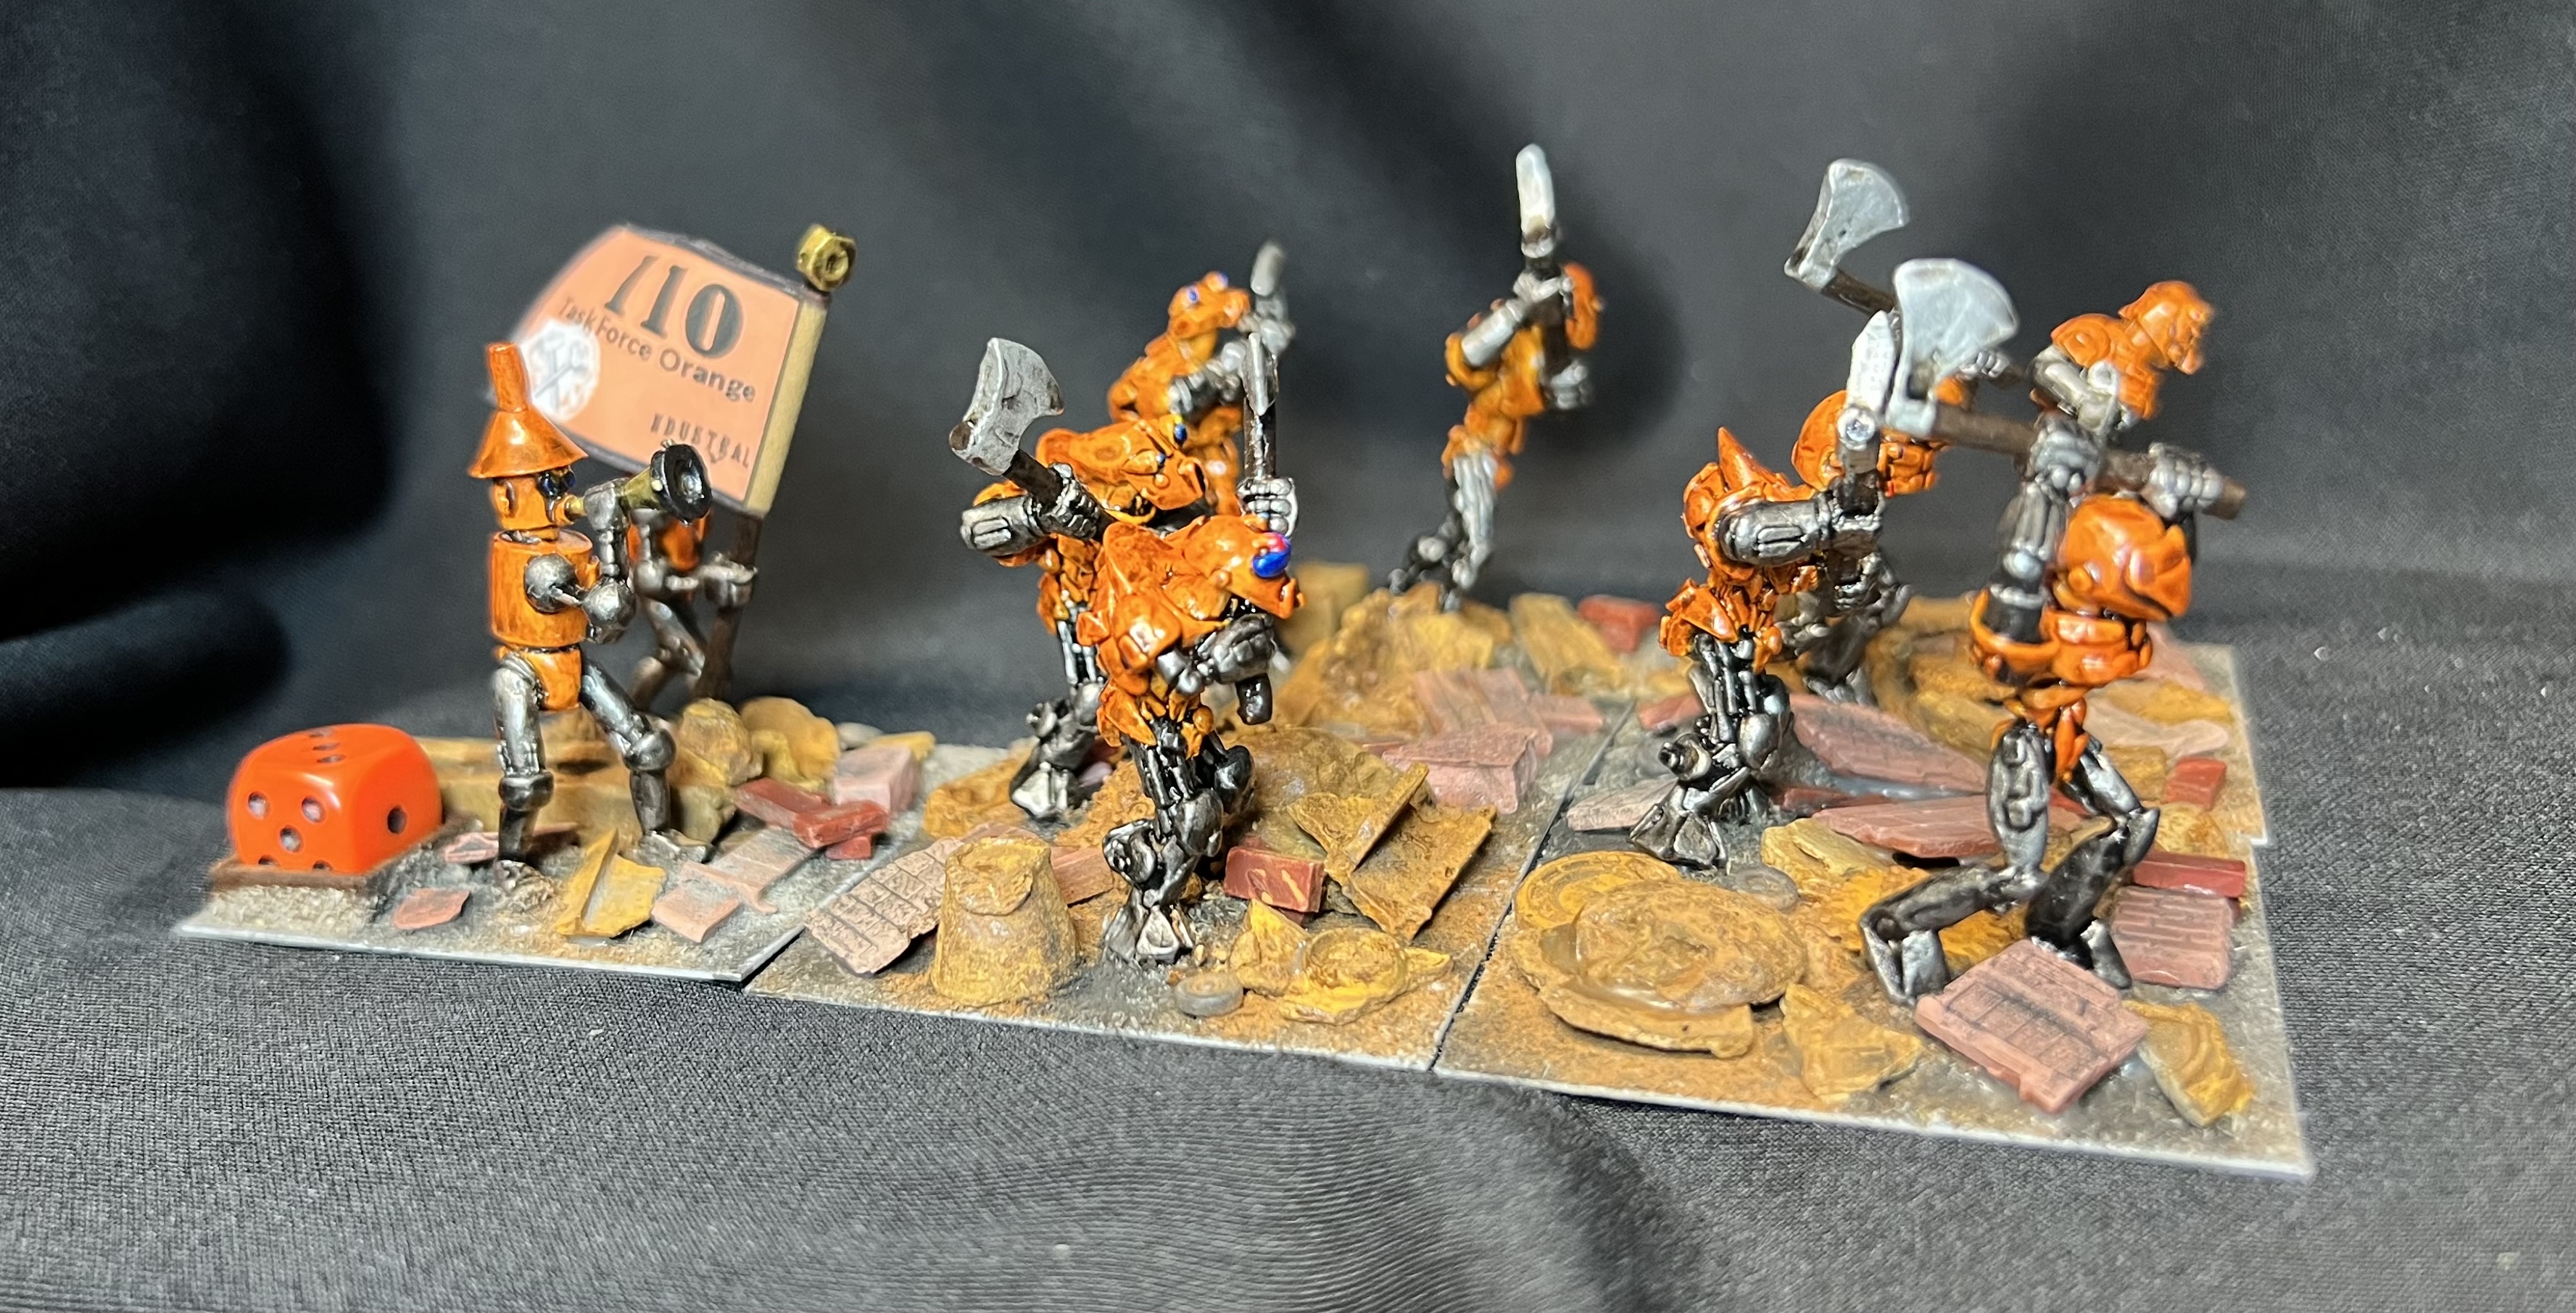
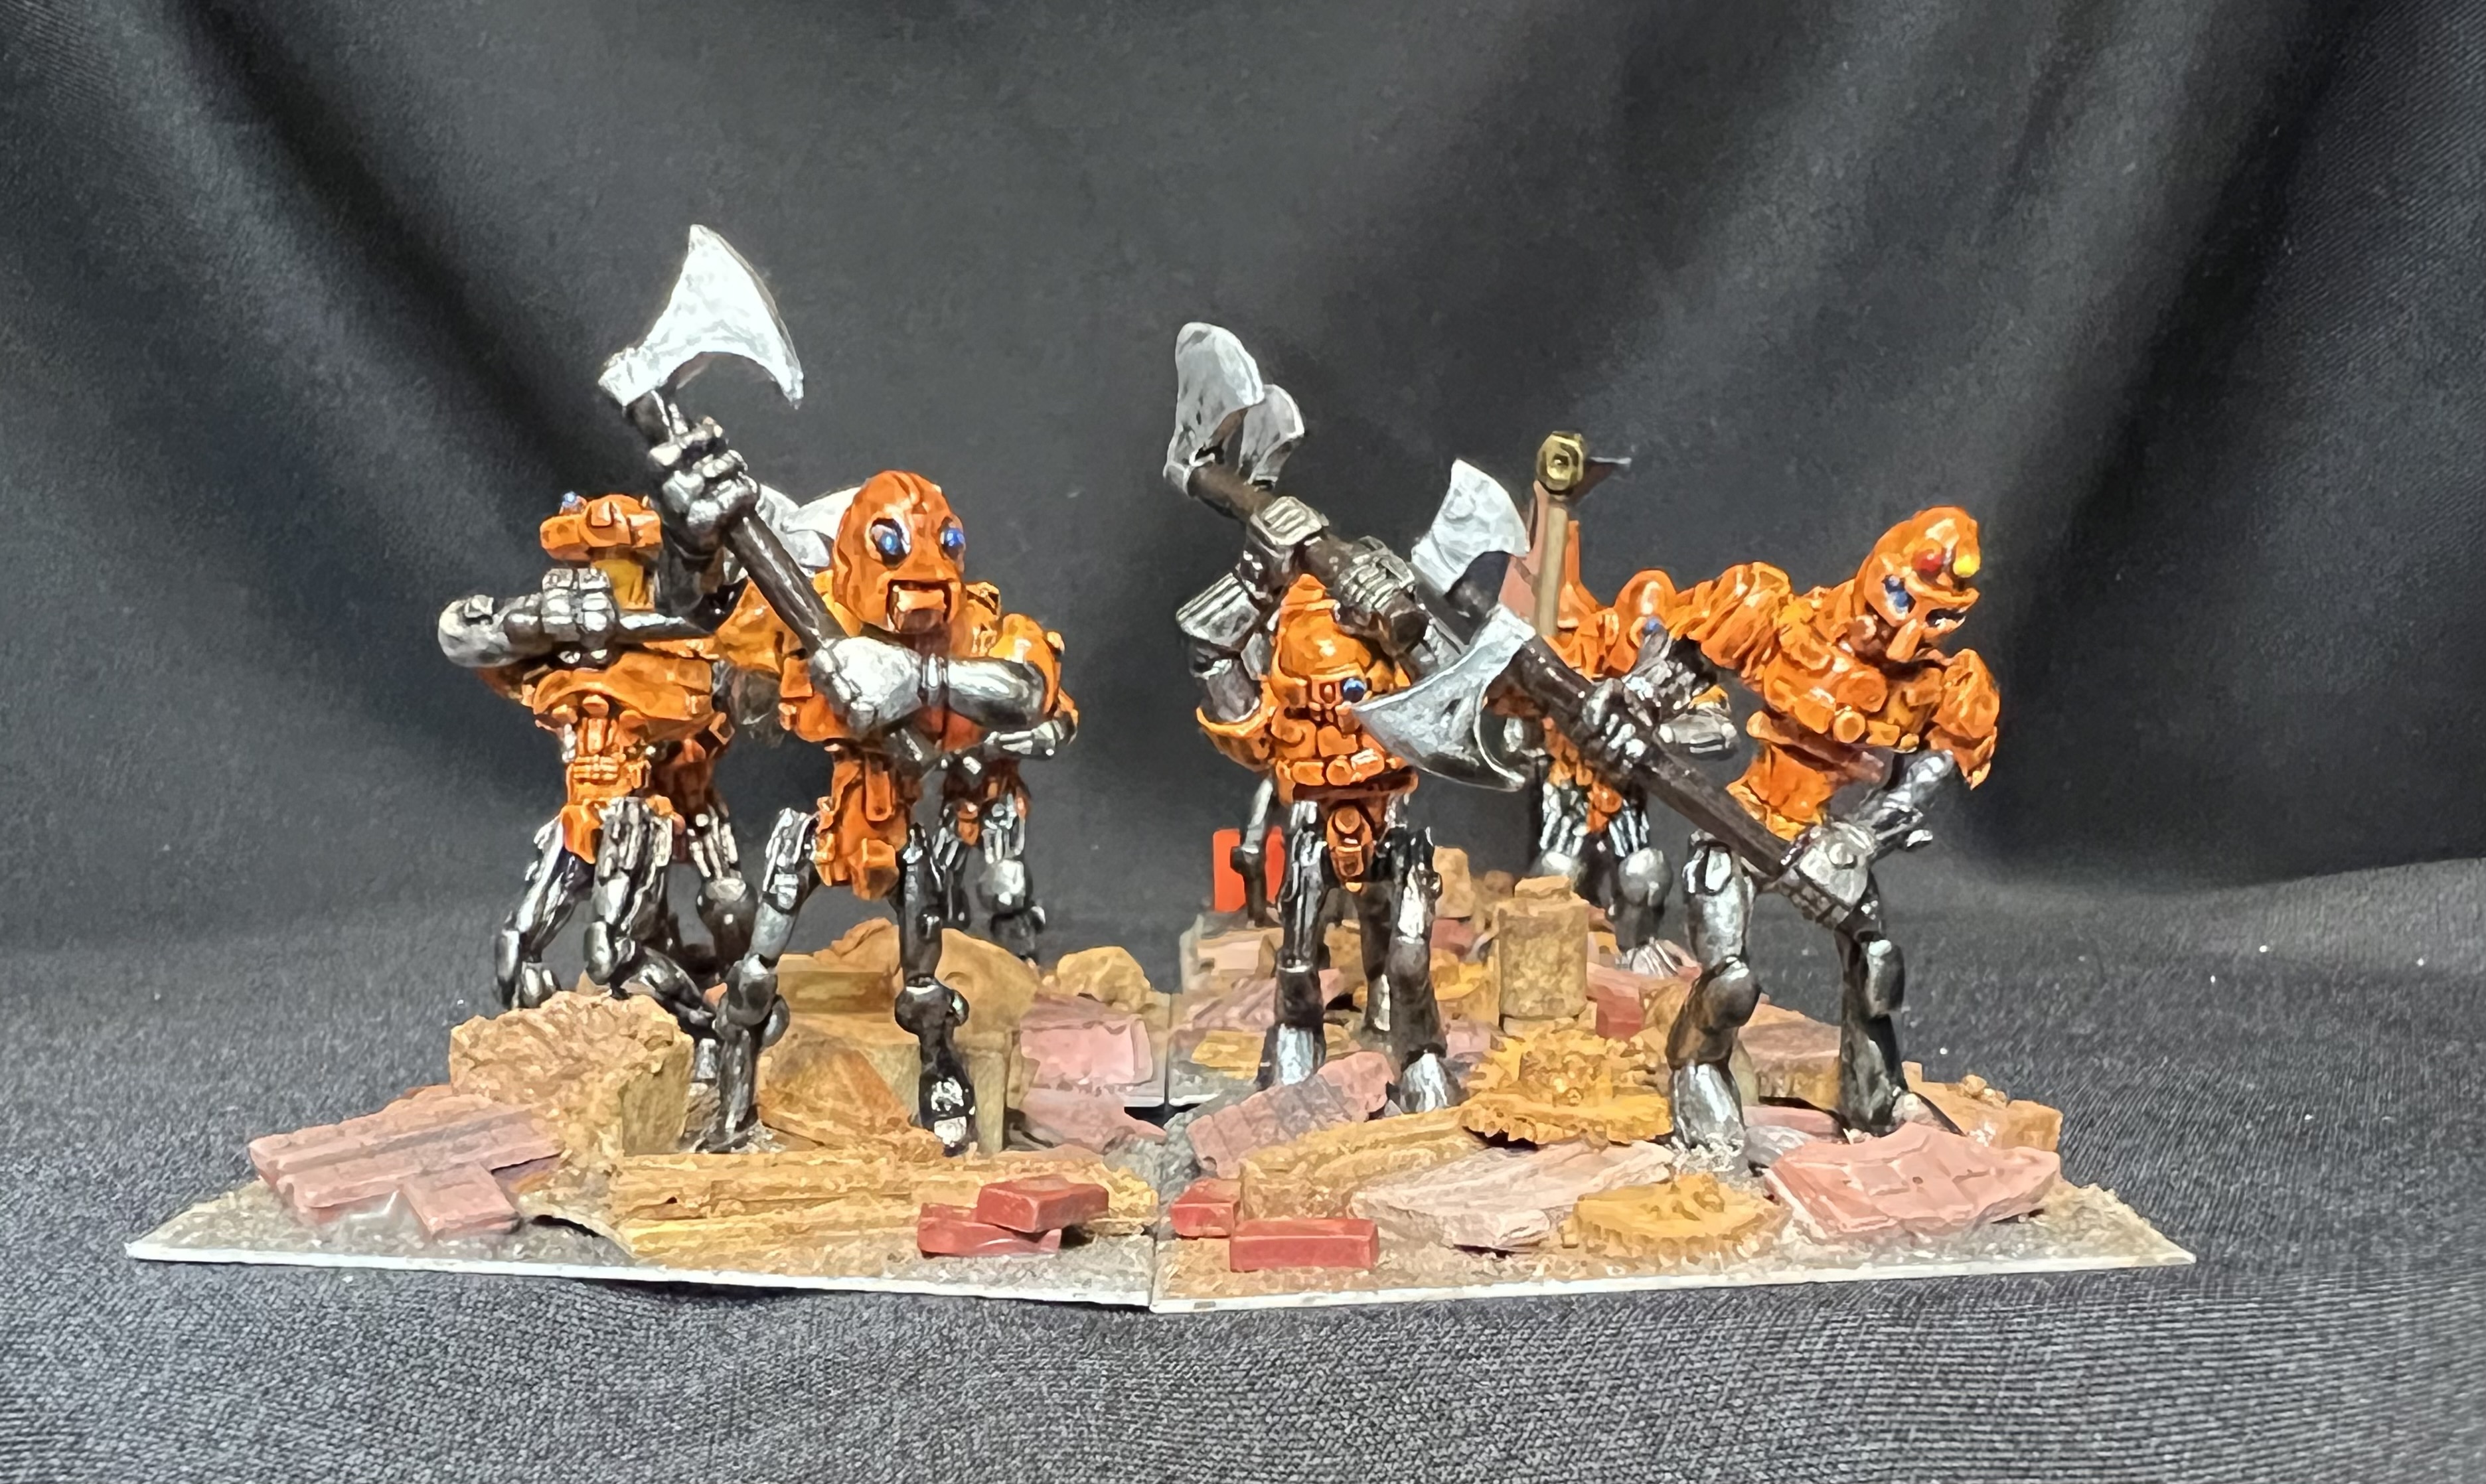
Task Force Orange
Also just one WIP shot for these guys.
WIP – still used a pearlized look with a sooty/oily sheen.
And some group shots:
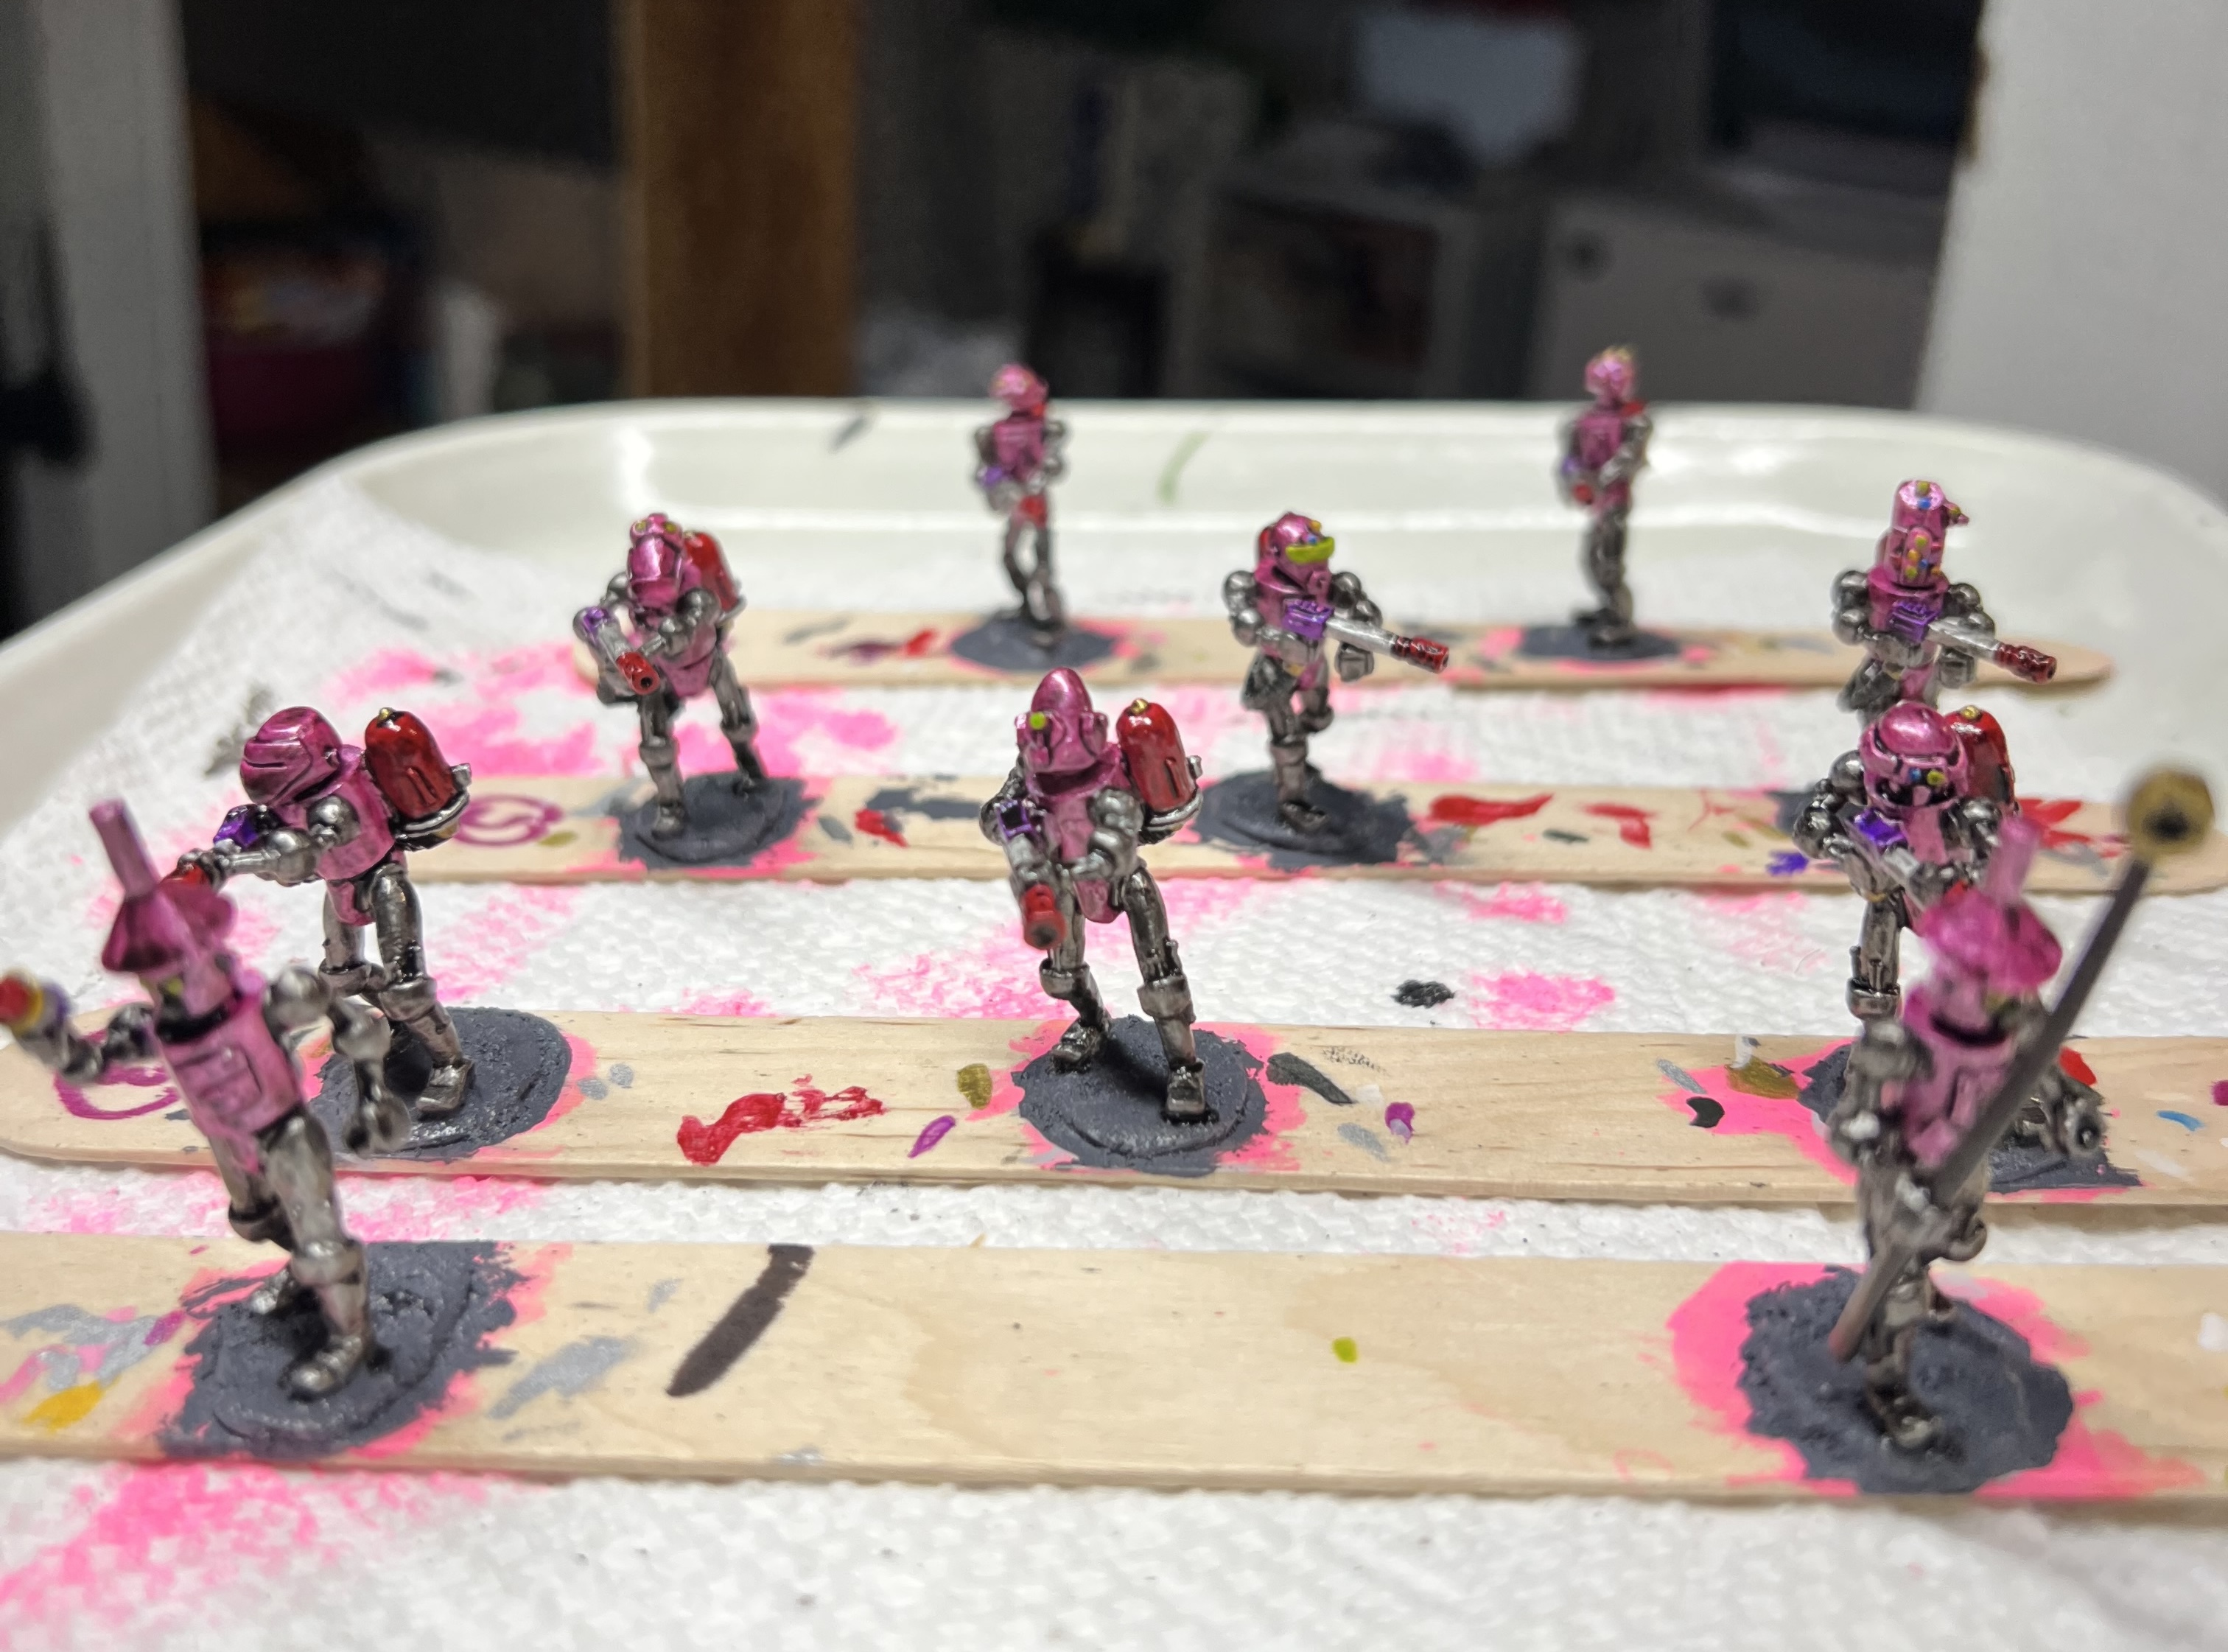
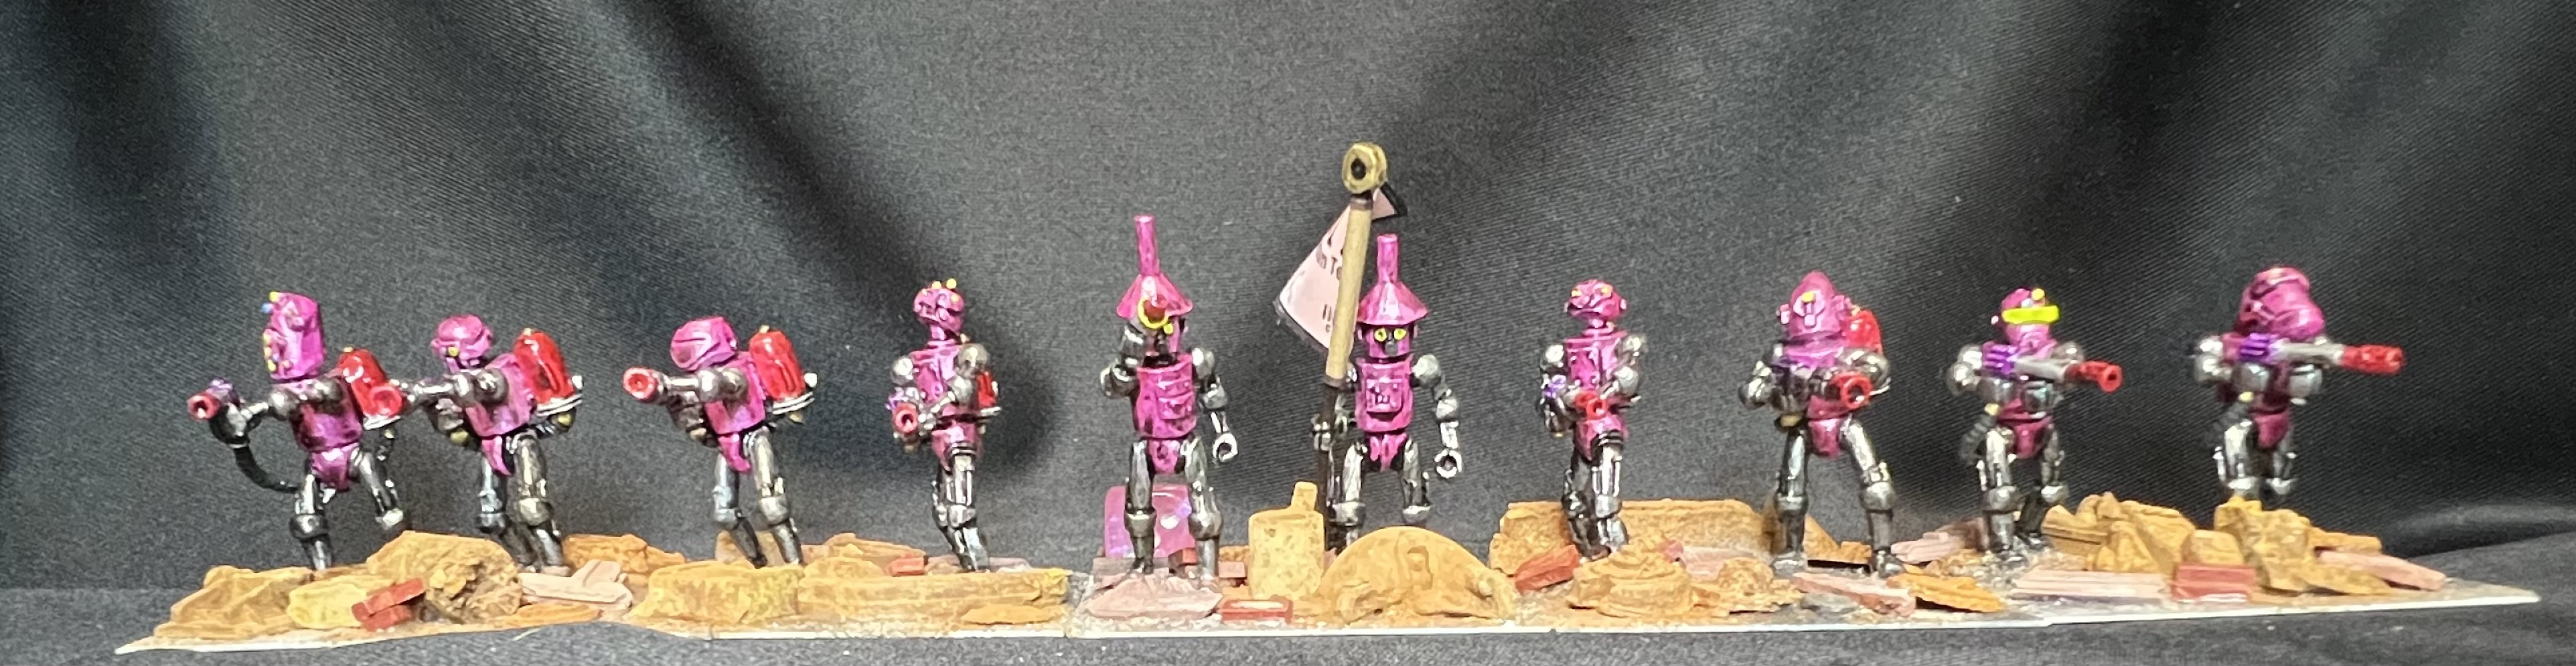
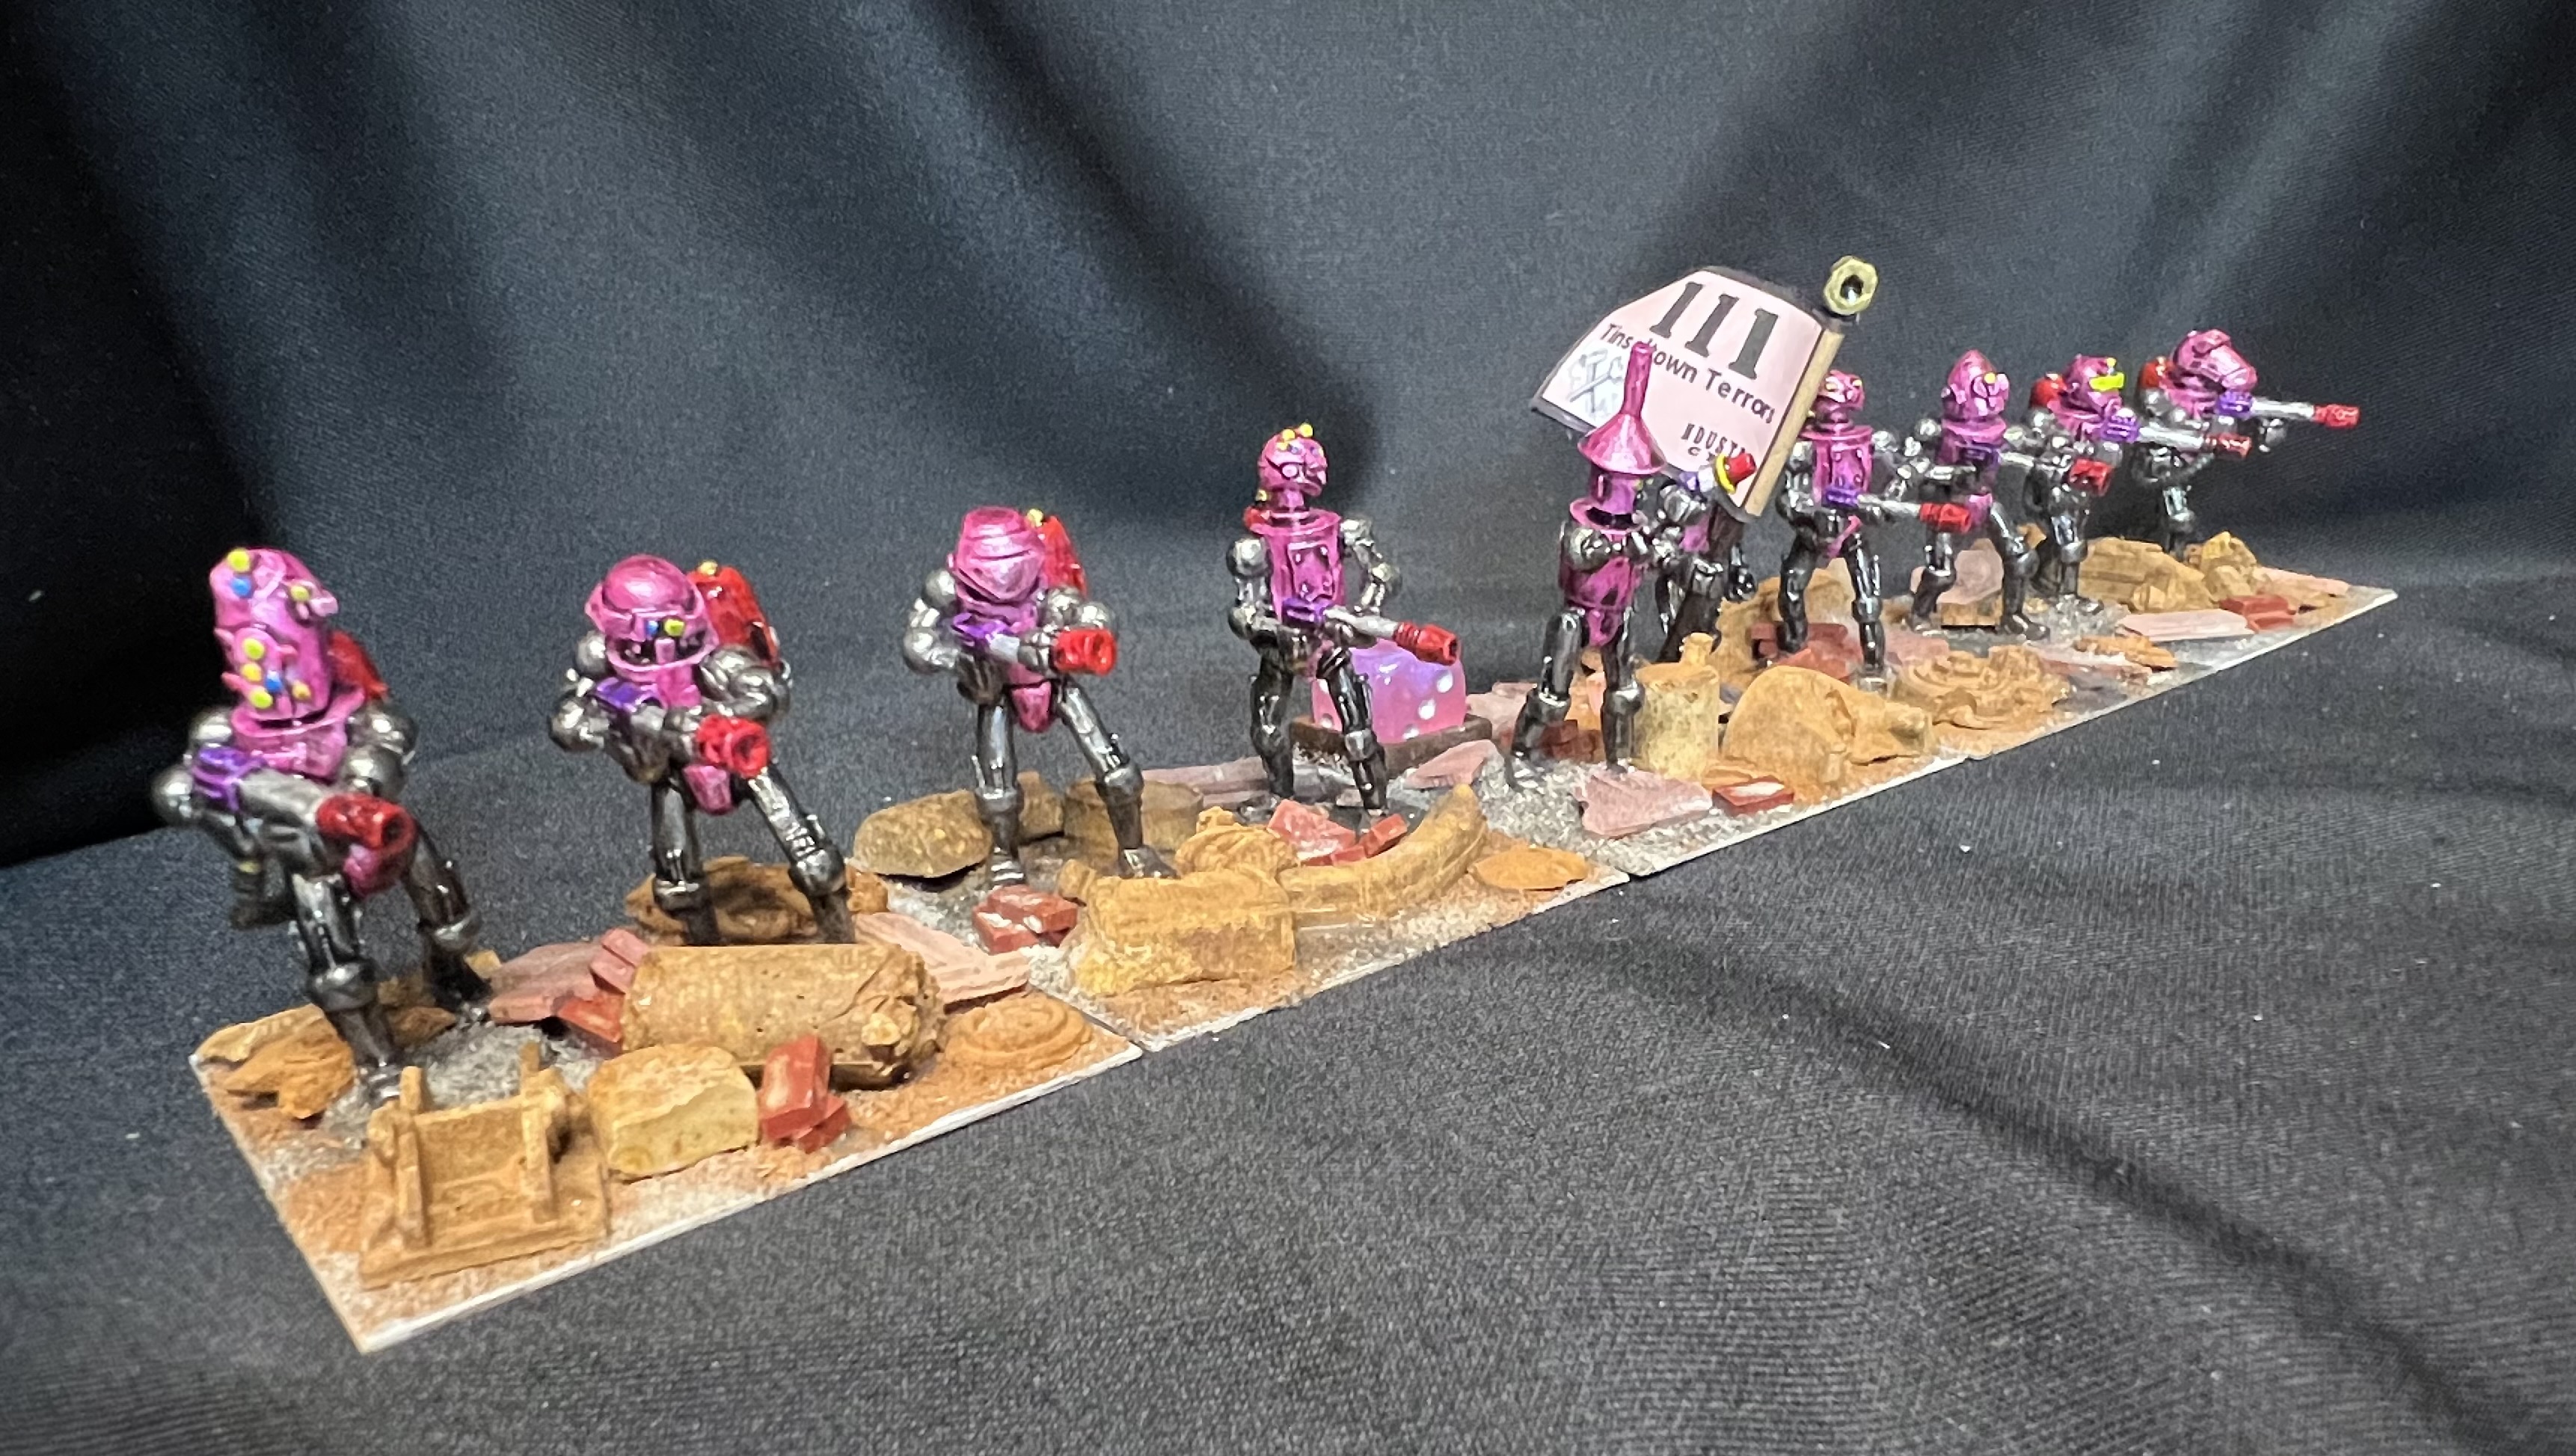
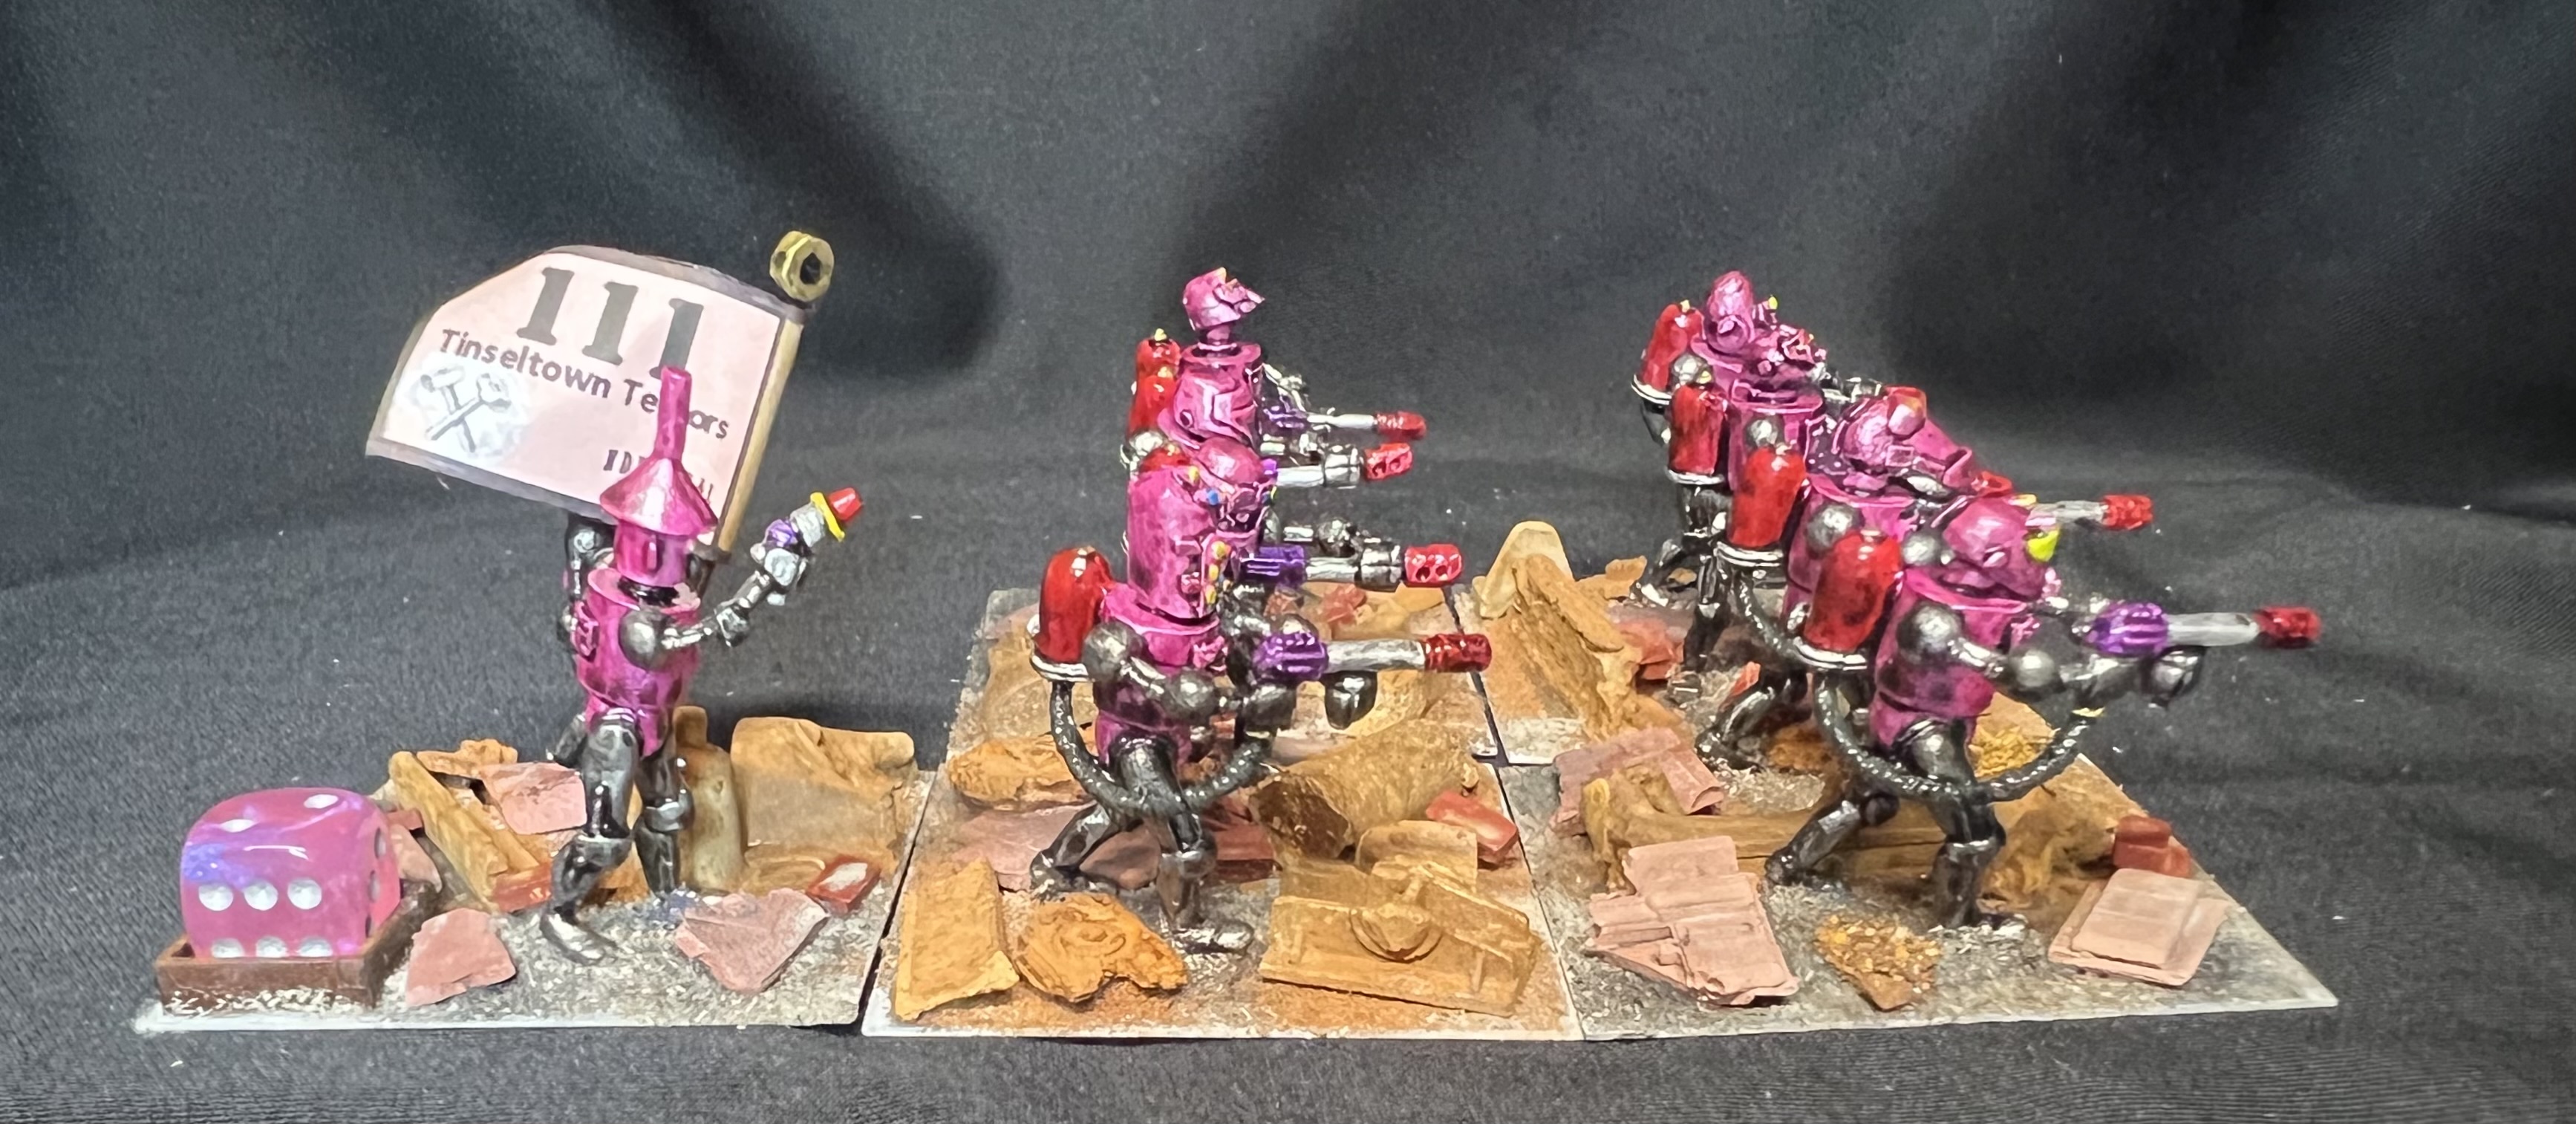
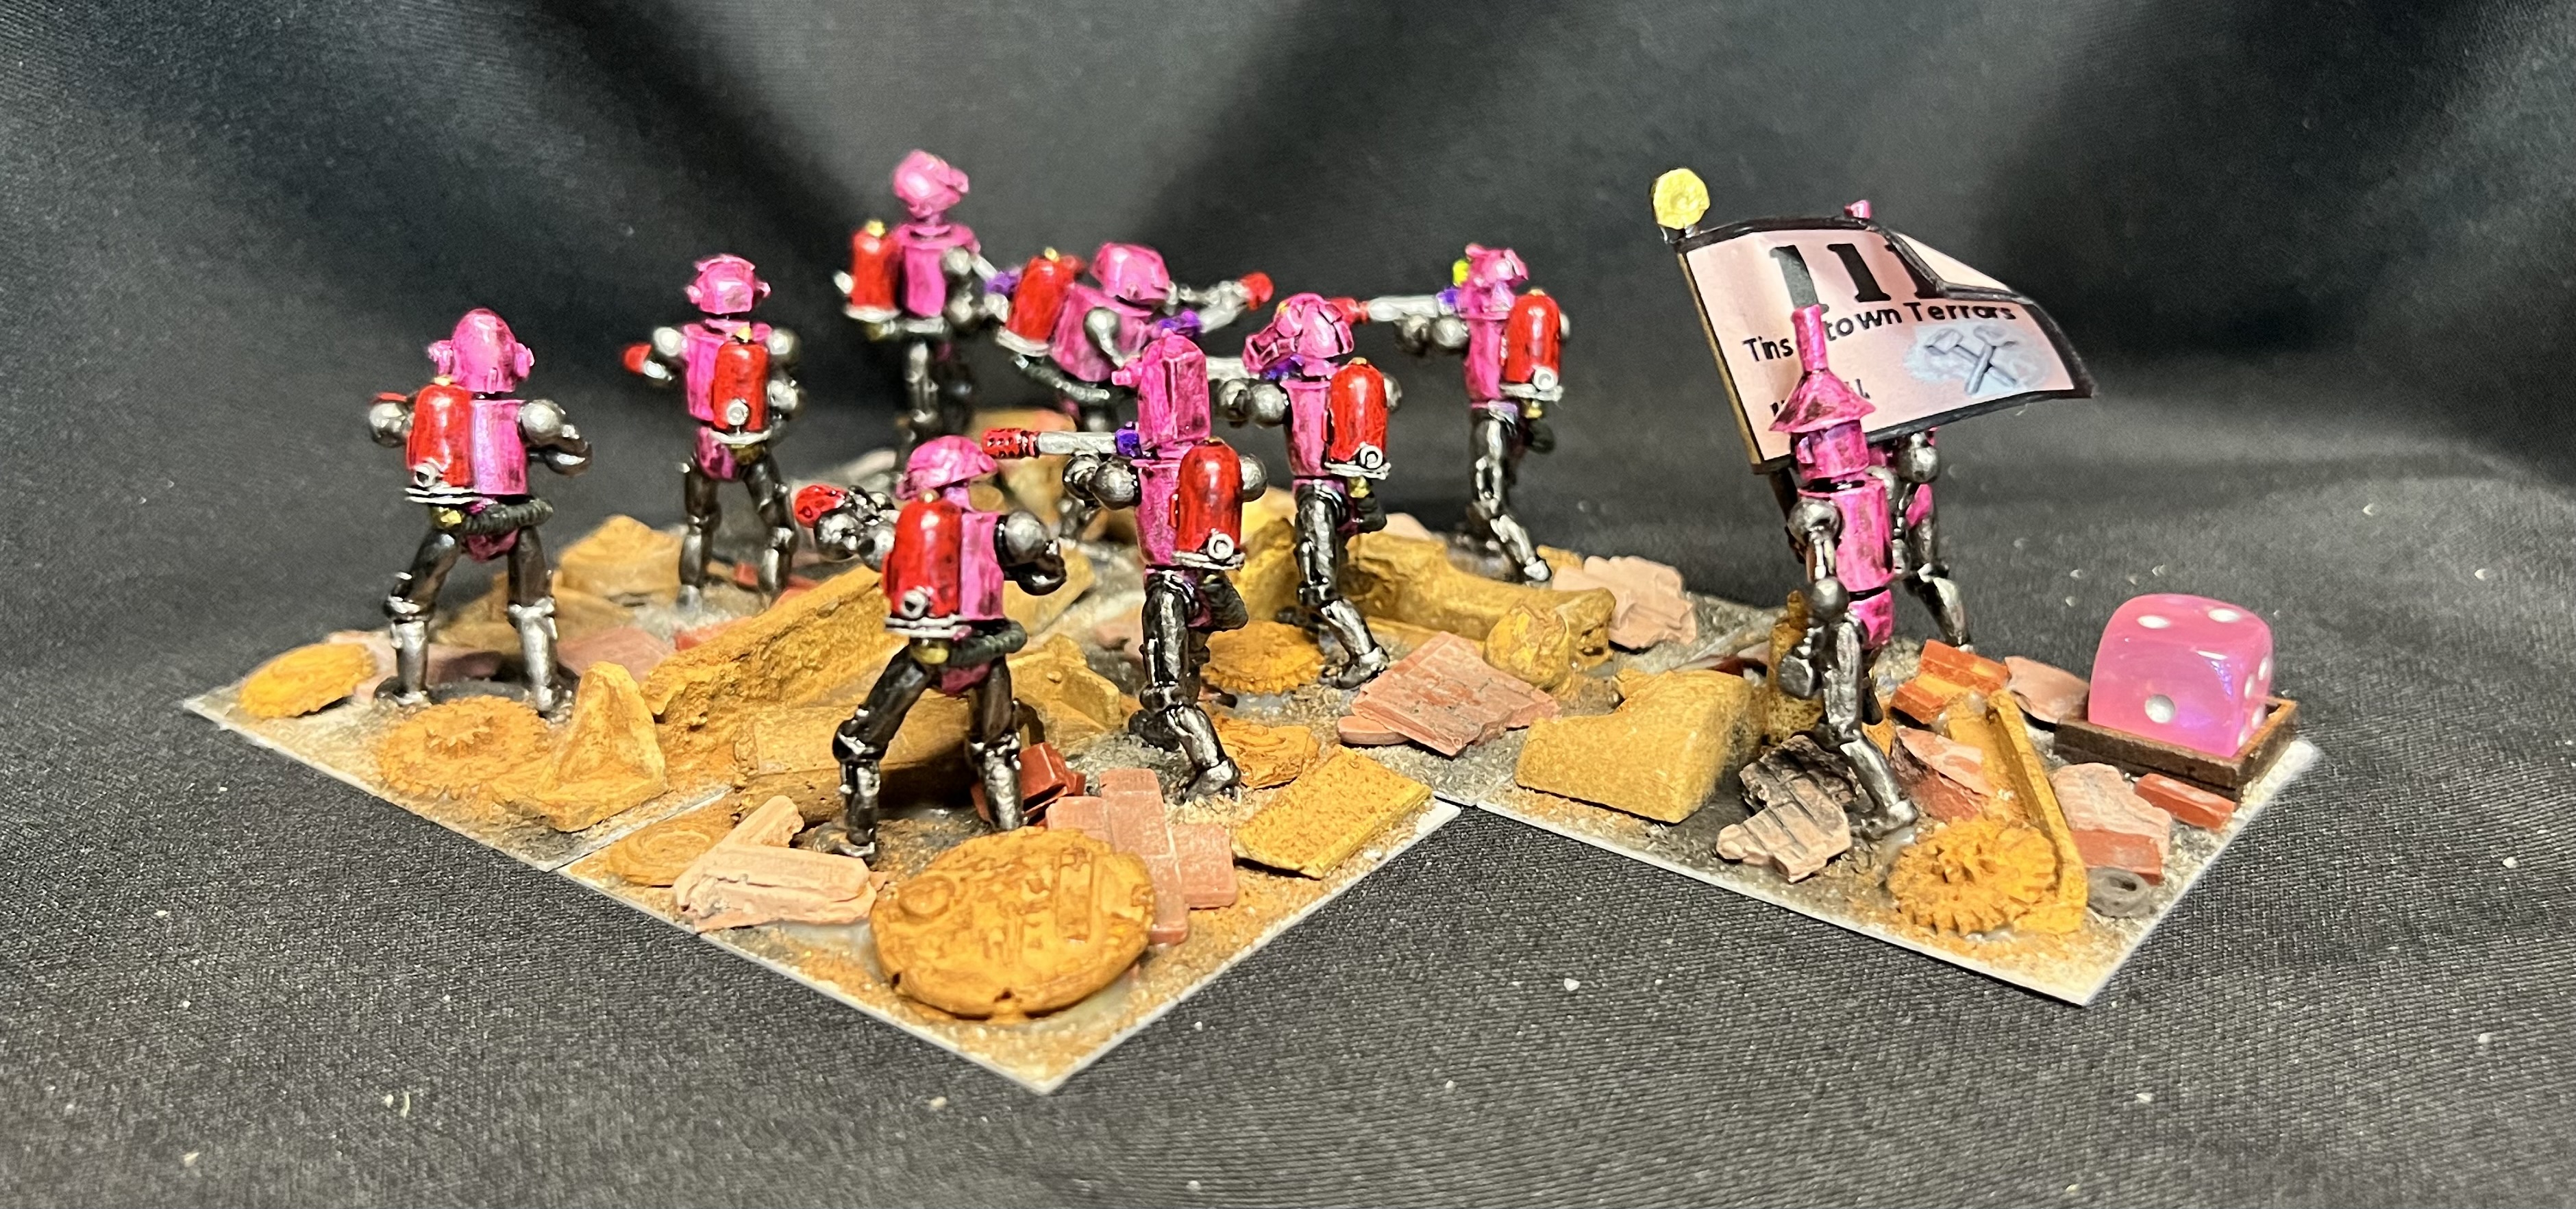
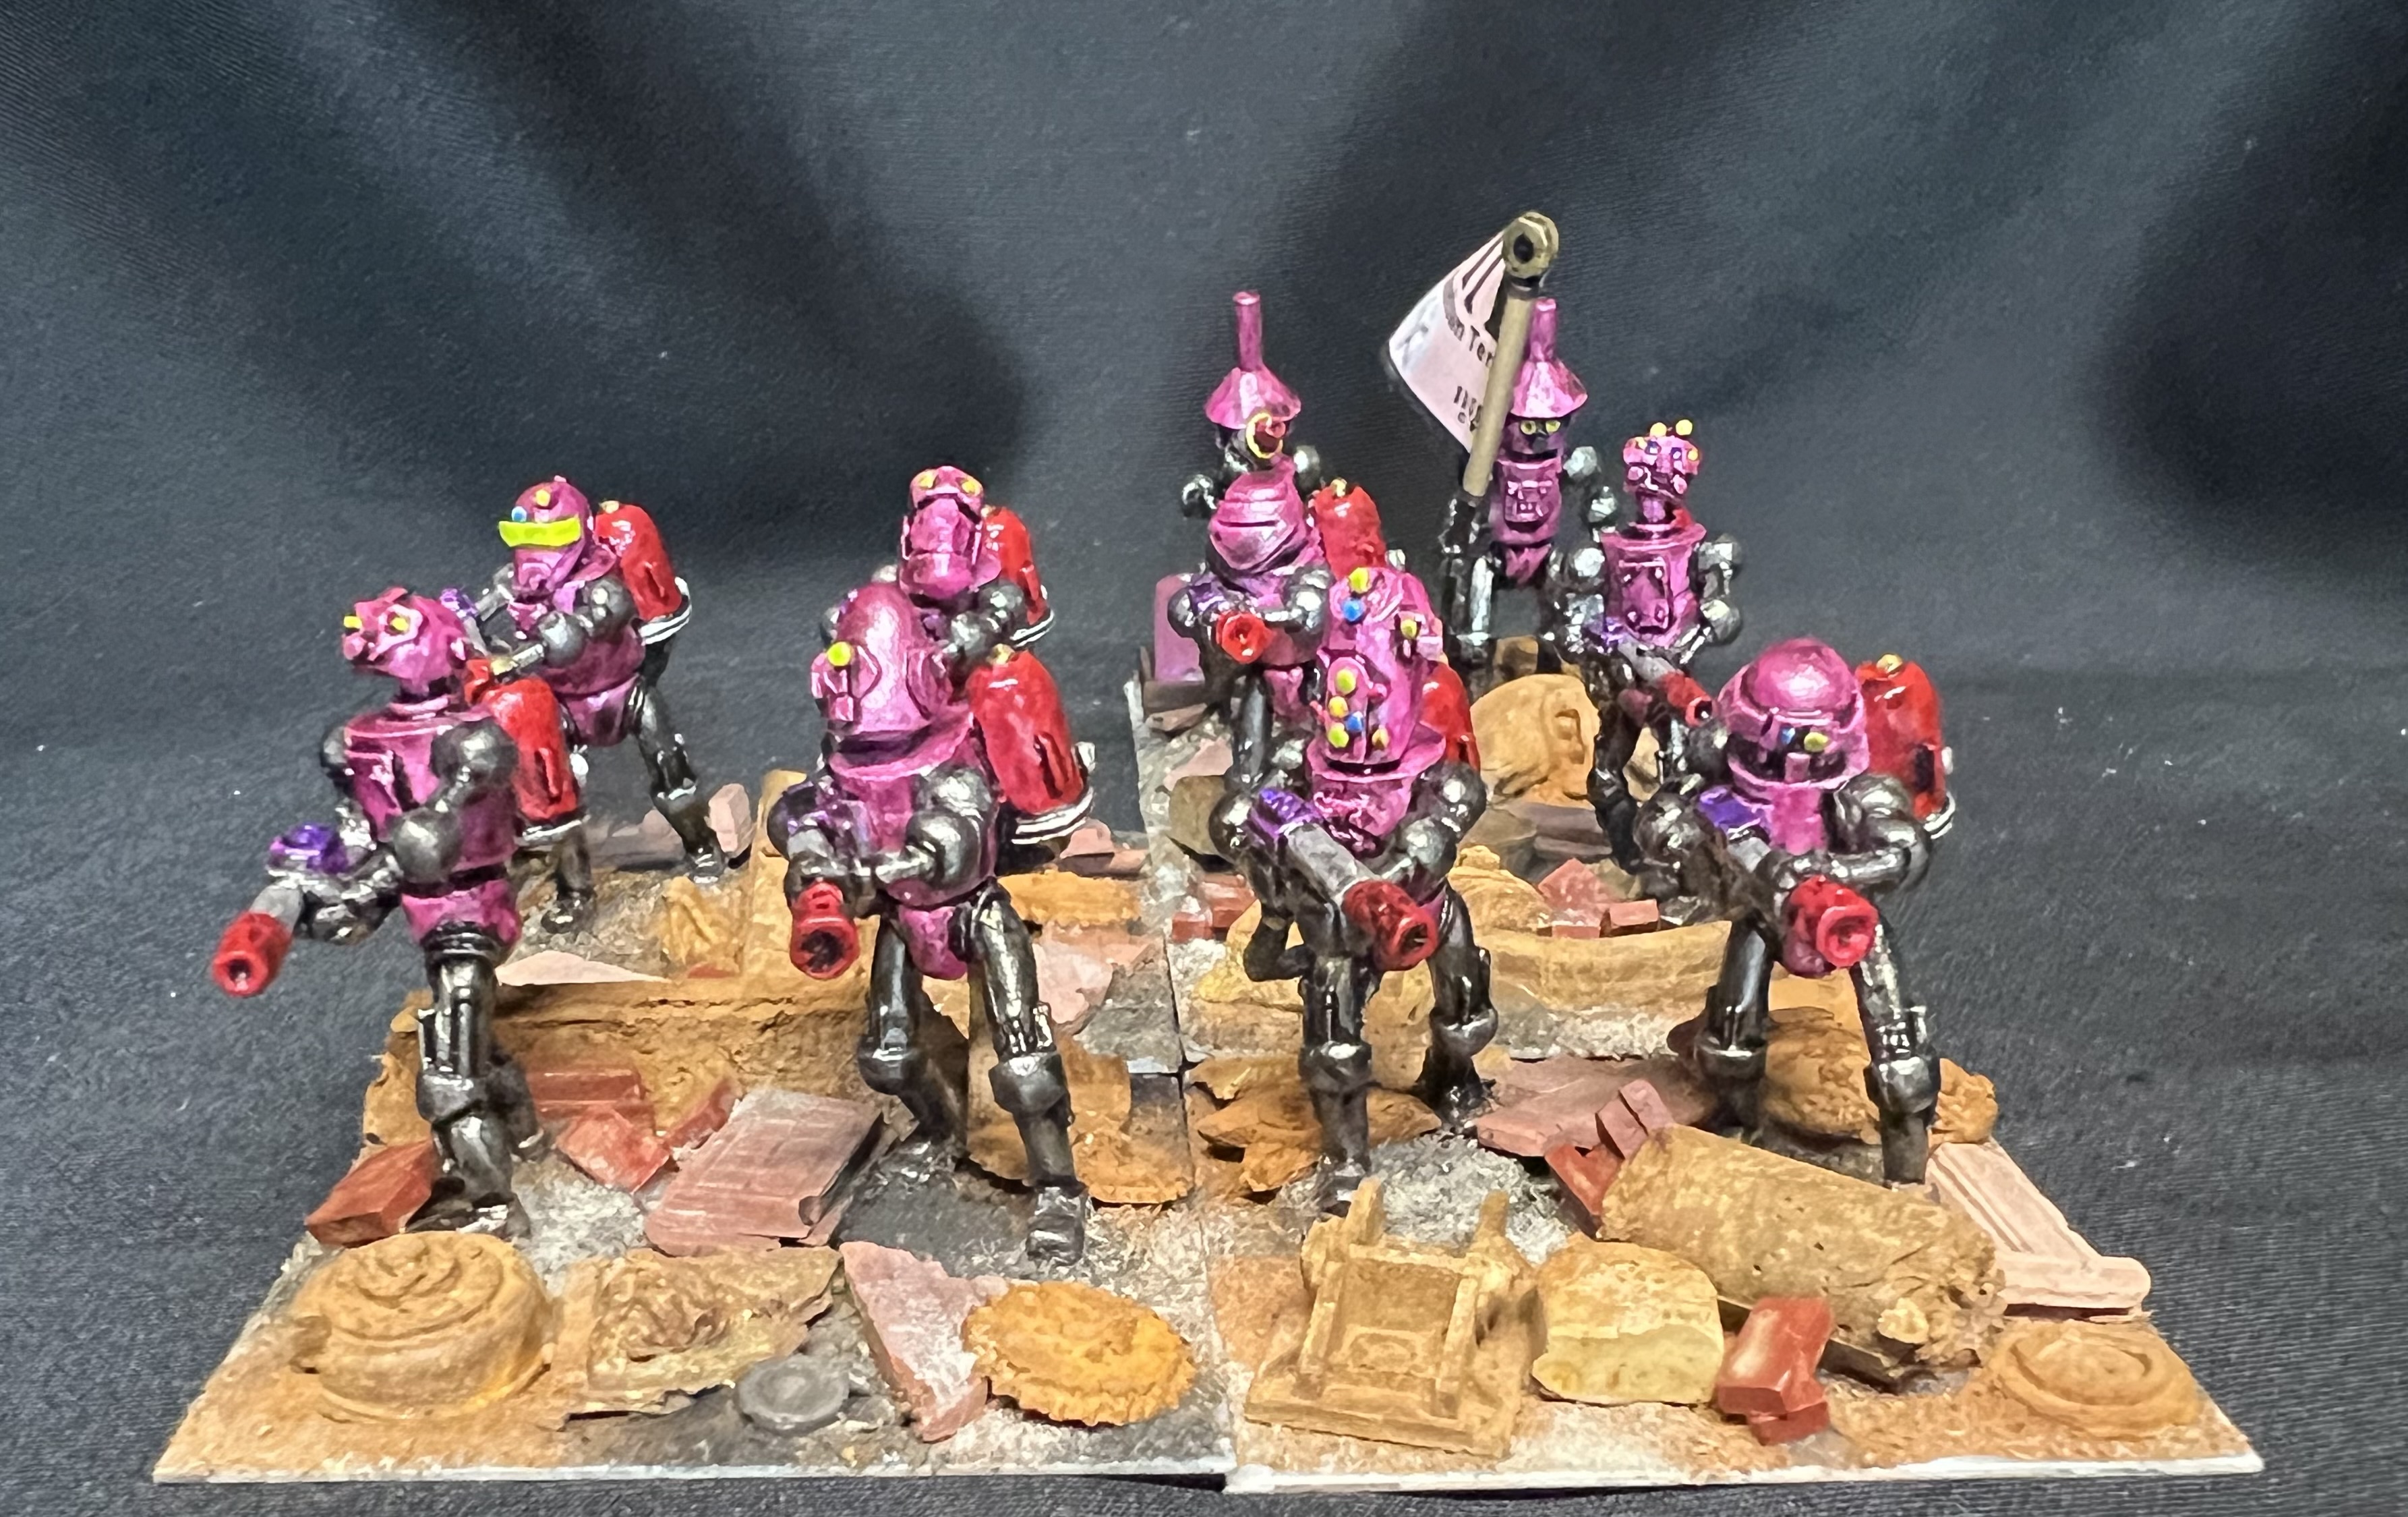
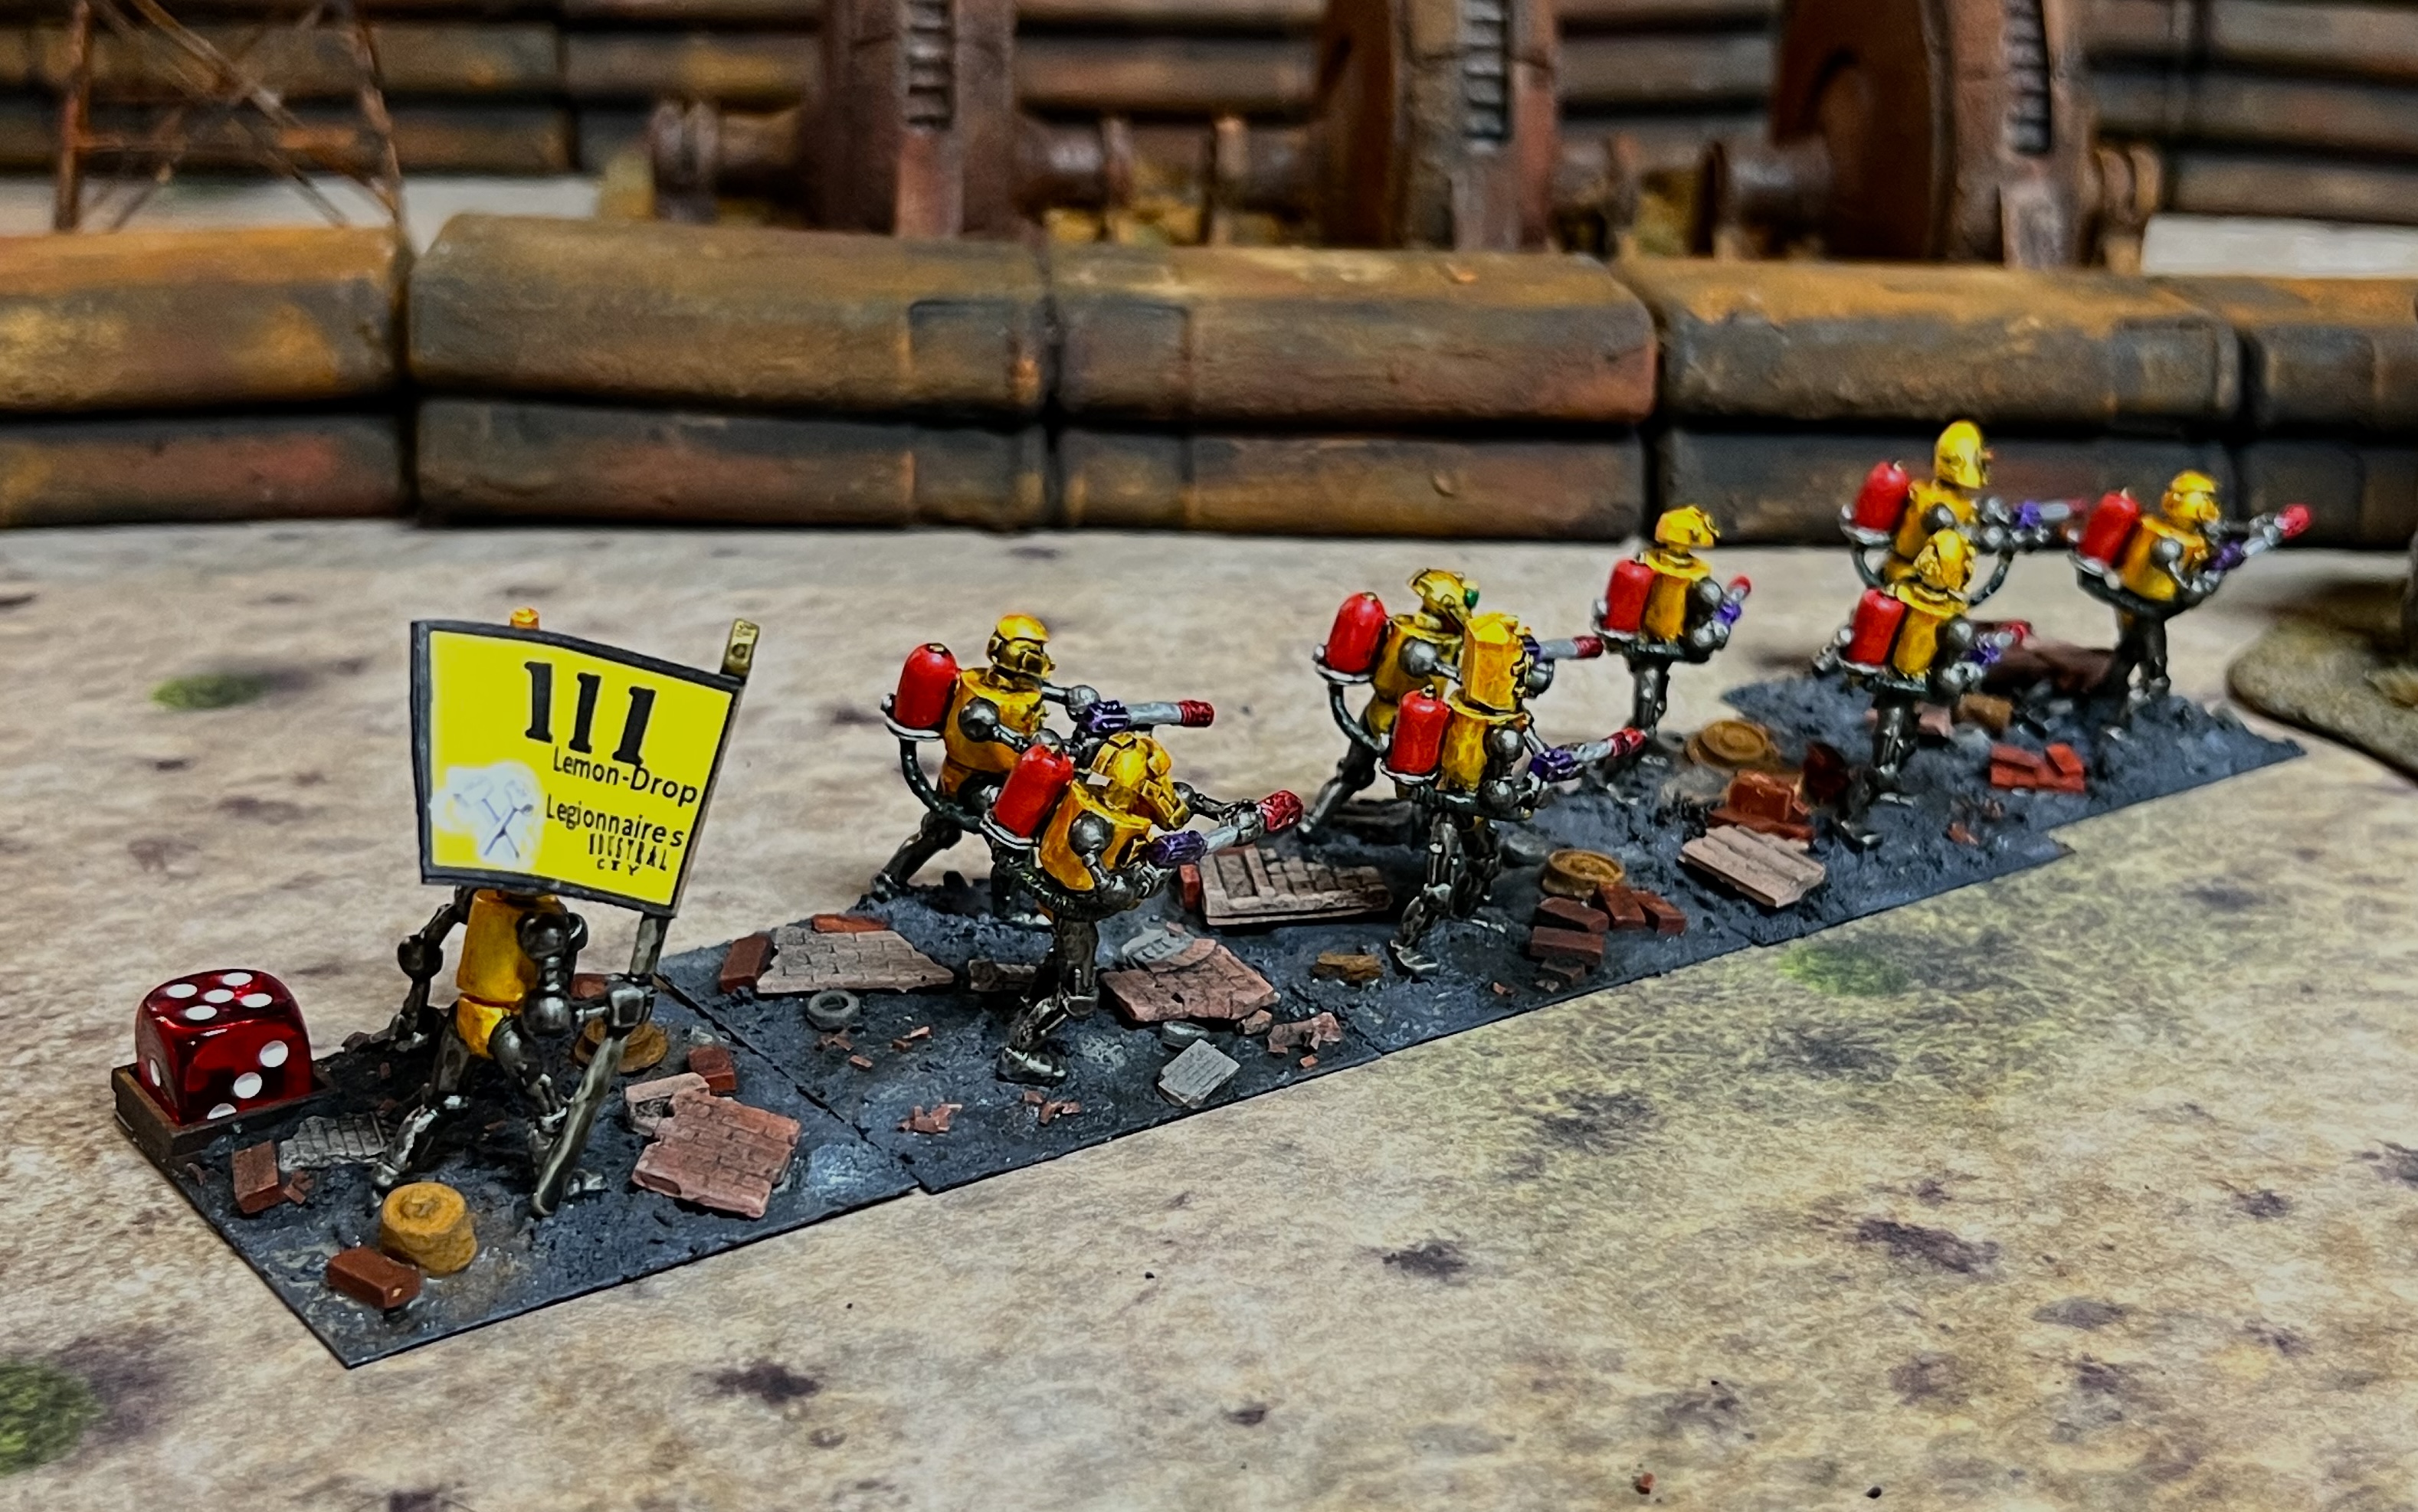
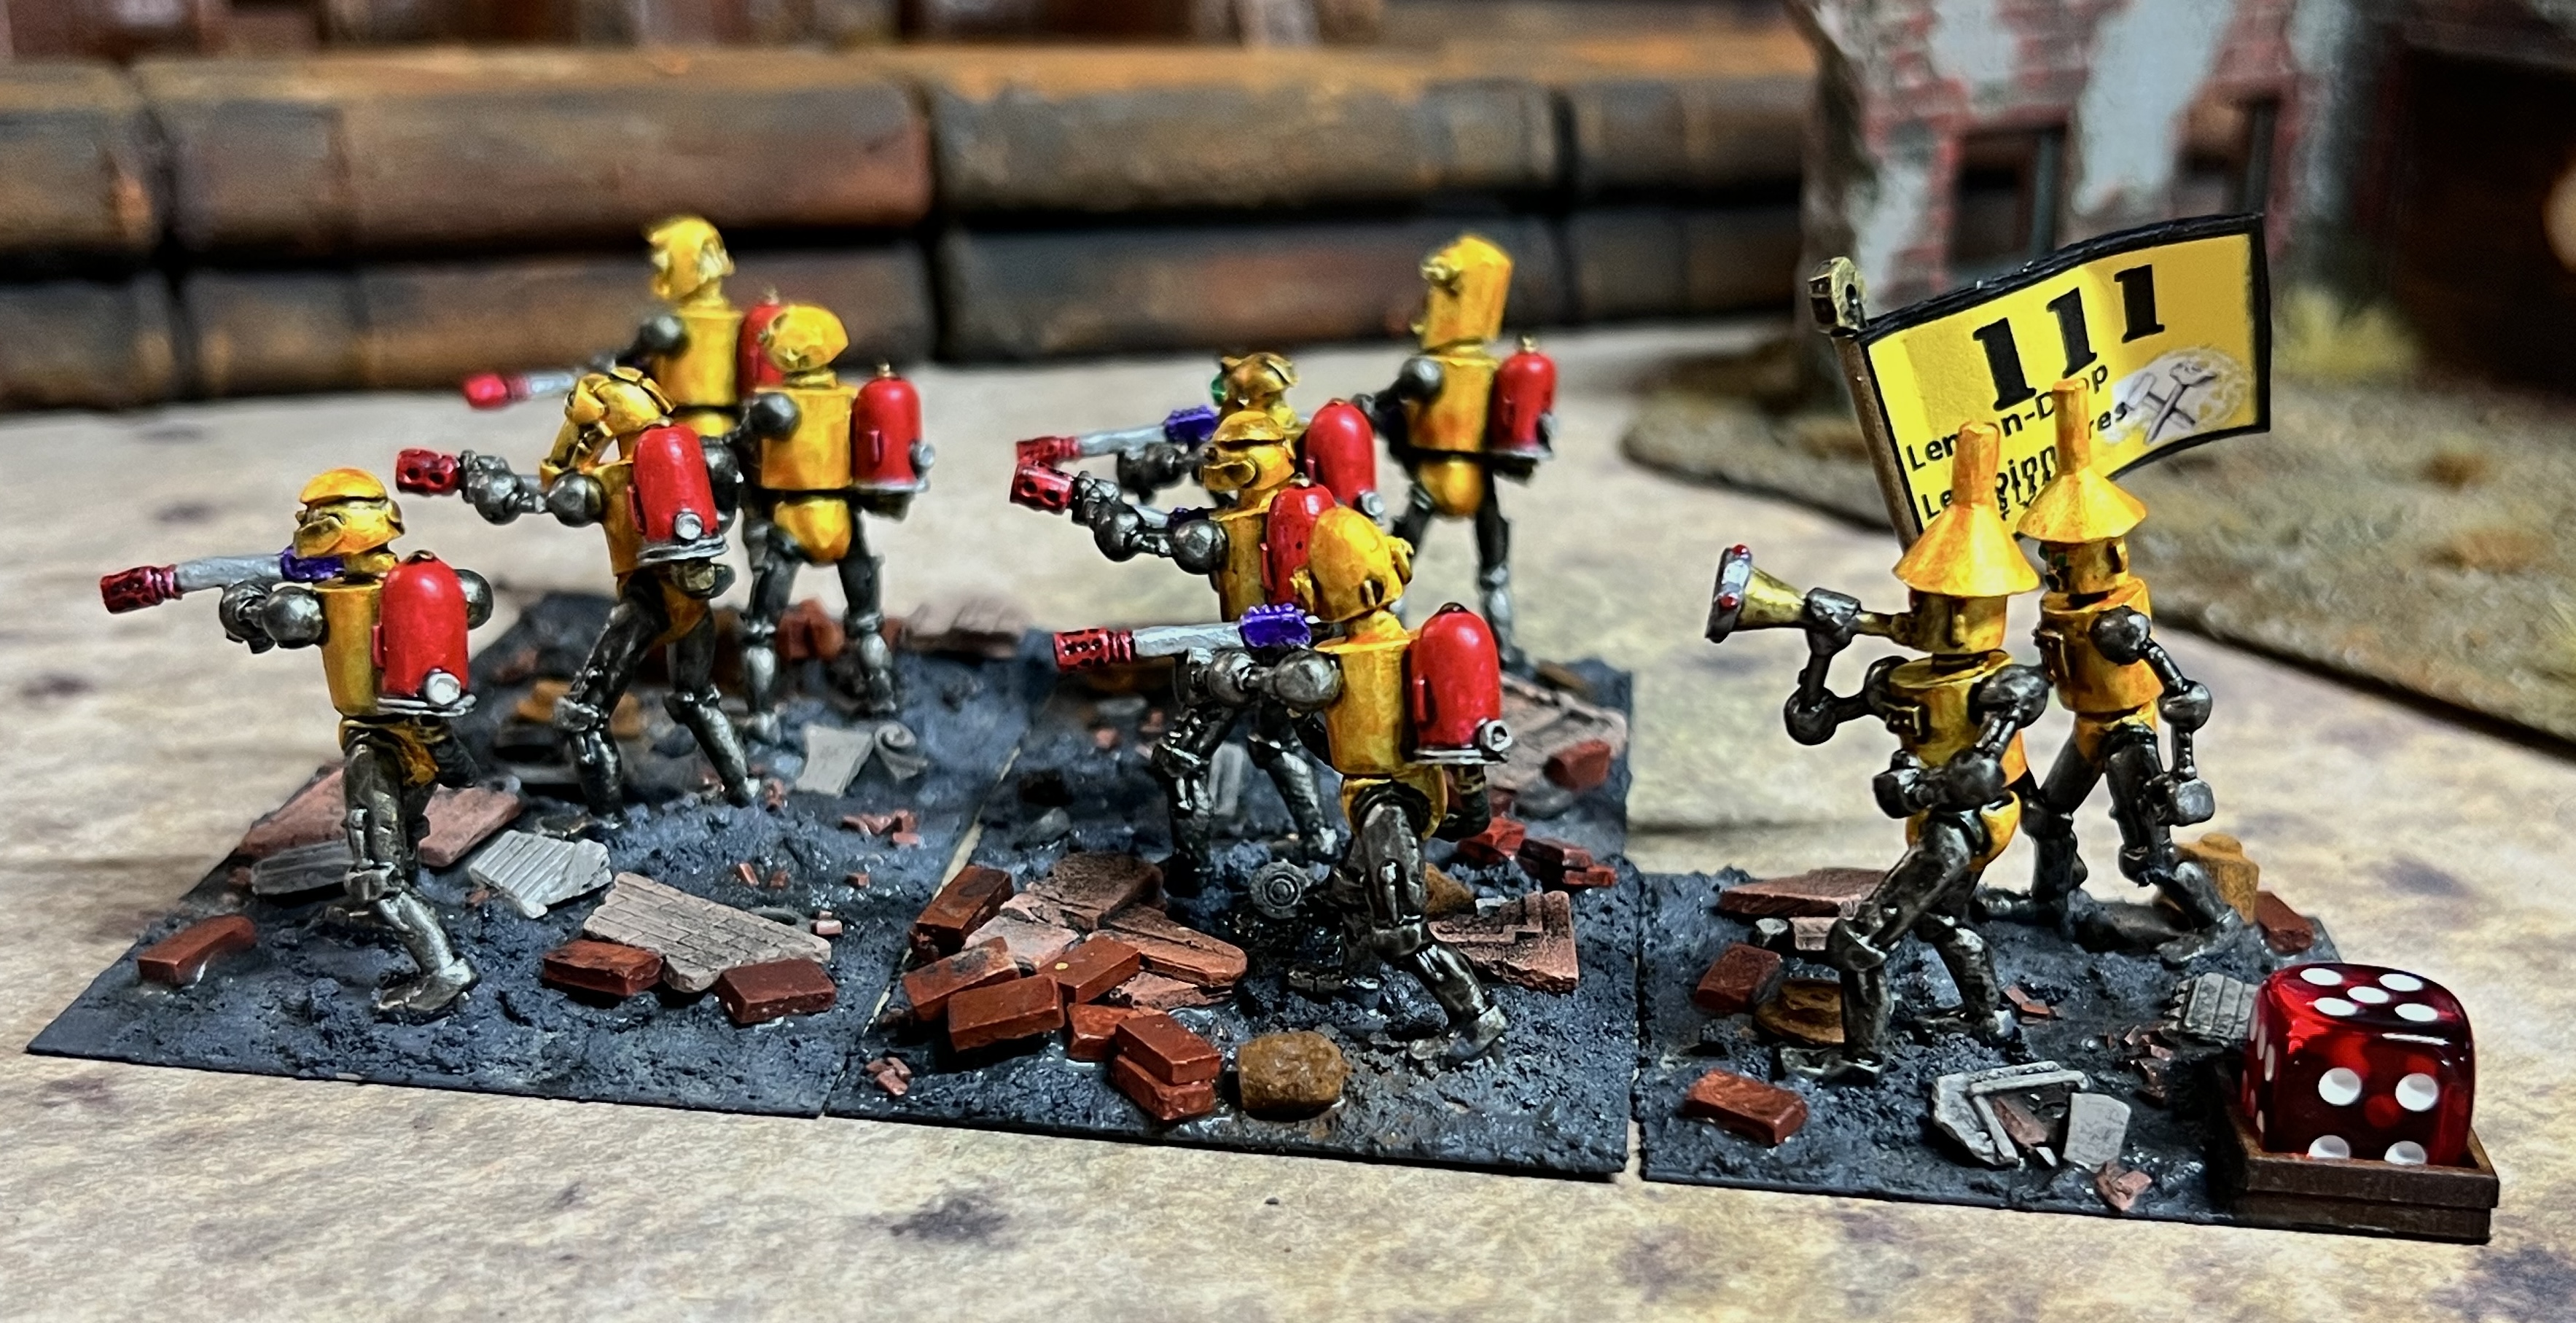
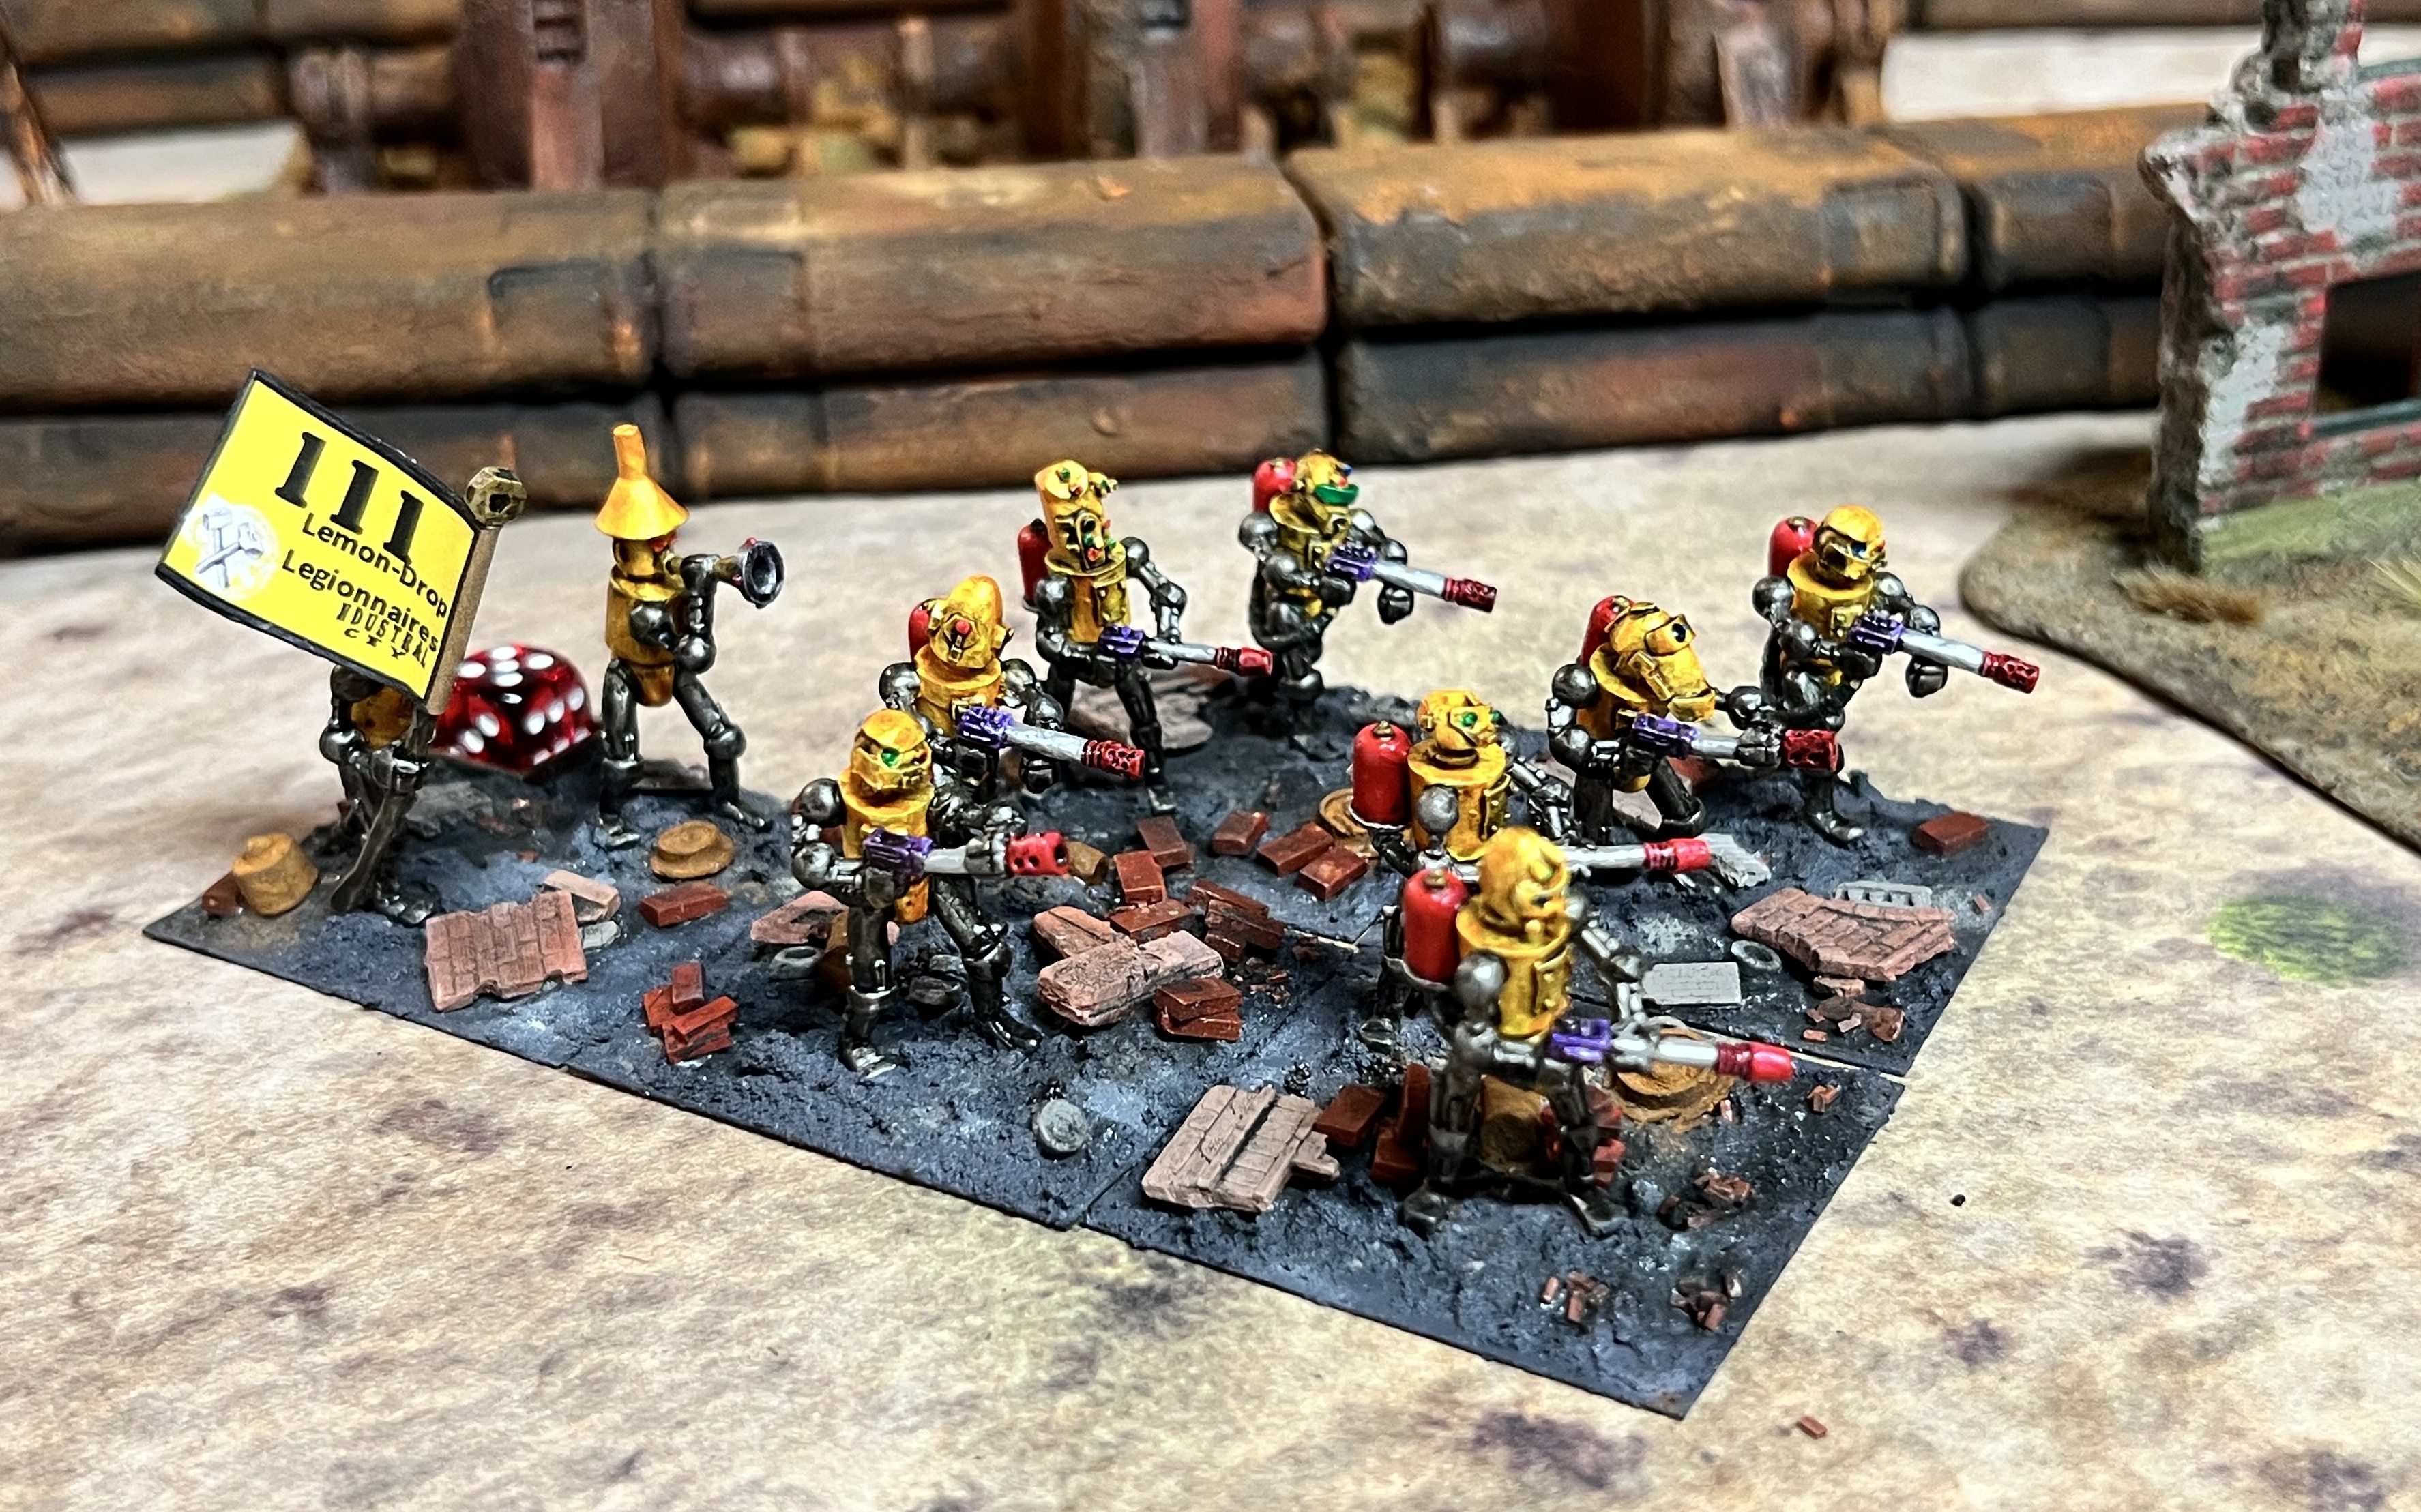
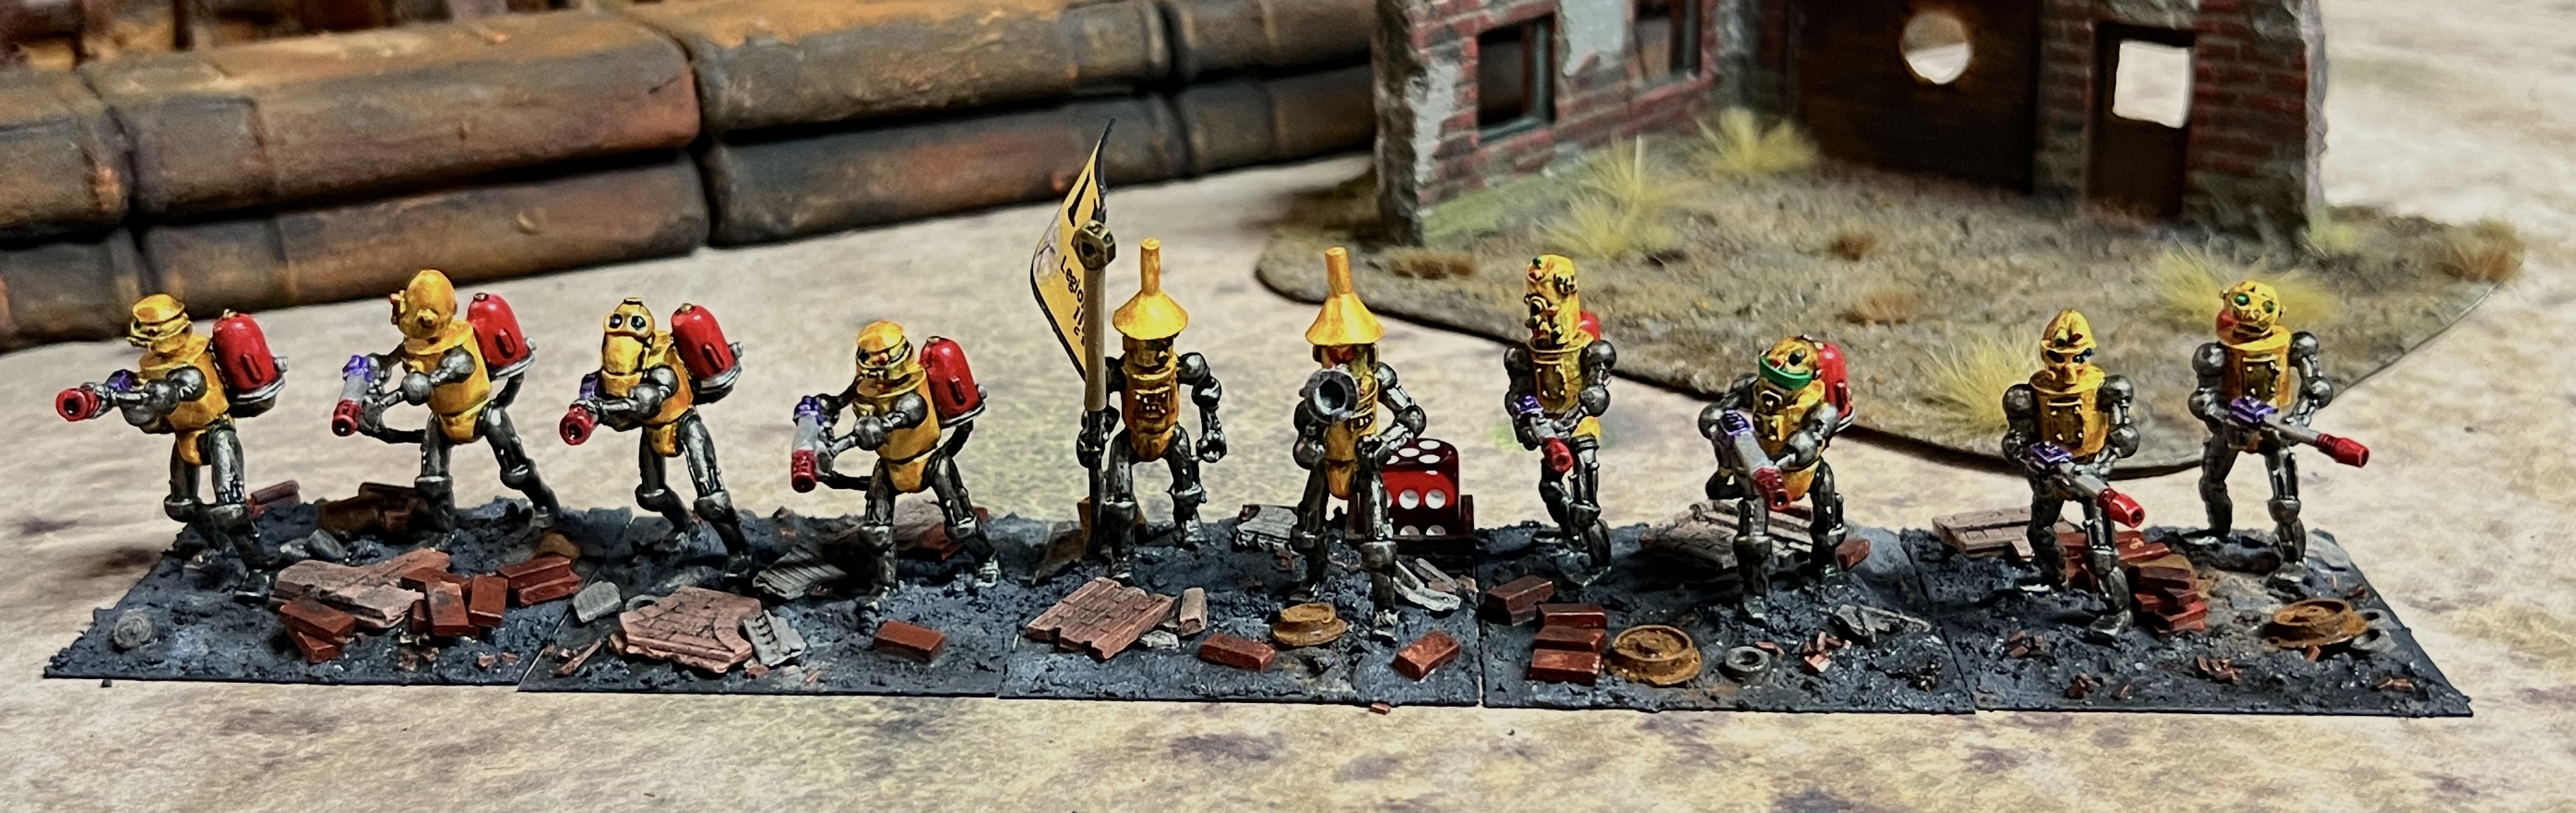
The other two regiments are armed with “plasma blasters”. They are OZZ-539, “Mechanical Men with Napalm Blasters”. The first one is magenta-themed:
The Tinseltown Terrors
WIP Shot.
And some poses:
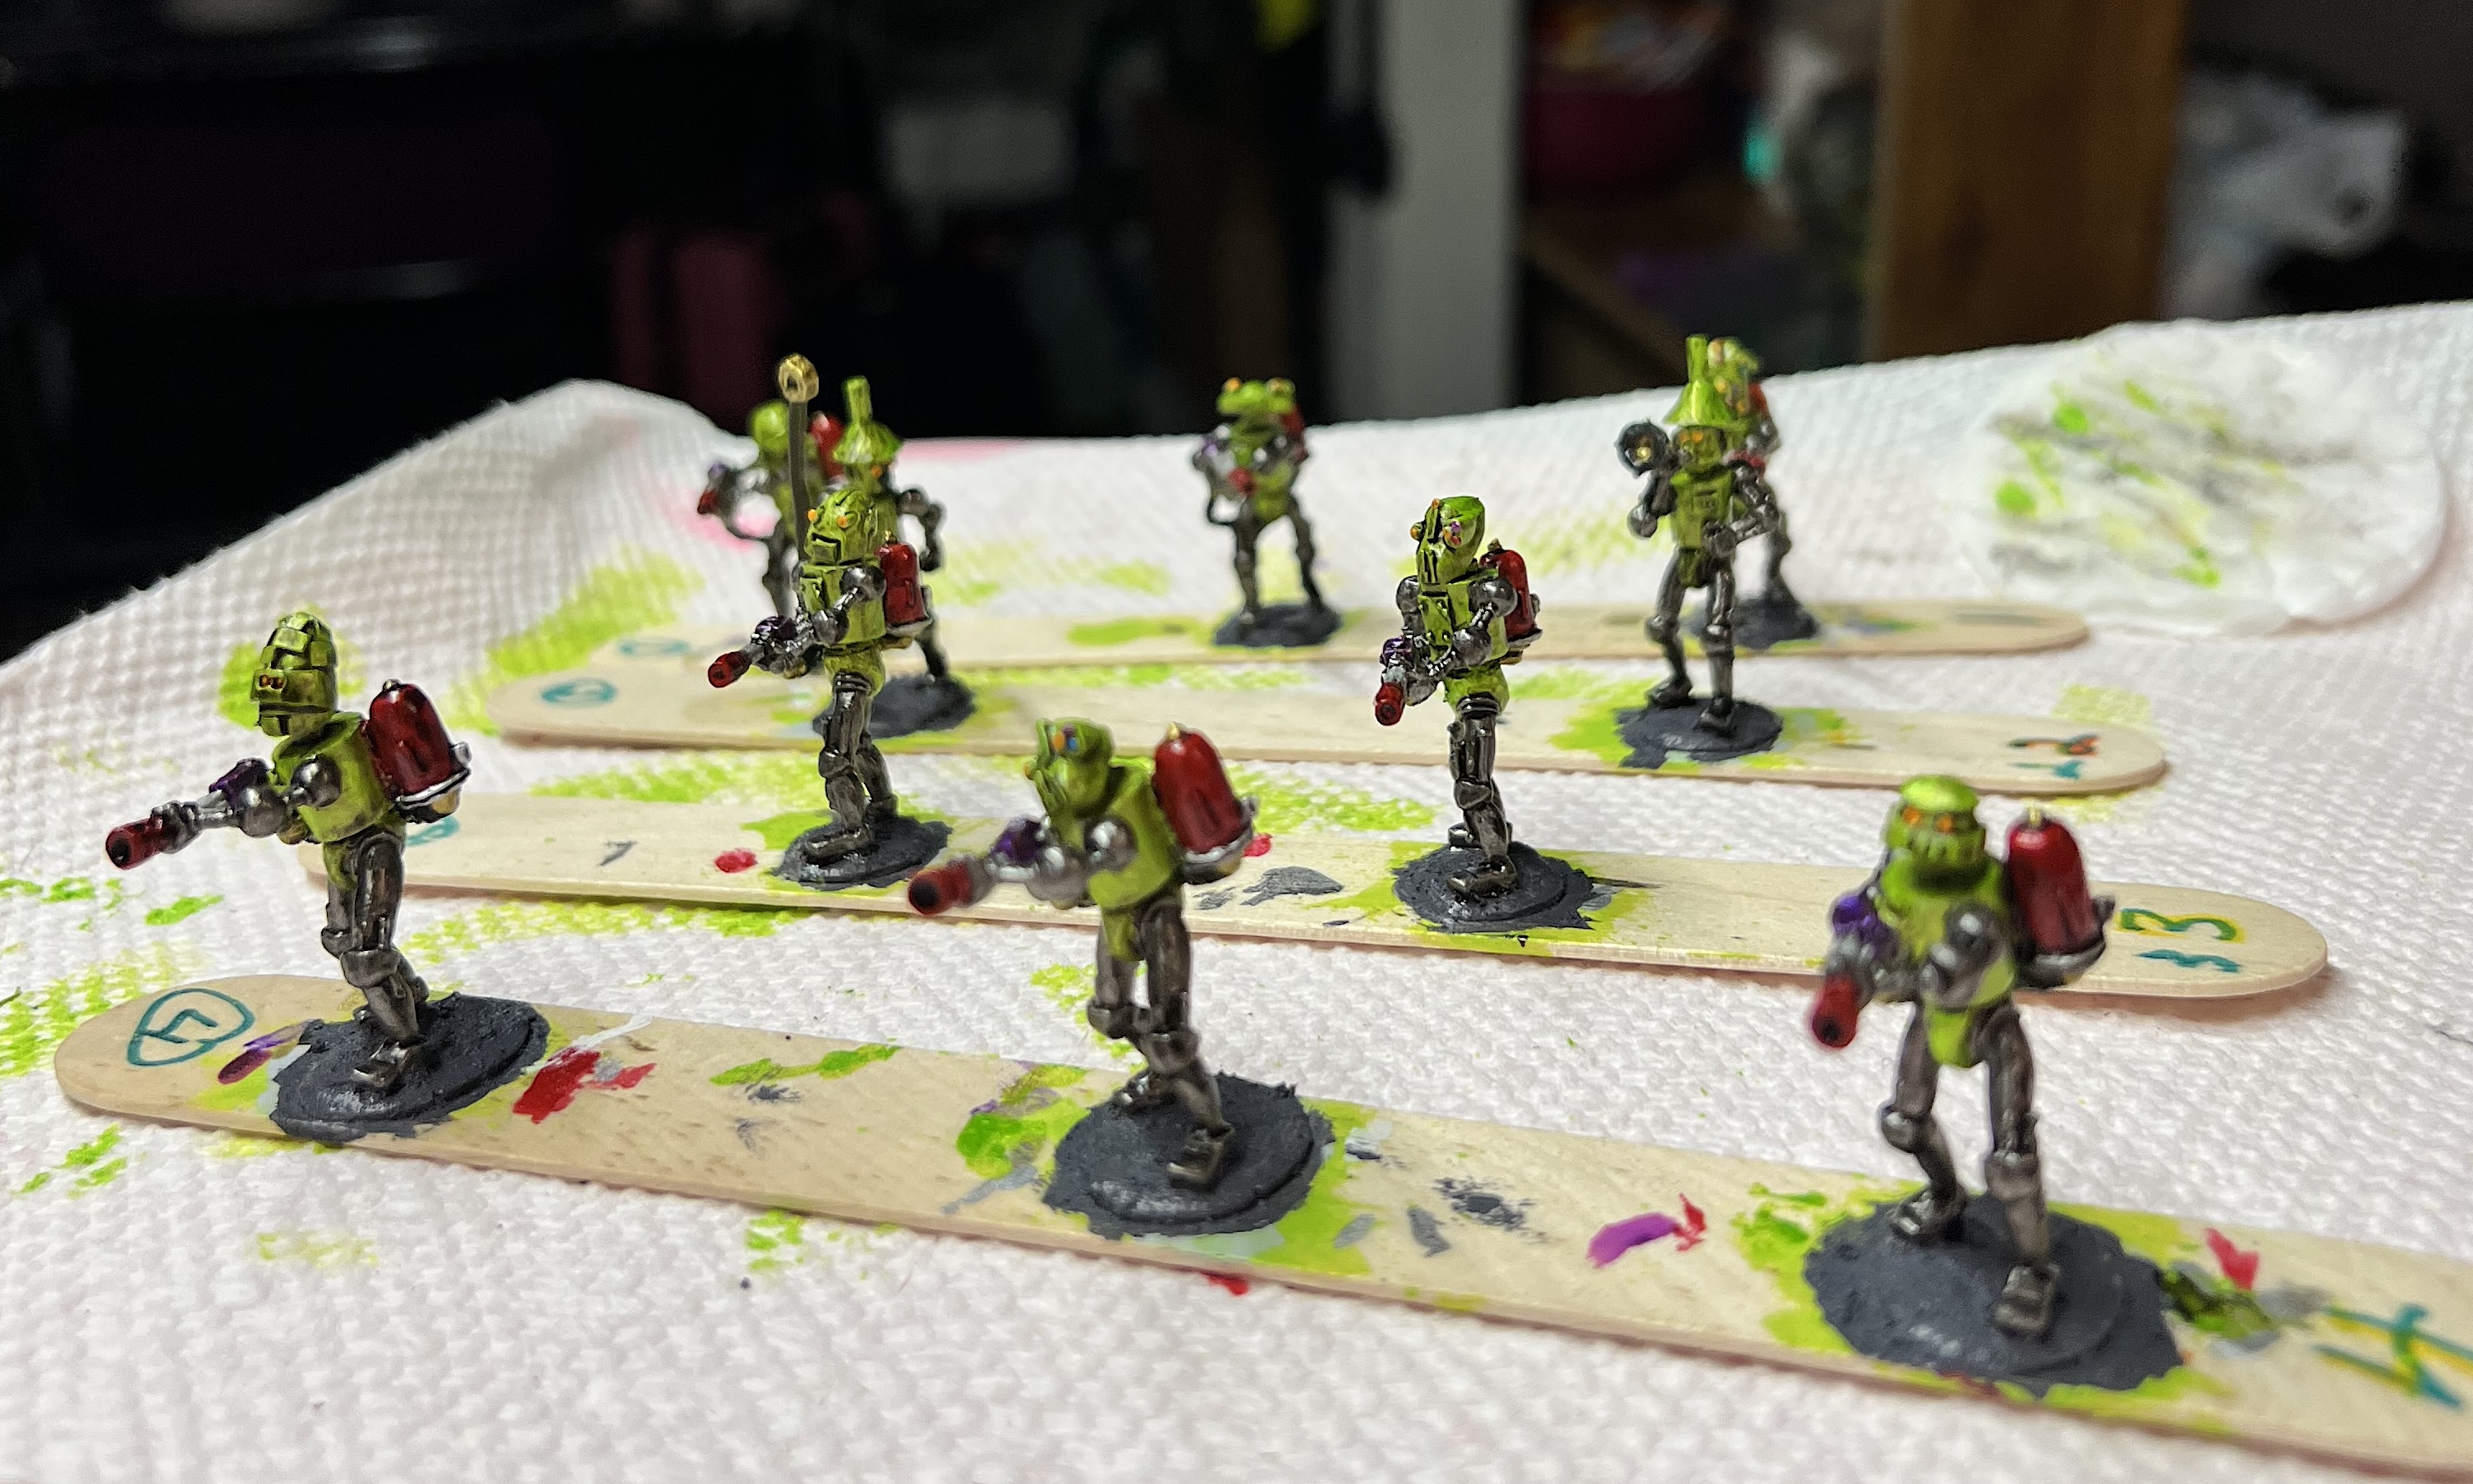
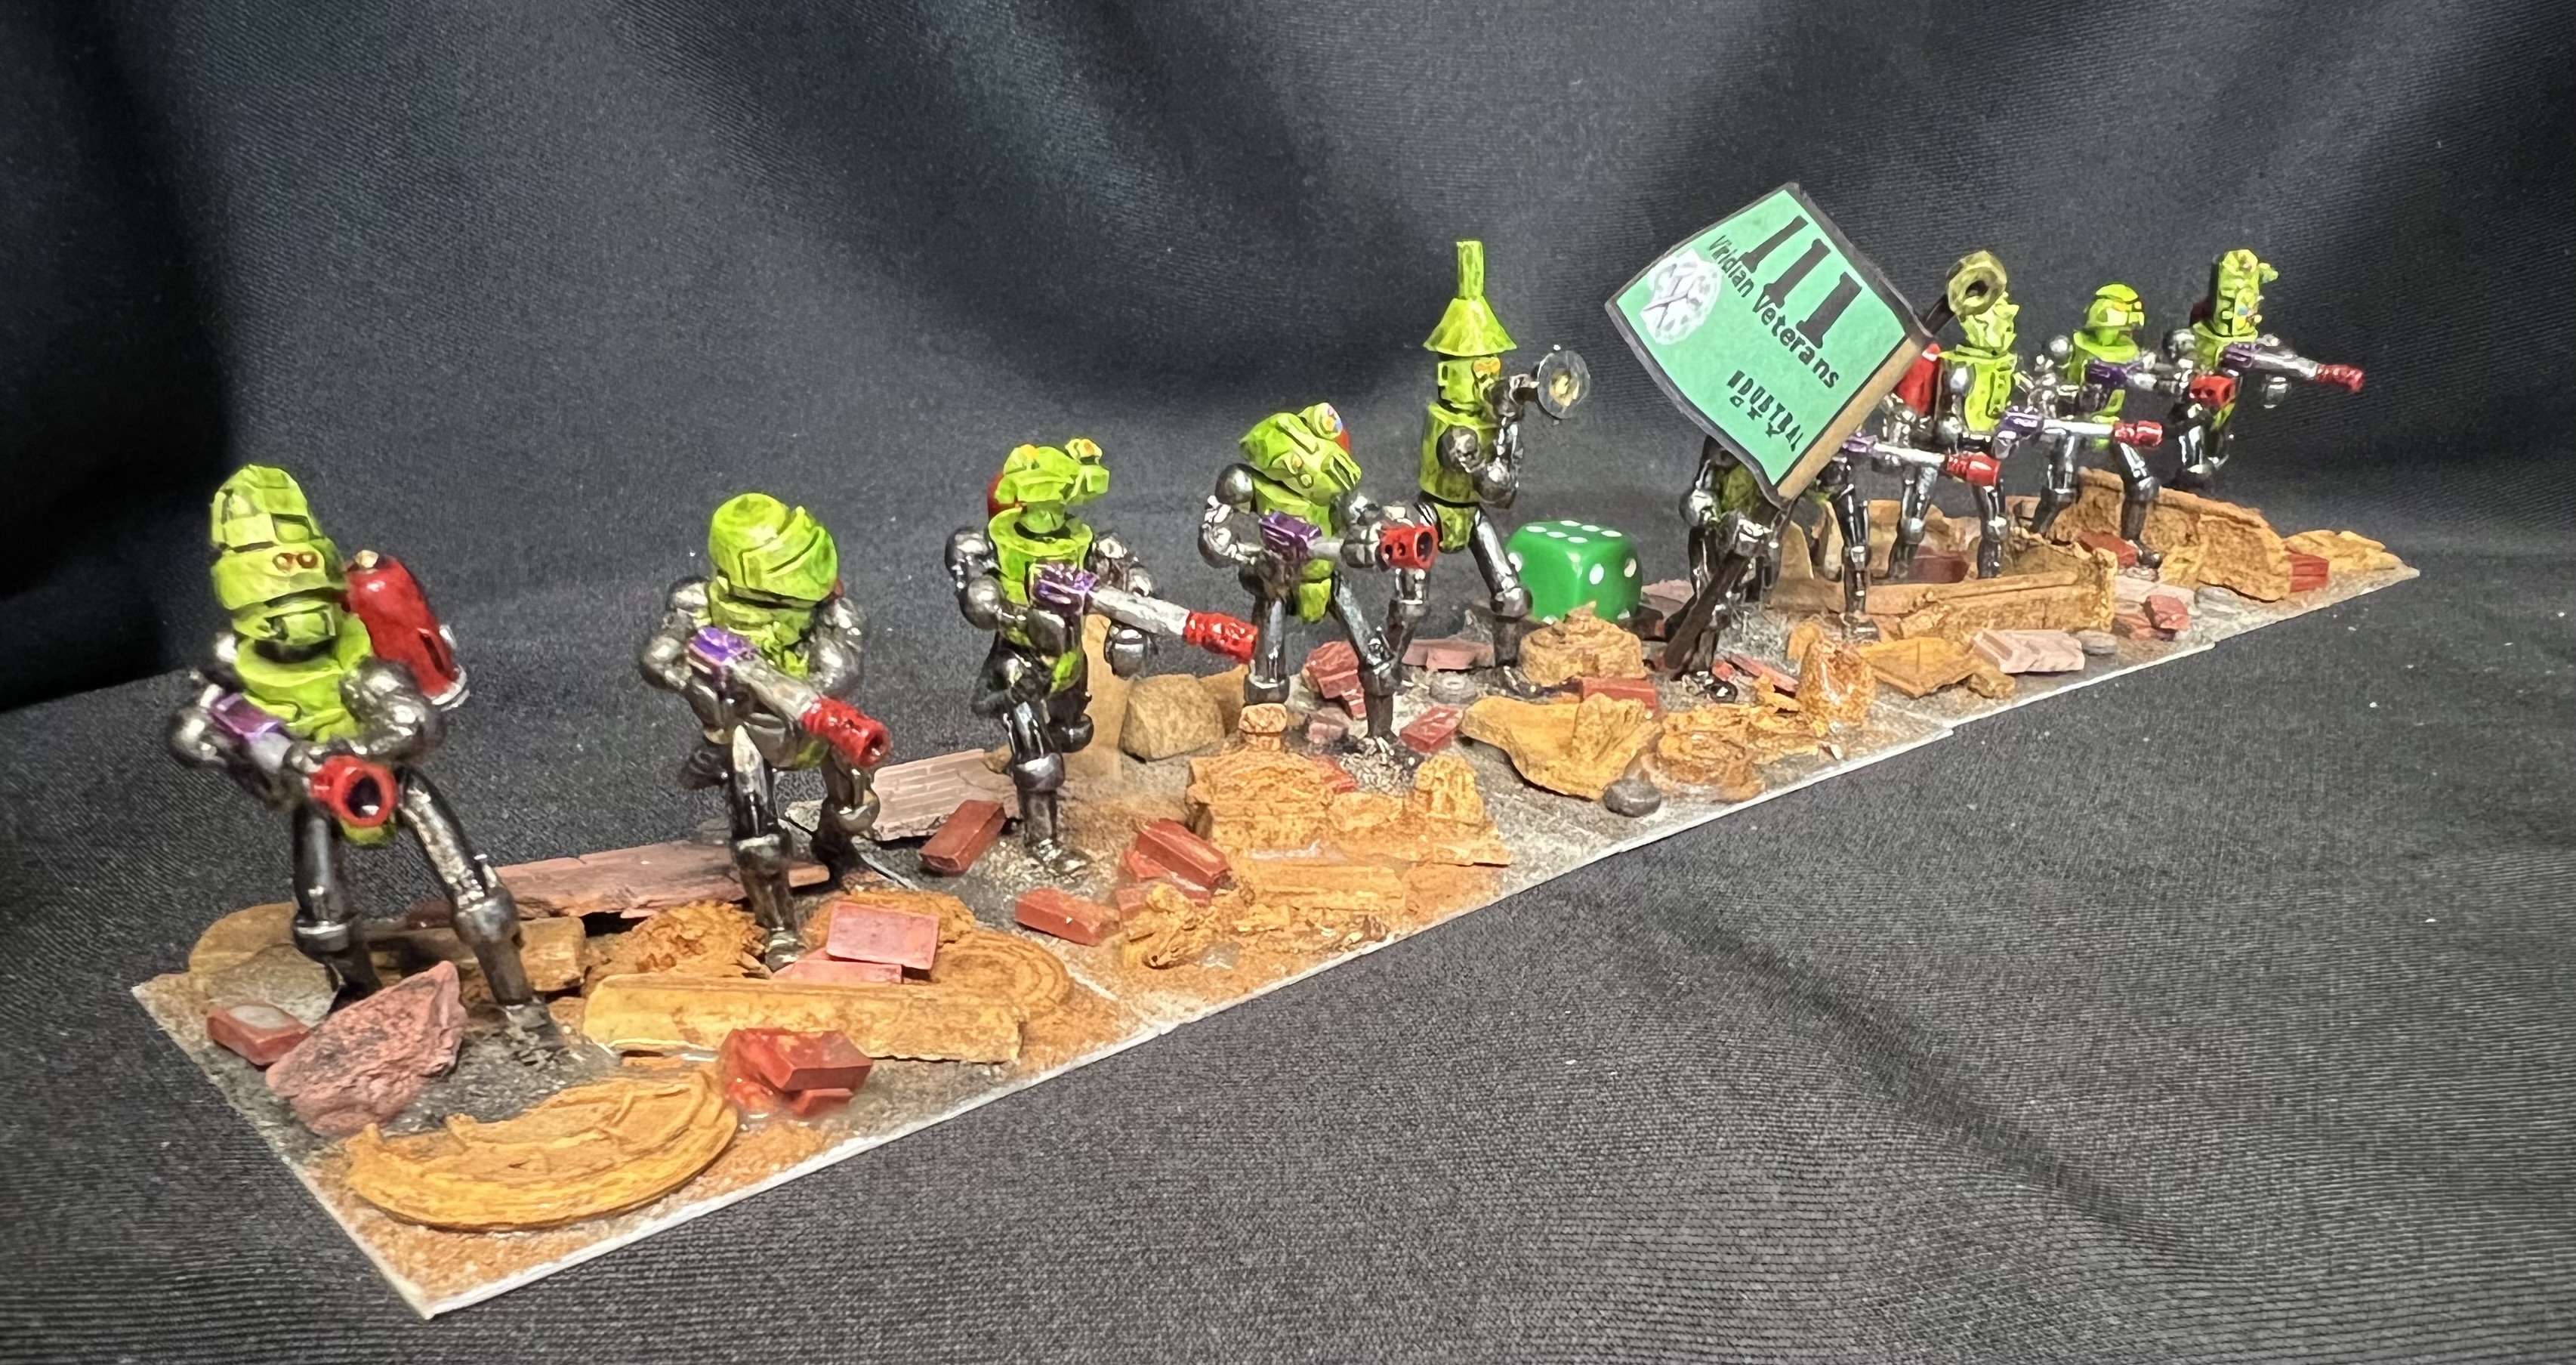
The last regiment I painted up was also a plasma blaster regiment. This time lime green-themed:
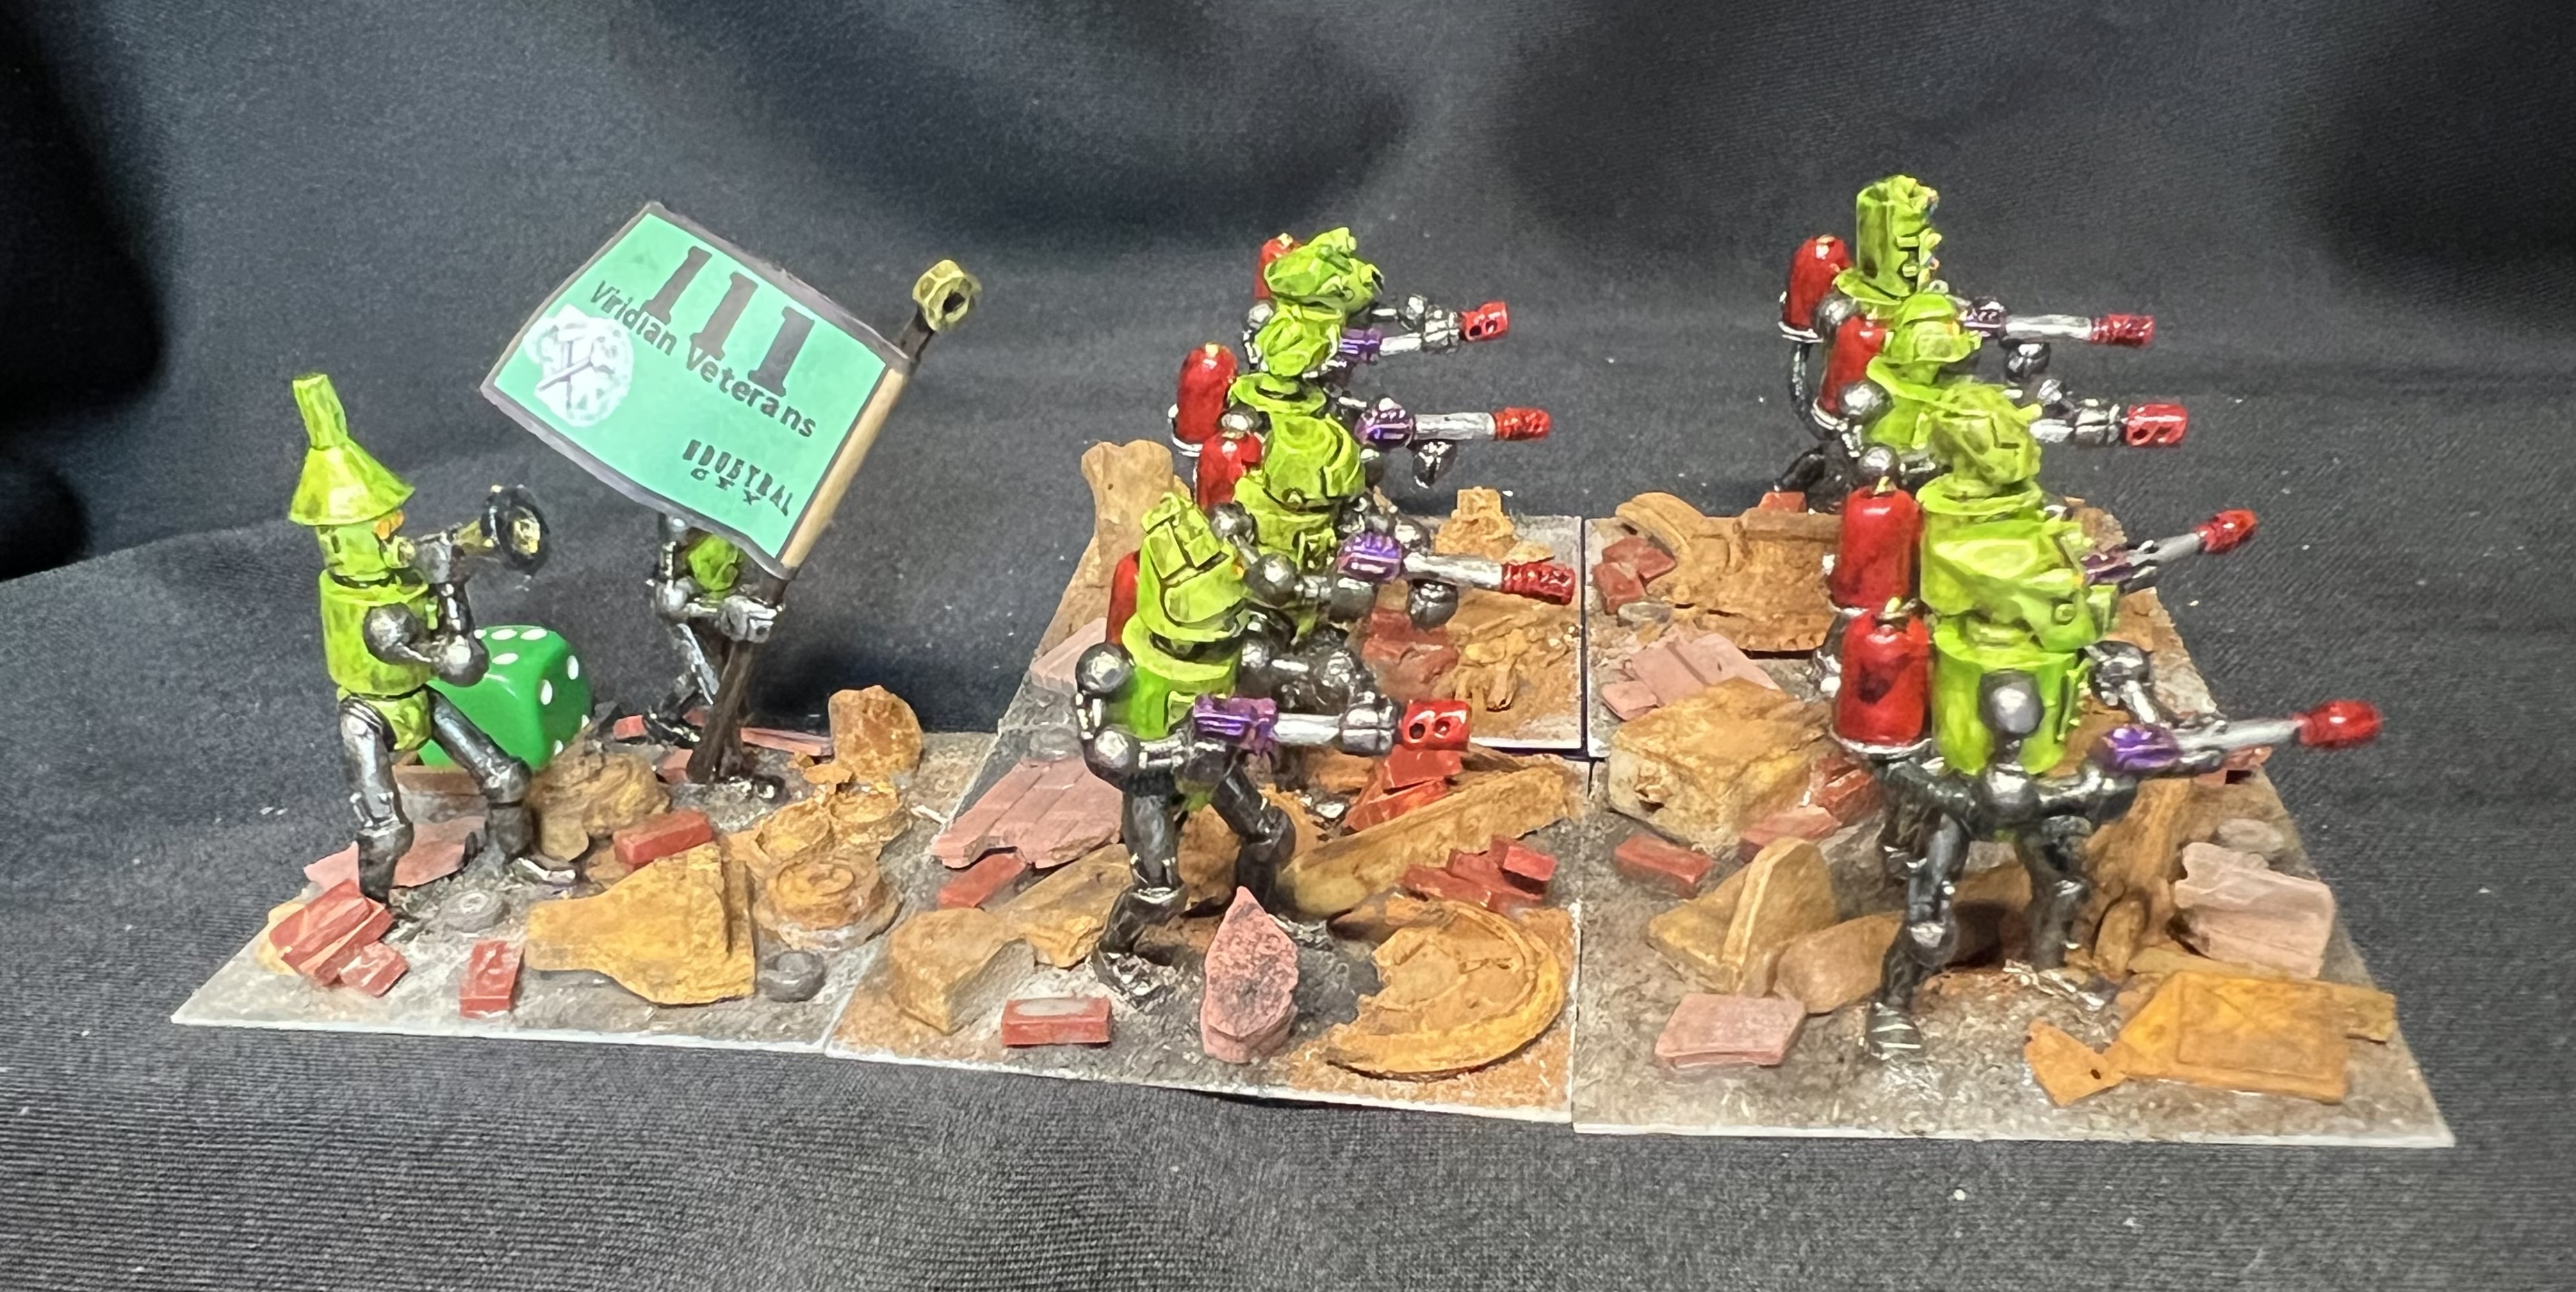
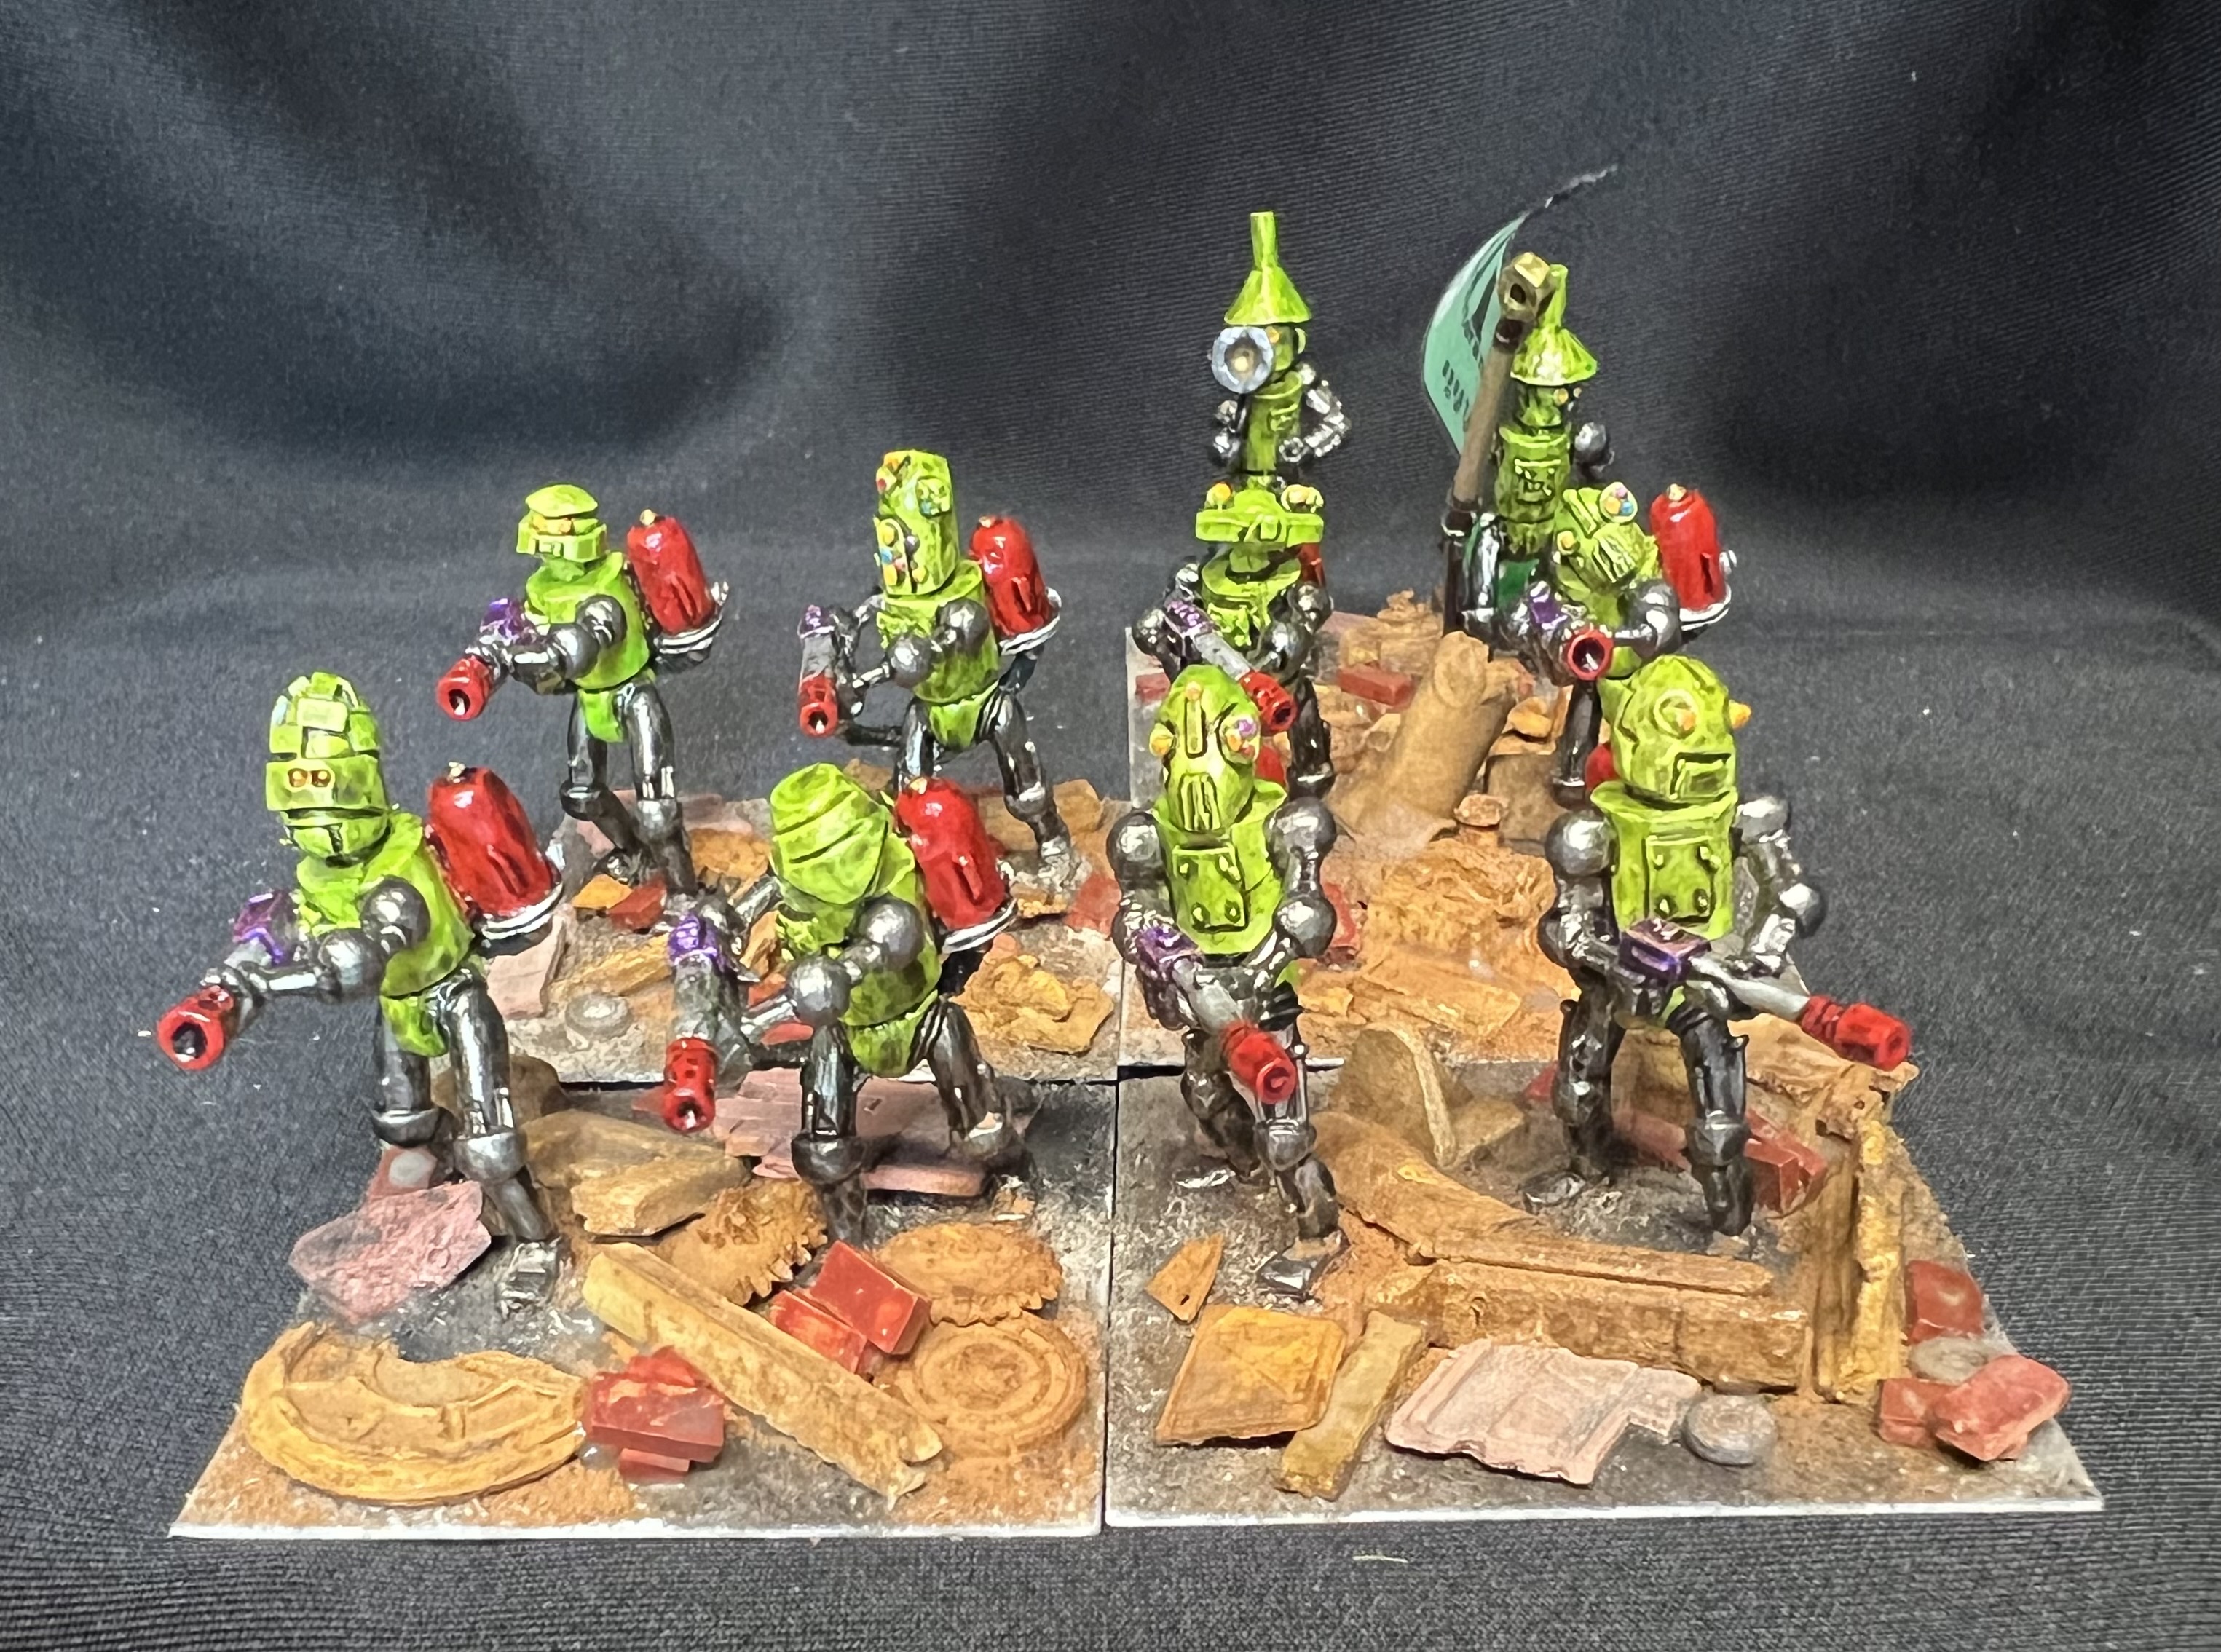
The Viridian Veterans
WIP shot.
And some poses:
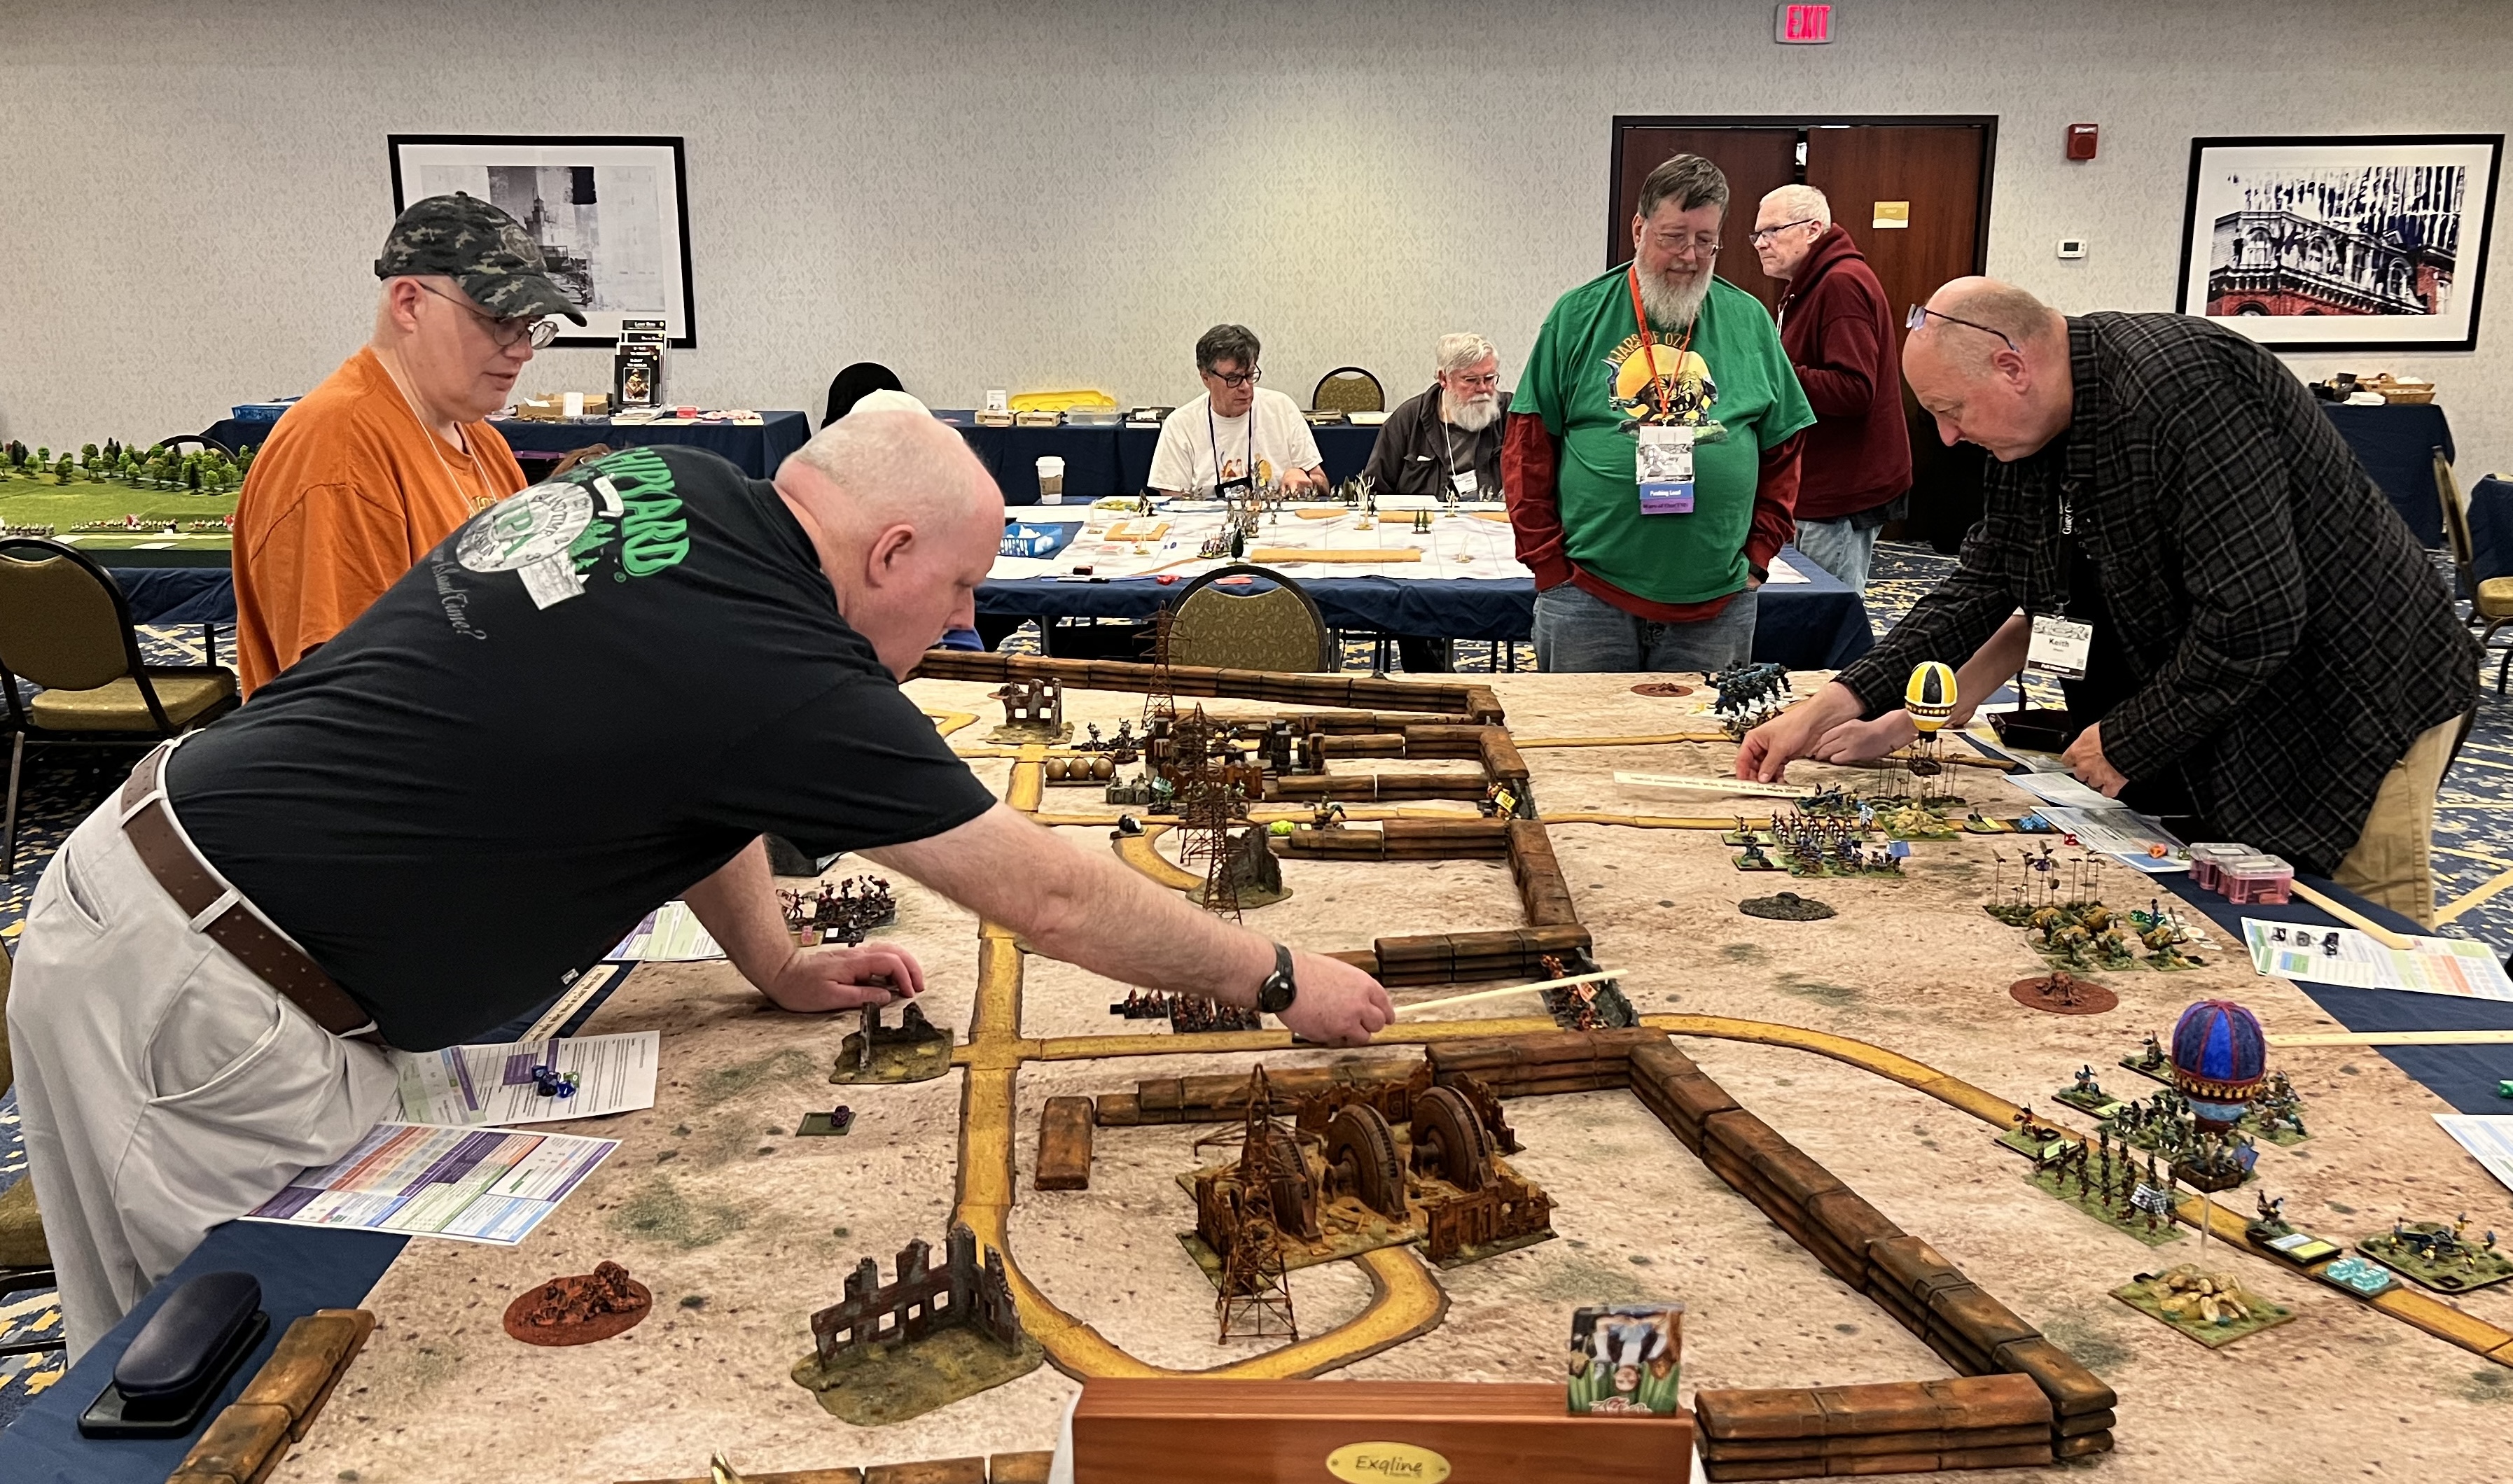
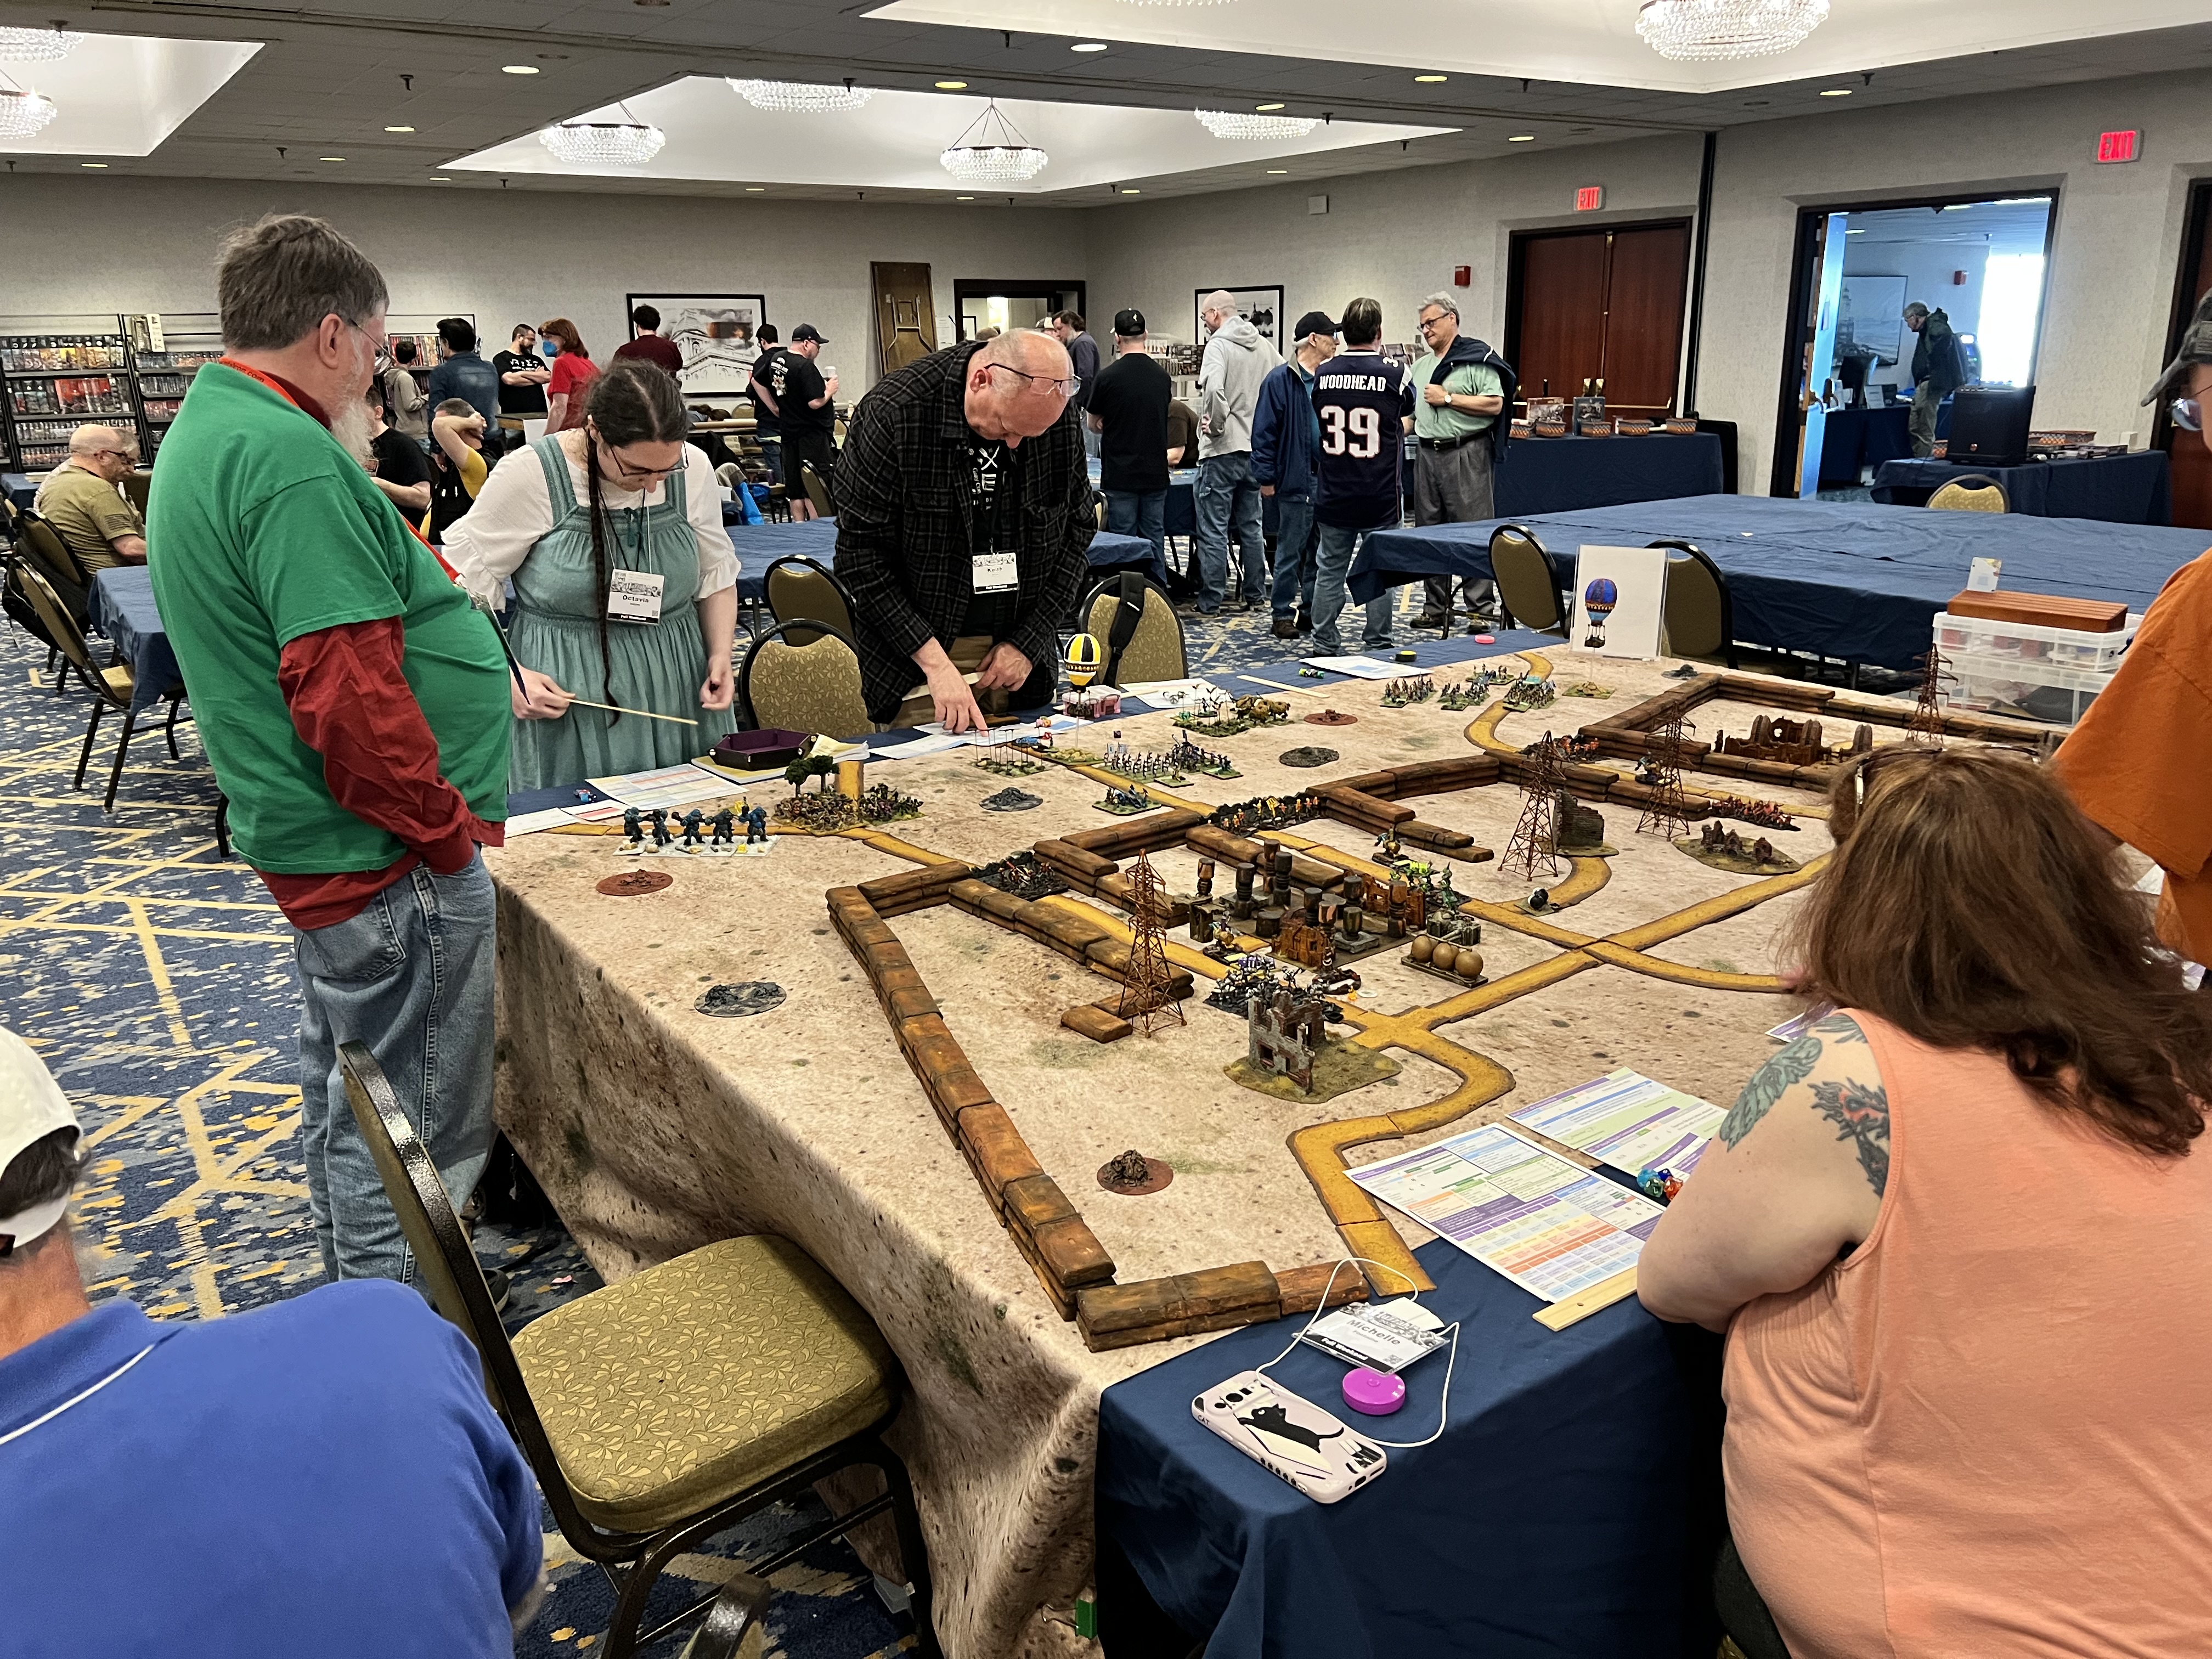
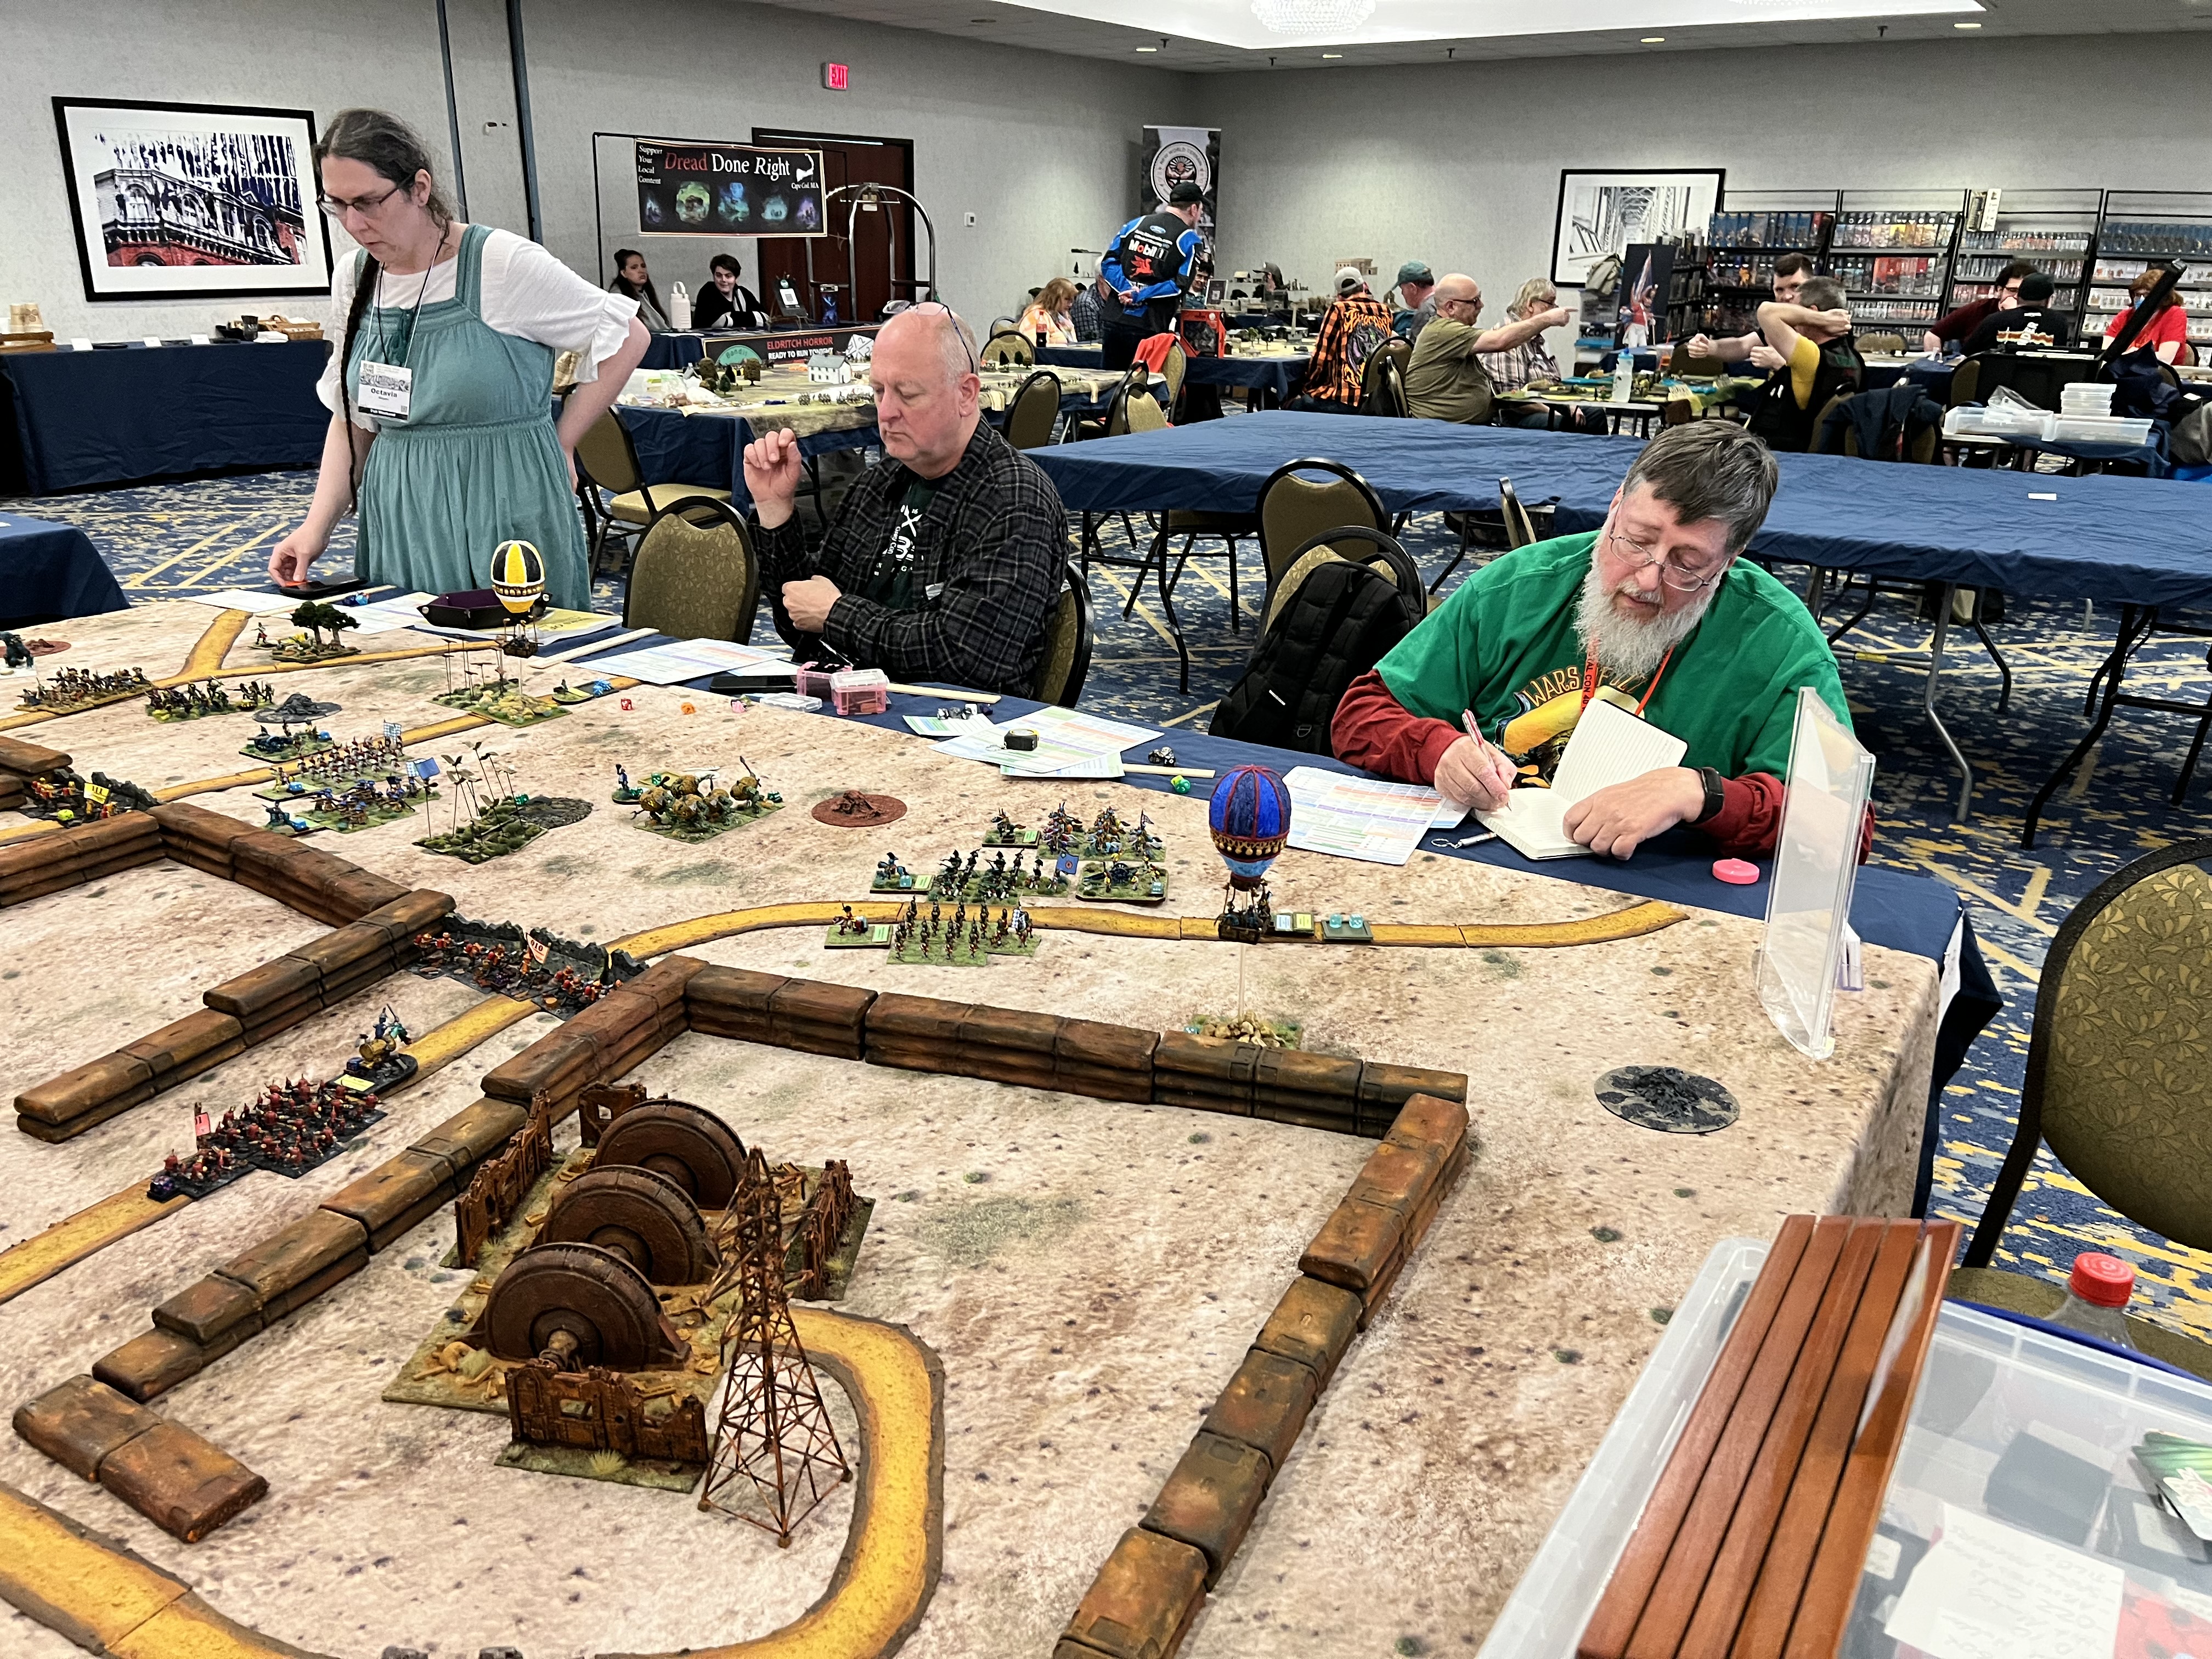
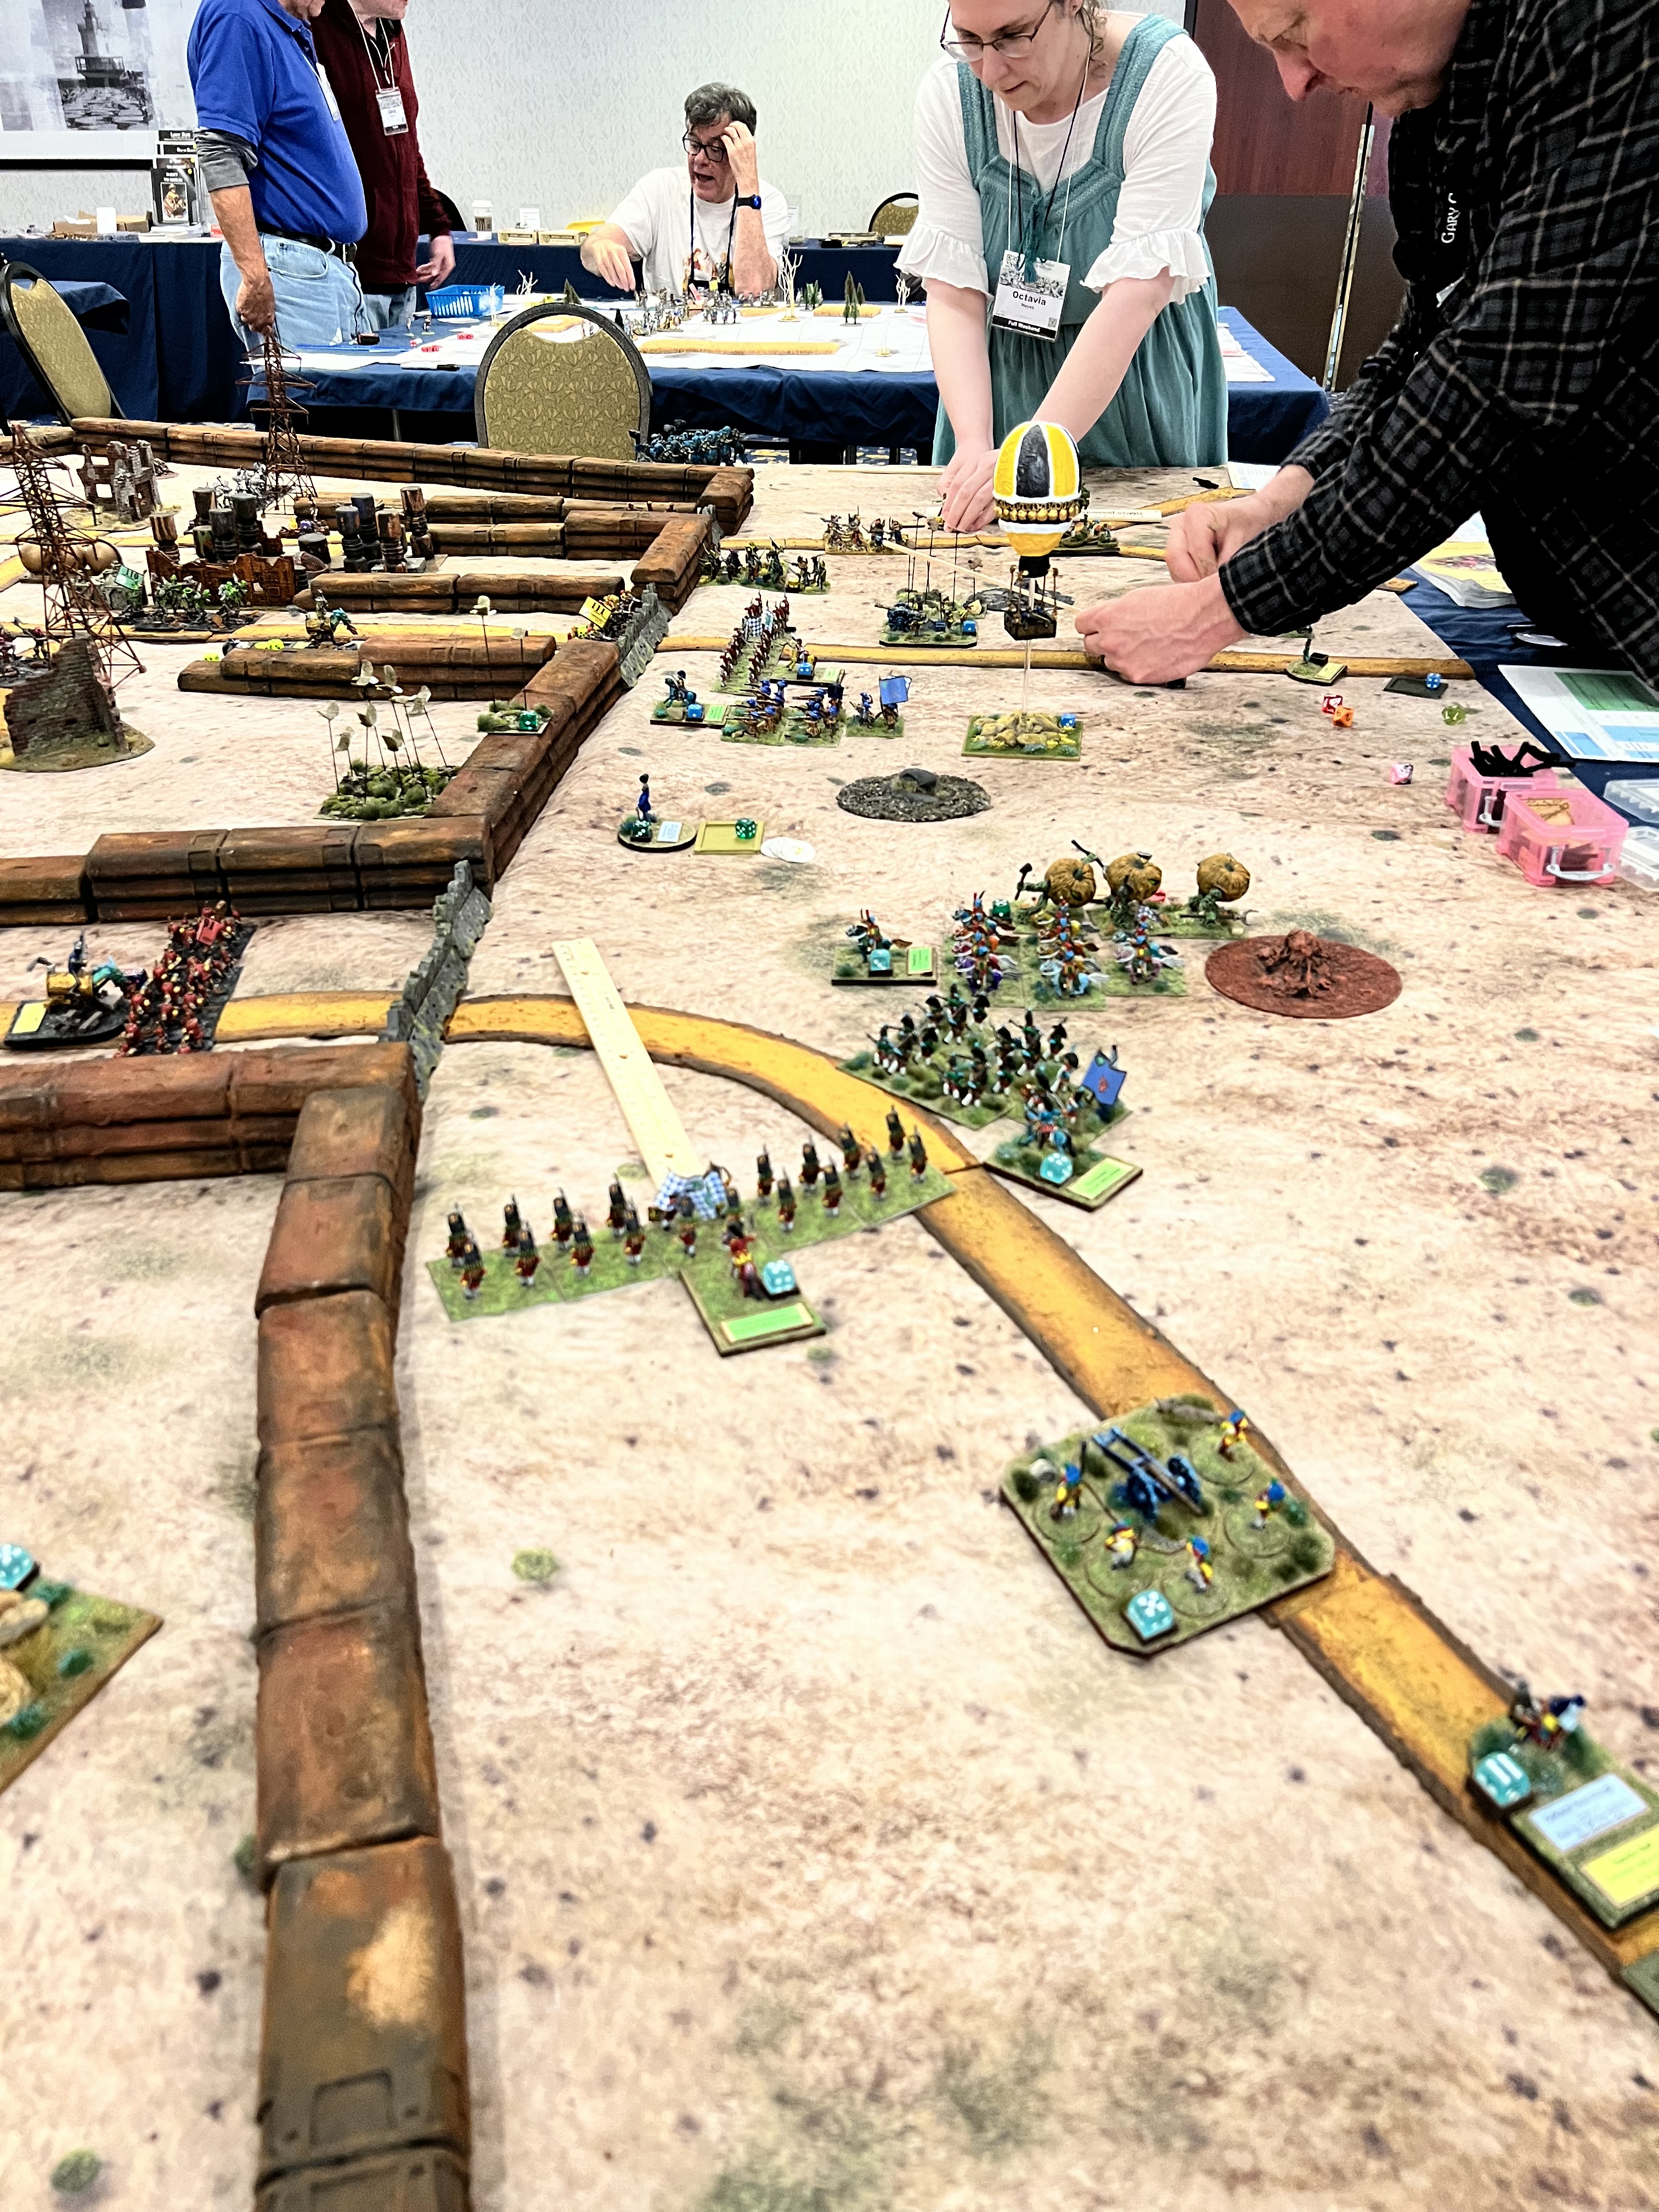
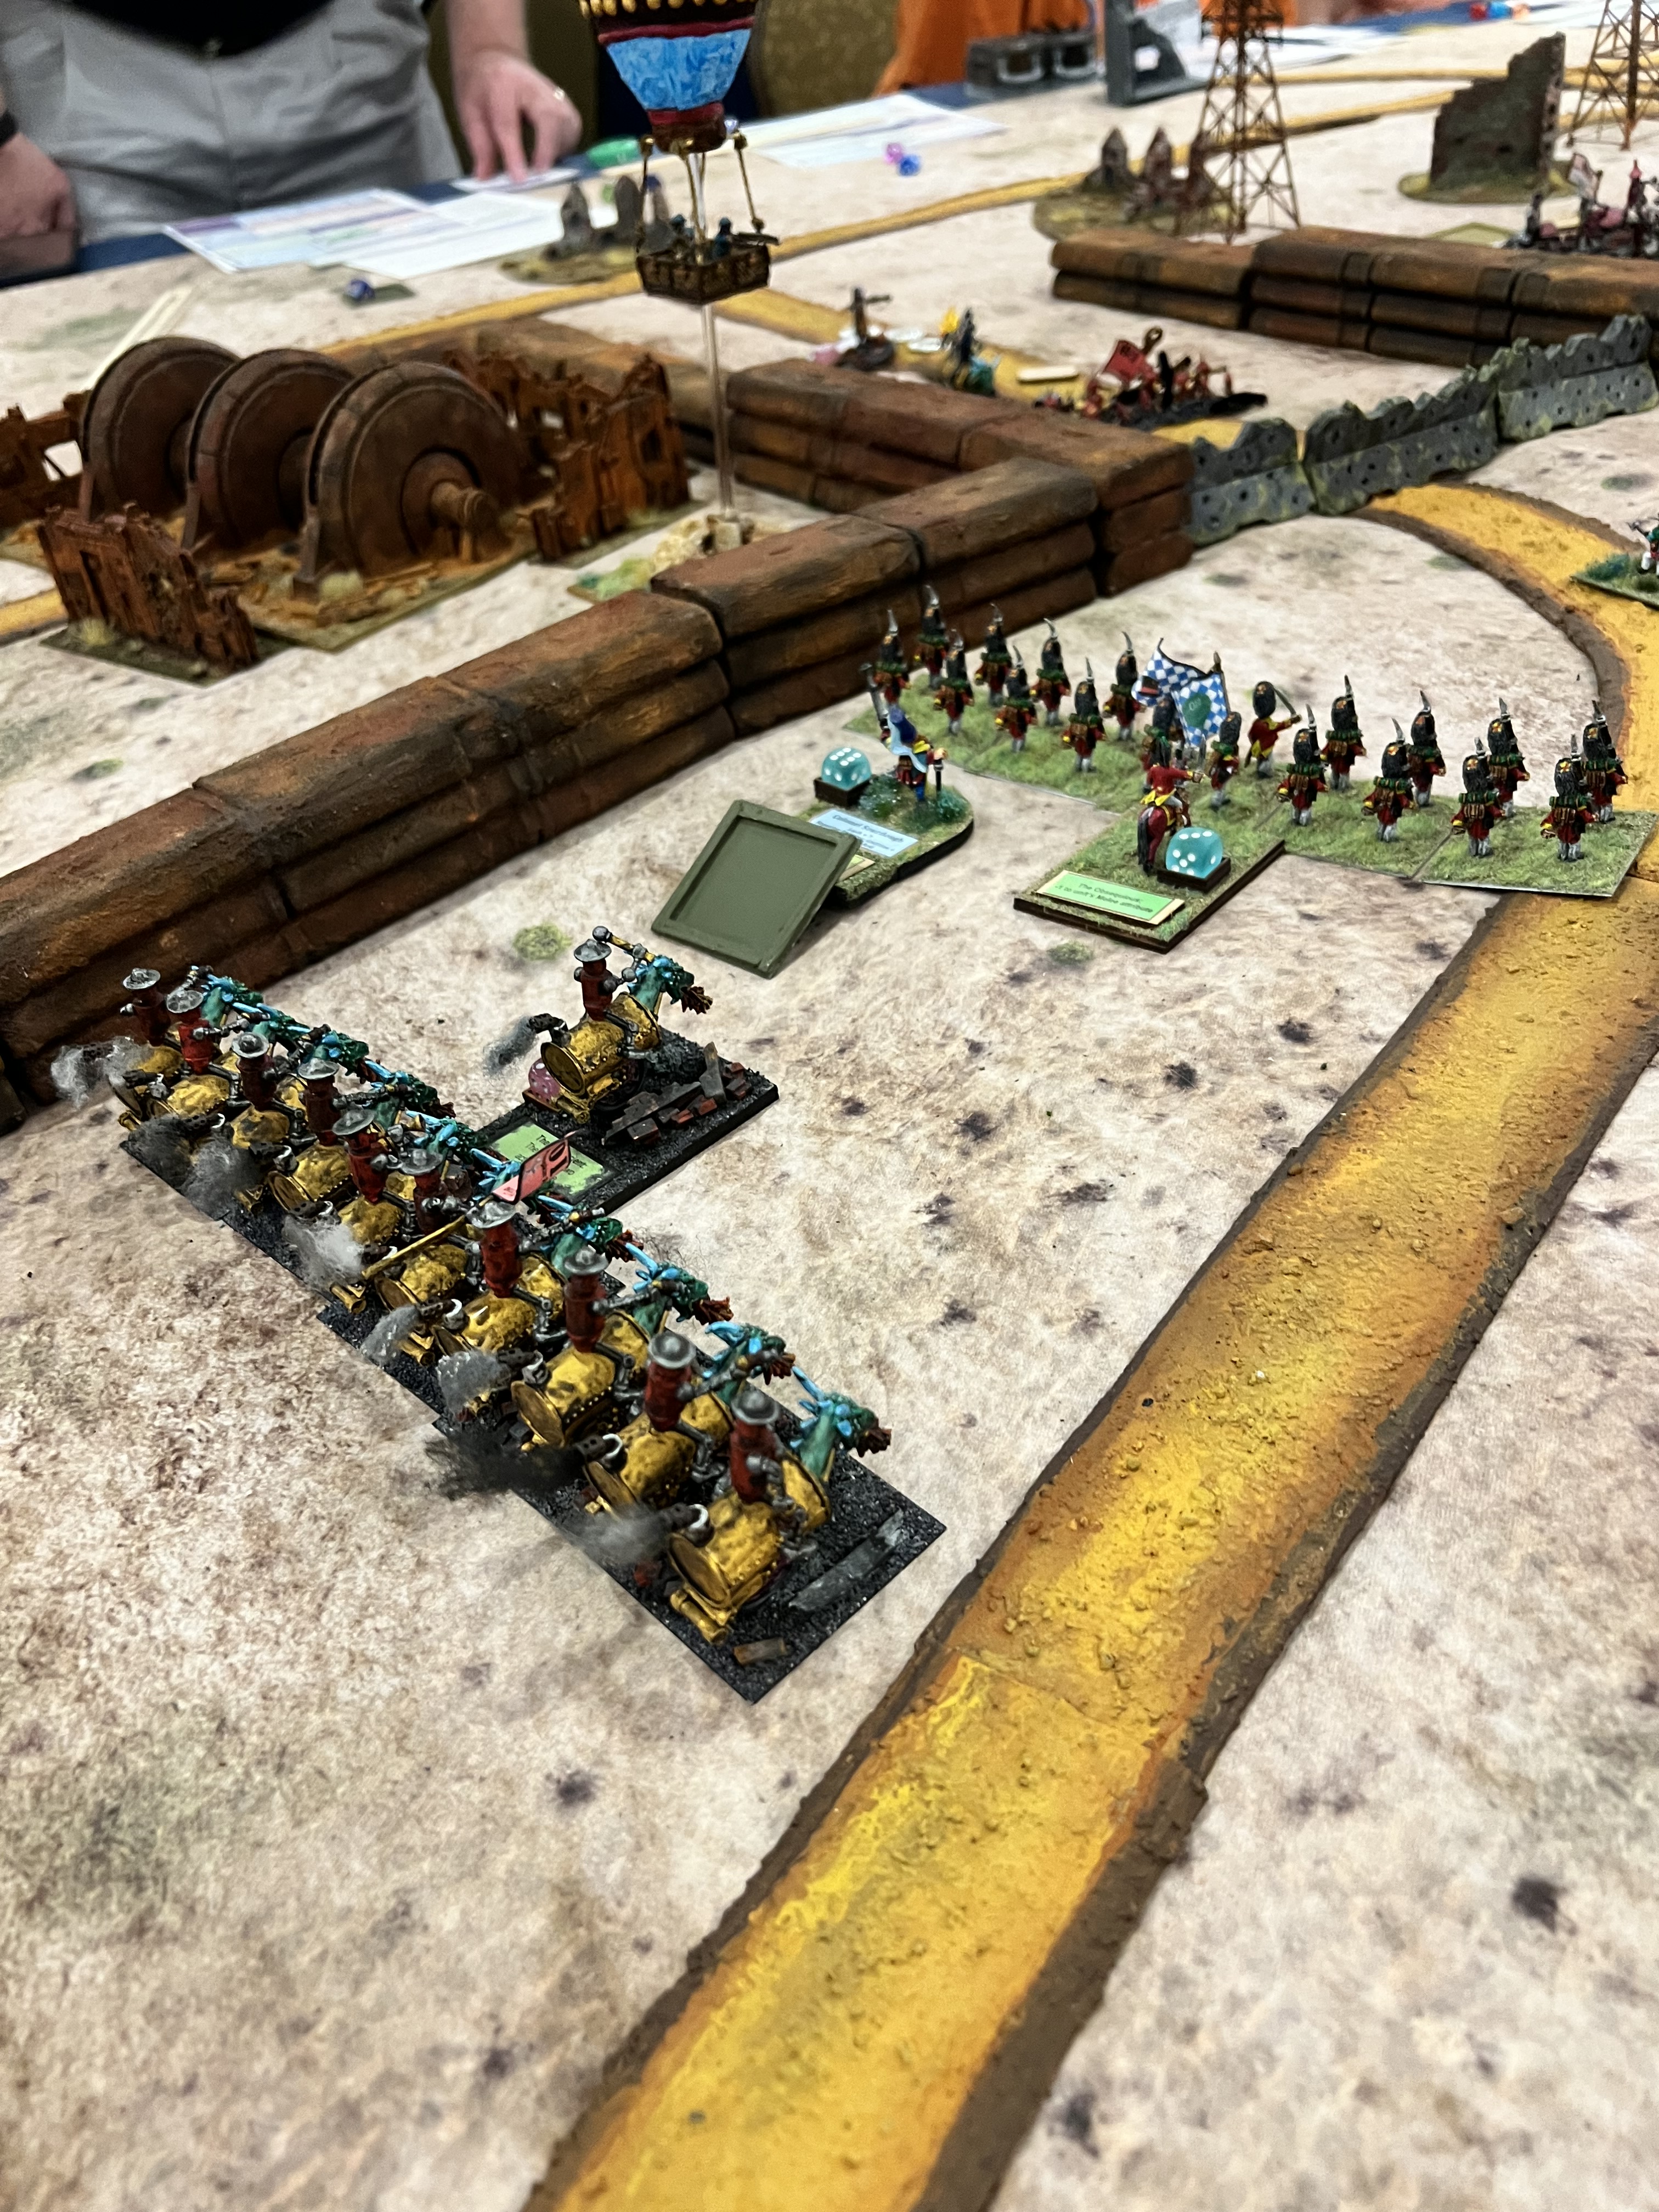
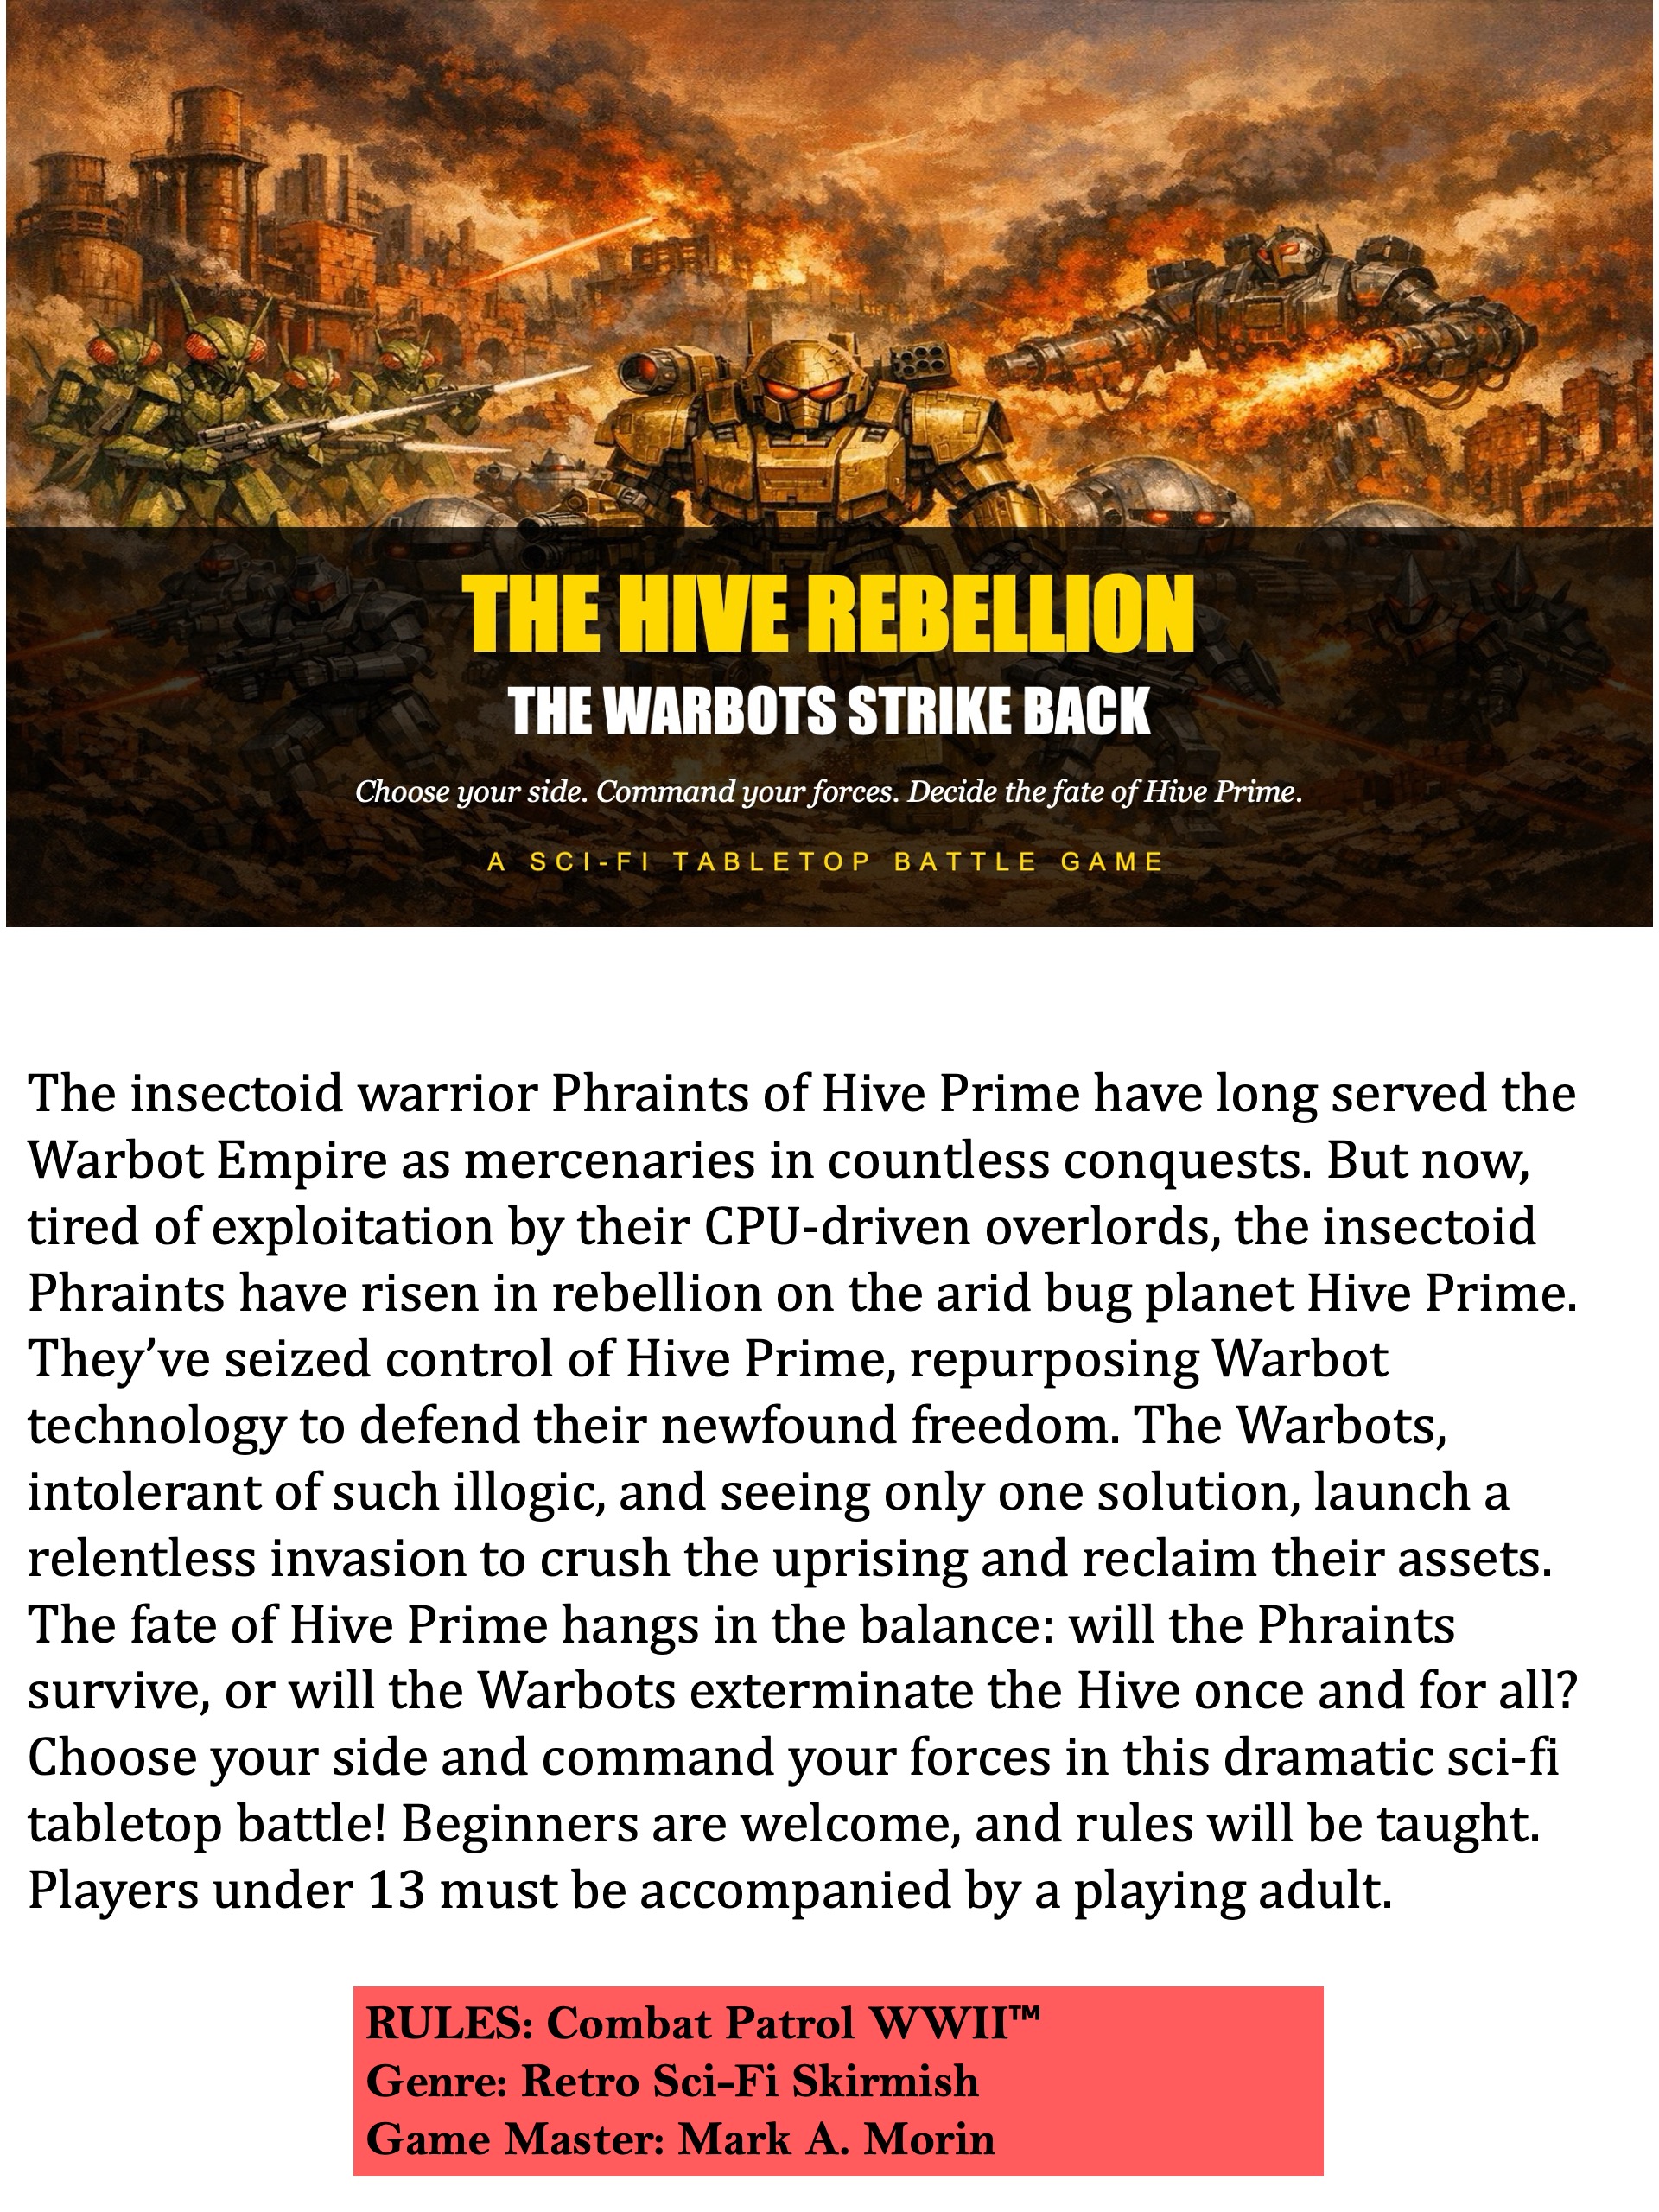
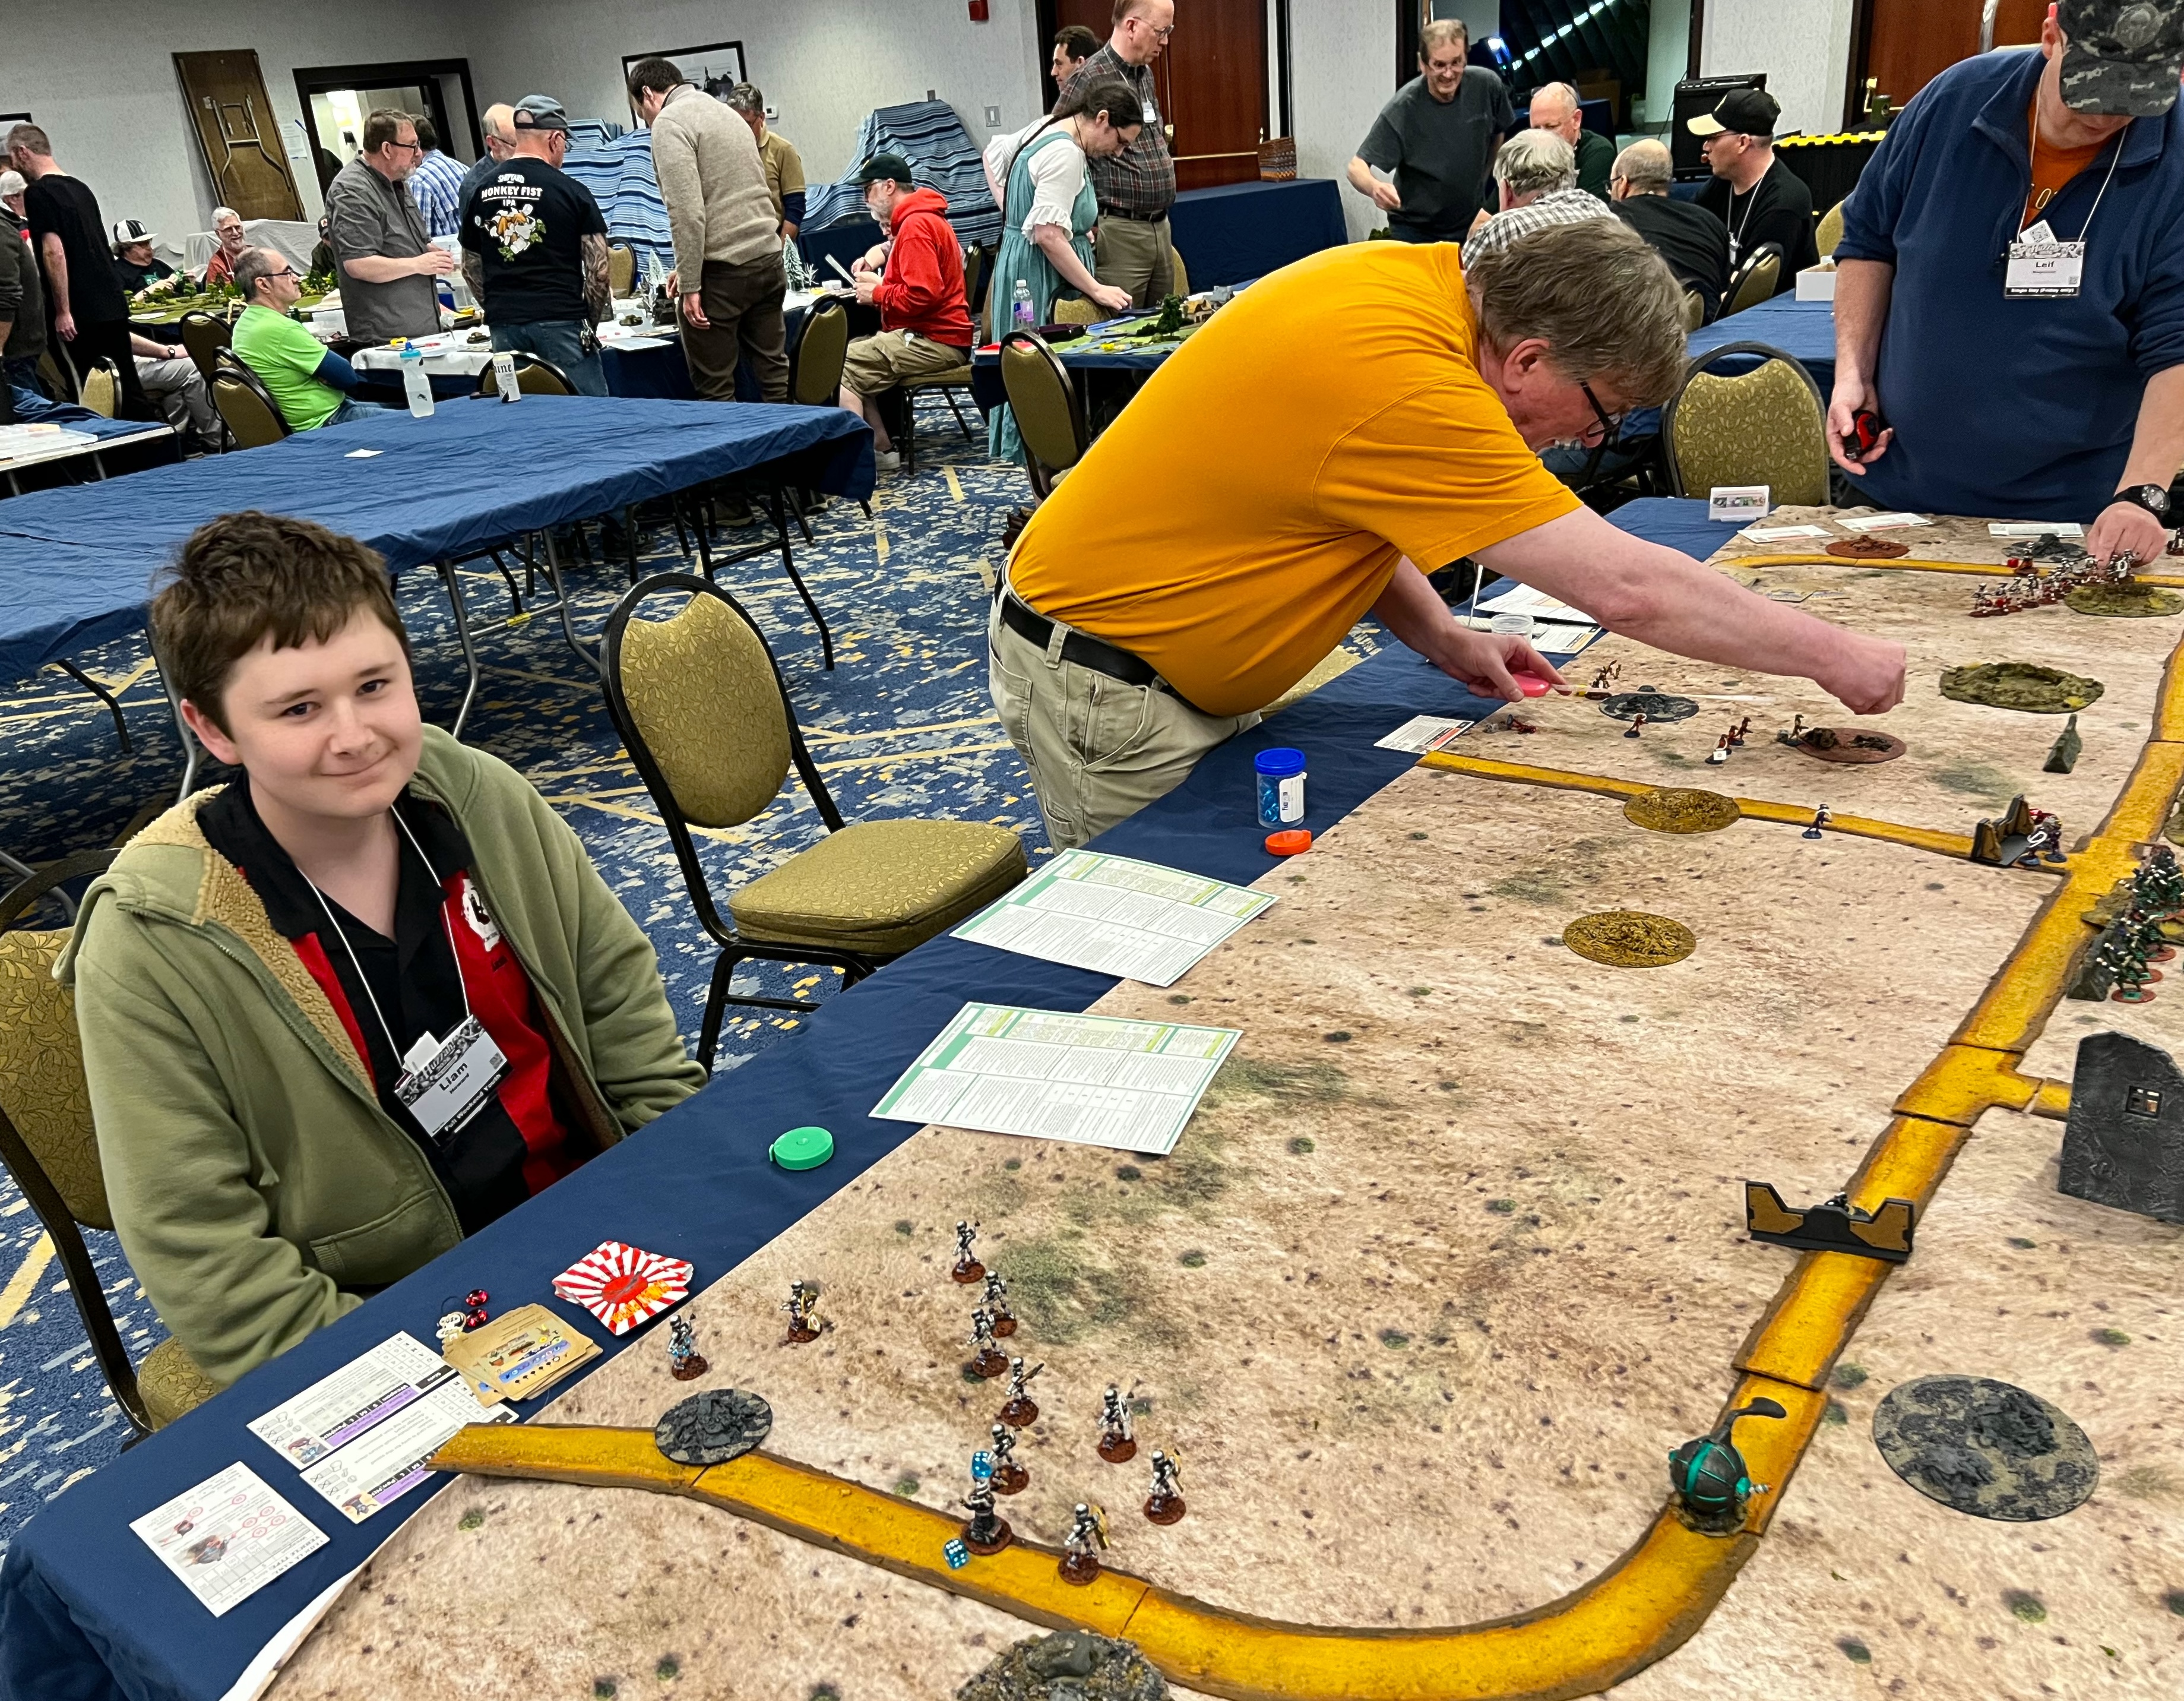
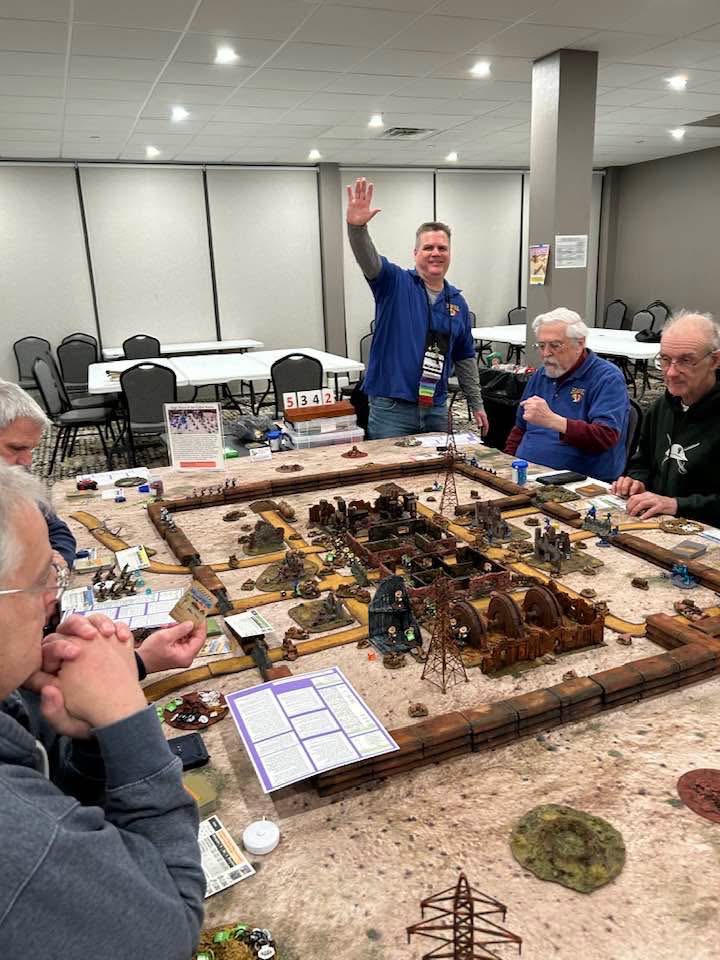
These 5 regiments were used in two of my Wars of Ozz games at HUZZAH. I also ran a retro sci-fi game using Combat Patrol rules and a What a Tanker game. Here are some game shots:
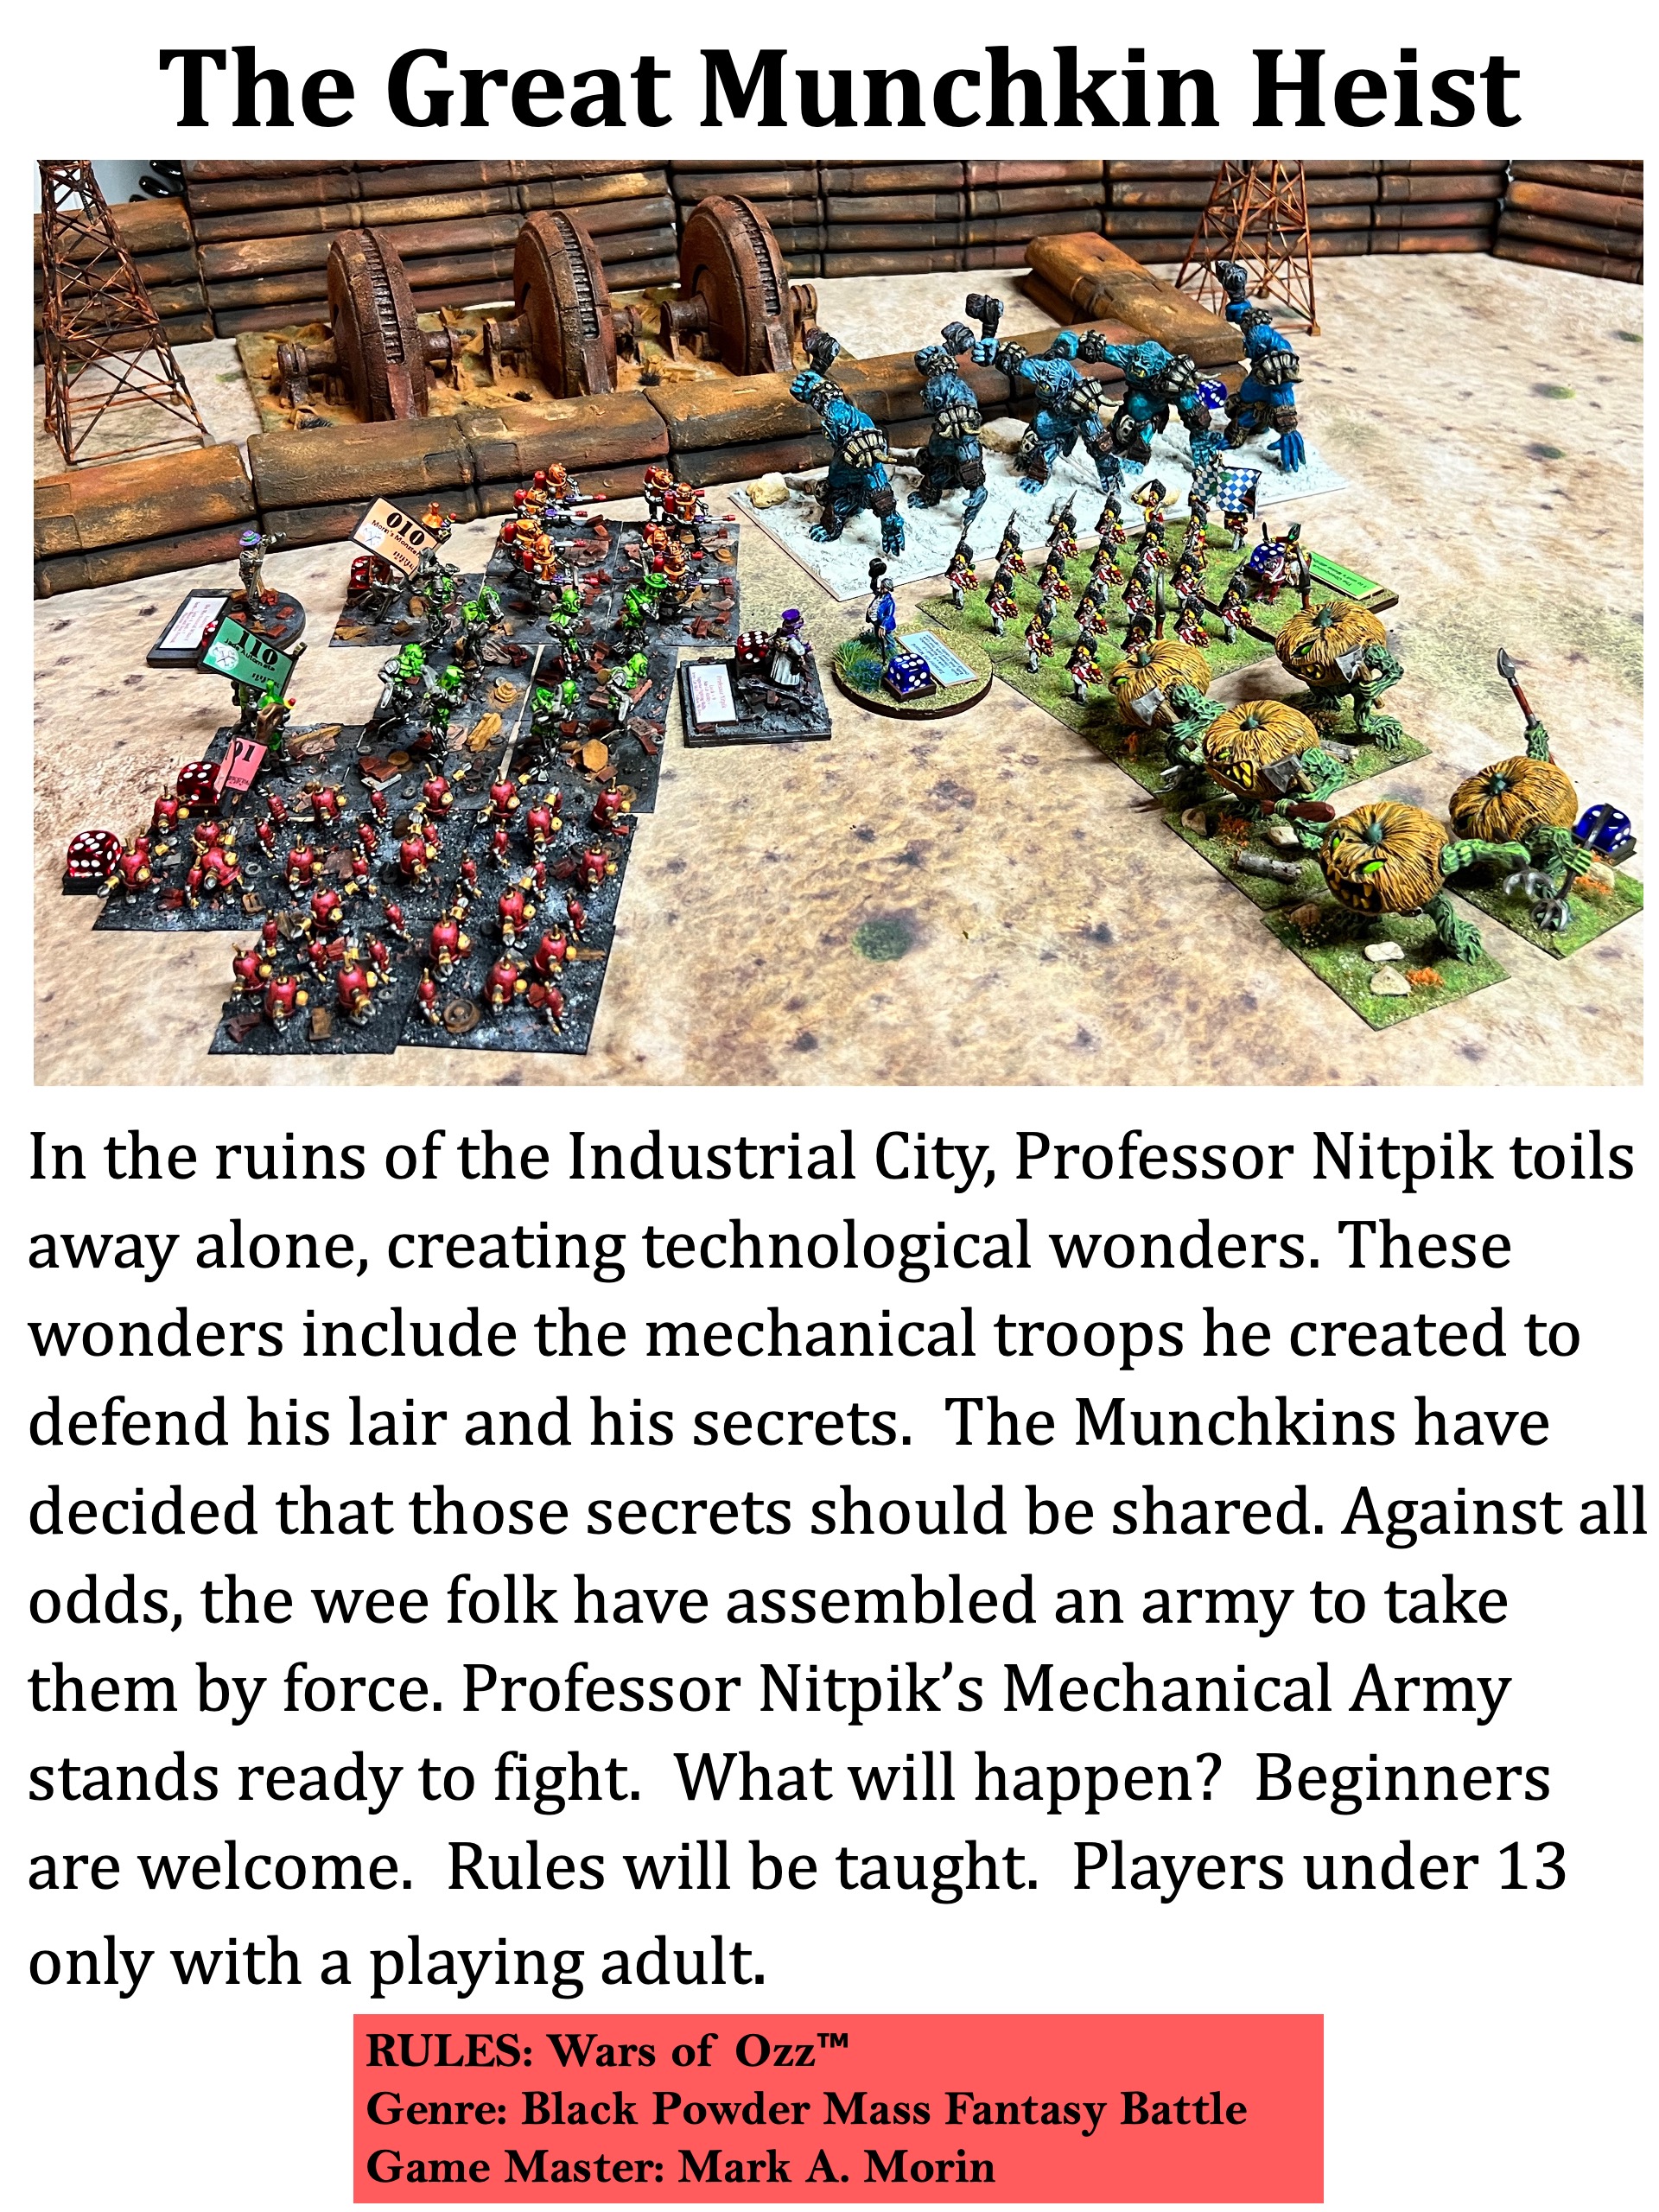
My first Ozz game was another iteration of “The Great Munchkin Heist“.
For the first time, the Munchkin players had really bad luck while the Nitpik/Mechanical Men side was very lucky. The coup de grace was the arrival of the Nitpik cavalry in relief – which arrived at the worst place for the Munchkins – in their rear. The cavalry got the initiative and quickly routed two Munchkin regiments and then an artillery battery, ending any Munchkin hopes. It was a major victory for the defending Tin Men.
Here are some game shots:
Brad waiting to play!The finishing blow – Nitpik cavalry in your forces’ rears is never a good day.
Check out the links above if you missed these older posts!
The Warbots barely did enough damage to win the battle, though not without casualties. Here are some game shots:
Liam moves up his tank and Warbots.Bruce and Brad are happy gamers.
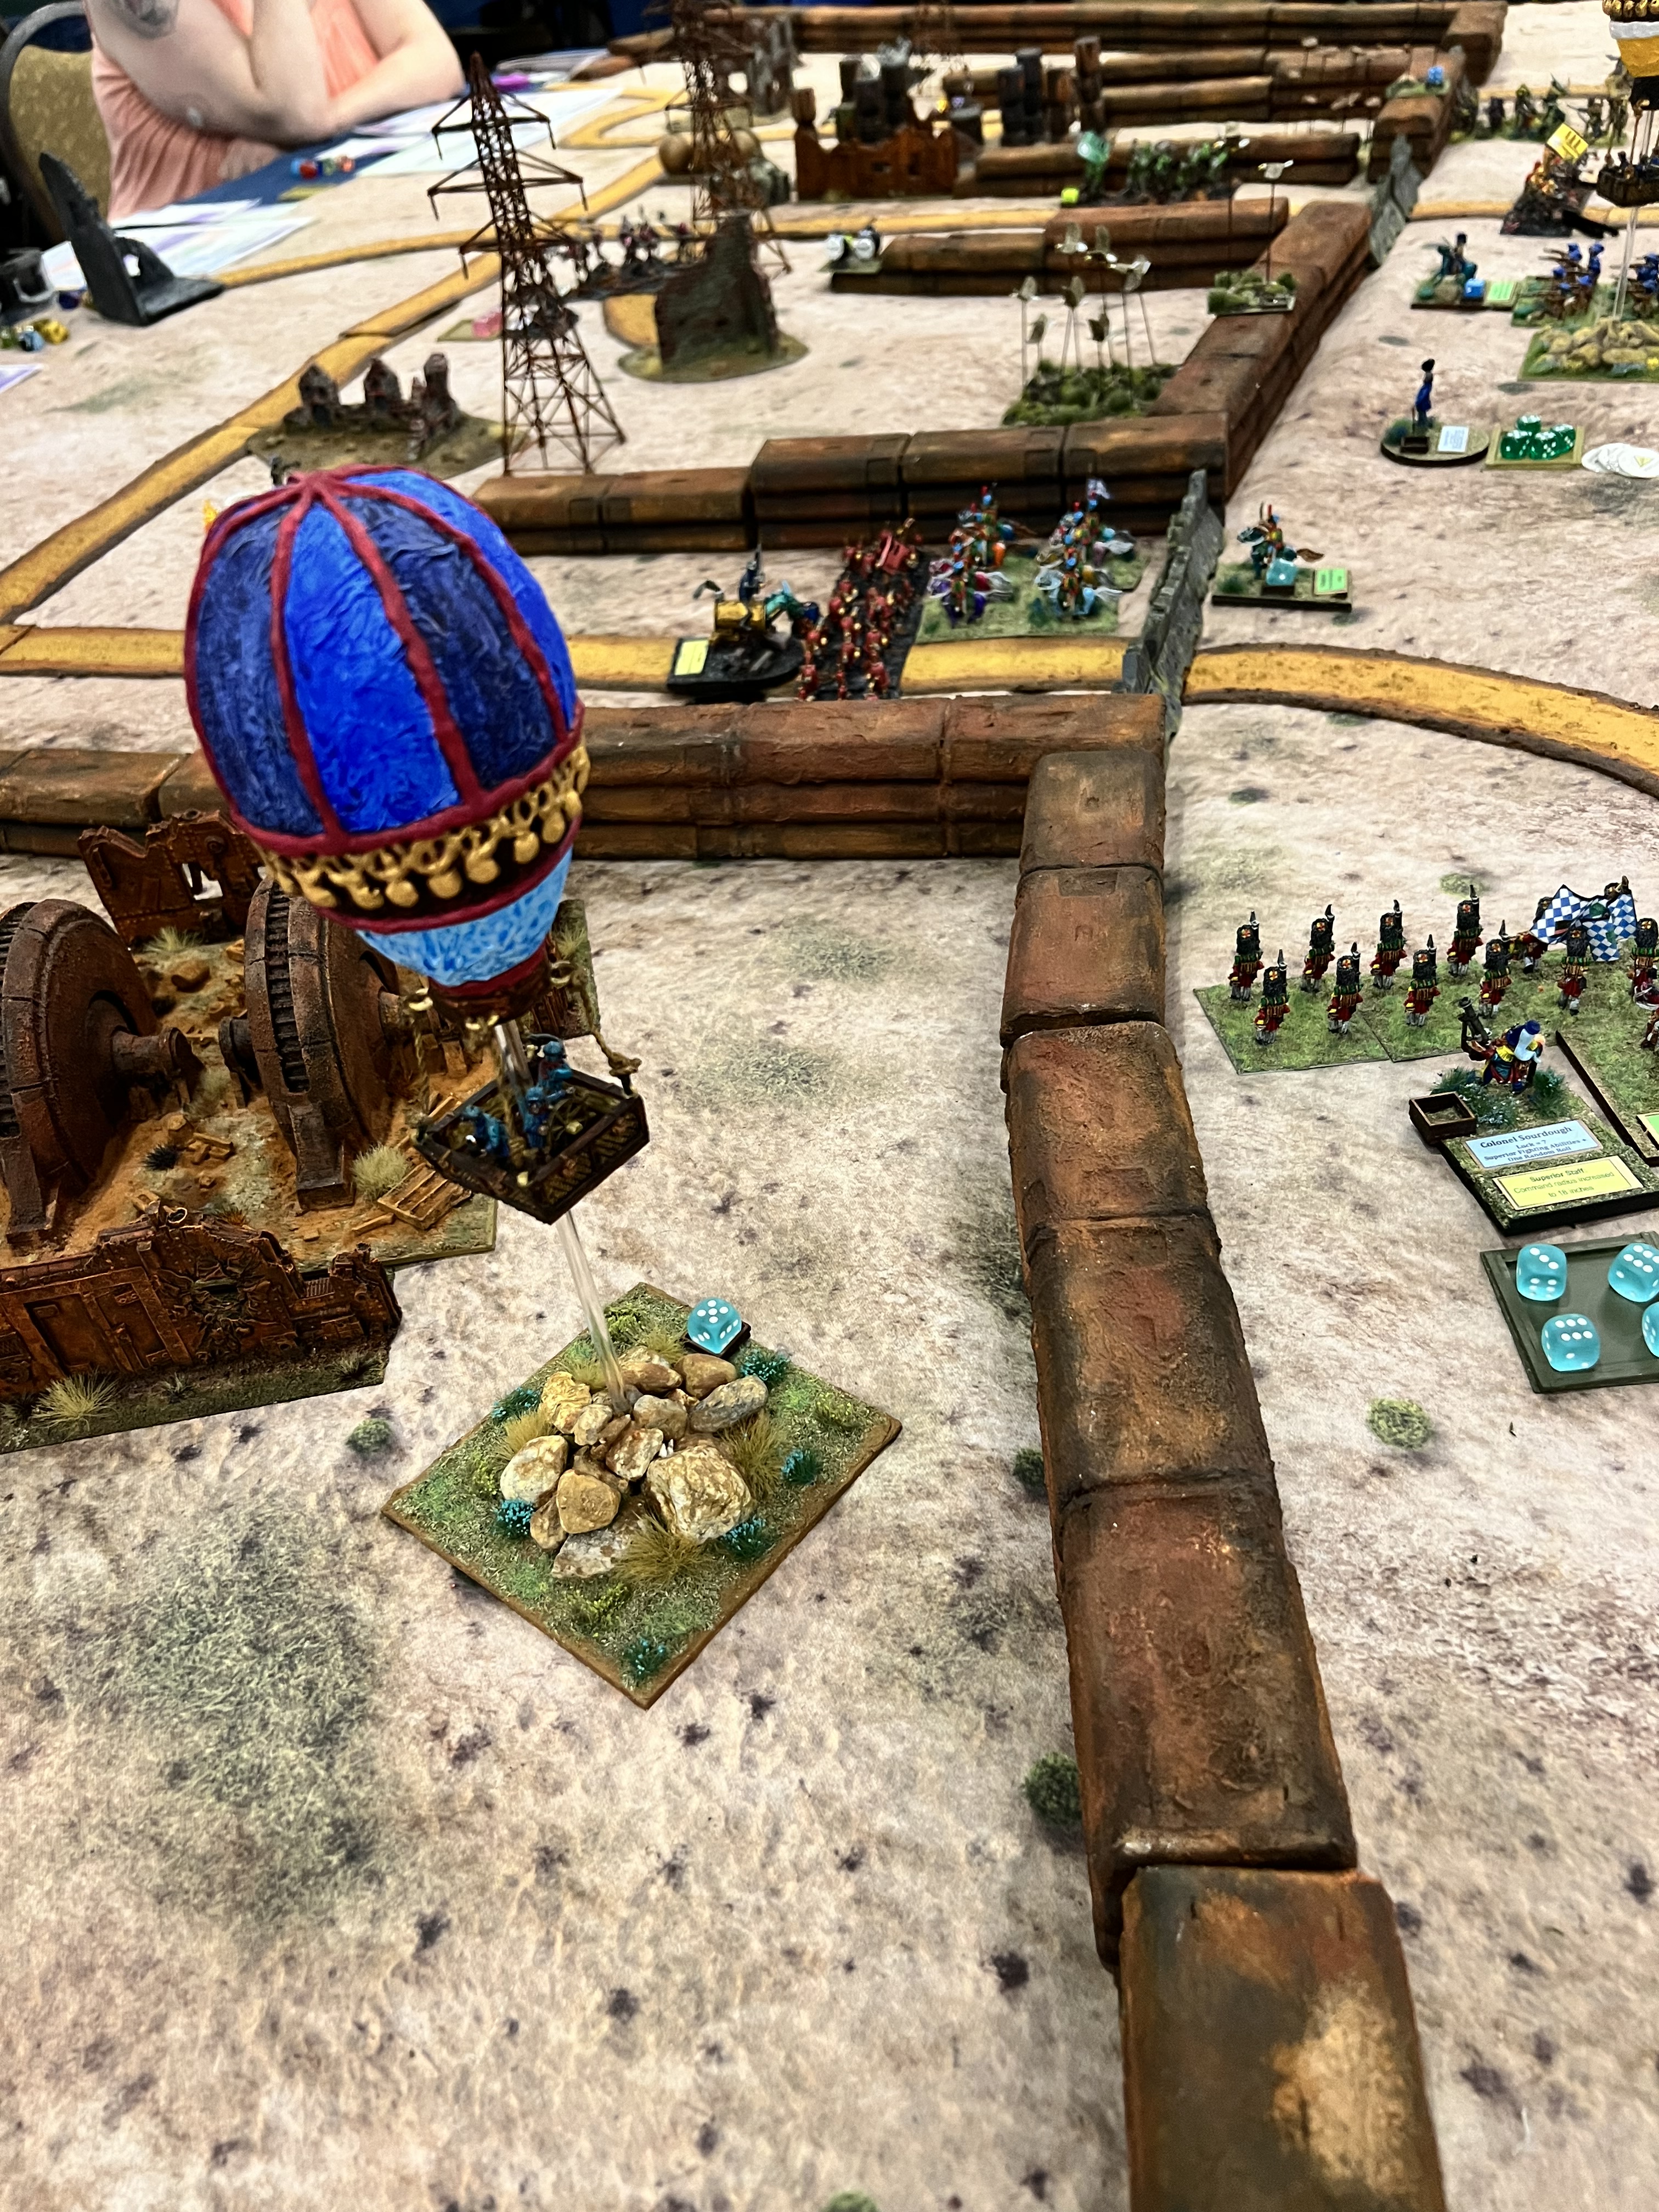
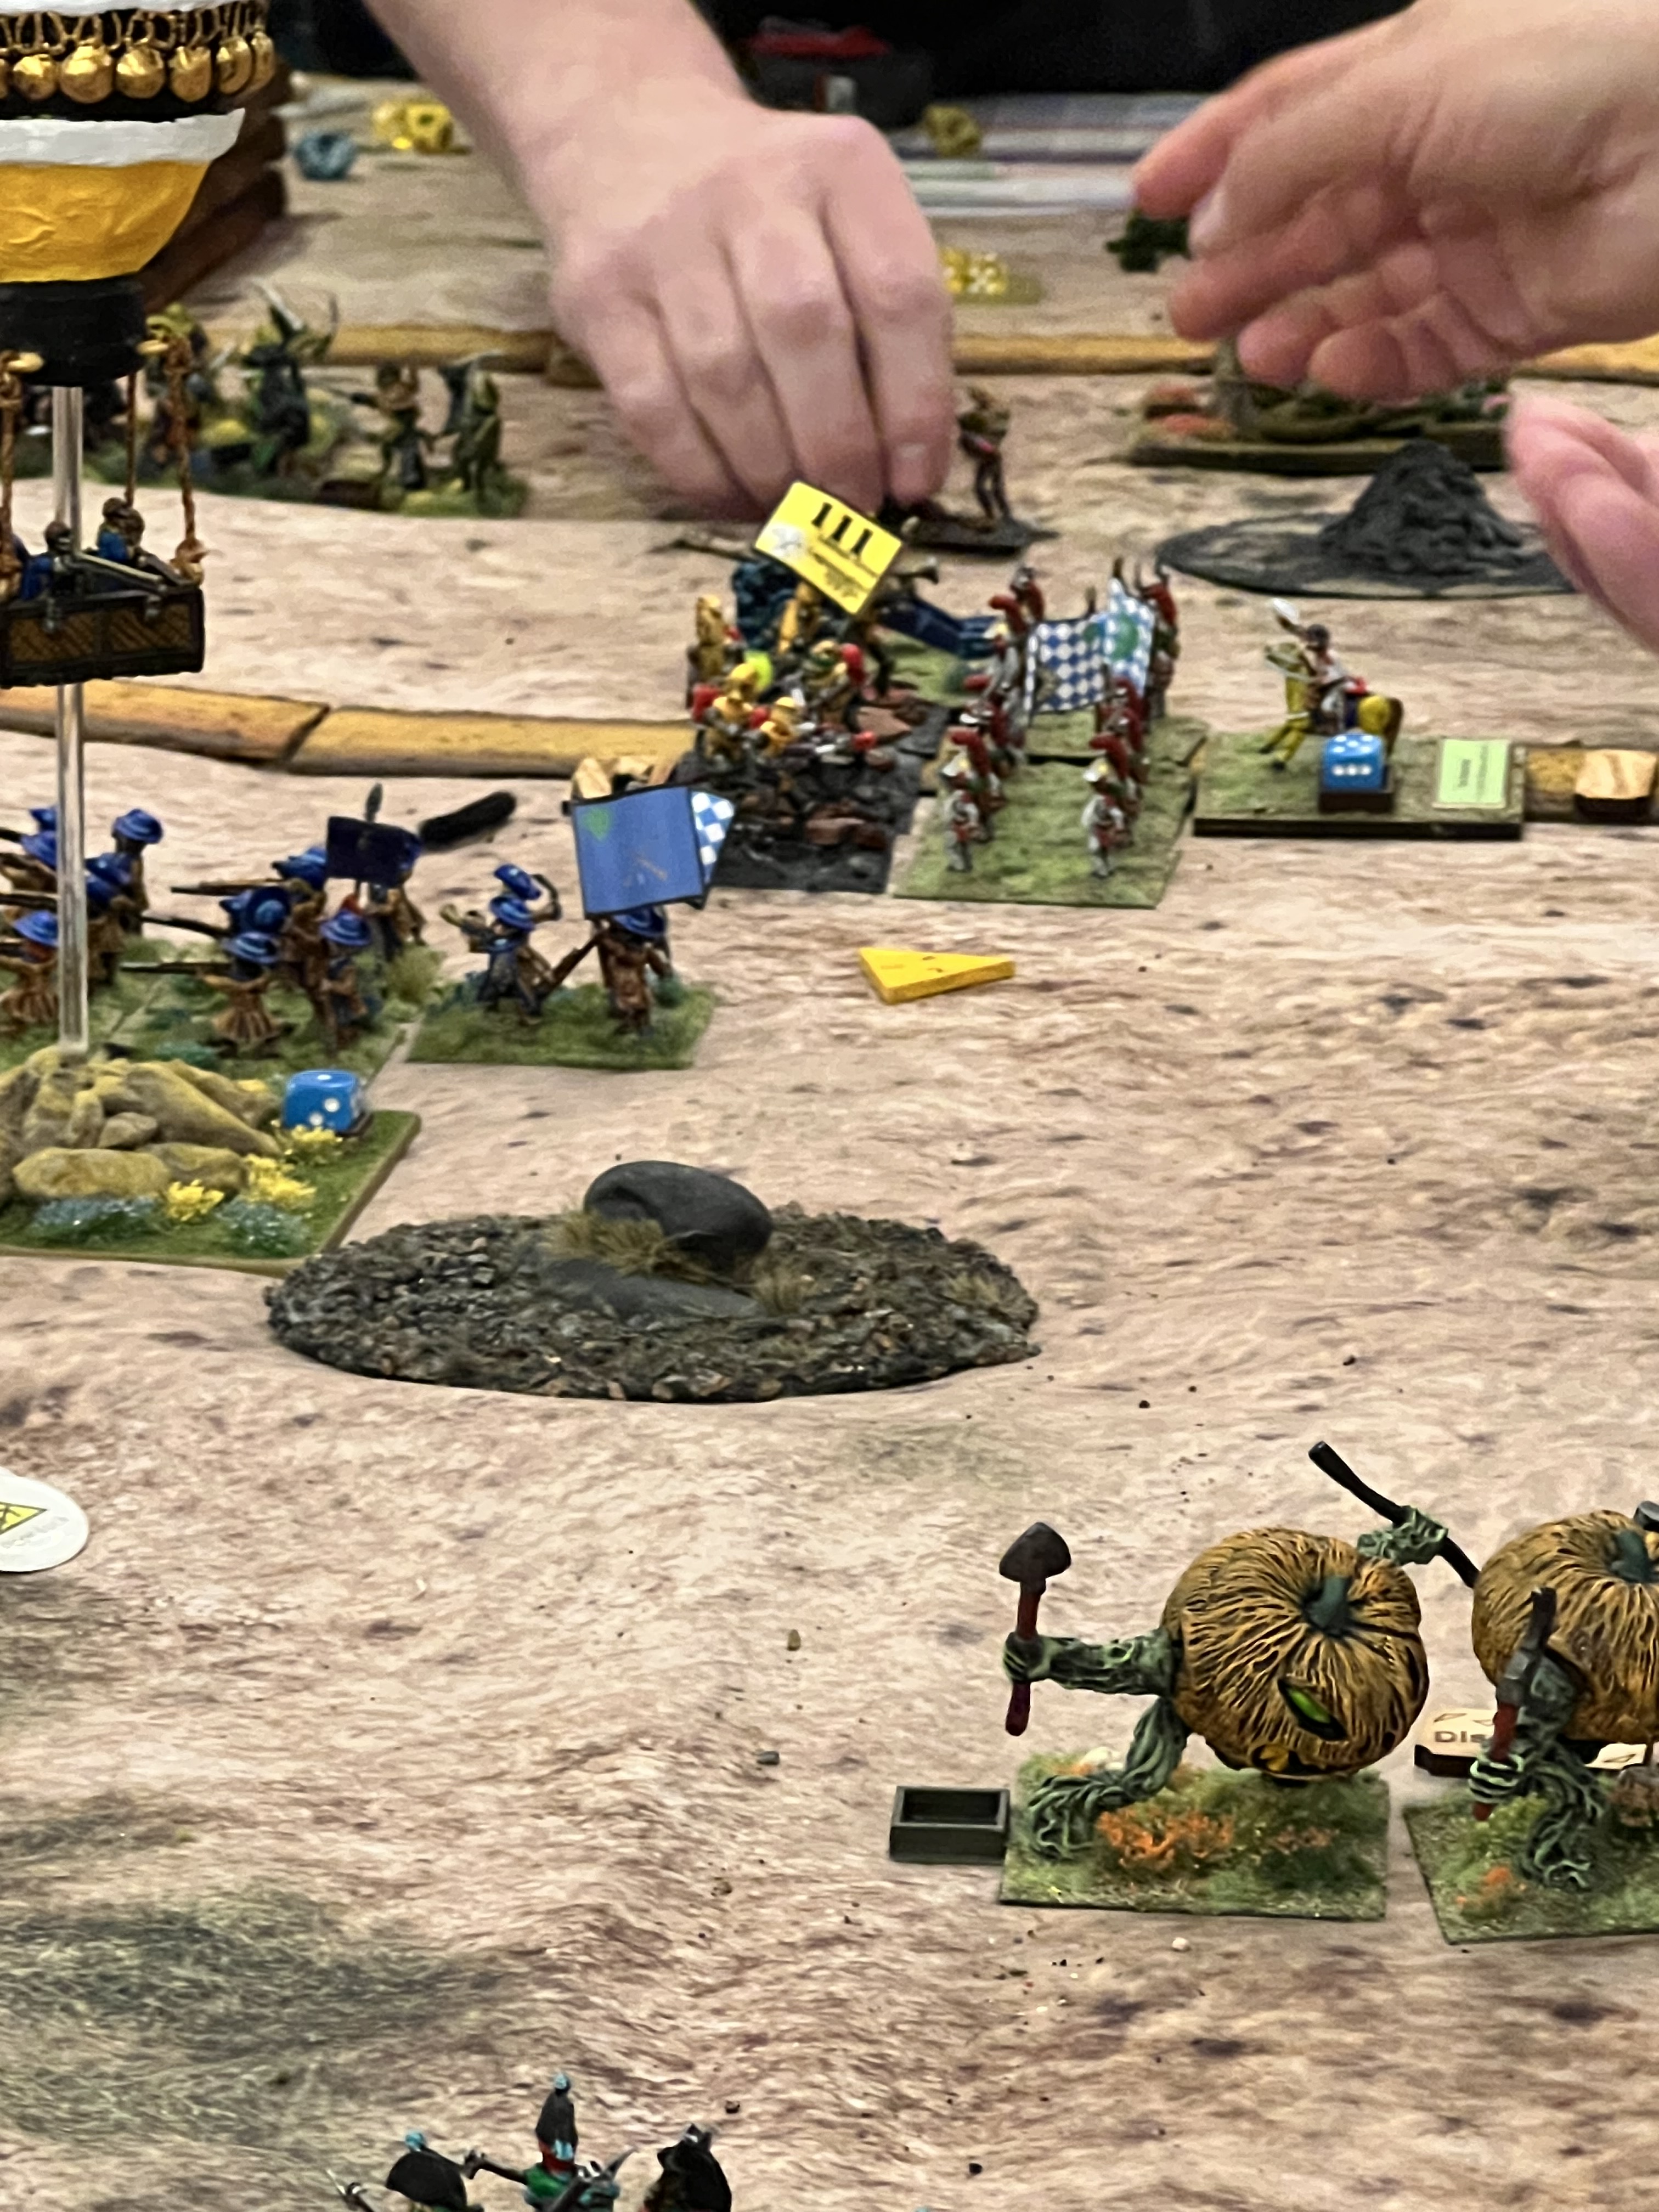
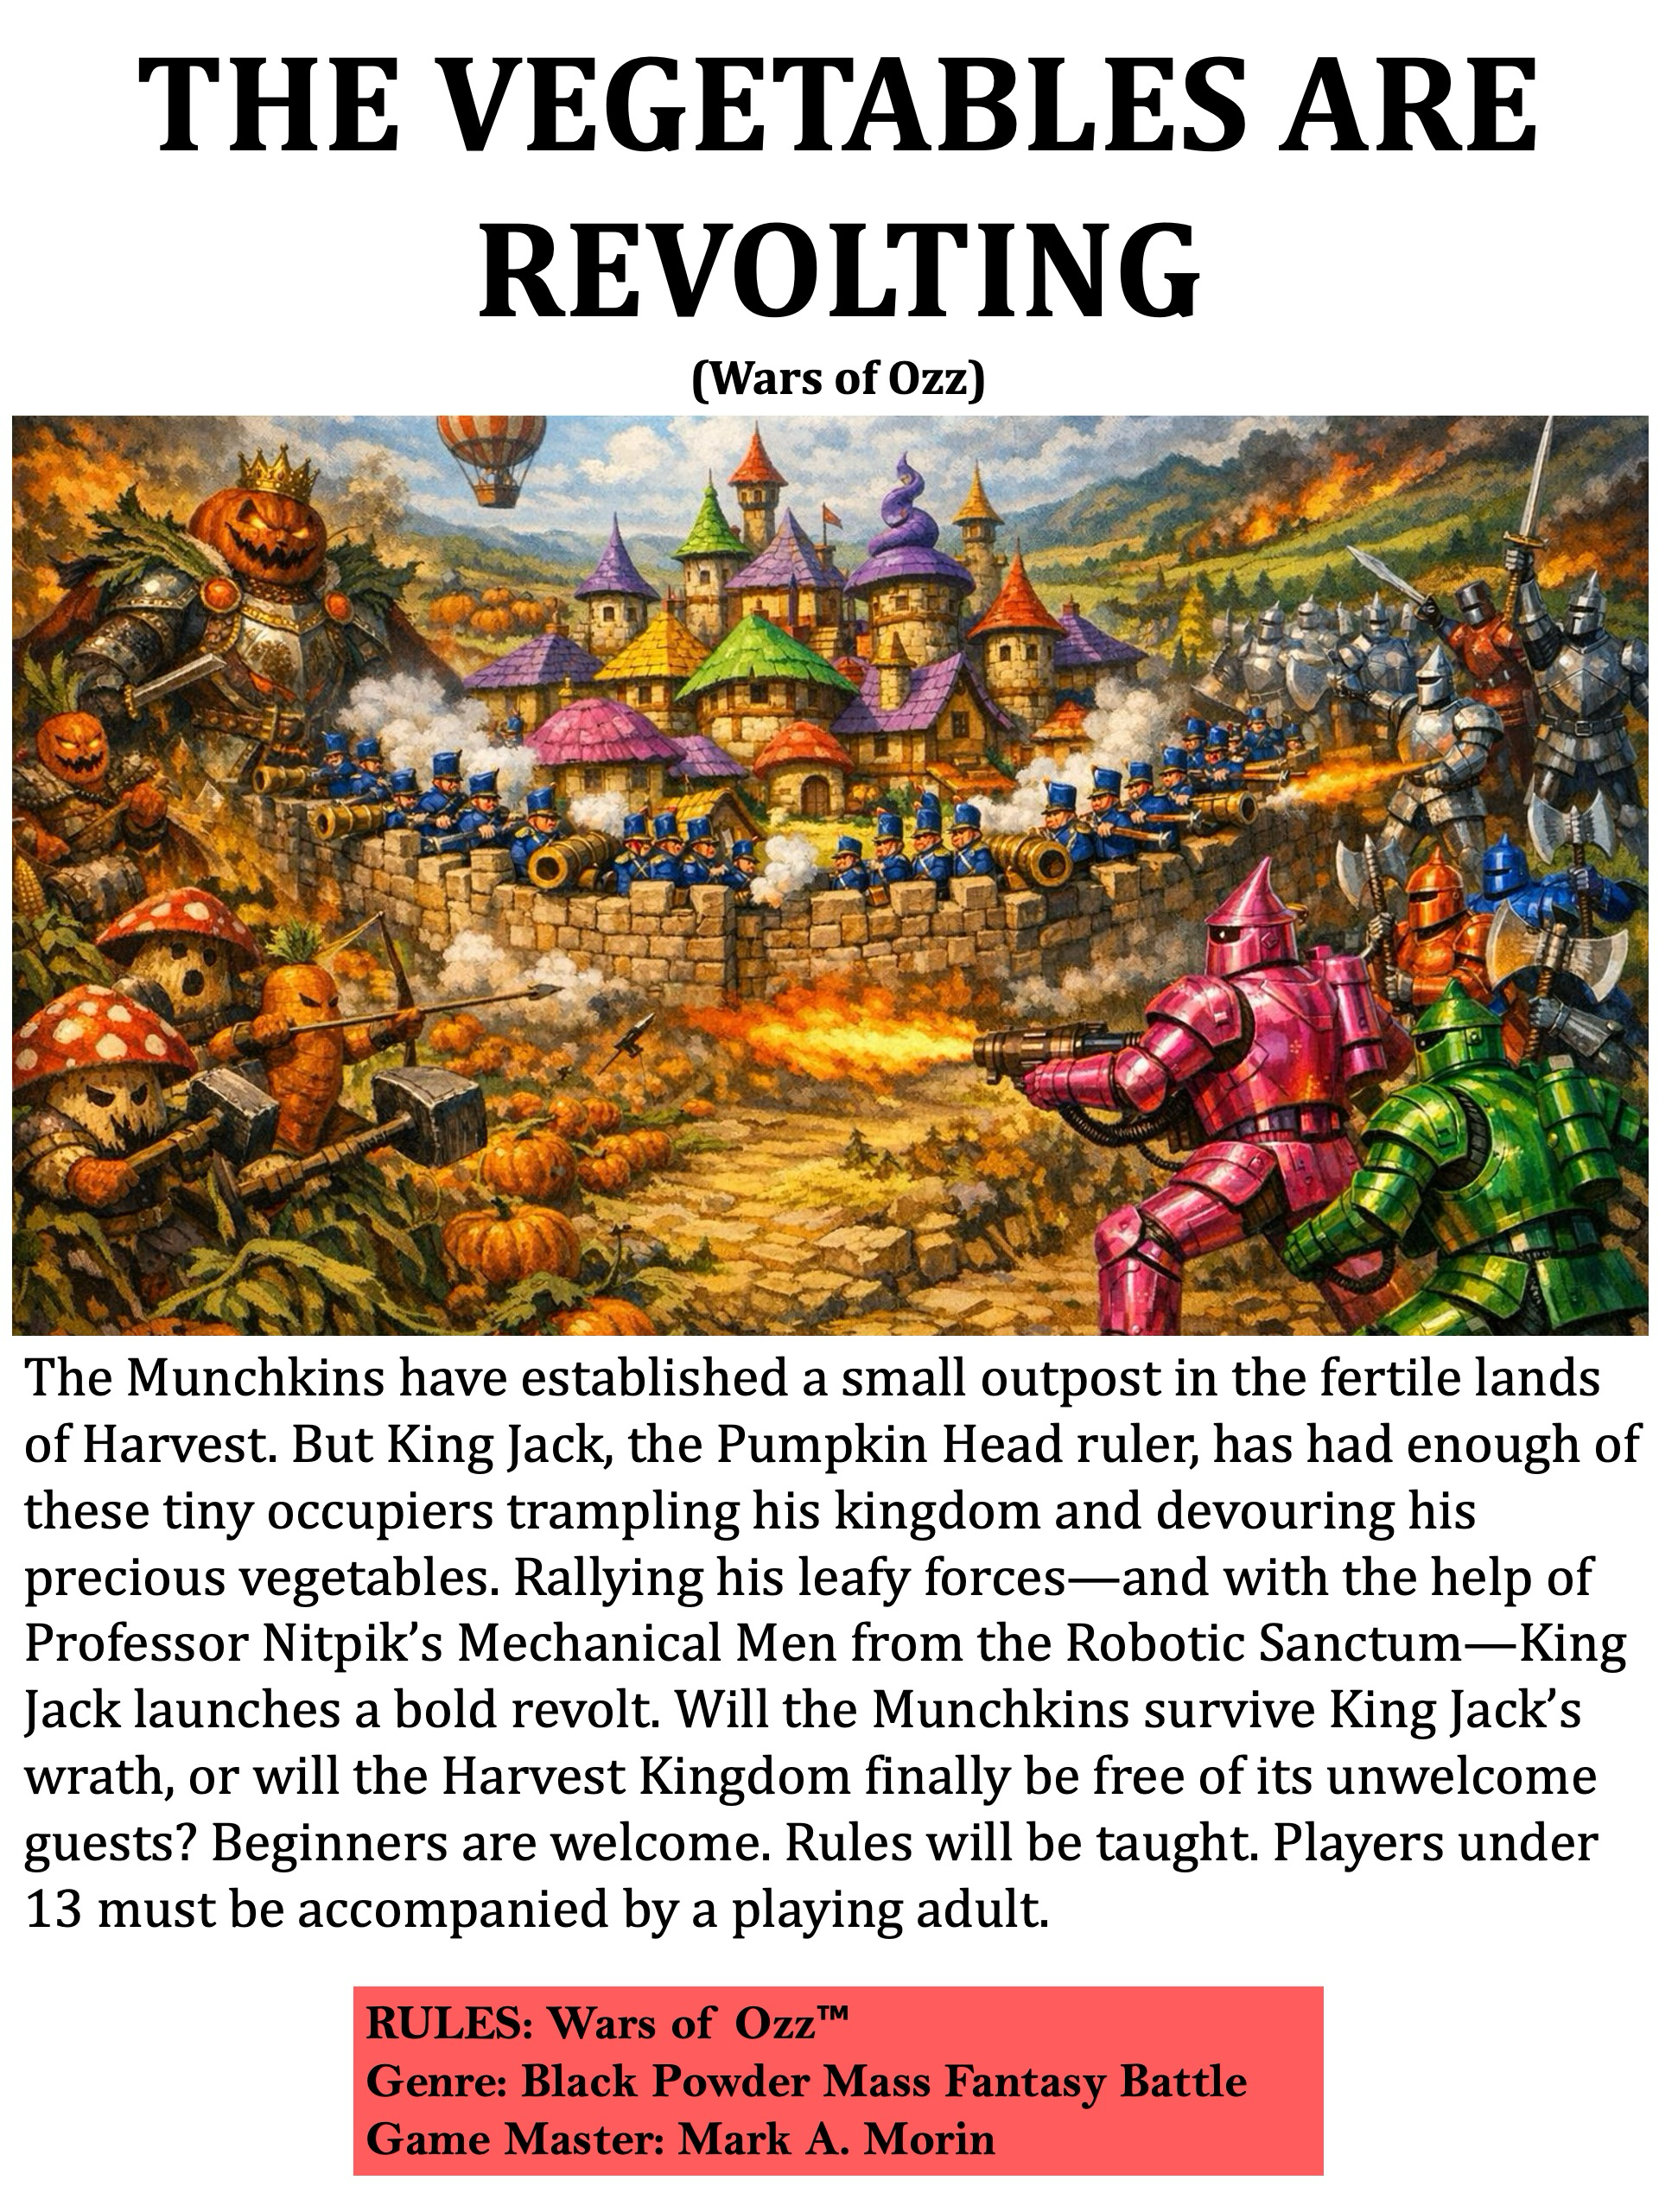
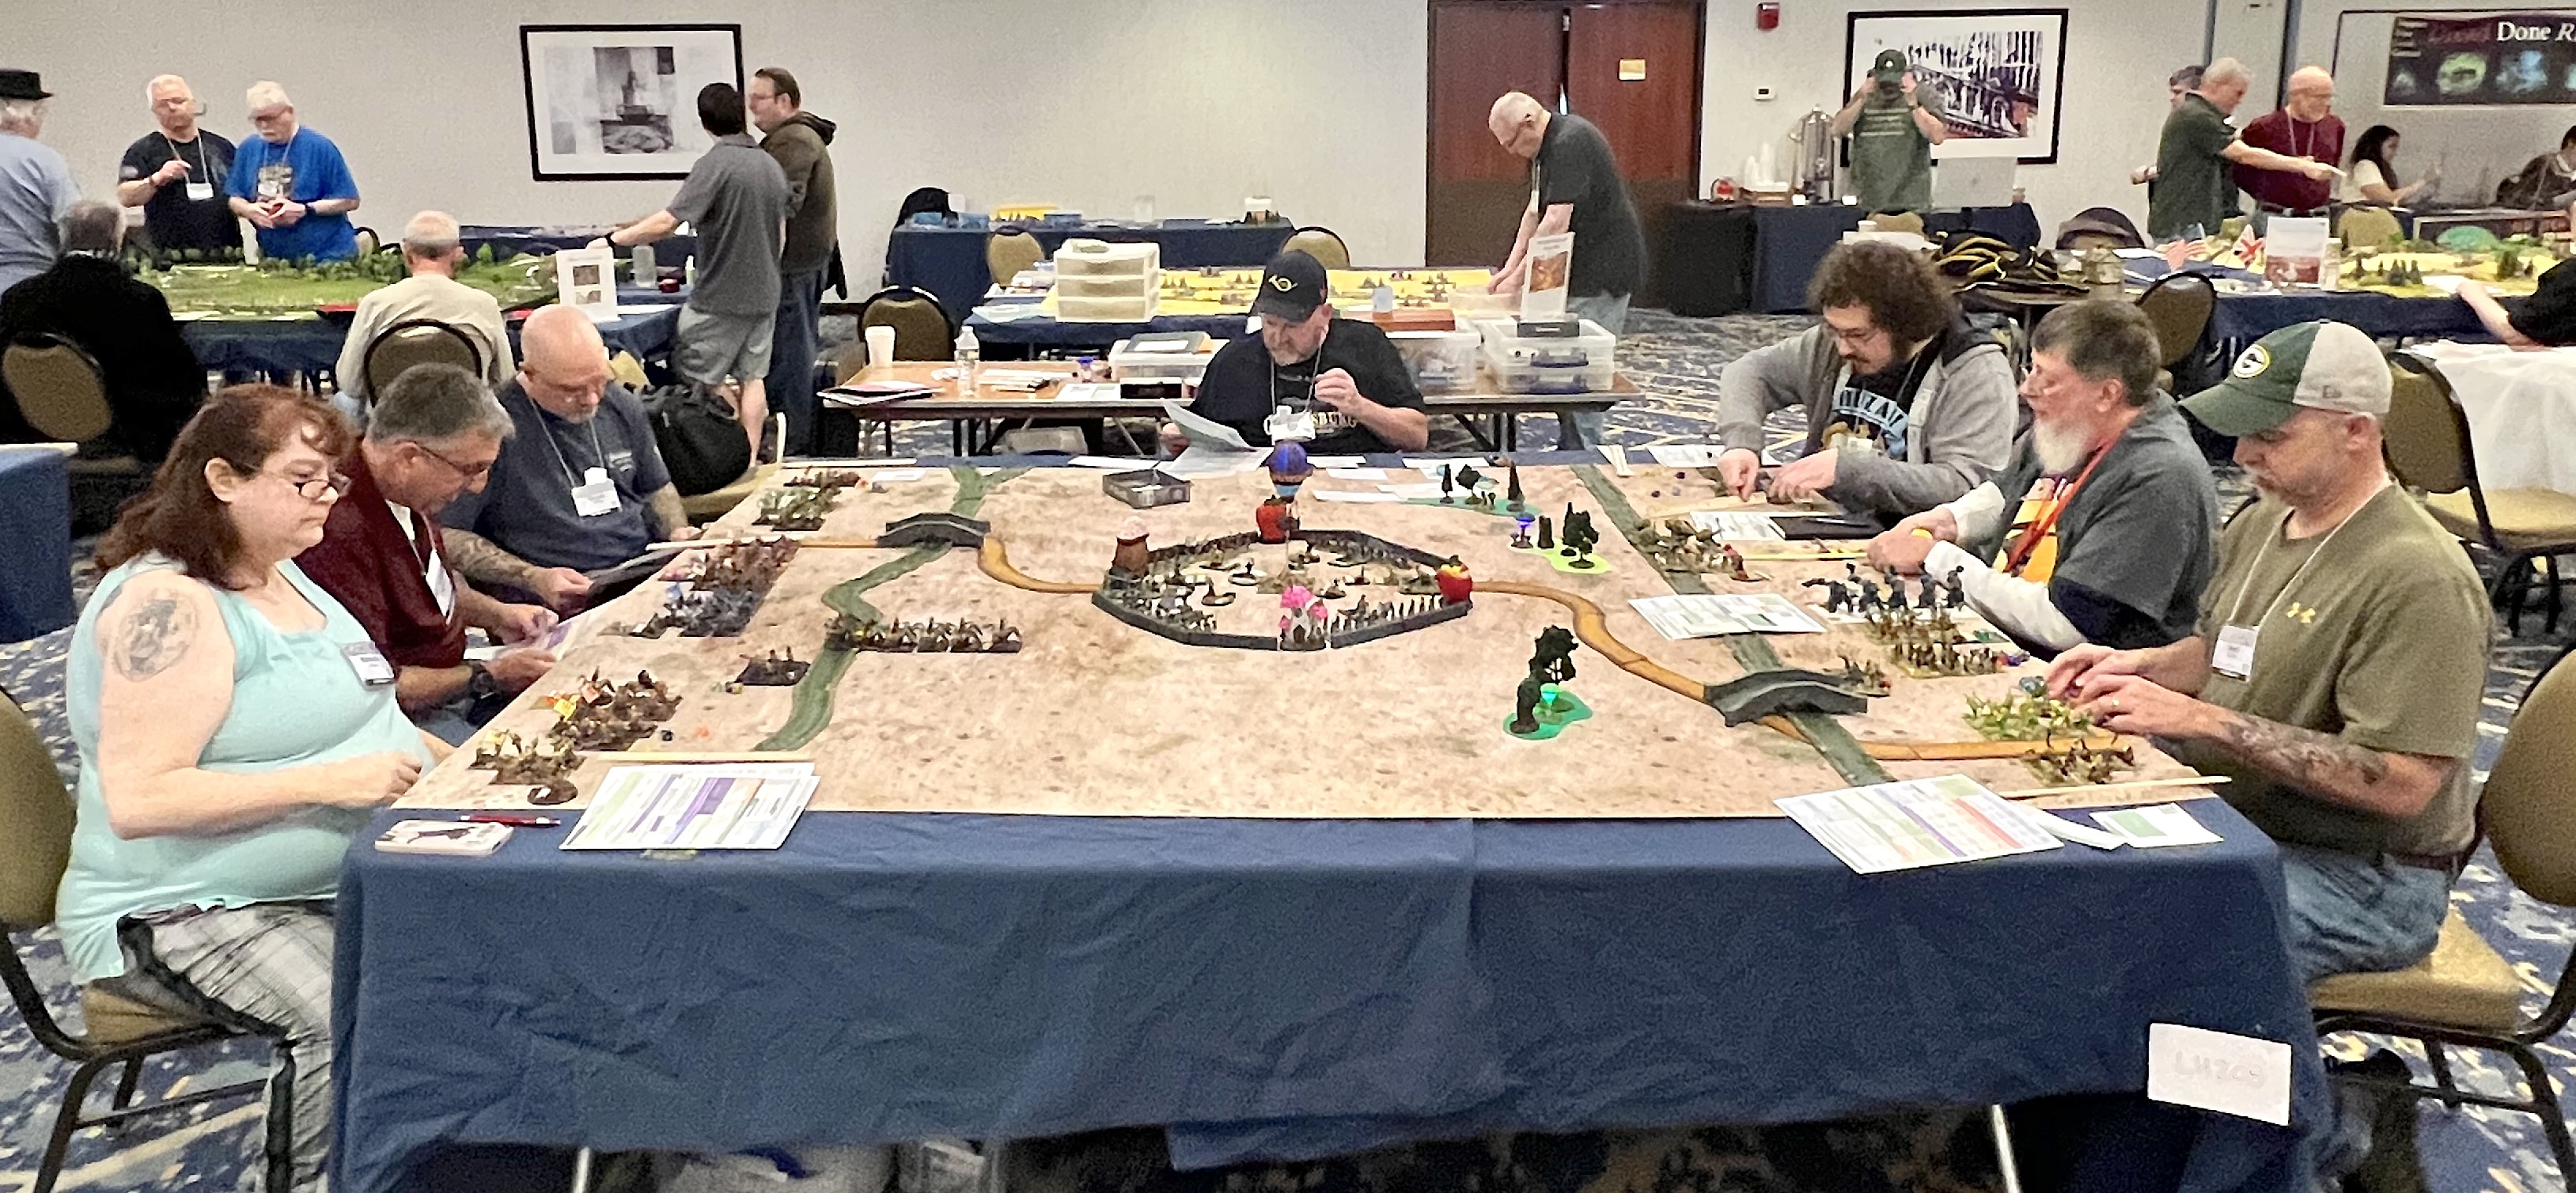
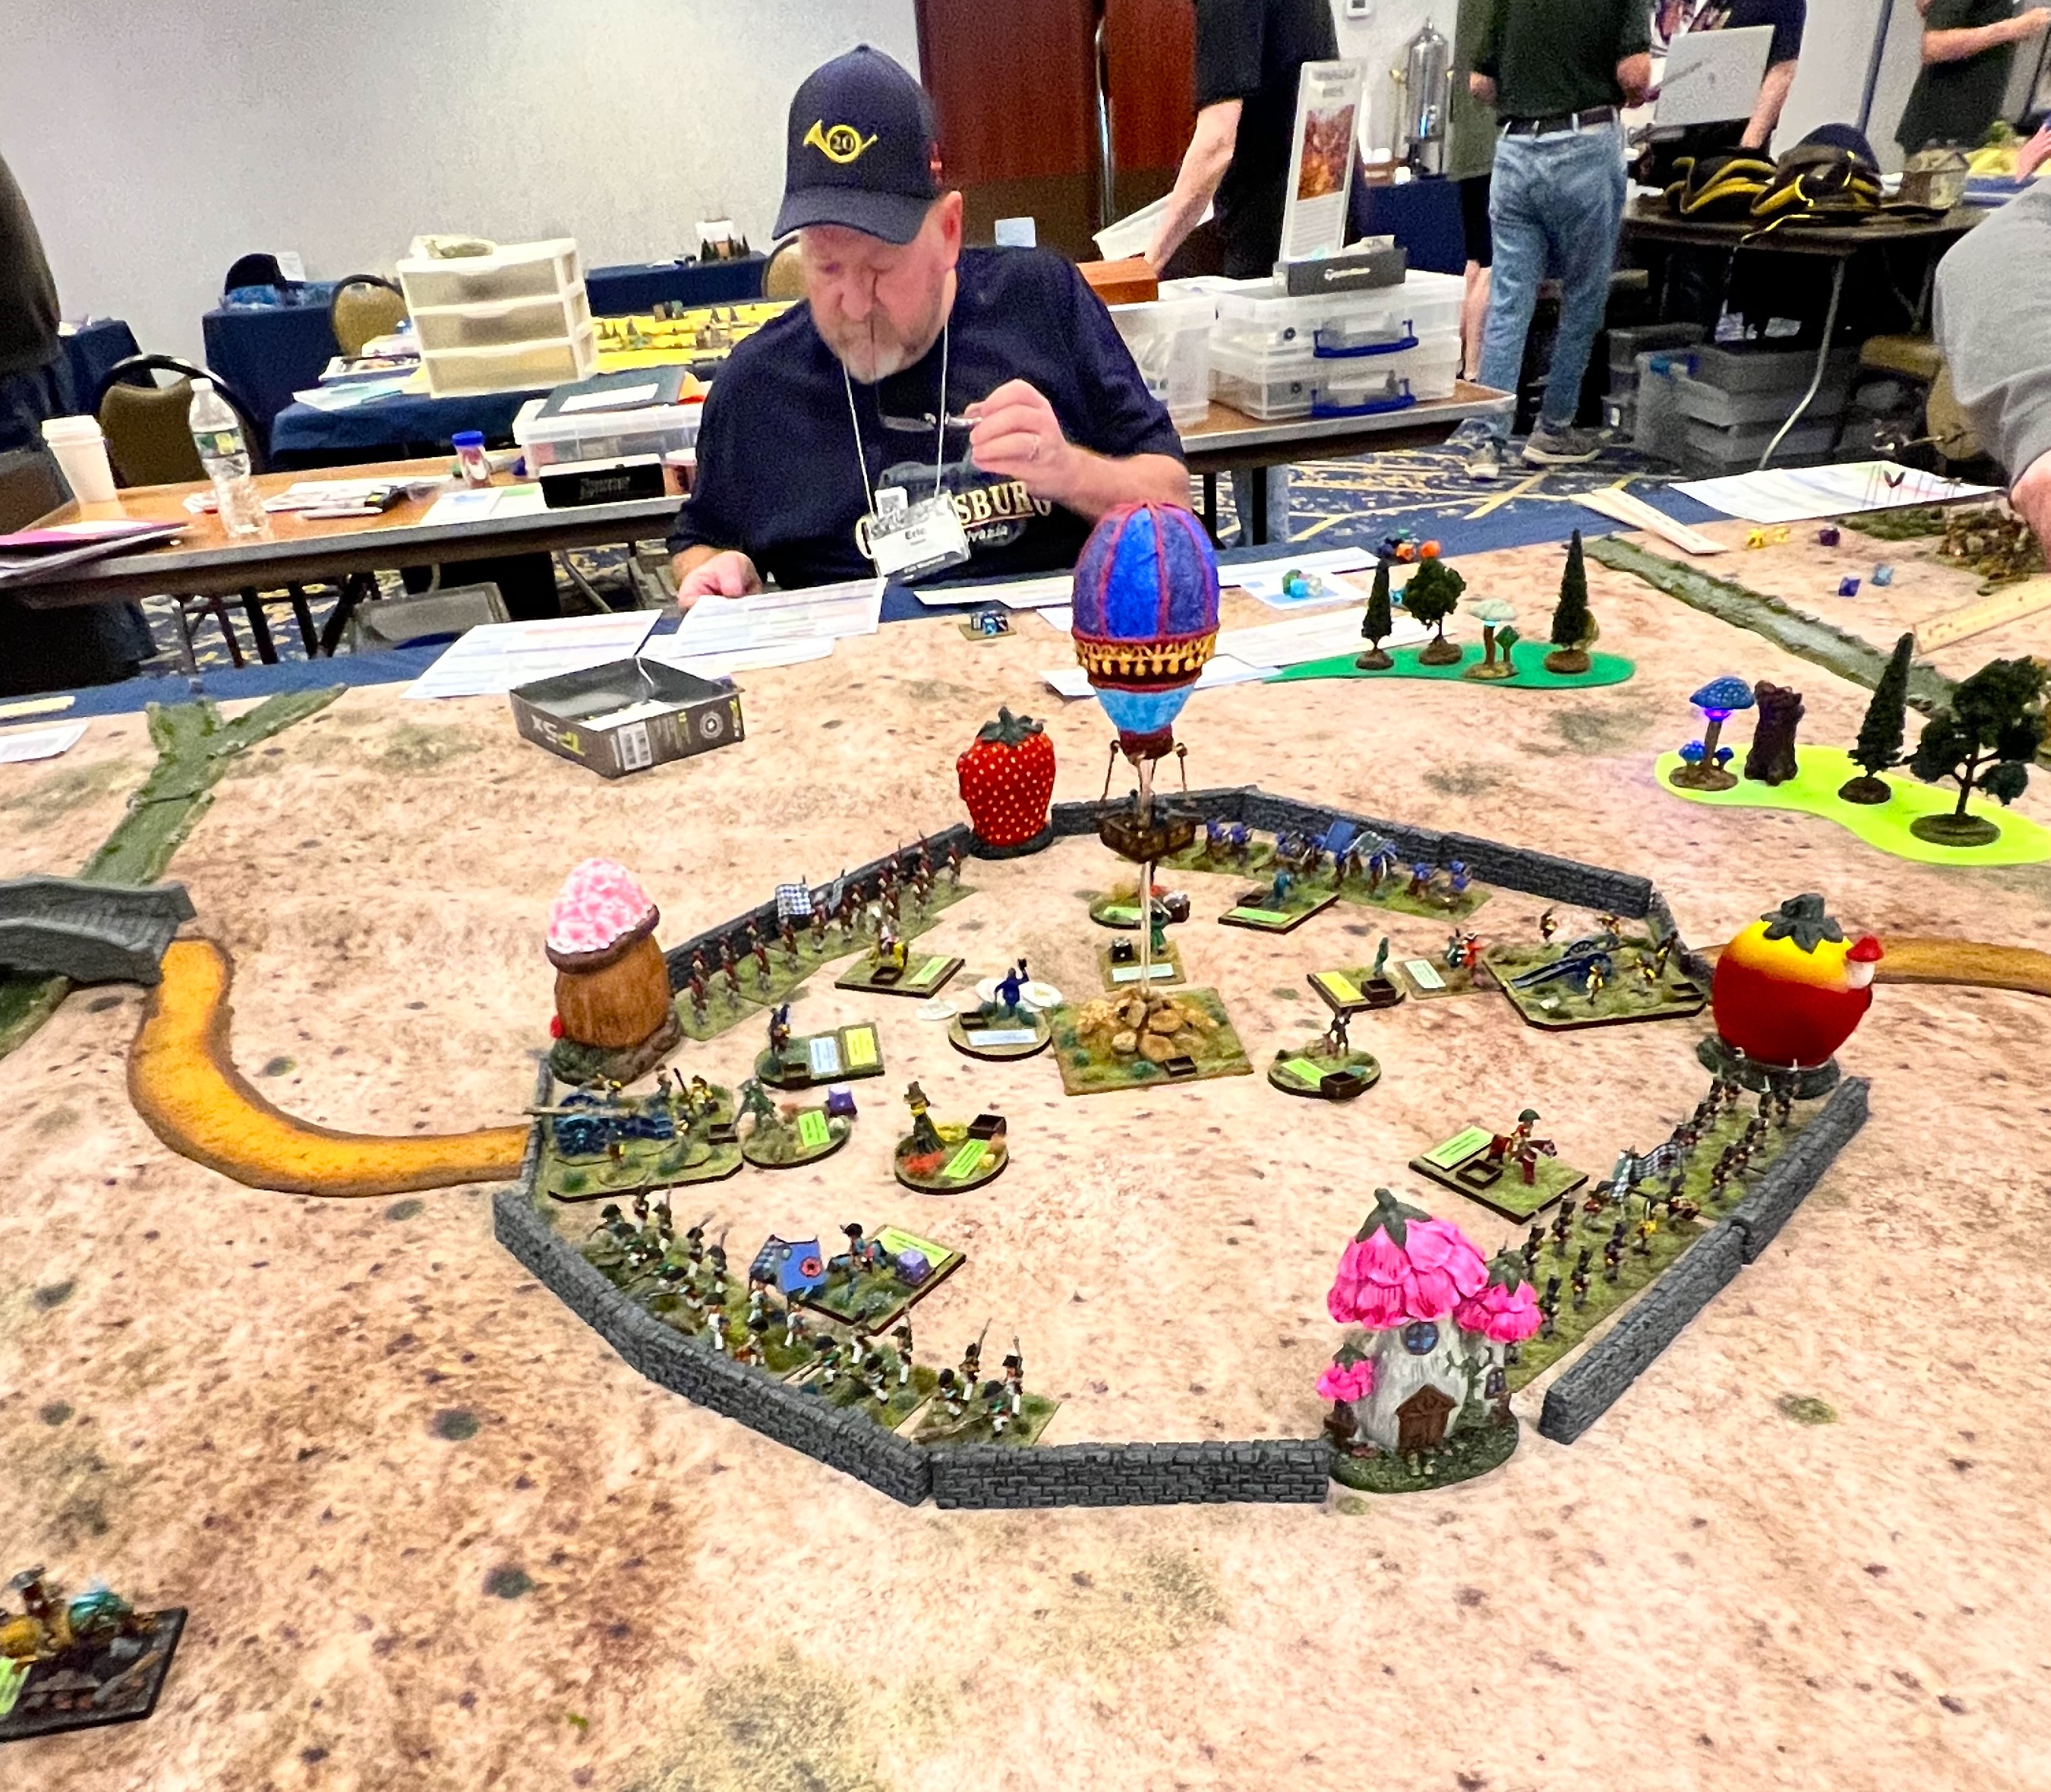
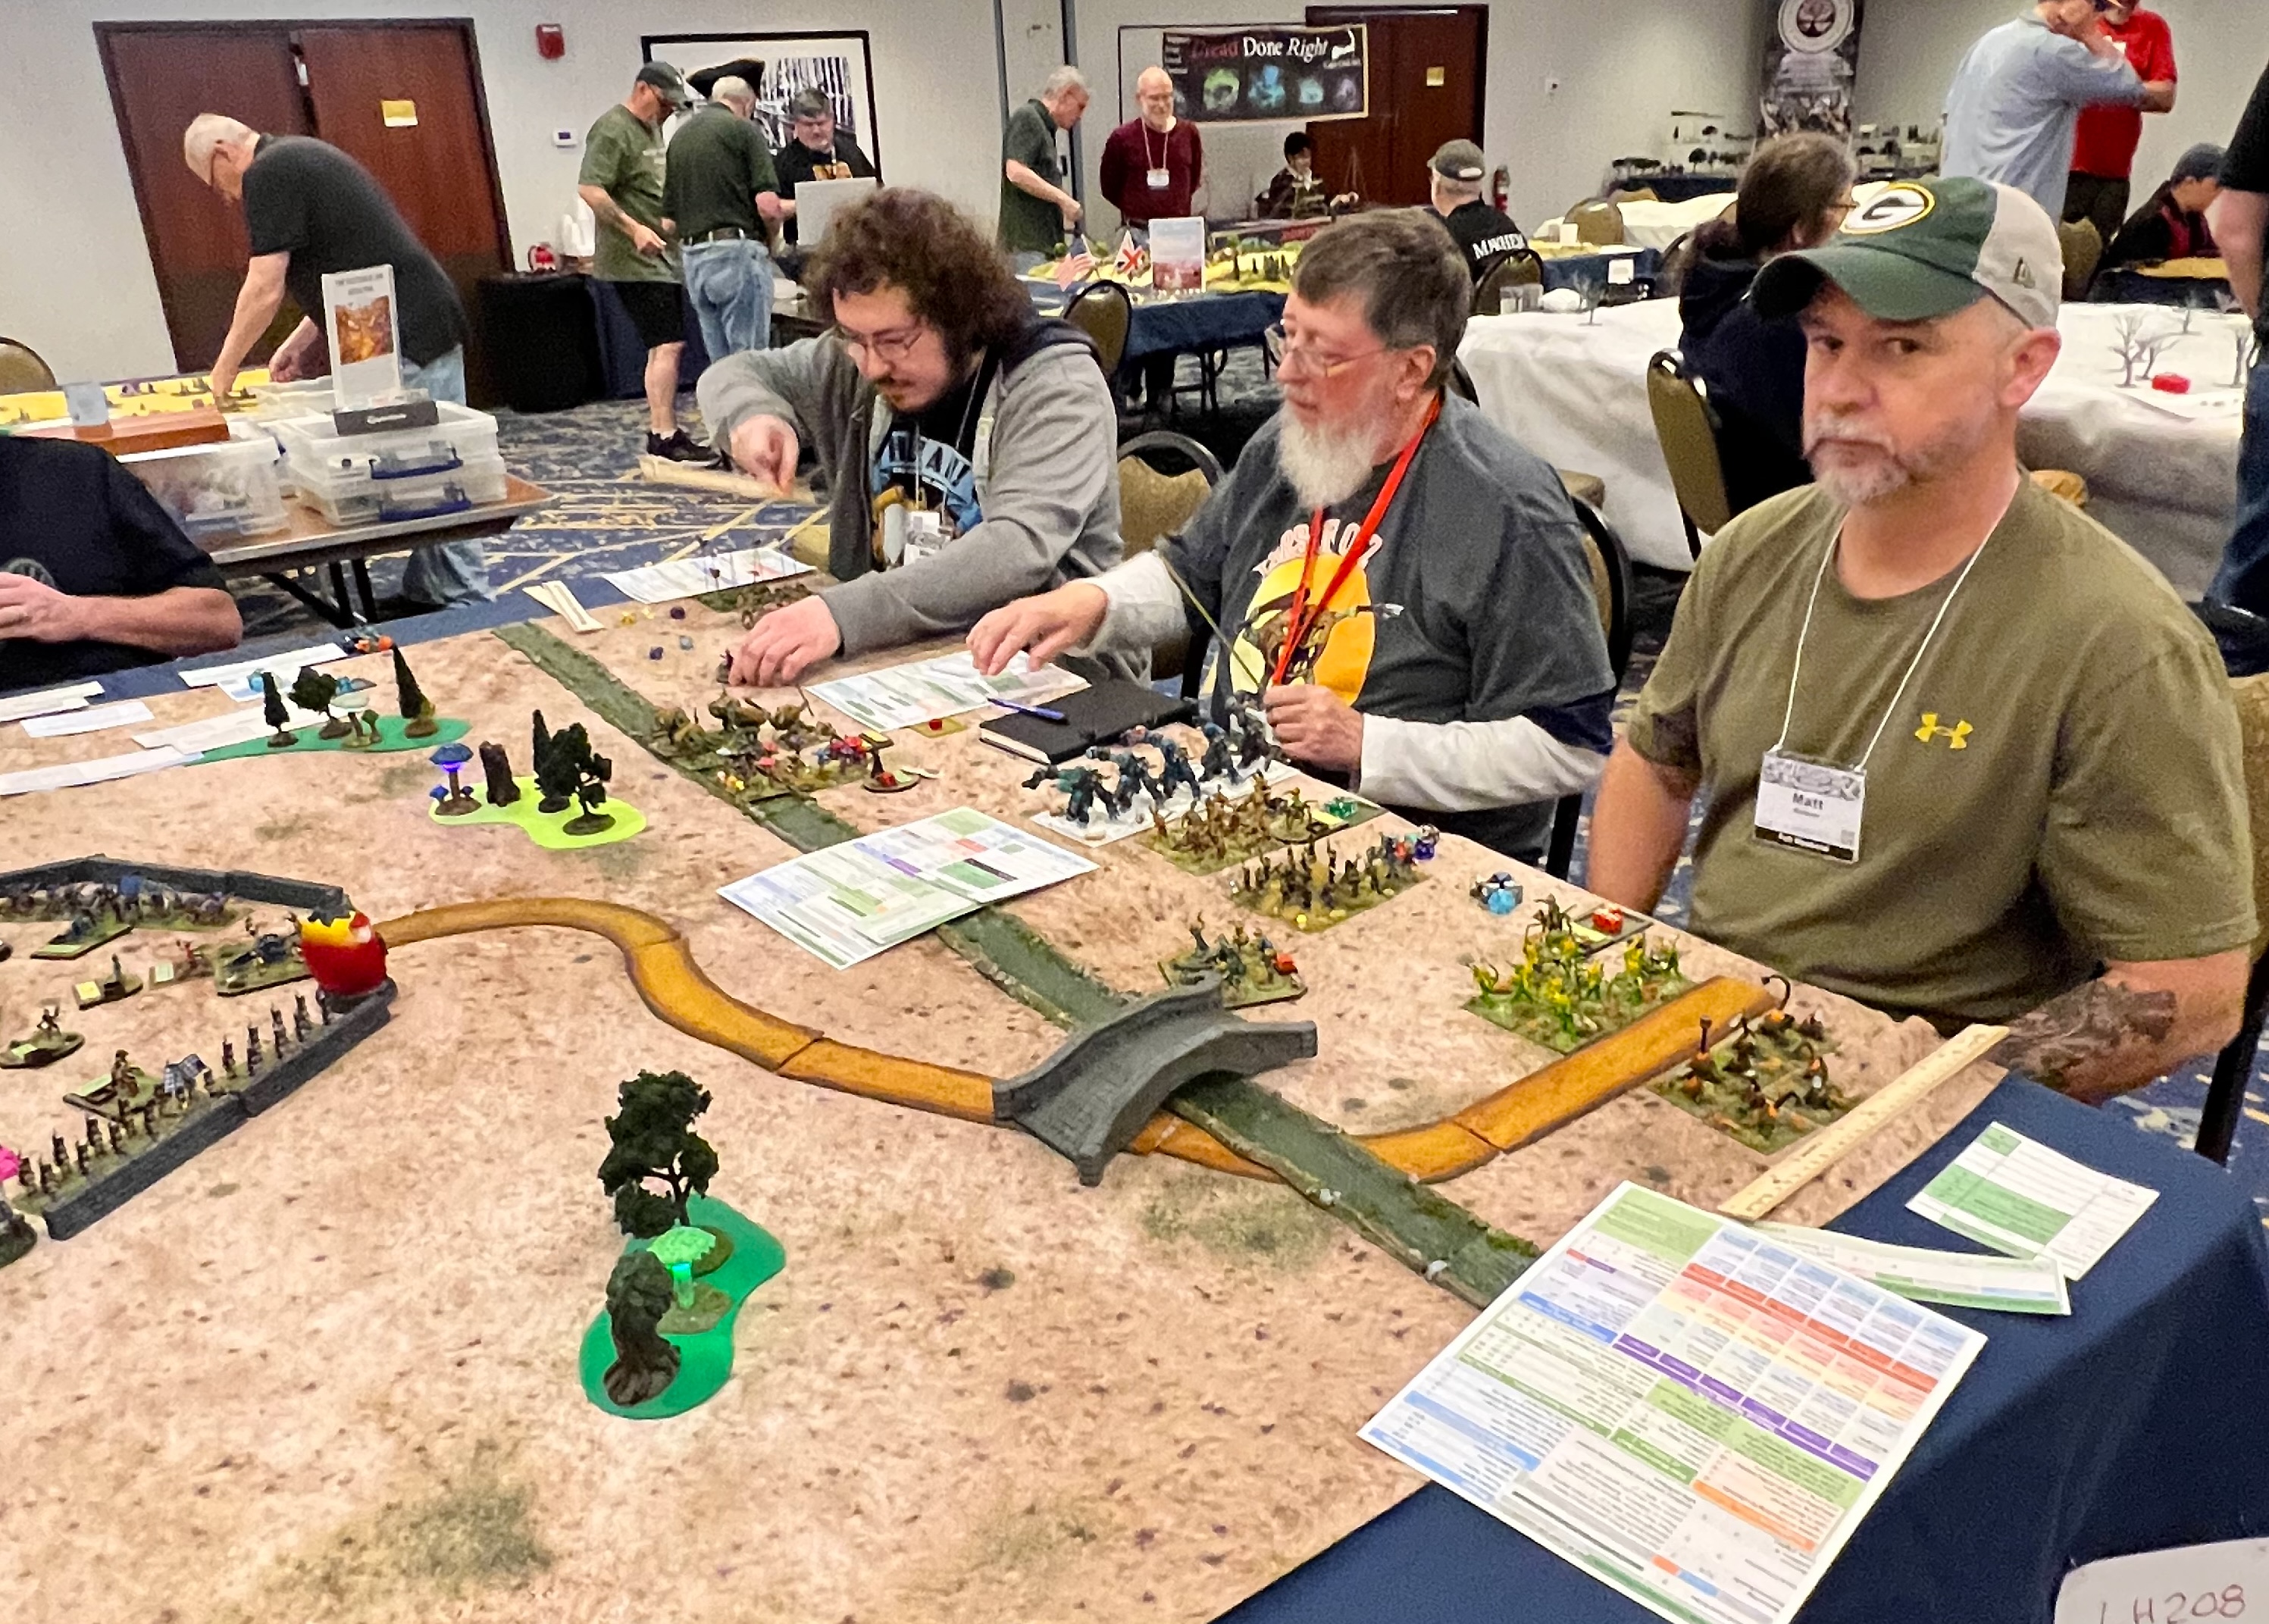
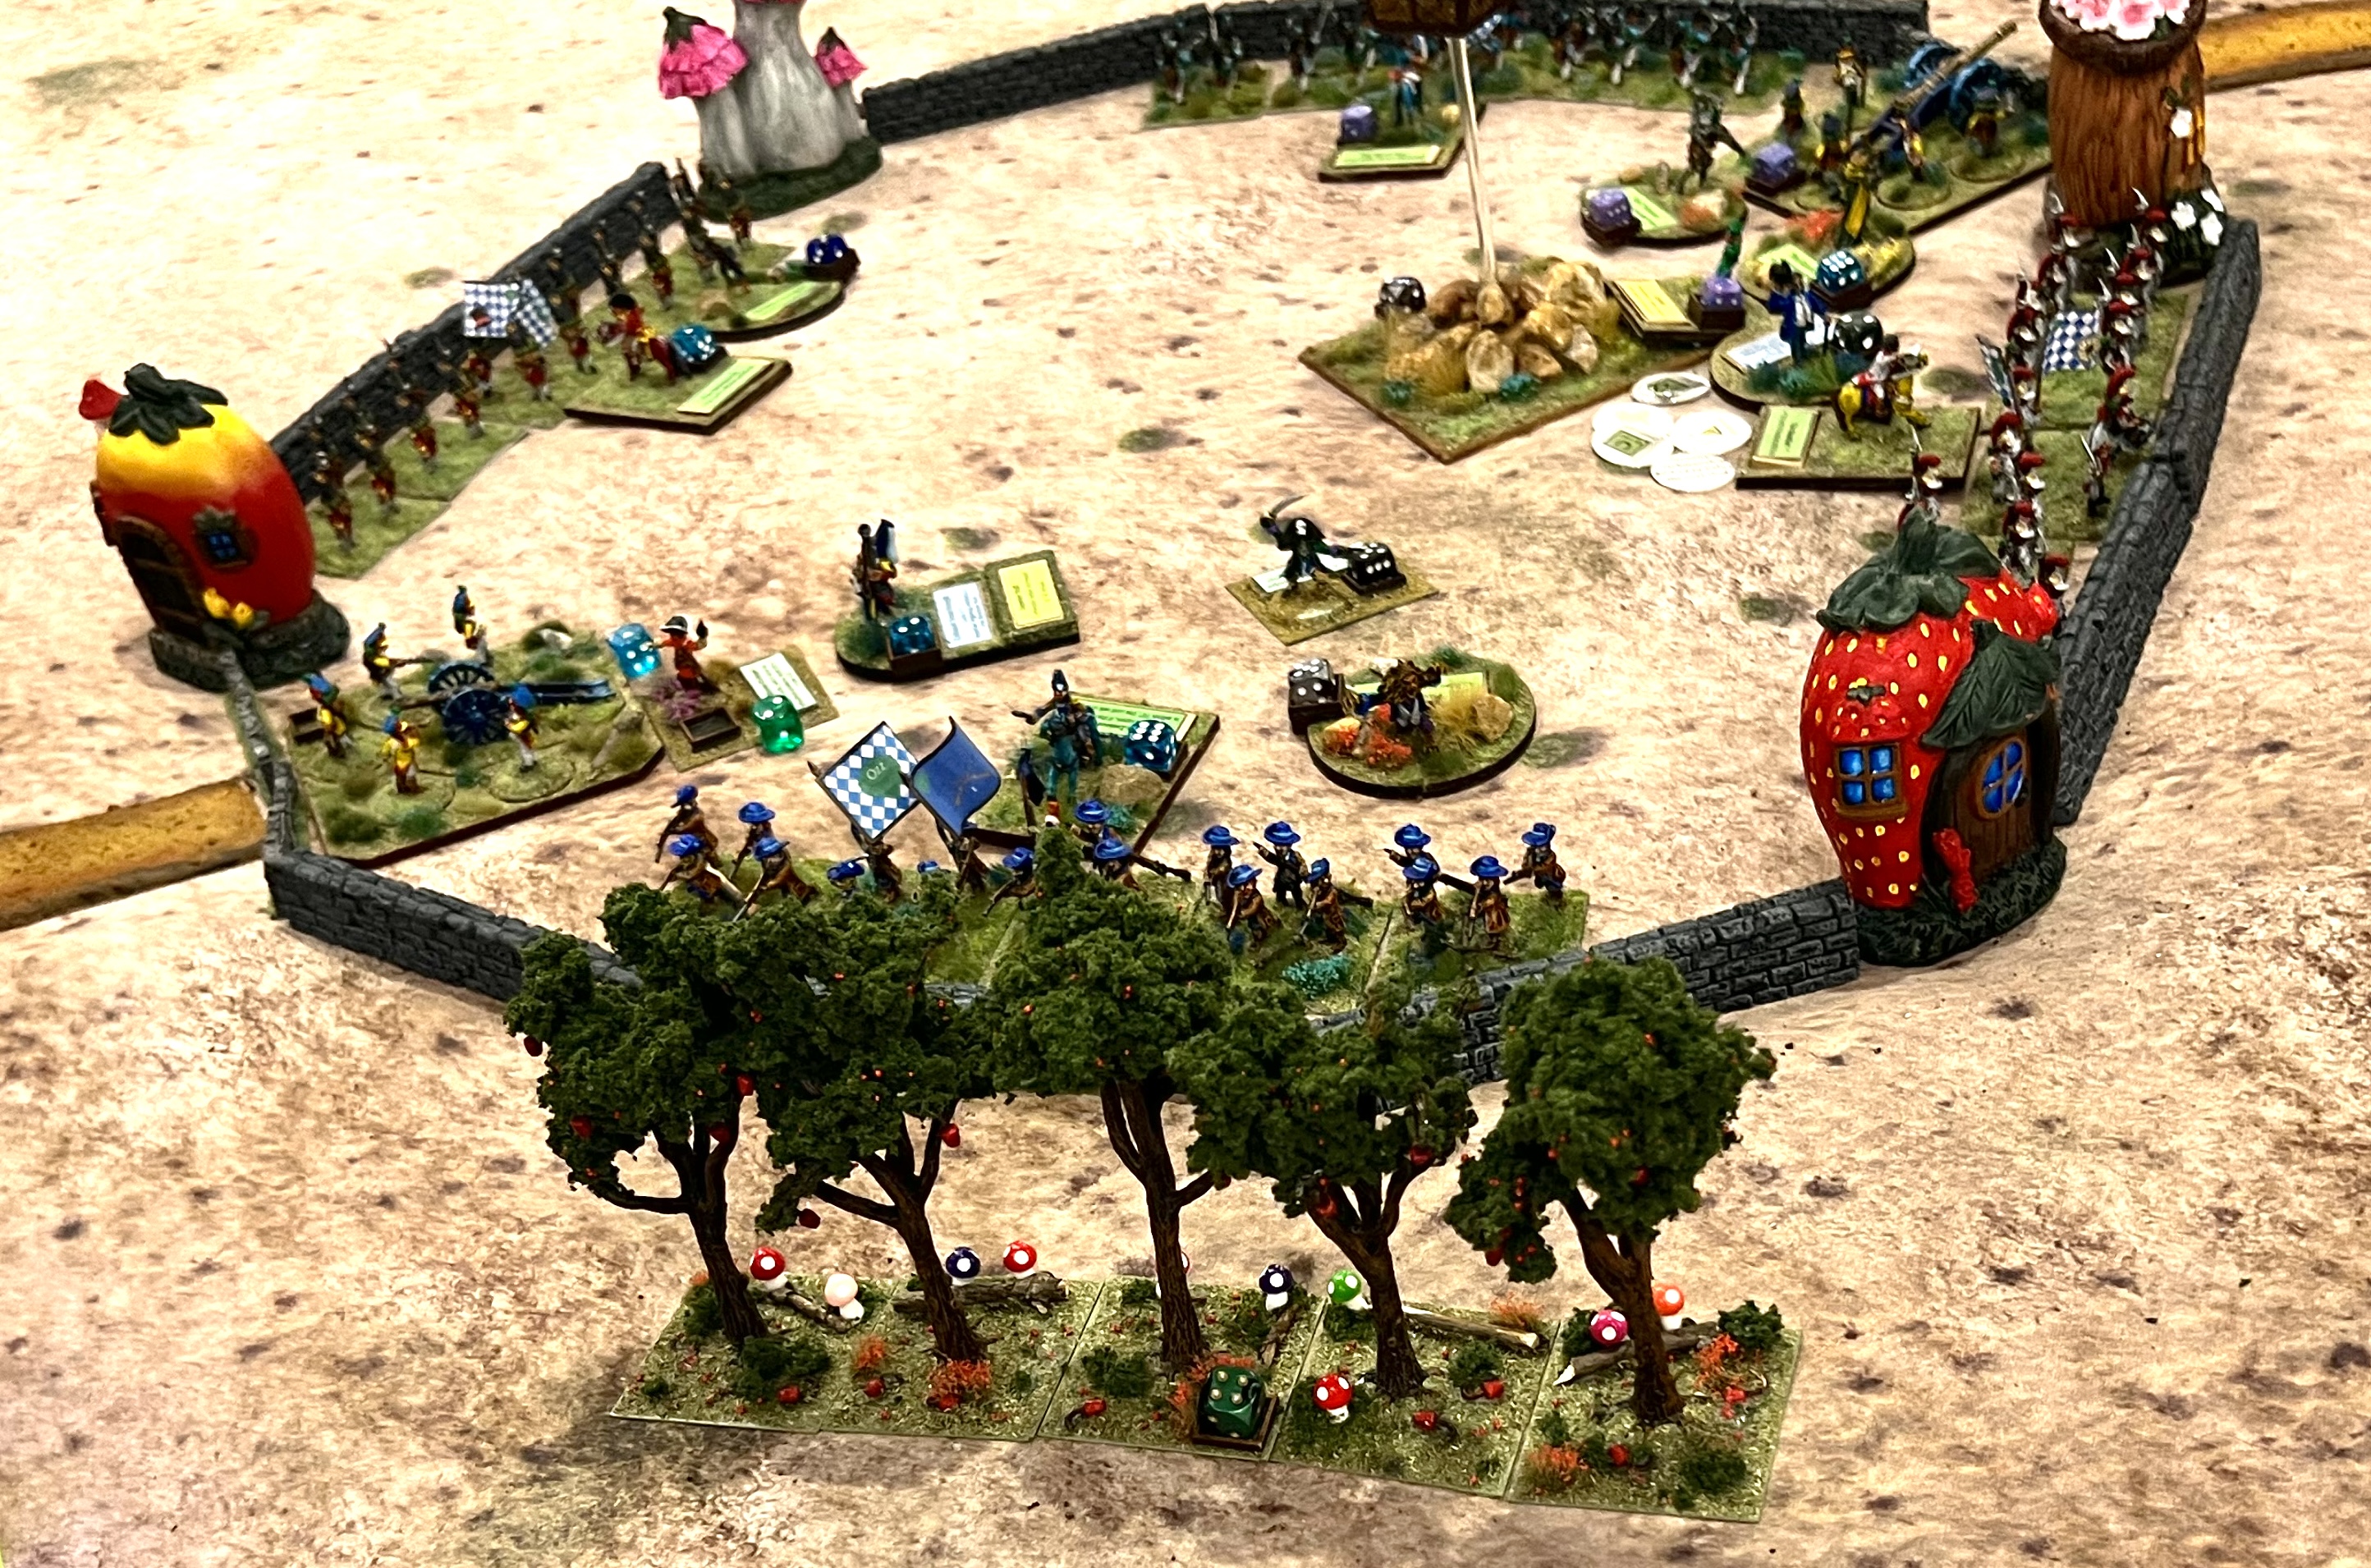
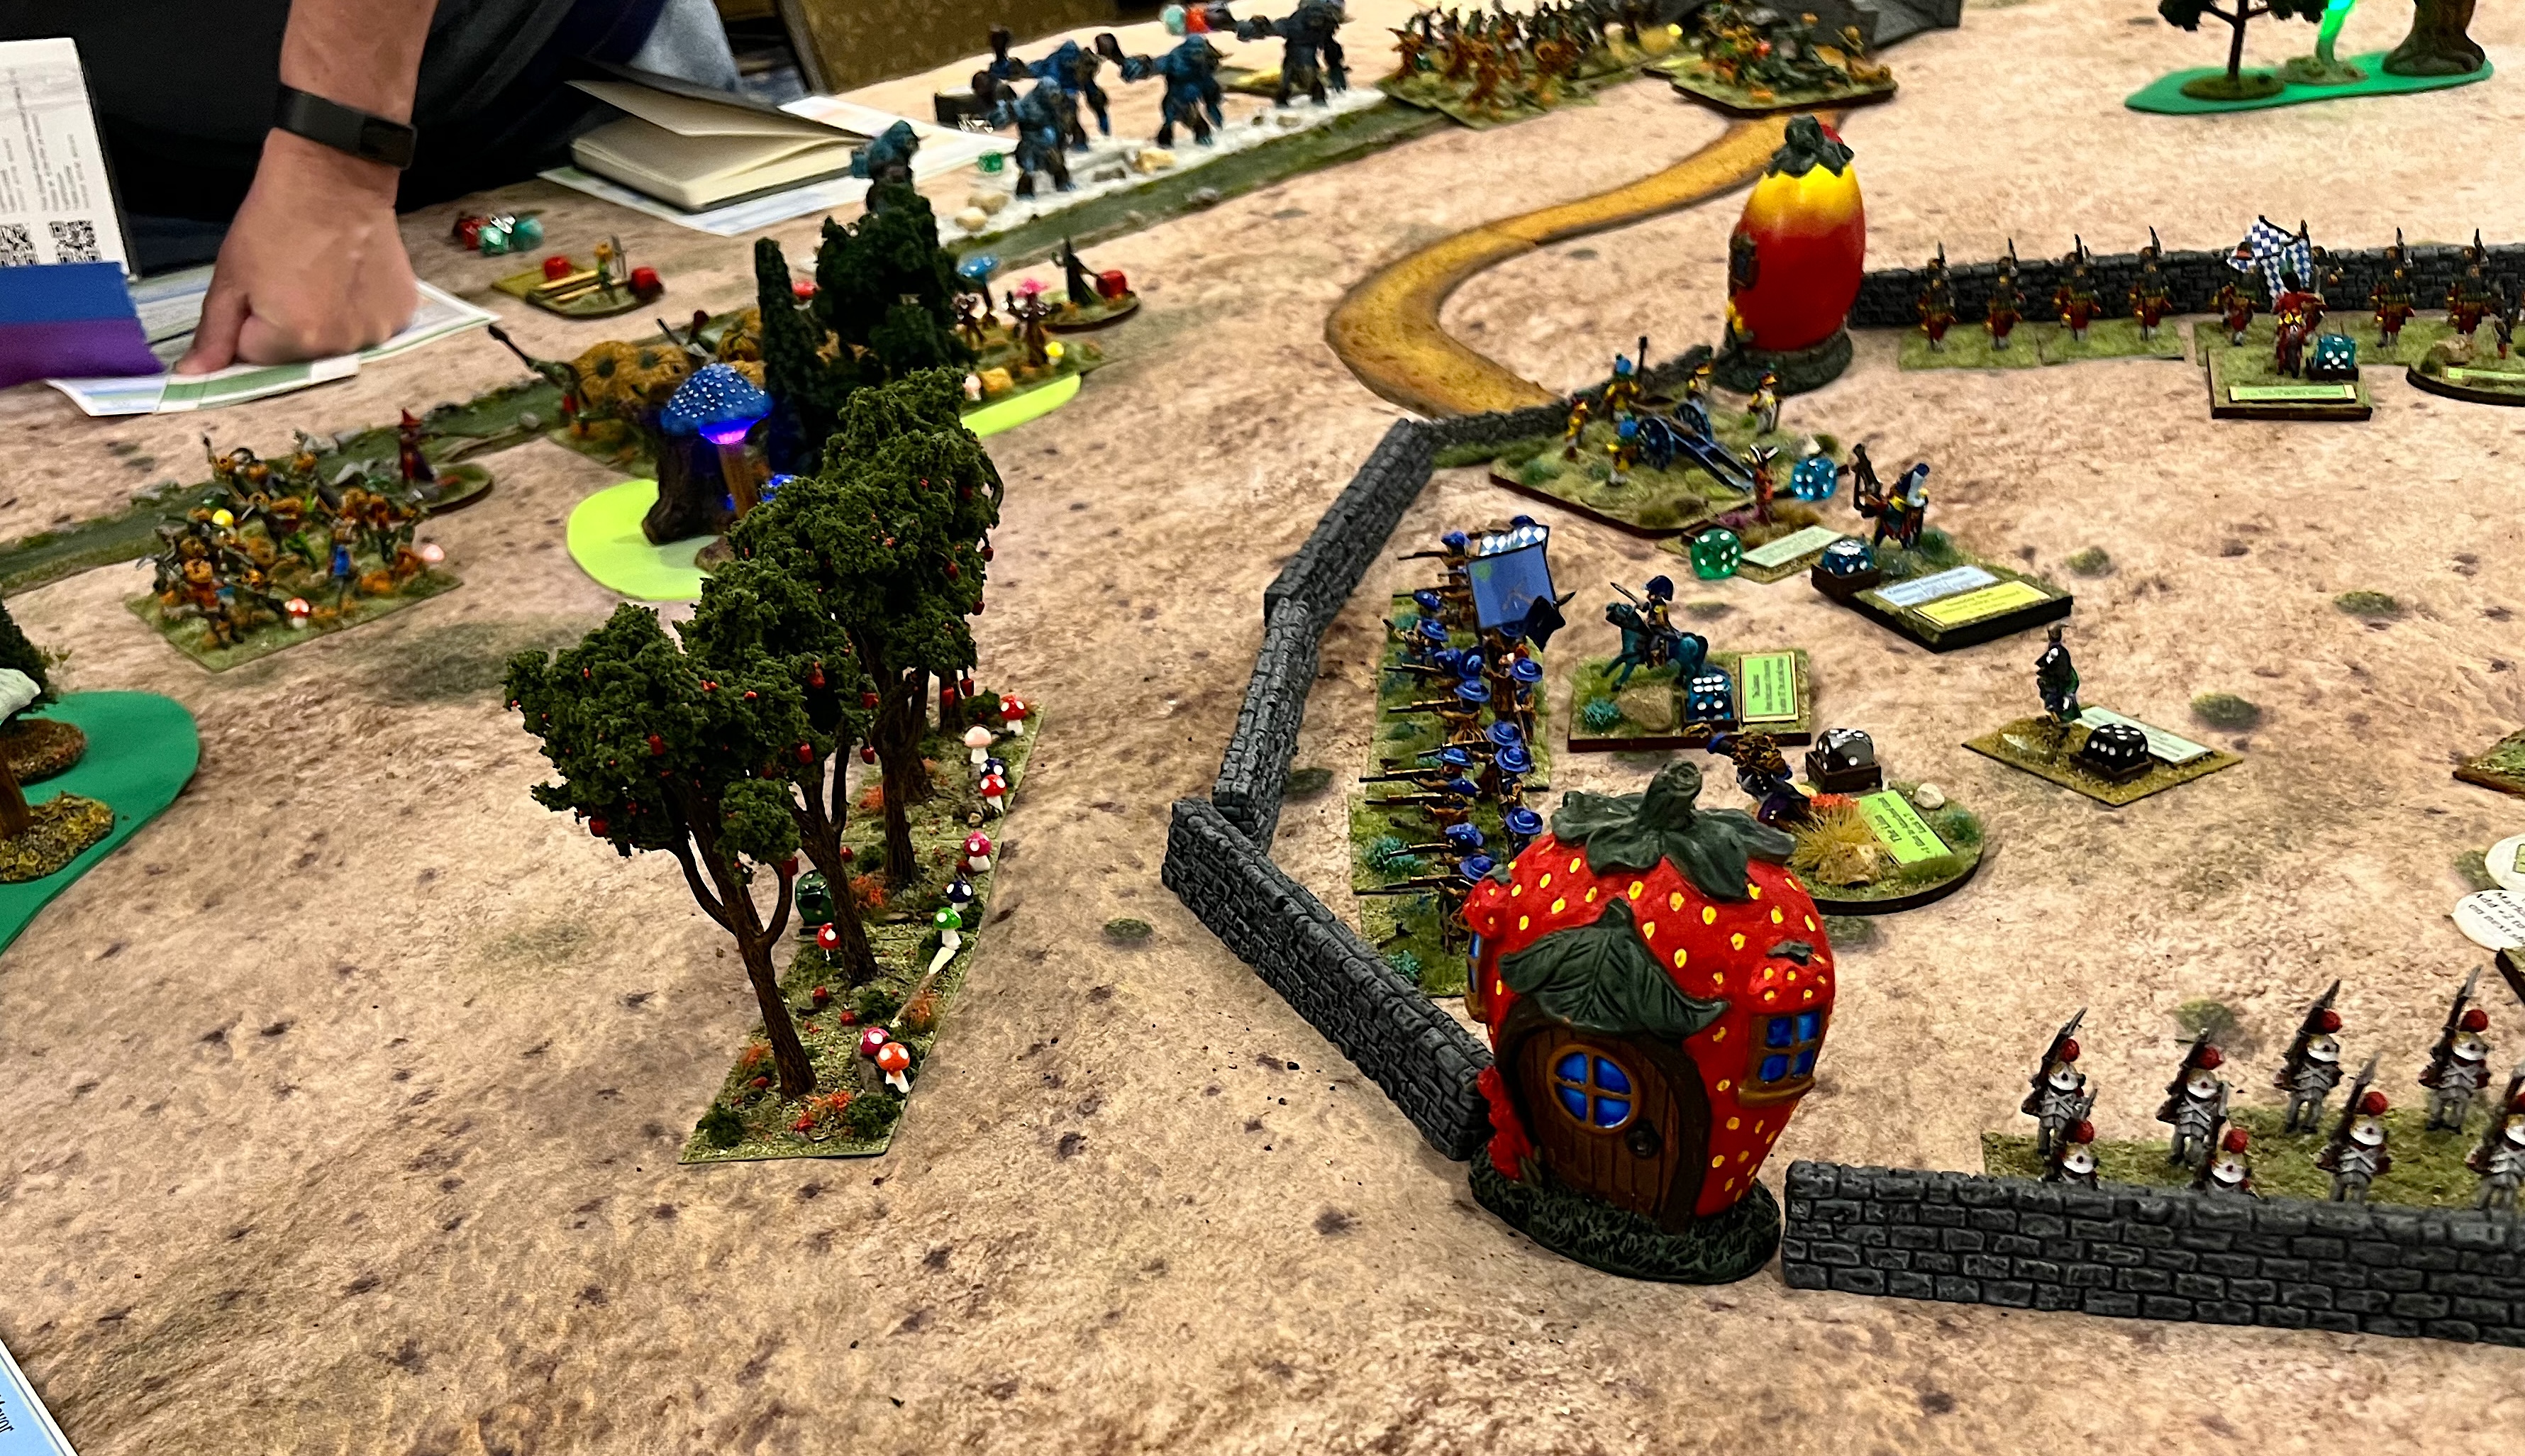
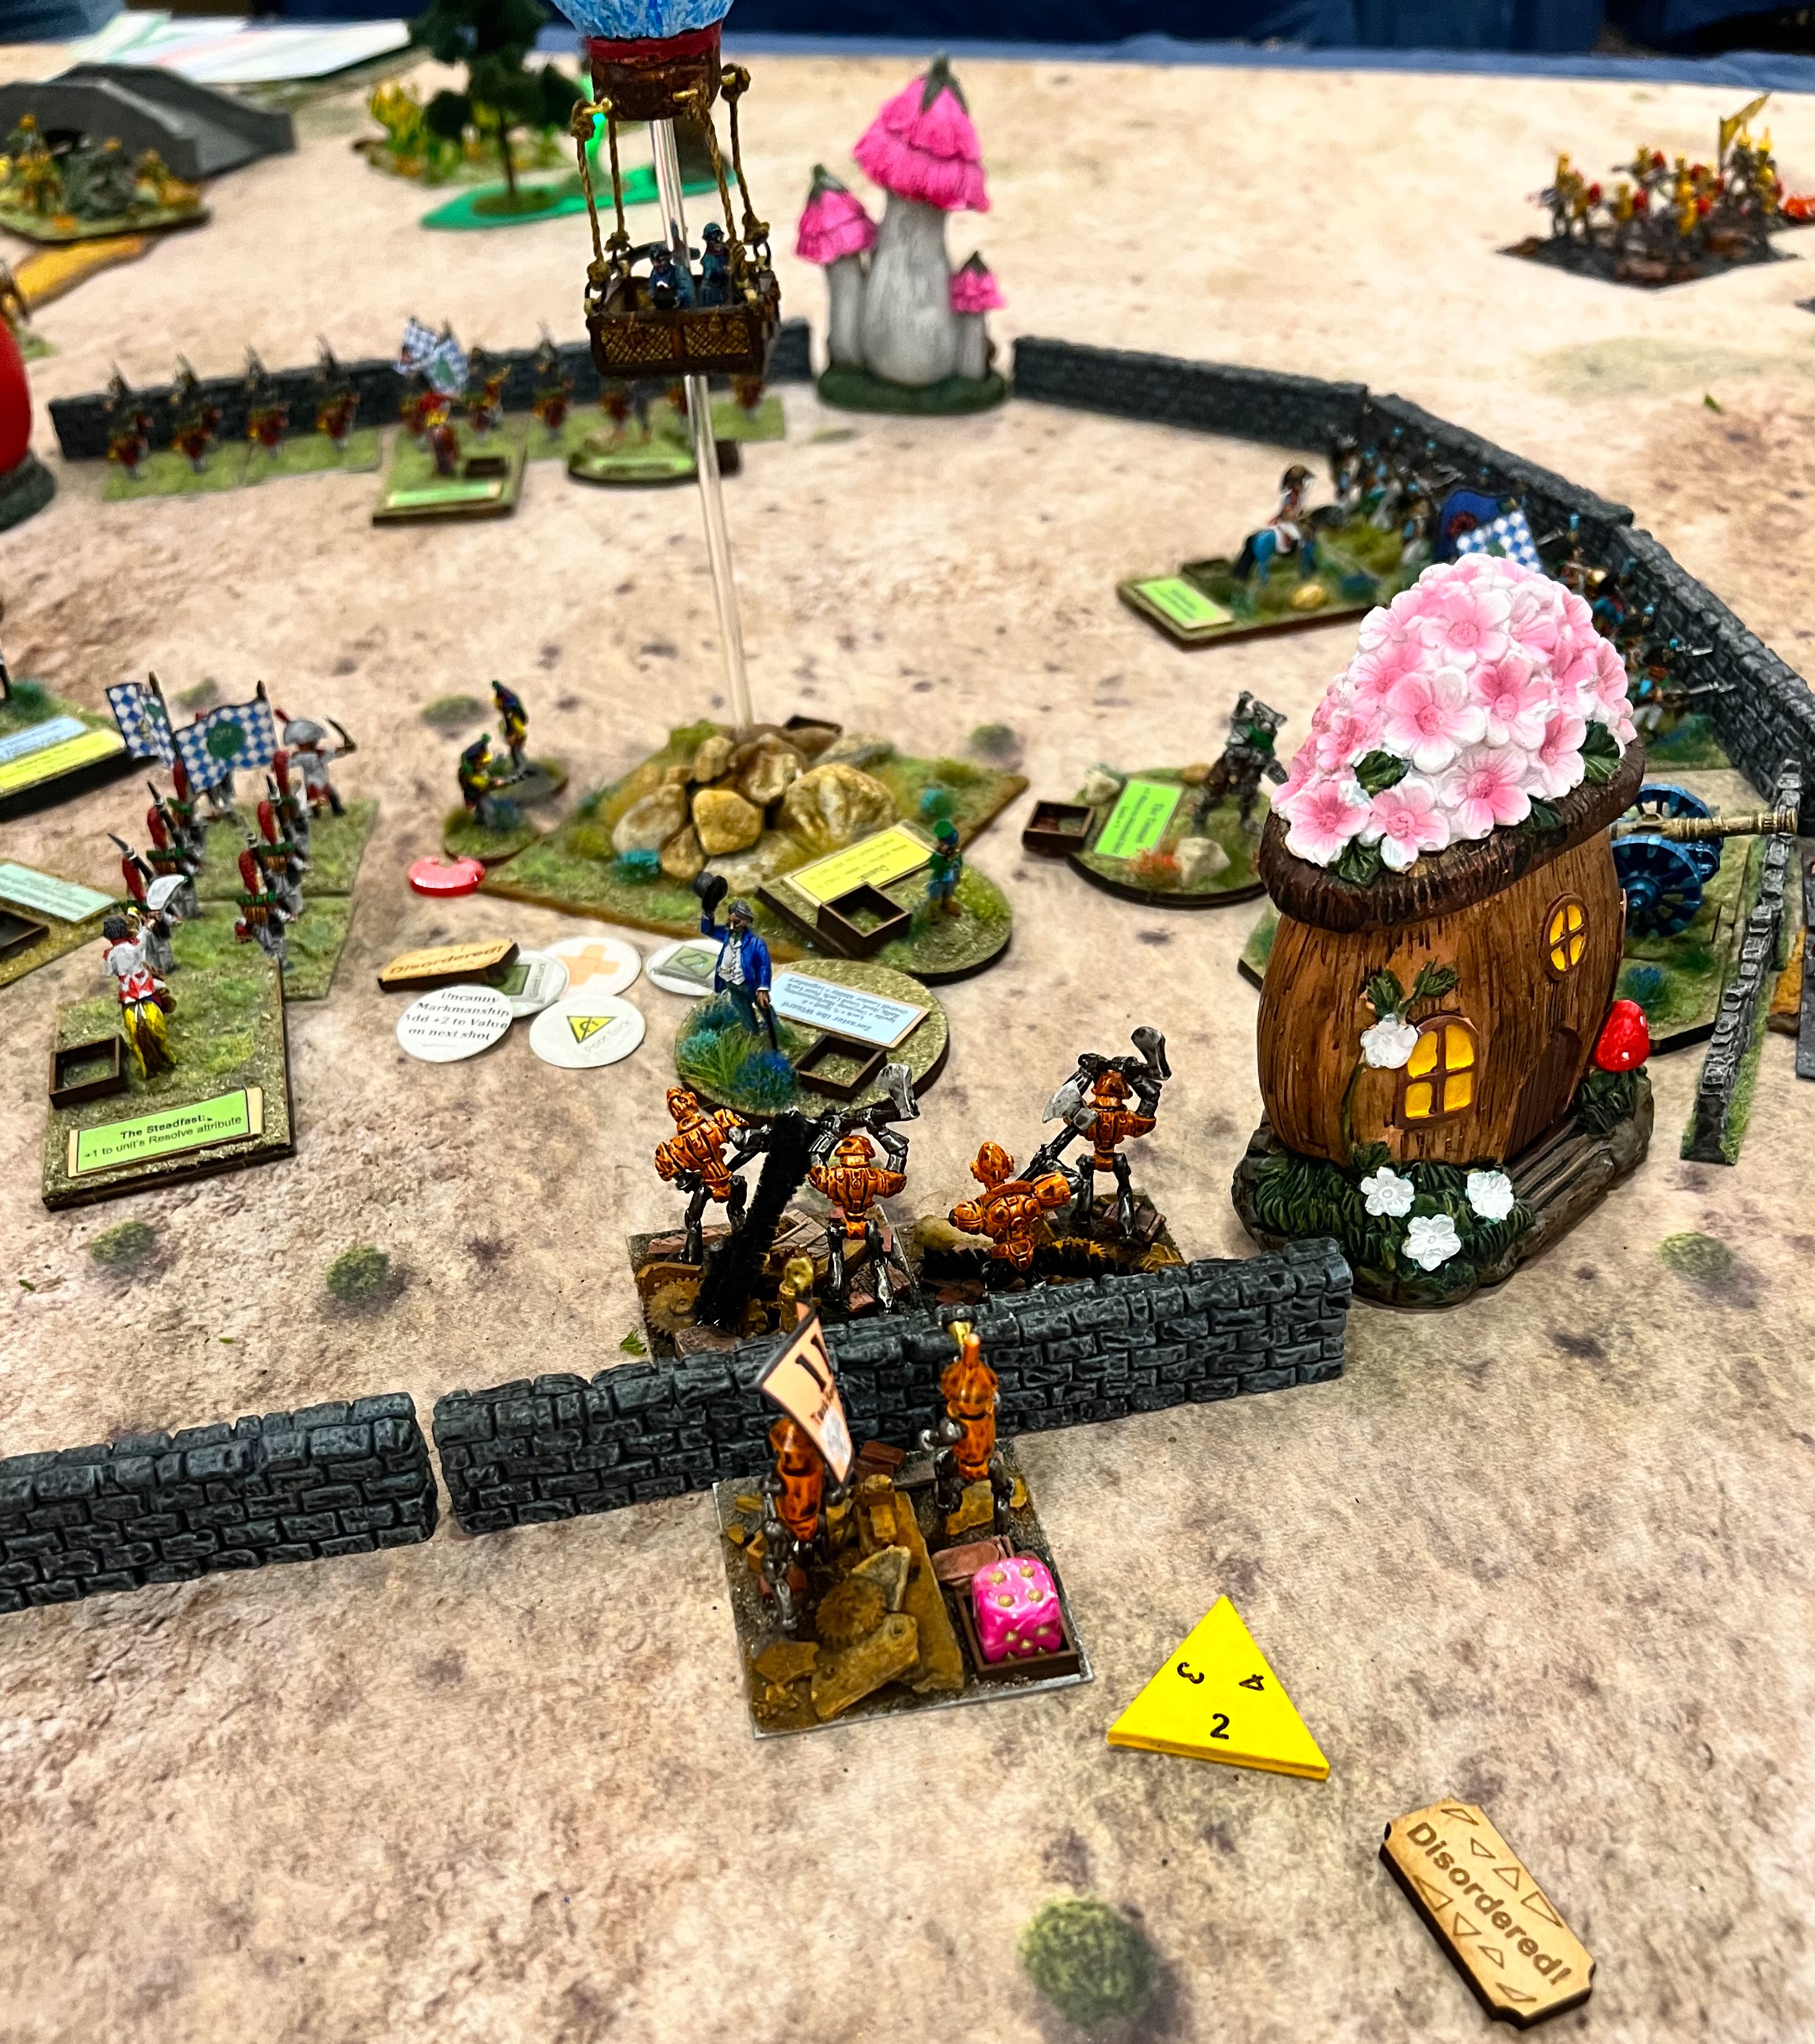
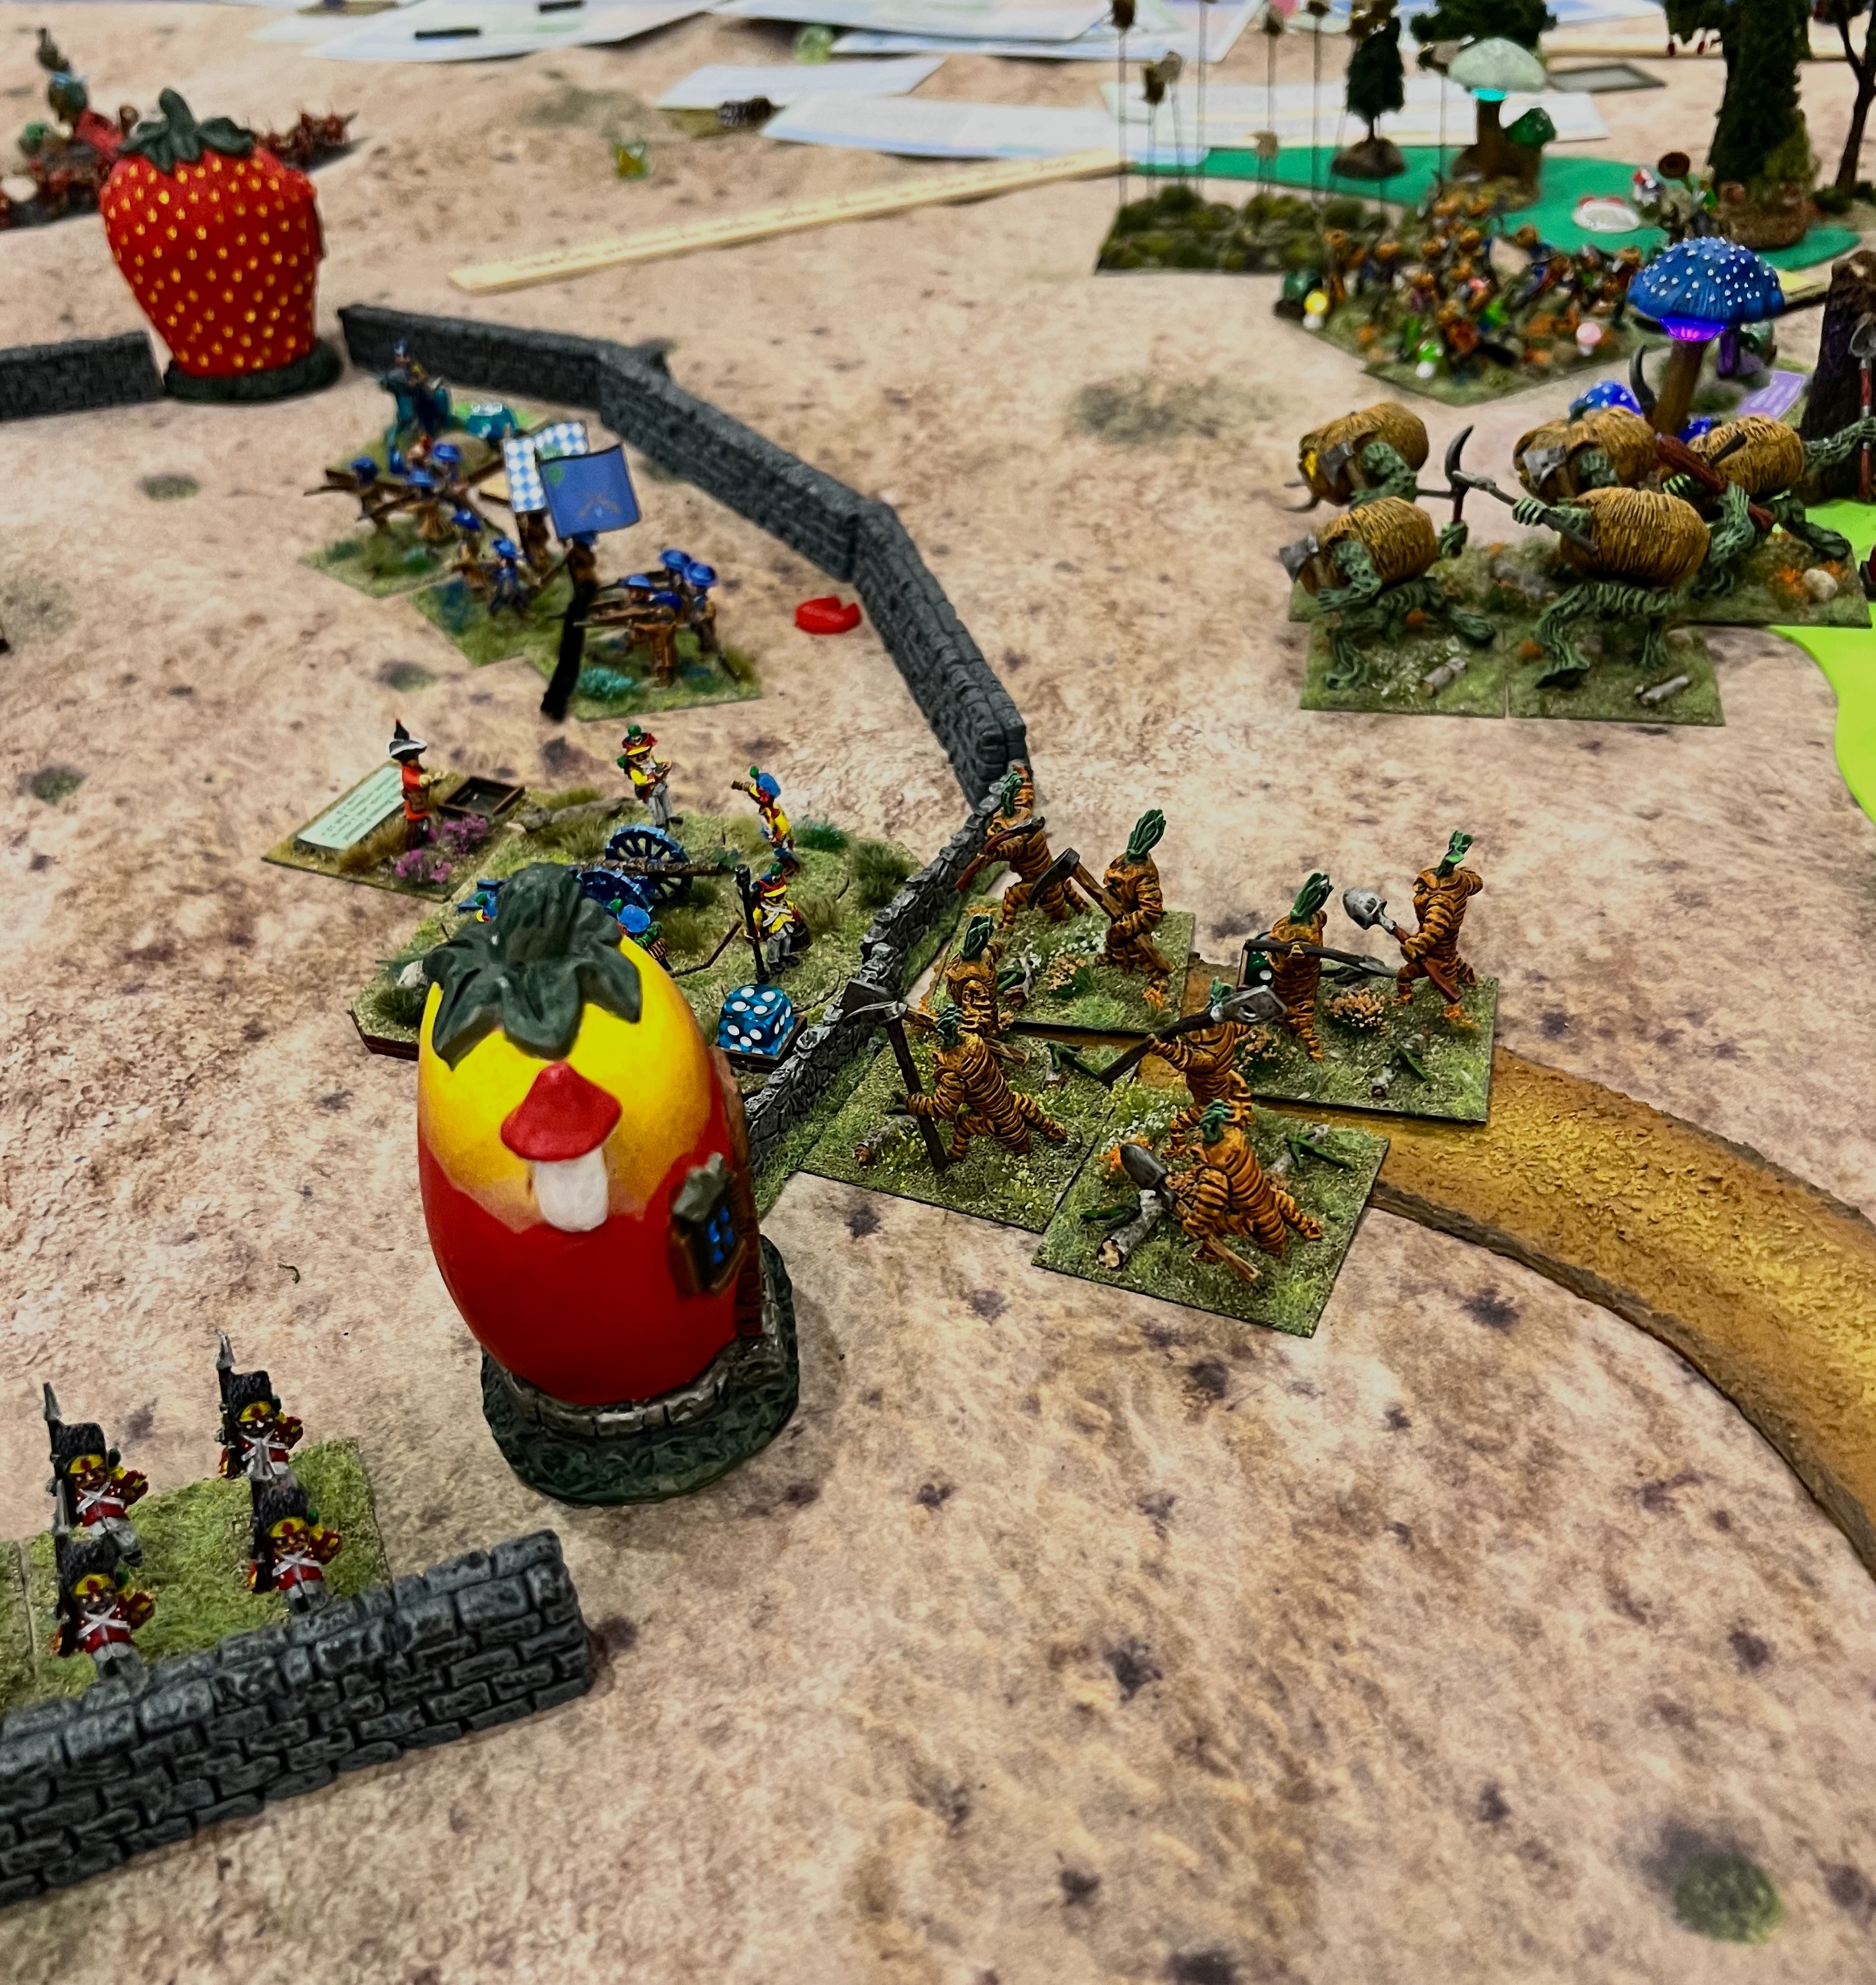
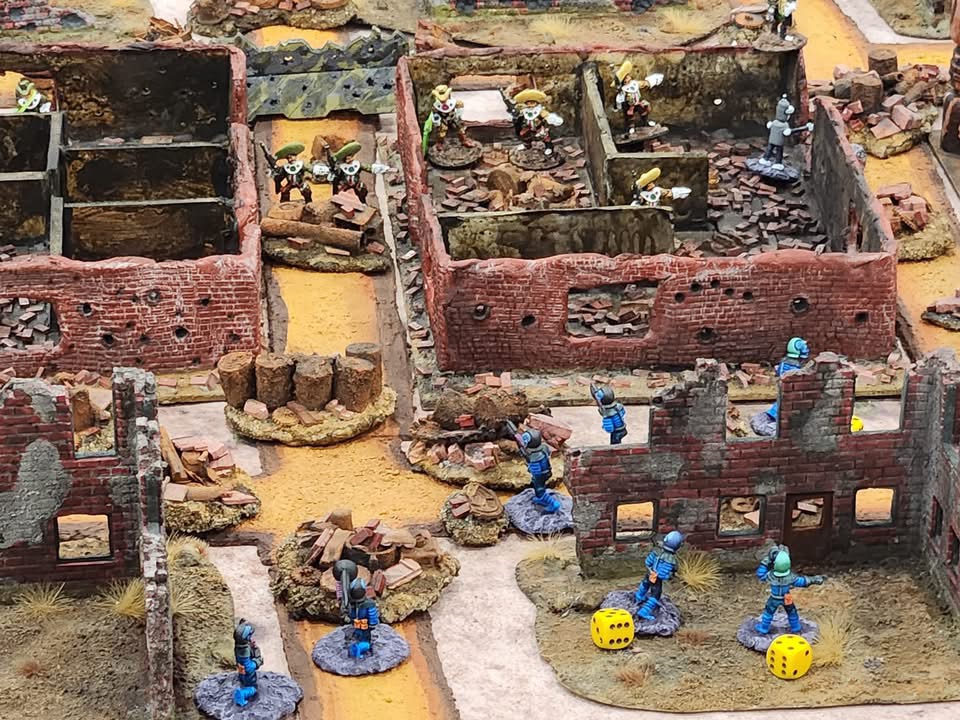
My second Ozz game simulated a revolt of the Harvest veggie folks against an intrusive walled Munchkin outpost. The theme of the 2026 HUZZAH! convention was “Revolution”. Harvest enlisted the help of Nitpik (apparently still aggrieved against the wee folk’s attempted robberies). The Nitpik and Harvest players successfully breached the Munchkin defenses and threw them out, though at a cost. Here are some game shots:
The players make their plans.Eric ponders his defenses.The Nitpik players prep for attack.Harvest players are ready too.The Savage Apple Tree regiment storms the walls while Munchkin Sharpshooters defend.Munchkin musketry trims the trees.Task Force Orange routs a defending Munchkin battery and breaches the walls as well.Carrot Creatures go face-to-face with another Munchkin battery.
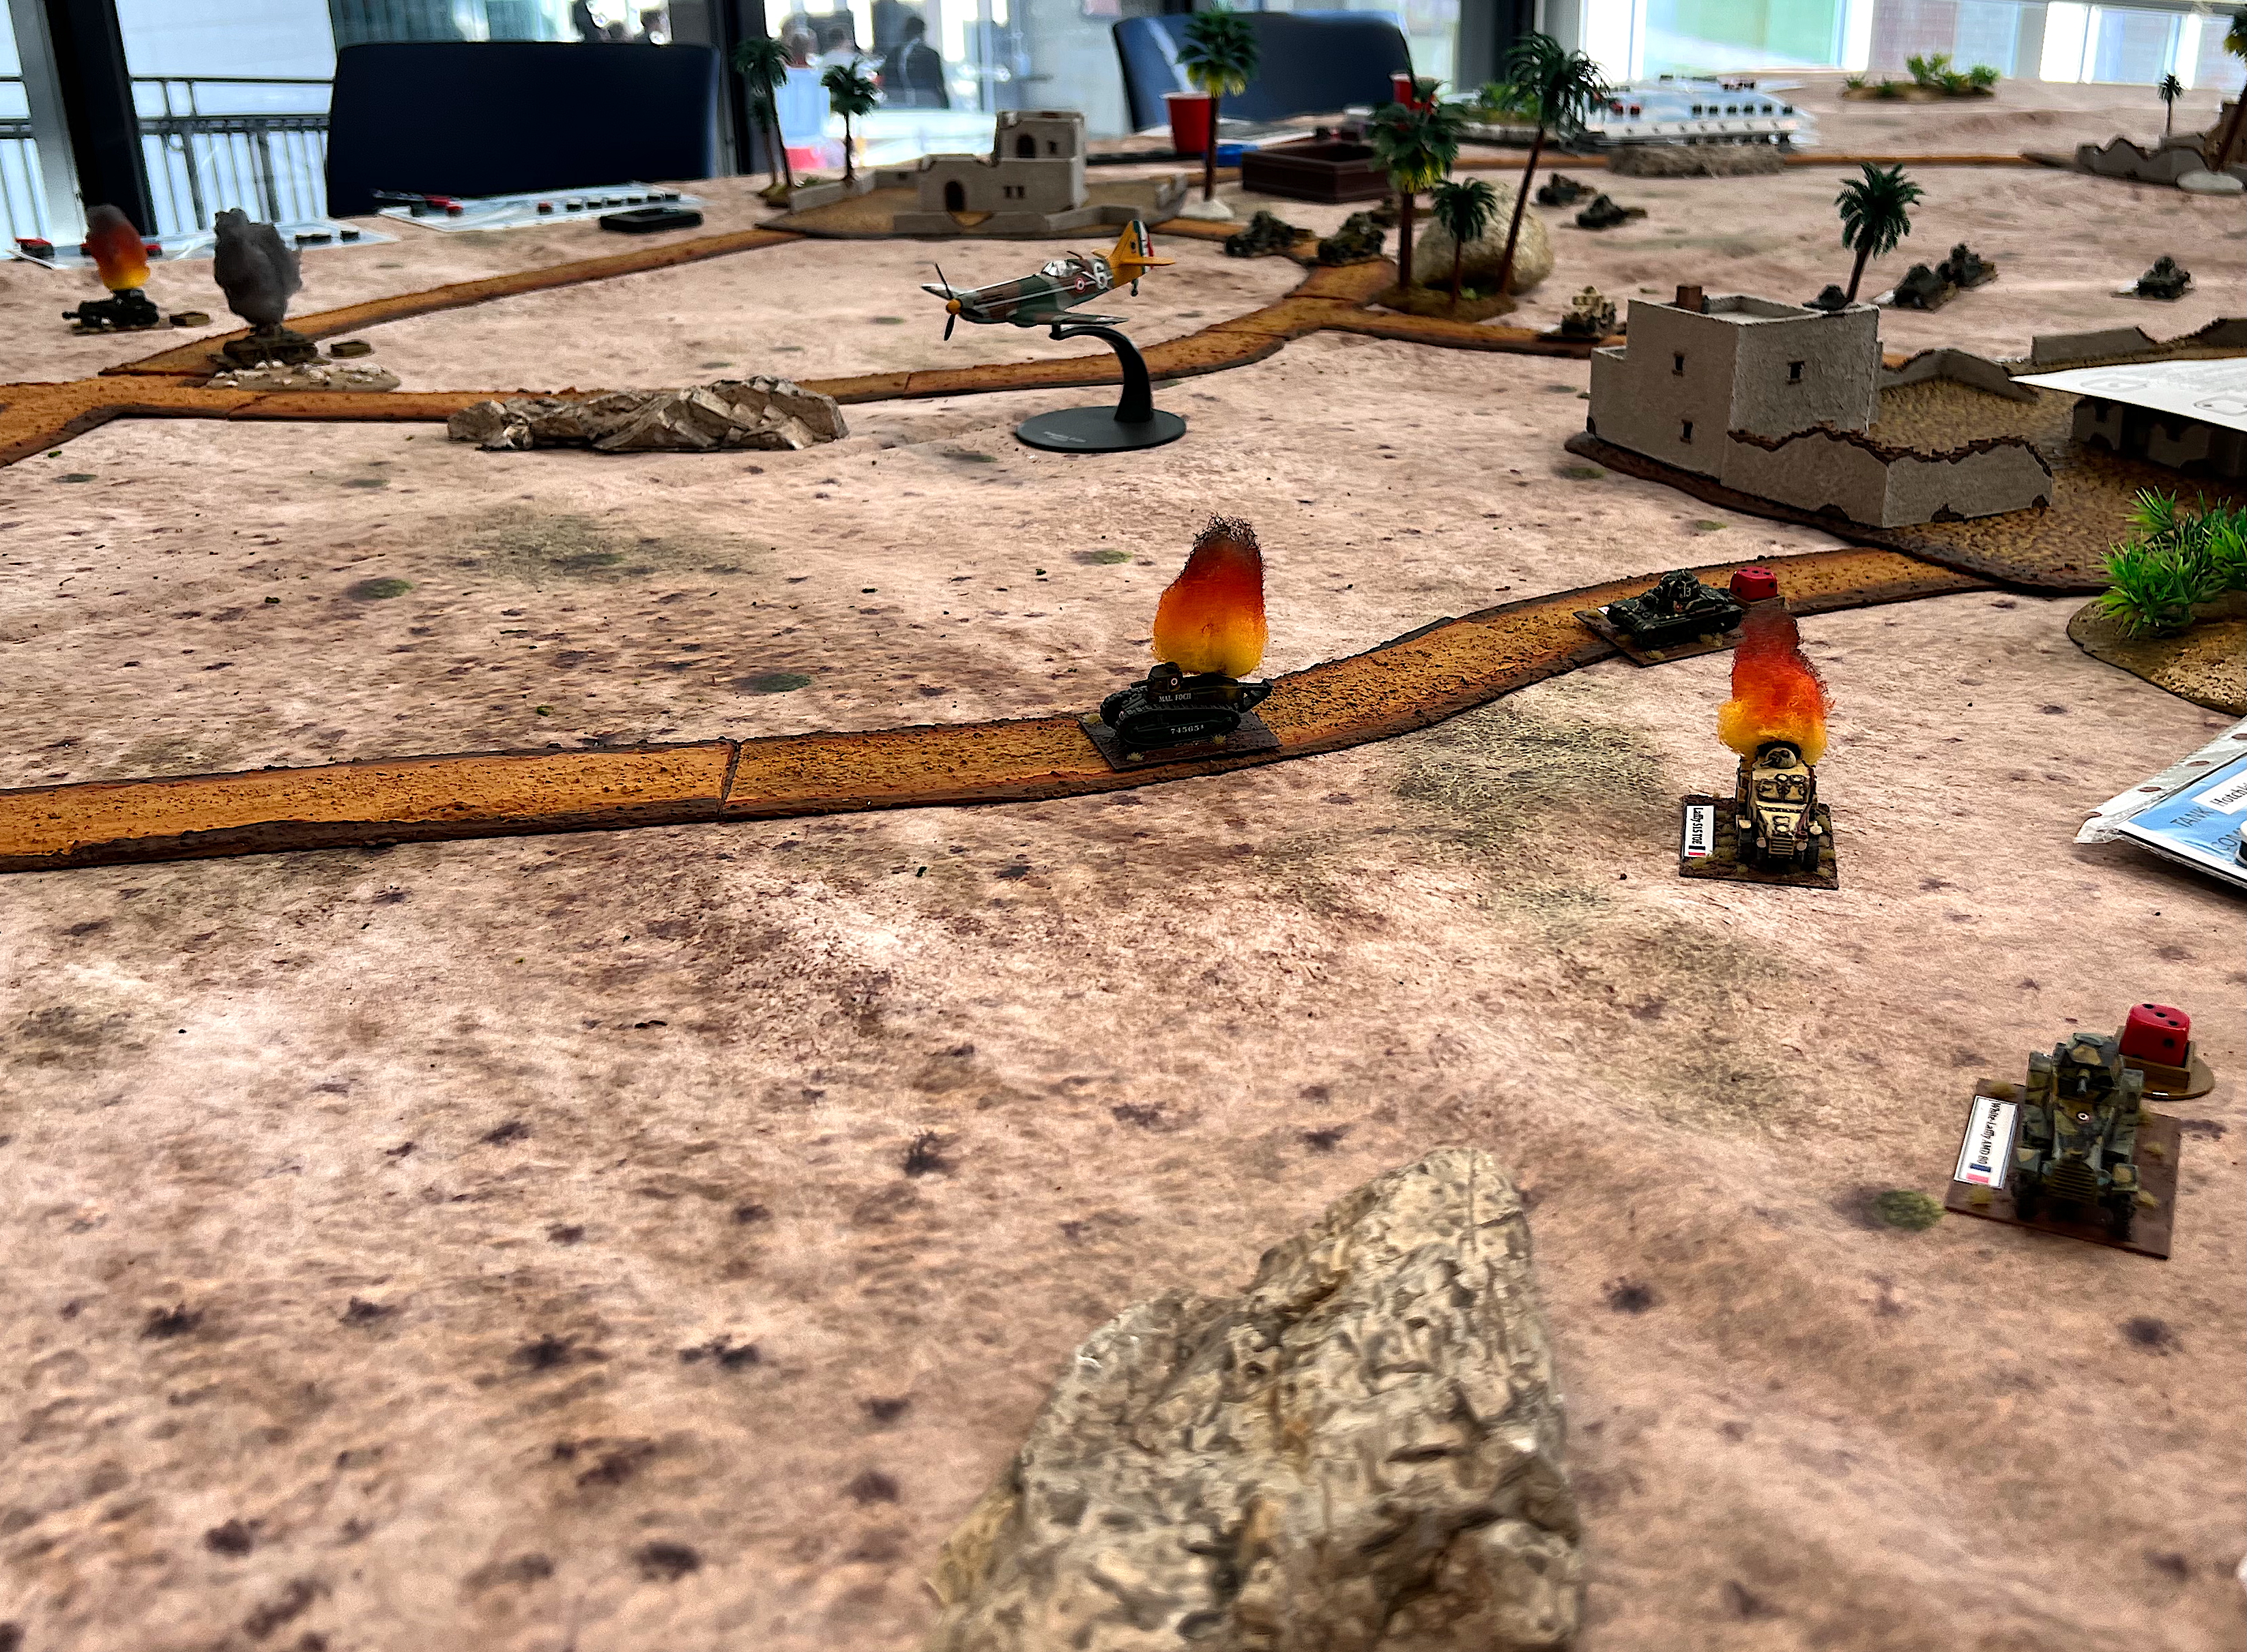
After the Veggie revolt game, I also ran another edition of my What a Tanker scenario for Operation Torch. I did not get any pictures, but one of my players, Arofan, did, and wrote a nice AAR that you can see on the Monadnock Historical Wargaming page https://www.facebook.com/groups/405278298850709. Scroll down to May 17th, 2026.
Thanks again to all at MHWA for yet another great convention!!
That’s it for now – and lastly here are the paints listings and Ozz information.
Final Notes and Informational Links
Want to learn more about Ozz and its world? If you want to check out the excellent Wars of Ozz figures’ range, there are two places to get them. You can also get the rules there. (I make no money from this.) The game rules and the figures are available from the next two places:
Followers of this blog have seen several posts showing my “rusty” preparations. I have been getting ready for my numerous games at 2026 tabletop wargaming conventions. That preparation involves painting up figures and terrain for scenarios that involve a good amount of ruins and wreckage.
In a previous post, I shared how I built transmission towers and rusty walls for a Wars of OzzTM game involving Professor Nitpik’s Industrial City (the Robotic Sanctum). I ran that game at Cold Wars and will share more about that convention shortly. The theme for Cold Wars this year was “The Wild West”, so I also had planned to run a game involving Space Cowboys (technically Archive Texican Space Rangers” from Star Rovers).
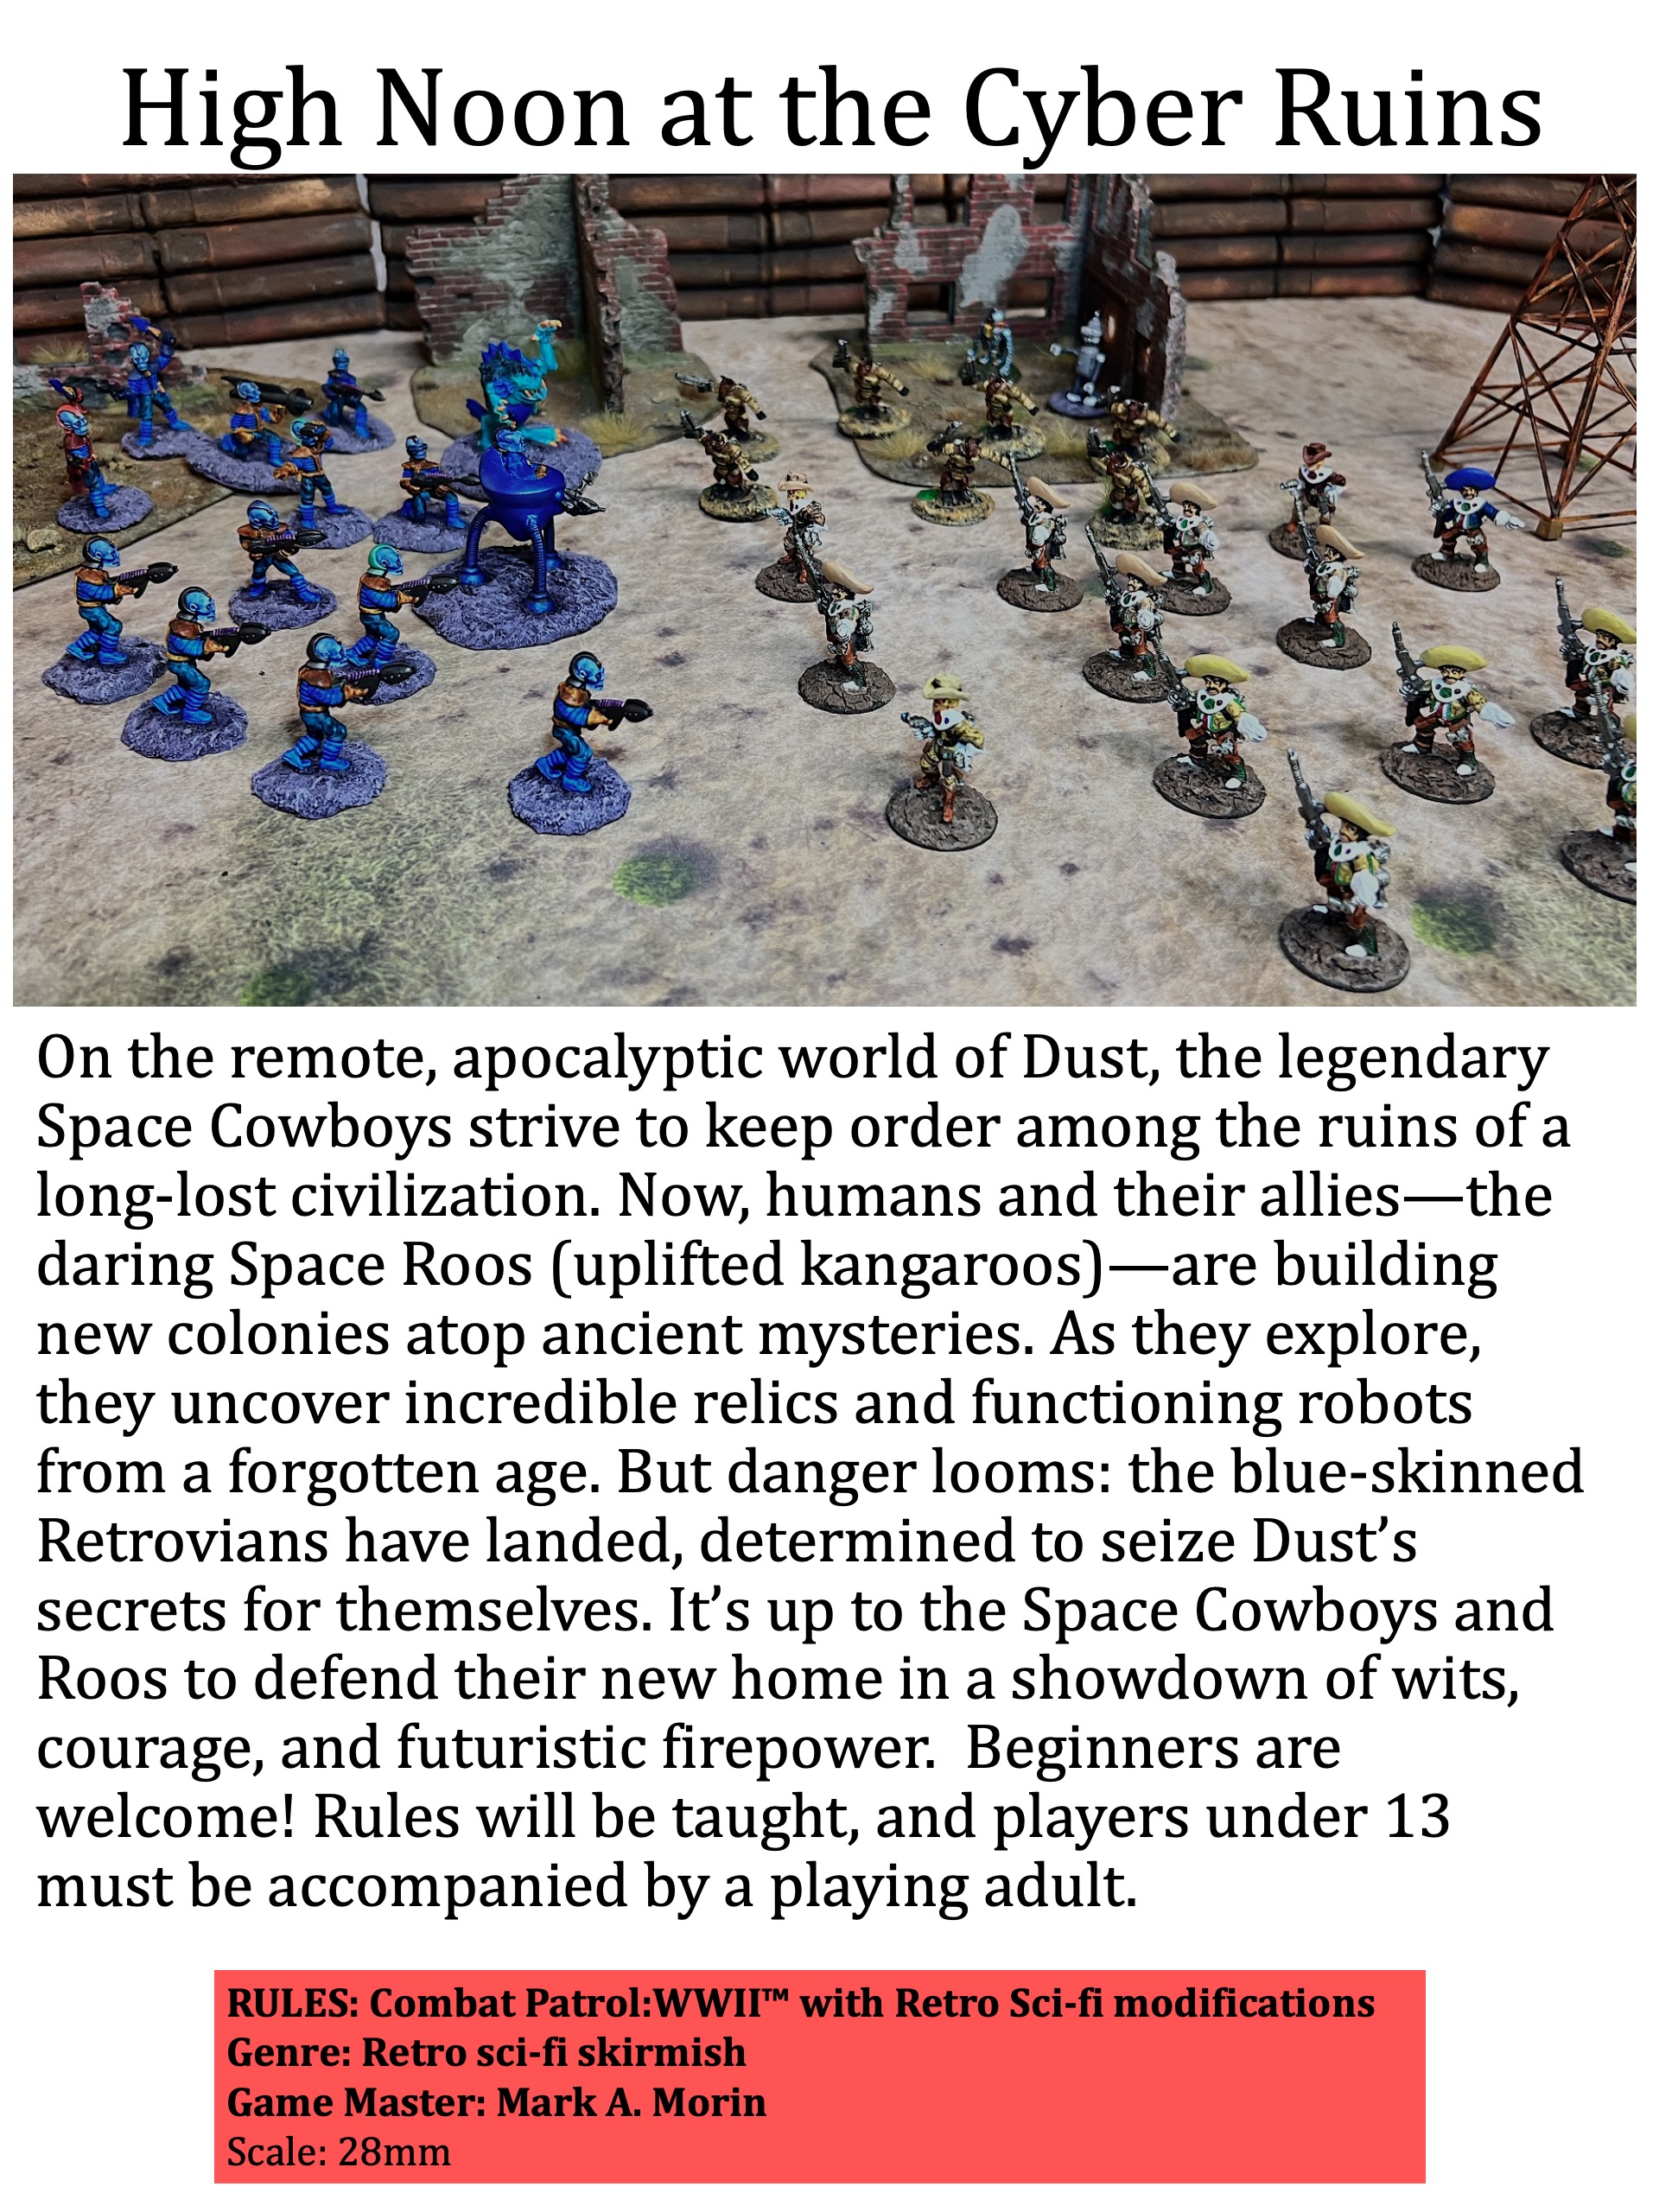
I don’t run western games, but I could cobble together a retro sci-fi game using Buck Surdu’s Combat Patrol:WWIITM gaming system (with my modifications). In my game Archive “Space Cowboys”, and uplifted kangaroos (“Space ‘Roos” ) combat blue-skinned “Retrovians” (from War Games Supply Dump). Both armies are searching for hidden ancient robots in the apocalyptic ruins of a long-dead civilization on a newly-colonized world called Dust.
To really make the ancient ruined industrial panorama that I wanted, I needed more buildings and structures than just my transmission towers, rusty walls, rusty generators and ruined chemical plant. I also wanted a lot of wreckage strewn about as terrain.
To those ends, I ended up making two ruined factory buildings, two industrial structures, and 61 scatter bases of industrial wreckage. These were all built at the same time. This enabled me to work around issues like drying and curing times as time was short. Oh yeah, and we had a few snow storms here in Massachusetts along the way that ate up some hobby time (not helpful at all).
I wanted to share my project and all its components here with you. As these were simultaneous efforts, you will see multiple project stages here. You may notice that I used a lot of repurposed bits of metal and plastic and Juweela products. The lists will be at the end of this post as is my habit. My concept was to achieve a Stalingrad-like look.
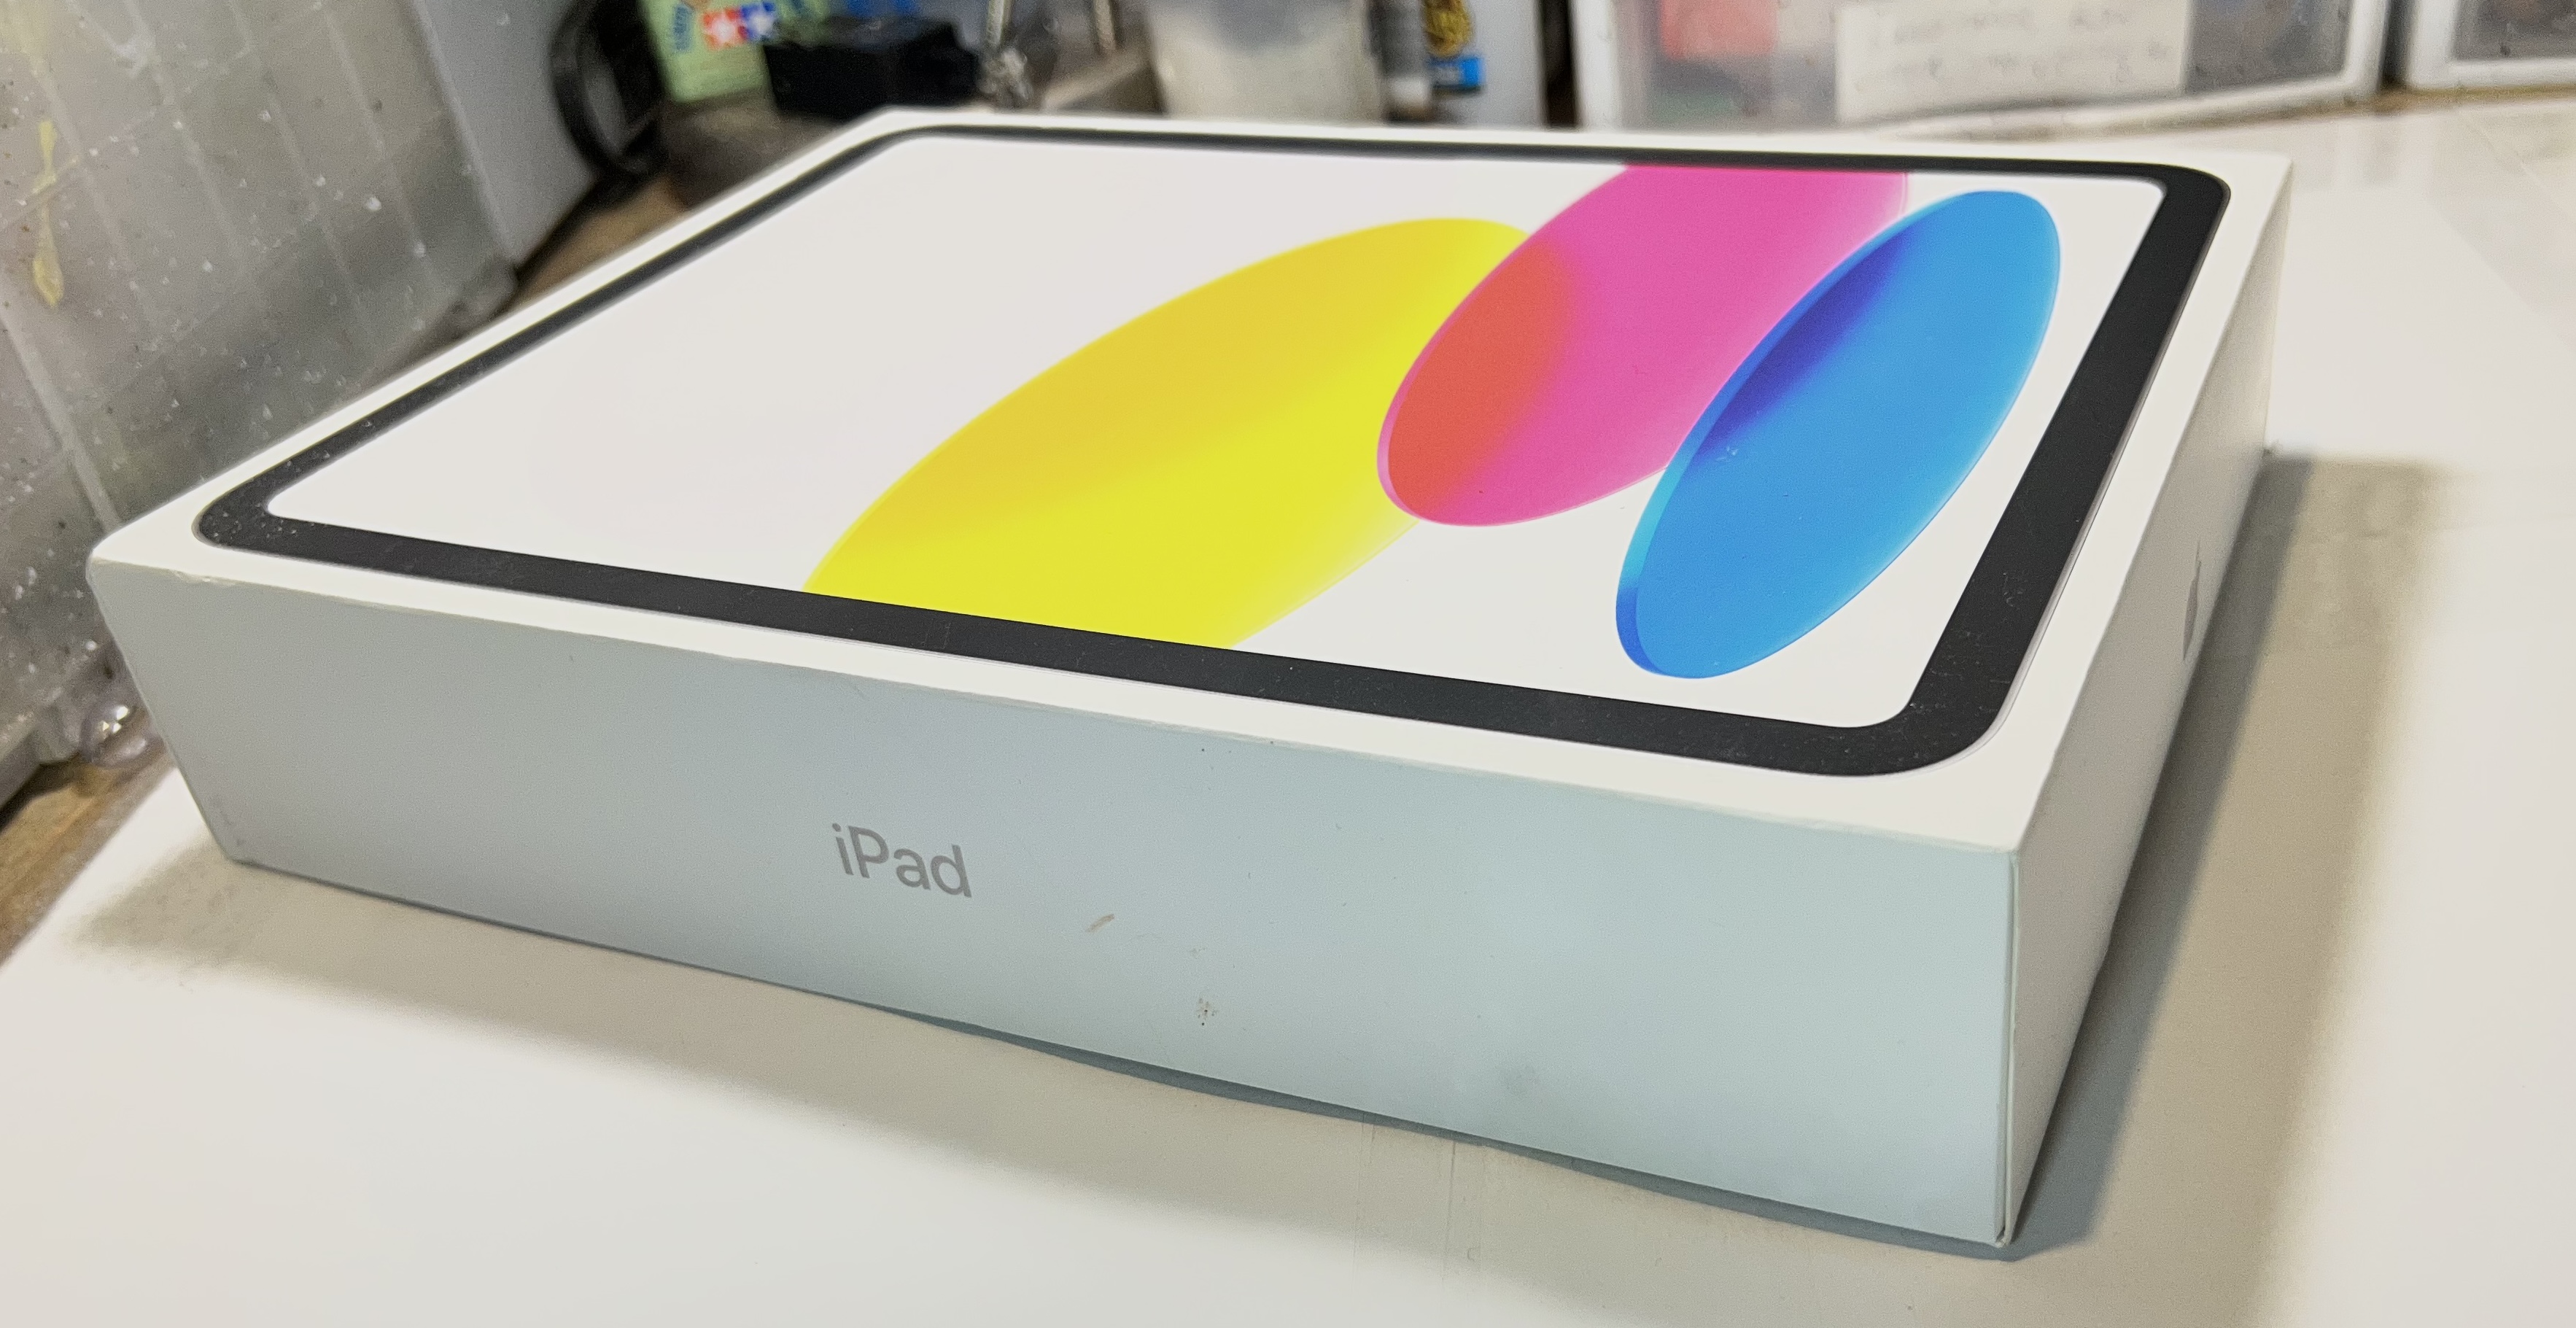
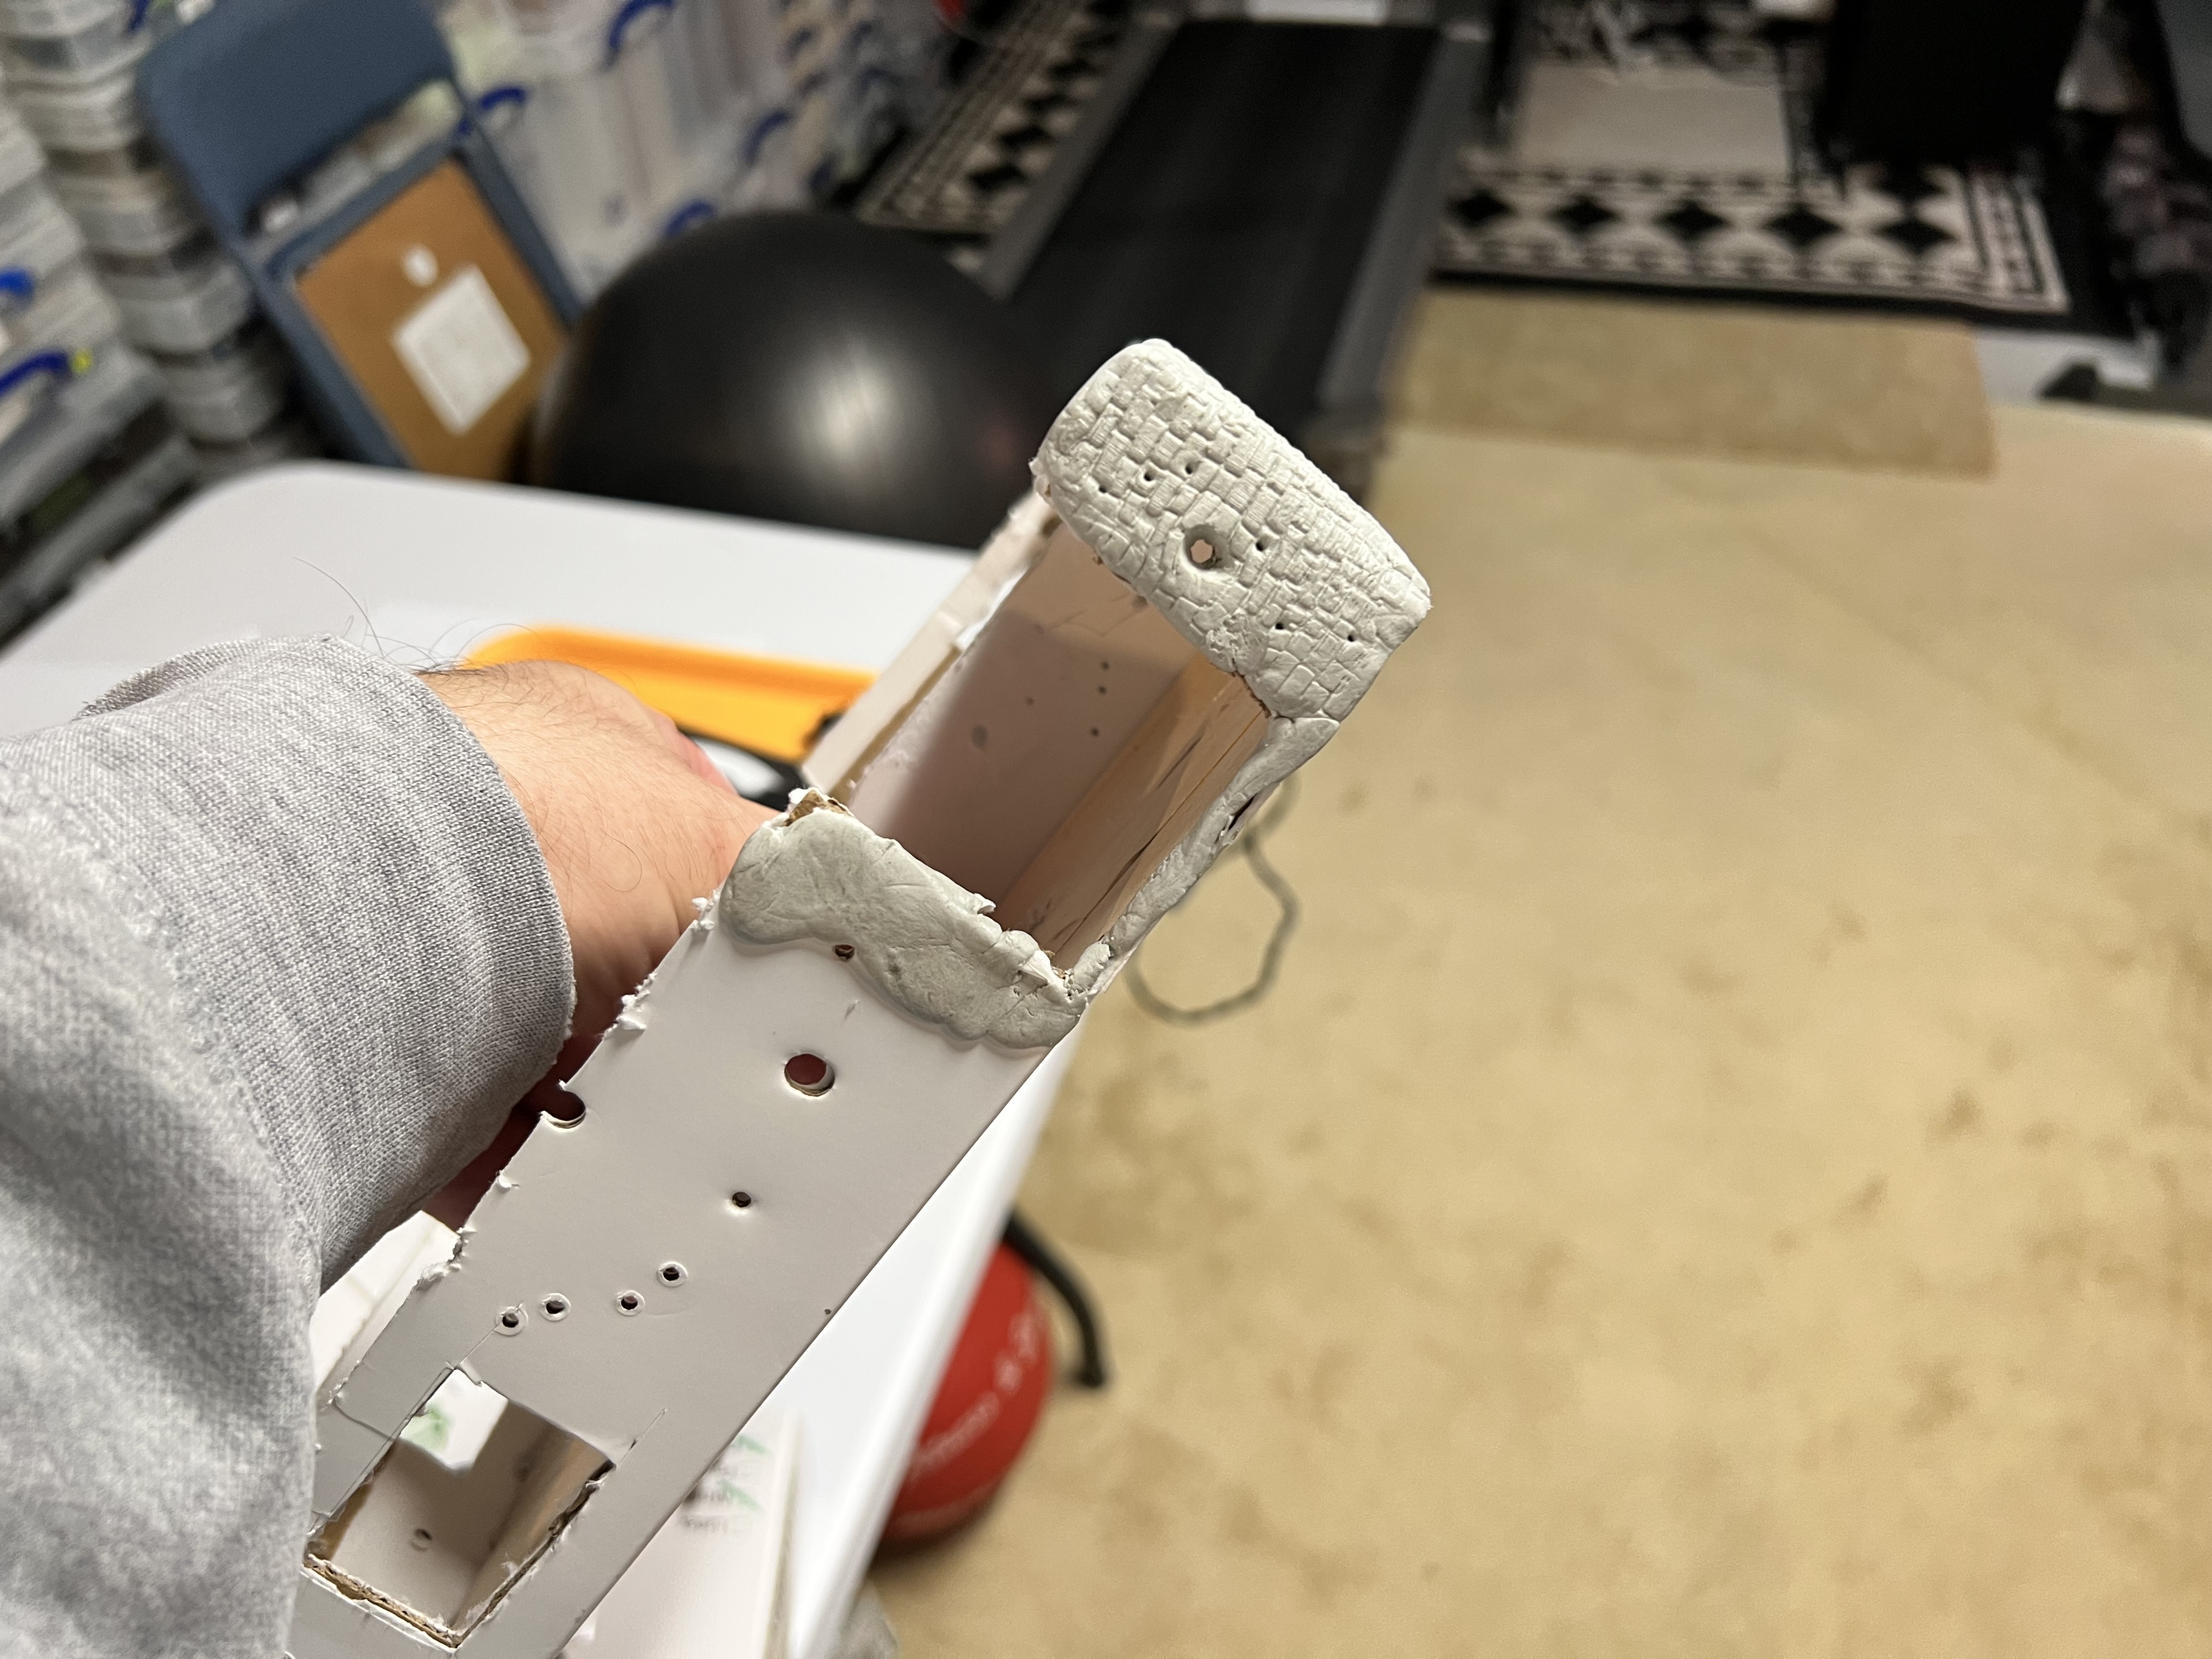
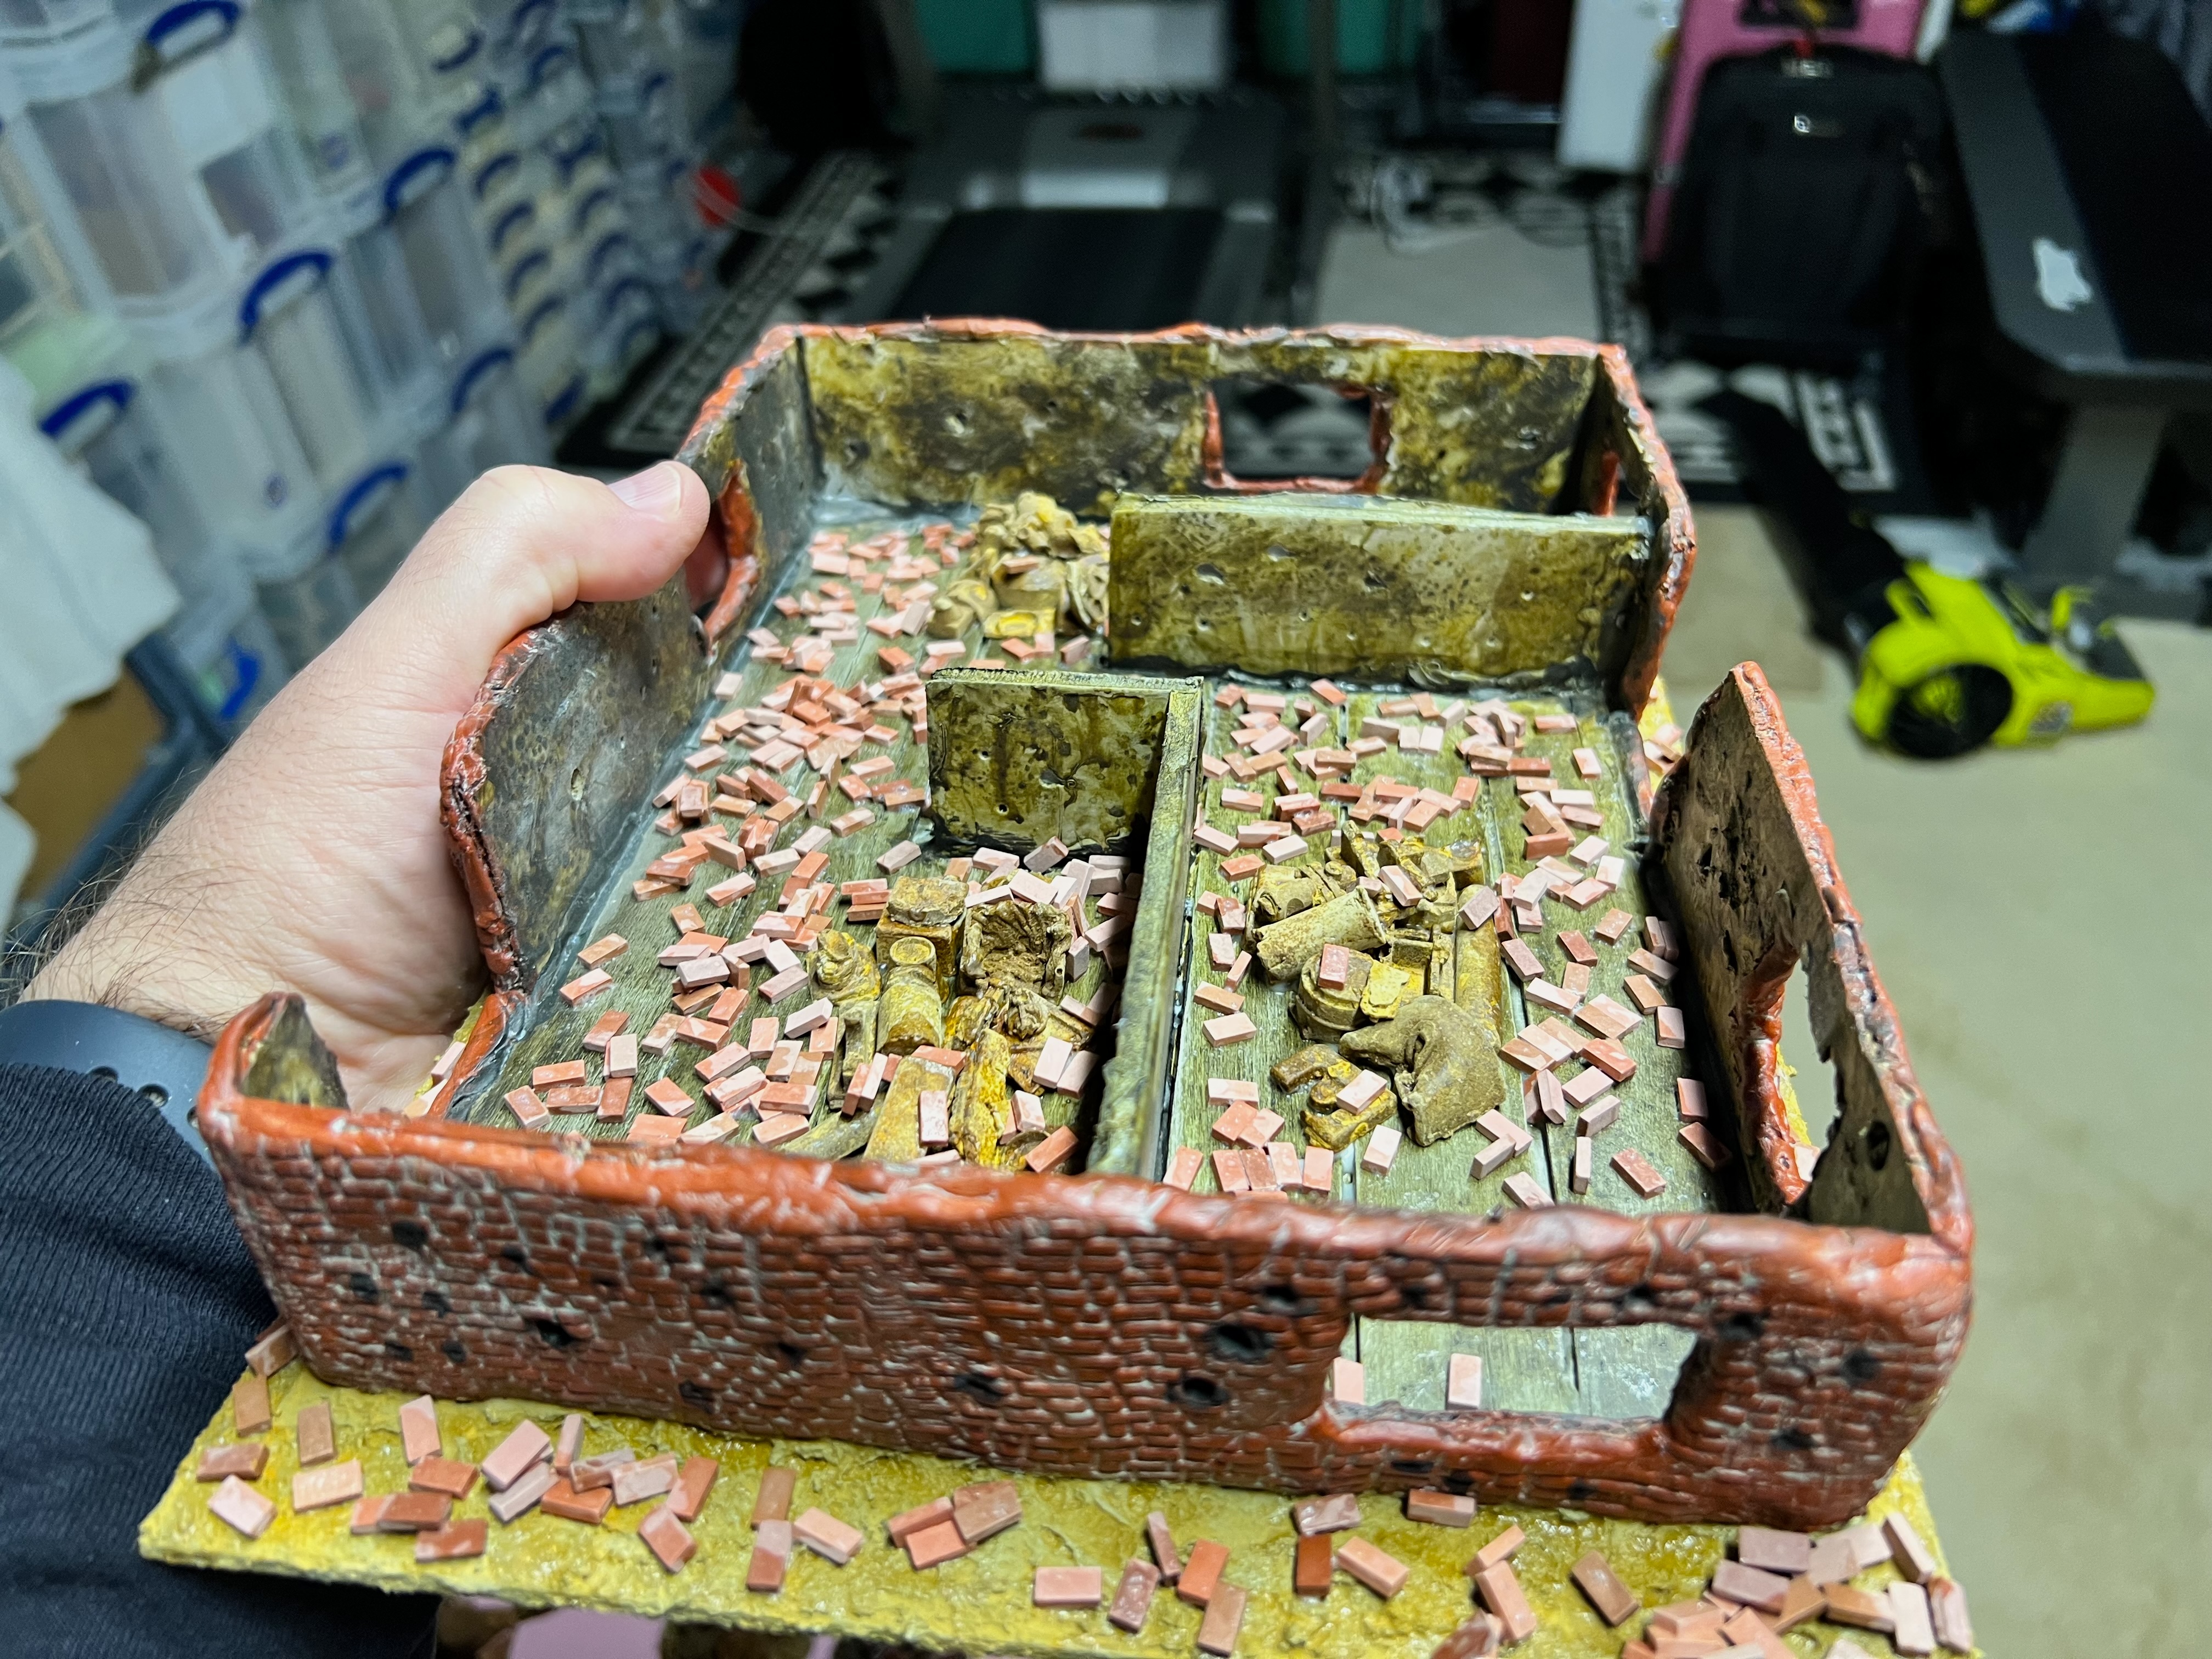
For the two buildings, I converted an iPad 16 box top and bottom. I used Apoxie Sculpt, steel washers, sand, multiple pieces of plastic, desiccant cylinders, and a lot of Juweela items to make the 61 scatter bases. And for two flat industrial structures, I reused two pieces of packing materials to repurpose them as flat rusted structures.
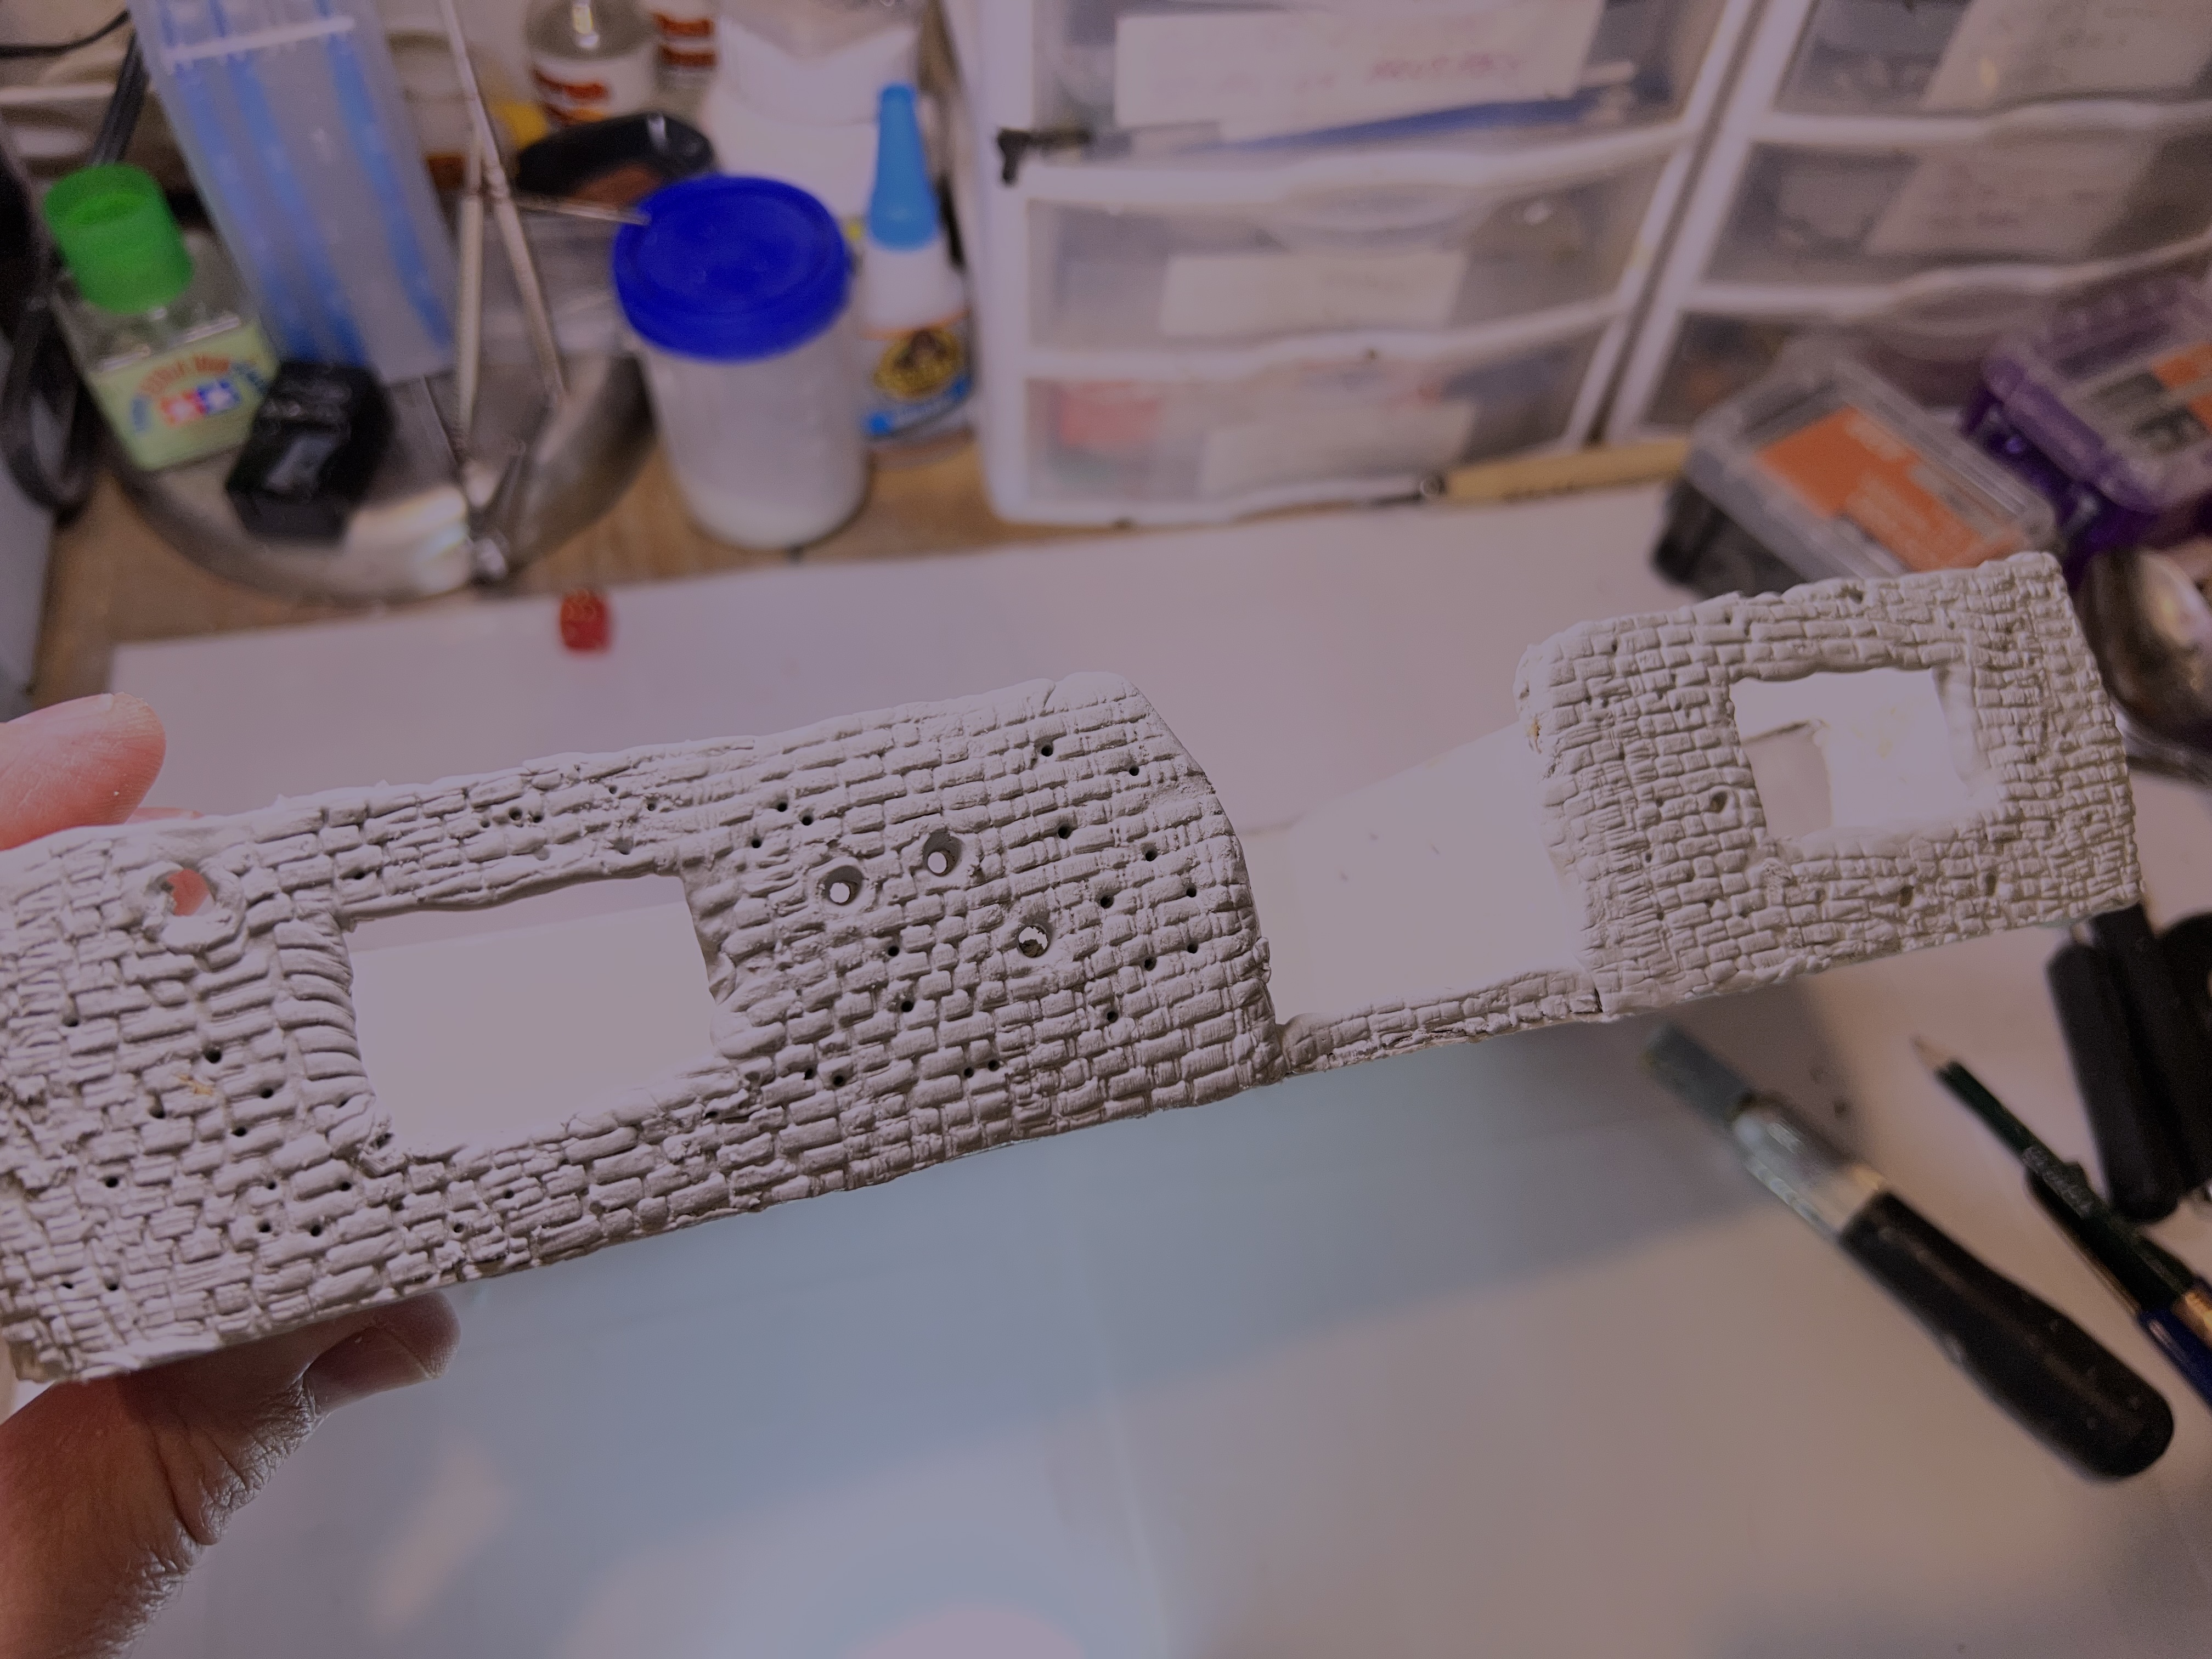
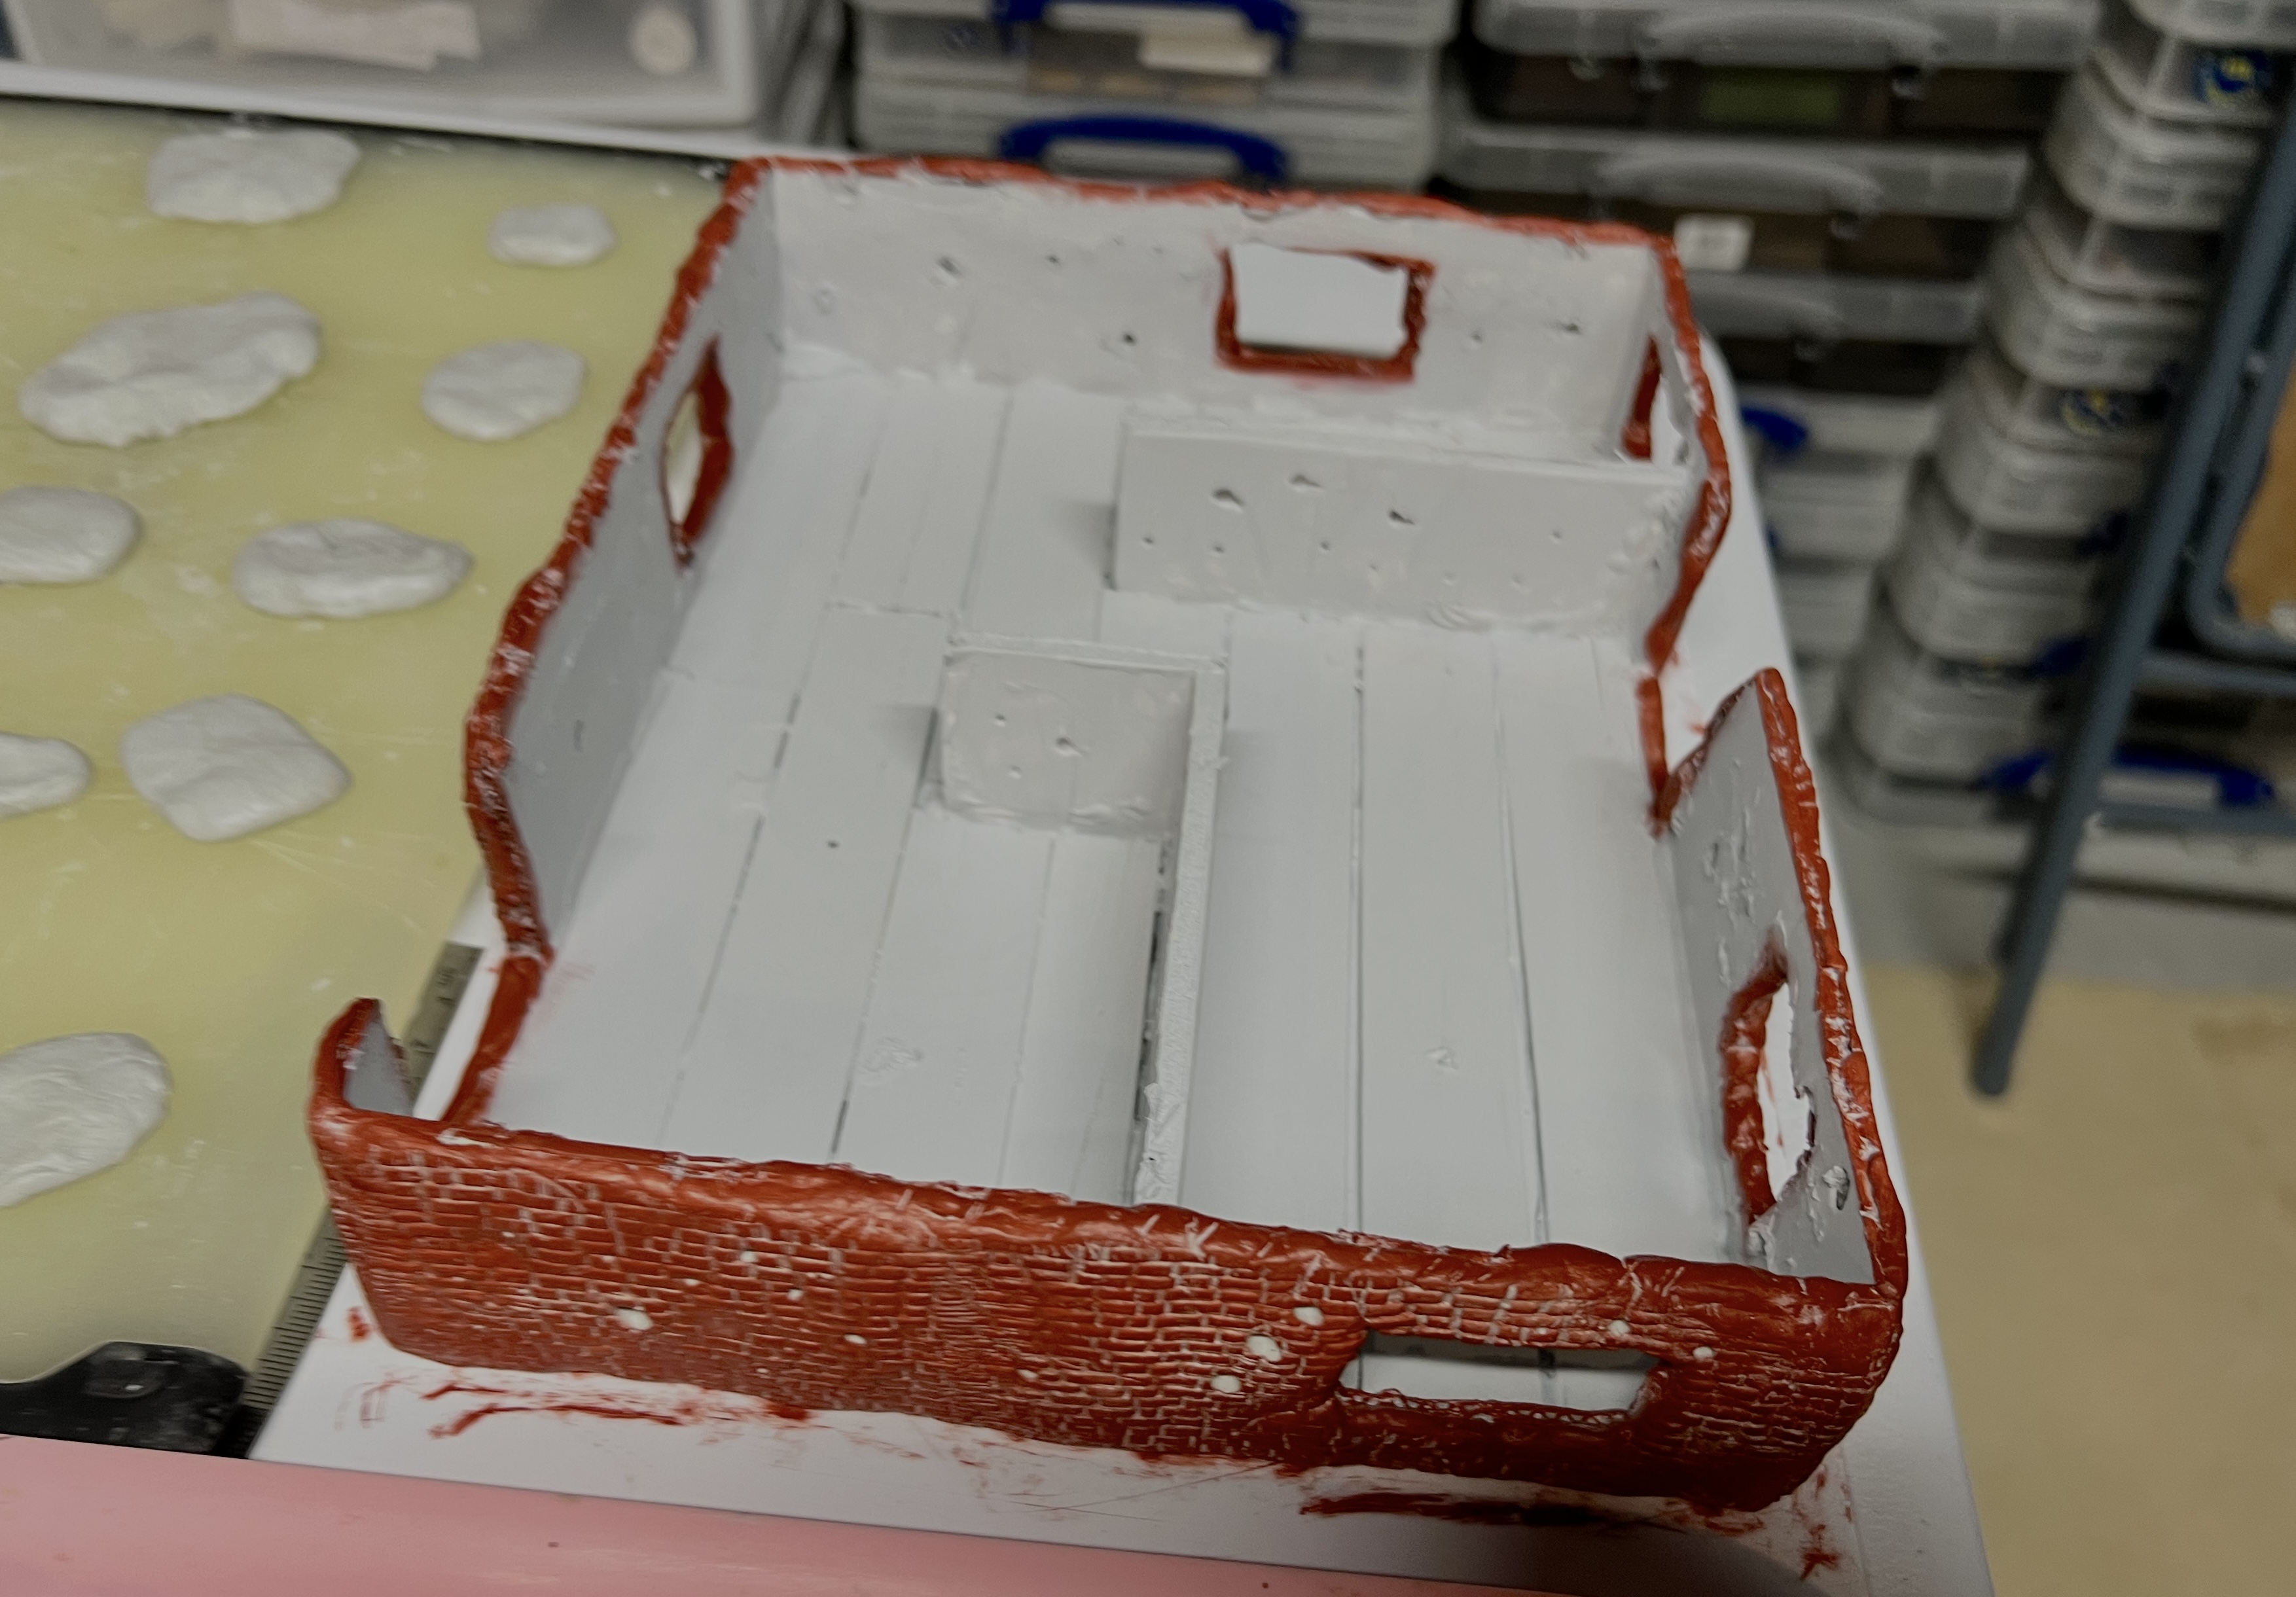
I started out with this iPad 16 box. I would use the top and bottom of this. It is plastic and cardboard.
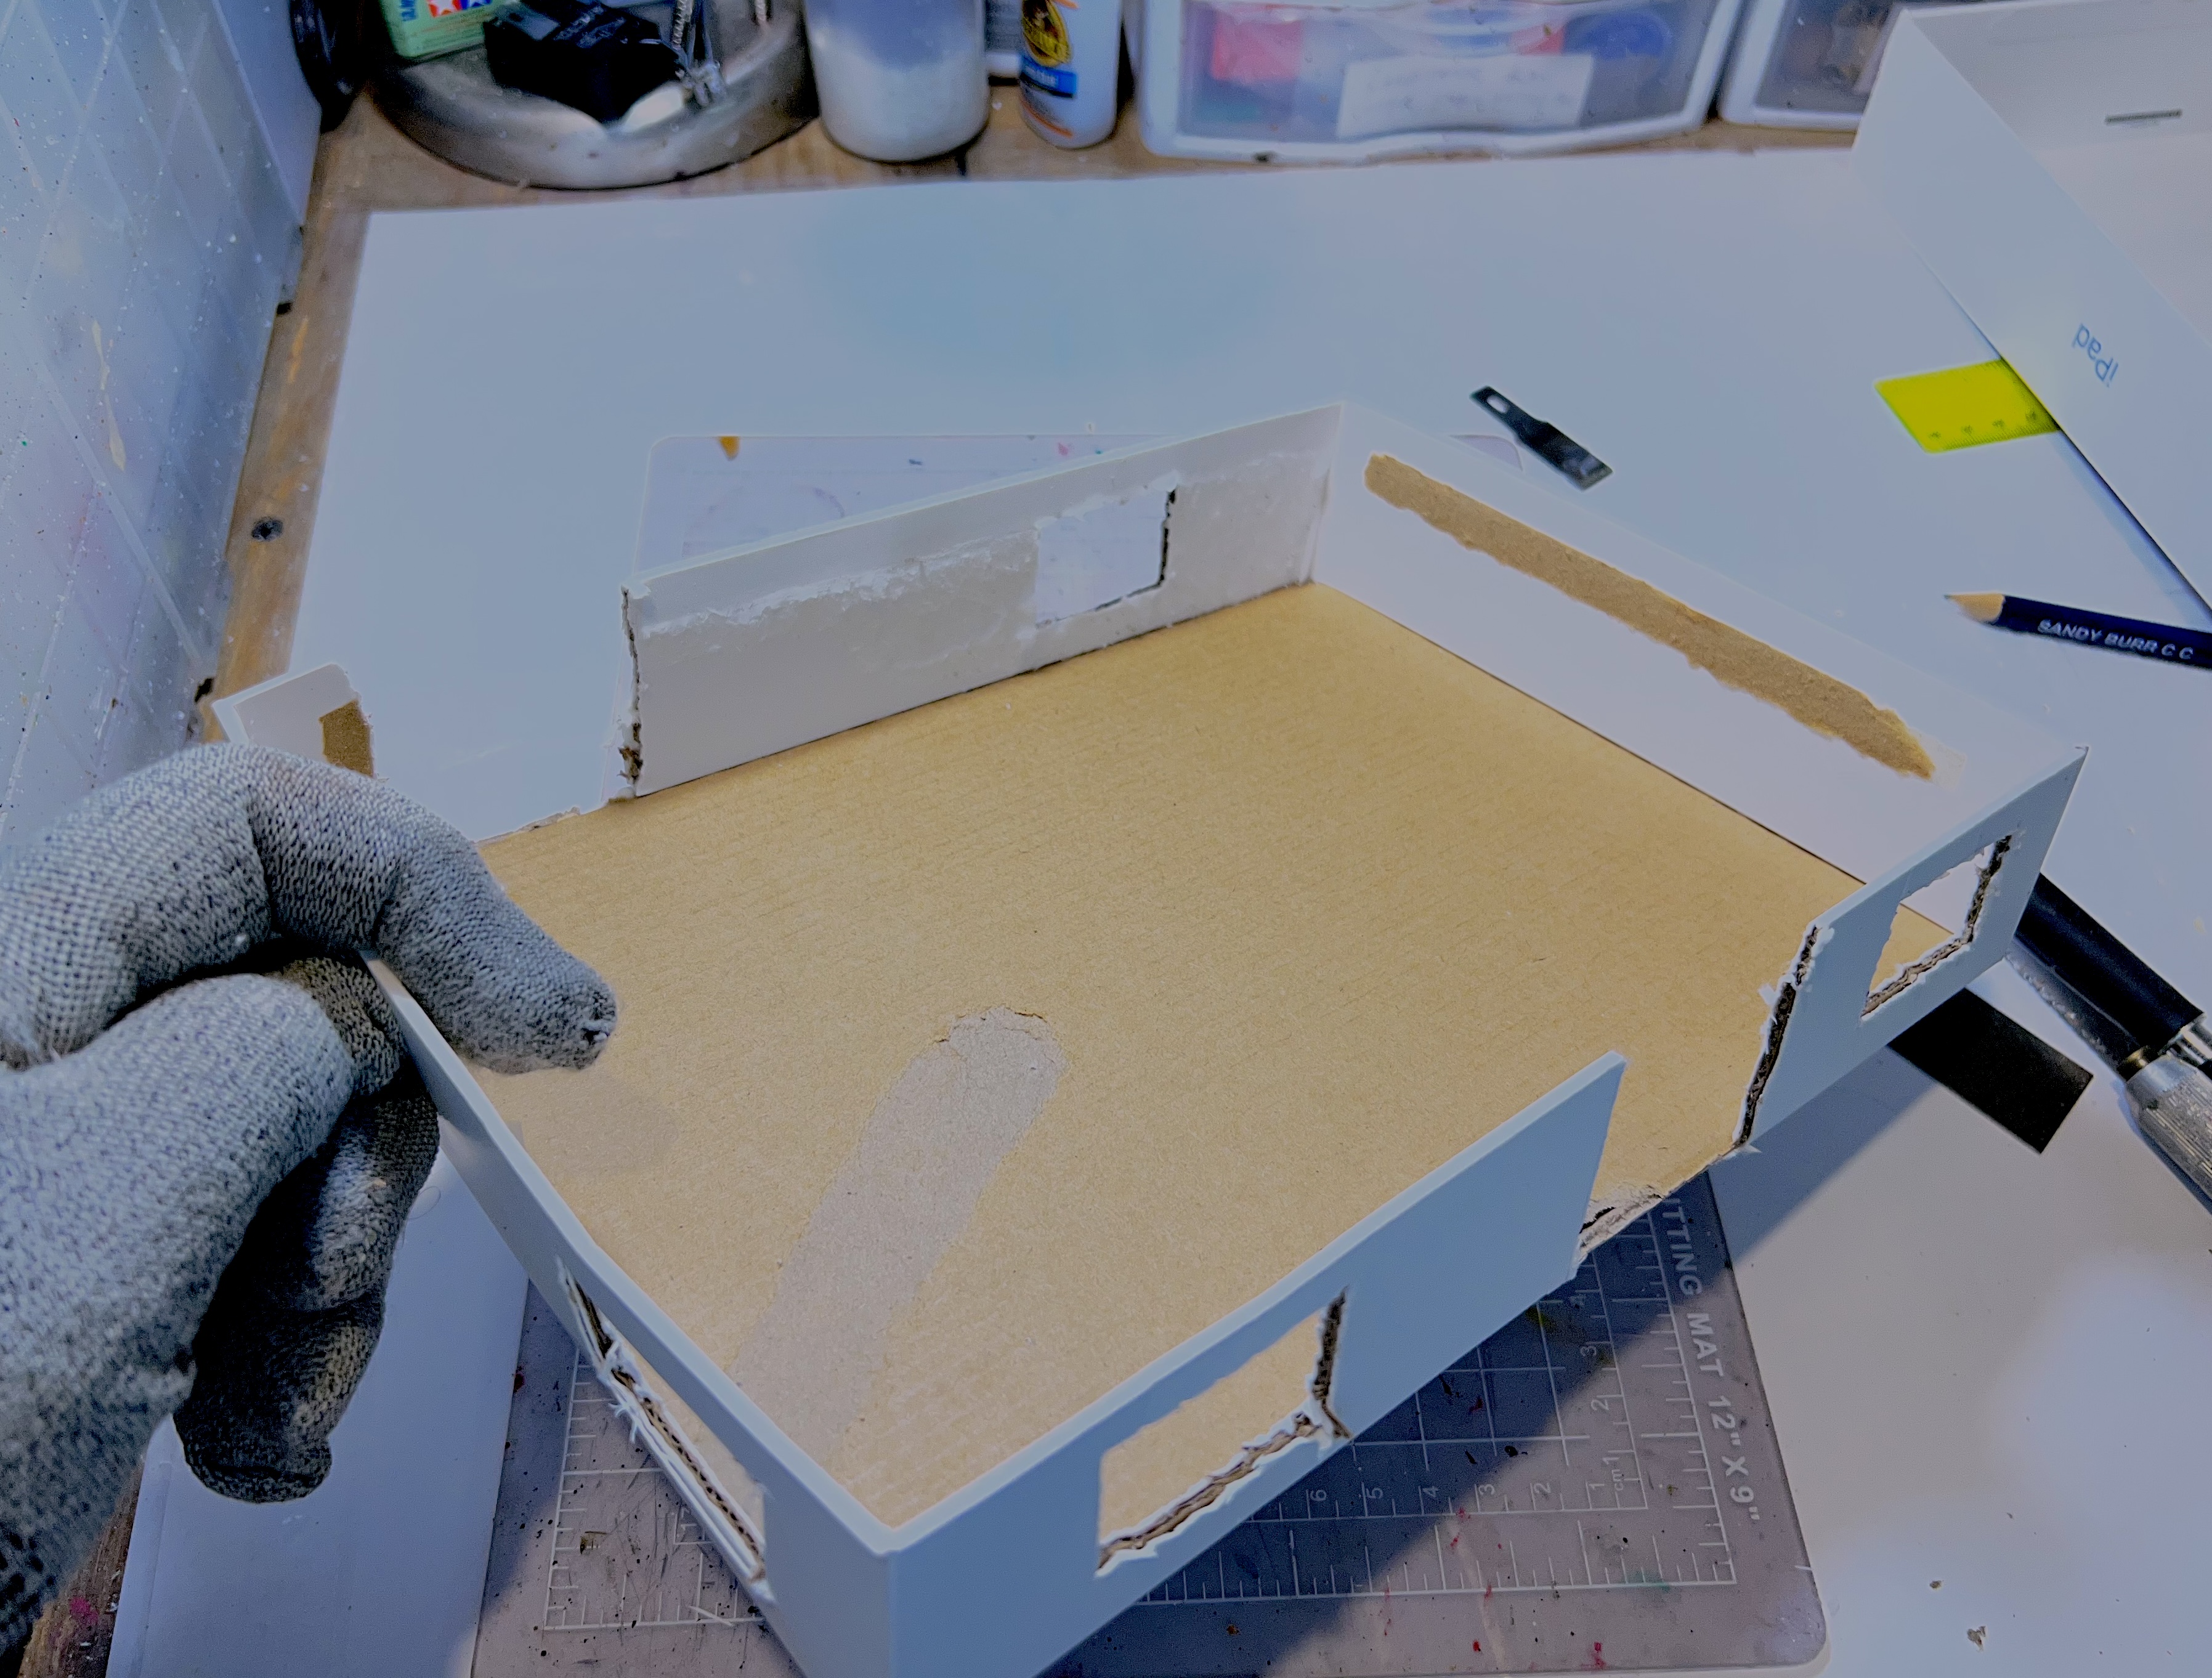
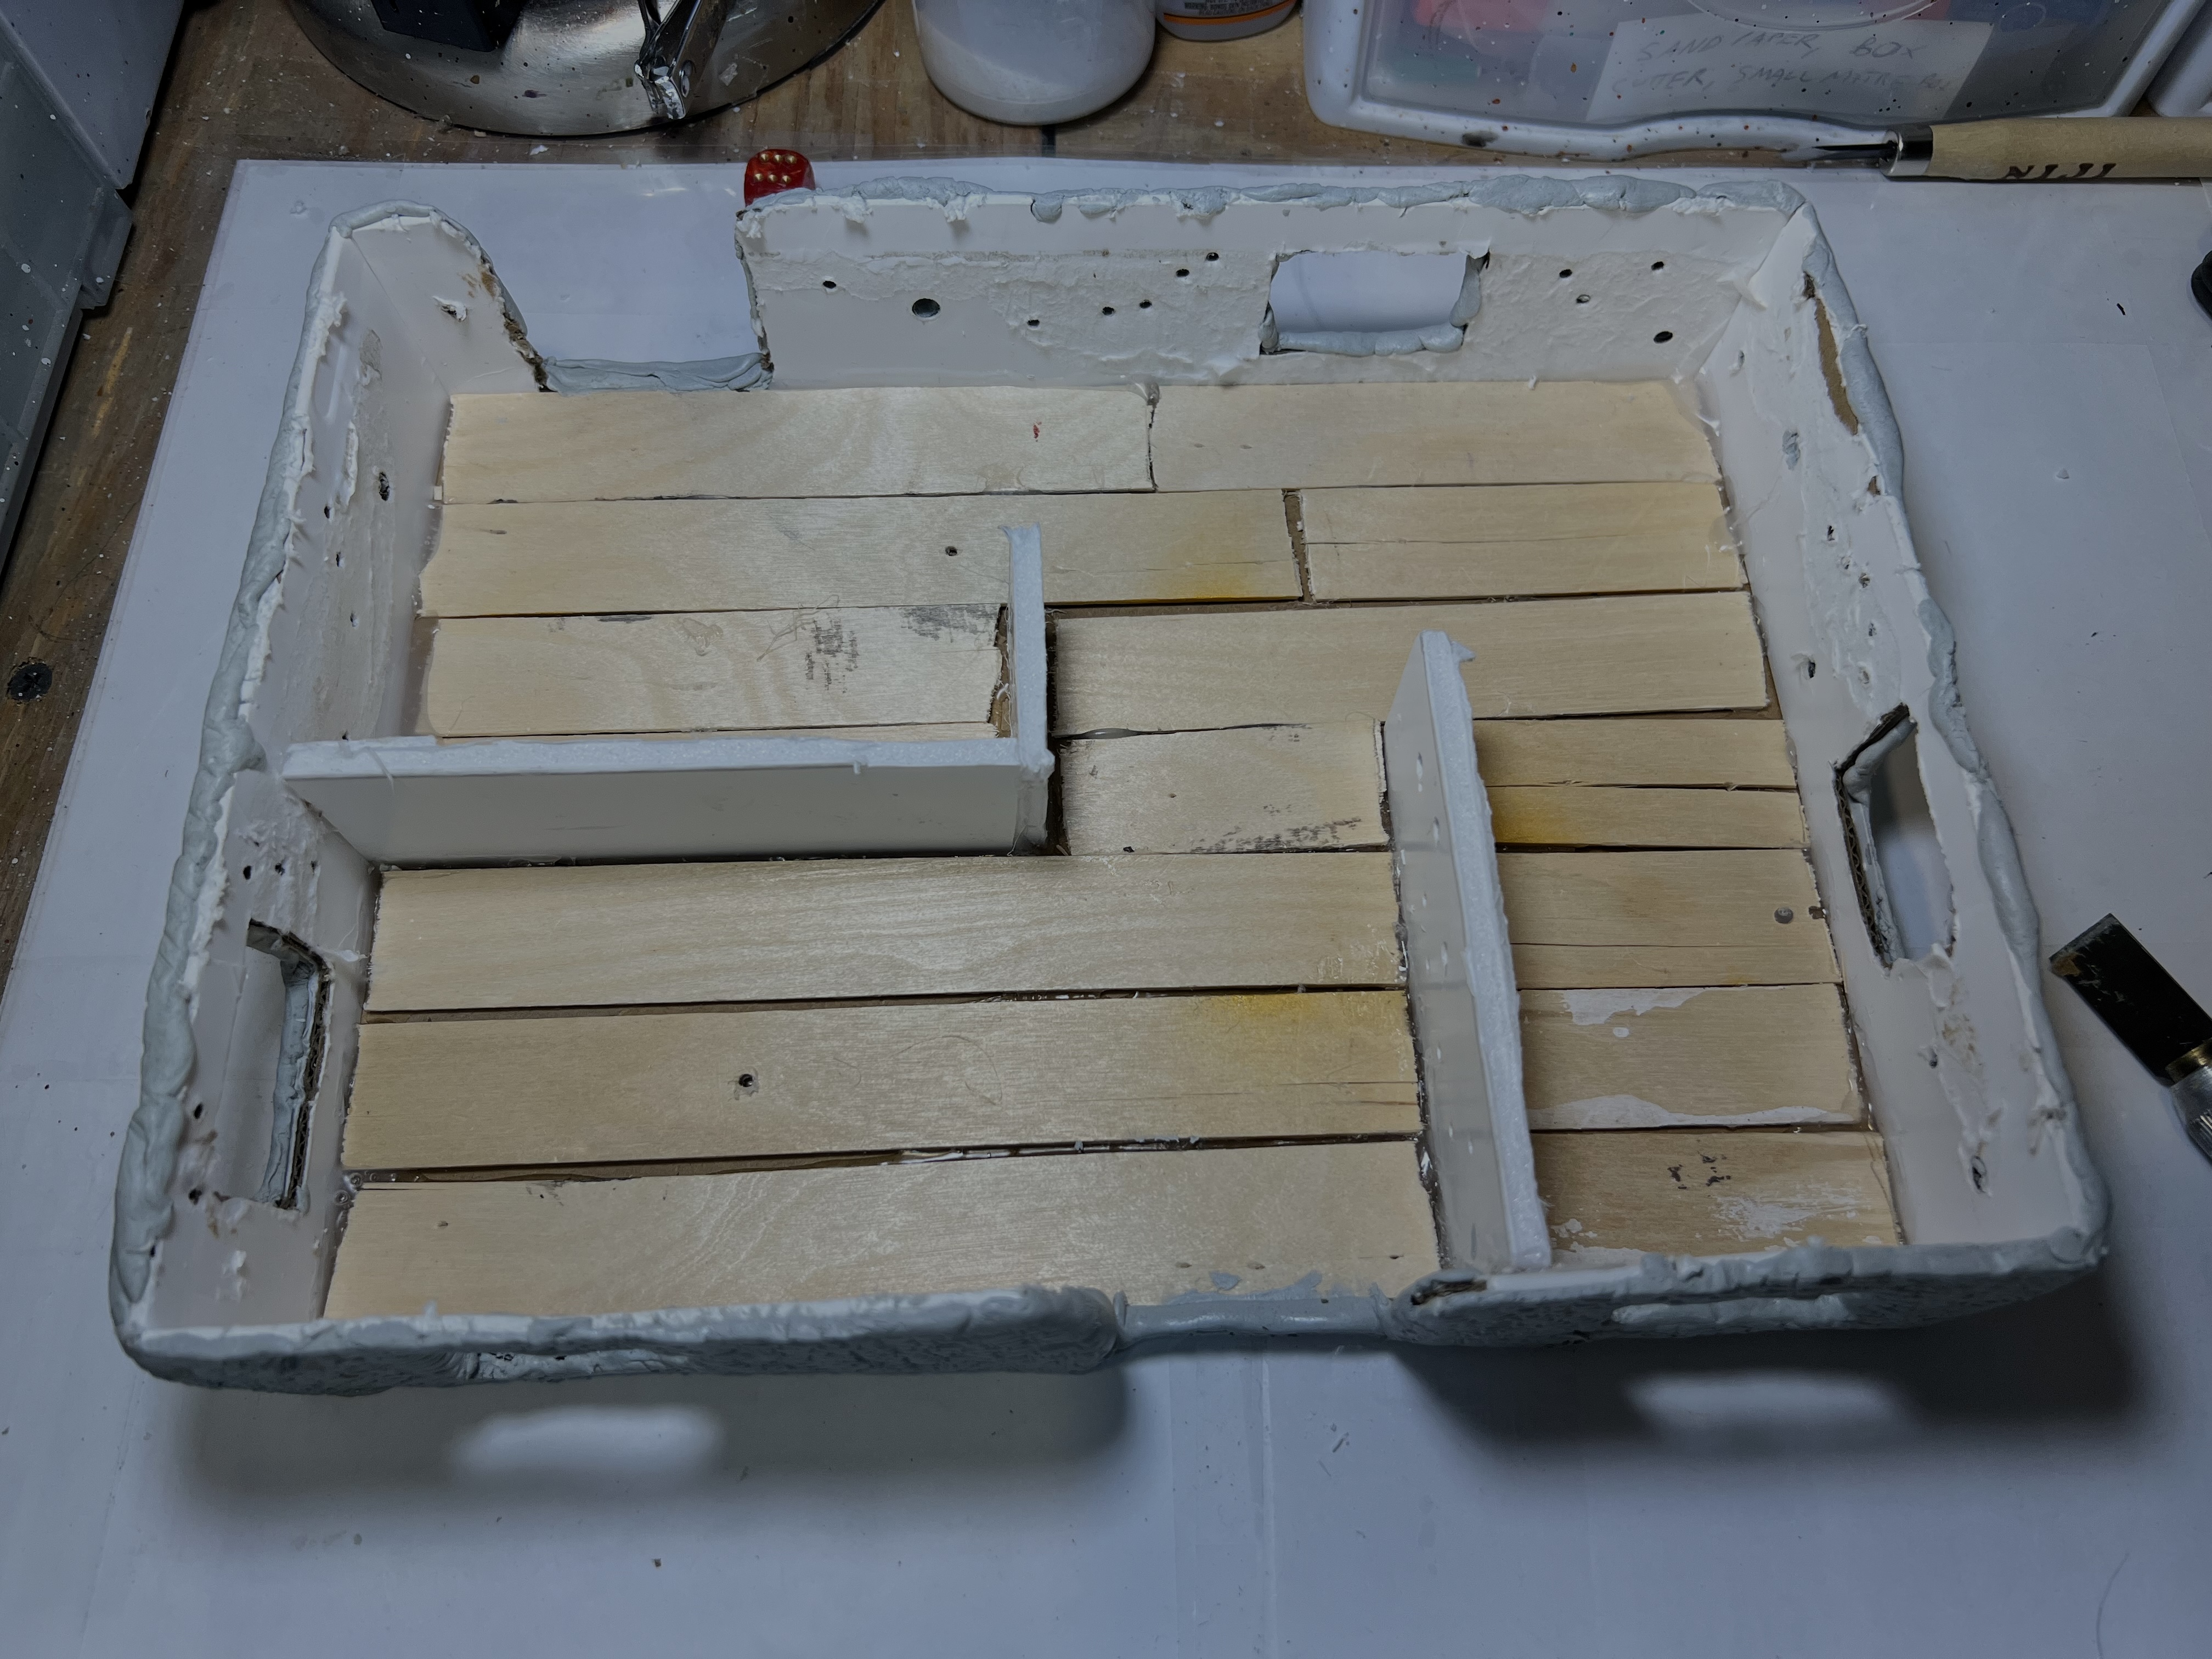
I sawed out windows and doors on both box pieces and made each a bit differently in terms of architectural arrangement. I then hot-glued foam board to make rooms. For flooring, I broke up old popsicle sticks. These I had used previously to mount figures for painting on other projects. Lastly, I drilled out holes in the walls to simulate old bullet holes.
Cutting out the windows and doors on the first building.Adding the walls, bullet holes, and flooring.
Then it was on to sculpting the outside walls. I did each building separately from here on so as to handle both curing times and to learn as I went as to best practices. Apoxie Sculpt and a Green Stuff World brick roller worked well.
Sculpting the walls. I used an awl to create and shape shell and bullet impacts on the outside.Using the windows as gripping spots made the sculpting easier. I did need to then wait for curing.
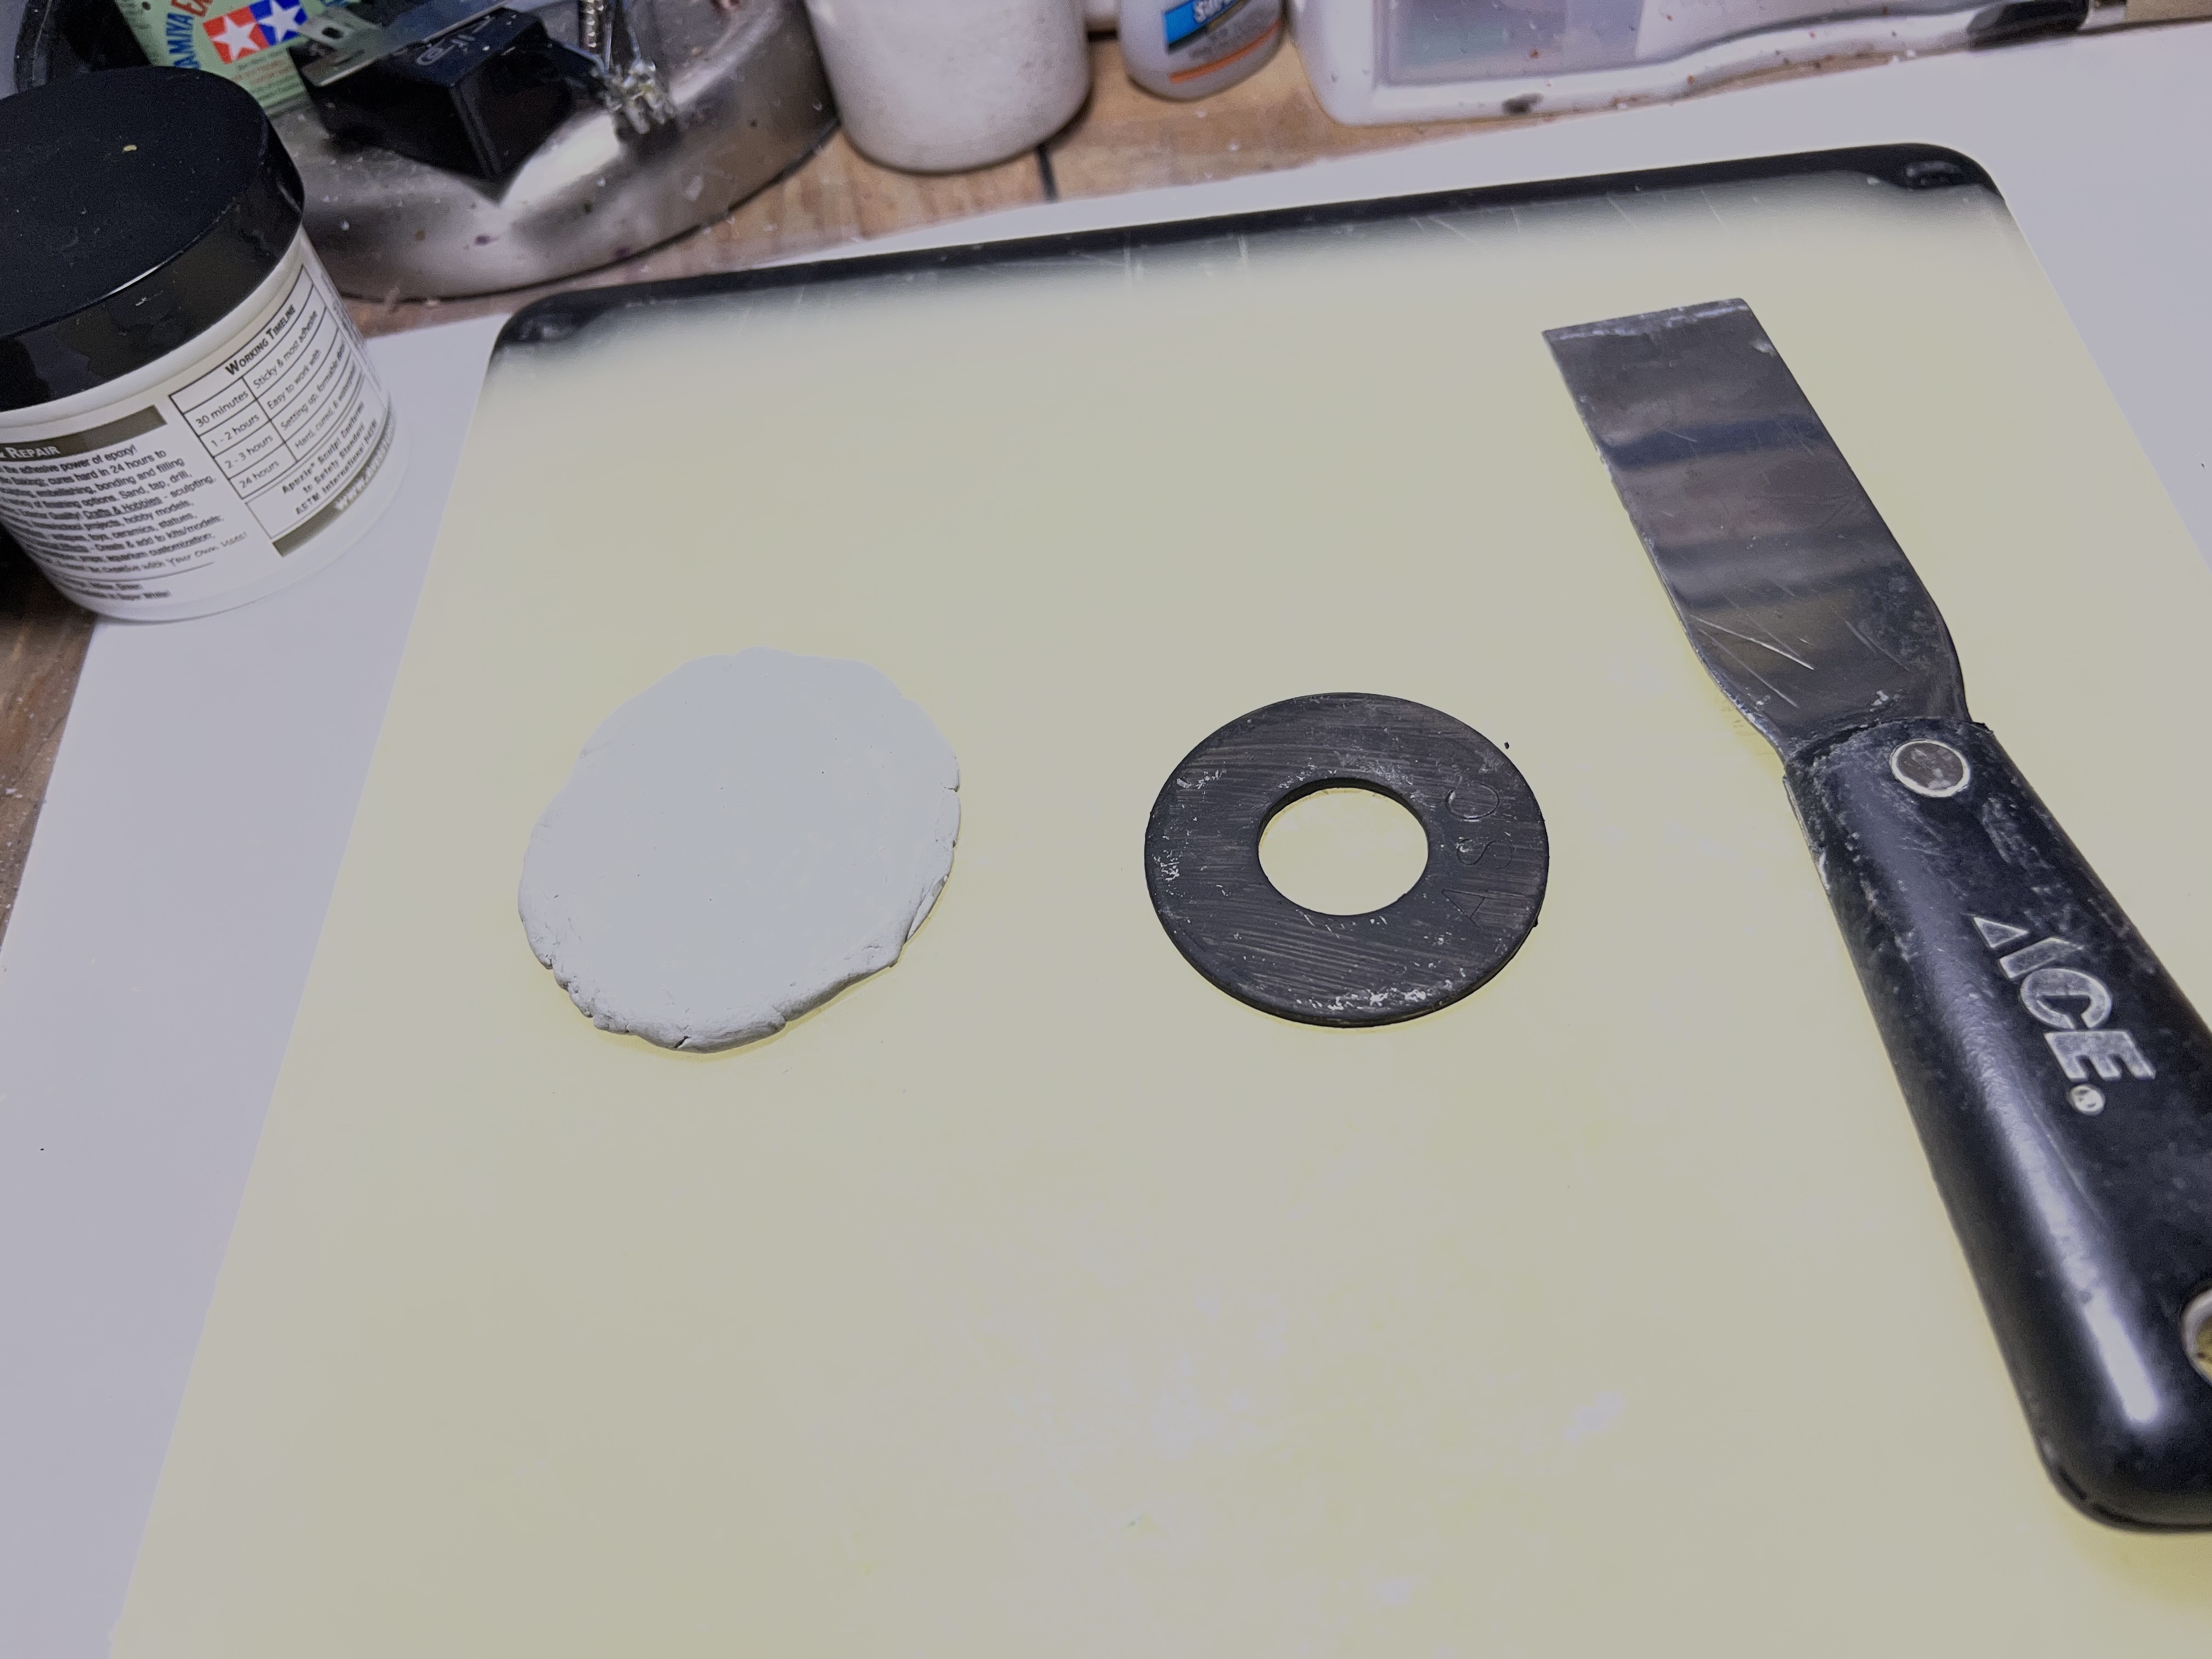
While the walls cured, I worked on the wreckage bases – also using Apoxie Sculpt. I made the bases differently in terms of both size and shape. It helped to use one or more steel washers underneath the base sculpts. Using different sizes helped to make the shapes varied.
The biggest washer that I used and a base covered with Apoxie Sculpt.Examples of the other sizes and shapes – all with steel washers underneath.
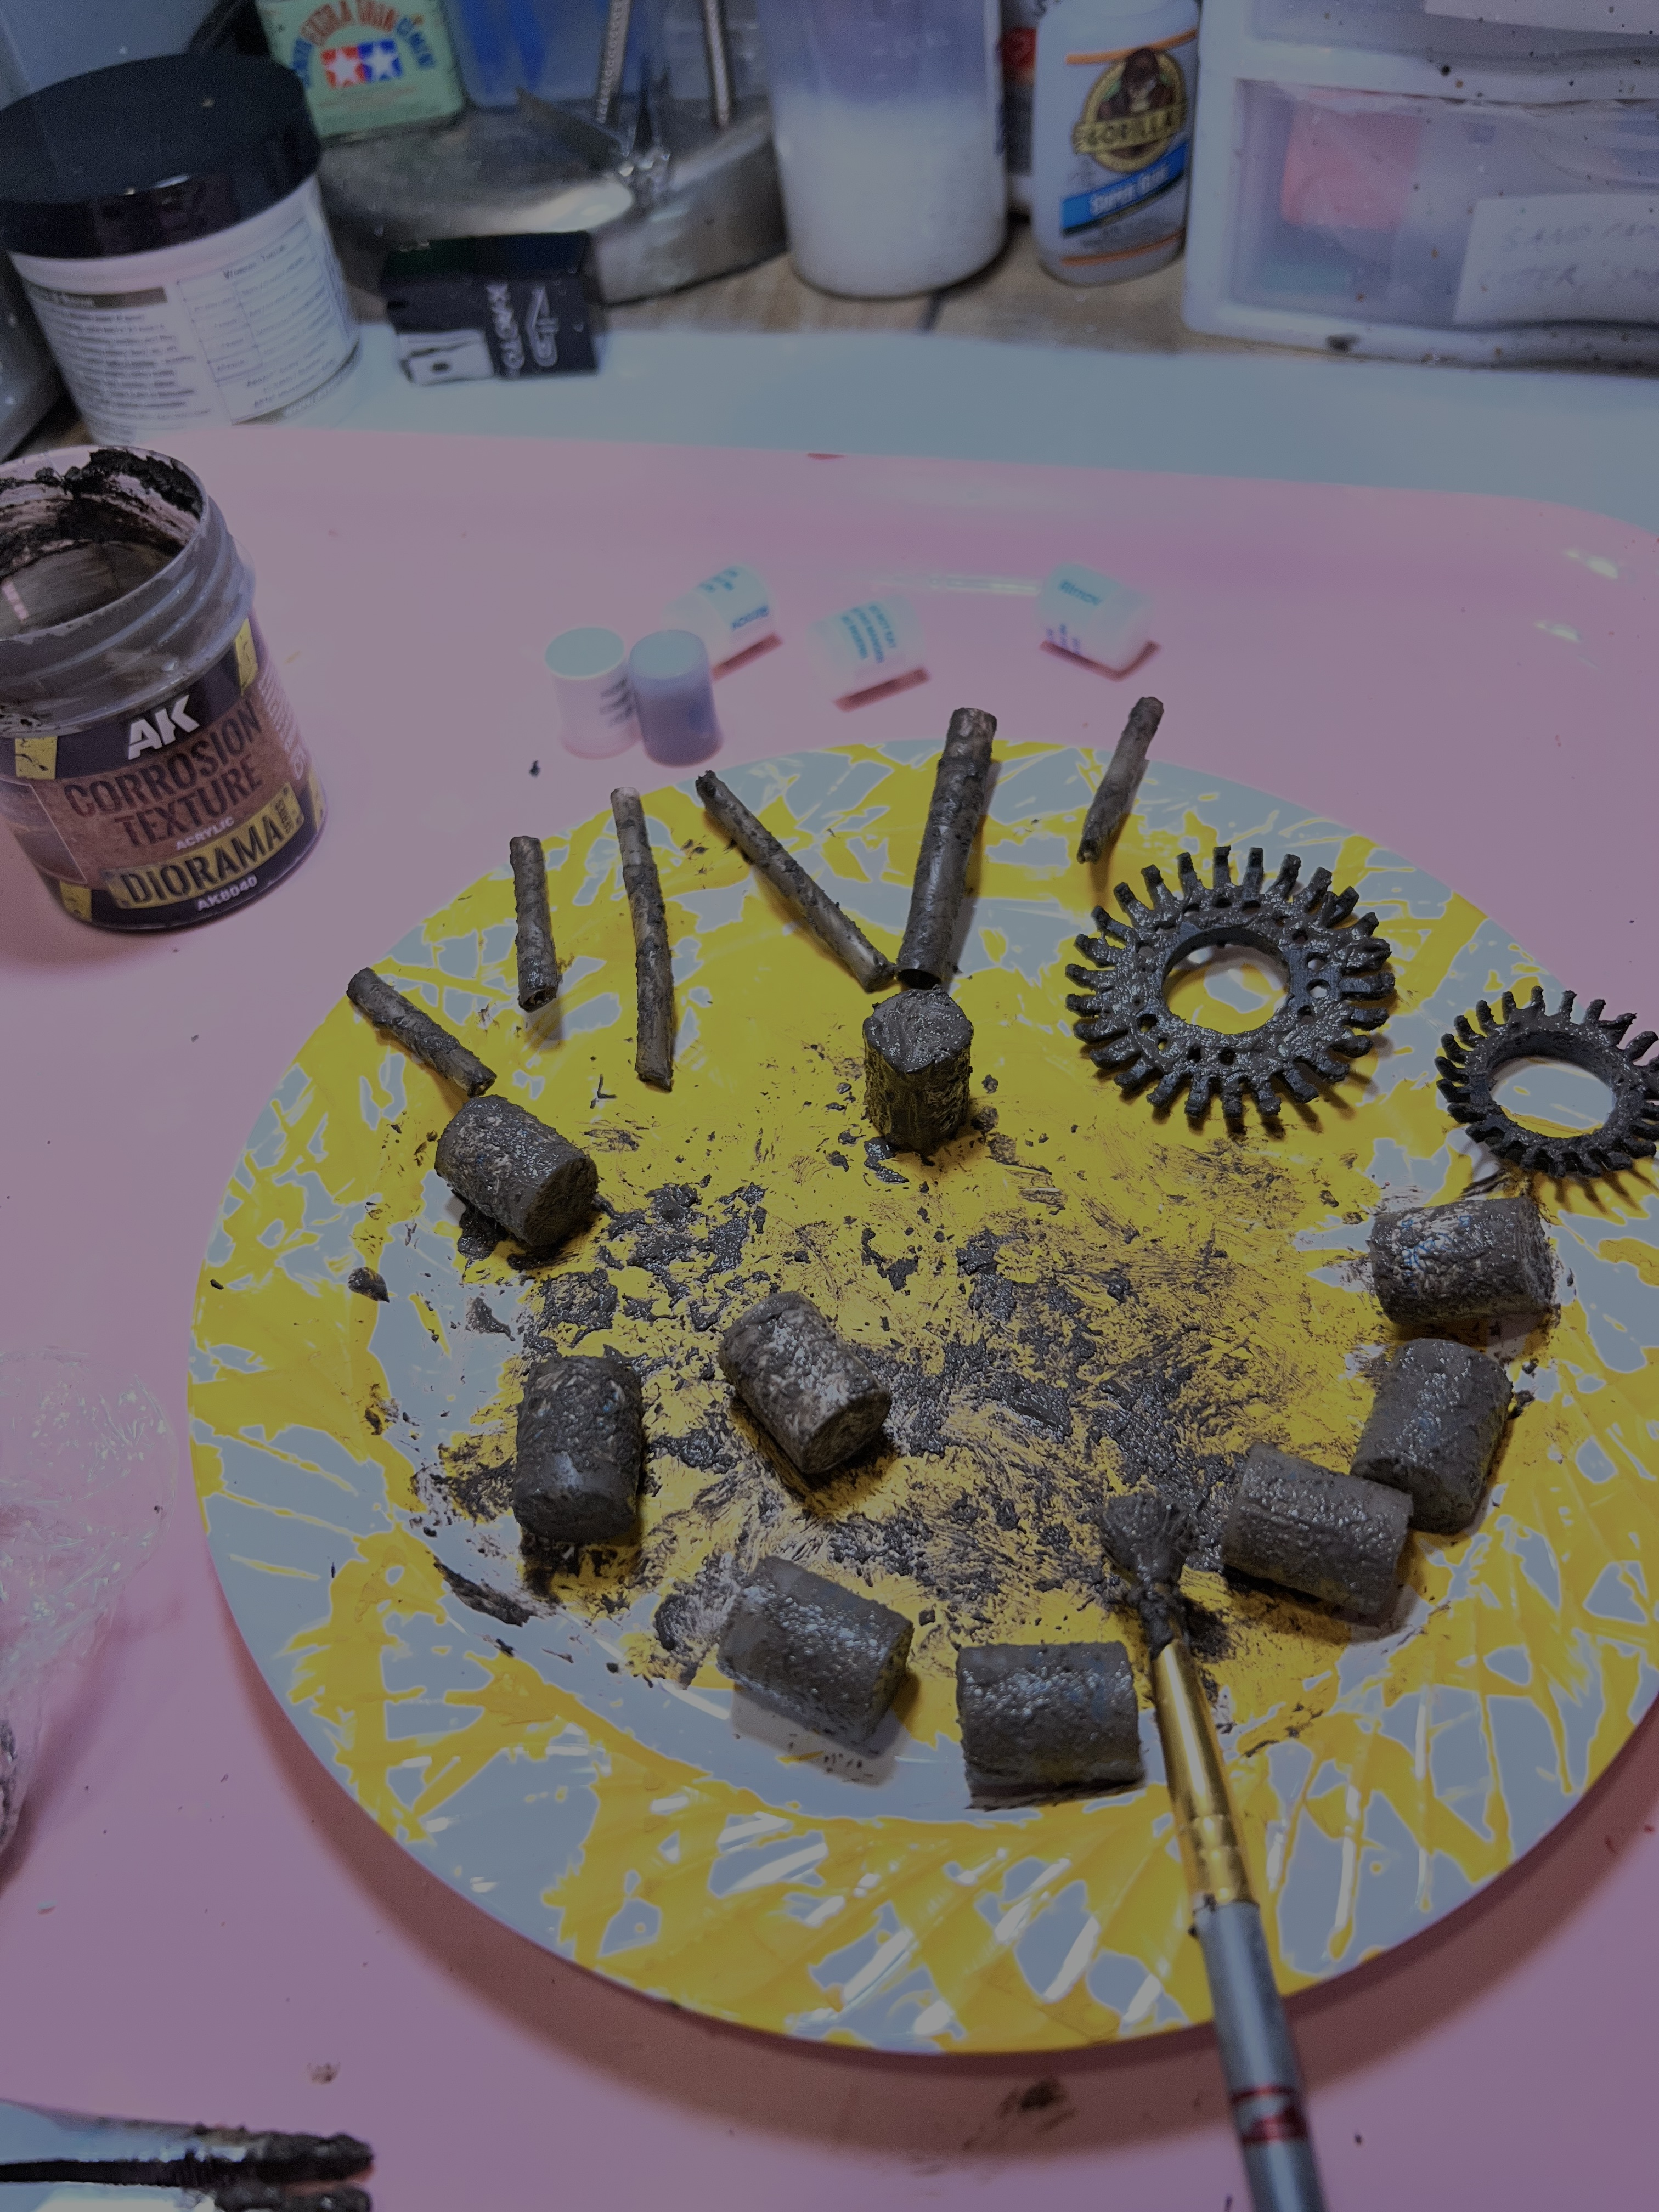
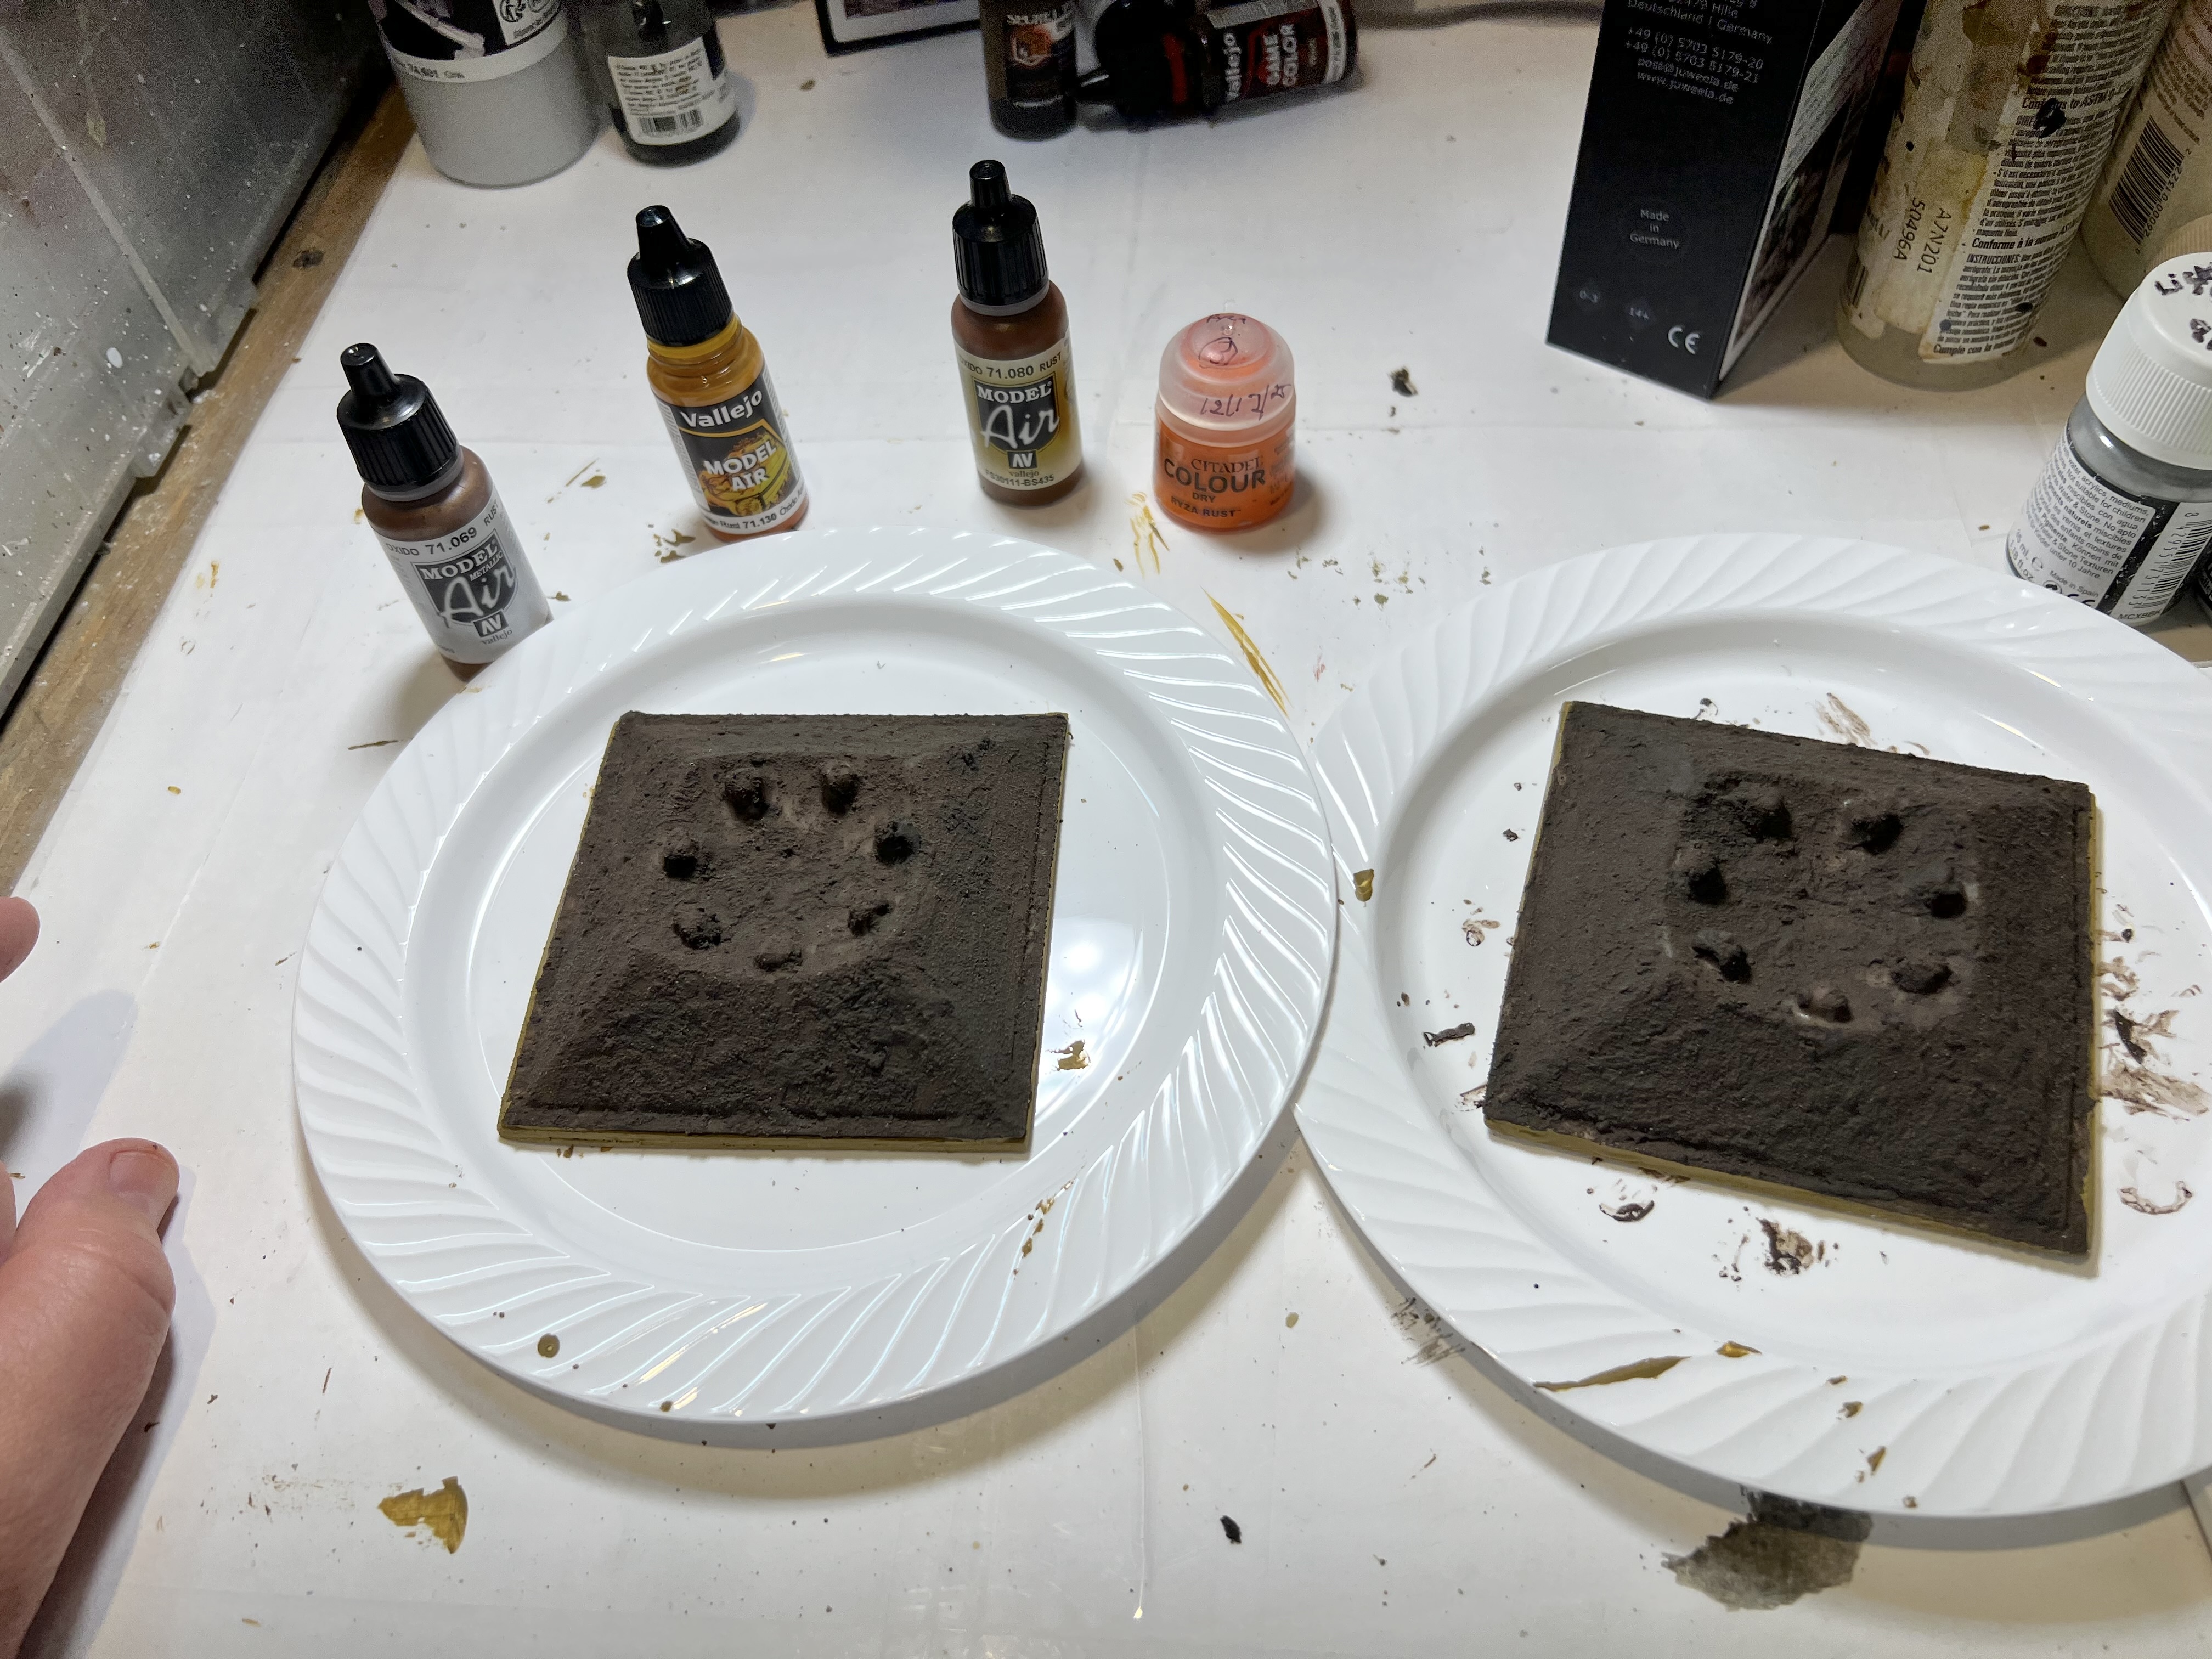
As the corrosion texture paint takes time to dry as well, I started adding that to various pieces of debris that I had saved up. I like to use a cheap old brush that could serve no other purpose – especially as it usually destroys it. The corrosion paint needed to dry and then got a second application.
Using the AK Corrosion Texture paint. Here I am using it on desiccant cylinders (from pill bottles), crushed plastic straw sections, and rubber inserts from a drain plug replacement.
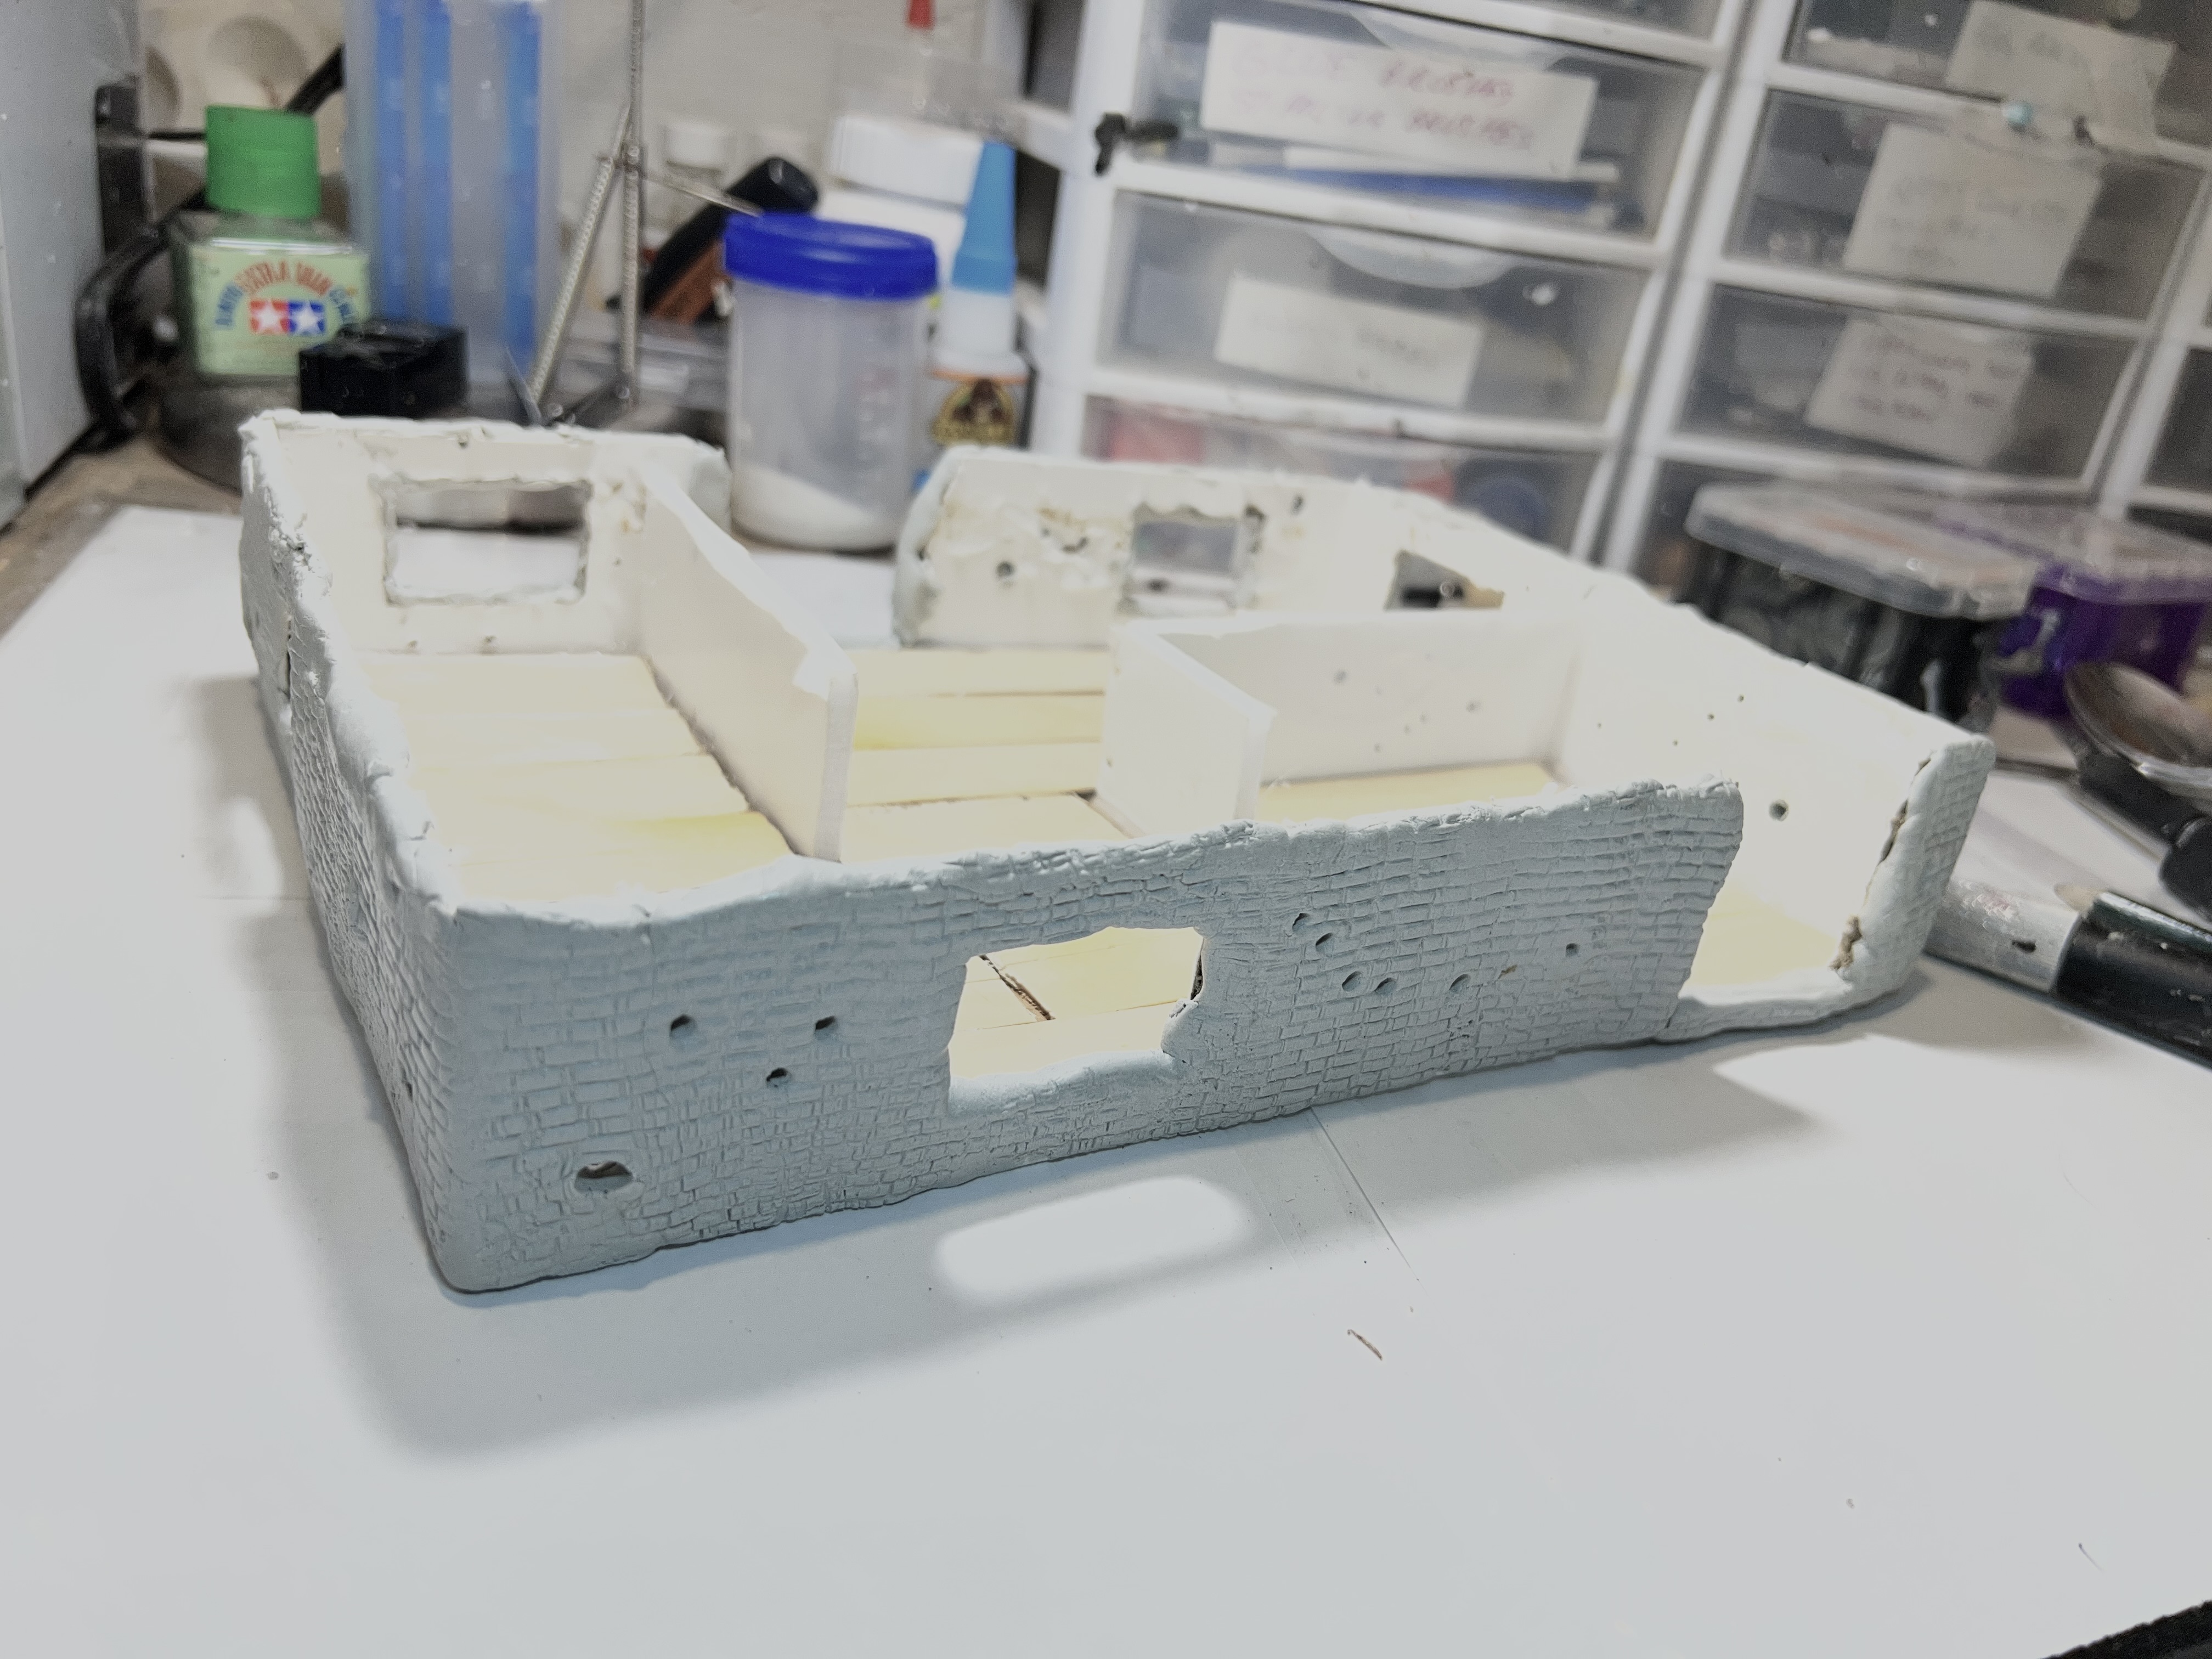
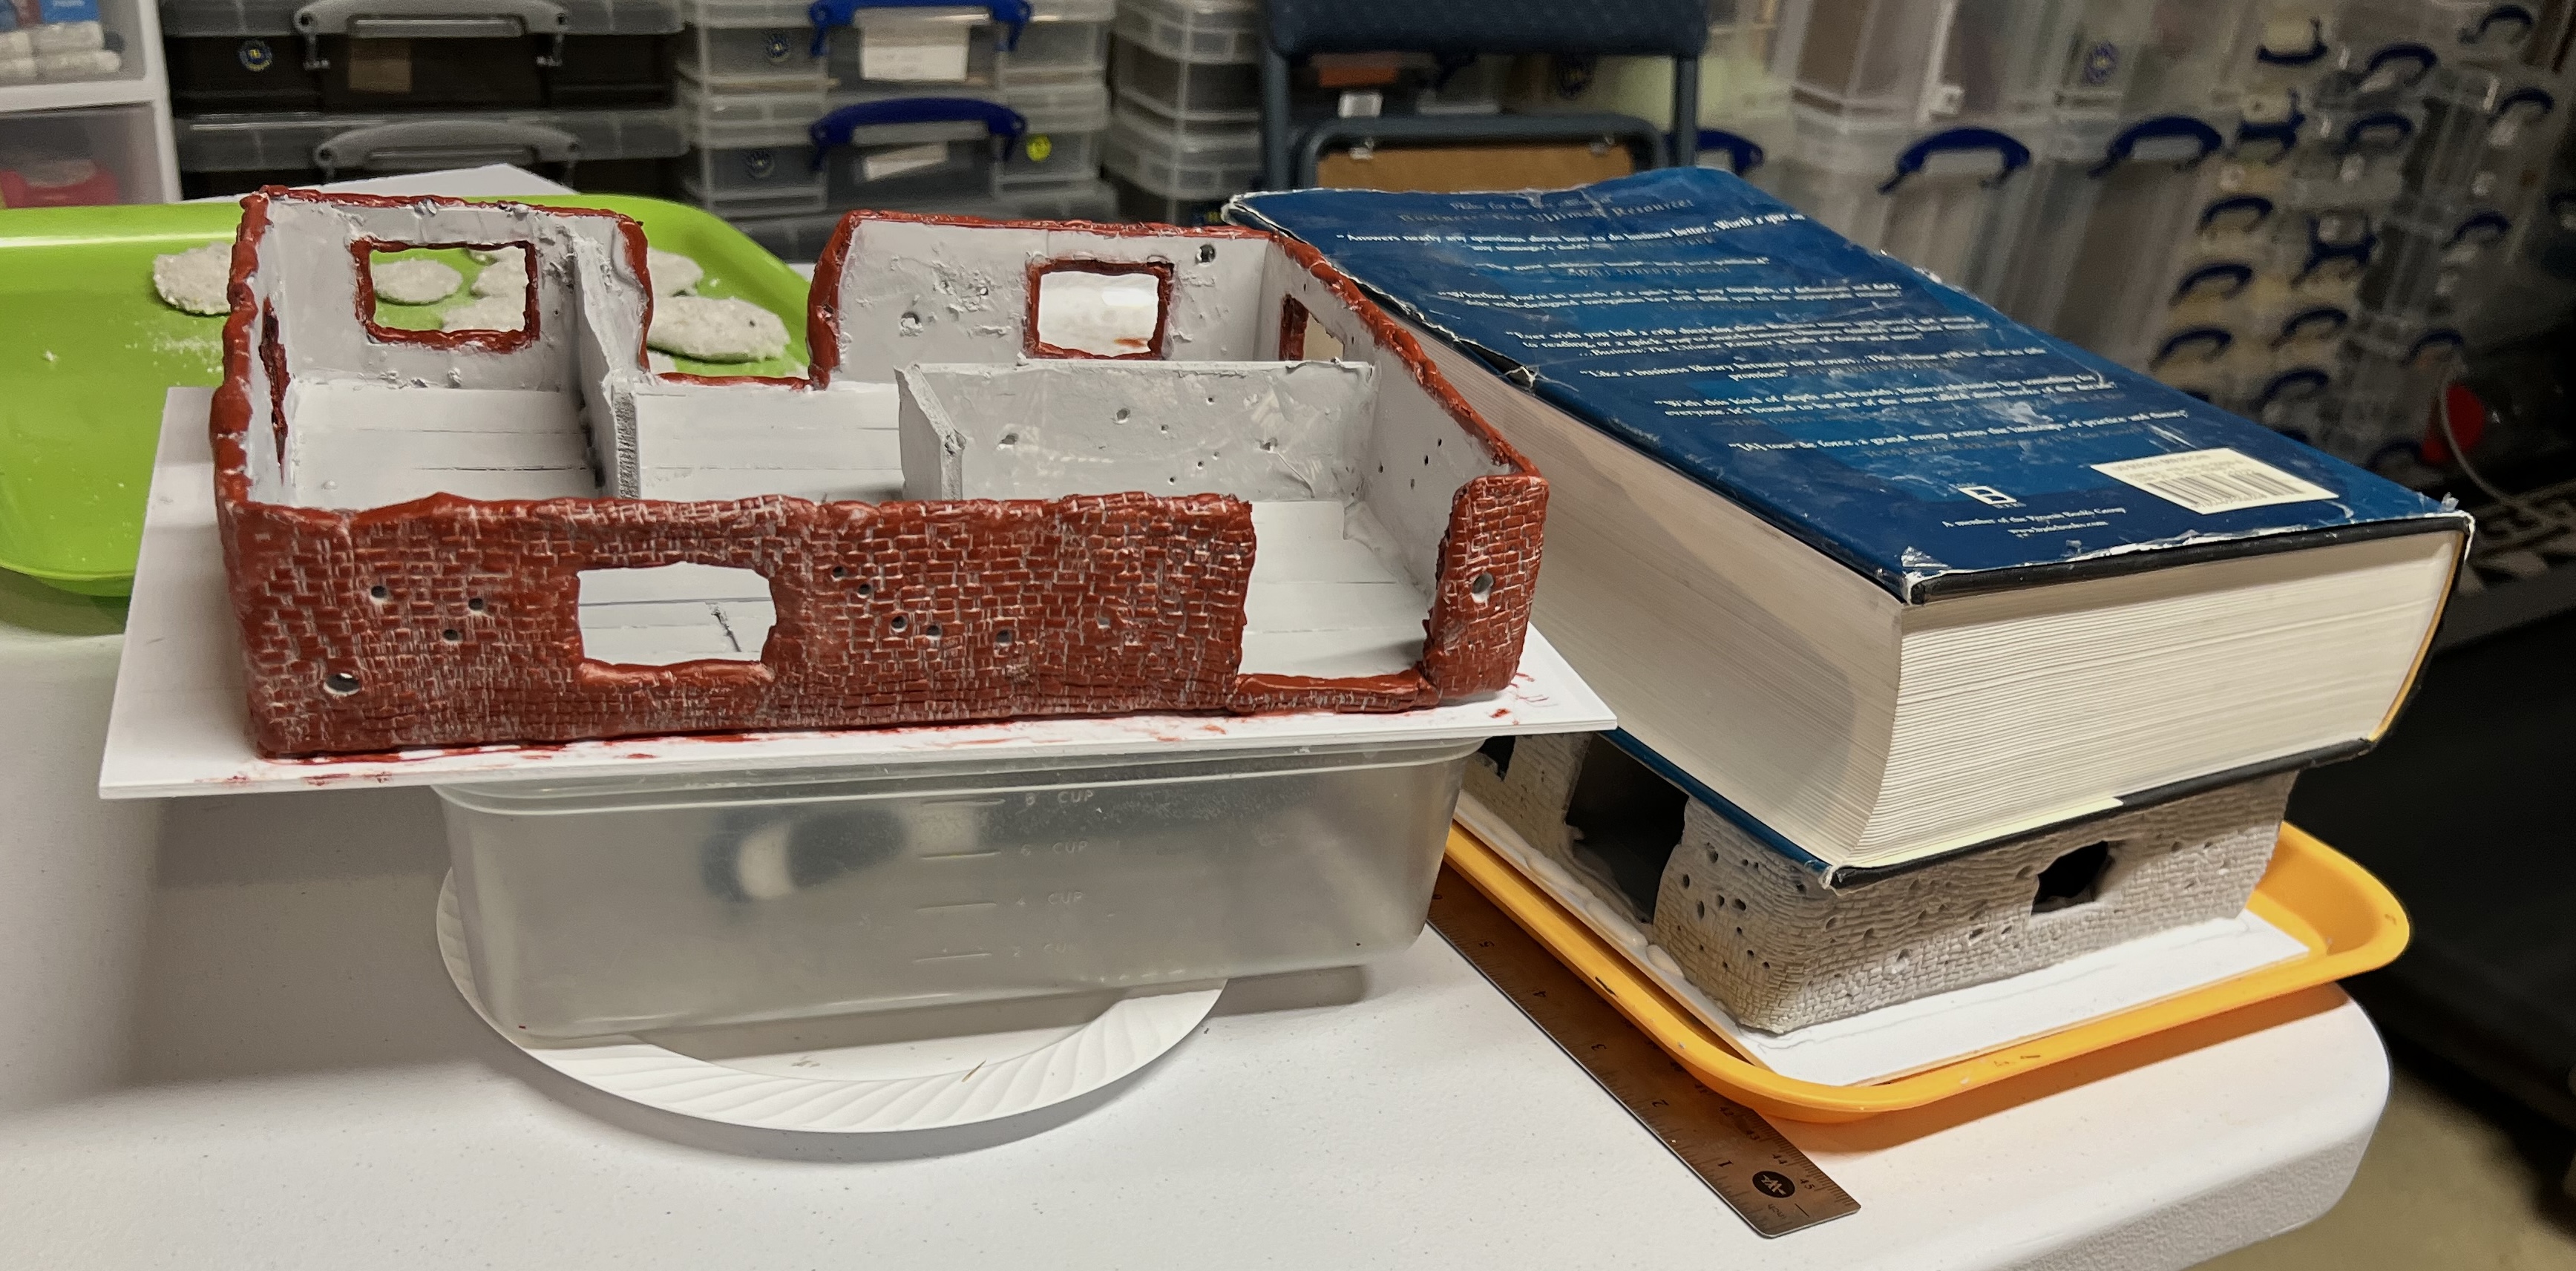
After a day, the Apoxie Sculpt on the first building had cured. But I wanted there to be a small outside rim to it that could hold wreckage and brick debris. While a sheet of polystyrene was gluing to its bottom, I worked on the second building.
First building cured.Bottom view – I needed more here underneath…but before that I finished the second building’s outside.Second building outside sculpting…….and second building flooring installation.
As the first building had cured, I started to paint it. Then I was able to glue a polystyrene base to building number 2.
Building number one with early paint work, and building number two being glued to the PS sheet under a heavy textbook.
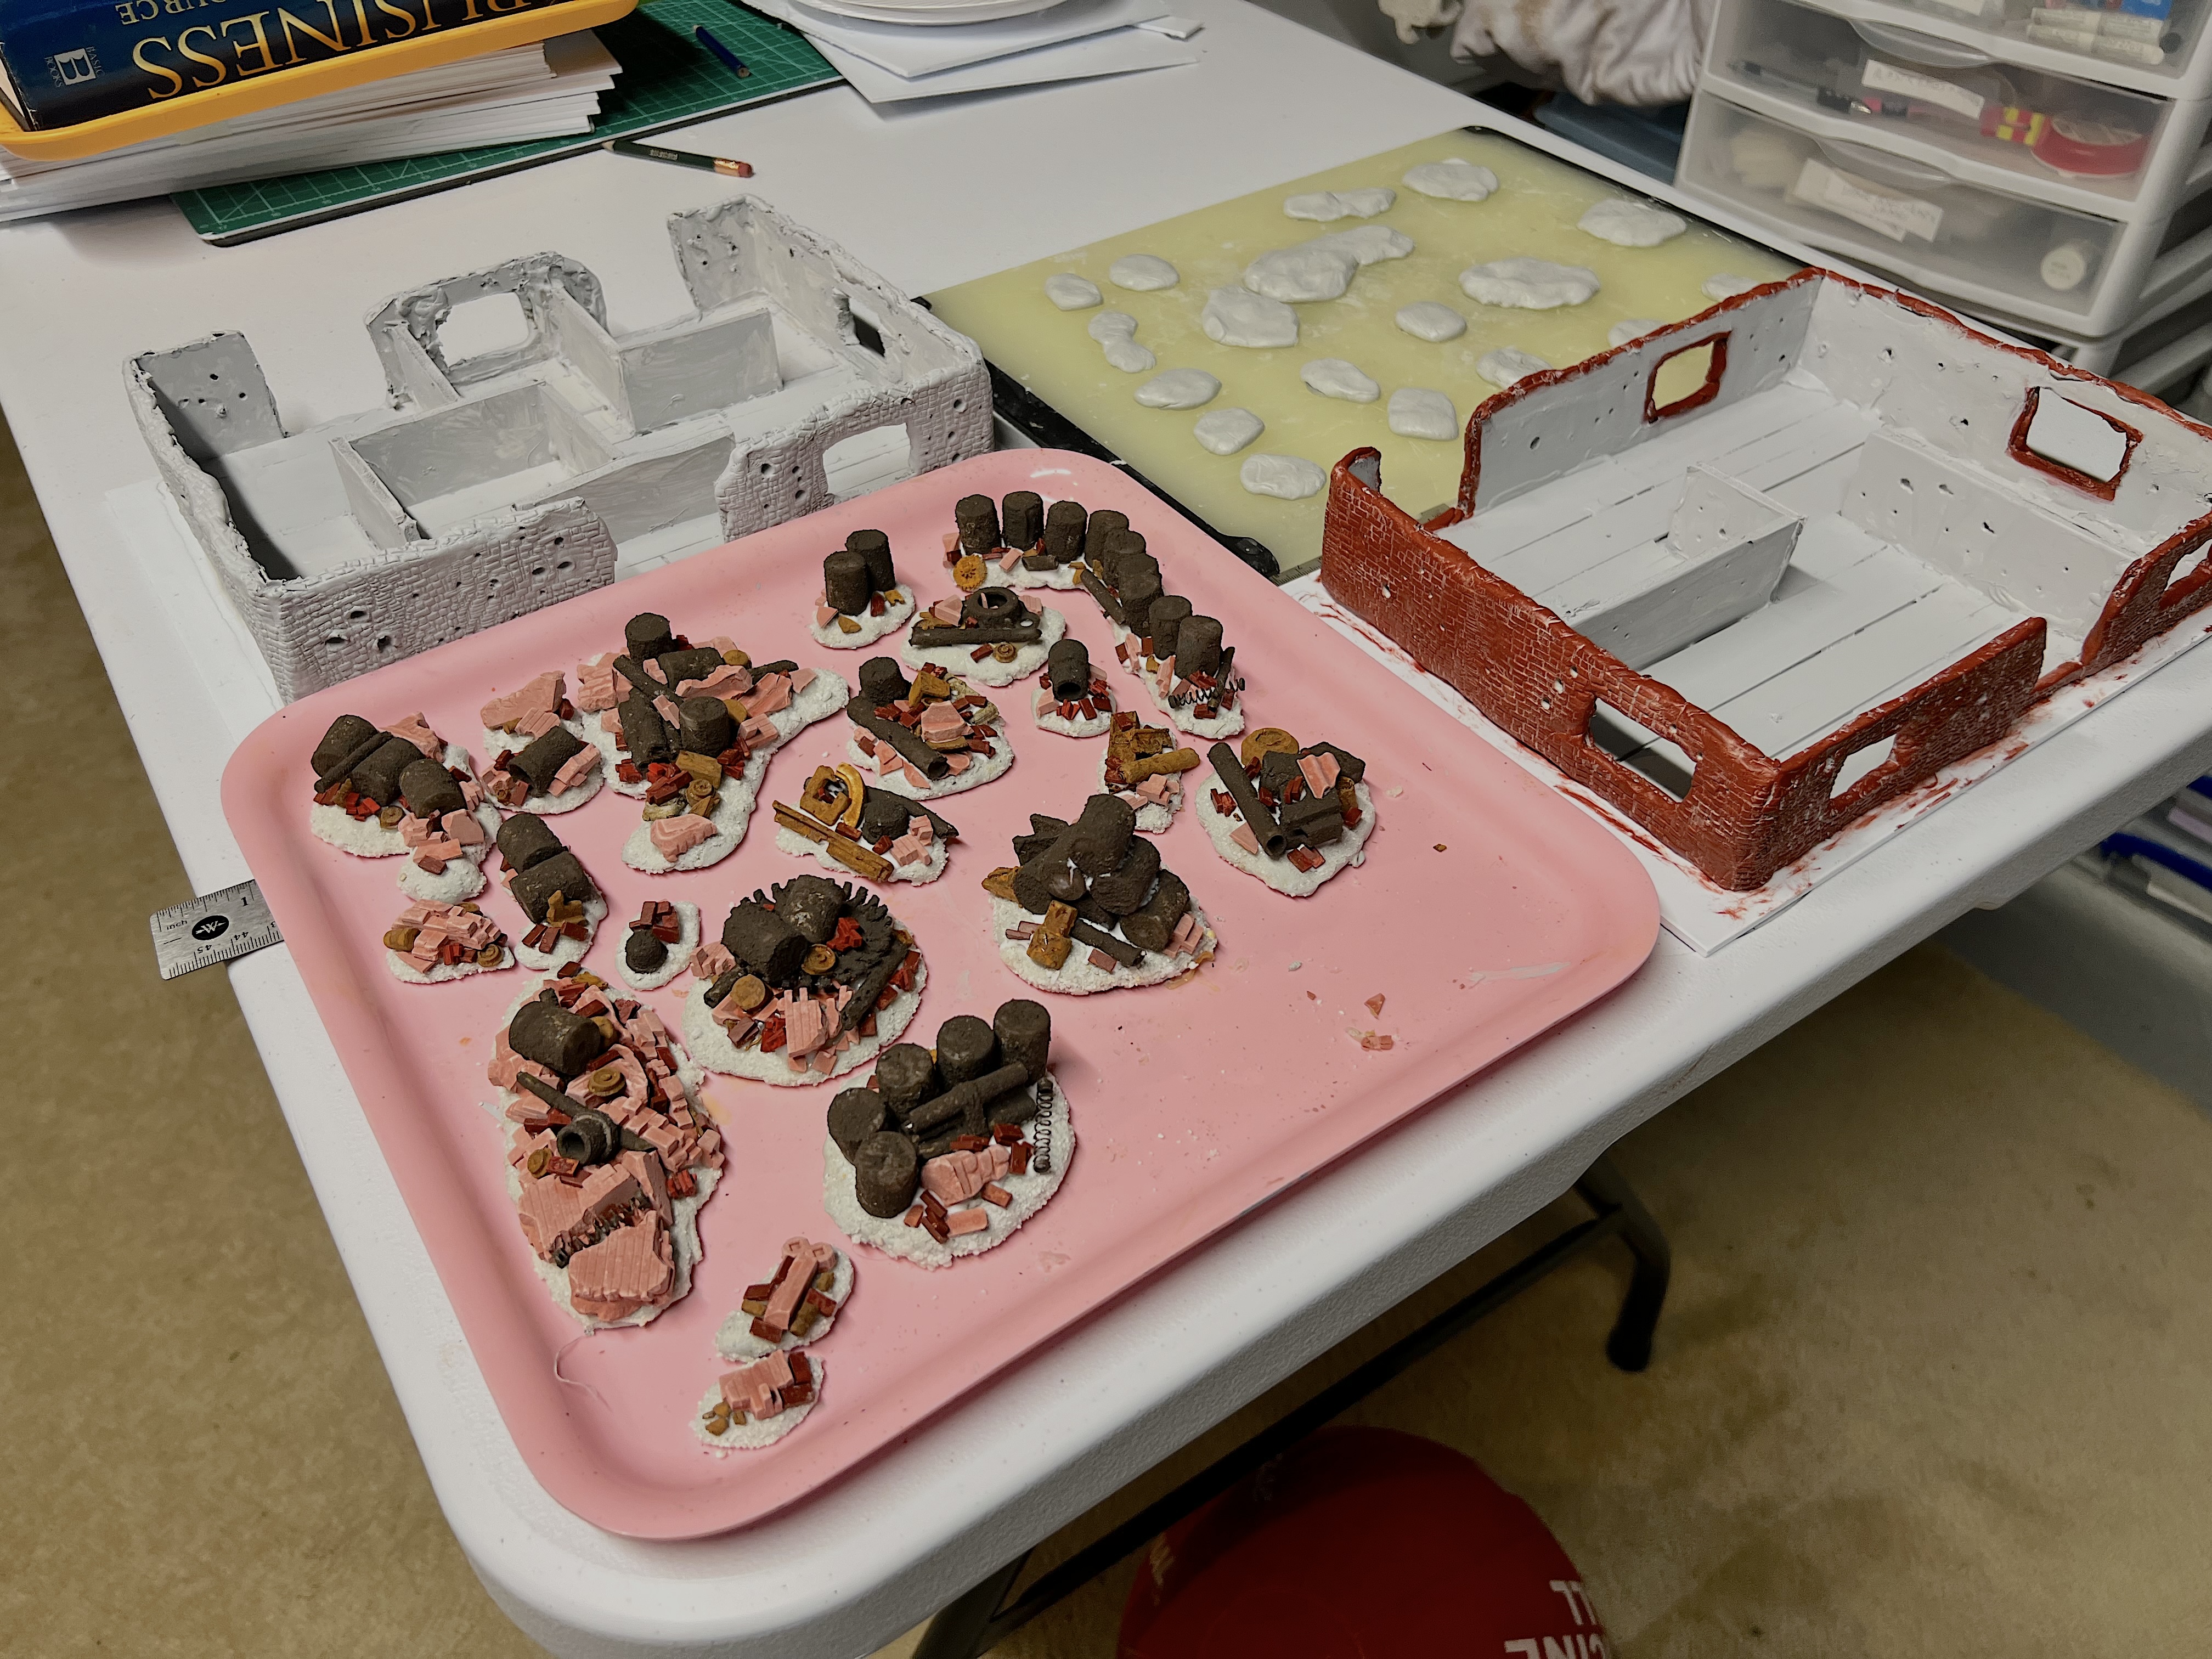
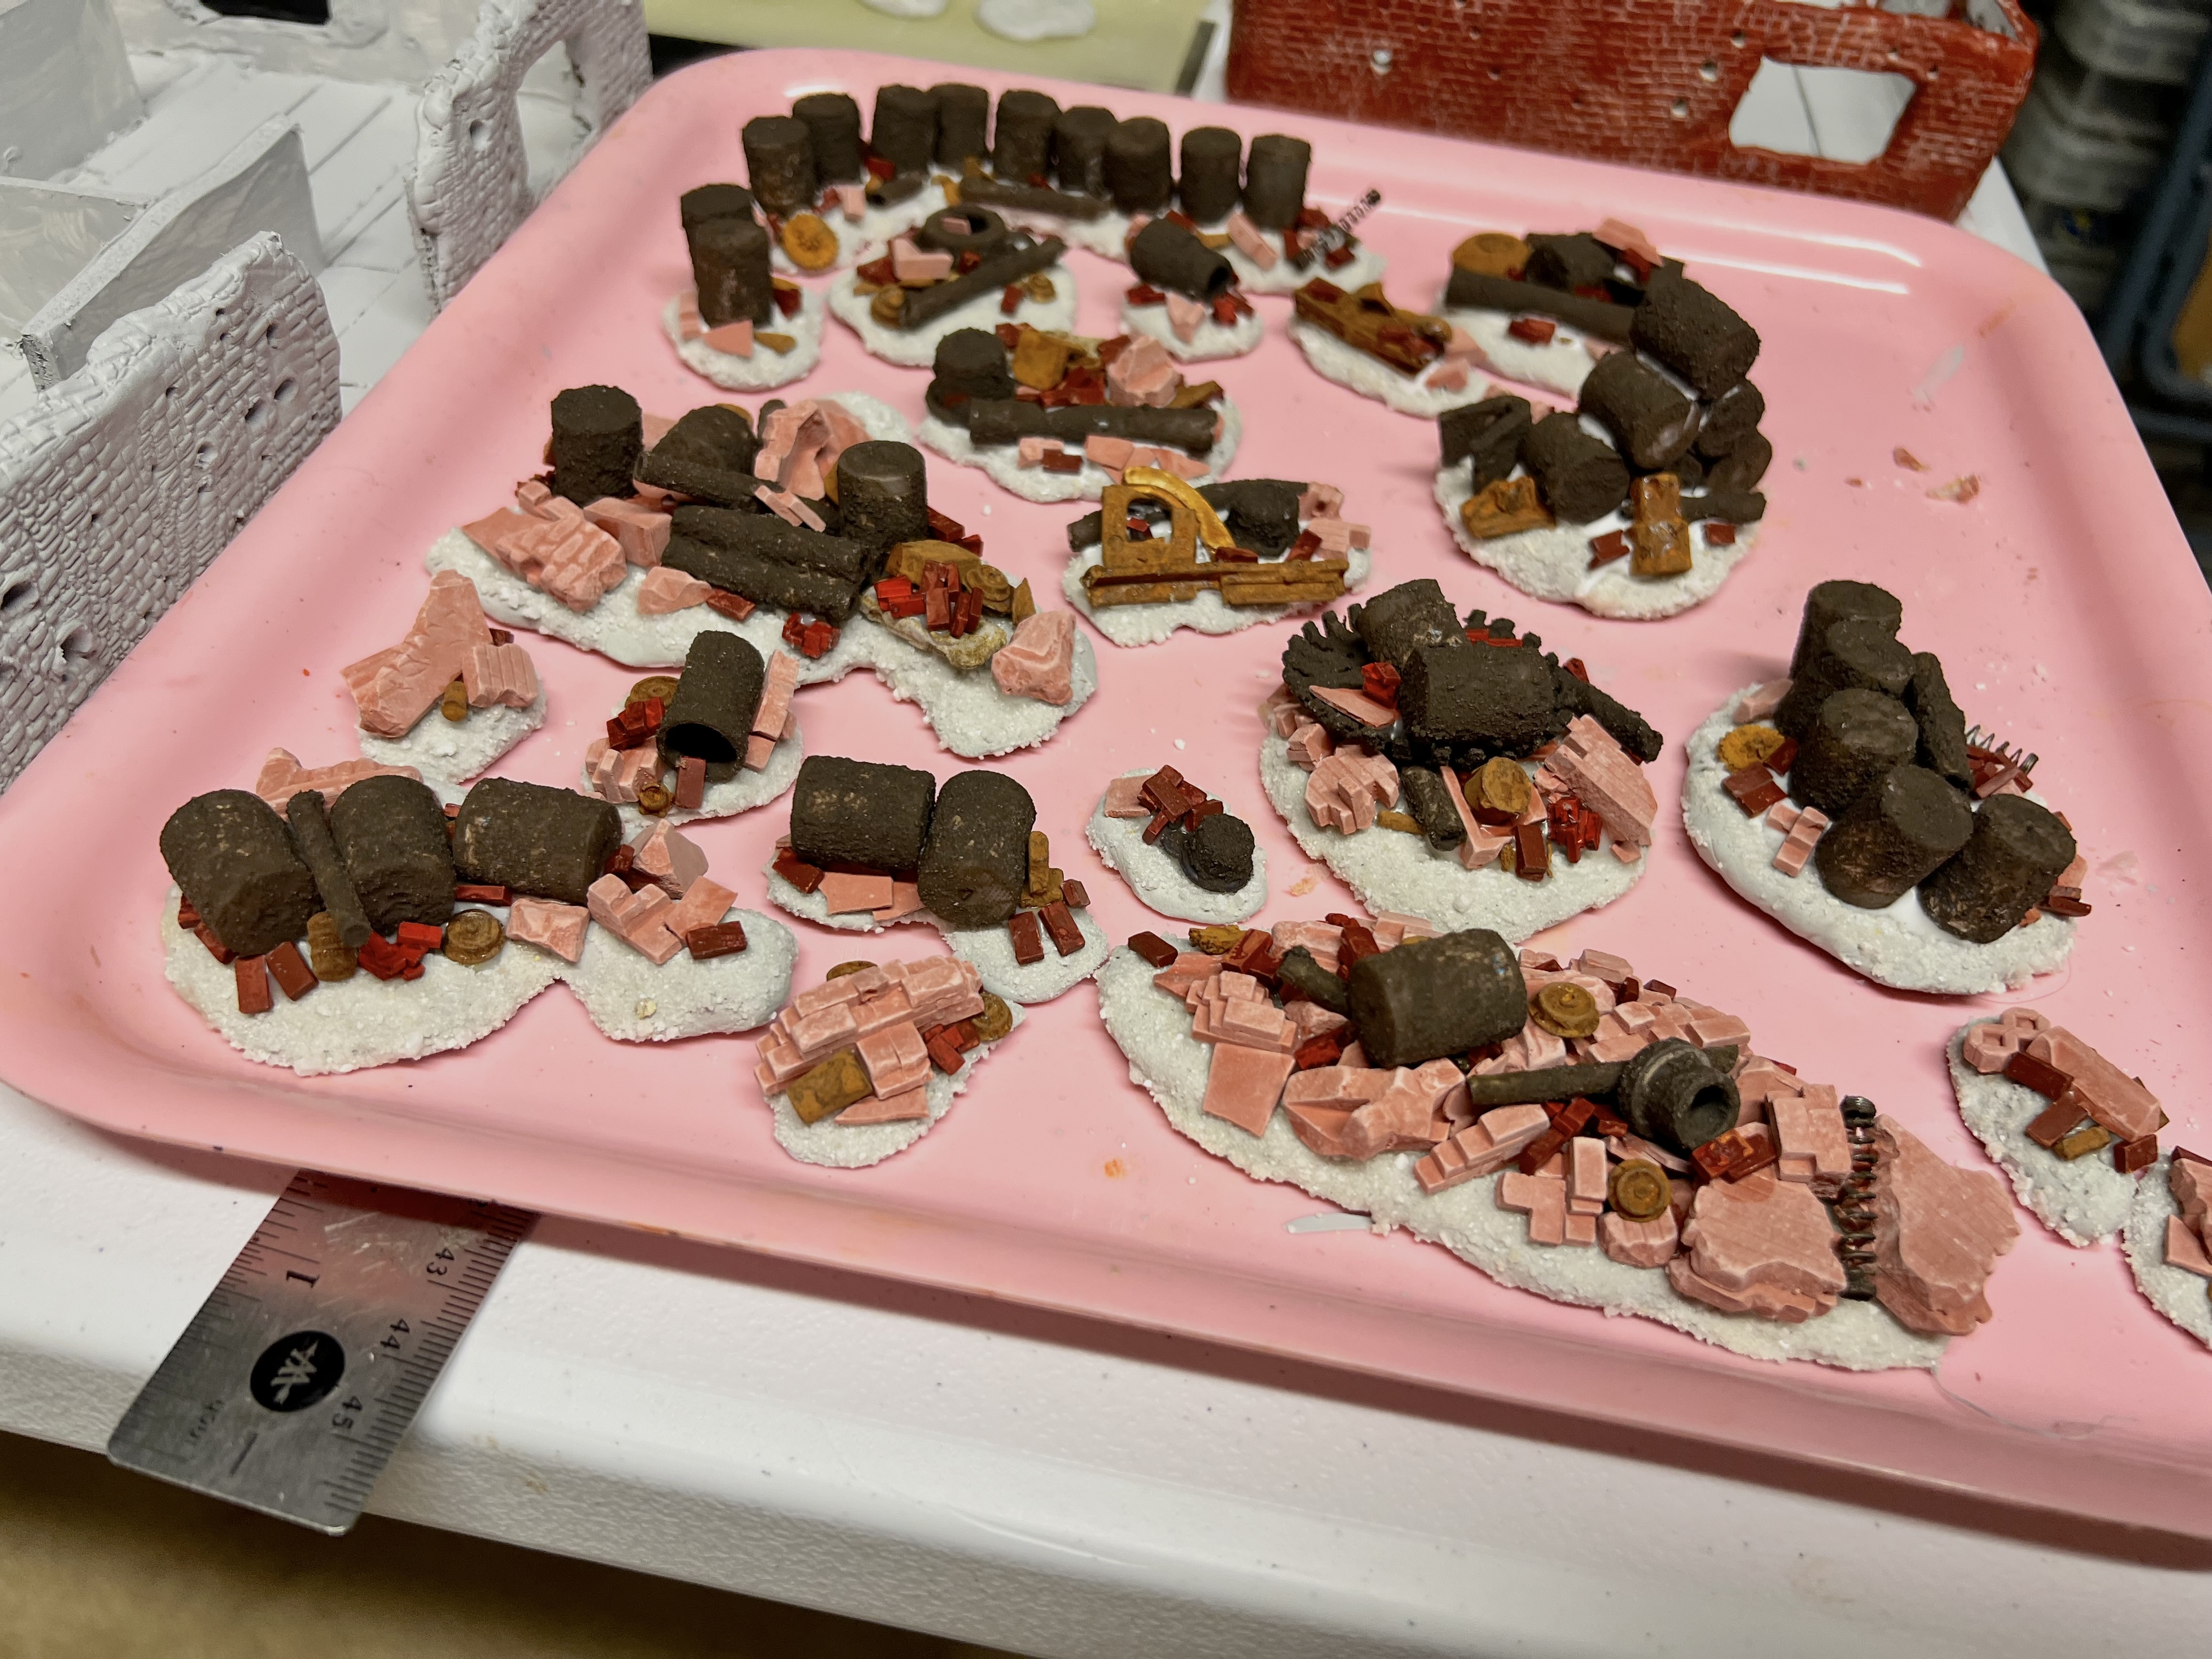
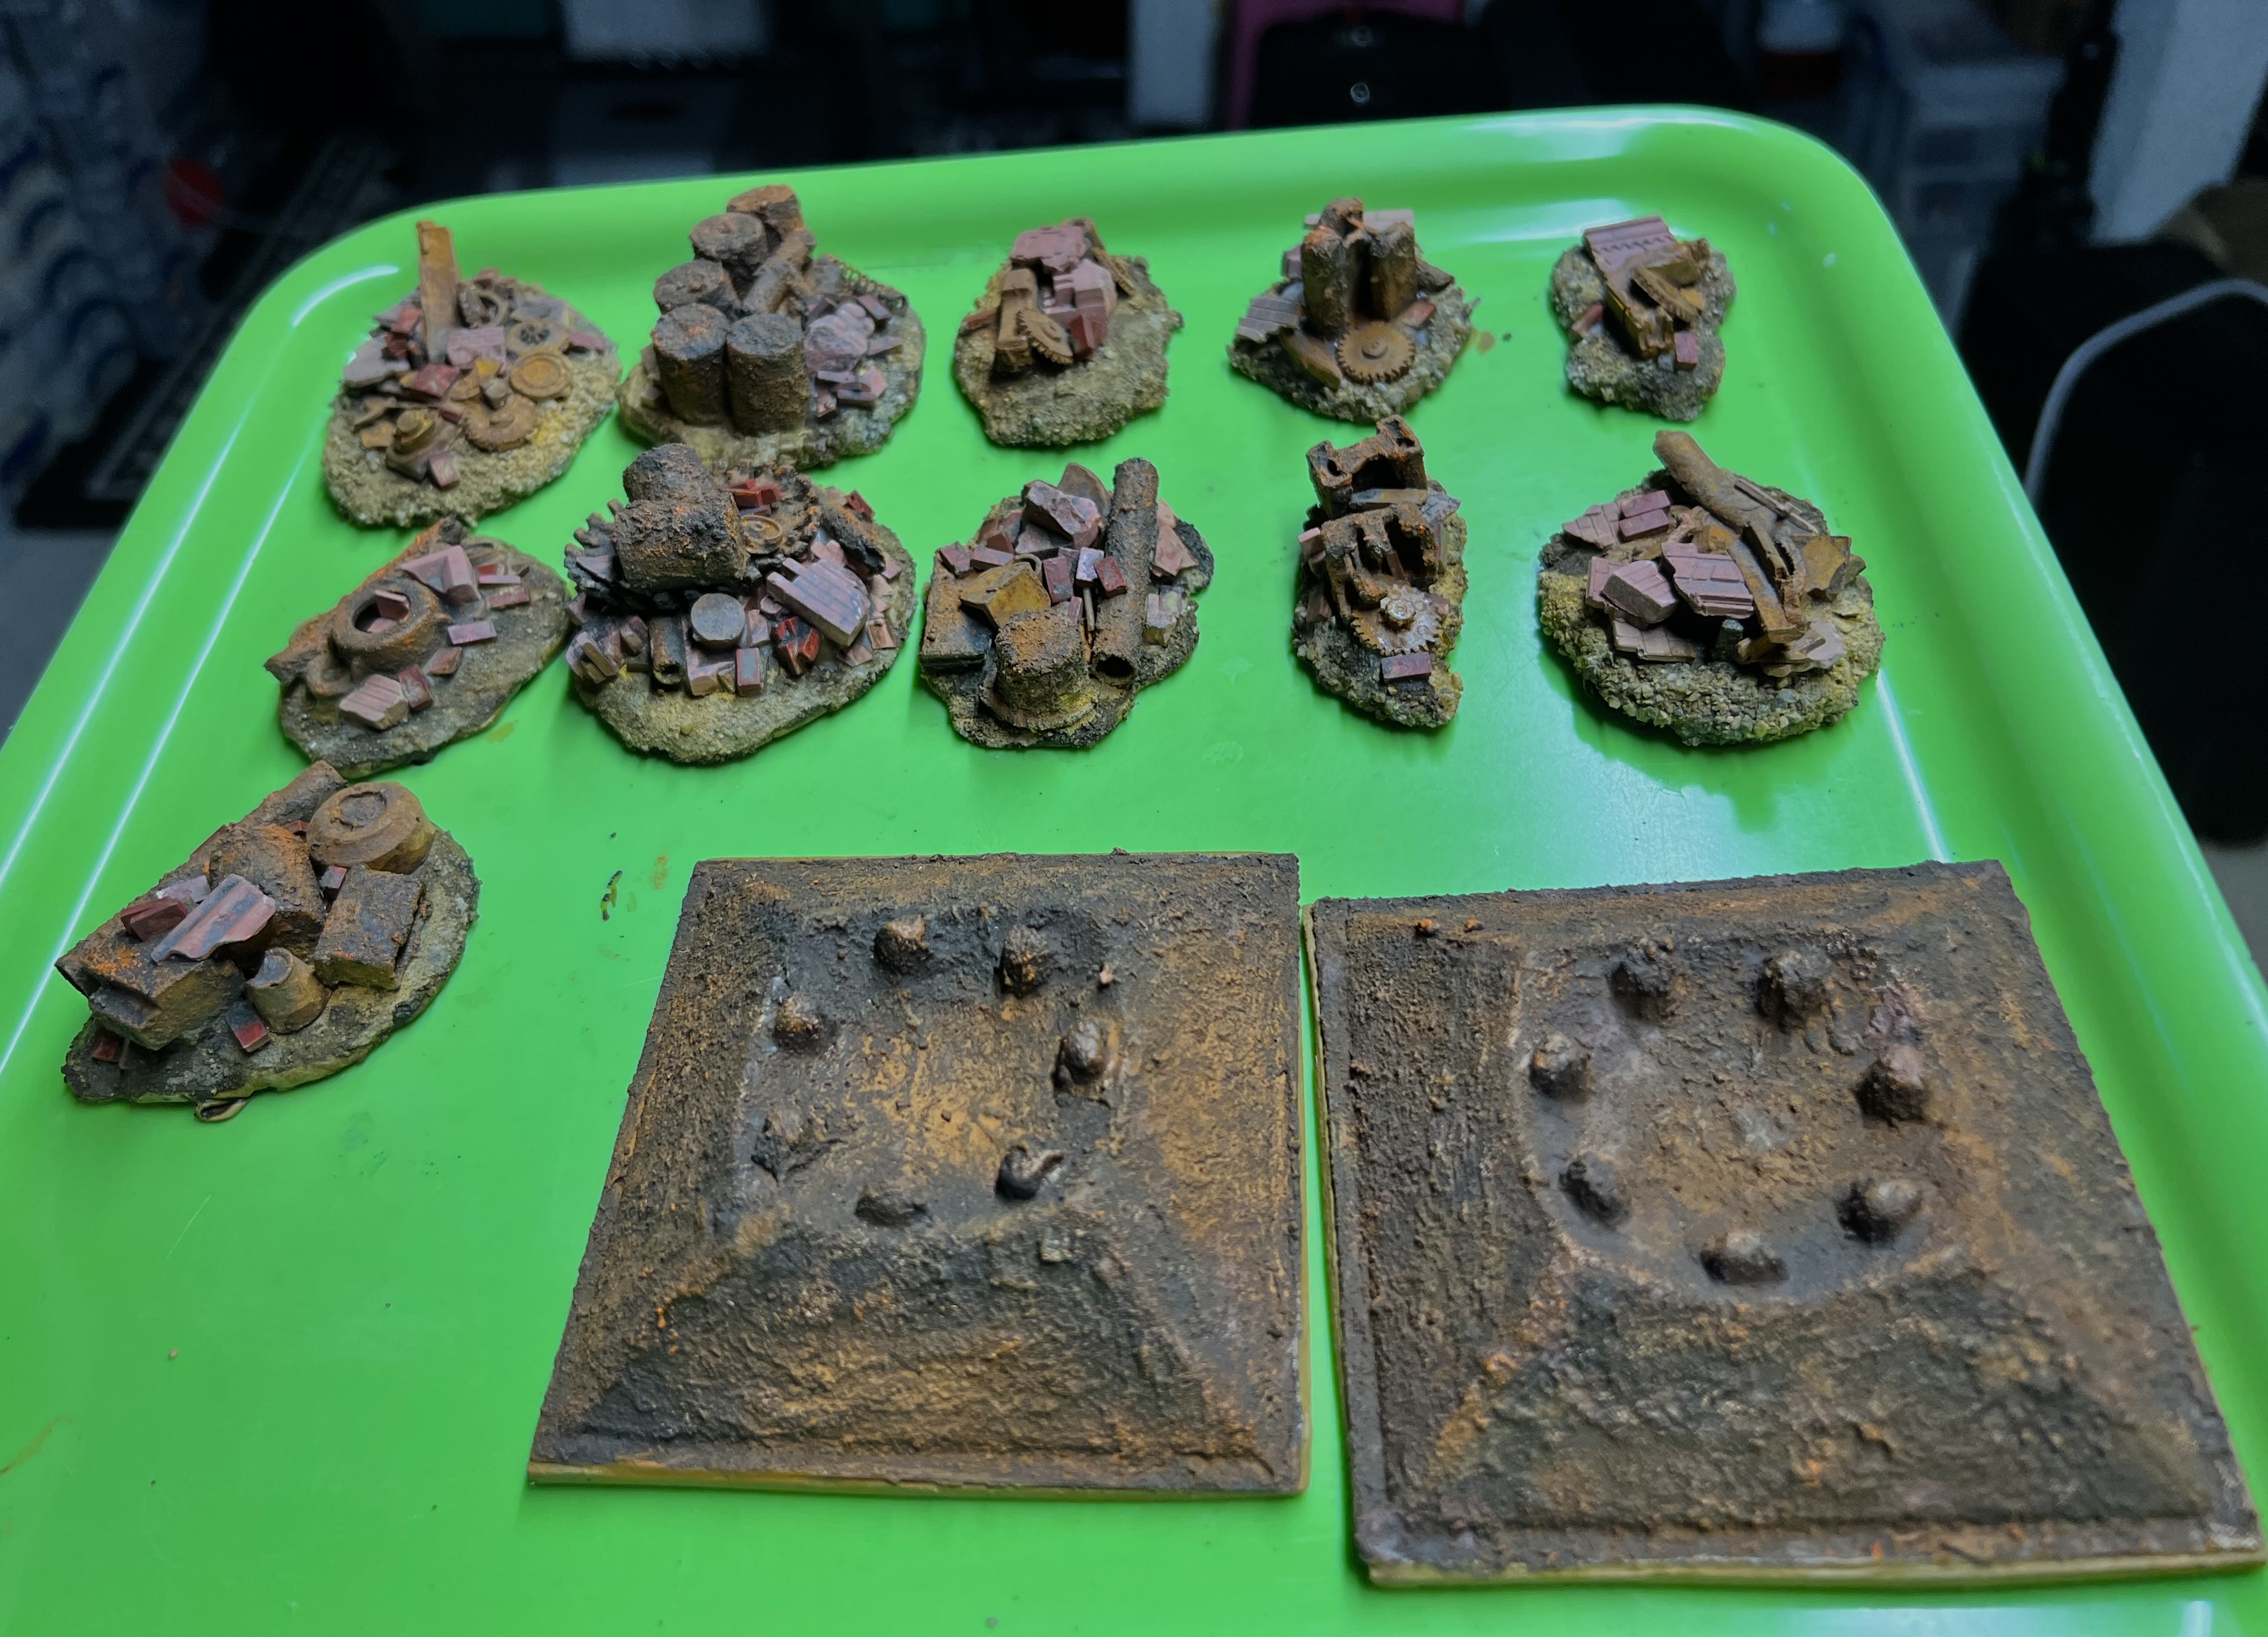
As I was again dealing with drying and curing times, I went back to work on the wreckage bases. I used up some white sand on the Apoxie Sculpt bases and applied with PVA. Once that had dried, I added as much wreckage as I could to each.
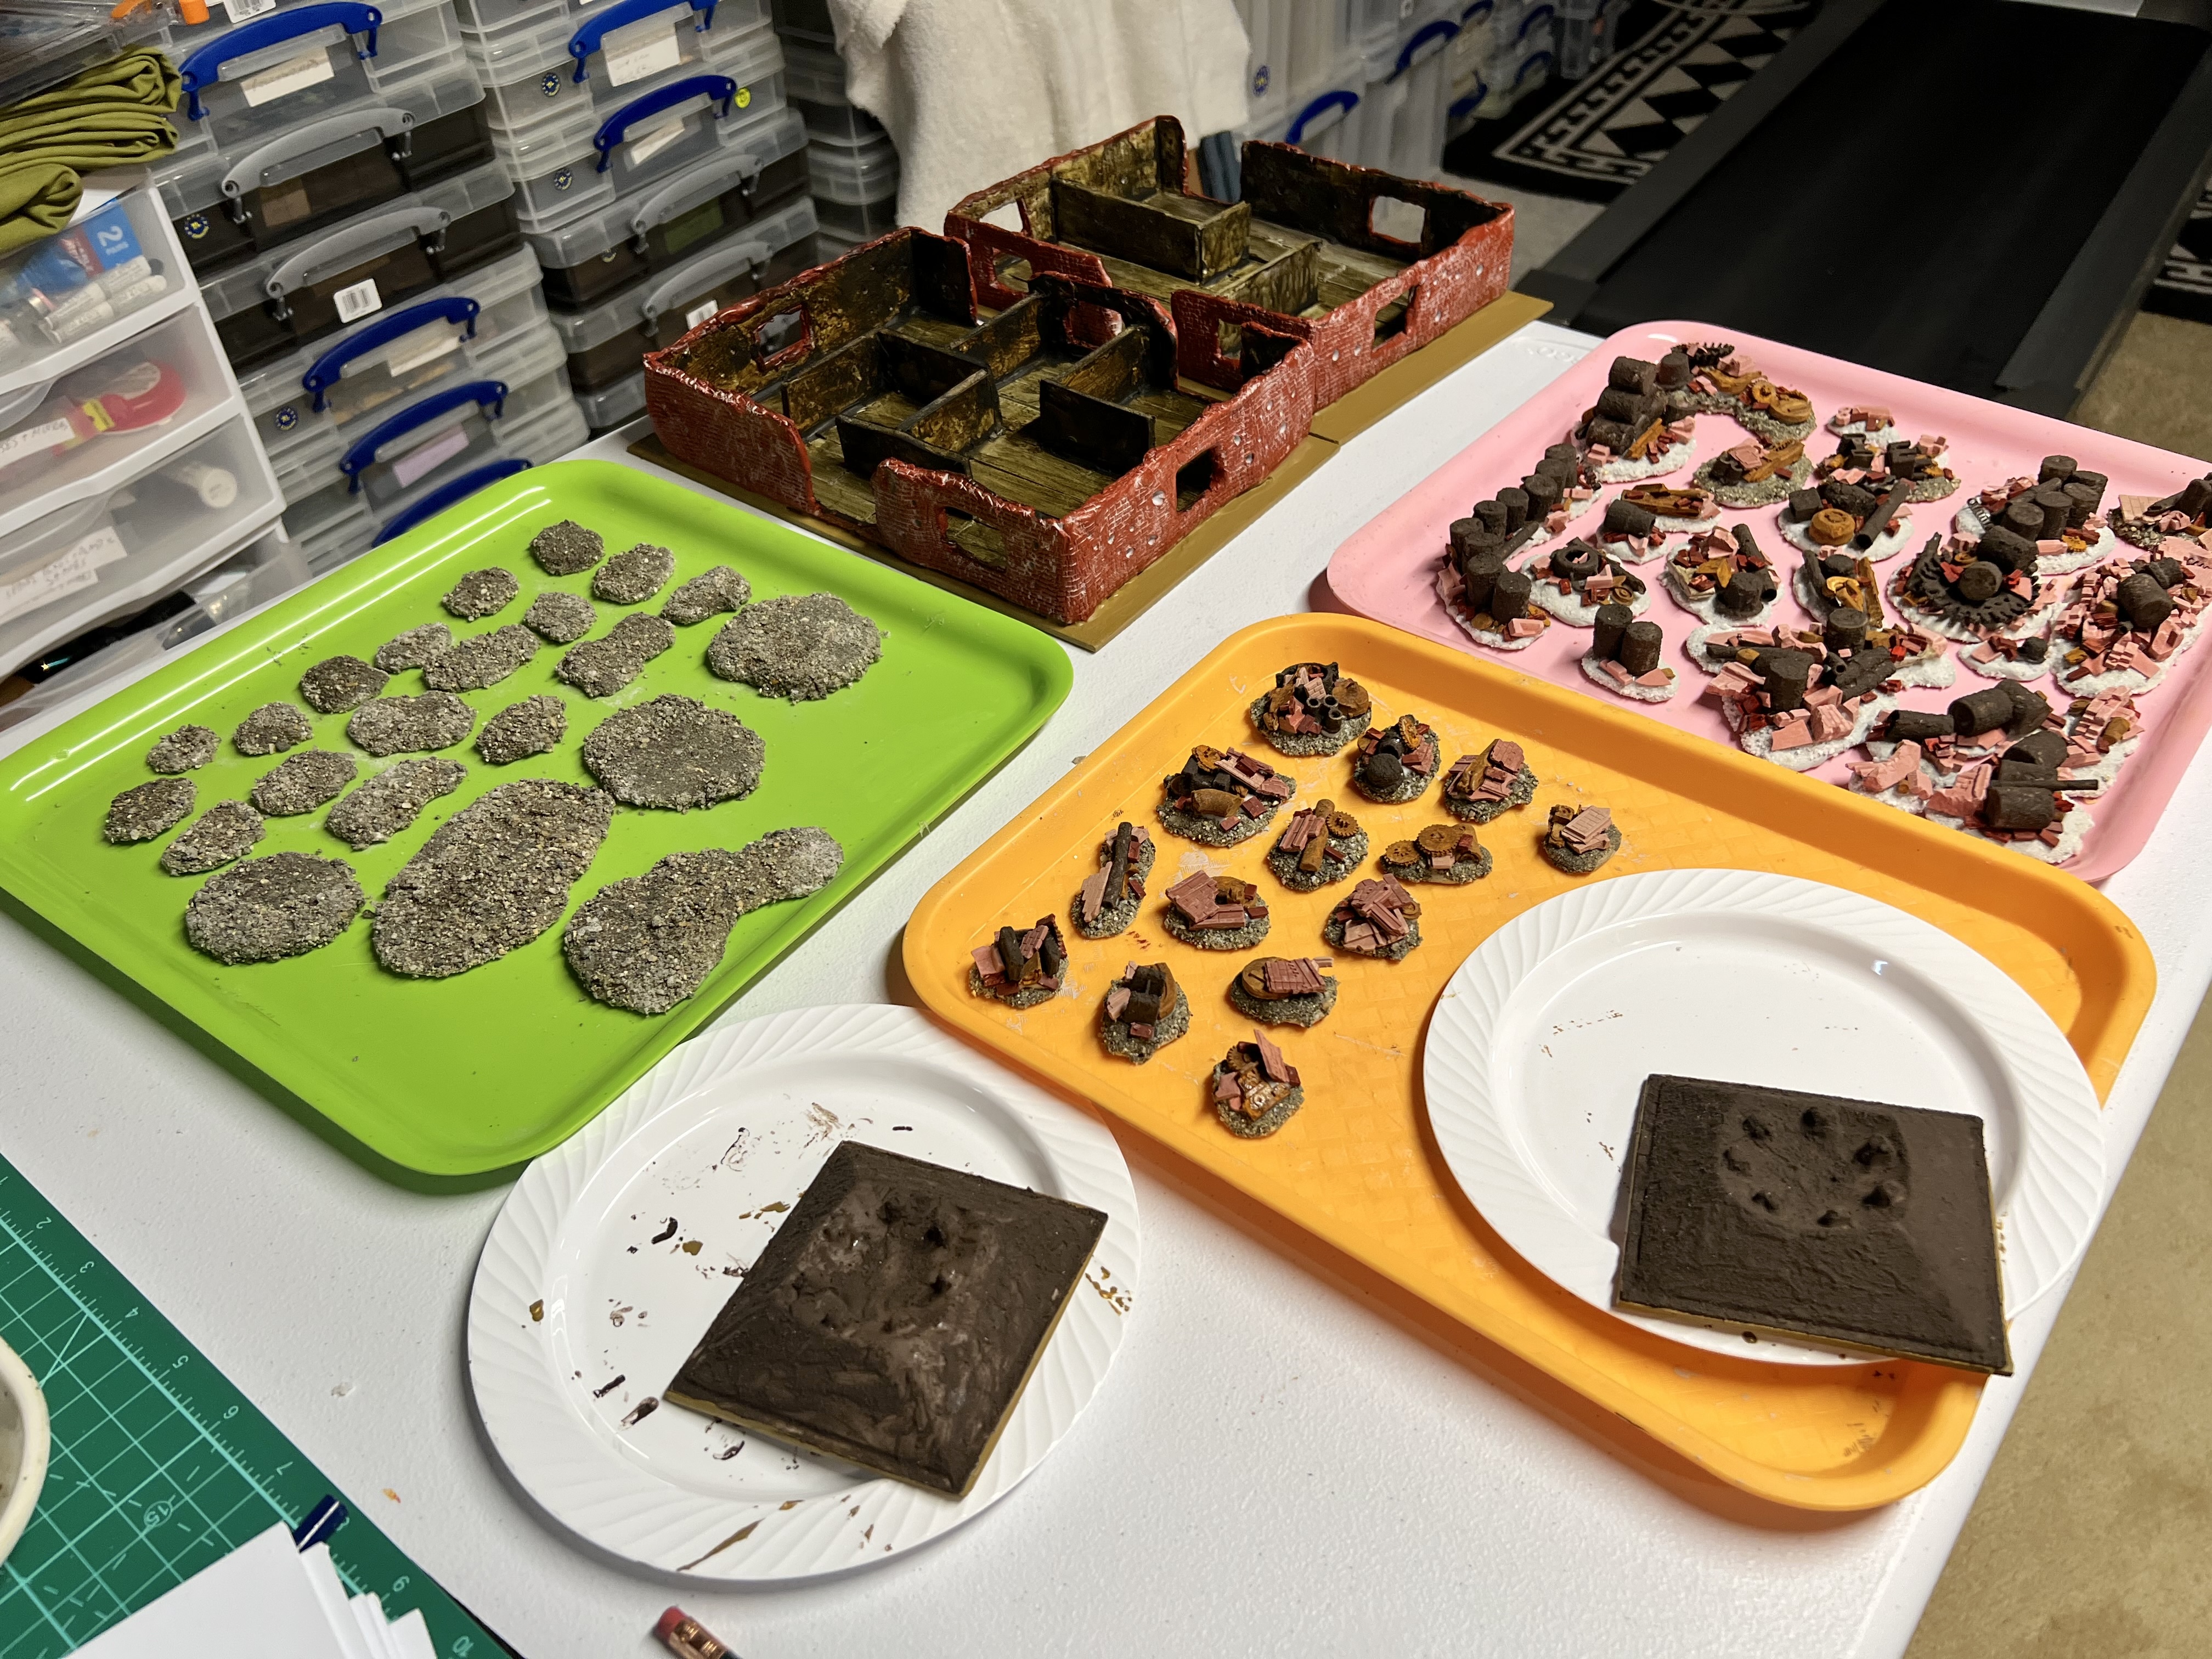
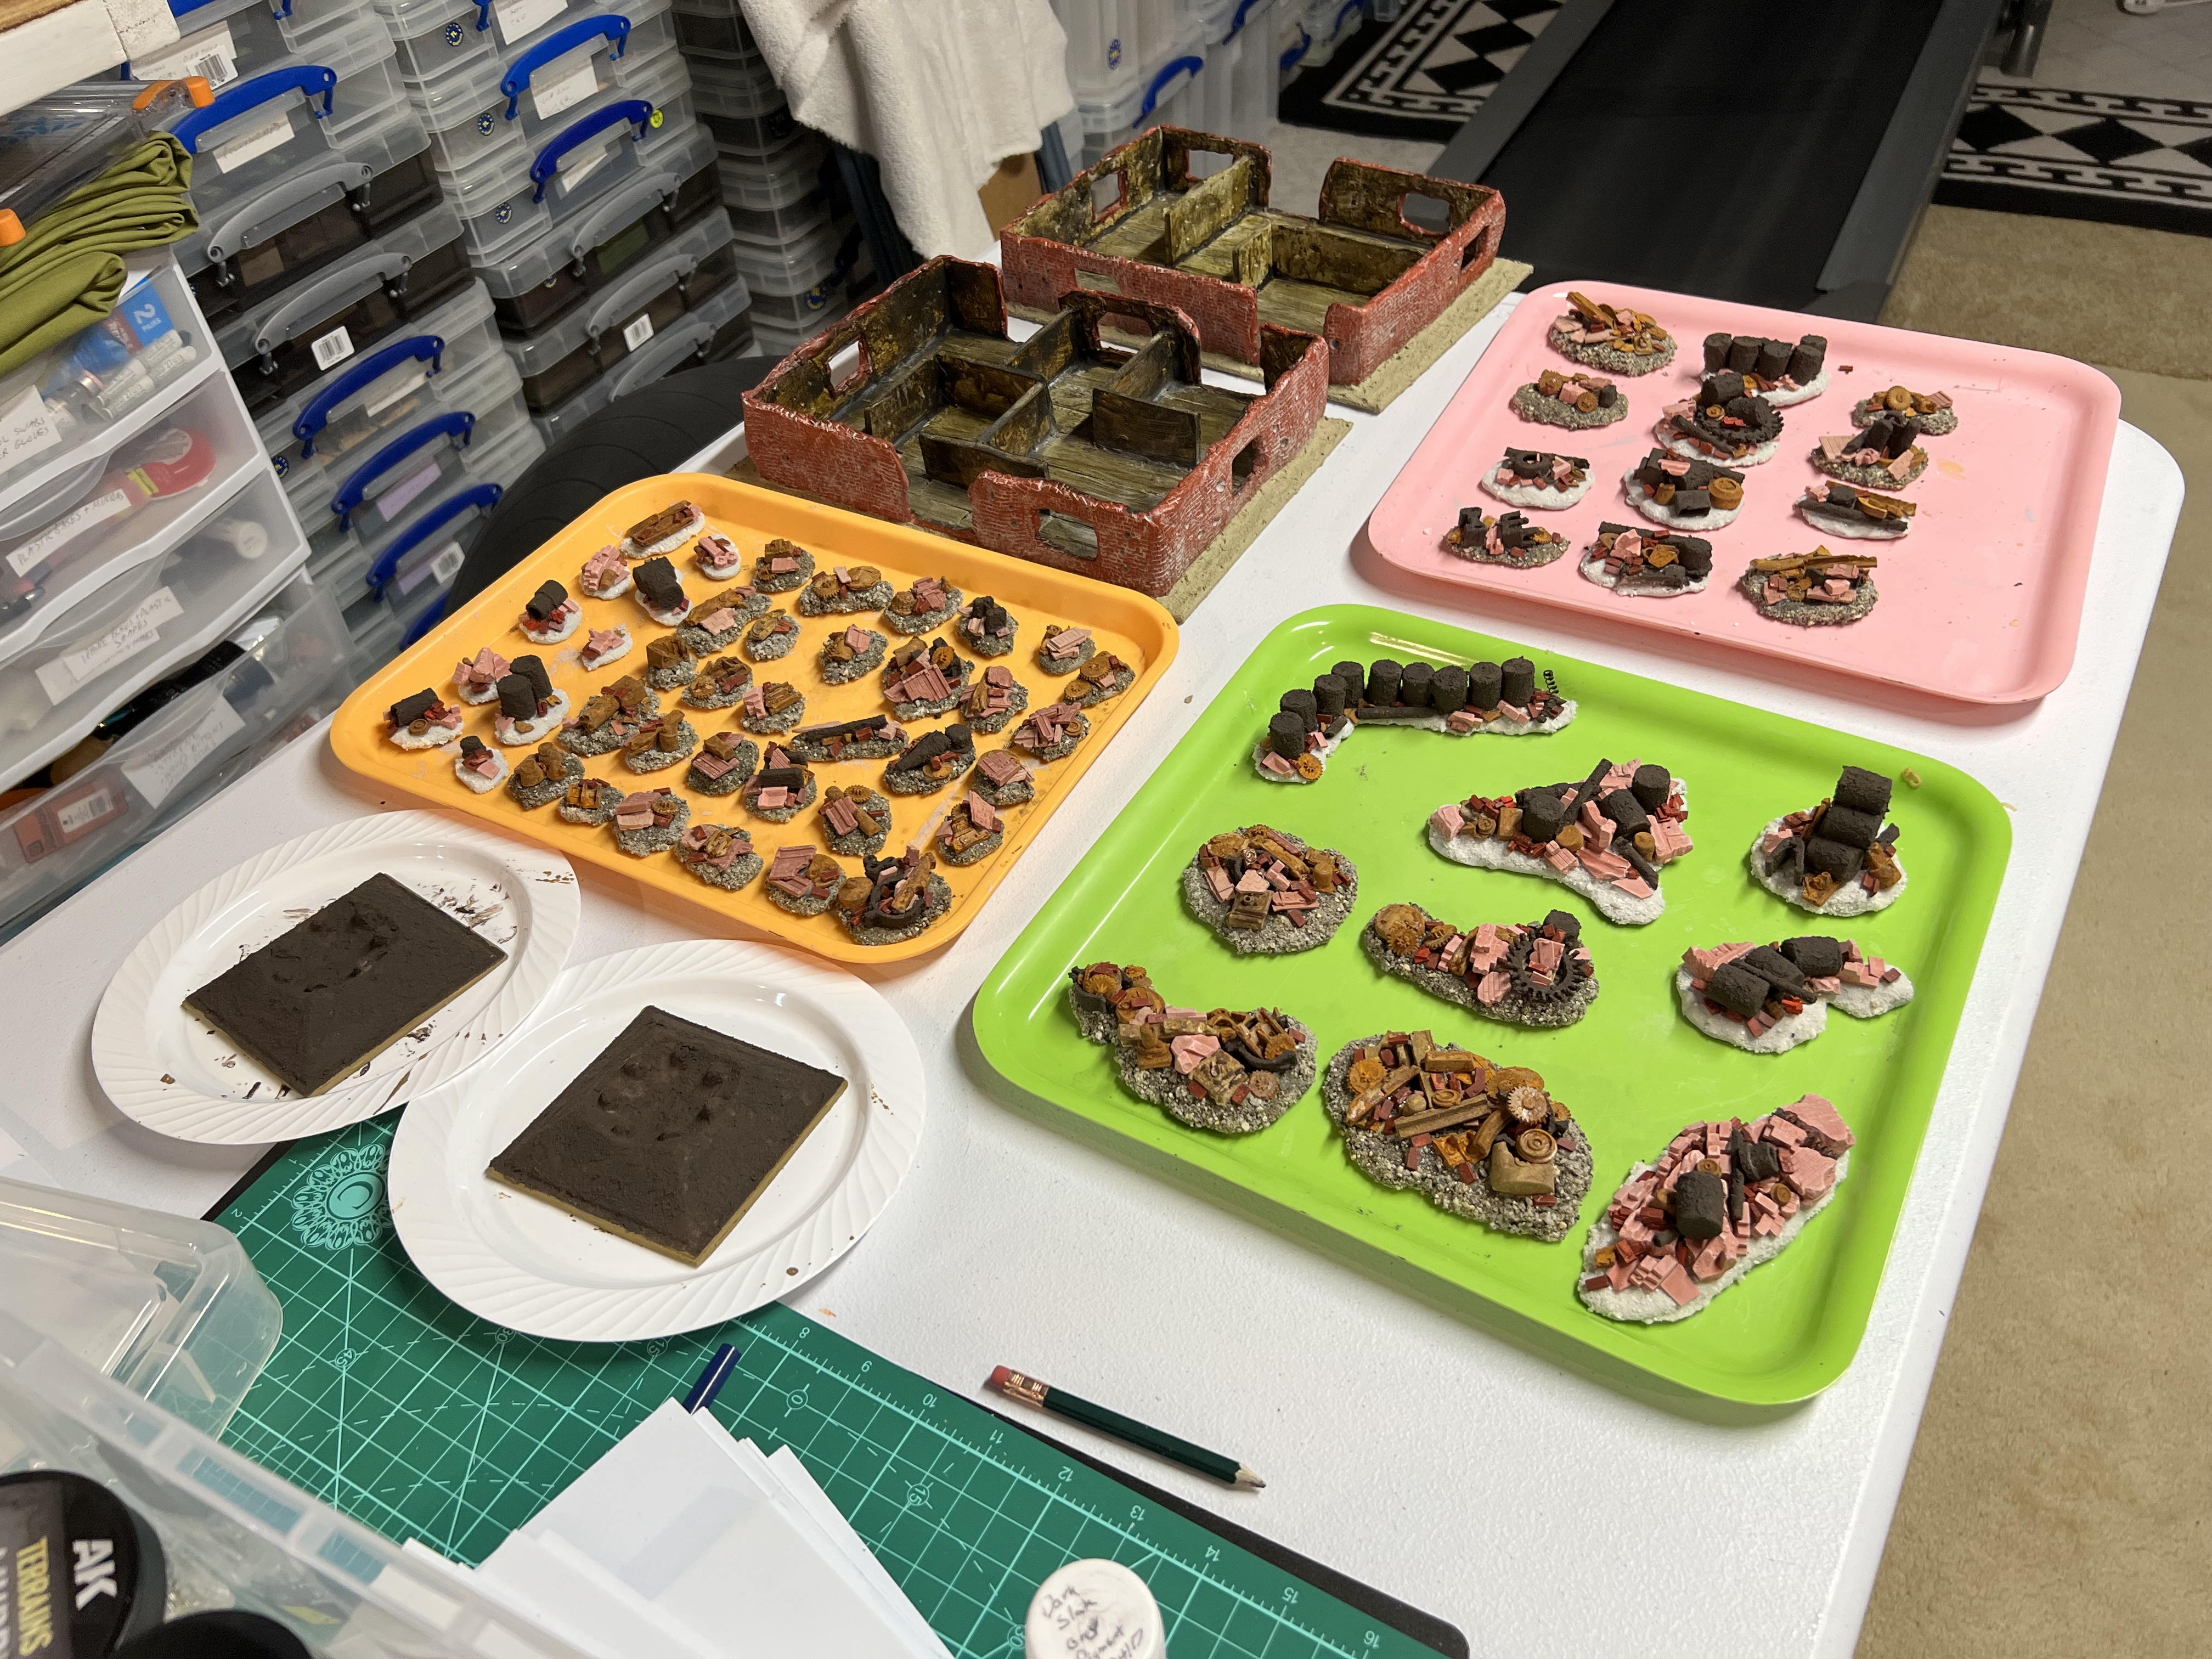
Wreckage bases – I started with the largest. The two buildings are shown in progress as are the next batch of sculpted bases curing.Close up shot of the larger wreckage bases in progress. Glue must dry…Close up of building one with insides primed.
At this point, I added the flat clear plastic packing material to two square pieces of polystyrene by clamping and gluing them in preparation for corrosion texture. Then it was back to the wreckage bases. I had run out of white sand, so the next batch of wreckage bases got a PVA/grey sand application. As I used a lot pigments later, this made zero difference. At the same time, I also dirtied up the interior building walls and flooring using a sponge and various dark washes. The rim outside the buildings got a sandy texture paint covering.
The dark sand drying on the next wreckage bases, the flat structures with first application of corrosion texture, other bases in progress, and the buildings in the back.A second coat of corrosion paint has been applied to the flat structures here. I also sorted the wreckage bases by size before adding pigments.The flat structures and some other rusty paints I would add before augmenting with pigments.
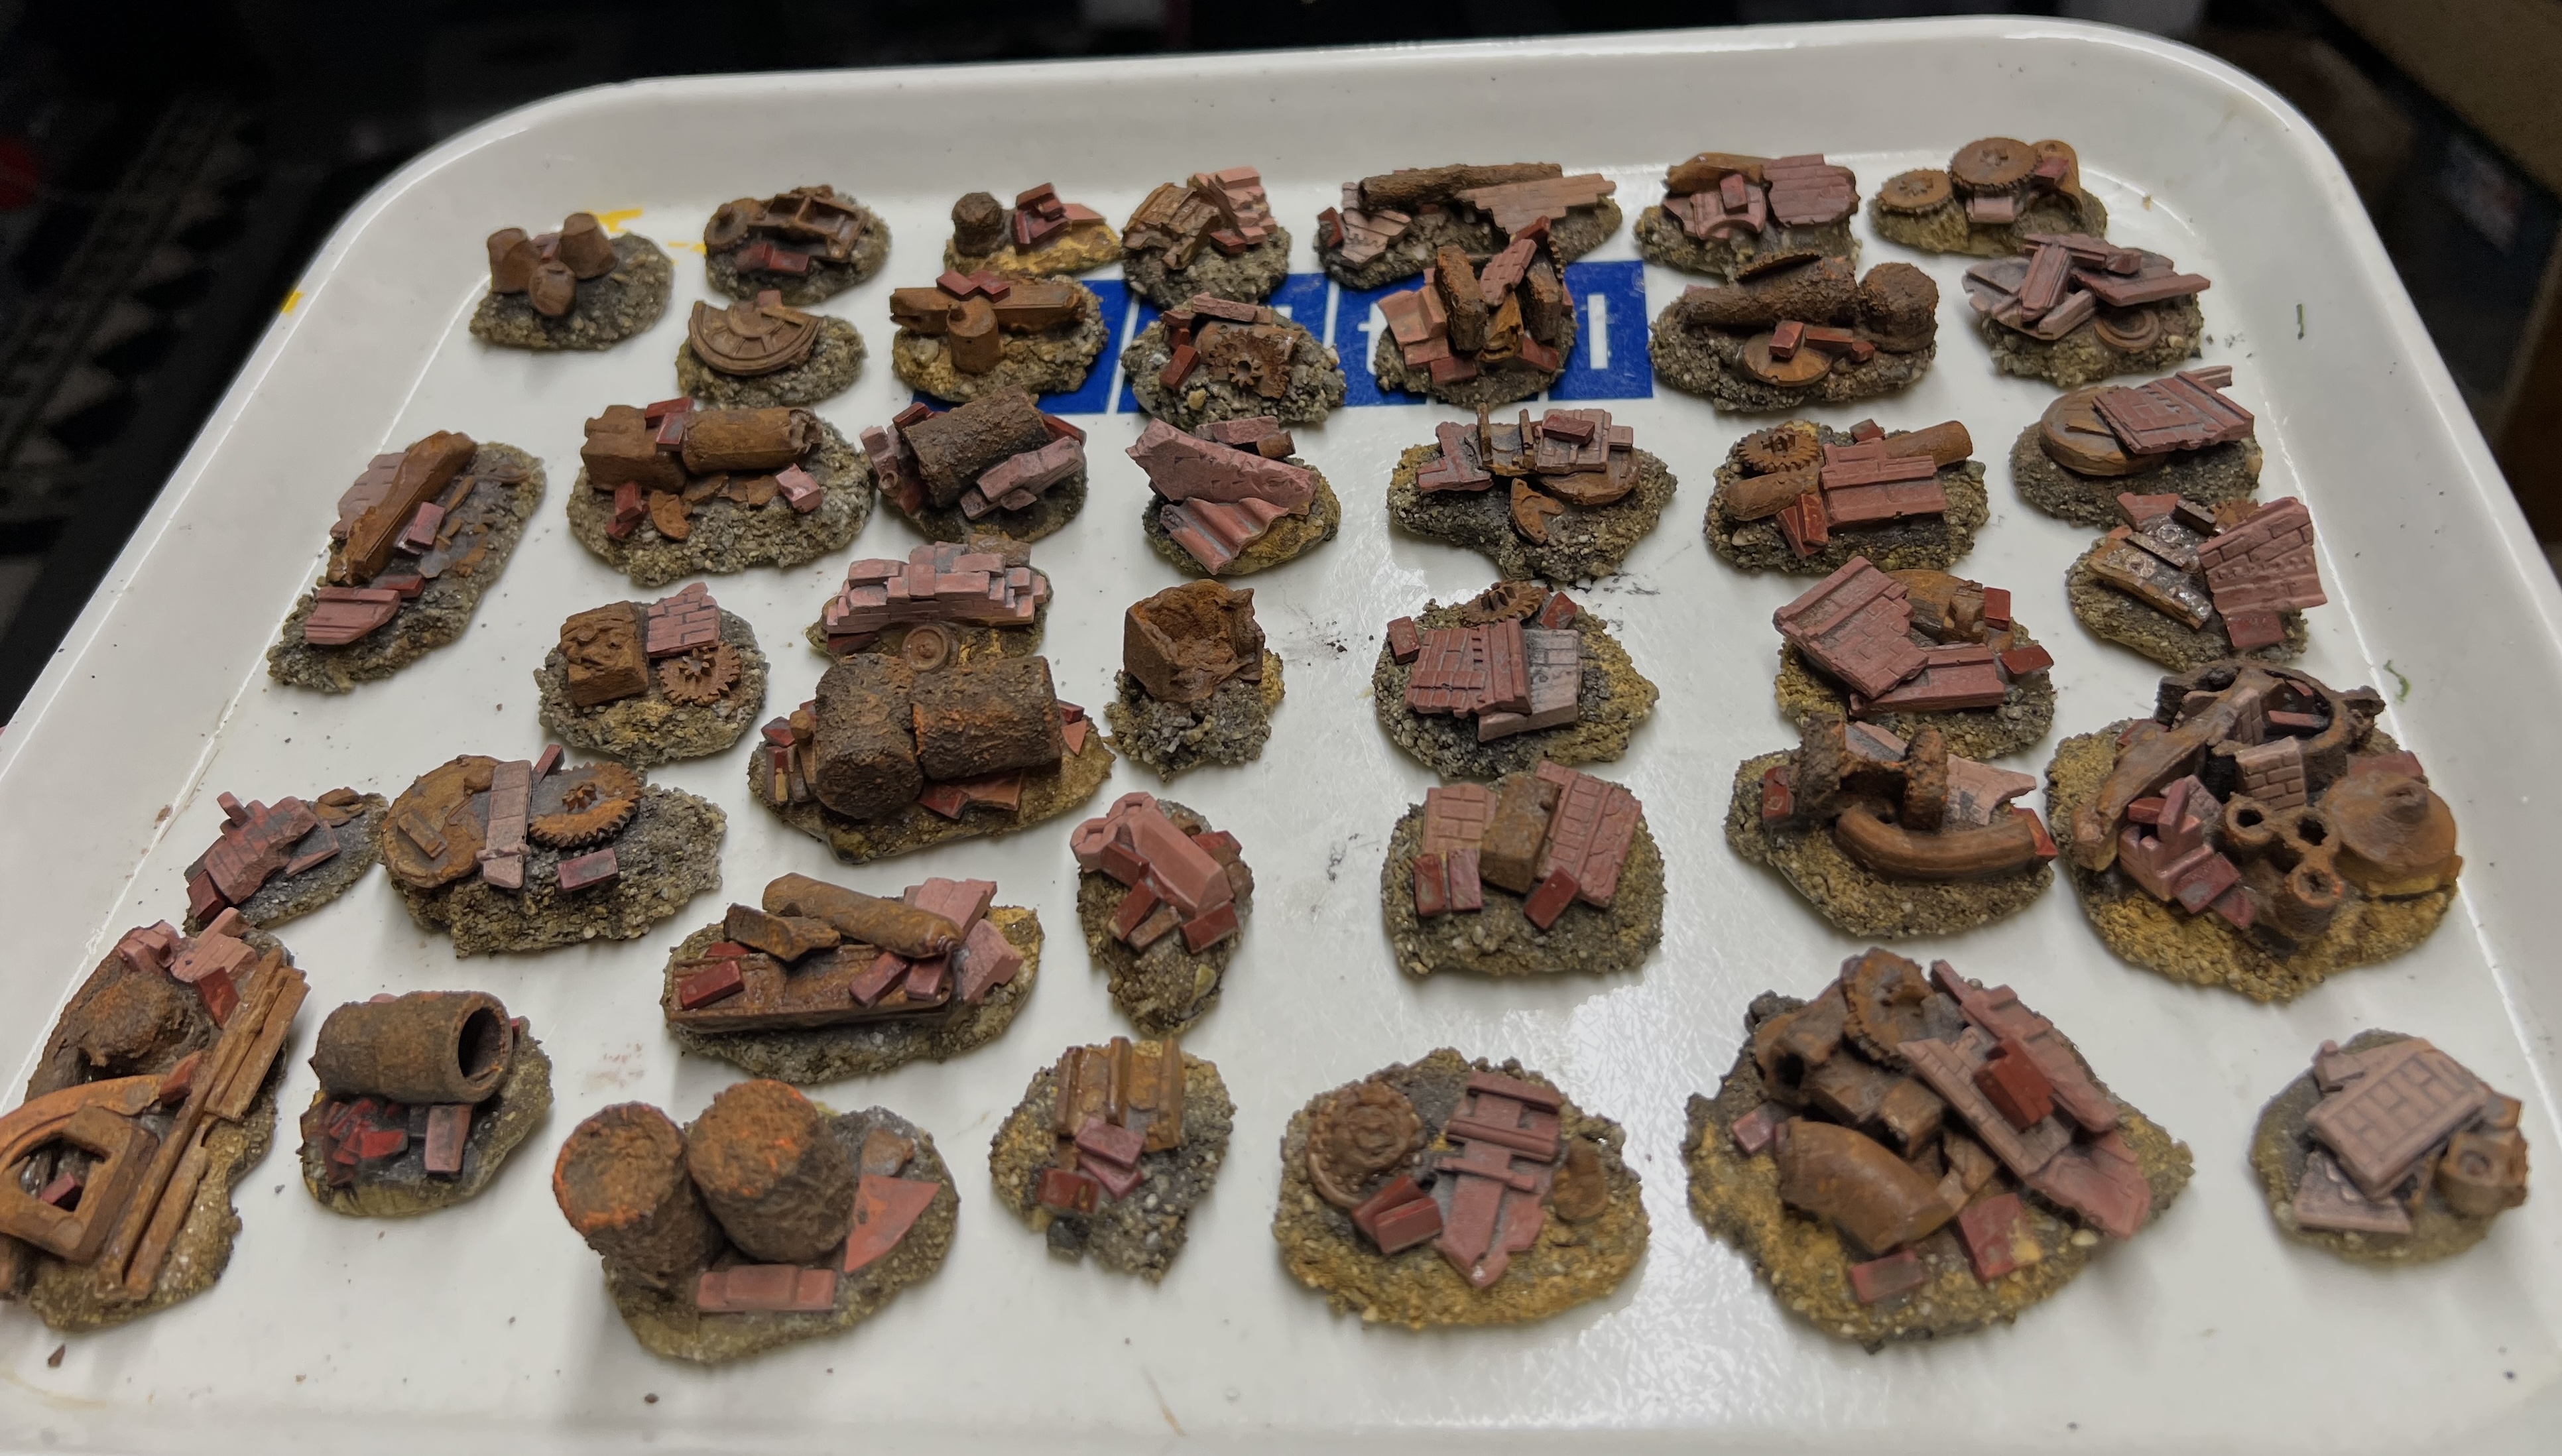
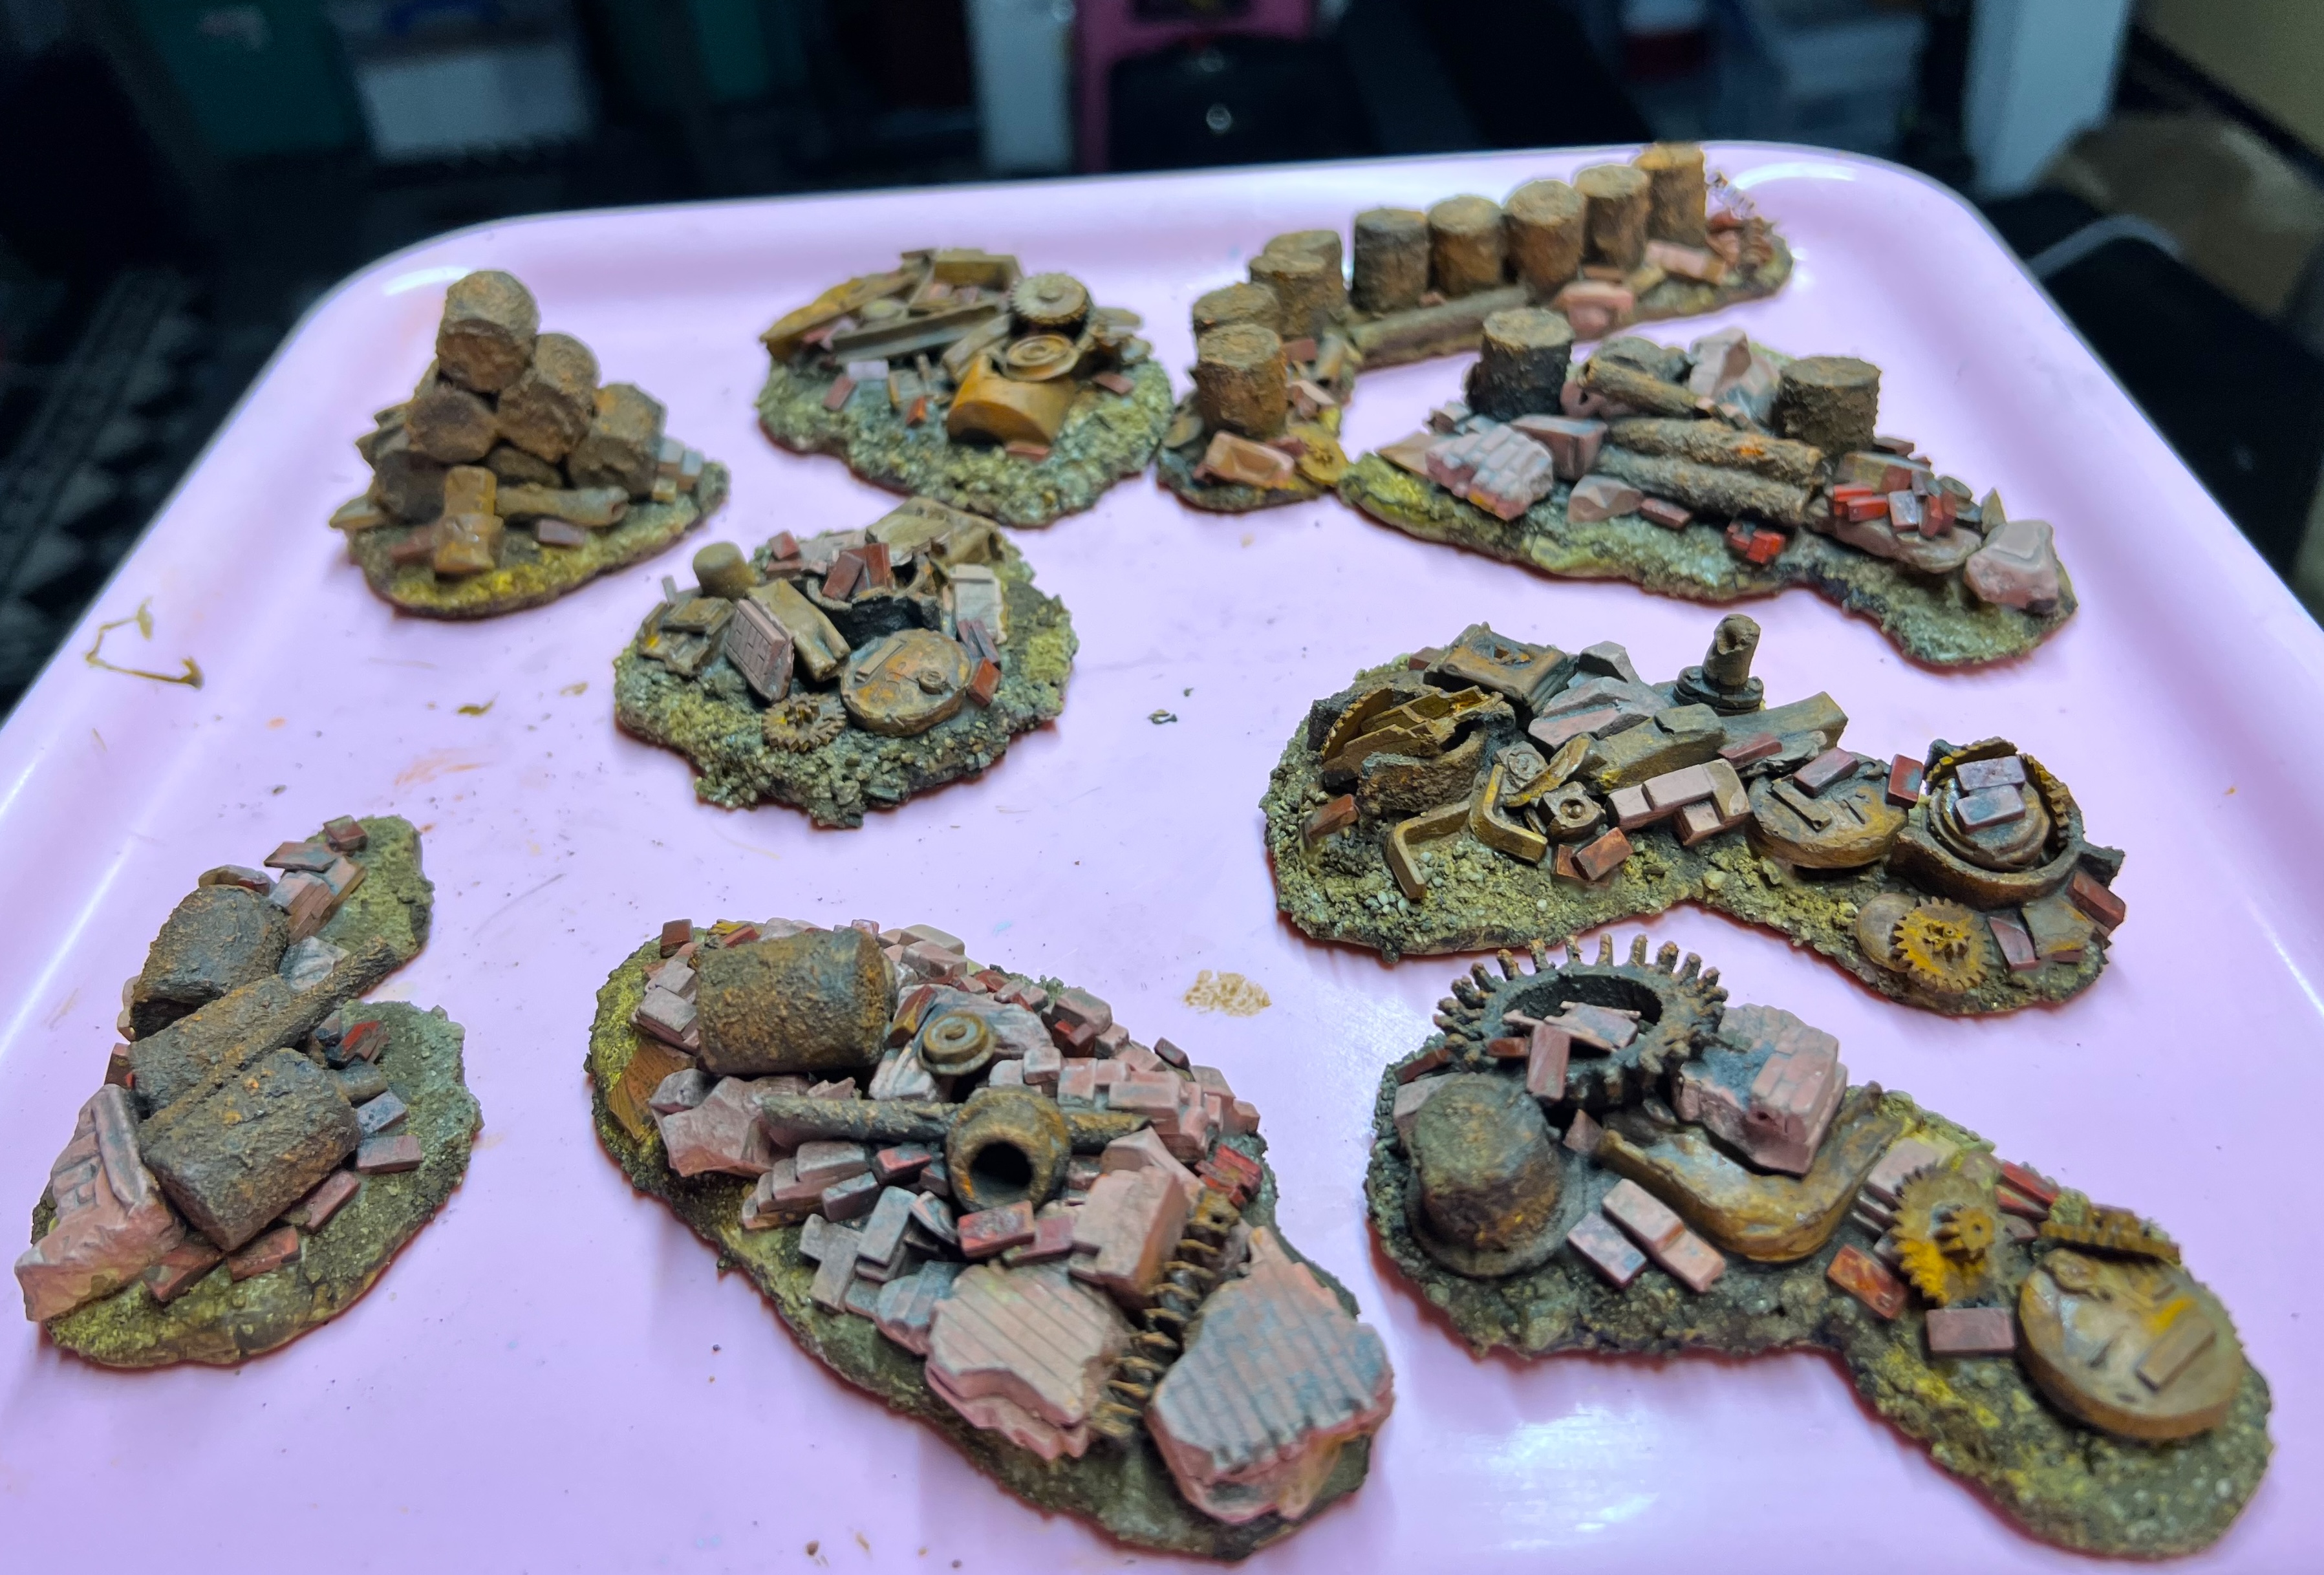
Below you can see the wreckage bases after I added pigments to them. I fixed the pigments with Vallejo Thinner applied with a spray from a lens cleaning bottle.
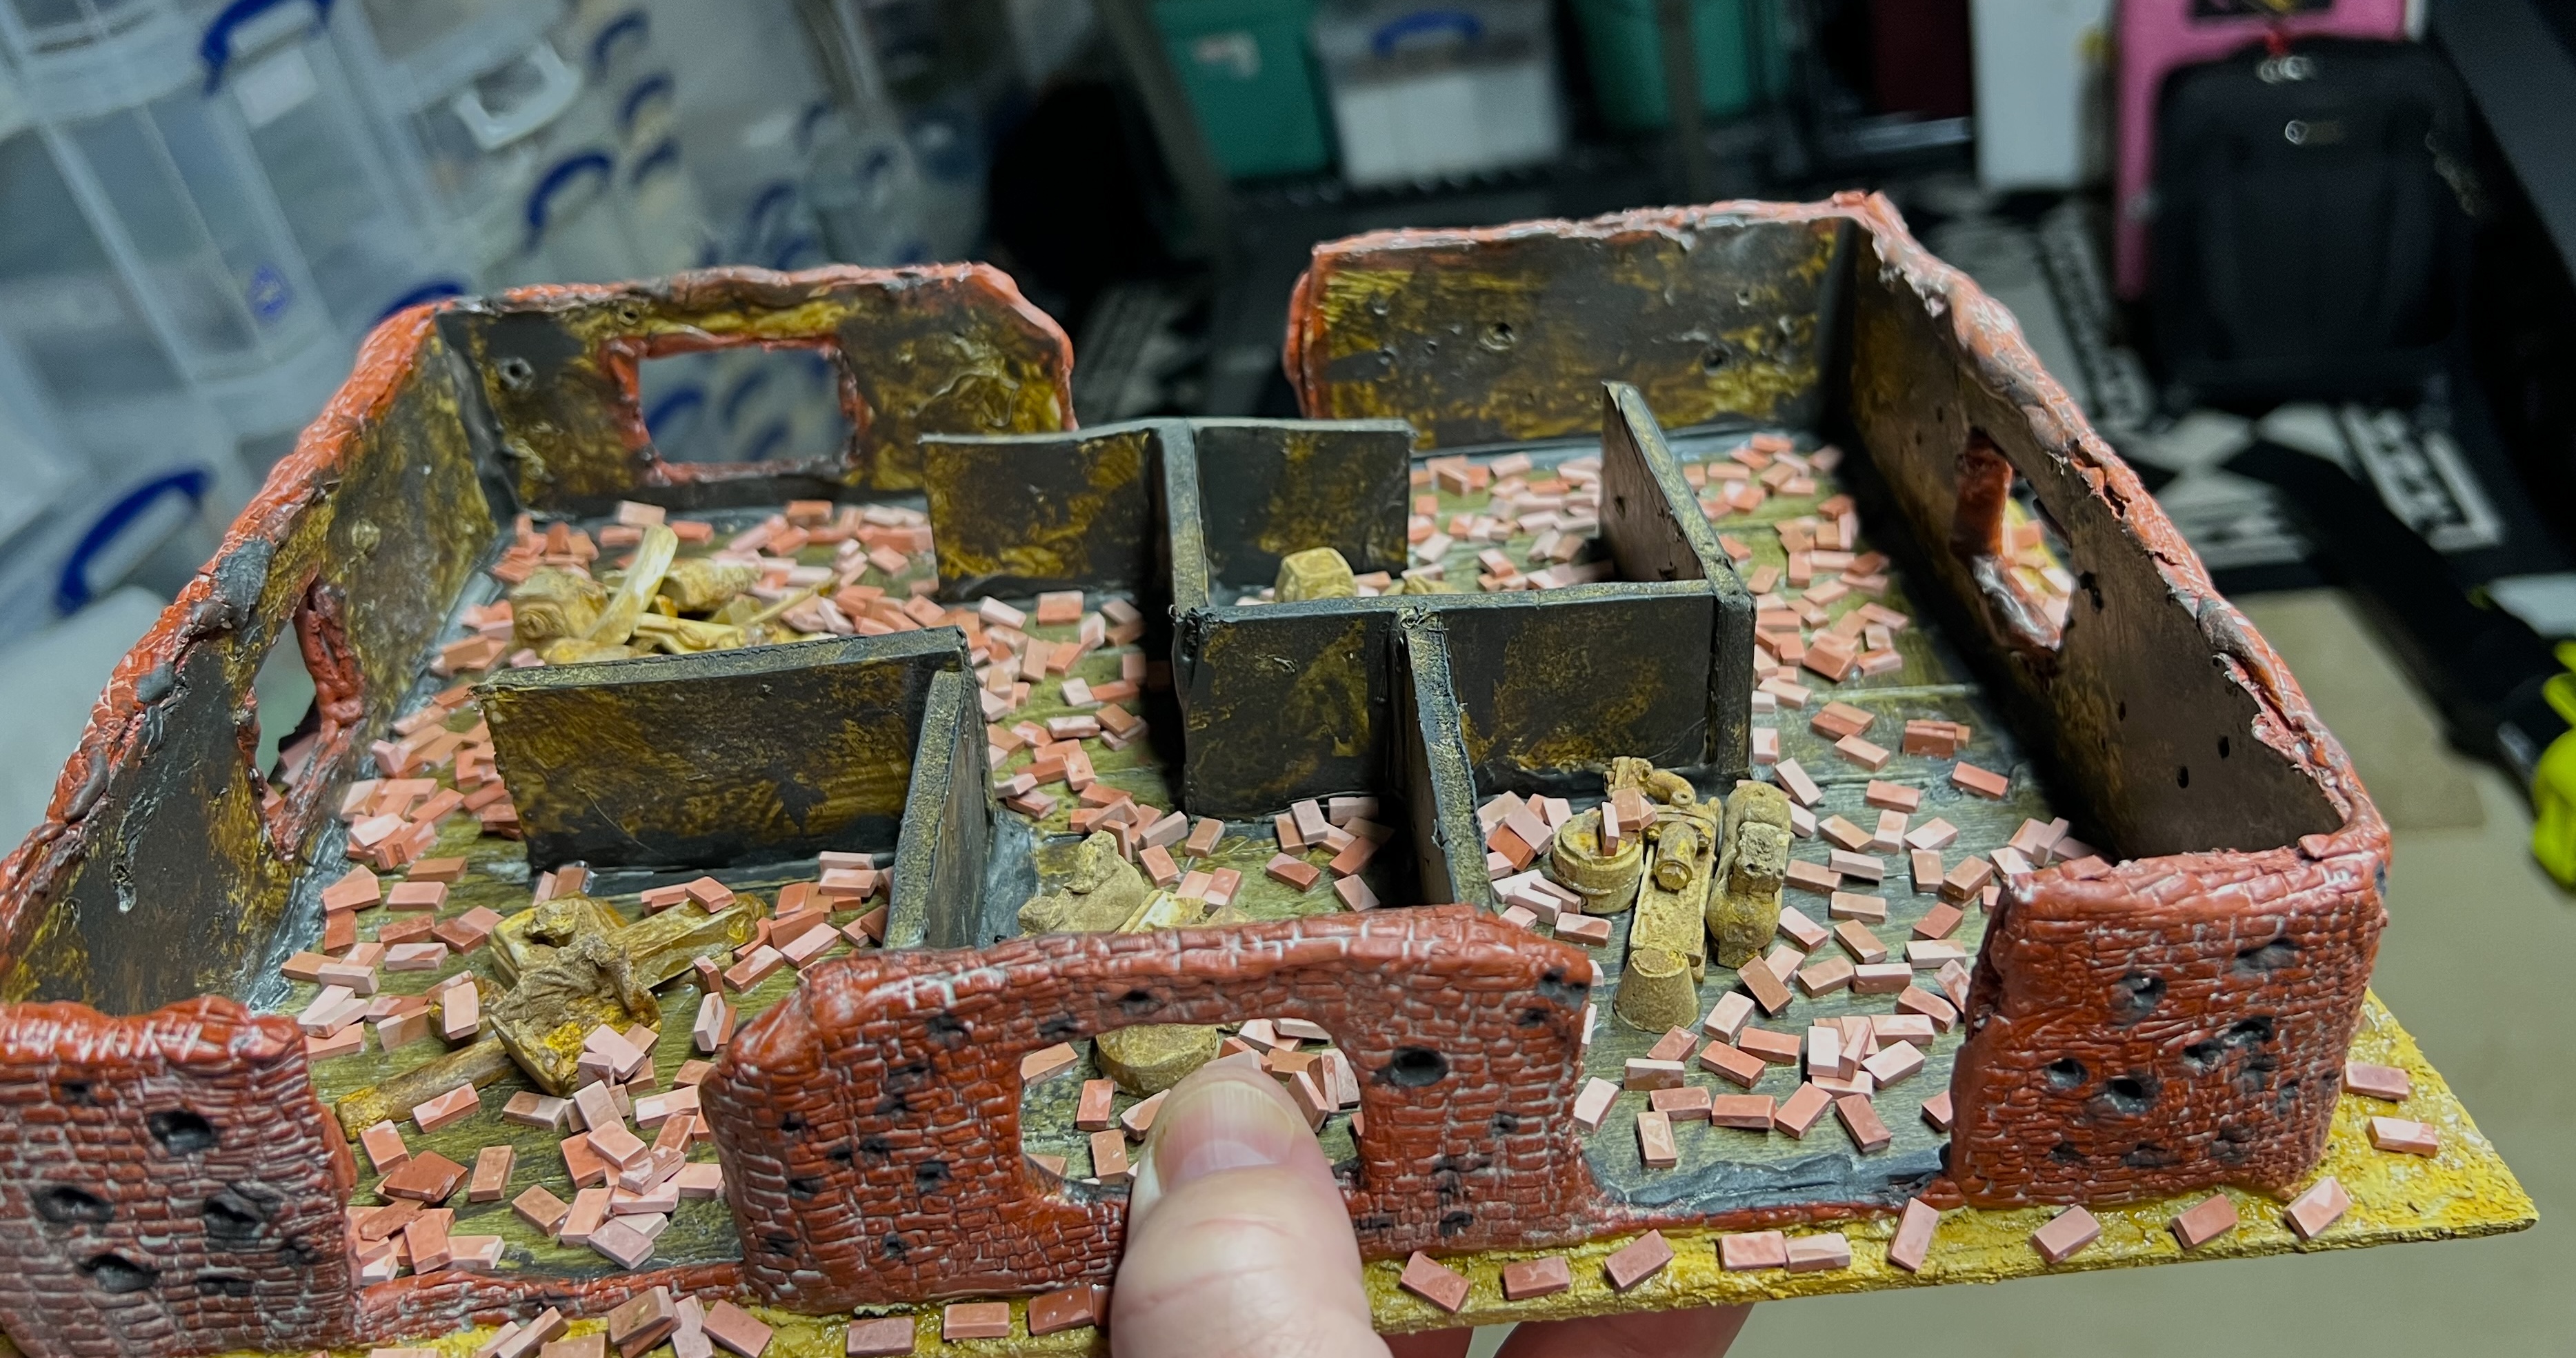
Next, I added rusty industrial wreckage and scattered bricks to the buildings’ interiors.
After adding industrial wreckage and bricks to building 1……and building 2.
Clearly, pigments were needed at this point to make the bricks and wreckage look older and dirtier. More pigments and dark washes to the rescue!
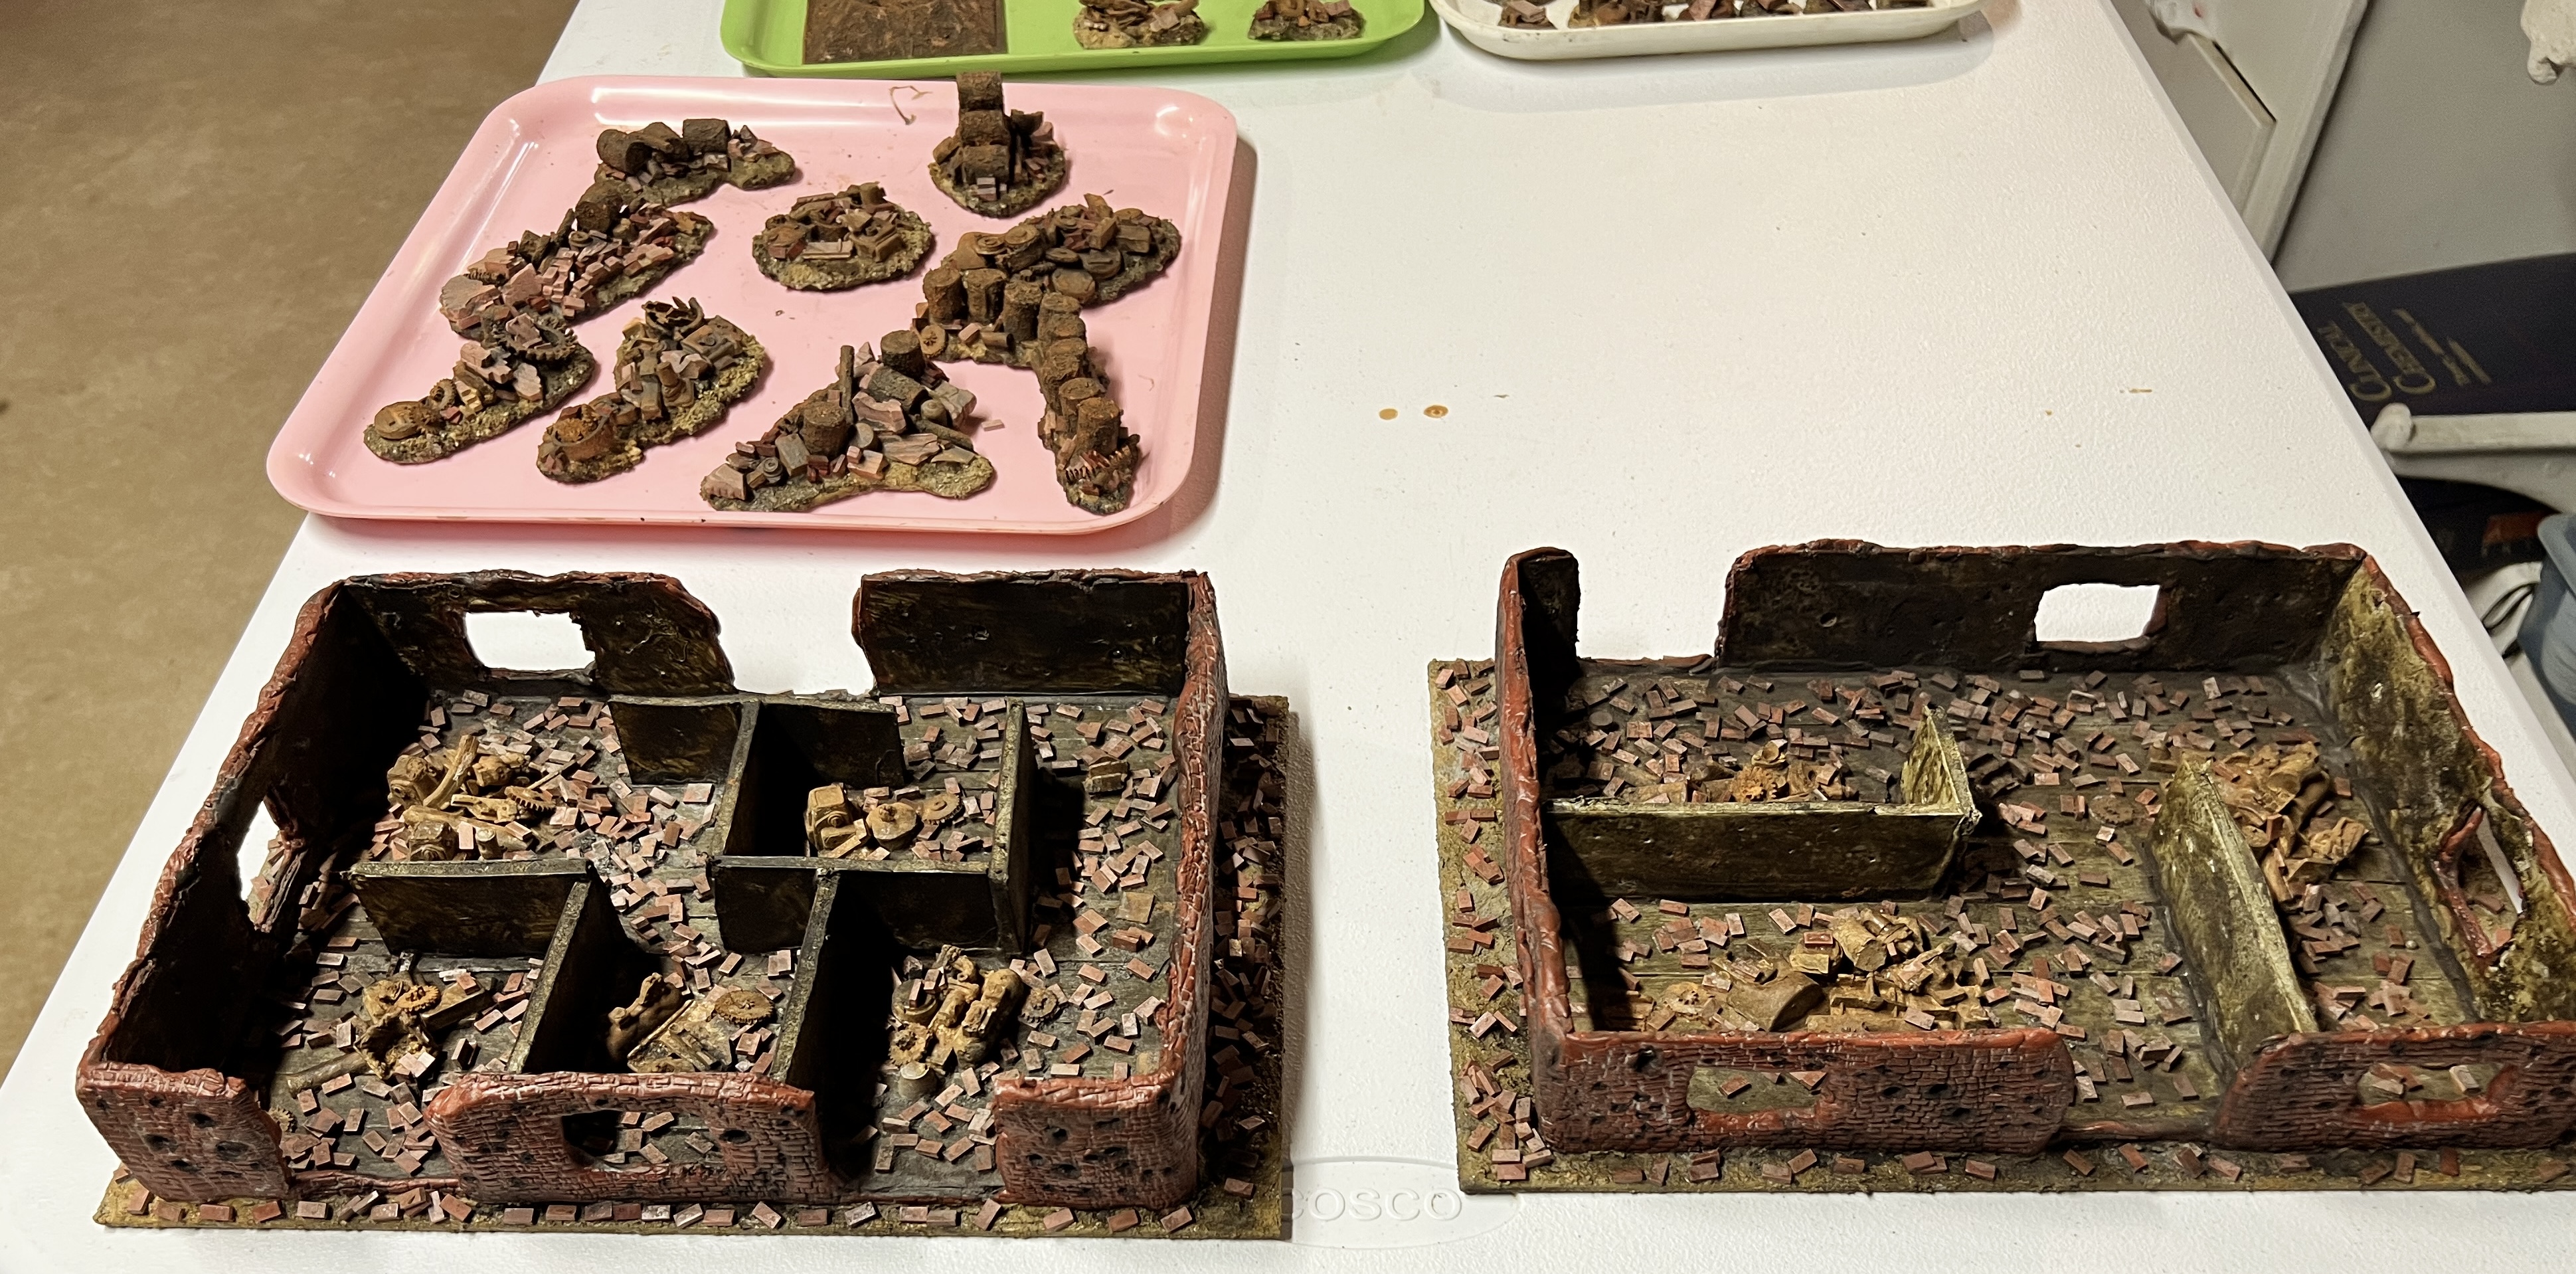
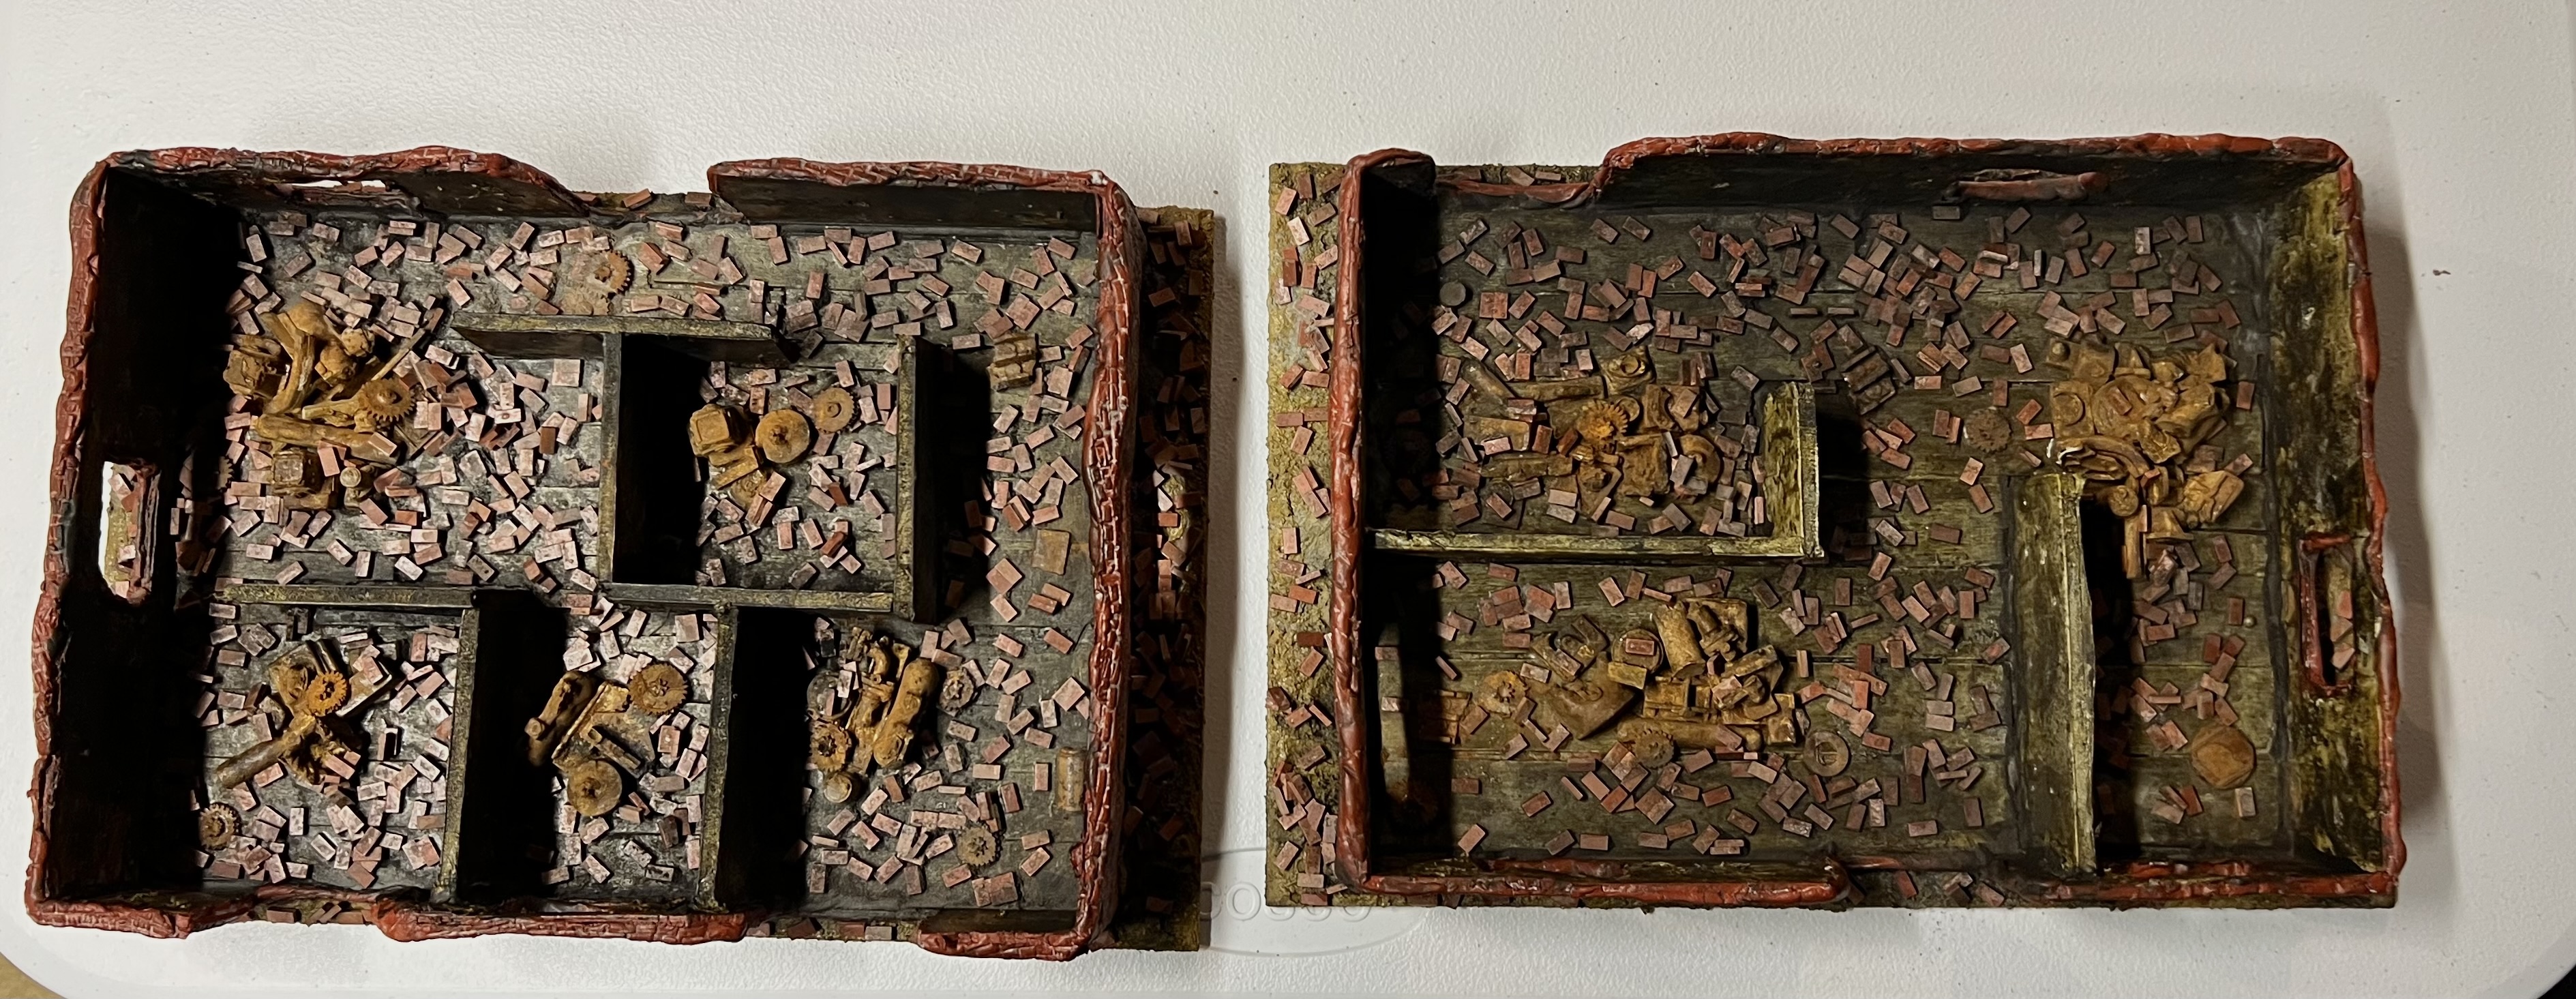
The buildings after adding the pigments and washes to dirty and rust up everything.Top view of both buildings as completed.
I was now ready to mock up the tabletop with everything! But first, the flyer for the game – which I finished before this project:
Game flyer.
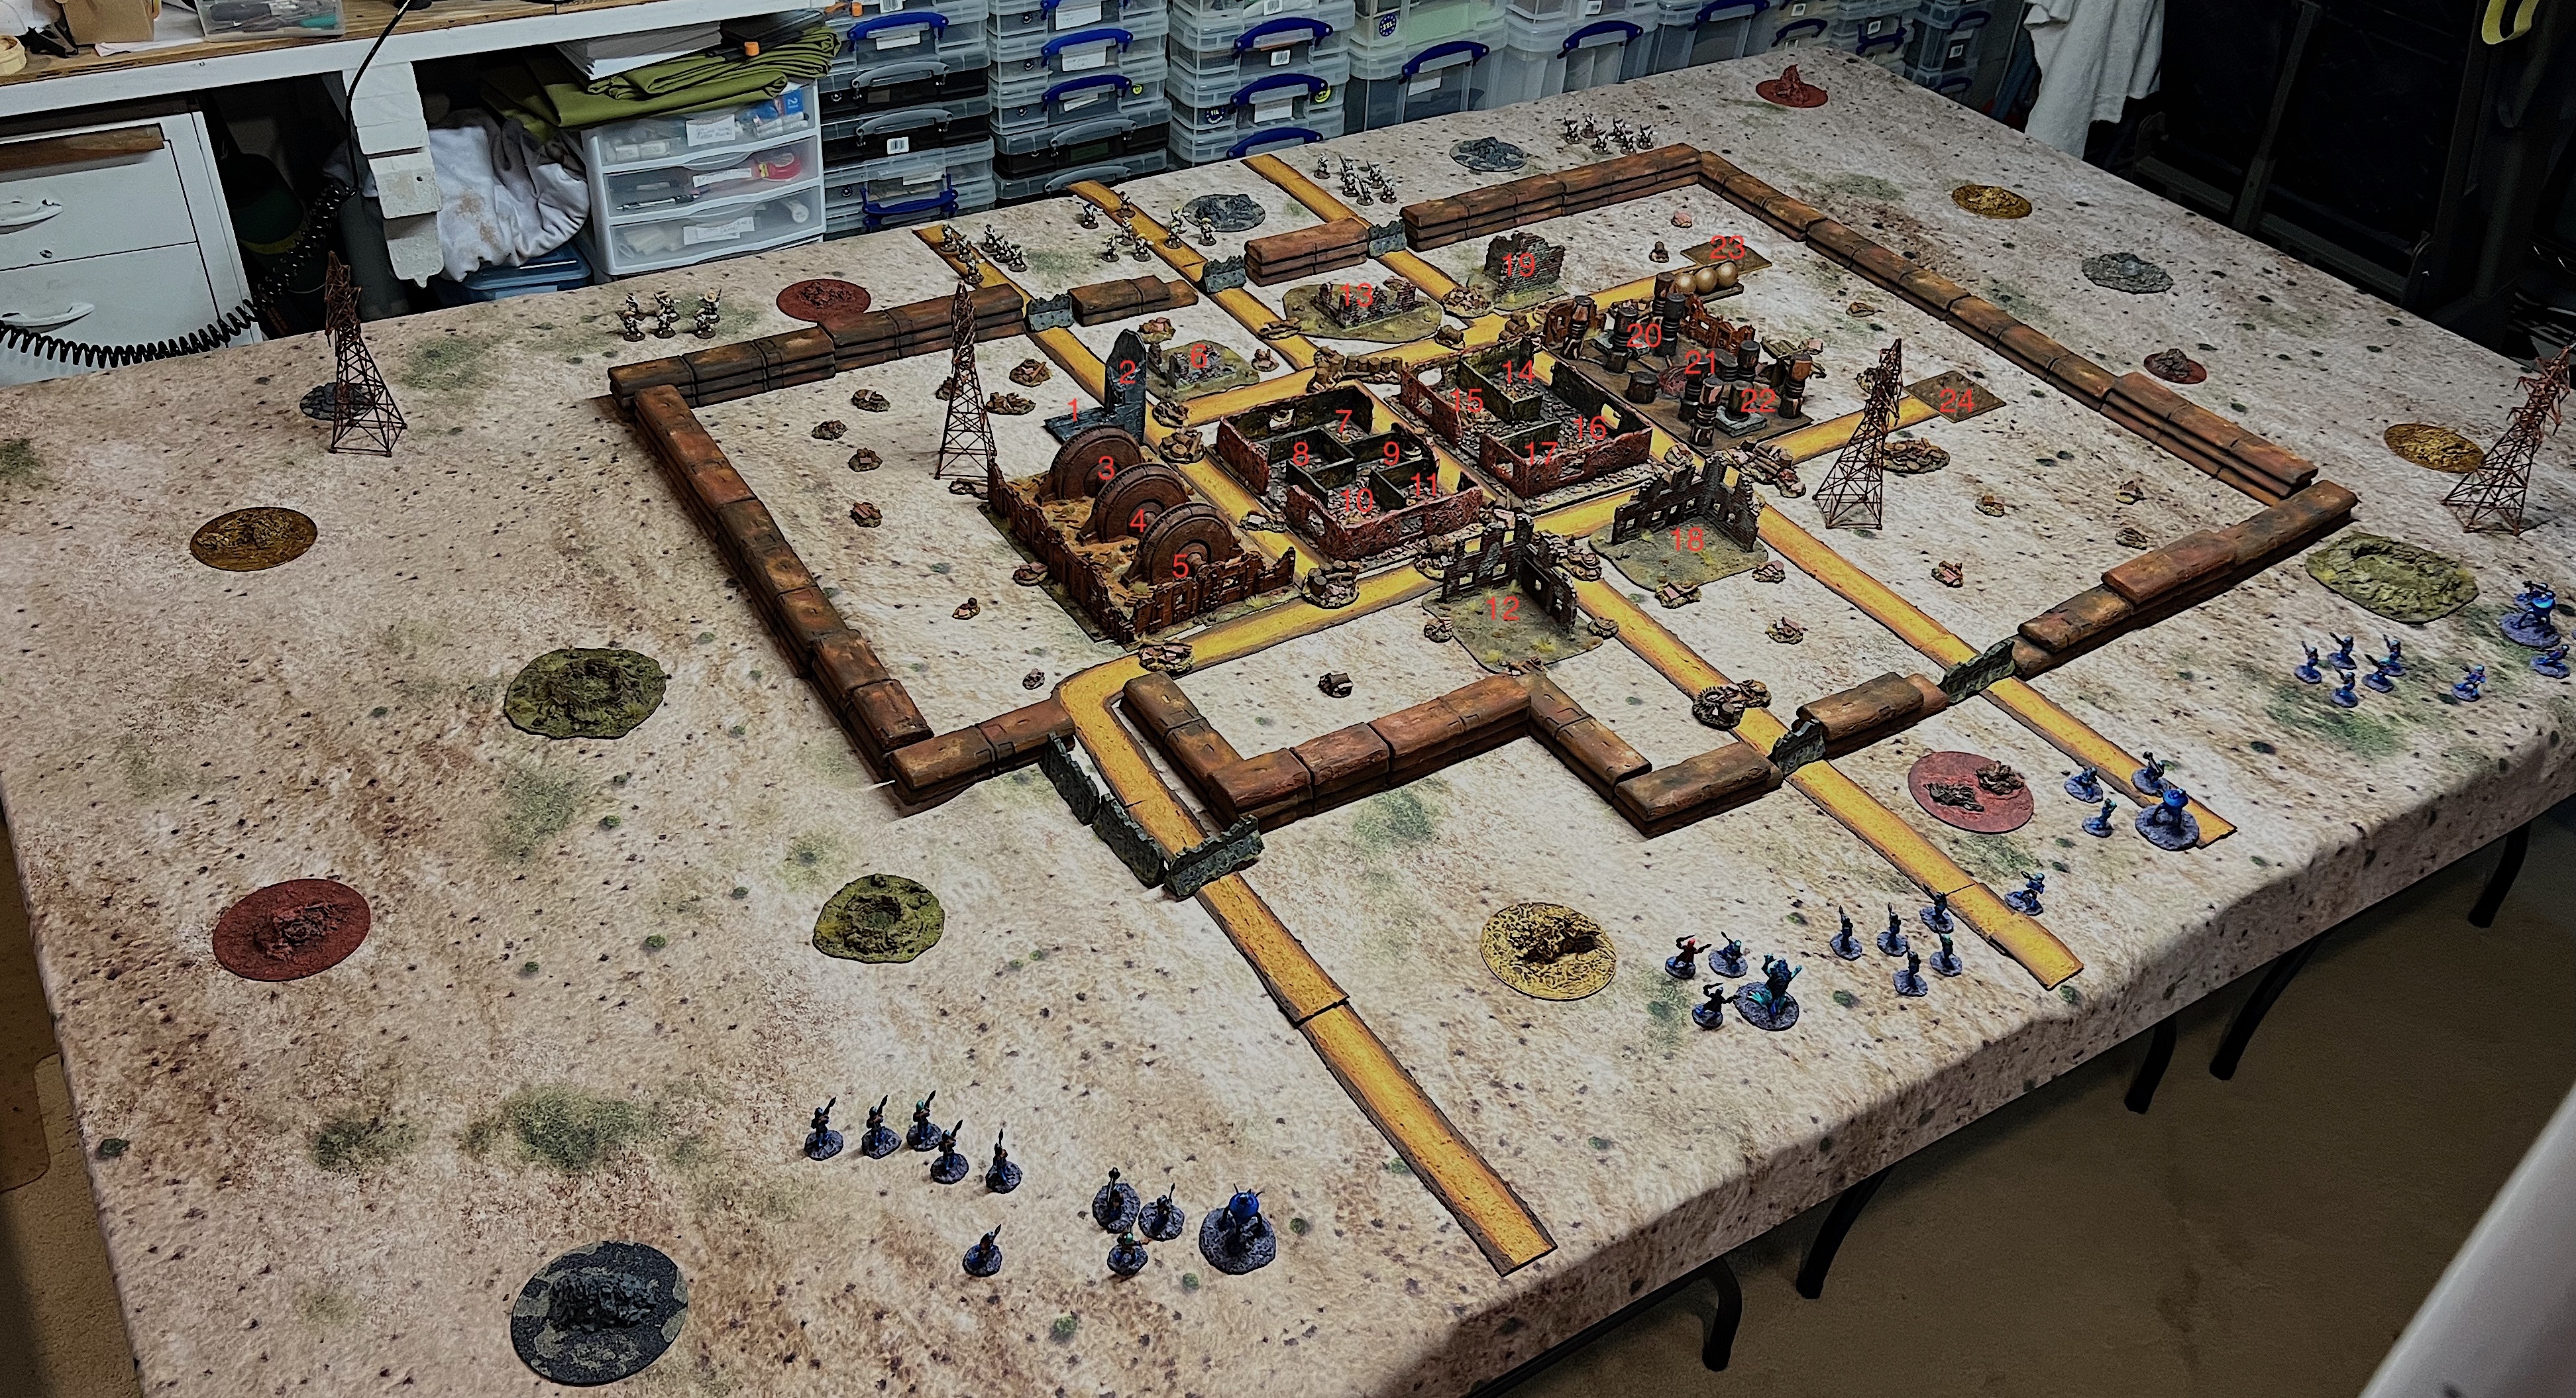
The wreckage (all 61 pieces and the buildings really helped complete my vision. There are 24 possible search locations for the 4 ancient robots, known only to the GM. The four ancient robots I used were: “Folder Bot 3000” (aka Bender) from Armorcast Terraform Terrain Ltd.’s “Robot Townies” collection; and “RT22” from old Archive miniatures Star Rovers line circa 1977; and two Archive Miniatures Robot Cooks also circa 1977 (also Star Rovers).
The four ancient robots! Folder Bot 3000, RT22, and the two Robot Cooks.
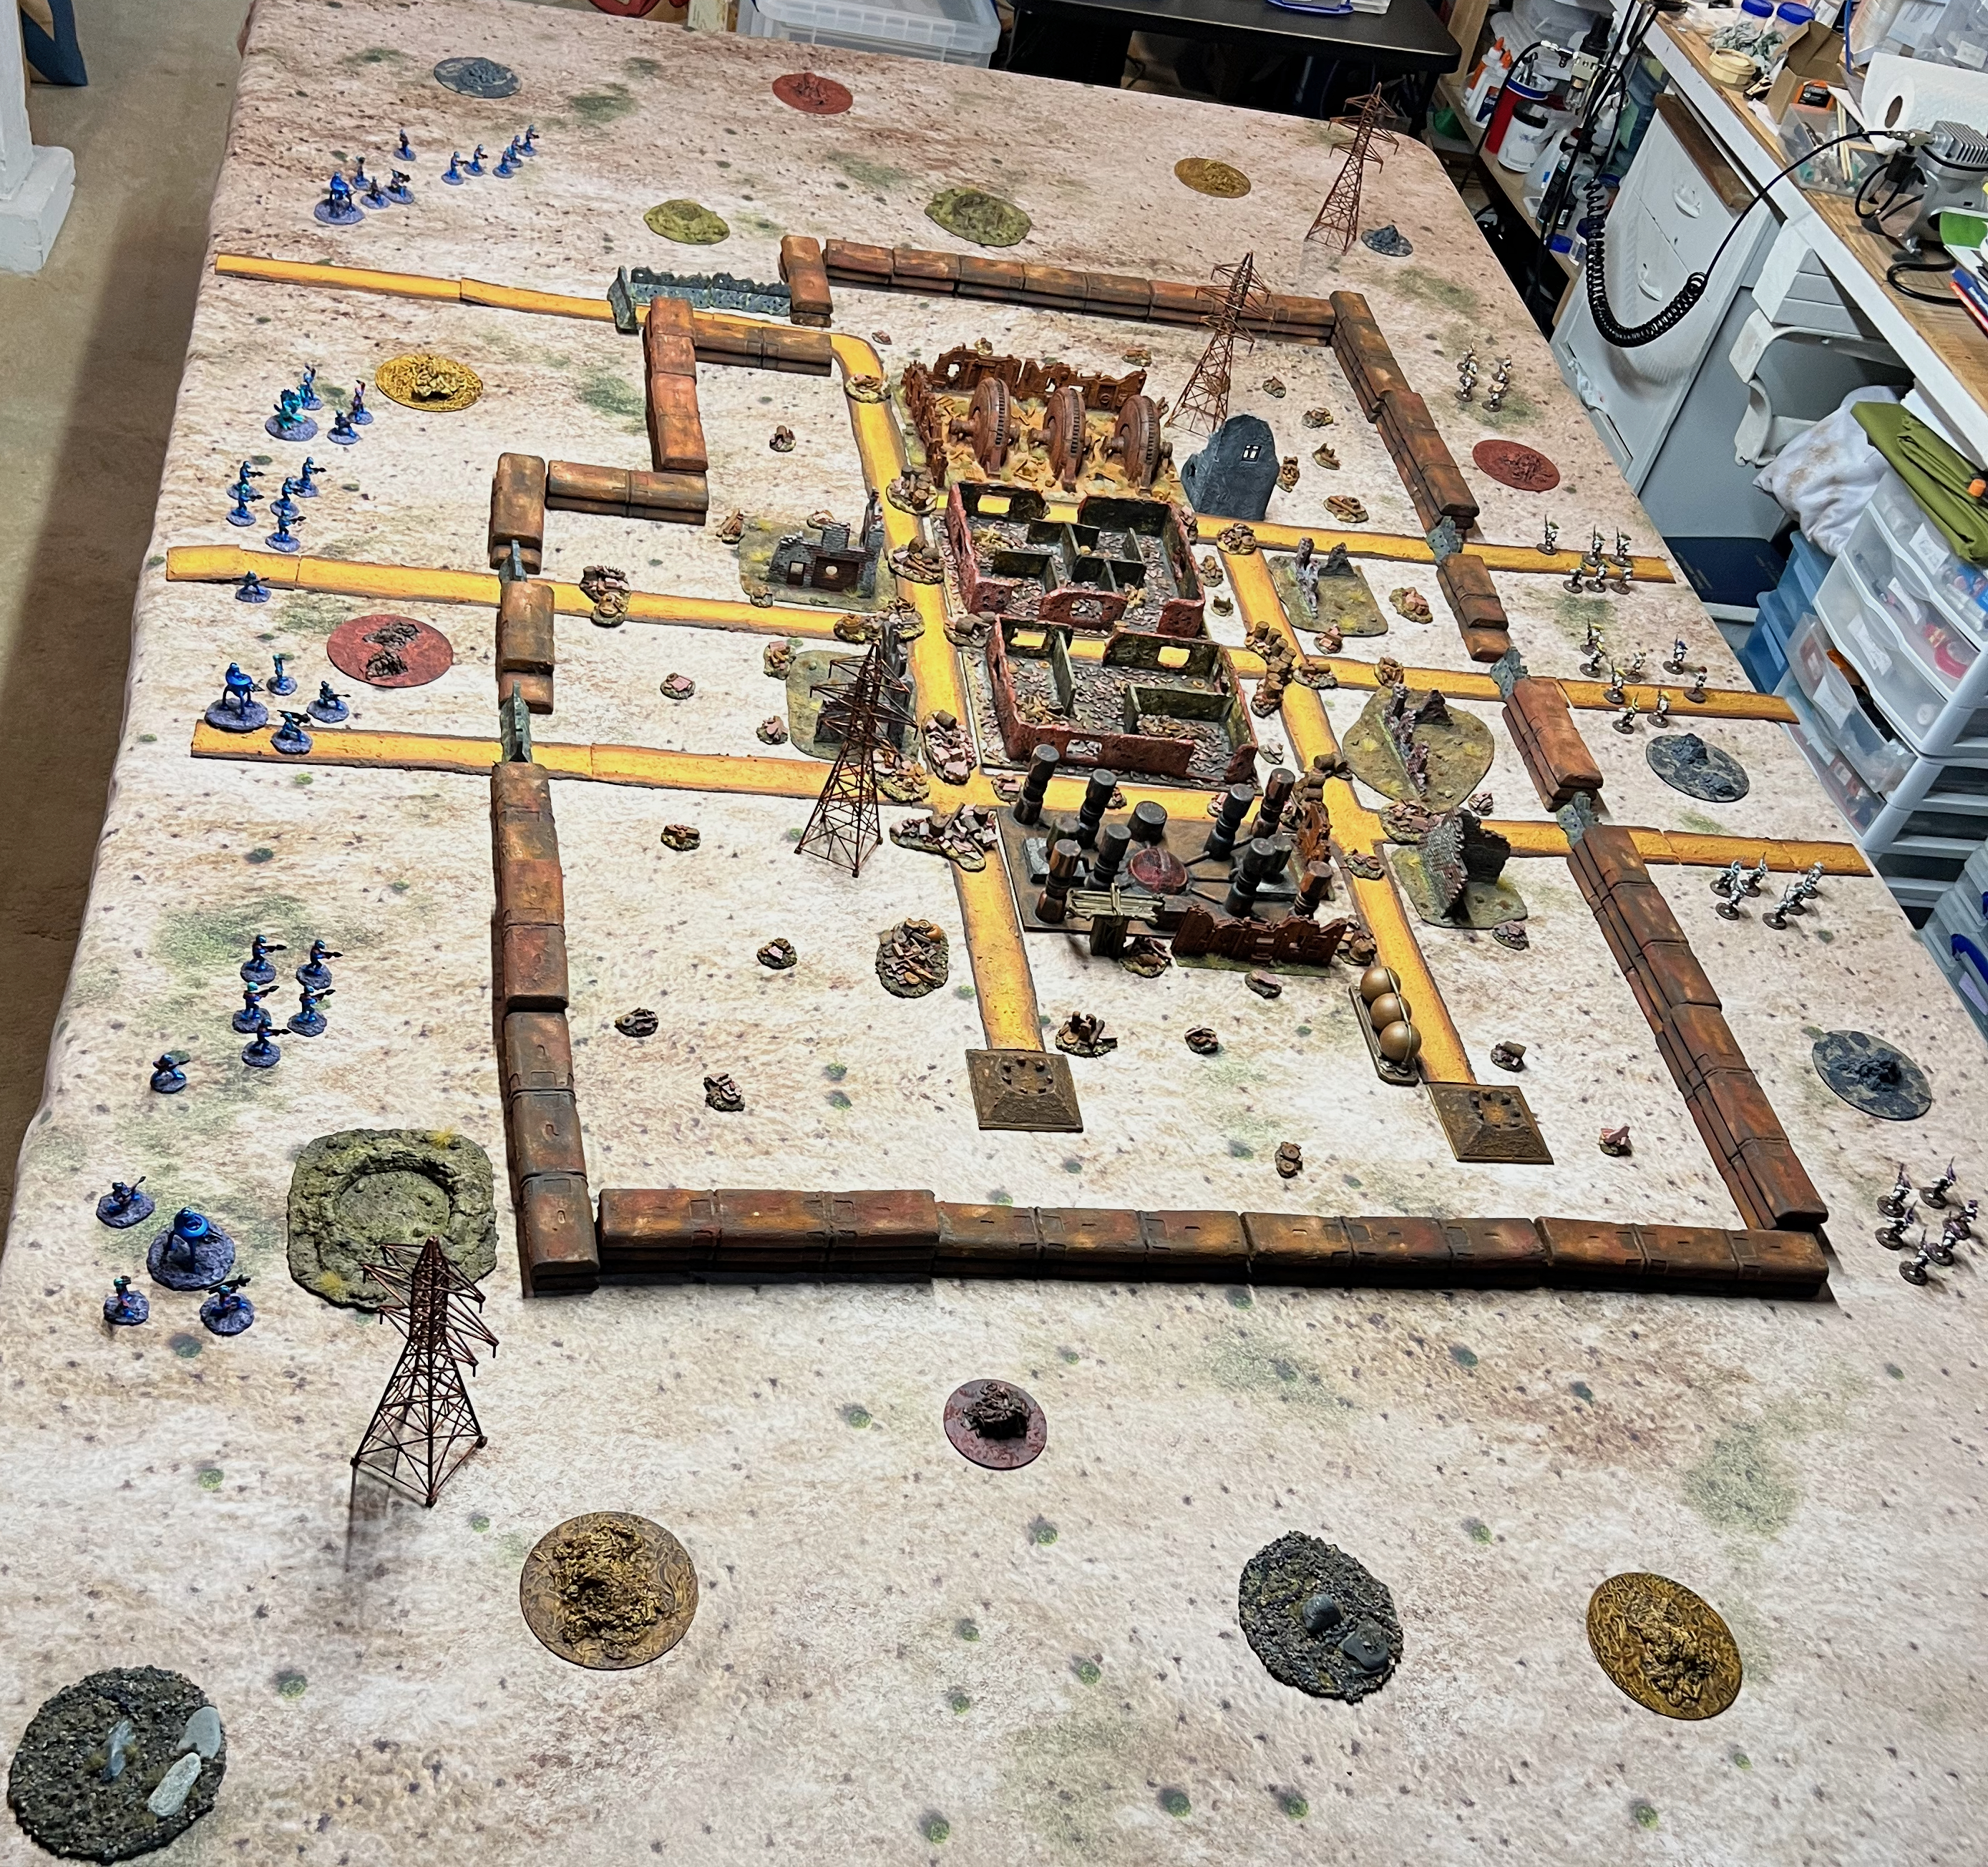
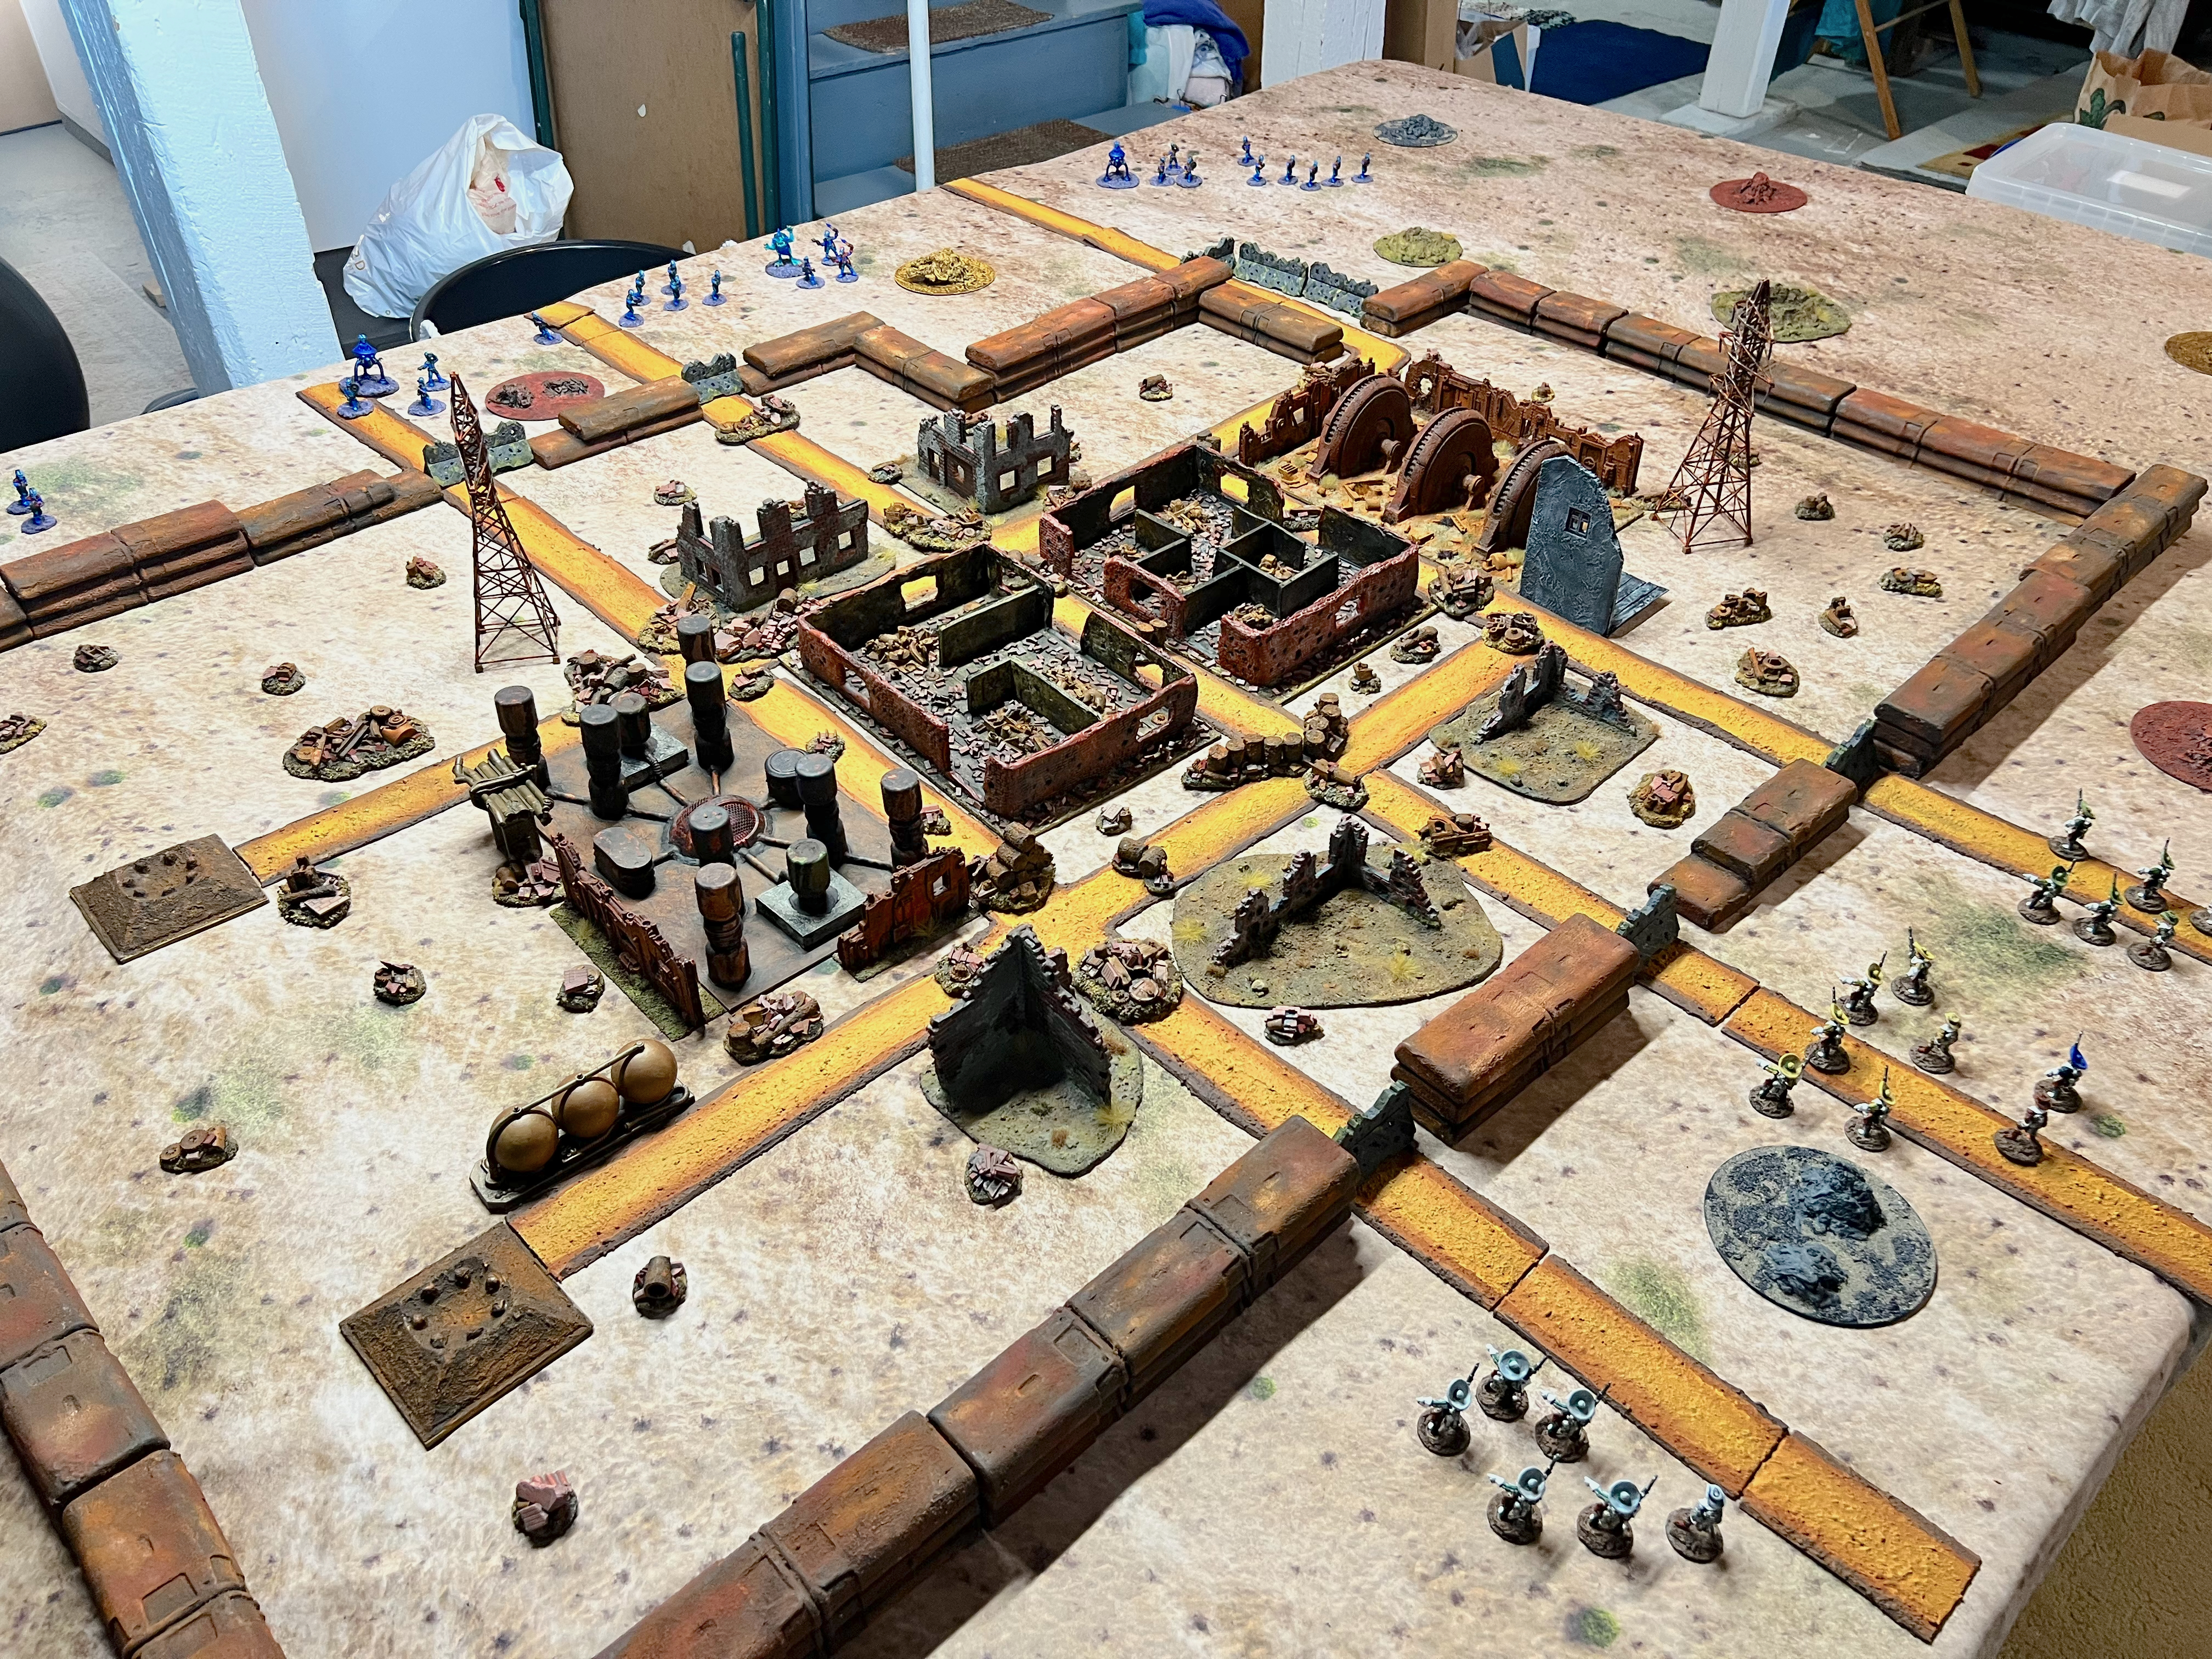
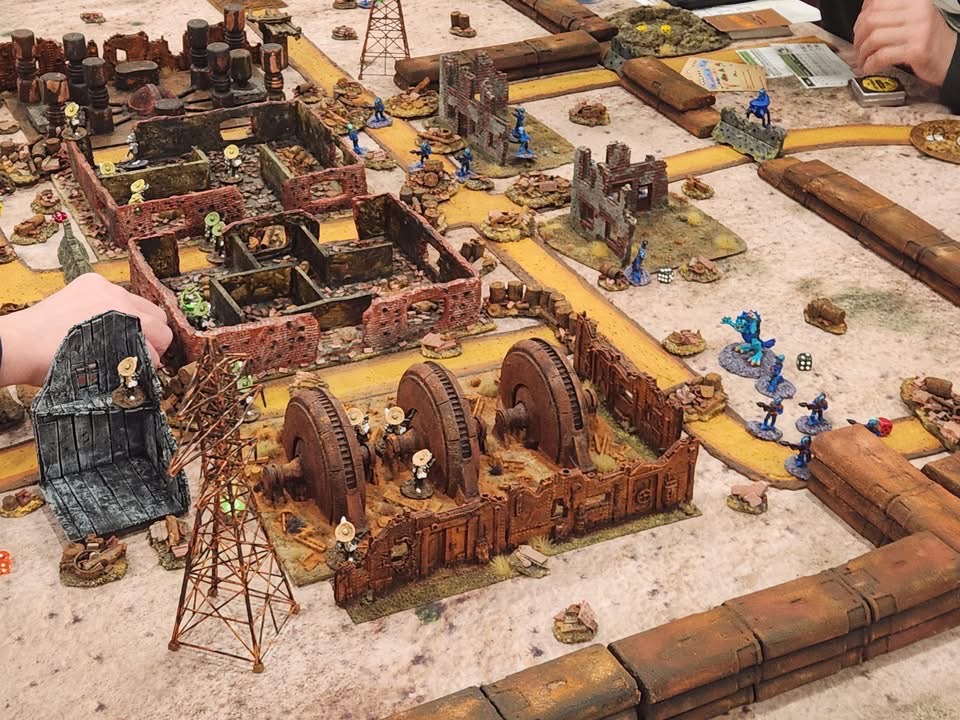
I randomly select the locations for the four robots (see numbers on the map below). My playtest worked well, and here are some shots of the mock-up tabletop.
The mock up of the tabletop for the game. The Retrovians three squads and command group are in the forefront. The Space Cowboys are at the opposite side.A side view.View from the Space Cowboy’s side.Generator side view.
I did not use all of the wreckage in the mock-up. I will share a Cold Wars post soon. However, as a preview here are a couple of shots of the game set up at Cold Wars in all its glory:
Photo of the game in progress at Cold Wars with me as the GM. (photo courtesy of Ken Howe).Space Cowboys and Retrovians start searching for the robots.The shoot out starts – while one robot has been found in the upper right. This was Bender, and he was not happy to be found and attacked and killed a Space Cowboy.
More about Cold Wars soon in a future post.
I hope you enjoyed reading this and seeing my rusty panorama come to life – on the tabletop anyways. If this WIP post helps you in any way, that is great! I am including these terrain pieces in Dave Stone’s PAINT WHAT YOU GOT 2025/2026 Challenge as these were completed in early February. For now, that’s it, until next time!
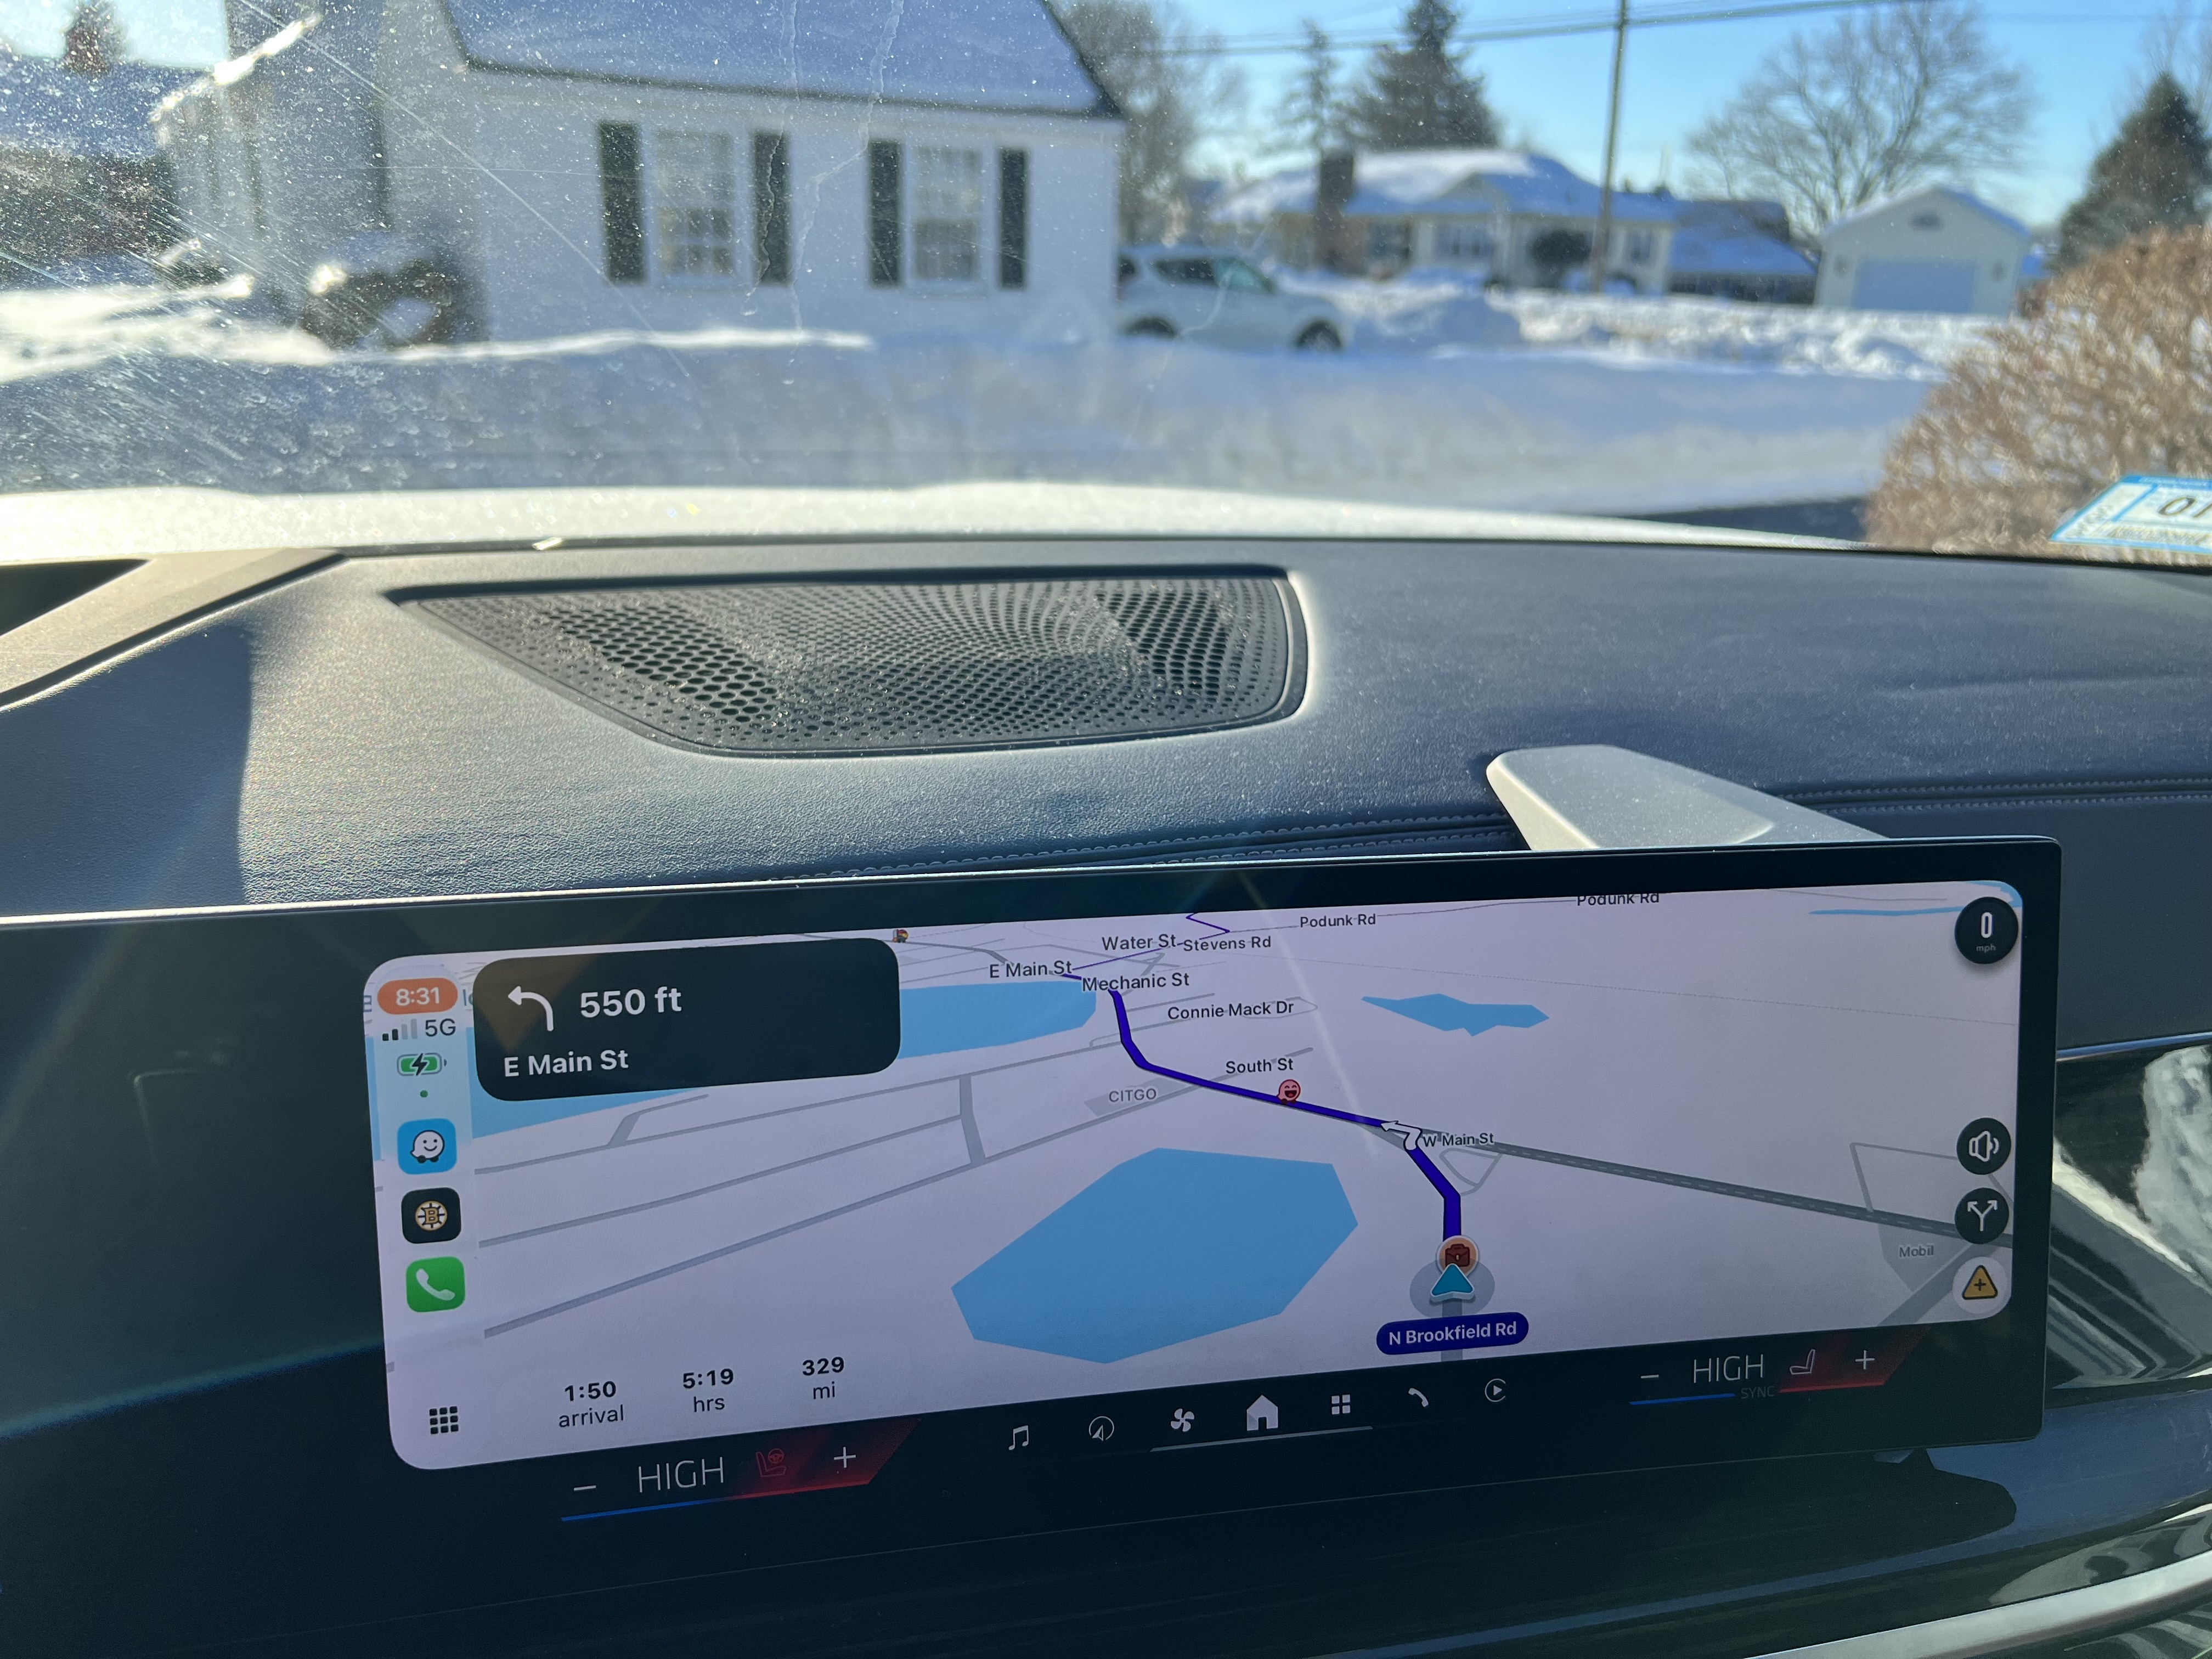
329 miles to Lancaster, PA and Cold Wars!
The materials are listed below as a reference for me (and you maybe).
For all of my previous posts on terrain projects, please see this page. For all of my previous posts on sci-fi projects, please see this page…for any of my previous posts on scratch-building, see this page.
PAINTS, INKS, GLAZES, SHADES, WASHES, PIGMENTS, FLOCKING, GLUES AND MORE THAT I USED ON THE TWO RUINED BUILDINGS:
iPad 16 Box (top and bottom)
Hot glue
Foam Board
Toothpicks
Popsicle sticks
Apoxie sculpt
Vallejo Surface Primer “Grey”
SIBE AUTOMATION “White Polystyrene 8″ X 12″ X 1/8″ Plastic Sheet”
PVA
Huge Miniatures “Brick Red”
MSP “Brown Liner”
Vallejo Game Color “Sepia” (wash/shade)
Vallejo Wash FX “Dark Grey” (wash/shade)
Liquitex “Burnt Umber” (ink)
Secret Weapon Washes “Sewer Water”
Vallejo Thinner
Vallejo Surface Primer “German Green Brown”
Vallejo “Light Slate Grey” (pigment)
AK “Dry Ground” (texture)
Vallejo “Carbon Black” (pigment)
Juweela Metal Scrap Rusty Industry (23336)
Juweela Debris Assortment (23316)
Juweela Debris Brick Red (23315)
Juweela Debris Assortment (23315)
Juweela Bricks (23034)
Juweela Metal Scrap Rusty Gear Wheels (23317)
Army Painter “Red Tone” (wash)
Secret Weapon Washes “Red Black” (wash)
Secret Weapon Washes “Ruby” (wash)
P3 “Red Ink” (ink)
Vallejo Game Air “Red Terracotta”
PAINTS, INKS, GLAZES, SHADES, WASHES, PIGMENTS, FLOCKING, GLUES AND MORE THAT I USED ON THE 61 WRECKAGE BASES/PILES:
Play sand
Apoxie sculpt
PVA
Various scrap plastic pieces
Cylindrical desiccant holders
Rubber sink stopper rim
Juweela Metal Scrap Rusty Industry (23336)
Juweela Debris Assortment (23316)
Juweela Debris Brick Red (23315)
Juweela Debris Assortment (23315)
Juweela Bricks (23034)
Juweela Metal Scrap Rusty Gear Wheels (23317)
AK “Corrosion Texture” (texture)
Vallejo Model Air “Rust” (71.080)
Vallejo Model Air “Rust” (71.080)
Vallejo Model Air “Rust” (71.069)
Vallejo Model Air “Orange Rust”
Citadel “Ryza Rust” (dry)
Vallejo “Old Rust” (pigment)
Vallejo “Pigment Binder”
Vallejo Thinner
Vallejo “Dark Slate Grey” (pigment)
Vallejo “Dark Yellow Ochre” (pigment)
Vallejo Game Color “Sepia” (wash/shade)
Secret Weapon Washes “Sewer Water”
Army Painter “Red Tone” (wash)
Secret Weapon Washes “Red Black” (wash)
Secret Weapon Washes “Ruby” (wash)
P3 “Red Ink” (ink)
Vallejo Game Air “Red Terracotta”
PAINTS, INKS, GLAZES, SHADES, WASHES, PIGMENTS, FLOCKING, GLUES AND MORE THAT I USED ON THE 2 FLAT INDUSTRIAL STRUCTURES:
SIBE AUTOMATION “White Polystyrene 8″ X 12″ X 1/8″ Plastic Sheet”
Convention season has arrived! So, I needed to finish off a few regiments in anticipation of several games between now and June. This time, I needed to augment my forces of Professor Nitpik and his Mechanical Men. Click the link to learn his back story.
Luckily, my first group of mechanical men miniatures for 2026 is now done. By group, I mean 41 figures for my Wars of Ozz games.
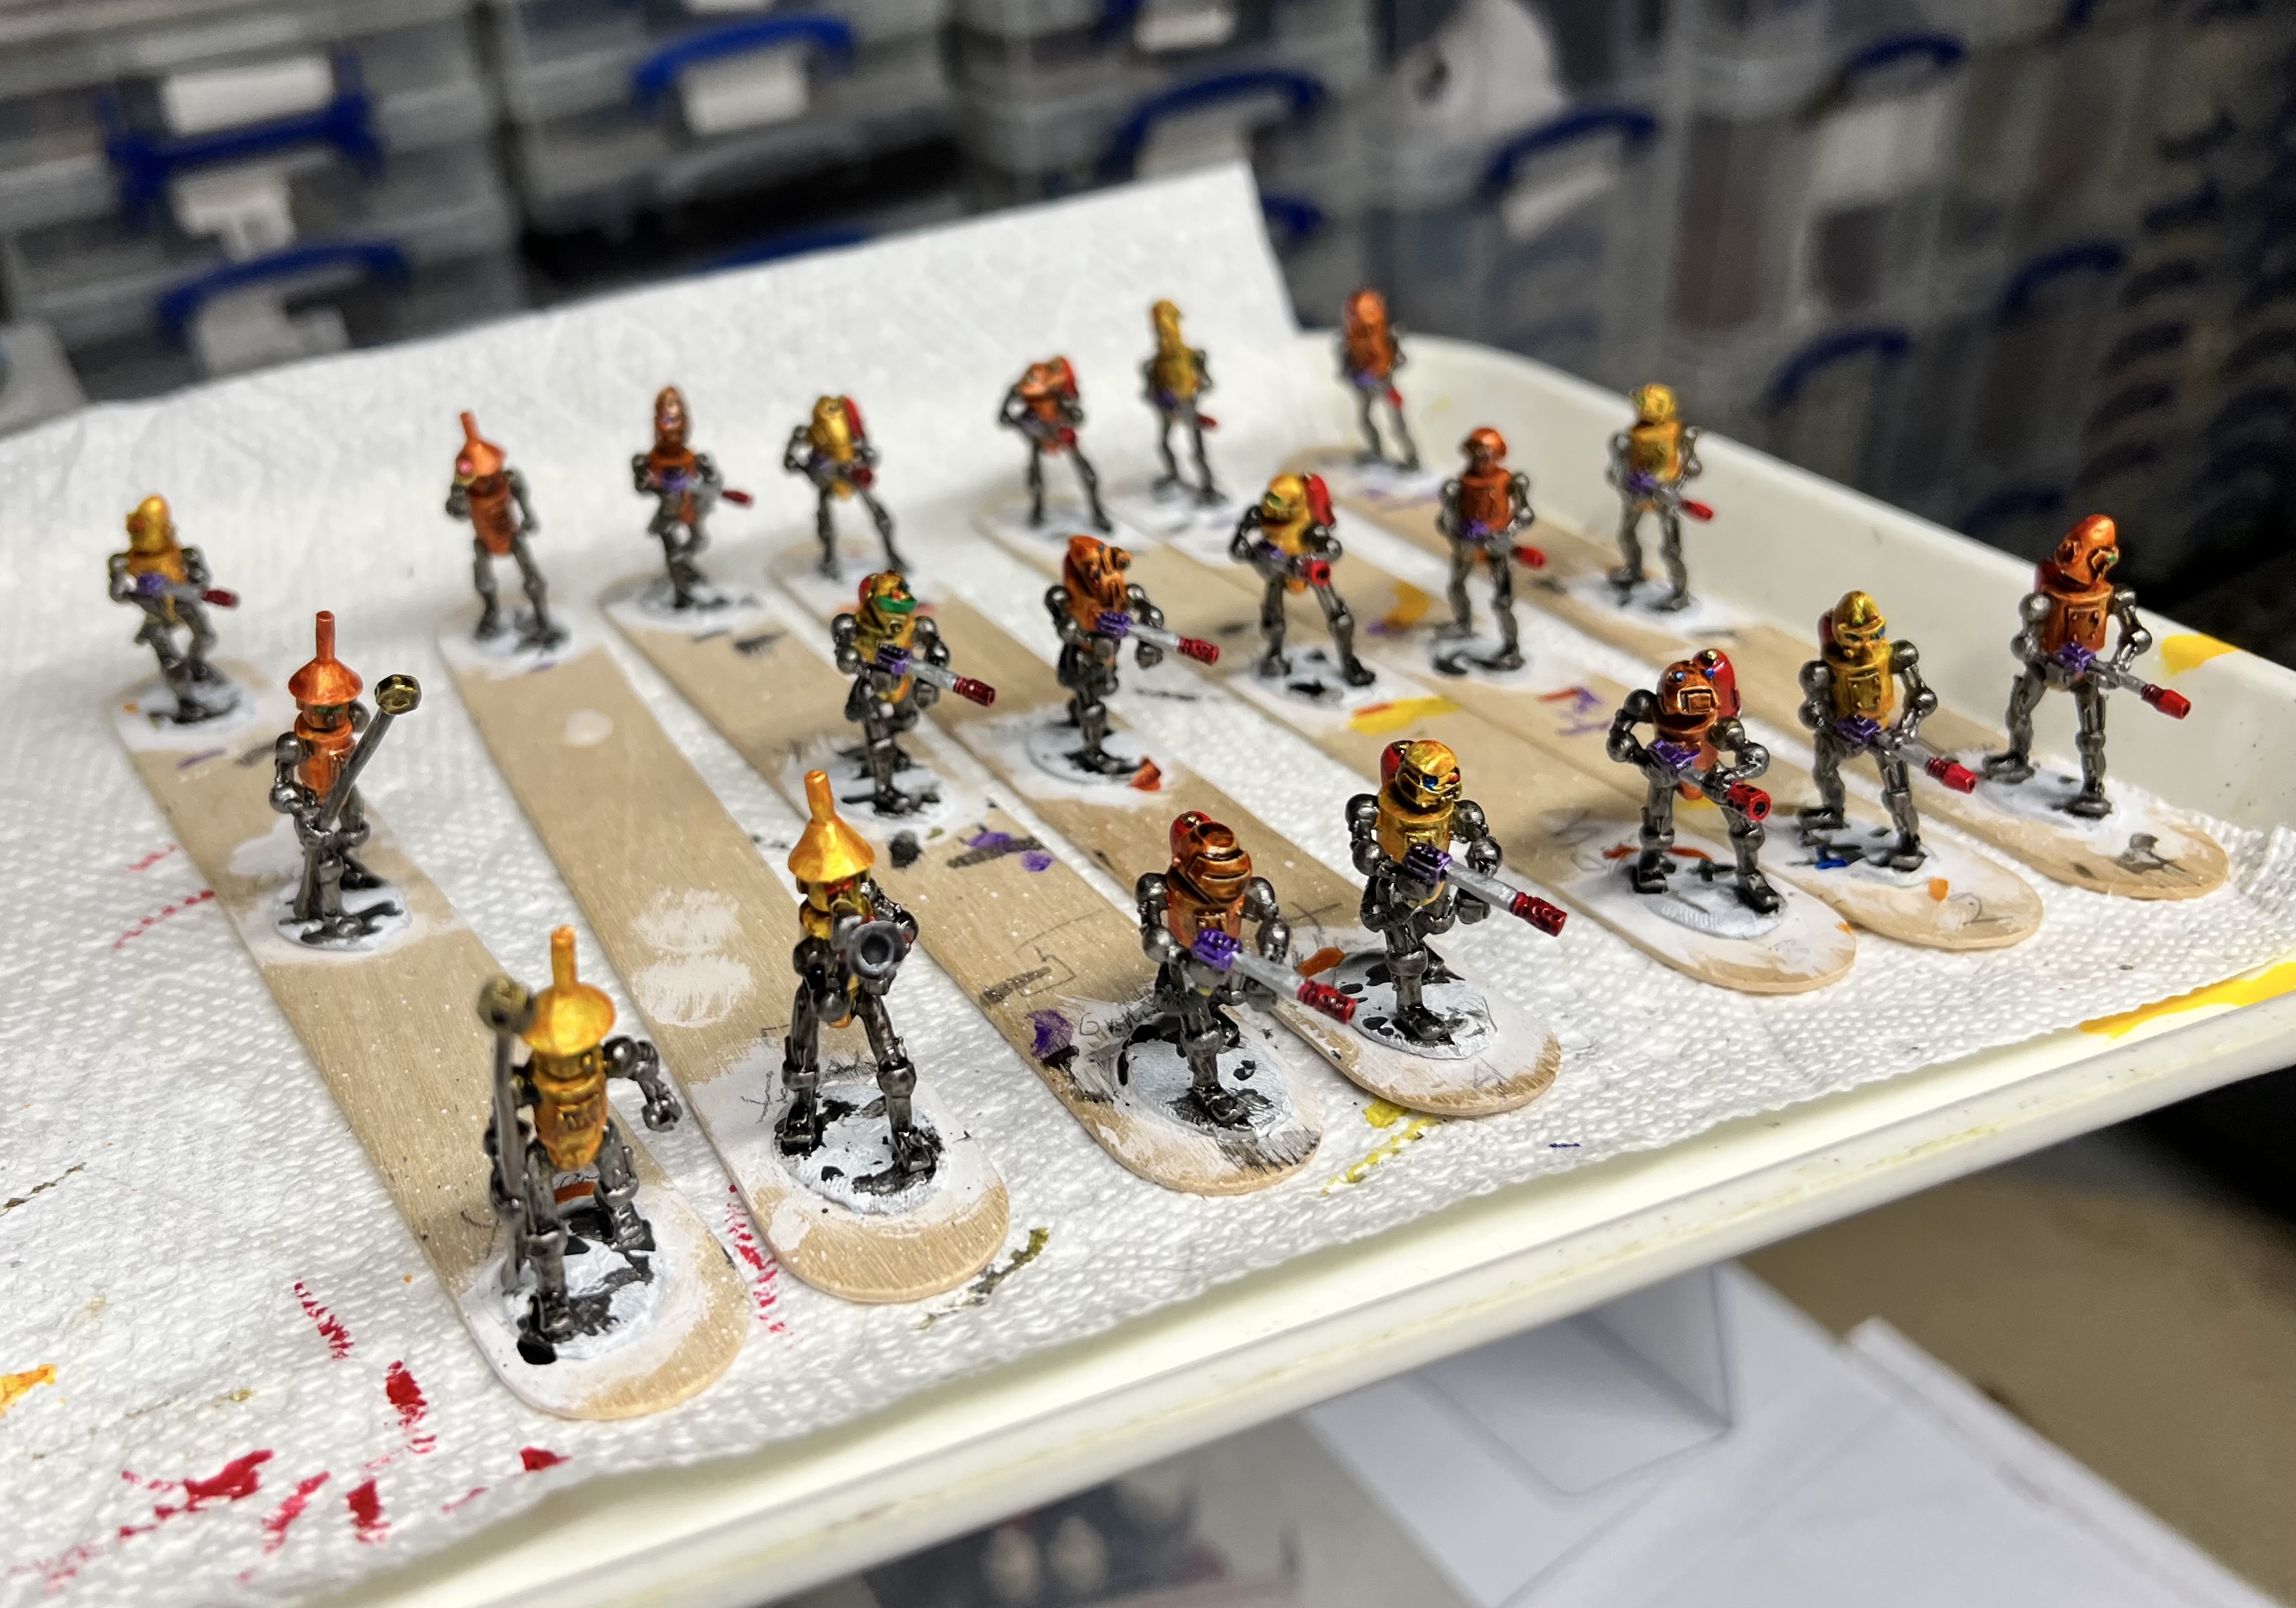
The Mechanical Men would need help in 2026 defending against marauding Munchkins. They would also need help chasing them down as they attempt to steal technological secrets. I chose to build and paint up two regiments of axemen (OZZ-511). Additionally, I chose two regiments armed with napalm blasters (OZZ-539 – not sharing a link as the picture is incorrect on the website). I also had a mechanical wizard, Androit (OZZ-543).
Luckily Buck Surdu has changed the basing rules for these such that a regiment has 10 figures, not 20. They still do come in 20 figures though! This is why I was able to turn each SKU into two regiments of each!
I wanted to give these bad bots a colorful metallic shine. To that end, I experimented by mixing Vallejo “Metallic Medium” with Army Painter Speed and Citadel Contrast Paints. I even tried this with a few of the 1.0 versions that have a reputation for “bleeding”. I am happy to report that no bleeding occurred with this combination.
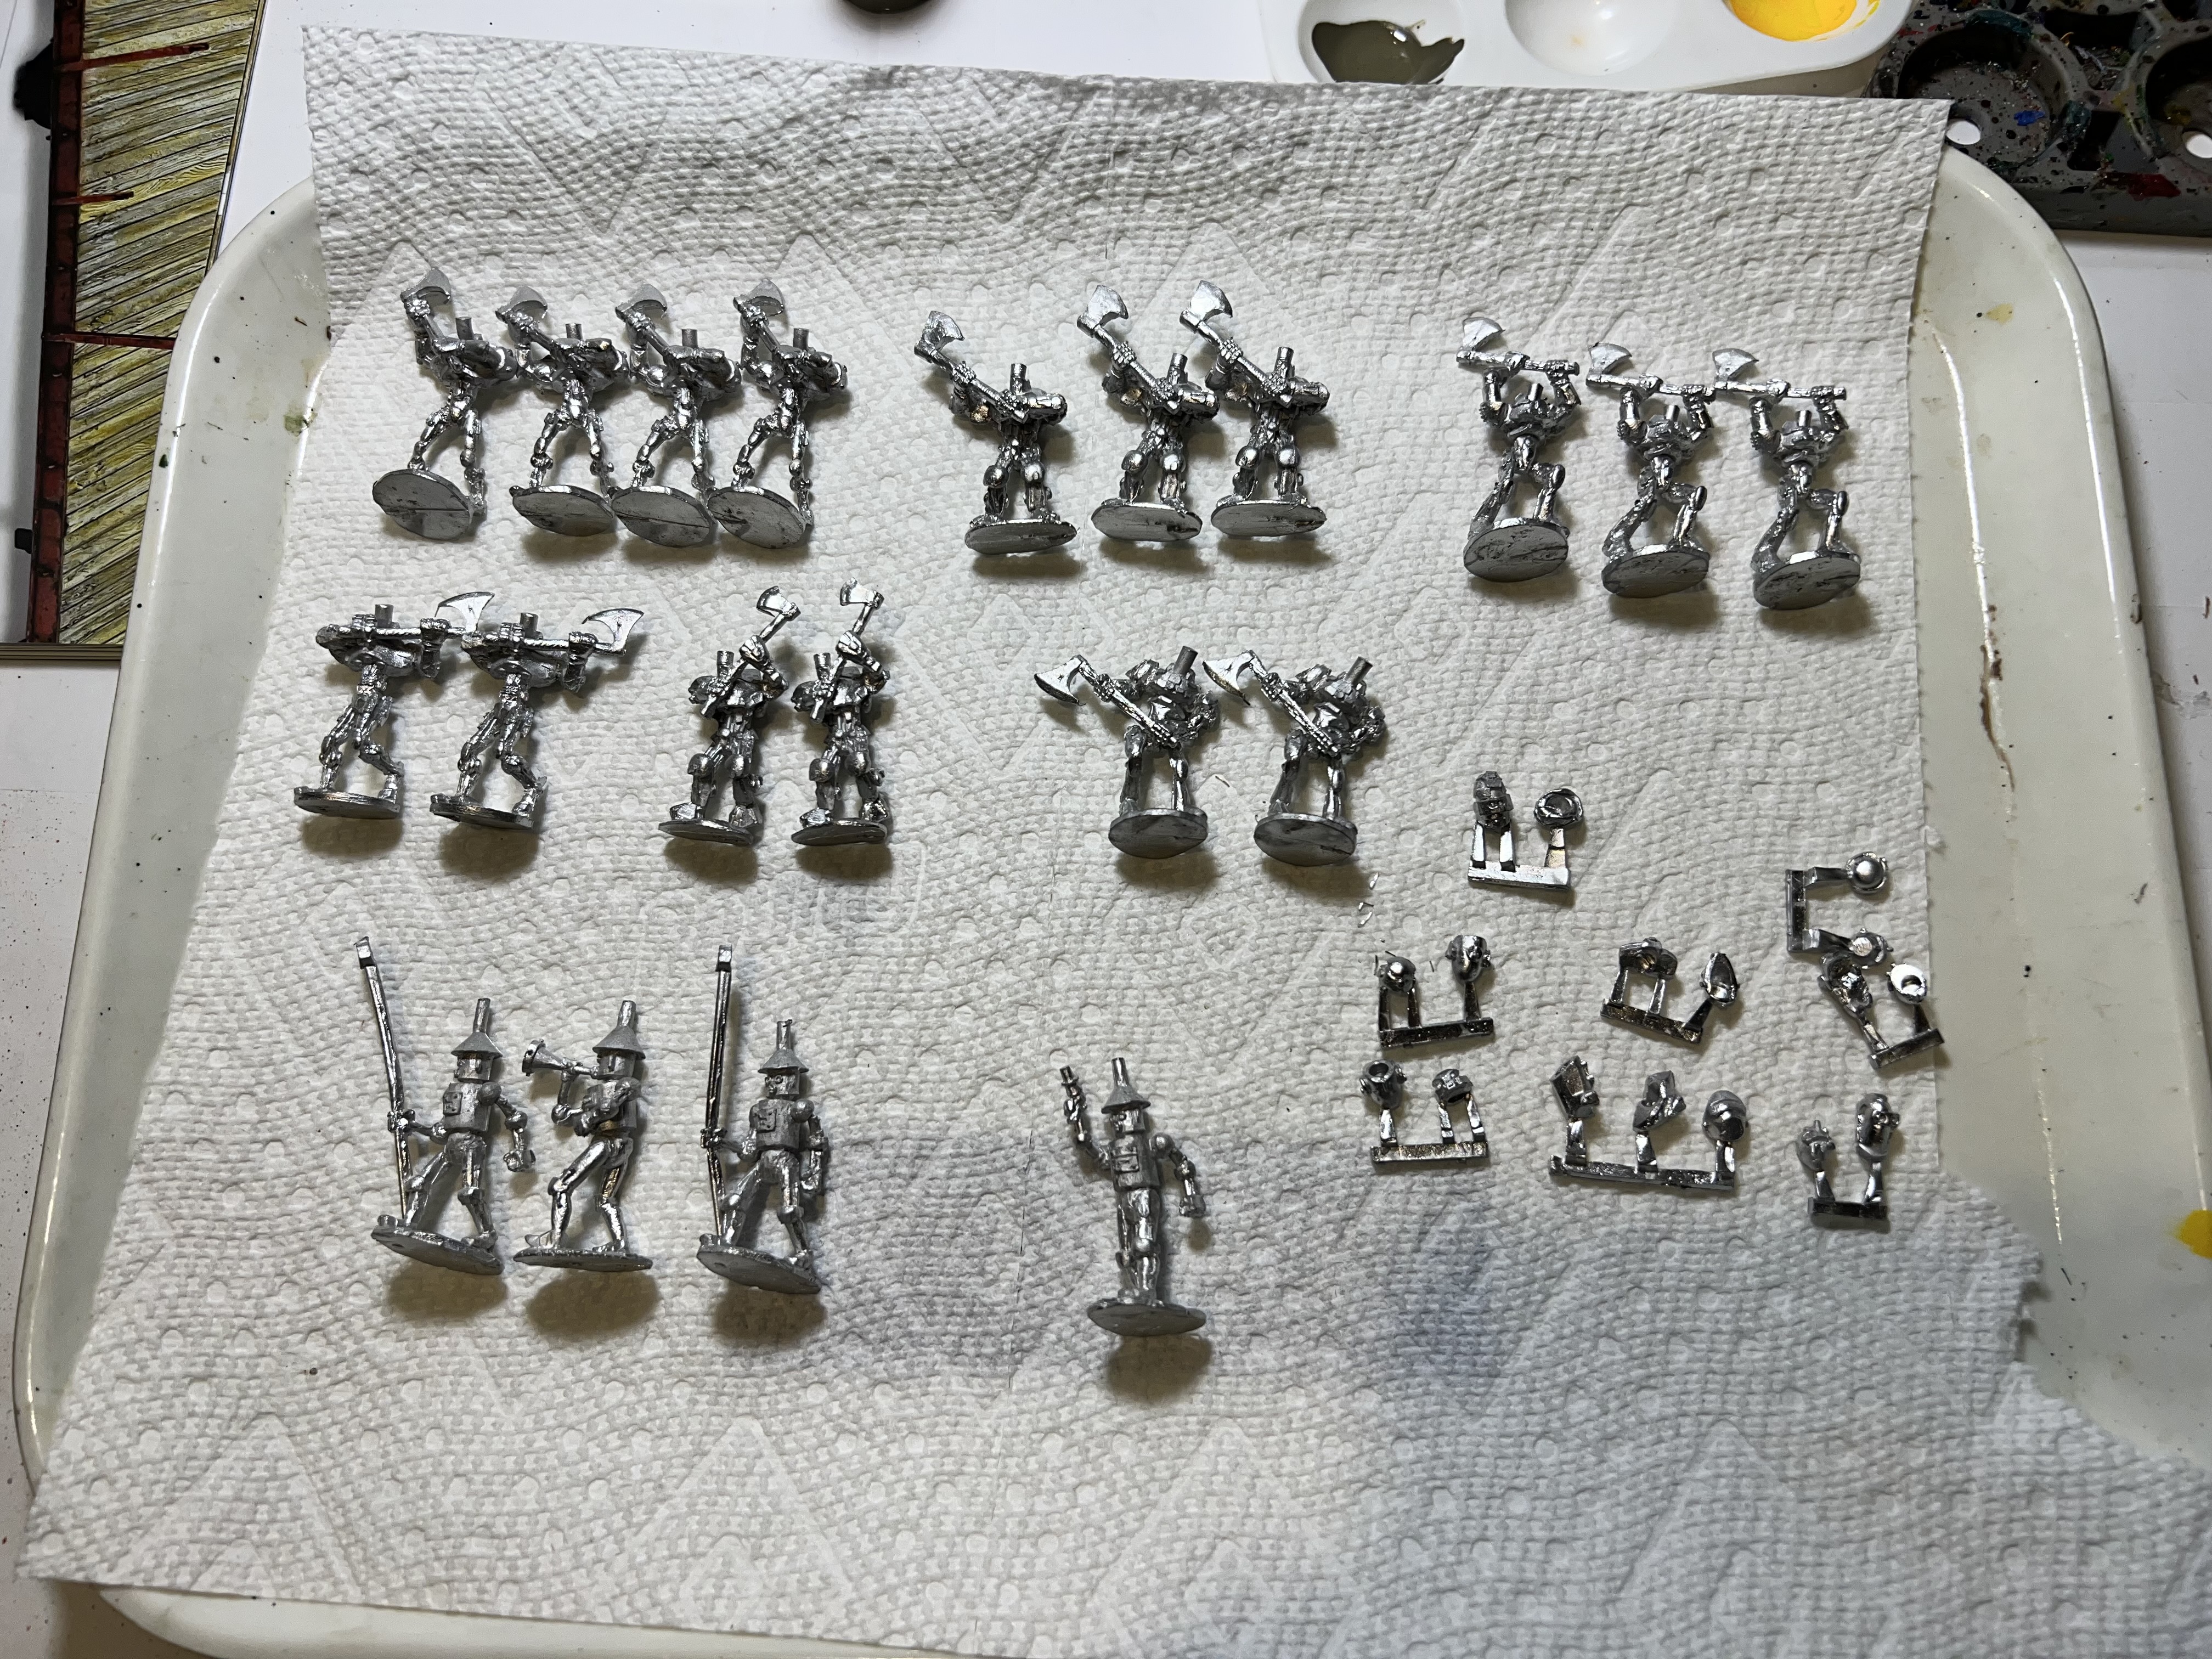
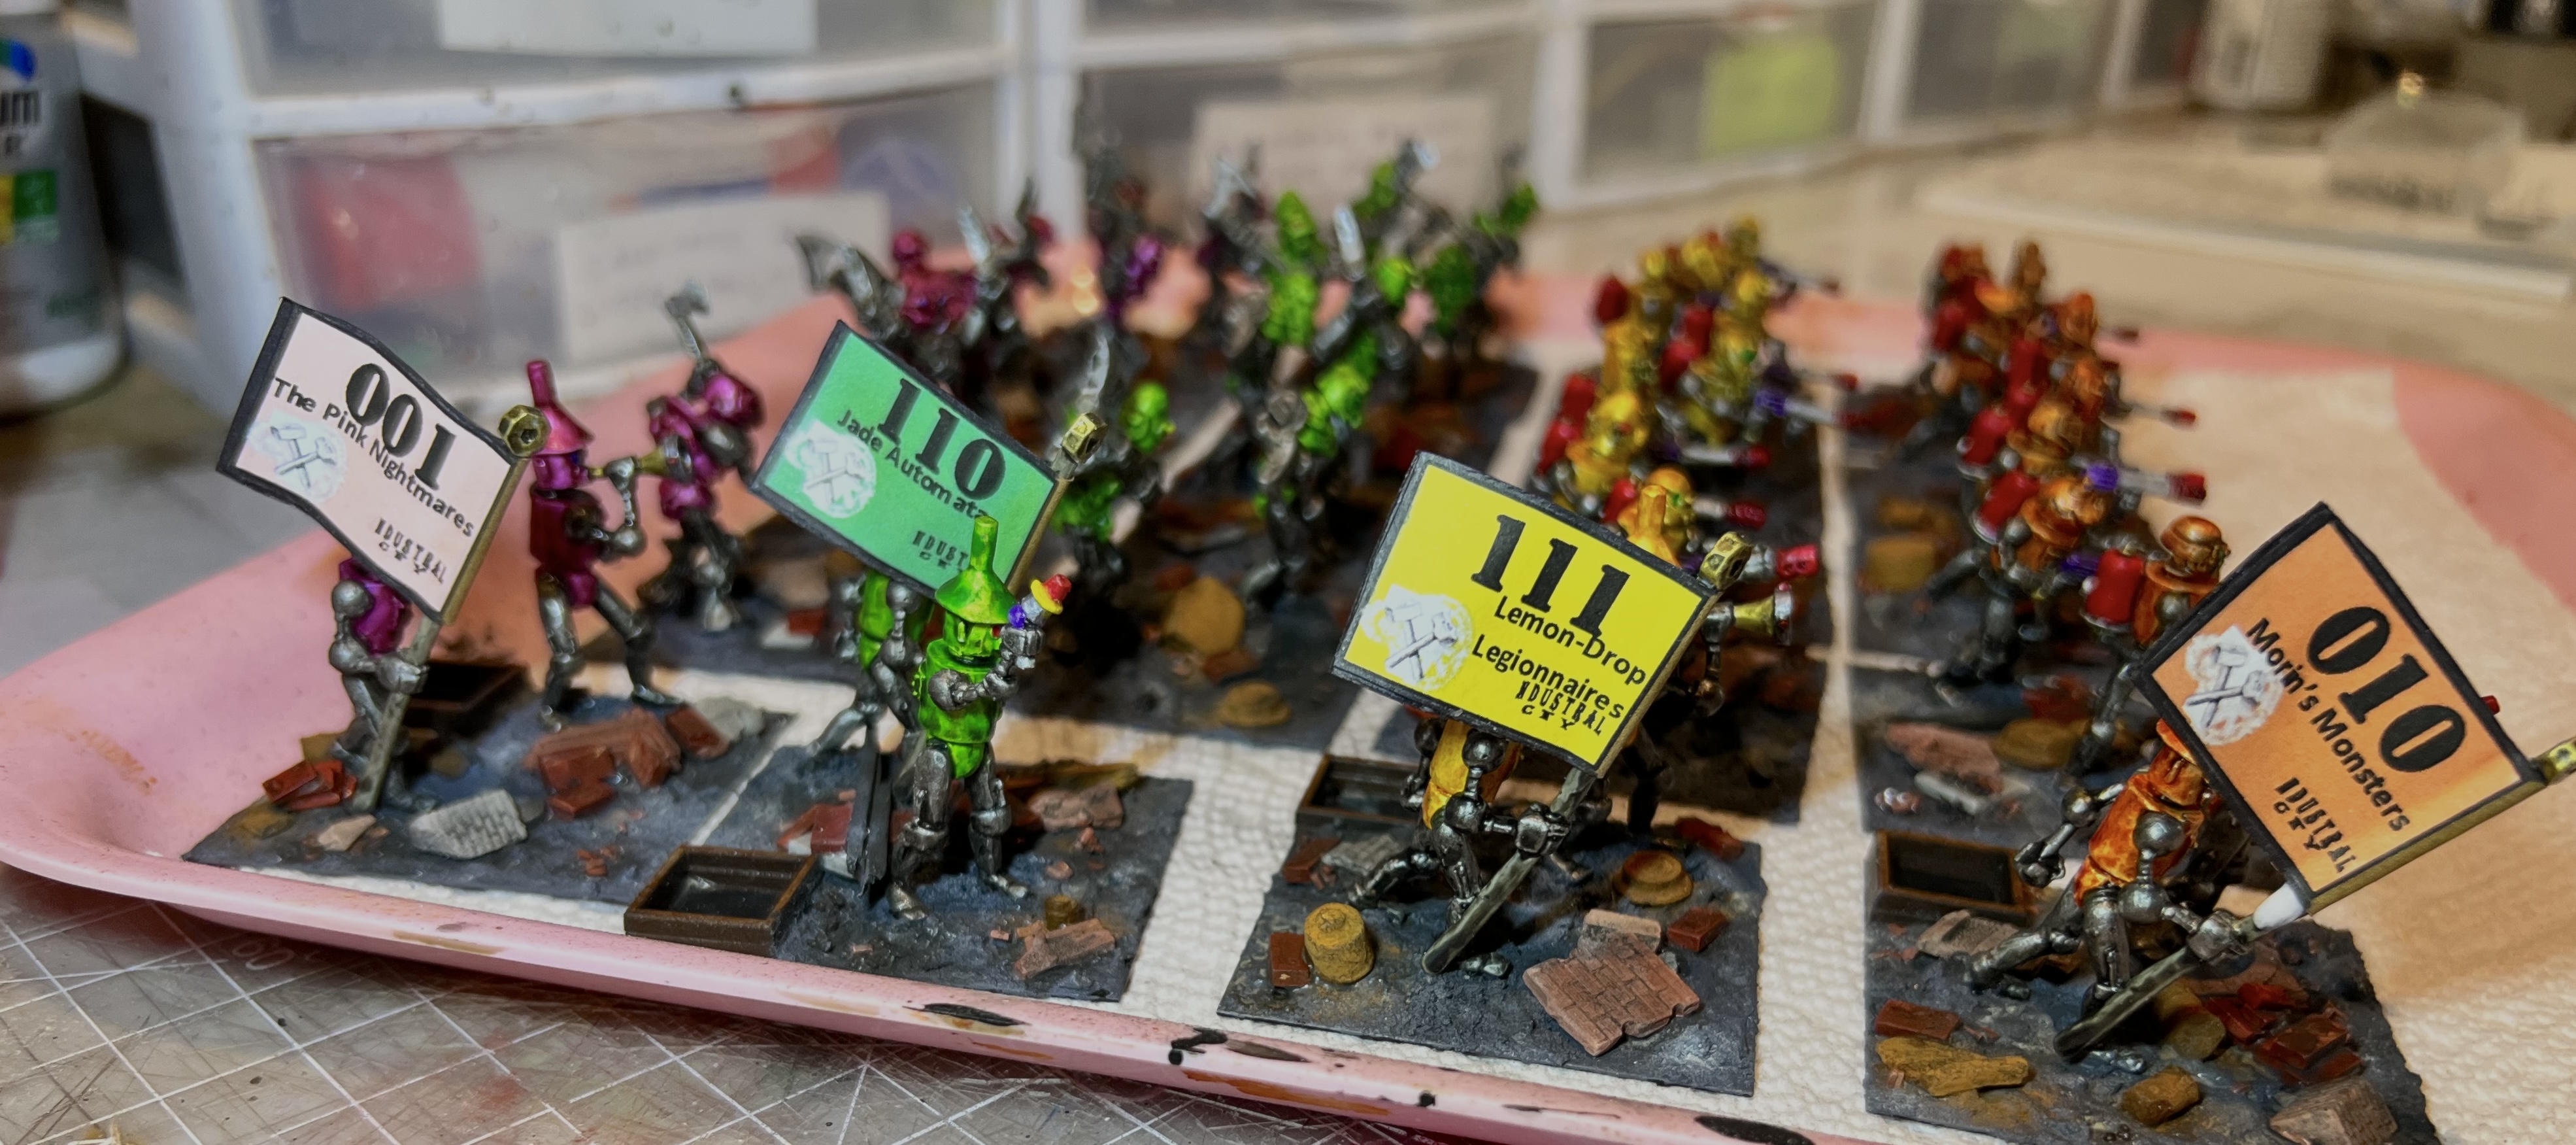
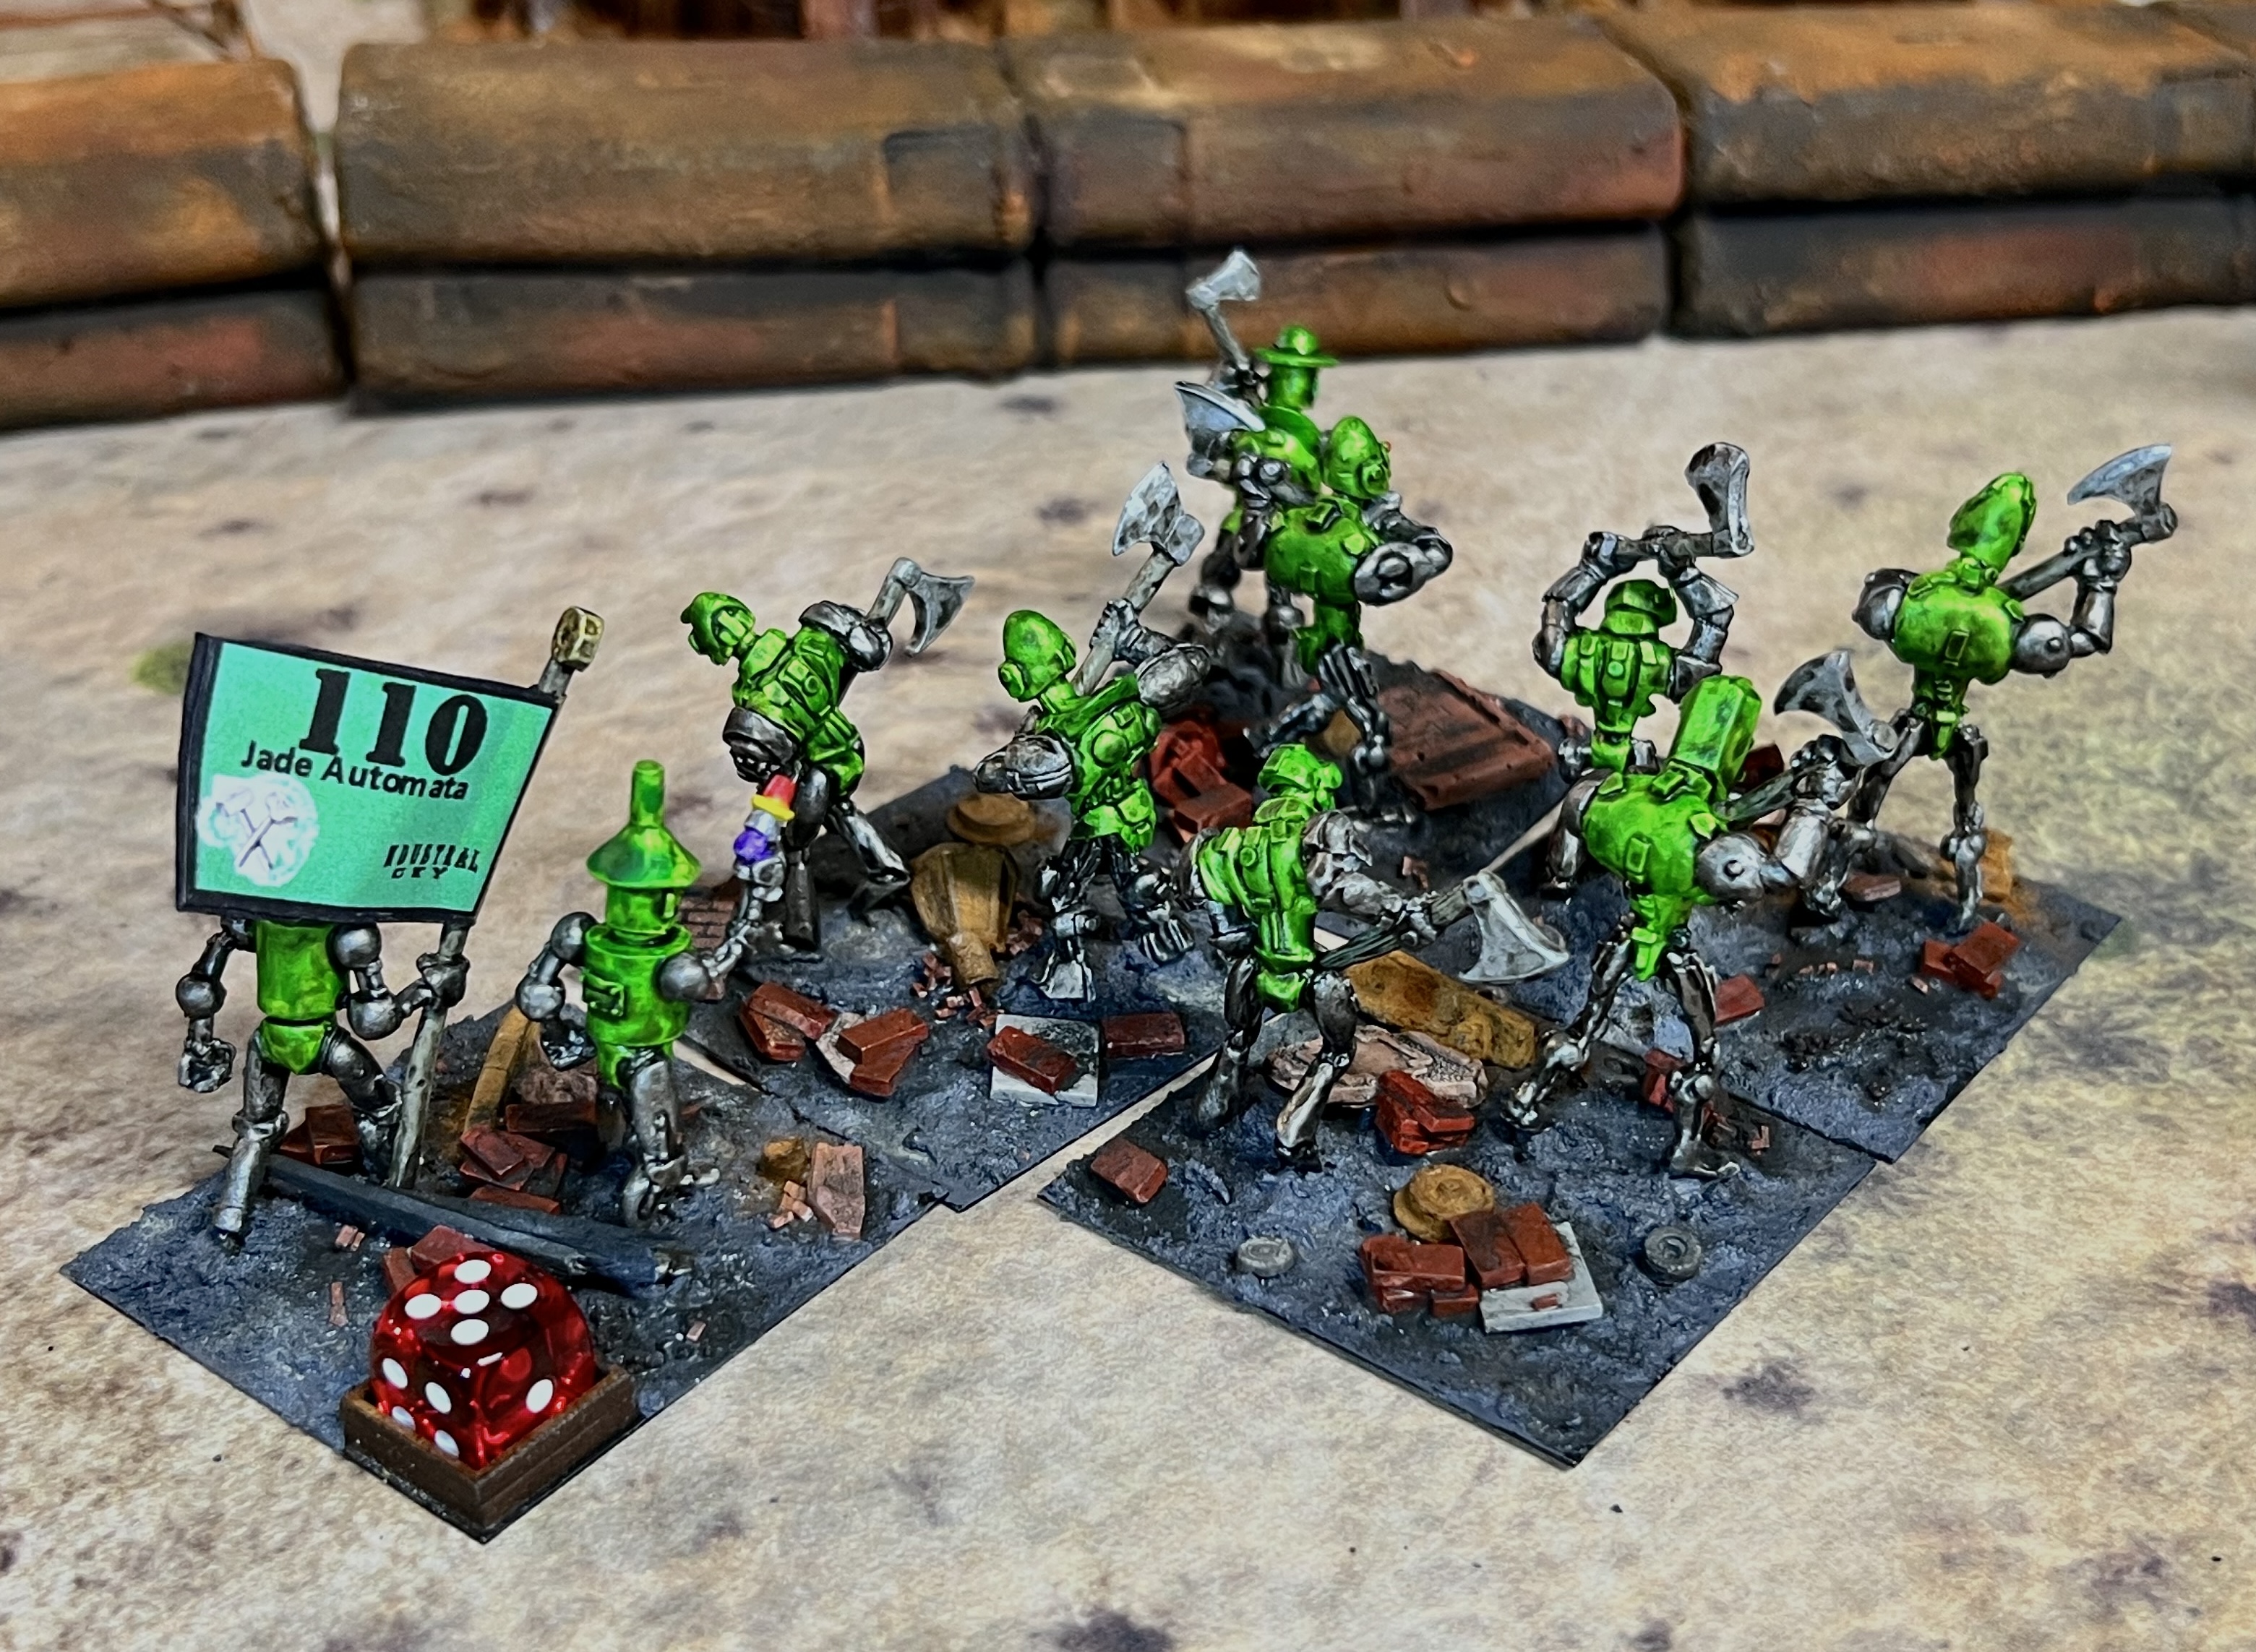
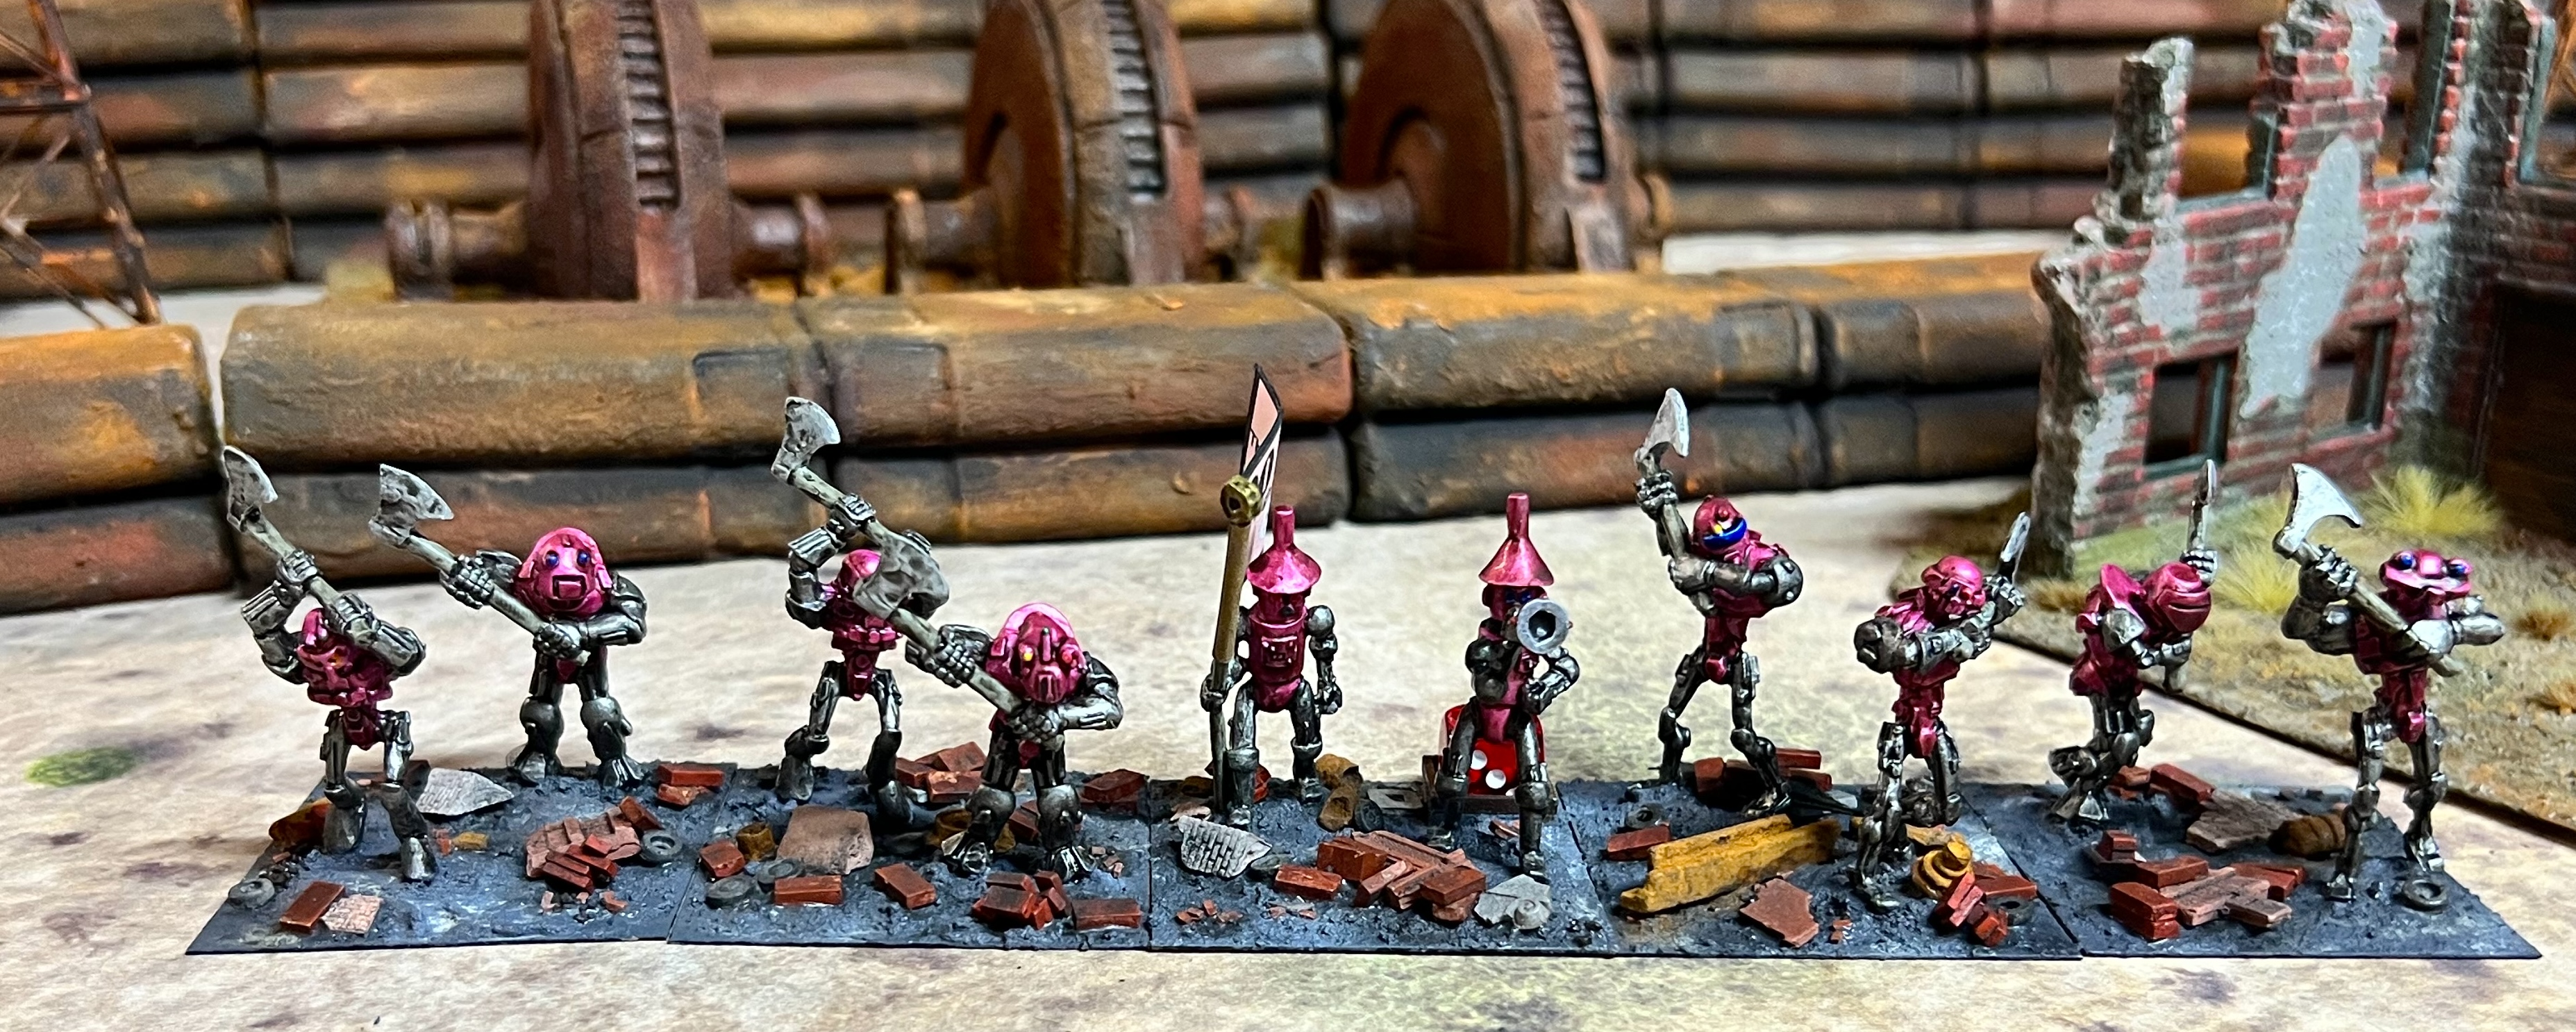
The group all cleaned up and ready for assembly and priming.Here you see the two regiments of axemen in progress. These regiments would be “The Jade Automata” and “The Pink Nightmares”
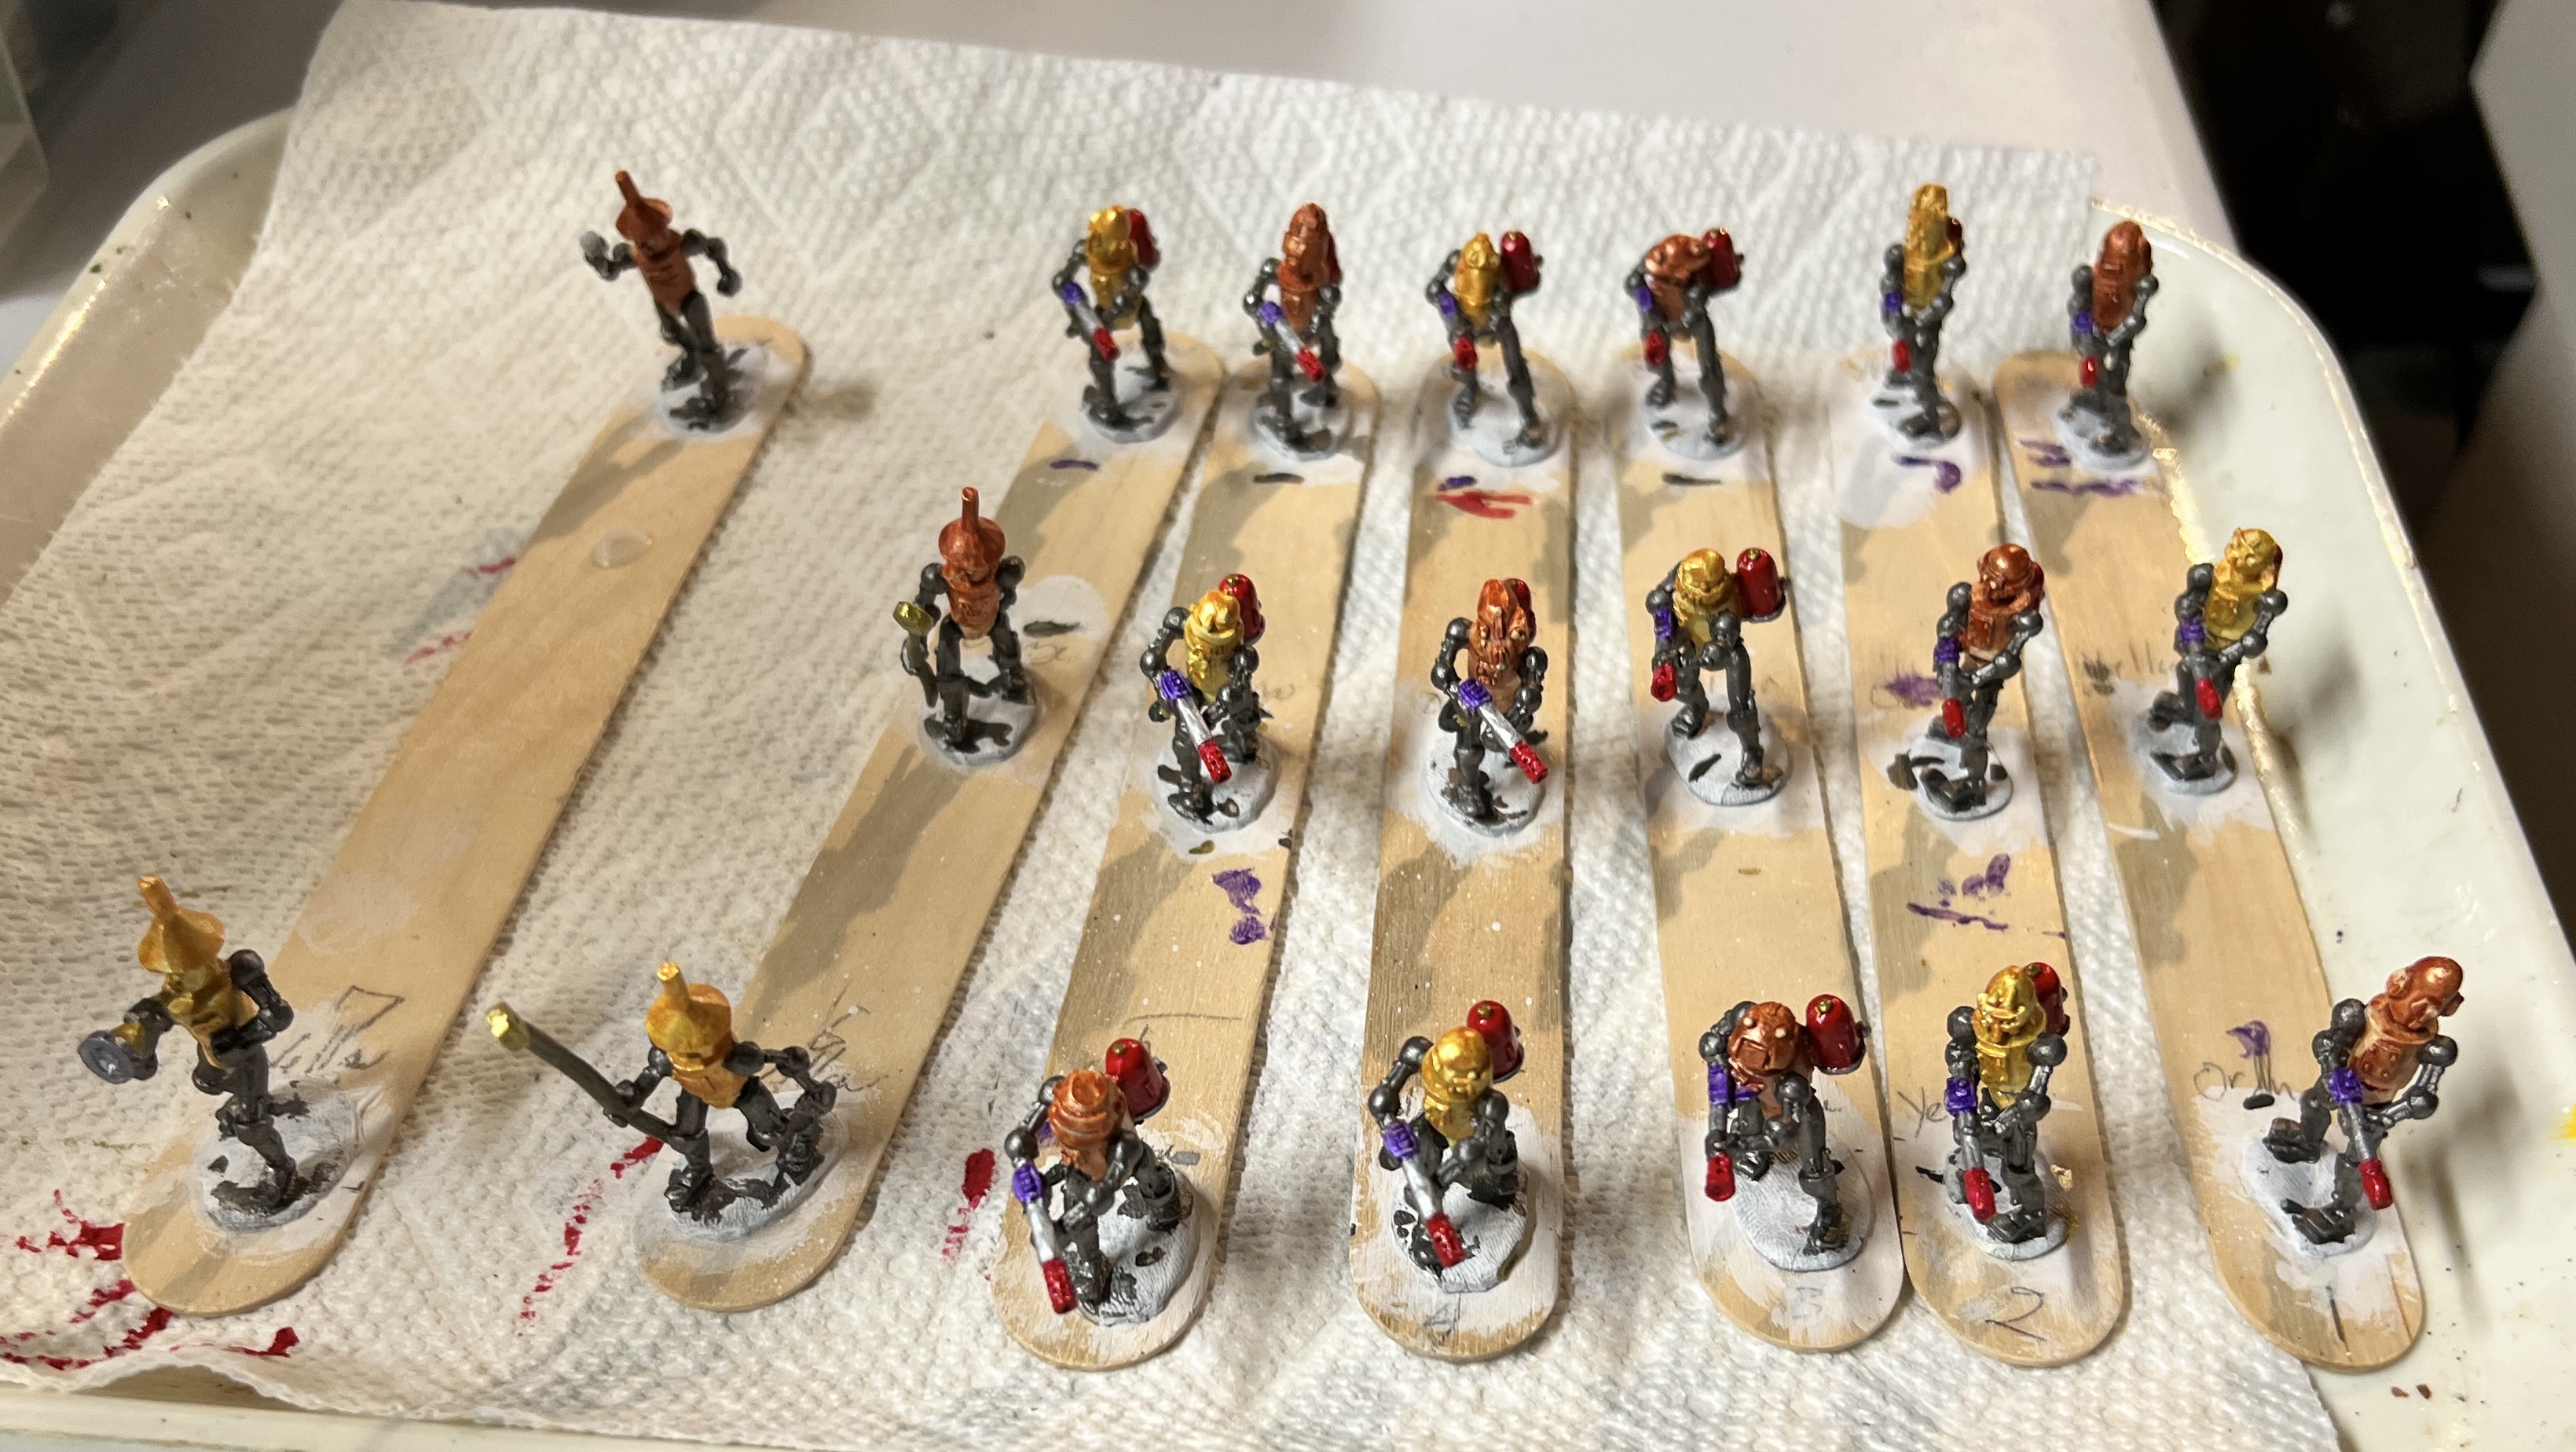
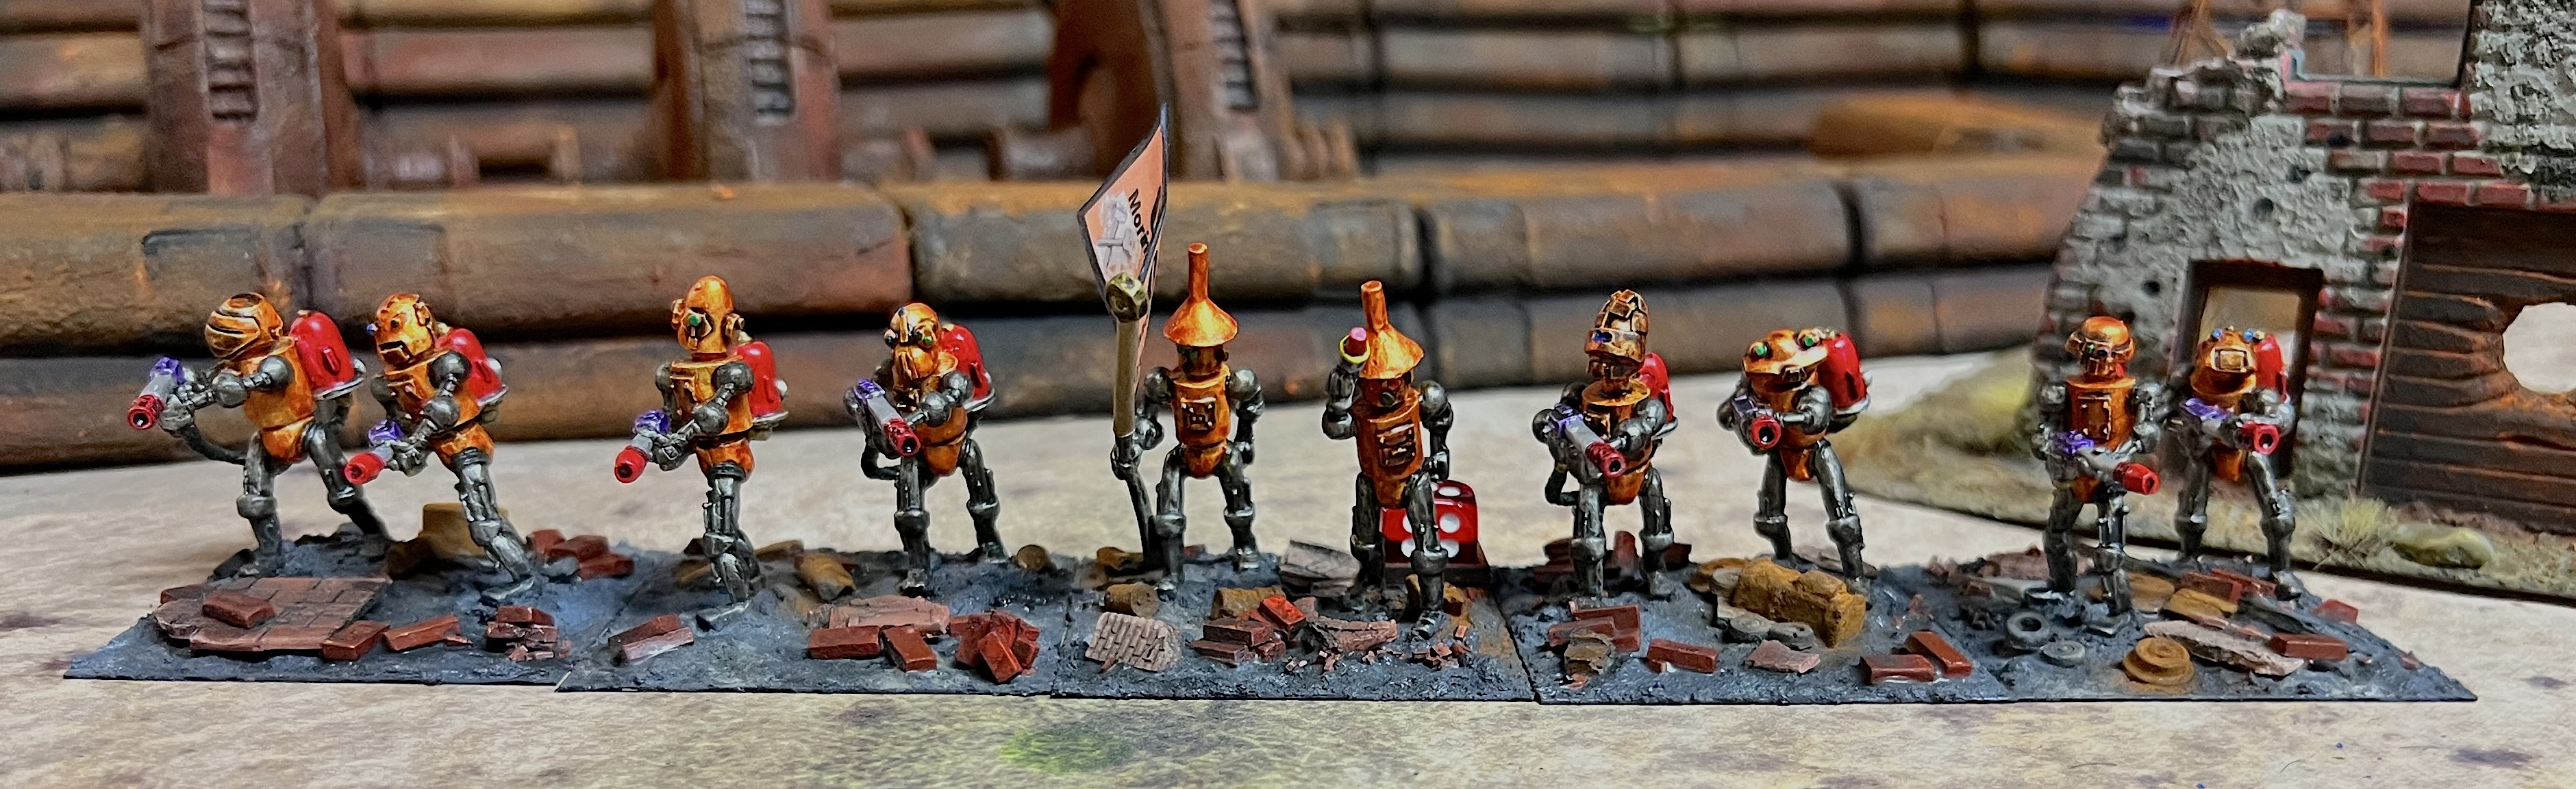
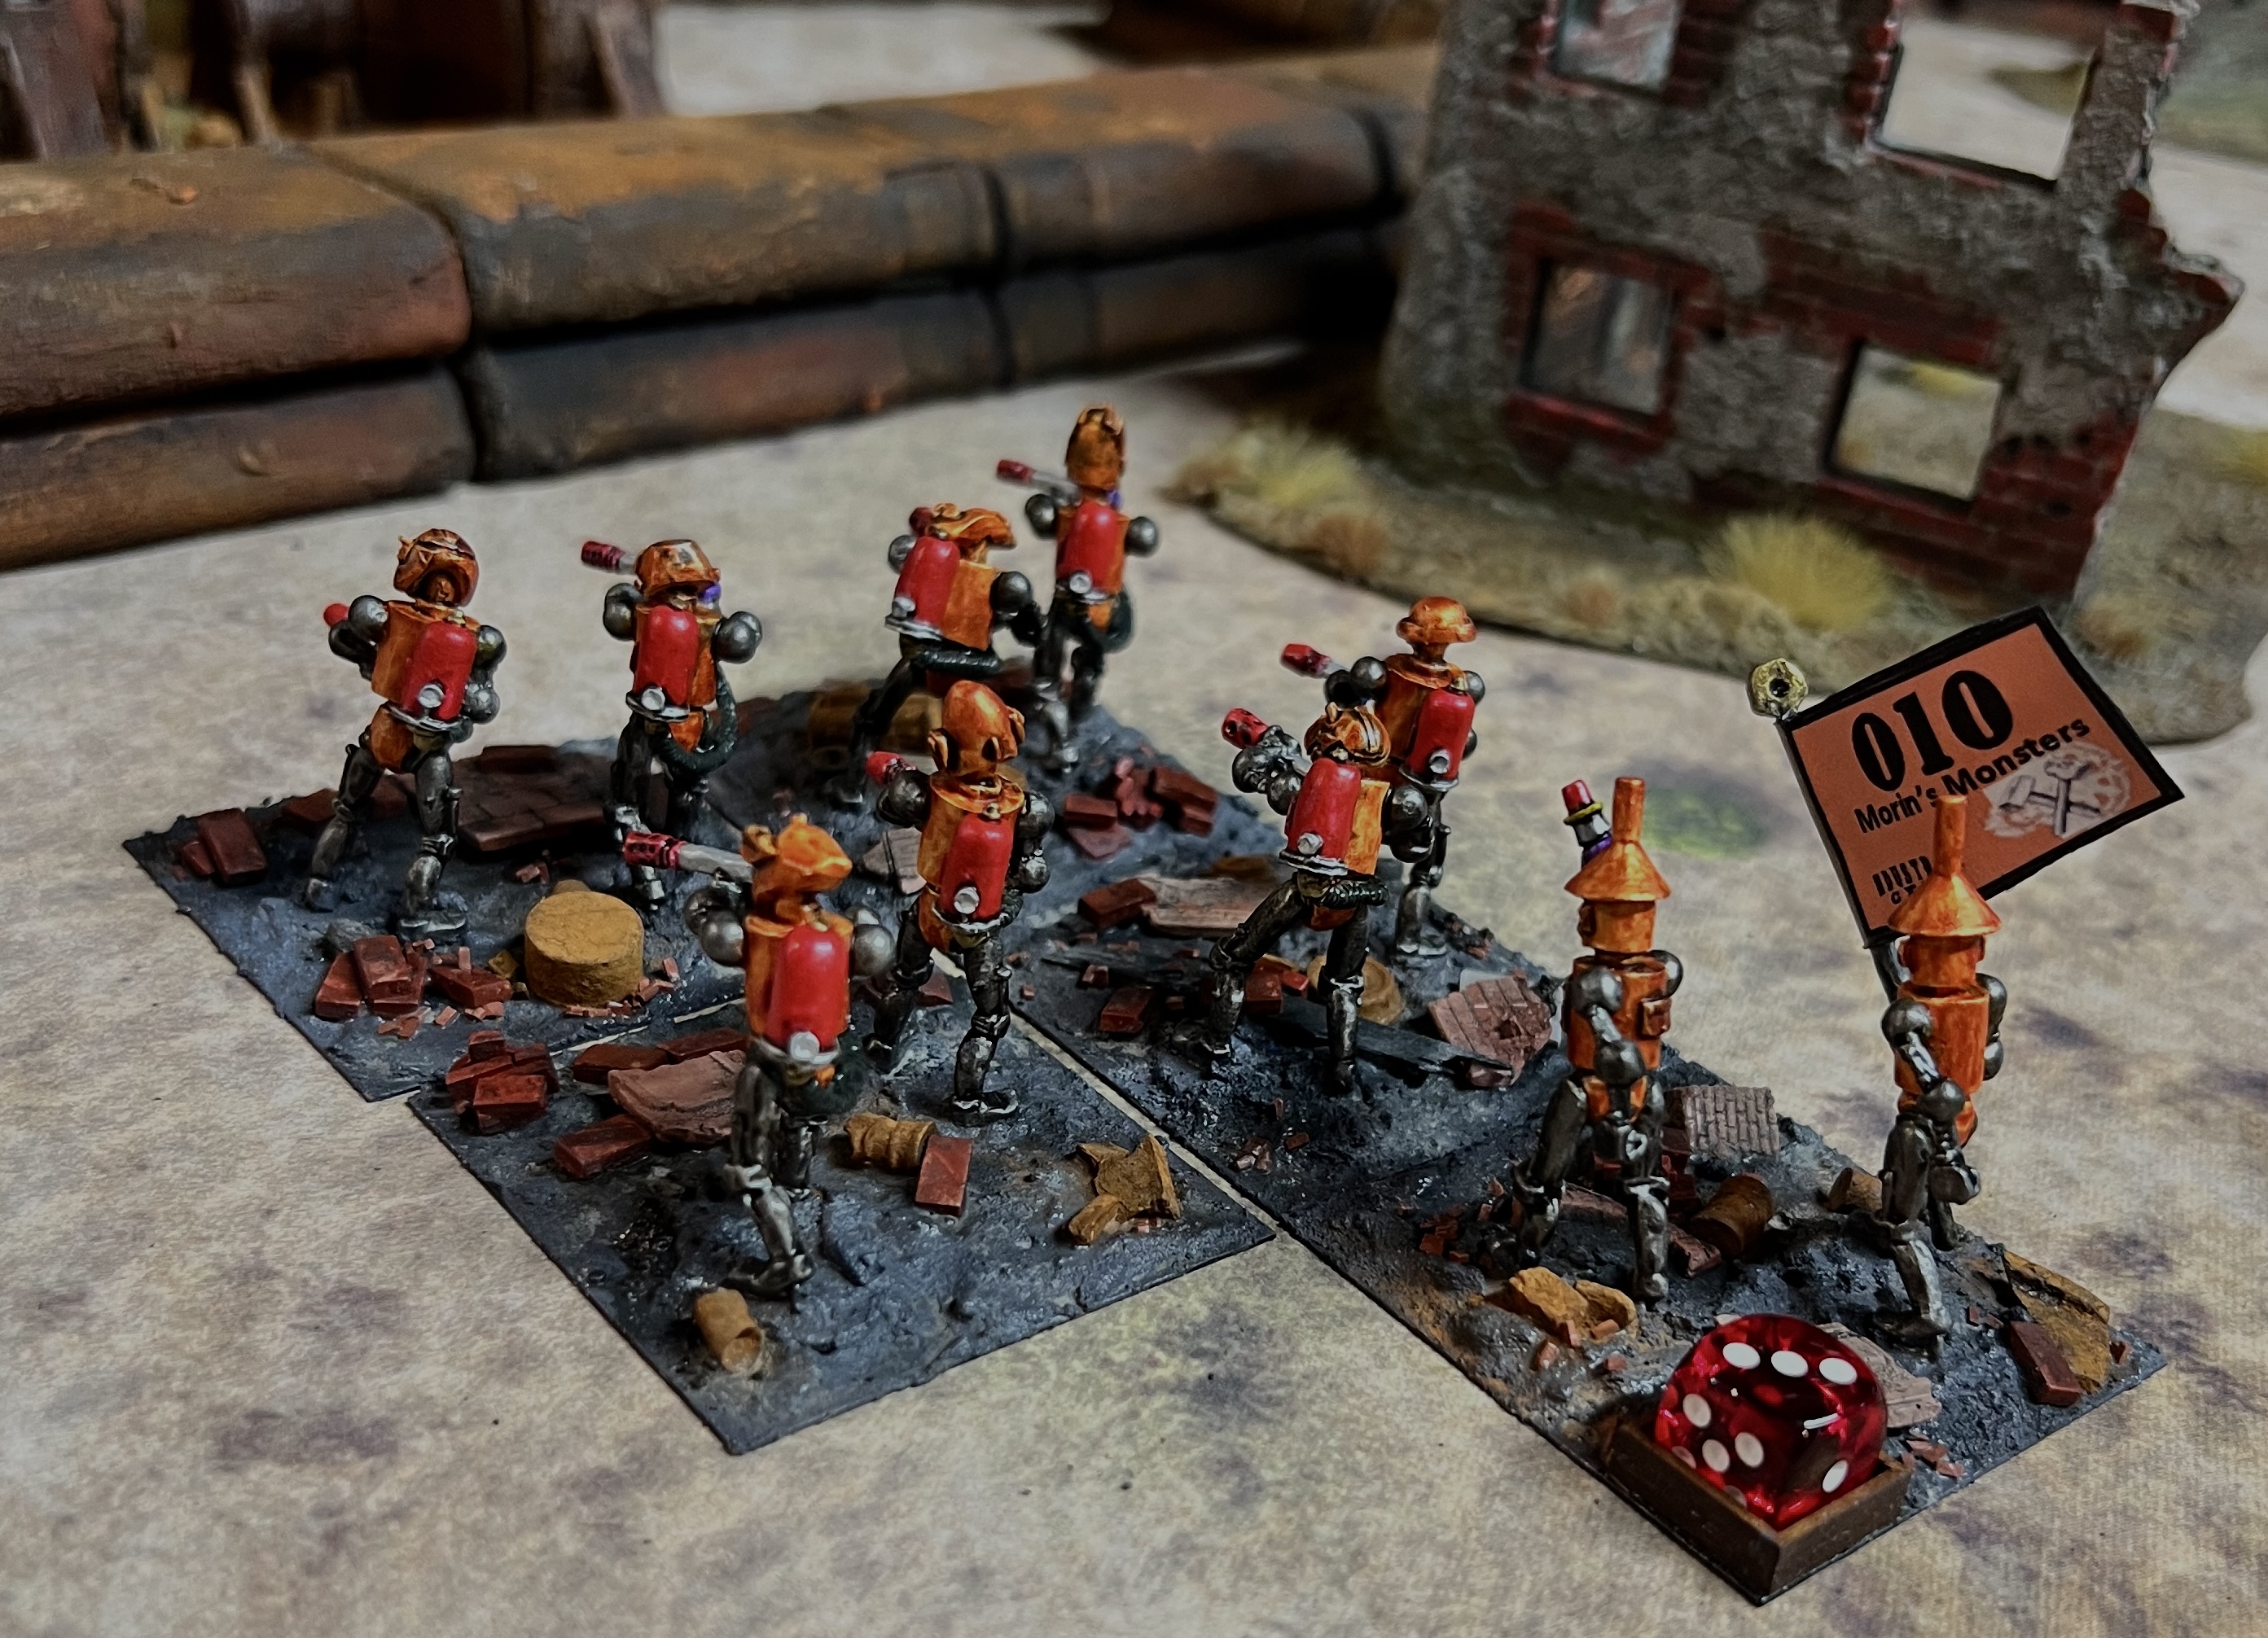
The two napalm blaster regiments would be yellow-themed (“The Lemon Drop Legionnaires”) and orange-themed (Morin’s Monsters). Buck edited his flags for me and named that last one so I just had to give that moniker!
Napalm blasters painted, before washes added……after washes..
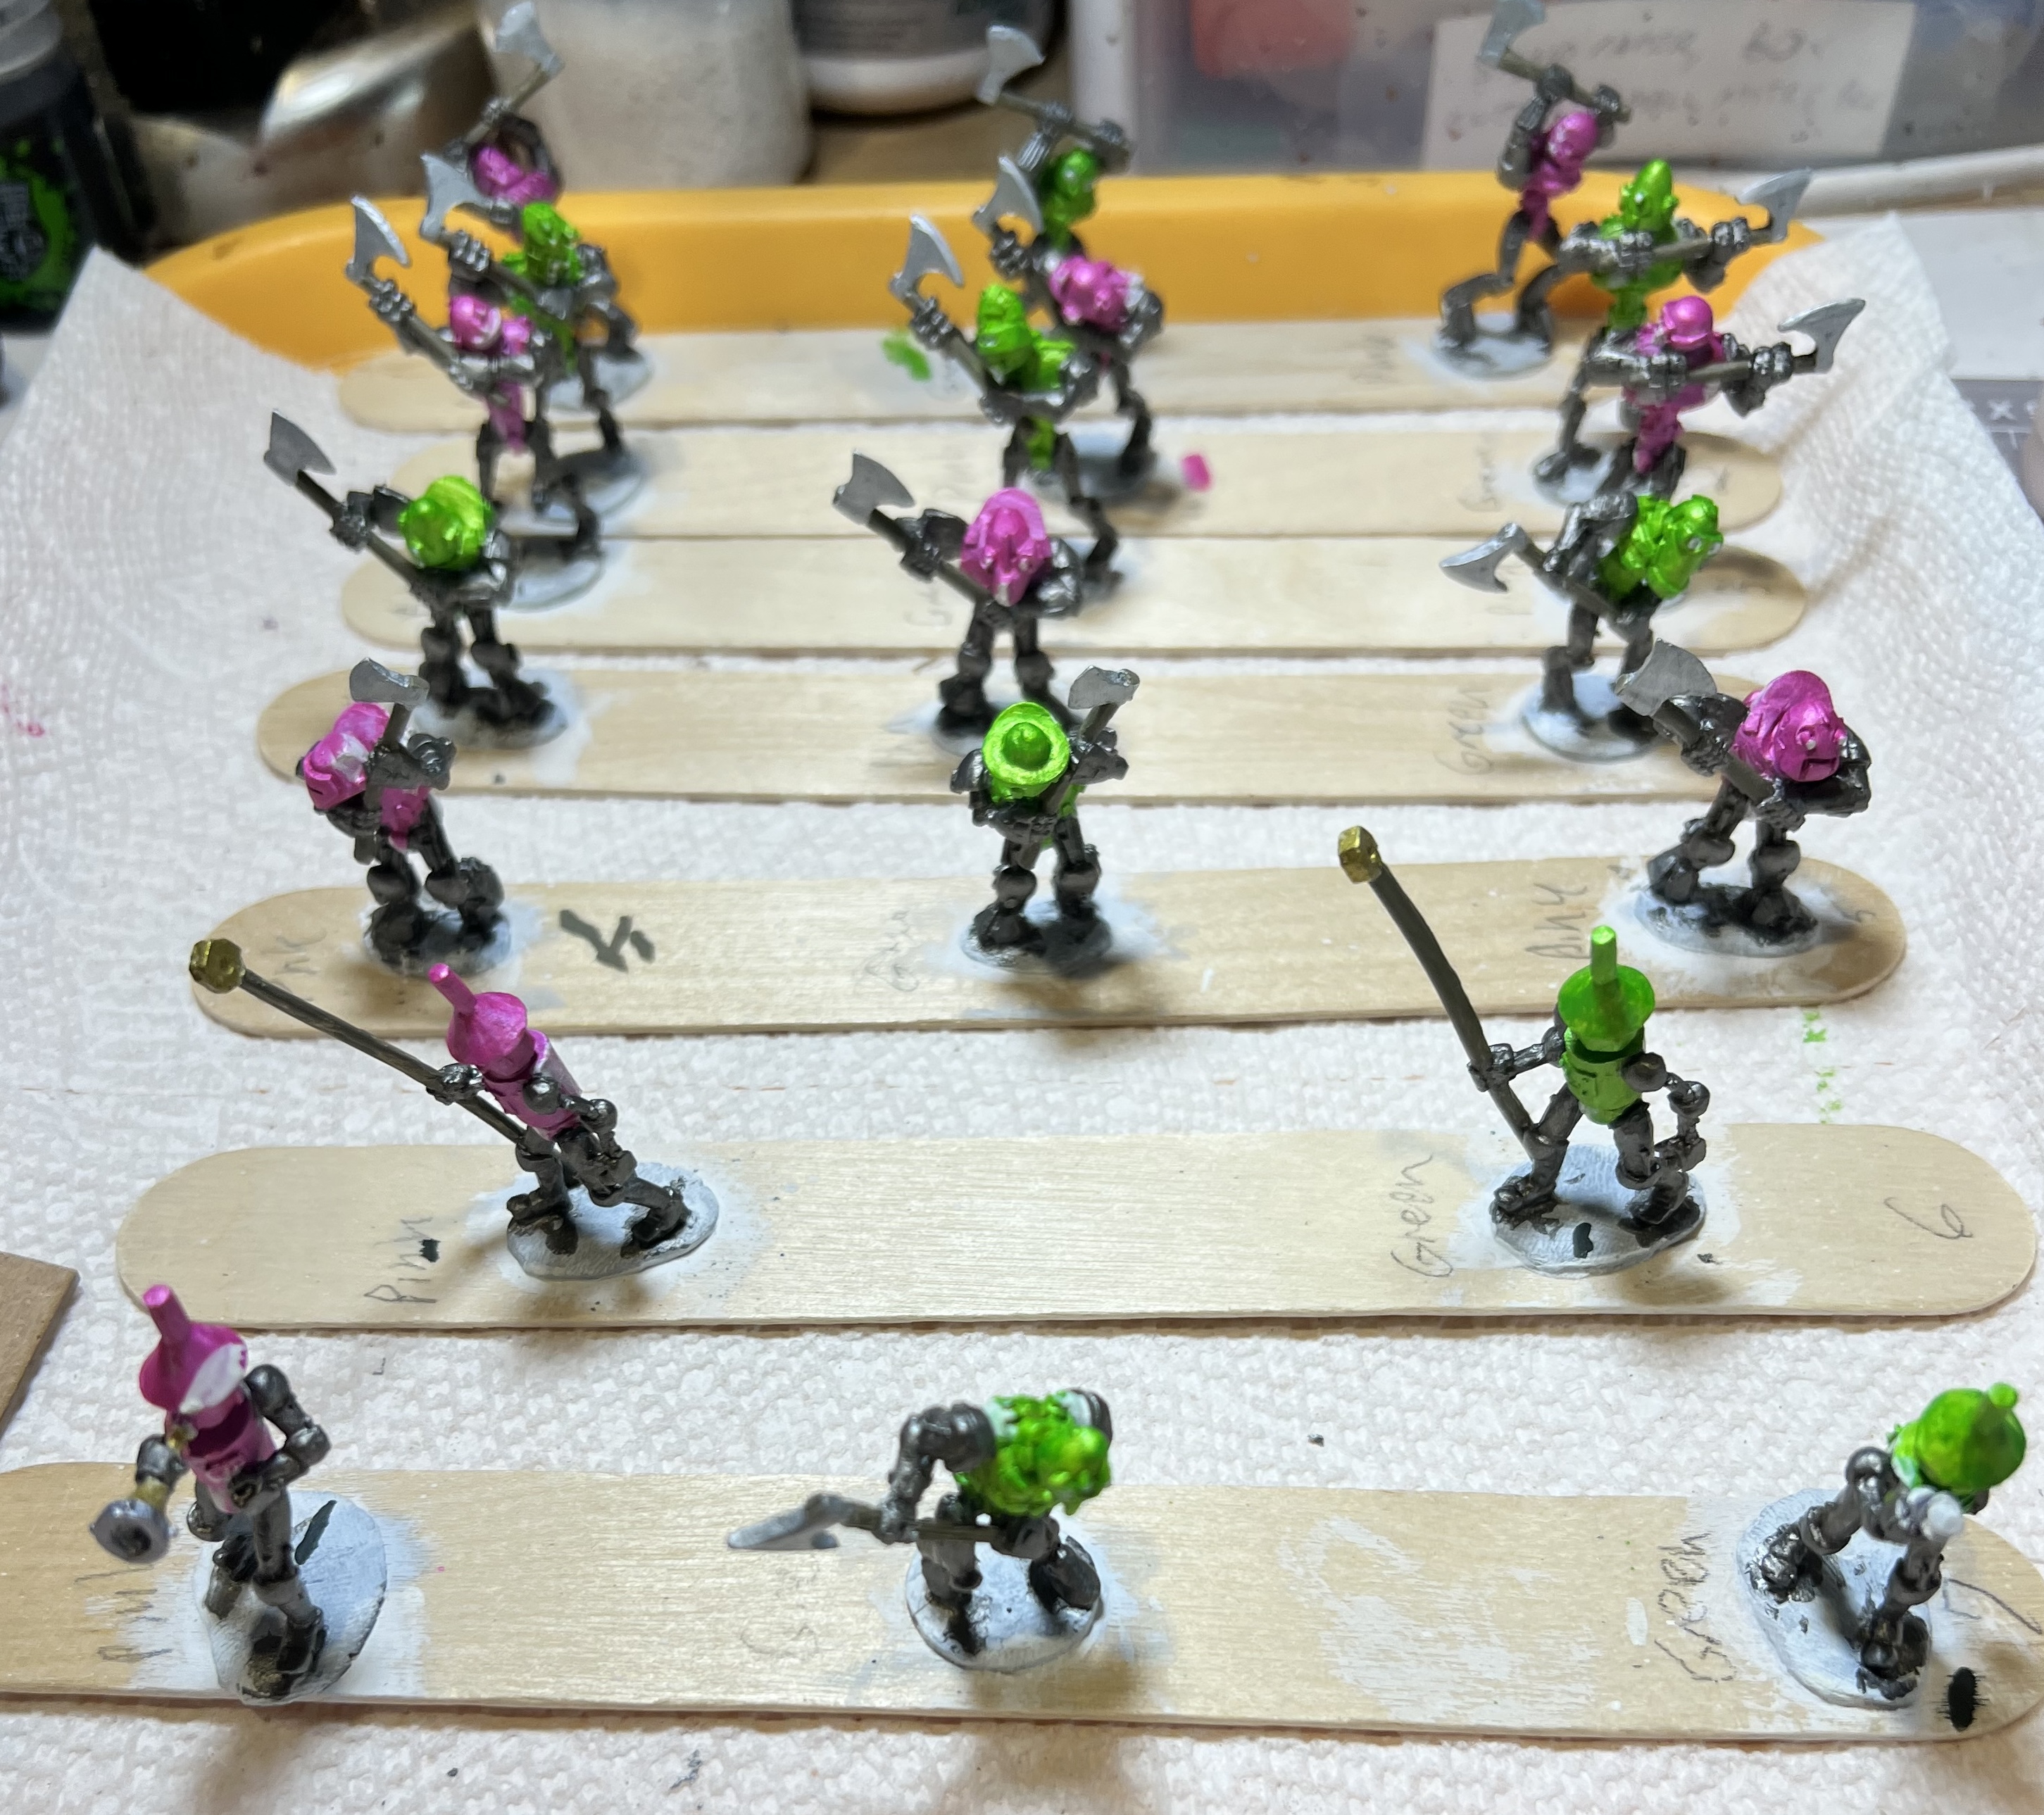
Below the axemen in progress:
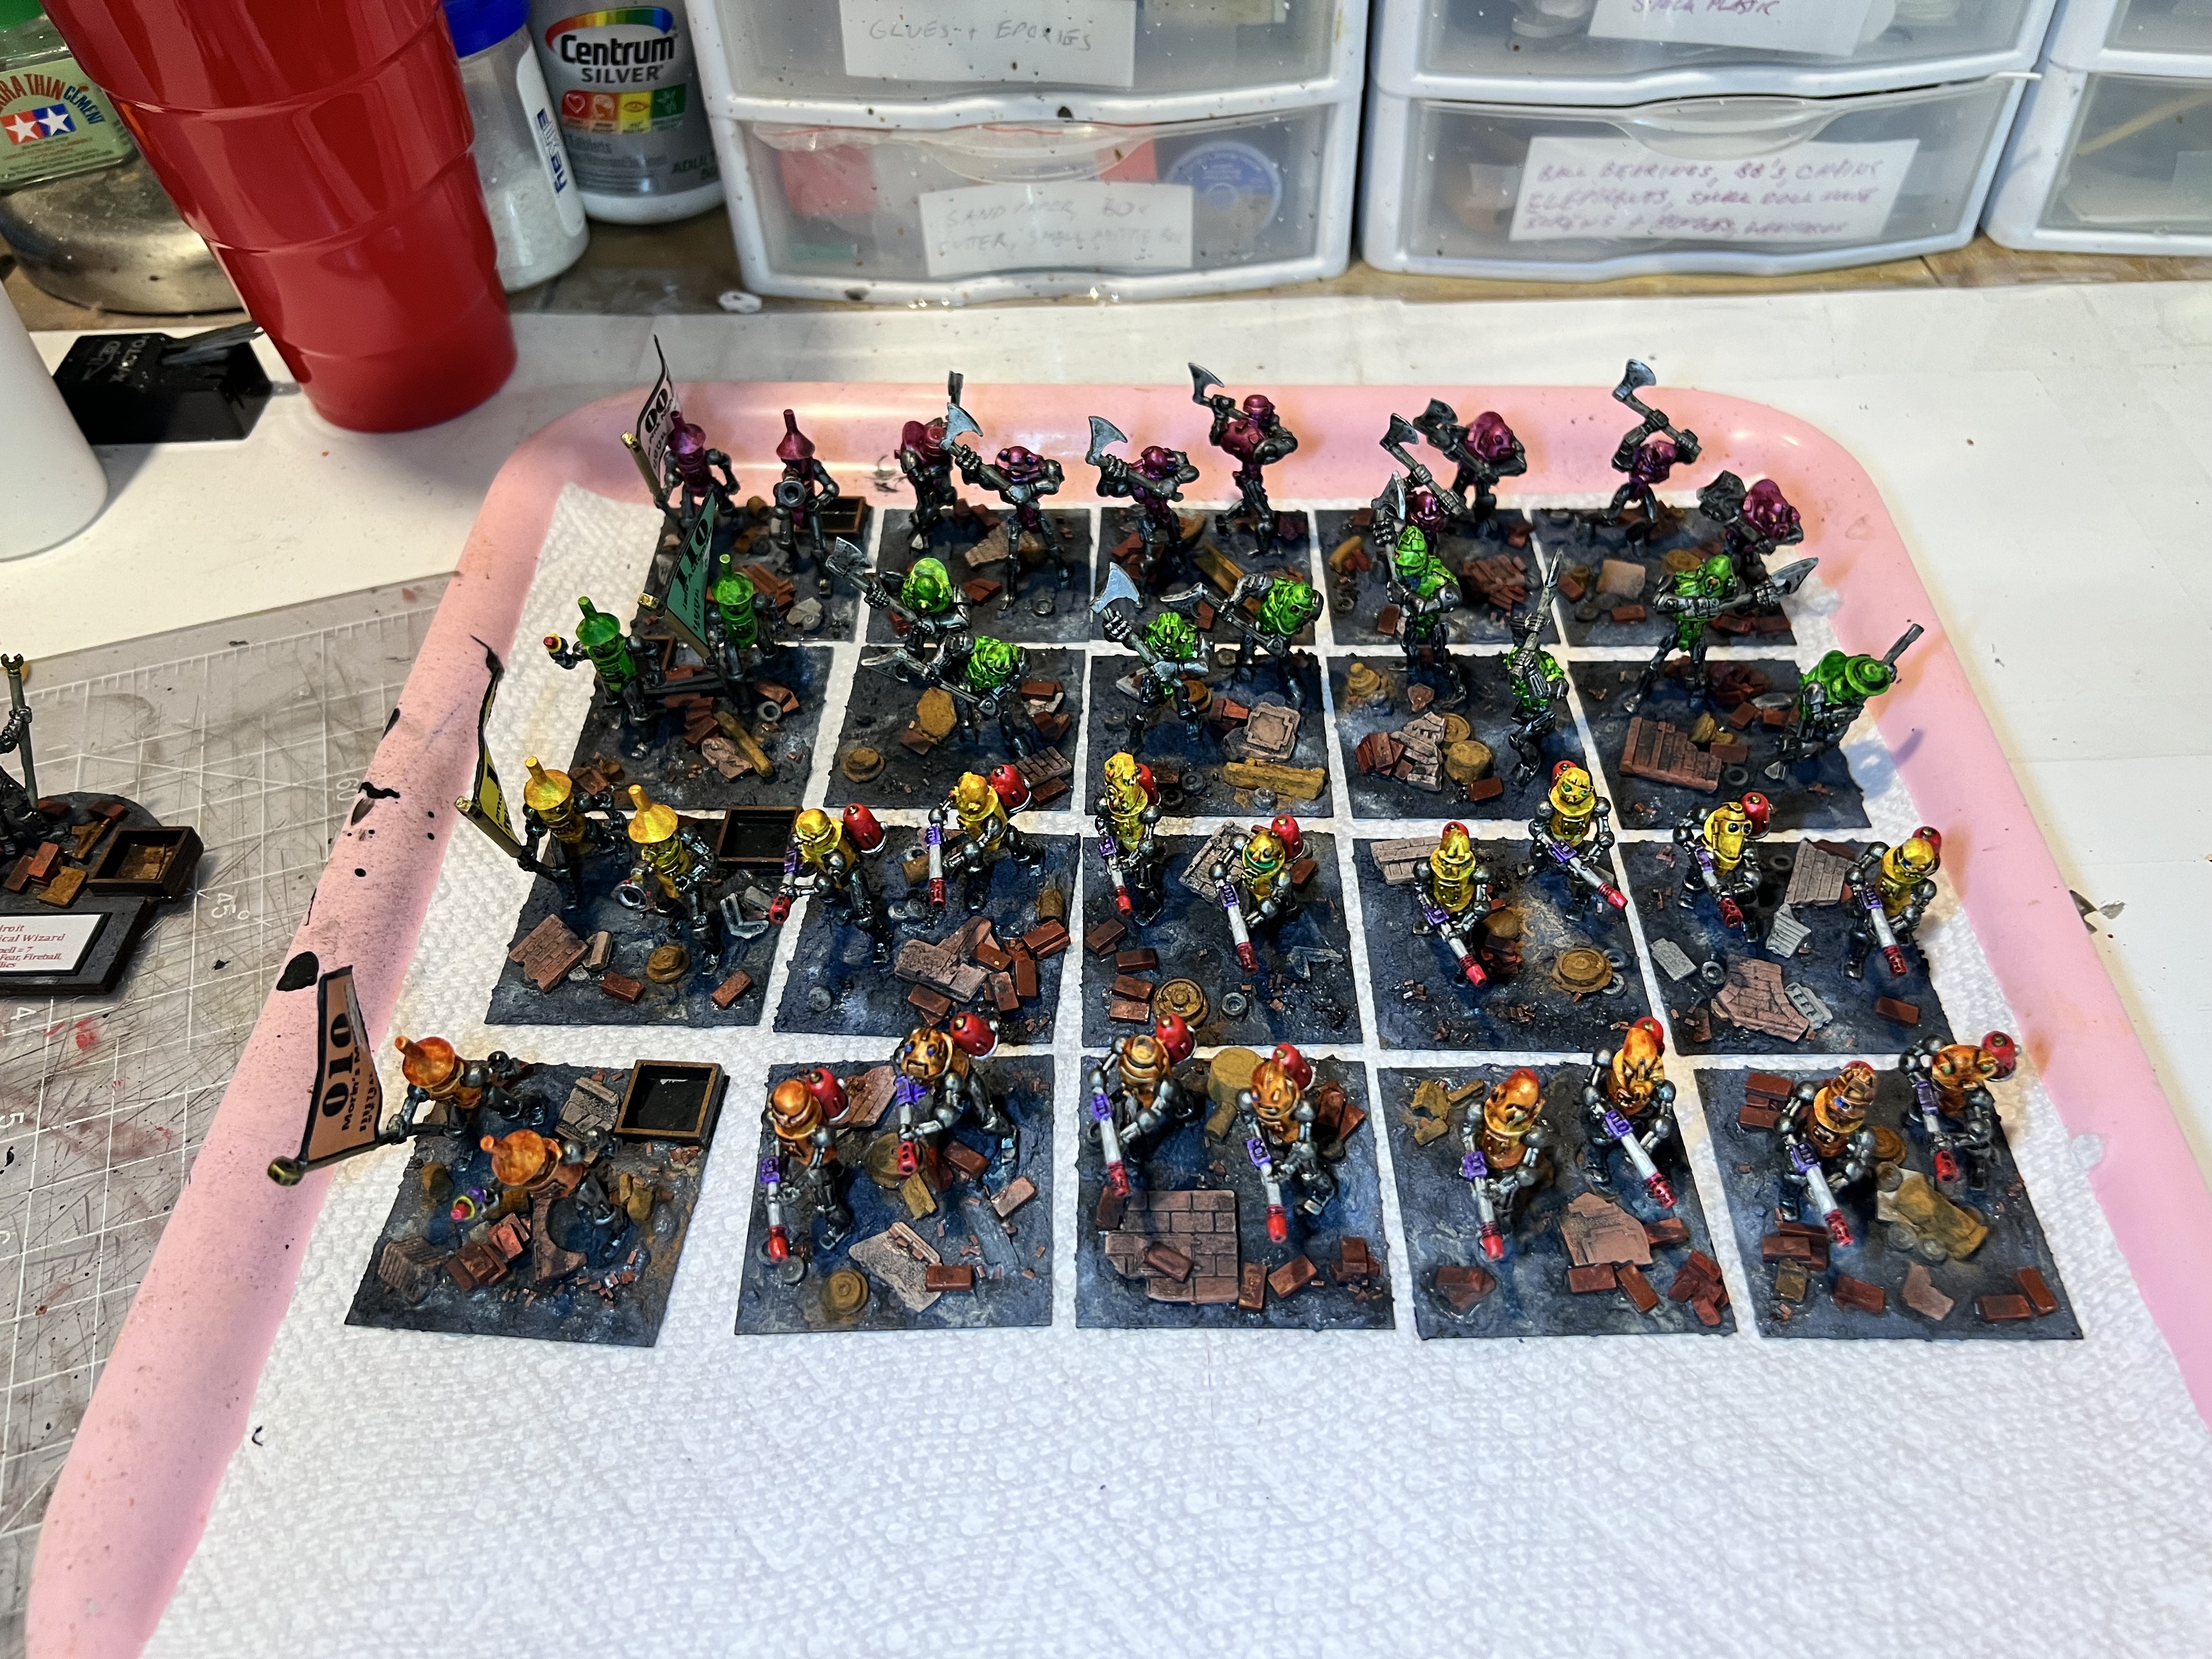
They have gun metal arms and legs, but colorful torsos for Ozz! The Metal Medium and contrast/speed paint combination worked well.The command bases of the 4 regiments with their nice new battle standards.Top view.
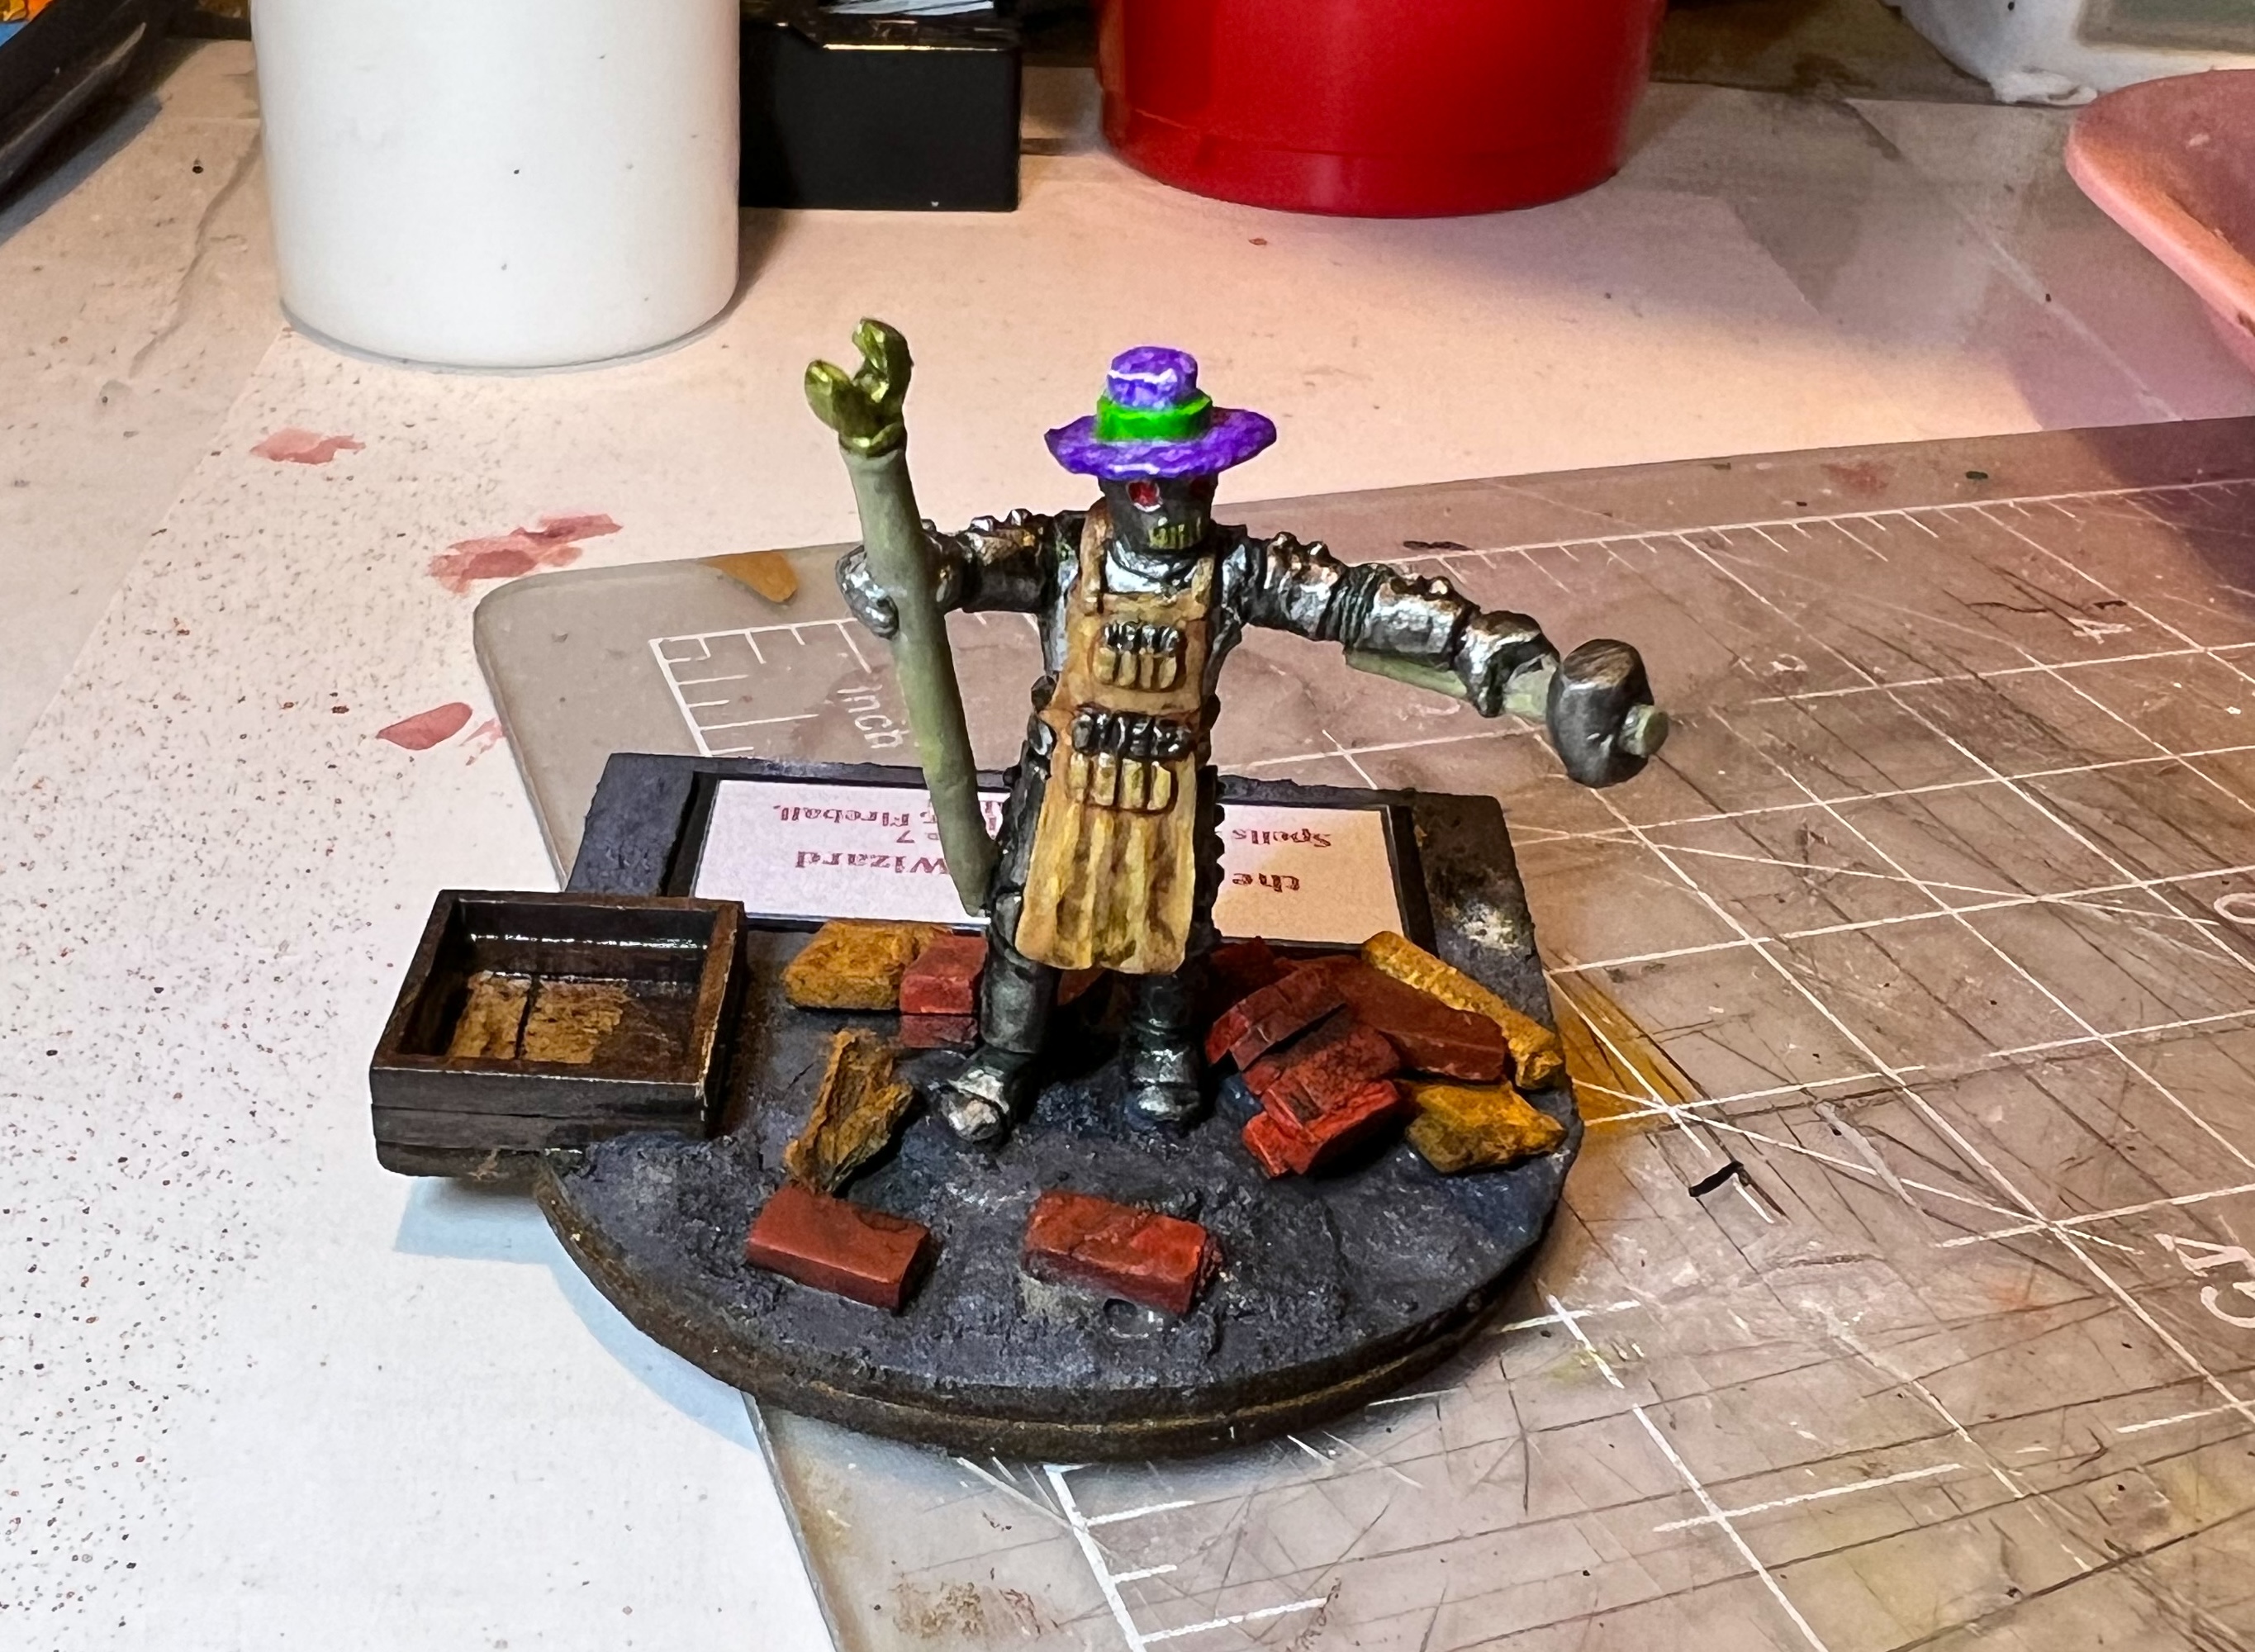
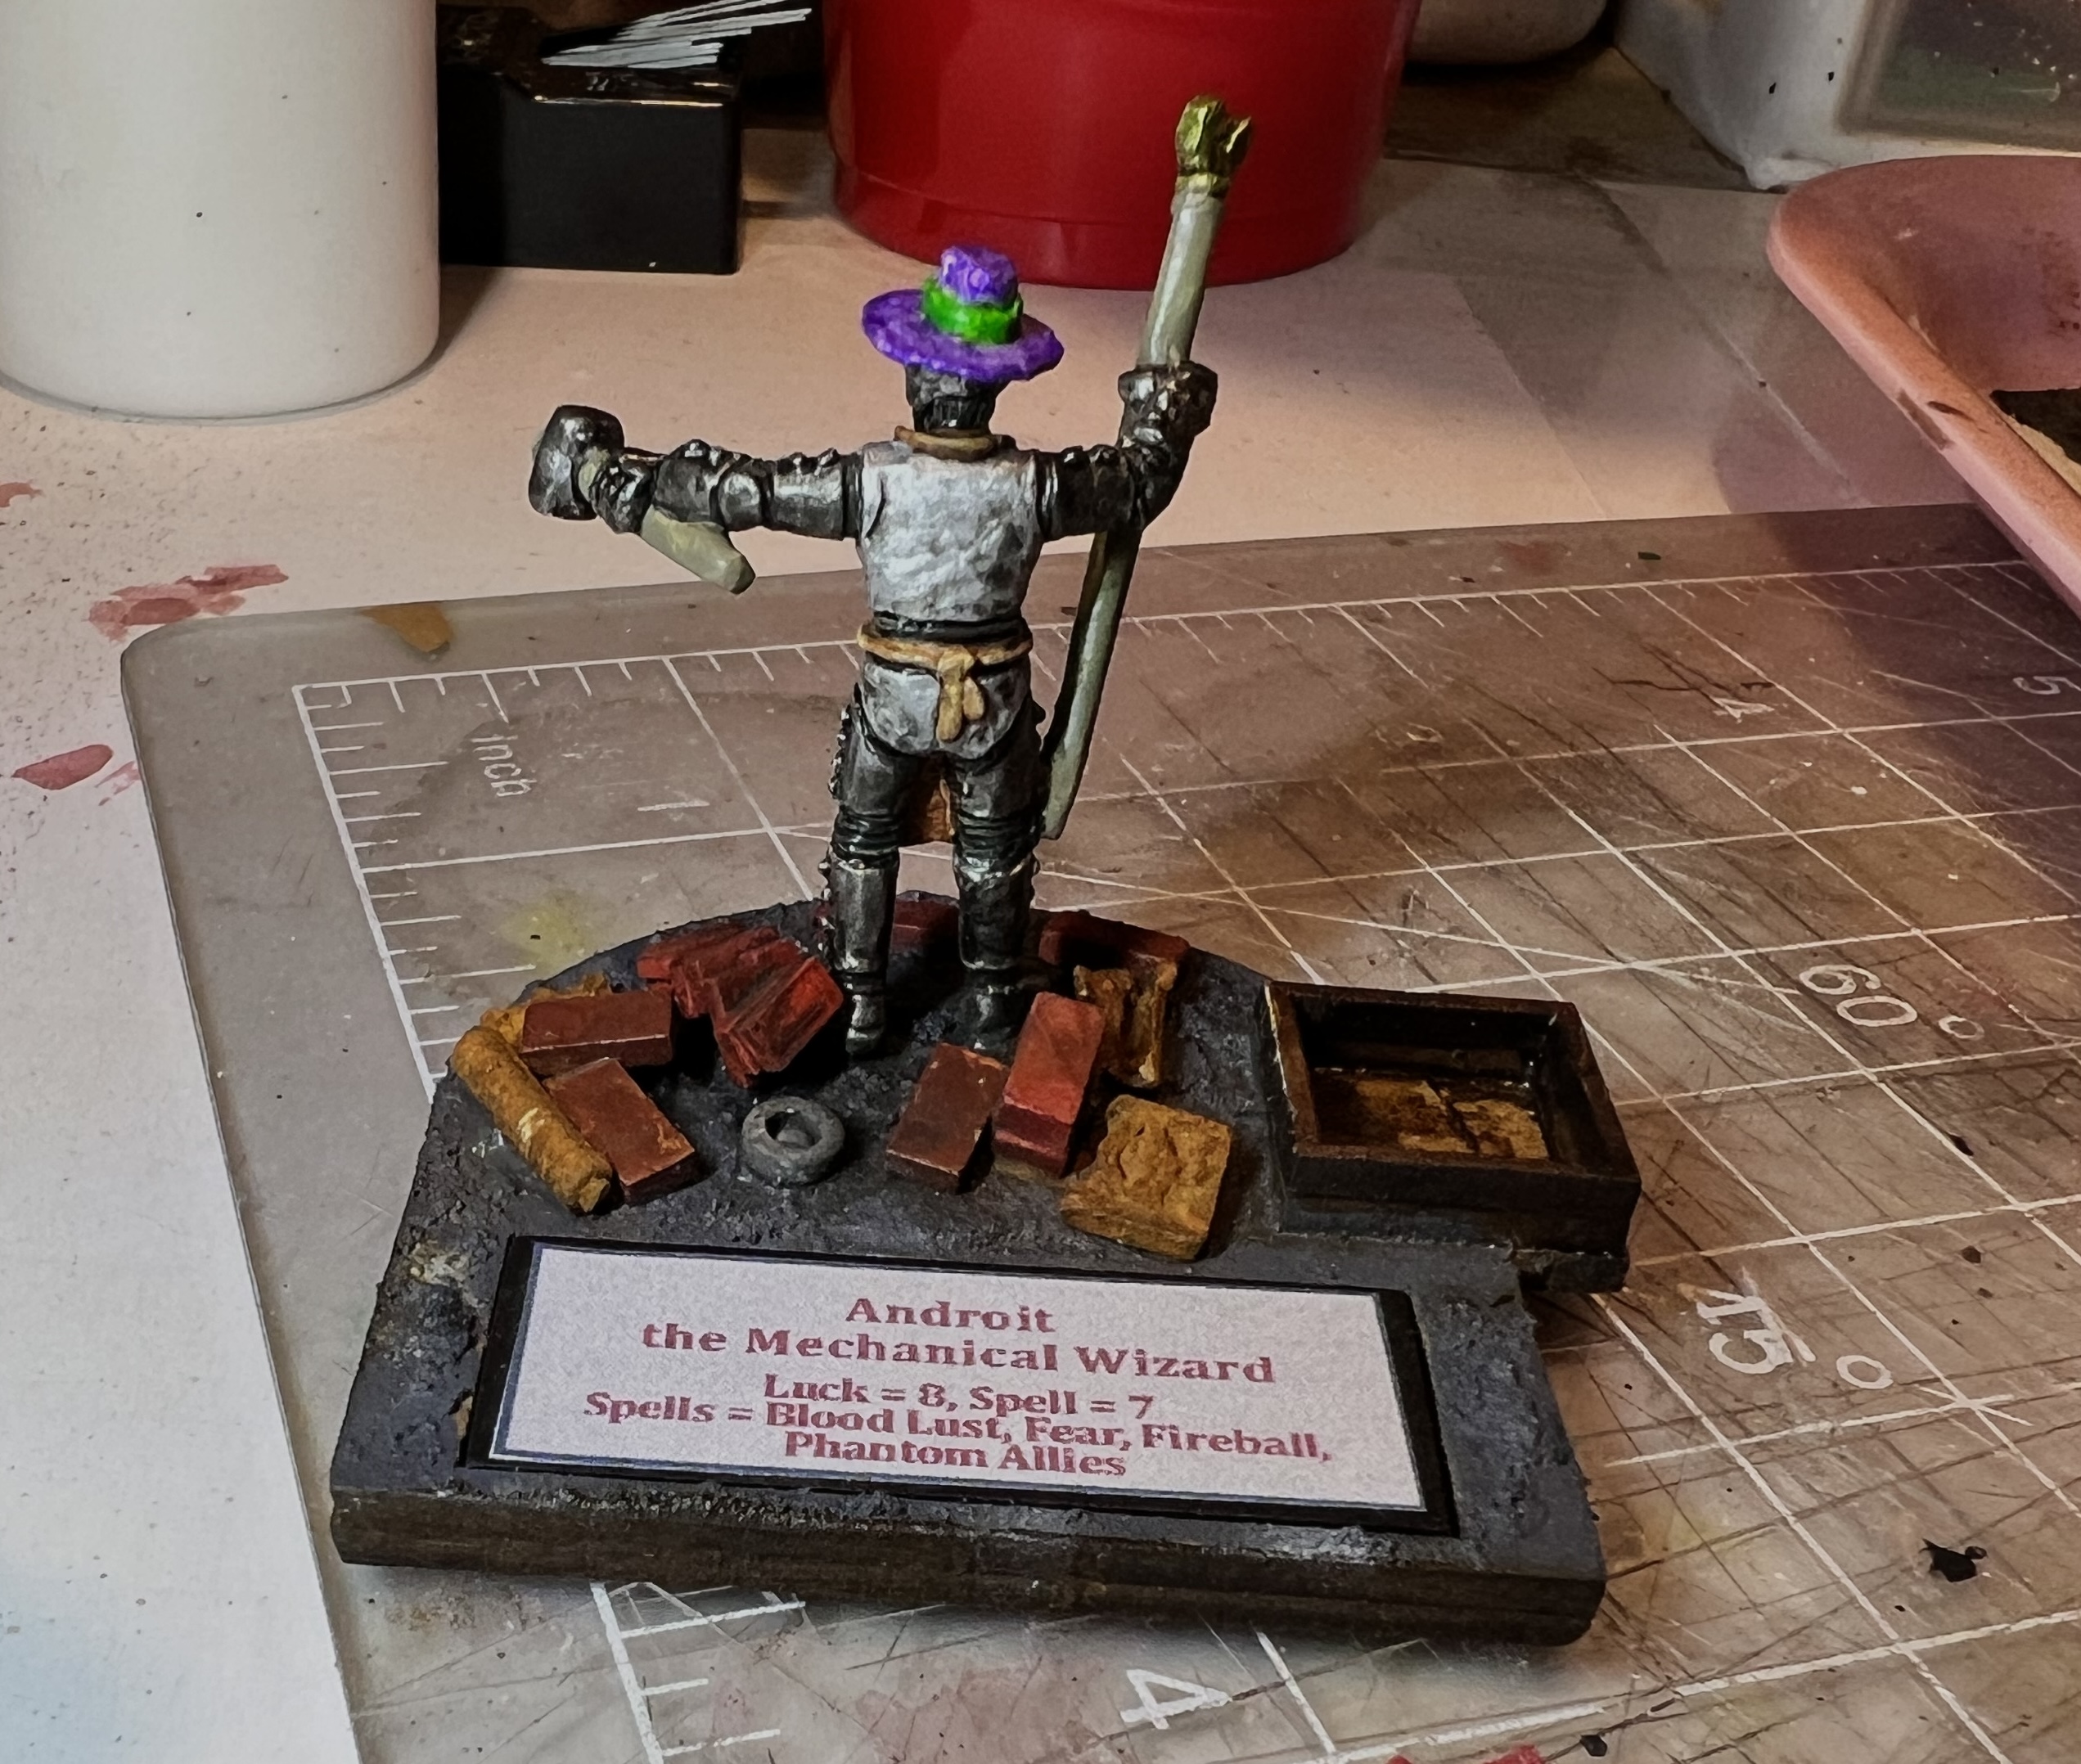
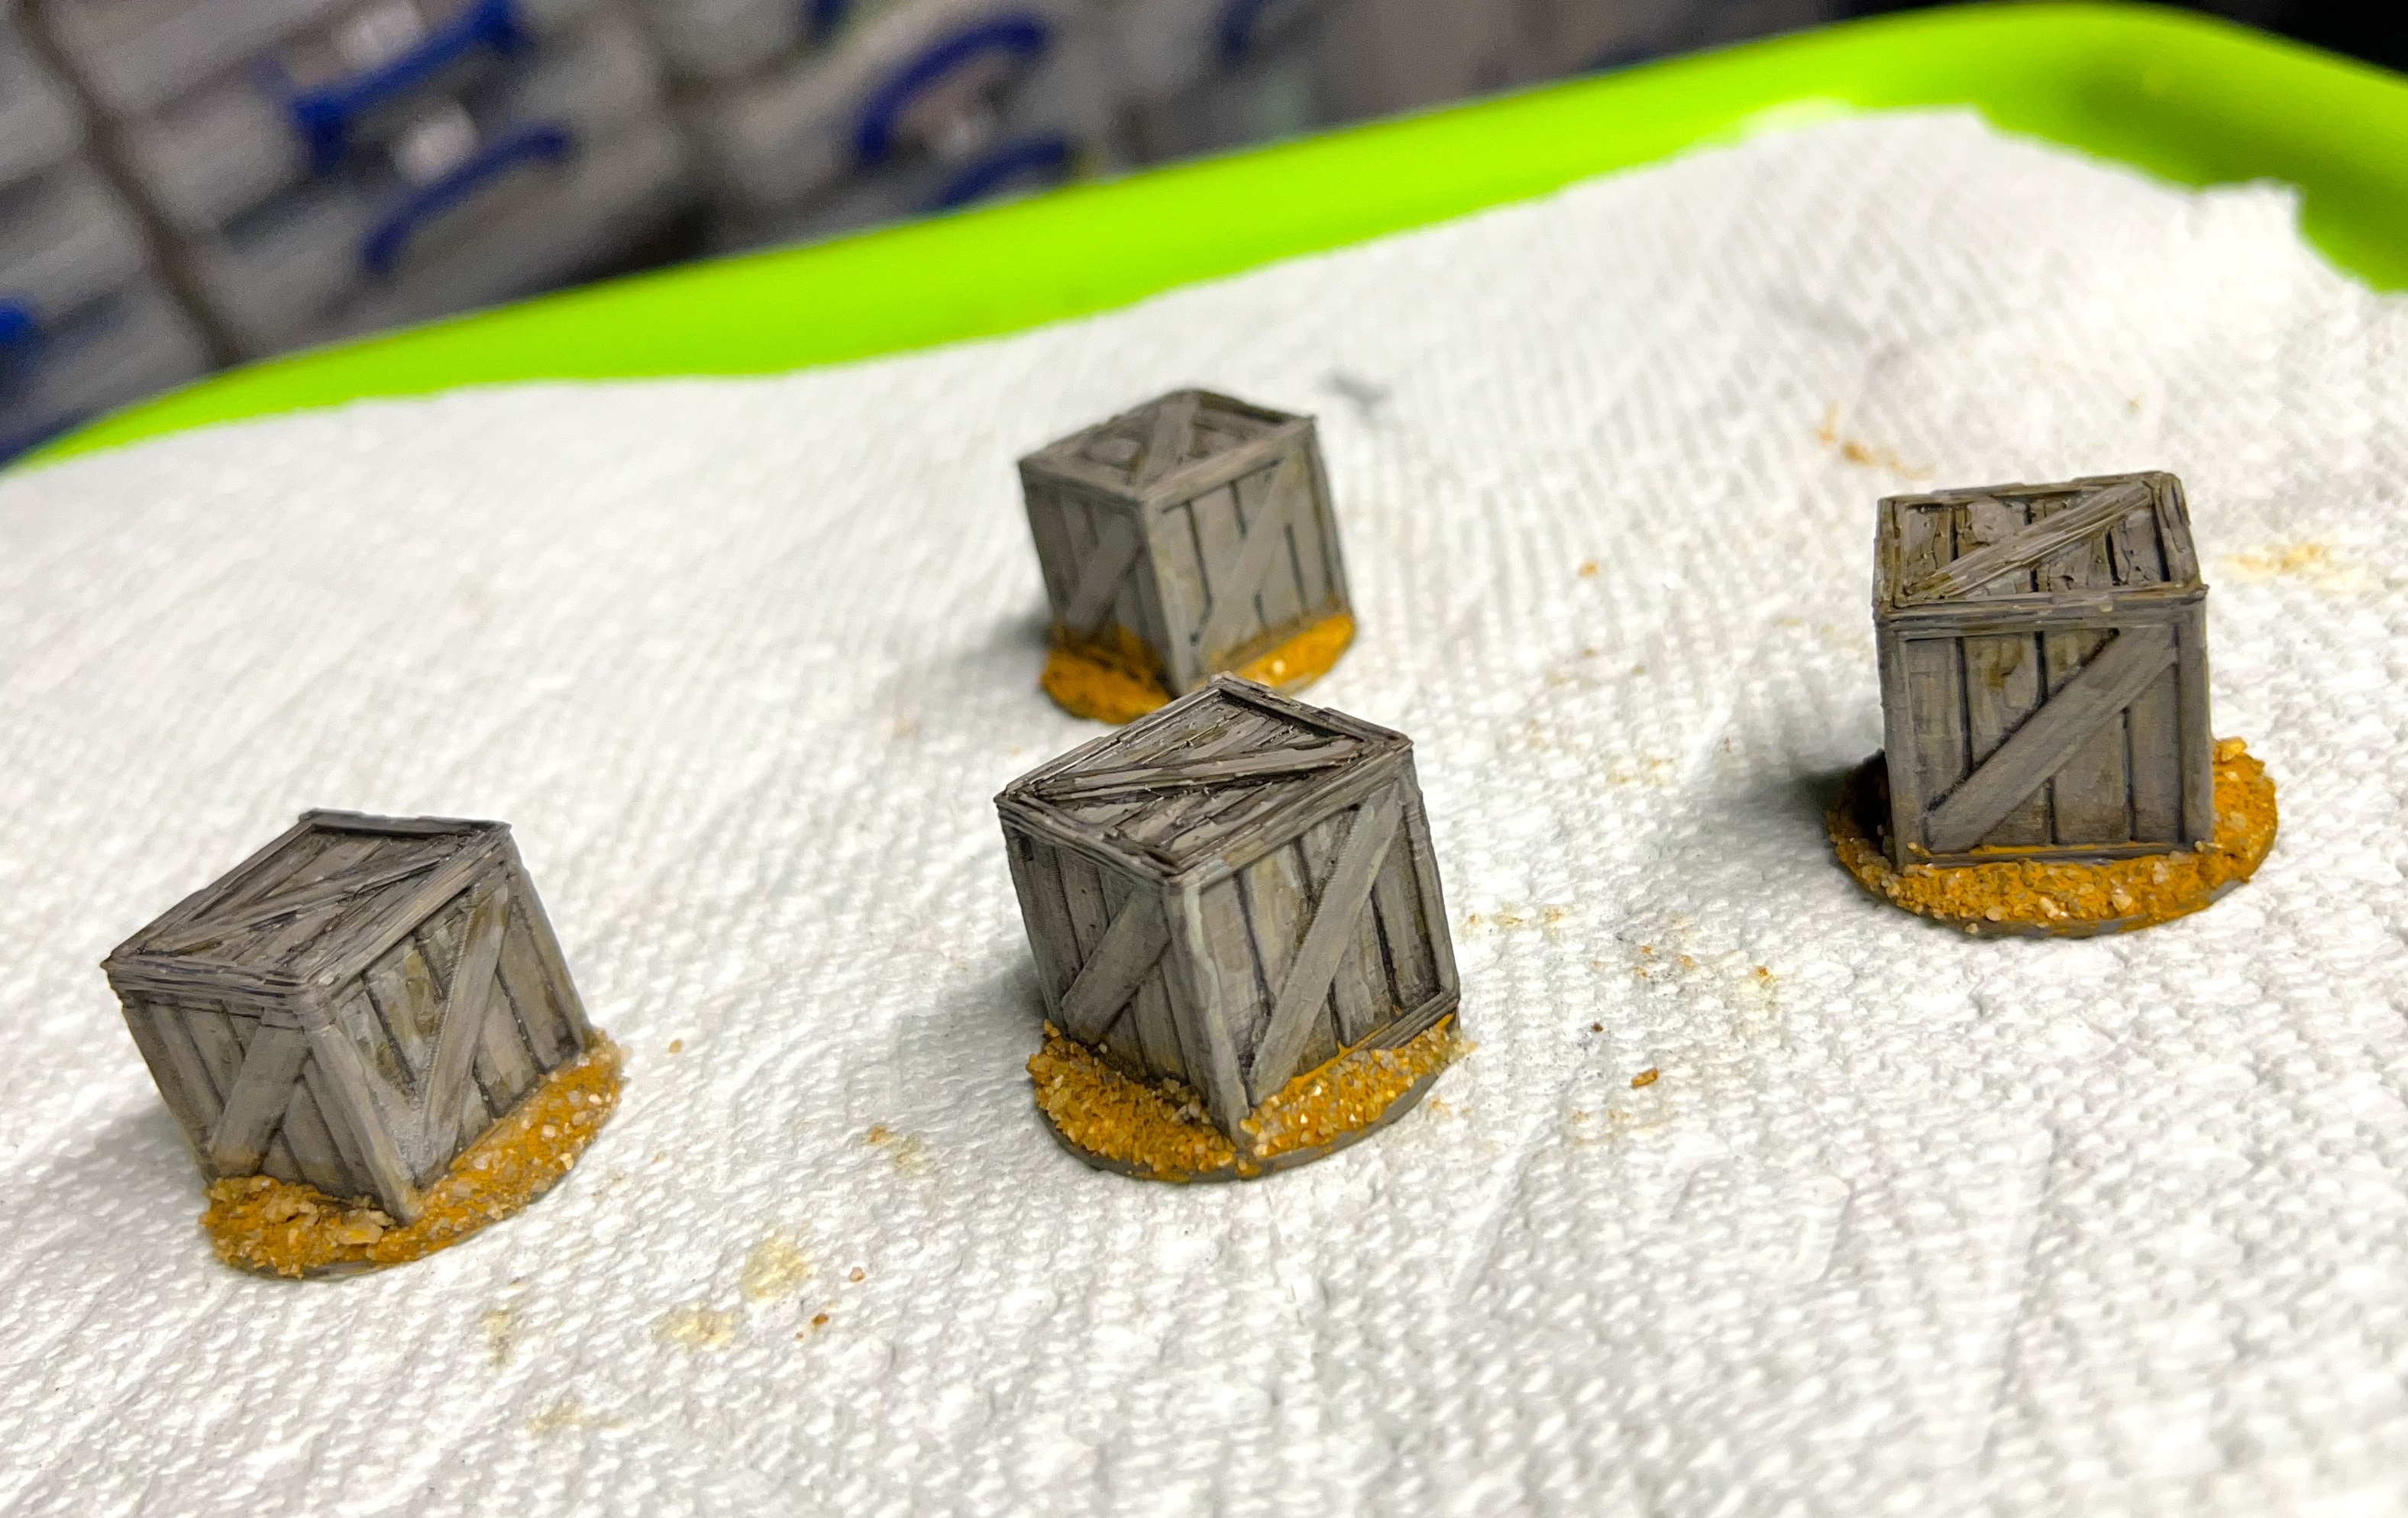
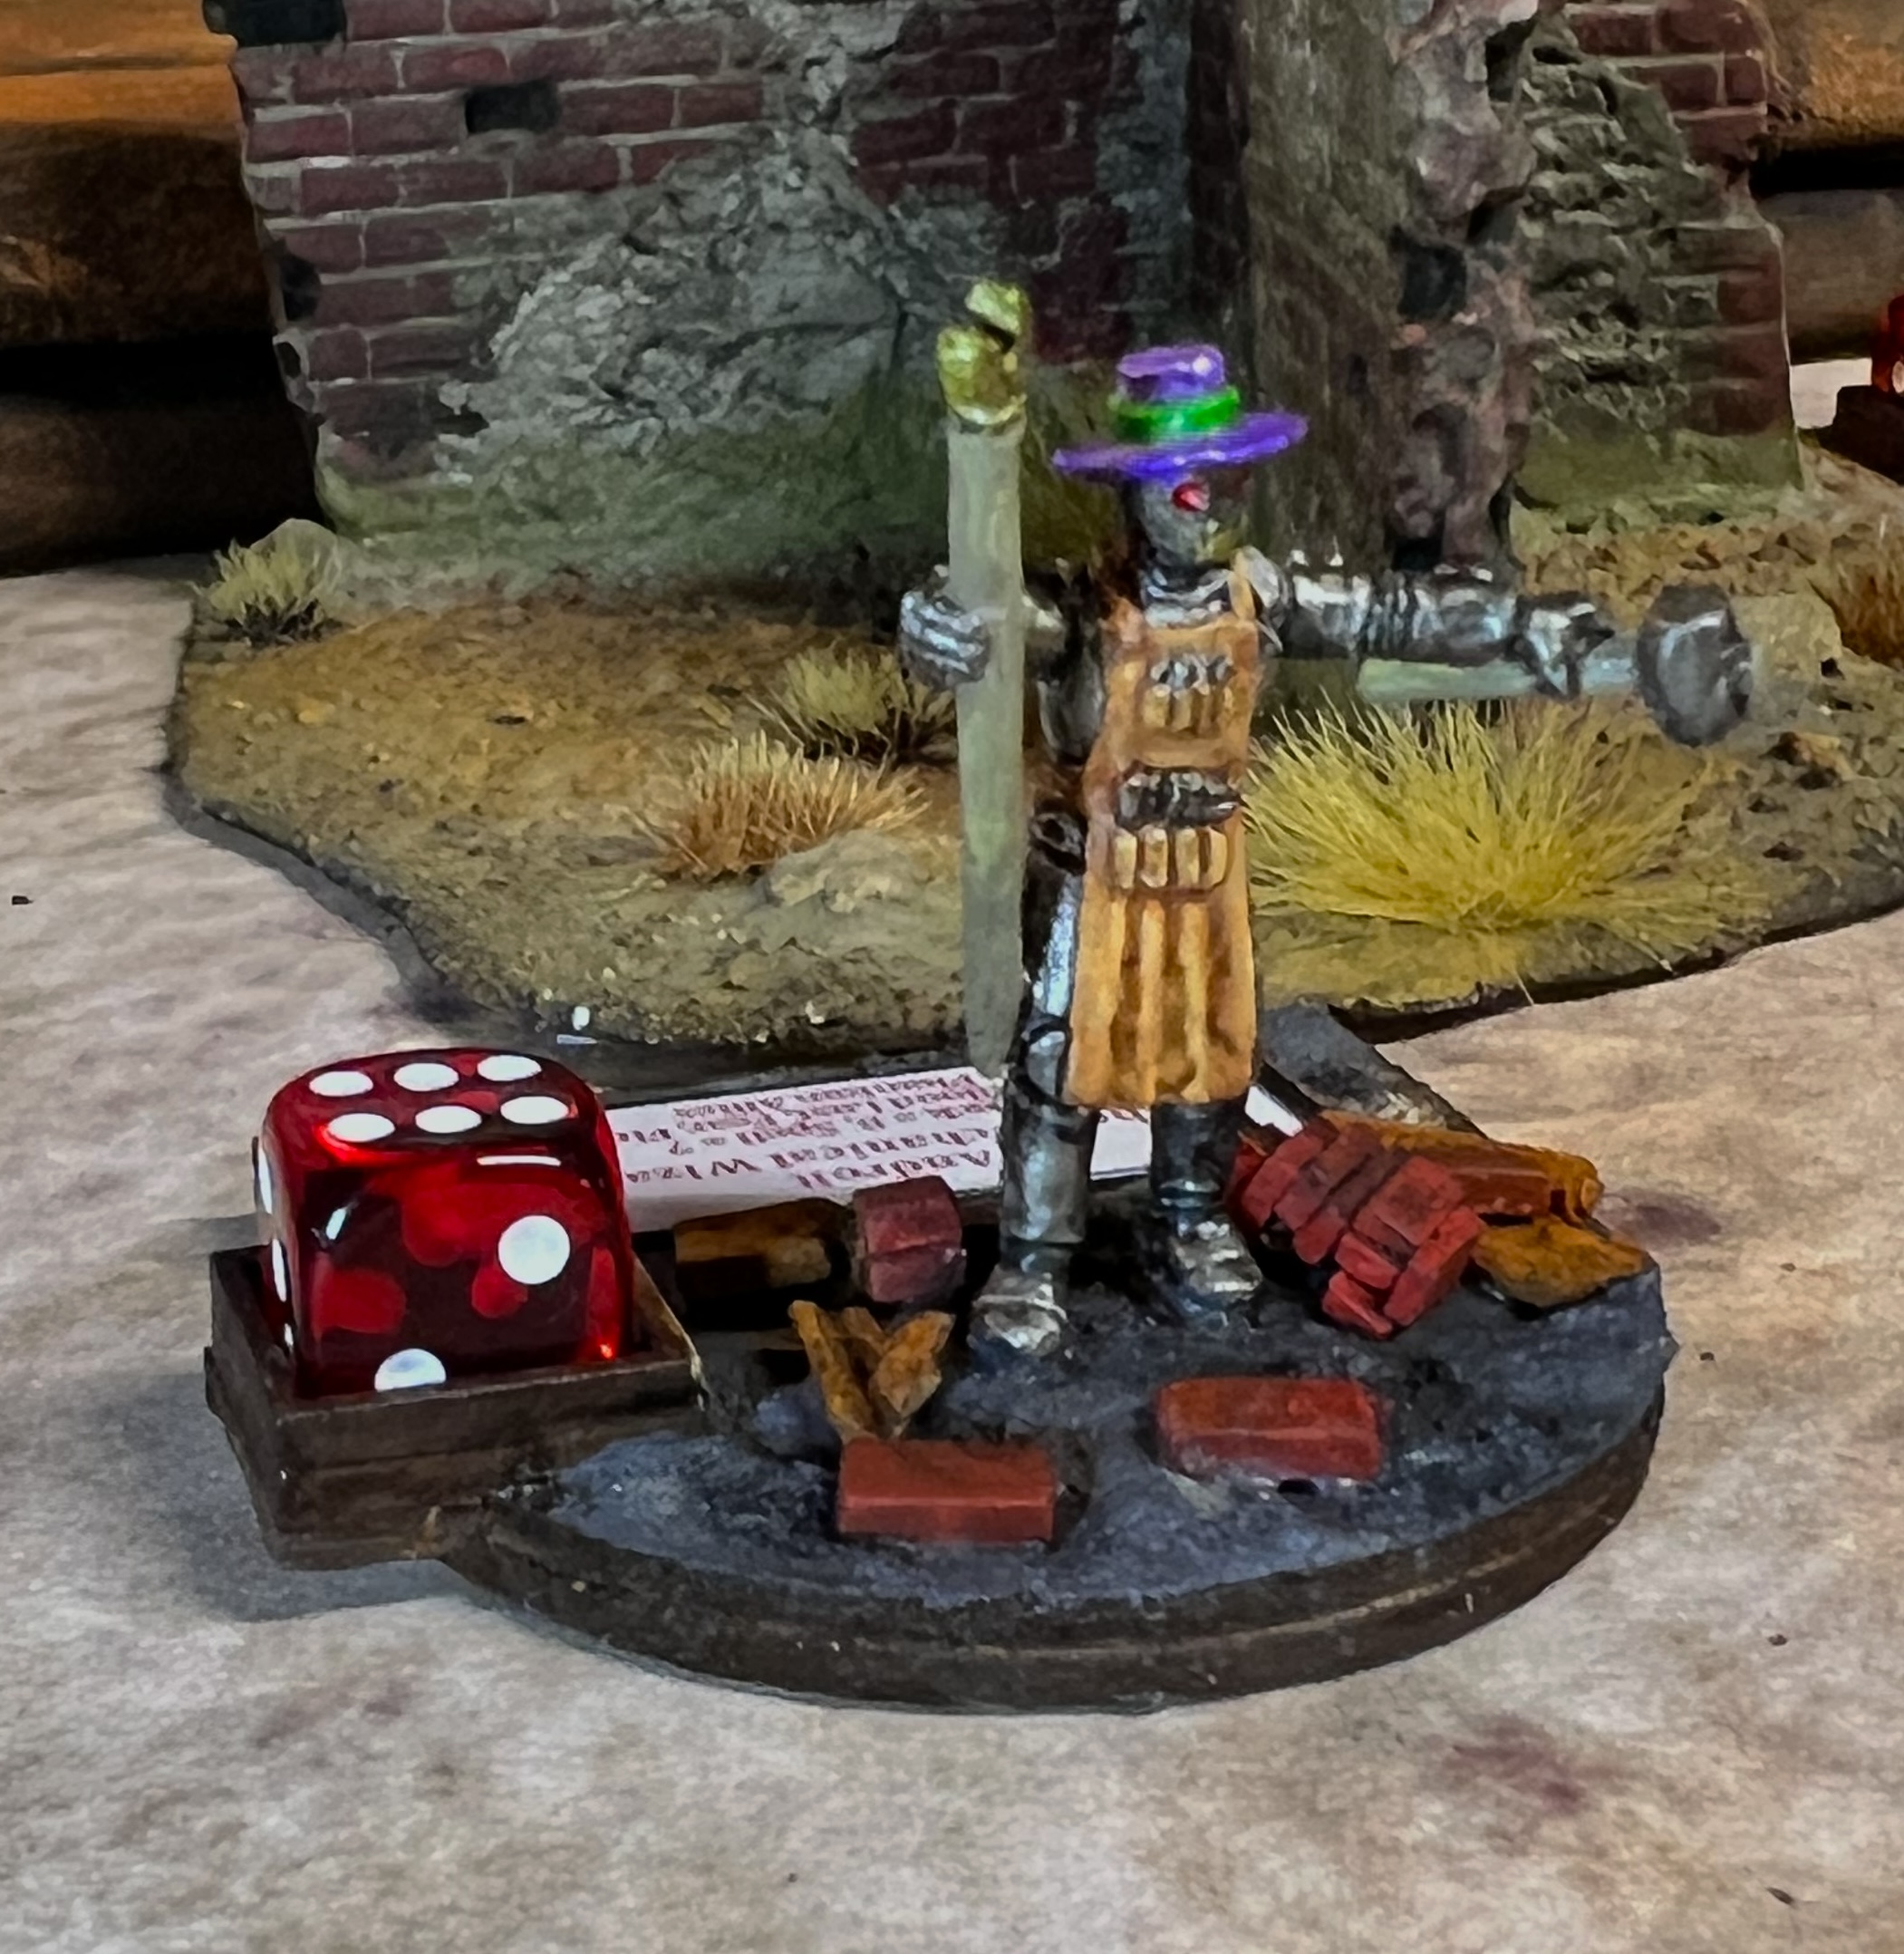
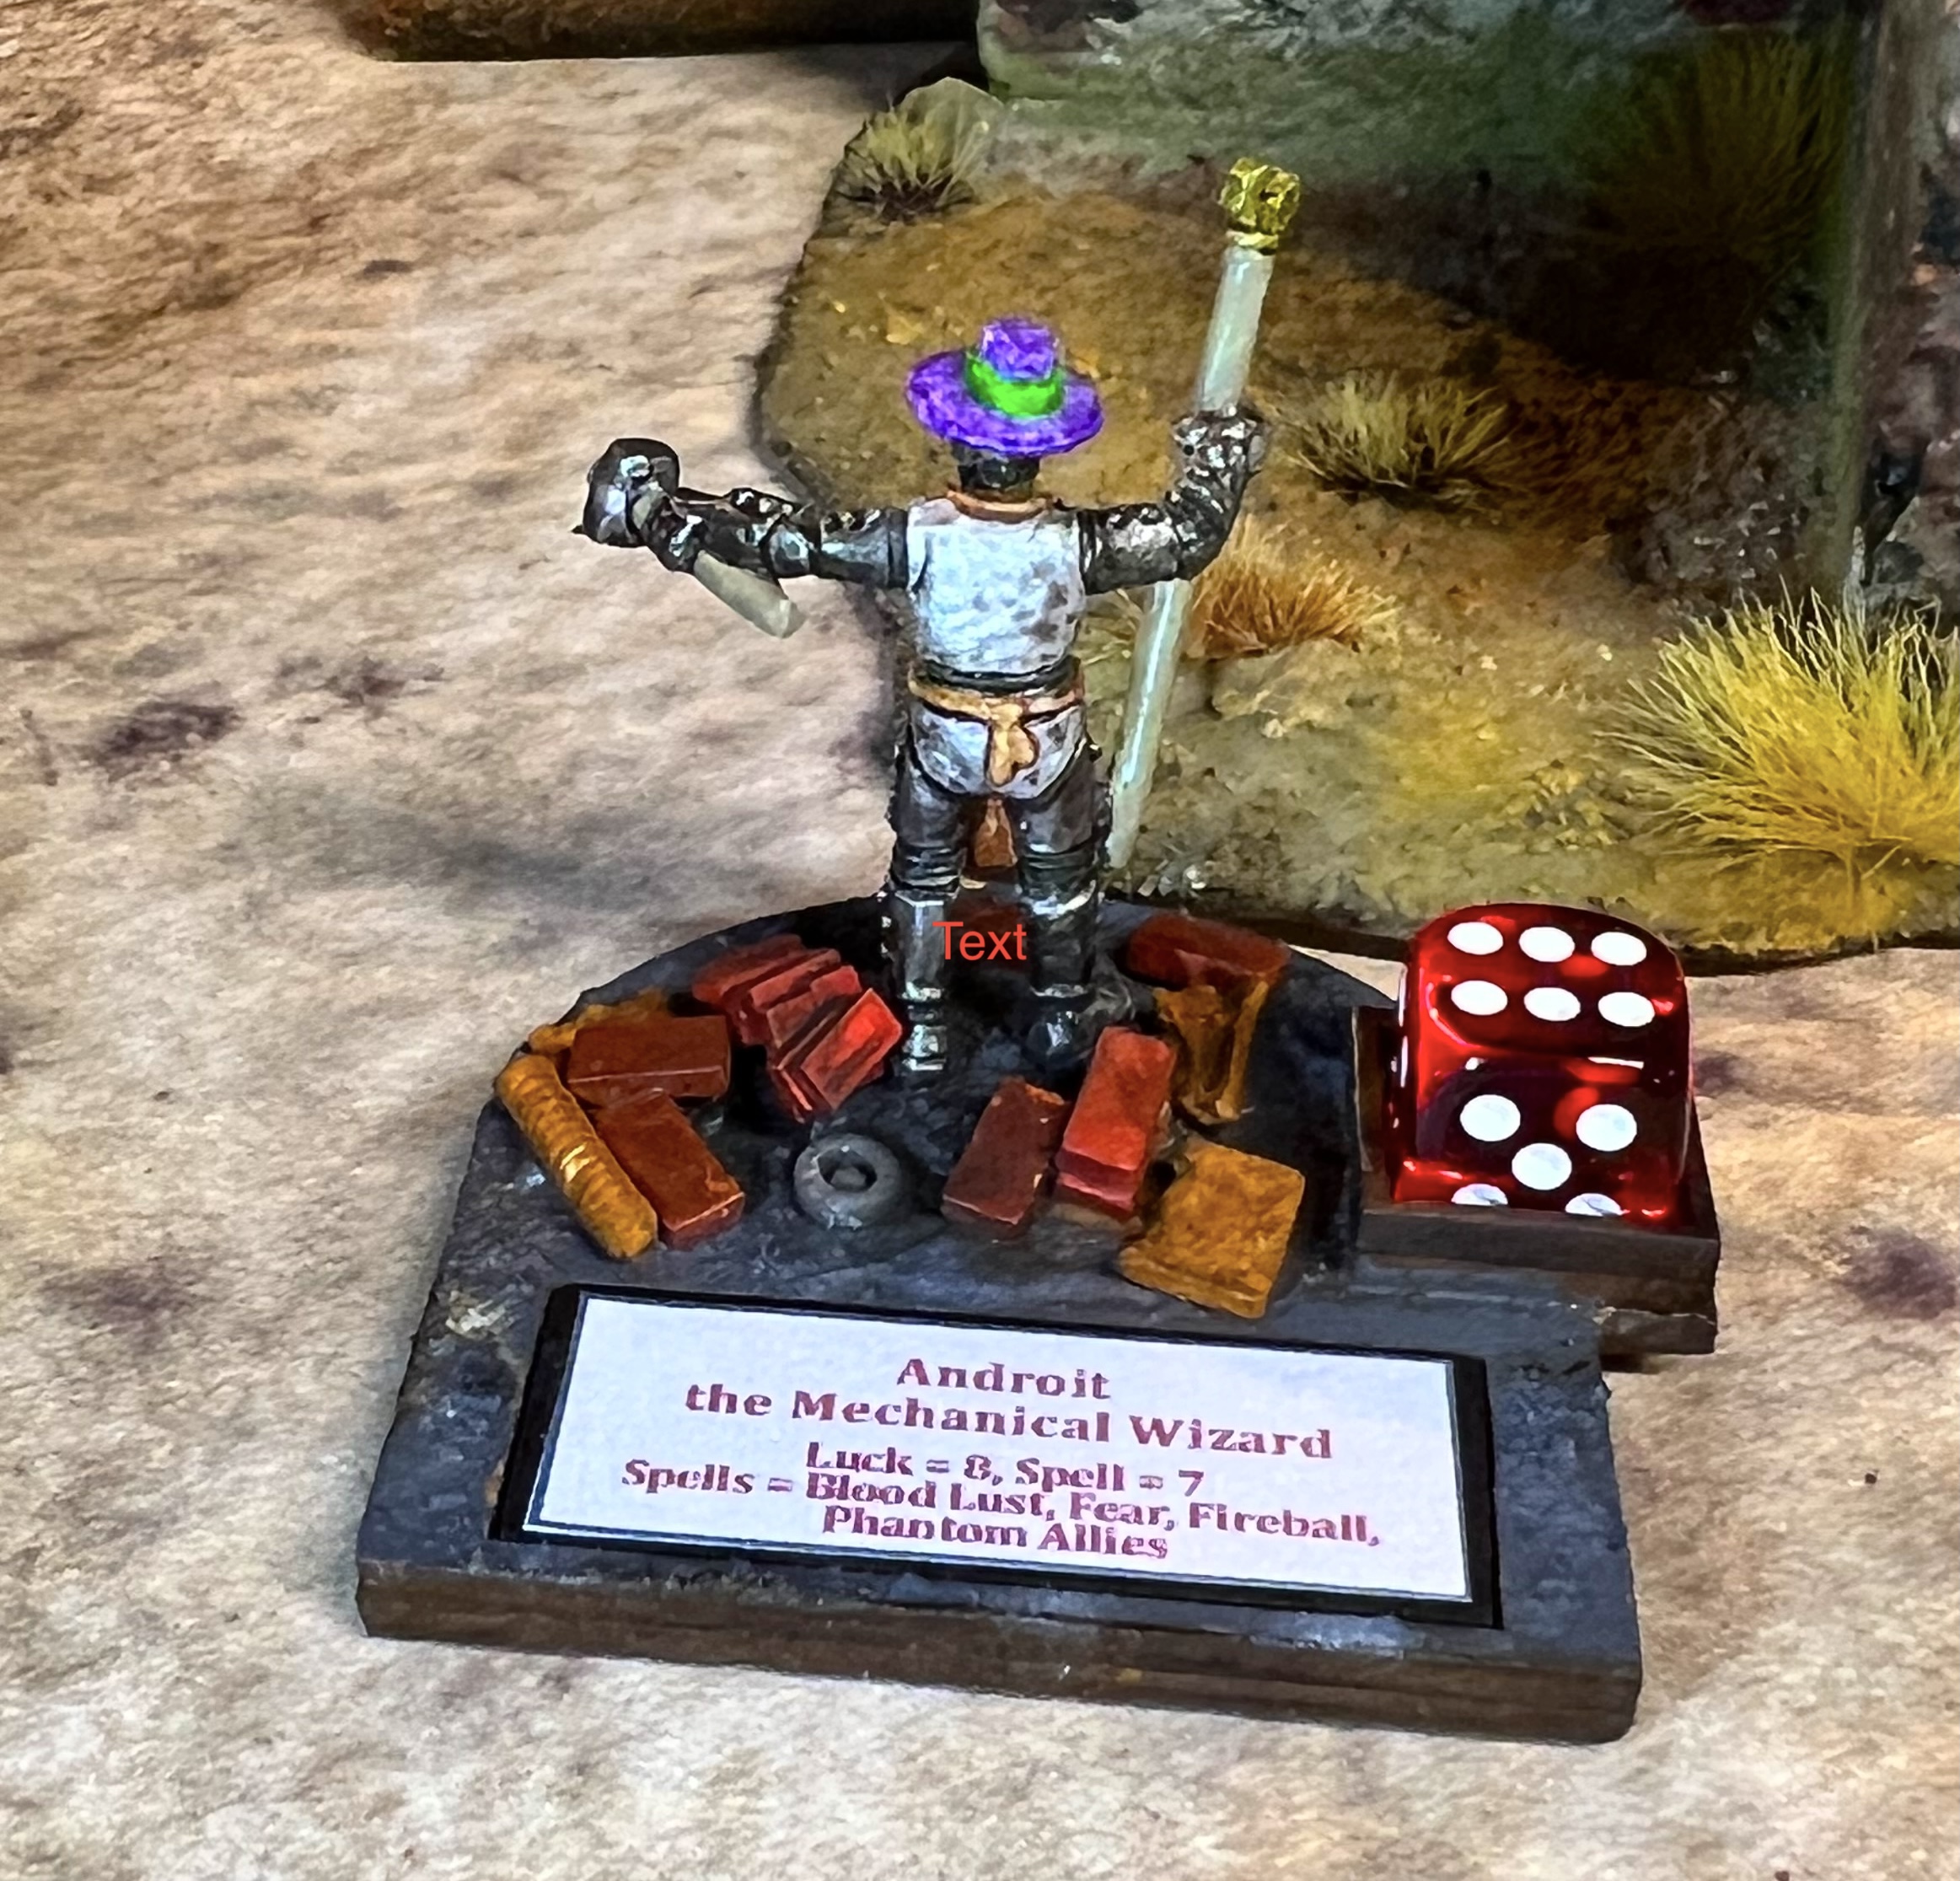
I also painted up Androit, plus 4 crates as game markers for the games to come. These represent stores of Professor Nitpik’s technological secrets.
First Androit:
Androit frontAndroit back with placard
And the crates – I think I got these from Armorcast years ago.
Crates of unknown technological secrets from before the Last Great War…
How about some eye candy (they do already look quite sugary, no?)
Completed Eye Candy
Morin’s Monsters
The Lemon Drop Legionnaires
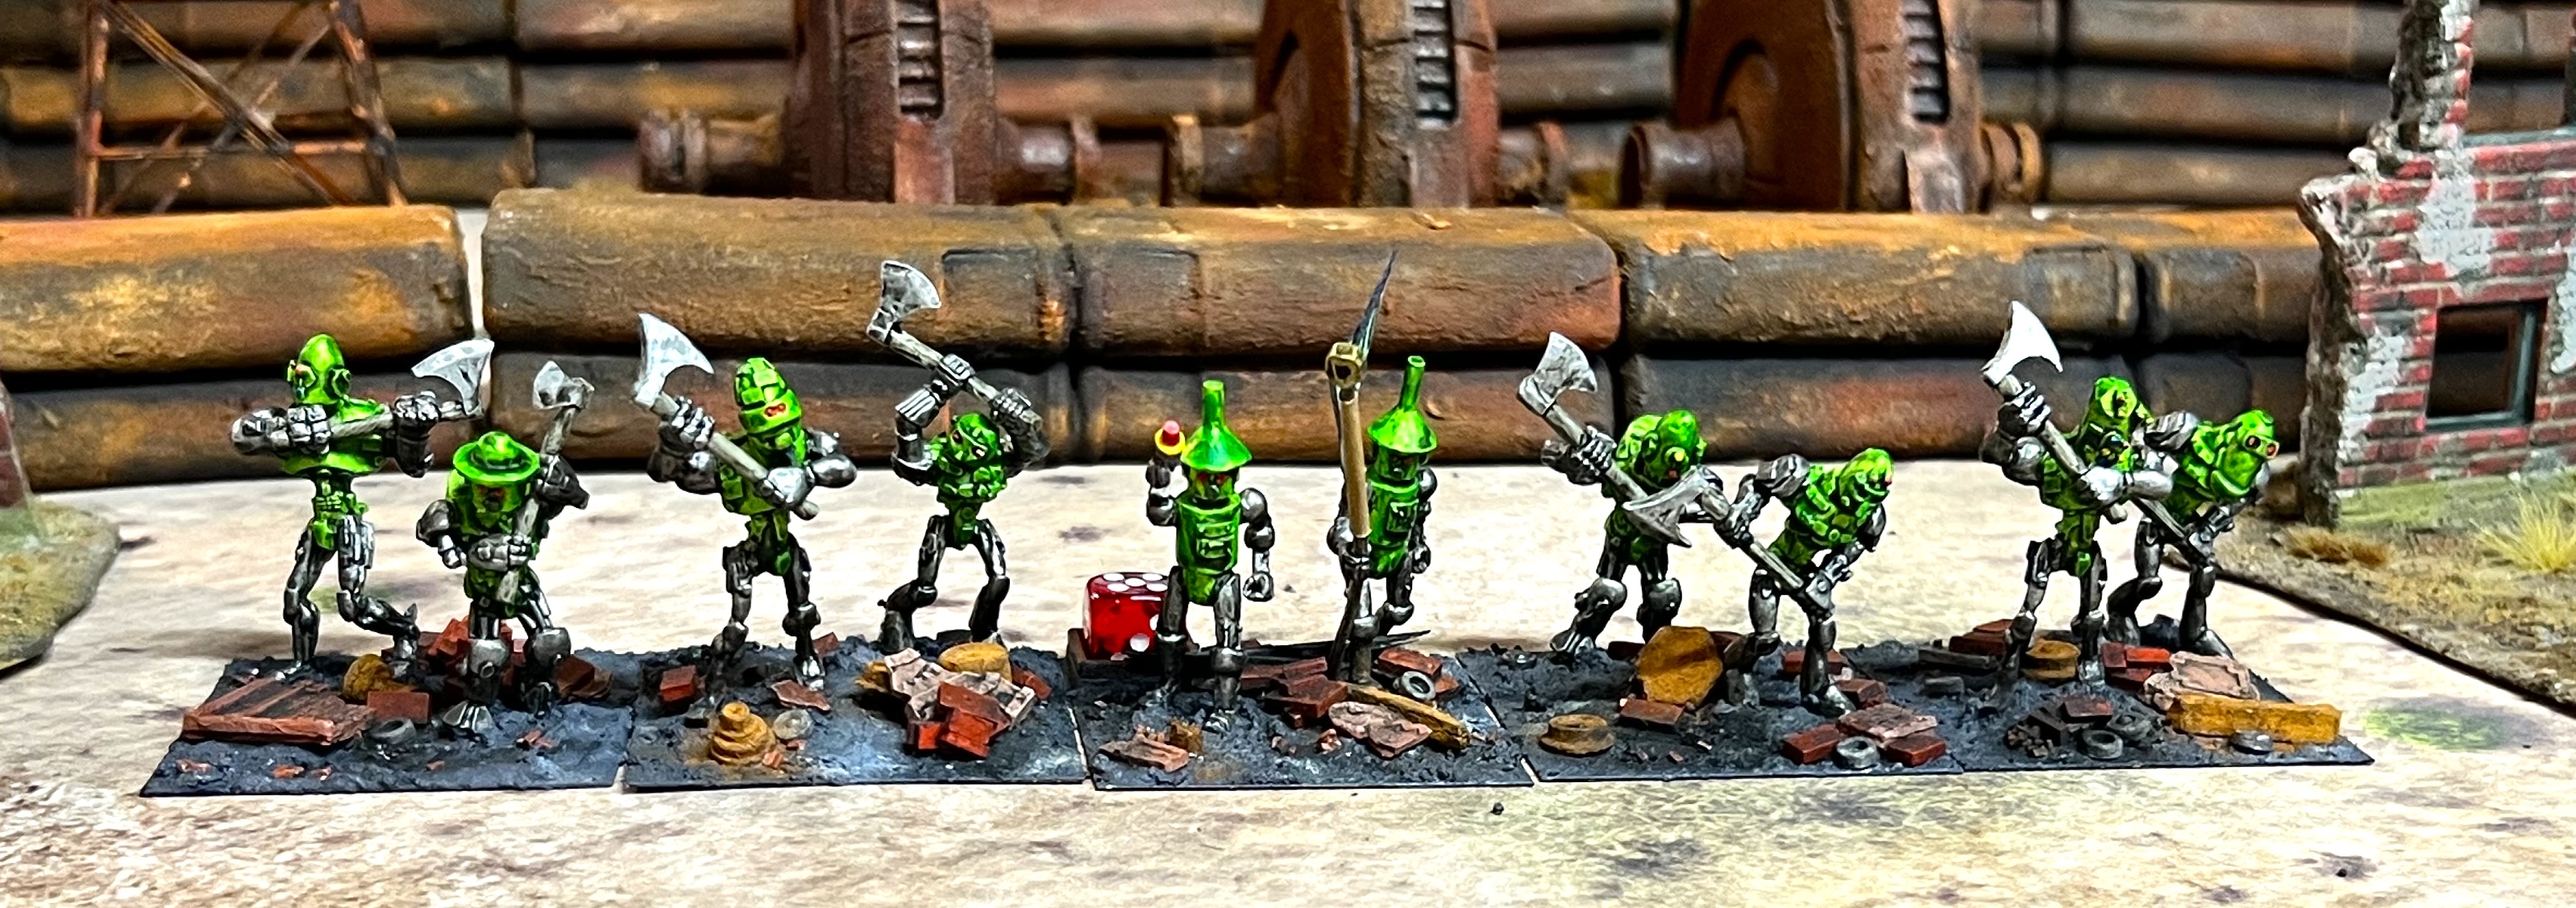
The Jade Automata
The Pink Nightmares
(Apologies to Ralphie.)
Androit The Mechanical Wizard
Group Shot
I also posted a short video on Instagram showing these mechanical men up close:
As I write this I have just returned from Cold Wars in Lancaster, PA. These miniatures debuted in their first game, “The Great Munchkin Heist”. In upcoming posts, I will share that game and some photos from Cold Wars.
Below is the flyer for that game.
The game went exceptionally well and I look forward to sharing it in a post in the near future. I also intend to share more apocalyptic terrain that I made it for this and another scenario. I also hope to do a 2025 roundup post as well…again, I said hope!
AND I hope to see some of you soon at conventions!
Final Notes and Links
Want to learn more about Ozz and its world? If you want to check out the excellent Wars of Ozz figures’ range, there are two places to get them. You can also get the rules there. (I make no money from this.) The game rules and the figures are available from the next two places:
As for the paints I used here – the list is extensive. But my memories are not always – so they are as much a resource to me as to you. Given that I have so much wreckage on the mechanical men’s bases, it does add to the variety.
If interested, here you go. If not, thanks for looking at these bots. Until next time…
Miscellaneous details and references for those interested in that sort of thing:
For my earlier posts on Wars of Ozz games, view this page. It includes figures, units, and other related projects.
PAINTS, INKS, GLAZES, SHADES, WASHES, PIGMENTS, FLOCKING, GLUES AND MORE THAT I USED ON THE TWO REGIMENTS OF NITPIK AXEMEN:
Polystyrene sheet
Gorilla Glue
PVA Glue
Popsicle sticks
2″ Square War Games Accessories Steel Bases (21)
Vallejo Surface Primer “Black”
Vallejo Mecha Primer “White”
Vallejo Thinner
Army Painter Speed Paint 2.0 “Familiar Pink”
Vallejo “Metal Medium”
Citadel Contrast Paint “Striking Scorpion Green”
Popsicle sticks
PVA Glue
Vallejo Model Air “Concrete”
Vallejo Model Air “Tire Black”
Vallejo Model Air “Bright Brass”
Army Painter Warpaints Metallics “Gun Metal”
Vallejo Mecha Color “Light Steel”
Vallejo Mecha Color “Off White”
Army Painter Speed Paint 2.0 “Polished Silver”
Createx Wicked Colors “Pearl Red”
Citadel Contrast Paint “Moon Yellow”
Createx Wicked Colors “Pearl Blue”
Createx Wicked Colors “Pearl Green”
Vallejo Model Air “IDF Sand Grey”
Reaper MSP Core Colors “Pure Black”
Army Painter “Red Tone” (wash)
Secret Weapon Washes “Red Black” (wash)
Secret Weapon Washes “Ruby” (wash)
P3 “Red Ink” (ink)
Vallejo Game Air “Red Terracotta”
Army Painter “Green Tone” (wash)
Citadel “Nuln Oil GLOSS” (wash/shade)
Citadel “Astrogranite” (texture)
Citadel “Astrogranite Debris” (texture)
Vallejo “Gloss Acrylic Varnish”
Vallejo Flow Improver
Vallejo “Satin Varnish”
Juweela 1:35 Debris
Juweela Metal Scrap Rusty
Juweela 1:35 Bricks
Wood shards
Vallejo “Old Rust” (pigment)
Vallejo “Carbon Black” (pigment)
Vallejo “Light Slate Grey” (pigment)
Vallejo “Titanium White” (pigment)
Pendraken 12mm dice frames
Nitpik flag design from Wars of Ozz Facebook page (printed on card stock)
PAINTS, INKS, GLAZES, SHADES, WASHES, PIGMENTS, FLOCKING, GLUES AND MORE THAT I USED ON THE TWO REGIMENTS OF NITPIK MECHANICAL MEN ARMED WITH NAPALM BLASTERS:
2″ Square War Games Accessories Steel Bases (21)
PVA Glue
Popsicle sticks
2″ Square War Games Accessories Steel Bases (21)
Vallejo Mecha Primer “White”
Vallejo Thinner
Army Painter Speed Paint 1.0 “Zealot Yellow”
Vallejo “Metal Medium”
Army Painter Speed Paint 1.0 “Fire Giant Orange”
Createx Wicked Colors “Pearl Red”
Createx “4011 Reducer”
Vallejo Model Air “Tire Black”
Vallejo Mecha Color “Light Steel”
Vallejo Model Air “Bright Brass”
Turbo Dork “People Eater”
Army Painter Warpaints Metallics “Gun Metal”
Vallejo “Thinner Medium”
Vallejo Model Air “Black Metallic”
Vallejo Mecha Color “Off White”
Army Painter Speed Paint 2.0 “Polished Silver”
Citadel Contrast Paint “Moon Yellow”
Createx Wicked Colors “Pearl Blue”
Createx Wicked Colors “Pearl Green”
Vallejo Model Air “IDF Sand Grey”
Secret Weapon Washes “Yellow Snow” (wash)
Secret Weapon Washes “Sunshine” (wash)
Army Painter “Red Tone” (wash)
Secret Weapon Washes “Red Black” (wash)
Secret Weapon Washes “Ruby” (wash)
P3 “Red Ink” (ink)
Vallejo Game Air “Red Terracotta”
Citadel “Nuln Oil GLOSS” (wash/shade)
Citadel “Astrogranite” (texture)
Citadel “Astrogranite Debris” (texture)
Vallejo “Gloss Acrylic Varnish”
Vallejo Flow Improver
Vallejo “Satin Varnish”
Juweela 1:35 Debris
Juweela Metal Scrap Rusty
Juweela 1:35 Bricks
Wood shards
Vallejo “Old Rust” (pigment)
Vallejo “Carbon Black” (pigment)
Vallejo “Light Slate Grey” (pigment)
Vallejo “Titanium White” (pigment)
Pendraken 12mm dice frames
Nitpik flag design from Wars of Ozz Facebook page (printed on card stock)
PAINTS, INKS, GLAZES, SHADES, WASHES, PIGMENTS, FLOCKING, GLUES AND MORE THAT I USED ON ANDROIT THE MECHANICAL WIZARD:
Imagine an industrial cityscape – an apocalyptic one. One that shows that “something really terrible happened here”. Now add 300 years to it and an arid desolate climate with a lot of rust. Lastly, add mystery – “what am I looking at?”, and you are here.
These were the thoughts that I had last month as I prepared to create and build components for such a wasteland ruin. As my 2026 “convention season” was nearing, I needed to build terrain for my tabletop games. For games of Wars of OzzTM, my goal was to build terrain pieces for Professor Nitpik’s Industrial City (aka the Robotic Sanctum). I also wanted to get back into some retro sci-fi games using Buck Surdu’s Combat Patrol:WWIITM gaming system (with my modifications). One of the games I envisioned for that would be using Archive “Space Cowboys”, my converted “Space ‘Roos” defending against an invasion of blue-skinned “Retrovians”. Click those links to learn more about those forces – and more about them in a future post. For now, I needed more rust than just my rusty generators and my ruined chemical plant.
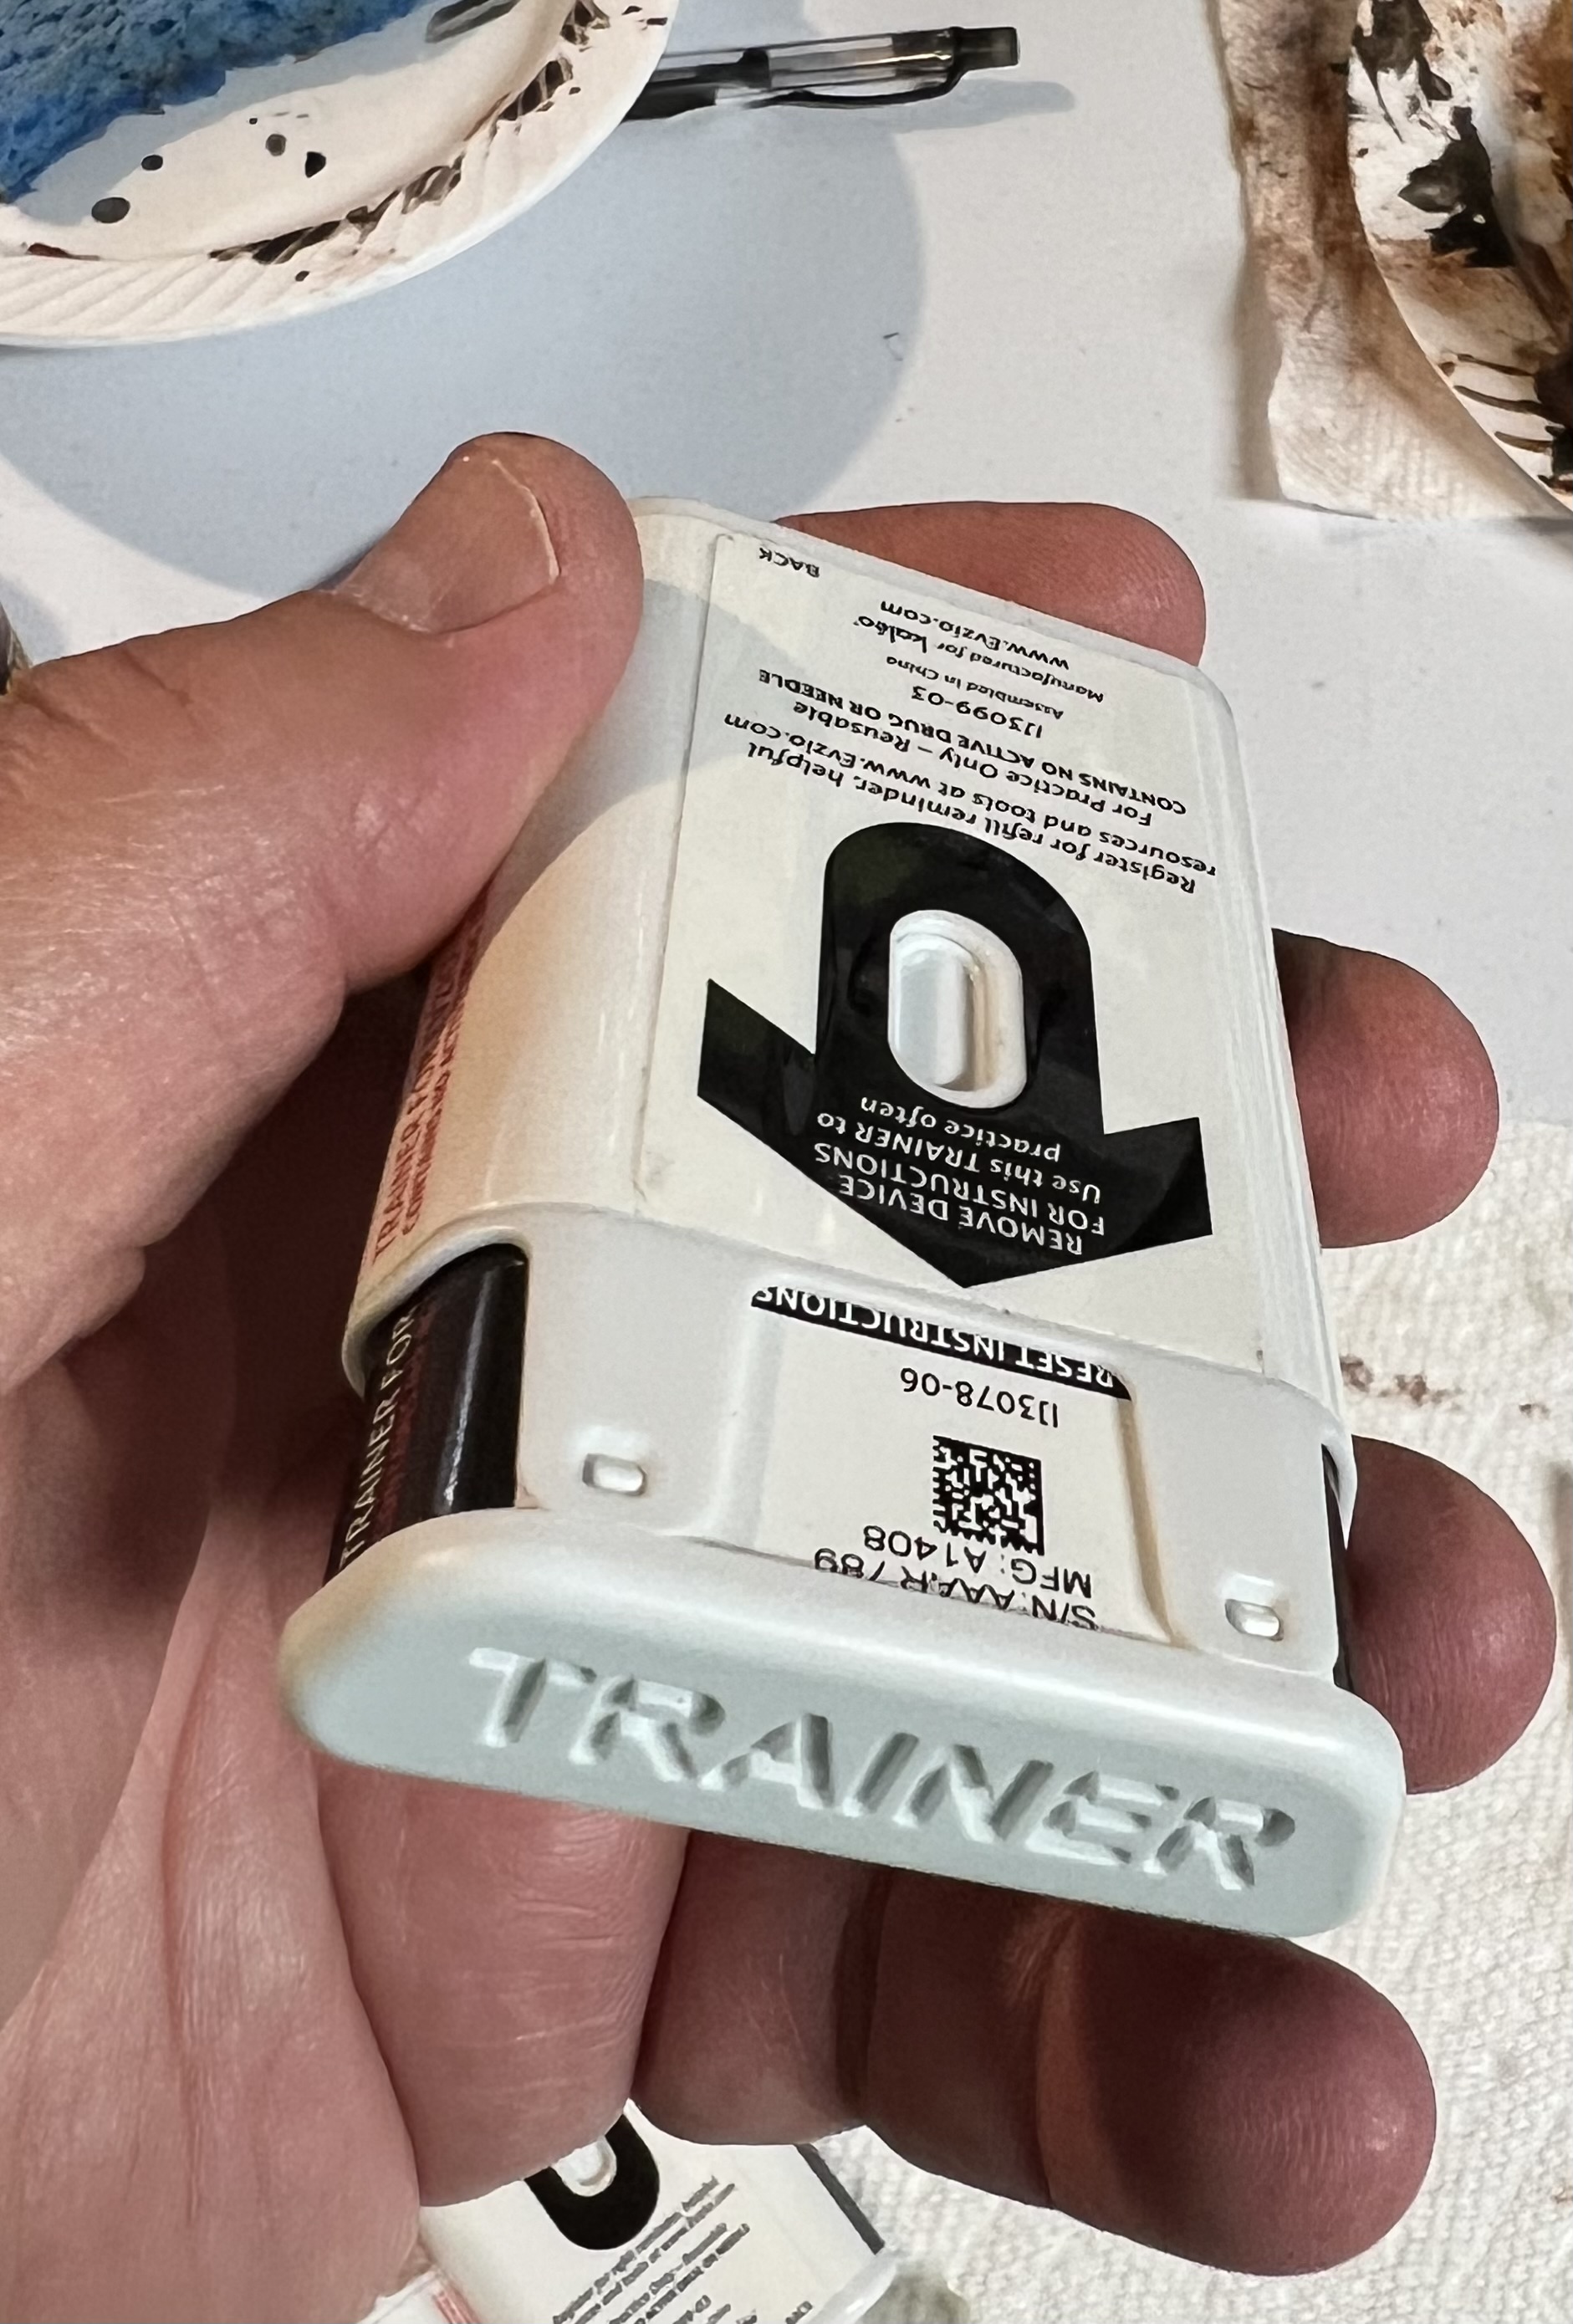
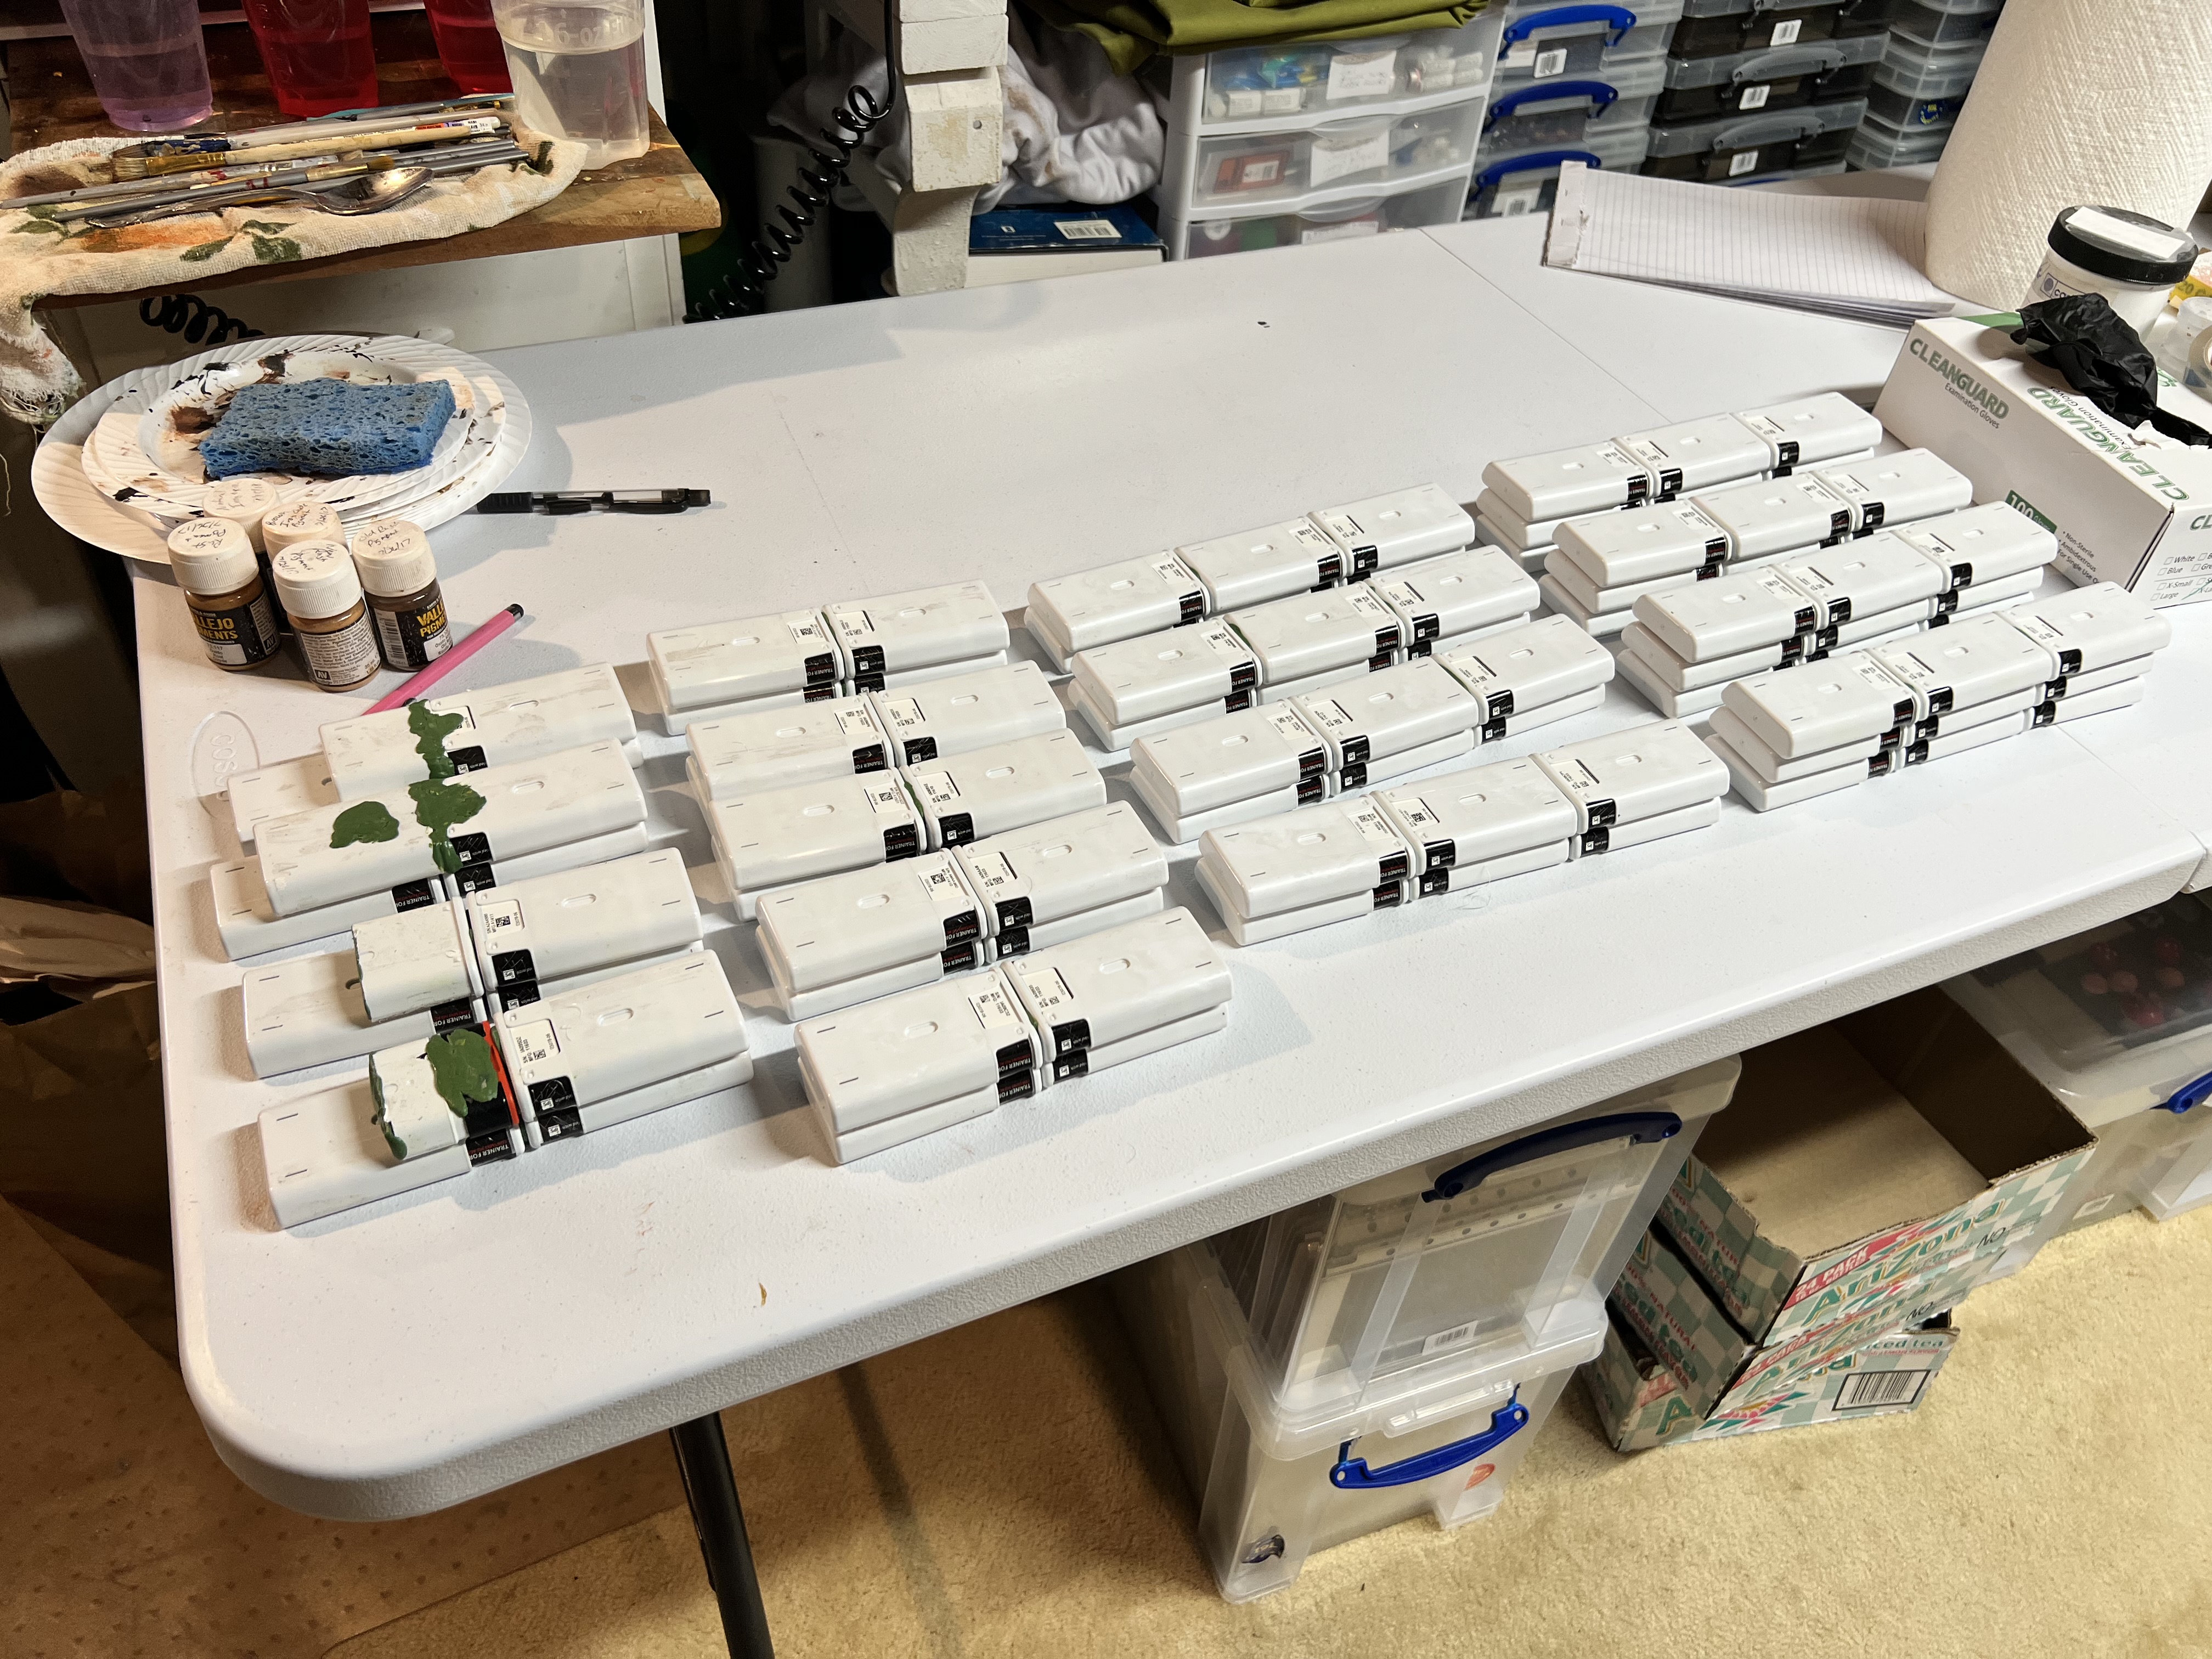
I’ve been retired now since 2019. I got laid off of my last job when the company I was working for pulled the product line off the market. Never found a replacement gig. Back to the product I was selling – it was a pharmaceutical autoinjector device. We had dozens of electronic trainer devices we handed out to potential customers. These trainers acted like the real thing except without any needles or drug inside. After the layoff happened, I had a bunch of them, and was told by my former employer to just throw them away. They had a unique shape, like a cross between a card deck and a tapered brick. The outer layer was plastic, with a label glued on to it. I was running retro sci-fi games, and thought these would be good for making walls. I saved them, and they waited to fulfill their destiny until December 2025!
An example of the trainer.
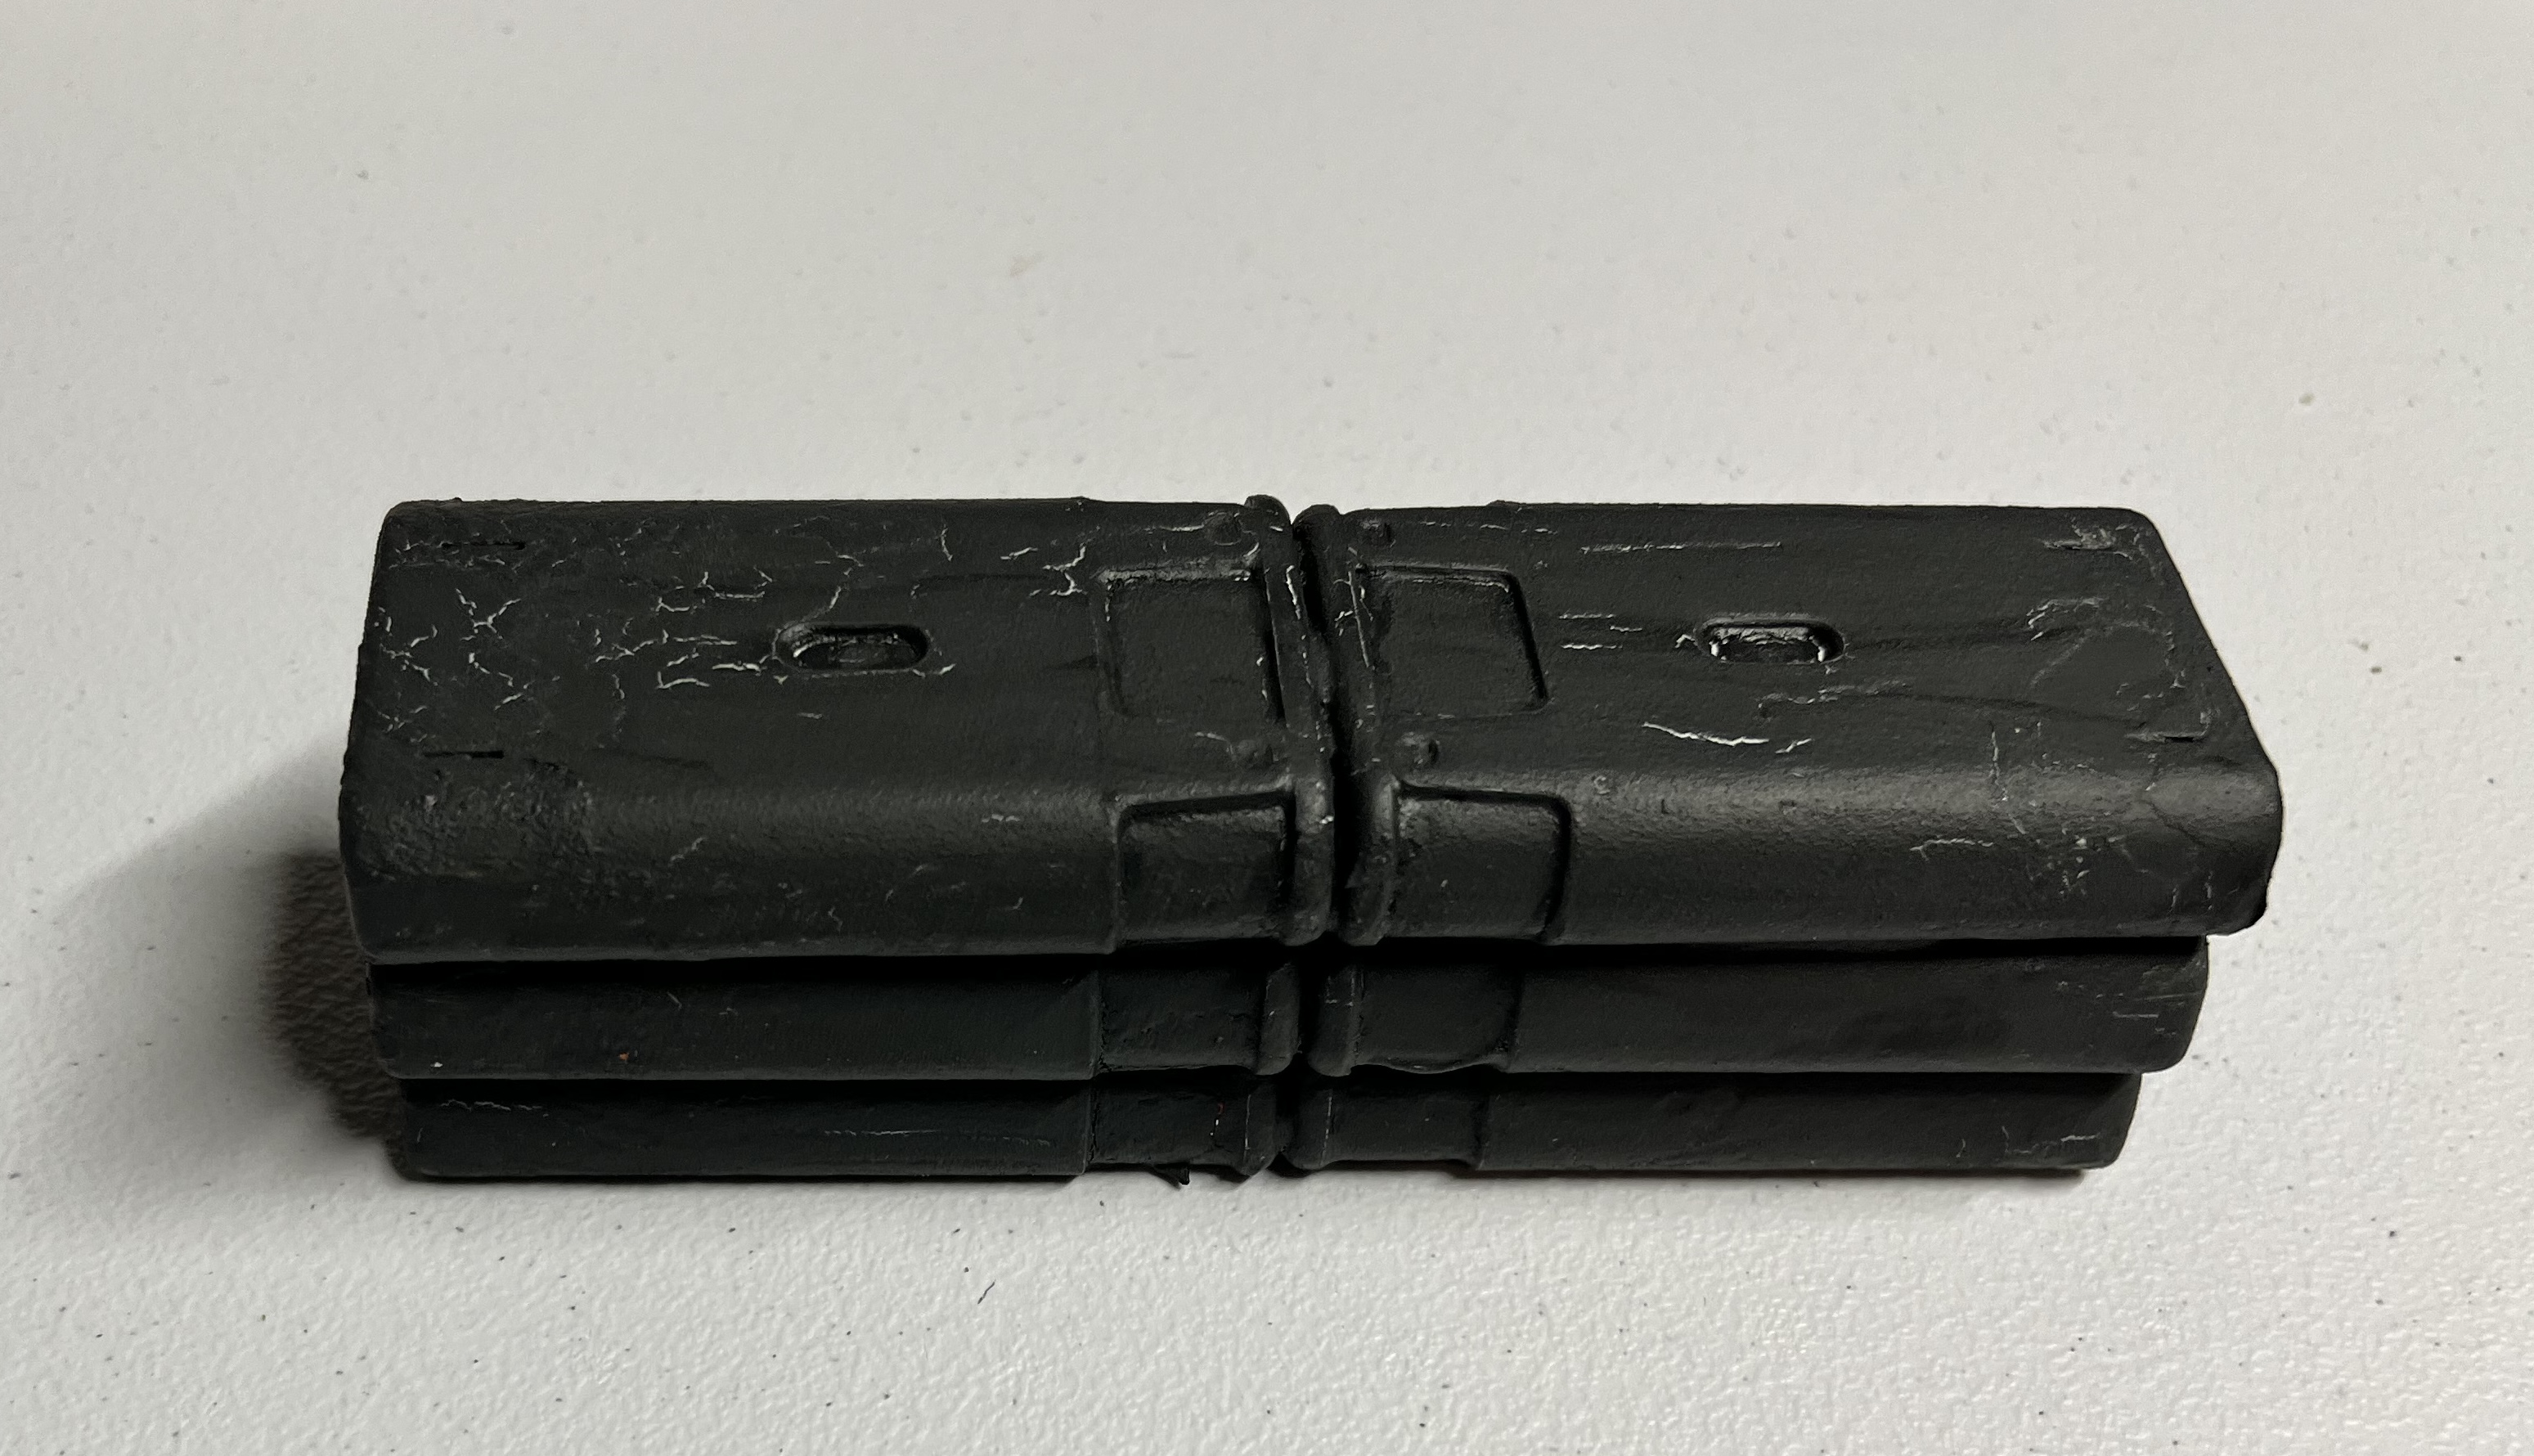
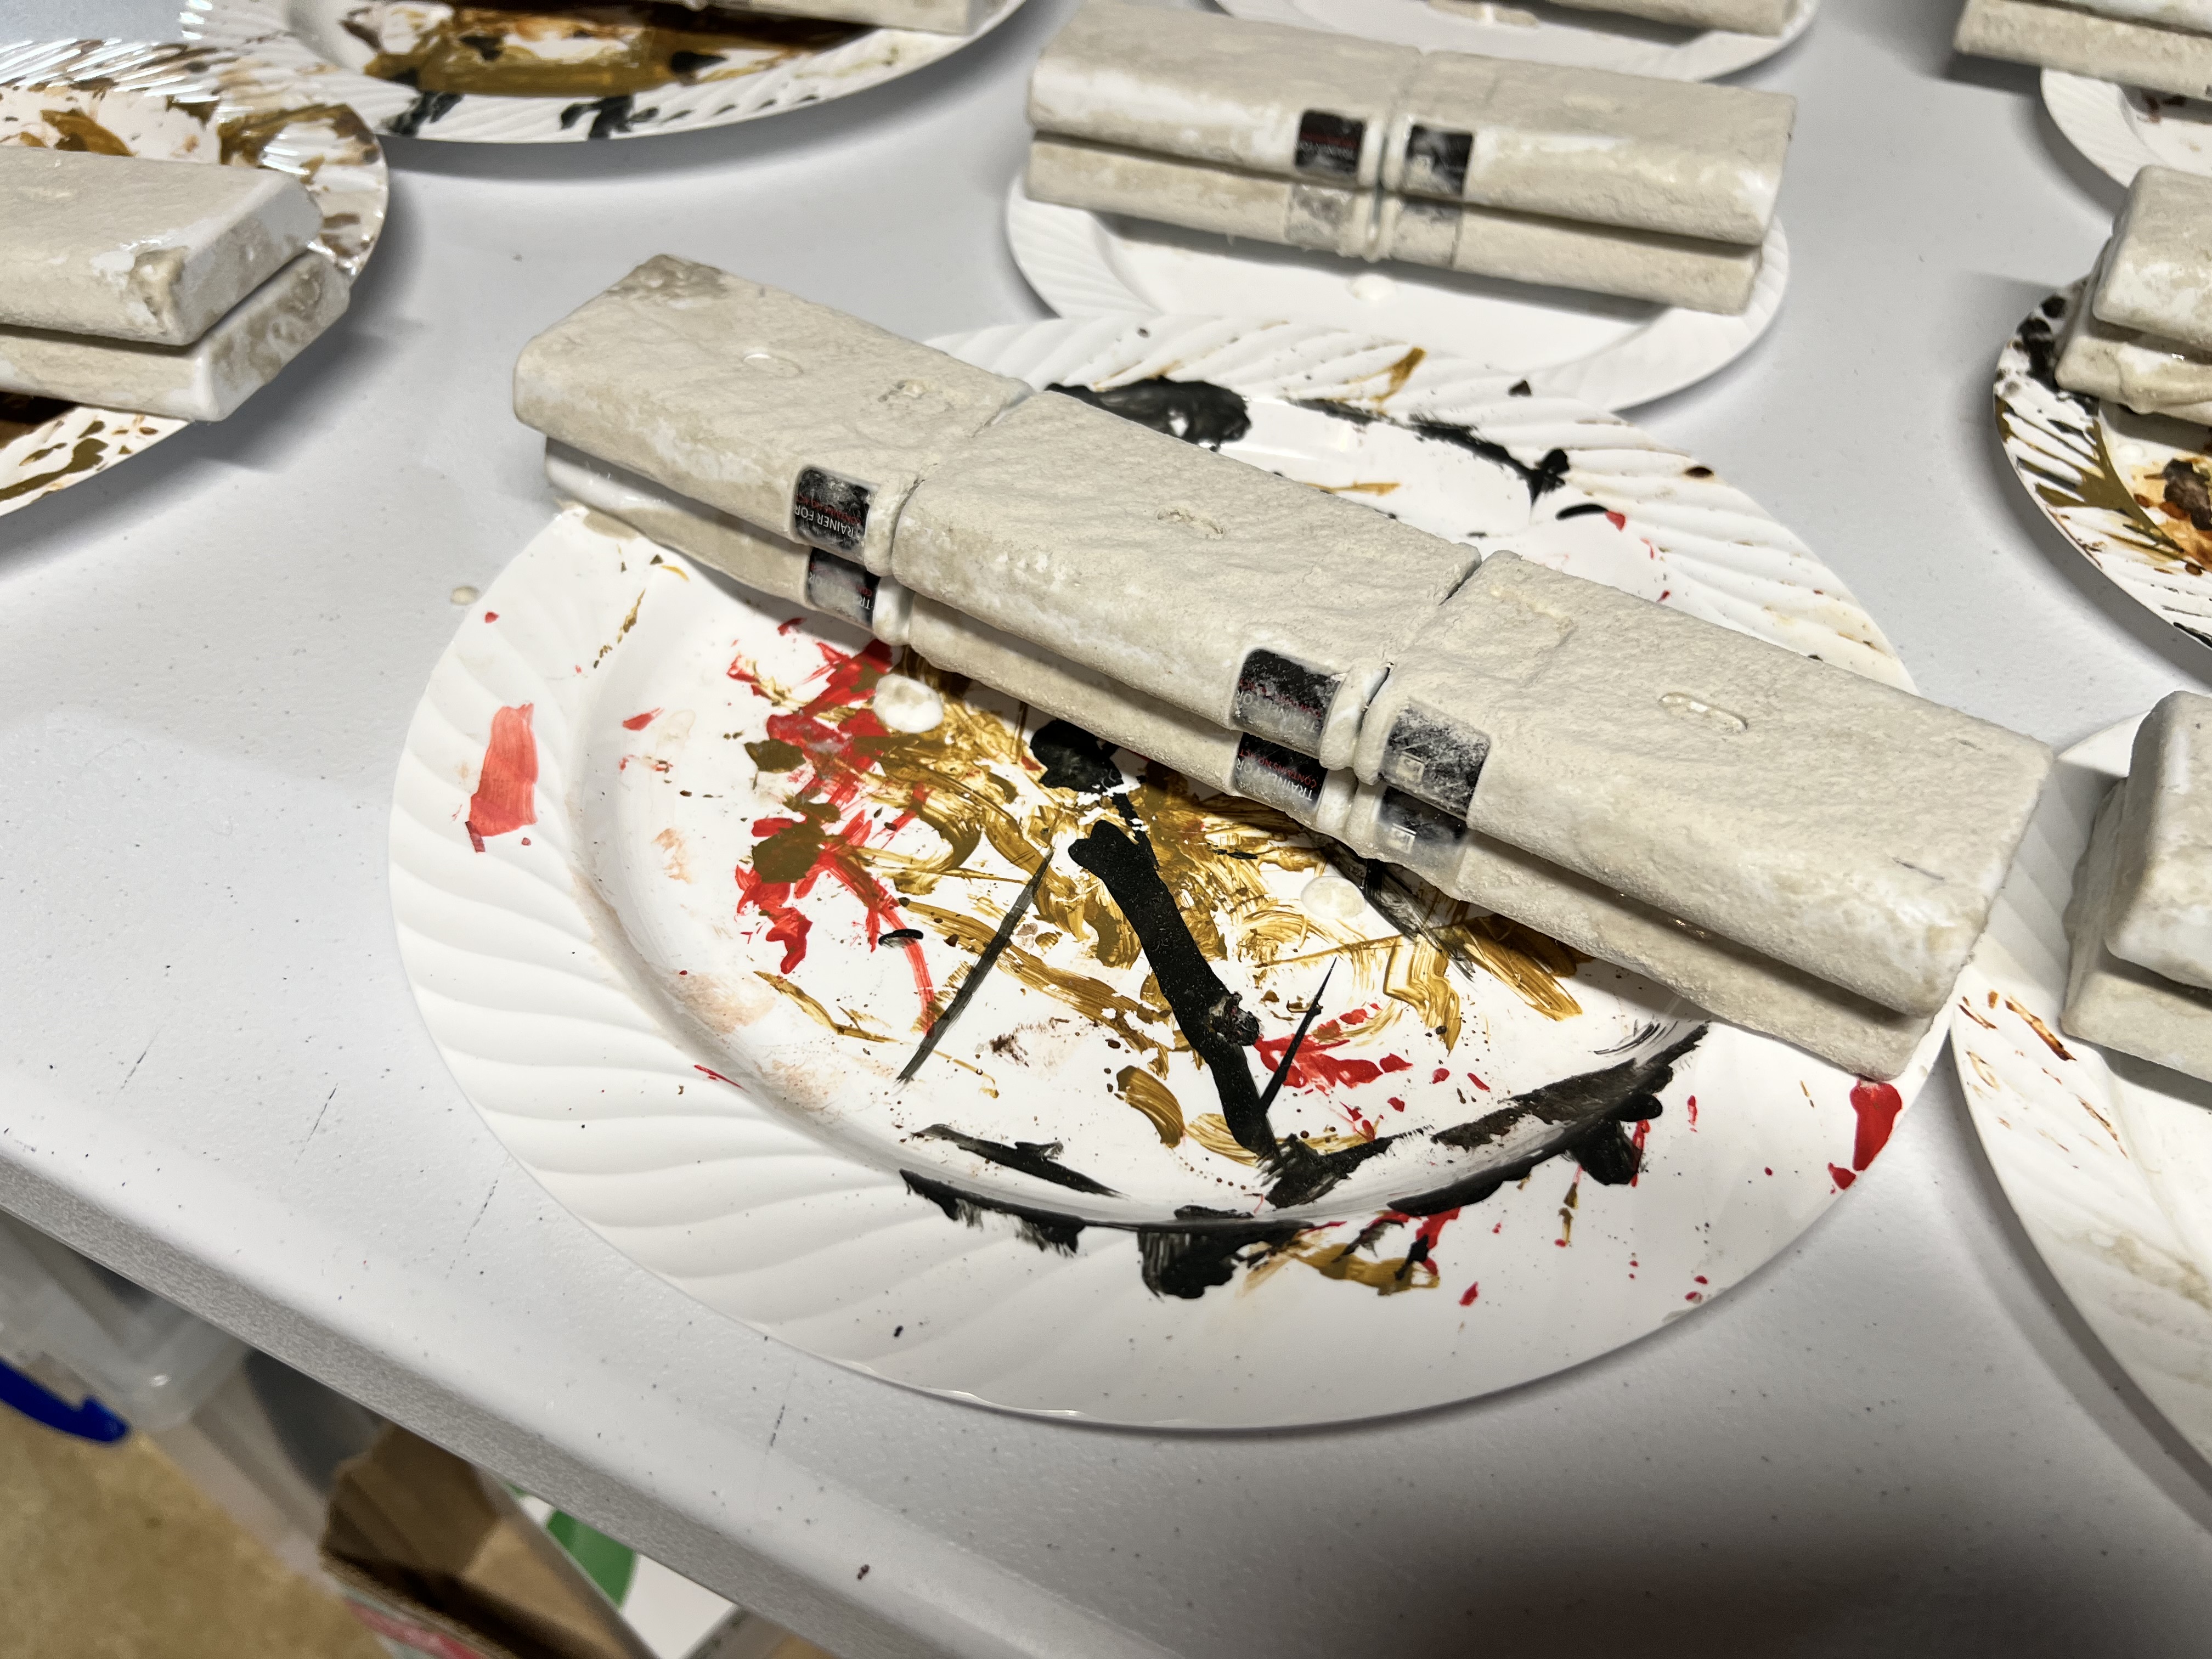
To make sure what I wanted to do would work (and to learn from any errors), I went with a prototype. I used an Exacto blade to remove the outer label. Then, I sanded the exterior to make it rough. To attach multiple units together, green stuff was the solution. After that hardened, I coated the outside of the attached trainers with PVA – followed by a dusting of chinchilla dust on the glue. When that combination had hardened, I primed the combinations with black primer.
First prototype primed.
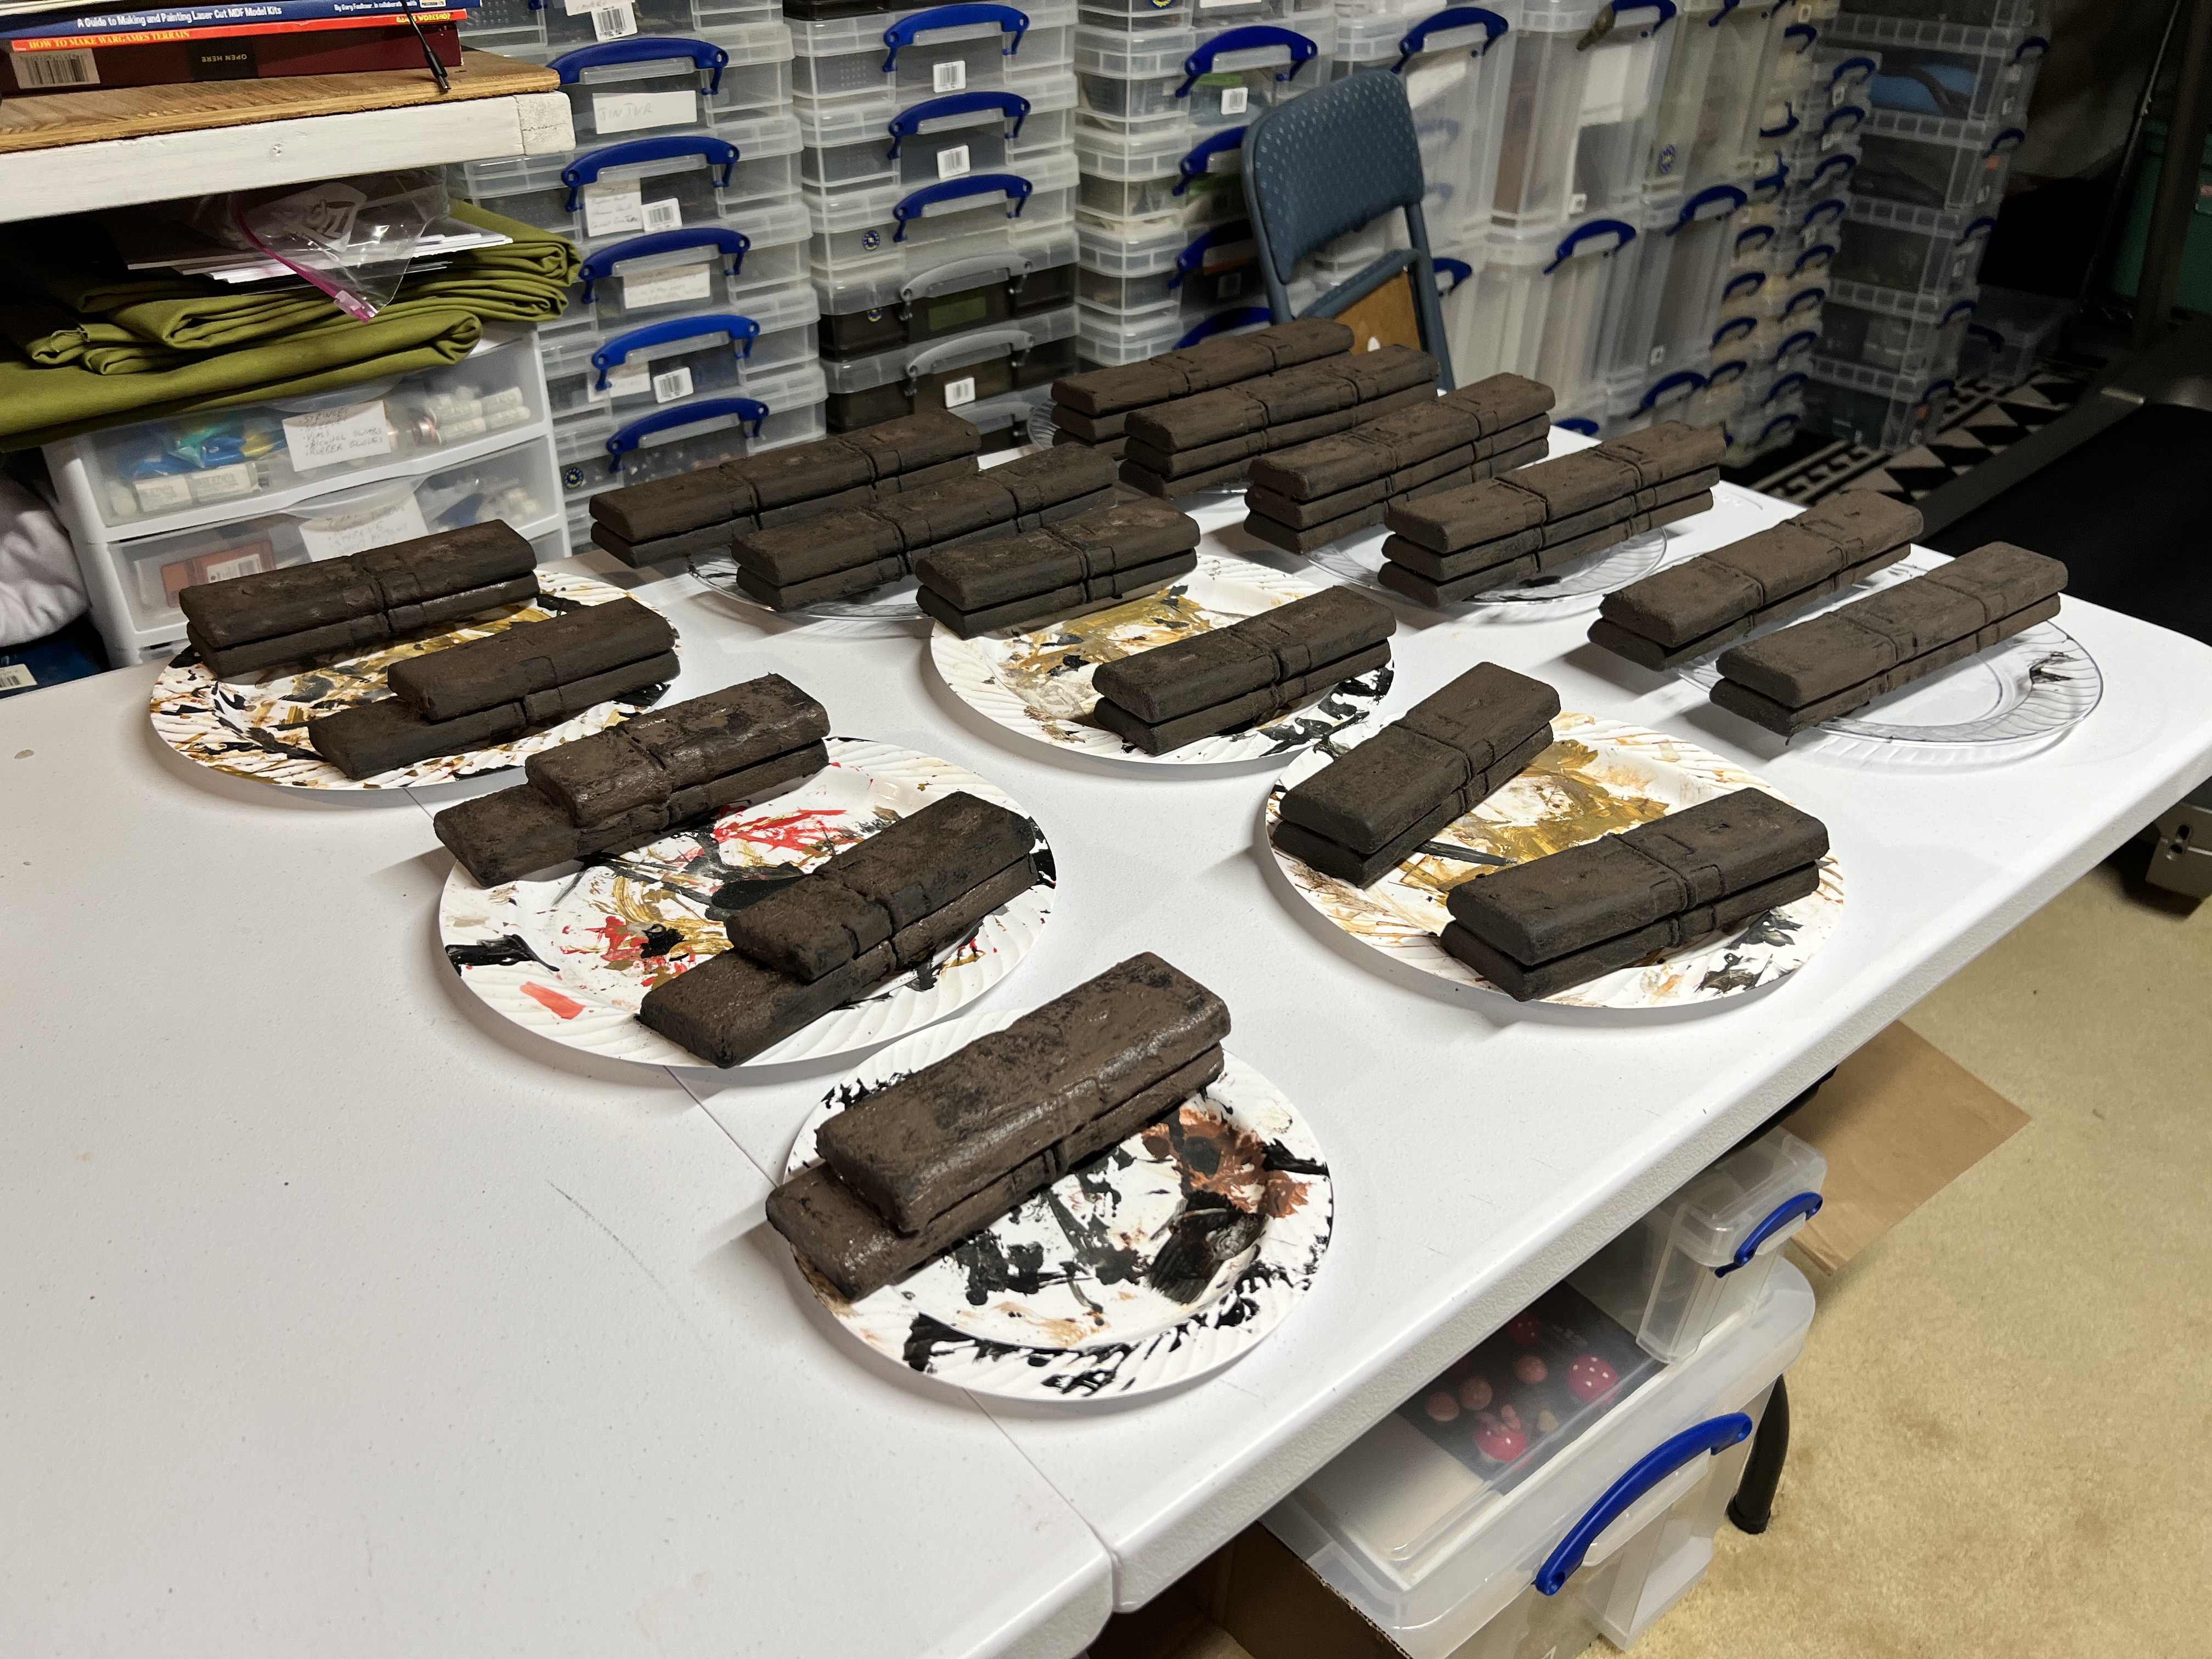
From this point, I used corrosion texture paint(let that harden), then used a number of rusting paints and pigments. I really liked the results and moved on to making two large batches of different combinations.
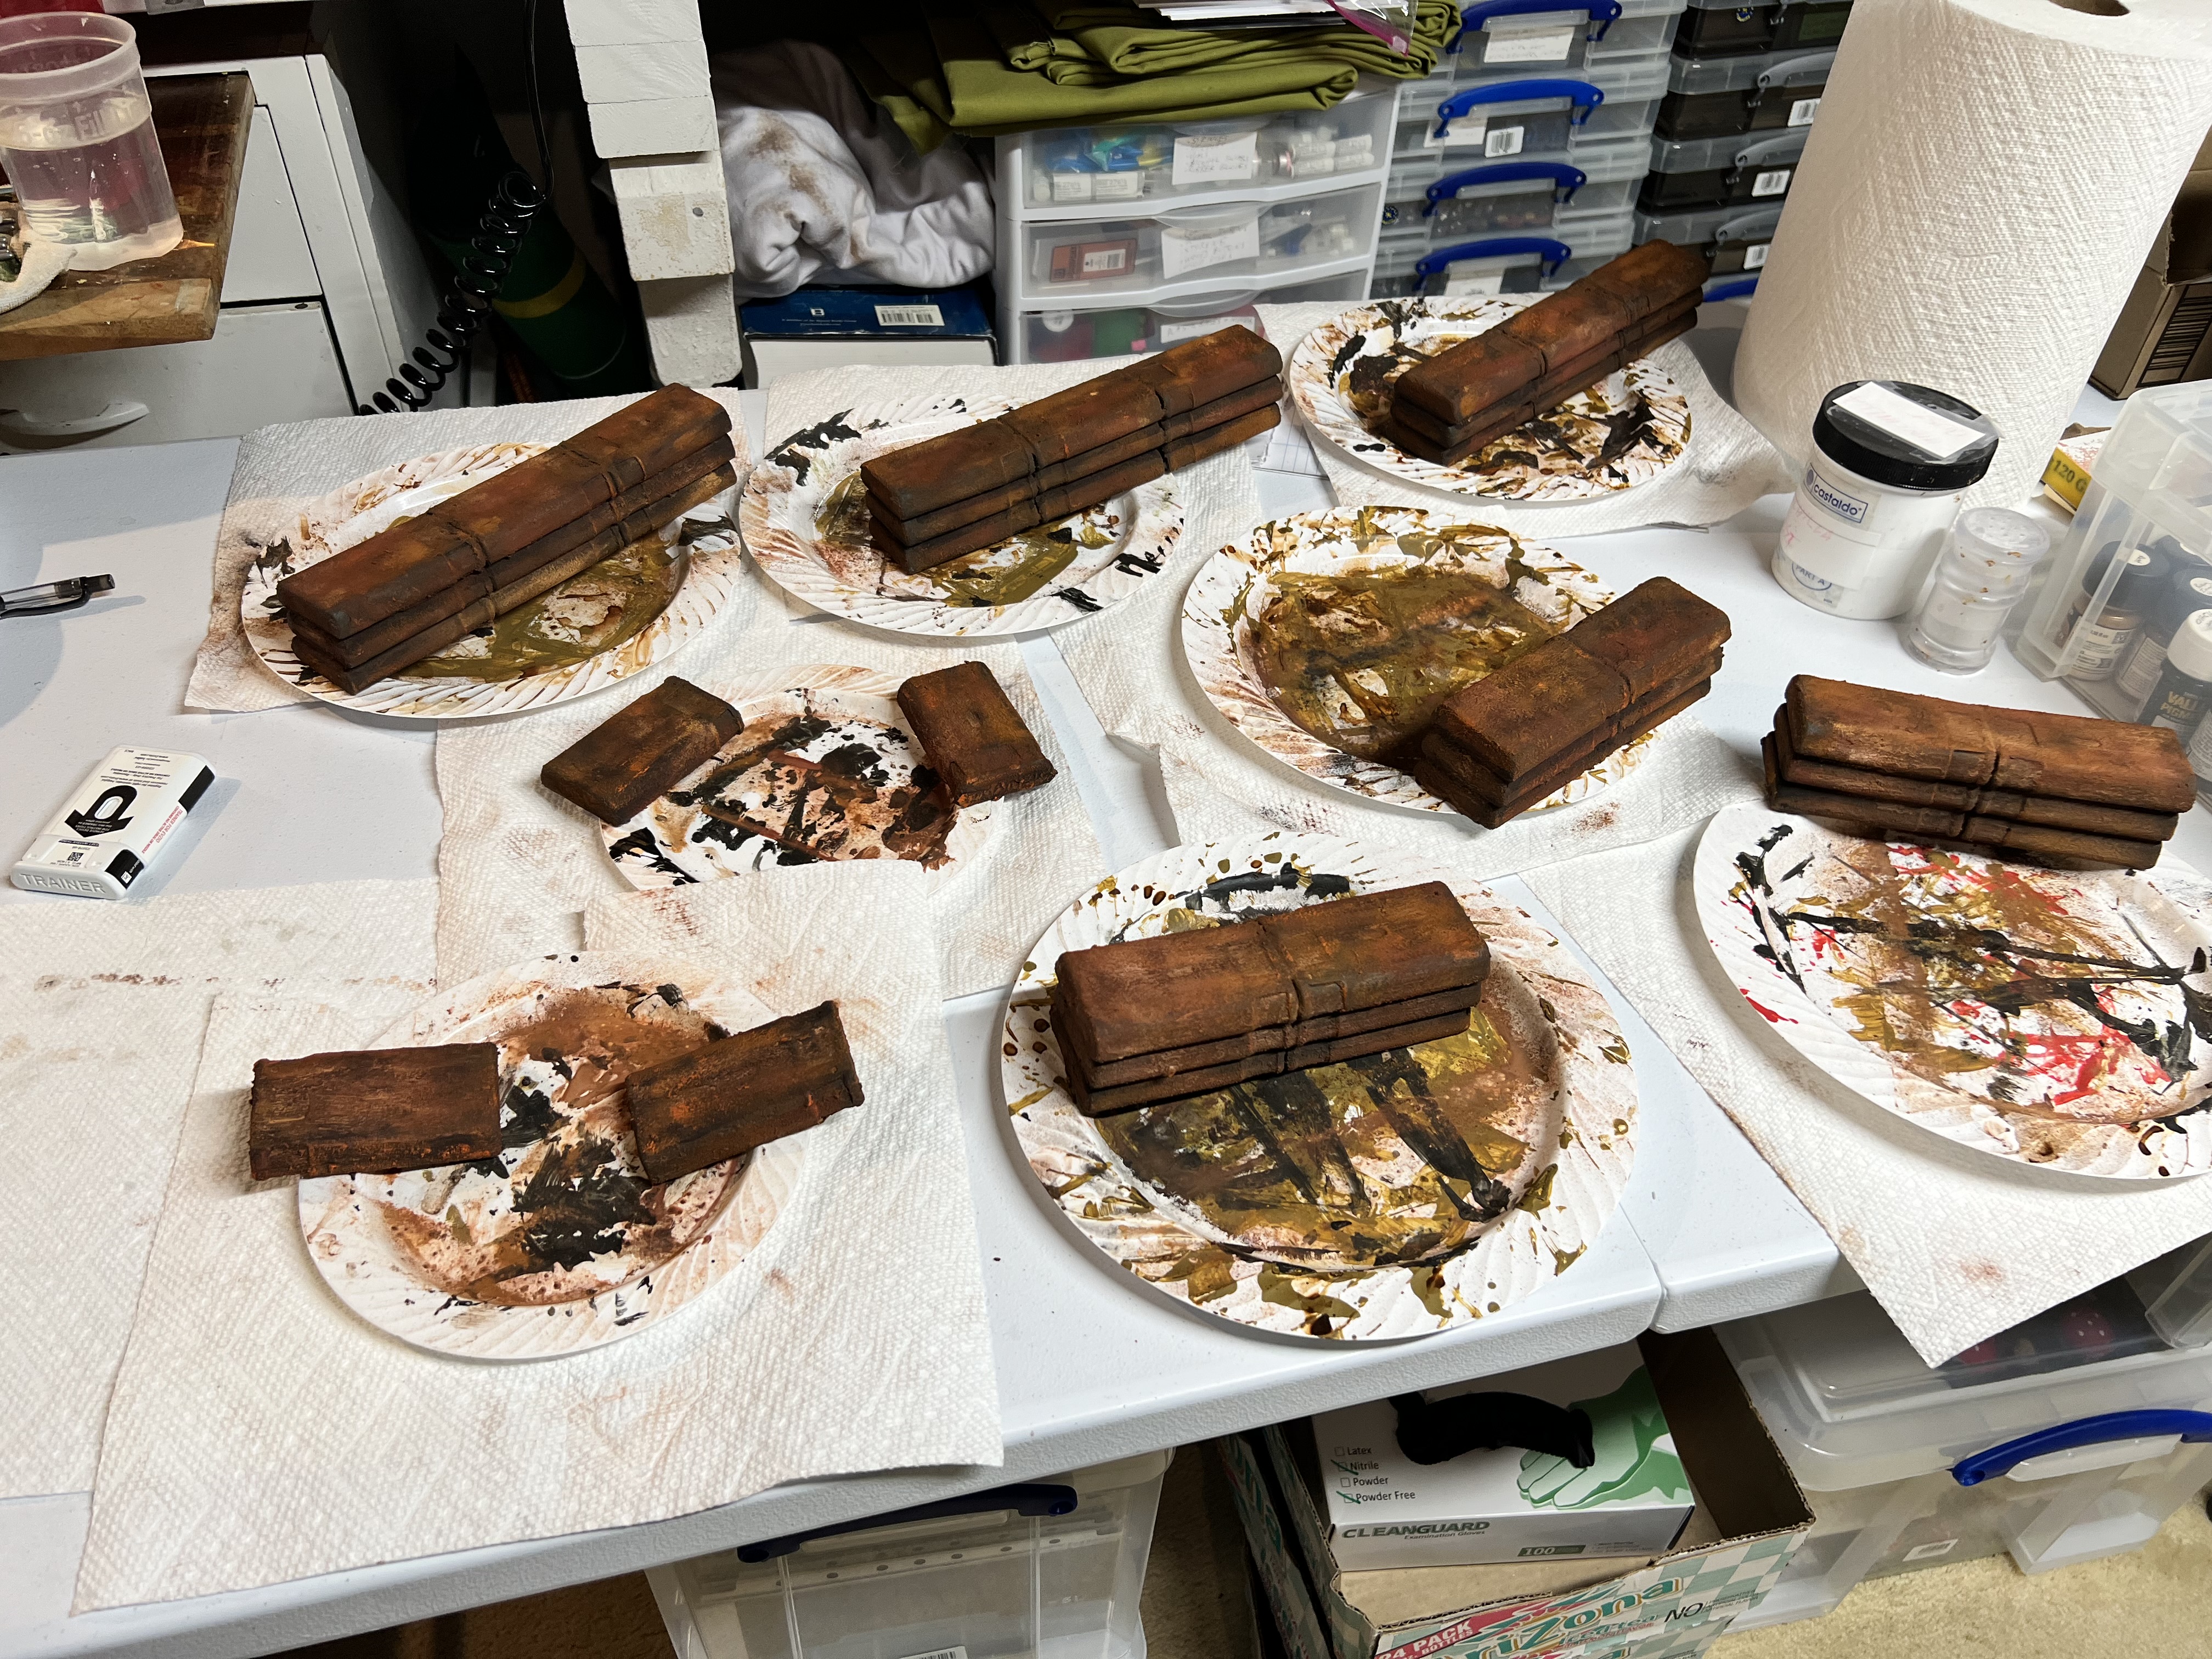
Walls after labels removed and sanded.PVA and chinchilla dust application.Corrosion texture paint applied and drying.First half-batch of walls after being rusted up.Close up shot of a 3×3 combination.Second half batch done.
I ended up with 27 sections = a total of 17.8′ worth of rusty wall.
And here they are in total finished up mid-December.:
27 sections of rusty walls!
With the walls done, it was time to get some verticality for the tabletop. And get them done BEFORE Christmas.
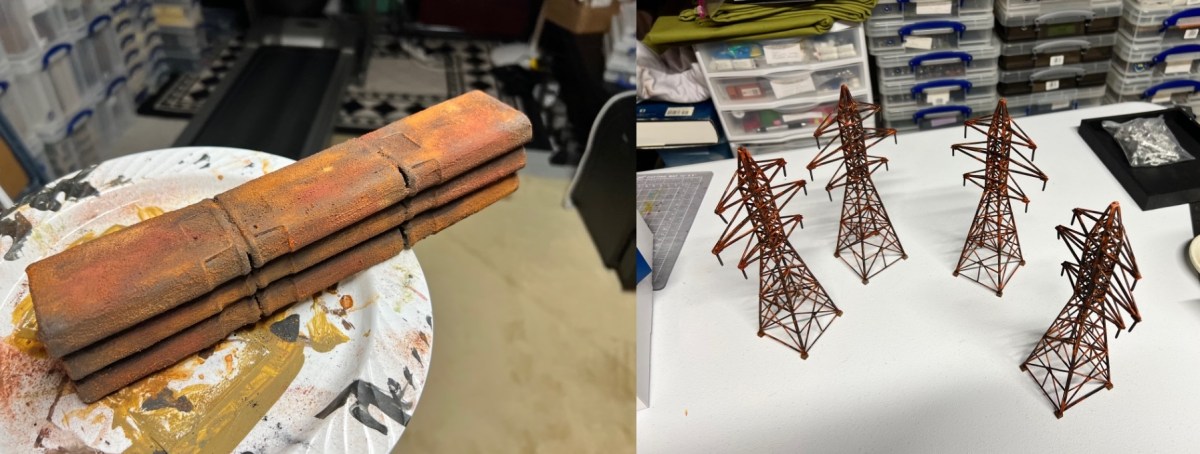
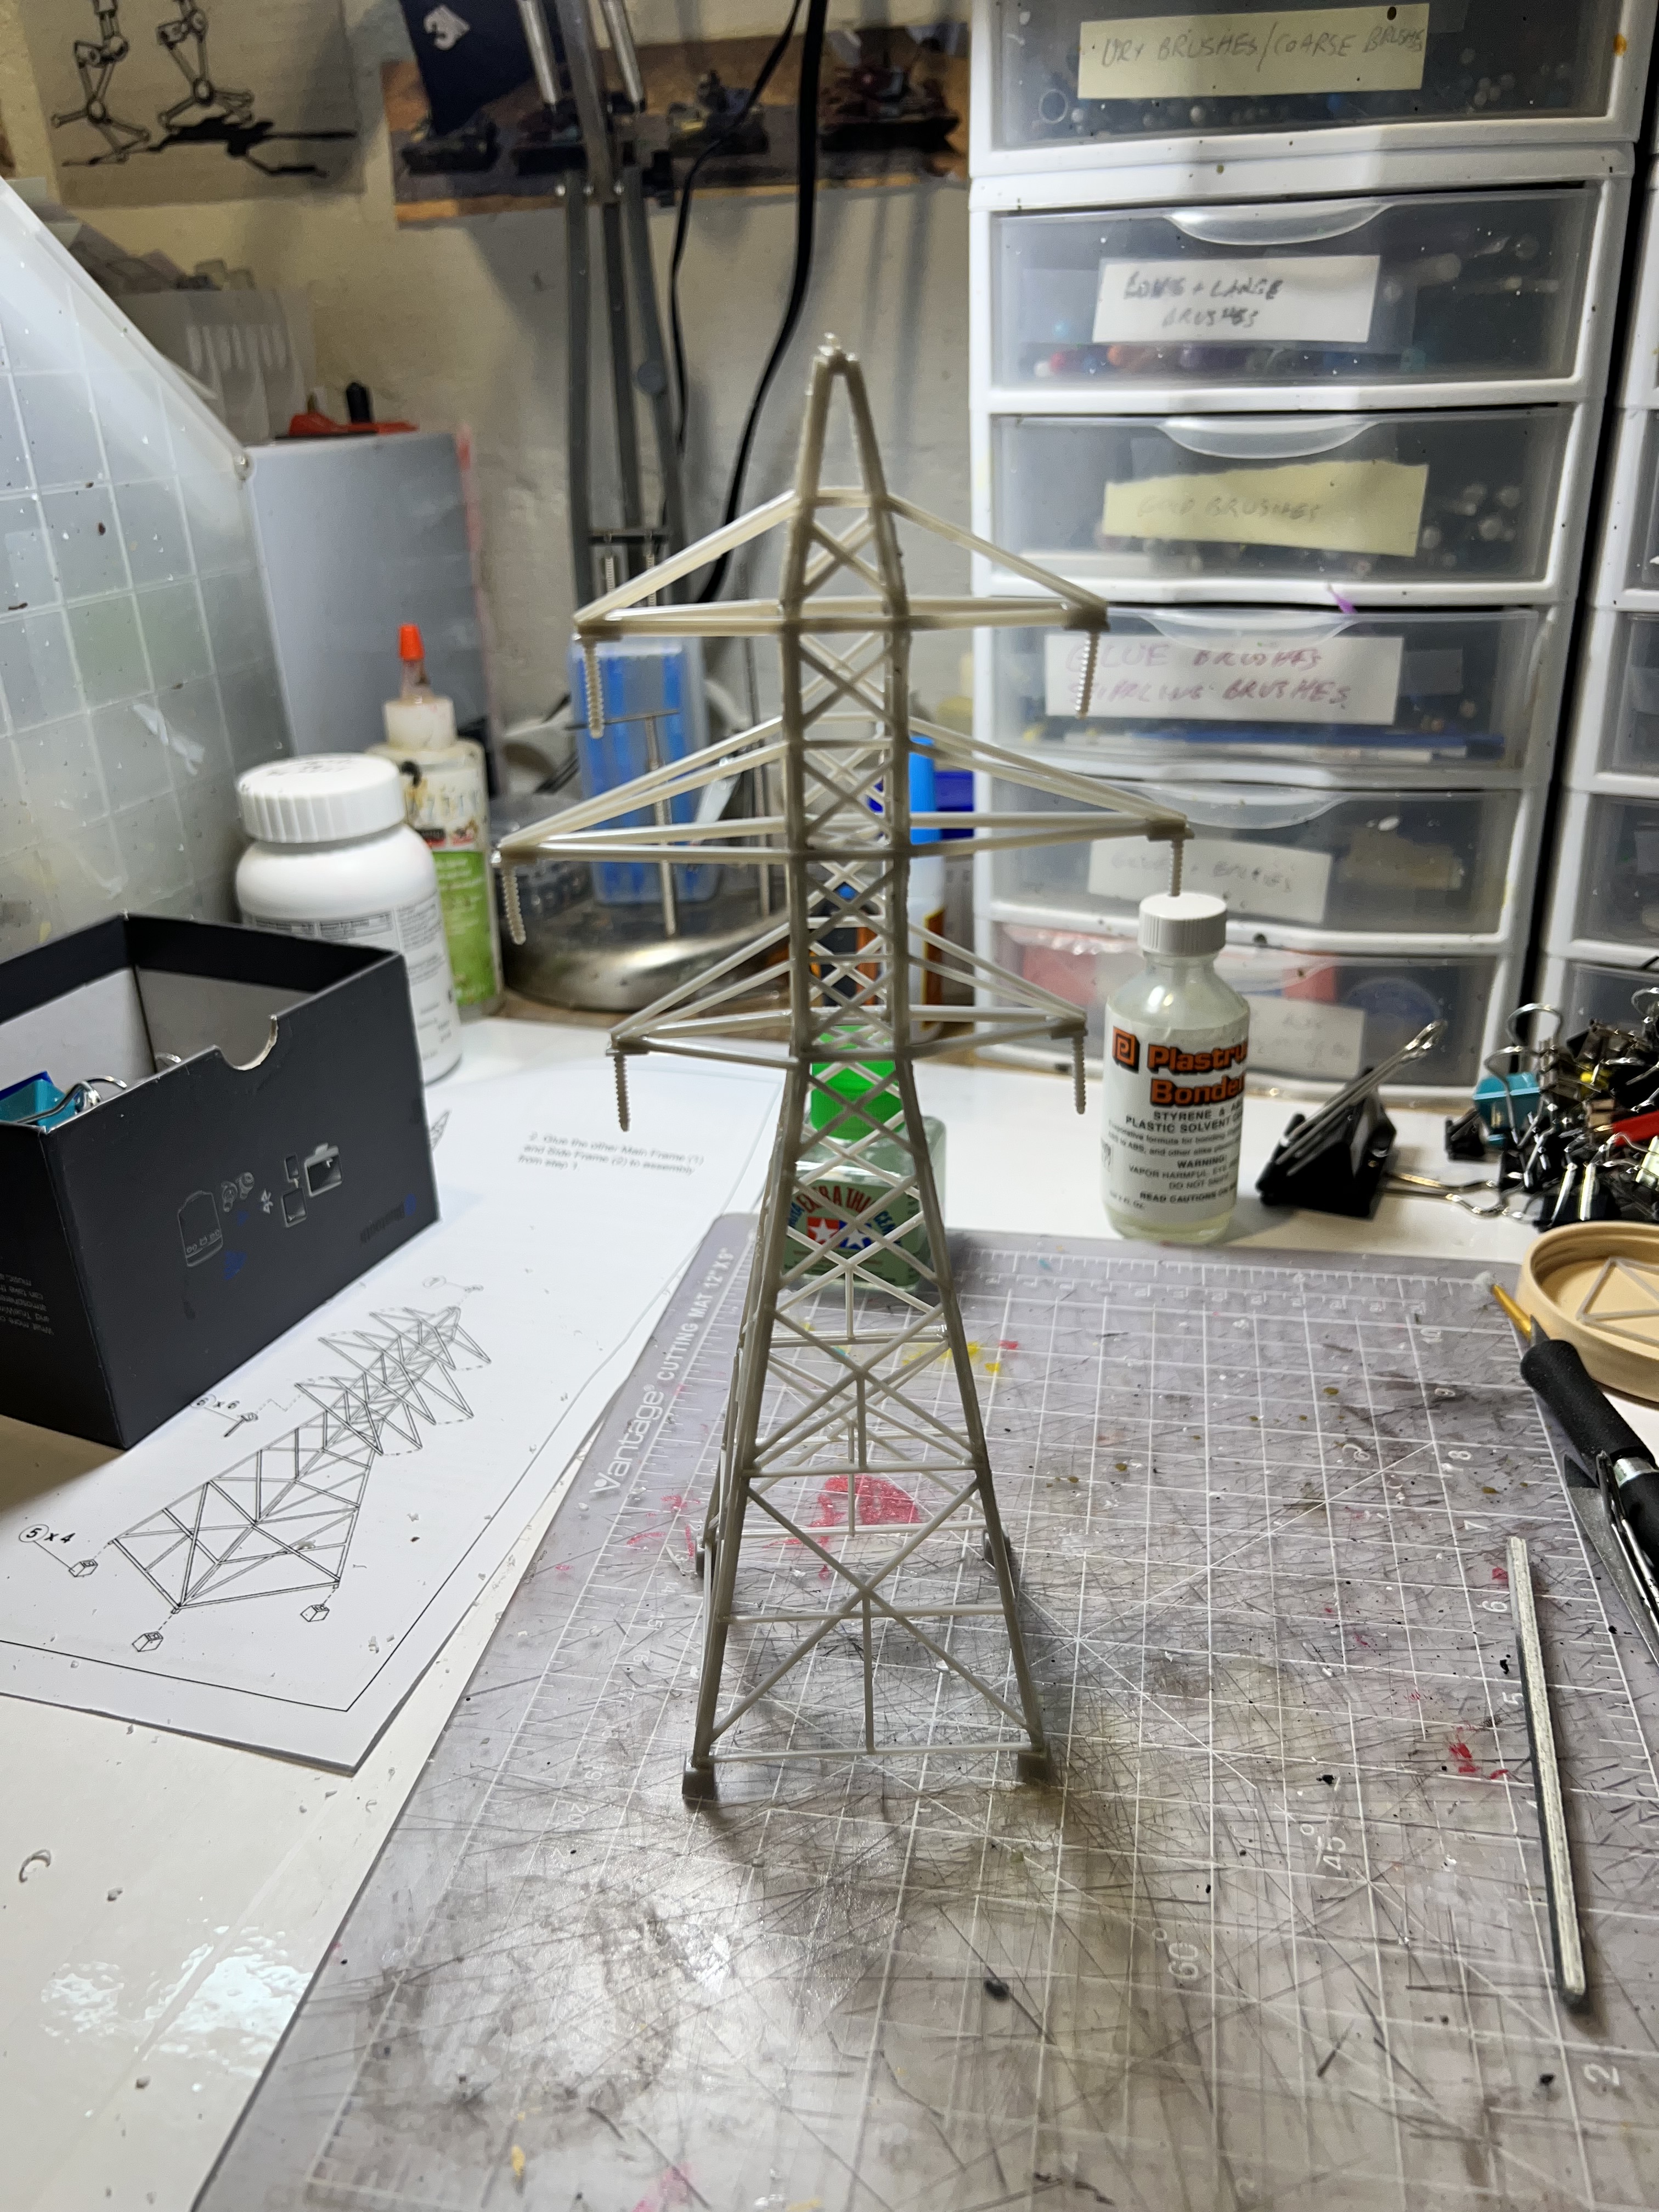
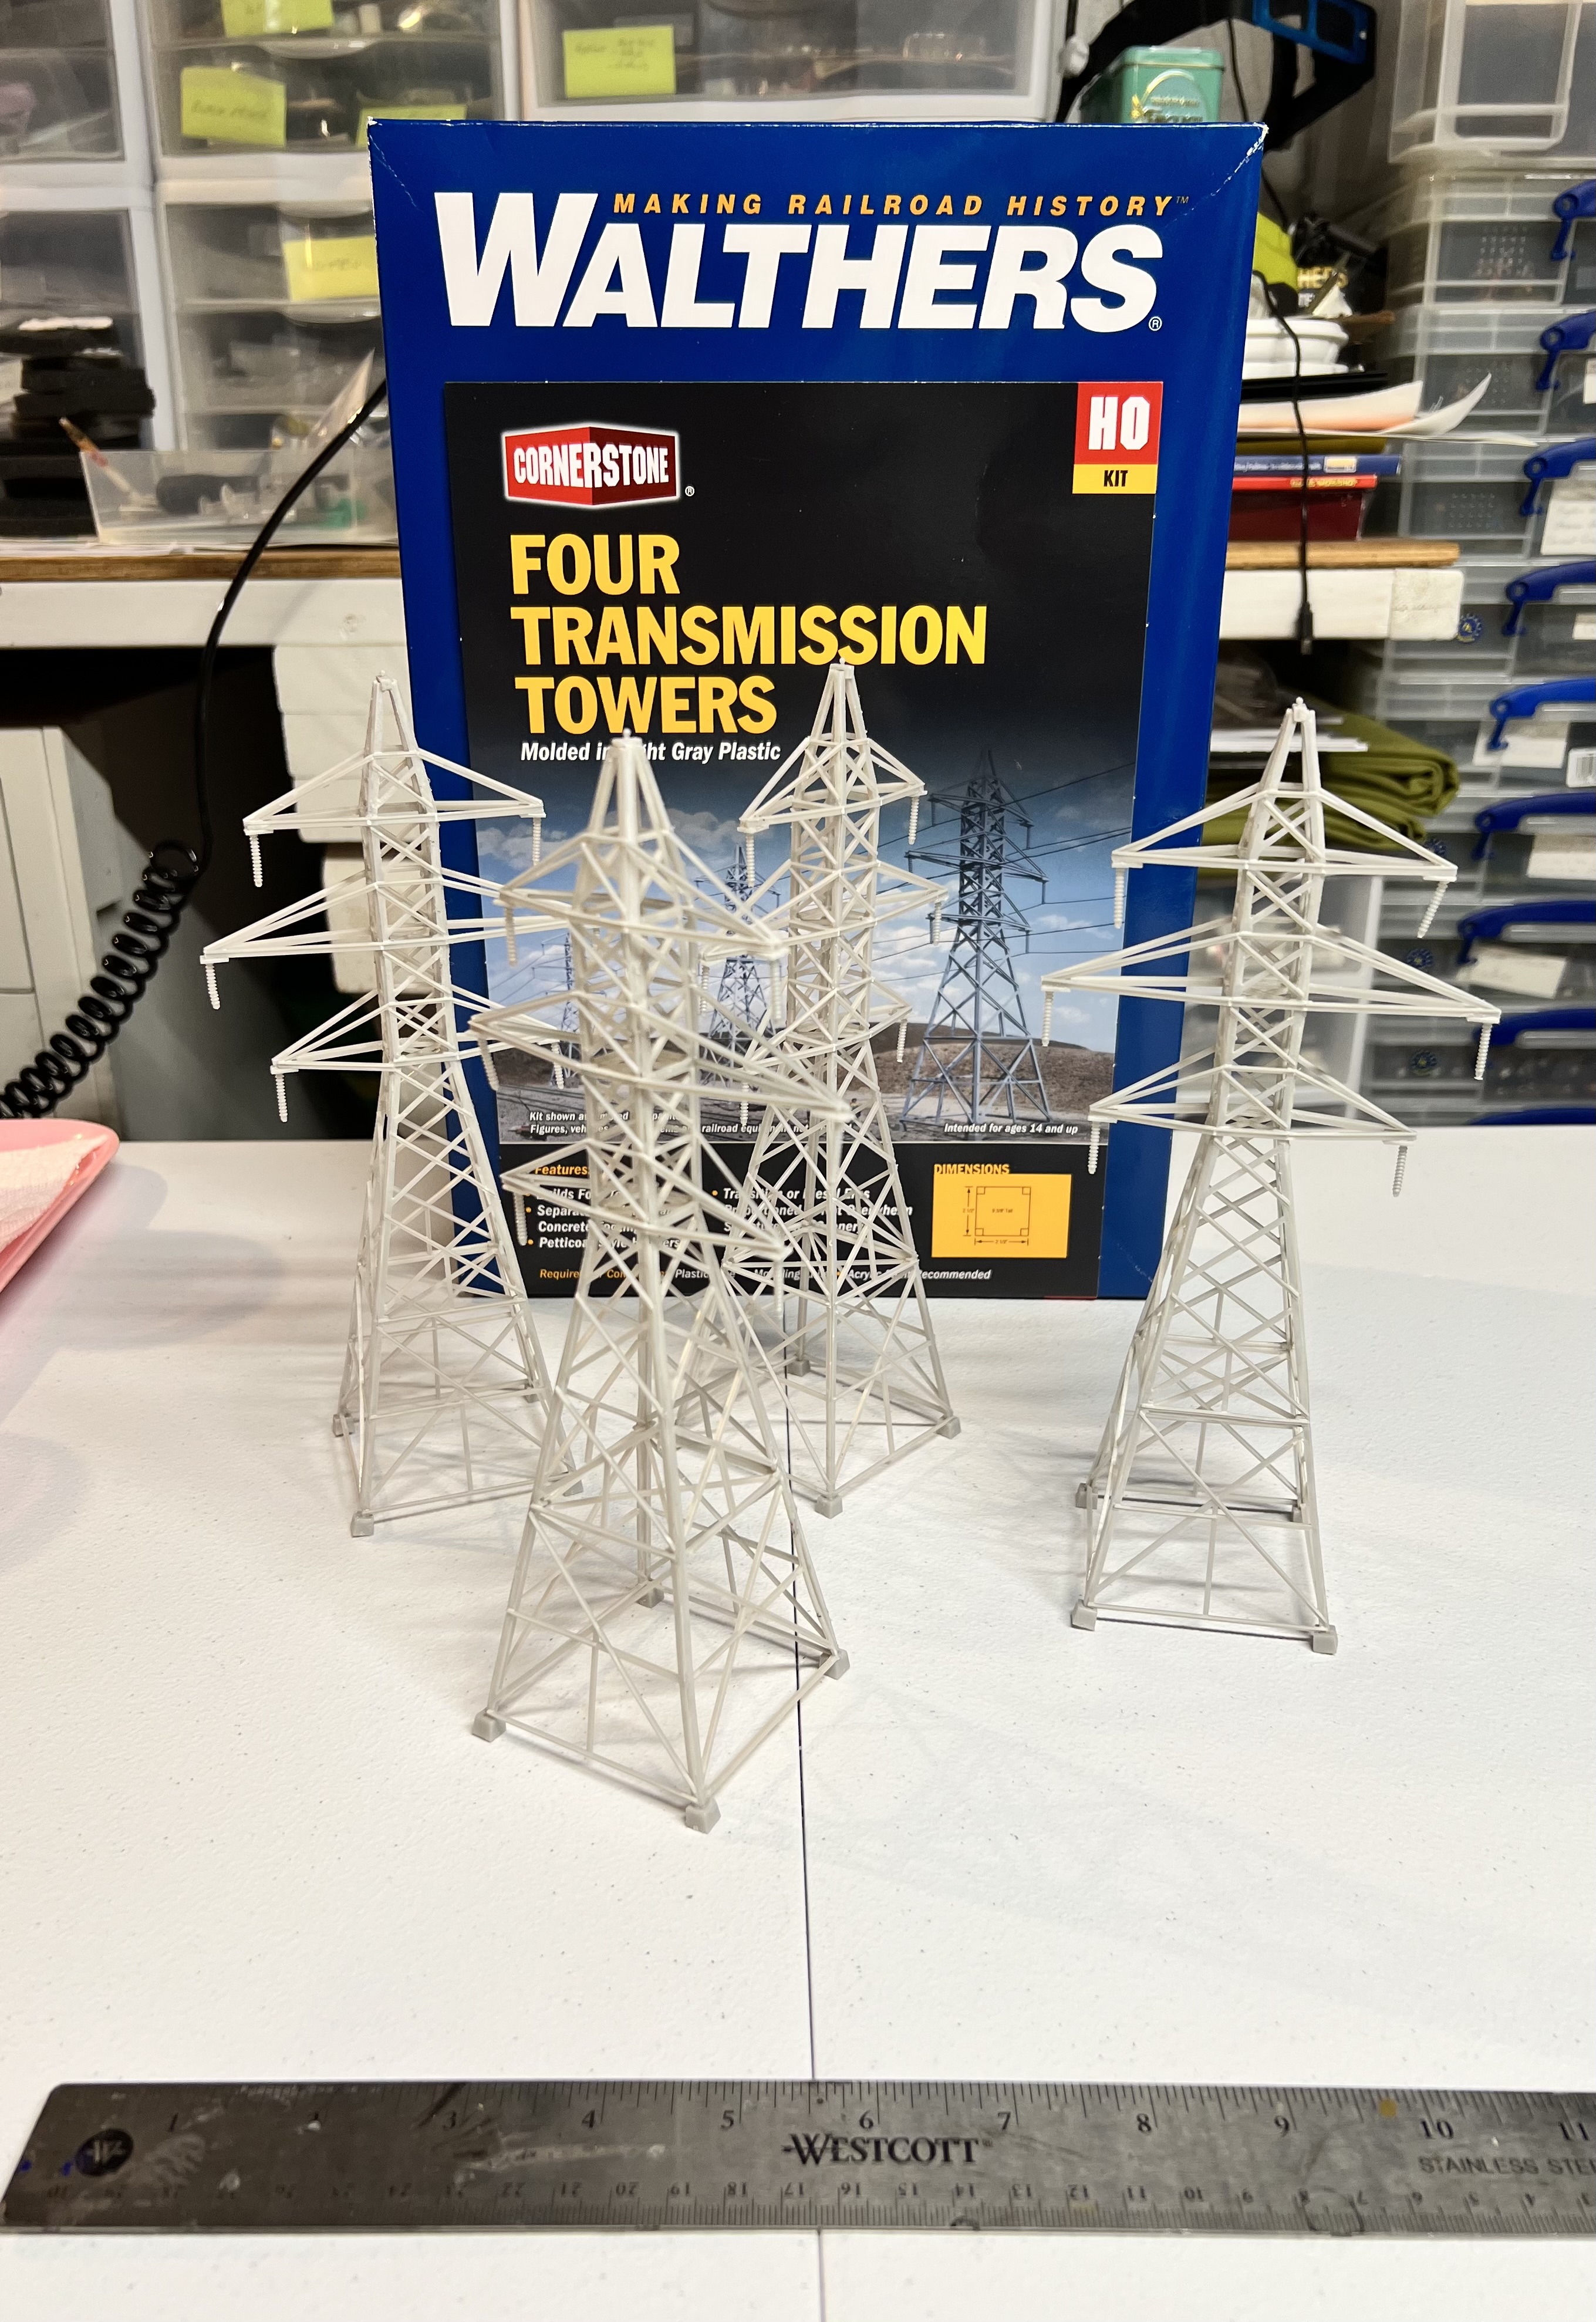
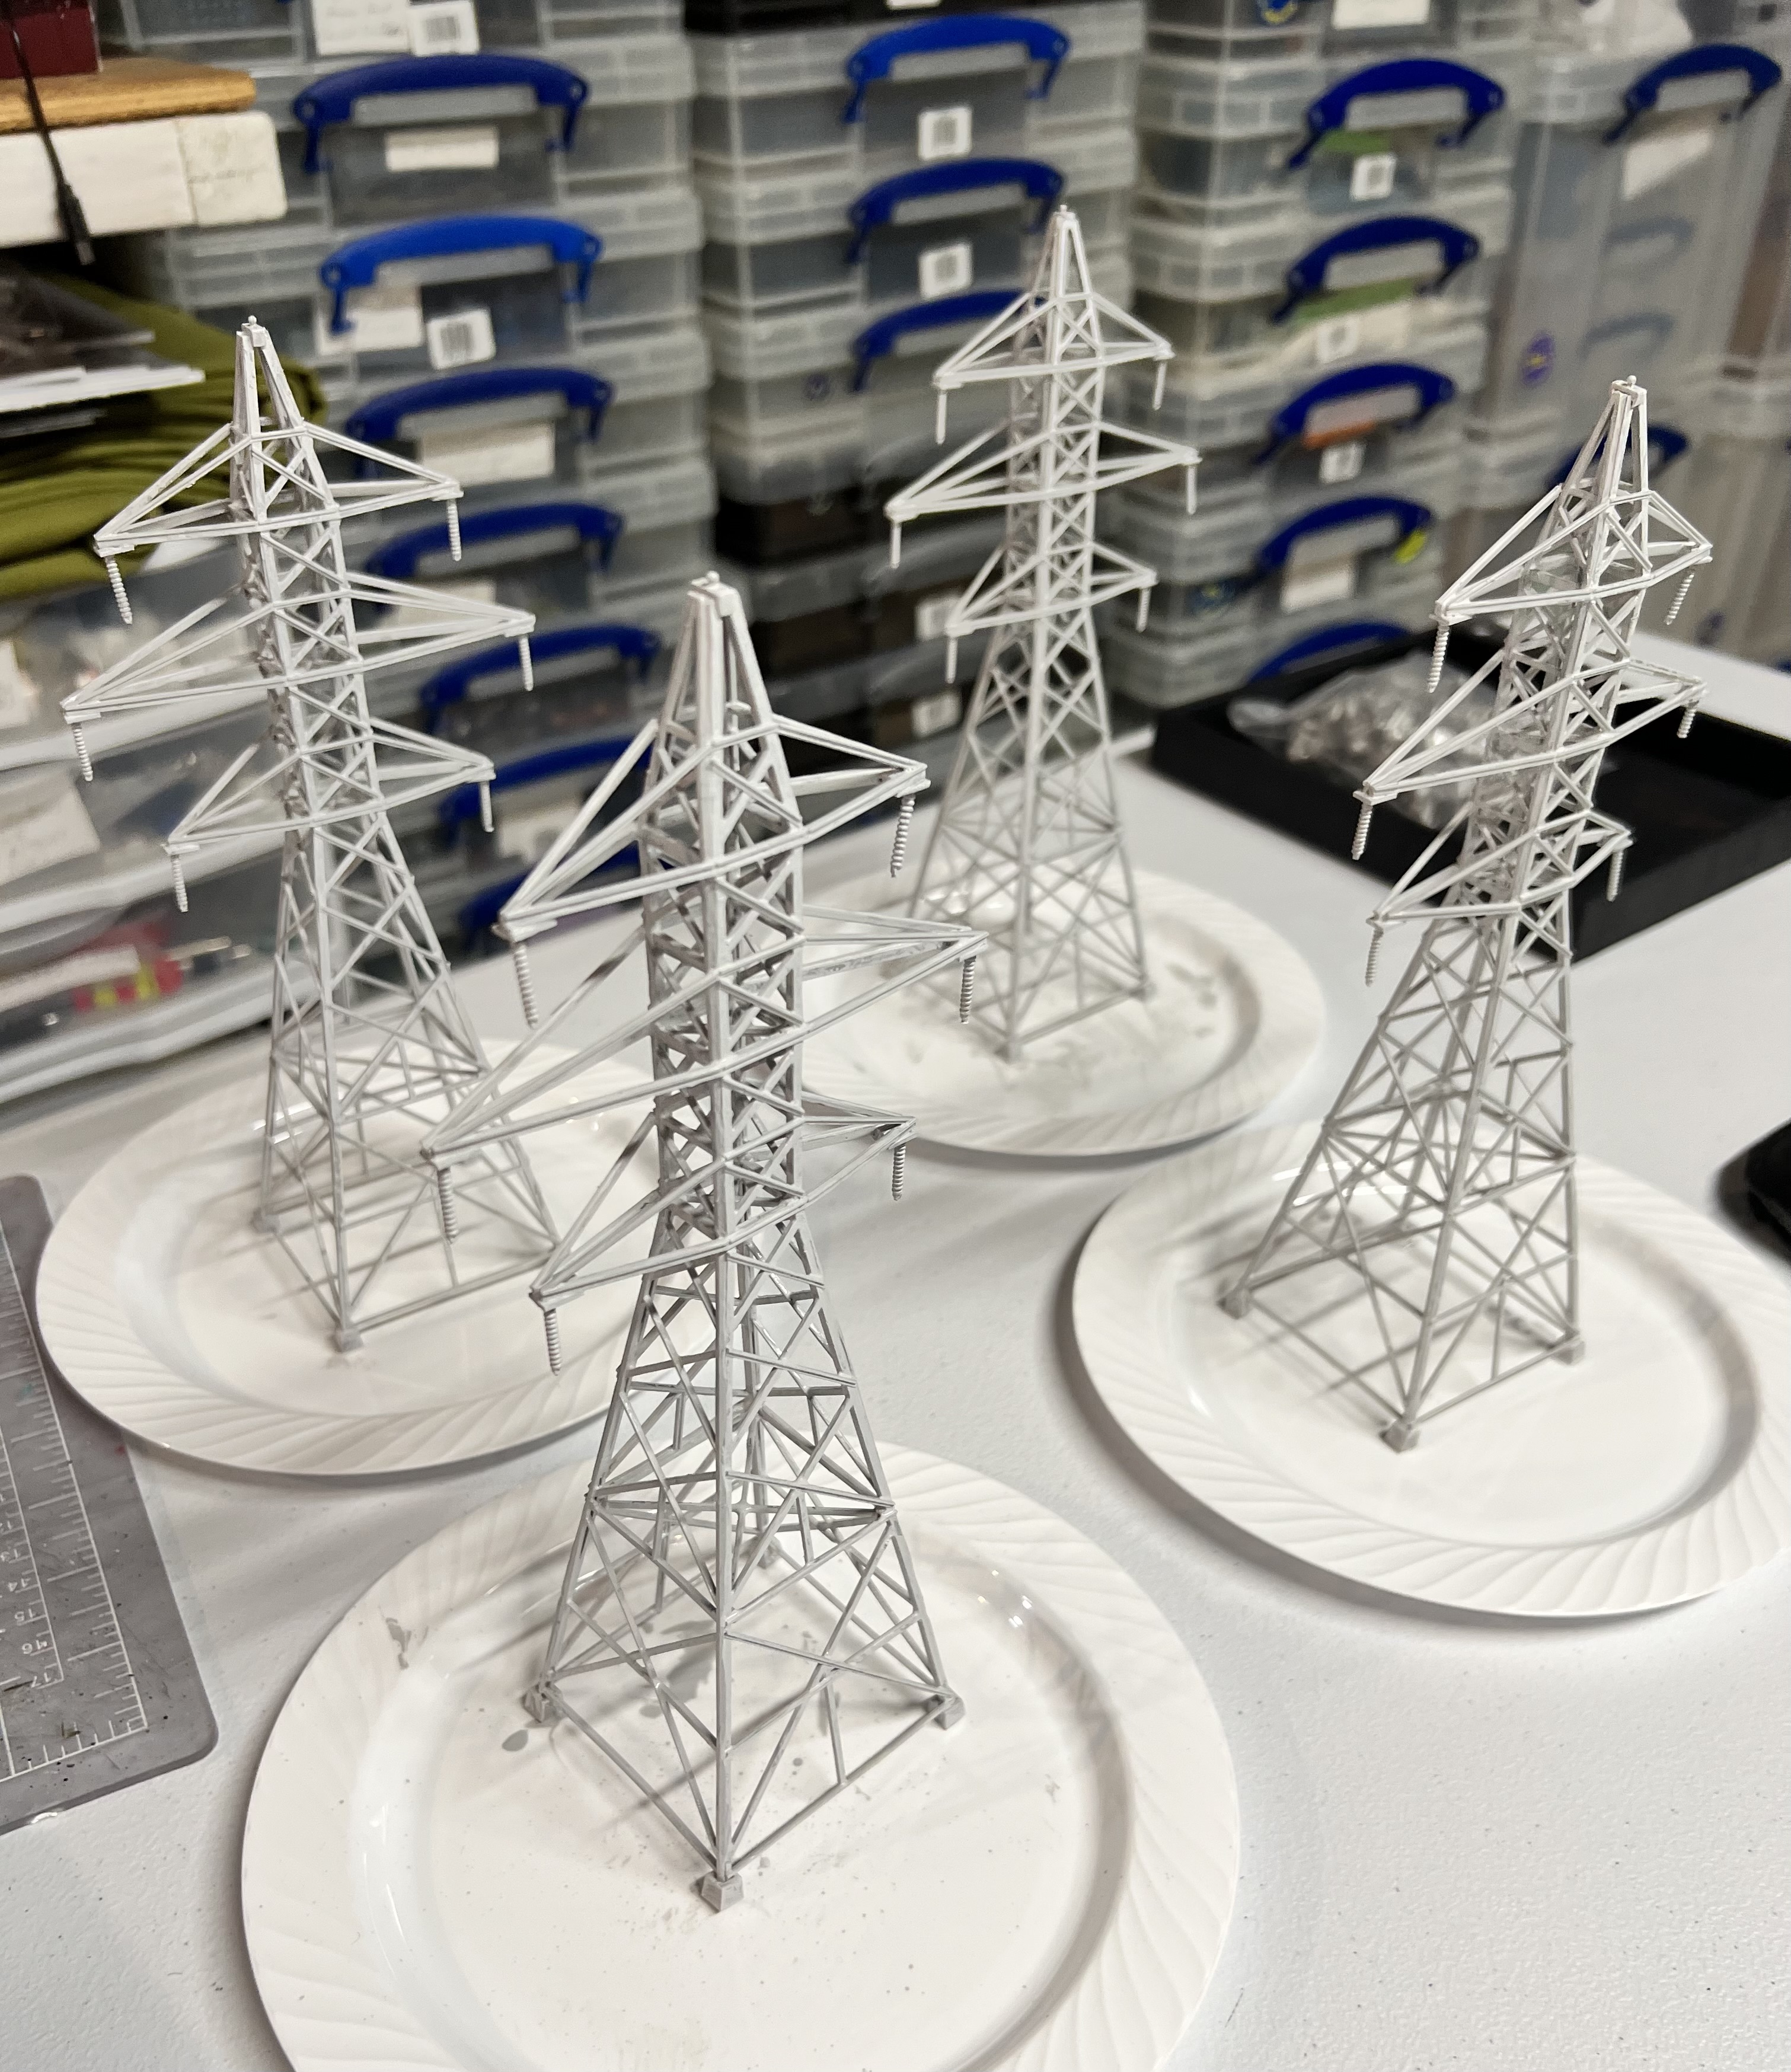
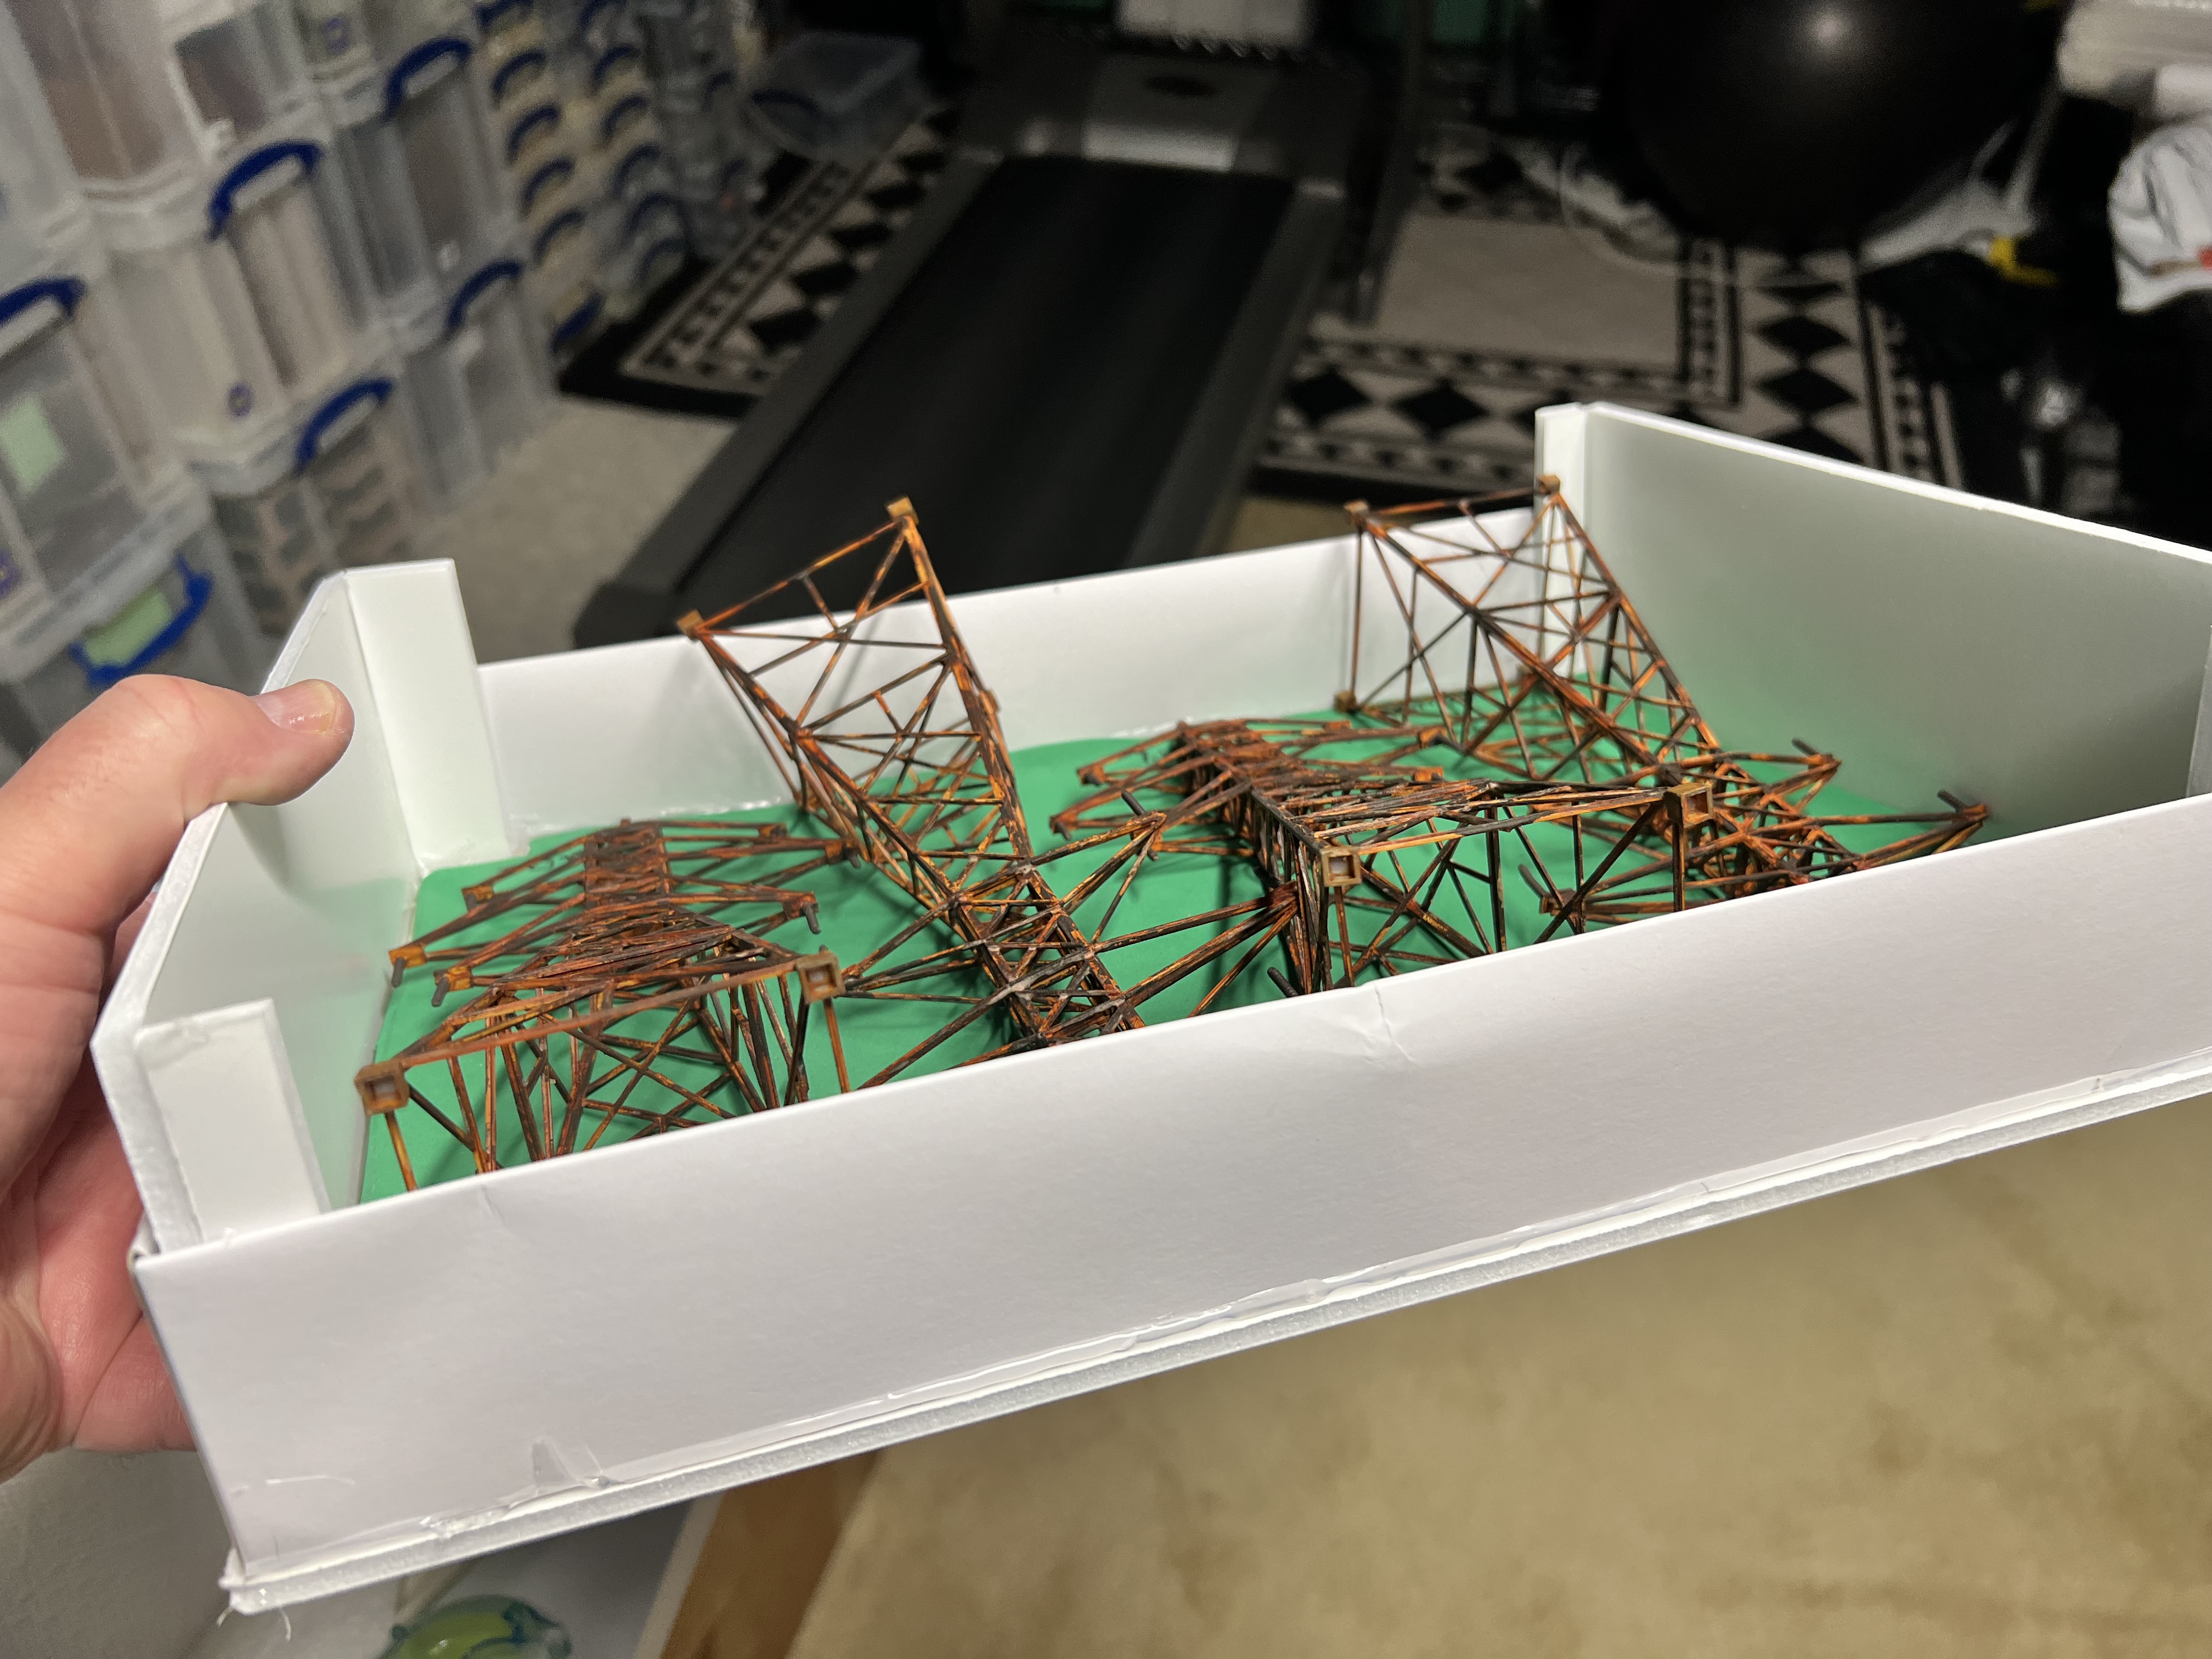
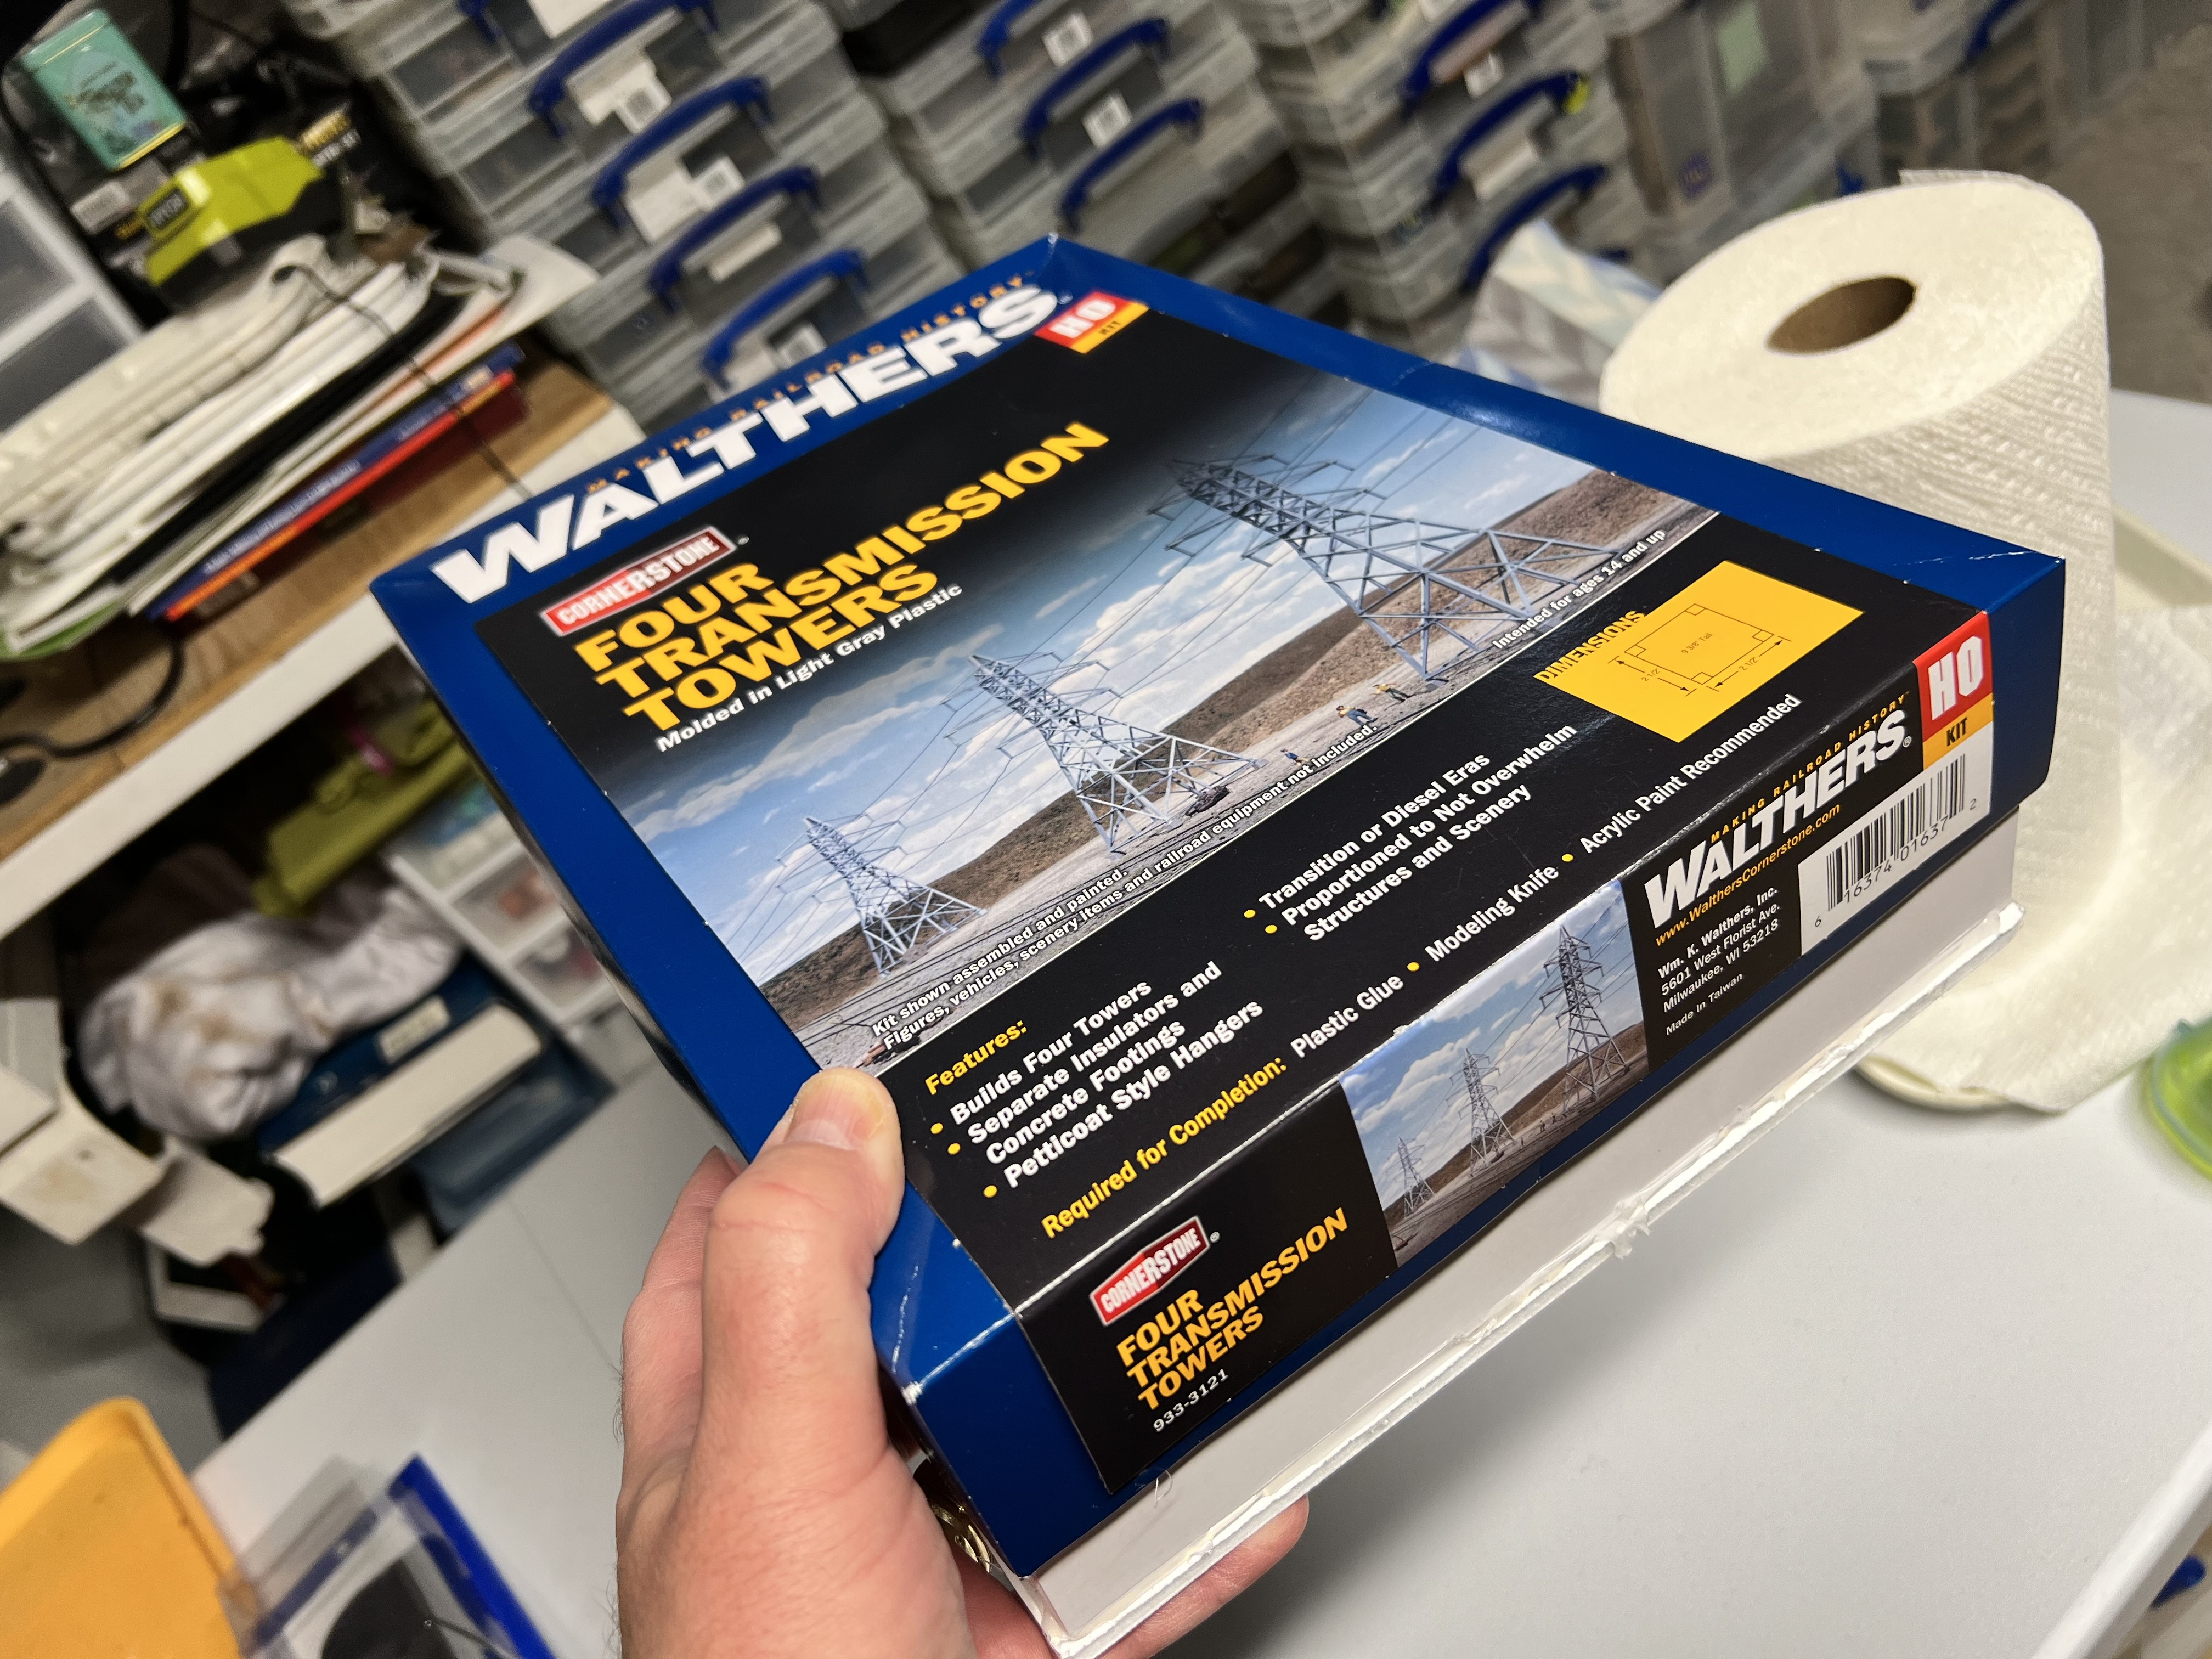
I thought transmission towers – rusty ones – would be great in that role. I found a railroad terrain kit on eBay. It was HO scale. It would go well with the other pieces of rusty fun. These were “Walther’s Cornerstone Four Transmission Towers”.
The transmission towers kit.
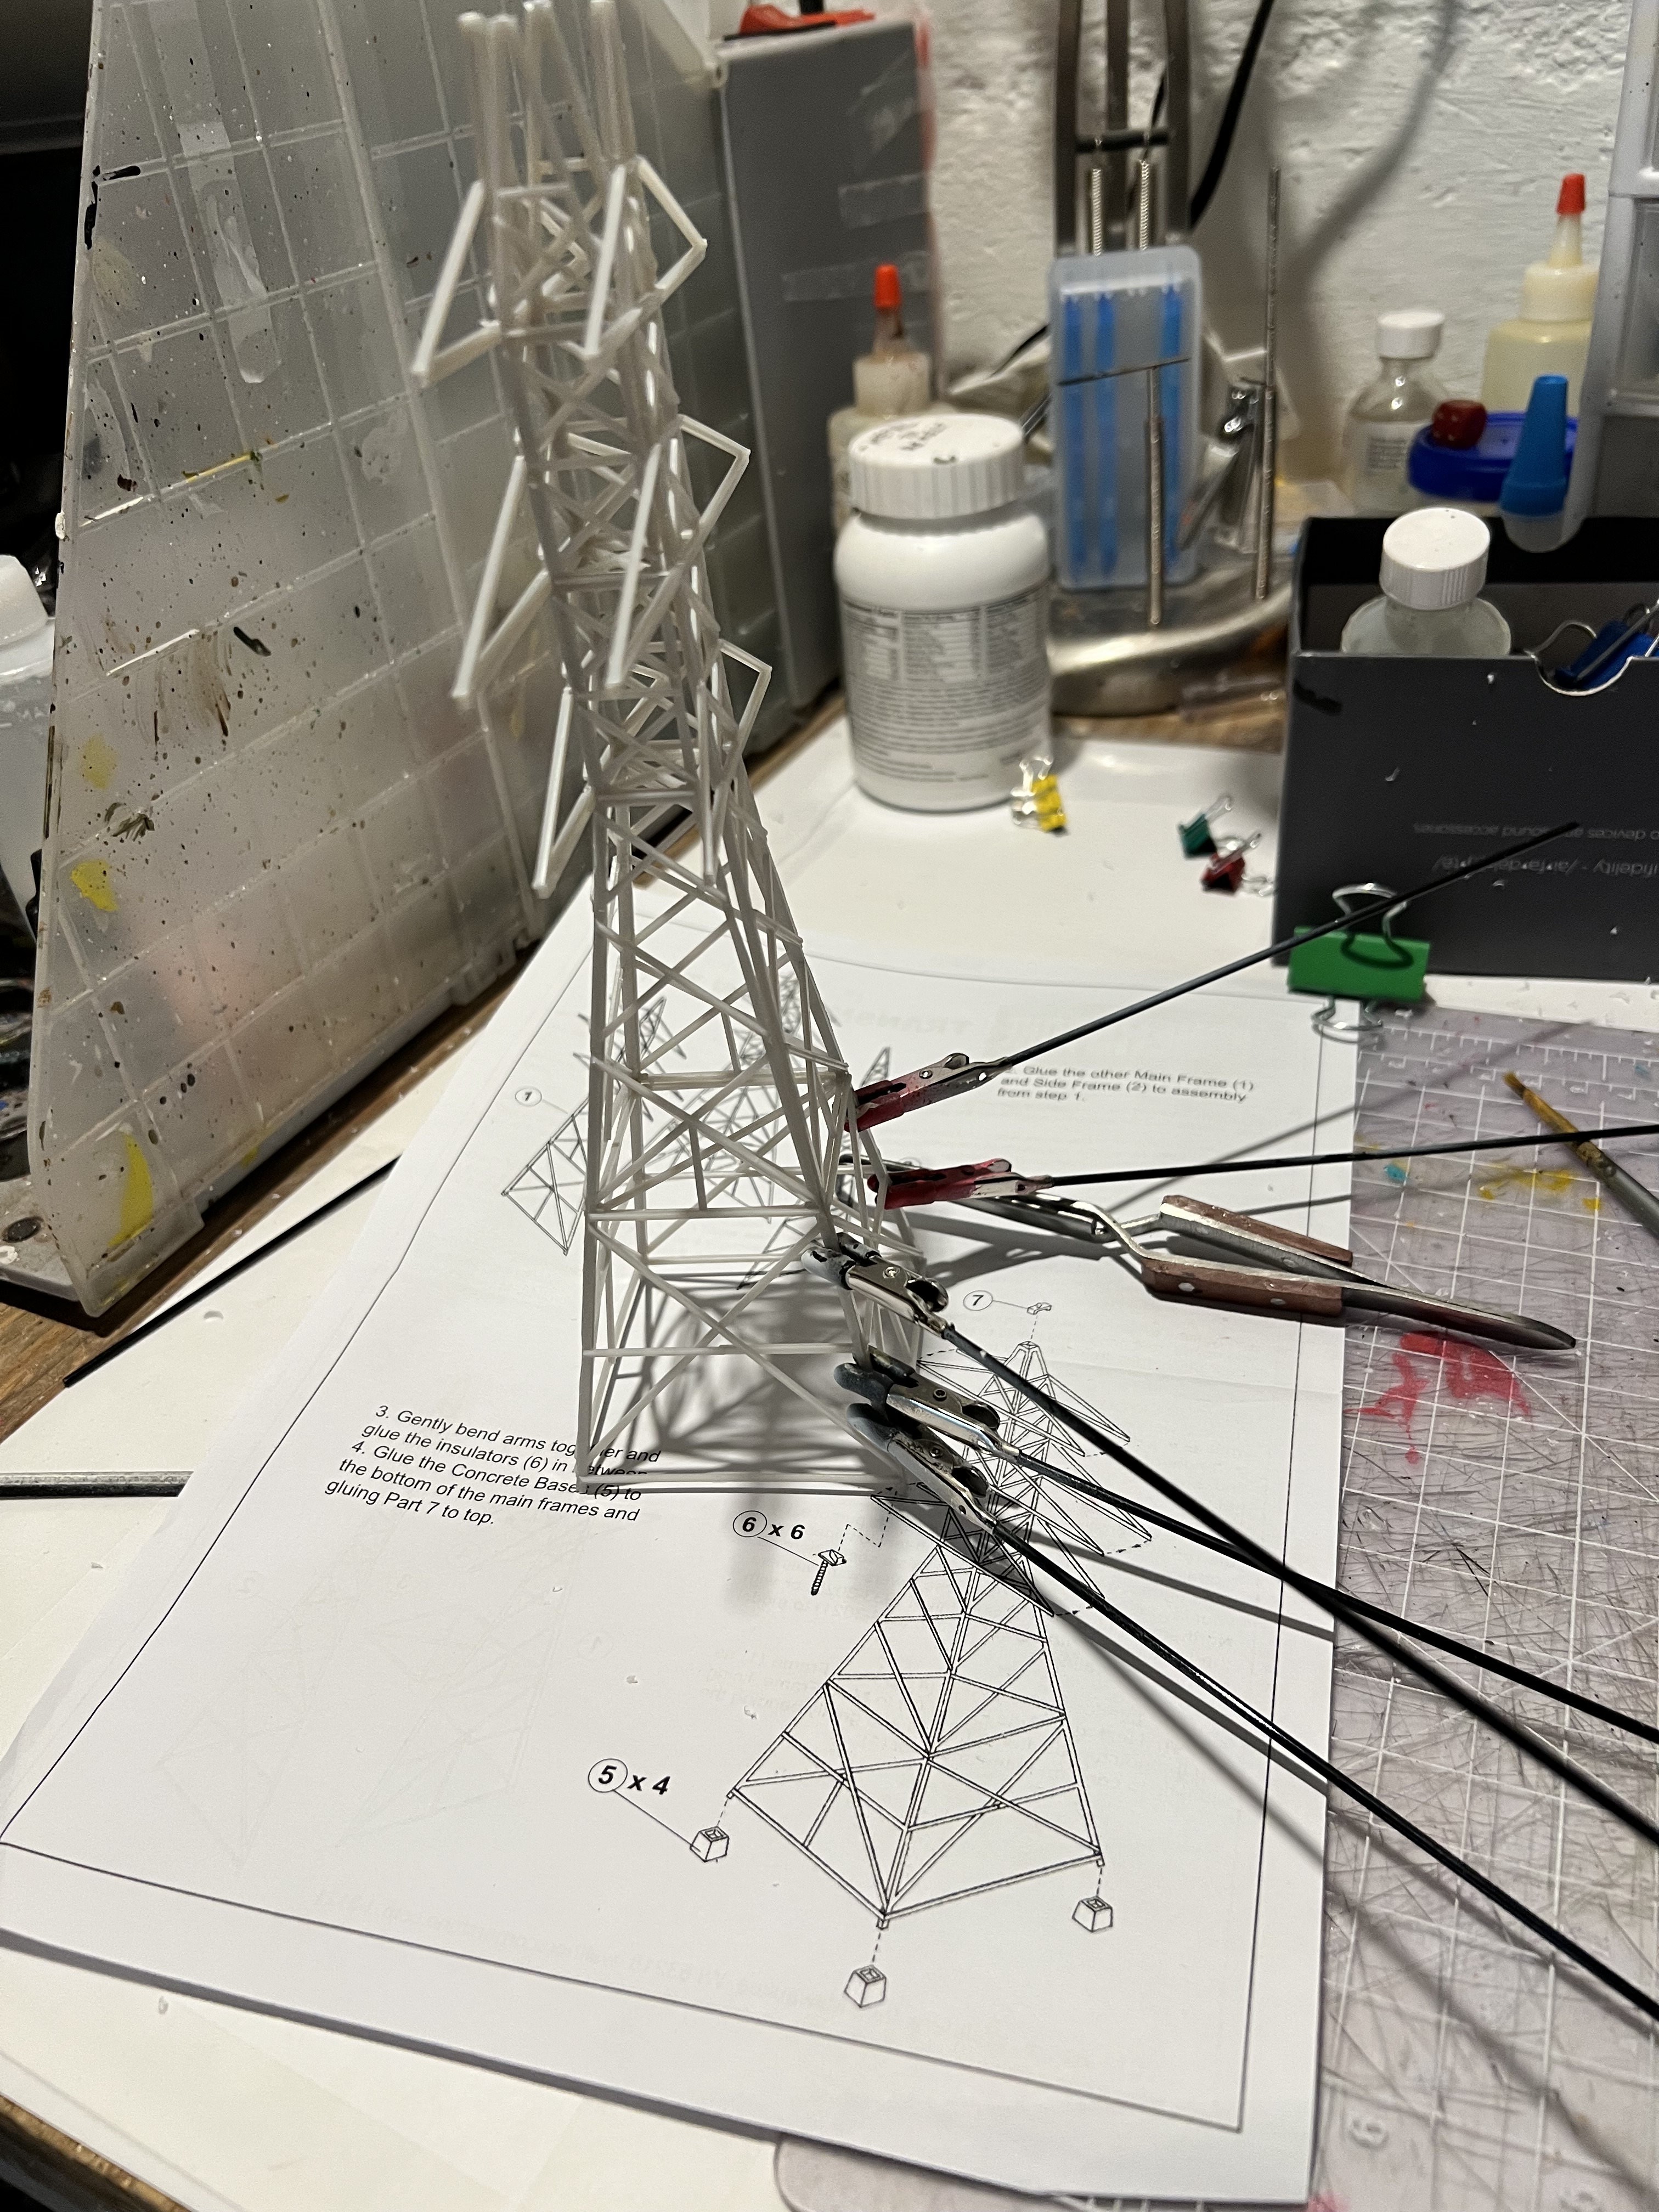
Assembly was a bit fiddly but manageable. It was not immediately clear to me which sides were front or back – but by the fourth iteration I got it down. Luckily, plastic cement covers any mistakes in assemble. I did find using rubber-shoed alligator clips to hold sections together while the cement set to be VERY helpful.
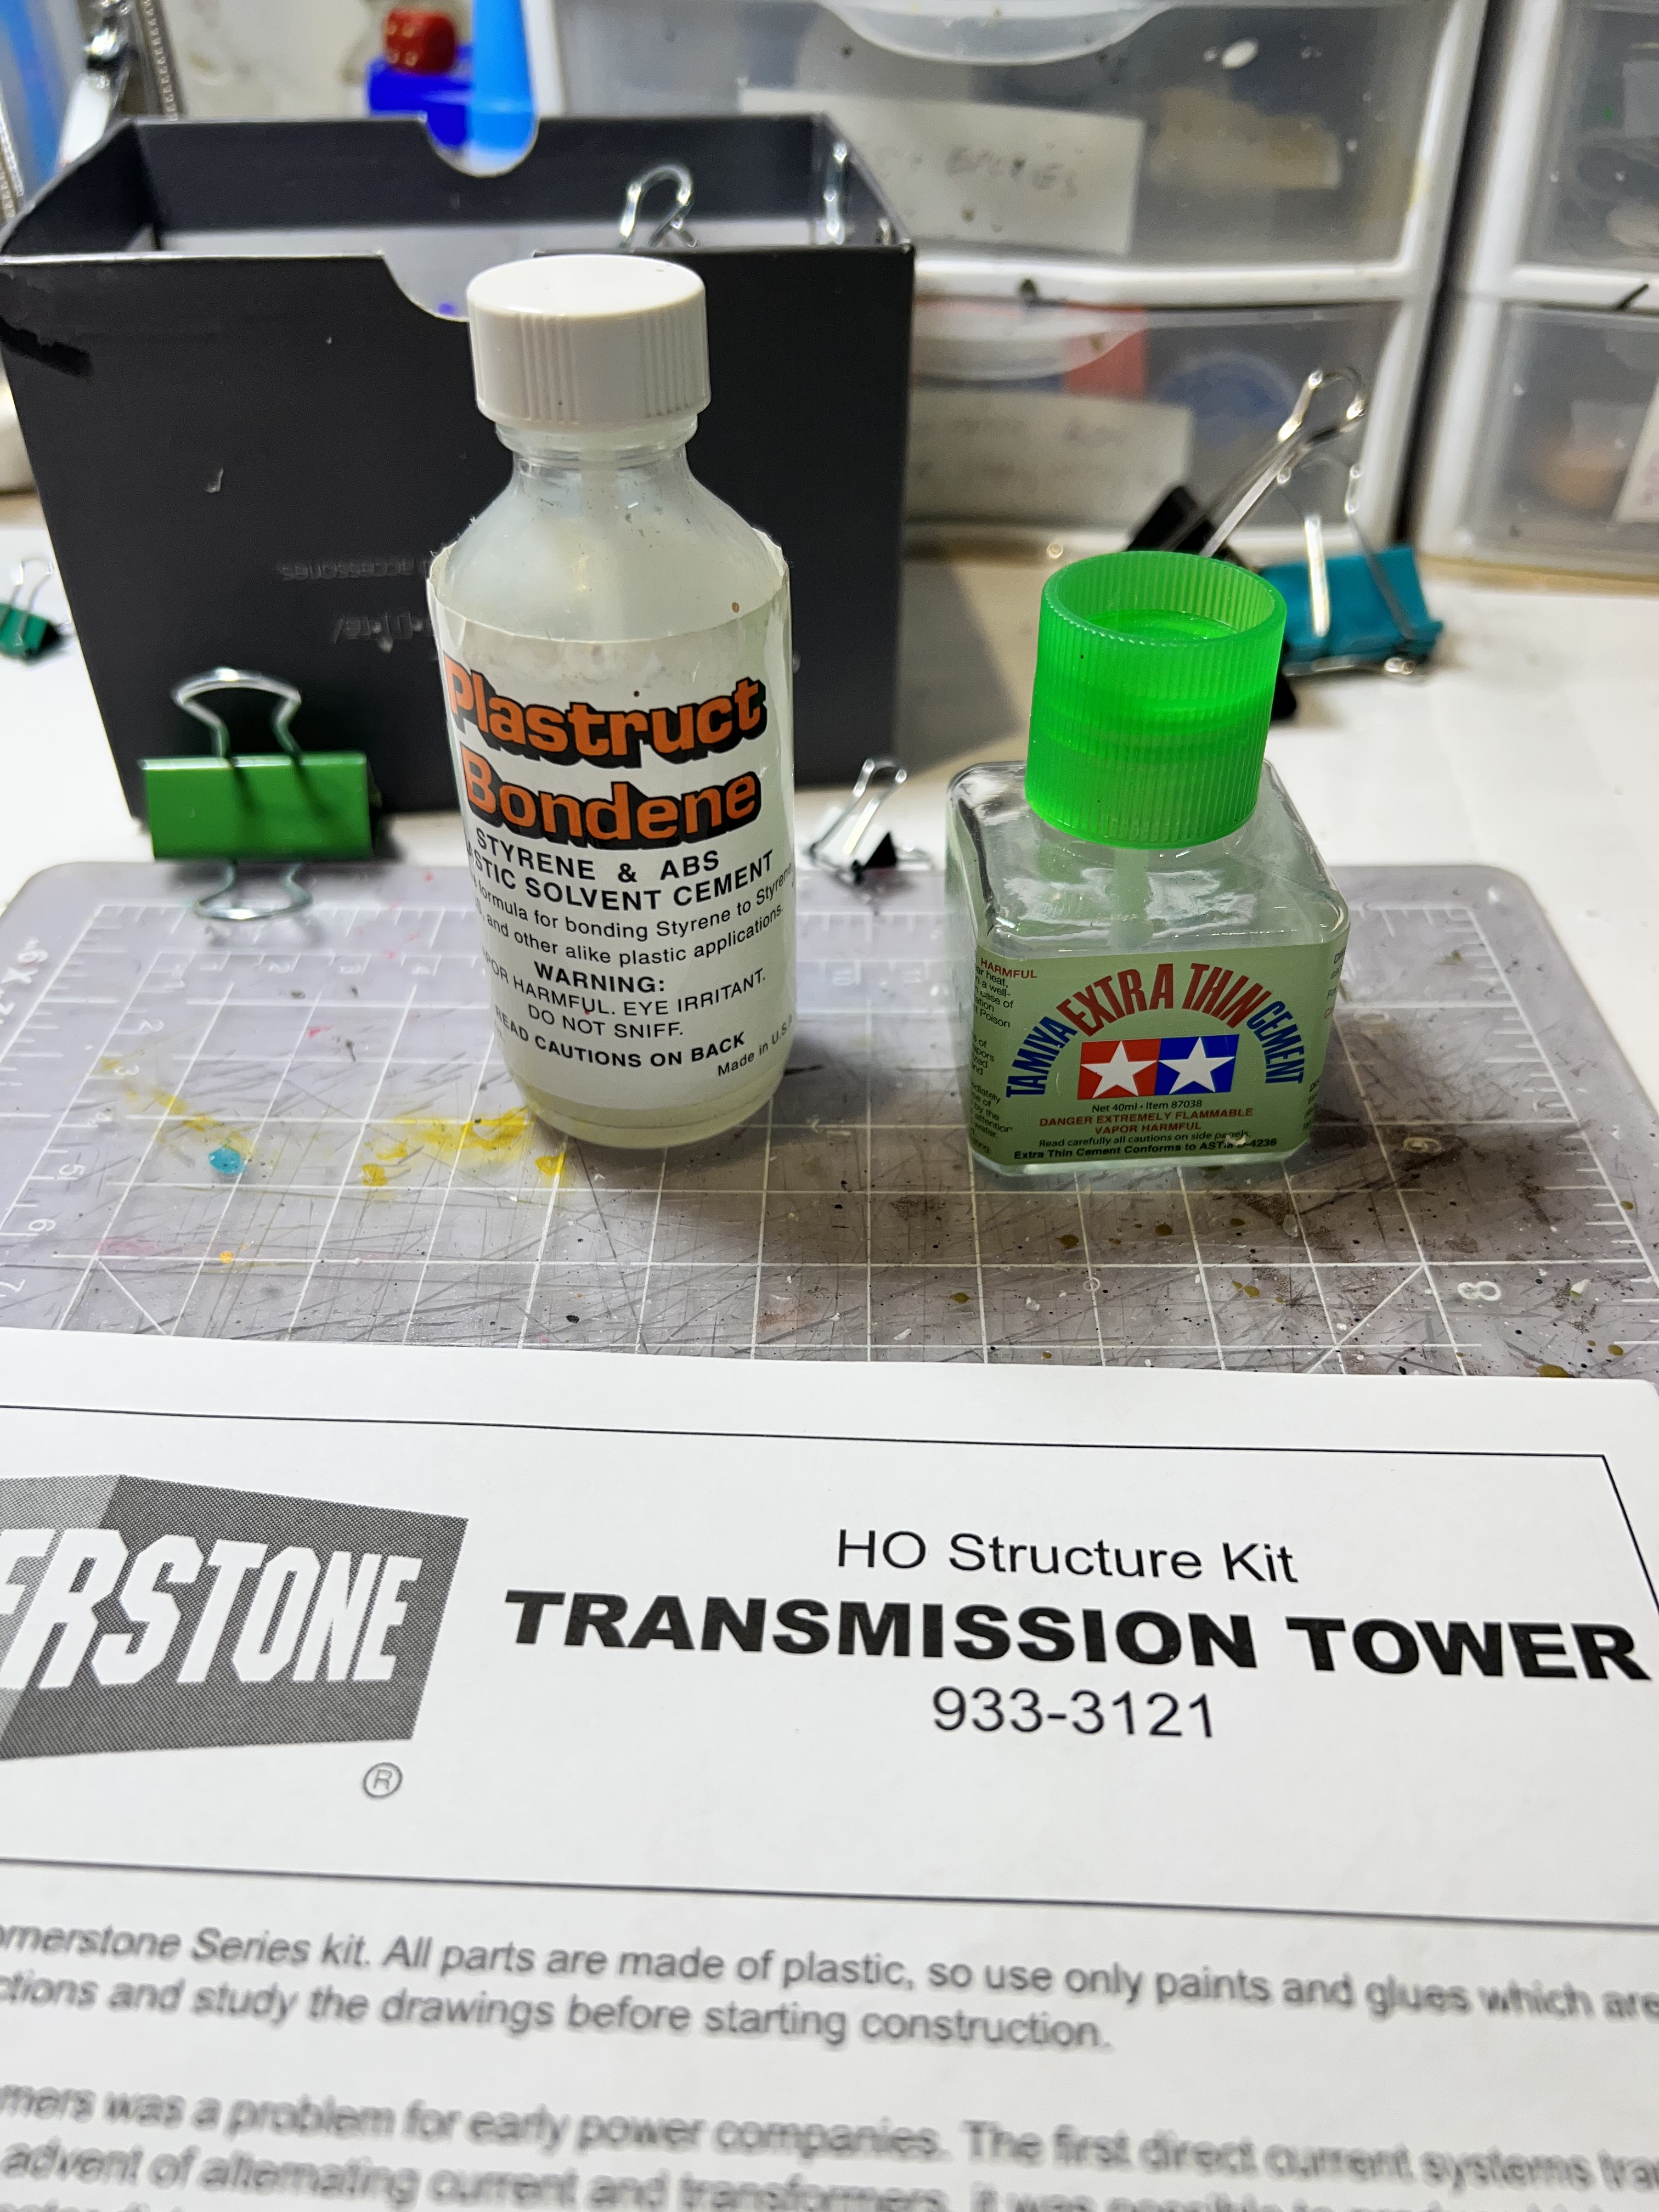
The first assembly went smoothly……the second was off (again figuring out which side went where was a bit confusing). Alligator clips to the rescue!All four assembled.The cements I used.The towers primed in grey.
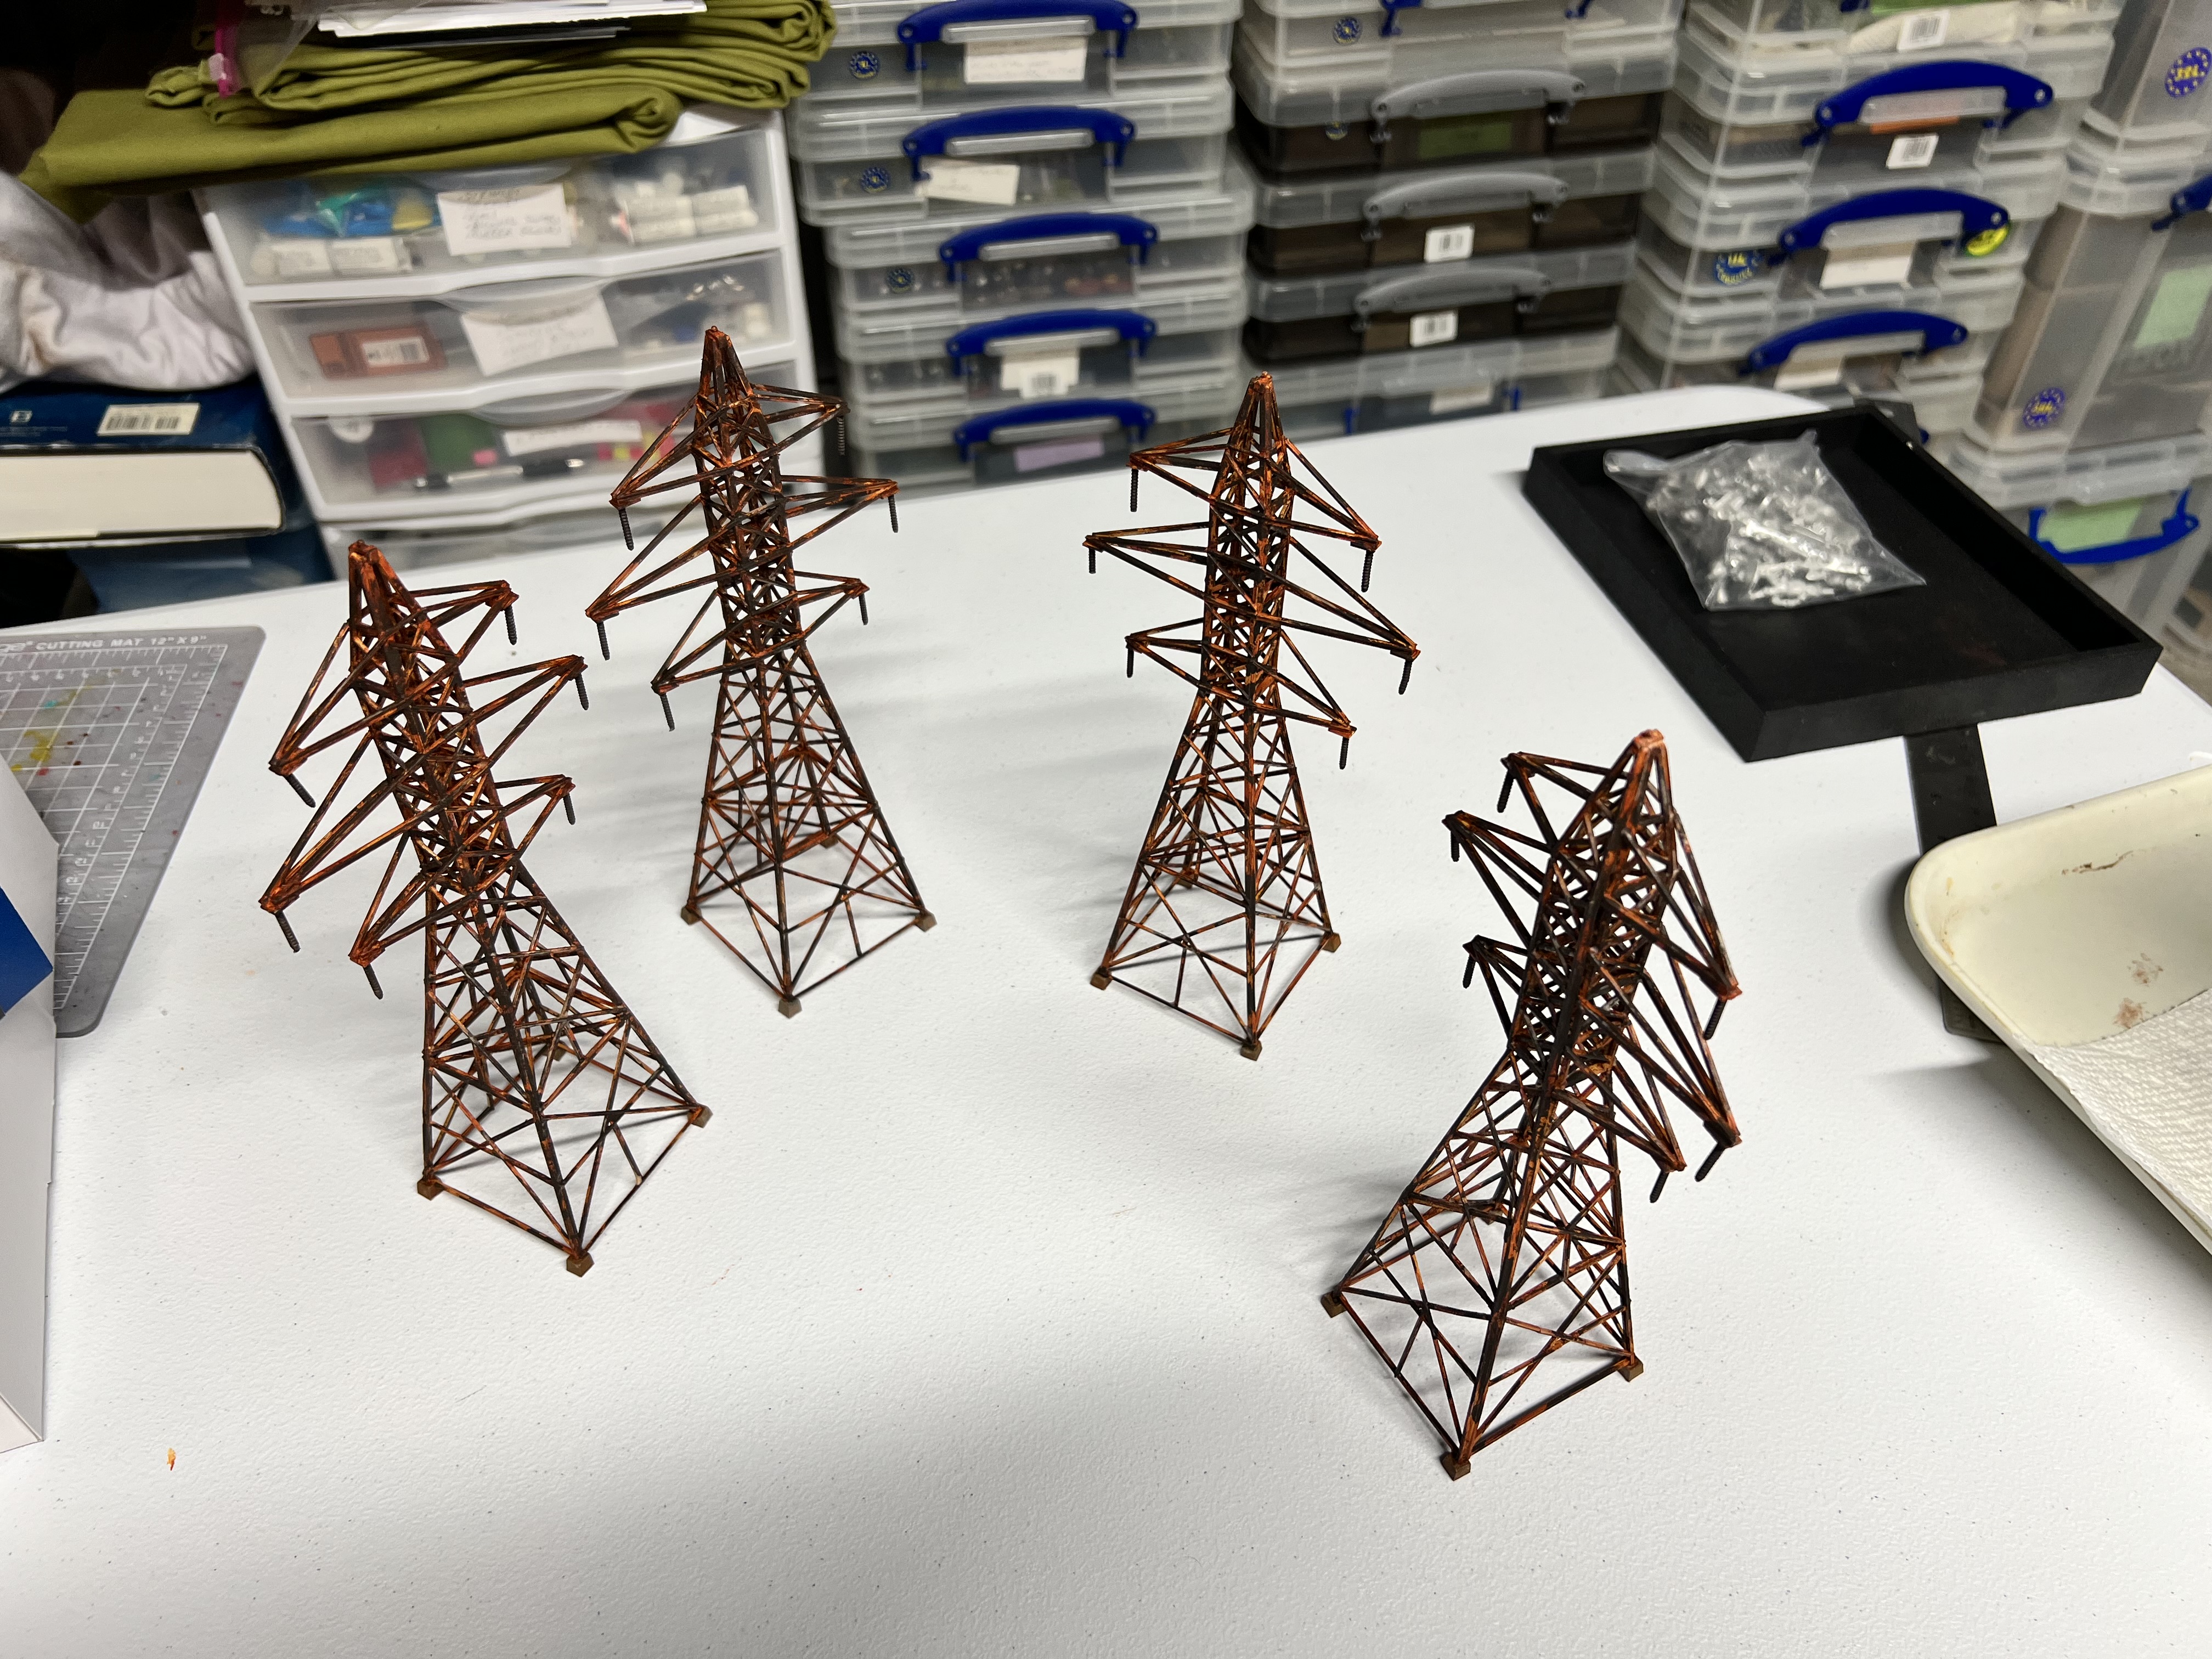
Rusting them up was similar to the walls – basically minus the use of the corrosion texture paint. The lists of what I used for these and the walls will be listed at the end of this post.
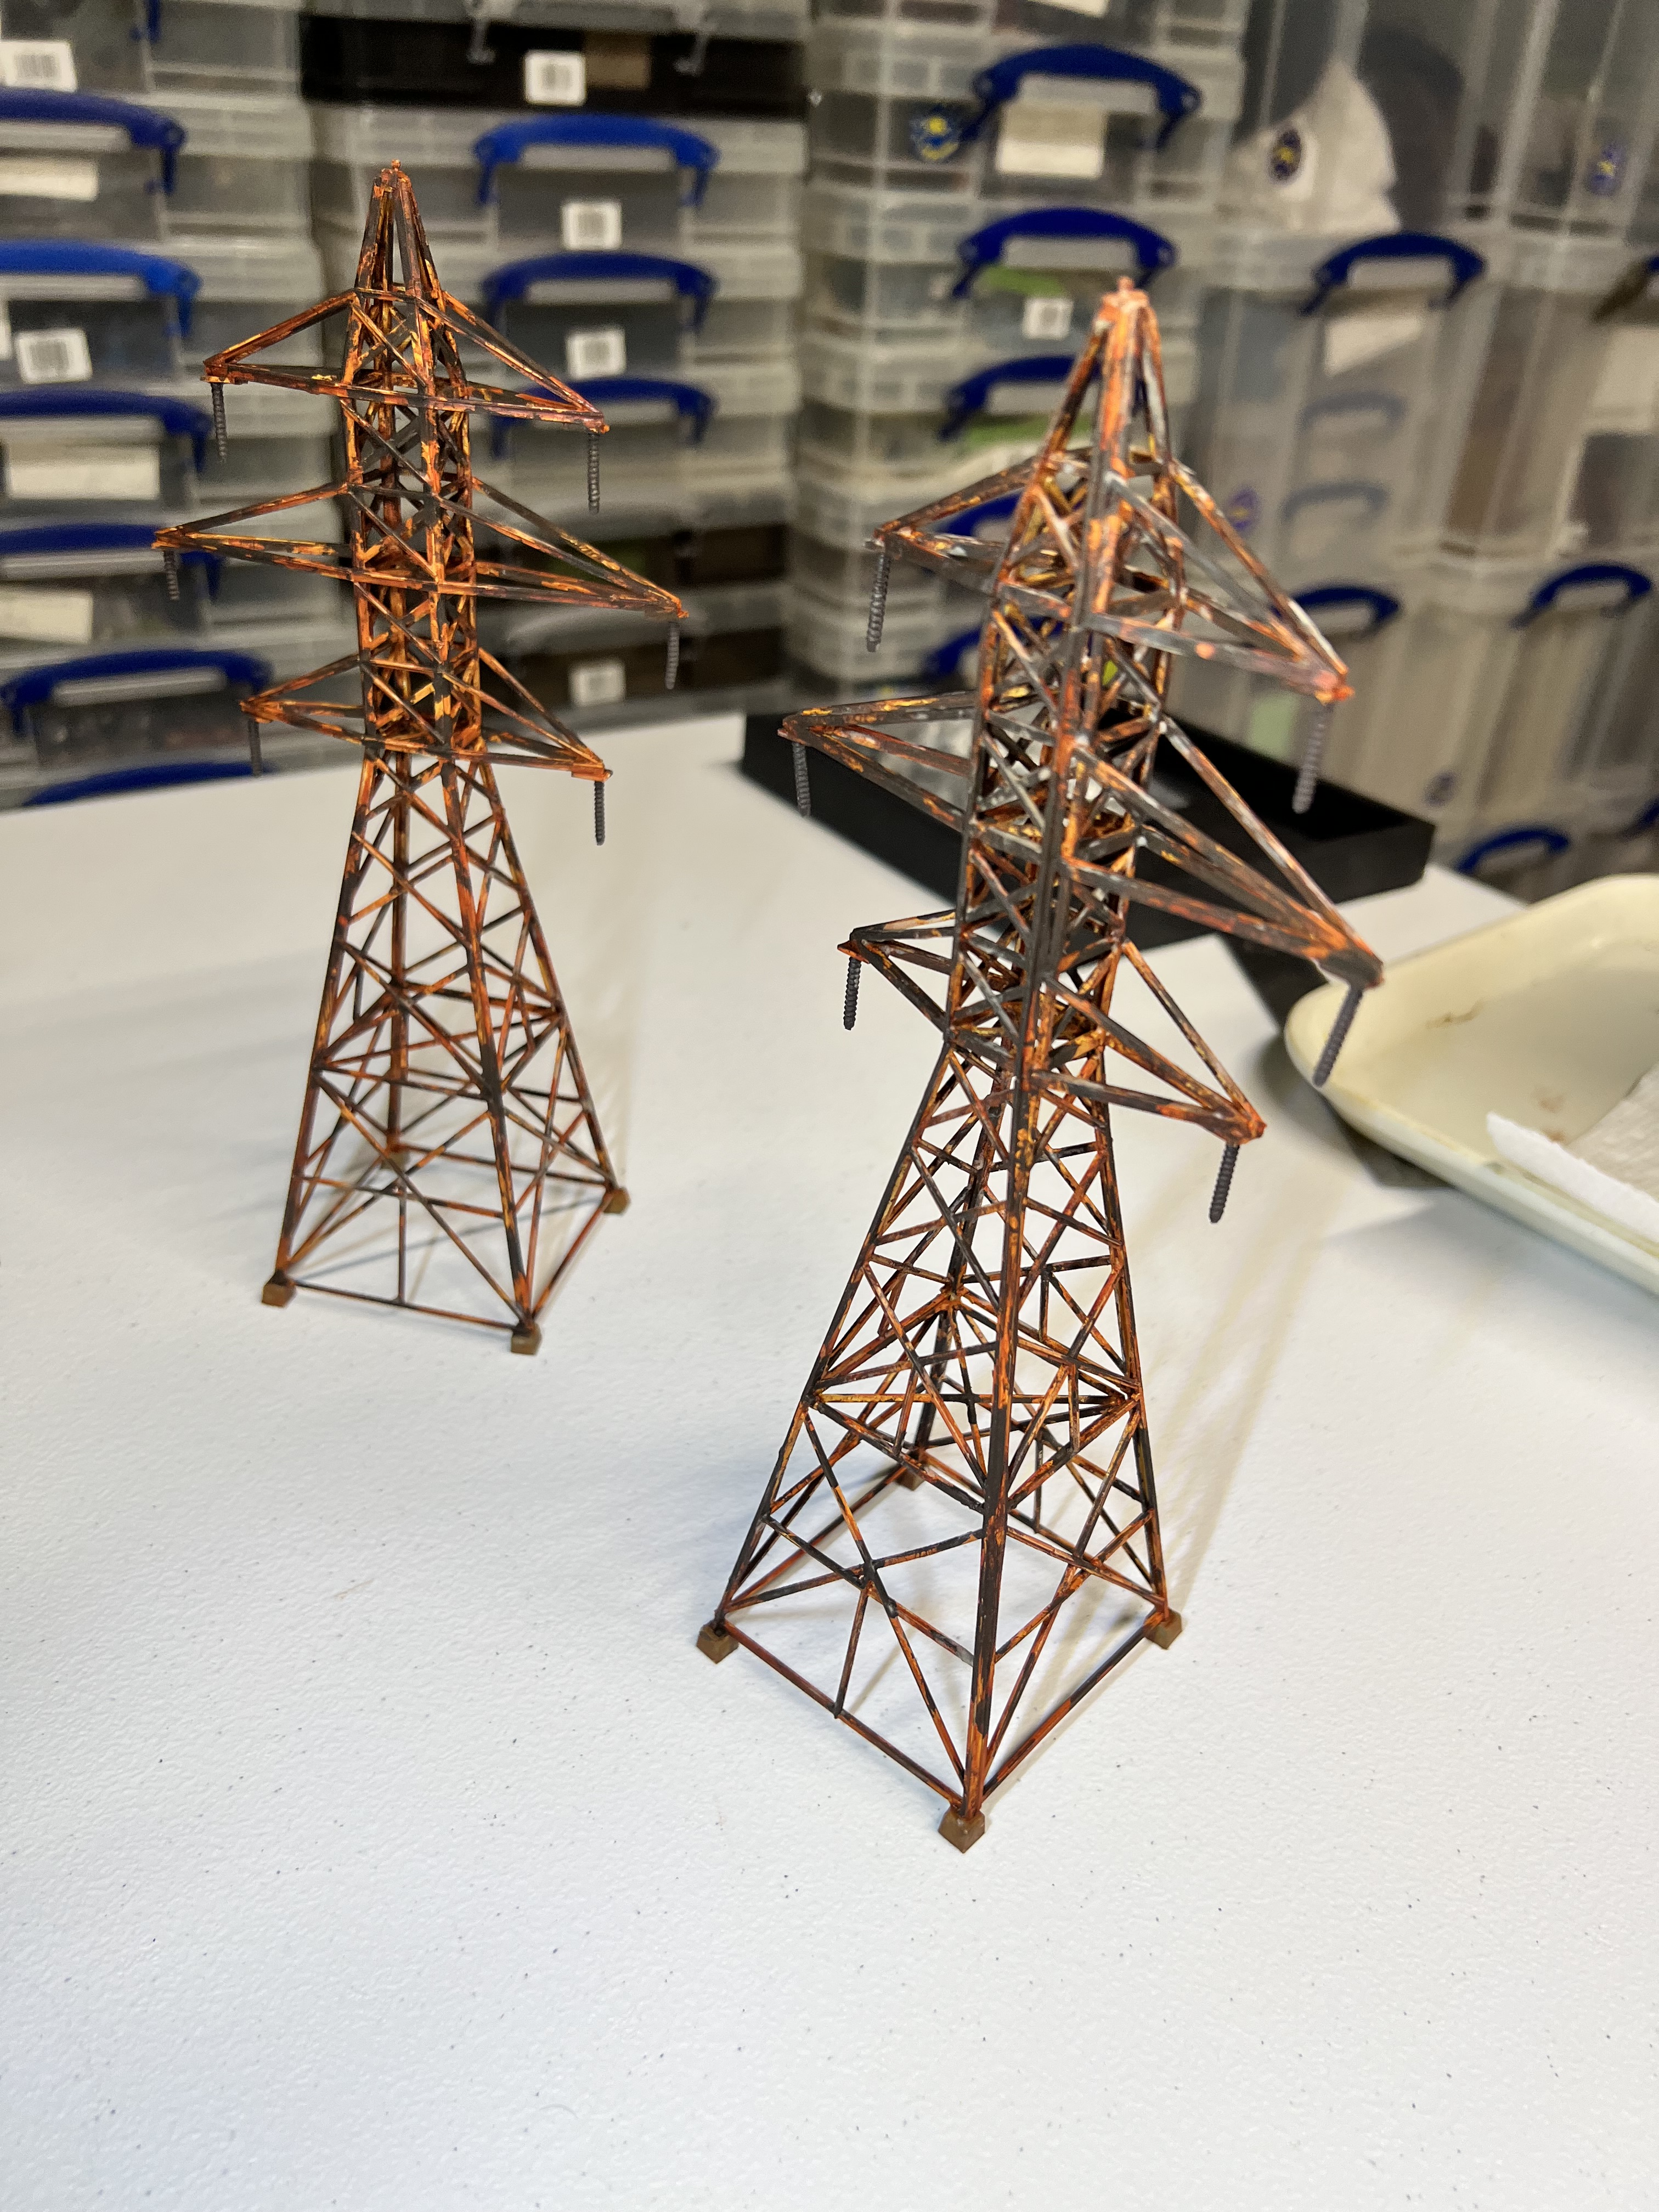
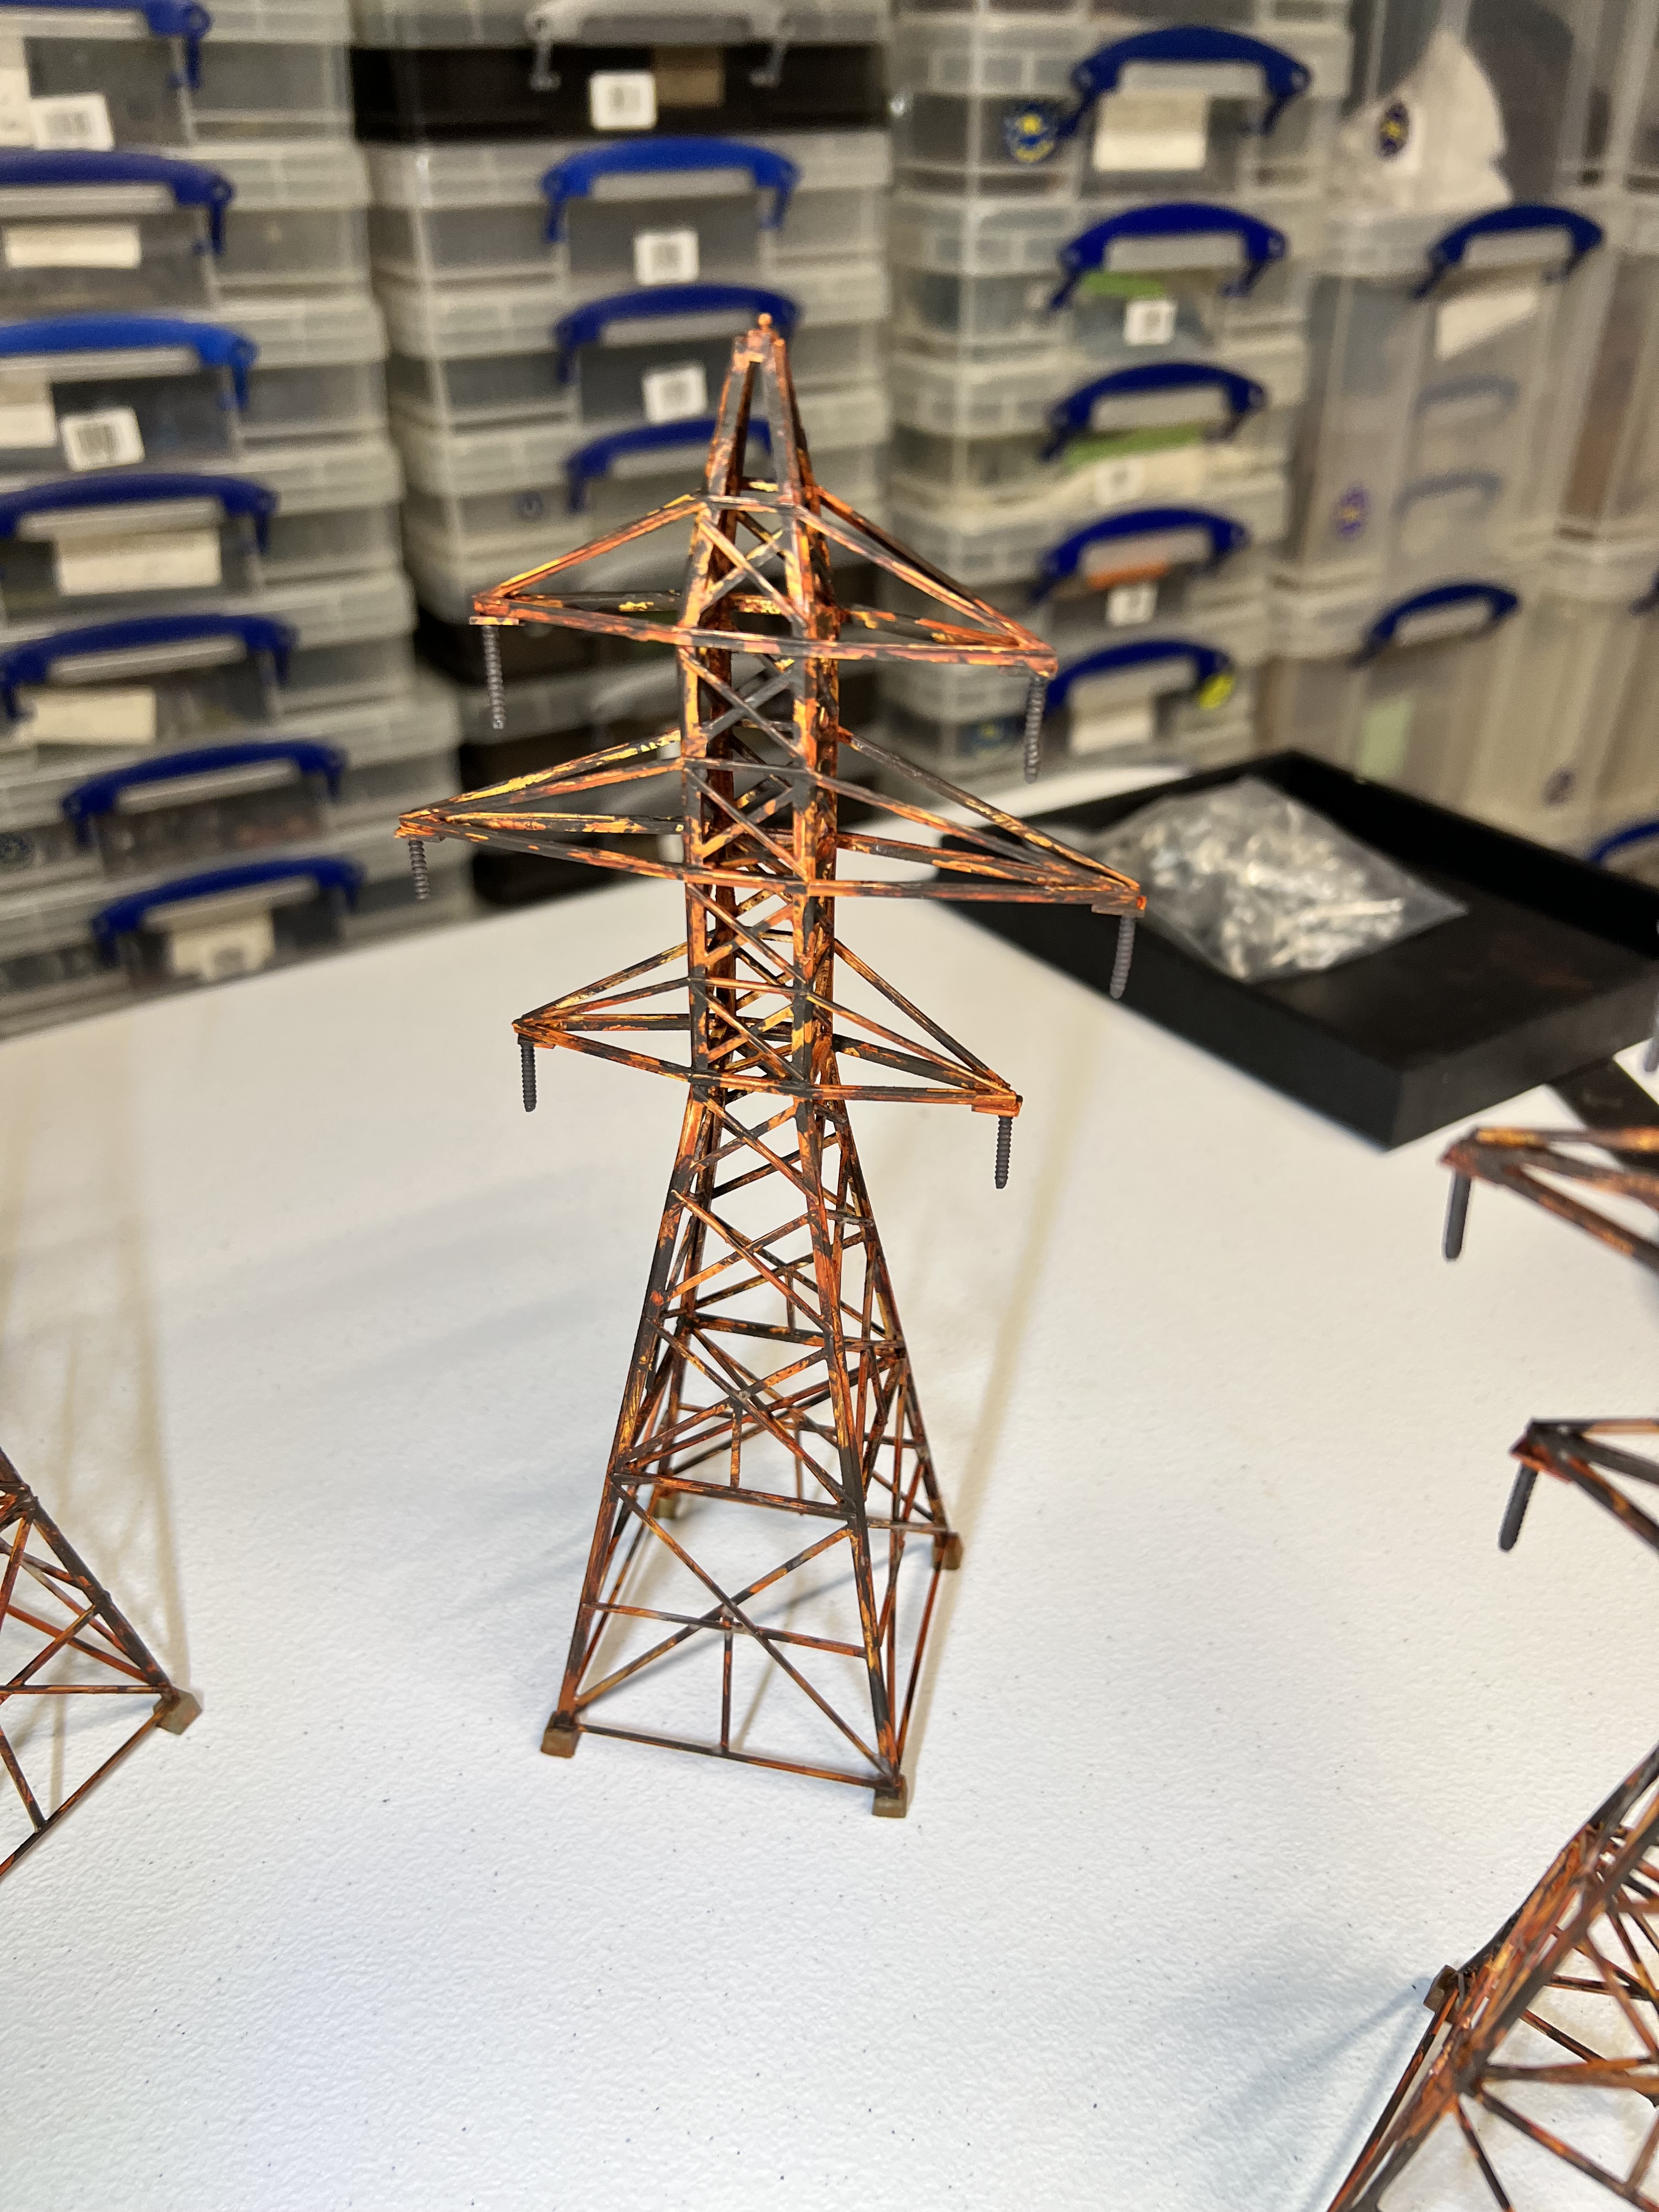
Rusted up!Close up shot of two.View of one from a slightly different angle.
As you can see these are just plastic models and vulnerable to damage in transport! Unlike the walls, which went into a cardboard wine bottle box with some foam padding between levels, these needed a sturdy solution. They required something strong. I decided to modify the original box to accommodate the greater height needed when the models were lying down. I used more foam padding on the box bottom, and foam board to extend and strengthen the box as you see below:
Top view of the original box modifications with a sheet of green foam padding on the bottom. The sides and corners were reinforced by adding foam board set with hot glue on the insides.Side view – here you see the added height with the foam board.The original box top fit like a glove – and is significantly stronger than its original configuration.
That’s about it for this rusty old post. I hope it inspired you to rust up some stuff yourself!
As I teased, I will be sharing how these fit into both of the tabletop set ups for 2026. I’ll also be sharing some of the new 2026 units of mechanical tin men that will find these structures as part of their apocalyptic homes. Until next time.
For all of my previous posts on terrain projects, please see this page. For all of my previous posts on sci-fi projects, please see this page…for any of my previous posts on Wars of Ozz, see this page.
PAINTS, INKS, GLAZES, SHADES, WASHES, PIGMENTS, FLOCKING, GLUES AND MORE THAT I USED ON THE RUSTY WALLS PIECES:
Old autoinjector trainers
Green stuff
Chinchilla dust
PVA Glue
Vallejo Surface Primer “Grey”
AK “Corrosion Texture”
Citadel “Typhus Corrosion” (Technical)
Citadel “Ryza Rust” (Dry)
Vallejo “Old Rust” (pigment)
Vallejo “Brown Iron Oxide” (pigment)
Vallejo “Natural Iron Oxide” (pigment)
Vallejo Model Air “Rust 73.117” (pigment)
Vallejo Model Air “New Rust 73.118” (pigment)
Vallejo Thinner
Vallejo Model Color “Dark Rust”
Vallejo “Natural Umber” (pigment)
PAINTS, INKS, GLAZES, SHADES, WASHES, PIGMENTS, FLOCKING, GLUES AND MORE THAT I USED ON THE RUSTY TRANSMISSION TOWER MODELS:
Walther’s Cornerstone Four Transmission Towers (HO Scale)
In short, (if you don’t want to click above) he has a list of folks who blog that he follows (most of them are the same ones that I also follow).
To quote Roger:
Well, What I’m asking you to do is, if you look below you’ll see a list of blogs that I follow (or should follow!), some are great painters (actually all of them are) 3D printers, game writers, DM’s, Sculptors, Convertors etc.. The one thing they all have in common is they are all entertaining writers! So if you can I’d like you to follow each of the links and take a look around, now some of these have not had new posts added for a while, but don’t let that put you off, have a look around check out some older posts, you never know there might be something you like or find useful, if so make a comment, follow (or if you have too “like”), let’s give these people some love and hopefully get them posting again!
So, take a look. I know some might not be up your alley, but if you’re into hobbying or modeling etc, most will. Of course my blog does also have some golf in there, but that’s just another addiction you know…
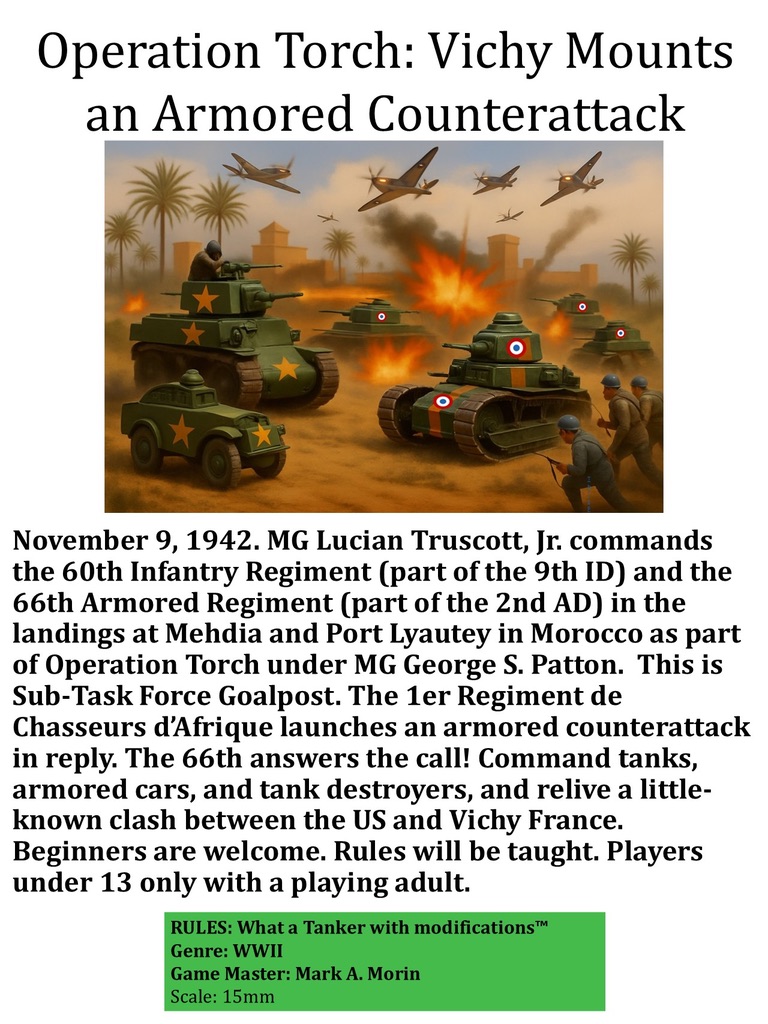
Over the summer, happily, golf dominated my free time for the most part. I didn’t really have much time for hobby work or wargames. Blogging about what little I did complete or participate in fell to the wayside. The “little” that I refer to is work on my 15mm/1:100 scale WWII scenario, Operation Torch: Vichy Mounts a Counterattack. This scenario is part of a What a Tanker game. It is set in Morocco in November 1942. The Vichy French responded to the American landings during this time with an armored counterattack.
It is a little-known clash. France the June 1940 post-armistice was titurlarly neutral, and had the responsibility to defend its colonies against any allied invasions. At this time in 1942, the Soviets were under massive German pressure on the Eastern Front. They were begging the Allies to get in the fight against the Germans – anywhere at all. However, at this point in the war, the US/UK were not in a position logistically to assault Fortress Europe. They also lacked the necessary forces to execute such a mission successfully.
The invasion of North Africa – and the colonies of Vichy France – became the compromised option. Operation Torch thus came to be. In addition, this assault would open up a line of attack on Rommel’s rear. This would reduce pressure on the British 8th Army in Egypt. However, no one knew how much the Vichy French would resist.
My flyer for the game scenario.
As I write this, the 2025 golf season is over now. At least it is here in balmy Massachusetts in November. It’s time for me to capture my summer and fall efforts that led to my running this games at conventions. This post will cover some of my preparations, upgrades, and the actual games themselves. I will discuss the initial games at HMGS HISTORICON, then my upgrades, then the games at HMGS FALL IN! and EllisCon.
By the time I attended HISTORICON in July of 2025, I had the scenario pretty much where I wanted it. I had play-tested it with friends, and was ready to roll it out. This year, in total I have run the game twice at three different conventions. These are HMGS HISTORICON in July, and both HMGS FALL IN! and EllisCon in November. This makes six iterations so far since the spring.
For vehicles for the game, I have finished many AFV’s for that I have discussed in previous posts. Here below are those posts in reverse chronological order in case you missed them:
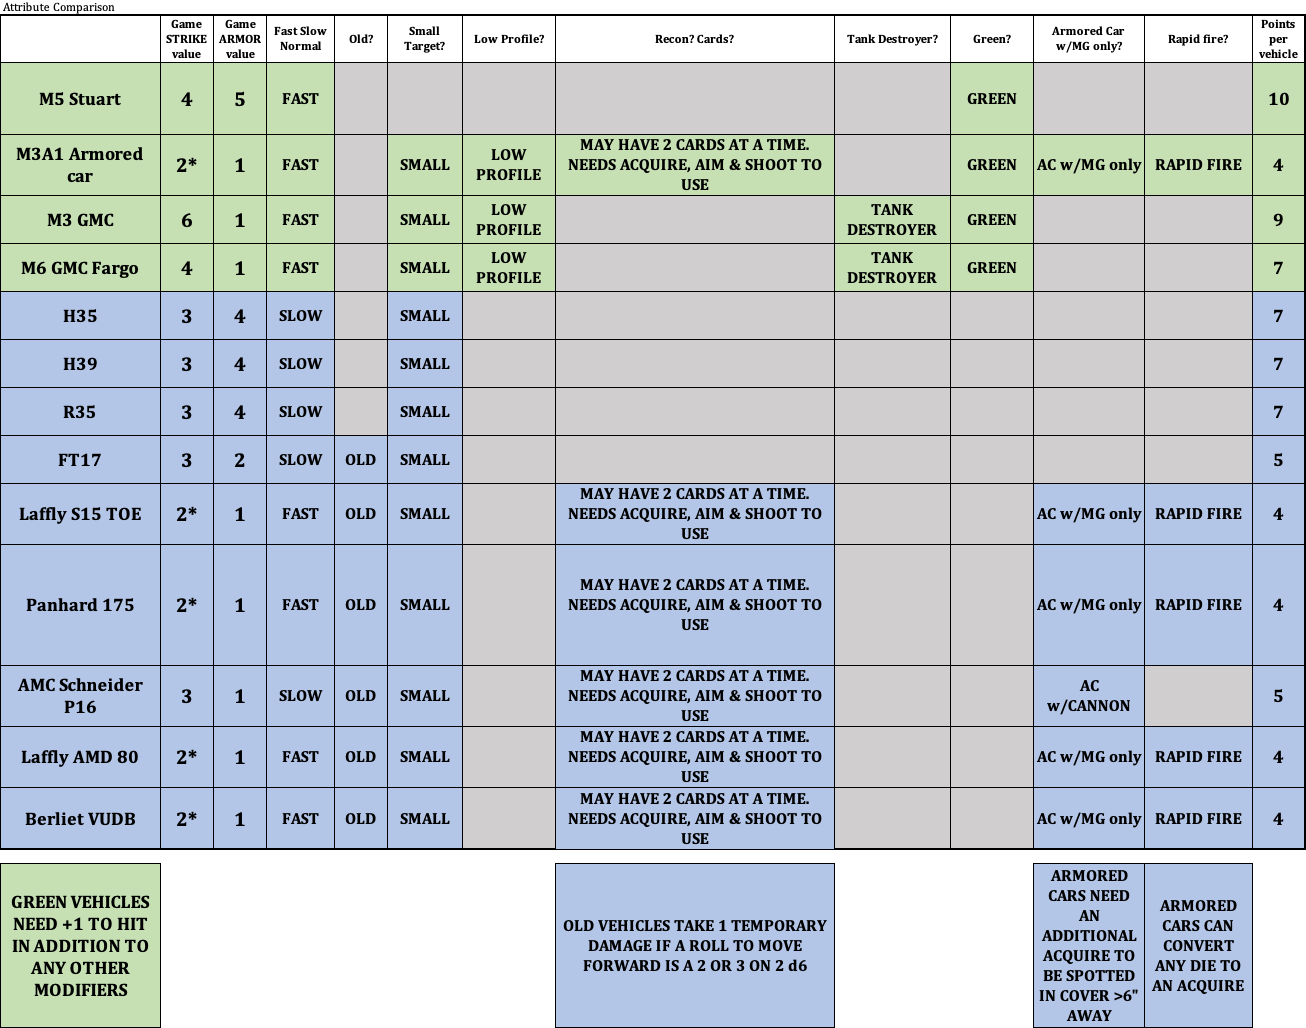
The vehicles for the gameAFV attributes for the game
In addition to the vehicles, many game aids also were on my to do list. Before HISTORICON, I made road sections and town bases out of poster board and painted them. I also built dice boxes and dice frames for ease of play. Plus, I needed more blast markers for destroyed vehicles.
I was making these dice aids to make play better. What a Tanker is a great game. However, for a multiplayer game at a convention, the activation sequence is not the greatest. It does not keep the players engaged. I decided to borrow Buck services Double Random ActivationTM activation methodology, and that seemed to serve the game well. I also added Bonus Attack Cards and other changes as discussed in the next section.
Overview of My Scenario Rules Modifications
The game uses modified What a Tanker rules. The major modifications that I use are:
The game starts with each player receiving $75 in Tanker Bucks.
Before there are any play or purchases of extra resources, there is a VICHY FREE ATTACK PHASE. All US vehicles on the table will receive both 1 French infantry attack and 1 French AT attack. This phase represents the Vichy infantry attacks that were repulsed in November 1942 prior to the armor engagement. This happens only once at the beginning of the game.
There is an ACQUISITION PHASE after the free attacks conclude. More vehicles and Bonus Attack Cards may be purchased. This phase happens once at the beginning of each turn.
Uses of Bonus Attack Cards in the game simulate infantry, anti-tank, artillery, naval gunfire, and air actions. These are deployed by scout cars according to each sides’ historical capabilities. These cards can be shared across the team. Bonus Attack Cards are purchased with “Tanker Bucks”, which also play into Victory Conditions. Having more Tanker Bucks at the games end is better, as high amount remaining wins the game. I allow teams to share their Tanker Bucks as well. However, you need to use resources to defeat the enemy. You earn $25 for each AFV or plane destroyed. See the card below to see the costs for acquisitions and for rewards. So, a balancing act exists for the players. Do they hoard their Tanker Bucks, or use them effectively against their opponent?
Costs and Rewards as shown on the requisition form.Vichy Bonus Attack CardsUS Bonus Attack Cards
To represent the French vehicles’ advanced age and mechanical unreliability. “OLD” French vehicles that try to move and roll a 3 or less will lose 1 die to temporary damage. Mathematically, there is an 8.33% chance of that happening. So a good number of the Vichy Forces are indeed OLD (mainly the armored cars and the FT-17’s). In addition, all of the French tanks and some armored cars are SLOW – which limits their advances. But, in the game, there are more of them, and not all of the French tanks are OLD.
Any vehicle touching a road can convert any die to a DRIVE dice.
Armored and scout cars may engage other armored cars and tanks with heavy machine guns or deploy Bonus Attack Cards. Also I have rules that show how devastating any cannon fire would have been against thin-skinned vehicles. Cannon fire causes double hits on thinly armored vehicles that are not tanks.
The US Army was inexperienced before these landings. To represent that, their status is GREEN at this point in the war. GREEN means their base roll needed to hit increases. It goes from needing a 6 on 2d6 added together to a 7 as a base number. Most of the French vehicles are SMALL. This necessitates an additional +1 to hit at short range. There is also another +1 at long range. Oh yeah, the Stuarts have just a 37mm gun. This means that the US has a tough time making damaging hits at long range against French tanks.
The US use of Bonus Attack Cards is limited to just the US Scout and French Armored Cars. The M5 Stuart’s radios got wet during the landings and were not working. Many French tanks in North Africa did not have radios. The one-man-turrets in all of these Vichy tanks made coordinating activities very difficult.
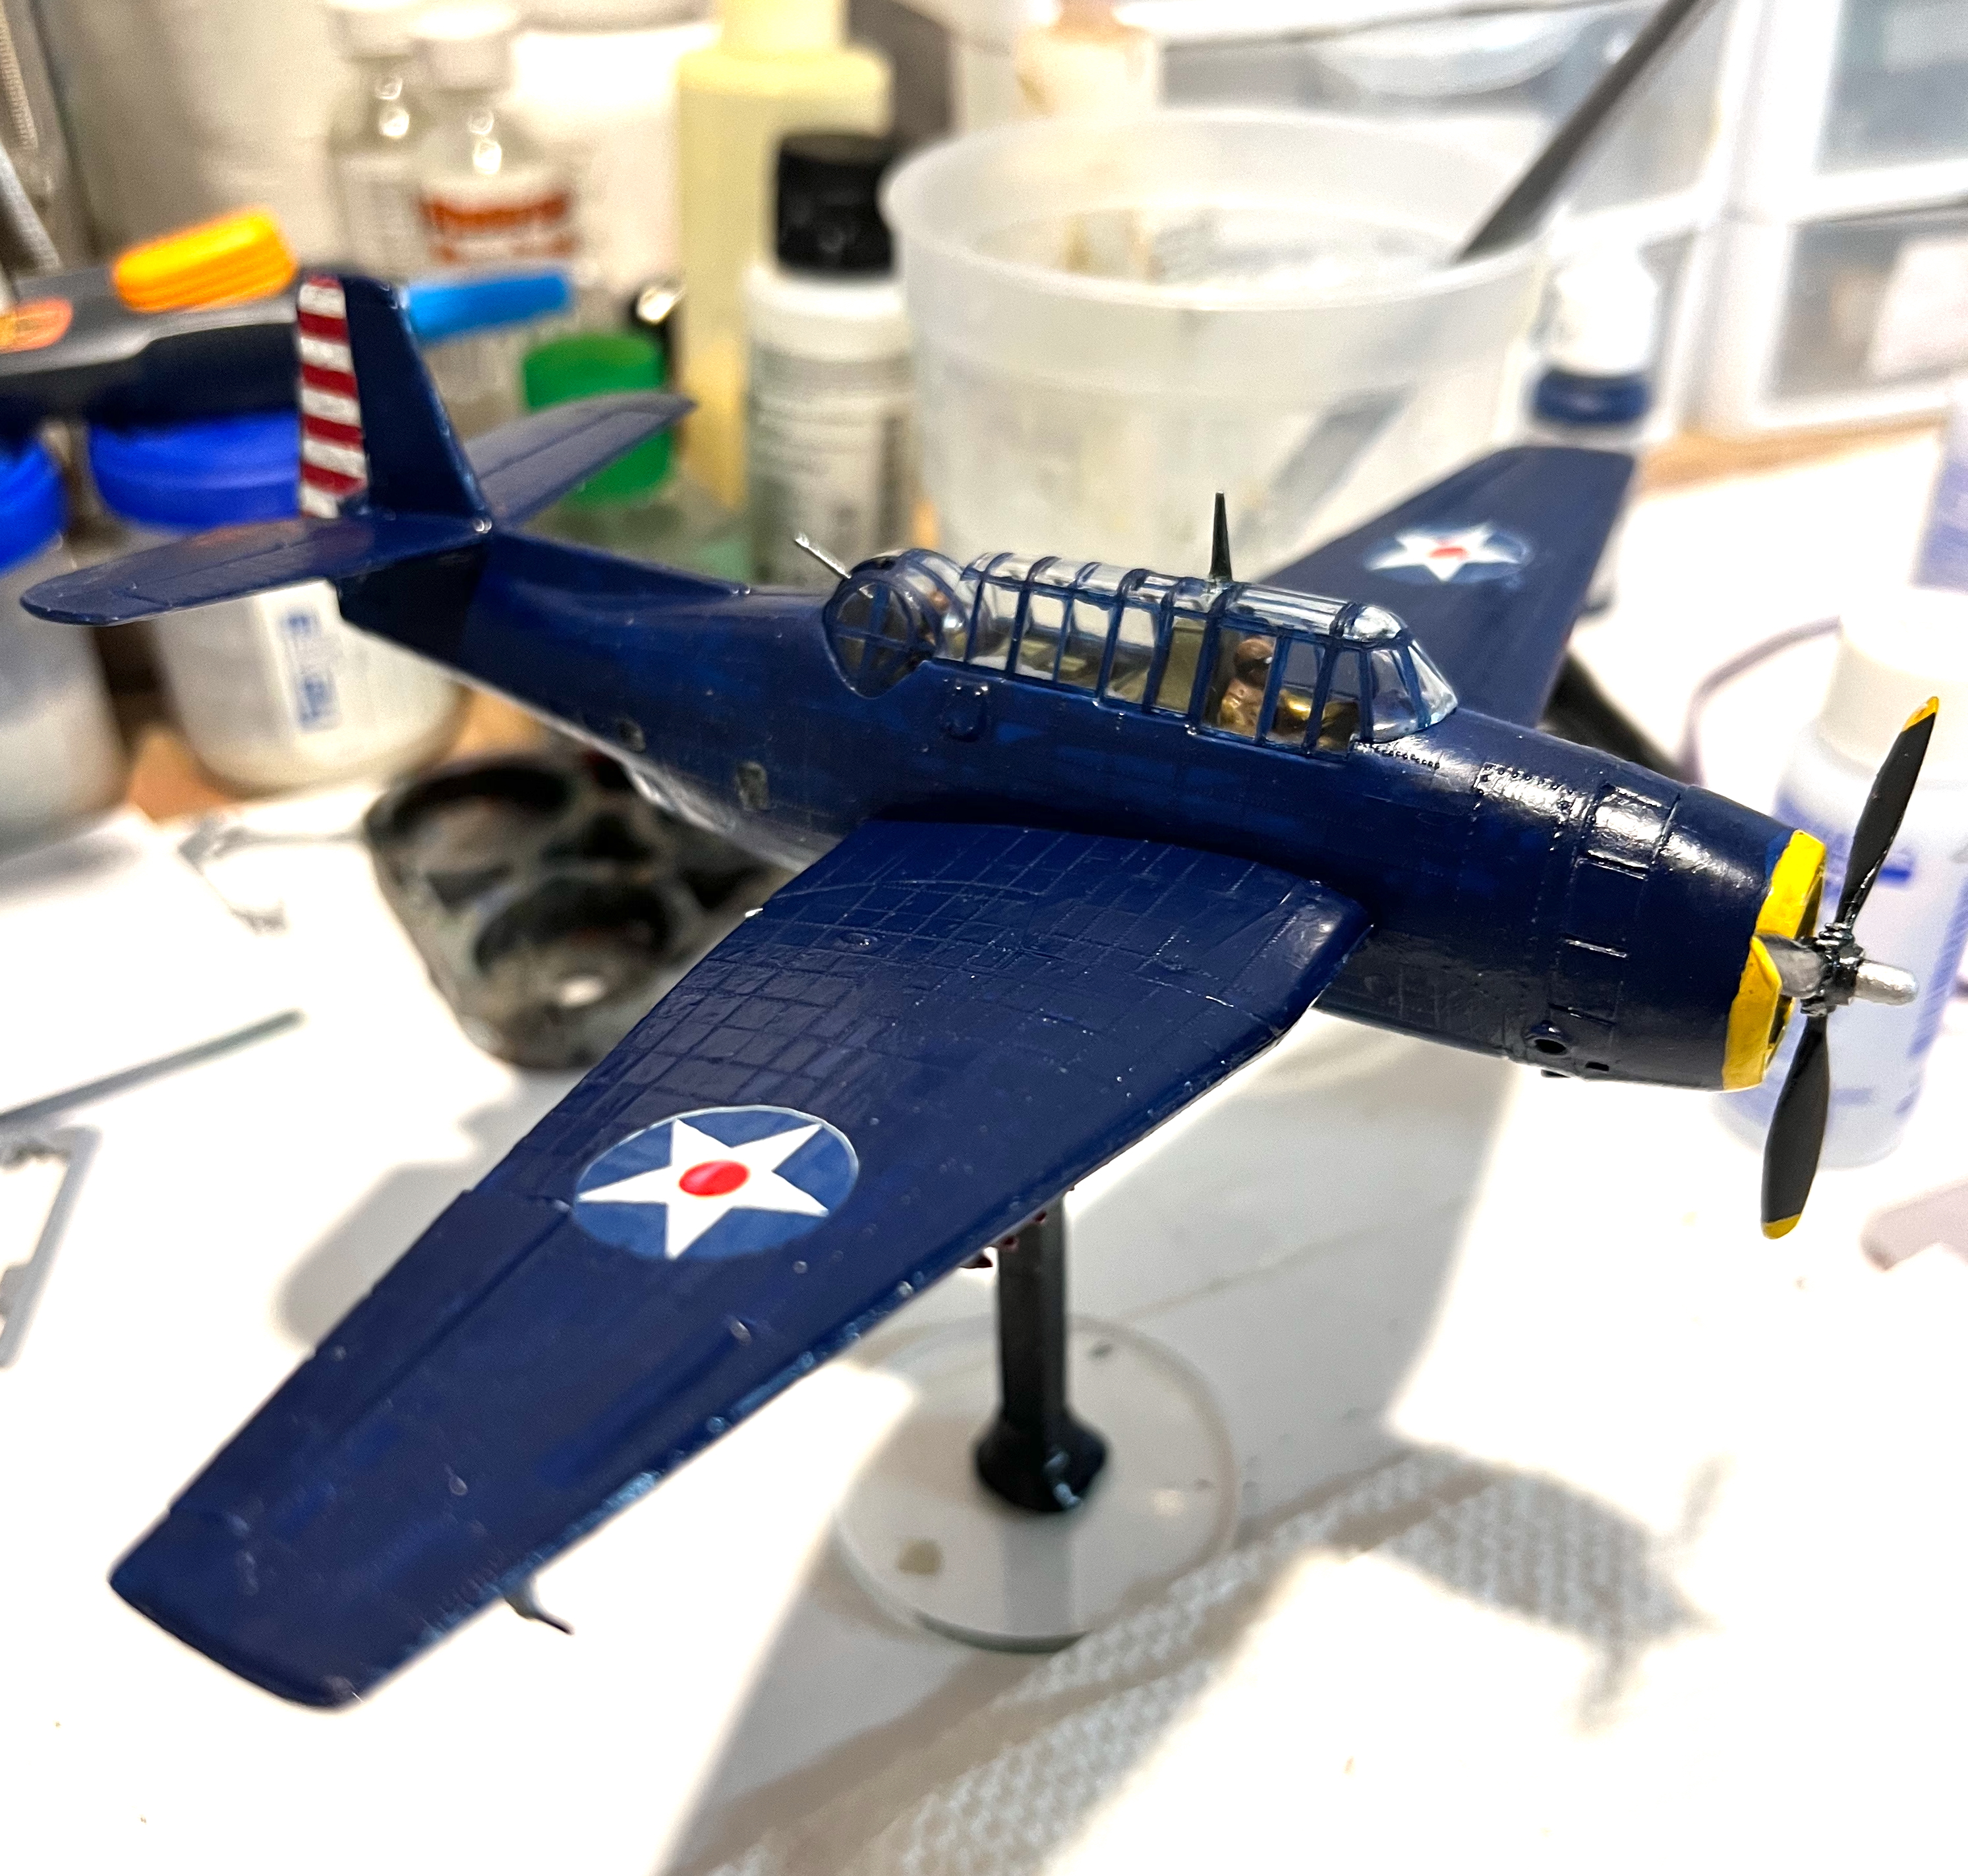
To represent the fight for air superiority, I added Bonus Attack Cards that allow the deployment of French Dewoitine D.520’s and American carrier-bases F4F Wildcats. These vie for air superiority and can also convert to ground attack missions with other Bonus Attack Cards as well.
Having air superiority enables the US player to deploy the Avenger TBM’s as spotter planes. These can improve US artillery accuracy significantly. They also can also bomb the French vehicles with depth charges (yes that happened). Lastly, Avenger deployment also opens up the chance for devastating naval gunfire from the light cruiser USS Savannah.
Modifying the activation sequencing methodology by using Buck Surdu’s “DOUBLE RANDOMTM ACTIVATION” method.
Because of the different activation sequence from What a Tanker, I now use three types of dice. Larger white d6 are used for COMMAND DICE (these let your AFV take actions). Larger colored d6 are used for ACTION DICE (for rolling for movement and firing). Smaller colored d6 are used for ACTIVATION DICE (to, well, activate an AFV in the game).
Scoring is done with TANKER BUCKS. Most wins at game end. See the rules file below (downloadable) for all the details.
I was asked to share my rules on the Facebook What a Tanker page. As I am a wicked nice guy (as we say here in Massachusetts), I am happy to do so. Below is the Word document that outlines all of the rules changes in detail. Feel free to download. If you use them, please do share your thoughts and experiences with me, I’d love to hear them.
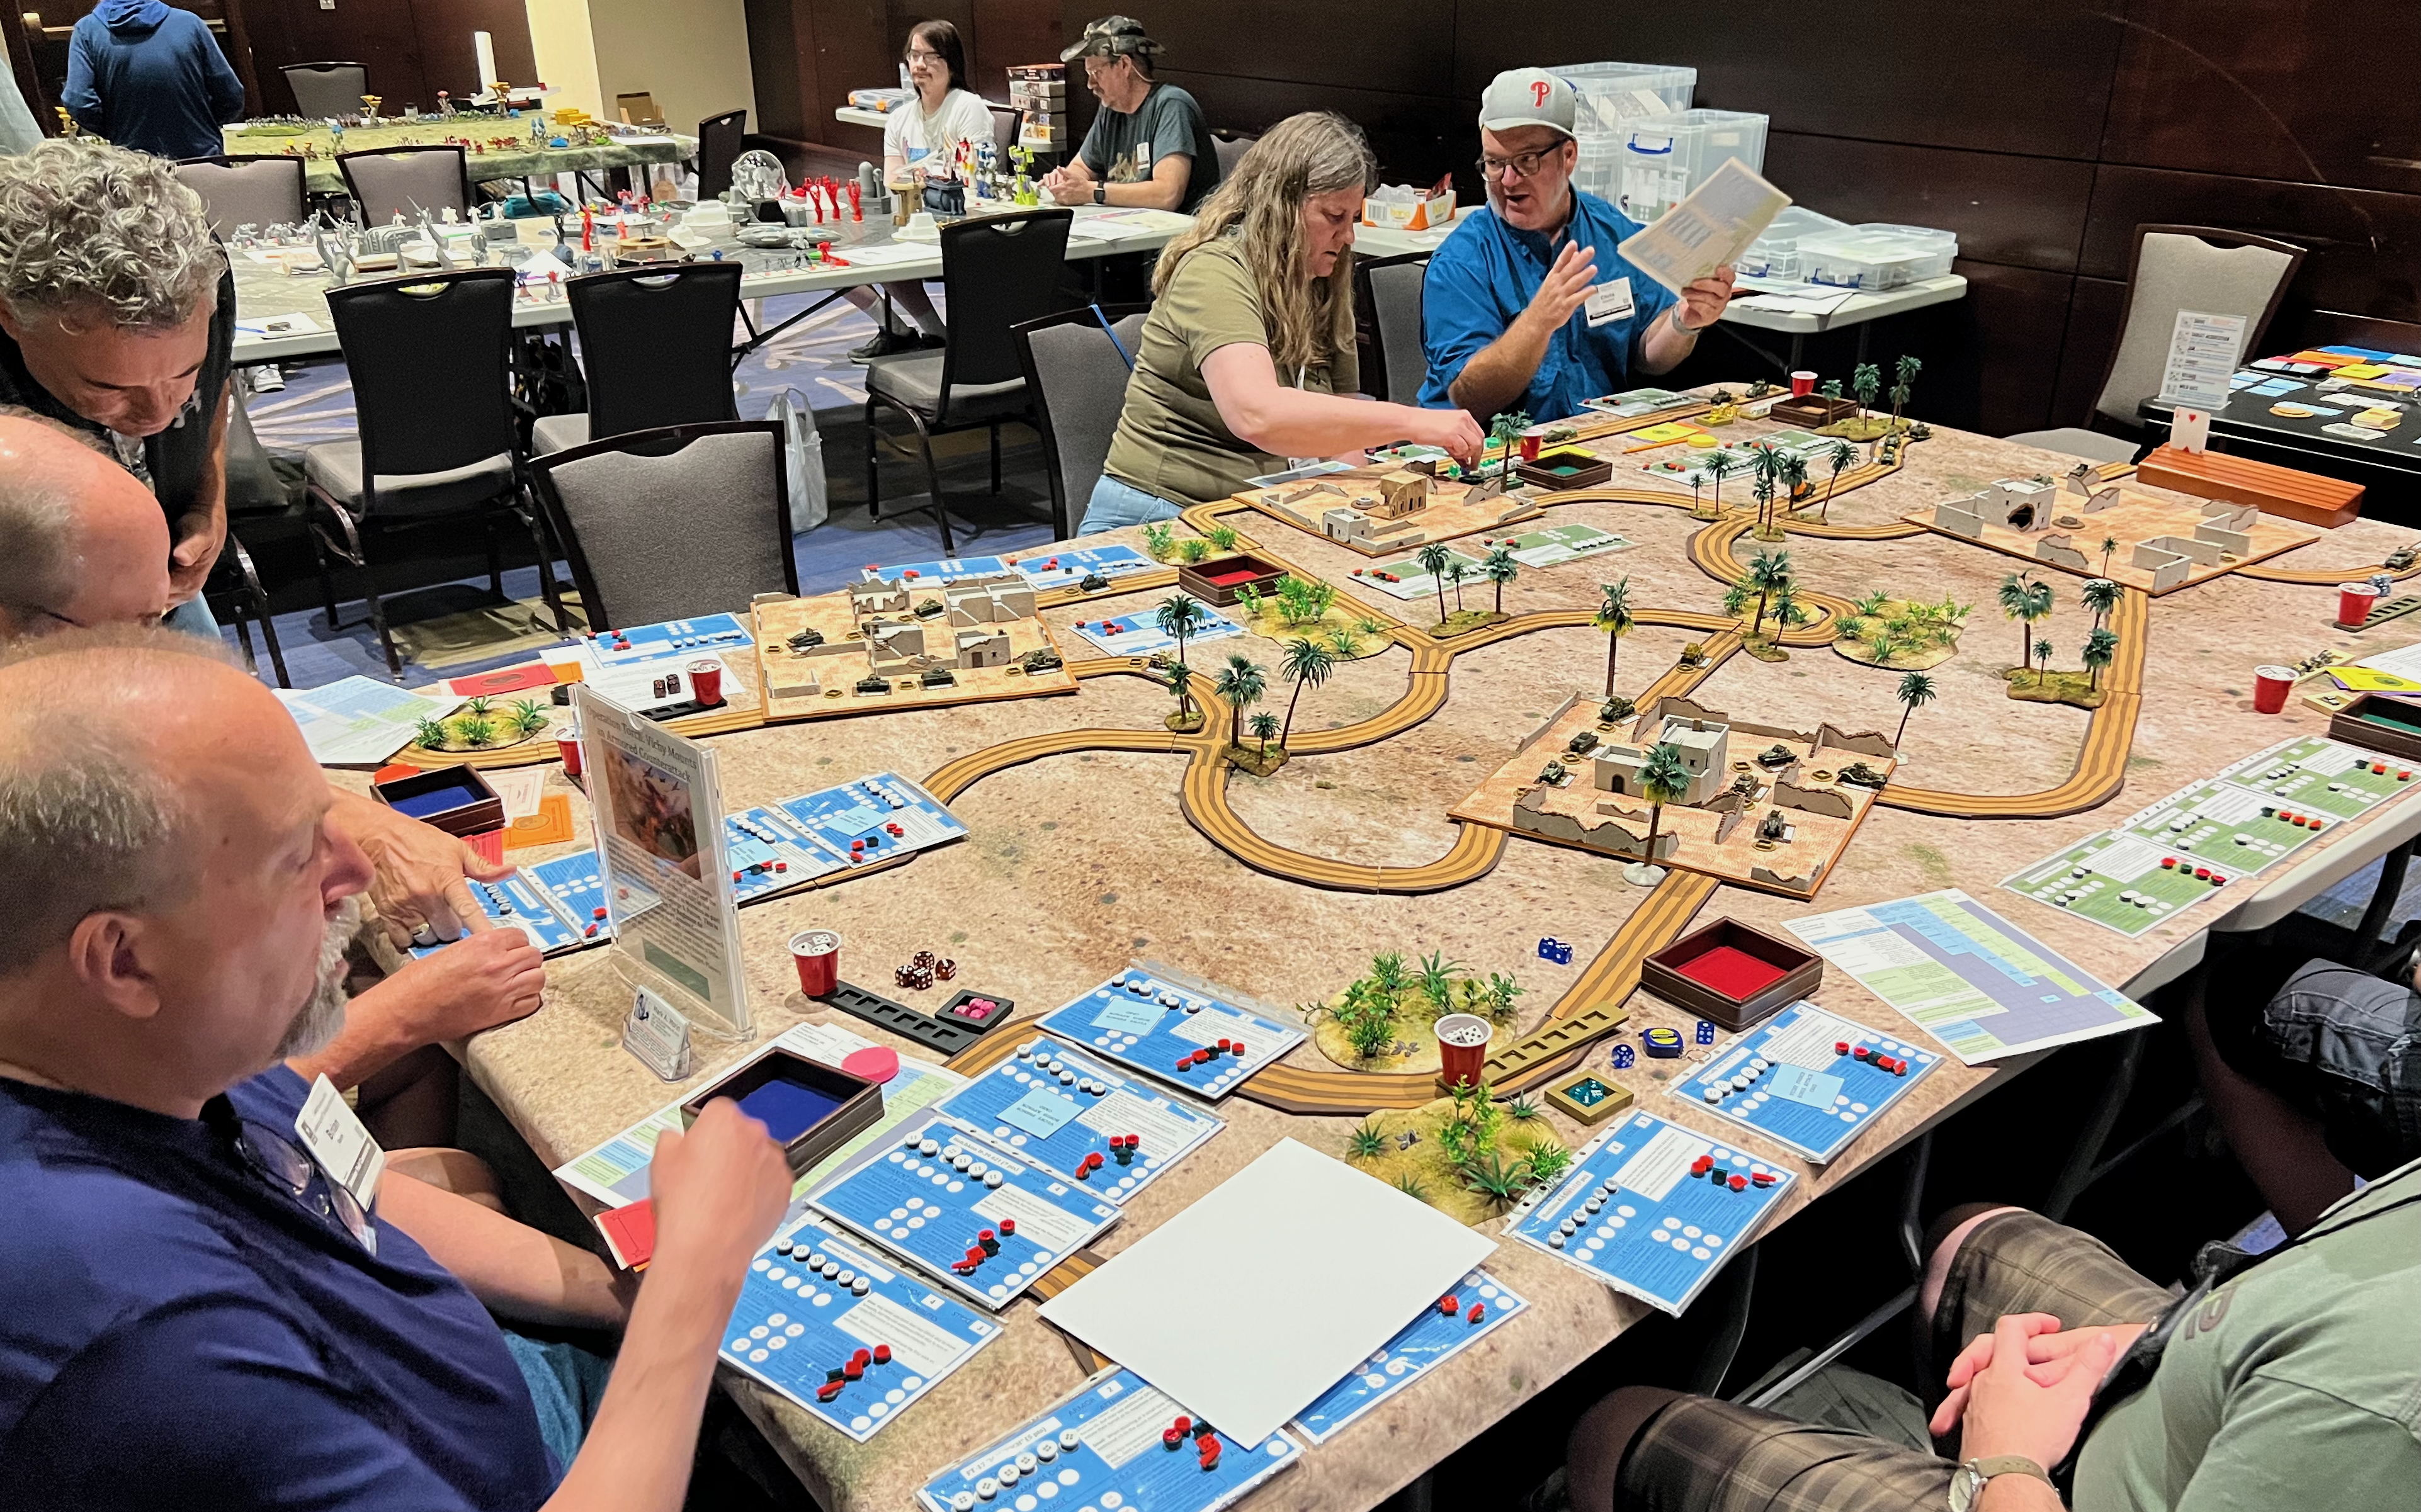
Let’s look at some photos from the HMGS HISTORICON convention games next.
HMGS HISTORICON 2025 PHOTOS OF THE GAME
I ran the scenario twice at HISTORICON in July 2025. The games went well. Each side won once.
The tabletop set up from the French side. Note the painted poster board roads and town pavements.Each French player started with 5 vehicles. The number of American vehicles varied by player, usually 2-3 including one M5 Stuart tank.Set up with Tanker Bucks. I did eventually decide on $75 per player on each side with the differentials being the cost of resources.The players from the first game – the French won here.In the second game, the US won. This victory was mainly because Dan Eustace successfully used his Bonus Attack Cards. He successively achieved air superiority with Wildcats, then got the Avenger deployed. This led to calling in naval gunfire from the USS Savannah – unleashing a volley from its 15 6″ guns. The results on the French armor was devastating.
After the game, I pondered what improvements I could make. The tweaks in the rules are reflected in the file I shared previously. However, I need to add:
More game aids like dice holders
More blast markers
Better roads – I wanted rubber ones that laid flat and took up less space in a box.
Better town bases that also were rubber and laid flat on the tabletop.
Actual plane models to represent the aircraft. I was using photos on flight stands at HISTORICON for the planes, and I wanted better.
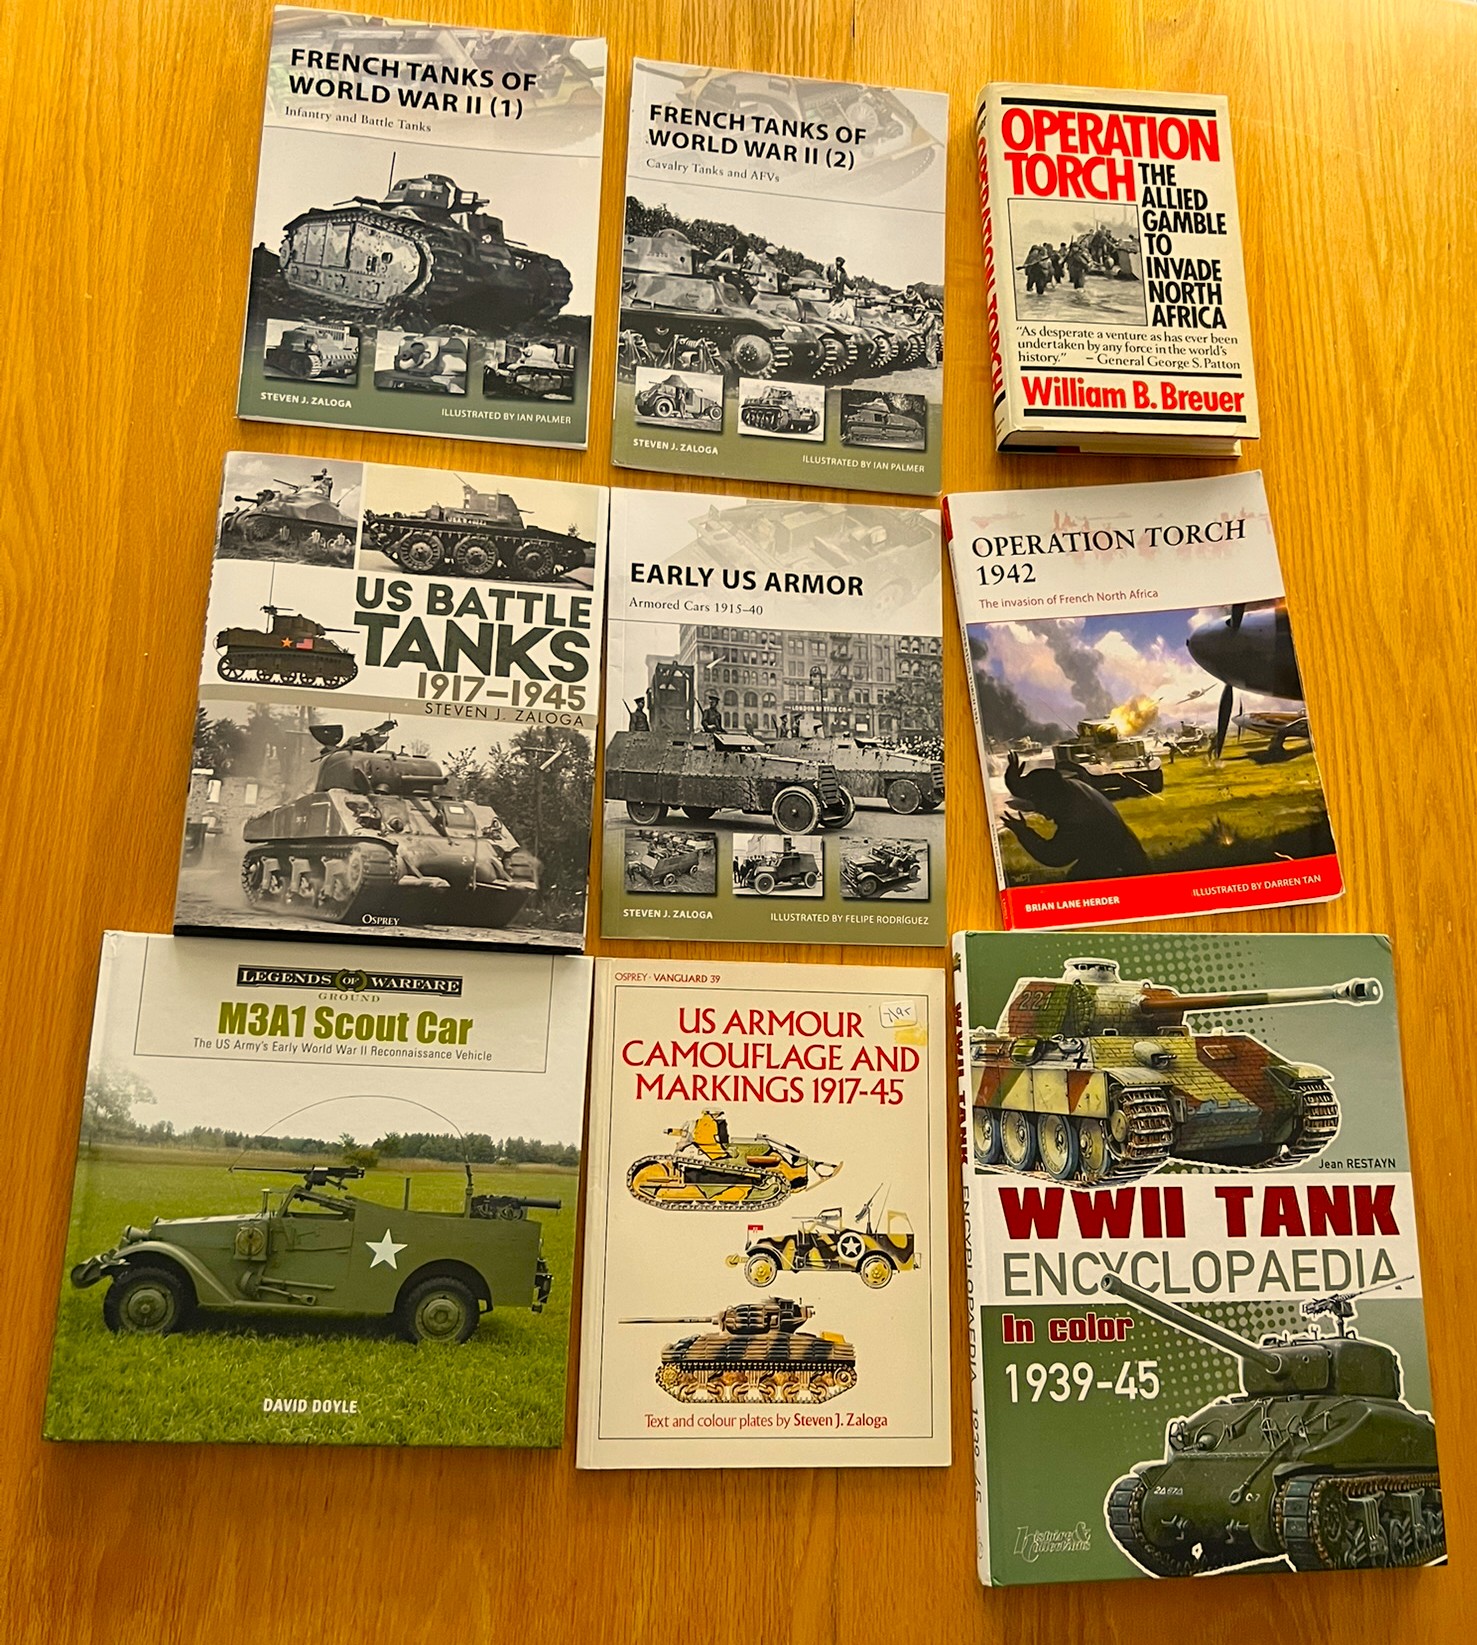
I wanted to read a book on the campaign that I learned about. It was recommended to me in a comment to one of my blog post links on TMP. It focused on this phase of WWII, and I planned to do this before I did any more hobby work. Rick Atkinsons’s An Army at Dawn is a true gem of a historical book, and a must read. This was my August effort.
Previous research booksAugust’s great read!
After reading these, it was time to get going on the additional “stuff” listed above. I knocked out the dice frames and similar tasks quickly. I had enough for 8 players, and now I was set for 10.
Building Dirt Roads and City Bases WIP Shots
Now it was time to make the roads and city bases. I stumbled on this excellent video on how to make rubber wargaming roads. It became the blueprint I used and I highly recommend his process.
Here is a link to the excellent video.
Below are progress WIP shots of how I built 54 sections of road and 4 bases.
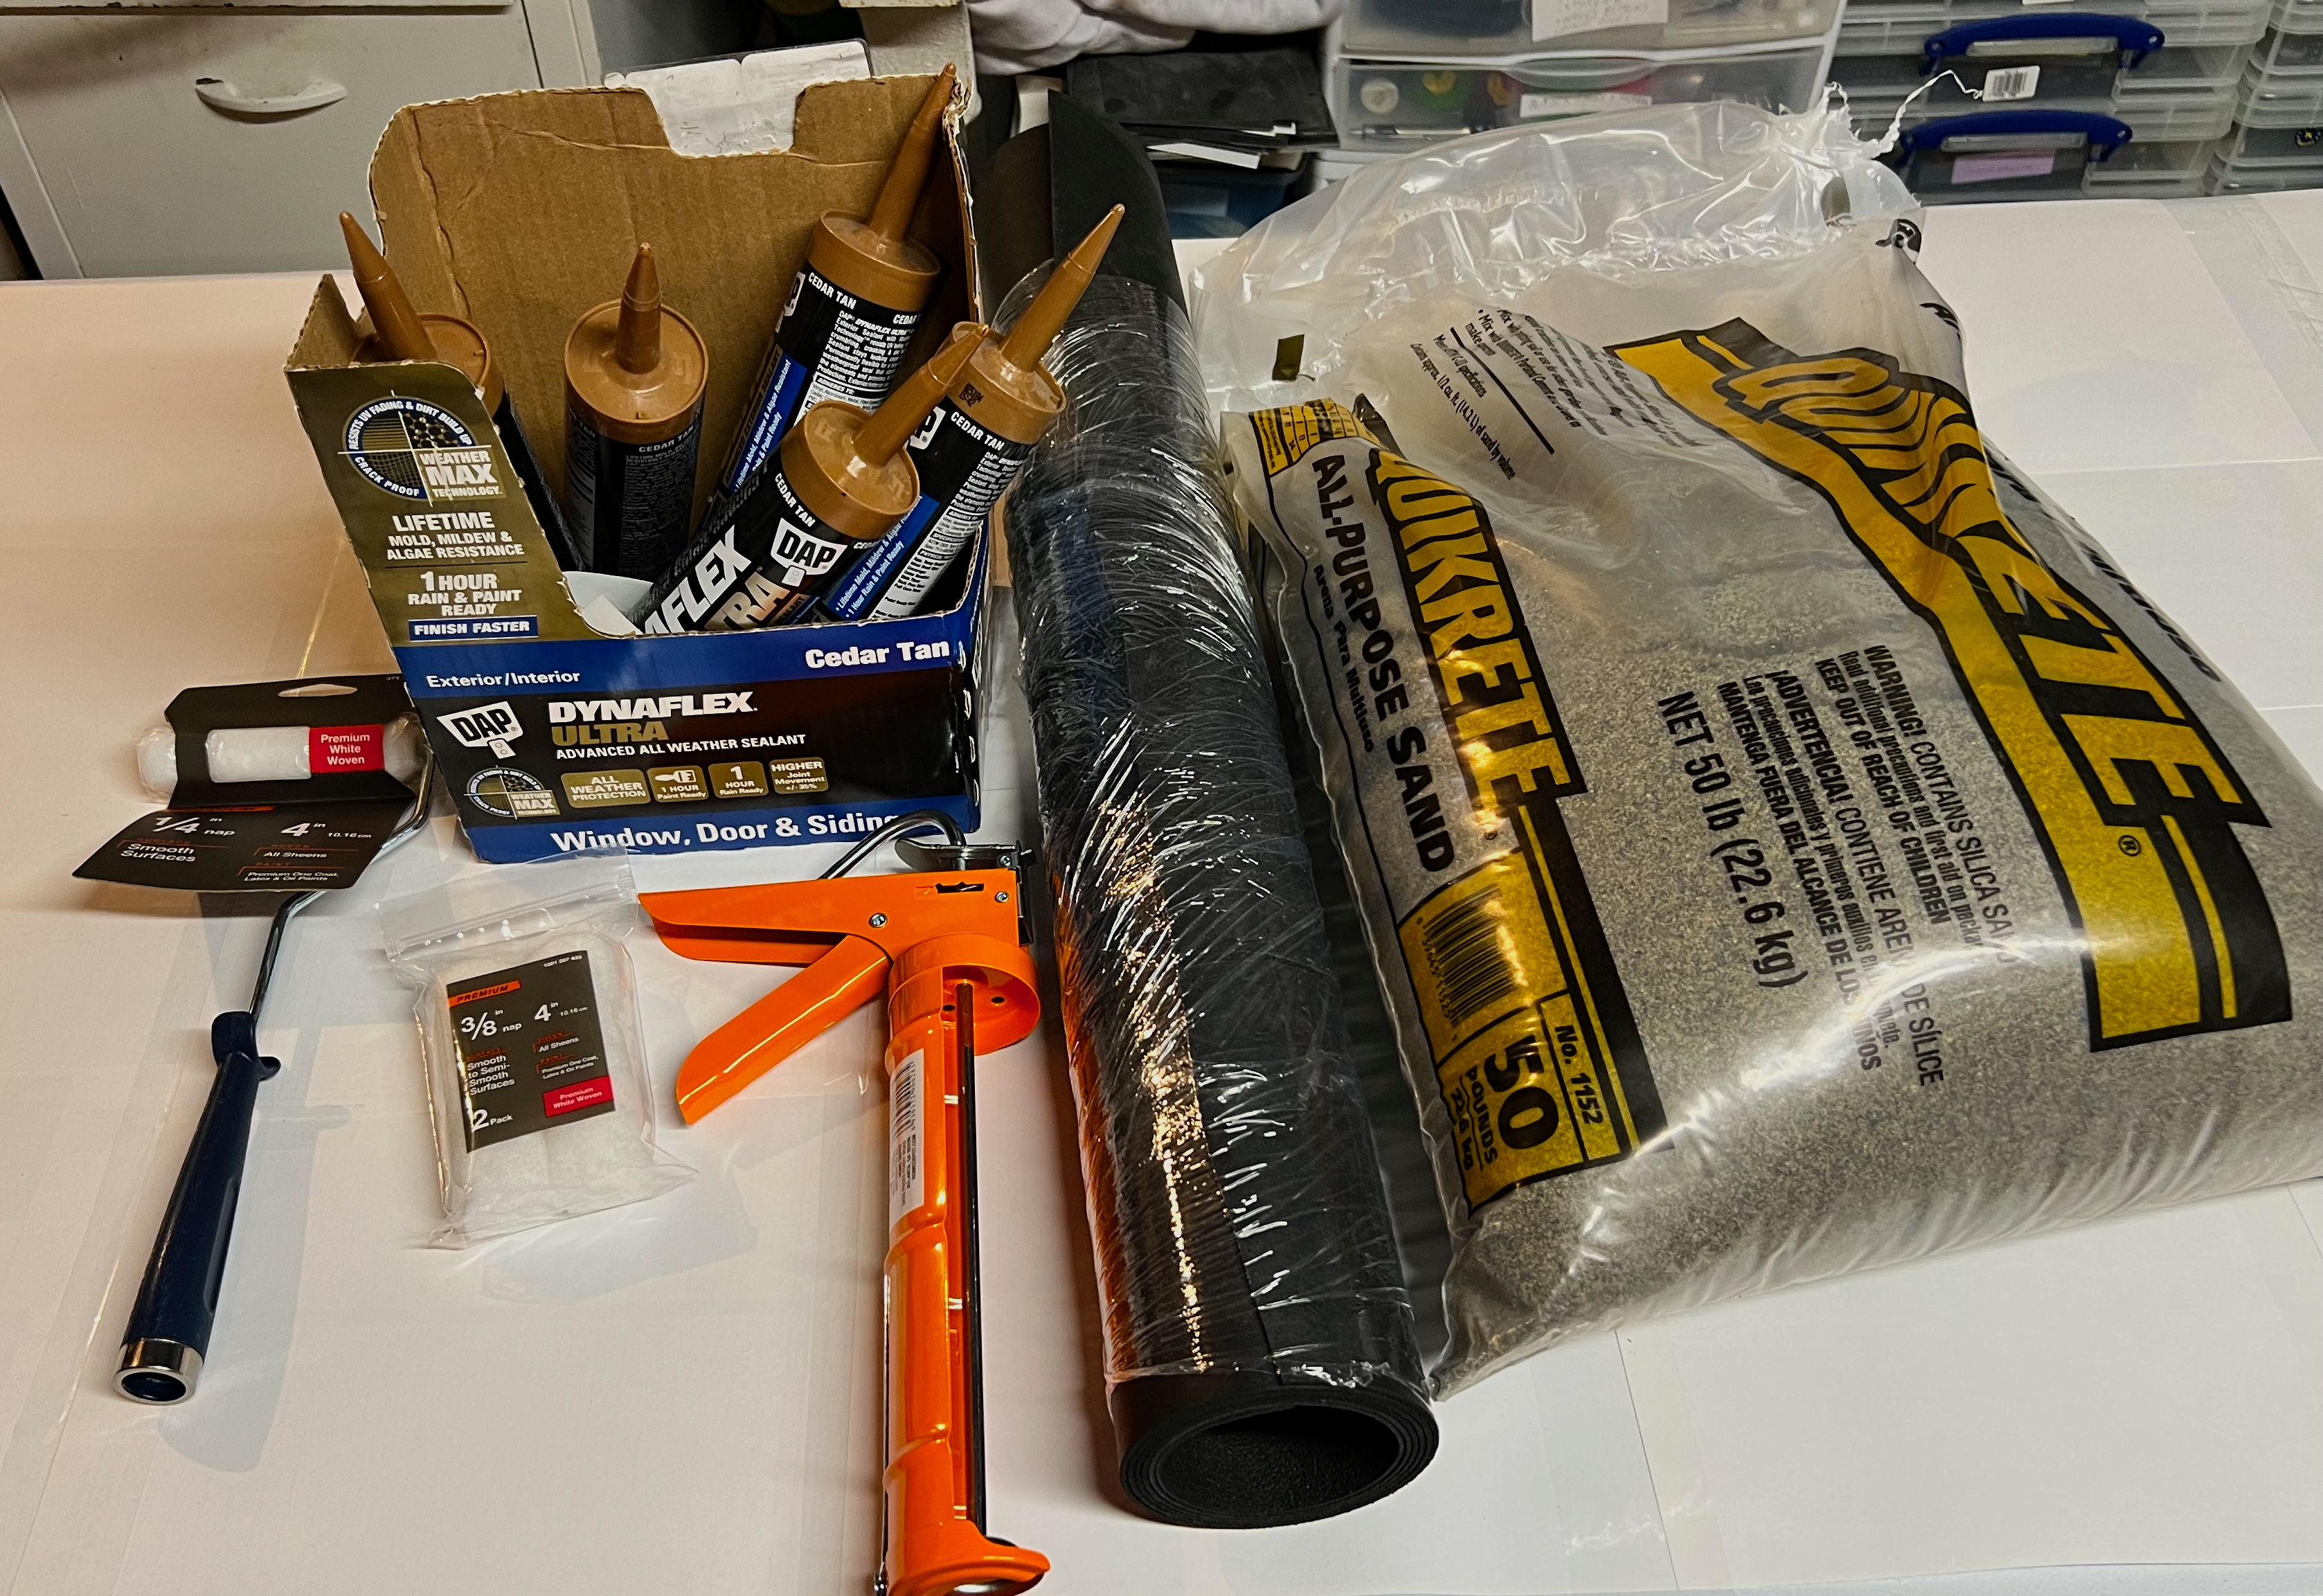
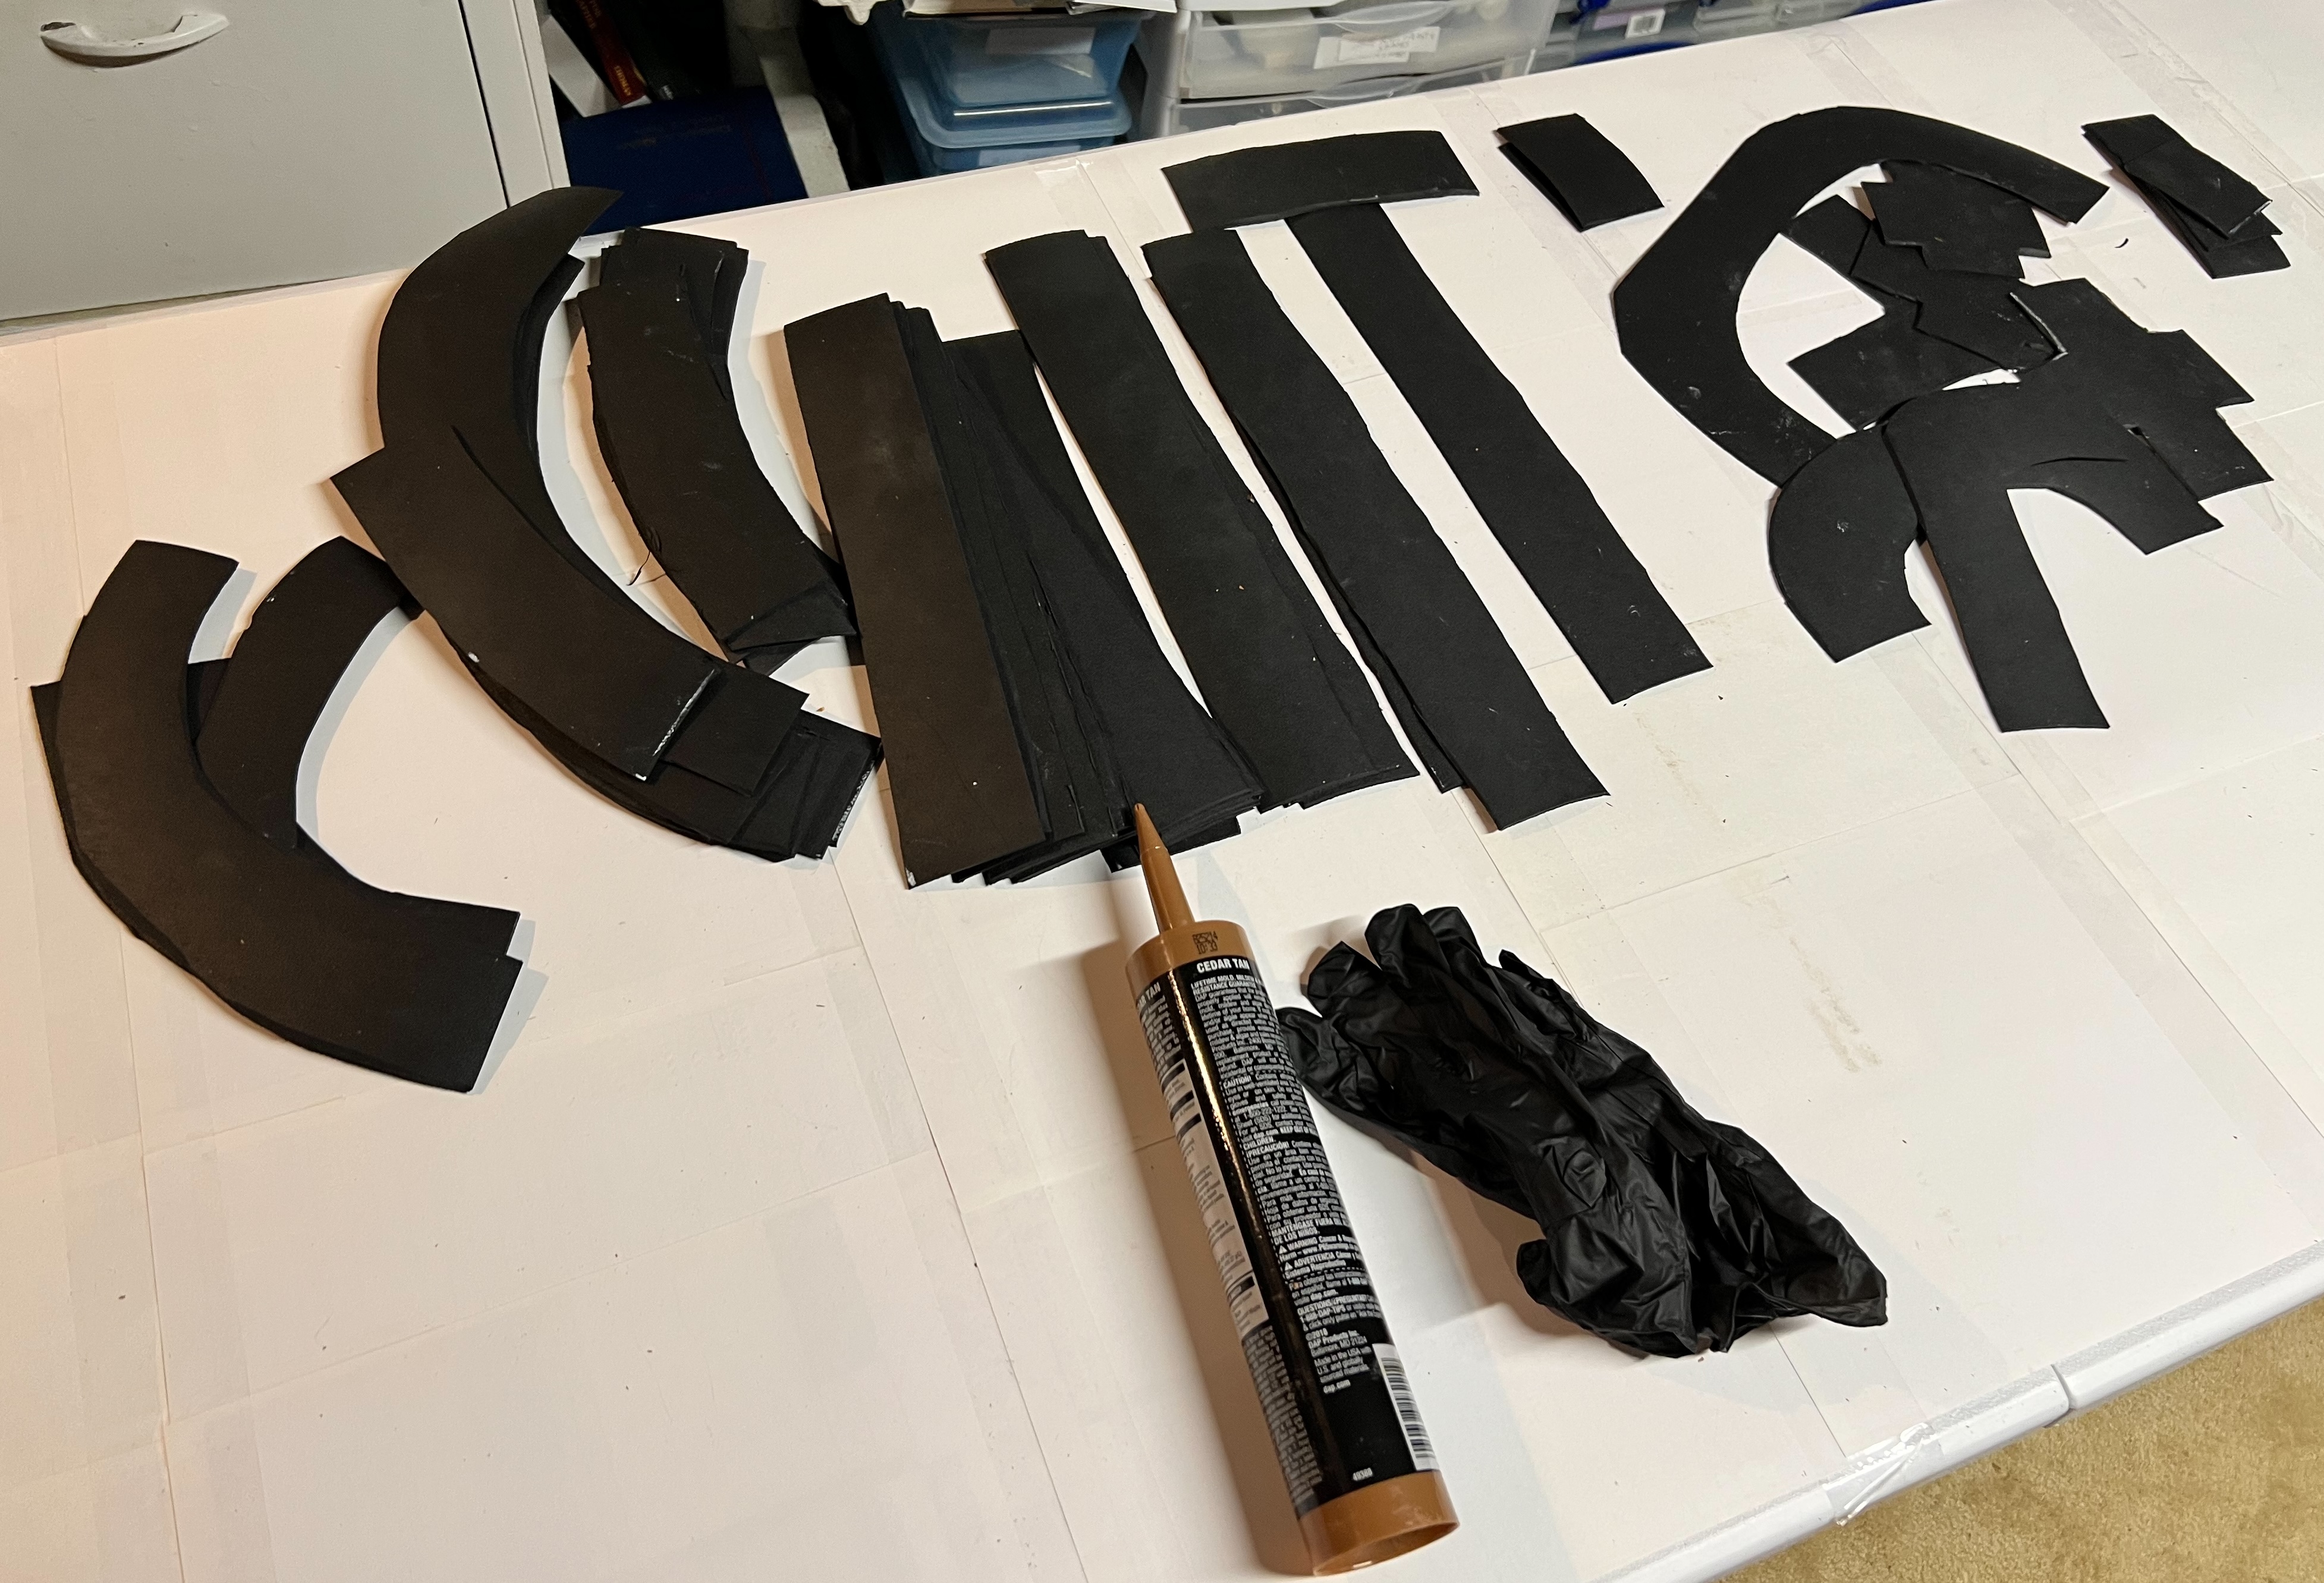
What I needed included a small paint roller, a caulking gun, and paintable caulk sealant. It also involved cutting up rubber floor runner material. Additionally, play sand and chinchilla dust were used on the roads for texture.I cut the floor runner rubber with a box cutter on a wooden cutting board. I made the same number and types of dirt roads I had previously made with the poster board (54).
For a working space to work on the roads, I covered one of my gaming tables with paper. The sheets were secured with packing tape and this was sufficient to protect the table.
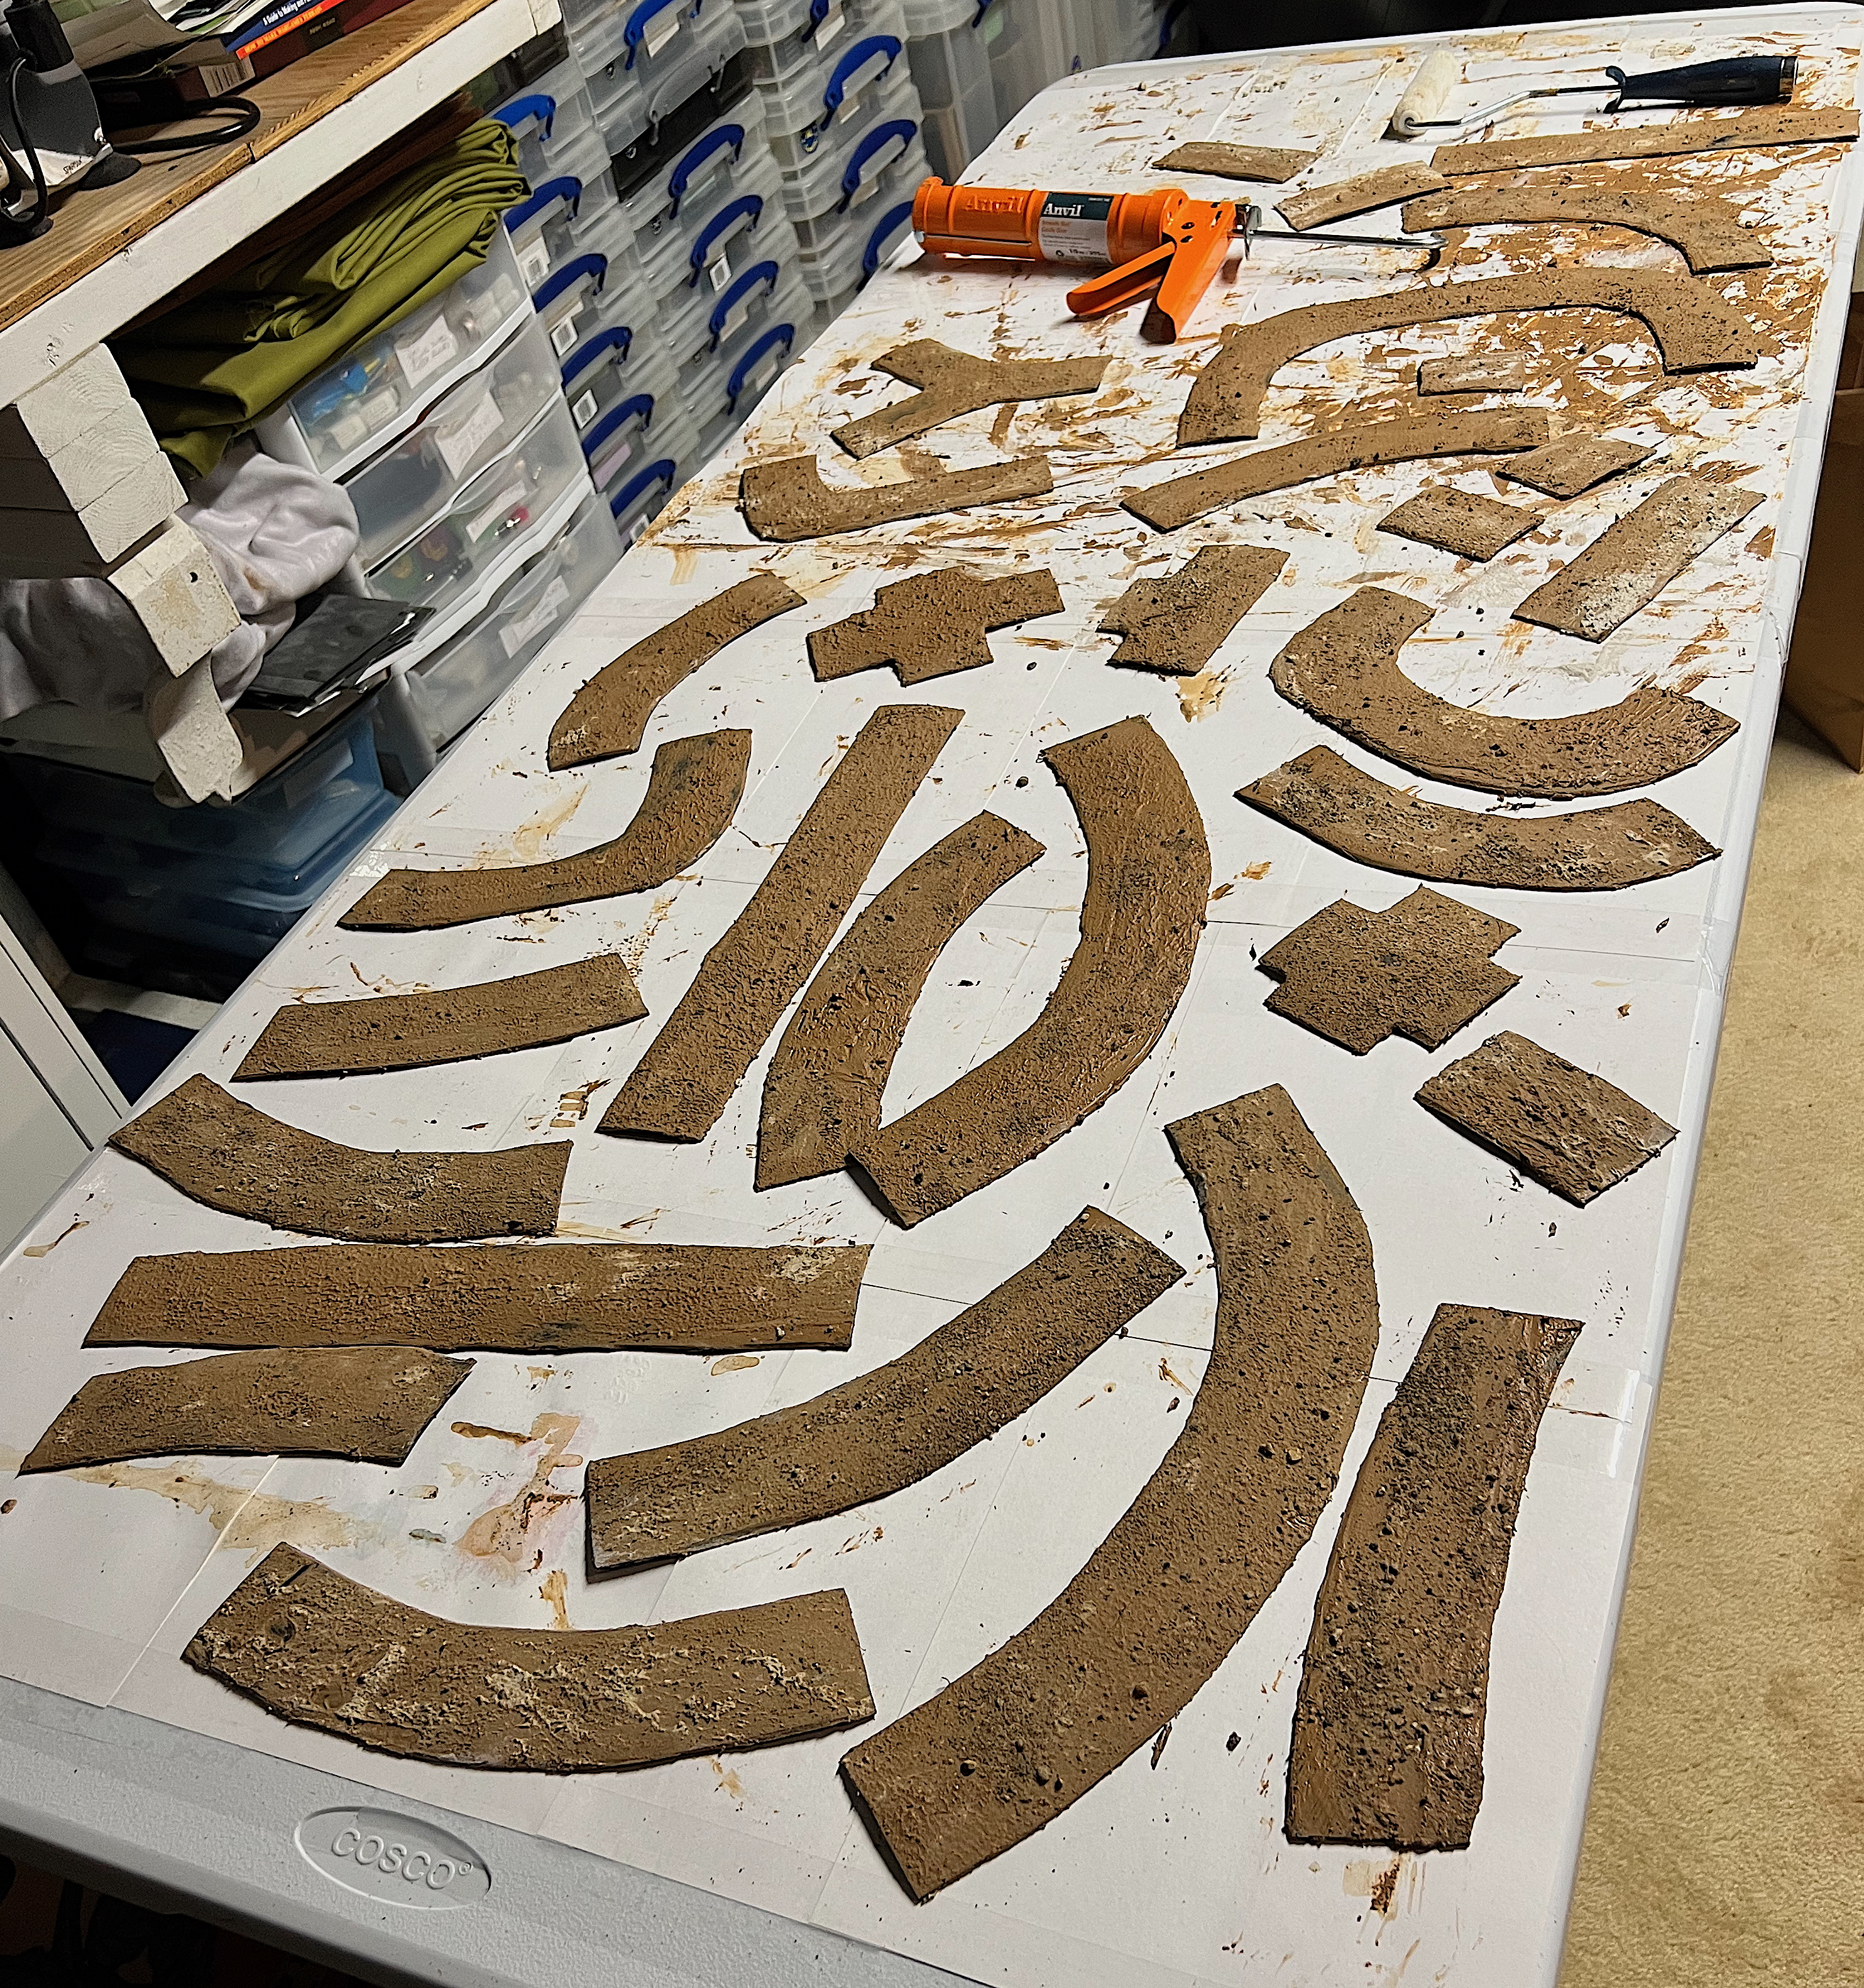
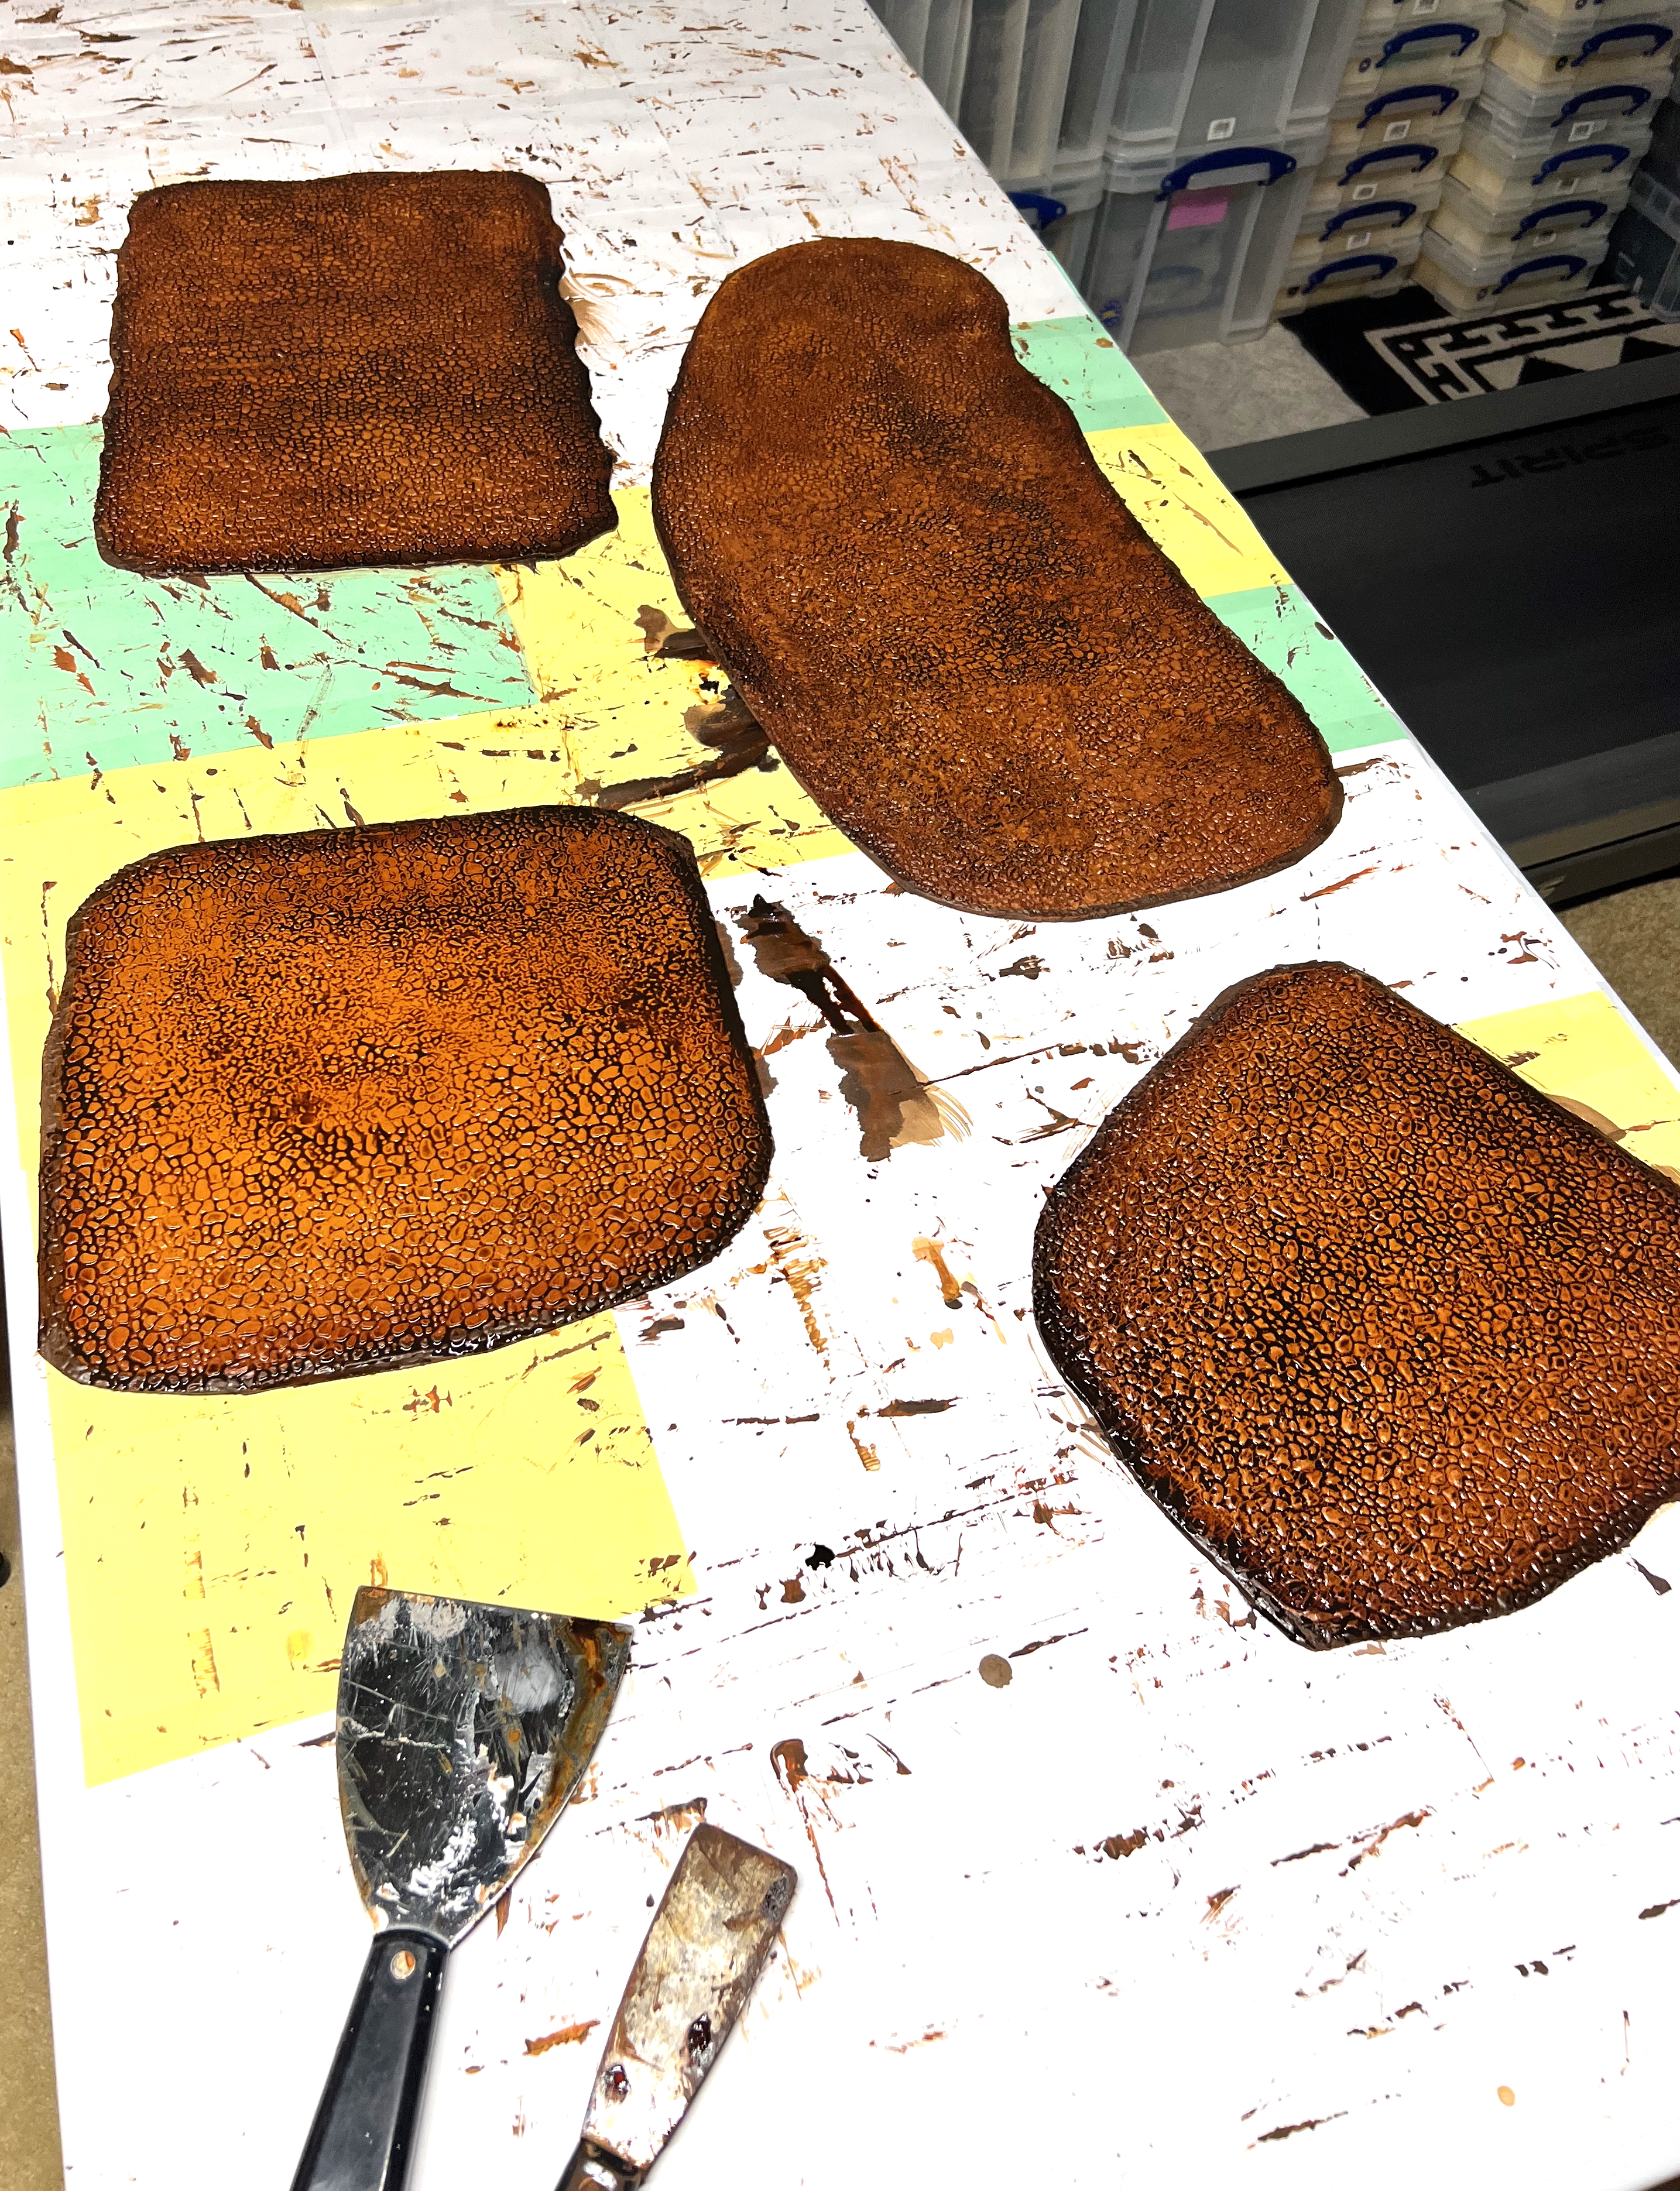
Here you see some of the road sections in progress. Sand and chinchilla dust were both rolled onto the caulk with a wet paint roller.The first tranche of roads drying……and here painted minus some final dry brushing.Then it was on to the city bases. I limited the width of the city bases to accommodate using a Green Stuff World Mega roller. The roller made a cobblestone imprint.Greg Priebe was kind enough to gift me the roller. Here I cut the first piece of rubber floor runner. As I did with the roads, I beveled the edges slightly. The edge angle was around 45 degrees.A caulking gun spread out the sealant. Then I smoothed it as you see with two different putty knives, before rolling the cobblestone patterns. This was the approach for all four bases – I just sized and shaped them differently.The painting scheme was basically the same for all four. Here you can see the imprinted cobblestones. To accentuate them, I used a Liquitex “Burnt Umber” ink cut with thinner. Then I let them dry before adding a quick dry brush.The final bases completed. I would place 15mm buildings on them.
This was far more economical than buying similar roads. Now that the dirt roads and town bases were completed, it was time to add my 3 aircraft.
Aircraft Model WIP Shots
My search initially was for the right three 1:100 scale planes, but that effort proved fruitless. No one really makes aircraft in that scale, at least not the ones that I was looking for. Most models were 1:72. I did find some die cast models that would work just fine. They are more like game status makers. Those diecast models were the carrier-based Grumman F4F Wildcat and the Dewoitine D.520. Both had flight stands – an important feature as I wanted their landing gear to be retracted in flight.
A bit of assembly for these two diecast models was required, but not much. That left the Grumman Avenger TBM to source. And lucky me, I found one on eBay – obviously left unassembled since at least 1979 – if not much earlier. It was an Airfix plastic model, and it was complete. The papers inside were amazingly yellowed with age as you will see. I had not built a plastic model like this since I was a kid. It was probably for sale back then!
The F4F Wildcat, the Dewoitine D.520, and the Avenger kit. It says “new”, but…I guess it was at some point in the 1970’s? 1960’s?The kit contents.The components laid out so as to figure it all out. The directions were fine. The decals were, well, as you can see, trash. I did order some replacements from eBay as you will see.
As for assembly, it went fine. I painted the three crewmen. The tail gunner will never be seen because the acrylic window was not too clear. As for the outside, I went with a Vallejo “Deep Prussian Blue” – it seemed closest to the box color. In my research, I saw several different color schemes for the undercarriage. Some were blue, some were two-toned. The model would be on a flight stand. This stand would not afford visibility to the bottom, so I decided that blue was sufficient.
Inside the wing – how old was this?The three crewmen and the rear landing gear and tailhook. The tailhook would not survive the build.Avenger TBM assembled and painted (and below in the gallery).
The last assembly from the kit for the Avenger was the rockets underneath. I assume that any depth charges would have been in the bomb bay – as unseen as the gunner underneath. So that works!
The rockets are mounted. Next, we moved on to applying appropriate decals. That proved to be the most difficult part.
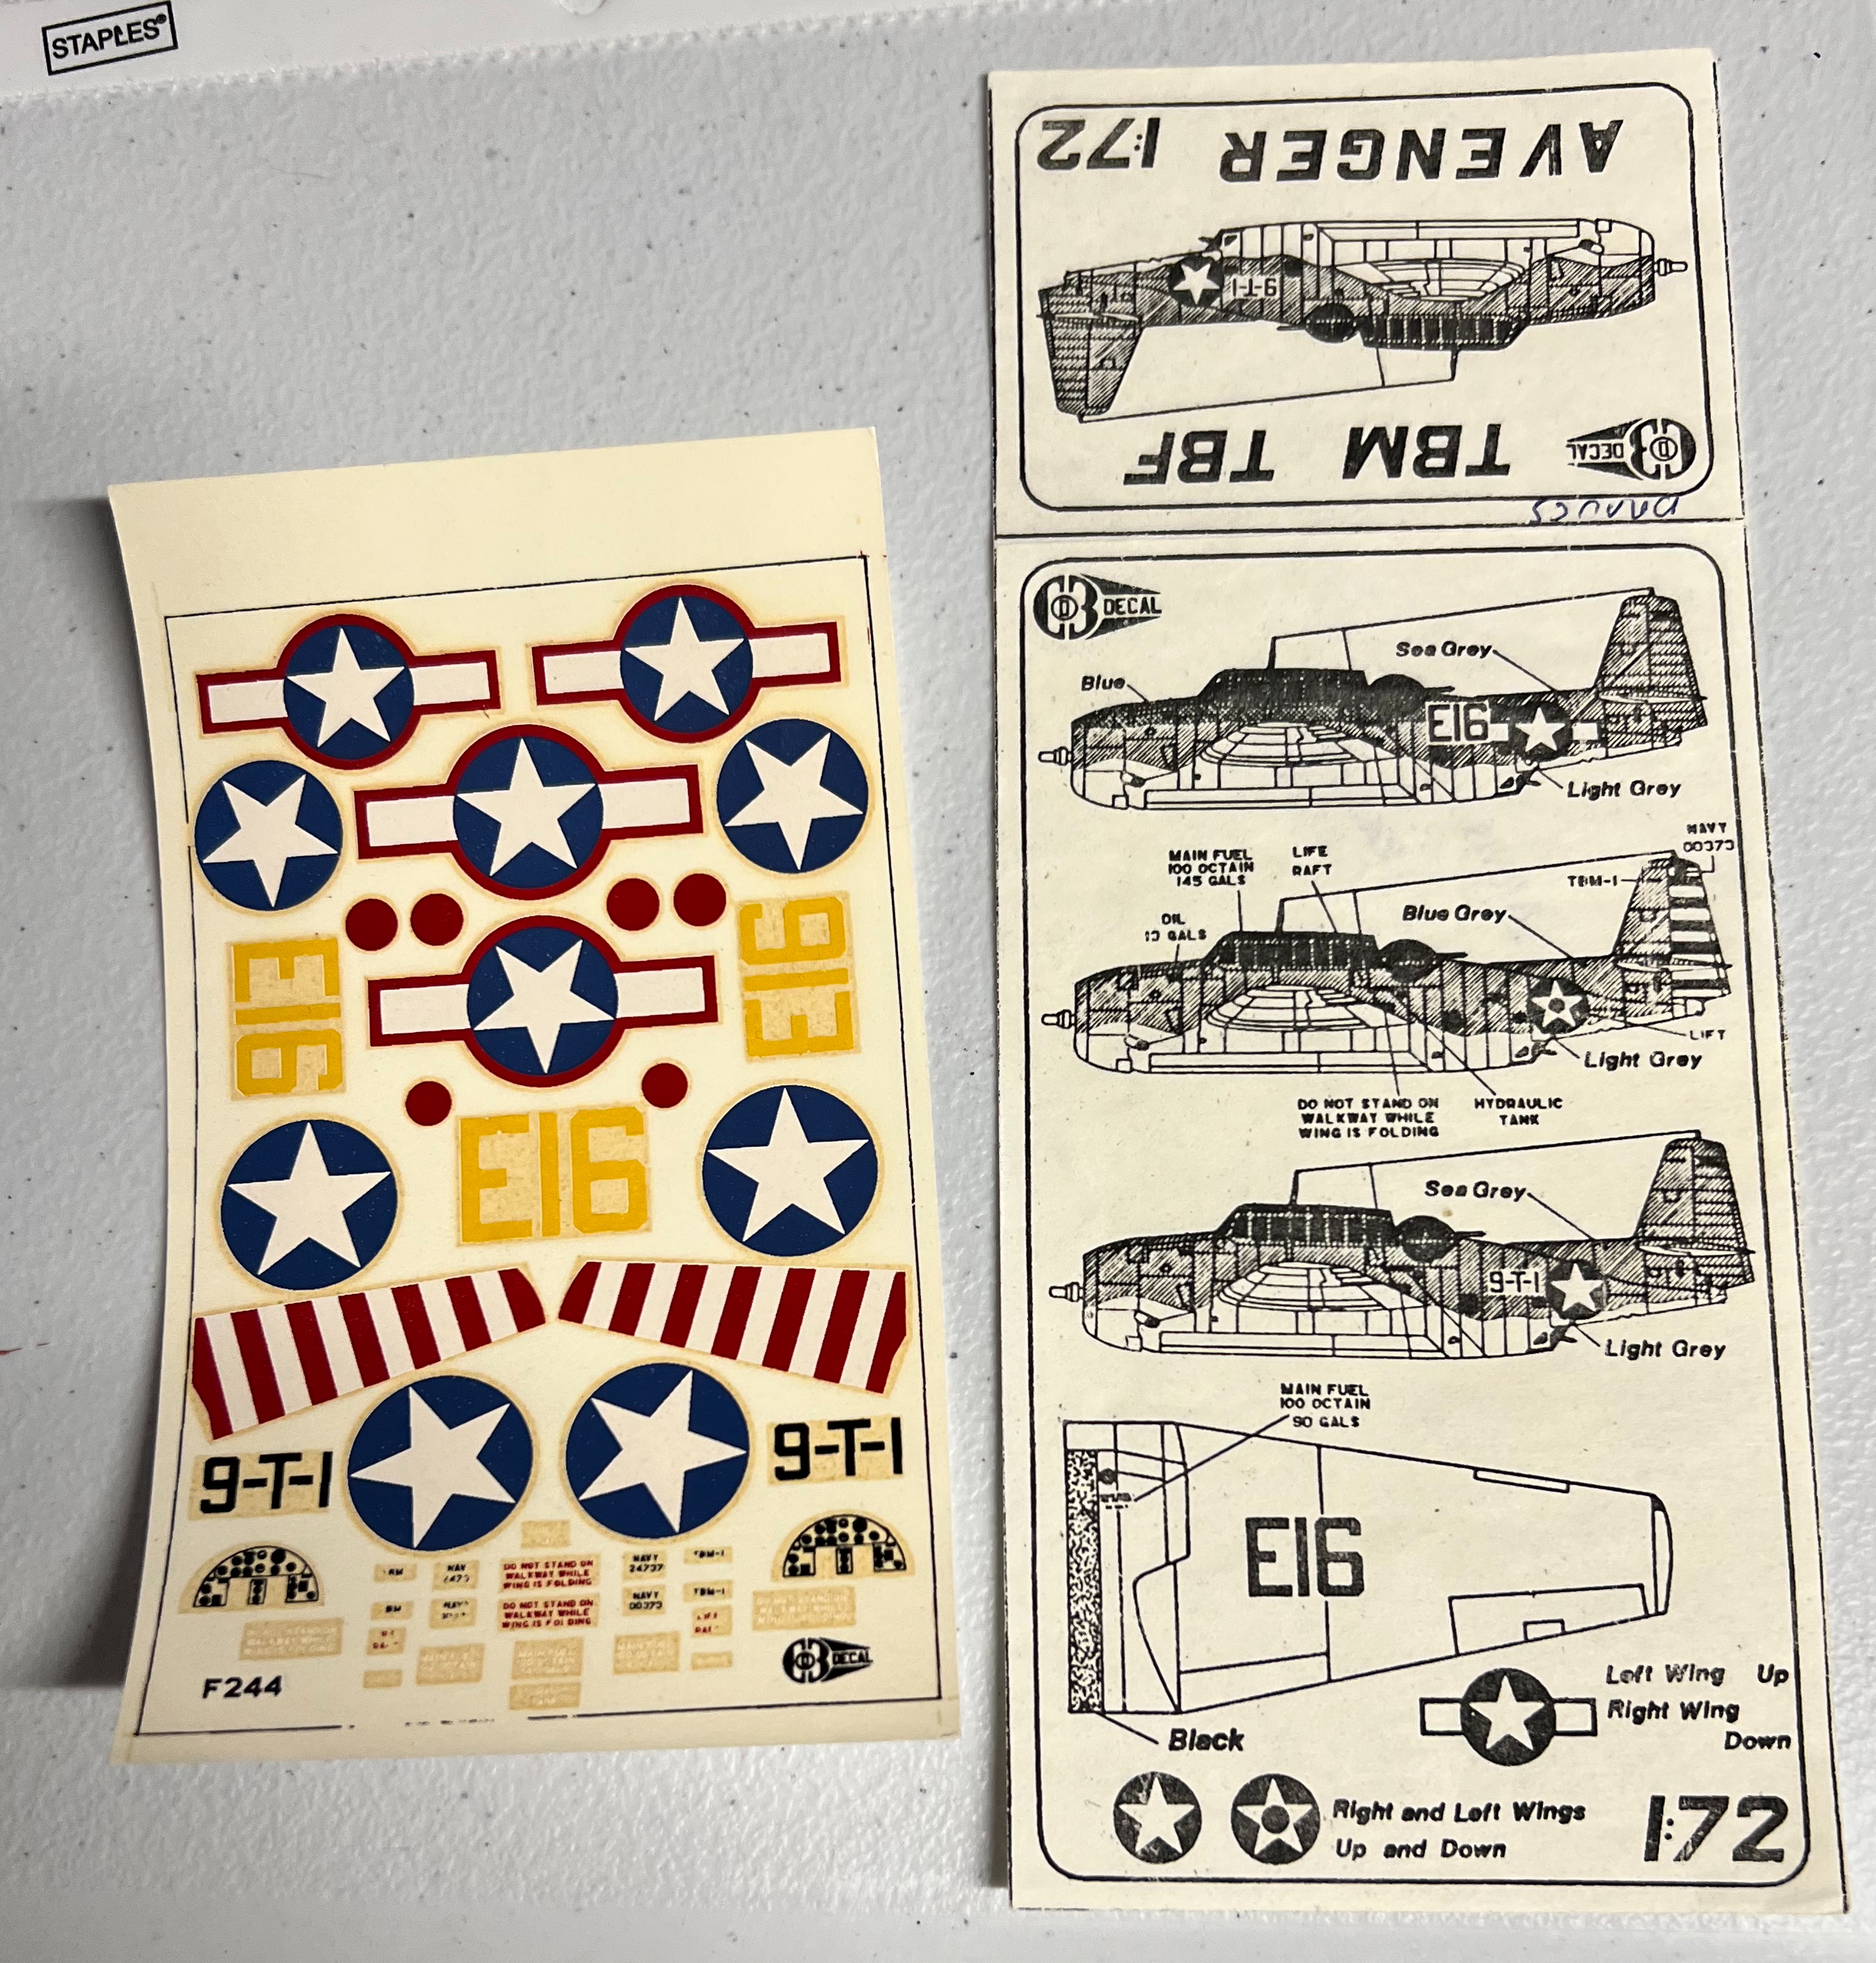
The decals I bought were from the US and came via a modeling shop in Latvia of all places. I have no idea of the age – except likely post-Cold War I imagine. I used multiple coats of Microscale “Liquid Decal File” to restore them as best I could. Even with that, several of them disintegrated into multiple jigsaw pieces in the progress of placing them on the model. This led to my having to reconstruct the decals while wet. Ugh. I made it work.
The “newer” decal set.Latvia?
But wait – before all the decal work – I needed a flight stand! I made one with a 1/4″ wooden dowel, green stuff, and a 2″ acrylic base. I carefully carved out a hole on the model to accommodate the stand.
Then it was on to applying decals as best as I could.
Mid-stage with the decals. The tail and rudder ones were really finicky.
Finally the planes were done. I also built a special travel box for the Avenger. For the other two, the original package blisters served that purpose.
All three planes for the game, frontal view……and a side view.
Upon completion, I could mock up the tabletop in the cellar in preparation for HMGS FALL IN! in Lancaster PA and EllisCon in Danielson, CT.
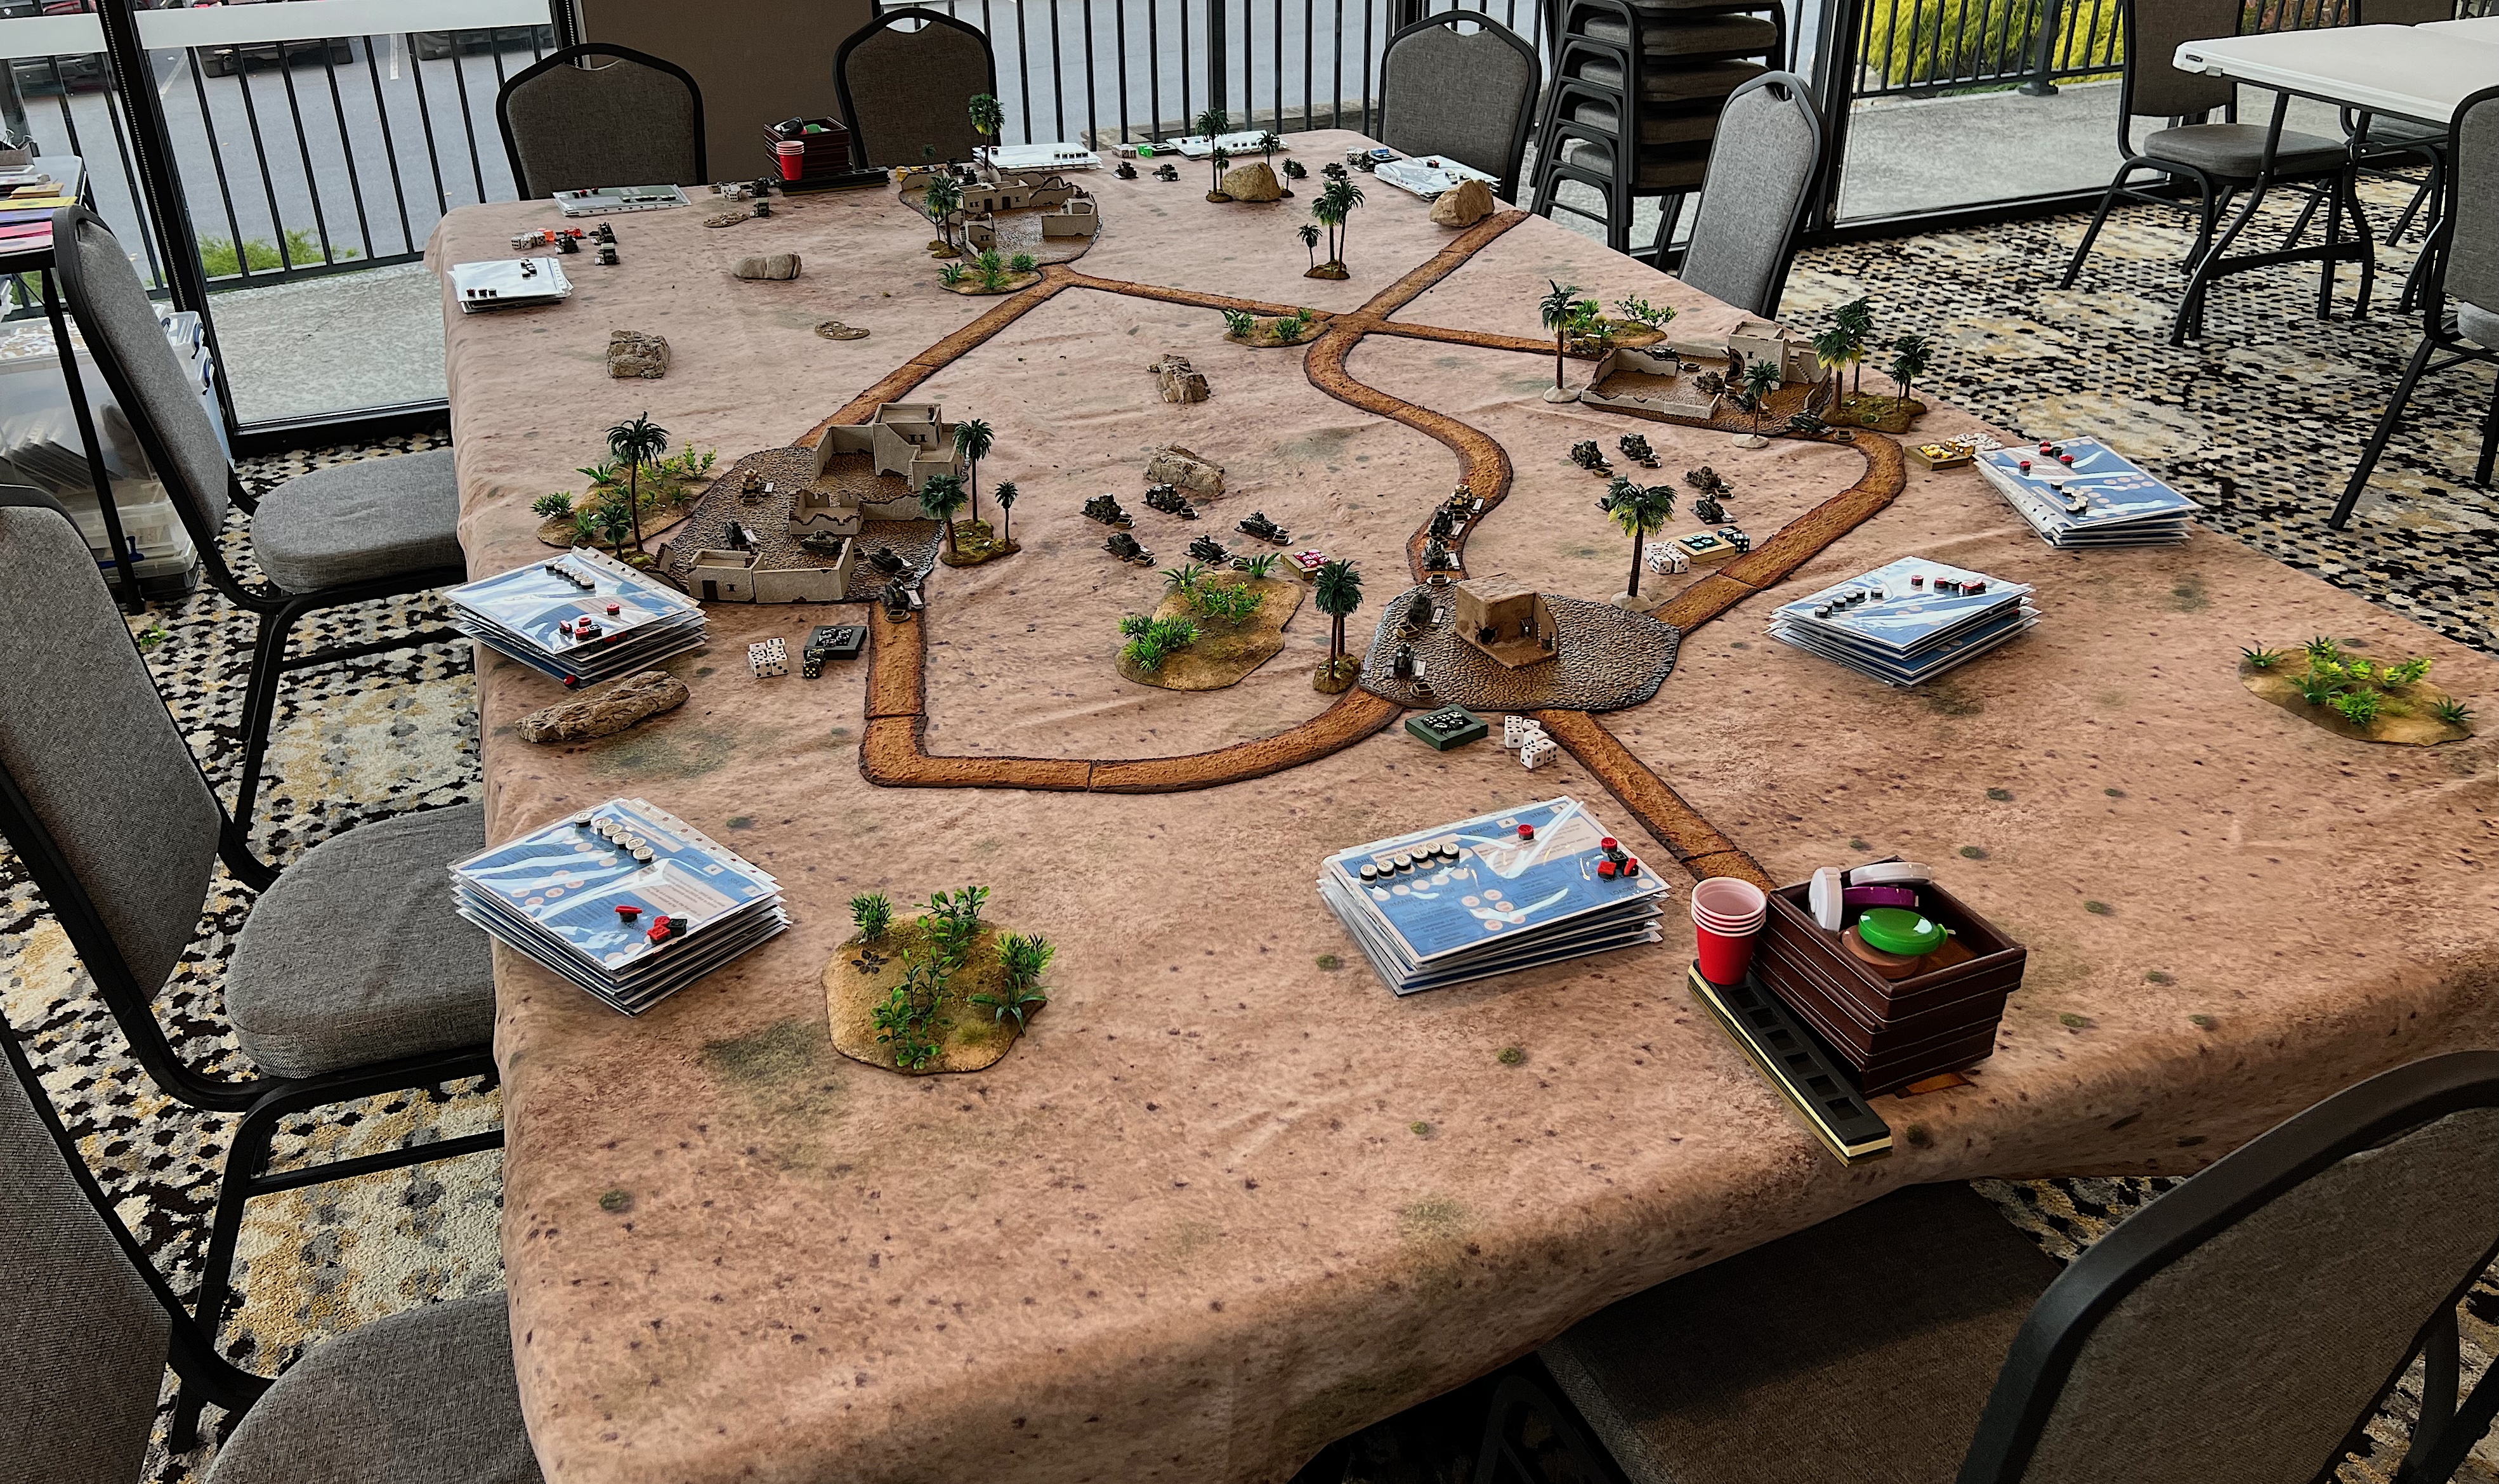
Mock up of the Tabletop
I used photos of this mock up in my cellar to guide its recreation at both upcoming gaming conventions.
First up, HMGS FALL IN!
HMGS FALL IN! 2025 PHOTOS OF THE GAME
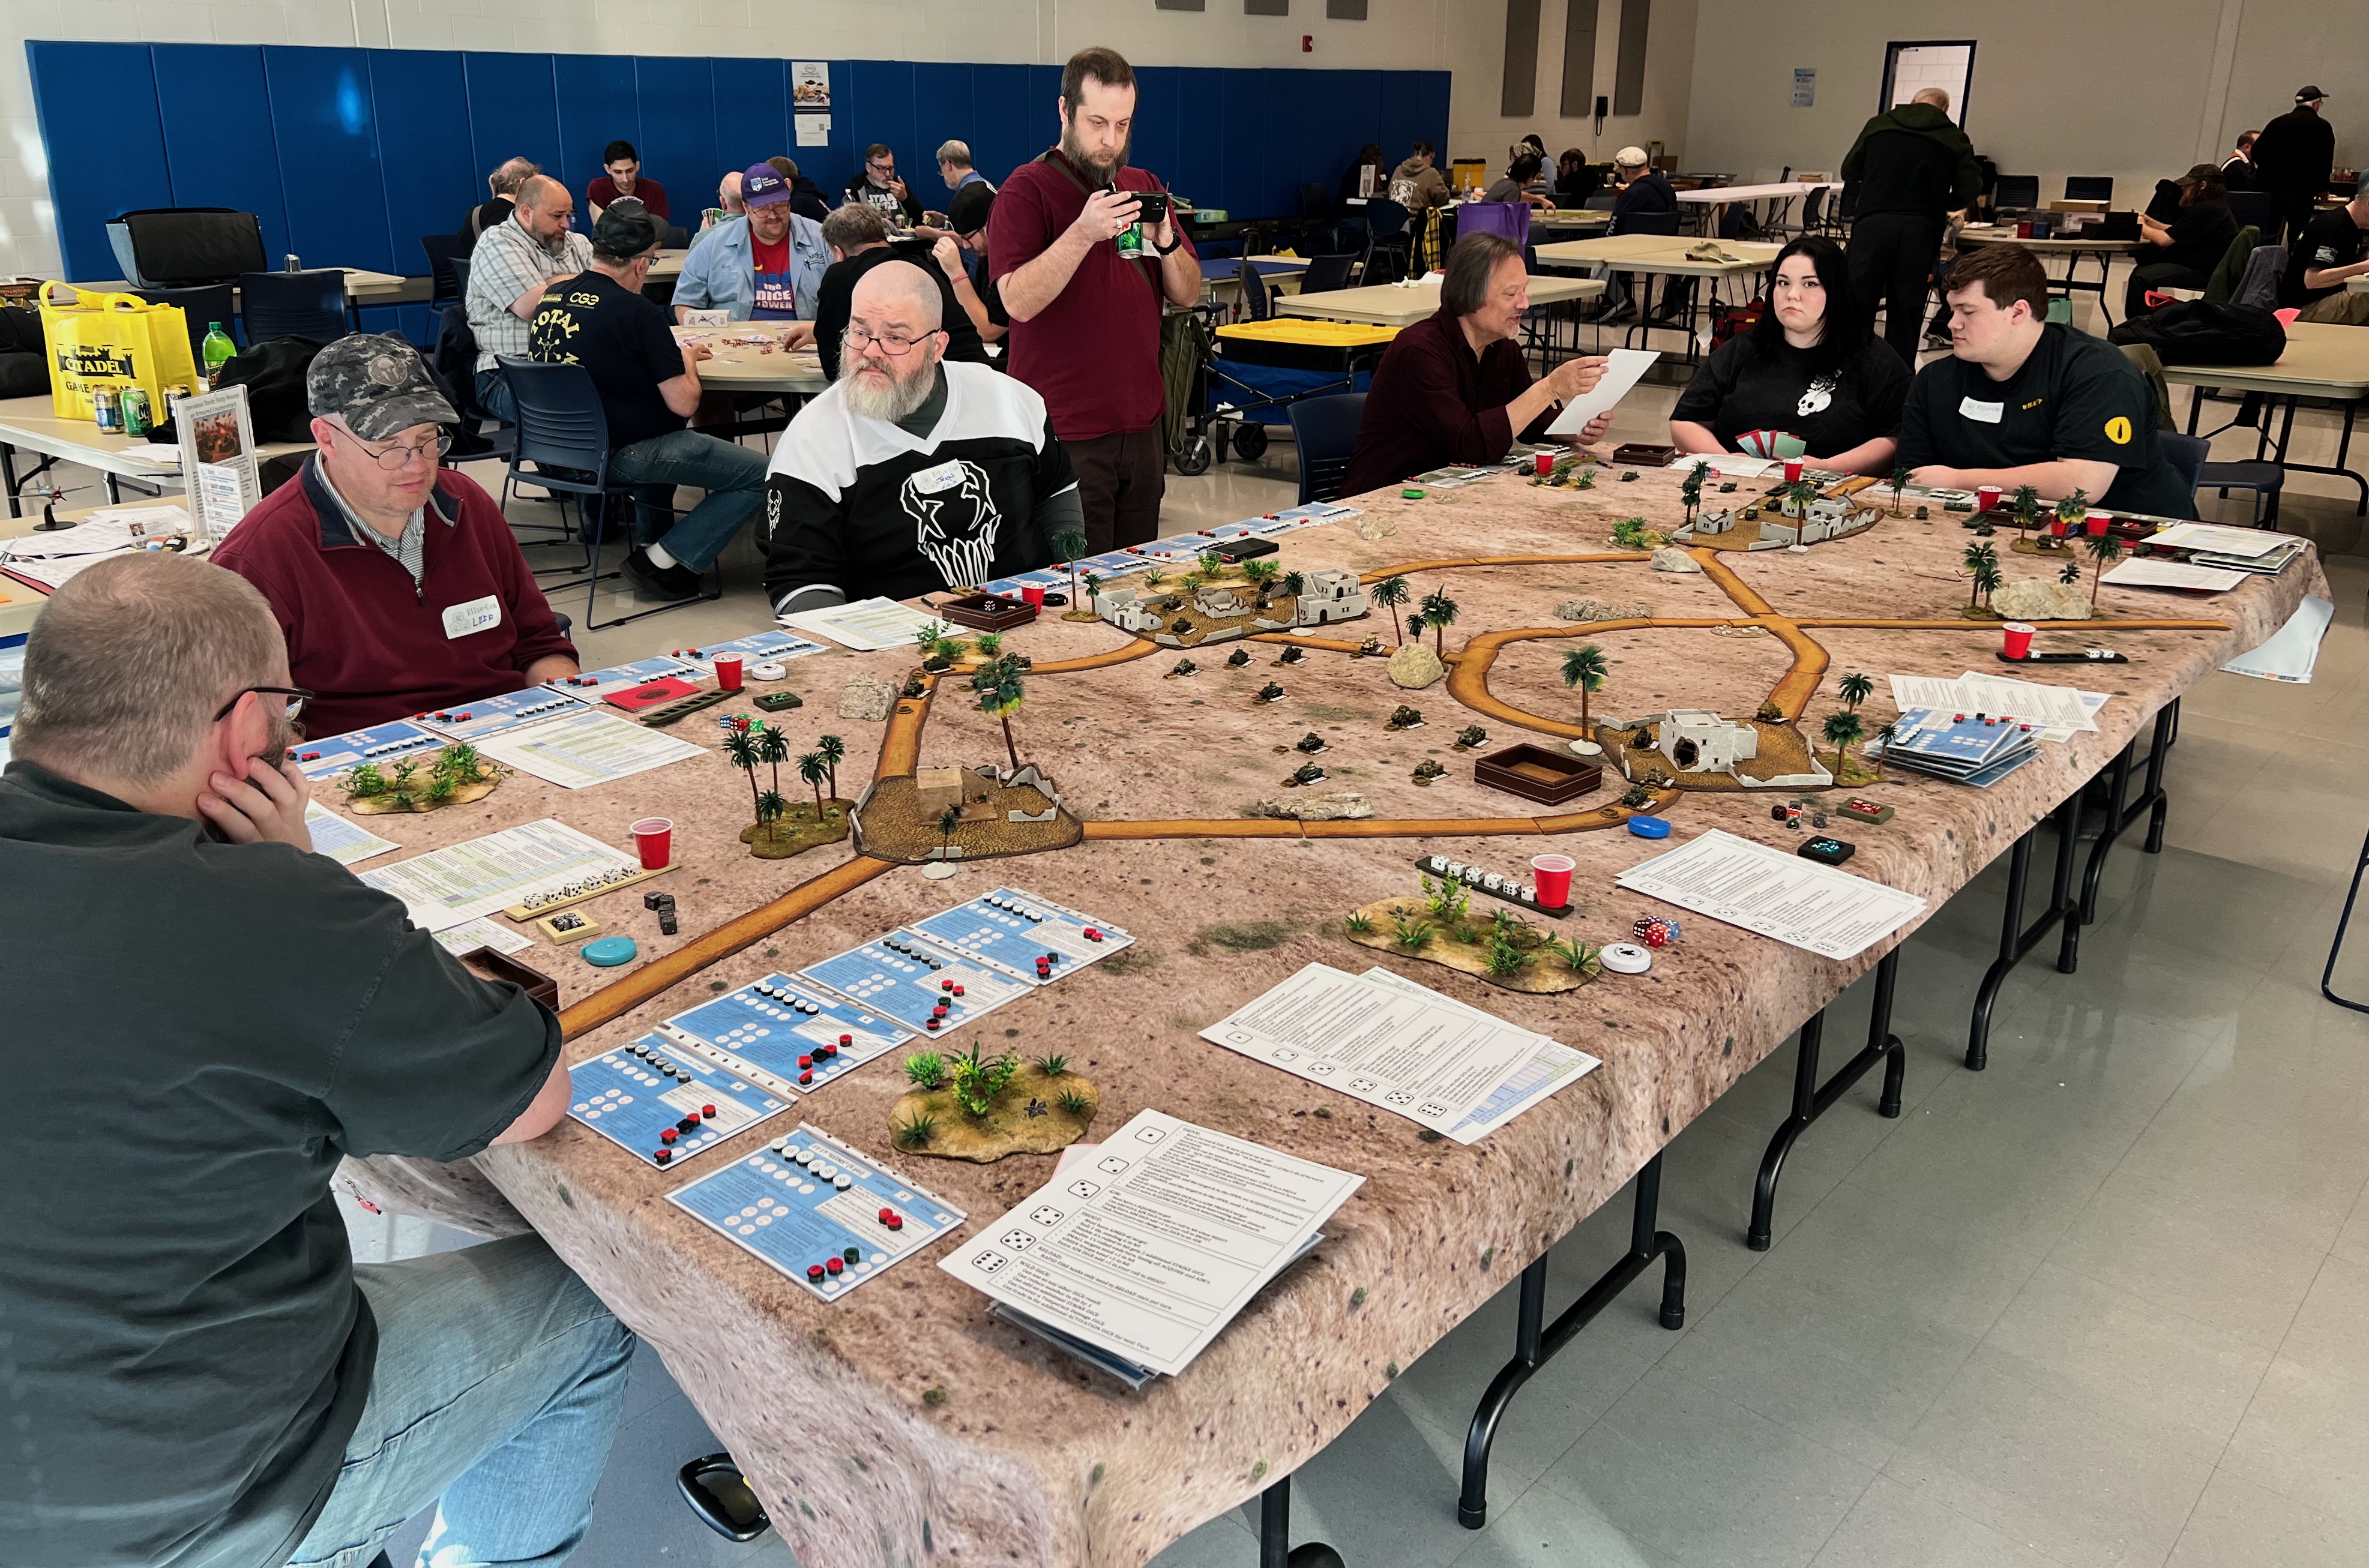
The game as set up in the H.A.W.K.’s room.The players in my first game. It was nice to have my Wargame Wingman Leif Magnuson in the game. Several Maine Historical Wargame Association members joined as well! As I am also a member of MHWA, that was VERY cool.The French tanks and armored cars were cautious about leaving a town here. The Mainers plot their strategy.
The US then deployed air, achieved superiority, and brought on the Avenger.
The F4F Wildcat about to dispatch the Dewoitine D.520.While US vehicles burn in the background, the Avenger deploys, and calls in naval gunfire……blasting the Vichy armor.
With that, the US won the first game I ran.
In the second game, the tables turned. The US never got going very well. Or, perhaps, the French were very lucky. Take your pick. I don’t have any photos of that game (apologies) – but it was a complete French victory.
Next up, one week later, was EllisCon.
EllisCon 2025 Photos
Here I also ran the game twice.
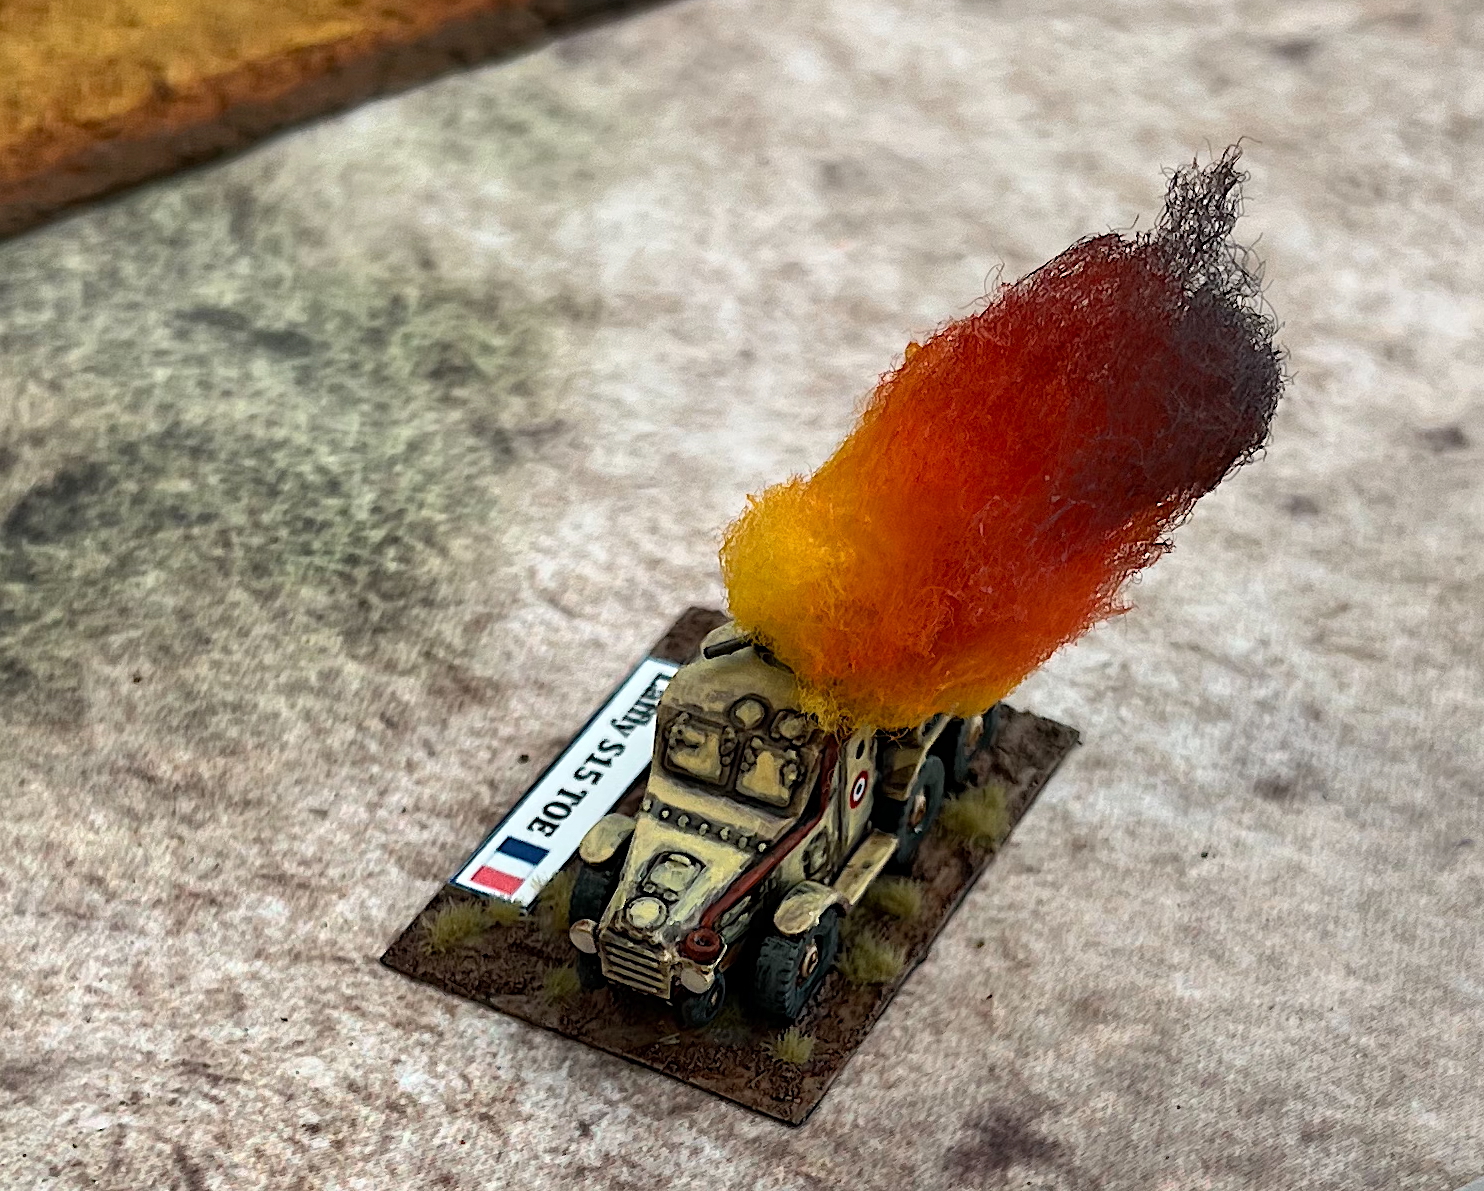
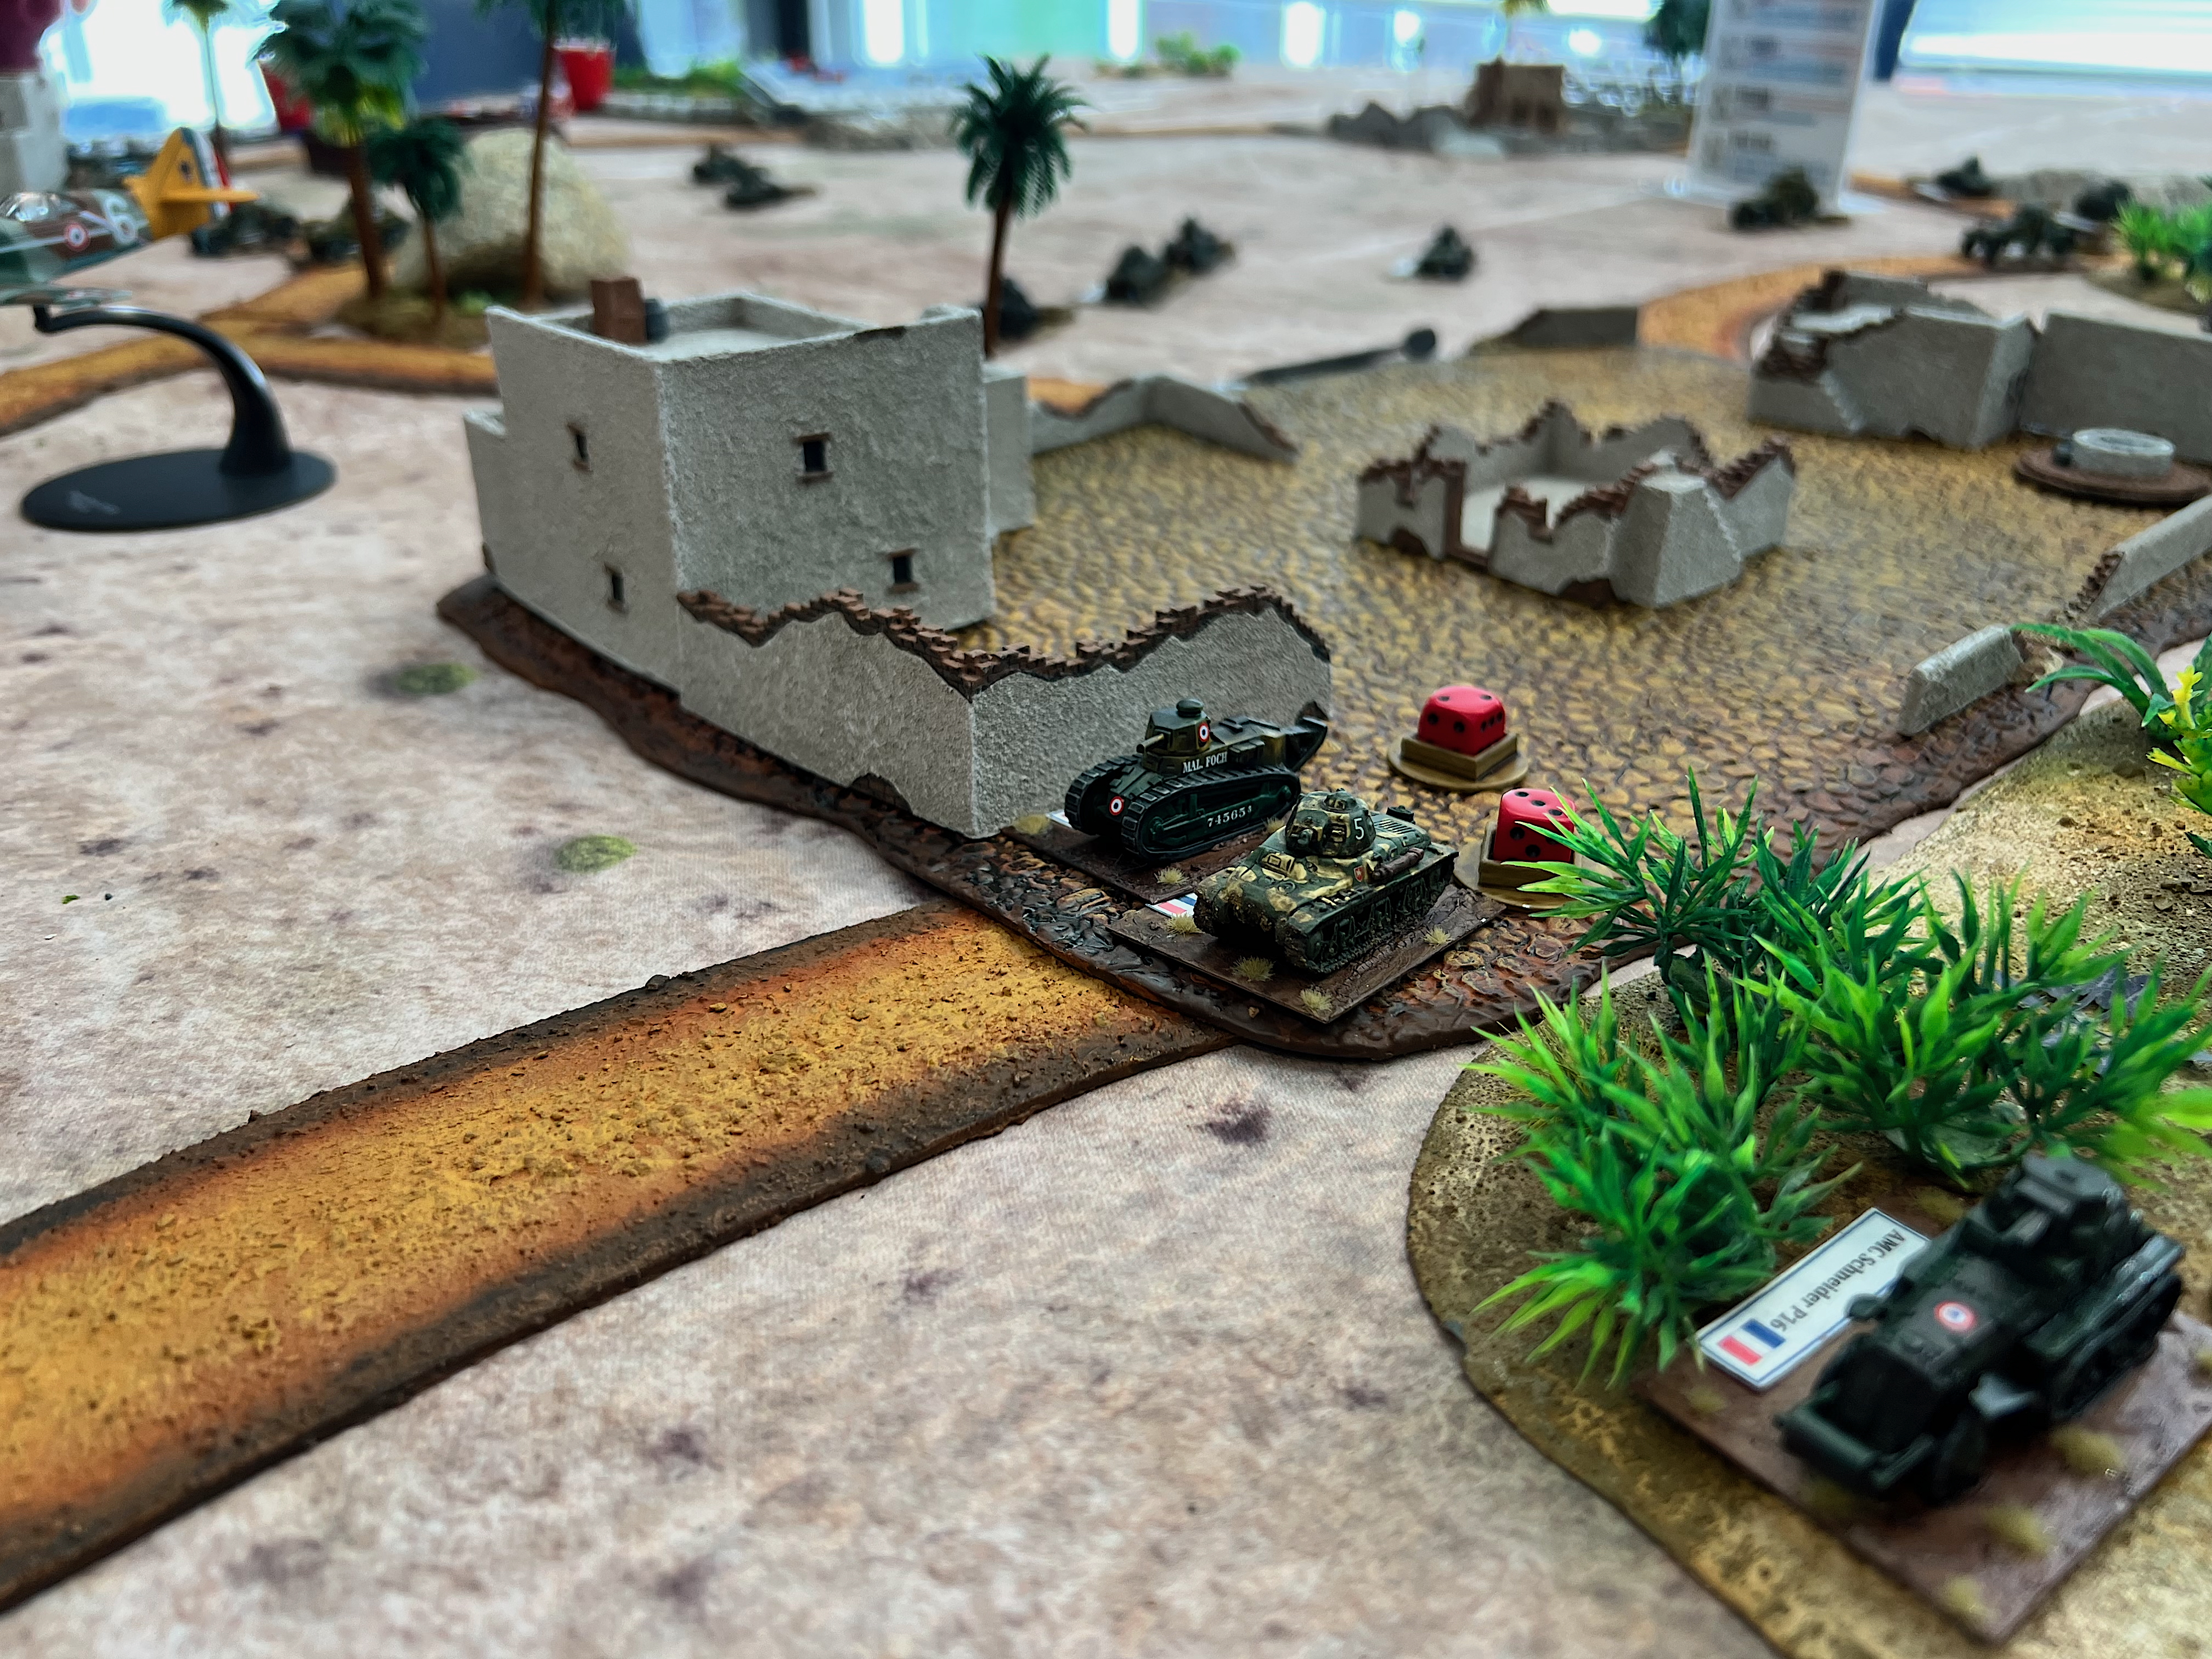
The first game at EllisCon had 4 players. Leif joined us again for both games. Here he strategizes for the French with his teammate Brian.A Laffly S15 TOE armored car is hit and burns early in the game.The US players are then hit hard, as the M5 Stuart “Beast”, and M3A1 Scout Car “Annie” are destroyed. The M3 GMC “Hurricane” takes cover in a brush firing position.Once again, though at a different convention, the Vichy armor looks to leave the town safely in the face of “Hurricane”.The French gain air superiority.An AMC Schneider P16 (the old armored car on right) uses its 37mm gun to destroy the M5 Stuart “Beast”.The FT-17 ” Marechal Foch” is taken out near r=the end of the game.
At the end, the Vichy claimed a victory, as their Tanker Bucks were more than the Americans total.
In game two, the fortunes reversed yet again. Leif played again and was joined on the other side by Gregg Belevick. Both were involved in my initial play testing of this scenario.
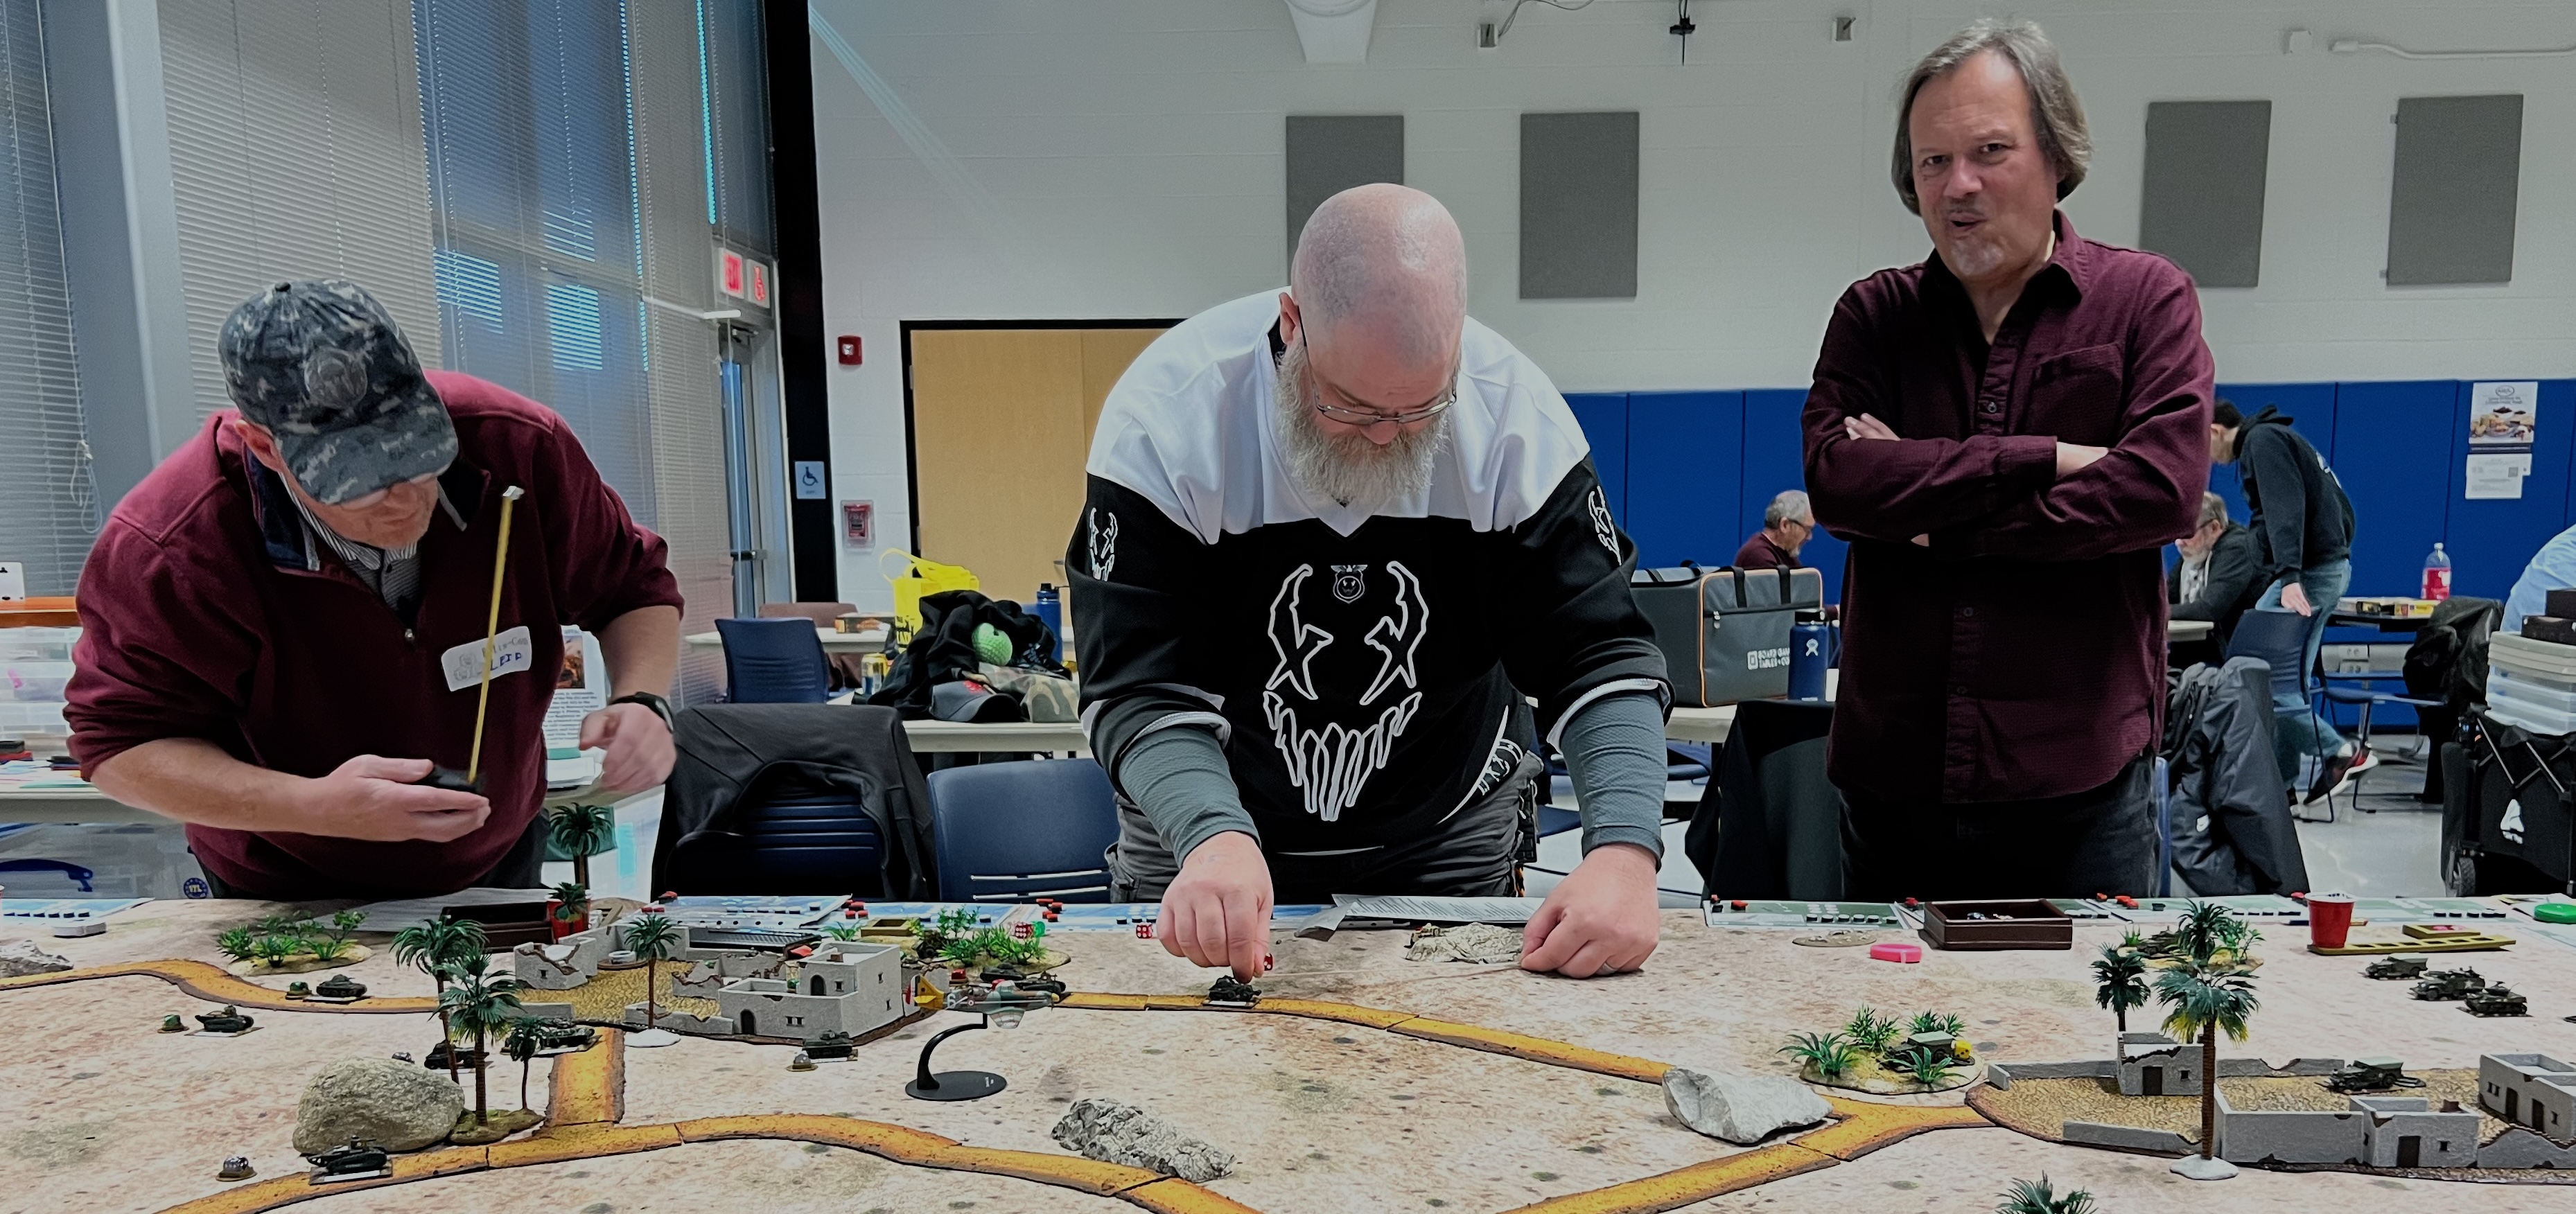
The players discuss their game strategies.The French players move up – and Gregg has a twinkle in his eye – does he have a plan?Yours truly GM’s the game. Photo courtesy of David DeVeauI guess Gregg did have a plan – naval gunfire! Convention history repeats itself as 5 Vichy vehicles burn on the Moroccan sand.
The US won this game with the last barrage destroying 1/3 of the Vichy force deployed at the time. A massive US victory!
I really like this scenario. So far, the victories have been 3 for each side. It seems pretty fairly balanced. It’s fun and highlights a little-known part of WWII. It’s likely coming again to a convention in 2026.
I list the paints that I used for the roads at the end of this blog post. For my records, I am sharing these materials I use for these projects with you, dear reader. You’ll see the list below detailing the process and materials for both the roads/bases and the Avenger torpedo bomber.
I hope that you found this tale of my journey interesting. If you do use my rules modifications, again please let me know how they worked out. If you have any questions, certainly throw them at me. I’d also enjoy any feedback on the work or this post in the comments section. Thanks in advance for that.
Lastly, I have compiled all of my posts on WWII games and projects. There is a consolidated list of posts and their links located here.
MATERIALS USED
PAINTS, INKS, GLAZES, SHADES, WASHES, PIGMENTS AND FLOCKING USED ON THE DIRT ROADS:
TrafficMaster Rubber Floor Runner from Home Depot, SKU 1003092882
DynaFlex Ultra Advanced All Weather Sealant “Cedar Tan”, (paintable caulking)
Quikrete “All Purpose Sand”
Chinchilla Dust
DecoArt Americana “Cinnamon Stick”
DecoArt Americana “Deep Ochre”
DecoArt Americana “Raw Sienna”
DecoArt Americana “Raw Umber”
Apple Barrel “Burnt Umber”
Vallejo Thinner
PAINTS, INKS, GLAZES, SHADES, WASHES, PIGMENTS AND FLOCKING USED ON THE TOWN BASES:
TrafficMaster Rubber Floor Runner from Home Depot, SKU 1003092882
DynaFlex Ultra Advanced All Weather Sealant “Cedar Tan”, (paintable caulking)
Quikrete “All Purpose Sand”
Chinchilla Dust
DecoArt Americana “Cinnamon Stick”
DecoArt Americana “Deep Ochre”
DecoArt Americana “Raw Sienna”
DecoArt Americana “Raw Umber”
Apple Barrel “Burnt Umber”
Vallejo Thinner
Liquitex “Burnt Umber” (ink)
PAINTS, INKS, GLAZES, SHADES, WASHES, PIGMENTS AND FLOCKING USED ON THE AIRFIX AVENGER TBM-3 MODEL:
Airfix Grumman Avenger TBM-3 1:72 plastic model kit
And now little bots from the apocalyptic ruins of the Industrial City!
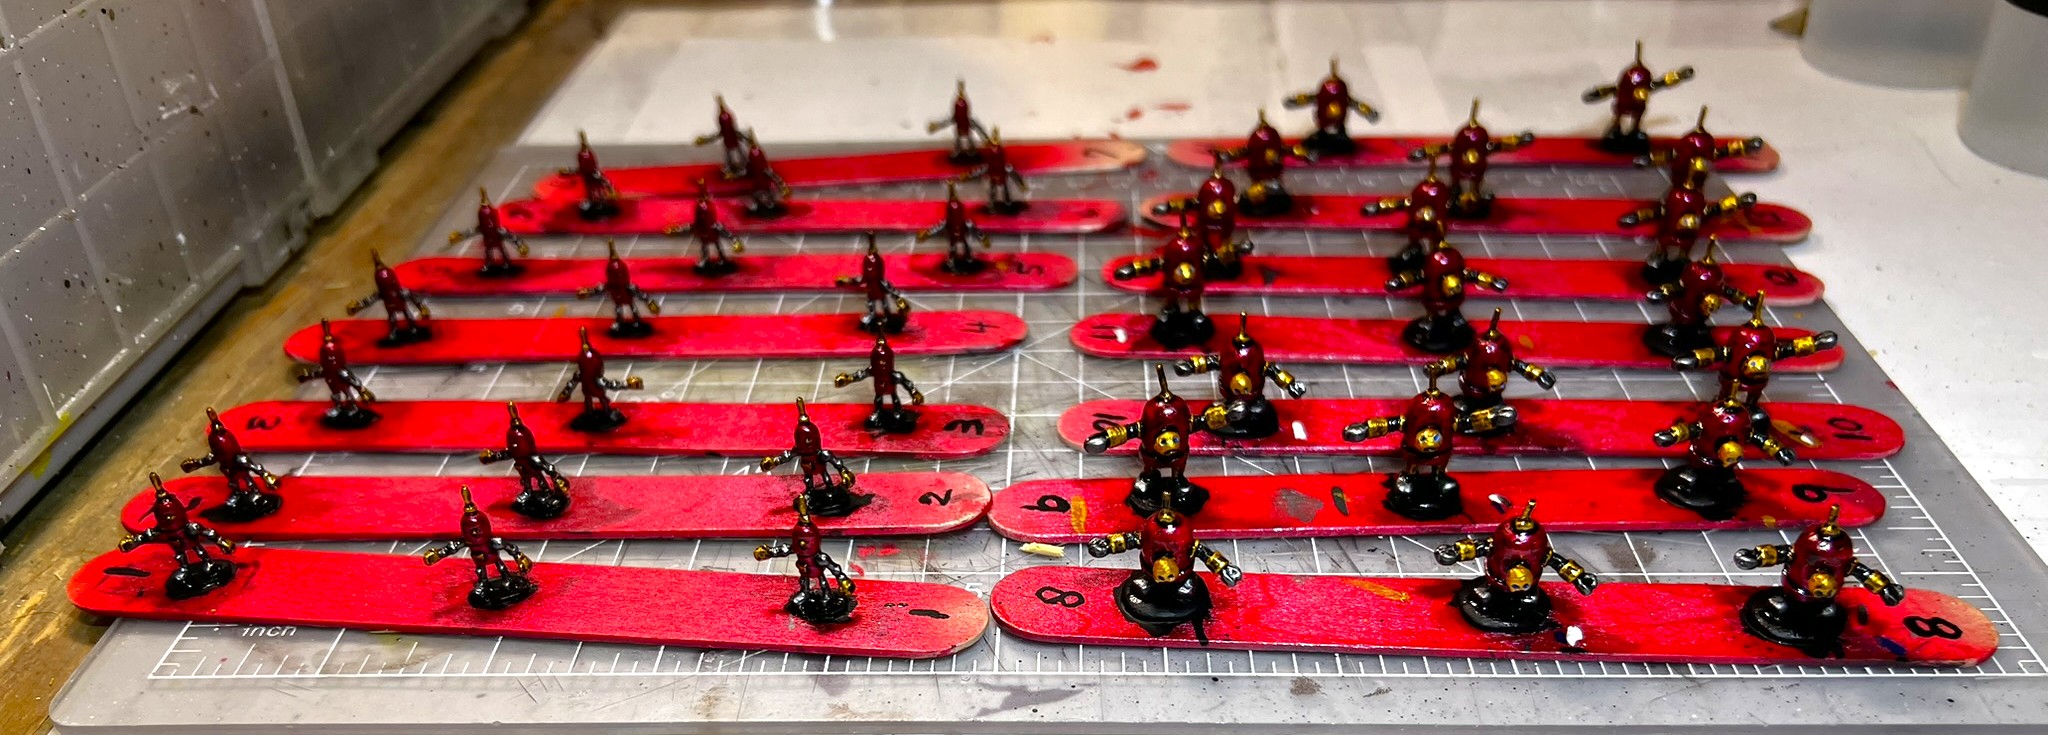
This unit is a part of Professor Nitpik’s Industrial City Army. This regiment is composed of 40 mini-mechanical men (robots), deployed on five 2″ bases. The figures are metal and 28mm in size.
I have described my work on the good Professor’s background and army in three previous posts that you can check out:
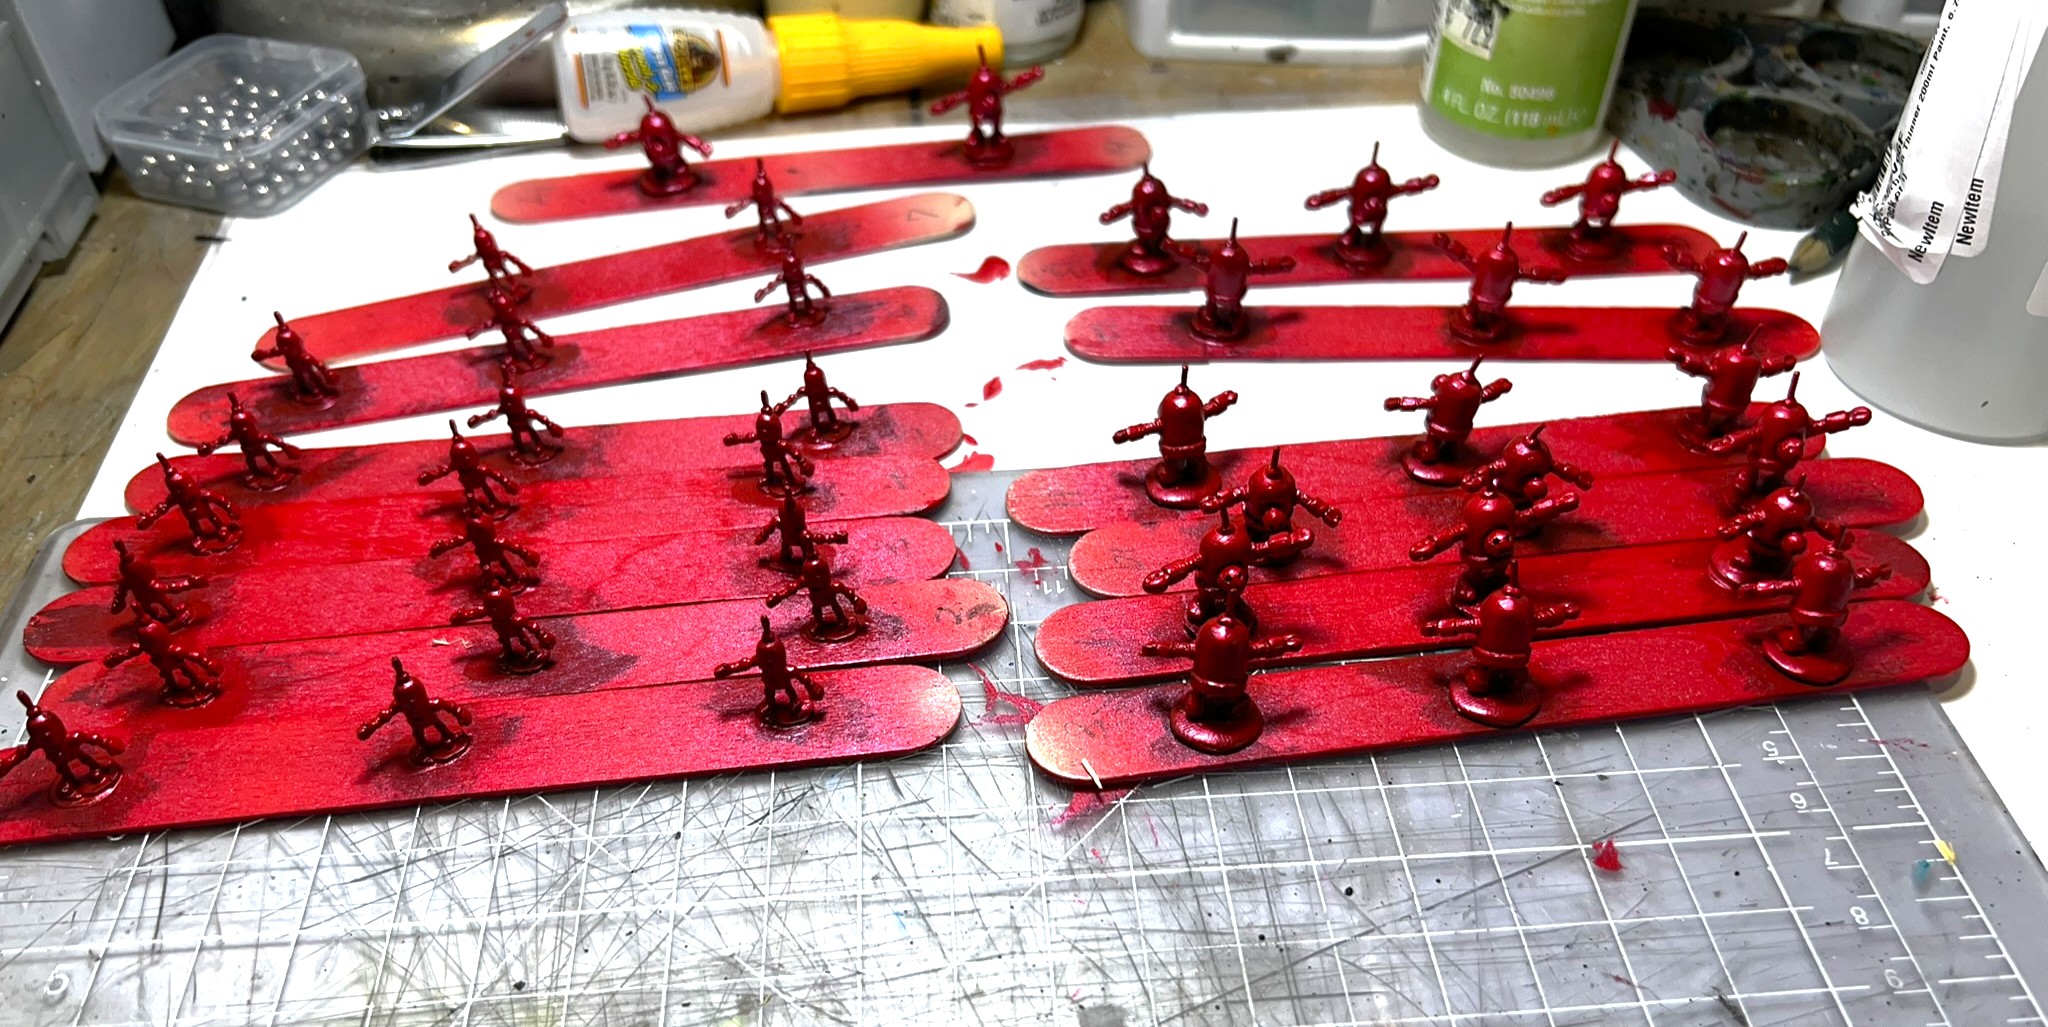
I decided to go red on gold again. I really liked the effect I got on the artillery battery.
After priming – a good airbrush application of Createx “Pearl Red” on April 15.
The pearlized red works well with pearlized copper. I faced a downside. It was unbeknownst to me that my spray booth filter needed cleaning before I started. As a result, my basement had some residual fumes after painting, which I otherwise never see. Luckily I always mask up when airbrushing.
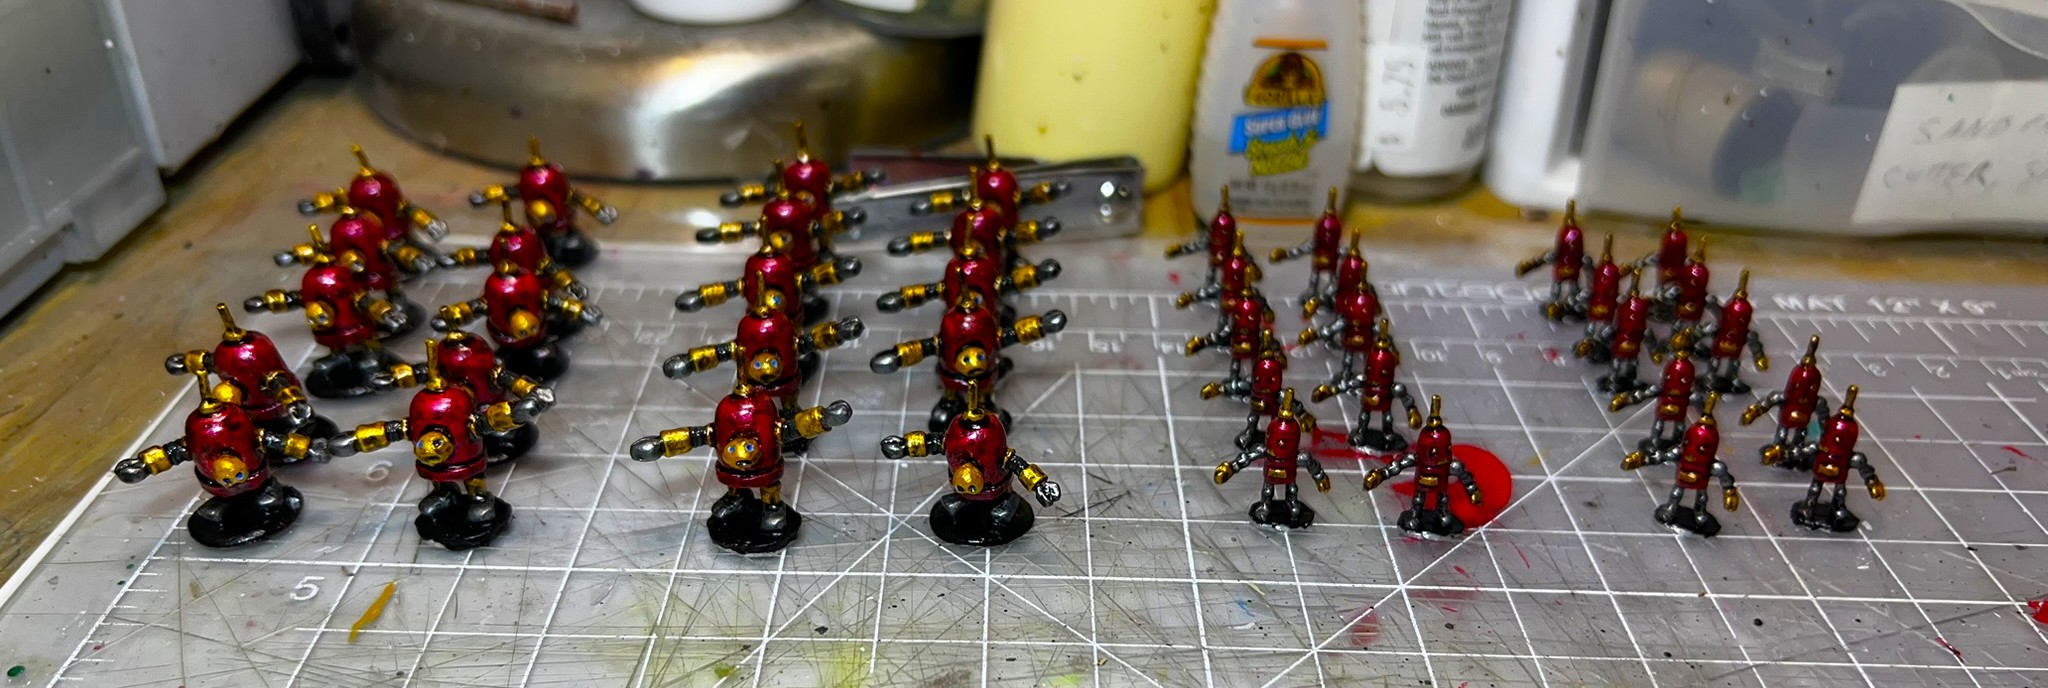
Finished hand brush painting these on April 16th, to include a wash.
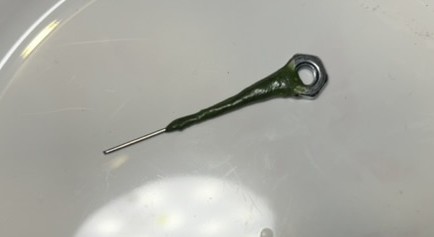
The regiment does not have a regimental commander. However, I thought it would be good to give them a standard. So I took a wire spear from my unused Aztec bits, and a nut. With some green stuff, I crafted an ersatz standard pole.
The standard pole.
I then varnished all the bots with a gloss coat. This allowed me to handle them and better mount them on the bases without causing any damage.
All glossied up.
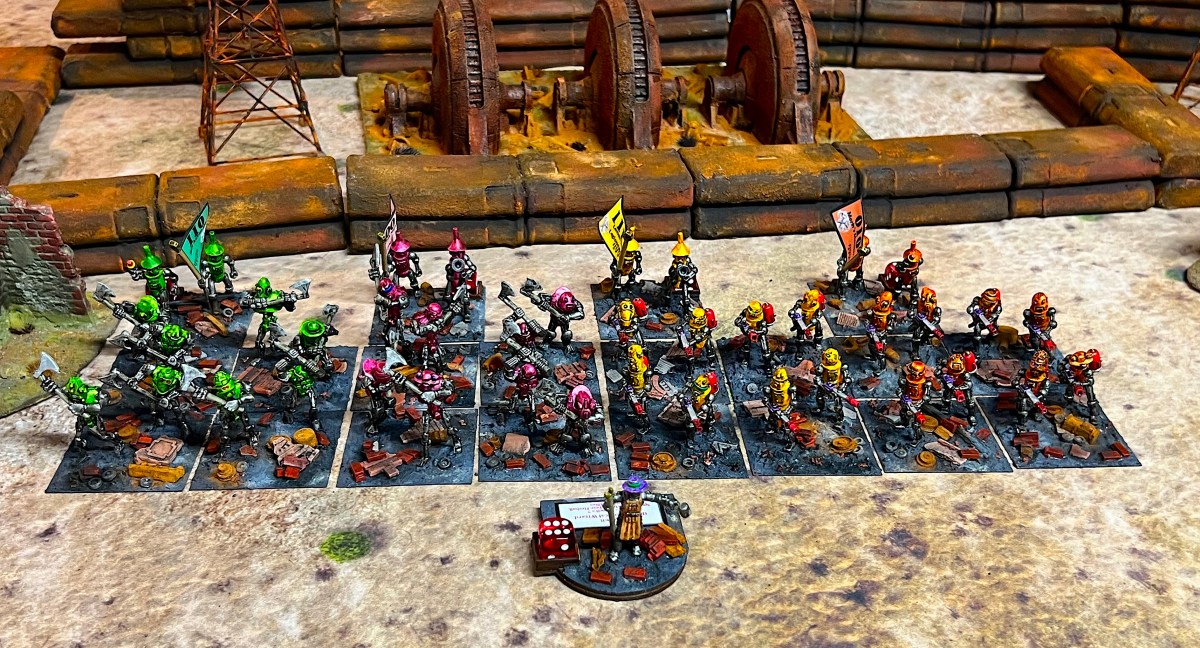
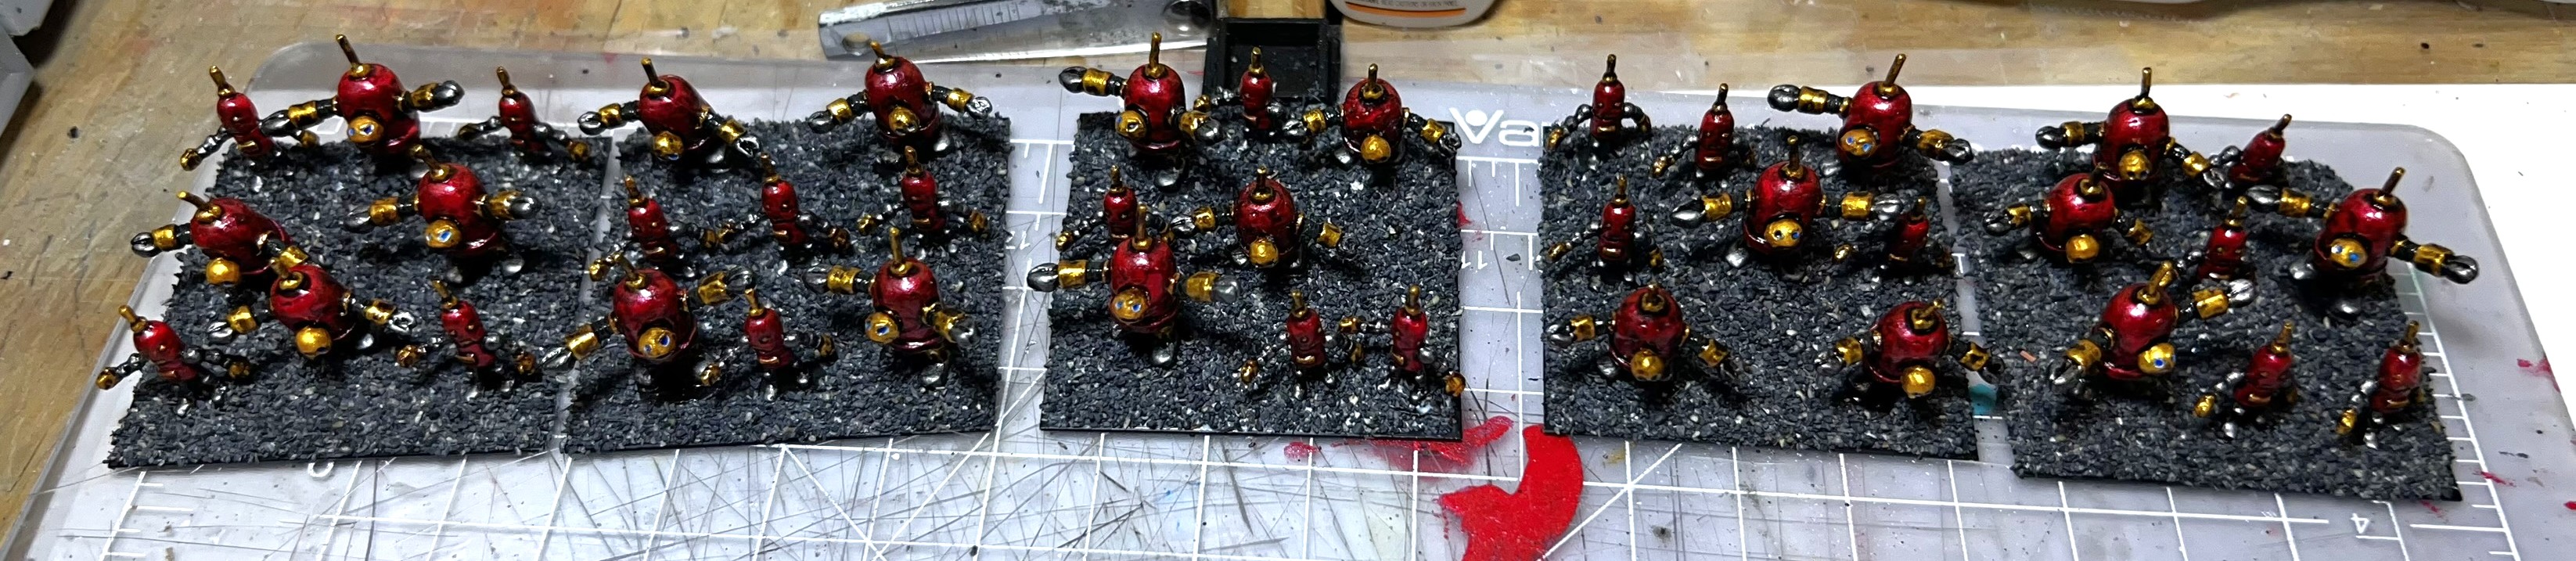
I mixed and matched the bots into different places on the bases. I also drilled out one bot claw and base to hold the standard. Next came a generous flocking of Army Painter “Black Battlefield”. I also added rusted bits and brick rubble before adding pigments.
Basing started.
After a matte varnishing, the last step was to add the standard!
April 19th – done!Close up of the command stand.The regiment in column formation.
That’s a wrap on this regiment – and for my Ozz painting for a while. I will be starting a new project in support of my upcoming HISTORICON 2025 games. Yes, I will still be running Wars of Ozz games – BUT I’m branching out a bit after painting over 1,000 (1,040 to date) Ozz figures…
Hint – I’ll be plowing new ground – but not totally new ground…yes, TANKS! But for which period and theater…hmmm….do you have a guess?
I will get back to Ozz painting sometime this year, so I can finish off my forces.
Here’s the Instagram link for a video that shows the command stand:
Want to learn more about Ozz and its world? If you want to check out the excellent Wars of Ozz figures’ range, there are two places to get them. You can also get the rules there. (I make no money from this.) The game rules and the figures are available from the next two places:
Below you’ll see the list of paints and the like that I used on this project. They are more useful for me when I need to recreate a color scheme in the future. They are not likely as useful for you as they are for me. I have had to refer back to a post more than once. This happens when I need to recreate a color theme. It also happens when I need to repair a unit. In any case, that’s why I post the lists.
Miscellaneous details and references for those interested in that sort of thing:
For my earlier posts on Wars of Ozz games, view this page. It includes figures, units, and other related projects.
PAINTS, INKS, GLAZES, SHADES, WASHES, PIGMENTS, FLOCKING, GLUES AND MORE THAT I USED ON THE MECHANICAL MINI SWARM WITH PULSE BLASTERS REGIMENT:
Popsicle sticks
PVA Glue
War Games Accessories Steel Bases (number 16)
Vallejo Surface Primer “Black”
Createx Wicked Colors “Pearl Red”
Createx Wicked Colors “High Performance Reducer”
ComArt “Opaque Carmine”
Createx Airbrush Colors “Pearl Copper”
Vallejo Model Air “Tire Black”
Vallejo Model Air “Gun Metal”
Vallejo Mecha Color “Off White”
Army Painter Warpaints Fanatics Effects “Blue Flux” (effect)
Citadel “Nuln Oil GLOSS” (wash/shade)
Aztec leftover wire spear
Steel nut
Green stuff (kneadatite)
Army Painter “Black Battlefields” (flocking)
Citadel “Gehenna’s Gold”
Gorilla Glue
Juweela 1:35 Debris
Juweela Metal Scrap Rusty
Juweelinis “Diorama Mix” – various metal scrap, tires, bricks
Vallejo “Carbon Black” (pigment)
Vallejo “Titanium White” (pigment)
Vallejo Acrylic Varnish “Gloss”
Vallejo Flow Improver
Vallejo Thinner
Vallejo Premium Color “Matte Varnish”
Pendraken 12mm dice frame
Card stock
Wars of Ozz flag from supplement
Black Sharpie Pen
Brown Sharpie Pen
If you have any questions or feedback – go for it in the “Comments” section! Thanks for looking as always!!
Artillery for the forces of Professor Nitpik’s Mechanical army!
This medium artillery battery will play a prominent role in my Wars of Ozz games. It will be featured in upcoming gaming conventions (HAVOC, MAYHEM, and HUZZAH). The artillery battery consists of 6 crewmen and the gun. It is 28mm and metal, SKU OZZ-541. Assembly was required for the gun and to attach the mechanical men’s heads.
Amazingly, this unit for the army of Professor Nitpik is personally significant. It marks that I have now painted 1,000 figures for Wars of Ozz. I started back in November 2022 with Zoraster’s Guard Infantry. What a journey!
In my last post you saw my cavalry additions. I already had painted up an infantry unit of axemen before Nitpik had his own faction. So, artillery was the next logical addition.
This post will be brief. I did not take as many photos as I normally would. I am trying to shorten my posts going forward. I said “trying”.
Conventions beckon so time was short.
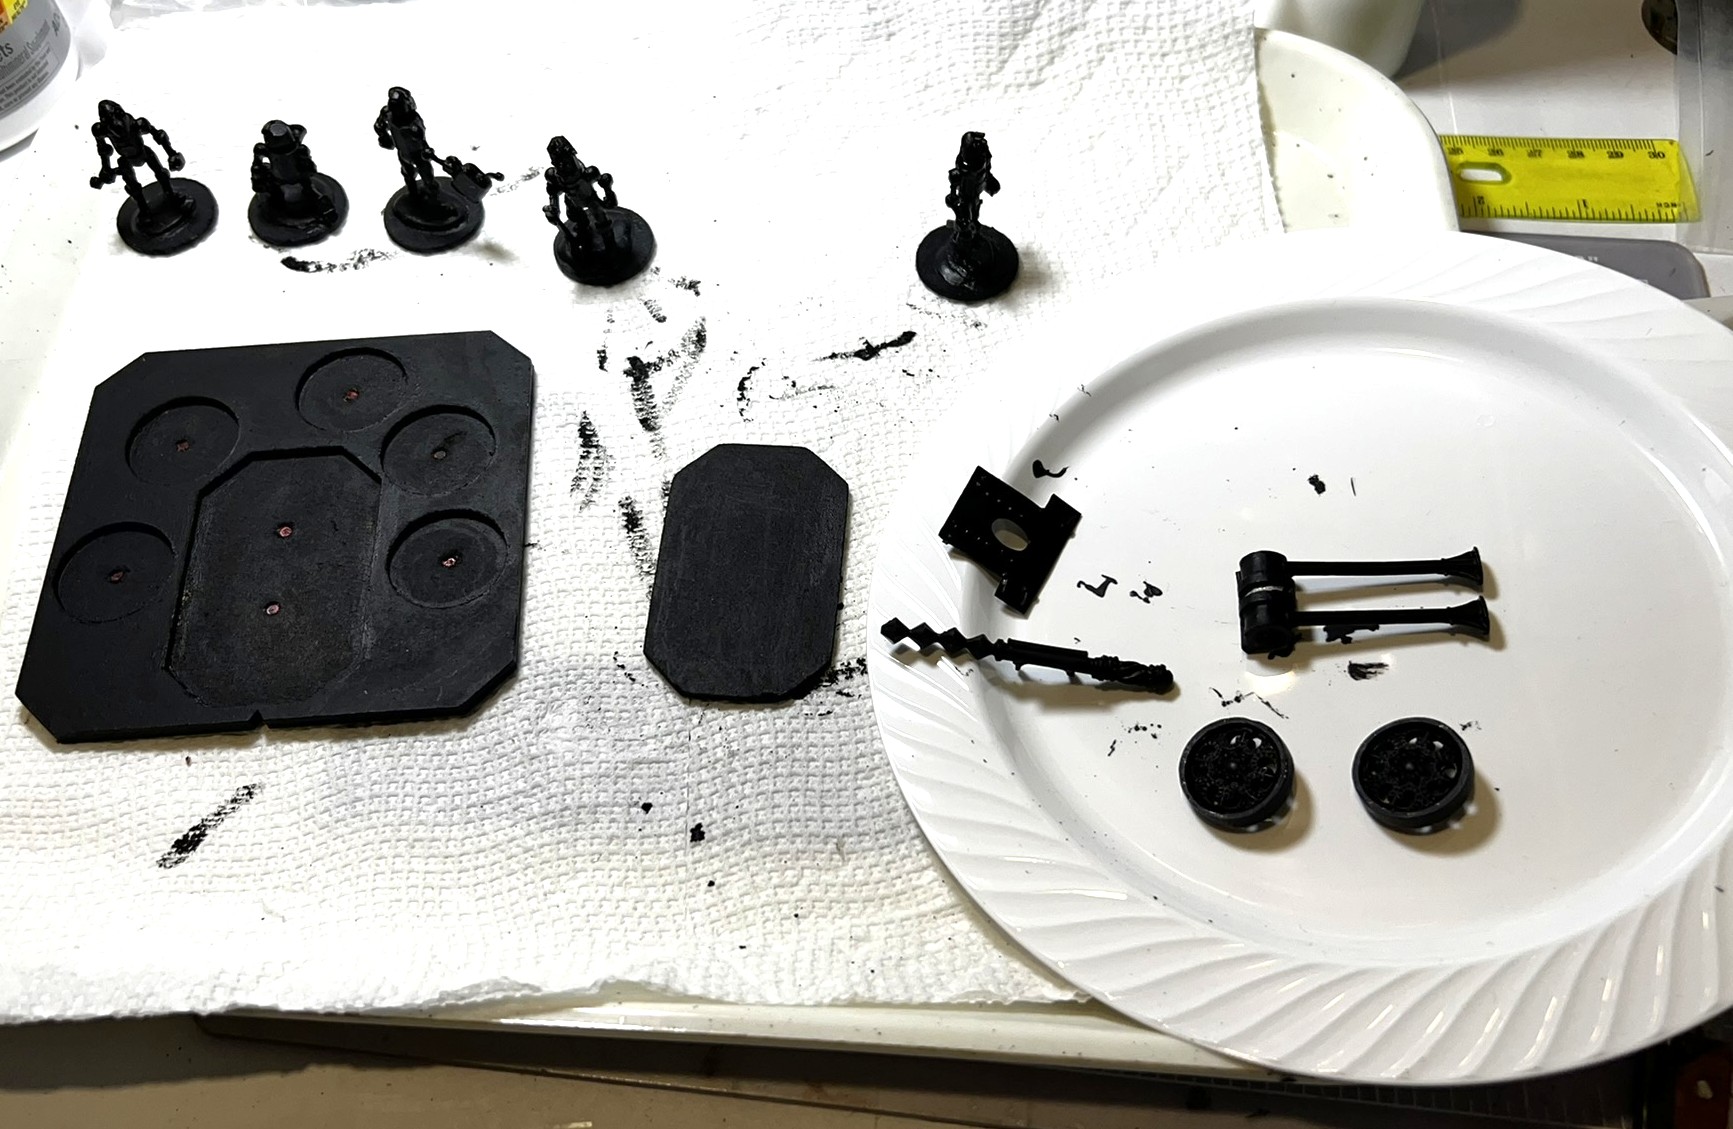
The pieces of the battery filed and washed.I primed everything in black to include the MDF sabot base.
The gun came with a gun shield. The shield was perfectly flat, but thin and malleable. It looked to me less like a black powder-era weapon. It resembled more an anti-tank gun like a WWII German Pak 38. So, with that inspiration, I shaped it to be curved as well.
I added a lot of rubble pieces to the sabot base. I also used pigments and washes to create a sooty and oily look. As with Nitpik’s cavalry, I used pearlized red and copper airbrush paints here.
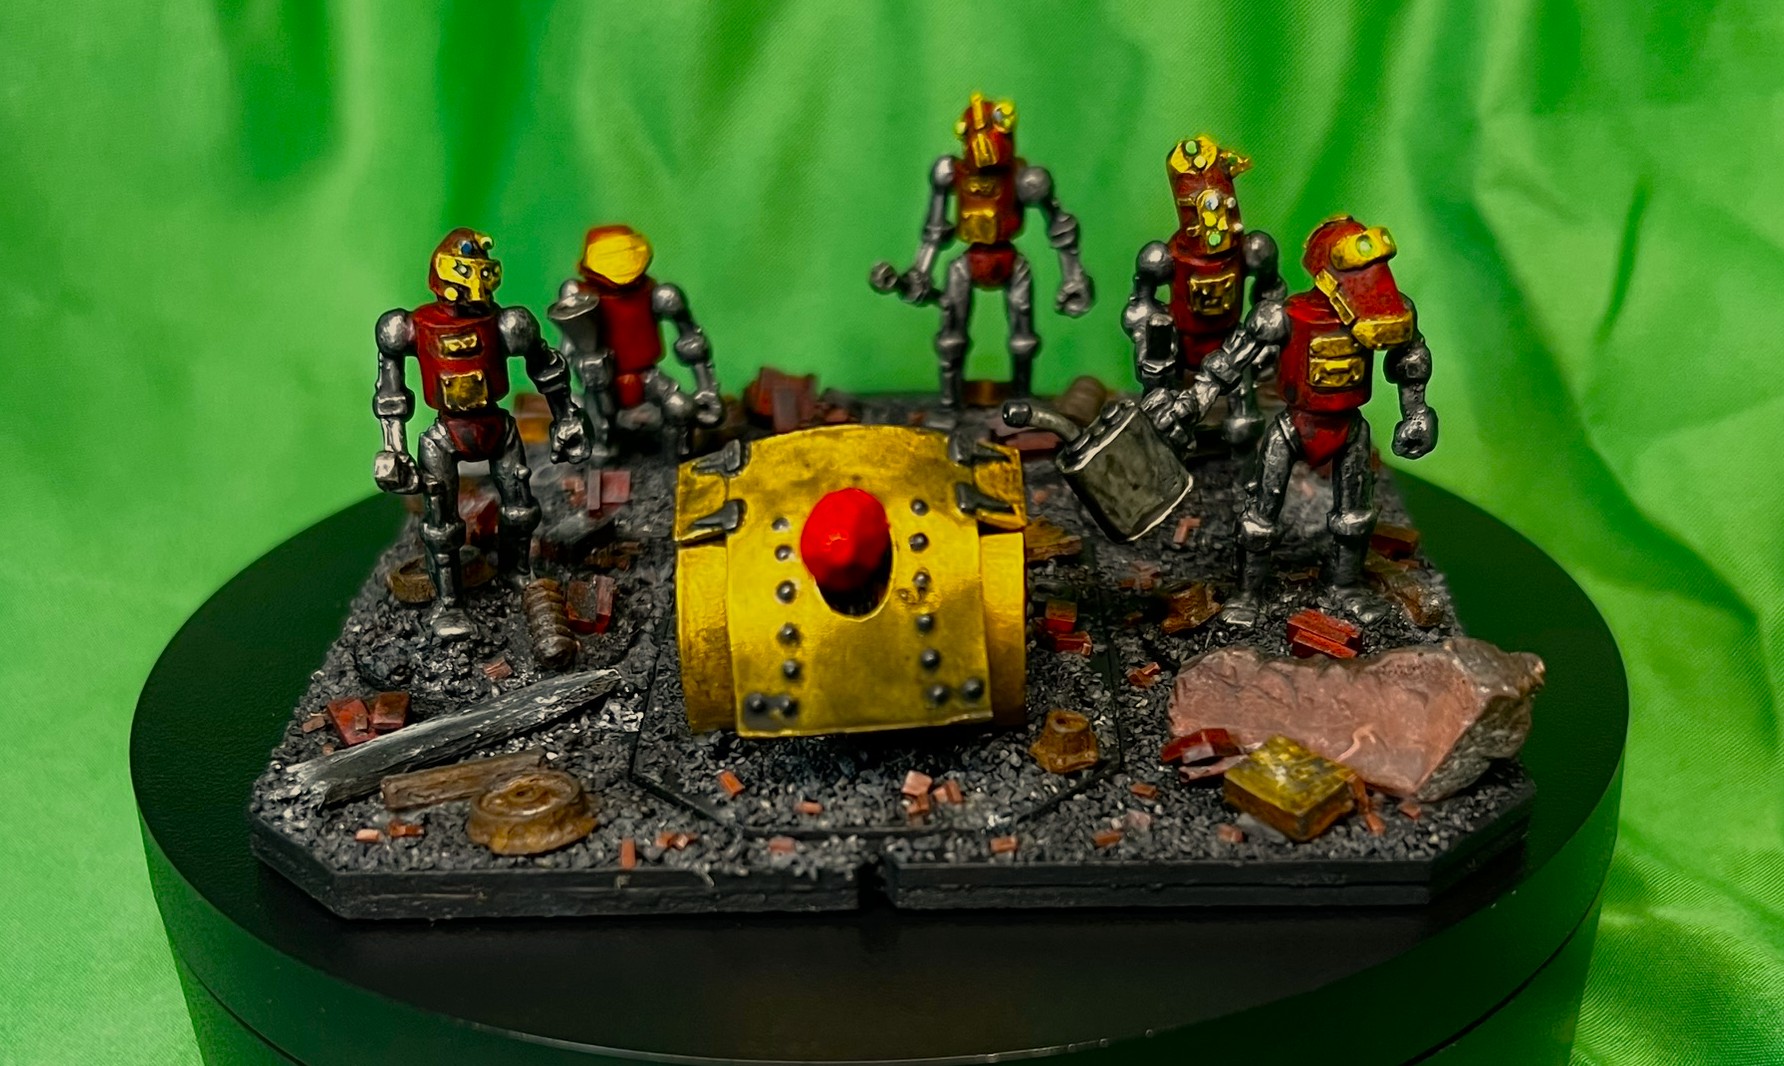
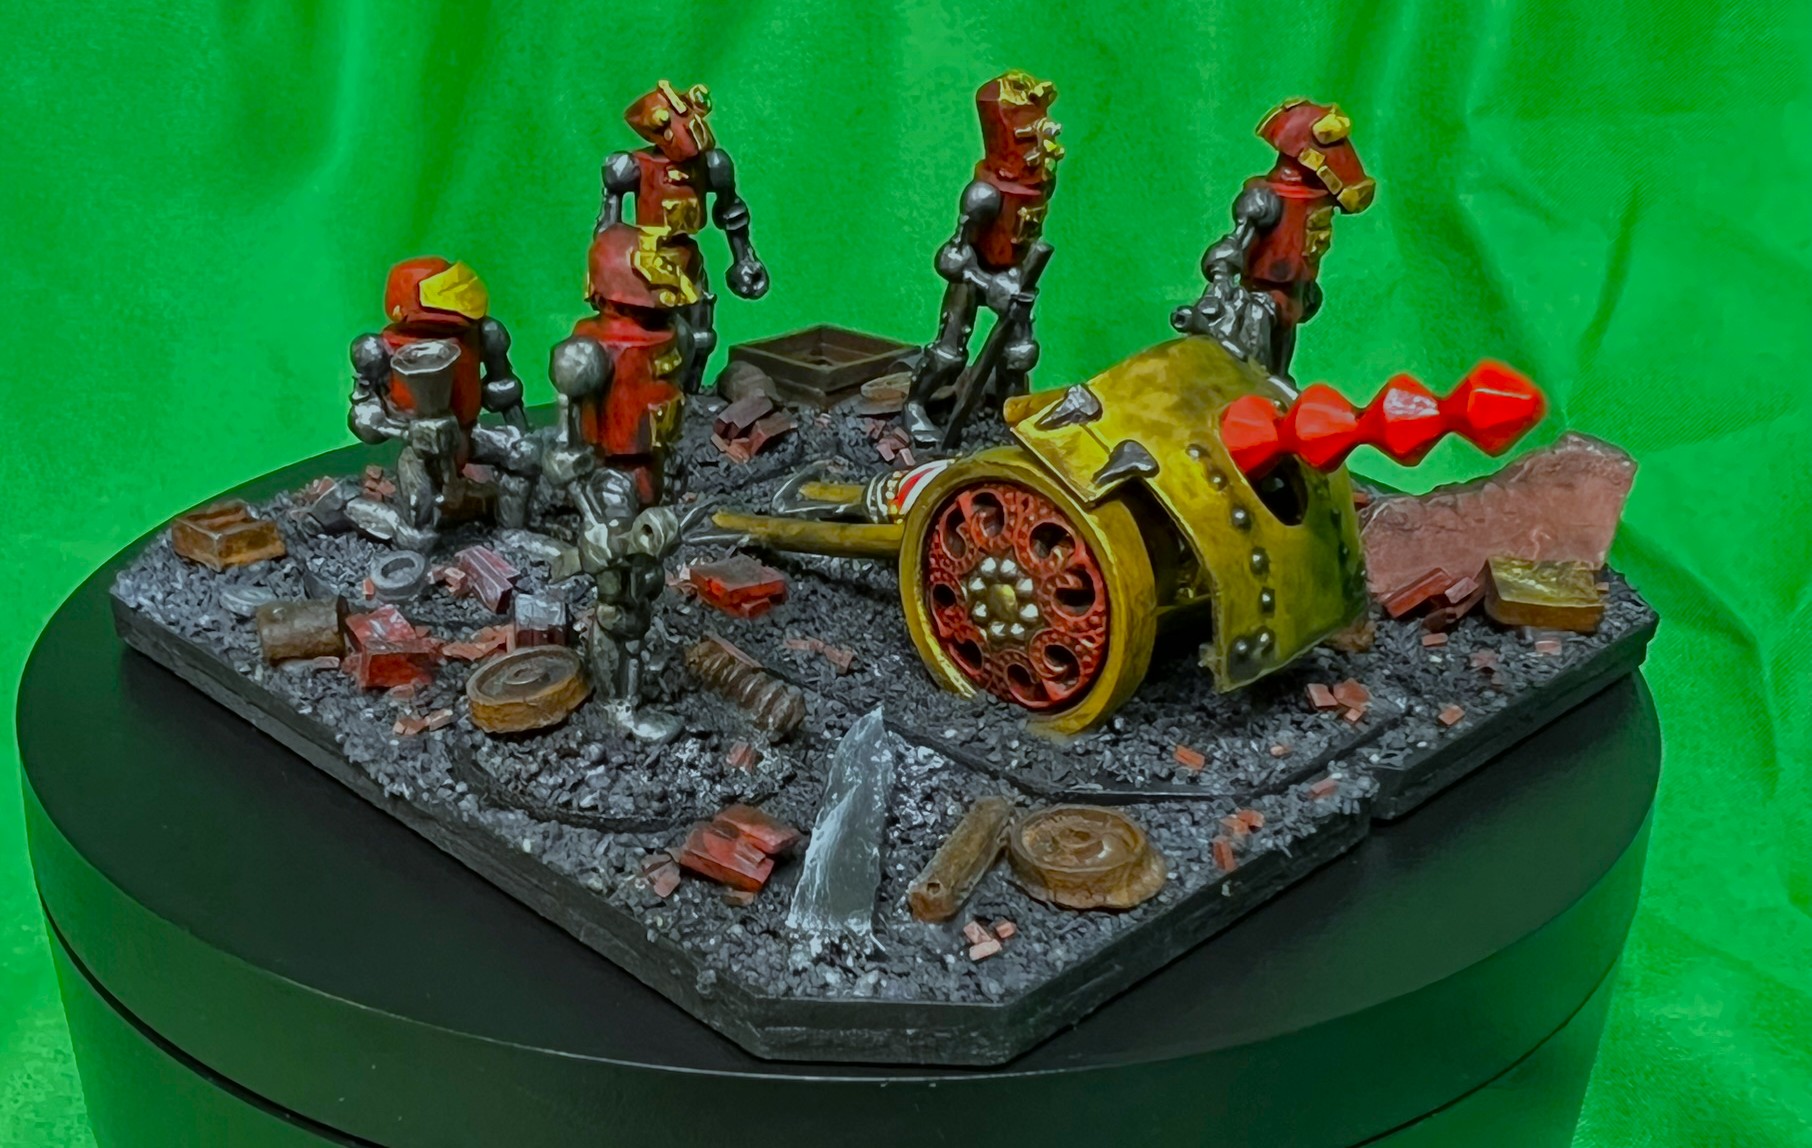
Below are shots of the battery. In the end, I think I achieved a retro sci-fi/”Iron Man” look to the unit. I may continue this theme for future Nitpik units. All of the “eyes” were painted with fluorescent paints – though that might not be so obvious in the photos.
Here is a video for your viewing pleasure:
OZZ-541
I hope you enjoyed this post. Next up (after conventions), will be more of this faction. Plus…I have a plan for a new WWII tank project…
Final Notes and Links
Want to learn more about Ozz? If you want to check out the excellent Wars of Ozz figures’ range, there are two places to get them. You can also get the rules there. (I make no money from this.) The game rules and the figures are available from the next two places:
Below you’ll see the list of paints and the like that I used on this project. They are more useful for me when I need to recreate a color scheme in the future. They are not likely as useful for you as they are for me. I have had to refer back to a post more than once. This happens when I need to recreate a color theme. It also happens when I need to repair a unit. In any case, that’s why I post the lists.
Miscellaneous details and references for those interested in that sort of thing:
For my earlier posts on Wars of Ozz games, view this page. It includes figures, units, and other related projects.
PAINTS, INKS, GLAZES, SHADES, WASHES, PIGMENTS, FLOCKING, GLUES AND MORE THAT I USED ON THIS NITPIK MEDIUM ARTILLERY BATTERY:
PVA Glue
MDF Base
War Games Accessories Steel Bases (FOW1)
1/8″ neodymium magnets
Gorilla Glue
Vallejo Surface Primer “Black”
War Games Accessories Steel Bases (Number 1)
Alligator clips and stands
Poster tack
Specimen jars
Createx Wicked Colors “Pearl Red”
Createx Wicked Colors “High Performance Reducer”
ComArt “Opaque Carmine”
Createx Airbrush Colors “Pearl Copper”
Tamiya “Titanium Silver X-32”
Vallejo Model Air “Gun Metal”
Tamiya “Chrome Silver X-11”
Vallejo Model Air “Black Metallic”
Vallejo Model Color “Off White”
Army Painter Warpaints Fanatics Effects “Data System Glow” (effect)
Army Painter Warpaints Fanatics Effects “Neon Yellow” (effect)
Army Painter Warpaints Fanatics Effects “Blue Flux” (effect)
Citadel “Spritstone Red” (technical)
Citadel “Nuln Oil GLOSS” (wash/shade)
Army Painter “Black Battlefields” (flocking)
Juweela 1:35 Debris
Juweela Metal Scrap Rusty
Juweelinis “Diorama Mix” – various metal scrap, tires, bricks
Popsicle stick shards
Vallejo “Carbon Black” (pigment)
Vallejo “Titanium White” (pigment)
Vallejo Acrylic Varnish “Gloss”
Vallejo Flow Improver
Vallejo Thinner
Vallejo Premium Color “Matte Varnish”
Pendraken 12mm dice frame
If you have any questions or feedback – go for it in the “Comments” section!
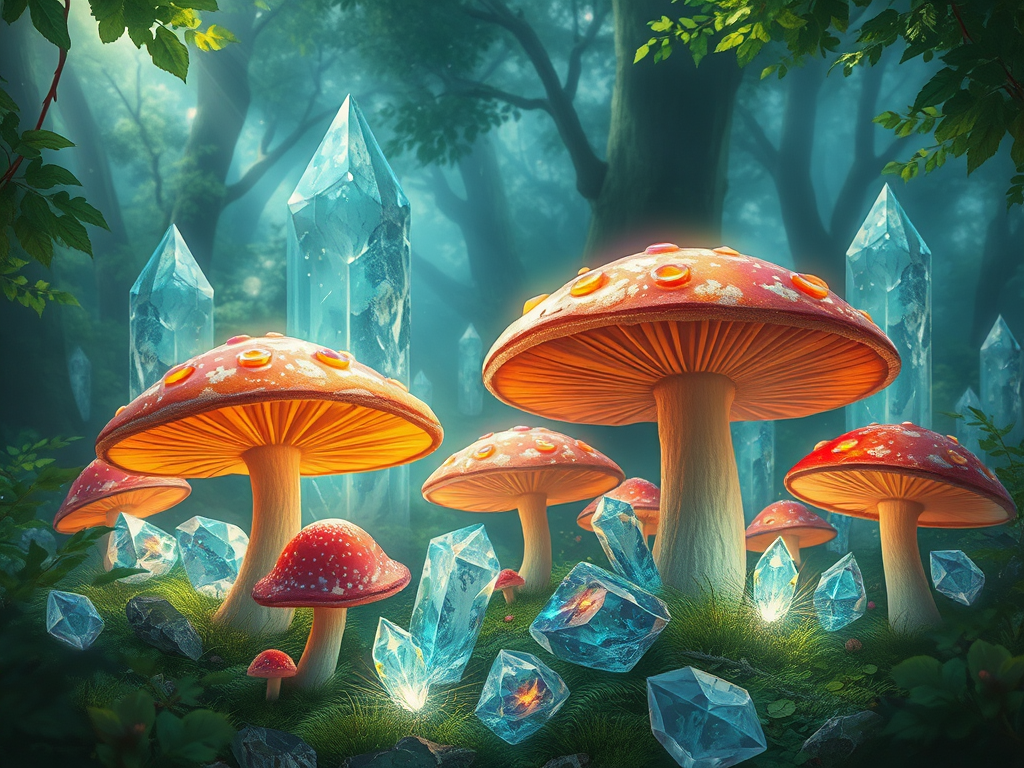
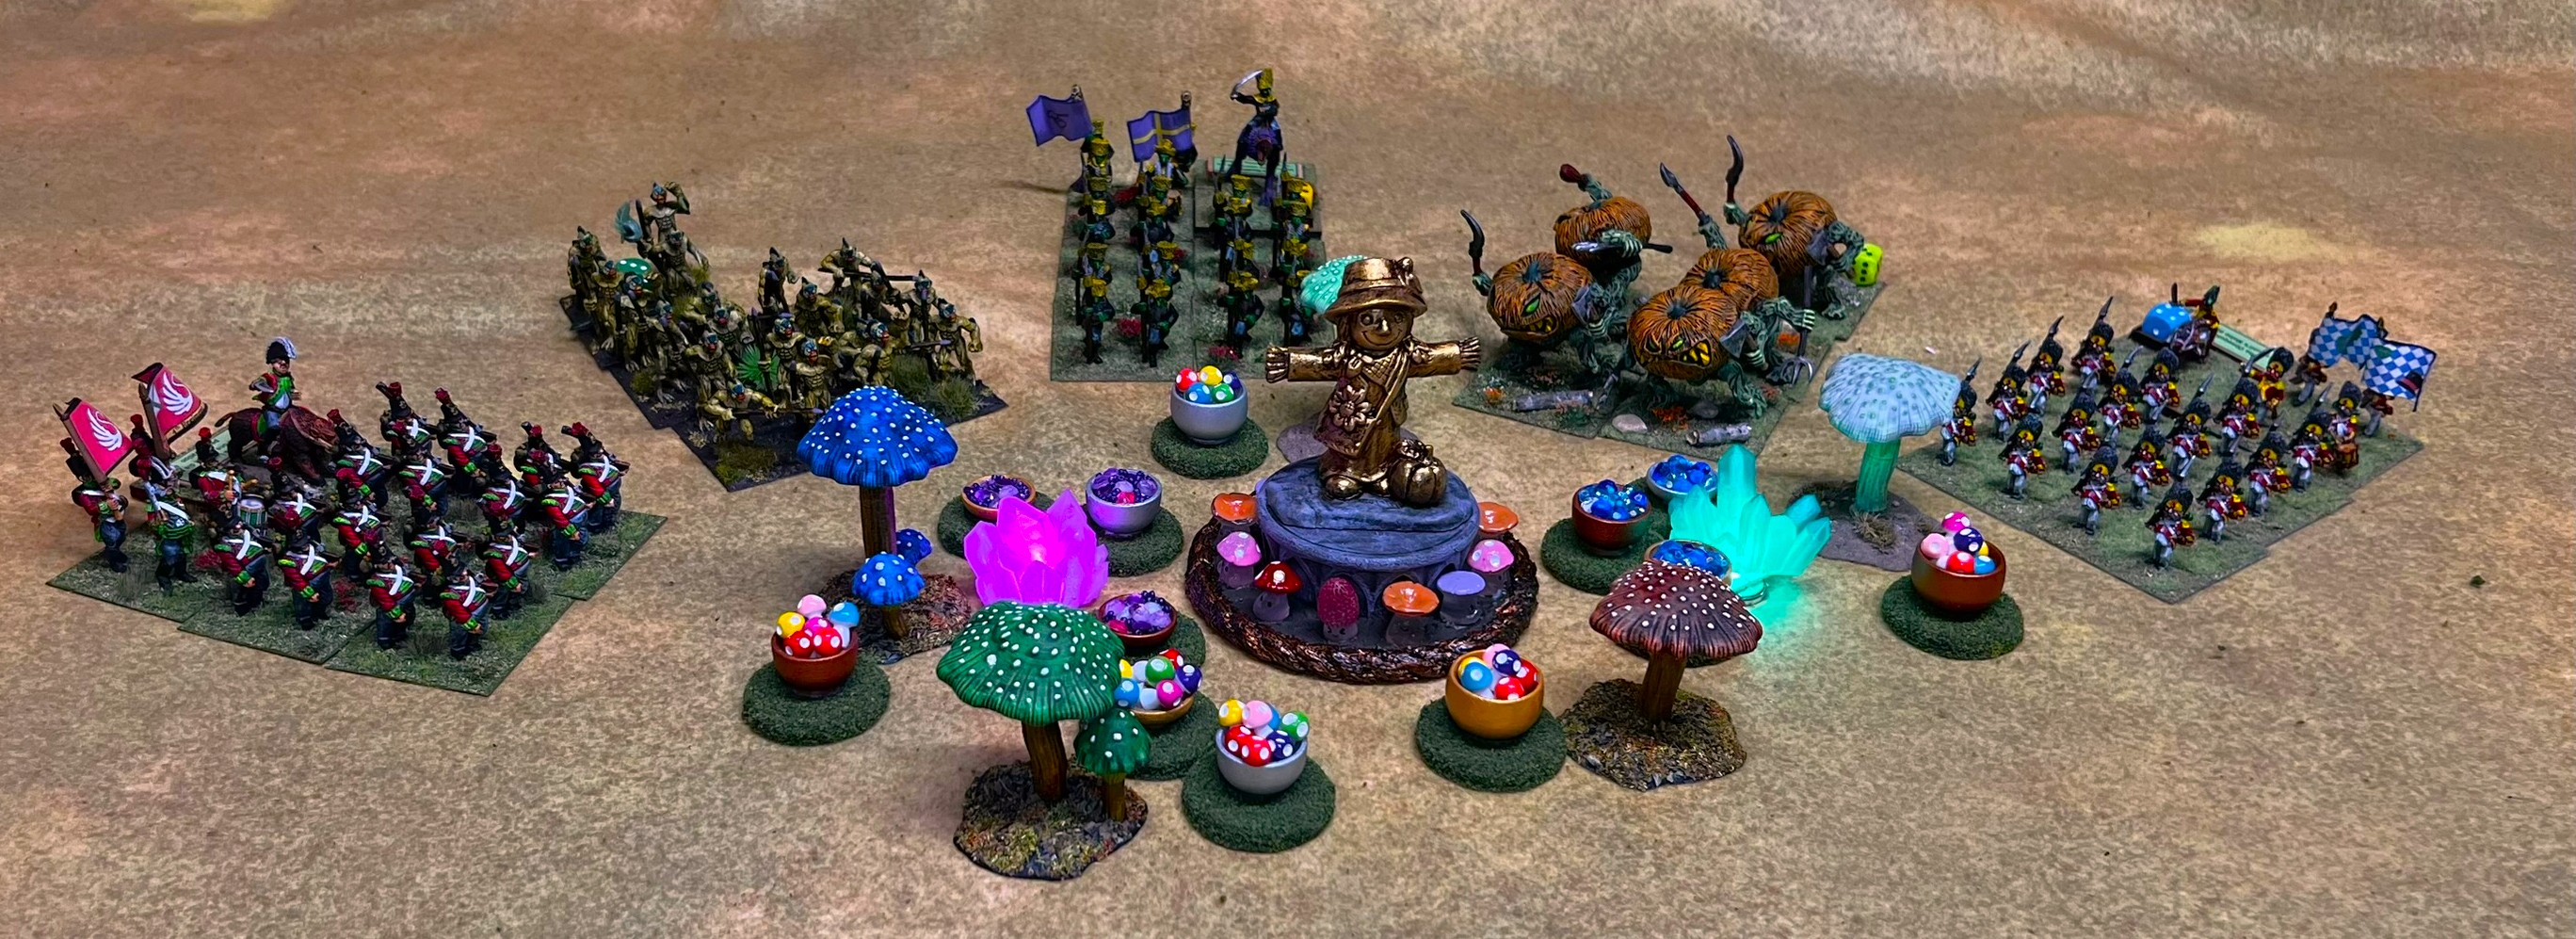
For part three of this series, I wanted to share some smaller Wars of Ozz games projects. These projects included making some game markers. These are for a convention scenario I will be running. The scenario is called “Wars of Ozz – Battle for the Magic Mushrooms & the Ancient Crystals of Power“. There will be 6-8 players, each controlling one brigade, all converging on the center of the tabletop. At that center will be the Scarecrow Girl that I spotlighted in part 1. She will be surrounded by the Magic Mushrooms and the Ancient Crystals of Power. The players’ goal is to secure supplies of these and get them off the table to their homelands. Naturally, all the other players will compete for the same objective. Alternatively, they might try to deny possession to their competitors. Here is the game flyer:
Game flyer
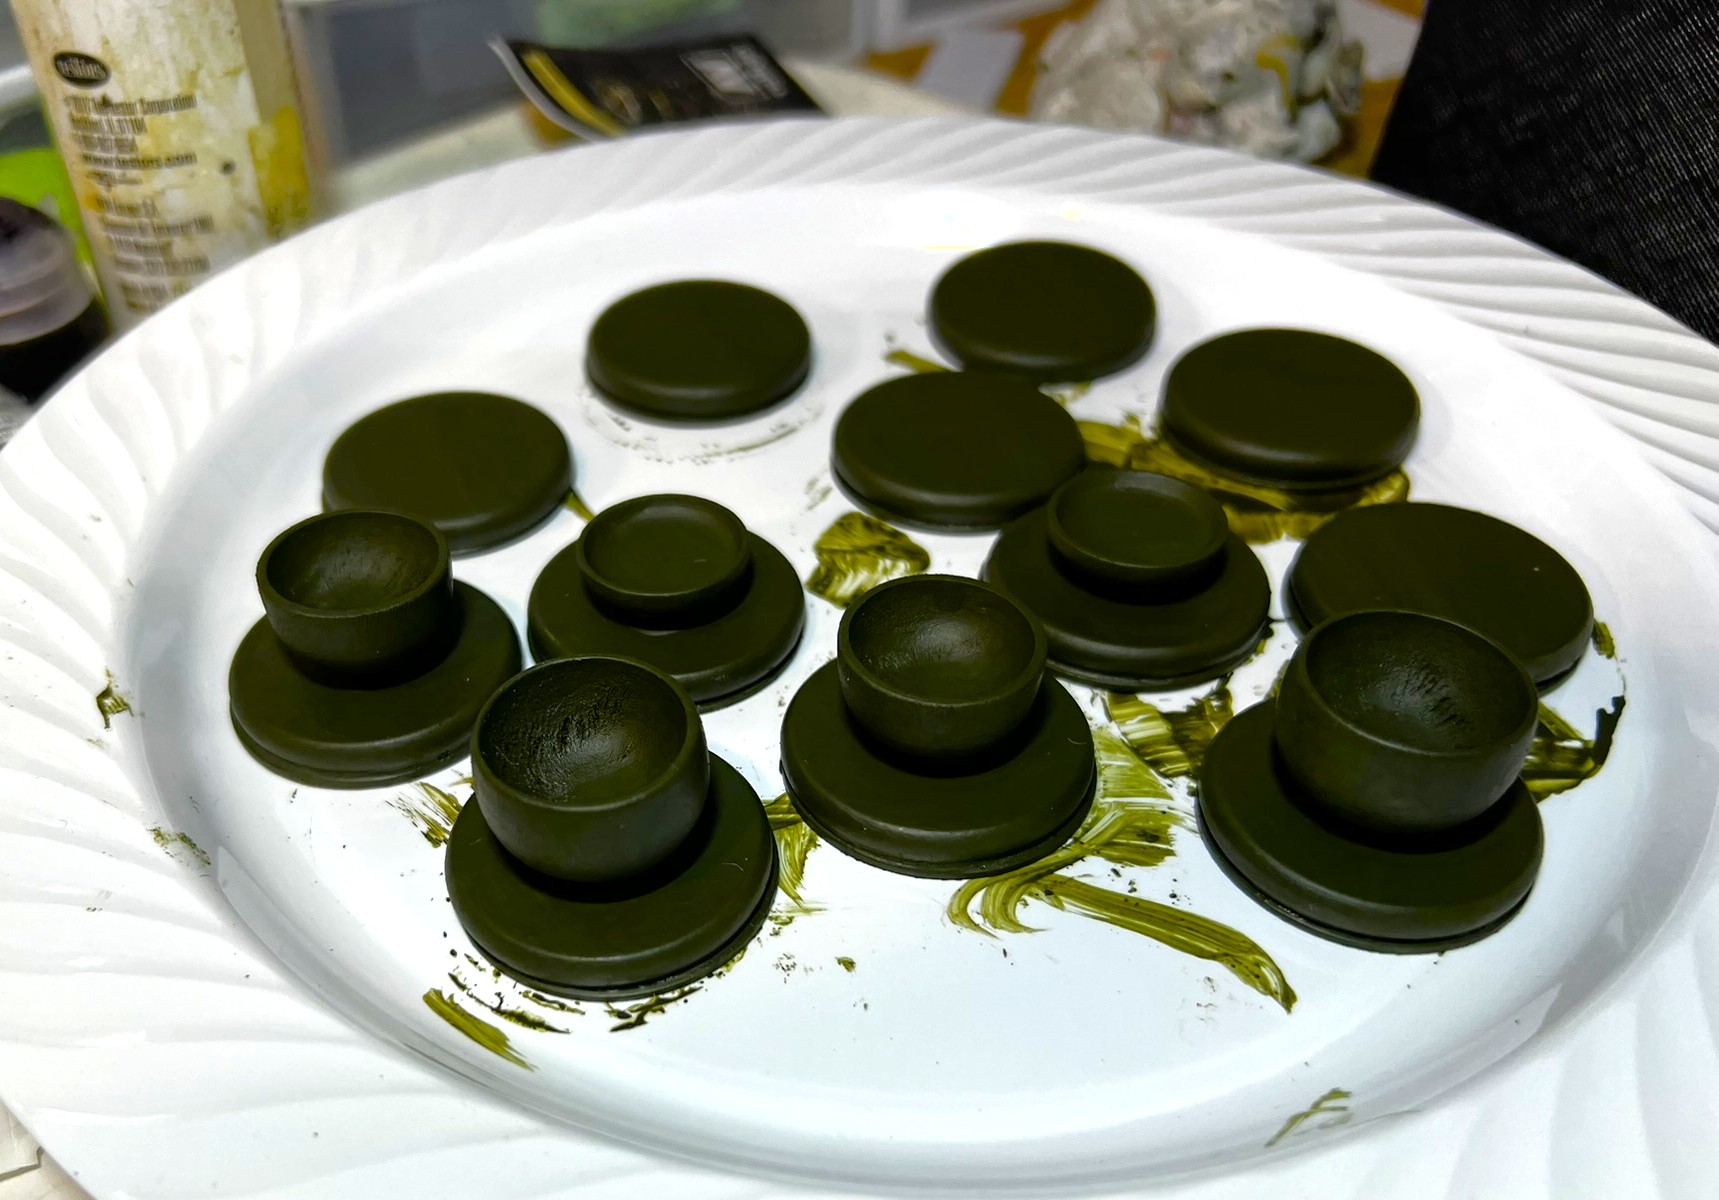
Naturally, I would need to have some markers or tokens to denote actual possession of either mushrooms and crystals. Therefore, I put some together – that would at least look like terrain. These were not difficult to make, cobbling together some bits from here and there. First, I saw some wooden miniature bowls at Michael’s that I thought would fit the bill. I got 12 in 2 packages, and based them on wooded disks atop steel washers. I primed them green.
Primed bowls.
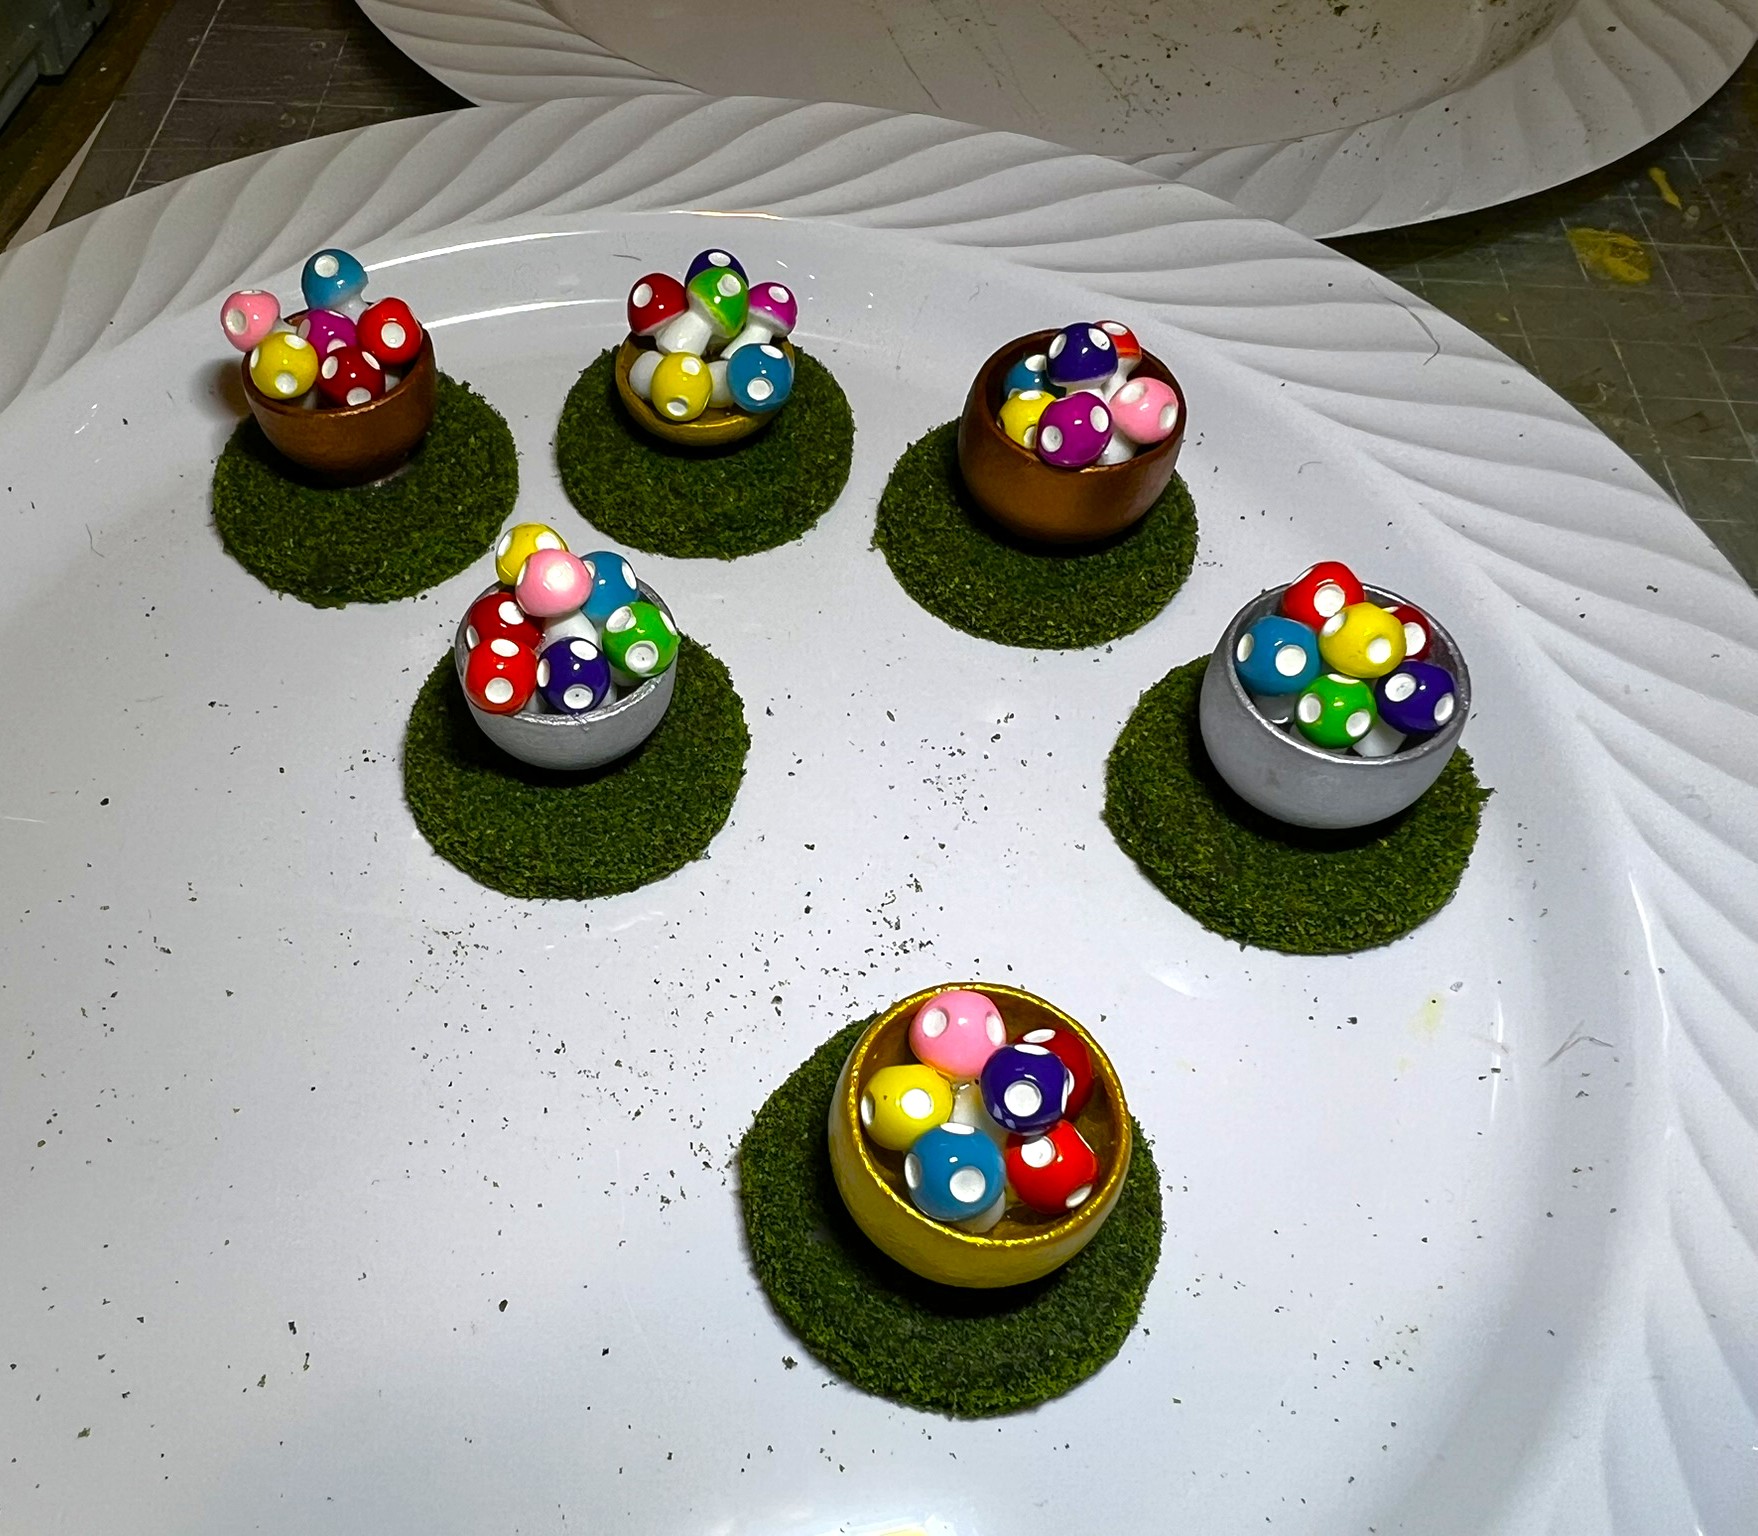
I decided to paint one third of these copper, one third gold, and one third silver. Then I flocked them as I was also working on the trees you saw in my last post.
The bowls shown here flocked.
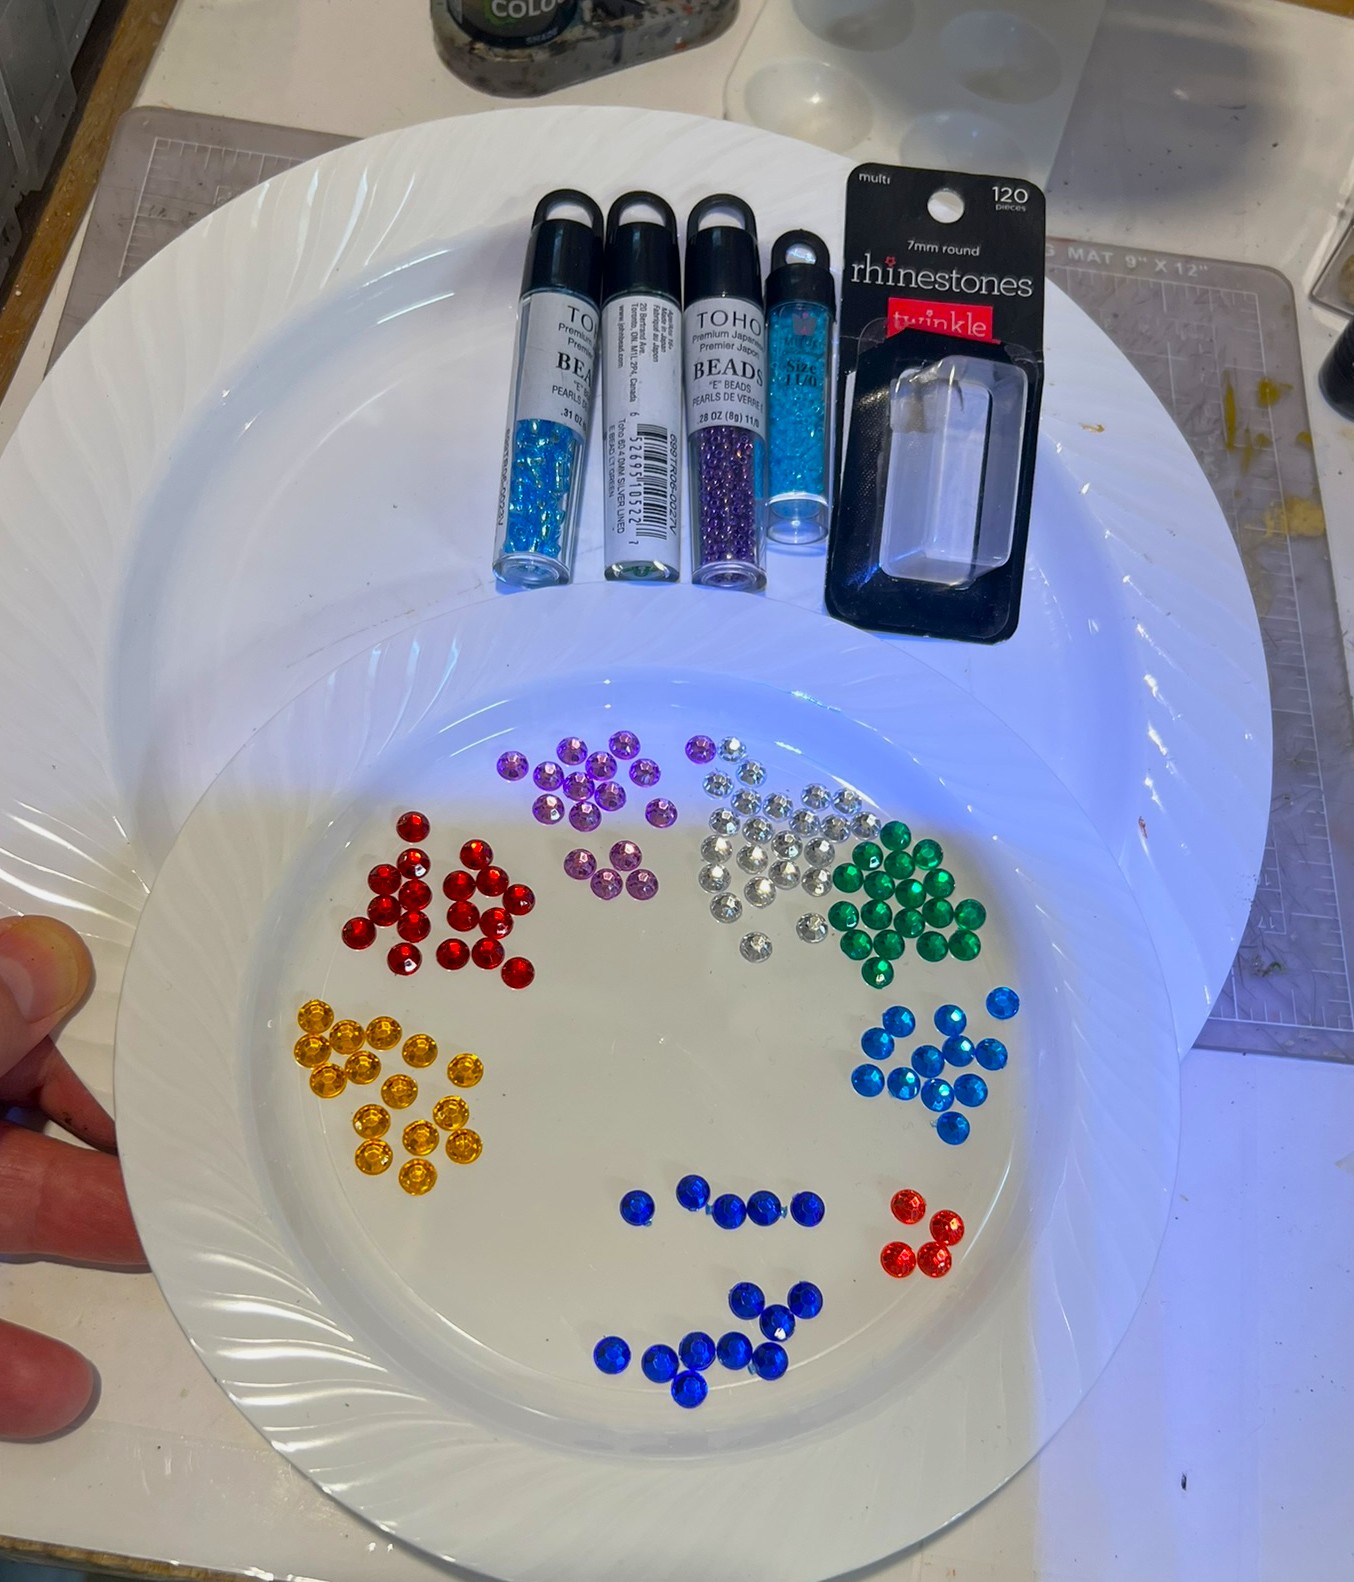
The next challenge would be to get small mushrooms and crystals to fill the bowls. To that end, I used multiple products to bling out the bowls as full of ancient magic crystals.
Rhinestones, glass beads…and more rhinestones!
I used Gorilla Glue to mount them in various combinations for the crystal markers.
6 crystal markers.
As for the mushrooms, I found some colorful little ones on Amazon. They serve the purpose. I can use them on unit bases too.
Mushroom markers.
And these were done!
I hope that these were fun to look at. In the game, possession of these will cause detrimental effects to the holders! So I expect a free-for-all in the game!
Additionally, I did adjust two units’ bases. The Great Flying Apes had one base that still needed adjustment to stay upright. I added a support wire and camouflaged it with some tall jungle turf.
Great Flying Ape base front……and back – repaired.
The other basing challenge I needed to rectify involved my regiment of Mushroom Creatures. I really like the regiment, but their big caps obscure their eyes from above. The issue is that players struggle to identify the actual facing direction of the Mushroom Creatures’ bases. The same little mushrooms that I used for the markers shown here were the solution. I added them to the front of each base – problem solved!
Mushroom Creatures with small mushrooms
I initially thought that this series would be one with just 3 parts. Now it will be 4 as I have finished off a very cool set of terrain pieces. I made these as gifts that simply MUST be shared. Stay tuned for a bonus part 4 and see if you agree!
Final Note
Want to learn more about Ozz? If you want to check out the excellent Wars of Ozz figures’ range, there are two places to get them. You can also get the rules there. (I make no money from this.) The game rules and the figures are available from the next two places:
Below you’ll see the list of paints and the like that I used on the markers. They are more useful for me when I need to recreate a color scheme in the future. They might not be as useful for you. In any case, that’s why I post them.
Miscellaneous details and references for those interested in that sort of thing:
For my earlier posts on Wars of Ozz games, view this page. It includes figures, units, and other related projects.
PAINTS, INKS, GLAZES, SHADES, WASHES, PIGMENTS, FLOCKING, GLUES AND MORE THAT I USED ON THE MAGIC MUSHROOM AND ANCIENT CRYSTALS OF POWER MARKERS:
1½” wooden disks from Michael’s
Everbilt ASD 1½” steel washers
Gorilla Glue
Twinkle 7mm plastic rhinestones
TOHO glass beads from Michael’s
Recollections purple bling stickers
Make Market Miniature Bowls & Plates (2 sets) from Michael’s
Everbilt ASP washers
PVA Glue
Binder clips
Vallejo Surface Primer “Russian Green”
Citadel “Auric Armour Gold”
Tamiya “XF-6 Copper”
Tamiya “XF-11 Chrome Silver”
Woodland Scenics “Blended Turf” (flocking)
Exasinine Mini Mushroom Resin Figurines for Home DéCor (Style 1, Small)
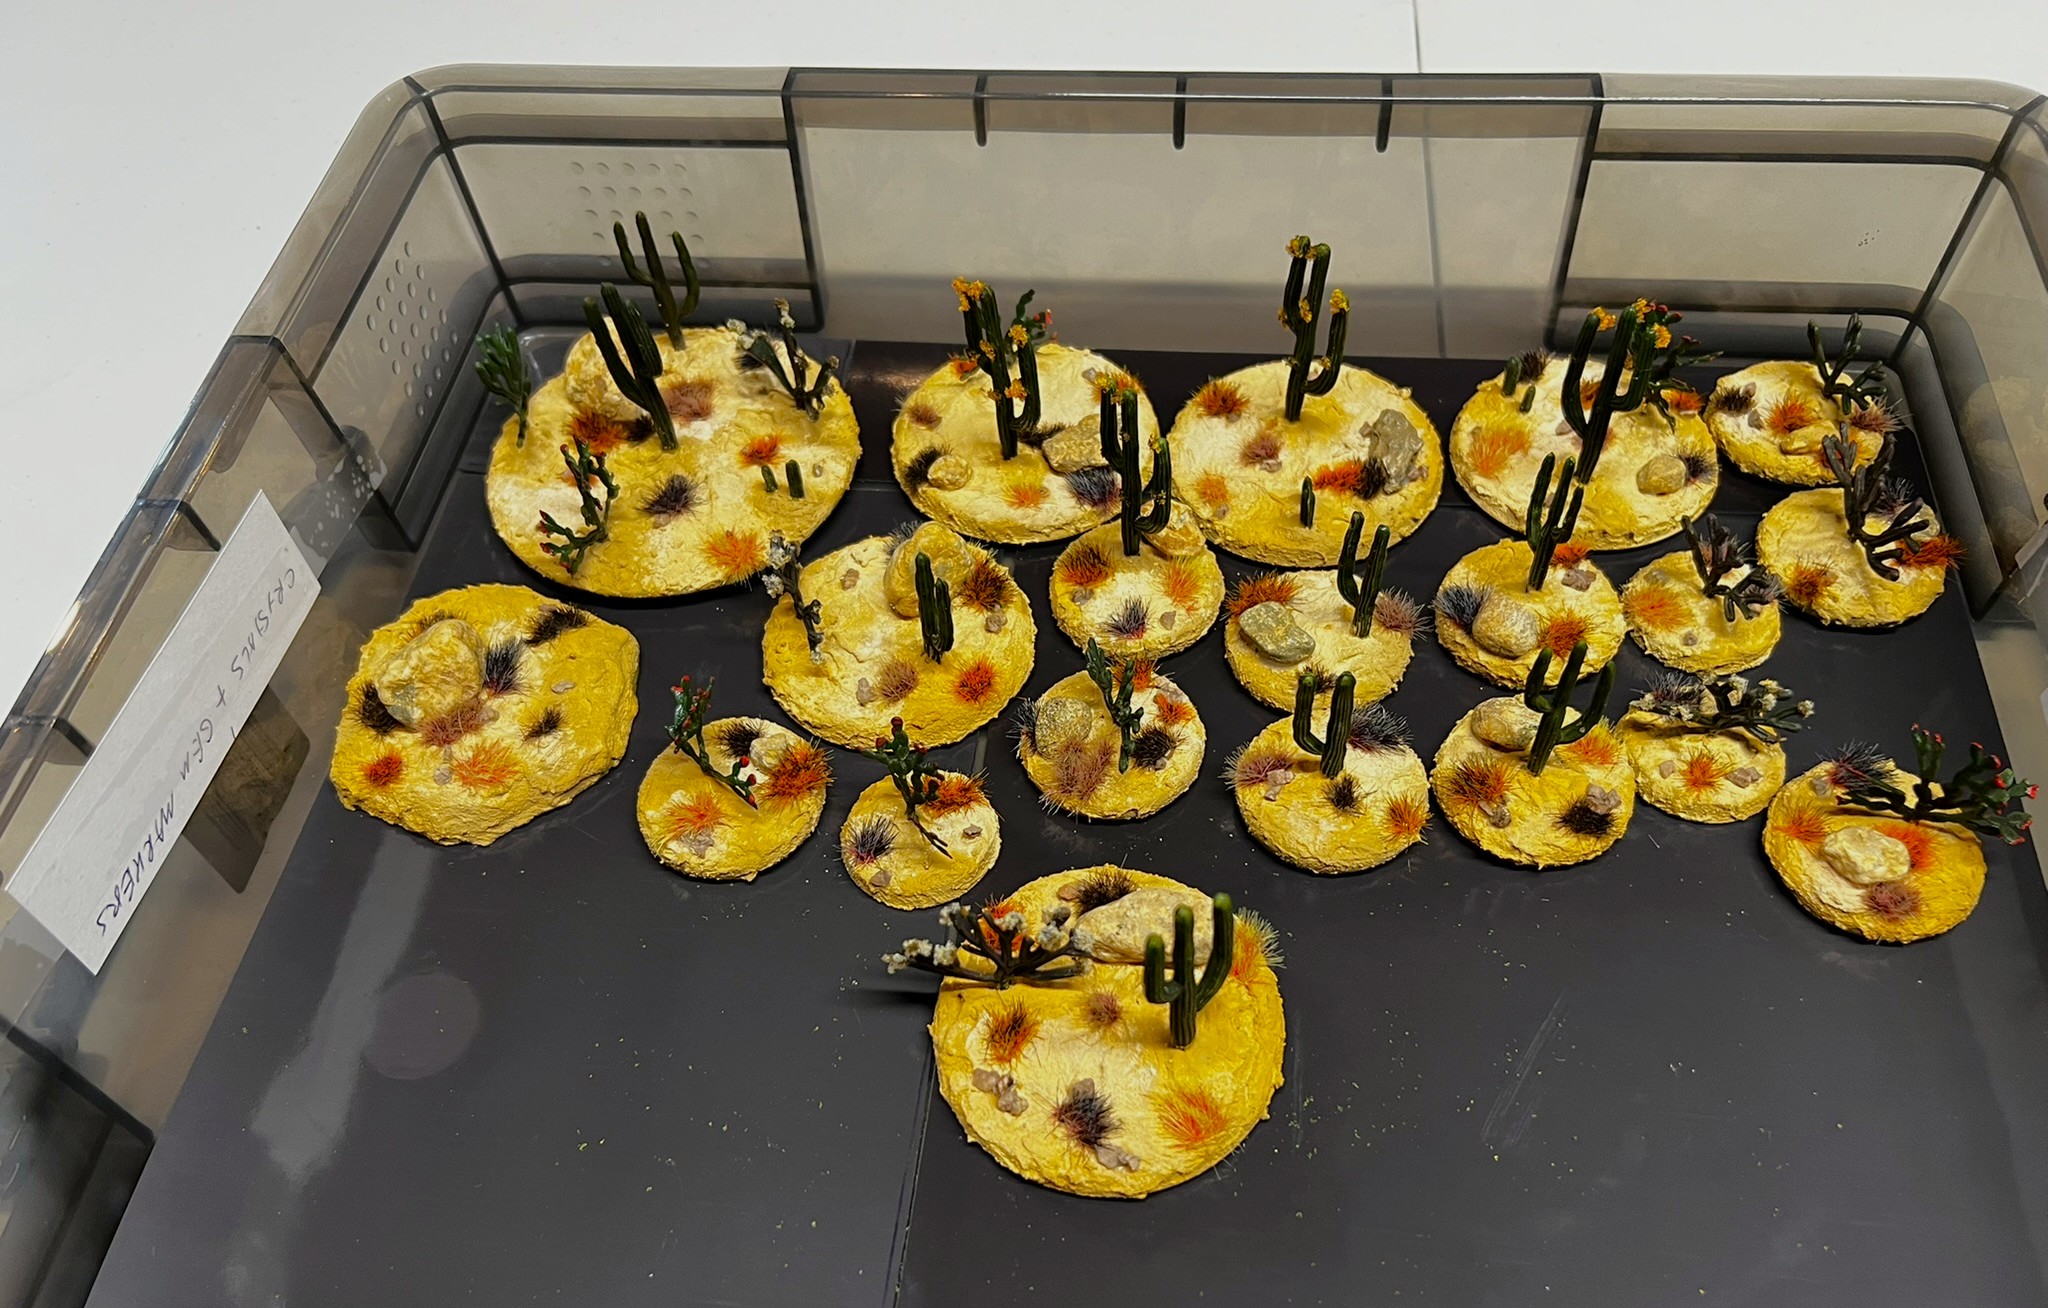
On the last time that I posted, I shared my Scarecrow Girl statue that I cobbled together. After Christmas, I was able to add even more to my scatter terrain with a myriad of pieces. In the case of this post, I’ll share how I built out and painted up desert/cactus pieces and some oases. I also did a bit of tree build and rehab work that I will share here.
It’s all for my Wars of Ozz games. I needed some more desert pieces – especially now as I have significant numbers of desert units from both the Whim Whim and Temujican factions. I did previously use some cacti from Hobby Lobby in my Mesoamerican games.
Two Christmas gifts from my Mom – cacti and trees (both kinds the types for model railroads or dioramas) – brought me an opportunity to go further. On a side note, she says I’m tough to get a gift for – to which I say I really don’t need any at my age – but I do appreciate her a lot and it was very thoughtful (she’s probably reading this too!). In any case they will outlast golf balls for sure…
The cacti were great for building some scatter terrain. Additionally, I needed to make objective markers for one of my desert games – and oases seemed appropriate for that purpose. Lastly, my deciduous and evergreen tree collection (which is mostly second-hand from a flea market) needed an upgrade badly as they were looking like victims of Agent Orange defoliant. So, Mom’s tree gift of three Hobby Lobby trees was another scatter terrain opportunity. I’ll discuss the cacti scatter bases first, then the oases build, and lastly the trees.
Cacti Bases
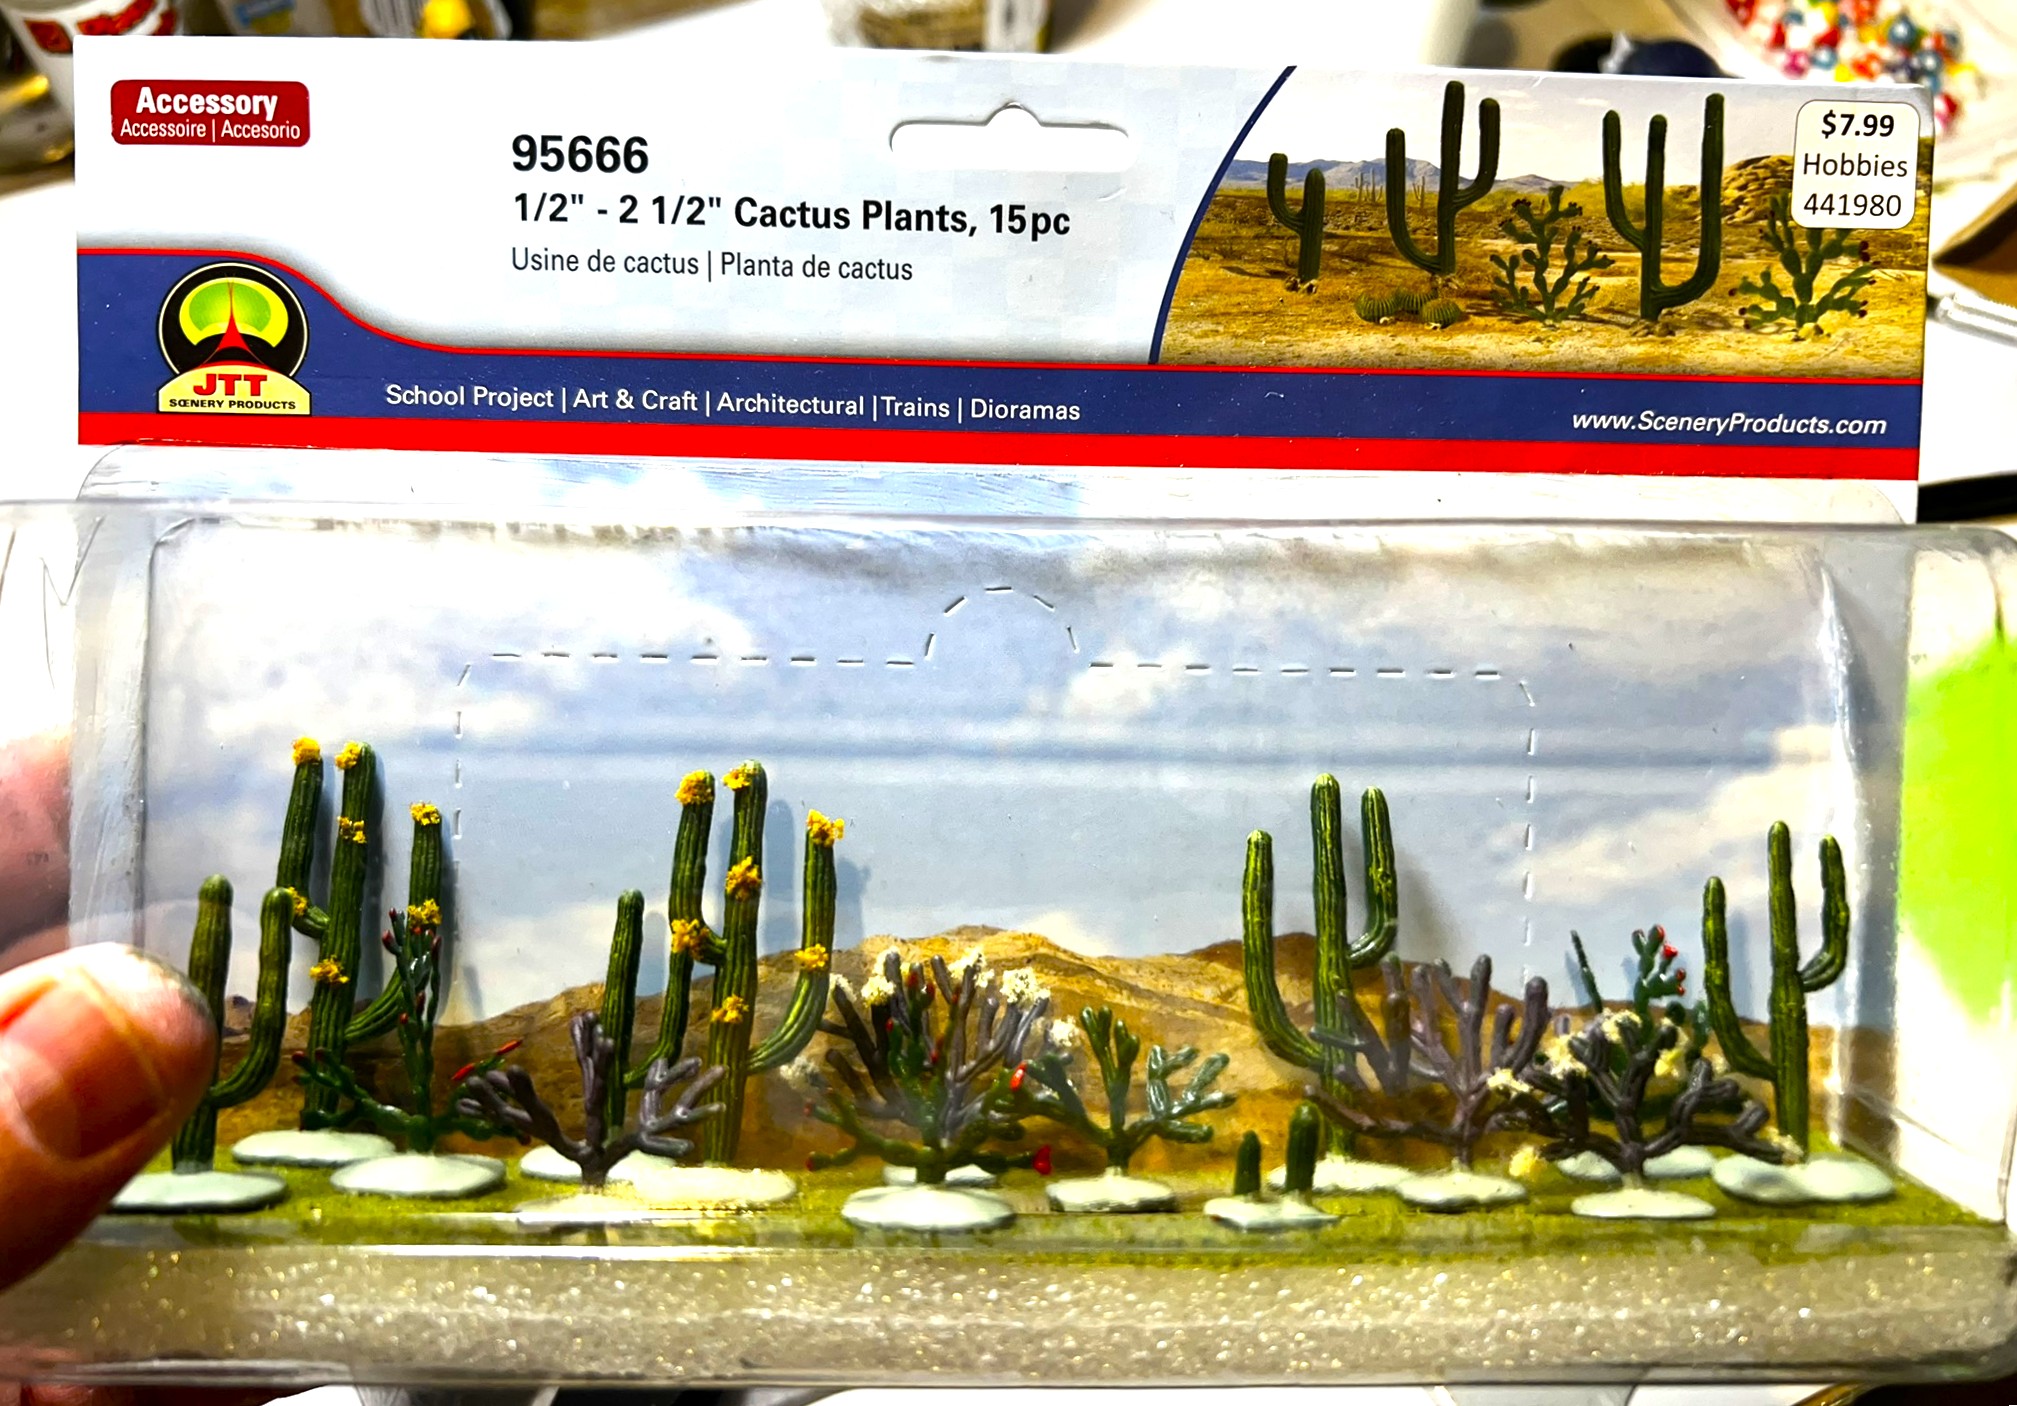
Cactus plants from JTT Scenery – I had two packages of 15 cacti.
The cacti are from JTT, and are plastic, and hence, they have that glossy look. I used a wash to knock off the glossy appearance and to give some depth to the plants’ striations. This was easy to do as the plants are set in the package into a styrofoam base. That base holds them loosely enough for applying a sepia wash and removing the cacti and bushes afterwards was simple.
After applying a sepia wash. The mounting styrofoam made this easy.
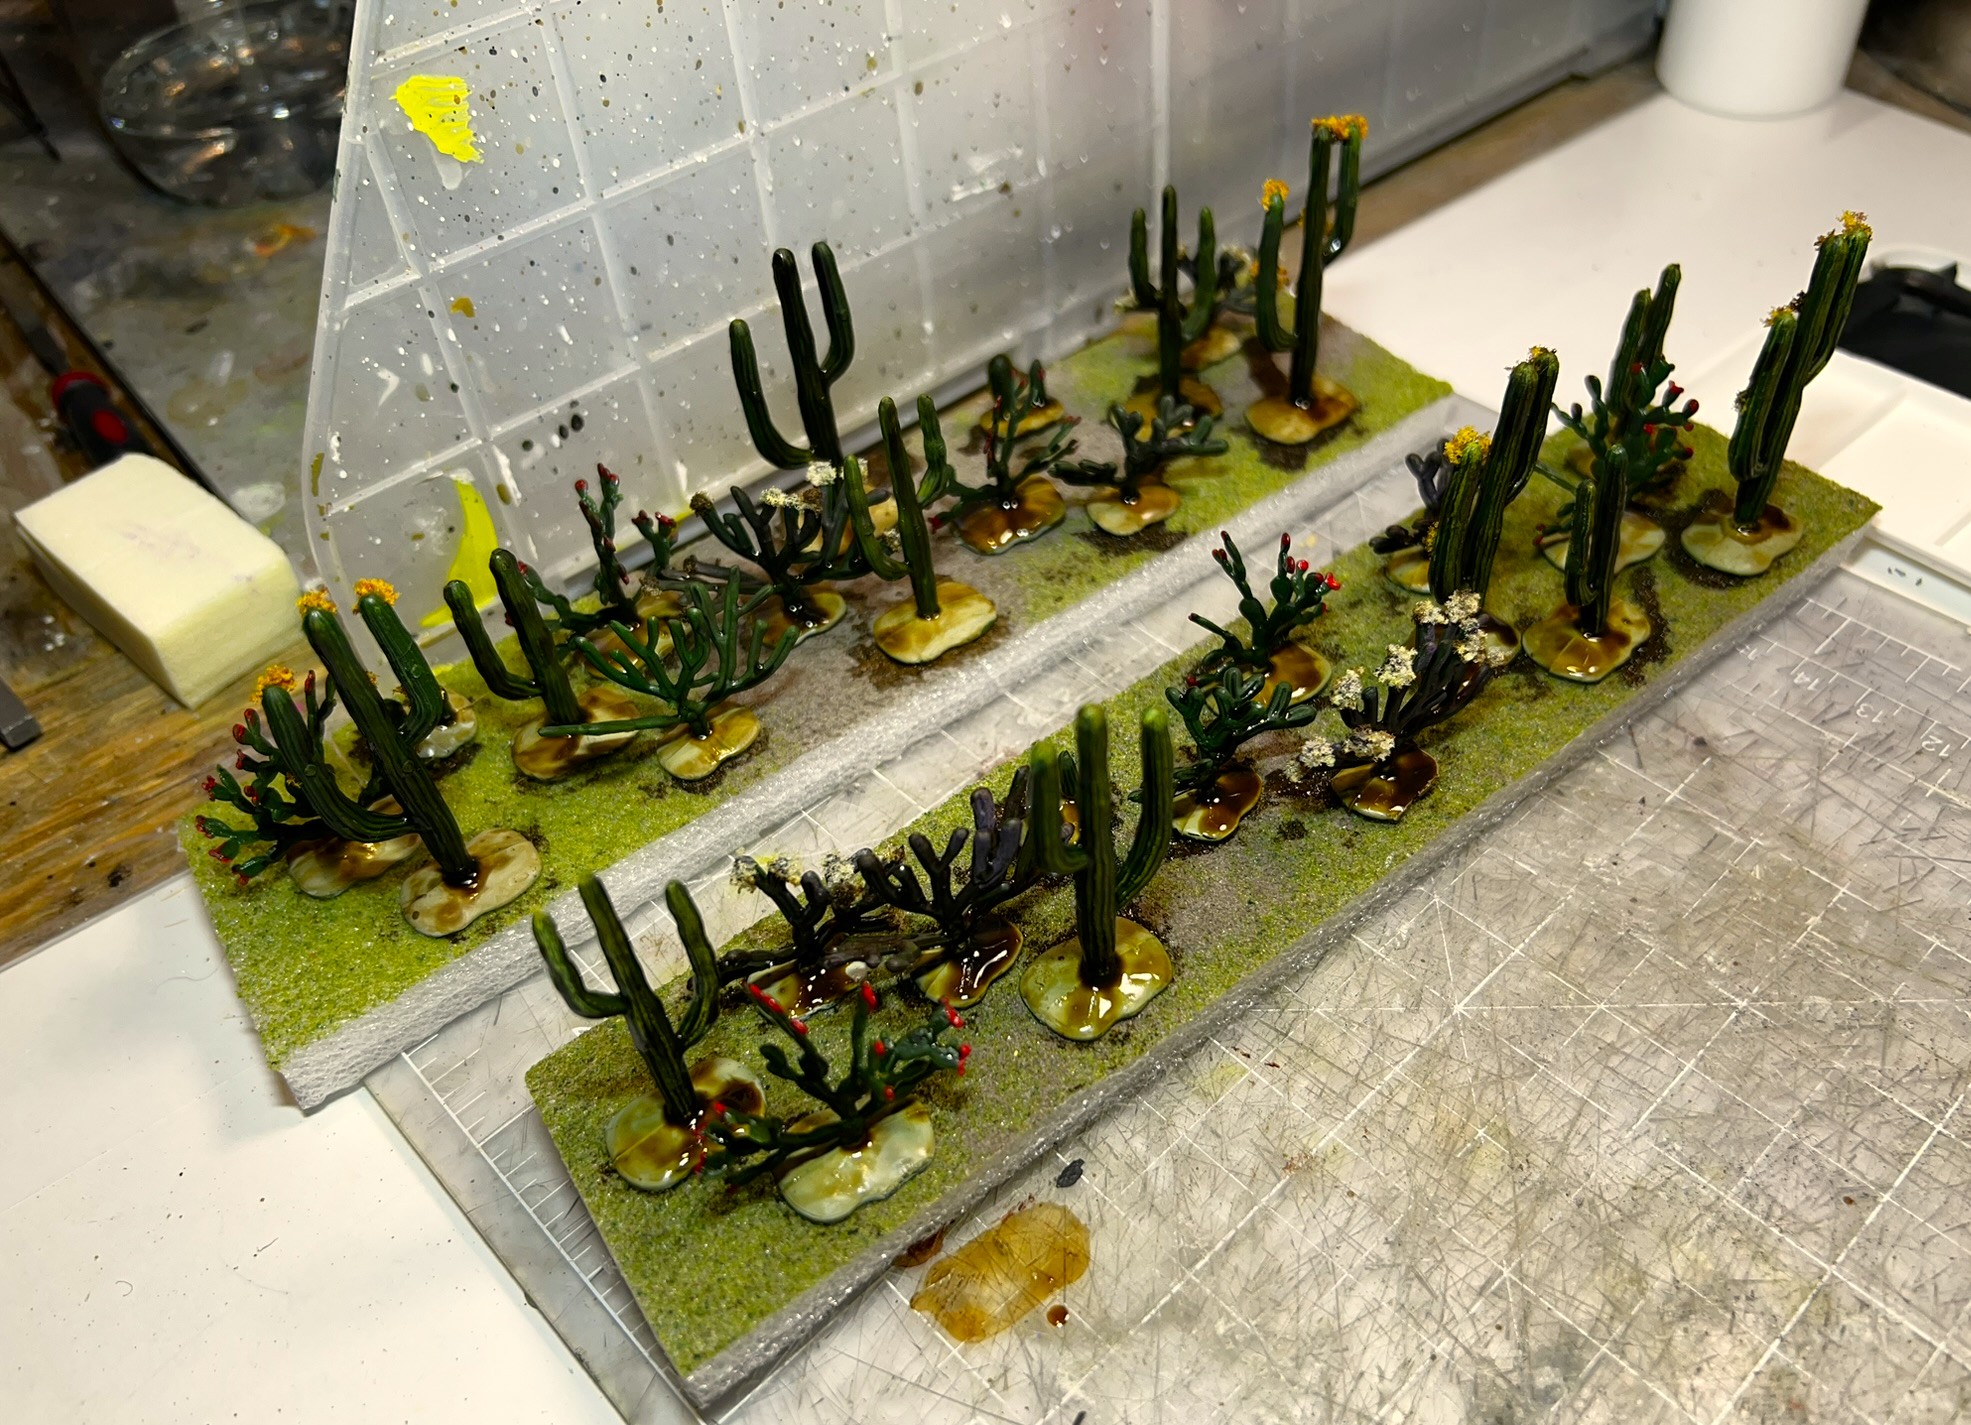
As for bases for the plants, I decided it was a good opportunity to clear out a bunch of different plastic and wooden bases from my collection. One was even the same as I used on the Scarecrow Girl statue. You can see them below – I ended up with 20 bases. All of them got appropriately-sized steel washers underneath.
Some of the bases I used – well 19/20 anyways! The other one was a wooden scratch-built base that needed a purpose.
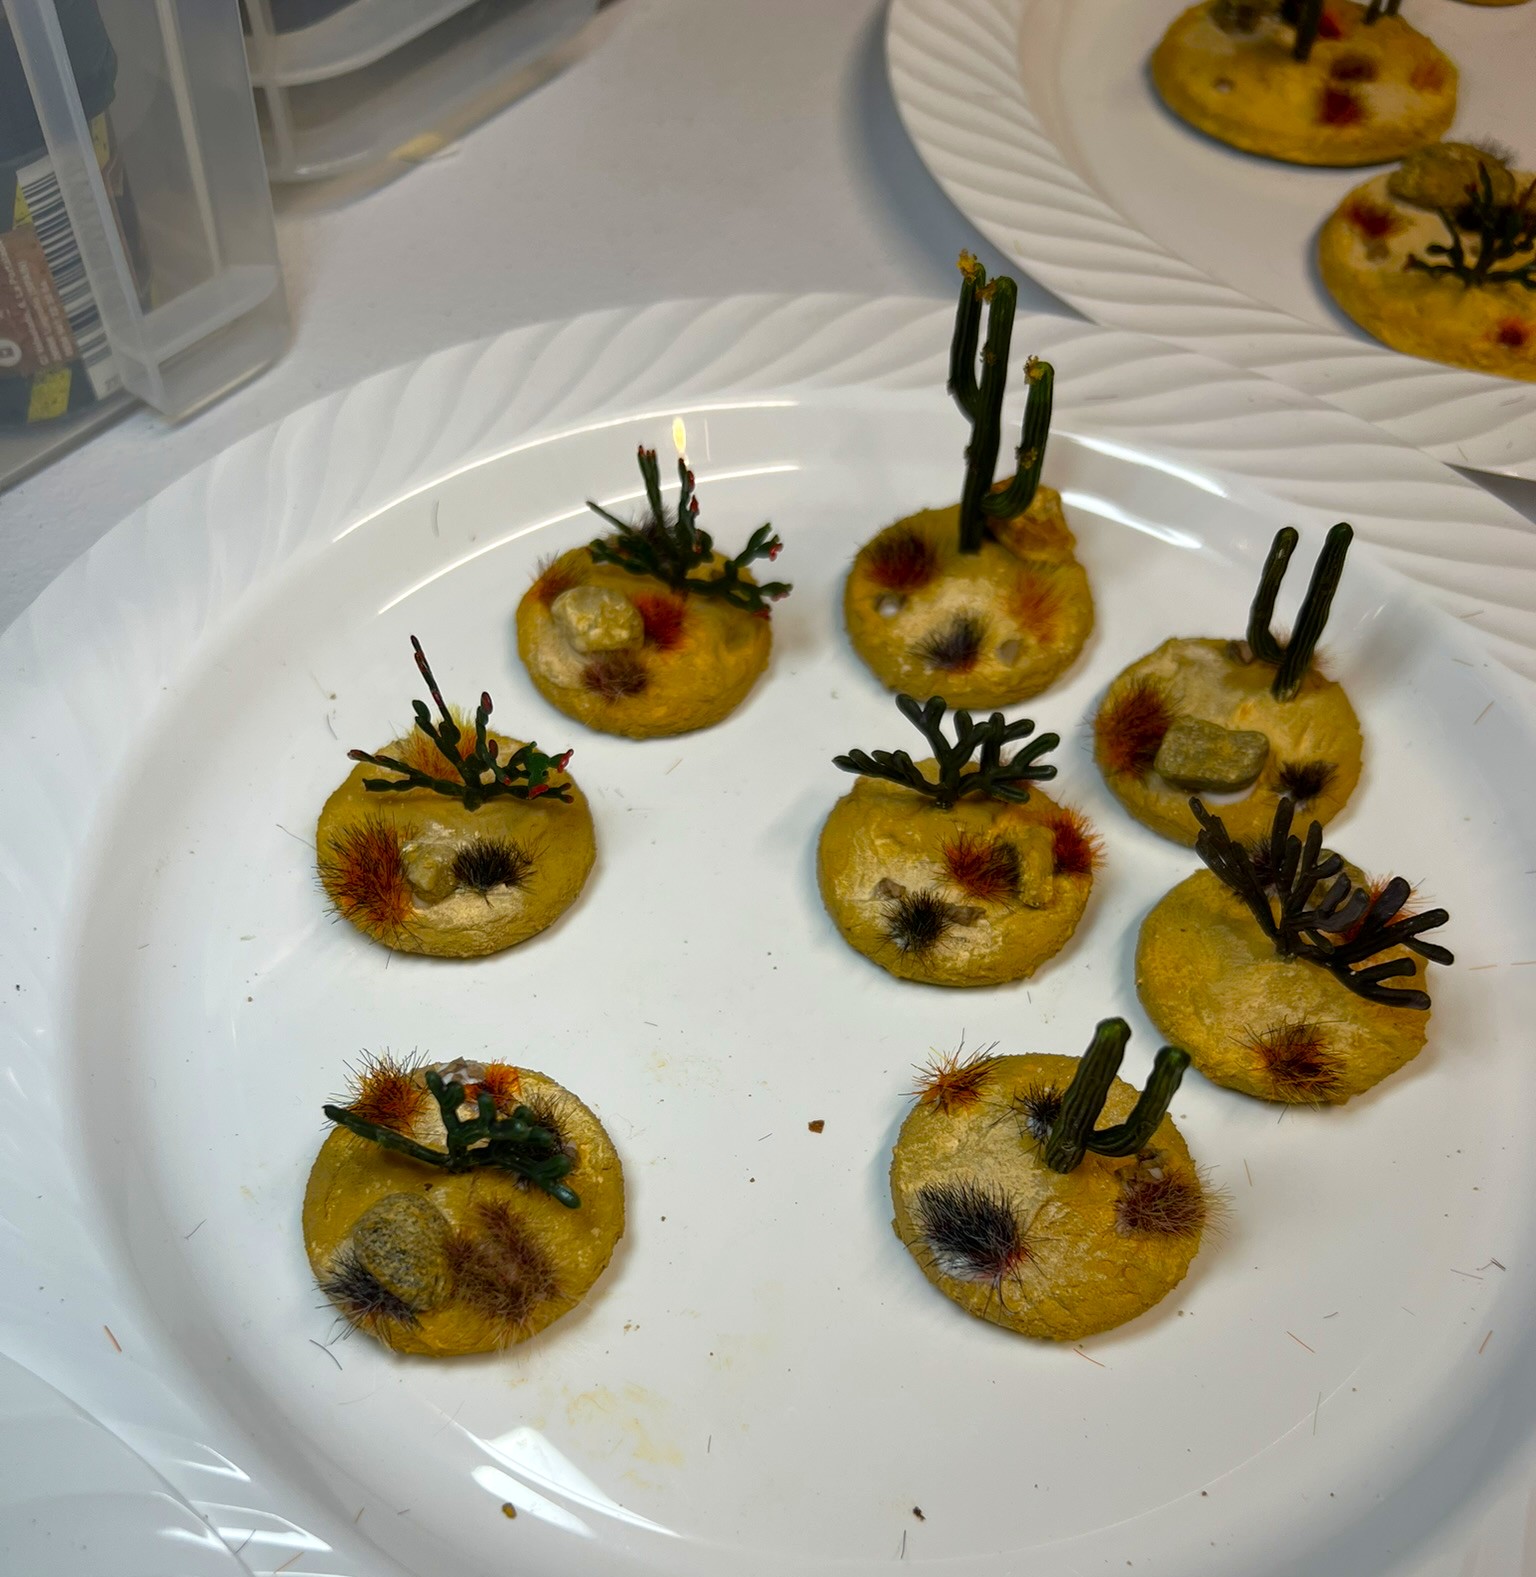
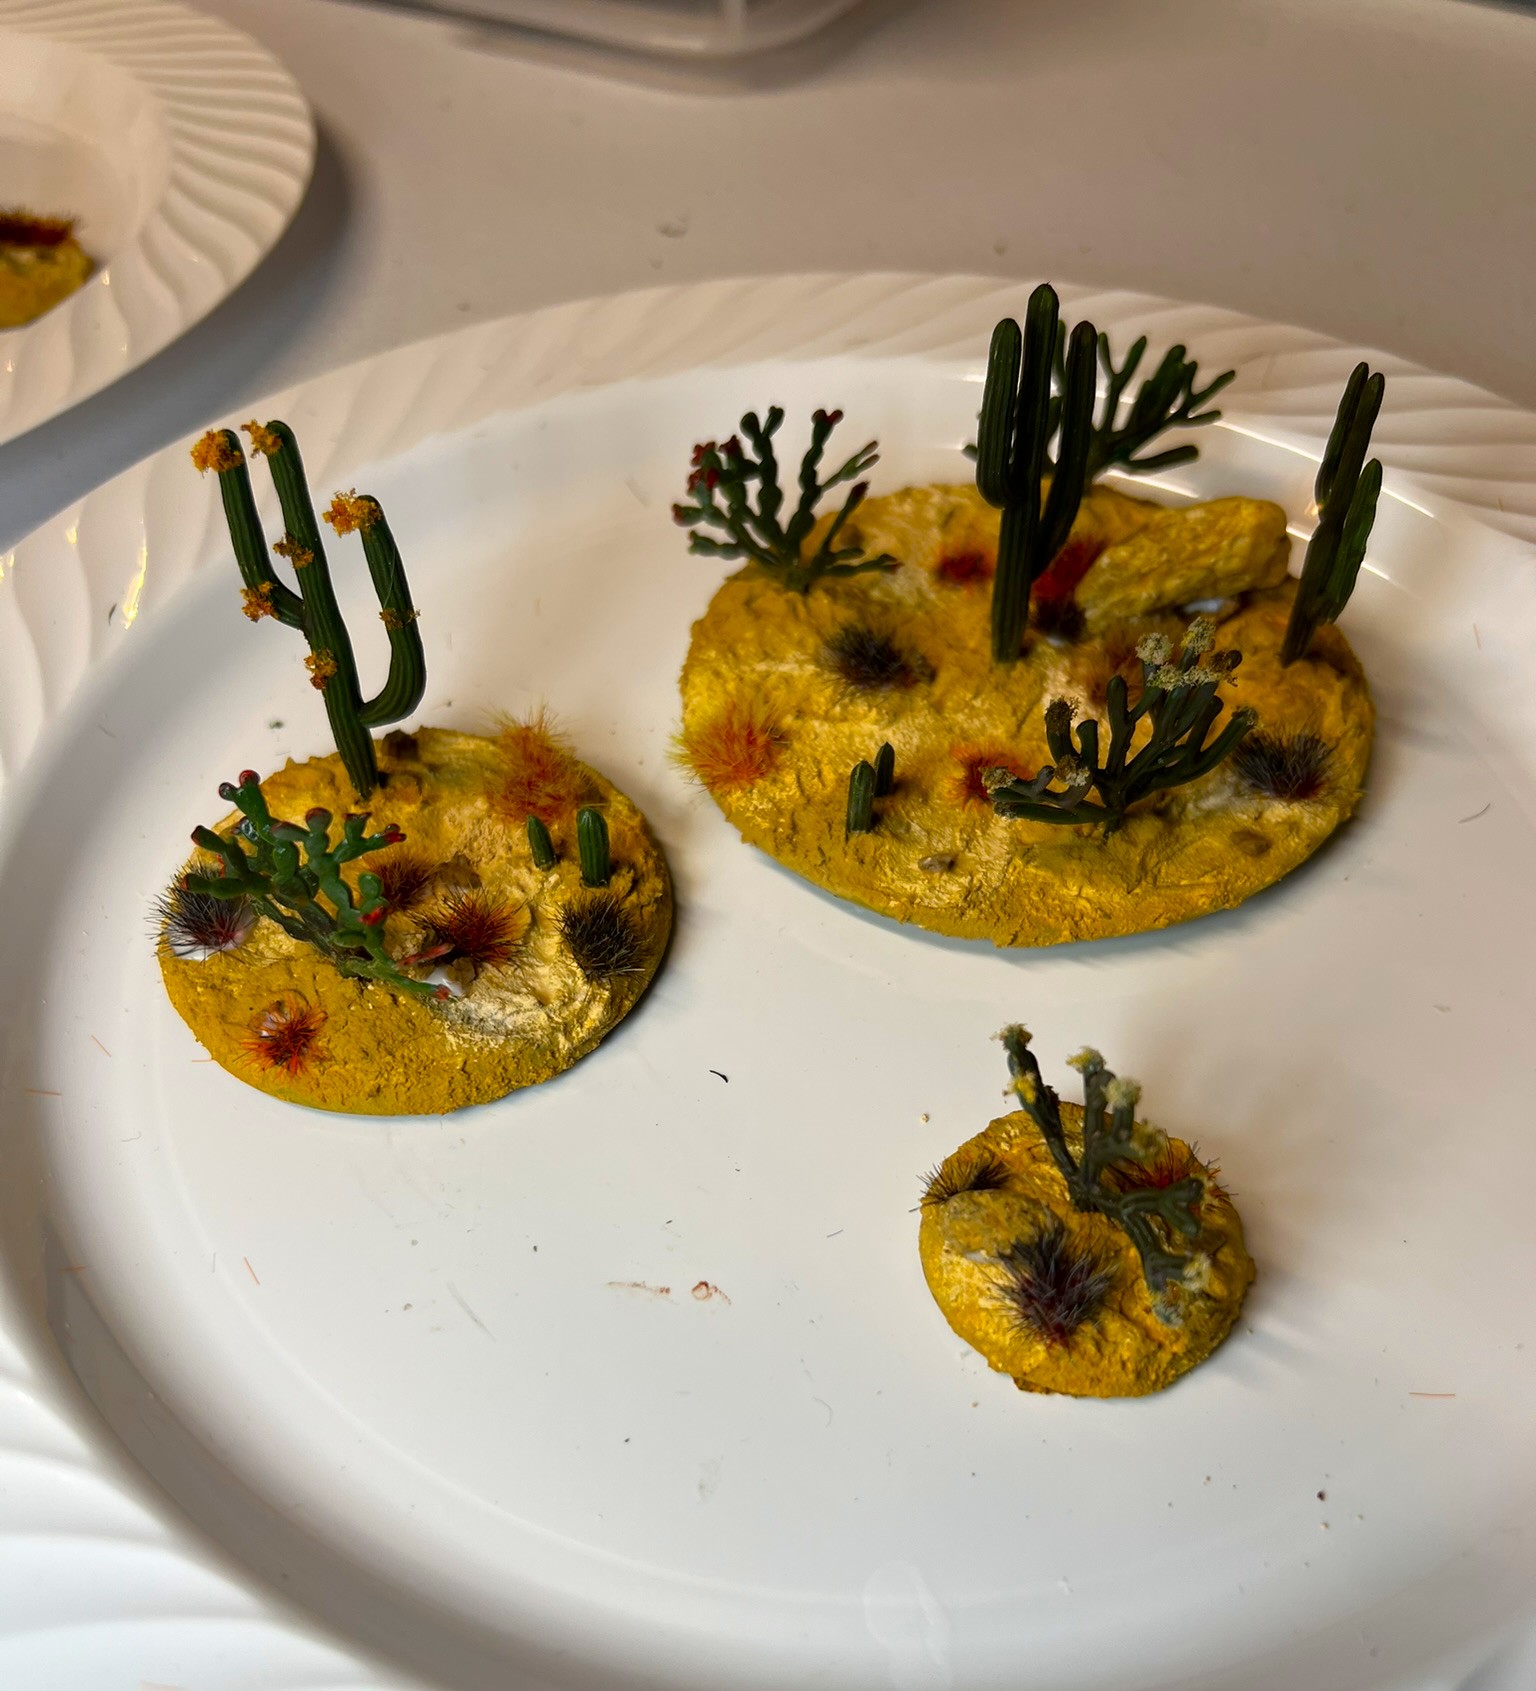
I glued the plants to the base, then added the AK basing paste, let that dry, then added pigments. When that was set, I added flocking to match my Whim Whim and Temujican unit basing schemes.
When I sent my mother these pictures on my phone, she thought they were cookies! Below you can see all 20 of them in a Really Useful Box.
Oases
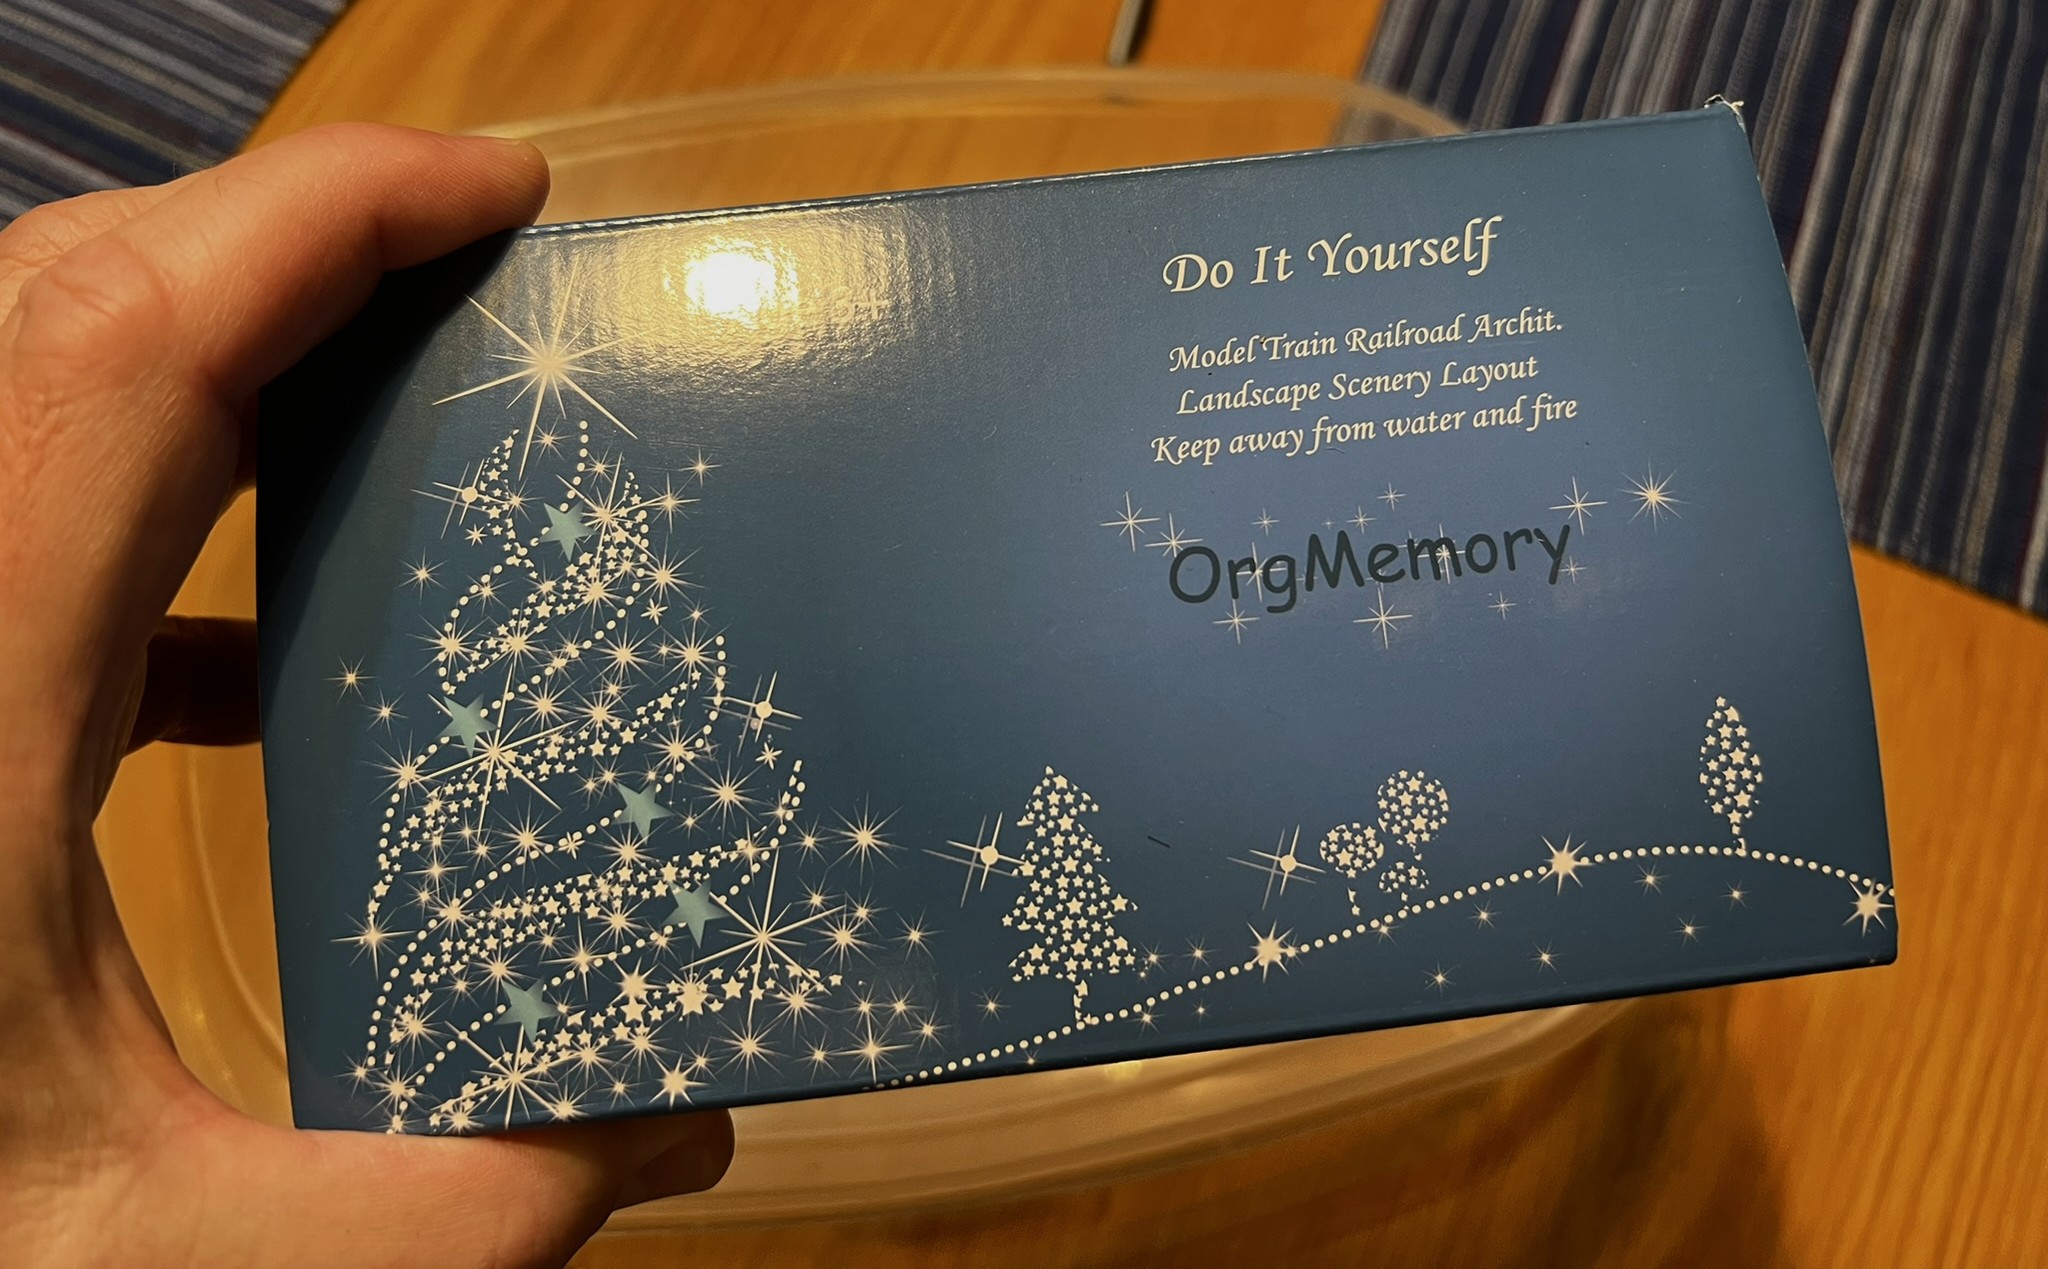
Some of you may remember that for my Conquistador/Maya game, I built some sandy scrub-like terrain pieces, that had a few palm trees. These did not look like an oasis to me – so I decided to make some that did. I found some model landscape palm trees on Amazon from OrgMemory.
The OrgMemory palm tree box.
The plastic palm trees would need (similar to the previous situation with the cacti), a sepia wash. To ensure that a sepia wash would adhere properly, I washed all of the palms in soap and water and let them dry. This would also let me figure out what sizes would be best to use on this scratch-build.
A mass of trees ready to wash……and drying. Now I needed somewhere to put them and to determine the appropriate mix of types and sizes. The little prongs on the bottoms of the trees would help later with mounting on the oases.
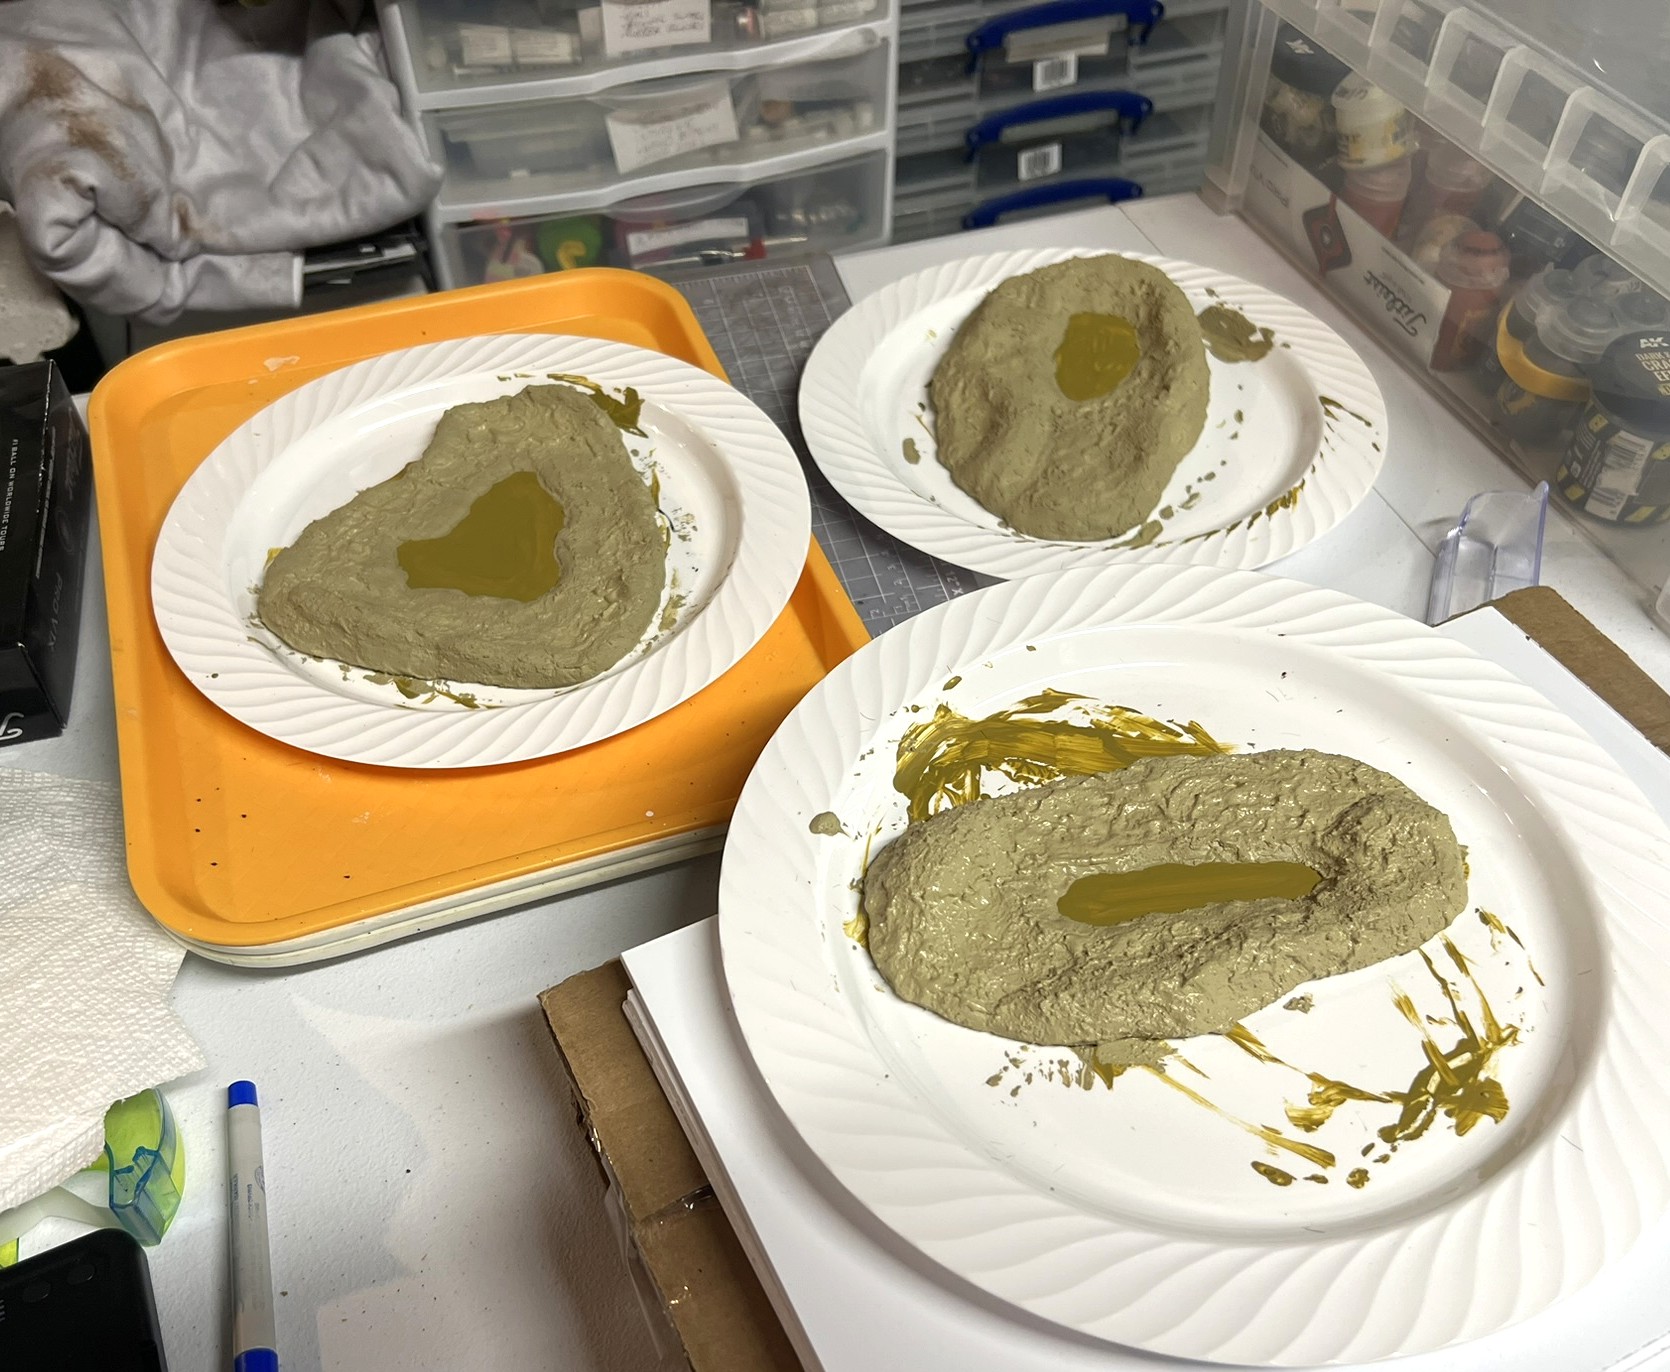
While the palm trees dried, I used my scroll saw cut up four polystyrene sheets into random shapes for the oases’ bases (that rhymes?). Apoxie Sculpt was applied on the sheets to create the shapes of the terrain. In the end, I only used three of the four sheets. I’ll save the other for later use.
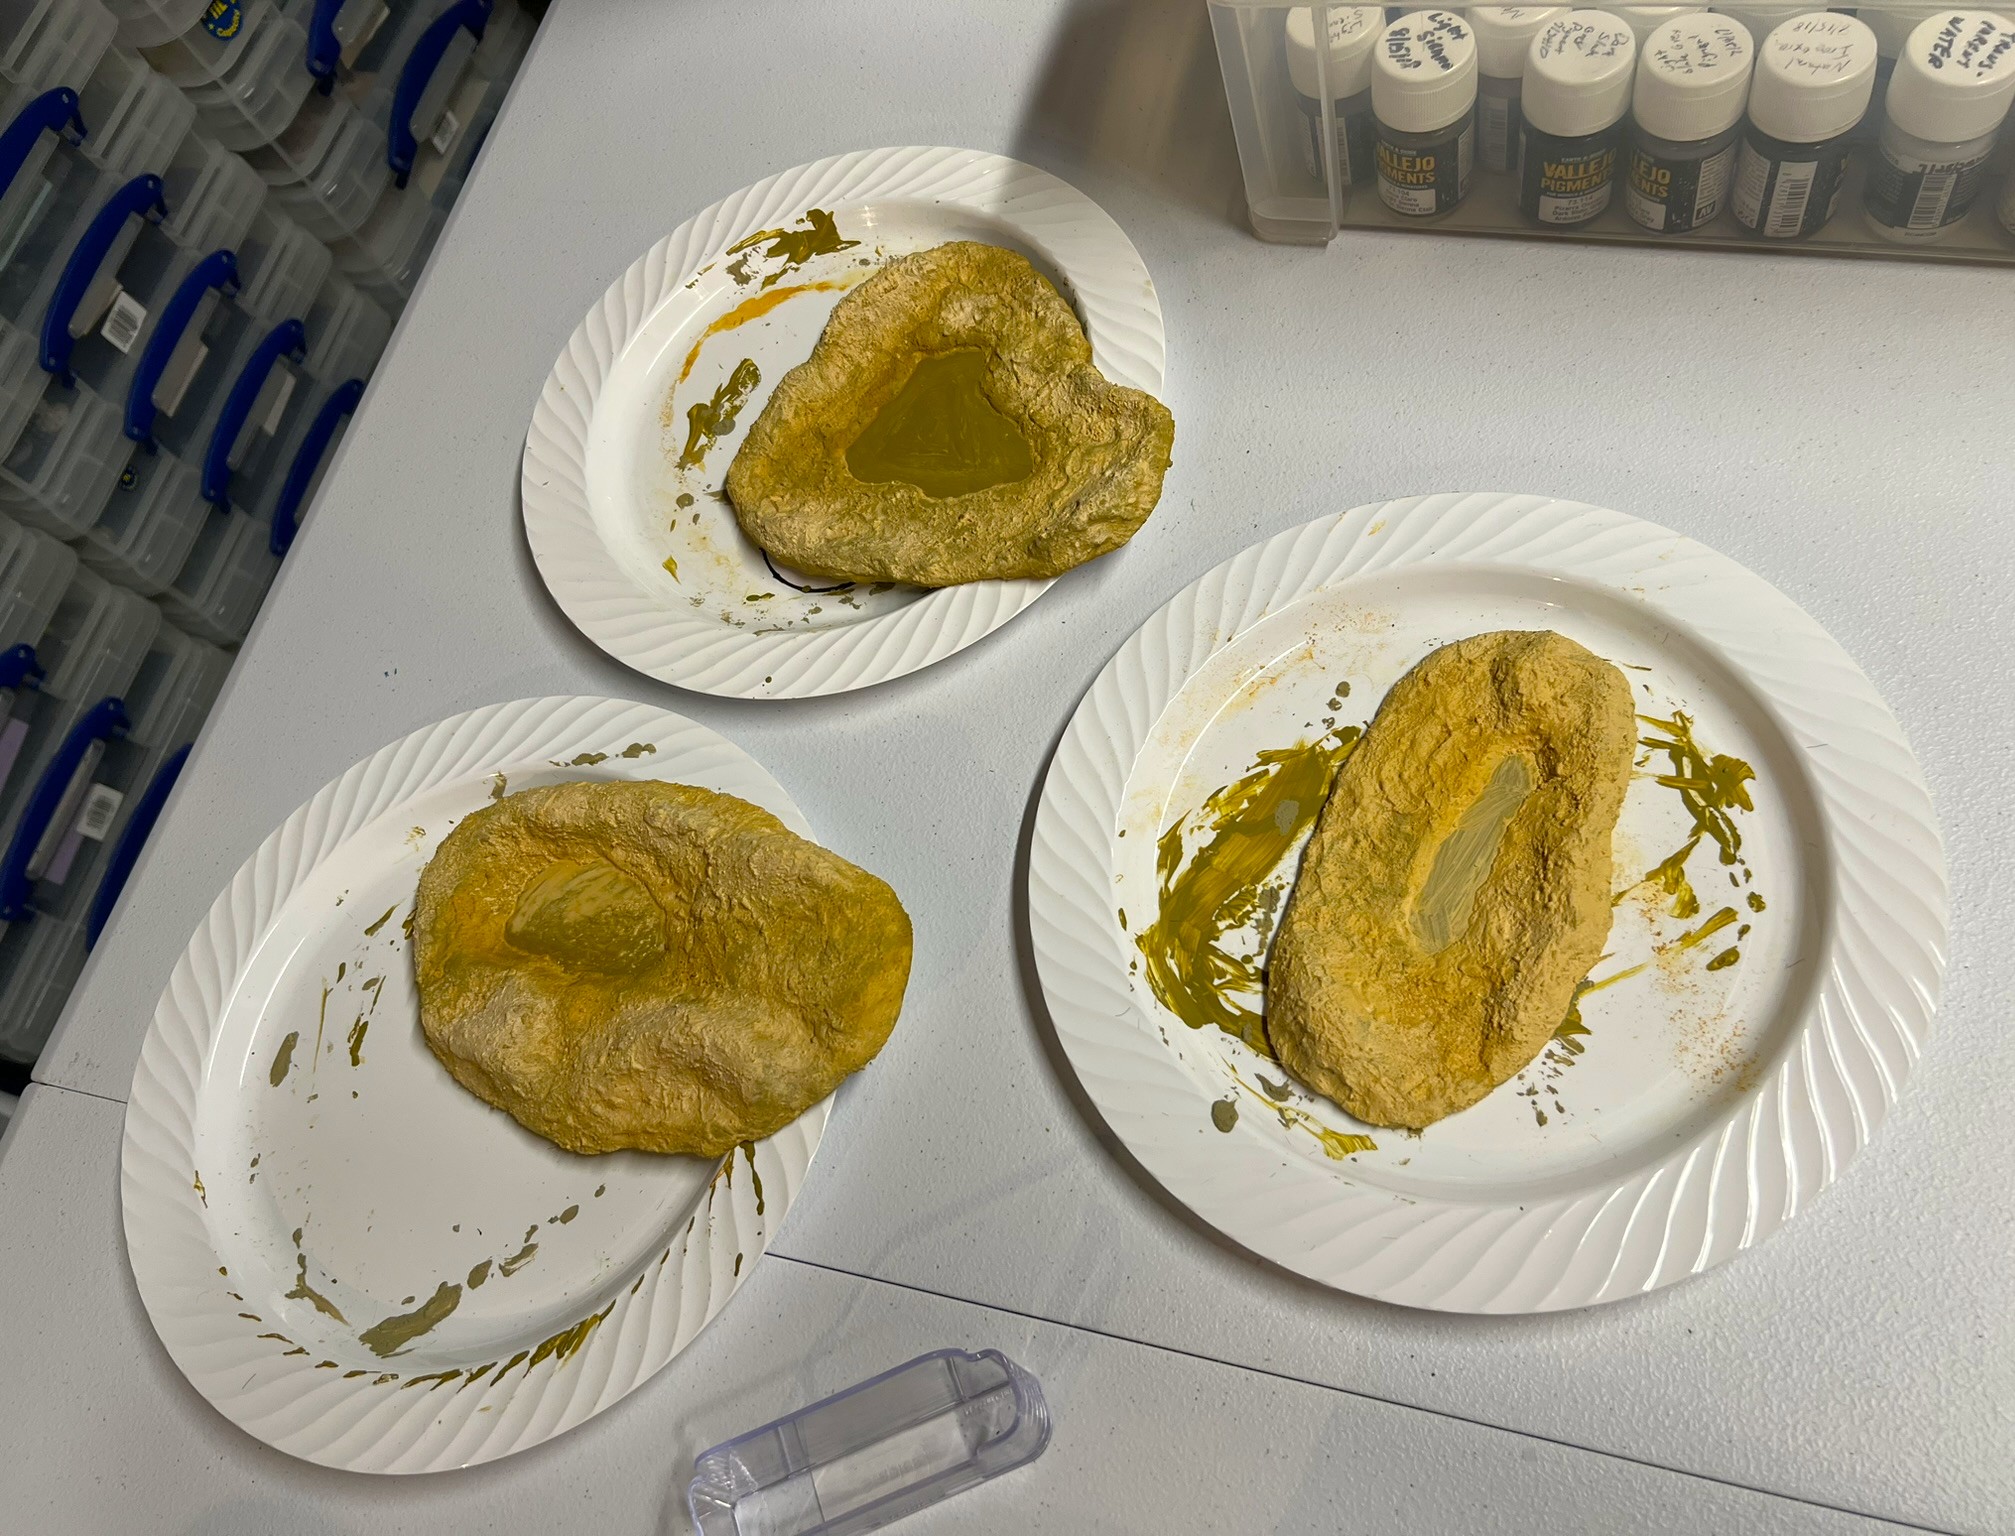
The polystyrene sheets cut into shapes for the oases.The Apoxie Sculpt setting up and hardening as shaped on the three oases. It cures in 24 hours.Once the Apoxie Sculpt had cured, I primed all three with a light yellow primer – and let that cure before adding the desert paste.Here you see the AK dry desert paste applied and starting to dry.Once dry, I added three different pigments (similar to my desert bases and scatter terrain), and let the pigments set.The next step was to paint the bottom of the water holes a distinct turquoise in anticipation of adding the Vallejo Still Water product later. I wanted the water to really stand out color-wise.
Once all the flocking was in I added the Vallejo Still Water in – mixed with some Secret Weapon Washes blue ink.
I then mixed and matched the palm trees to see what worked. The cured Apoxie Sculpt was pliable enough – yet strong enough – such that I was able to use an awl to make the holes for the trees’ prongs you saw above to set in the oases. This allows them to be removable, which is a plus, while the holes stay strong for reinsertion of the trees.
Completed!
Lastly, here is a video of them and a brief description by yours truly:
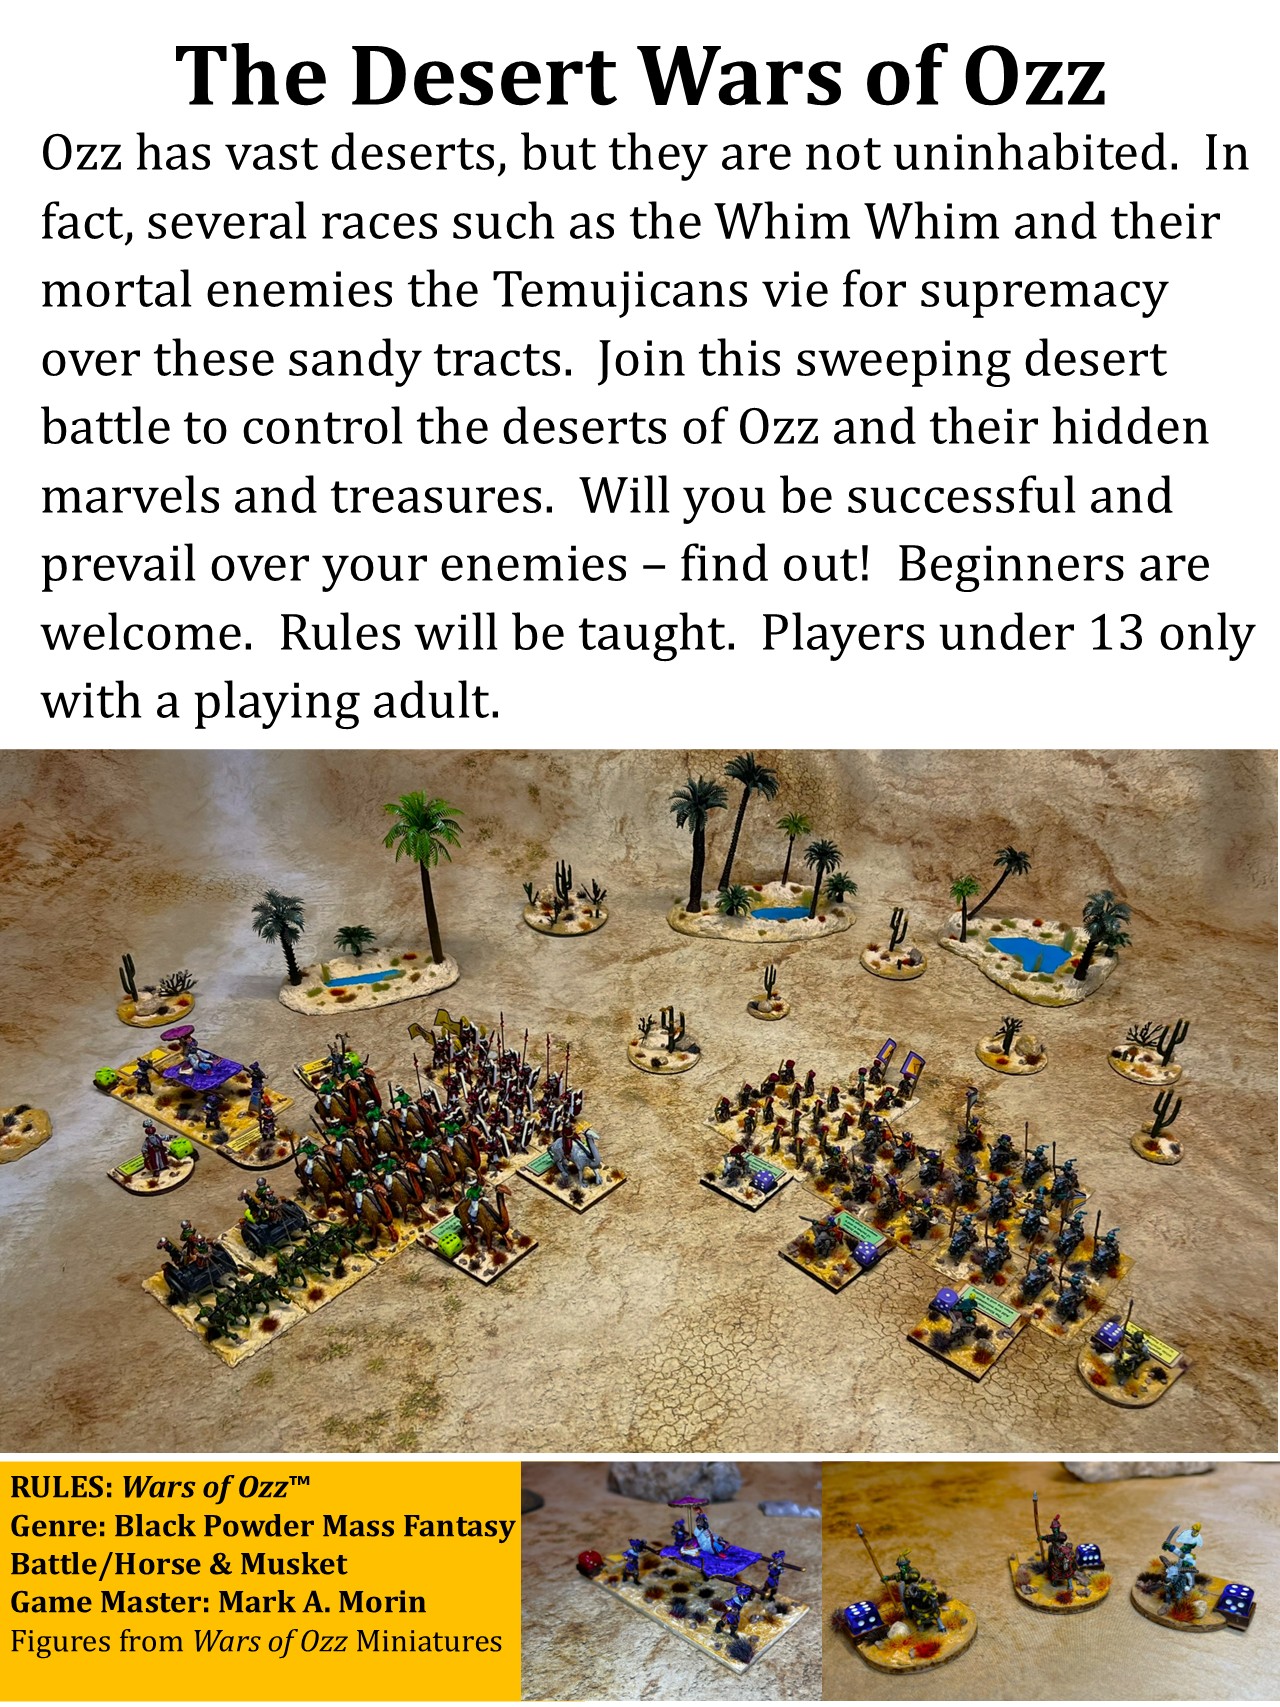
These three oases are the objective markers for my game, “The Desert Wars of Ozz“. The flyer for that game is below. You can see the some of the cactus bases and the oases – though they lost some color on the flyer being in the back.
“The Desert Wars of Ozz” game flyer.
I will be running this game (or a similar one) at multiple gaming conventions this year.
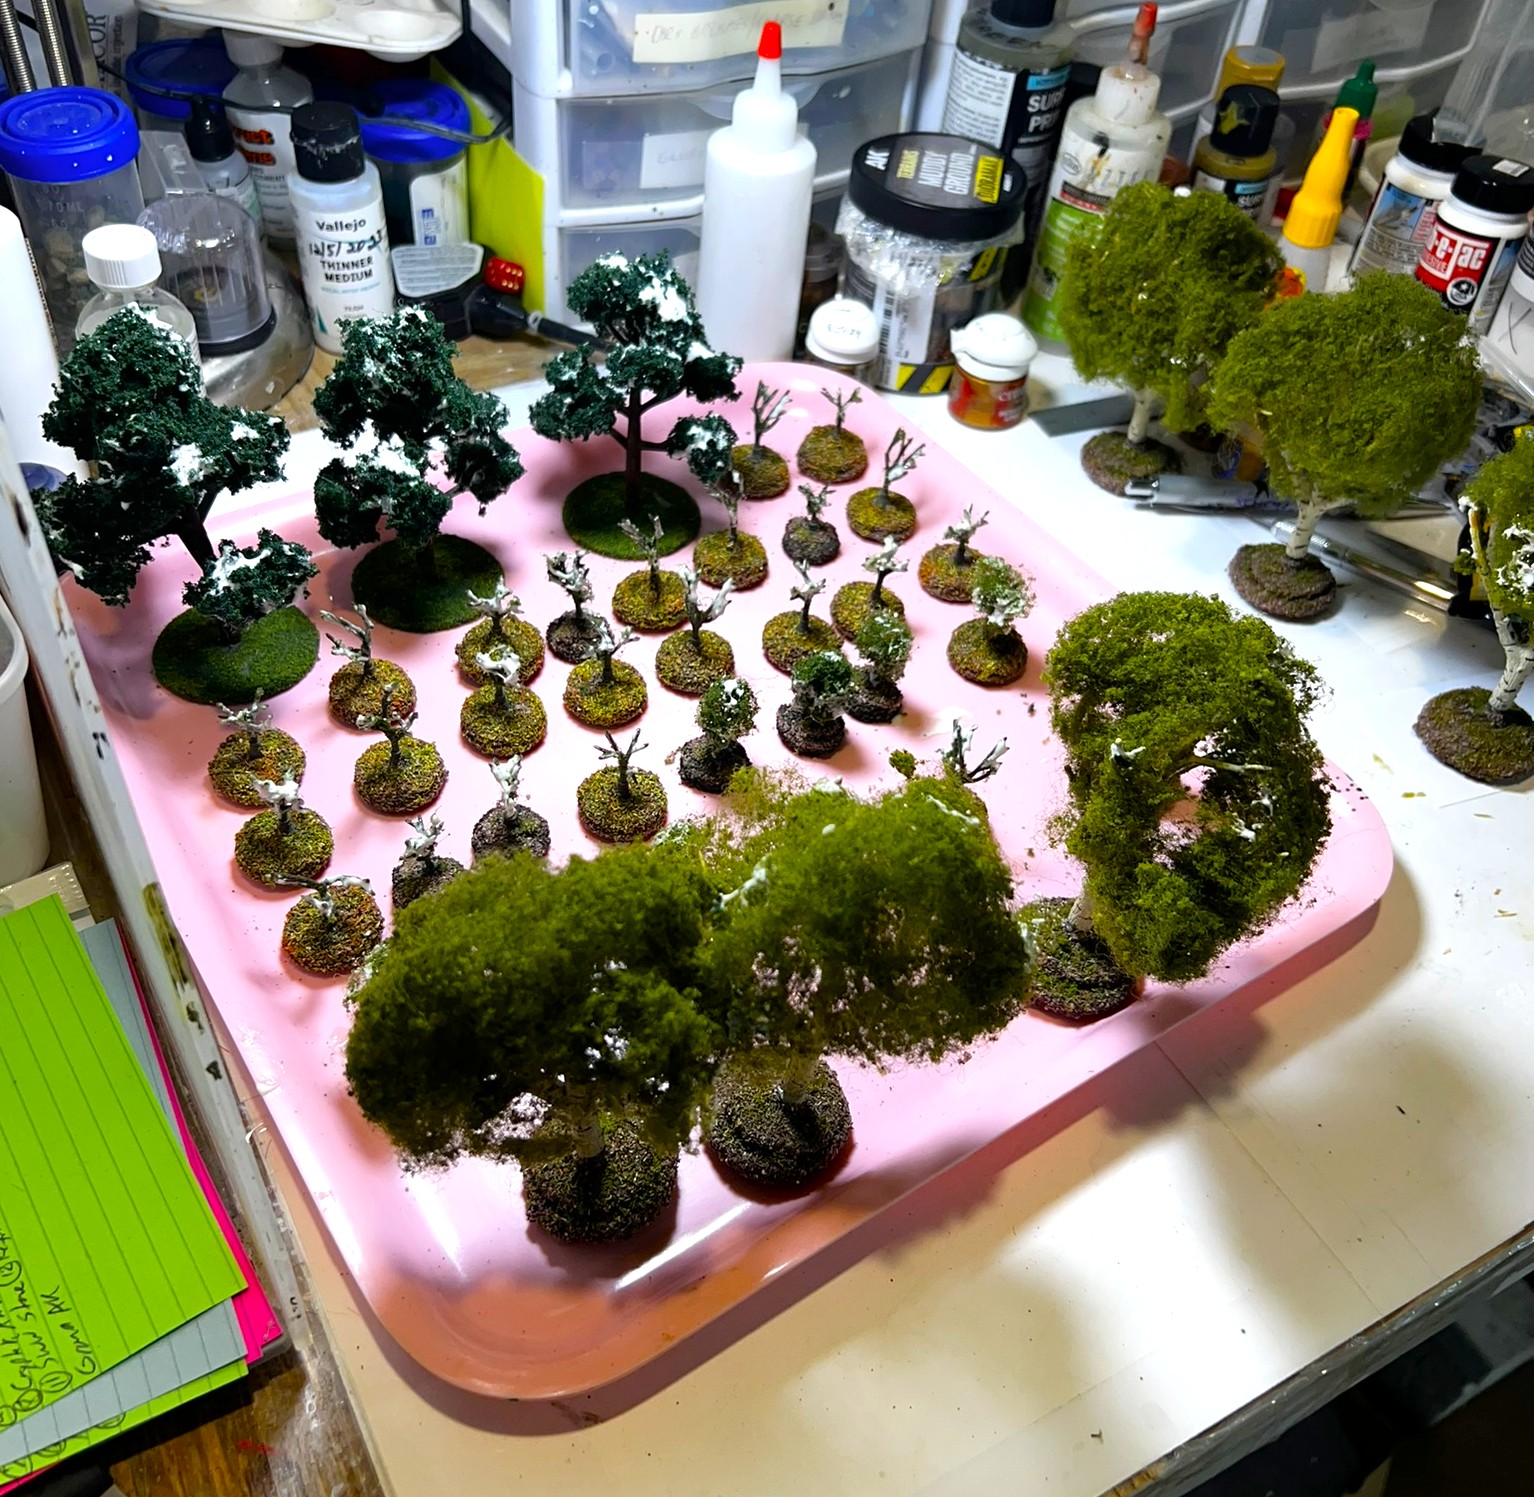
Tree Builds and Rehabilitation
My tree collection that I have used for years was in need of rehabilitation. The other gift from Mom was a JTT product that you see below:
The tree package.
These were nice trees, but the foliage was a bit stringy in places. Plus I needed to wash the plastic limbs and trunks down with sepia and a darker wash. I assembled and mounted these three on large 2″ steel washers. Then I went to my tree collection and stripped off the stringier foliage on the older trees I already had. I applied Woodland Scenics Hob-E-Tac to the older trees and the newer ones. After the glue had turned clear, I used Woodland Scenics Light and Medium Green clump foliage to finish them off. There were 32 trees in all.
The stripped trees with the three new ones in the back – all with Hob-E-Tac drying.The post-makeover trees.
As trees are just so essential to a tabletop, I was happy to have these in better shape for my games going forward.
That wraps up part 2 of this mini-series on terrain. I think I got a lot done here and it was fun. The cactus bases and the oases also qualify for Dave Stone’s annual “Paint What You Got Challenge”. Please, check it out – Dave is a great guy and runs this every year between Christmas and the end of February.
If you have any suggestions or feedback, as always, let me know in the comment section.
And part 3 (the last one) in this series will be coming soon…
Final Note
Want to learn more about Ozz? Well, if you do want to check out the excellent Wars of Ozz figures’ range – there are two places to get them and to get the rules (and I make no money from this). The game rules and the figures are available from the next two places:
Below you’ll see the list of paints and the like that I used on these – and they are more useful for me when I need to recreate a color scheme in the future than maybe you – but in any case that’s why I post them.
Miscellaneous details and references for those interested in that sort of thing:
For all of my earlier posts on Wars of Ozz games, figures, units, and other related projects – please see this page.
PAINTS, INKS, GLAZES, SHADES, WASHES, PIGMENTS, FLOCKING, GLUES AND MORE THAT I USED ON THE CACTUS SCATTER TERRAIN BASES:
2 packages of Cacti/desert bushes from JTT Scenery (SKU 95666)
Homemade wooden hex base
1½” wooden disks from Michael’s
Games Workshops 3½” Plastic bases
Games Workshops 2½” Plastic bases
Unknown 1¼” Plastic bases
Unknown 1½” Plastic bases
Unknown 2¼” Plastic bases
War Games Accessories Steel Bases (FOW1)
Citadel “Seraphim Sepia” (shade/wash)
Vallejo Surface Primer “German Dark Yellow”
PVA Glue
AK Terrains Diorama Series “Sandy Desert” (texture/basing paste)