

Yes, you read that correctly. Munchkins.
They are one of many factions in the Wars of Ozz game. The rules were written by my good friend Buck Surdu (who also wrote the rulesets of Combat Patrol™ and Feudal PatrolTM . I have been wanting to get going on my Wars of Ozz figures – but first wanted to finish the figures and terrain for my Civilizations Collide games involving the Aztec/Conquistadores/Tlaxcalans/Maya. As I shared in my last post, that has now happened, so onwards to Ozz!
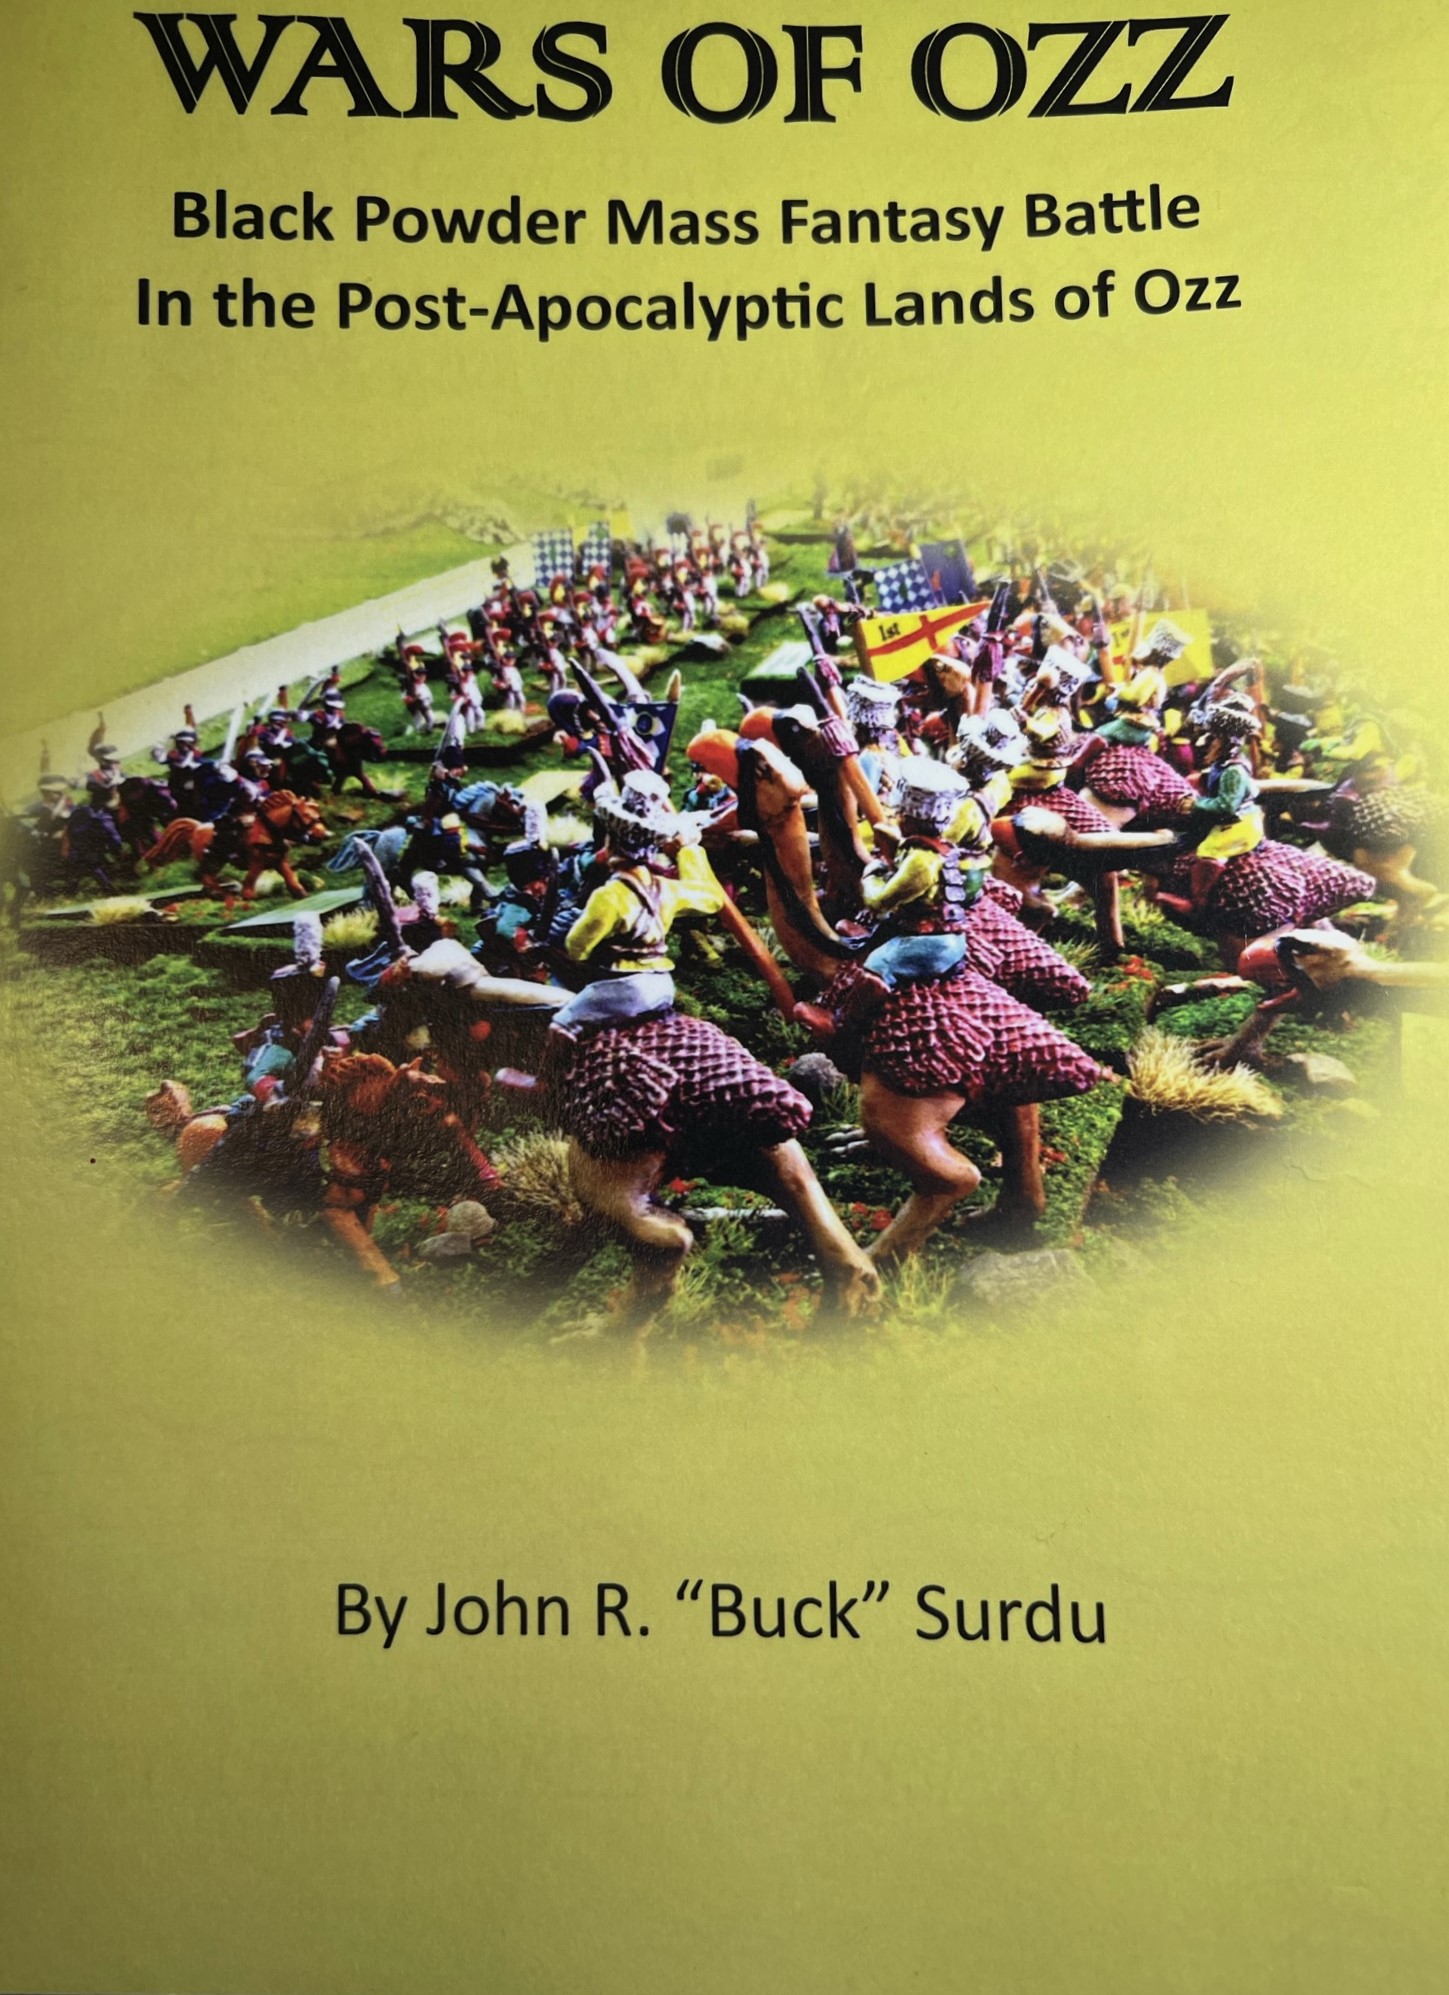
The game rules and figures are available from the following two places:
In the US Old Glory has a site – Wars of Ozz Miniatures.
In the UK go to Sally 4th.
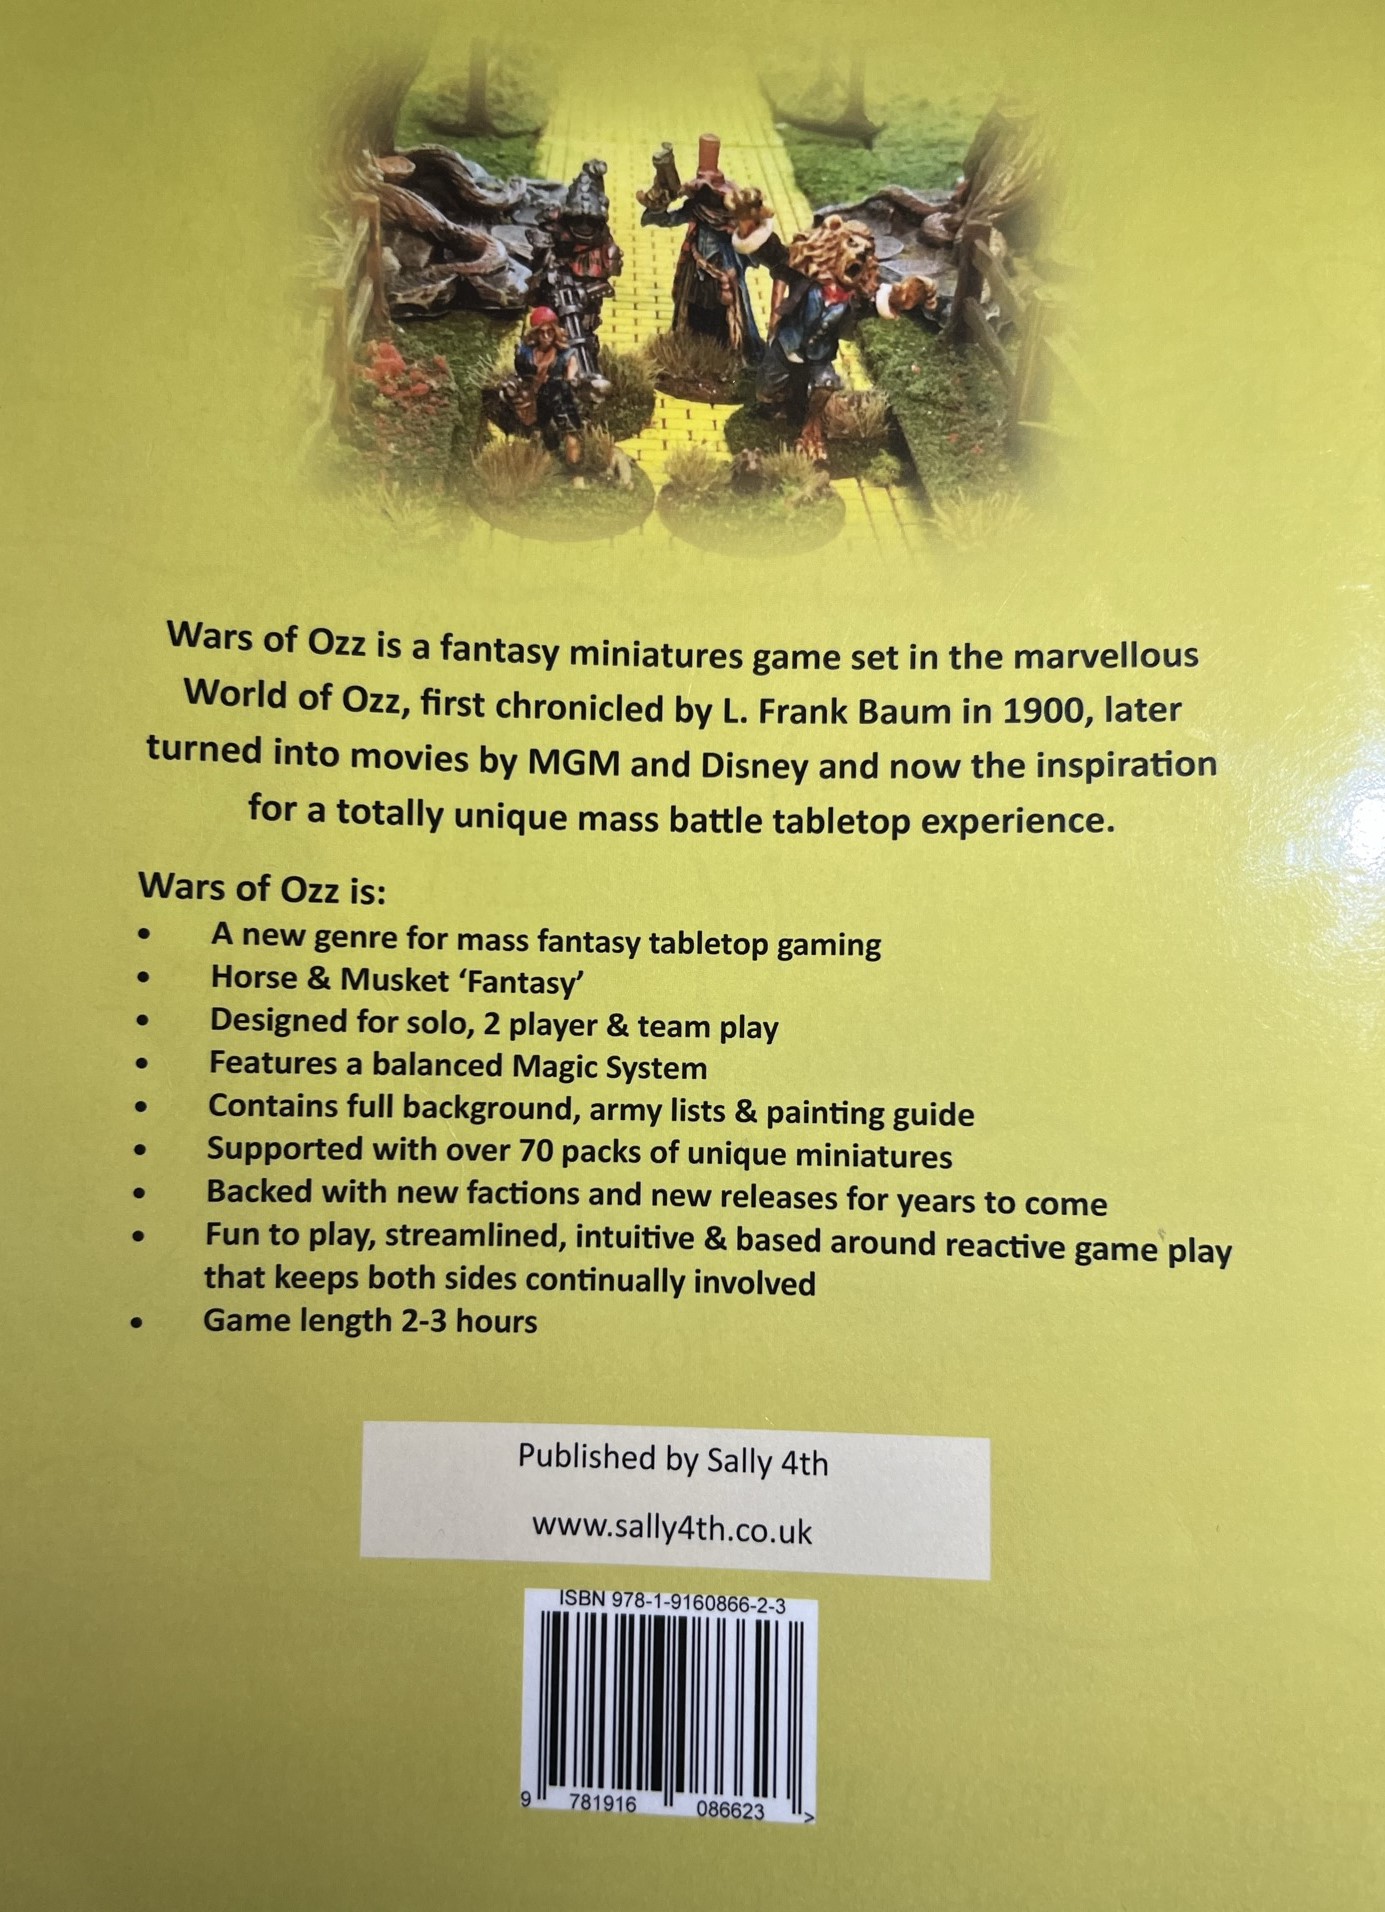
Of course, there are now many new factions for Wars of Ozz. Currently, I have Munchkins and Winkies (think orc-like dudes) and some pretty cool allies – which I’ll eventually post about here. However, first I am going to finish a Munchkin brigade. It will consist of two infantry regiments, a light cavalry squadron (on pastel ponies), and an artillery battery. One cool aspect of the universe of the Wars of Ozz game is the use of a lot of color (hence the pastel ponies and more). I find, like I did in my Mesoamerican projects, that having a lot of color can be a lot of fun.
Here, the units in Ozz are made up of mass armies – this is not skirmish gaming. There are wizards and witches, so some magic, but the game is primarily black powder type warfare. The gaming engine of Ozz has also been used as the basis for WOOD (Wars of Orcs and Dwarves) for mass fantasy battles. But let’s get back to my first regiment…
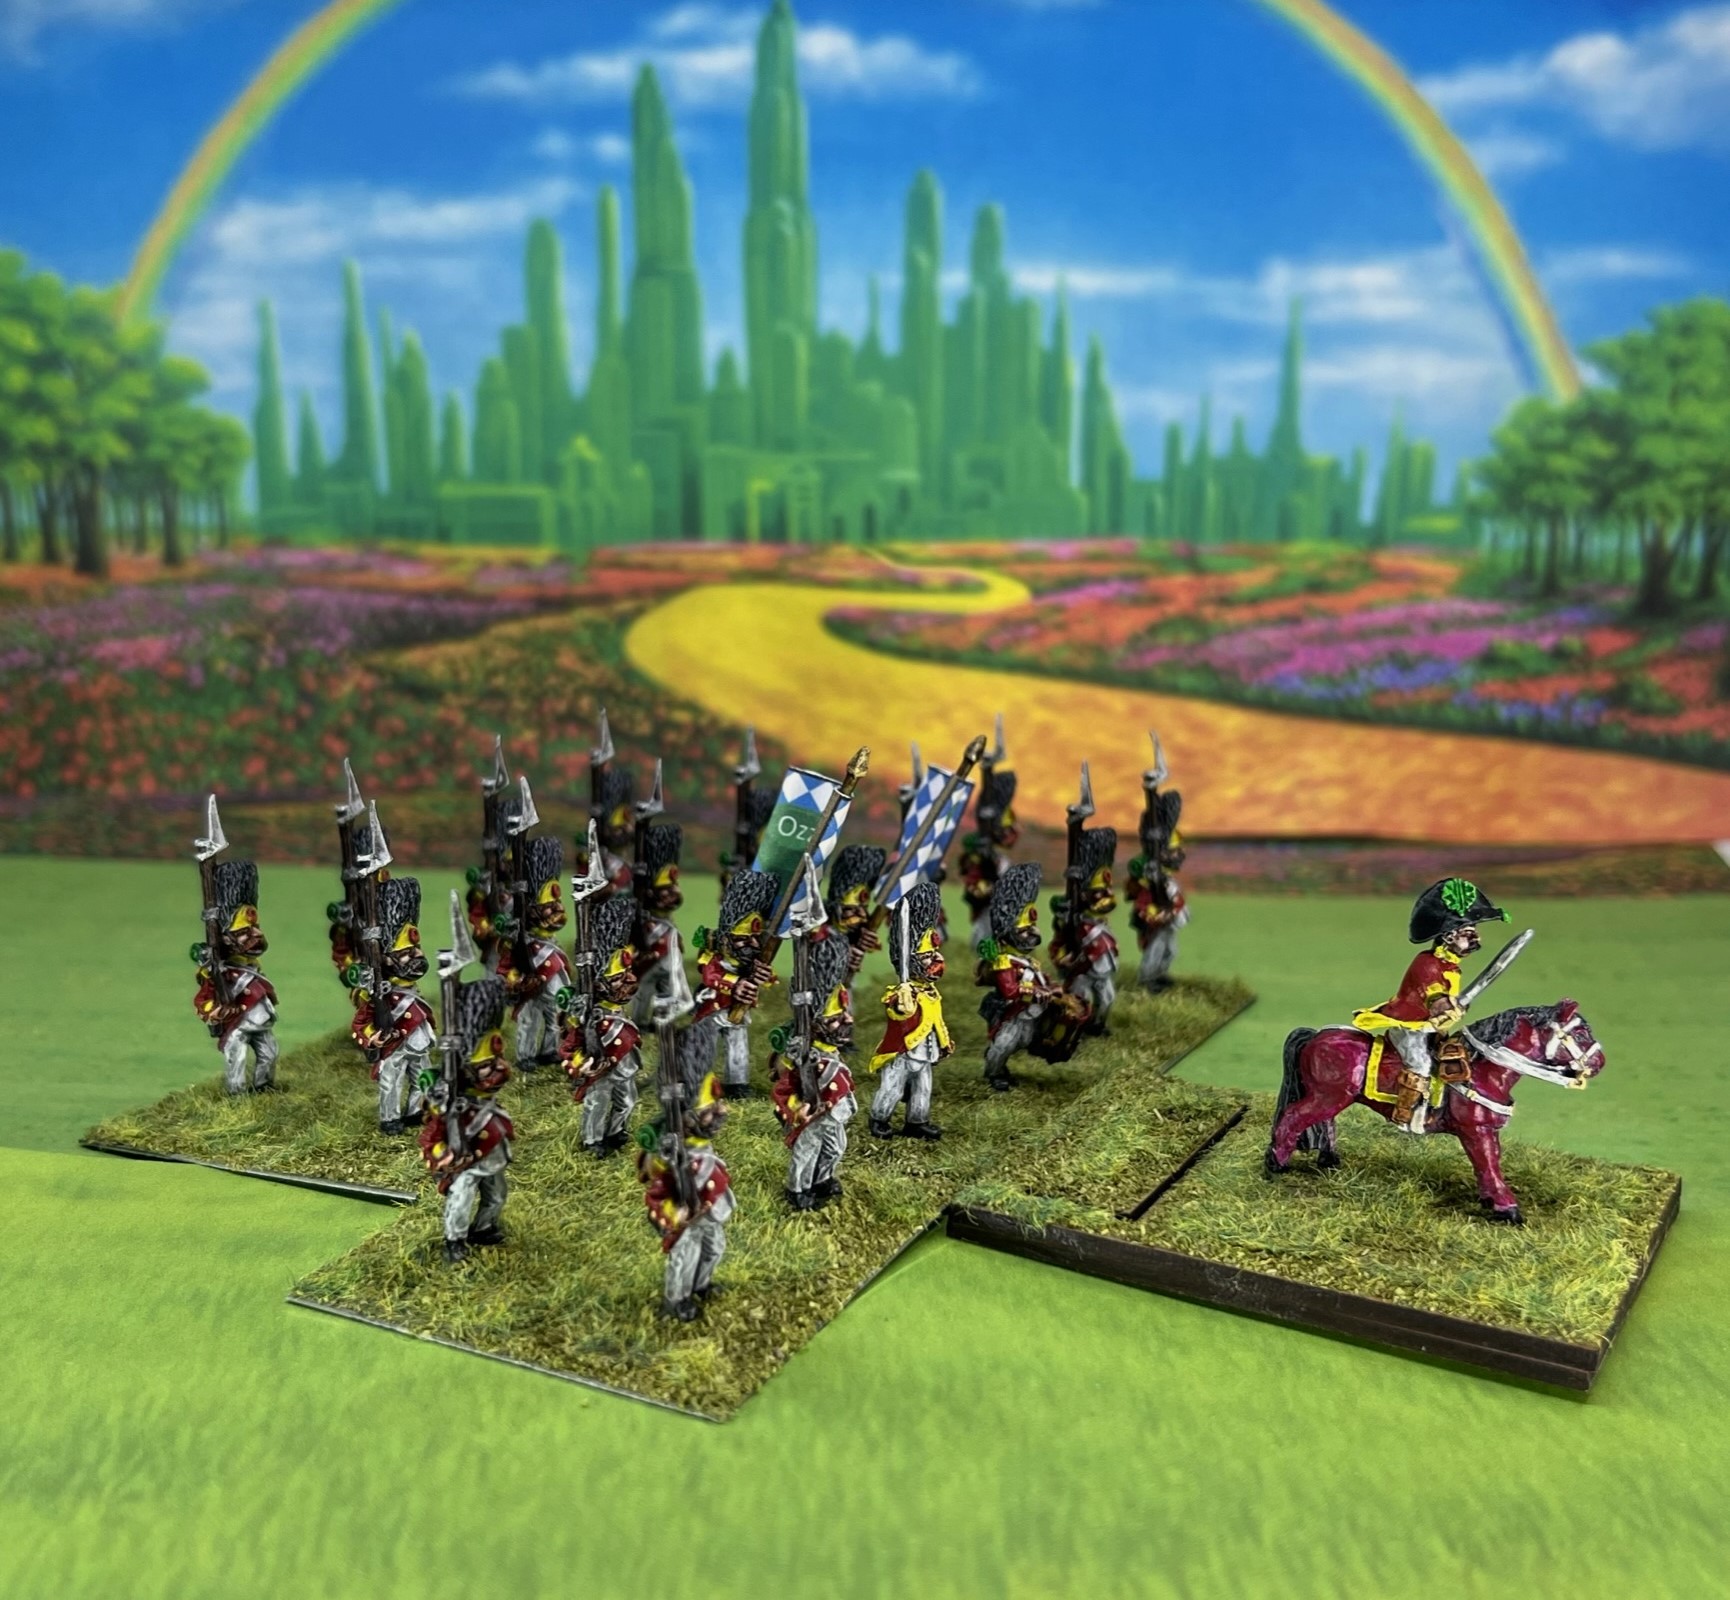
It is OZZ-101 – Zoraster’s Guard Infantry Regiment (hereafter referred to by me as ZGIR). The scale is 28mm and these are metal.
Zoraster is “the Wizard Supreme”, and created the Munchkin Army. As for ZGIR, it’s a tough unit, as one would expect of a guard unit, with excellent marksmanship and melee values. It is armed with muskets. It also has great resolve and elan values which help it in combat. It’s also the most expensive Munchkin unit. Of course, I had to start with this one…
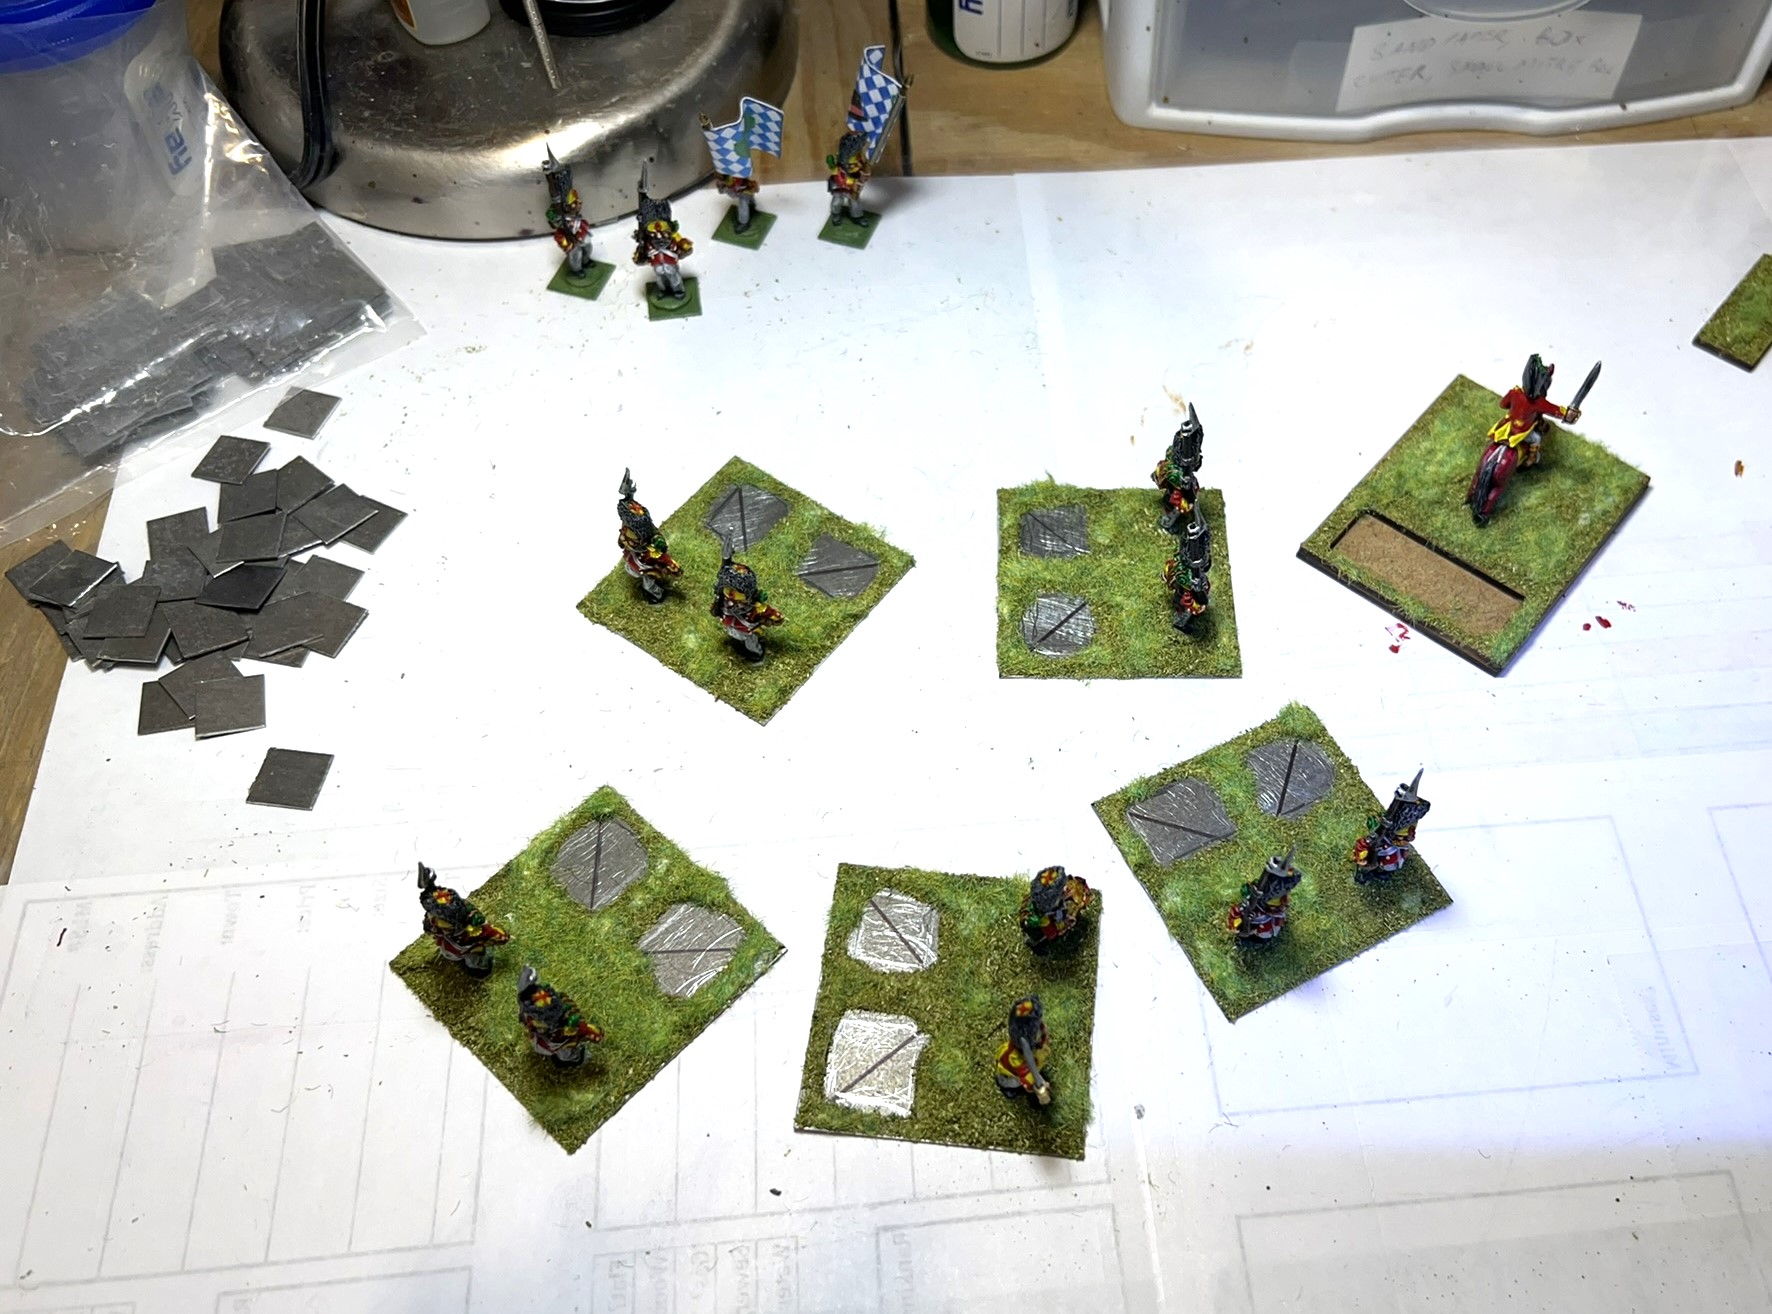
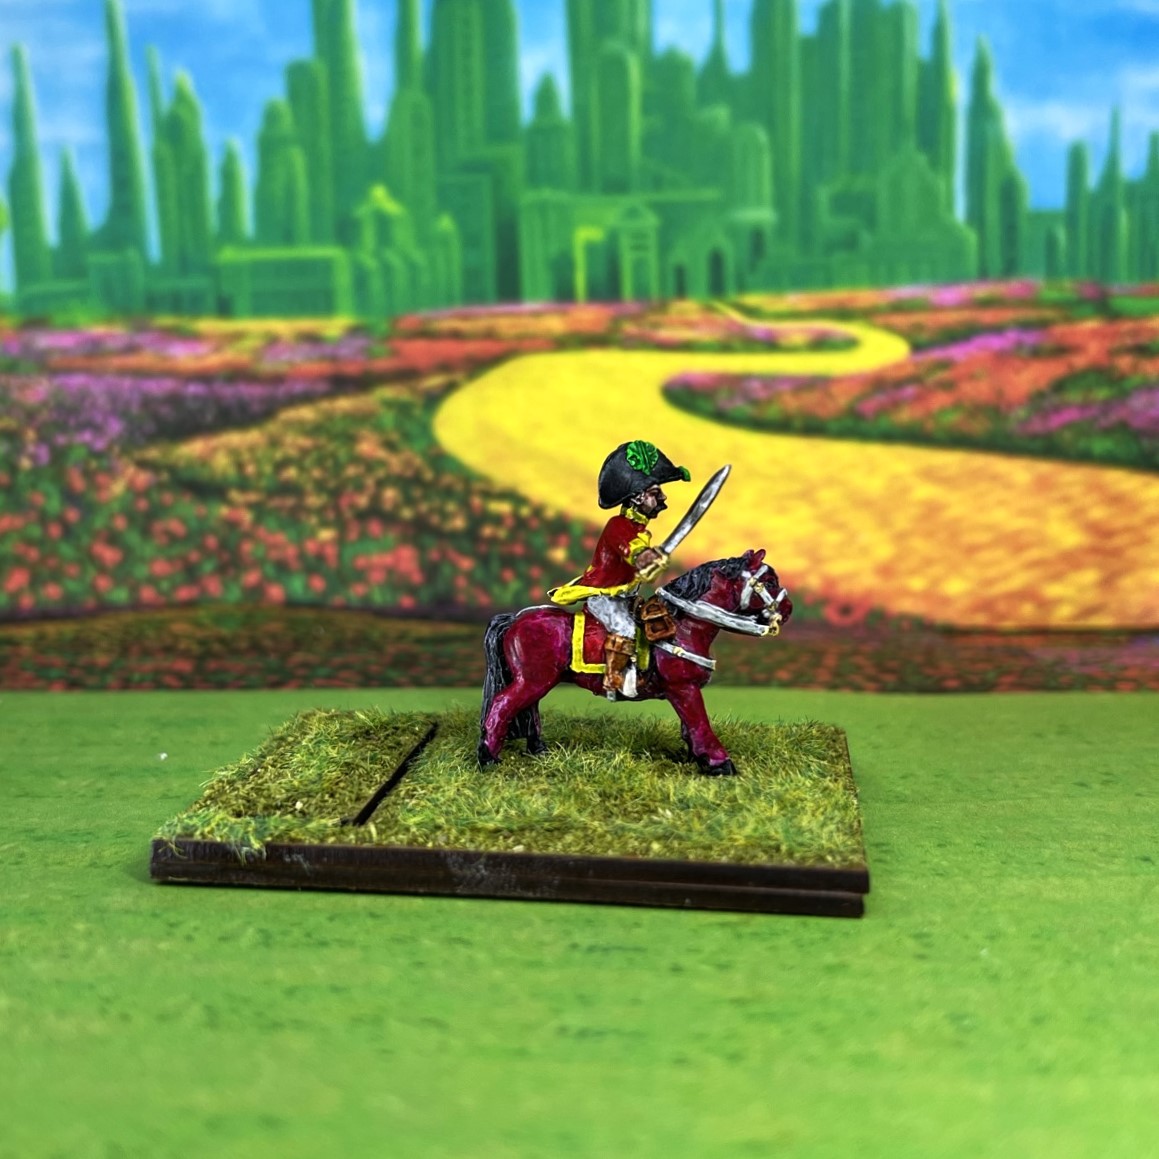
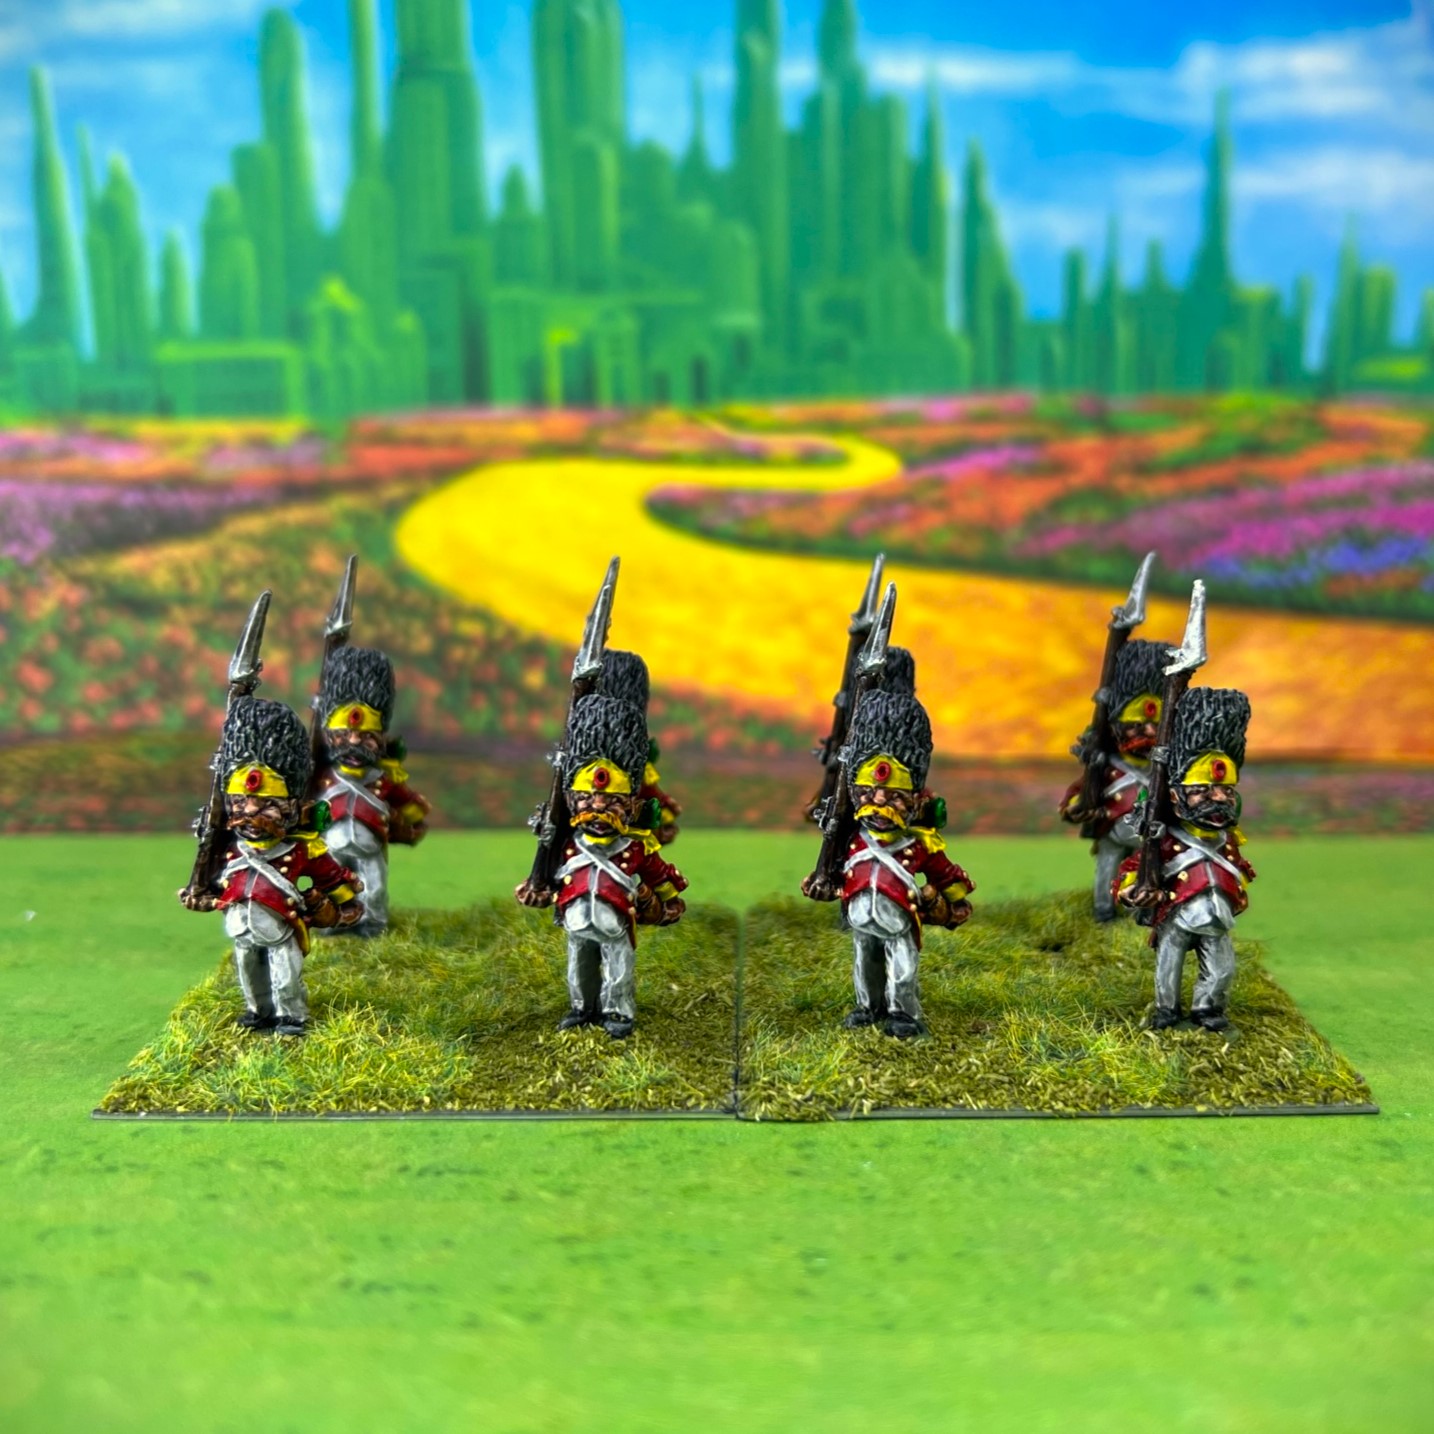
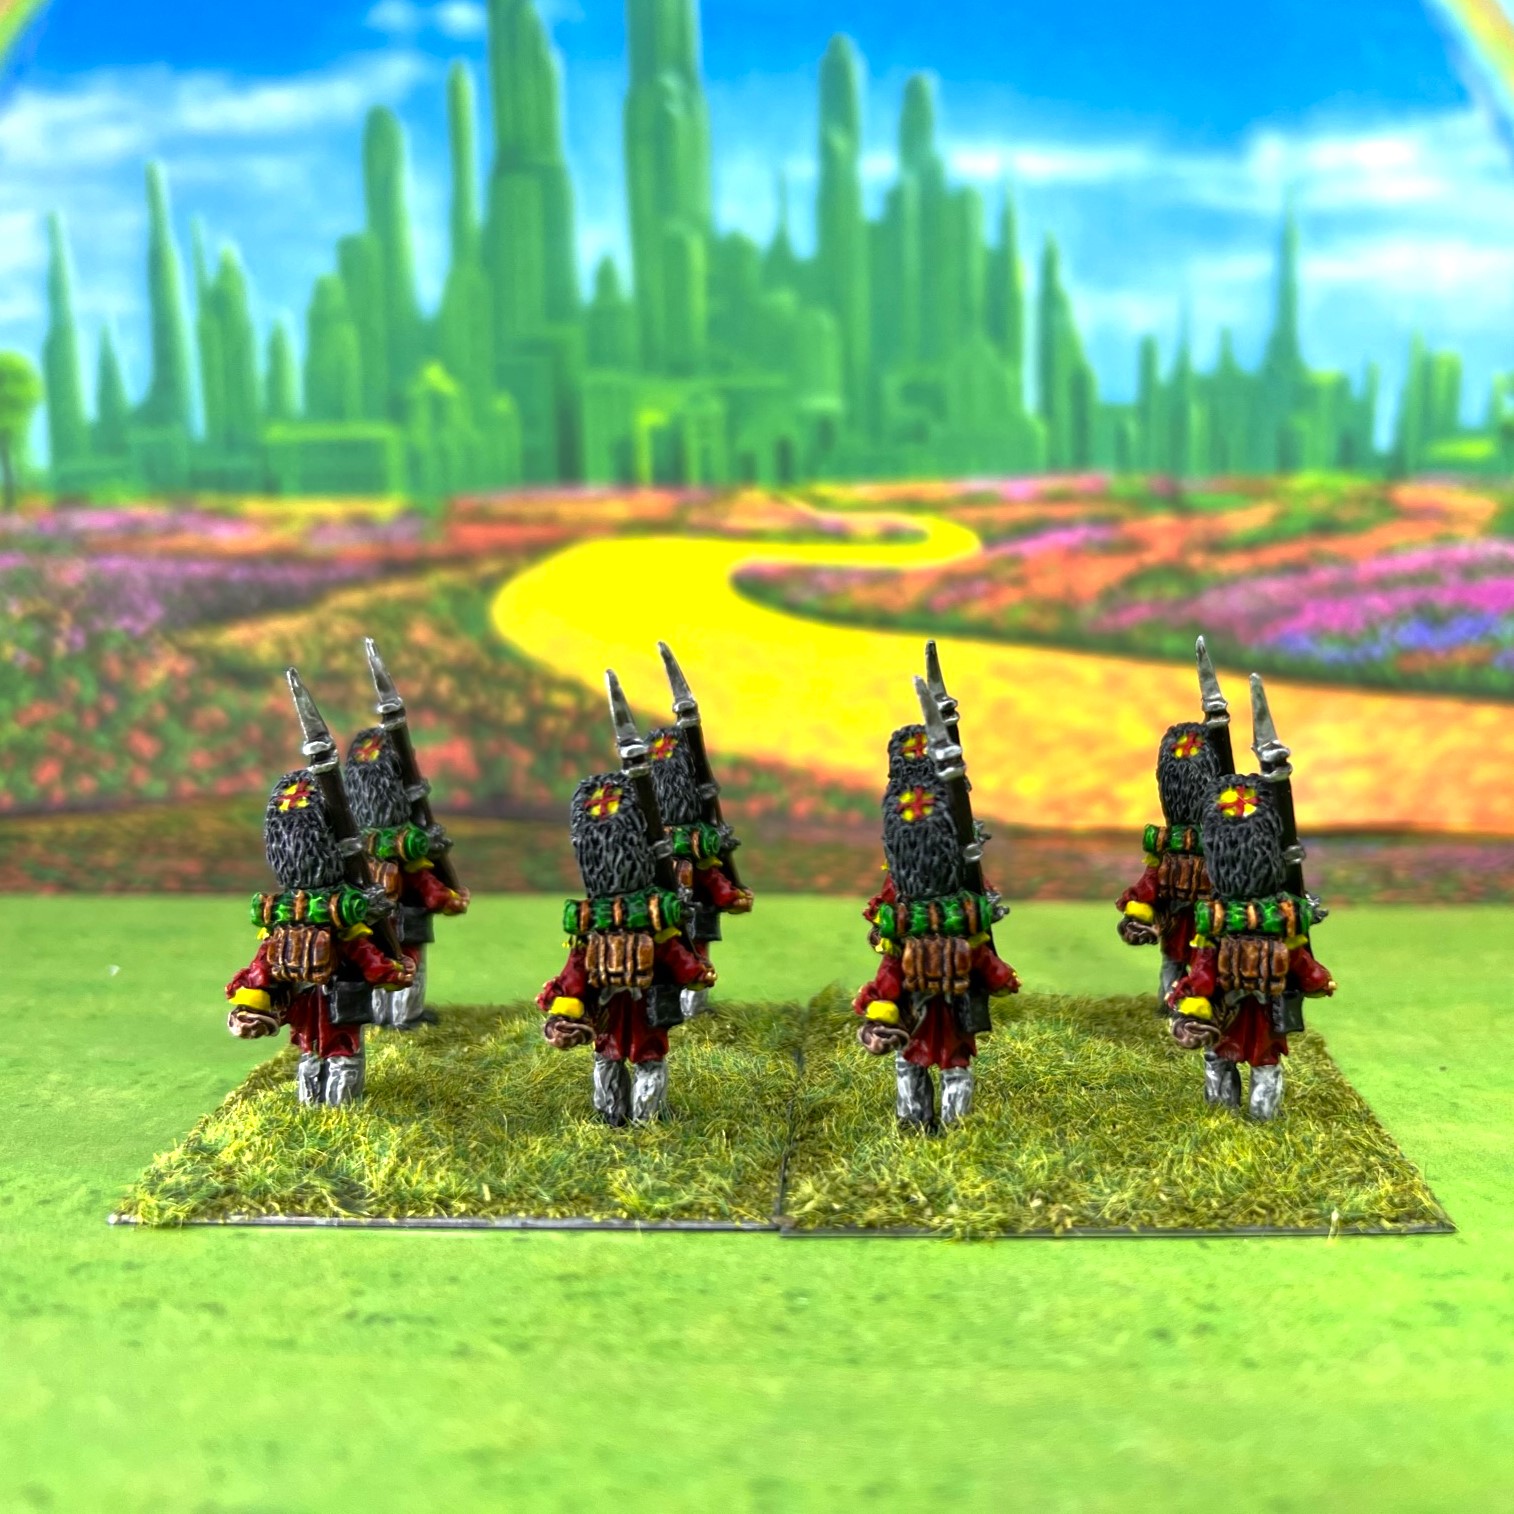
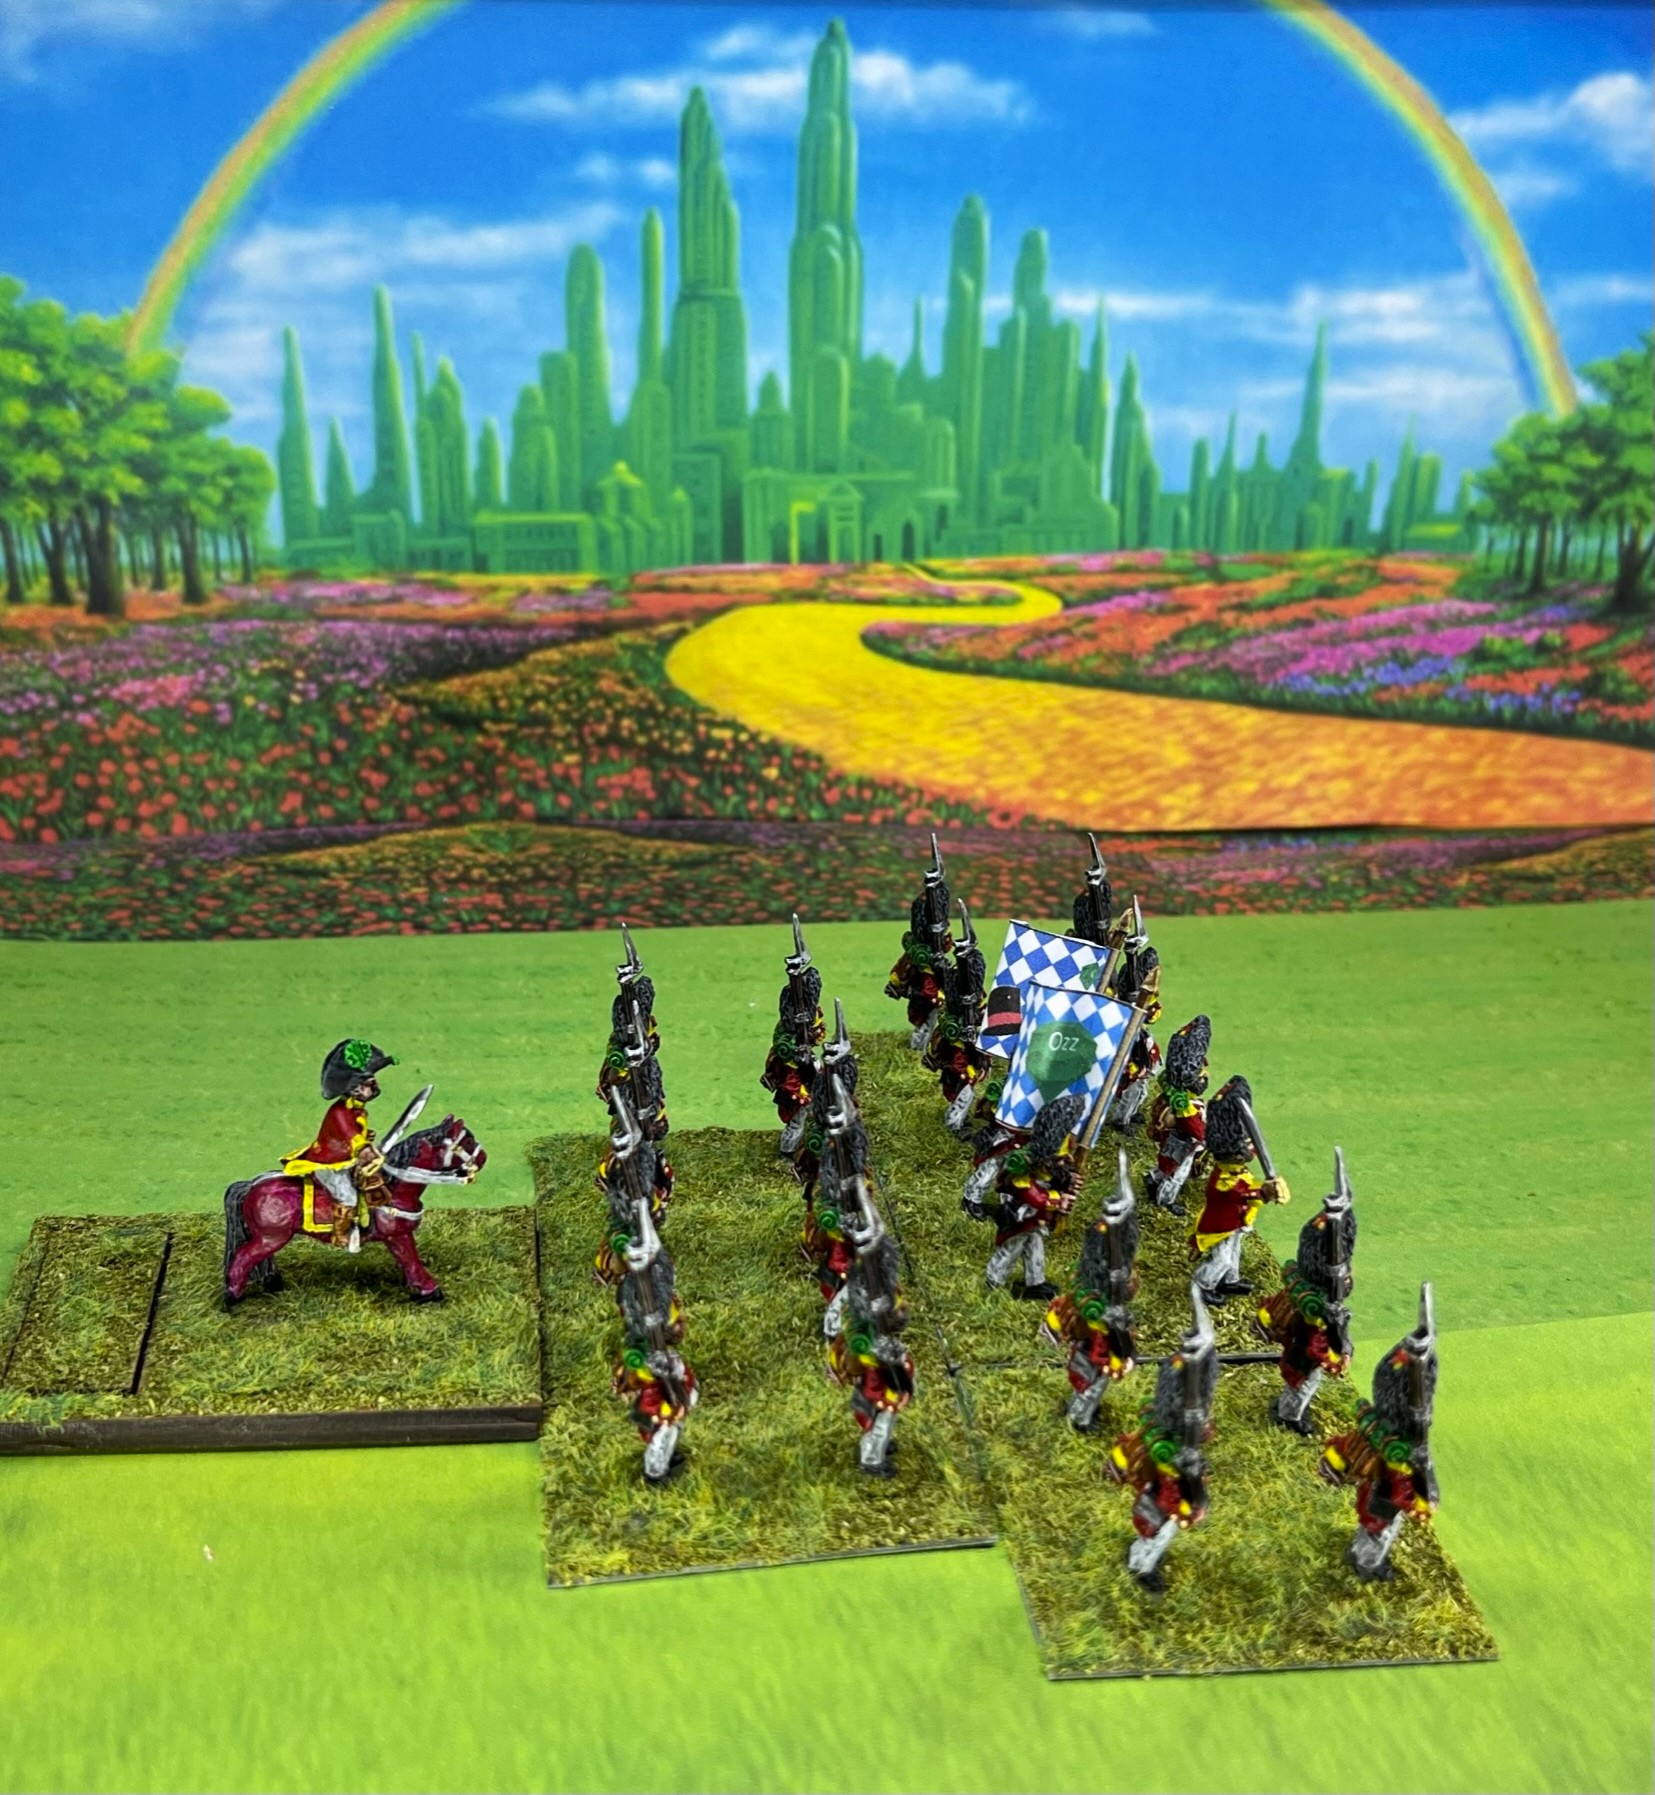
It, like all infantry regiments in Ozz, is composed of 20 figures plus a regimental commander. There are 4 figures per 2″ square base, so five bases plus a commander make up a regiment. 16 of the based figures are of the same type, while the fifth base has four different figures – two standard bearers (with the Ozz flag and the regimental colors), a drummer, and another leader figure. This “command” stand fights like the others, but has an aesthetic effect on the tabletop of being nice to see. The regimental commander has his own base and can have special attributes, but its stand never engages in combat. It exists mainly for the attributes tab (on its MDF base) and also aesthetics. If the regiment dies, so does he.
I’ll share some WIP shots, then some eye candy of the regiment.
WIP shots…
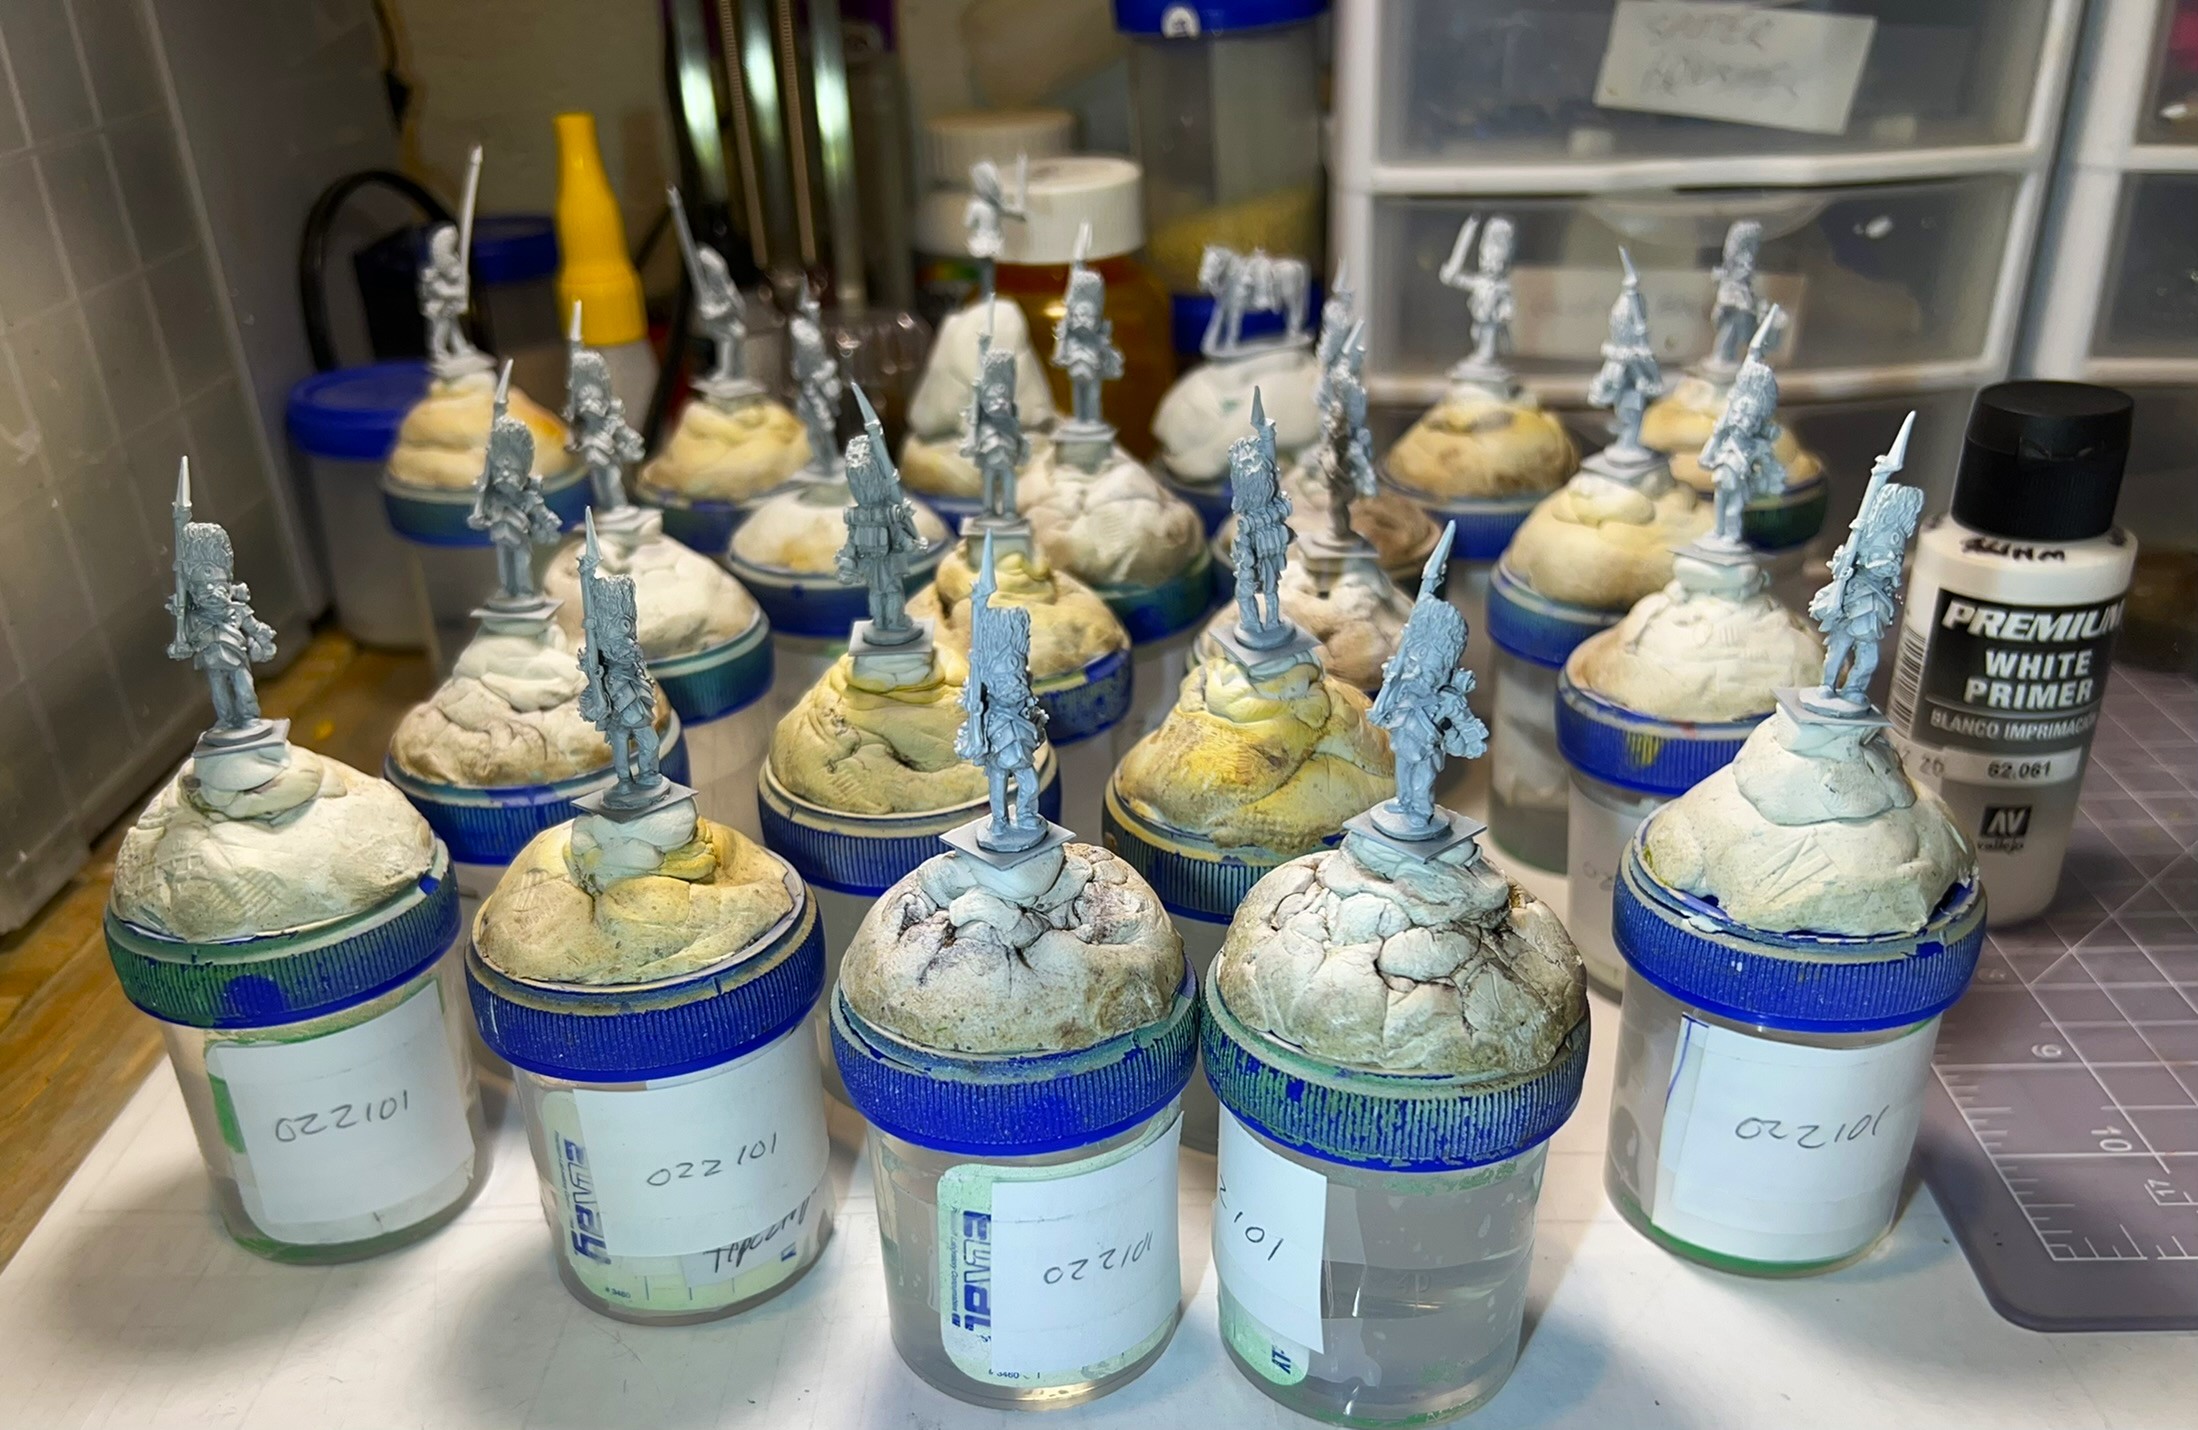
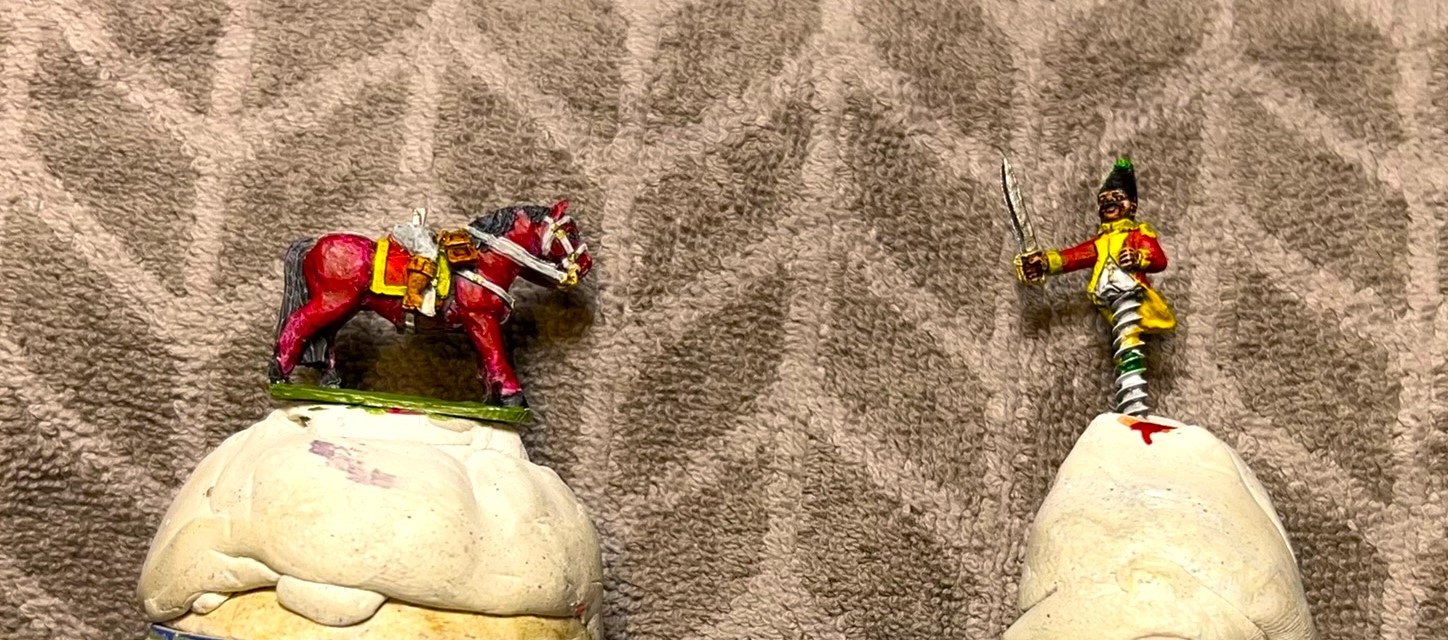
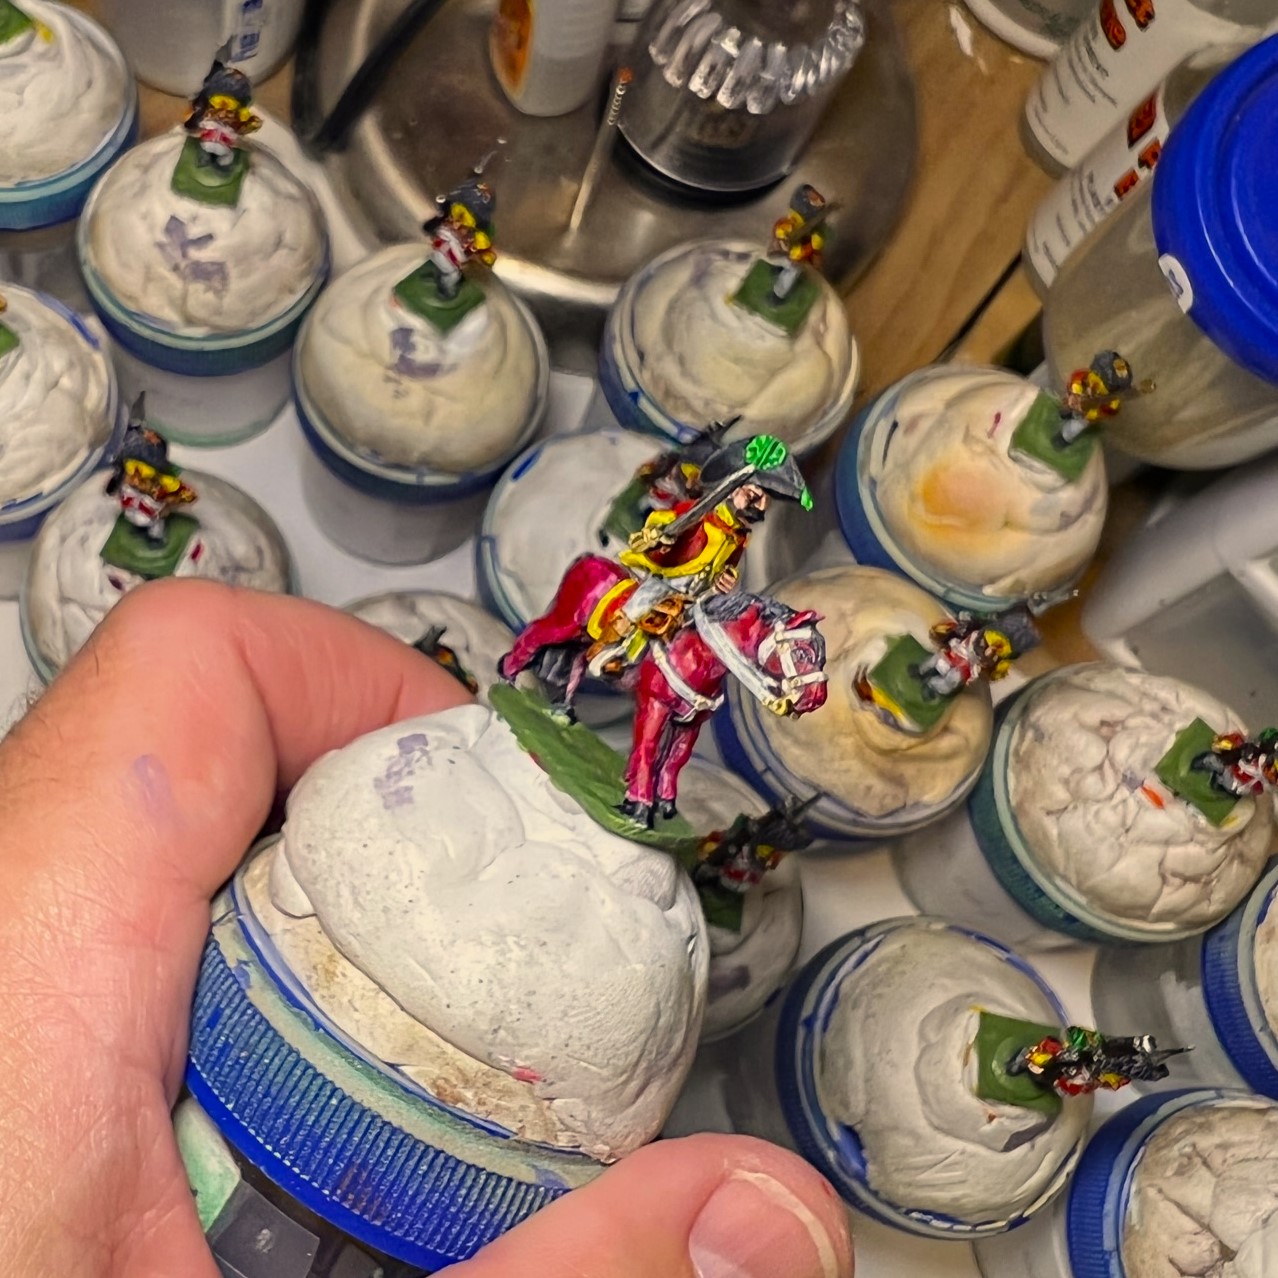
I first cleaned up the regiment (filing, washing) then worked on drilling out a couple of holes on the two figures for the regimental commander to be able to be mounted onto his pony. I inserted a paper clip wire into the pony to match the hole under the commander. This also allowed me to mount the upper torso of the commander for painting on a screw on a specimen container.


Then, I needed to find a way to mount the other figures. The figures’ bases are less than 3/8″, and as mentioned will eventually be mounted on 2″ square bases. For the individual figures, I decided to use 1/2″ x 1/2″ square steel bases – both the 2″ and 1/2″ square bases are from Wargames Accessories.

I decided to use Citadel Contrast and Army Painter speed paints as much as possible. As these are mass units, I thought this would be fine. I want to get them into games!
The figures themselves are nice, but not differentiated much. The faces are all mustachioed, and all have a “puppy dog” look with an open mouth and tongue sticking out. Still, they have a certain character.
As it’s Mo’vember, I chose to vary the mustache colors. After priming, I gave them all a wash with Citadel “Nuln Oil” and then dry brushed them in white before adding any colors. As is my habit, I do list all the paints I used on these at the end of this post for those interested.
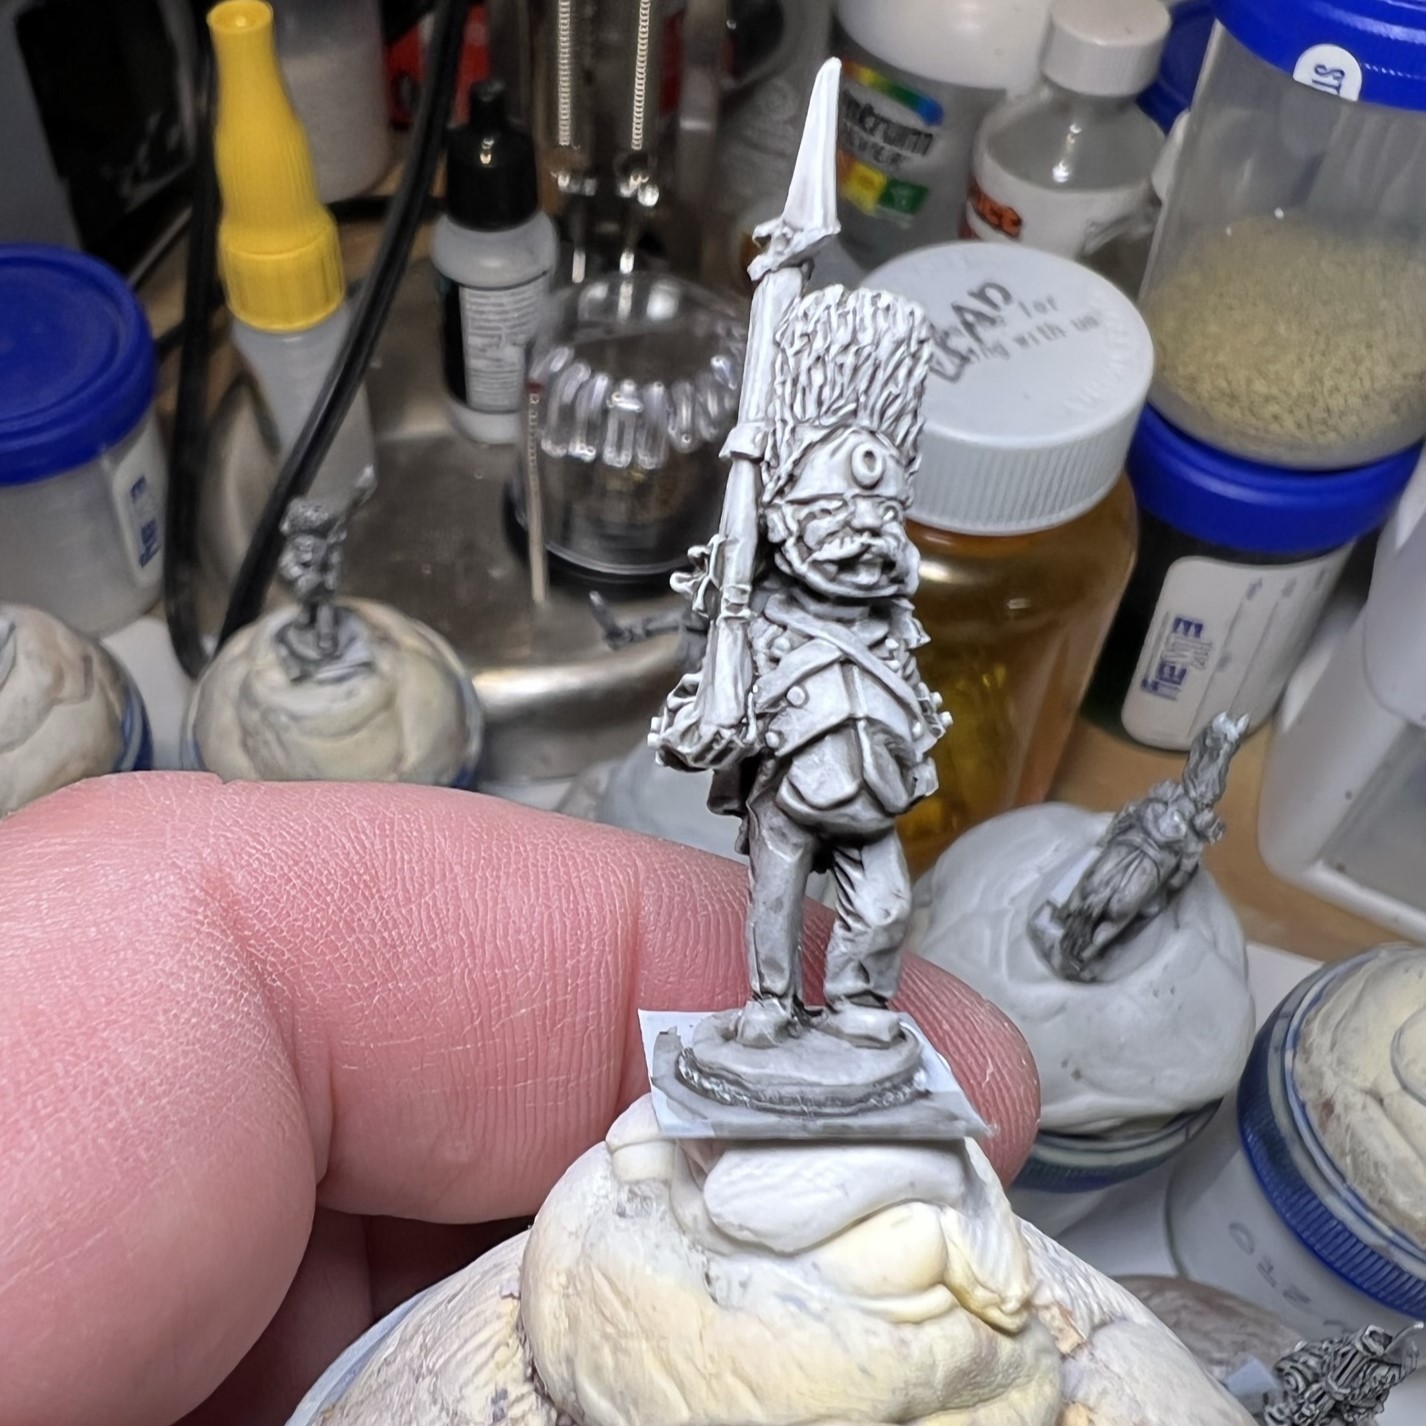

I started working on these on 11/14 – by 11/22 I had made good progress. I found highlighting with Citadel “Doomfire Magenta” over its “Baal Red” was effective. The regiment has a somewhat British redcoat look to it.


Then I assembled the Regimental commander’s MDF base.


While the base set, I matte varnished the figures in preparation for mounting on the 2″ square steel bases.
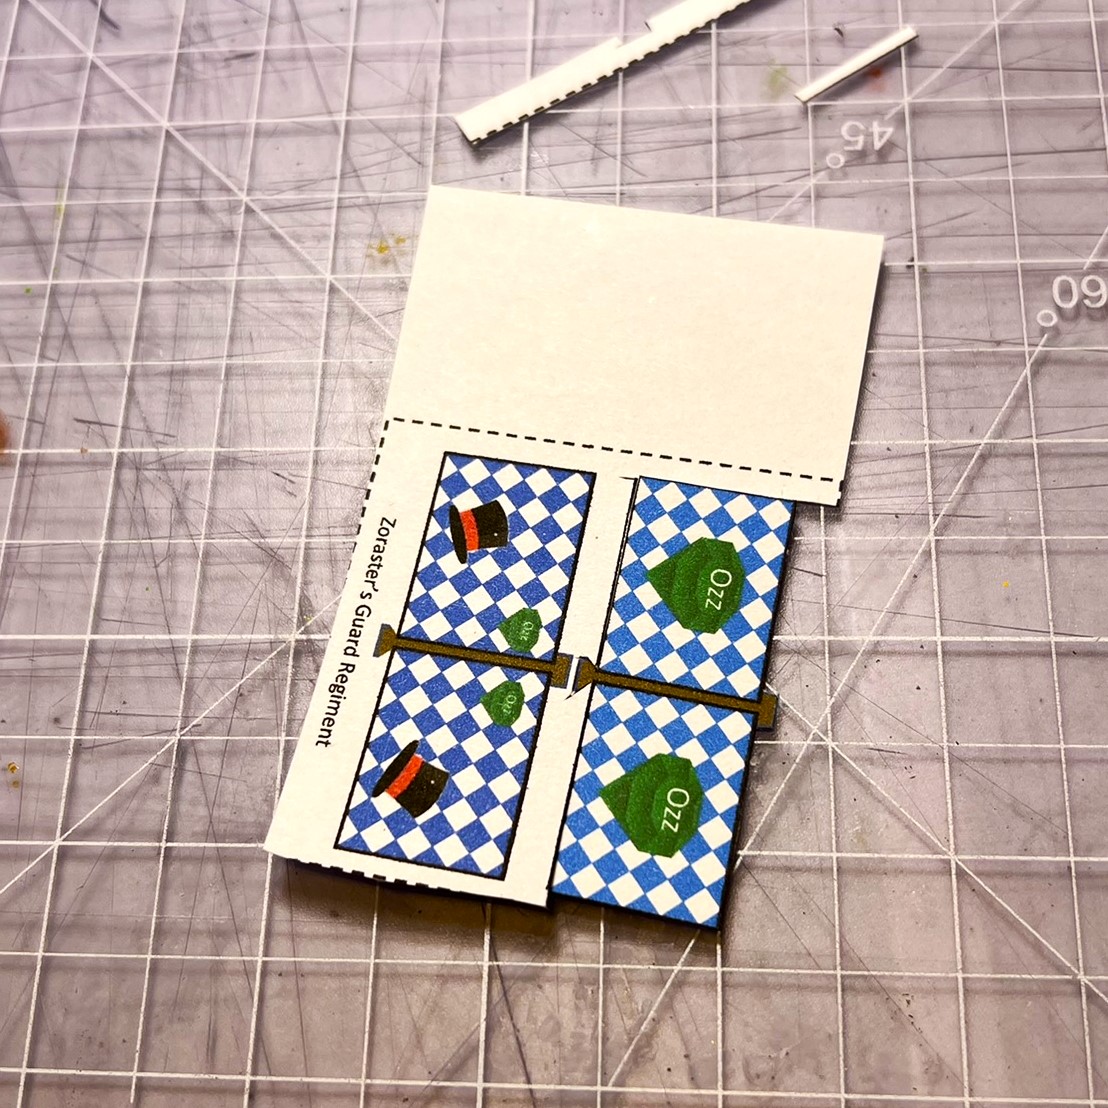
The ZGIR post-varnish needed its standards attached and also basing completion – to include flocking. The flags are available on the Wars of Ozz Facebook page as downloads. I cut out the flags after printing them out on cardstock. I glued them together on with PVA and bent them to get a wind-blown look. As for mounting the figures, I drew a pair of lines with a sharpie on the steel bases corner-to-corner. Then I took a blank 1/2″ x 1/2″ square steel base and aligned it in the center of the 2″ base, using the lines to align the 4 corners of the 1/2″ base. Then I traced over the little base in pencil, such that I could going forward use the corner of the little traced square and the sharpie lines to orient the bases. I believed that flocking with the figures all affixed to the 2″ square bases would be too difficult. Therefore, I glued on two figures, flocked, then the third, then flocked, then the fourth. All this time I flocked the spaces where the figures would not be. This way I was able to apply the flocking effectively to give some depth of grass. In this case – I used three different flocking products from Army Painter sequentially with PVA to give this depth to the otherwise bland steel bases.


Now on to some eye candy with a new background!
Eye Candy
Zoraster’s Guard Infantry Regimental Commander
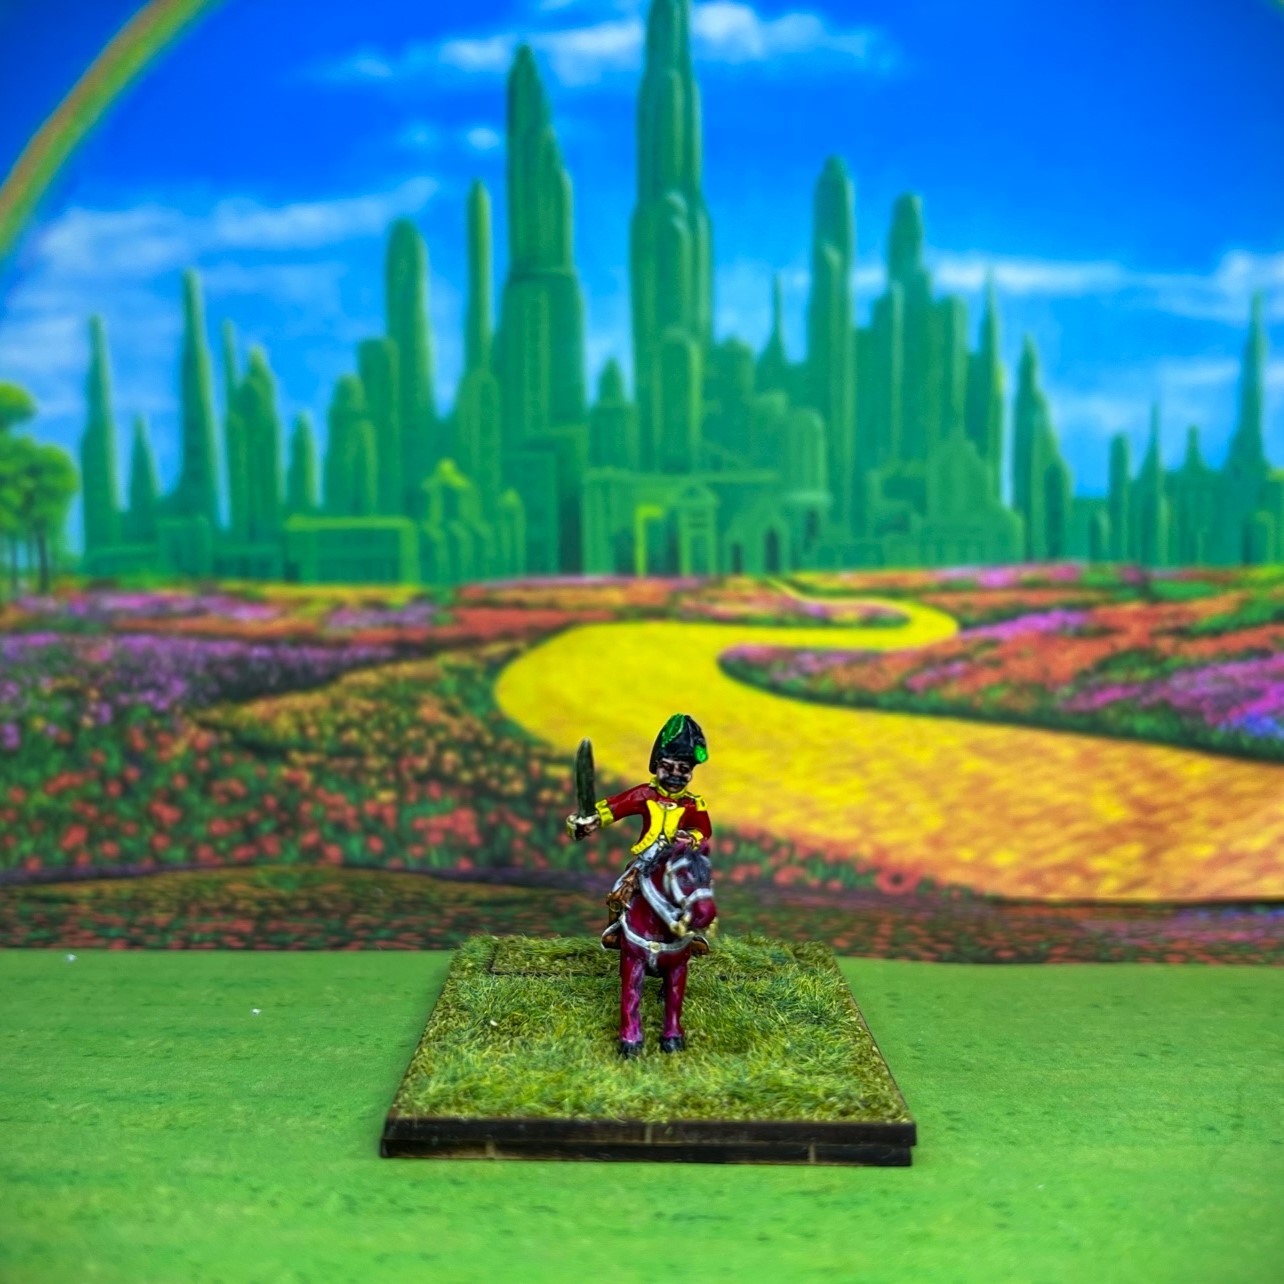
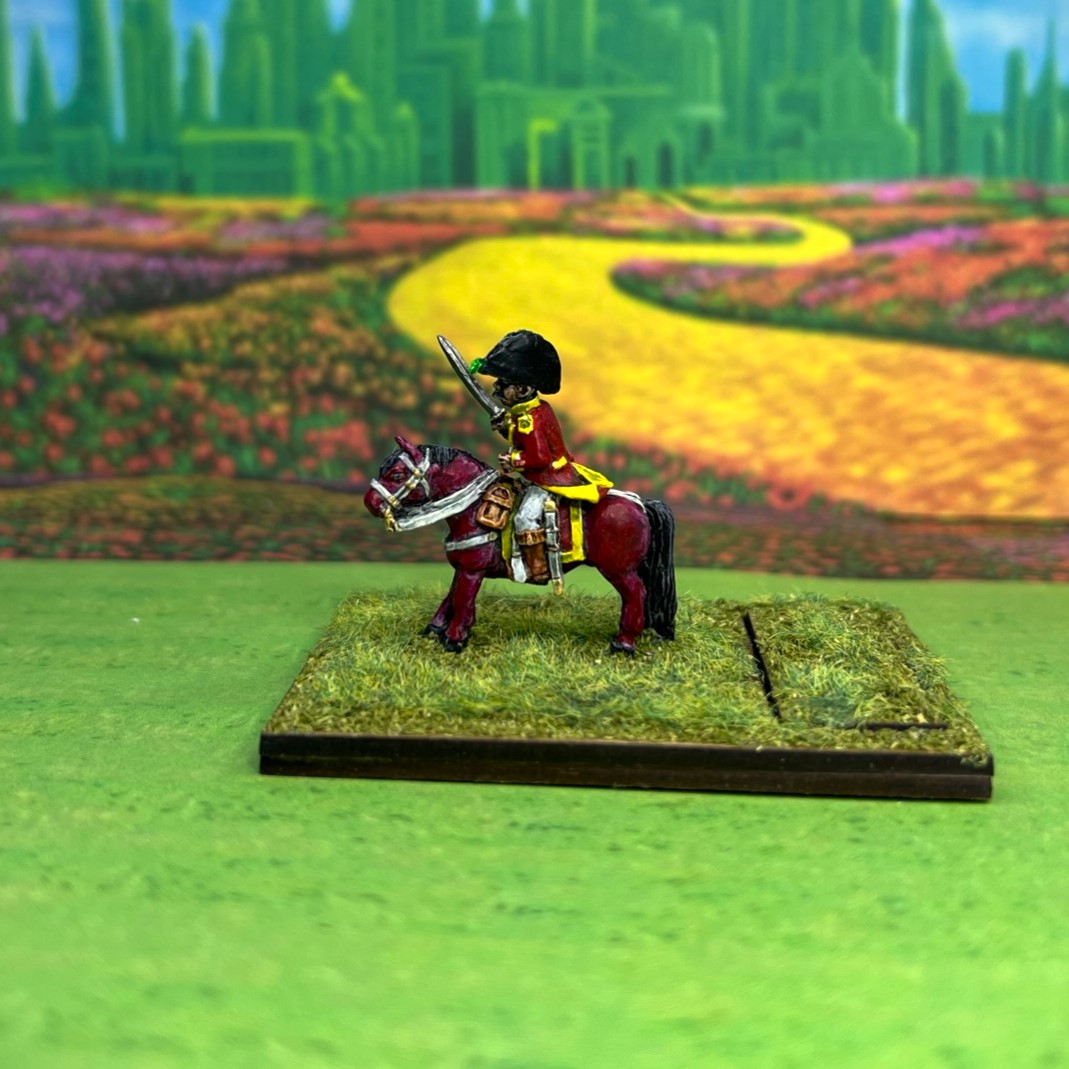
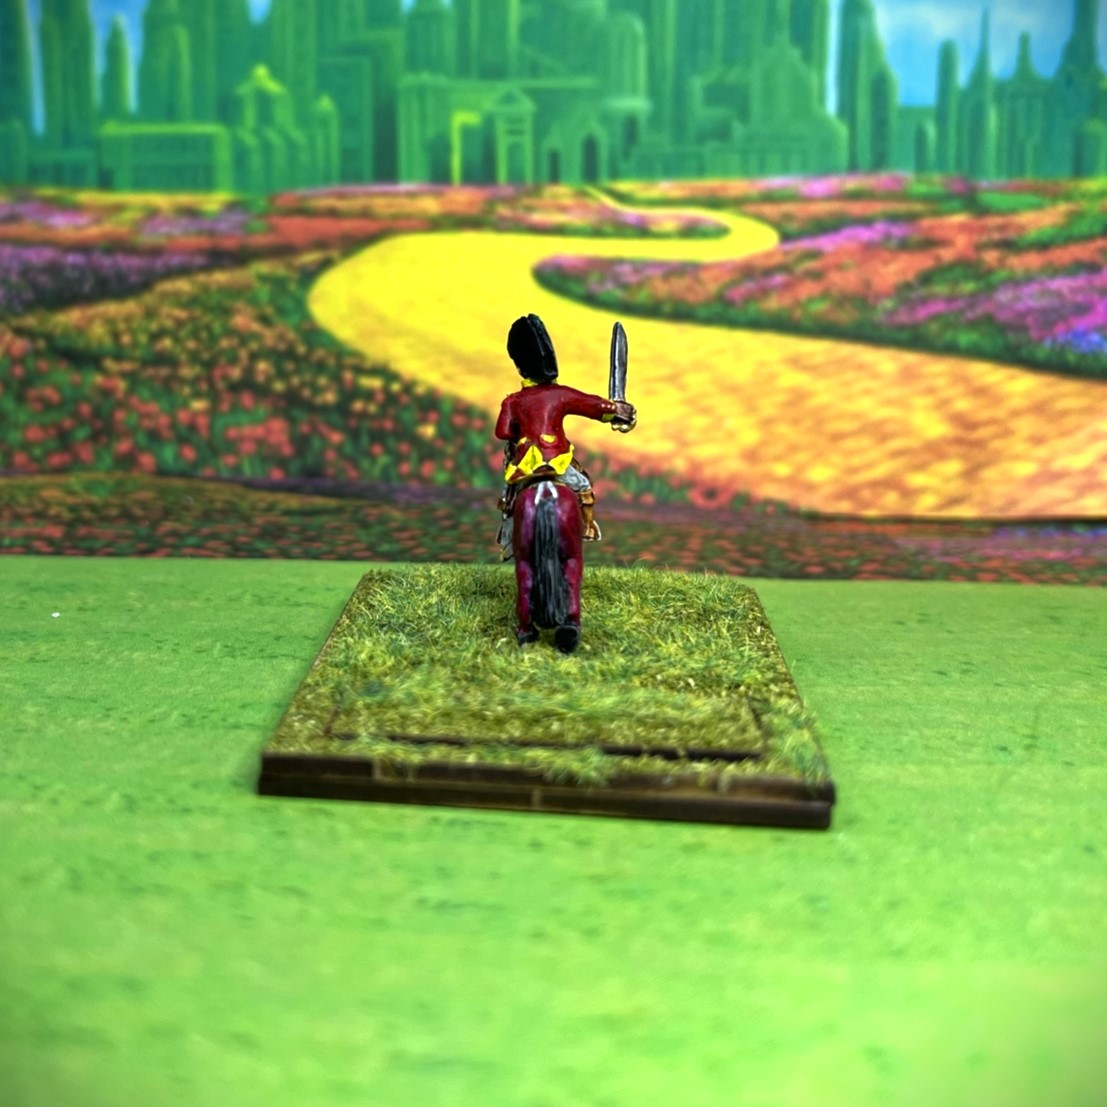
A look at 2 stands…
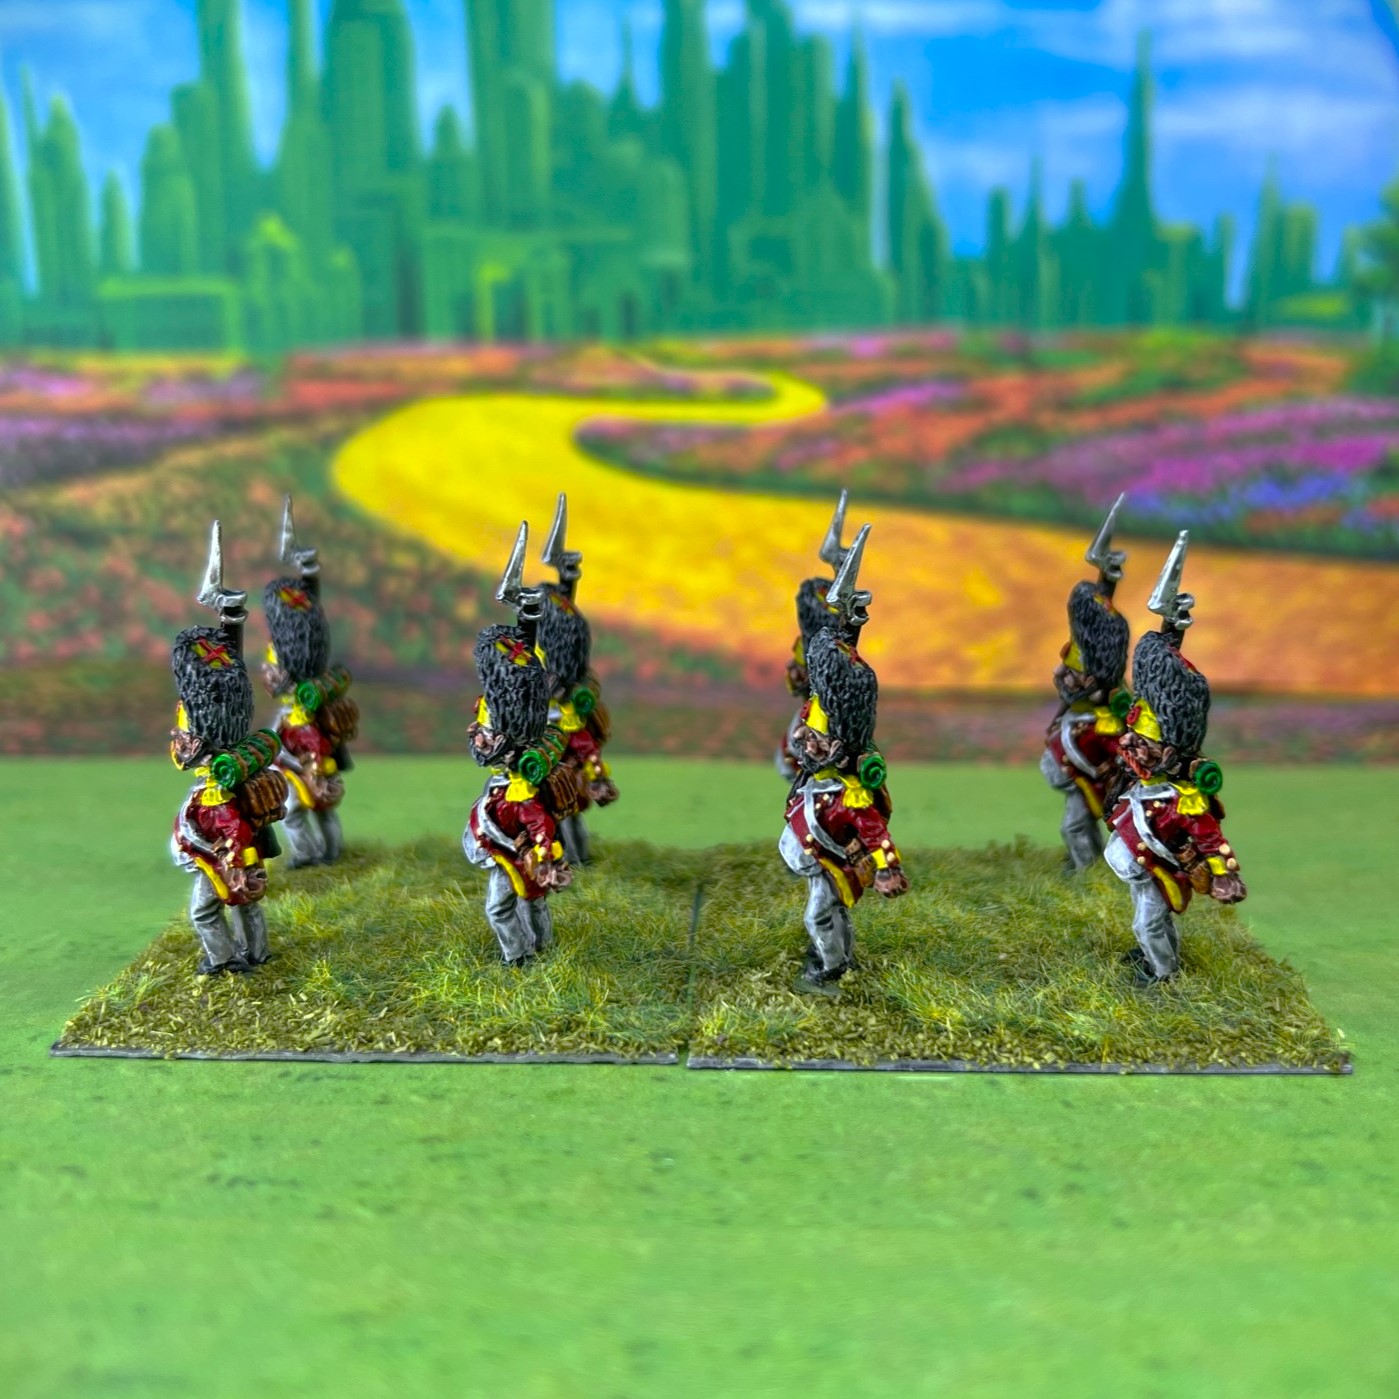
A look at the command stand…
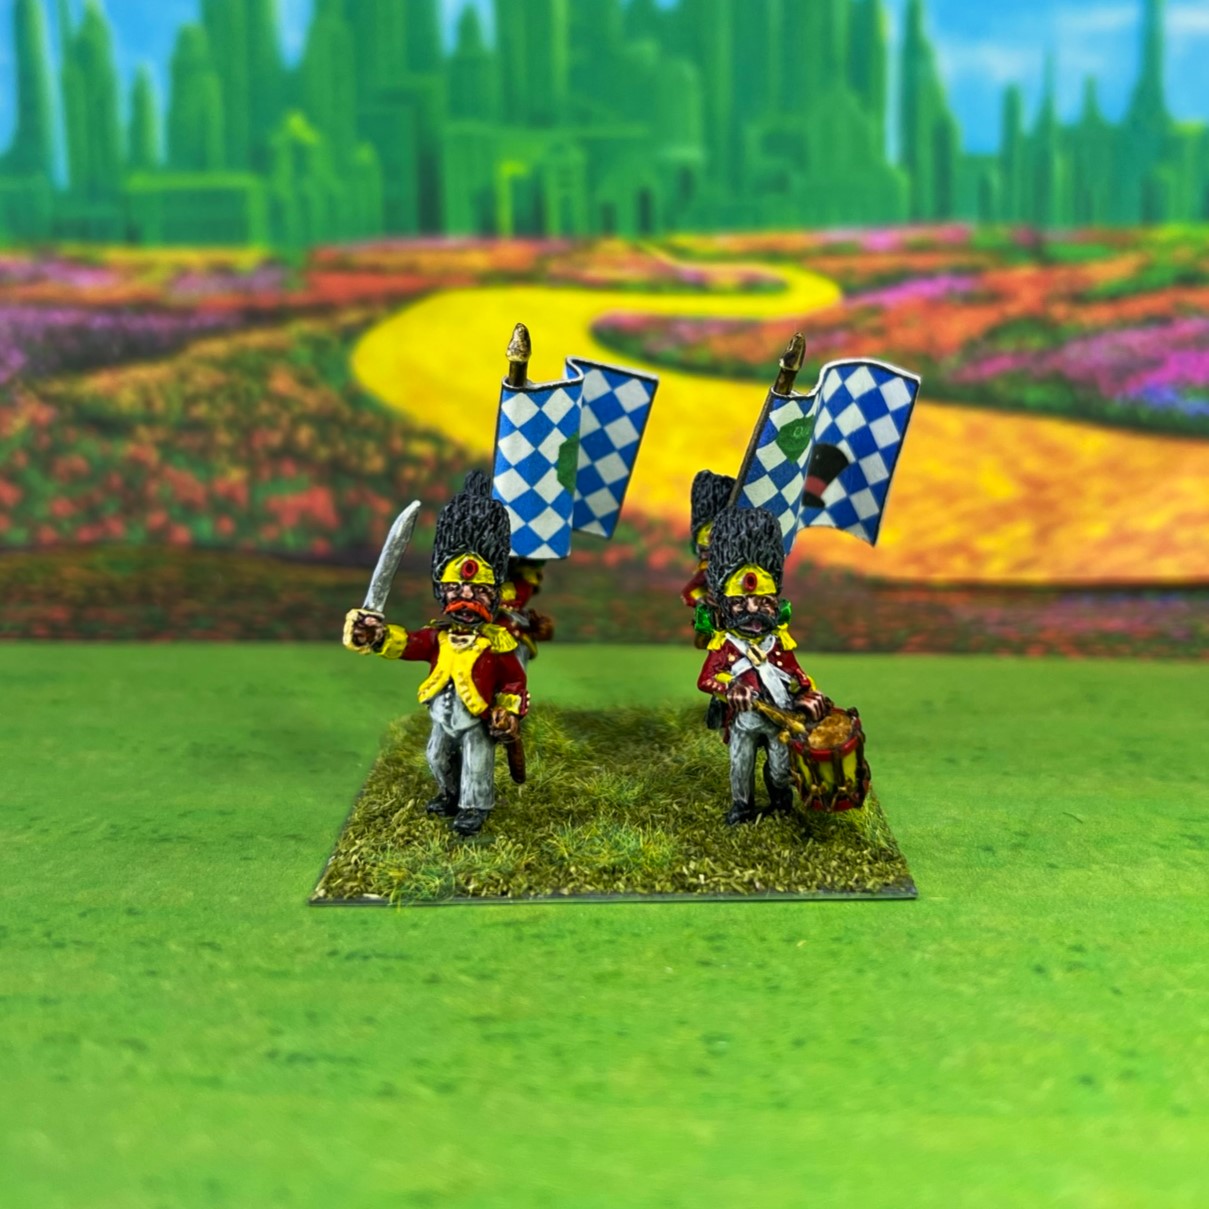
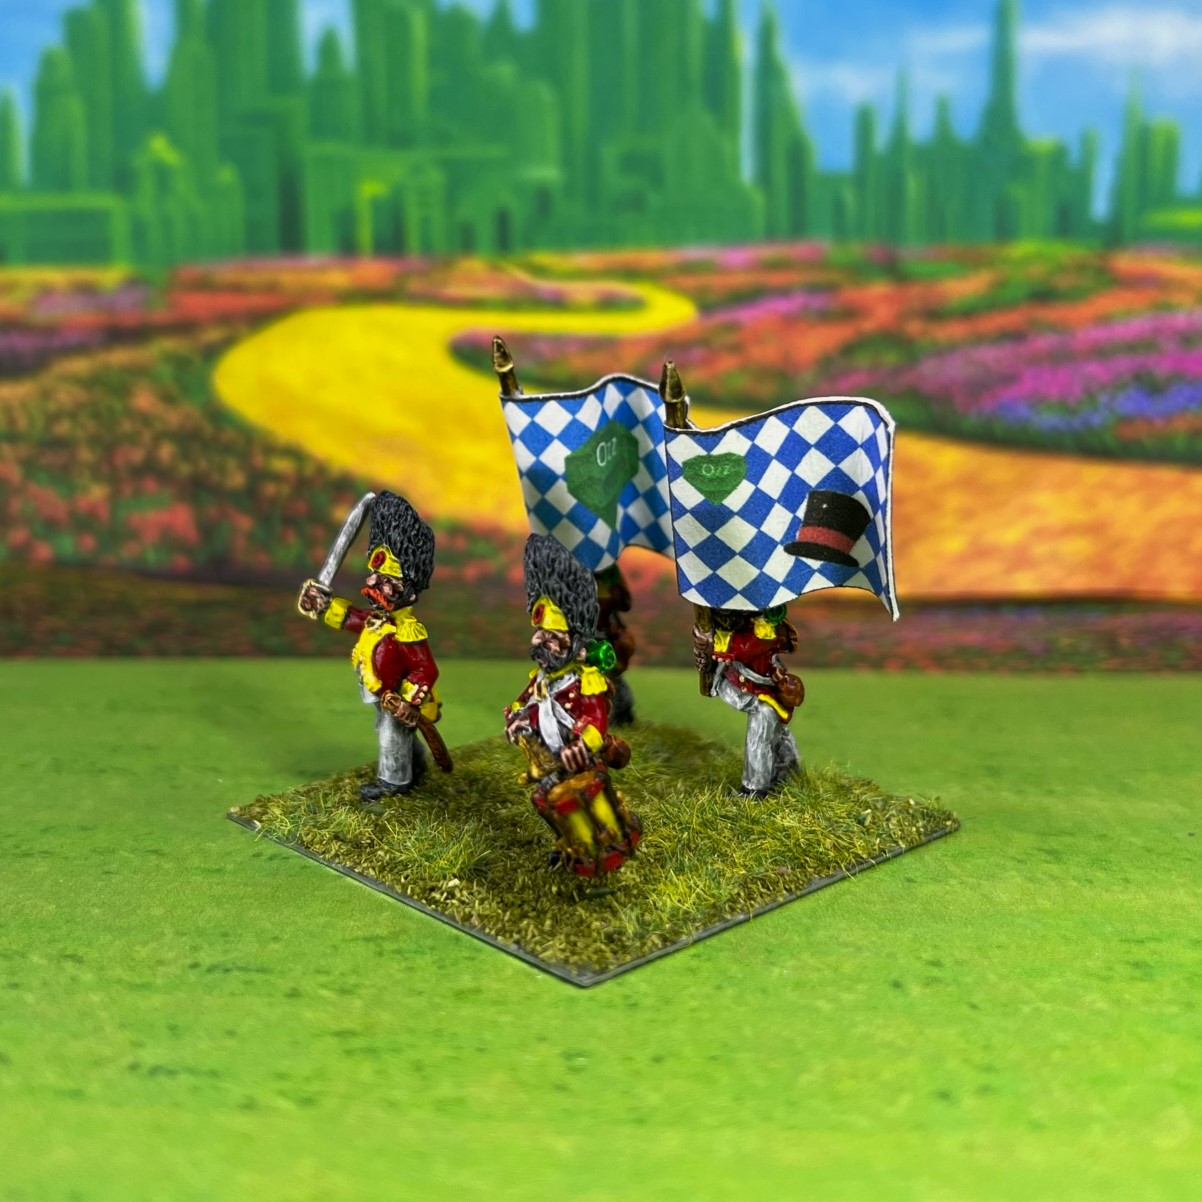
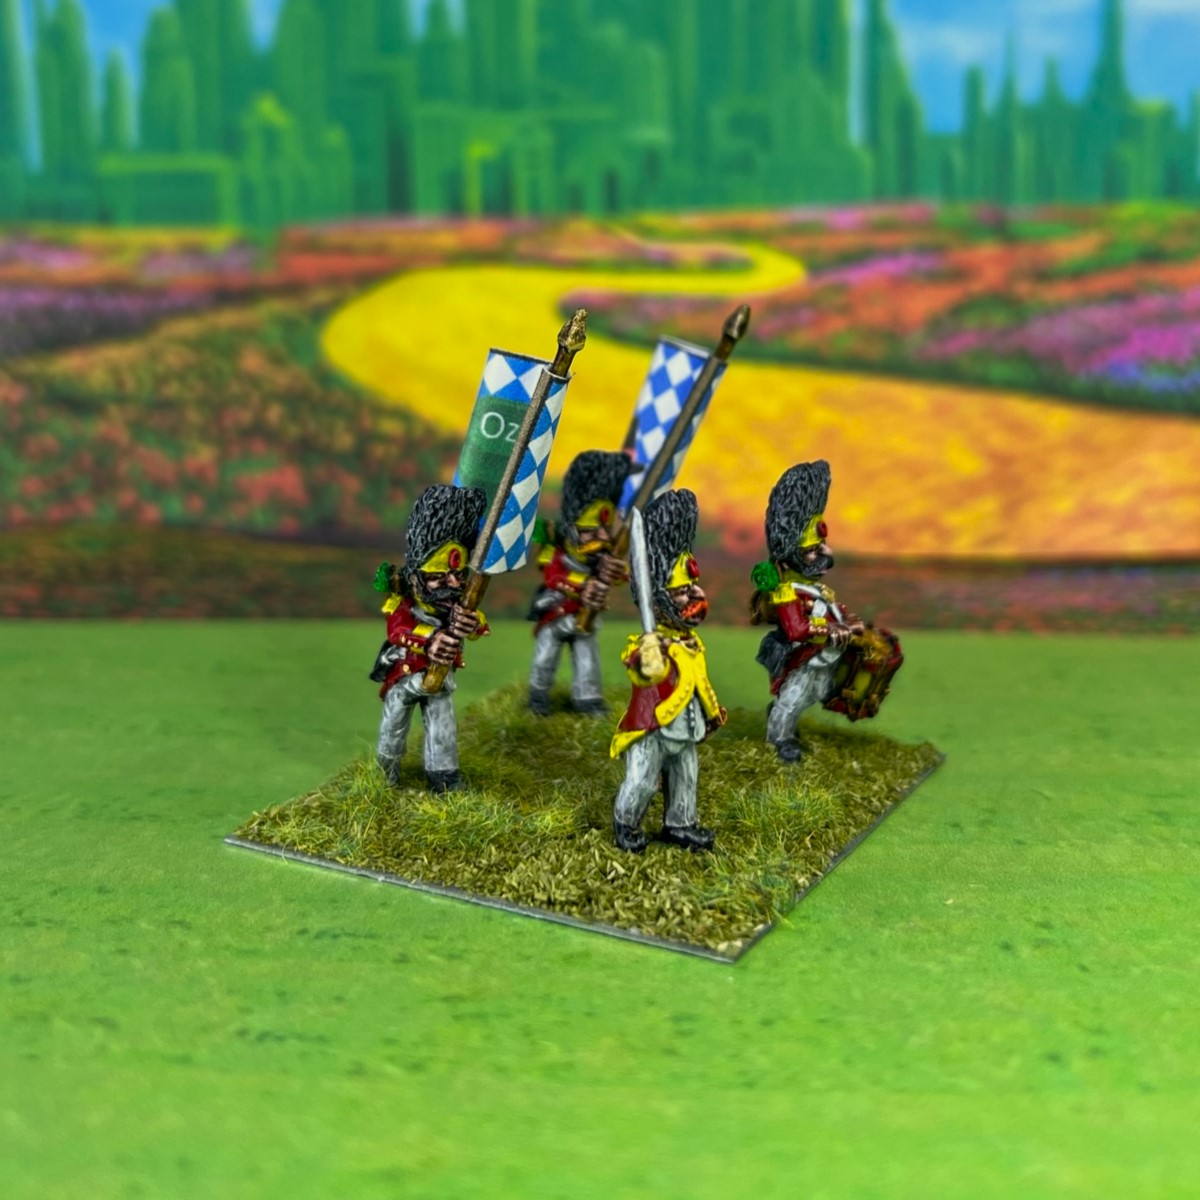
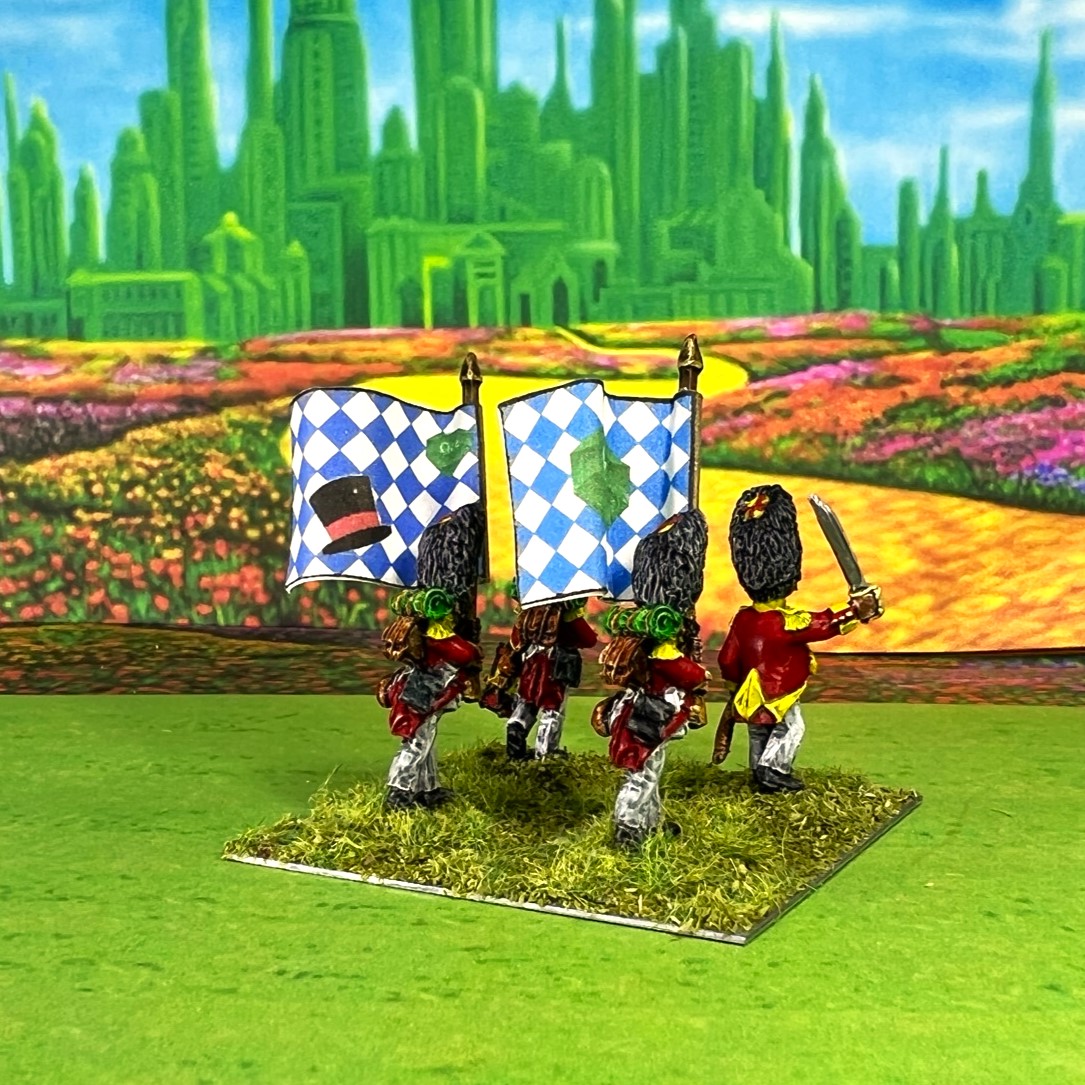
A look at the whole regiment…


I managed to finish the regiment on 11/22 – so 8 days. This post had to wait for Thanksgiving (and for me to overcome a bad cold). I enjoyed painting these and am moving on to the rest of my Munchkin brigade.
Thanks for looking, and always please let me know what you think of this new project in the comments section.
Miscellaneous details and references for those interested in that sort of thing:
For all of my previous posts on Wars of Ozz games, figures, units, and other related projects – please see this page.
PAINTS, INKS, GLAZES, SHADES, WASHES, PIGMENTS, FLOCKING, GLUES AND MORE THAT I USED ON THIS MUNCHKIN REGIMENT:
- Gorilla Glue
- Paper clip wire pieces
- 1/2″ x 1/2″ square steel bases from Wargames Accessories (#16)
- Poster tack
- Vallejo Premium Primer “White”
- Vallejo “Flow Improver”
- Vallejo “Airbrush Thinner”
- Citadel “Nuln Oil” (wash)
- Vallejo Model Color “White”
- Citadel “Contrast Paint – Bad Moon Yellow”
- Citadel “Contrast Paint – Contrast Medium”
- Citadel “Contrast Paint – Volupus Pink”
- Army Painter “Speed Paint – Crusader Skin”
- Army Painter “Speed Paint – Grim Black”
- Citadel “Contrast Paint – Ironjawz Yellow”
- Citadel “Contrast Paint – Magmadroth Flame”
- Citadel “Contrast Paint – Gore Grunta Fur”
- Citadel “Contrast Paint – Baal Red”
- Army Painter “Speed Paint – Holy White”
- Citadel “Contrast Paint – Karandras Green”
- Citadel “Contrast Paint – Aggaros Dunes”
- Army Painter “Speed Paint – Hardened Leather”
- Army Painter “Speed Paint – Dark Wood”
- Vallejo Model Air “Armour Brown”
- Vallejo Model Air “Steel”
- Vallejo Model Air “Gun Metal”
- Martha Stewart Crafts “Pale Bronze”
- Citadel “Contrast Paint – Snakebite Leather”
- Army Painter “Speed Paint – Pallid Bone”
- Citadel “Nuln Oil GLOSS” (wash/shade)
- Citadel “Warpfiend Grey”
- Vallejo Mecha Color “Olive Green”
- Citadel “Contrast Paint – Doomfire Magenta”
- Vallejo Mecha Varnish “Matte Varnish”
- Elmer’s PVA Glue
- Regimental MDF base from Old Glory
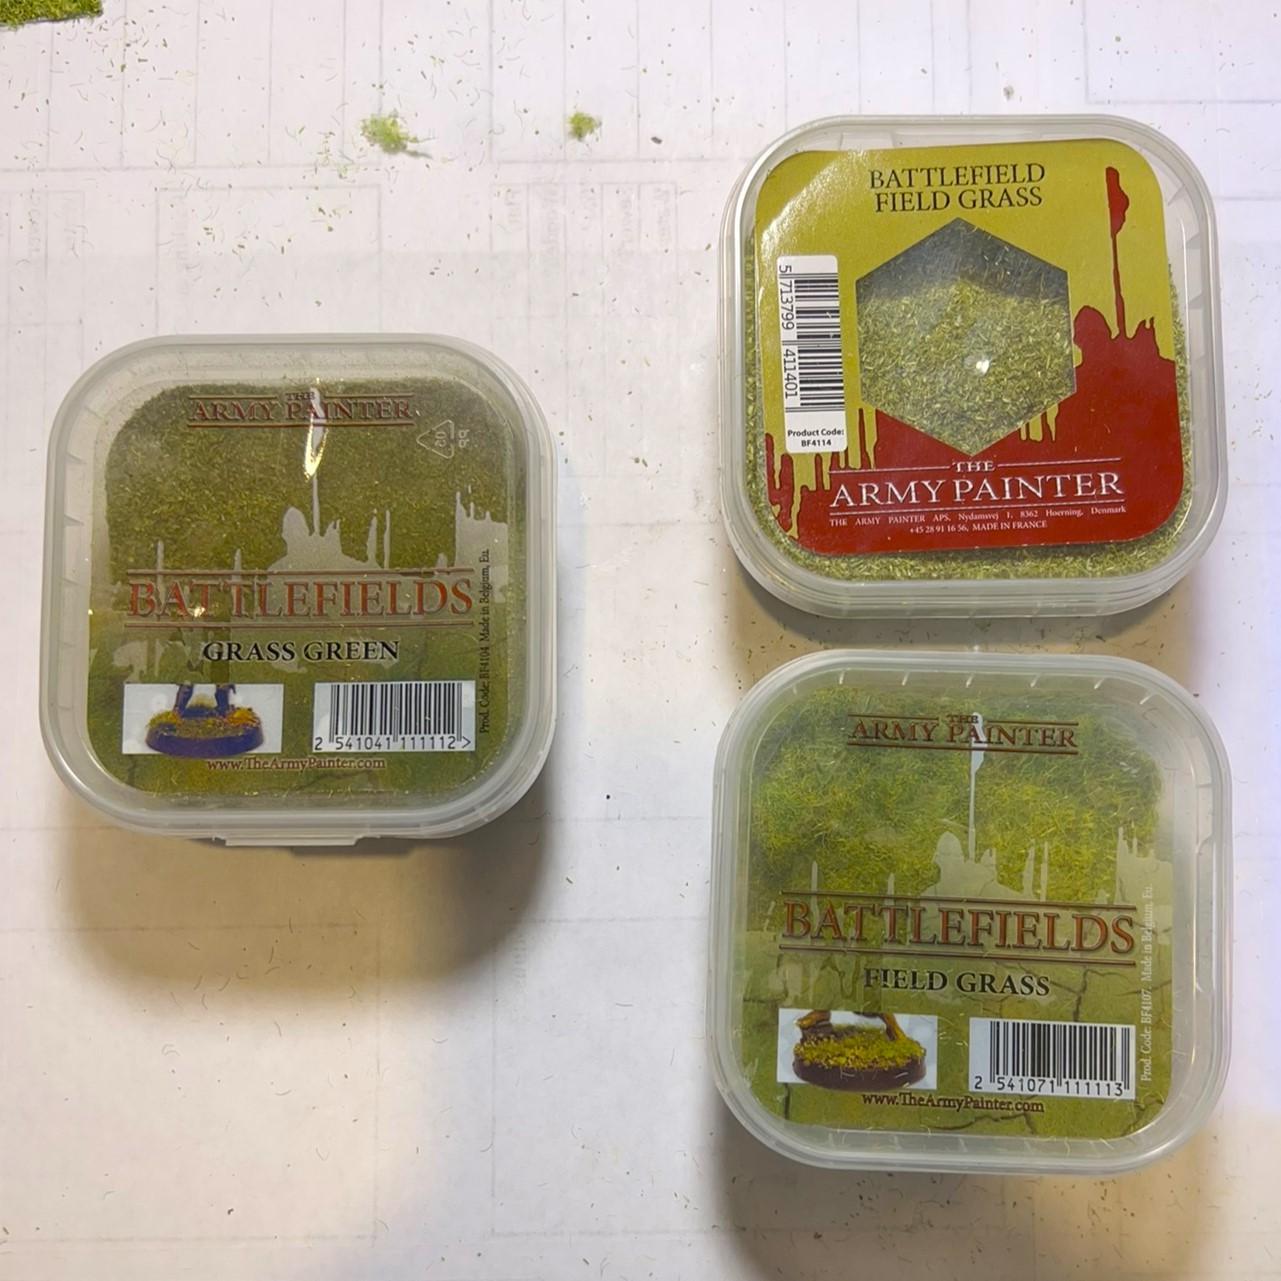
- Army Painter “Battlefields Grass Green” (flocking)
- Army Painter “Battlefield Field Grass” (flocking)
- Army Painter “Battlefields Field Grass” (flocking)
- Army Painter “Brown Battleground” (flocking)
