Epic Battles at Cold Wars 2026: A Recap

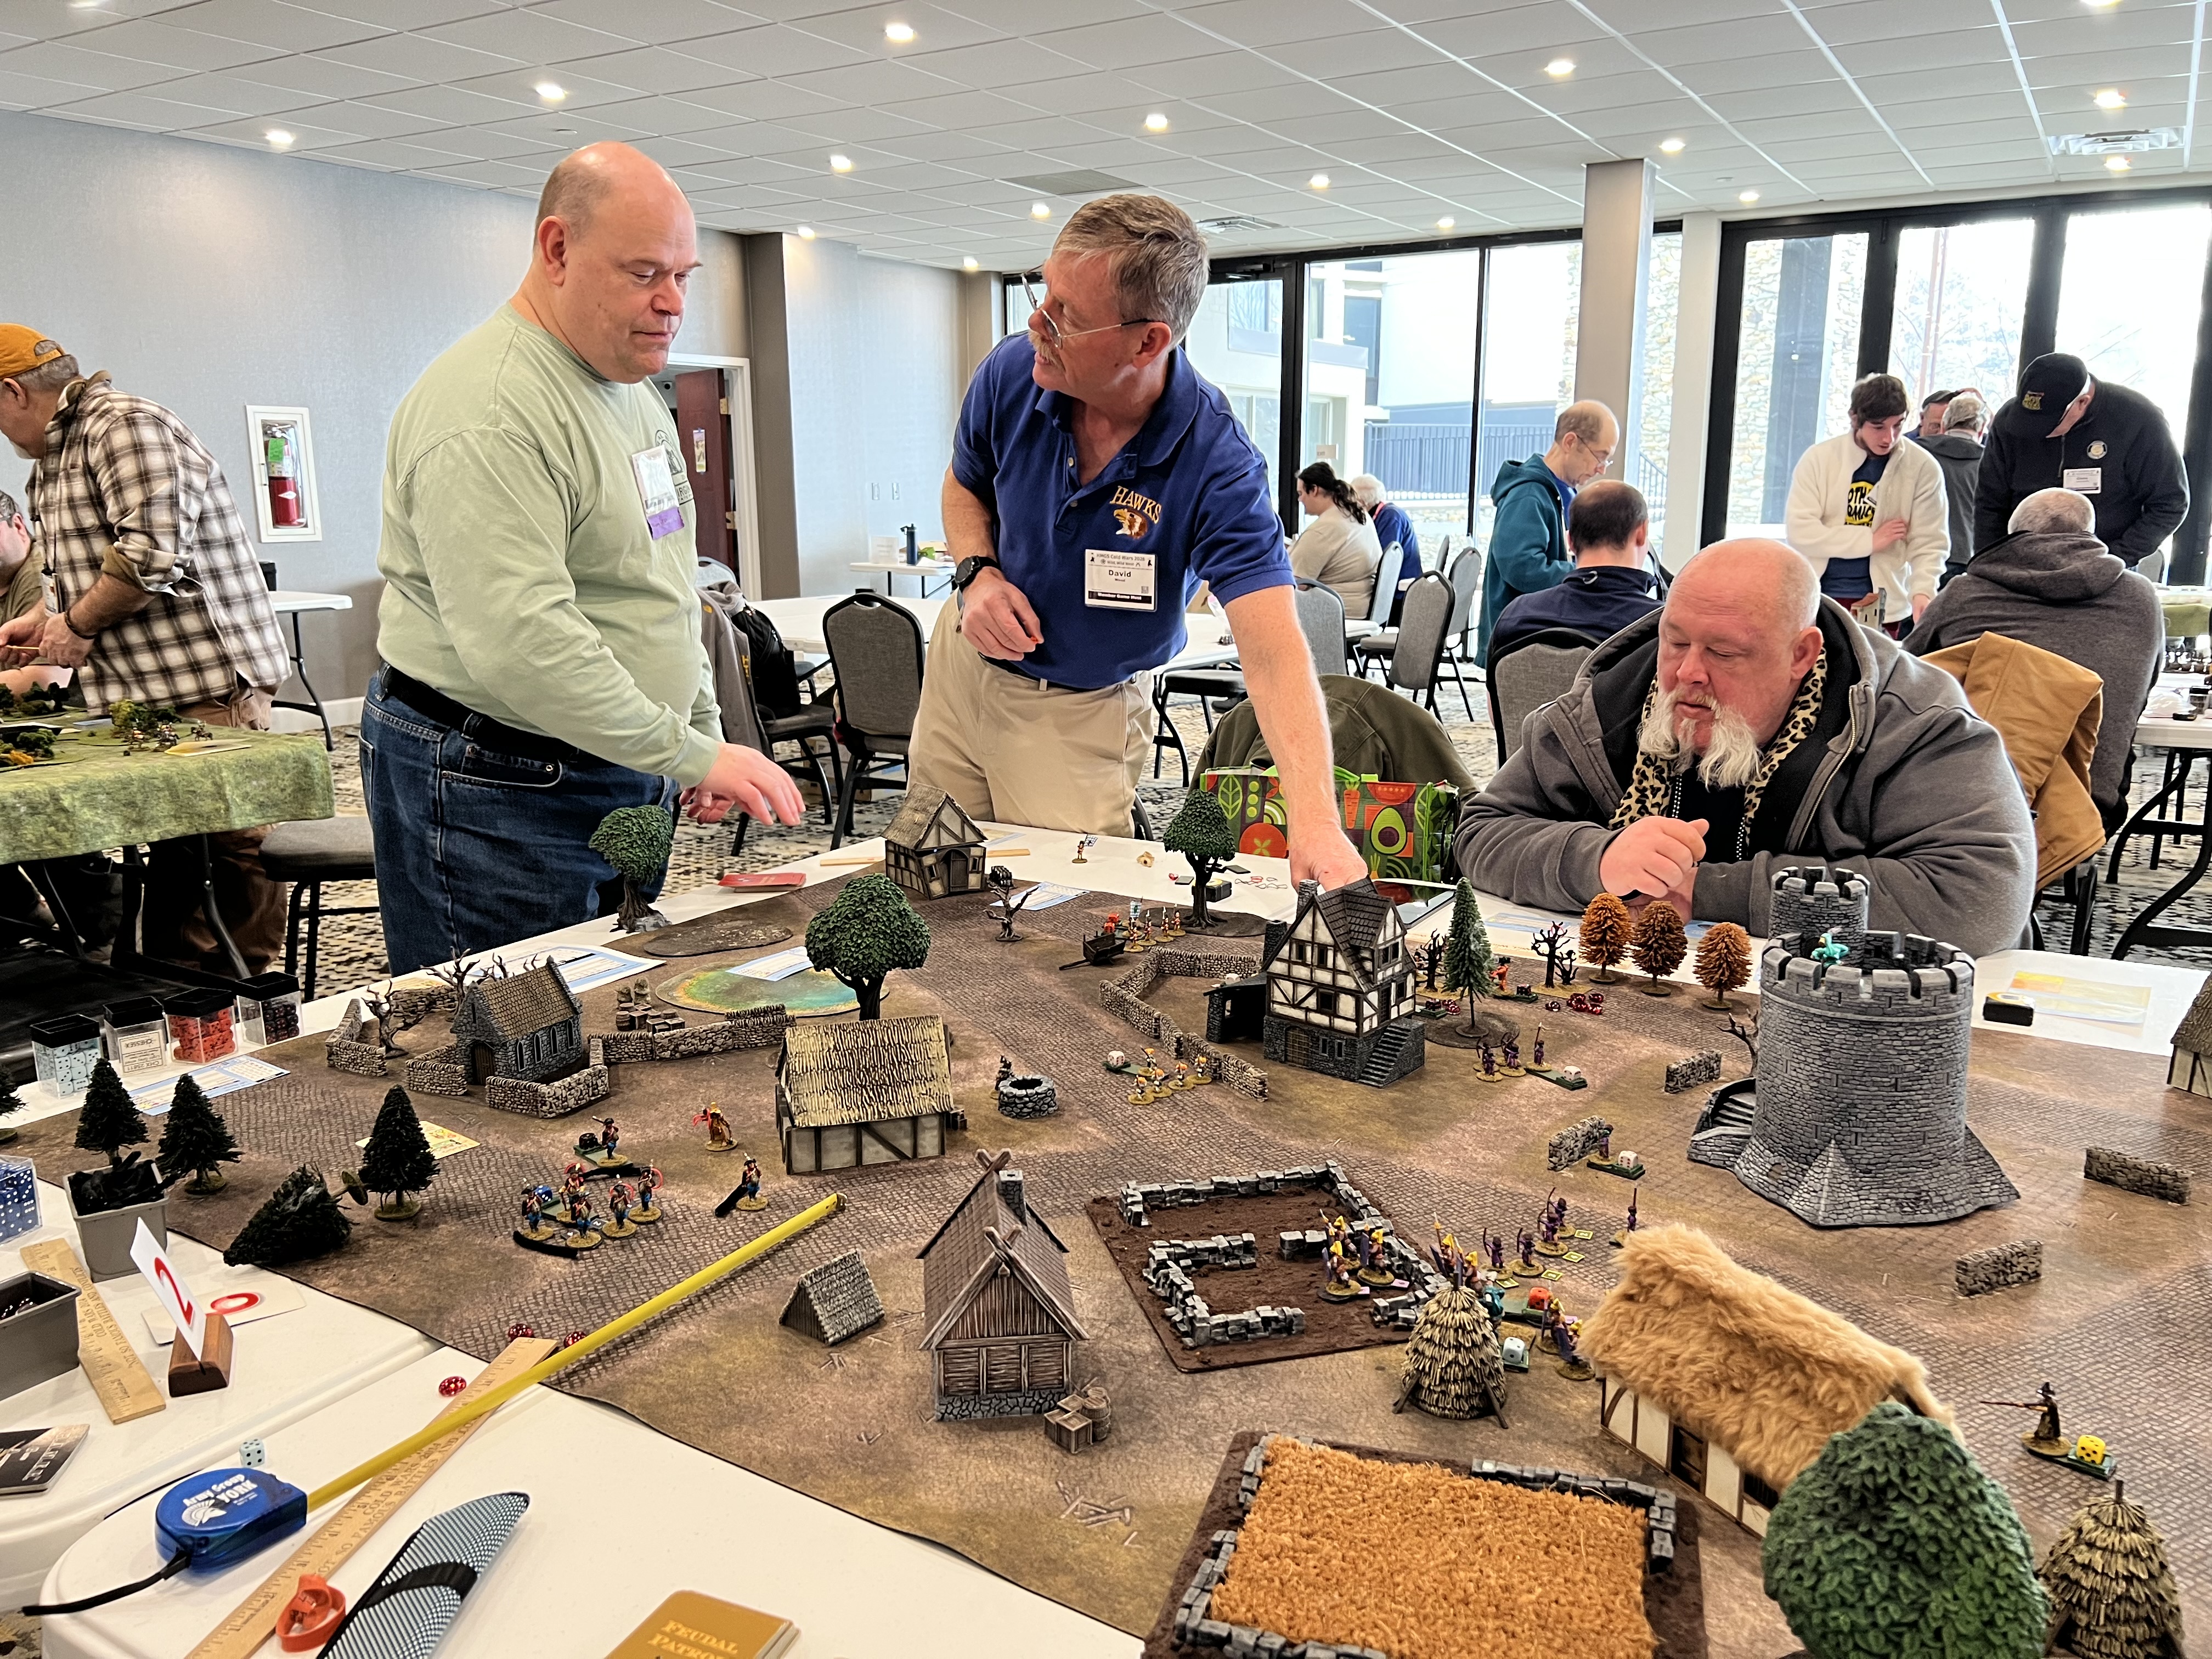
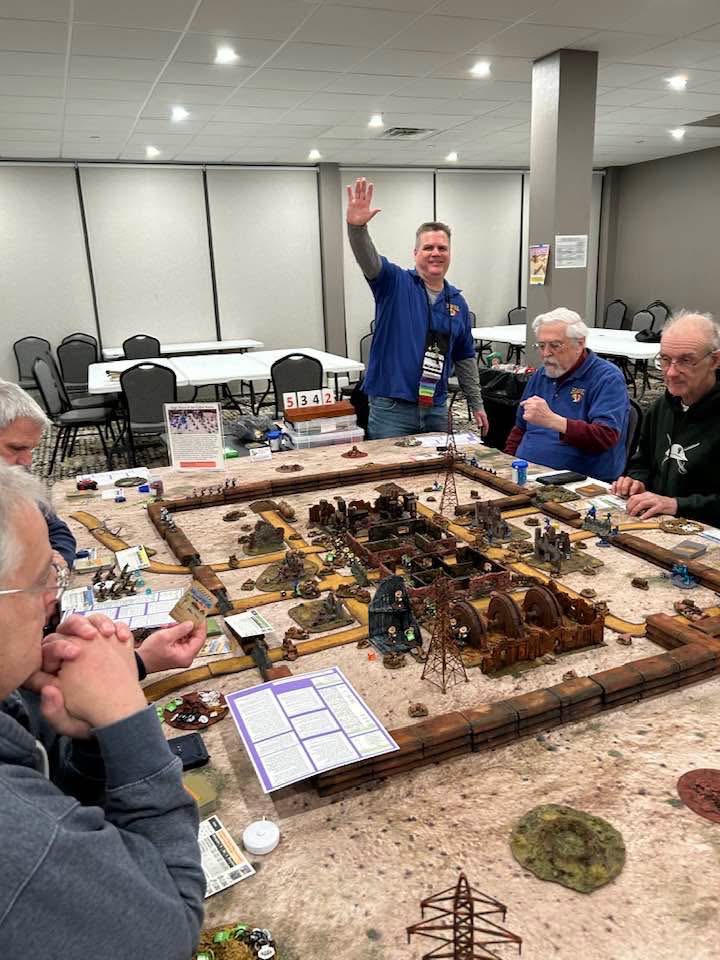
Back in early February, I attended the 2026 HMGS Cold Wars convention in Lancaster, PA. The theme was “Wild, Wild, West”. this is not one of my usual game themes, but as you’ll see shortly I adapted for one game anyways. As I write this now it is already mid-March, so I thought it was about time to finally got around to sharing some of the games I played in and ran in the H.A.W.K.’s room.

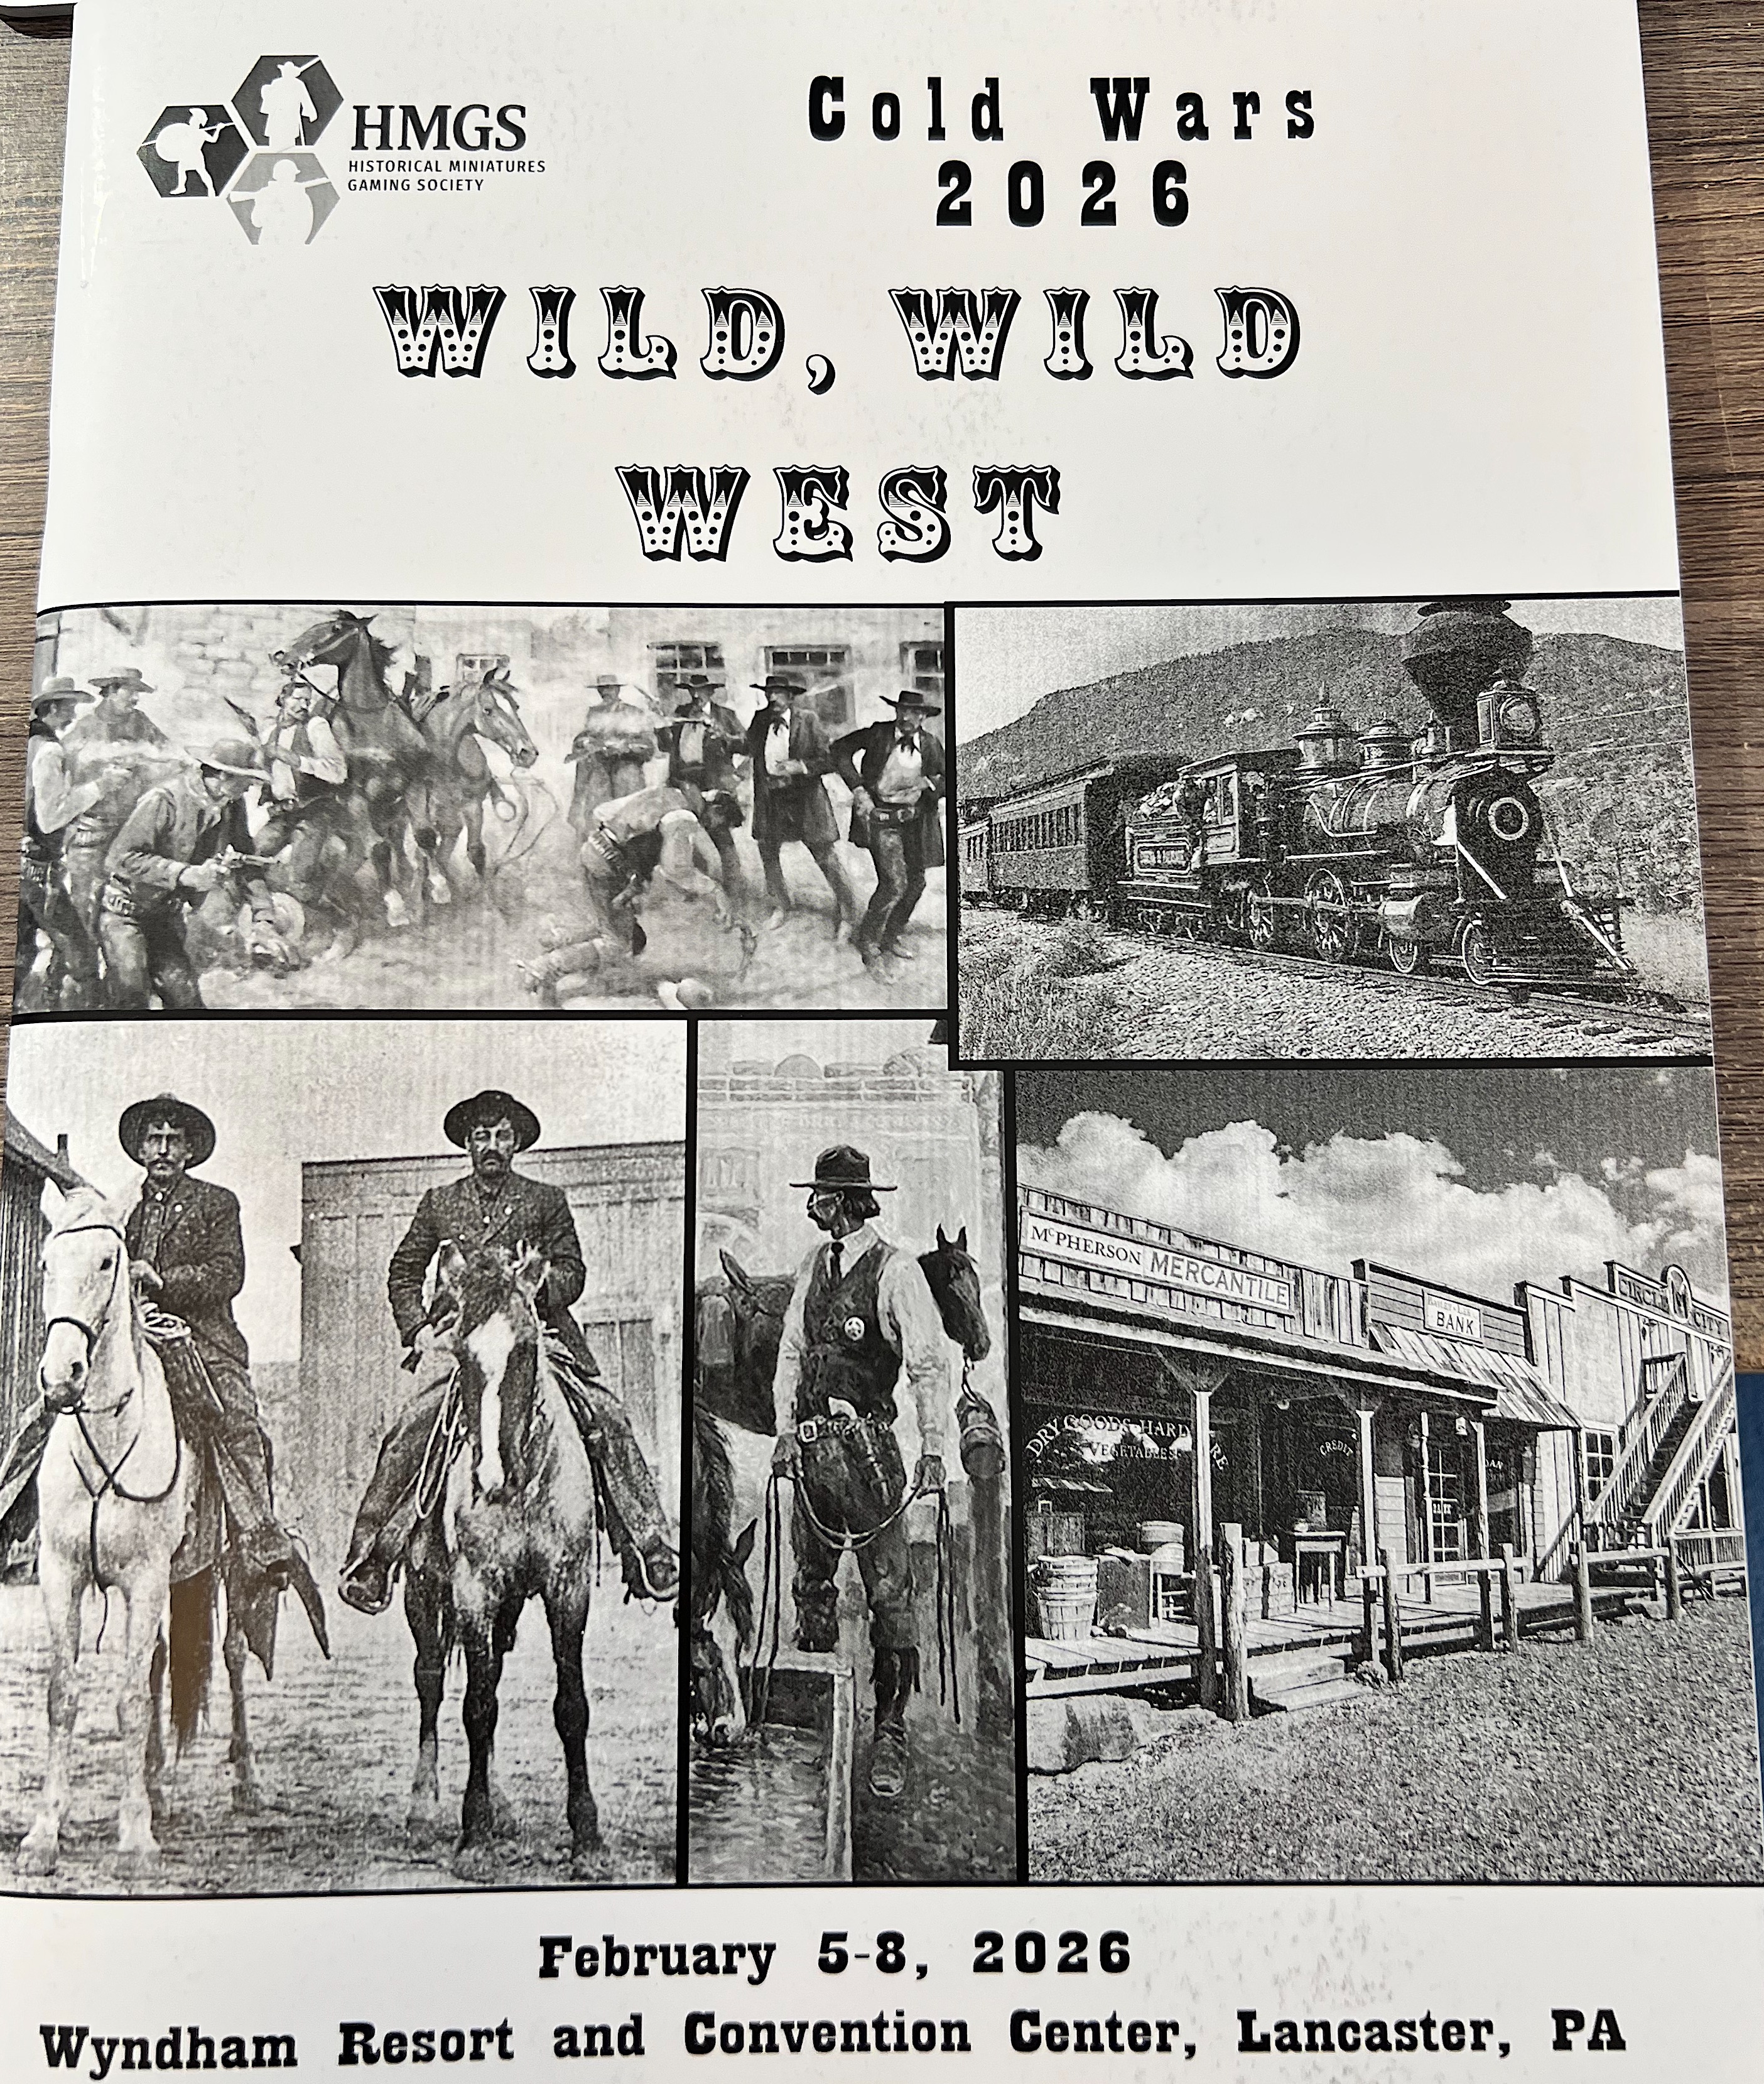
The H.A.W.K.’s are a great club from Harford County, Maryland. Two of my good West Point buddies (Buck Surdu USMA ’85 and Dave Wood fellow USMA ’84) have been members for years, and I have been fortunate enough to be their New England carpetbagging GM for a few years now.

Buck, yours truly, and Dave

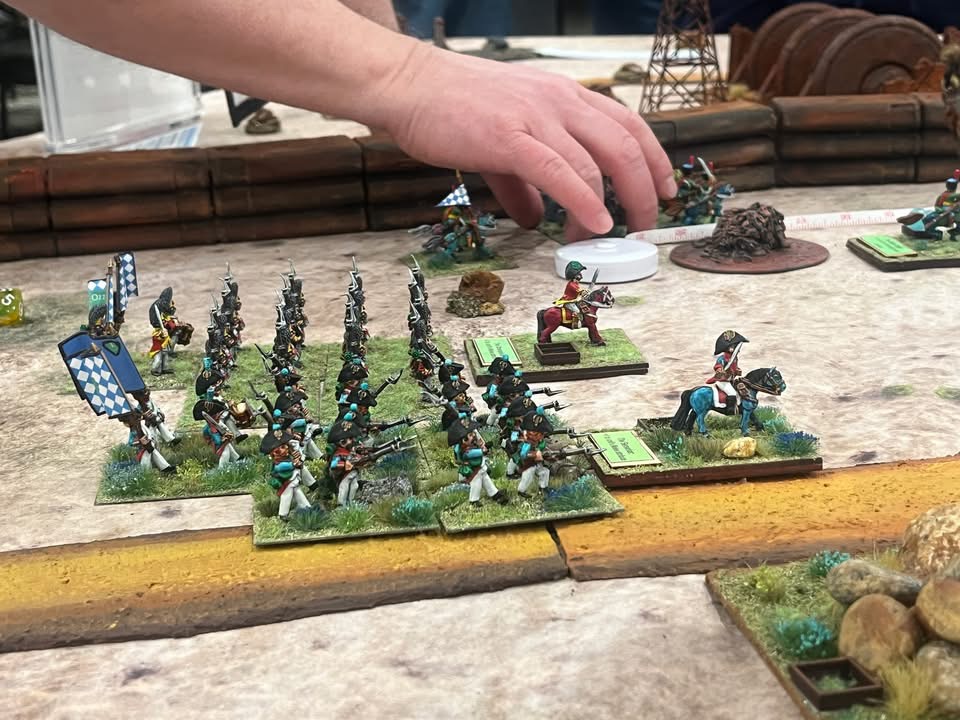
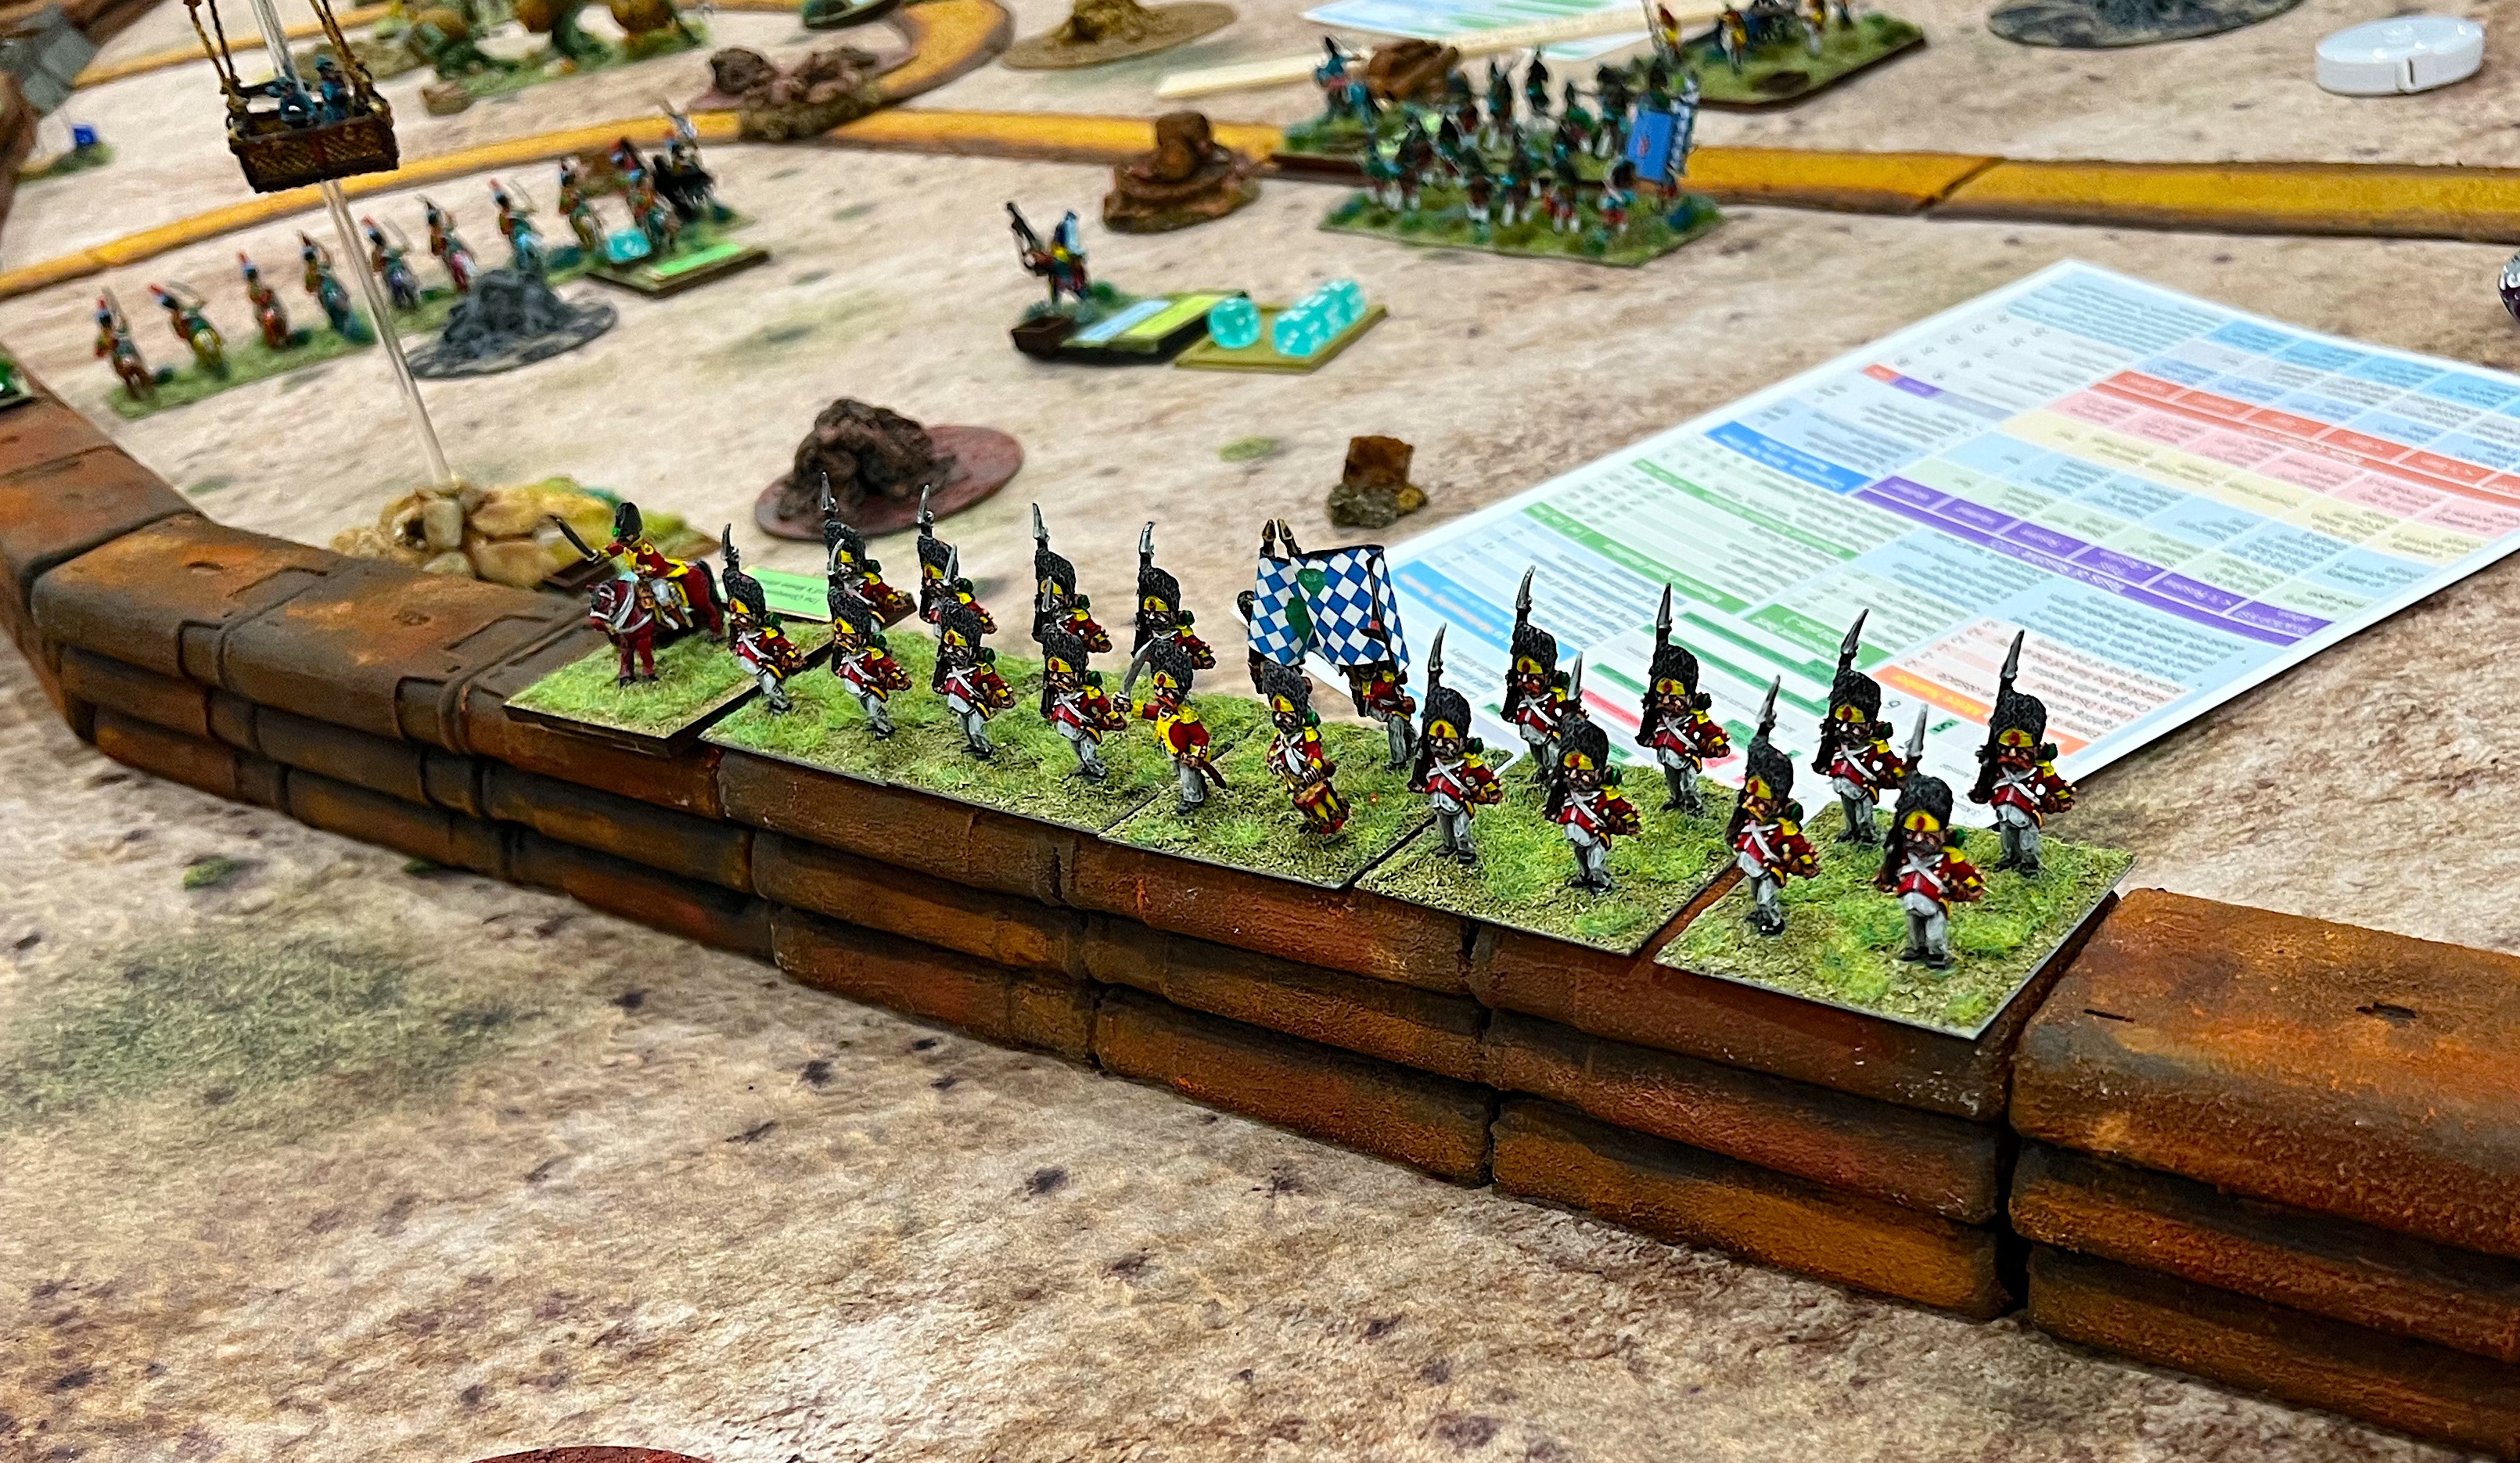
Prelude to Austerlitz (Wars of Eagles and Empires)

Thursday night I jumped into a Napoleonic 28mm game run by Buck, “Prelude to Austerlitz”. It used his Wars of Eagles and Empires rules.

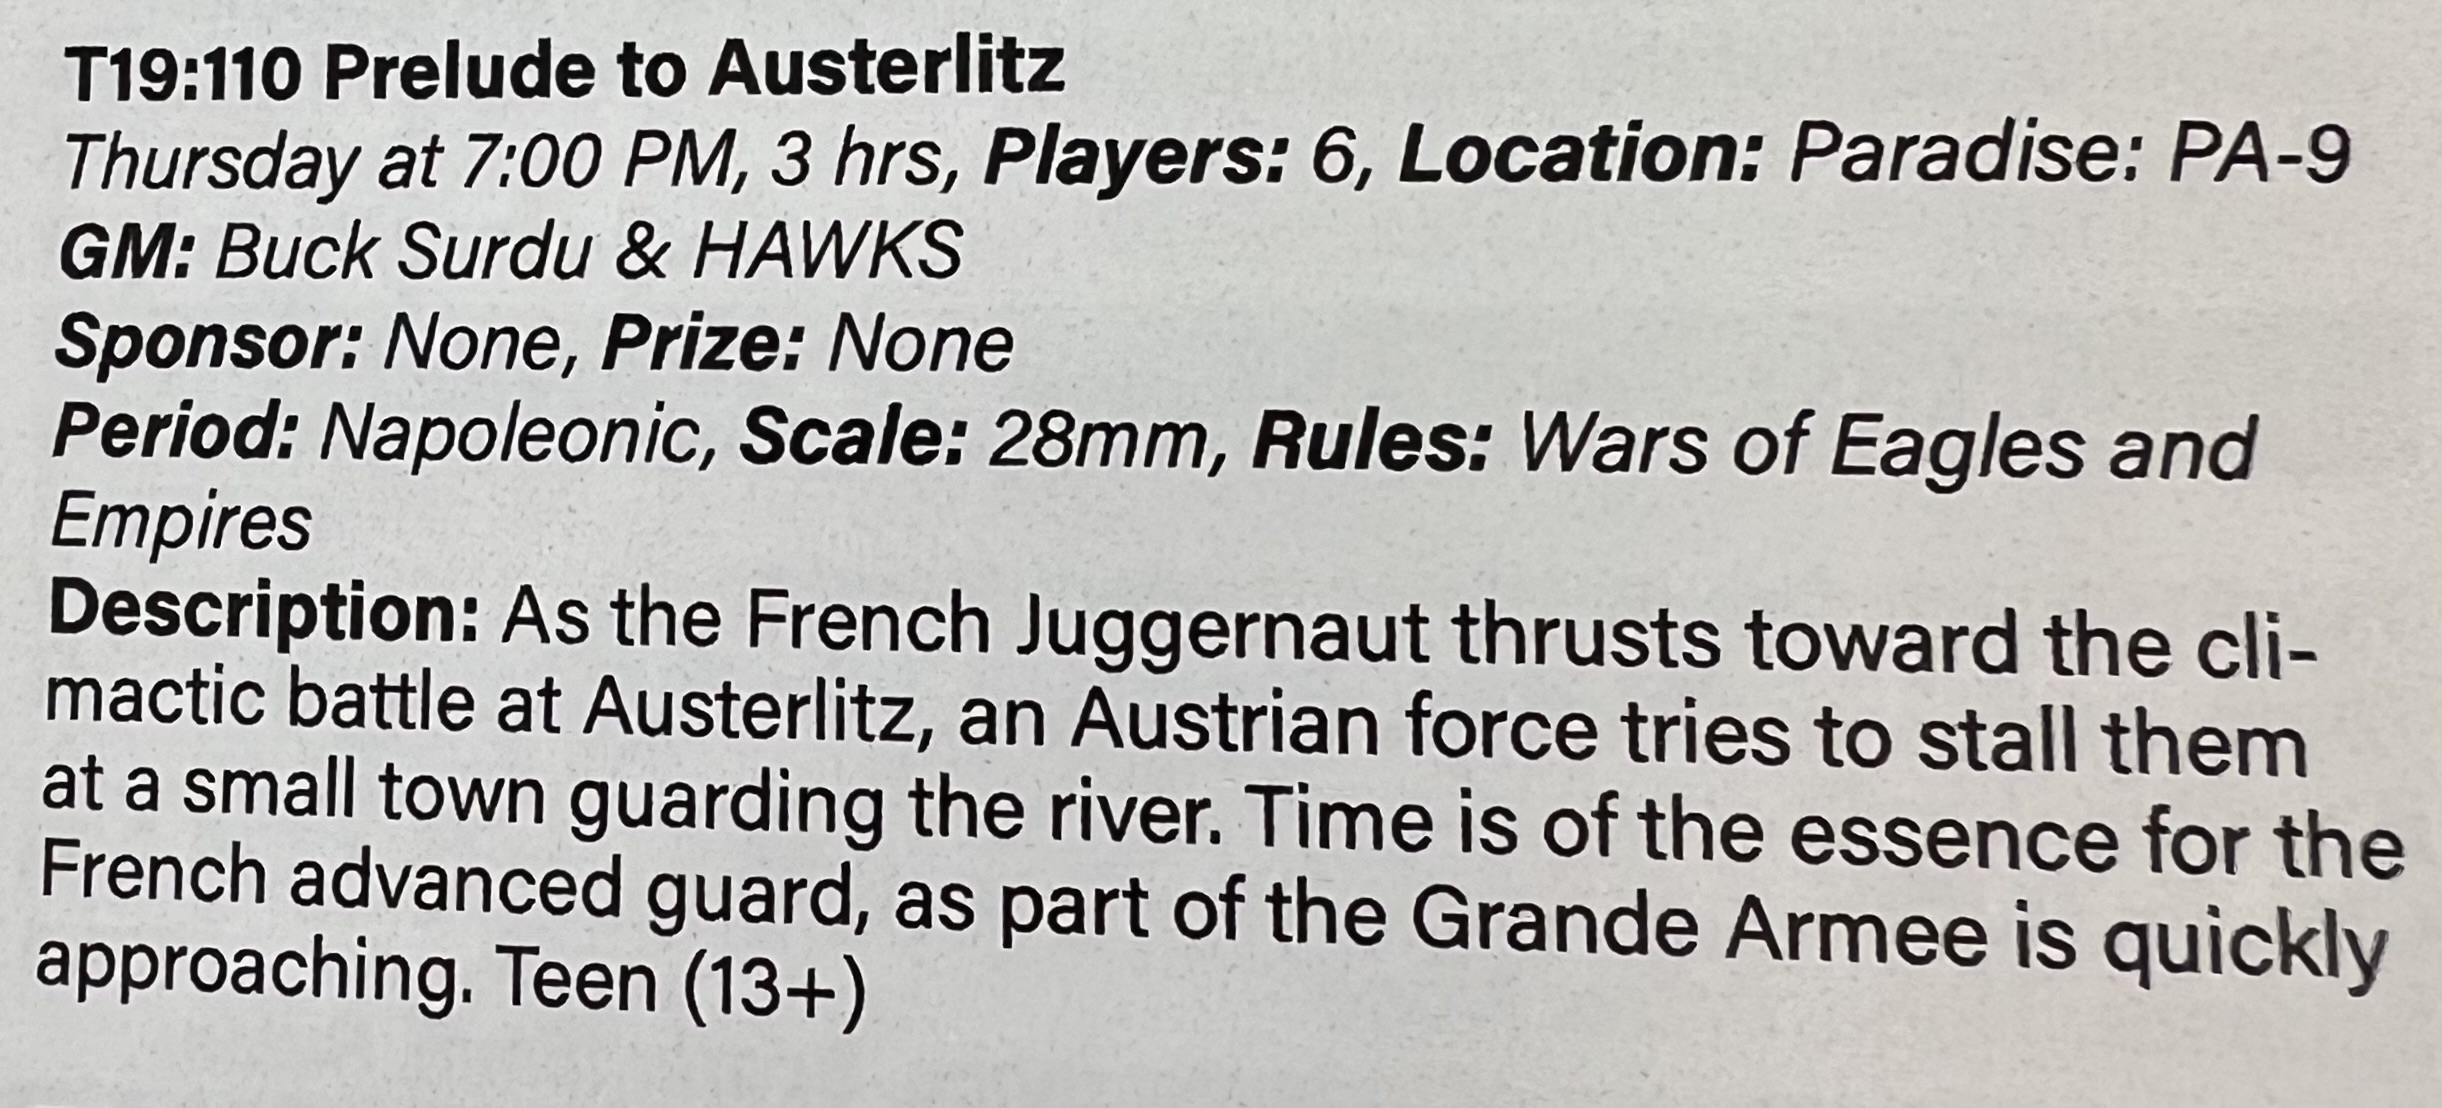
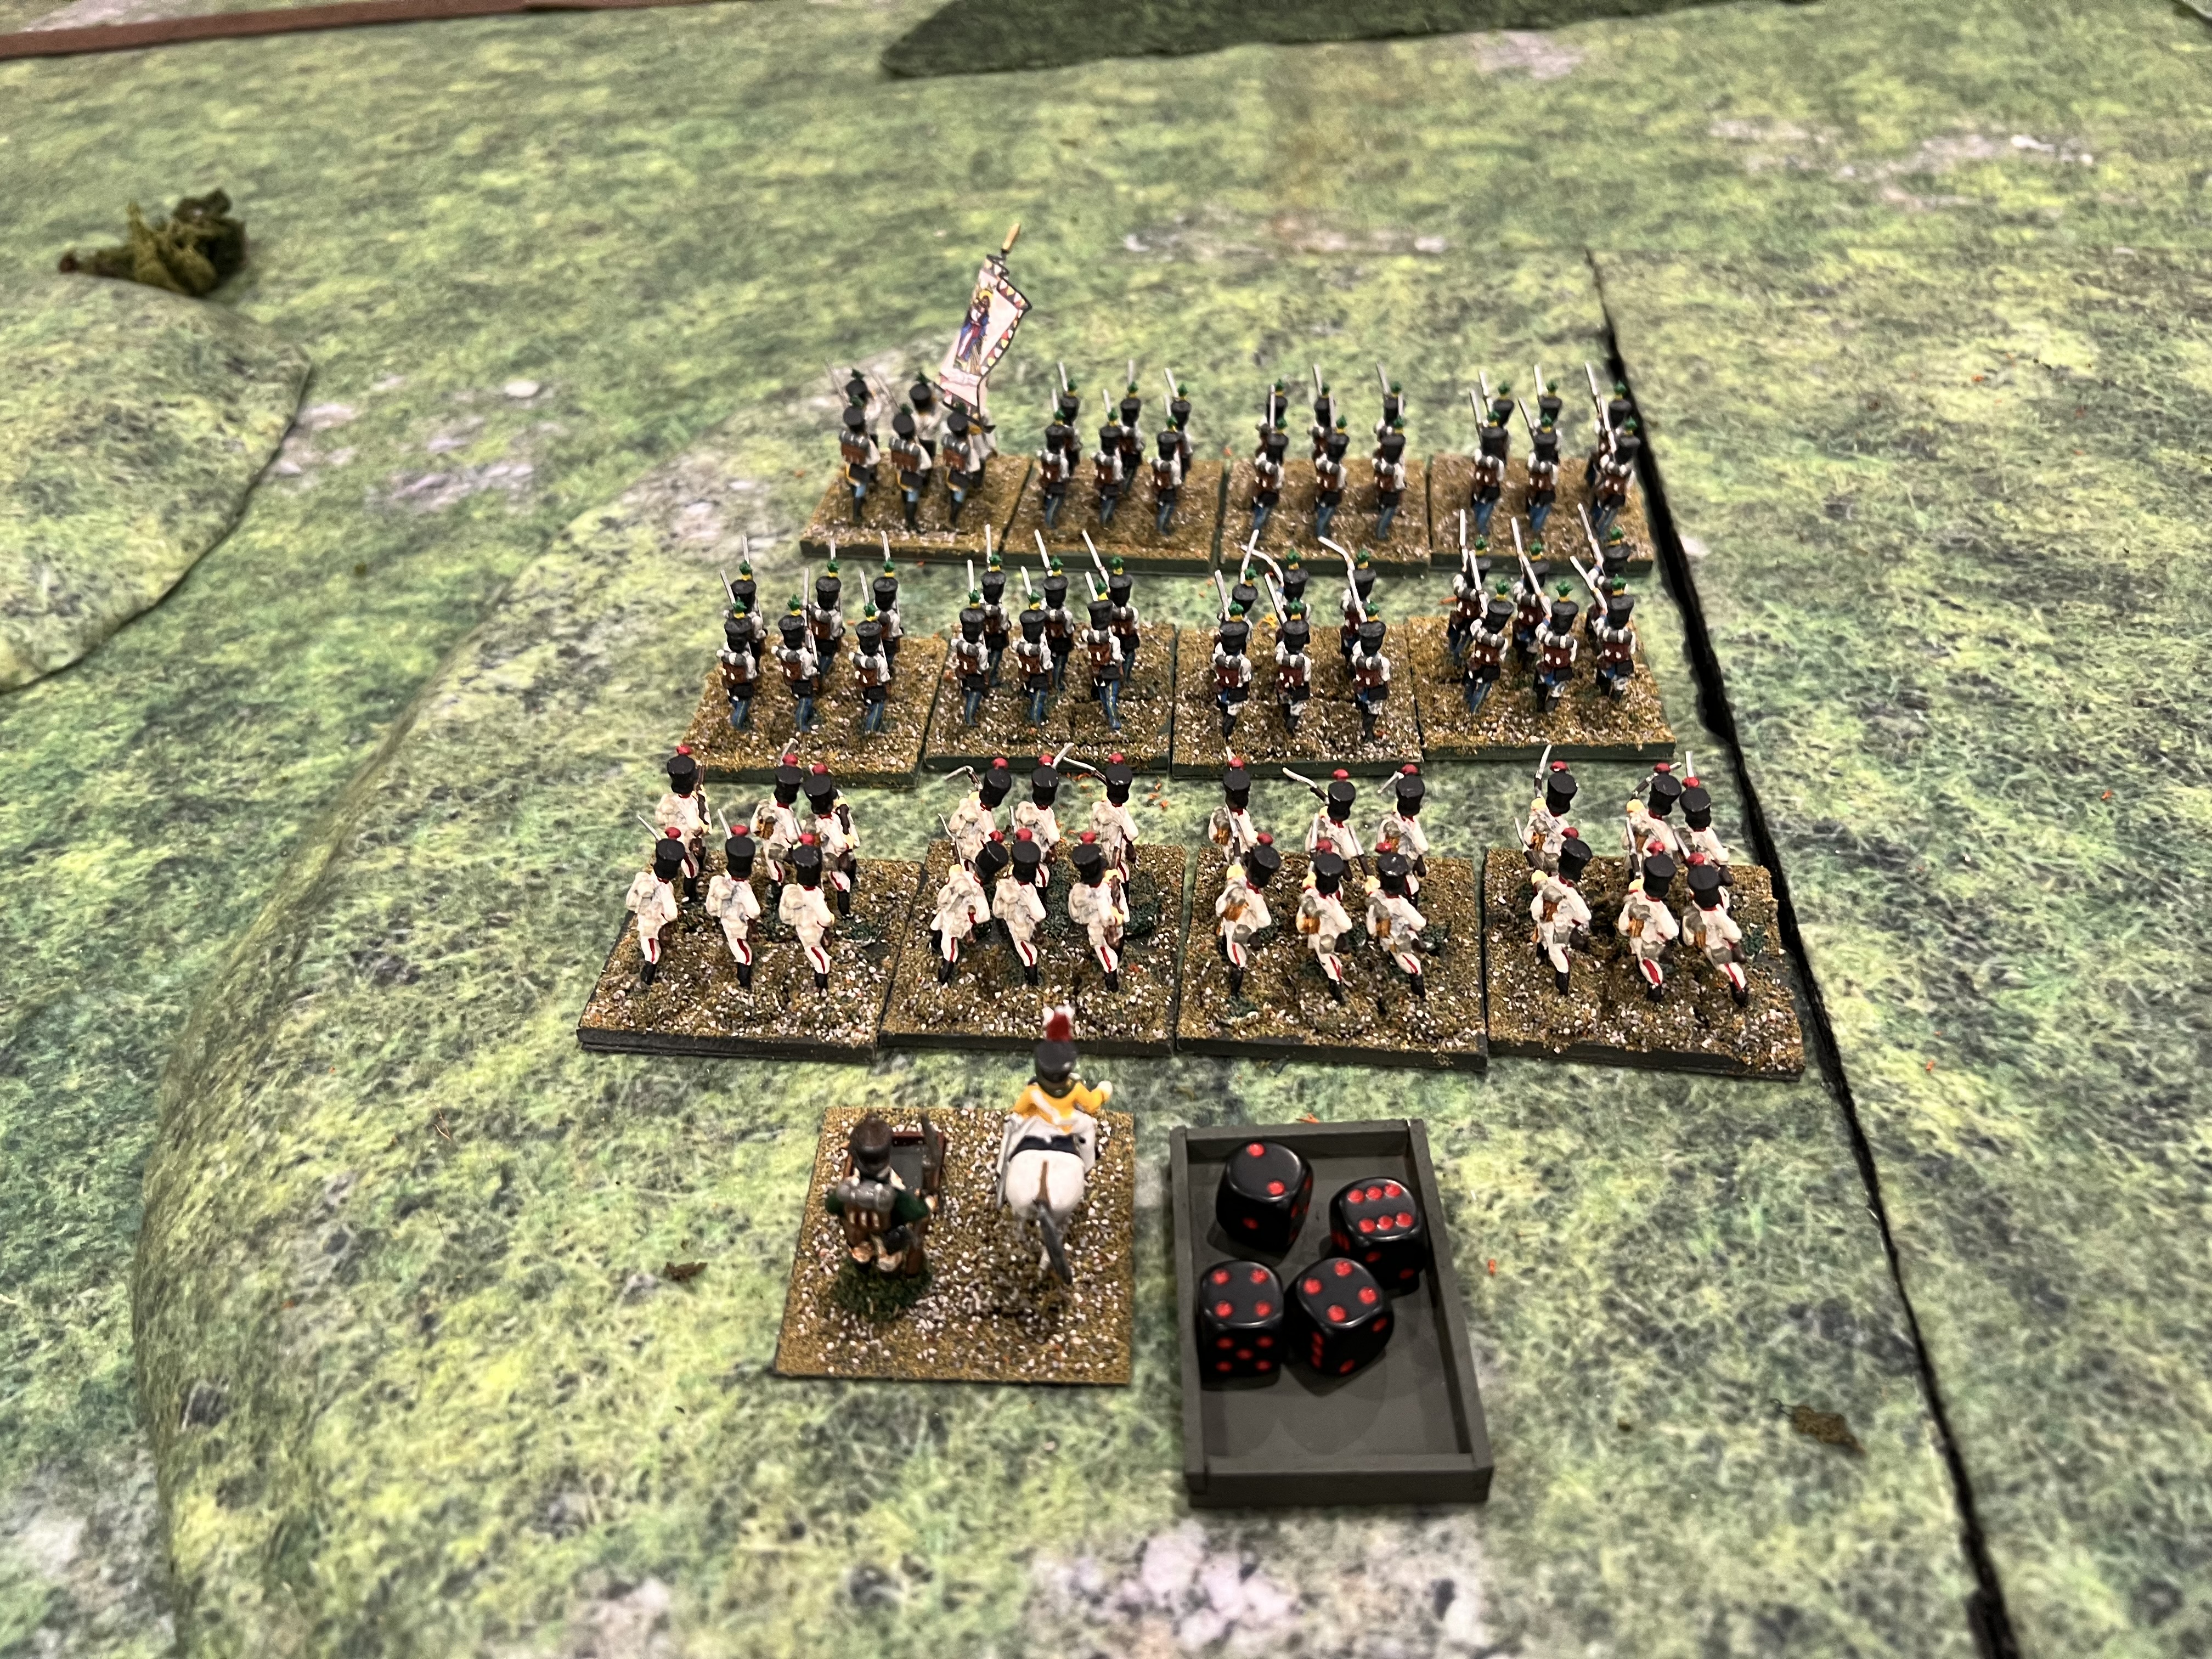
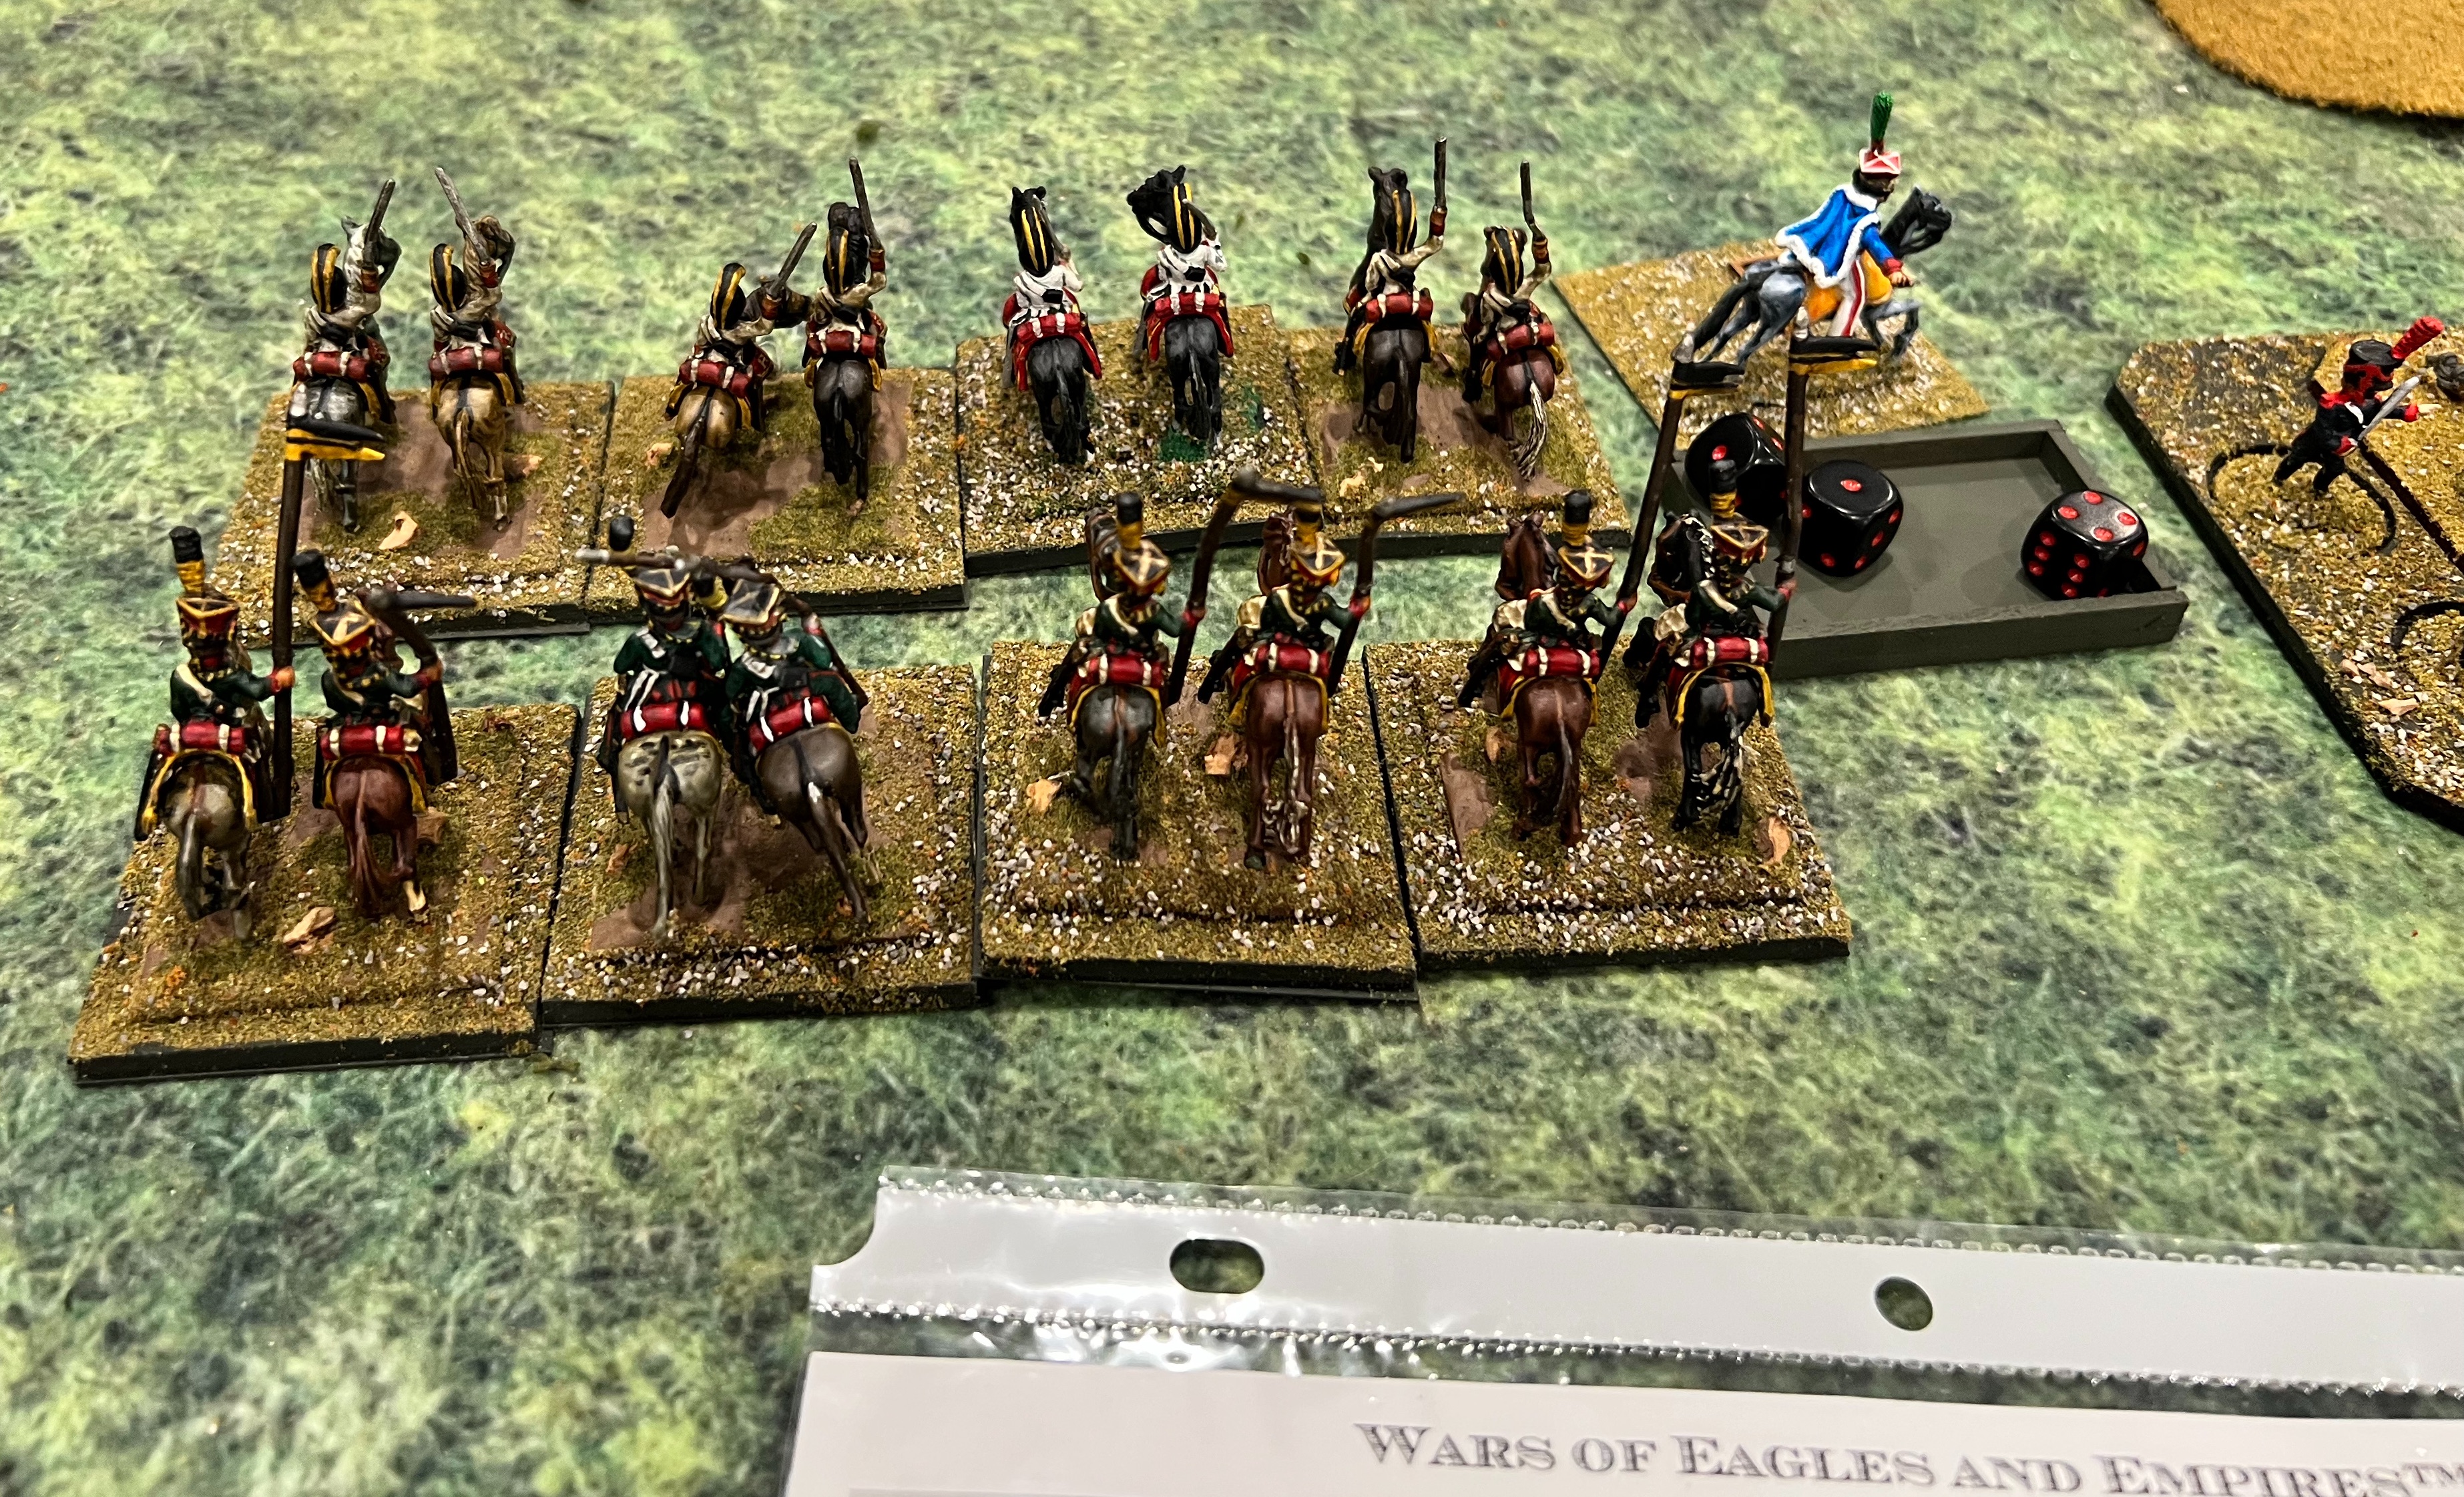
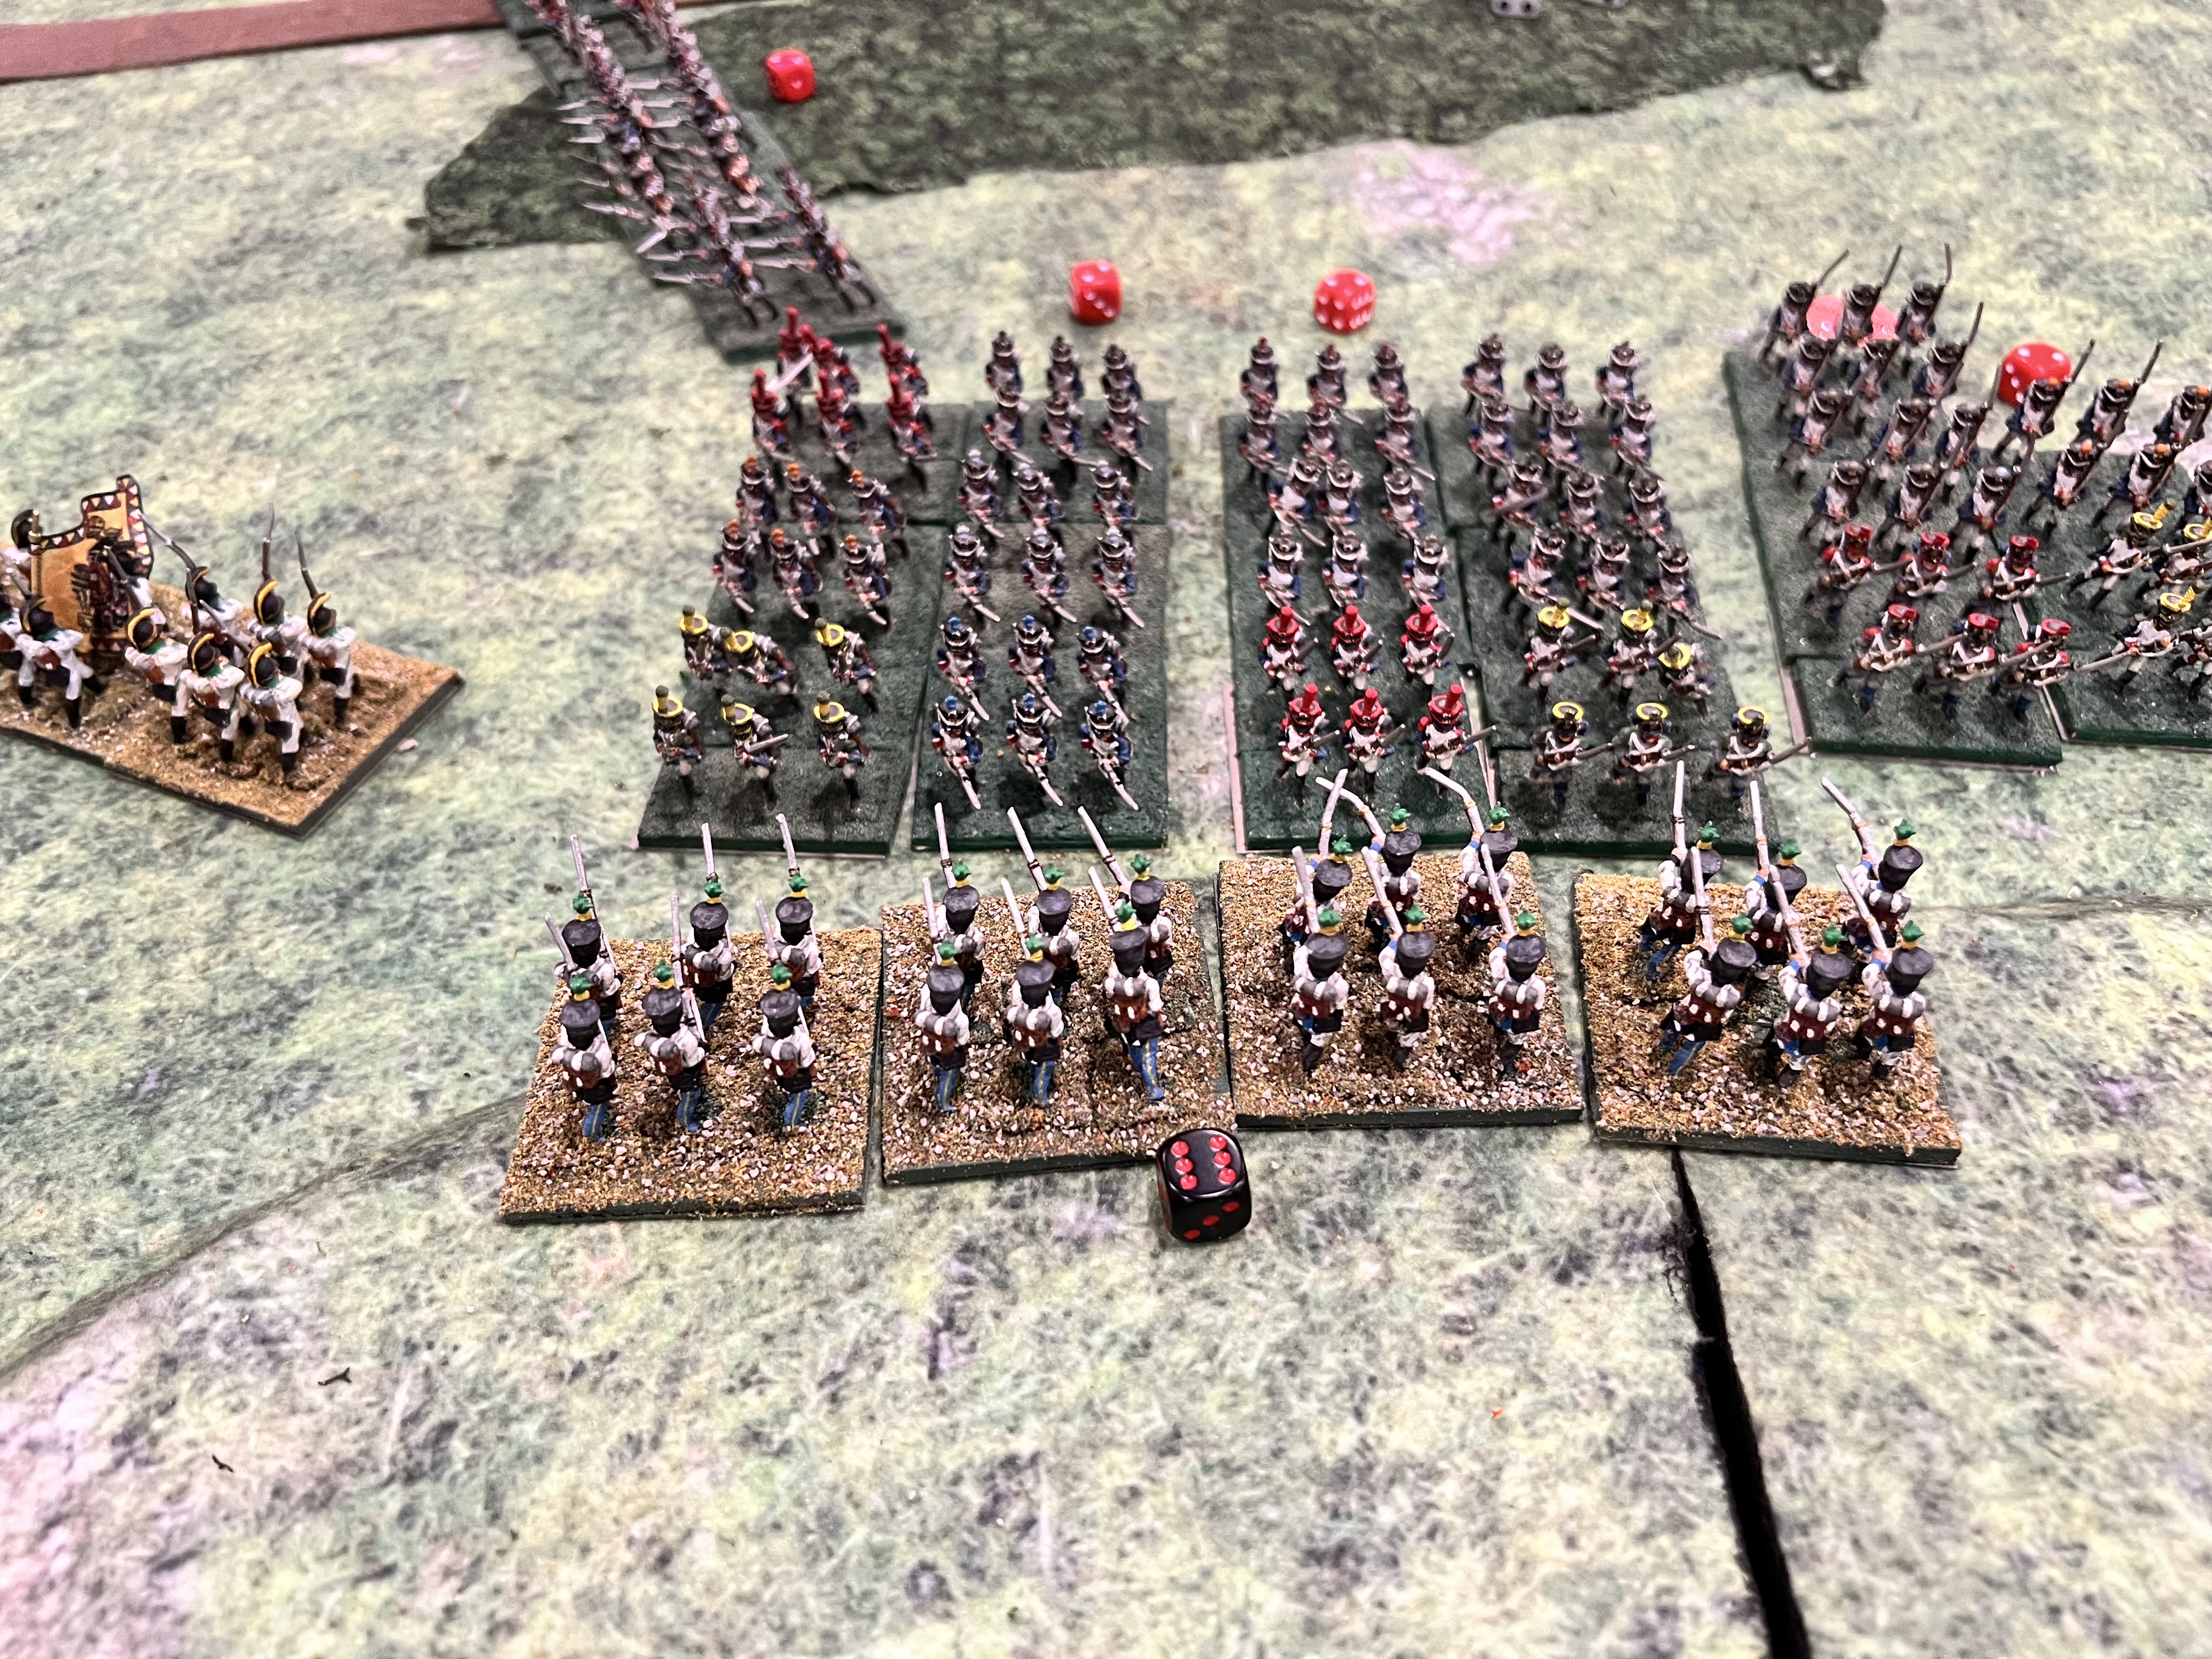
It was a fun game and I was on the Austrian side with two other young players (they were young anyways). The French players were not as aggressive as they probably had wanted to be, which allowed us to successfully defend the town.

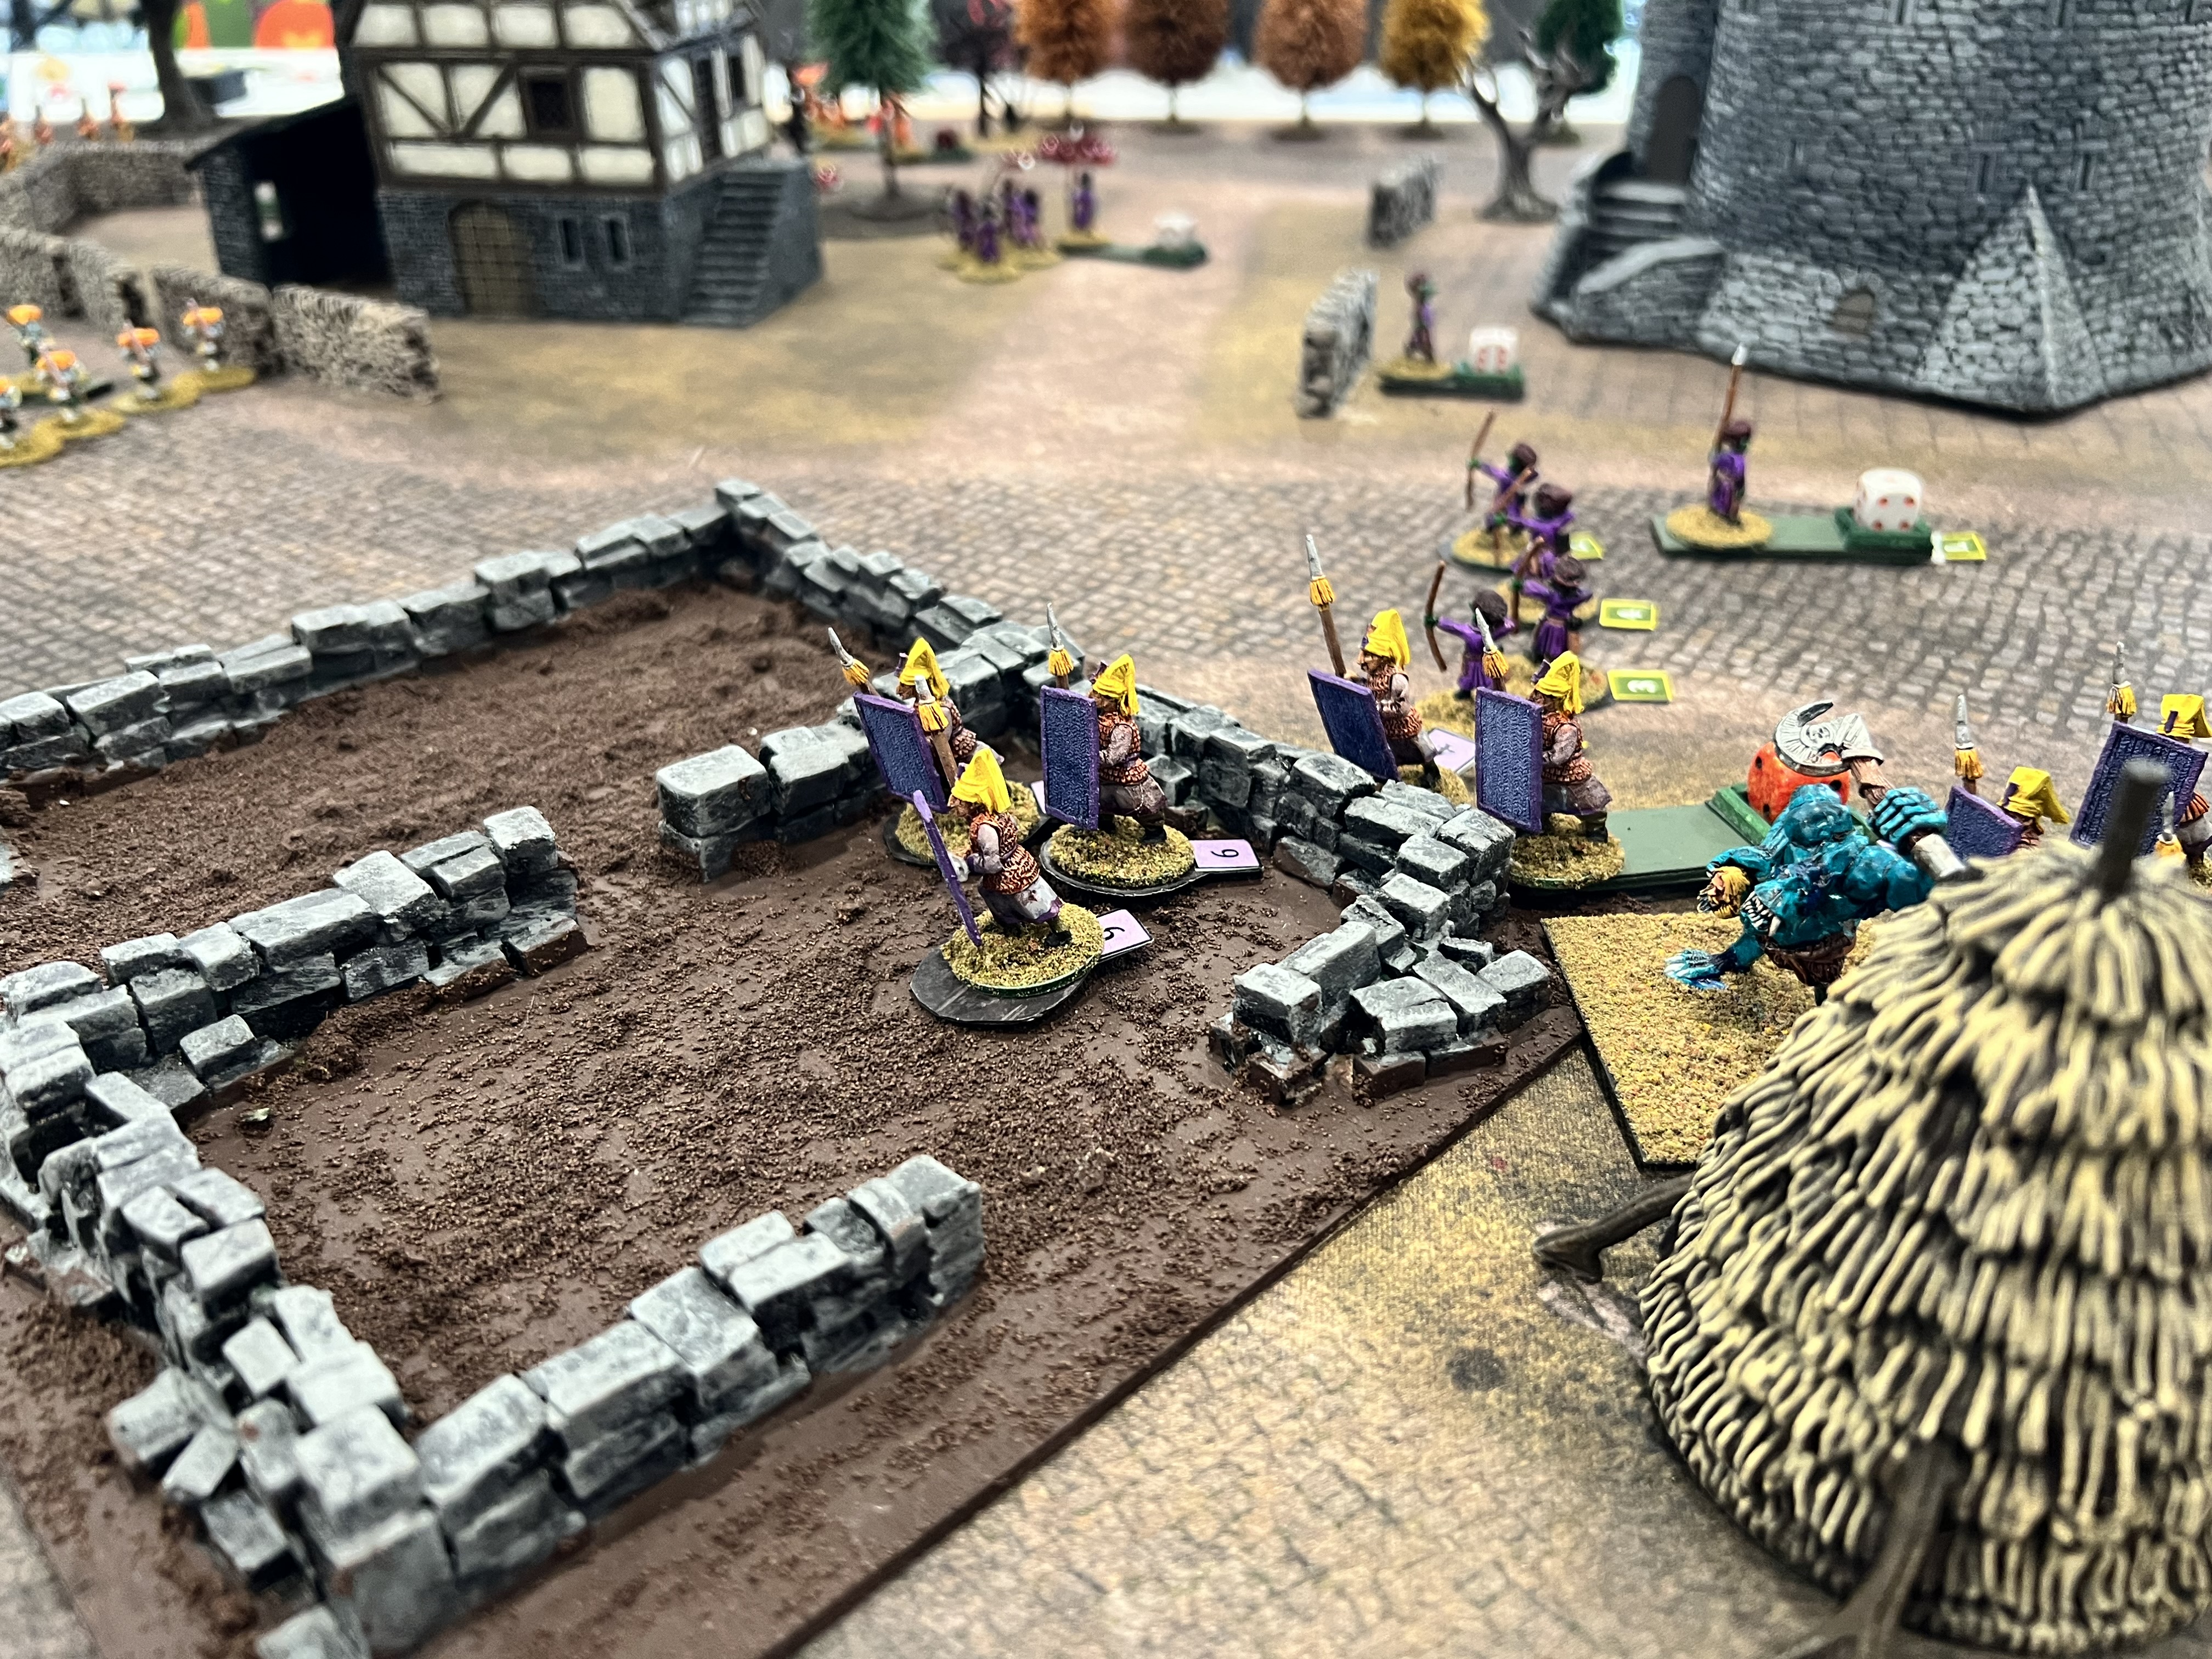
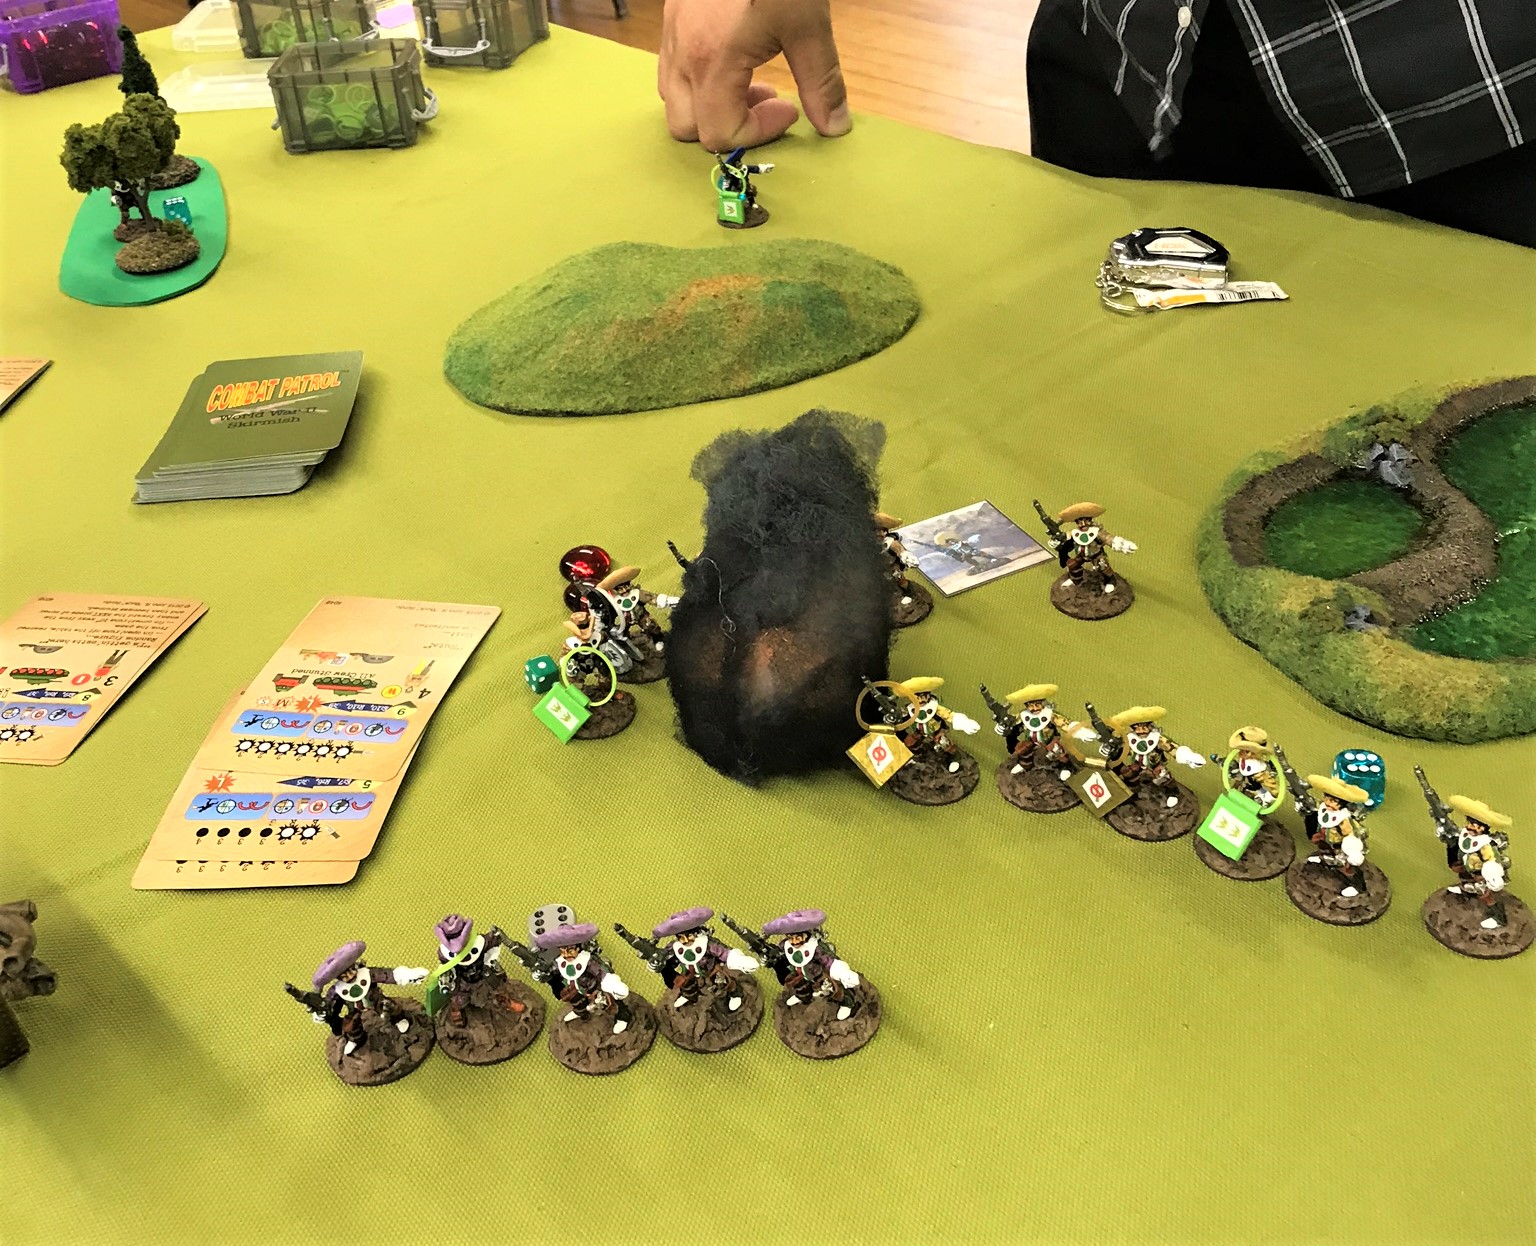
The Wicked Witch is Still Trying to Get Dorothy’s Slippers (Feudal Patrol using Wars of Ozz figures)

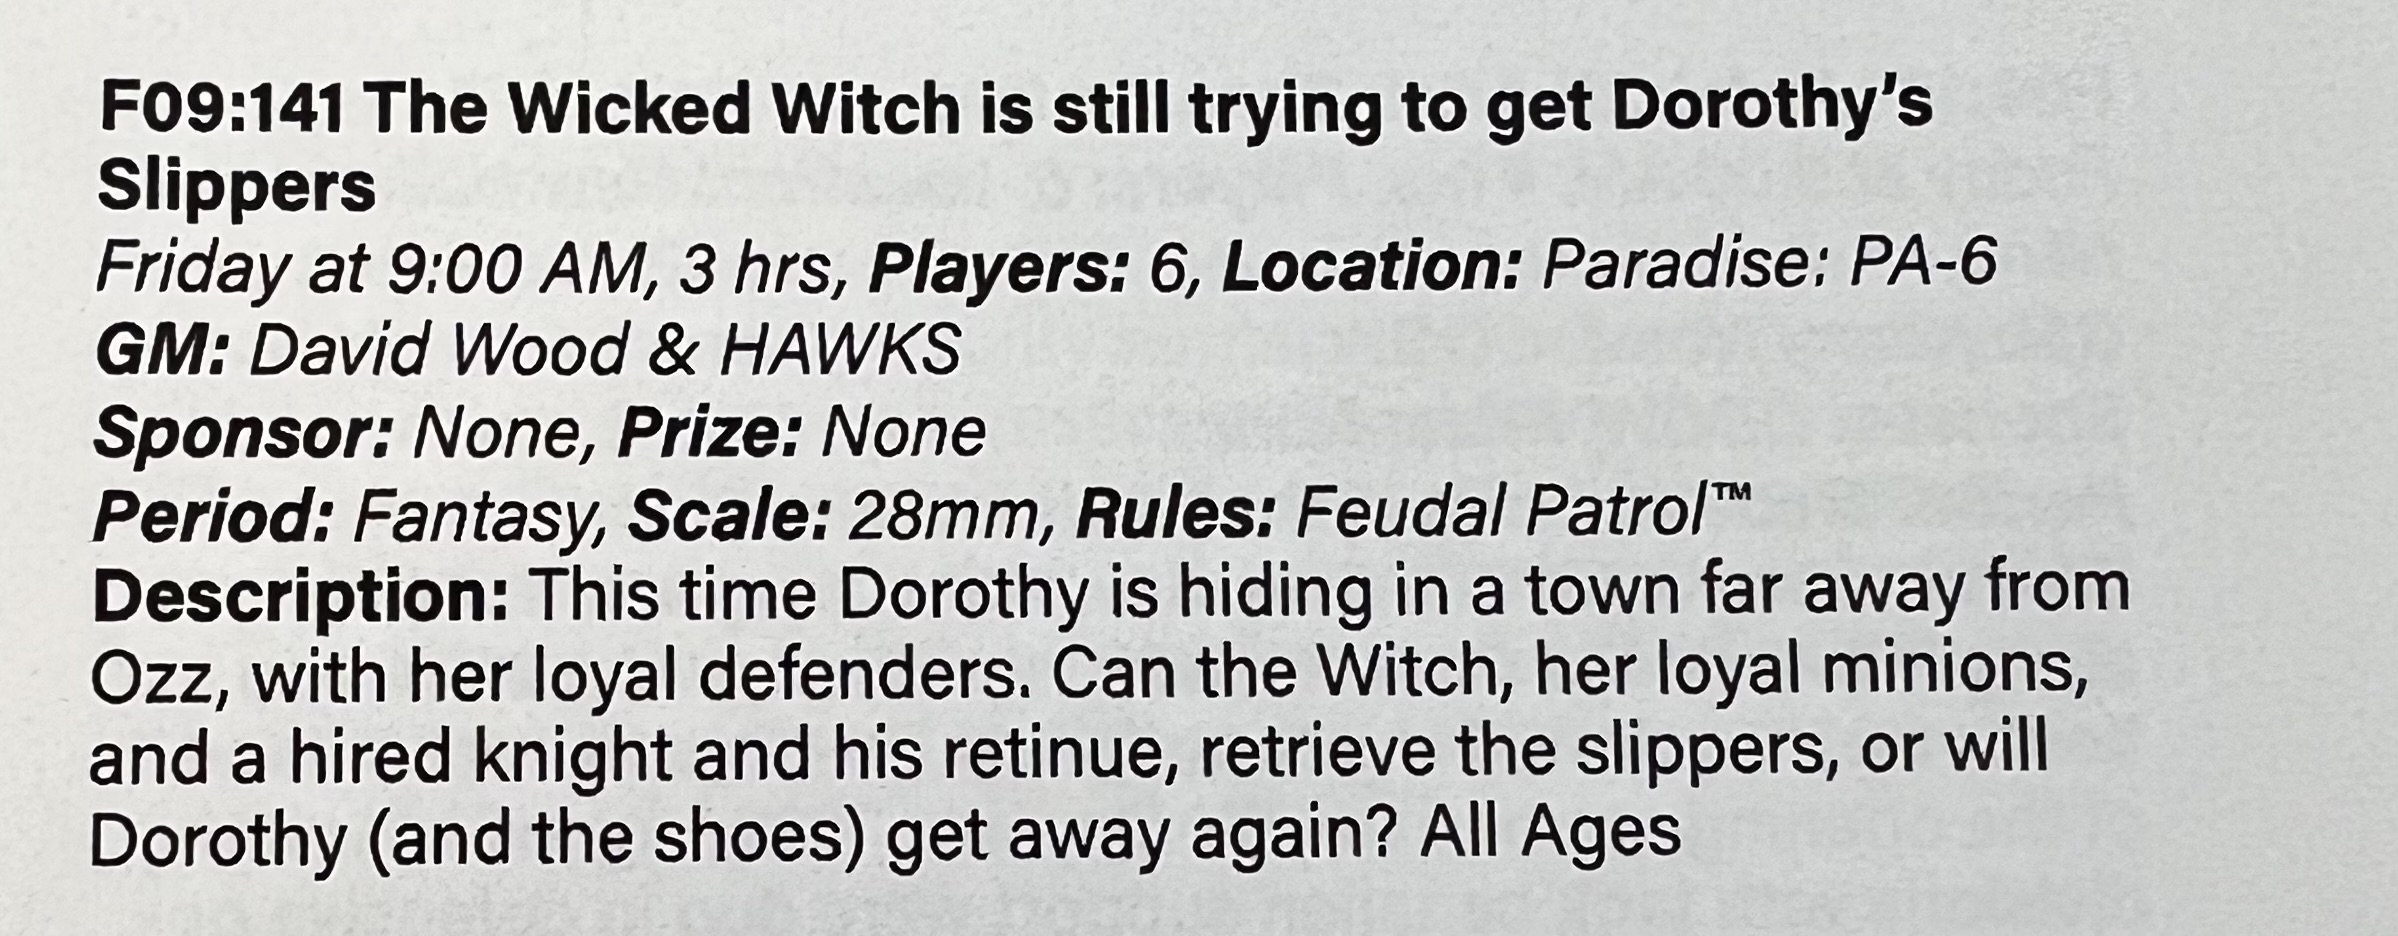
This was a fun opportunity to jump in a Feudal Patrol game with my old USMA roommate Dave. Dave does a great job as a GM and even won a PELA award at Cold Wars for his Zulu game. Dave uses 28mm Wars of Ozz figures in a skirmish game using Feudal Patrol rules. I played on the Winkie side and we were able to take Dorothy down and get those valuable slippers!

After this game, I hit the vendors hall and got some lunch. Then I took the rest of the afternoon time to set up my Friday evening Wars of Ozz game. – “The Great Munchkin Heist“.

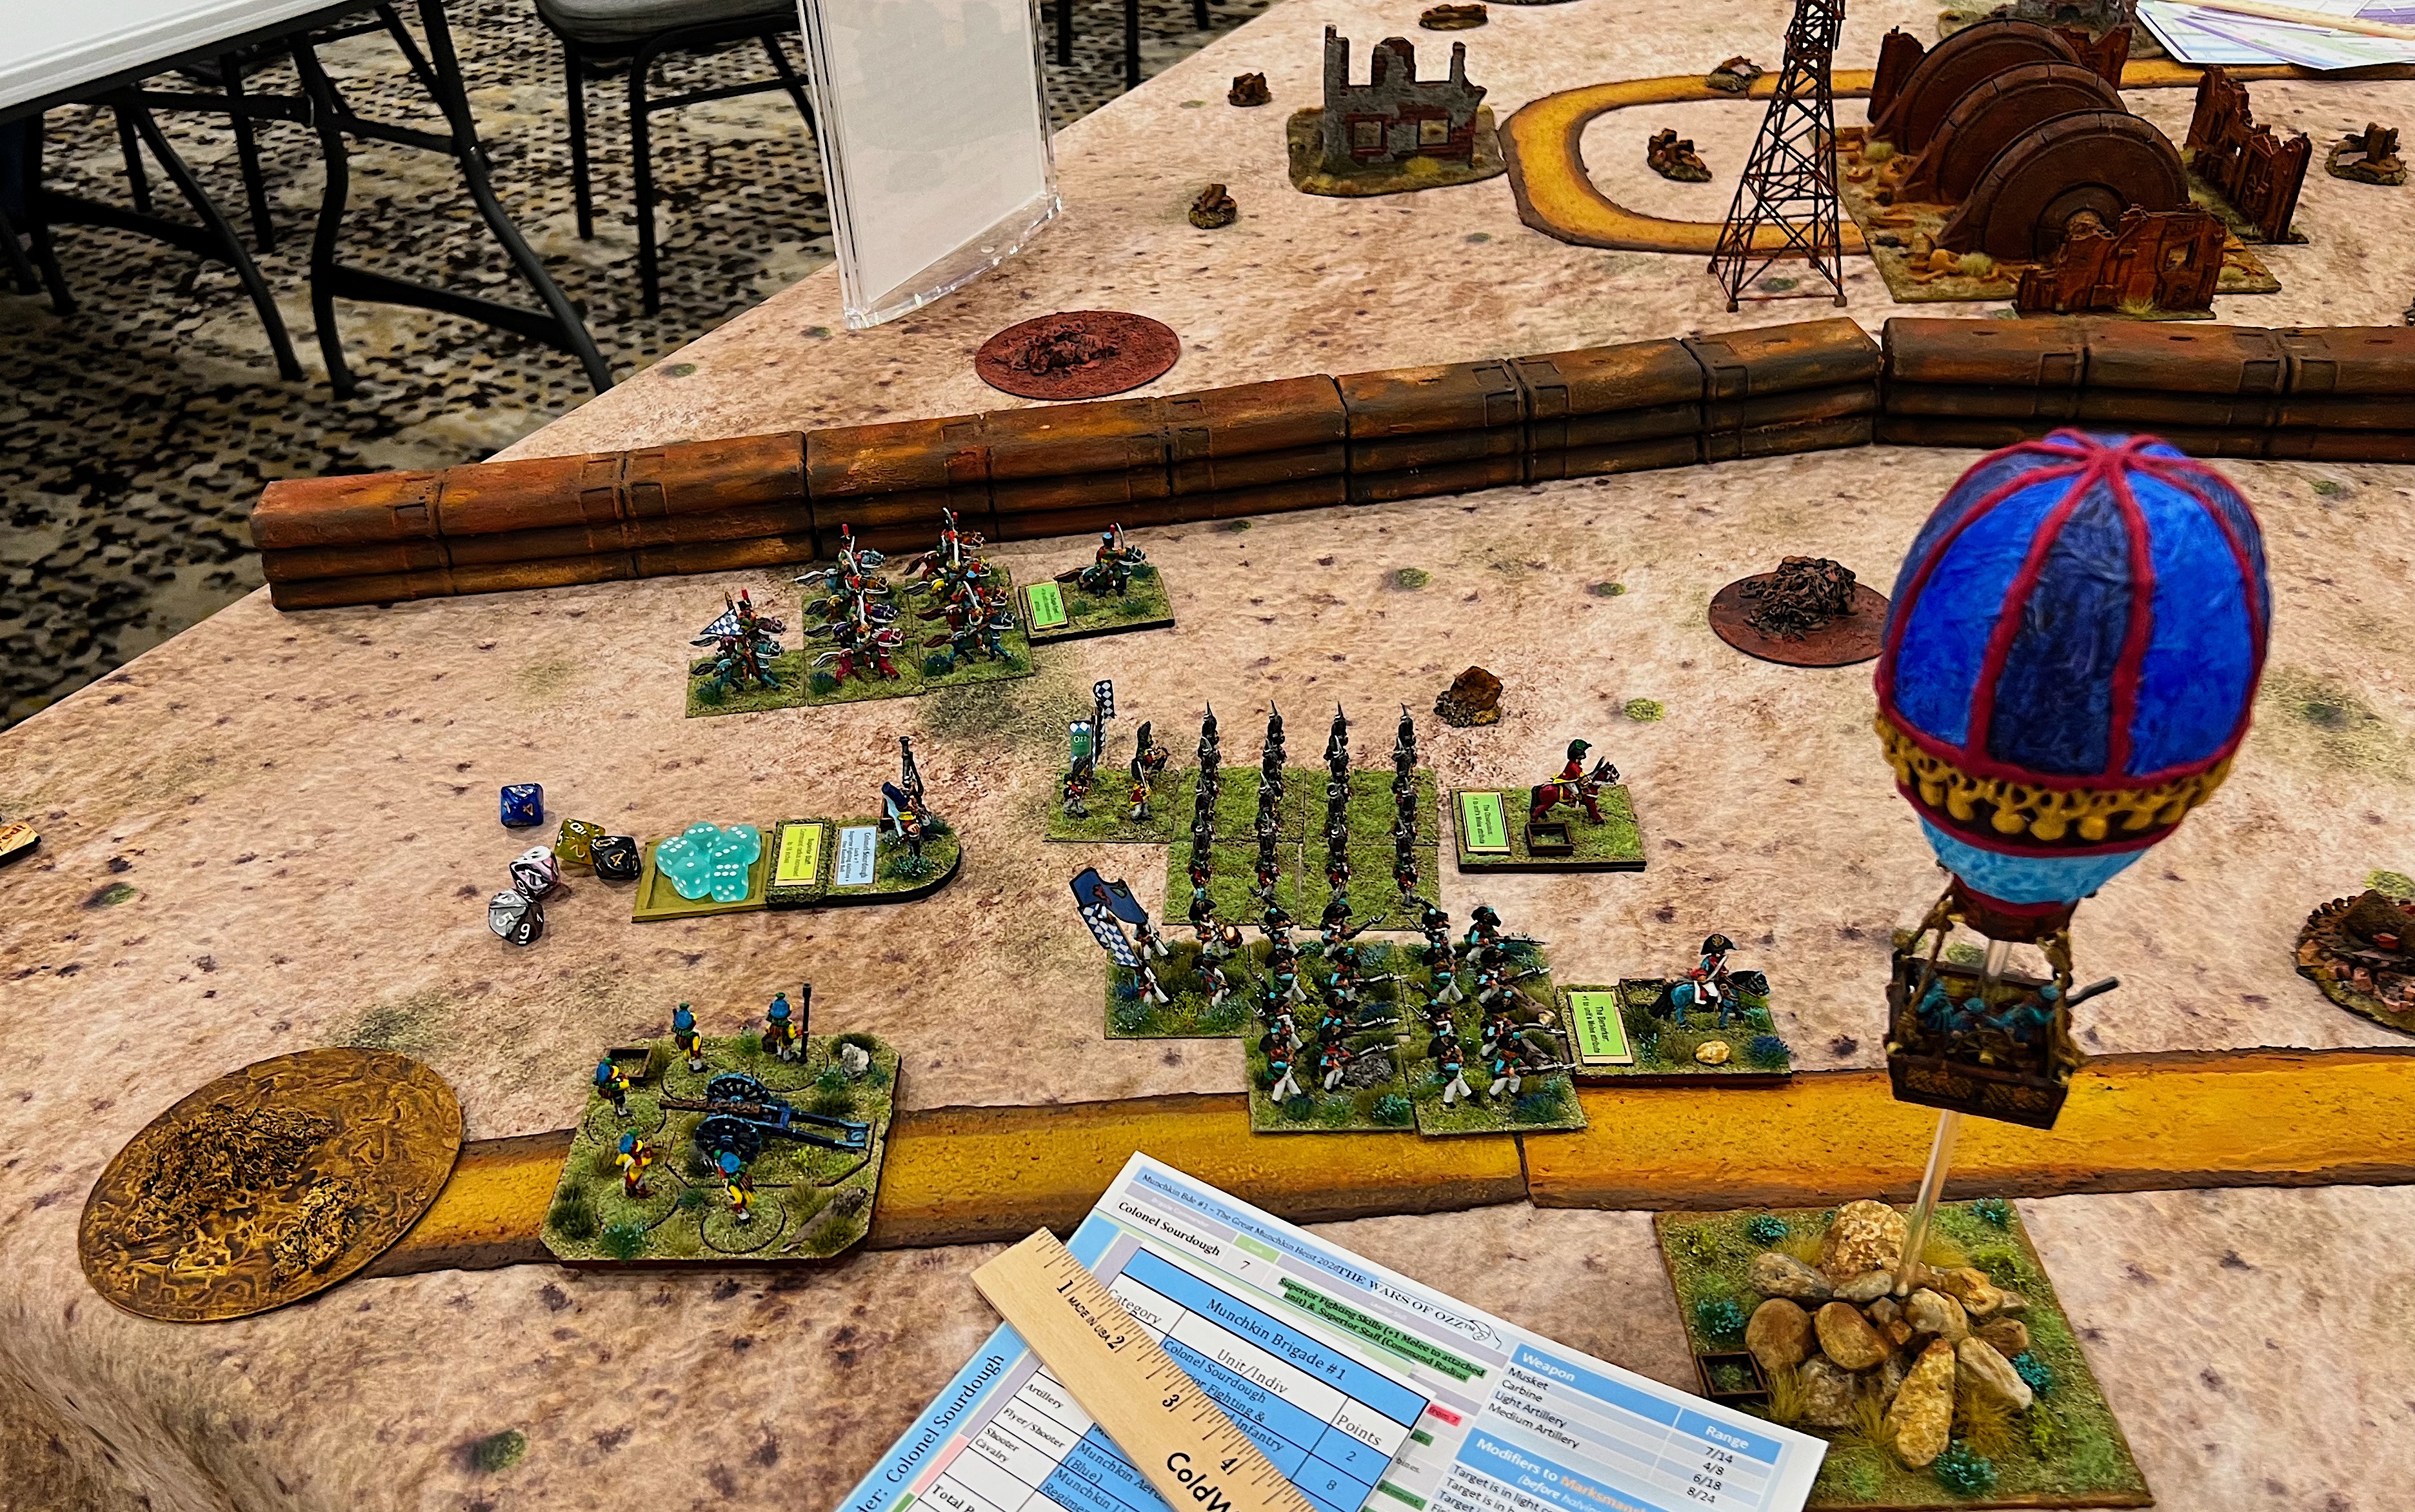
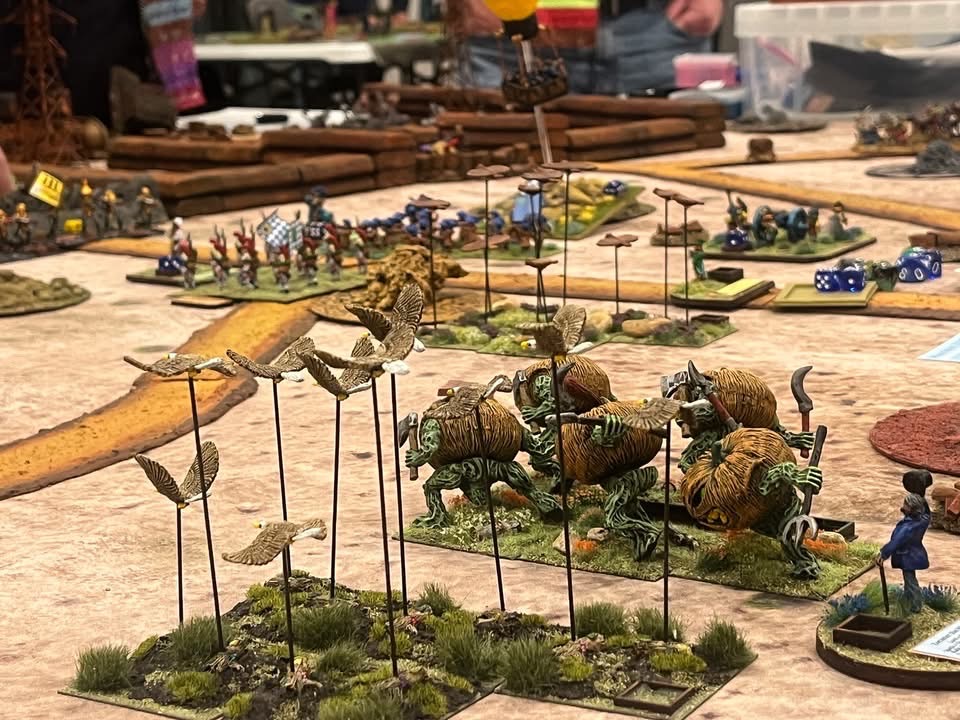
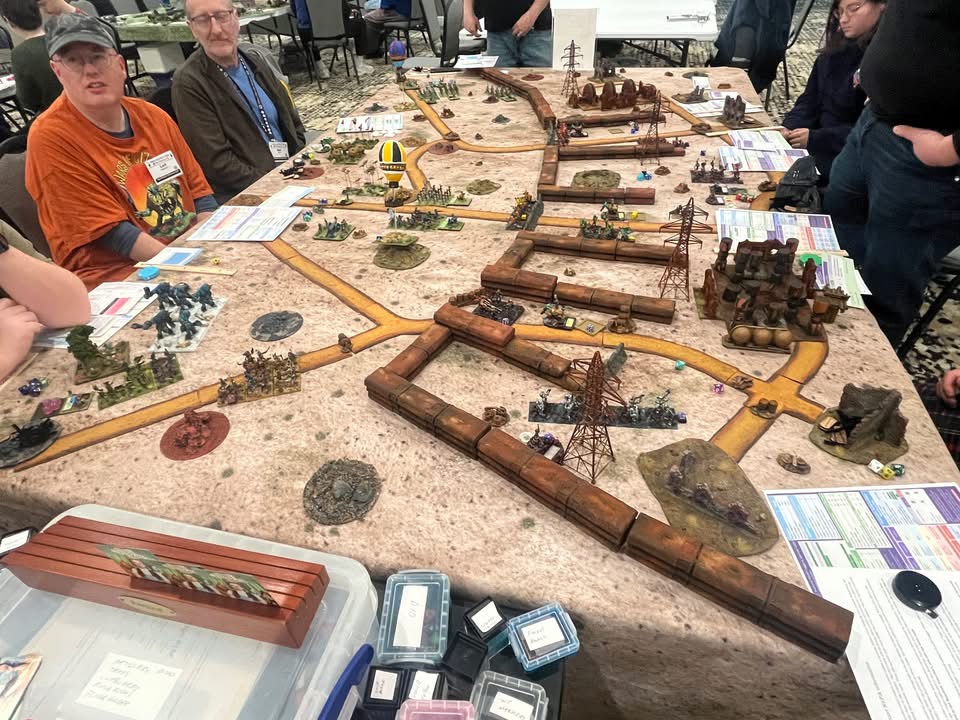
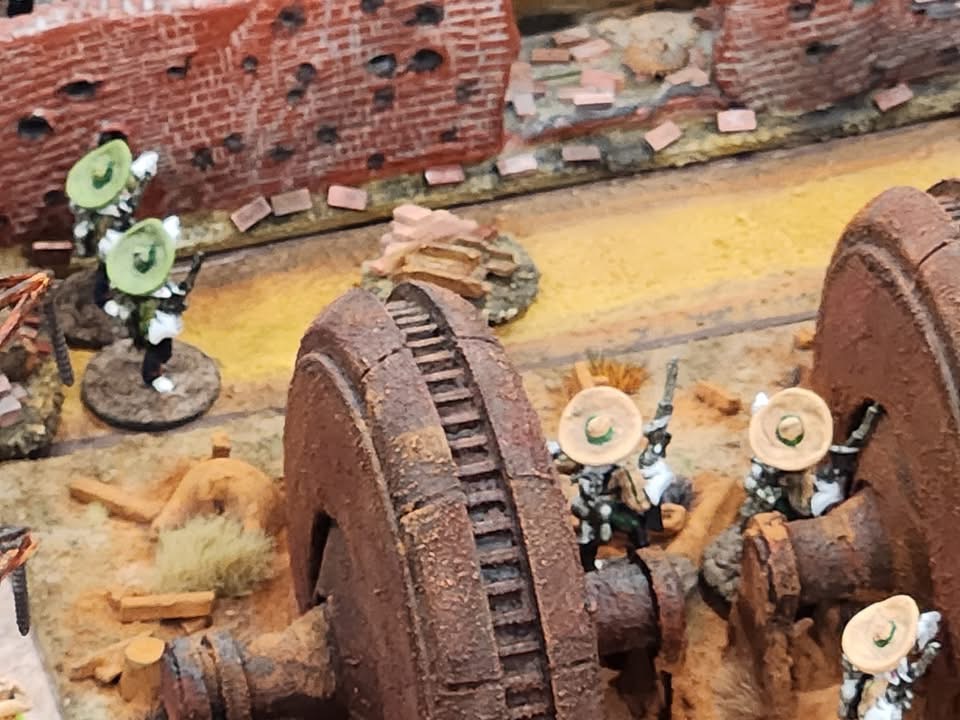
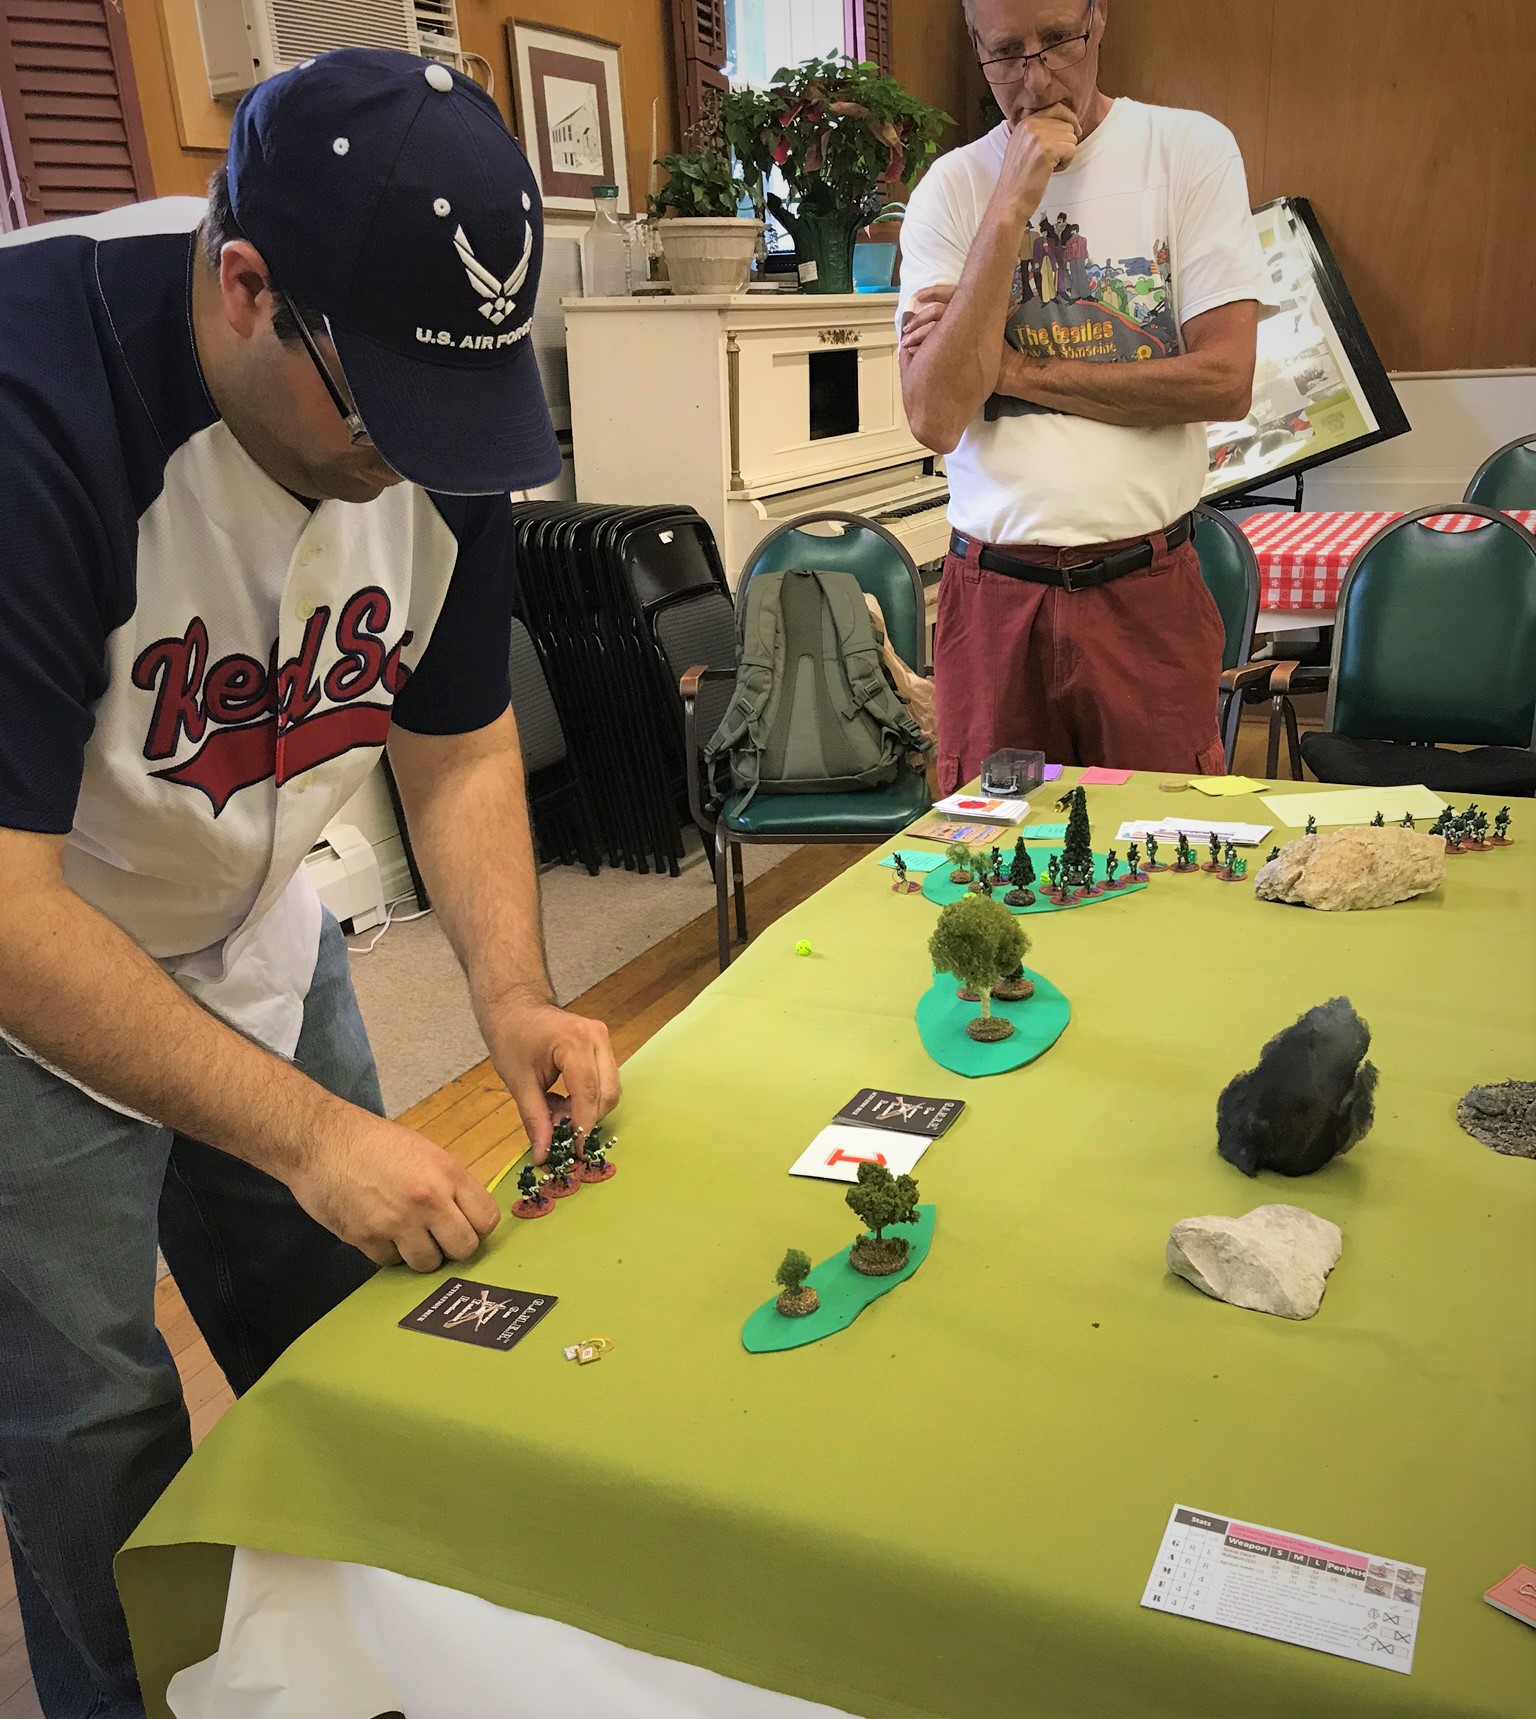
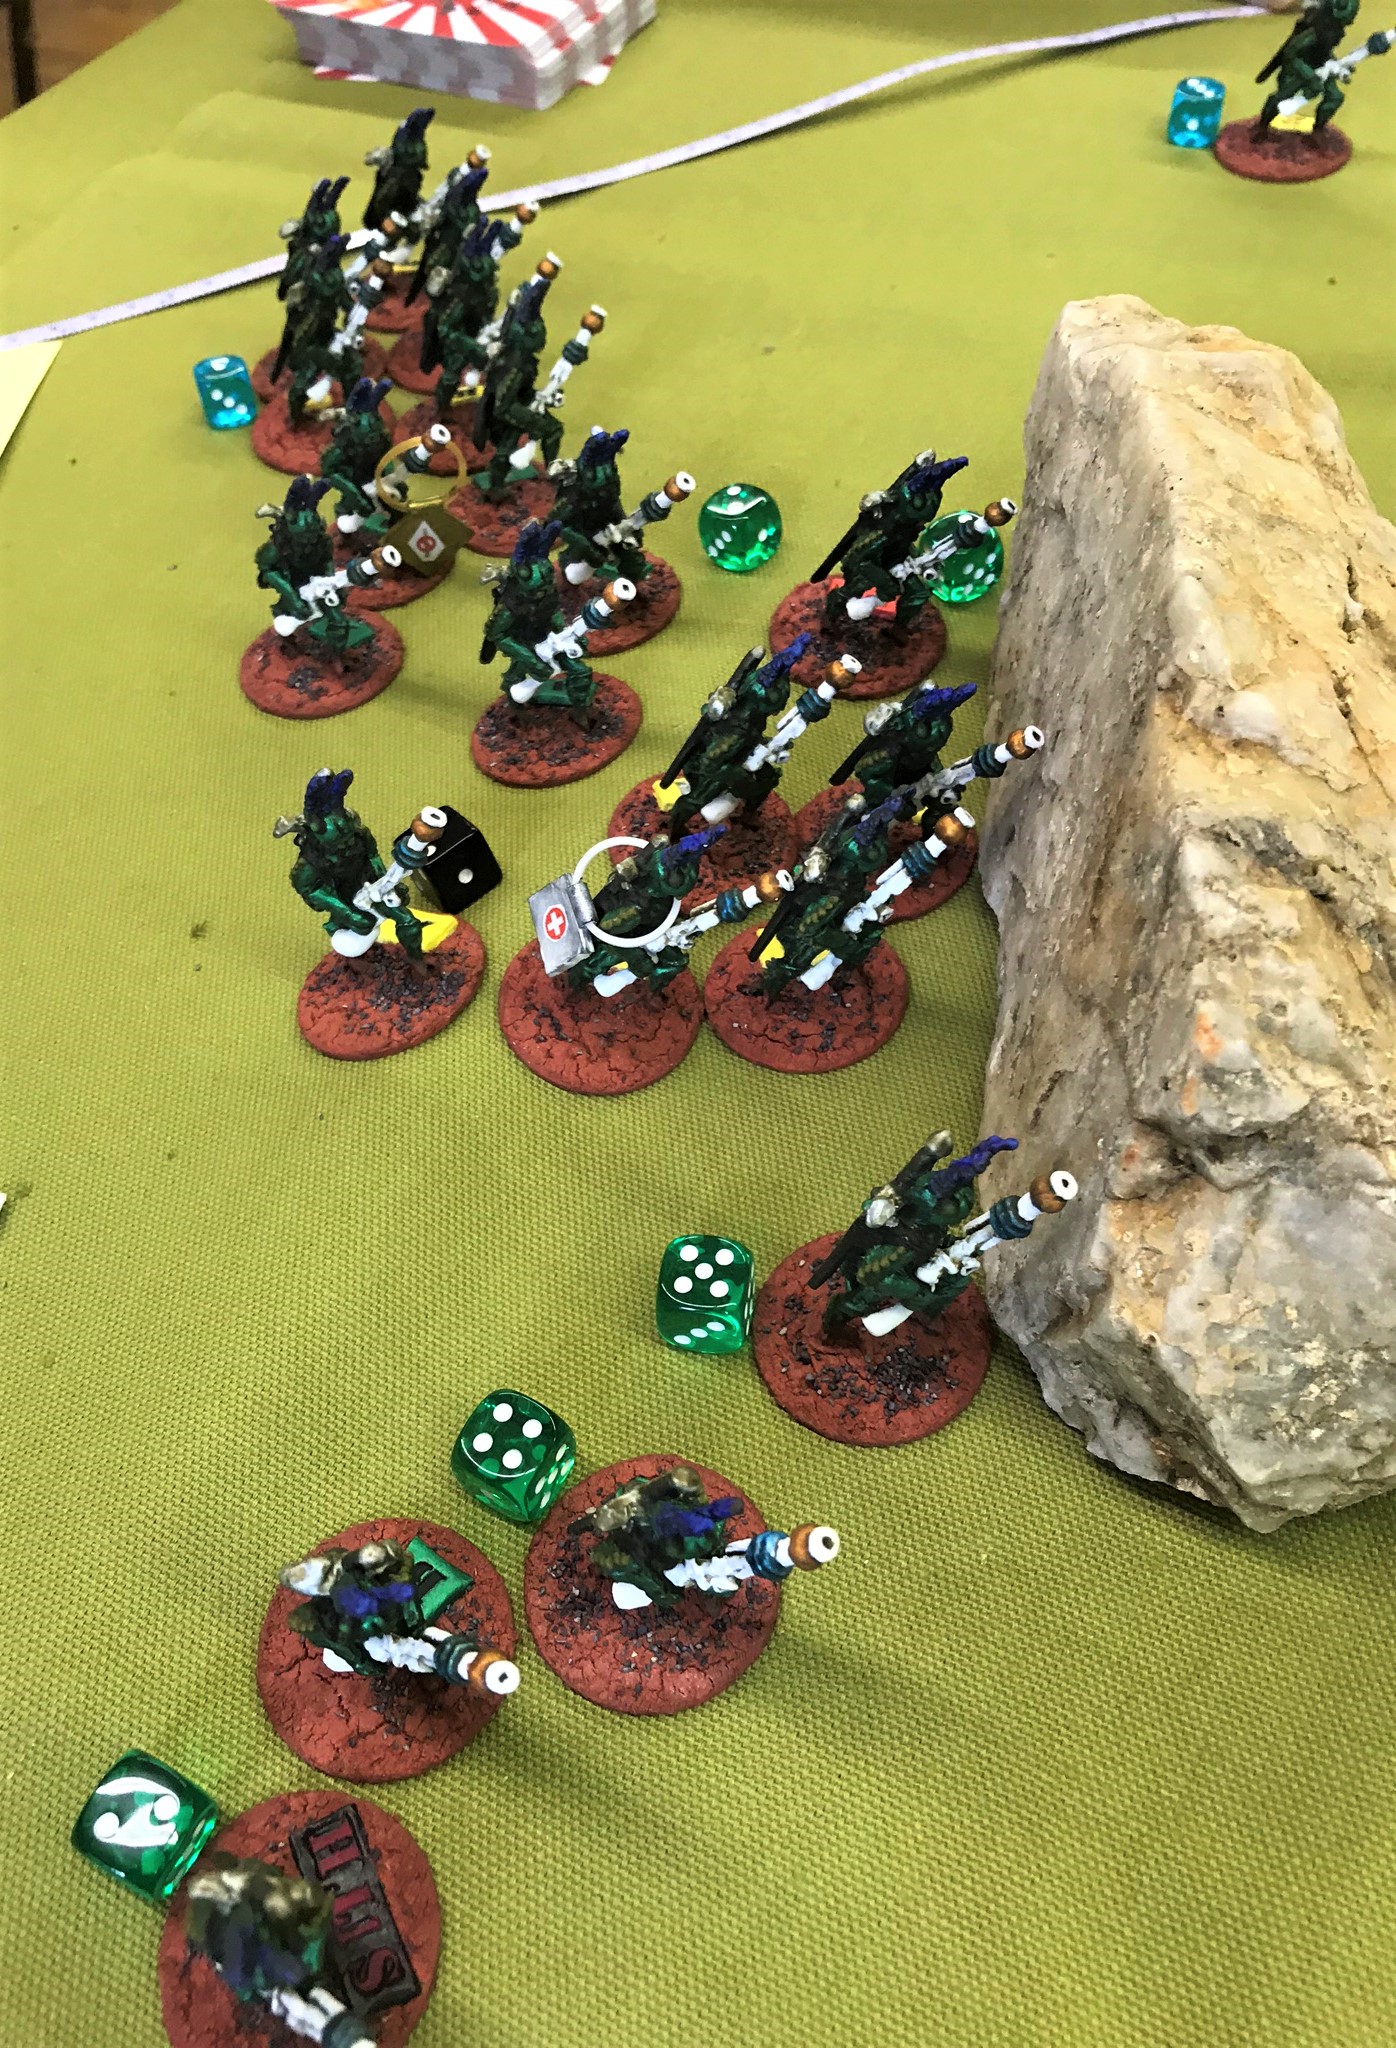
The Great Munchkin Heist (Wars of Ozz)

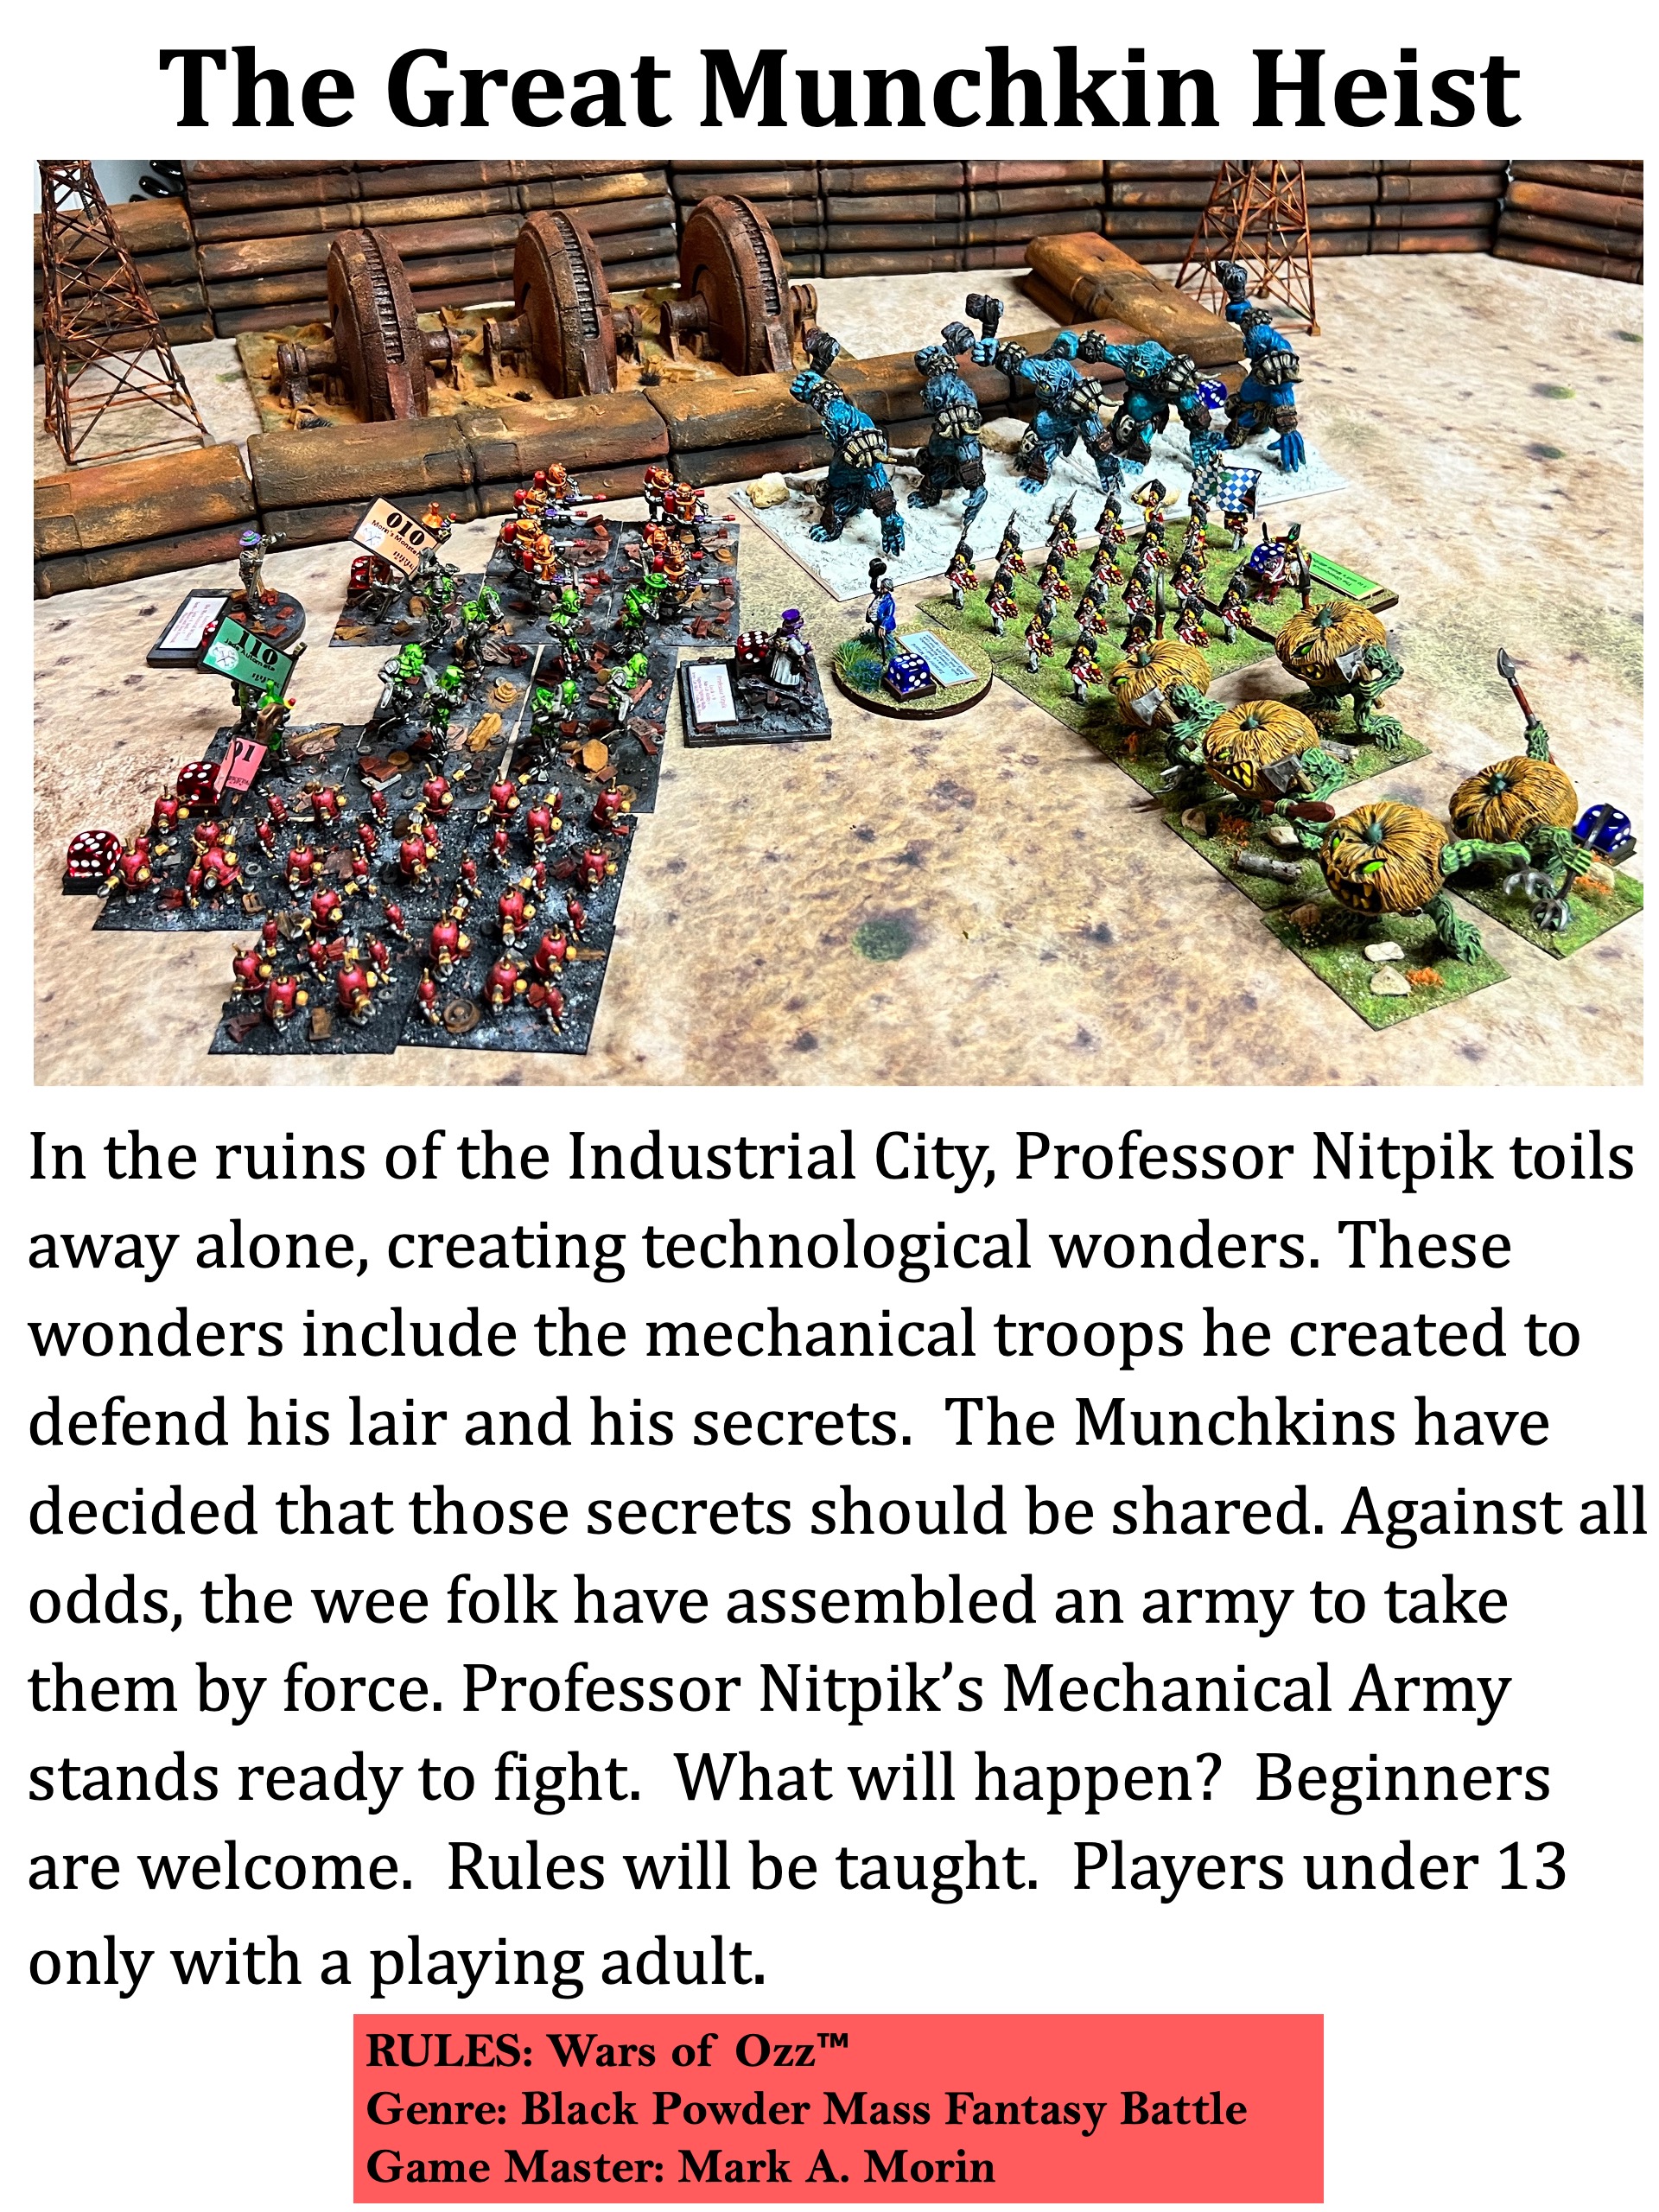
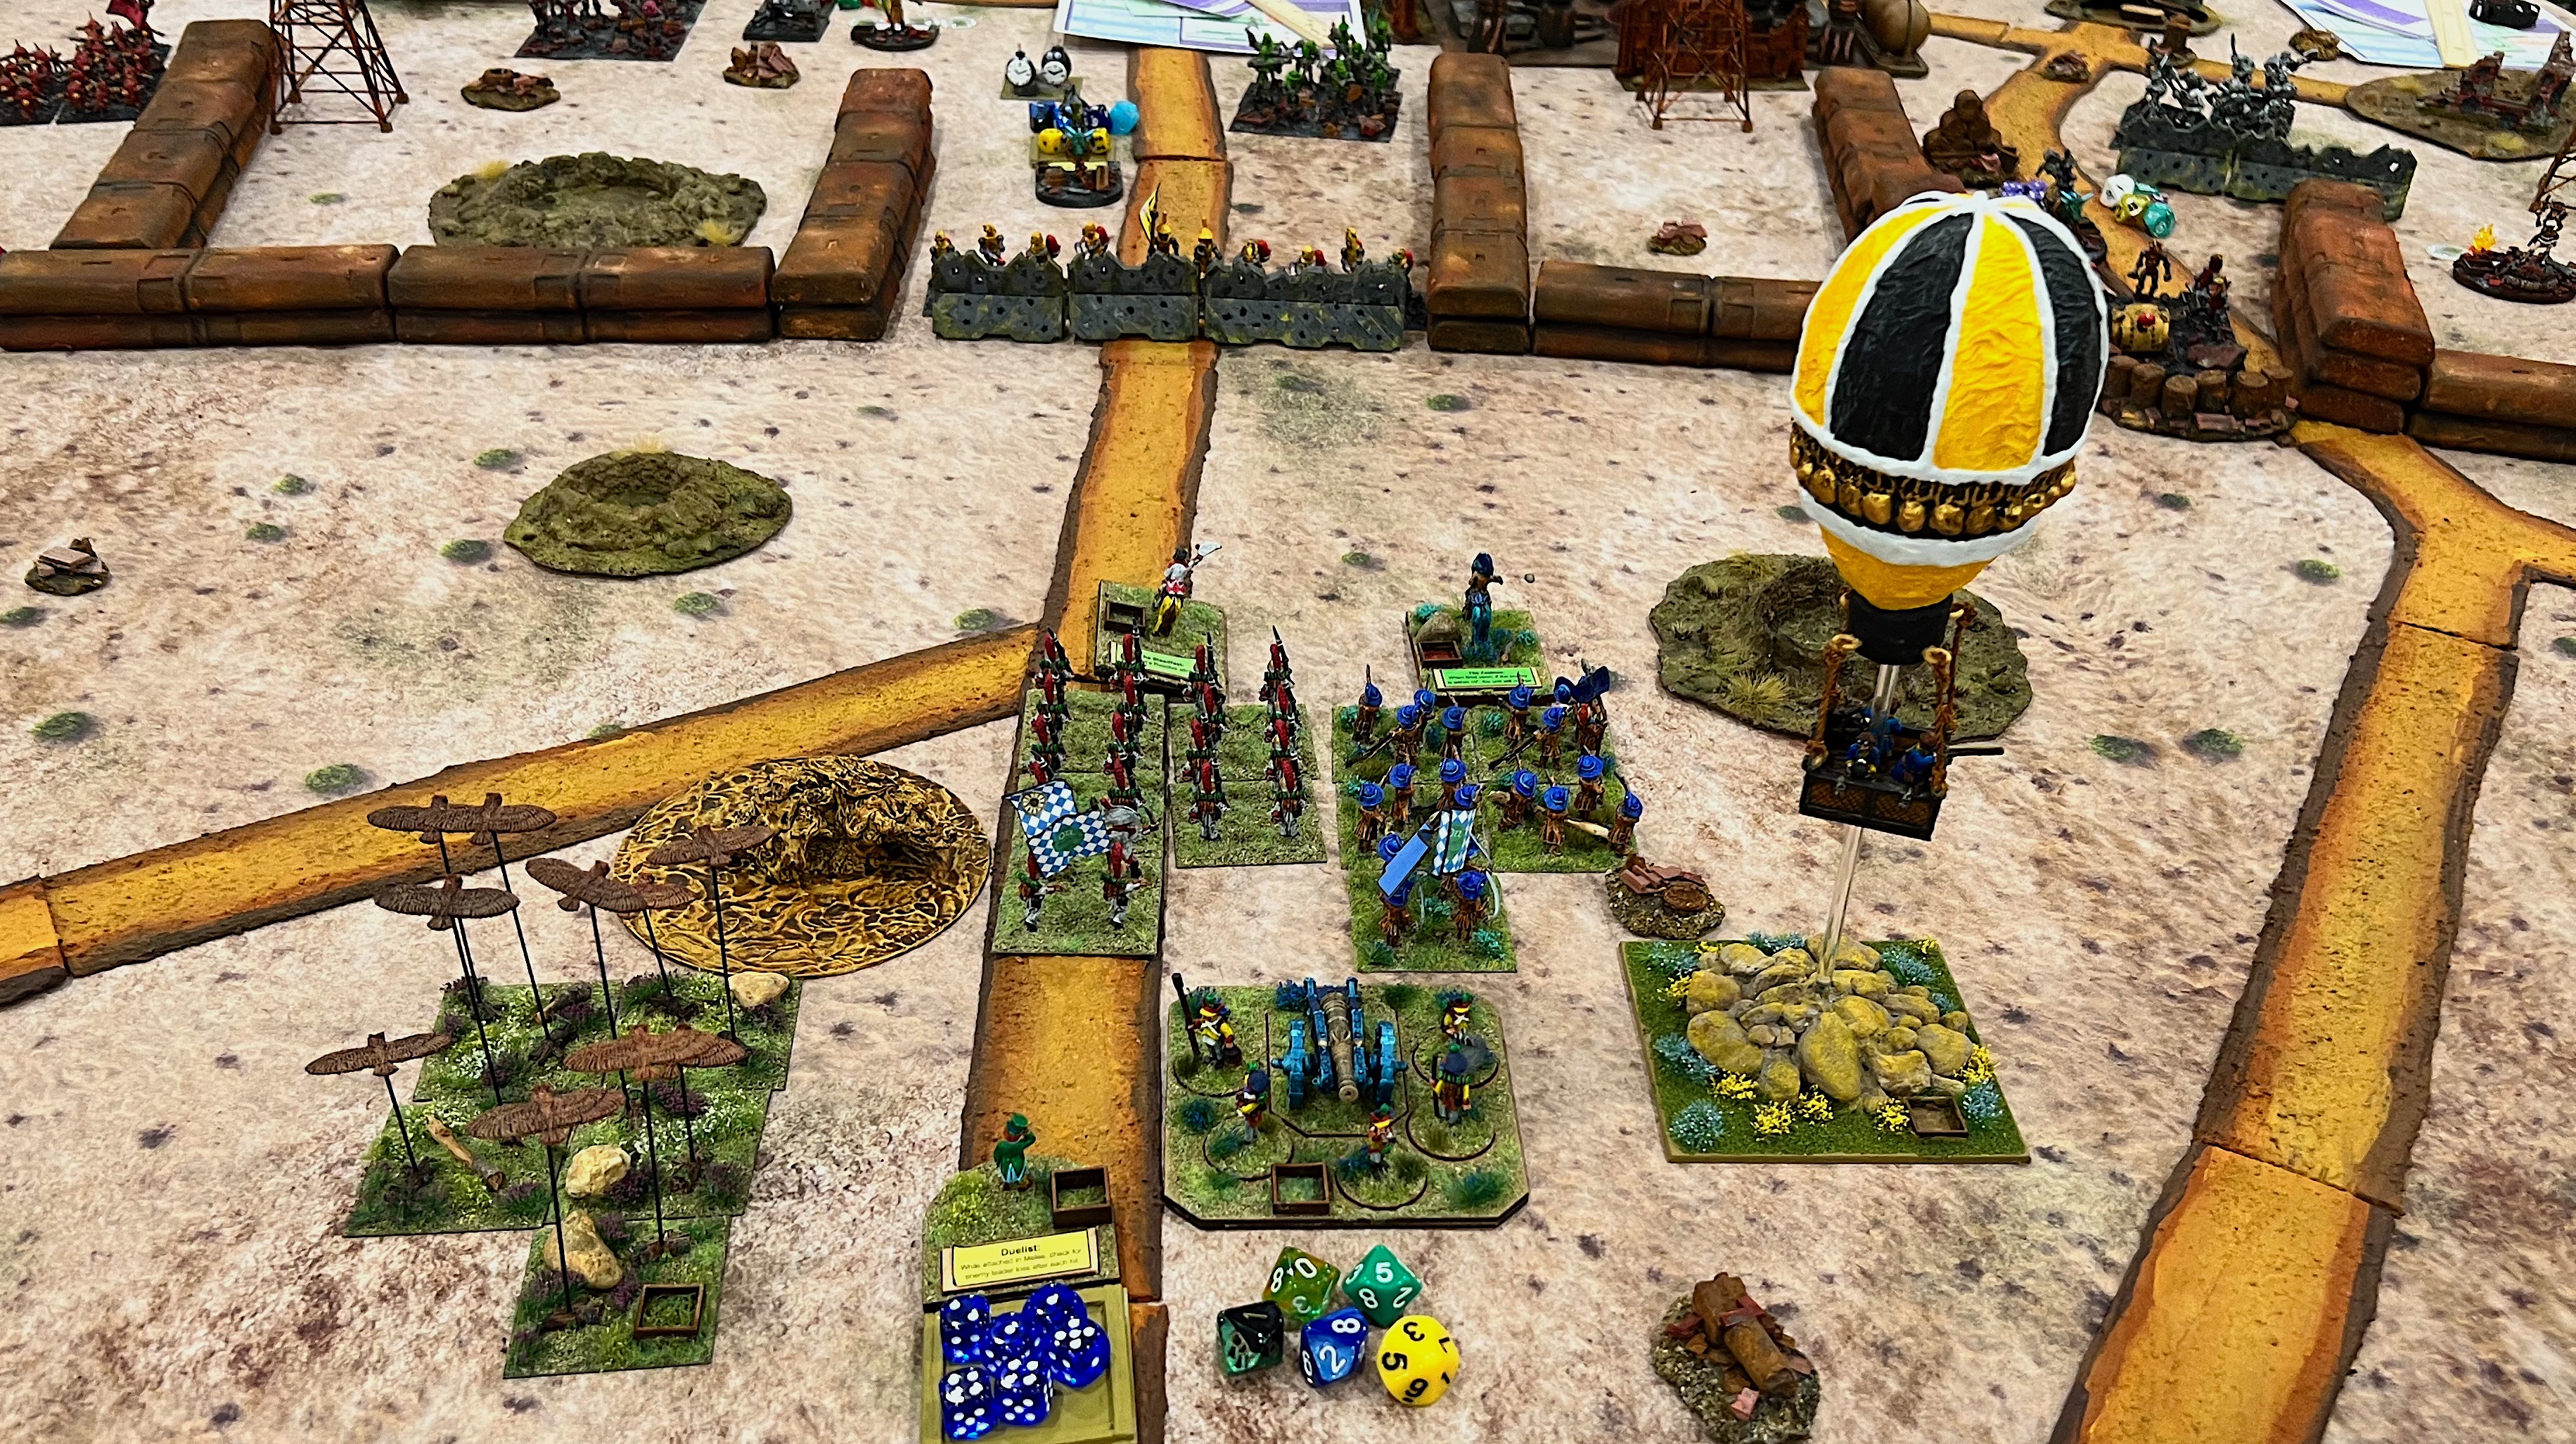
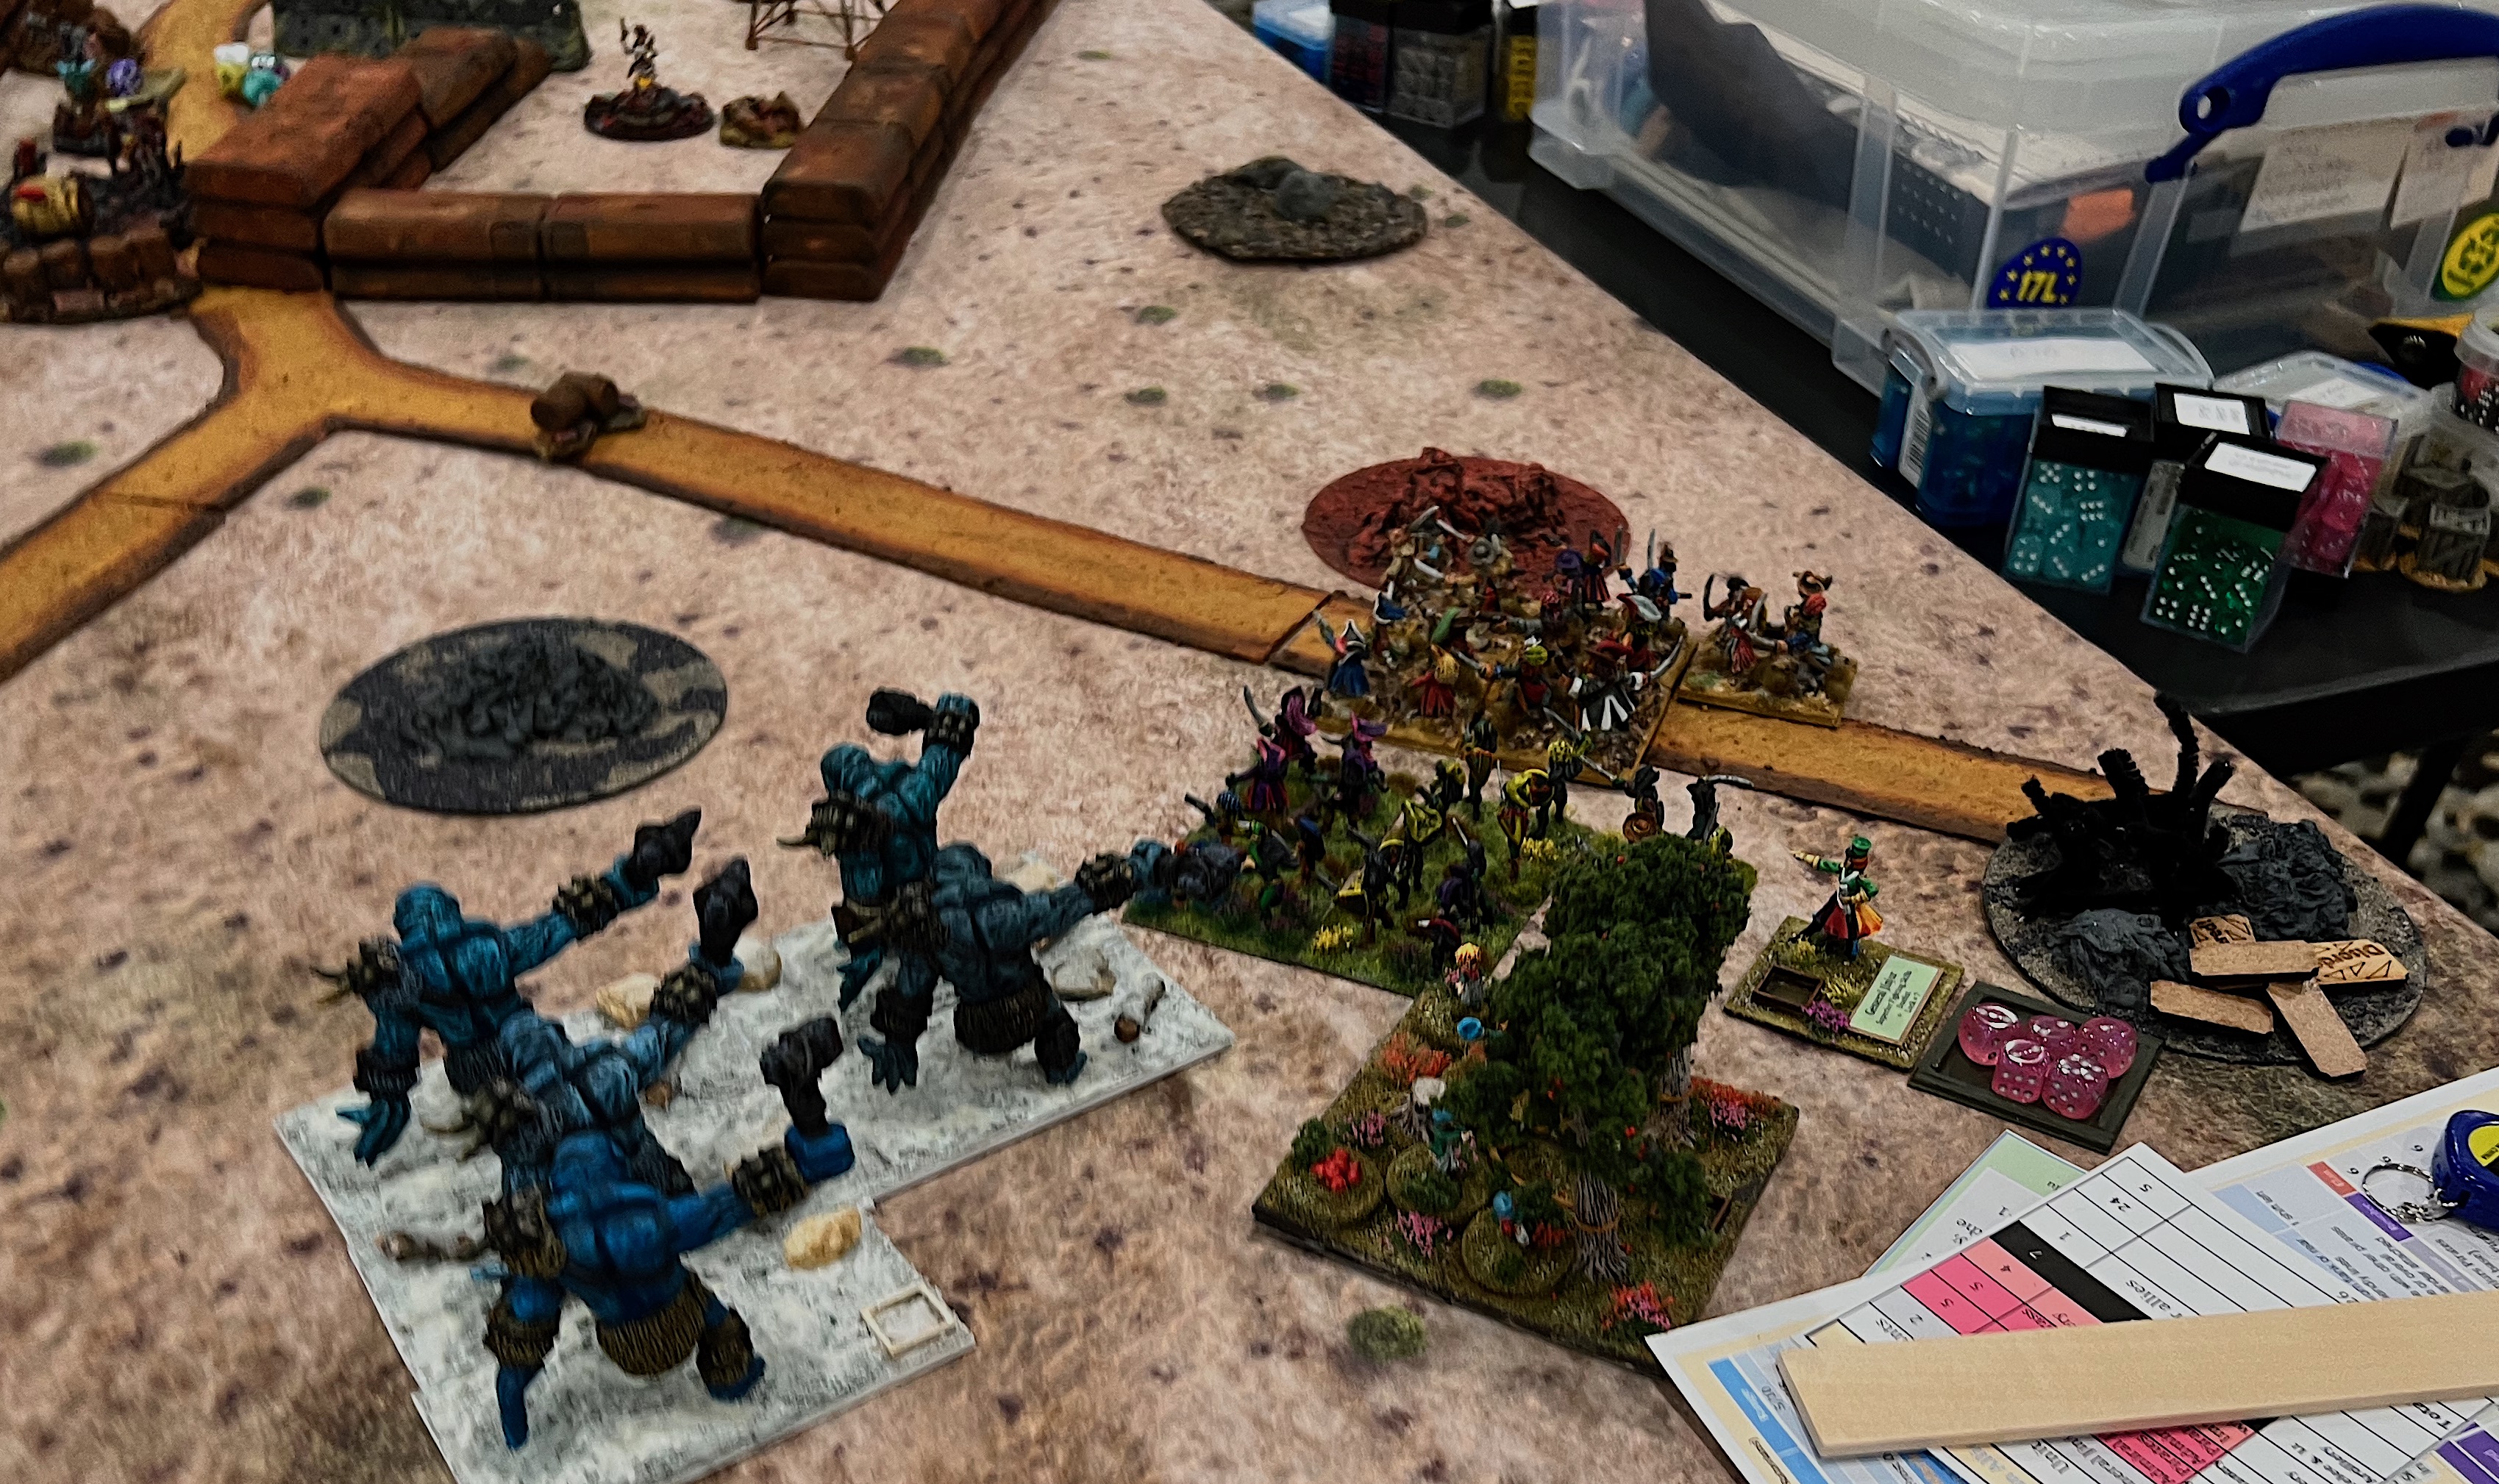
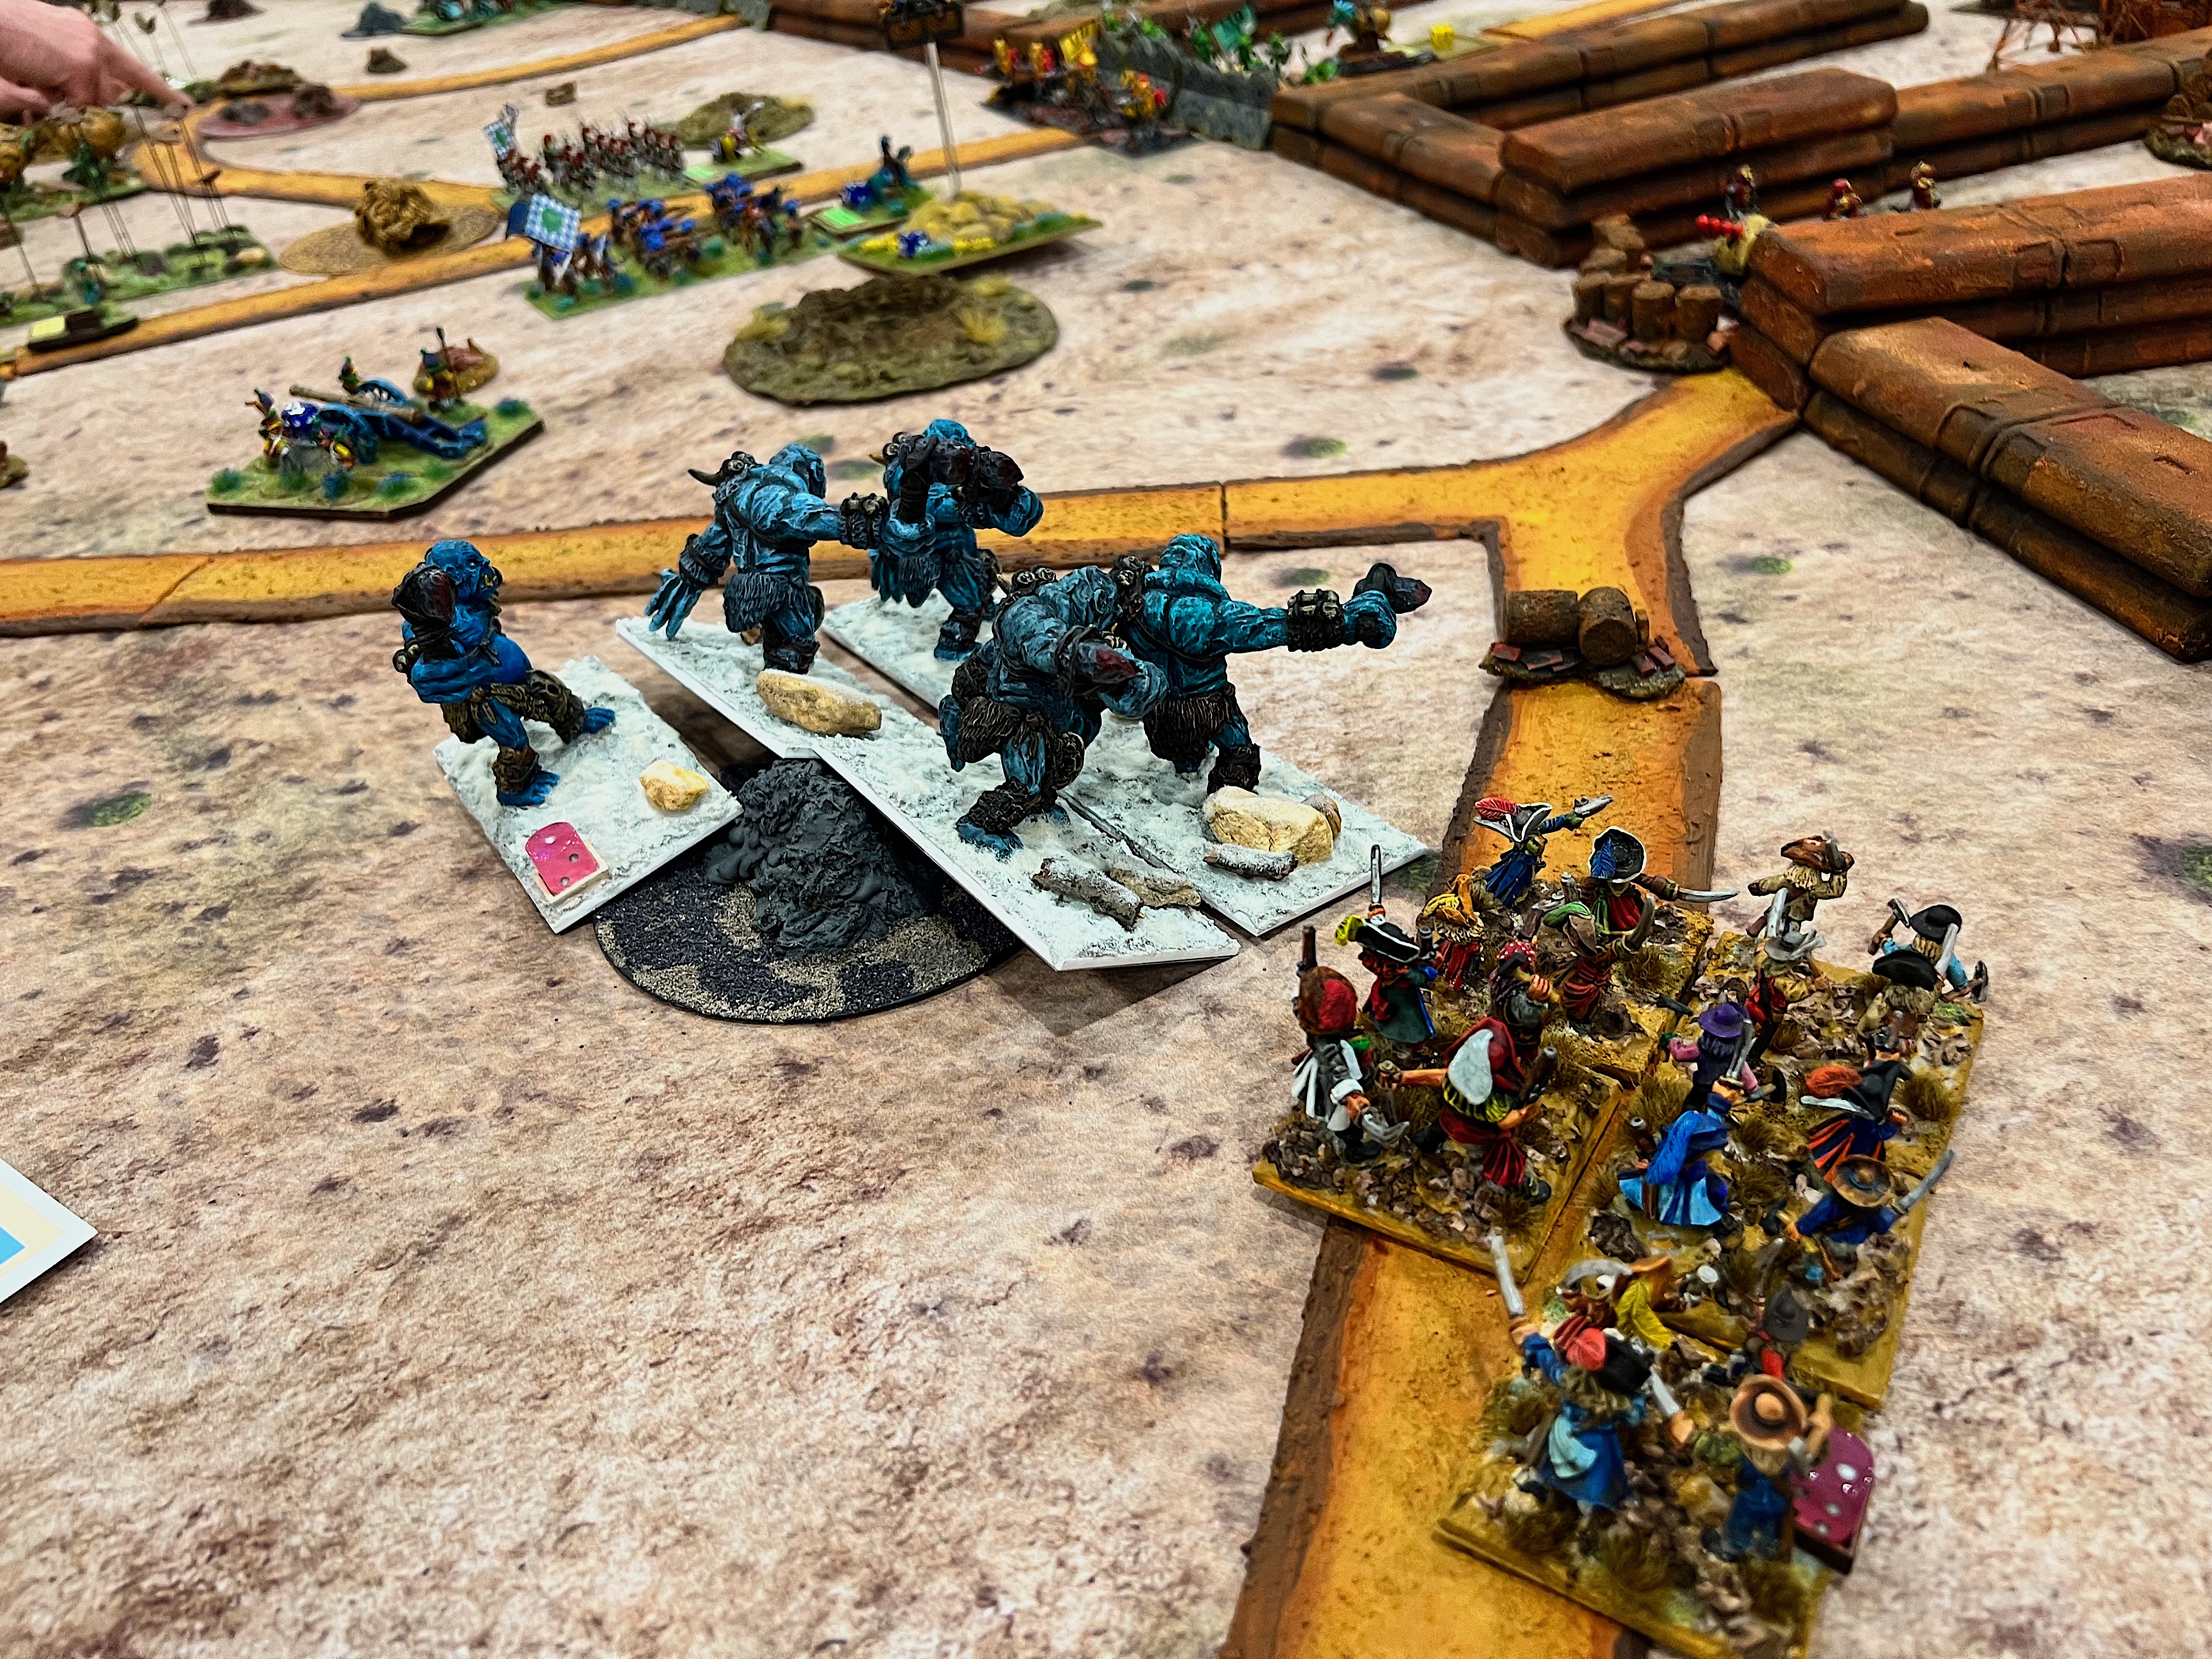
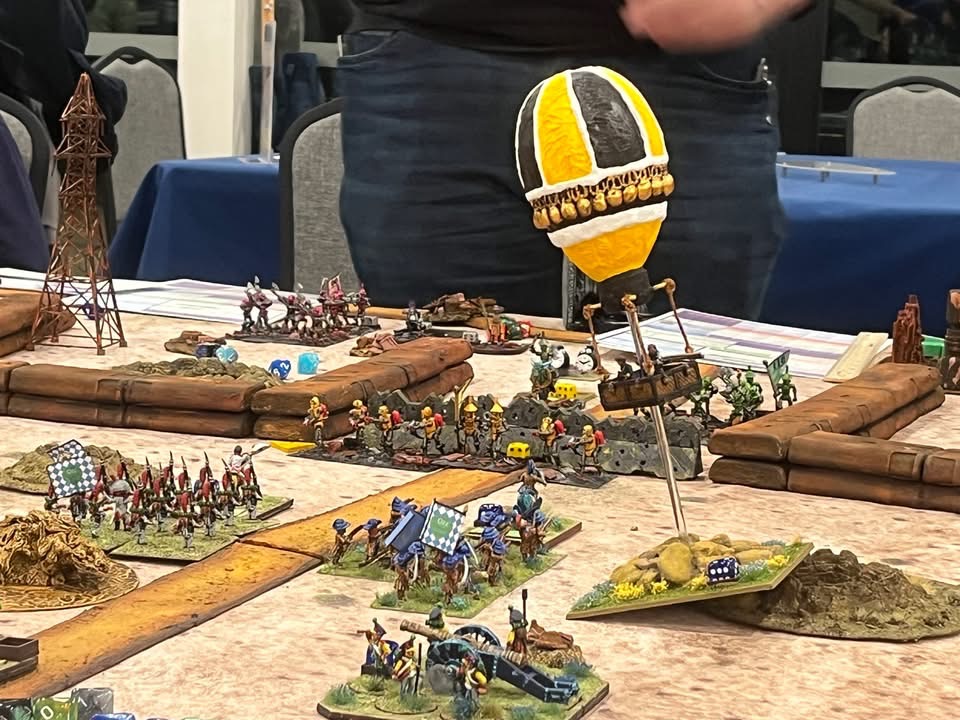
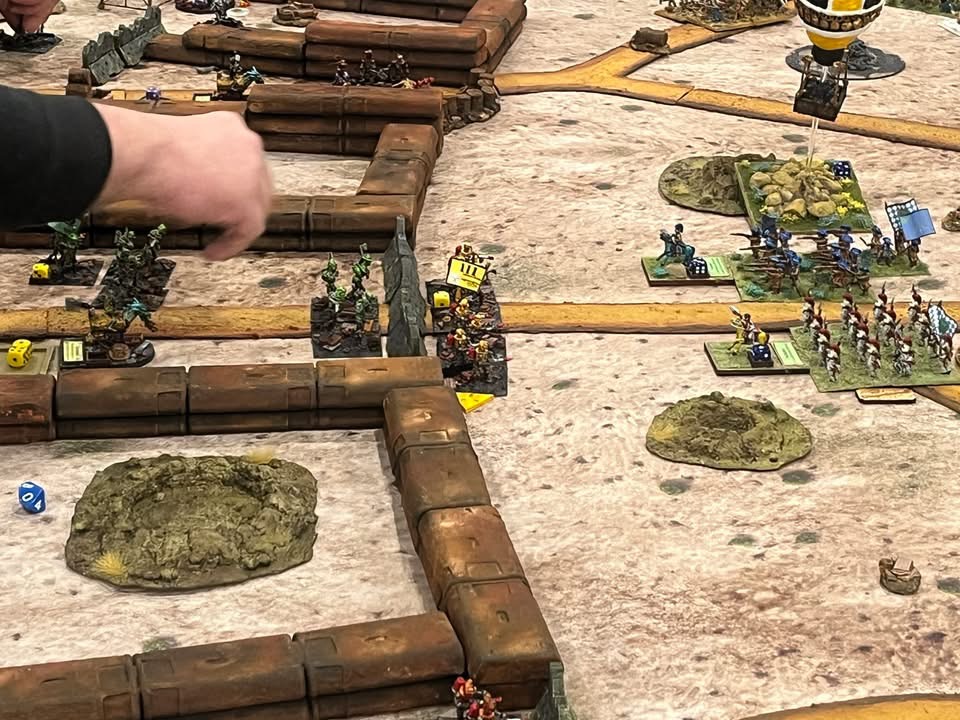
This was an epic back and forth Wars of Ozz battle, which really was great to see! Three brigades were on the attack (two Munchkin, one allied brigade, and an army reserve). The allied brigade was composed of two regiments of Jinjur female pirates, an Impkin slingshot battery, and a regiment of Frost Ogres (that Dave Stone will recognize!). The reserve came from the Land of Harvest – Great Pumpkinheads and regiments of eagles and owls. these allies hoped to share the loot with the Munchkins. Technological “secrets” were hidden in buildings throughout.

Three small but potent Nitpik mechanical men brigades and a small reserve force defended the formidable rusty steel walls of the Robotic Sanctum – a.k.a. the Industrial City. A small infantry reserve remained in the city, and there were rumors of a Nitpik relief force coming…

The Munchkin 1st Brigade advances on the left.
The Munchkin 2nd Brigade advances in the center.
The Allied Brigade ready for battle.
In the center was the Munchkin Army Reserve of Harvest troops under the command of Zoraster the Wizard.
The Nitpik Medium Artillery defends the left flank, with Elite Axemen behind ready to deal with any penetrations of the walls by the allied brigade.
Defending the Nitpik center against the Munchkin 2nd Brigade was the Lemon Drop Legionnaires at the wall (also with napalm blasters) and the axe-wielding Jade Automata.
Defending the Nitpik right was the 3rd Nitpik Brigade. They had Morin’s Monsters with napalm blasters and a mechanical mini-swarm.
A side view of the start of the battle behind the Nitpik lines. The Mechanical mini-swarm is in the foreground, while the sole regiment in the Nitpik reserve – the Pink Nightmares – is in the back left.
The battle begins.
The Allied Brigade moves up on the right.
The Nitpik Artillery prepares to fire at the Frost Ogres…
….who take casualties and rout in the face of withering fire.
Overzealous Lemon Drop Legionnaires take fire from the balloon and an unlucky reaction test causes them to jump over their protective walls towards the enemy!
This unlucky reaction subjected the Lemon Drop Legionnaires to Munchkin musketry at short range.
Morin’s Monsters hold the line.
Munchkin Light Cavalry and Landwehr move up on the left flank..
The Munchkin 1st Brigade moves towards the gate – somewhat stymied by the ominous rusty steel walls – their solution…
…climb the wall !! Assault Munchkins! (or Ranger Munchkins?)…they were soon in the town searching for technological secrets.
The Munchkins commit the Great Pumpkinheads and Great Owls and bypass Morin’s Monsters.
A female pirate regiment breaches the right wall and faces the Elite Axemen.
The Munchkin Center is breached as well.

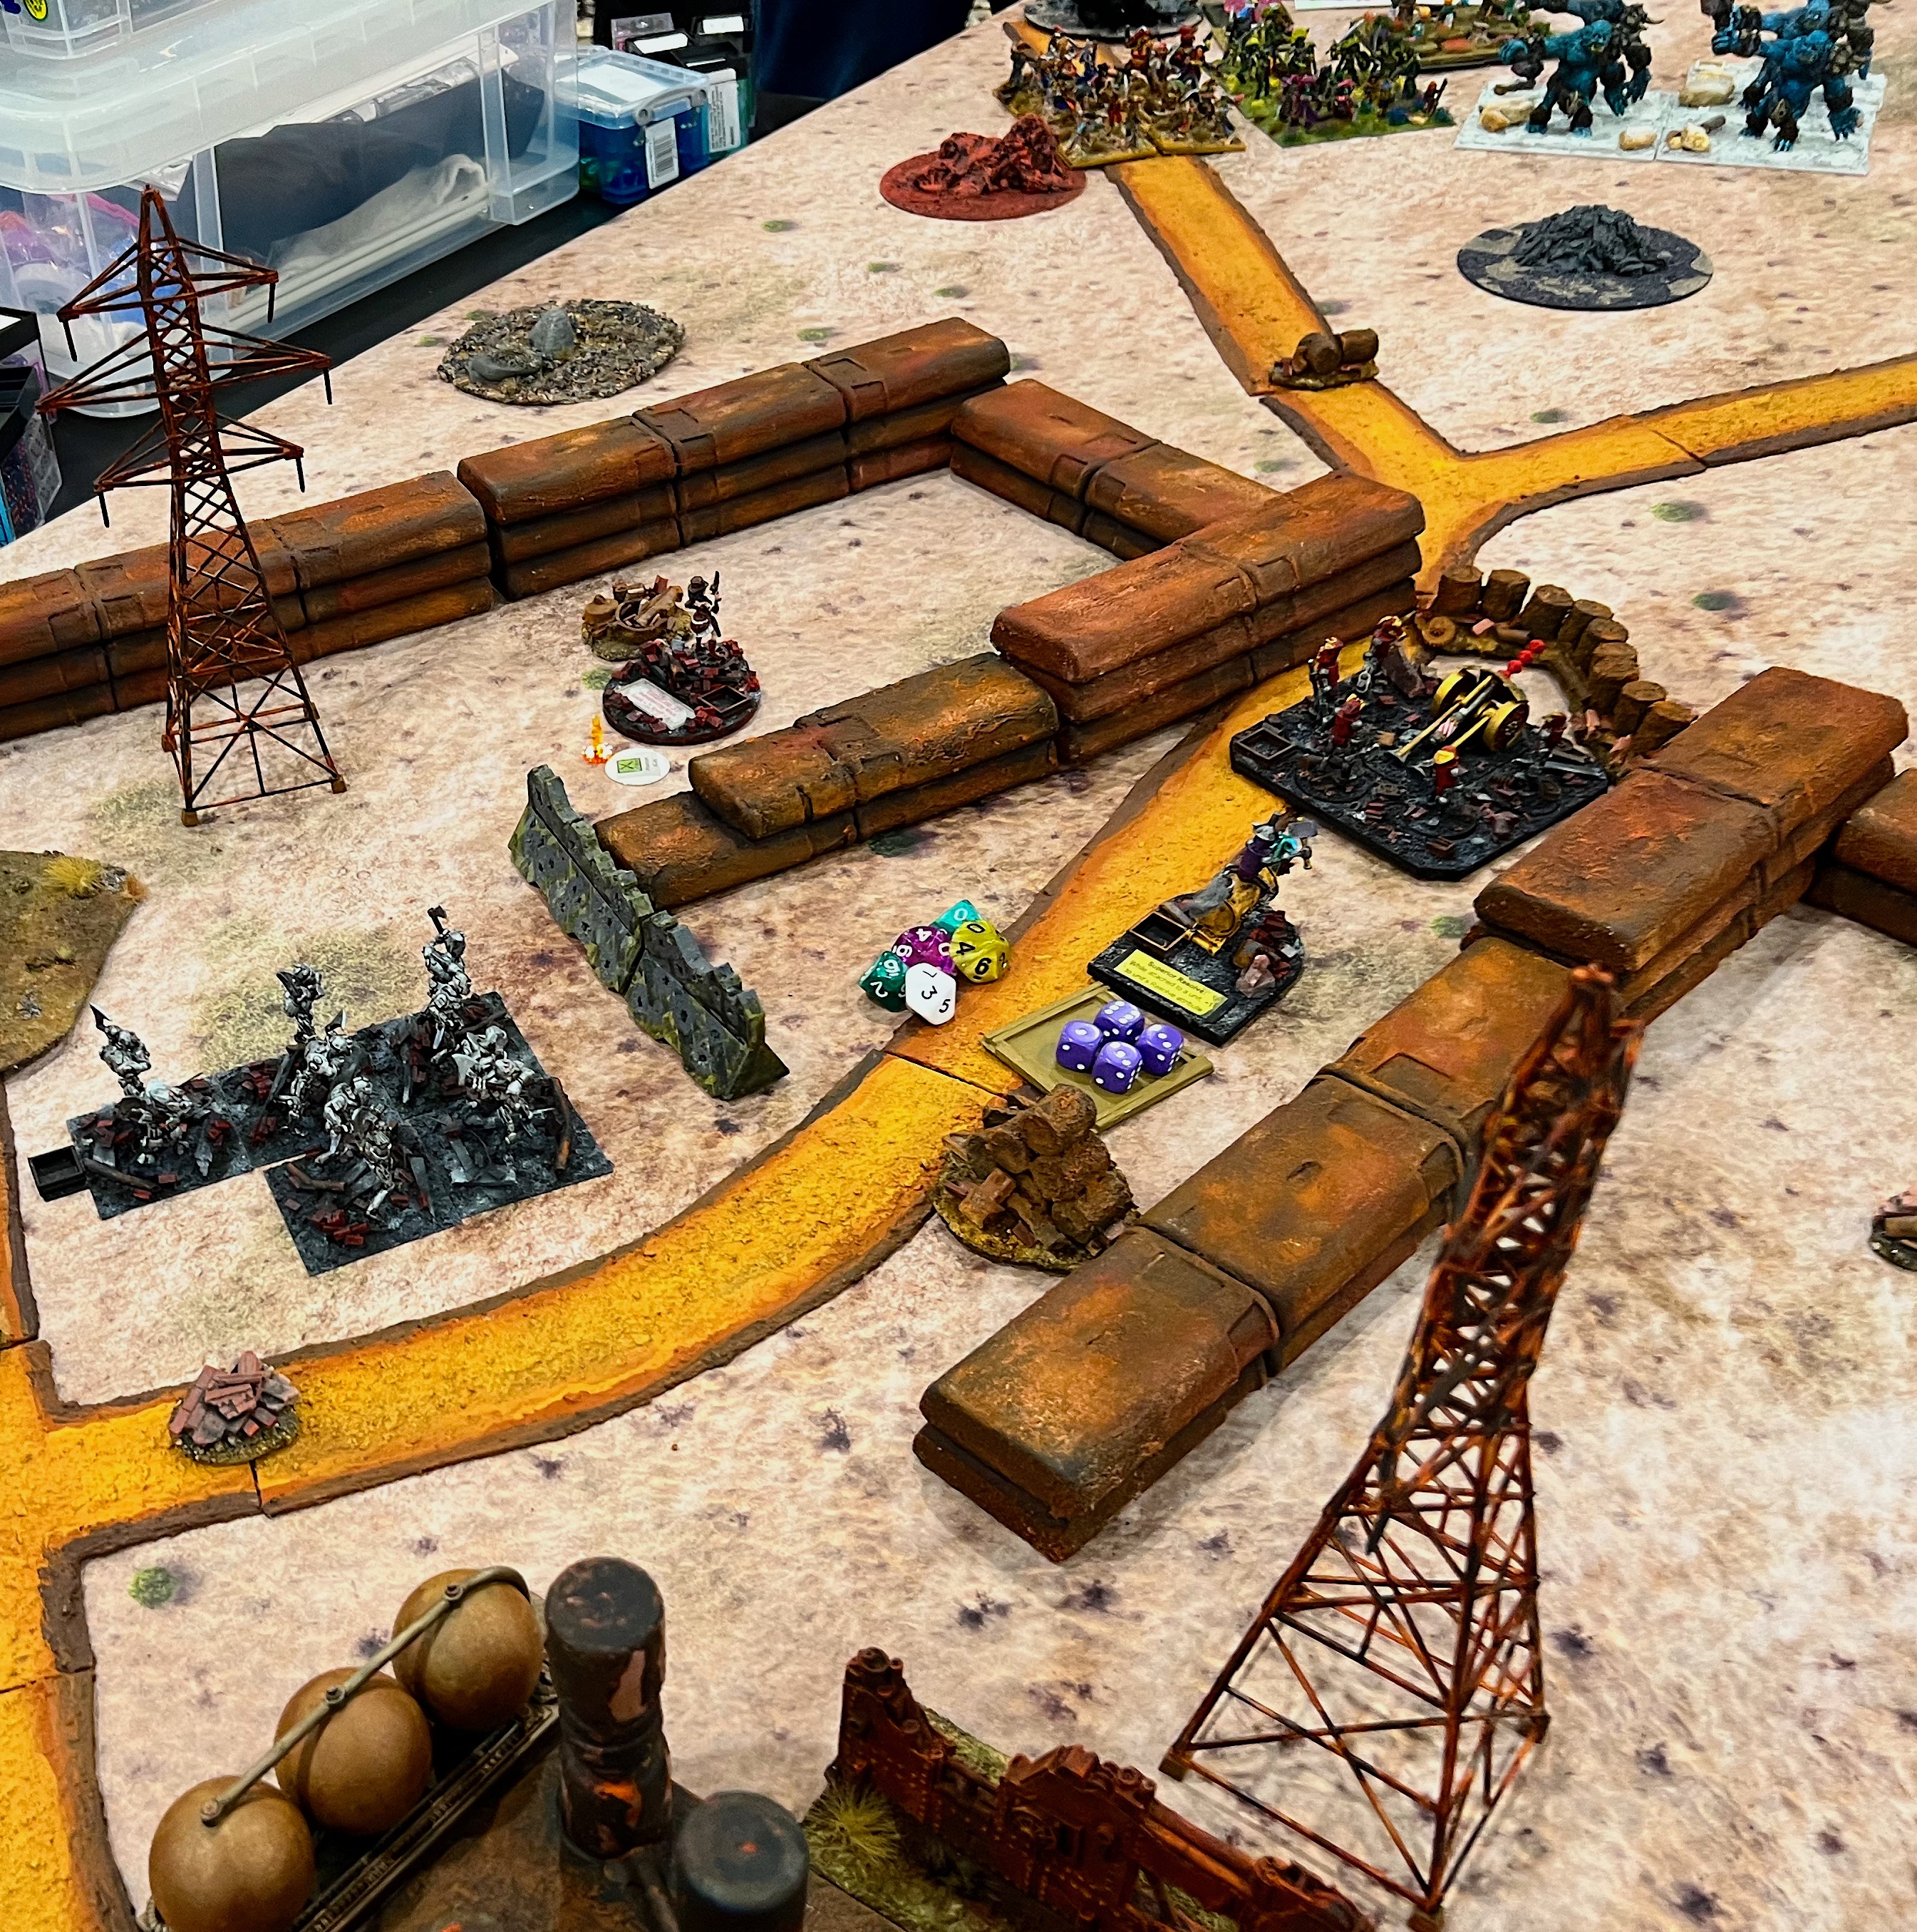
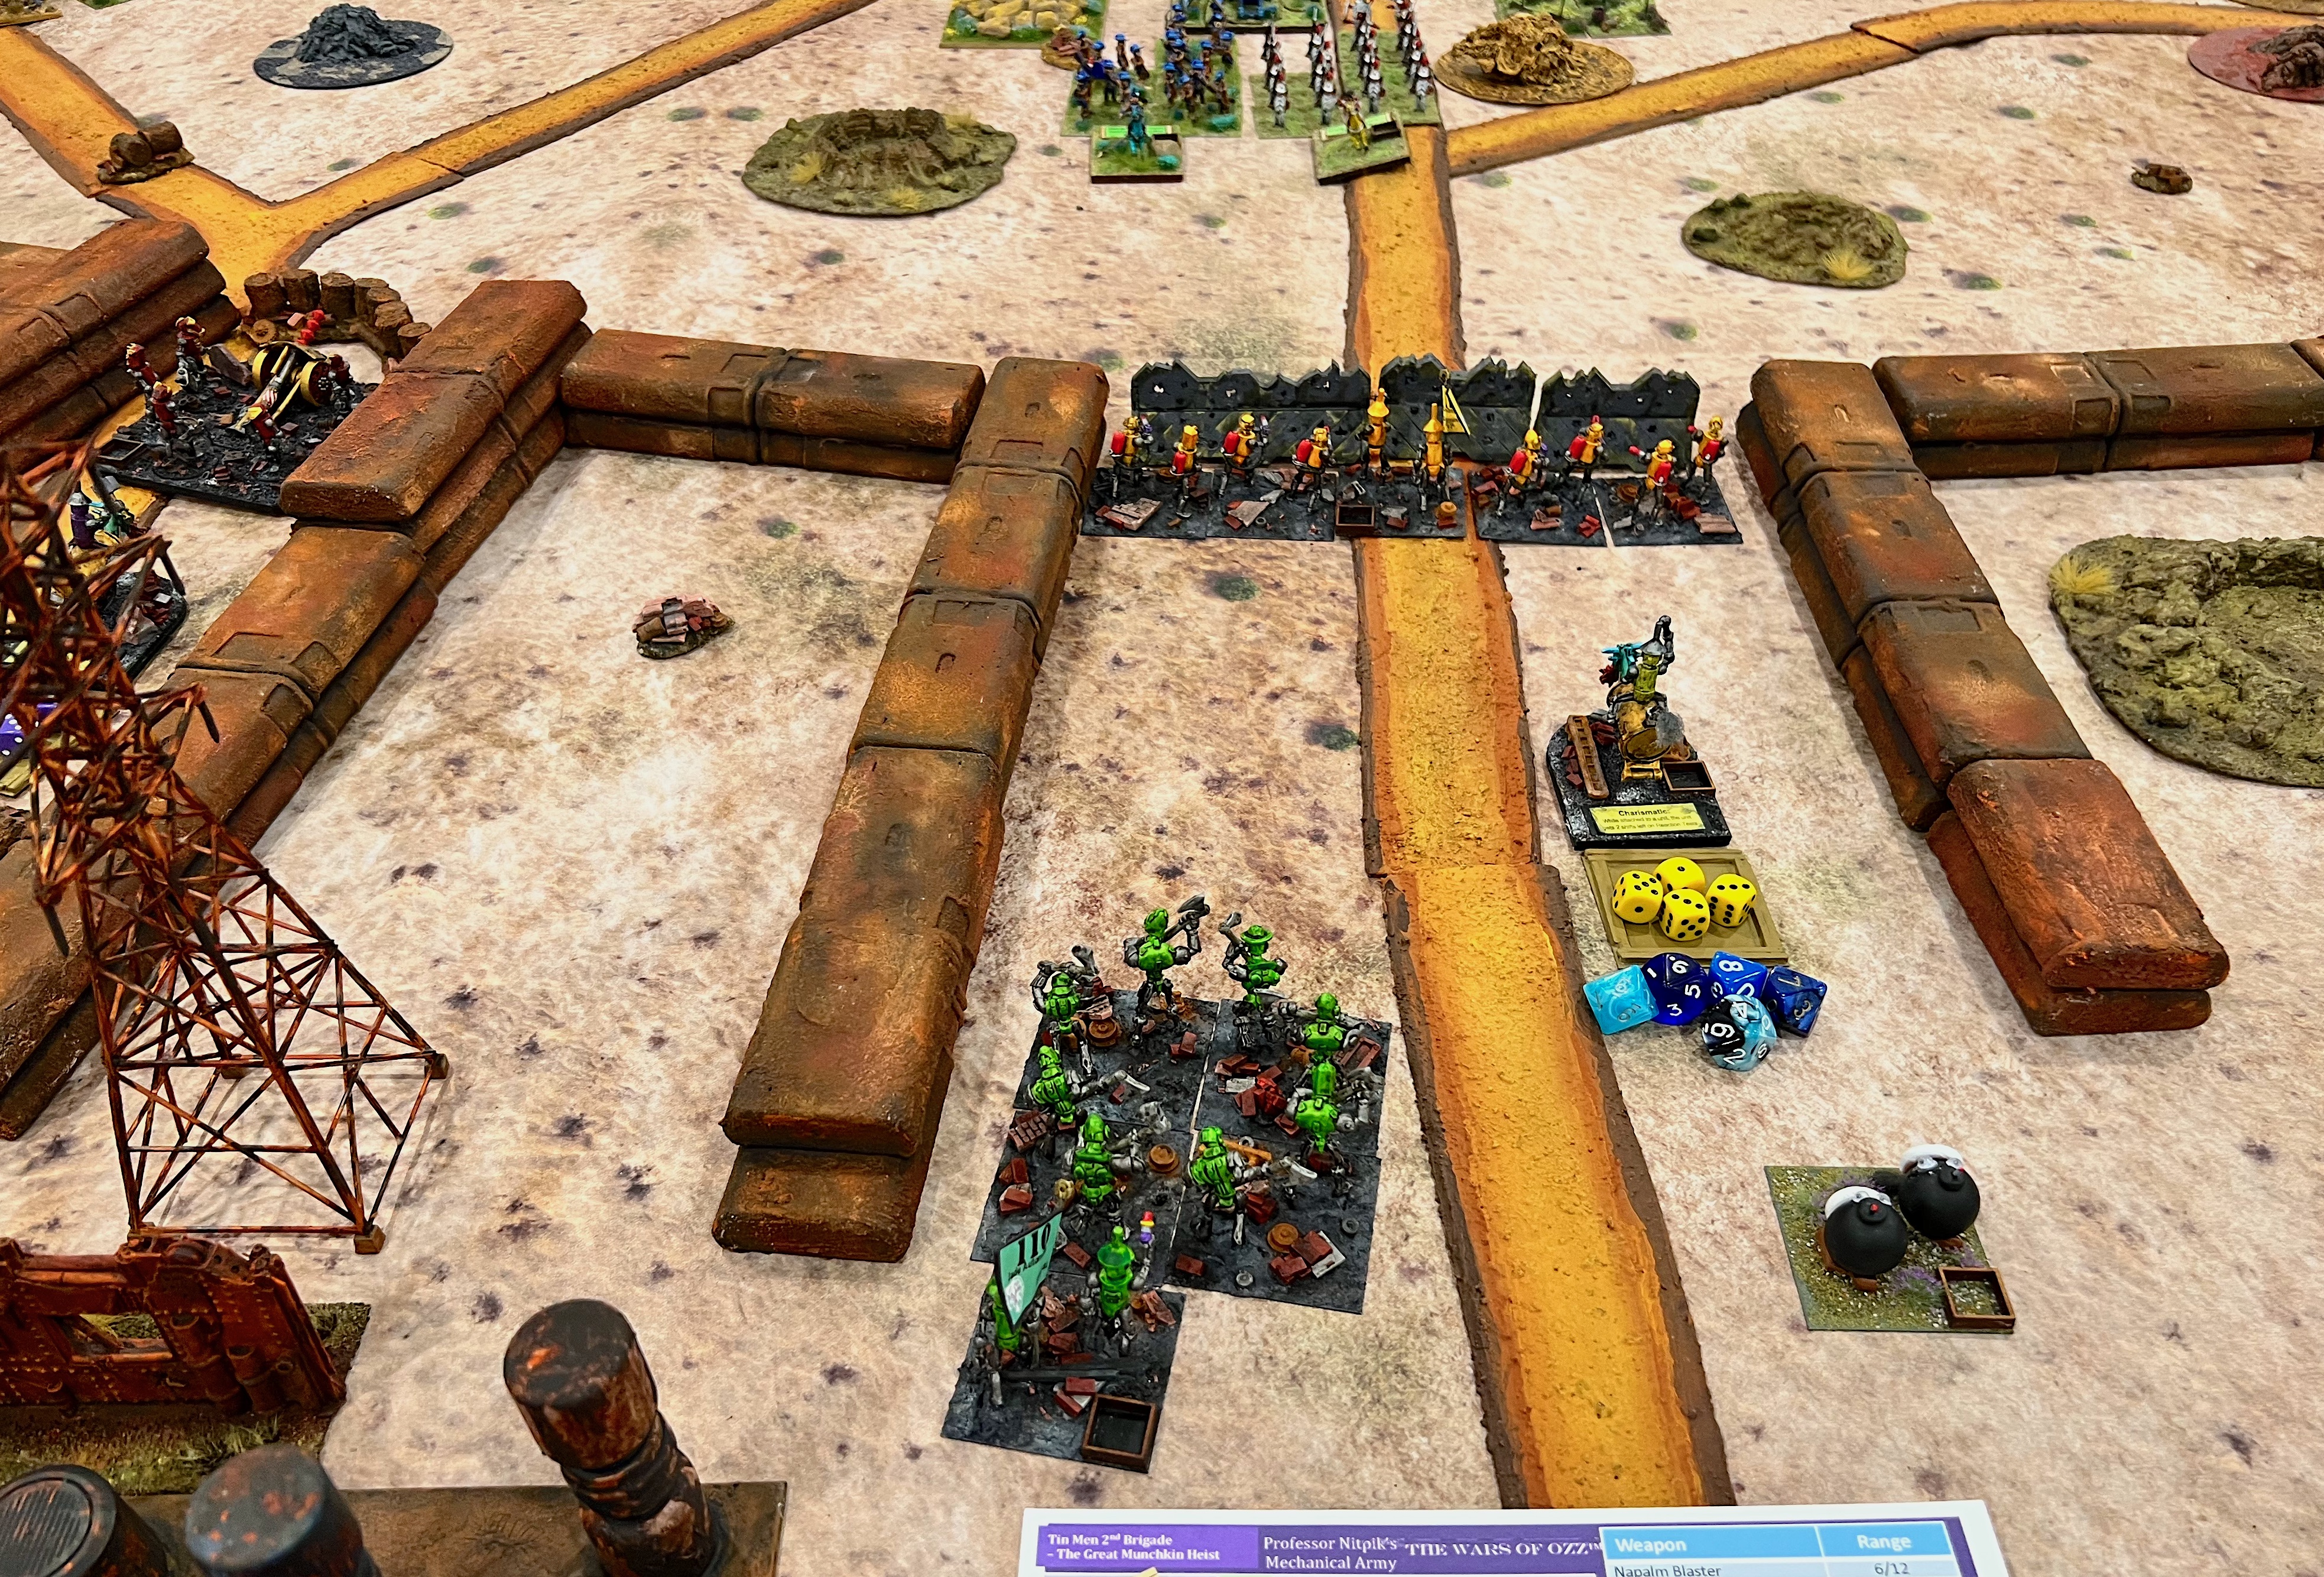
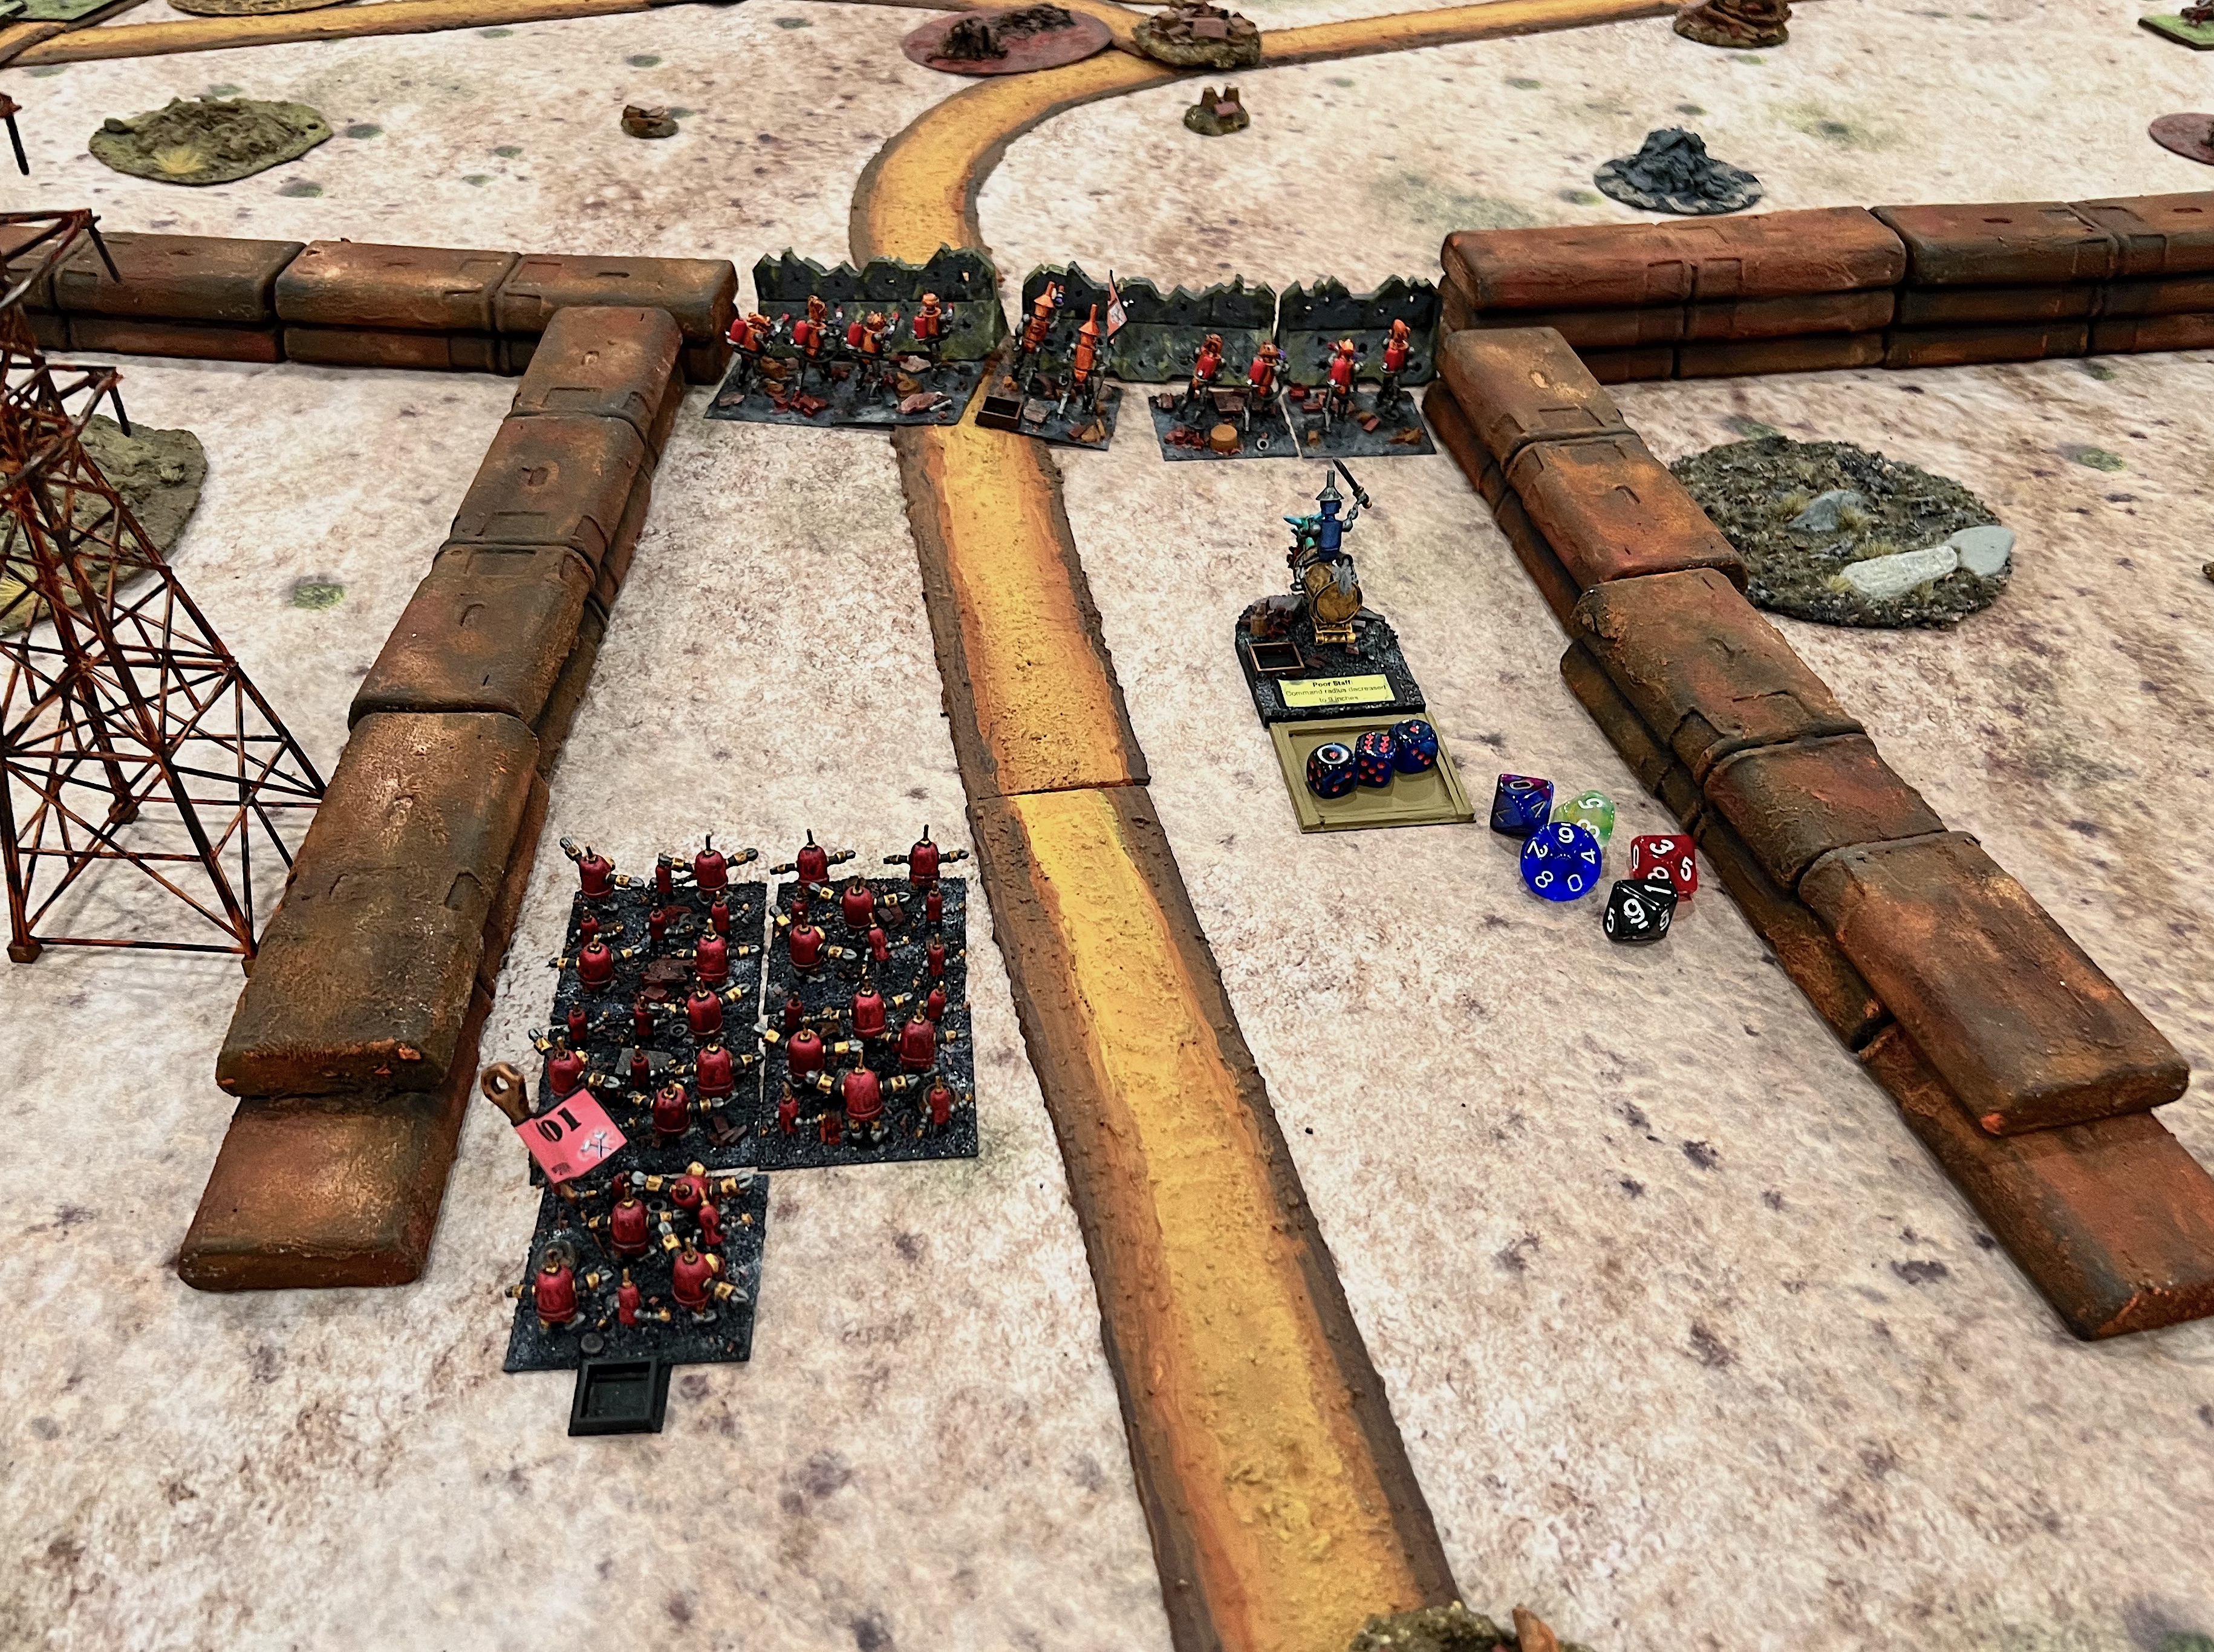
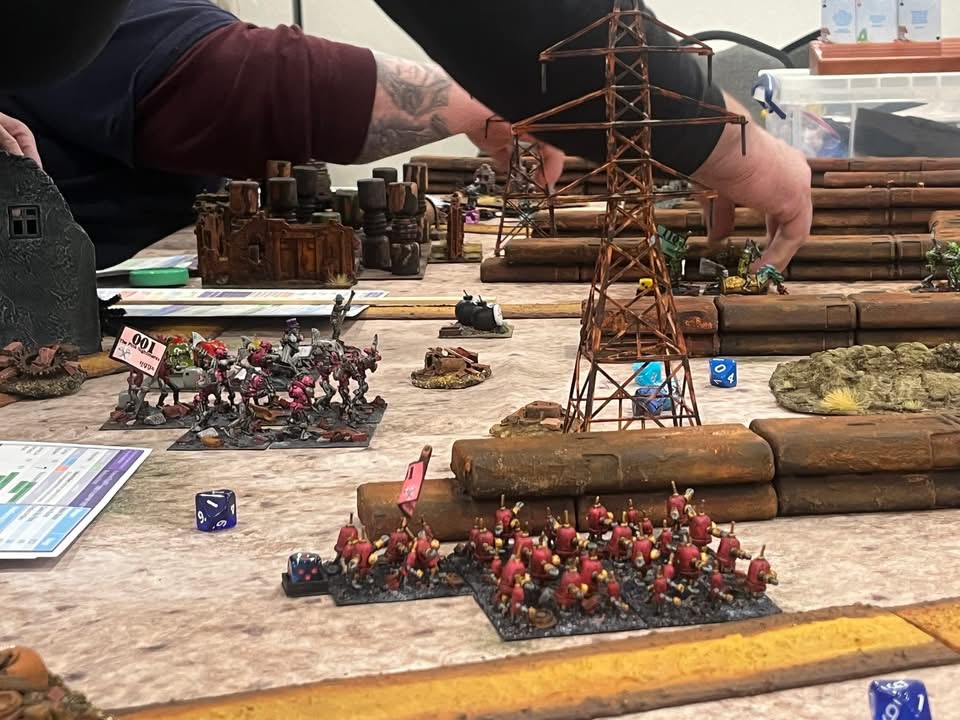
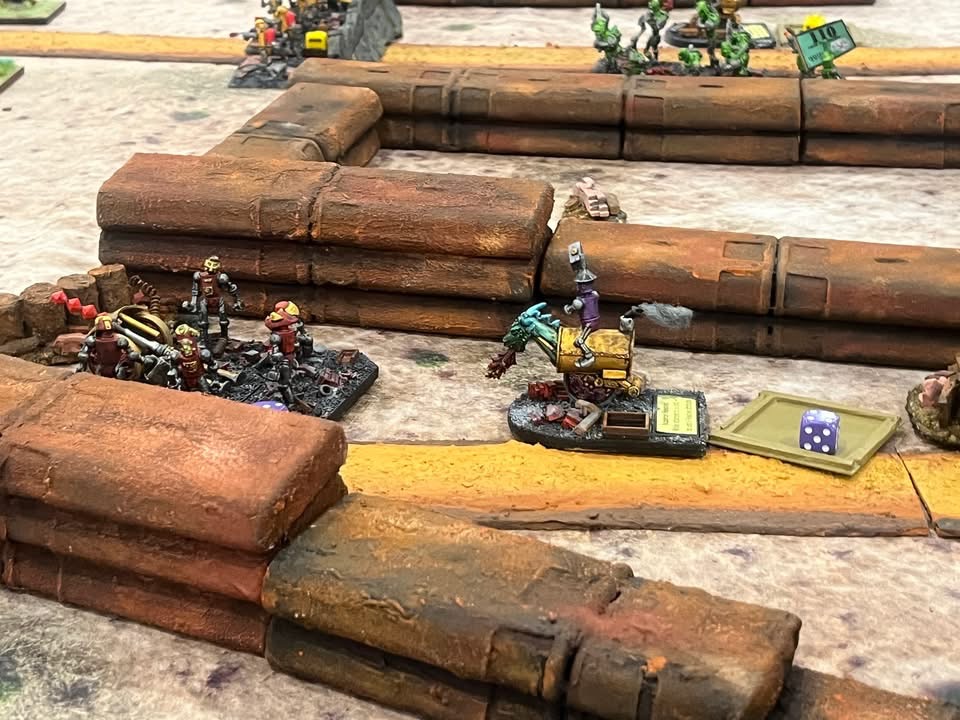
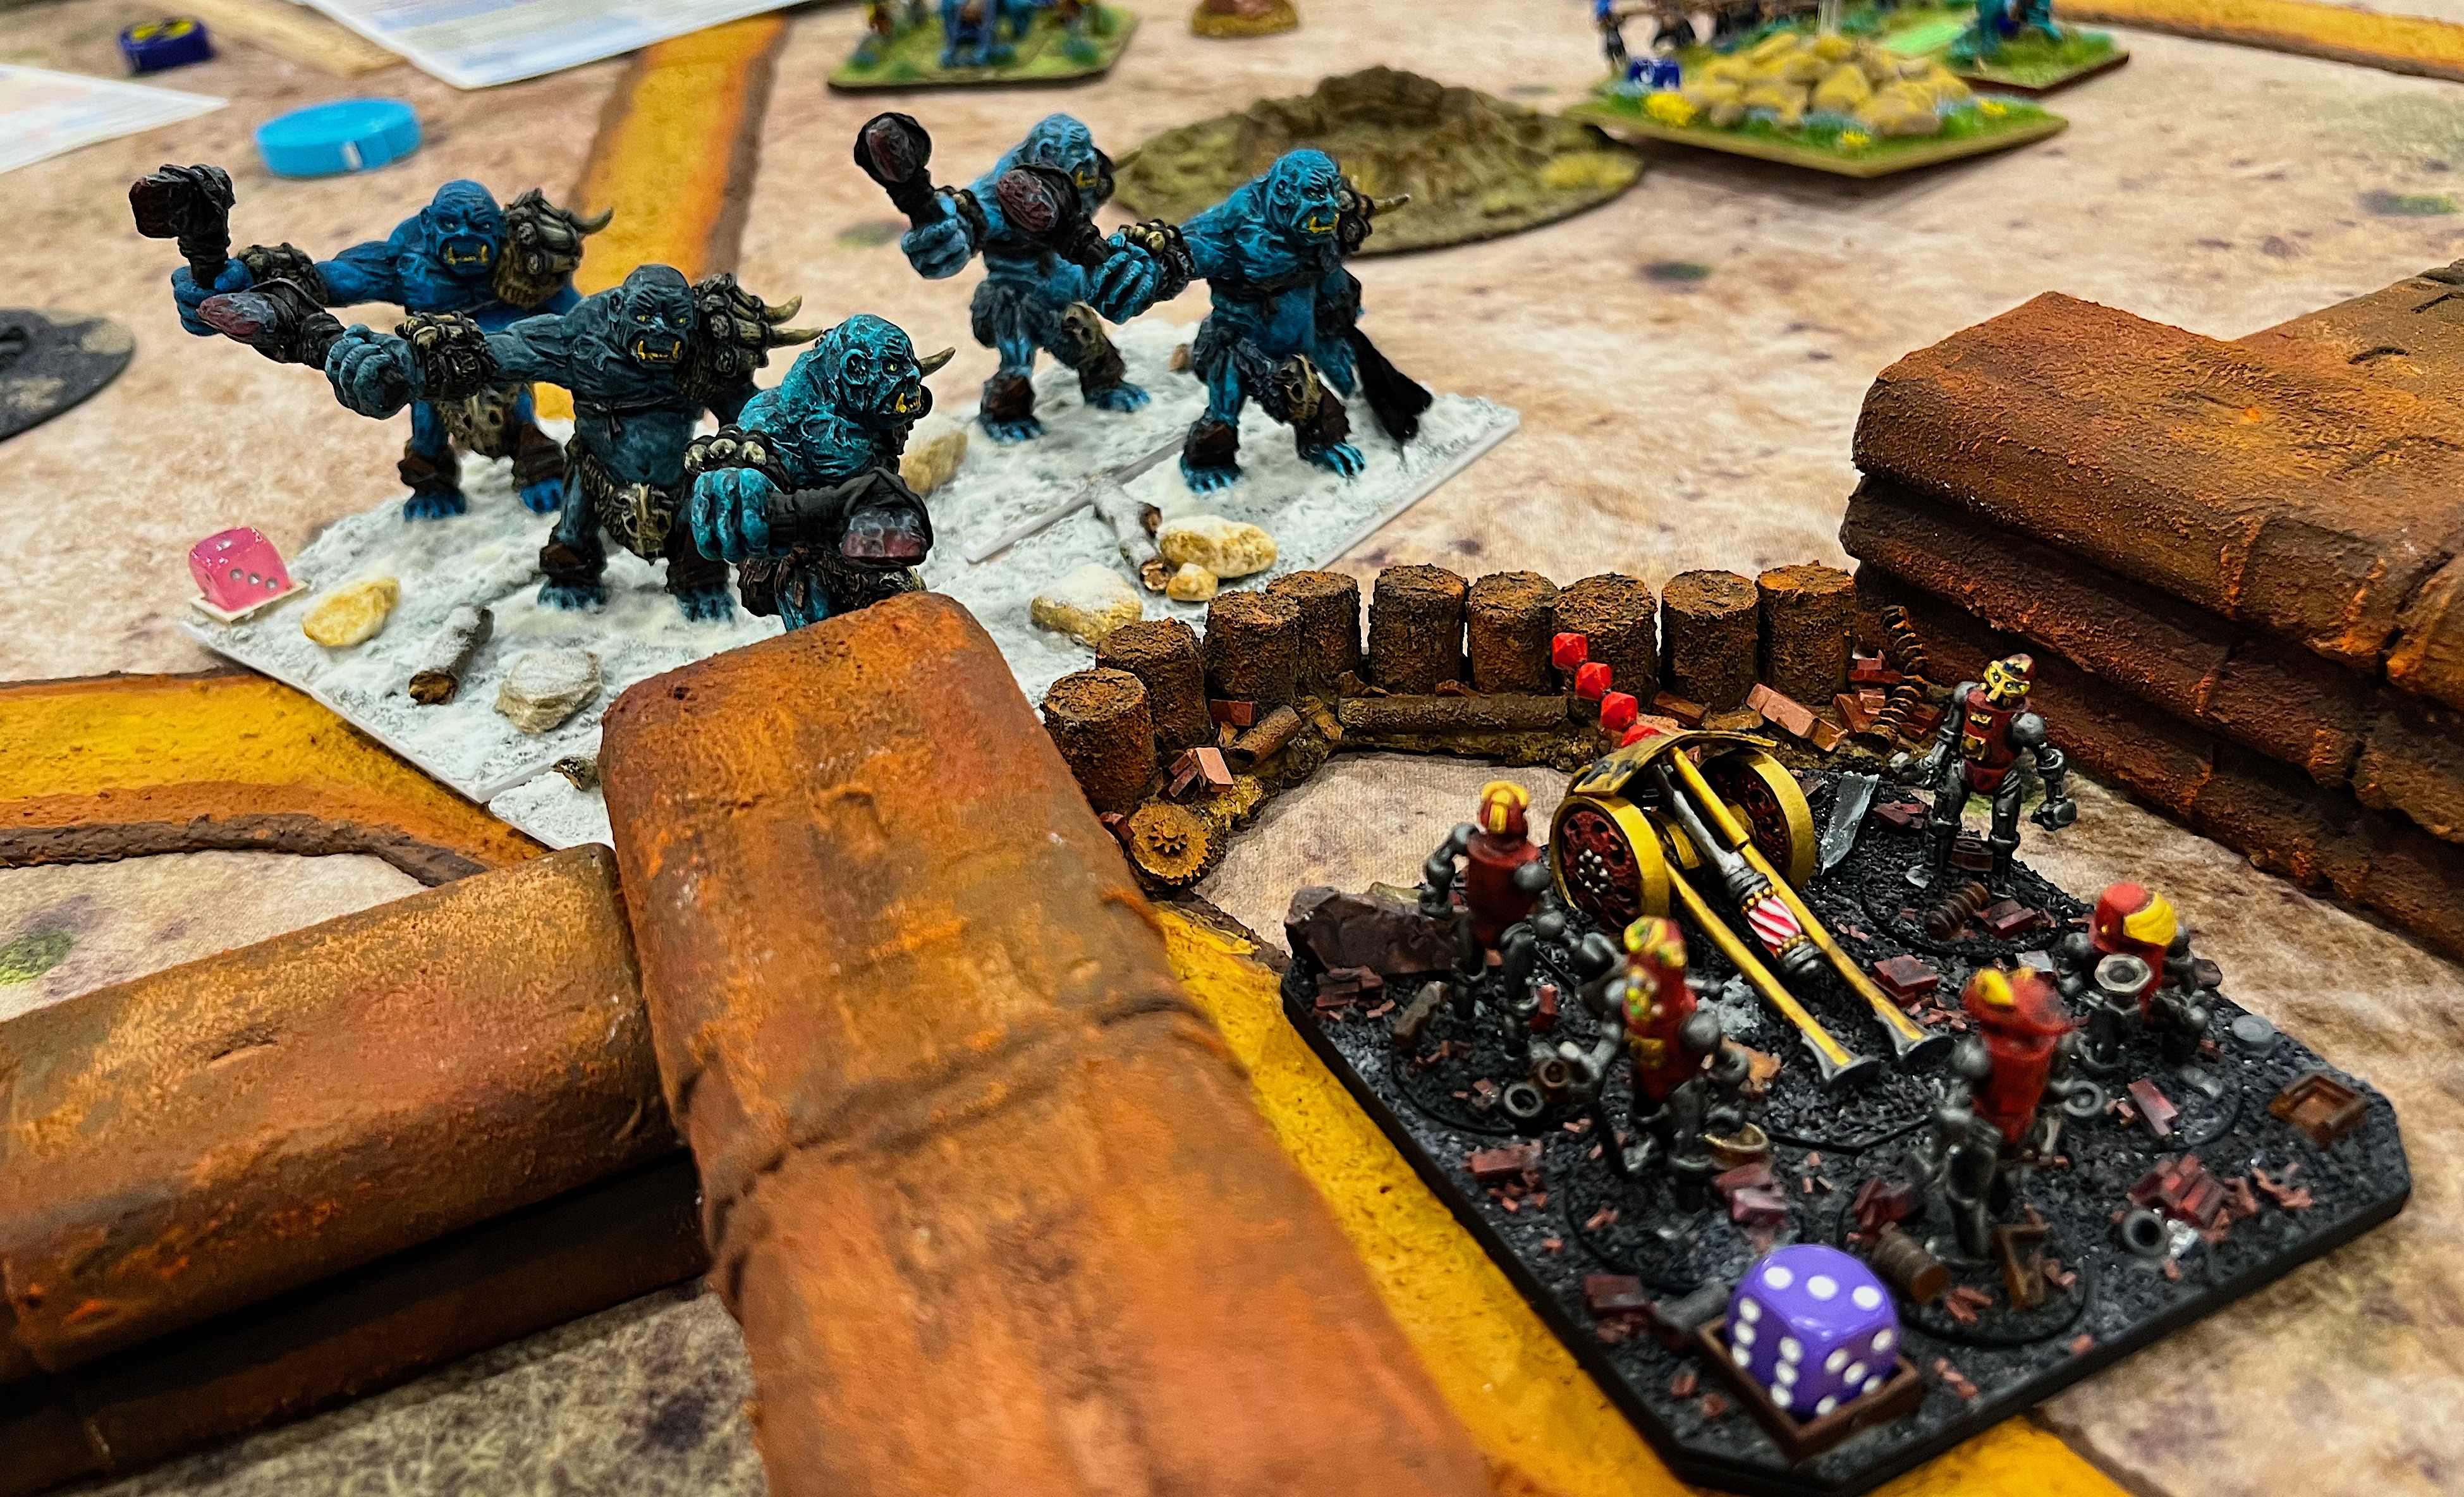
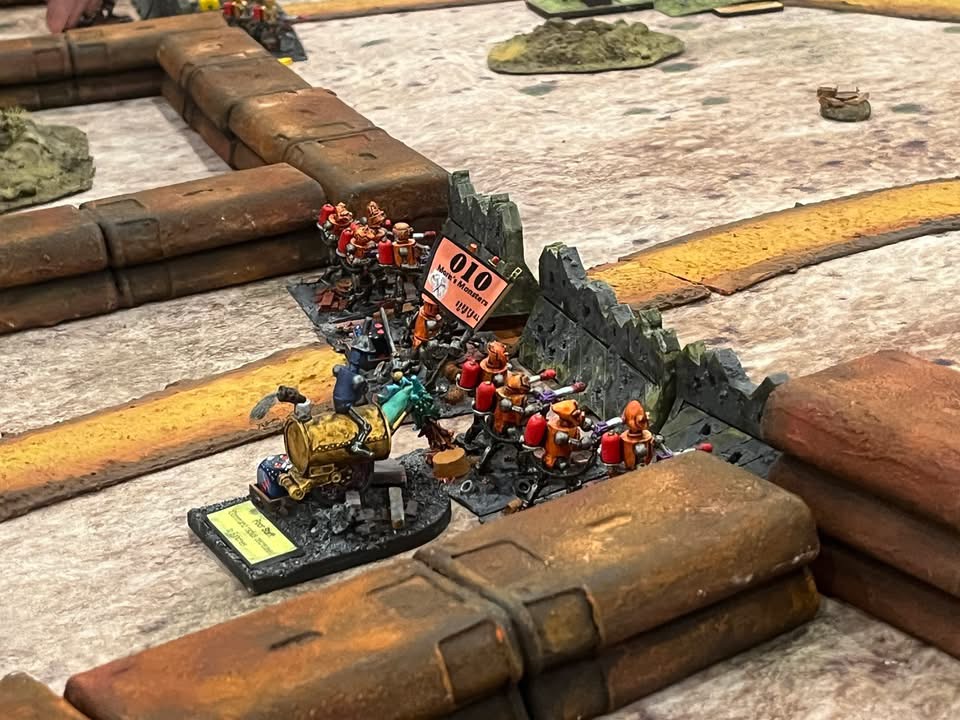
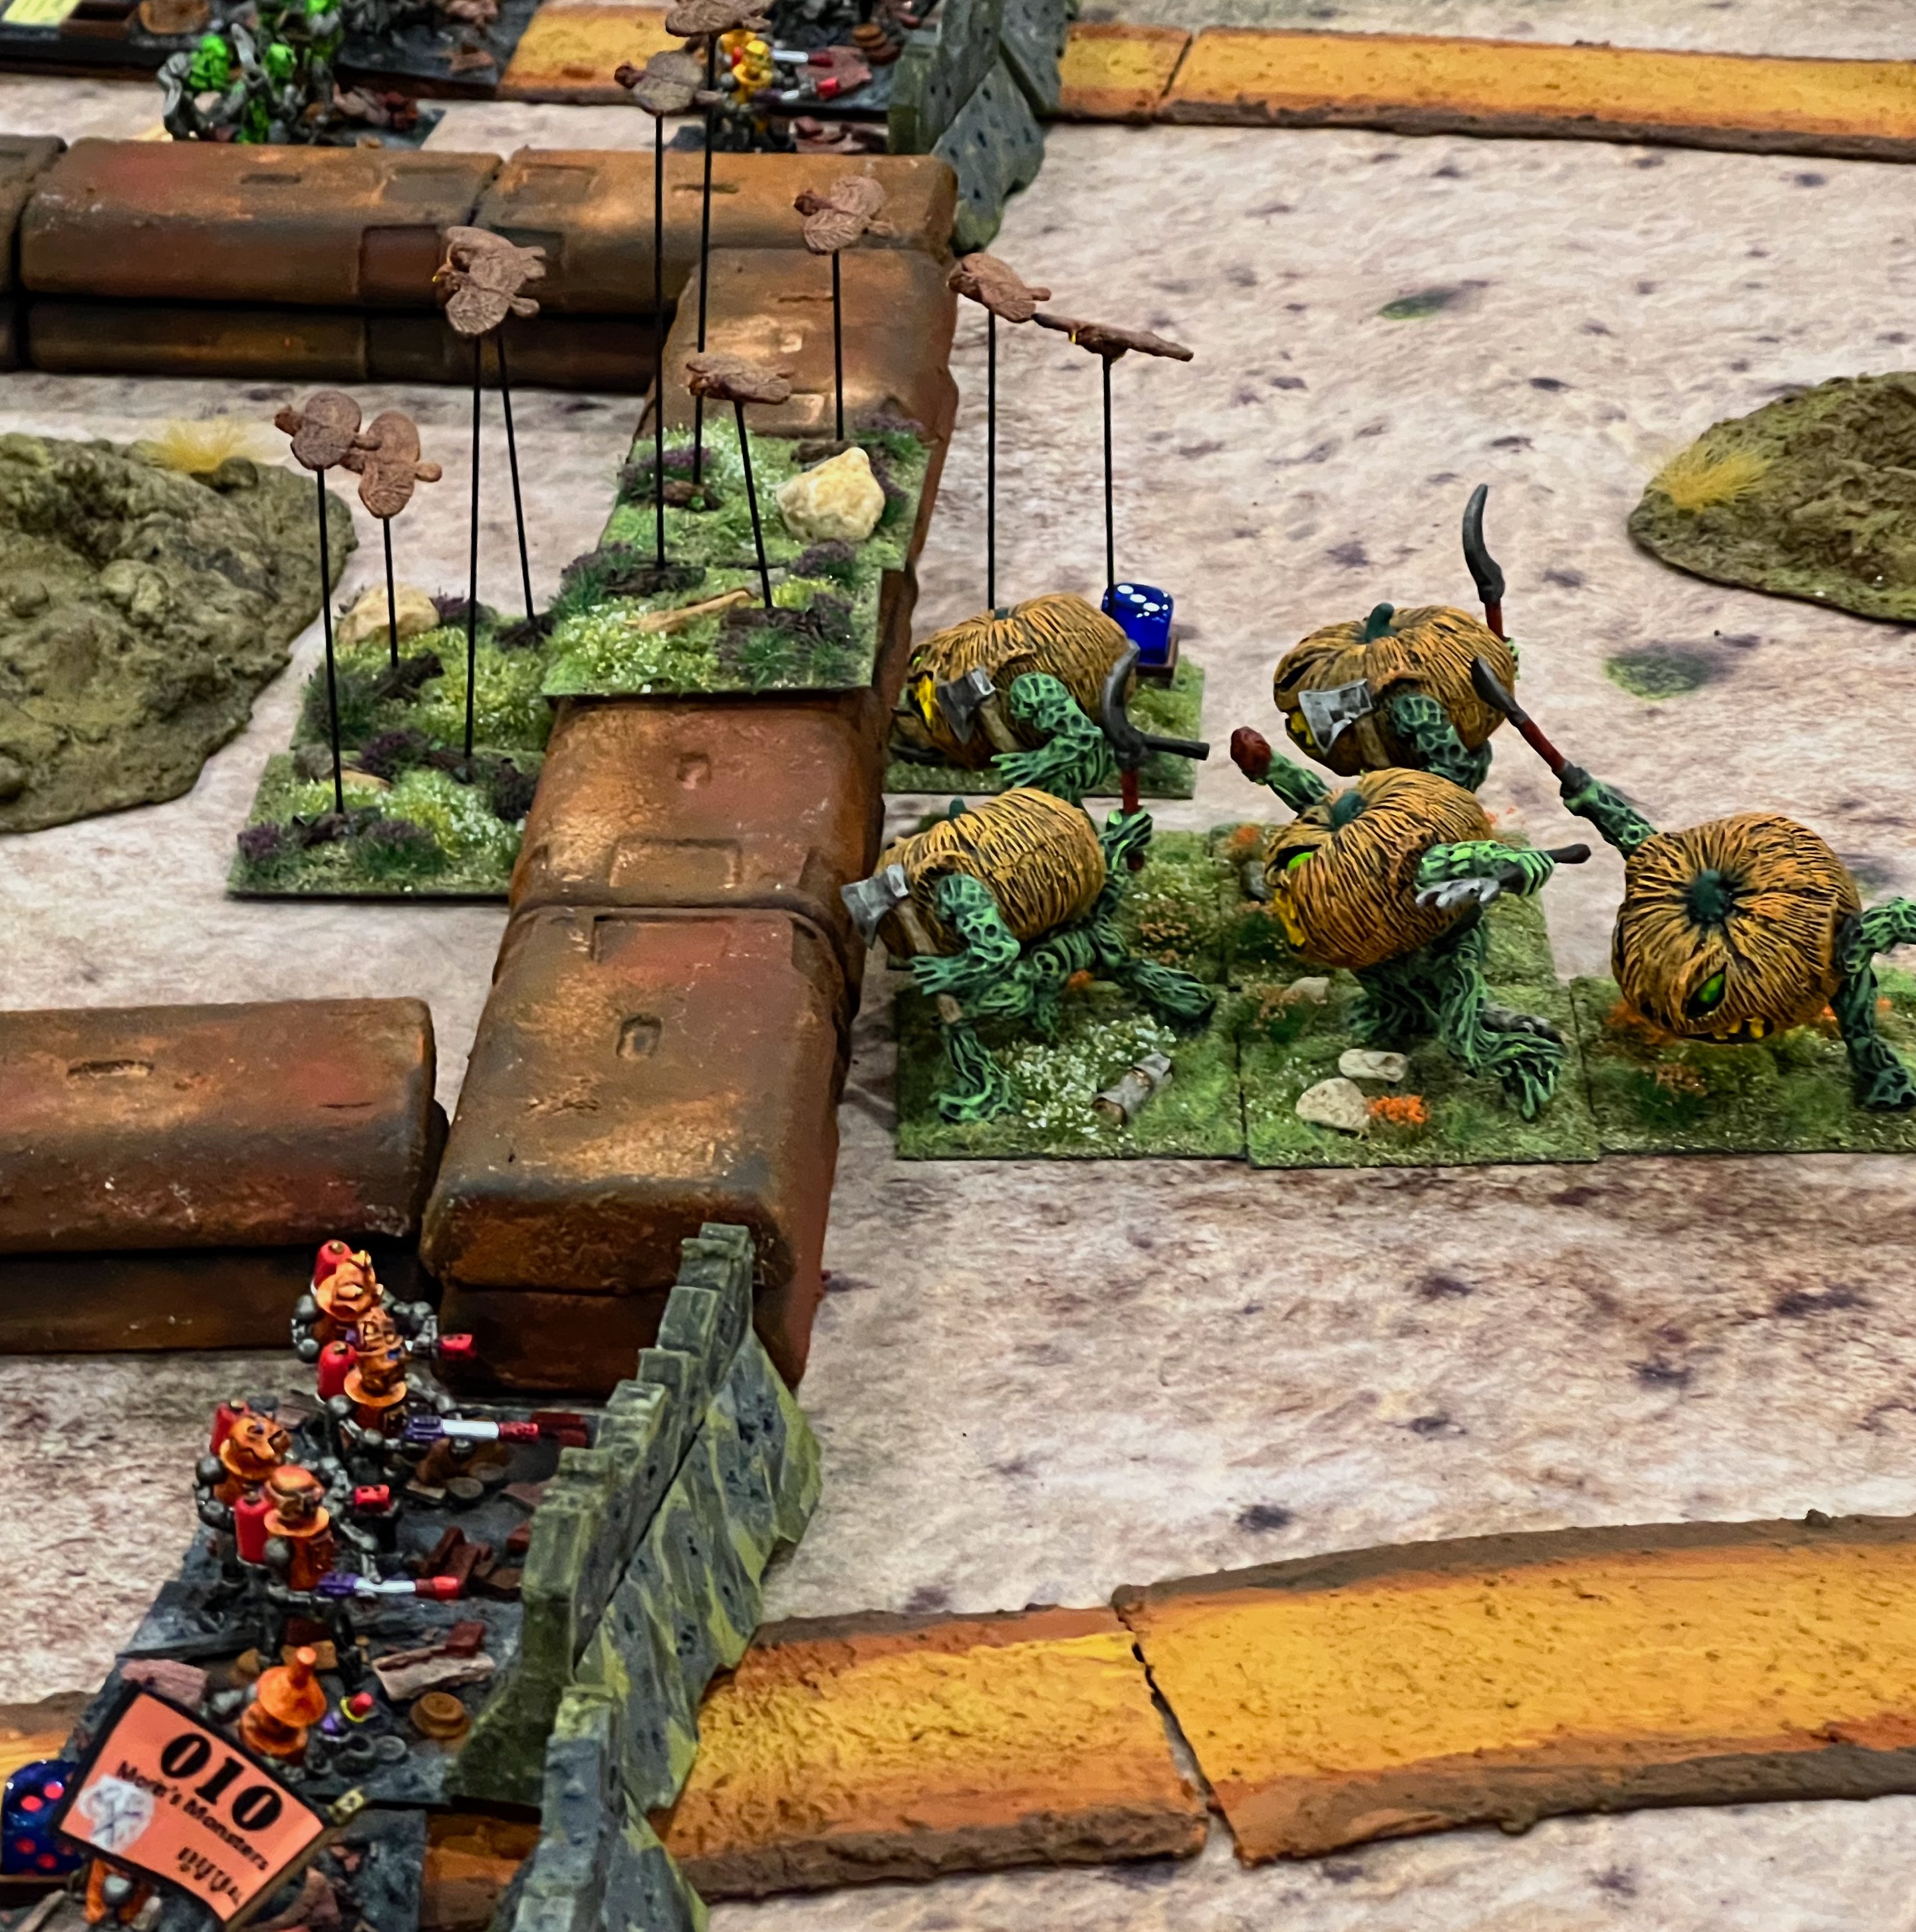
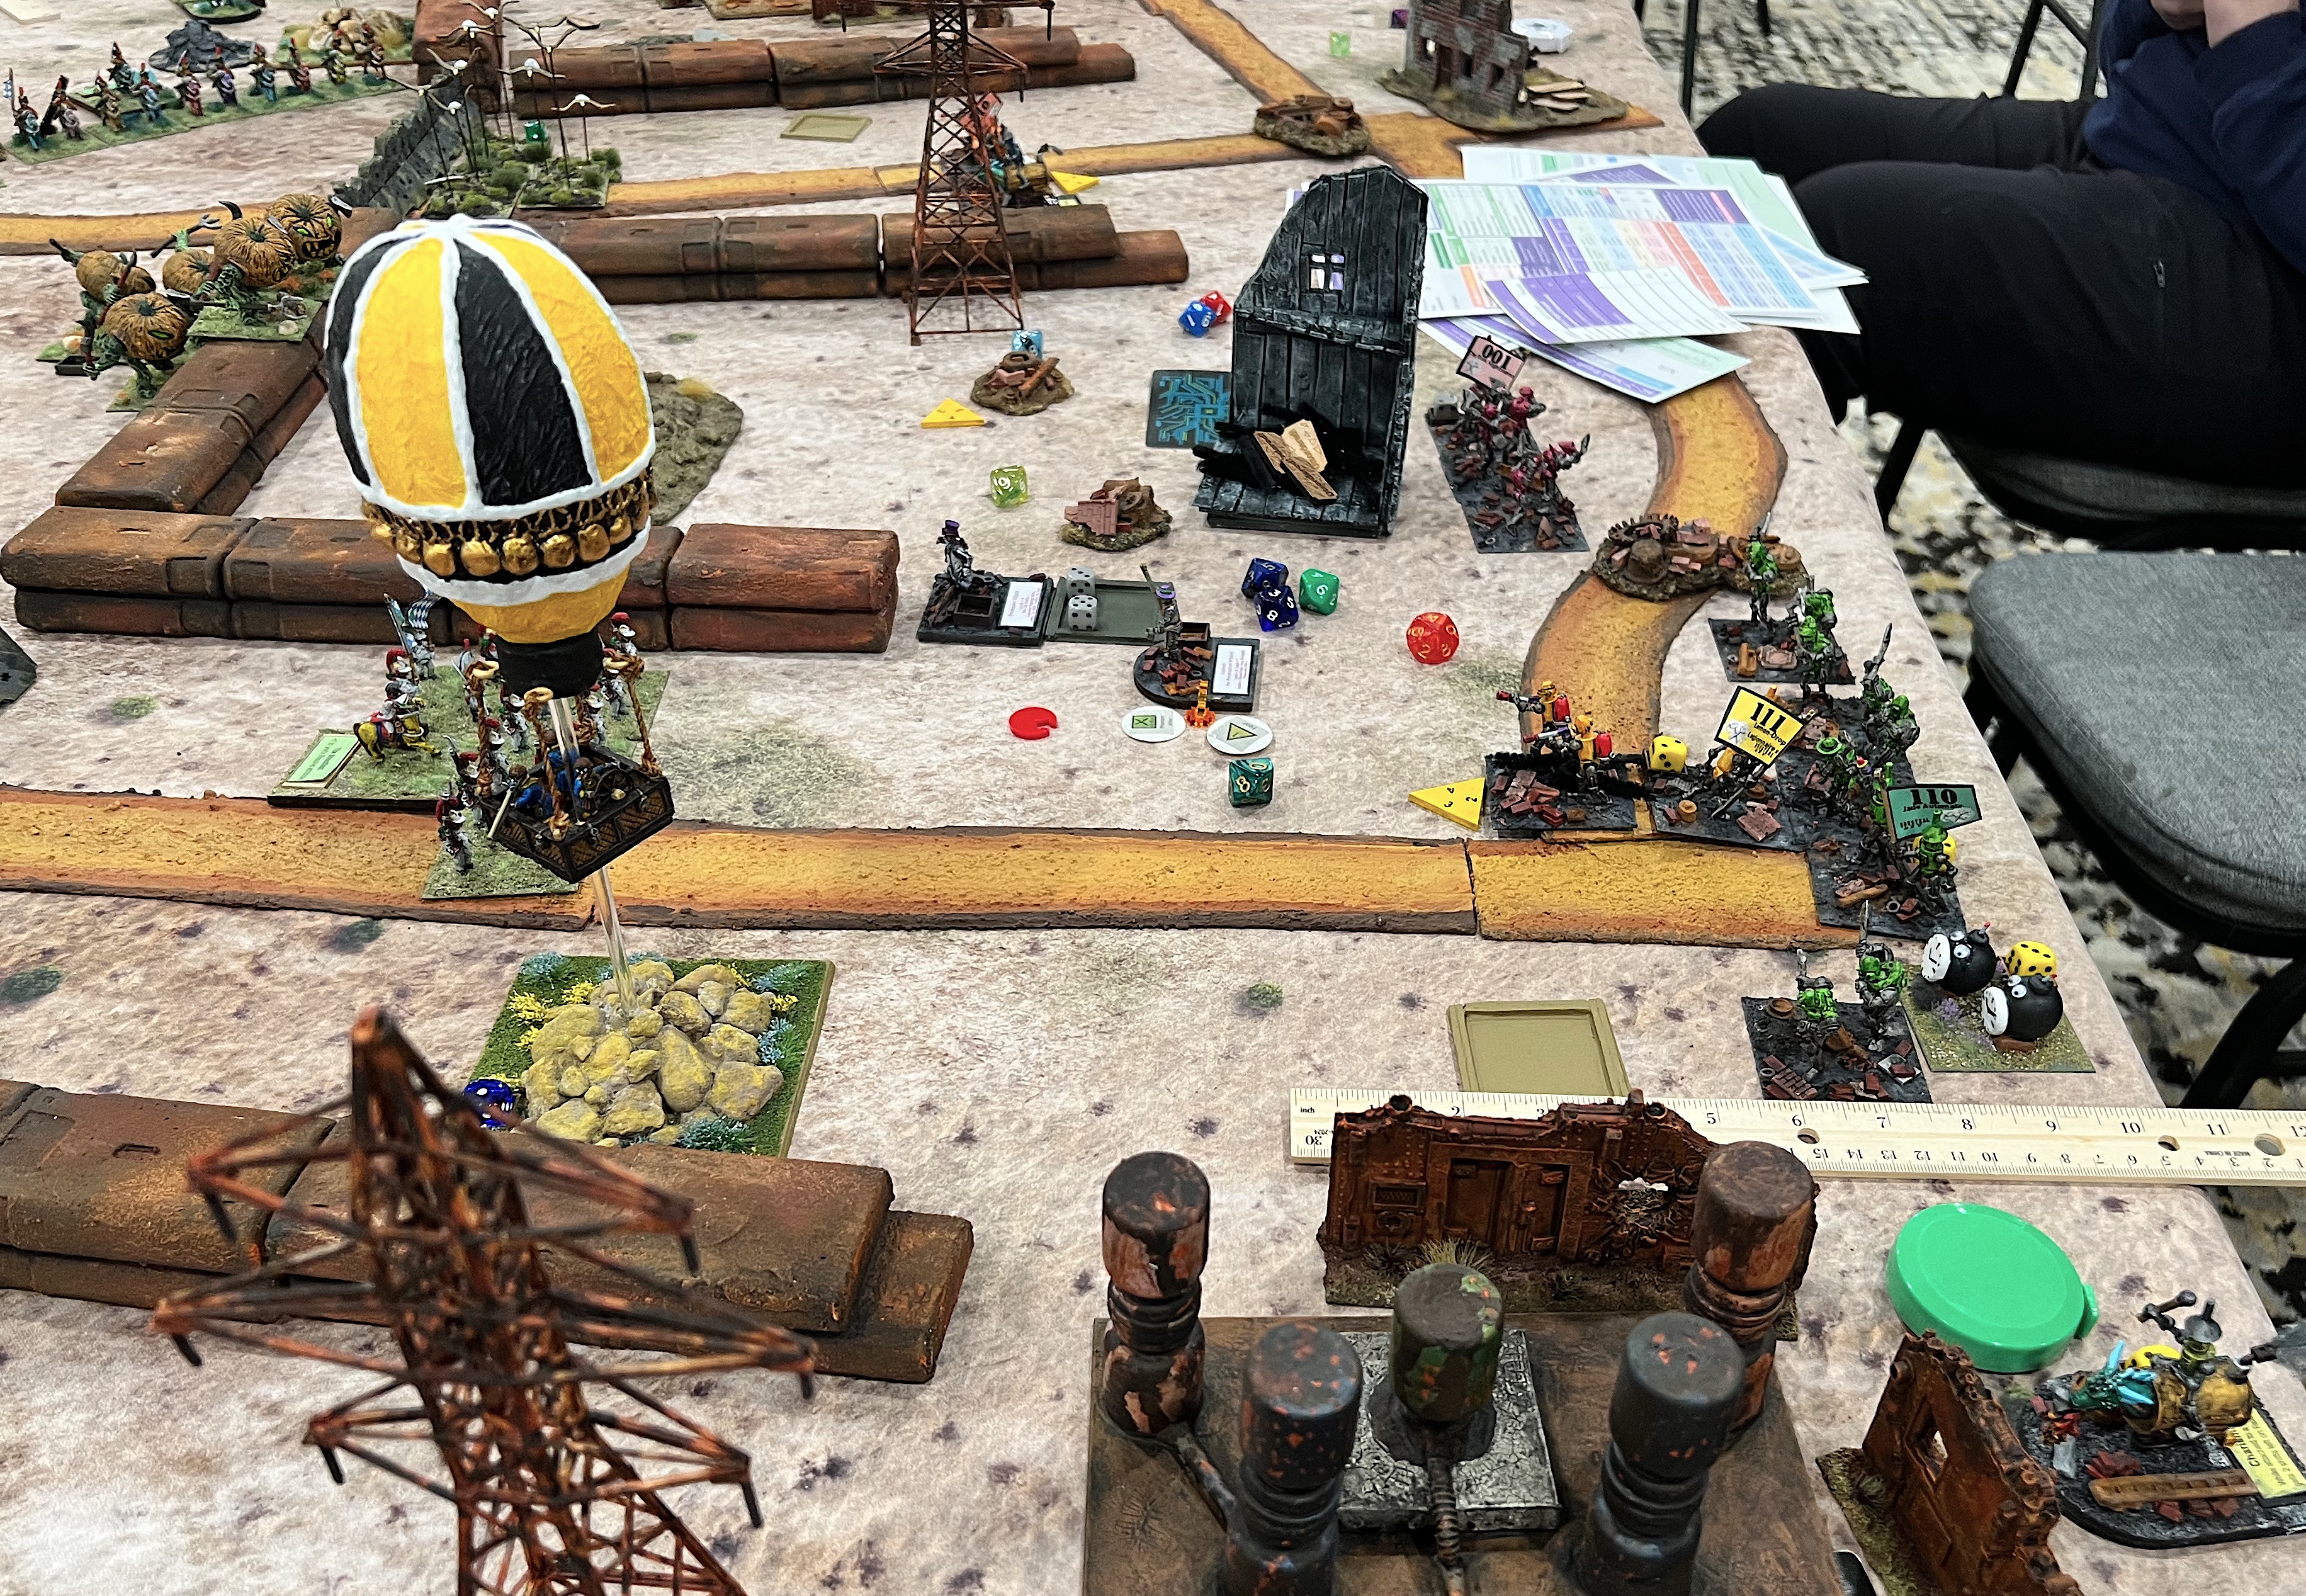
The Munchkins searched in vain for any technological secrets. They did manage to inflict slightly more casualties on Professor Nitpik’s forces, resulting in a narrow 18-15 point victory.

Little Wars TV actually showed a snippet this game on their Cold Wars video – you can see it at minute mark 12:31. My players look happy!

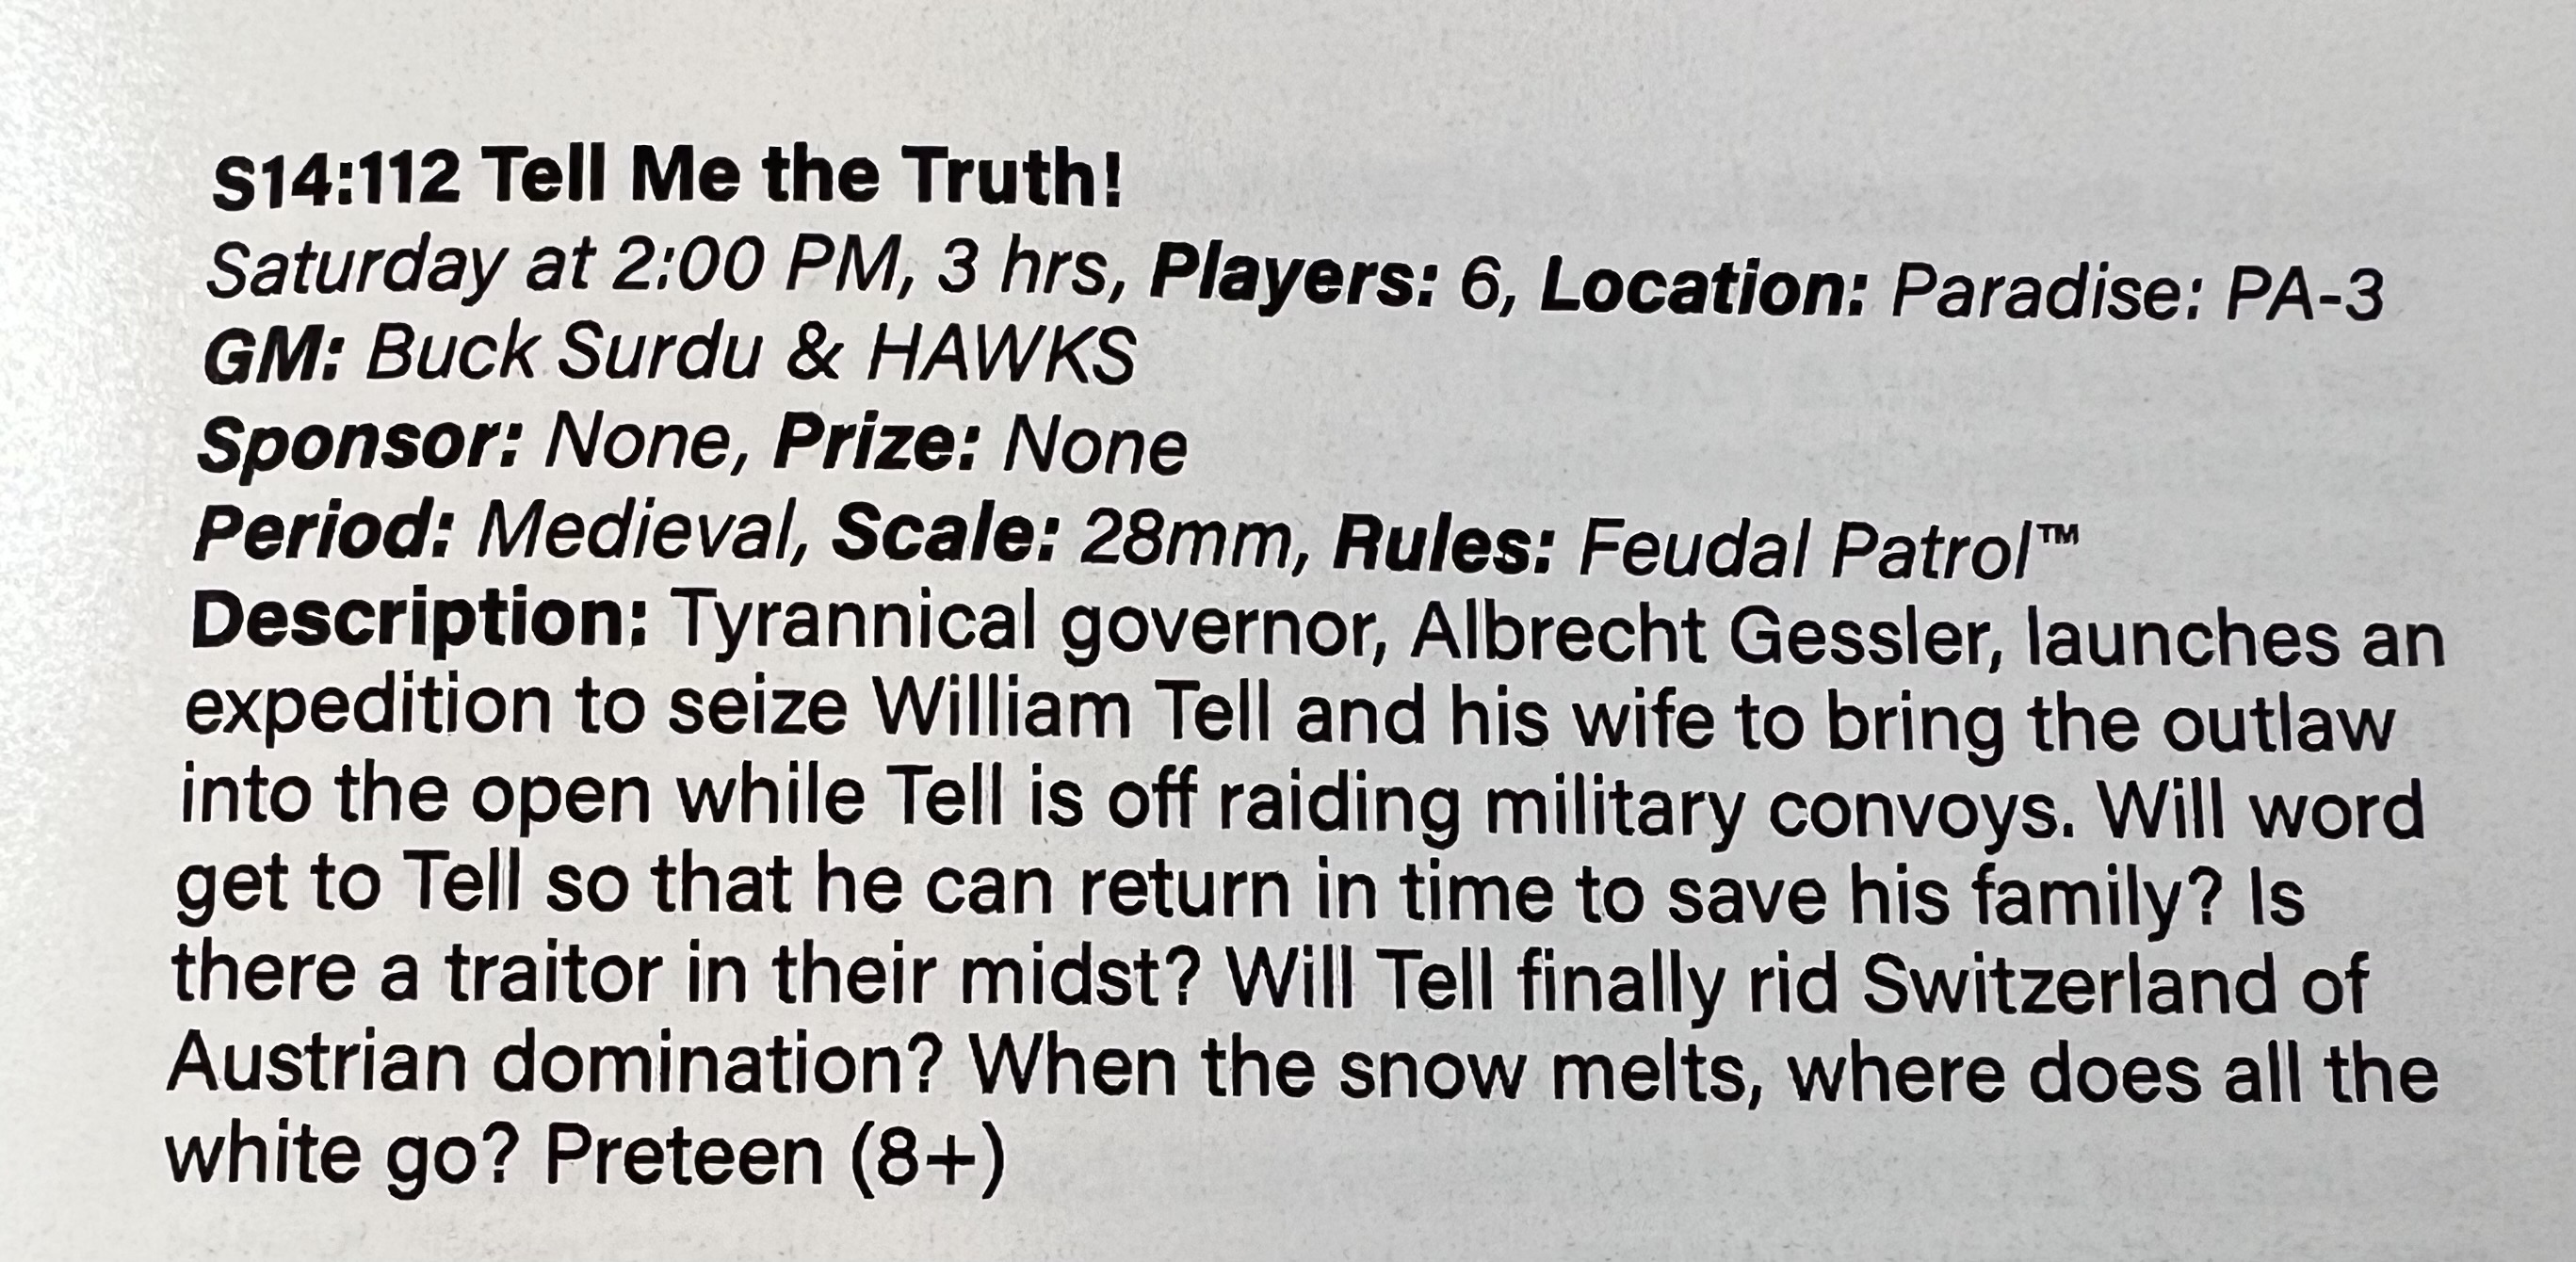
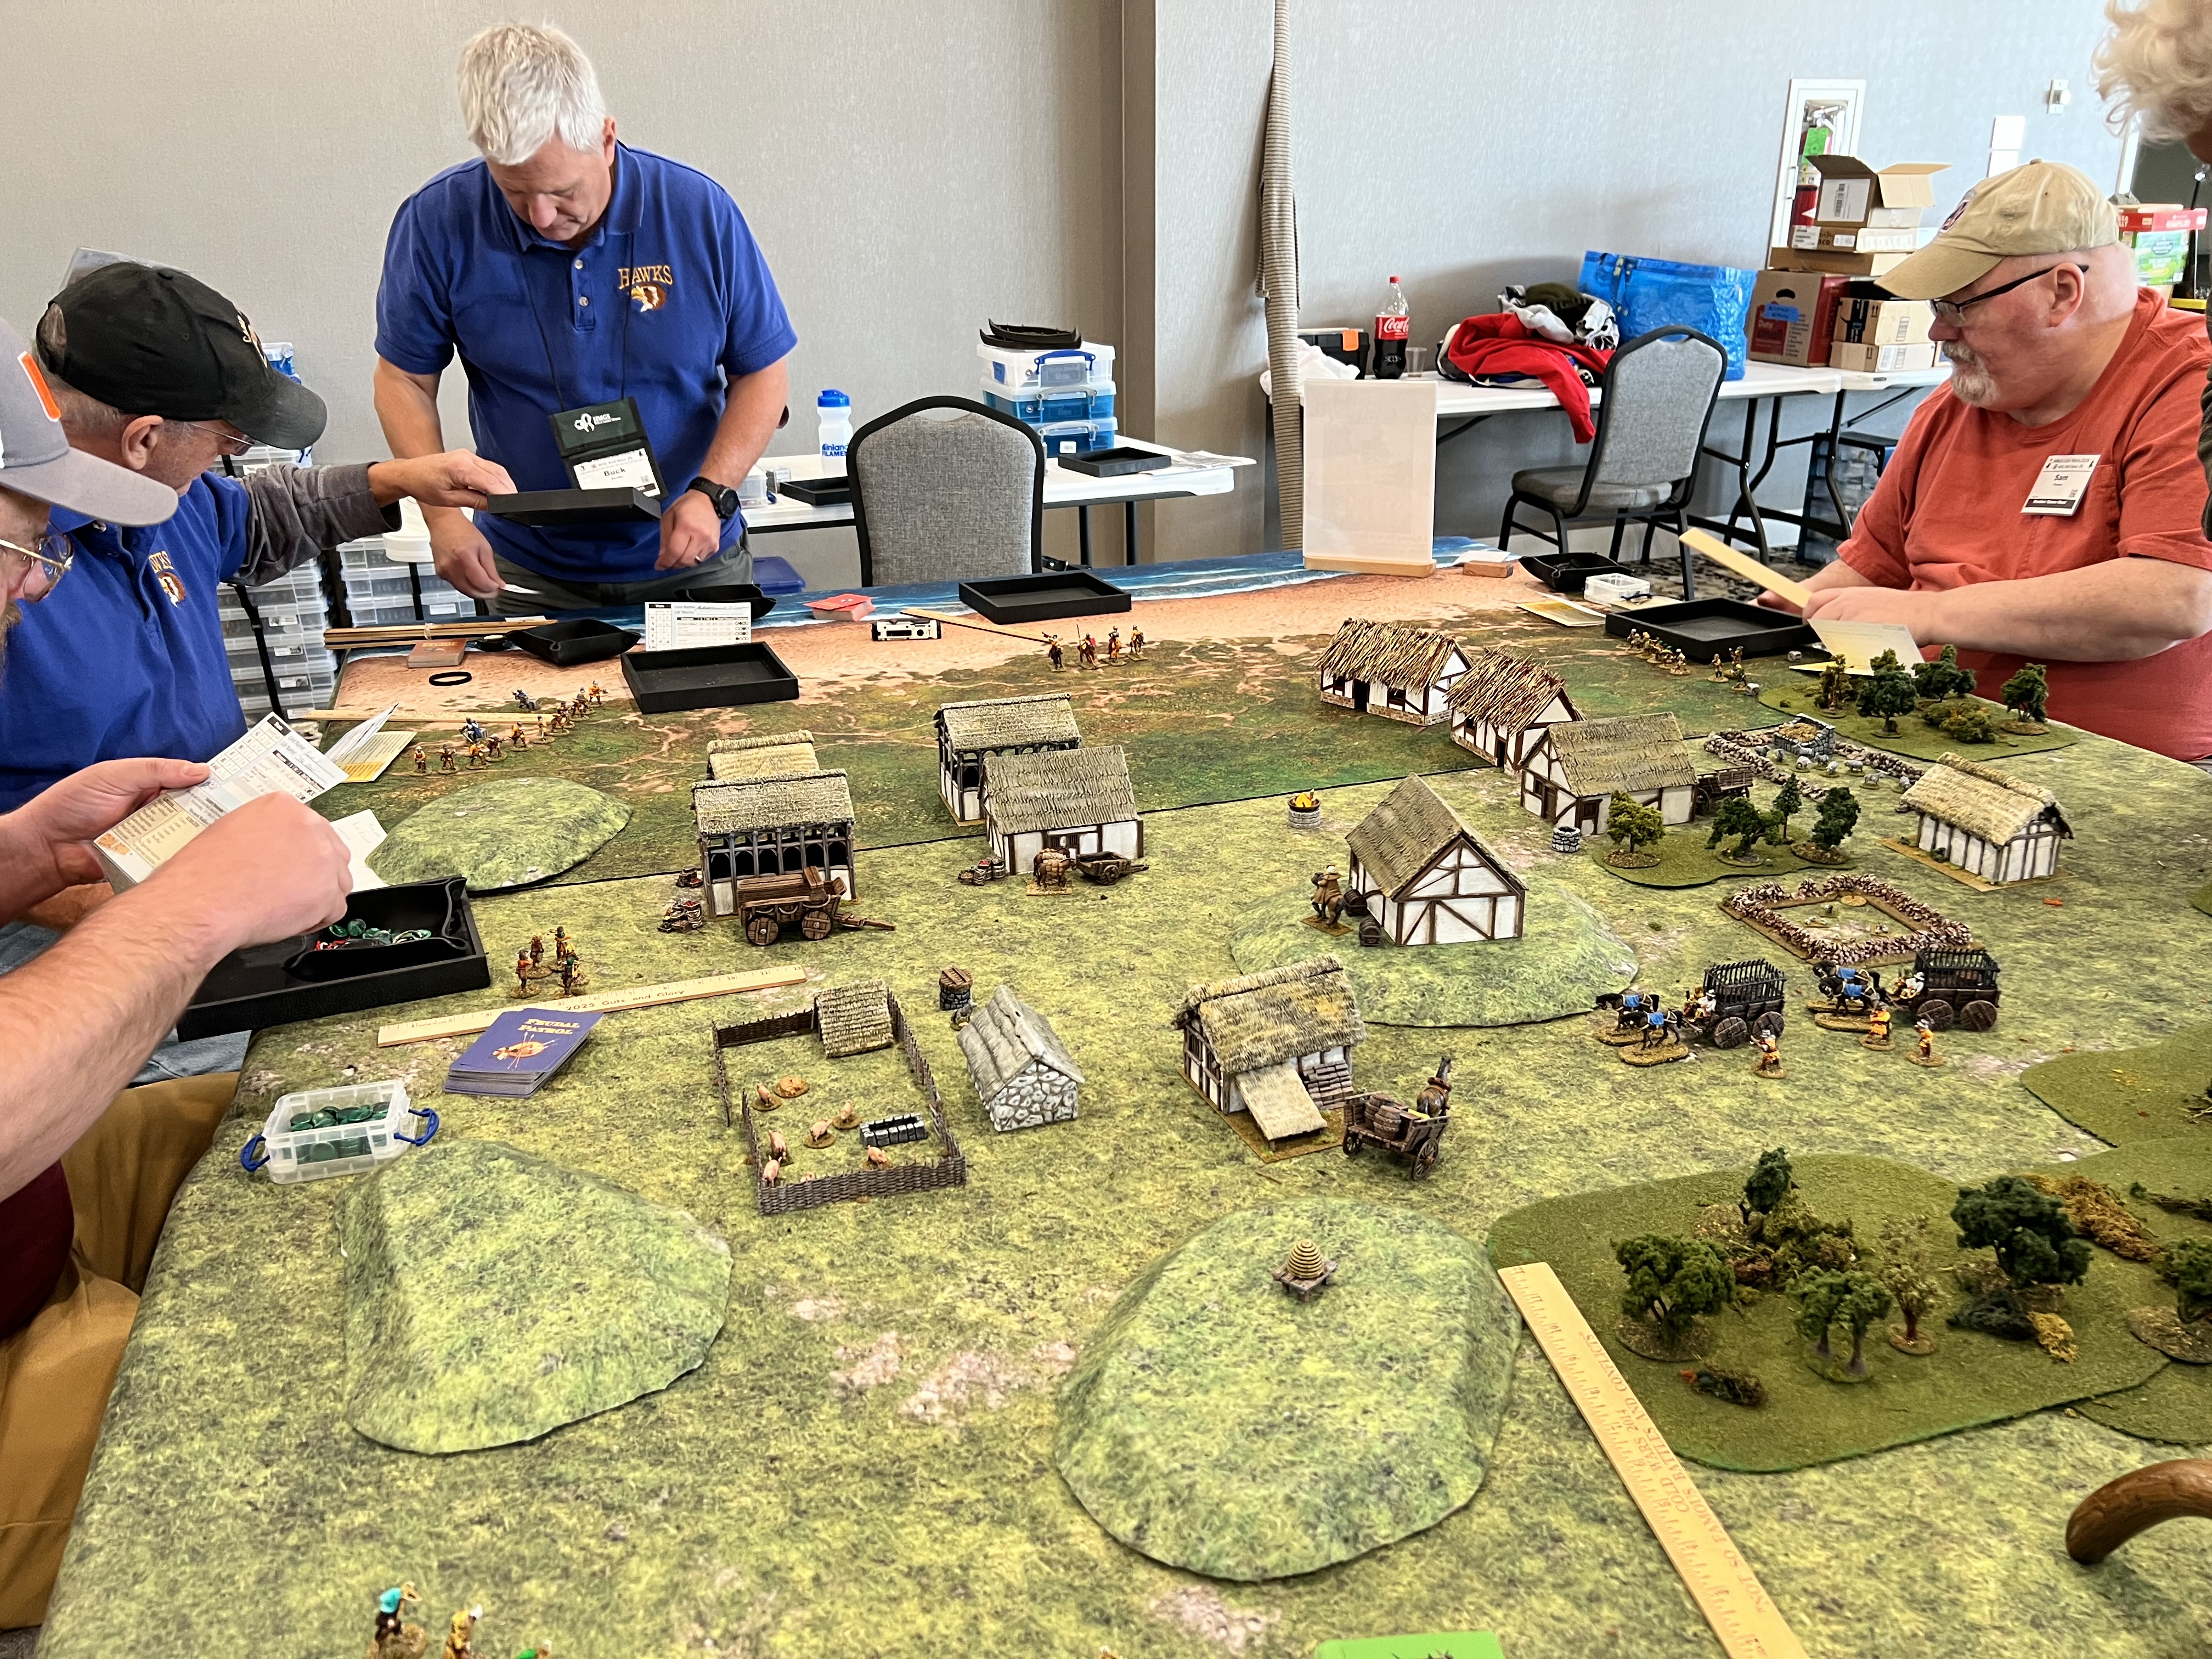
That wrapped up Friday – and Saturday I had two games scheduled. The first was a What a Tanker “what if” scenario between Vichy French and Italian armor. I had to cancel it due to lack of players. That allowed me more time to set up my evening game and to play in another Feudal Patrol game run by Buck. It was a scenario based on a William Tell TV show from the ’60’s that I have no memory of! It was fun, we freed the good guys from the Austrians, and had a good time.

Tell Me the Truth! (Feudal Patrol/William Tell)

Buck prepping at the game start. I spent a lot of time in the game moving that bee hive on the hill!

At last it was time for Saturday night’s game.

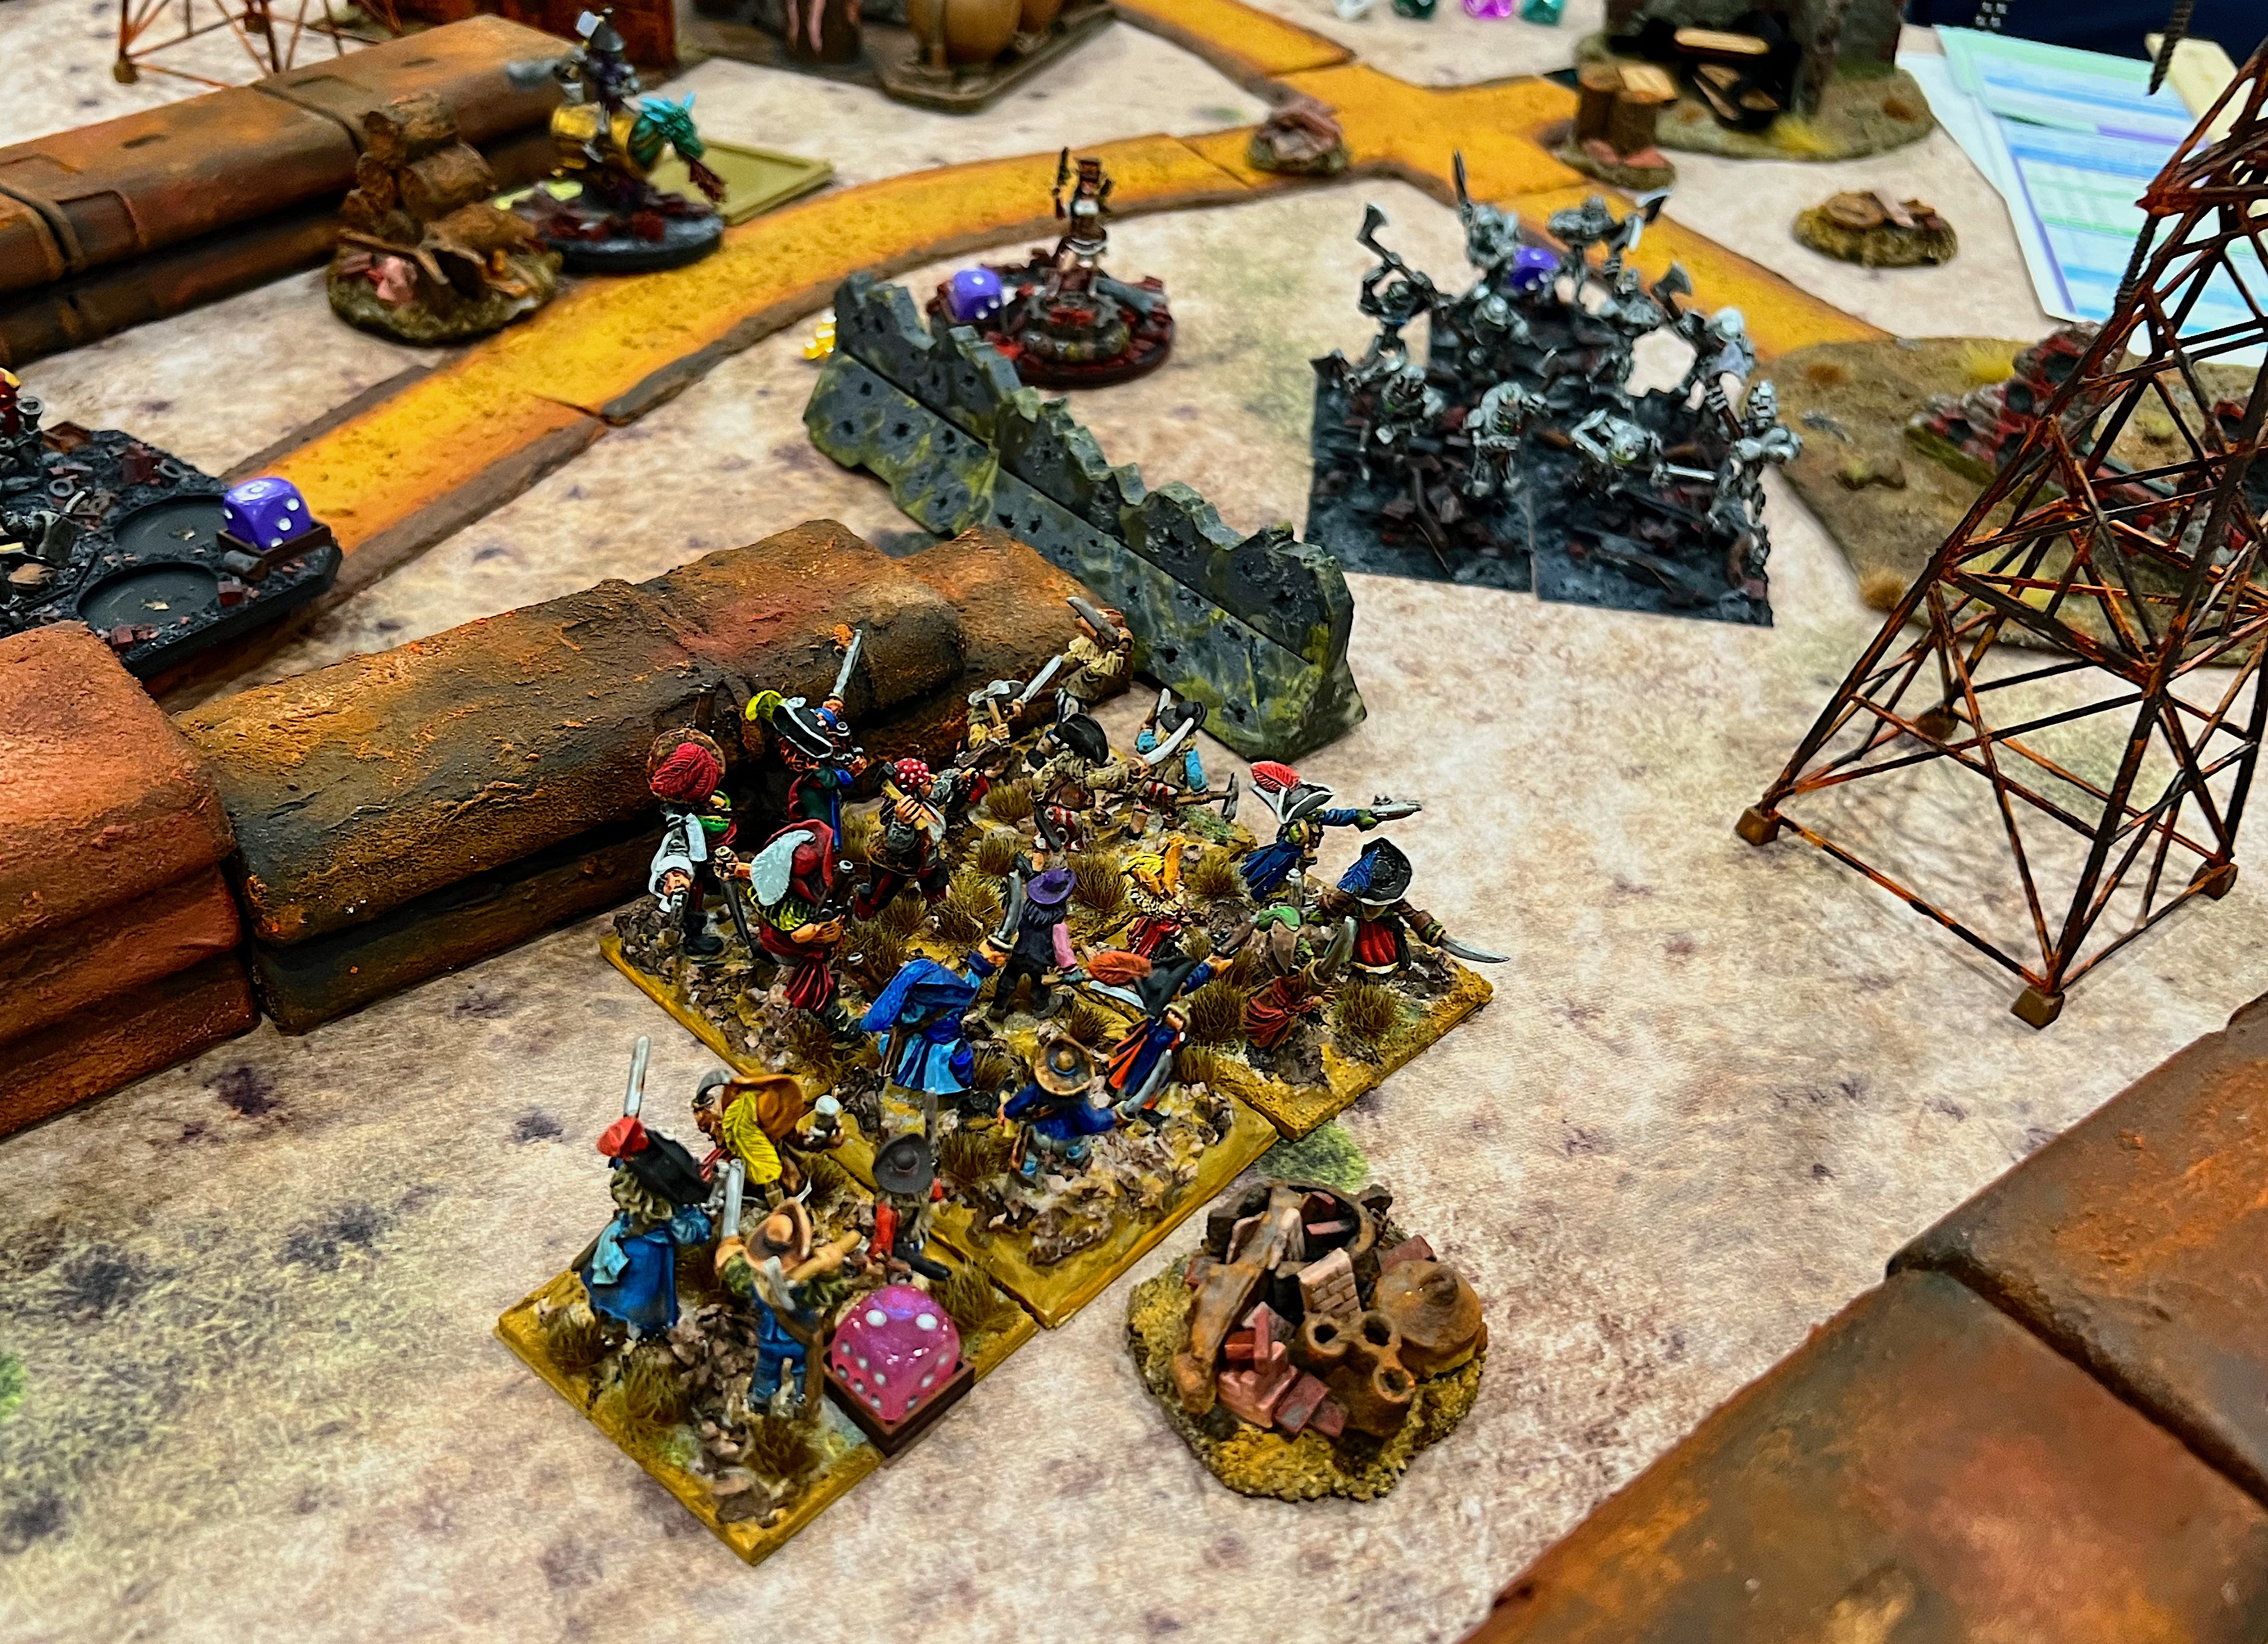
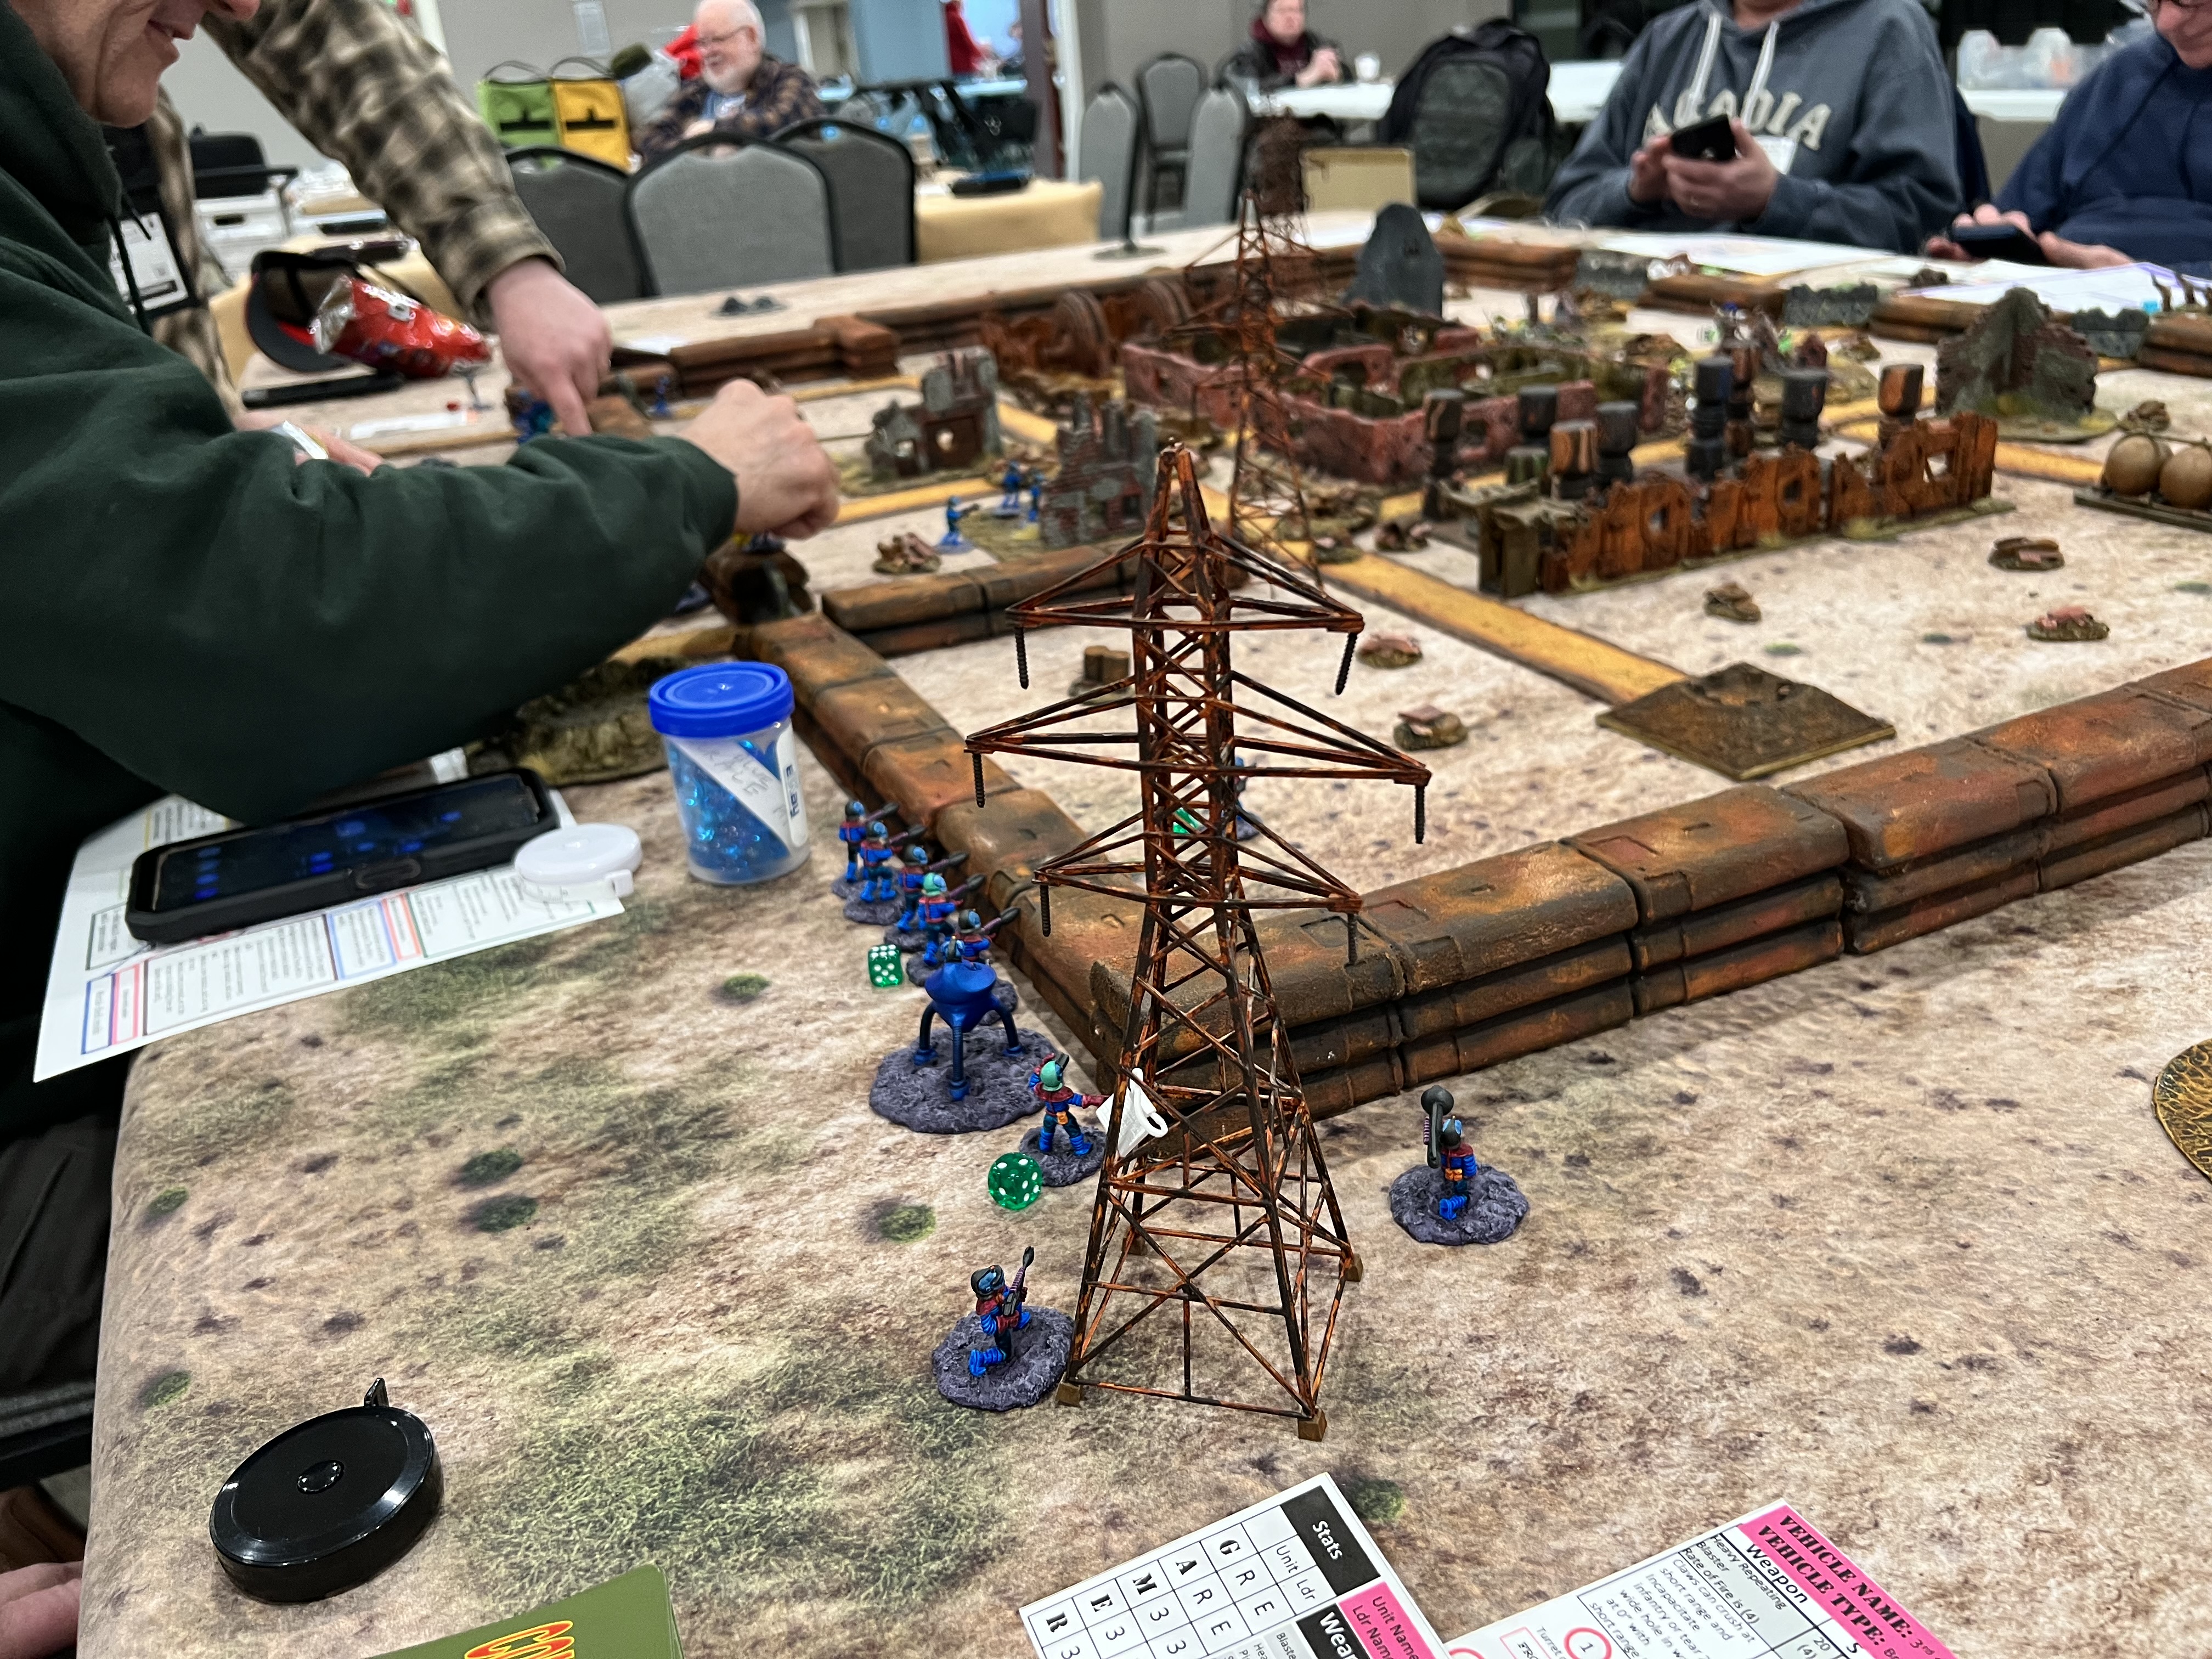
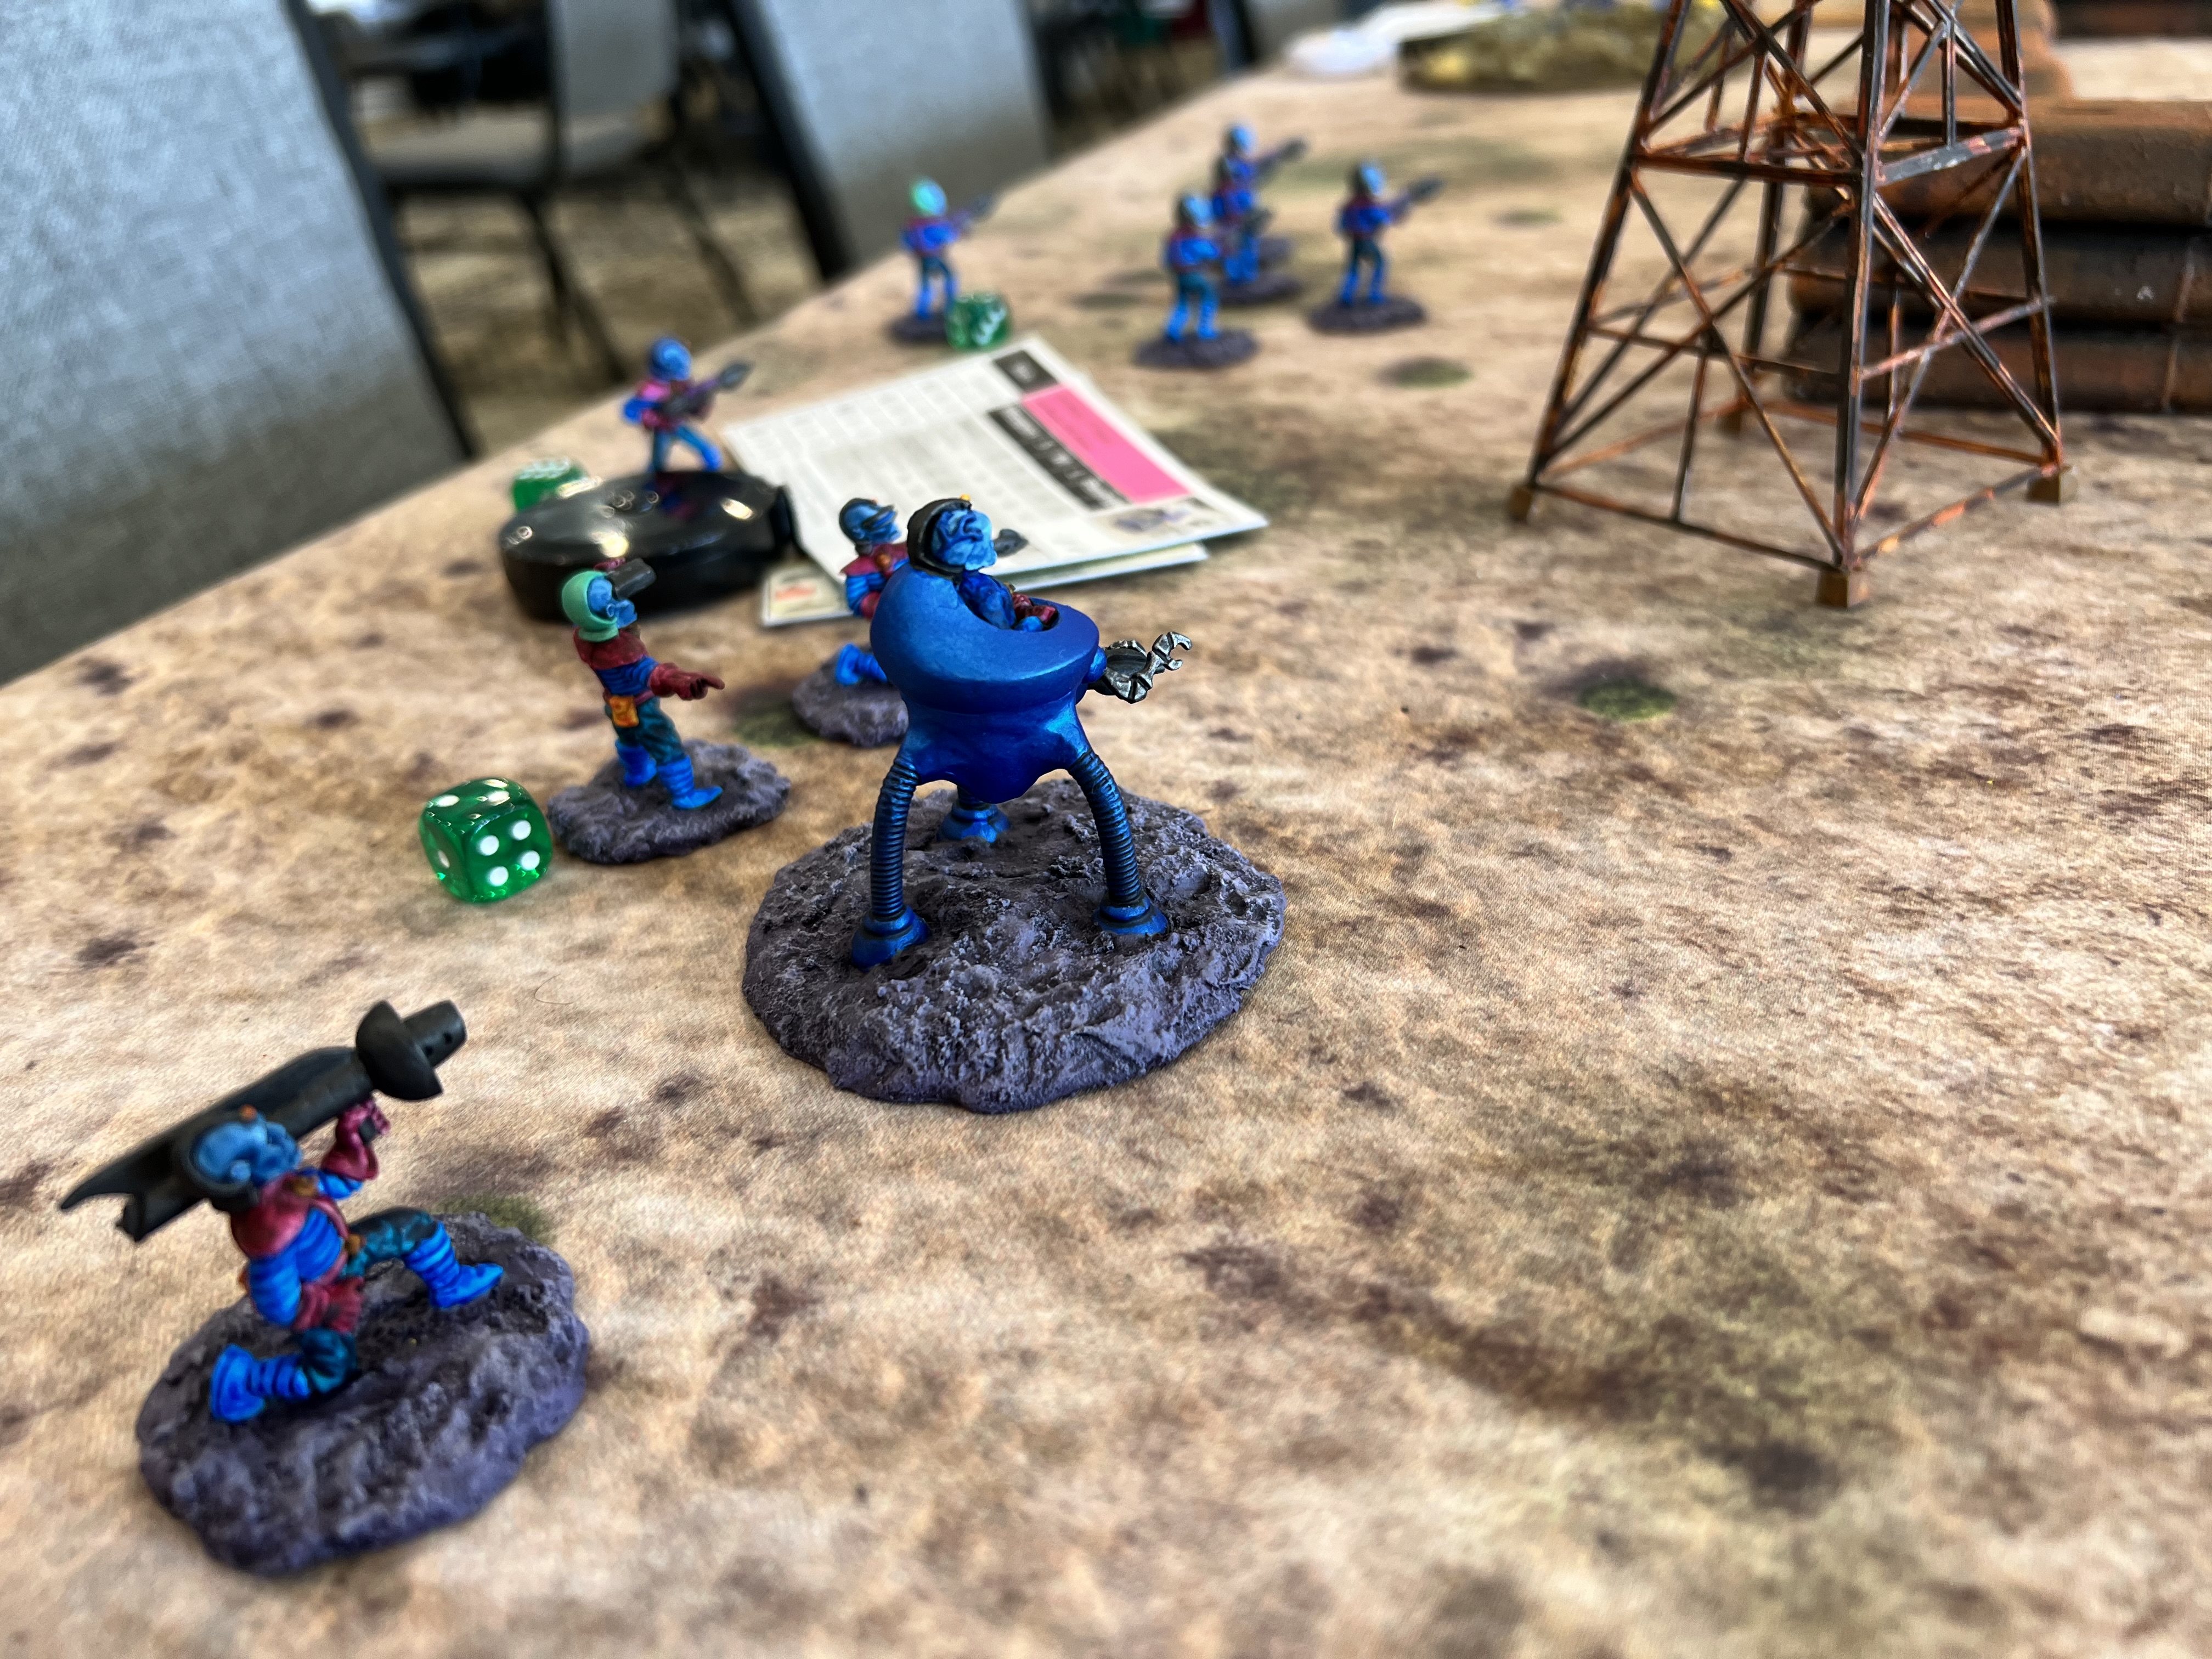
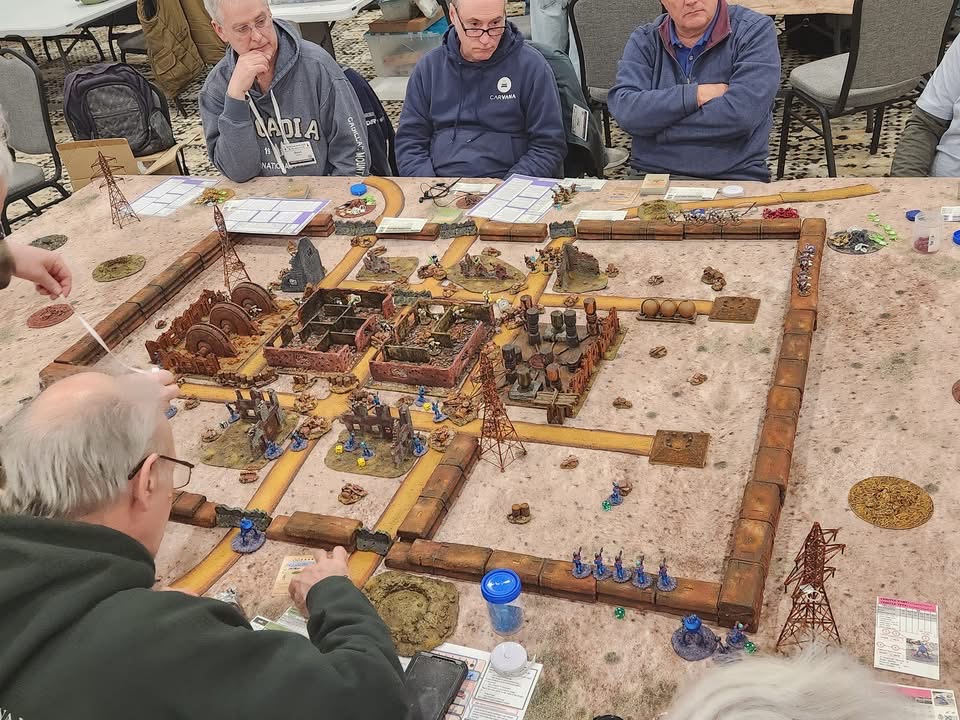
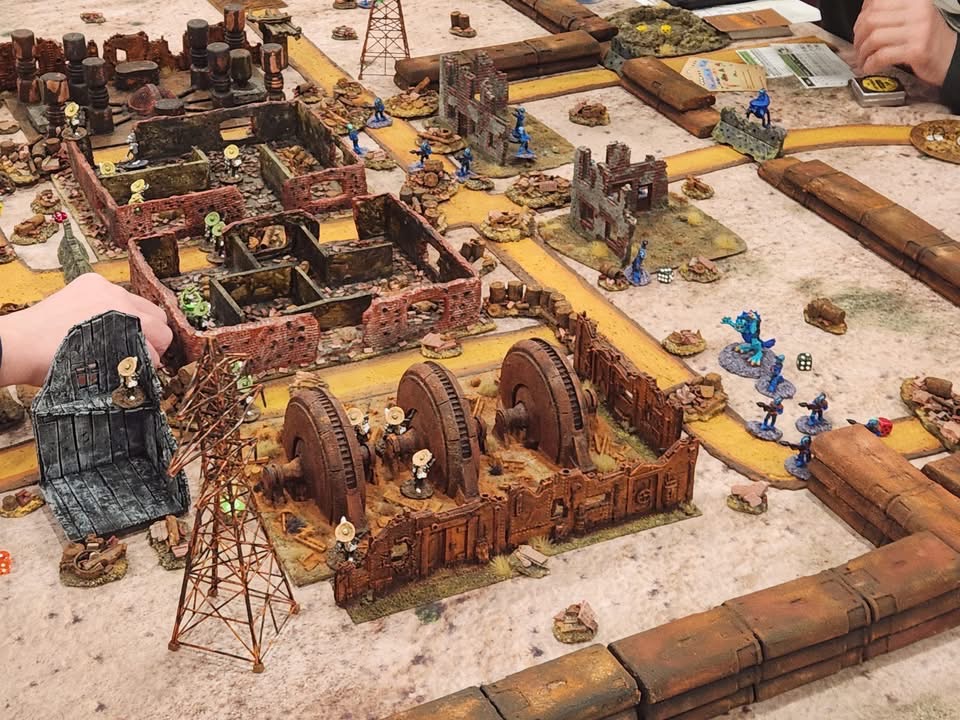
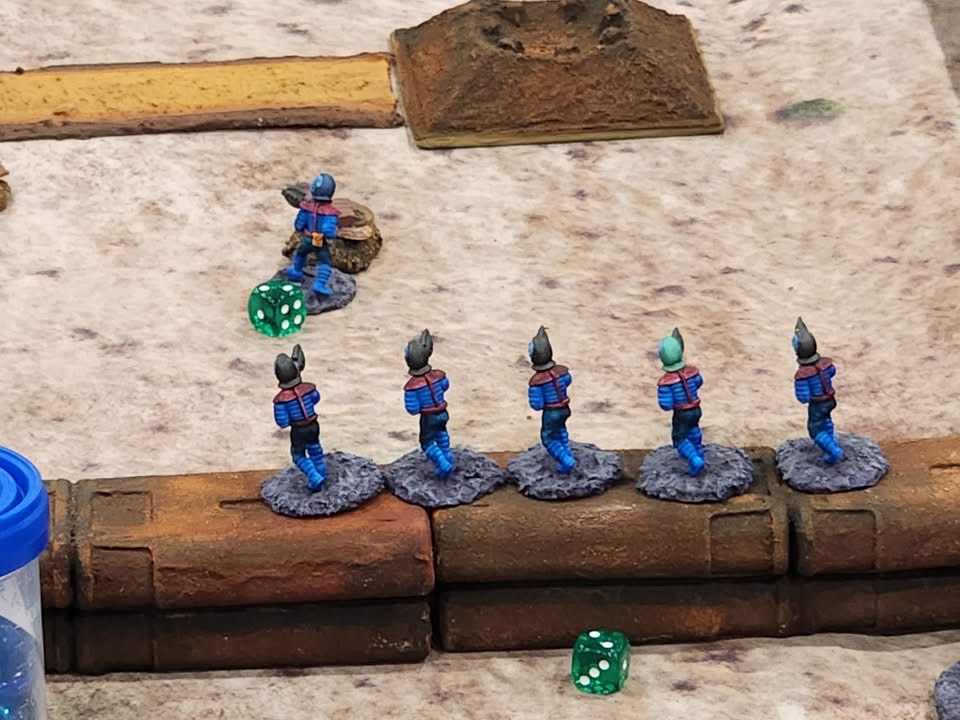
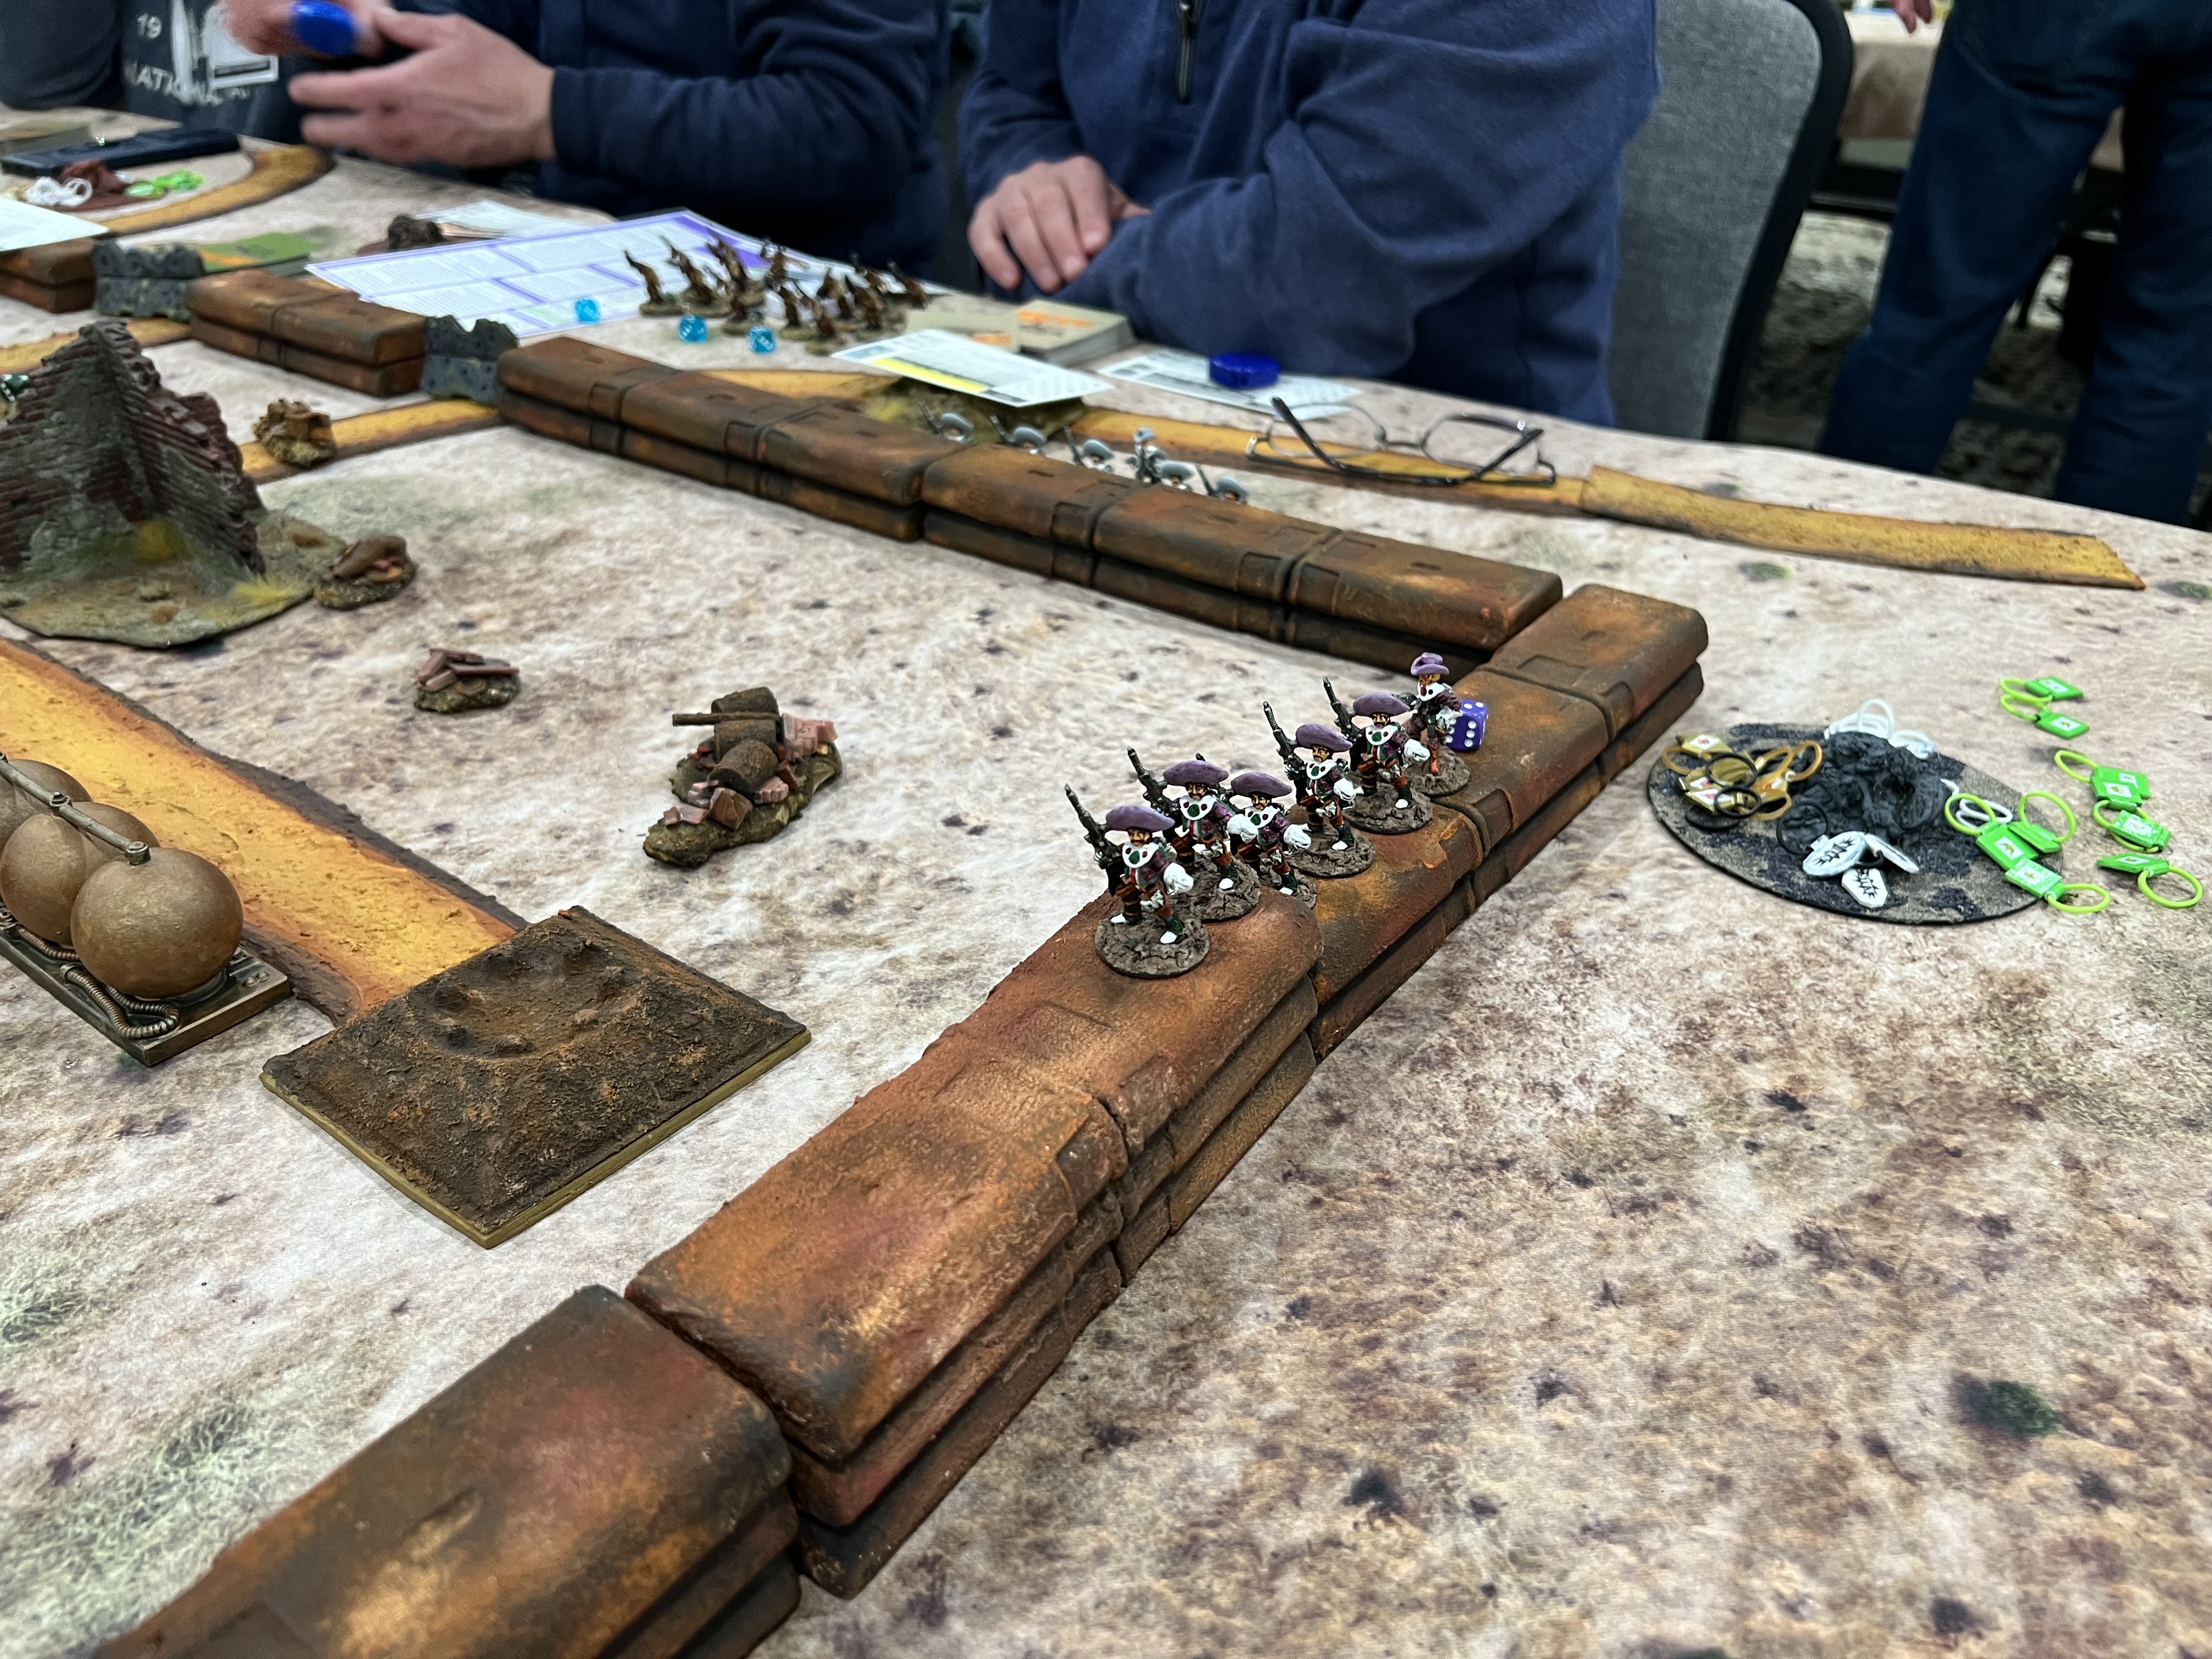
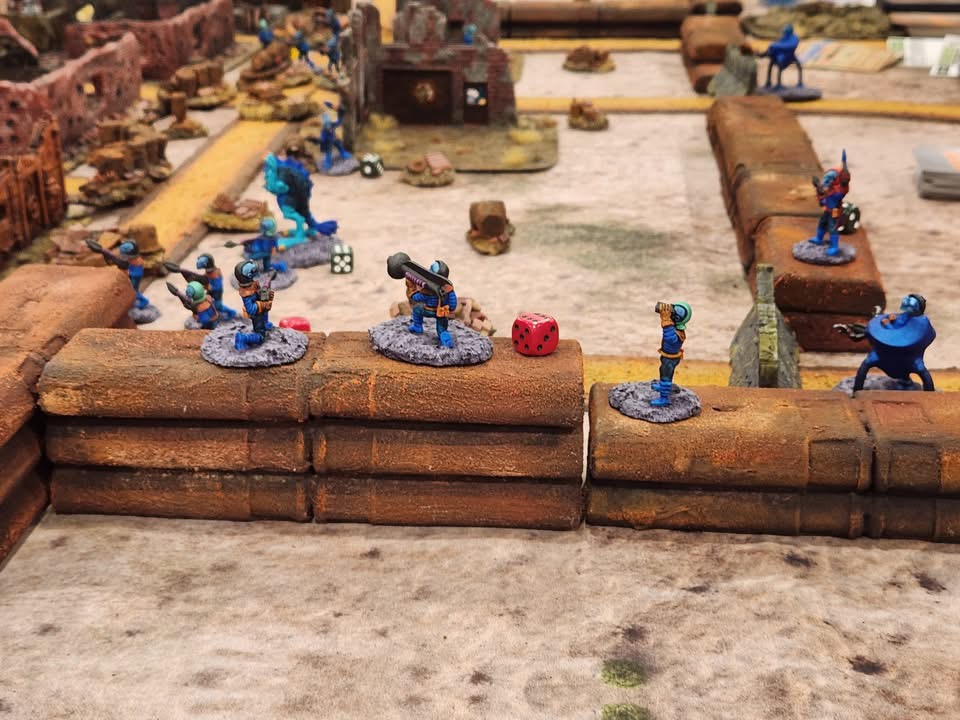
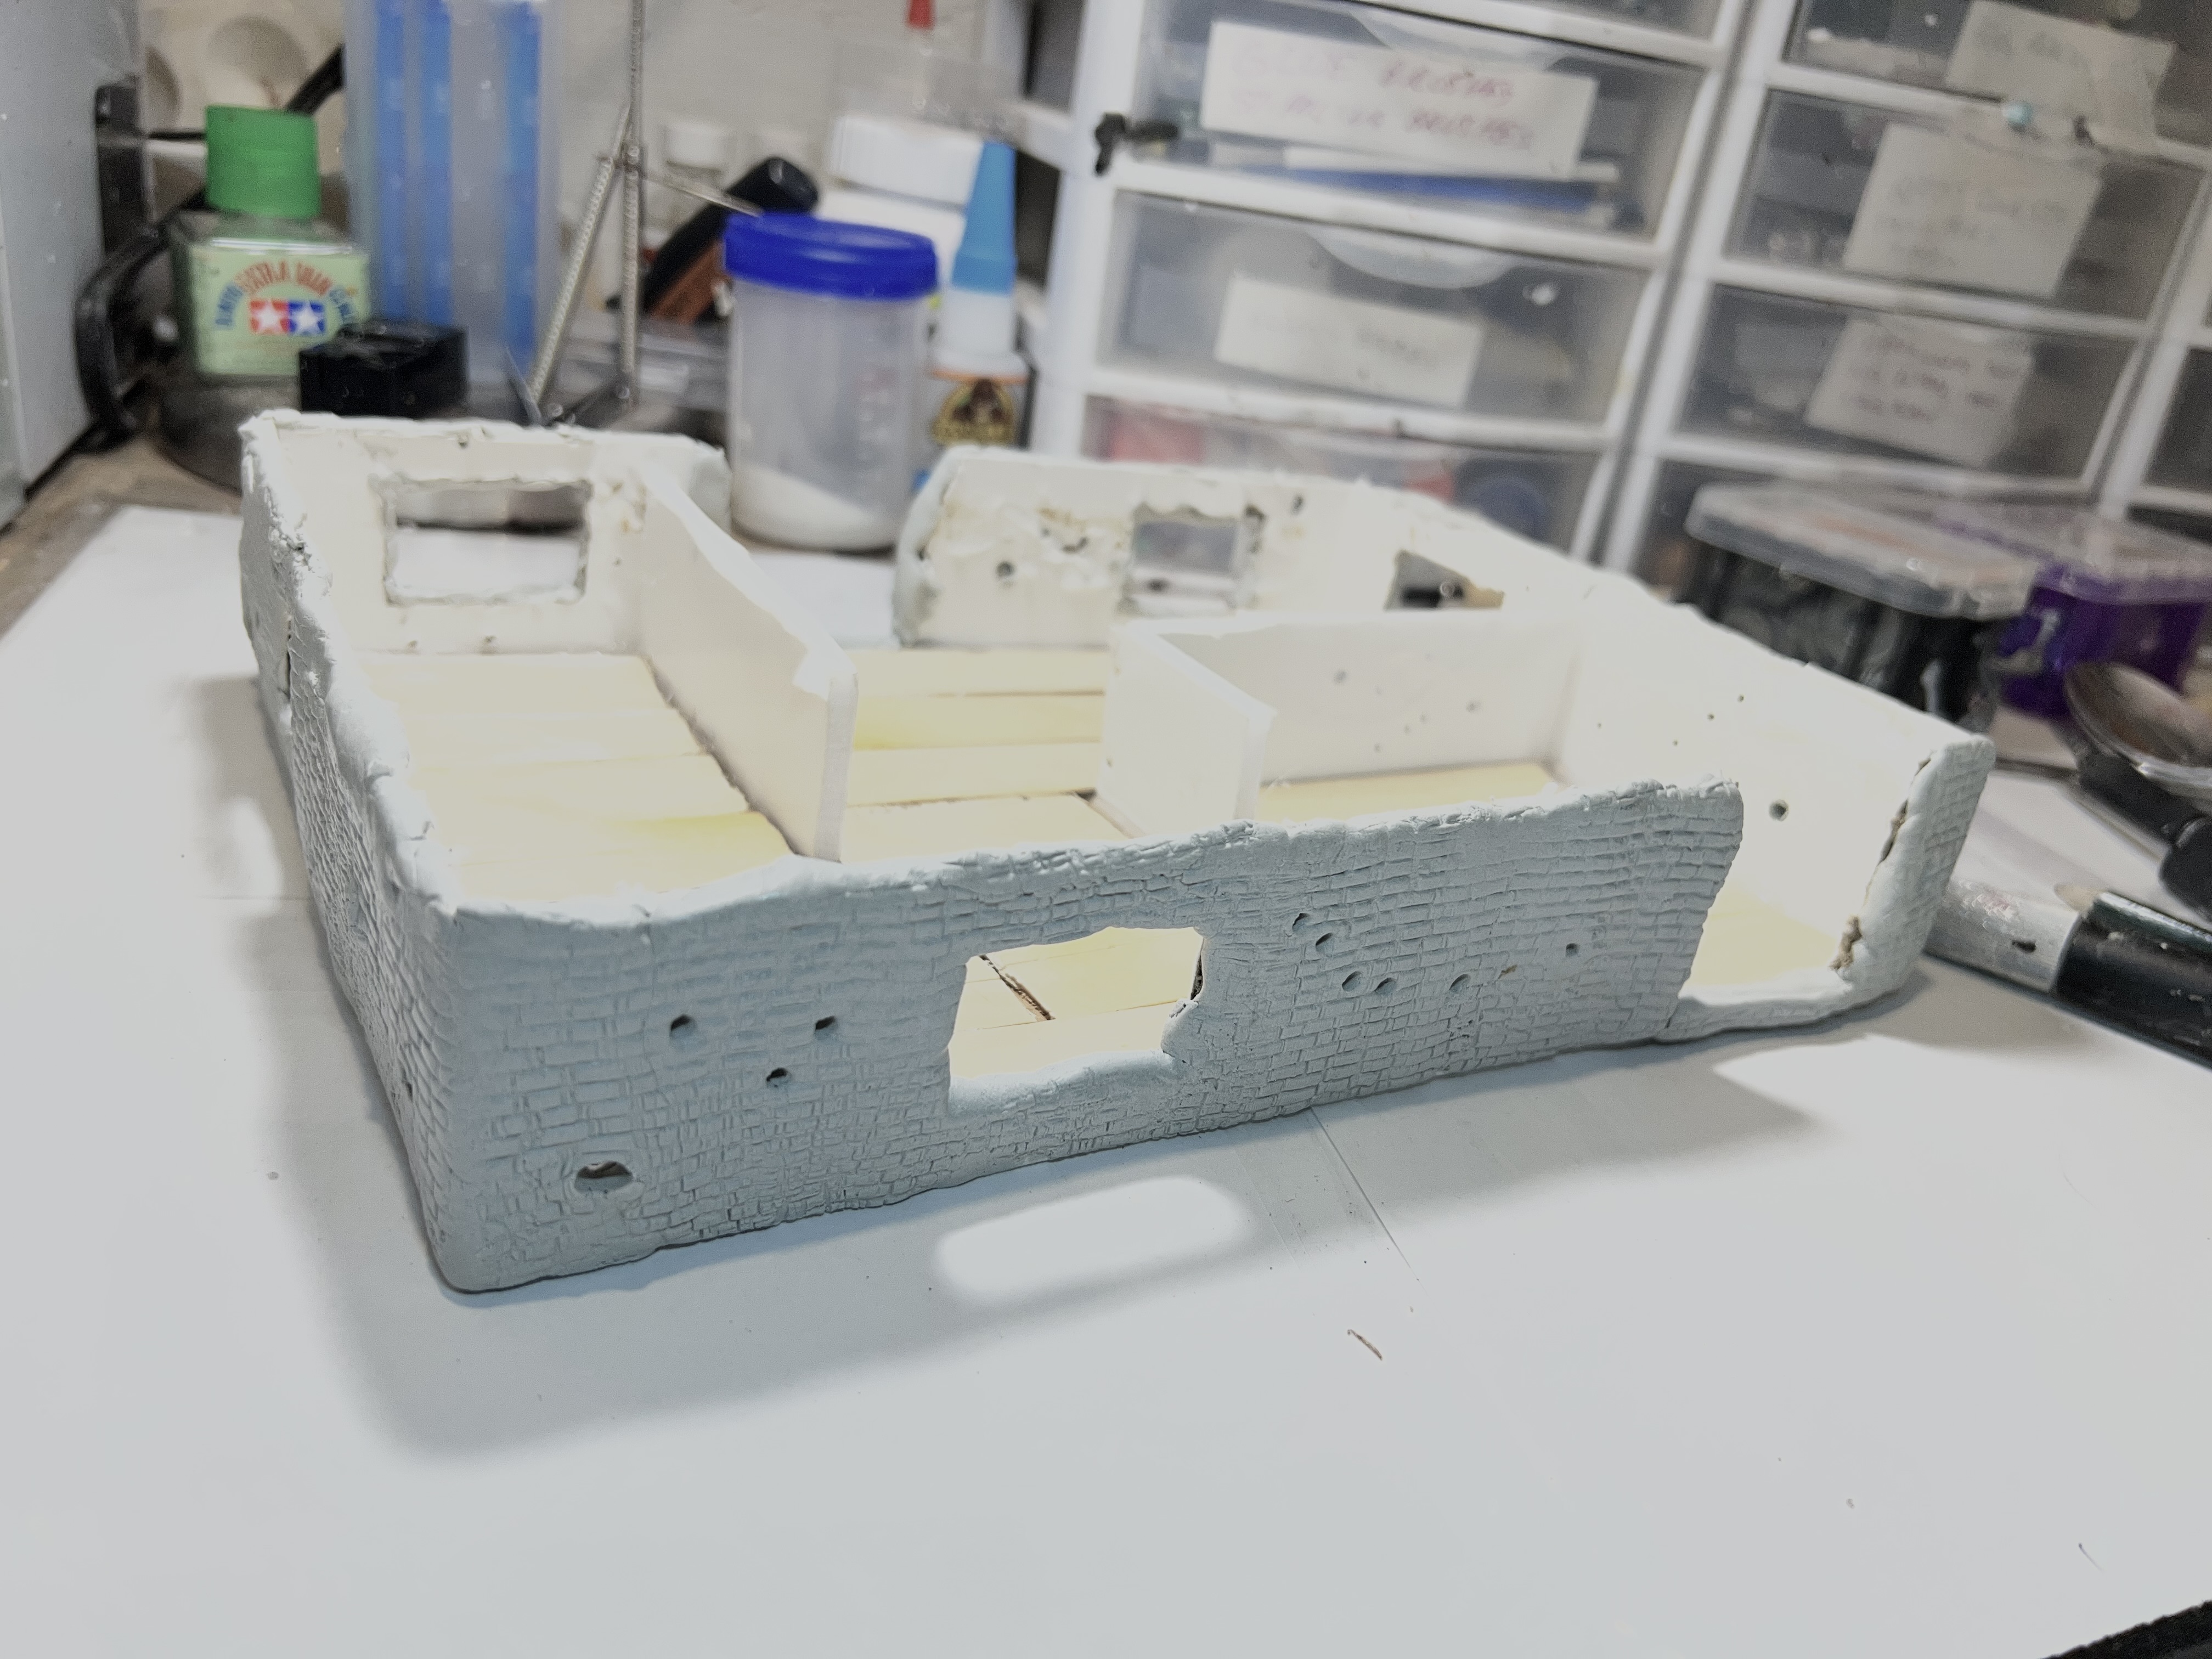
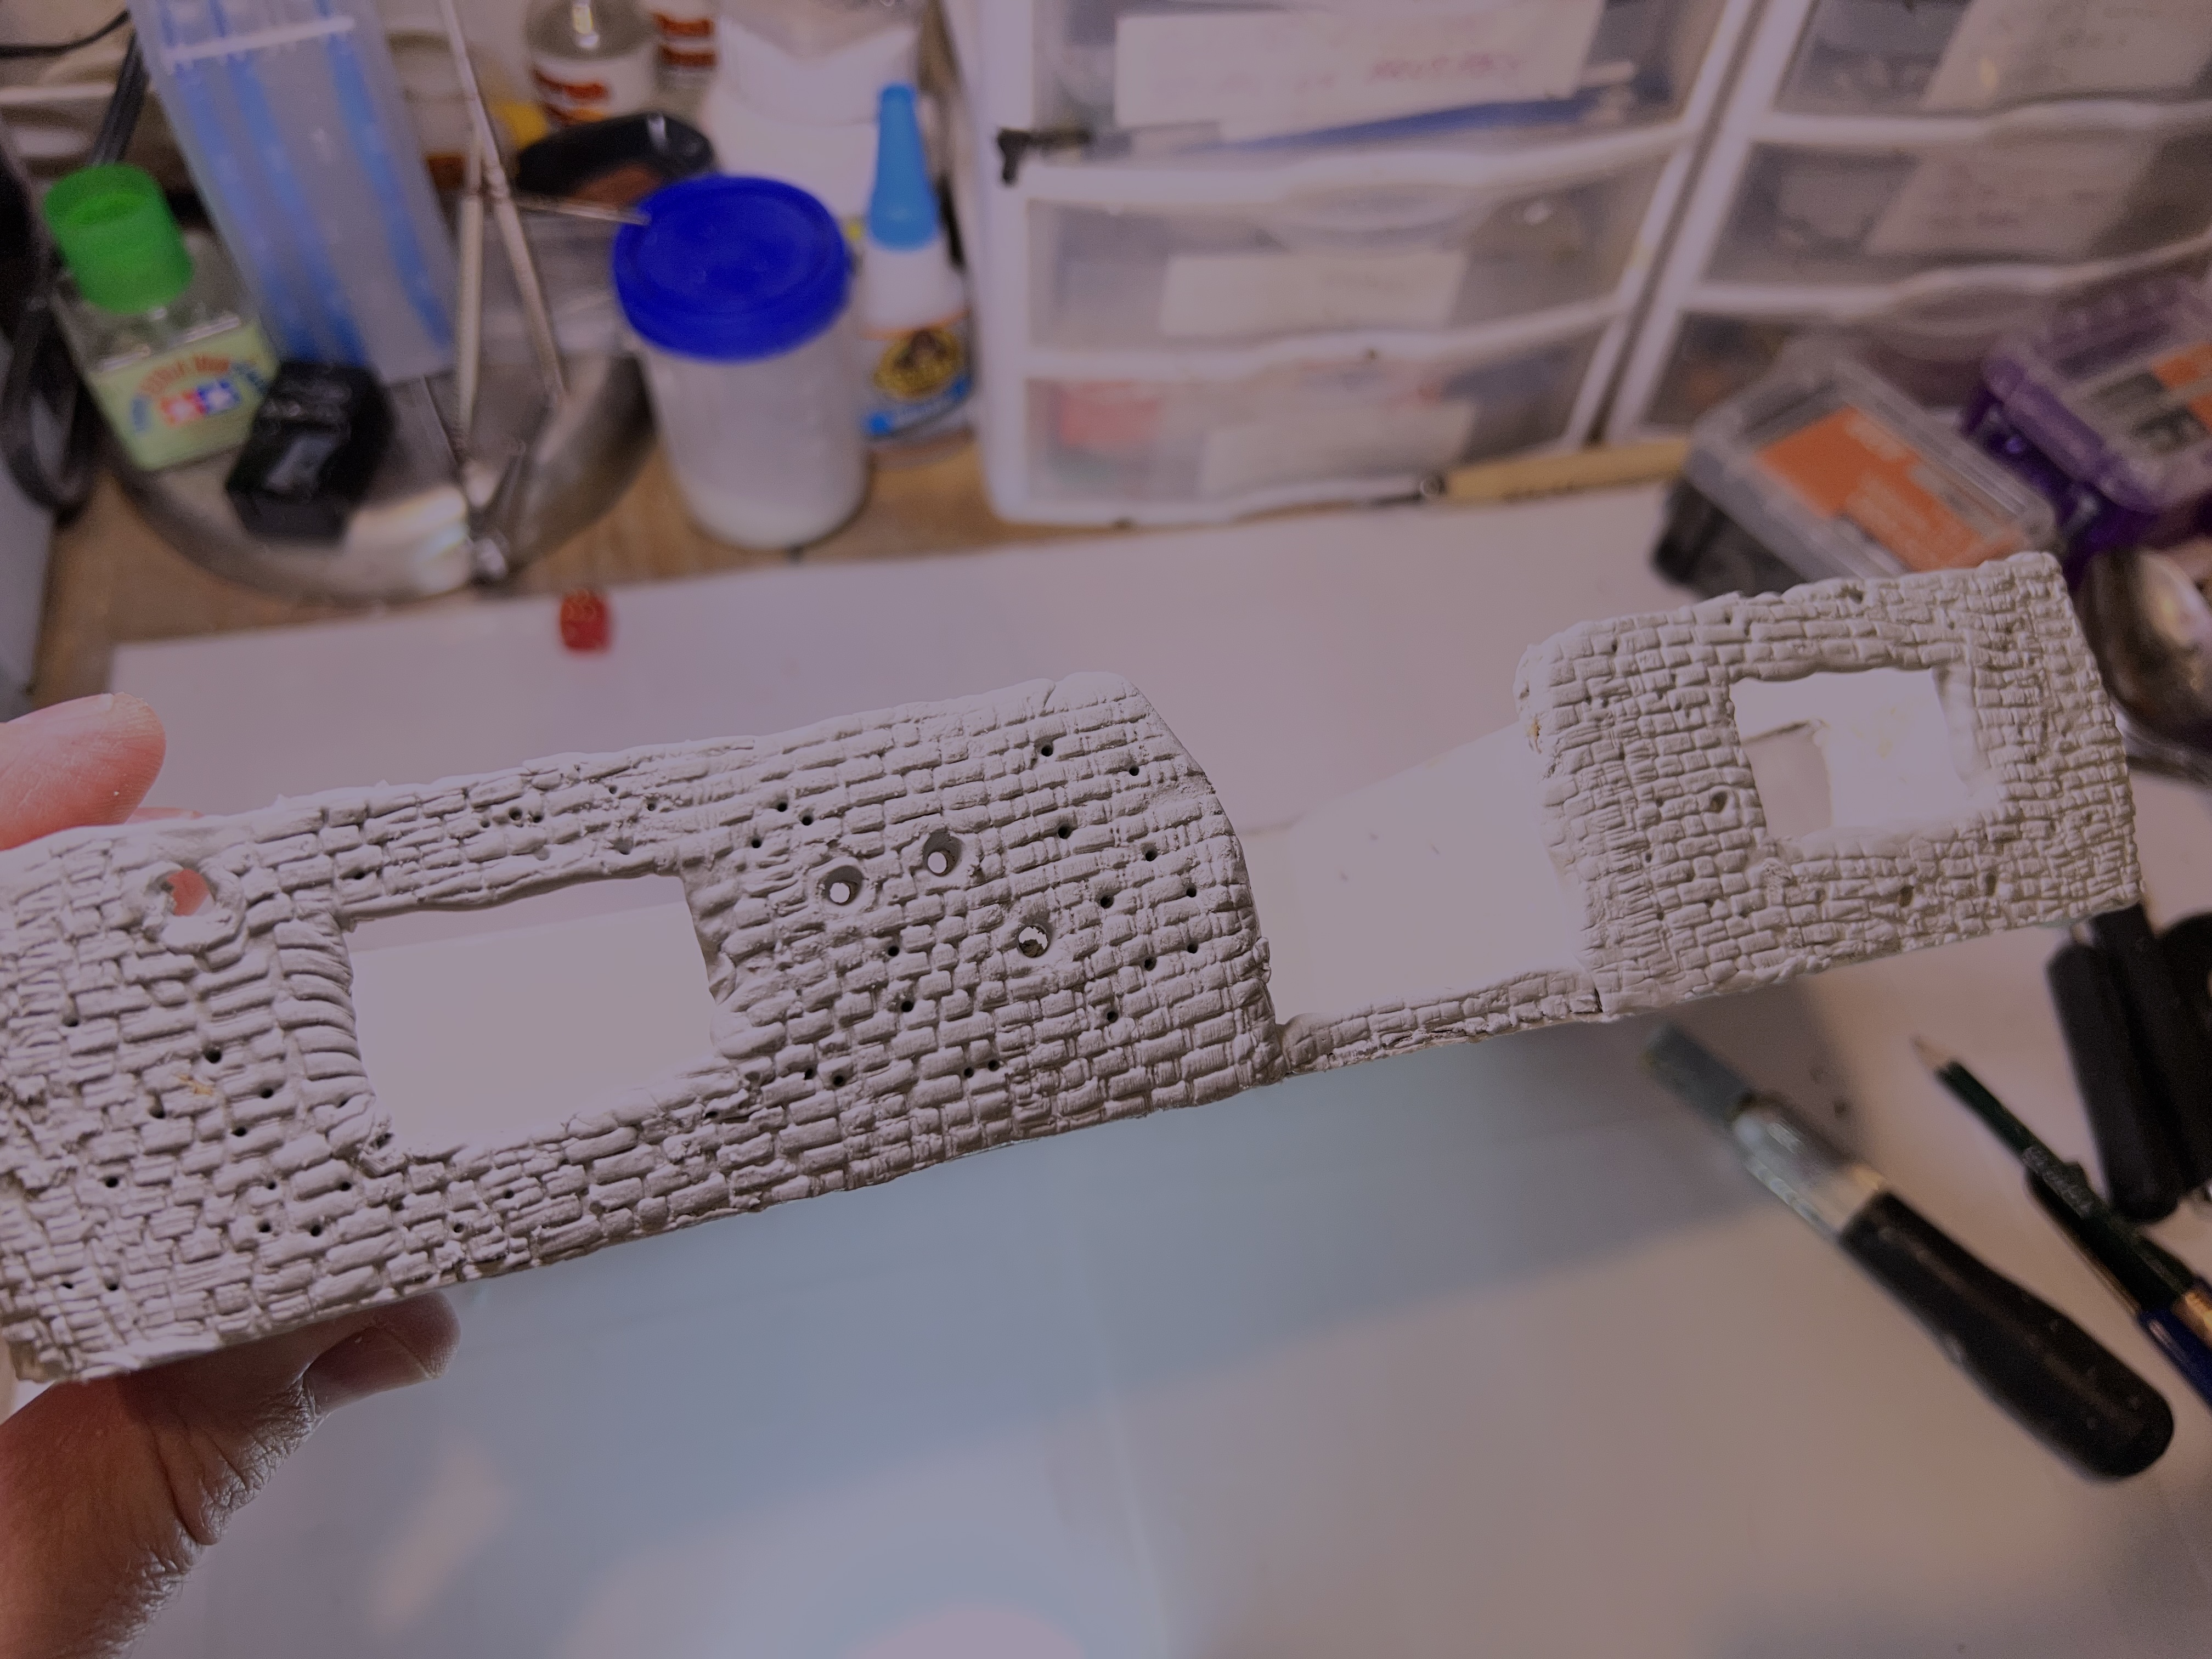
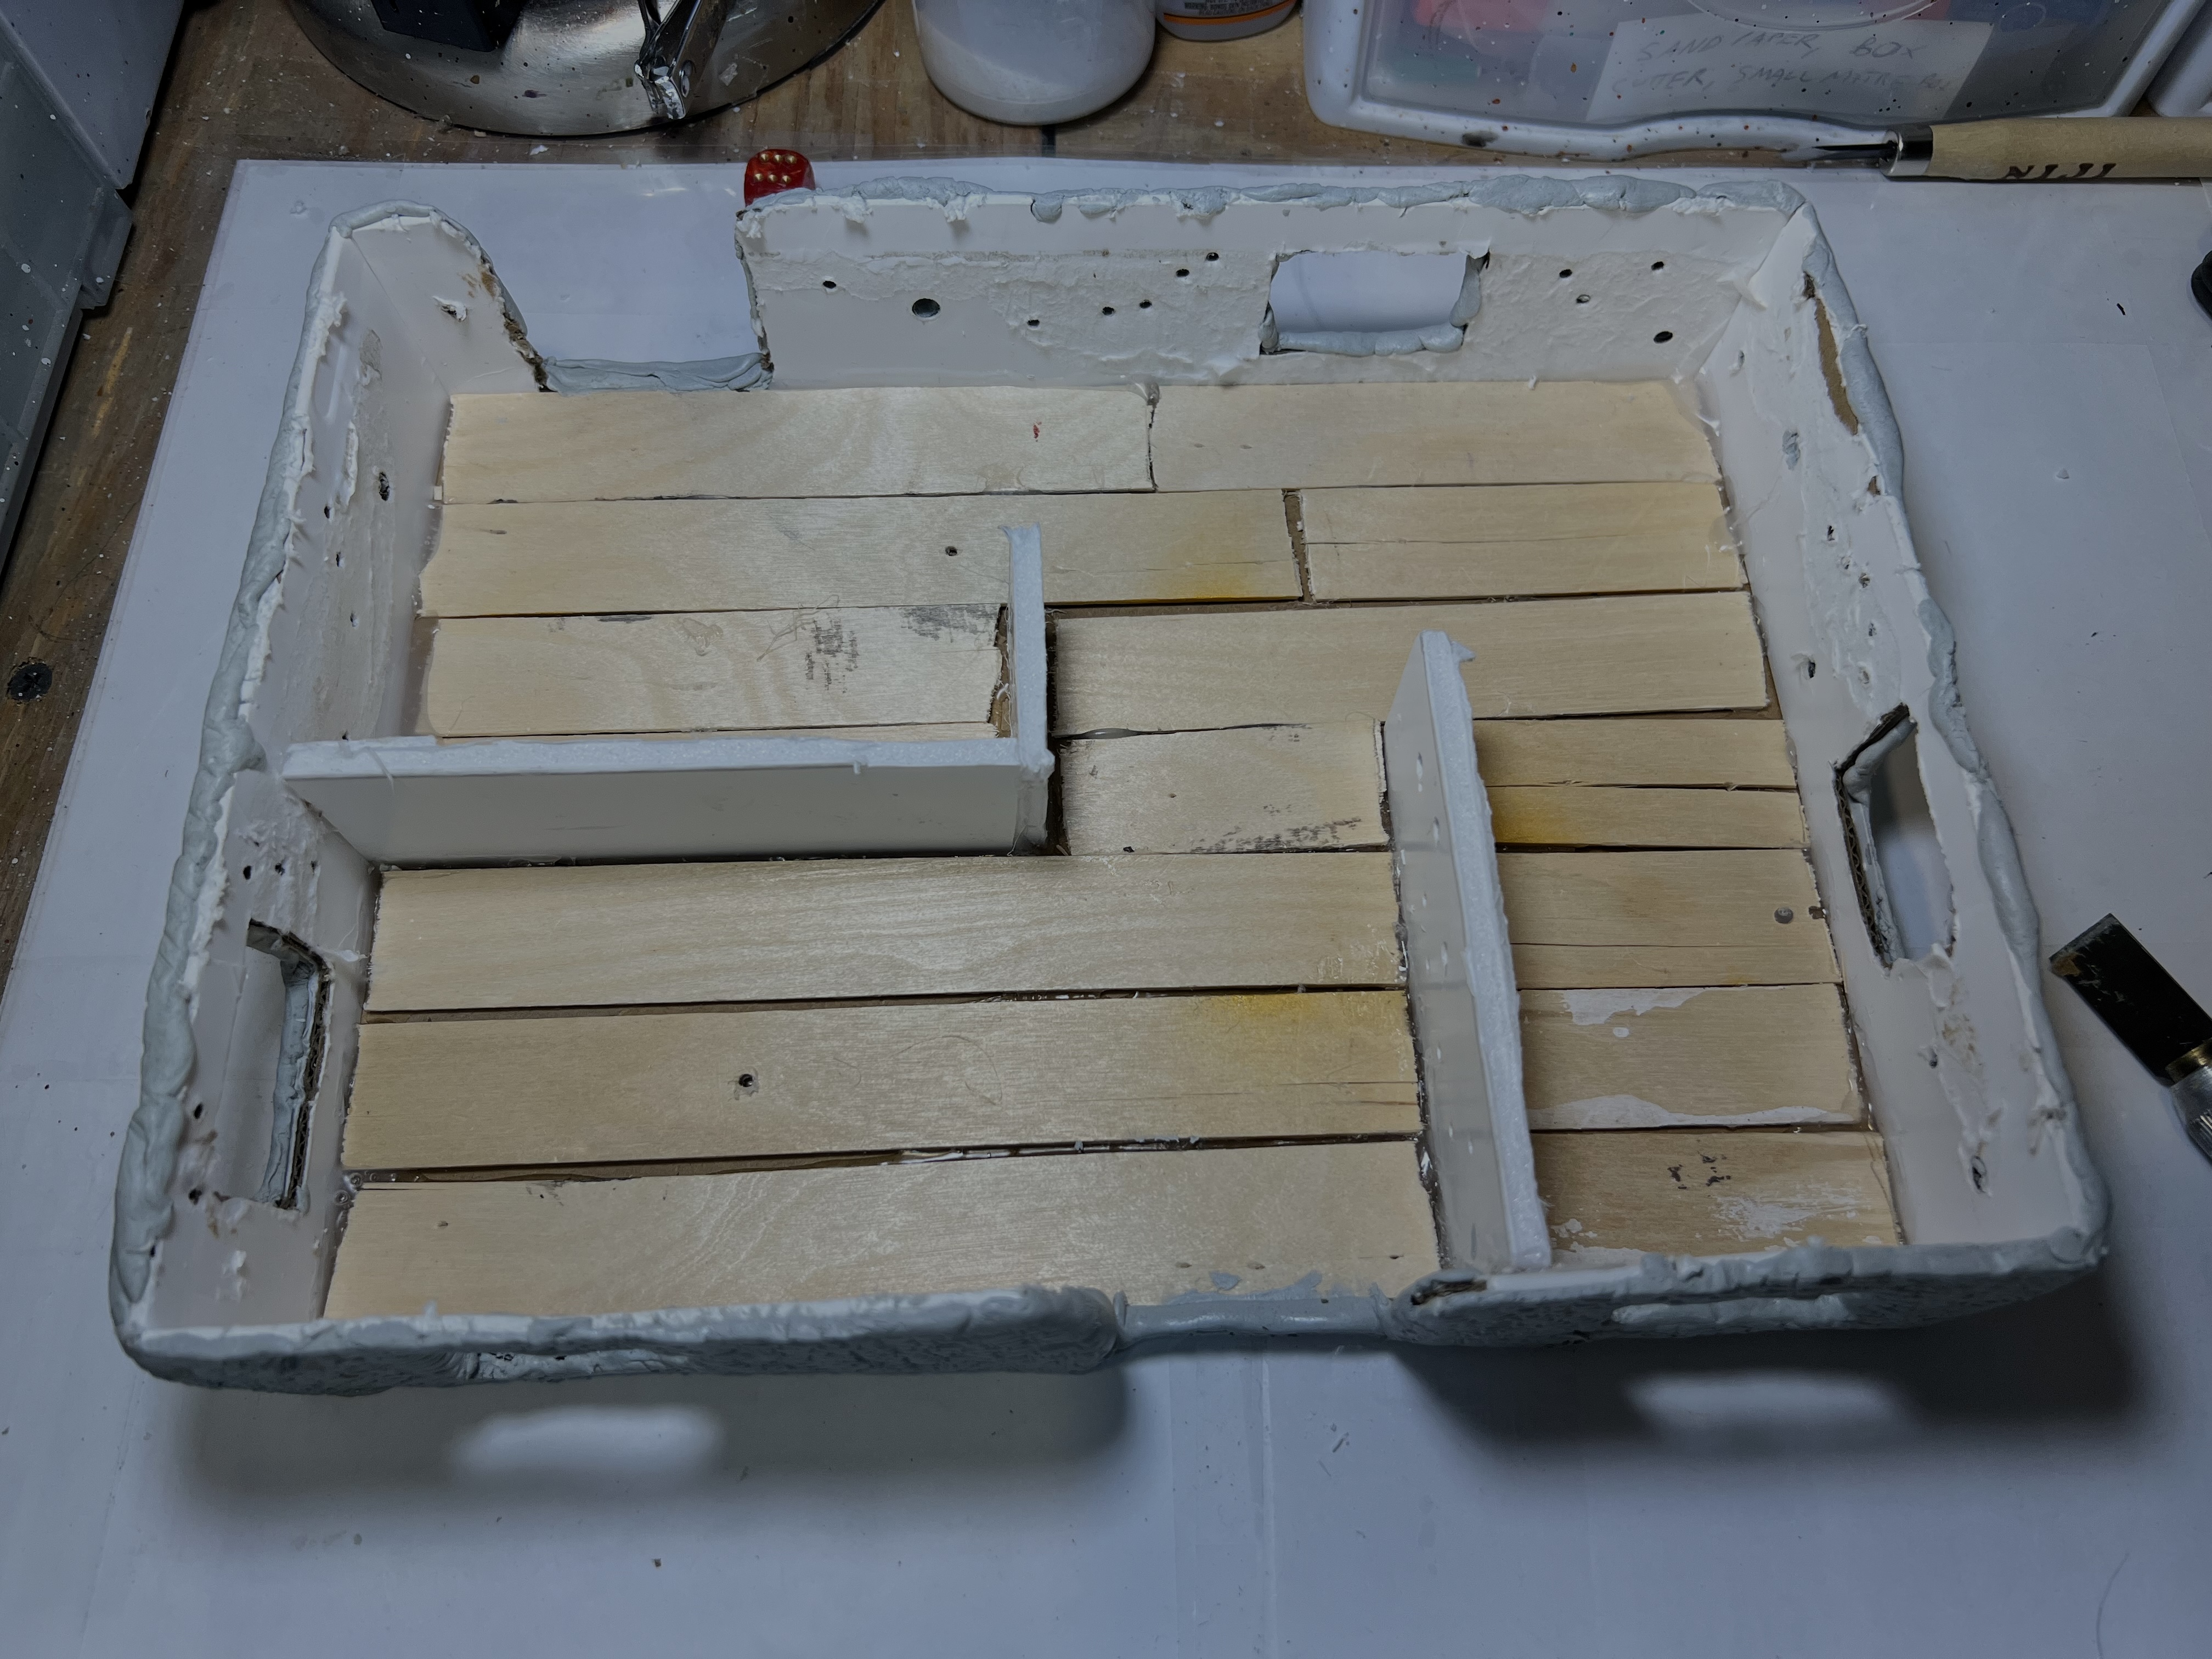
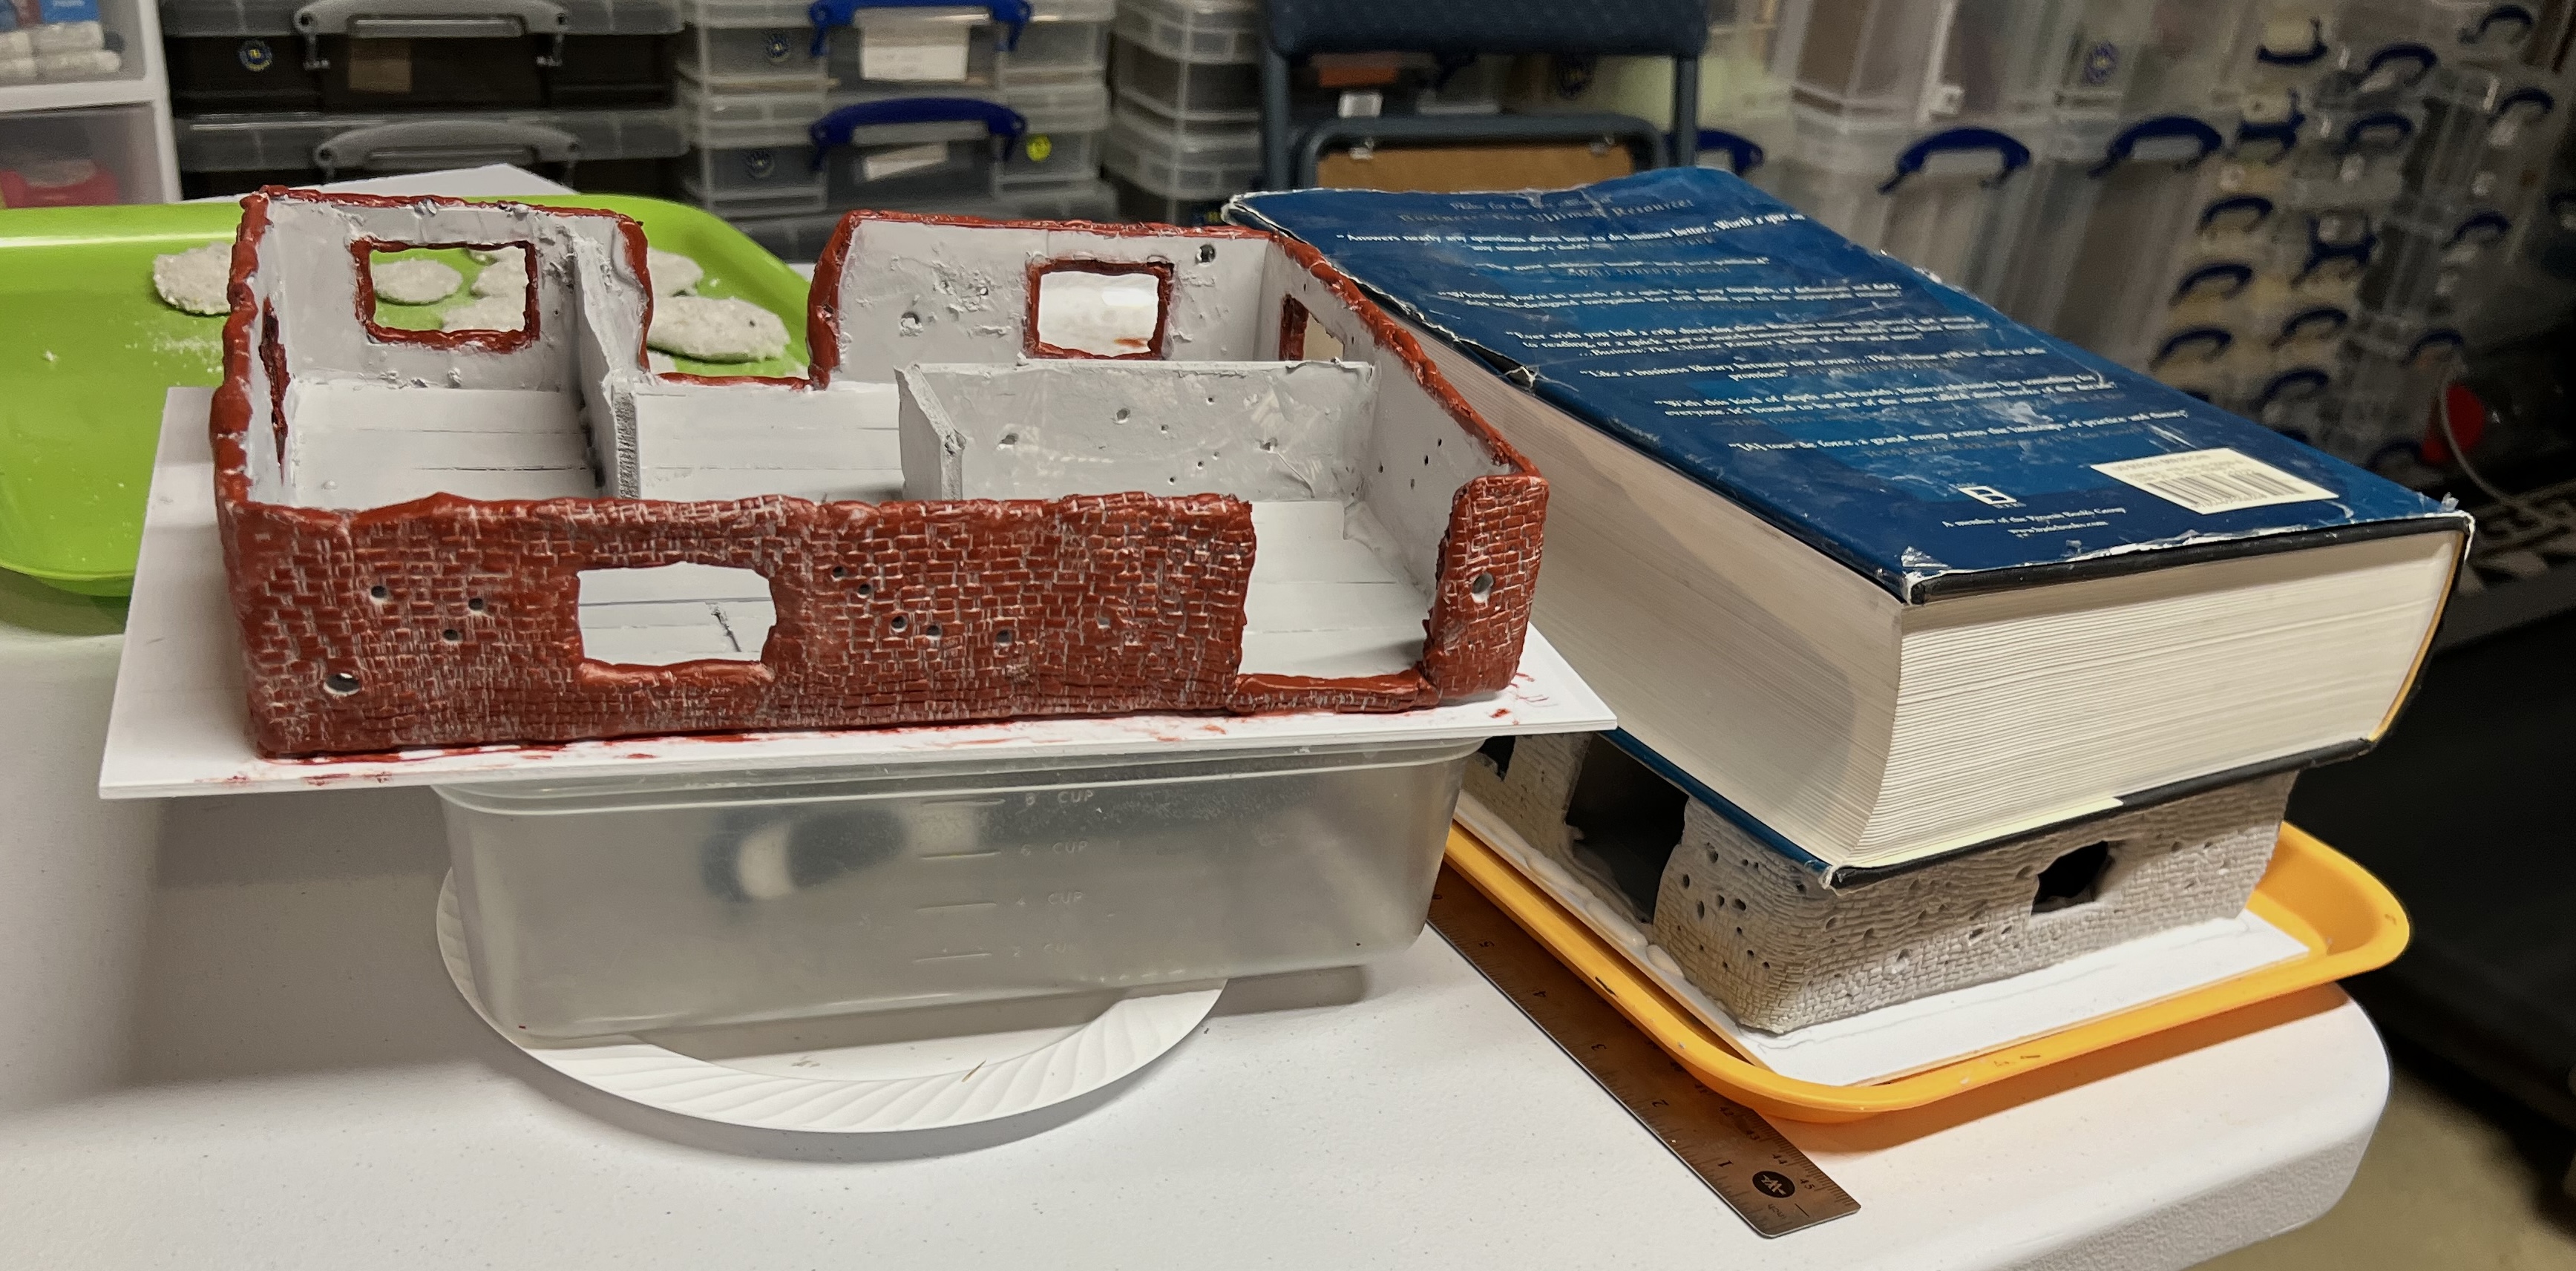
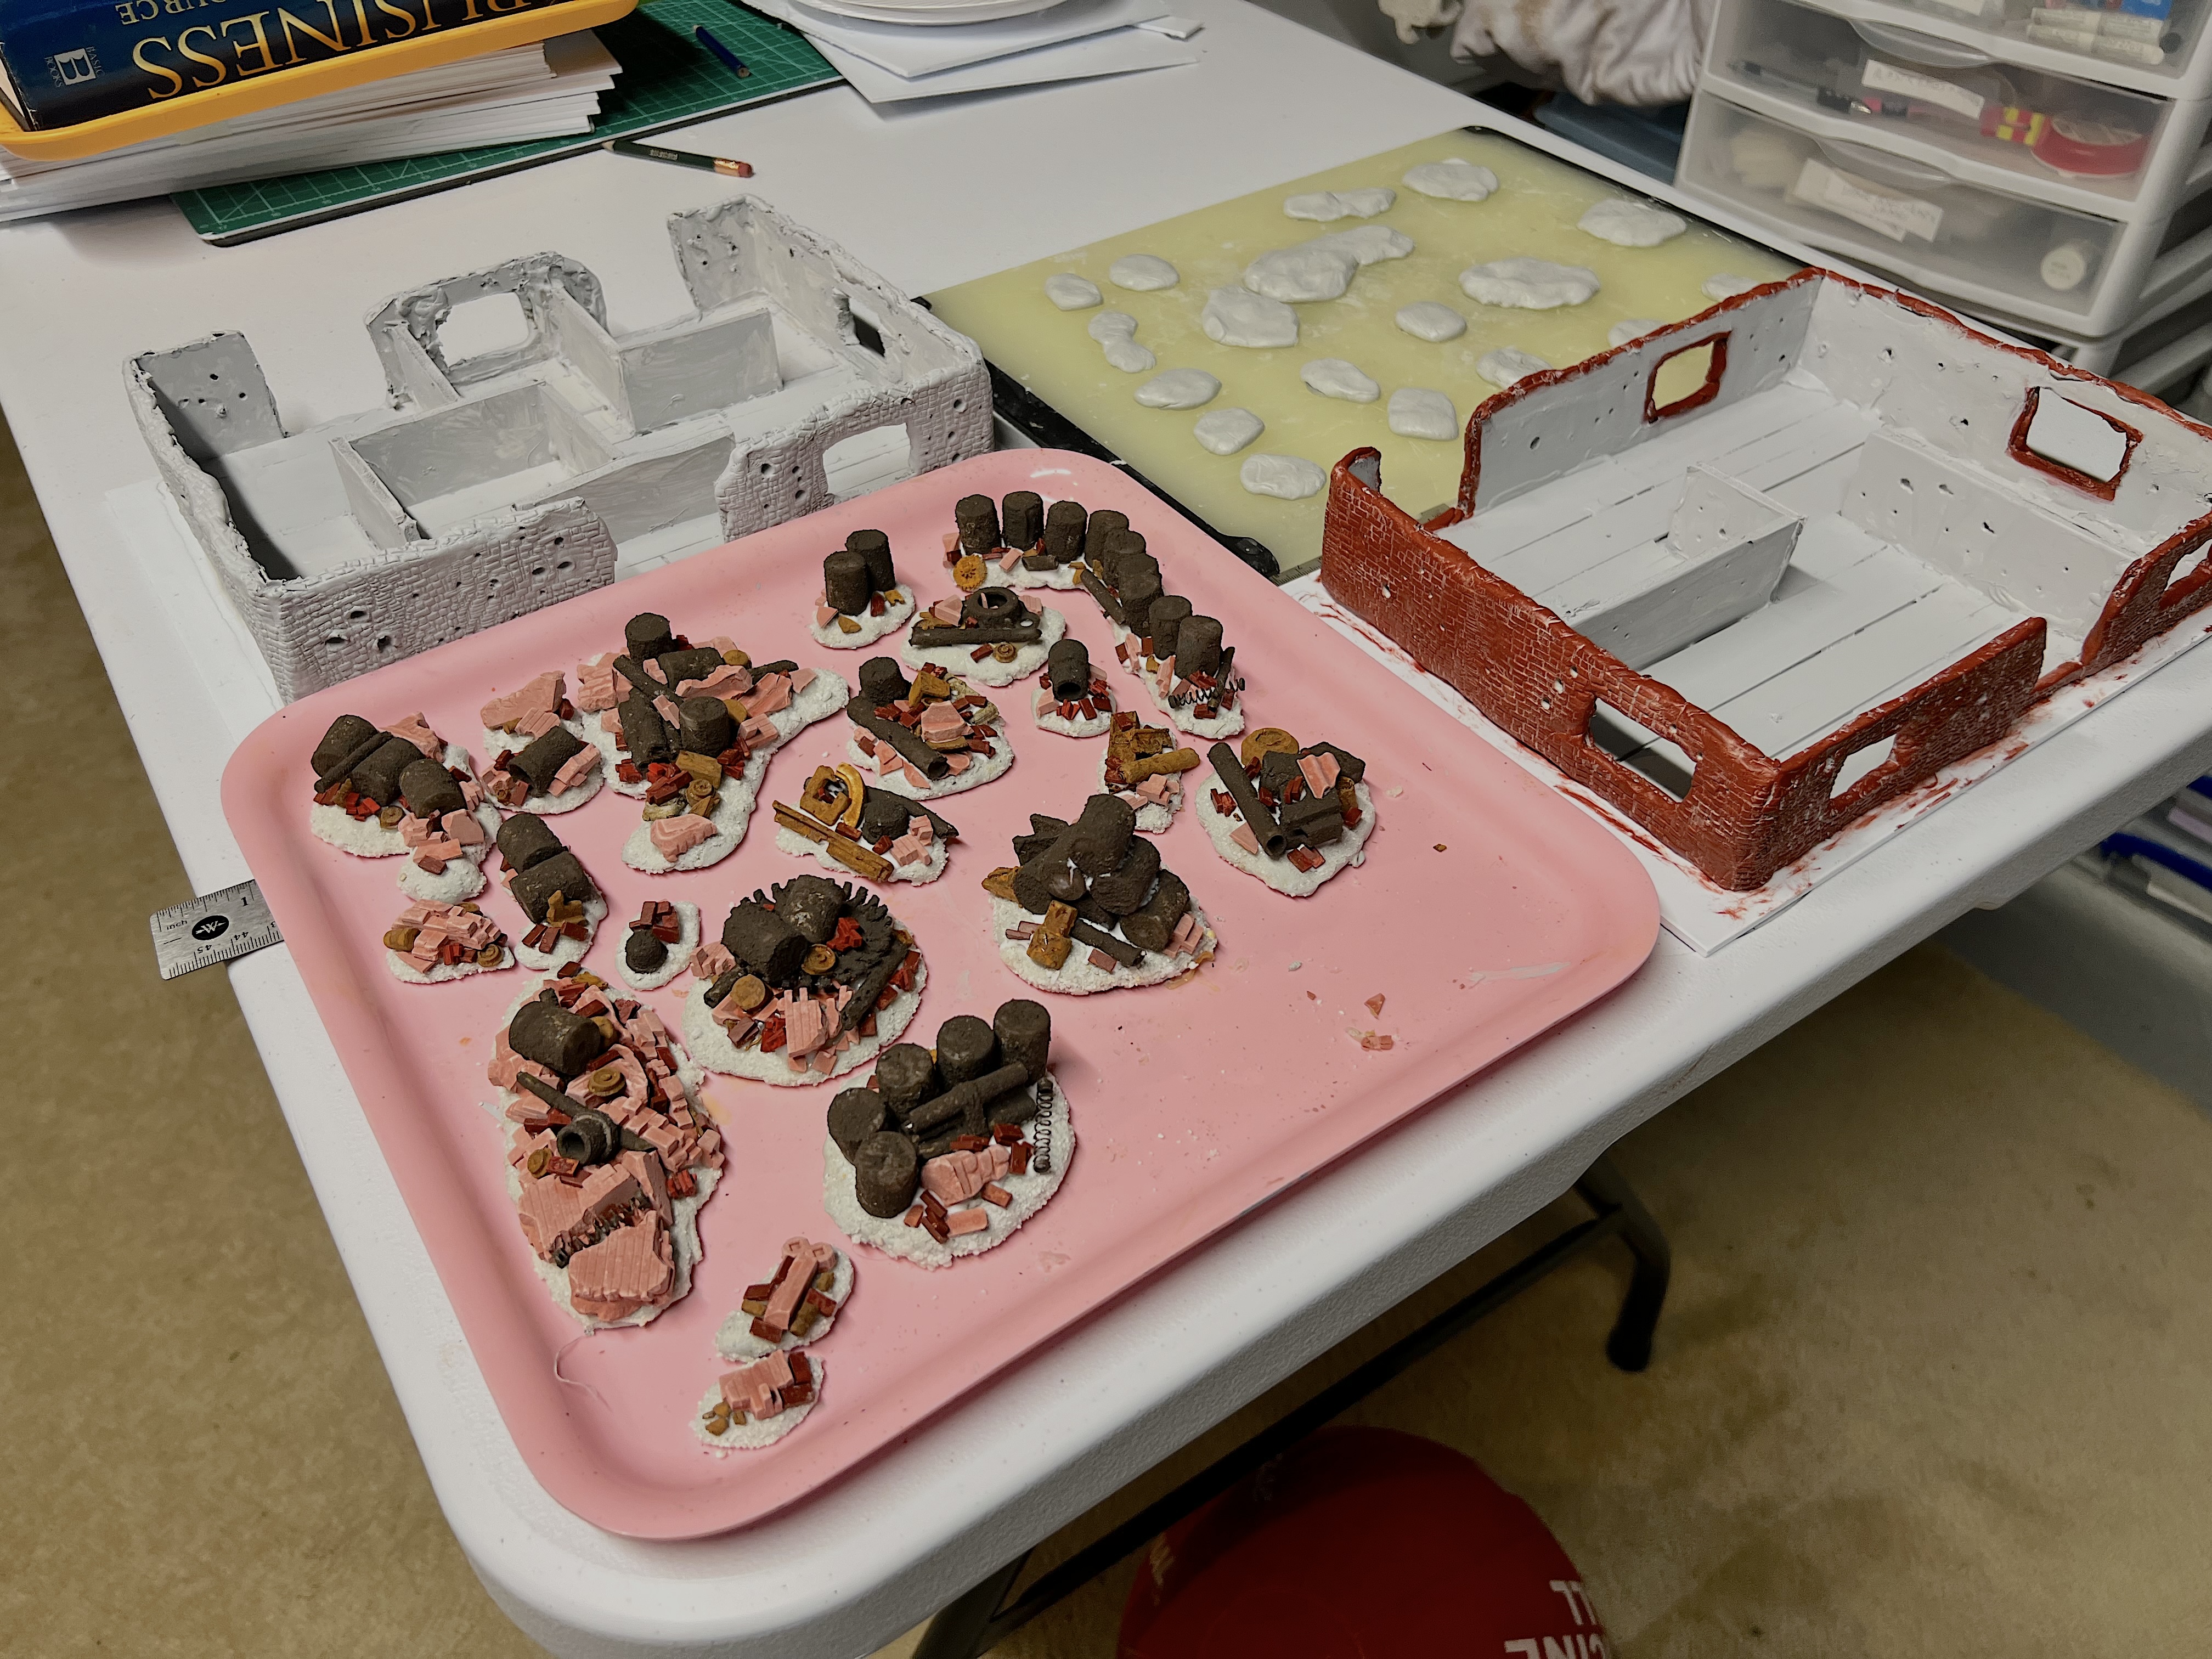
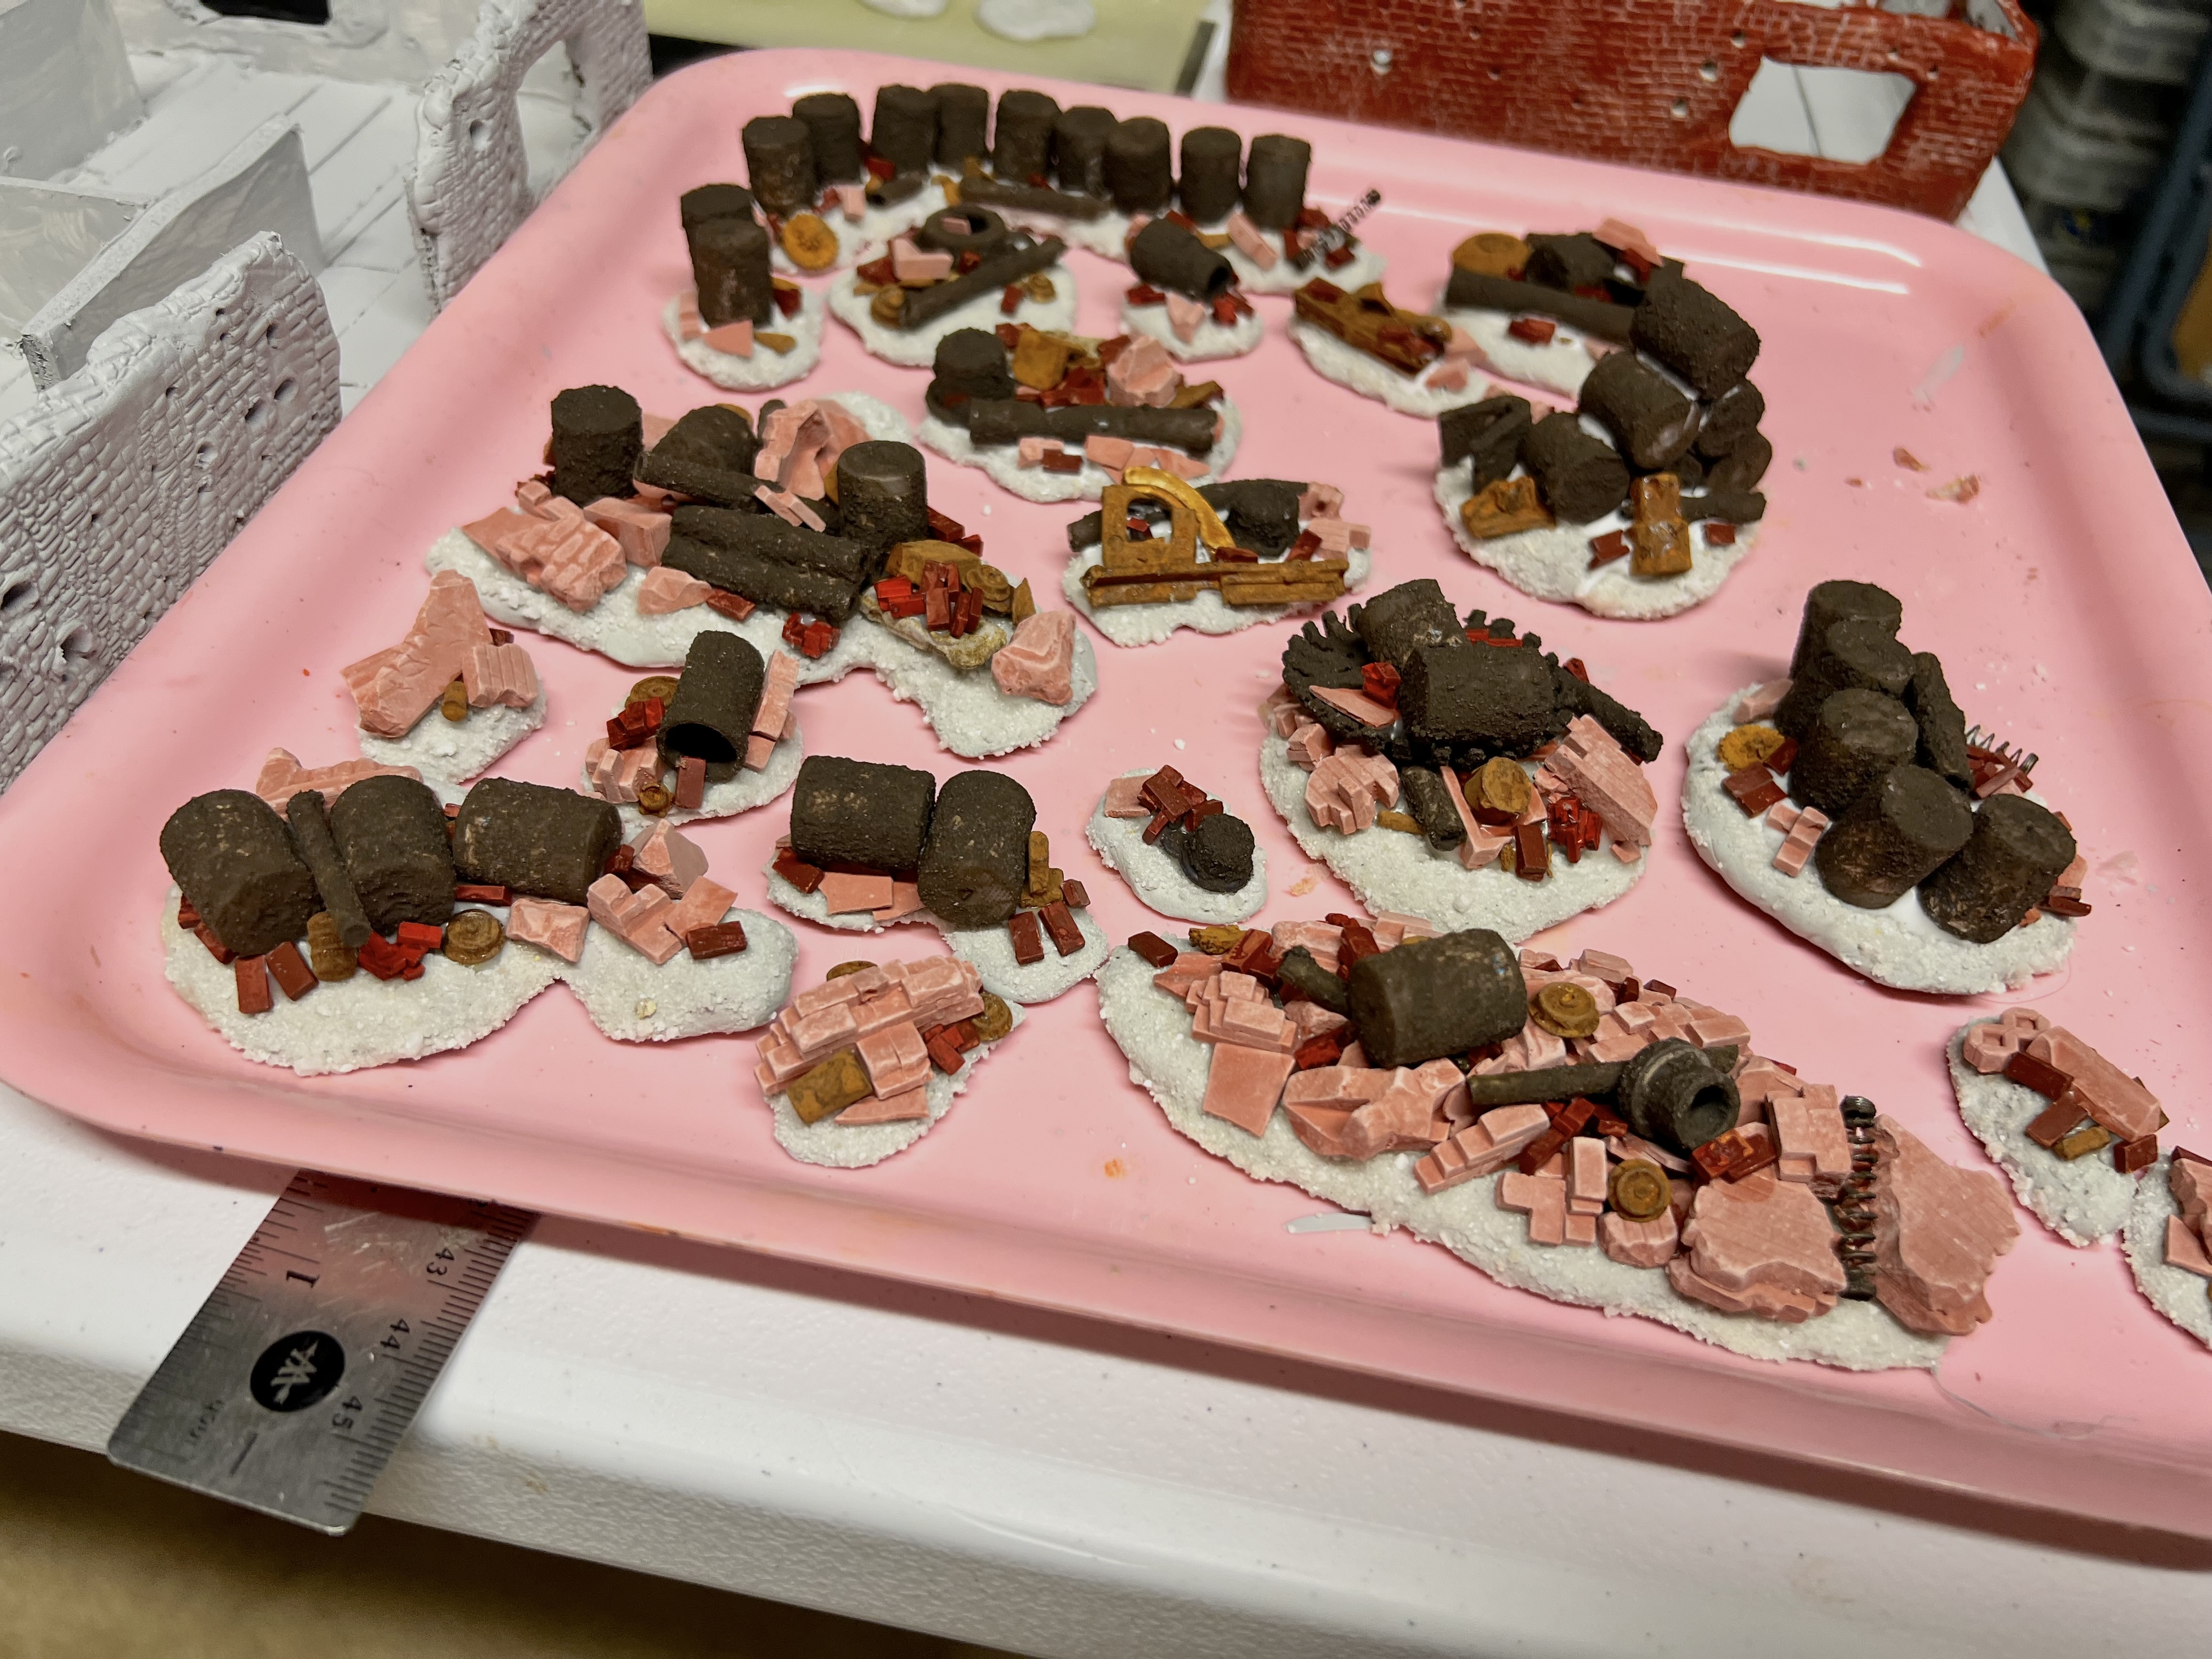
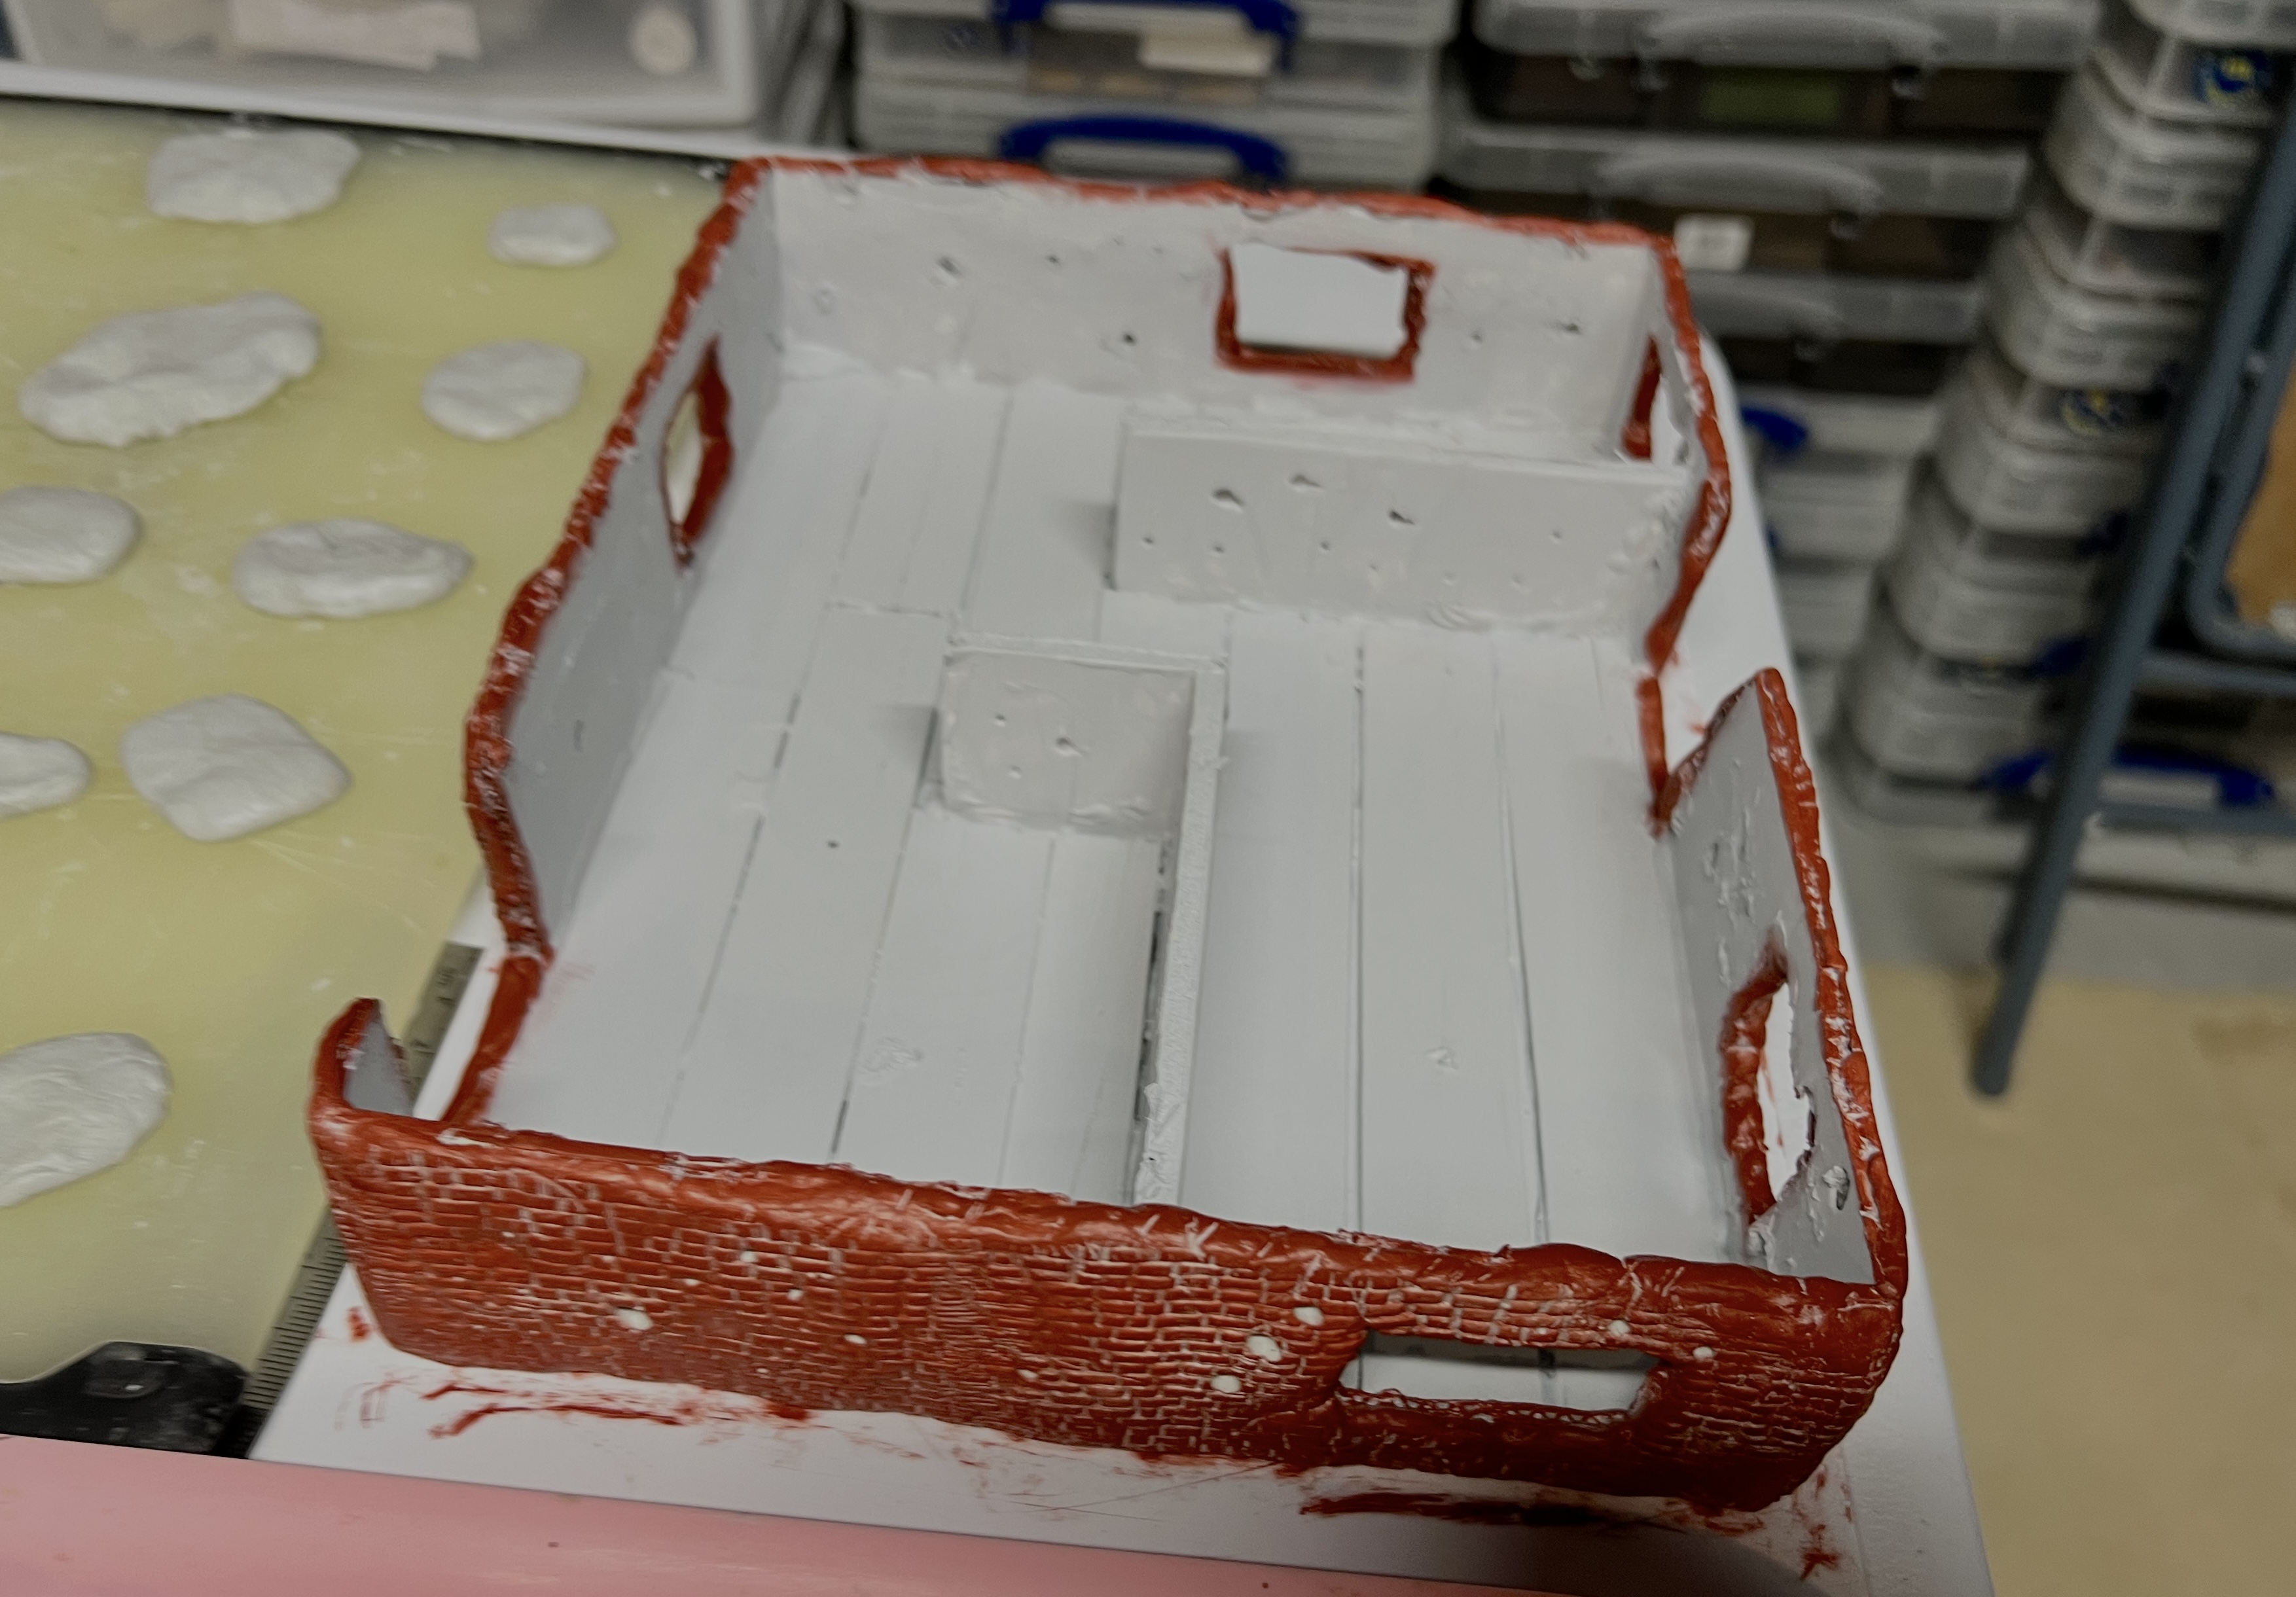
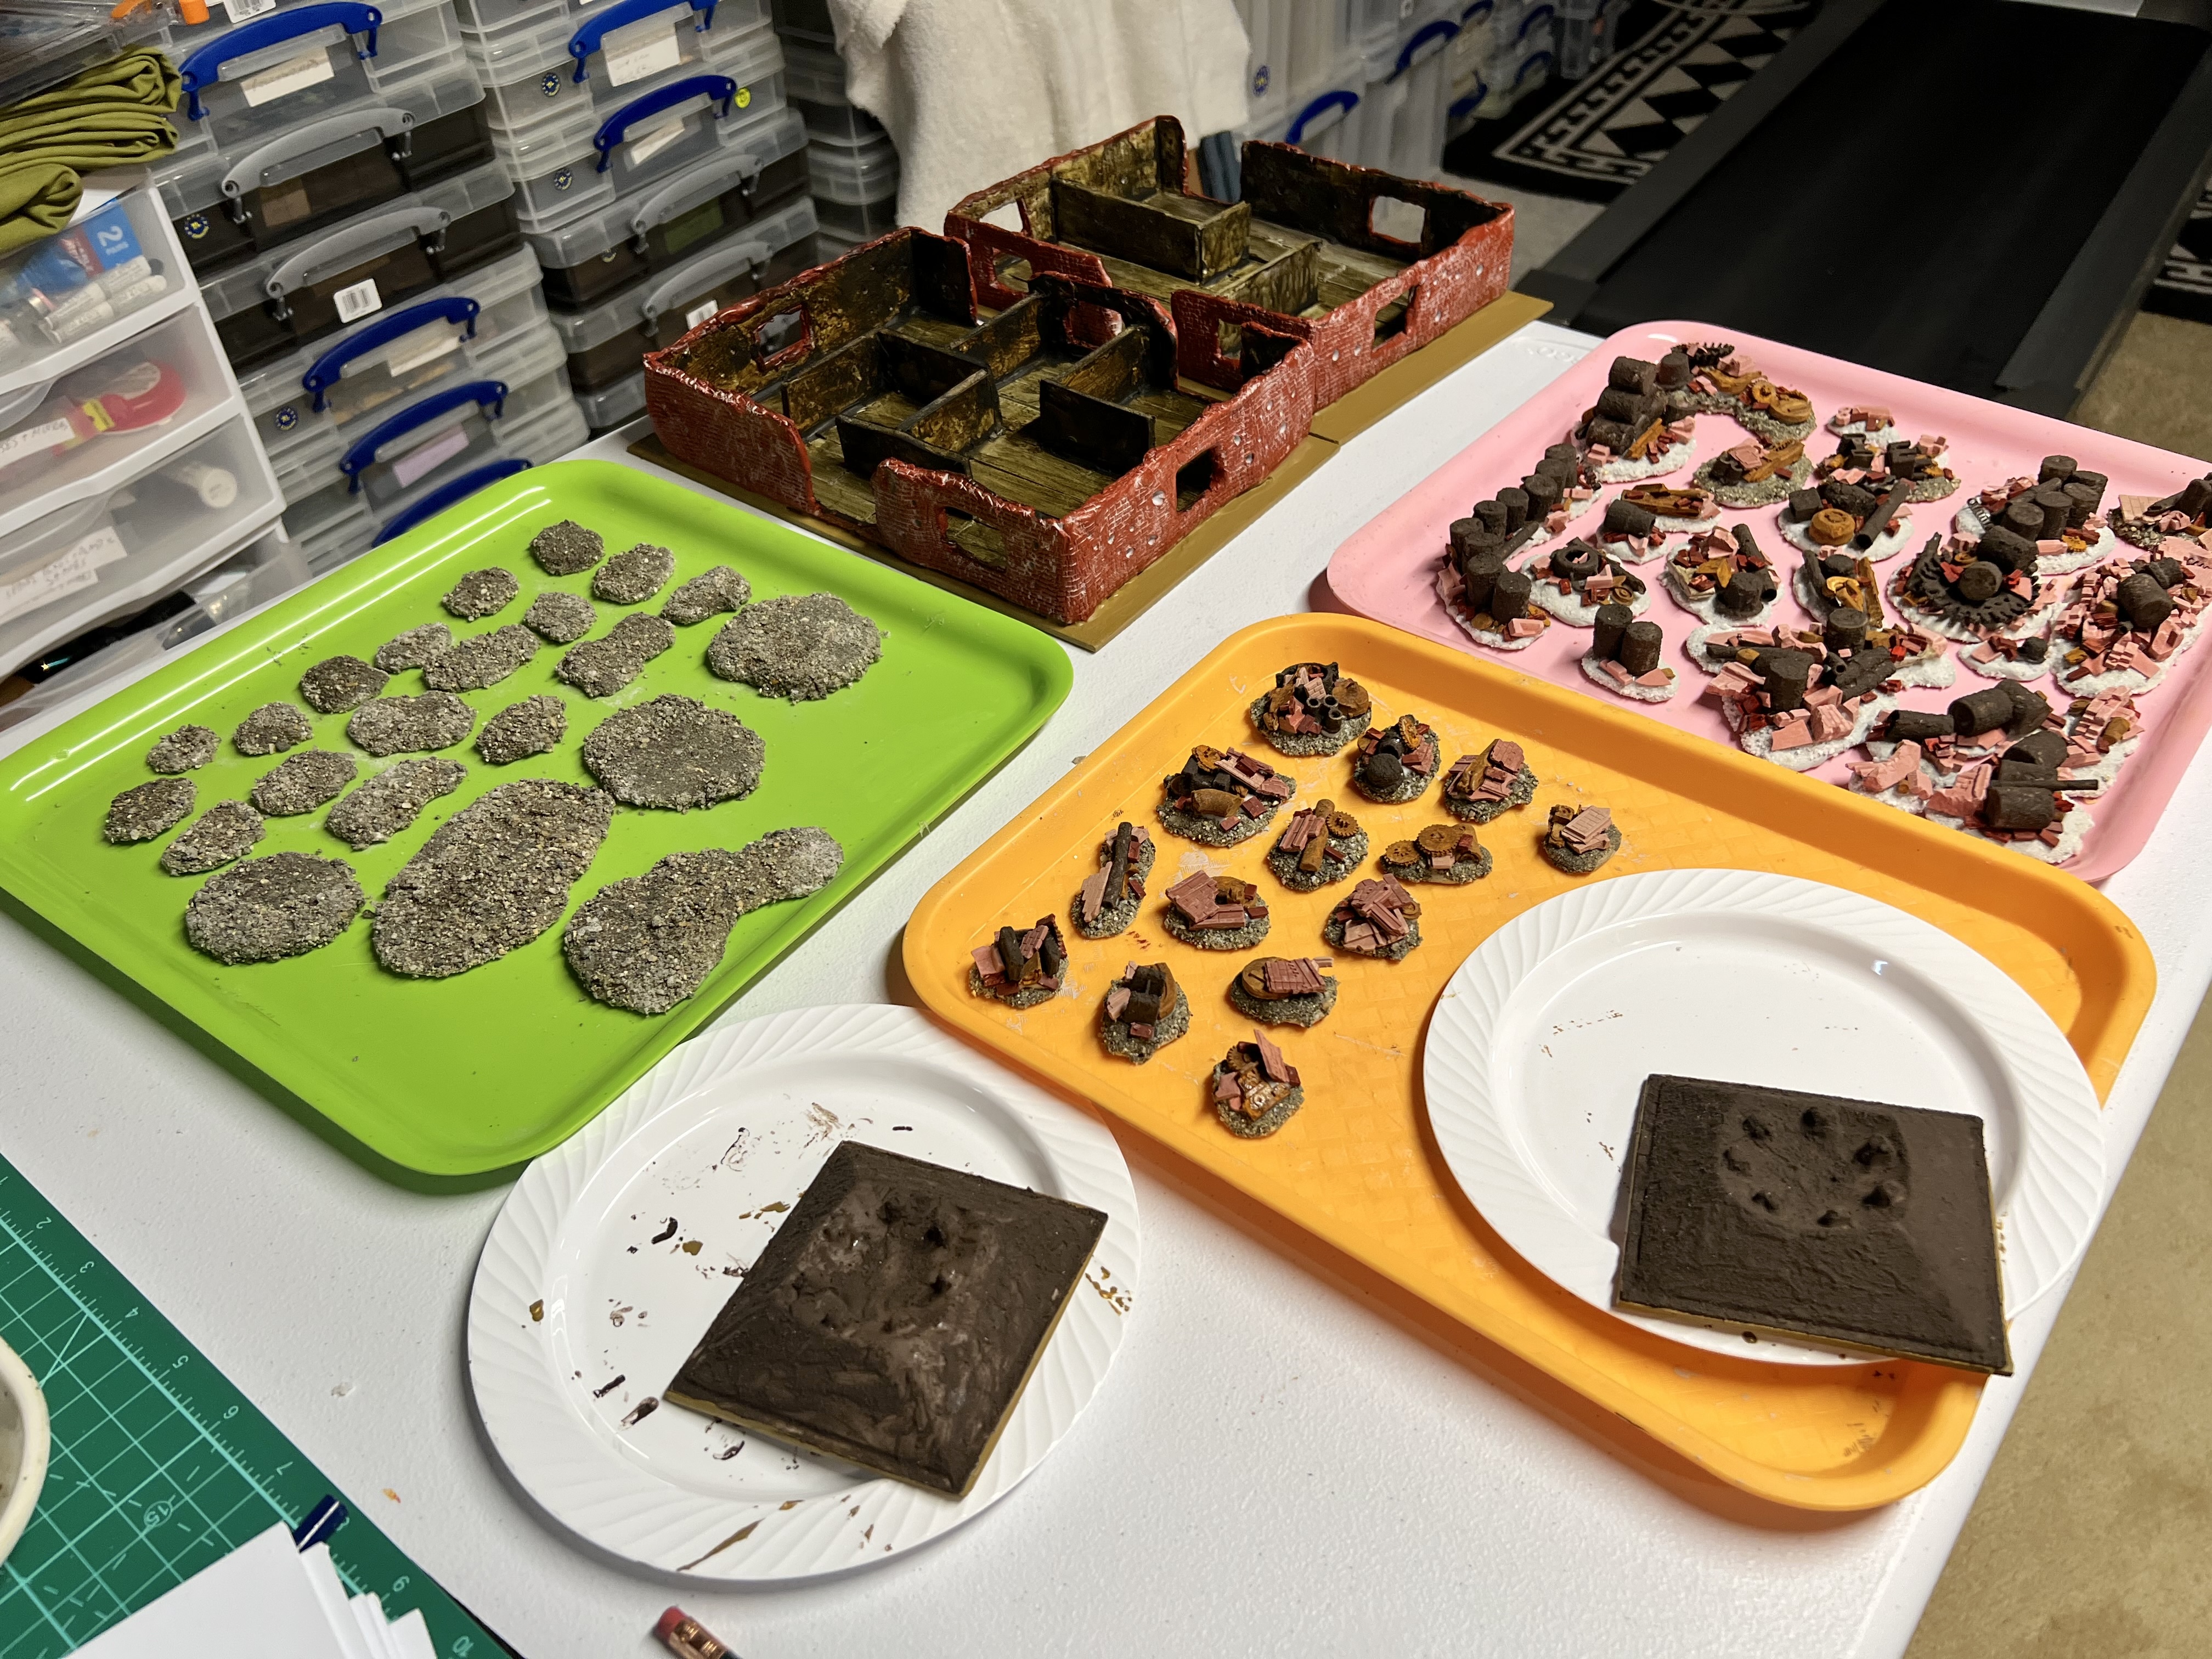
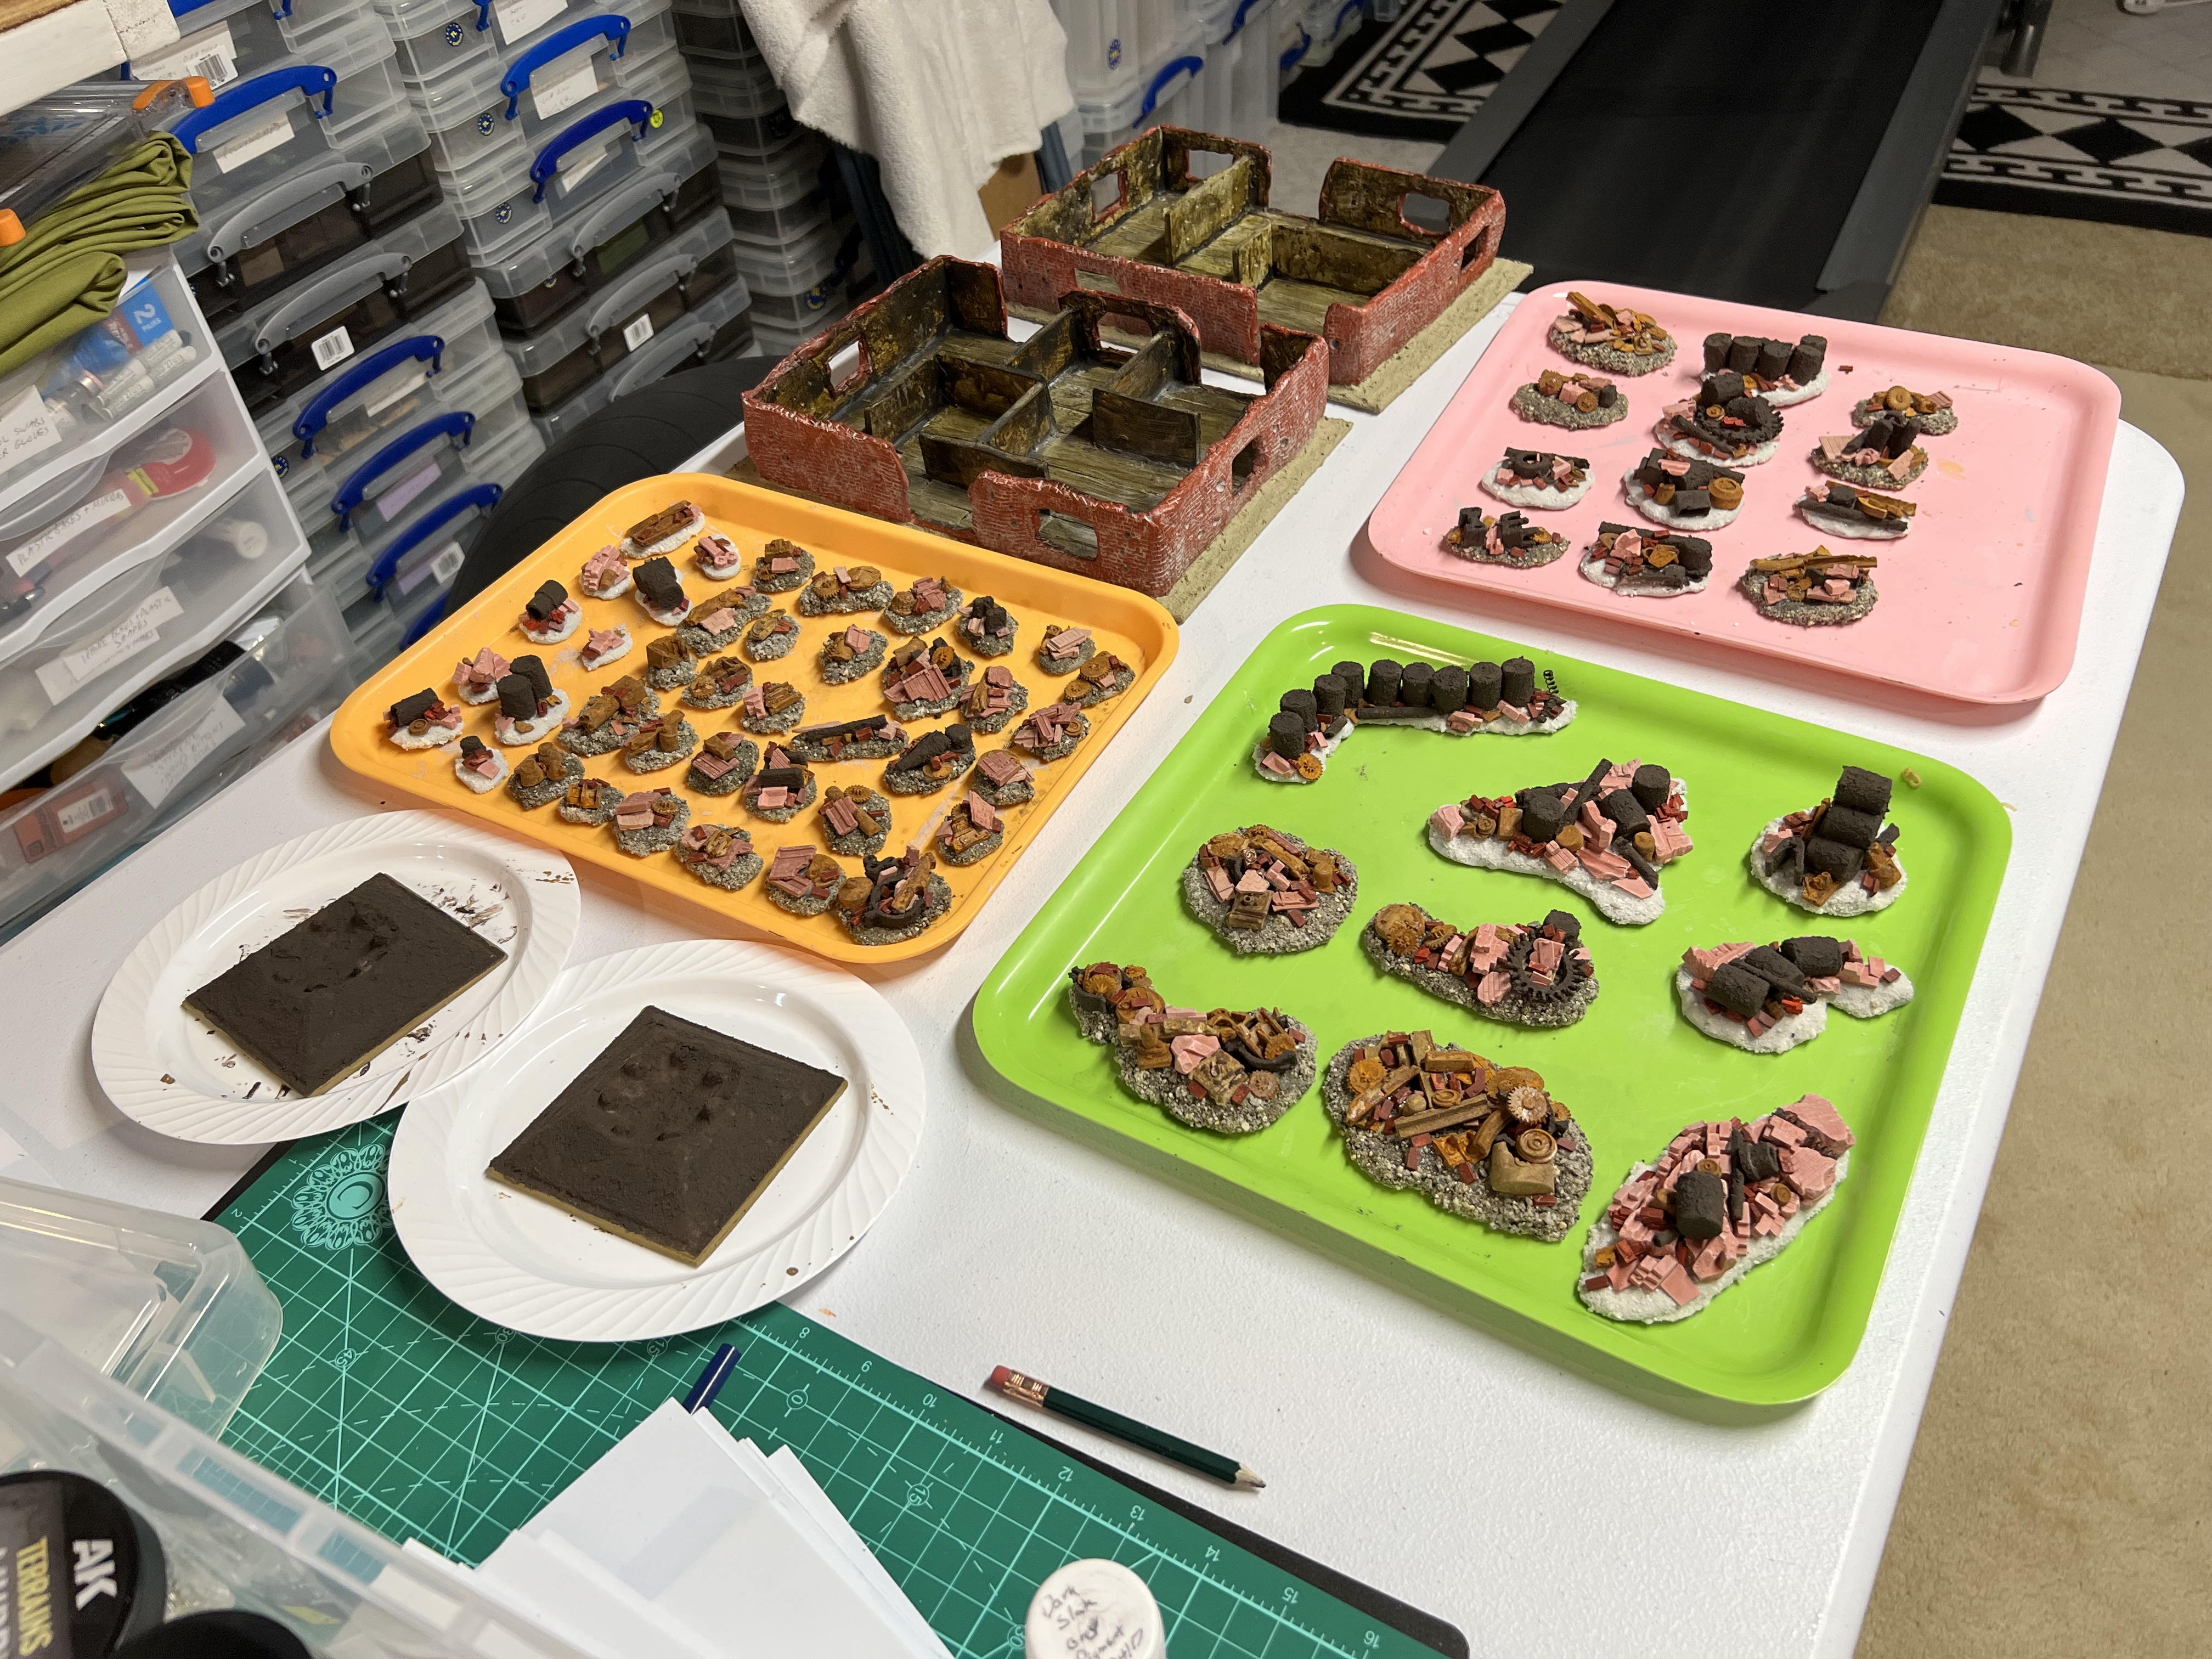
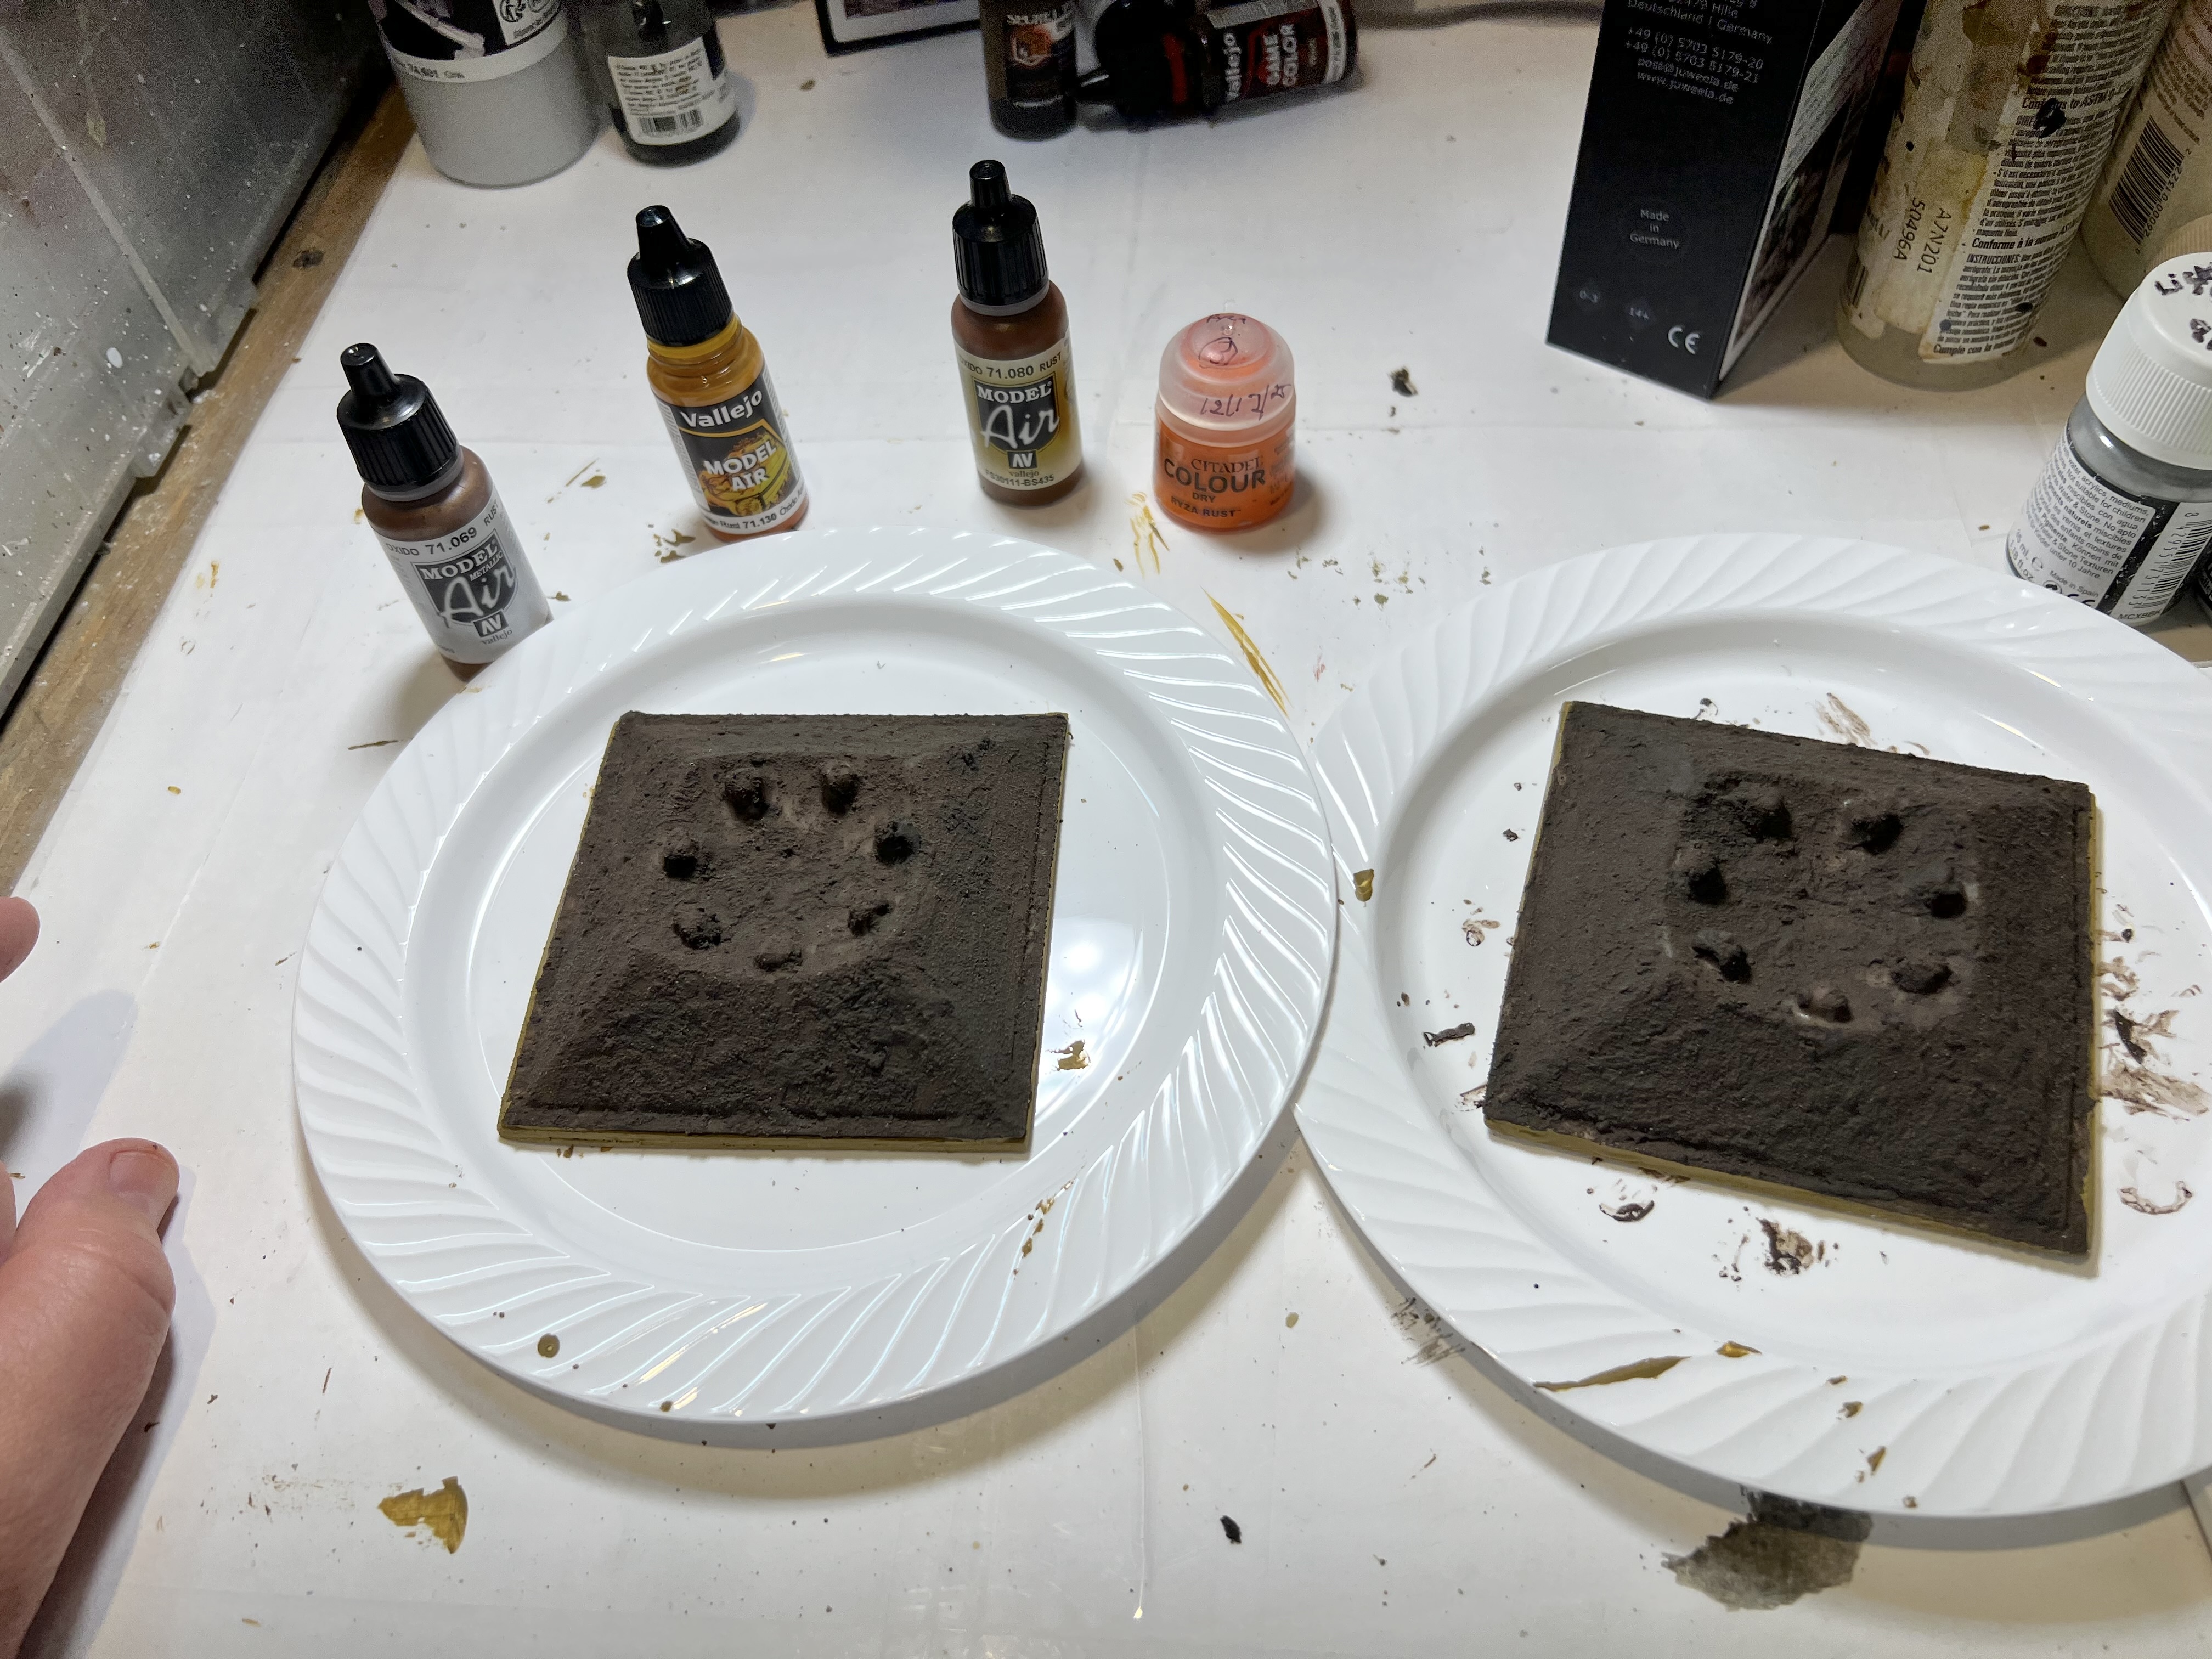
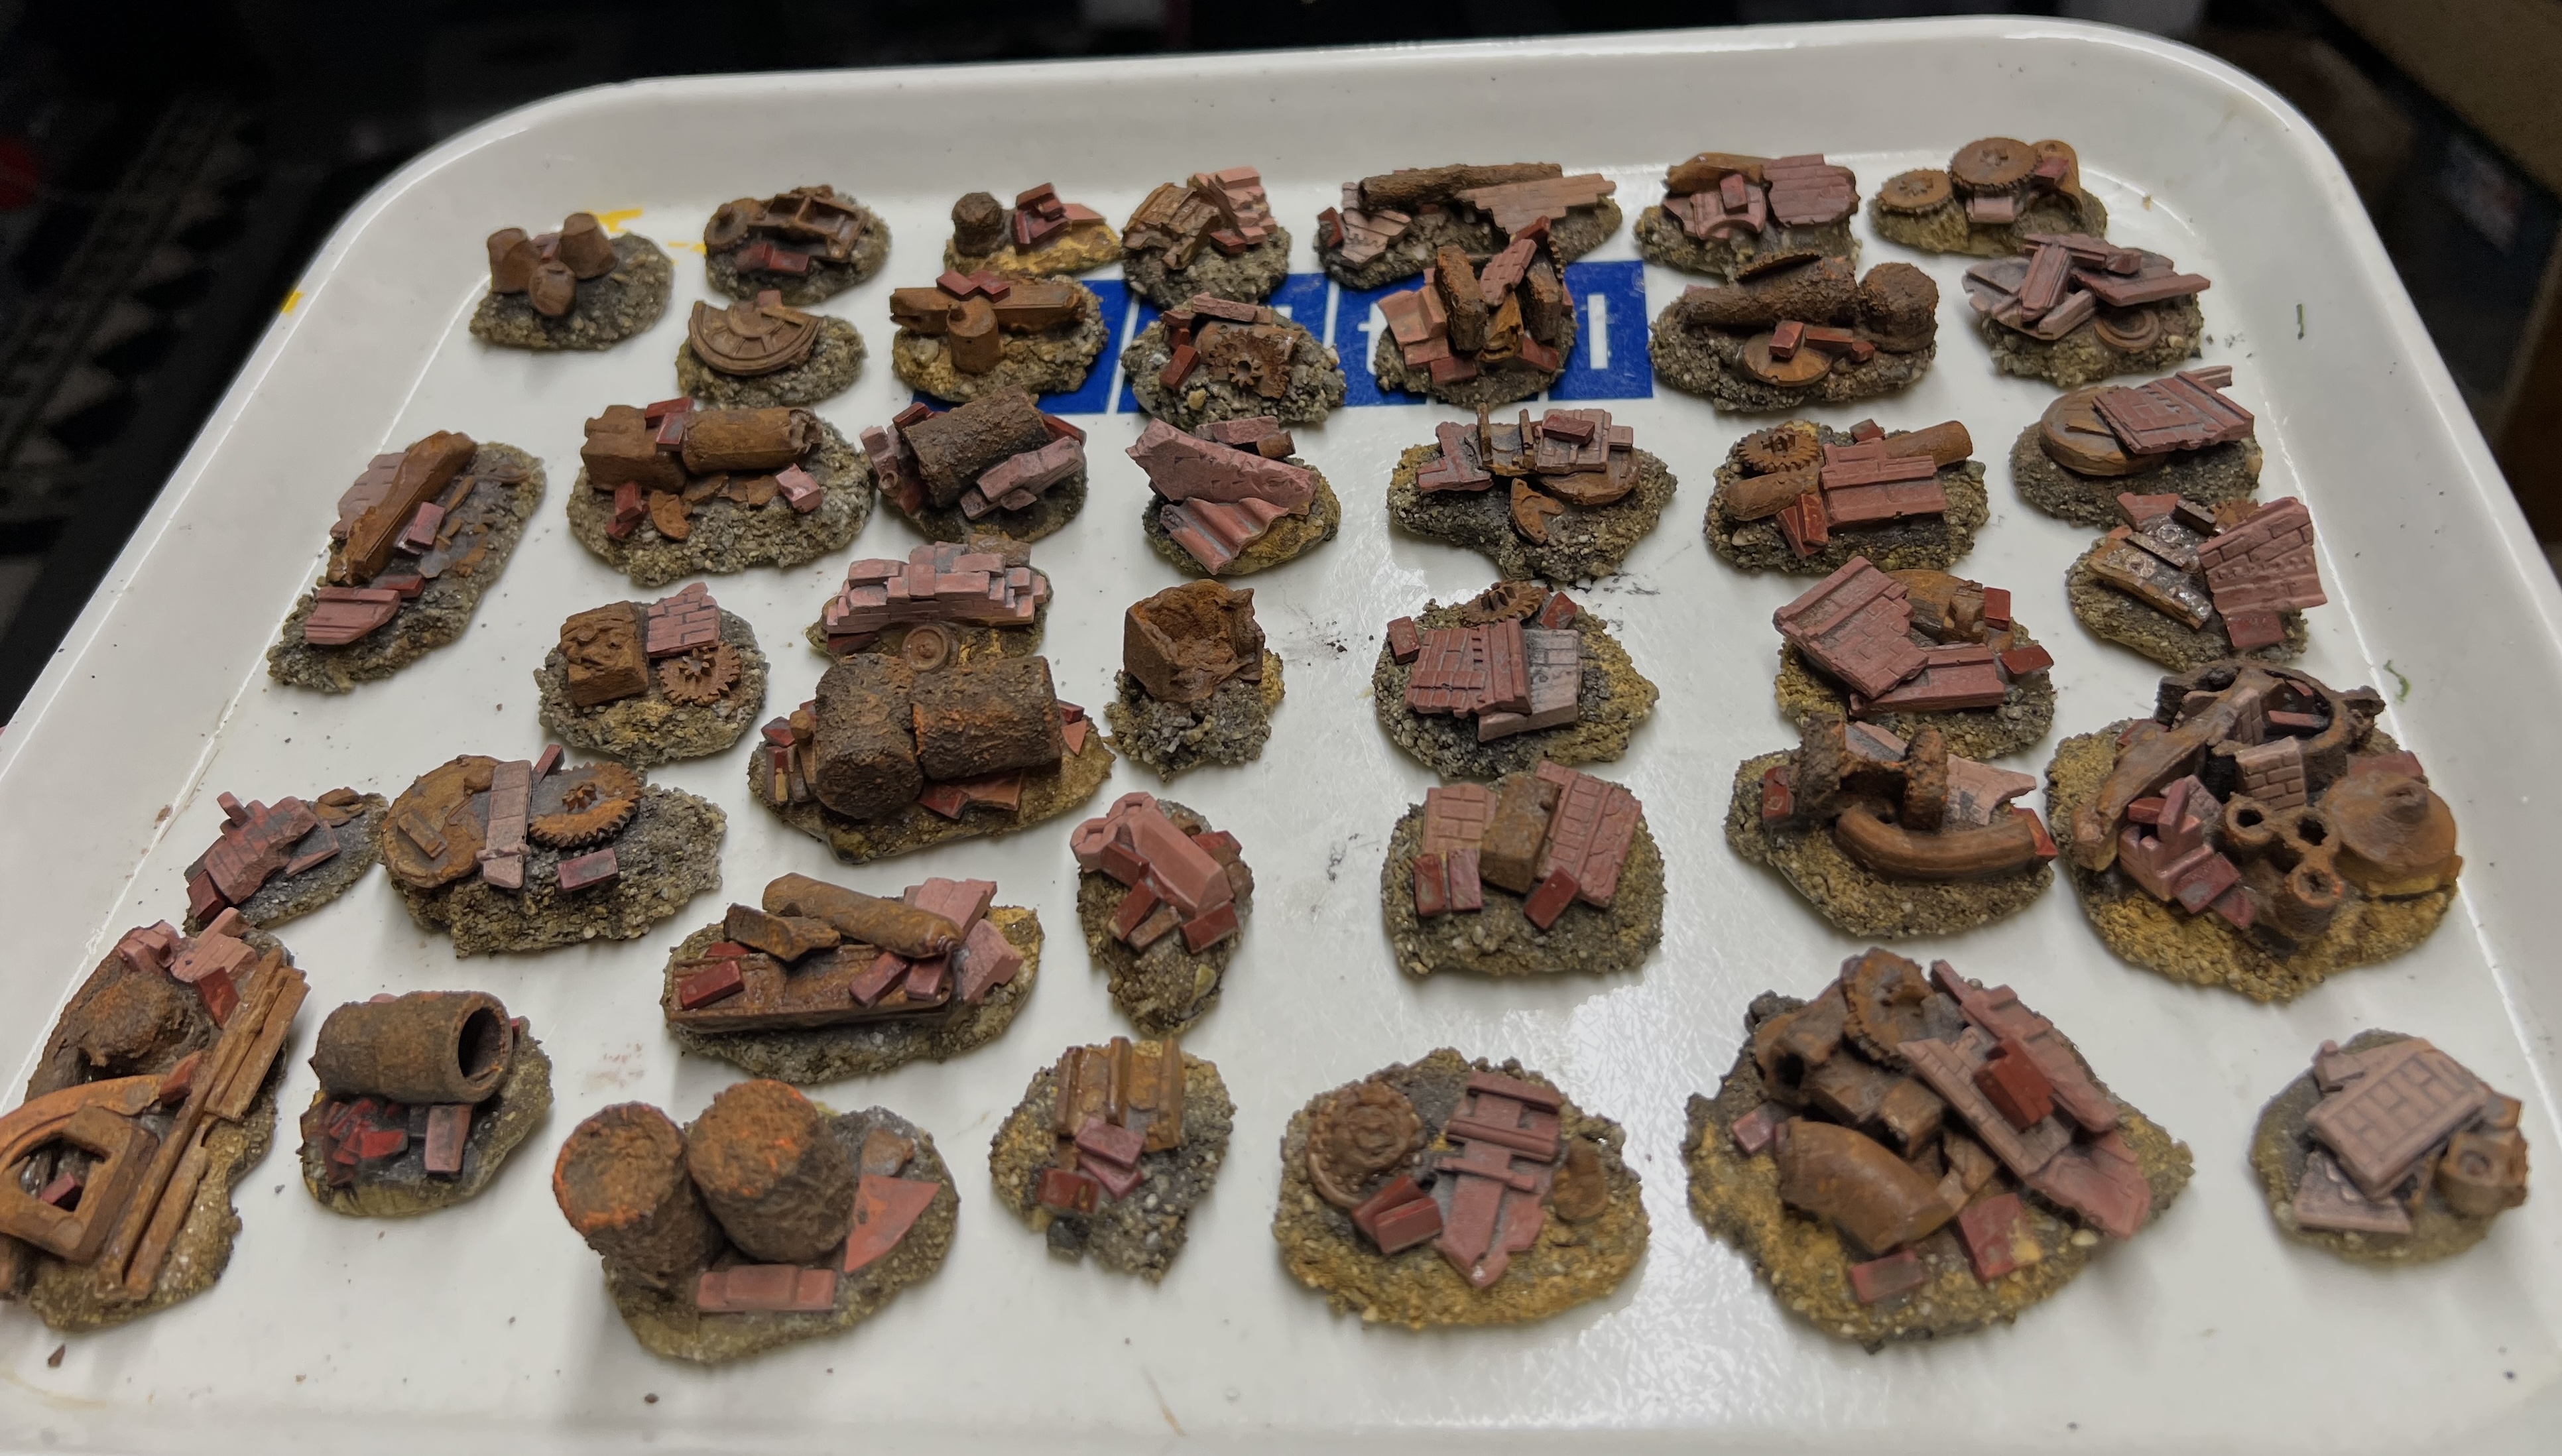
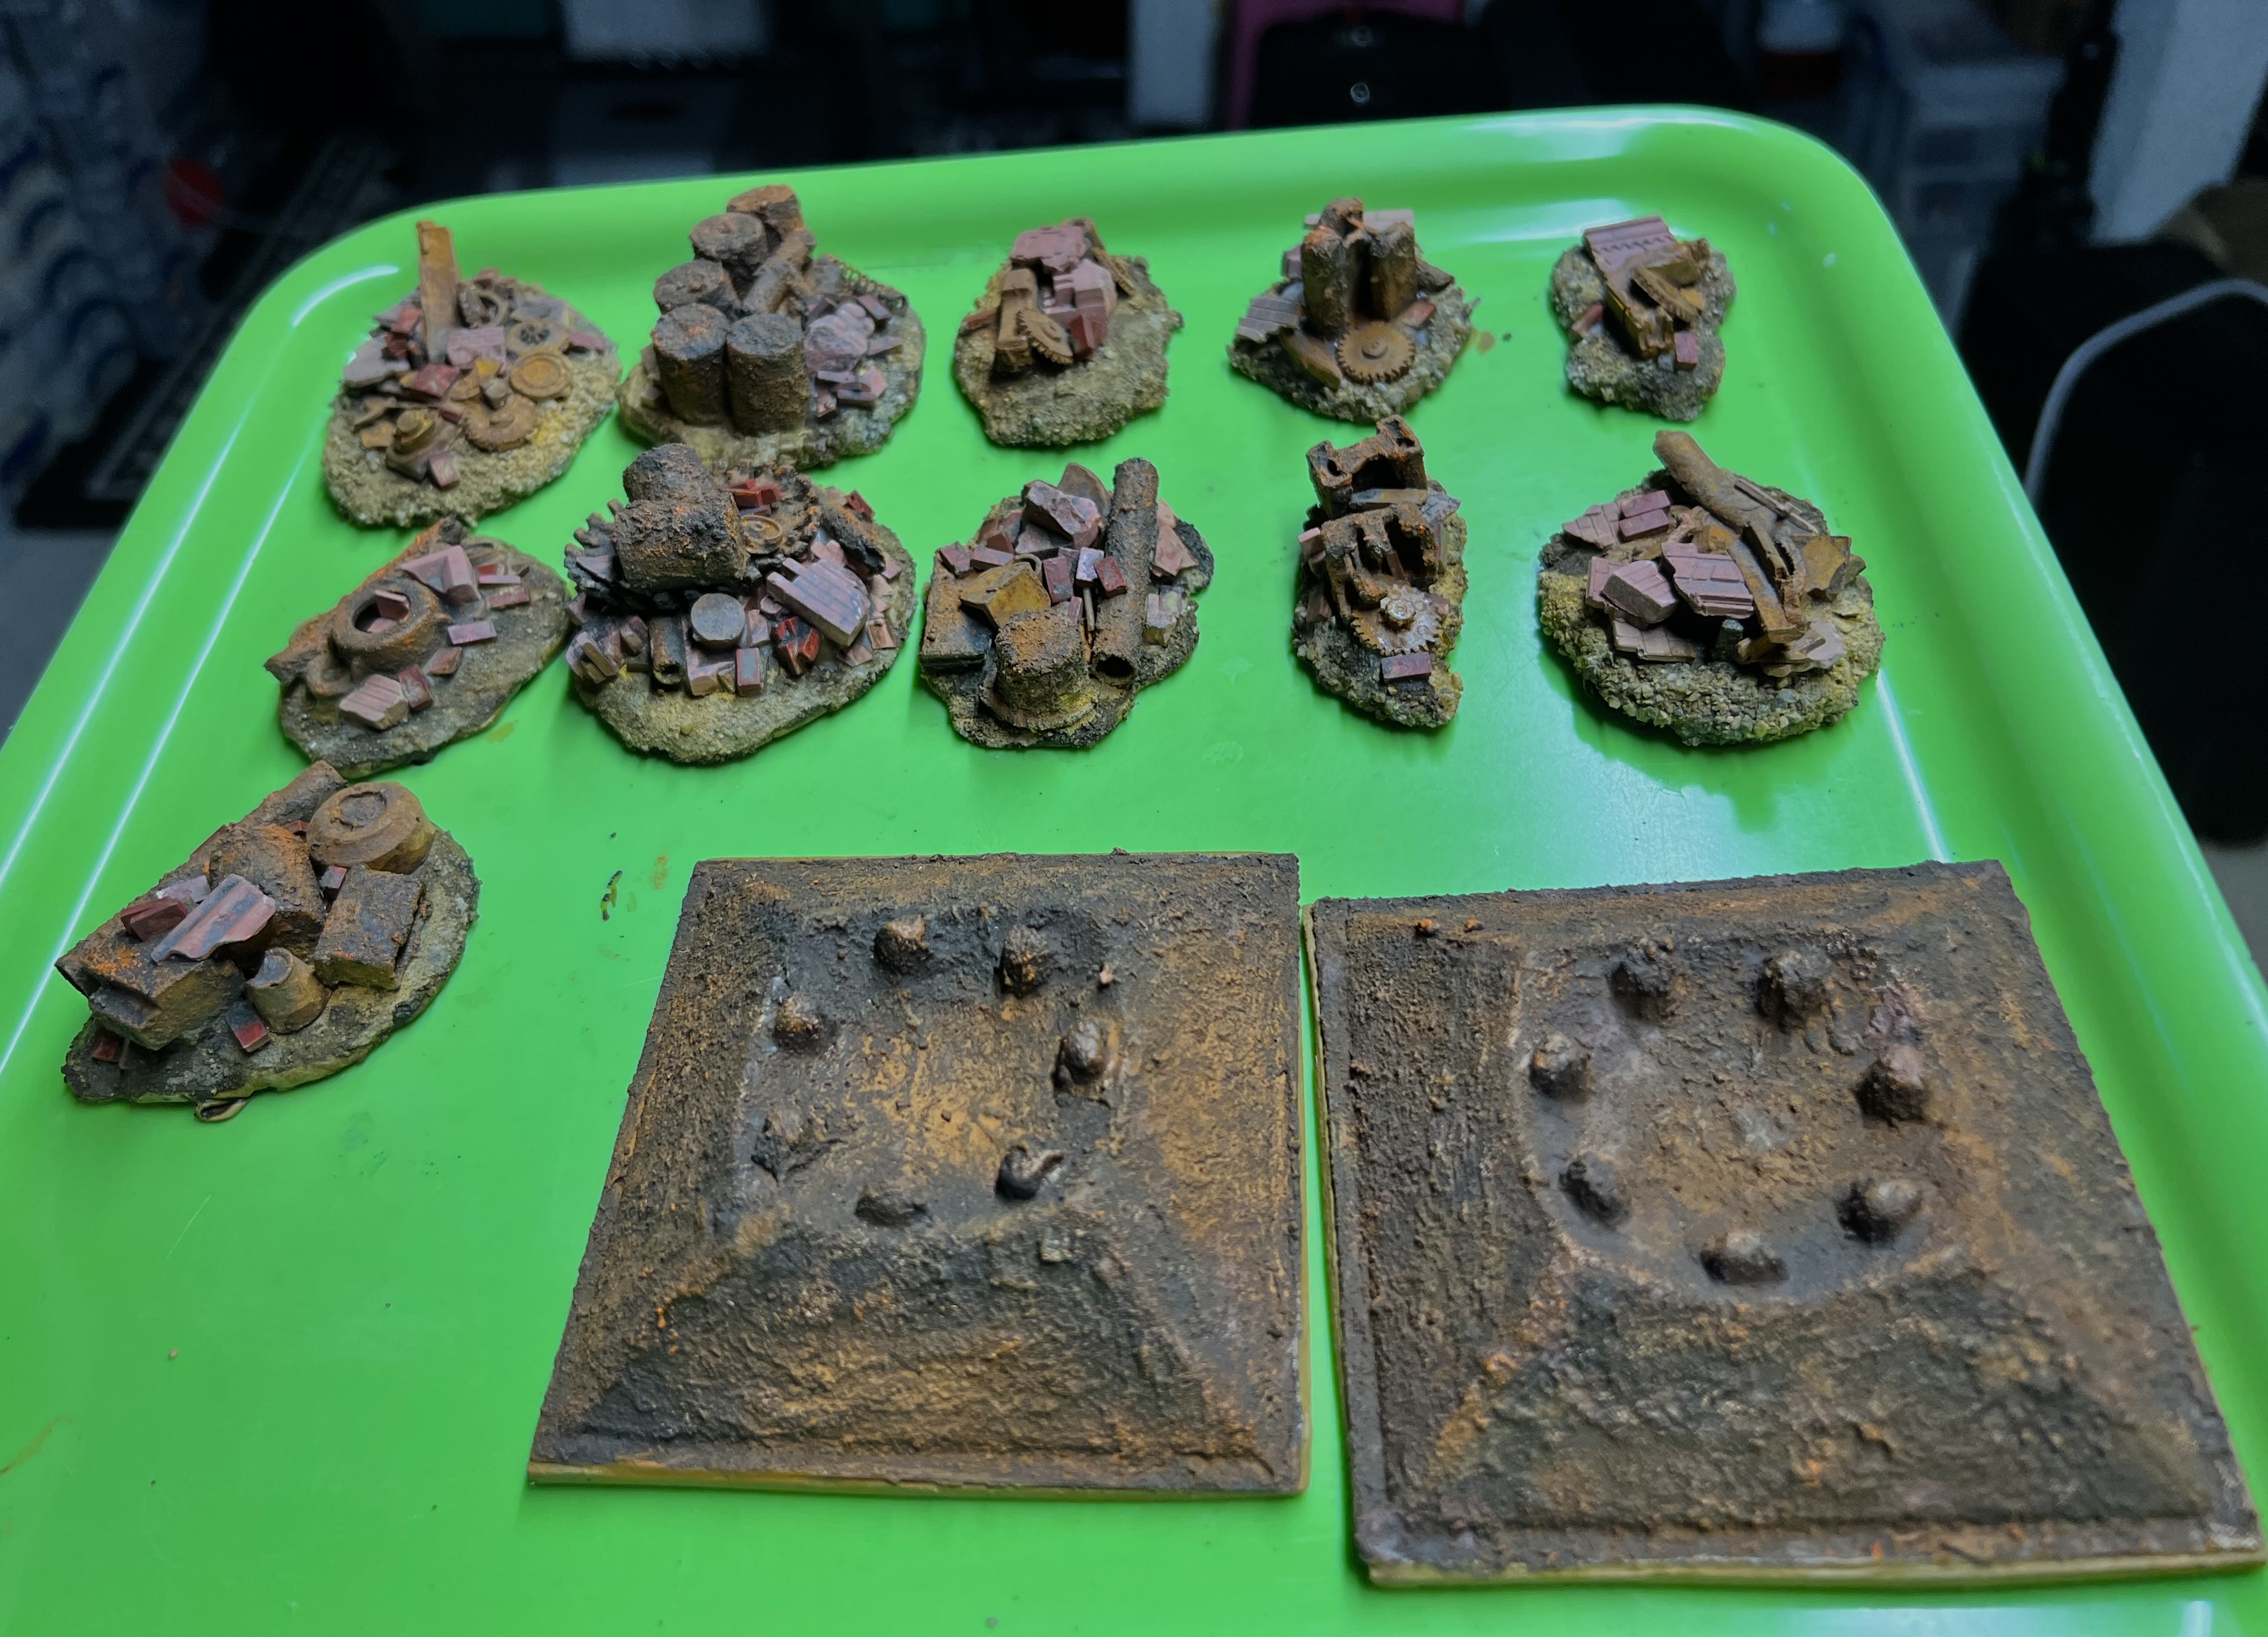
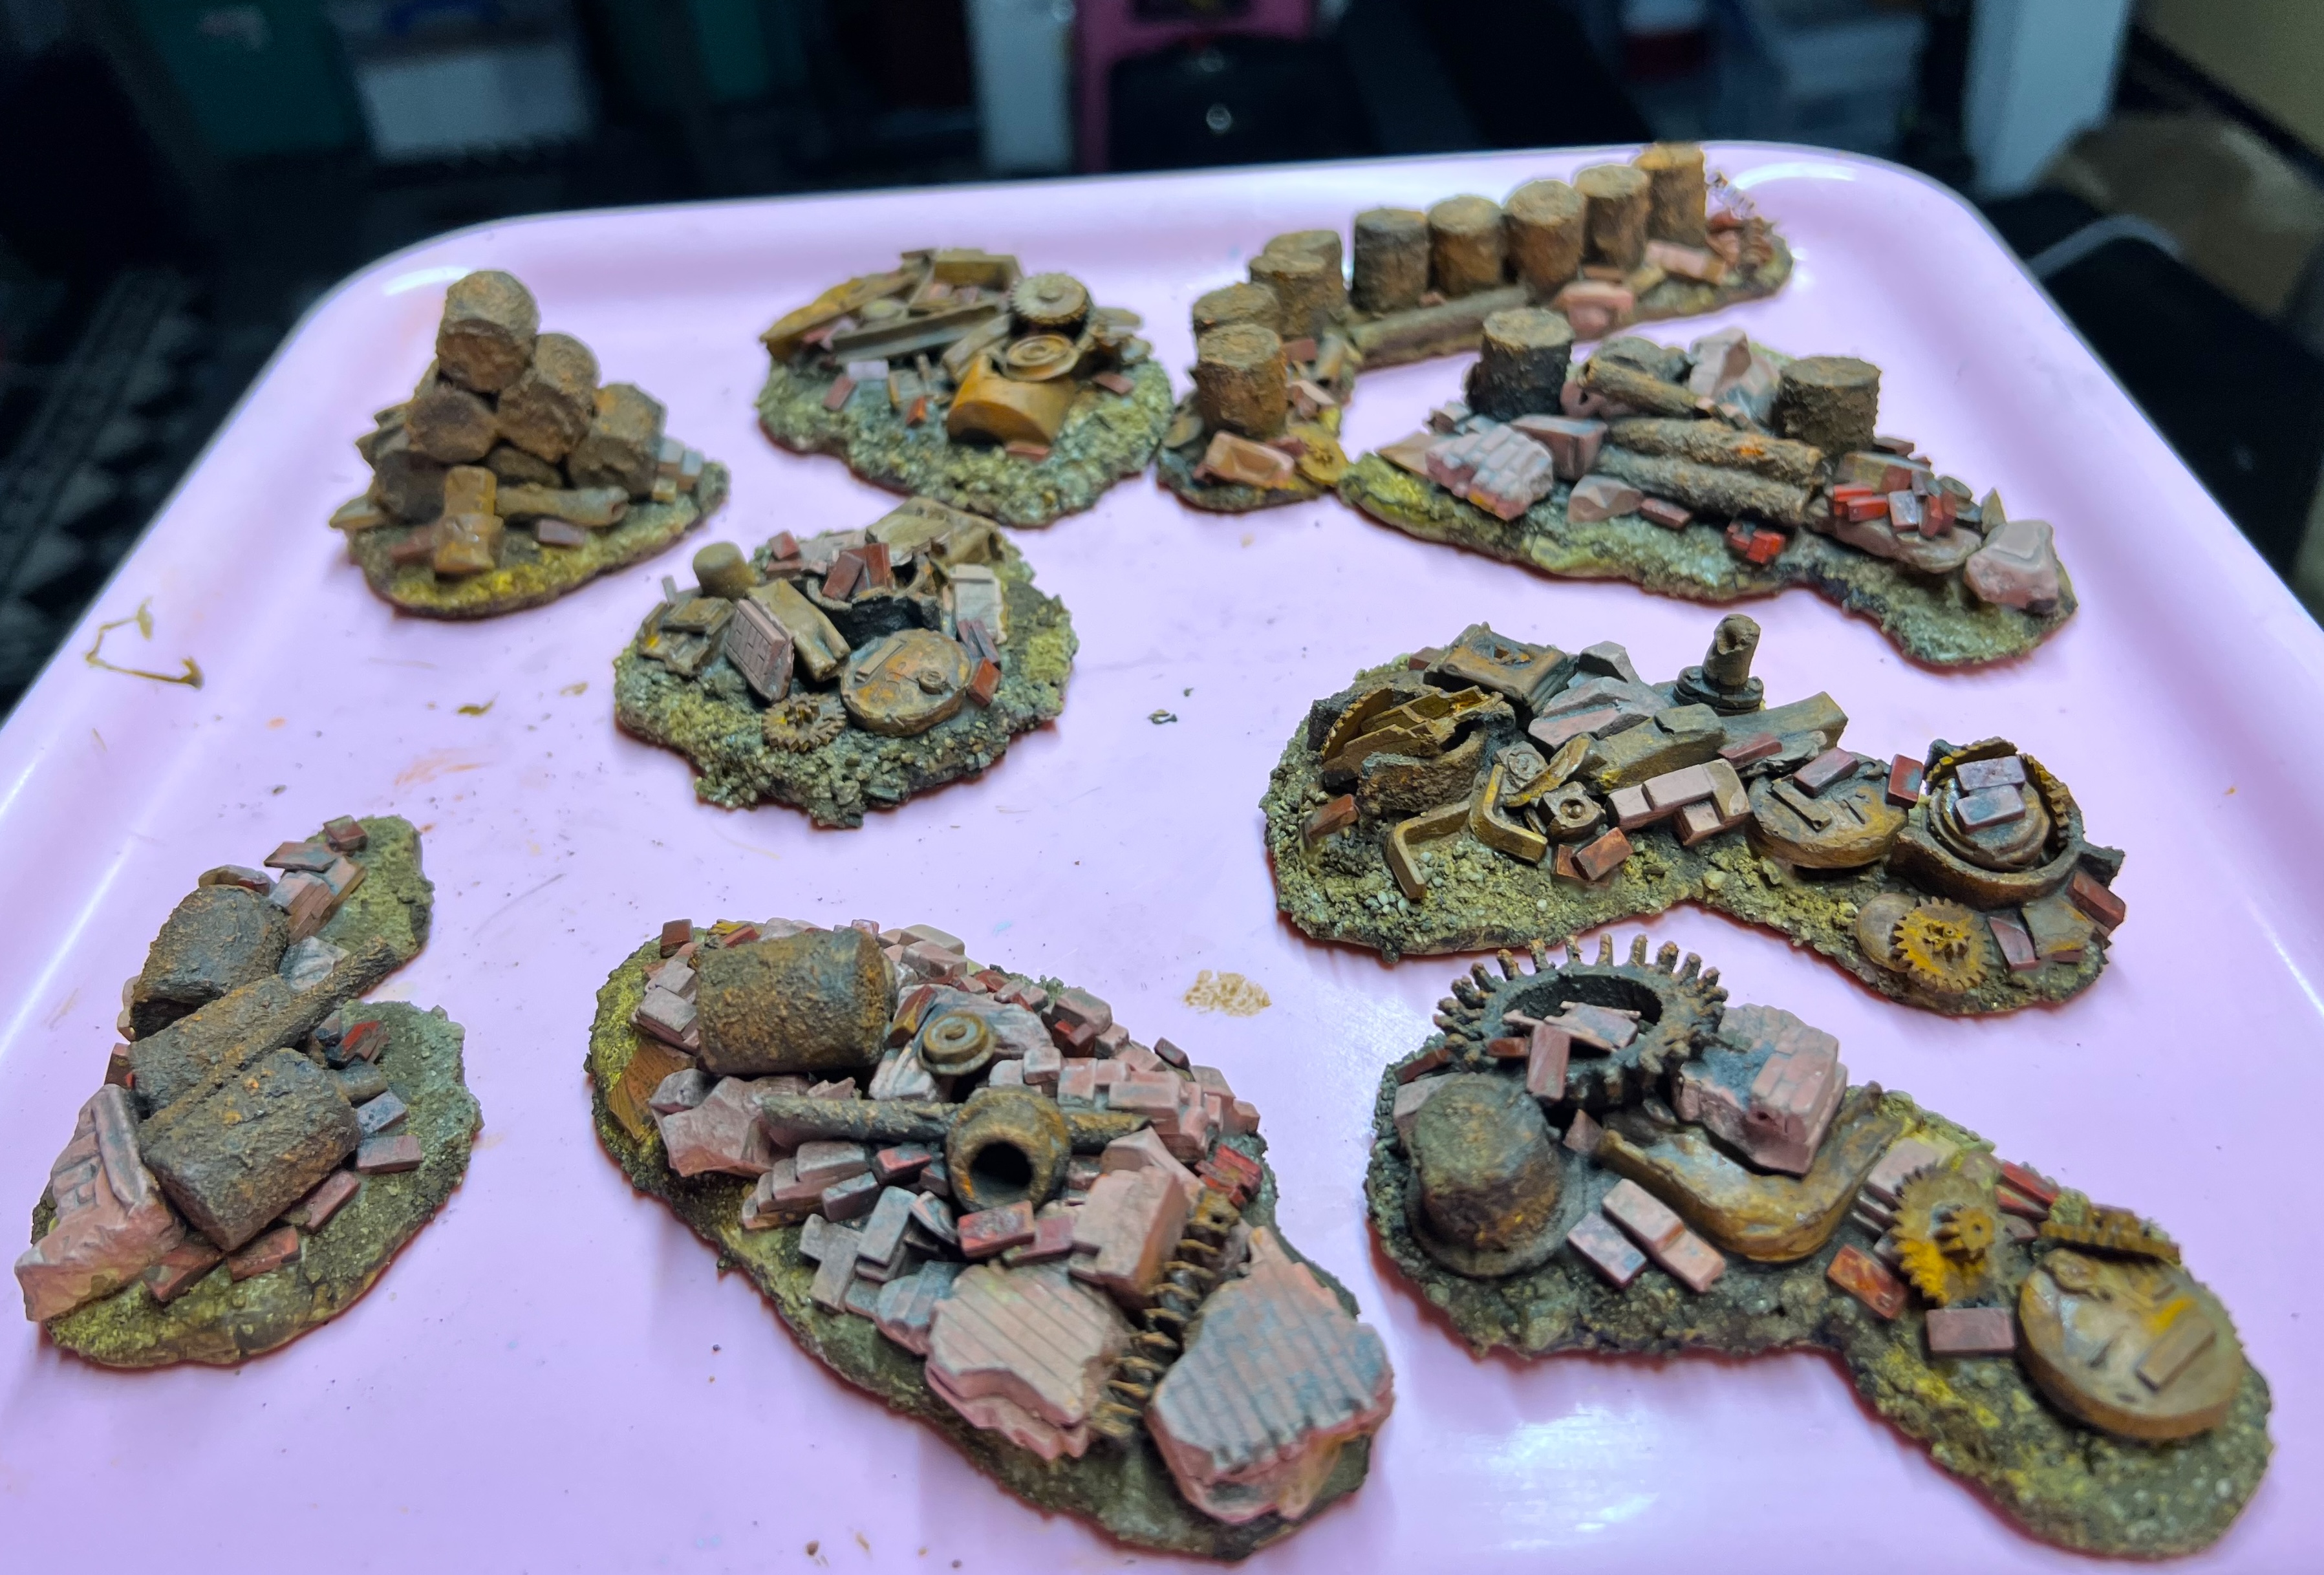
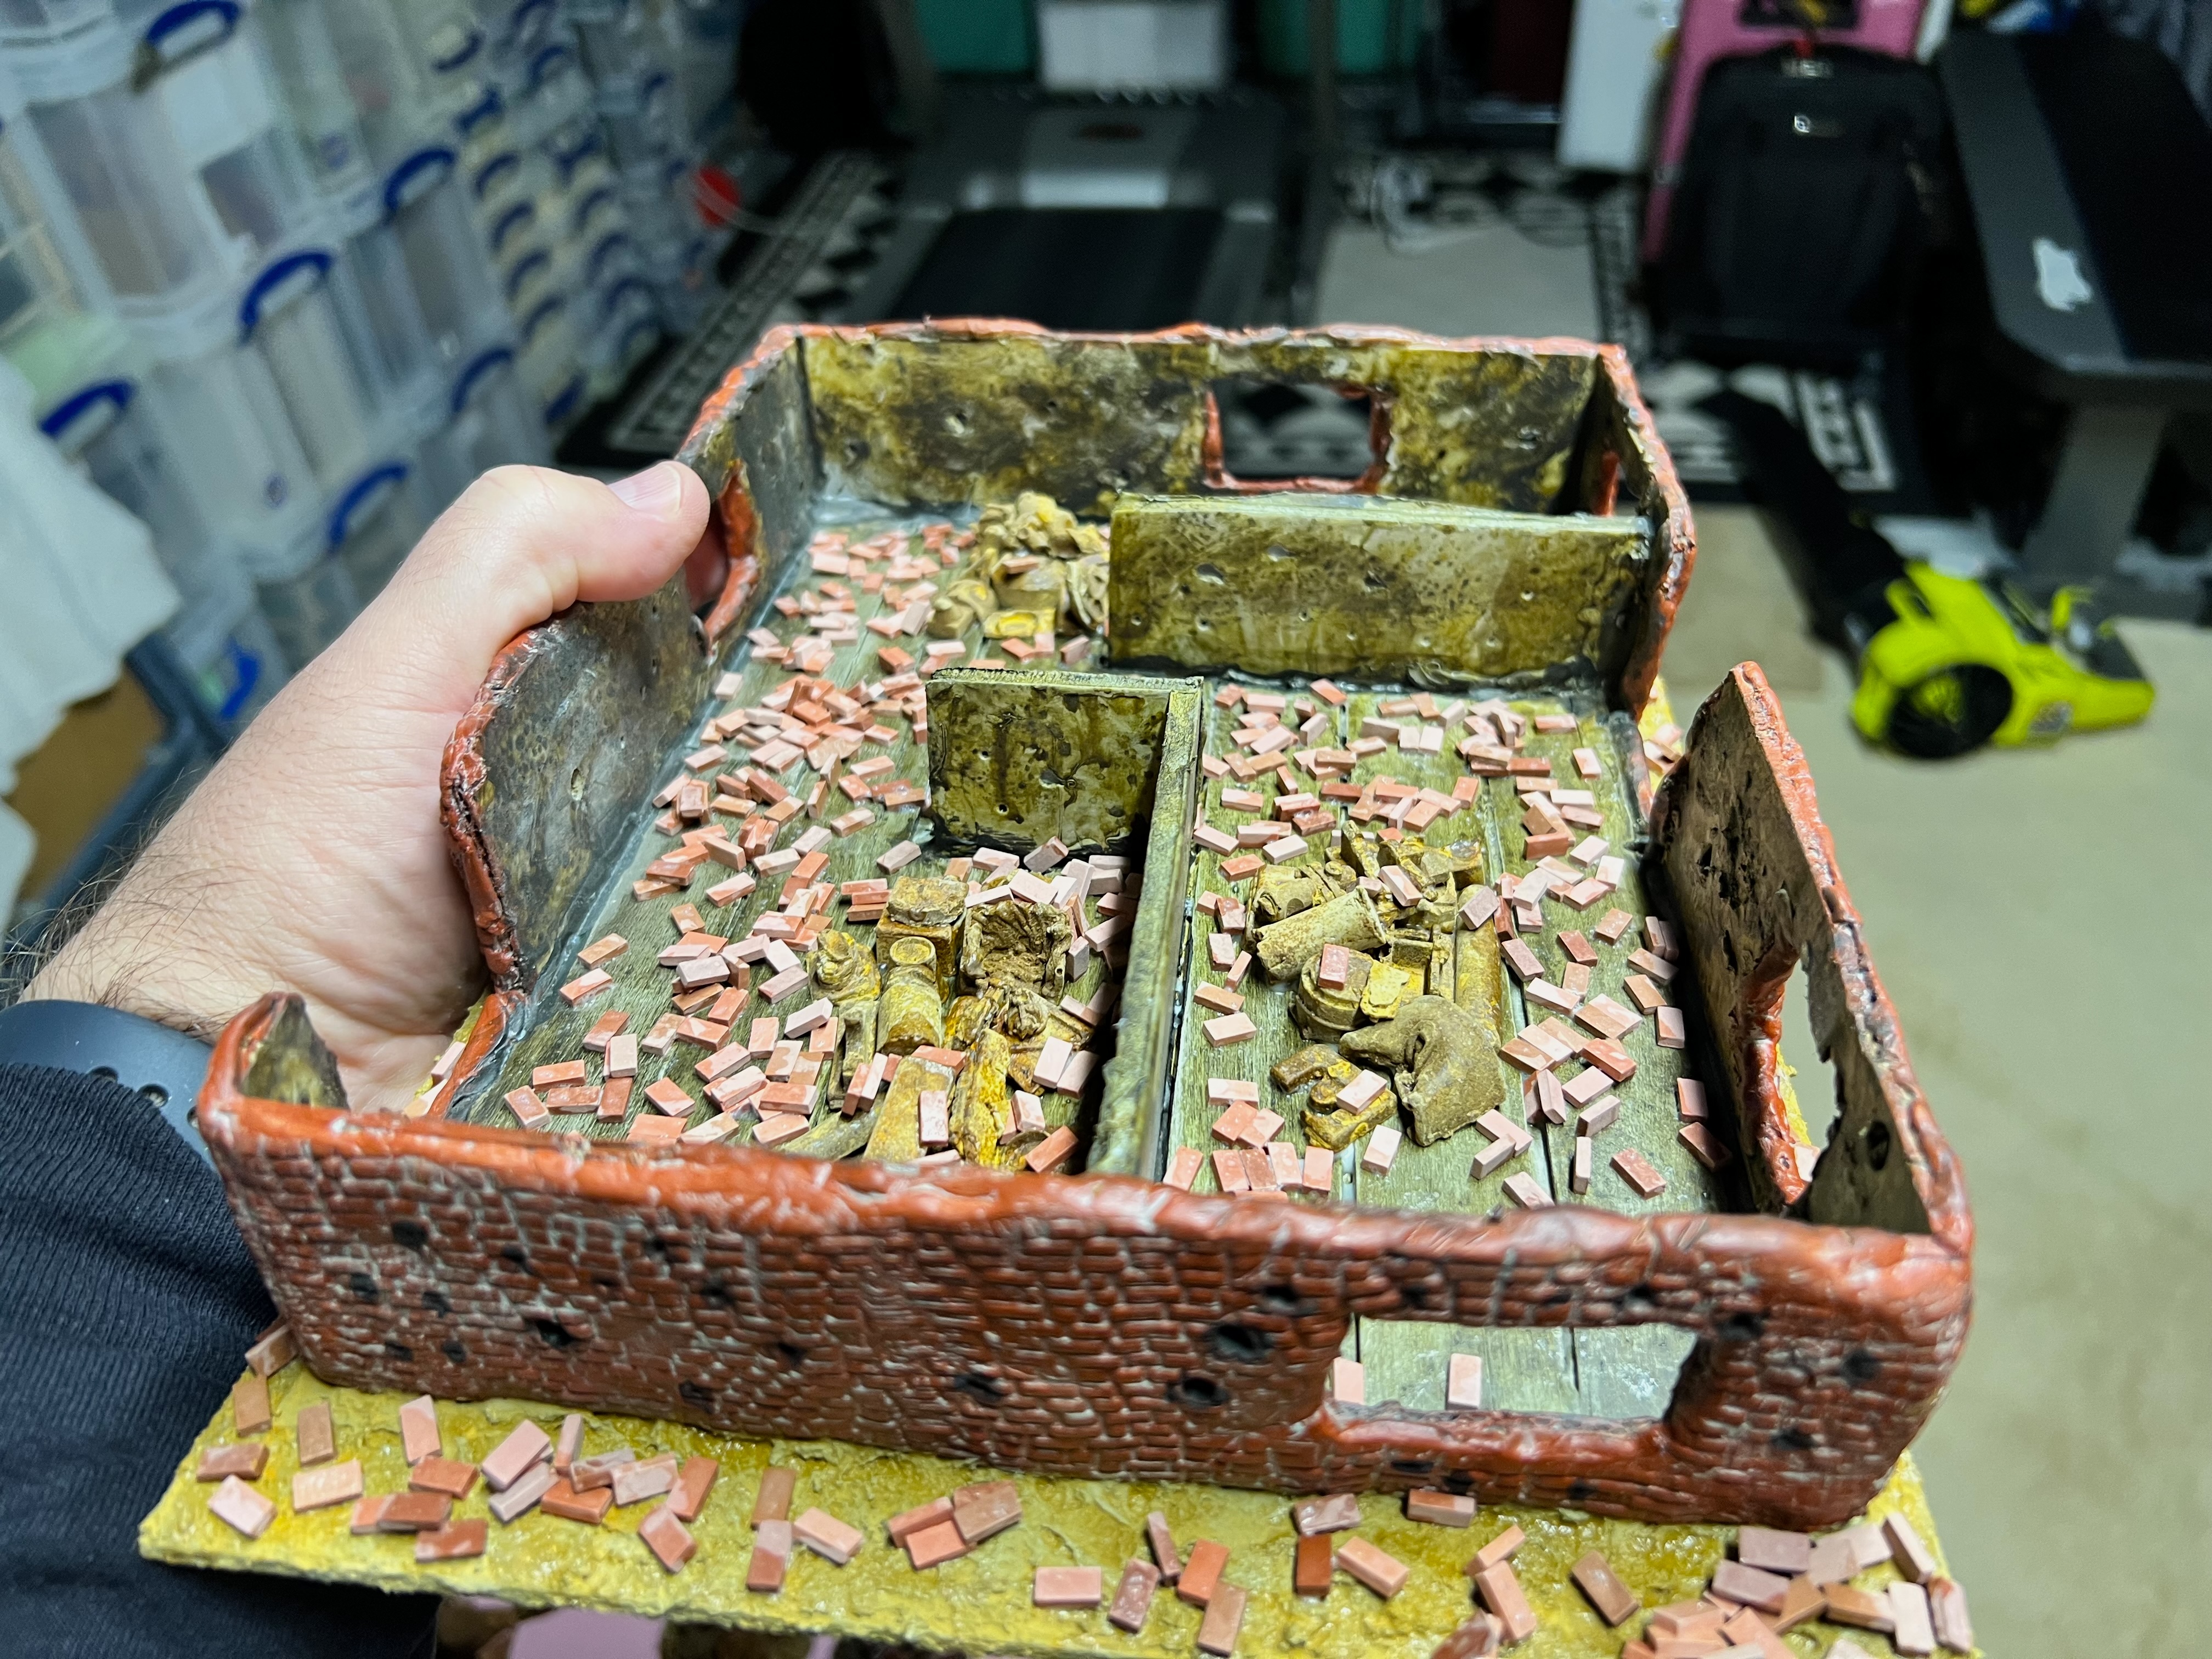
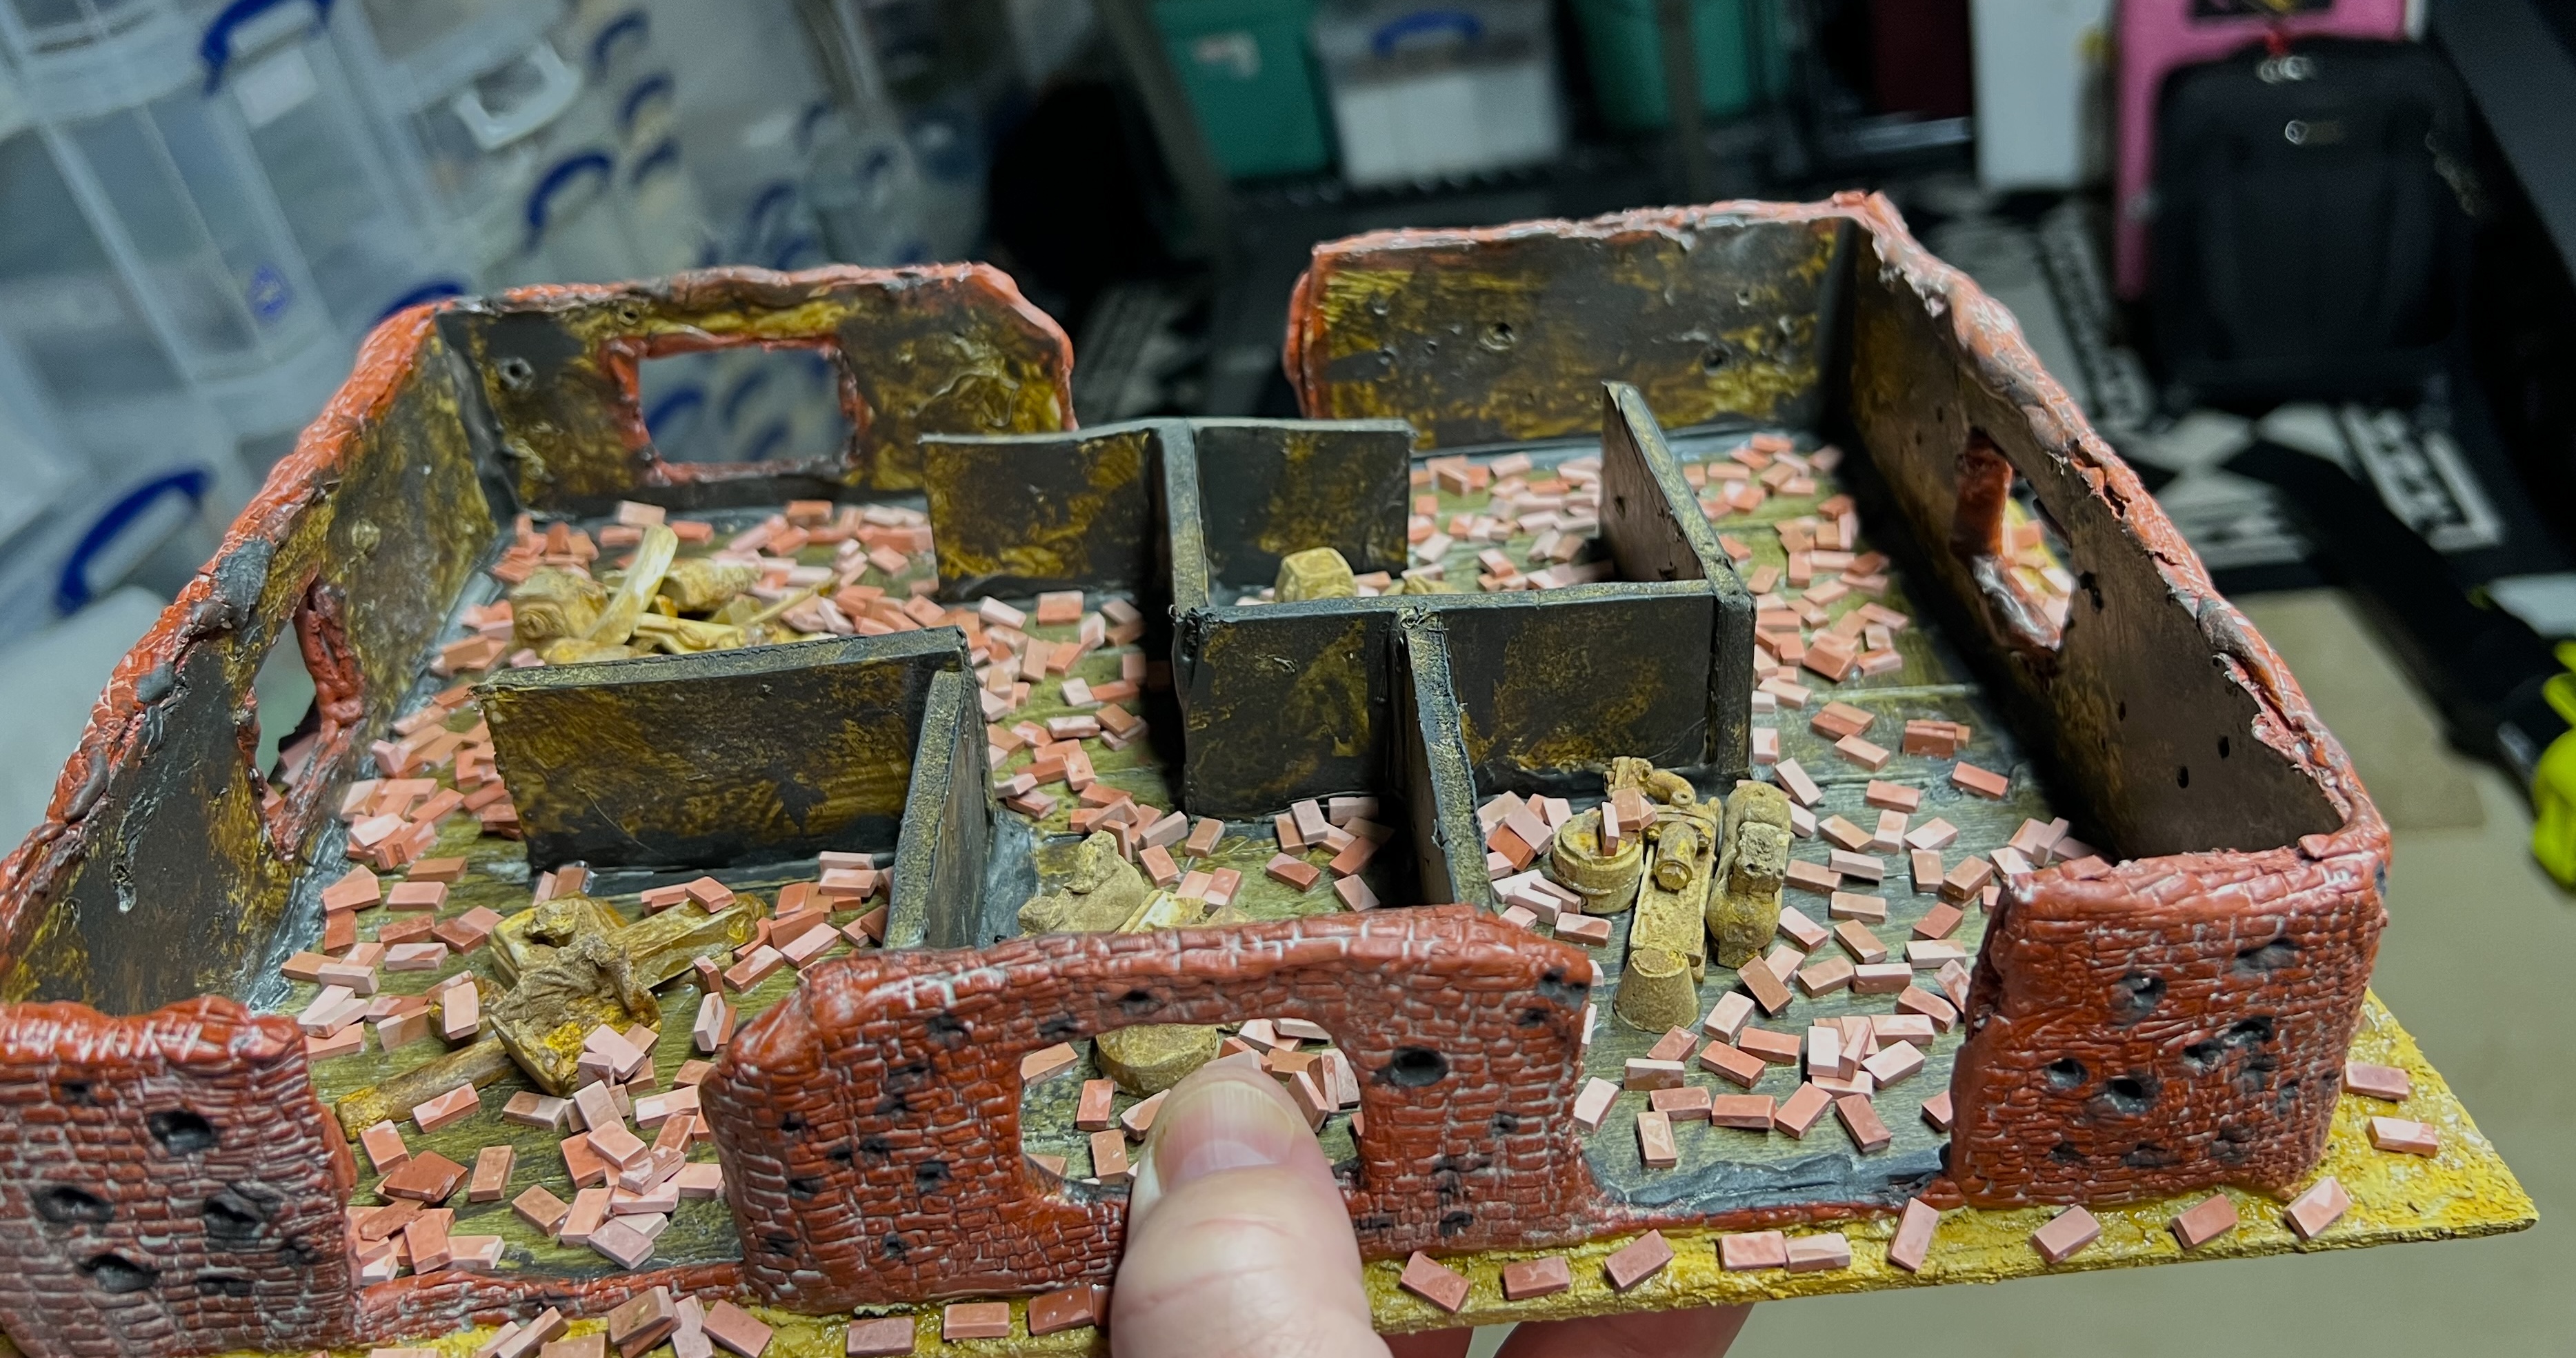
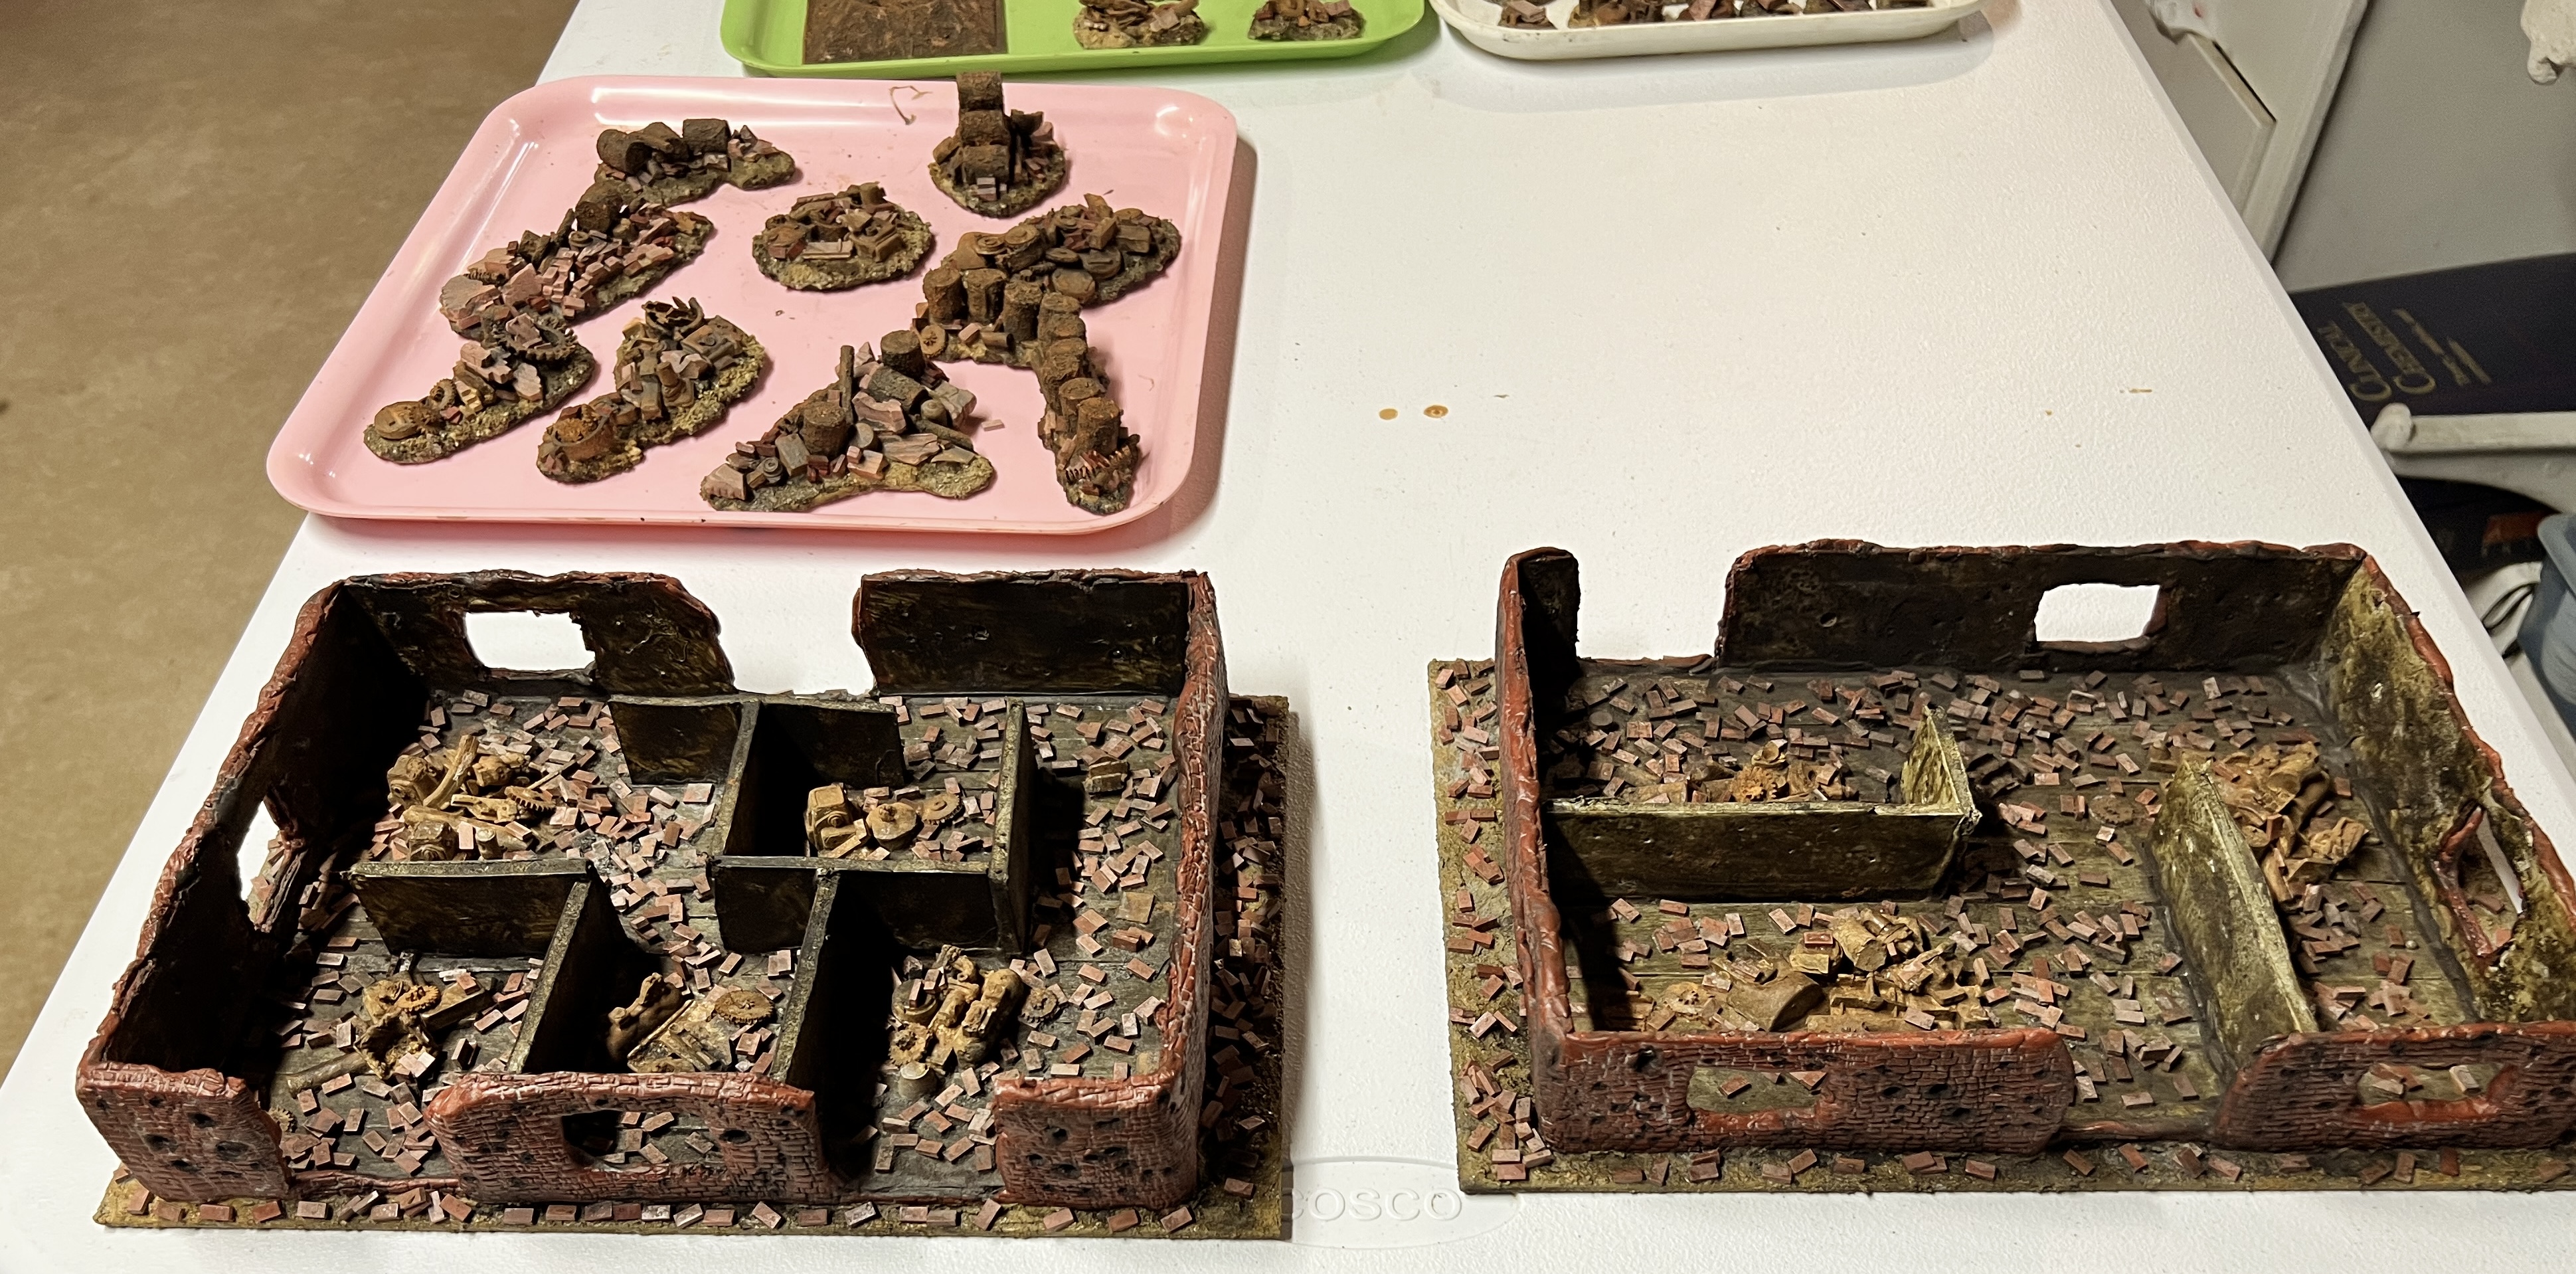
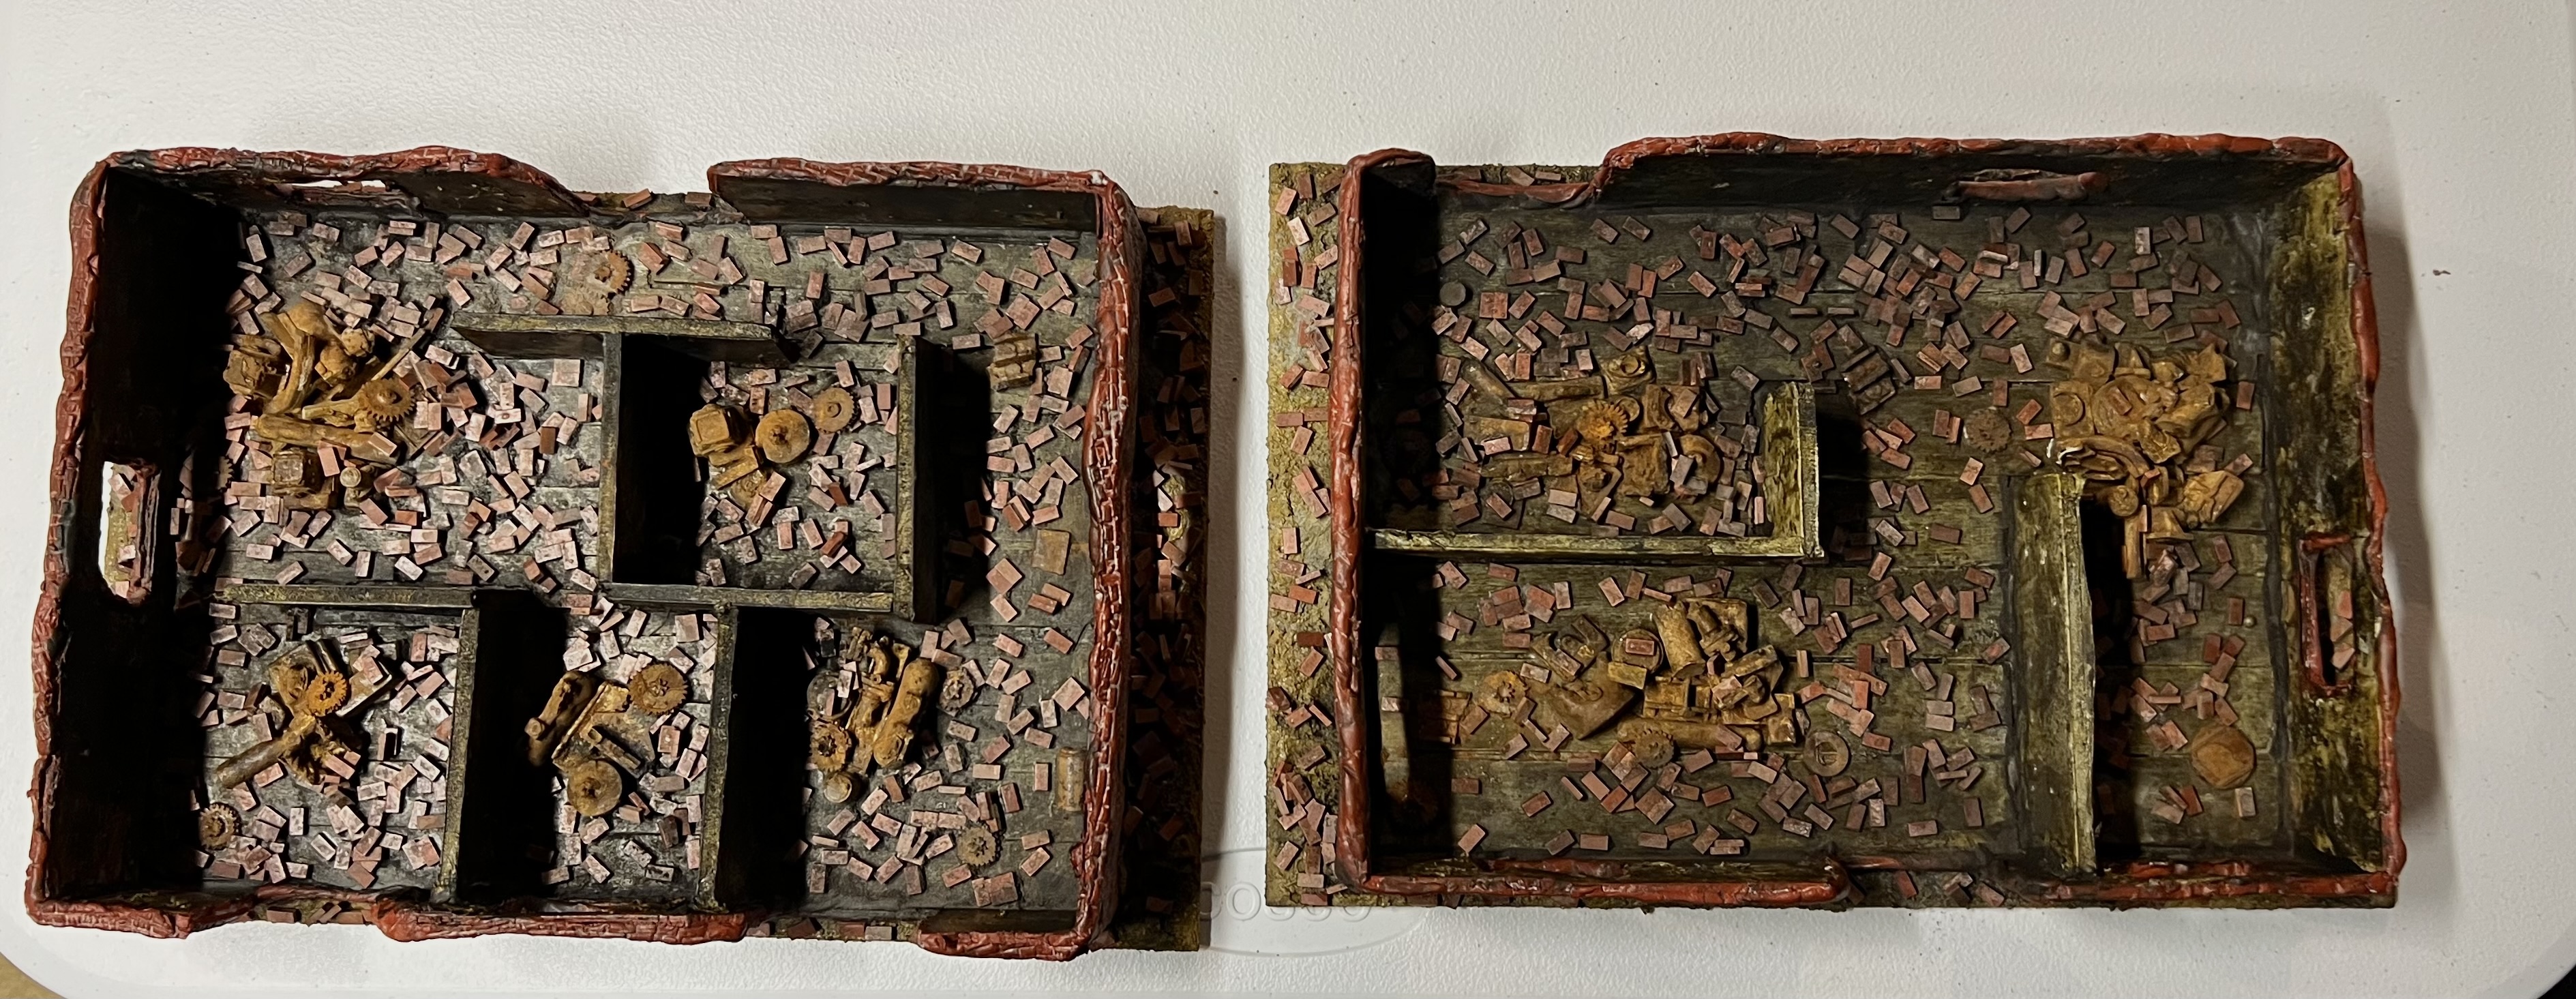
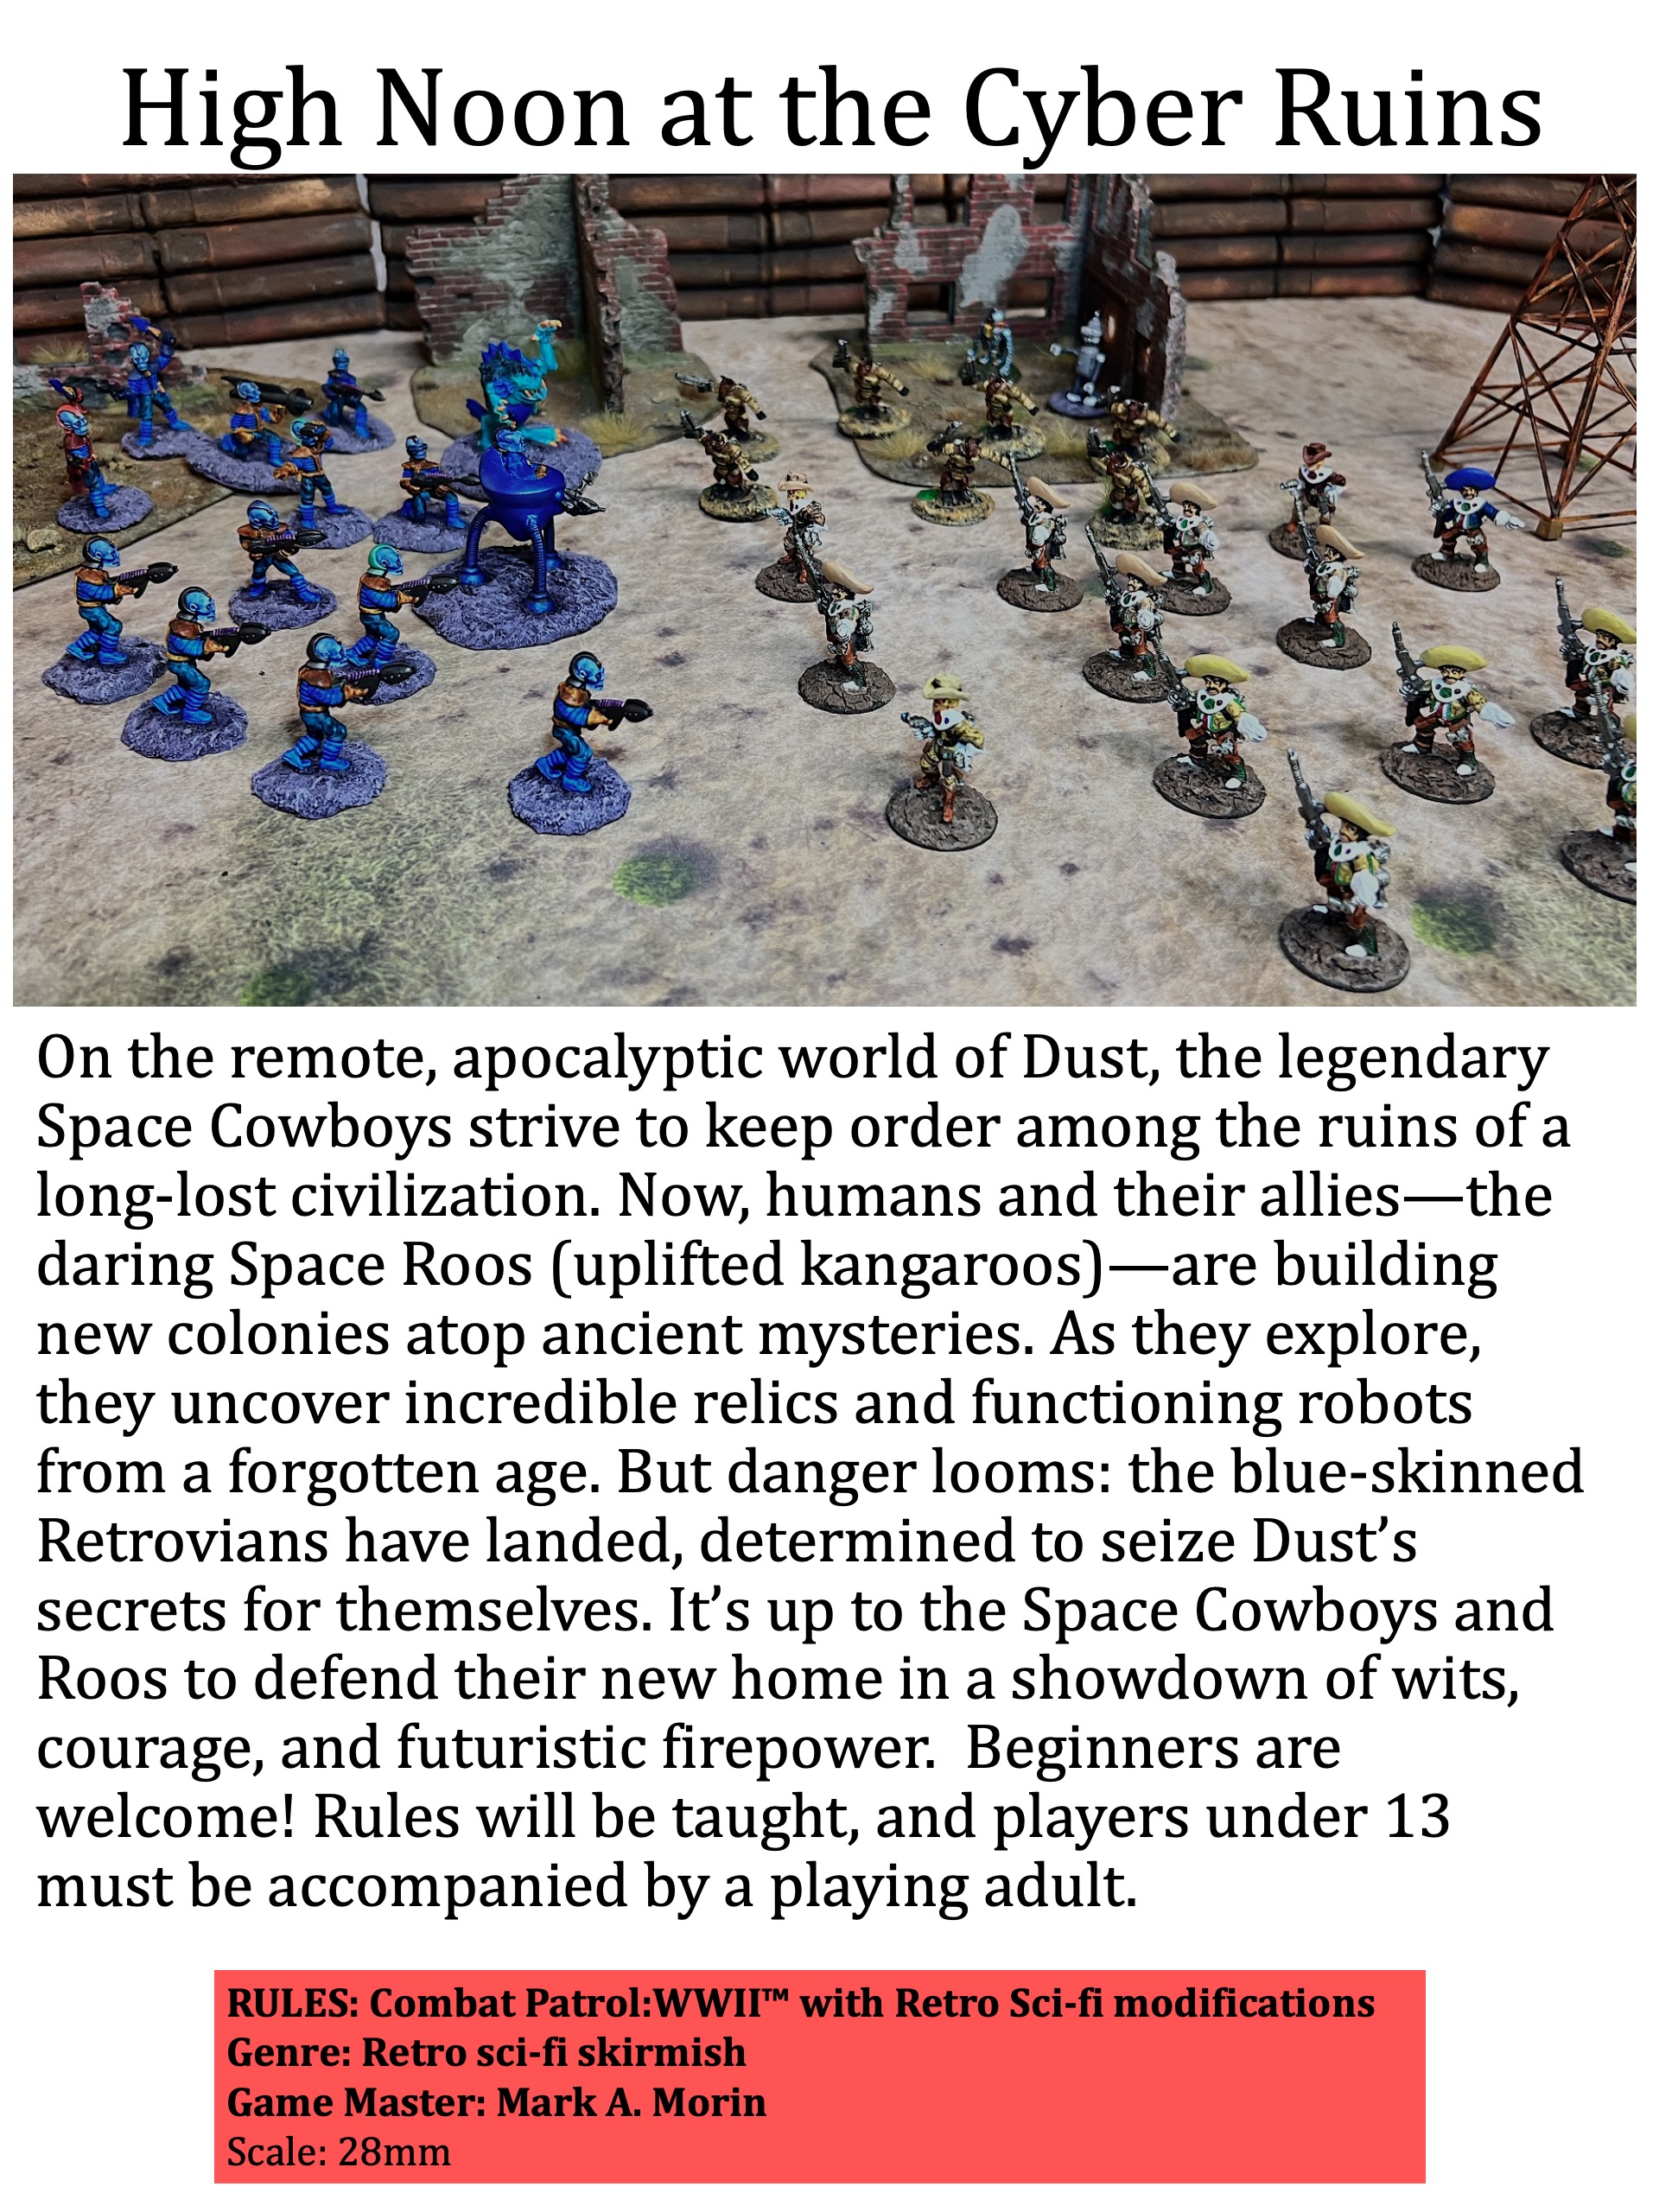
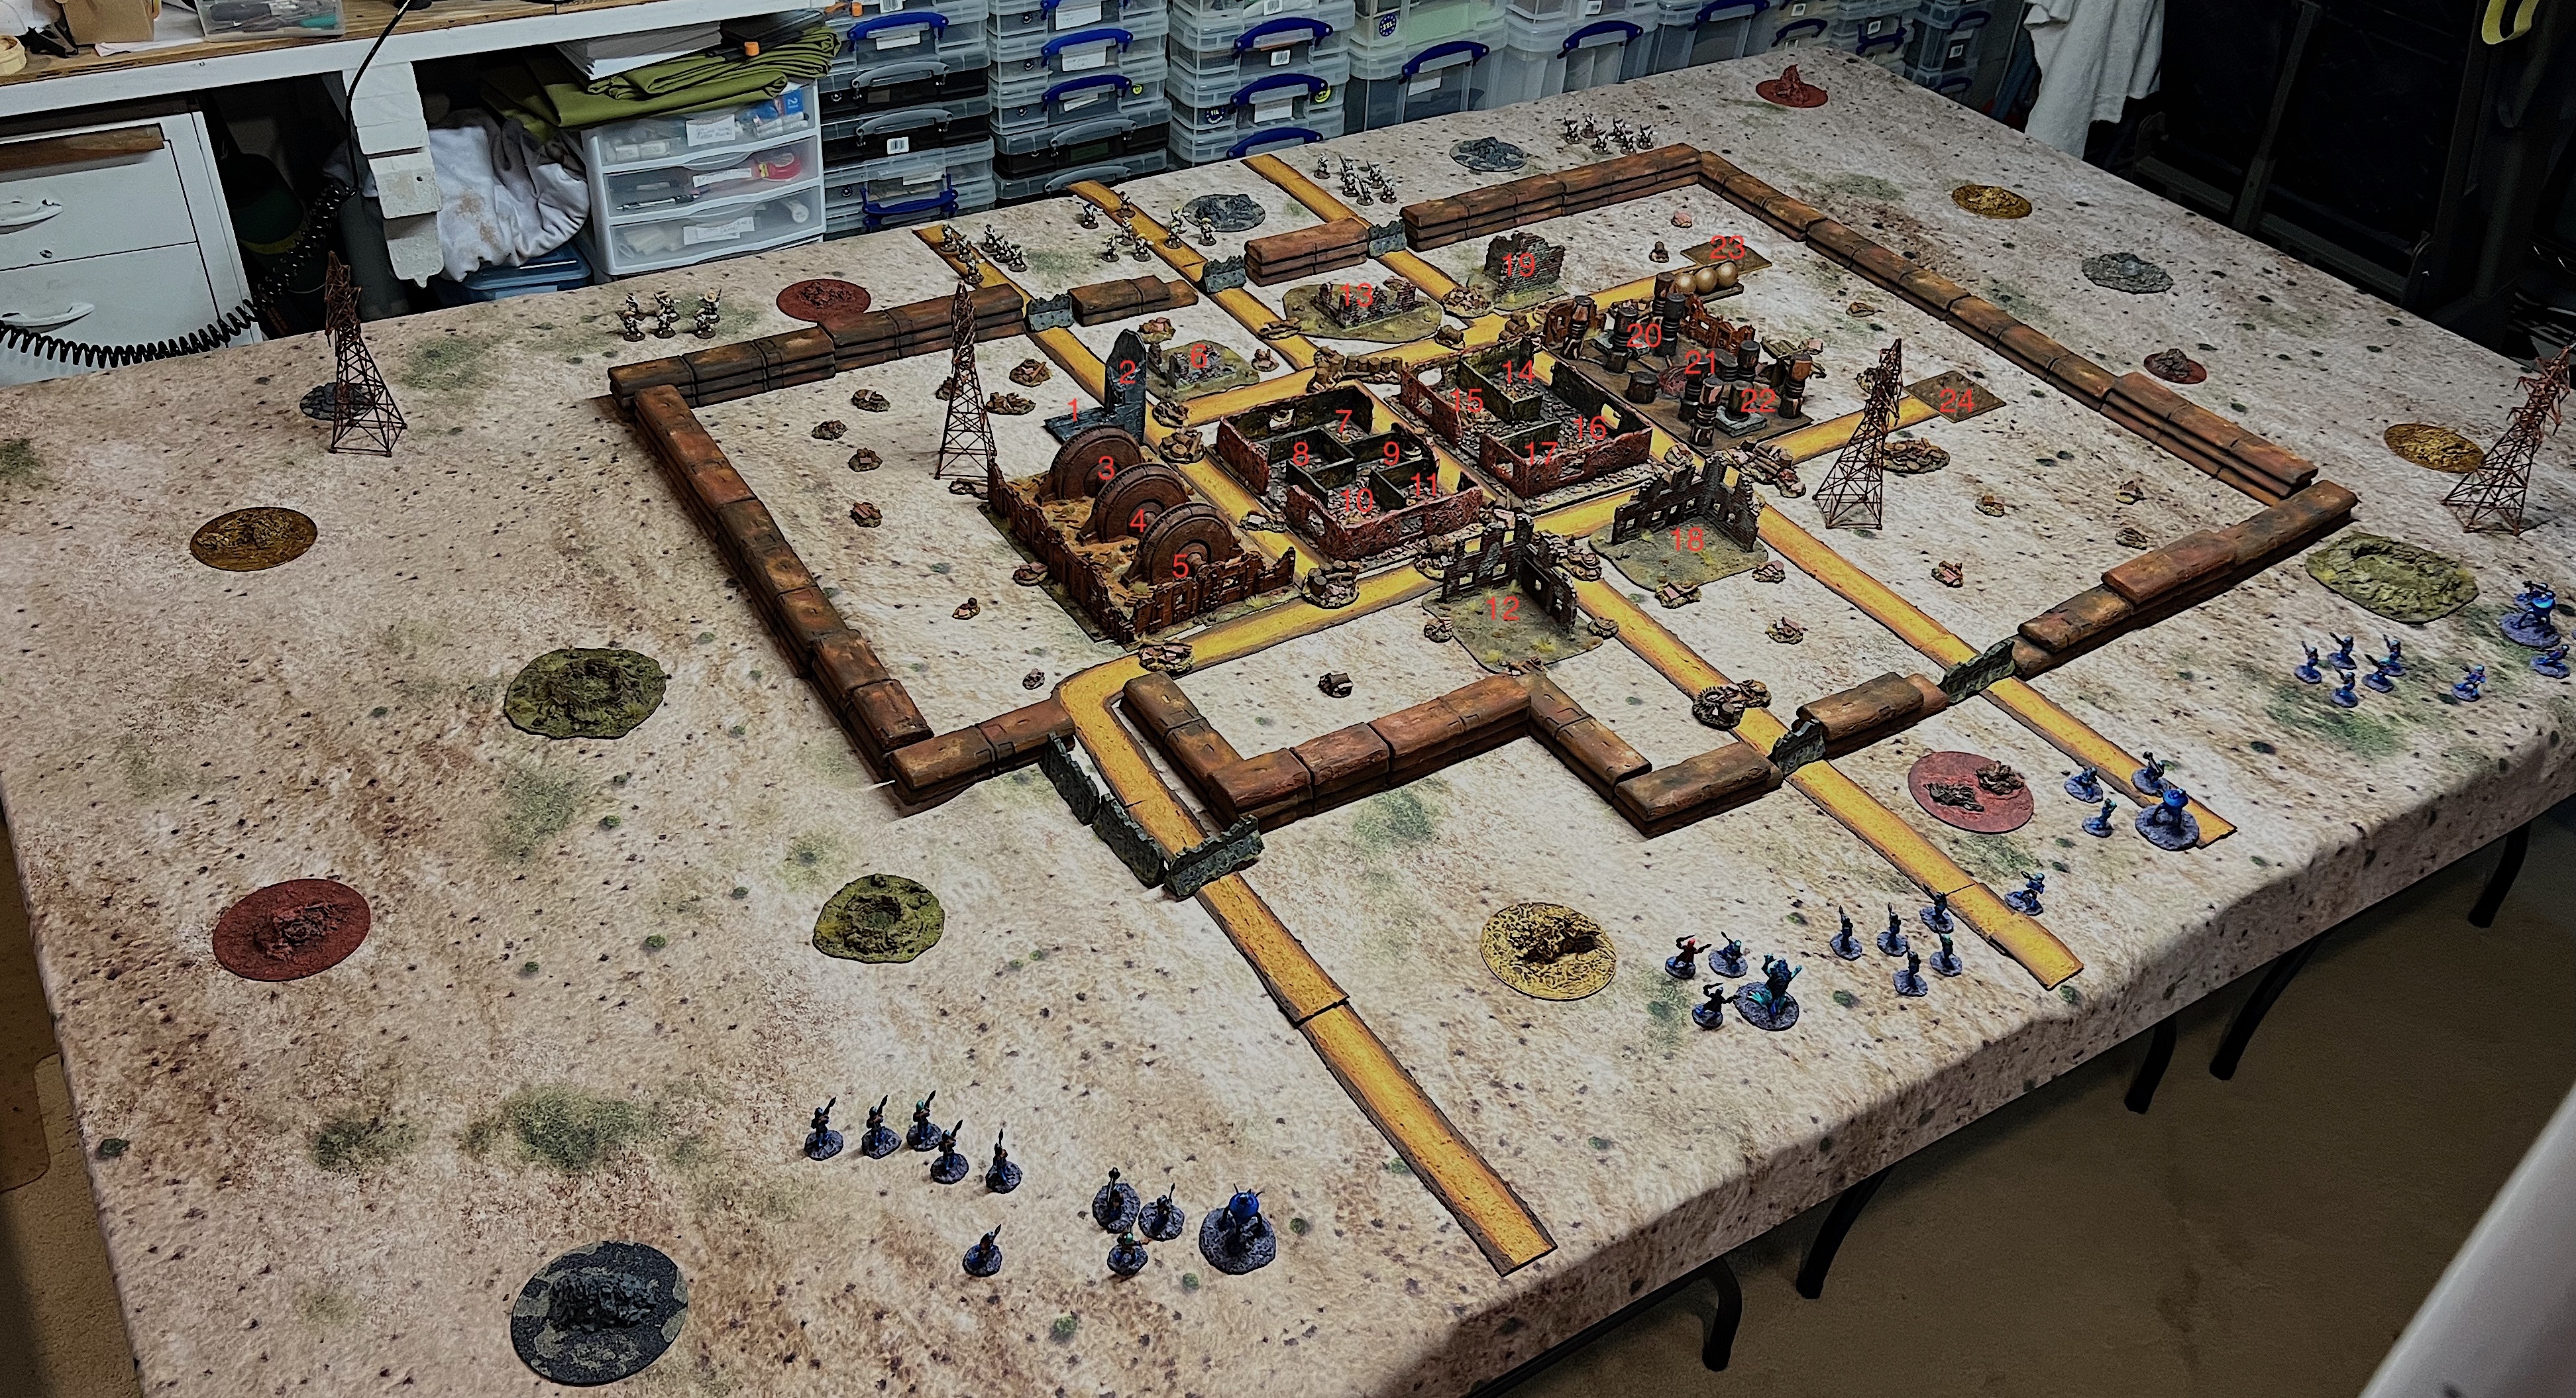
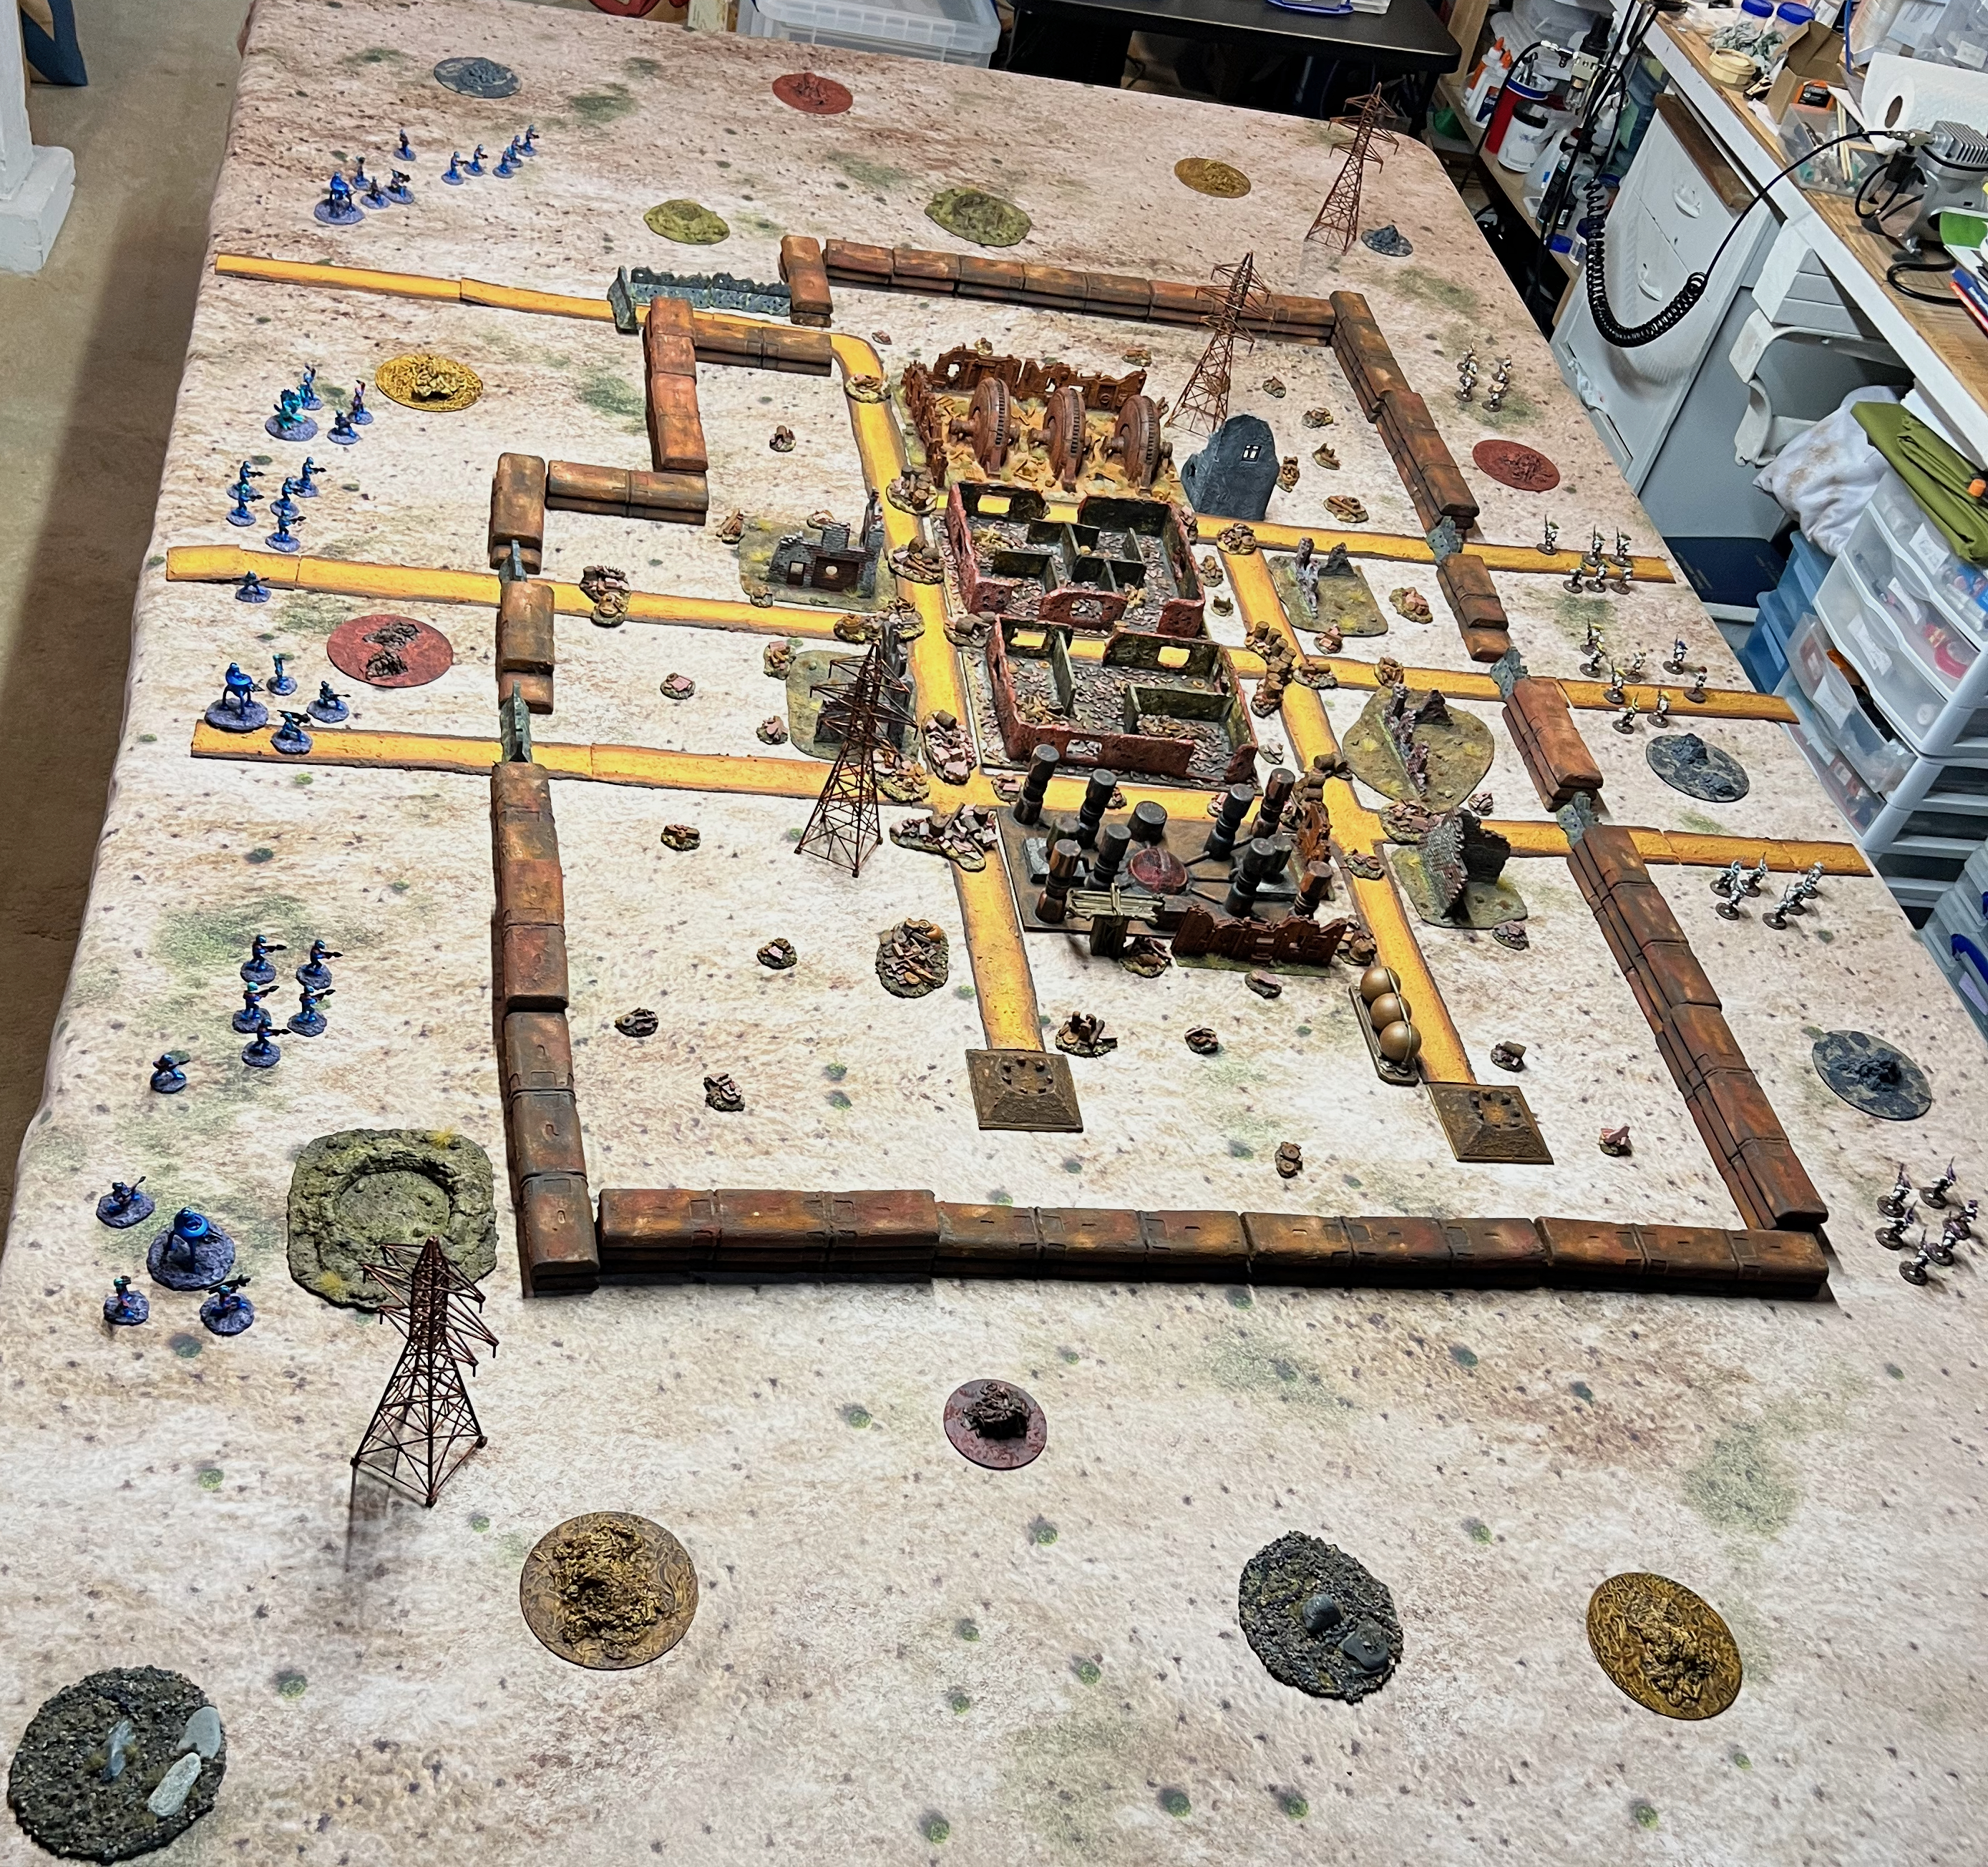
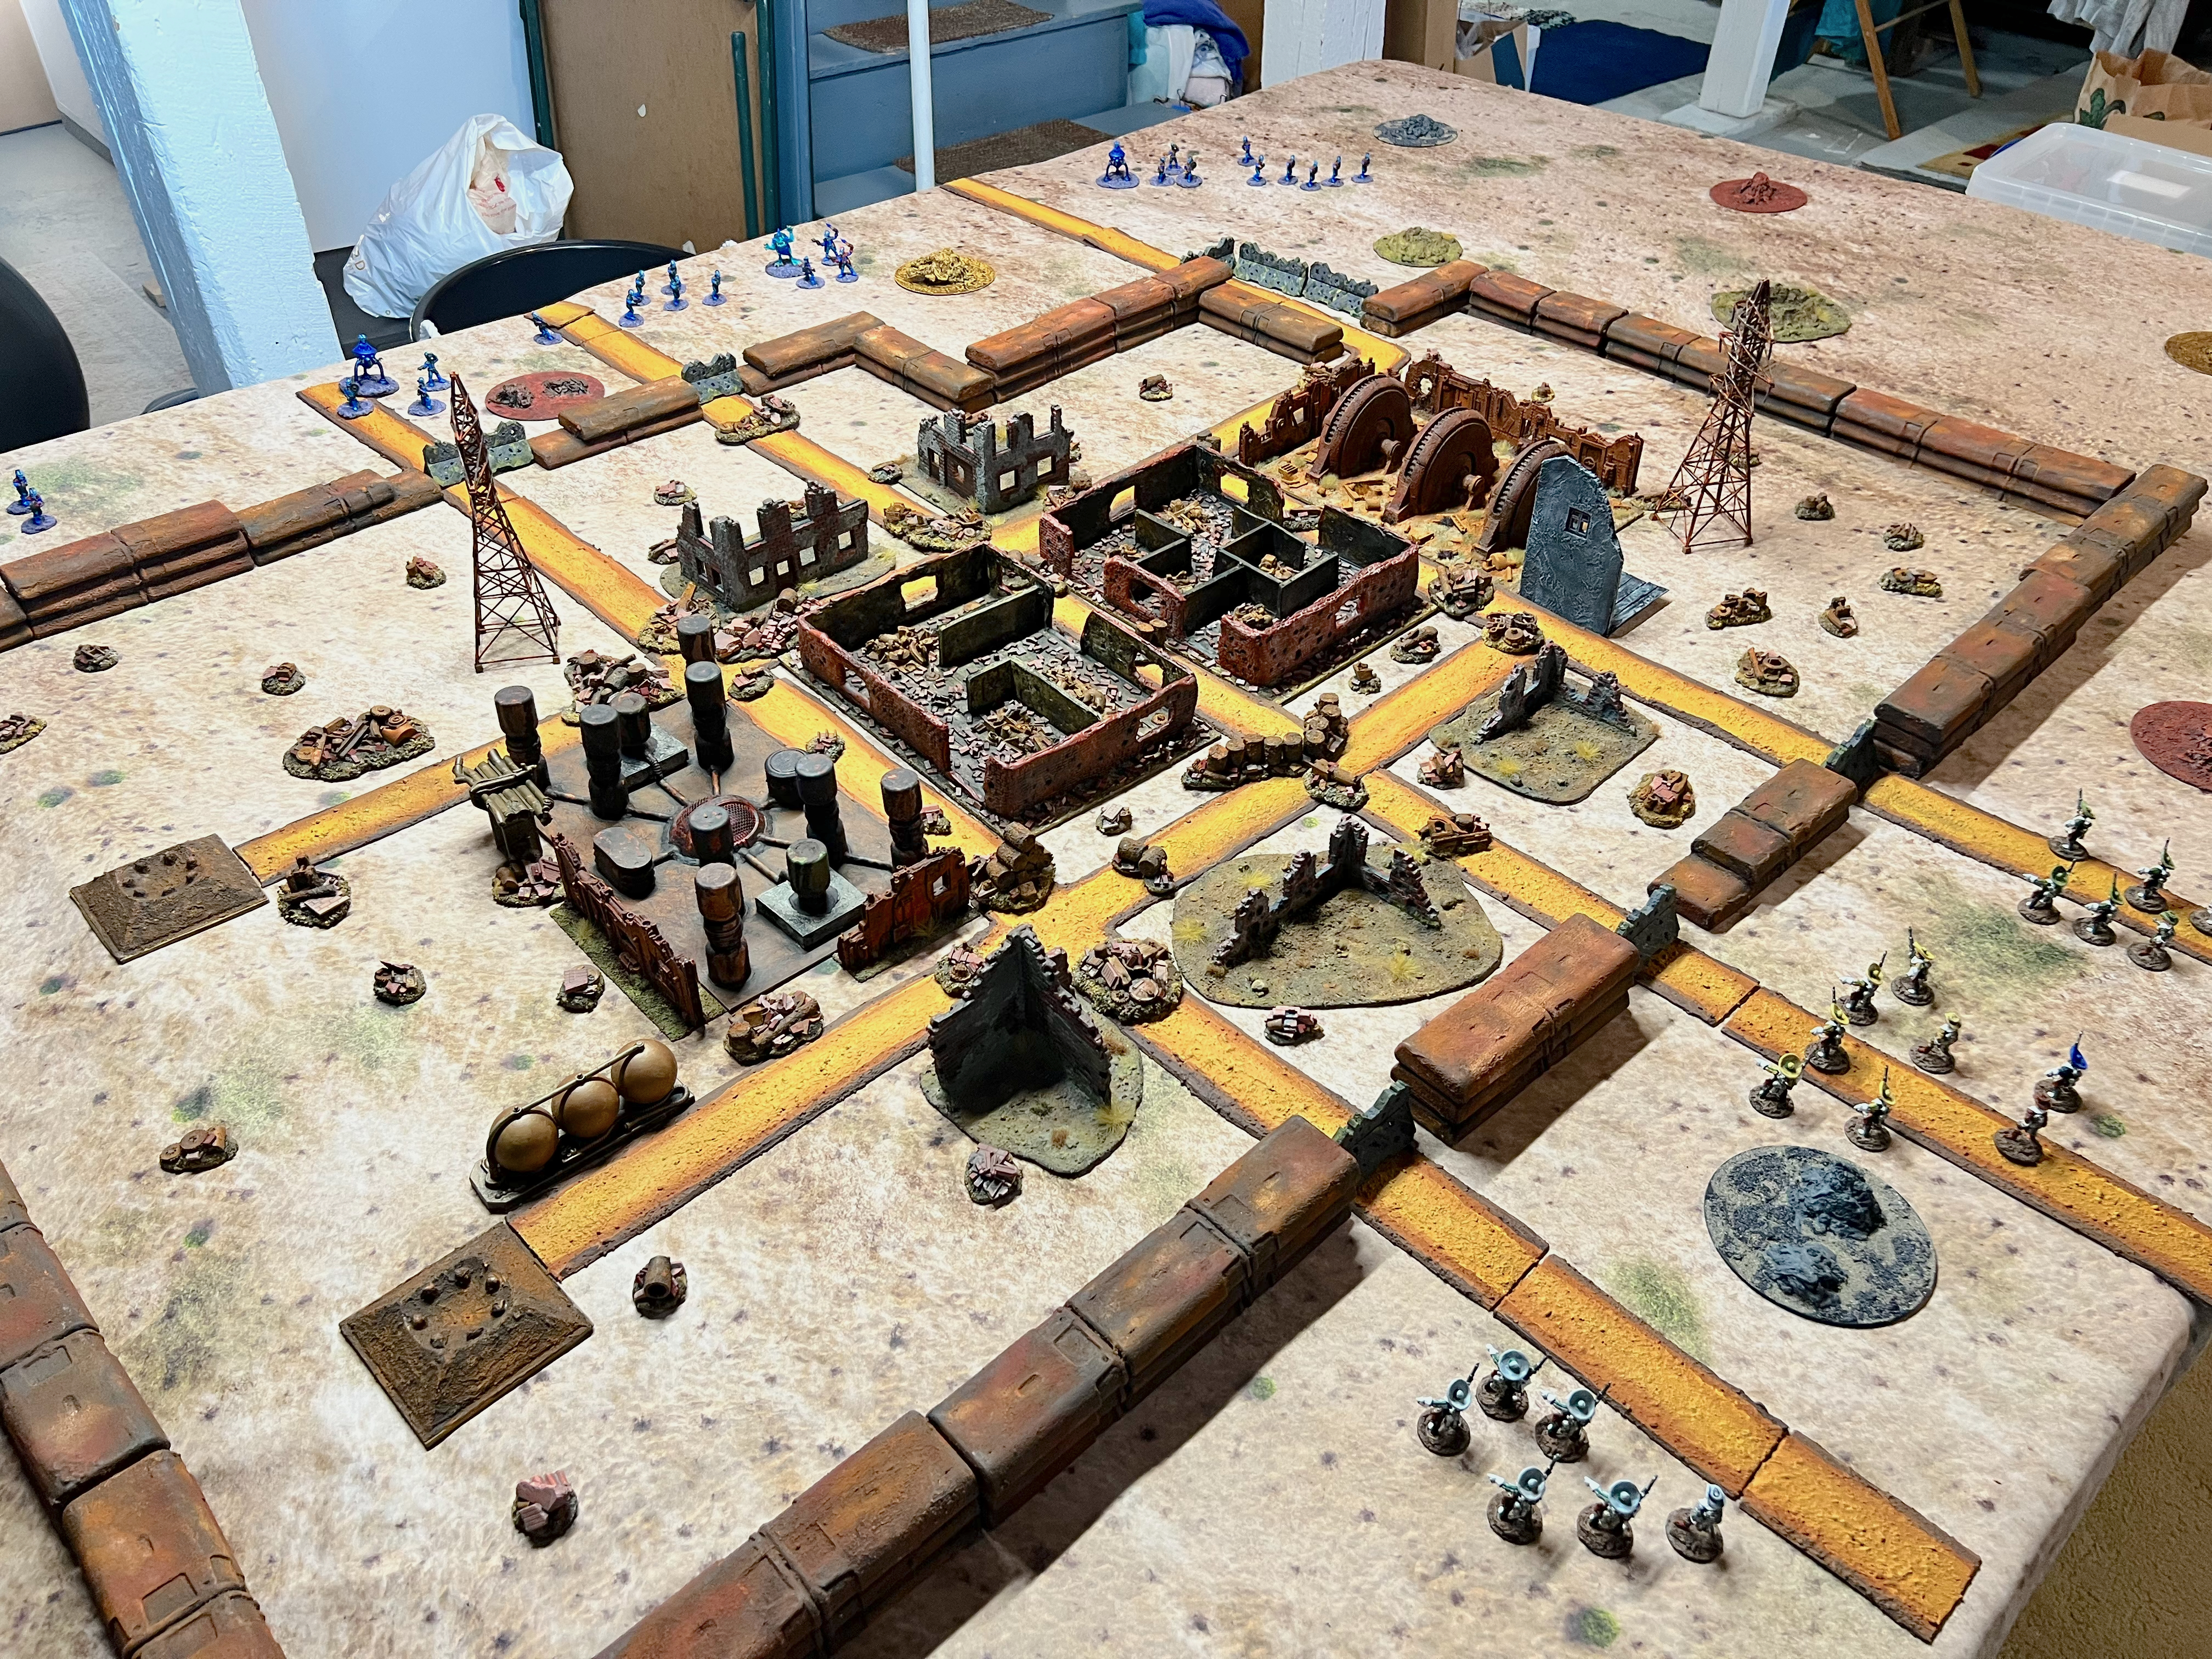
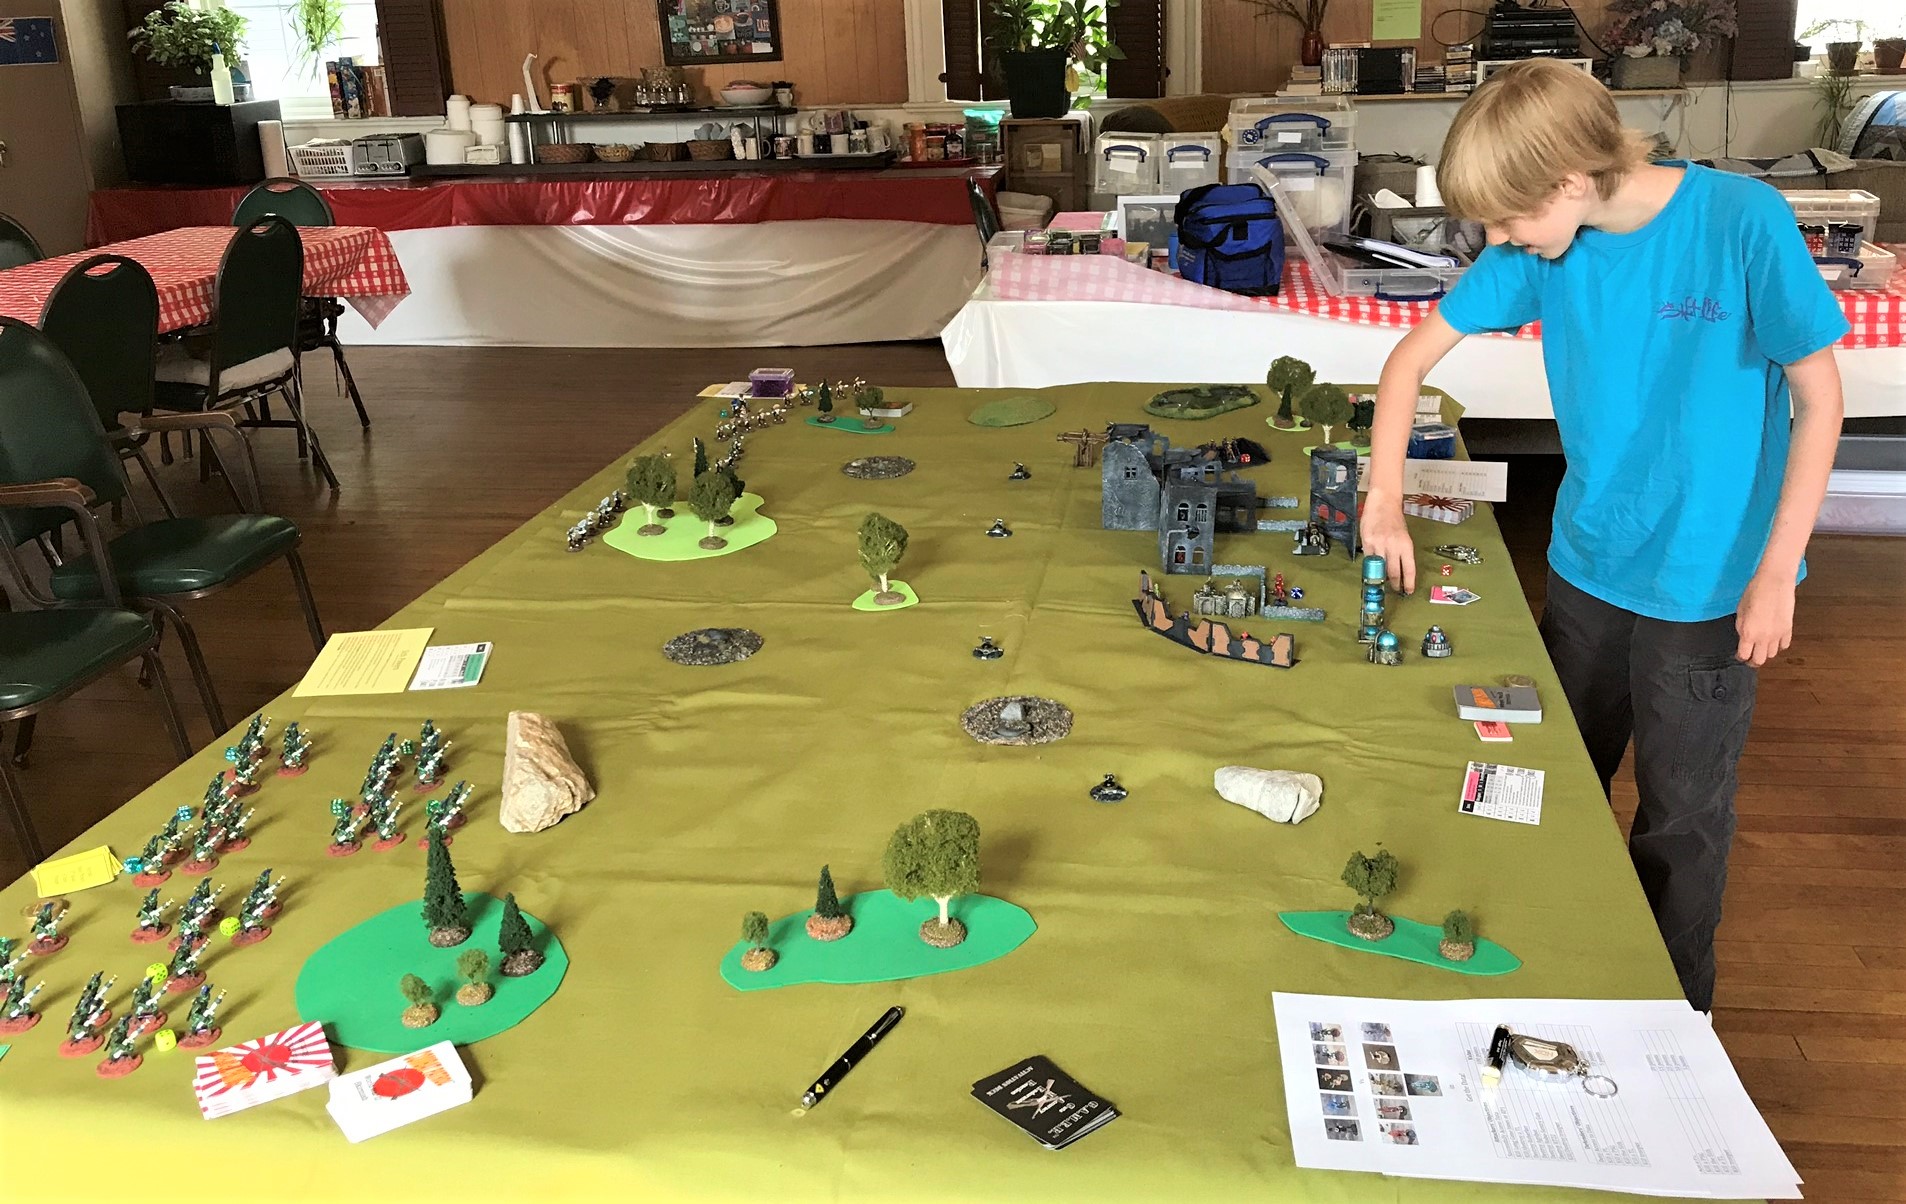
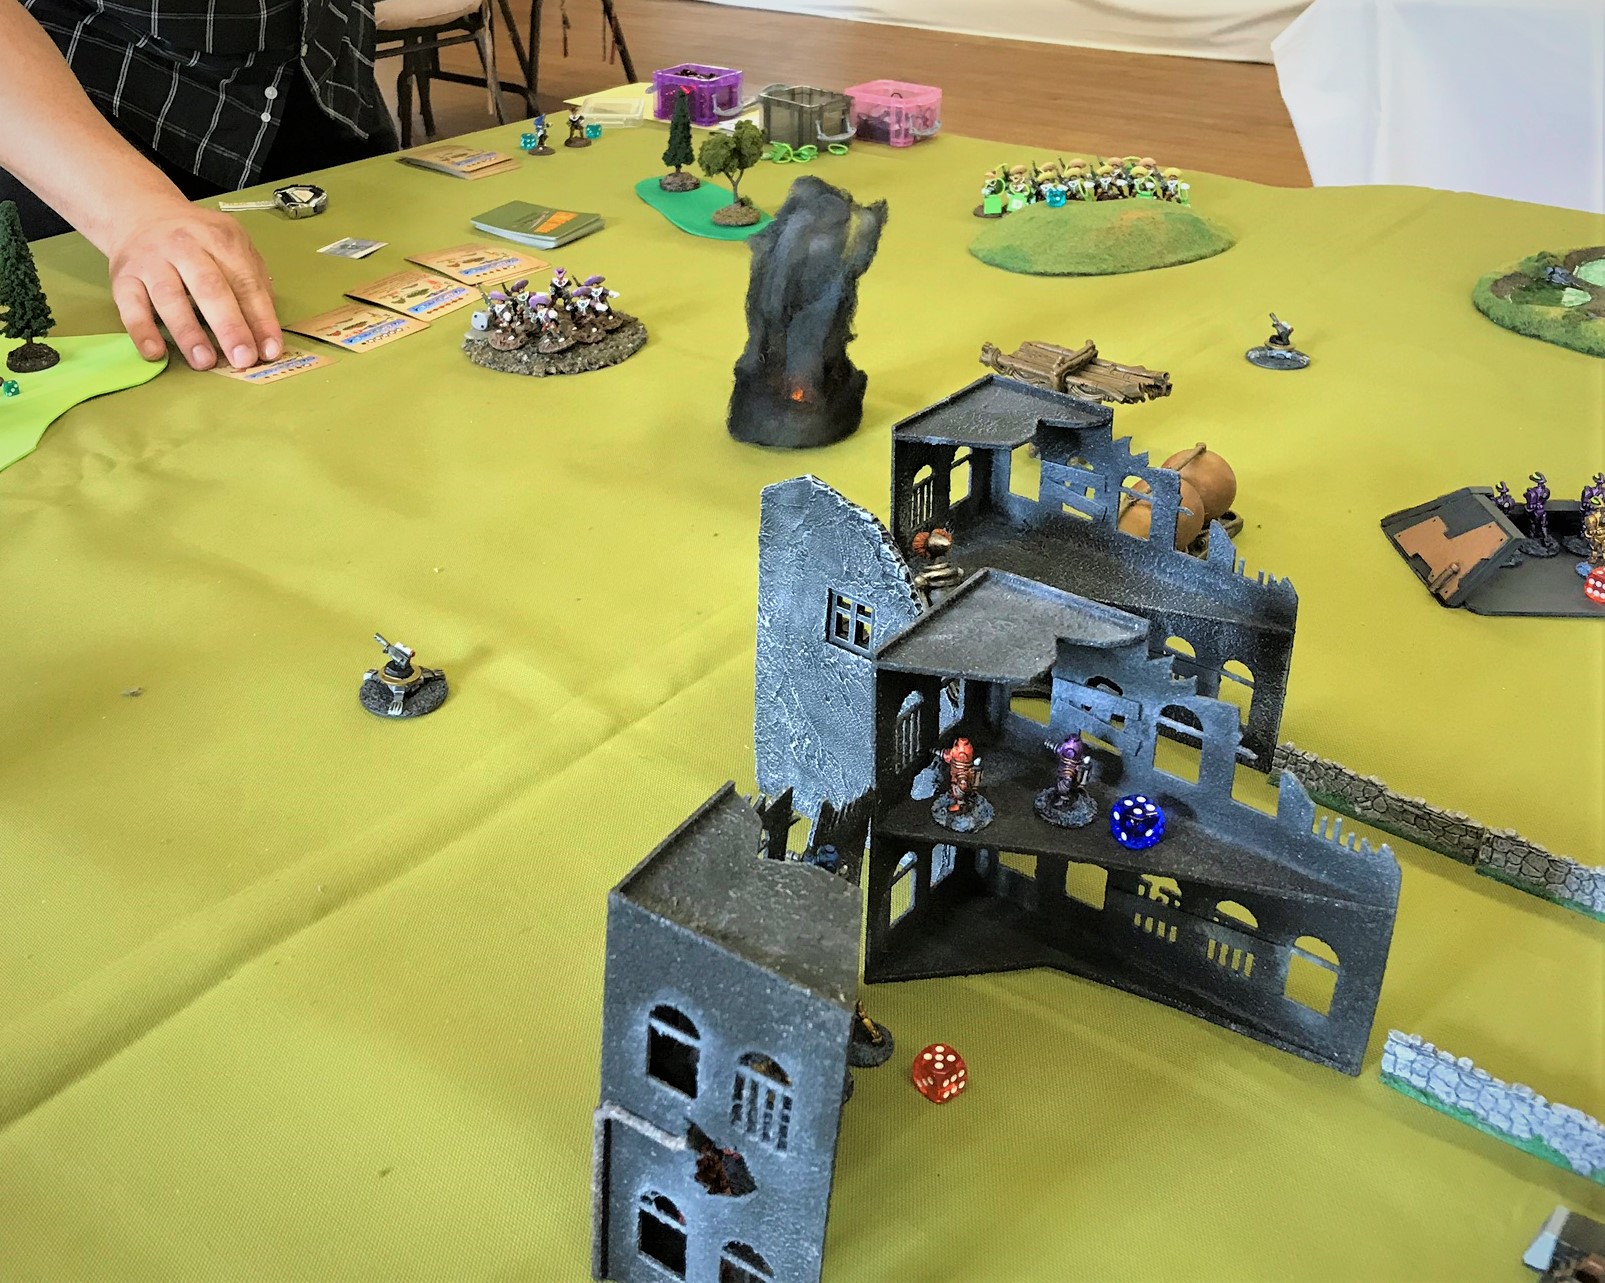
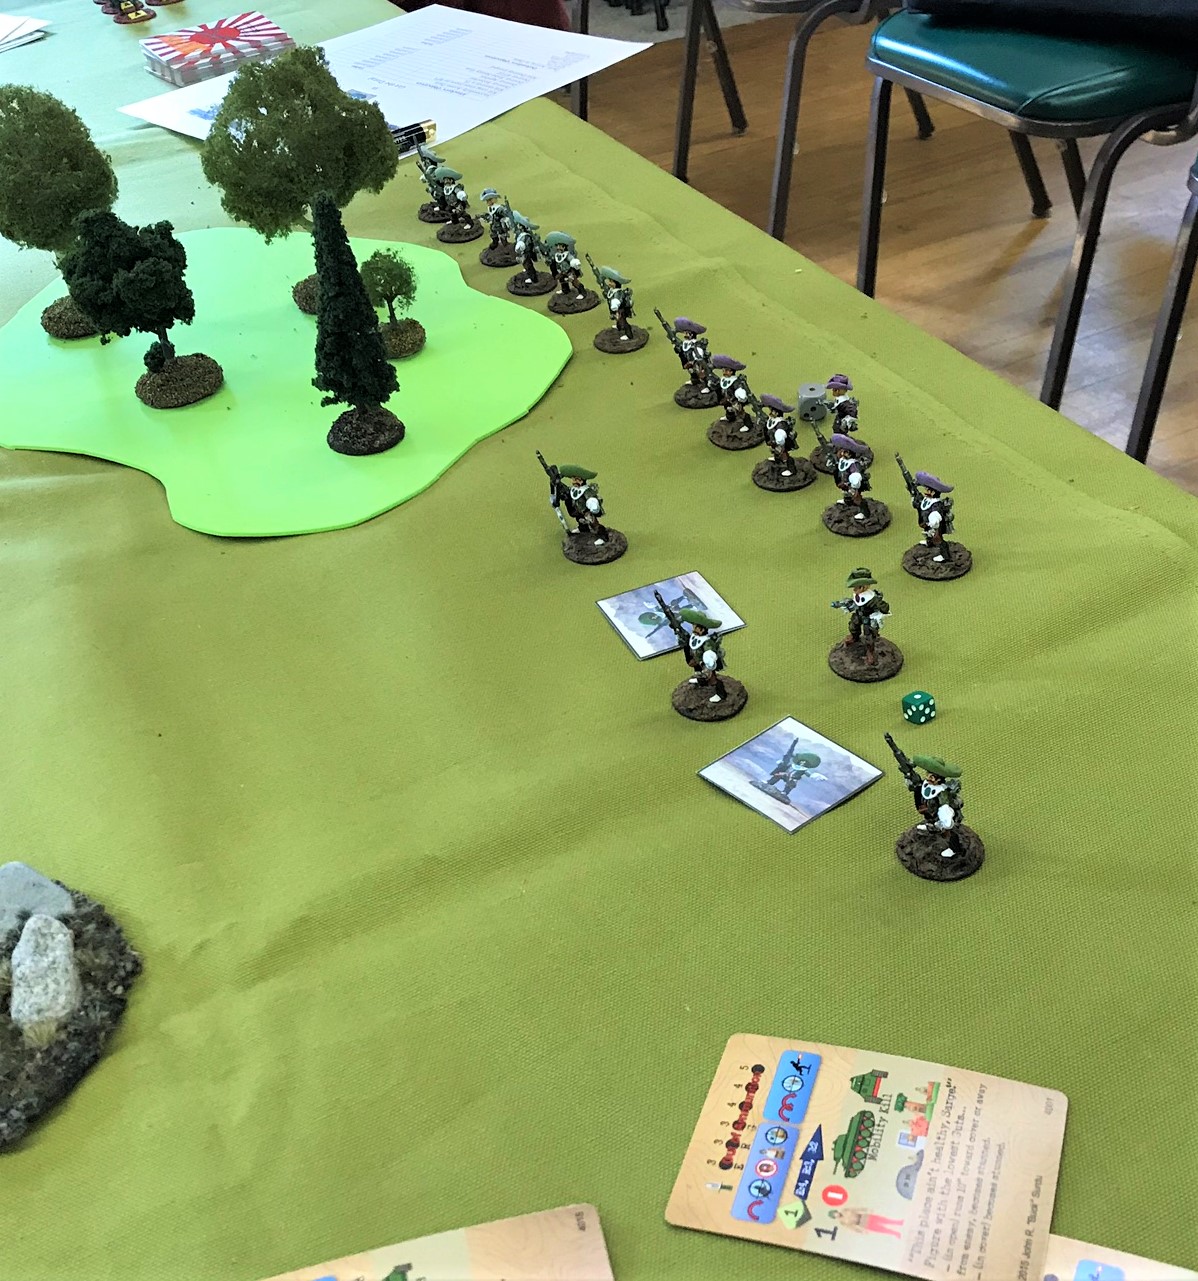
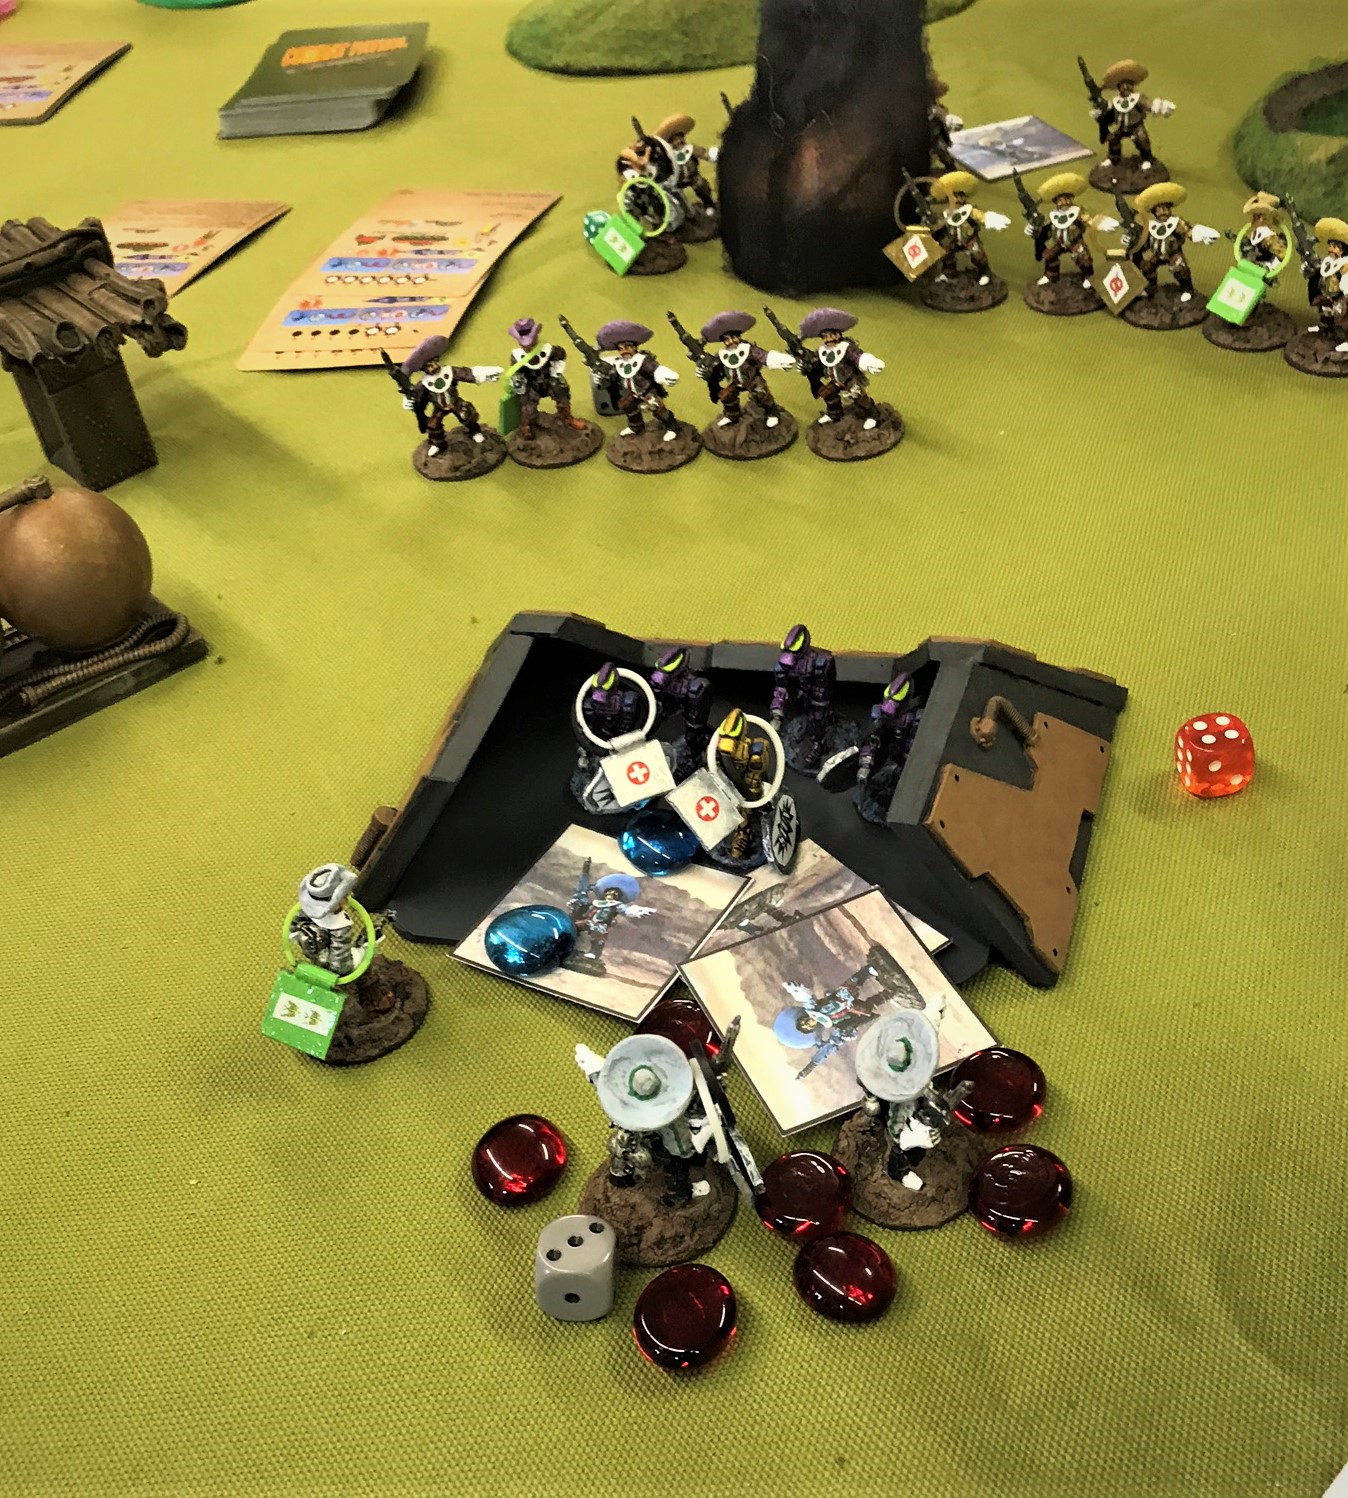
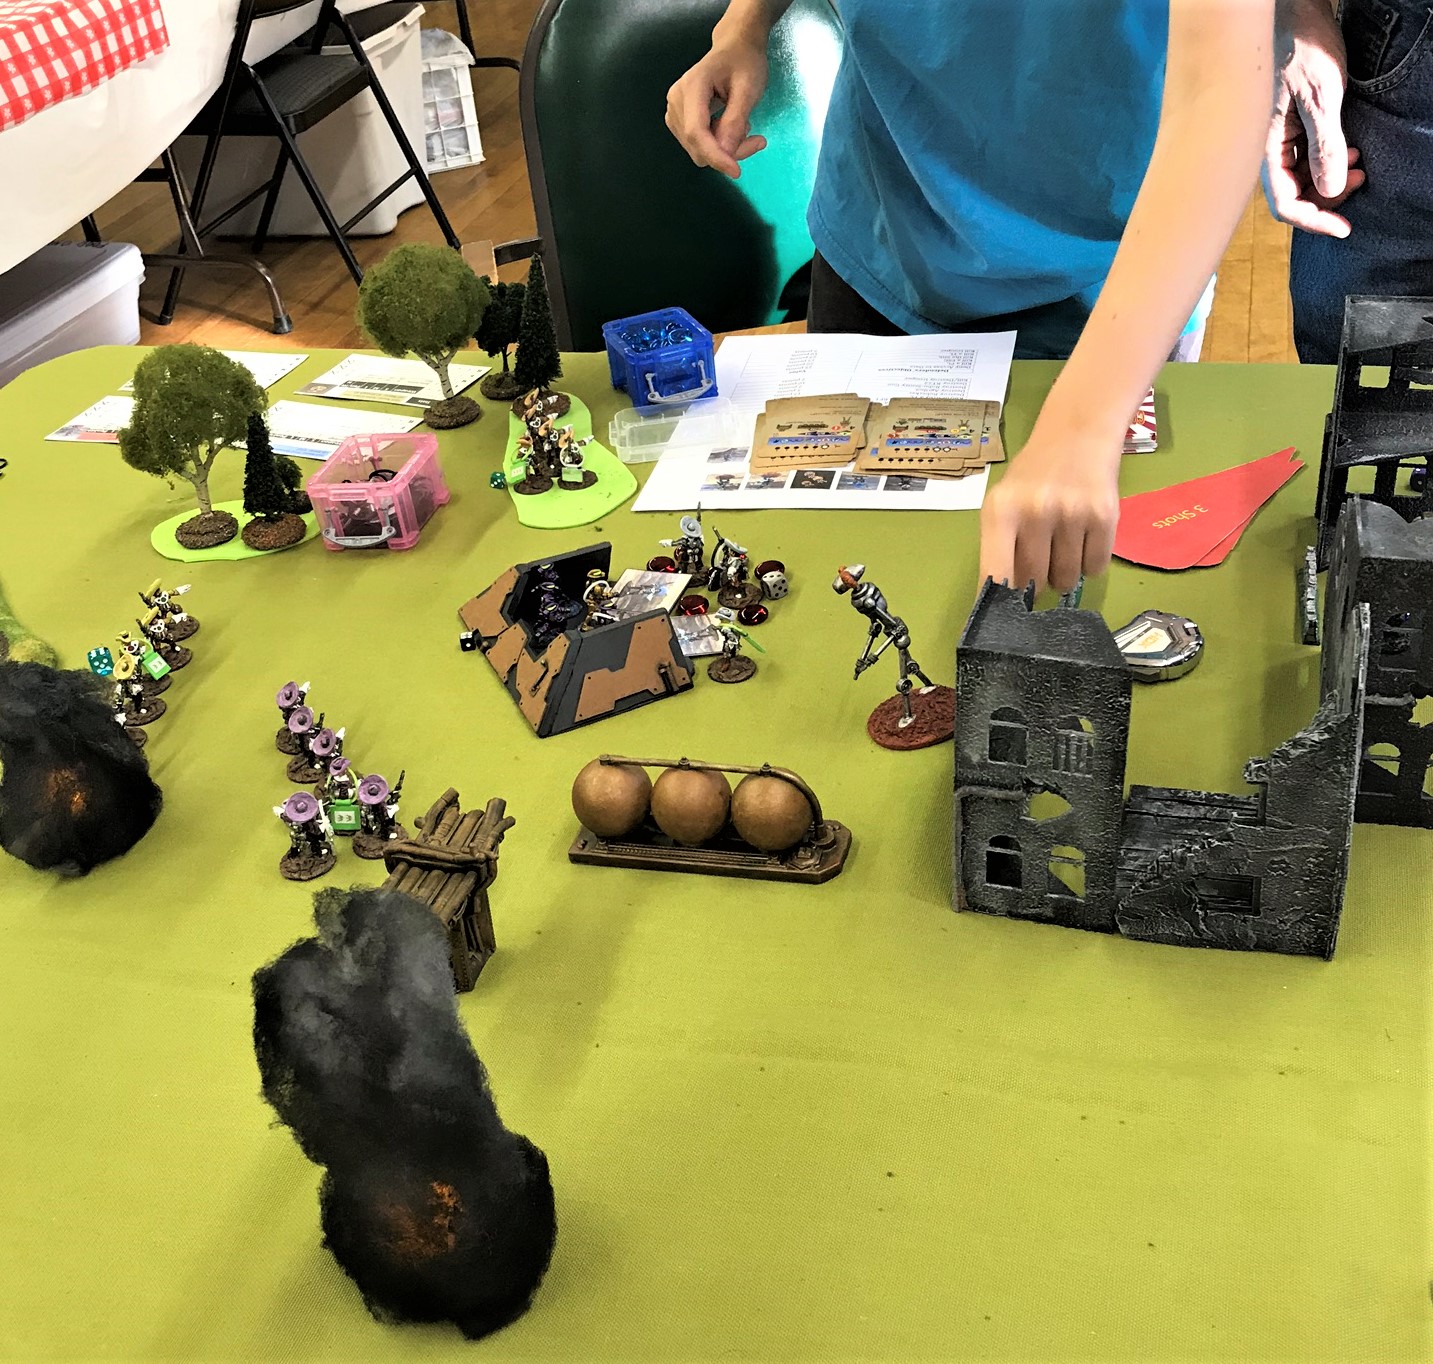
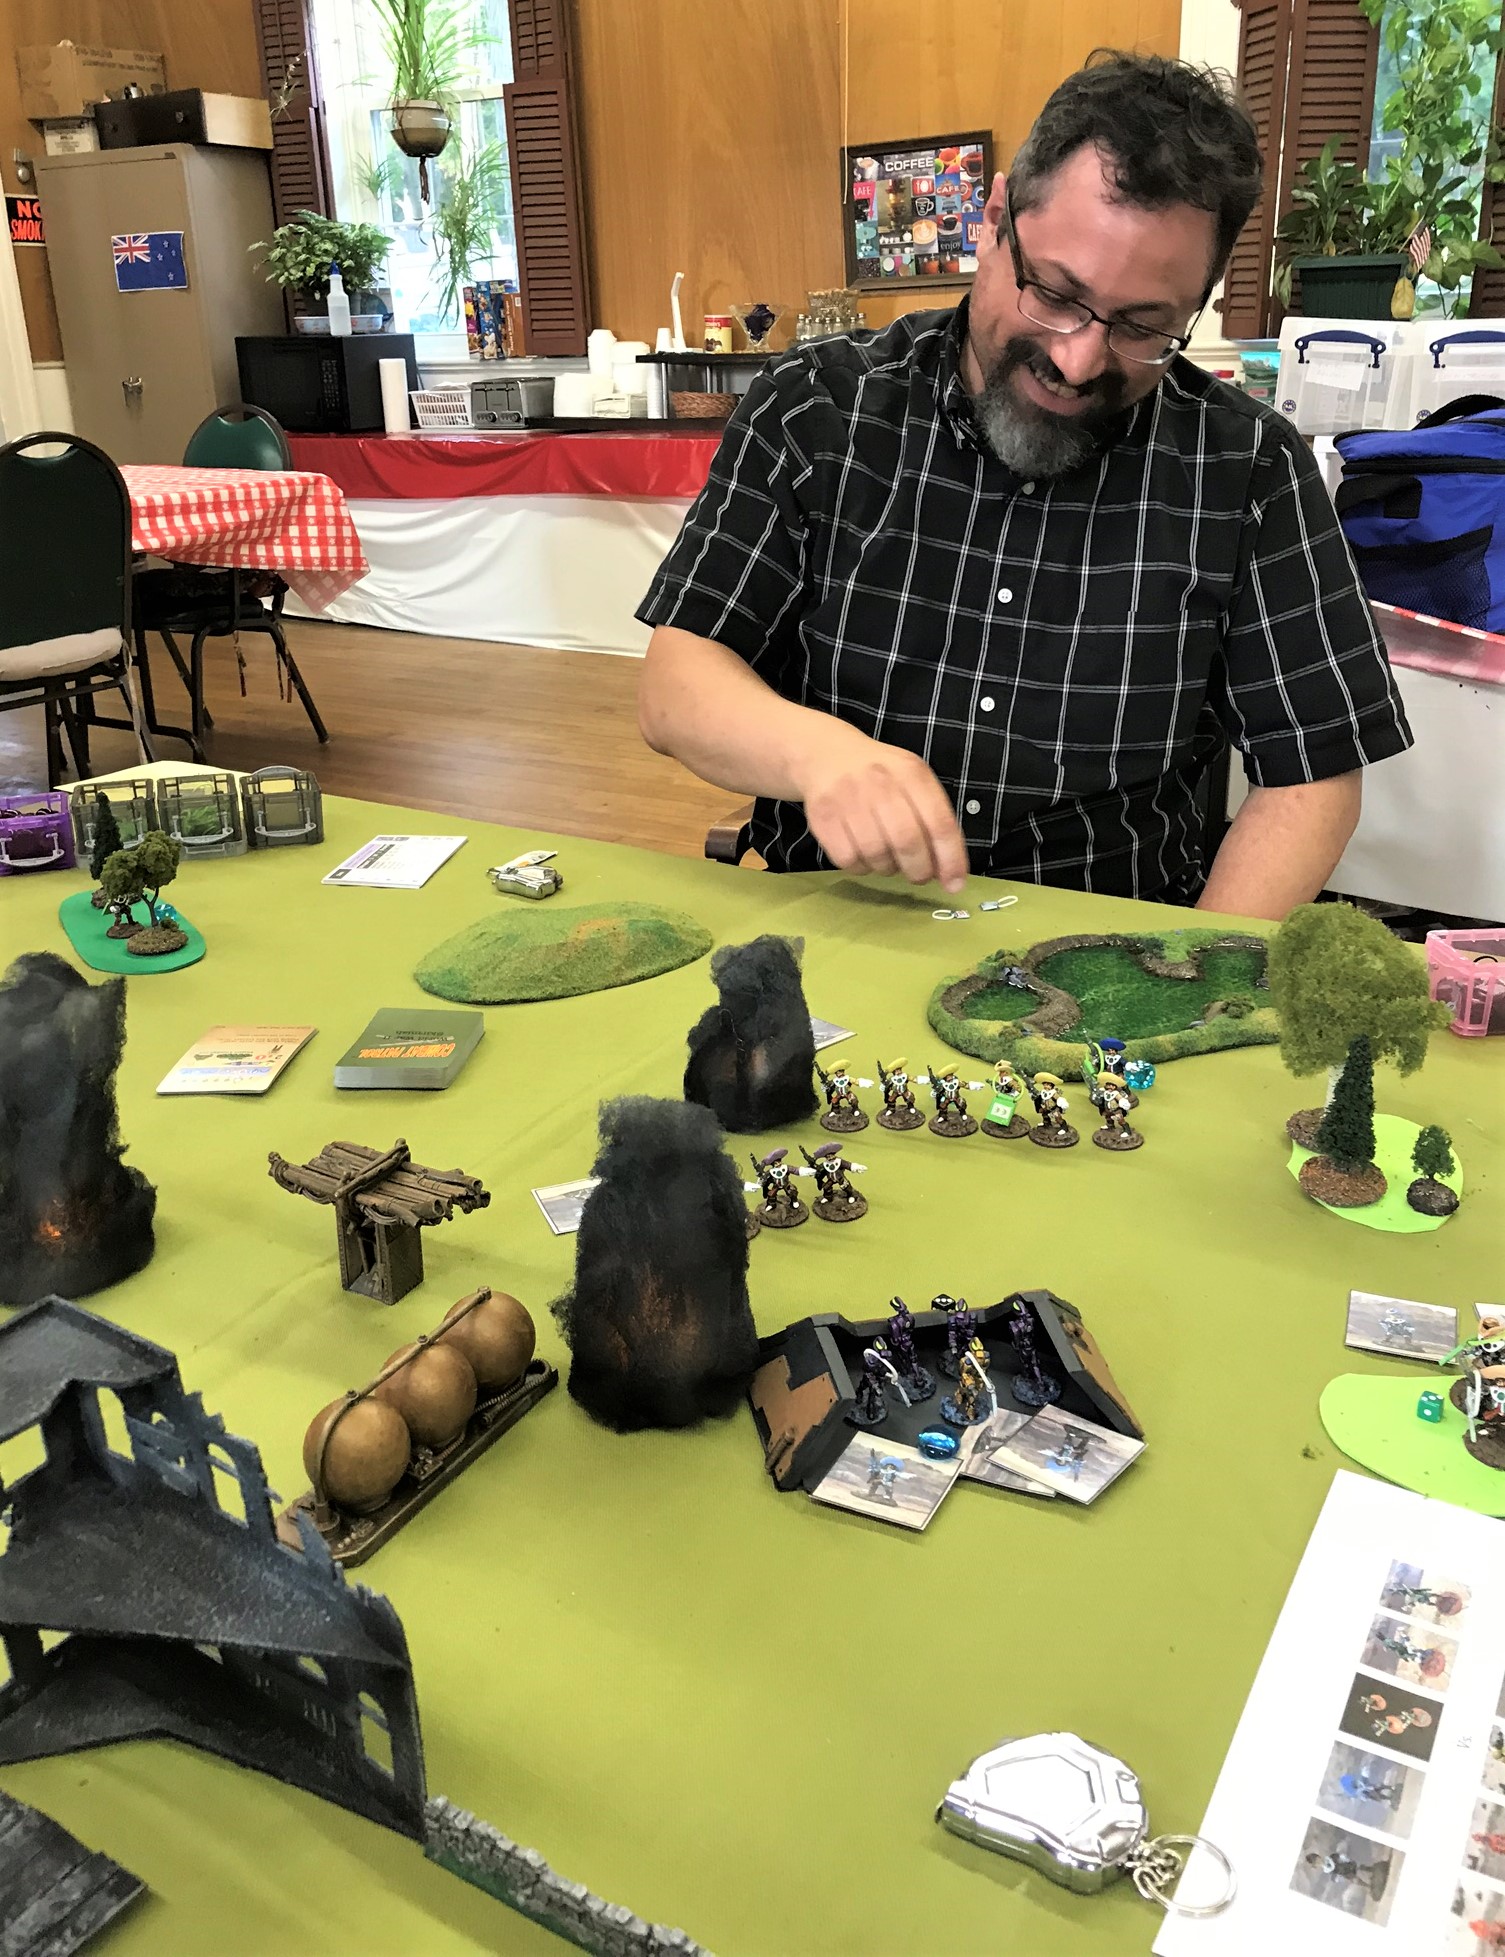
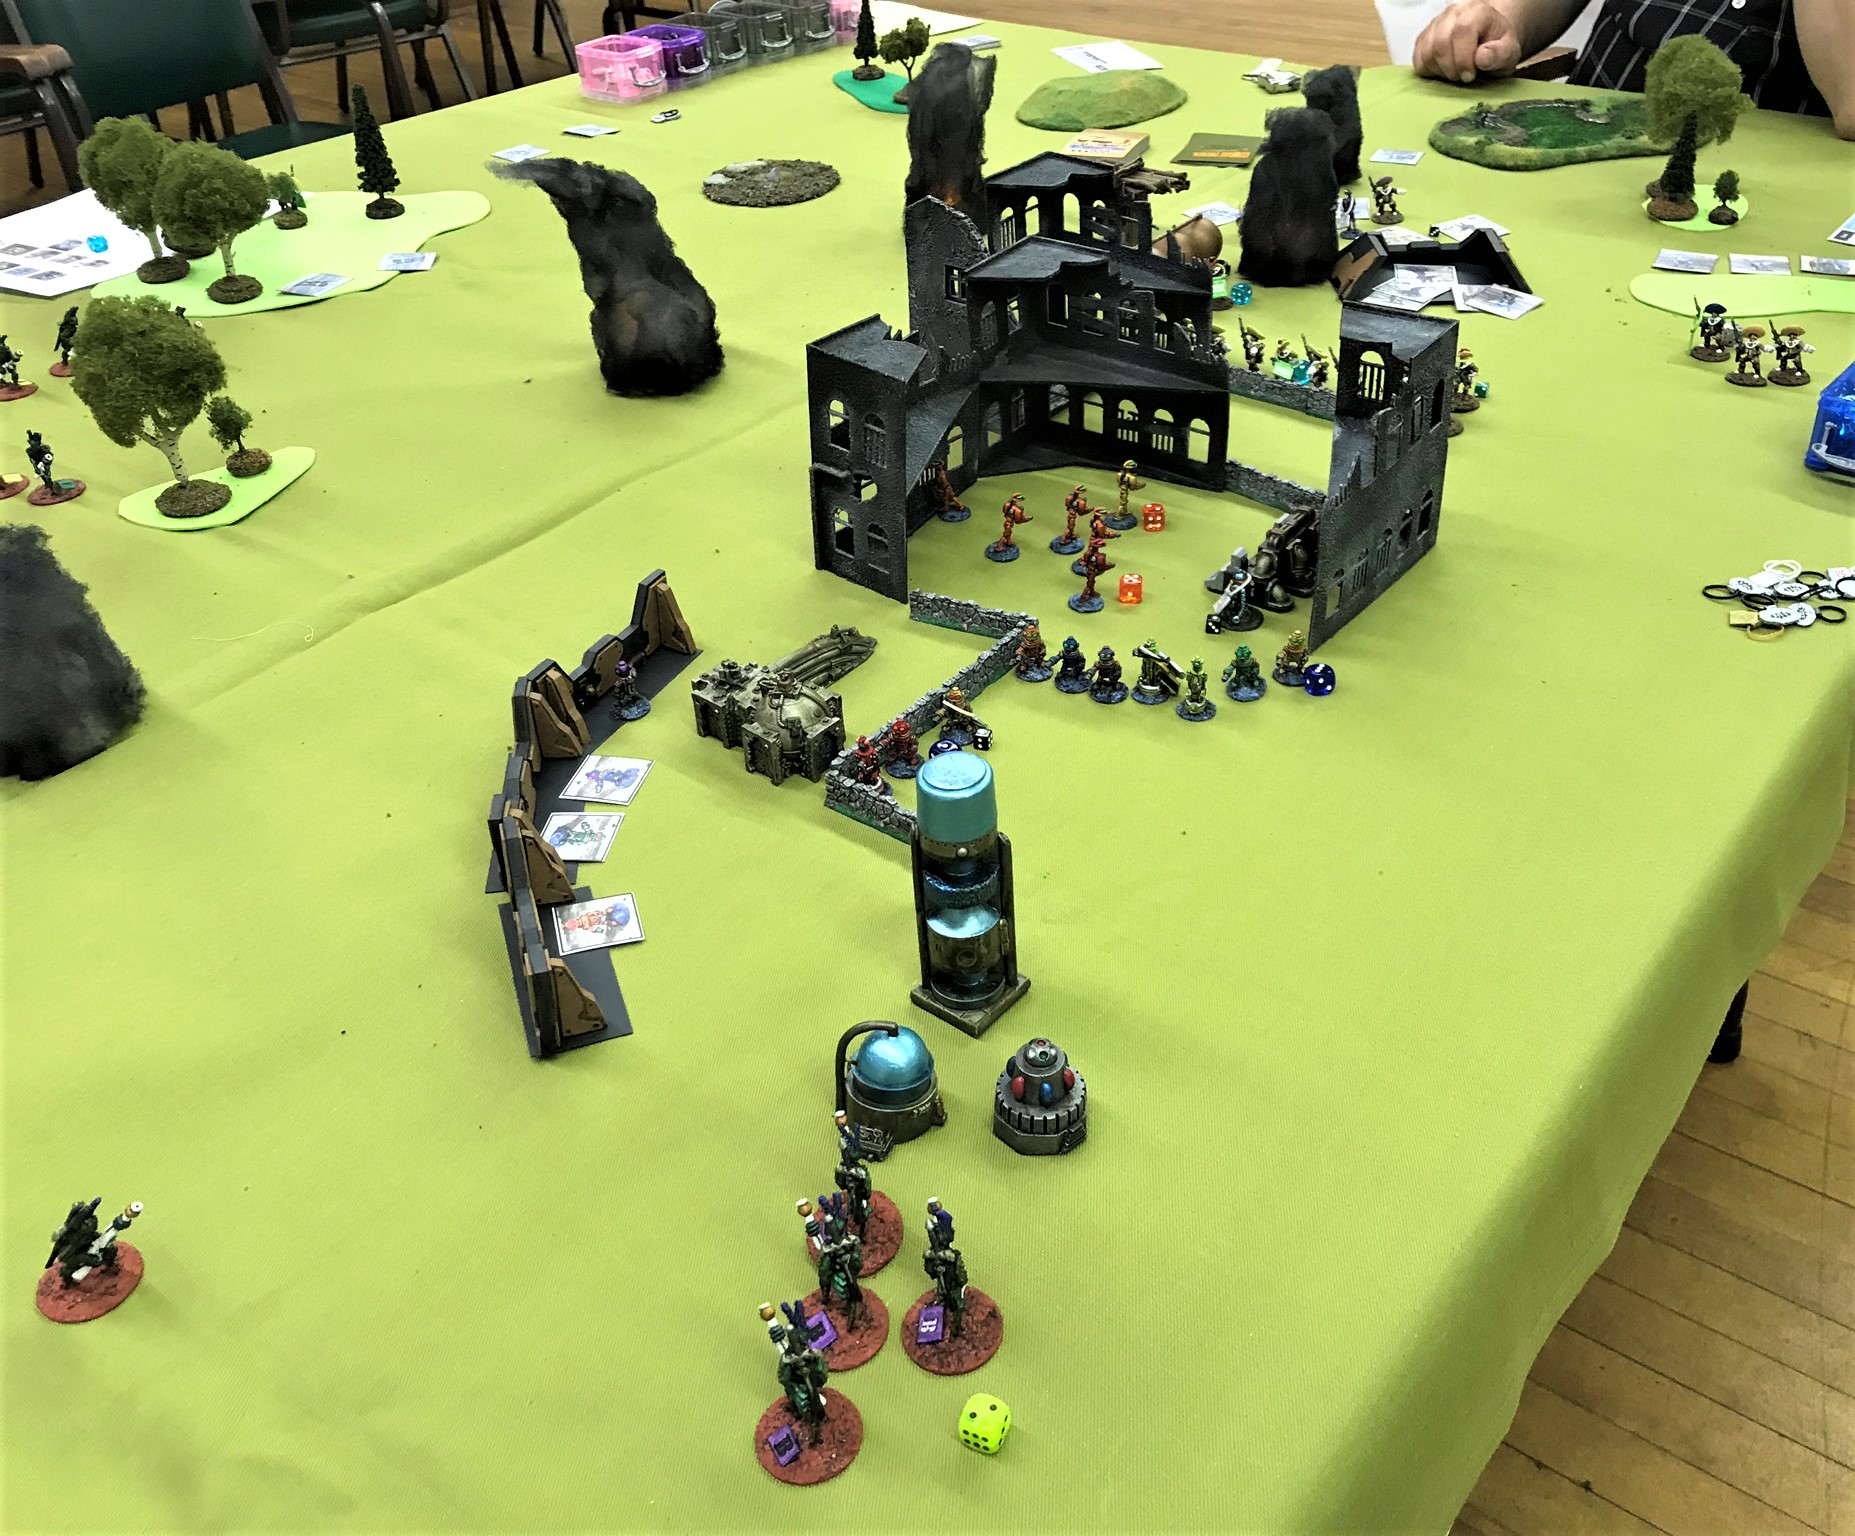
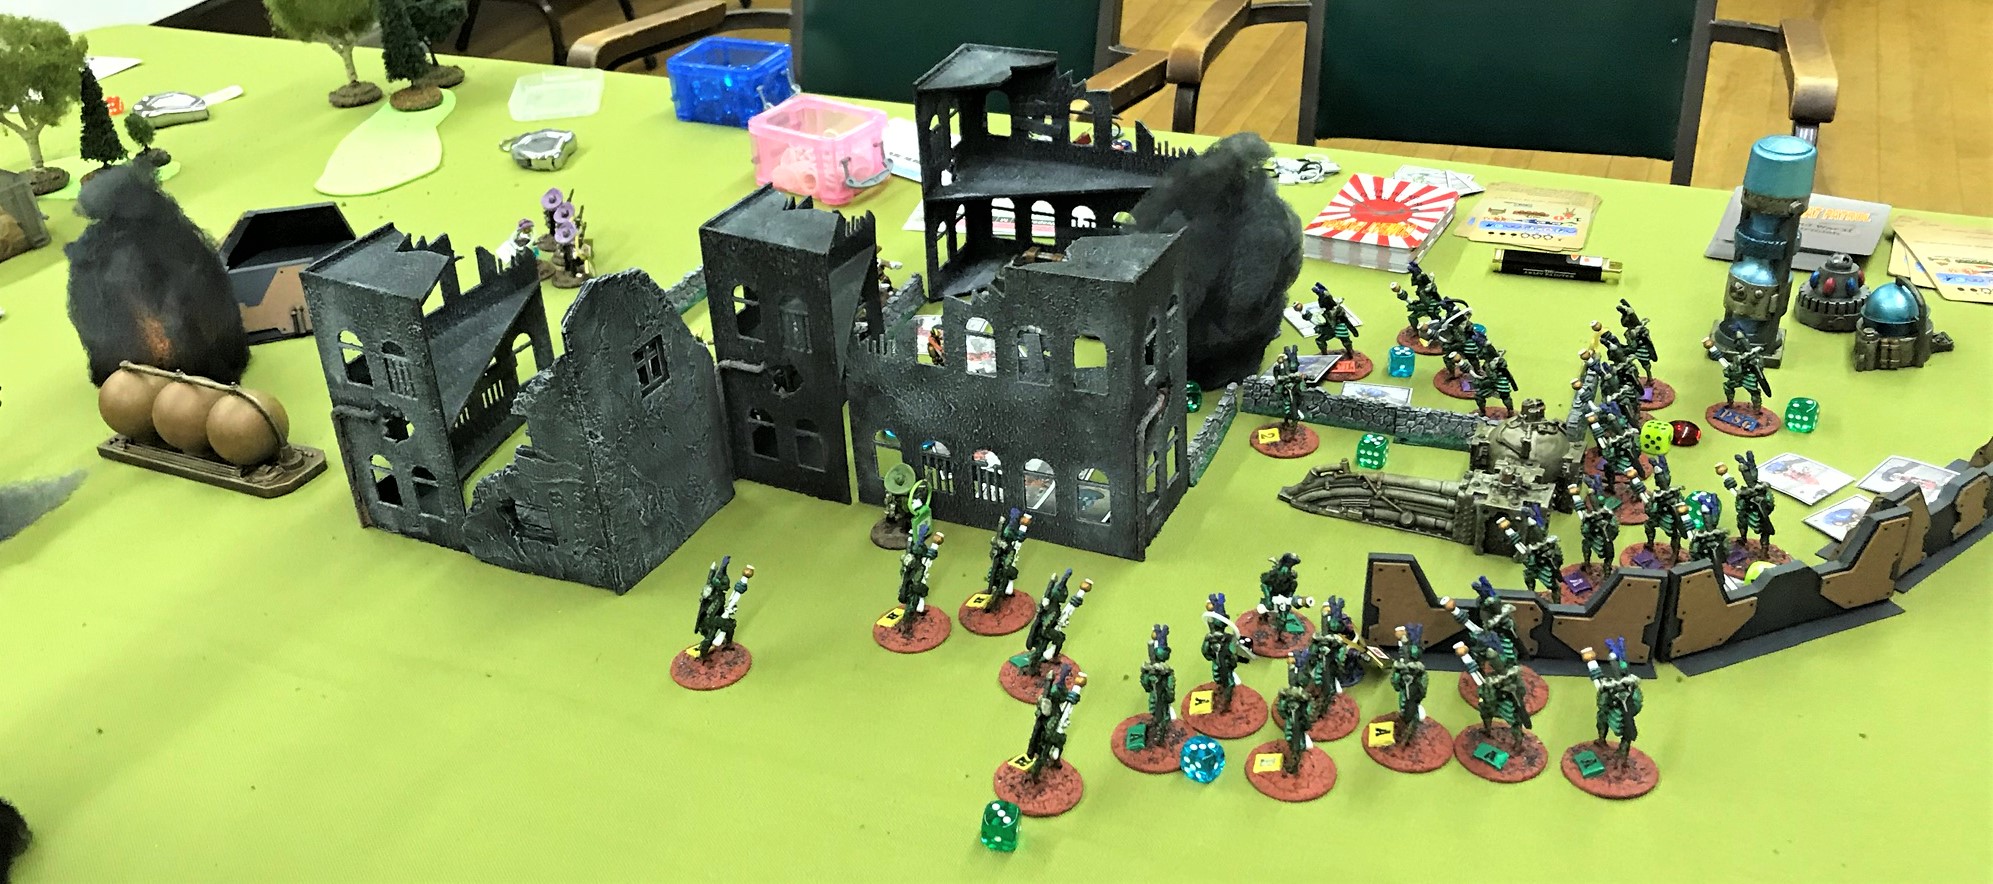
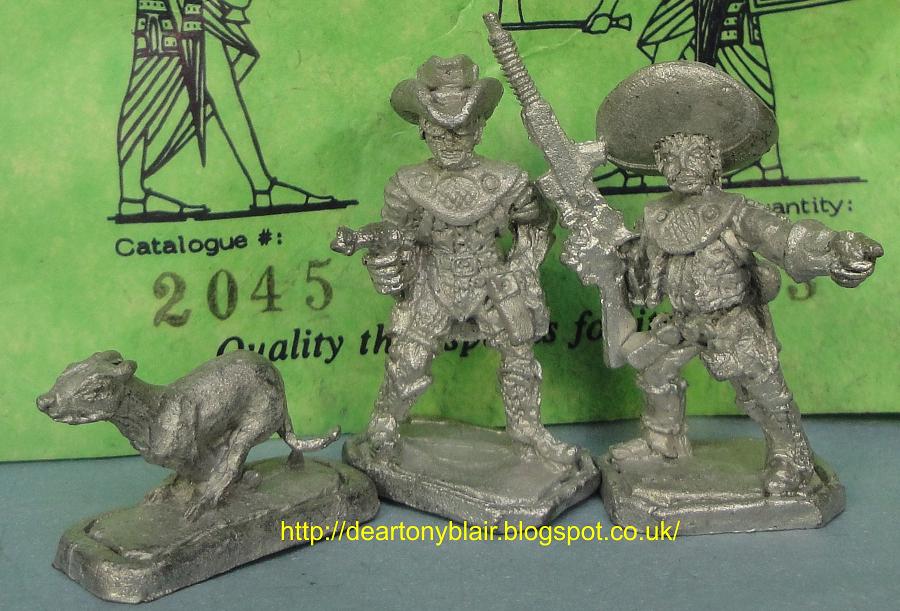
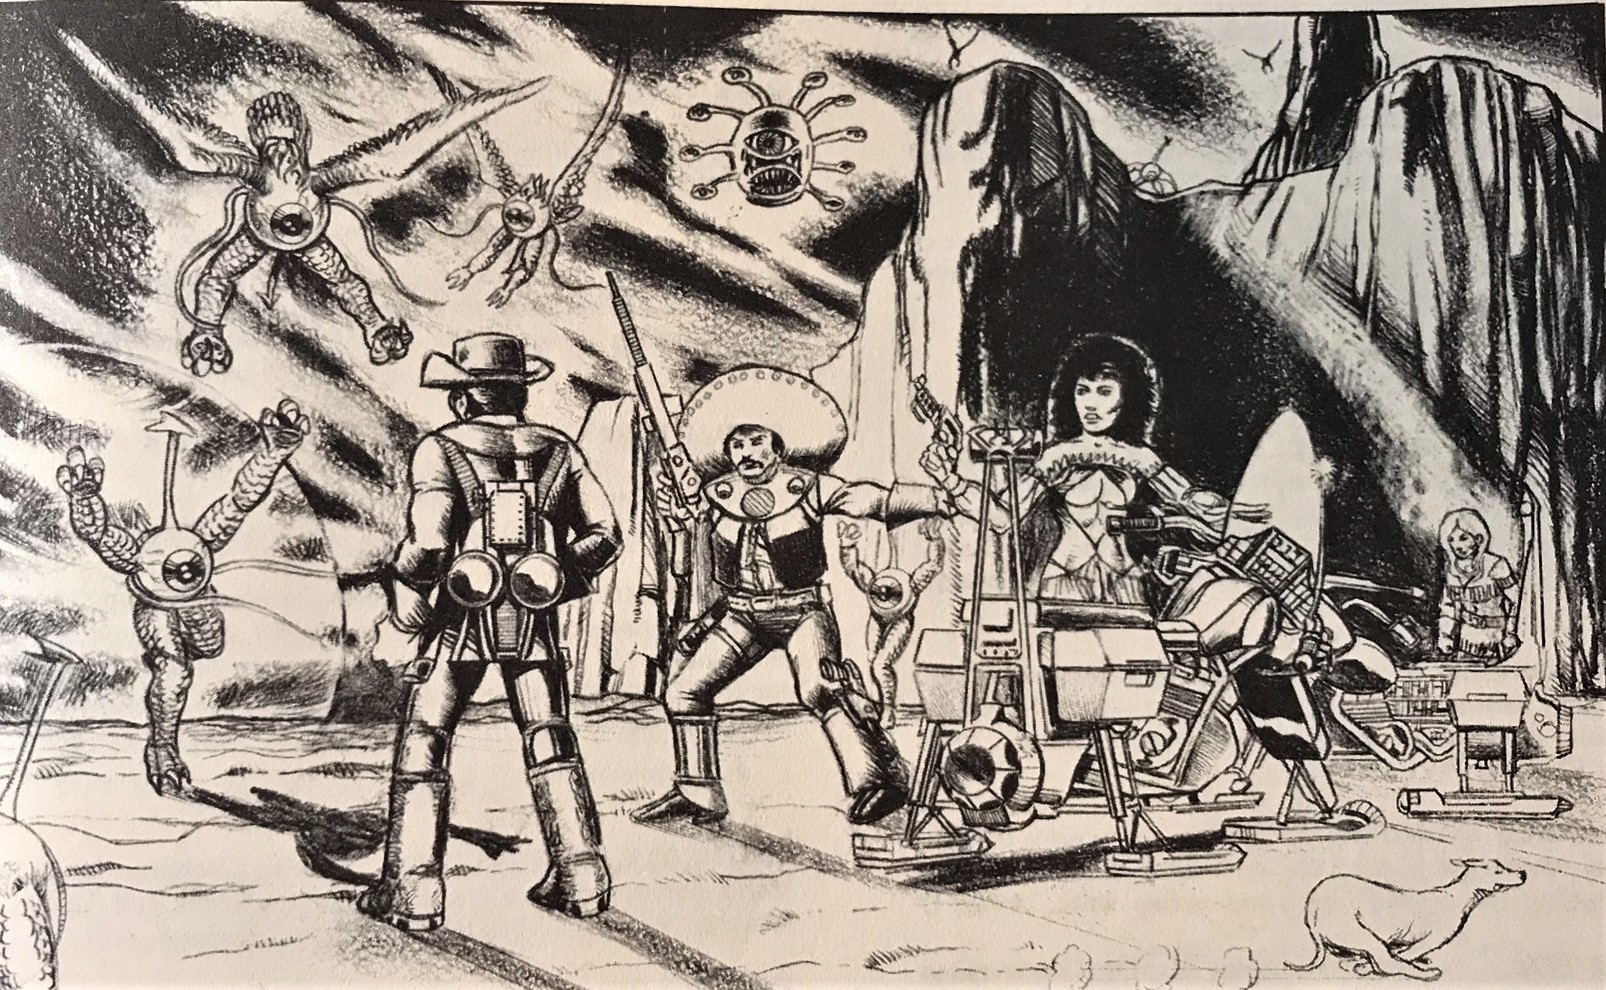
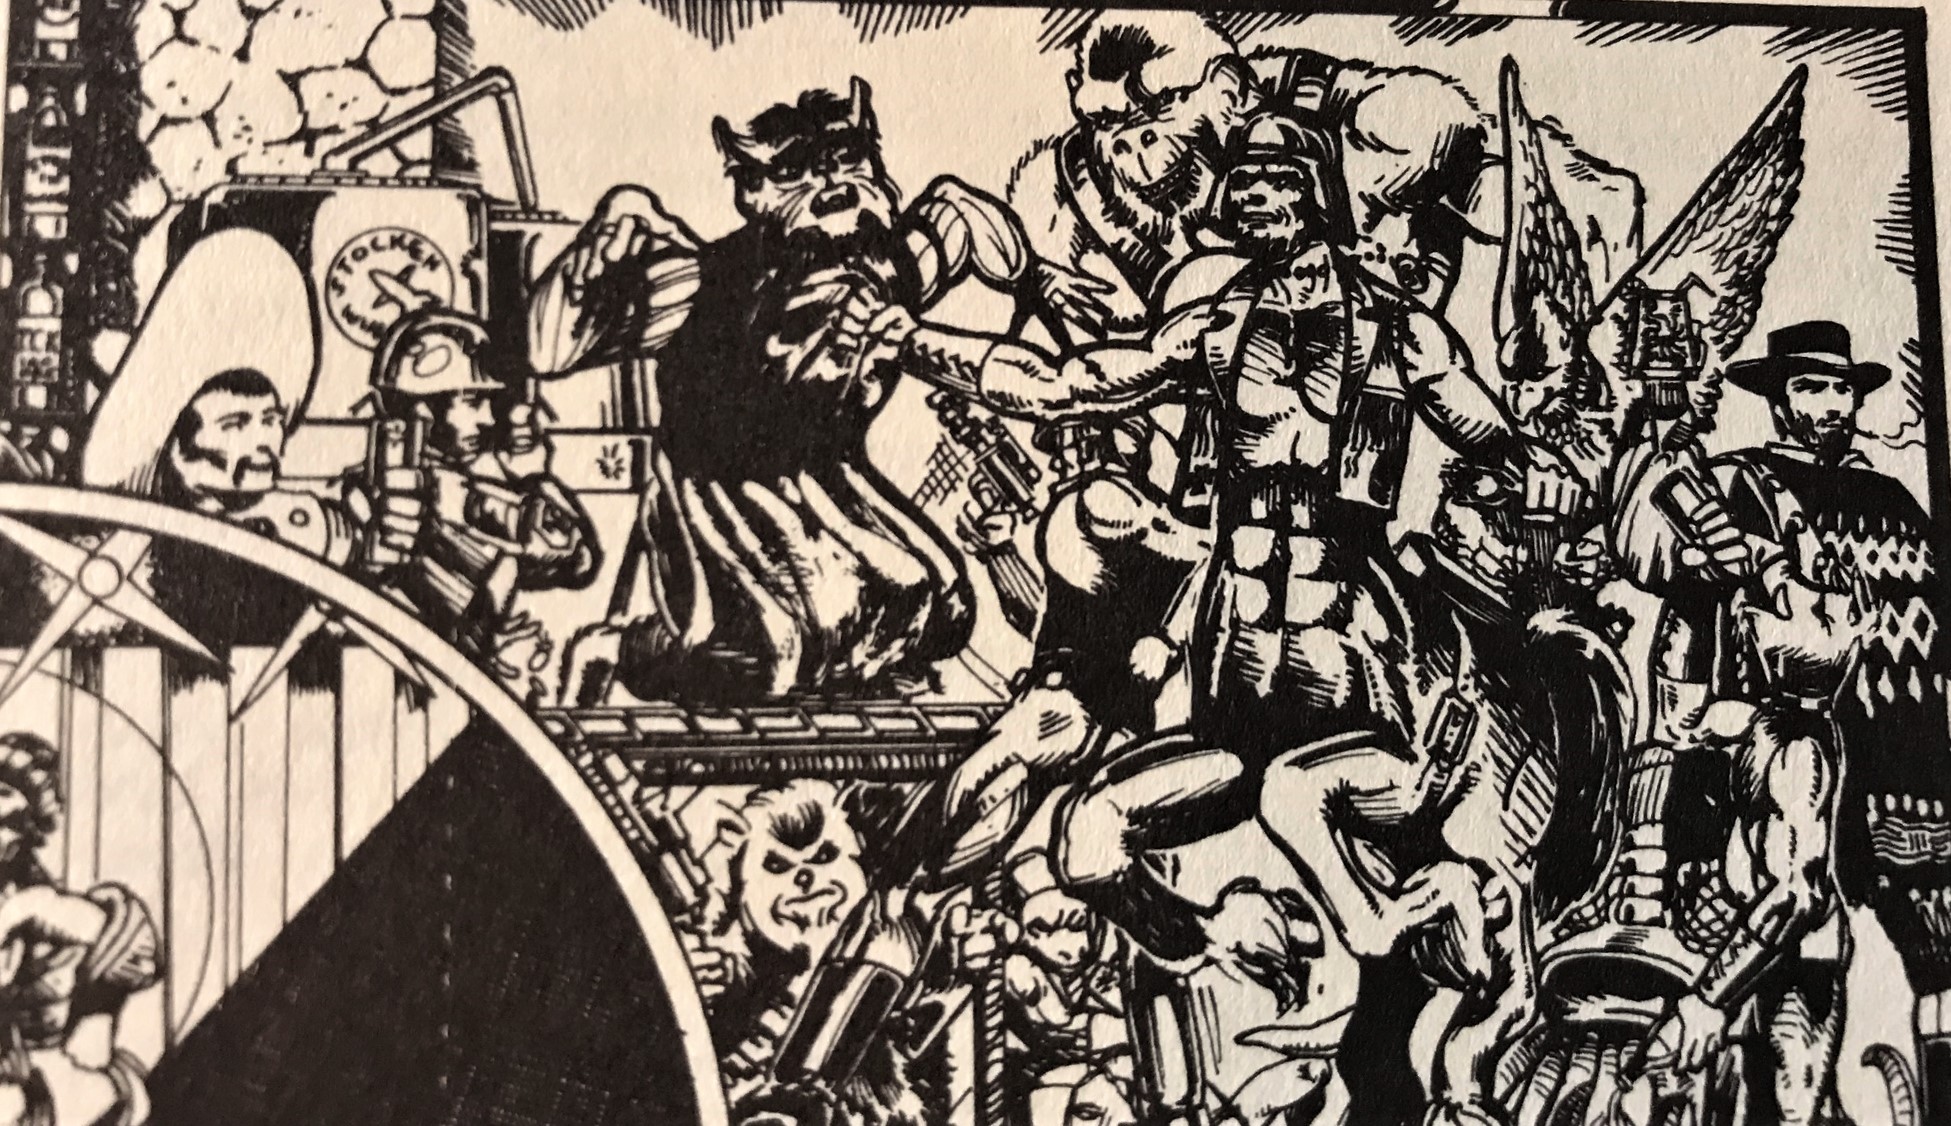
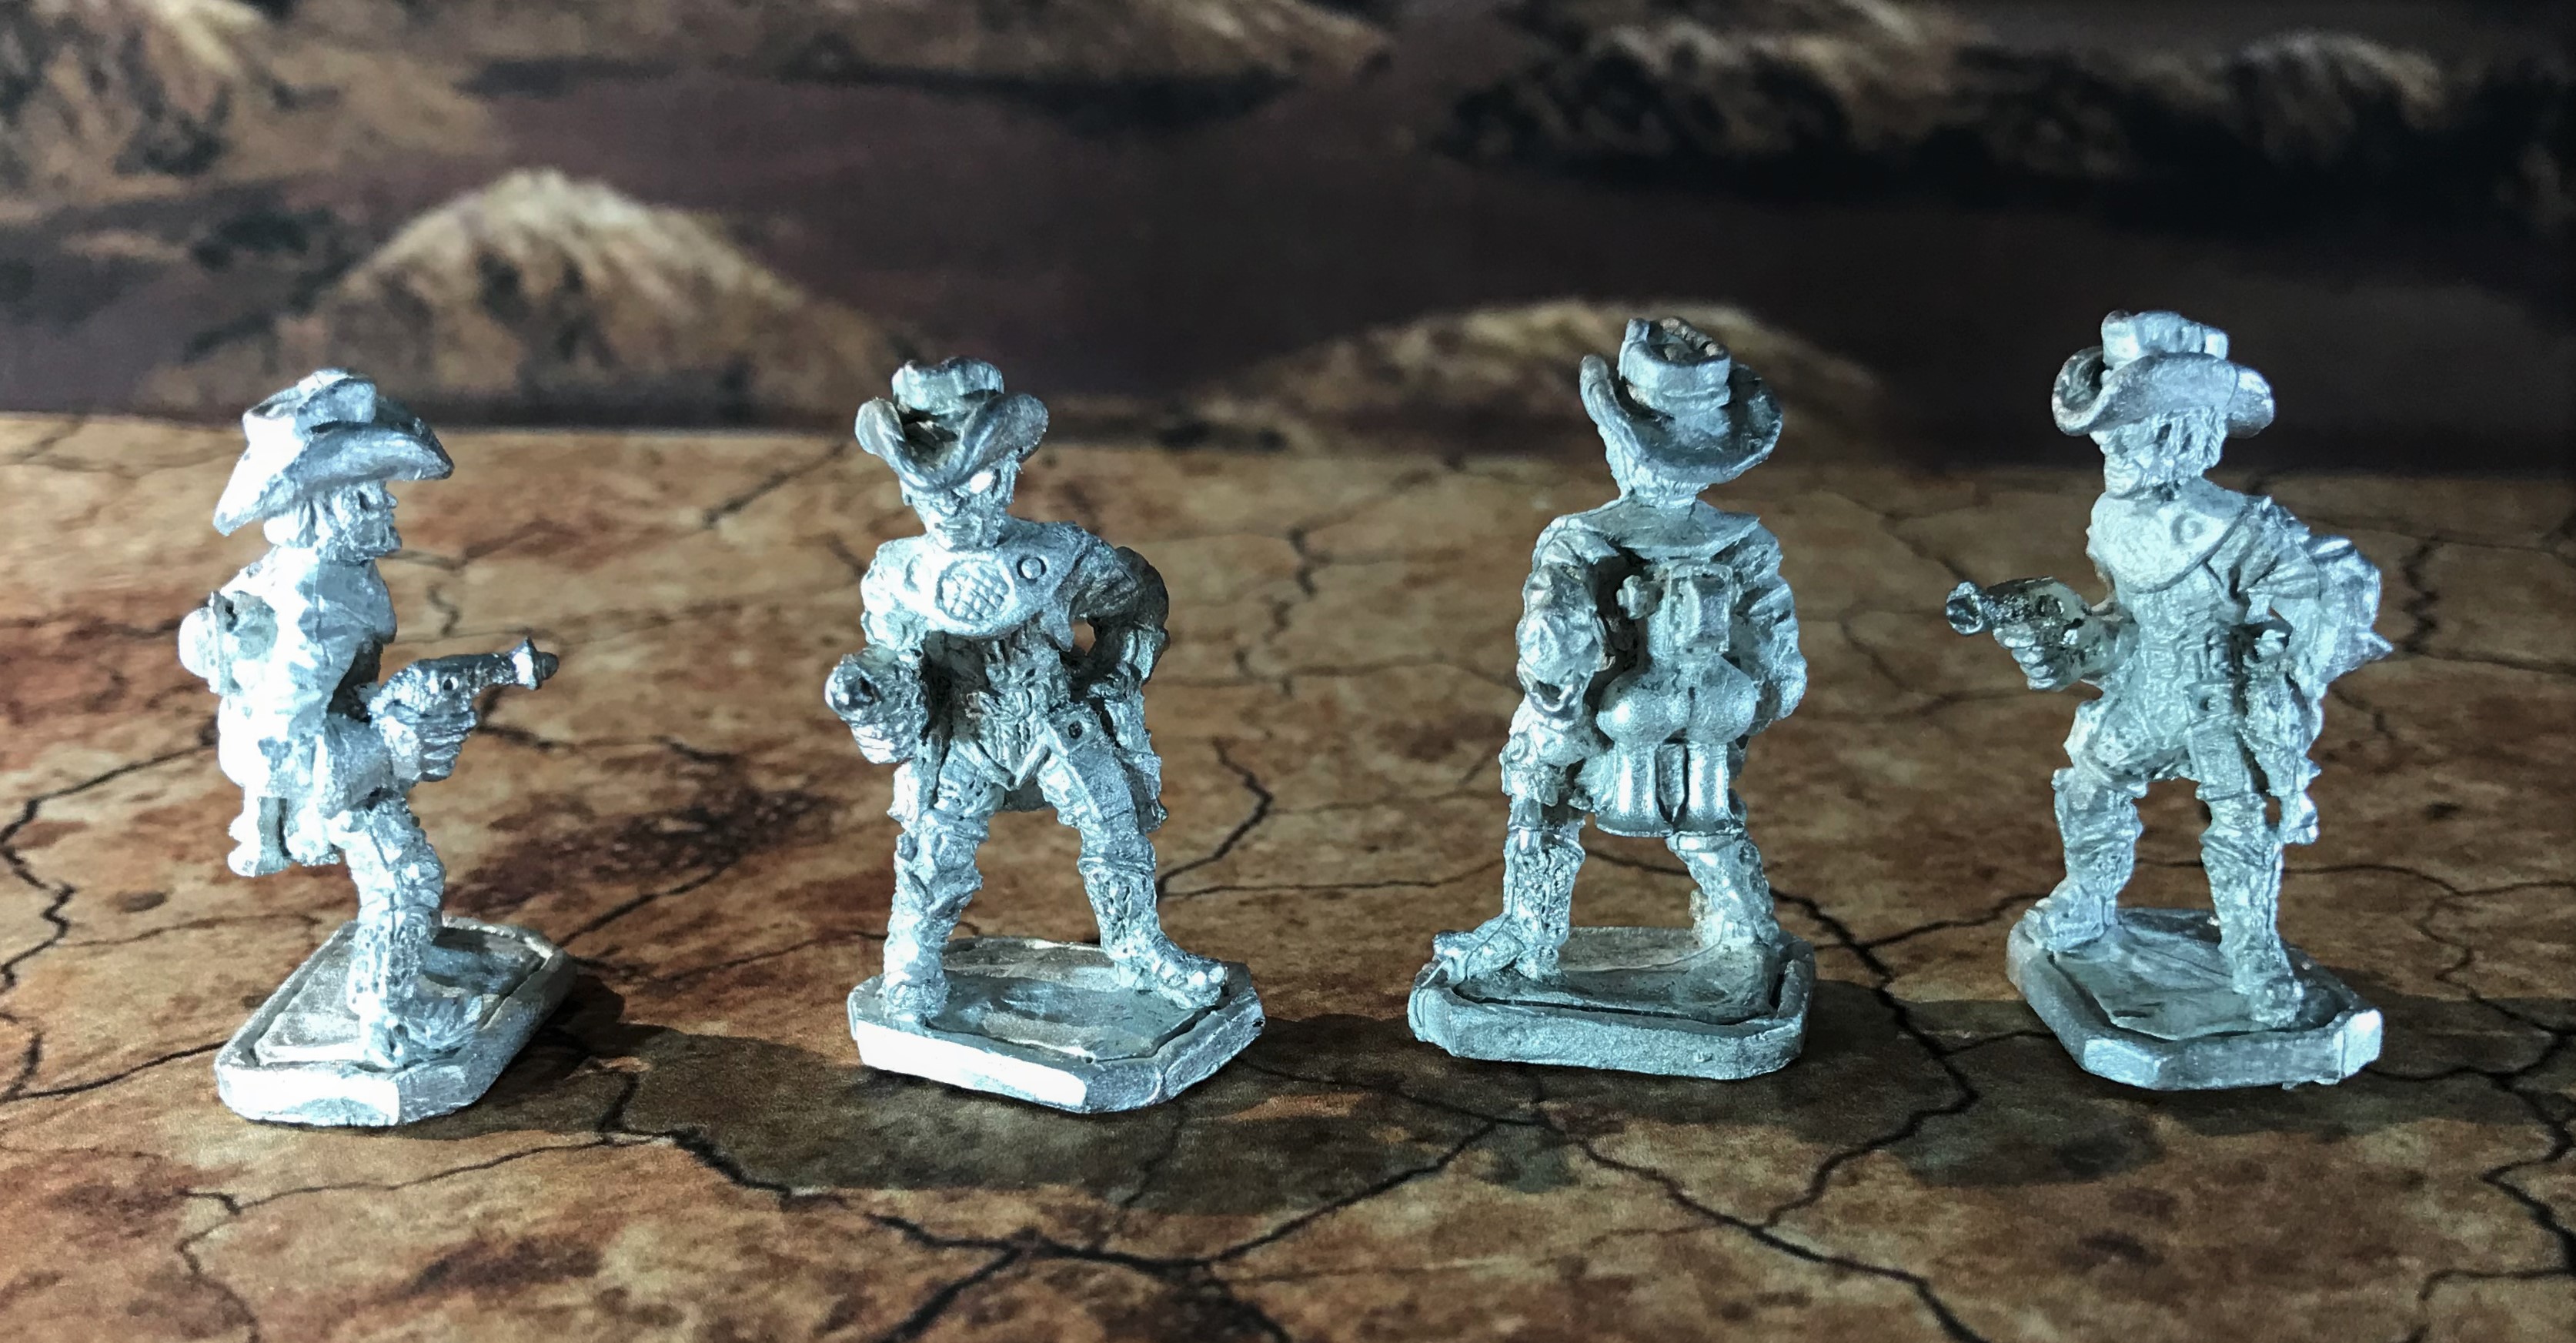
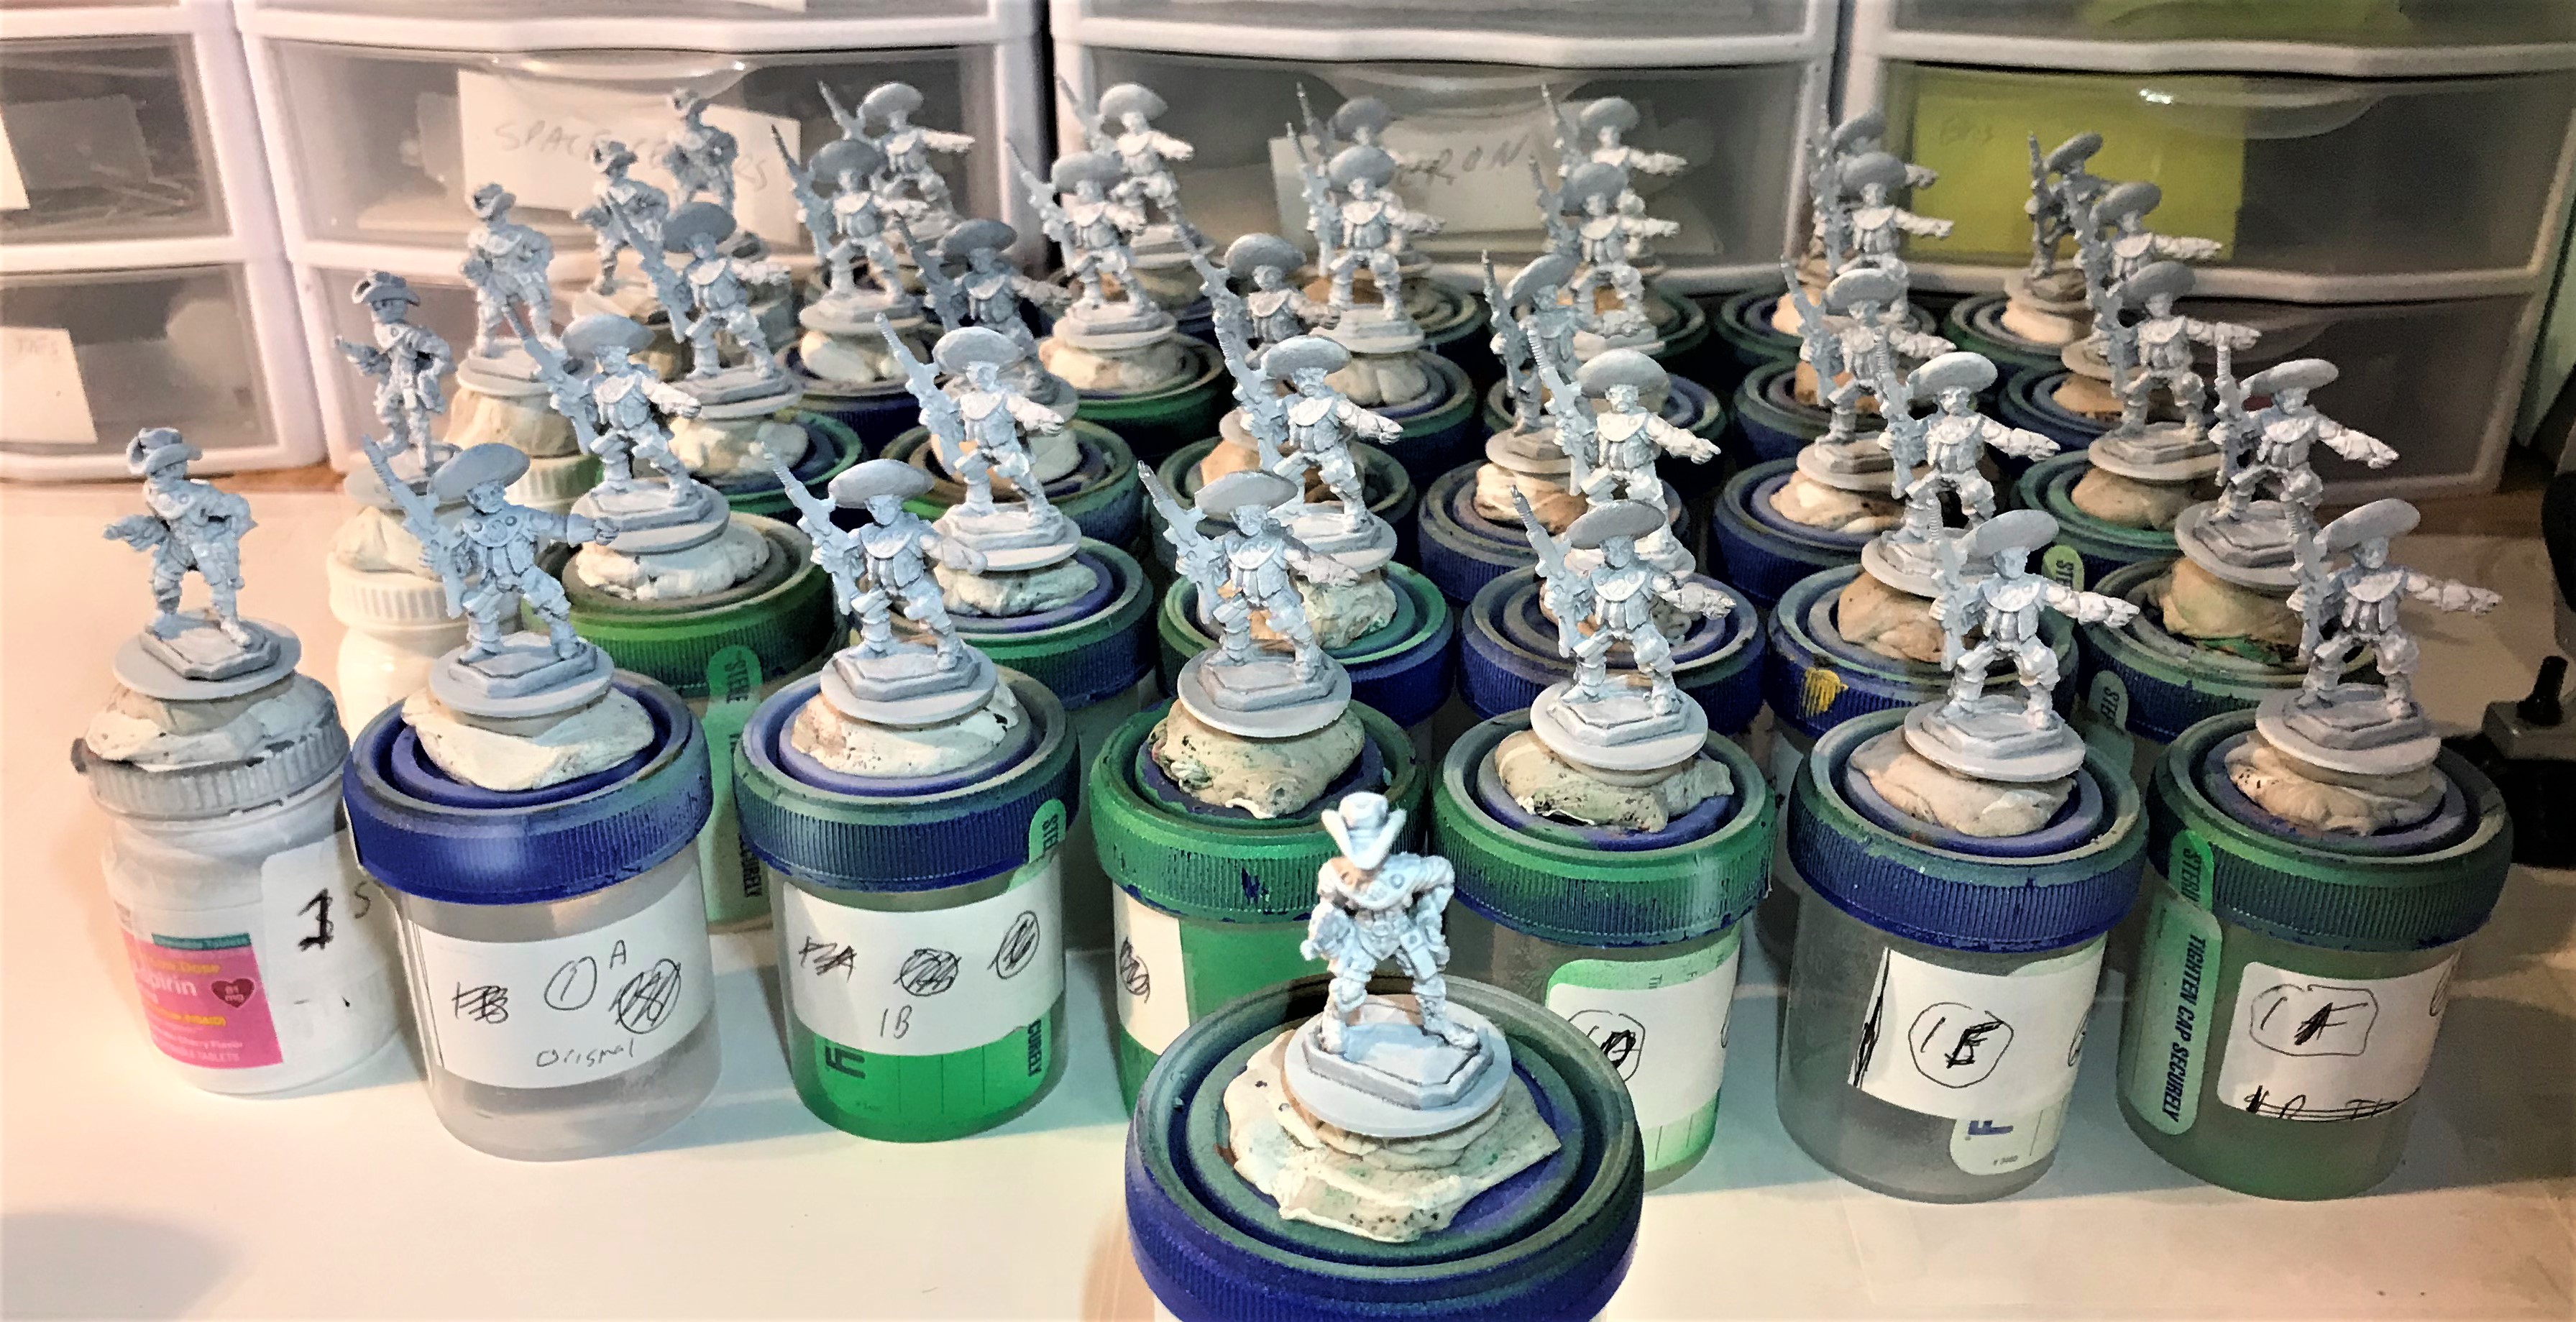
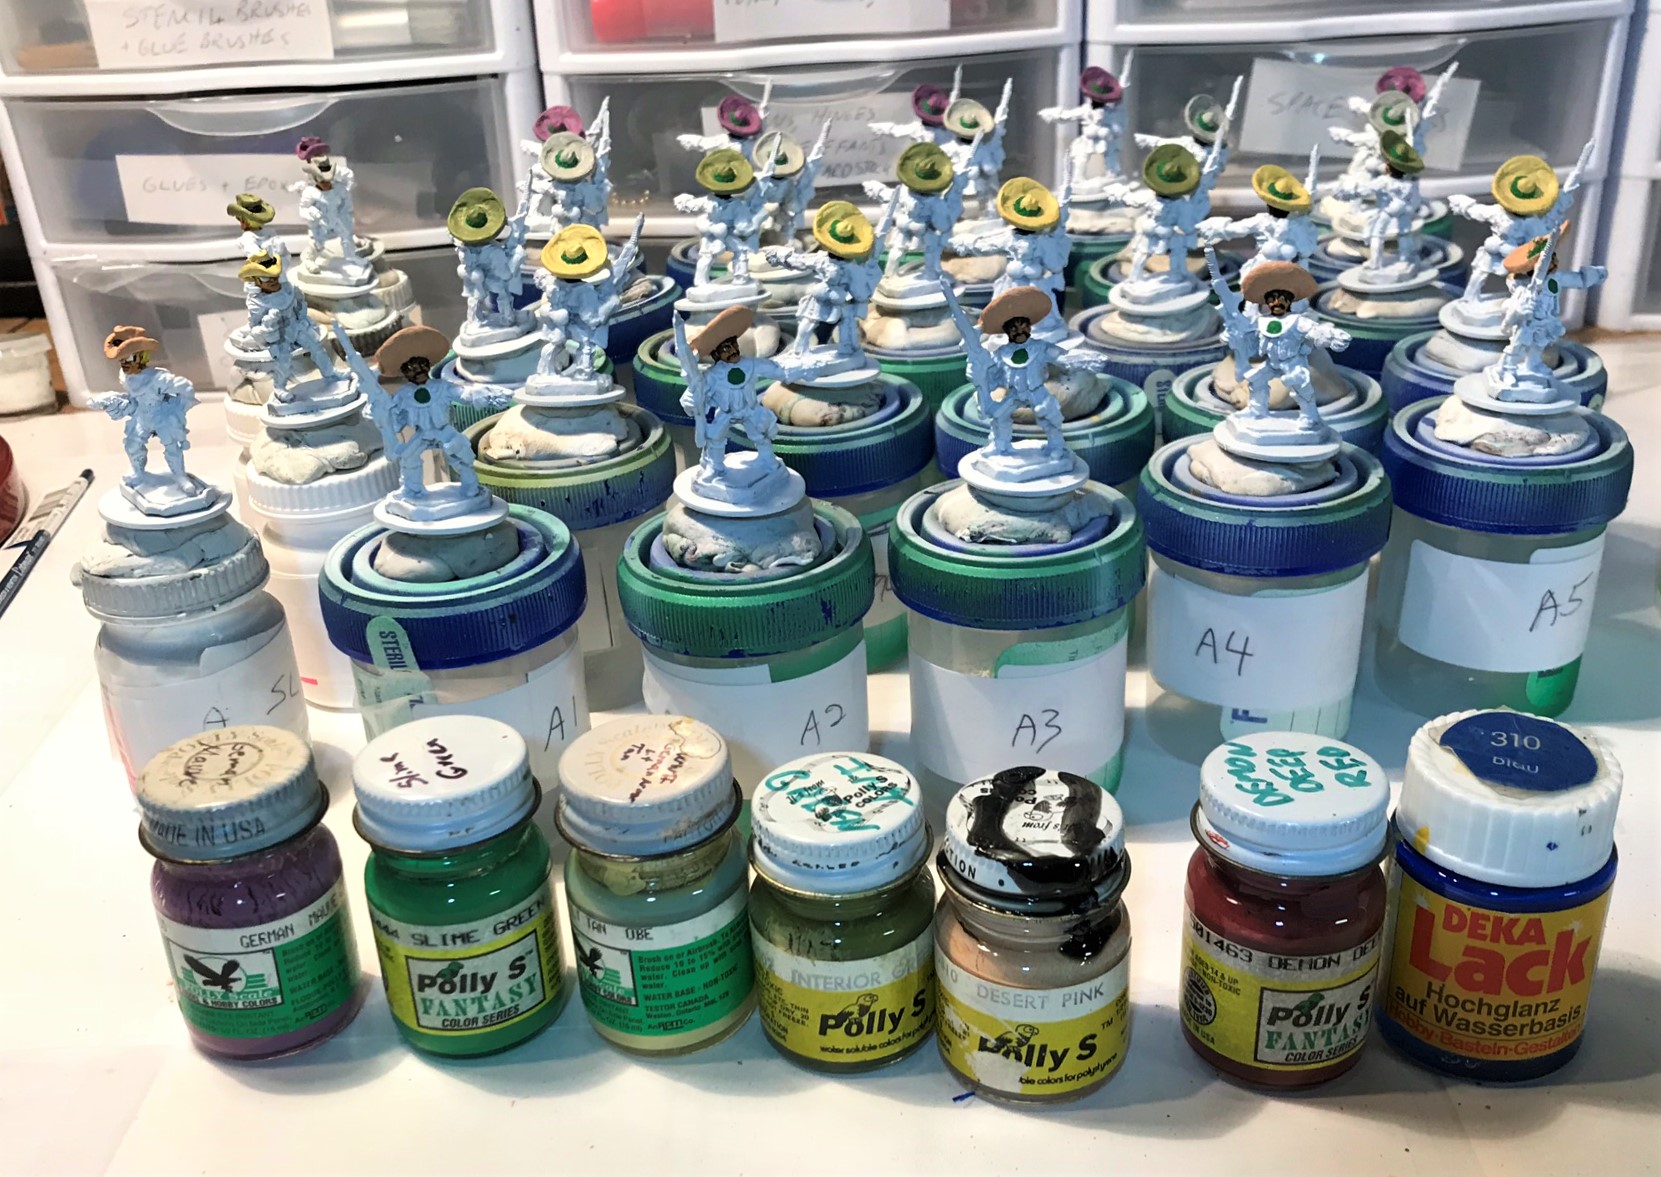
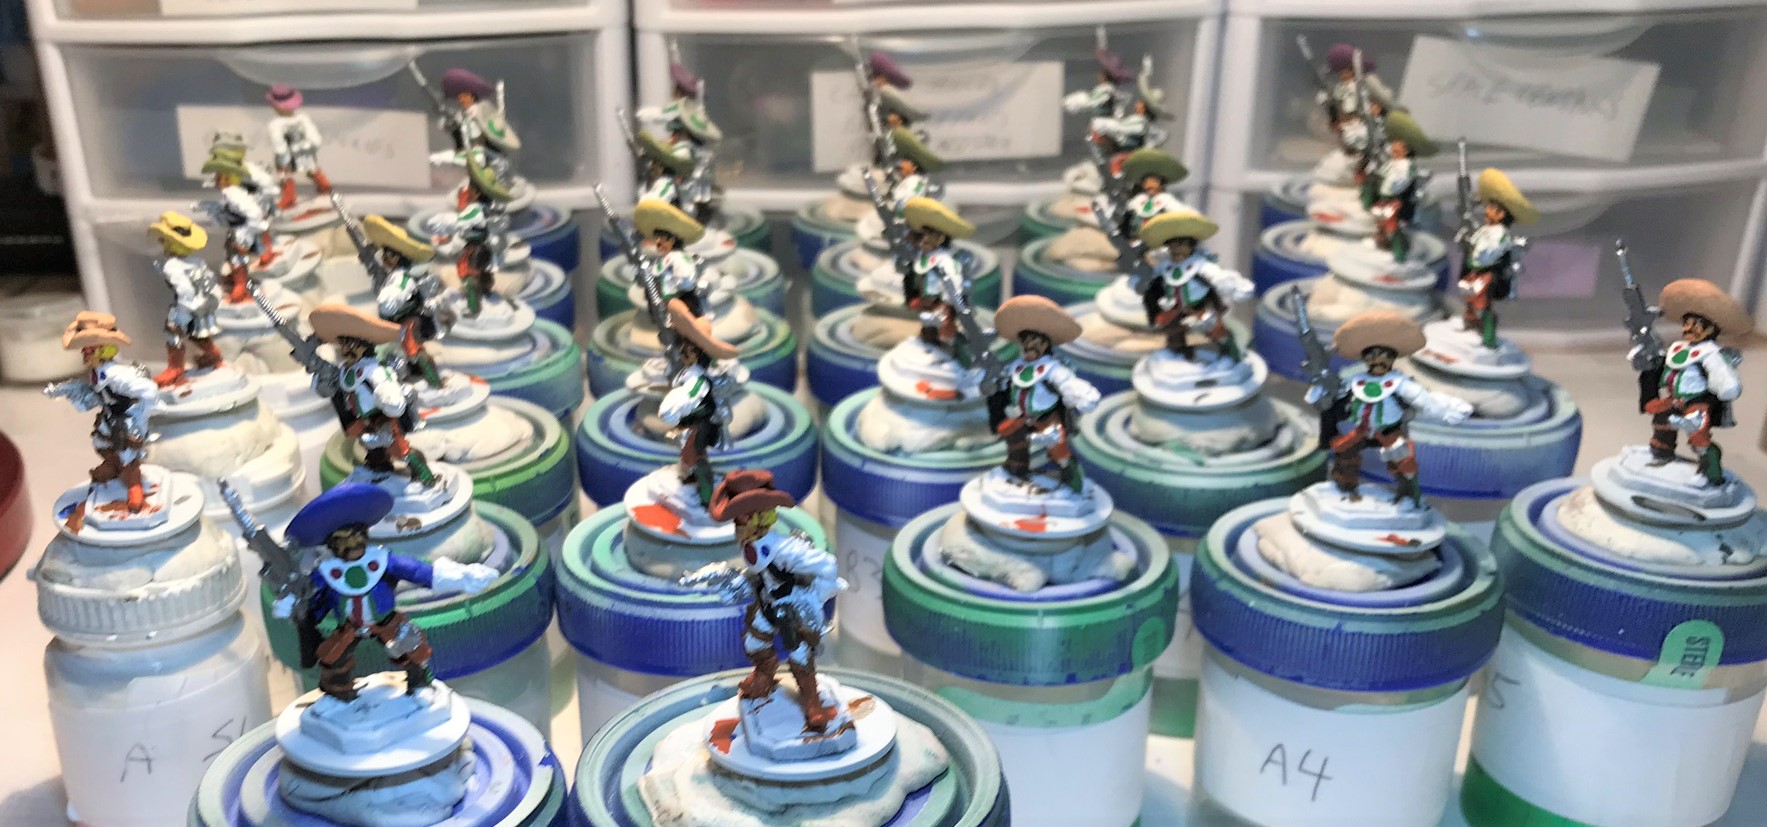
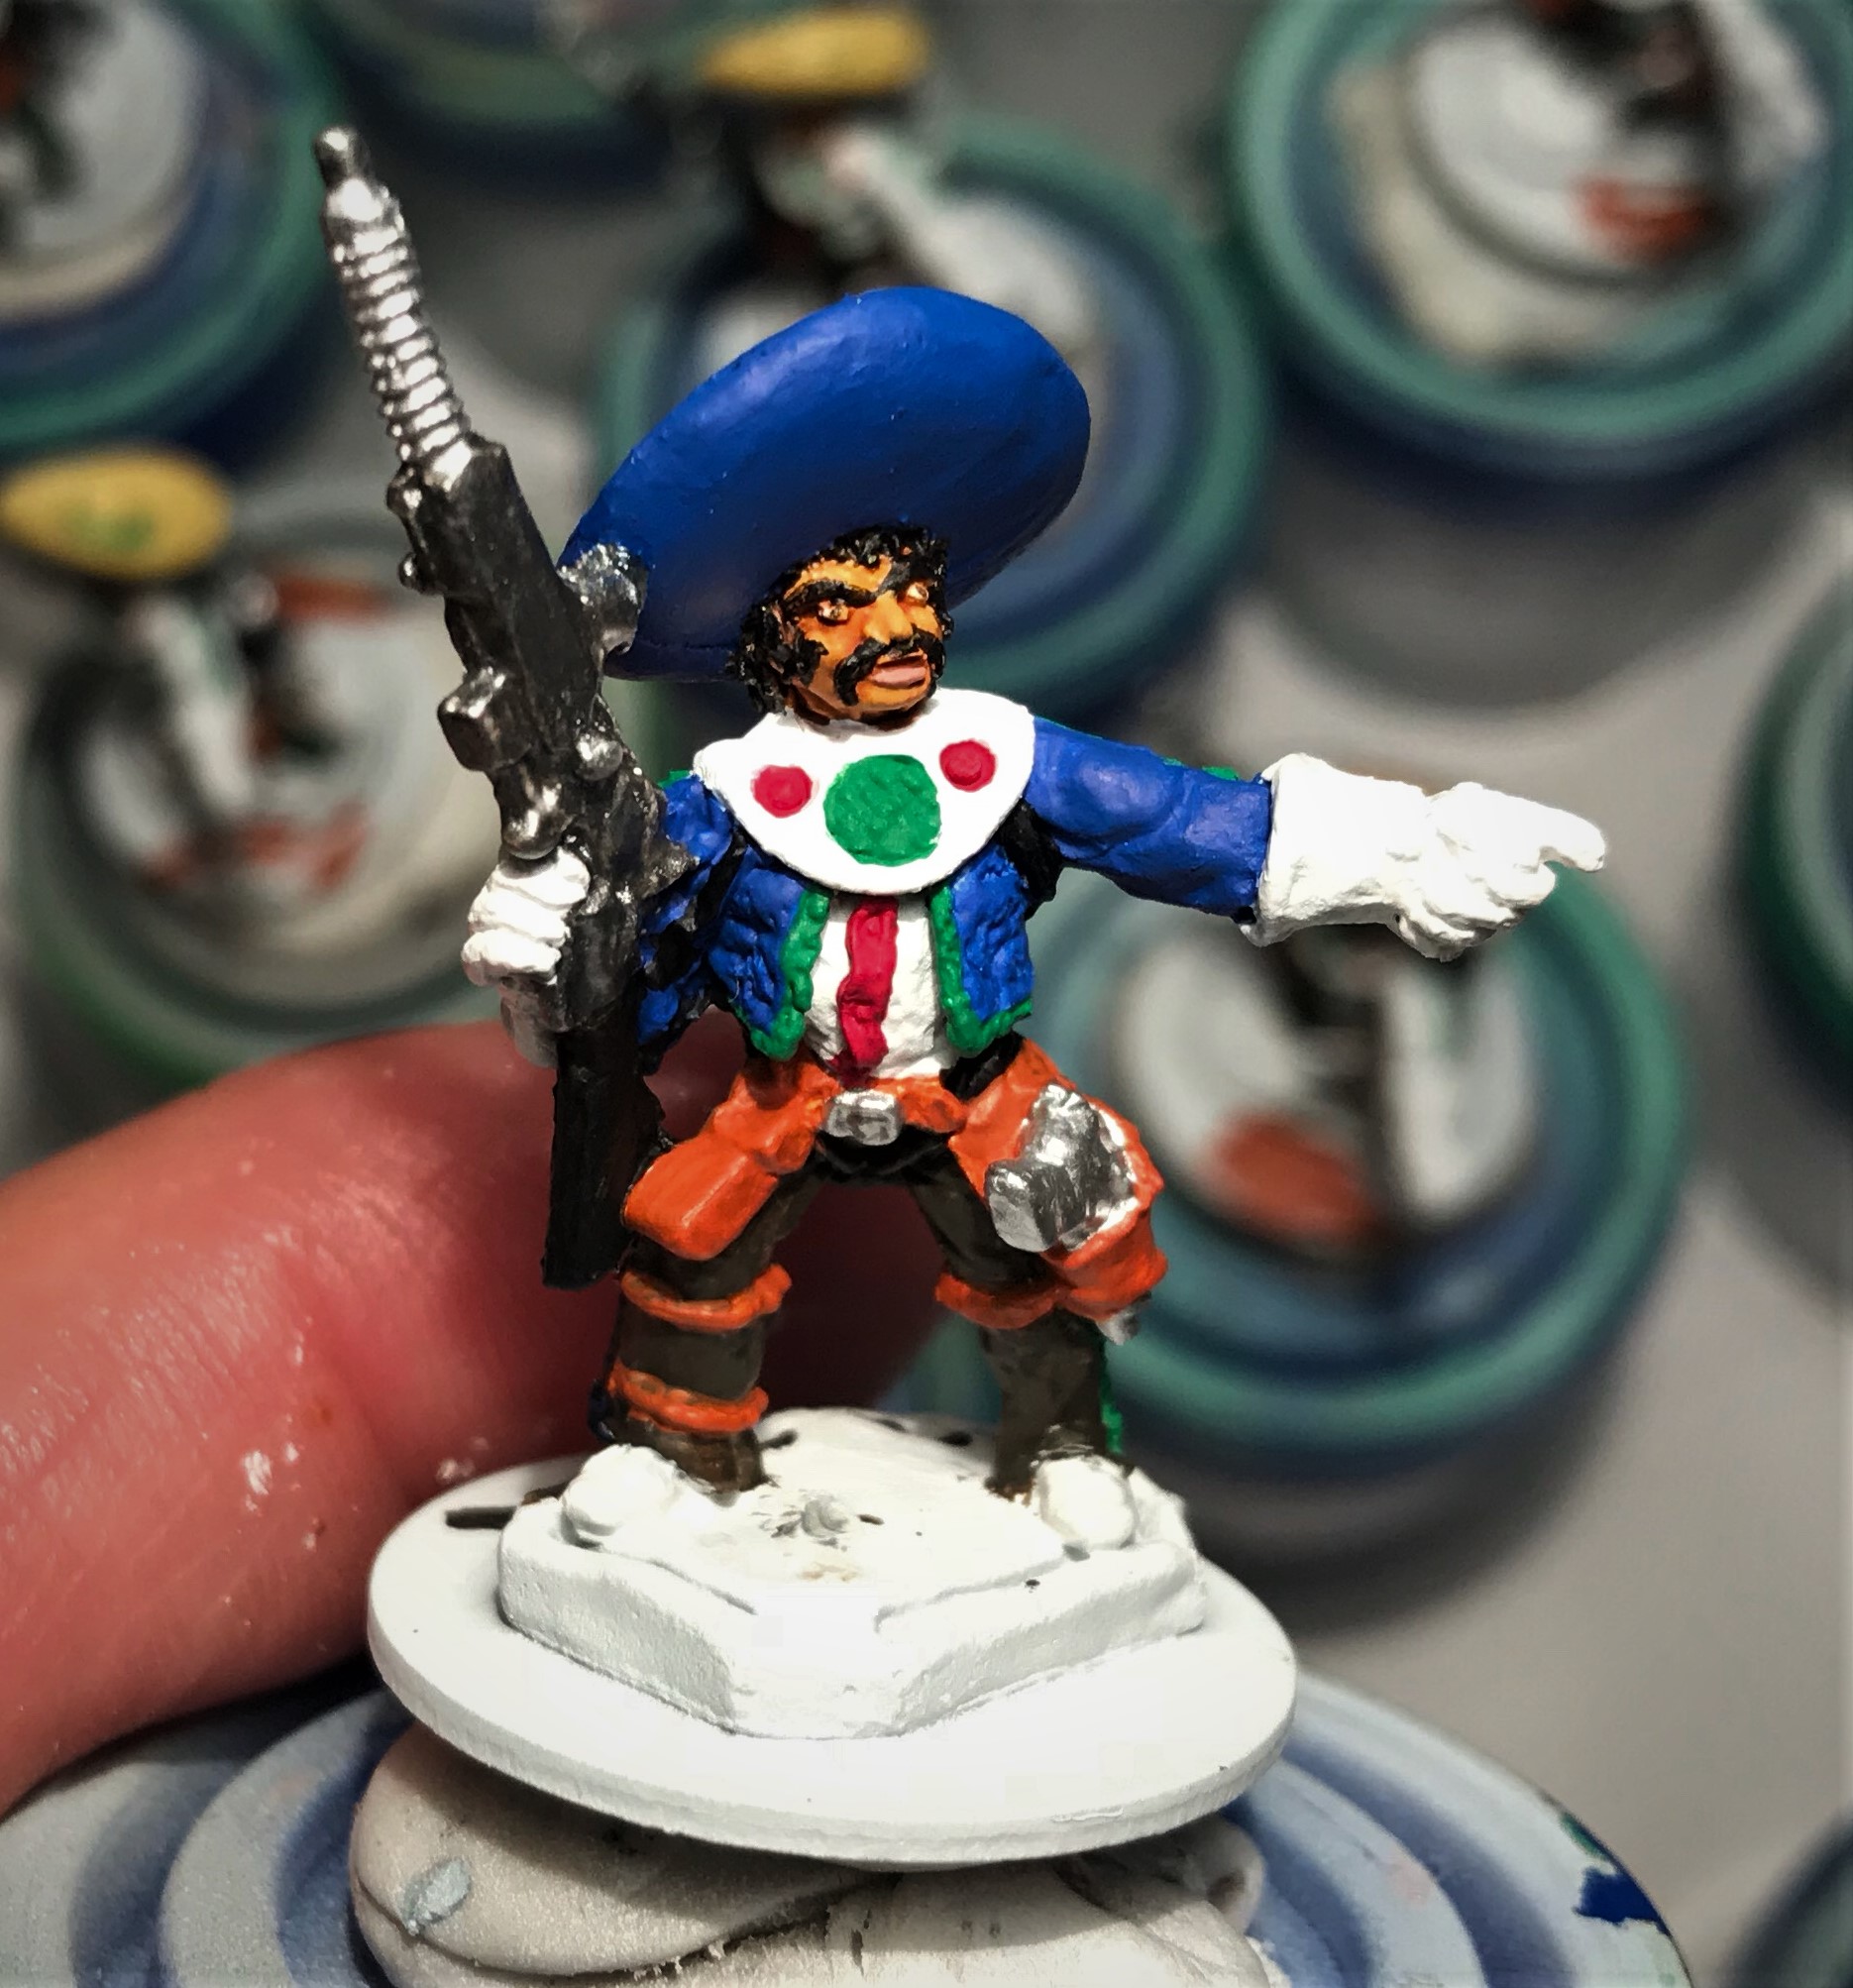
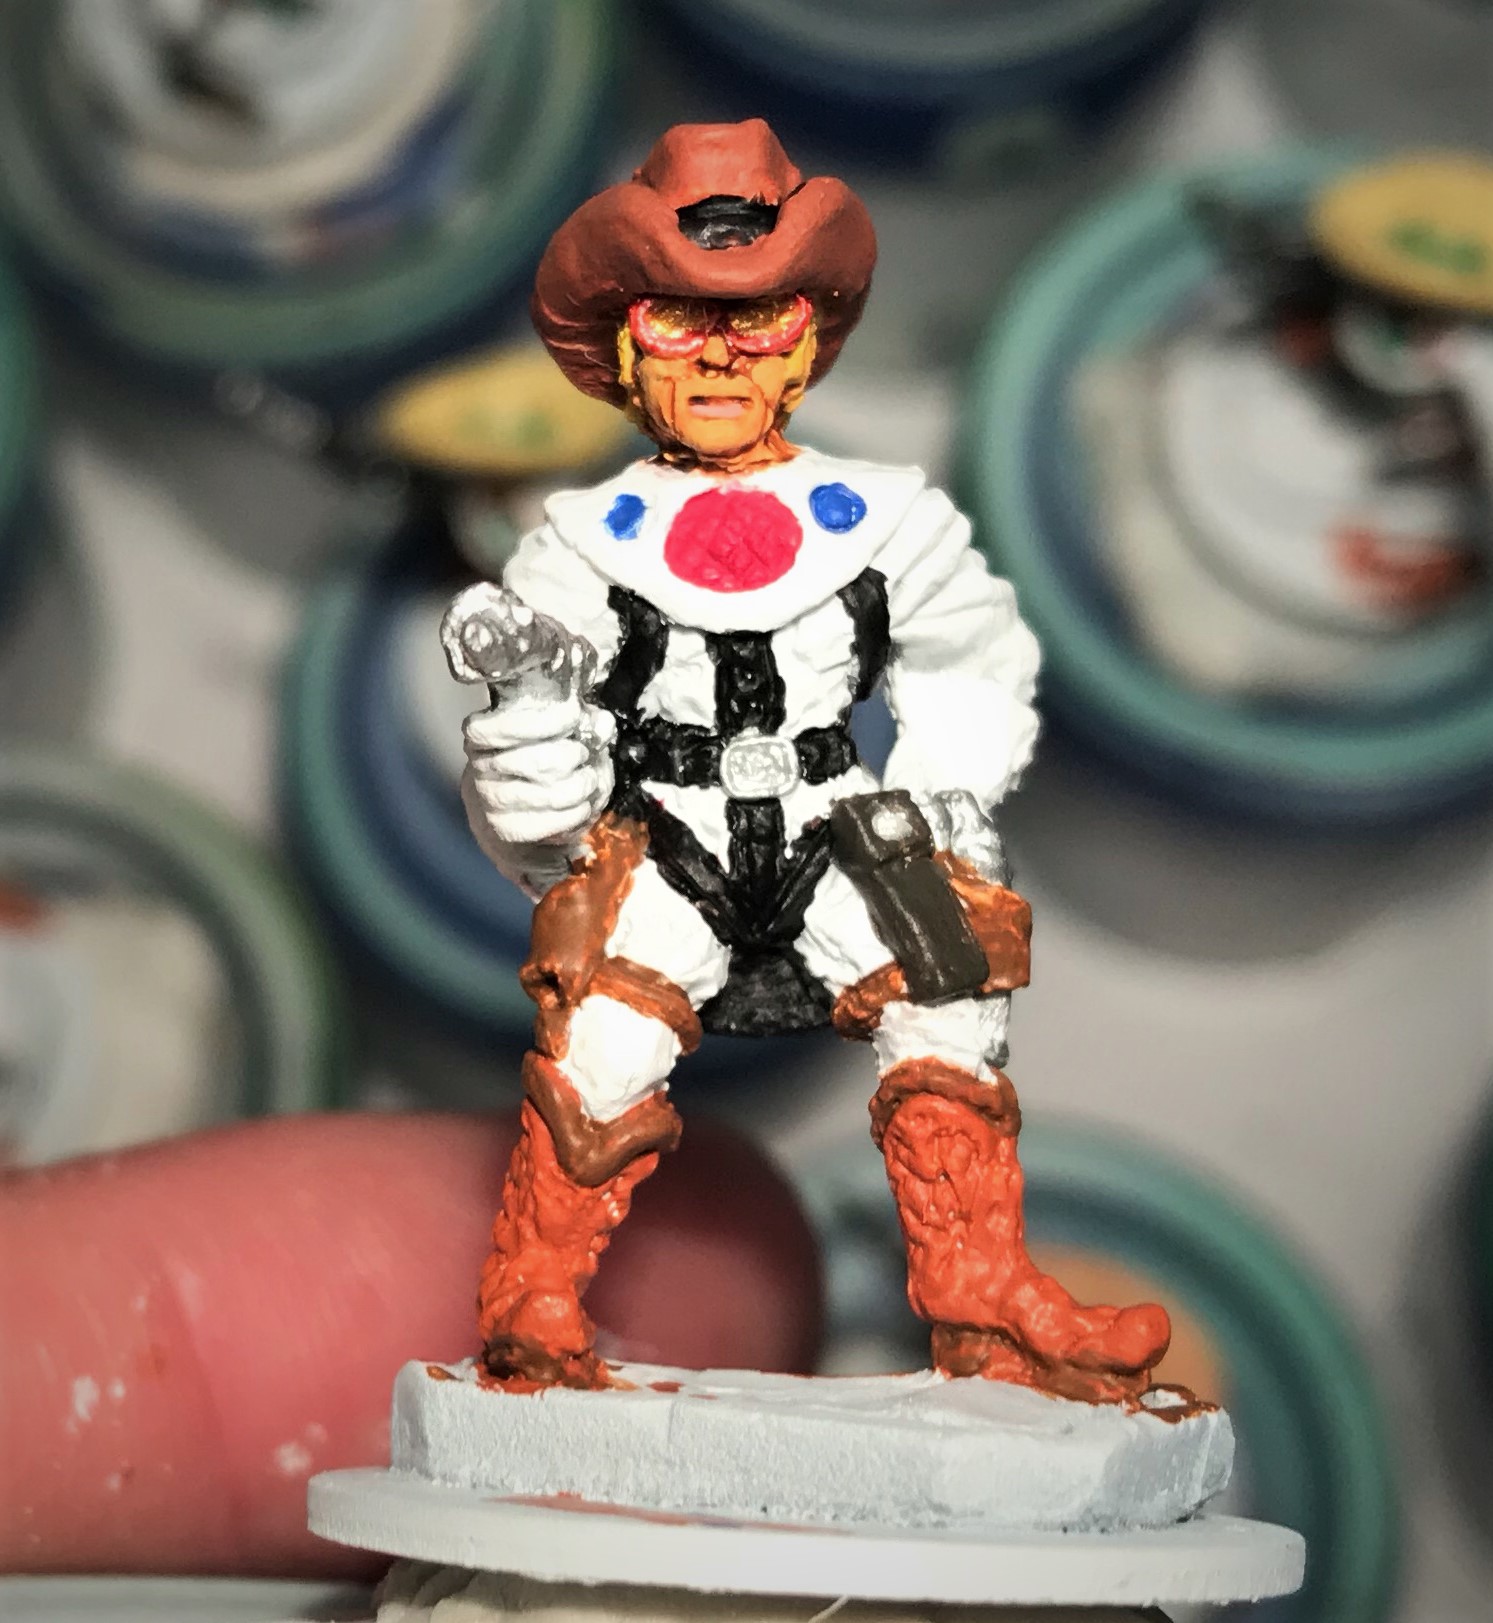
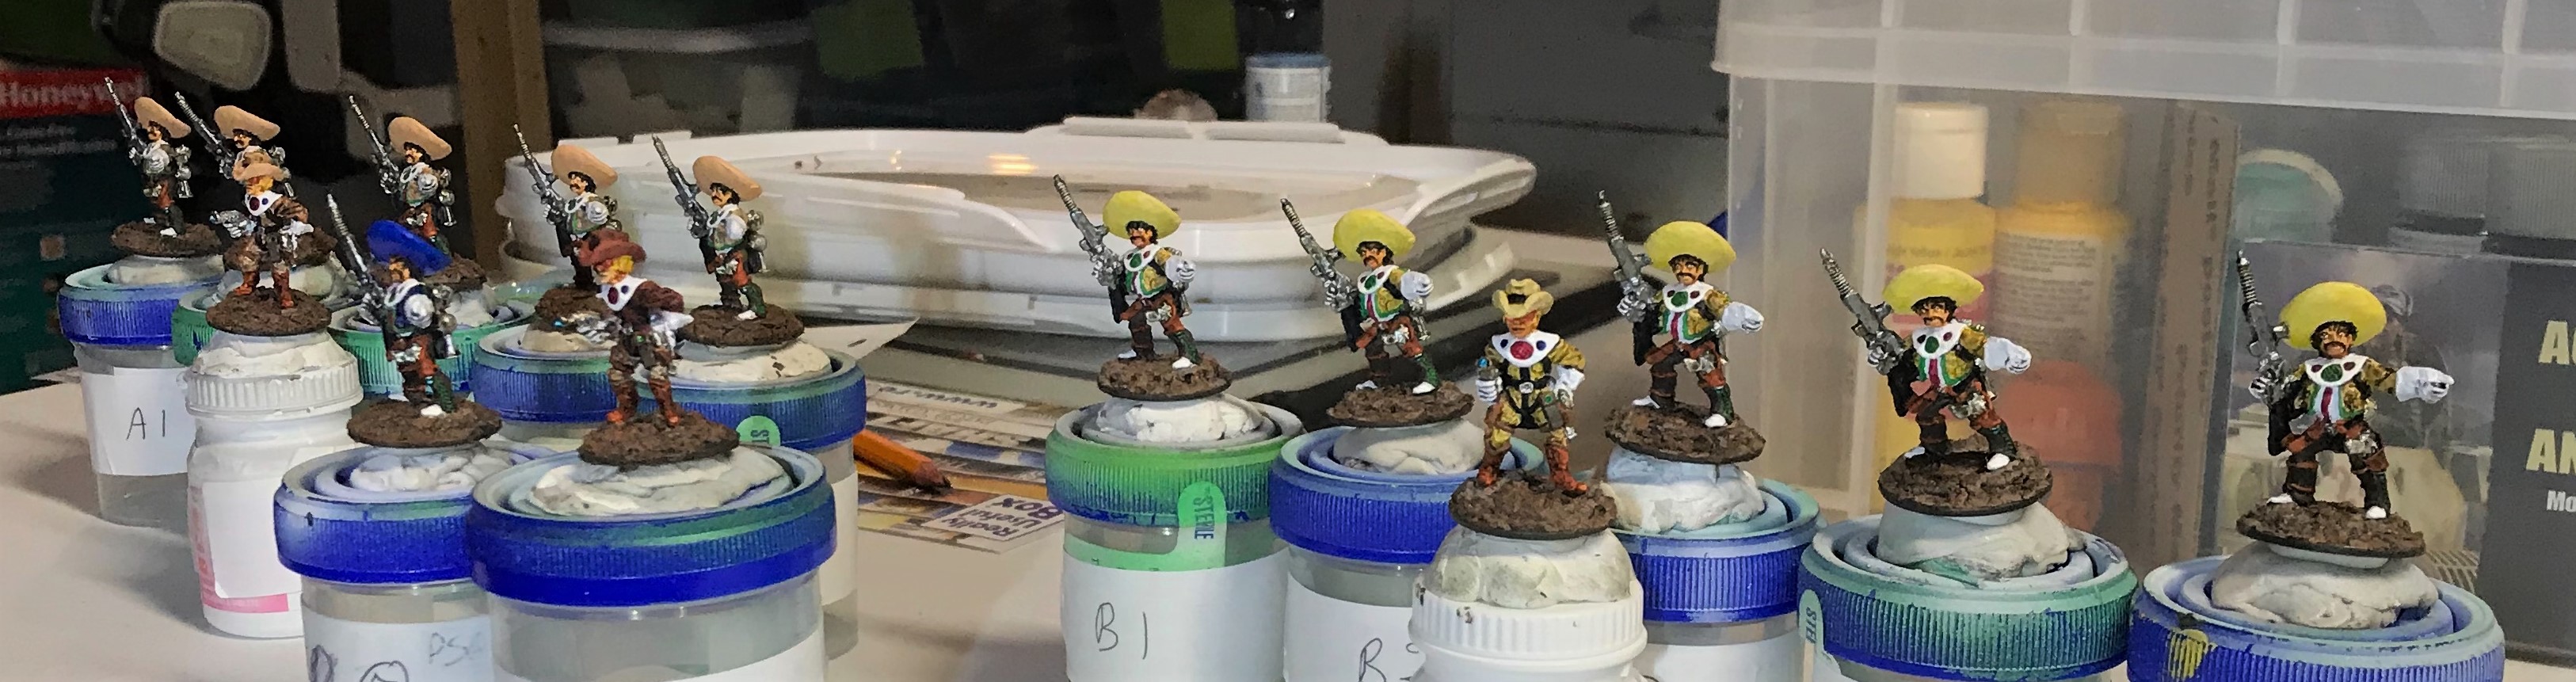
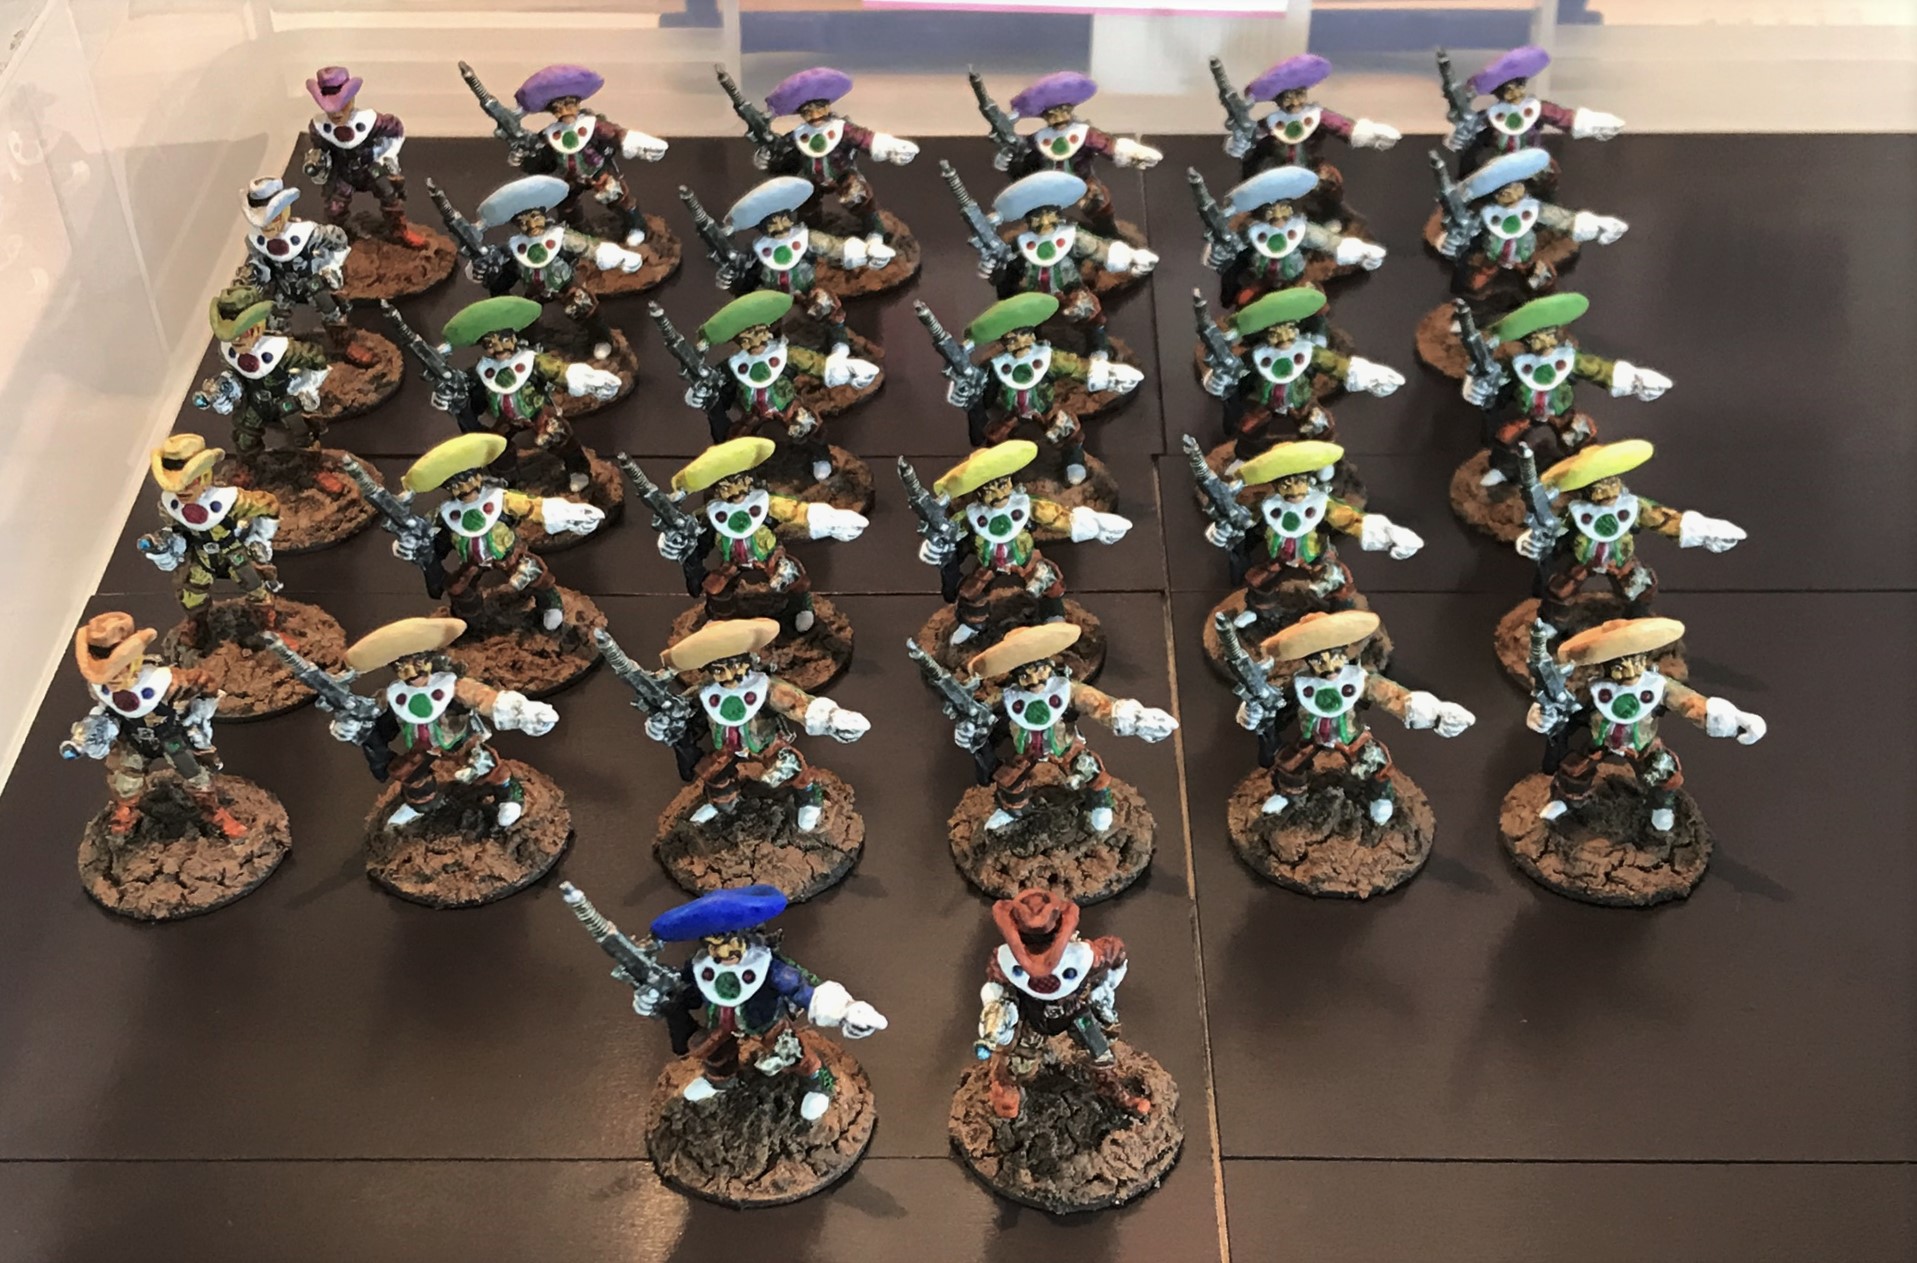
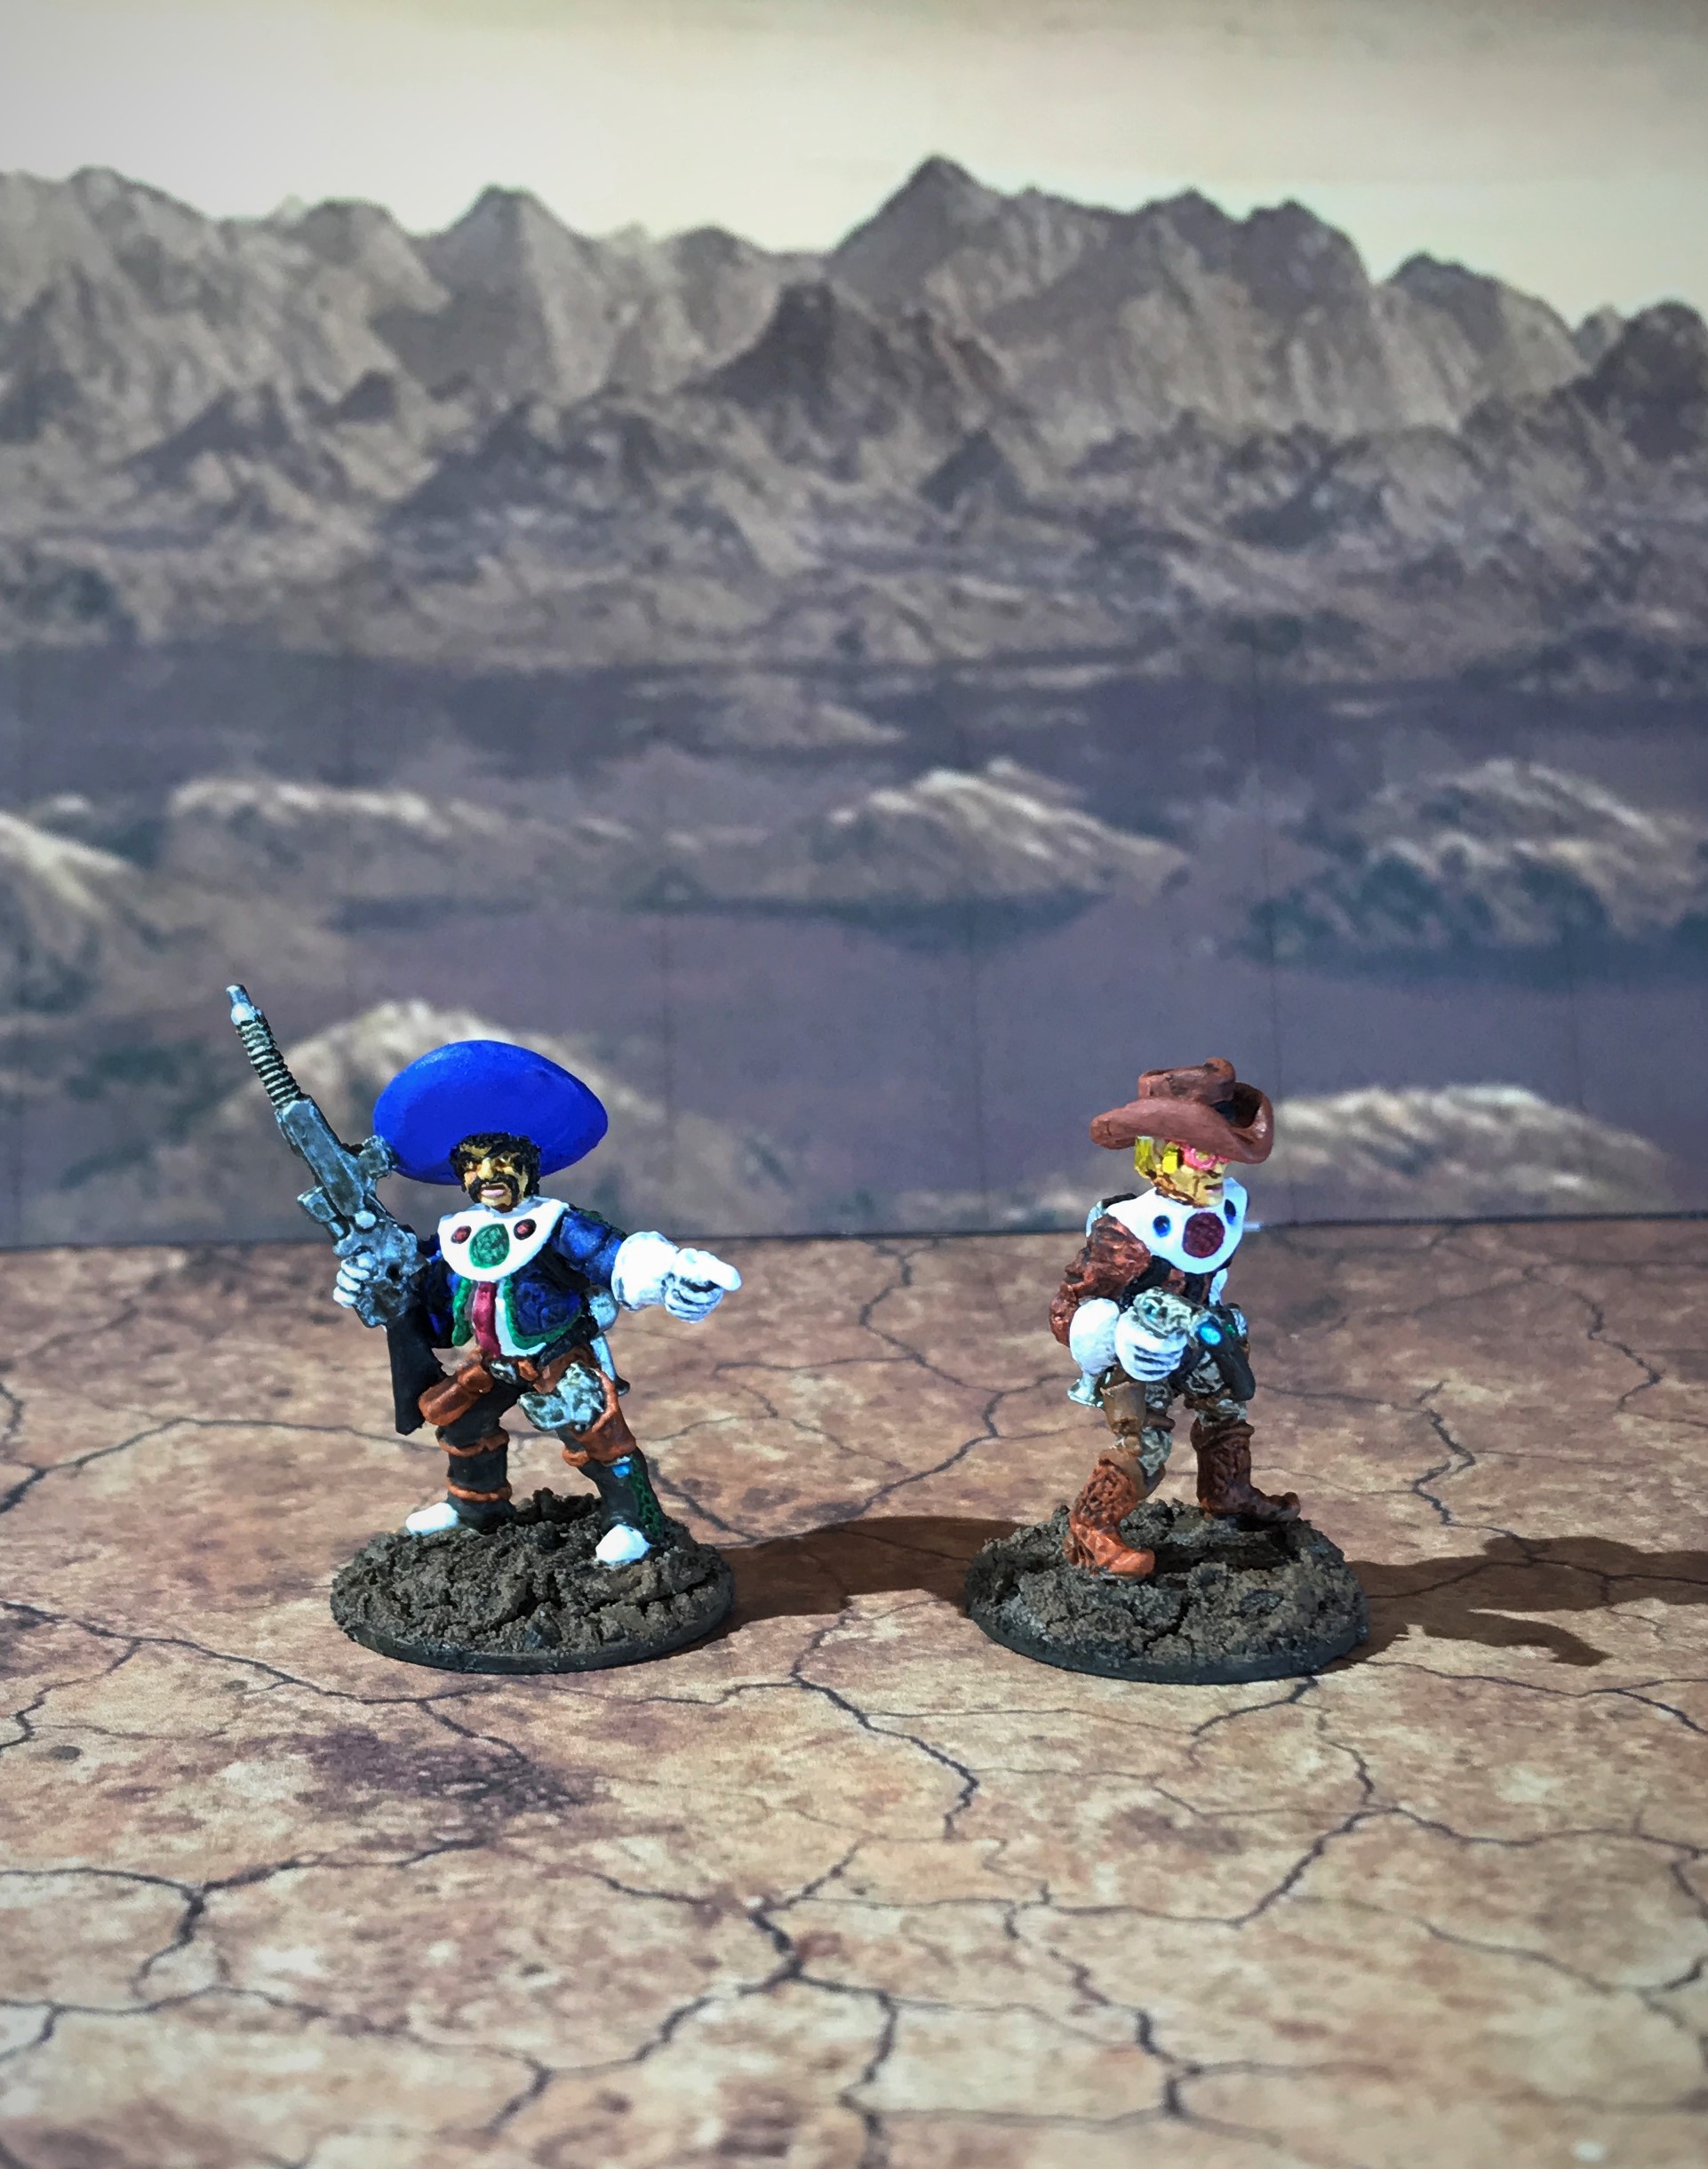
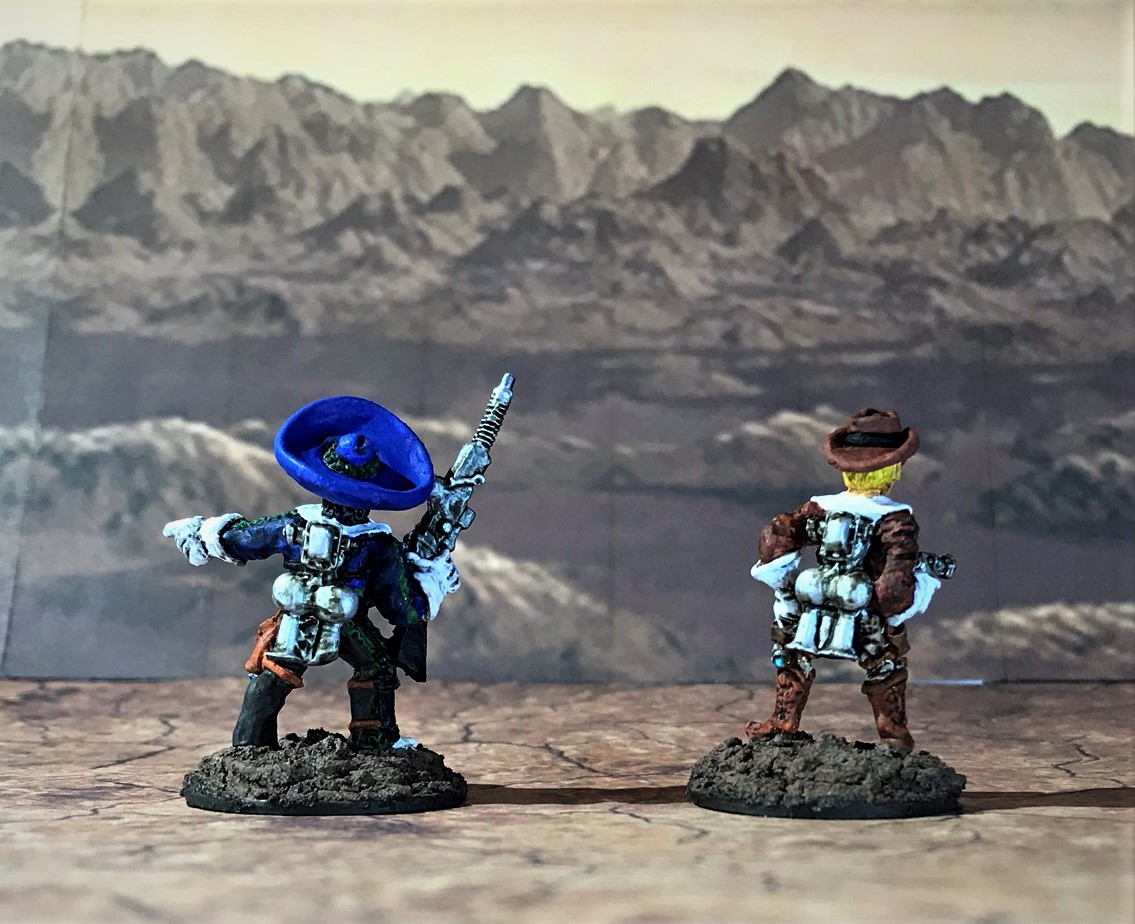
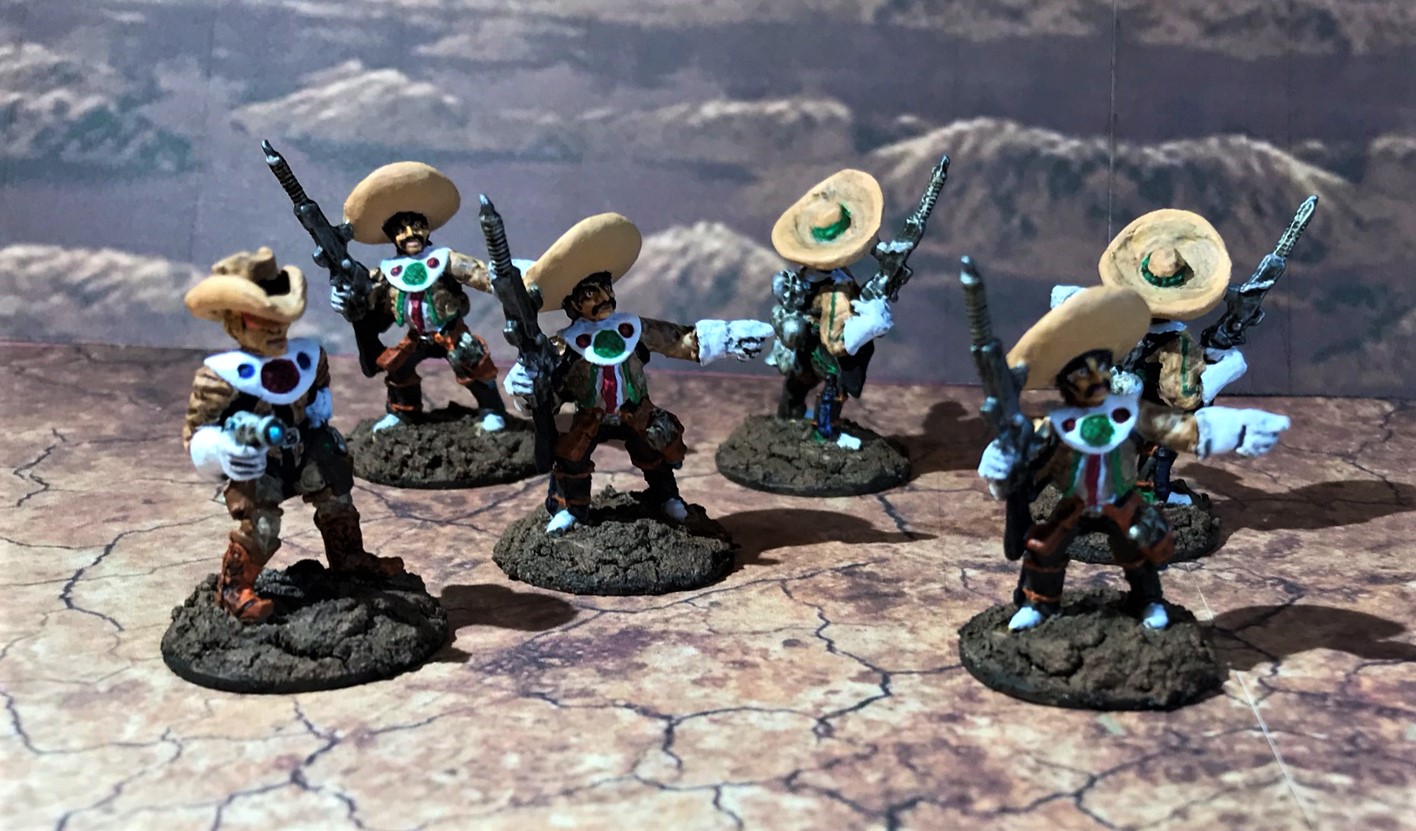
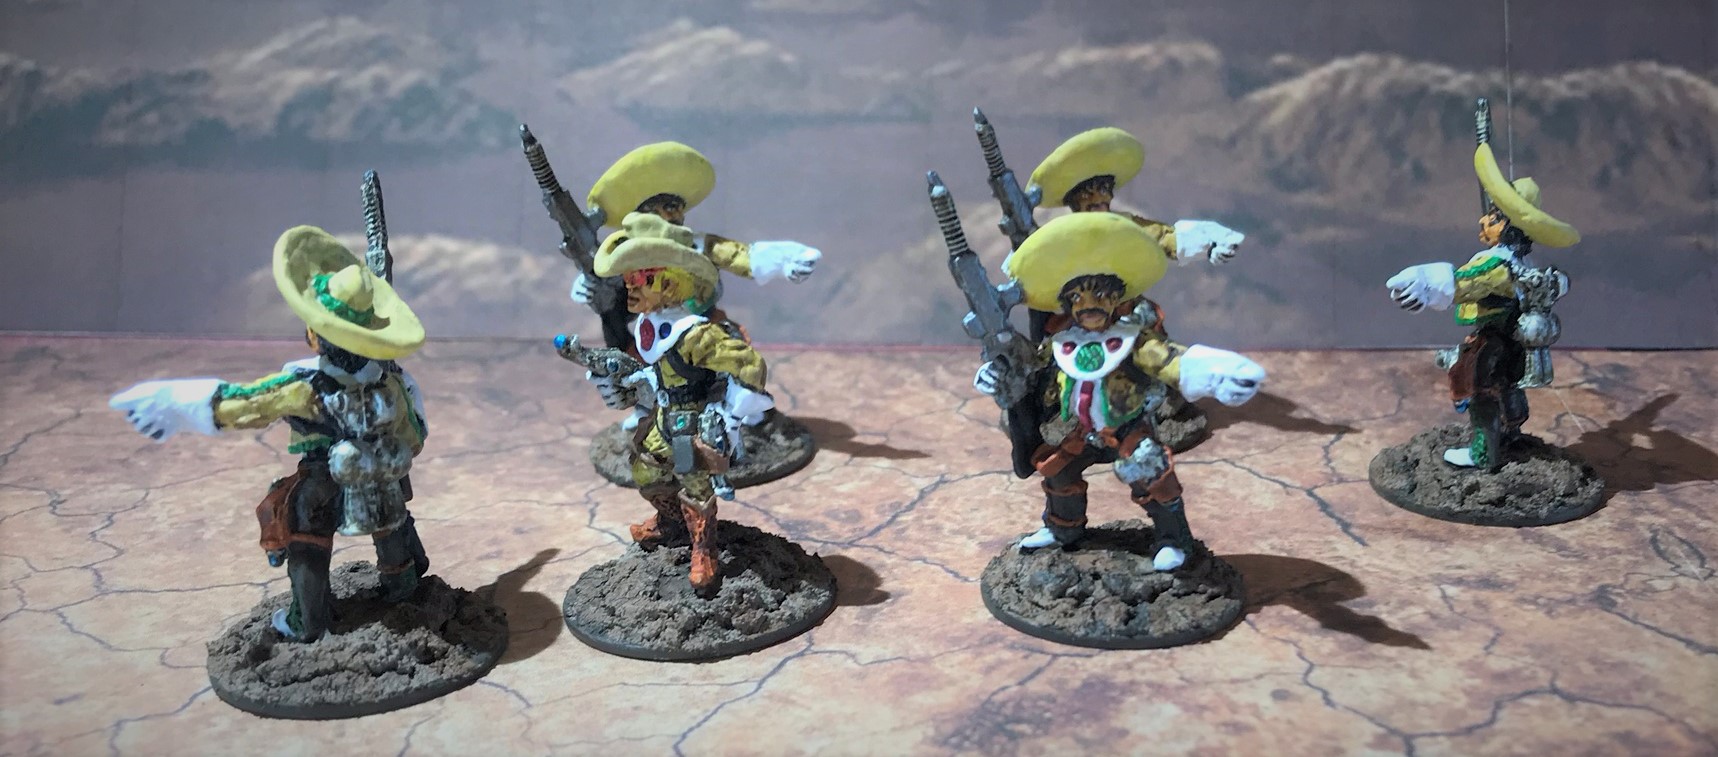
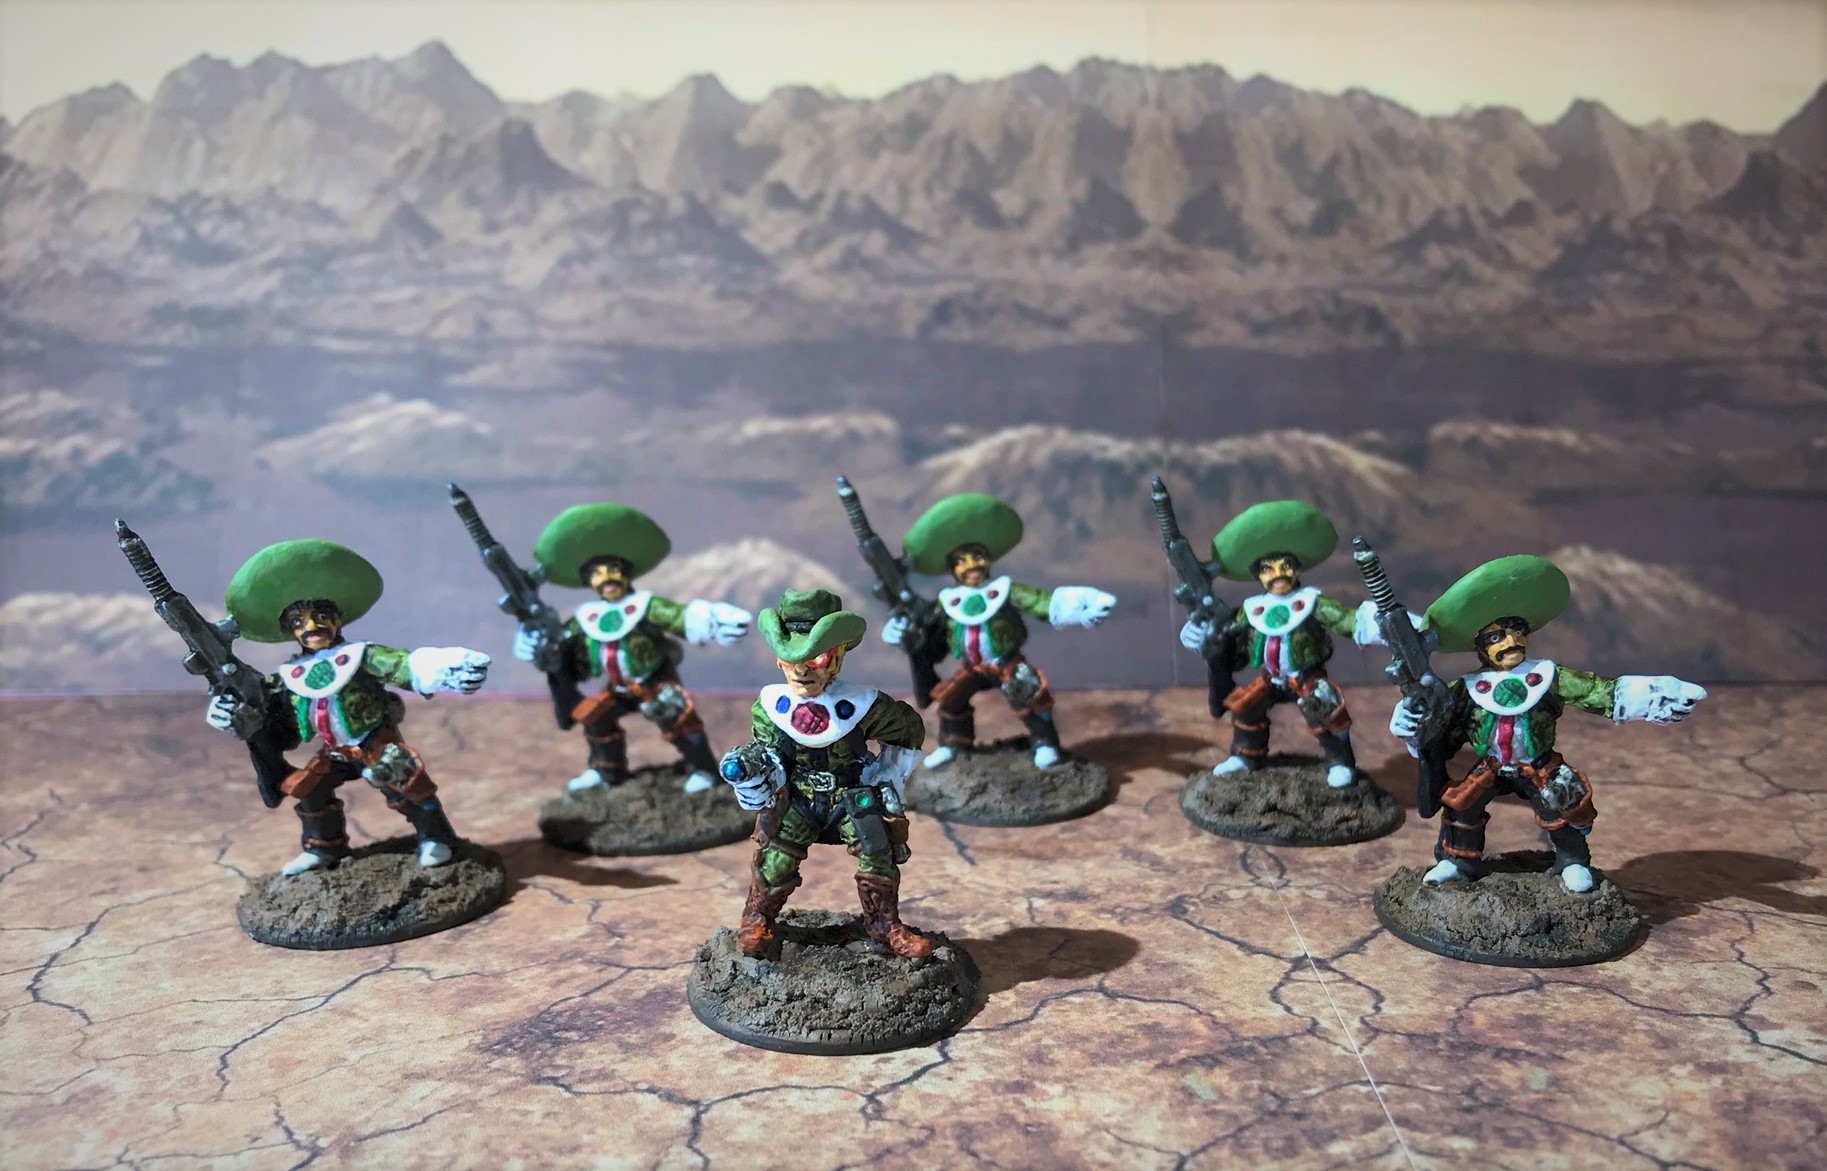
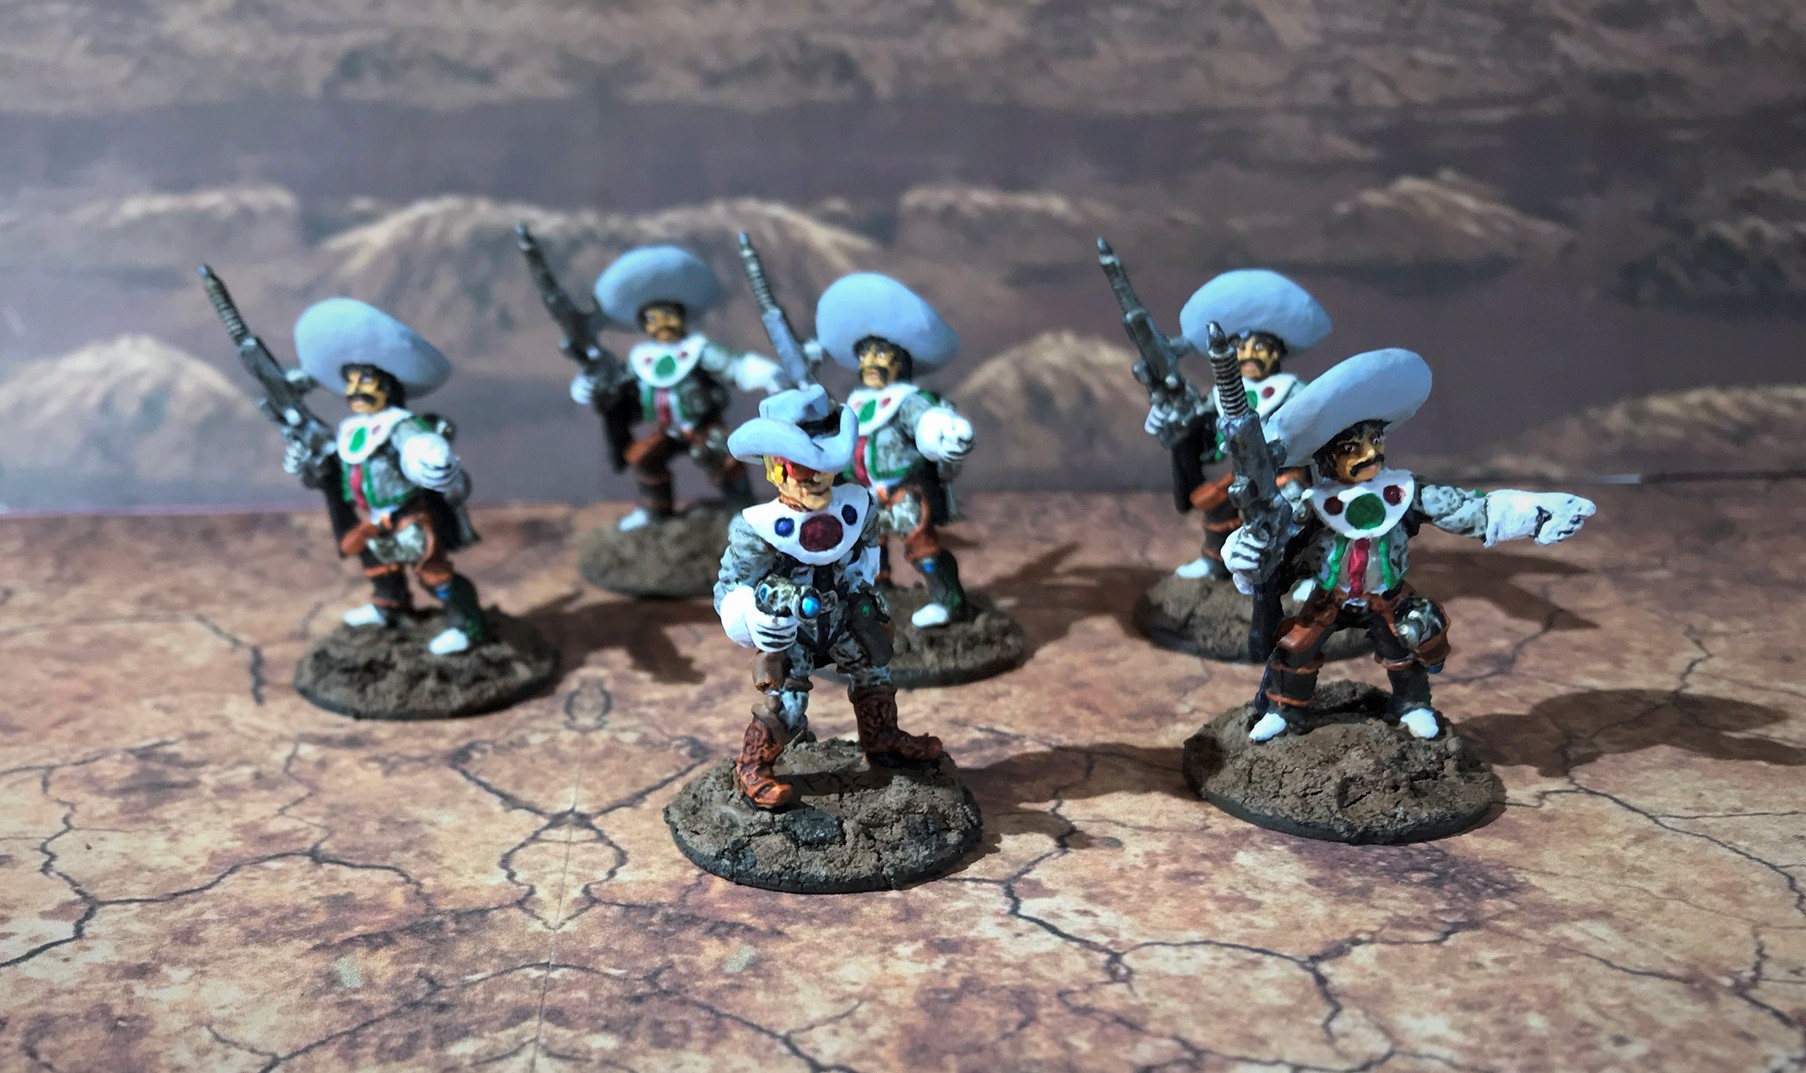
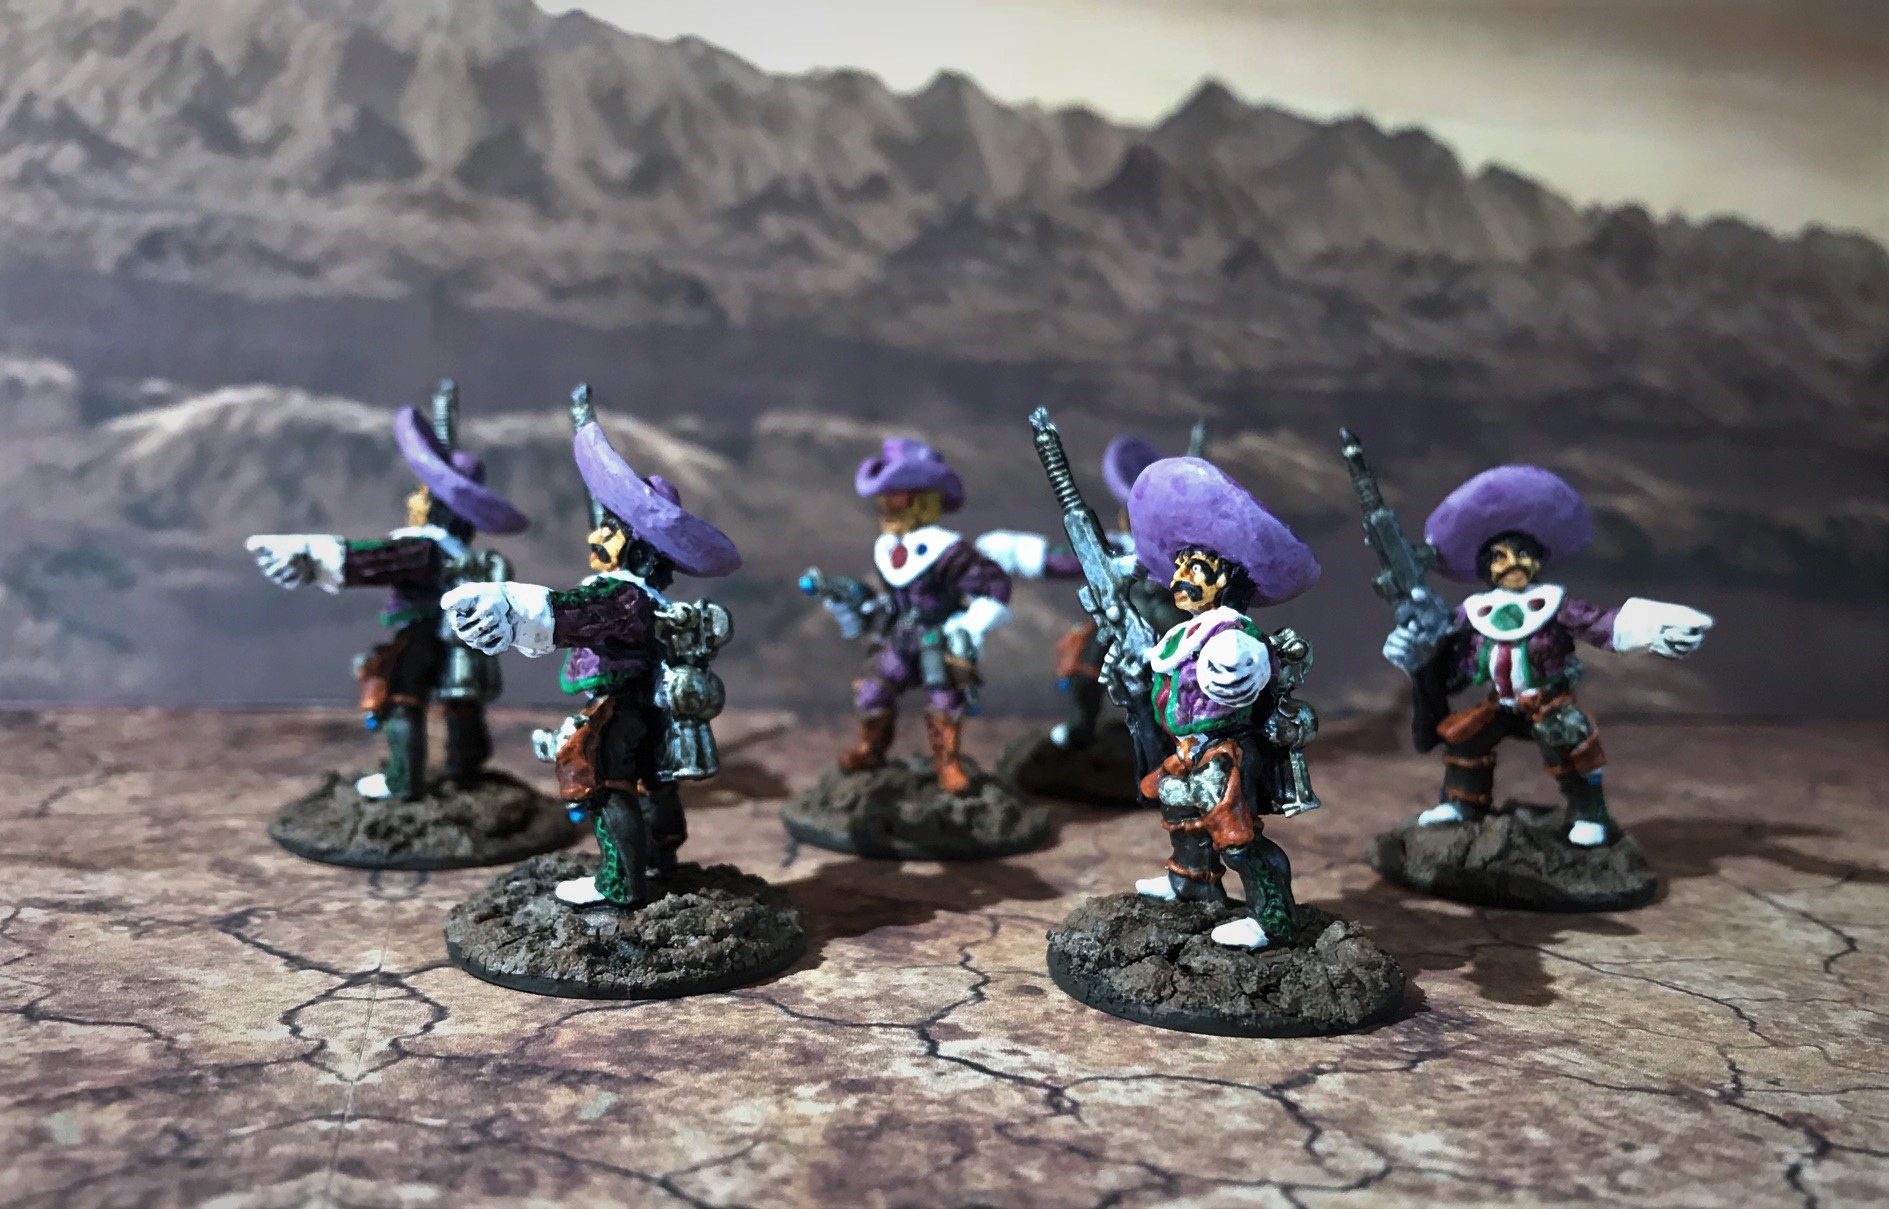
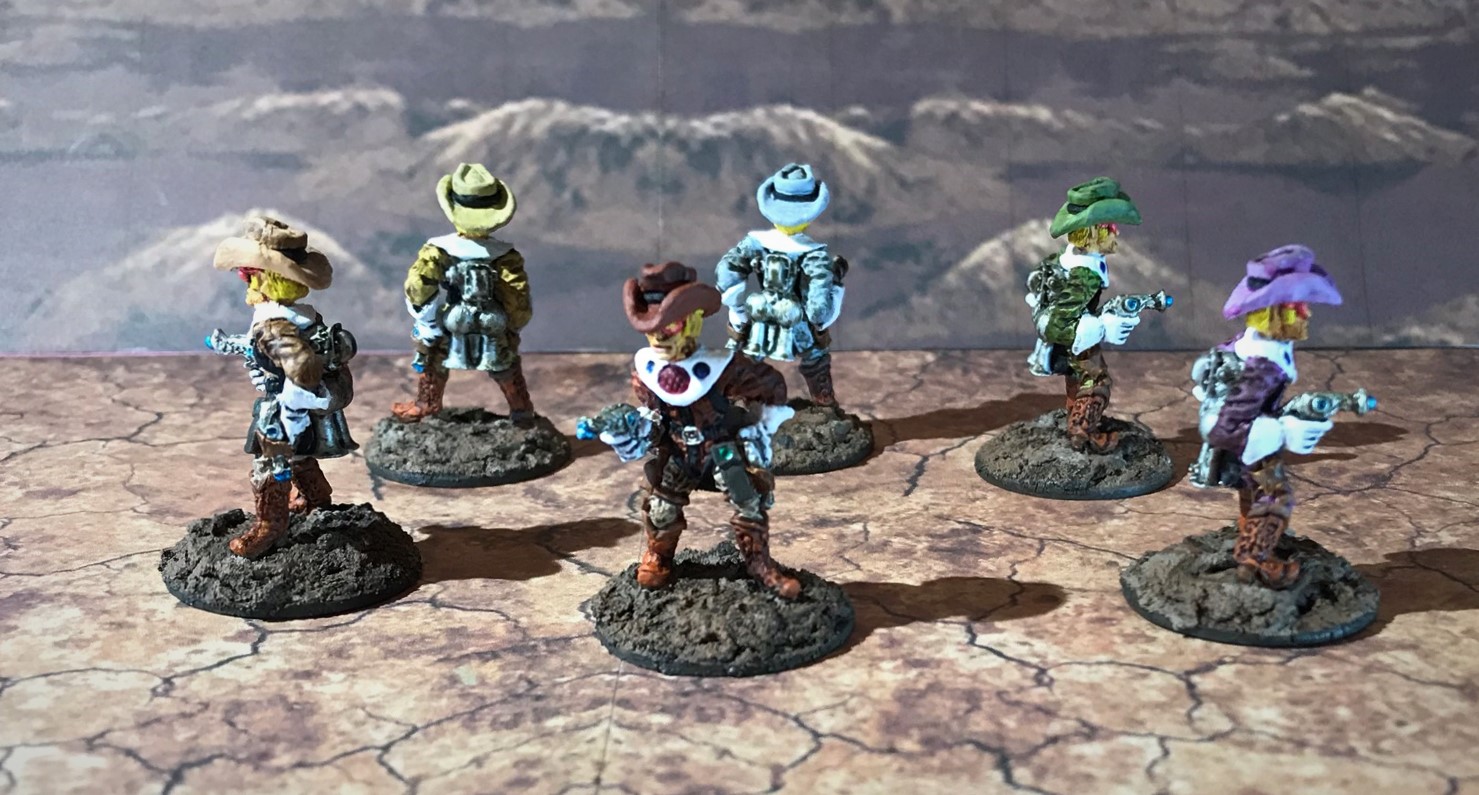
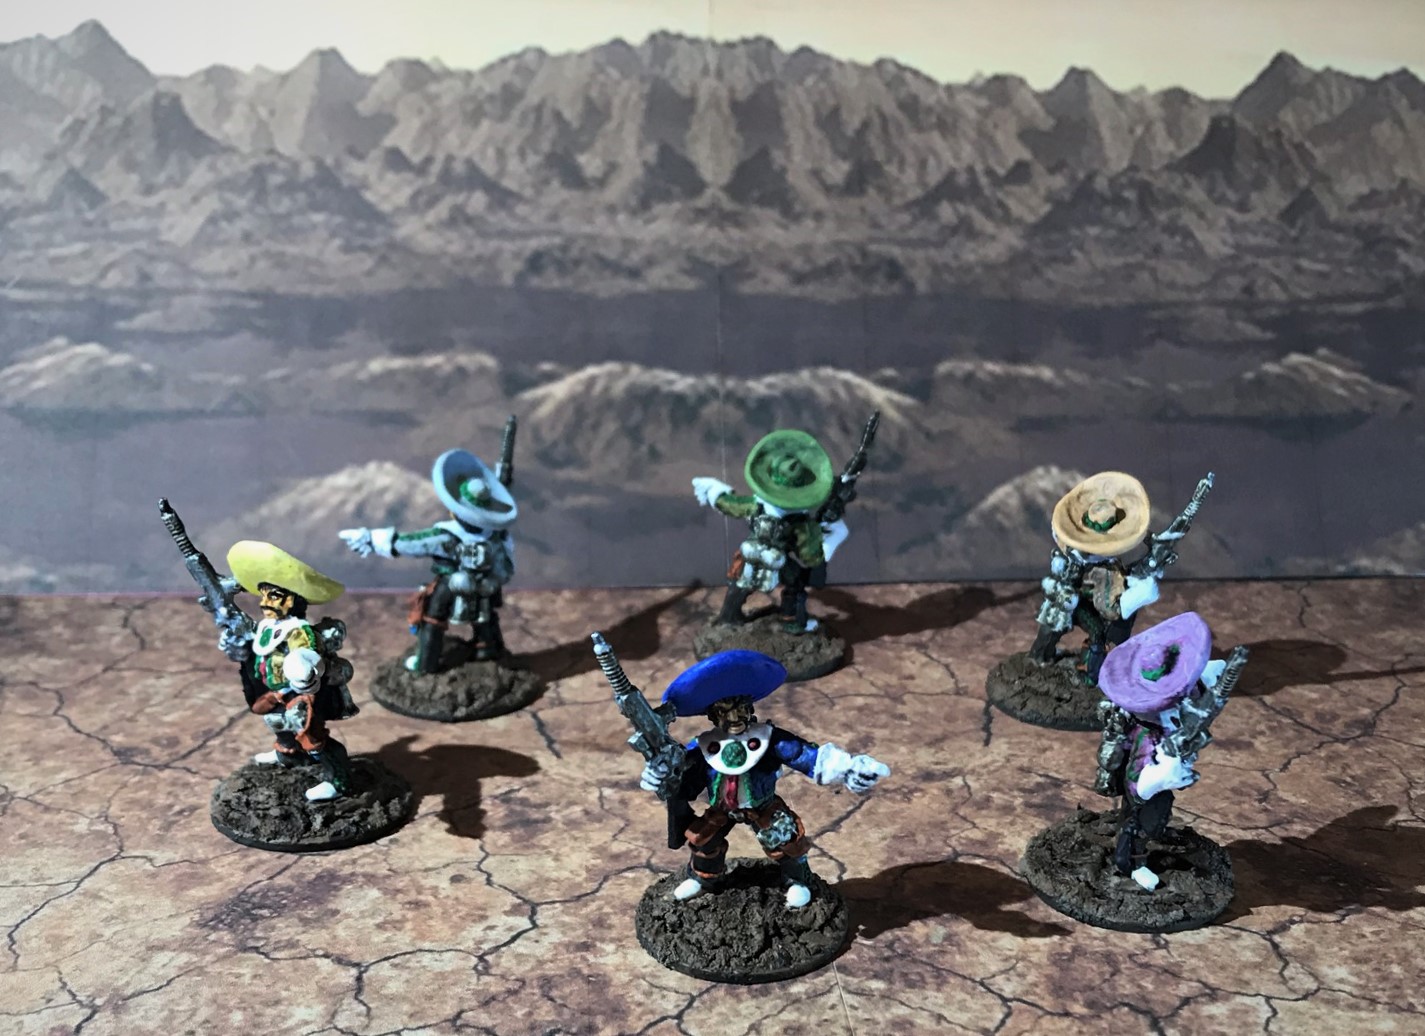
High Noon at the Cyber Ruins (Combat Patrol:WWII – modified for retro Sci-fi)

This was my “western-themed” game.

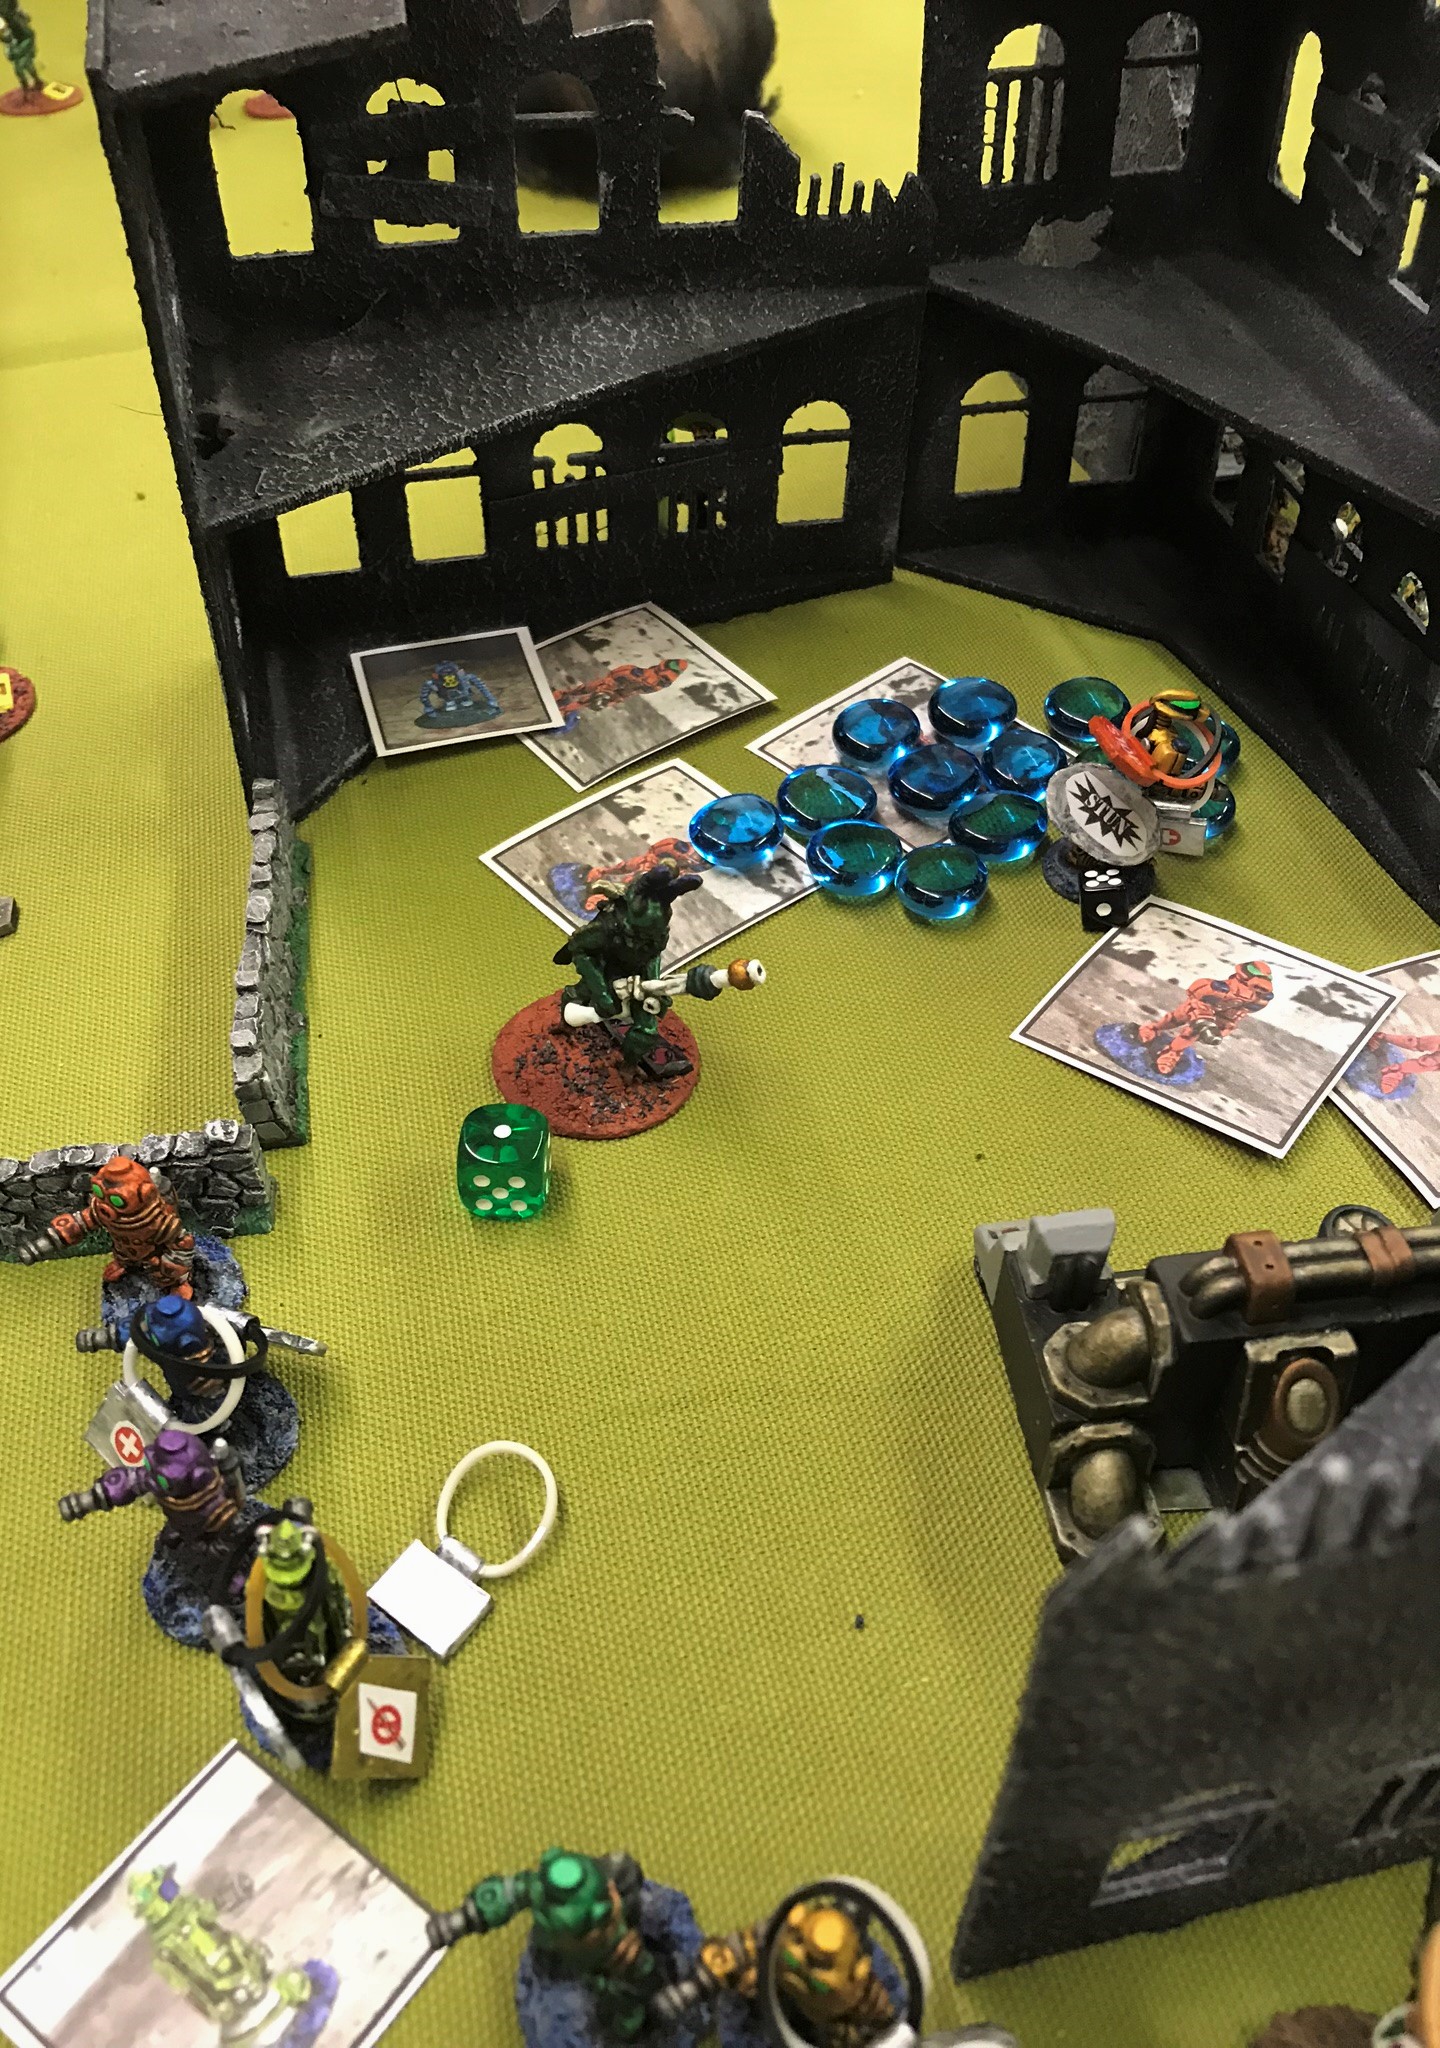
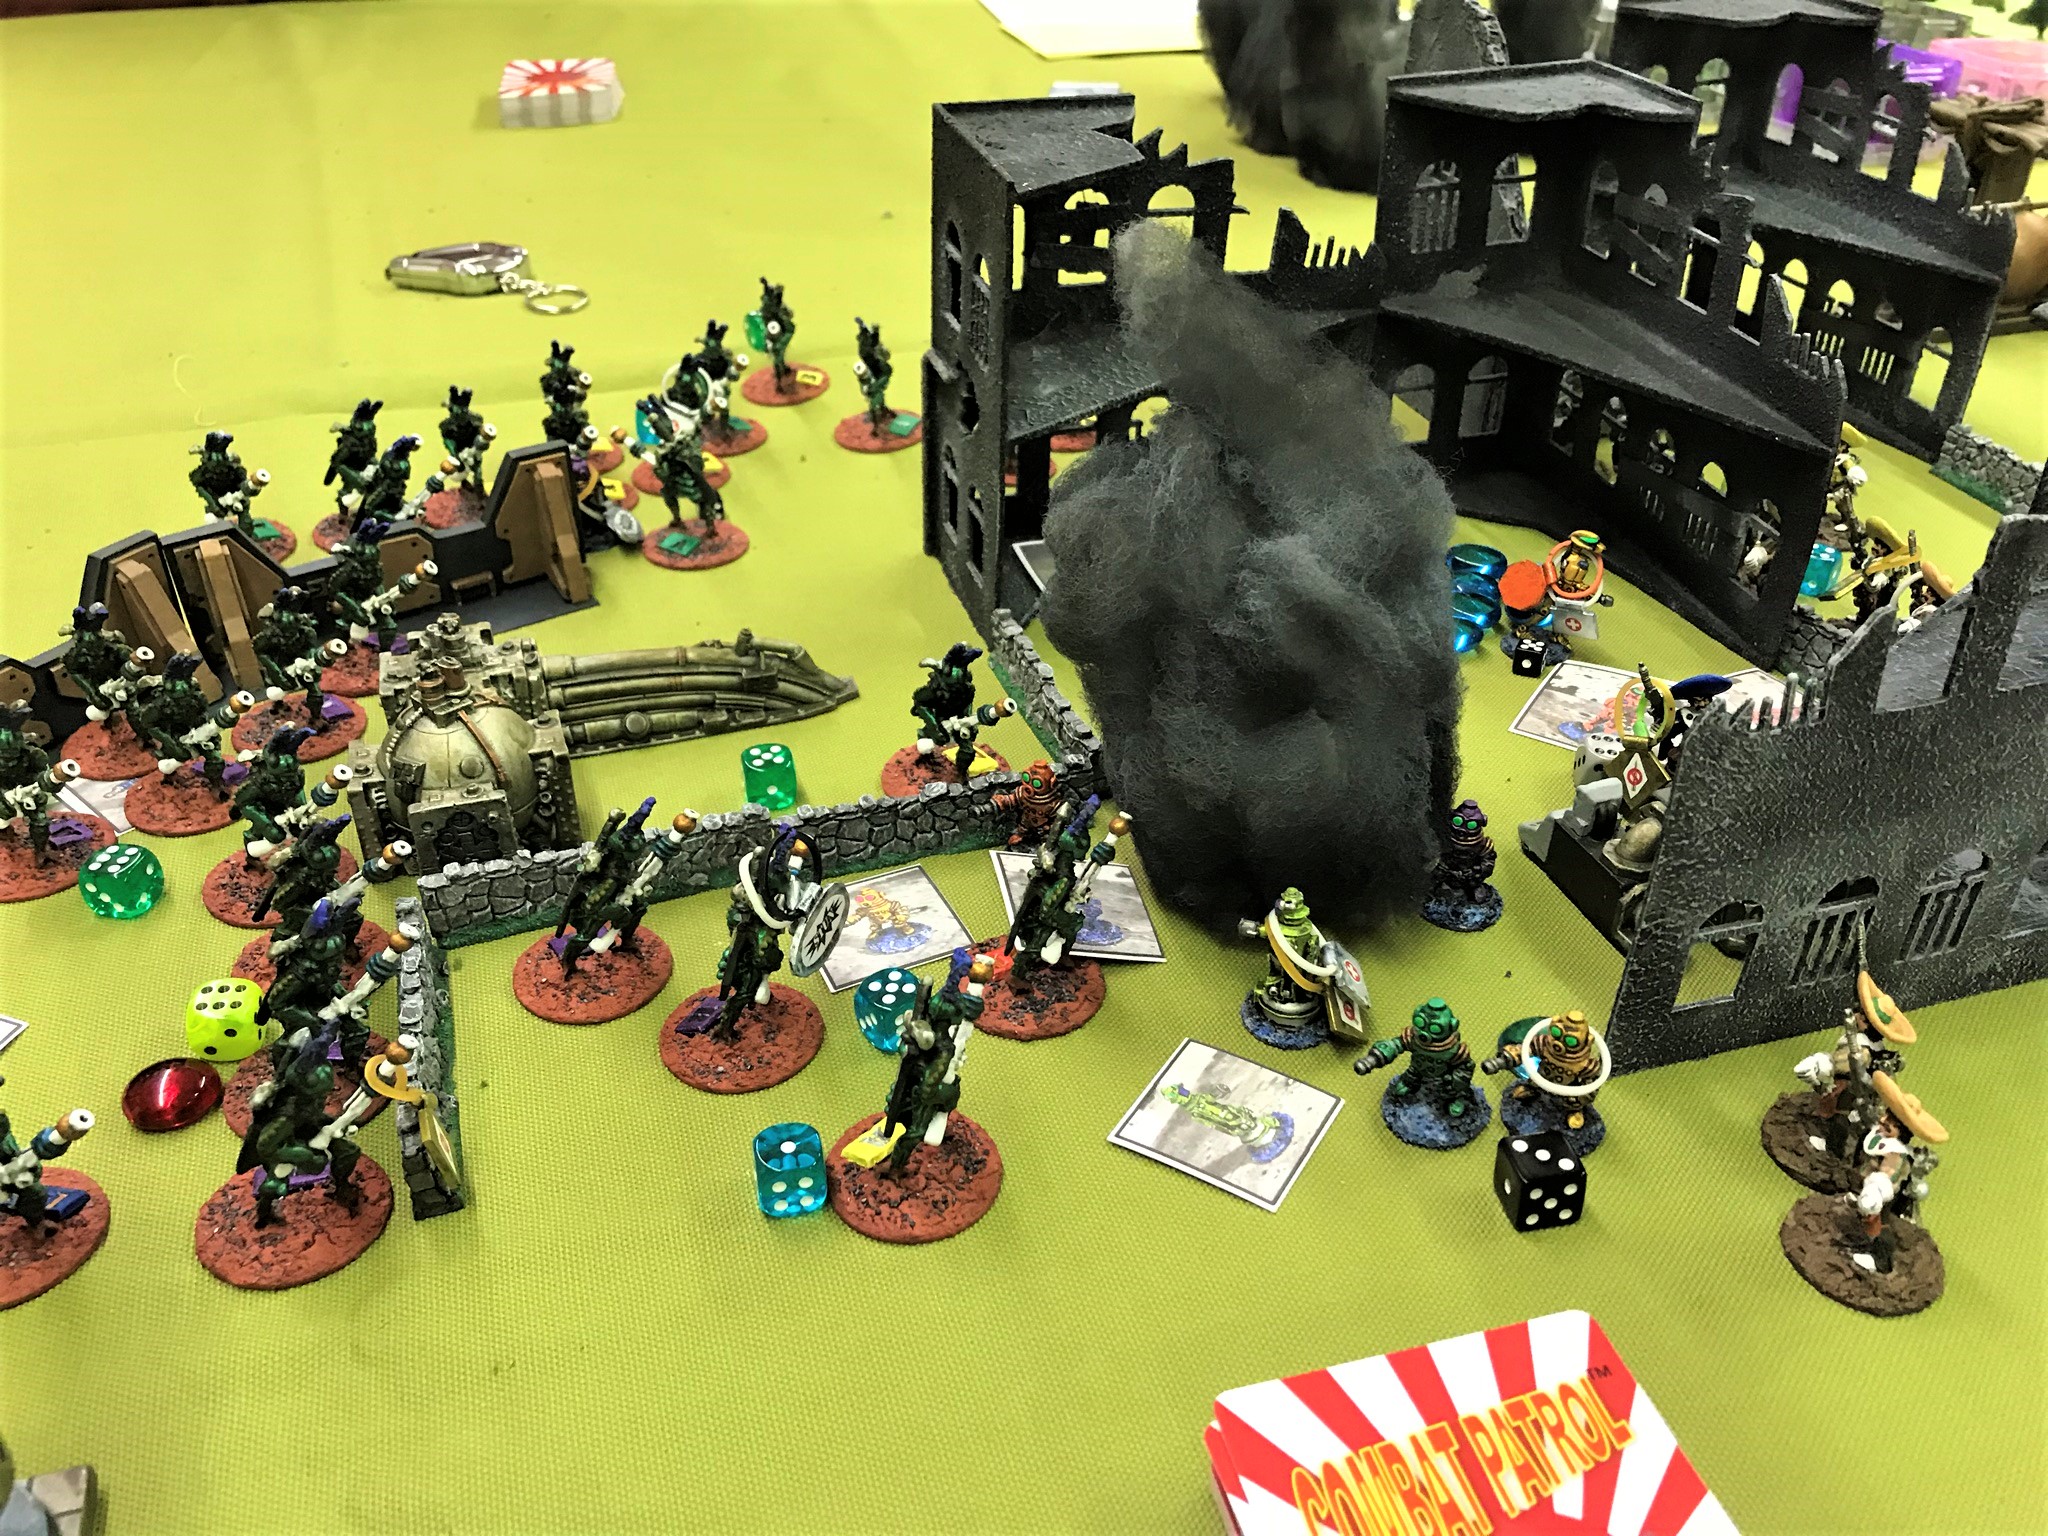
I was really looking forward to this one as I got to use all of my rusty wreckage and ruined buildings that I have posted about here in this blog. It did not disappoint. The battle was full of action, with jet-packing cowboys (Texican Space Rangers) and Space ‘Roos engaging the Retrovians (Roger’s own). (More about Roger here.) Ancient robots were found and lost, some even getting violent when found. Buck got to play and channeled his inner paratrooper in the attack.

The game set up for action. Retrovians are moving into the ruined city from the left, and Space Cowboys from the opposite side. Space ‘Roos come in as reinforcements.
Players ready for action.
Skip maneuvers his troops in the background while Bruce deftly had his sniper climb the transmission tower. Obviously the figure would not stay, so we used a rubber band.
Retrovian Heavy Weapons Squad.
Movement into the city.
My friend Ken Howe snapped this shot!
Retrovian “Garkon” section.
Moving into the city – what to do?
Space Cowboys and Retrovians search for ancient robots.
Retrovian fire team mounts the wall.
Space Cowboys huddle in the wreckage from Retrovian fire.
The tripod “Bra’sheers” had a difficult tome getting over the walls. They did at points and instantly decapitated a few Space Cowboys with their claws.
A “Bender” robot was found – but was hostile and killed a cowboy and needed to be subdued.
Some of Leif’s Space Cowboys got on the wall in a conga line only to take Bra’sheer machine gun fire.
The conga line of death before machine gun fire…
Retrovians getting into the city in any way they could.
The battle rages.
Urban fighting!
Lots of combat in the city.
Buck jet-packs his Space ‘Roos and ambushes Bruce’s Retrovians, wiping them out. He was practically giddy in this game with how successful his tactics were.
Retrovians seek revenge with sonic cannon and sniper fire.
Space Cowboys and Space ‘Roos continue the search.

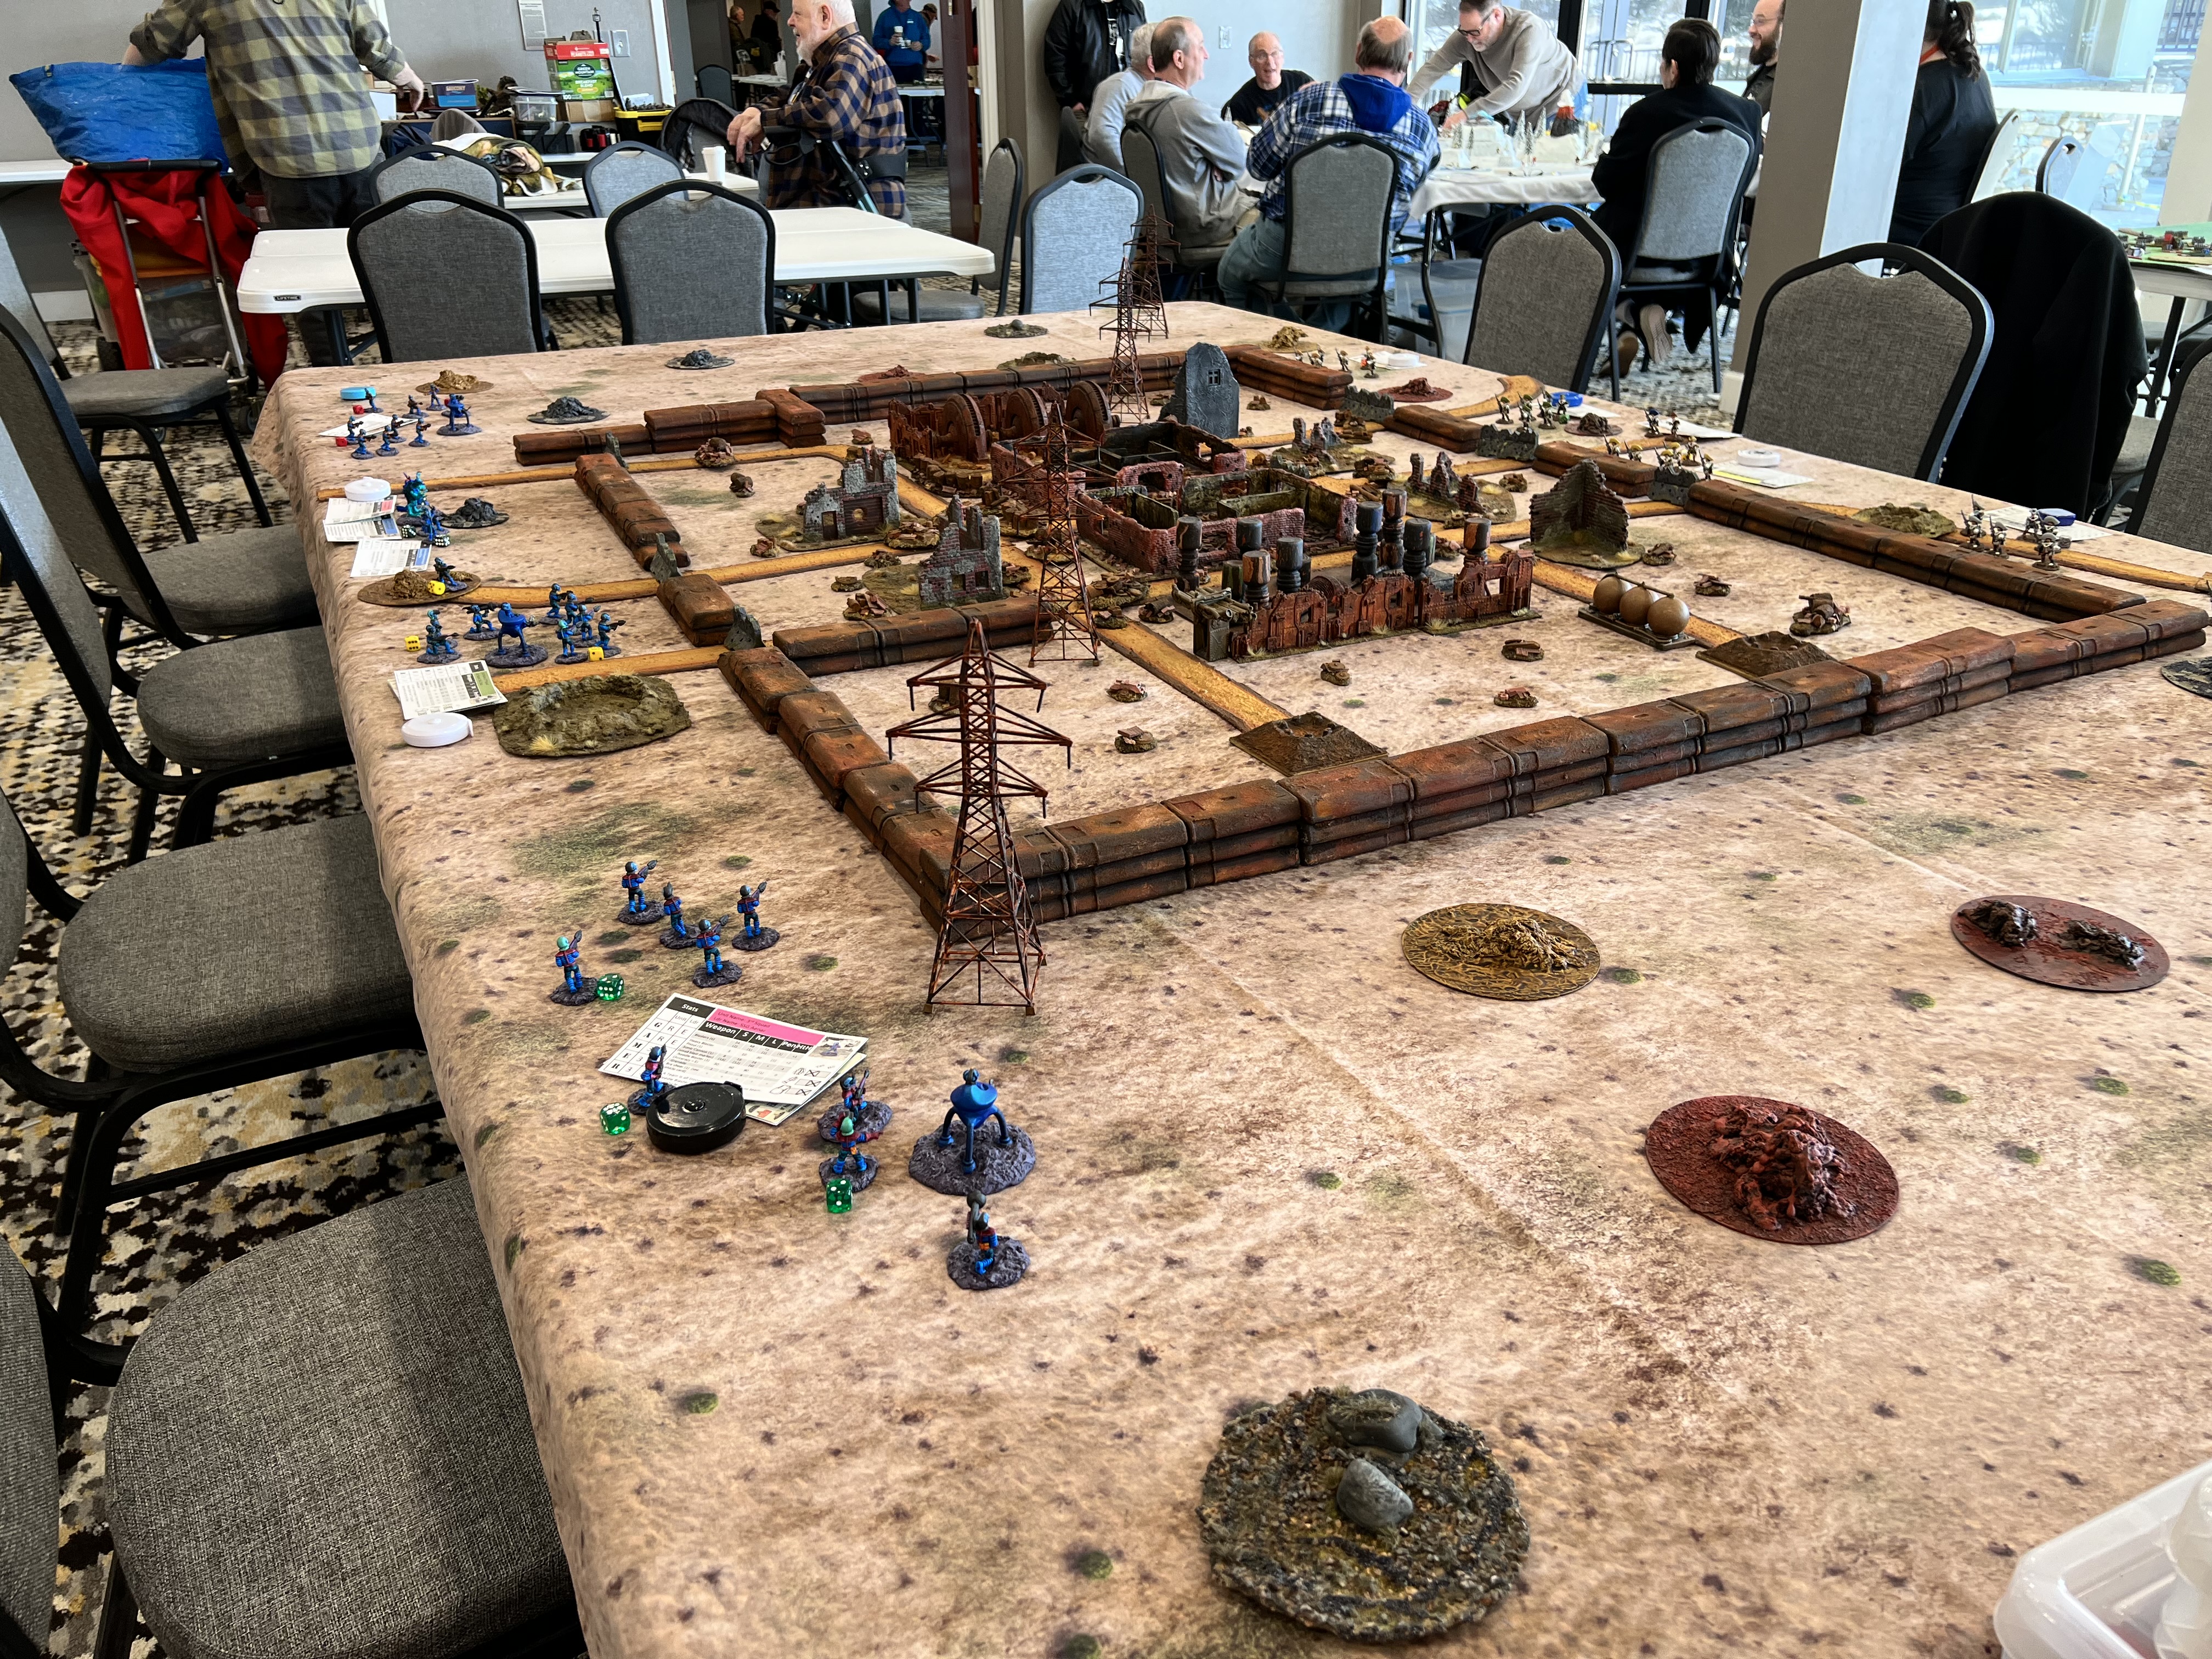
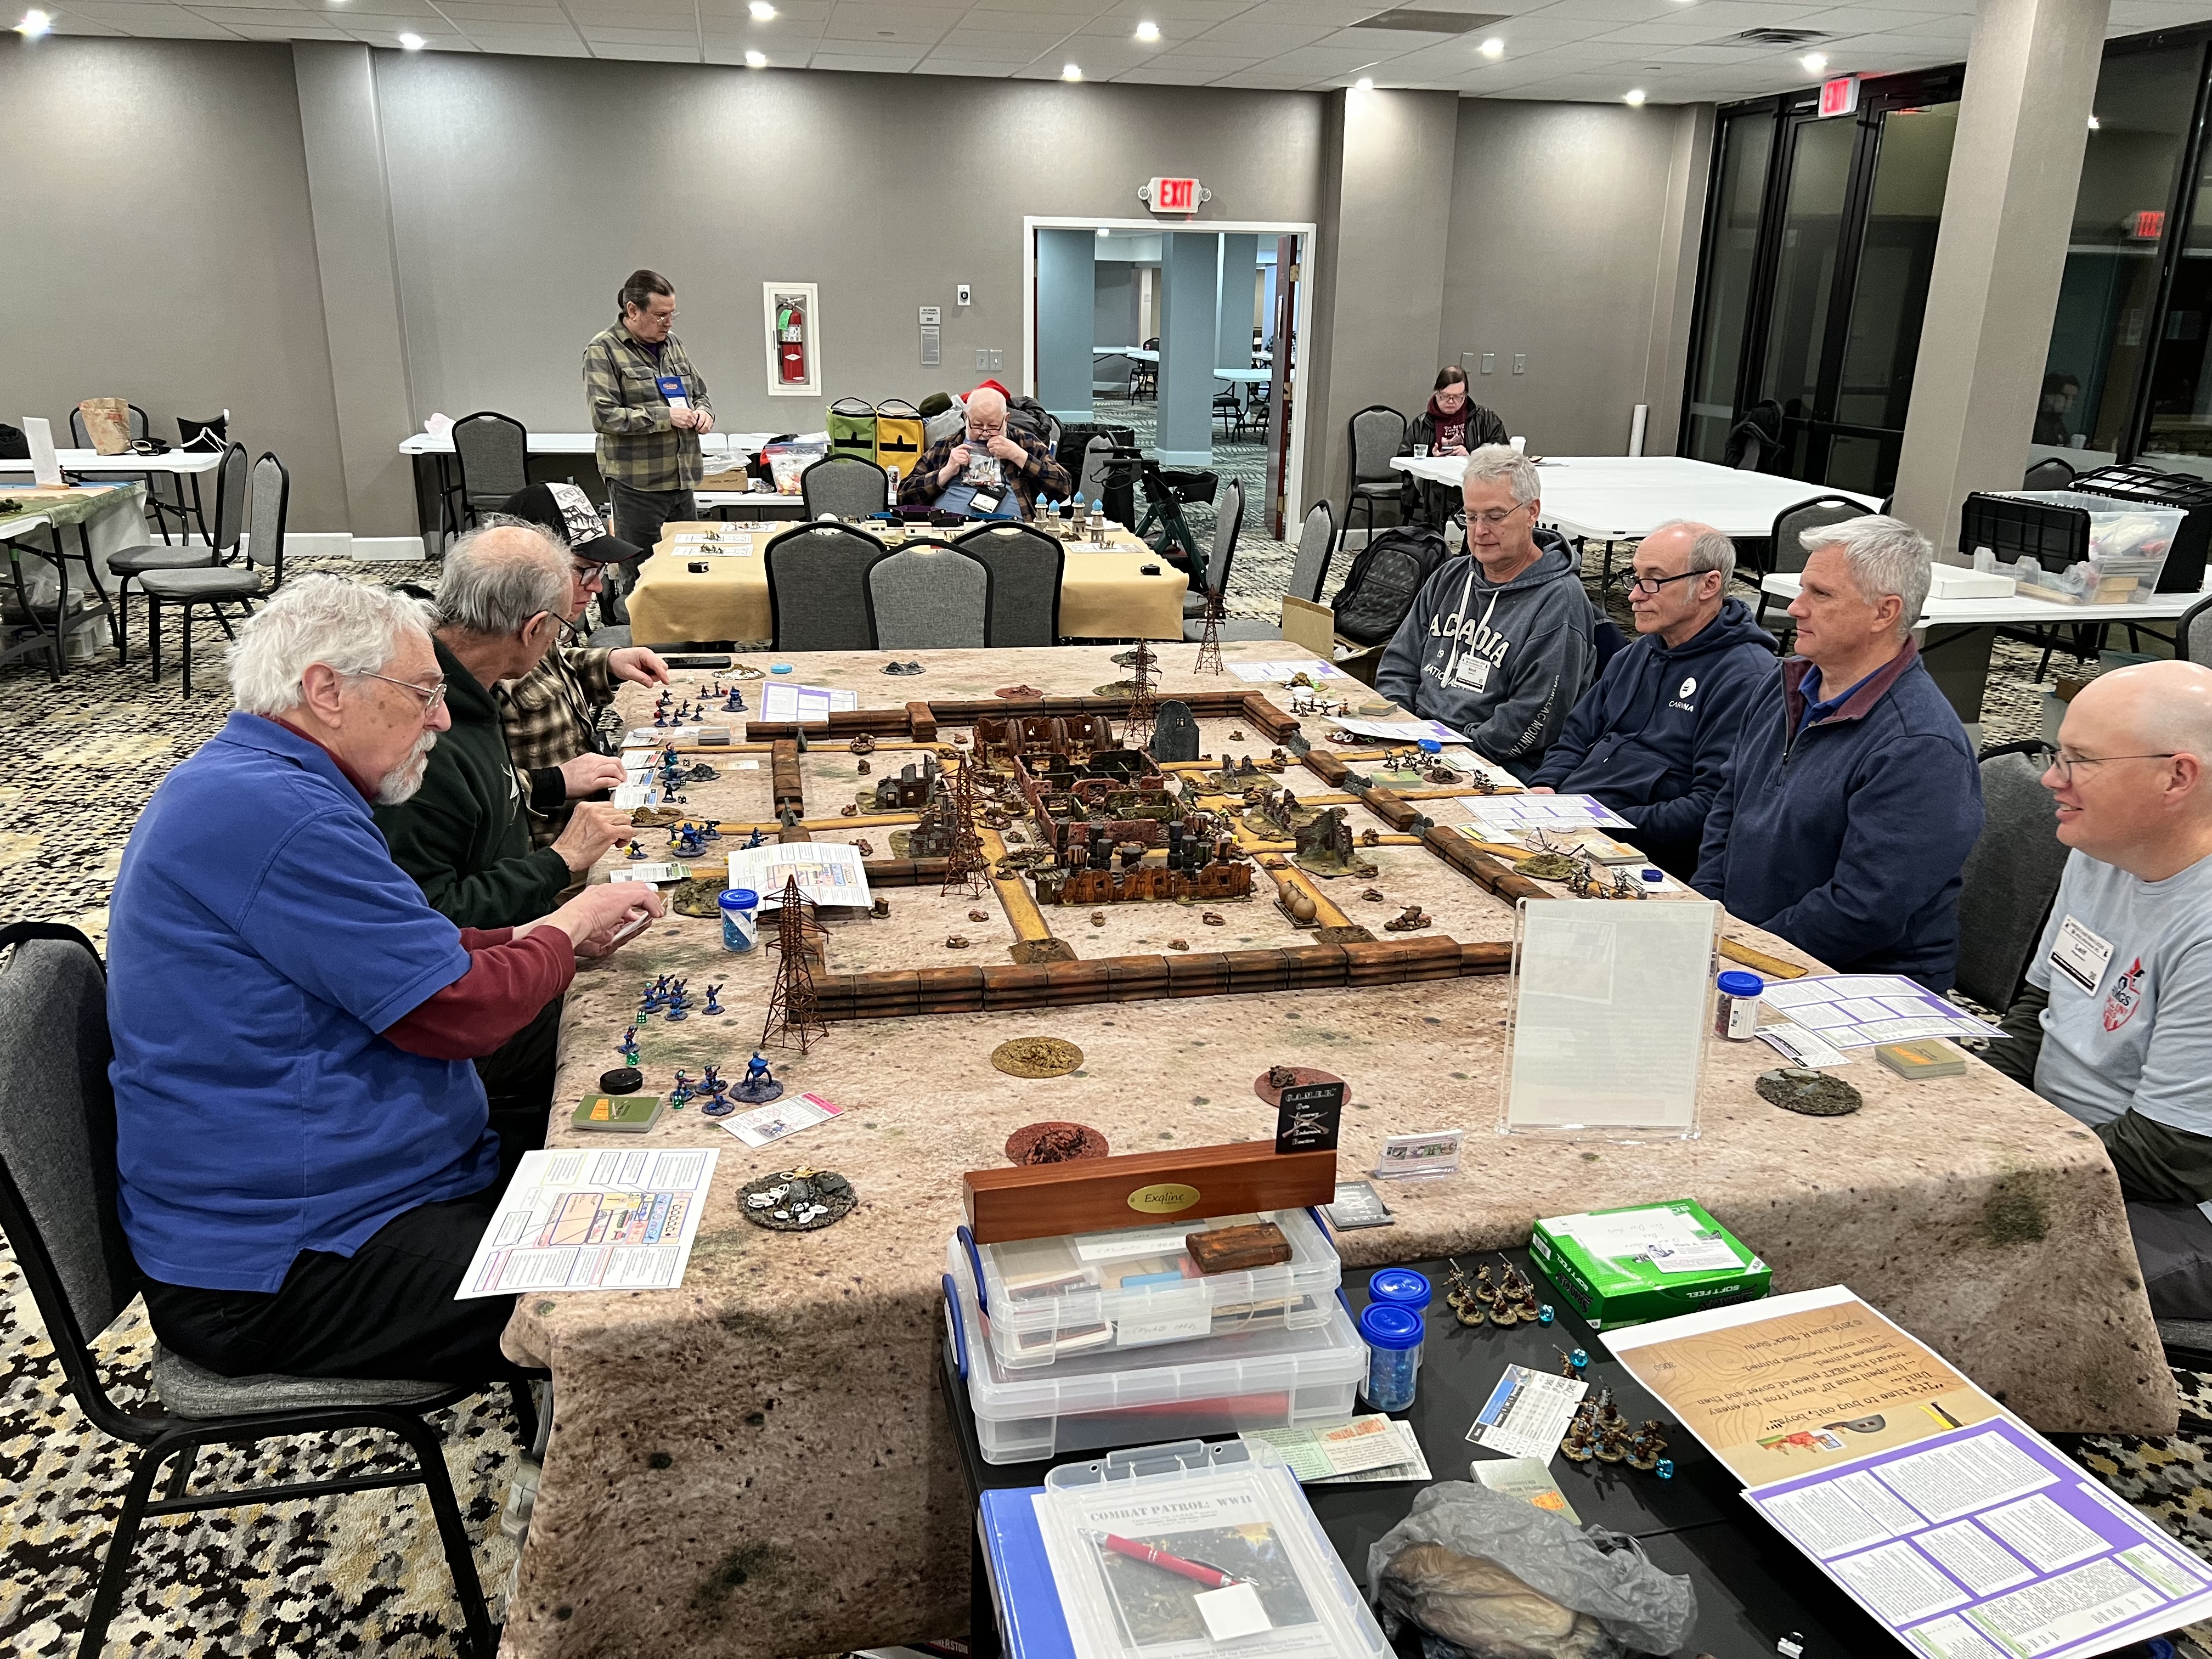
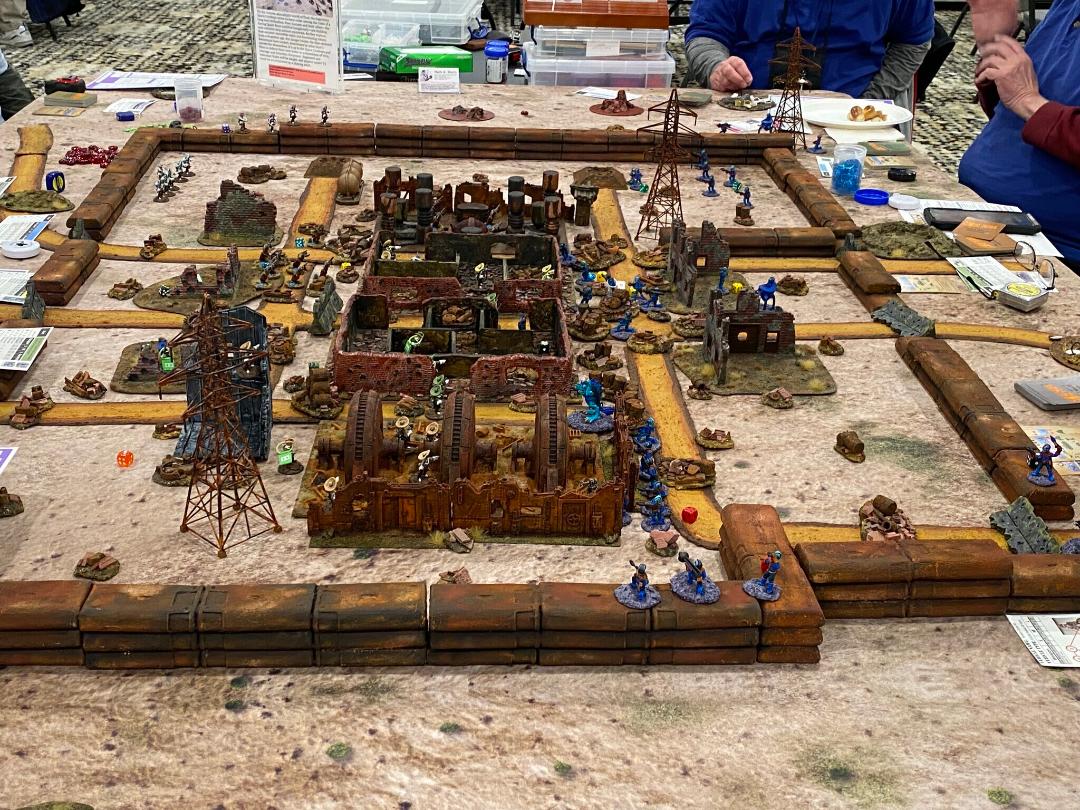
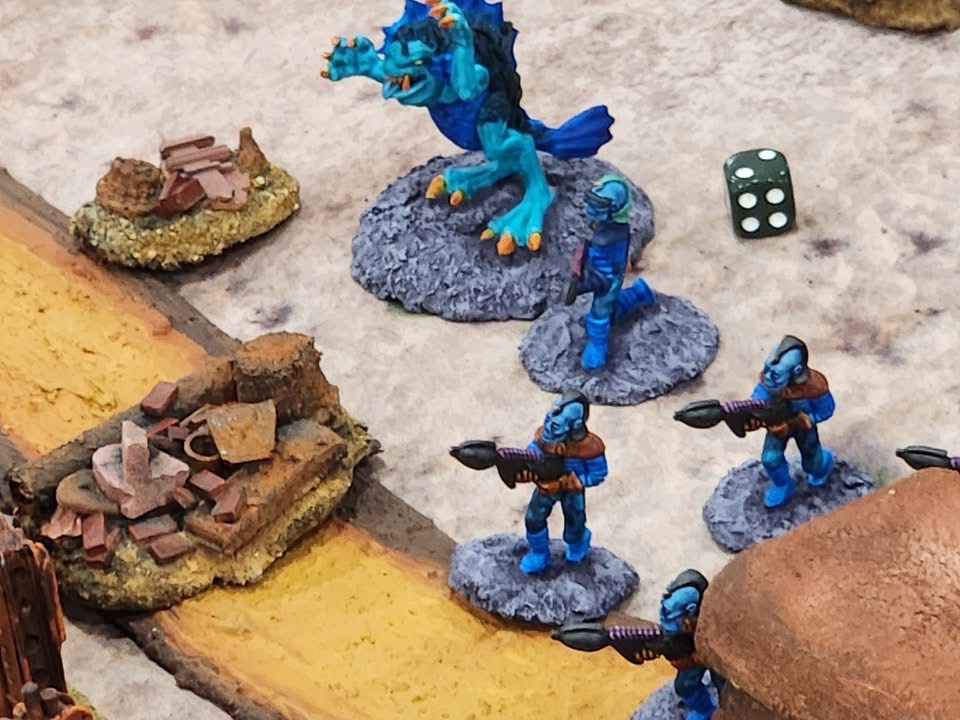
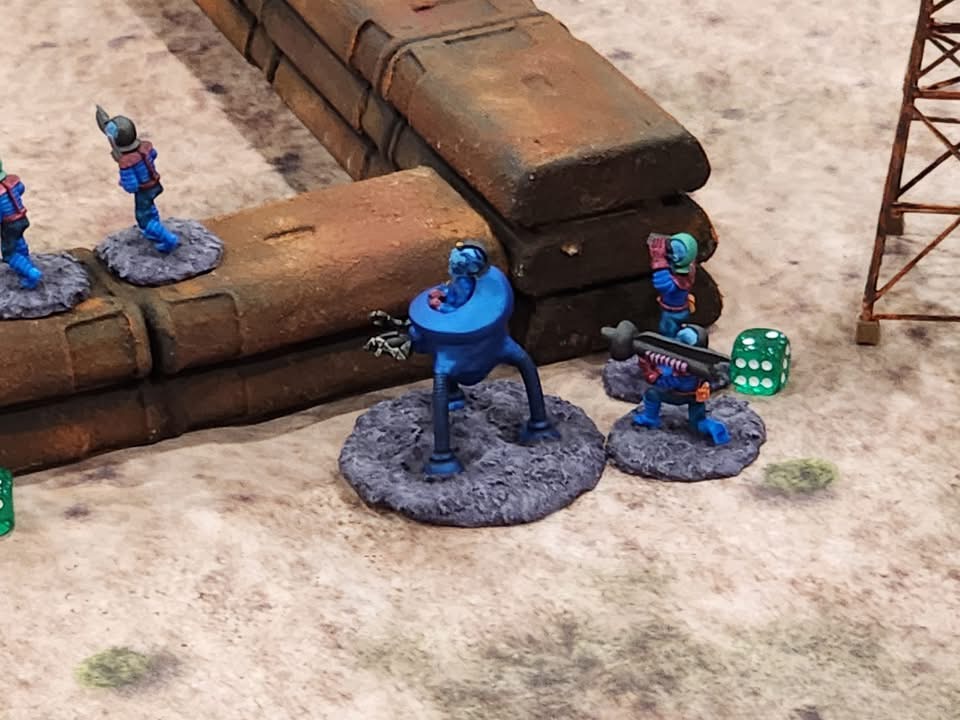
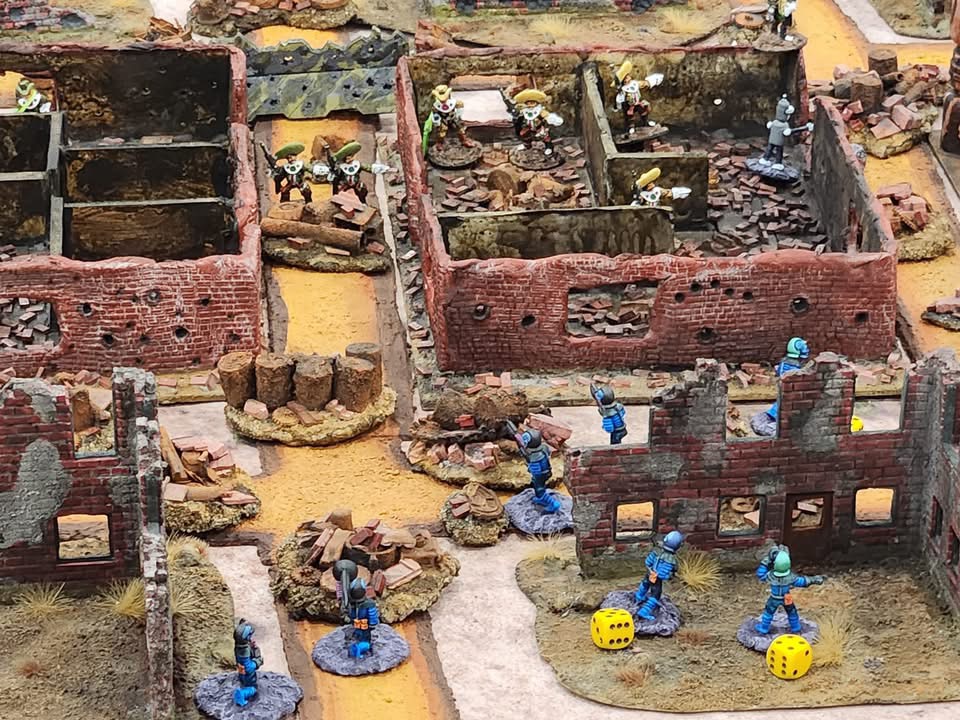
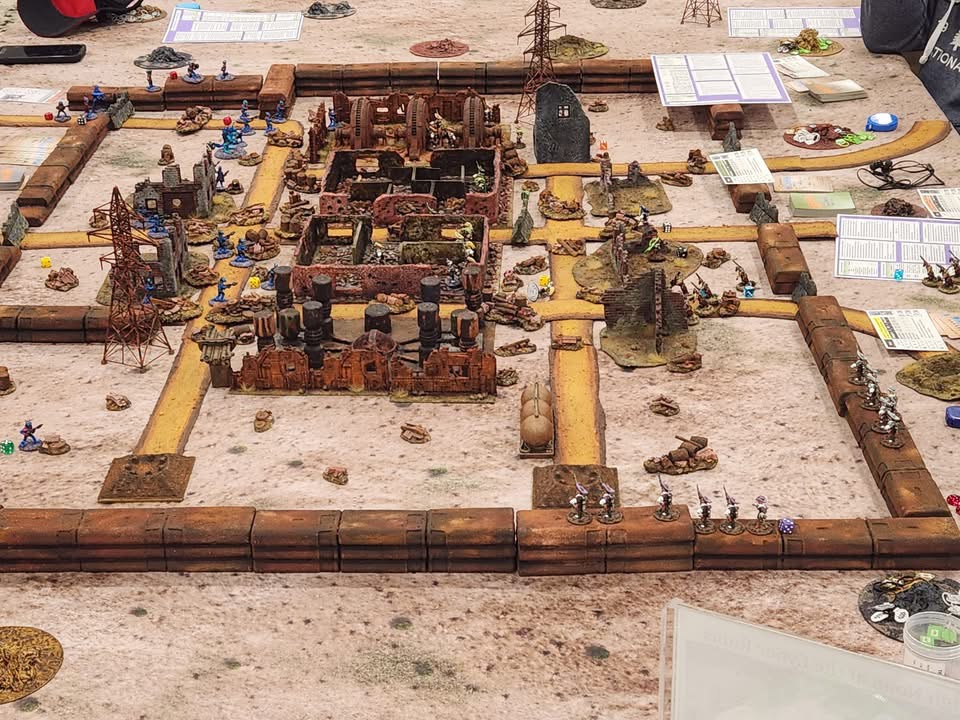
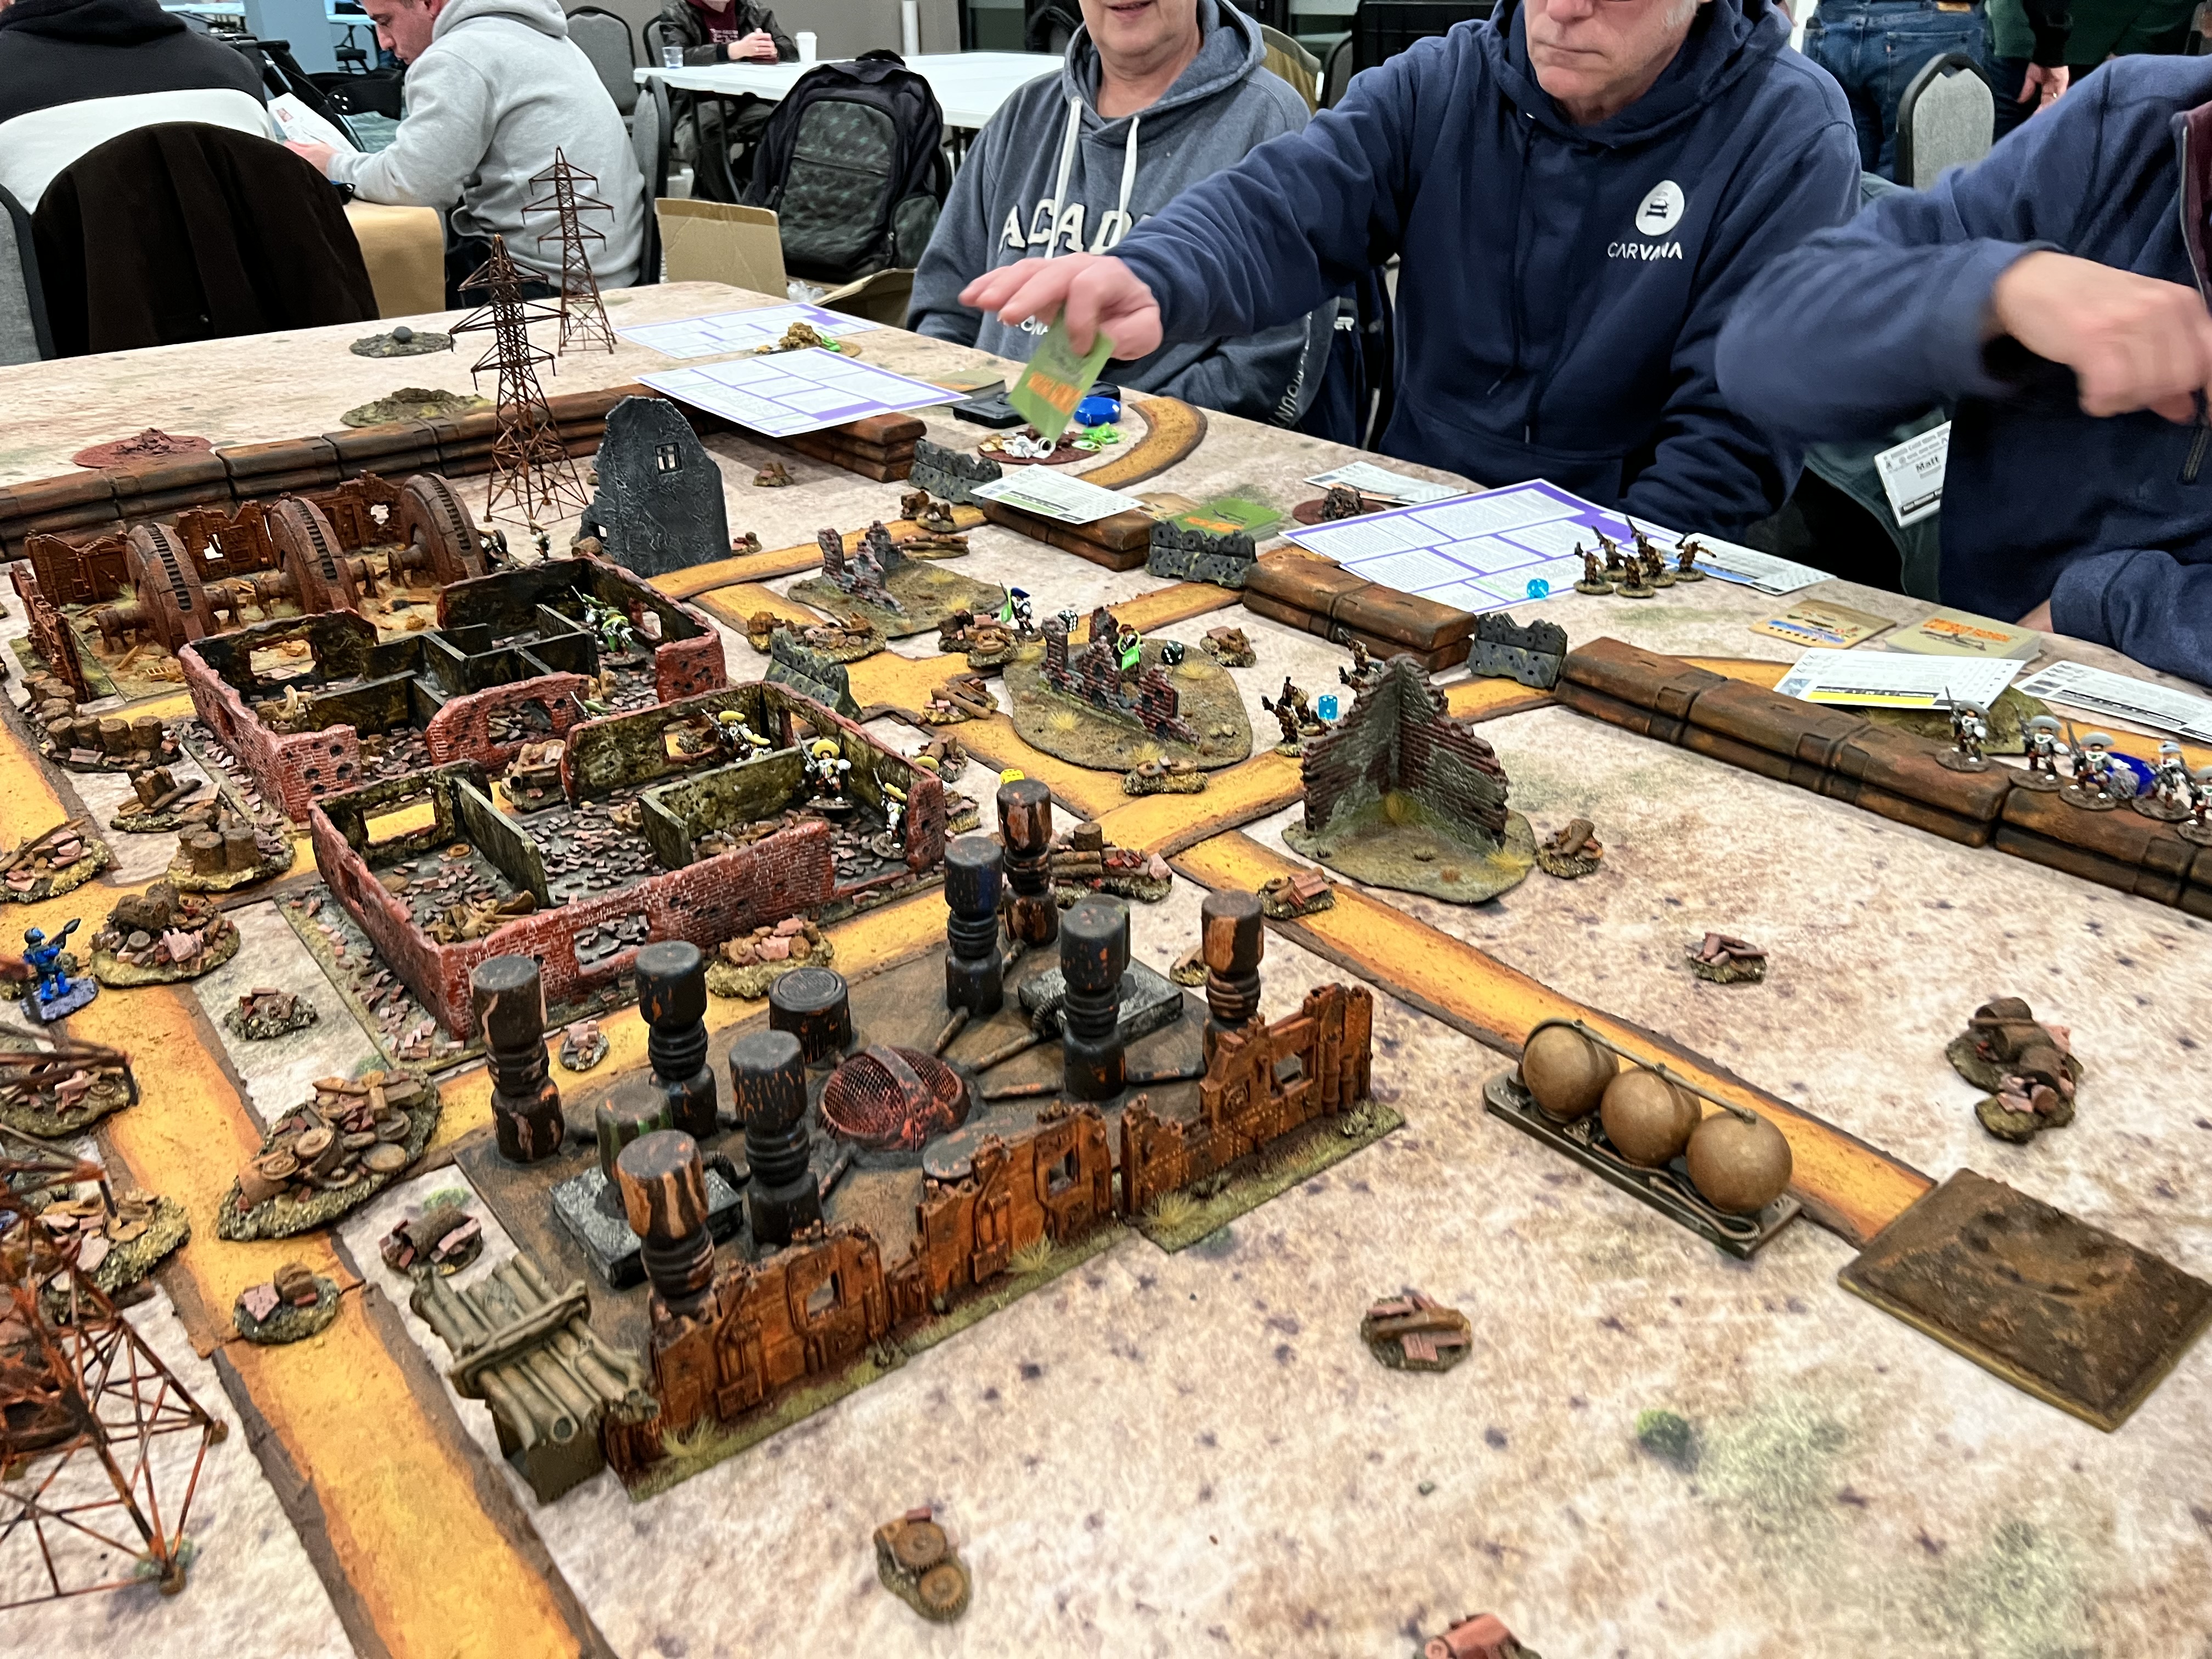
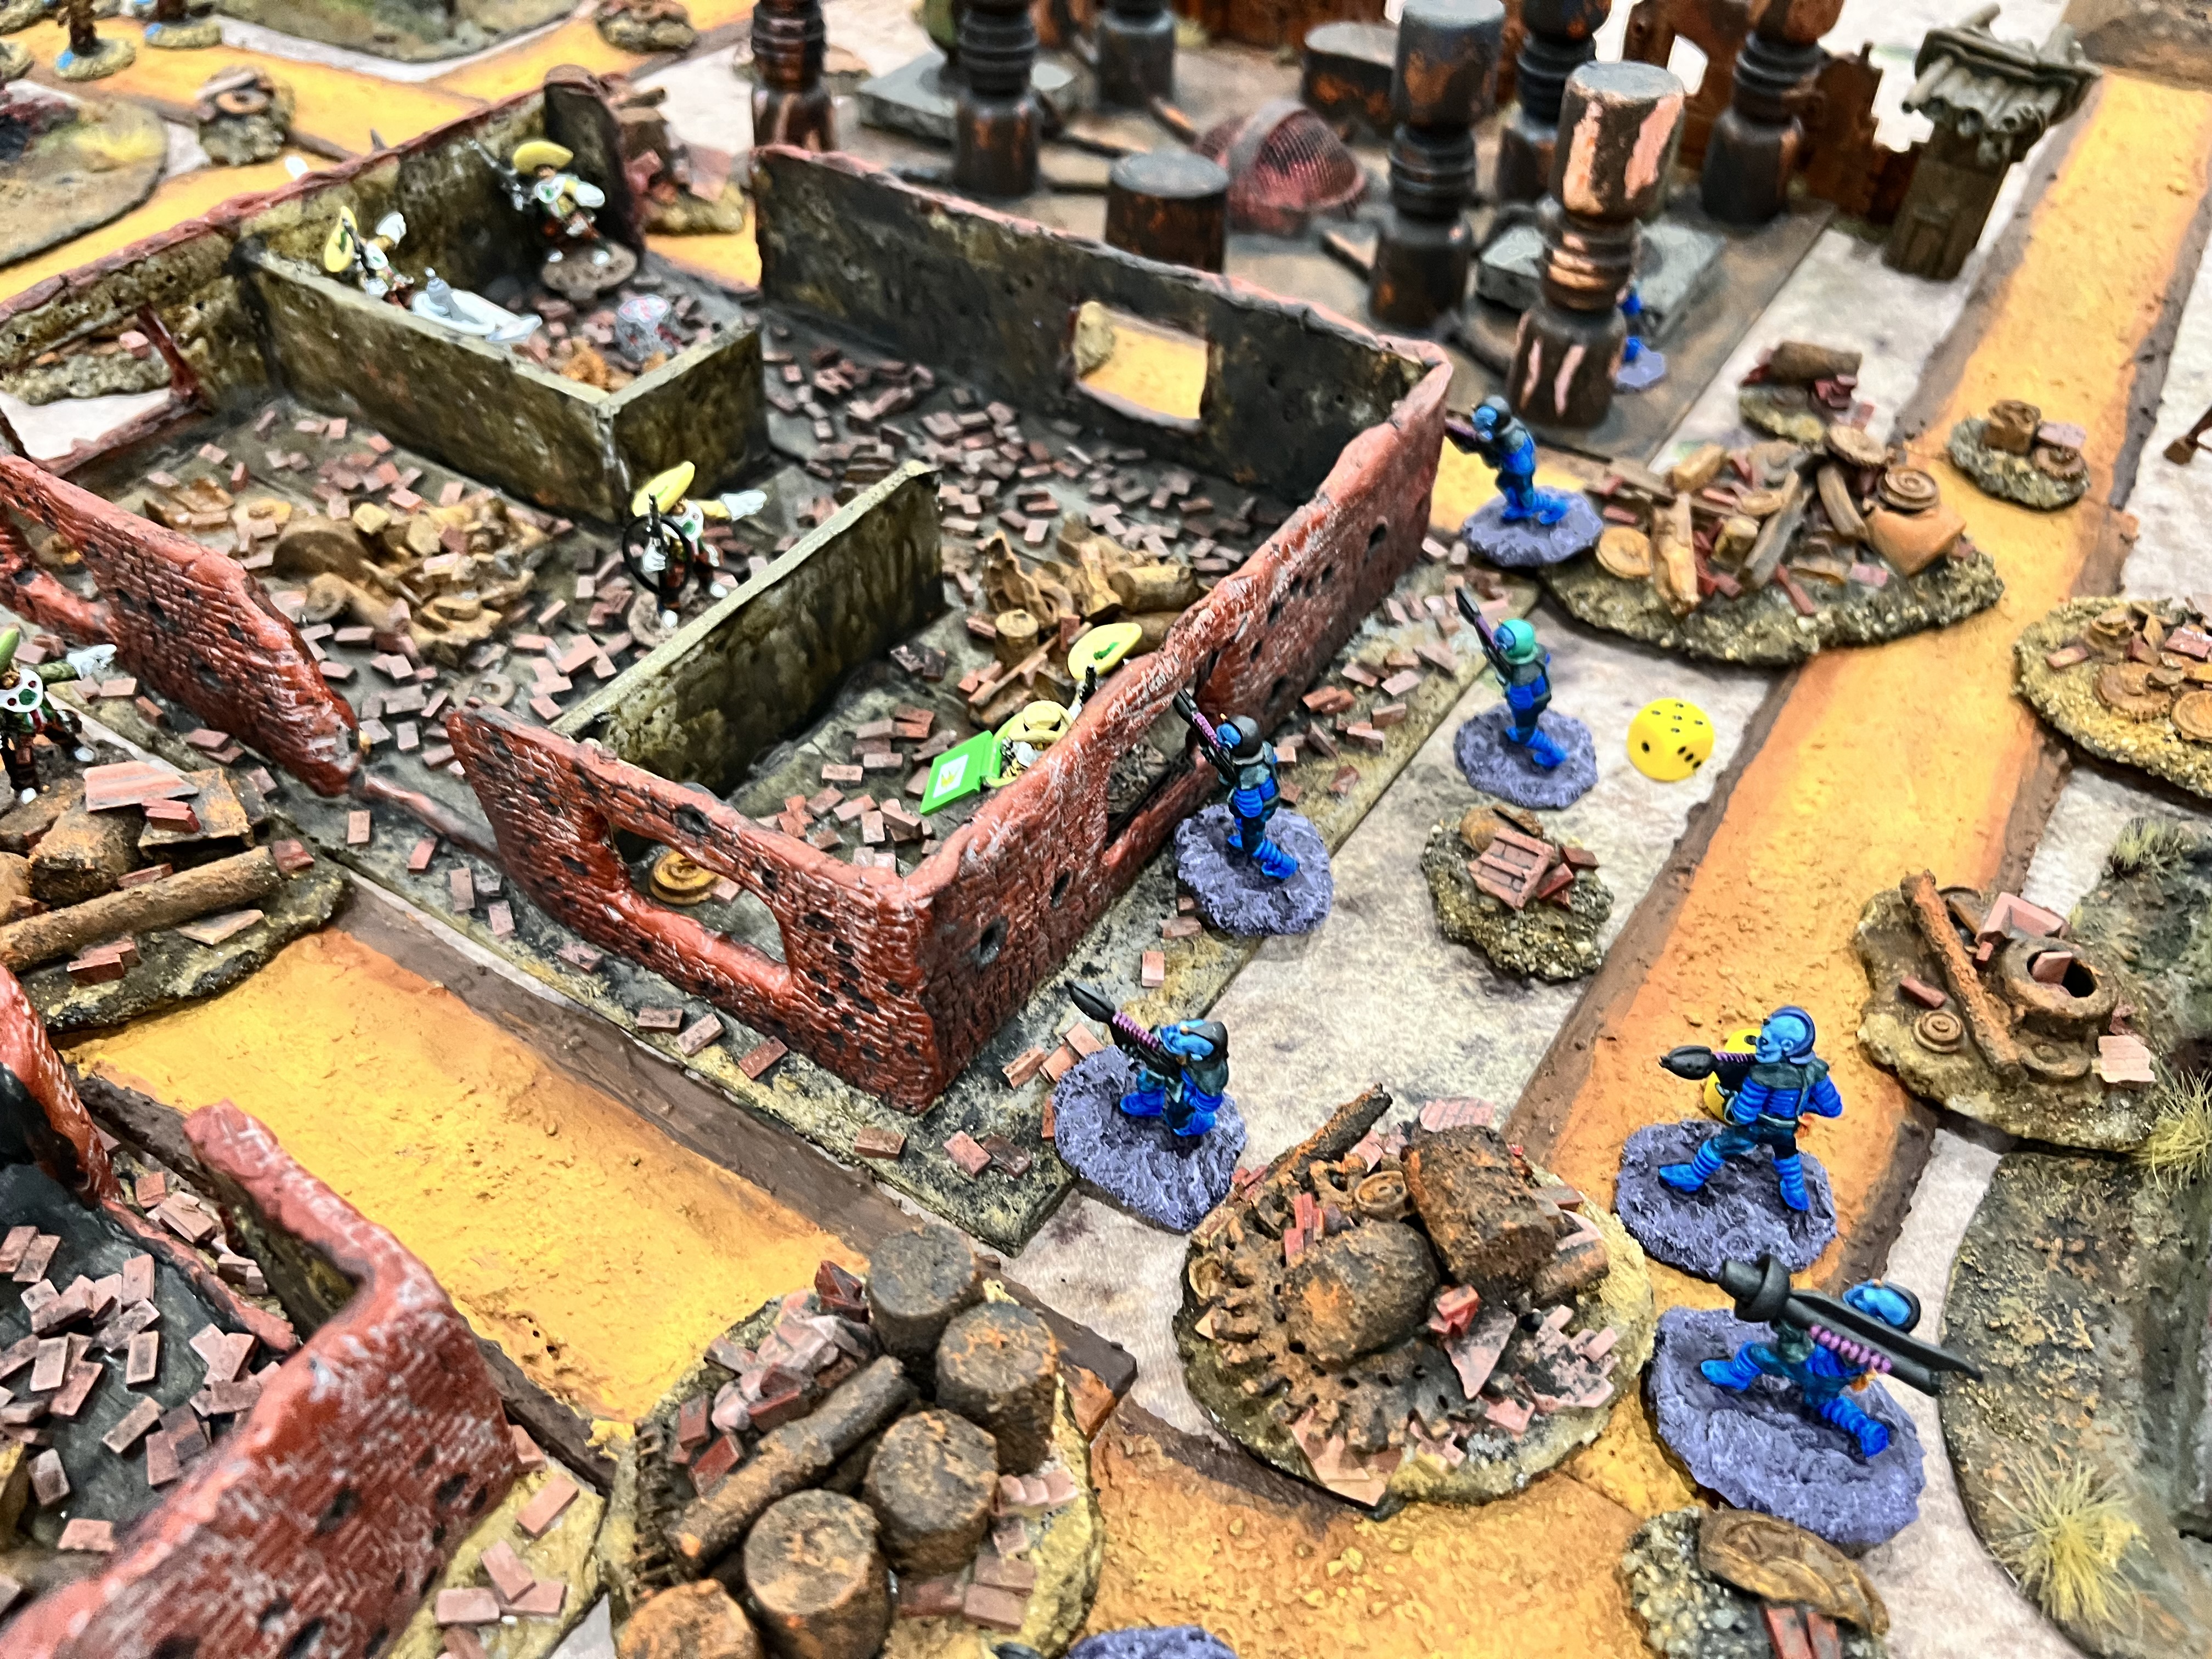
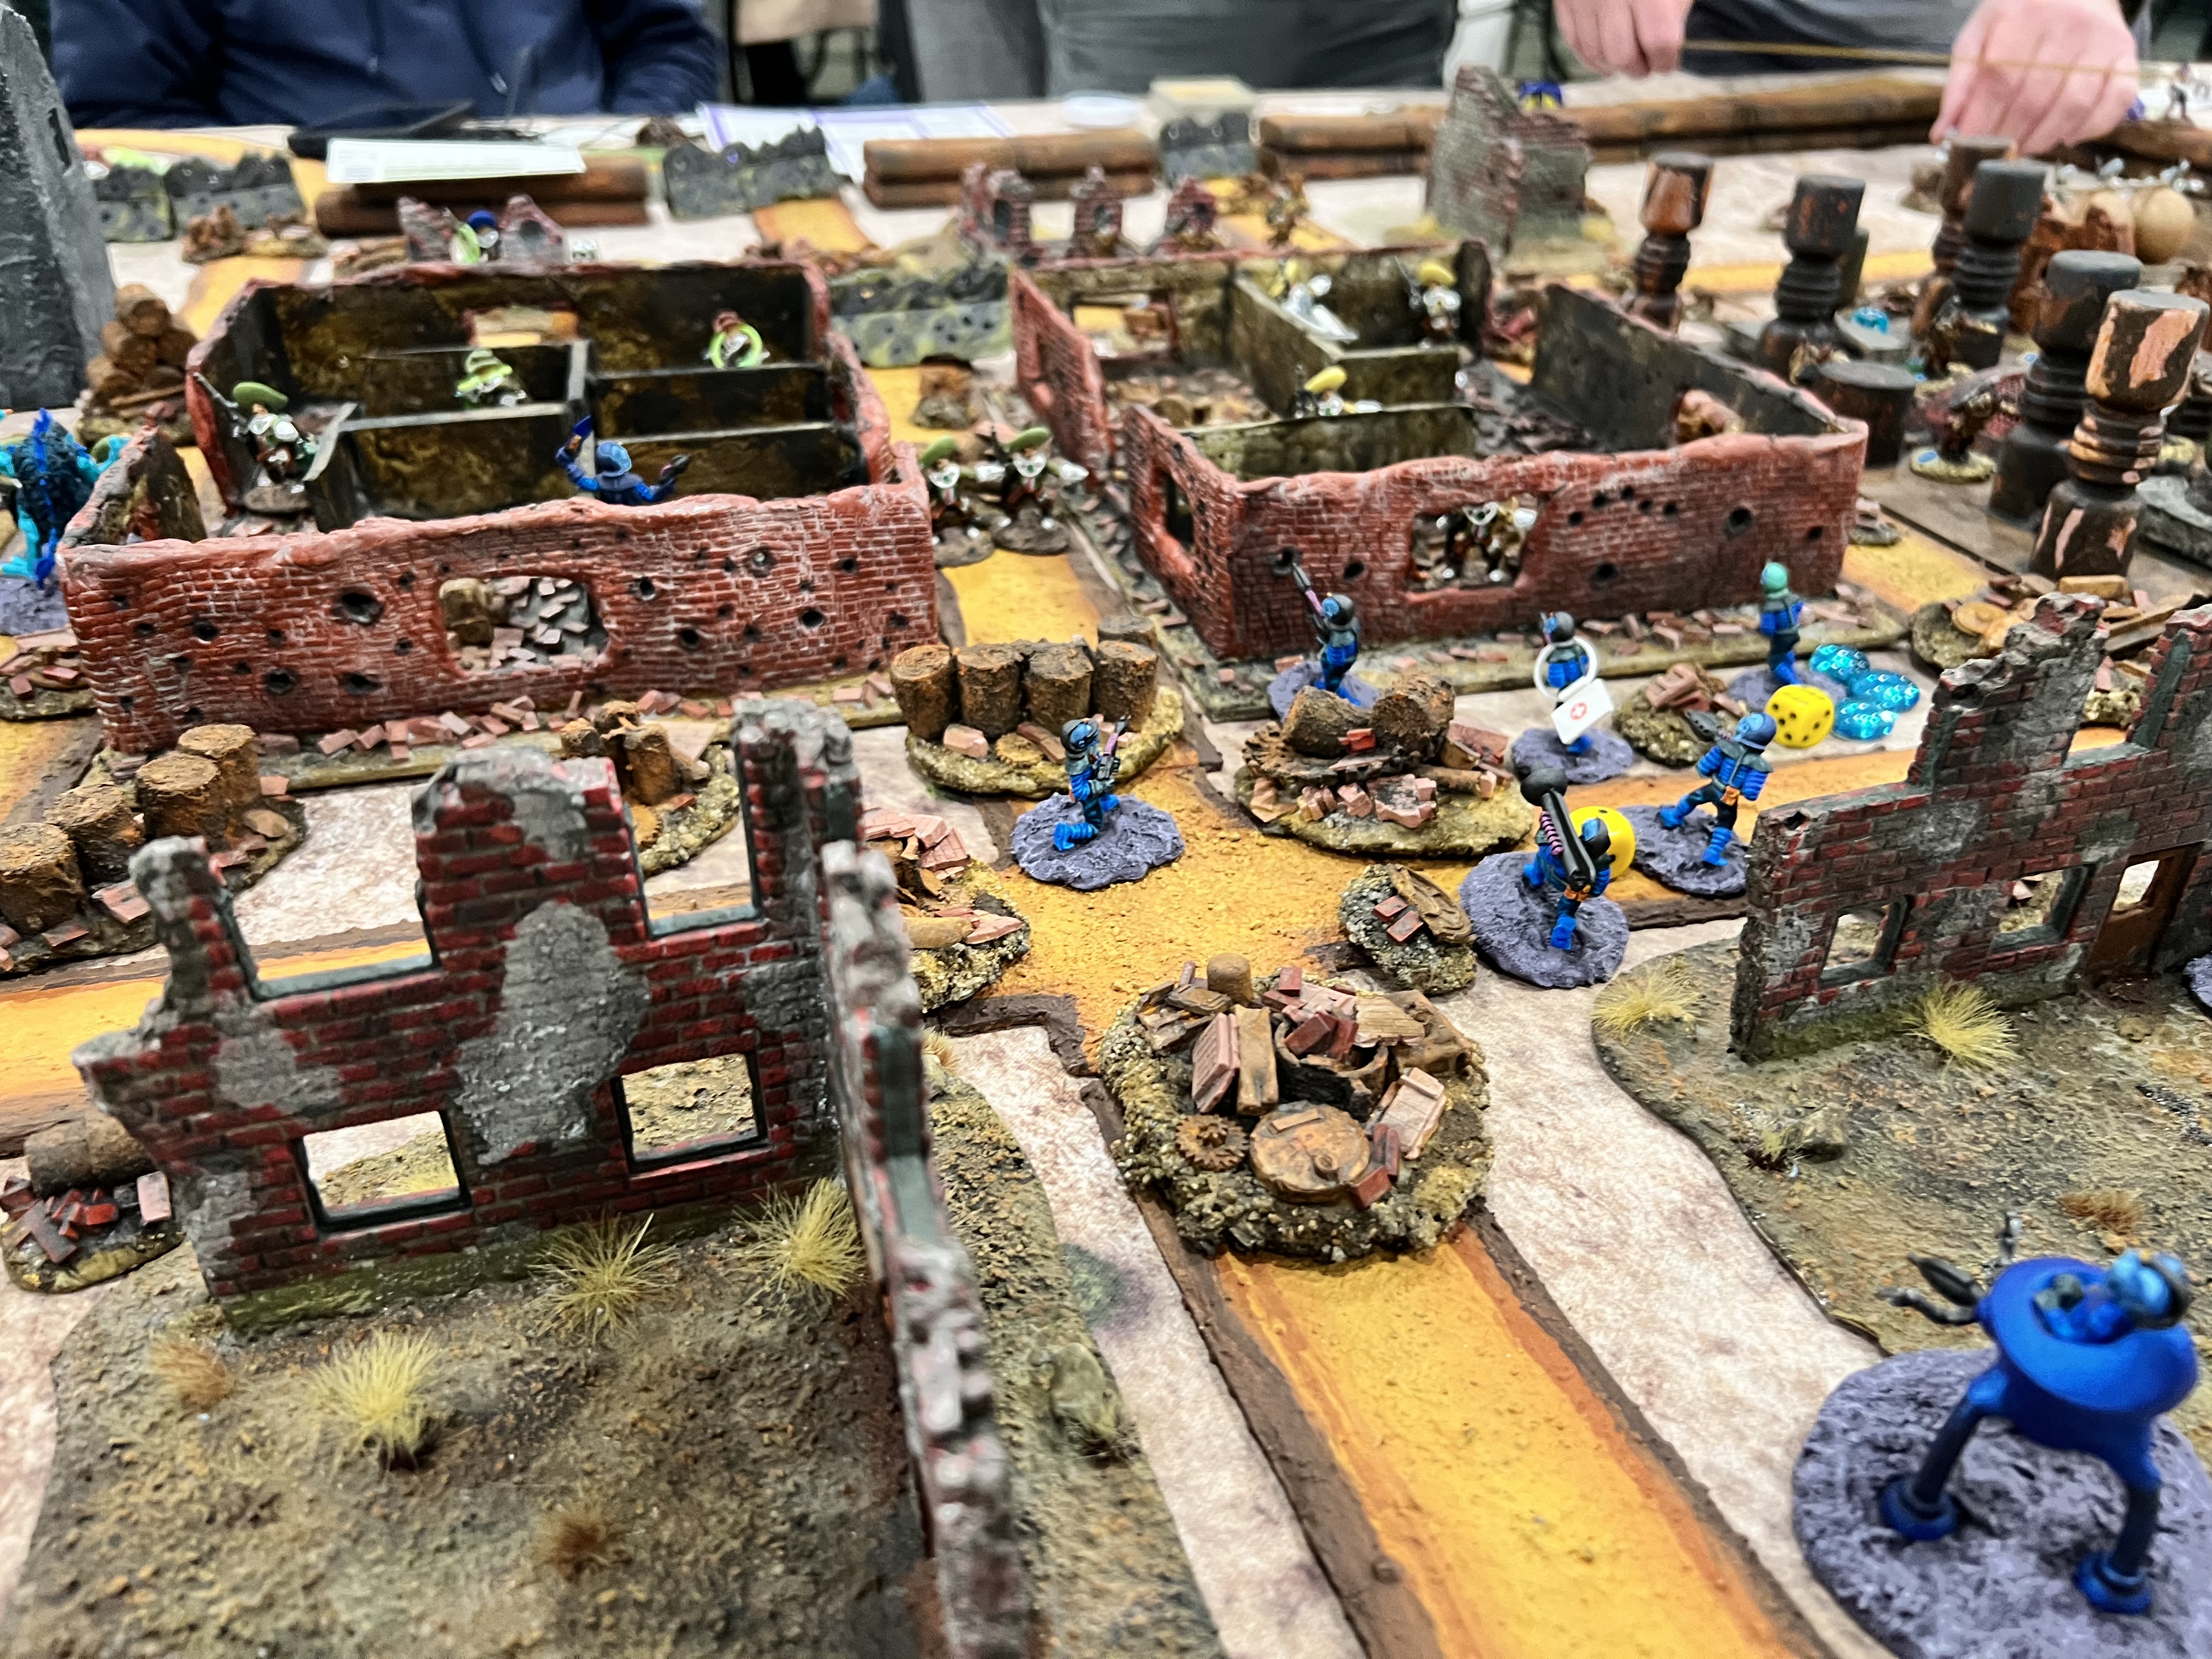
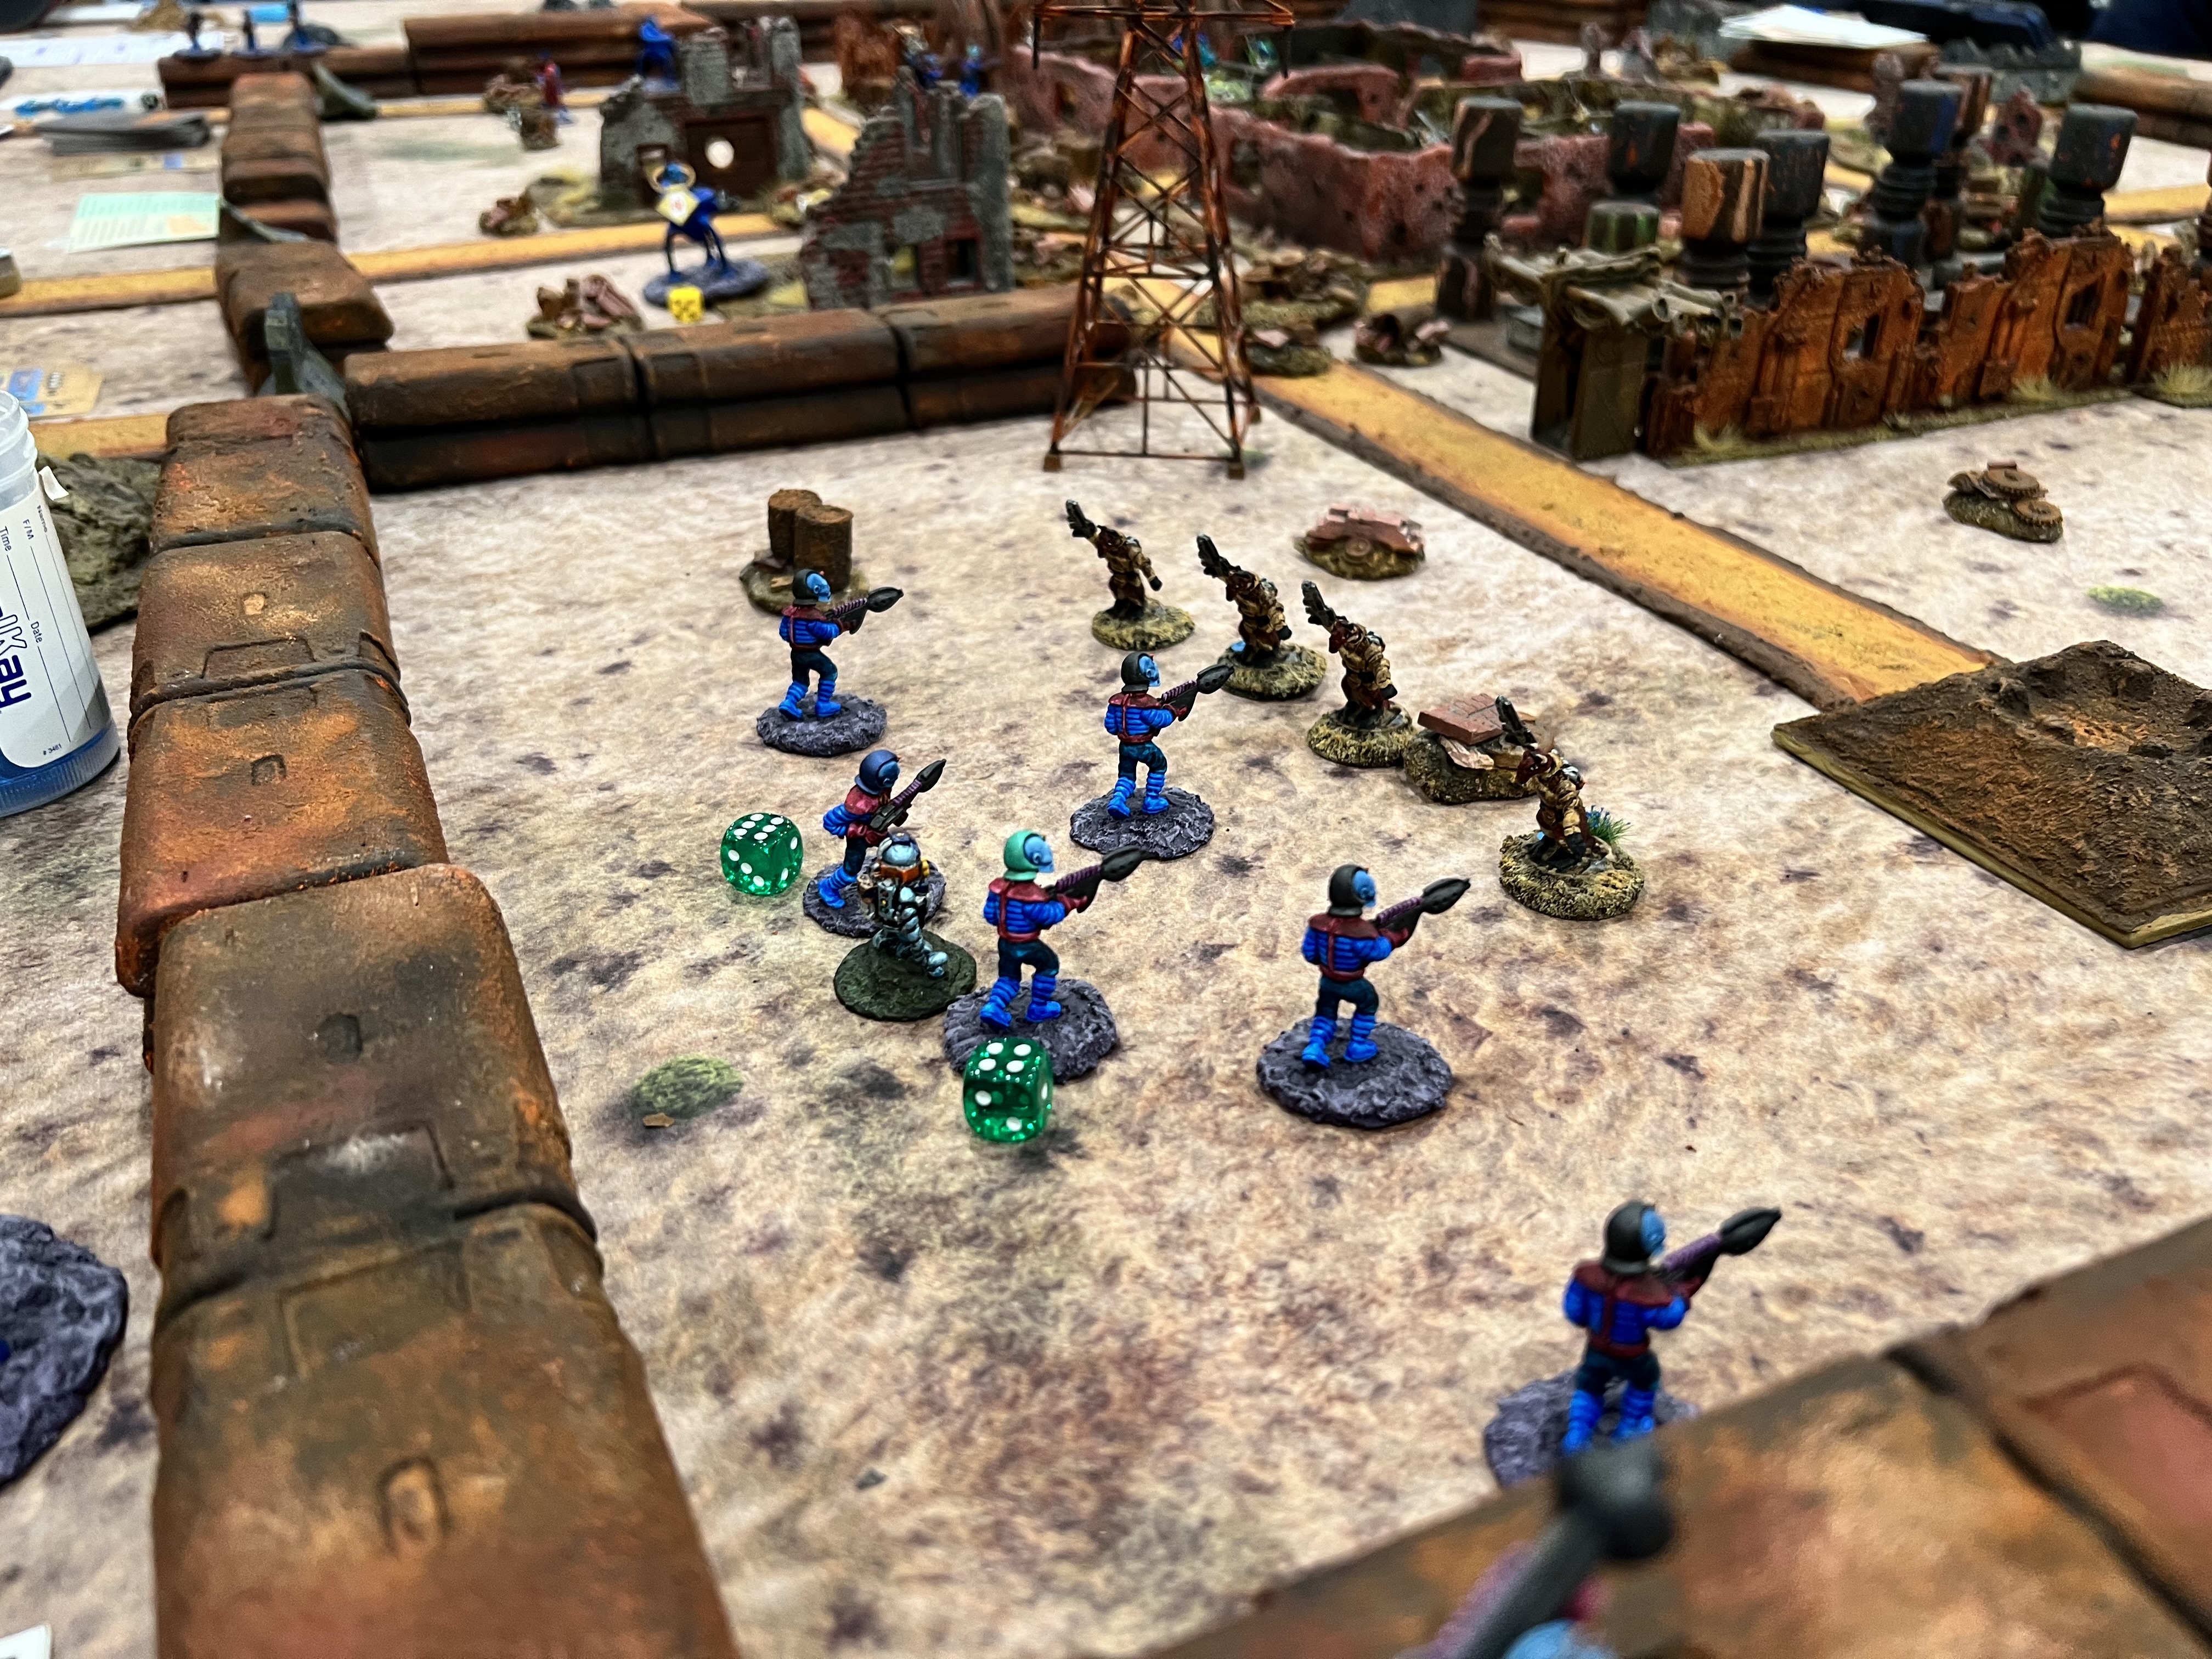
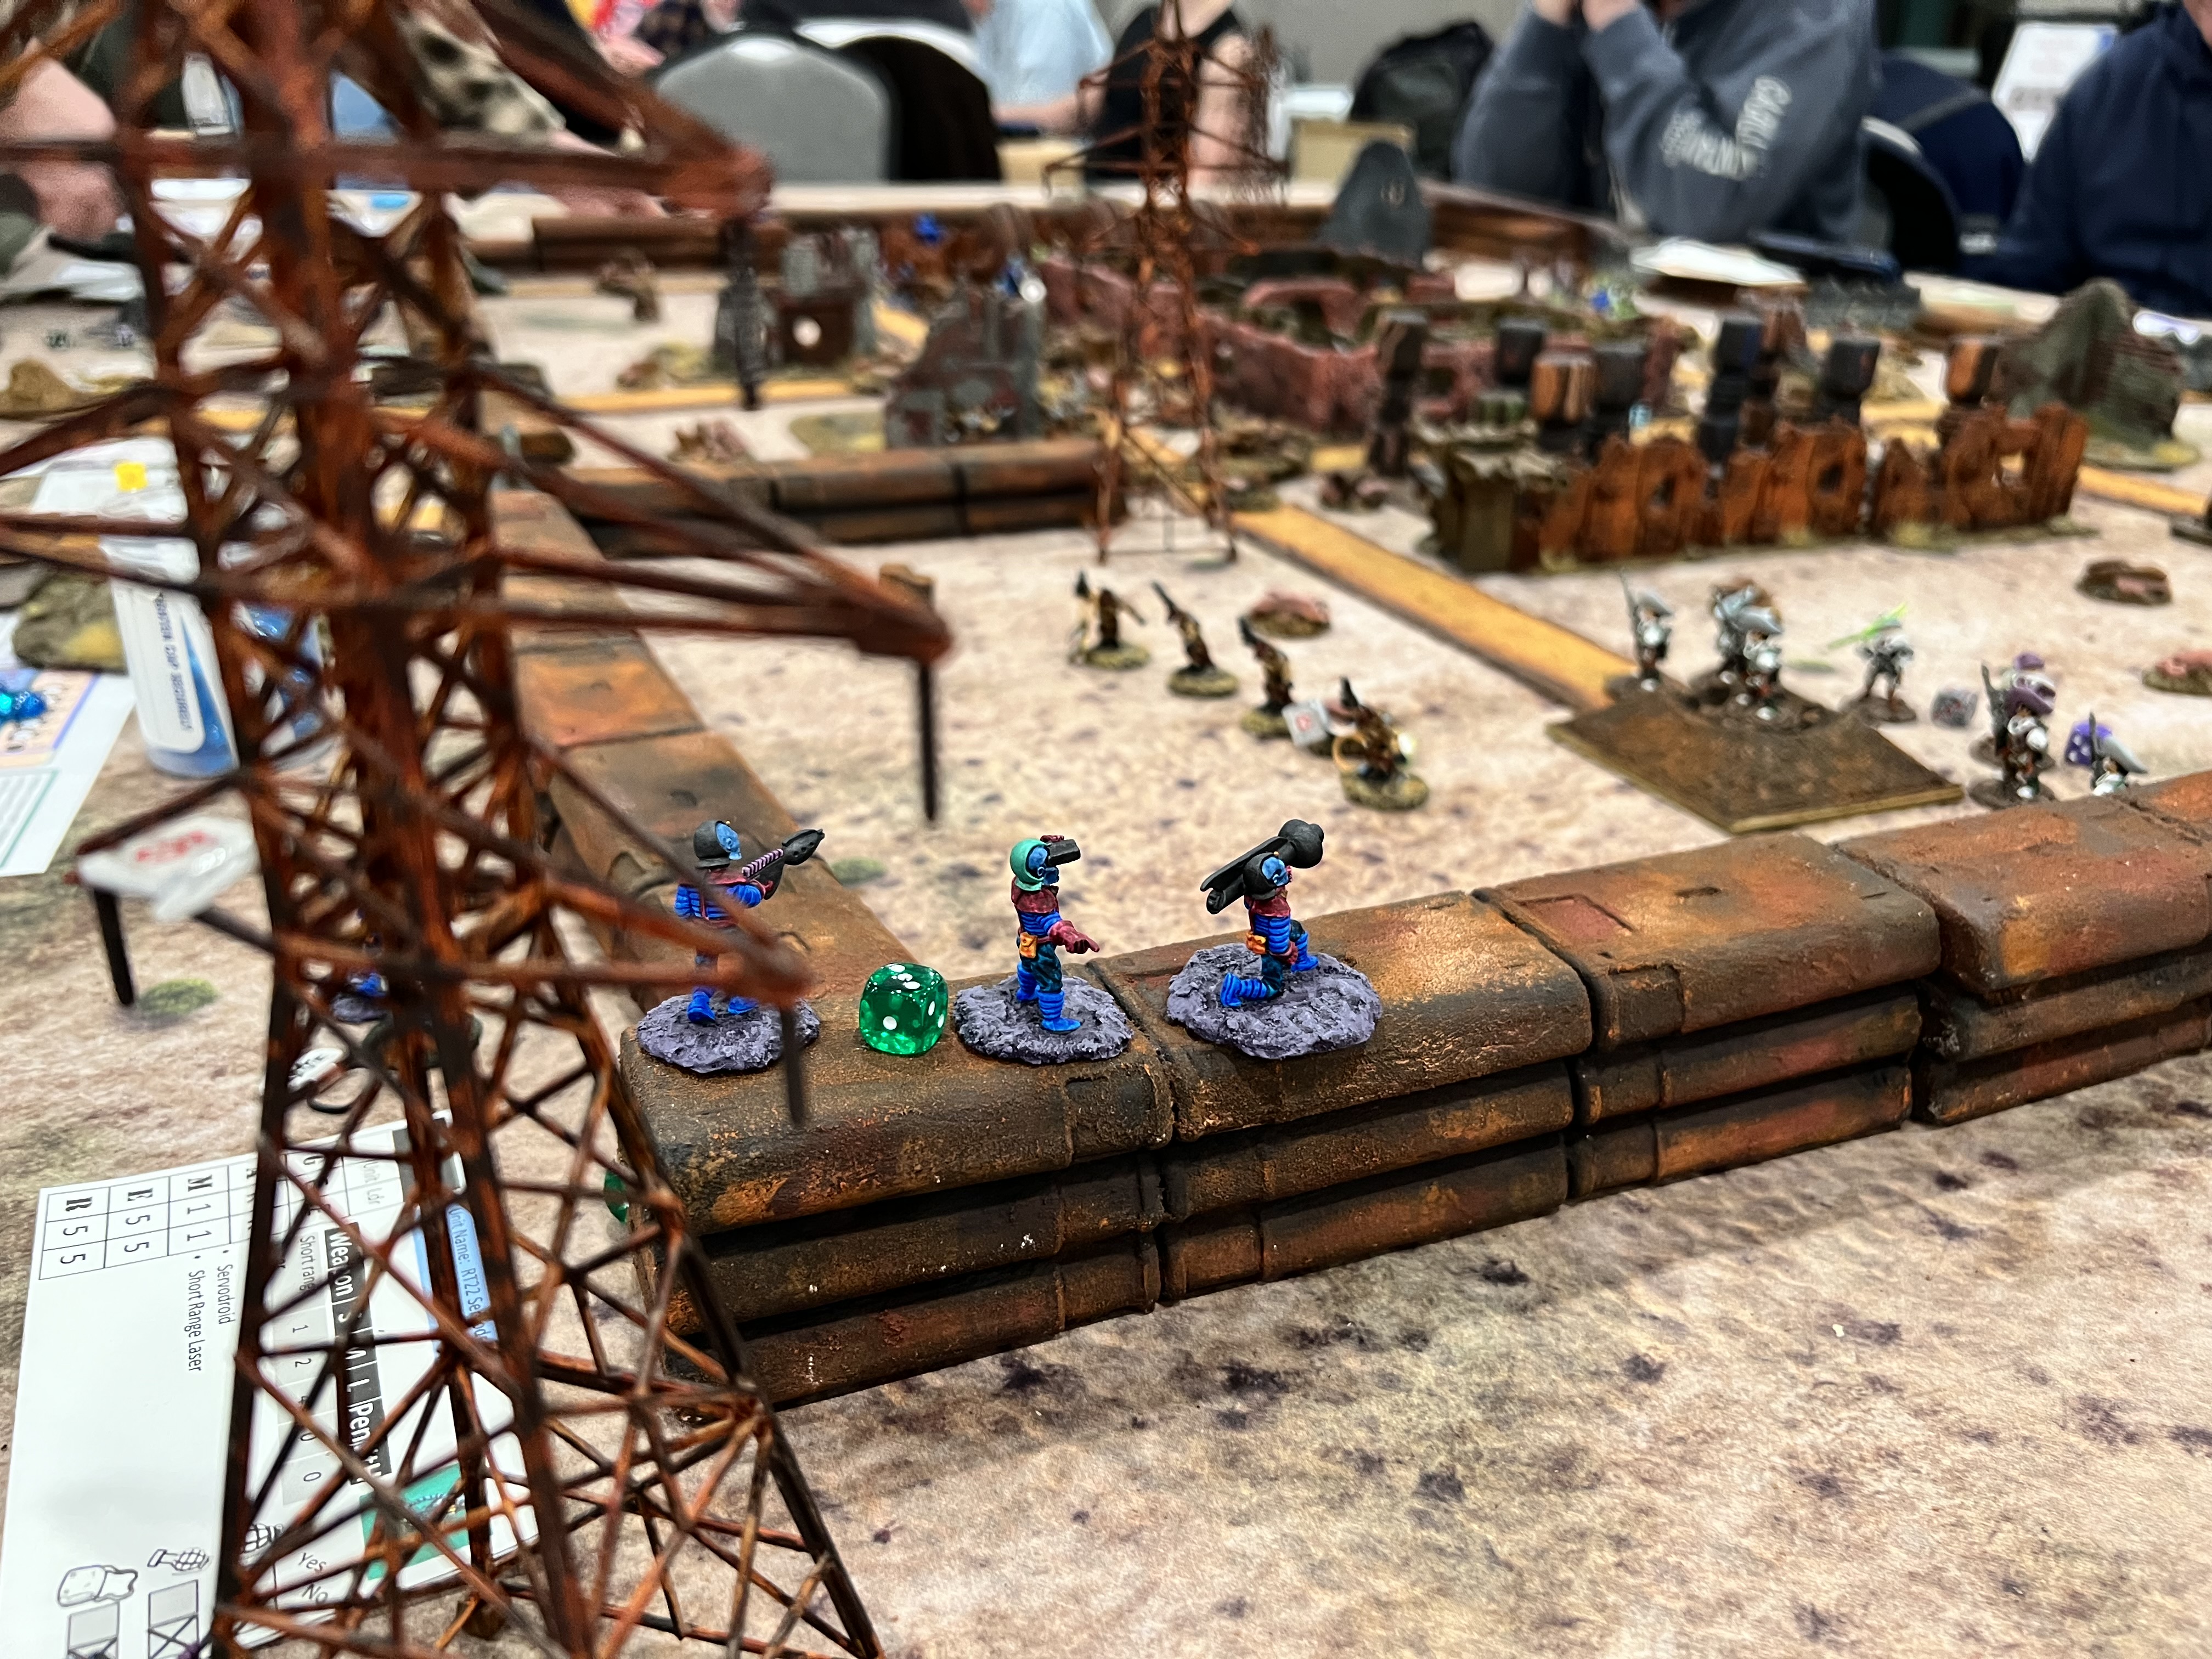
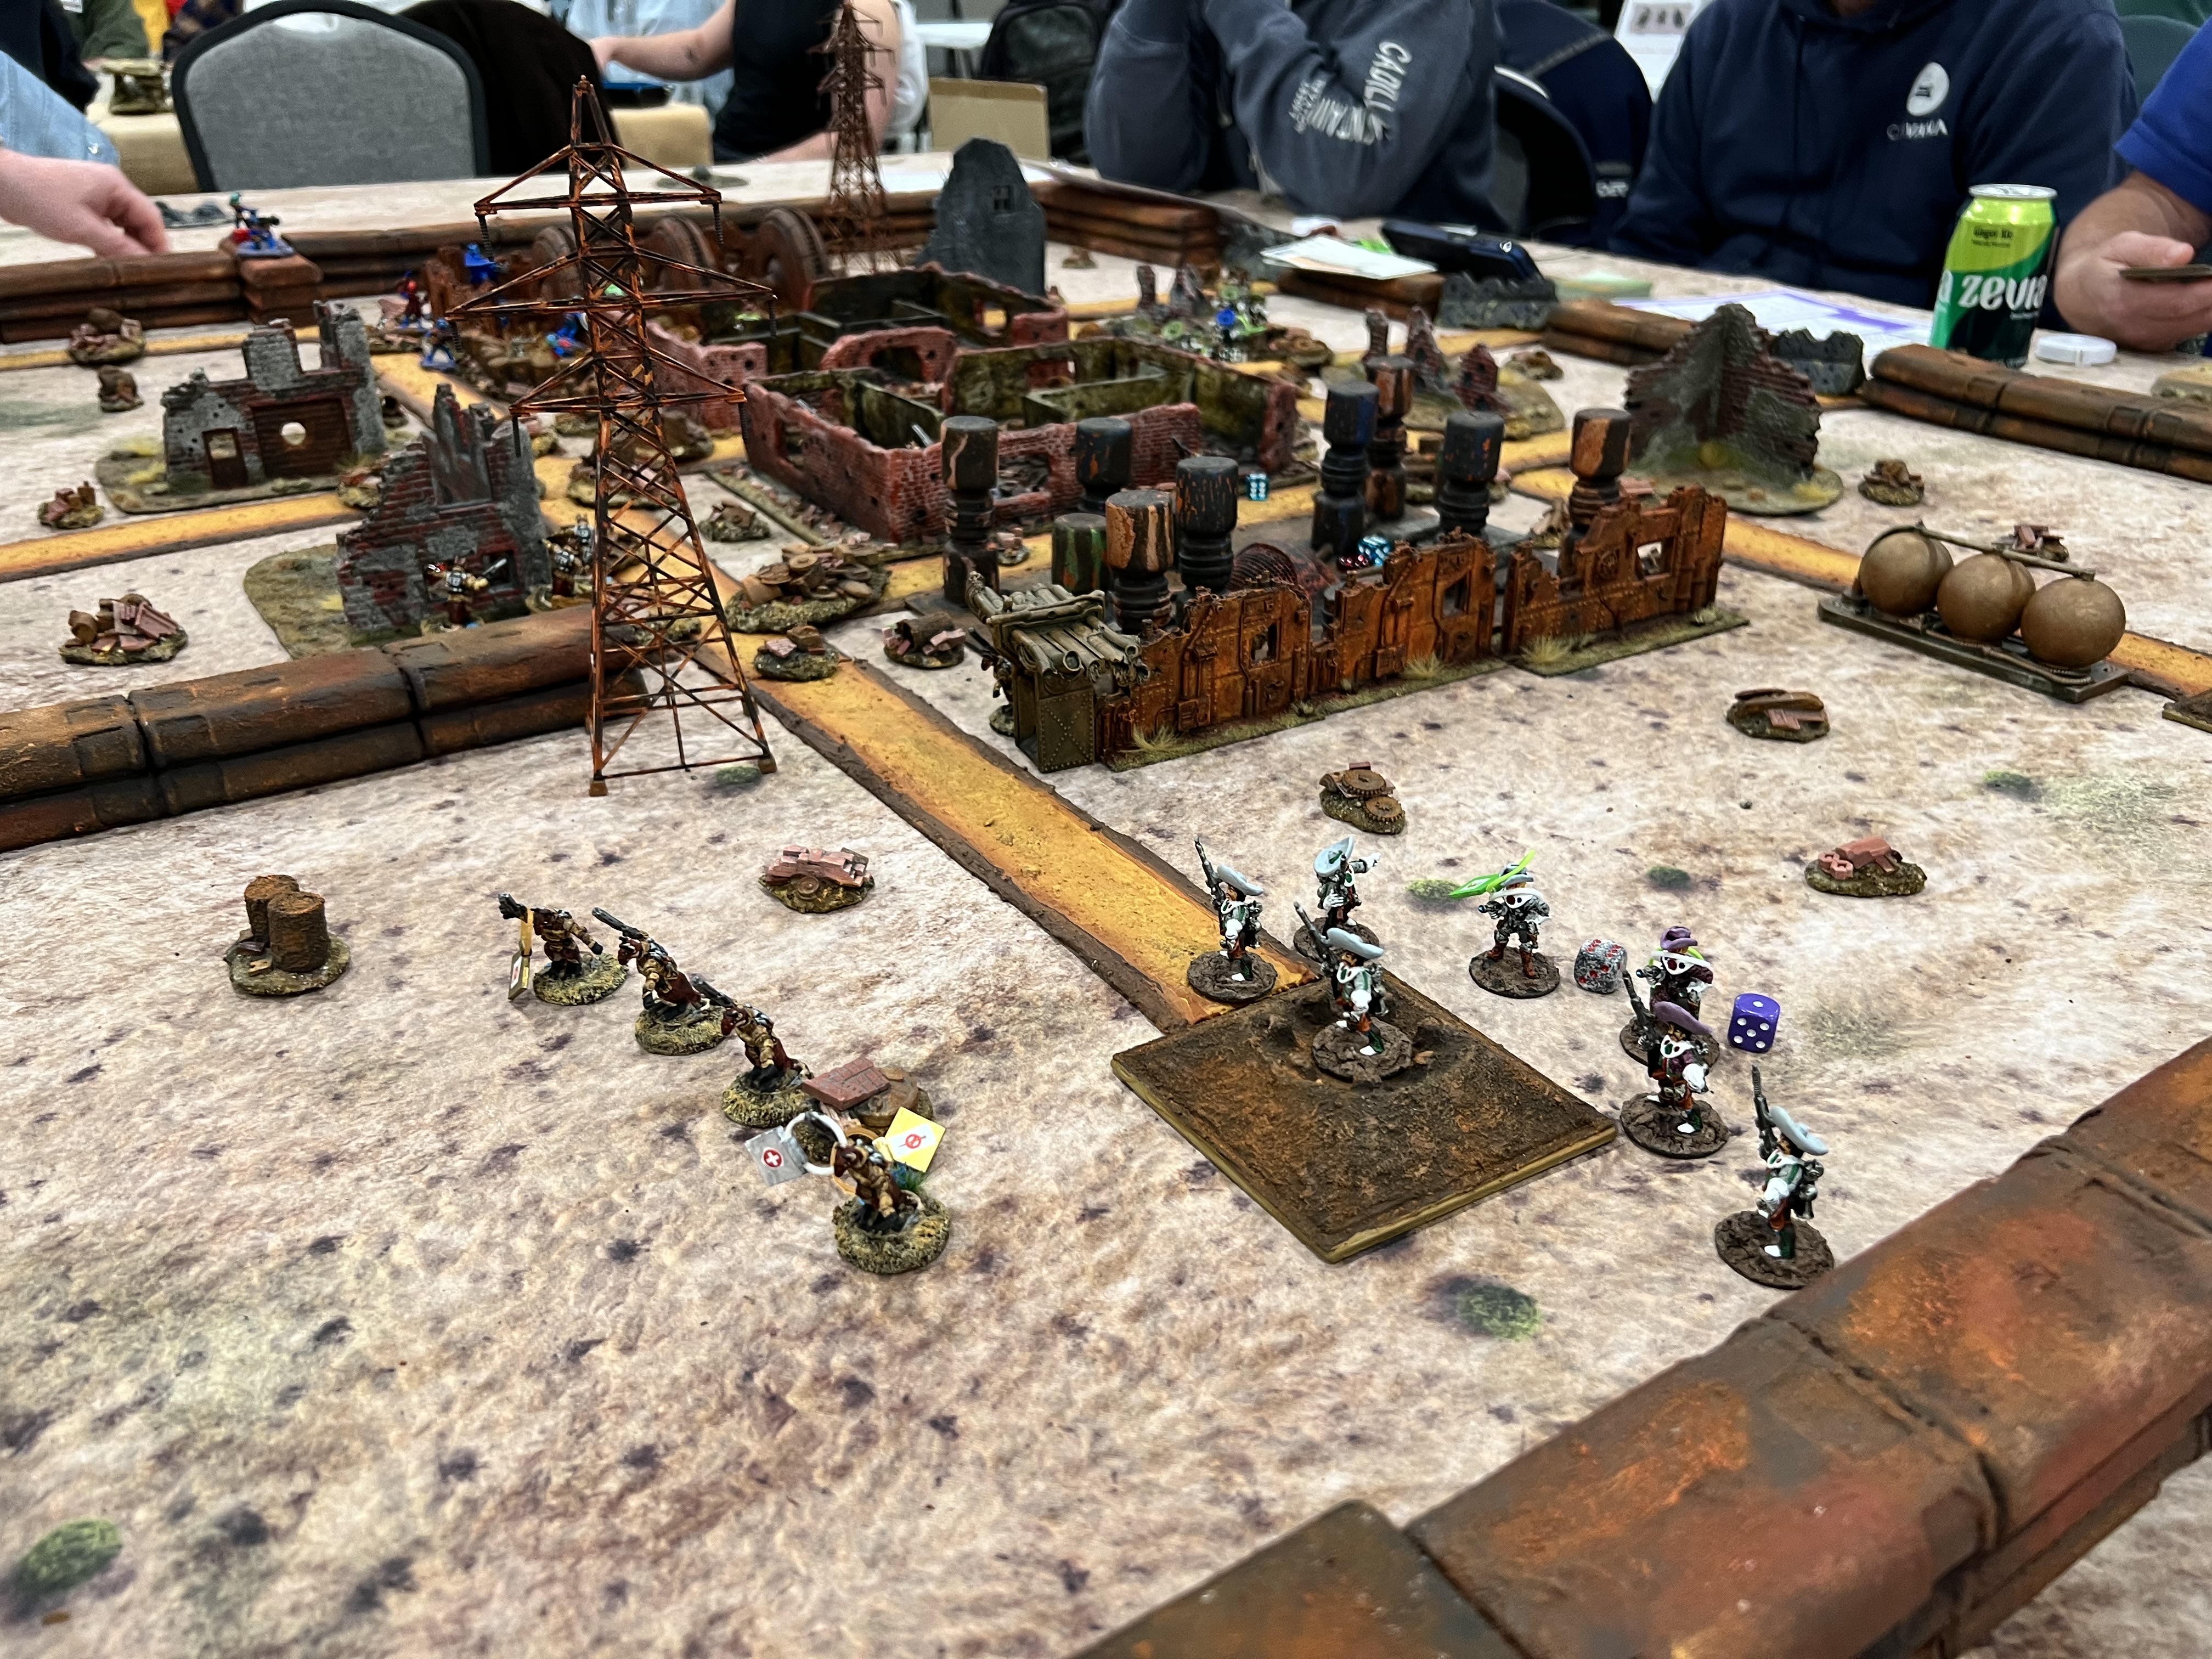
In the end, the Space Cowboys and Space ‘Roos alliance found 3/4 robots and successfully held on to them. All casualties mounted. But the victory was clearly in the hands of the Space Cowboys and Space ‘Roos!

After the game, with help, I was able to pack the car for a Sunday morning drive home. The temperature was well below zero Fahrenheit! With the wind chill it was -13 degrees Fahrenheit (or -25 Celsius for you metric types!).

Thank you to all at HMGS who made Cold Wars possible!

That wraps up this post – I still have a few that are in the queue , and I hope they are of interest.

I will be running these games again so see you at the next convention!

Next up? Some more terrain I think!

References:

Check these out!

For a consolidated list of links for any of my previous convention/club/game battle report blog posts, please see this page: https://markamorin.com/club-convention-games/

For a consolidated list of links for any of my previous Wars of Ozz posts, please see this page: https://markamorin.com/miniatures/wars-of-ozz/

For a consolidated list of links for any of my previous sci-fi/retro sci-fi posts, please see this page: https://markamorin.com/sci-fi-retro-sci-fi-projects/

Creating Realistic Ruined Buildings and Wreckage for Wargaming

Followers of this blog have seen several posts showing my “rusty” preparations. I have been getting ready for my numerous games at 2026 tabletop wargaming conventions. That preparation involves painting up figures and terrain for scenarios that involve a good amount of ruins and wreckage.

In a previous post, I shared how I built transmission towers and rusty walls for a Wars of OzzTM game involving Professor Nitpik’s Industrial City (the Robotic Sanctum). I ran that game at Cold Wars and will share more about that convention shortly. The theme for Cold Wars this year was “The Wild West”, so I also had planned to run a game involving Space Cowboys (technically Archive Texican Space Rangers” from Star Rovers).

I don’t run western games, but I could cobble together a retro sci-fi game using Buck Surdu’s Combat Patrol:WWIITM gaming system (with my modifications). In my game Archive “Space Cowboys”, and uplifted kangaroos  (“Space ‘Roos” ) combat blue-skinned “Retrovians” (from War Games Supply Dump). Both armies are searching for hidden ancient robots in the apocalyptic ruins of a long-dead civilization on a newly-colonized world called Dust.

To really make the ancient ruined industrial panorama that I wanted, I needed more buildings and structures than just my transmission towers, rusty walls, rusty generators and ruined chemical plant. I also wanted a lot of wreckage strewn about as terrain.

To those ends, I ended up making two ruined factory buildings, two industrial structures, and 61 scatter bases of industrial wreckage. These were all built at the same time. This enabled me to work around issues like drying and curing times as time was short. Oh yeah, and we had a few snow storms here in Massachusetts along the way that ate up some hobby time (not helpful at all).

I wanted to share my project and all its components here with you. As these were simultaneous efforts, you will see multiple project stages here. You may notice that I used a lot of repurposed bits of metal and plastic and Juweela products. The lists will be at the end of this post as is my habit. My concept was to achieve a Stalingrad-like look.

For the two buildings, I converted an iPad 16 box top and bottom. I used Apoxie Sculpt, steel washers, sand, multiple pieces of plastic, desiccant cylinders, and a lot of Juweela items to make the 61 scatter bases. And for two flat industrial structures, I reused two pieces of packing materials to repurpose them as flat rusted structures.

I started out with this iPad 16 box. I would use the top and bottom of this. It is plastic and cardboard.

I sawed out windows and doors on both box pieces and made each a bit differently in terms of architectural arrangement. I then hot-glued foam board to make rooms. For flooring, I broke up old popsicle sticks. These I had used previously to mount figures for painting on other projects. Lastly, I drilled out holes in the walls to simulate old bullet holes.

Cutting out the windows and doors on the first building.
Adding the walls, bullet holes, and flooring.

Then it was on to sculpting the outside walls. I did each building separately from here on so as to handle both curing times and to learn as I went as to best practices. Apoxie Sculpt and a Green Stuff World brick roller worked well.

Sculpting the walls. I used an awl to create and shape shell and bullet impacts on the outside.
Using the windows as gripping spots made the sculpting easier. I did need to then wait for curing.

While the walls cured, I worked on the wreckage bases – also using Apoxie Sculpt. I made the bases differently in terms of both size and shape. It helped to use one or more steel washers underneath the base sculpts. Using different sizes helped to make the shapes varied.

The biggest washer that I used and a base covered with Apoxie Sculpt.
Examples of the other sizes and shapes – all with steel washers underneath.

As the corrosion texture paint takes time to dry as well, I started adding that to various pieces of debris that I had saved up. I like to use a cheap old brush that could serve no other purpose – especially as it usually destroys it. The corrosion paint needed to dry and then got a second application.

Using the AK Corrosion Texture paint. Here I am using it on desiccant cylinders (from pill bottles), crushed plastic straw sections, and rubber inserts from a drain plug replacement.

After a day, the Apoxie Sculpt on the first building had cured. But I wanted there to be a small outside rim to it that could hold wreckage and brick debris. While a sheet of polystyrene was gluing to its bottom, I worked on the second building.

First building cured.
Bottom view – I needed more here underneath…but before that I finished the second building’s outside.
Second building outside sculpting…
….and second building flooring installation.

As the first building had cured, I started to paint it. Then I was able to glue a polystyrene base to building number 2.

Building number one with early paint work, and building number two being glued to the PS sheet under a heavy textbook.

As I was again dealing with drying and curing times, I went back to work on the wreckage bases. I used up some white sand on the Apoxie Sculpt bases and applied with PVA. Once that had dried, I added as much wreckage as I could to each.

Wreckage bases – I started with the largest. The two buildings are shown in progress as are the next batch of sculpted bases curing.
Close up shot of the larger wreckage bases in progress. Glue must dry…
Close up of building one with insides primed.

At this point, I added the flat clear plastic packing material to two square pieces of polystyrene by clamping and gluing them in preparation for corrosion texture. Then it was back to the wreckage bases. I had run out of white sand, so the next batch of wreckage bases got a PVA/grey sand application. As I used a lot pigments later, this made zero difference. At the same time, I also dirtied up the interior building walls and flooring using a sponge and various dark washes. The rim outside the buildings got a sandy texture paint covering.

The dark sand drying on the next wreckage bases, the flat structures with first application of corrosion texture, other bases in progress, and the buildings in the back.
A second coat of corrosion paint has been applied to the flat structures here. I also sorted the wreckage bases by size before adding pigments.
The flat structures and some other rusty paints I would add before augmenting with pigments.

Below you can see the wreckage bases after I added pigments to them. I fixed the pigments with Vallejo Thinner applied with a spray from a lens cleaning bottle.

Smaller bases done!
Medium-sized bases and flat industrial structures done!
Largest wreckage bases done!

Next, I added rusty industrial wreckage and scattered bricks to the buildings’ interiors.

After adding industrial wreckage and bricks to building 1…
…and building 2.

Clearly, pigments were needed at this point to make the bricks and wreckage look older and dirtier. More pigments and dark washes to the rescue!

The buildings after adding the pigments and washes to dirty and rust up everything.
Top view of both buildings as completed.

I was now ready to mock up the tabletop with everything! But first, the flyer for the game – which I finished before this project:

Game flyer.

The wreckage (all 61 pieces and the buildings really helped complete my vision. There are 24 possible search locations for the 4 ancient robots, known only to the GM. The four ancient robots I used were: “Folder Bot 3000” (aka Bender) from Armorcast Terraform Terrain Ltd.’s “Robot Townies” collection; and “RT22” from old Archive miniatures Star Rovers line circa 1977; and two Archive Miniatures Robot Cooks also circa 1977 (also Star Rovers).

The four ancient robots! Folder Bot 3000, RT22, and the two Robot Cooks.

I randomly select the locations for the four robots (see numbers on the map below). My playtest worked well, and here are some shots of the mock-up tabletop.

The mock up of the tabletop for the game. The Retrovians three squads and command group are in the forefront. The Space Cowboys are at the opposite side.
A side view.
View from the Space Cowboy’s side.
Generator side view.

I did not use all of the wreckage in the mock-up. I will share a Cold Wars post soon. However, as a preview here are a couple of shots of the game set up at Cold Wars in all its glory:

Photo of the game in progress at Cold Wars with me as the GM. (photo courtesy of Ken Howe).
Space Cowboys and Retrovians start searching for the robots.
The shoot out starts – while one robot has been found in the upper right. This was Bender, and he was not happy to be found and attacked and killed a Space Cowboy.

More about Cold Wars soon in a future post.

I hope you enjoyed reading this and seeing my rusty panorama come to life – on the tabletop anyways. If this WIP post helps you in any way, that is great! I am including these terrain pieces in Dave Stone’s PAINT WHAT YOU GOT 2025/2026 Challenge as these were completed in early February. For now, that’s it, until next time!

329 miles to Lancaster, PA and Cold Wars!

The materials are listed below as a reference for me (and you maybe).

For all of my previous posts on terrain projects, please see this page. For all of my previous posts on sci-fi projects, please see this page…for any of my previous posts on scratch-building, see this page.

PAINTS, INKS, GLAZES, SHADES, WASHES, PIGMENTS, FLOCKING, GLUES AND MORE THAT I USED ON THE TWO RUINED BUILDINGS:

  1. iPad 16 Box (top and bottom)
  2. Hot glue
  3. Foam Board
  4. Toothpicks
  5. Popsicle sticks
  6. Apoxie sculpt
  7. Vallejo Surface Primer “Grey”
  8. SIBE AUTOMATION “White Polystyrene 8″ X 12″ X 1/8″ Plastic Sheet”
  9. PVA
  10. Huge Miniatures “Brick Red”
  11. MSP “Brown Liner”
  12. Vallejo Game Color “Sepia” (wash/shade)
  13. Vallejo Wash FX “Dark Grey” (wash/shade)
  14. Liquitex “Burnt Umber” (ink)
  15. Secret Weapon Washes “Sewer Water”
  16. Vallejo Thinner
  17. Vallejo Surface Primer “German Green Brown”
  18. Vallejo “Light Slate Grey” (pigment)
  19. AK “Dry Ground” (texture)
  20. Vallejo “Carbon Black” (pigment)
  21. Juweela Metal Scrap Rusty Industry (23336)
  22. Juweela Debris Assortment (23316)
  23. Juweela Debris Brick Red (23315)
  24. Juweela Debris Assortment (23315)
  25. Juweela Bricks (23034)
  26. Juweela Metal Scrap Rusty Gear Wheels (23317)
  27. Army Painter “Red Tone” (wash)
  28. Secret Weapon Washes “Red Black” (wash)
  29. Secret Weapon Washes “Ruby” (wash)
  30. P3 “Red Ink” (ink)
  31. Vallejo Game Air “Red Terracotta”

PAINTS, INKS, GLAZES, SHADES, WASHES, PIGMENTS, FLOCKING, GLUES AND MORE THAT I USED ON THE 61 WRECKAGE BASES/PILES:

  1. Play sand
  2. Apoxie sculpt
  3. PVA
  4. Various scrap plastic pieces
  5. Cylindrical desiccant holders
  6. Rubber sink stopper rim
  7. Juweela Metal Scrap Rusty Industry (23336)
  8. Juweela Debris Assortment (23316)
  9. Juweela Debris Brick Red (23315)
  10. Juweela Debris Assortment (23315)
  11. Juweela Bricks (23034)
  12. Juweela Metal Scrap Rusty Gear Wheels (23317)
  13. AK “Corrosion Texture” (texture)
  14. Vallejo Model Air “Rust” (71.080)
  15. Vallejo Model Air “Rust” (71.080)
  16. Vallejo Model Air “Rust” (71.069)
  17. Vallejo Model Air “Orange Rust”
  18. Citadel “Ryza Rust” (dry)
  19. Vallejo “Old Rust” (pigment)
  20. Vallejo “Pigment Binder”
  21. Vallejo Thinner
  22. Vallejo “Dark Slate Grey” (pigment)
  23. Vallejo “Dark Yellow Ochre” (pigment)
  24. Vallejo Game Color “Sepia” (wash/shade)
  25. Secret Weapon Washes “Sewer Water”
  26. Army Painter “Red Tone” (wash)
  27. Secret Weapon Washes “Red Black” (wash)
  28. Secret Weapon Washes “Ruby” (wash)
  29. P3 “Red Ink” (ink)
  30. Vallejo Game Air “Red Terracotta”

PAINTS, INKS, GLAZES, SHADES, WASHES, PIGMENTS, FLOCKING, GLUES AND MORE THAT I USED ON THE 2 FLAT INDUSTRIAL STRUCTURES:

  1. SIBE AUTOMATION “White Polystyrene 8″ X 12″ X 1/8″ Plastic Sheet”
  2. Plastic packing material from a forgotten source!
  3. PVA
  4. AK “Corrosion Texture” (texture)
  5. Vallejo Surface Primer “German Green Brown”
  6. Vallejo Model Air “Rust” (71.080)
  7. Vallejo Model Air “Rust” (71.069)
  8. Vallejo Model Air “Orange Rust”
  9. Citadel “Ryza Rust” (dry)
  10. Vallejo “Old Rust” (pigment)
  11. Vallejo “Pigment Binder”
  12. Vallejo Thinner
  13. Vallejo “Dark Yellow Ochre” (pigment)

Retro Sci-Fi Combat Patrol – Texican Space Rangers & Space Phraints defeat Space Dwarves & Robot Peacekeepers

The July 2018 session of the Mass Pikemen Gaming Club was fun time for all.  We had an epic battle using the Combat Patrol™ gaming system.  The battle (called “Get The Data!”) was between the attackers (an alliance of the Texican Space Rangers and the Hurraku Space Phraints) and the combined forces of the Robot Peacekeepers and the Space Dwarves.  The objective for the attackers was to seize weapons design data from a computer in an abandoned and ruined factory/research facility.  The defenders mission was to exact a high price in casualties from the assault force.

So why did I align the Texicans and the Hurraku?  One picture in the Star Rovers game shows them having a drink at Moondog Maude’s Cantina – so I went with that.

21 bar image of rangers
Hey, after this drink, let’s go to battle!

I assigned points differentially for the attackers and the defenders based on the mission.  The Hurraku attacked on the defenders’ left, and the Texican Space Rangers attacked from the defenders’ right.  The defenders also had Robo-Sentry guns deployed run by RT22.   I also gave them Roberker, a flame-throwing giant robot to help with their defense.

1 0718 Startwith Will Valentine (2)
Will prepares to defend

2 0718 the cowboys get cover
The Texicans destroy a Robo-Sentry gun, then take cover.  You can see the defenders in position in the building.  If only the defenders had mortars!

3 0718 the cowboys get hit
Two Texicans are dispatched by automatic weapons fire.  I use casualty cards to designate fallen figures and to help score the battle at the end.  Plus I think it shows the battle’s progression without having a bunch of minis tipped over. 

4 0718 the cowboys assault the bunker
Chris Comeau (Texican commander) made a bold move and had his gray squad jet pack directly into a bunker filled with one of Will’s Robot Peacekeeper team.  The bots passed a reaction test and the Rangers took massive fire and three dead before they could fire.  The red beads mark morale checks for them, the blue for the bots.  This sacrifice was to prove worthy, as follow on teams of Space Rangers were able to clear the stunned robots from the bunker.

5 0718 the cowboys take out a rsg
Another of the 5 Robo-Sentry guns is cleared by the Space Rangers.

6 on the other flank Jared Burns and Michael Morgan
On the other flank, Jared Burns and Mike Morgan were able to use the long ranges of the Hurraku blasted to keep the defenders’ heads down.  They maneuvered to flank the defenders.

7 bugs hiding
One of the Agribot automatic weapons did hit a team of Hurraku for one wound.  Unluckily, the team promptly failed morale and became pinned behind a boulder.  They were eventually able to rally.

8 Roberker moves out
Back on the right flank, Will and Dave decided that it was time for Roberker to counterattack with his dual flame throwing arms.  Roberker successfully roasted a number of the purple-sombreroed Space Ranger team.  However, he put himself in the open…

9 Chris Comeau happy as Roberker dies
…and he took automatic weapons fire from multiple Rangers.  The plume from his smoking hulk is next to the bunker…Chris Comeau smiles…he also killed Roberker in his last game BTW!

10 Carnage by the bunker
The Robot Peacekeepers in the bunker then drew an unfortunate morale result that caused them to perform a banzai charge (I have robots use the WWII Japanese in the Pacific cards for morale).  Thus, they left the nice safe bunker and got mauled.  Note the large number of blue morale checks to be performed after the banzai charge.

11 sdas last stand
By this point, Will and his dad Dave had to leave, so I took over.  The defense was collapsing, so I withdrew the front line defenders as best as I could.

12 sith smash
The sacrifices of the Texican Space Rangers allowed the Hurraku to penetrate the defensive position.  The first in was their Sith warrior, who used the powers of the Force to smash two robots (RT22 and a Robot Peacekeeper) with a Telekinesis attack by sending them into the factory walls.  This destroyed them.  As you can see, the morale checks were piling up…

13 satchel charge
…so why not add more to the carnage with a satchel charge thrown by a Hurraku Space Phraint into the Space Dwarves (the smoke plume here)!  Meanwhile, the Hurraku Space Phraints swarmed in.

14 the end
The attackers swarm the compound.  Game over.

The game was fun, and when the tide turned, the attackers did a good job of exploiting the openings presented.  I love it when maneuver is executed well.  The Texican Space Rangers aggressiveness resulted in nearly 50% casualties, but helped the Hurraku press their assault on the other flank.  The defenders did get some very unlucky morale results, but so did the attackers so it was a wash there.  Next time I run this scenario, I probably will include some defensive indirect fire support as well as some time constraints on the attackers.

Still, it was a fun session, and I am appreciative to the players!  It was nice to meet everyone, and I’m glad that they got to learn the system so quickly.  Our next session is tentatively scheduled for August 18th.


Space Cowboys – Bet You Weren’t Ready for That!

Space Cowboys!  More properly Archive Miniatures Texican Space Rangers (circa 1978), are the subject of this blog, plus some Steve Miller Band stuff from the 1970’s.  Most people are familiar with the Steve Miller Band song The Joker:

Some people call me the space cowboy yeah
Some call me the gangster of love
Some people call me Maurice
‘Cause I speak of the pompitous of love…

Lyrics from The Joker, Steve Miller Band, 1973

Some also know that the opening line of The Joker refers to the band’s 1969 hit Space Cowboy – a rousing song with psychedelic undertones.

I told you ’bout living in the U.S. of A.
Don’t you know that I’m a gangster of love
Let me tell you people that I found a new way
And I’m tired of all this talk about love
And the same old story with a new set of words
About the good and the bad and the poor
And the times keep on changin’
So I’m keepin’ on top
Of every fat cat who walks through my door

I’m a space cowboy
Bet you weren’t ready for that
I’m a space cowboy
I’m sure you know where it’s at
Yeah, yeah, yeah, yeah…

Lyrics from Space Cowboy, Steve Miller Band, 1969

If you have not heard it before, and/or if you want a theme song for this blog post, here it is:

I’m sure that in some way, shape, or form, these songs influenced the sculpting of these figures.

Back to the miniatures!

In the early stages of my chasing down Archive Star Rovers a couple of years ago, I discovered two figures that were called Texican Space Rangers. One figure was Travis B. Crockett who was armed with a couple of laser pistols.  The other was Armando Garcia, who had an assault rifle, a laser pistol, and a very imposing sombrero.  Both had very cool jet packs as well.  I did think that they would make an awesome unit for Combat Patrol™  games.  Archive packaged them in two ways.  One was as a set (along with a dog I have not found) as #2045 Texican Space Ranger Group.  The other was individually as #2225 (Travis) and #2226 (Armando).

19 catalogue
From the Archive Miniatures Catalog

23 Archive-starrover-2045
From the excellent Lost Minis Wiki website.  The photo above includes the elusive dog, and was posted by David Wood whose excellent blog http://deartonyblair.blogspot.co.uk/ is worth a look if you like old school minis!

There are a few images in the Star Rovers game that showcase the Texican Space Rangers.  I think the artwork is very cool and worth sharing as well.

20 image of rangers
Here the Texican Space Rangers are being attacked by Eyegars and Flygars.  Note the dog disappearing here as well on the lower left (maybe why I cannot find it?).

21 bar image of rangers
Travis hanging out with a Hurraku Space Phraint at a bar!  I made a platoon of these Arduin types earlier this year which you can read about here.

22 bar image of rangers
Quite the bar fight mash-up here.  I see Armando on the left, some Space Centaurs, Felynxi, Clint Eastwood (?) and a Chewbacca look alike under the table?  Also a Nevile Stocken logo behind the bar near Armando.

I searched, and the only source that I initially found for the figures was on eBay which made the prospect of building a platoon-sized unit very expensive.  Because of this, back in June 2016 I made a mold of Armando Garcia and cast several for personal use and for some friends which I wrote about here.  I had a plan to cast Travis B. Crockett, but did not get around to it, which was lucky for me as I found a better option.

Michael Thomas is a hobbyist who bought a spin caster and has been collecting OOP miniature molds and making them available for a very reasonable price.  I discovered that Michael has both Texican Space Rangers (among many other lost and OOP miniatures) available at  http://classicminiatures.net/.   The product codes are RKV-0122 for Travis and RKV-0021 for Armando, with their prices being $3.50 and $3.75 respectively, which is very reasonable.  I had a sufficient number of Armando’s, so I ordered enough Travis figures to round out a small platoon sized unit of 32.

My concept for the Texican Space Rangers was to have them as a small constabulary-type unit (like the Texas Rangers).  I made a command group (1 of each type), and 5 infantry teams.  Each team would have one Travis and five Armando’s.  Filing and cleaning the originals ones I got from eBay and from Michael was a breeze, while my castings needed much more work to make them presentable.  They are moderate in terms of crispness, but not like today’s figures.  But hey, this is what it was like in the 1970’s!  Once that was done, I used my airbrush to prime them, and moved on to painting them.

I also had a pretty important secondary goal on this project, which was to use as many of my old Polly S, Polly Scale, Deka Lack, and Armory acrylic paints as possible.  My Polly S paints were ones I bought in the early-to-mid 1980’s (really).  My Deka Lack paints are ones that I purchased in West Germany (remember that?) around 1987.  The Polly Scale paints were made after Testors bought them out, and my guess is that they date from the 1990’s (they were gifts Buck Surdu got for me slightly used from a gaming convention flea market).  My Armory paints were all bought by me in 1996.  All of these paints are viable, but they have lumps and clumps and do not always thin easily.  I thought as a challenge, I would use as many as possible as theme colors, and add washes, inks, and glazes to enhance the models.  Besides, they won’t be useful indefinitely.  If you are interested in the history of Polly S , I did find this blog post that was interesting.

Additionally, I follow a couple of blogs that were inspirational for this project.  One was imperial rebel ork’s post about his Western/sci-fi mashup.  He has three chapters there.  Also, our good inspirational friend Azazel from down under made a painting challenge for units for June, so this works and this is my entry (or at least one of them)!  On to the theme colors…

The platoon leader’s main color was Polly S “Venetian Dull Red”, while the platoon sergeant’s was Deka Lack “Blaü” (blue).  for the teams’ main colors, the A team got Polly S “Desert Pink”, the B team got Polly Scale “German Armor Light Tan”; the C team got Polly S “Interior Green”, the D team got Polly Scale “WWII British Aircraft Gull Gray Light”; and the E team got Polly Scale “German Mauve”.  The Travis figures also have US red, white, and blue on their collars, and the Armando’s have the colors of the Mexican flag (red white, and green).  I list all of the paints, glazes, inks, washes etc. that I used for this project at the end of this post (only 55 this time!).

0 Travis B. Crockitt Texican Space Rangers
The Travis B. Crockett’s I got from Michael Thomas, unpainted.

1 platoon primed
The Texican Space Rangers, primed for painting.  I ended up with some reductions so I actually painted 32 for this unit.

2 platoon start
Here I started working on the heads and the theme colors.  Some (not all) of the old paints I used are in front for fun.

3 mid platoon start
In the middle of the project.  I did heads first, then legs, with torsos last.

4 Armando mid stage
The platoon sergeant before washes and inks.  This is an original, not a recast.

5 Travis mid stage
The platoon leader early on – I cleaned him up substantially as the project continued.

6 Teams A and B await varnish
The command group, and Team’s A and B painted and awaiting varnish.

7 all painted
The whole platoon finally painted and awaiting varnish.

8 All varnished
All varnished and ready to leave their specimen bottles!

9 in storage box
In the storage box

10 Command group front
Command Group frontal view

11 Command group back
Command Group, rear view

12 Team A desert pink
Team A

13 Team B german armor light tan
Team B

14 Team C interior green
Team C

15 Team D gull grey light wwii british aircraft
Team D

16 Team E German Mauve
Team E

17 leadership travises
All of the leaders (being the Travis figures).  You can see the differentiating colors on the hats and uniforms, which I hope will aid on the tabletop for play.

18 Armandos
Examples of the different Armando figures 

This was a fun project, though the older paints are much harder to use than modern ones.  Still, I am glad that those oldies got a chance to be useful.

Thanks for reading, and I always appreciate comments and feedback in the comments section!

PAINTS, INKS, GLAZES, WASHES, AND FLOCKING USED:

  1. Vallejo “Surface Primer – White”
  2. Vallejo “Dark Flesh”
  3. Vallejo “Medium Flesh Tone”
  4. Citadel “Reikland Fleshshade”
  5. Vallejo “White”
  6. Vallejo Game Air “Black”
  7. Vallejo “Brown Rose”
  8. Polly S “Venetian Dull Red”
  9. Vallejo “Dark Blue”
  10. Polly S “Desert Pink”
  11. Polly S “Venetian Dull Red”
  12. Polly Scale “WWII German Armor Light Tan”
  13. Polly S “Interior Green”
  14. Polly Scale “WWII British Aircraft Gull Gray Light”
  15. Polly Scale “German Mauve”
  16. Vallejo Game Air “Moon Yellow”
  17. Deka Lack “Blaü”
  18. Polly S “Slime Green”
  19. Vallejo Model Air “Signal Red”
  20. Vallejo “Red”
  21. Citadel “Auric Armour Gold”
  22. Vallejo Model Air “Gun Metal”
  23. Vallejo “Dark Blue”
  24. Vallejo “Glossy White”
  25. Polly Scale “WWII German Armor Dark Brown”
  26. Armory “Leather Brown”
  27. Armory “Prussian Blue”
  28. Vallejo Model Air “Aluminum”
  29. Vallejo Game Air “Dead White”
  30. Vallejo Game Air “Beastly Brown”
  31. Secret Weapons Washes “Just Red” (ink)
  32. Citadel “Gulliman Blue” (glaze)
  33. Citadel “Waywatcher Green” (glaze)
  34. Secret Weapons Washes “Blue” (ink)
  35. Secret Weapons Washes “Armor Wash” (wash)
  36. Citadel “Agrax Earthshade” (wash)
  37. Secret Weapons Washes “Parchment” (wash)
  38. Citadel “Nuln Oil” (wash)
  39. Citadel “Nuln Oil Gloss” (wash)
  40. Citadel “Soulstone Blue”
  41. Citadel “Waystone Green”
  42. Citadel “‘Ardcoat”
  43. Citadel “Agrellan Earth”
  44. Citadel “Agrellan Badlands”
  45. P3 “Bootstrap Leather”
  46. Secret Weapons Washes “Sunshine” (wash)
  47. Vallejo “Glaze Medium”
  48. Vallejo Game Air “Wolf Grey”
  49. Secret Weapons Washes “Stone” (wash)
  50. Secret Weapons Washes “Purple” (ink)
  51. Testors “Universal Acrylic Thinner”
  52. Vallejo Mecha Color “Purple”
  53. Vallejo “Flow Improver”
  54. Vallejo “”Airbrush Thinner”
  55. Vallejo “Matt Varnish”

Thanks again and feel free to let me know your thoughts!

Man of TIN blog two

Toy Soldiers, Gaming, ImagiNations

Gisby's Gaming Blog

Miniatures gaming projects, products, and reviews

Carrion Crow's Buffet

Narrative Wargaming, Fiction and General Musings on the Universe

Despatches from Fort Syllabub

An account of fictional adventures on the North West Frontier - and other times and places, real or imagined

Man of Tin blog

Toy soldiers, gaming, Imagi-Nations

Zauberwurfs Blog

Ein Blog über Tabletop und Miniature Wargames.

Frank Tank Rants

musings of a fat old bloke on tanks and wargames

Dragons of Lancasm

Games, miniatures, painting, books and more games

Tiny Painted Heroes

The Adventures of a lifelong Tabletop Gamer, Game Design hobbyist, and full-time Software Engineer

Steve's Paint Brush

Grimdark model making and mini painting

Wargamesculptors Blog

Life, Golf, Miniatures, & Other Distractions

Dead Dick's Tavern and Temporary Lodging

Life, Golf, Miniatures, & Other Distractions

Guru Pig - the gaming Guru

Guru's thoughts on wargaming, life, and the universe!

Wisely lead... without a head!

History, Miniatures and Wargaming

Kuribo's Painting

Fallout Wasteland Warfare, Warhammer, and Hellboy Painting, Terrain, Dioramas, and Battle Reports

Don't Give Greg Ideas

Seriously, just don't

War Across the Ages, and other dark horrors

A discussion of miniatures collecting, painting and gaming.

Classic Warhammer 40K

Painting diary focused on Warhammer 40K 2nd ed., 5th ed. WHFB, related GW games, and miscellaneous whimsy

Colonel Mustard

WW2 Modelling in 1/72 Scale

Bogenwald

Random painting and terrain making.

Pat's 1:72 Military Diorama's

Scale diorama tips and ideas

Arcade Dreams

Building the Arcade Dream

P.B.Eye-Candy

Phil's 20th century wargame pages

SP's Projects Blog

A futile fight against entropy or 'Every man should have a hobby'? Either way it is a blog on tabletop wargames, board games and megagames

30mmdave

Wargaming Plausible reality?

The Imperfect Modeller

Miniature Figure Painting and Diorama Modelling

Double Down Dice

Painting miniatures and rolling dice!

Just Needs Varnish!

My ongoing wargames projects!

miniaturepopcorns

Sculpting some worlds

Despertaferres

Wargaming with the ability of a dull nine year old

Dawn of the Lead

Miniature wargaming and the occasional zombie

Rantings from under the Wargames table

Wargames, Figures, Sculpting and Converting Miniatures

Simple as War

Miniatures & Terrains

Buck's Blog

Life, Golf, Miniatures, & Other Distractions

IRO aka Imperial Rebel Ork

- I model - therefore I am -