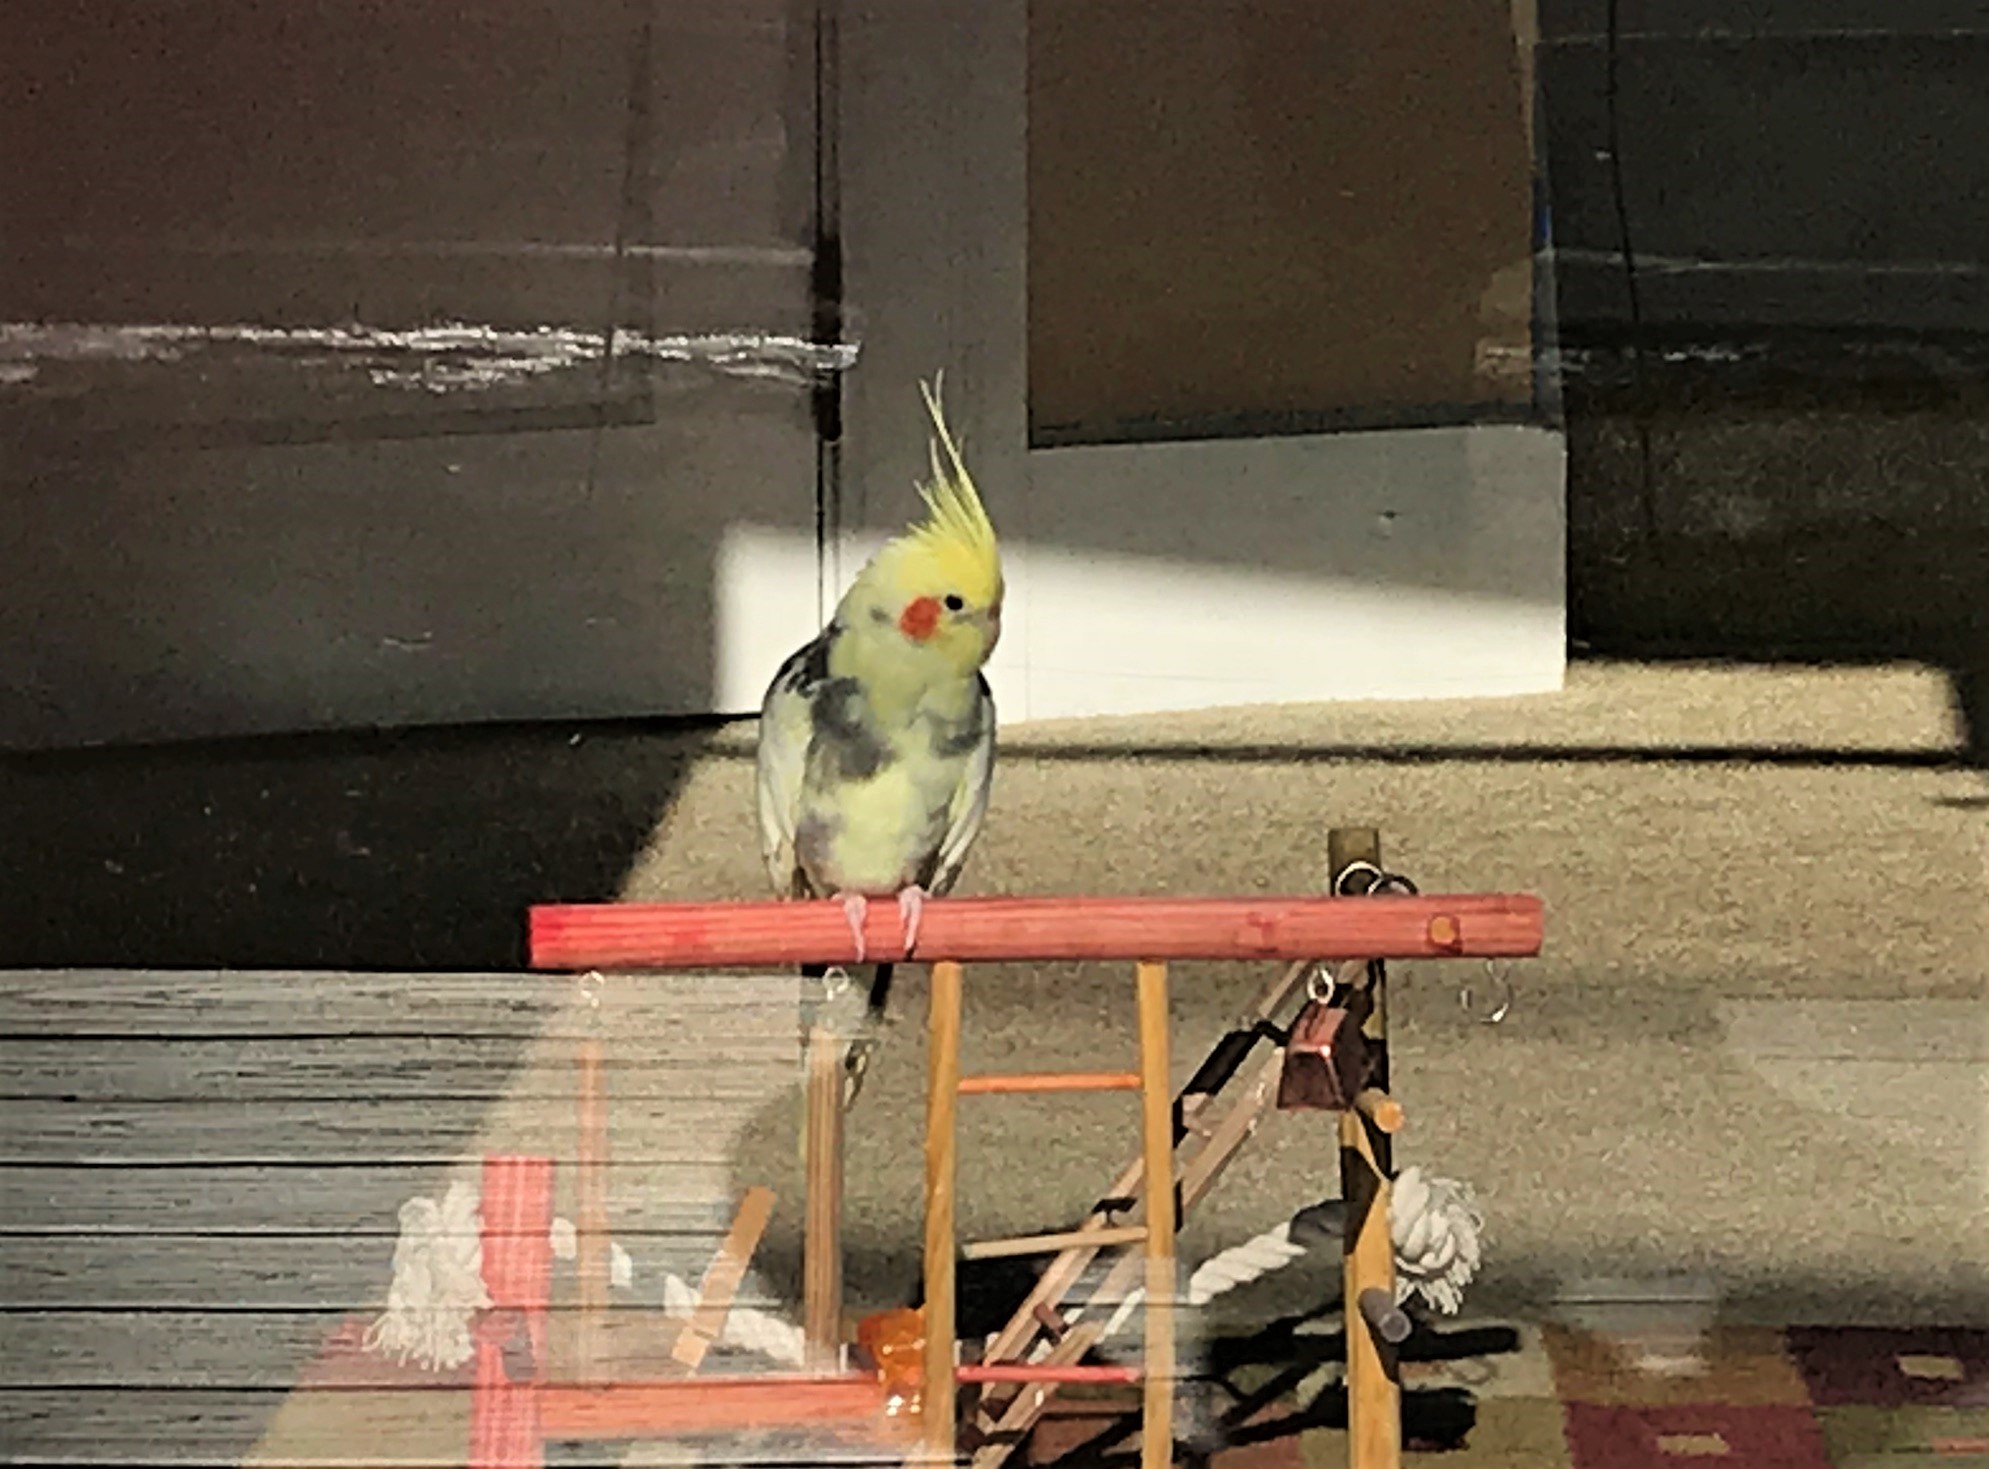
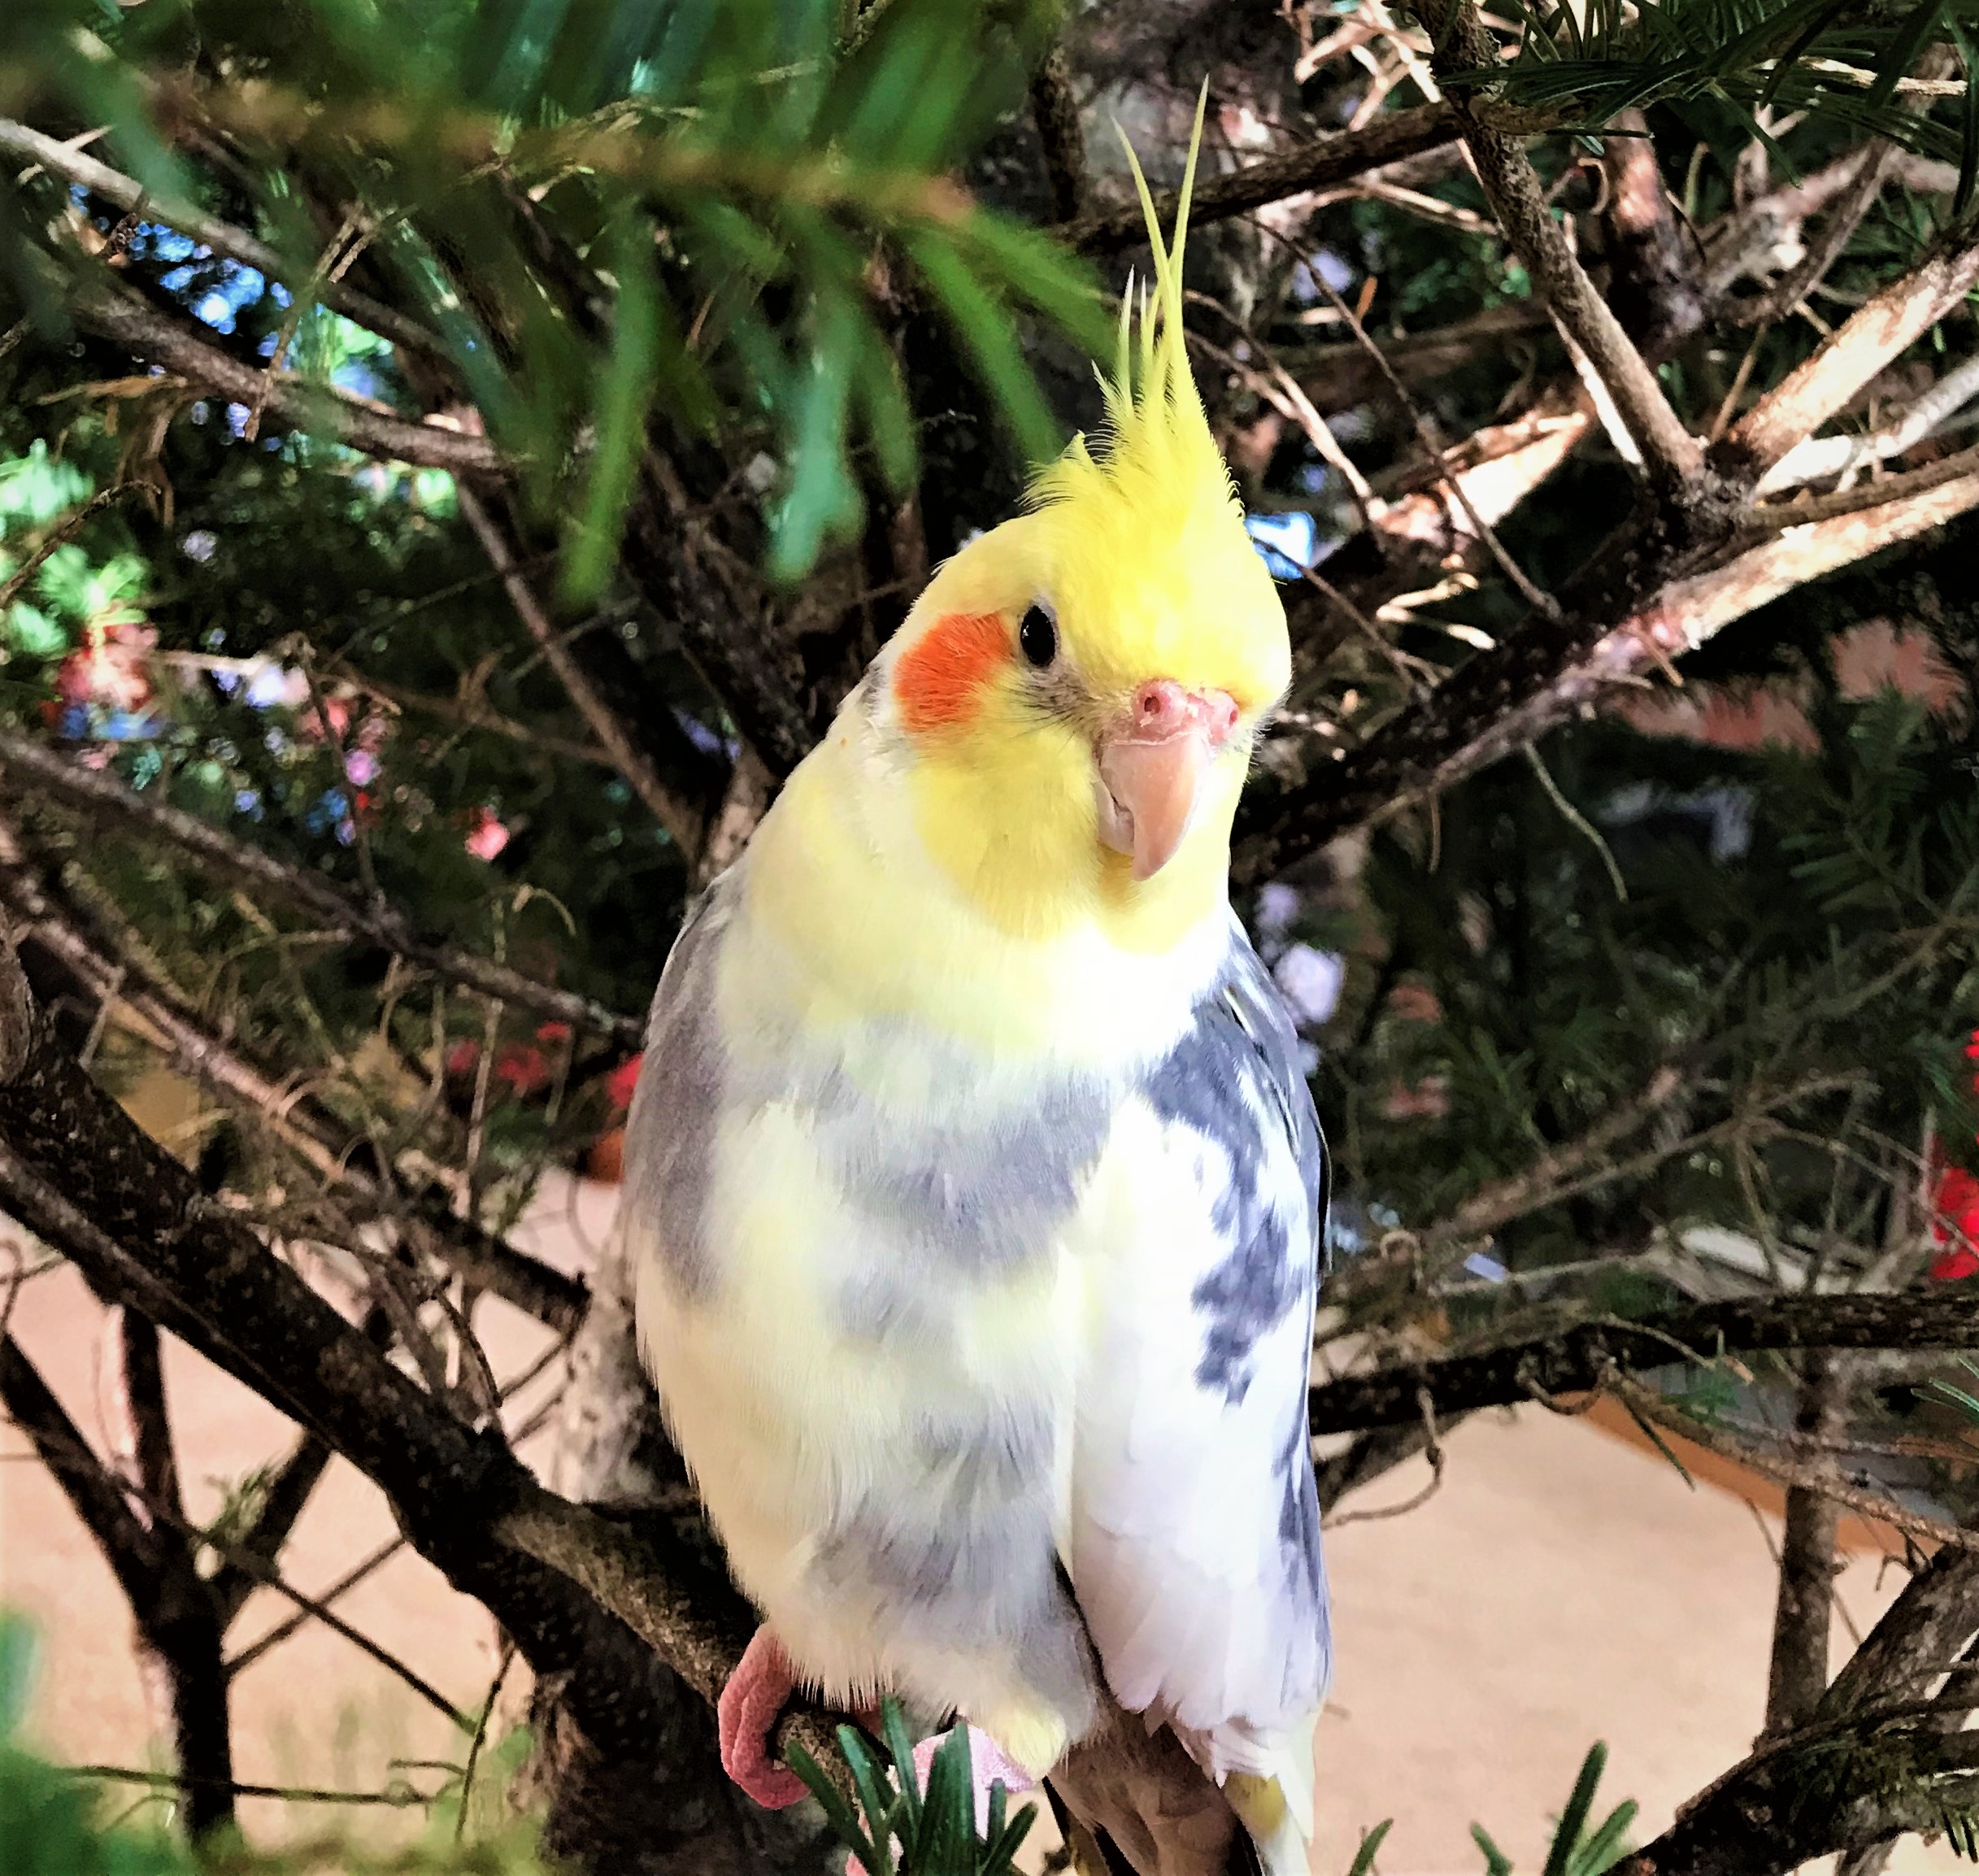
As you can tell by the title of this post, we lost our cockatiel Caesar on New Year’s Day. He was 27 and a half – and I had had him in my life for 24 years. I never thought that I would get close to a pet bird or have one be a big part of my life.
I met Caesar on my wife Lynn’s and my first date on December 14, 1997. He was interesting – I though he’d be flying around but Lynn had his wings clipped so as to prevent him from flying into a ceiling fan or a window. He was not too fond of me at first – after all I was competing for attention with “his mummy” Lynn. He lived on top of his cage – but the door was never shut – he had full reign over his domain.
Over the years, he got used to me and I to him. He could talk – saying “Caesar is a pretty bird” or “pretty bird” or the whistle commonly associated with cartoon wolves seeing a pretty girl. He also could “almost” do Jingle Bells (badly), mimic a barking dog, a landline phone ring (he was that old), or the sound of a construction vehicle backing up. I posted a video of his jingle bells and a finishing “pretty bird” on Instagram here. Take a listen.
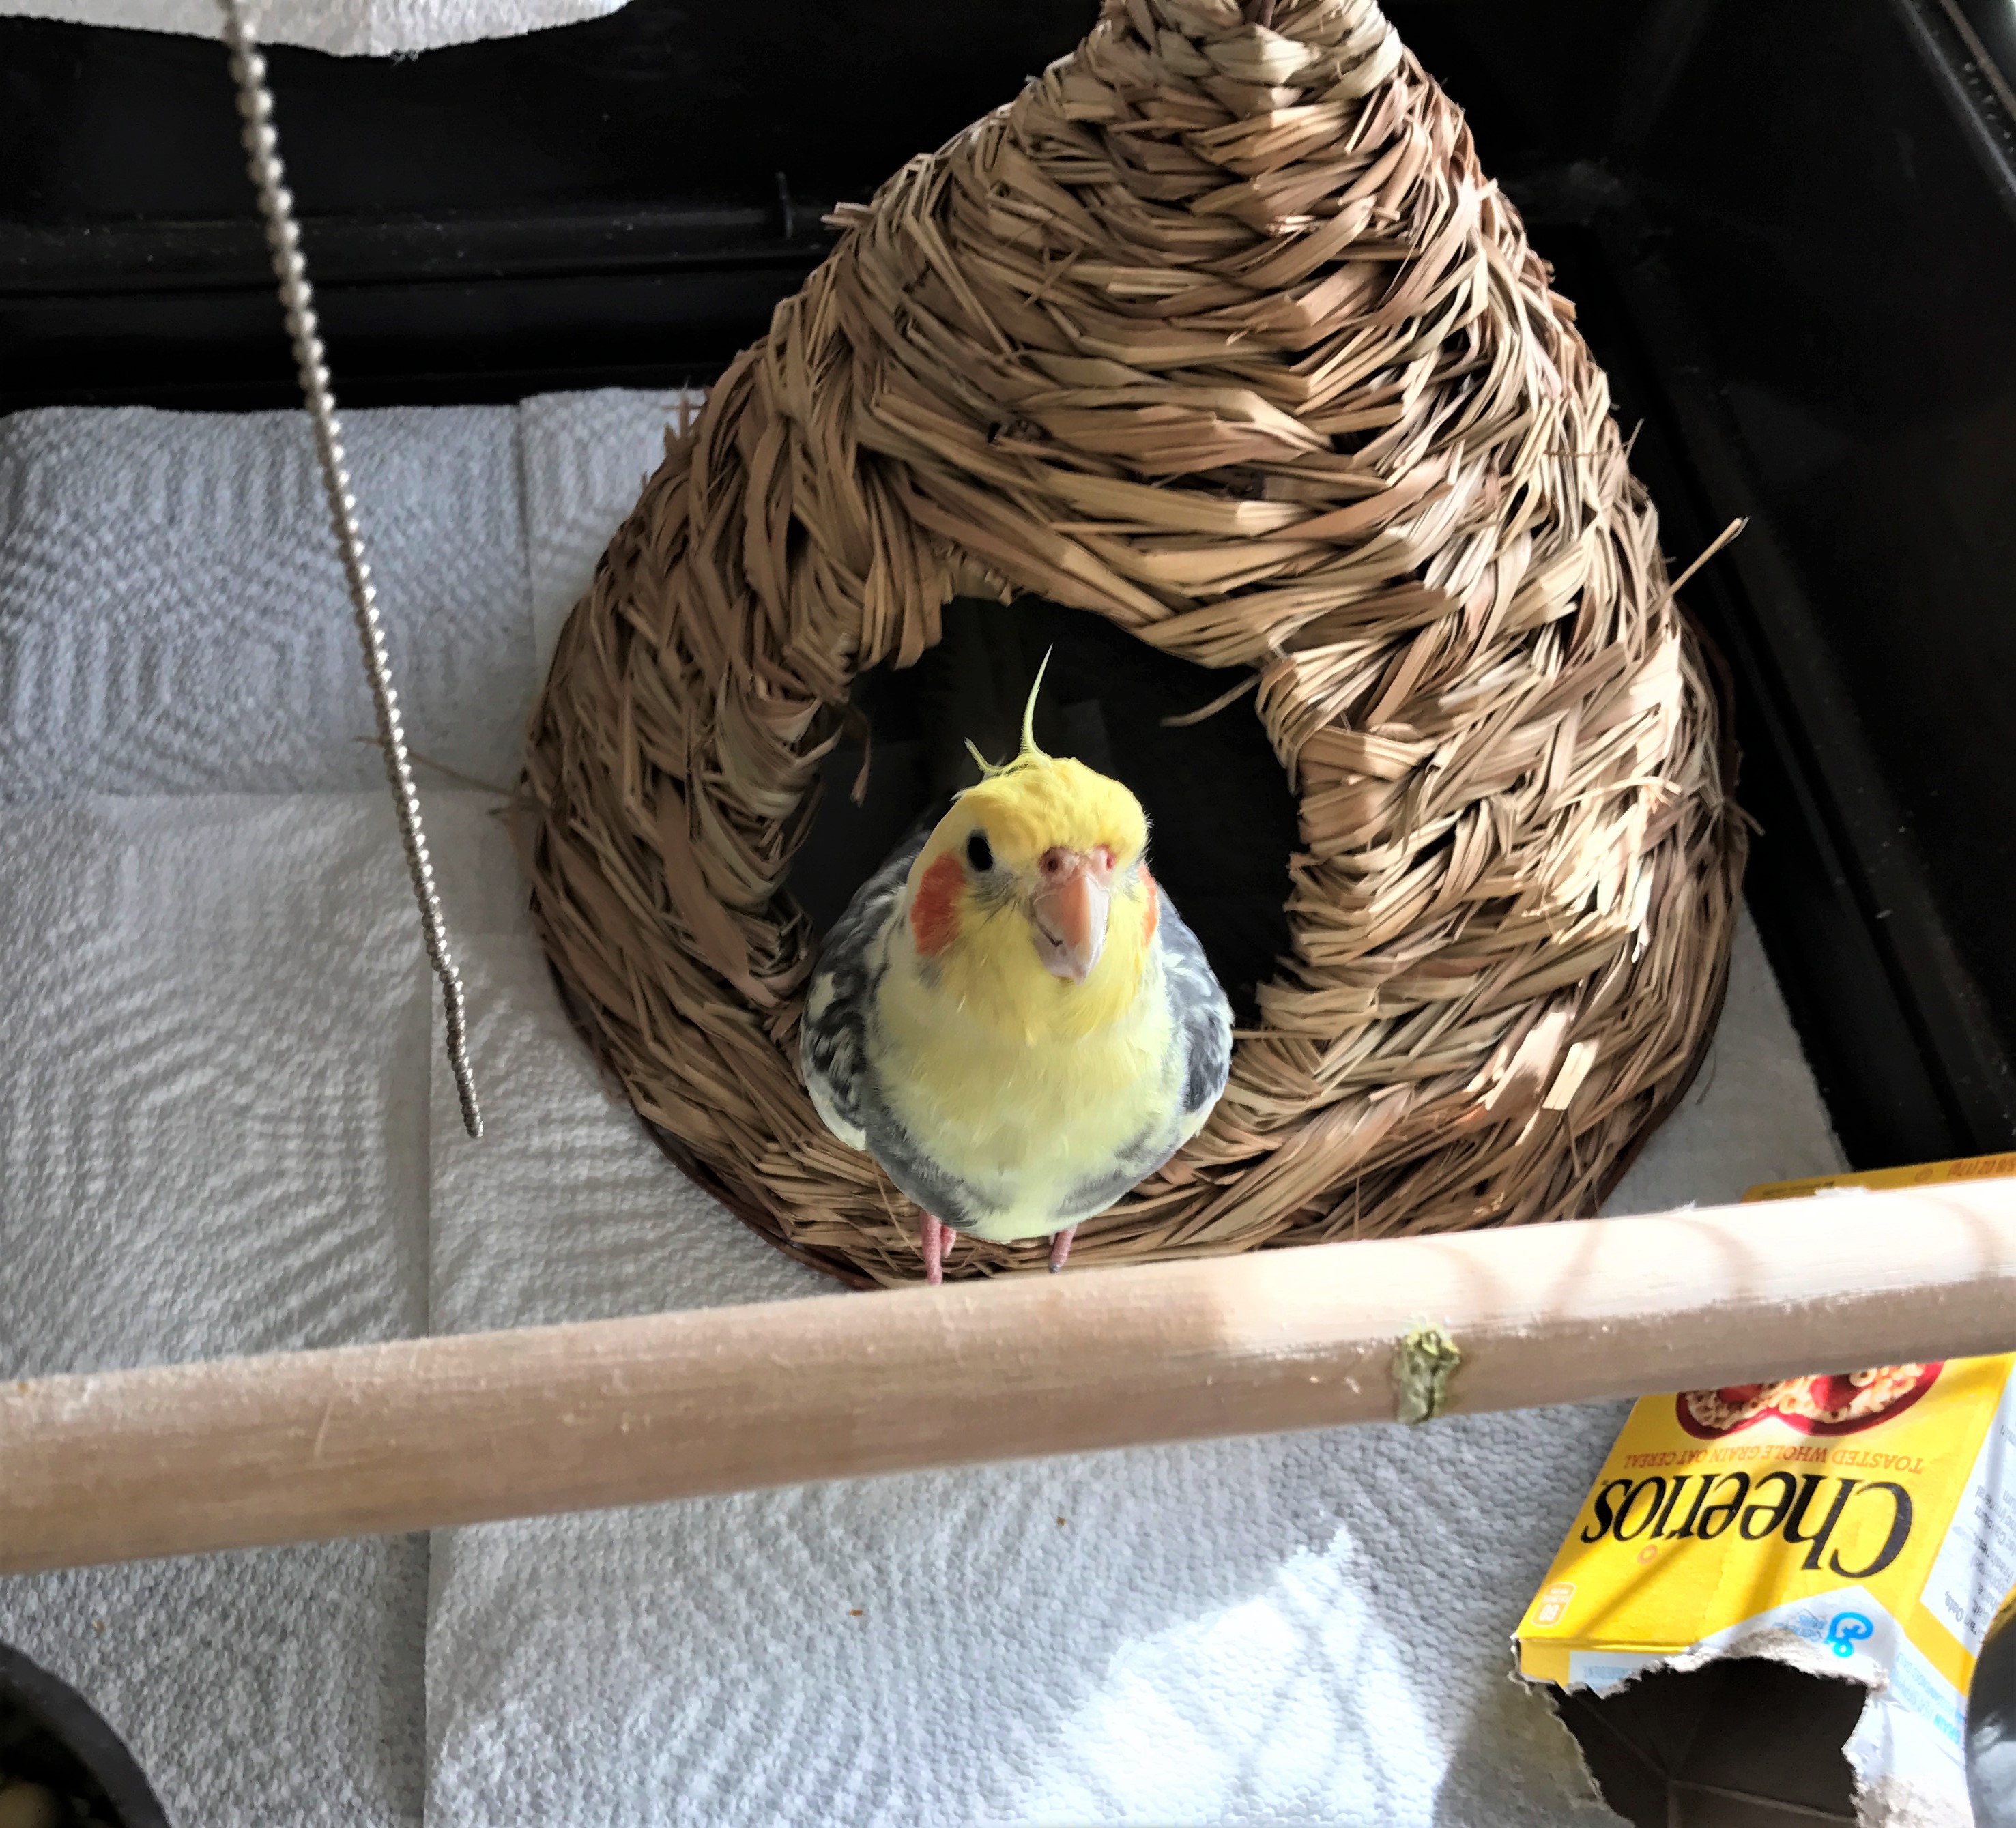
He loved being in closed spaces (cockatiels in Australia live in holes in trees so I supposed this was instinctual). Out of old shoe boxes, I cut out houses for him and mounted them to the top of his cage. These were his “apartments” and he loved to make them his own by chewing them up. We also got him straw tepees and boxes designed for gerbils and he loved being in them too.
We spoiled him – he got more than bird seed – he like “people food”. His favorites were lobster and steamed clams (just the necks). Whenever he got them, he’d warble in excitement as he ate them.
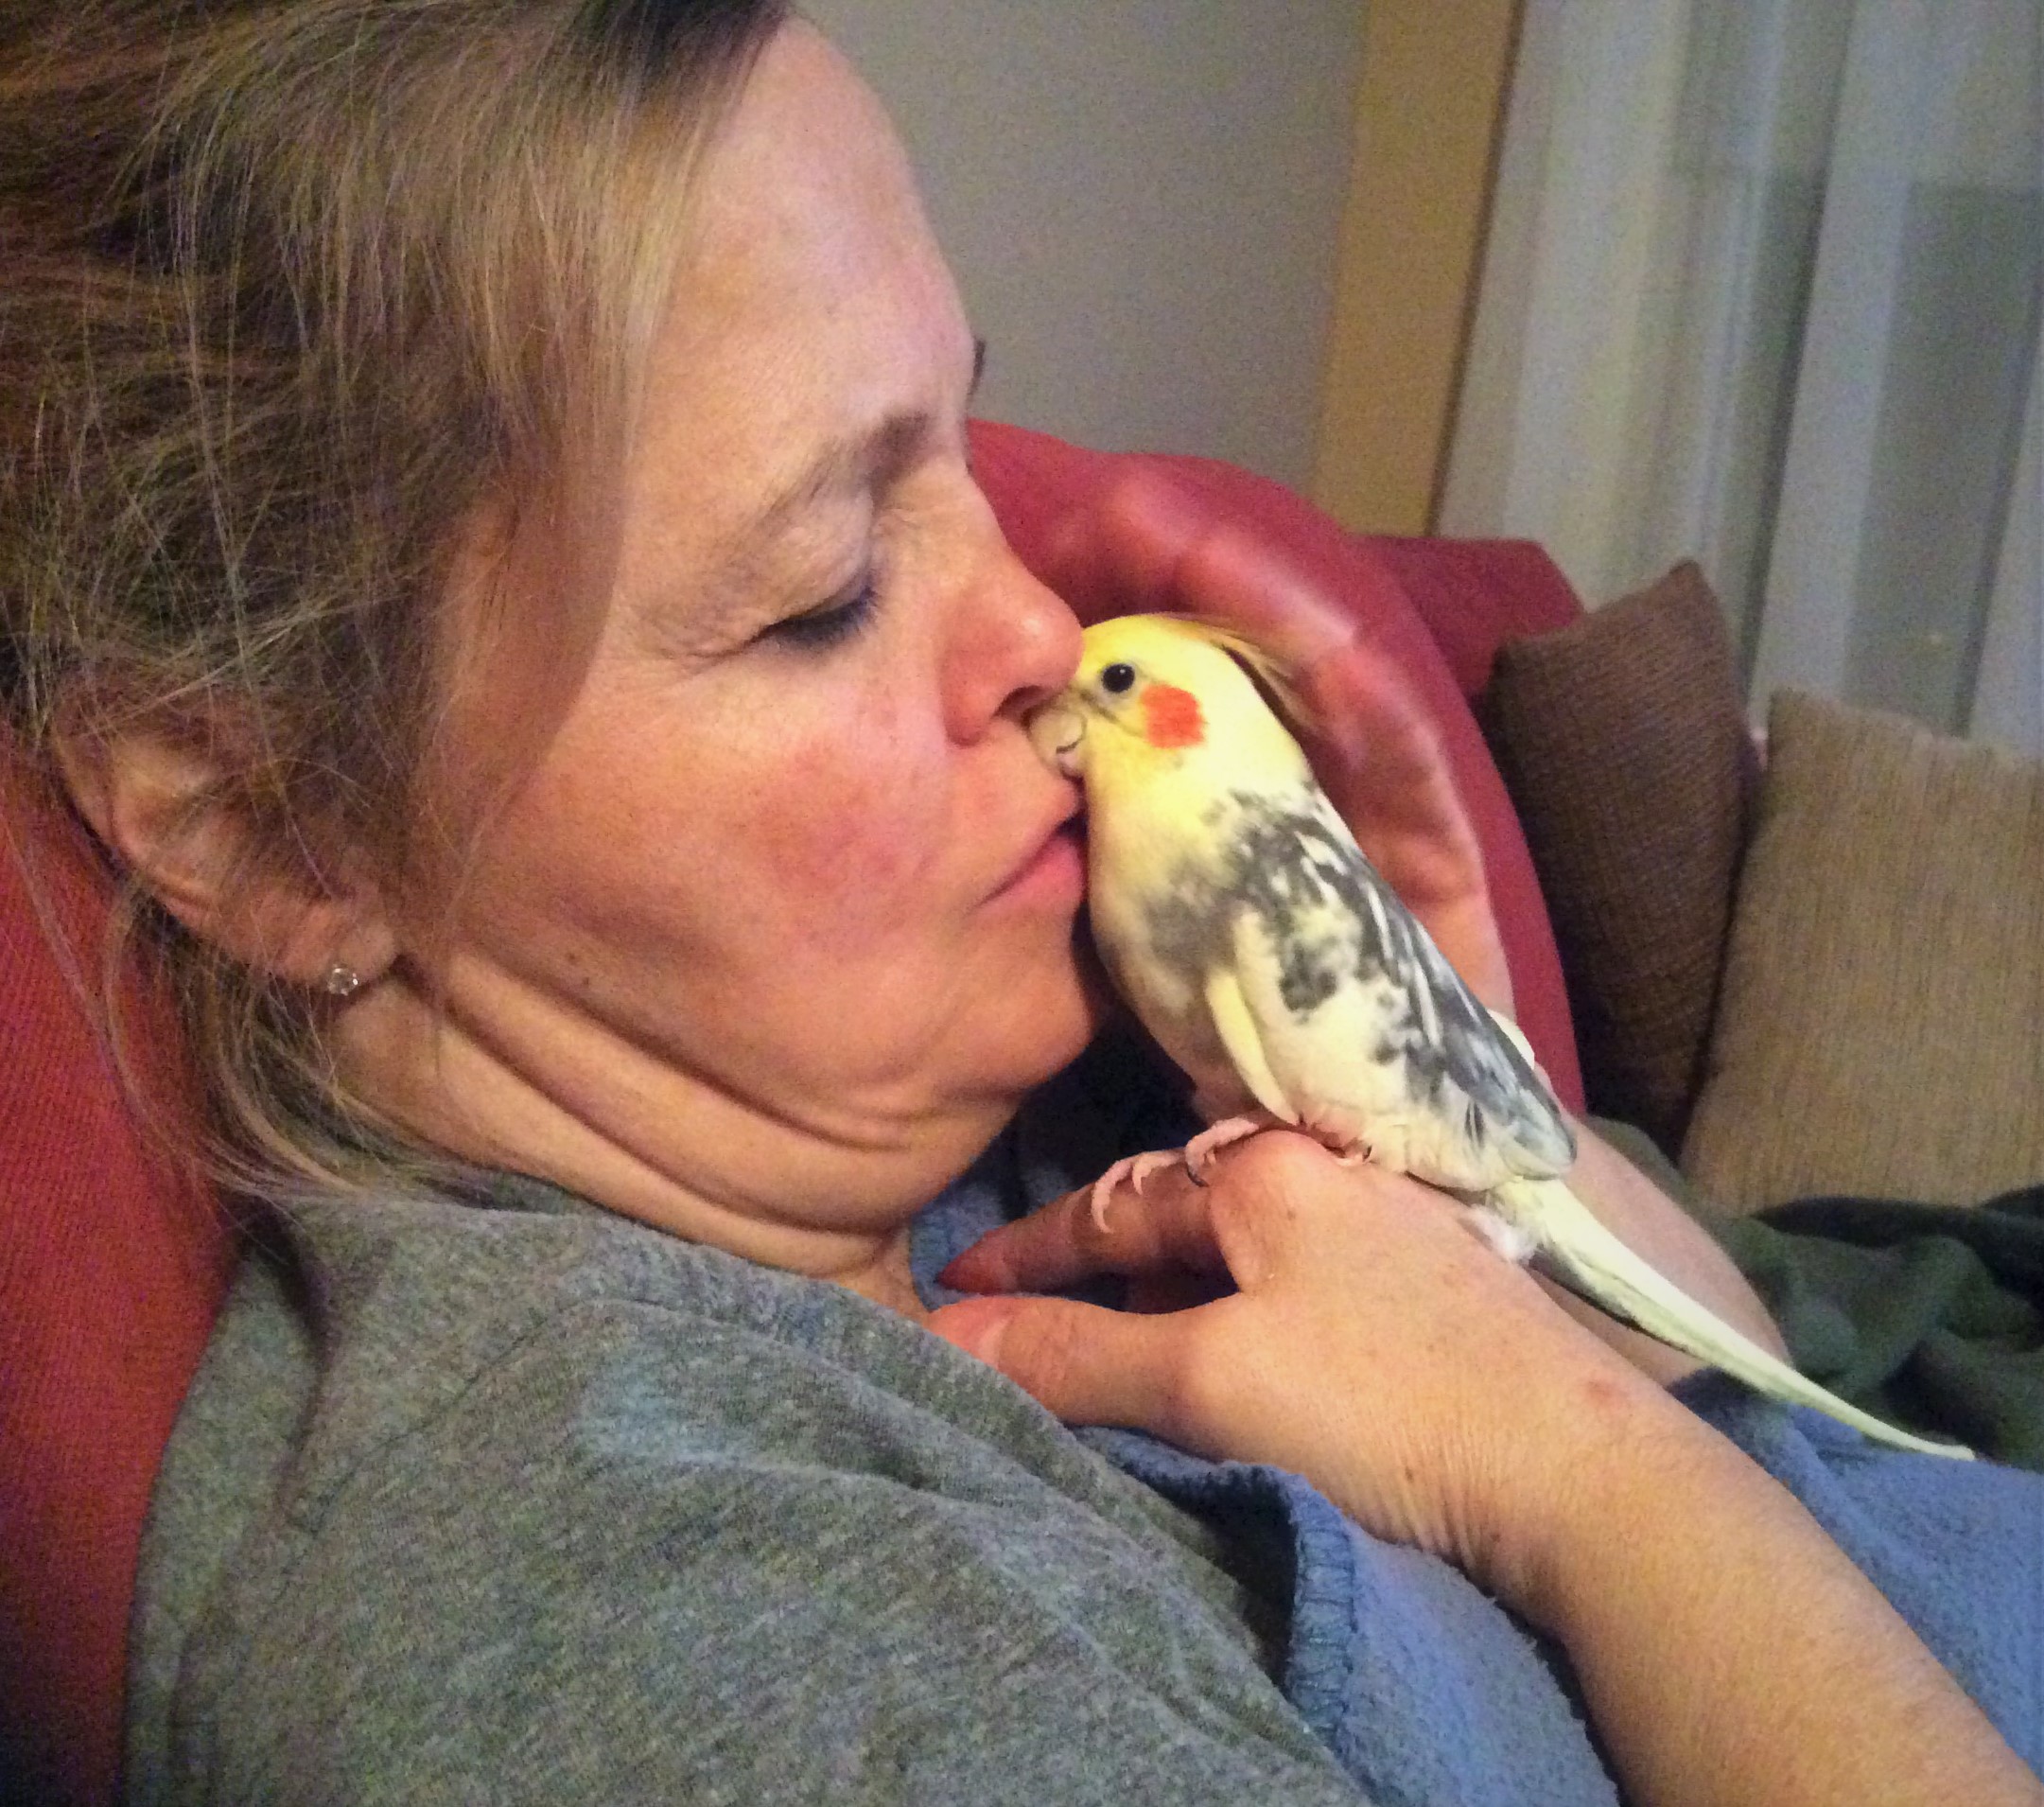
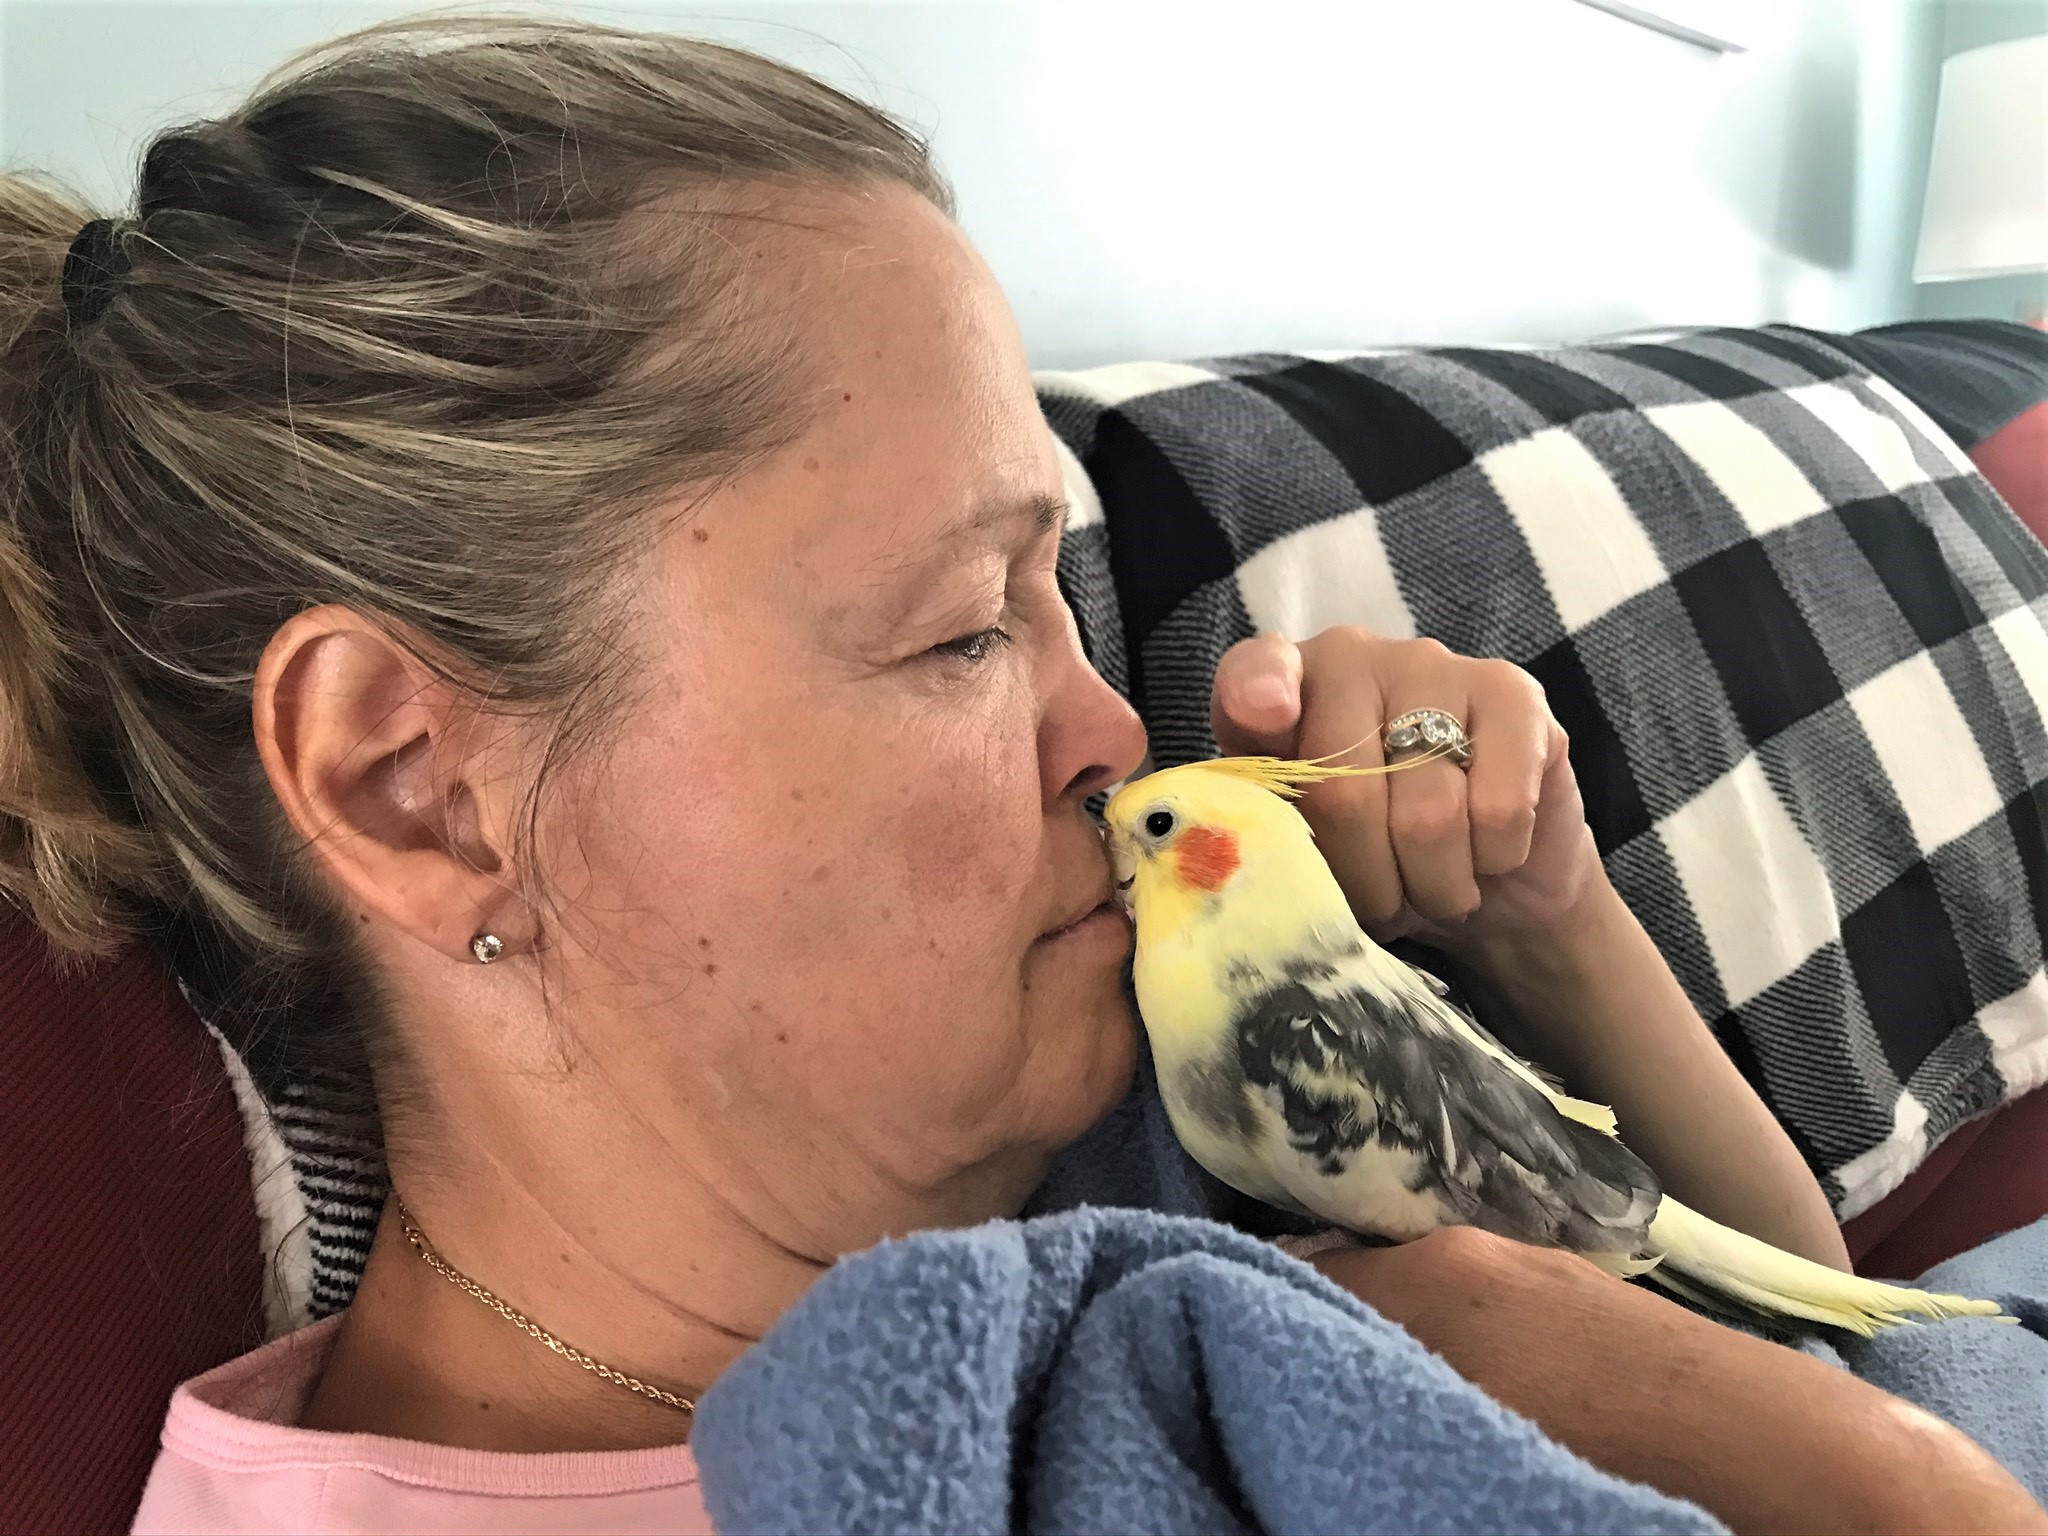
He’d cuddle with Lynn and get his head scratched. I could get to scratch his head, but only Lynn could get face to face with him. She called Caesar her son, and loved the hell out of him. So did I.
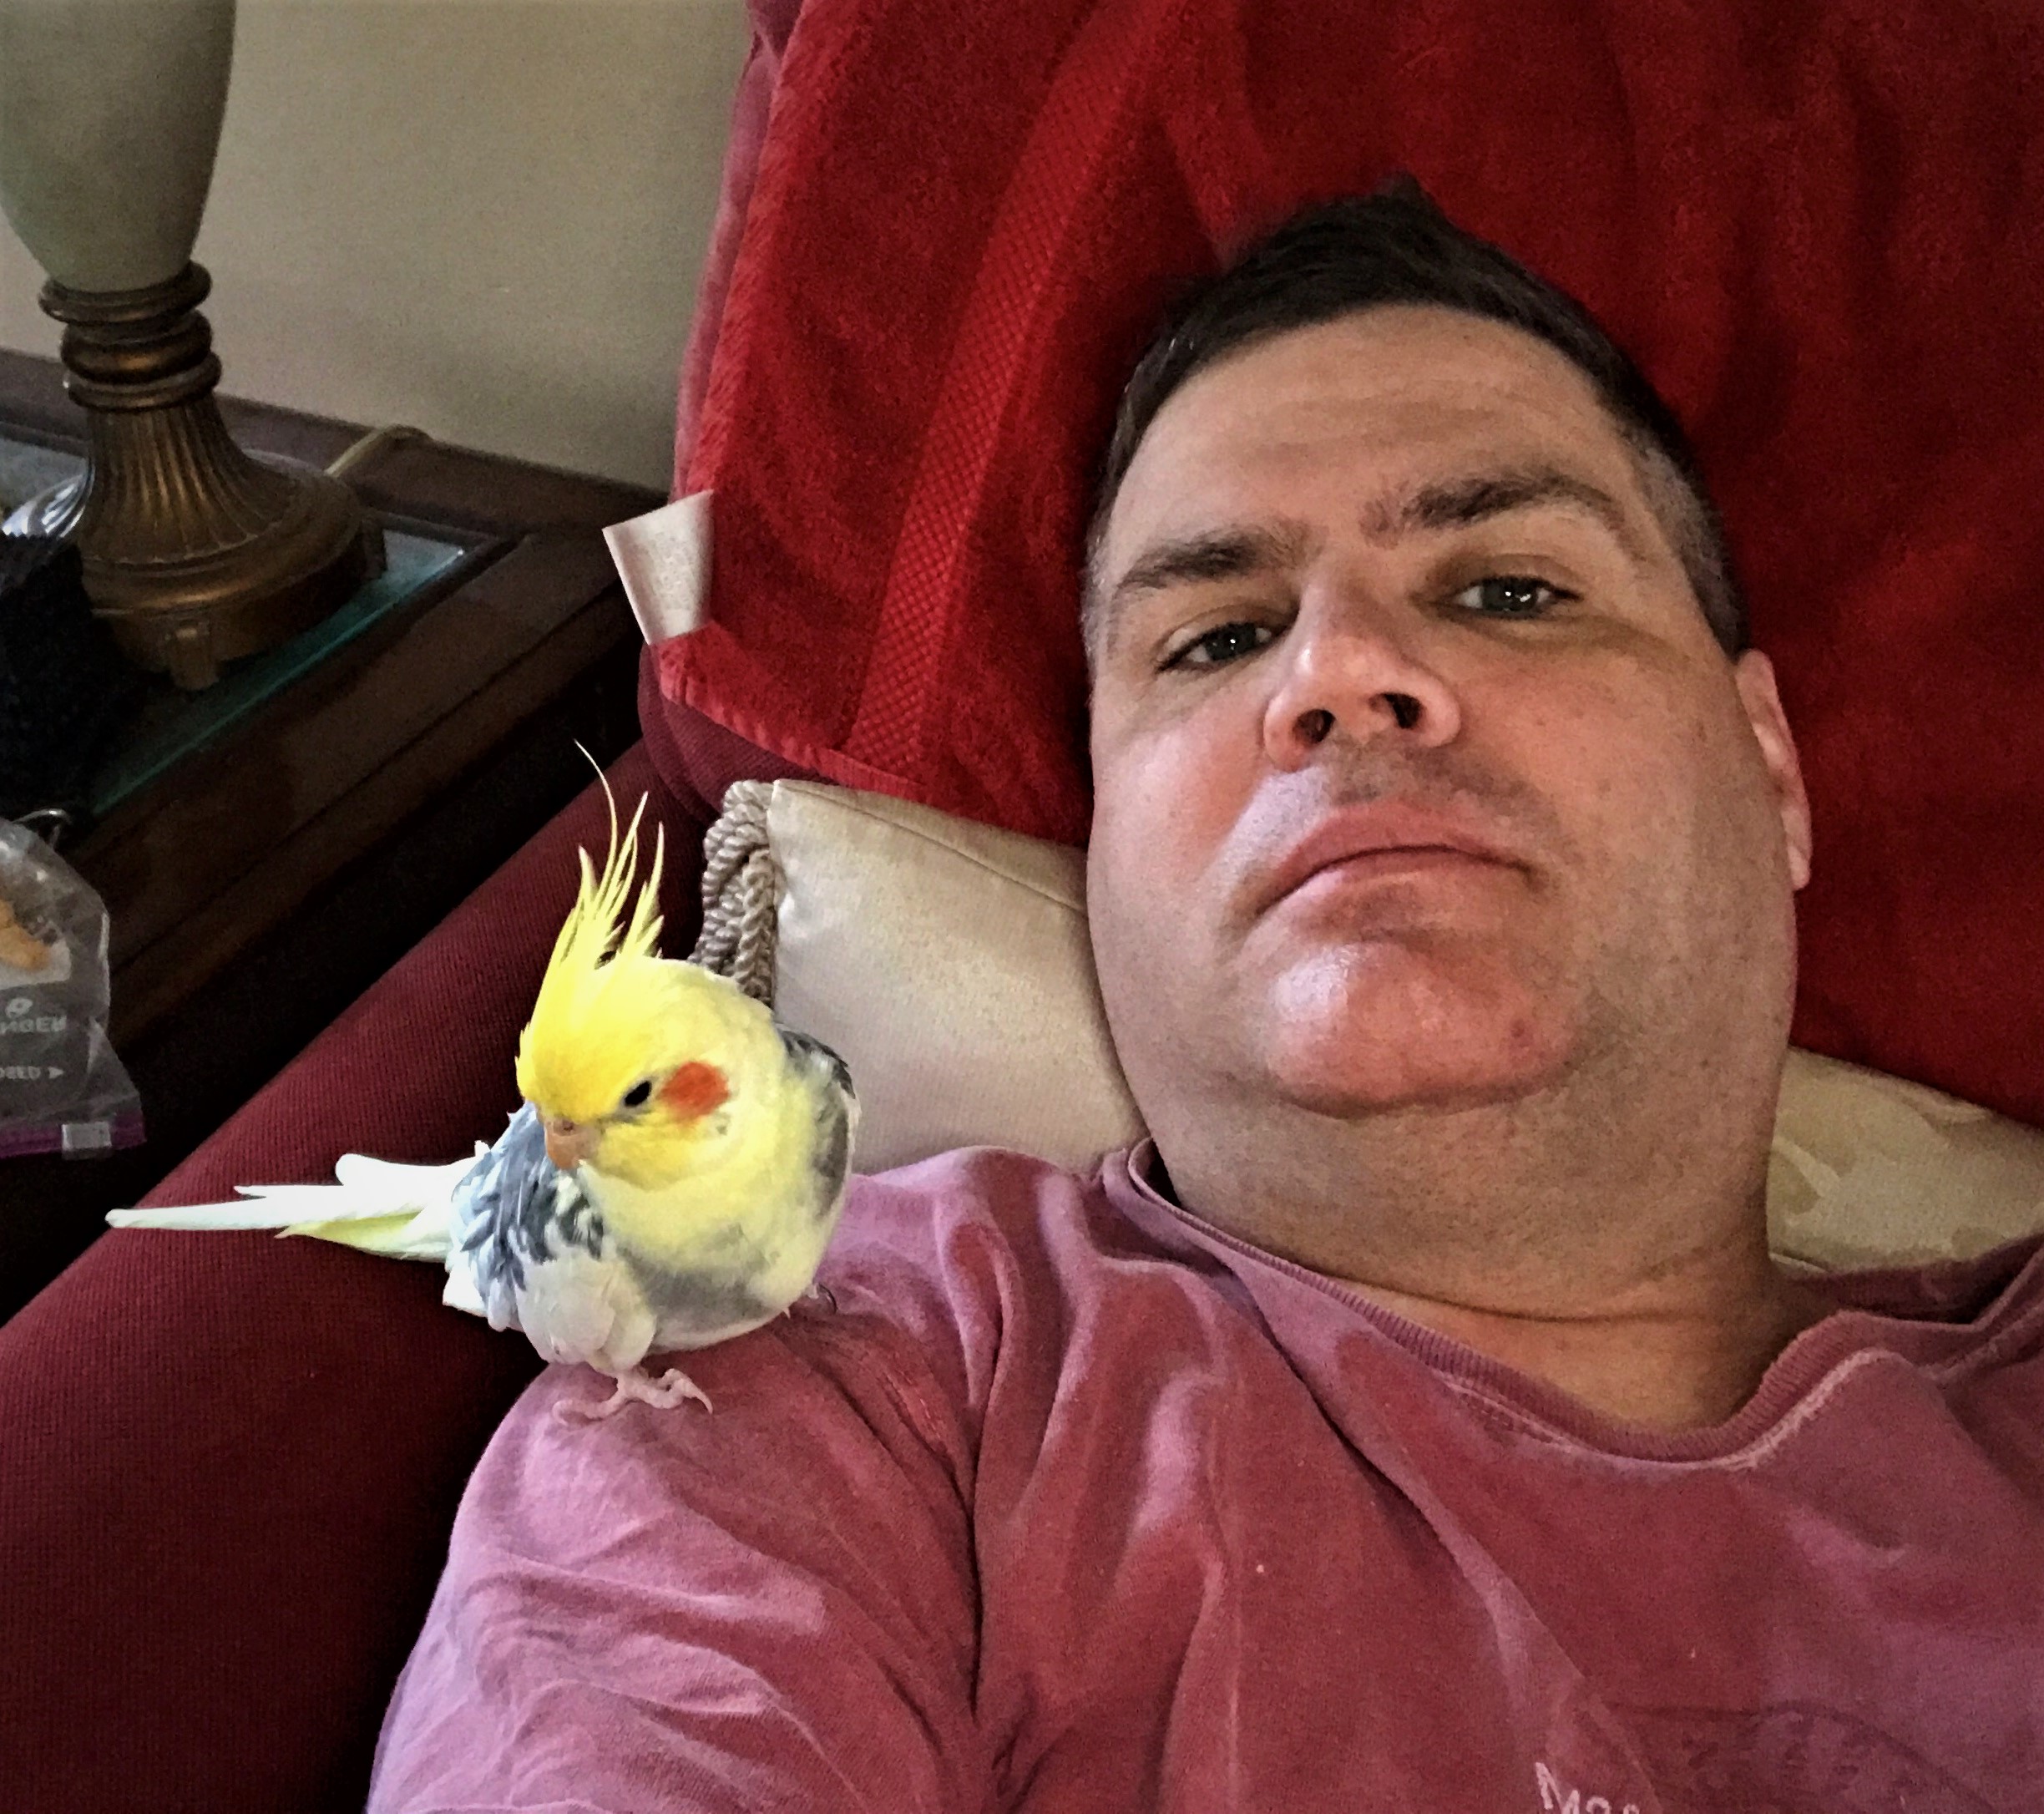
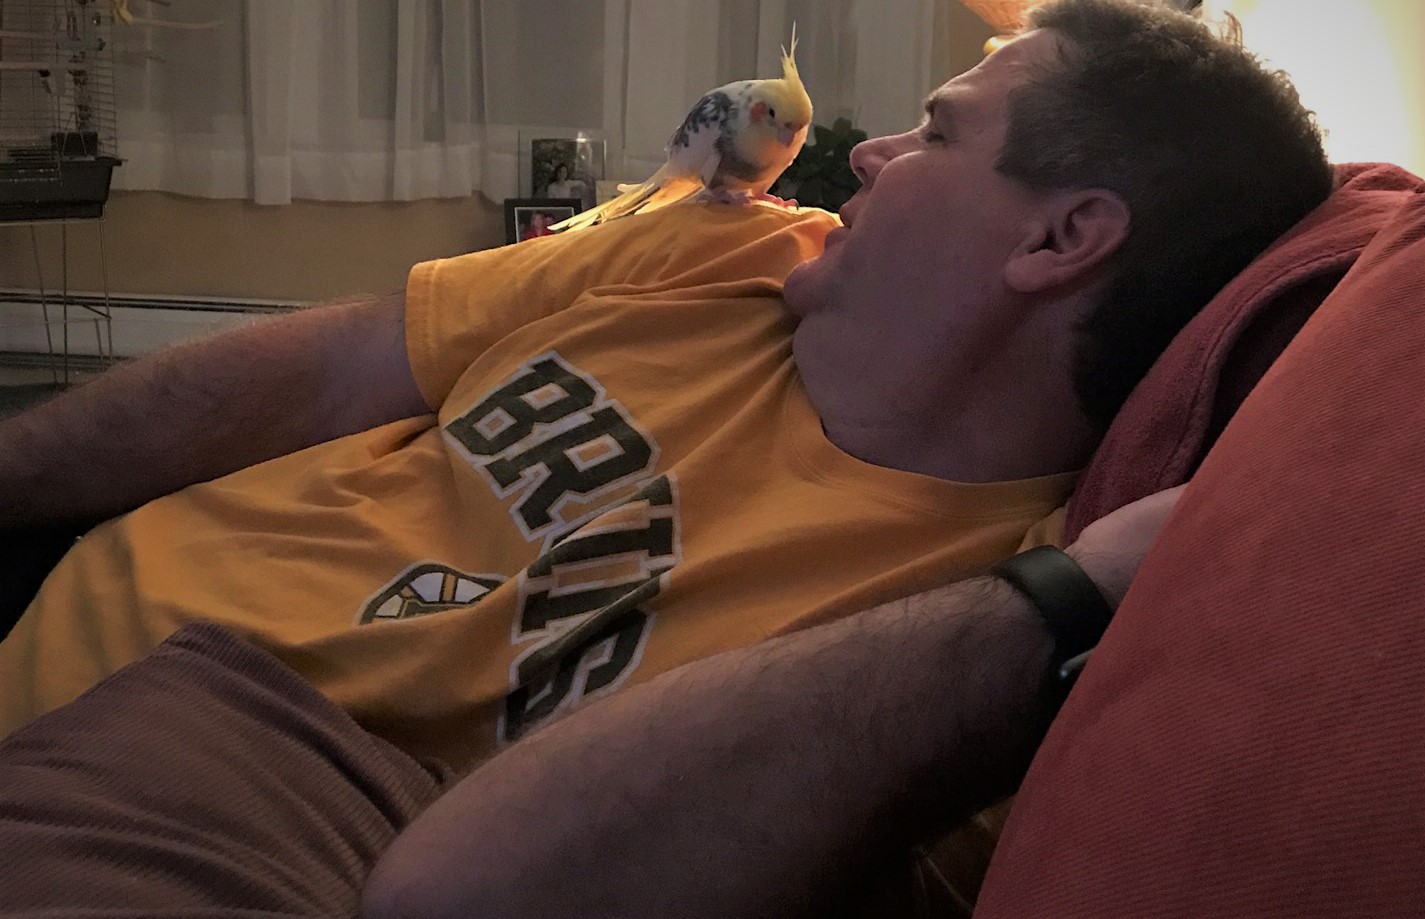
As he aged, I looked to see how long he might live – after all, we knew his loss would be devastating to us. I think the world record is 35, though rarely wo they make 30. Most times it’s 20 and done, if not shorter. Still, he was always there. As I went through multiple surgeries over the years, he kept me company as I recovered.
I said goodnight to him every night, and greeted him every morning. Until last night and this morning that is.
He was the equivalent of a human at 103 years old.
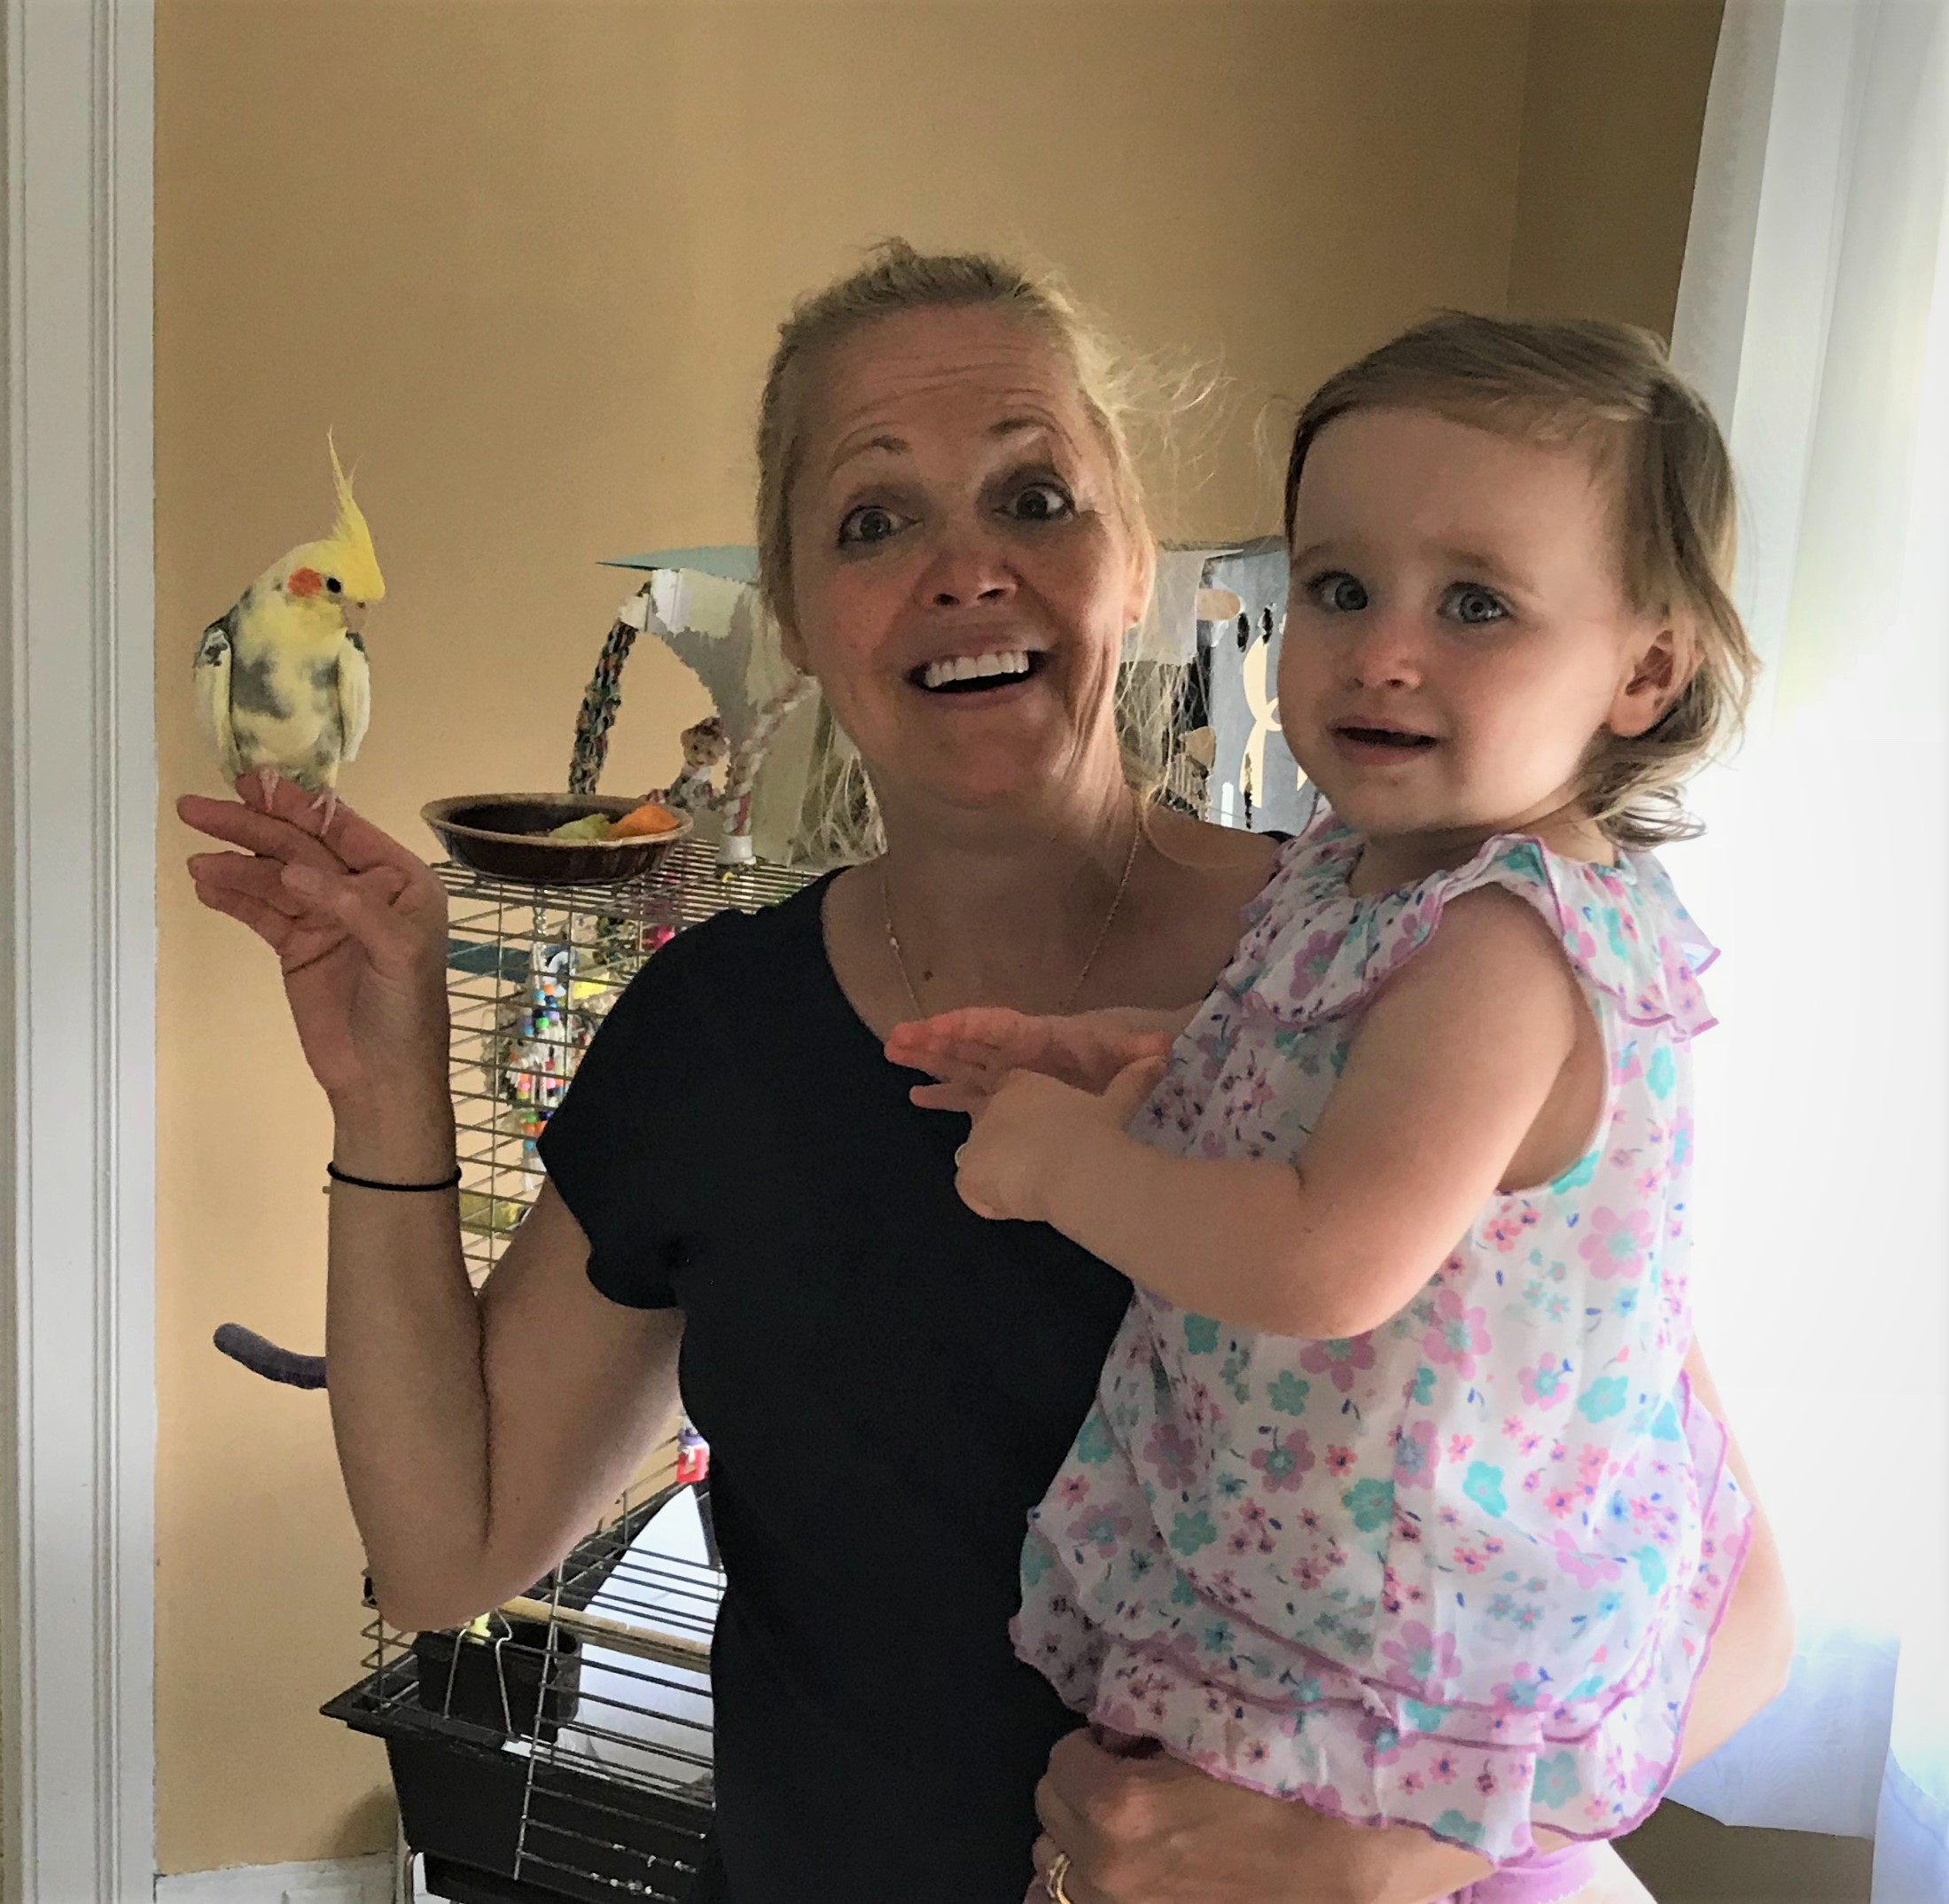
On New Year’s Eve, we usually get lobsters and steamers and this was no exception this year. Caesar was so happy he ate three clam necks and some lobster – warbling his happiness. On New Year’s Day, Lynn took a selfie with him (see photos below), and cuddled with him. By later in the day, he had started getting listless and had trouble walking. He had been arthritic, but this was worse. Lynn cuddled him, and soothed him. Within an hour and a half, he breathed his last and died in her arms.
We are broken hearted of course, but are somewhat comforted in that we know he had a good pampered life. We rarely left him with babysitters (I think only 3 times in 27 years), as Lynn (and I) did not want him to be stressed. Even then, those times were with family he knew.
It has been unseasonably warm here in Massachusetts. To bury him, I had to buy a new shovel as mine was broken. I drove to Klem’s store in Spencer and got a new D-handled shovel – and on the way out looked at the 4 cockatiels in the pet section and cried even more.
Lynn put him in a nice cedar box. For his grave, I dug the hole in the garden by the house in the front yard, right below the window that he looked out of every day. I used some concrete pavers and 5″-high edgers to put in his grave – such that his little coffin was not resting on or under dirt. Basically, I created a little stone box by putting a 16″ x 16″ paving stone in the bottom of the grave with the edgers making walls on top of it. My daughter Ellen and my granddaughter had come by, and we all surrounded his little box with decorative landscaping stones, then I covered it with another 16″ x 16″ paving stone as a gravestone. Then we decorated the rim with the pretty stones.
I’m going to share some photos below – as this is cathartic for me in a way, but I will never stop remembering my little birdie friend. Love ya buddy.
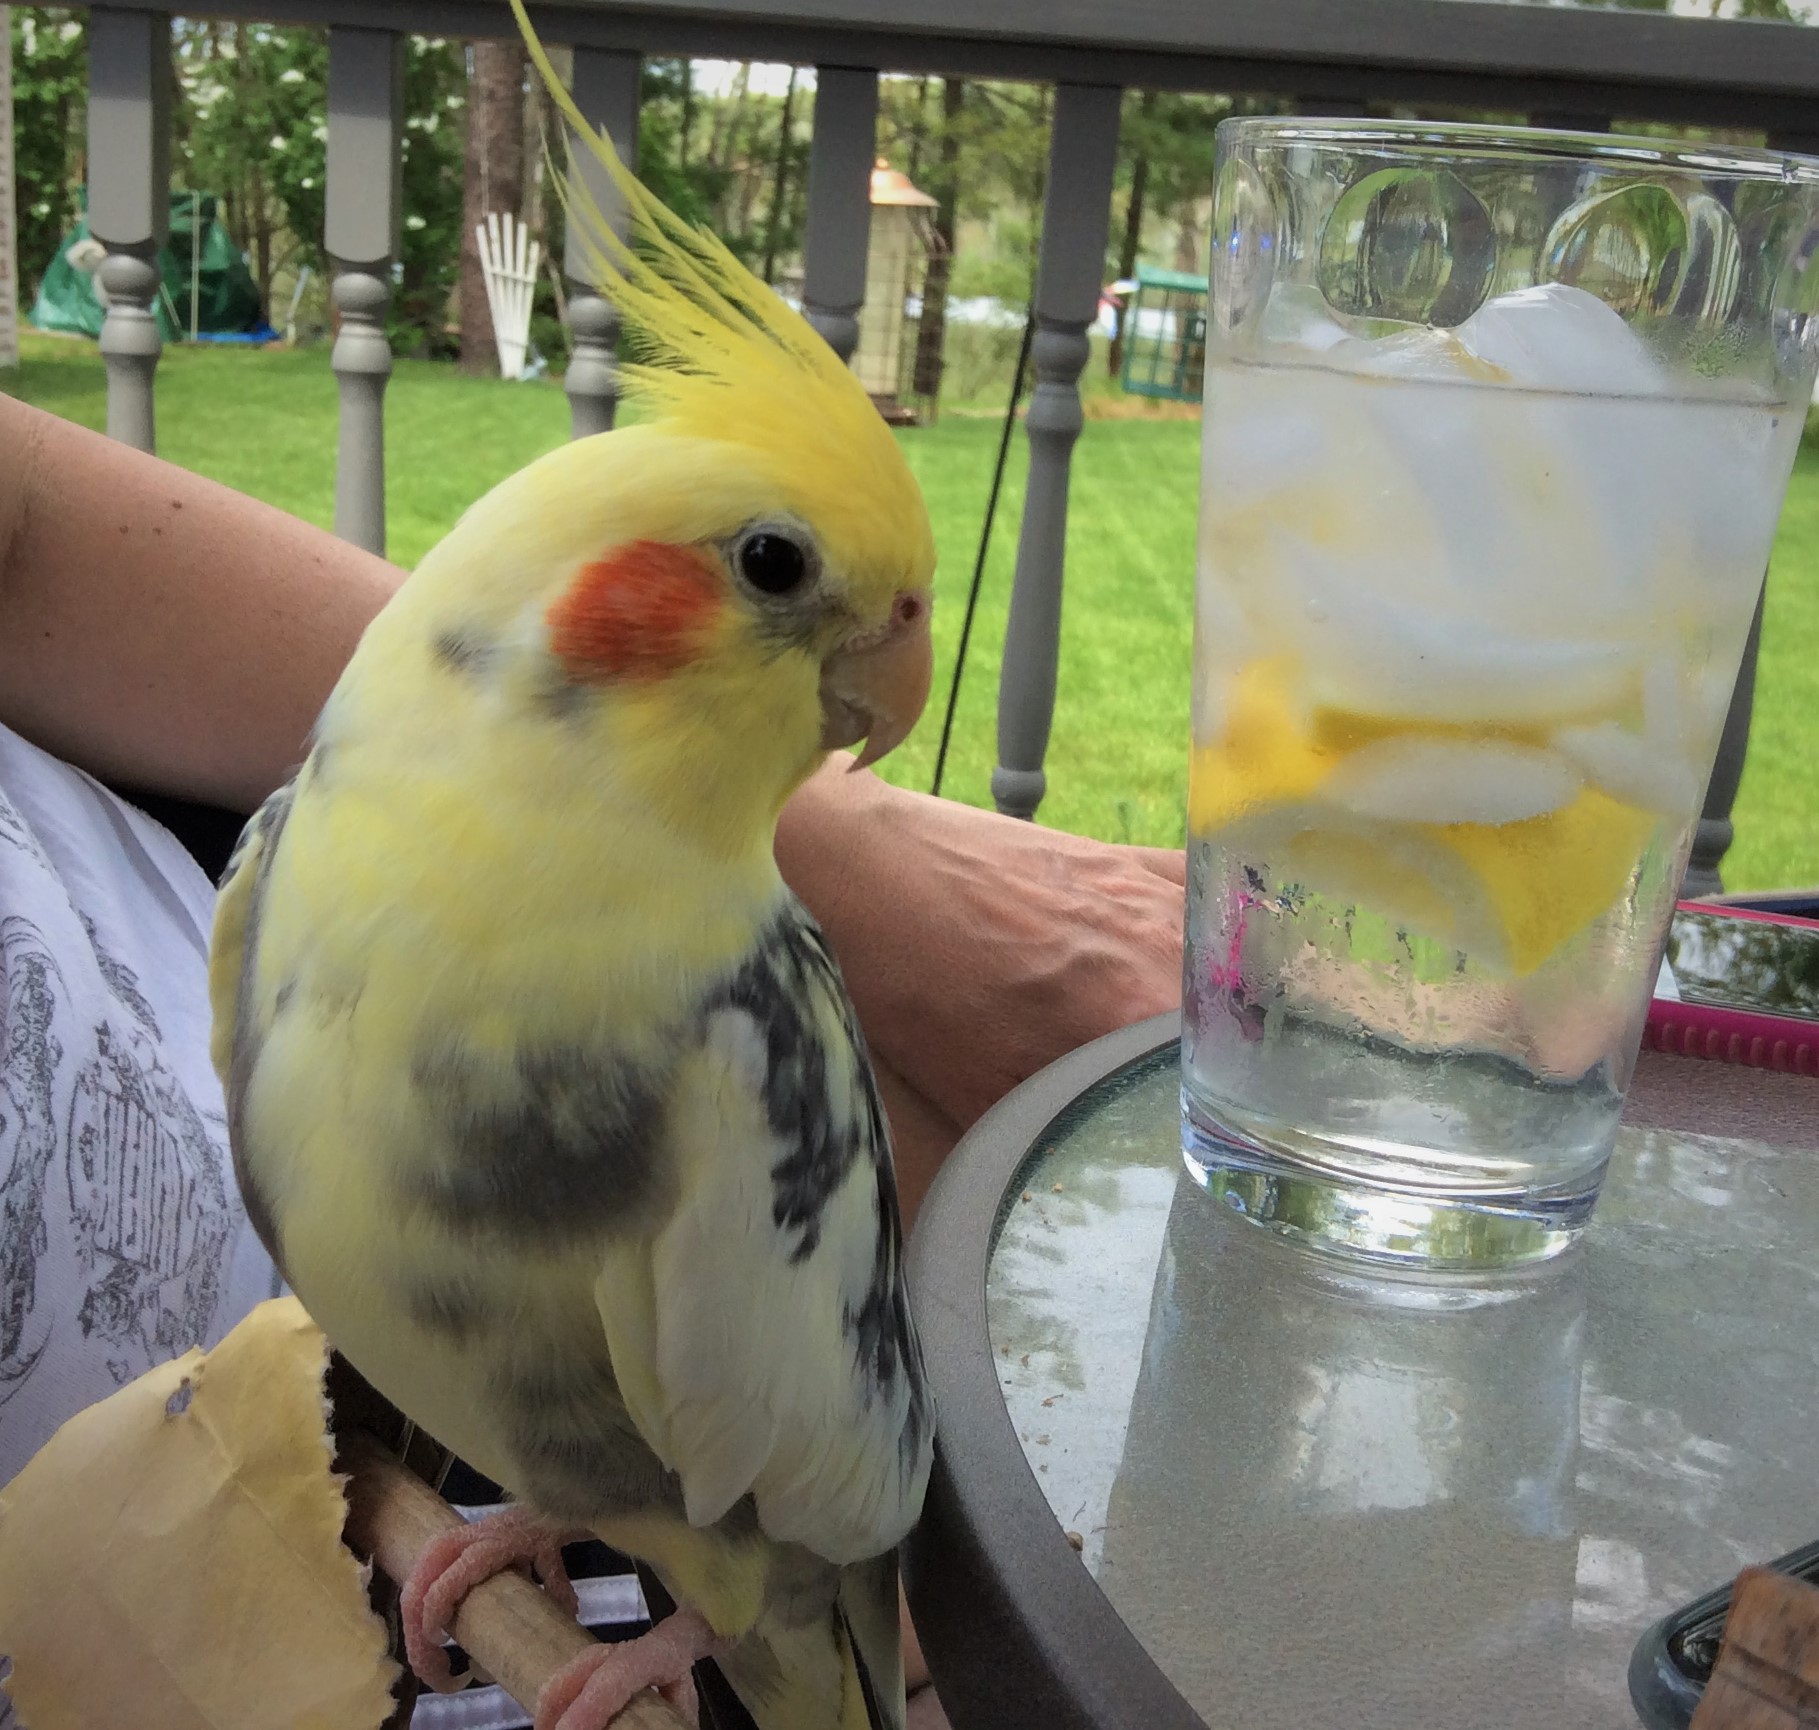
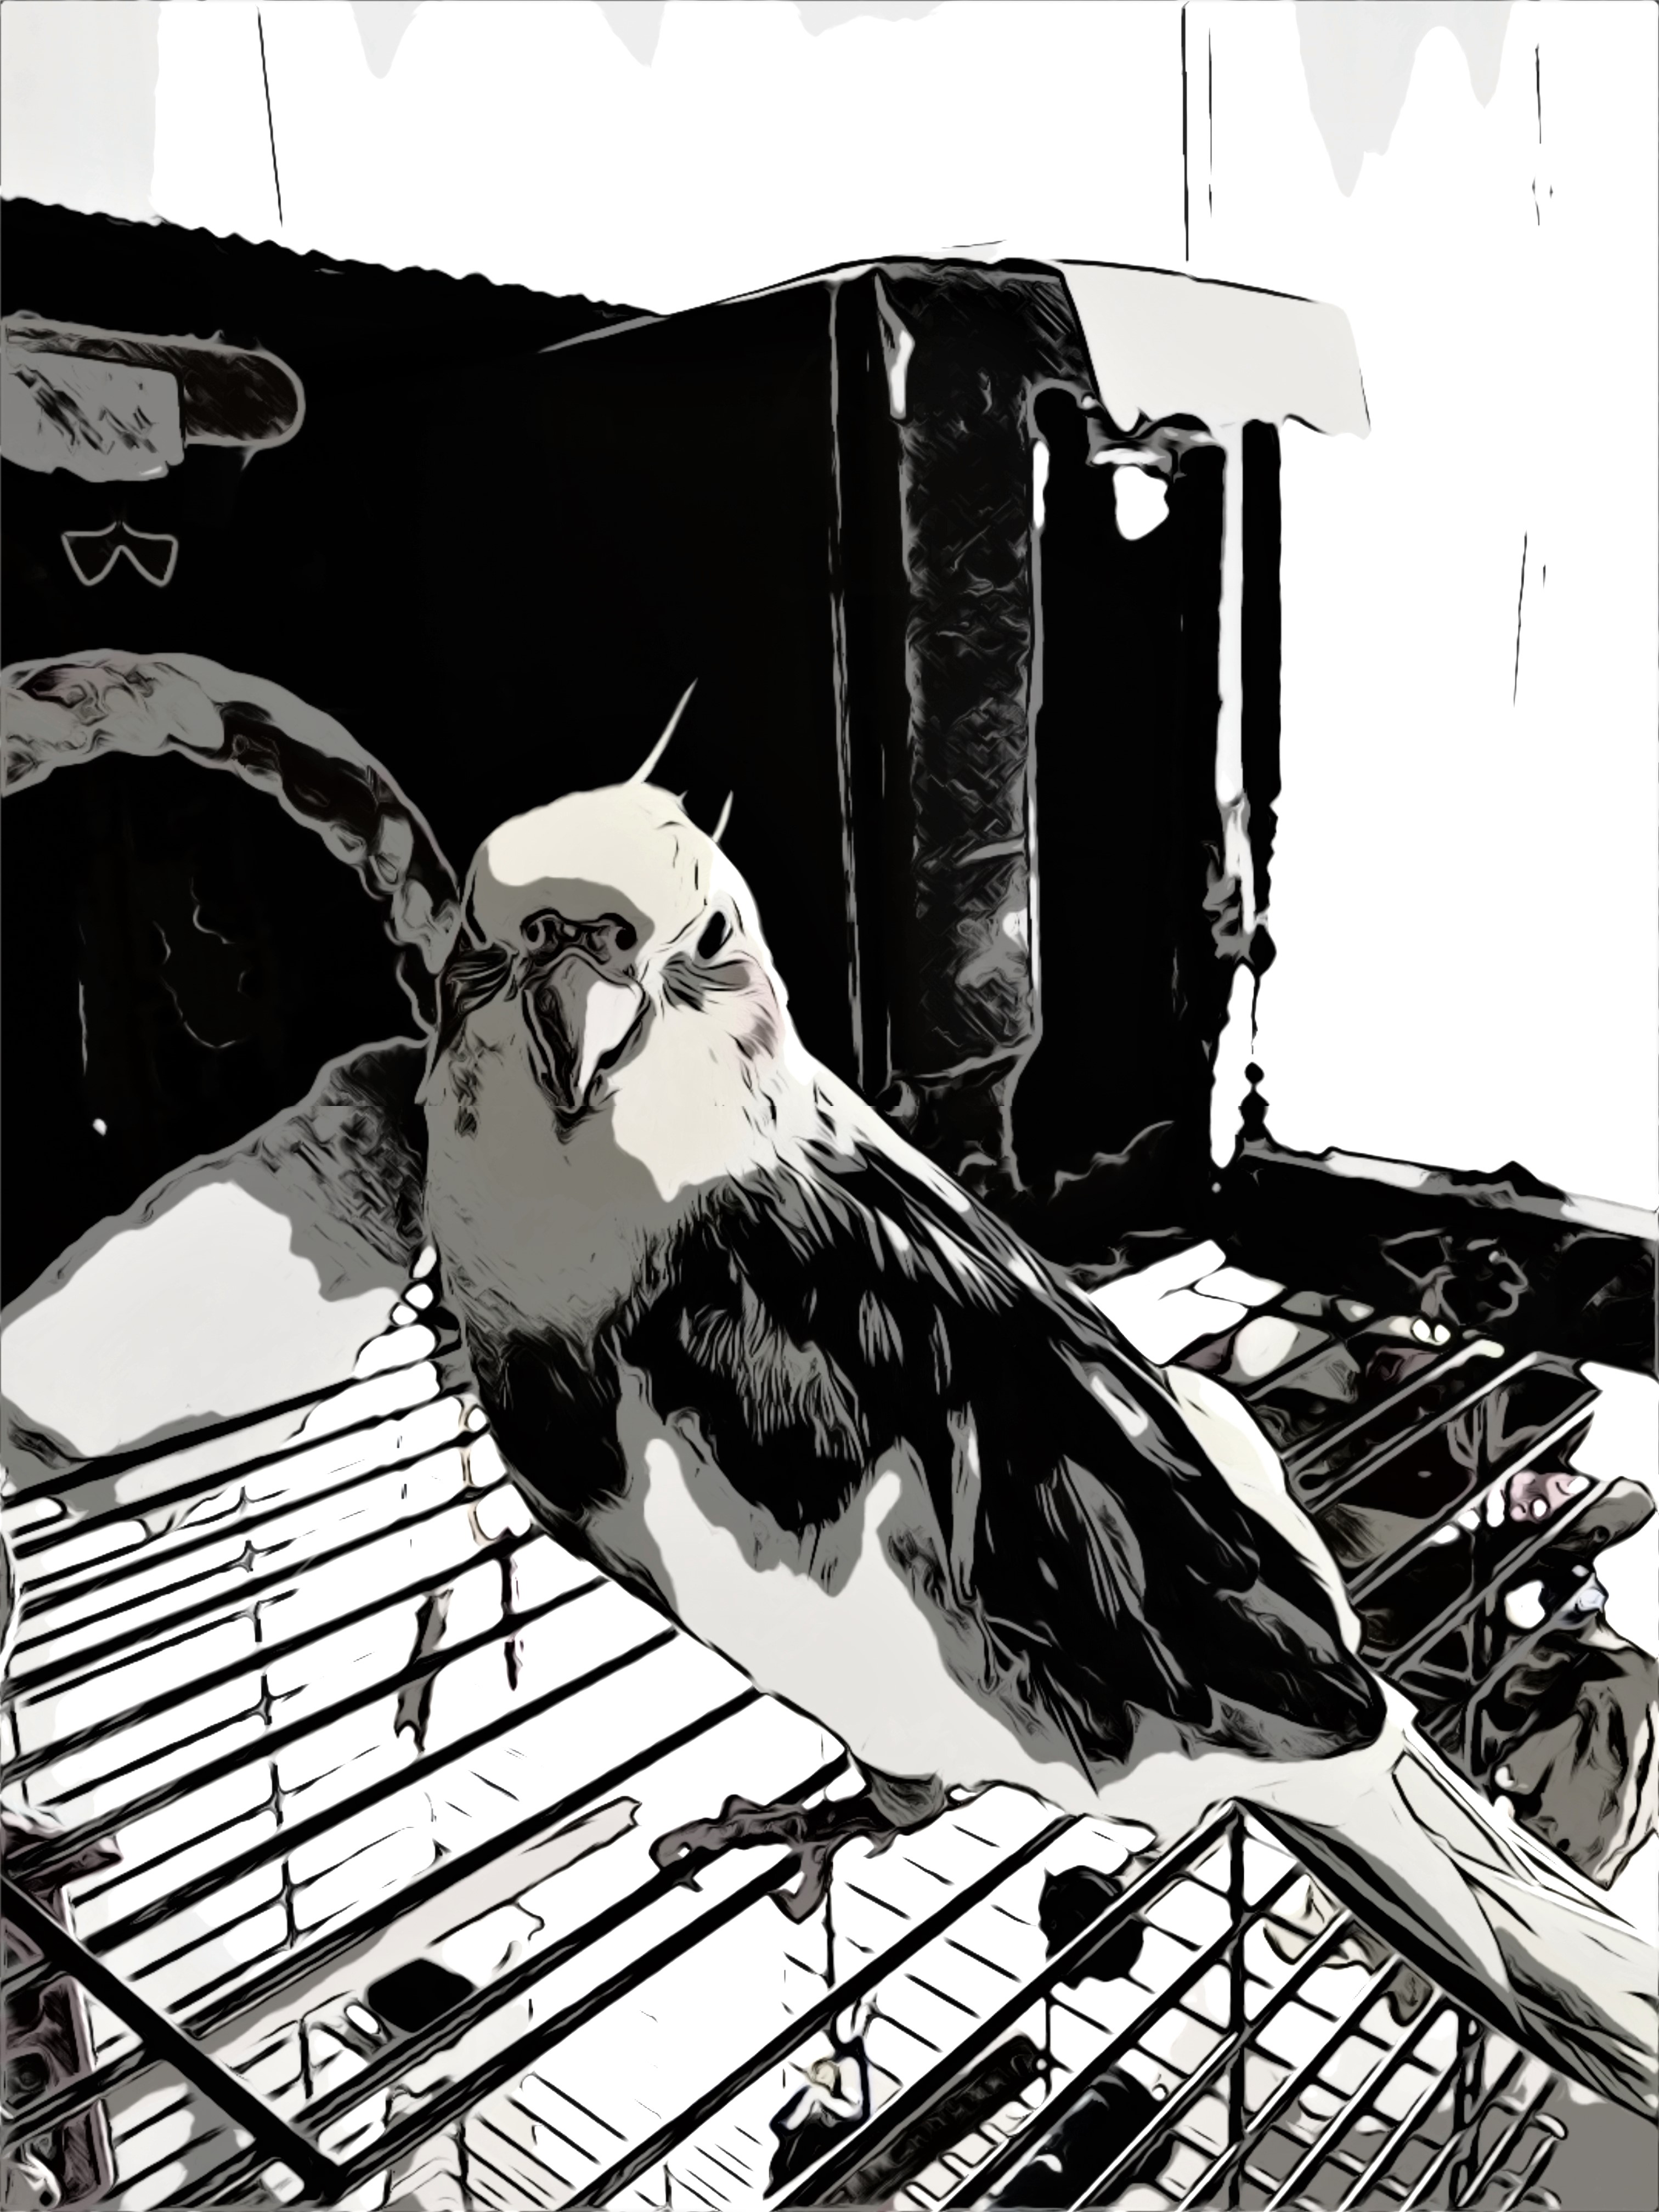
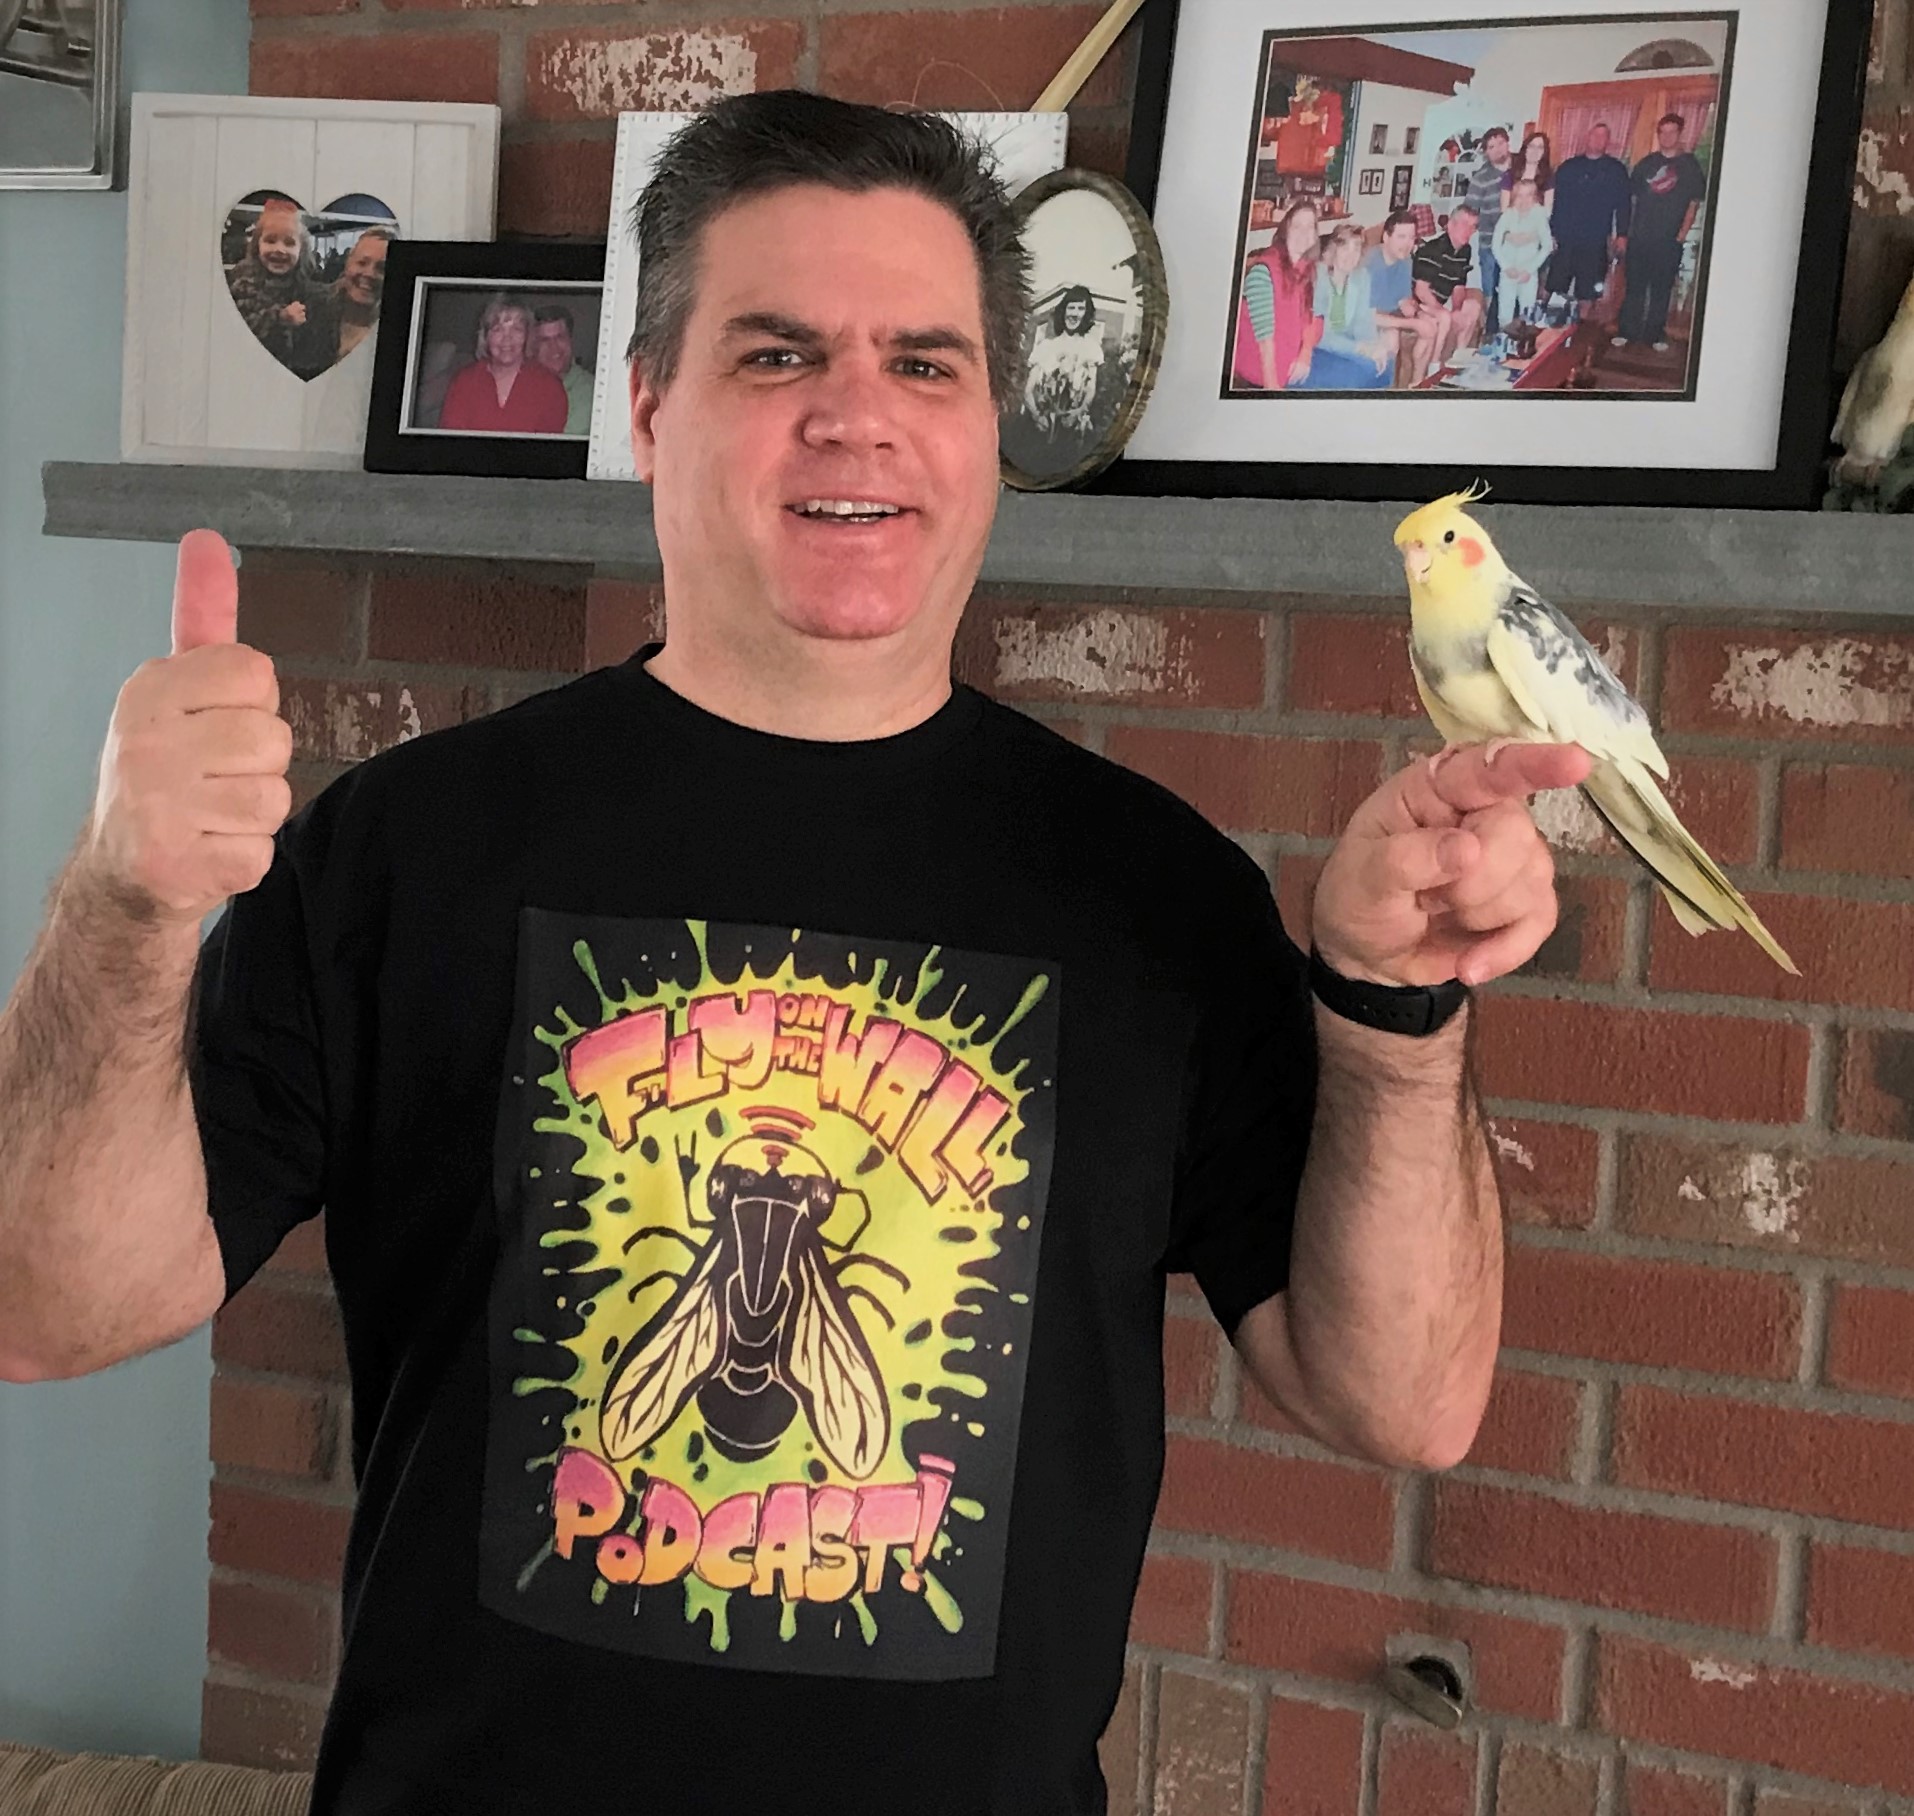
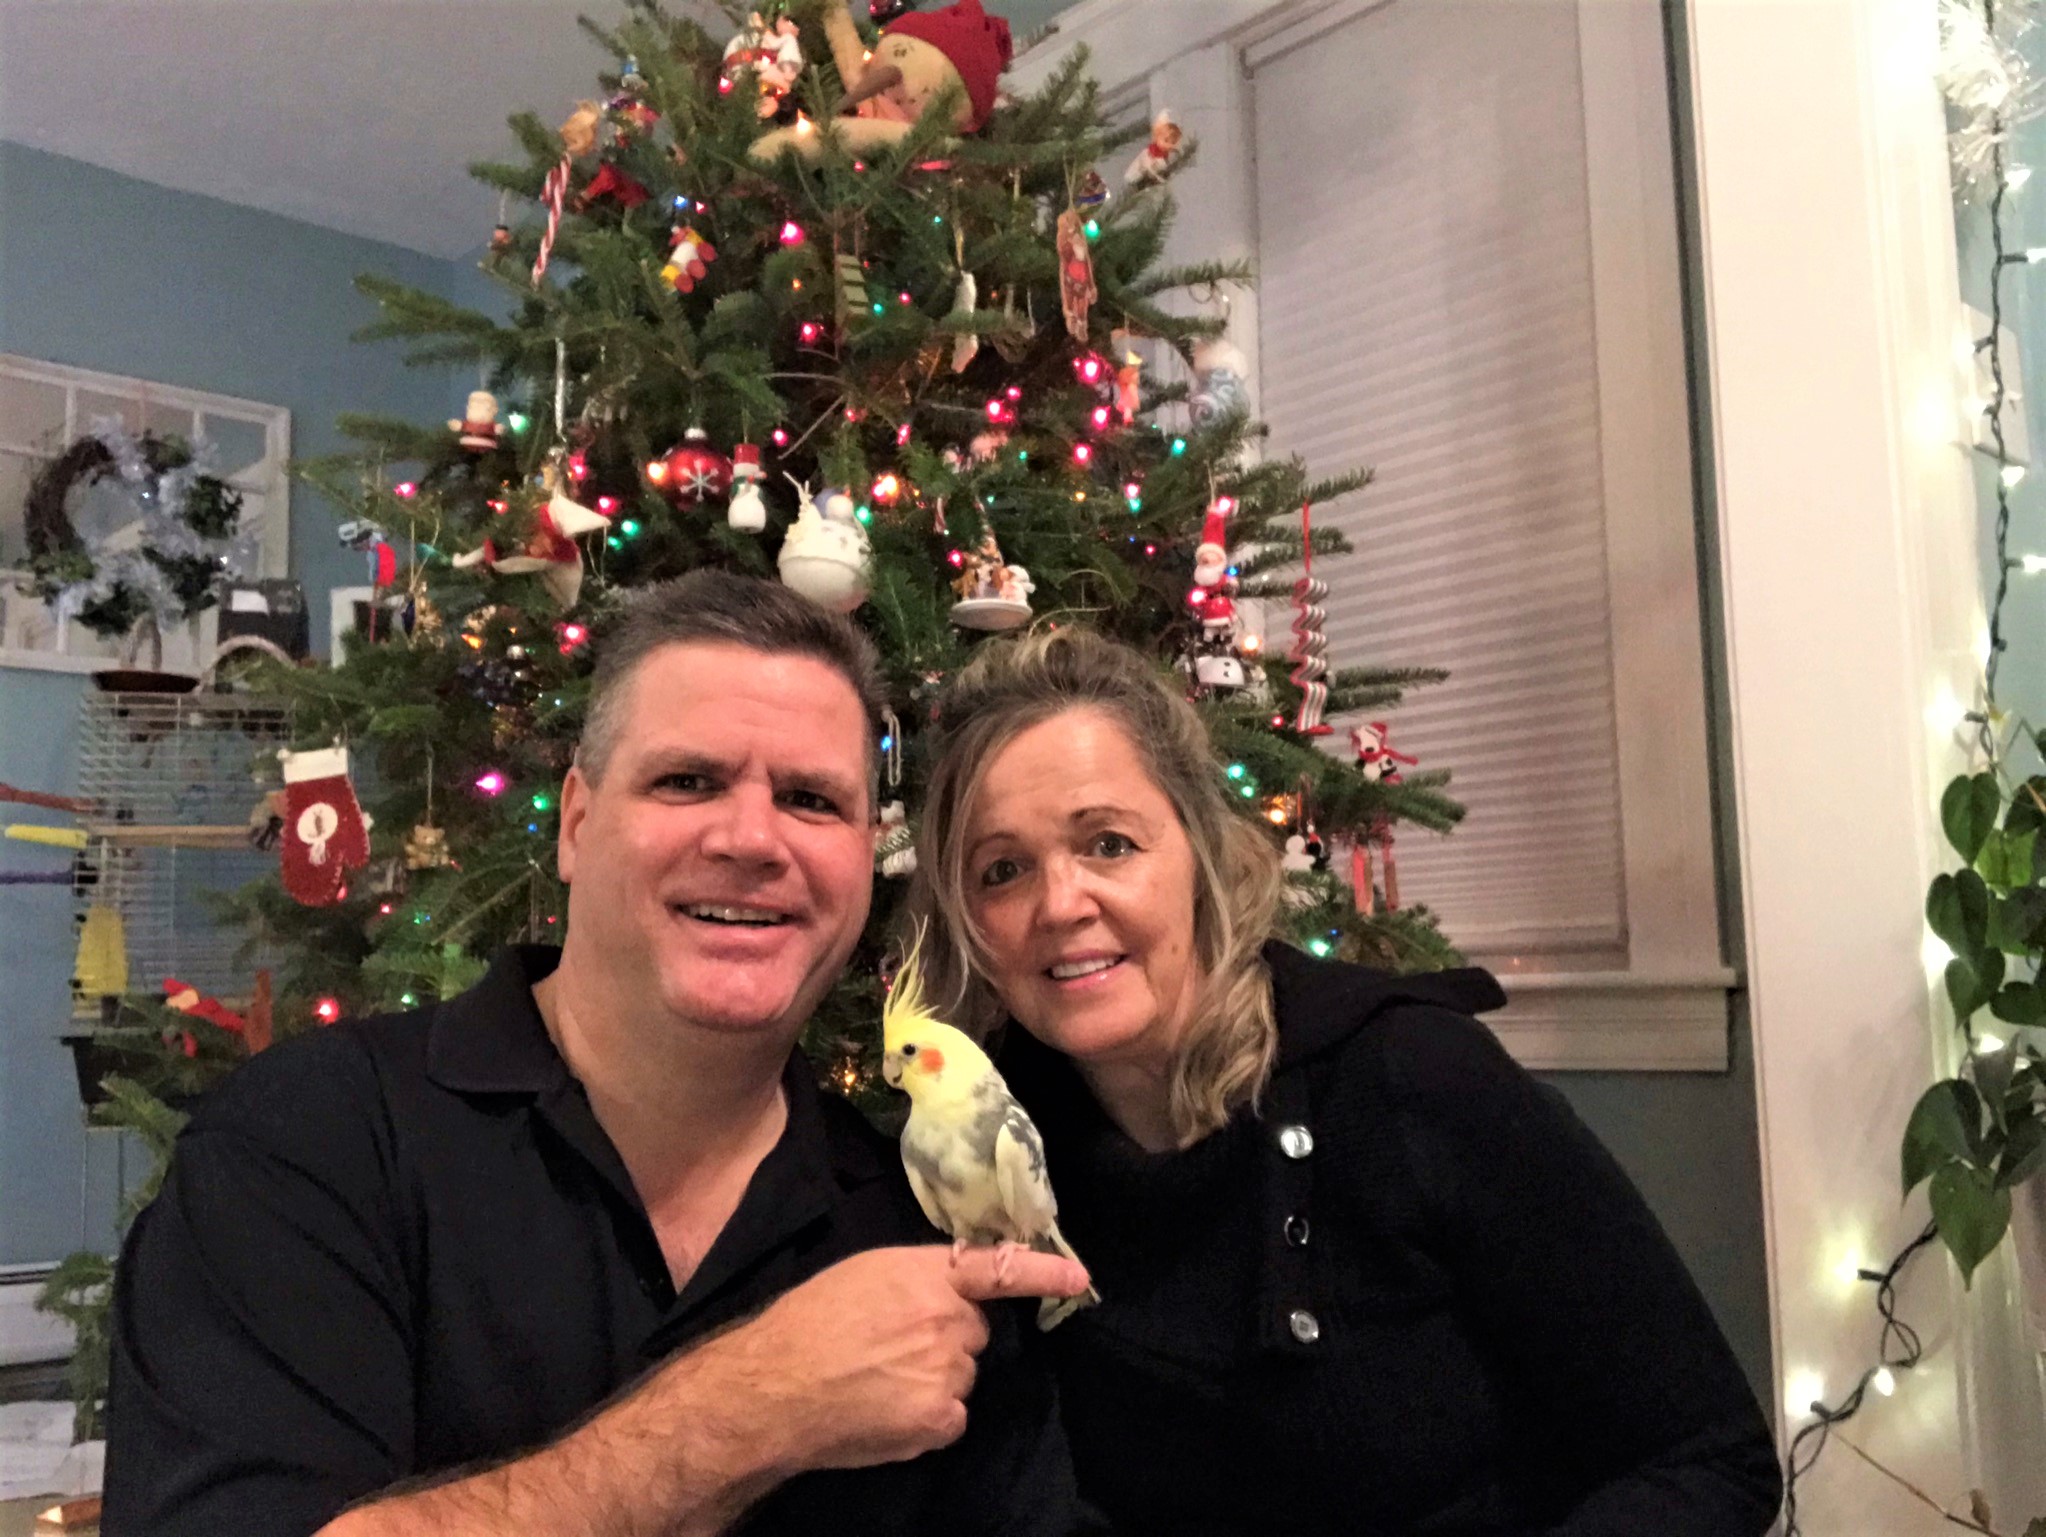
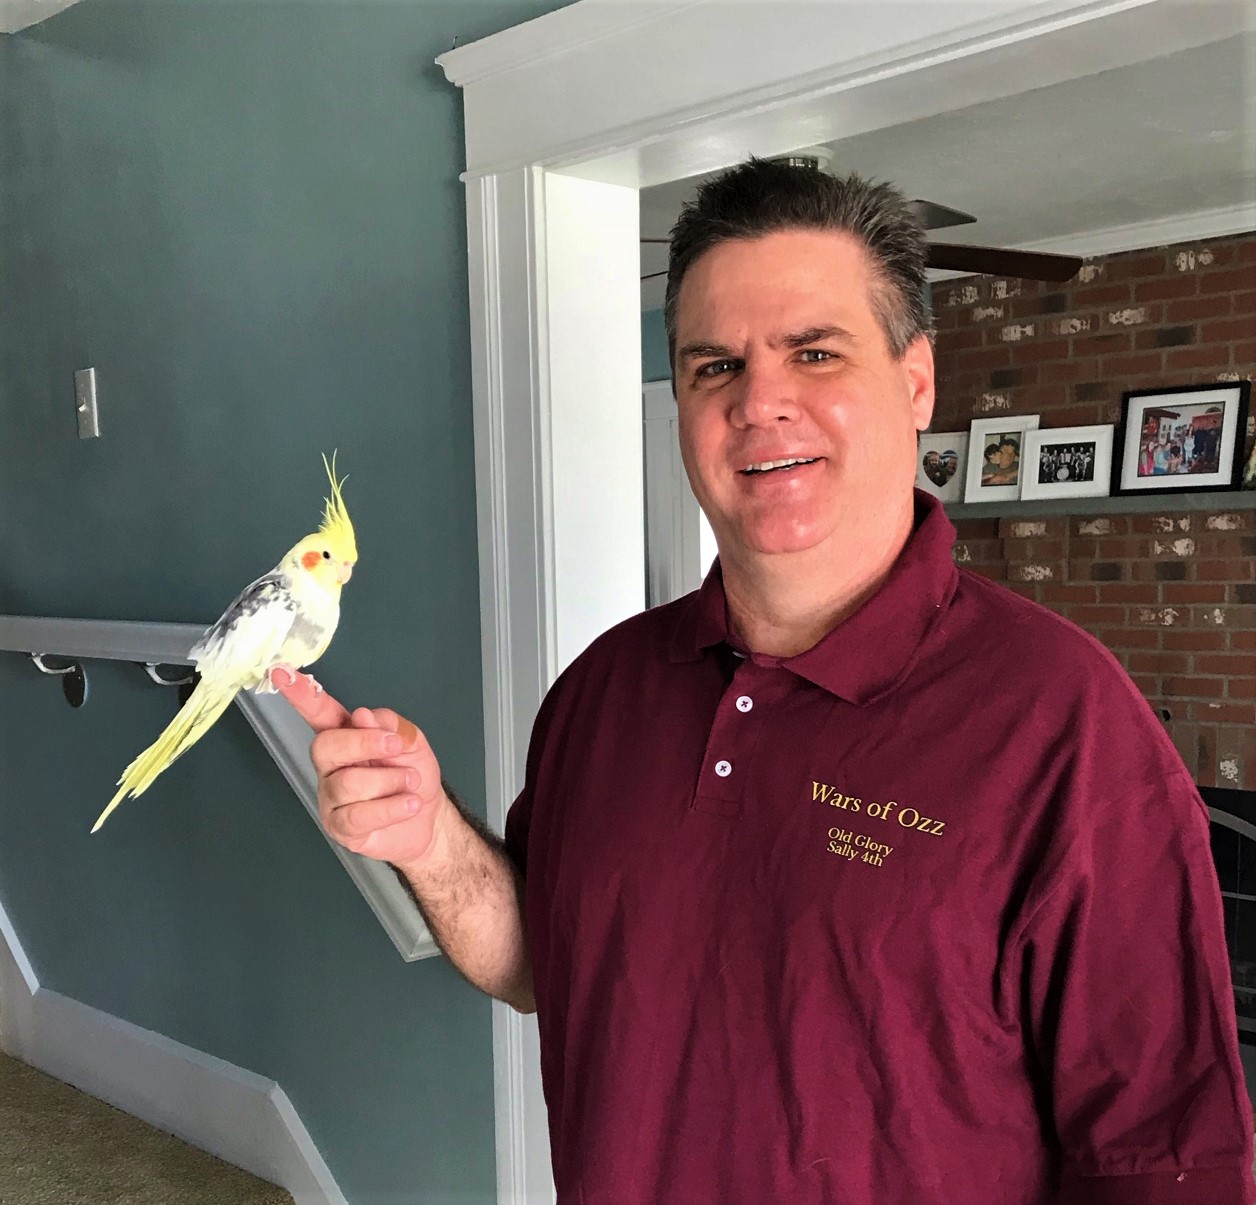
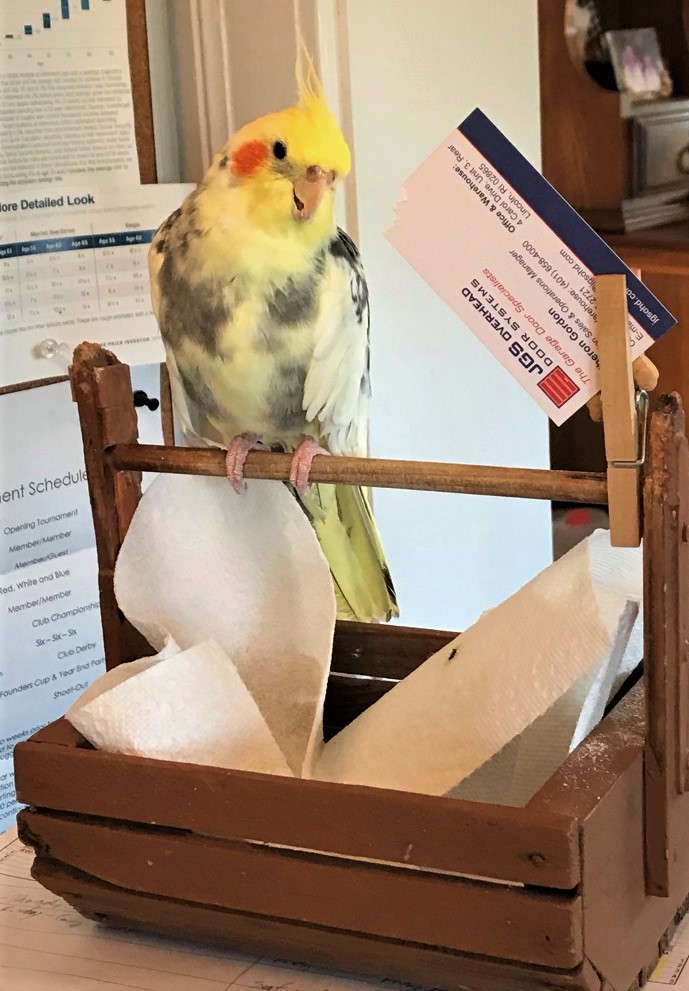
December 2006 he posed as a “Misfit Toy”.Caesar in October 2014 at the ripe old age of 20.Our 2014 Christmas card shot.Caesar loved to have Lynn play with him like this in January 2015. I couldn’t as this was only for mummy.Caesar and Lynn enjoying a summer’s day in July 2015. We got him outside like this on warm days – but kept an eye out for hawks.Rarely would Caesar take a drive – but here we are in September 2016.Looking cute in December 2016.Playing with me under a paper towel on a blanket as I lay on the couch in January 2017. He loved confined spaces.His cage (always open) with his teepee (that he eventually chewed up) in February 2017.He loved cuddling with Lynn – here in March 2017.I’m here recovering from one of my many surgeries in 2017 and Caesar is keeping me company. Caesar enjoying a warm day outside in May 2017.Here you can see his house – he designed it himself!Valentine’s Day 2018 – he’s being photographed here from outside as he enjoys the winter sun.In June of 2018 with Lynn and Tabitha (then 1 and a half).August 2018 – sometimes he cared less about posing…I took this shot in October 2018 and don’t even remember how I filtered it – but I do like the shot.Caesar and me in October 2018,He loved the Christmas tree – well staring at it as it was next to his cage every year. Once in a while – like here in 2018, we got him to pose in it.Christmas card shot for 2018. We probably needed 20 shots to get one!2019 Christmas Card shot.One of the few selfies he let me take without a fuss. He is on his basket, which was his “traveling perch” in the house.The teepee after months of chewing up…As my Aussie buddie Luke sent me his podcast T-shirt, I only thought it proper to take a shot with our resident Aussie bird – well he was American but descended from Aussies.In July 2020 getting love from his mummy.Our 2020 Christmas card shot – unfortunately we did not do one with him in 2021…Caesar and me with my Wars of Ozz shirt in April 2021.In November keeping me company as I do computer work in my office. You can see he’s enjoying chewing on a business card form our garage door vendor. He loved to chew paper and especially cardboard.New Year’s Day, 2022, only hours before he passed, cuddling with his mummy.
Goodbye my little birdie friend, love ya to pieces. I’ll miss you until the day I die.
Yes, it’s been a while since I updated you on the project – a month! It often seems like either everything is going on at the same time, or we are waiting and nothing is happening , and November 2021 was such a month.
Lots of external and internal issues happened. I had Historicon, surgery, Thanksgiving, and weather to deal with, plus a broken dishwasher and some old school Vikings minis to paint that I just posted about. So, where are we? Like I wrote, some days it was like crazy-town with activity, and others like crickets as we waited for inspections or materials. We are further along but winter is coming – so I’ll give you the progress time line in pictures.
As a reminder – as of November 6th – the project looked like this:
Week 17 – November 7th to 13th
November 9
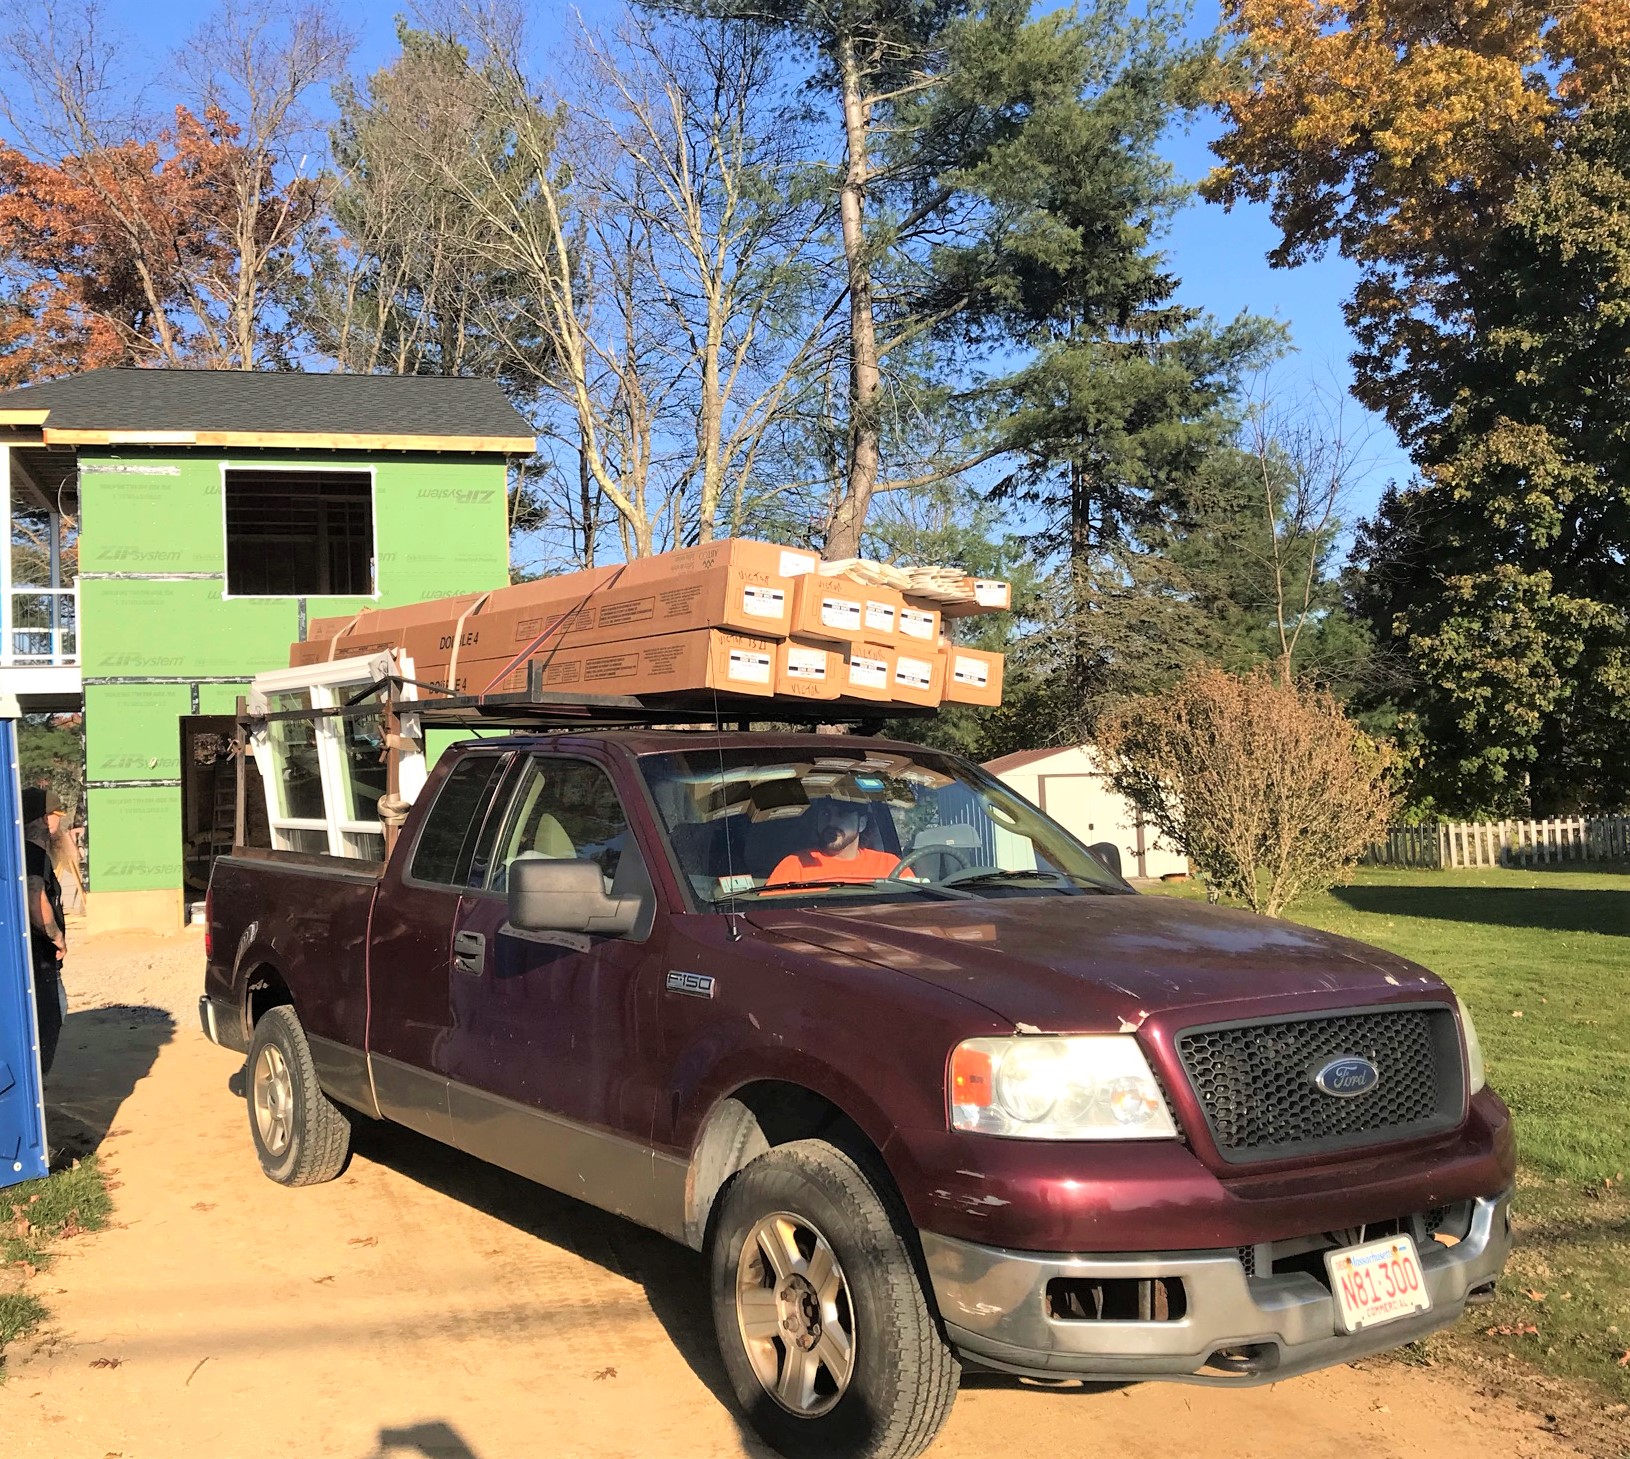
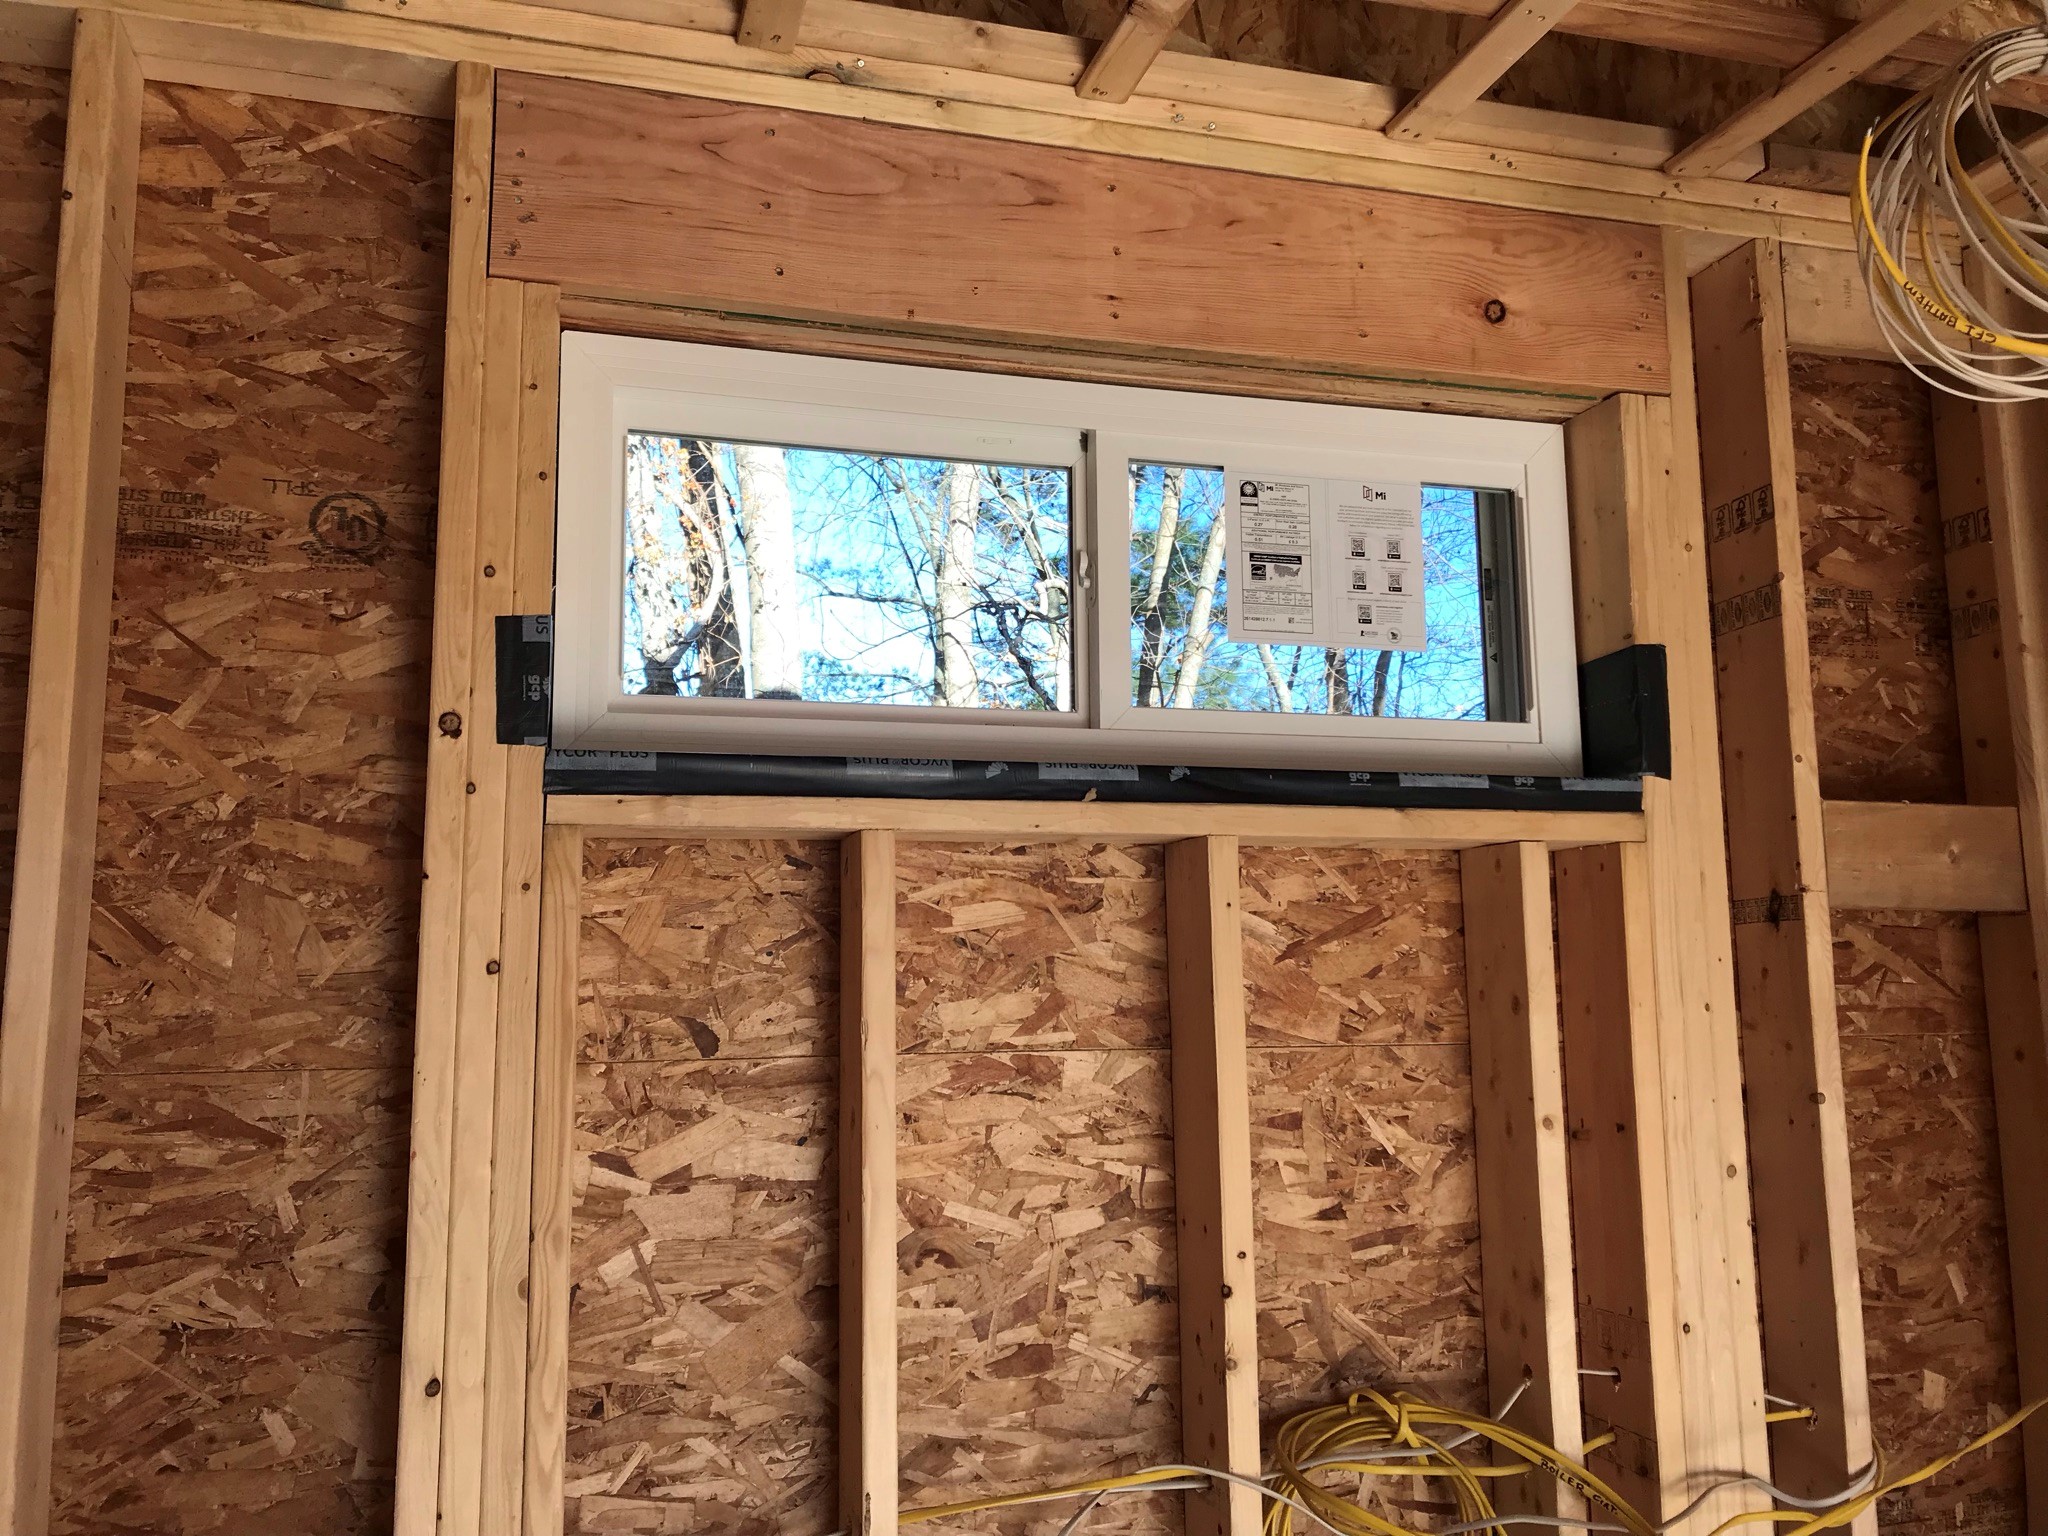
Evandro’s guys excavated the gas line (by hand) into the fire pit area.The windows were prepped for installation.Finally – after a long supply chain delay, windows and siding arrived and were moved onto the job site.
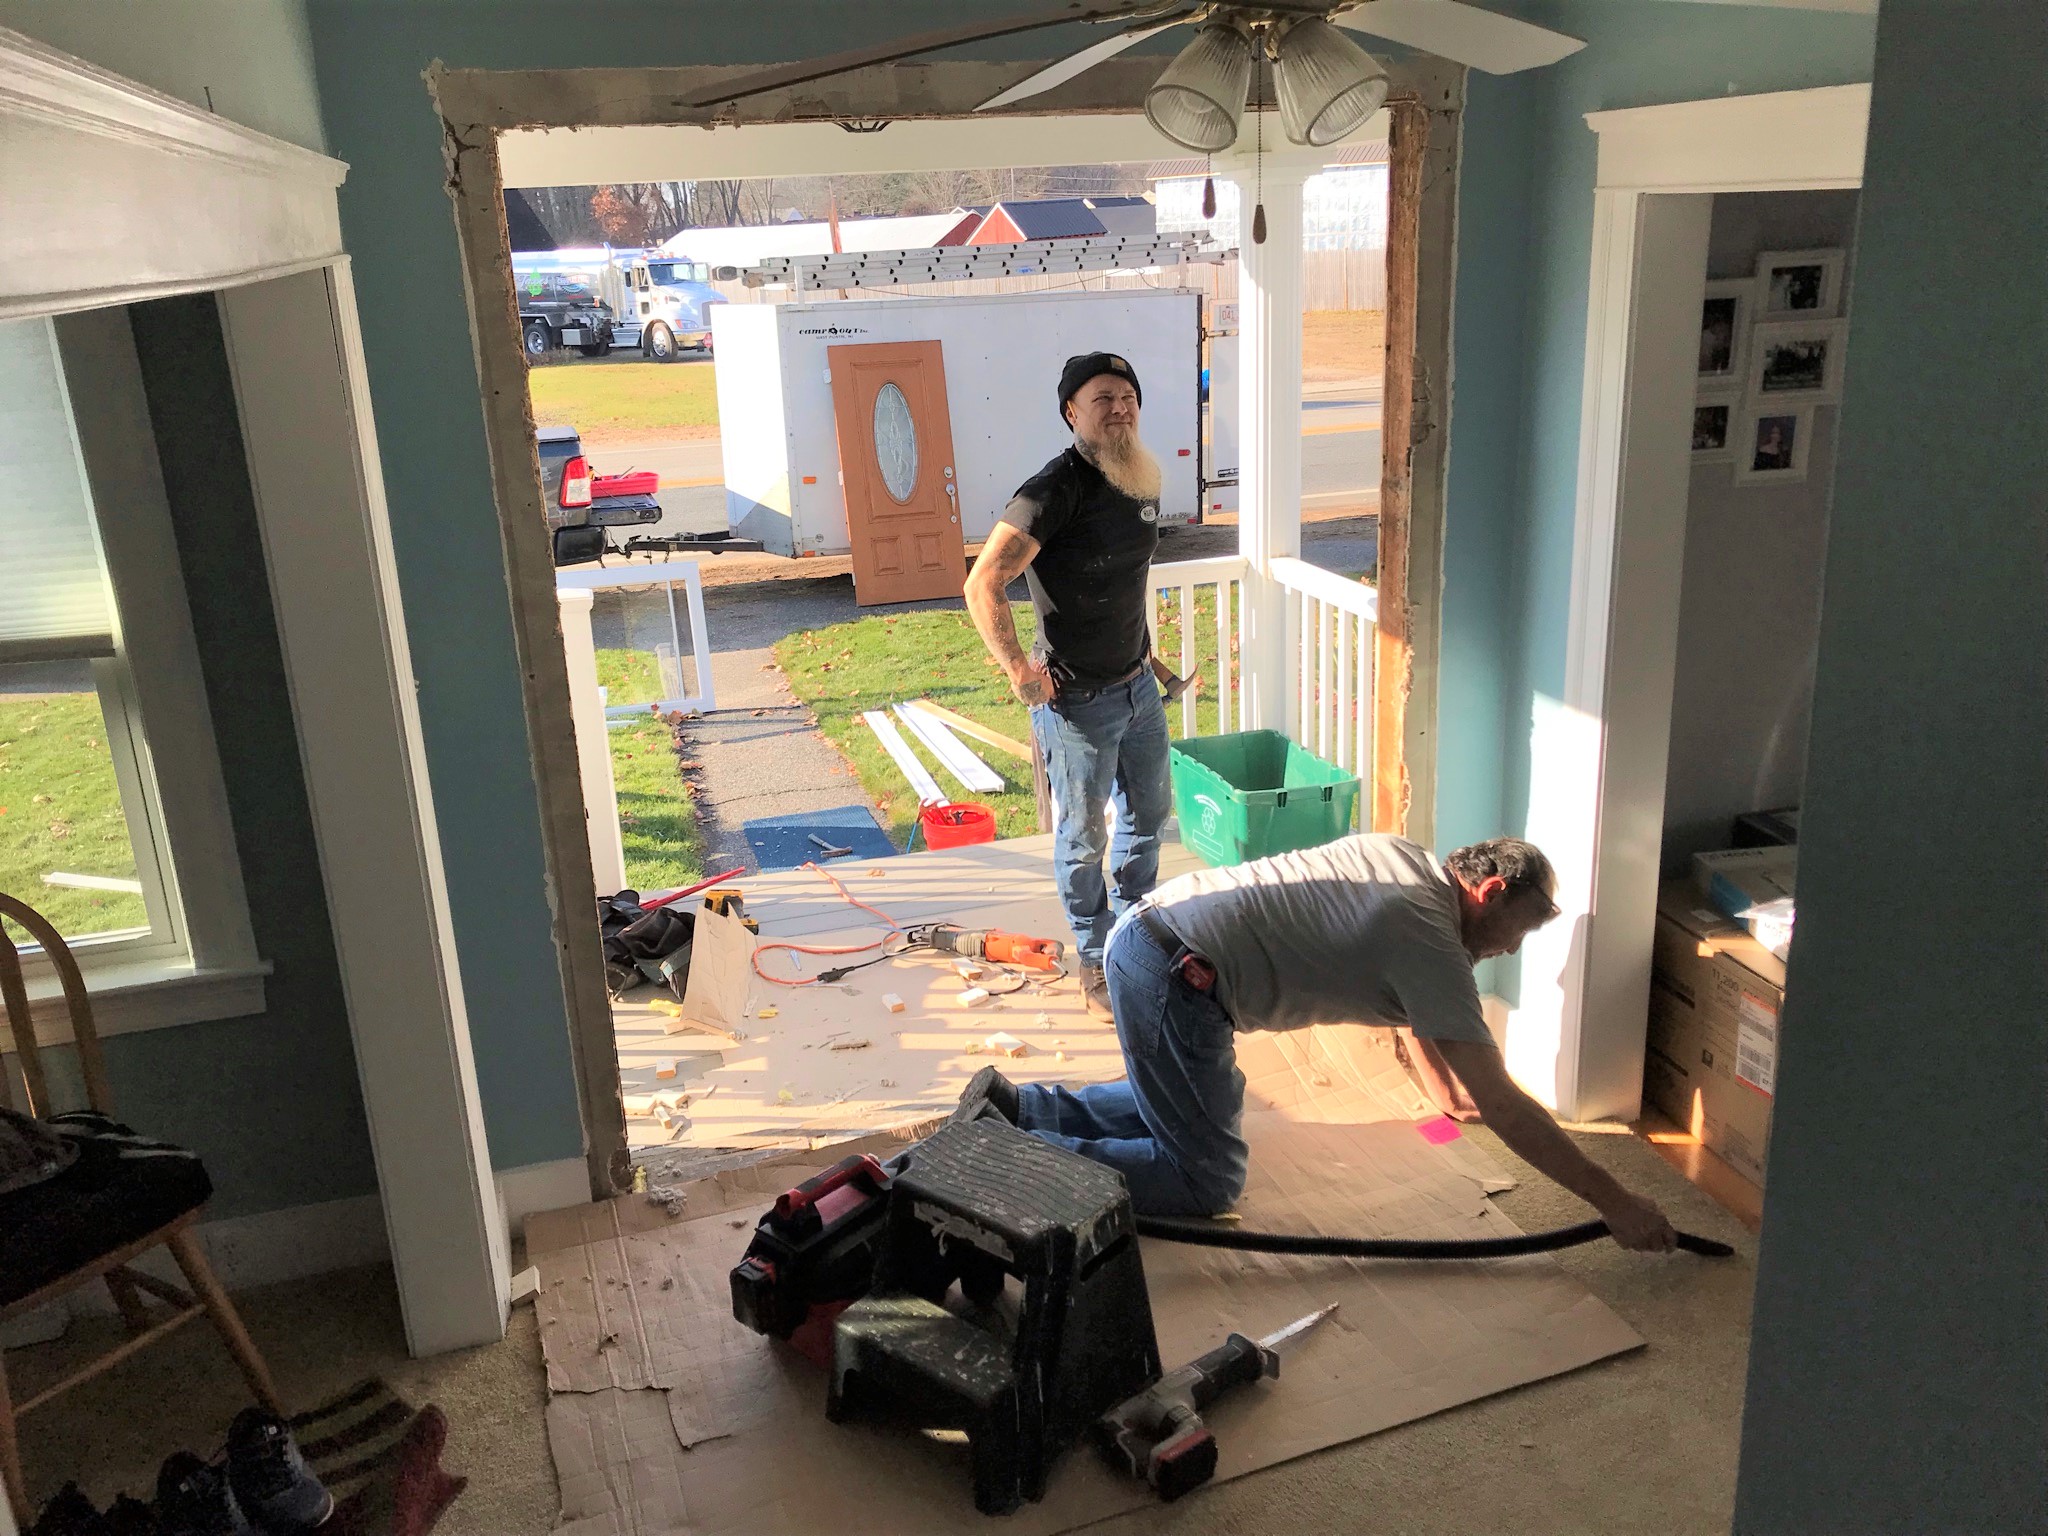
November 10
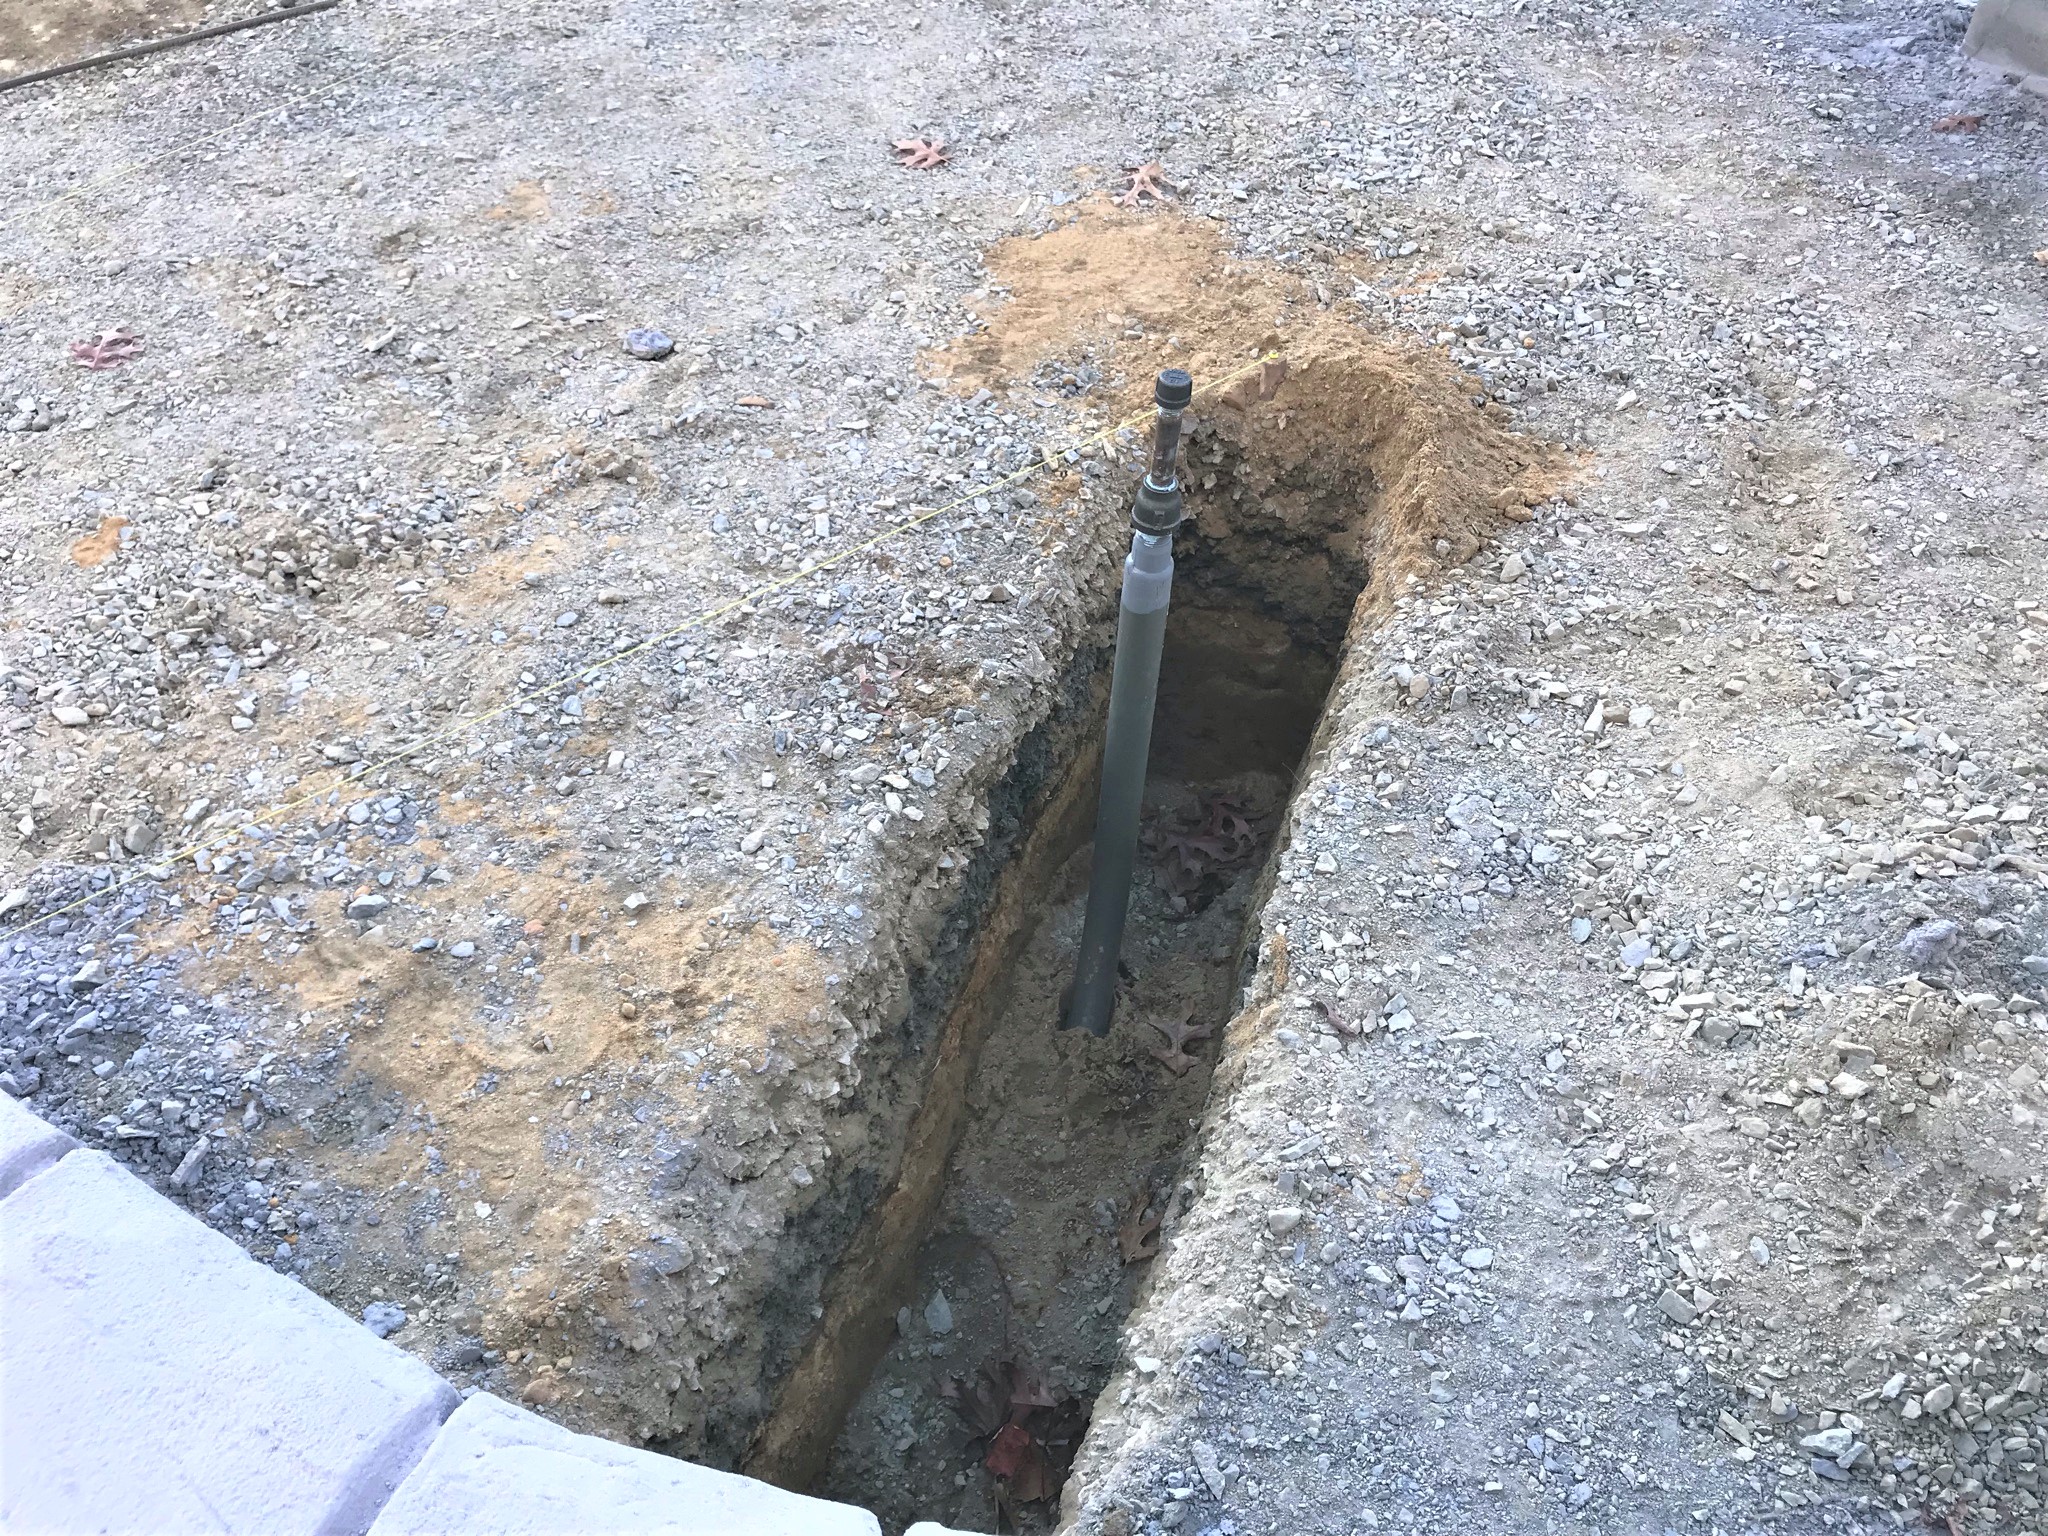
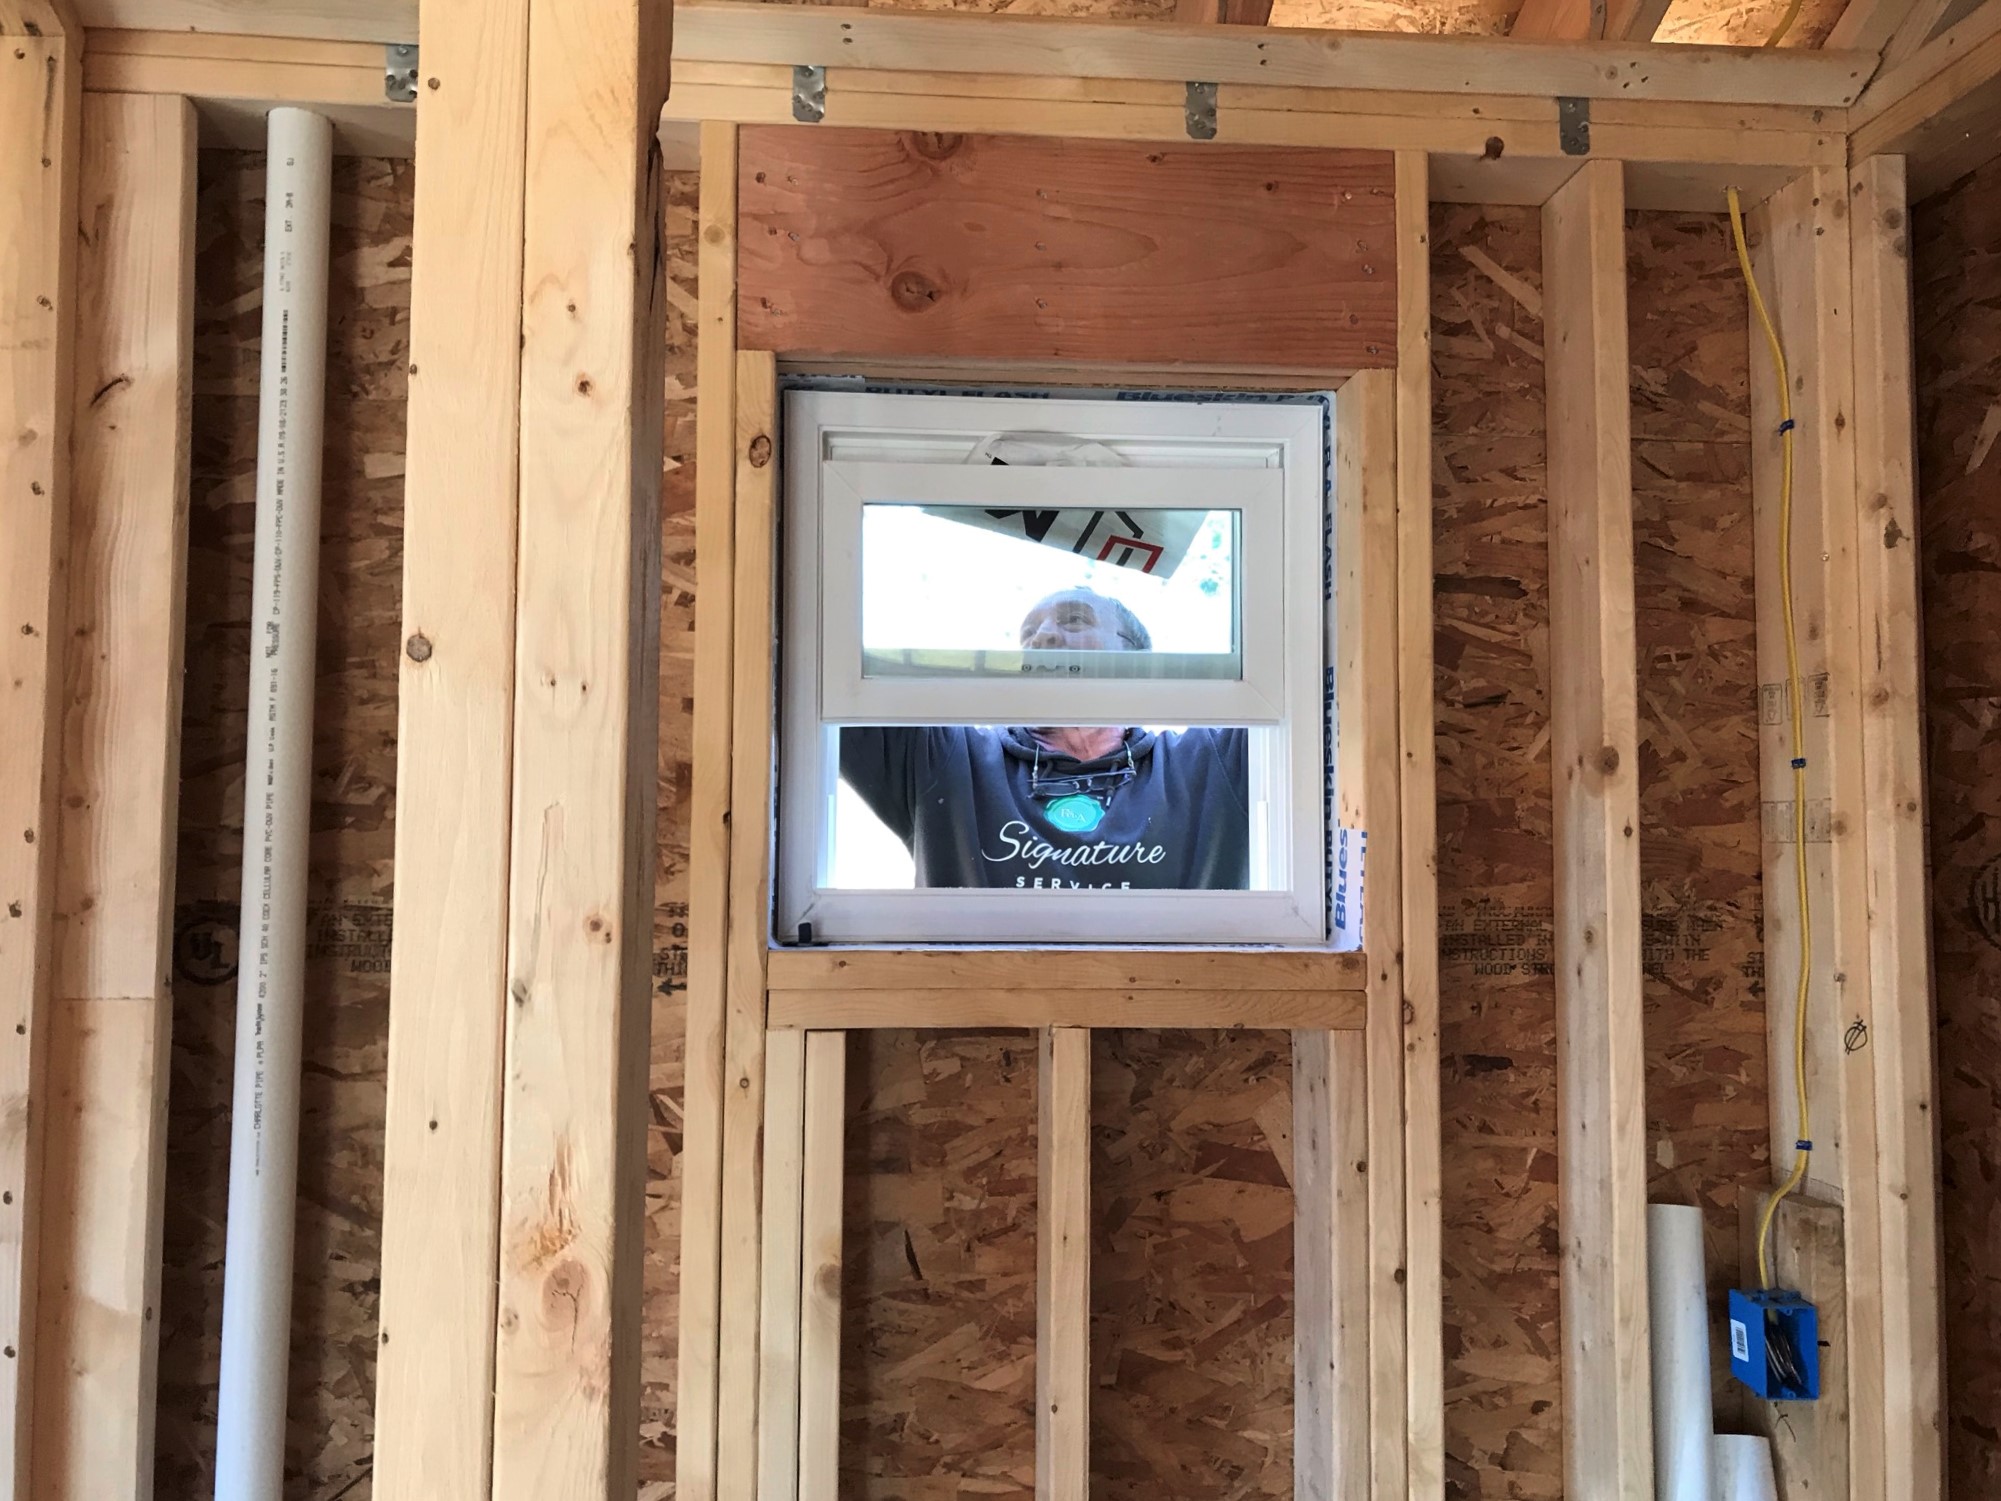
Early Wednesday morning shows the front window getting installed, Don Millette putting the gas line in the trench, and the Victors supervising.
Gas line in trenchGas Line hookup in fire pitGas line installation.The transom windows and door frame.
Frame going in!
Bathroom window, 2nd floorGarage back windowOther windows went in too.
Back side of the building showing installed windows.
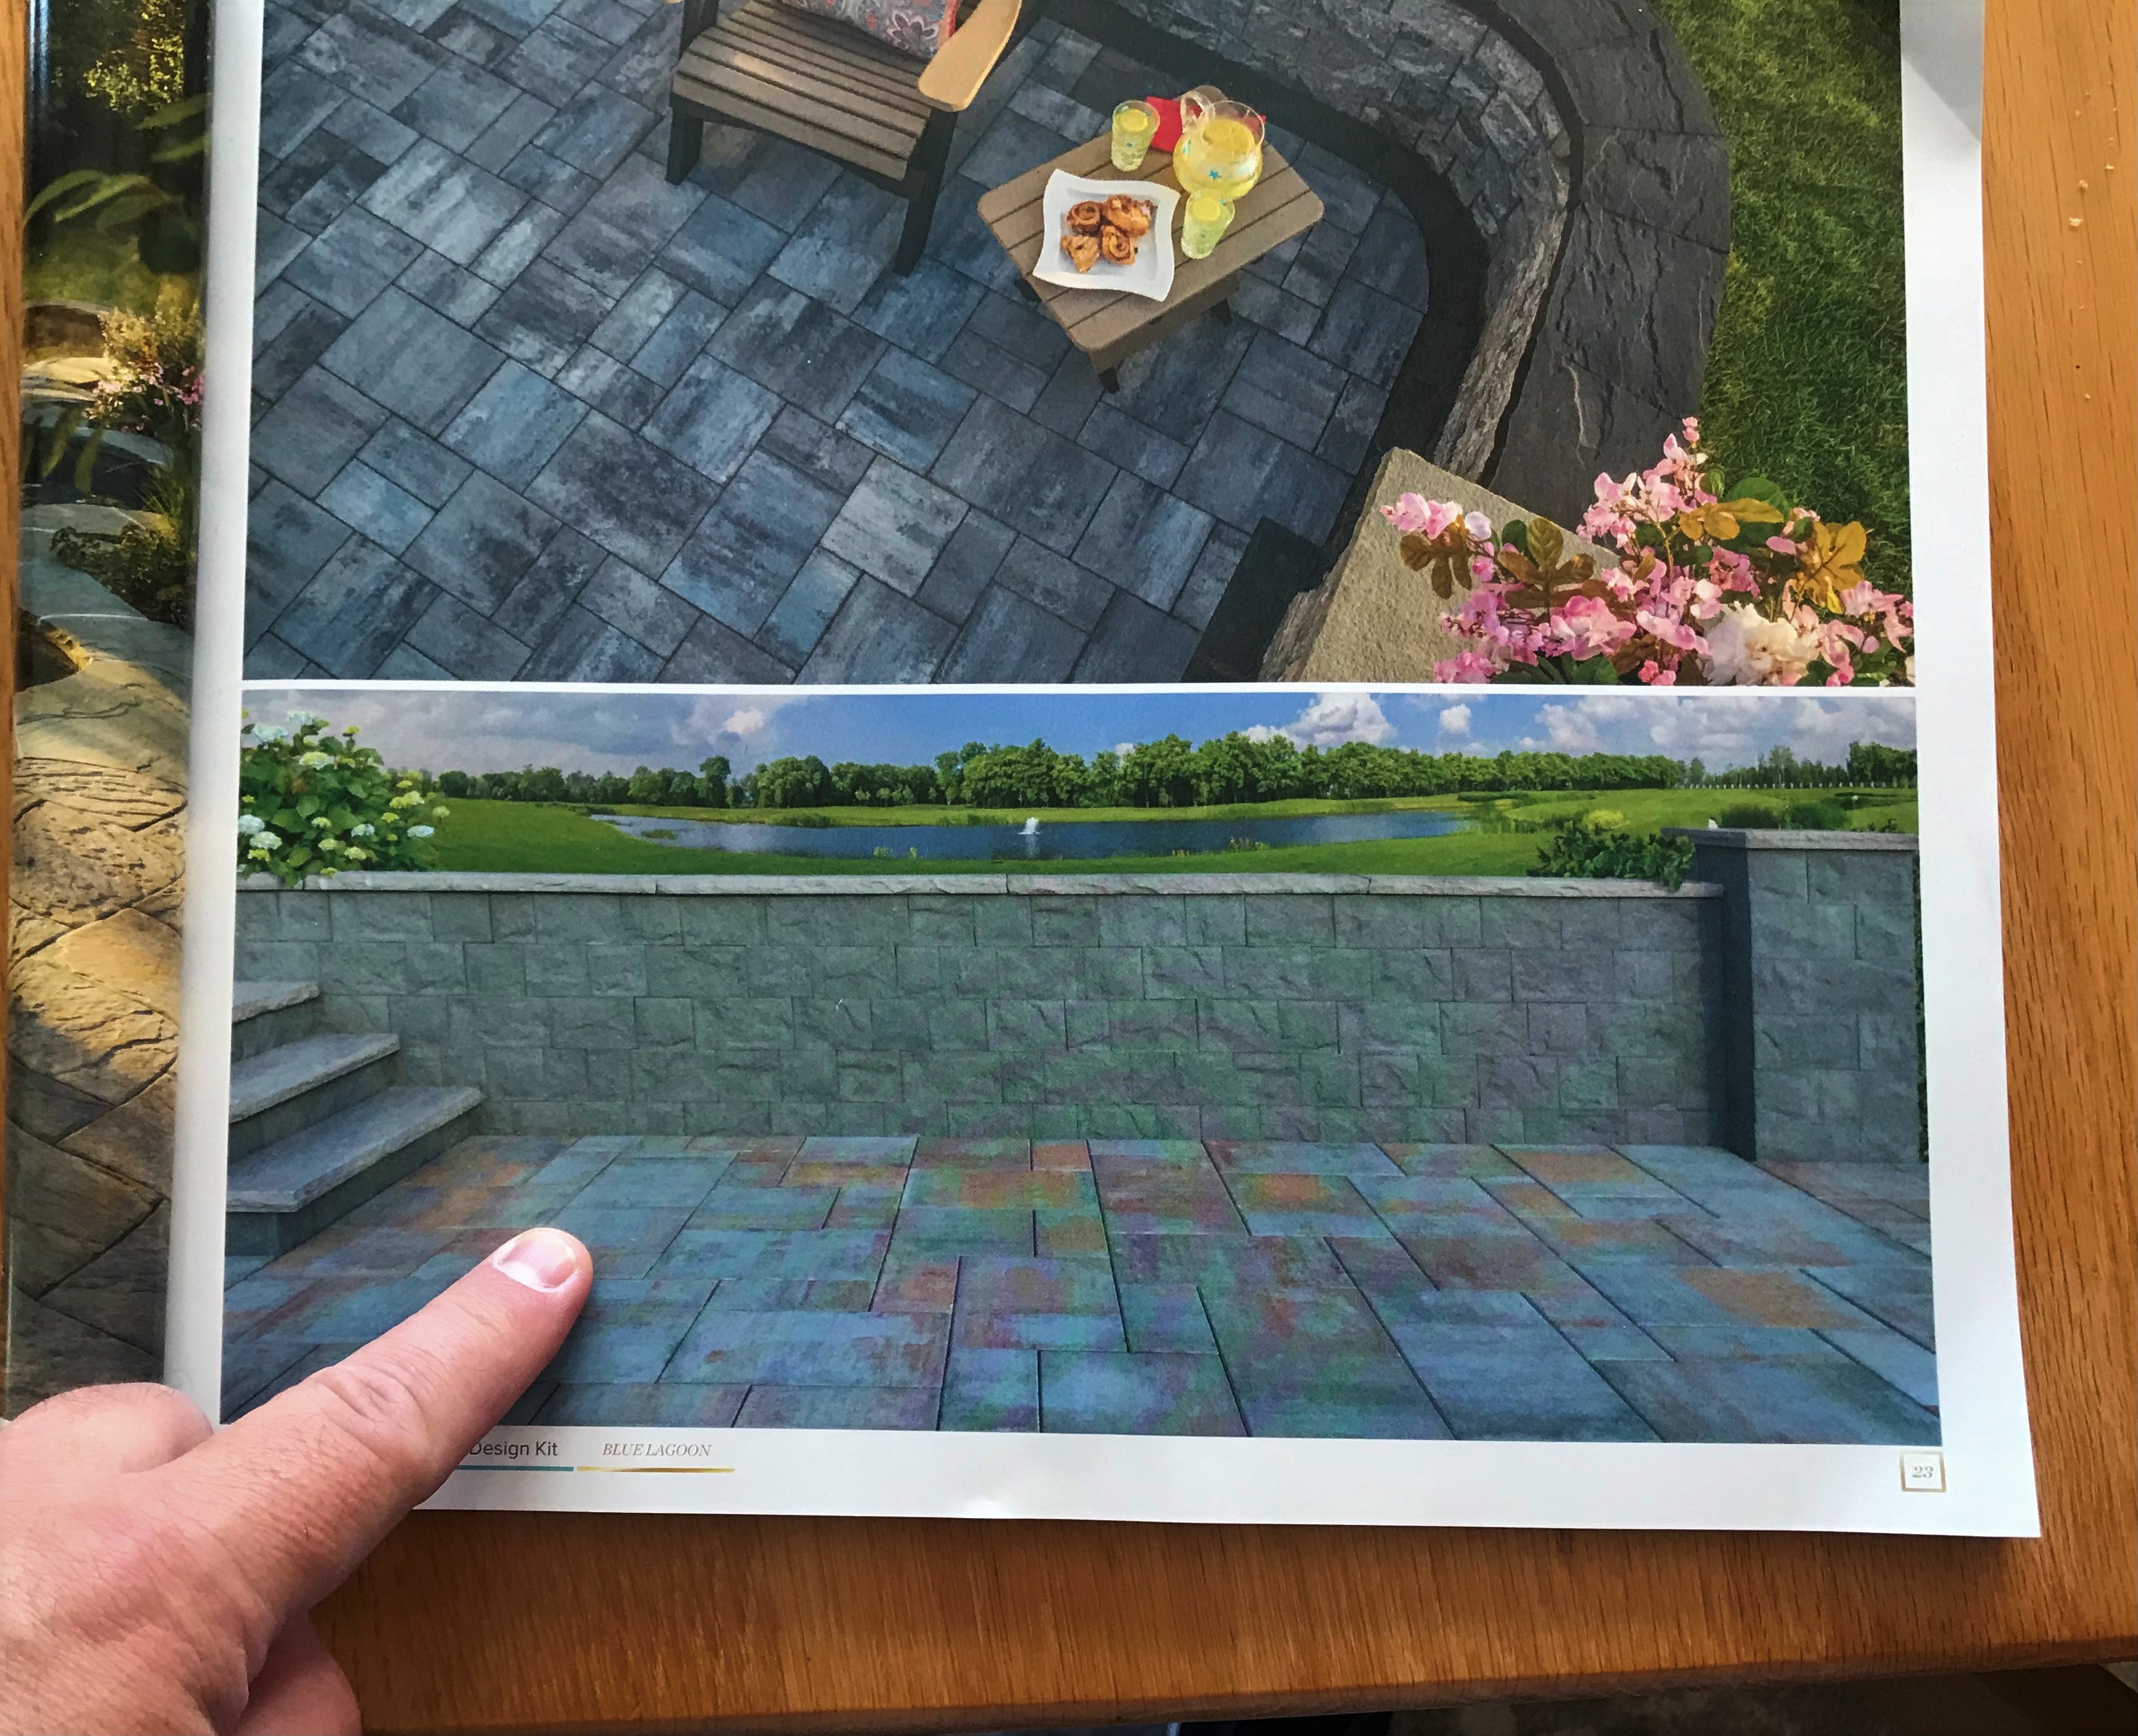
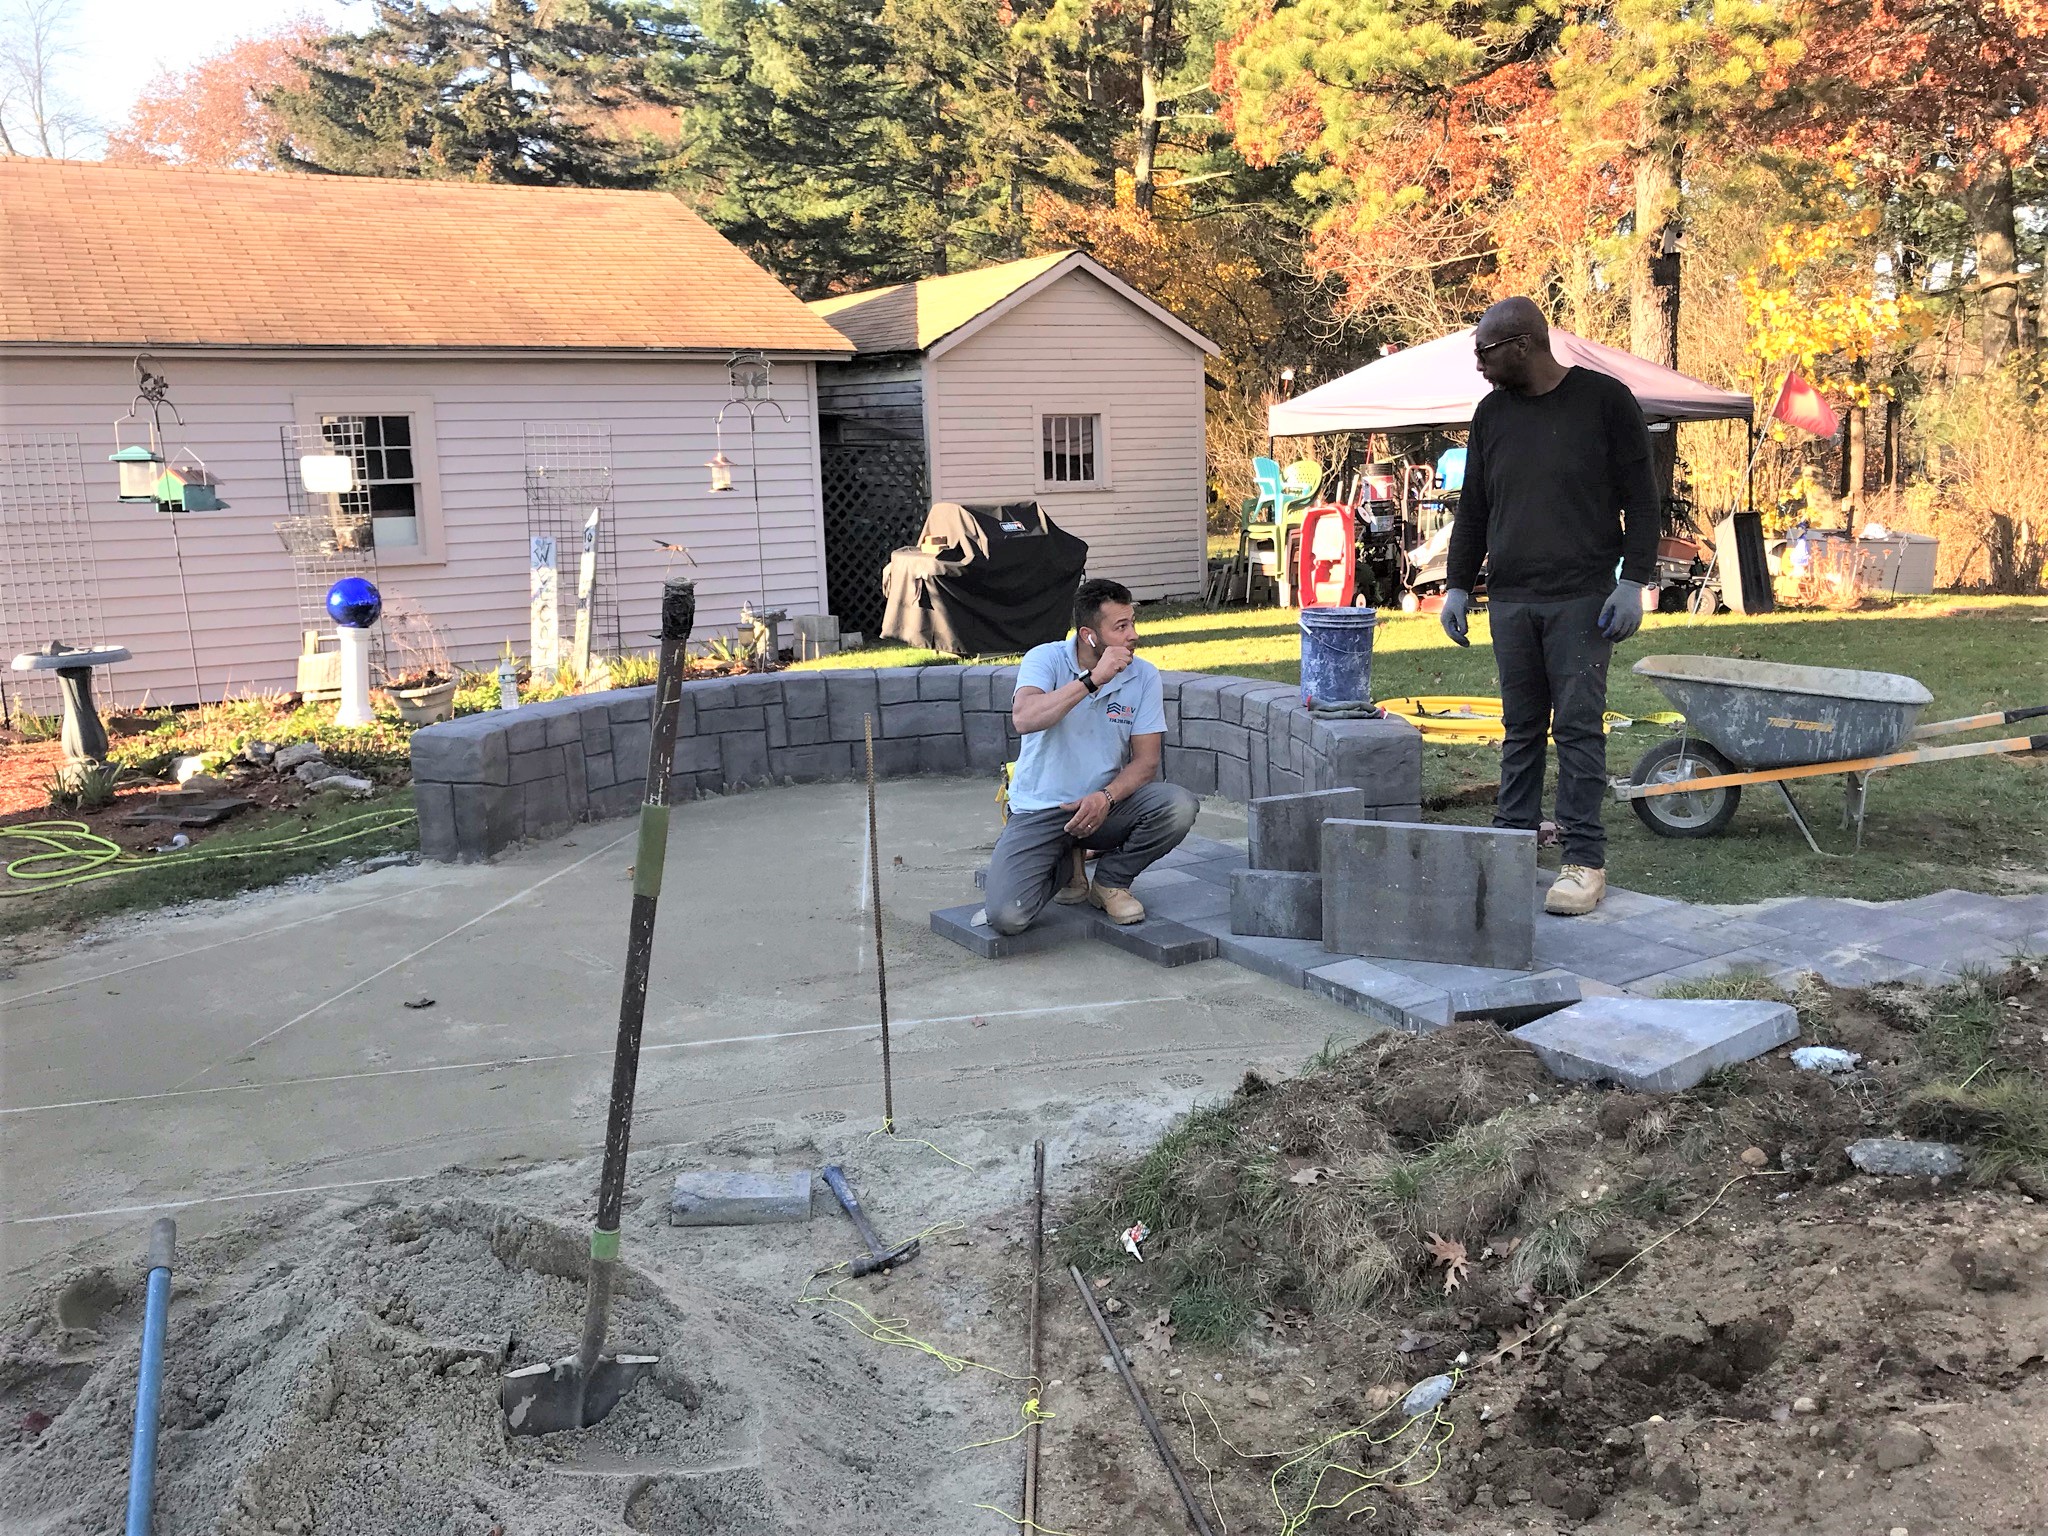
Then, a minor supply-chain-related crisis. Evandro (our masonry guy) found out that the paving stones that we wanted were not available. We would need to scramble. I told Evandro that for this project I was function (what works), and my wife Lynn was form (i.e. she picks colors and similar choices – what looks good). At the time Lynn was at work, and Evandro had a book of stone examples but no physical samples. As it’s a major decision, we asked to see some, and Evandro came back later in the evening (after dark) with probably a dozen full-size paving stones as samples (each weighing maybe 30 pounds). We thought the samples would be, well, small! Anyways, by flashlight we were able to make a choice so Evandro could keep going. The choices are less bluish, but still a nice mixed gray hue.
Original choice – not in stockNext choiceThe paving stone issue.
The next day I was off to Historicon, returning Sunday the 14th.
Week 18 – November 14th to 20th
November 14
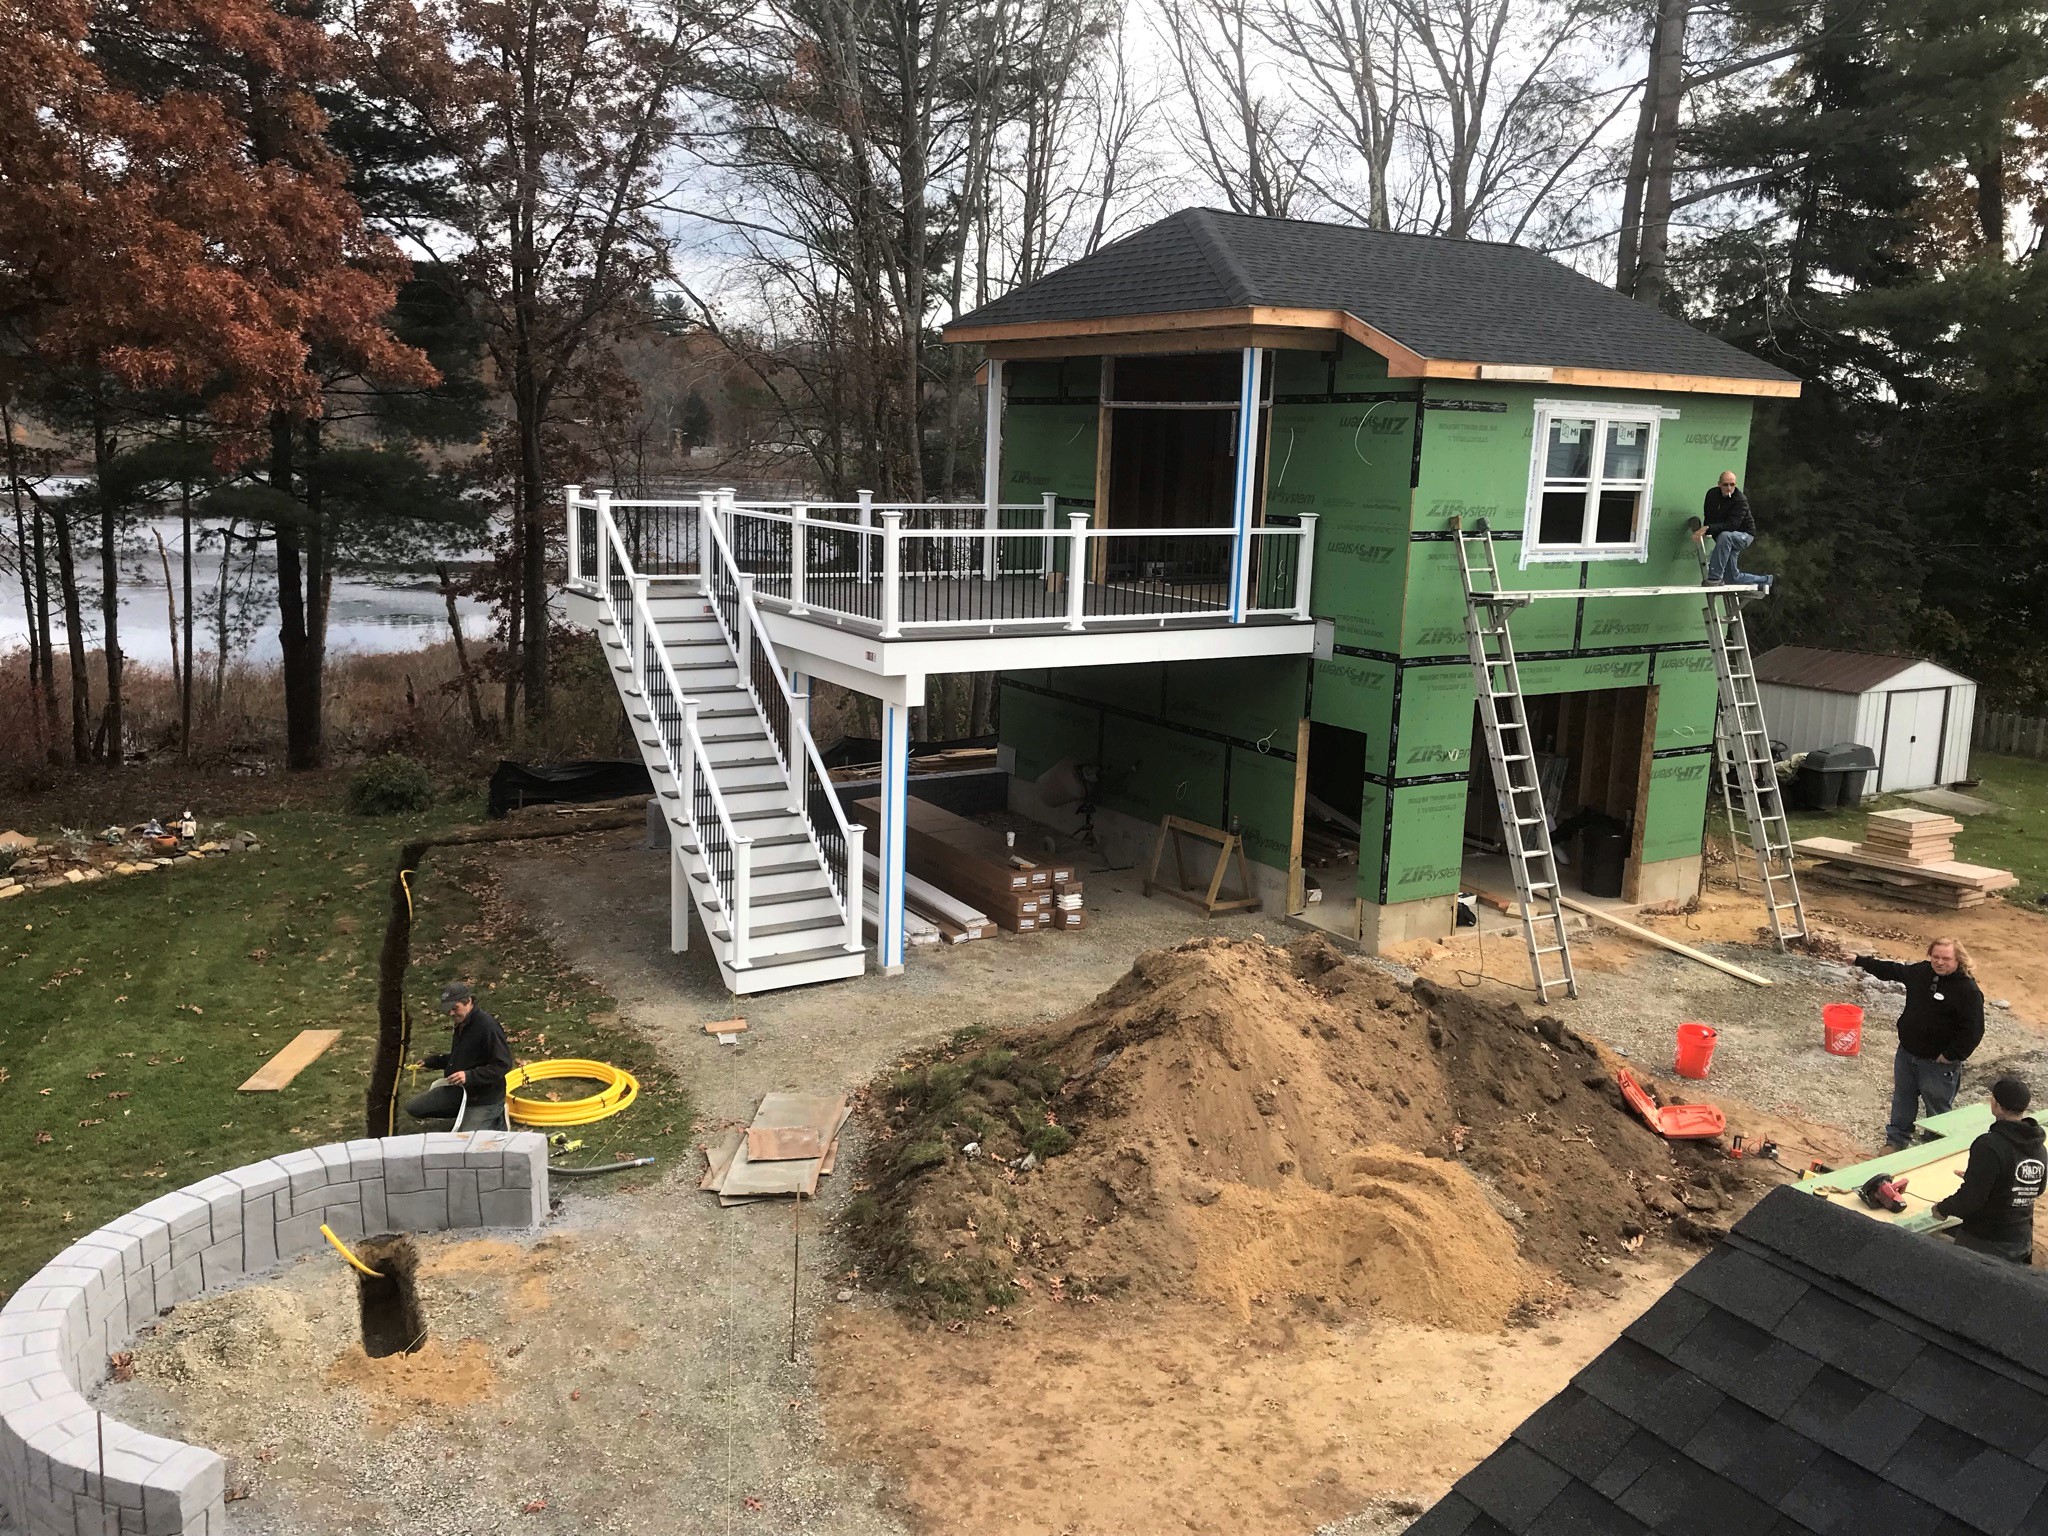
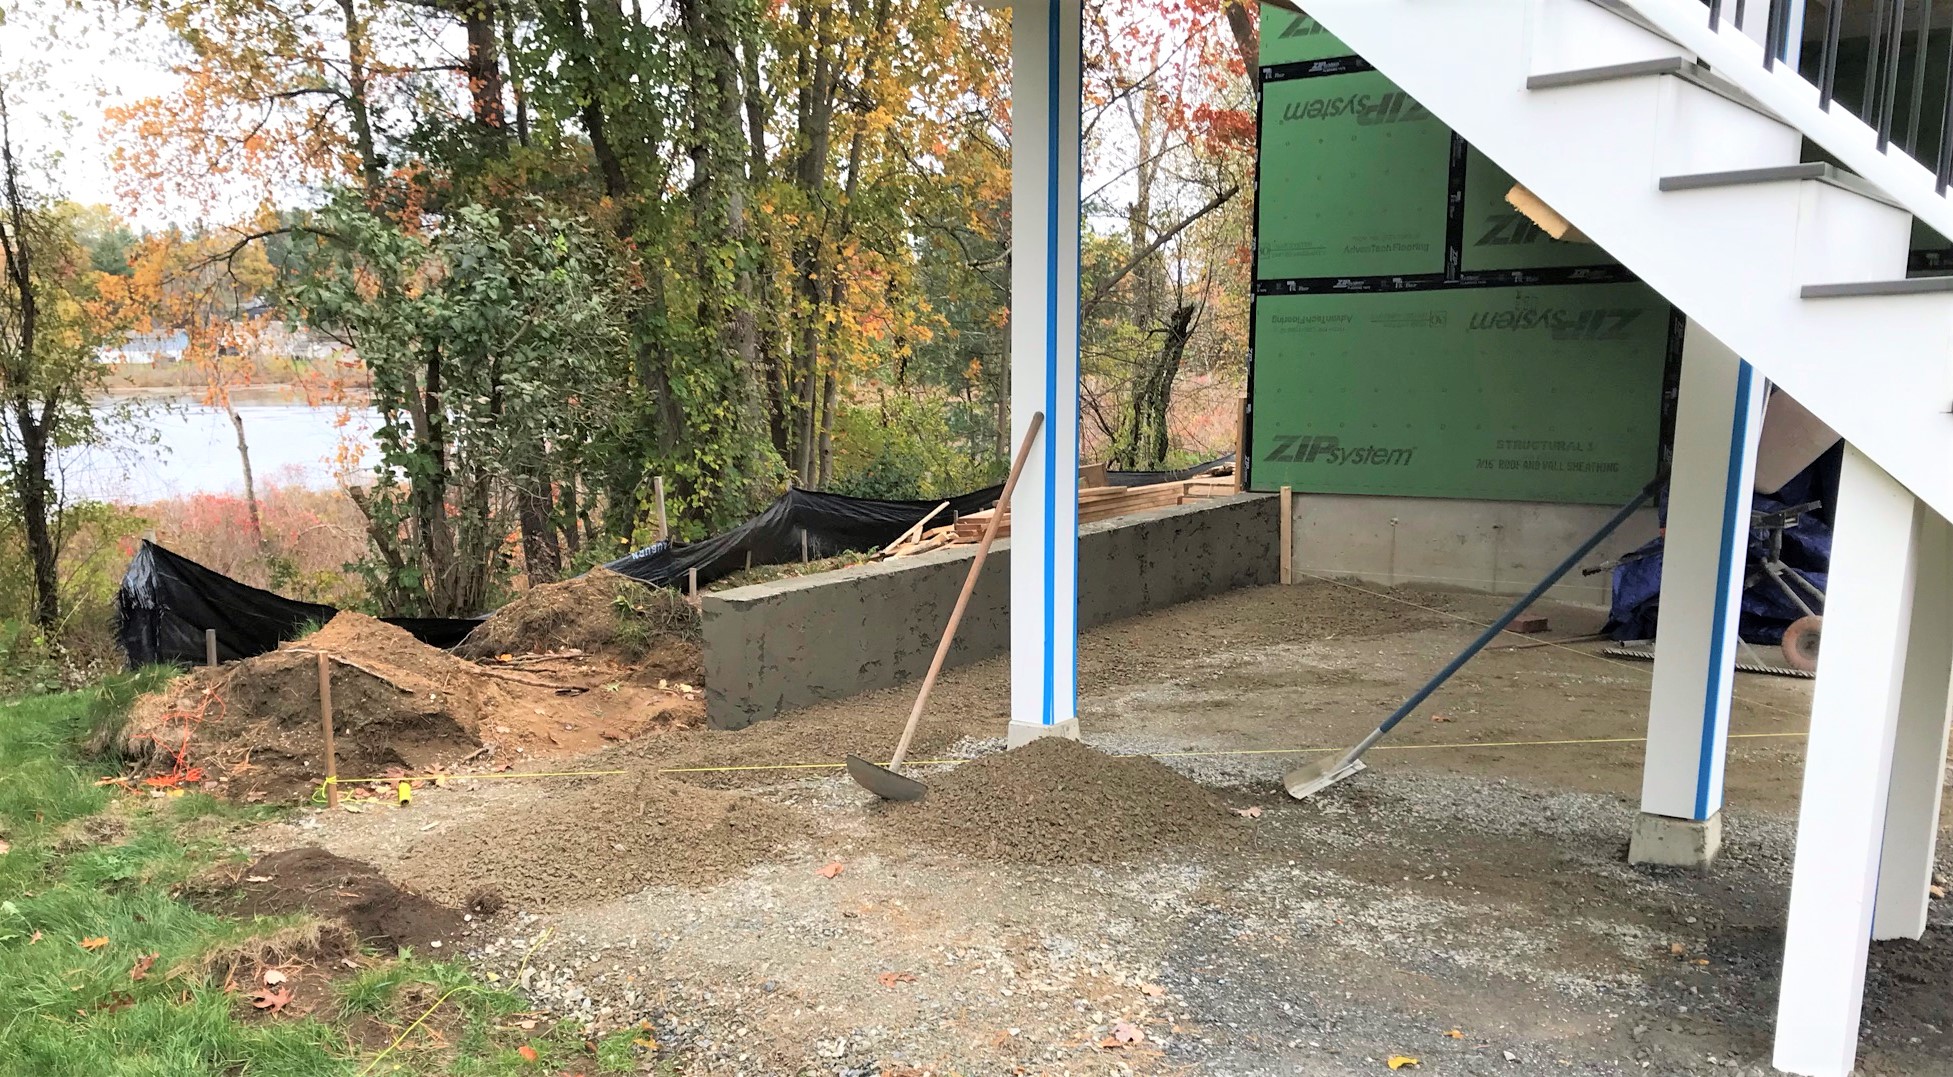
When the sun came up, this was the progress while I was away. You can see progress on the patio and the doors and windows.
Sunday morning November 14th showed me this!
However, Evandro was still at work that Sunday trying to take advantage of the good weather.
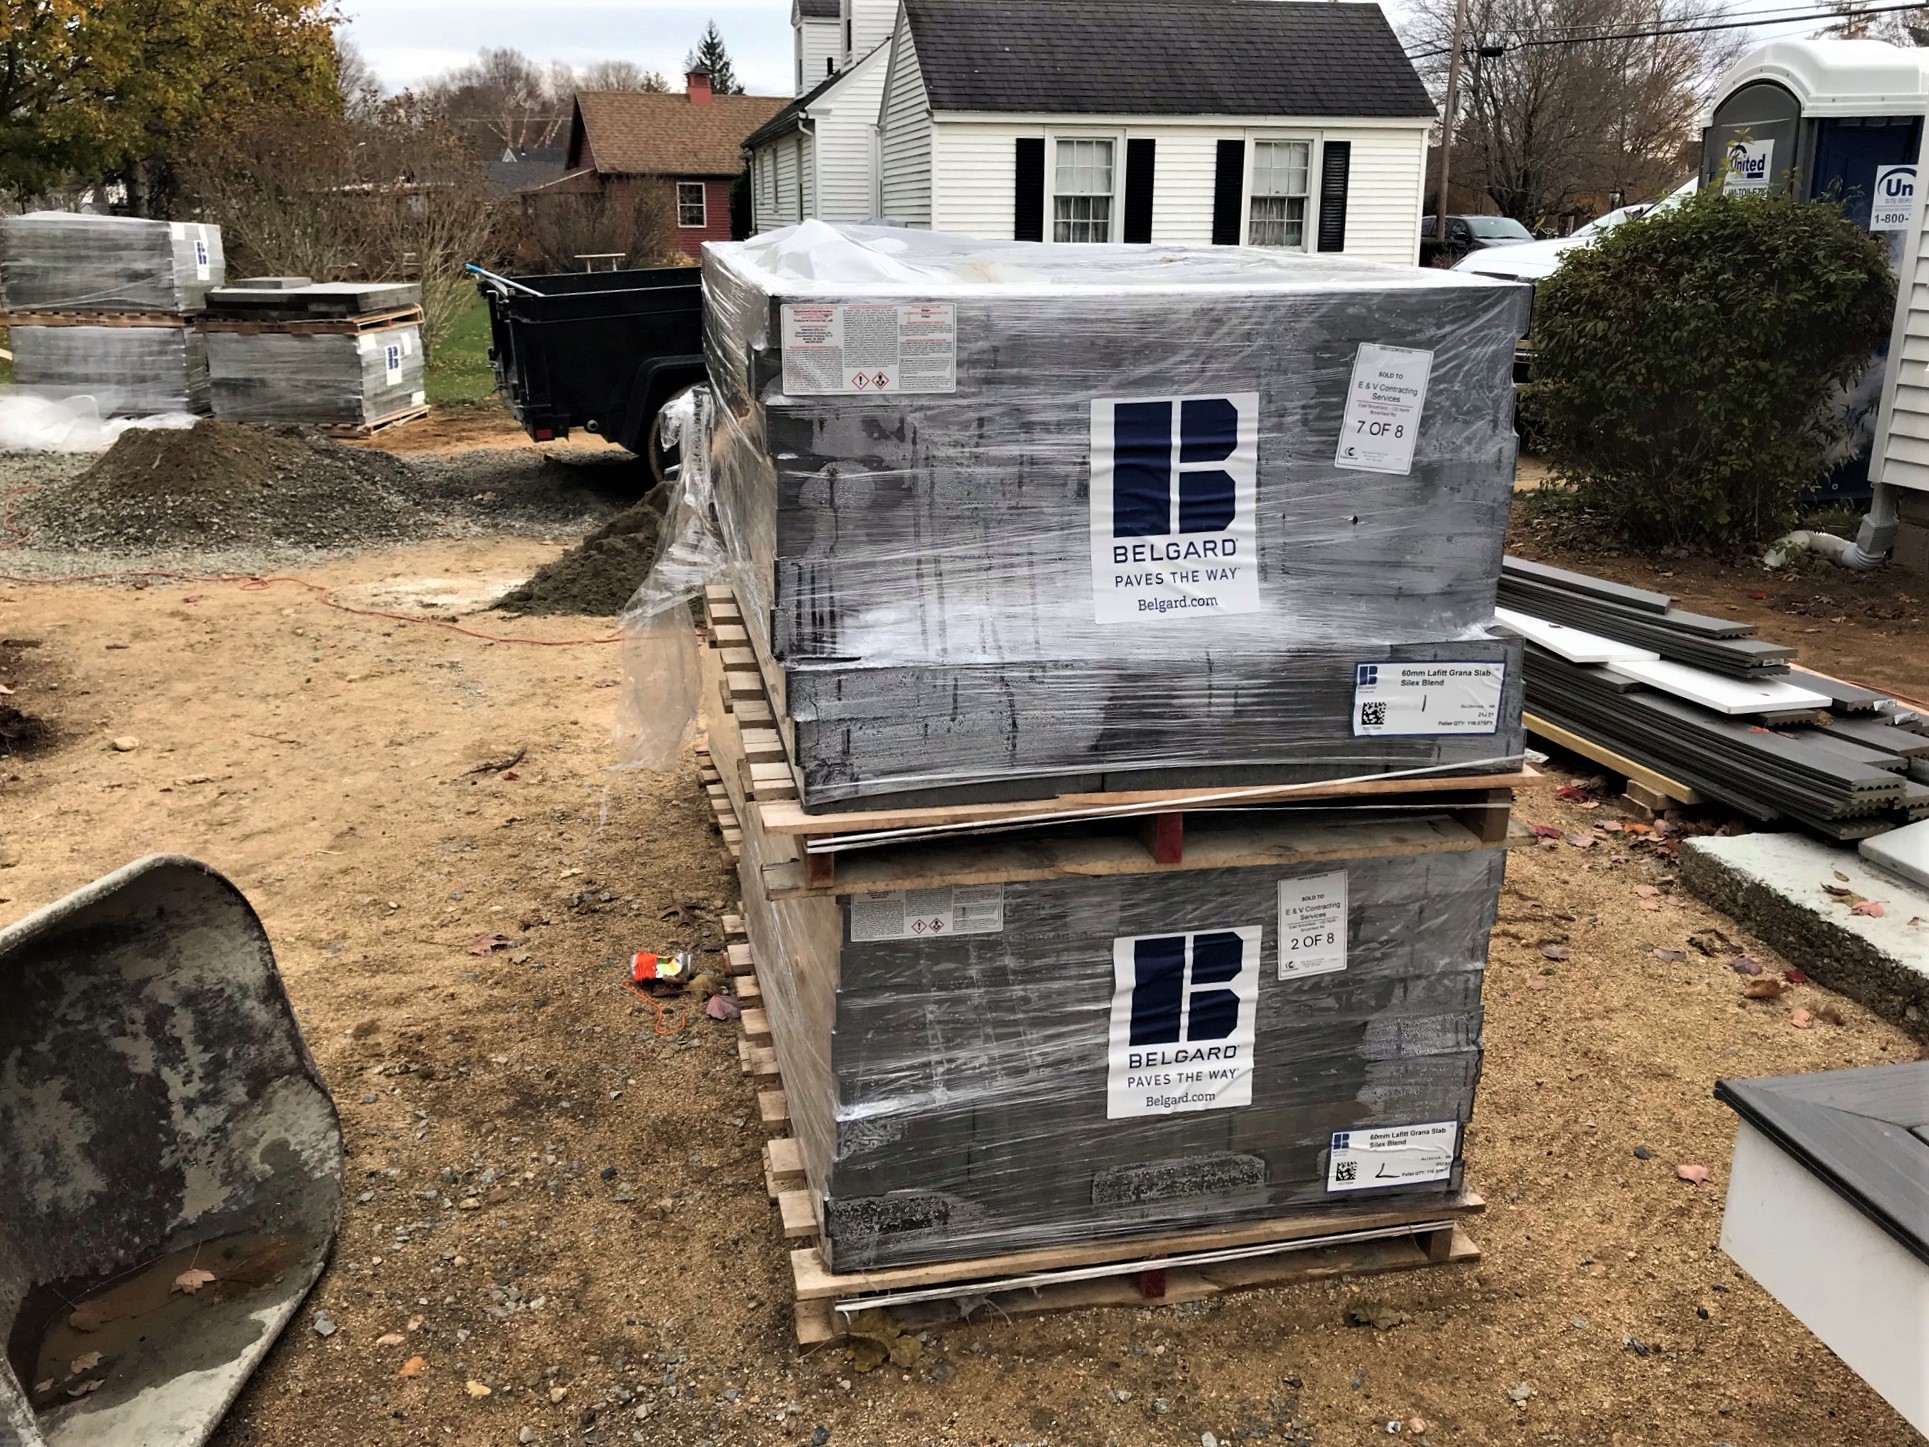
Lots of paving stones.
Paving stones going in on smoothed sandReverse angle
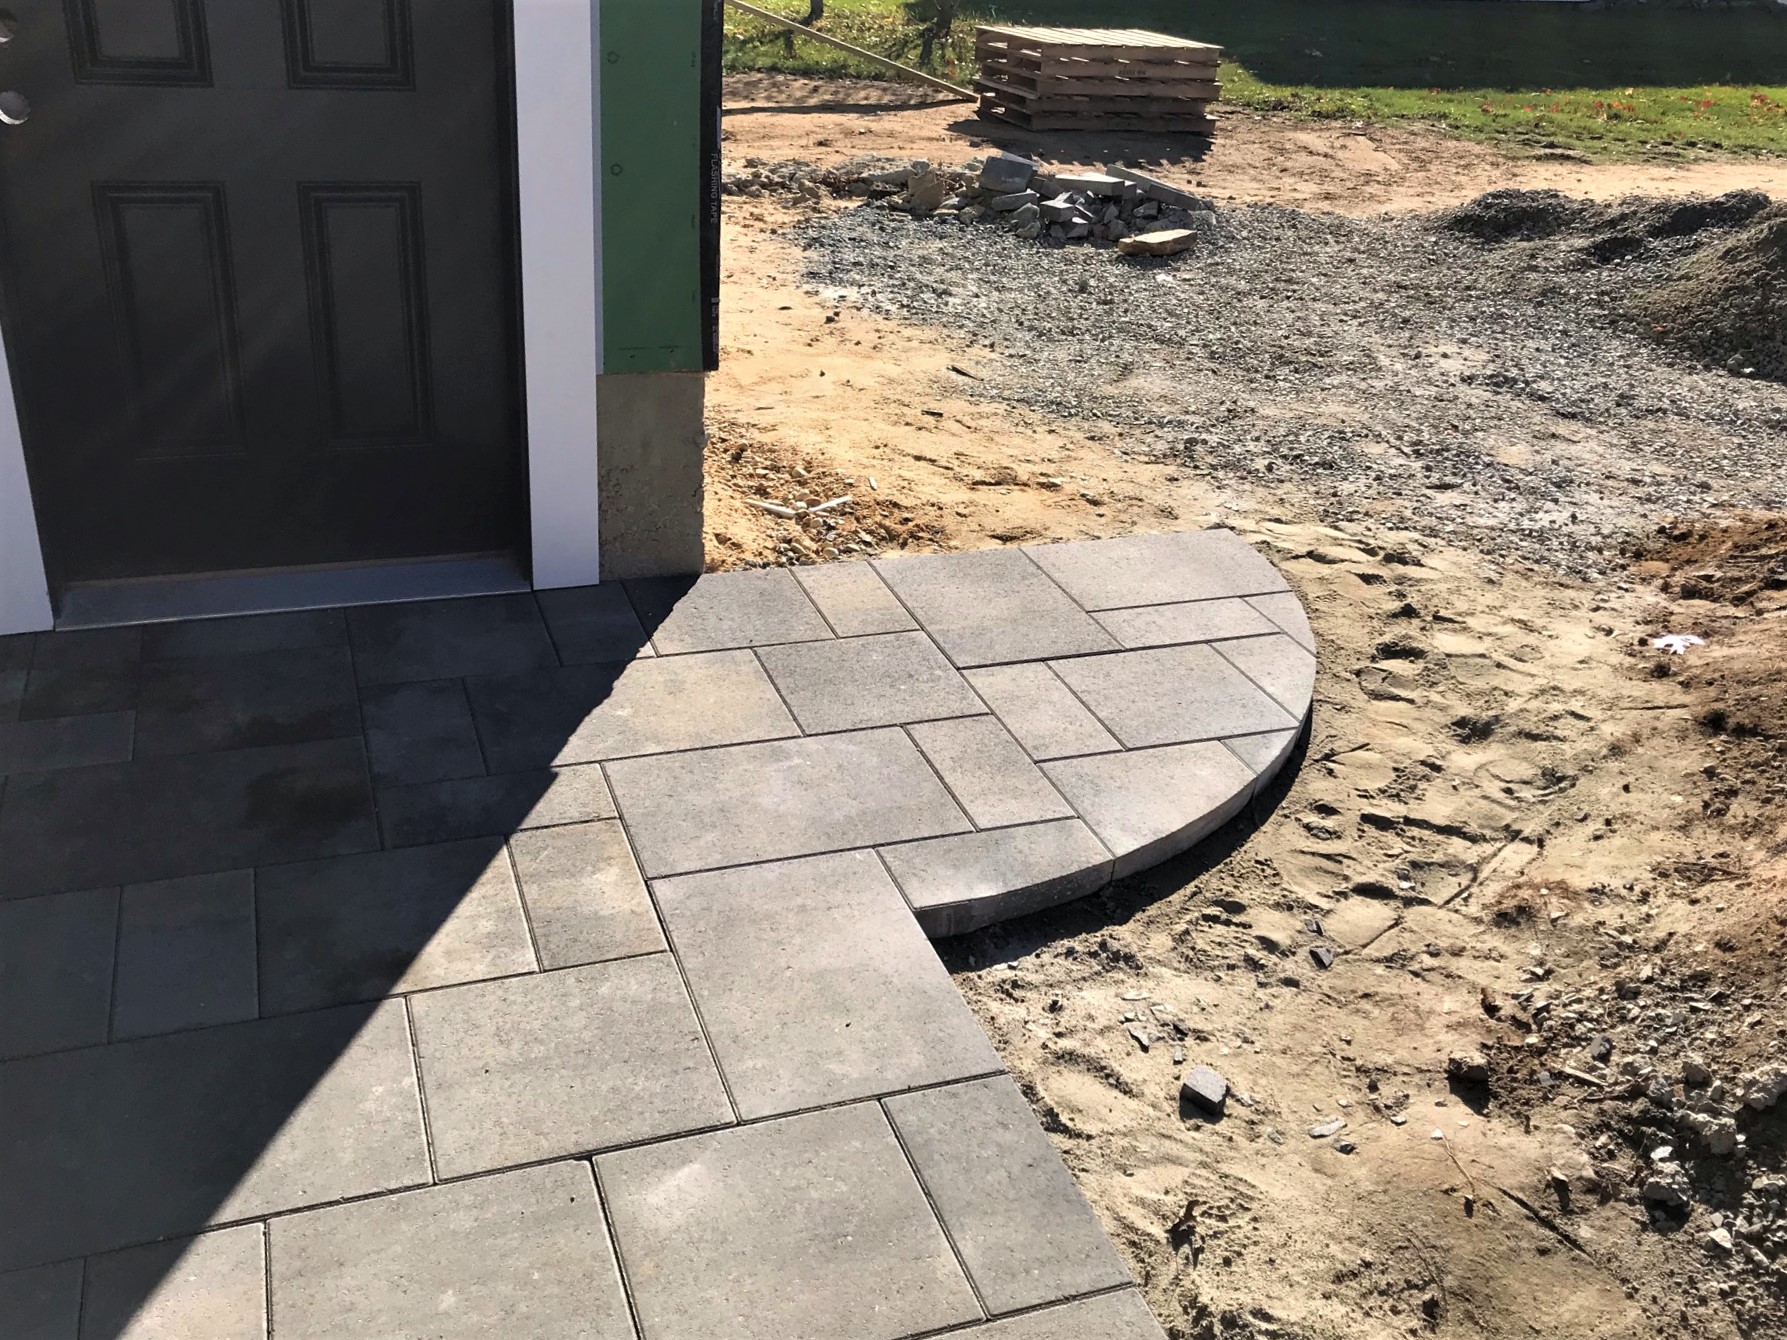
The other progress was nice as well on doors and windows.
Deck doorwaySmall garage door
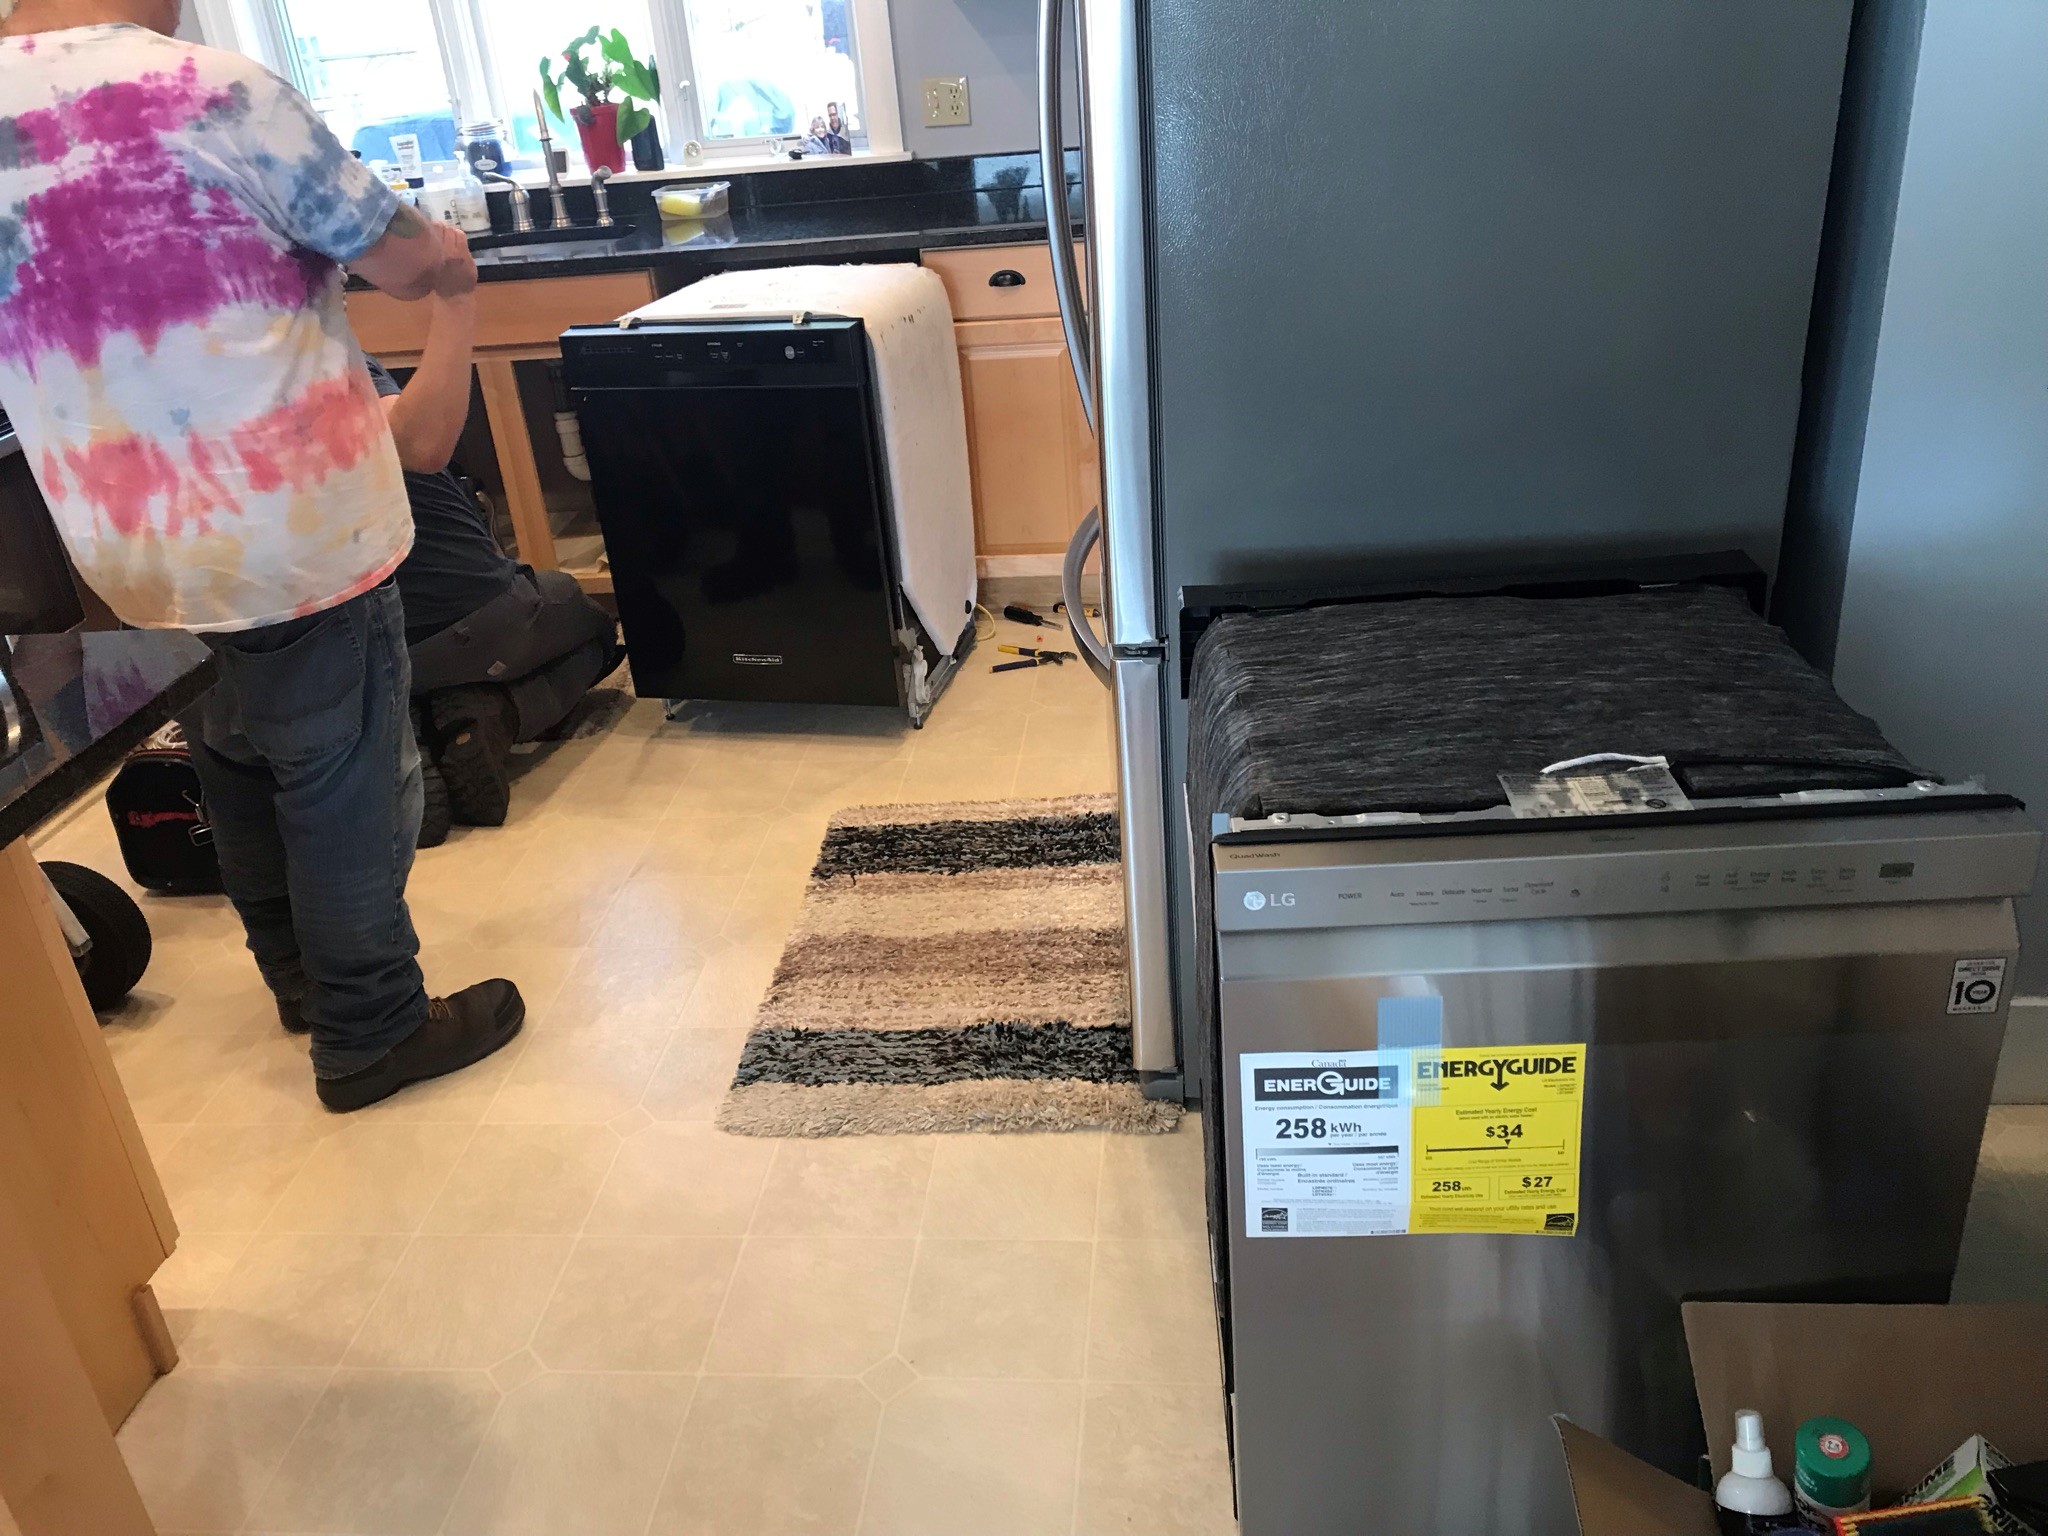
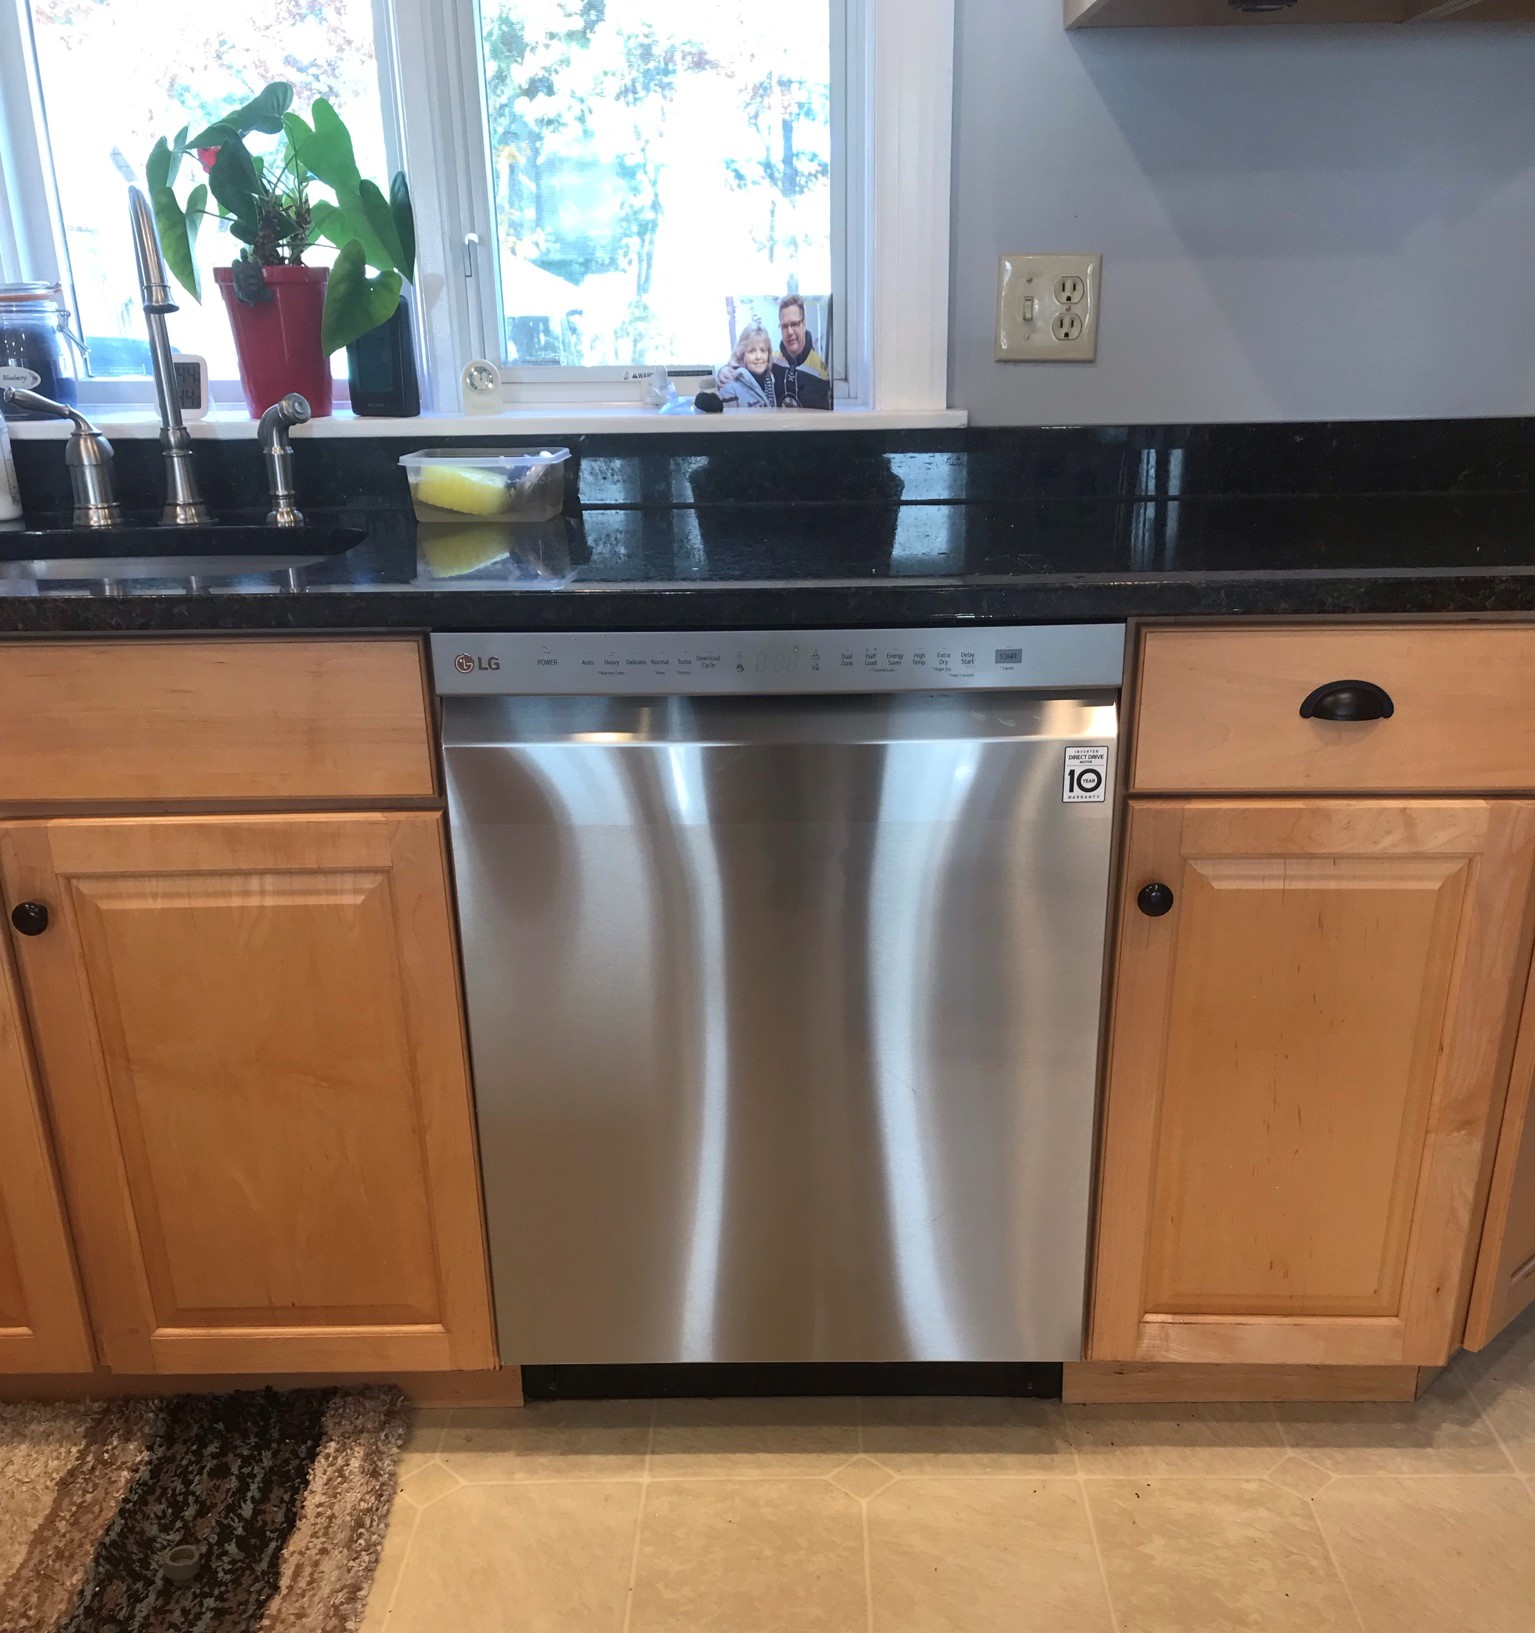
While I was away, our dishwasher decided to shed its mortal coil – or at least to begin to leak. This was not part of the project, but needed attention as we also discovered that we needed new valves under the kitchen sink. Luckily we got a plumber to replace the valves and found a dishwasher model locally for delivery later in the week.
November 15
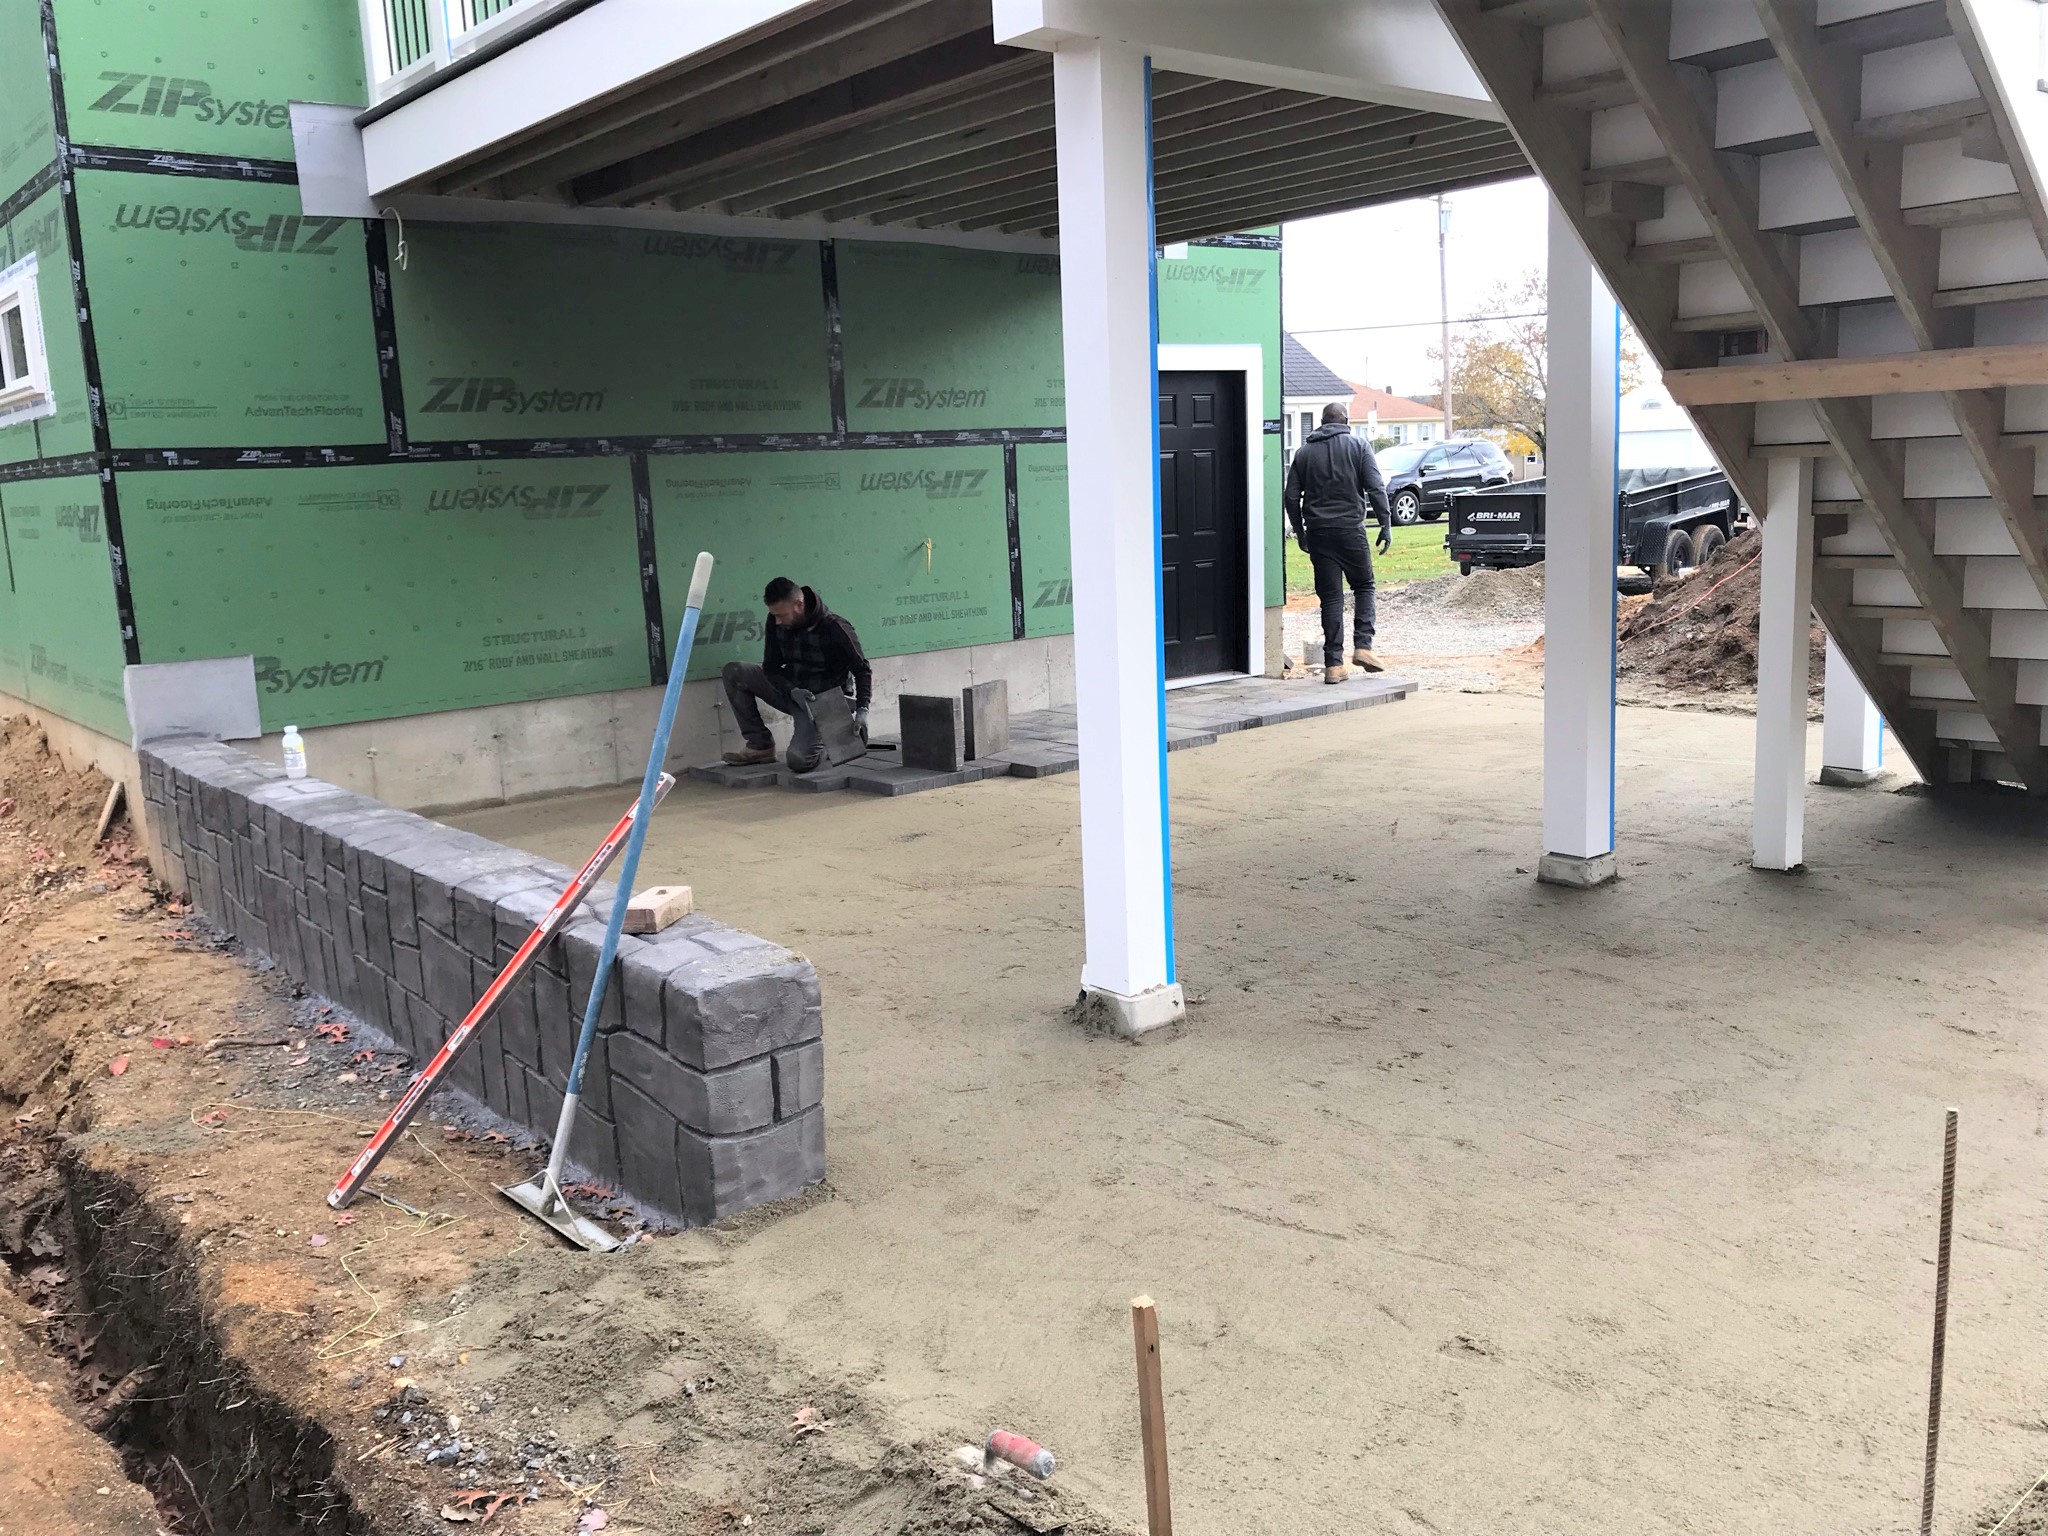
The patio made significant progress on the 15th getting under the stairs.
November 16
On the 16th, Evandro was well into prepping the fire pit for paving stones – but the gas line needed inspection before we could go further.
Gas line passed inspectionThe artistic corner cut by the garage.
November 17
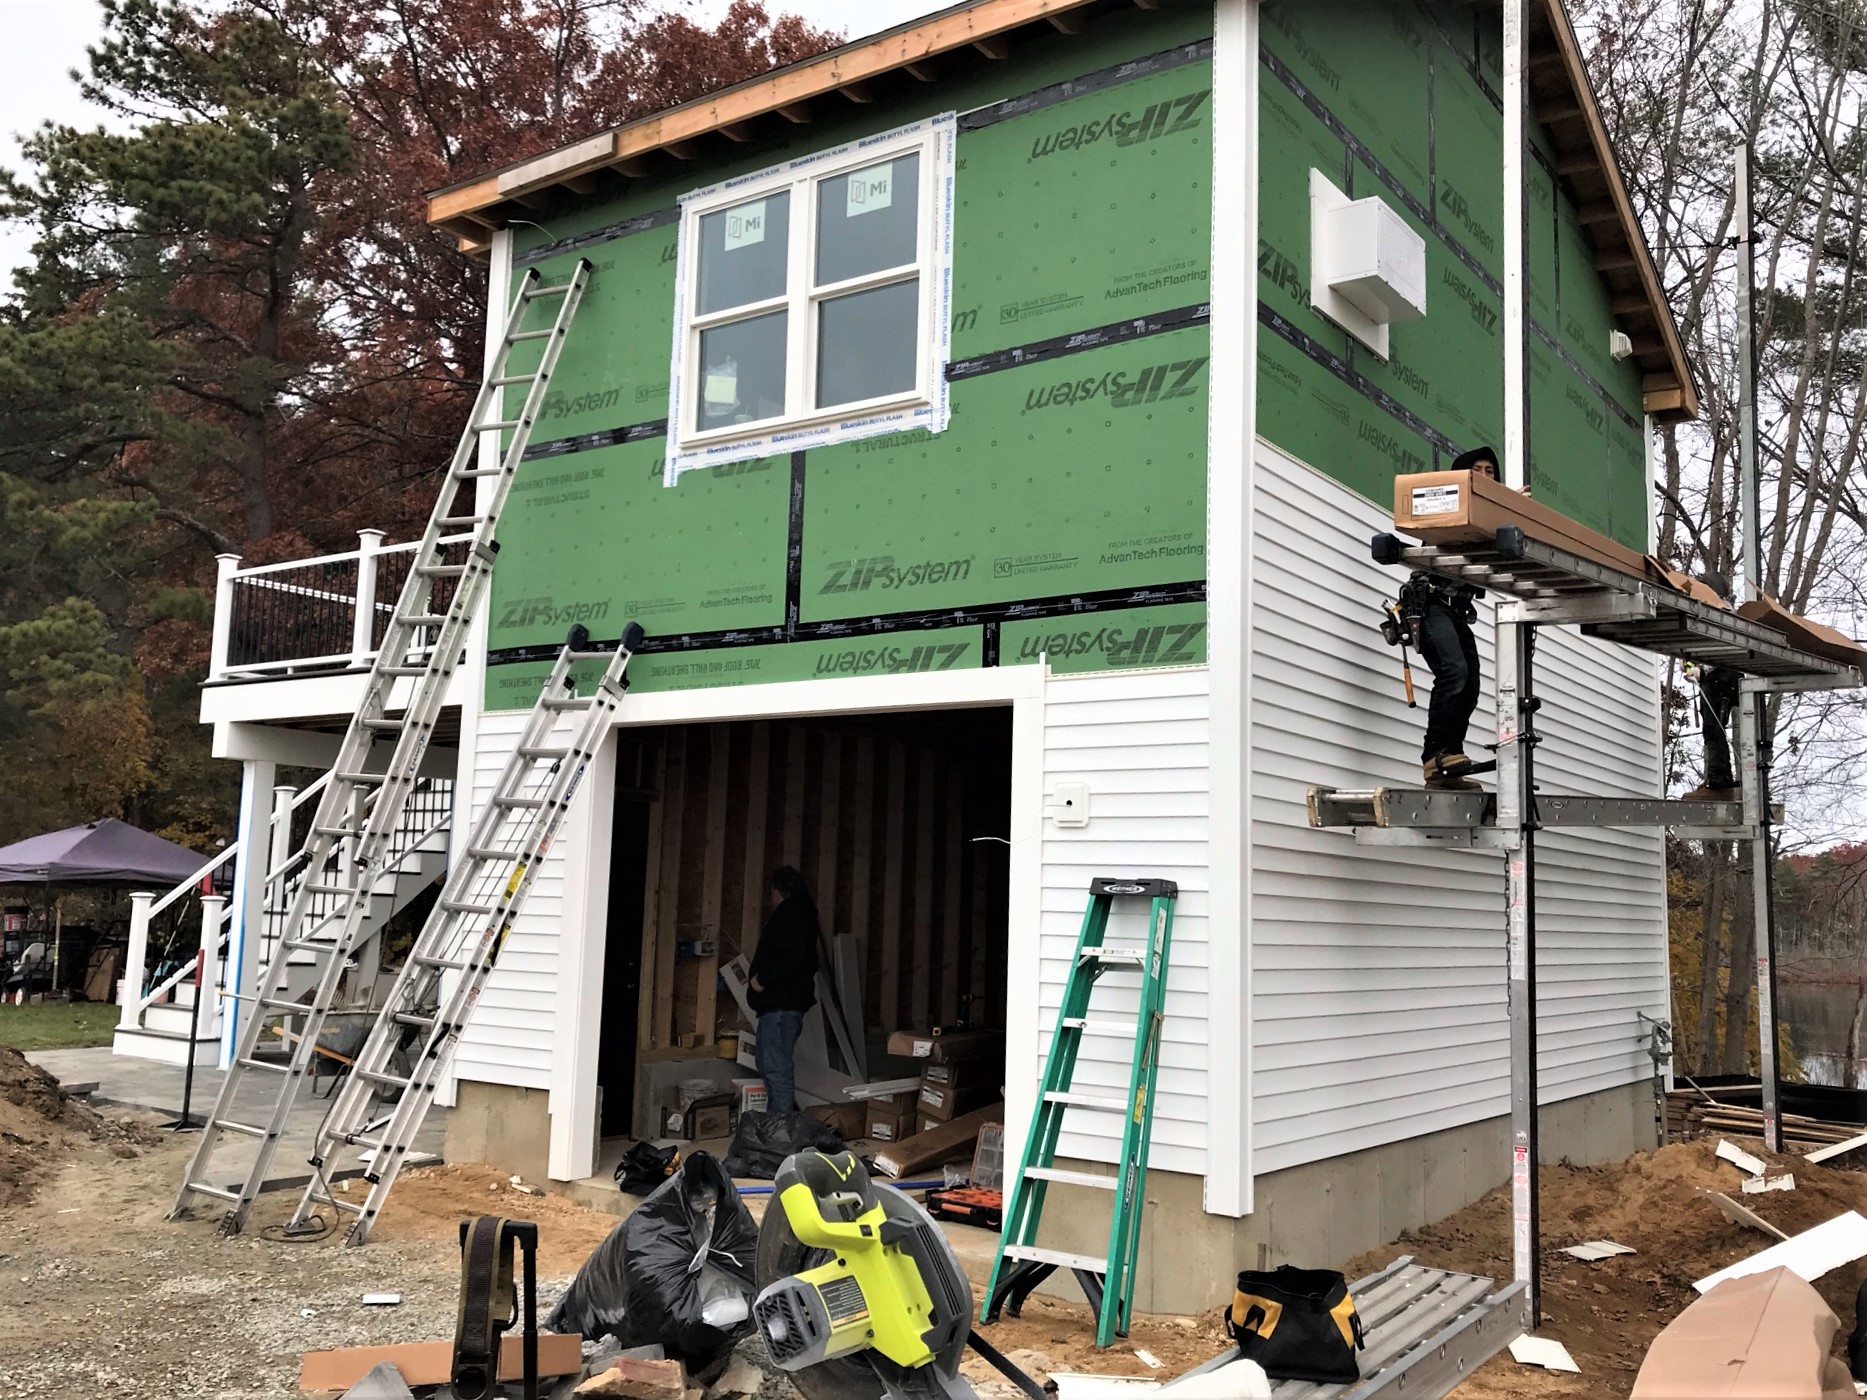
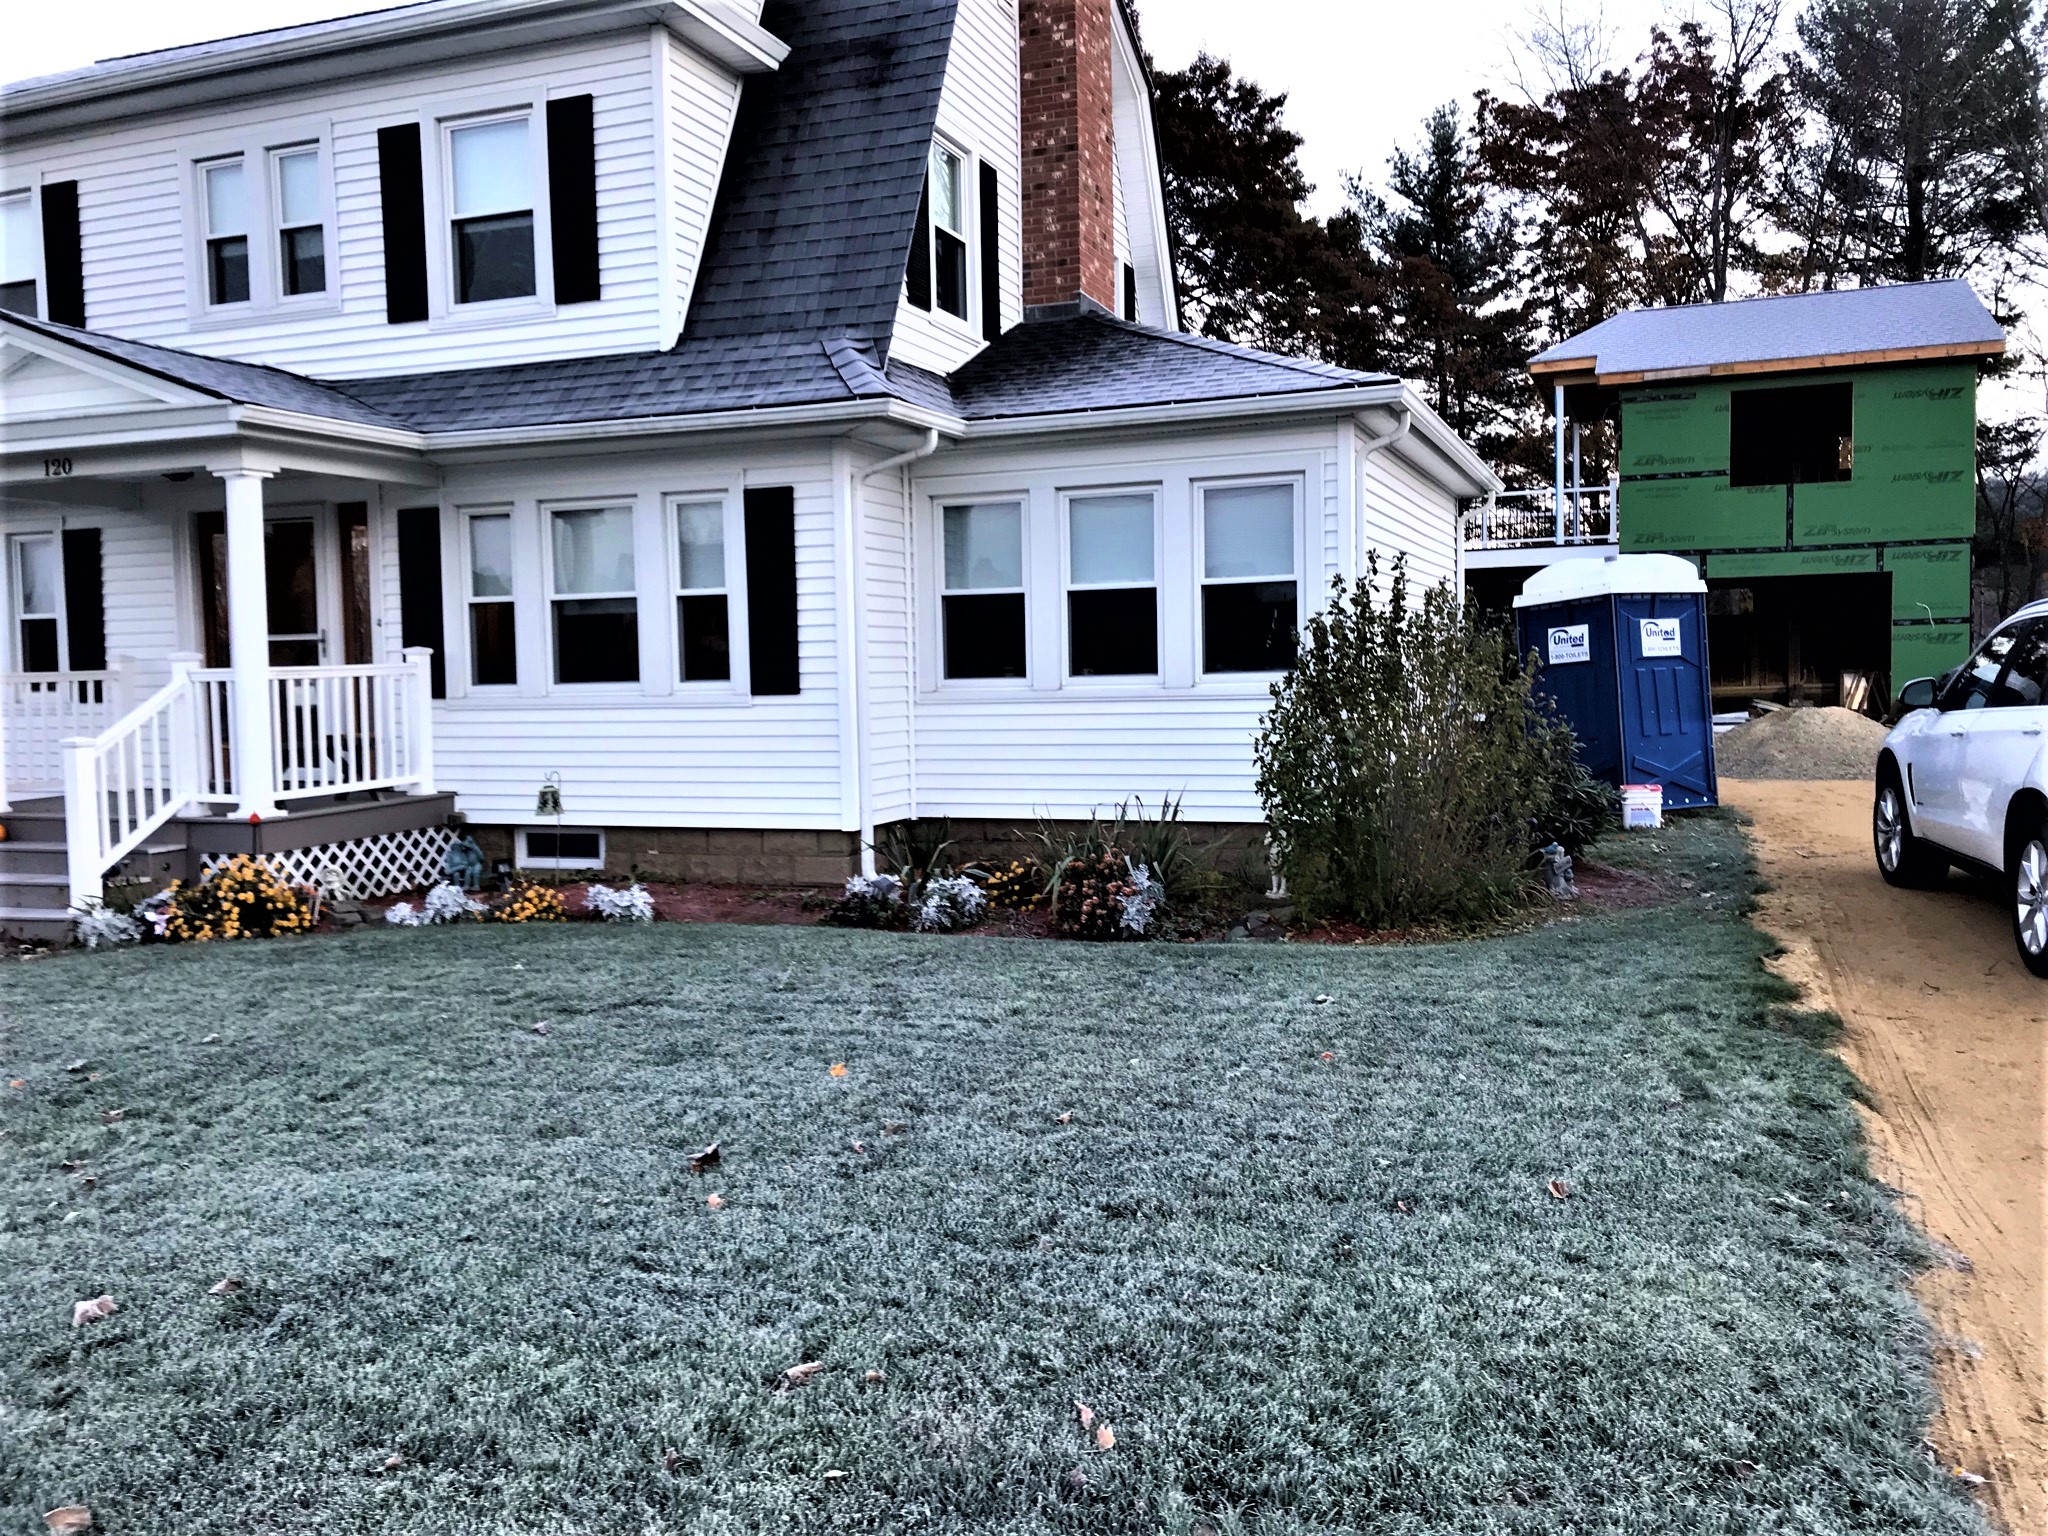
The morning of the 17th there was a heavy frost – yes, my roof is not normally white. Jonny Victor was early and got going on the siding installation.
Siding going up.
November 18
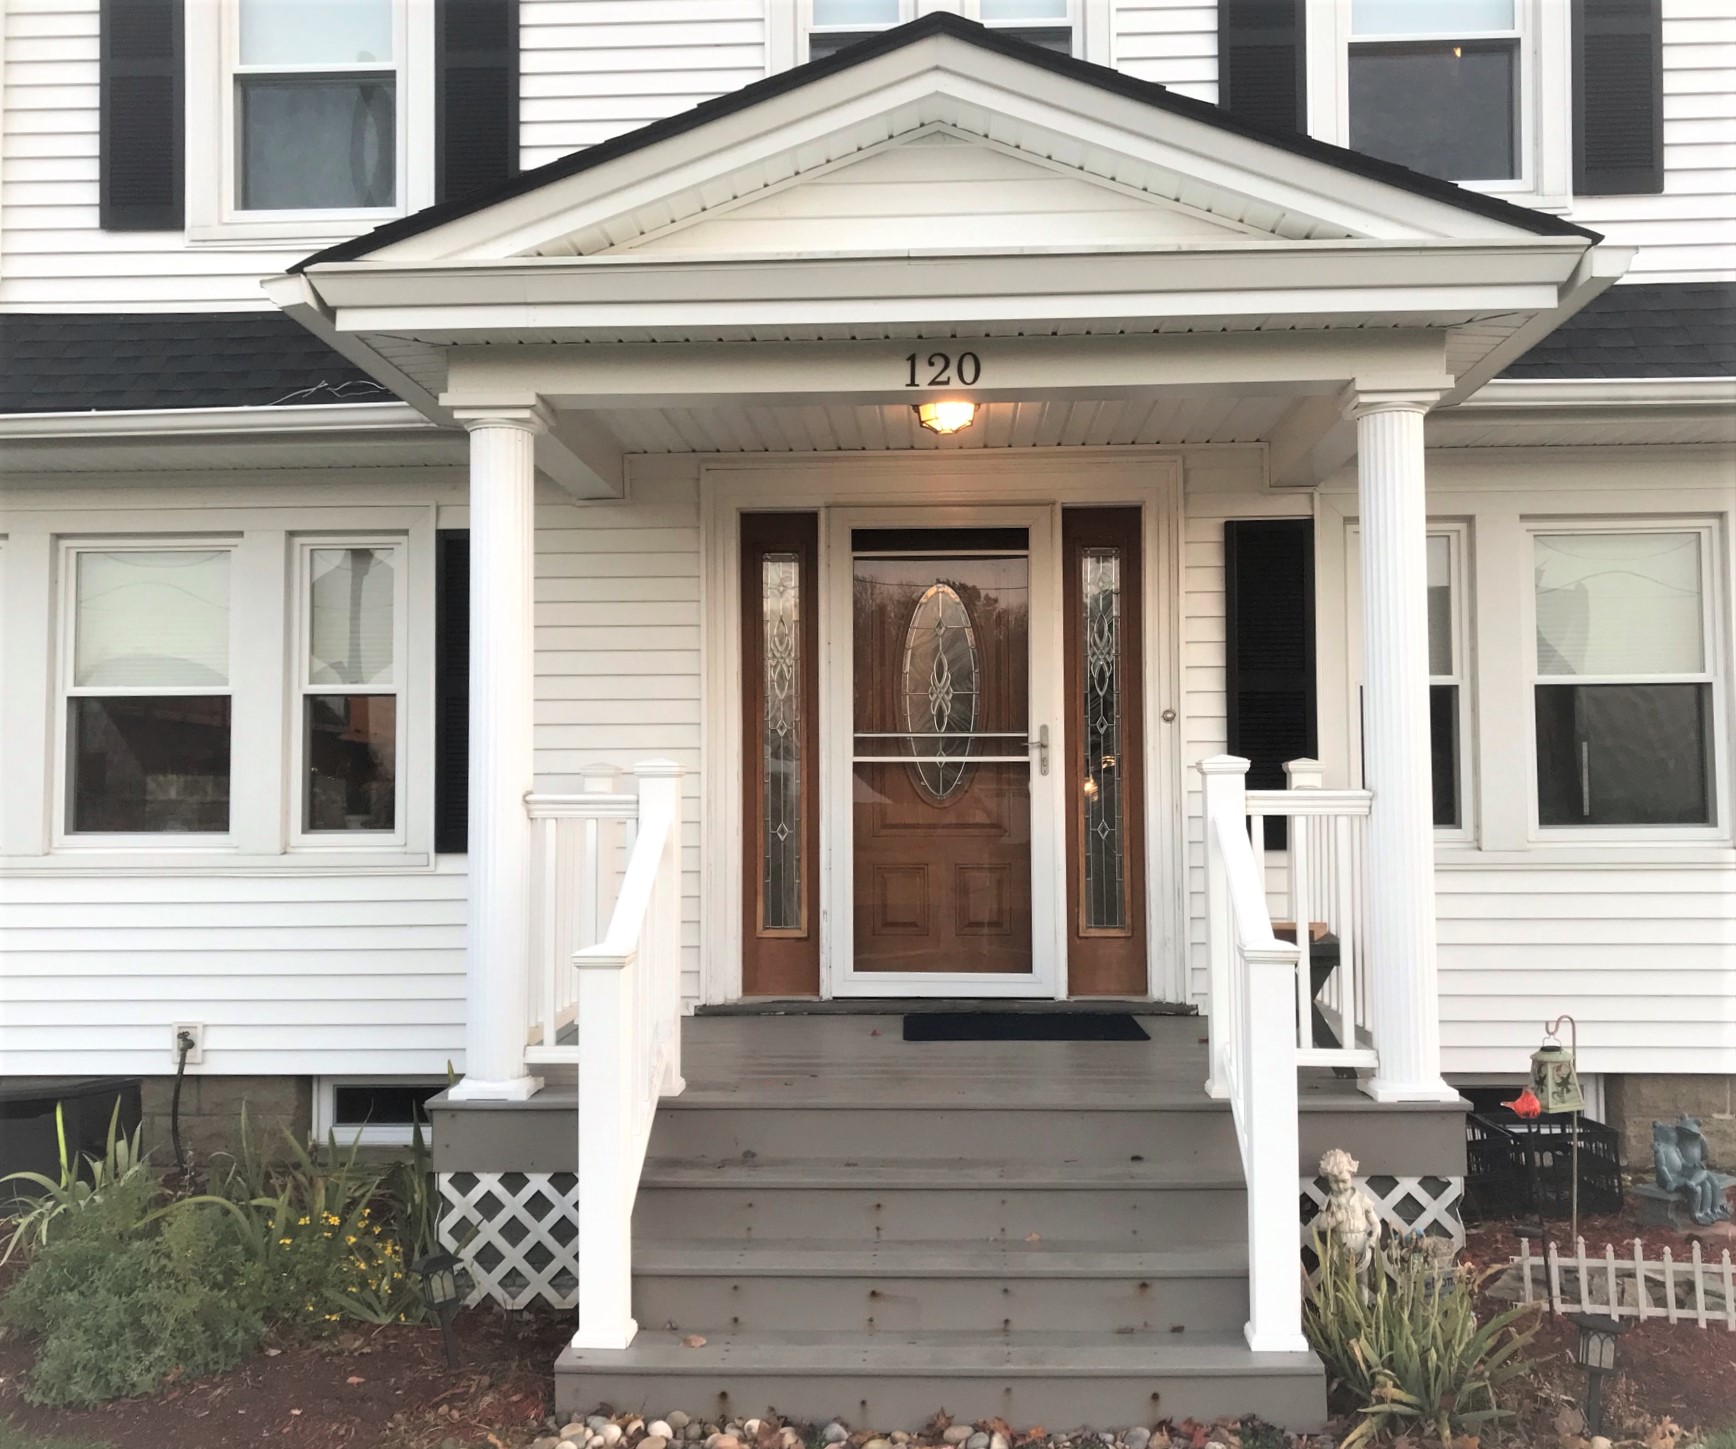
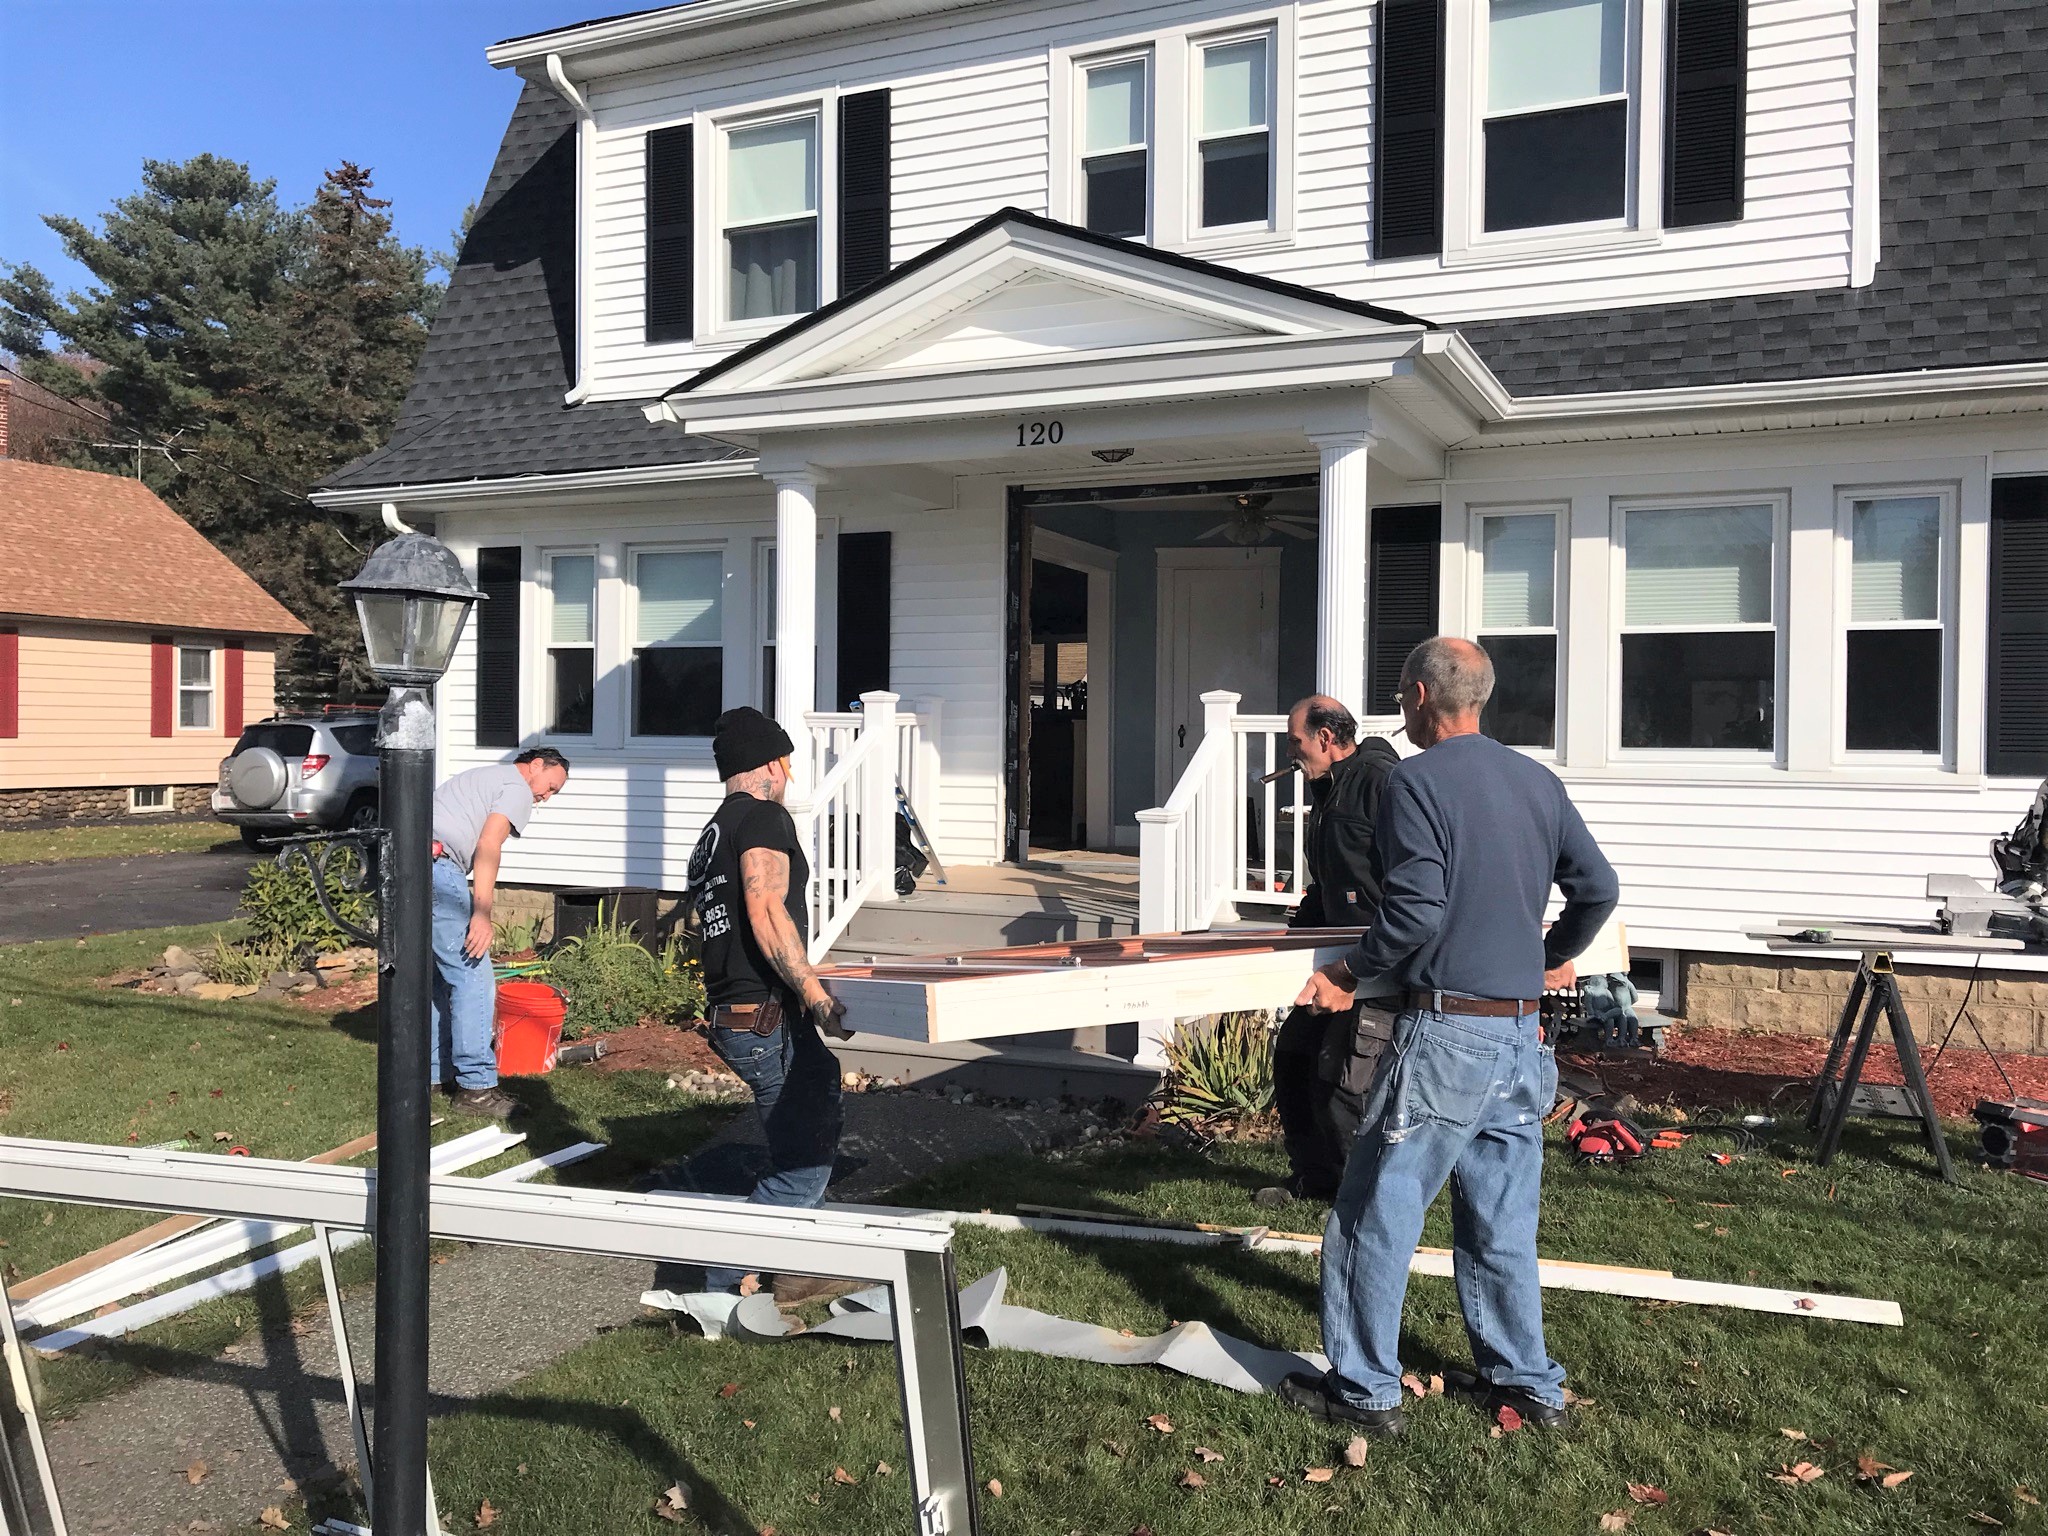
The weather warmed up significantly on the 18th, which made it an ideal day to replace our front door. It had been previously ordered to be installed in the summer, but the retailer screwed up and sent a door with no stain on it. That was sent back, and finally the new one arrived.
The old front door with the storm door over it. The storm door had trapped sunlight (and heat) and delaminated our front door, so it needed replacement.
The old door and side panes are removed.The new door is carried in.
Inside showing the new door, unfortunately it’s defective!
The door width was 1/8″ wider in the middle than at the top! So, it sticks, and will need to be redone – unfortunately – but as it’s a manufacturing defect we should be ok with a replacement. Timing in November is not good, and it only gets colder. At least the old one is gone now.
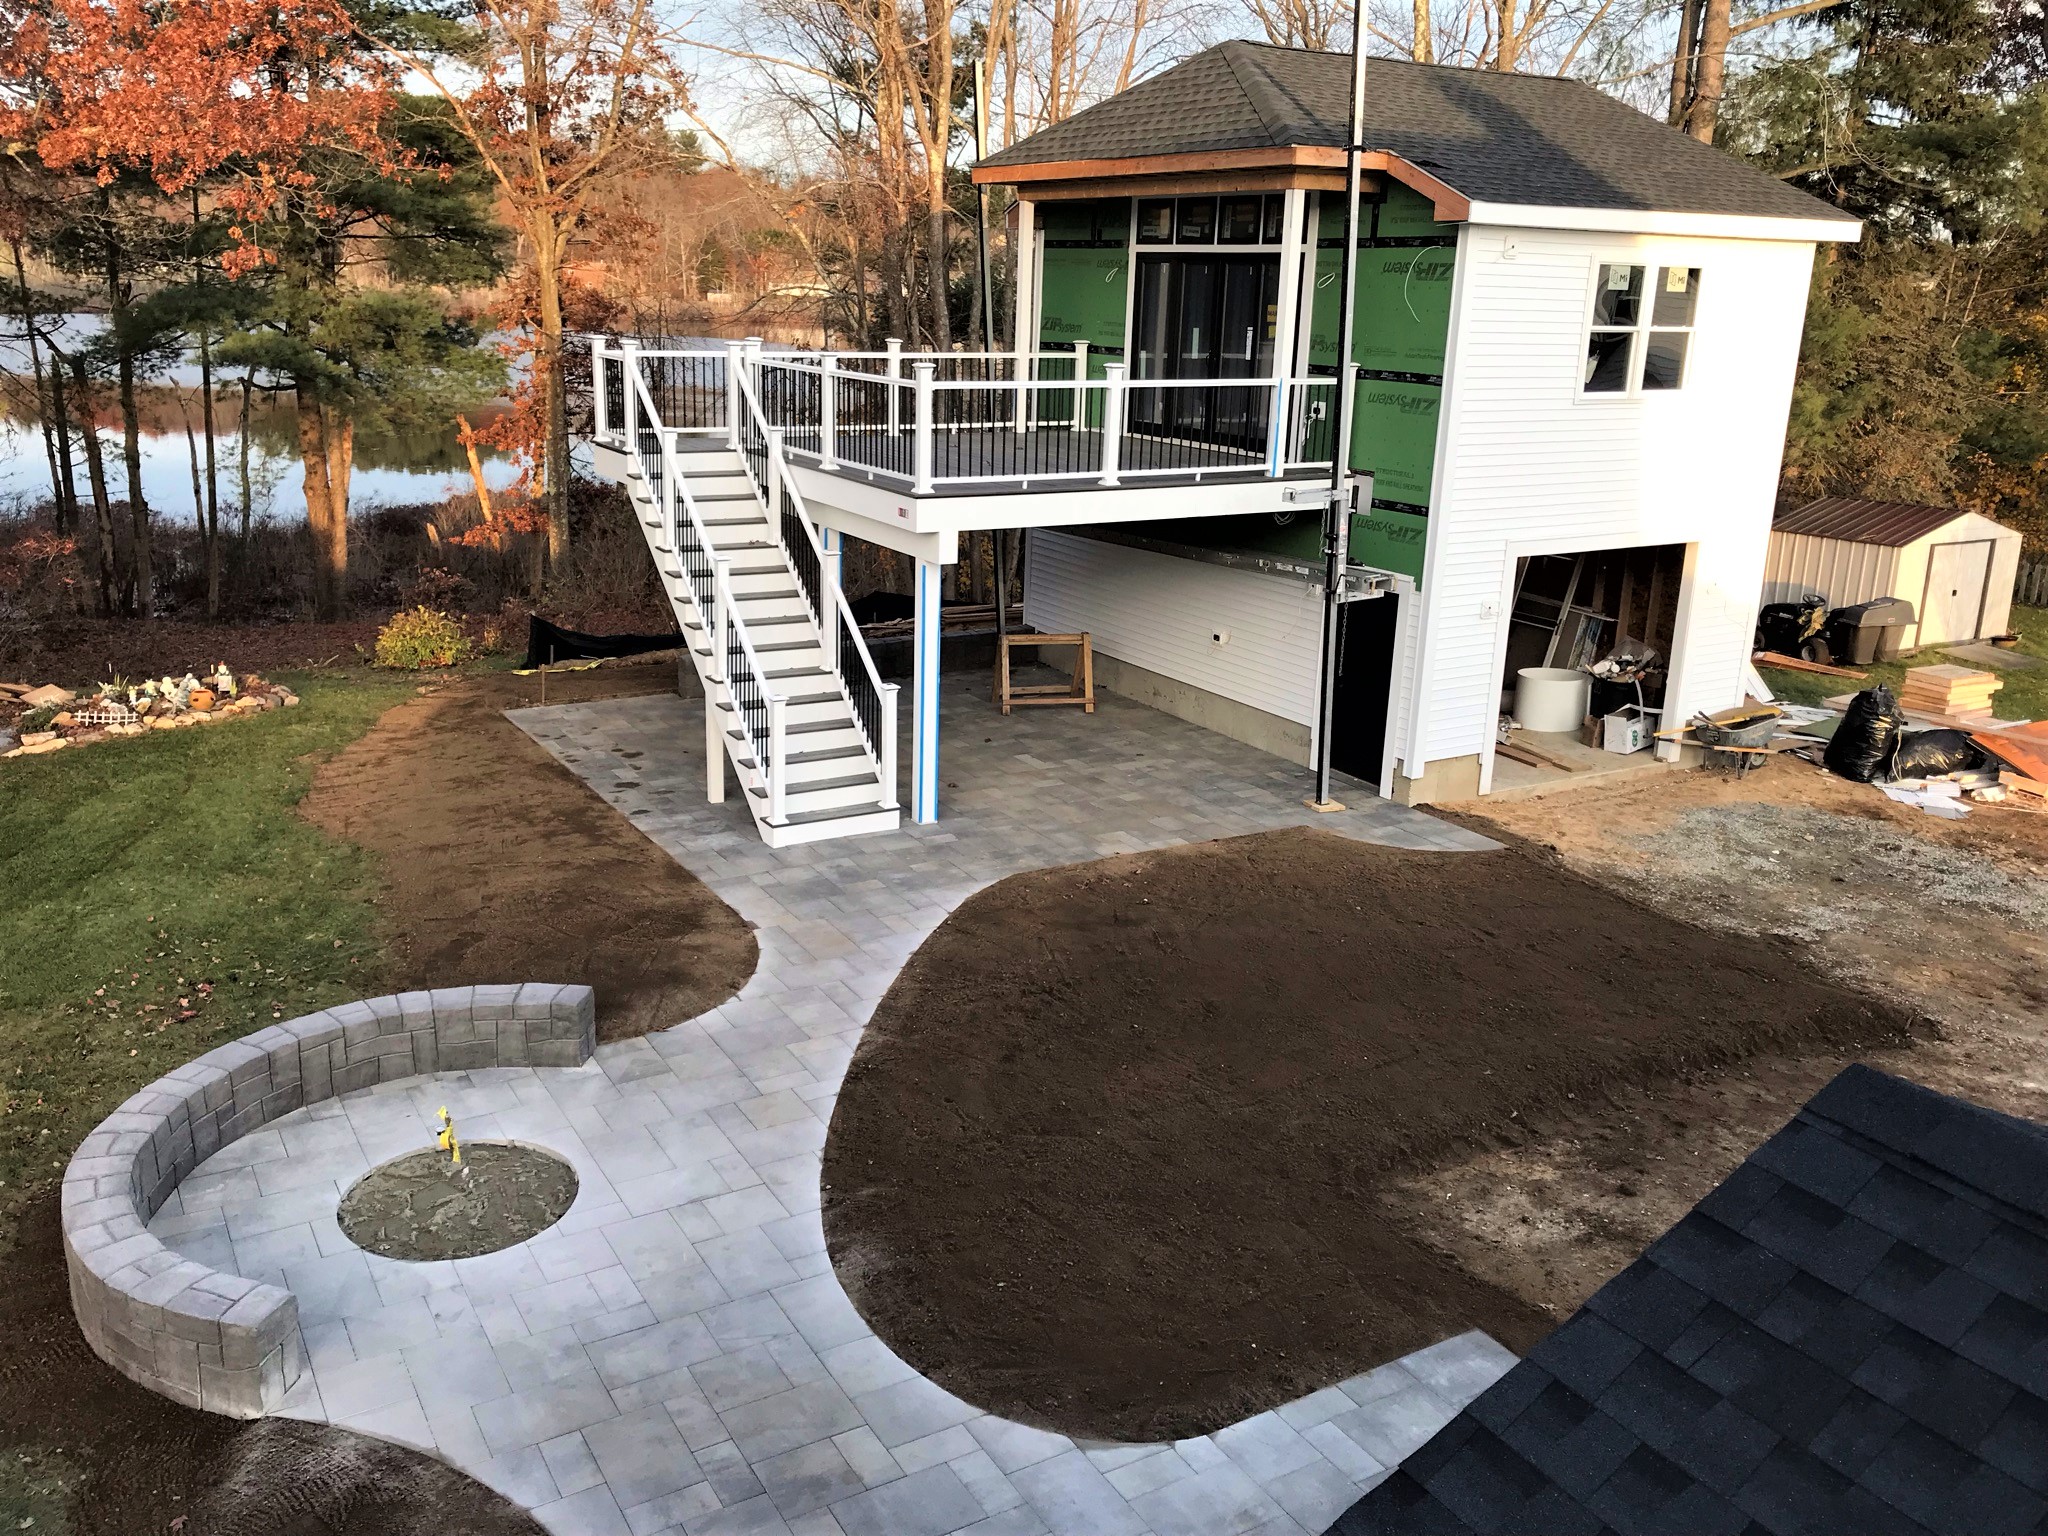
Evandro progressed on paving the fire pit.
And on the same day, the dishwasher was delivered for installation – so yeah, busy.
Out with the old……in with the new.New dishwasher installation happening in the midst of the front door installation.
November 19
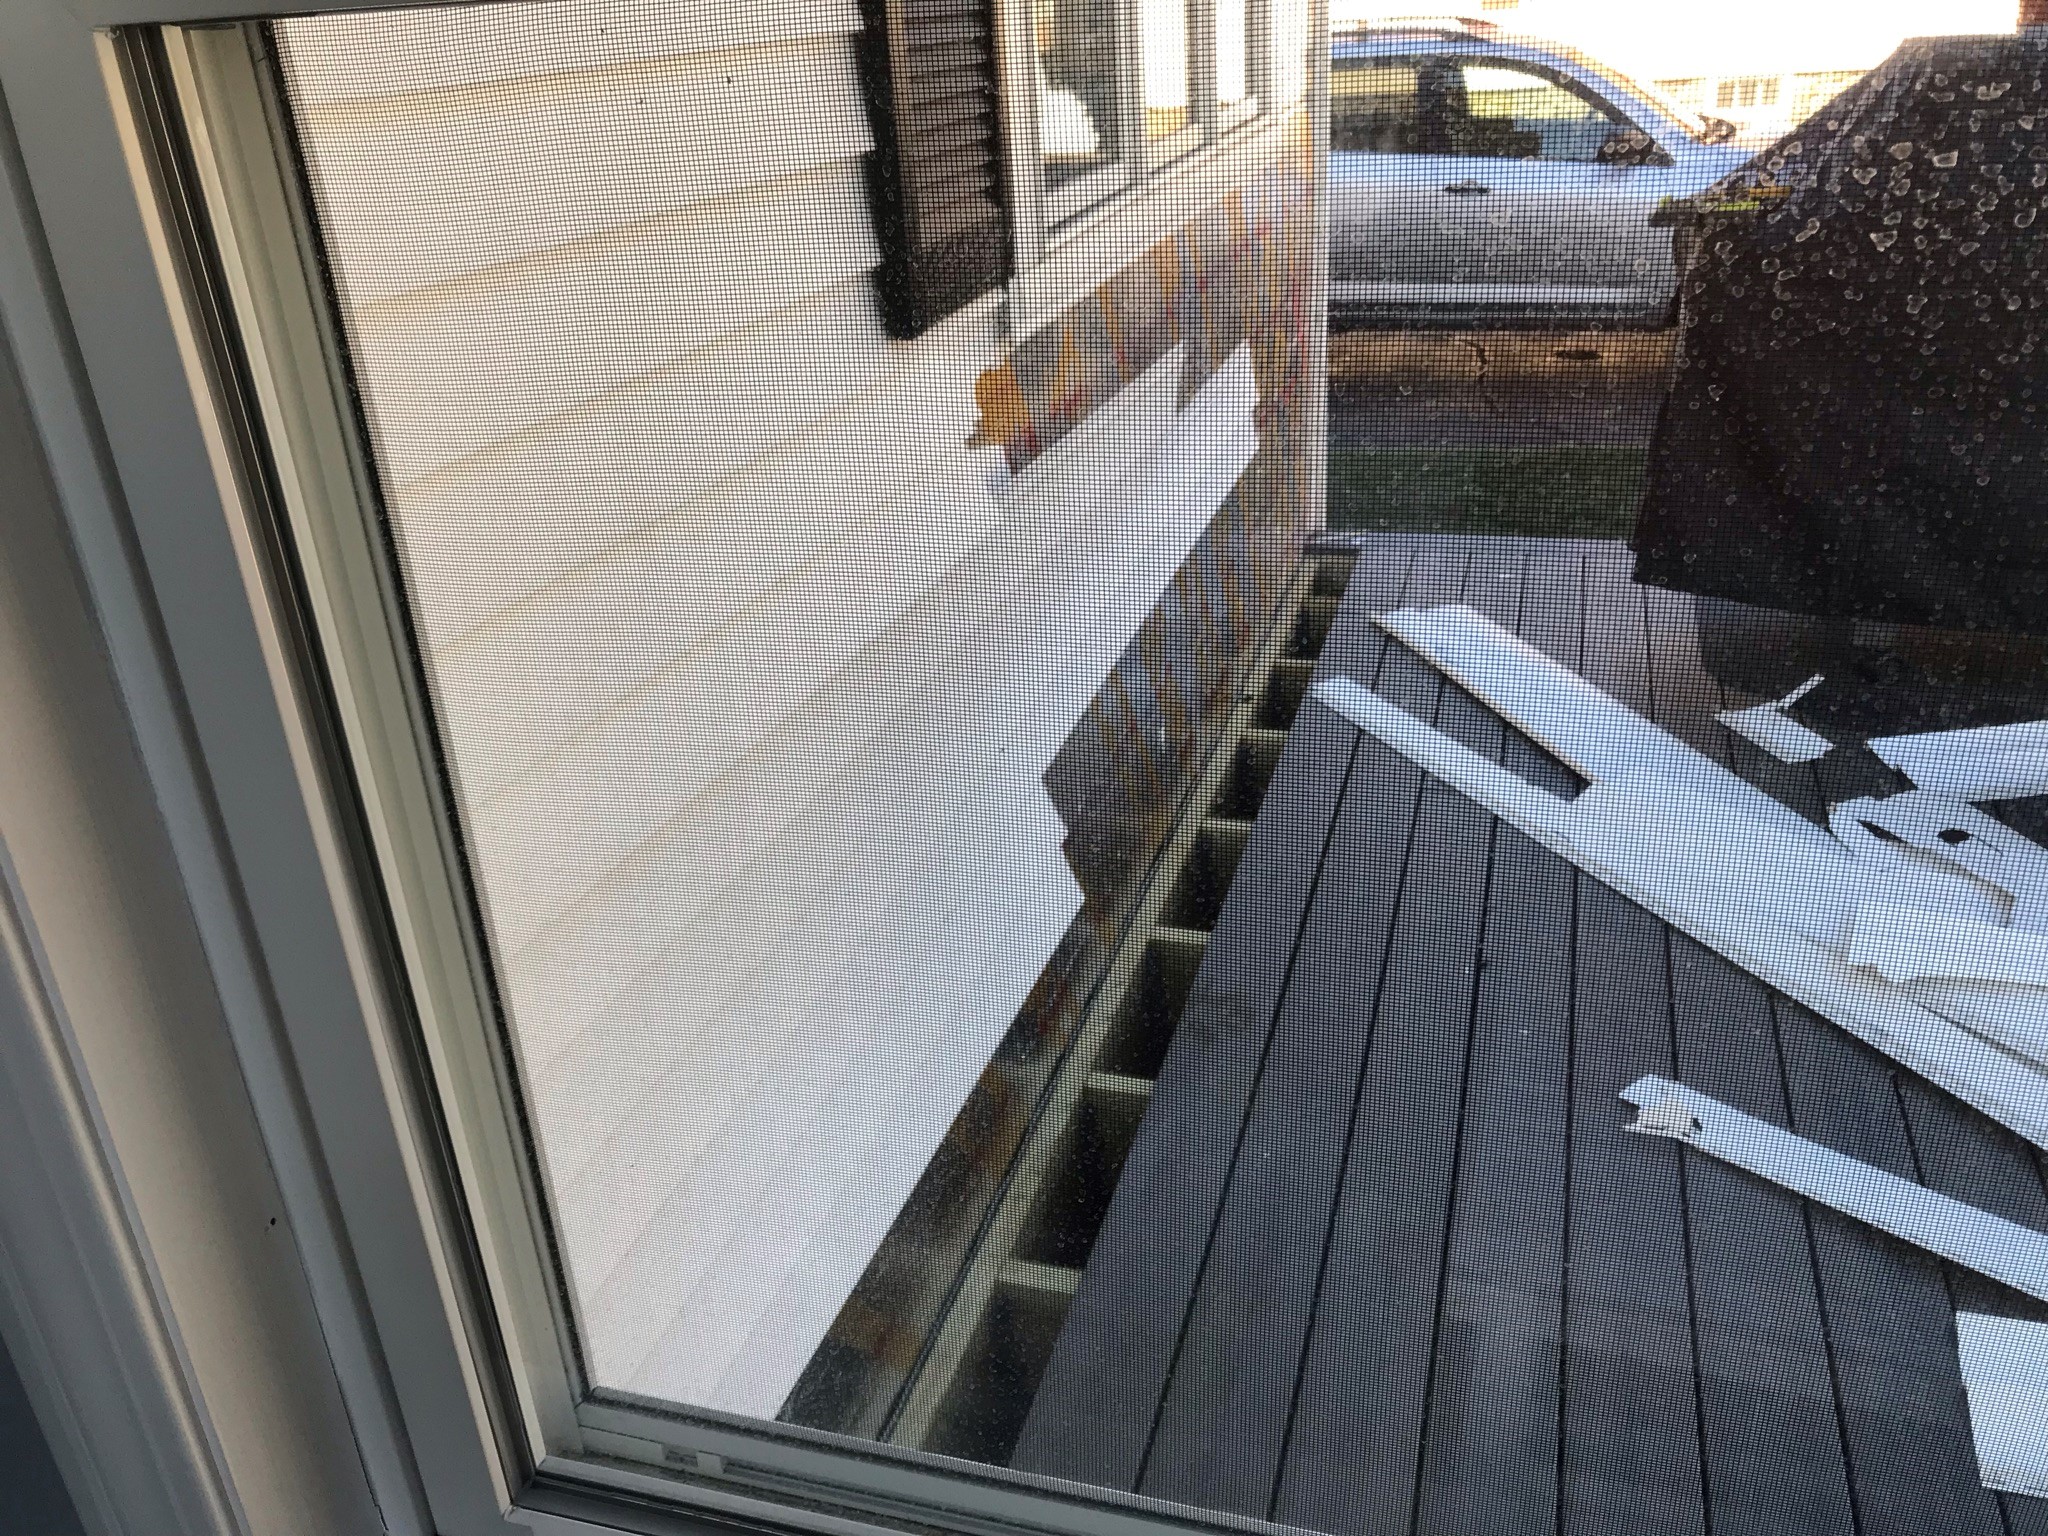
Early morning Friday the 19th showing siding and patio progress around the fire pit. All pavers are cut to shape.
Electrical work connecting the power in the house to the garage went on – plus a fluorescent light was replacement in the cellar with a safer LED.
November 20
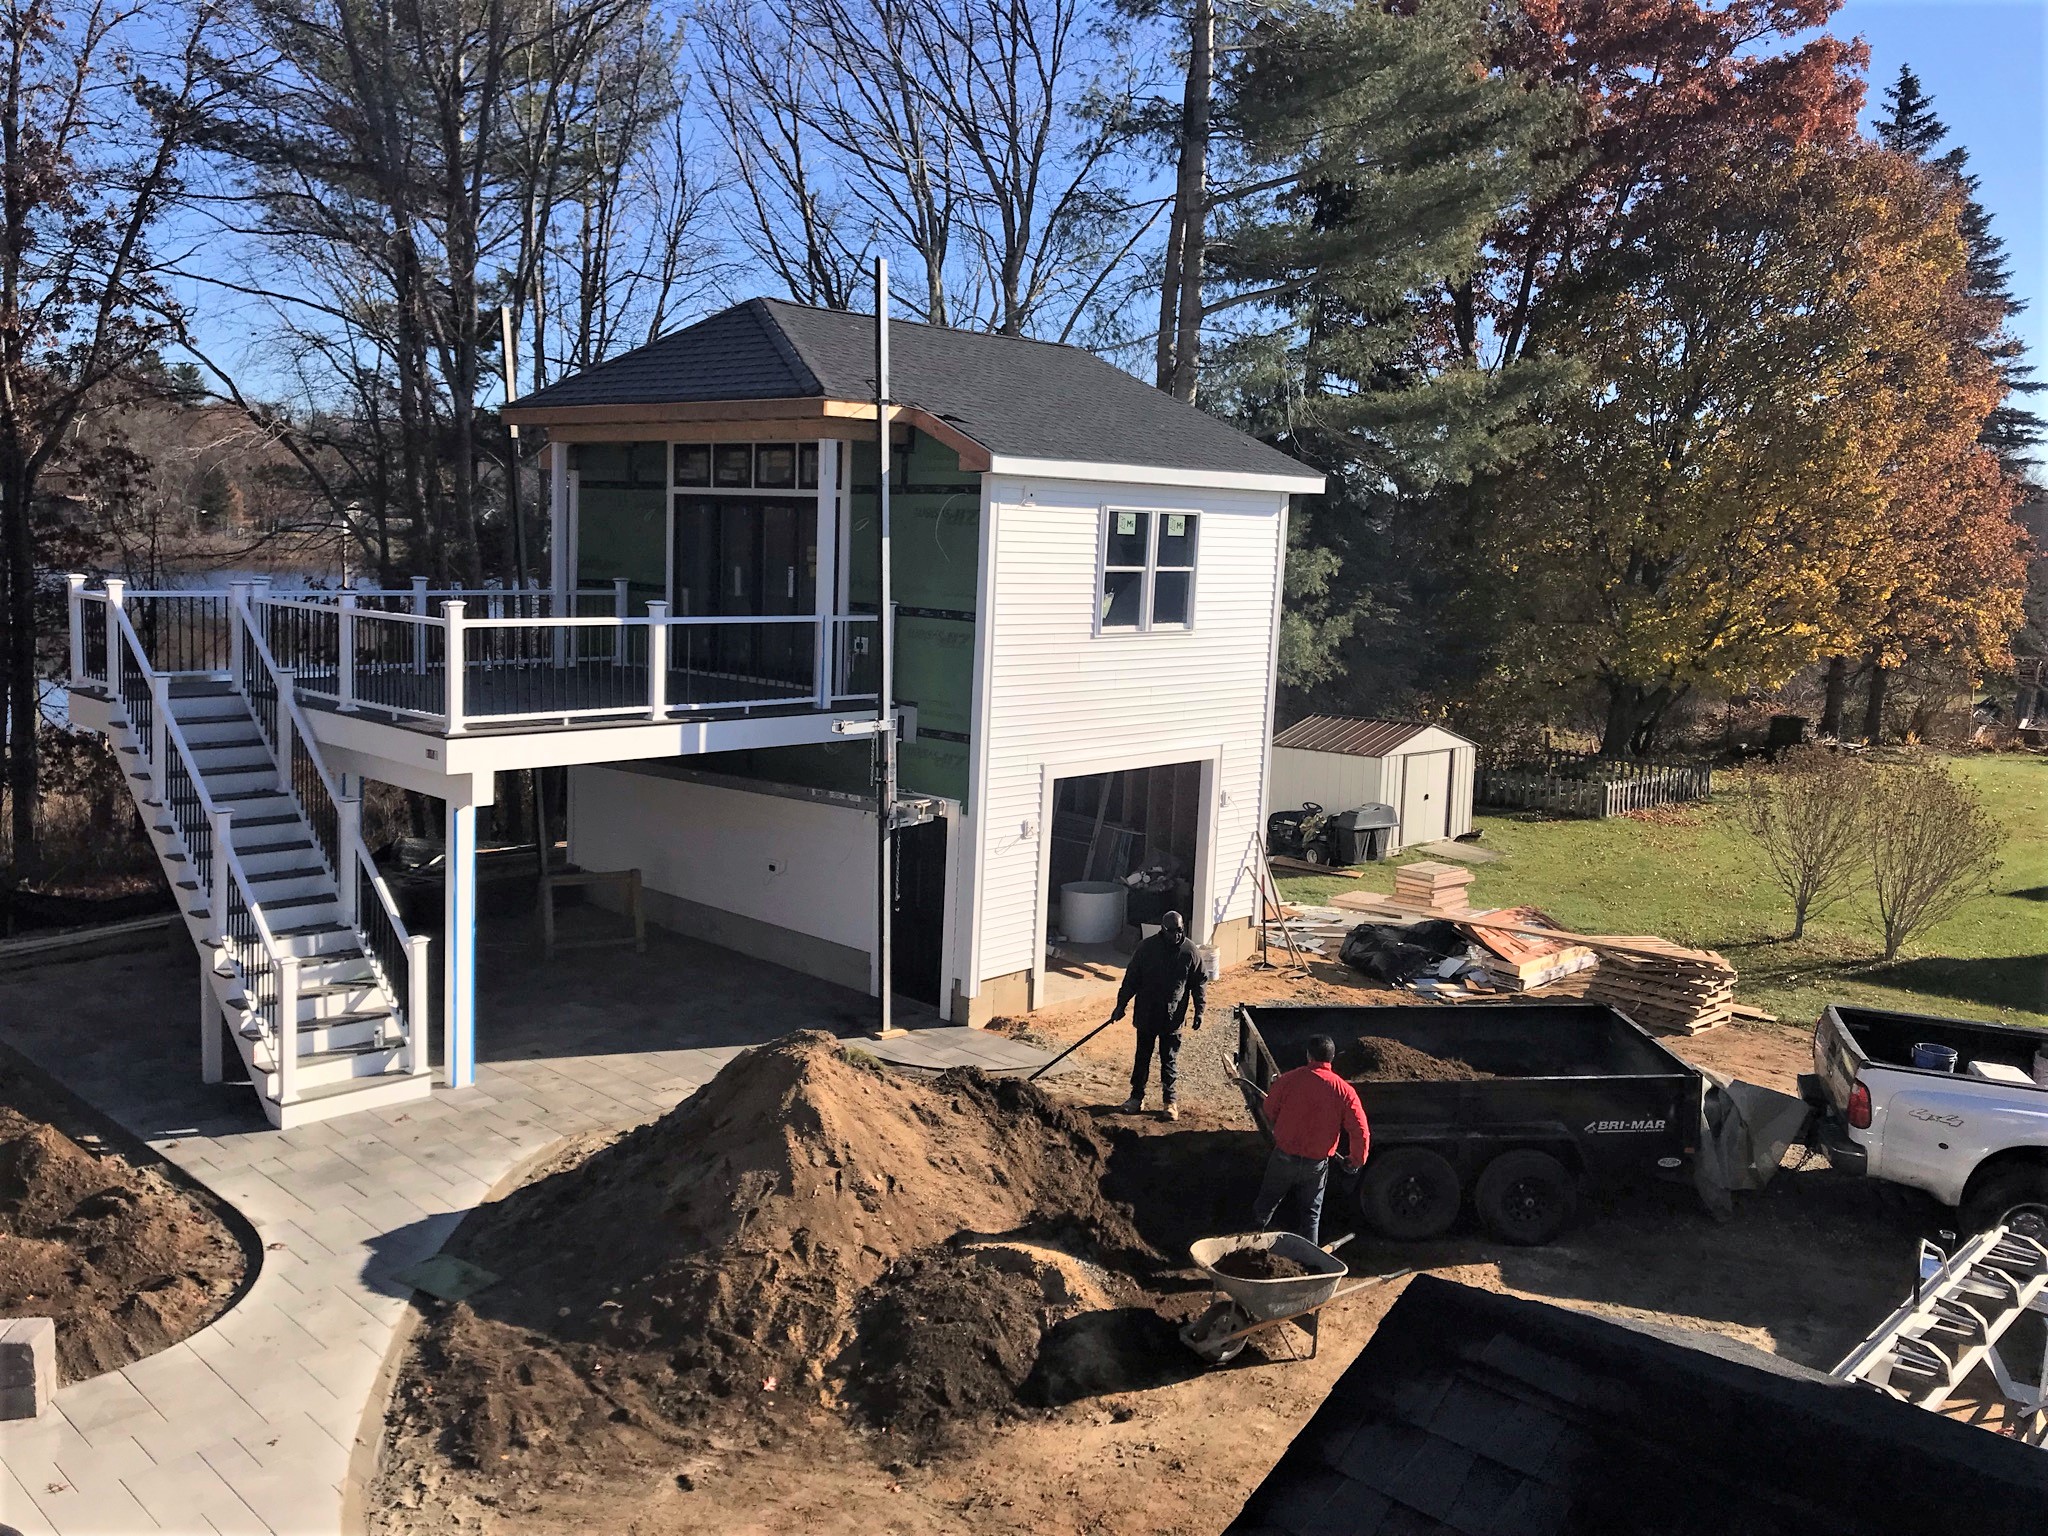
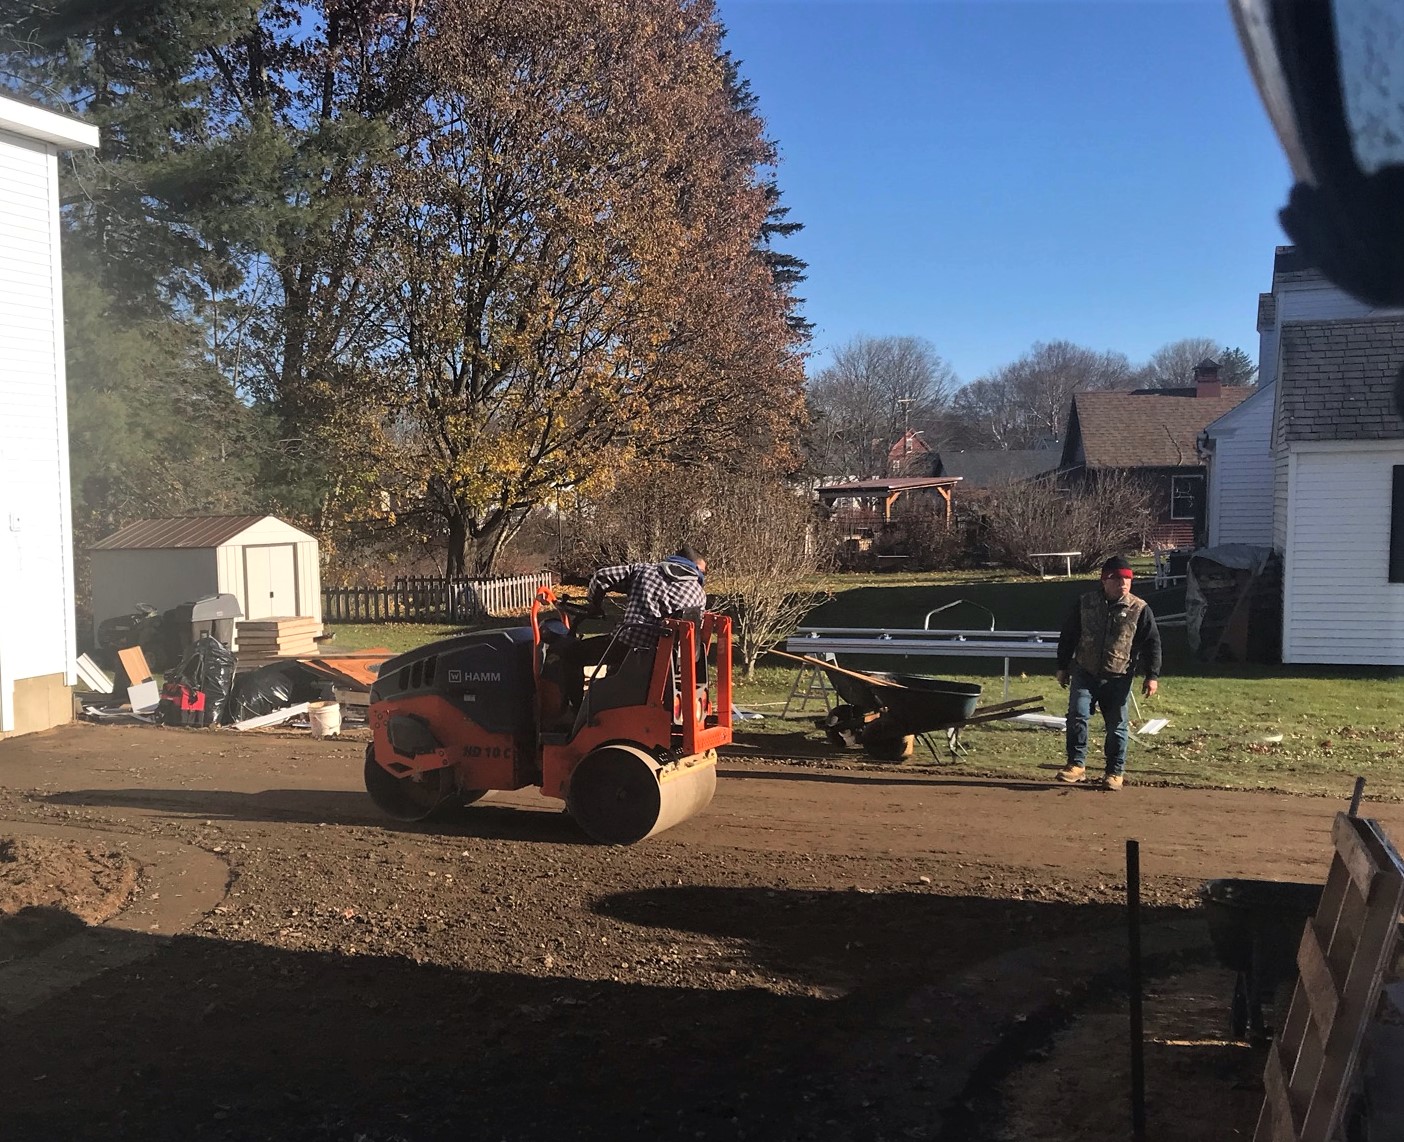
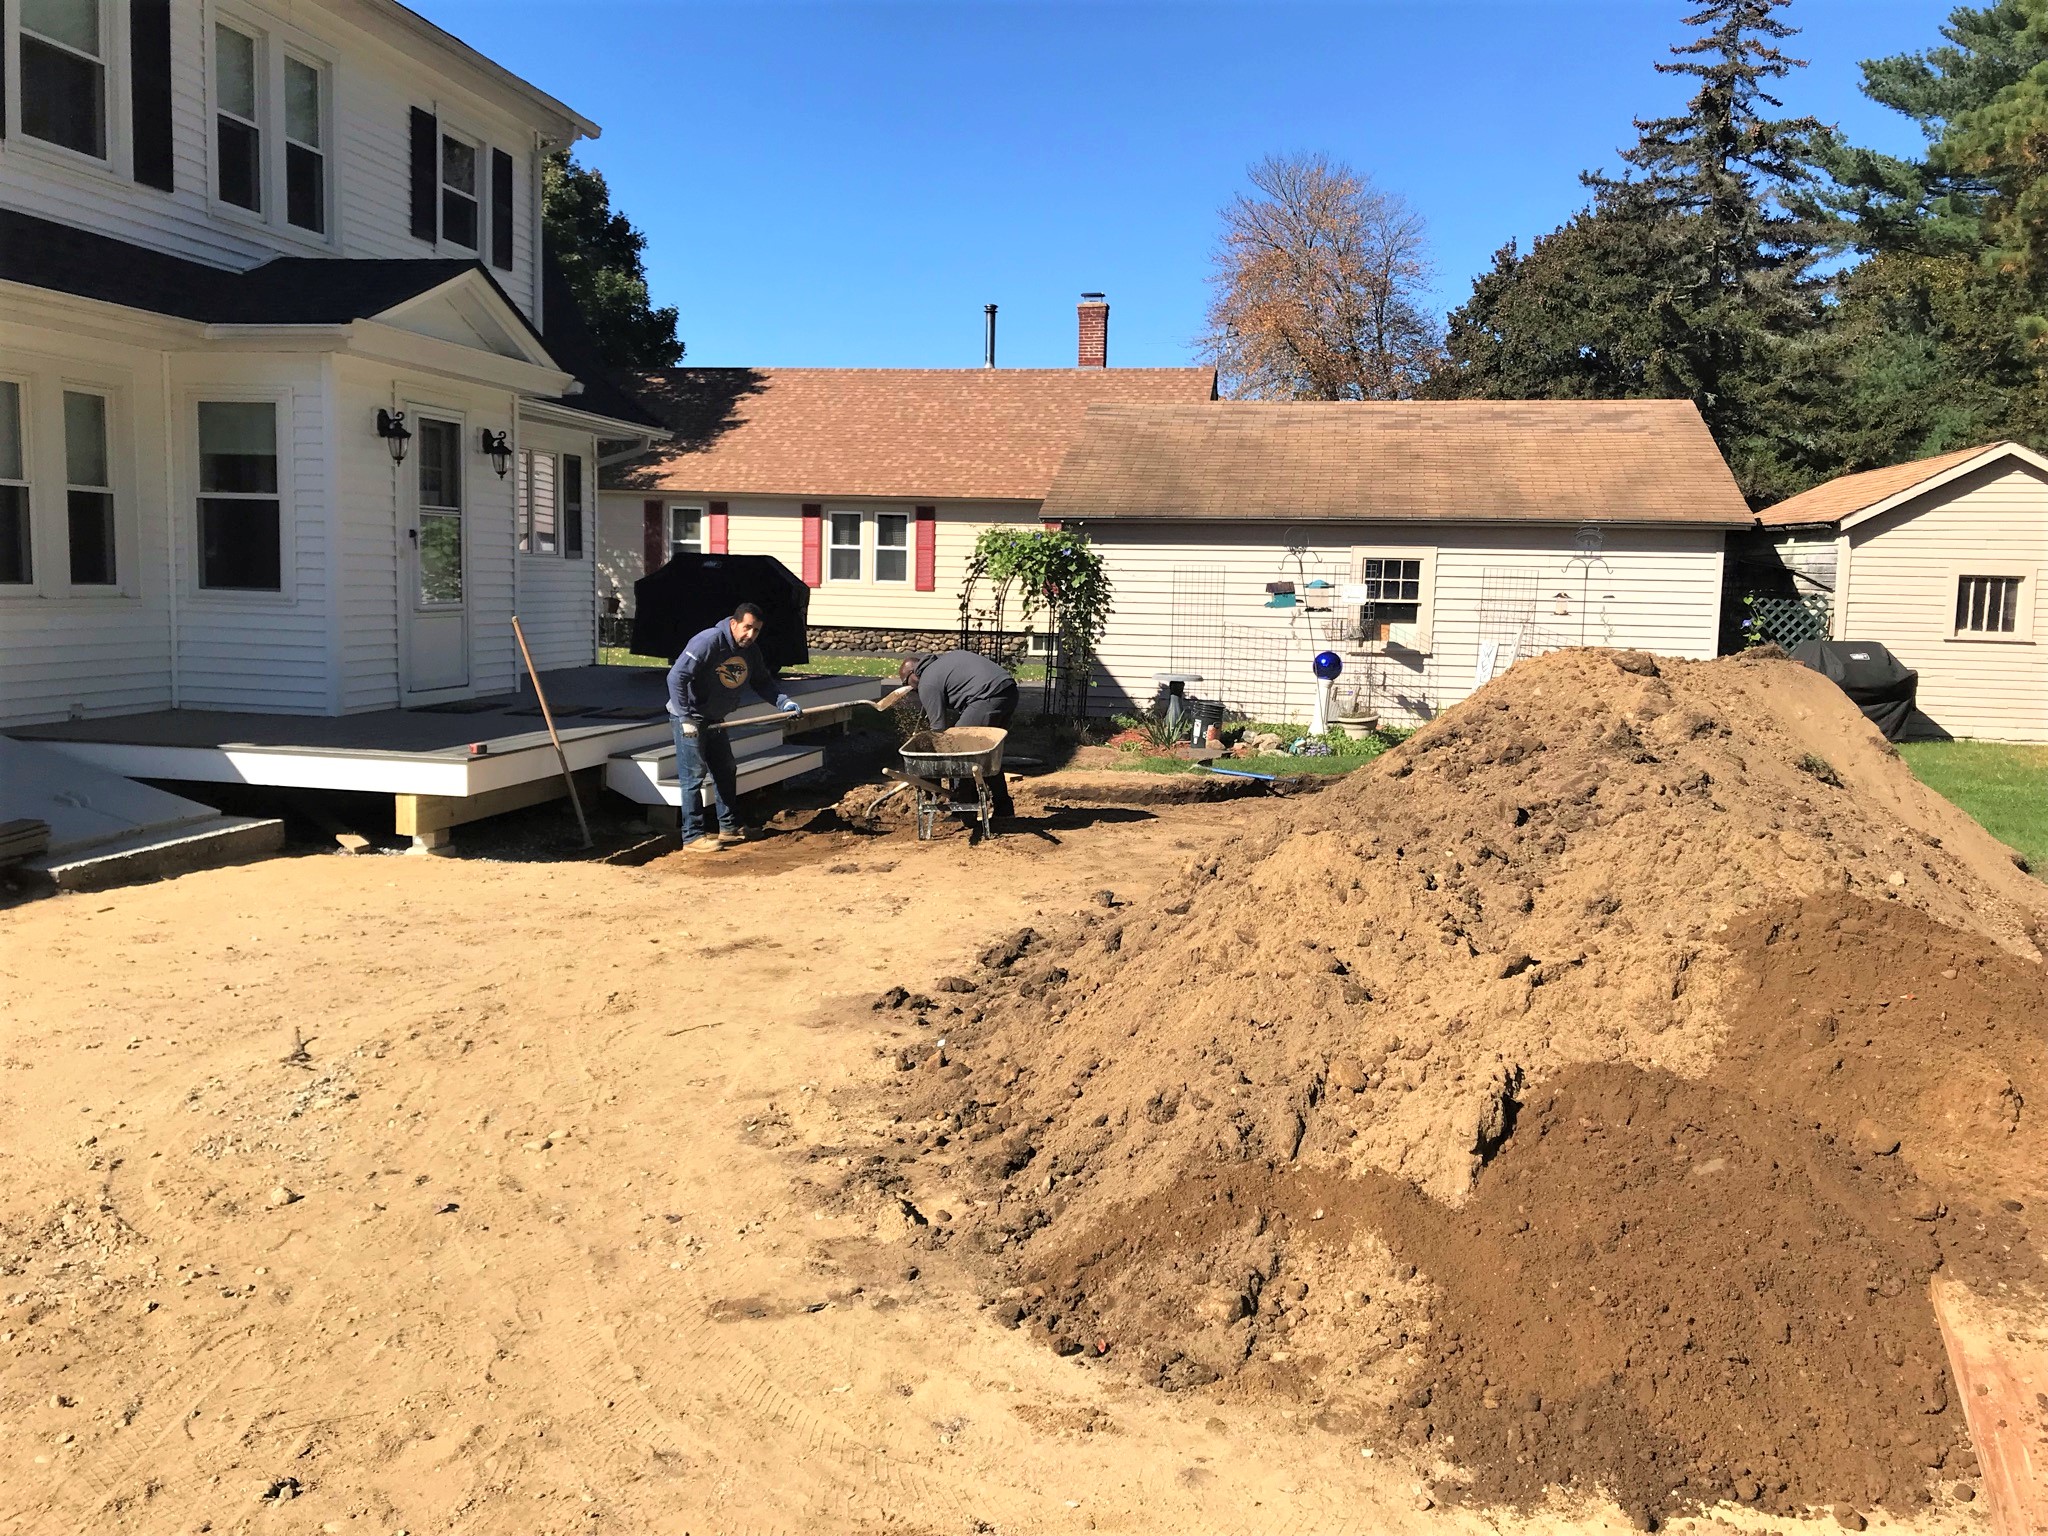
On Saturday, Evandro’s crew kept going – this time attacking the overburden pile of dirt they had previously excavated for the patio and gas line by hand. This was needed as we expected to get the driveway paved with a base course of asphalt within a week.
Moving the overburden by hand.
And it’s gone!
Progress at the end of a very busy week.
Week 19 – November 21st to 27th
November 22
On the 22nd, I was scheduled for minor surgery at noon – and I checked out the project. Siding work continued.
Siding work continuing by the deck door.
The surgery went ok, but I was pretty much out the rest of the day! Anesthesia and I do not work well together…
November 23
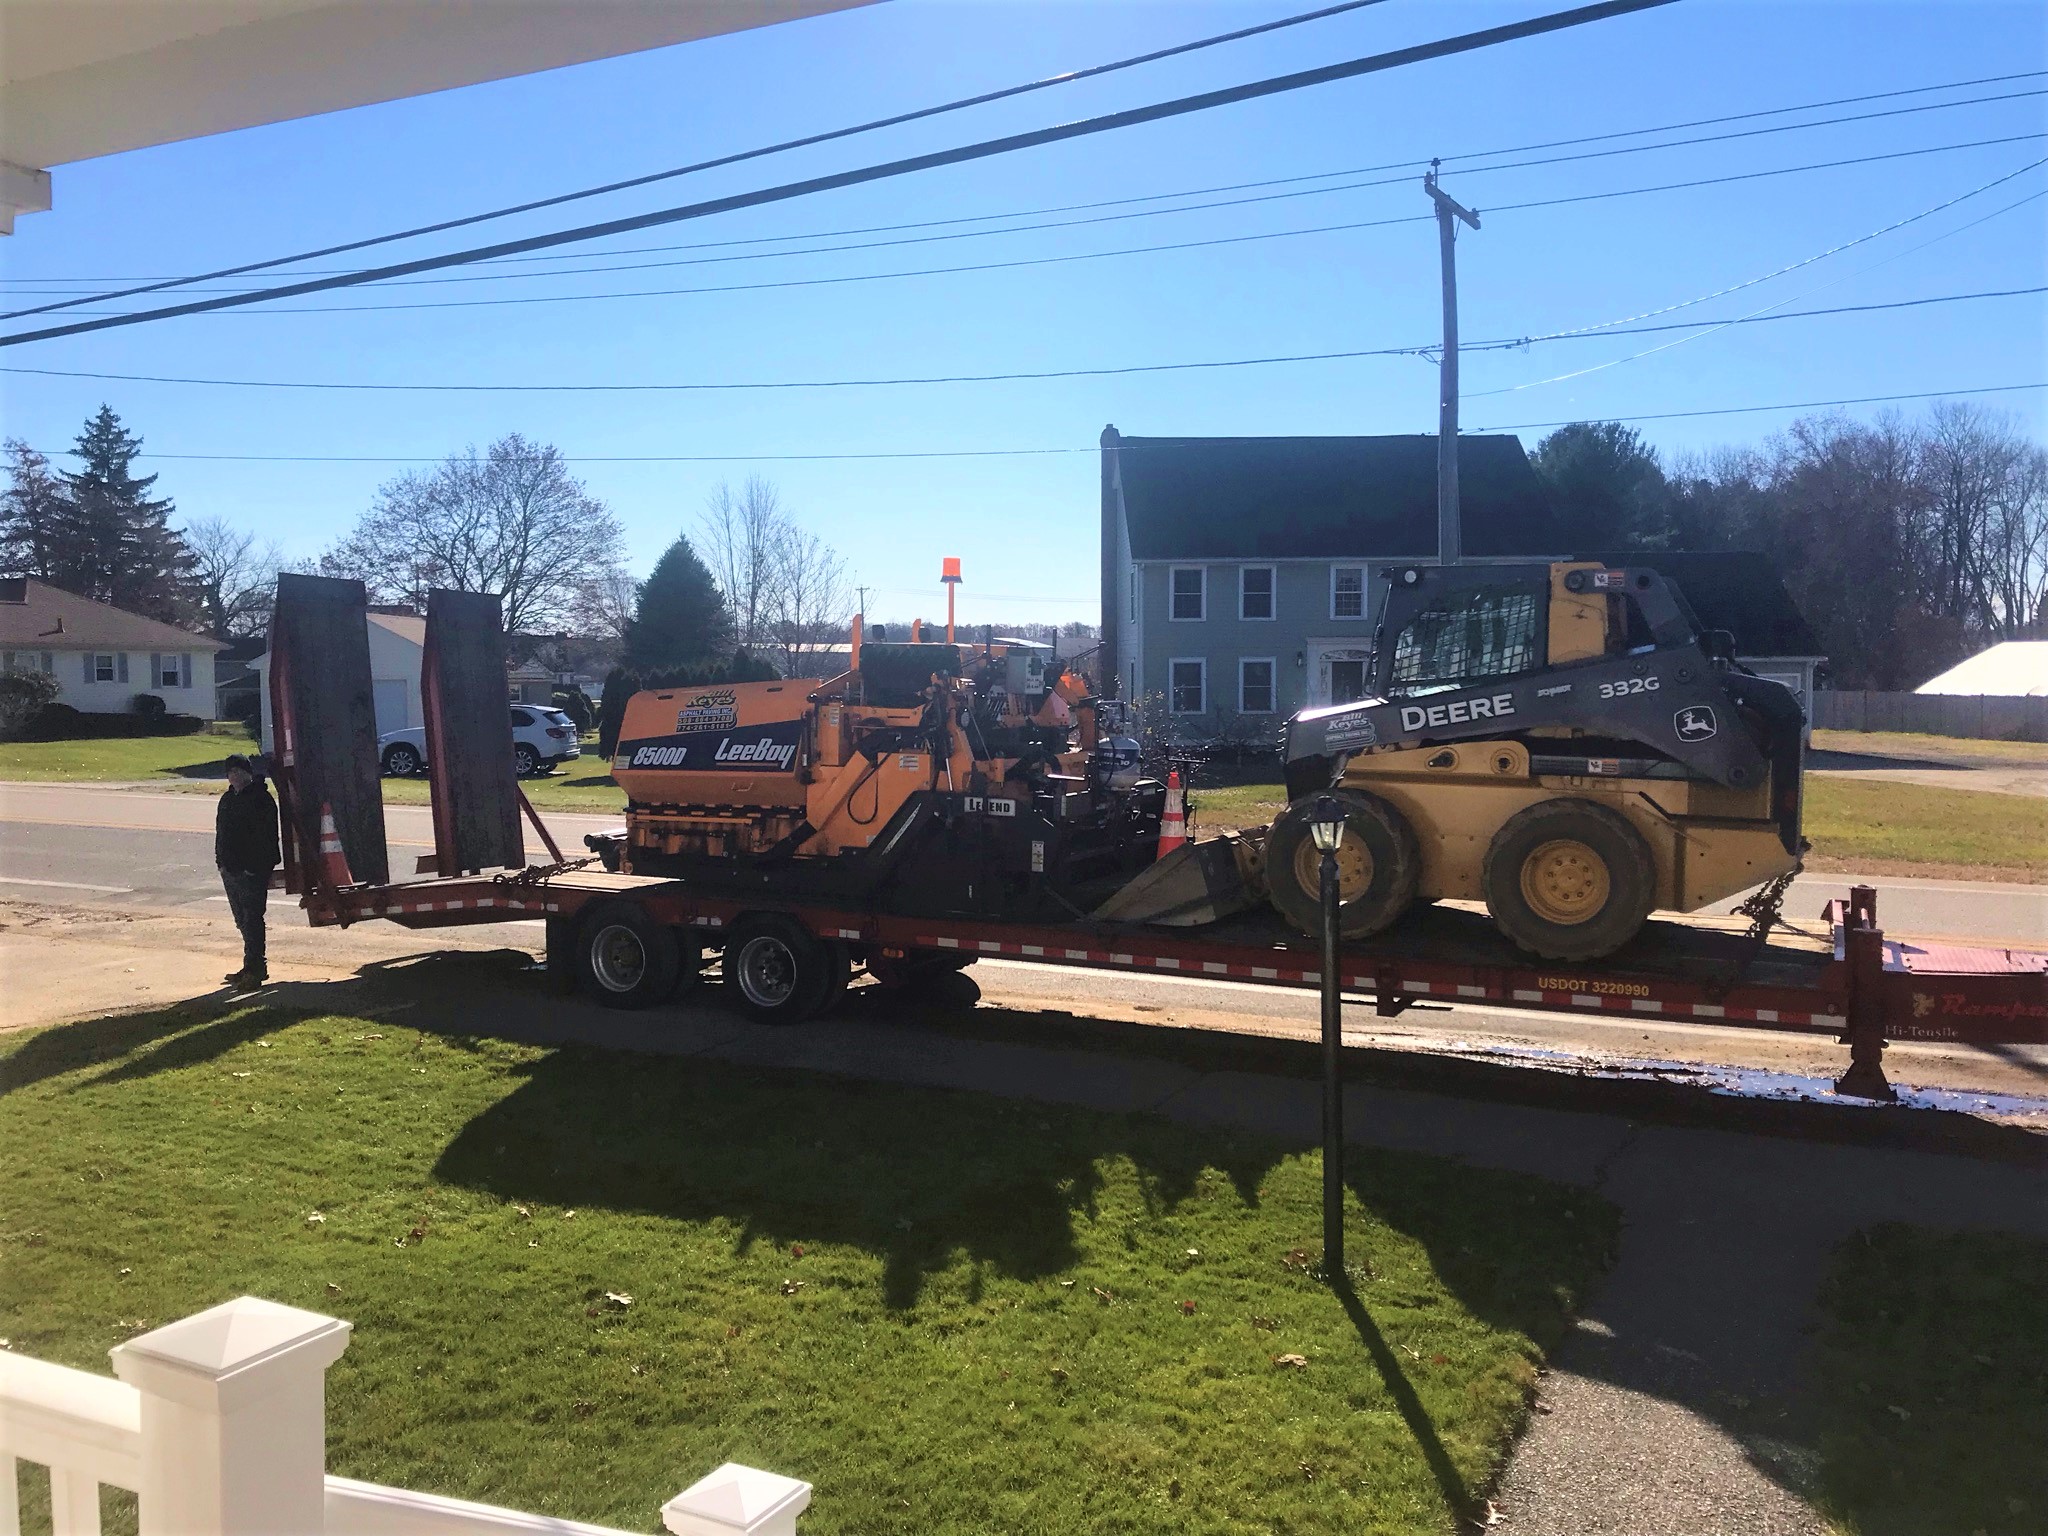
This was a part of the construction project that I really wanted to see close up – Bill Keyes Asphalt doing the paving! However, I was in no shape physically to do much more than poke my head out of the door or through a window to take pictures.
Gravel base materialPaving equipment arrivesGarvel was spread.Gravel leveledGravel compactedAshpalt arrivesSpreading the asphalt by the paving stones.Asphalt operationsAsphalt set and curing (like I was trying to do at the same time in the house).
November 24
The next day, the siders came back and installed the shutters and repaired the siding by the house deck that had to be replaced as a result of the new deck.
Shutters going in – these are for aesthetics only! I know Pat in Australia had asked me about shutters here – just for looks unless your house is 200 years old.
Repairing the siding by the house deck.
November 25
This was Thanksgiving – so no work happened of course. But the project looked like this below – and its getting colder.
Shaping up nicely and we even are parked in the driveway – for now anyways. Yes, that pond is freezing up too.
November 26
This date was our wedding anniversary – normally a day to hit the casino and have fun – but I was still recovering in the house. Of course, this being New England, we got snow anyways.
Well this sucks…
It did not last but it’s still been pretty cold.
Week 20 – November 28th to December 4th
With all the cold and needed inspections, and the Thanksgiving holiday weekend, the progress slowed to a halt. We did pass all of our inspections, and did get a dumpster dropped off to help with all of the rubbish and construction debris that had piled up – especially from the siding.
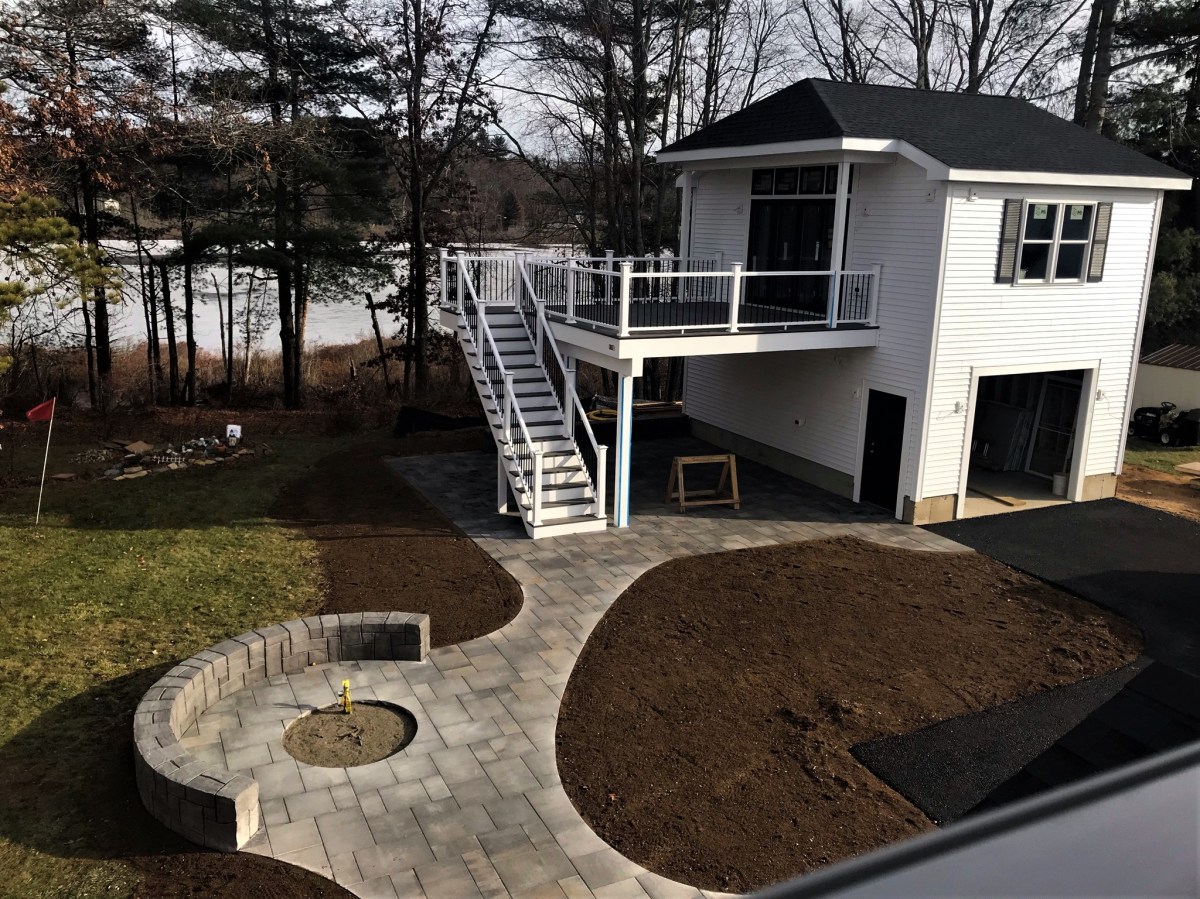
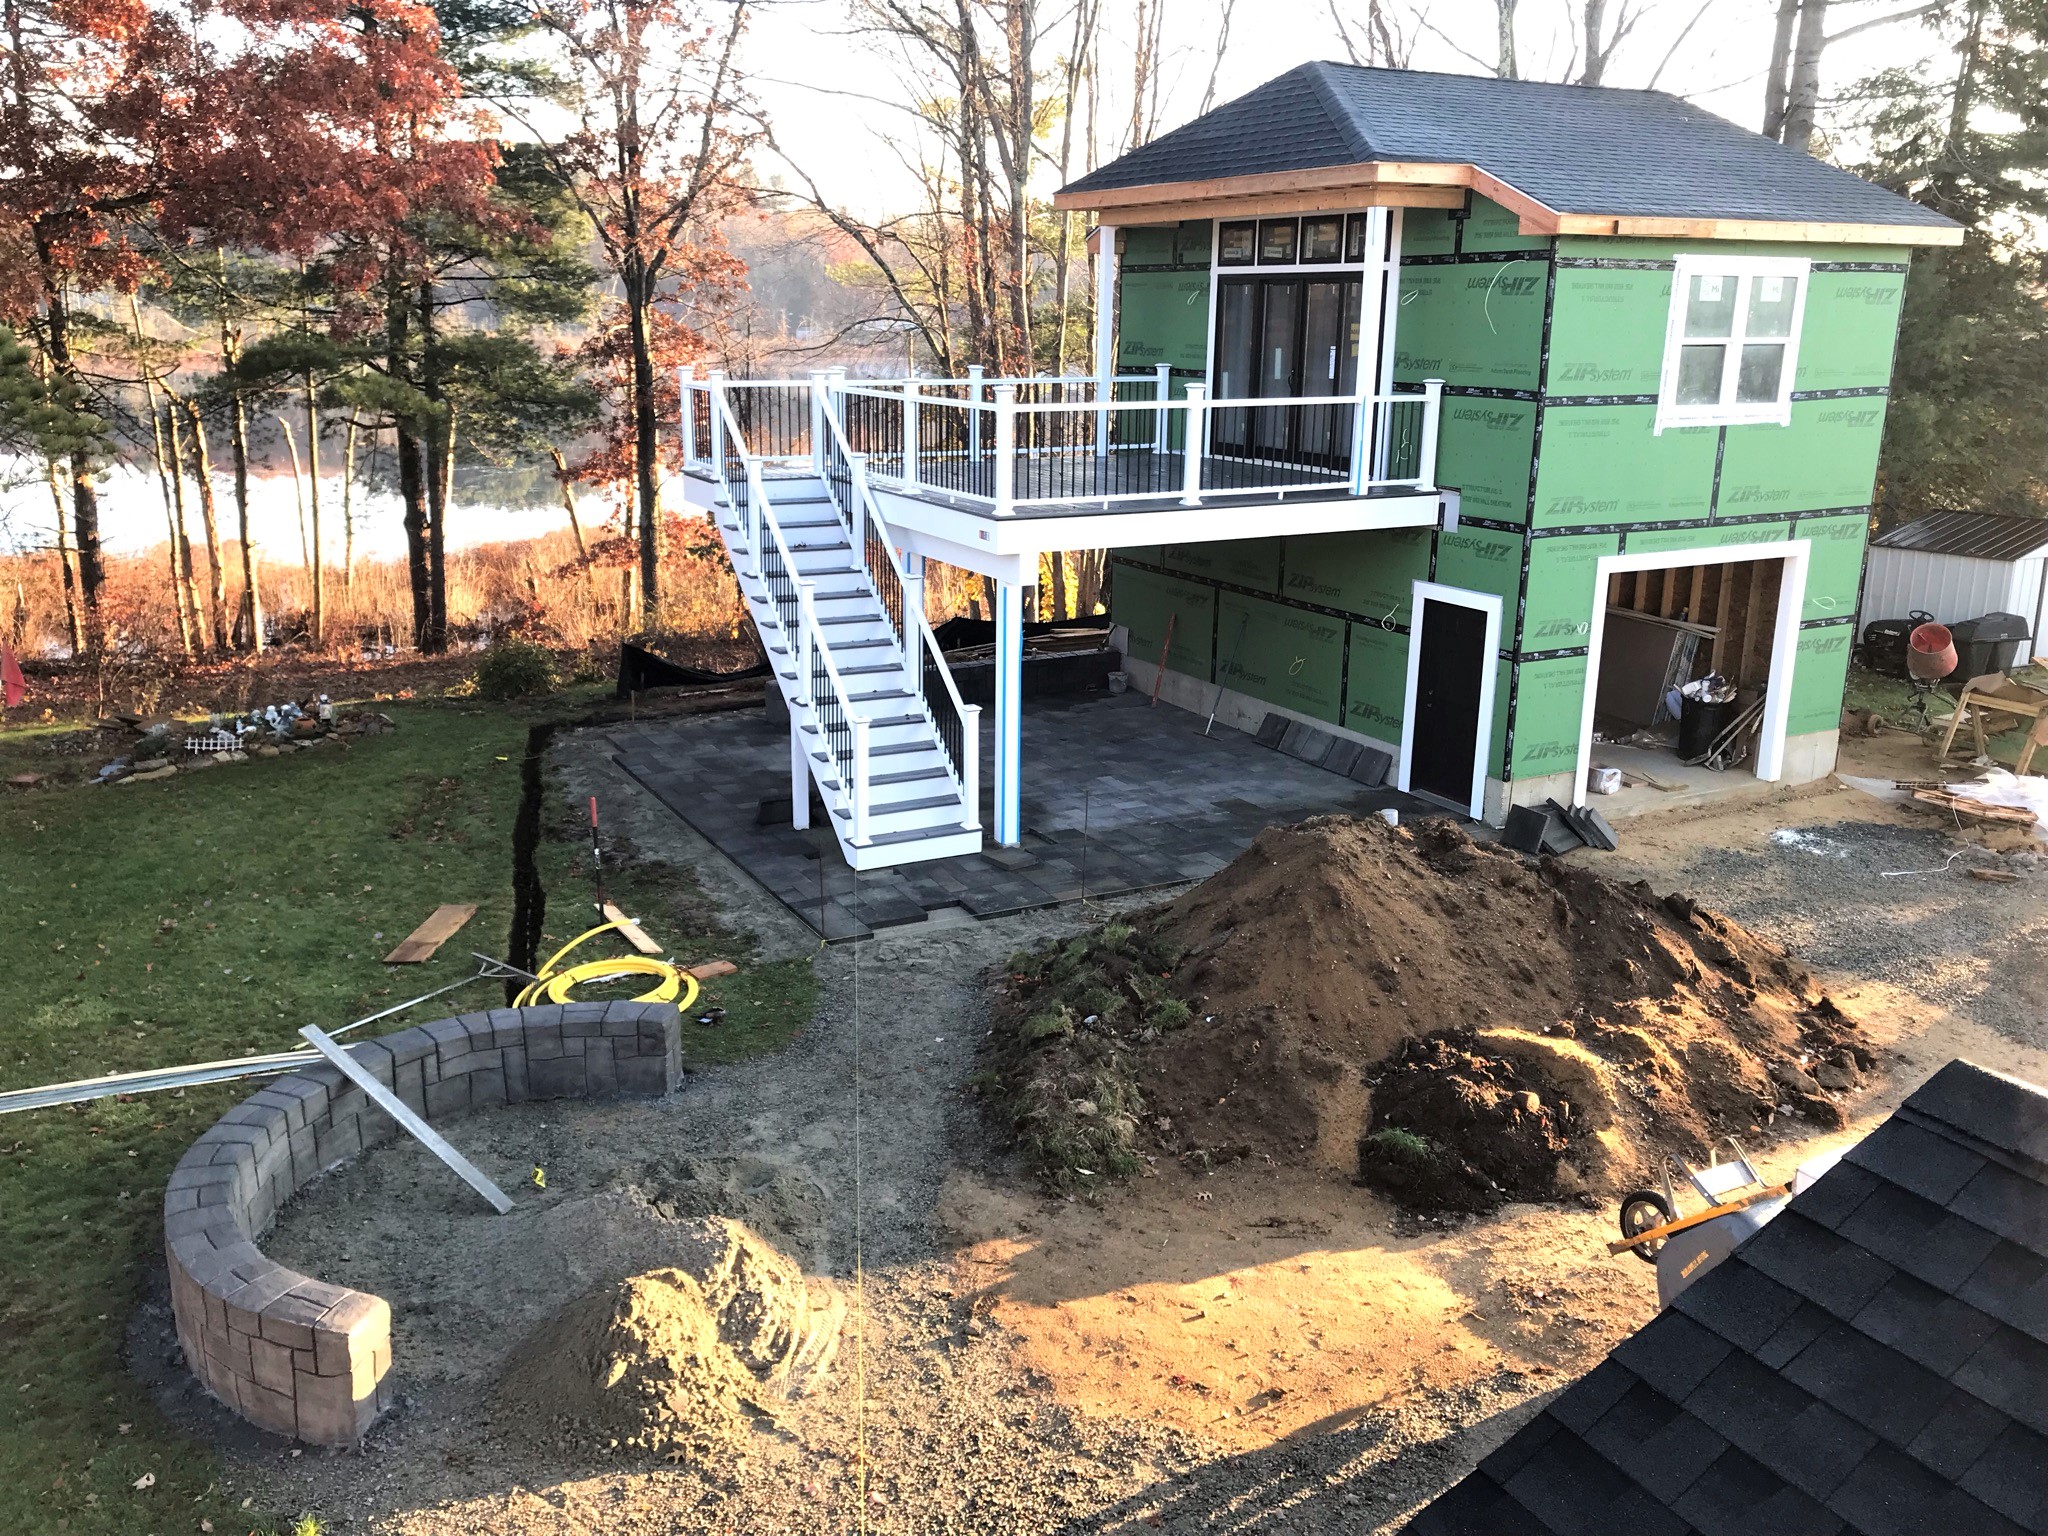
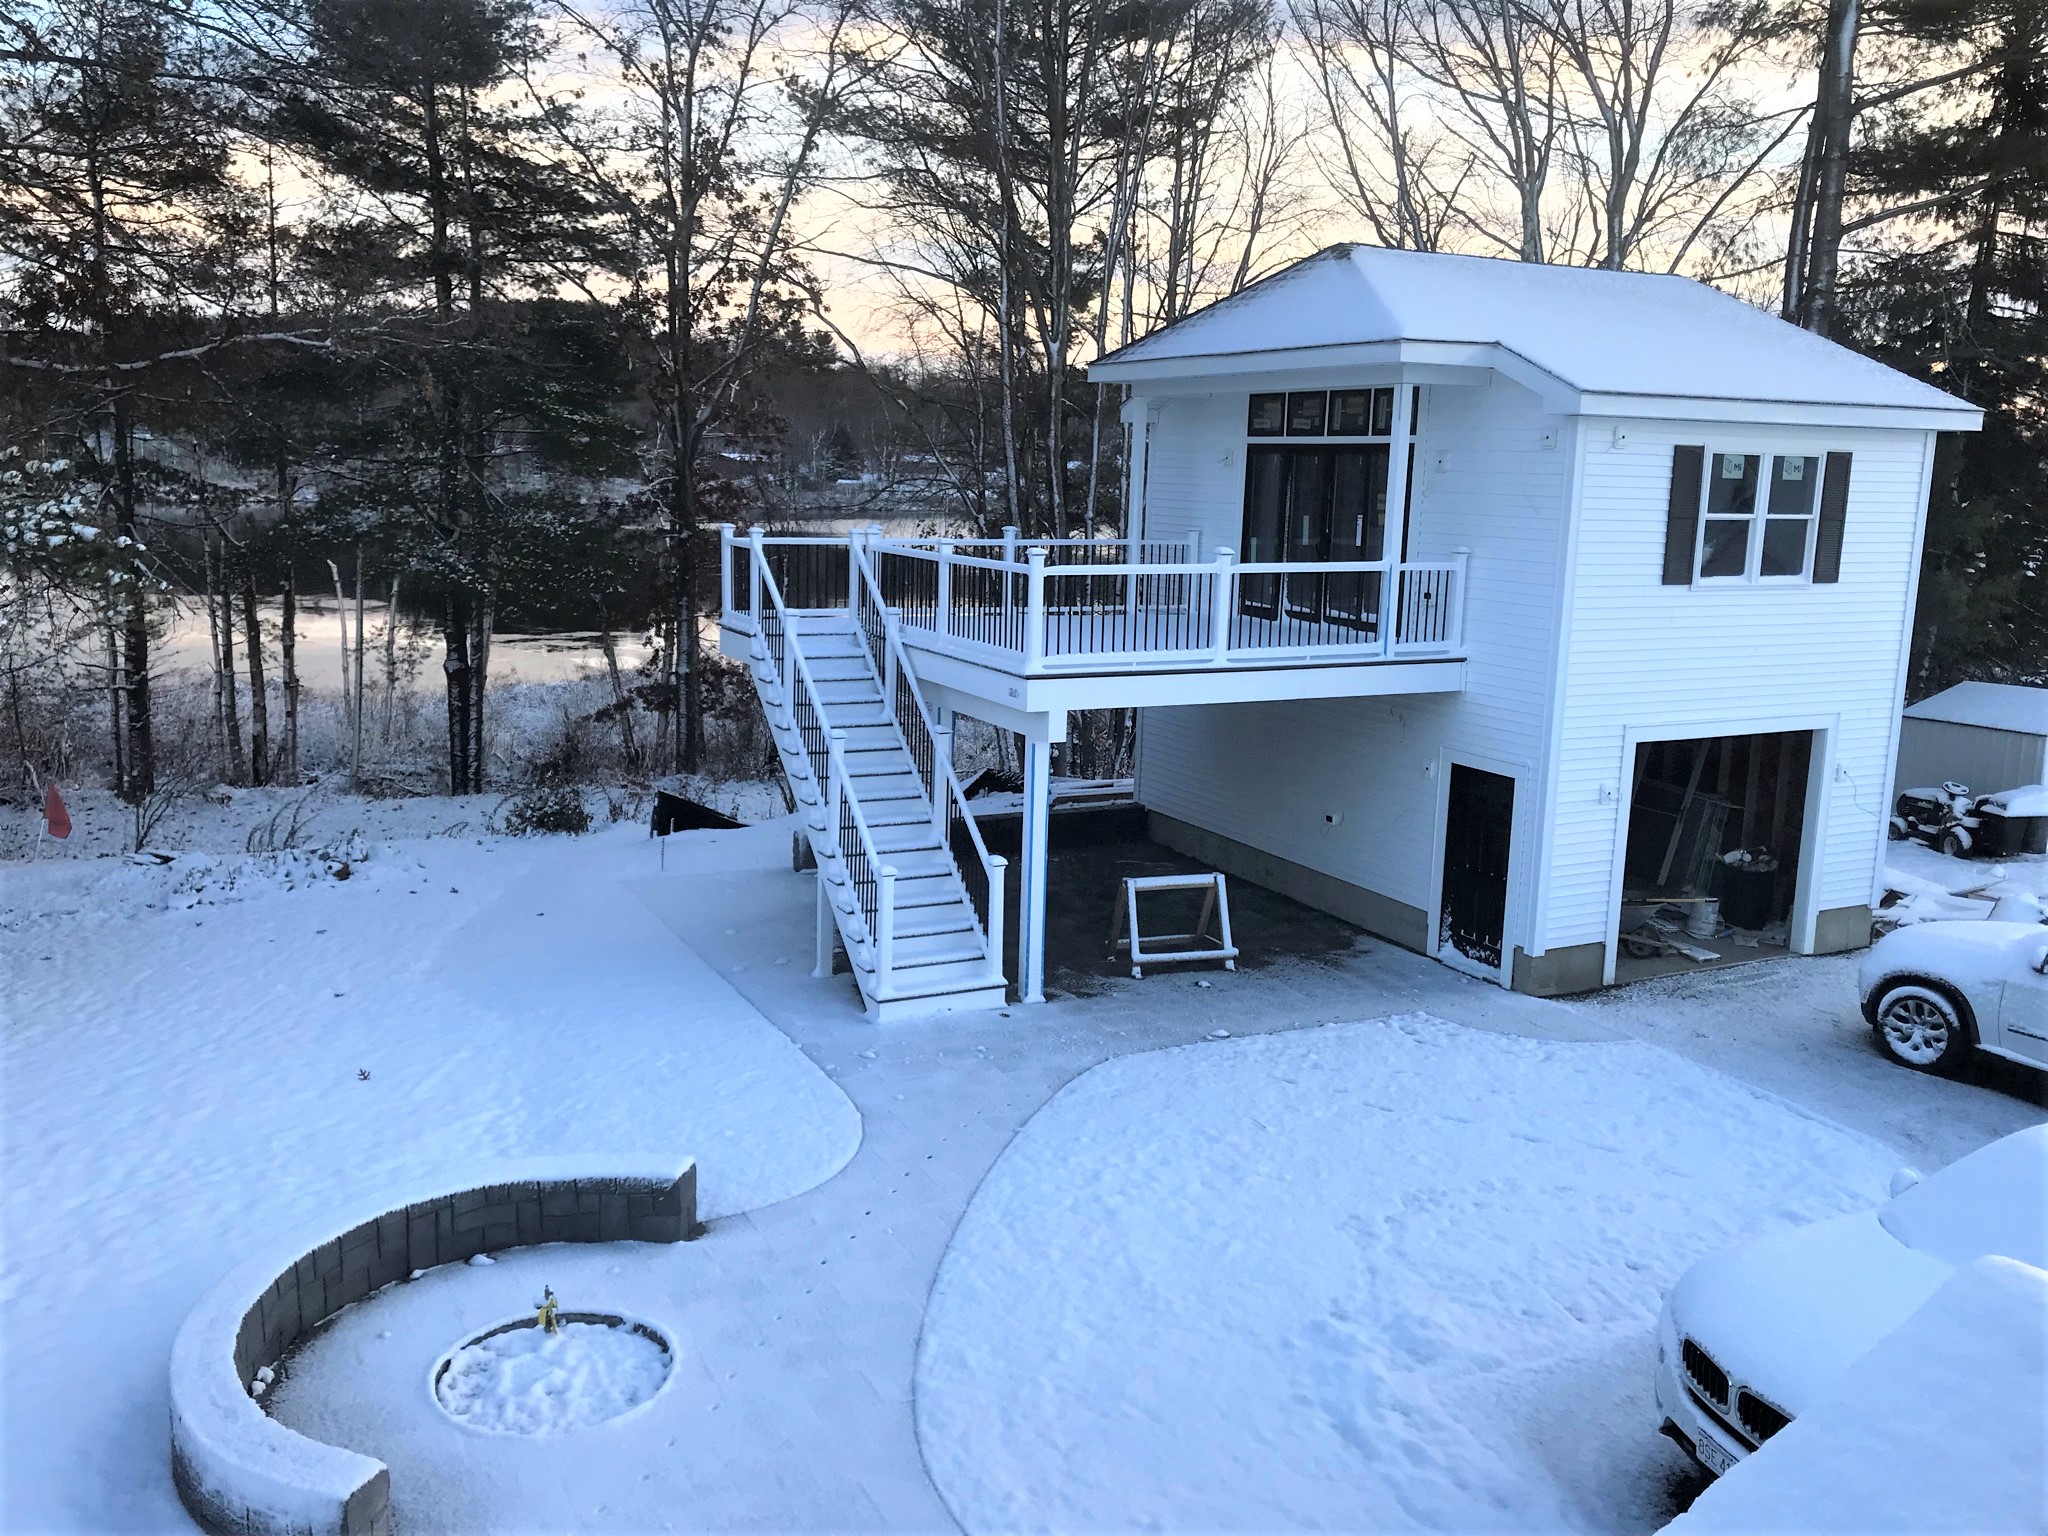
Hopefully, the upcoming week will show gutter installation, insulation, and more. As of now, it looks like this as of Saturday, December 4th.
Latest progress shot – and it’s getting colder and darker every day.
I was originally enticed into the hobby by way of 25mm metal figures from Ral Partha, Grenadier, and Minifigs back in the 1980’s. Some of you of course are remarking to yourselves at this point that you have no idea of those days!
Well, no internet existed such that one could go out and find whatever one wanted with a click. You either ordered from a catalog or got lucky at a hobby store with whatever existed in the shop (insert bad joke here).
Some of the figures were pretty simplistic, others were (and are still) marvels of art. Most readers of this blog will recognize that until recently, I have been very much involved with painting and building figures and terrain for my Civilizations Collide project (Aztecs, Conquistadores, etc. for Feudal Patrol. So, you ask, Mark, what the f**k you doing with old school Vikings?
Well, this is related to my recent trip to Historicon (which I wrote about here). Several of the scenarios that I am developing for the Spanish Conquest require Aztec (and Tlaxcalan) war canoes, which were involved in many of the battles, both along the causeways out of Tenochtitlan and in naval combat with Spanish brigantines on Lake Texcoco. At Historicon, I searched high and low in the vendors area and in the flea market for reasonably priced war canoes. All I found were a Blood and Plunder model for $20 (not reasonable) from a vendor’s booth and a single $3 scratch-built balsa-wood version from the flea market.
I got both as options for considering how to design and scratch-build my own. As I estimate that I need 4-6 war canoes for each of the 4 brigantines that I have in queue. That’s 16-24 canoes – and I am not going to pay $20 per canoe! Shortly after the convention, Greg Priebe (who was with me at Historicon) suggested that he could 3D print canoes for me! I was elated, and I asked him what I could offer in trade. Greg kindly said don’t worry about it. But, I thought that’s unfair, and I could paint some figures for him as a fair exchange.
Greg is the author of the Vikings Feudal Patrol supplement (which you can download for free here), so I offered him Vikings. He agreed, and when I got home I went into my unpainted stash to see what I had available.
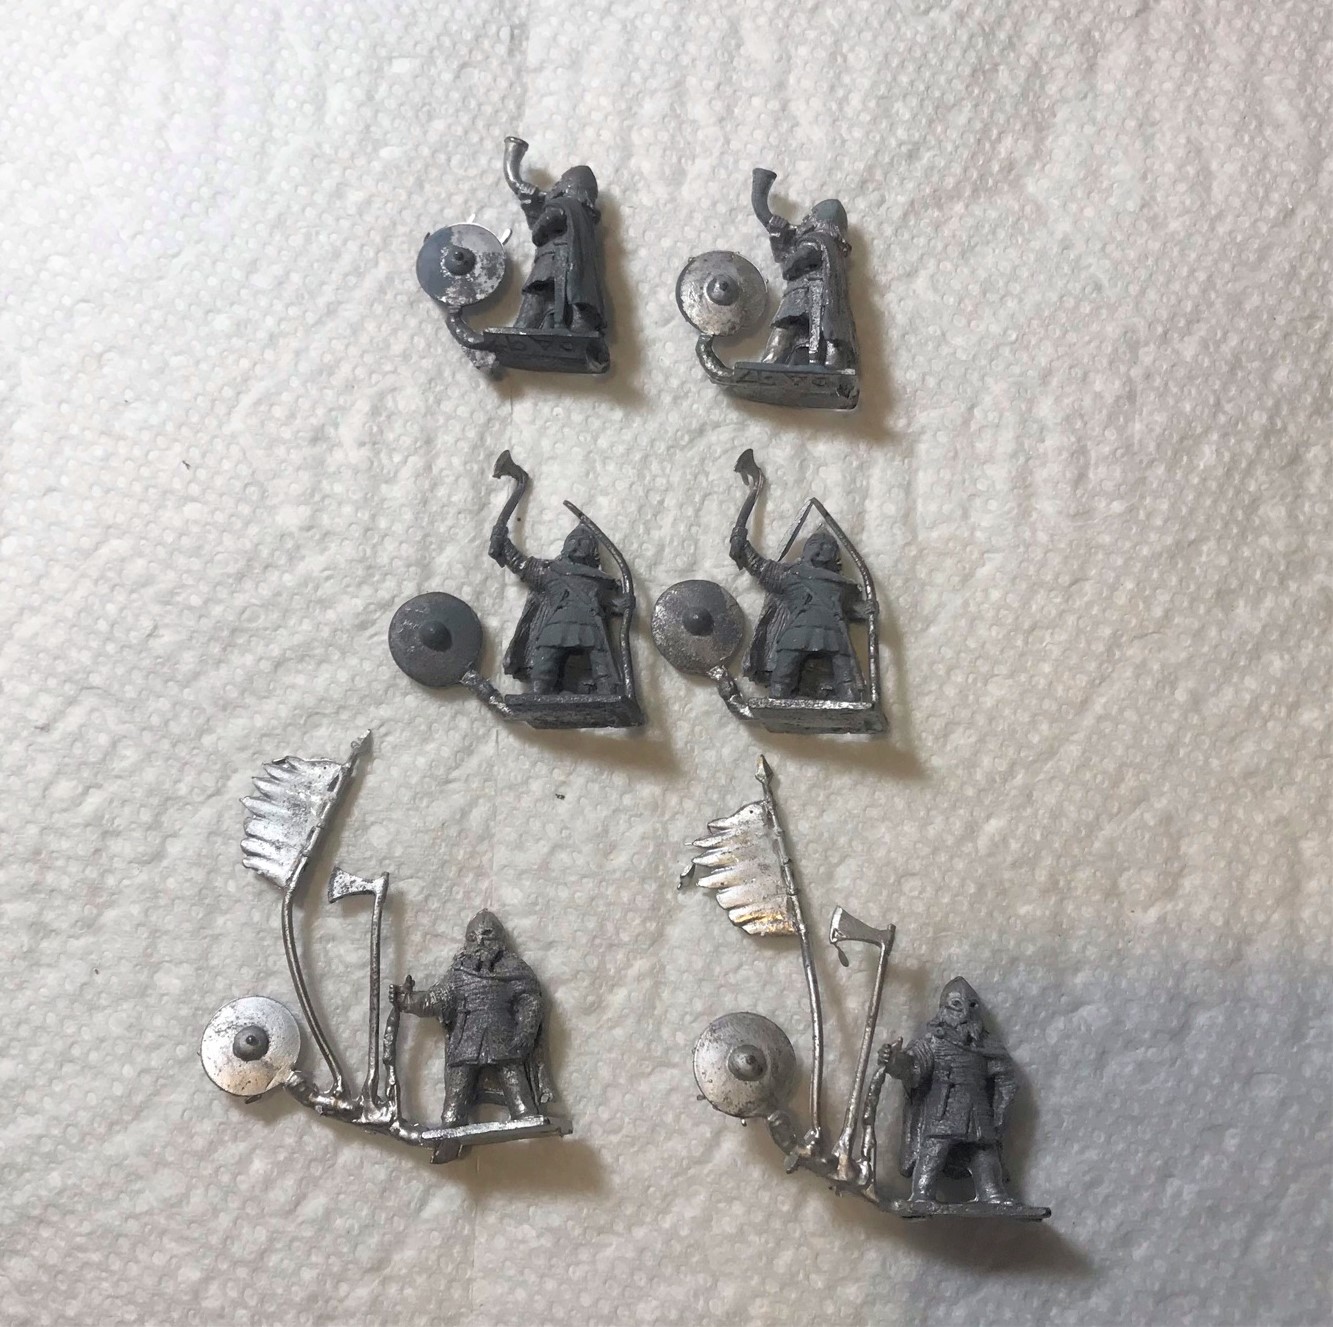
My supply of unpainted lead includes many figures from the ’80’s. I got a lot of them when I returned to the hobby but have not painted a lot of the 25mm ancient stuff. We conferred, and Greg agreed that he would like ones from three blister’s of 25mm figures and a single 28mm berserker. They all work for skirmish games.
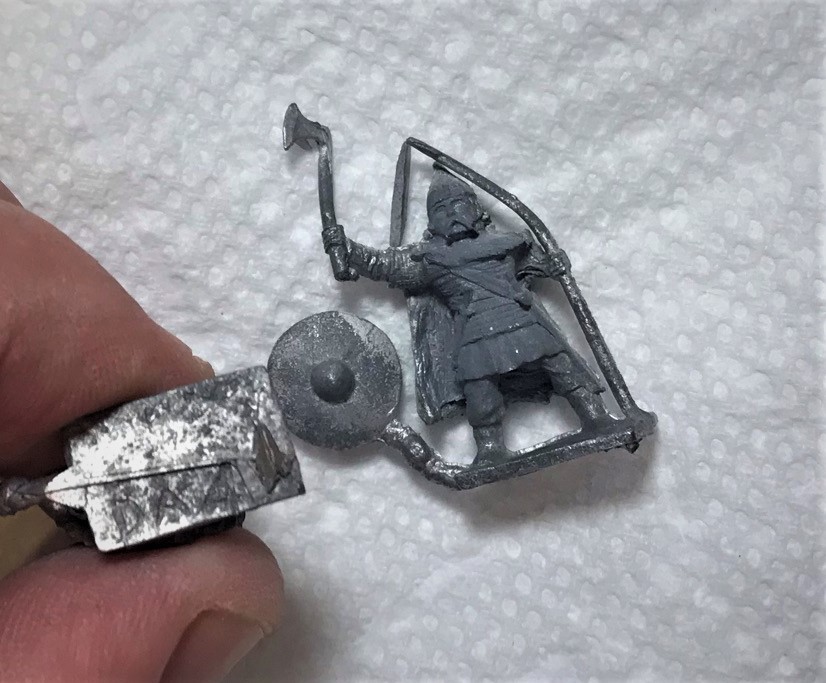
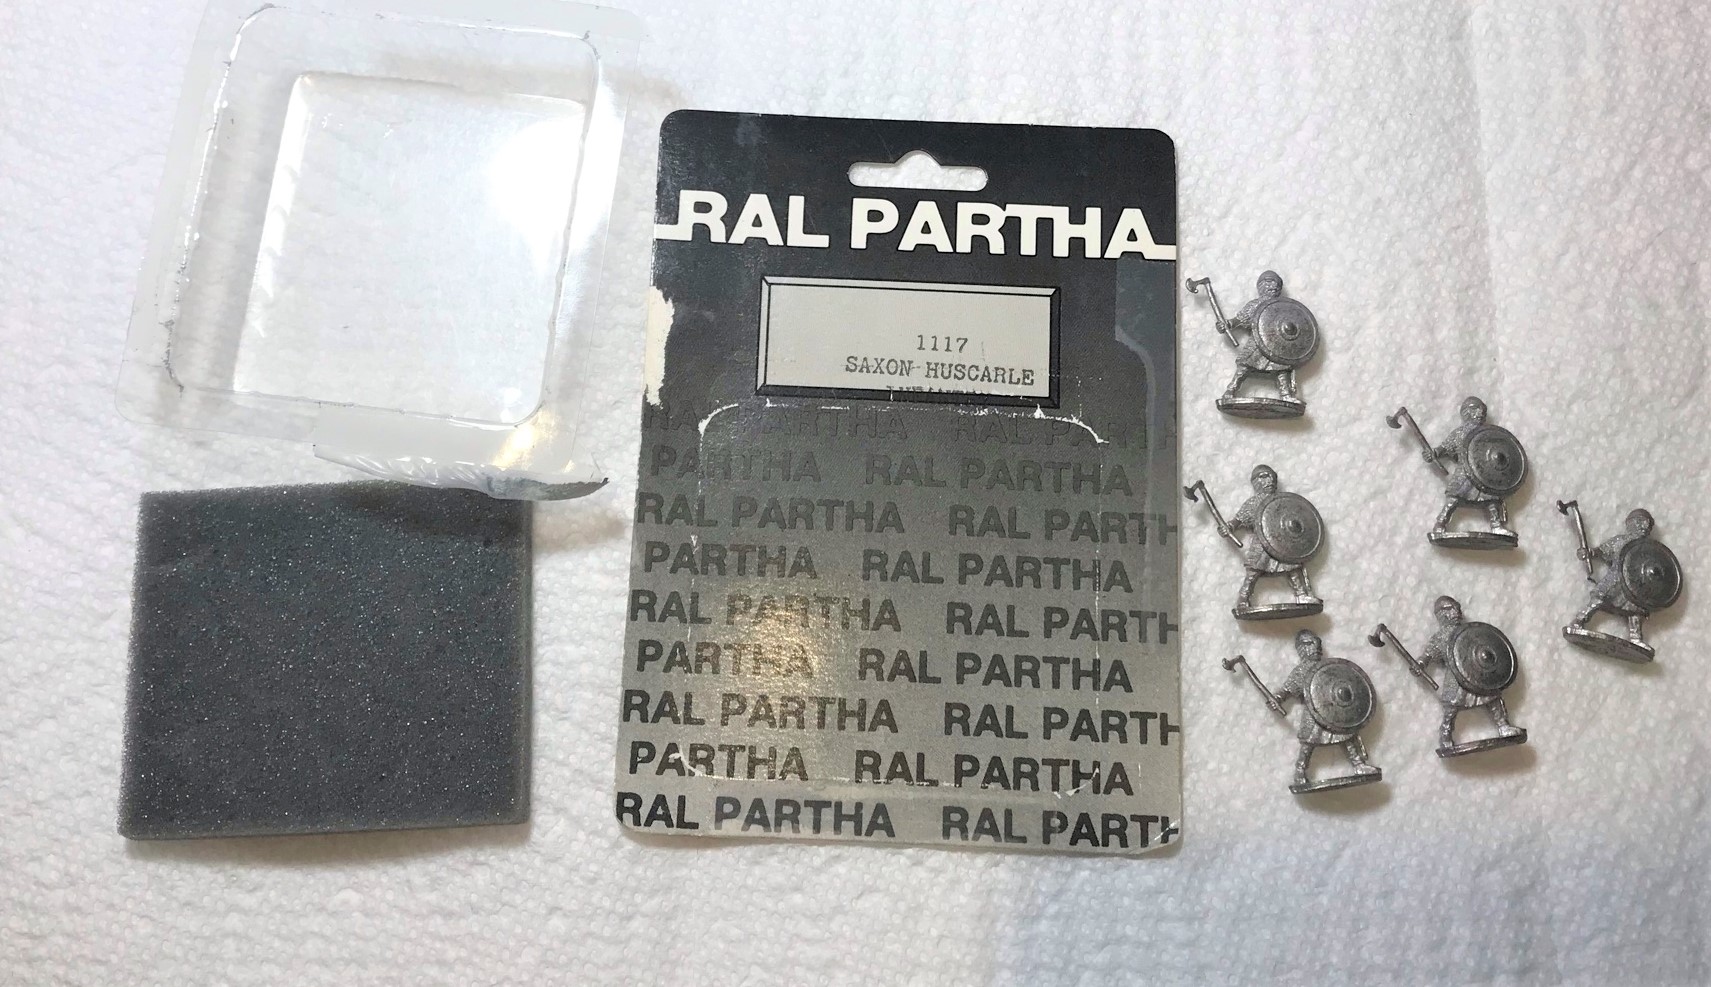
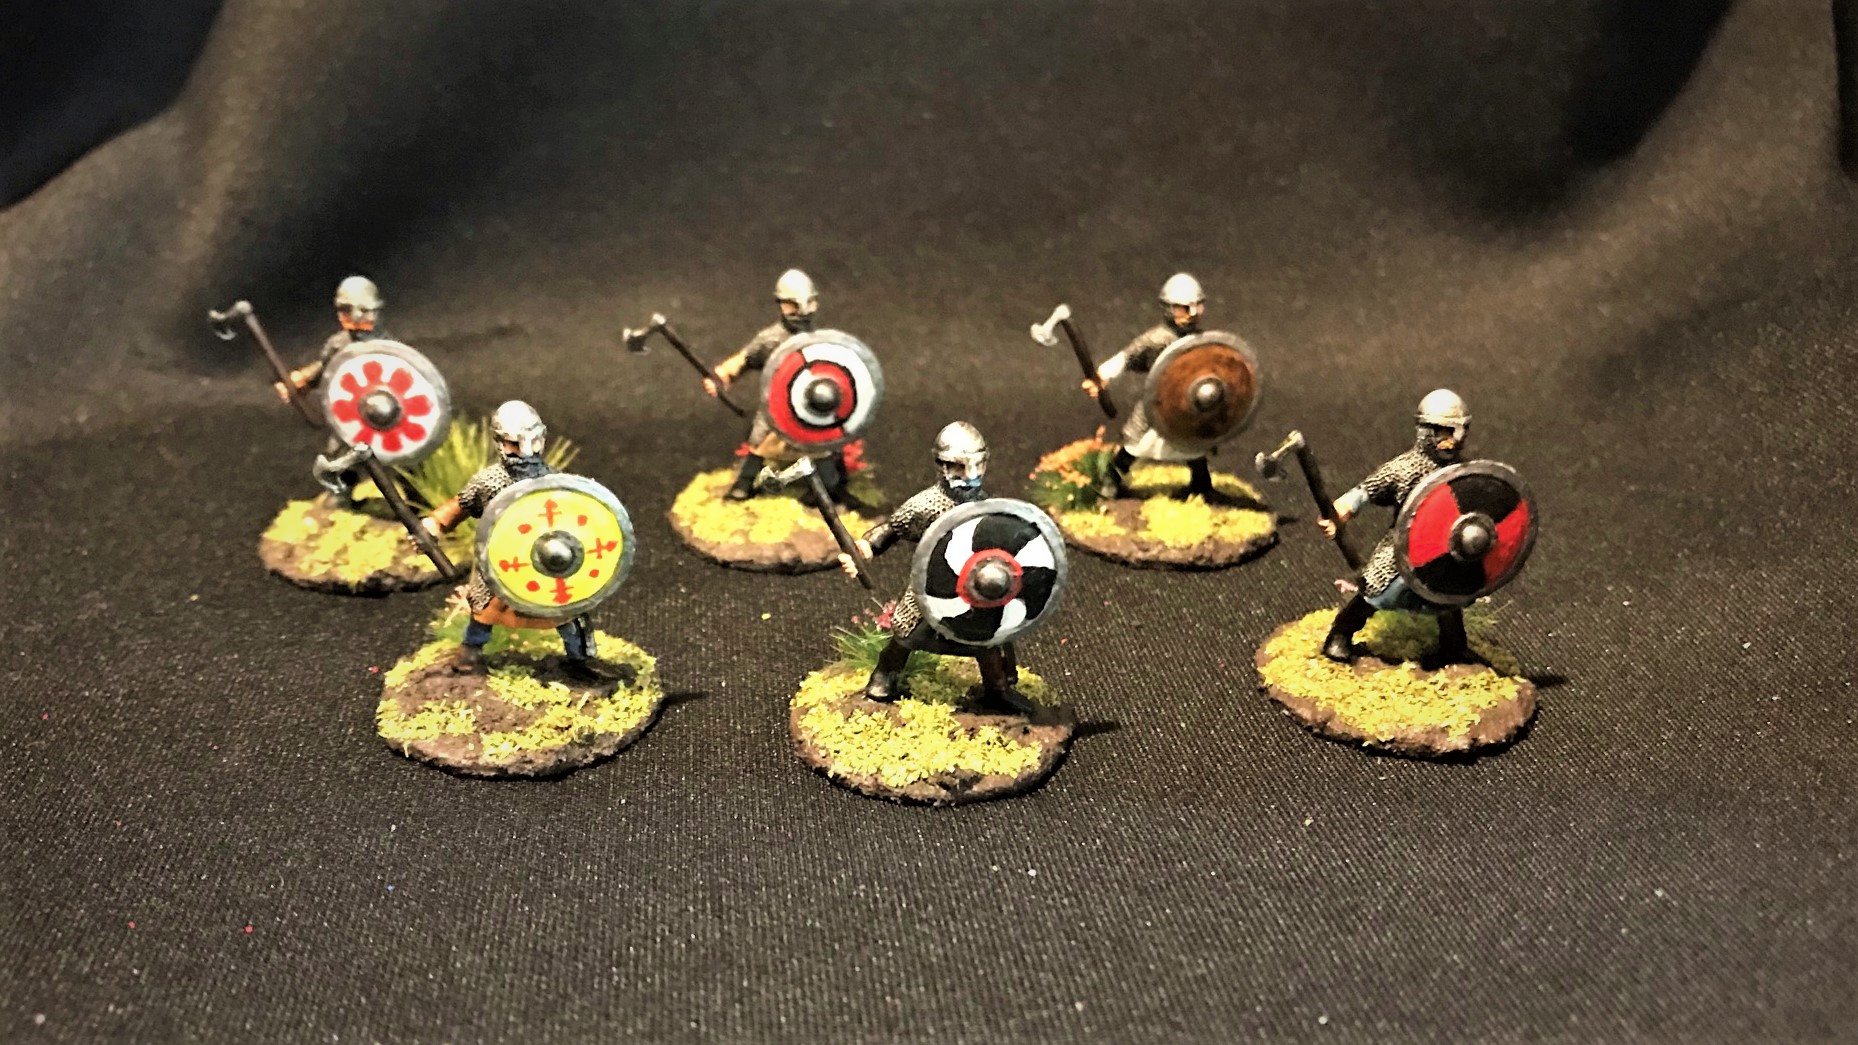
One was a six-figure blister of Ral Partha Imports “Viking Berserkers with Axes” (#DA45) – circa 1982. The second was a six-figure Minifigs “Viking Command” blister pack probably from around 1980-1982. The third was a six-figure pack of Ral Partha “Saxon Huscarle” (#1117) from their “1200 A.D.” line – circa 1982. The last was a single figure from RAFM, “Berserker” from their “Adventurers” line circa 1989. This adds up to 19 figures, and Greg is making me 20 or so canoes. So, the following will describe how I proceeded to paint all of these up.
Ral Partha Imports “Viking Berserkers with Axes“
These were likely made by Citadel and marketed by Ral Partha – a common commercial practice back then. The bases had “1982” and DA45 on them. As my process was modified batch-painting, I’ll include some of the steps I took on all of the models here and spare you a repeat later. There were three poses among the six figures, which was a lot back then (most packs of six had just one pose). But, I needed on all of these to make them different enough for easy identification and for fun on the tabletop.
The blister pack of DA45. Opened after 40+ years,
The figures had substantial mold lines, which was common back then. That issue was easily remedied. Their axe shafts were also a bit bendy (common as well) – and I gave them all a light coat of Gorilla Glue – to stiffen up the shafts (insert bad joke here).
Mold lines seen here. Also bendy axes.
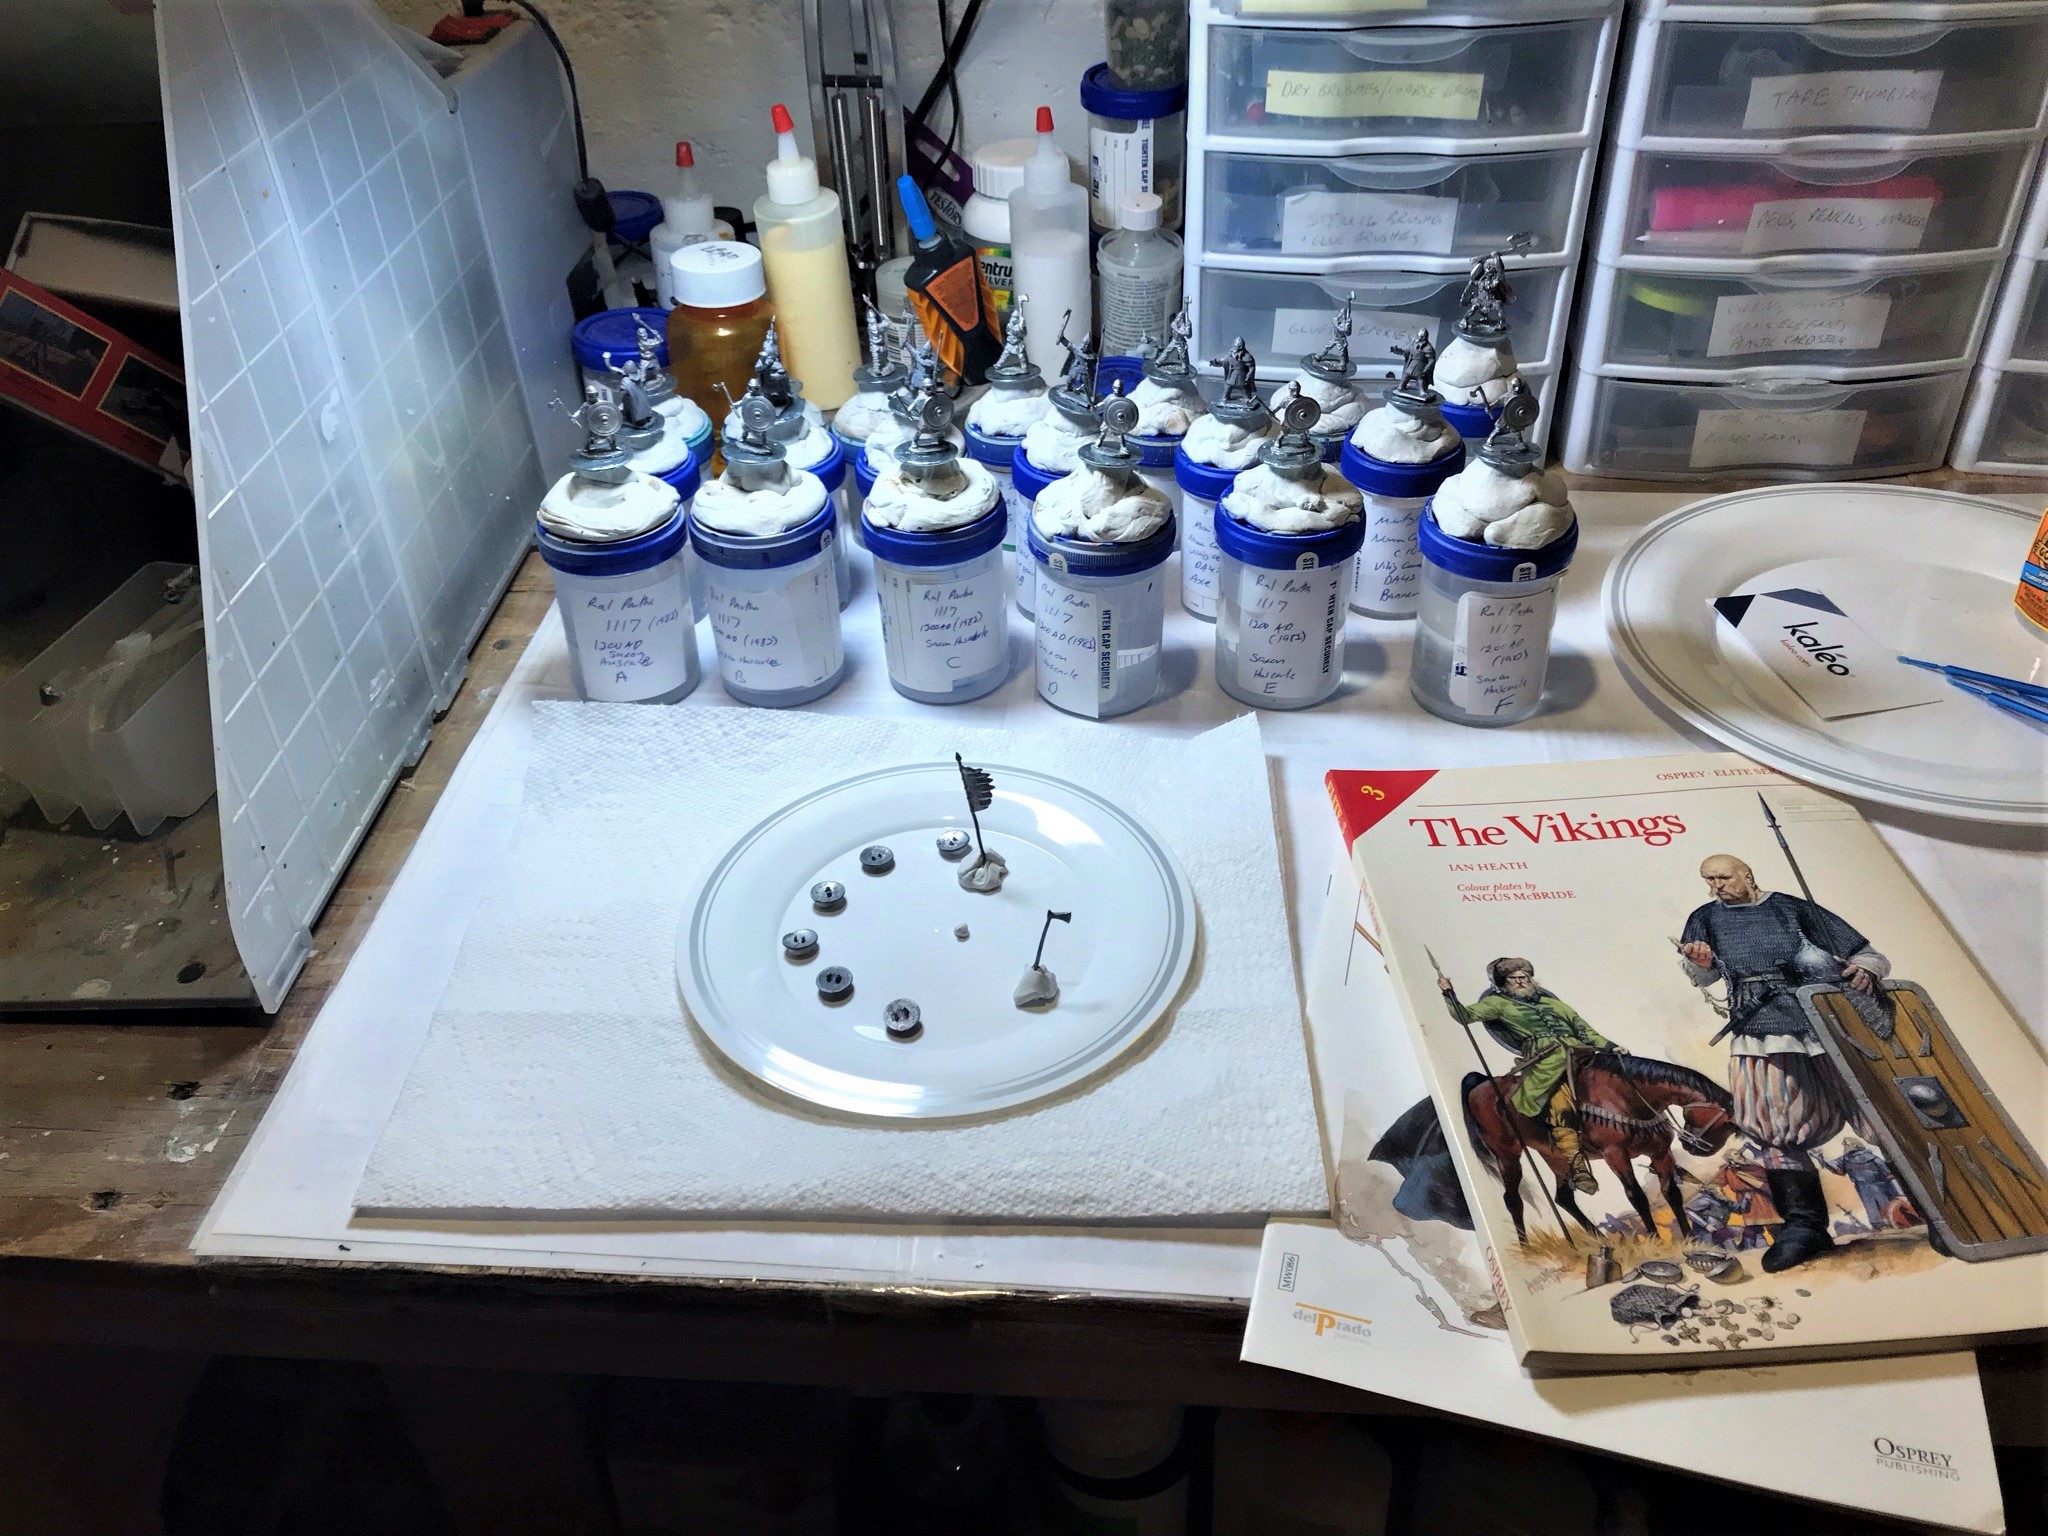
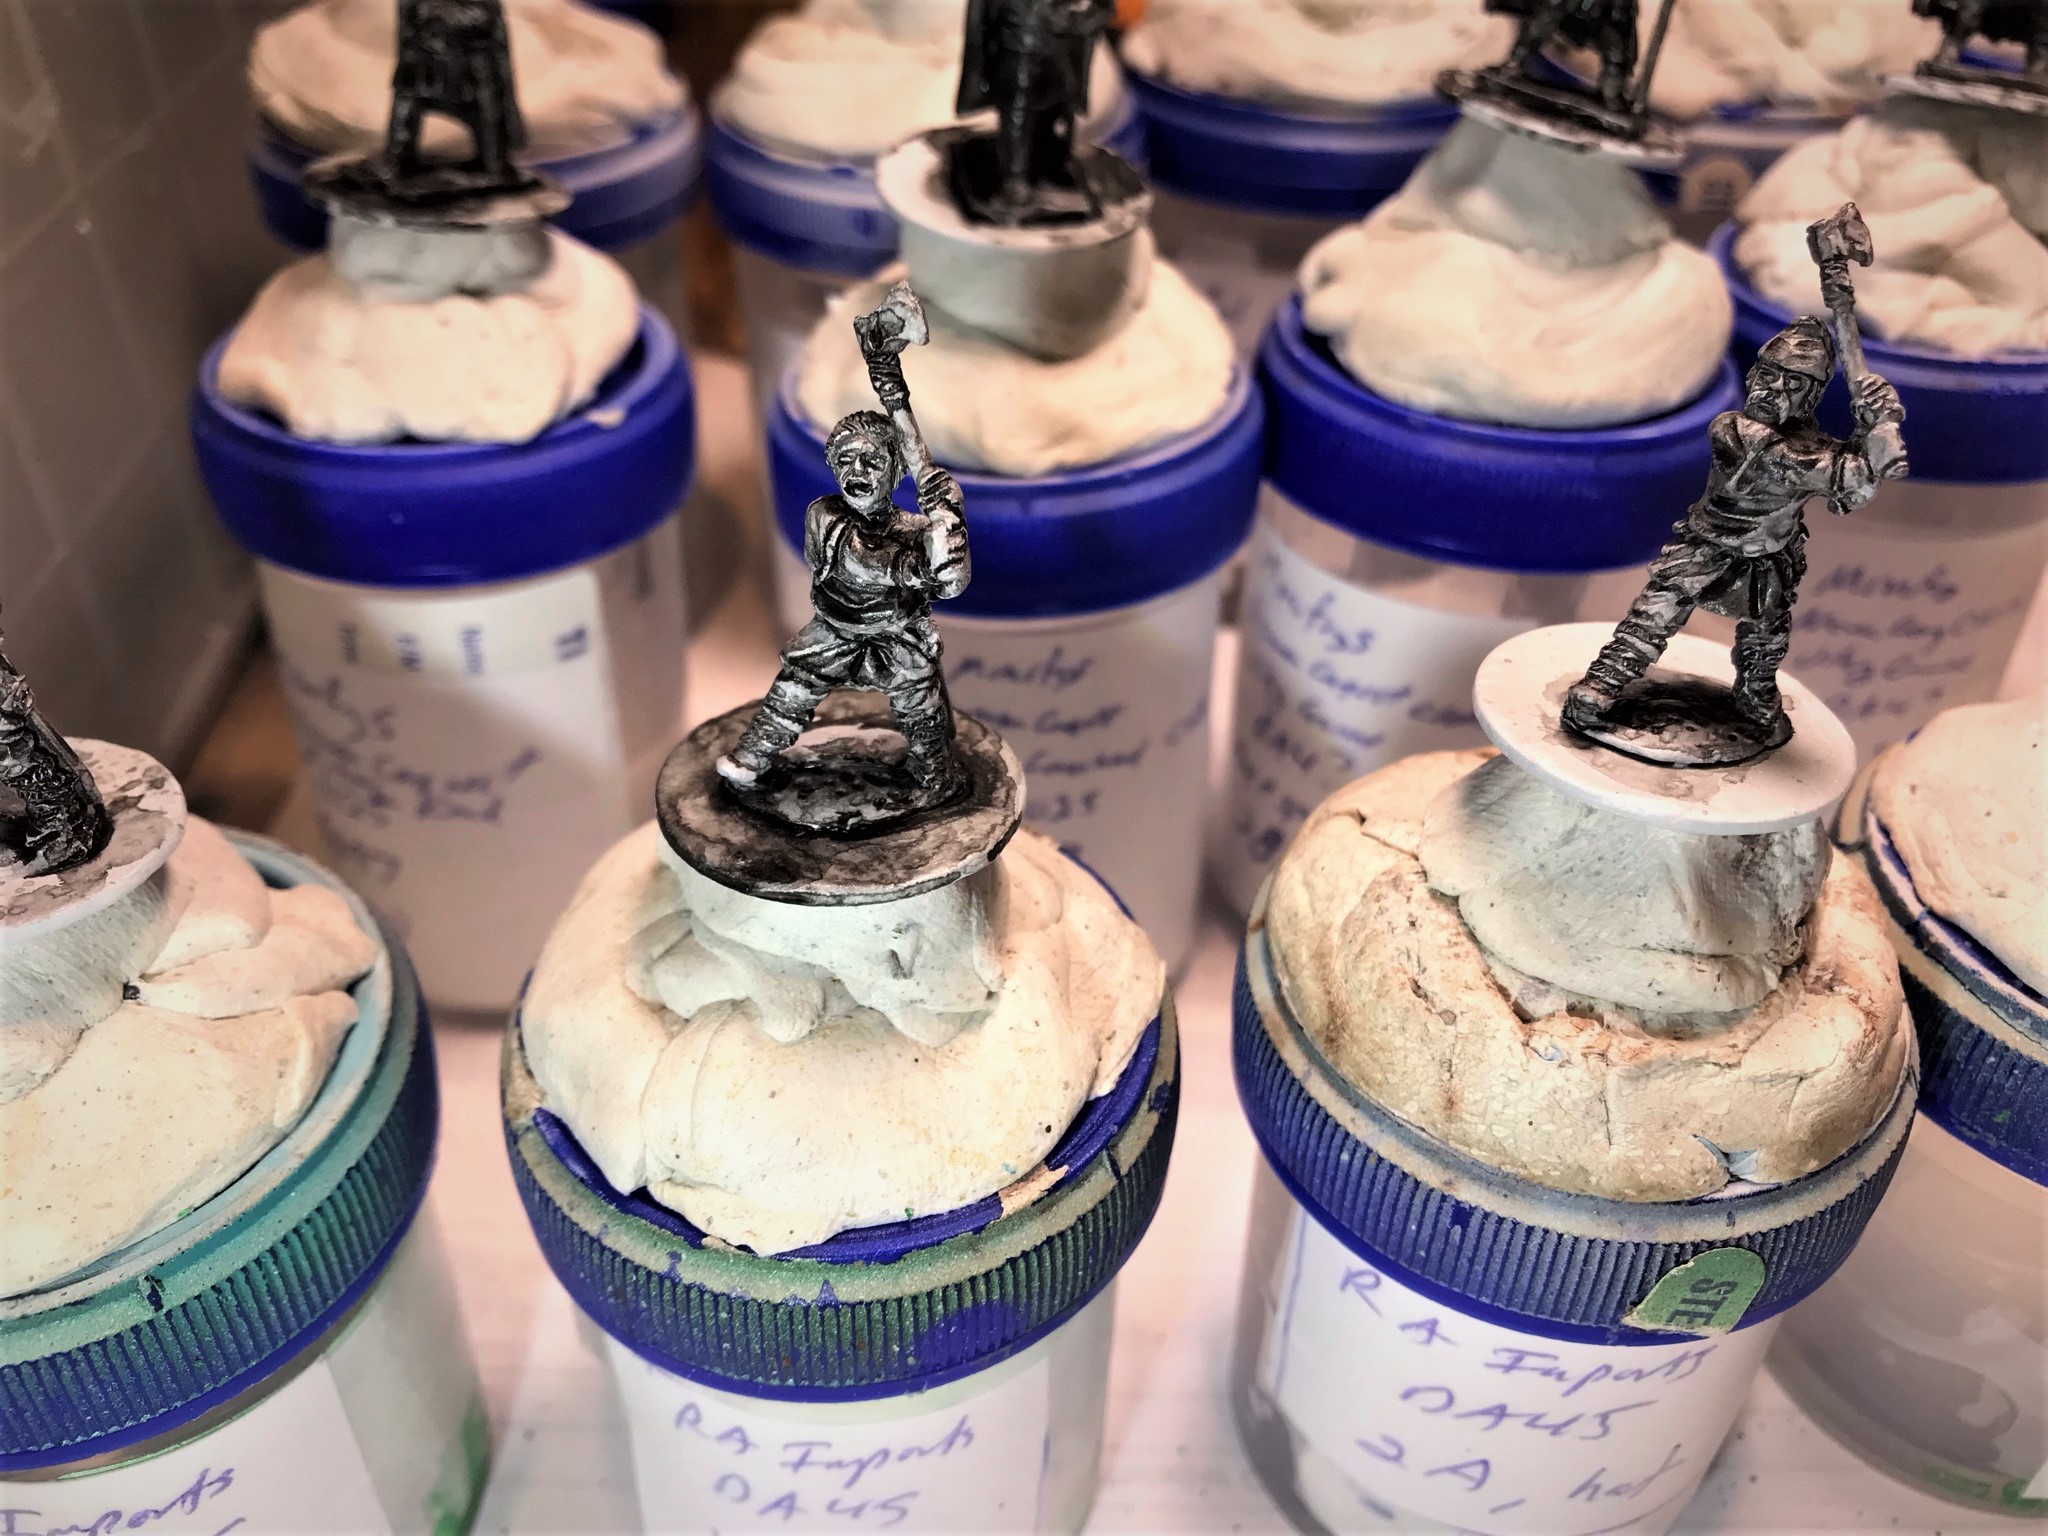
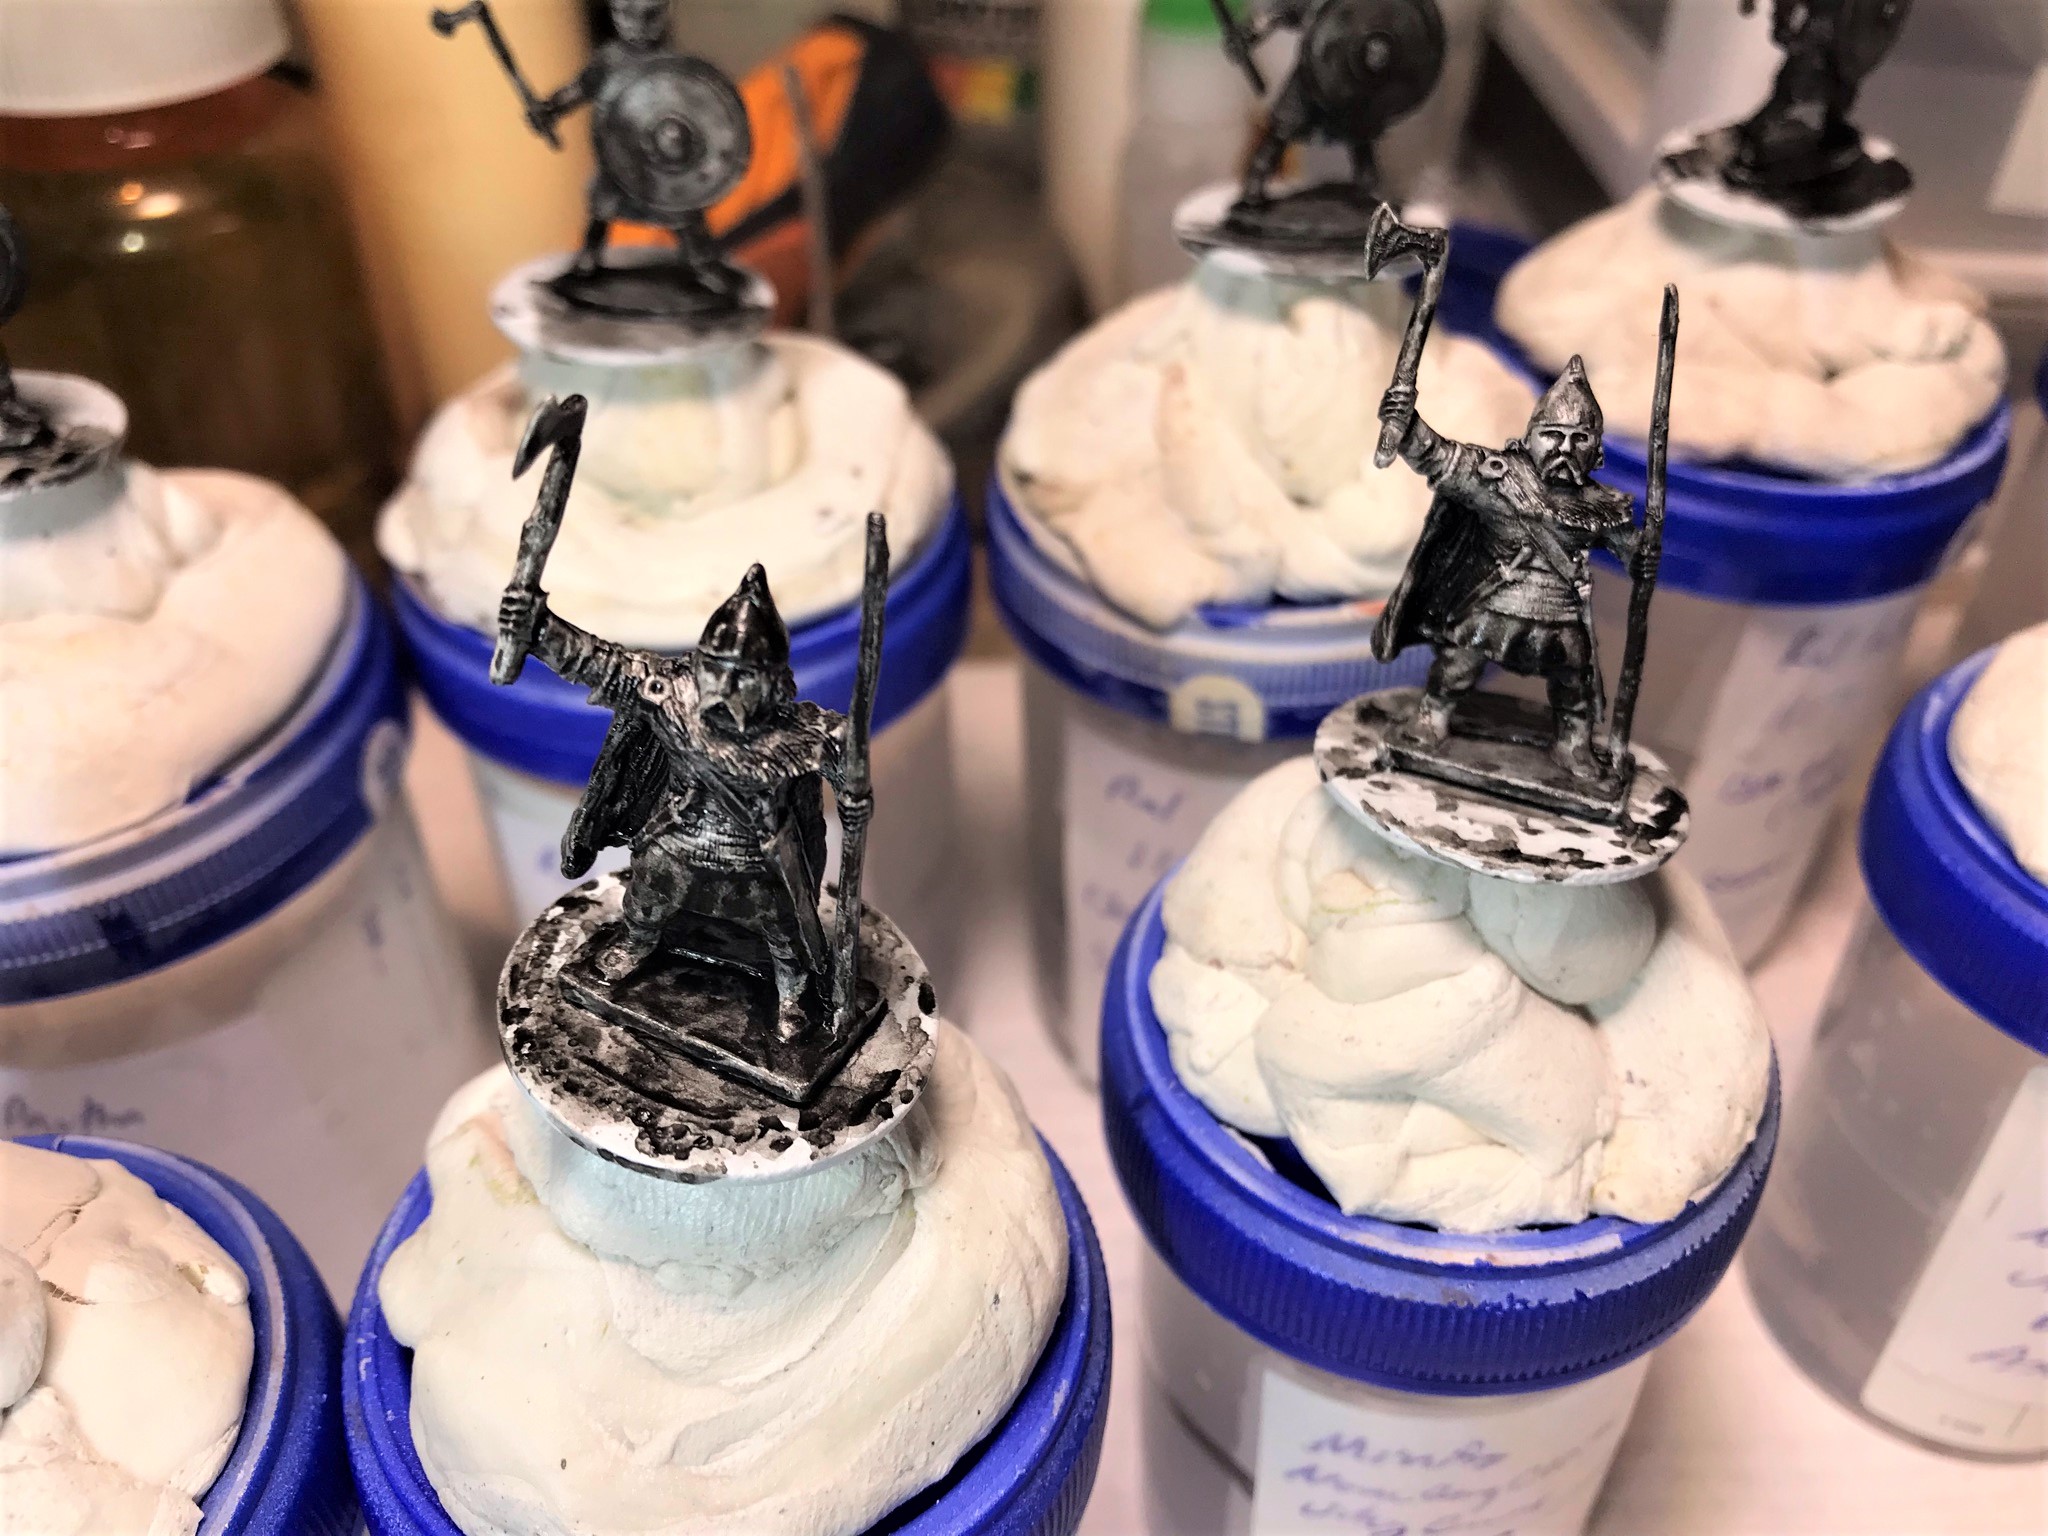
I then mounted all the figures on 1″ steel washers, and put them on poster tack on specimen containers for ease of painting. I primed them all white with my airbrush and after they dried, I washed with “Heavy Body Black” from Secret Weapon Washes (all of the paints that I used will be listed at the end of this post for those interested).
Mounted for paintingAfter prime and HBB washEarlybase coat
Close up of the HBB wash on the Berserkers. It helps me to see details and preshades the models – both very helpful steps with 25mm.
I numbered the six figures by the three poses (1A, 1B, 2A, 2B, 3A, and 3B) so that I could plan differences in painting. At least these had no shields…for the rest that did I needed a plan as well. Yes, I used Excel!
Pose 1Pose 2Pose 3Here all of the 19 figures are ready for varnish, but I did need to work on the shields. More on that in a bit.
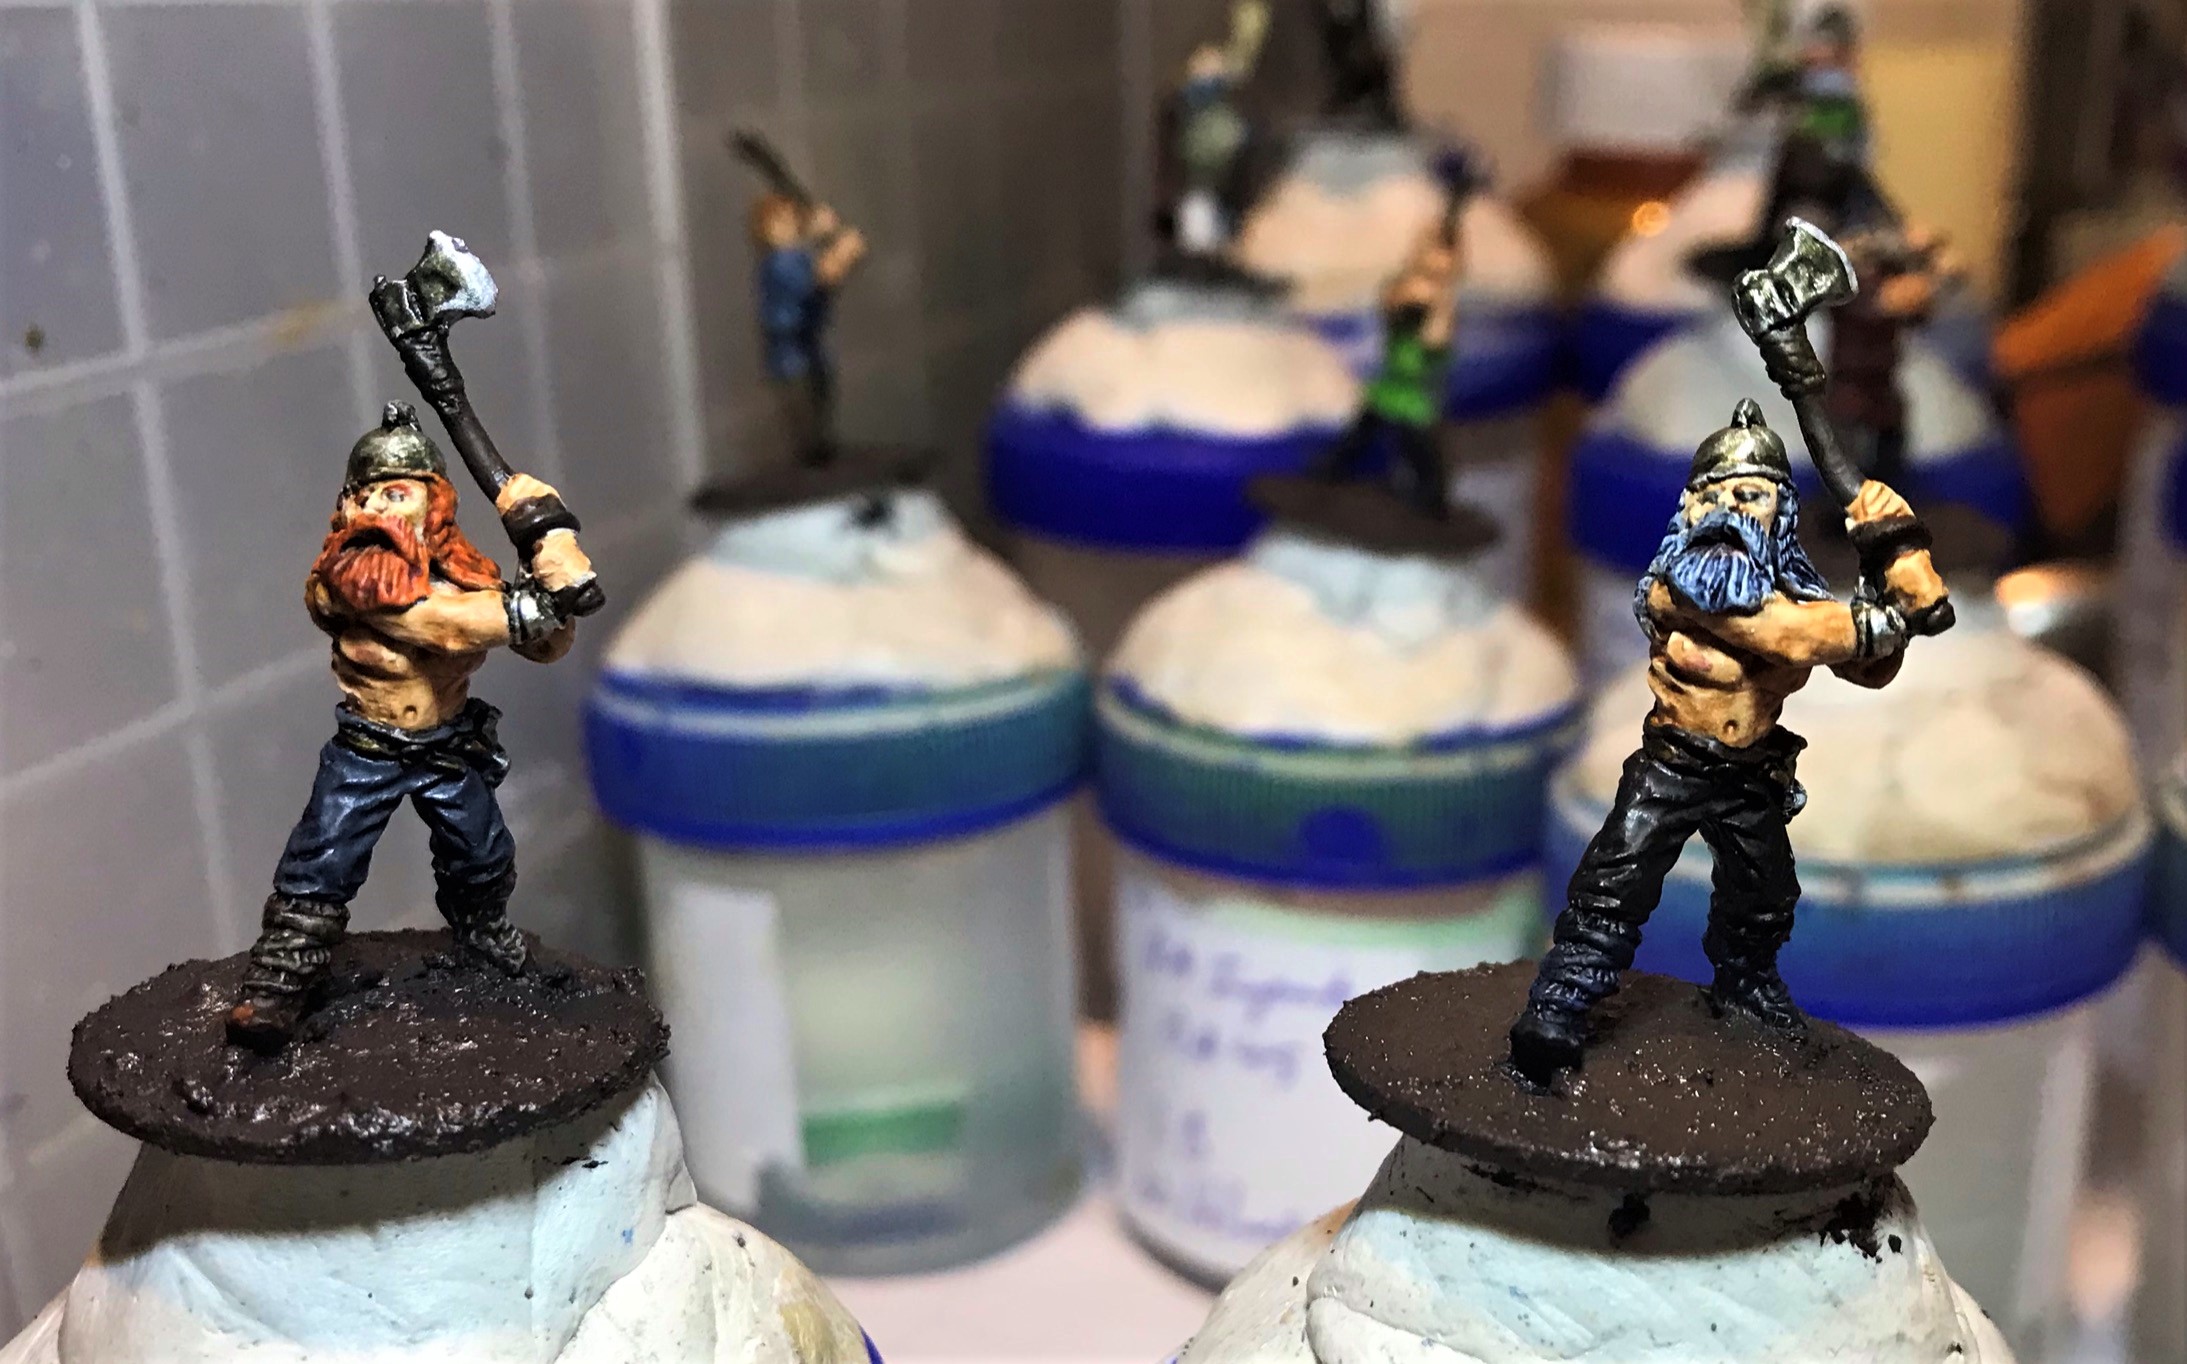
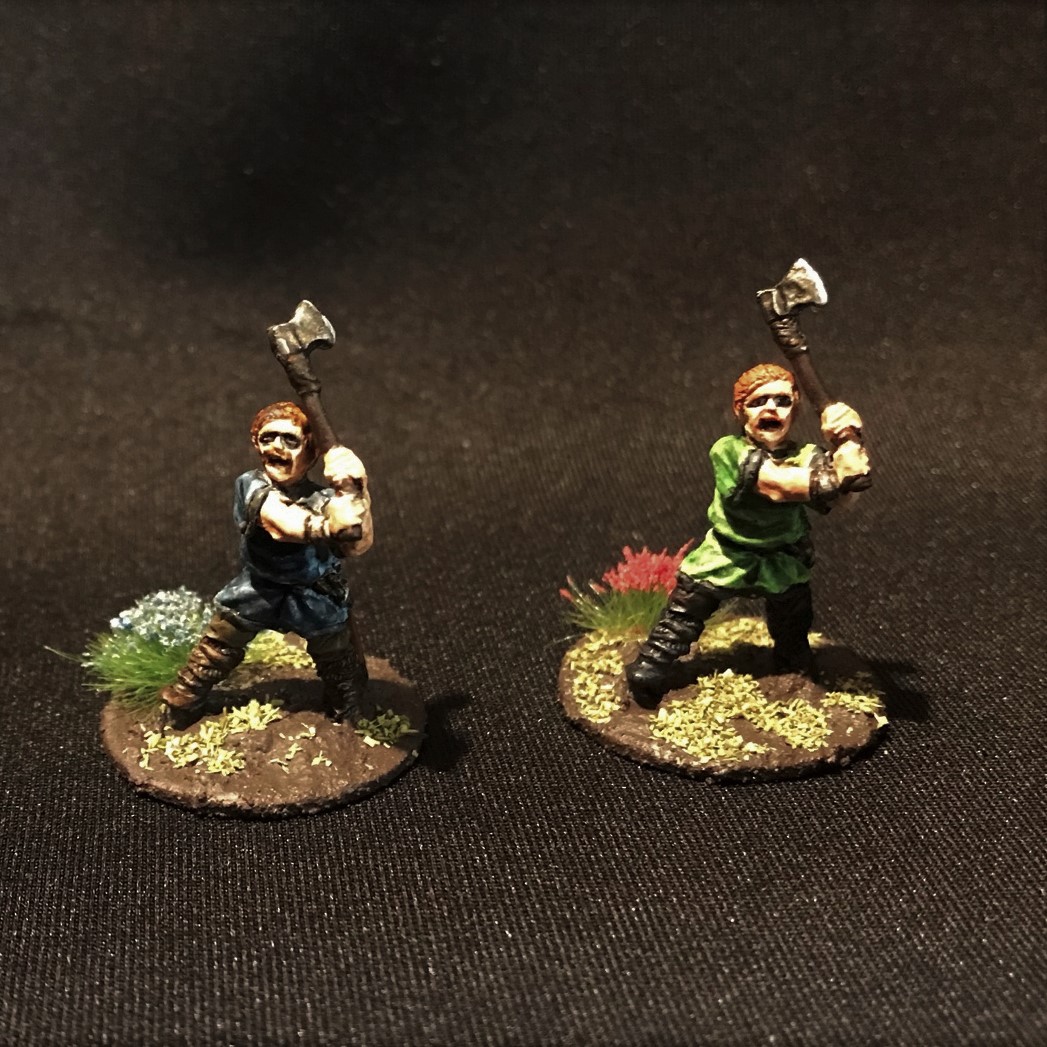
On all of these, in terms of painting, I aimed for a good tabletop standard. While I do not think these are badly painted at all, I have done better work – but these reminded me of how much easier painting modern figures is now, especially 28mm. Another challenge was effectively painting blonde hair. I don’t think I’ve done that in 40 years. Anyways, I toned down yellow (very Sailor Moon) with “Snakebite Leather” contrast paint and Seraphim Sepia” wash and worked ok. The ginger hair was easier. I also added differently colored tufts to the bases for ease of identification as well.
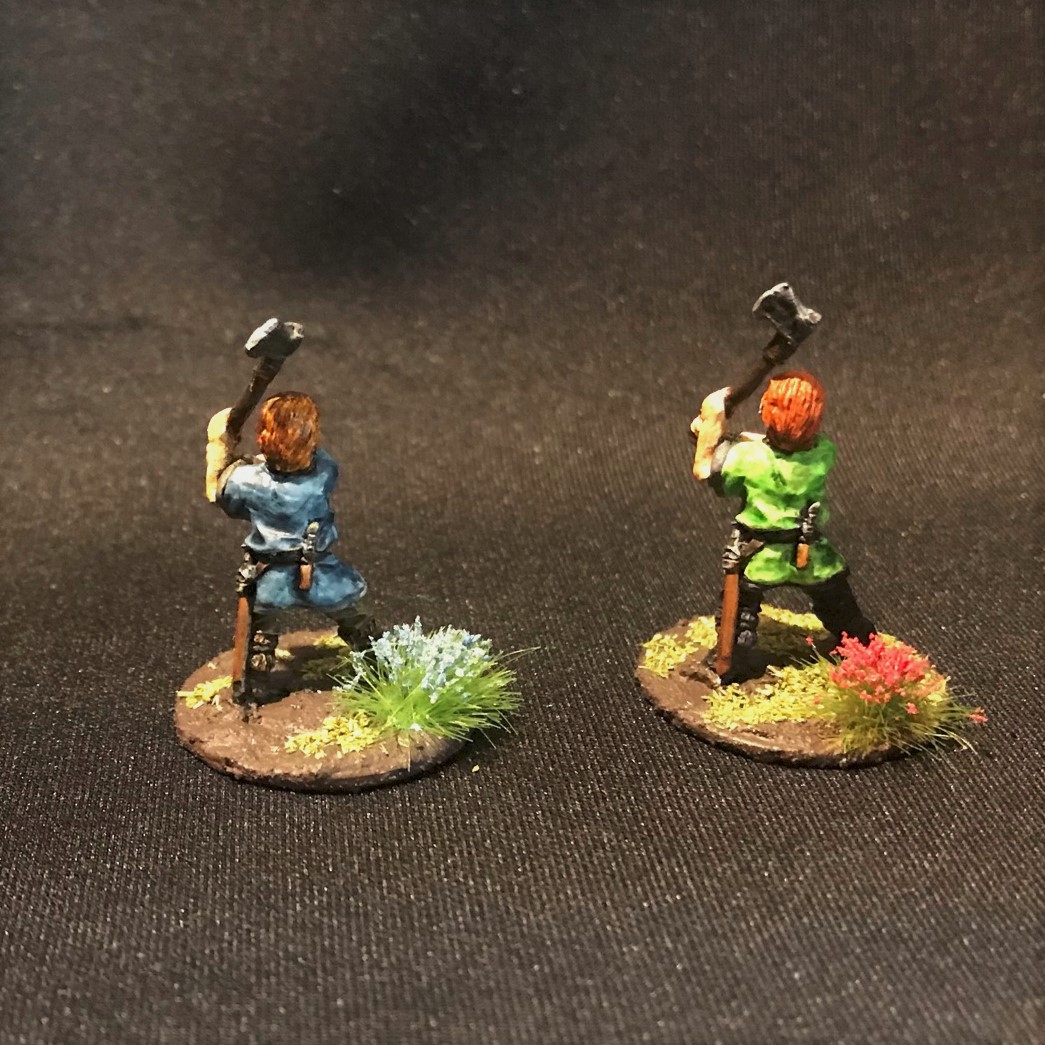
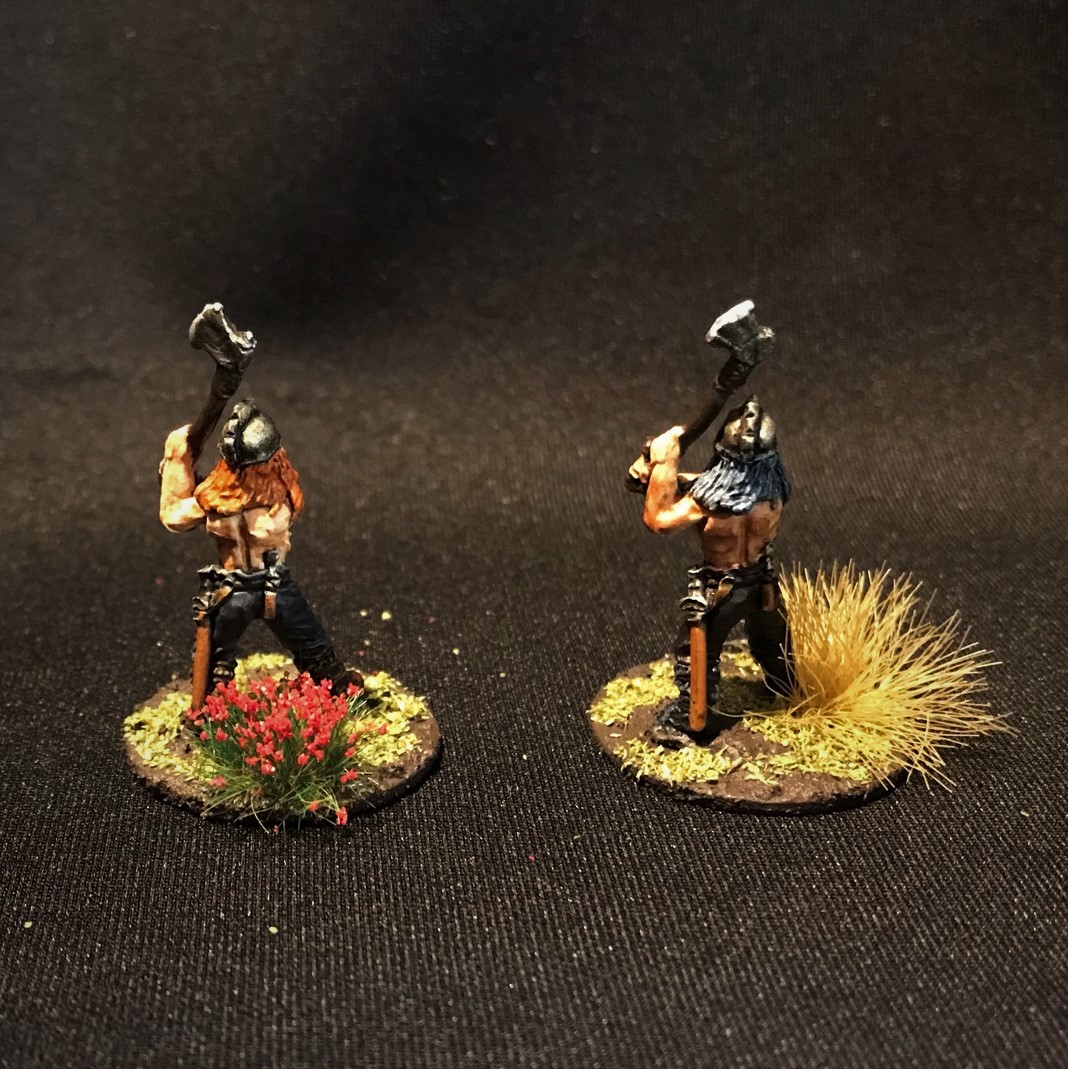
Now, let’s see the models from this blister all completed.
The first pose had no helmets.The second pose had caps.The third pose was more of a classic Viking berserker one with no shirts and helmets.The group. I tried to give the eyes a “mascara” look like the show “Vikings” did. At 25mm, this was hard to do, but you can let me know if it worked or not to your eye (pun intended).
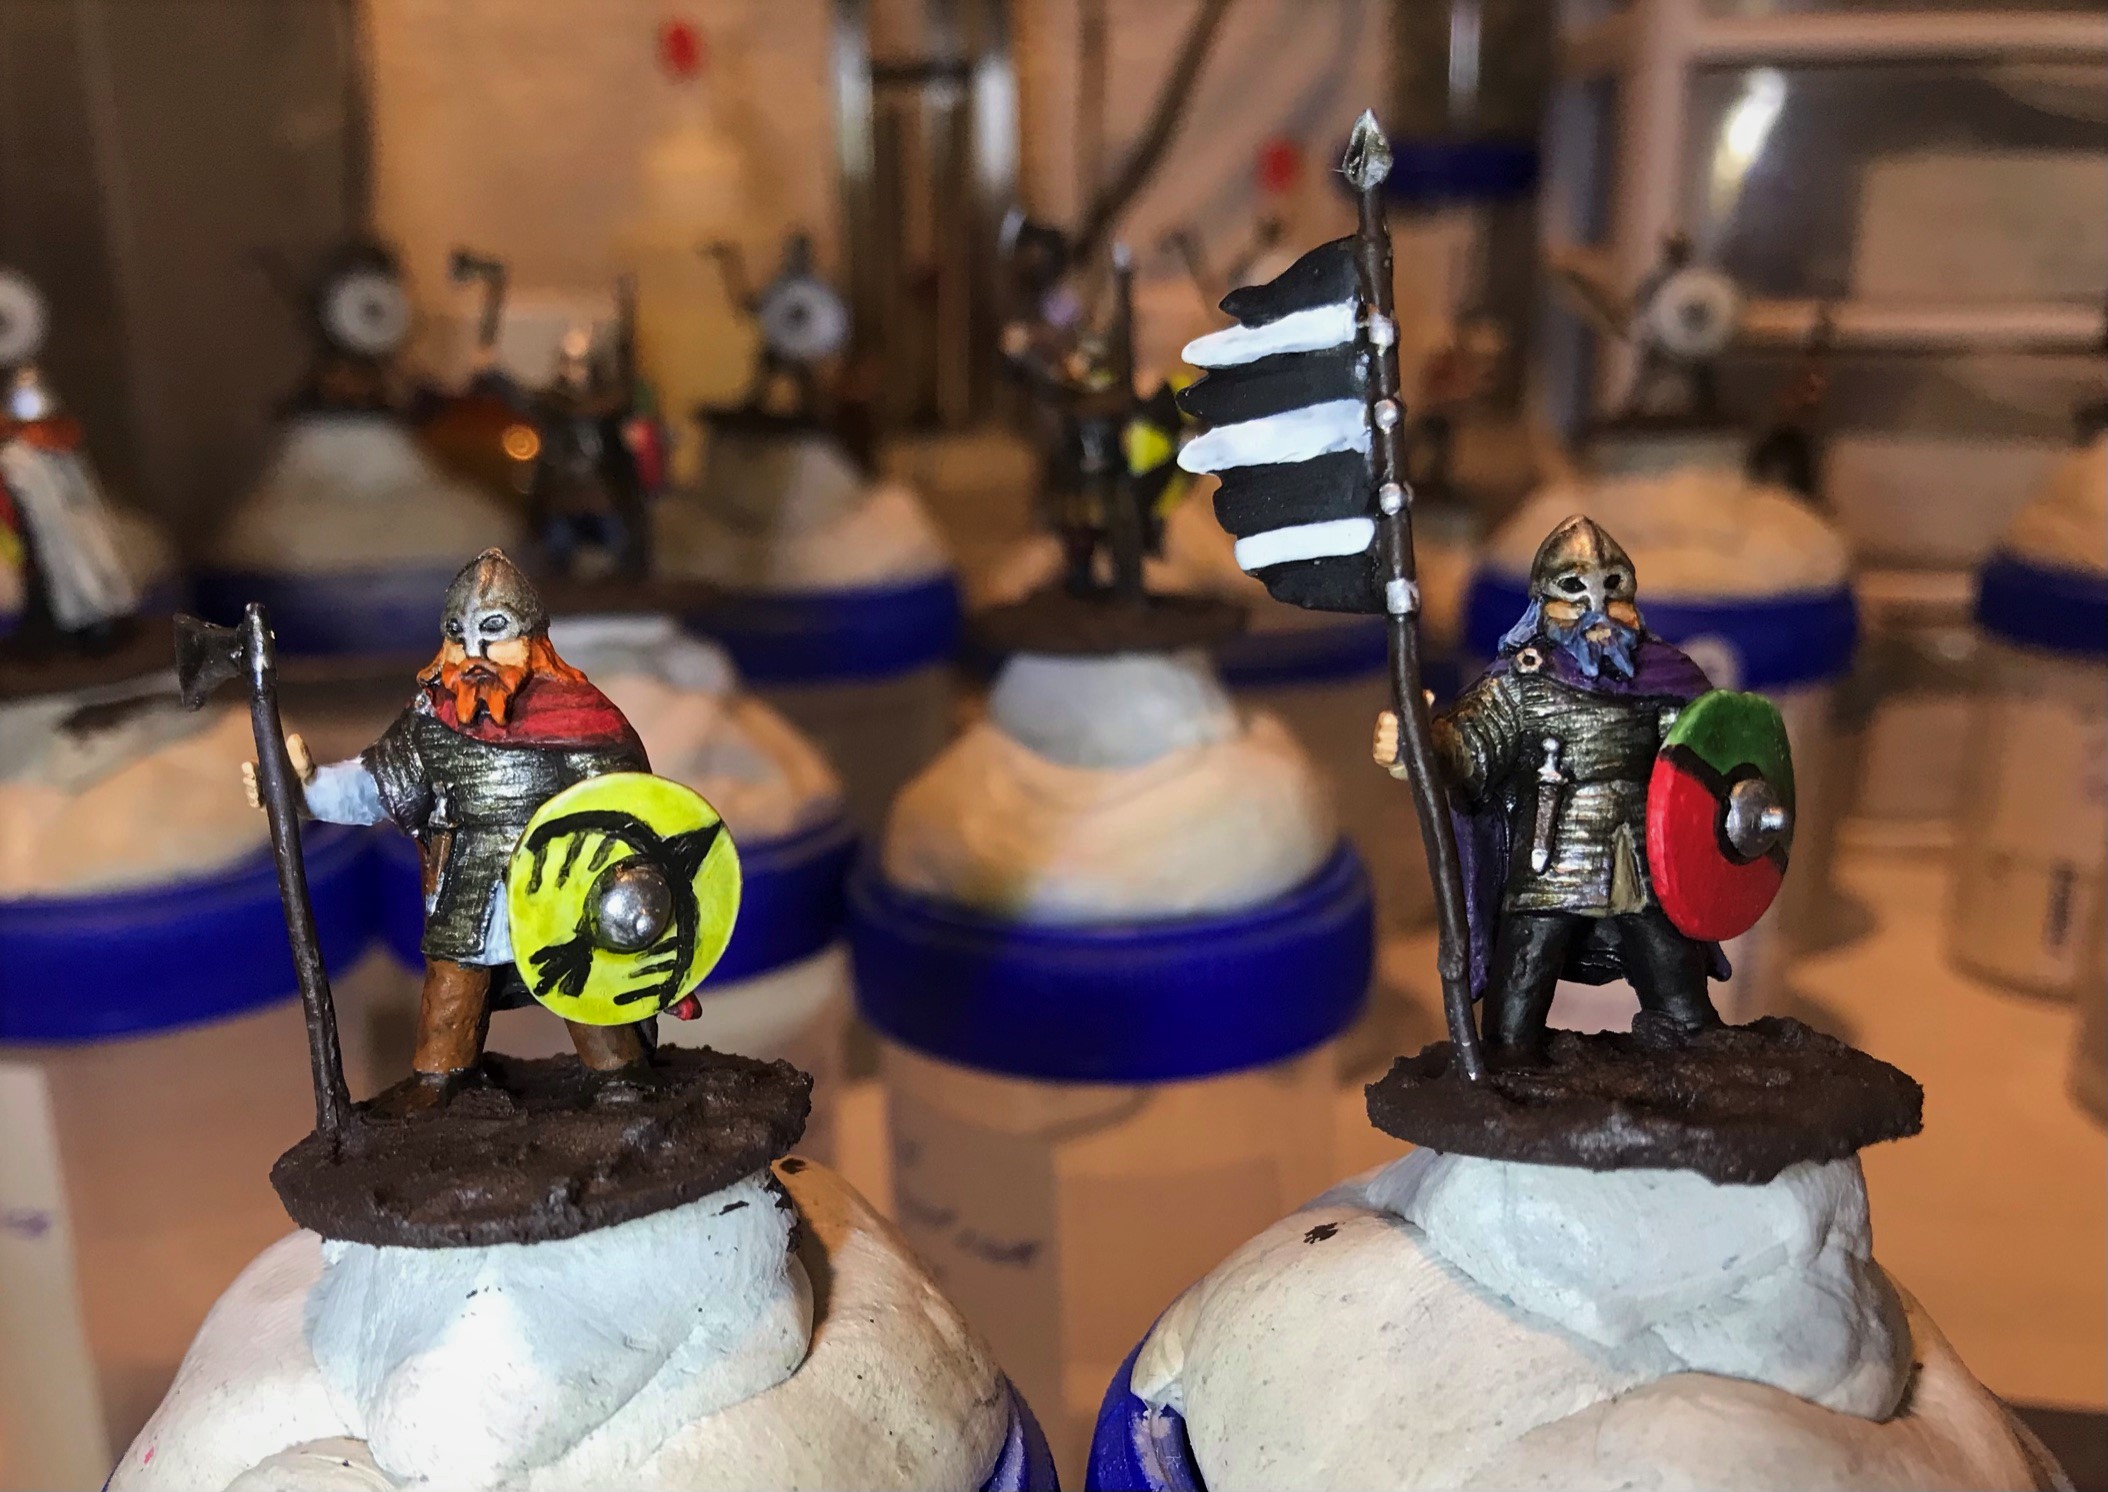
Minifigs Viking Command
I remember painting a number of fantasy Minifig miniatures back in the day. They had square bases and the details were rather plain. These were the same as those. My guess is dating from the early ’80’s or possibly even the late ’70’s.
Unfortunately, these had a severe coating of oxide or something black and crusty on them. I don’t think it was lead rot, but I did clean them up with baking soda just in case. Their spears and banner shafts were even more bendy than the others – which was very much a common issue for this manufacturer back then. I added a second stiffening coat of Gorilla Glue to these bendy shafts, and then proceeded as discussed previously.
There were three poses here. Two with a horn, two with spears and axes, and two with either a banner or a long-shafted axe. For the last group, I gave one an axe and one a banner. They all had shields (unattached) so I did need to get some references for free-hand painting them.
The old blister – $3.98 for six figures!You can see the dark oxidation (if that’s what it was) on all the figures – which needed filing, cleaning, and fixing of the more-bendy shafts.Close-up shot showing issues.
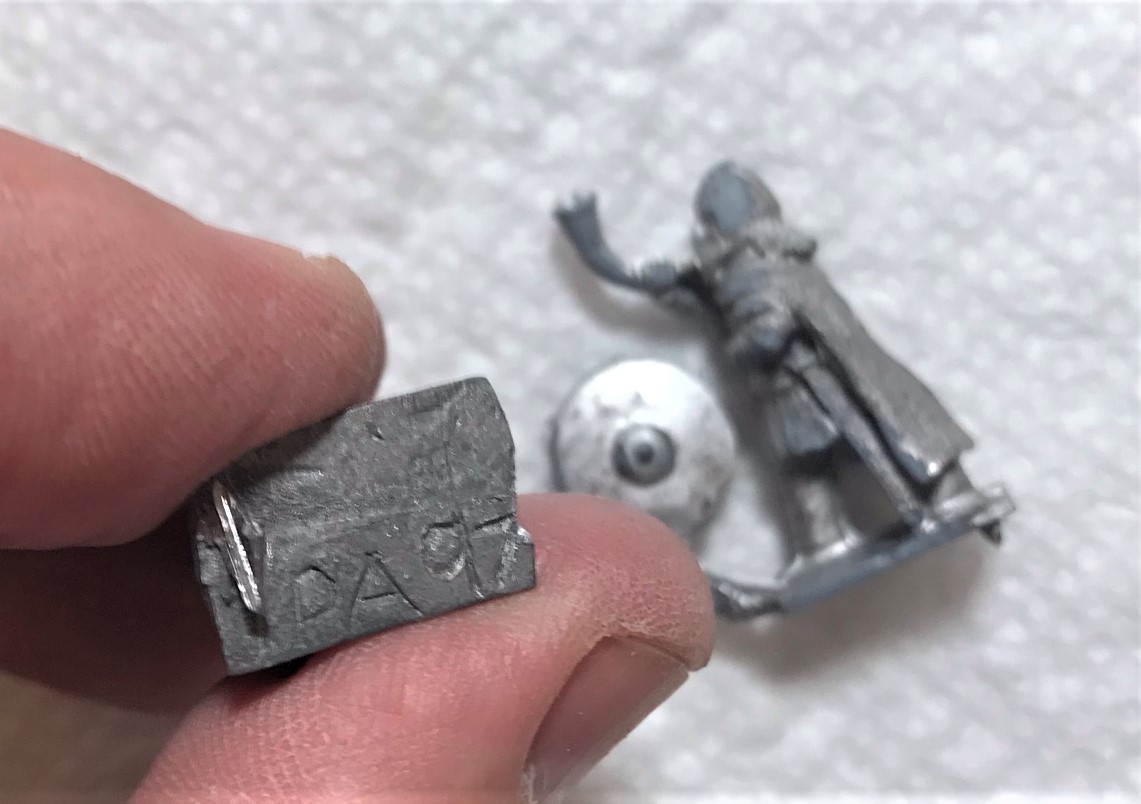
Each of the three poses had a different number on the bases. Pose 1 (with horn) was DA97, pose two (with axe and spear) had only partially DA4-something, and the last one was DA42. I’m assuming DA stood for “Dark Ages”.
DA97DA4?DA42
Second pose after HBB wash.
I tried to give different looks to these as well – again, a painting plan in Excel helped. As for the shields – they were fun the most enjoyable to paint – and different than the Aztec shields to be sure. I chose 6 designs that I thought would work with the colors. Instead of thinner, I used Vallejo Flow Improver with the black on a Newton & Windsor 0000 brush – and that worked (thanks to The Imperfect Modeler for that suggestion).
I would sketch lightly with a .5mm pencil, then line with black paint thinned with flow improver.Painted shields.
After I painted the shields, I gave them a brush of satin varnish. Once they dried, I mounted them to the figures.
Pose 1Pose 2Pose 3
Then after drying time, they were off to varnishing and flocking (similar to the previous group). Below are the finished models.
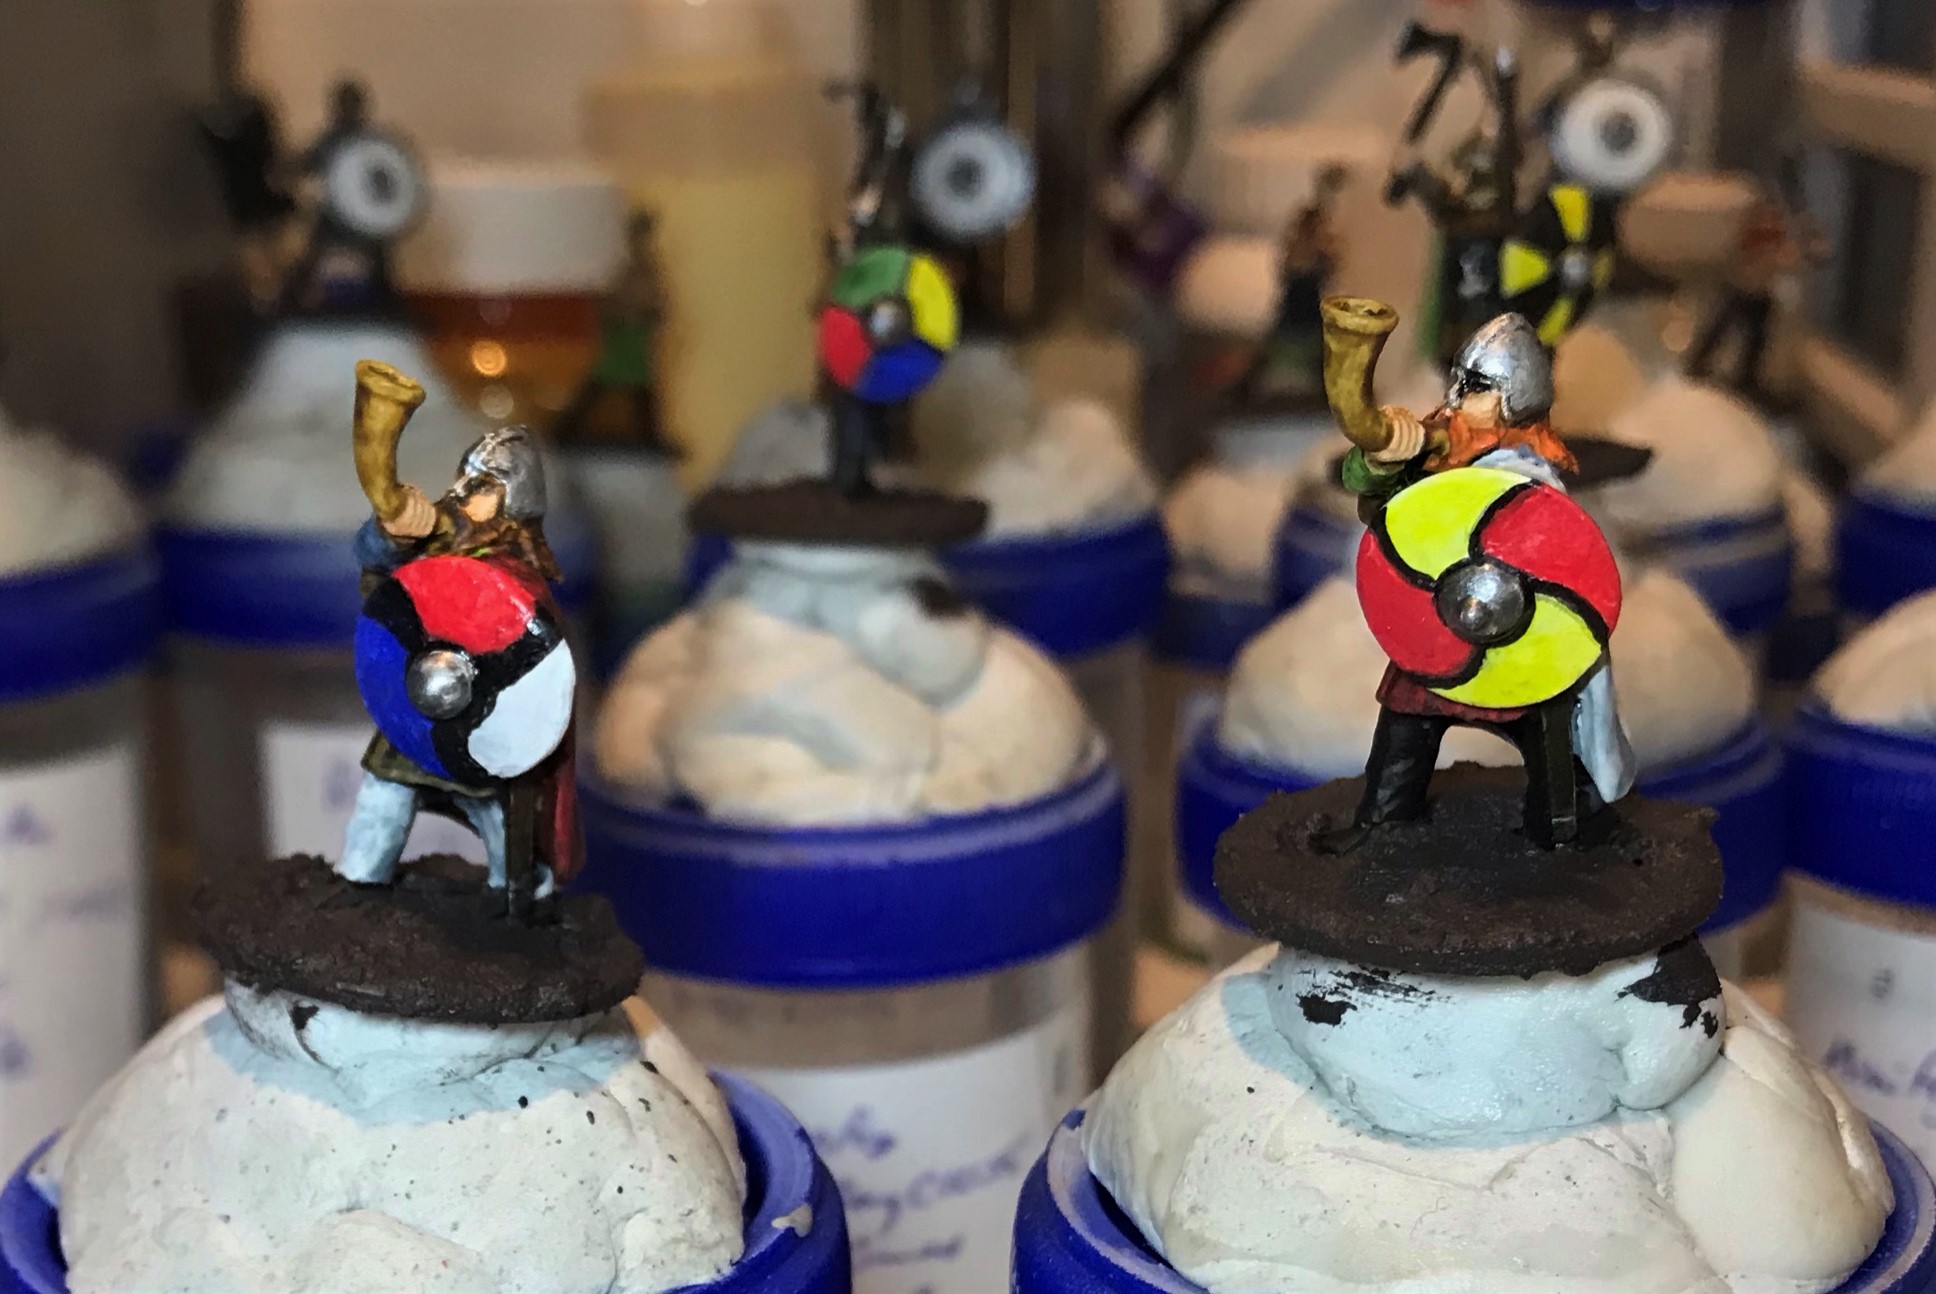
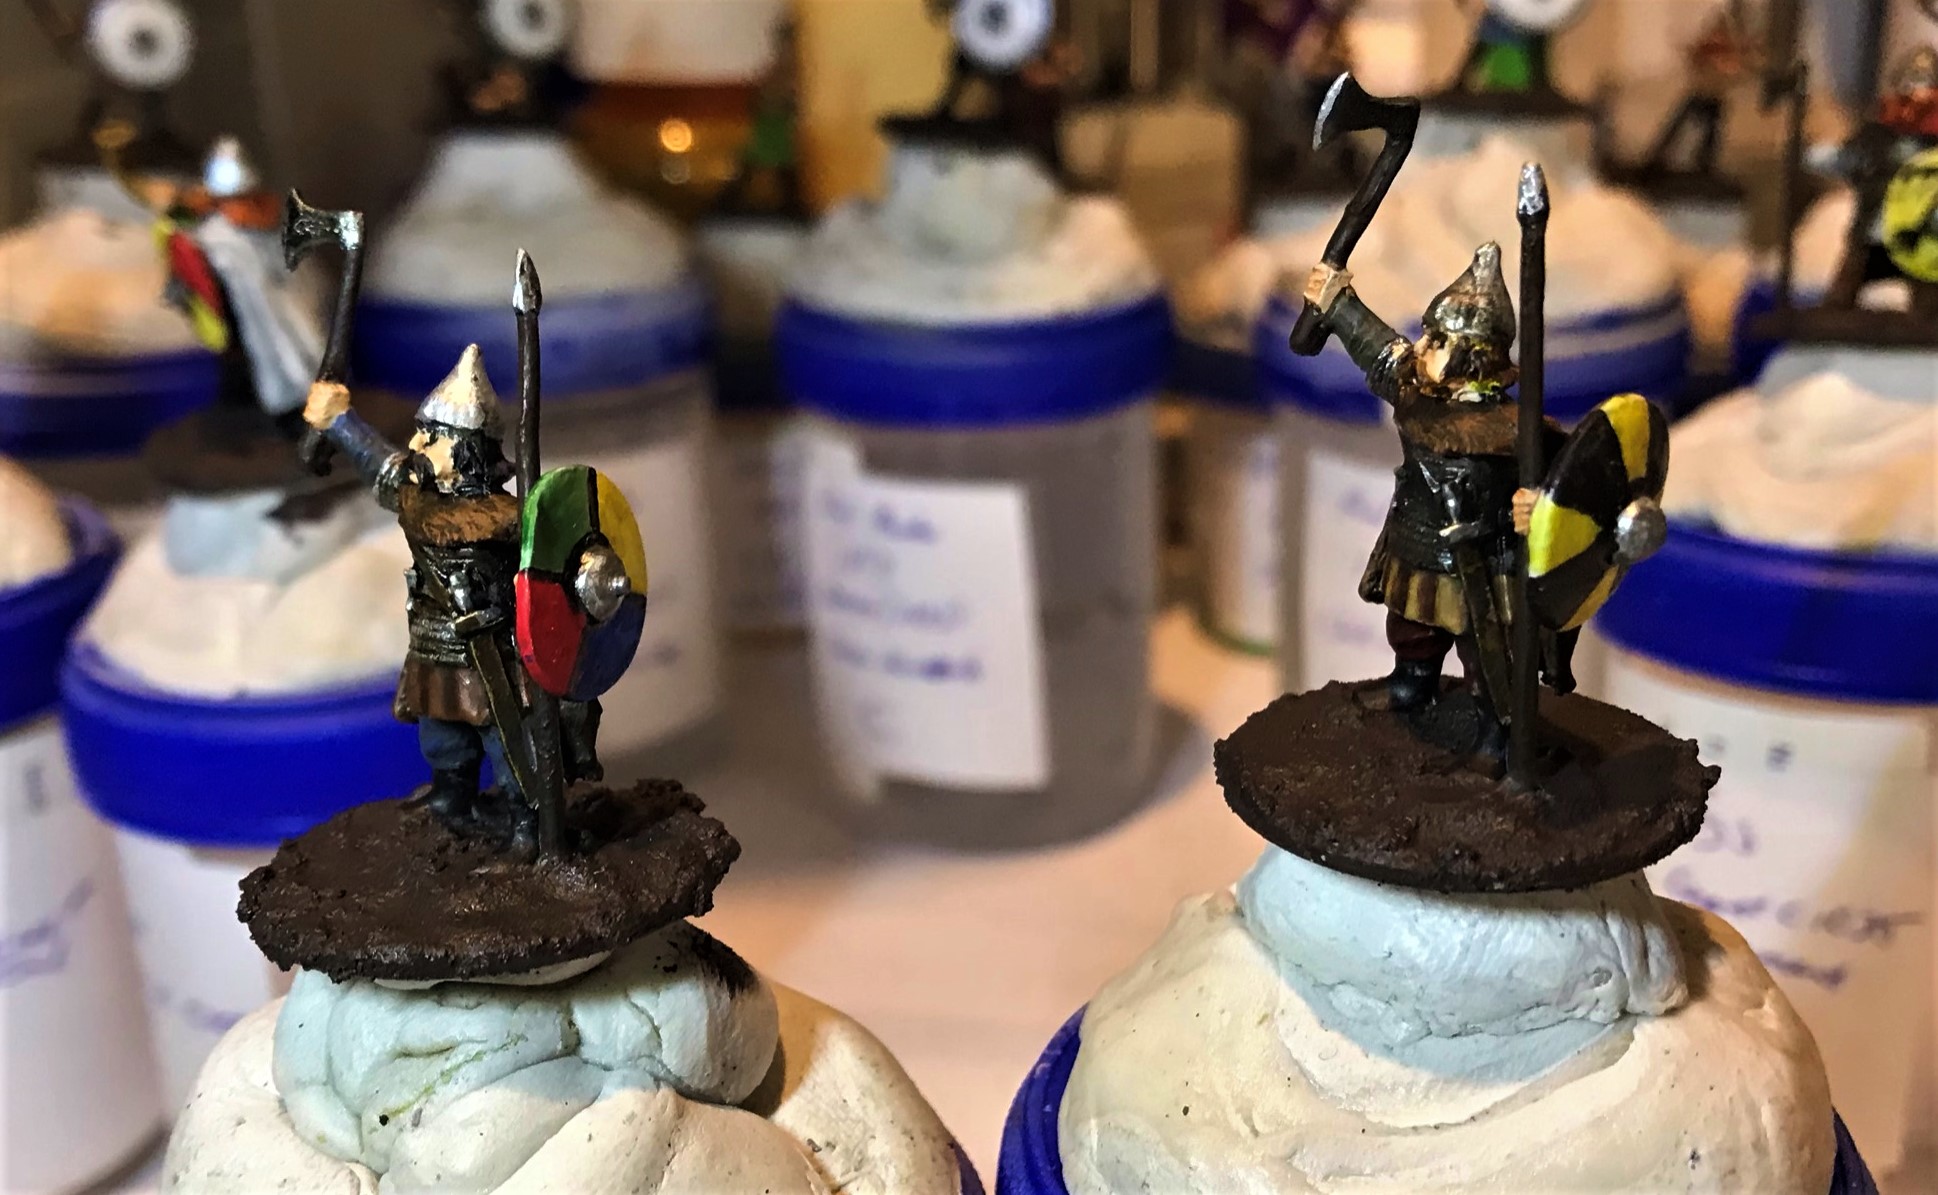
The first pose with the horns. It was easier to give their capes details than it was for their faces.Pose two with the axes and spears. Pose two with the axes and spears.Pose three had the banner or the long axe.The Viking Command Group together.
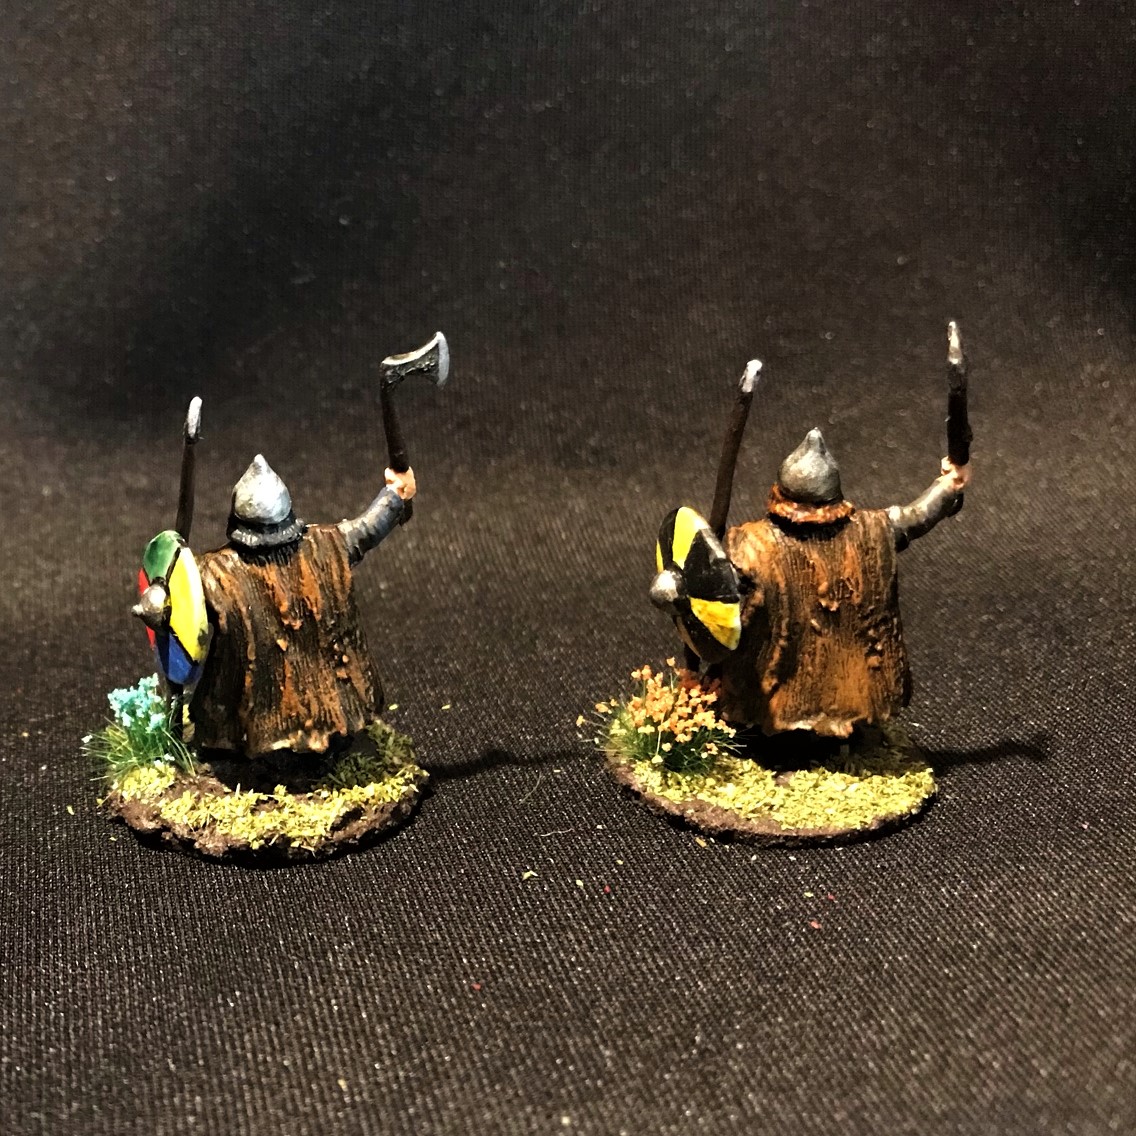
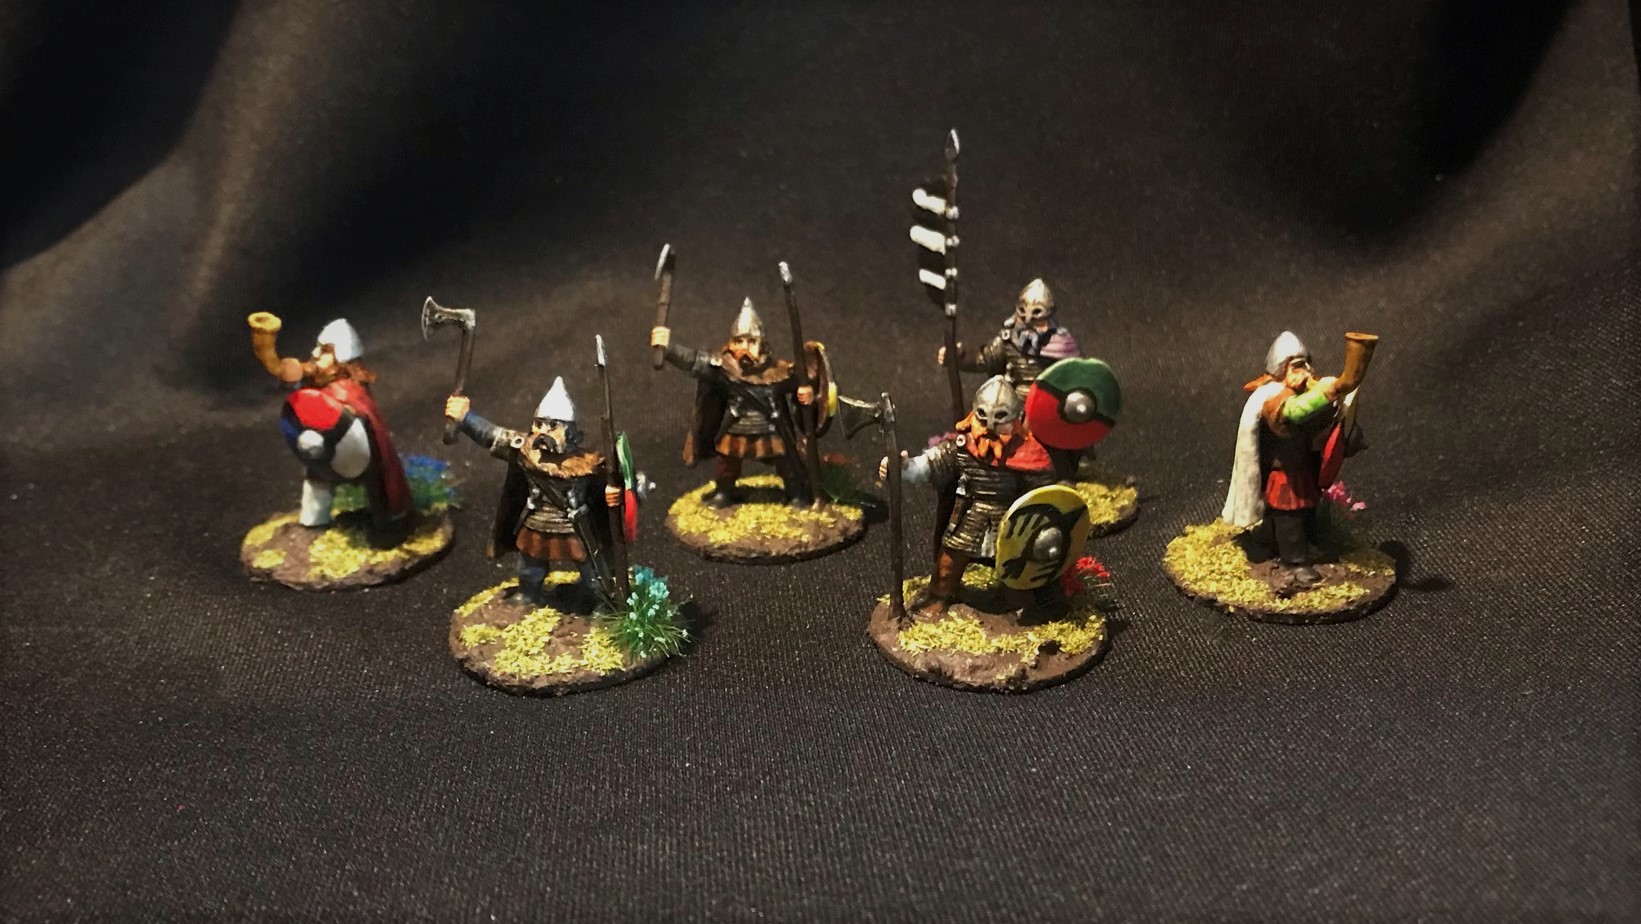
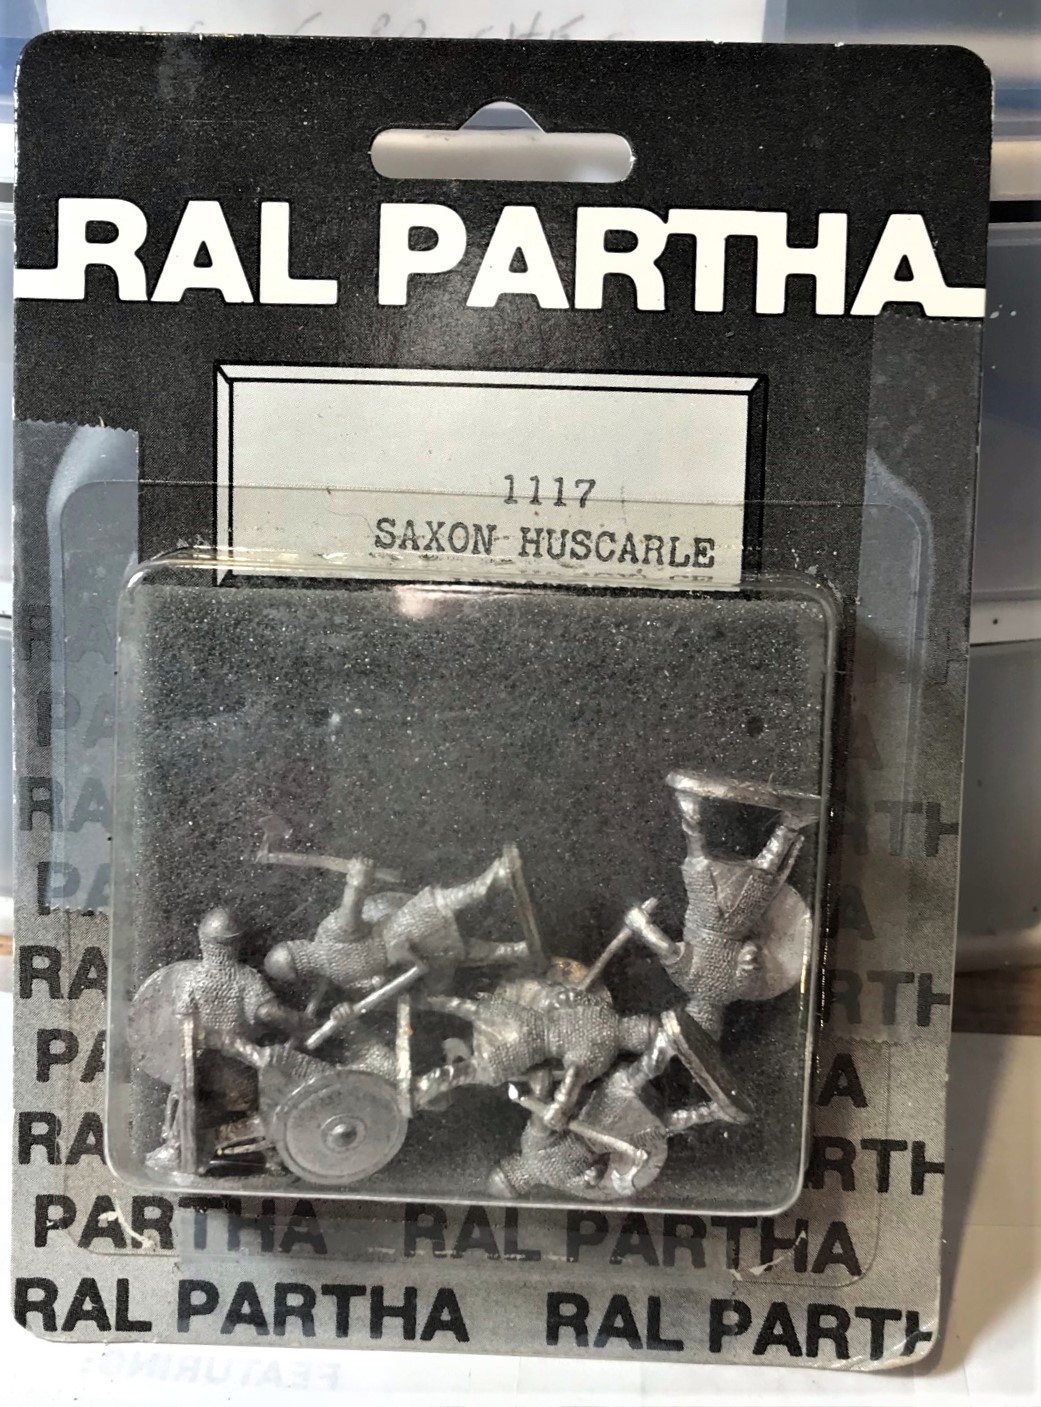
Ral Partha Saxon Huscarle
While housecarles in English is proper, the blister said “Huscarle”, so…
The old blister from the 1200 A.D. line.
The sculpts were pretty nice – especially the chain mail. However, these were in all the same pose (as was common back when these were launched in 1982). Therefore, differentiation was more needed.
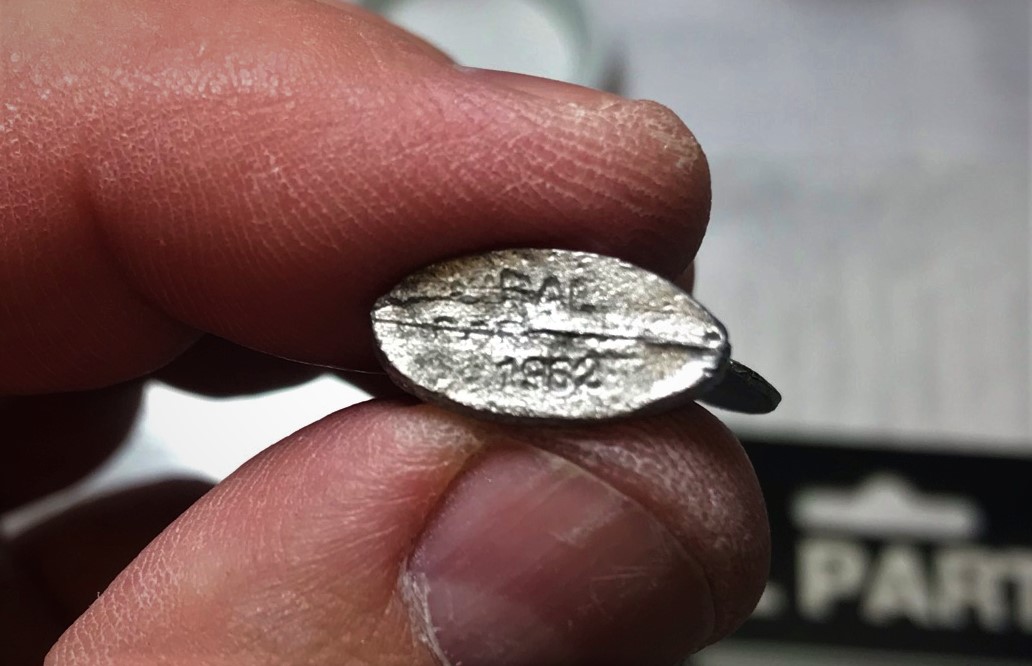
All the same!RAL 1982
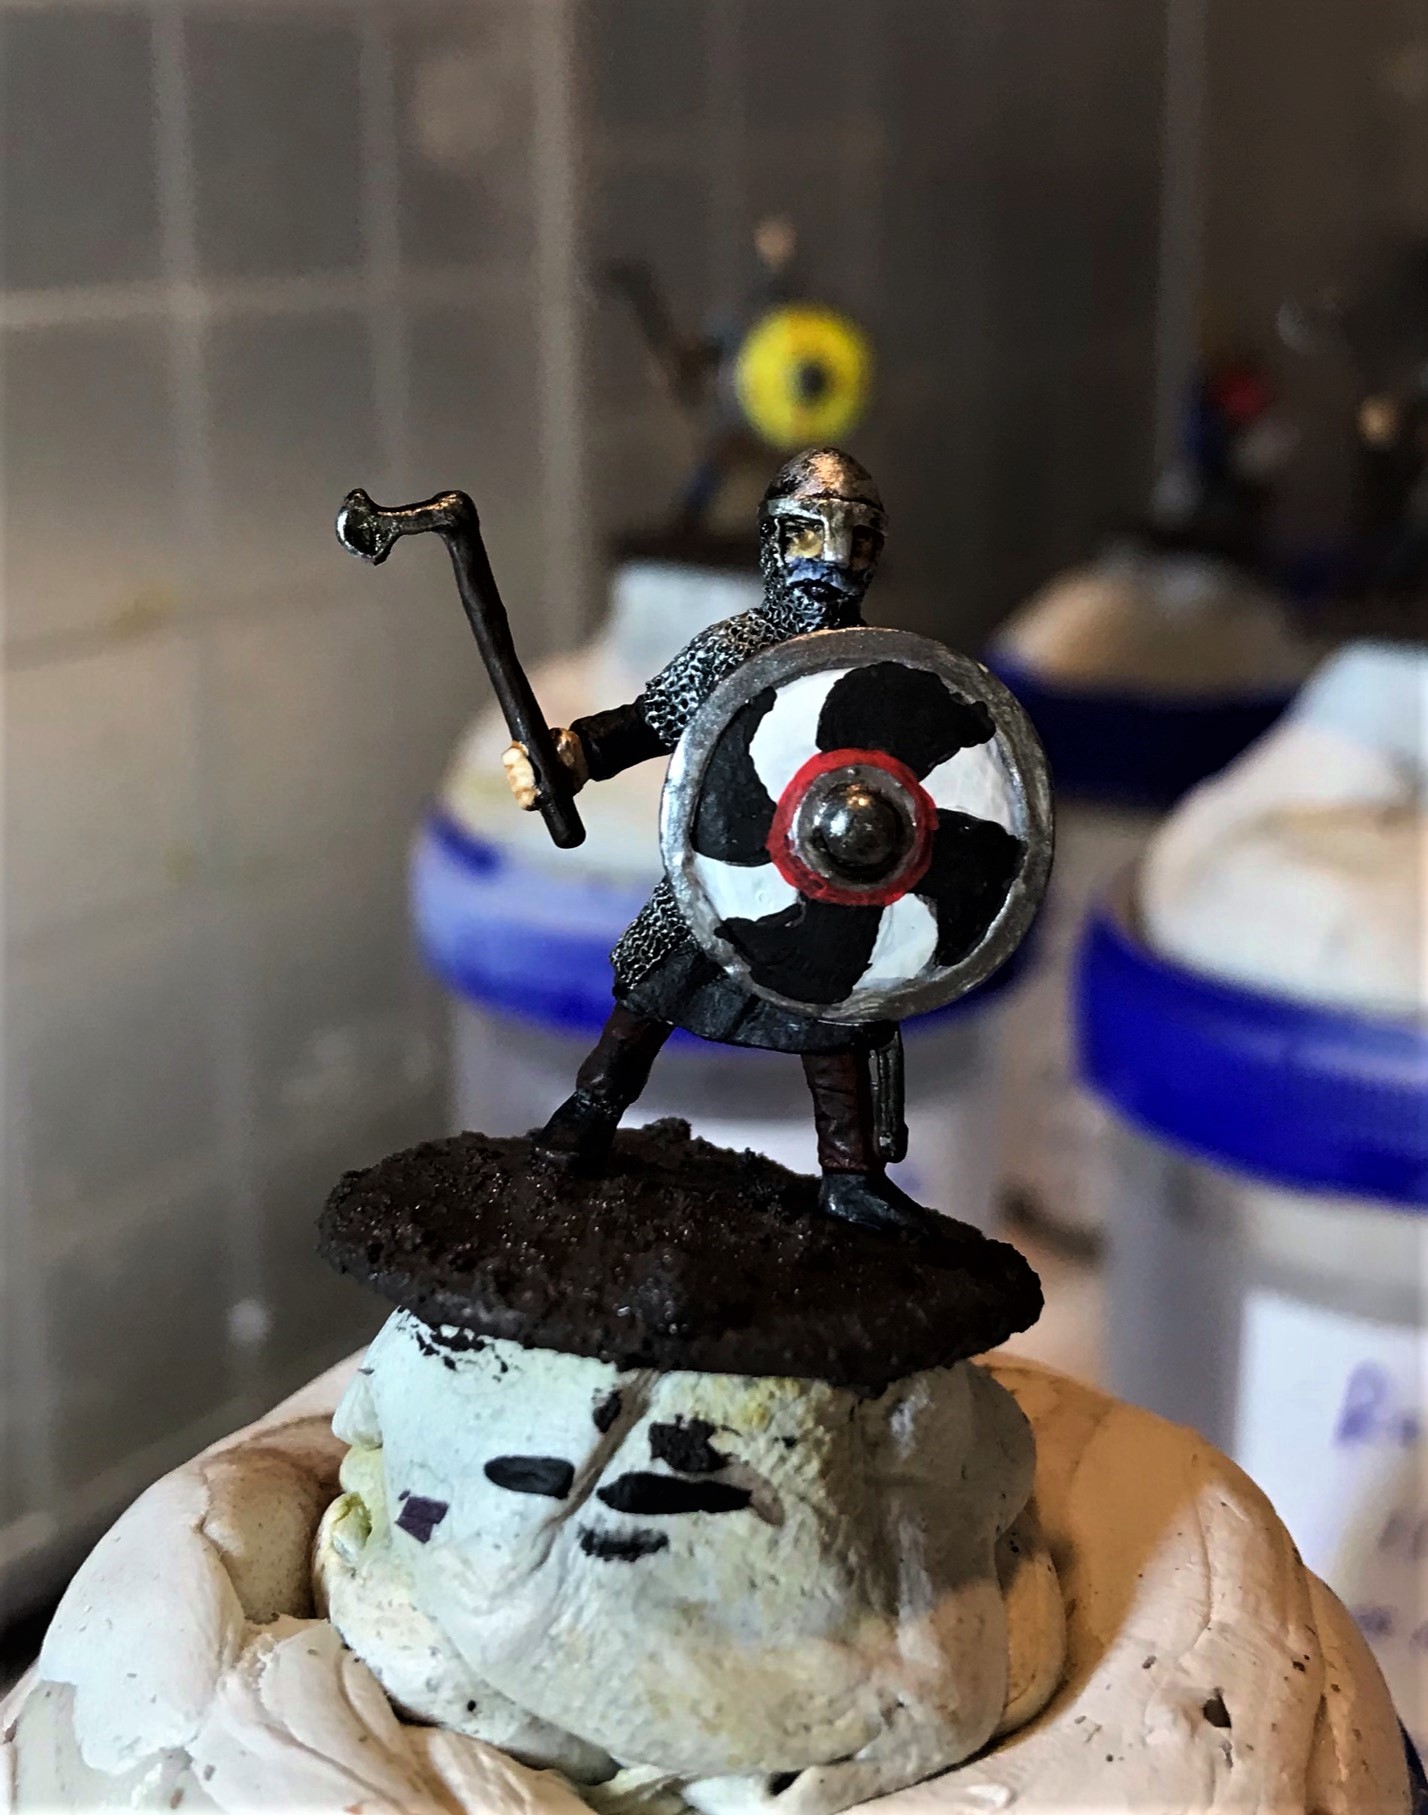
I followed the same process as discussed above with priming and the initial wash application. Another nice thing about these was that the shields were already attached – that and the eyes would not need special attention.
After the priming and the HBB wash application. I could have used Nuln Oil but I thought I’d use the HBB before it became useless.
For shields, I looked up some images for Saxon ones and chose six.
Saxon shield painting.
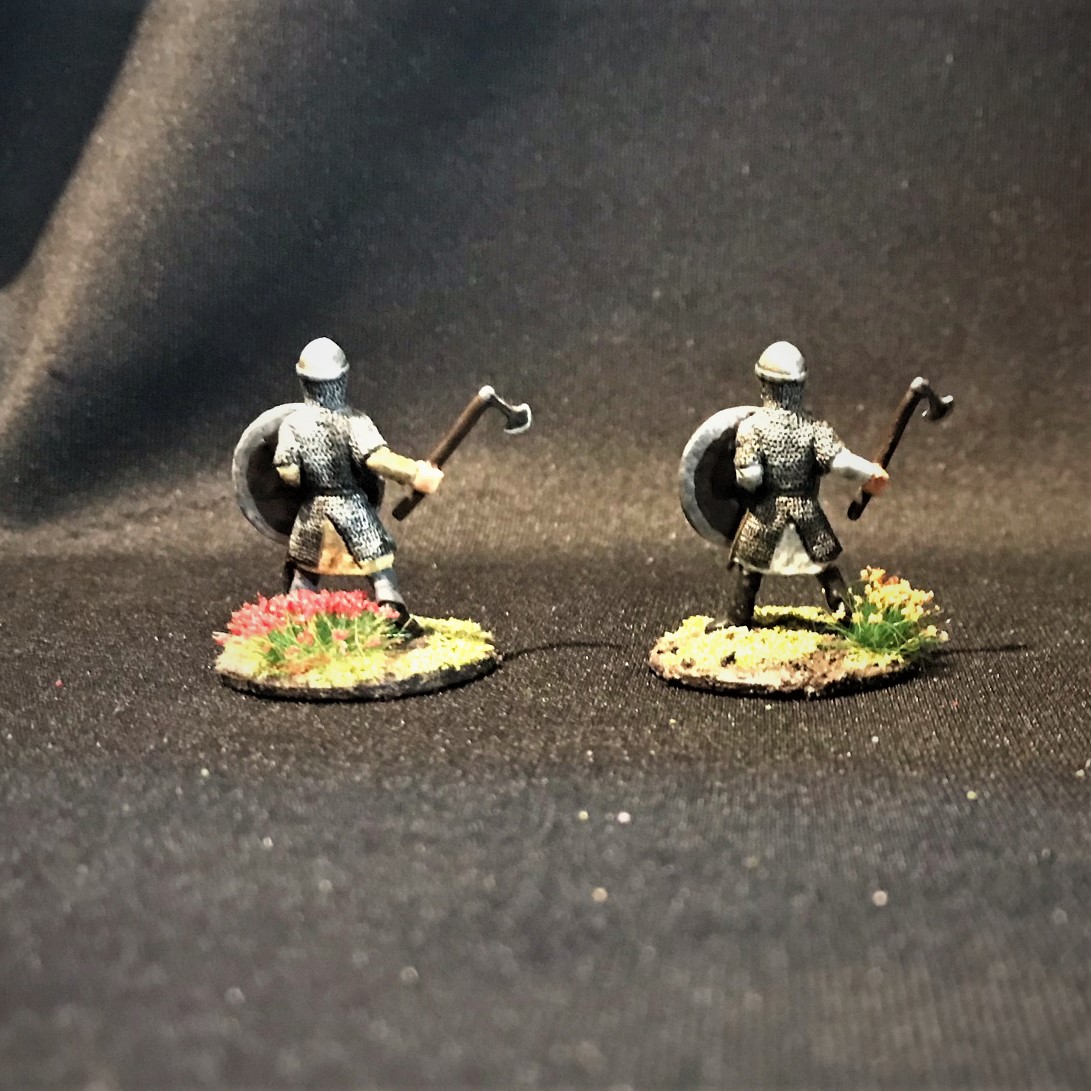
The final six look as follows:
The first and the second Saxon figures.The third and the fourth Saxons.The fifth and the sixth Saxons.The Saxon Huscarle group.
RAFM Berserker
The last figure was a single one – and he looks to be 28mm hero-scale. That makes him a bit off of the others, but maybe he’s like the Mountain from GoT?
Anyways, he looks pretty Viking-like, and Greg wanted him, so he’s in!
In his 1989 blister.Just out of the blister.After priming and wash.
This figure was so much easier to paint as it had virtually no mold lines and was well-sculpted. I only wish his axe was reasonably-sized.
Painted RAFM Berserker.
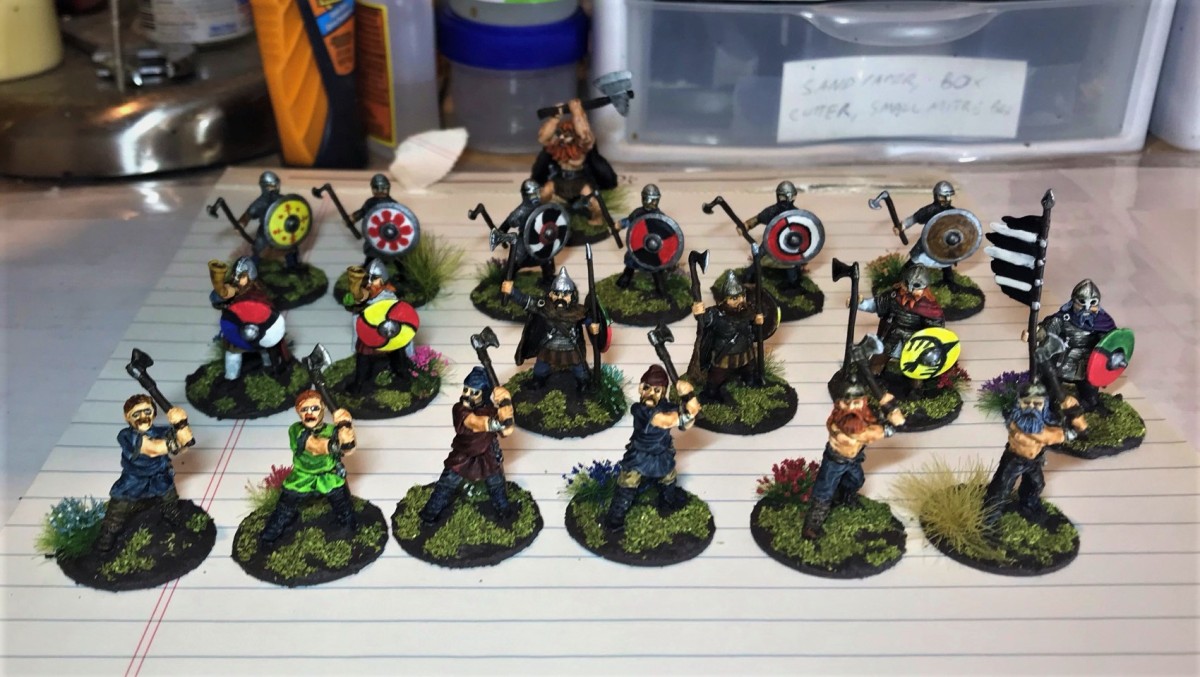
That’s the last of the 19. Here’s a group shot of them finished.
Group Shot. All in the mail to Greg in Maryland now!
I originally wanted to paint them all up as part of Roger’s (over at Rantings Under the Wargame Table) “Mo’vember Challenge”, but between surgery in November, Historicon, Thanksgiving, and my garage +build, it did not happen. Still, check out Roger’s cool roundup – I did get in Cortes…
As you may imagine, making all these figures different took a hell of a lot of paint! The list is at the end, but here’s a shot:
That’s a lot of paint!
I hope that this was enjoyable – and a change of pace was nice for me. Not sure what’s next, probably brigantines, but I do want to post a belated garage+ update by the end of this weekend. Thanks for looking and sharing any thoughts.
PAINTS, INKS, GLAZES, SHADES, WASHES, PIGMENTS, FLOCKING, GLUES AND MORE THAT I USED ON THESE VIKING FIGURES:
Below is a blog post from borderguy190 that some of you may not have seen – I am reblogging it with his permission. I (Mark) met him (Harry) at Historicon and he was a player in my Aztec/Conquistador game. I think he did a nice player review of my game as well as a superb review of the convention. His blog site is here – and I highly recommend you take a look! Now, here is his Historicon post:
One of the biggest joys of my year is getting to attend Fall In!, or as in the case this year, Historicon. Last year was a complete bust for conventions, and here in Michigan, the small local cons got called off for C19 earlier this year. Fall In! was my last hope. At some point […]
This post will cover my wargaming over the extended Veteran’s Day weekend – hopefully you will enjoy the discussion and the photos of the games here. Hell, grab a beer or a wine or whatever! Some cool pics and links to be sure.
I had been planning to attend the last Historicon – but it got moved (I think there was a pandemic or something, I (try) to forget). The event was then rescheduled for November. As Historicon and the other HMGS events have been on my bucket list, I wanted to go as a GM anyways and player too.
Also, as followers of this blog know – I have been deep into building out a series of games for the Spanish Conquest over the last year-and-a-half. This has involved many aspects – writing a rules supplement, painting figures, and building a series of games and battlefields much more for the for Feudal Patrol™ games for the period of the Spanish Conquest in Mesoamerica 500 years ago. I also recently rewrote my supplement Civilizations Collide – which will be a free download (as will a scenario booklet with multiple historic scenarios that I am working on now). So, I was very much looking forward to Historicon 2021.
Therefore, I signed up to run two games – both of which are scenarios on my in-progress booklet. I planned on running both my “Surprise Aztec Raid on the Spanish Outpost” and “Cortes’ Causeway Escape Attempt” games on Thursday night and Saturday morning respectively.
My friend Craig Hogan, myself, and Dave Wood back at USMA – probably Ring Weekend in the Fall of 1983. Craig sadly was killed a few years ago now in a private plan crash.Thanksgiving 1987 in Hagenbach, Rhineland-Pfalz, West Germany, Buck, myself, and my daughter Ellen (who is 34 now). We got together for gaming and the holiday. Buck came up from Vicenza, Italy where he was stationed to my place with a buddy, and we gamed and we had fun.
Through Dave and Buck, I have been lucky to make new friends with others of the H.A.W.K.’s, like Greg Priebe, Chris Palmer, and Duncan Adams (and many more too – like Zeb, Don, Eric and others – please don’t feel left out if I did not mention you). Due to my ongoing garage+ build (of which there are a number of updates that are listed here), I missed BARRAGE in September. So, I was pretty stoked about the opportunity to get together with friends (and make new ones) and push lead around the tabletop.
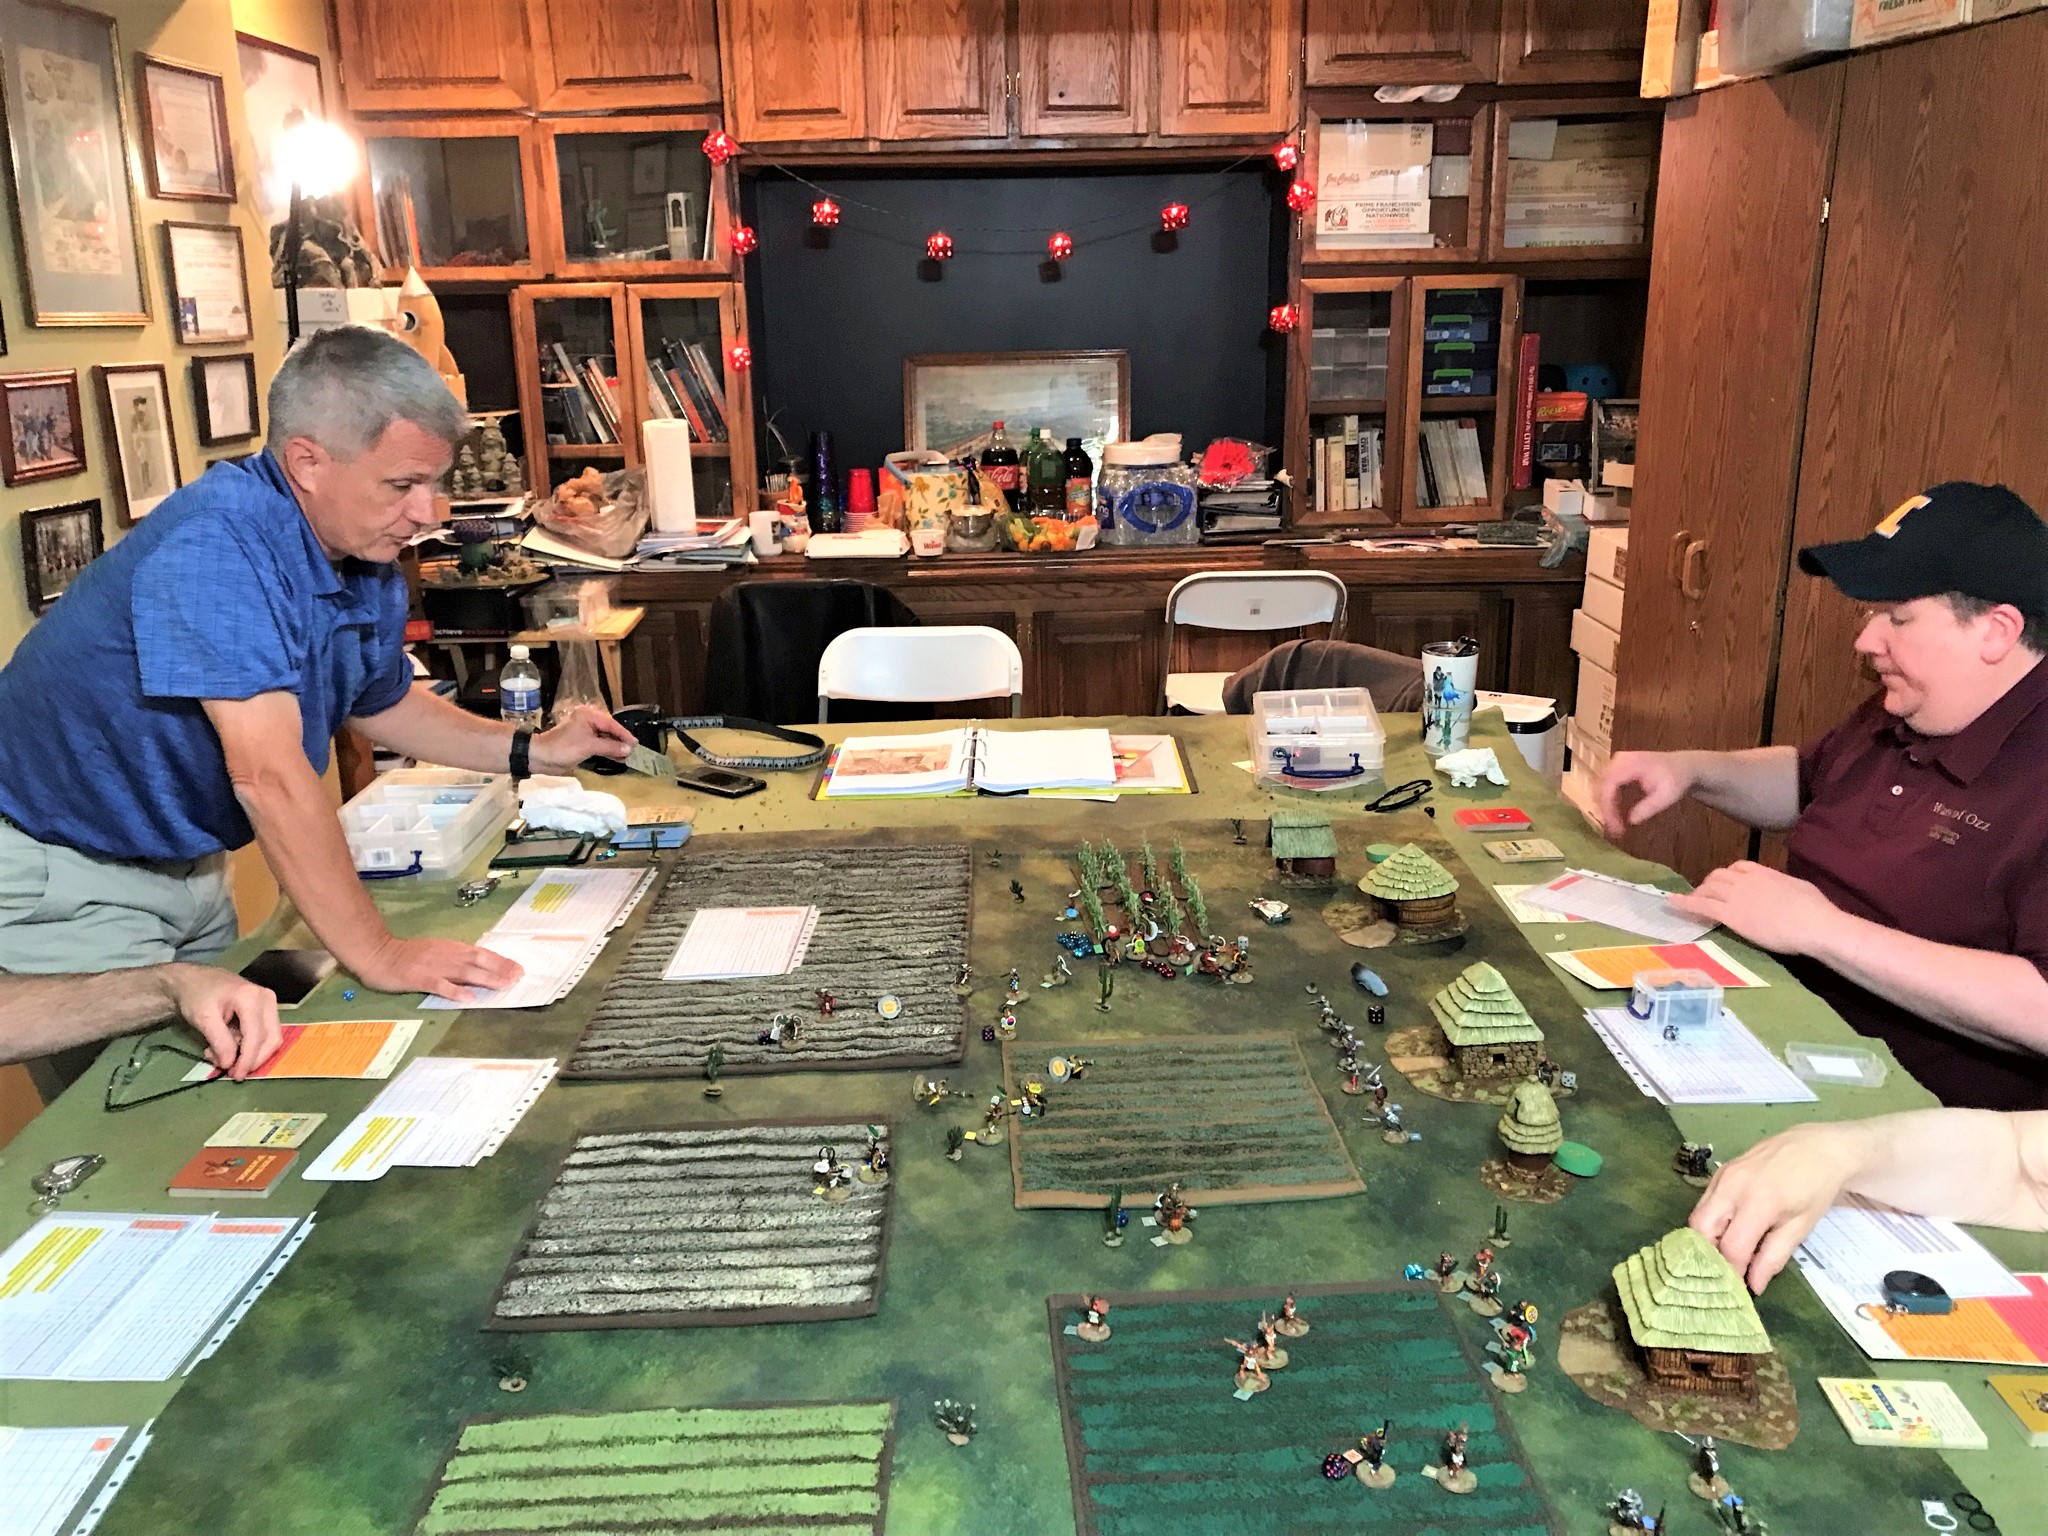
However, as fate would have it, some folks would not be able to attend Historicon due to personal reasons. As seeing and gaming with friends are as much a draw for me as the convention itself, I needed to make a change in plans. We had a Zoom call, and collectively arrived at a new plan. I would drive down from Massachusetts and meet Dave in Maryland for a gaming afternoon on the 11th at my hotel room. Then on Friday morning I would run my “Surprise Aztec Raid on the Spanish Outpost” game in Chris Palmer’s gaming room in Maryland, and then play in an Ozz game afterwards until I needed to leave for Historicon (about 90 minutes away). Friday night I would drive up to Valley Forge, Pennsylvania to set up my “Cortes’ Causeway Escape Attempt” game for Saturday morning play.
So, on a 28-degree morning in Massachusetts, I defrosted my loaded car (12 boxes of terrain, plus 2 mats, a wagon, plus a suitcase) and headed to Maryland – arriving around mid-day – where it was 4o degrees warmer. Ah, New England!
Frosty morning departure.
Axis & Allies
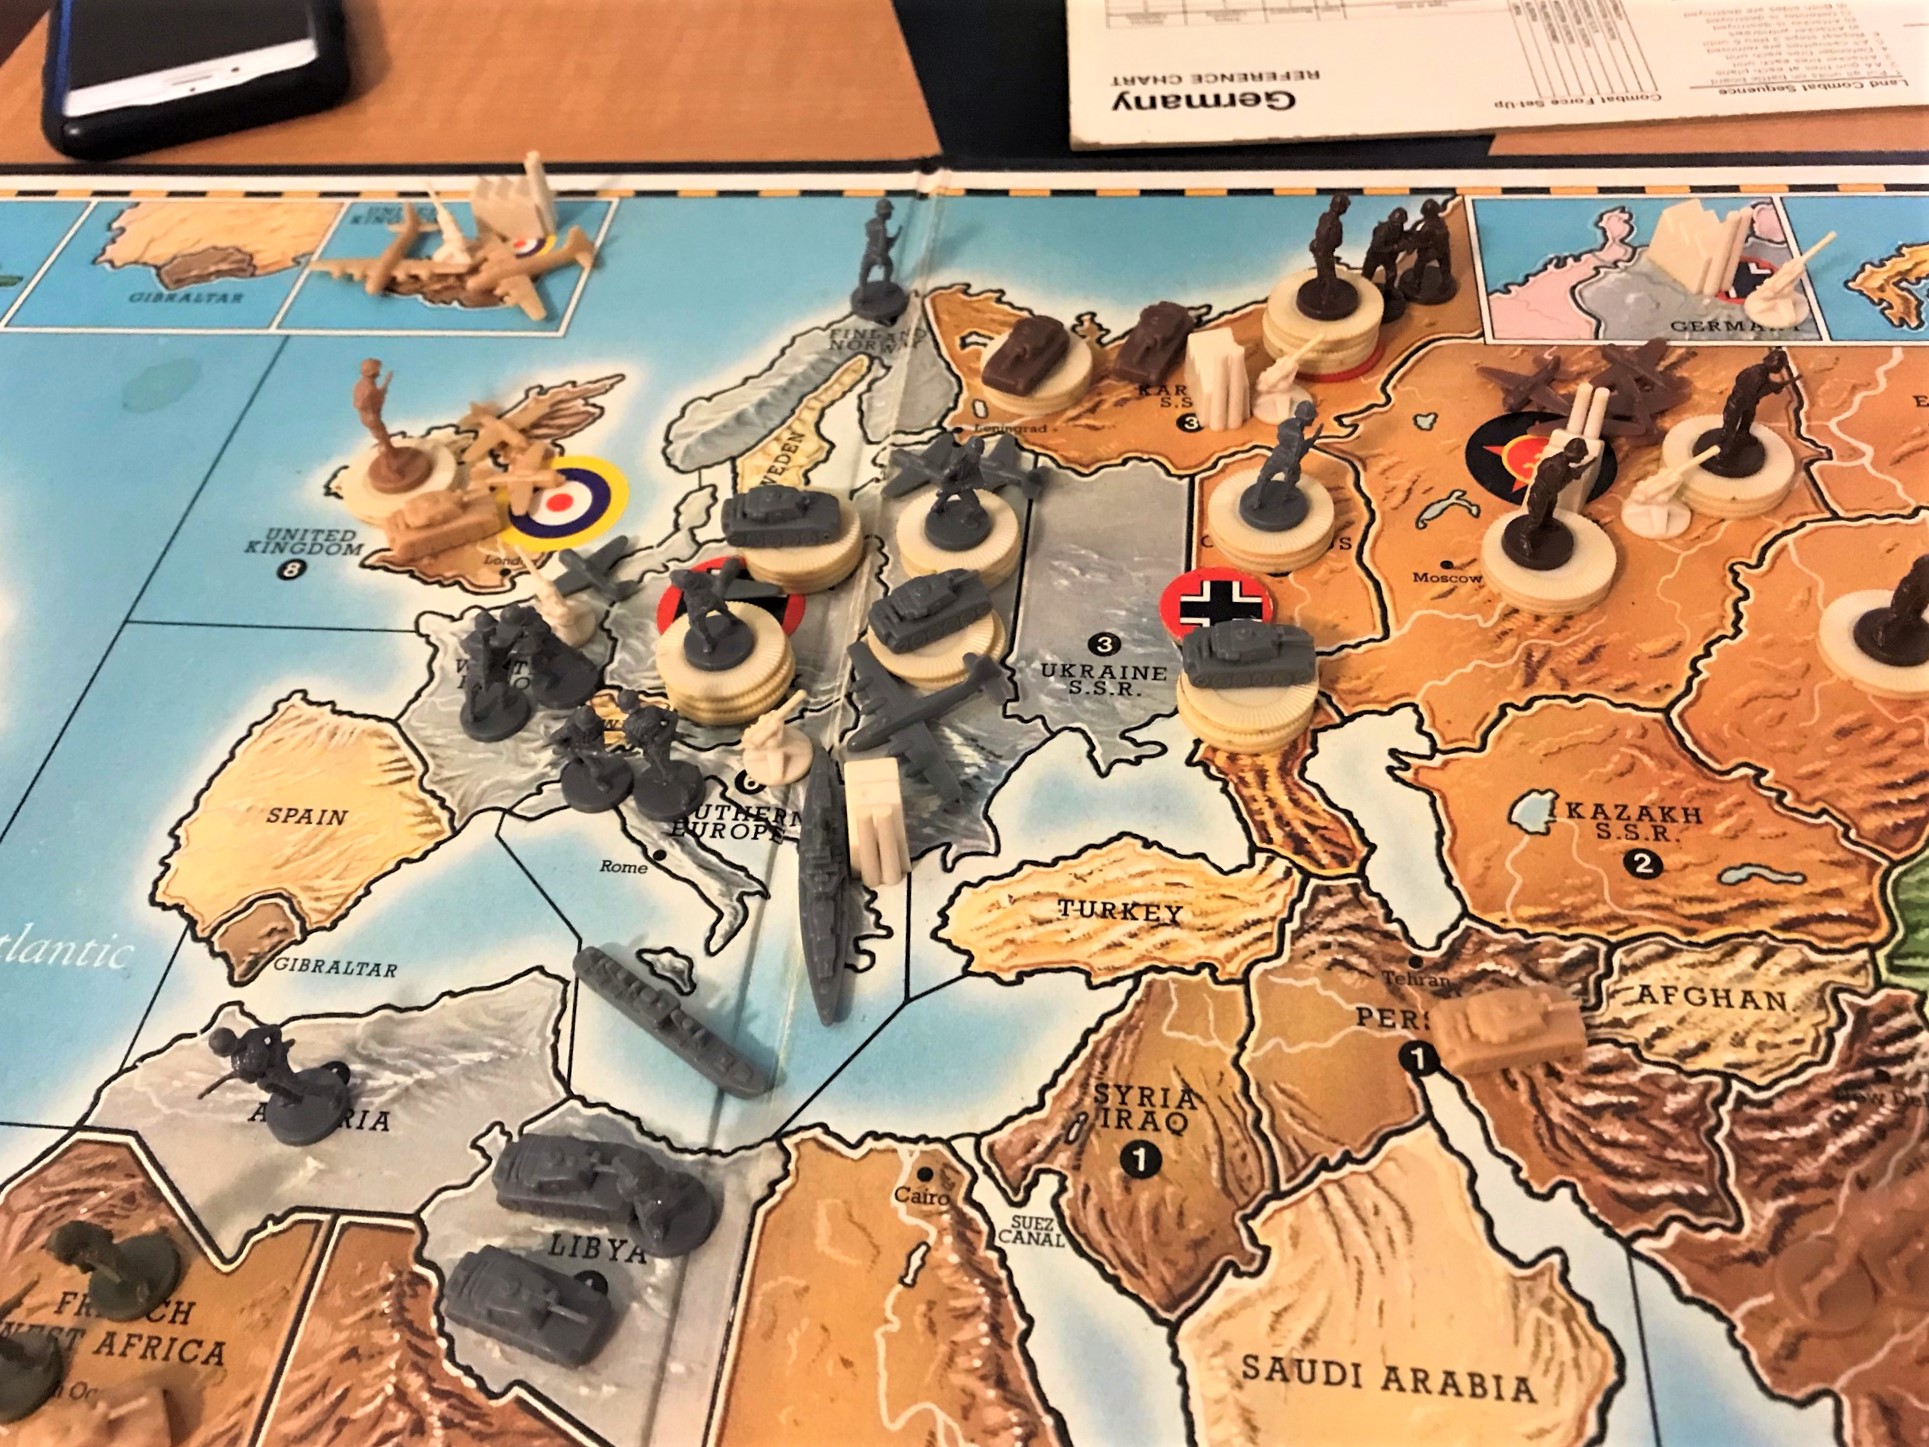
Dave and I have now gamed since 1982 – so coming up on 40 years. We have played Avalon Hill’s “Victory in the Pacific” (as well as other titles) dozens of times over the years. On Thursday, after I arrived, we decided to be different and try Milton Bradley’s “Axis & Allies” this time – a board game with plastic miniatures that we have discussed many times but never played before. I got this game back in the mid-80’s. At one point there was an on-line version but we never got around to playing that either. For this game, we picked sides at random, and Dave played the Axis, and I the Allies. It was Veteran’s Day, and as we are obviously both vets, it was a nice add.
The game went back and forth. A lot. I managed to keep Russia in the game – and built an industrial complex in India for the British. This allowed me to build 3 units per turn there in an attempt to keep the Japanese off the Russian’s back.
After the first turn, I had consolidated a nice position in Mother Russia to try to thwart Dave. And yes, the shirt says what I am impressed with – Dave has run dozens of marathons and many runs up to 50 miles and maybe more in distance.We had a back and forth fight over the Karelia territory that had a factory I did not want to lose. Eventually, I did.
Meanwhile, my Indian gambit attracted a lot of Japanese attention – maybe too much. Dave hammered away at it and while the Japanese were unsuccessful he did attrite my forces and that prevented me from exploiting my force buildup.
Dave made multiple attacks on India supported by carrier-based fighters and land-based bombers. I had sent the American-supported Chinese infantry in to help defend. Meanwhile, Russia fell.
Dave kept hammering away at India, and eventually had his Germans violate Afghan neutrality – hitting India for the decisive blow. Yes, the Germans took India by blitzing panzers through Afghanistan…
I built India up and flew in American air support, but the next turn it fell.
I did desperately roll for Weapon’s Development for both the Americans and the British – with only the British succeeding in getting 3 – Rockets, Super Subs, and Strategic Bombers. My rocket and strategic bomber attacks slowed the German’s production, but it was too late…congrats to Dave!
Christoricon – Surprise Aztec Raid on the Spanish Outpost
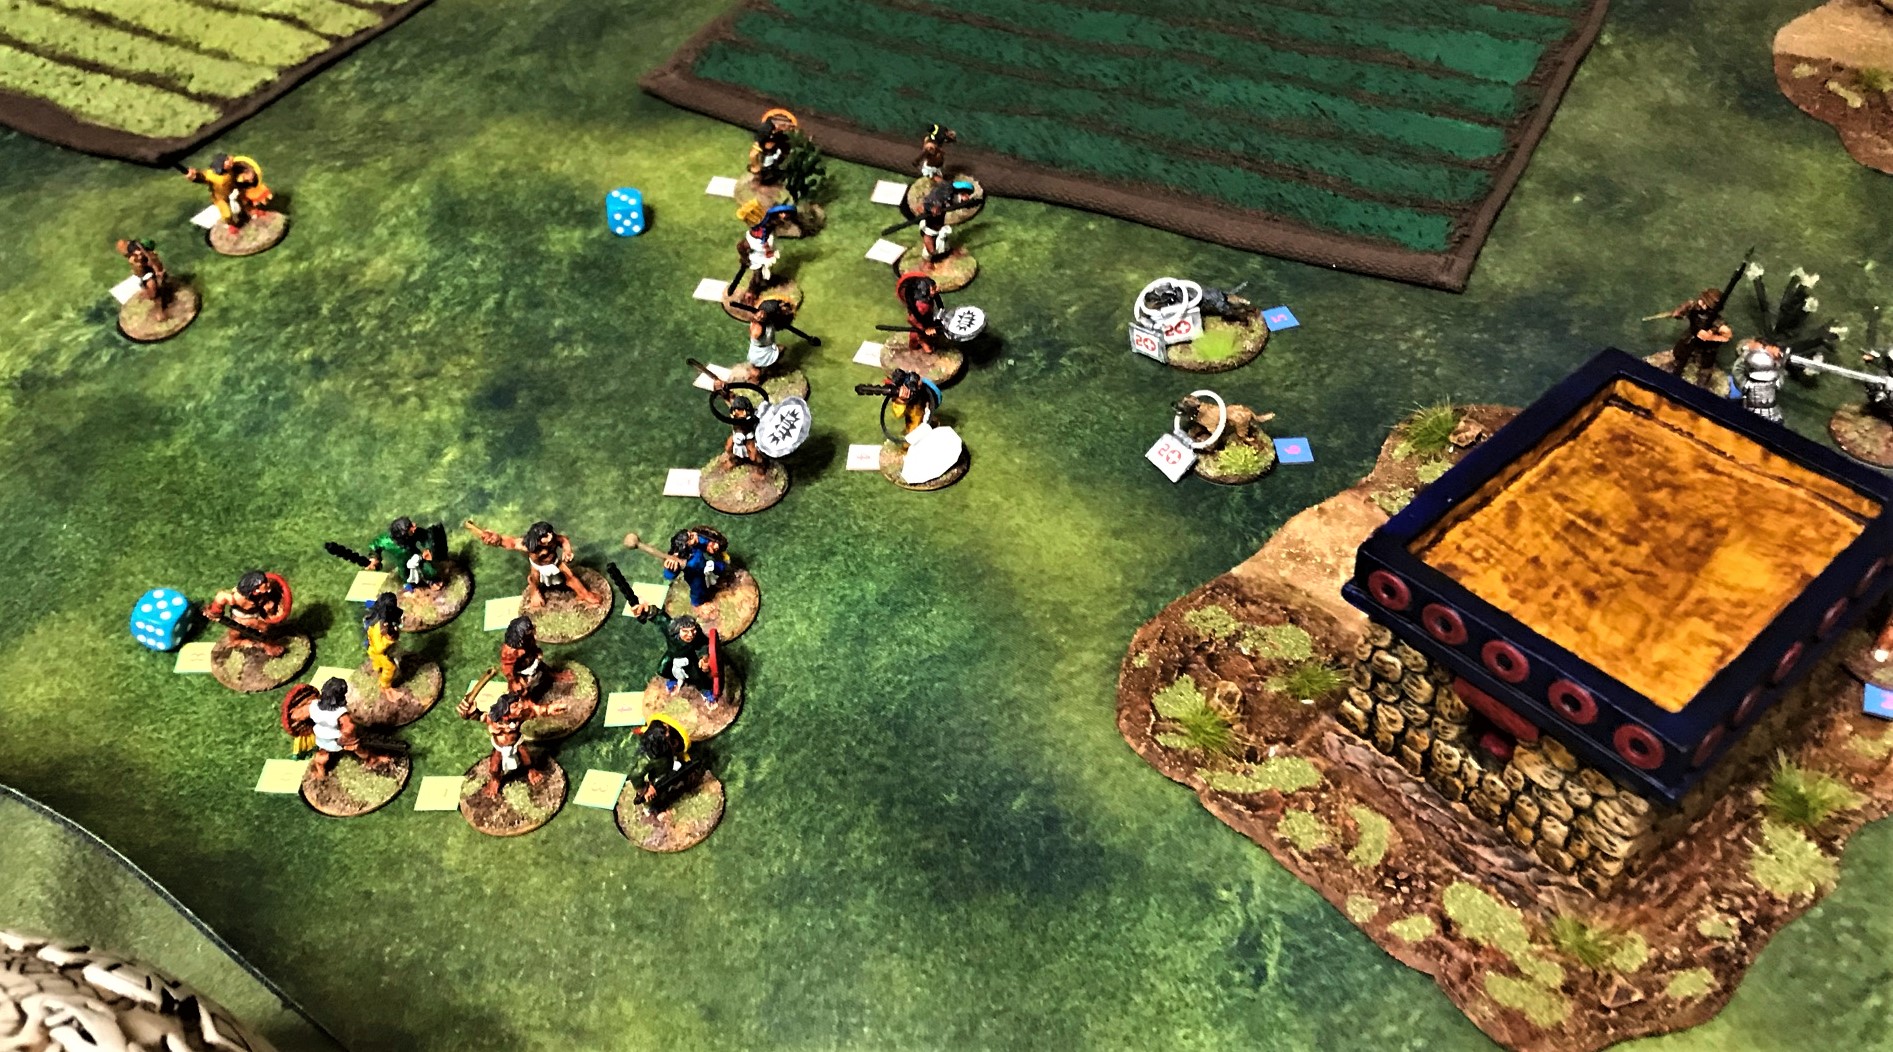
Originally I was supposed to run my one of my games at Historicon on Thursday night – that being a rural one where Aztecs are making a surprise raid on a Tlaxcalan village (acting as a Conquistador supply depot) – only to see that there were indeed some Spanish there. Instead, we went to Chris Palmer’s house and I ran the game on early Friday morning. We joked and called it “Christoricon”. I hosted and there were 5 players – Buck, Duncan Adams, and Dave for the Aztecs, and Chris and Greg Priebe for the Spanish/Tlaxcalans. The defending Spanish/Tlaxcalans had one Warband of three Elements – 23 figures worth 41 points. The attacking Aztecs had two Warbands of 3 Elements each – 53 figures worth 78.25 points. Buck has already written a great post about this game and the others that day on his blog here – and his write-up and pics are great. I took some photos that you see below, but for me, simultaneously being a GM and a photographer is not easy – so I do recommend you take a look. Meanwhile, here are my pics.
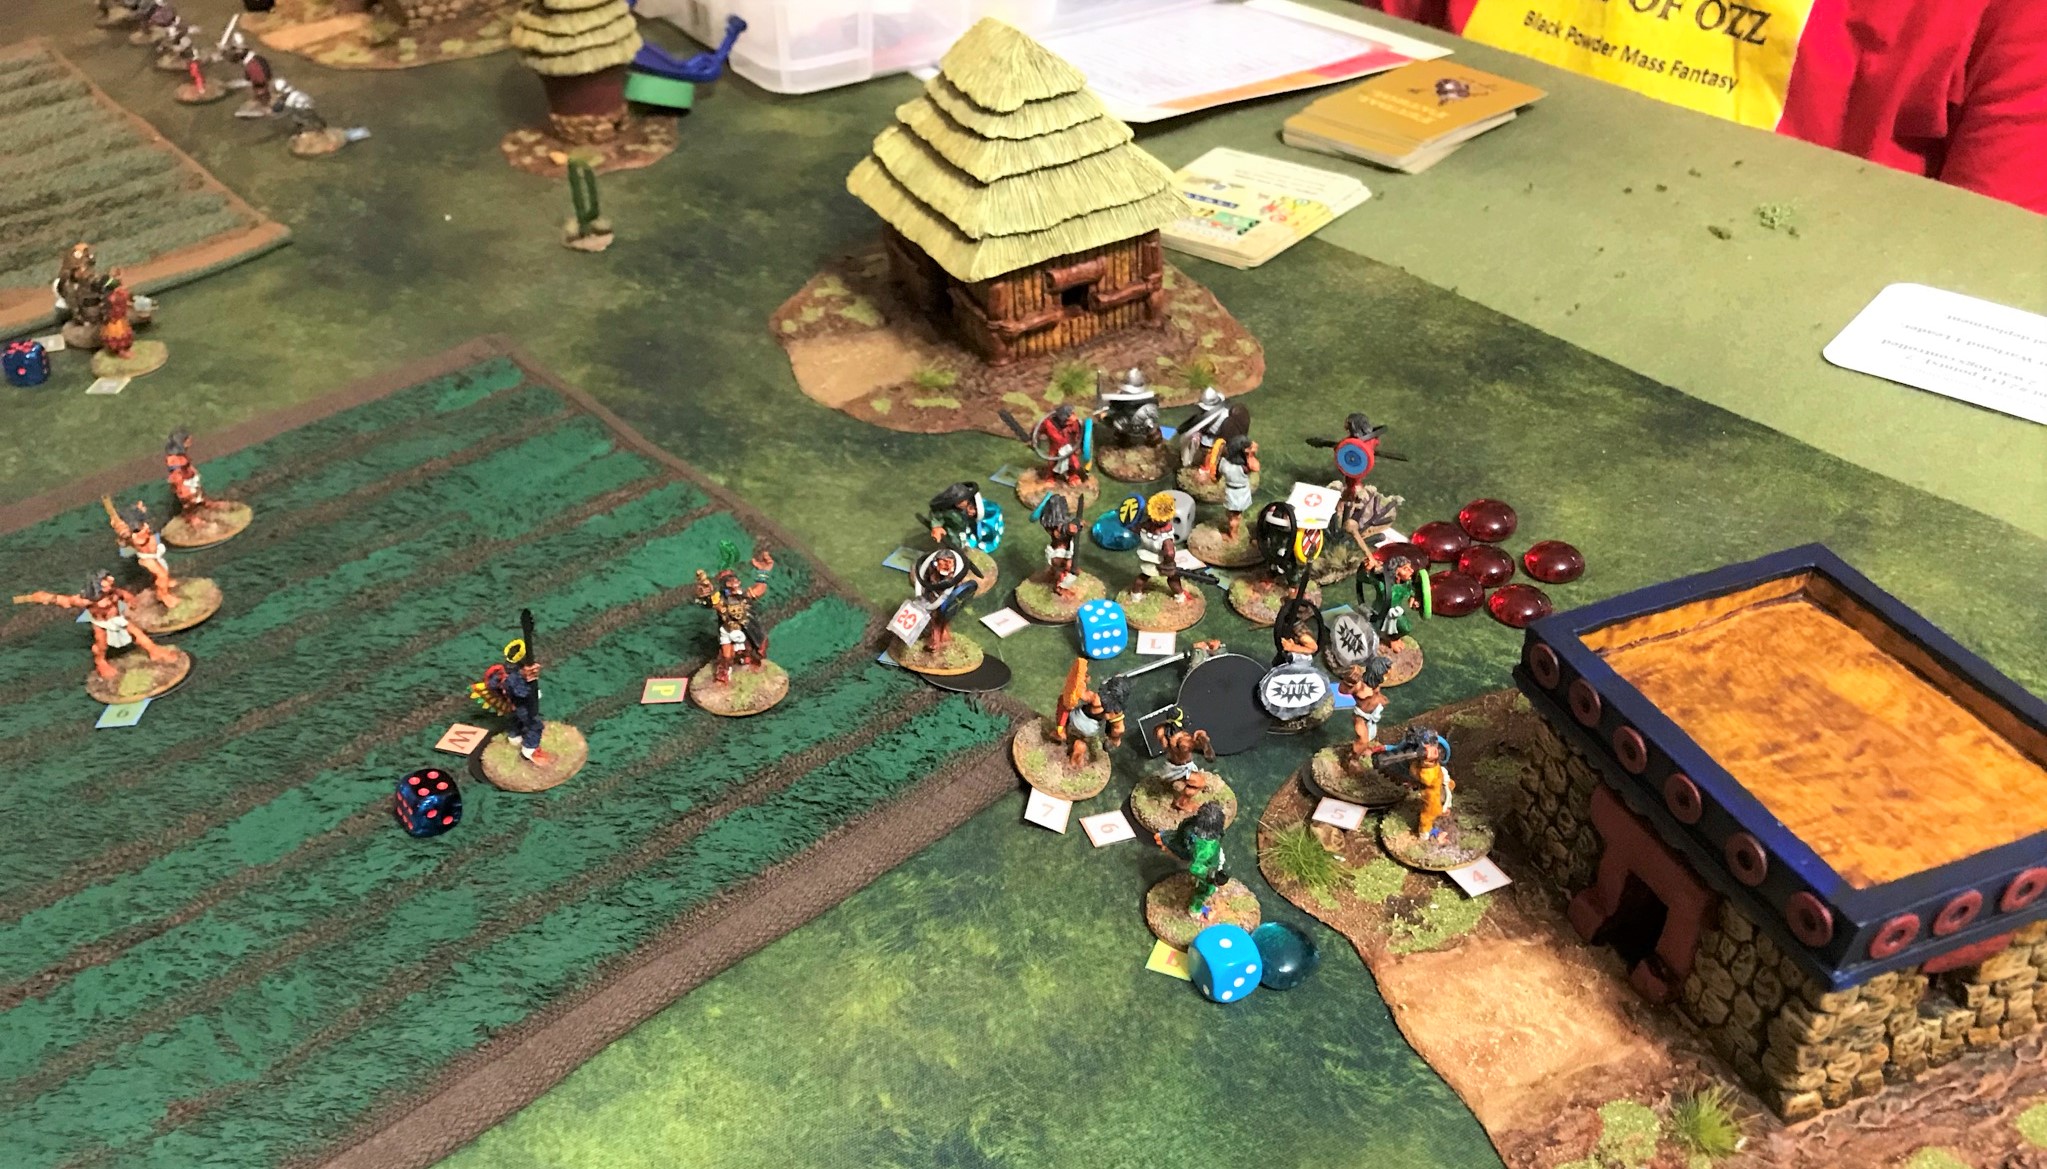
The game is ready to begin. Chris and Greg elected to place the Conquistador Element armed with arquebuses further away from their leader in their secret deployment in lieu of their Element of Sword & Buckler men. This meant that they were “pinned” with their black powder weapons only activating at best on half of the turns. They could have “unpinned” but as luck would have it the dice did not let that happen. Note also that Franco the unlucky Conquistador made the trip!
Chris chose to send out his war dogs towards Dave’s Aztecs as a screen, and they promptly took atlatl damage. Dave, Duncan and Buck moved up quickly, while Greg took up a position in the maize field with his dangerous Tlaxcalan bowmen.
Dave moves up his “twinned” Elements of veteran/novice warriors towards a wounded war dog.
The Spanish then had their Catholic Priest take possession of the gold (possession of the gold was one of the game objectives) and drag it to a more secure location while they contested the Noble House (another objective) – (insert joke here).
Battle starting at the Noble House – the war dogs are already going down here. Their priest has already dragged away the gold to a safer location.
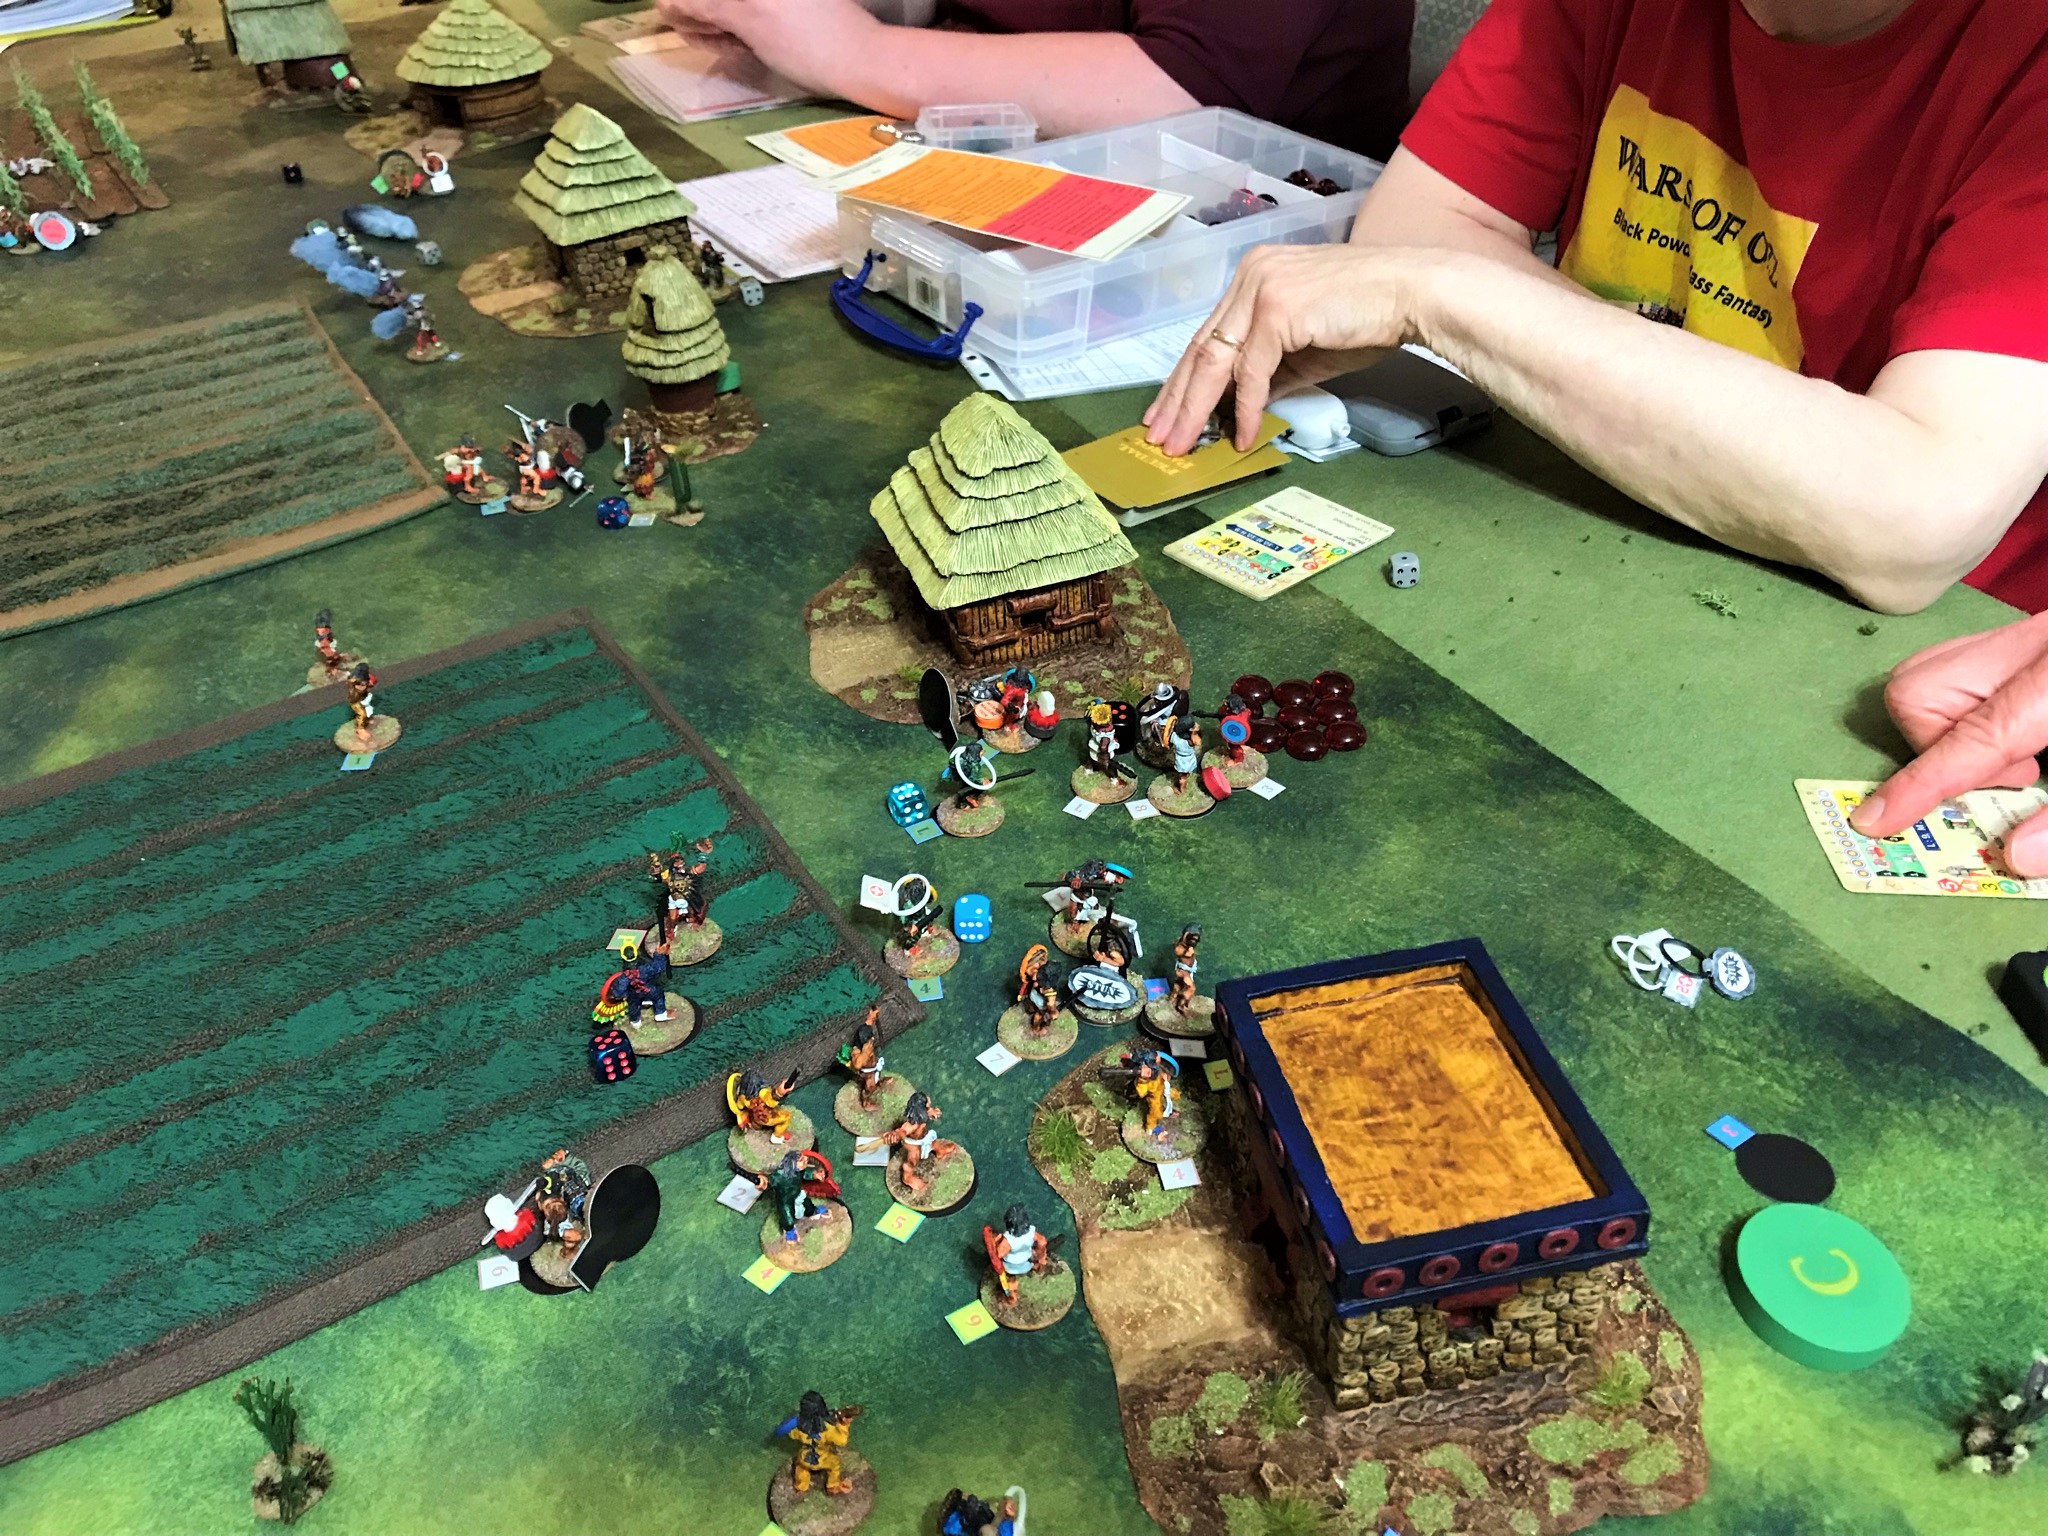
Buck’s advancing Elite Cuahchicque (“Shorn Ones”) took the full volley of arquebus fire from the less-activating pinned Spanish. Despite these Elite Aztecs taking a lot of damage and having a ton of Morale checks to overcome, Buck was able to rally his troops successfully against the odds twice. Meanwhile Duncan moved his Jaguar and Eagle Warriors against Greg’s Tlaxcalan bowmen in the cornfield – hoping to best them in melee.
Dave and Buck confer while surveying Duncan’s advance – and their chances at victory – with concern. This shows the second volley that Buck’s Elite Shorn Ones took and the blue beads are Morale checks he needed to pass. He did. Twice.
Slowly, the tide of battle started turning in the Aztecs’ favor. Dave’s attack on the Aztec right was making headway, and they were gaining control of the objectives.
Priest still dragging the gold away here.Lots of carnage on the tabletop.
Eventually, the Spanish and Tlaxcalans were overwhelmed.
The final break through.
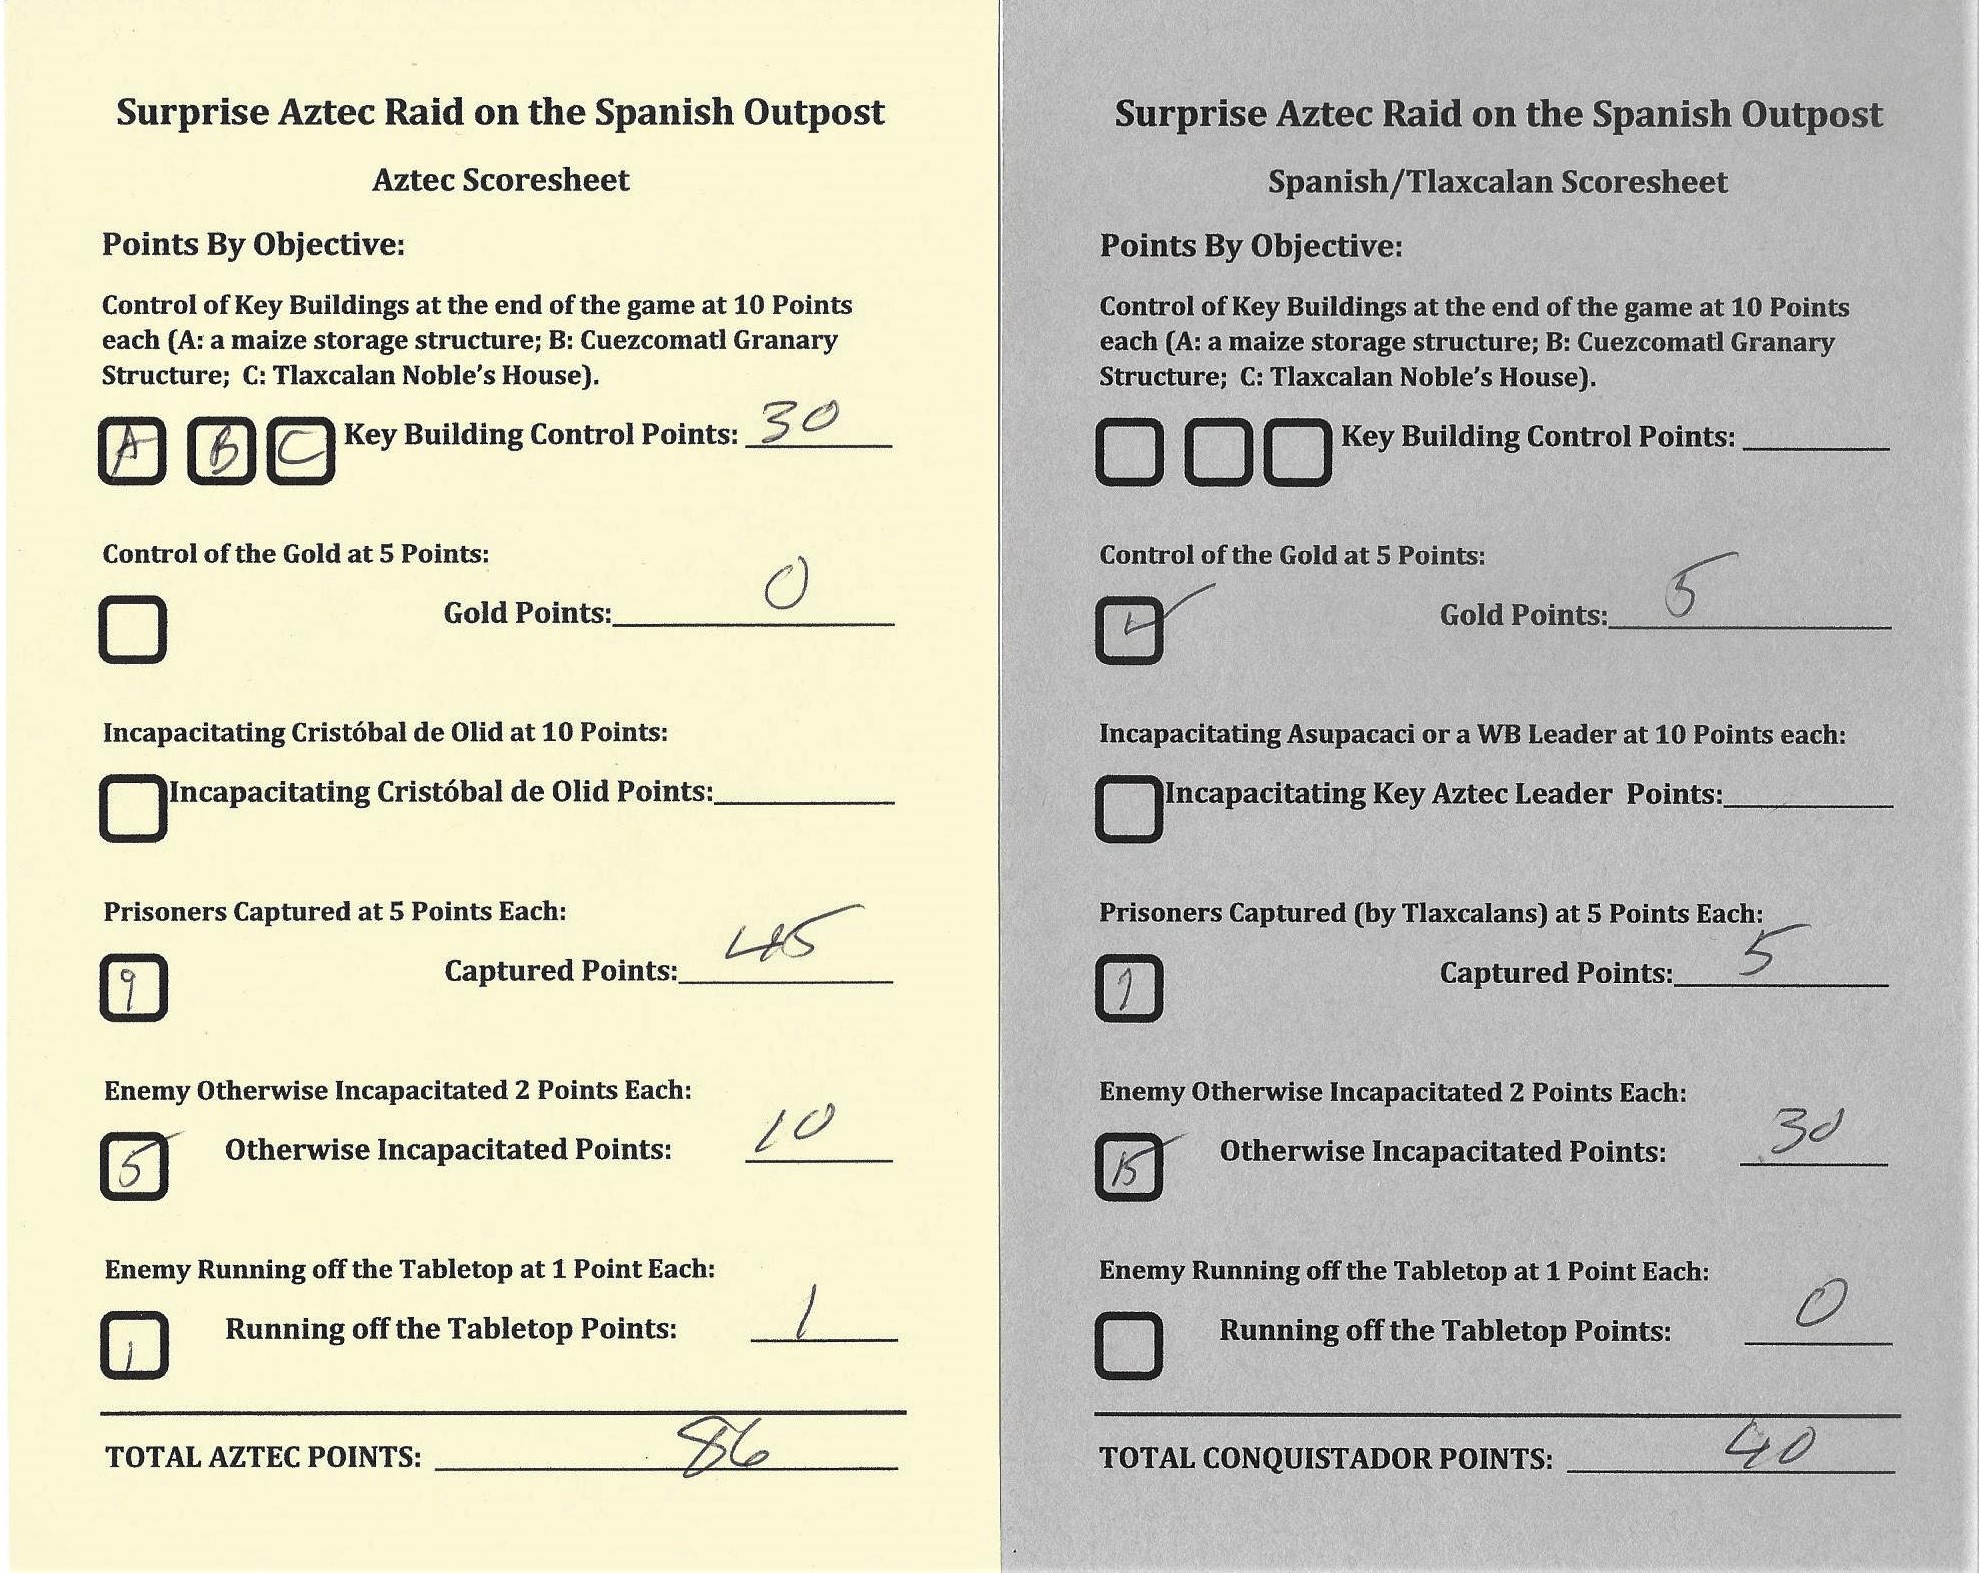
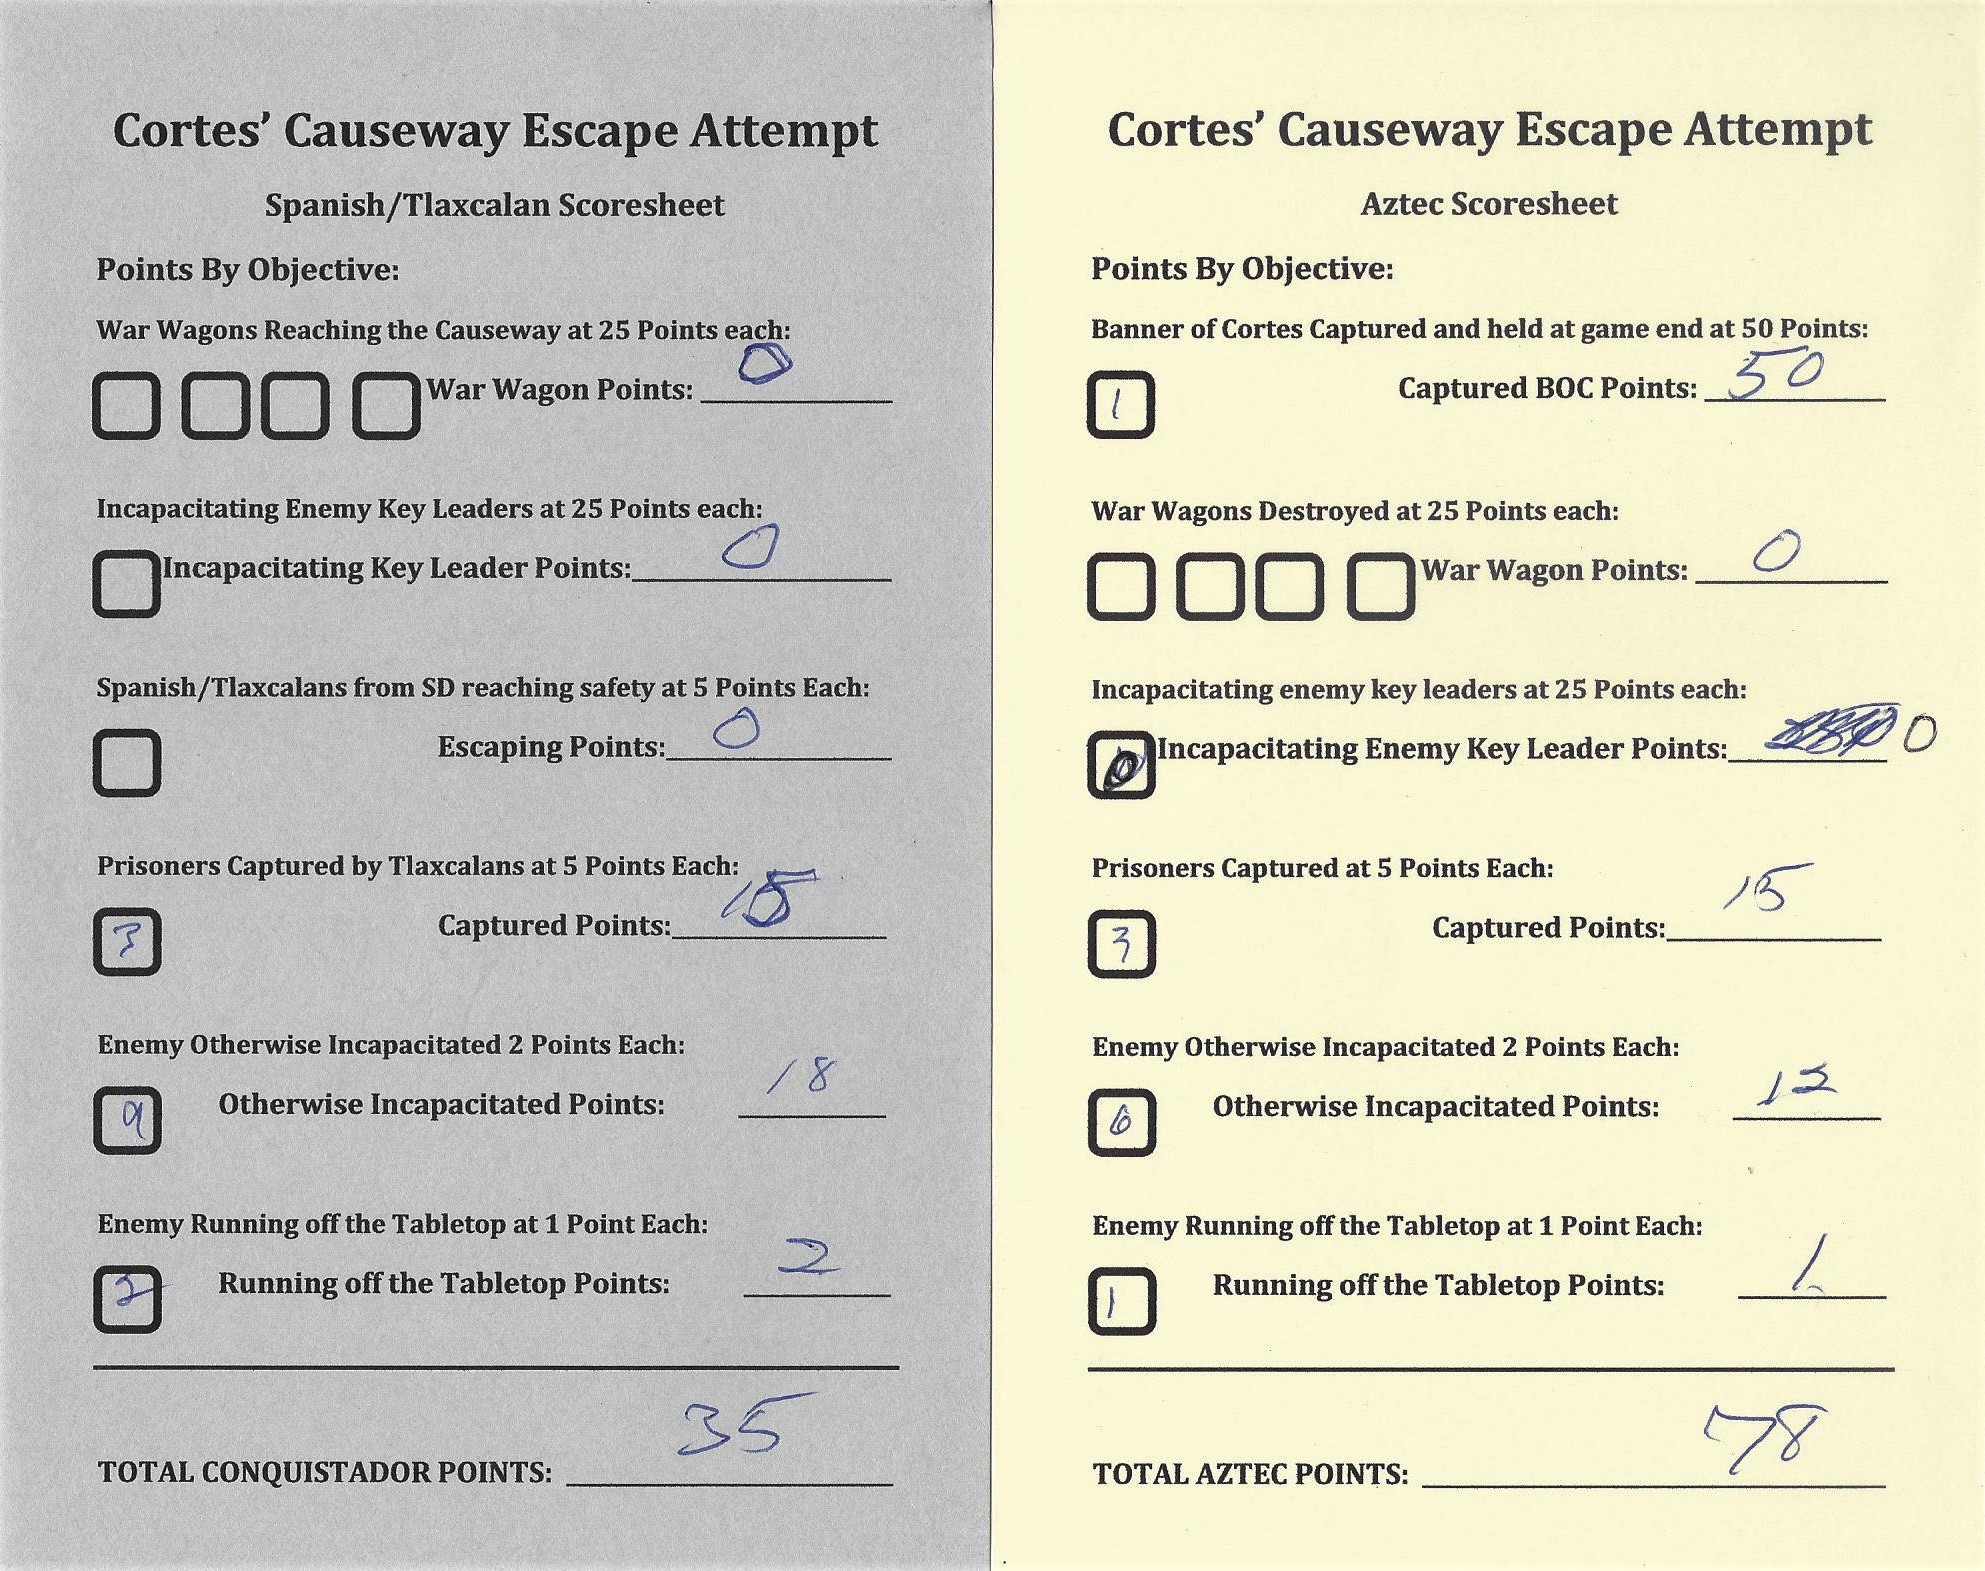
The game ended as a resounding Aztec win, as they had control of three objectives, as well as dragging off 9 pour souls for sacrifice, killing 2 more, and making one run away. The Spanish had only the gold, but did dispatch 15 Aztecs and capture one more. The final score was 86-40 as you see below. I think the players had a good game. Congrats to Dave, Buck, and Duncan!
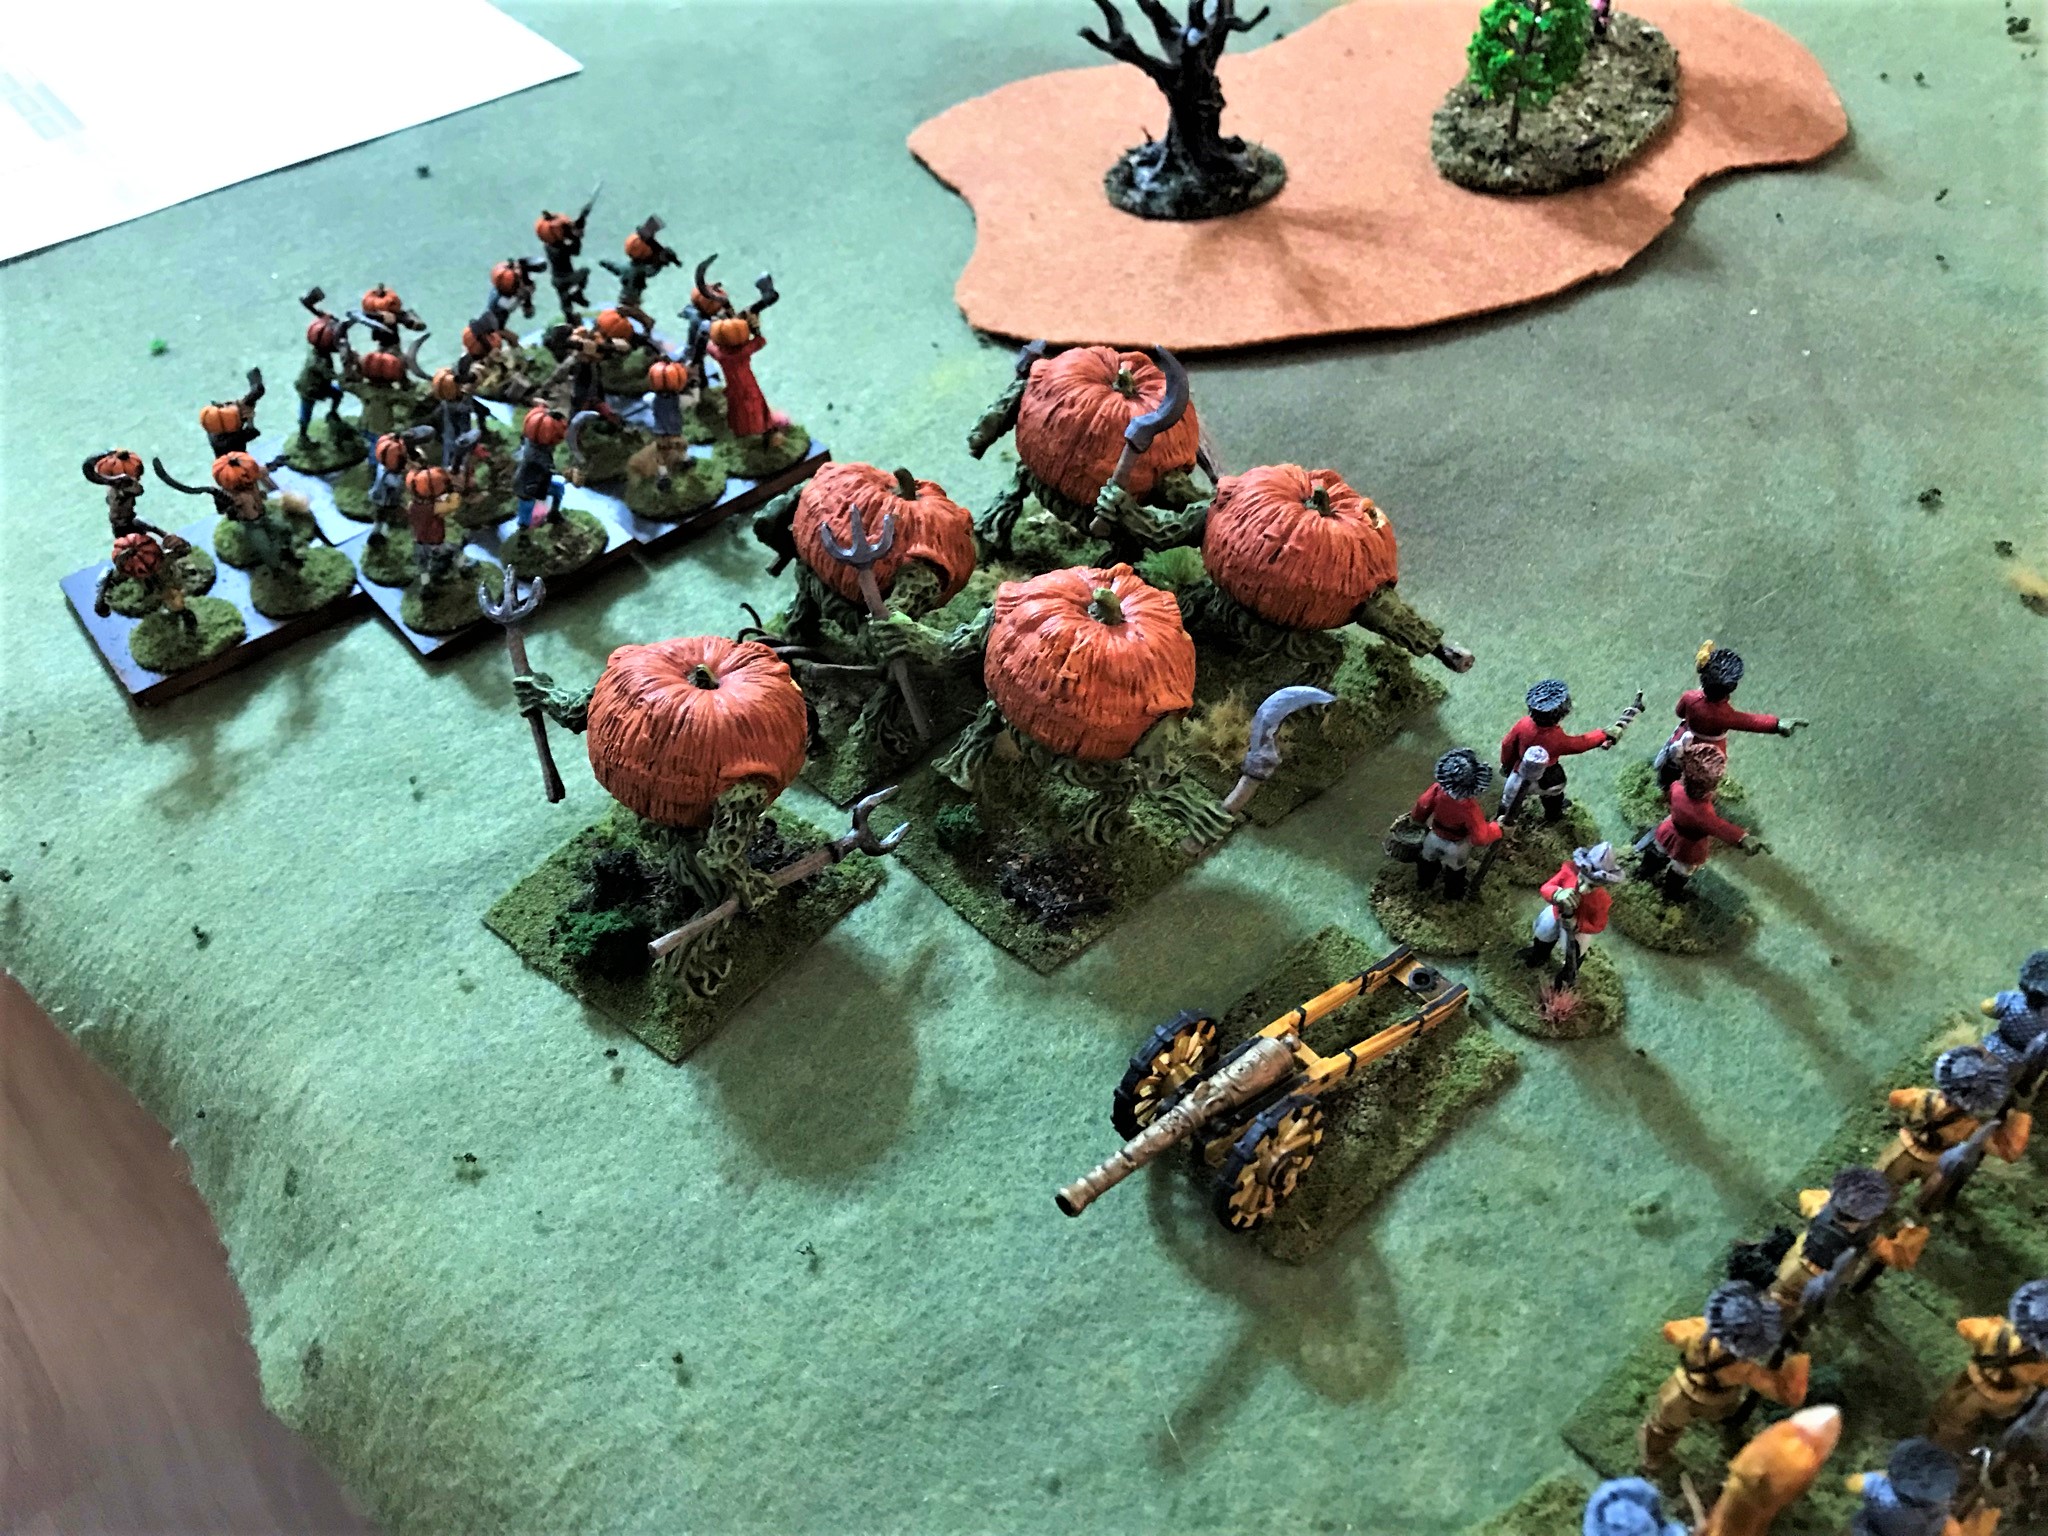
Greater PumpkinheadsI had a Winkie medium cannon……and 2 Winkie RegimentsMy Winkie and Pumpkinhead troops ready to contest control of the Yellow Brick Road.
I love the Ozz figures!
I then drove to Historicon, and set up for Saturday morning’s game.
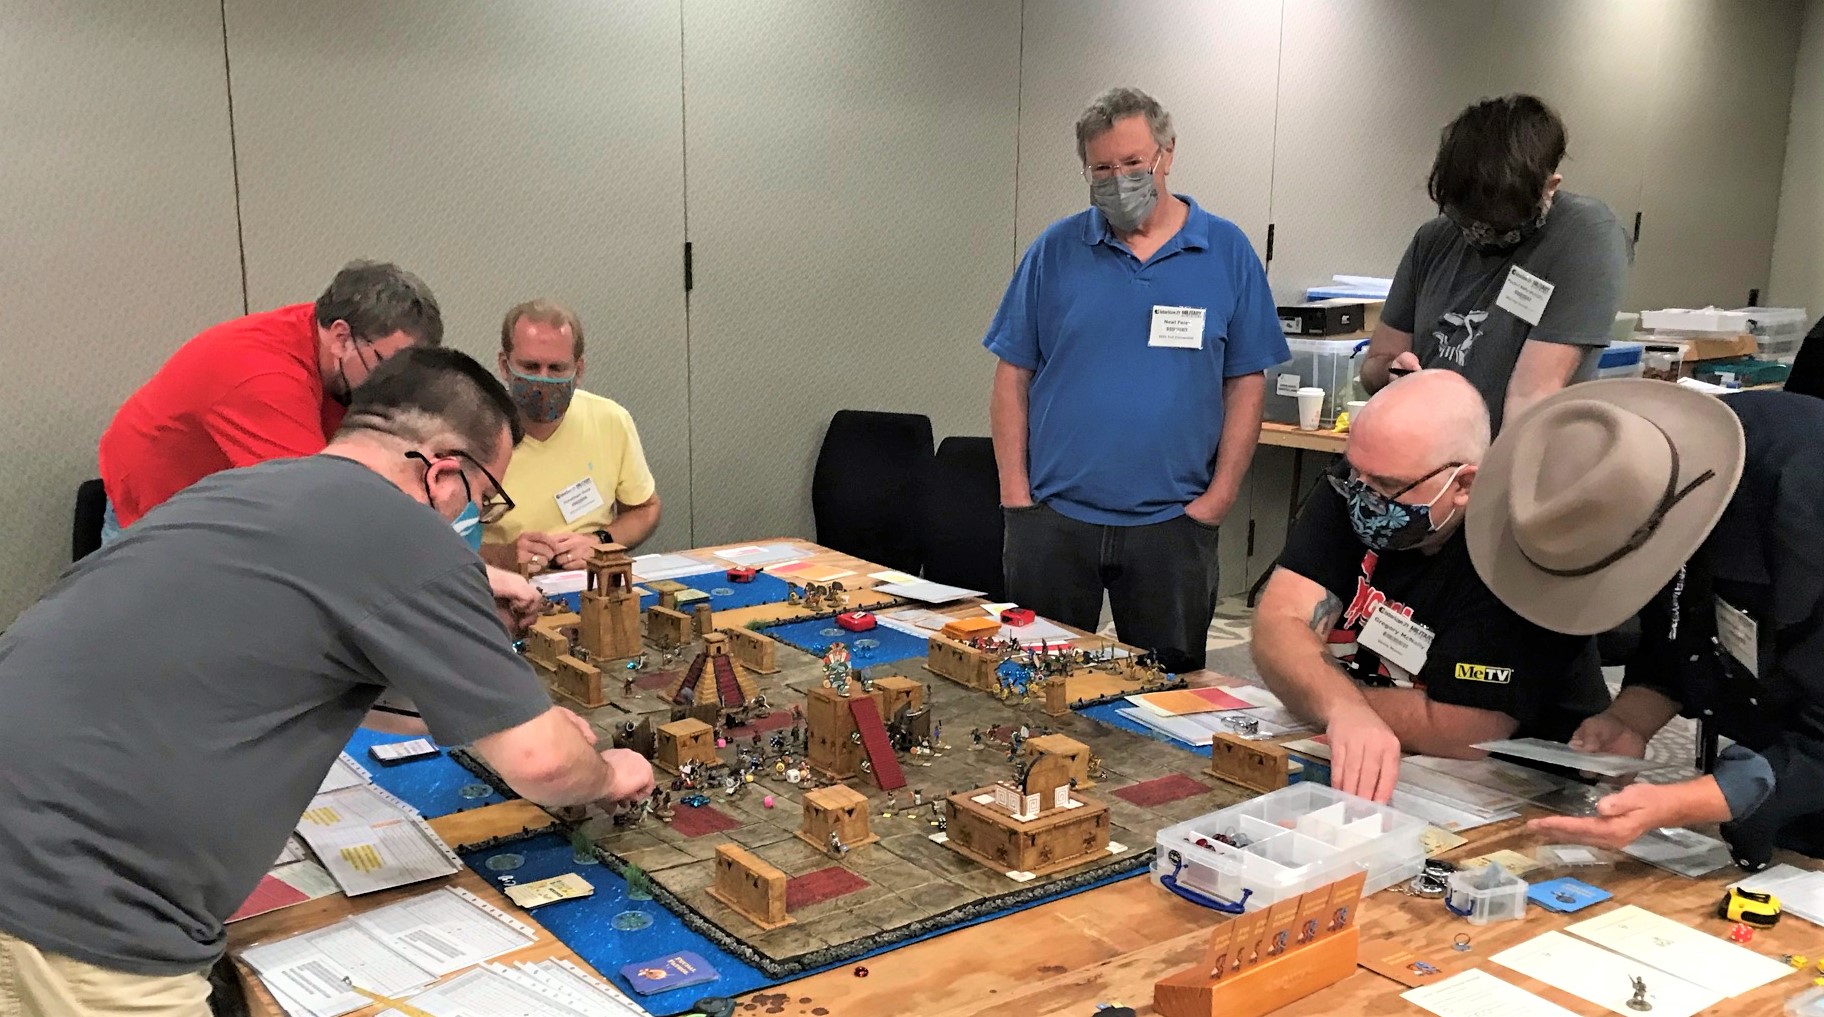
Historicon – Cortes’ Causeway Escape Attempt
The drive up to Valley Forge Resort Casino was uneventful – though finding the H.A.W.K.’s room was a challenge. The gaming was not located in one location at the resort. Unfortunately, it was also a Friday night at a casino and all the close parking was gone. Luckily, I have a little collapsible wagon and was able to get into the room with my stuff in a few trips and set up the terrain and the troops for Saturday morning’s game, Cortes’ Causeway Escape Attempt.
It’s a BIG battle. The Spanish/Tlaxcalans have three Warbands of three Elements (2 Spanish, 1 Tlaxcalan) plus support – 77 figures (including the 4 war wagons) worth 161.75 points. The Aztecs have five Warbands of 2-3 Elements each – 109 figures worth 154.25 points. 186 figures in total. This battle is Cortes’ second attempt to escape. He would do a second on the following day, and three days later a third – La Noche Triste. Originally, on the Historicon listings, the game was supposed to be La Noche Triste – which again happened three days later (and of which I will have that scenario written soon) – but I needed war canoes for that one. Those I don’t have yet, and will be mentioned here in a bit.
Back to the game set up. As I was setting up, I had a number of people come by to remark positively on the game visuals – terrain and figures. They had seen my posts on different forums (or fora both are ok!). To all of you, thank you so much for your kind words and interest.
Besides all of the cityscape – and it’s a lot I know – but with everything predeployed I just needed to put players on their troops and let them know what they needed to do on their part of the battlefield.
As I mentioned before, I had previously needed to cancel my Thursday game – and I got a comment from one of our blog community – Harry (aka borderguy190)- that he was disappointed as he had signed up for the game. I apologized, as I wish I could have ran that too at Historicon as well. But the good news was that he would be playing in this game!
He joined 7 other players. They seemed to grasp the concepts of the game quickly – and I did get some help from Greg Priebe and Buck Surdu in the early turns before they had to help run an Ozz game.
The game set up.Troops deployed and dashboards out. My undermagnets and game markers really have proven their worth – especially in big melee scrums.
In this game, the Conquistadores are surrounded, and need to fight their way out from the Palace of Axayacatl where they were holed up with their hostage/puppet Montezuma II. They have war wagons, and while these are helpful in providing cover against missile weapons, they are also rickety and slow – and prone to breaking. In fact, all of them broke during the game and were unable to move afterwards. The Aztecs are trying to get to the Conquistadores and avenge the massacre that the Spanish perpetrated at the Festival of Toxcatl. Their Tlaxcalan allies are mostly on the other end of the tabletop and trying to break into Tenochtitlan to help their Spanish allies escape.
There were ups and downs for both sides all over the table. The Conquistadores breakout went slowly, but they did take out a lot of Aztecs. On the other end where the Tlaxcalans were trying to help, the two sides traded missile fire and got into a scrum but were unable to change the status quo.
Lots of action! Harry (in red) ponders his next move.Aztecs swarm the war wagons and wound the crossbowmen and arquebusiers inside.Thinks get more contested in Tenochtitlan.
One of the aspects of the game is the importance of The Banner of Cortes. It provides inspiration to the Conquistadores and helps them to reduce negative Morale effects. However, I also made its capture (as well as incapacitating Cortes and dragging him off for sacrifice) game objectives. The Aztecs took some heavy losses BUT were able to take out the bannerman and seize the banner. This lead to the Spanish having to try to satisfy Honor and retake the banner. However, this did not happen before the game’s end. As it was worth 50 points (see below), it was decisive.
The Banner of Cortes is taken!Aztecs won 78-35. The 50 points for the capture of The Banner of Cortes made all the difference!
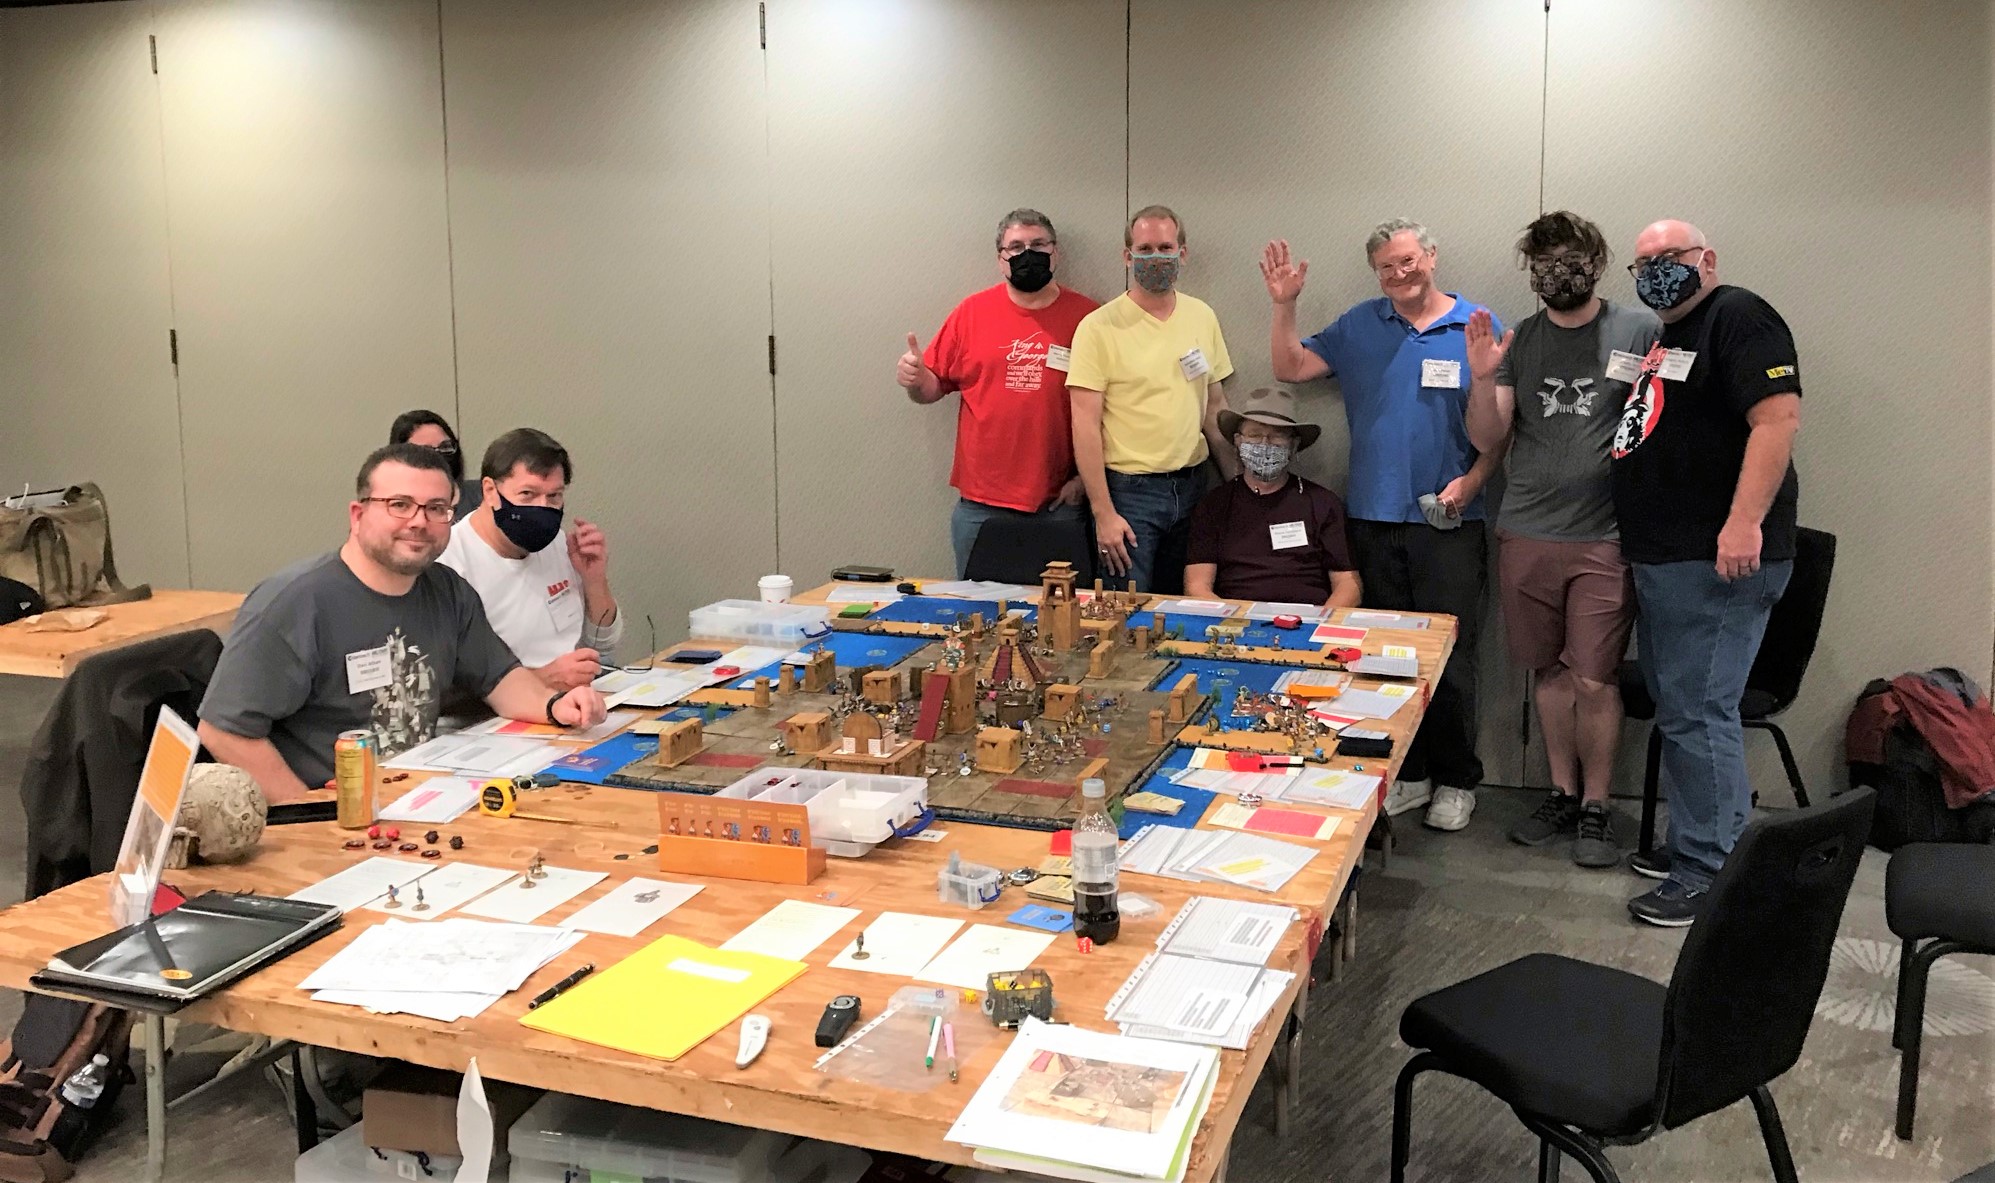
Thanks so much to all who played! I did not win any awards for the game – though many said I should have. Anyways, the best reward is happy gamers afterwards – and I got that in abundance!!
The gamers! Very cool group – thanks to all!
After the game, I got a lot of positive feedback, and learned of some areas to help make the play easier. Those suggestions have already have already been acted upon when I got home (mainly on the dashboards such as linking the undermagnet colors to the dashboards).
After the game, I then went with Greg and Buck to the vendors and the Flea Market. It was nice to go to the Badger Games booth and actually be remembered! Also, I was looking for canoes to use as war canoes, but only found one from Firelock Games that was $20. That is way too expensive when you need as many as do. I also found one in the Flea Market – a balsa wood scratch-built one from an estate sale- for $3. I am going to use both for gaming and as ideas on how to make my own. Of importance, Greg is a big lover of his 3D printer – and in exchange for me painting up some Viking figures for him, he will make me a good number of canoes! Win-win! So, my next job will be to paint those up.
I look forward to returning to the gaming and convention scene as a GM and a gamer. I hope you found this interesting – thanks for looking.
For all of my previous posts on games, units, and other projects for my 16th Century Spanish Conquest supplement for Feudal Patrol™ – “Civilizations Collide” – please see this page.
As I wrote back then in March (quoting myself) – and it’s still true:
…I want to emphasize that I did not need to do any of these projects to play Feudal Patrol™. Period. I did because they suited my personal needs and – well – I get thoughts of stuff in my head that need realization.
Buck’s Feudal Patrol rules have more than adequate tools and game aids. They are fantastic. My goals here were for myself so that I can make my games easier for me mainly.
Now, as time has gone on I have realized that I wanted a few more things to ease play for me as a GM – specifically to adapt to the period. I am sharing those here and my processes as they may prove useful for some, and just interesting for others.
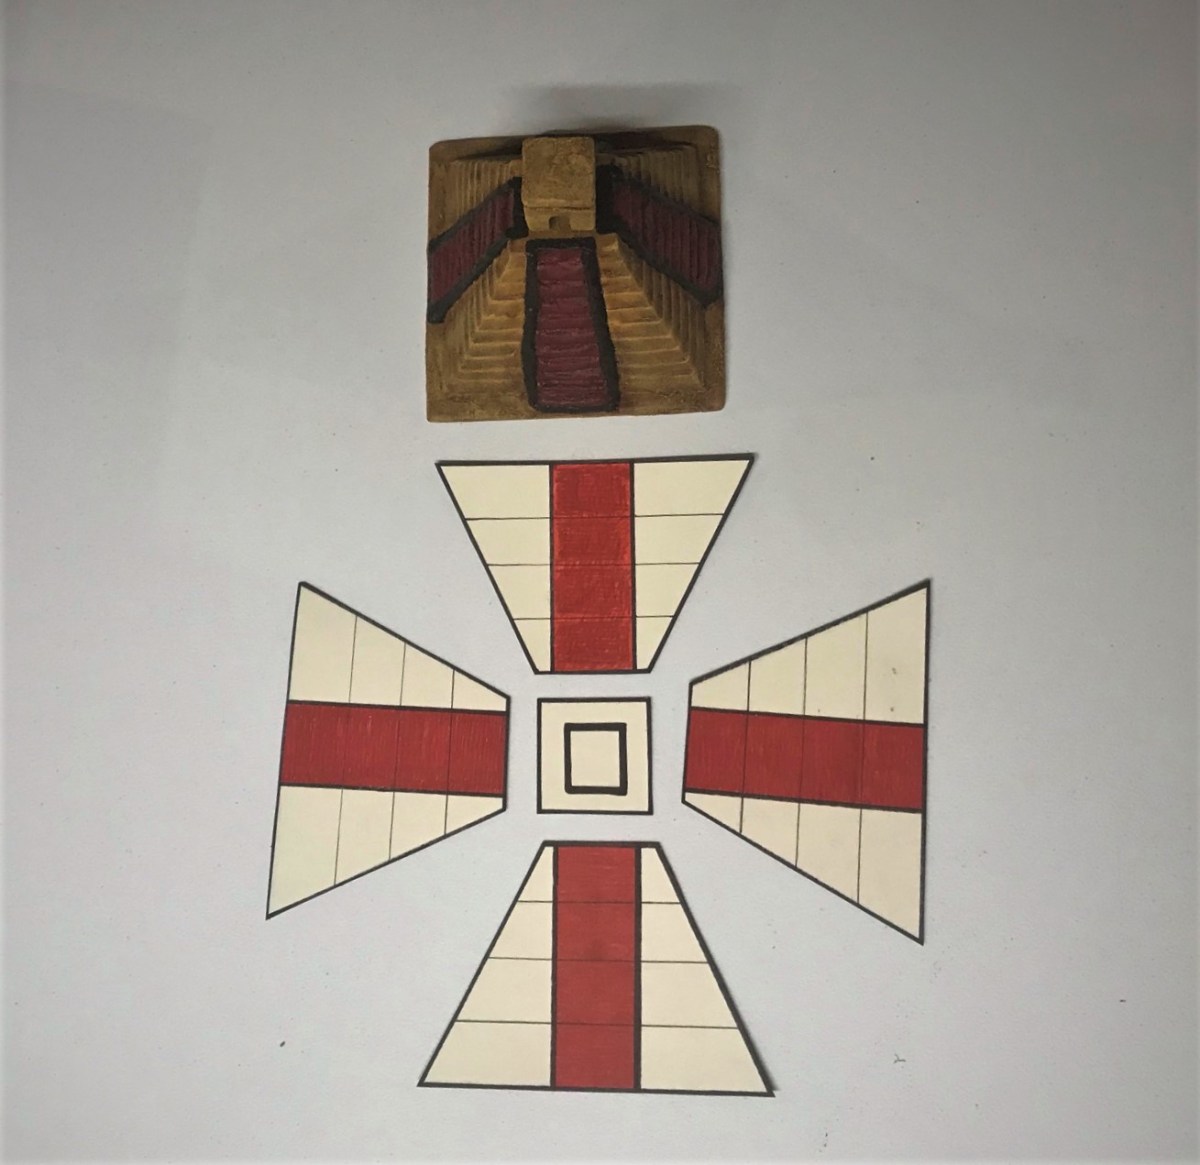
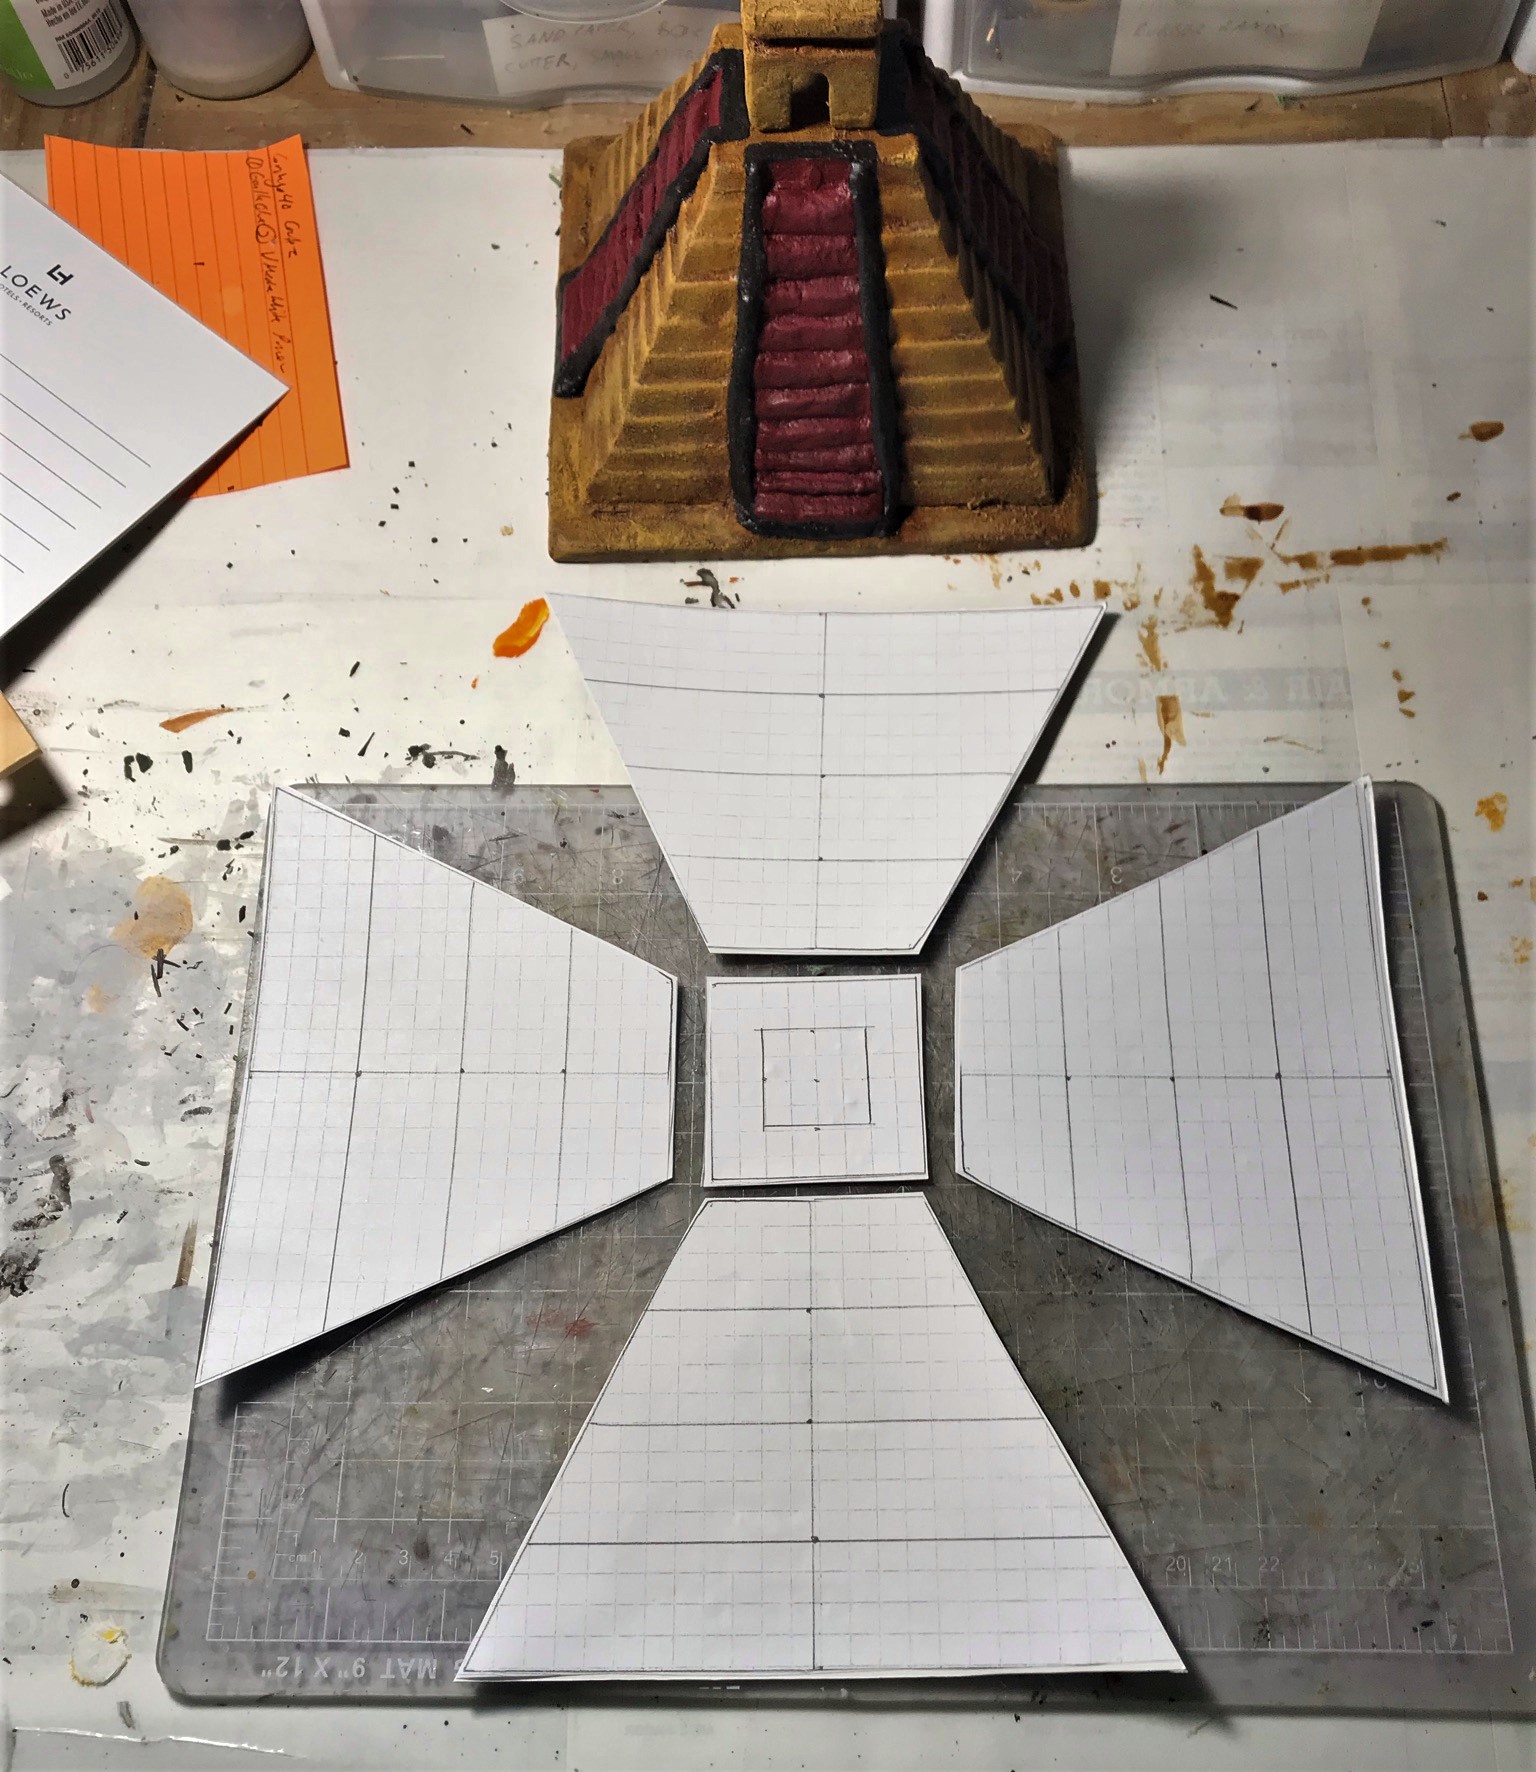
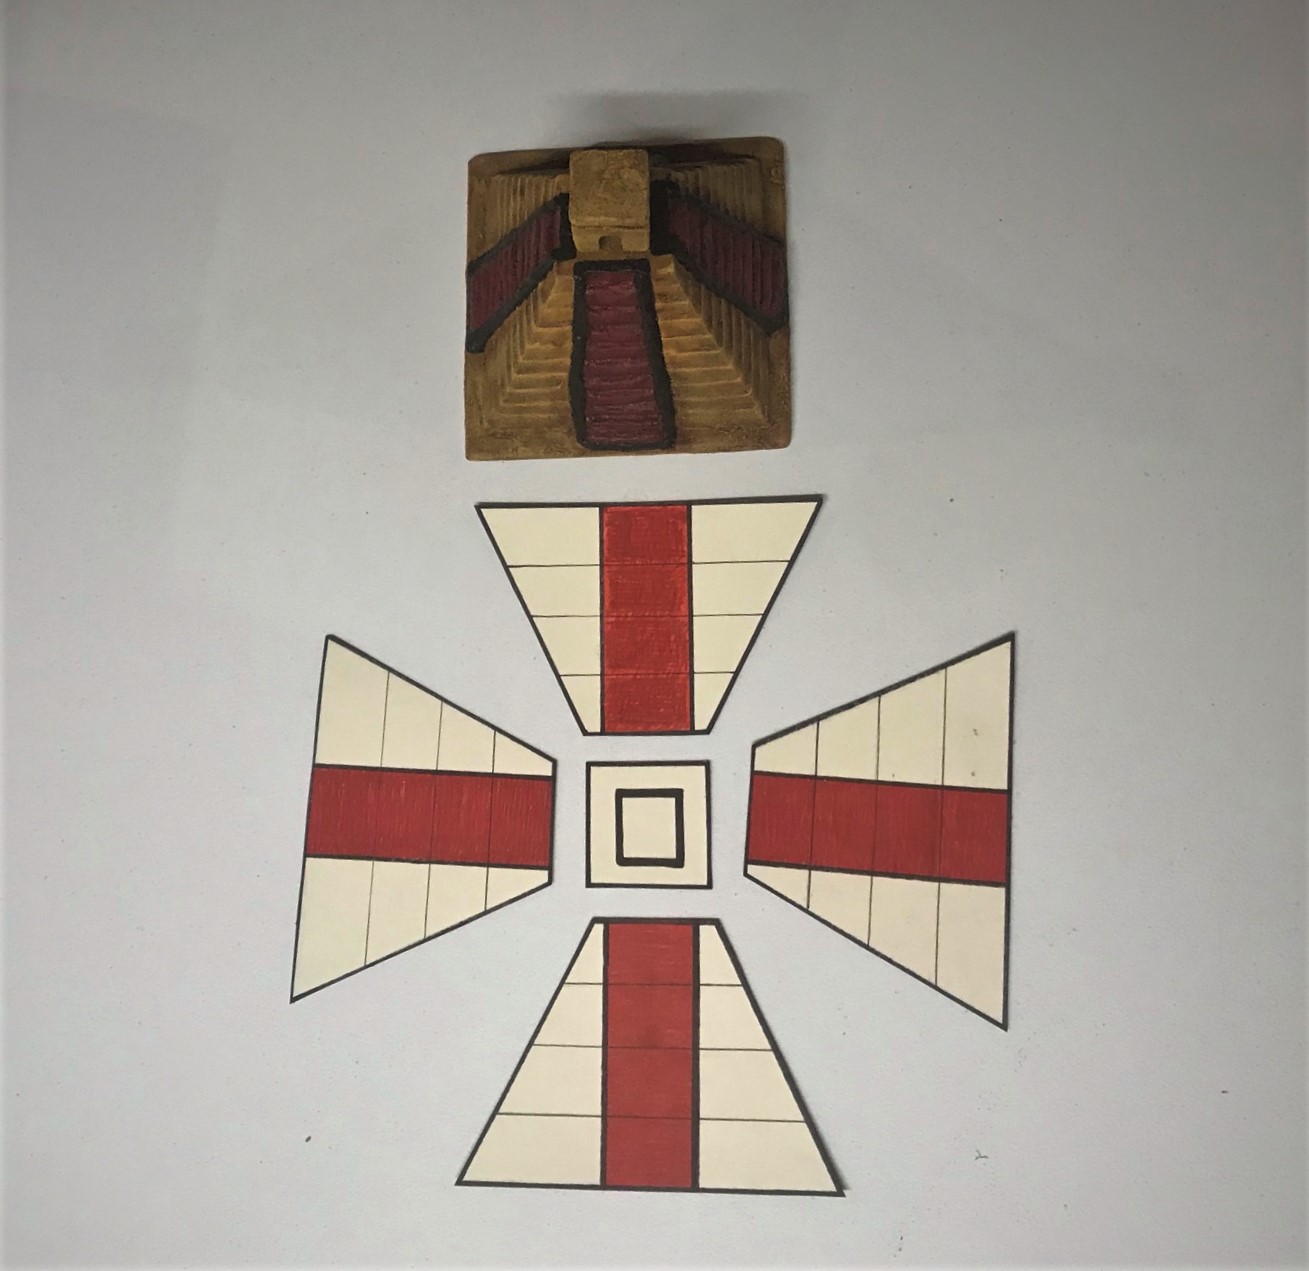
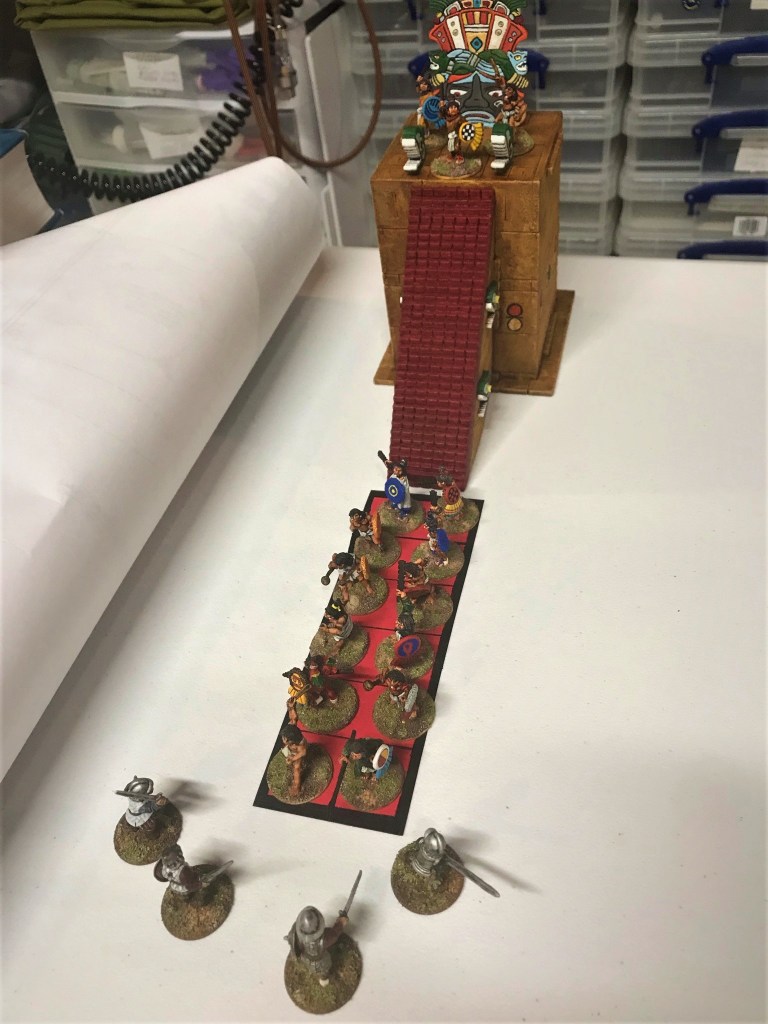
First, as far as steep-stepped structures (such as temples that one might expect to see in the Aztec or Mayan Empires), they pose a challenge gaming-wise. I have updated my rules for melee combat on these steps (but they are not yet published – but I use them). Most commercially available steep-stepped structures are either ruins (not ideal for depicting them in their heyday) or lacking adequate space on the steps to place figures during a game. Most of my figures are on 1″ bases, and getting them on the steps of my structures was not happening. I did not want them to be just big eye-candy on the tabletop. So what to do?
Make templates!
Below, I will share what I did and how – with the assumption that all my figures are 1″ based and that there would actually be sufficient depth in real life for them to stand on the steep steps in single rows.
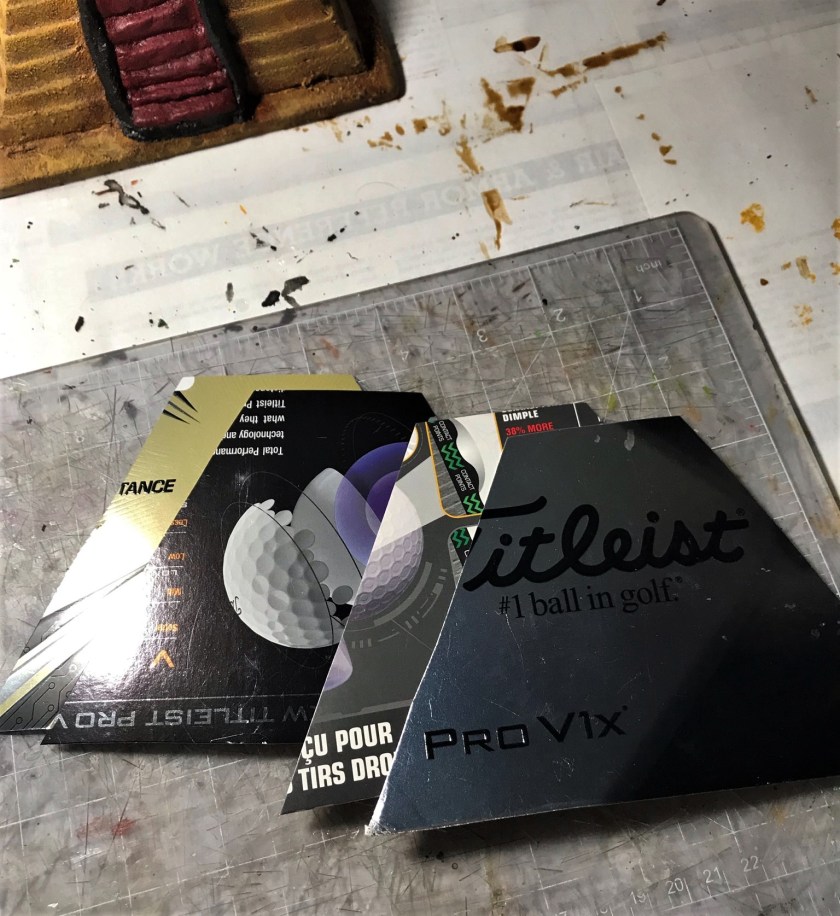
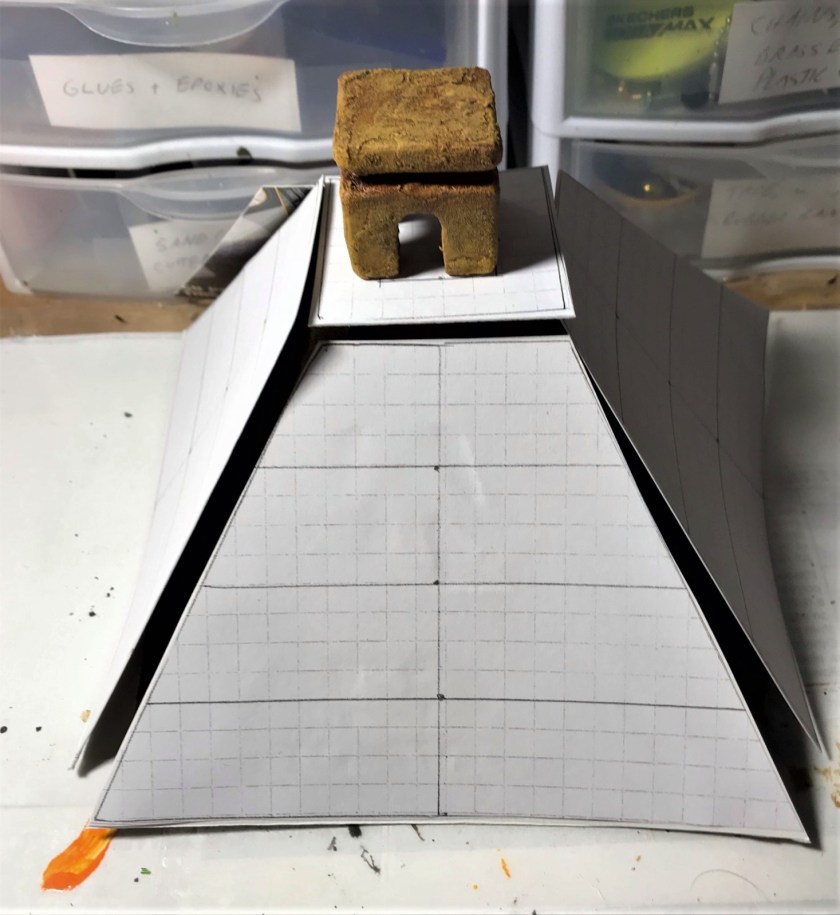
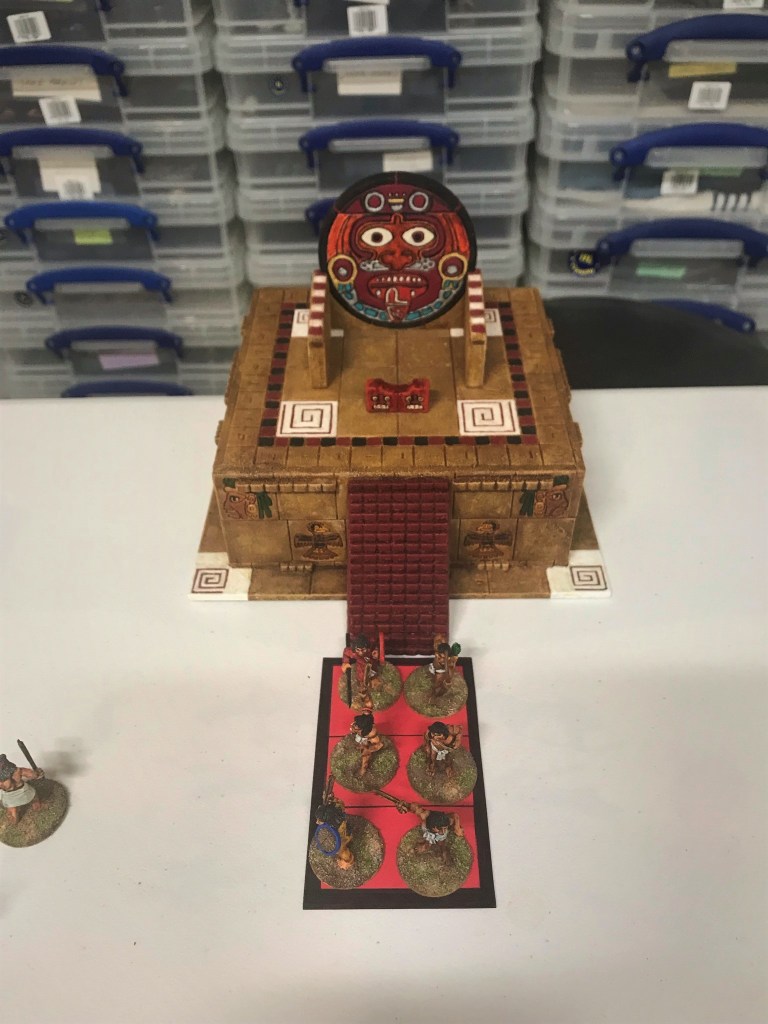
The main need was for the small temple that I am using as The Temple of Yopico in Tenochtitlan. I figured out the size of the sides and the top, and adjusted for 1″ steel washer bases. You can see that each side should allow for 14 figures plus one on the top. After drawing these, I then I cut out the graph paper templates. Ready for backing
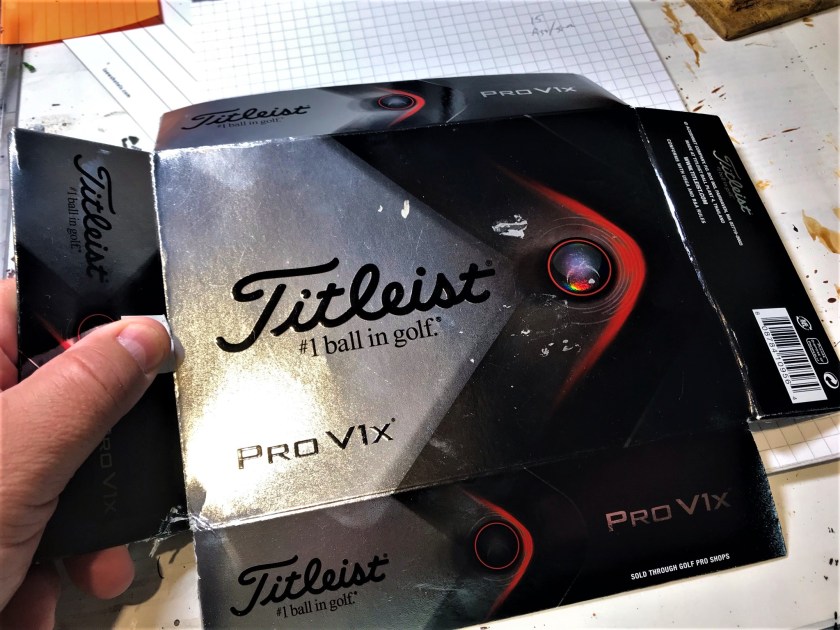
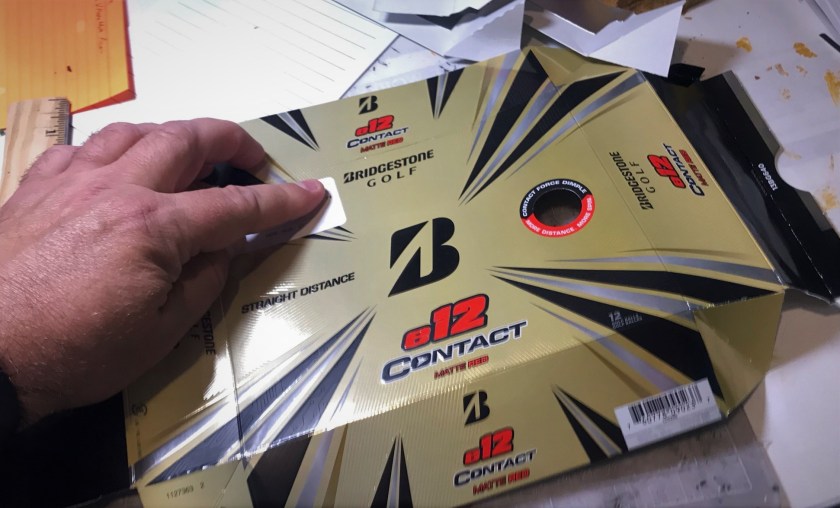
Clearly these needed some heft – and my other main hobby, golf, allowed for some good cardboard backings with a glue stick application. I pressed them down with a book and a 25 pound dumbbell.
Cut up box…
….and another…
…mount as backing…
…mounted…
…press for strong attachment…
…and check against the temple for size!
Template phase 1
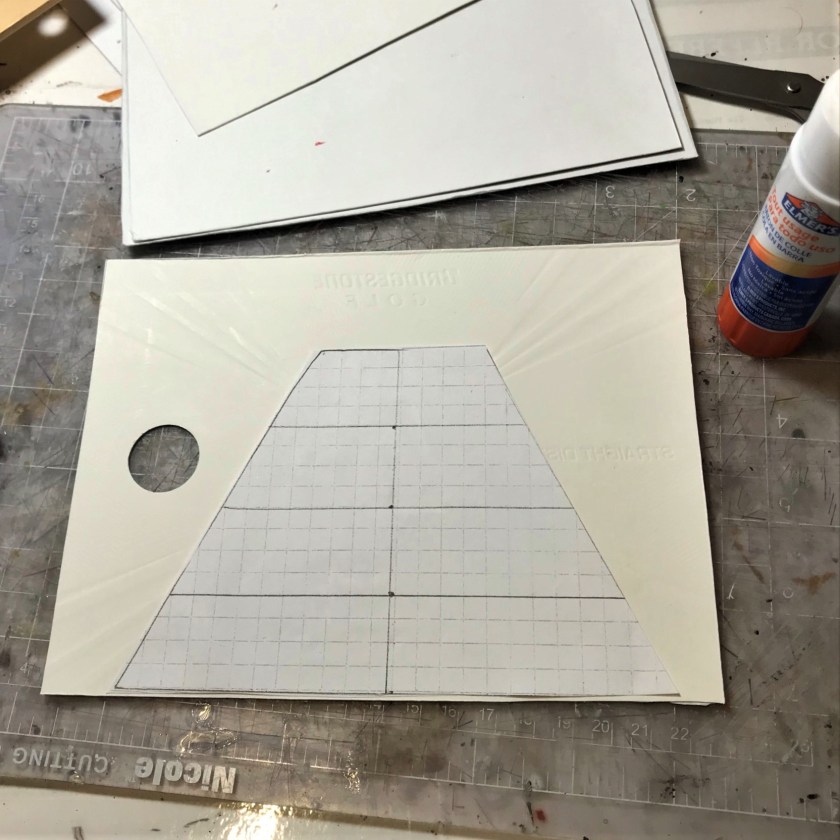
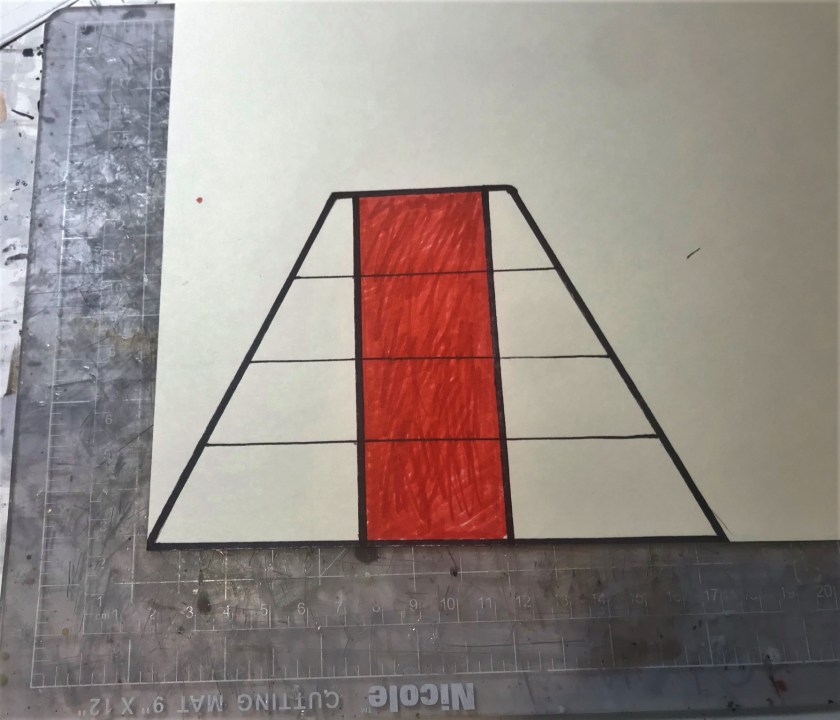
For phase 2, I traced the templates onto card stock, and in pencil drew in the lines. Next, cut out the card stock. Then I used red and black Sharpie pens to outline the steps and edges and color in. Add the glue stick, and press again under the weight.
The card stock
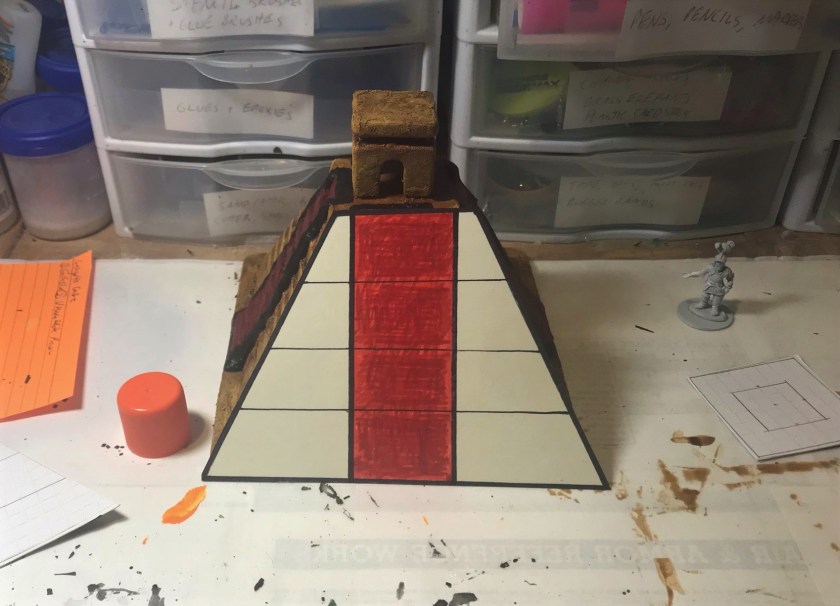
Sized up with the temple
Phase 2
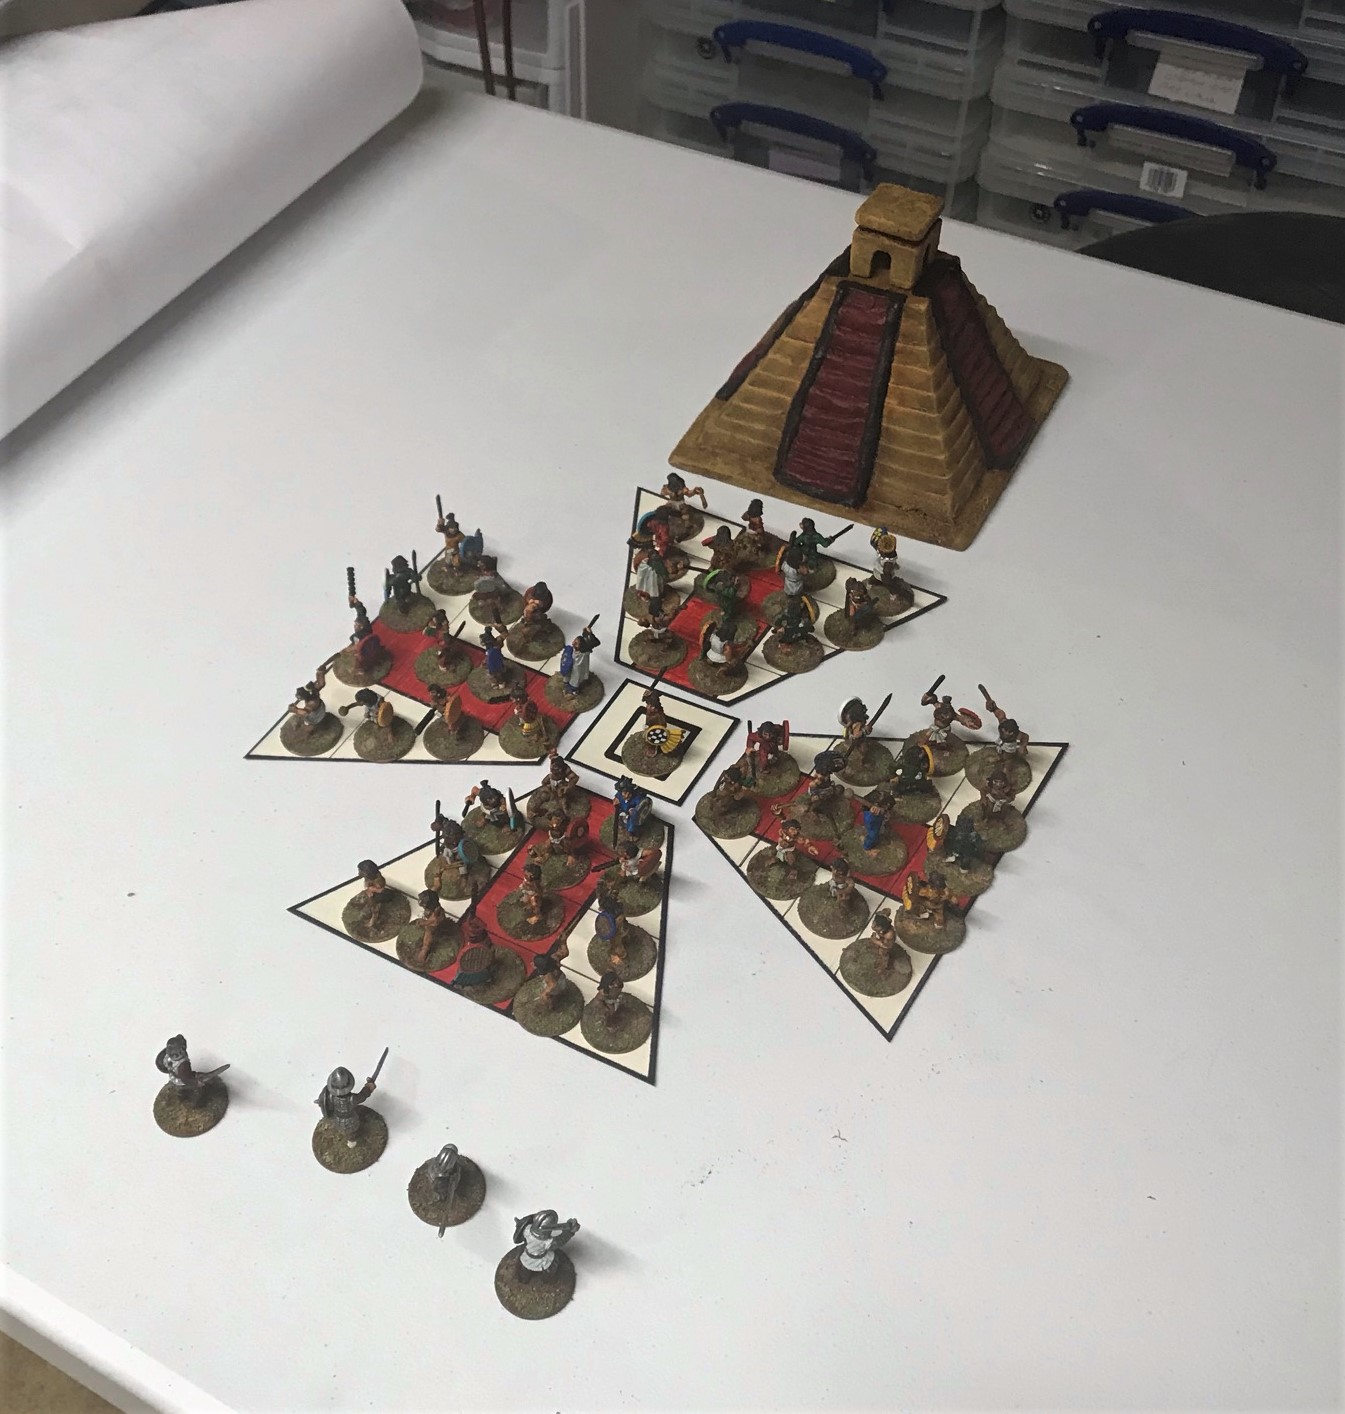
I am pretty happy with the results and look forward to using them.
Final templatesA mock up of the templates with them full of Aztecs facing off against some Conquistadores. In games, I will have these templates setup off of the table for resolving combat but am showing it next to the temple for comparison.
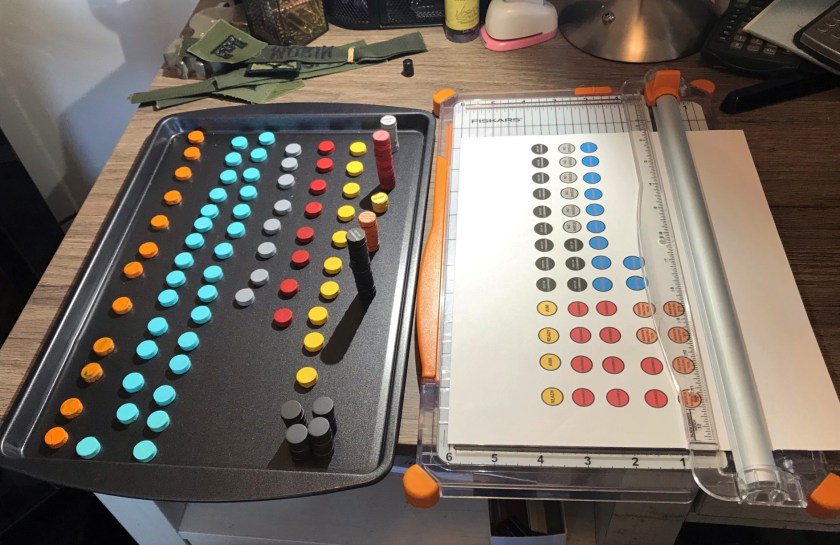
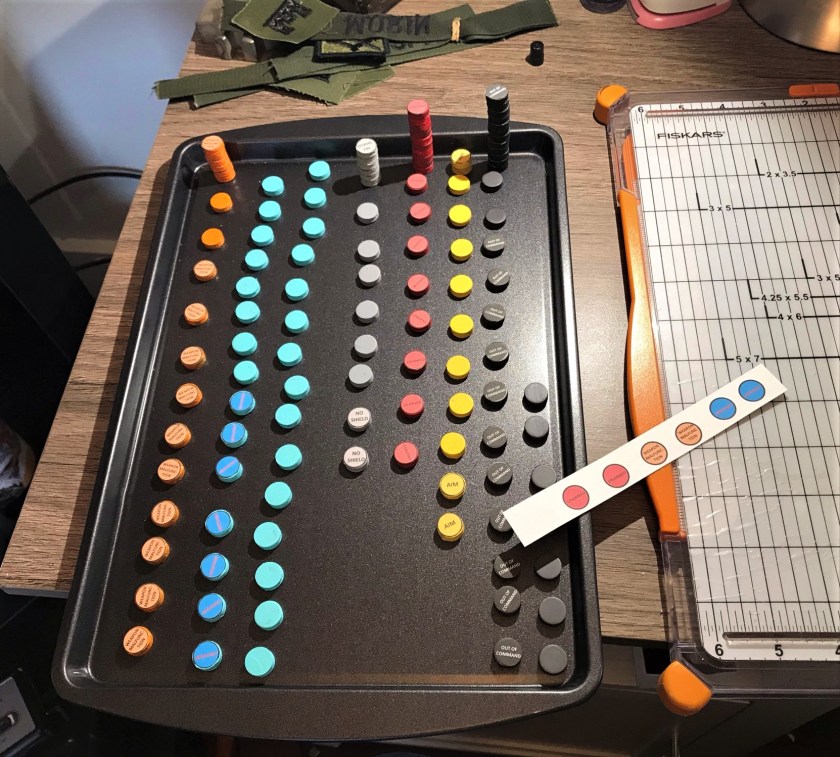
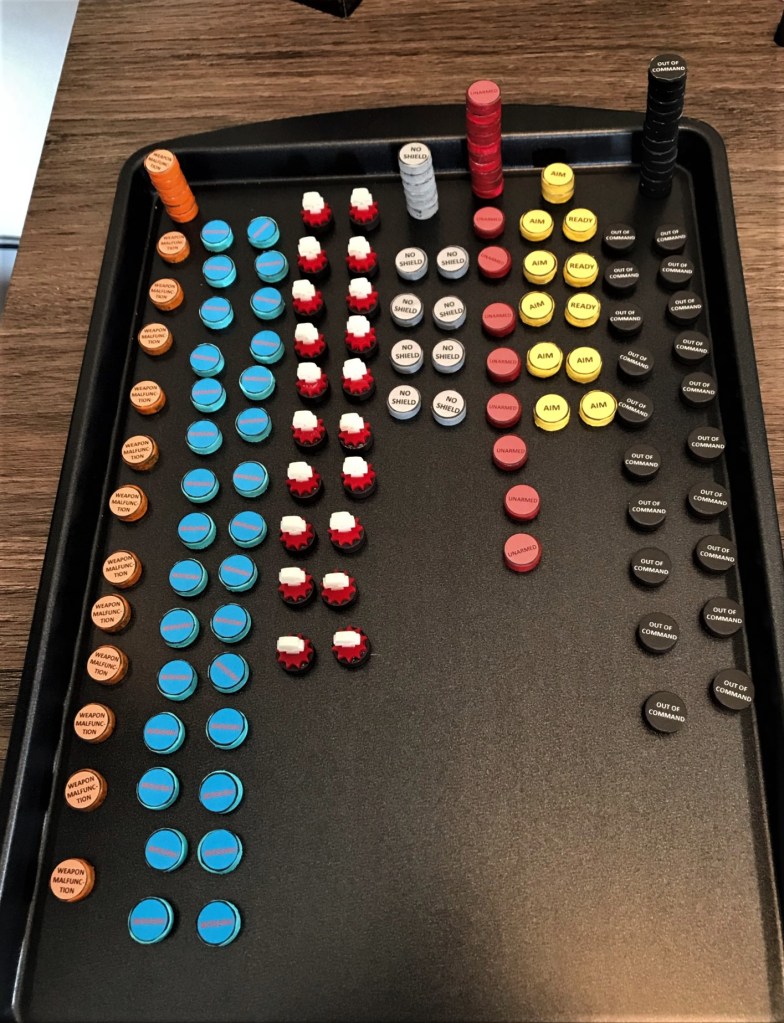
The next marker project was a continuation of my previous one that I mentioed above with some additions. In a game, Elite troops such as Jaguar or Eagle Warriors (and more) can go “berserk” – basically making a fanatical charge until either they kill an enemy or are killed. There are advantages and disadvantages to trying this as a player. I found that if Aztecs went into “berserk” mode on the battlefield, I needed to differentiate that on the tabletop, as some figures would, while others might not – plus they tended to charge far afield on the tabletop. To remedy this, and for better availability, I wanted more of the same magnetic markers. I did the same as you saw previously – using cheap magnets and craft paints and printing off labels that I cut out. As I use steel bases, magnets are a good help.
Old and new painted magnets
Punch out labels
In progress
All magnets complete
Magnetic markers
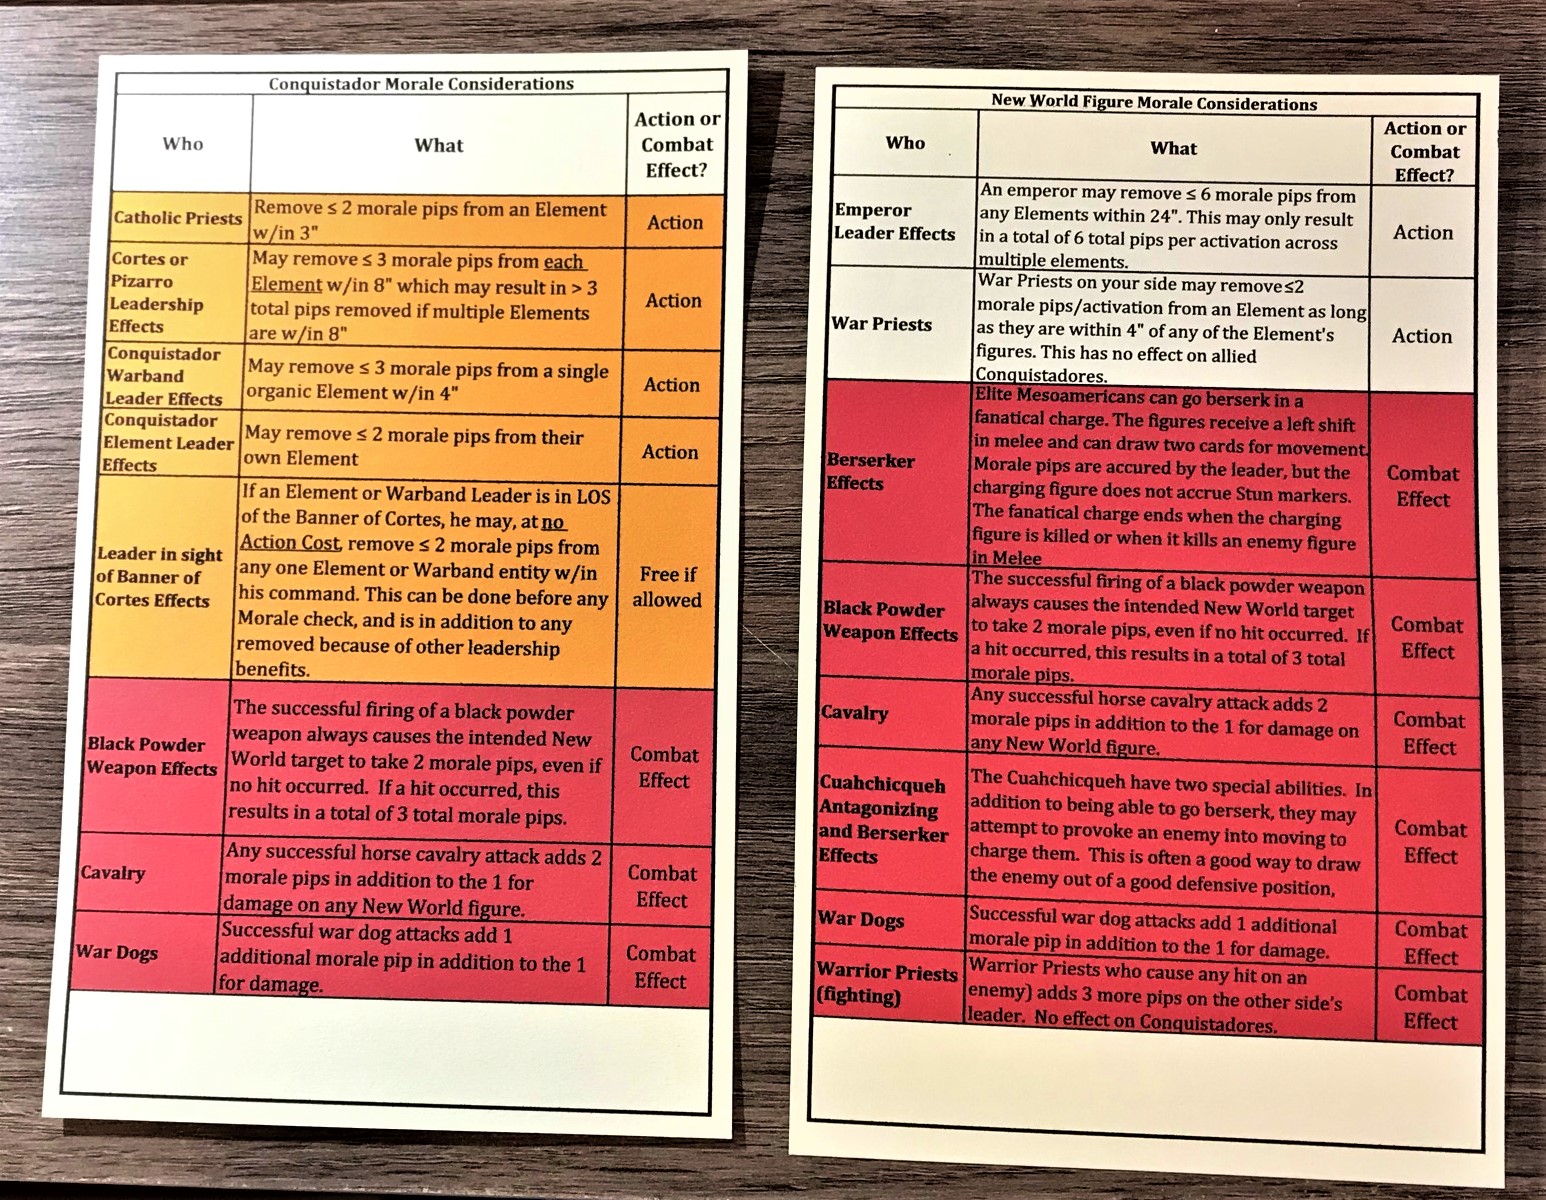
Lastly, I printed off some new 2-sided 5″ x 8″ cards with all the special Morale rule differences for my game versus other eras/theaters. Mine are meant to evoke the nature of the Spanish Conquest.
Morale Cards – and yes I see the typo!
Now, I as I write this I am getting ready to hit the road for a fun weekend of gaming with some old friends. Well, we are all getting older at this point I guess…beats the alternative!
I am hoping to share a good post on all the games when I return. Also I need to do a follow up on the garage+ project as a LOT is happening. If you are unfamiliar with my garage+ project, you can catch up on all of them here.
Miscellaneous details and references for those interested in that sort of thing:
For all of my previous posts on games, units, and other projects for my 16th Century Spanish Conquest supplement for Feudal Patrol™ – “Civilizations Collide” – please see this page.
Clearly, 500 years ago, the Catholic Faith of the Spanish Conquistadores was a huge part of their culture. One only need look at The Banner of Cortes to see that. As such, they were accompanied by priests that said Mass for them and worked – and did fight – alongside them in Mesoamerica 500 years ago. Remember, for them, in 1518-1521 it had only been a little over 20 years since they had successfully had the Reconquista and reclaimed the Iberian Peninsula from the Moors after 700 years of occupation. More recently, the Conquistadors had seen success in the Italian Wars. Much of that success was attributed to Providence to be sure.
For my Civilizations Collide scenarios for games of Feudal PatrolTM , I have updated my rules for priests on both sides. The updated supplement is soon to be made available for download, as is a planned 16-scenario booklet. In these games, the beneficial effect of Catholic Priests is that they can help reduce the number of Morale Checks that the Spanish might need to take as a result of combat and casualties, as they motivate them to fight on. They can also defend themselves, albeit understandably less effectively than a traditional Sword and Buckler Man.
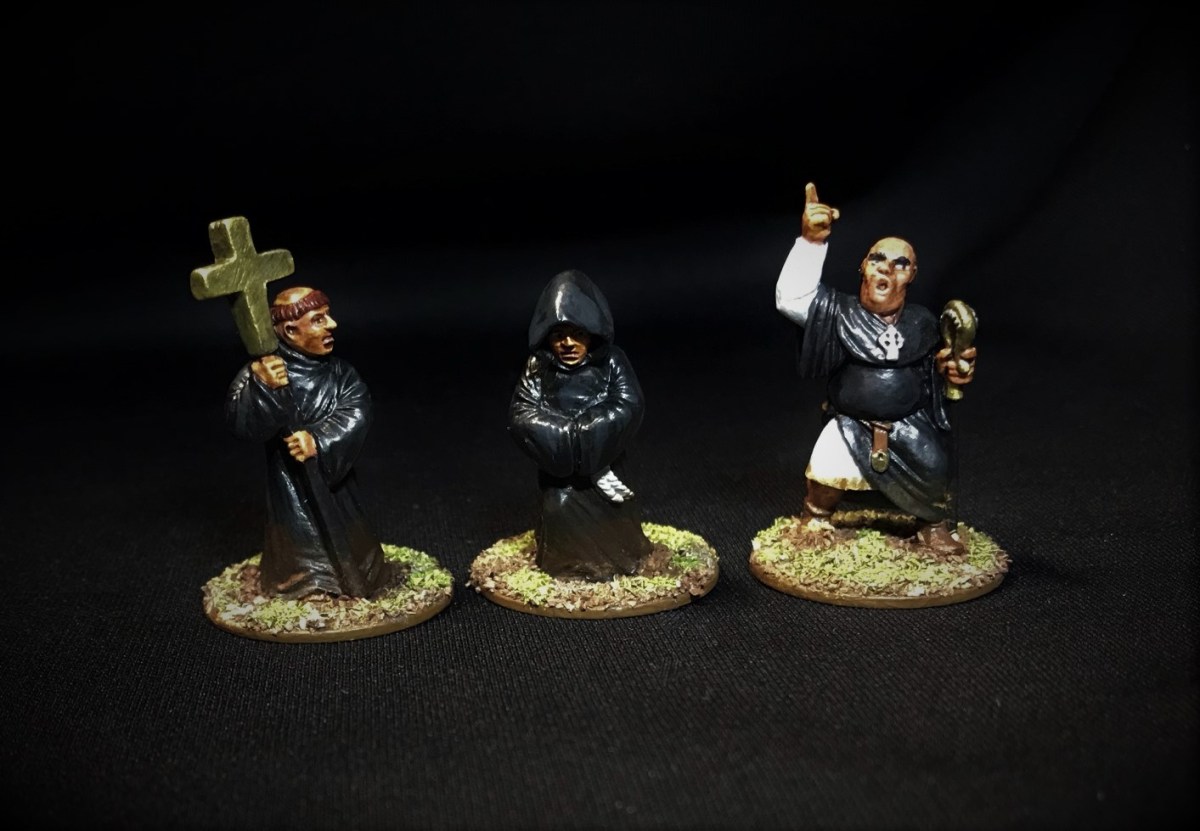
While I have many Sword and Buckler Men figures, no appropriate figures to use as priests were in my unpainted mountain. After a good search I did find a few at Badger Games from Gripping Beast/Saga and Conquest Games. These looked quite medieval, but to my knowledge I would not think that religious garb or holy garments really changed much over the centuries back then. These were probably designed for the era of Viking raids. Plus, the two that I got that were from Conquest games were monks. And yes, as a practicing Catholic, I am familiar with the differences! Still, these looked the part as best as I could tell, so I bought them. They are 28mm and metal. As for painting research, I used the only plate I found in John Pohl’s Aztecs and Conquistadores(page 168) showing a priest as a guide for painting. Clearly, a monkish look – in black – was going to be fine for the tabletop.
With Historicon and some upcoming gaming looming as early as three days from today, I painted the three up quickly right after I finished Hernan Cortes. I’m fairly happy with them for gaming the period.
The two Conquest Game figures were both monks, the Gripping Beast/Saga one was called a priest:
Catholic Priest/monk figure from Conquest Games Ecclesiastics/Monks Line via Badger Games (#CG CGMM121f Monk in Cowl) – designated CCP2 by me
Catholic Priest/monk figure from Conquest Games Ecclesiastics/Monks Line via Badger Games (#CG CGMM121g Monk with Holy Cross) – designated CCP1 by me
Catholic Priest figure from Gripping Beast/SAGA Priests Line via Badger Games (#SPR06 Christian Priest 2) – designated CCP3 by me
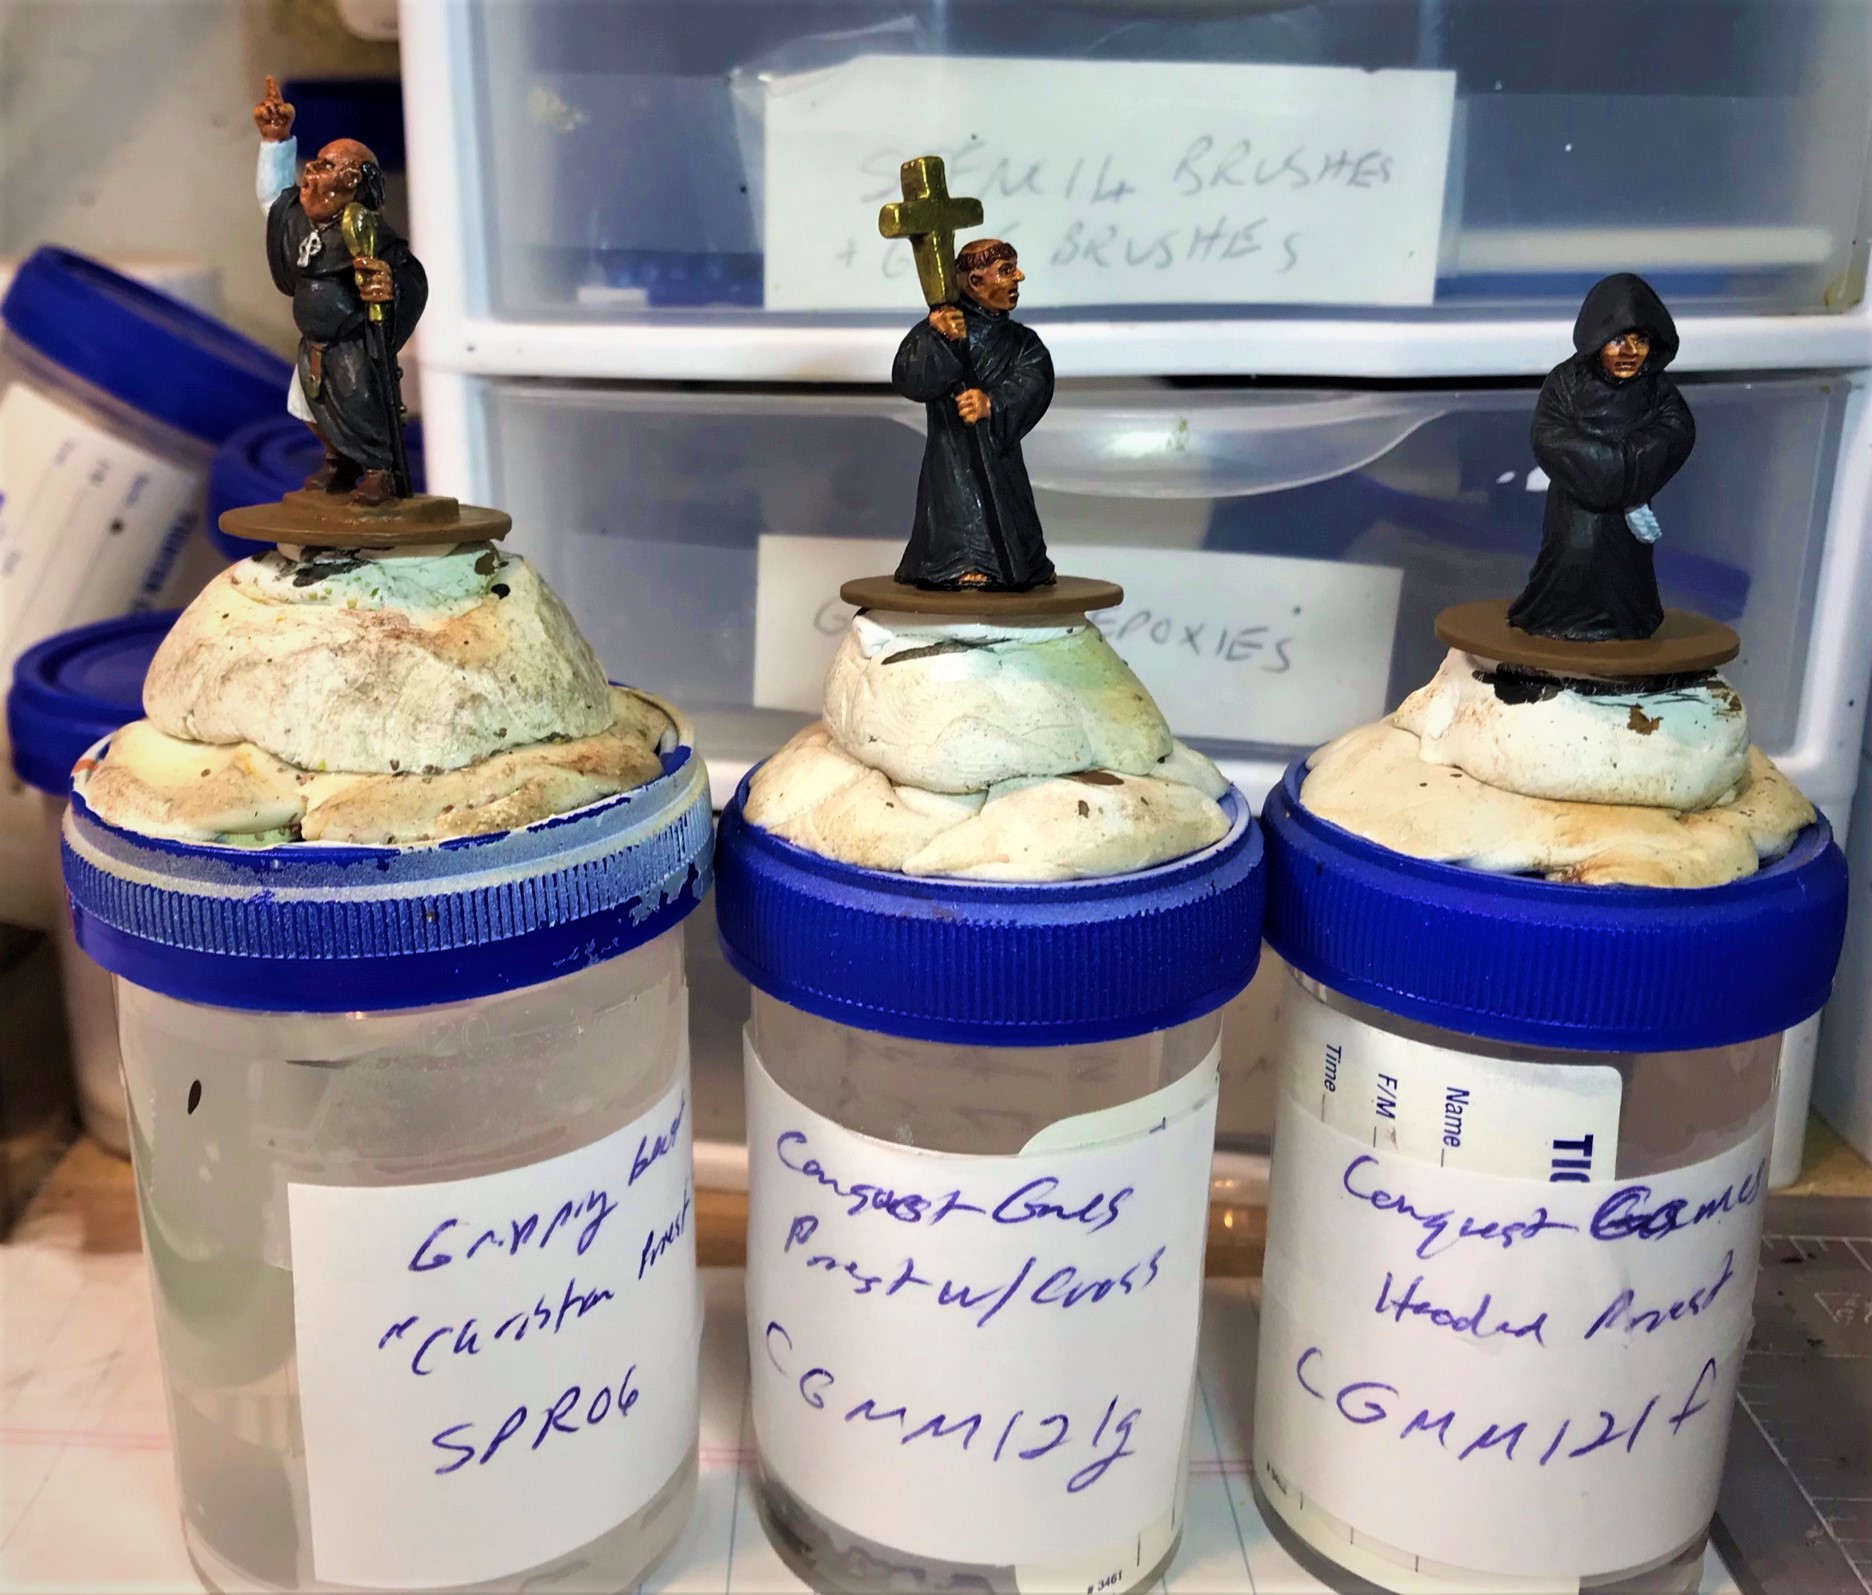
The three as receivedI removed the slotted bases from the two Conquest Games figures and based them all on good old steel washers. You can see a glaze on the steel washers – that’s Gorilla Glue, which I use to improve later paint adhesion on them (especially the rims).
As I was hurrying to get these done, I took few WIP shots, but here you go below:
Primed upPainted (base coat) and ready for some final touches
I want to mention a few areas of, well, let’s say minor challenges in painting these. First – and as someone without this condition I want to be sensitive. Two of them have shaven and/or bald pates. Painting shaved heads/bald heads was a new one for me and took a bit of experimentation to get acceptable results. After all, I would expect that these men of the cloth would have tanned up a bit facially. Still, the head and face on CCP3 (the Gripping Beast/SAGA figure) was not that easy to get right. Secondly, for all three you can imagine that their cloaks would have been less than pristine. I used some pigments for that. Lastly, highlighting black robes with gray was something I did want to play with here.
CCP1, 2, and 3. My three Priests. CCP3 actually has a sword in addition to his staff.
I like CCP 1 the best and CCP3 the least – mainly because of the face being a bit mushy. CCP2 is quite mysterious.
Well, now they have joined the ranks of the Conquistadores. Off to gaming with ye!
I hopefully have one more pre-Historicon post to share with you later today on gaming aids – if I can get it done before I have to pack. Then I’ll be silent for a bit and hopefully get a good post-weekend post on the gaming.
Miscellaneous details and references for those interested in that sort of thing:
For all of my previous posts on games, units, and other projects for my 16th Century Spanish Conquest supplement for Feudal Patrol™ – “Civilizations Collide” – please see this page.
PAINTS, INKS, GLAZES, SHADES, WASHES, PIGMENTS, FLOCKING, GLUES AND MORE THAT I USED ON THESE CATHOLIC PRIEST FIGURES:
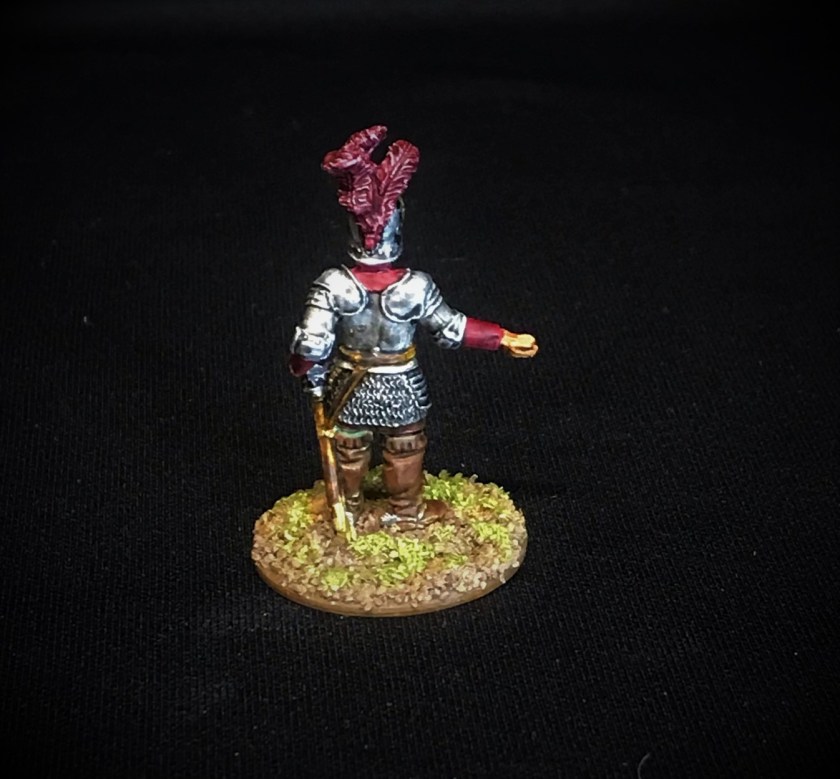
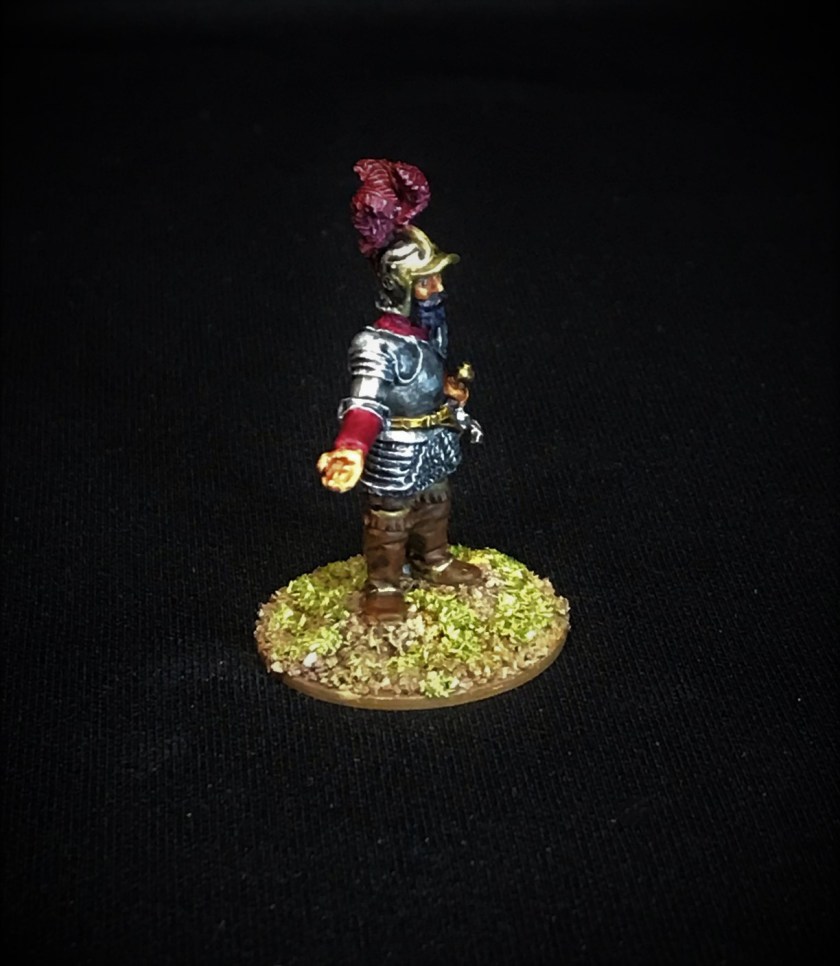
Or, let’s just call him Cortes for short – to avoid all the accent marks, surname confusion, and titles!
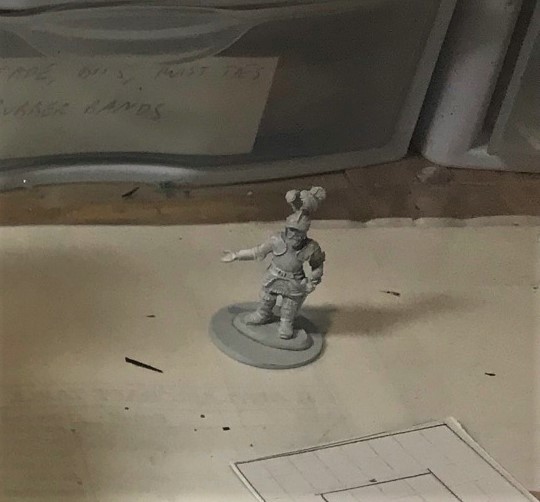
I got this figure from Gringo 40’s excellent collection of Conquistadores. It is from Gringo 40s Conquistadores line (#CONQP1 Cortez). The figure is 28mm in size, metal, and overall an excellent sculpt. I will be heading back to them for more figures. I had not painted a figure since I completed the war wagons back in August (also from Gringo 40’s), and really not a soldier since February. I am surprised at how much terrain took up the intervening time – as well as my garage (and now if you’ve not seen these you can see all of my garage+ project posts all in one place – here). But, let’s get back to Cortes.
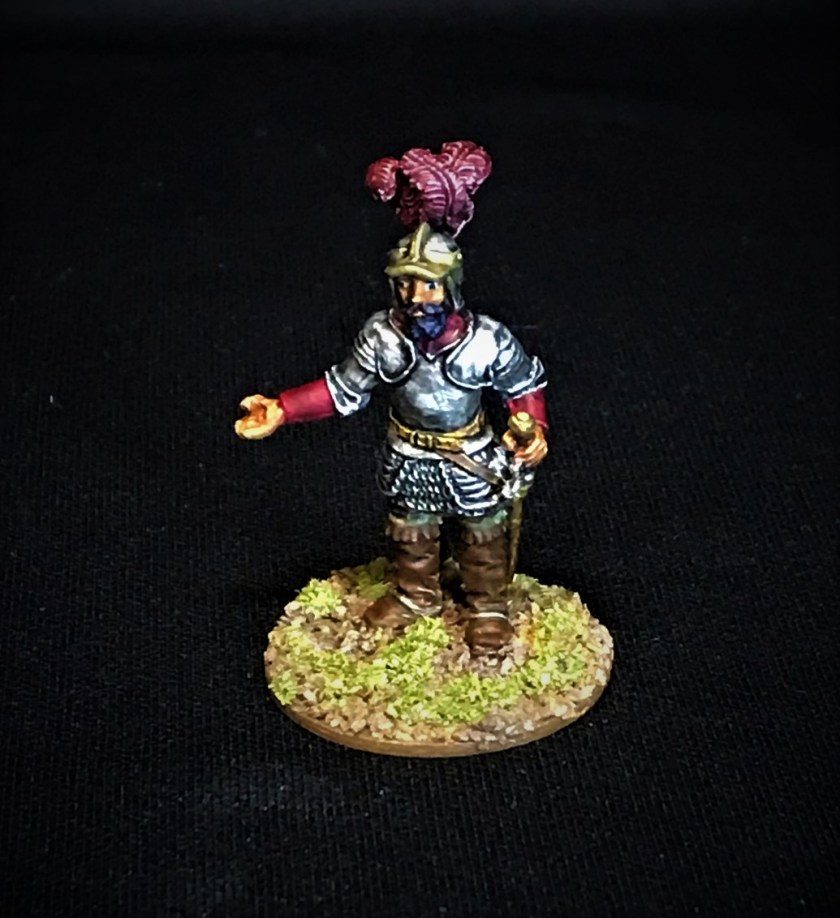
In his early 30’s, Hernan Cortes made his way into the history books as a Conquistador and the vanquisher of the Aztec Empire. He lived to his early 60’s. Now, there are plenty of negative things to say about his life – and by no means am I considering him a “good guy” – just as I would not do that for Montezuma or any Aztec either. Both combatants were pretty damn brutal in so many ways. They were all men of their time – not today – and if you want to check out the Wikipedia page on Cortes you’ll get a flavor. He was remarkable in many ways, good and bad, and he was complex. I wanted a true Cortes figure for my Civilizations Collide scenarios for games of Feudal PatrolTM .
Of course, Cortes played a major role in the Spanish Conquest 500 years ago, especially as a combat leader. He also is bearded, and my good friend Roger over at Rantings Under The Wargame Table threw out a challenge for Mo’vember around such guys. Therefore, he is my submission for Roger’s challenge.
I was able to paint him up pretty quickly – and it felt great to paint again.
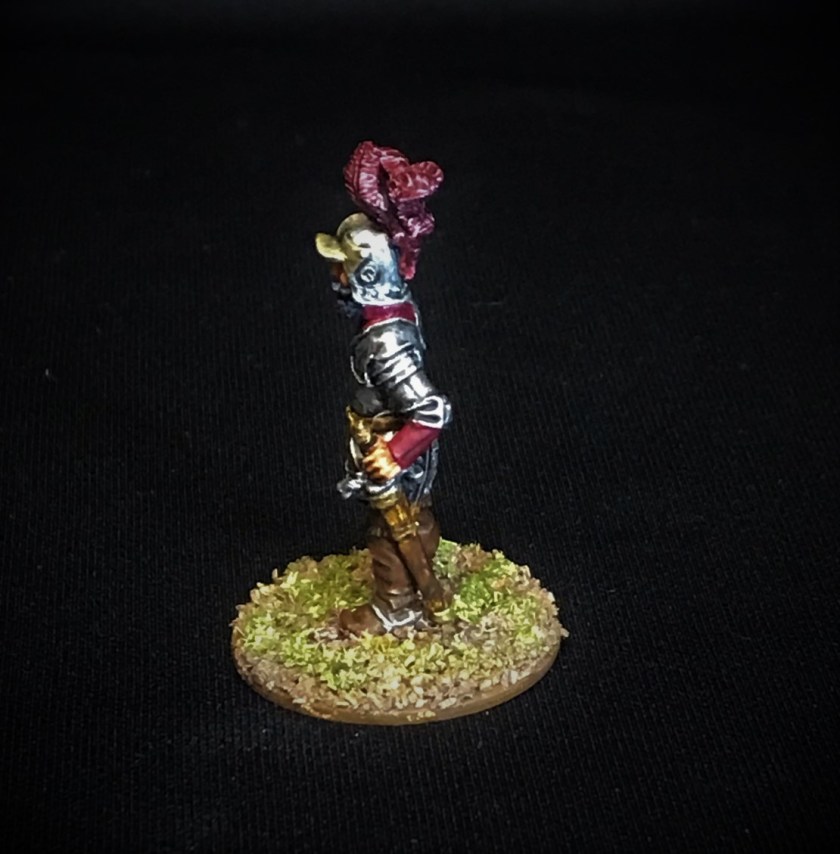
Primed and ready for Mo’vemberEarly work on base coatBase coated Cortez before washes and highlights addedHighlighted and washed – and very shiny – though I knew the matte varnish would help tone this down) some. I played with several metals here.Flocked and varnishedFinished off with some grass and some touch up shading
And add a label:
I enjoyed painting Cortes. I tried to give his armor different shading and tones while maintaining an overall proper look. The photo gallery below is not as good a group of shots as I’d like – it was tough to get the lighting correct – he’s thankfully not that shiny (as you saw above).
Cortes
I thought I’d add a picture of Cortes and Montezuma II. Cortes will get a lot more play in my scenarios anyways, but his picture is a little less shiny and better here, so here it is.
The two major figures in the Aztec Empire’s Fall
I hope that you enjoyed this – I have one more related post to do prior to this week’s Historicon game (I’m running it there on Saturday morning).
Miscellaneous details and references for those interested in that sort of thing:
For all of my previous posts on games, units, and other projects for my 16th Century Spanish Conquest supplement for Feudal Patrol™ – “Civilizations Collide” – please see this page.
PAINTS, INKS, GLAZES, SHADES, WASHES, PIGMENTS, FLOCKING, GLUES AND MORE THAT I USED ON THIS HERNAN CORTES FIGURE:
Yes indeed folks, I am yet again combining a couple weeks into a single post. This update will cover Weeks 15 & 16 – which comprises October 24th to November 6th. The main reasons are the same – slow progress due to weather and shortages that have been the bane of the projects’ ability to progress.
It’s been very wet, cold, and windy, followed by now heavy morning frost. Anyone in Massachusetts knows that this month can be very variable indeed. I guess we’re lucky no accumulating snow has happened yet (but we have seen the first few flakes flying).
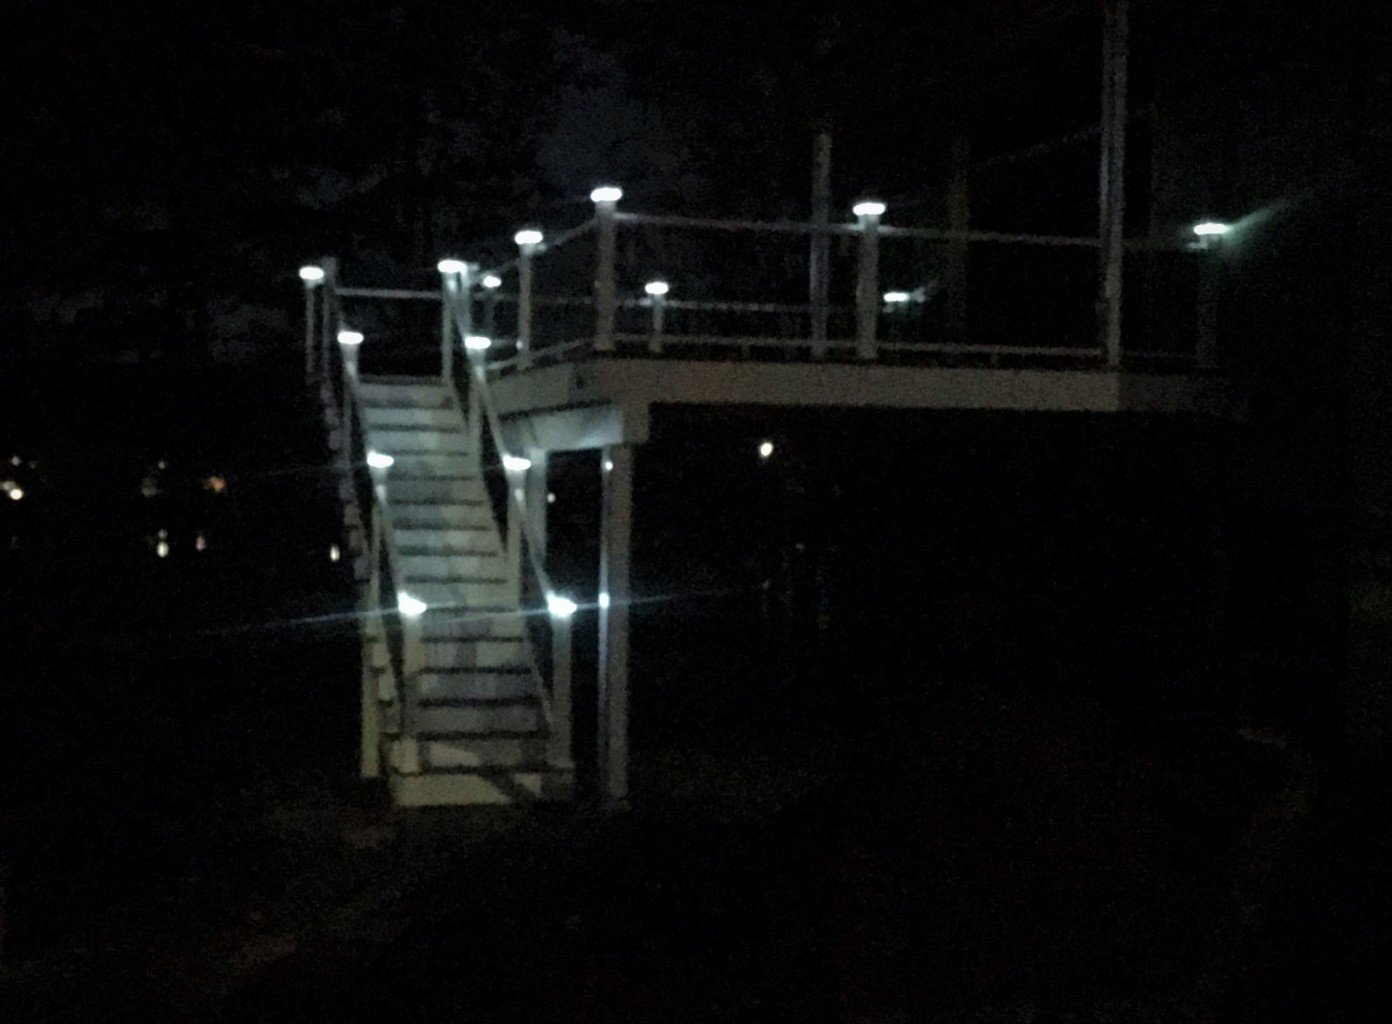
The work here still in these two weeks is focused on the patio – but I thought that first I’d share a picture of the deck at night with the solar caps all lit – my neighbor claims aircraft will be coming in to land!
The deck at night – I had a tough time getting a photo but you get the idea.
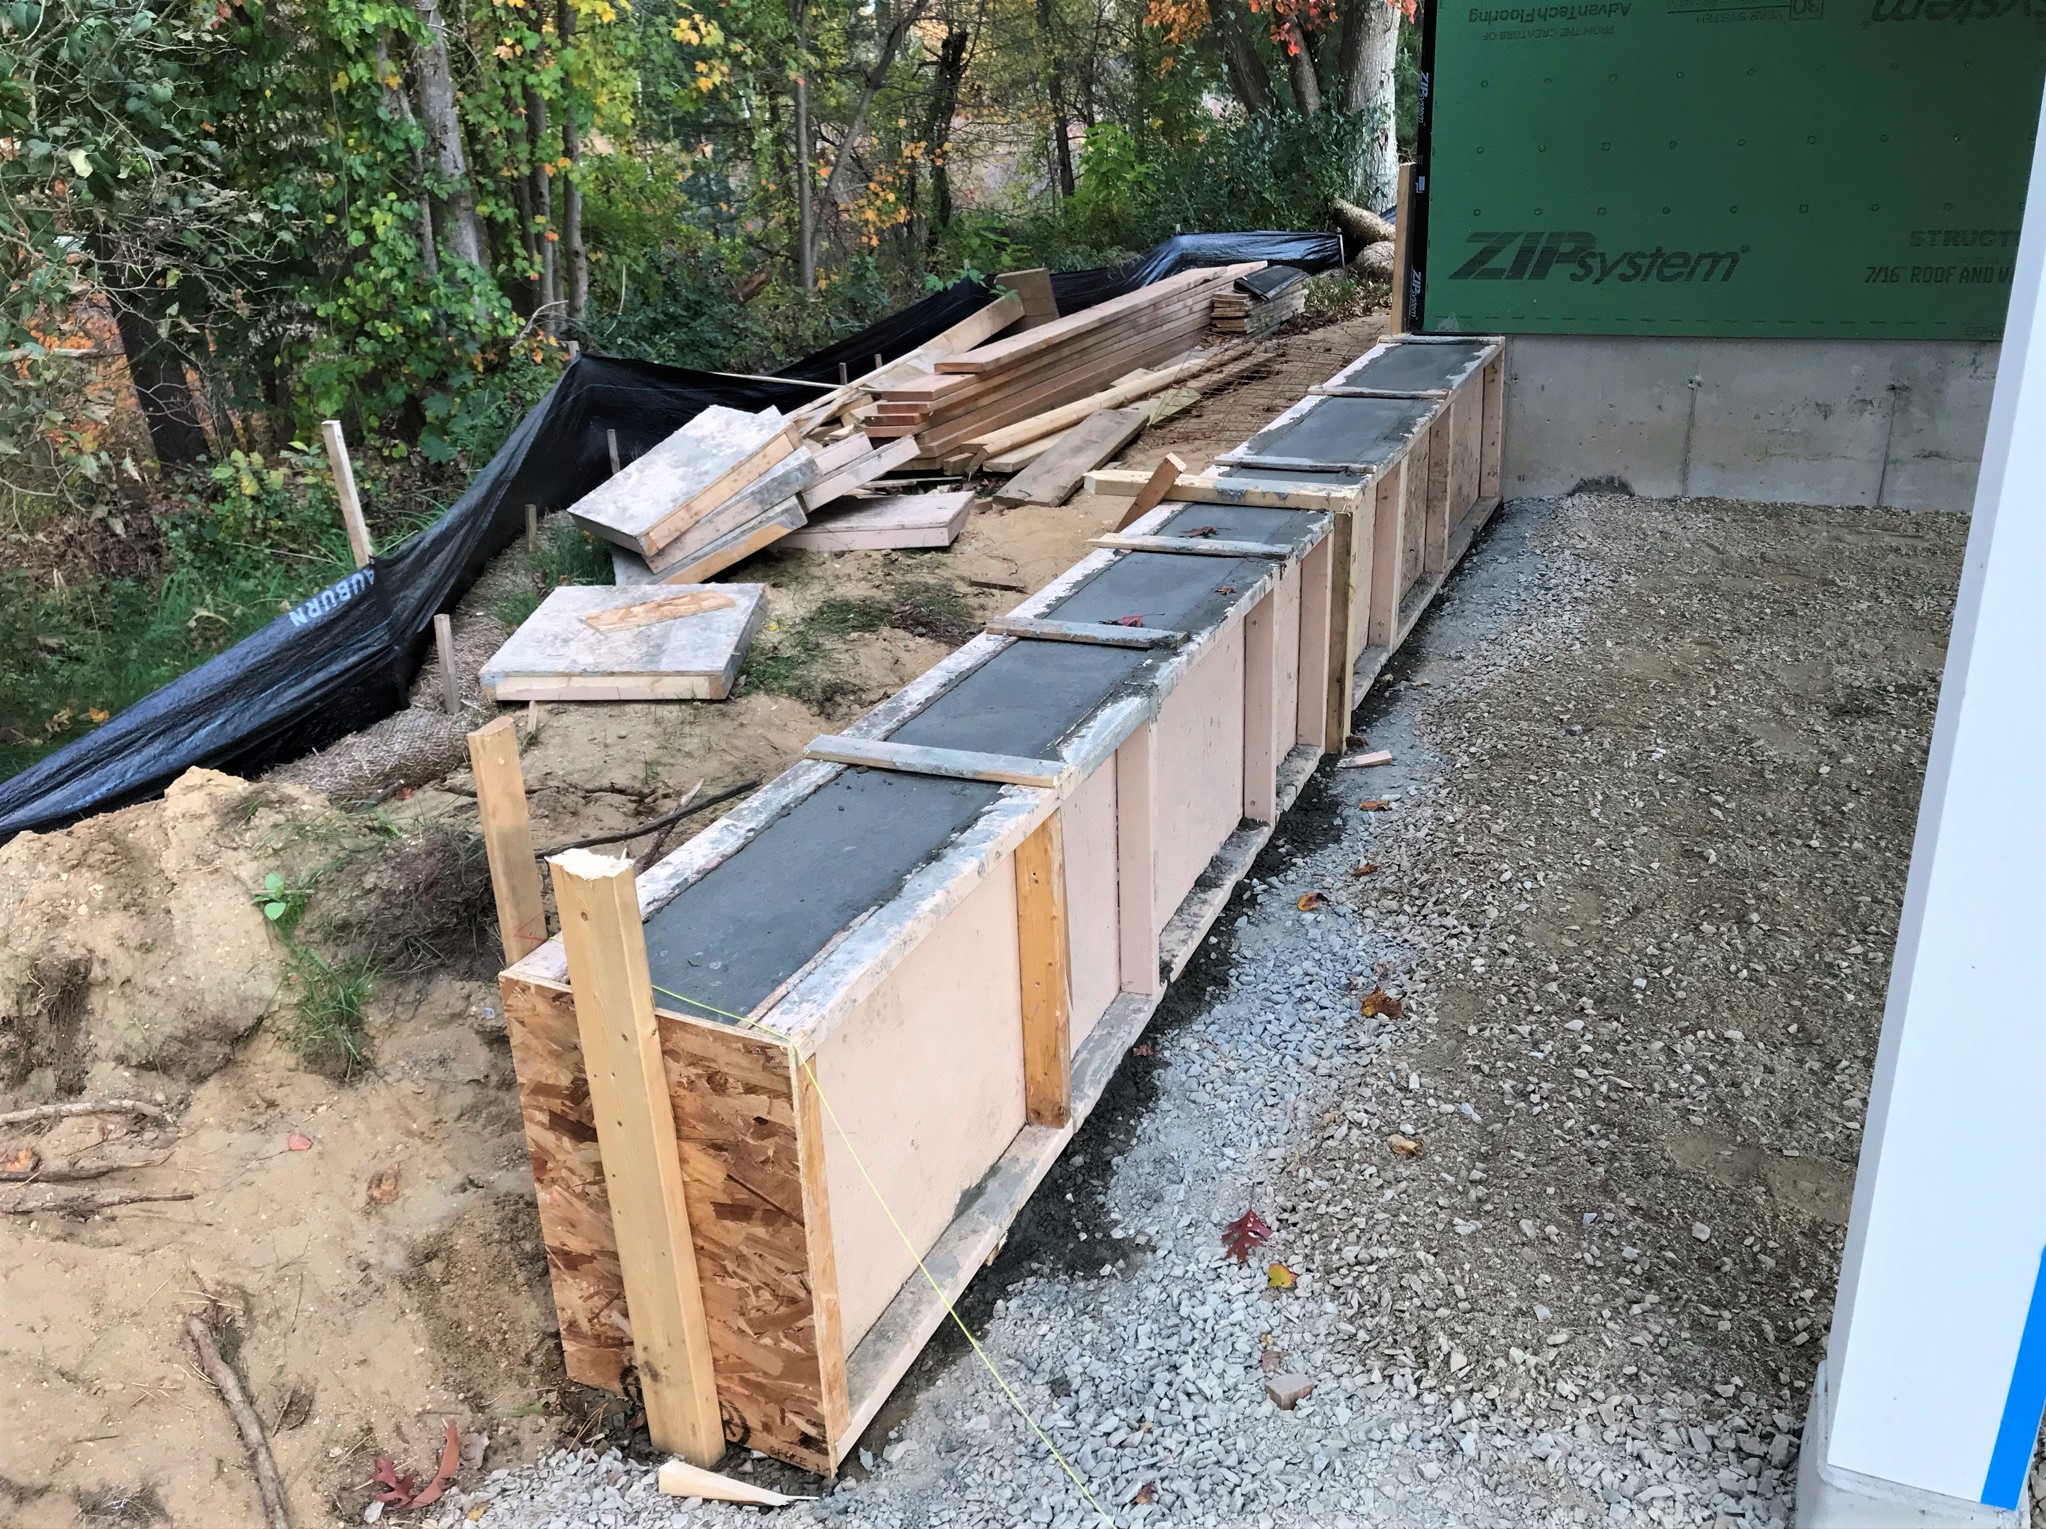
One of the wind-driven rain storms came in from the normal front of the house and hit from the back – where all the trees are. It was a mess, but I cleaned up early before Evandro’s guys came to pull off the forms.
Leaves everywhere – and more to come.Pulling the fire pit wall forms.
Then, they added a screed on the walls and let that set.
Walls with screed,
At the end of the day on October 28th, this was where we were with long shadows hitting the yard.
End of the day – and note I did get the leaves up.
No work continued until November 1st. And then it moved onto coloring the walls with releasing agent (a first step anyways) and digging (by hand) the gas line.
Gas line being dug and walls being colored.Digging the gas line.
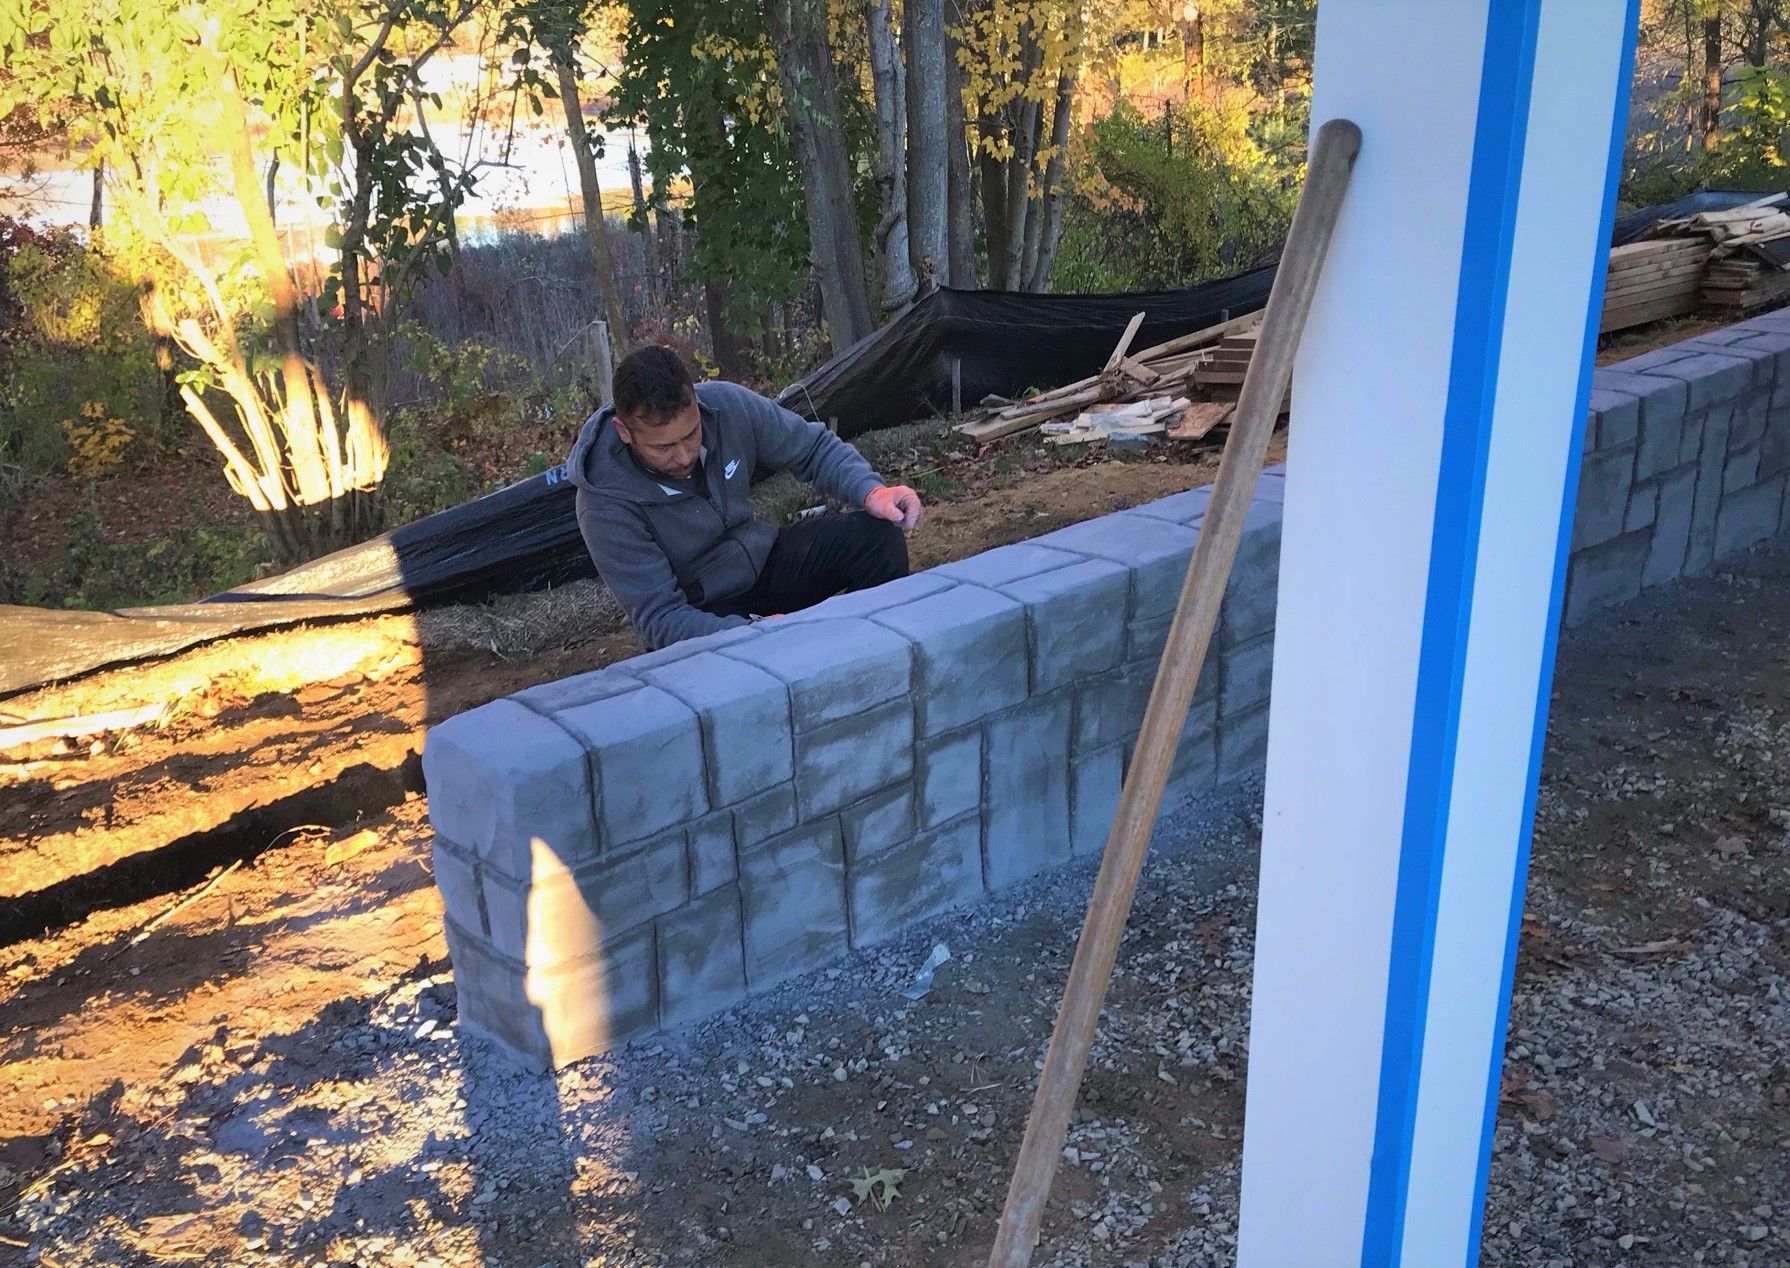
Meanwhile, Evandro began his color applications and shaping.
Evandro working on the back wall.After shaping it, he applied a releasing agent.The releasing agent.
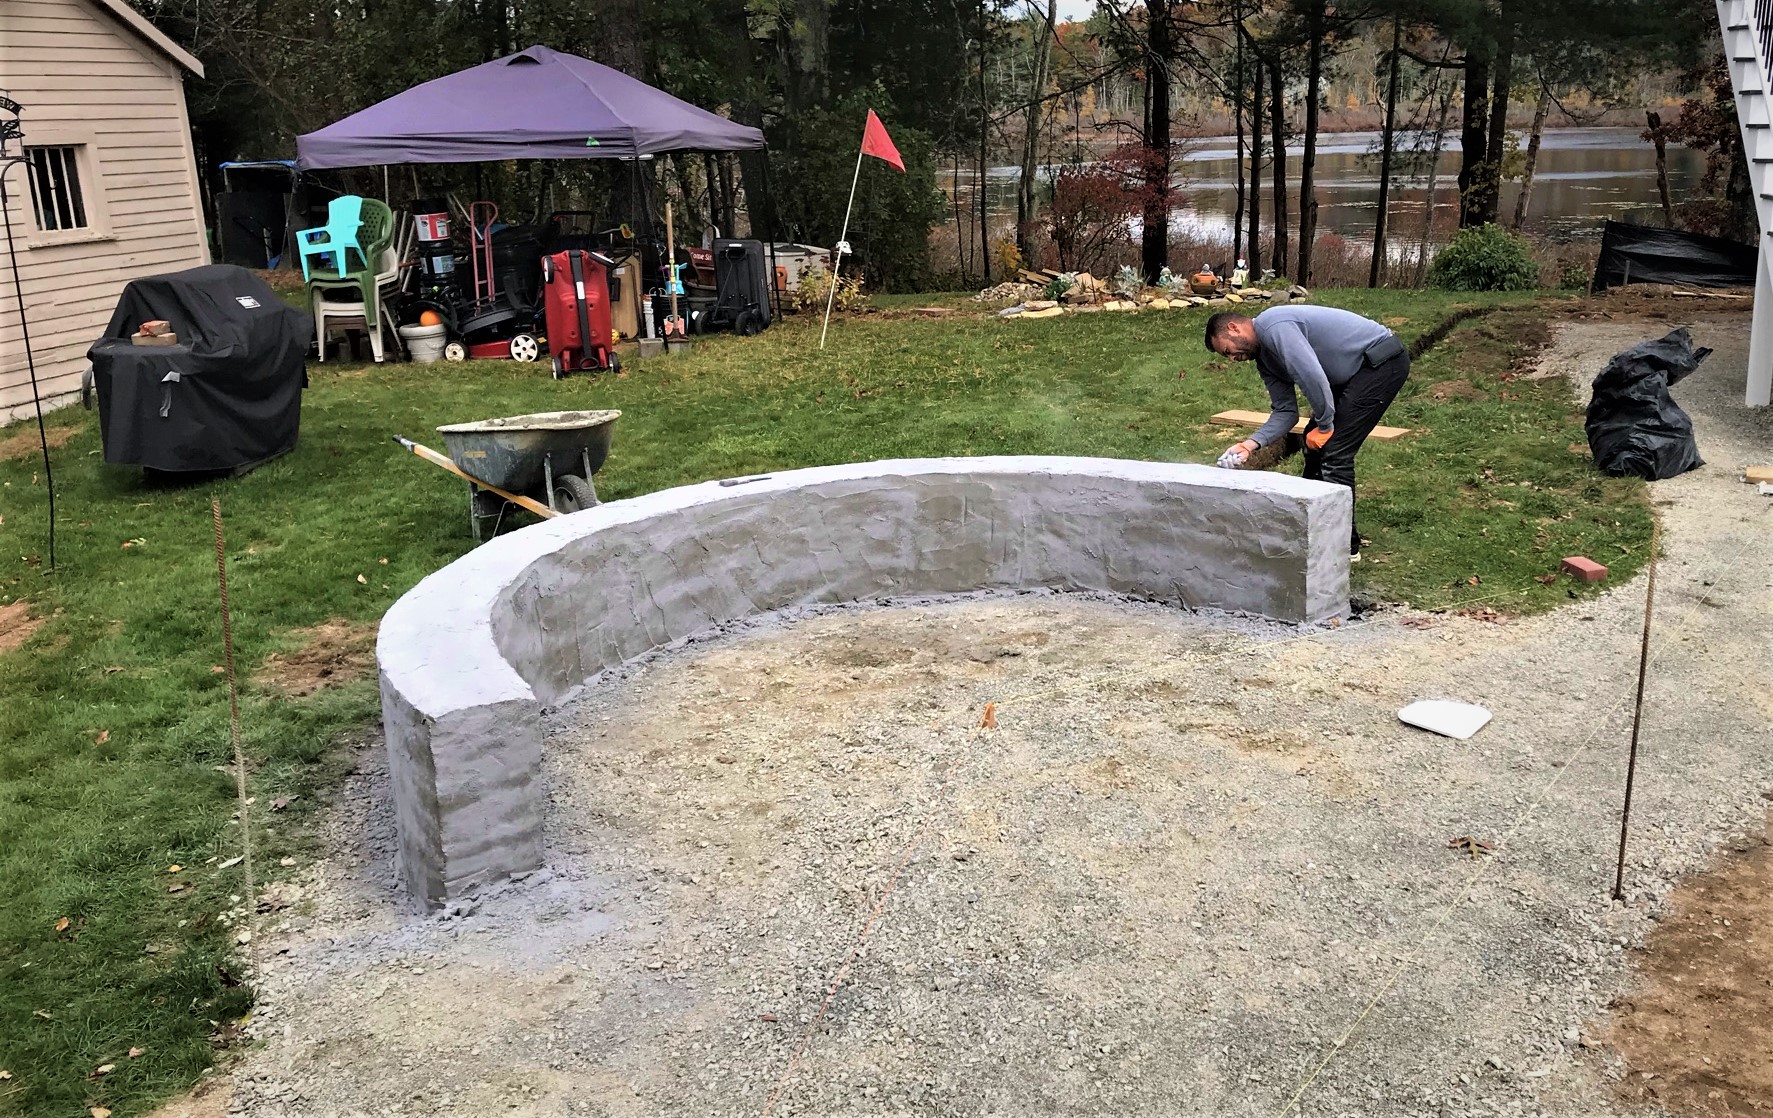
He did the same with the fire pit wall.
Evandro at work.Here you see him literally throwing the dusty agent on the wall.
After this, the weather was lousy the rest of the week. And then it got cold before it got rainy again.
Yes, that is frost everywhere – the temperature was down in the 20’s.
So, not much to show for two weeks. The good news is that this week will hopefully start going a bit gangbusters – there were window and door deliveries, gas line materials are here, and Evandro should finish up soon outside the garage. Stay tuned and I hope that there is more to share at week’s end.
And, for you hobbyists followers out there, I should have a few more posts to share on some small projects I have done in preparation for gaming this weekend with friends in Maryland and at Historicon. There have been some changes in plans – I’ll share soon.
The work shifted this week (October 17-23) to the patio and fire pit – and that meant Evandro and his crew were front and center as Ready Installs awaits window and door deliveries – all delayed by COVID.
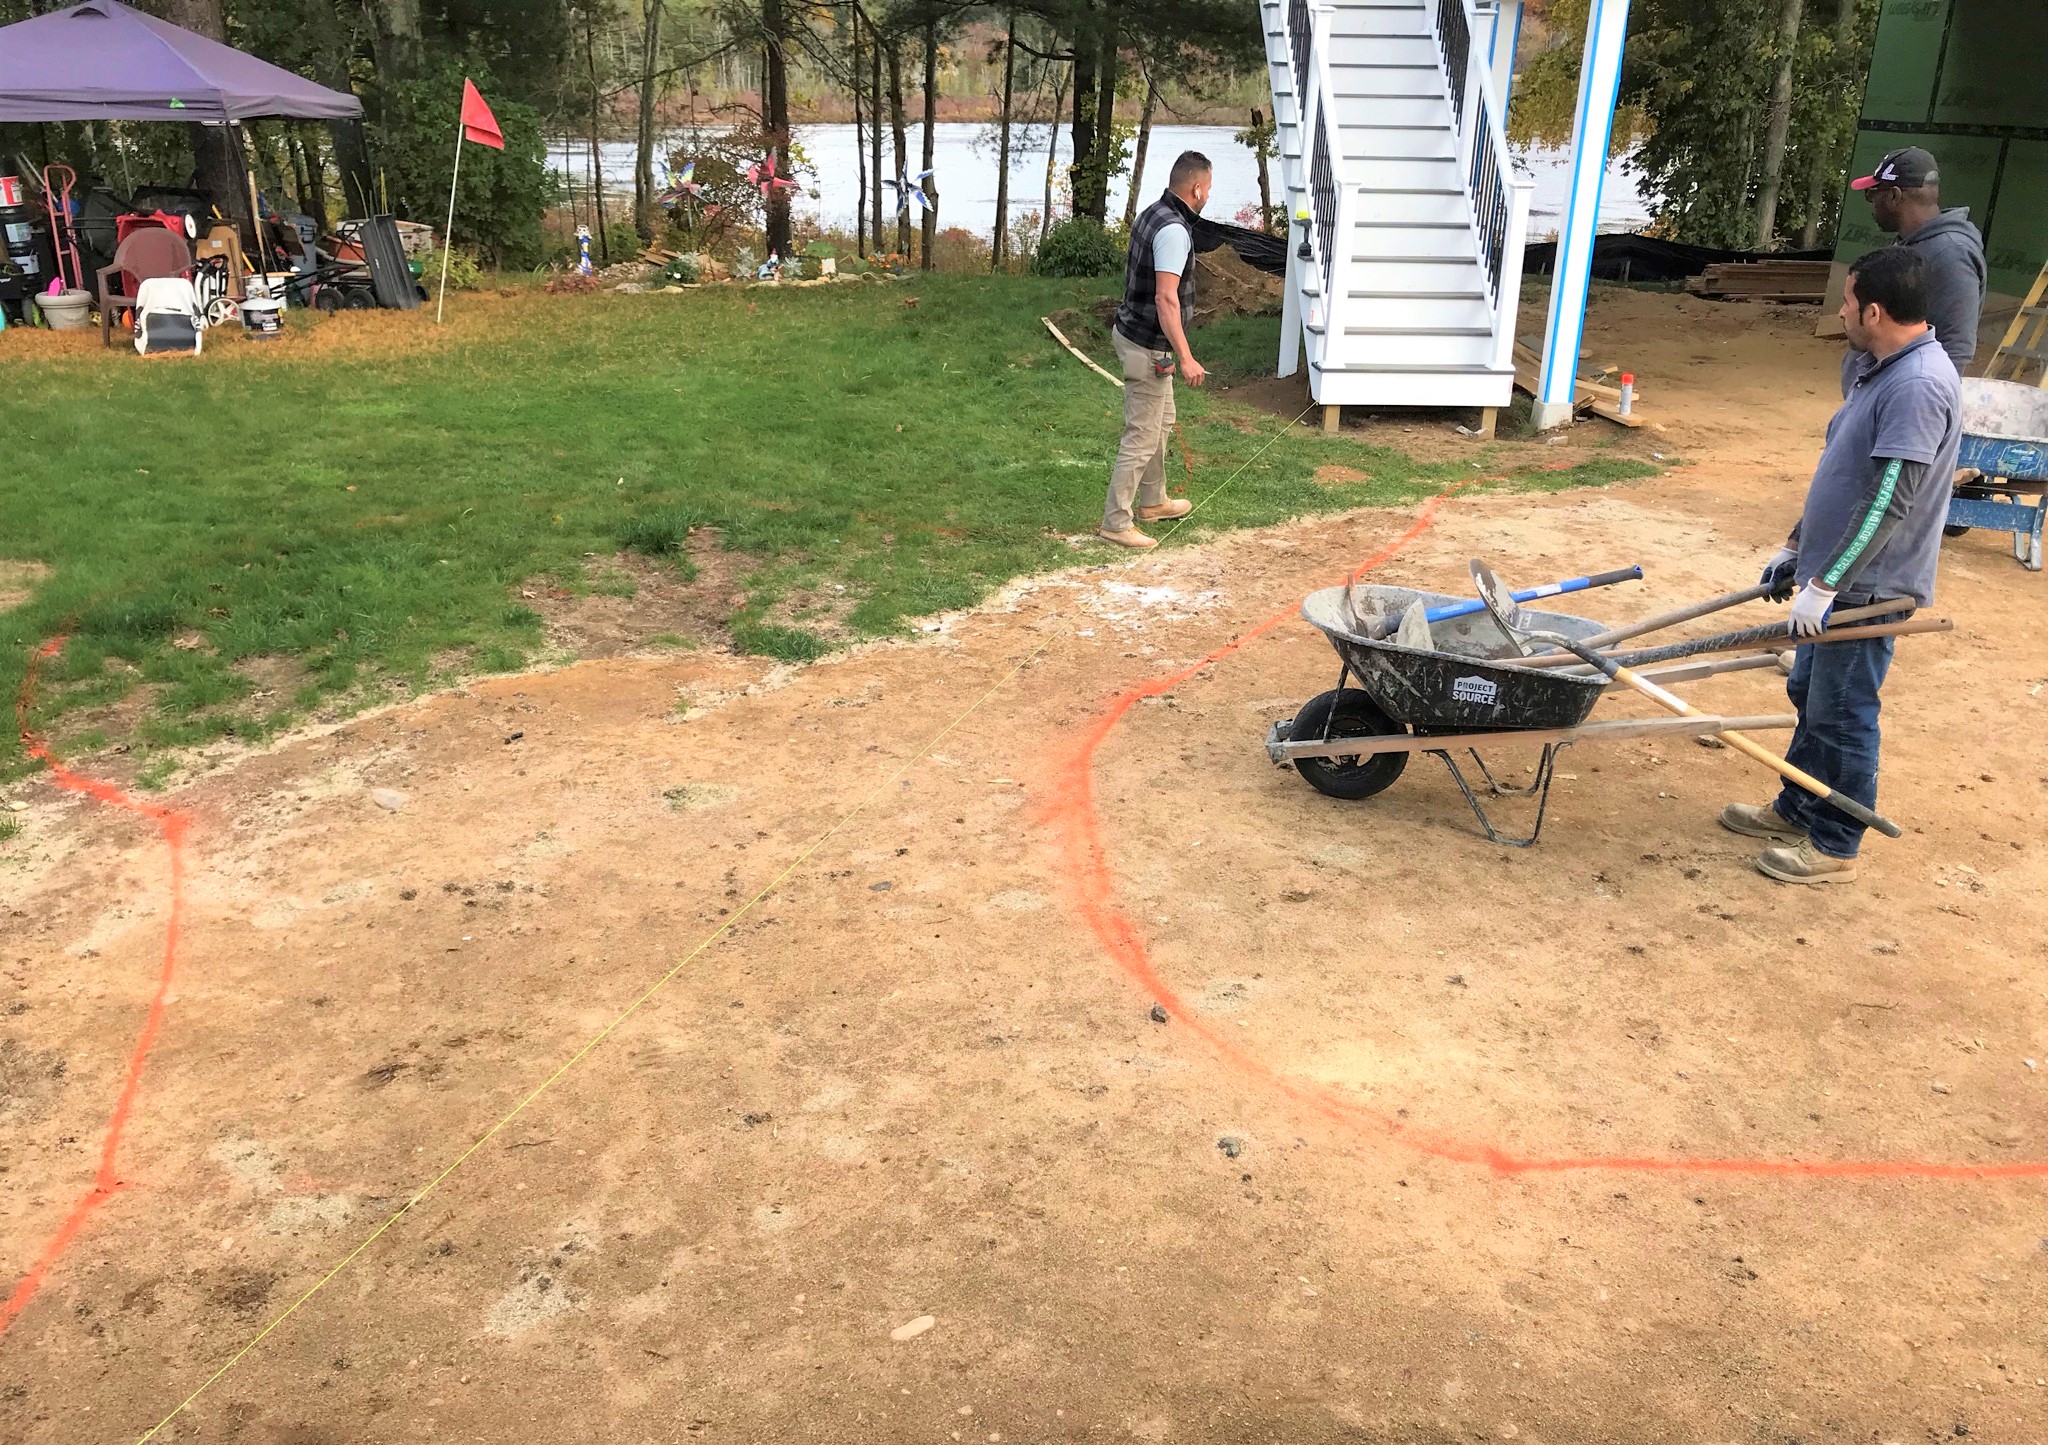
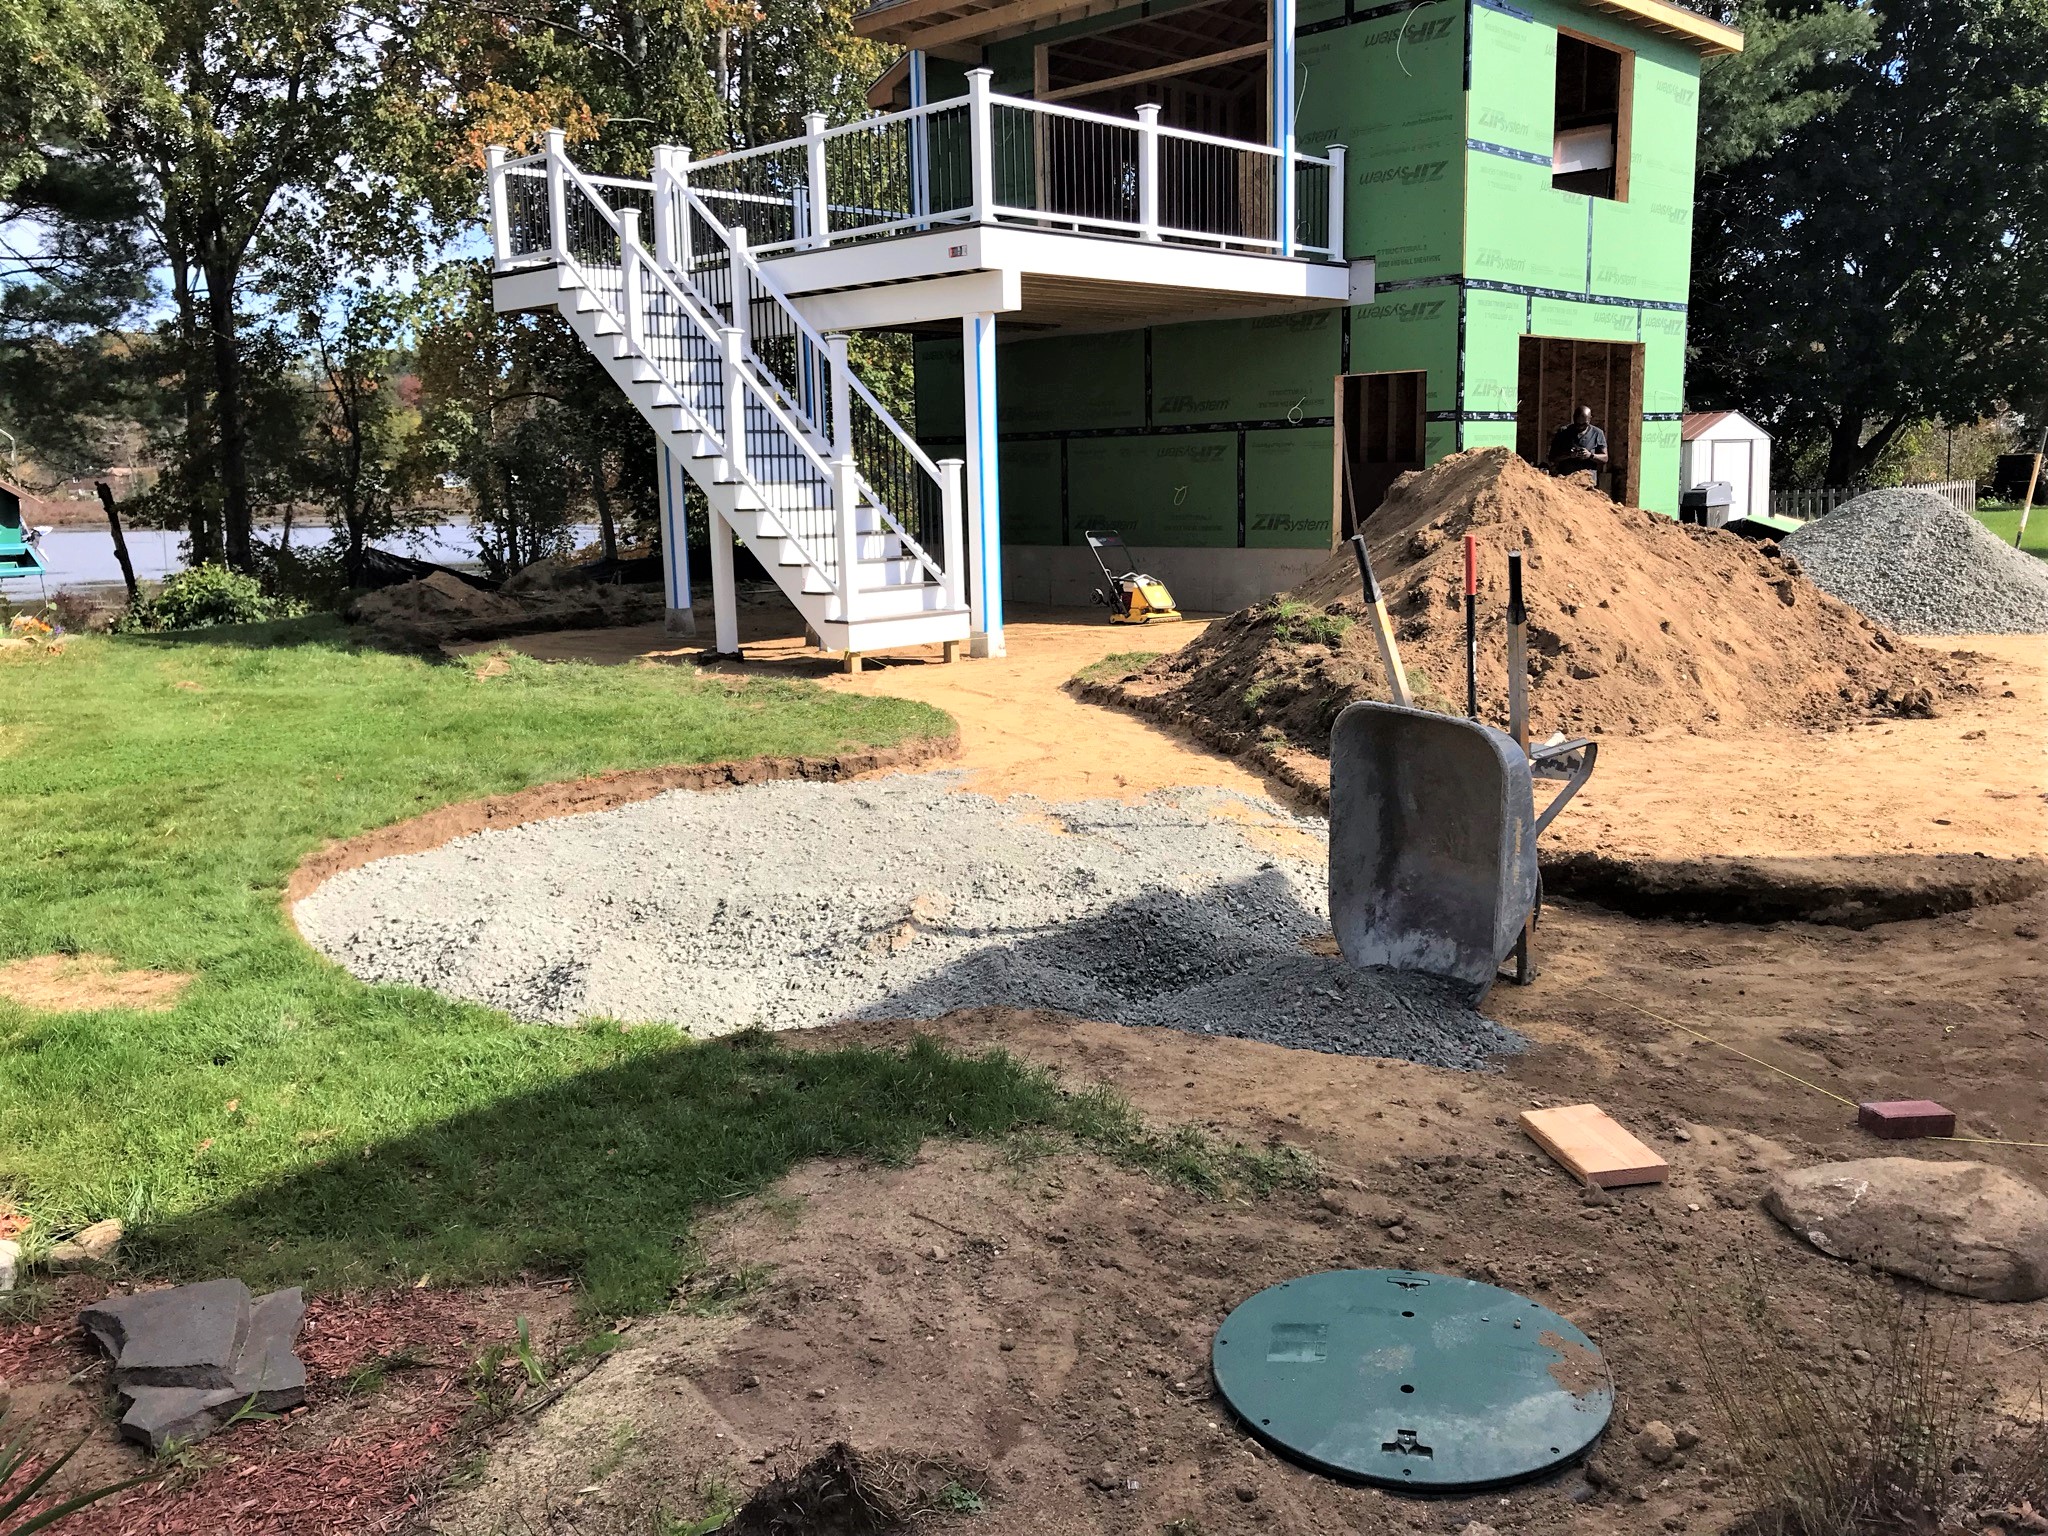
We had decided that we needed to upgrade our plan to include paving stone patios, walkways, a wall, and a gas fire pit. This post will focus primarily on those aspects. Evandro had previously roughly marked out where these new parts would go and link in with the new garage and the new house deck.
On Monday, Evandro verified his lines and excavation began.
Lines set and digging begins.Monday progress.
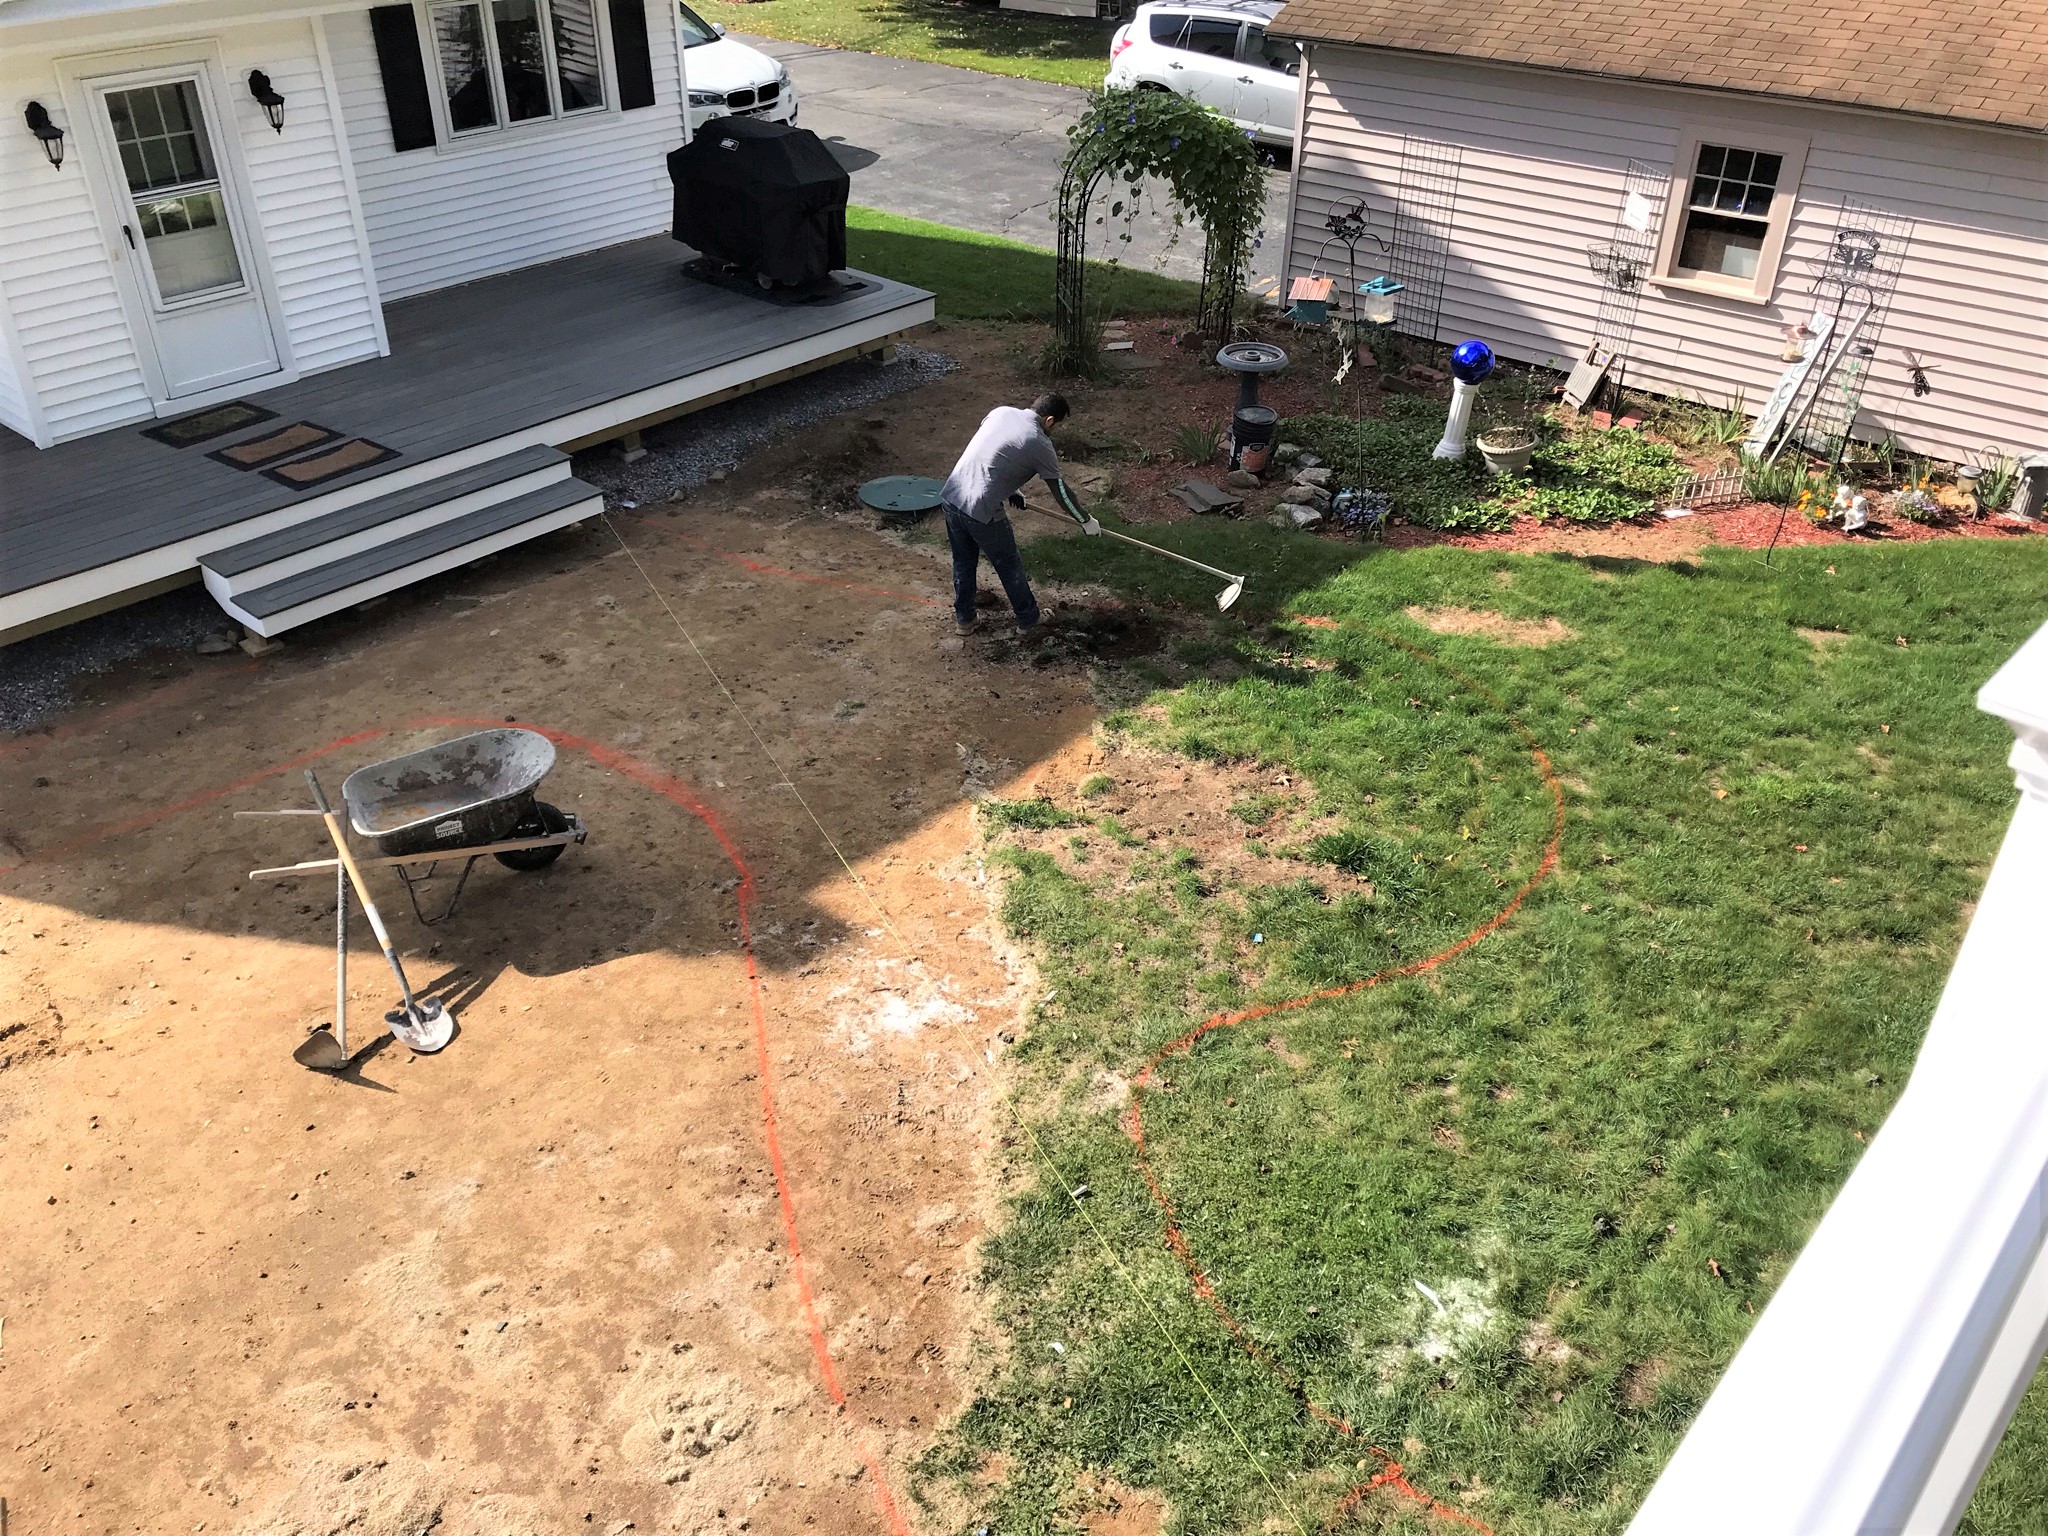
There was q lot of digging – and please note that this was done all by hand – no equipment other than hand tools.
Lots of digging by hand.Tuesday’s progress at seen at dawn on Wednesday.
On Wednesday, it rained. Thursday things picked up again. Subbase compaction began – some by hand and some by machine depending on the leach field presence underneath. Then crushed stone started being brought in and spread.
Thursday work in progress.End of Thursday progress.
Friday saw a continuation of Thursday’s efforts.
Friday work.
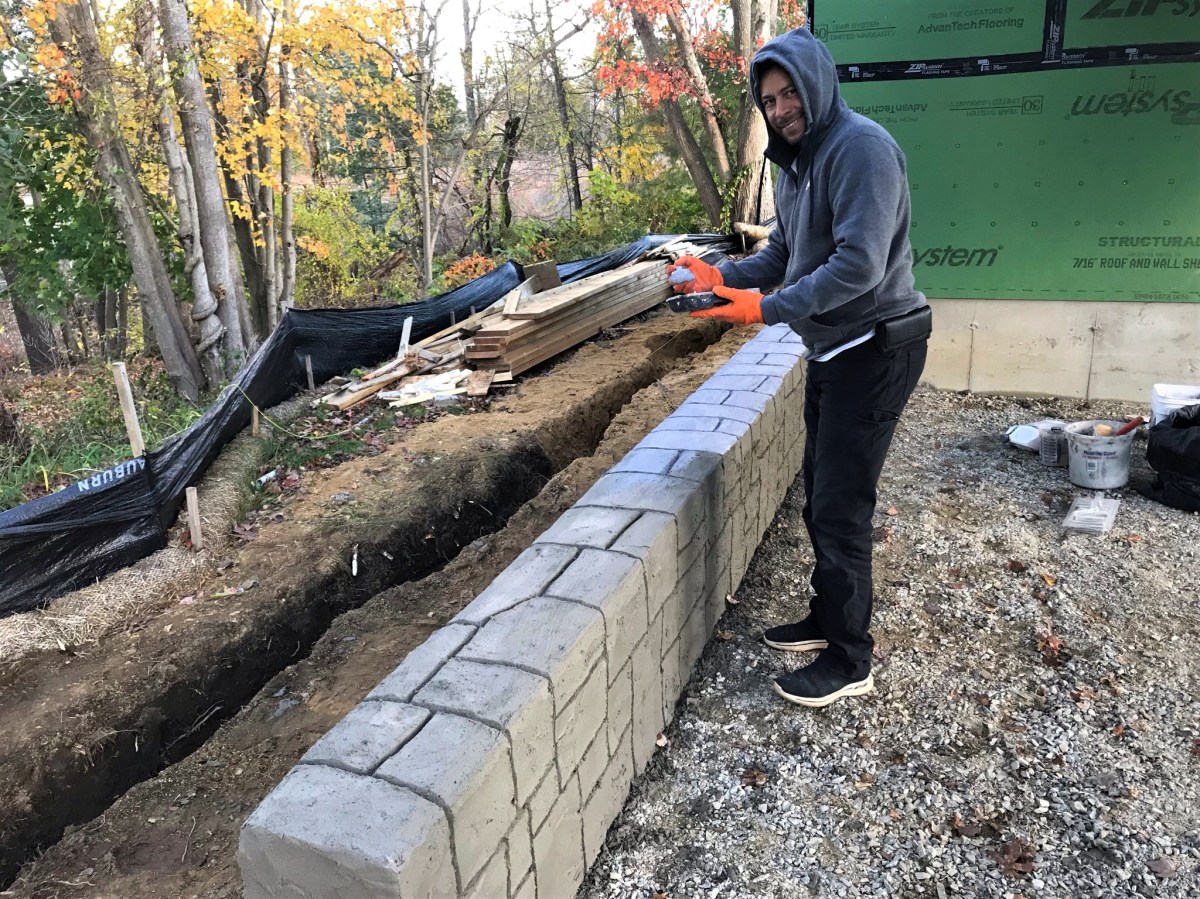
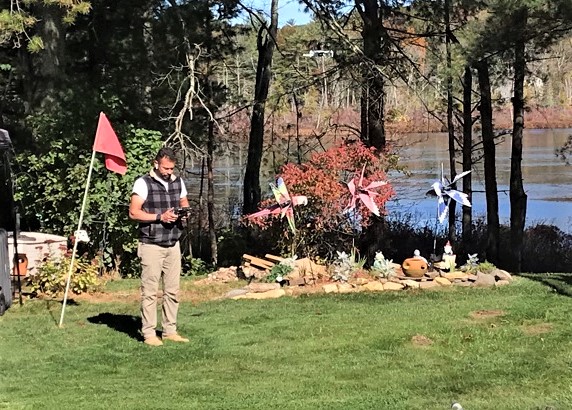
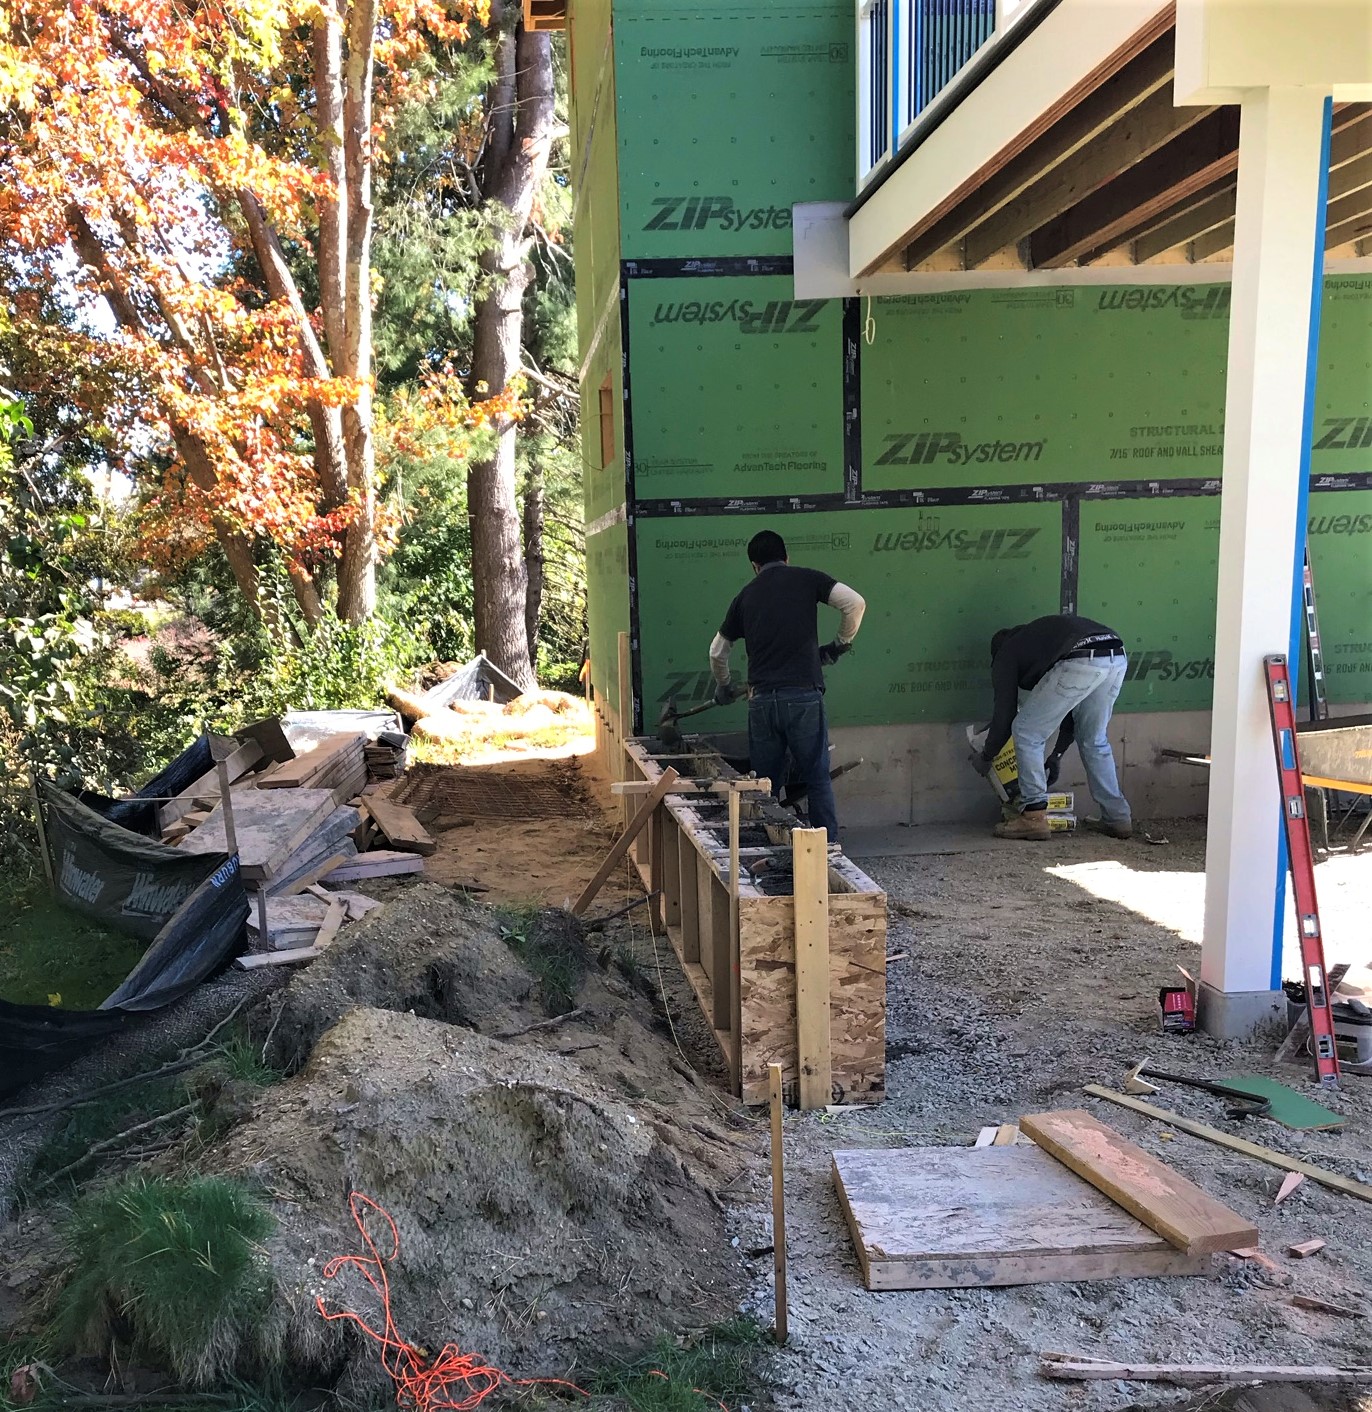
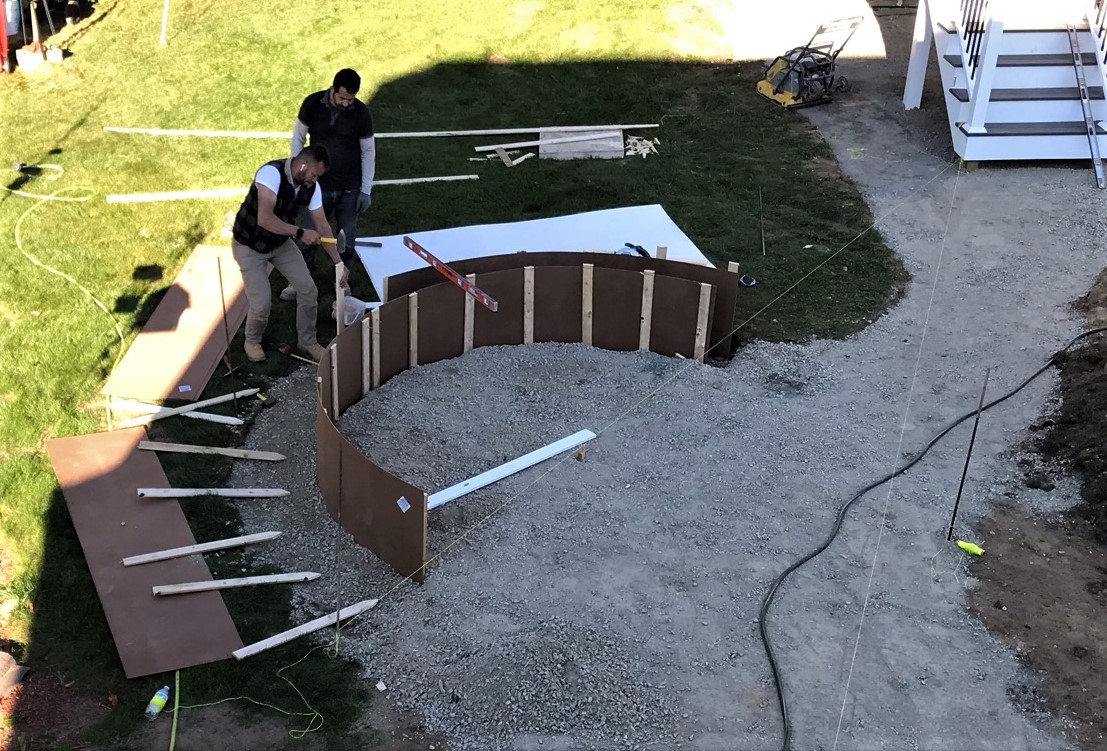
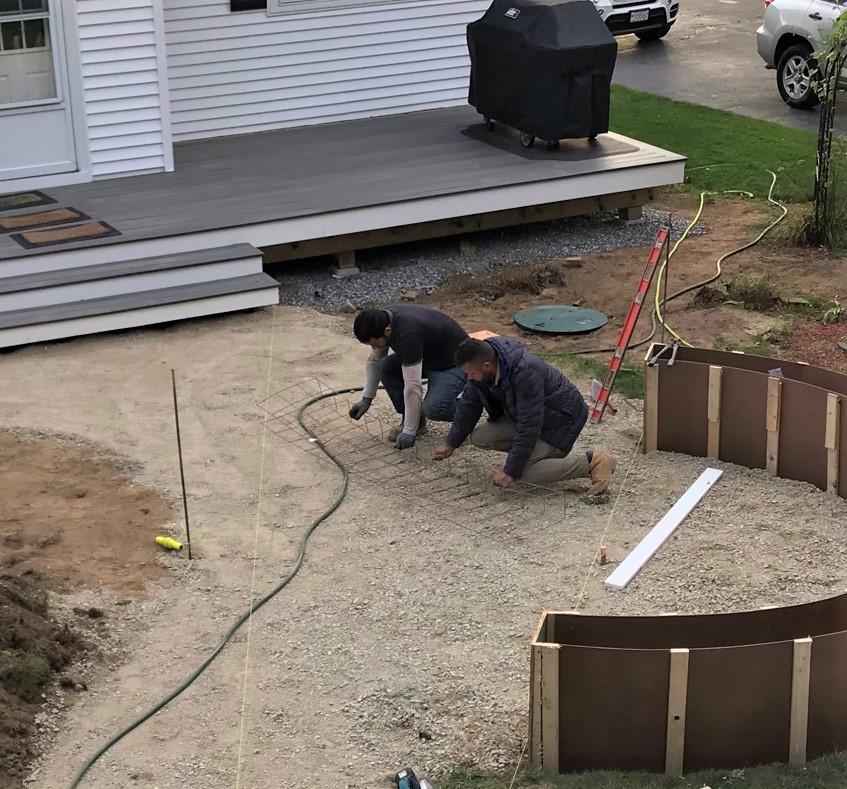
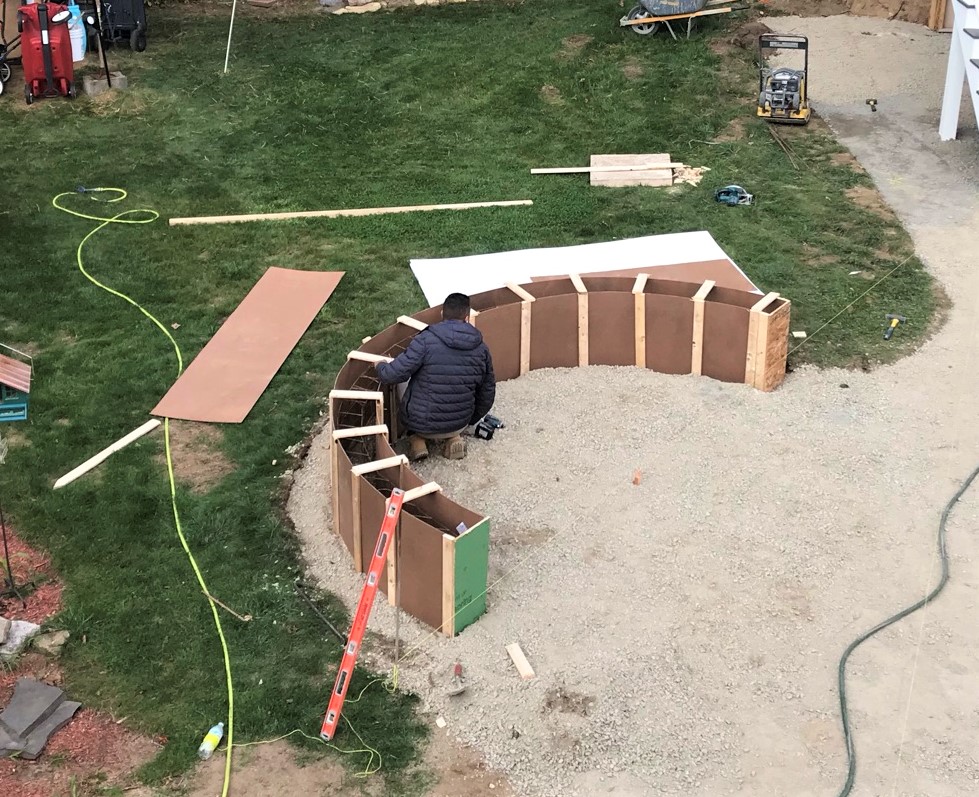
However, it became obvious that Evandro wanted to catch up for Wednesday, so work proceeded on Saturday as well. The work was focused on building concrete forms for the back wall and the fire pit, and lastly placement of hand-mixed concrete. Evandro had an amazing drone that he used to take some photos and videos that will eventually show his work start to finish – and I hope to share a link for that when its available. The drone was able to self-stabilize in the wind and could reach heights of 500 feet!
Evandro and his drone ( you can see it just above the midpoint of the two reddish bird windmills).
The back wall was formed and placed.
Back wall of patio under the deck.
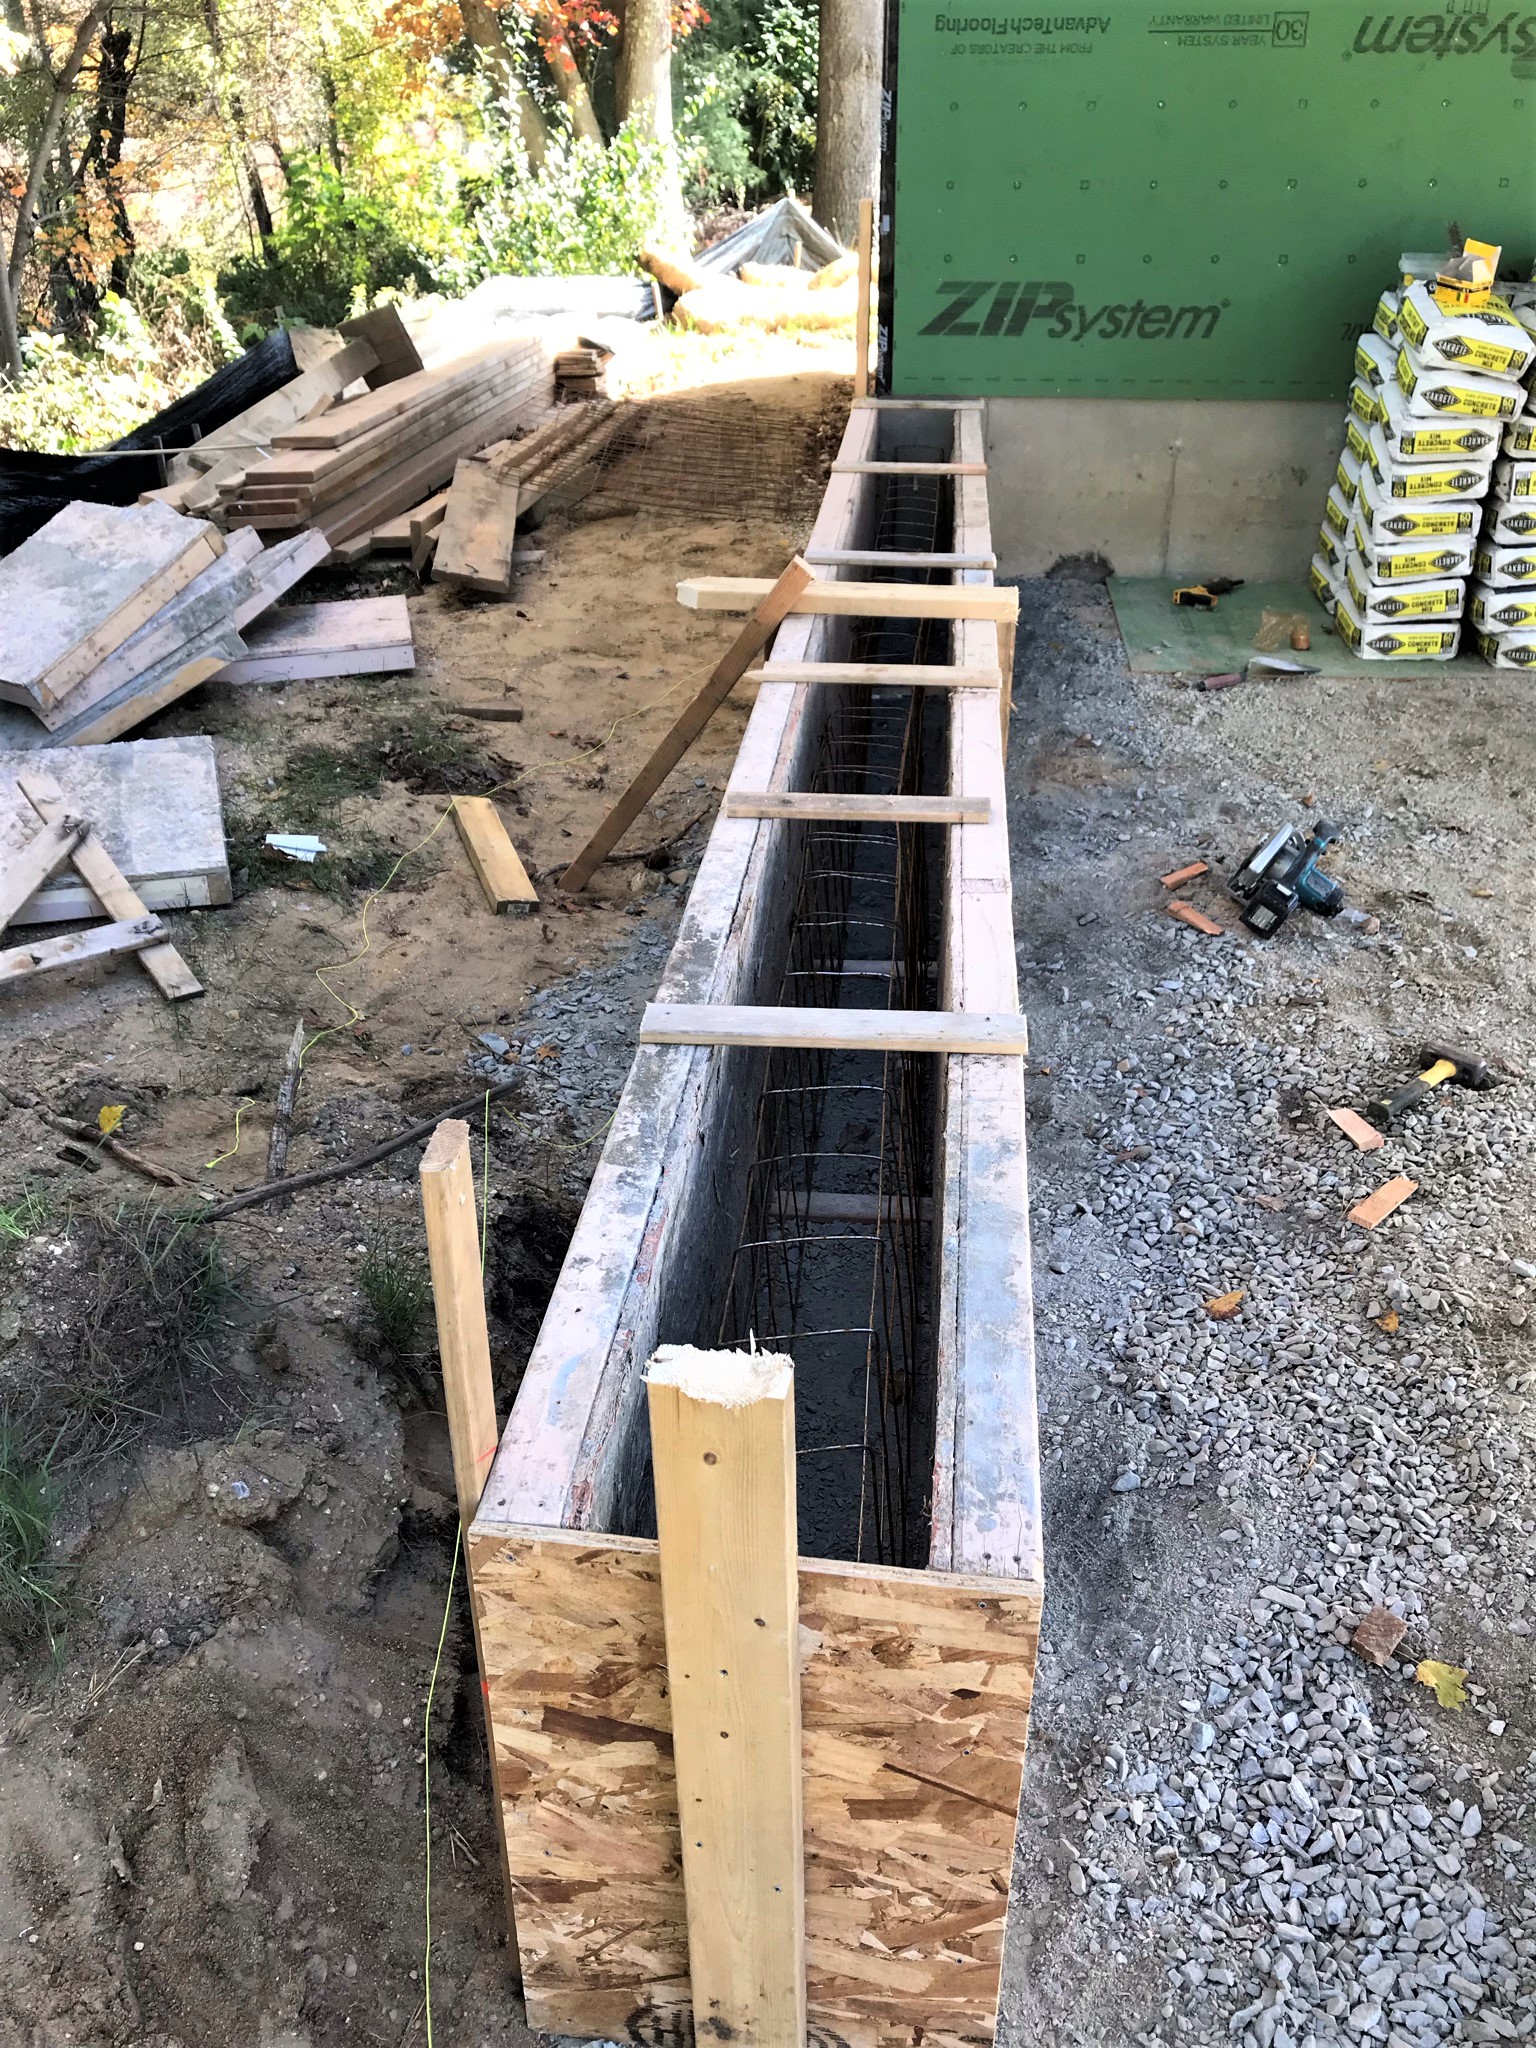
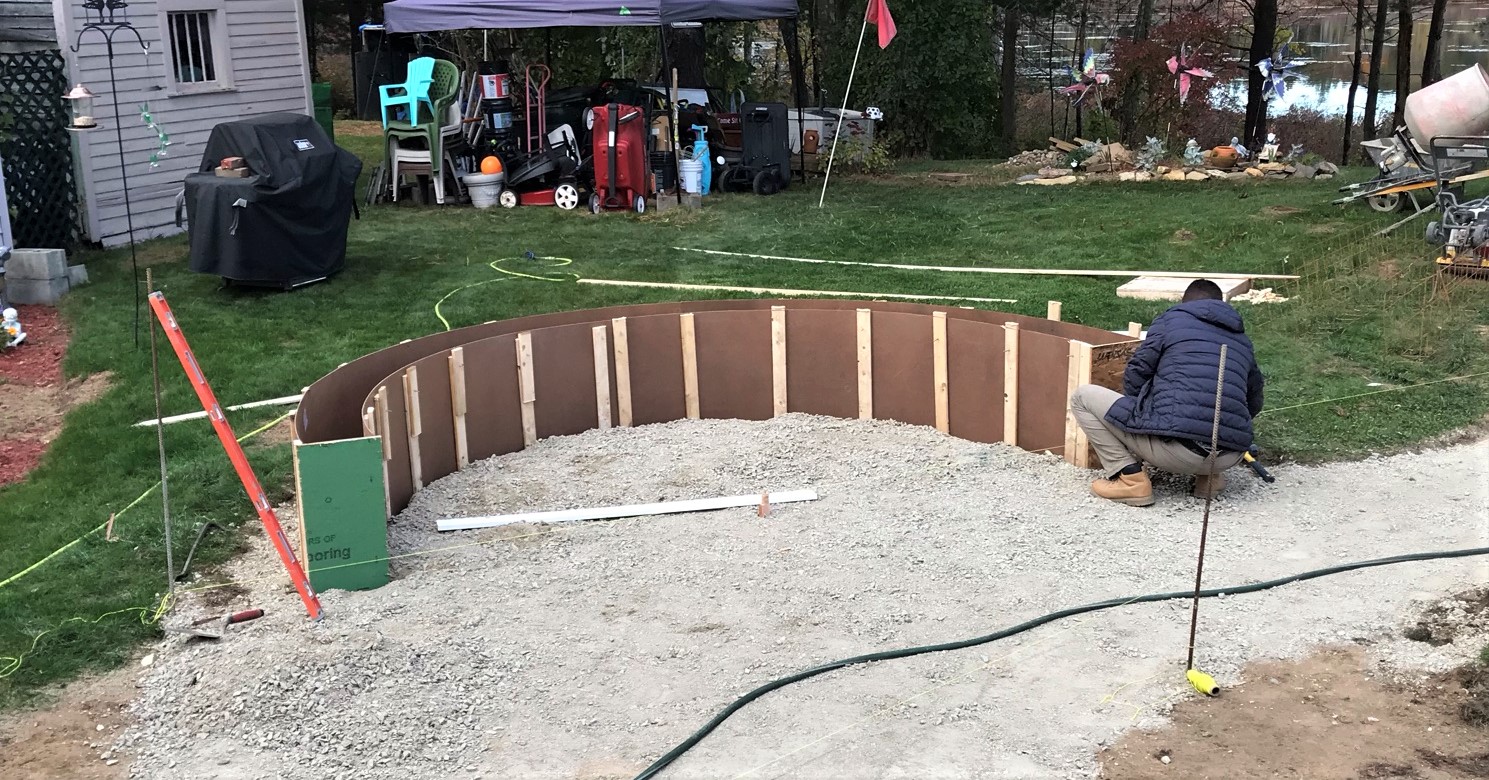
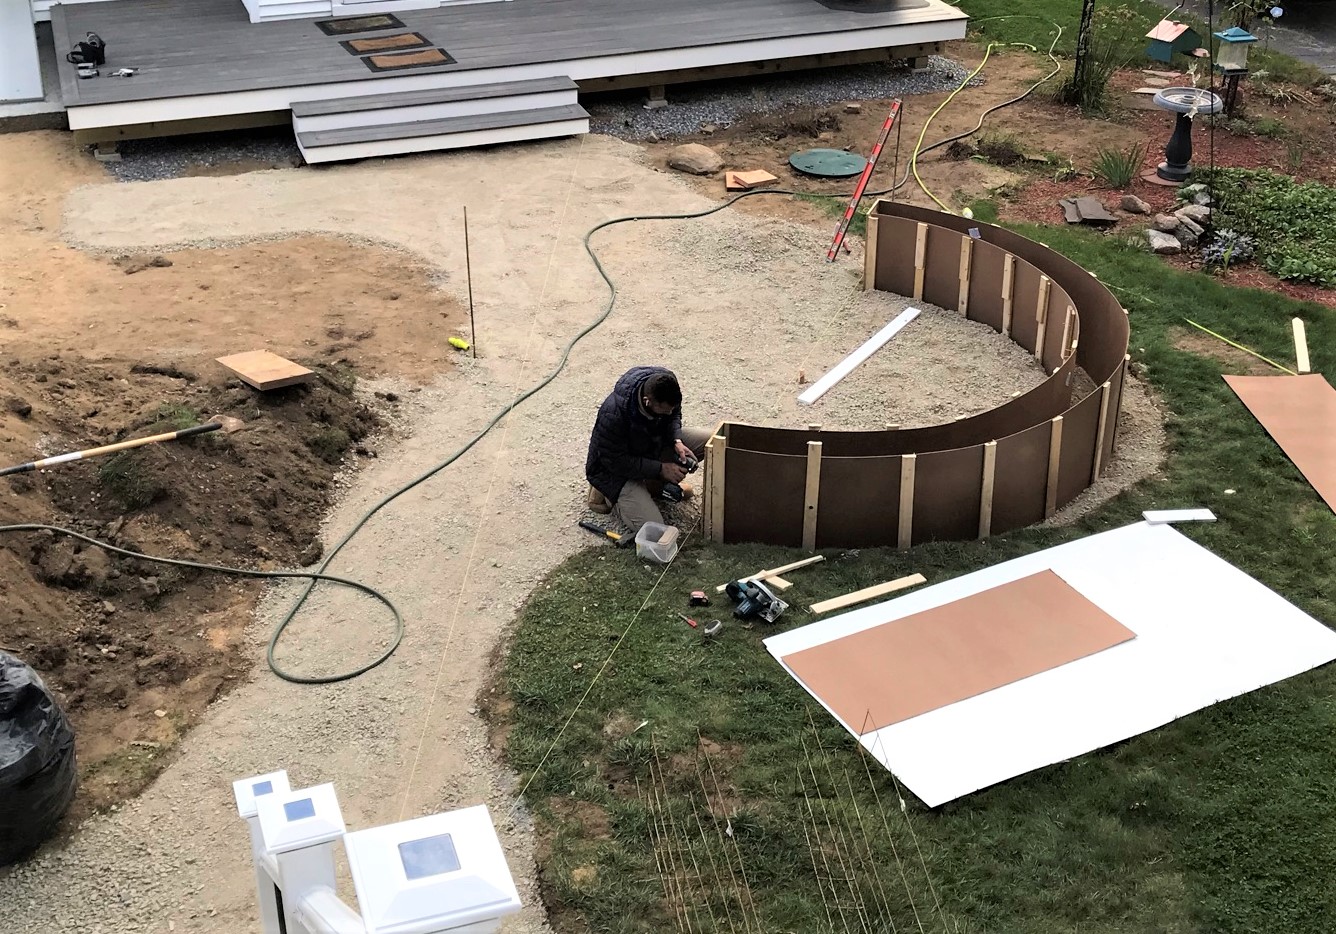
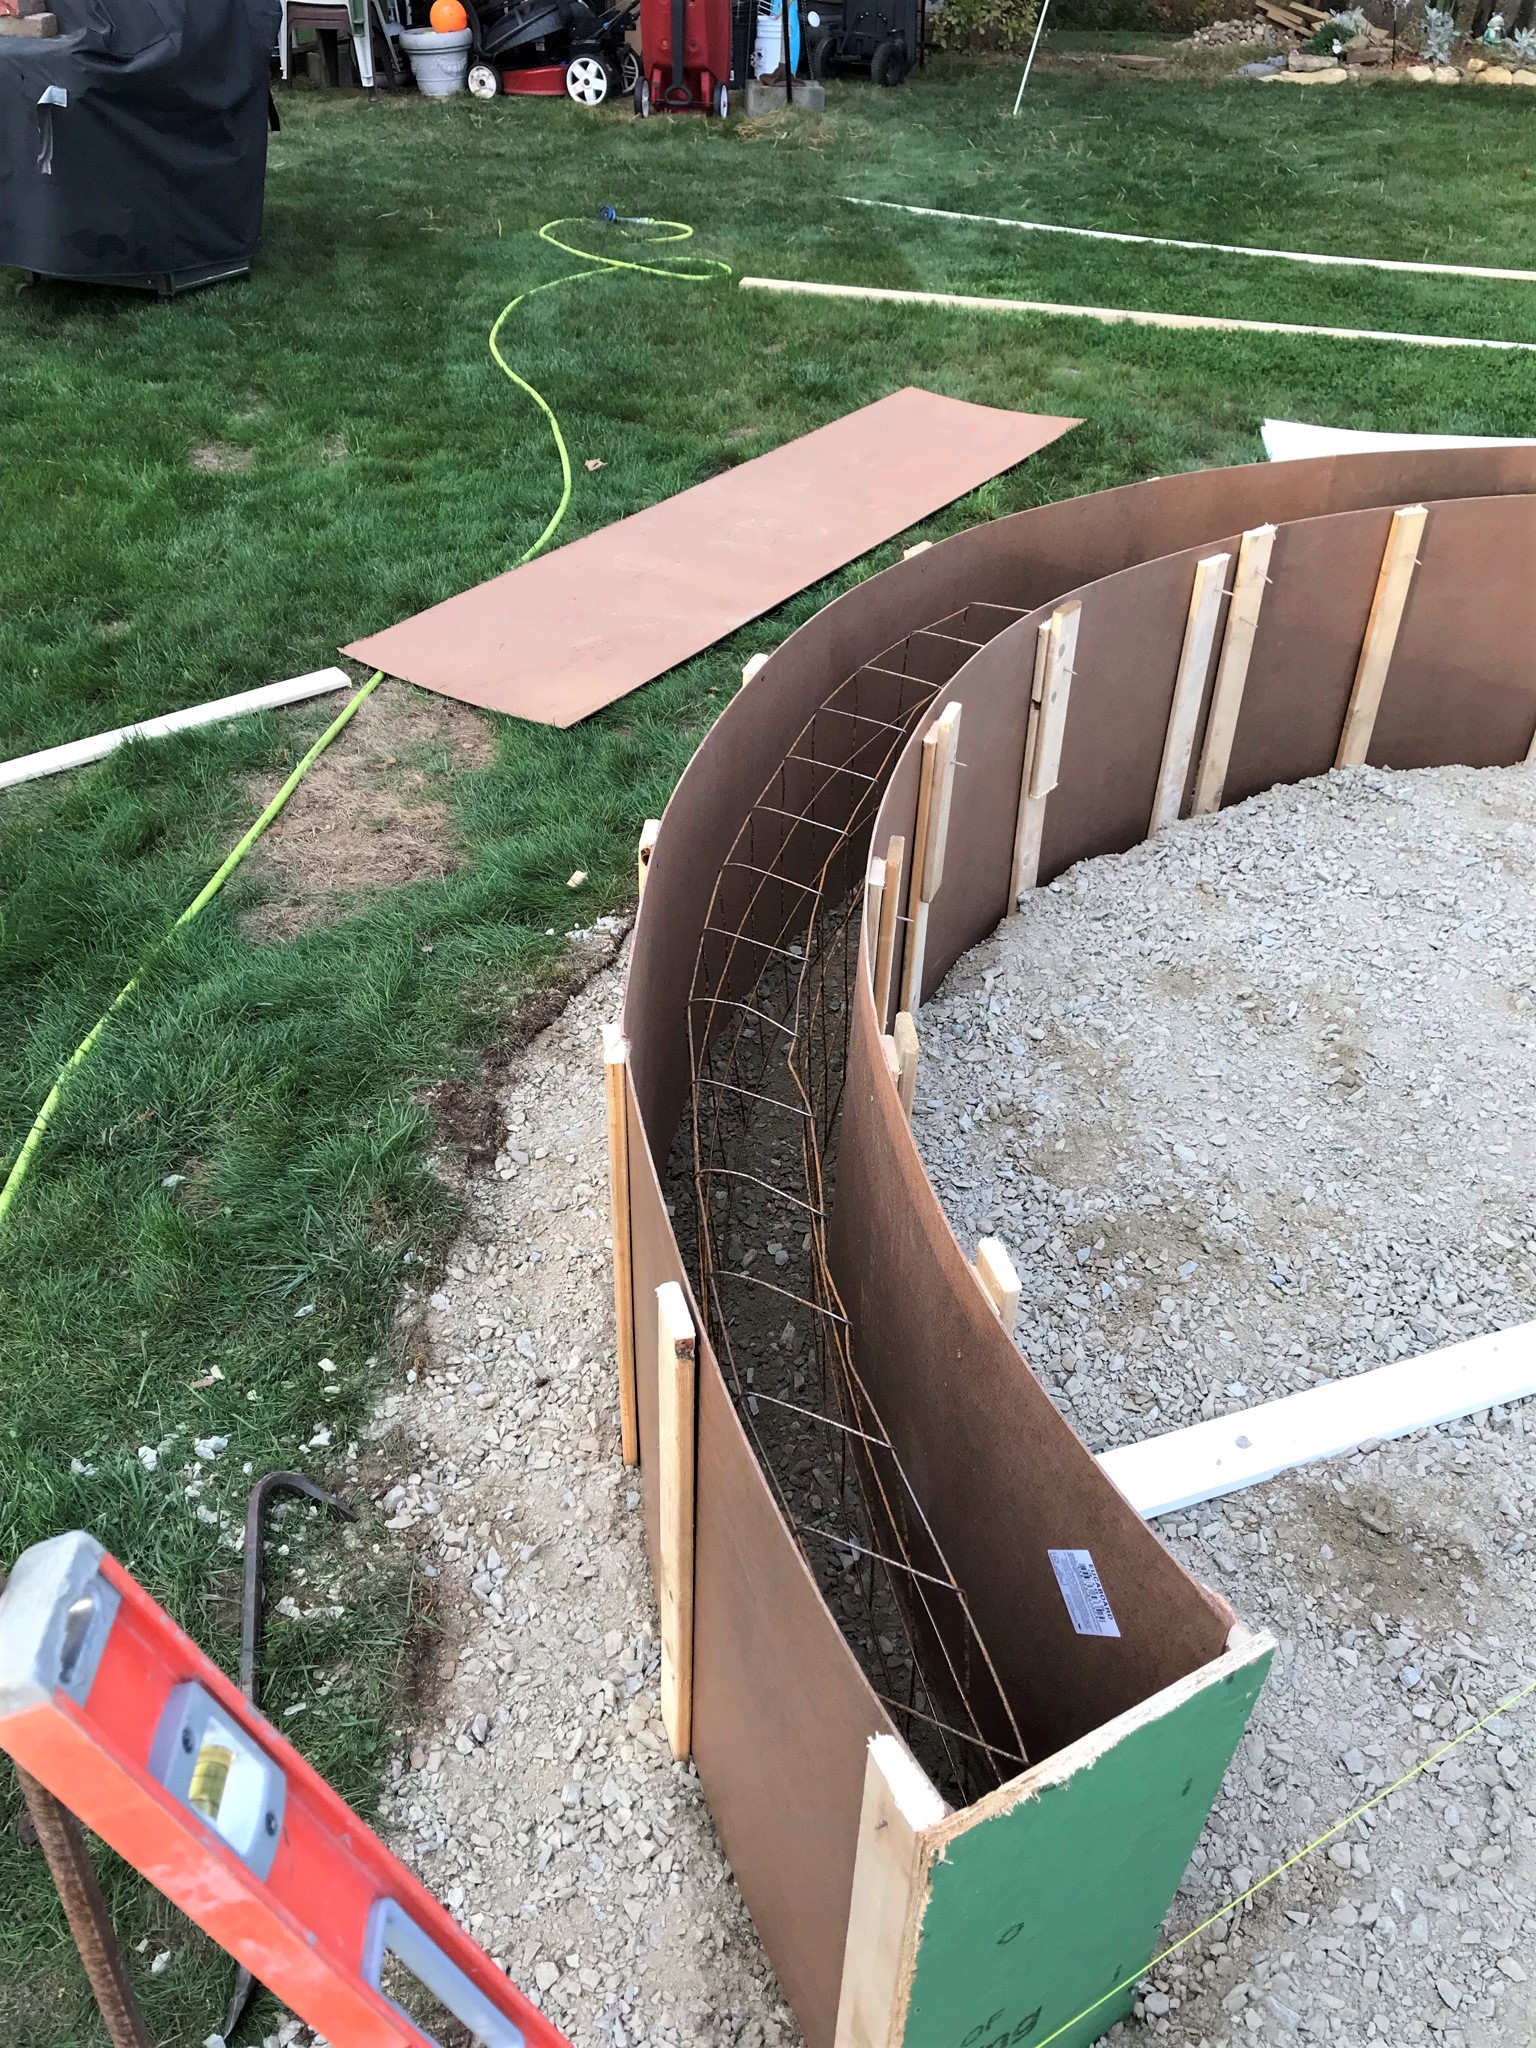
The fire pit wall was started.
Building the forms.
Staking the forms and bending and inserting the steel.
Steel in!
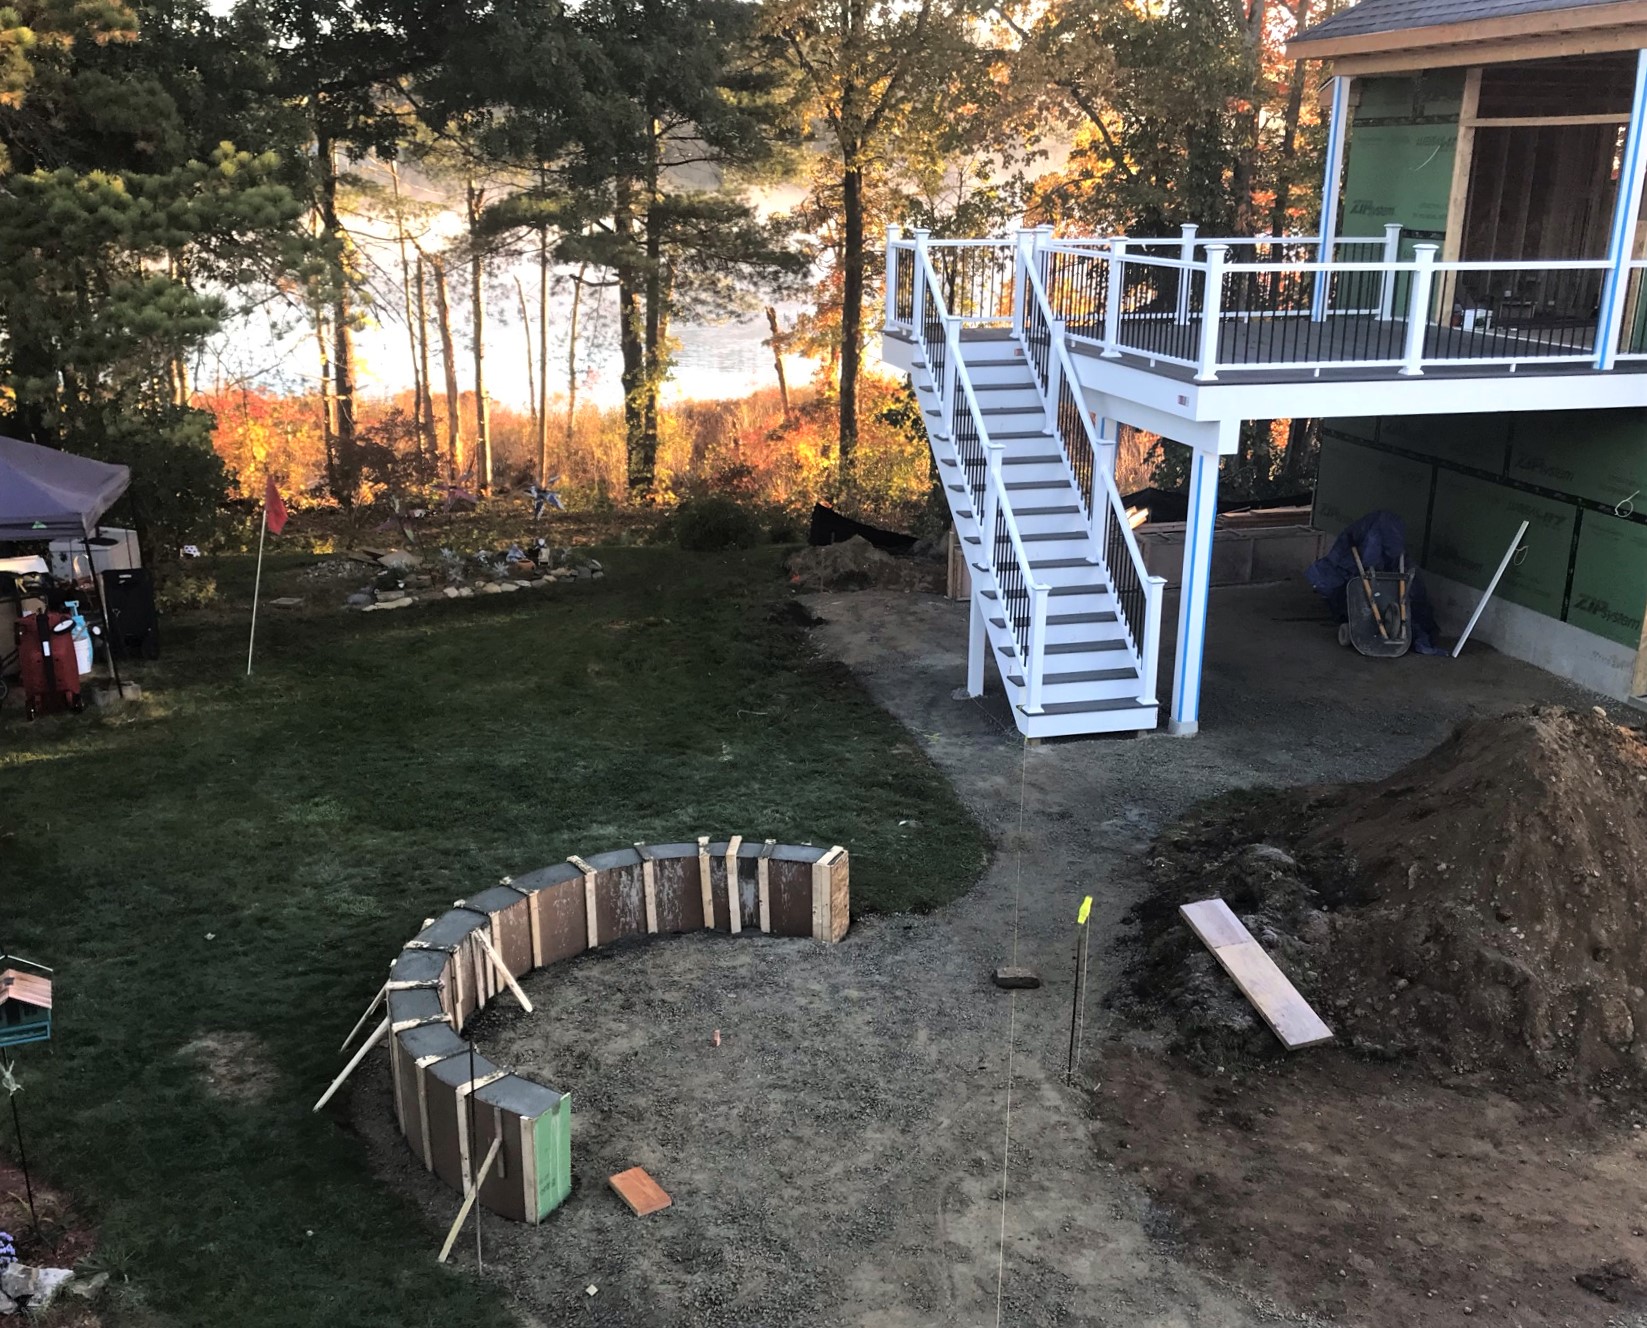
The crew worked past sunset on Saturday, and got good progress – though I had to wait until Sunday to have enough light to take a picture.
Week’s progress as seen at dawn on Sunday the 24th.
As I write this in week 15, it has been rainy and this is as far as we have gotten progress-wise. However, I bet Evandro hits the ground running when it dries up.
I hope this was enjoyable and thanks for taking a look. I may even do a hobby post shortly!