With the unhappy demise of our beloved Caesar on New Years Day (discussed here), and Lynn having subsequently joined me in retirement, we found ourselves for the first time in many years being able to travel. We decided to drive down to the Orlando Florida area in April to visit with friends, for some recreation, to attend a Marriott golf school, and to attend the RECON HMGS South Gaming convention. It was a needed break. The garage+ project would continue while we were gone – so no need to hang around in Massachusetts – off to Florida!
We drove because frankly we prefer it. We were in no mood to deal with airlines, masking requirements, and the rest. Besides, we could more easily bring all the stuff we wanted to take that way.
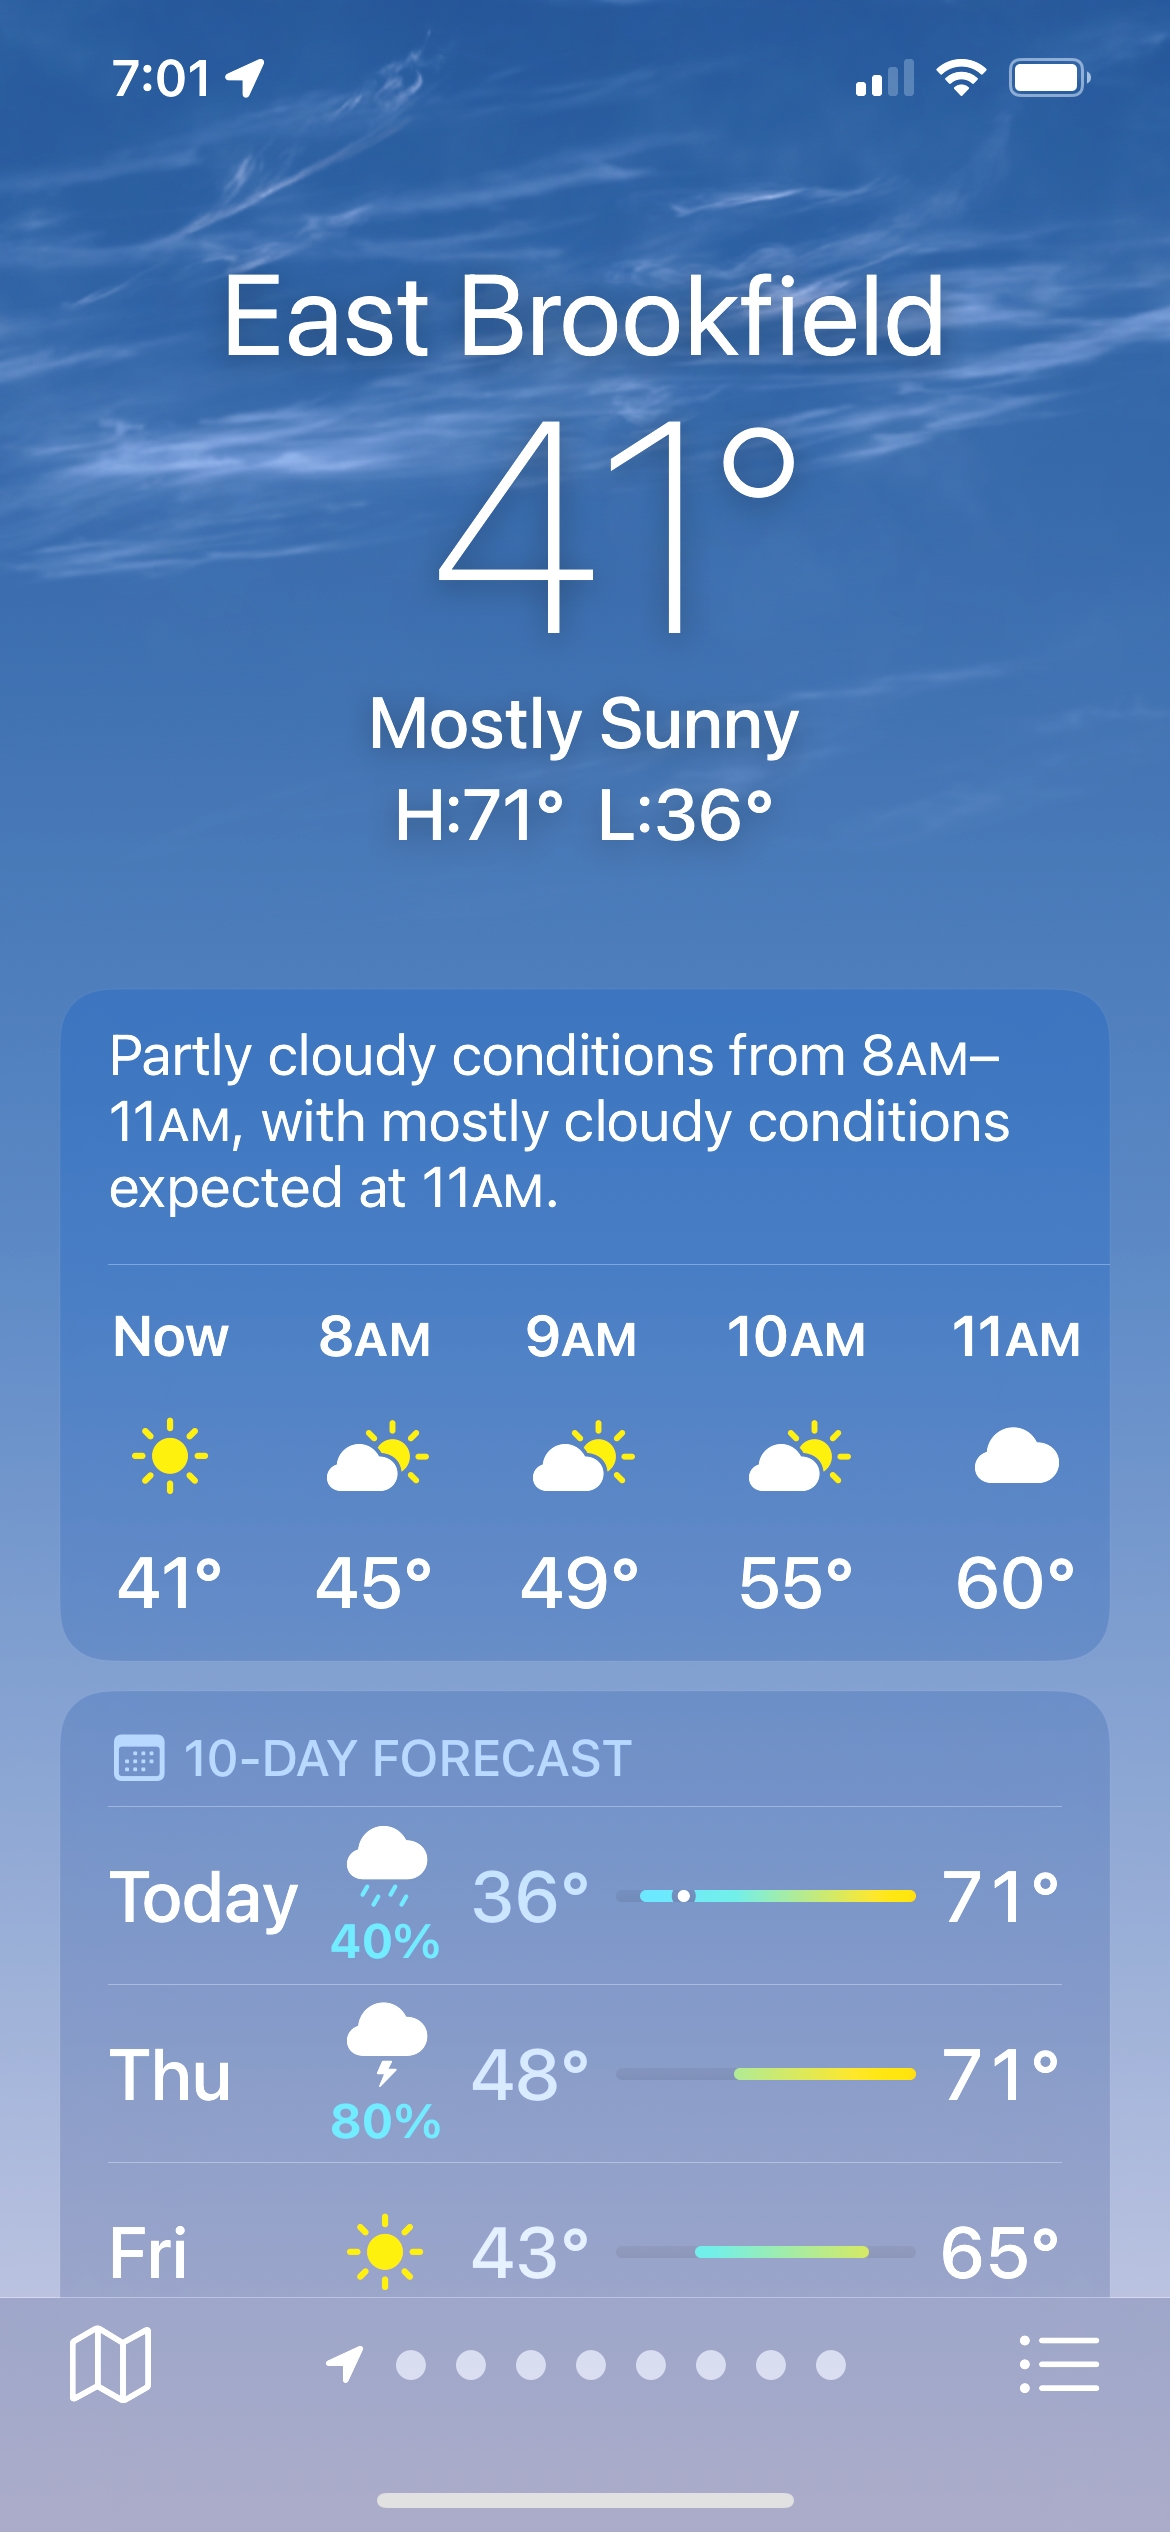
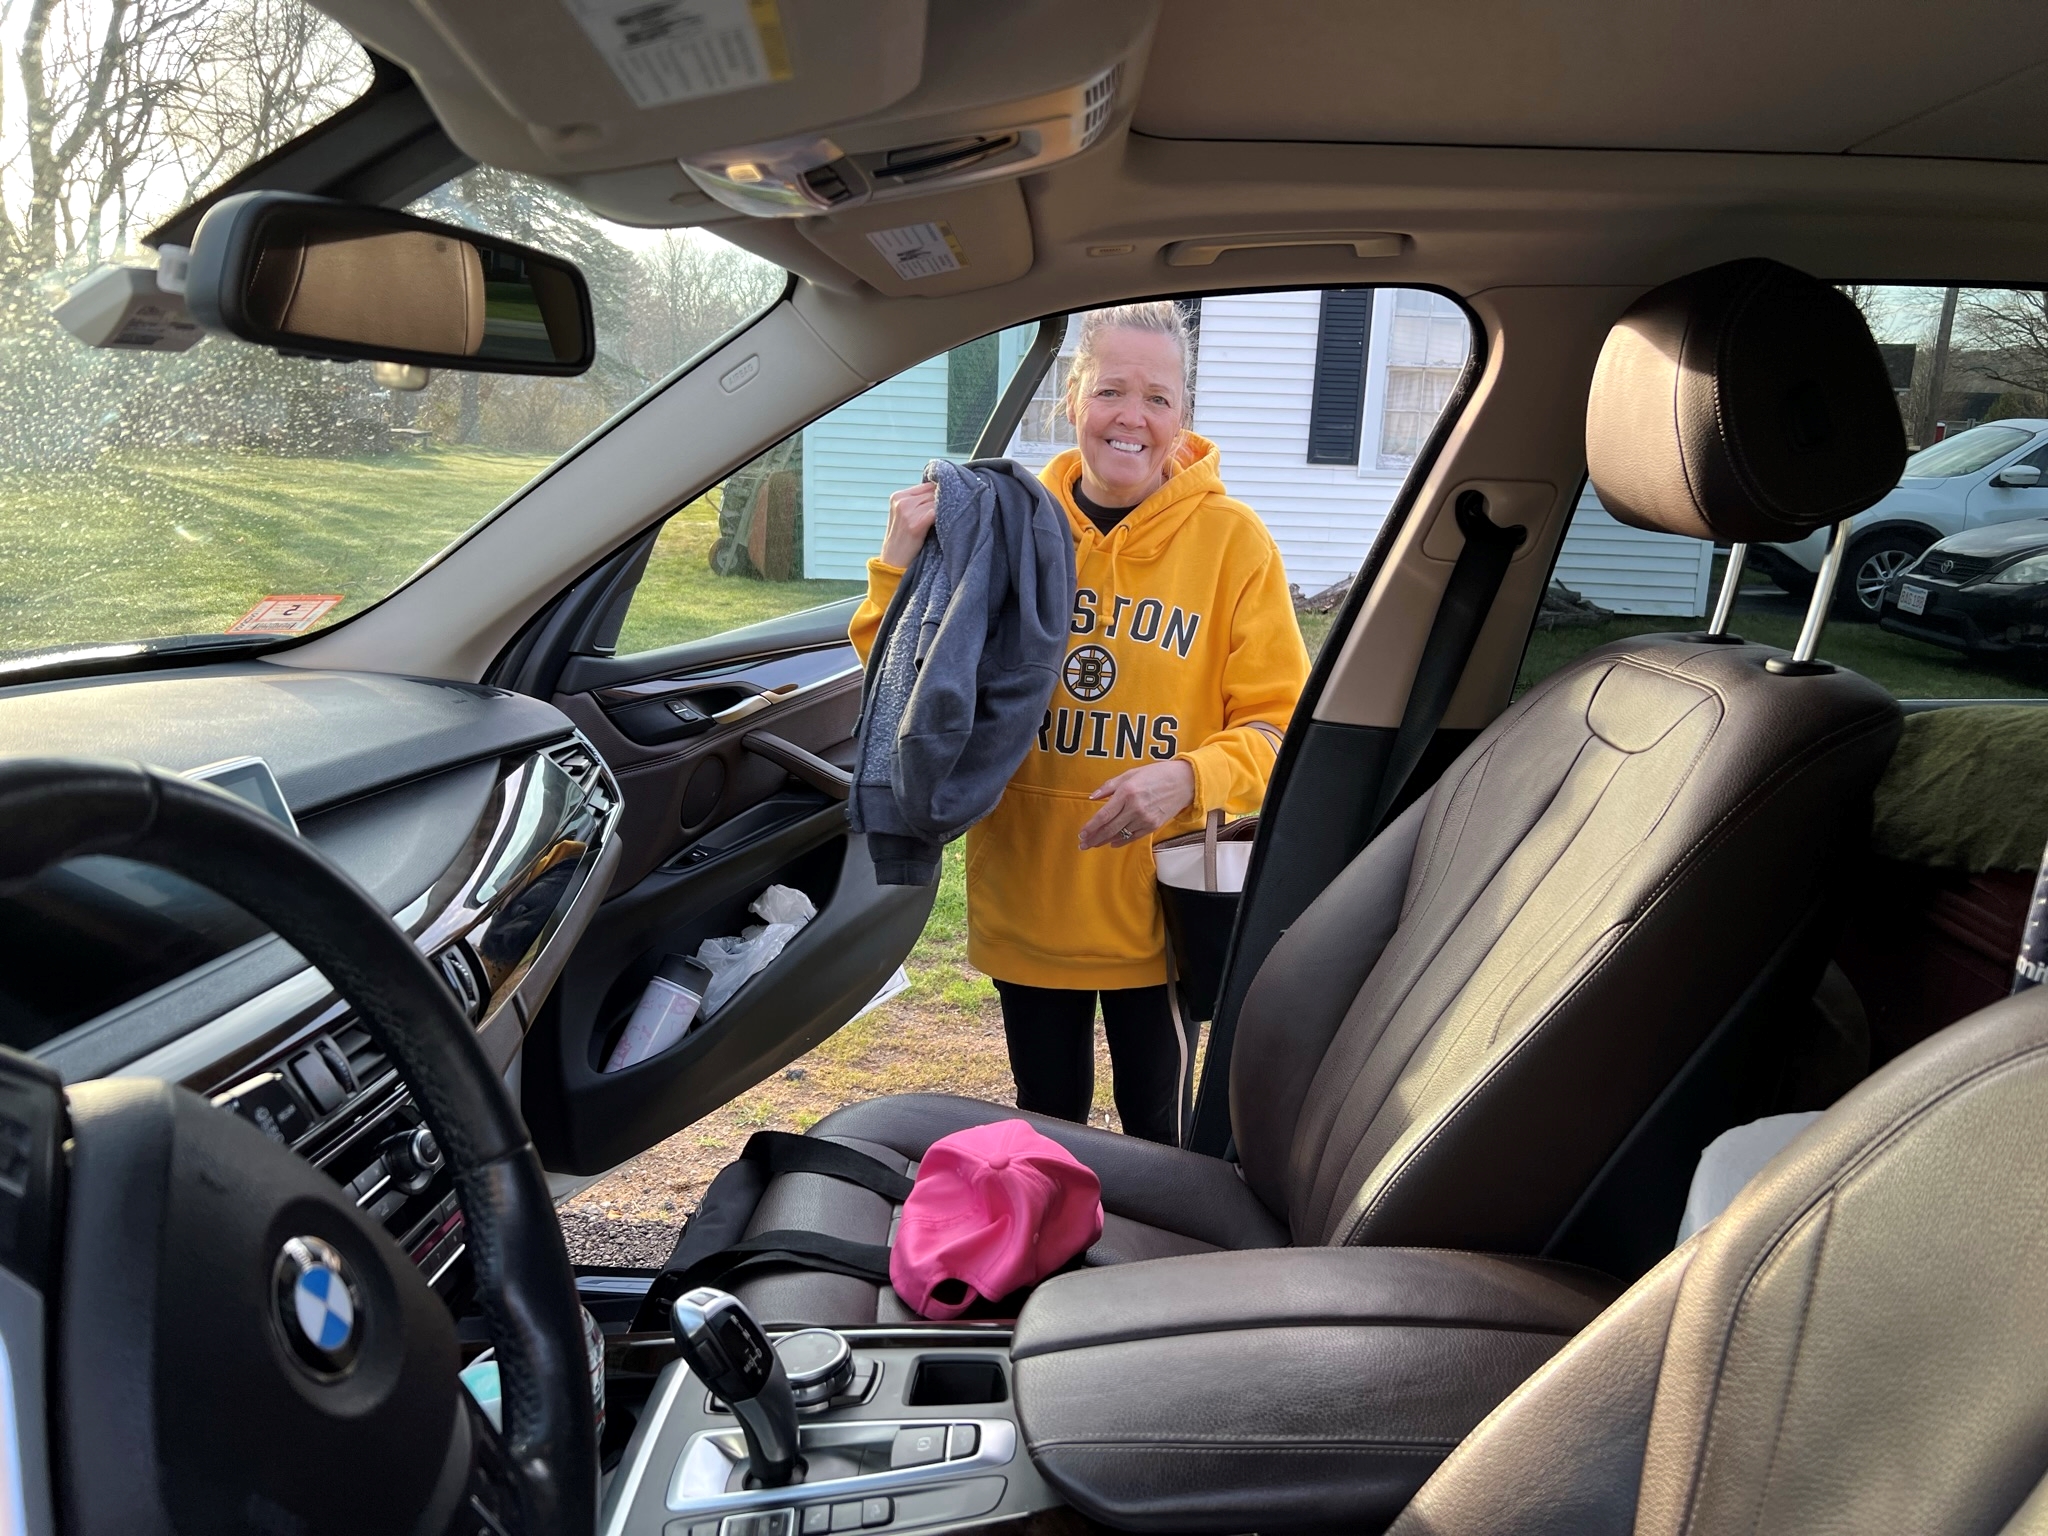
The morning we left was a chilly start.
It took us three days to get down to Florida (really two and a half). It’s a roughly 1200-mile drive. We left on 4/13, and stopped south of Richmond, VA and in Savannah, GA on the way.
X5 is packed, let’s hit the road!
The ride down was mostly done on I95 (avoiding NYC metro as that’s a nightmare). However, the most surprising aspect of the drive down was the number of dangerous/reckless drivers we saw – and really seeing no traffic enforcement to speak of on the way. Even while we were in Florida (where along with the metro DC area) we saw many drivers who were totally oblivious to safe driving practices. The only times we saw any cops on the highways happened twice in Florida when they shut down I4 – both for fatal crashes. Maybe this chaos was so because it was spring break week – but for the ride back we took a longer path inland towards I81-I84 and it was far less like a post-apocalyptic Road Warrior movie or a game of GASLANDS.
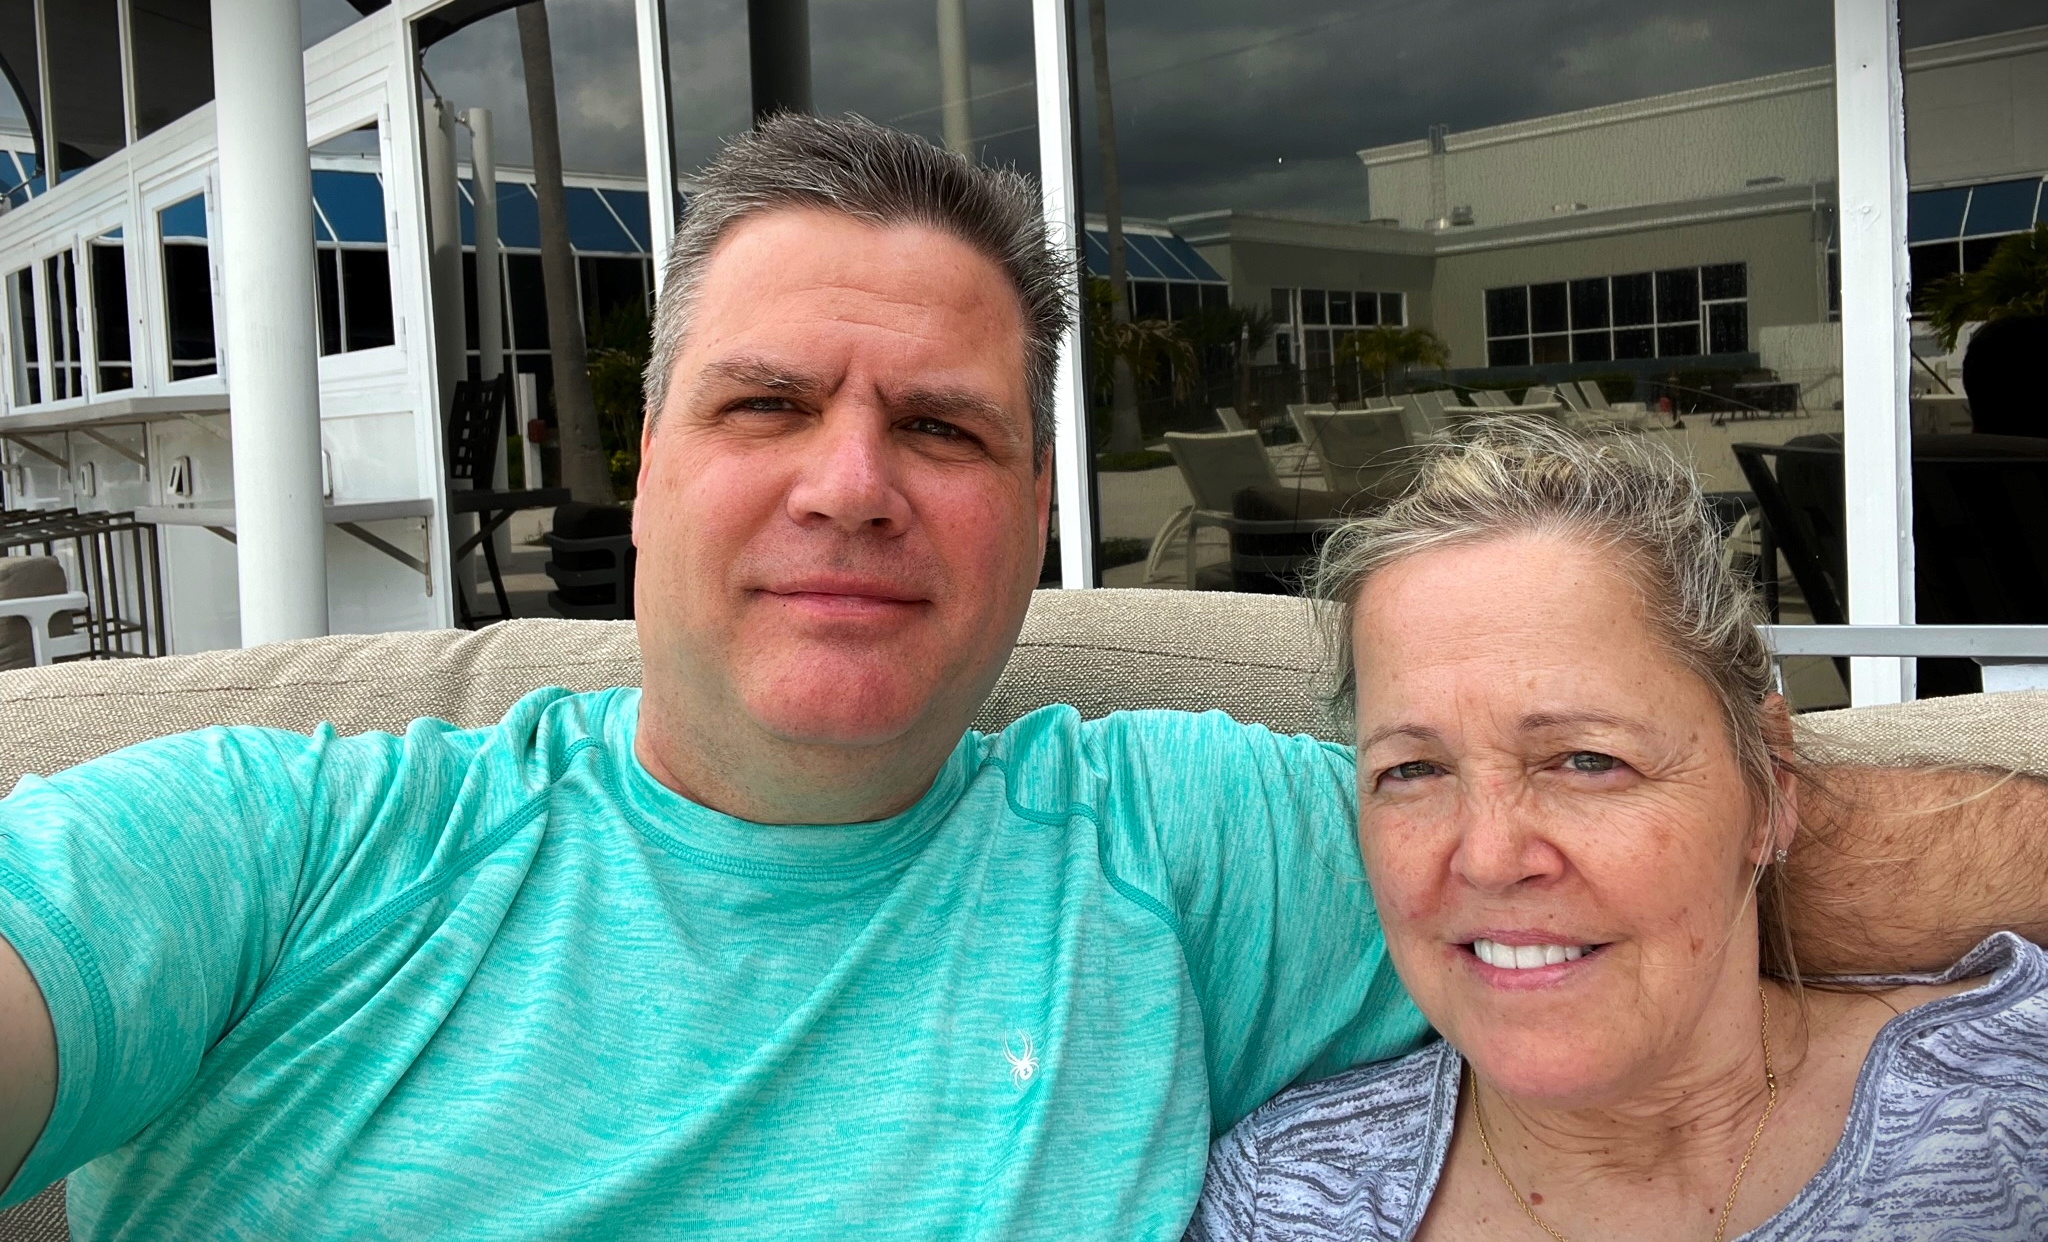
Arriving at our first hotel on Friday the 15th (the Wyndham in Kissimmee), we checked in and hit the pool deck for some needed drinks and relaxation. This hotel was also the site for the HMGS South RECON Gaming convention, but that was not to happen until the following weekend. That night, we got together with the Surdu’s (Buck and Candy) for dinner with them which was great fun.
Arrival and hanging out at the pool
As for Easter weekend, we decided that Disney and Universal costs were way too expensive – and we had visited both previously. Nearby SeaWorld owns both itself in Orlando, and Busch Gardens in Tampa. They had a decently-priced deal for visiting both parks in 5 days (well better than the ridiculous fortune that the other parks were asking for). We had not been to either before, so the plan became Busch Gardens for the 16th, and SeaWorld for Monday the 18th, with Easter Sunday being a hangout day at Casa Surdu.
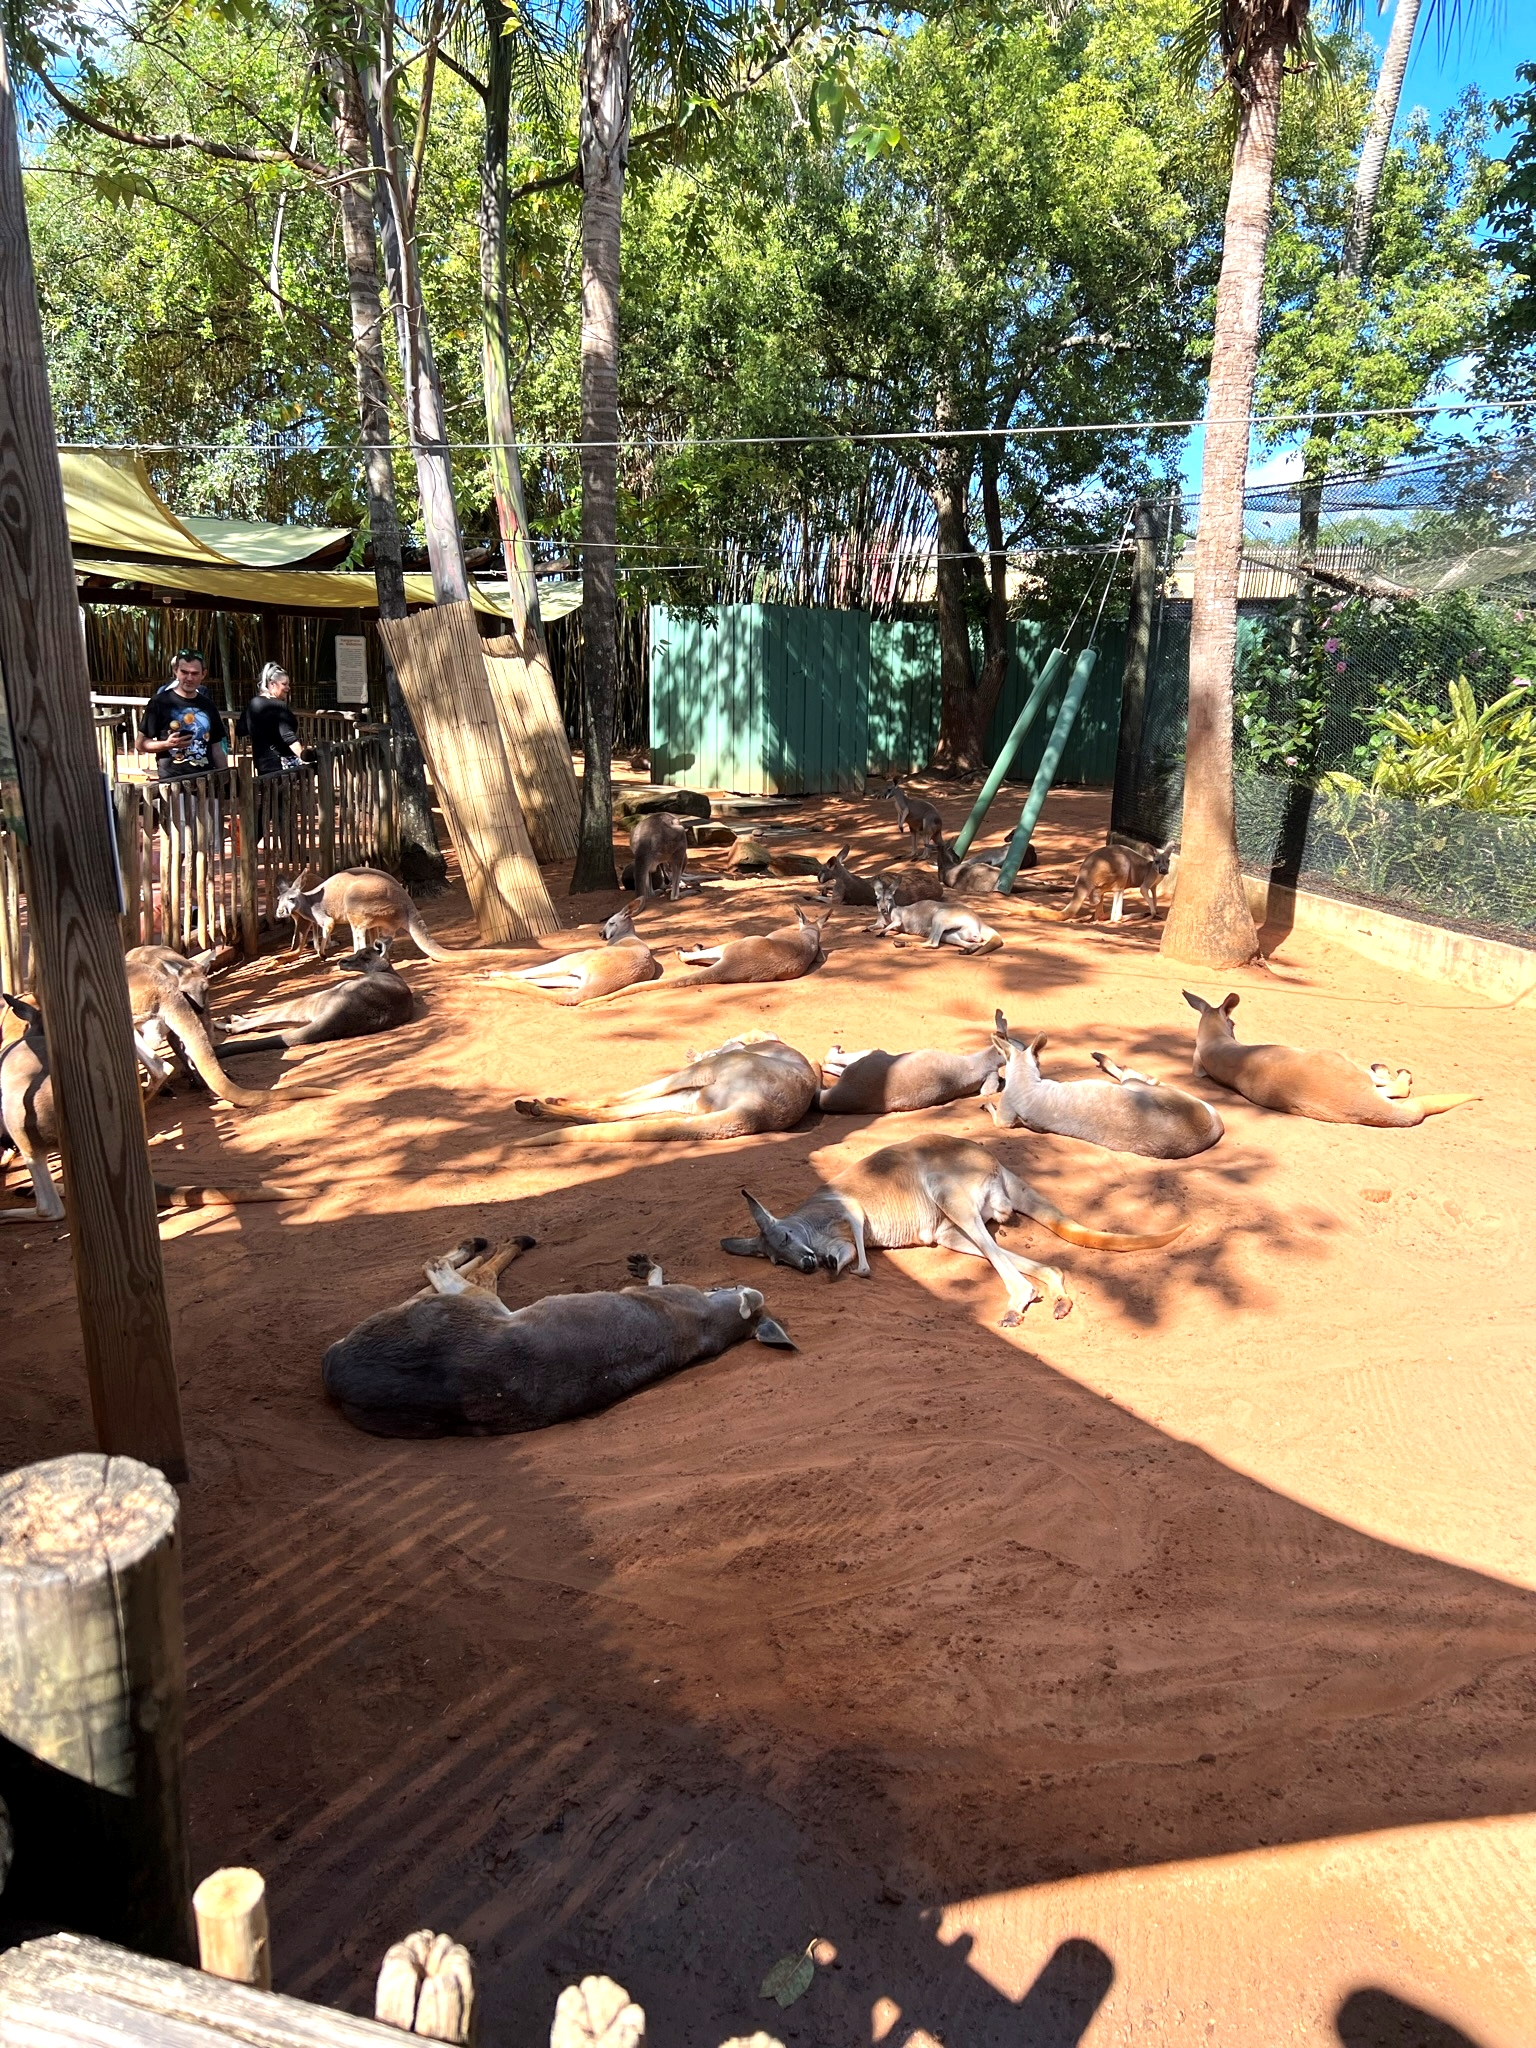
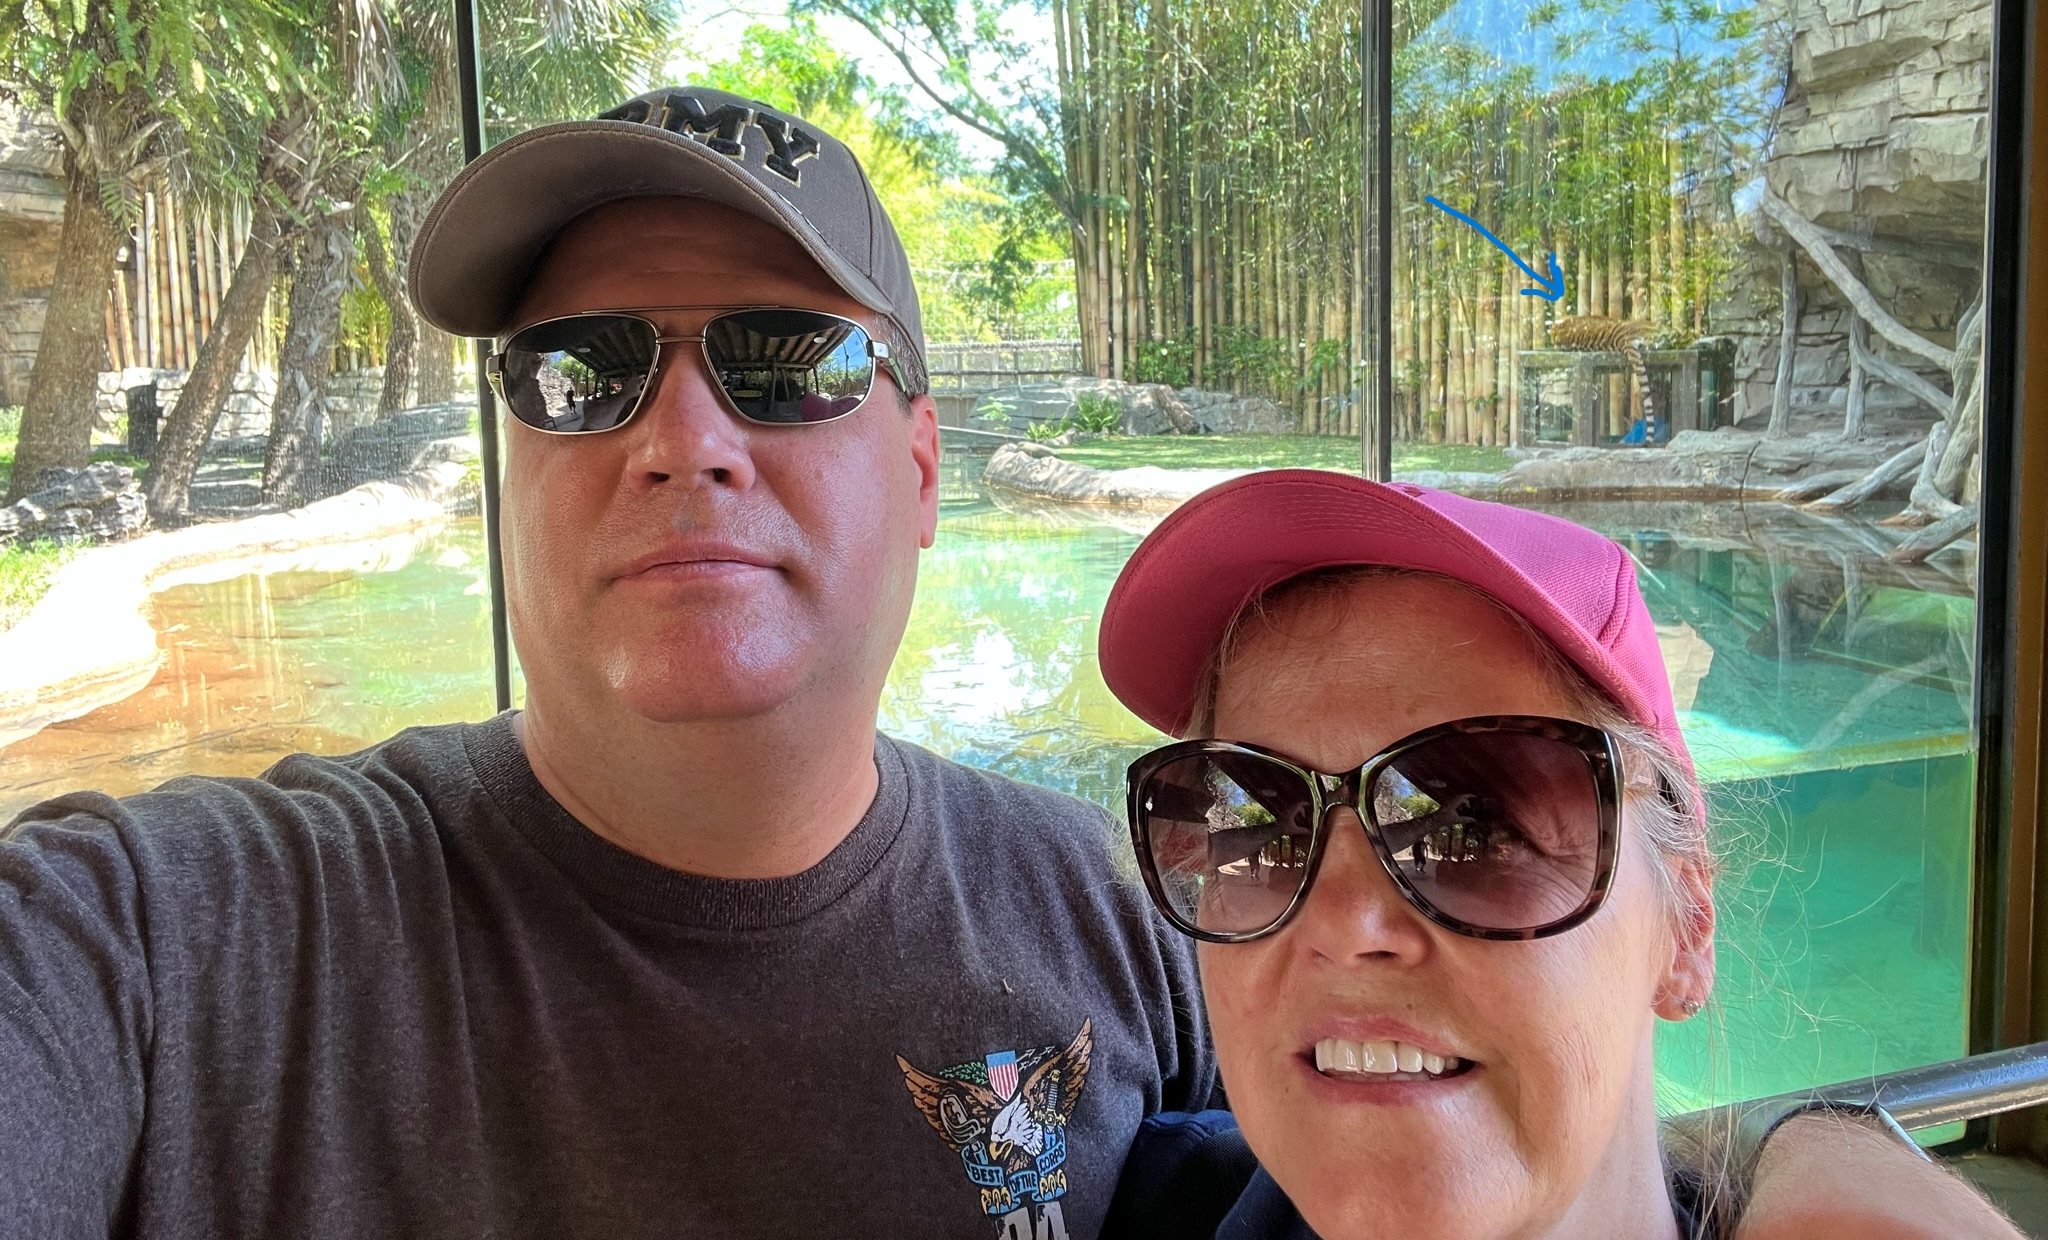
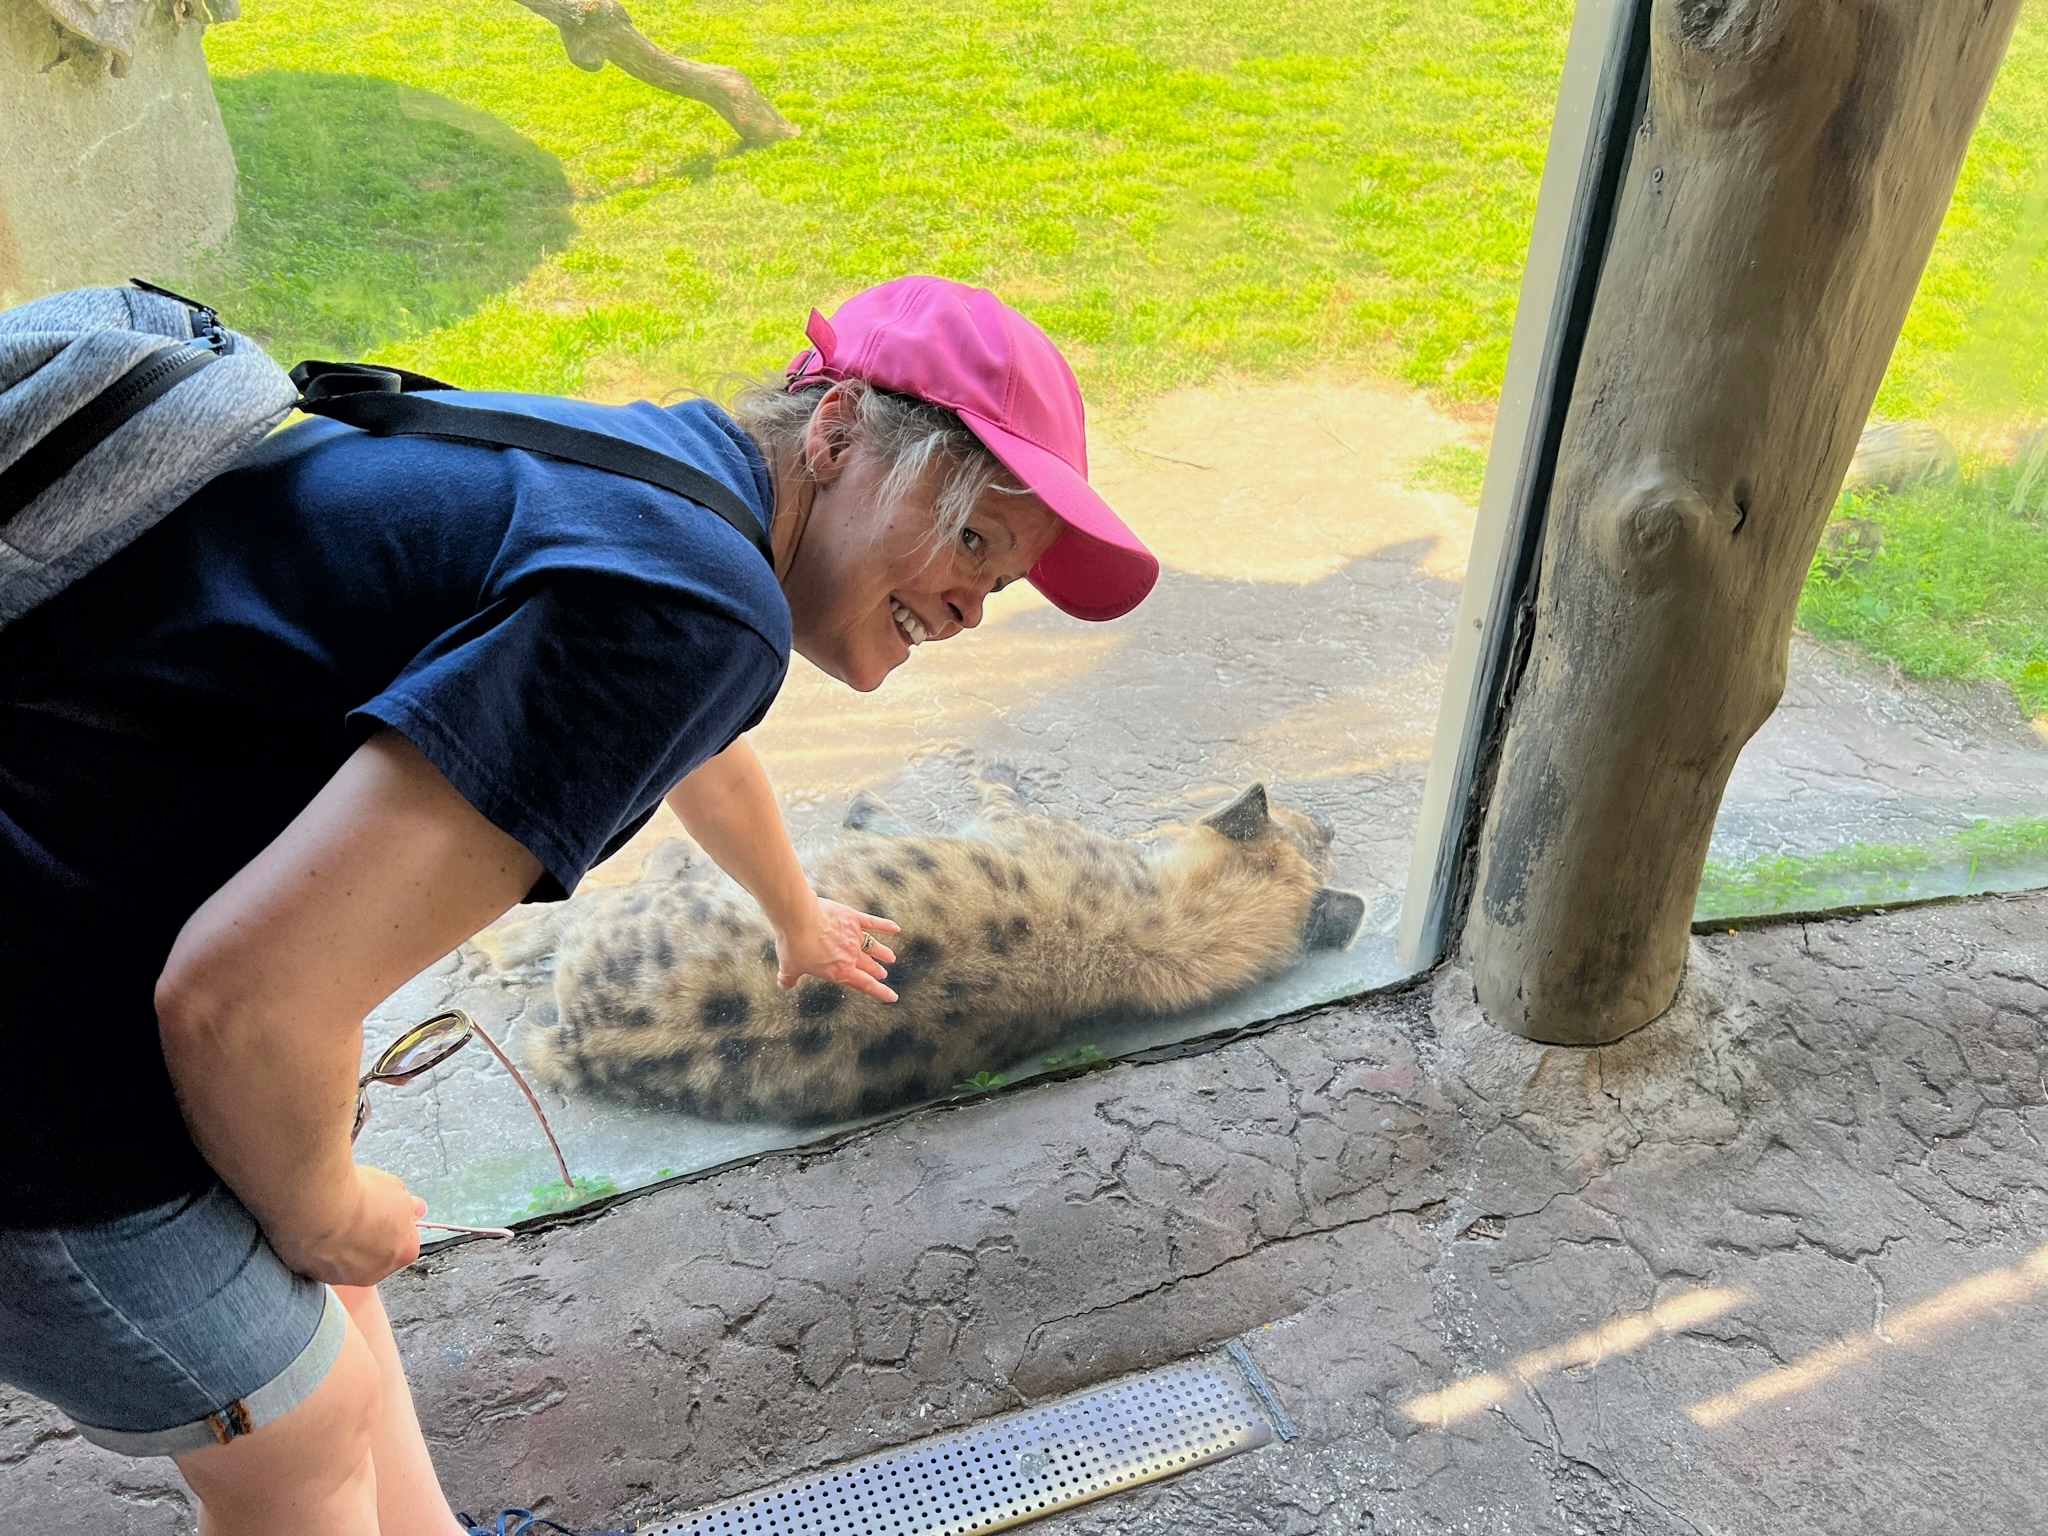
On Saturday the 16th, we drove to Tampa to visit Busch Gardens theme park. It has a LOT of roller coasters and is a pretty good zoo. Neither of us like roller coasters, but the experience was good. The animal exhibits were quite good. Below I have put up a few photos:
Busch Gardens mapThe kangaroo pavilion – made me think of you Aussies…The kangaroos and wallabies were cooling out – I sent this to IRO and he said it reminded him of his buddies after a good amount of beer consumption!We did ride the carousel!Tiger in back right“Petting” a sleeping hyenaMy favorite image – a Nile crocodile (not an alligator) and a very oblivious Florida egret that flew in to hang out. Apparently the croc wasn’t hungry.
We had an enjoyable day. The next day, Easter Sunday, was excellent as we got to hang out with Buck and Candy – whose hospitality was superb and thanks again you two.
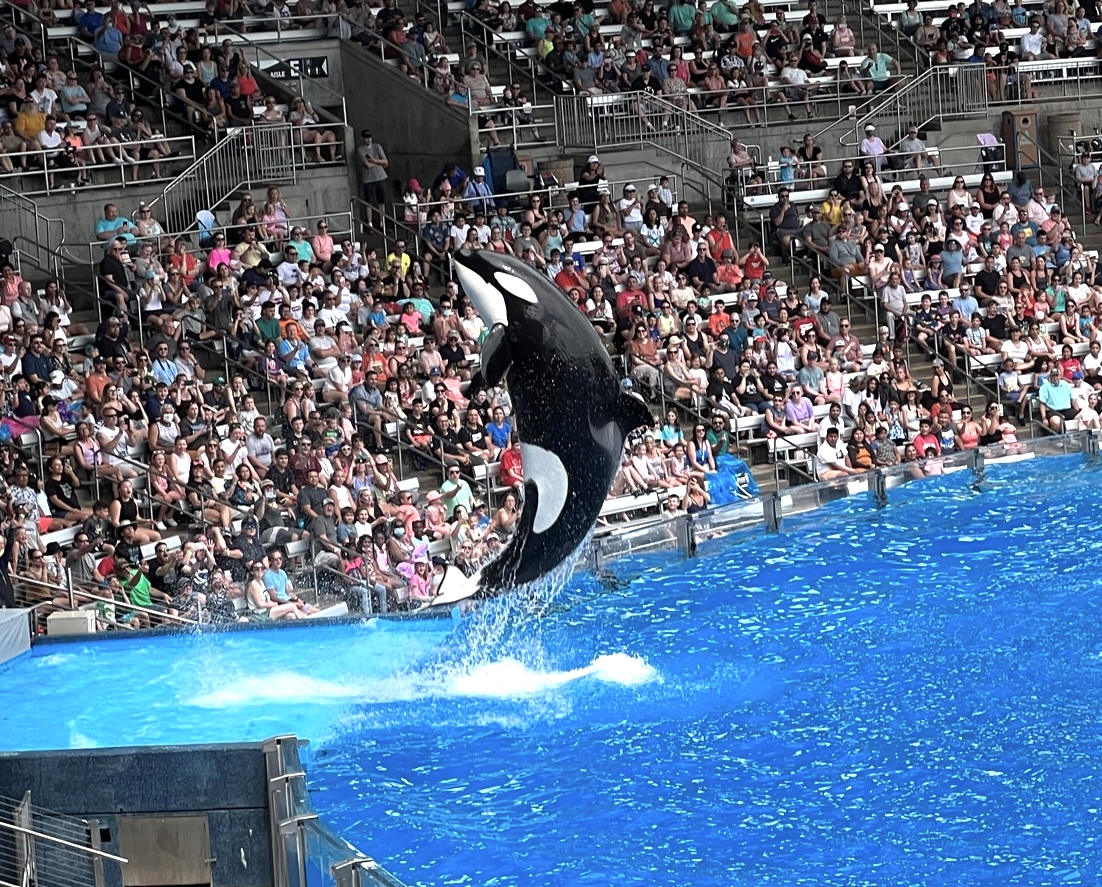
On Monday the 18th we went to SeaWorld. Of course, it is known for its orcas. I have to say it was a very nice sea-themed park with fauna from all ends of the globe. Certainly they have changed practices with all of their animals since the unfortunate trainer death a decade+ ago.
This walrus was in the arctic section of the park – along with beluga whales and others from that area. This walrus really hammed it up for us at the window, blowing bubbles and cavorting.The killer whales (orcas) were amazing to see.Great to see these but we stayed out of the “splash zone”!Wow!
Both Busch Gardens and SeaWorld have partnered with Sesame Street to have a kids section of their respective parks. I thought it was tastefully done.
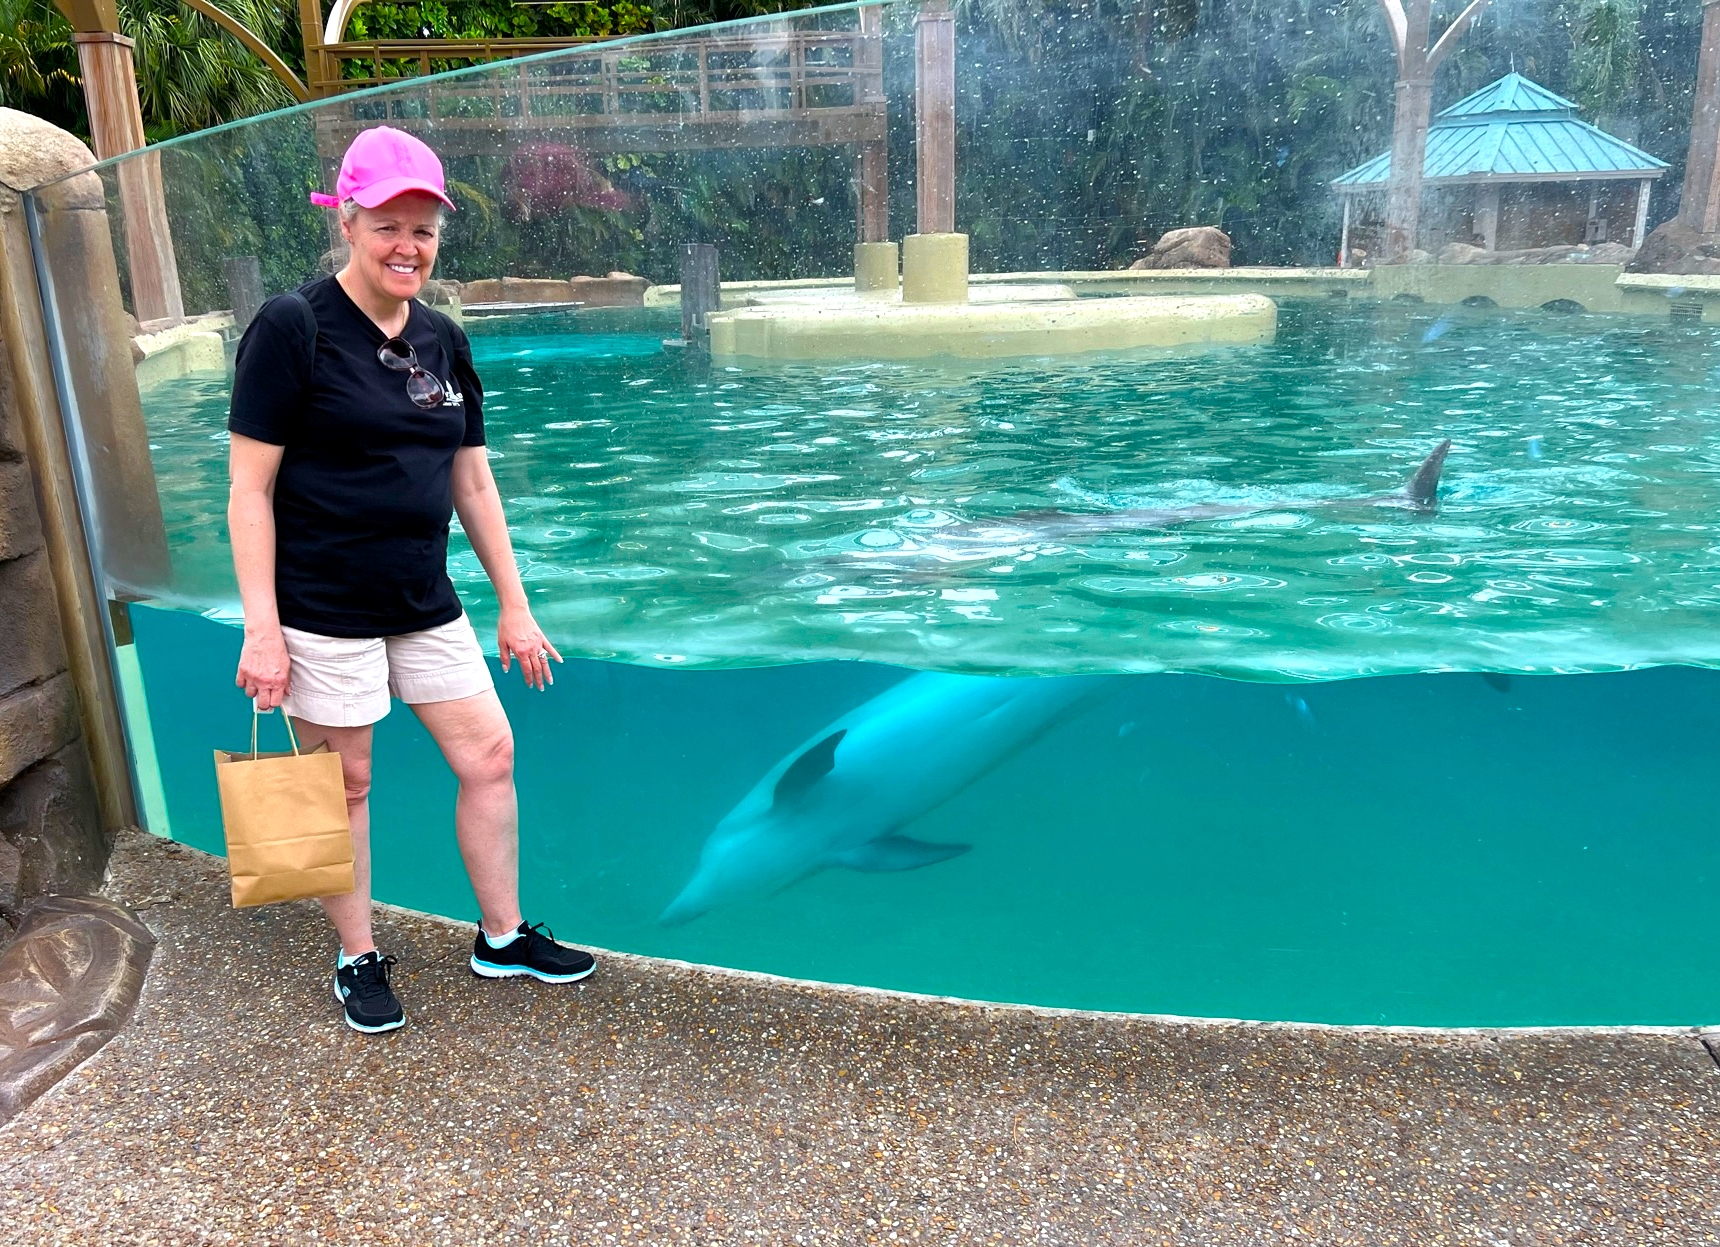
Juvenile dolphin pool.
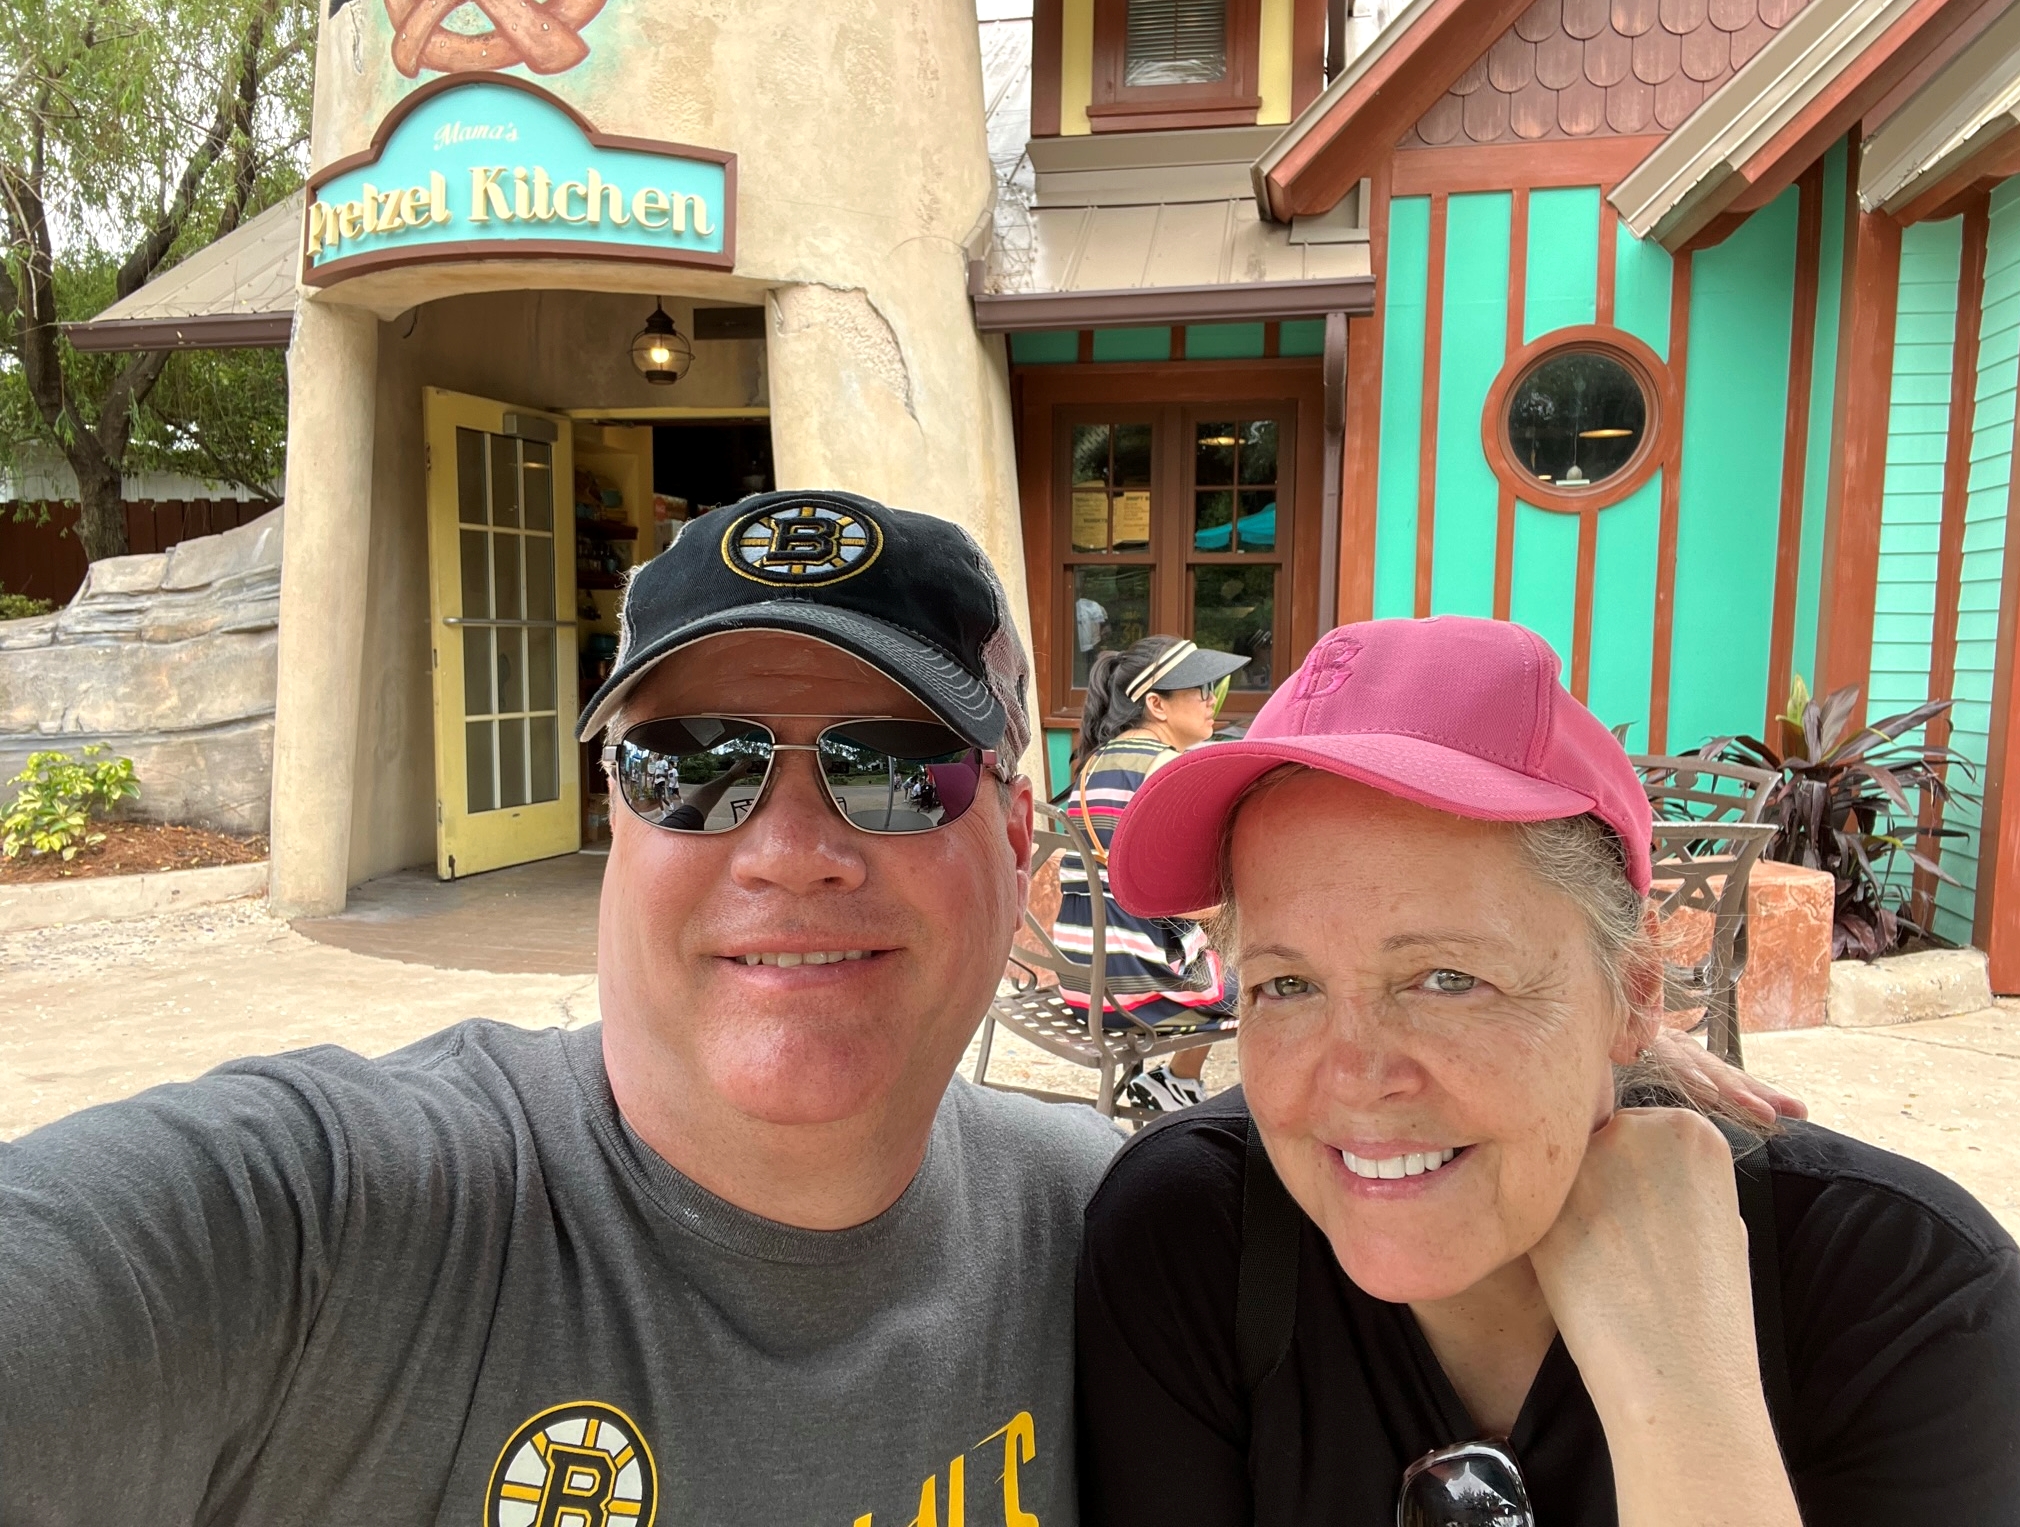
We also had purchased the “all-day dining” package – which was really not all it sounded like. It did not cover beer, and any food purchased under the plan started a 90-minute clock that prevented any other freebies until that 90 minutes was up. Also, most of the special kiosk foods were not covered (like the pretzel one below). Otherwise, we enjoyed the park – which also is loaded with roller coasters that we didn’t ride. The exhibits were really cool, as were the special show-type ones such as for the seals and the orcas.
Time for a beer (not free under the dining plan), a pretzel (also not free), and a selfie with Lynn.Met a new friend – but he only cared for cookies…would not share as they were not under the plan either…
Now both at Busch Gardens and at SeaWorld there were some promotional displays. This one also made me think of our favorite Aussie gardener/landscaper IRO. And no I did not spend my entire vacation thinking of him – just being reminded of him was enough!
Does IRO mow with Bad Boys?
That night we left the Wyndham for the Marriott Golf Resort/School for two days of relative luxury and golf school for us both. Lynn picked up a lot, and I used the opportunity to rework my swing (which is now coming around as I write this in early June as expected two months later). Lynn and I have been playing golf more and it’s nice to have the chance to play together. She’ll never be a die-hard like me, but we’re having fun. The Marriott resort there is really nice too.
At the Marriott Golf School.
After two days (the evening of the 18th-20th) at the Marriott, it was back to staying at the previous Wyndham where HMGS South was having their RECON gaming convention. Lynn was indeed missing the Marriott…so I plied her with a blue drink…
I think she misses the Marriott…
Still we managed to have fun on the 18th – the Wyndham had an interactive game of dodgeball with zombies on a projection screen. Apparently the blue drink does not help accuracy with dodgeball against the undead.
Yes, zombie dodgeball!
Still we were having a good time.
Hey that’s my hat!
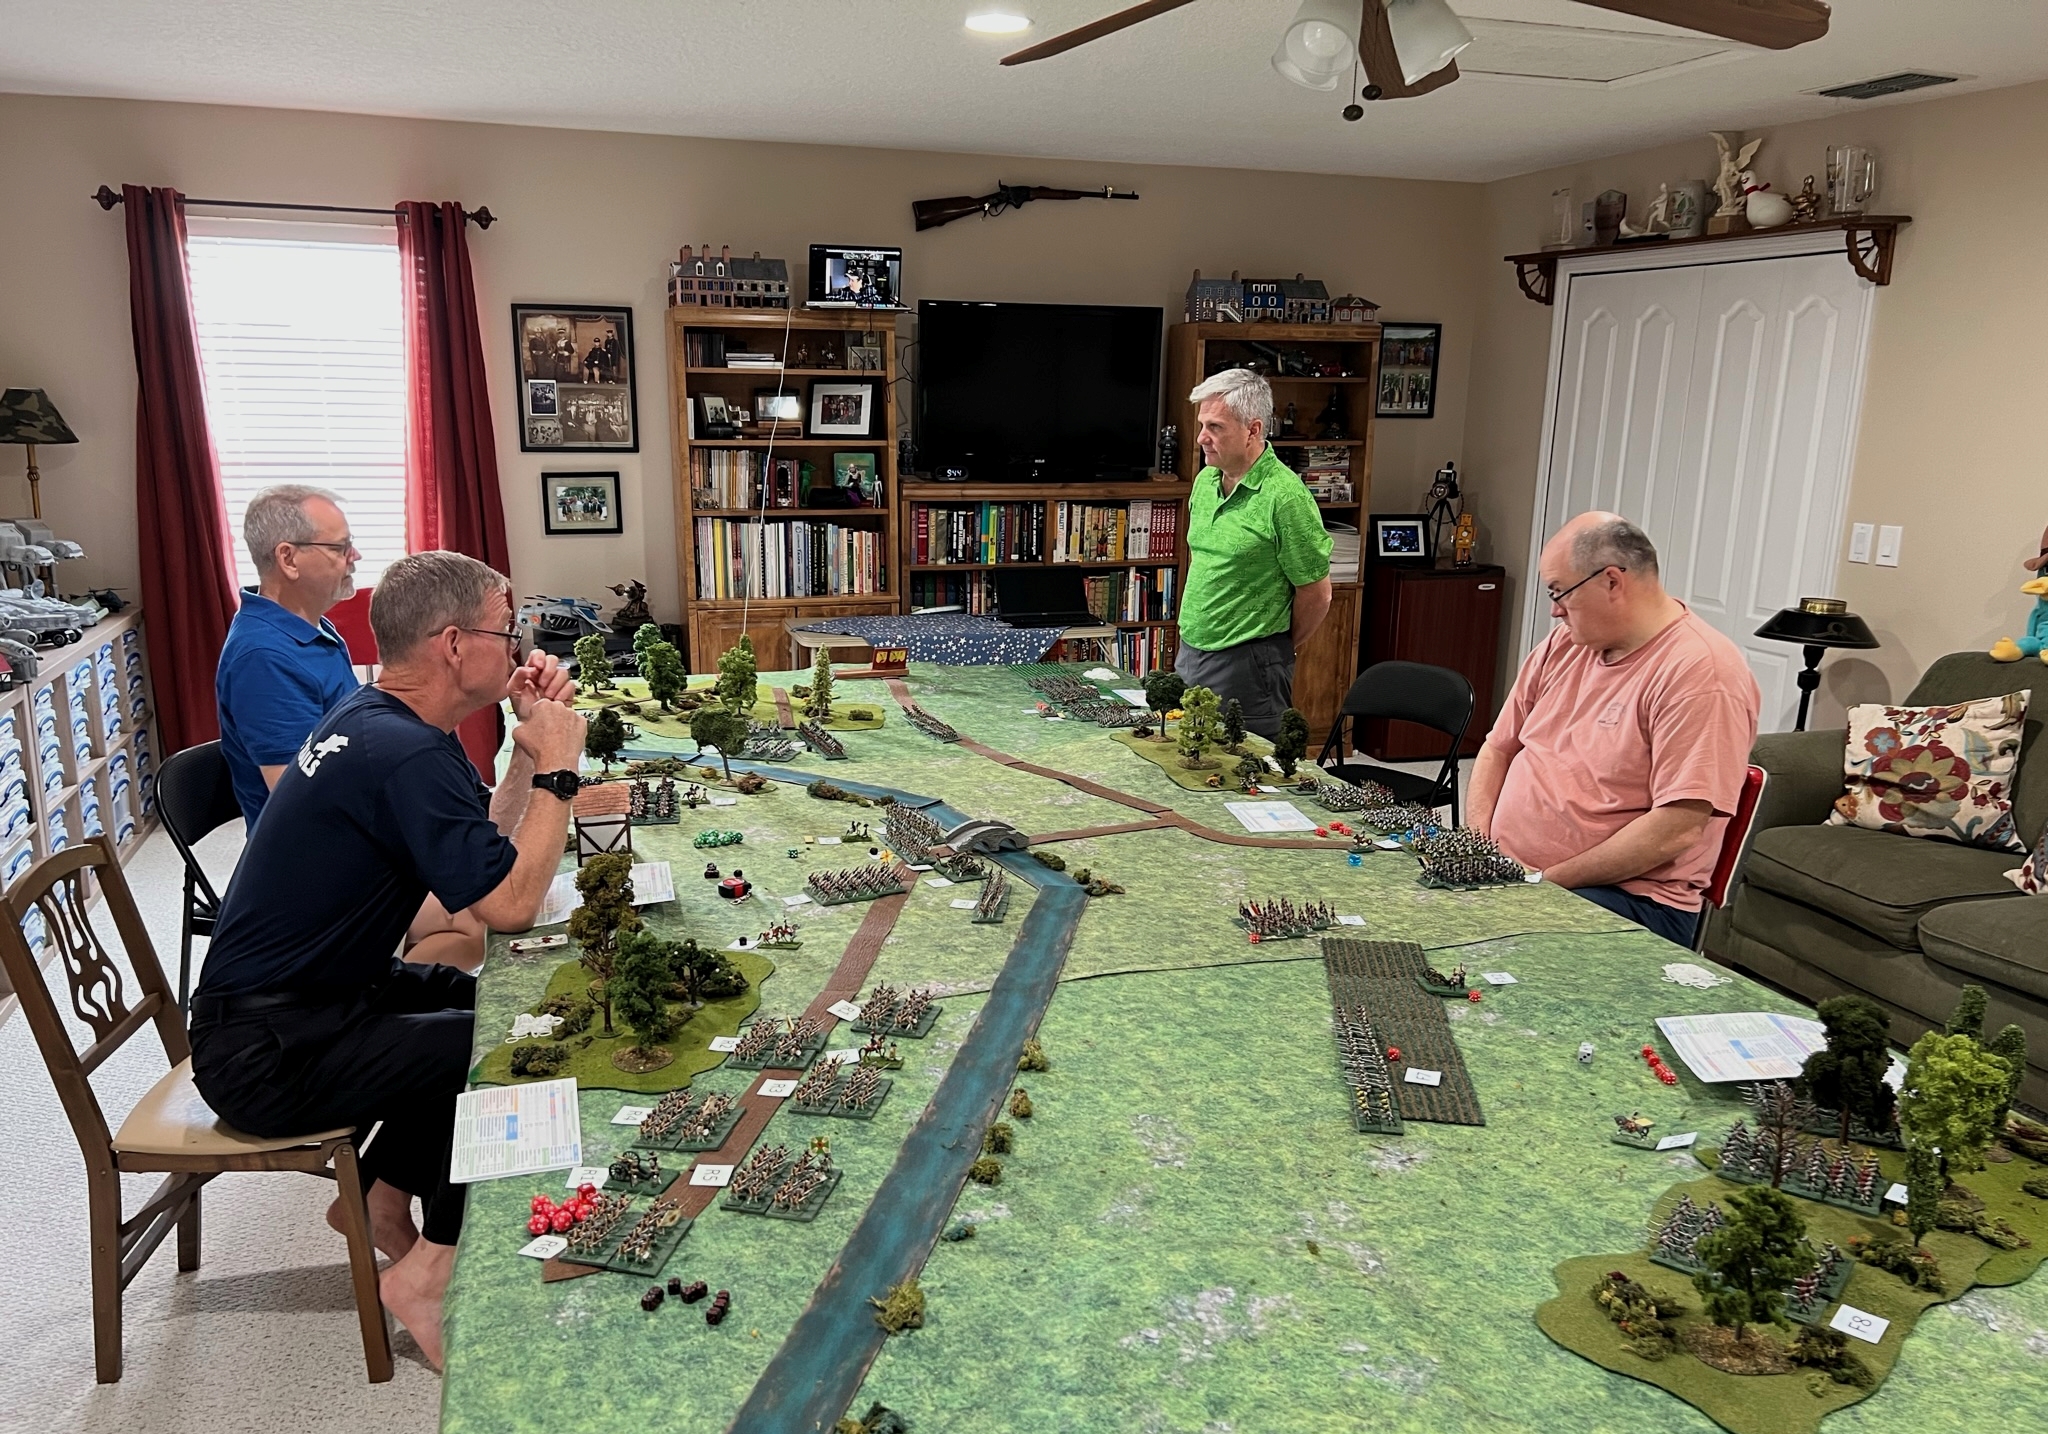
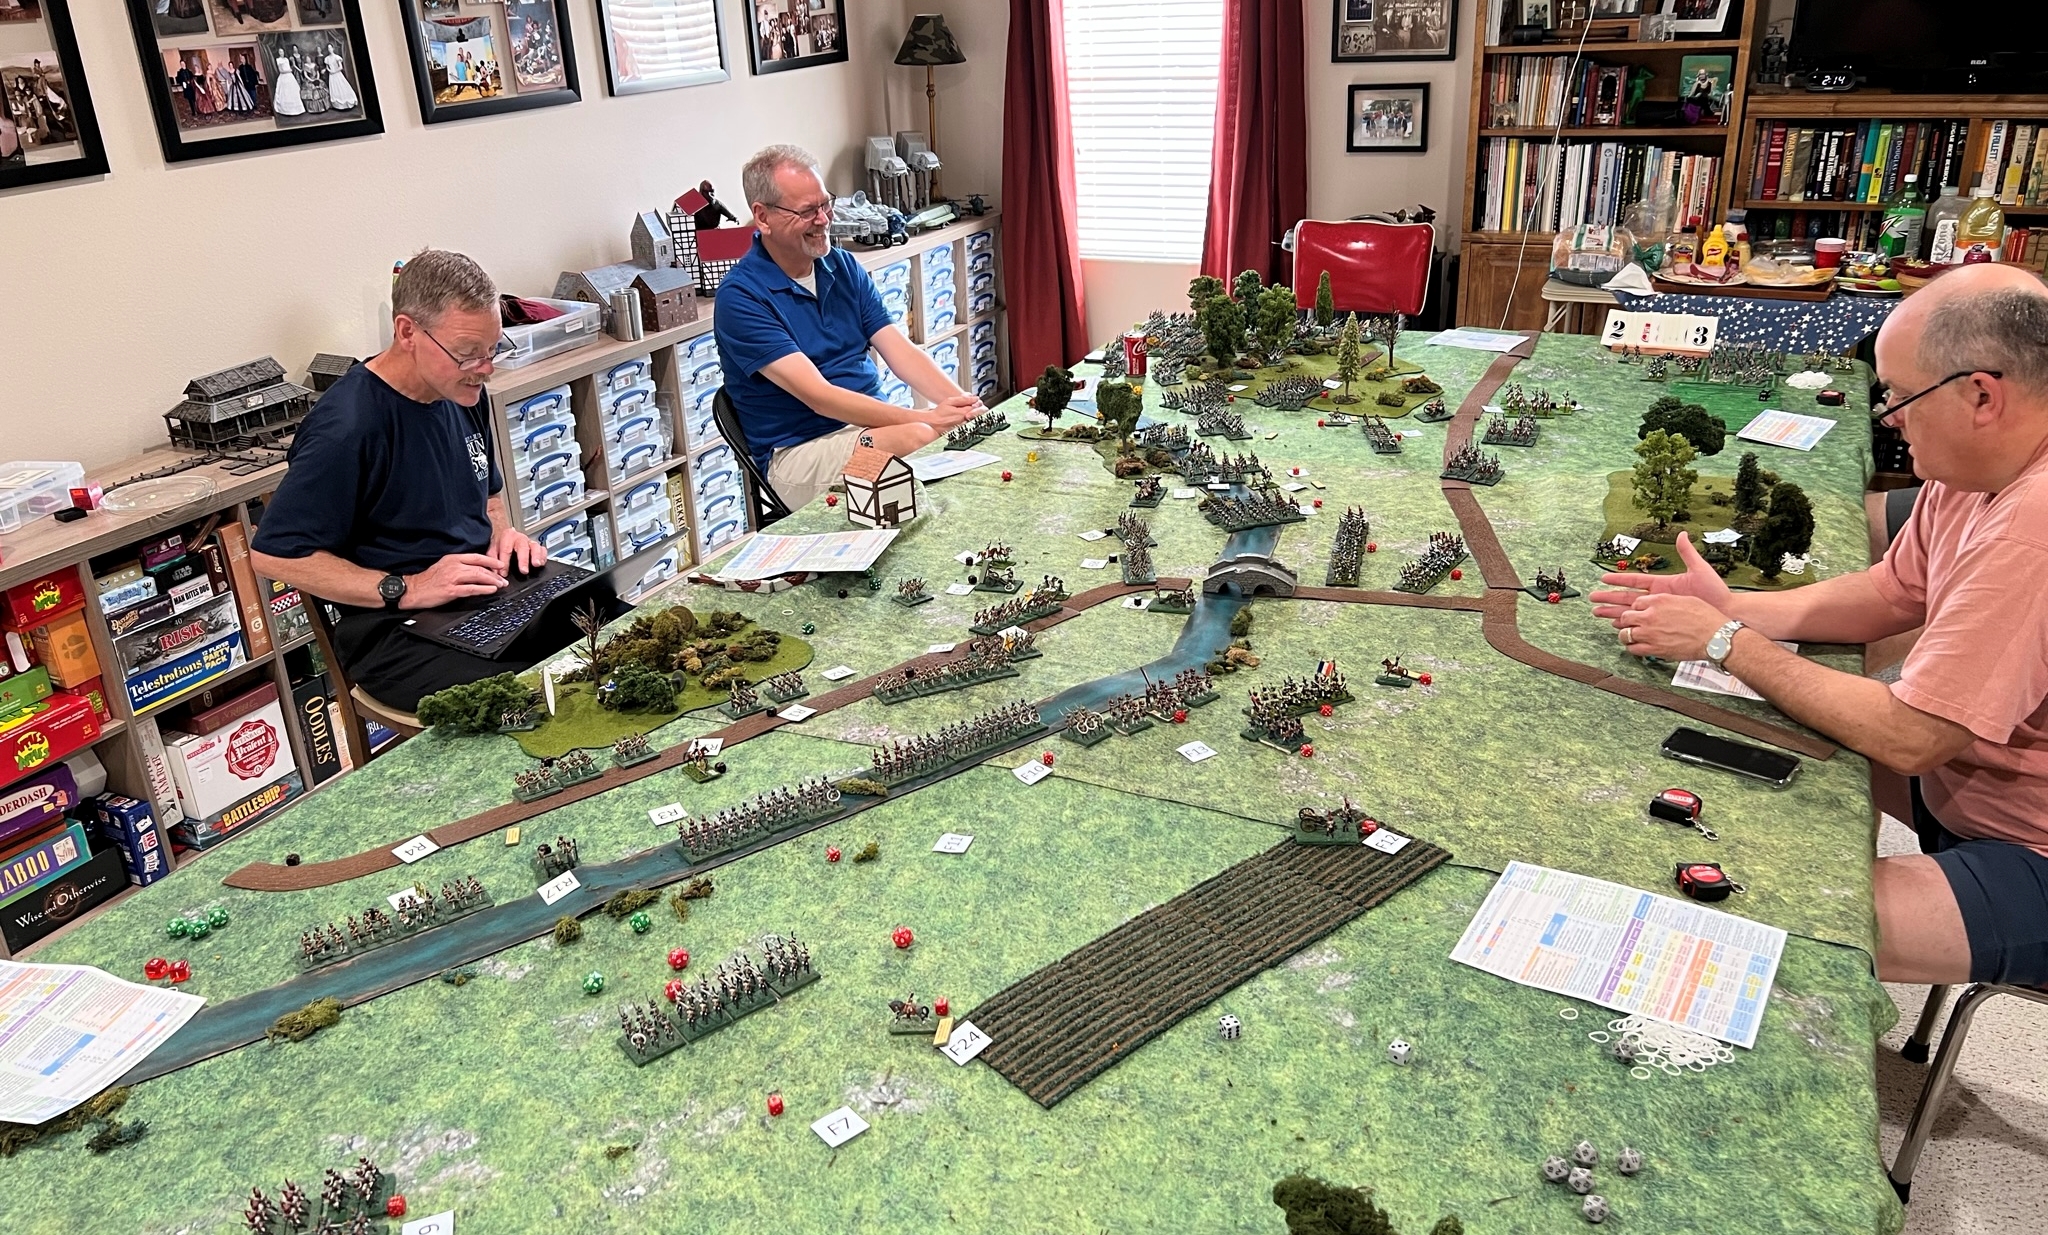
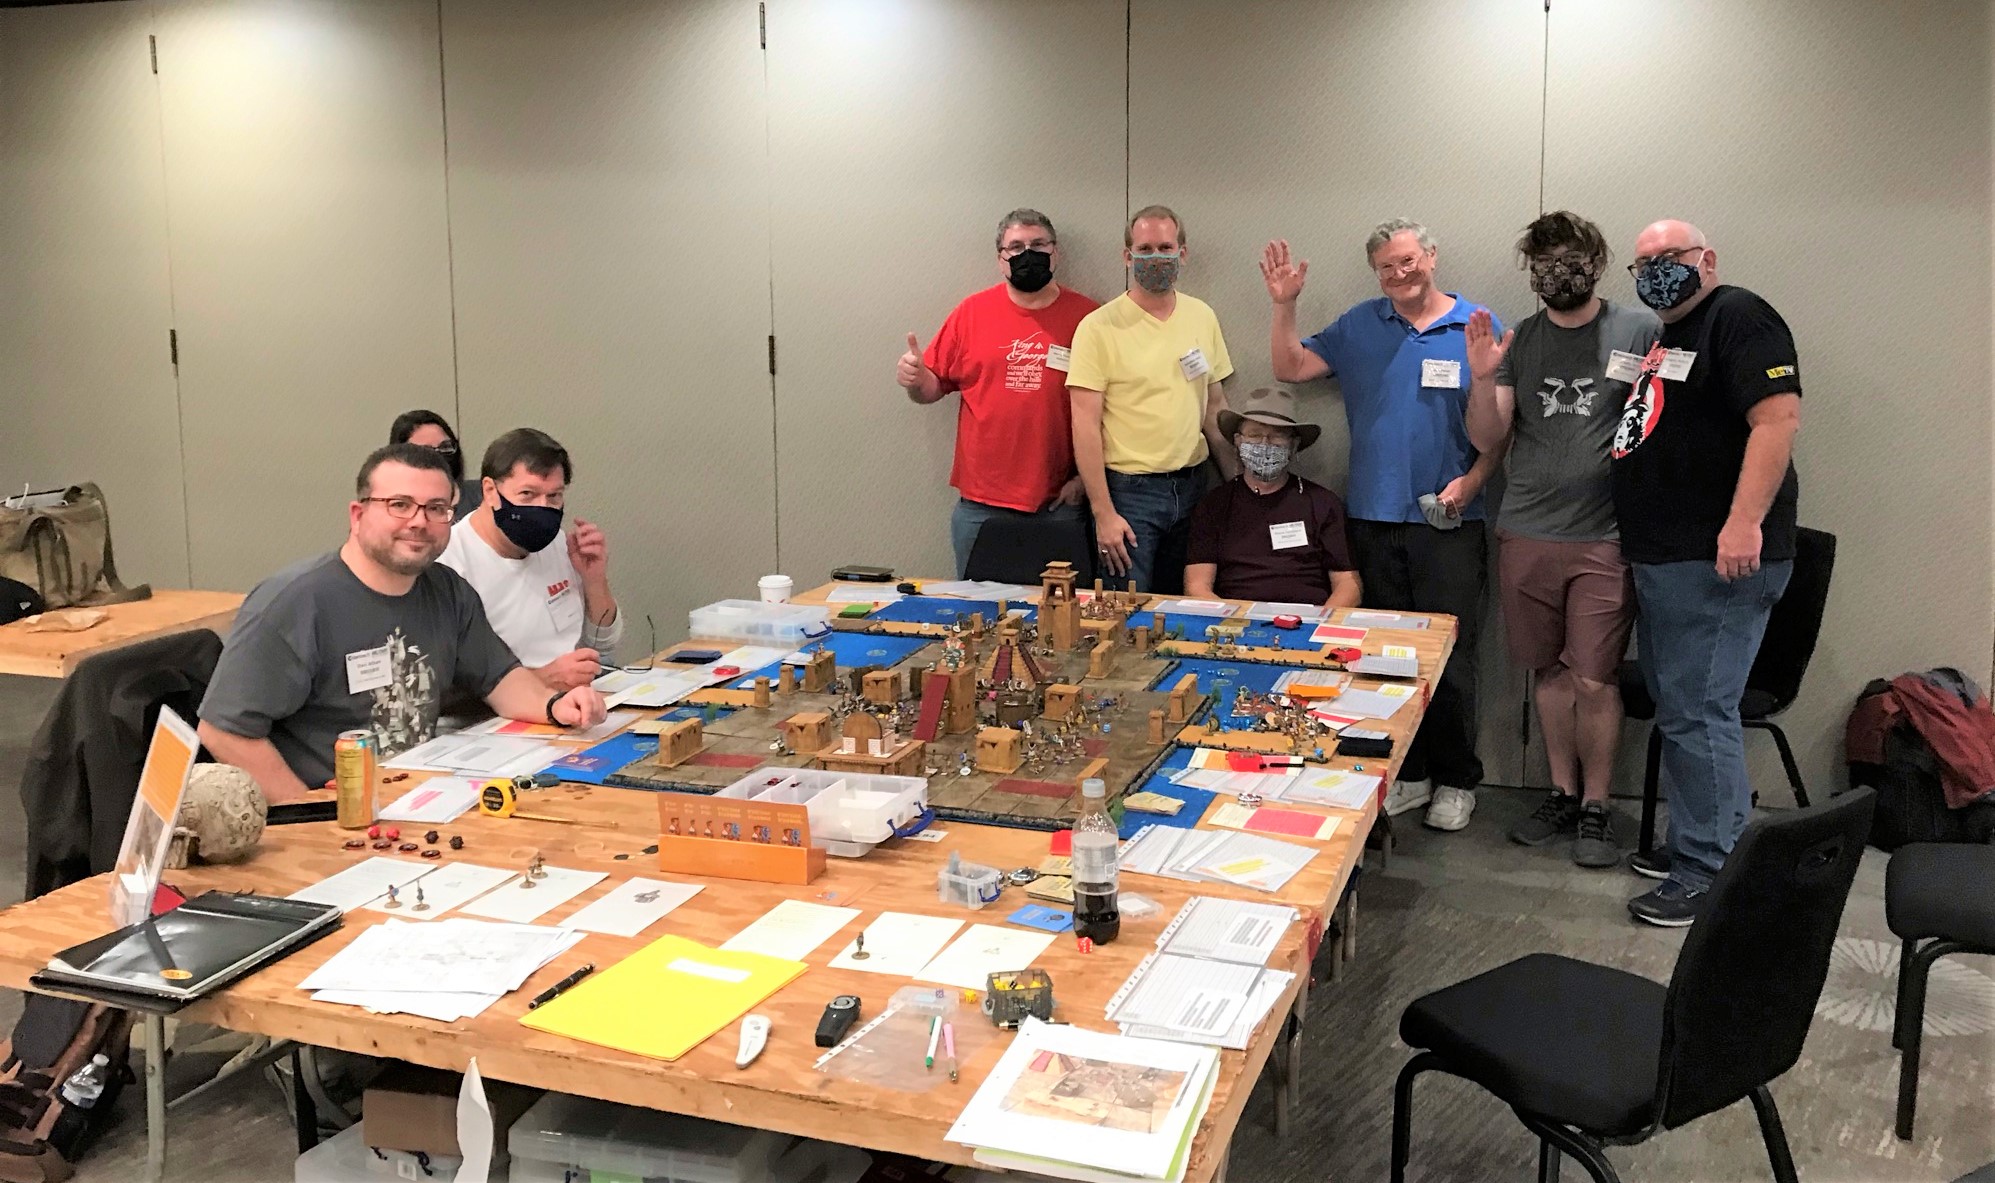
The next day (April 21st), I had the privilege of gaming with with Buck back at his amazing gaming room (which you can see below). As a bonus, my old West Point roommate Dave Wood and Buck’s buddy JJ were there. We were also joined via Zoom for this gaming session with Greg Priebe and Chris Palmer of the Maryland-based HAWKS gaming club. While Candy took our spouses out, we wargamers playtested a massive Napoleonic game using a derivative of Buck’s Wars of Ozz rules. It is in development and will be called Wars of Eagles and Empires.
Wars of Eagles and Empires gameThis game was a lot of fun, and despite its size, it only took about three and a half hours – not bad for a playtest.
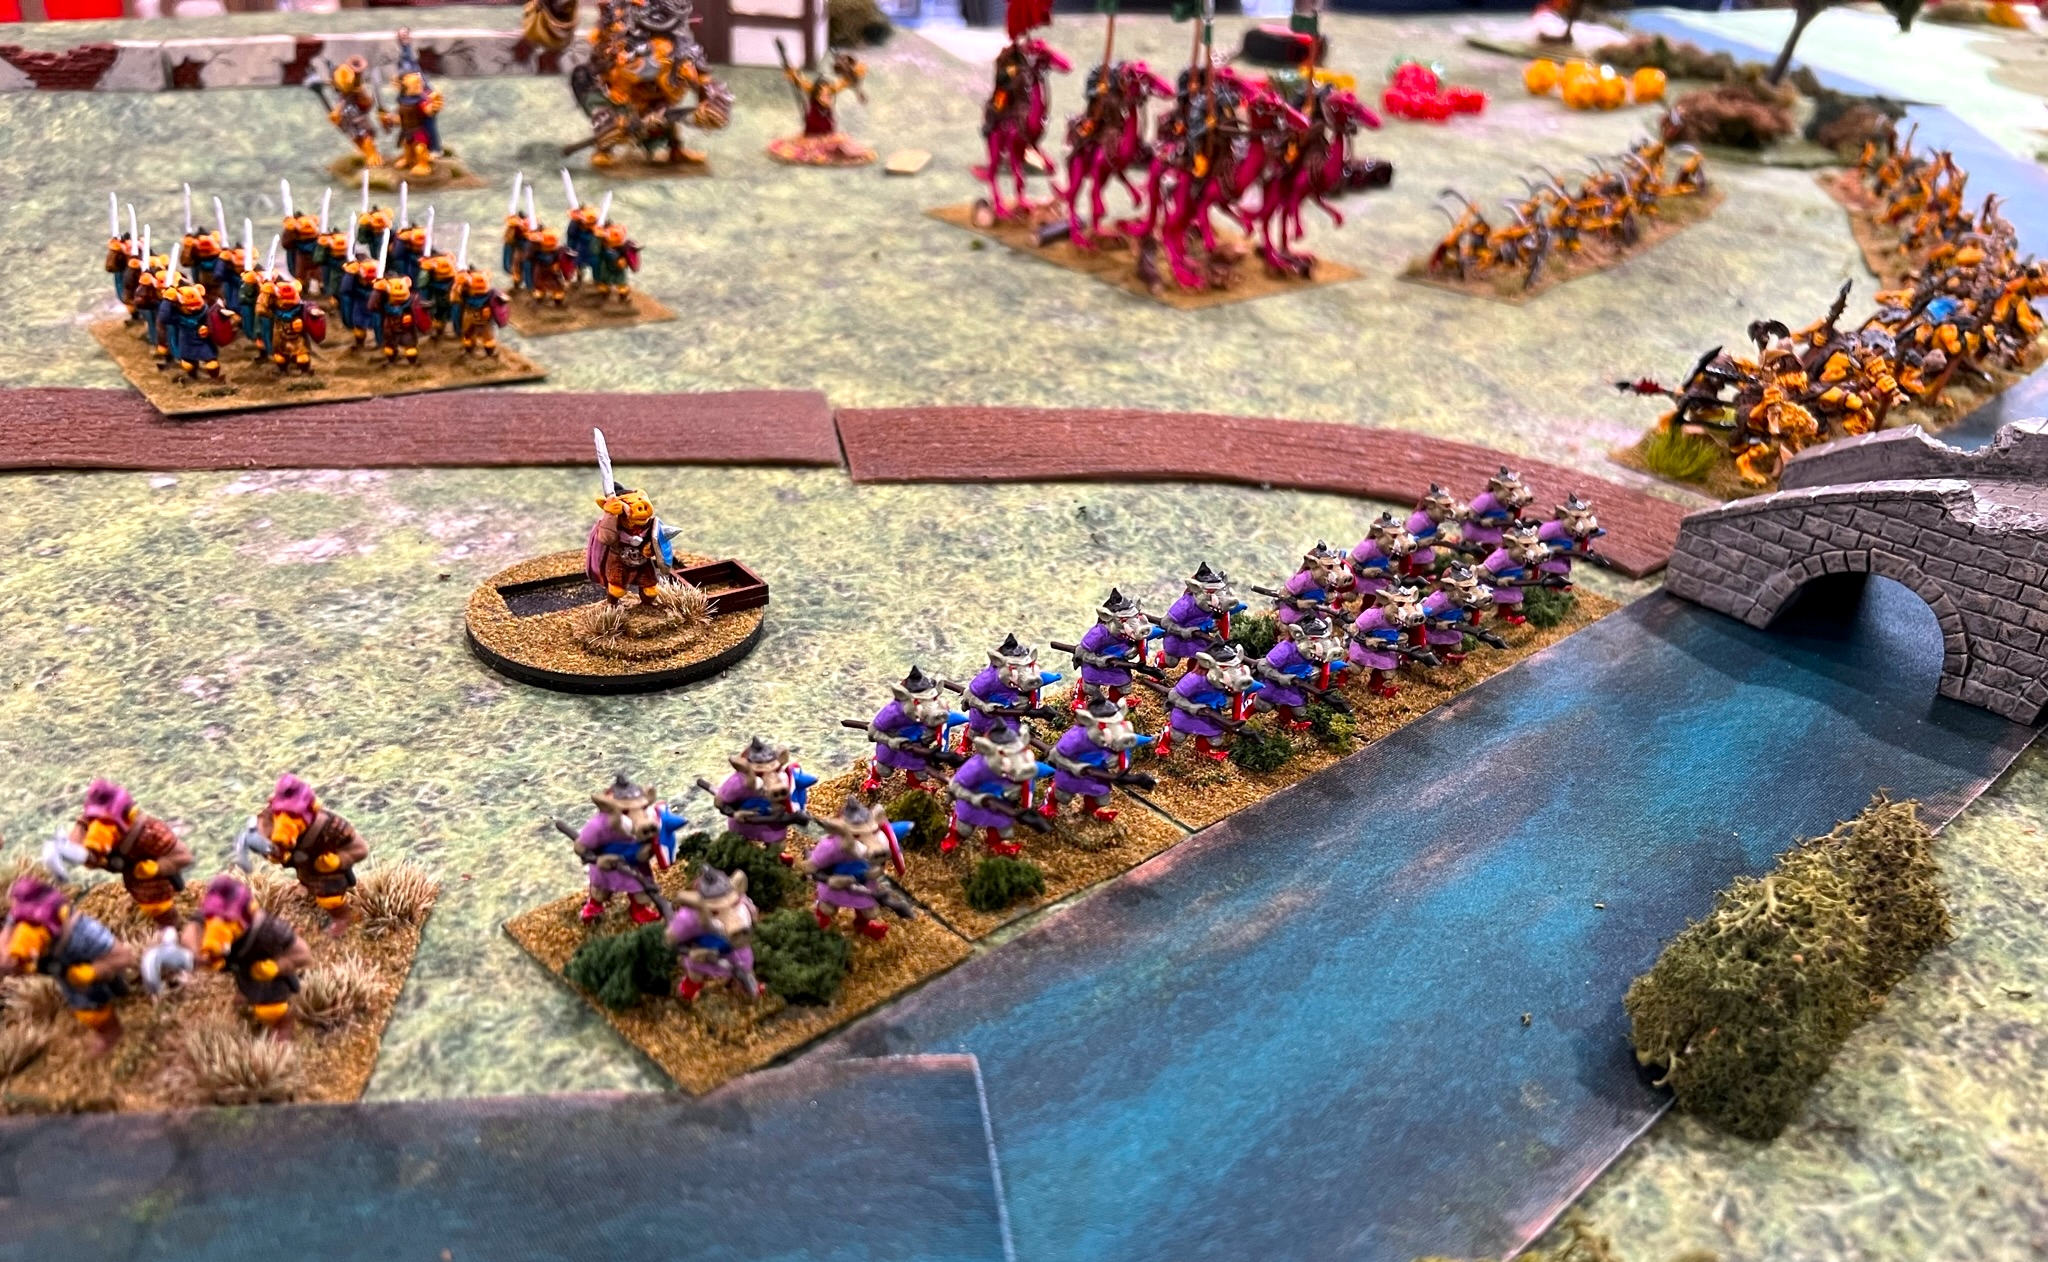
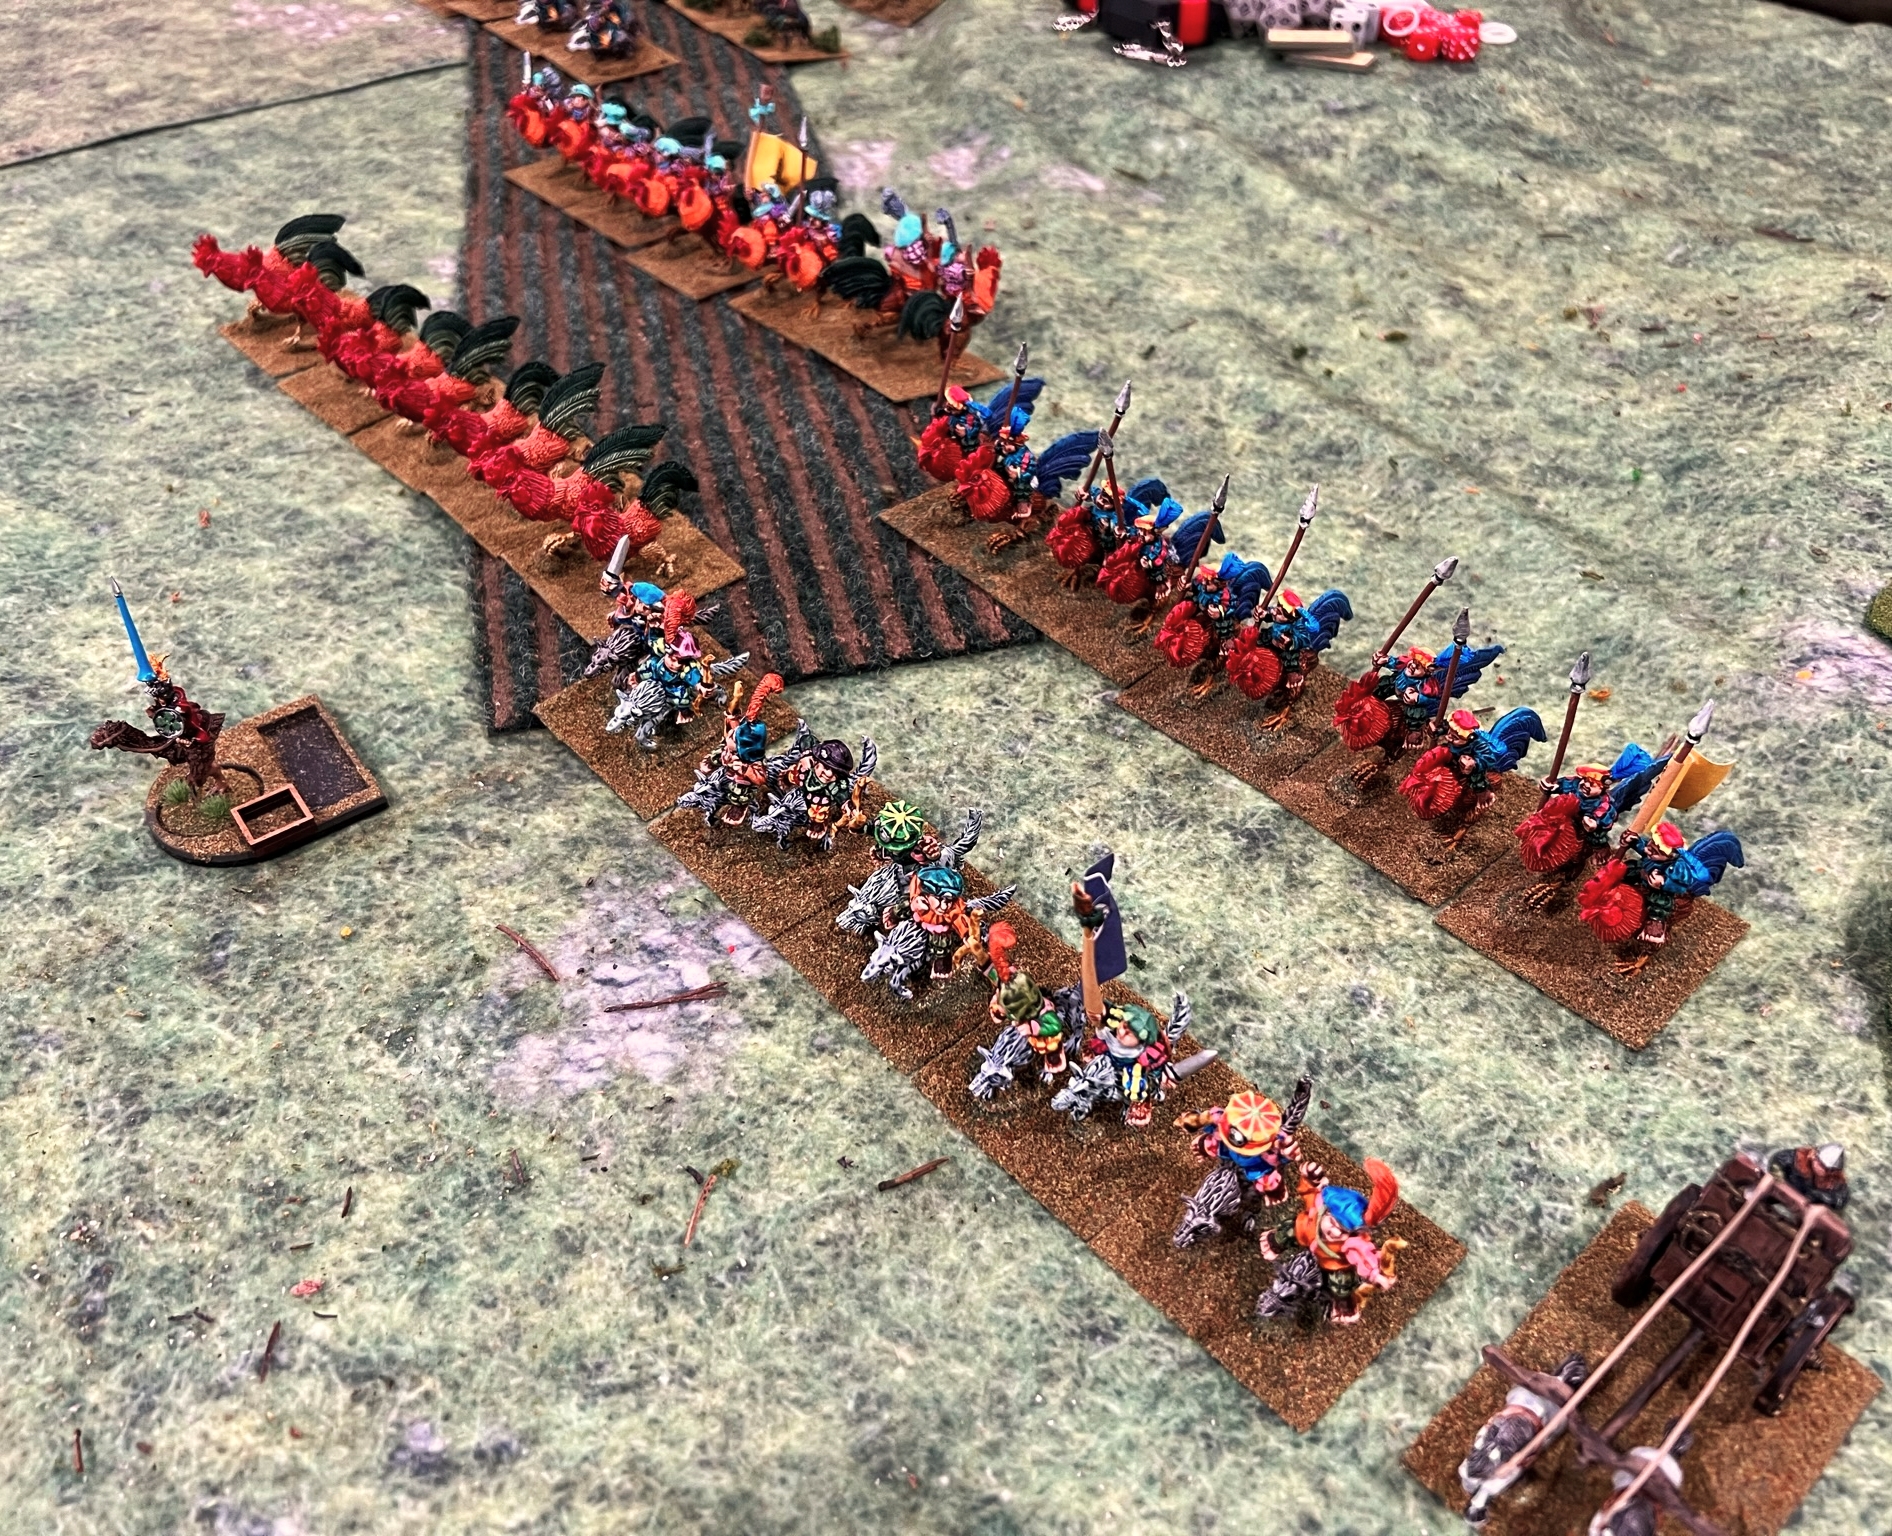
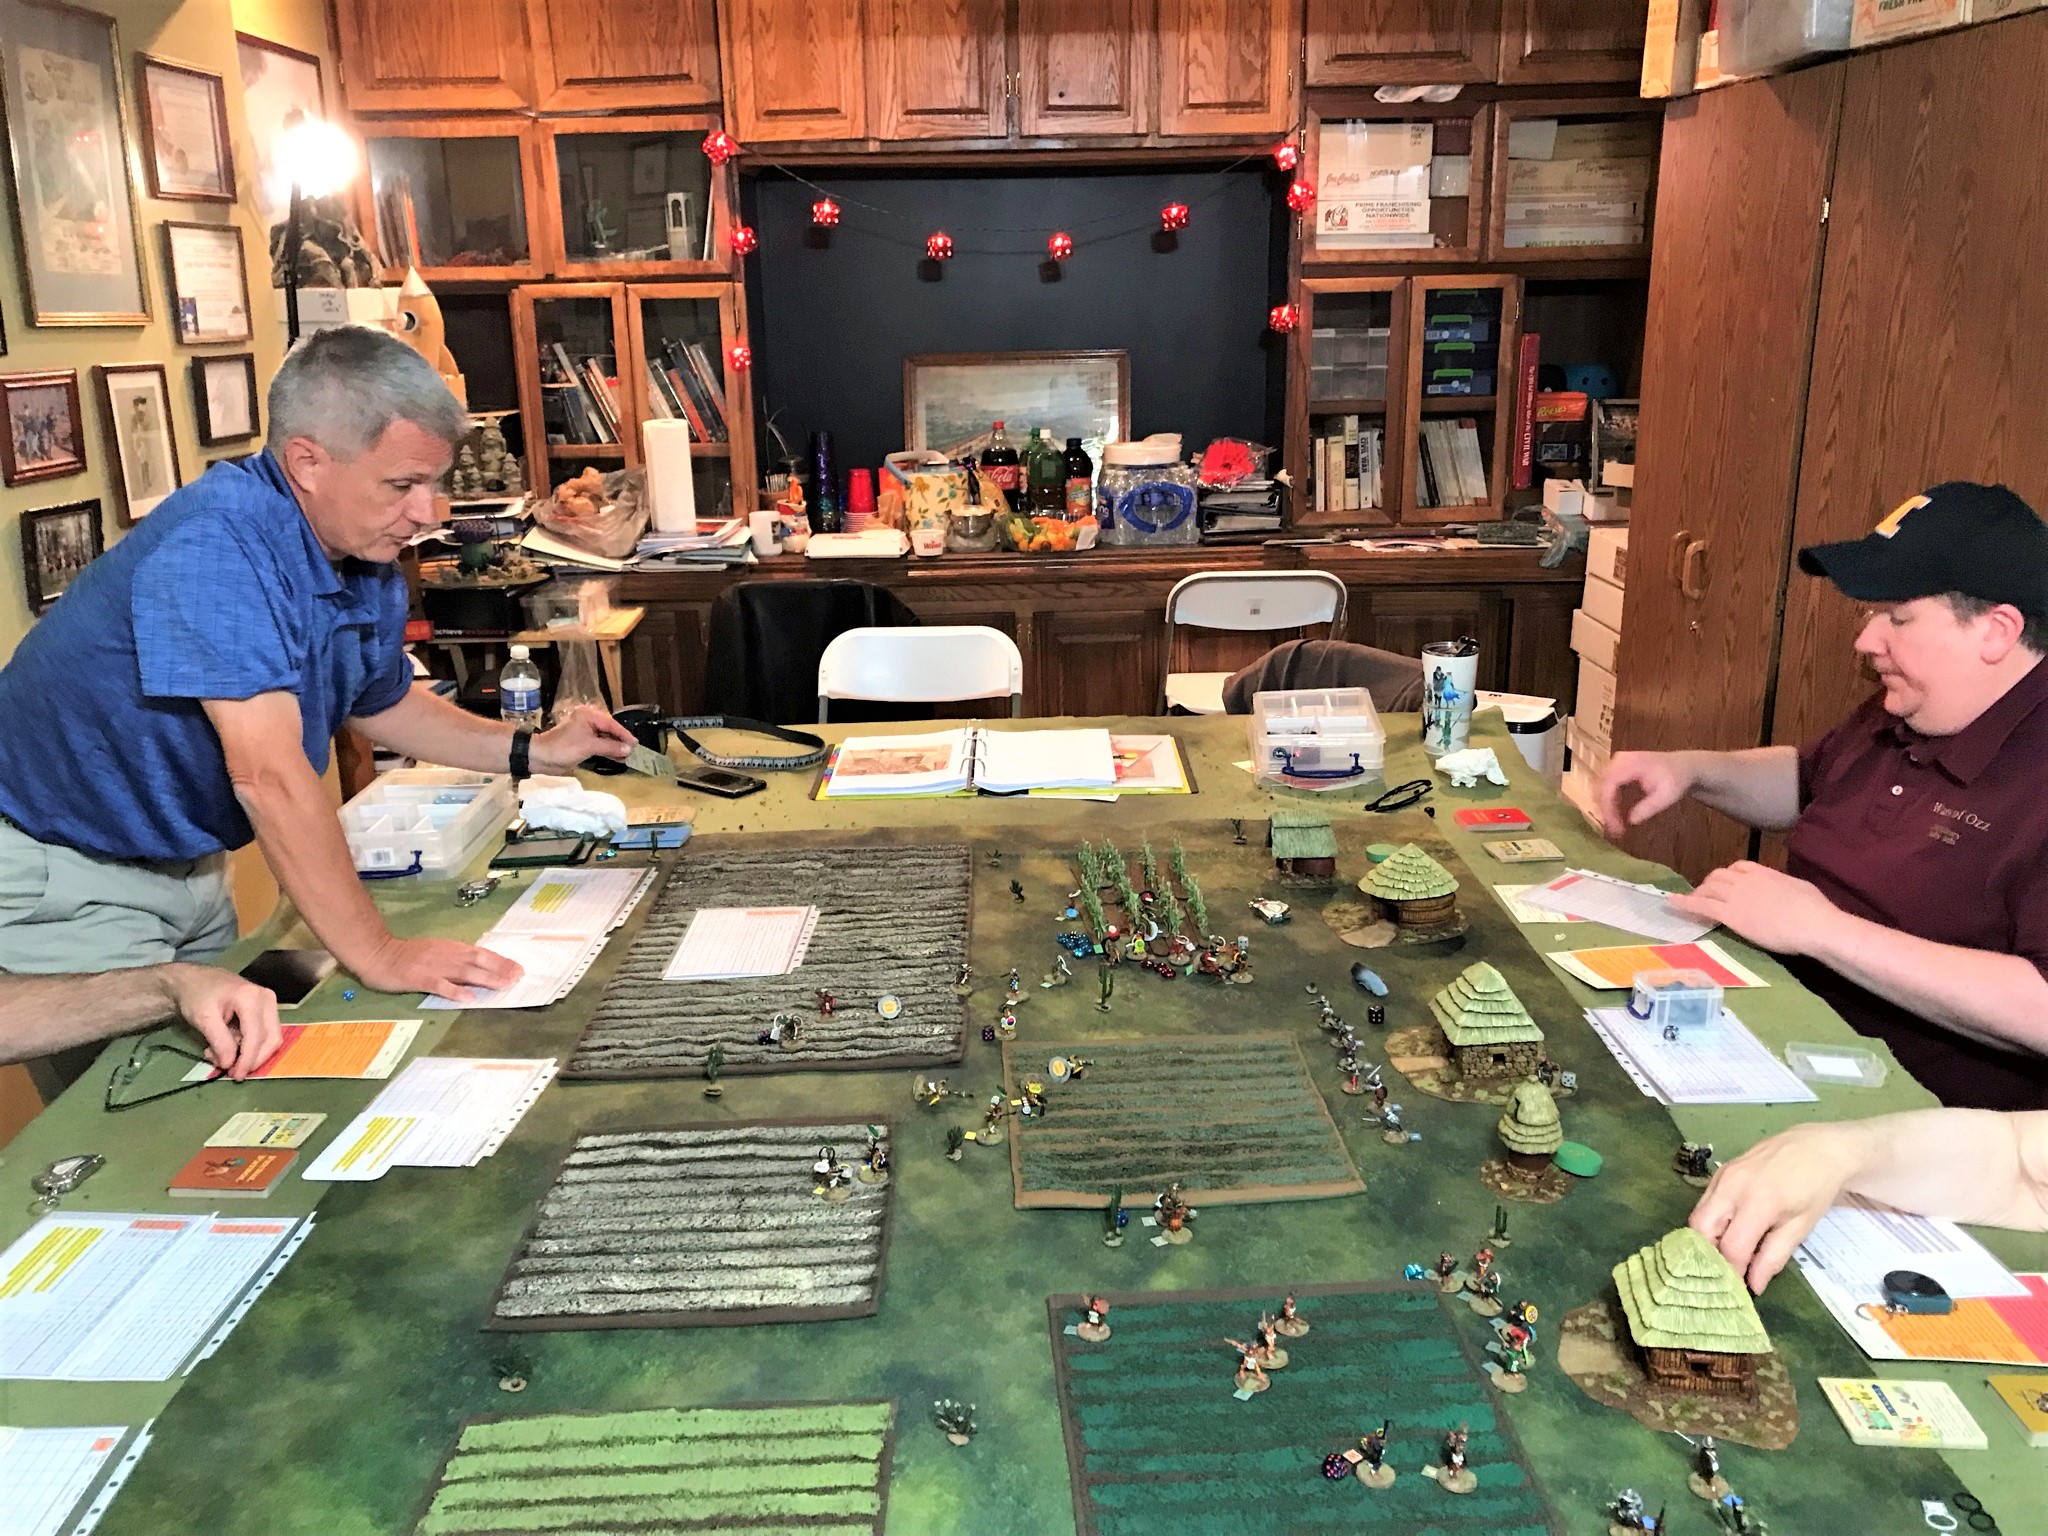
Then we moved on to run a final test of Dave’s RECON WOOD (Wars of Orcs and Dwarves) game. This also uses Buck’s Wars of Ozz-type mechanics, but with changes for fantasy gaming. It is close to publication. Here are some images – we would also play this game at RECON after any modifications.
The pig-faced orcs defend a bridge and river against the halfling onslaught.Halfling cavalry on goats and giant roosters attack.
The next day (22nd) was our day 1 of RECON. We reran the Hobbits raid on the Orc village scenario at the convention and it was a hoot.
Hobbits on purple pachyderms force a bridge crossing!The mighty GM (Buck) surveys the carnage.
I want to give EXTRA credit to Lynn as she agreed to game the whole day with me. During a lull in the game, I asked her with iPhone in hand if she was enjoying herself…
Having fun dear?
Seriously, she was a good sport but one day of gaming a year is the best I can expect!
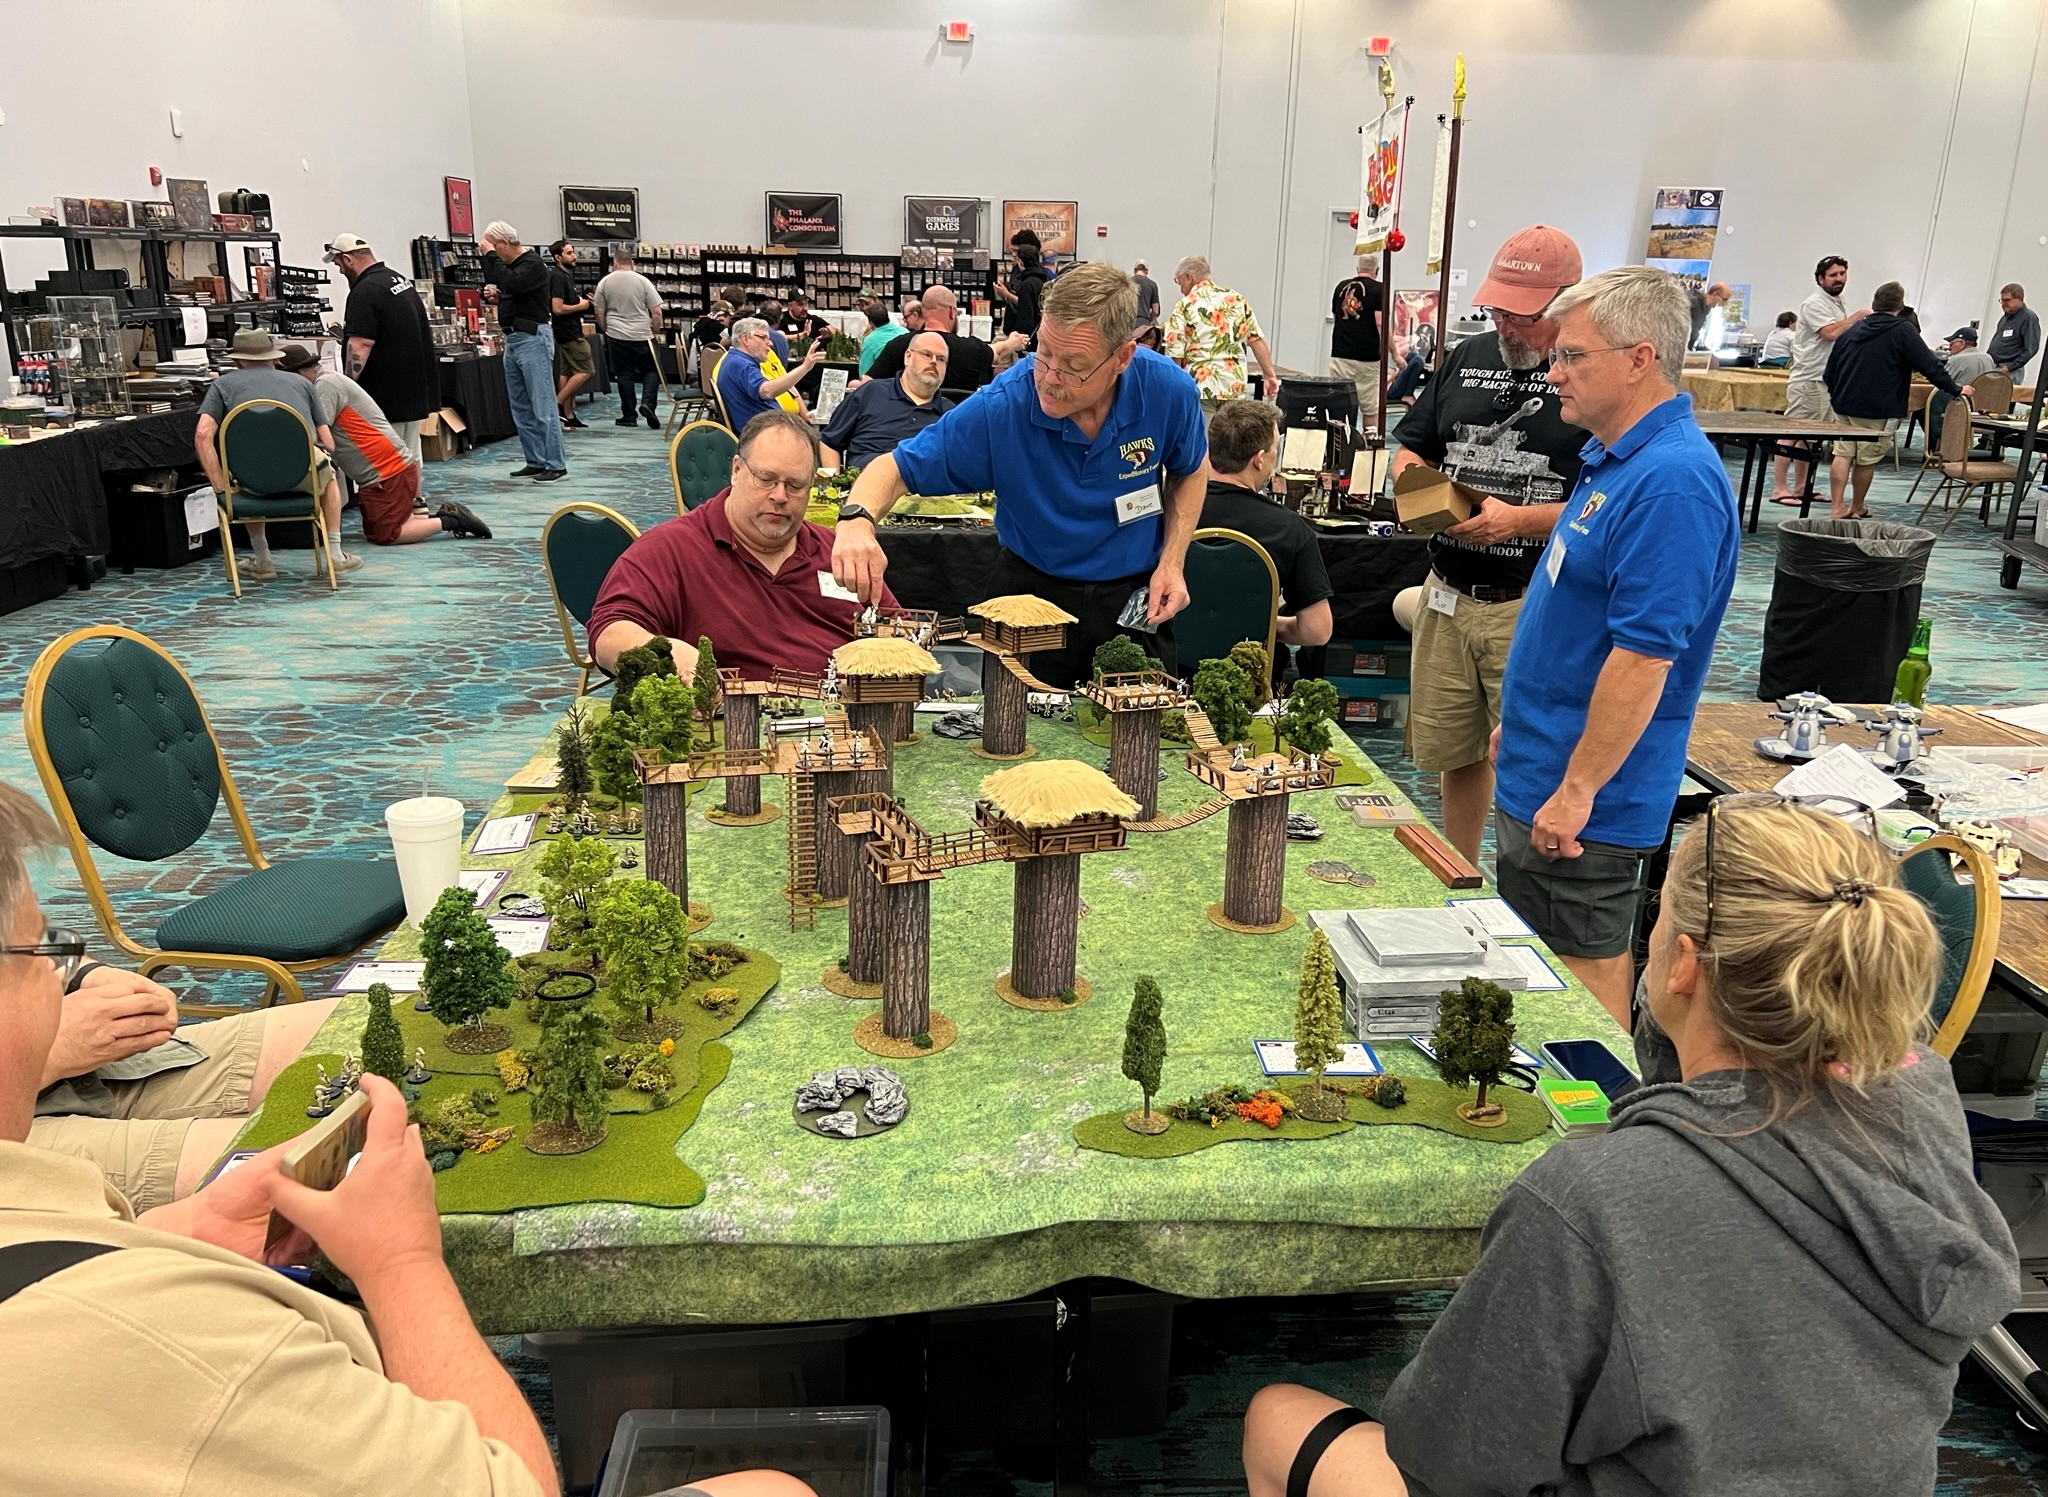
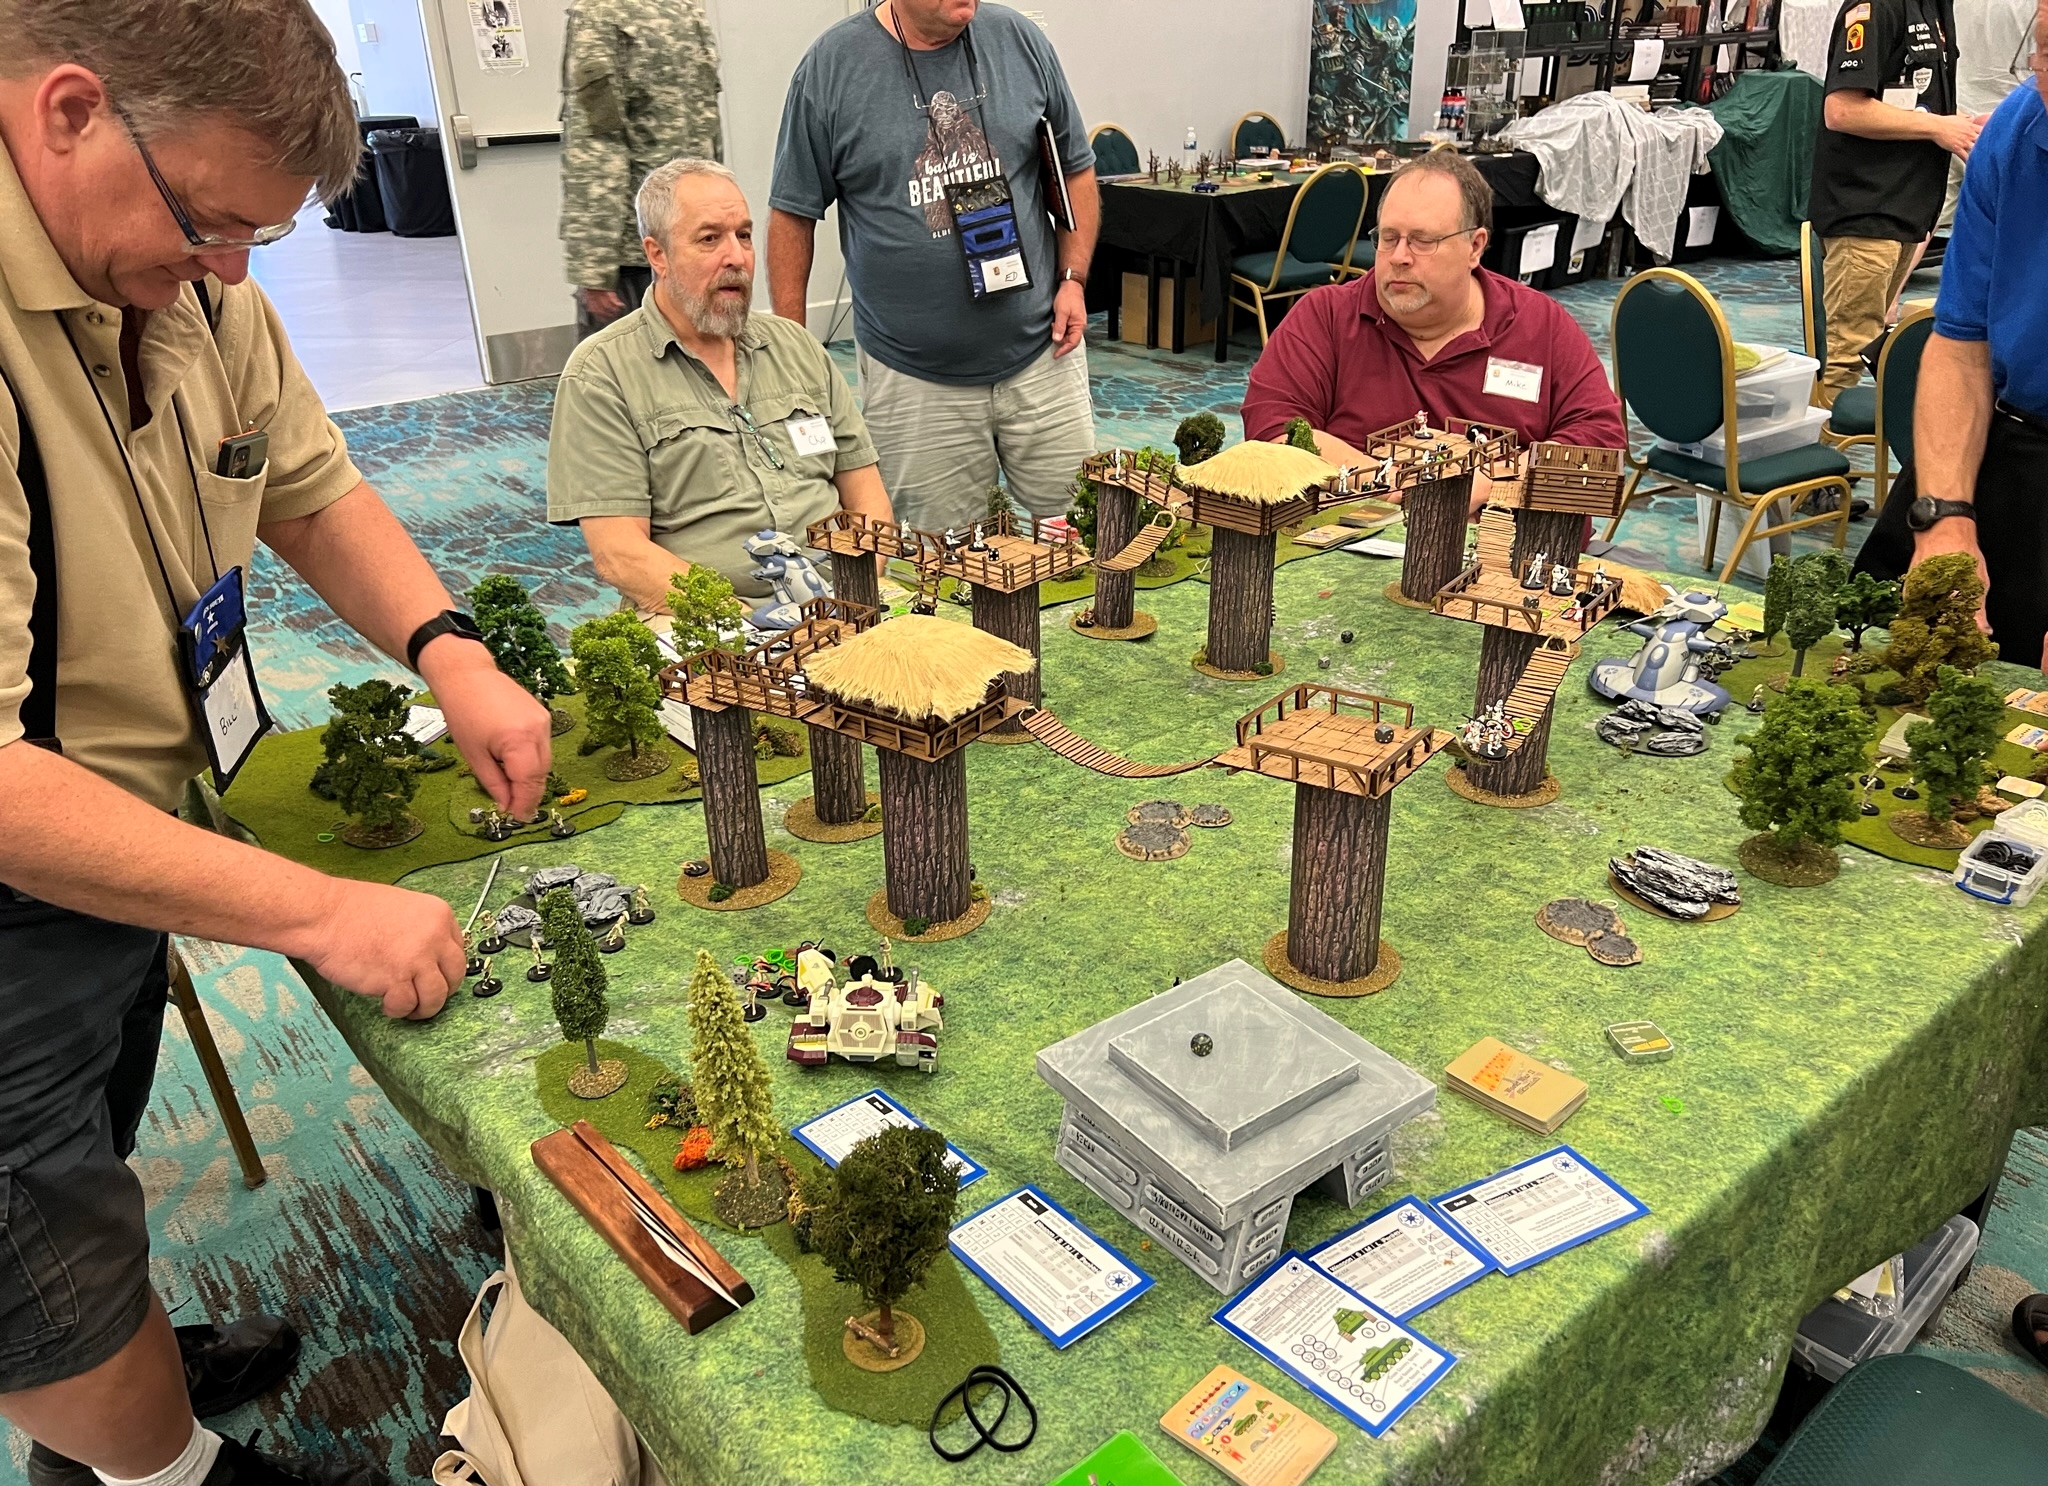
We then played in aCombat Patrol™ game involving Star Wars figures that was fun.
Dave and Buck GM’ing the Star Wars game.Buck had a nice tabletop here.All had fun – though I think my side (clones) lost against the droids.
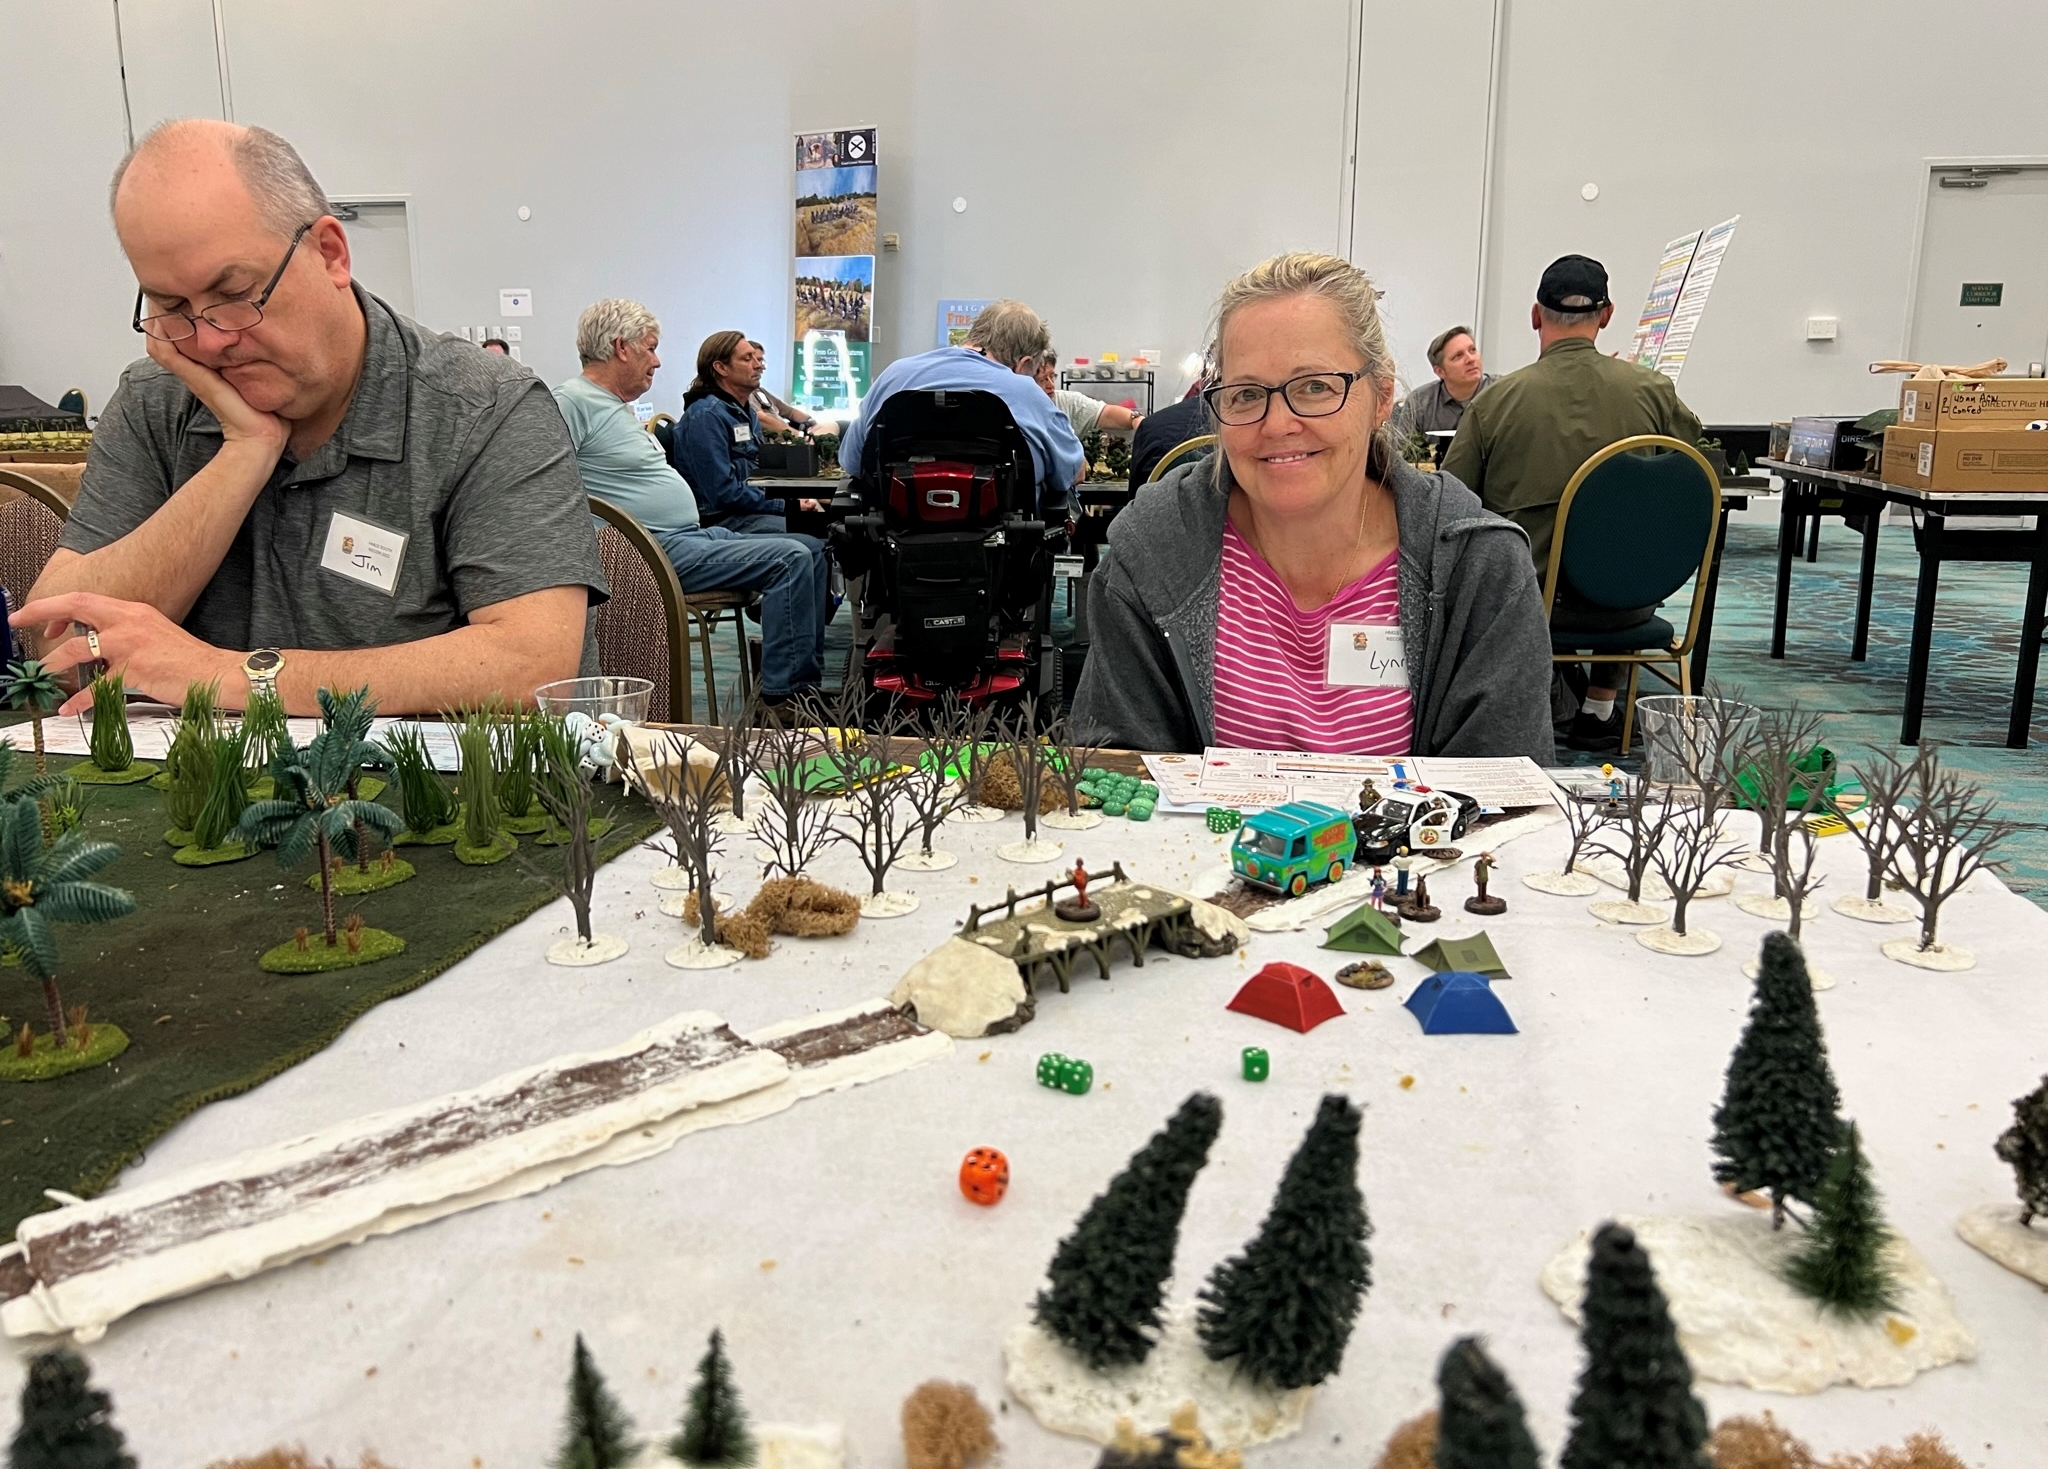
The last game Friday was a 7ITV game that Lyn and I played. There were three side-by-side games – and Lynn and I played the Scooby-Doo scenario.
Lynn and I play the Scooby-Doo scenario. Hey, she’s smiling! Next to her is JJ playing against Buck in a Jonny Quest scenario.Here you can see the three scenarios – some other sci-fi scenario is on the end. Buck is looking distracted. I think the GM had a wonderful set of terrain but the games dragged as we took a while to grasp the mechanics. Also, I found it tough to get his attention with three games running simultaneously – so not as fun as I expected. But Lynn had served her gaming sentence and was free to hang out with Candy at a blueberry fest on Saturday while the con went on.
Saturday morning Buck ran a Philippines 1941 Combat Patrol™ scenario that I helped him as an assistant GM. I truly enjoyed this!
Buck surveys the tabletop in his happy shirt.The Japanese players move up their Ha-Go tanks towards the bridge. Neither the tanks nor the the bridge would survive long as the Americans reacted.
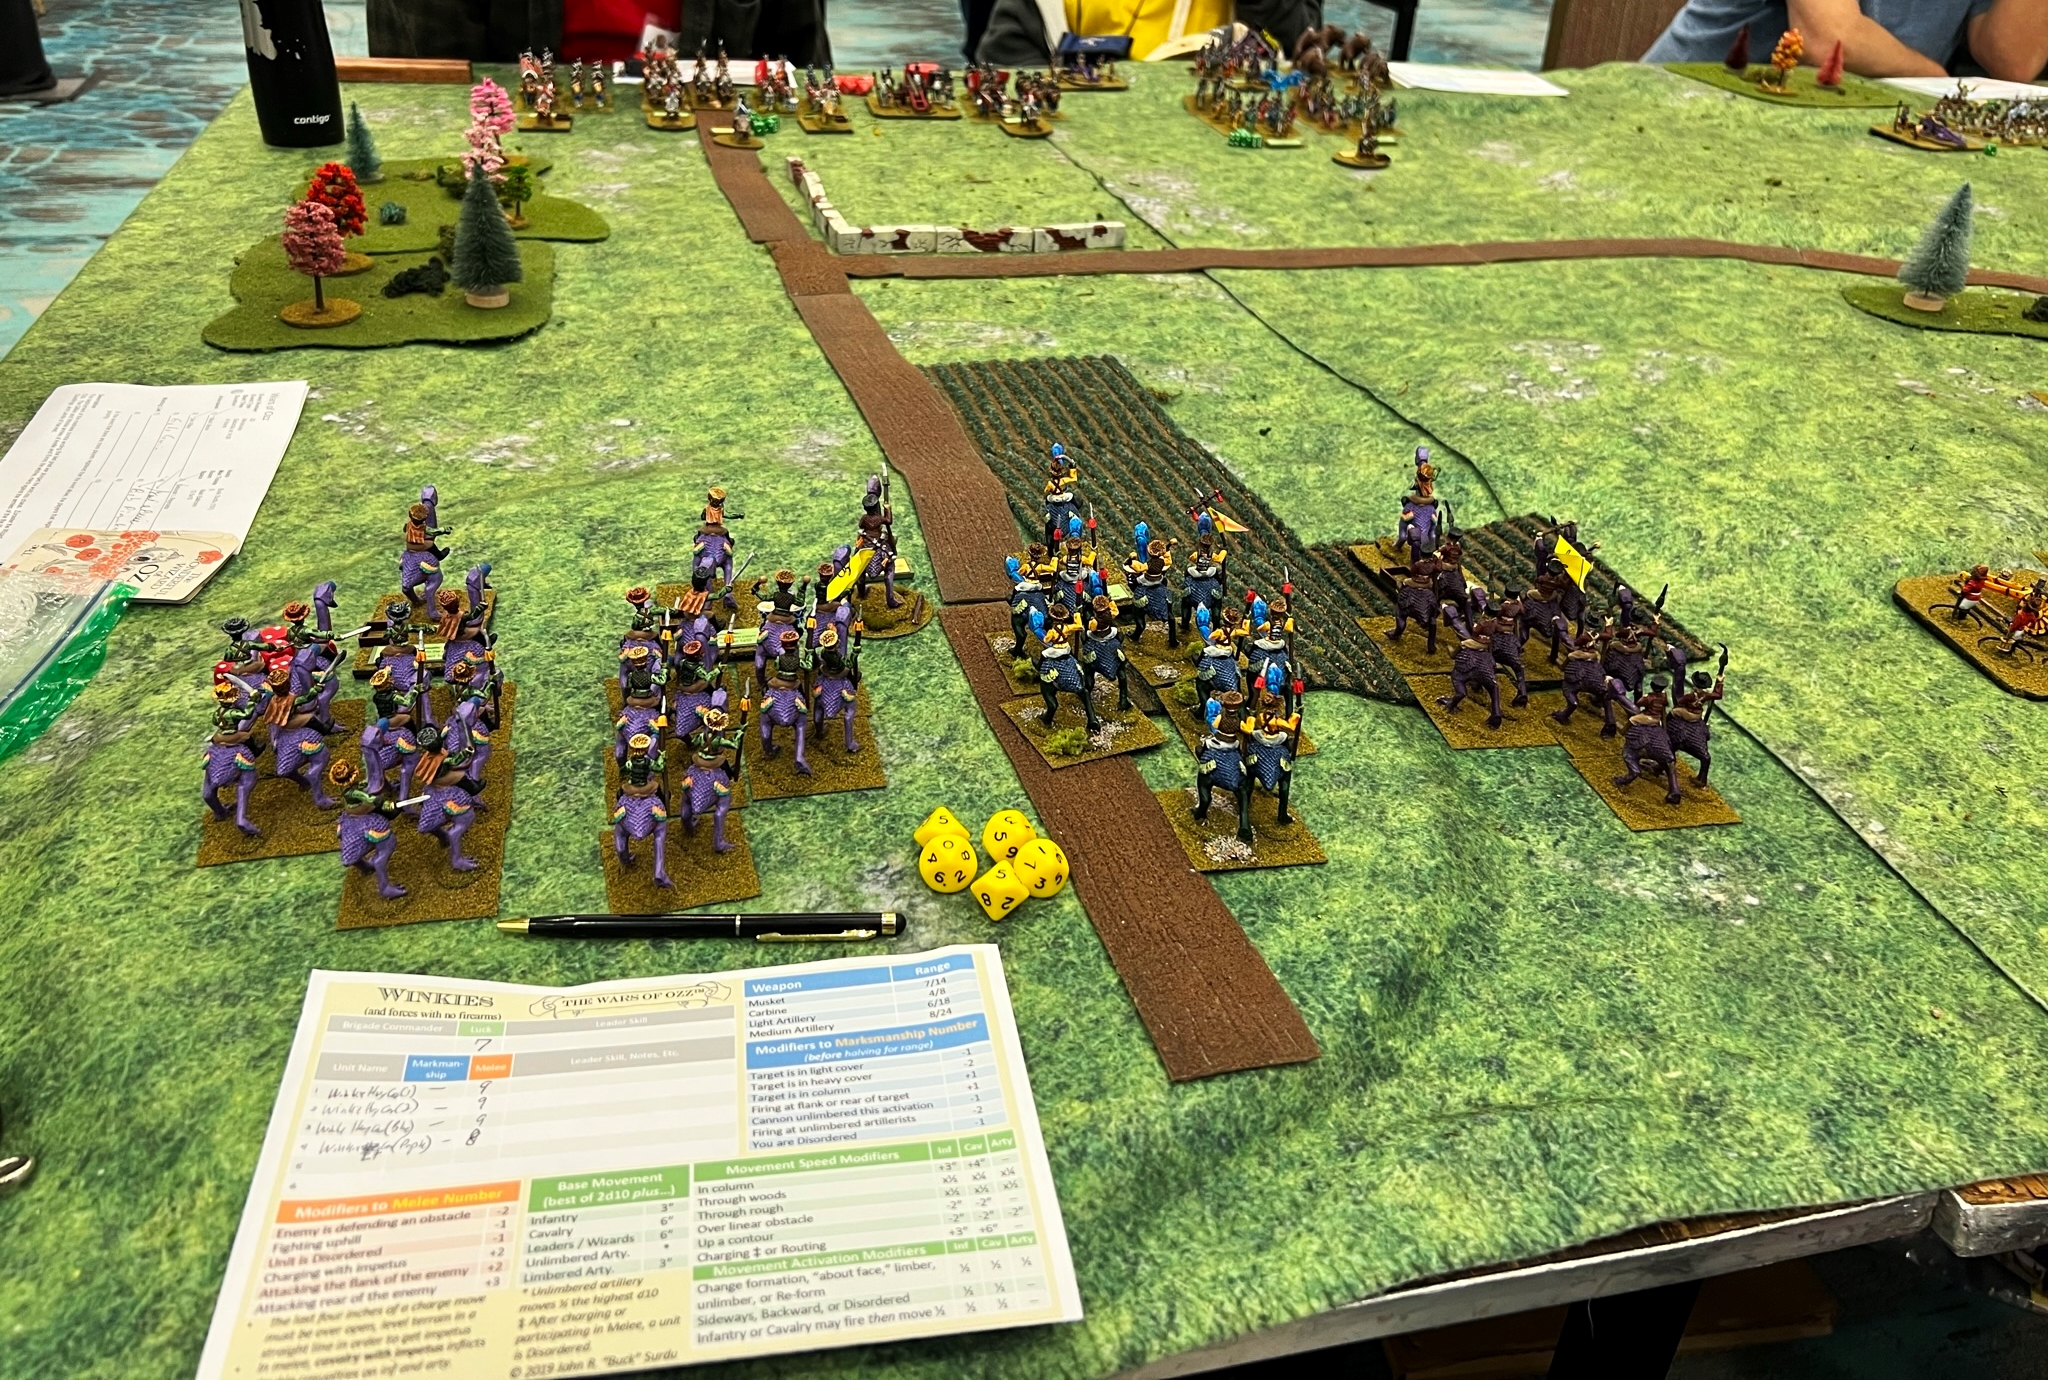
The next game was my favorite – a massive Wars of Ozz game where I commanded a brigade of Winkie zilk-riding cavalry (think giant birds of prey). I maneuvered the brigade to assault the Quadlings and Munchkins opposing me.
My Winkie cavalry forms up.The tabletop – my cavalry is in the foreground.My Winkie cavalry moving into action!
The game was an overwhelming Winkie and Gillikin (my allies) victory.
Lastly, Buck, JJ, and I (Dave left Friday) played a neat Spanish-American scenario for Blood & Steel. The GM did an excellent job – and the game came down to a final roll of the dice, which went for Buck and JJ, but it was a lot of fun to play them. The scenario was a very fun skirmish game. (no pics sorry).
After this, we said goodbye and I headed back to my room where Lynn and I packed up for the return trip to Massachusetts.
I have to say it was a great trip – and one I will always remember. Big thanks to Buck and Candy!!!! Dave and JJ too!!
Next up – how I built a Conquistador fleet for the Battle of Lake Texcoco for HUZZAH 2022 (in between taking this trip and HAVOC 2022)!
Yes, I am alive…at least I think I am, which counts for something I guess…
Apologies for not being as active – or more precisely not being a contributor at all – on the blogosphere since March. I HAVE been reading the blogs I follow but have not commented or hit “like” or anything of the sort. Why you may ask, have I been seemingly dormant?
The truth is I have been busier than a 1-legged man in an ass-kicking contest!
One would think that retirement would have slowed me down. It has had exactly the opposite effect.
I have – since my last post in March:
Ran two Mass Pikemen Gaming Club gaming sessions (one What a Tanker and one Feudal Patrol™ with my Spanish Conquest rules supplement Civilizations Collide).
Prepared for and ran 4 four-hour tabletop Feudal Patrol™ games at a three day gaming convention (HAVOC) in Massachusetts.
Drove 1200 miles to Florida and 1200 back over two weeks for another gaming convention (HMGS South’s RECON where I gamed for three days), two days of golf school, and a lot of leisure activities and travel with my wife.
Built a completely new MASSIVE naval game for Feudal Patrol™ – Aztecs vs. Conquistadores on Lake Texcoco – which required me to build 5 brigantines and 5 guns and 5 three-man crews – let alone the game rules, markers, dashboards, etc. I just finished it in time and debuted it at HUZZAH convention in Maine in April (150 miles away).
Went to the aforementioned HUZZAH and ran 6 four-hour games in 4 days!
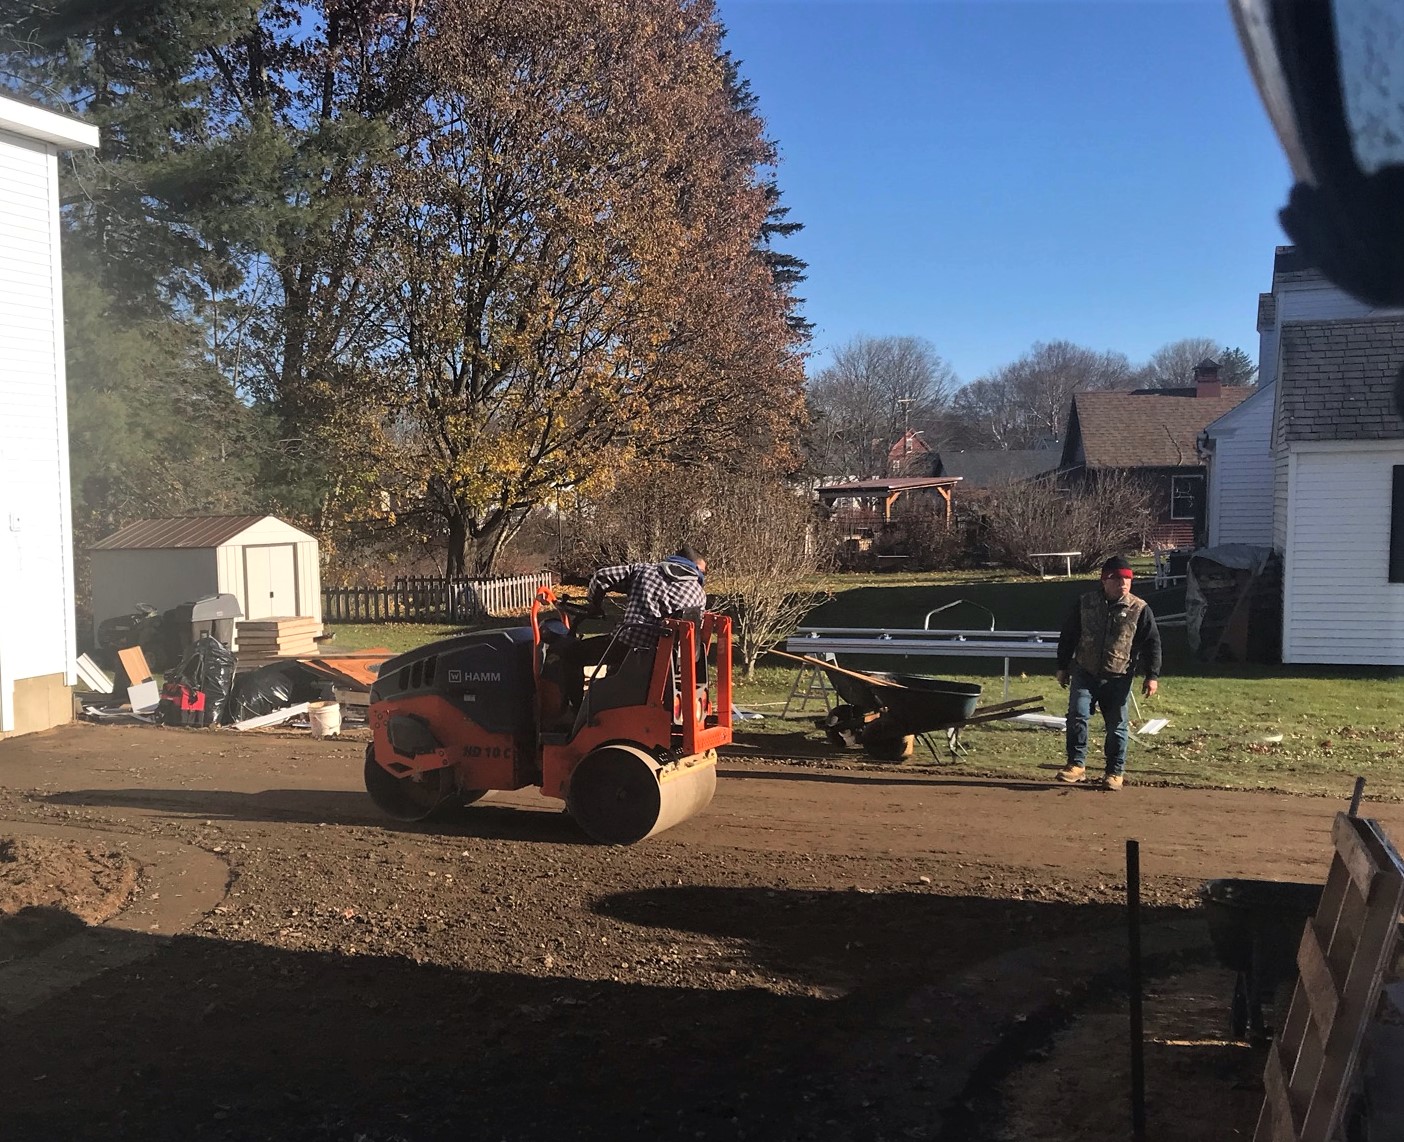
Continued on the garage never-ending but close to ending now project…now the driveway is completely paved, and the final pieces and landscaping are happening as I write.
Started golf season – started off really frigging cold but warming up now. Hey, I’m in Massachusetts after all.
Ran for reelection for Board of Health in my town. I was unopposed but got 82/99 votes (only a 6% turnout for a municipal election).
Played in 8 golf events and two weekly golf leagues as well as participating on a committee for three other tournaments. Plus trying to groove a new swing.
Also in March we had a funeral for my brother in law – he had been sick for a while so not a surprise.
Been driving my granddaughter to and from school 3 days a week.
I guess I had a blog birthday (my 7th) back in March – missed that too!
Yeah, I’ve been idle and lazy…
Awaiting school drop off with 5 year old Tabitha – and yes those are golf clubs and shoes in the back of my car!When Tabitha (on right) sees her friend Alina – they go hand-in-hand to school. Awwww…
So where do I go from here?
Basically I am going to restart and regularly read more of the blogs I follow.
I am also going to post about all of the above-mentioned conventions. I have run a dozen convention or club games this year as a GM so far, and played in nearly as many others too. I’ll share some info and pics about epic games I ran (IMO – hint – some of my games I ran were award-winning) or played in. These were at RECON, HAVOC, HUZZAH, and the Mass Pikemen that I think you will enjoy.
I’ll post about the building of my Conquistador brigantine fleet and their falconet & lombard crews.
Going to throw in some vacation and golf stuff as well – after all this blog IS titled “Life, Golf, Miniatures, & Other Distractions“.
Again, glad to be back and hopefully I won’t overwhelm you with new posts – and to those of you who inquired about me, thanks for caring and checking in. Thanks for missing me!
2021 was another one that we all want to forget in many ways, but not all.
I set out some goals for myself back last December for 2022. Some were around gaming, some around hobby production, some were around golf, and more. Back when I was working in “the dreaded private sector”, I had sales goals to hit every period – be it yearly, quarterly, thrice annually, or whatever. Every manager would ask you for “stretch goals” – which was pretty unnecessary as the sales quotas you were given from corporate were never layups anyways. Still, it’s always good to have a plan and try your best. It’s also good to be honest with yourself and be accountable to yourself. Hopefully, that’s what I did with regards to my goals in 2021.
How did I do versus my 2020 goals?
Paint 250 figures or more
That did not happen, though my production was pretty good at 104. For three months I did not do any painting (August-October) as I was pretty involved with the new garage+ project.
Not even all of them now…
Complete the figures and terrain for Civilizations Collide
I have to give myself full credit here – the building of the Aztec cityscape was an epic project. However, I still am finding that I have more to do as I develop scenarios for my Spanish Conquest scenarios booklet – so yes I built what I planned – I just have more to do to flesh out the other scenarios with terrain and figures.
No retro sci-fi games or WaT games this year – but I did run multiple games of for Feudal PatrolTM using my “Civilizations Collide” supplement, to include at Historicon.
HA! I have hovered around 20-21 all year. I did get new clubs this year, and I won my flight in the Club Championship (and as a caveat it was the D Flight, but I am proud of that).
I did get a trophy…
Play golf (in season) at least twice a week
I did do this!
The new G425 toys! I also got G710 irons.
Make between 30 and 36 blog posts of value and quality
As far as quality, I would judge them as up to standard (but that is the reader’s judgement, no?). Quantity-wise, I did 54, so that’s a “check”.
Get back on the Imperial Rebel Ork podcast
Well IRO euthanized his podcast earlier this year, so that wasn’t possible. Understandably, the man had a cabin to build!
Build a new garage
As most of you know, that is on-going, so not yet done.
Through early December
Personal Highs for 2021
Continuing to serve my Town (East Brookfield, MA) as the elected Board of Health Chairman during the pandemic. Specifically, getting over 500 seniors vaccinated (1/3 from neighboring towns even), and getting nearly 100% of the 56+ residents vaccinations.
Getting together with Dave Wood, Buck Surdu, Greg Priebe, Chris Palmer, and Duncan Adams in person and on Zoom games. Even had The Imperfect Modeller on one game as an observer (which was cool).
Winning my flight in the club championship at Quail Hollow Golf and Country Club in Oakham, MA.
Complete the remaining conquistador figures for Civilizations Collide.
Complete the remaining terrain for Civilizations Collide, to include the brigantines.
Complete the remaining Maya figures for Civilizations Collide.
Complete the scenario booklet for Civilizations Collide.
Complete my figures for Wars of Ozz, ok at least 40 of them.
Paint up a platoon from Wargames Supply Dump for Combat Patrol™ .
Try to get my Nomonhan WaT project off the ground.
Attend and run games at conventions or club nights or both, if possible. This would include TotalCon34, HMGS South Recon, HAVOC, HUZZAH!, Historicon, and BARRAGE .
Get the Mass Pikemen more active once the pandemic diminishes.
Celebrate my wife’s retirement (and mine belatedly) with a nice trip.
Finish the garage+ and launch that baby successfully.
Post on the blog 48 times or more – and in good quality.
Be a good blog follower.
Have multiple Zoom chats with fellow hobbyists.
Go to a golf school and get my golf handicap down below 18.
Play golf (in season) at least twice a week.
Win my flight in the Championship.
Be a competitive golfer.
Again, thanks to all who make the time to read this blog – Happy New Year!
Lastly, here follows a detailed list of the 2021 production. You can access more details here.
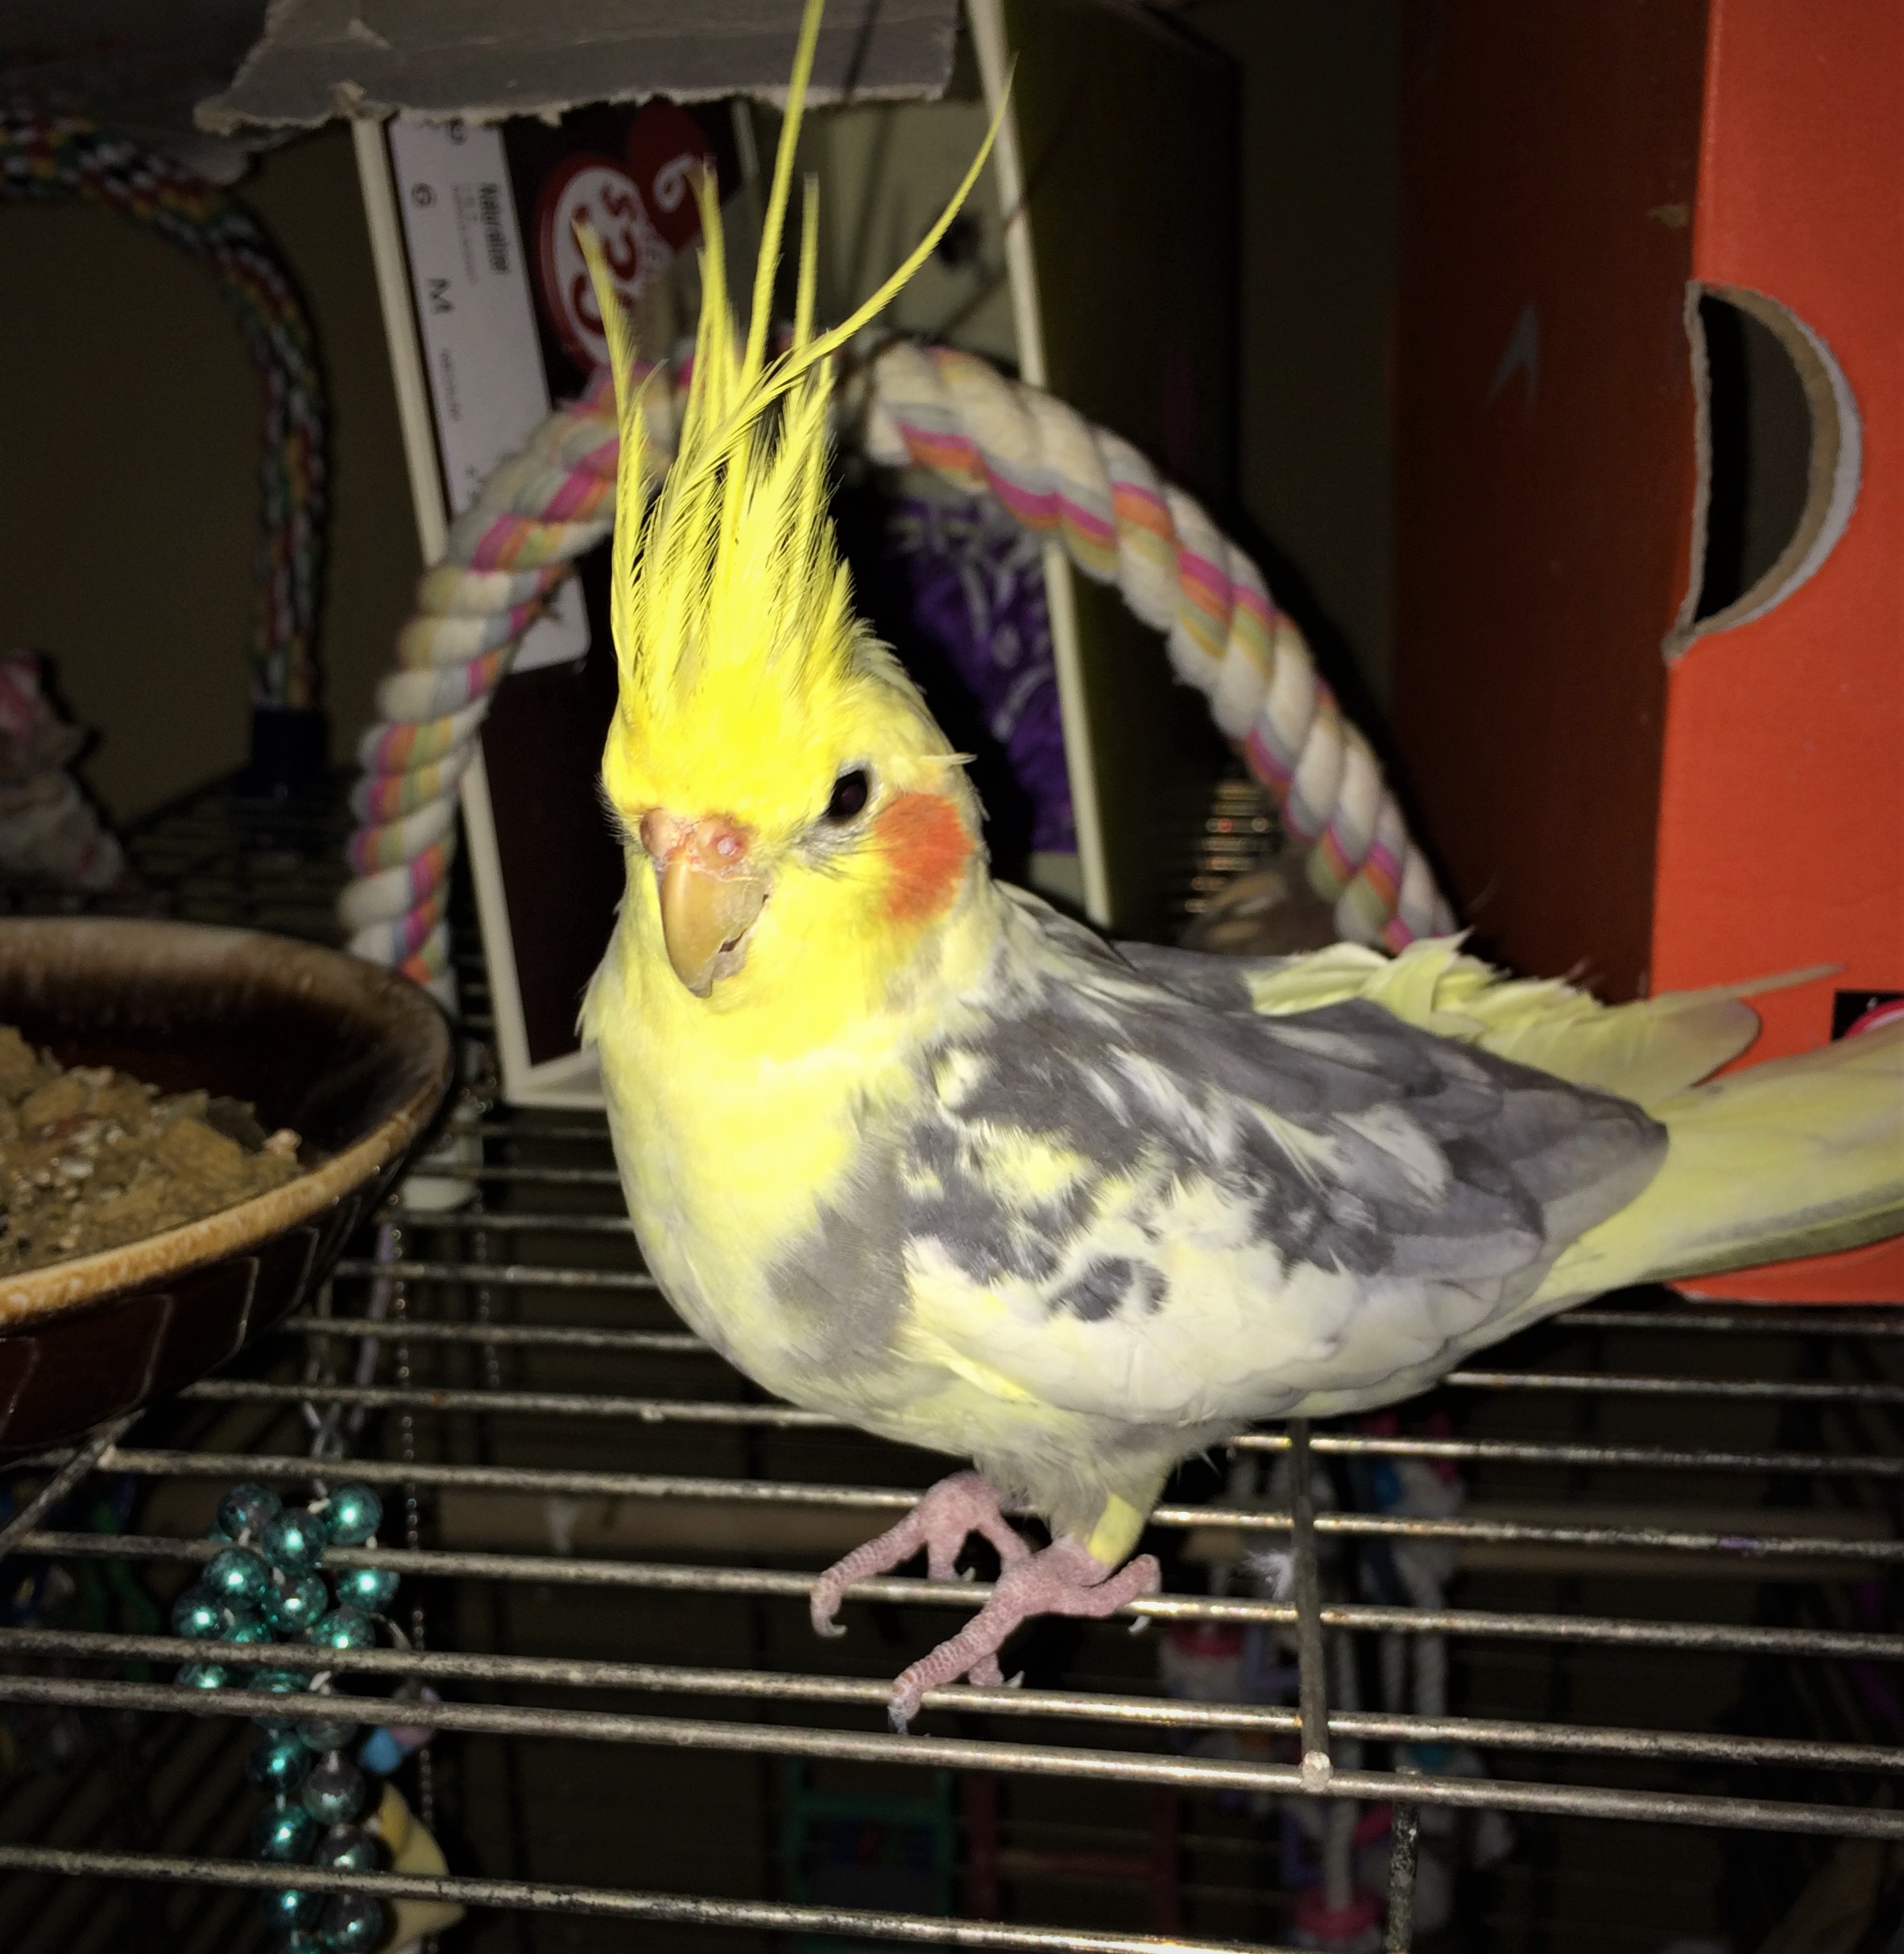
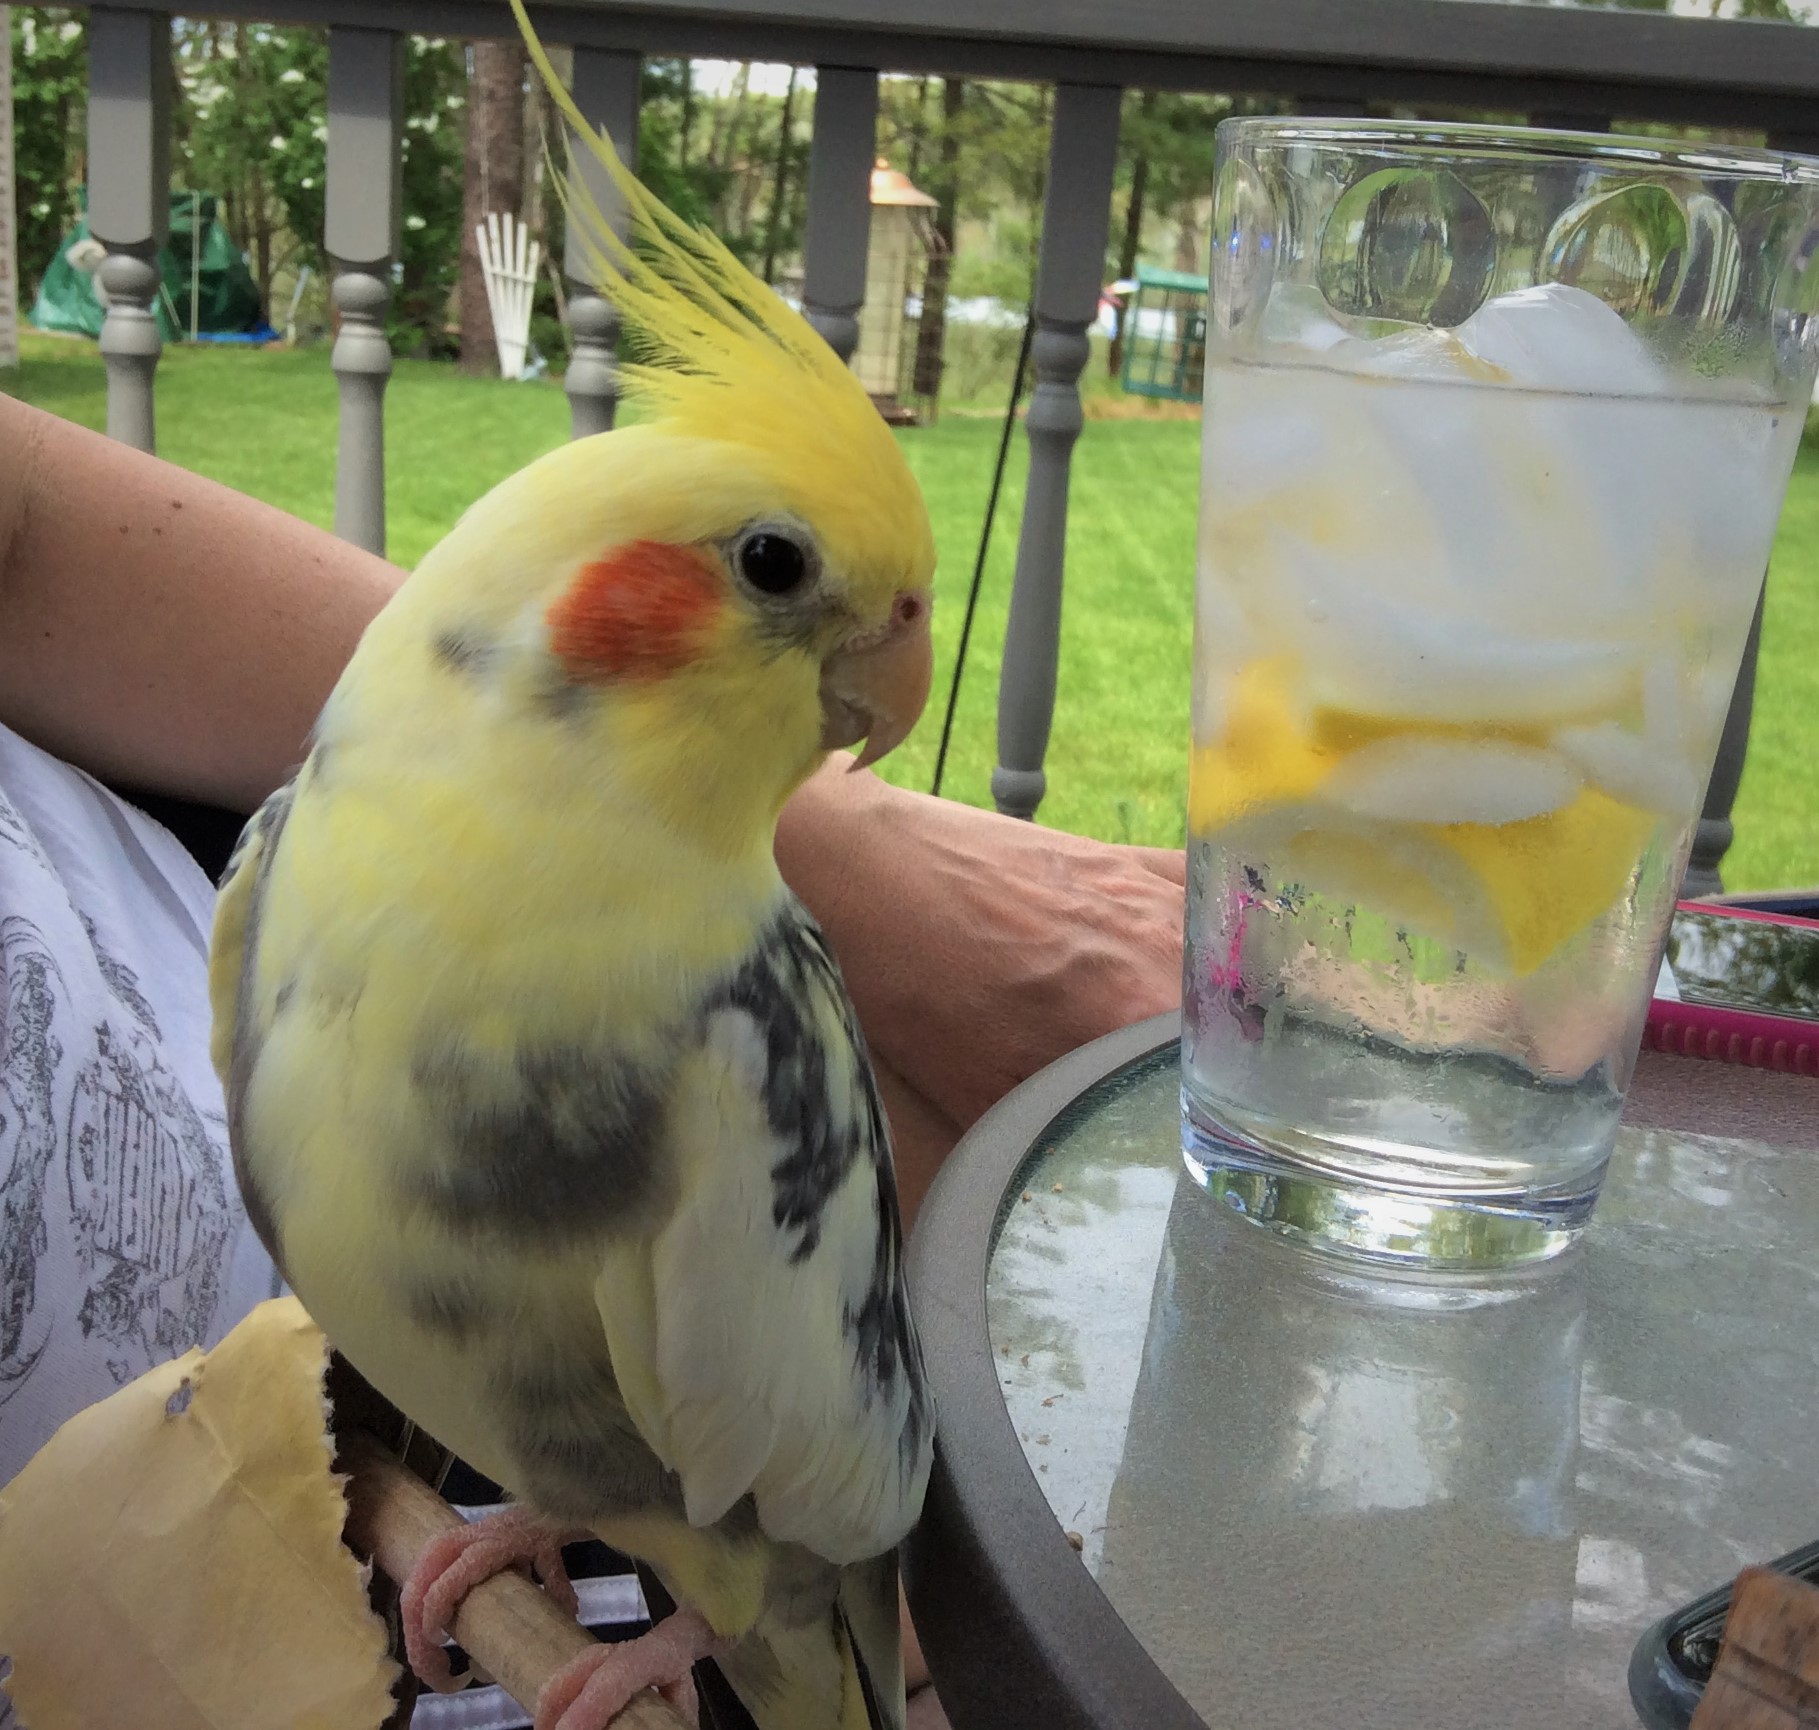
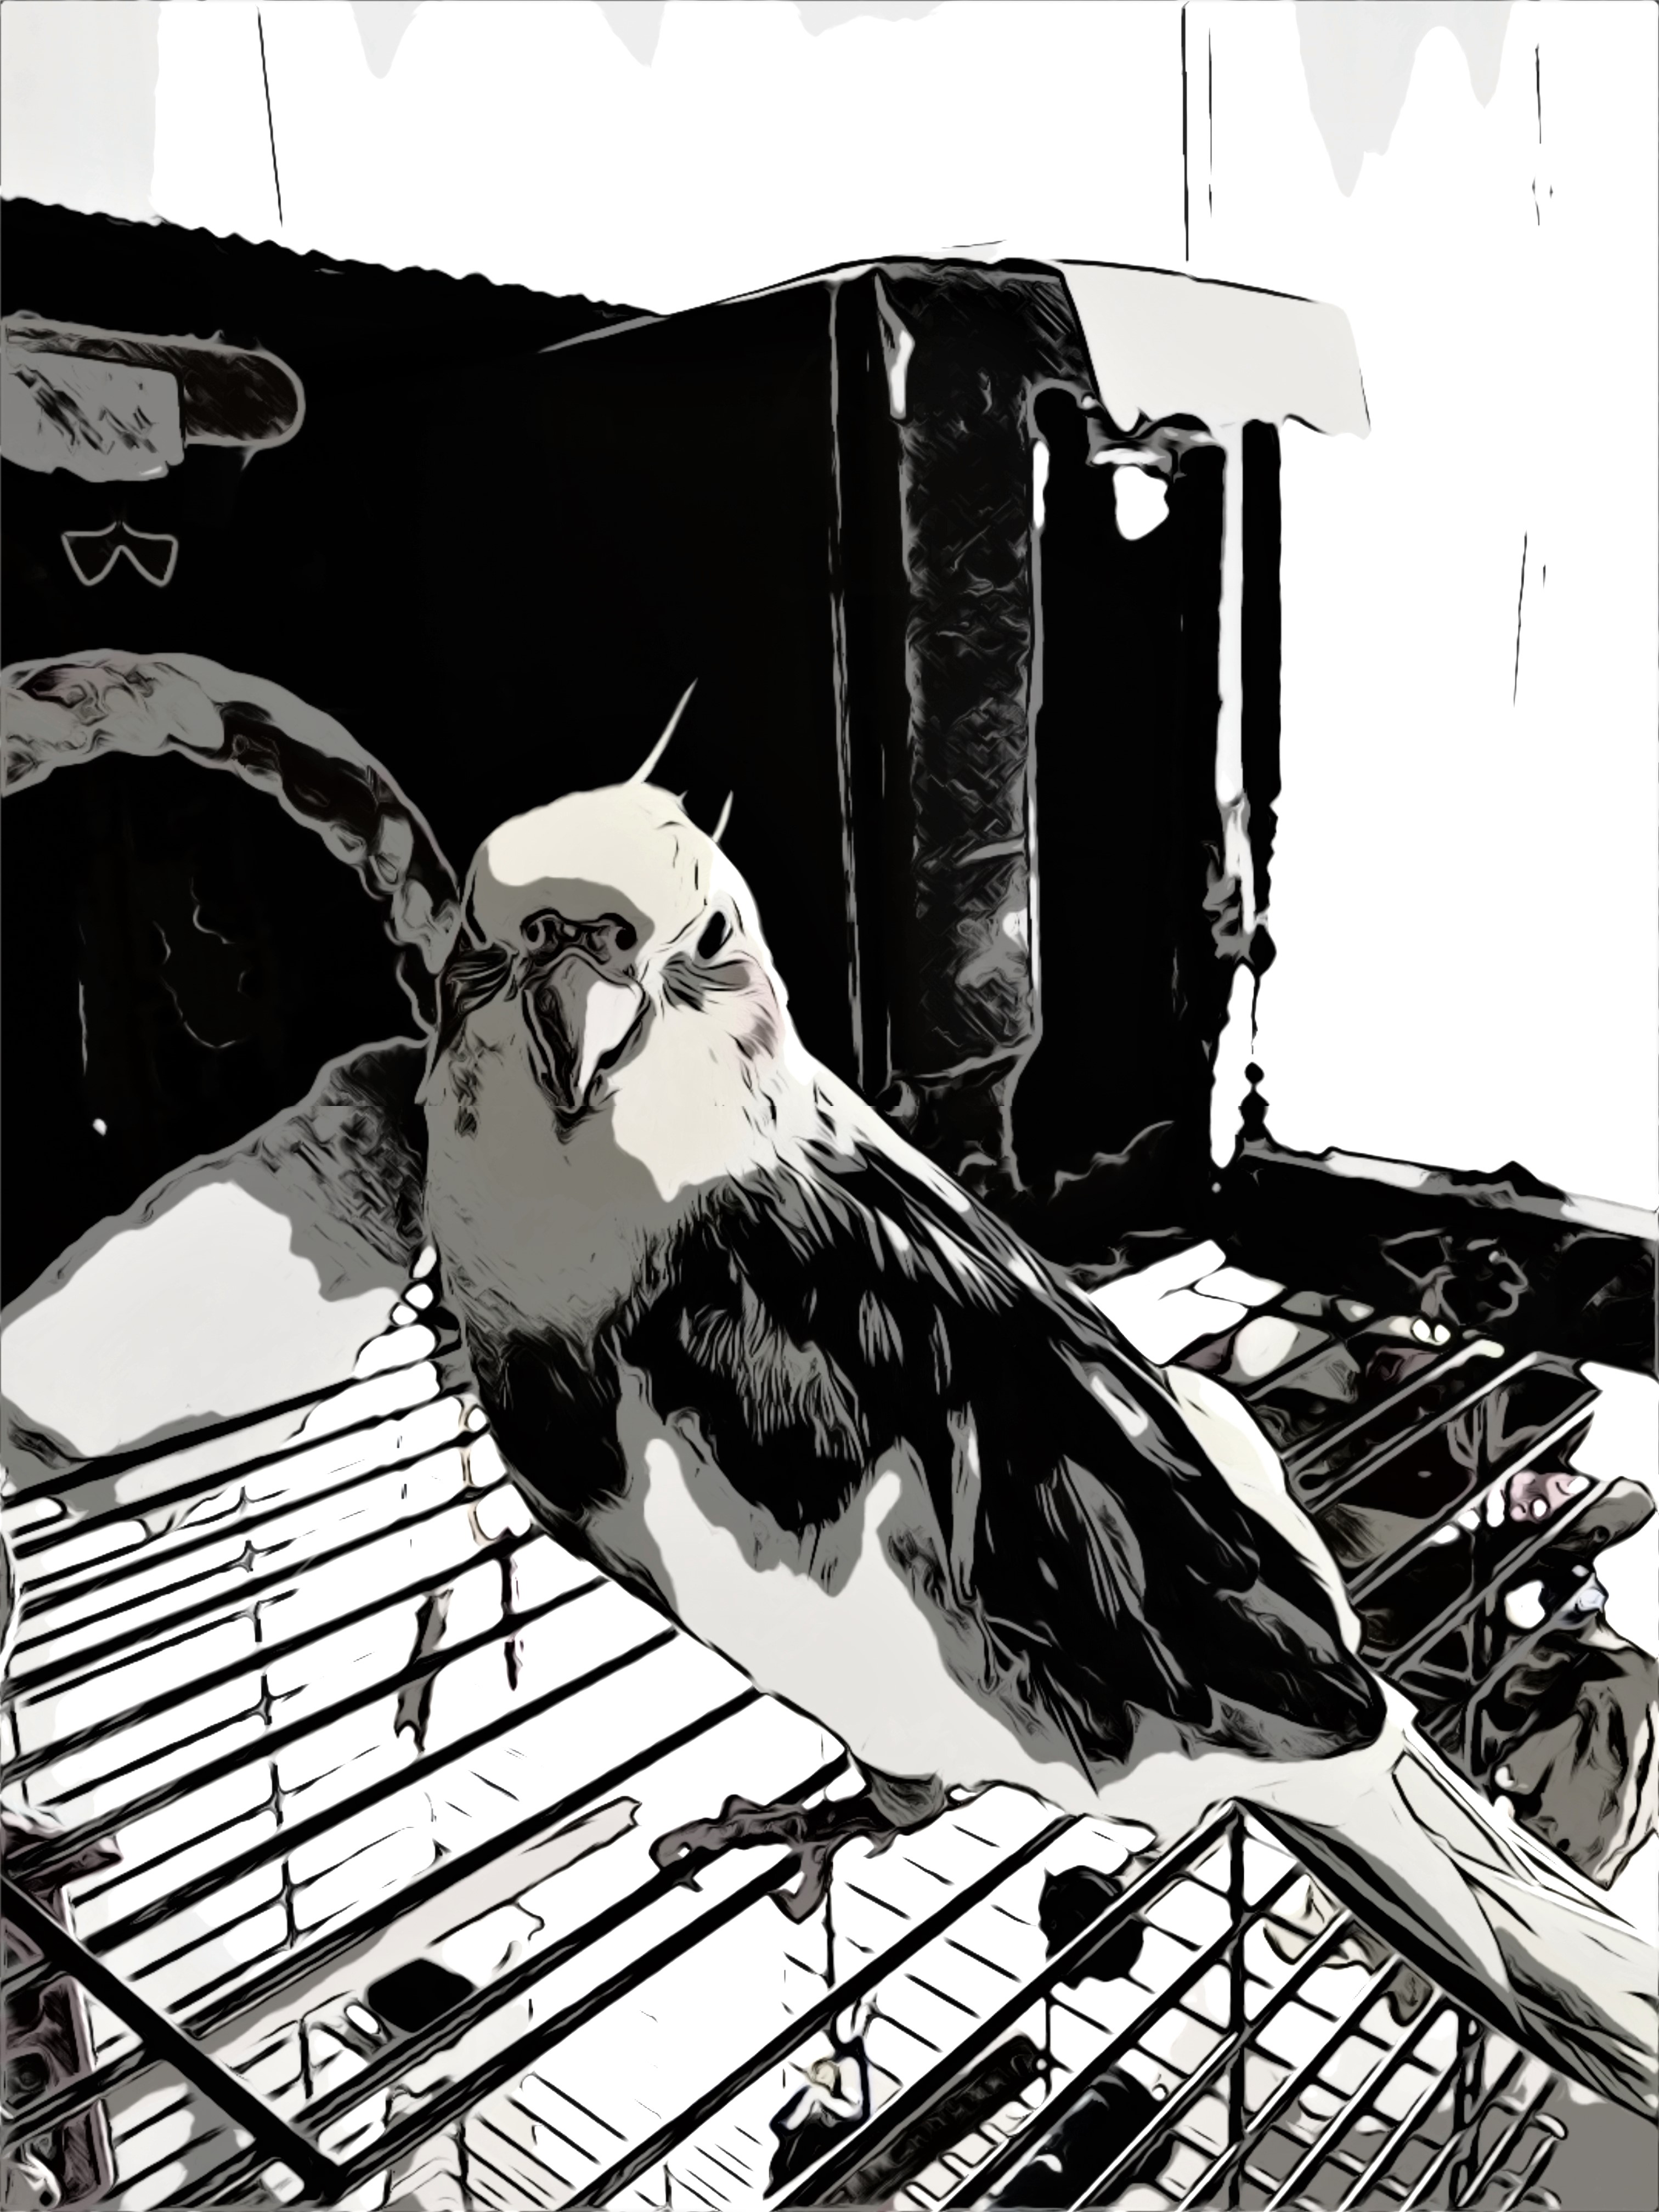
As you can tell by the title of this post, we lost our cockatiel Caesar on New Year’s Day. He was 27 and a half – and I had had him in my life for 24 years. I never thought that I would get close to a pet bird or have one be a big part of my life.
I met Caesar on my wife Lynn’s and my first date on December 14, 1997. He was interesting – I though he’d be flying around but Lynn had his wings clipped so as to prevent him from flying into a ceiling fan or a window. He was not too fond of me at first – after all I was competing for attention with “his mummy” Lynn. He lived on top of his cage – but the door was never shut – he had full reign over his domain.
Over the years, he got used to me and I to him. He could talk – saying “Caesar is a pretty bird” or “pretty bird” or the whistle commonly associated with cartoon wolves seeing a pretty girl. He also could “almost” do Jingle Bells (badly), mimic a barking dog, a landline phone ring (he was that old), or the sound of a construction vehicle backing up. I posted a video of his jingle bells and a finishing “pretty bird” on Instagram here. Take a listen.
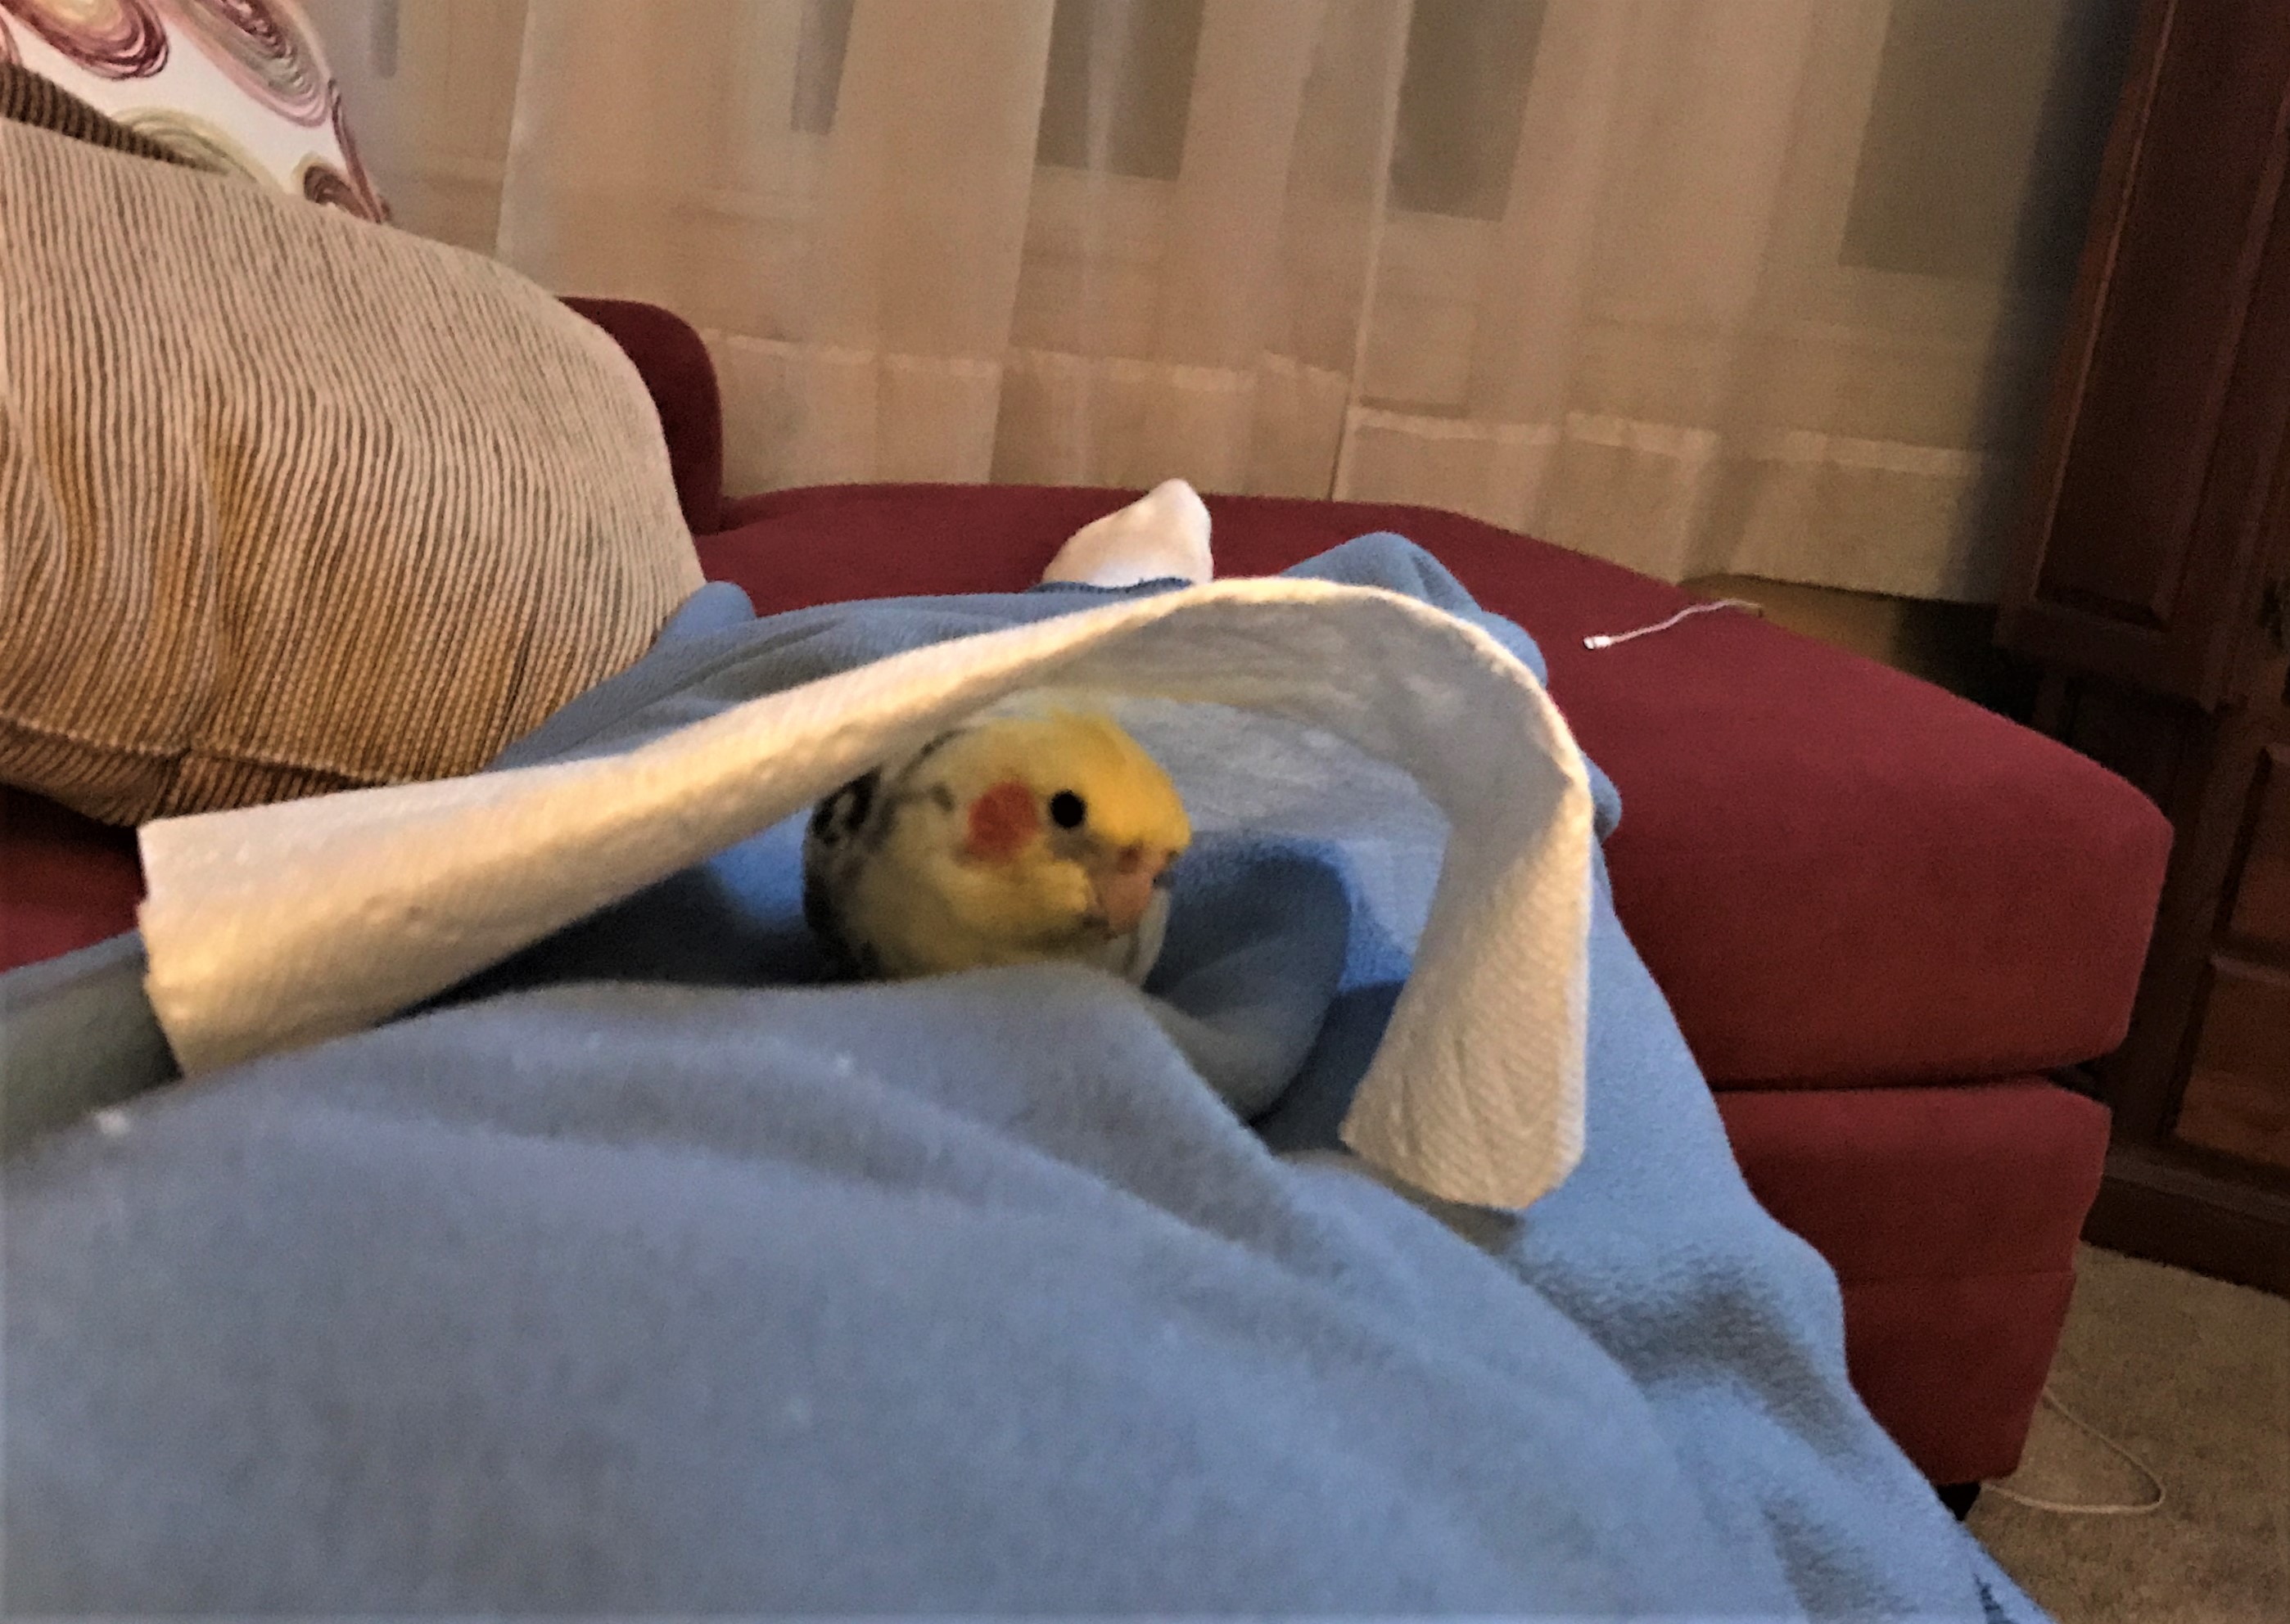
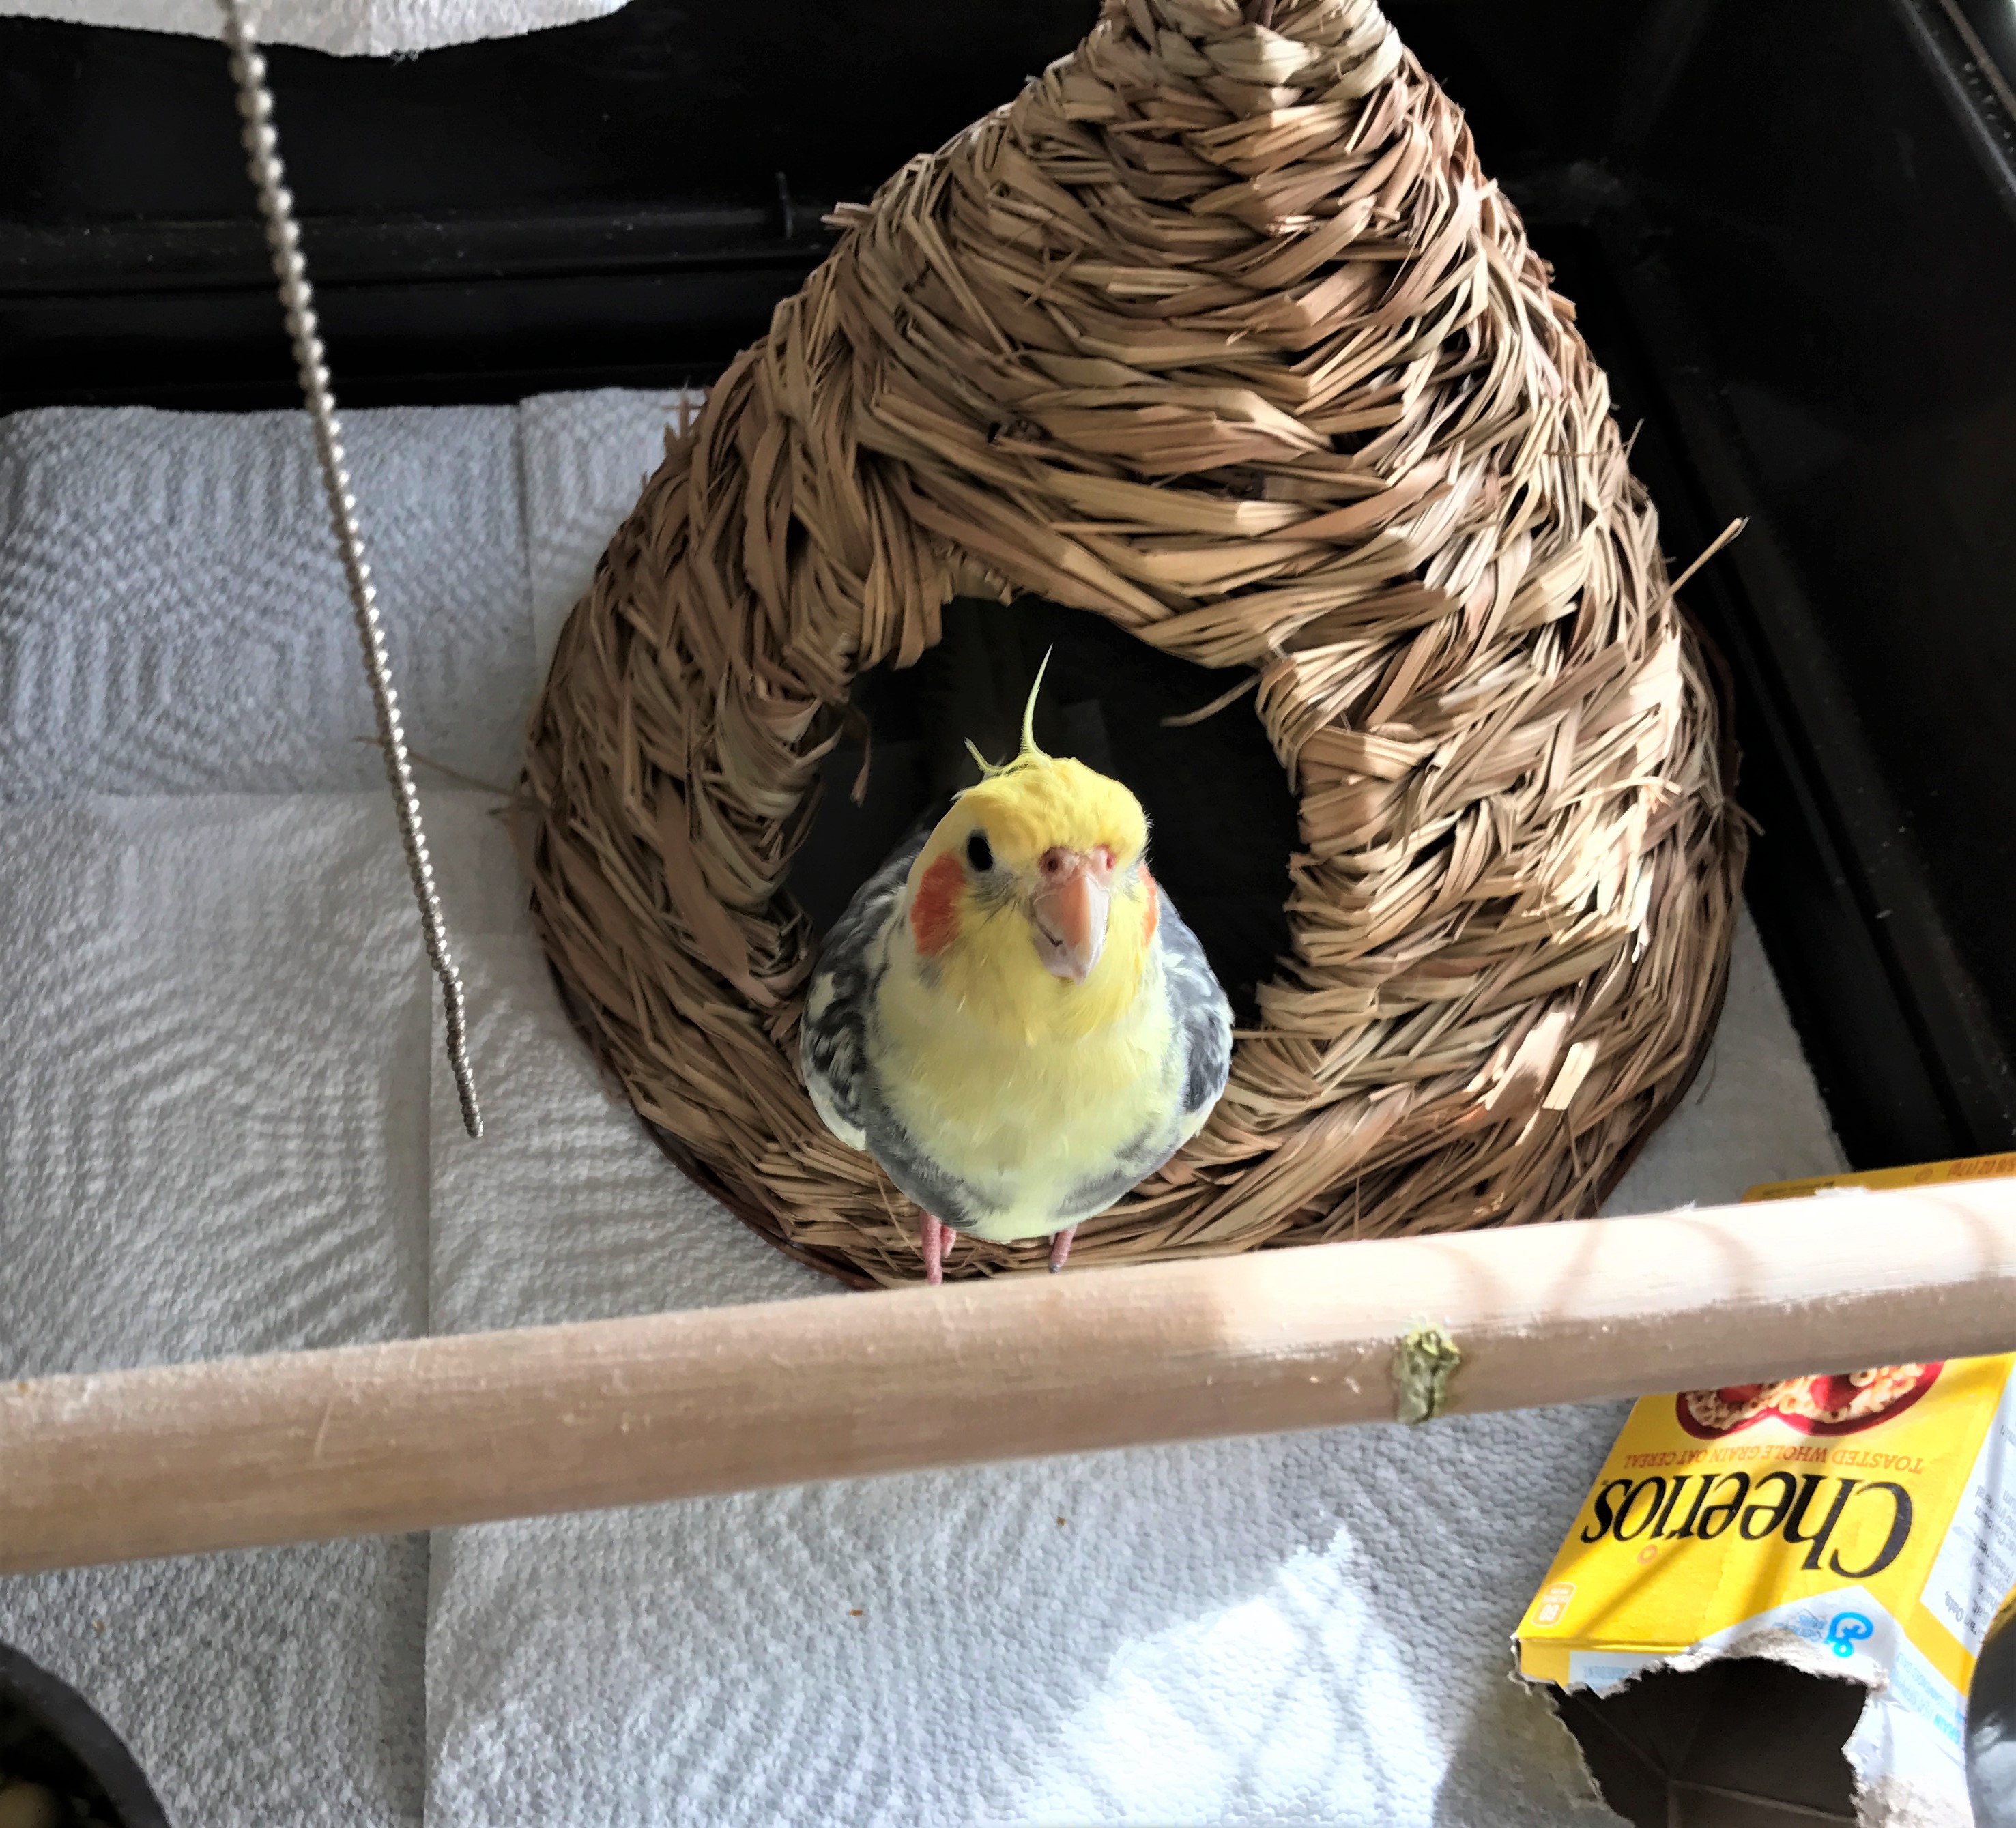
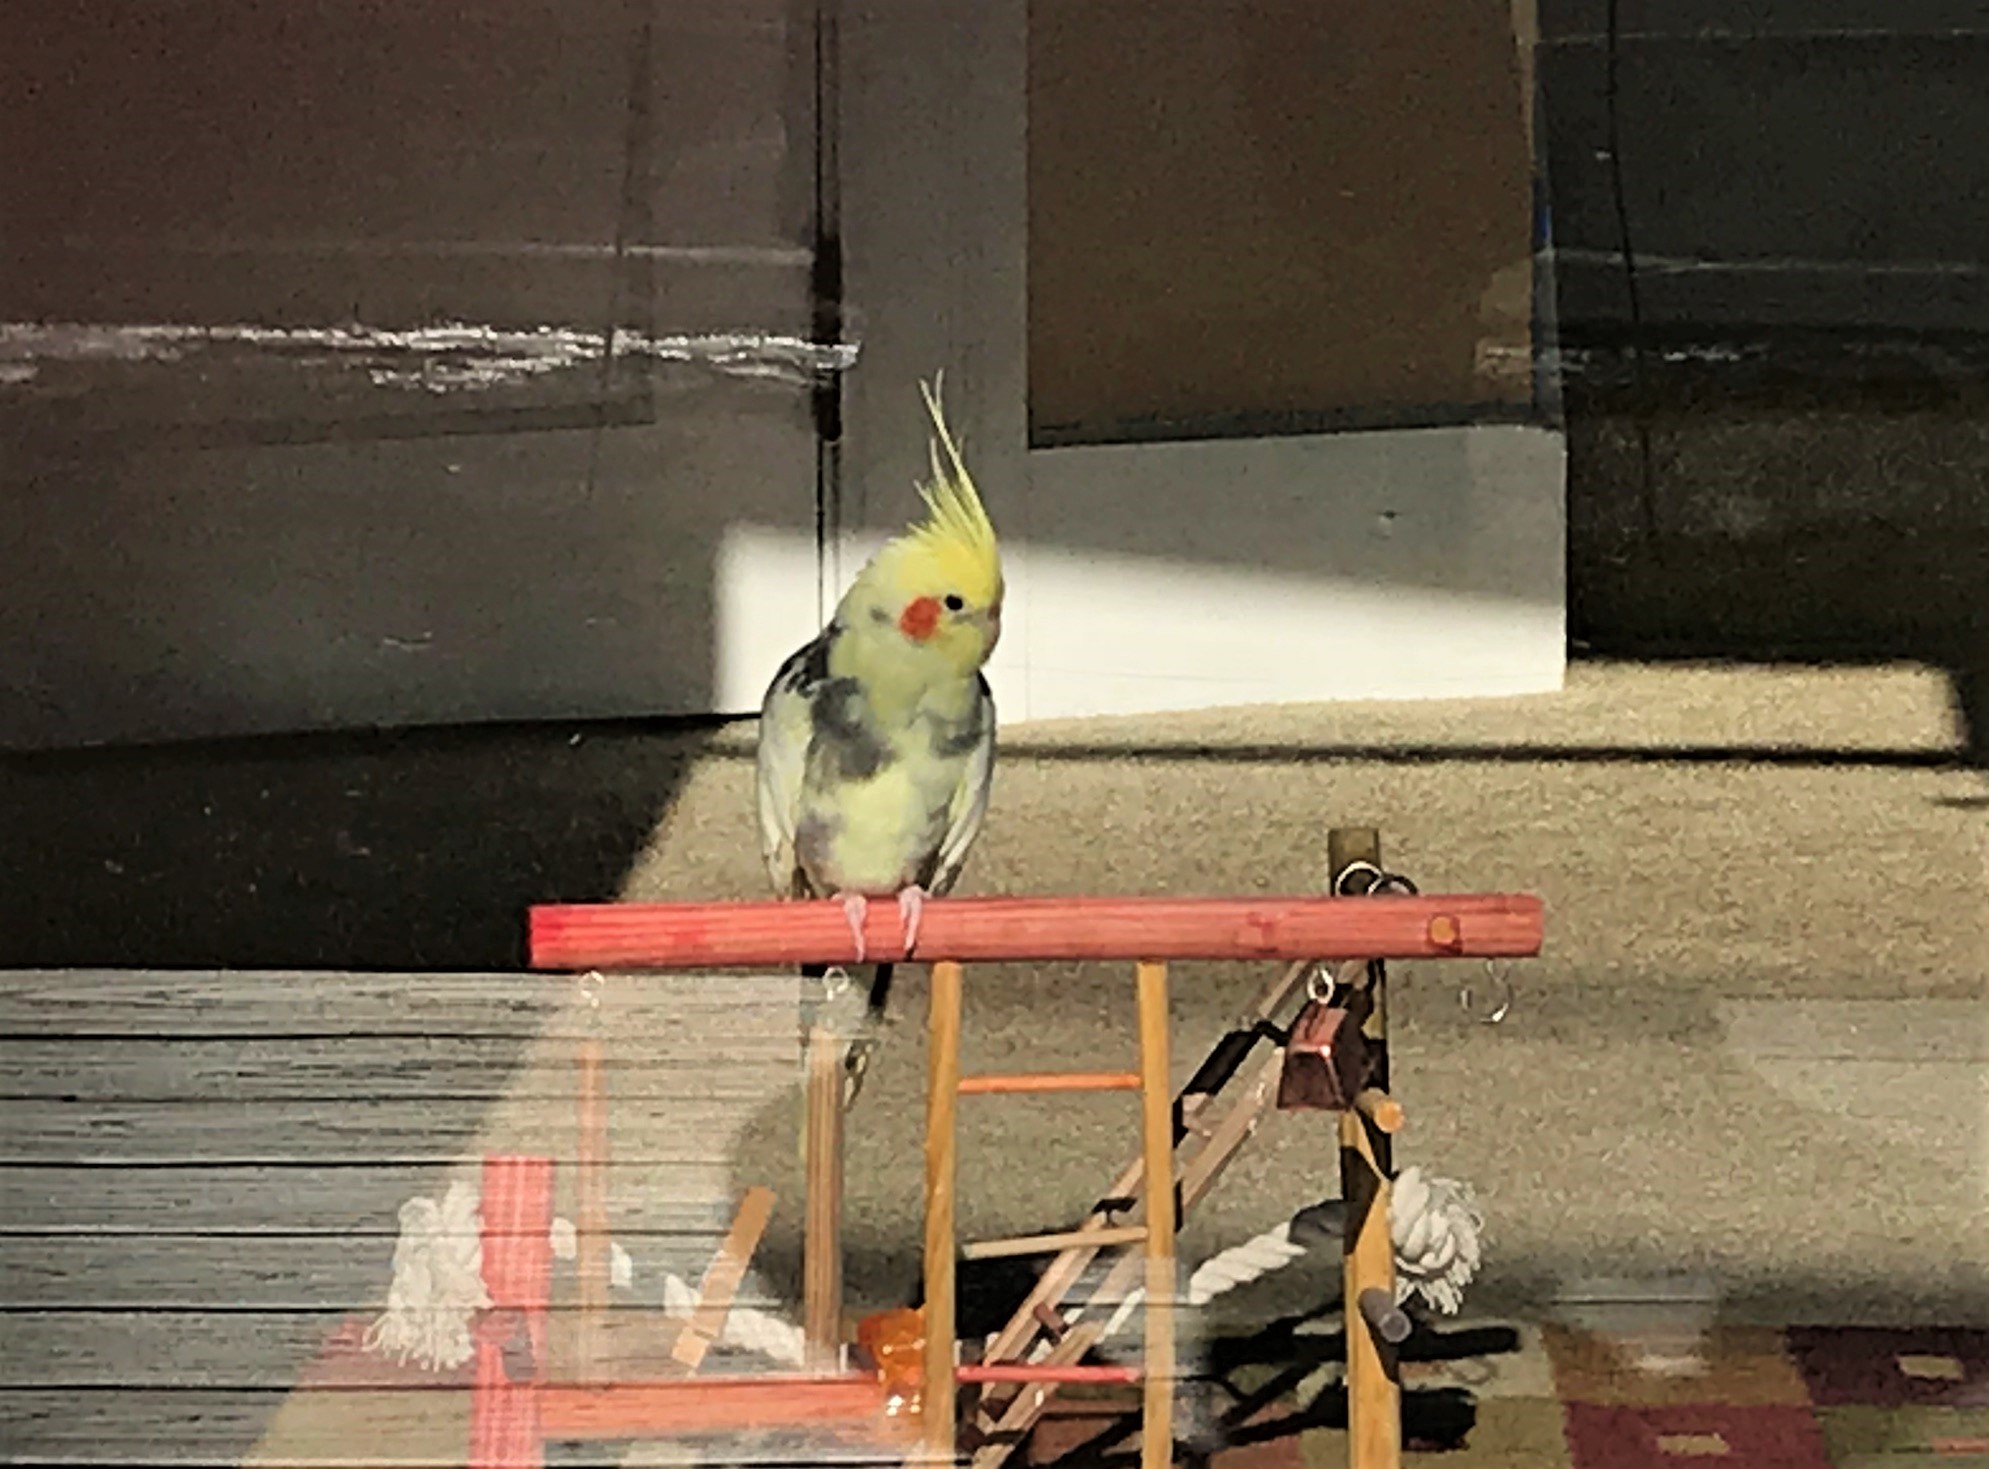
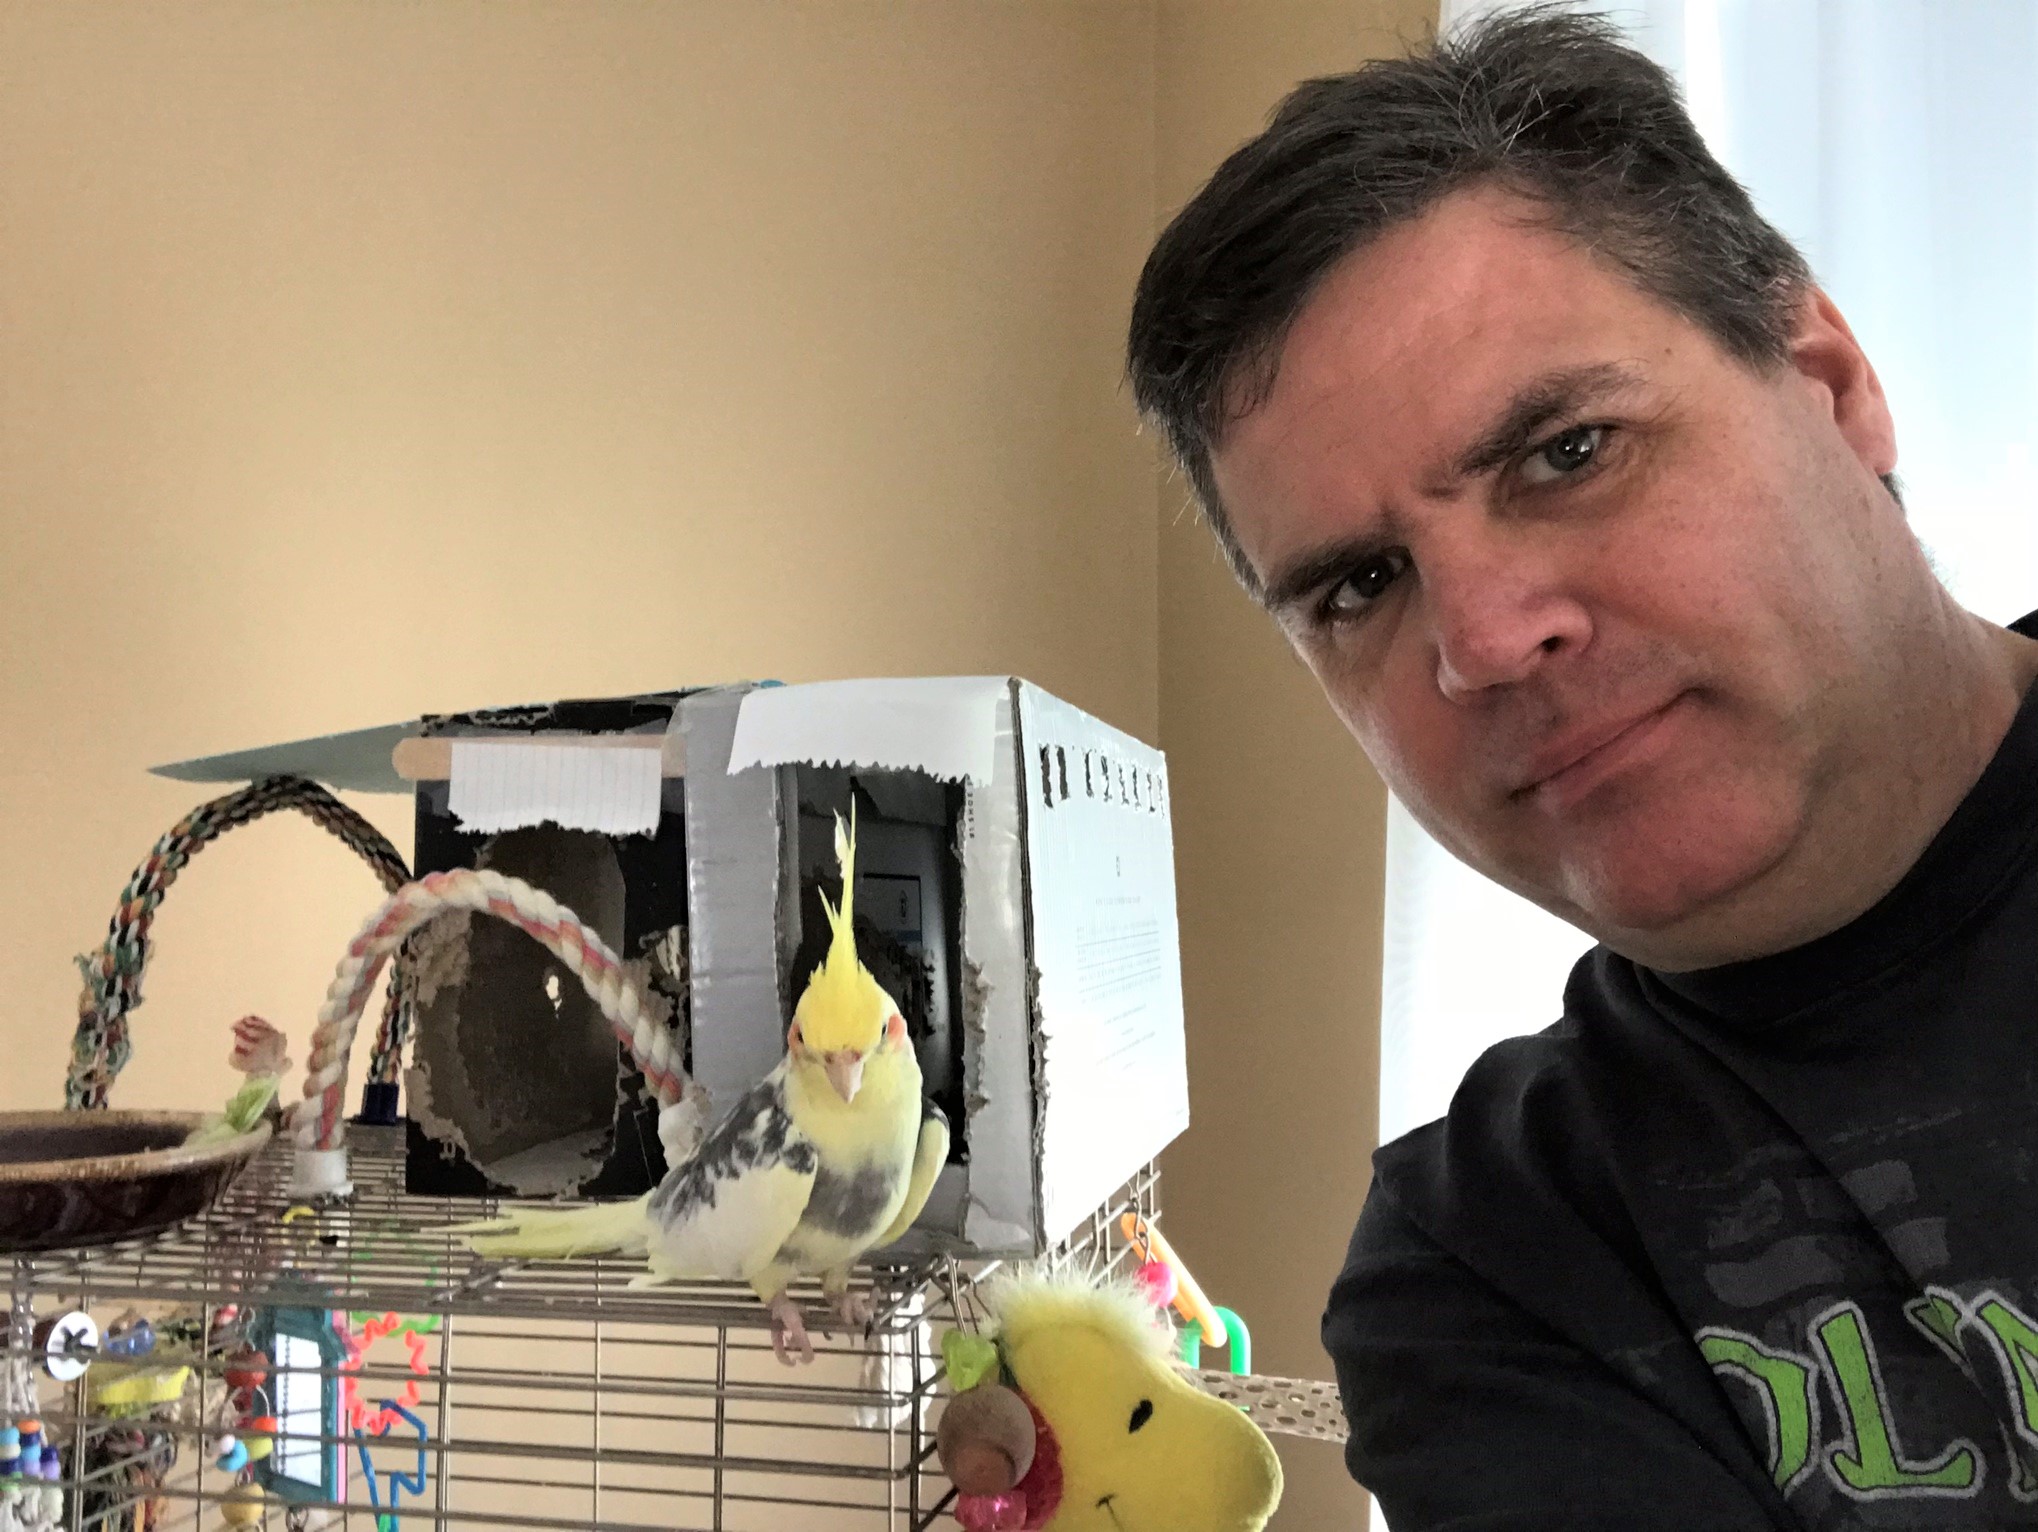
He loved being in closed spaces (cockatiels in Australia live in holes in trees so I supposed this was instinctual). Out of old shoe boxes, I cut out houses for him and mounted them to the top of his cage. These were his “apartments” and he loved to make them his own by chewing them up. We also got him straw tepees and boxes designed for gerbils and he loved being in them too.
We spoiled him – he got more than bird seed – he like “people food”. His favorites were lobster and steamed clams (just the necks). Whenever he got them, he’d warble in excitement as he ate them.
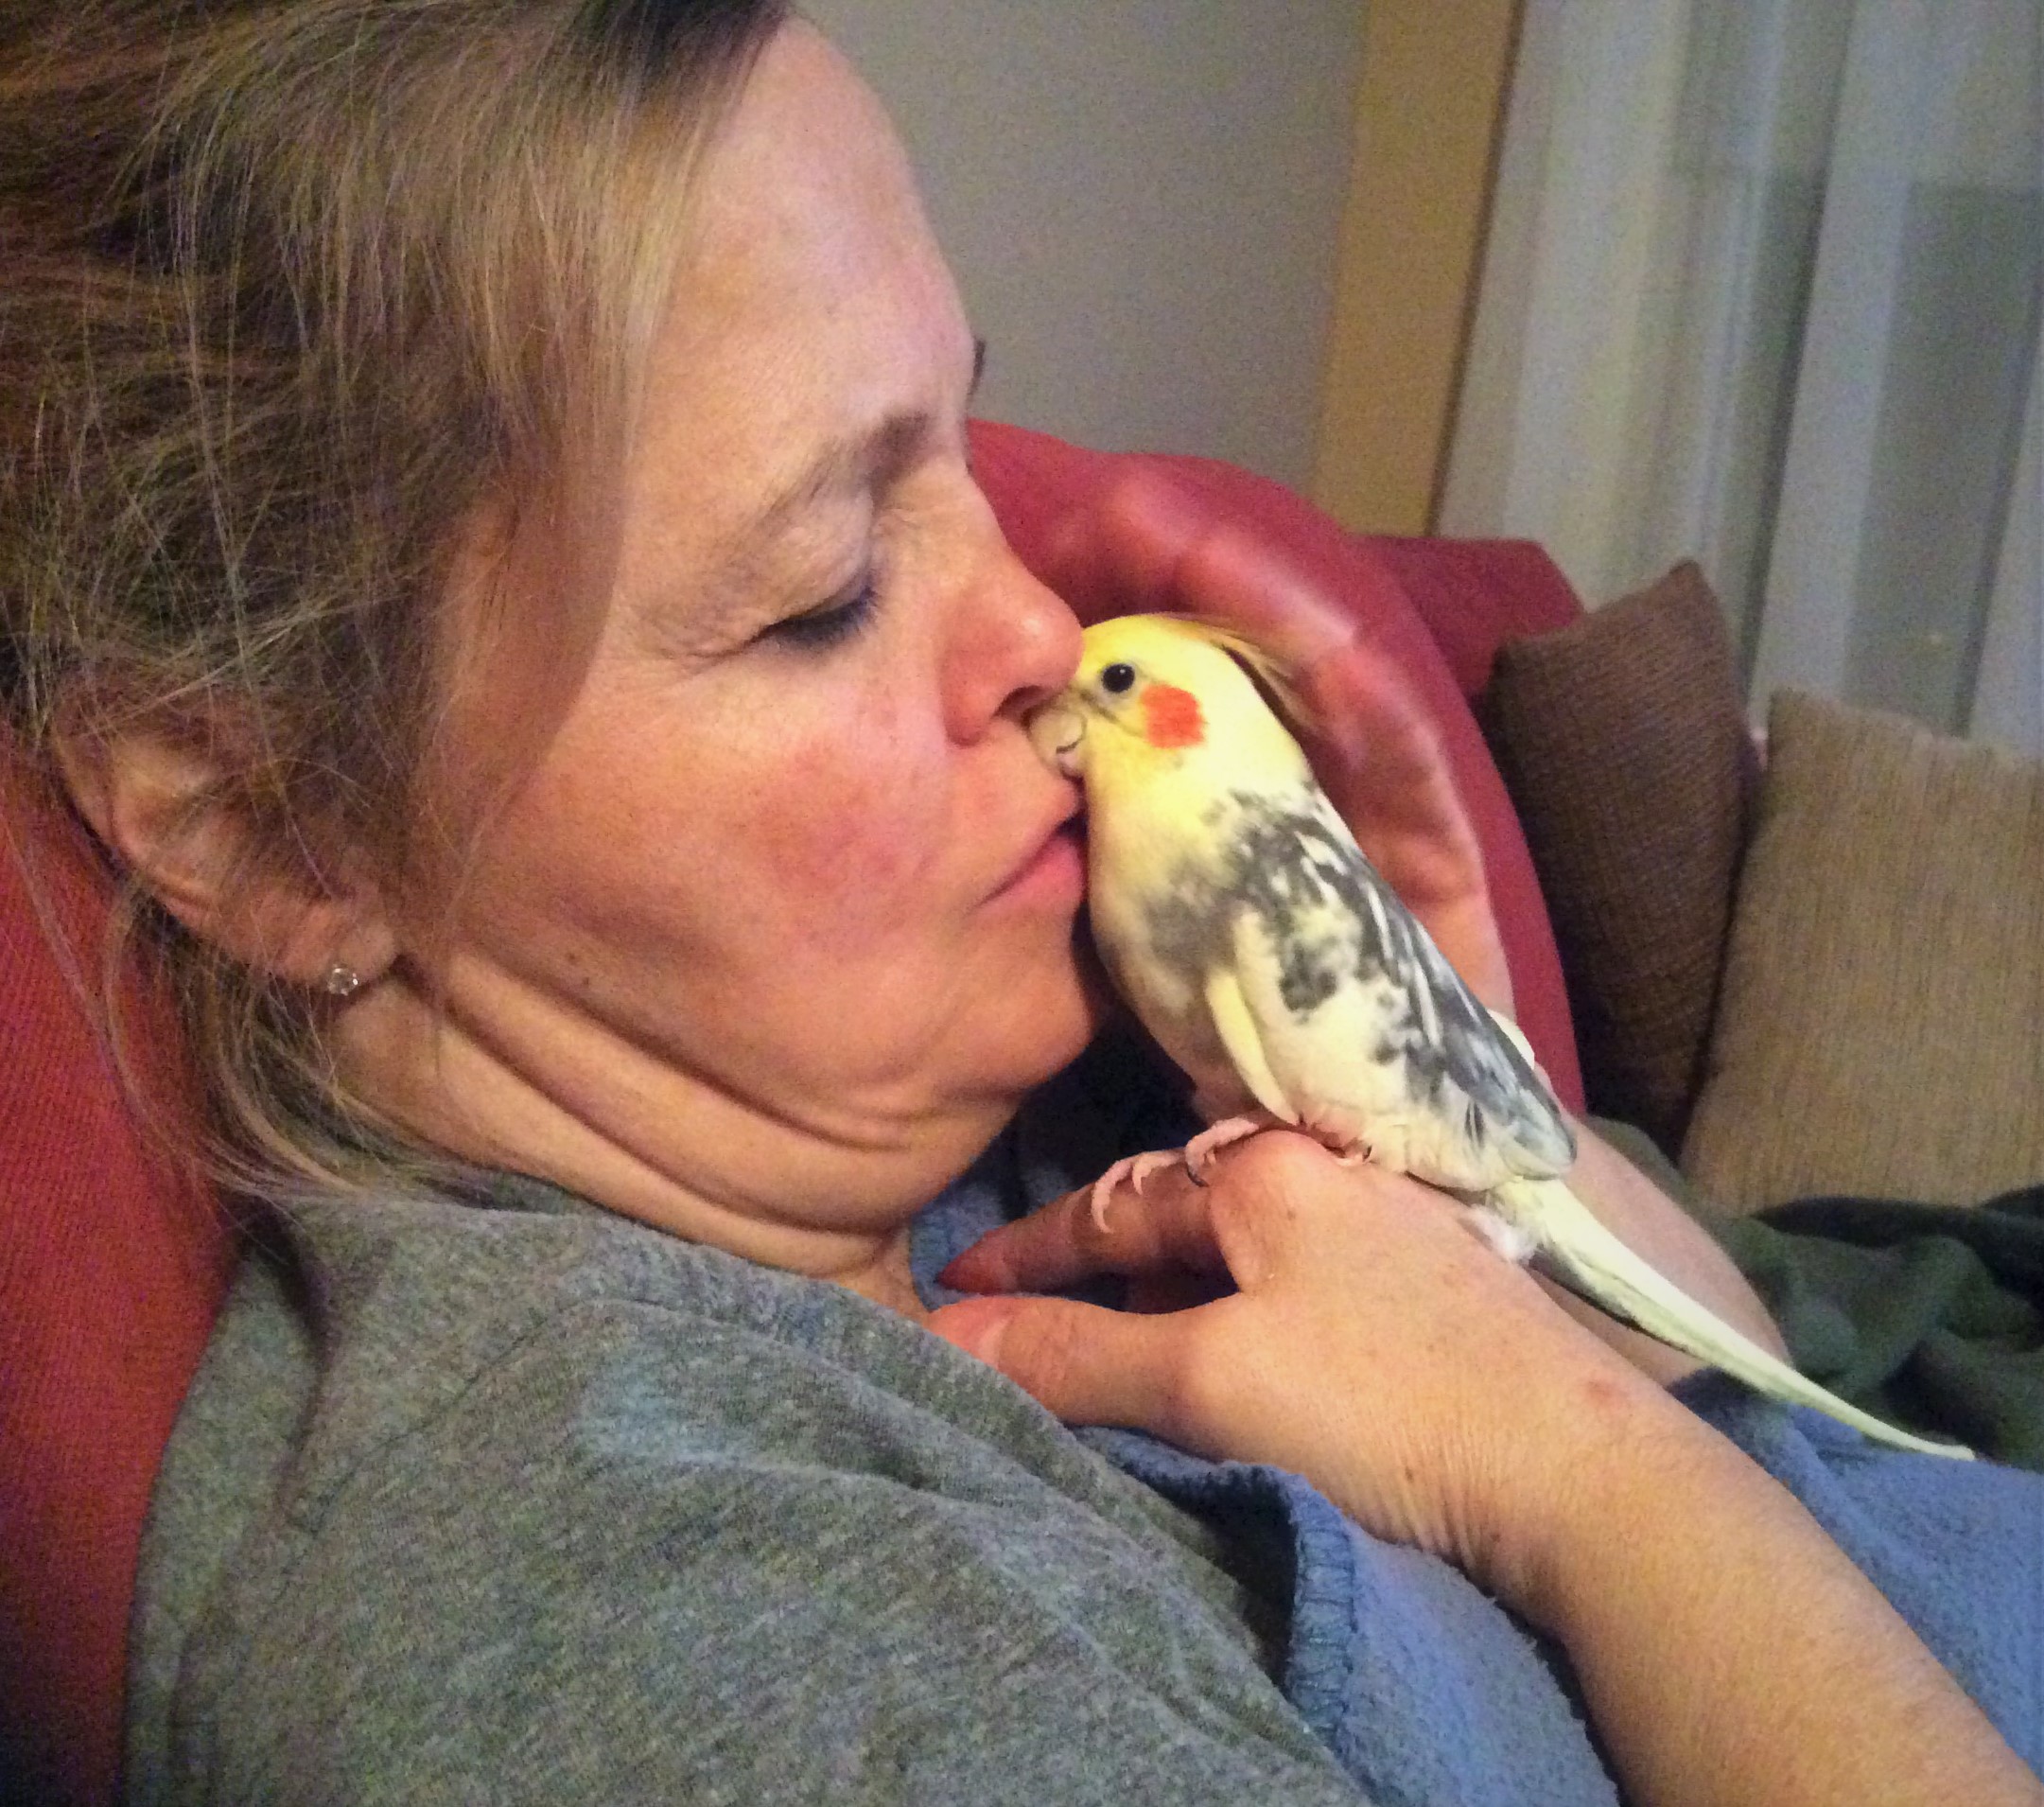
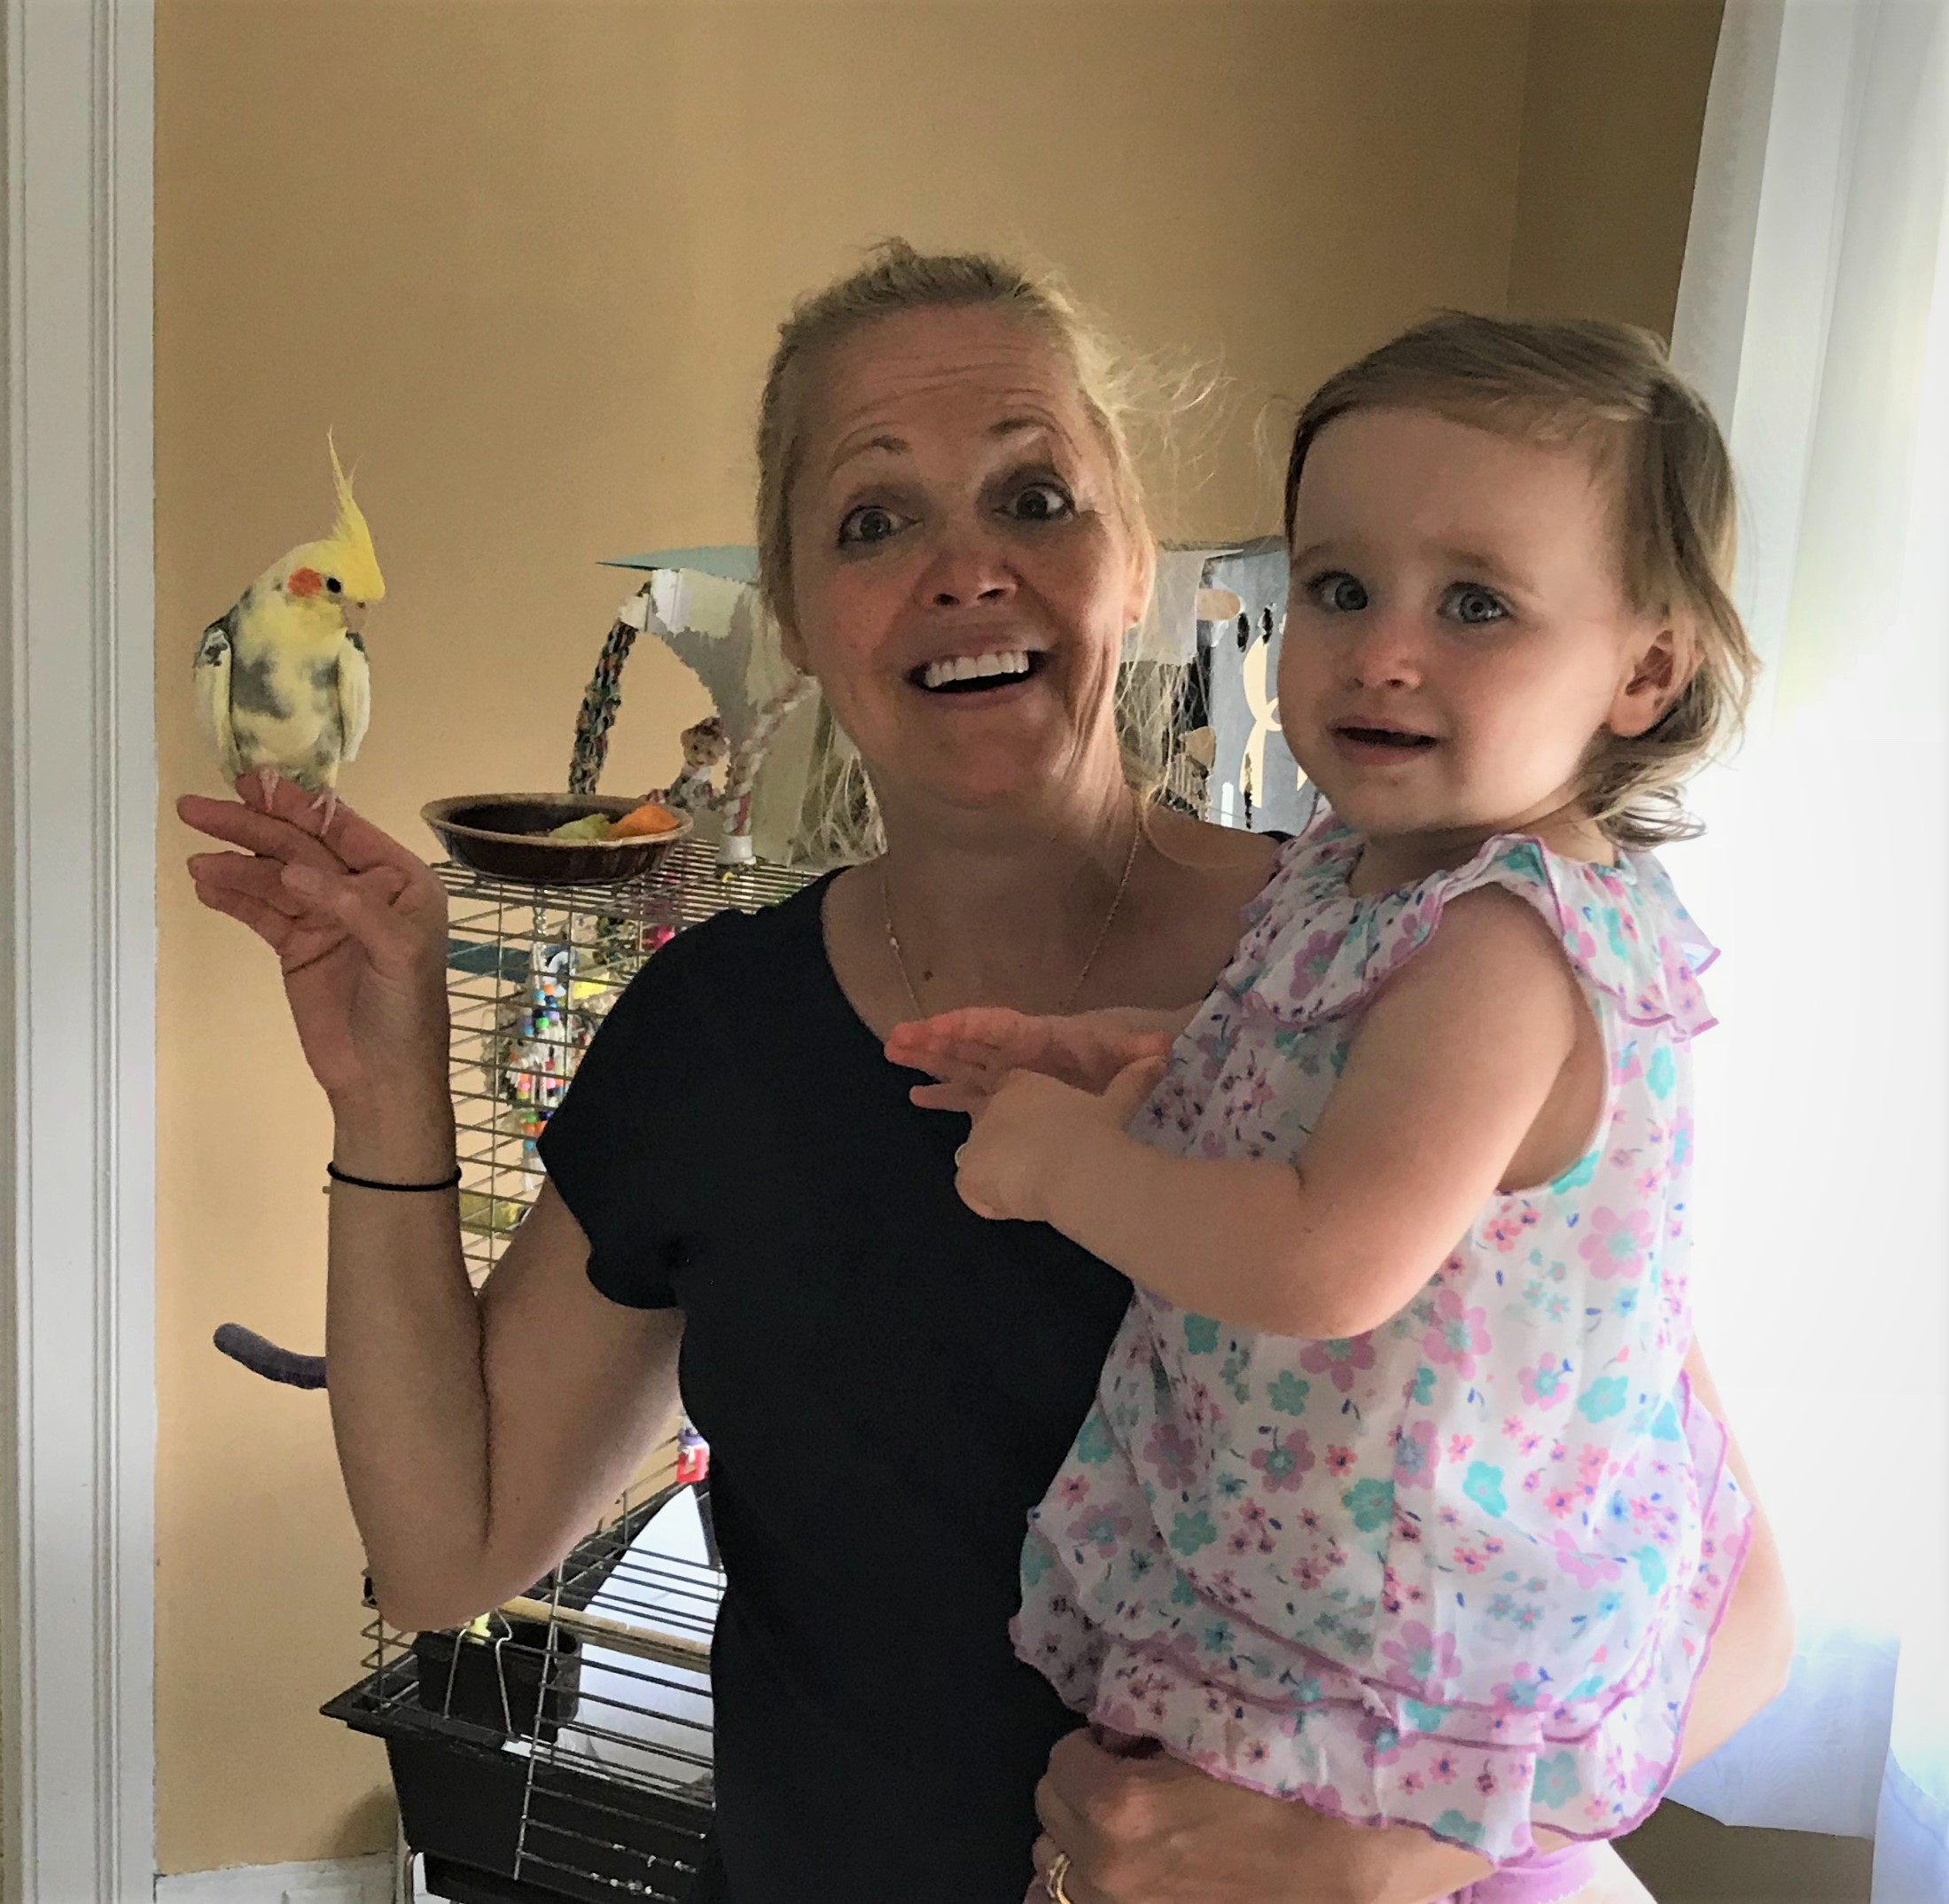
He’d cuddle with Lynn and get his head scratched. I could get to scratch his head, but only Lynn could get face to face with him. She called Caesar her son, and loved the hell out of him. So did I.
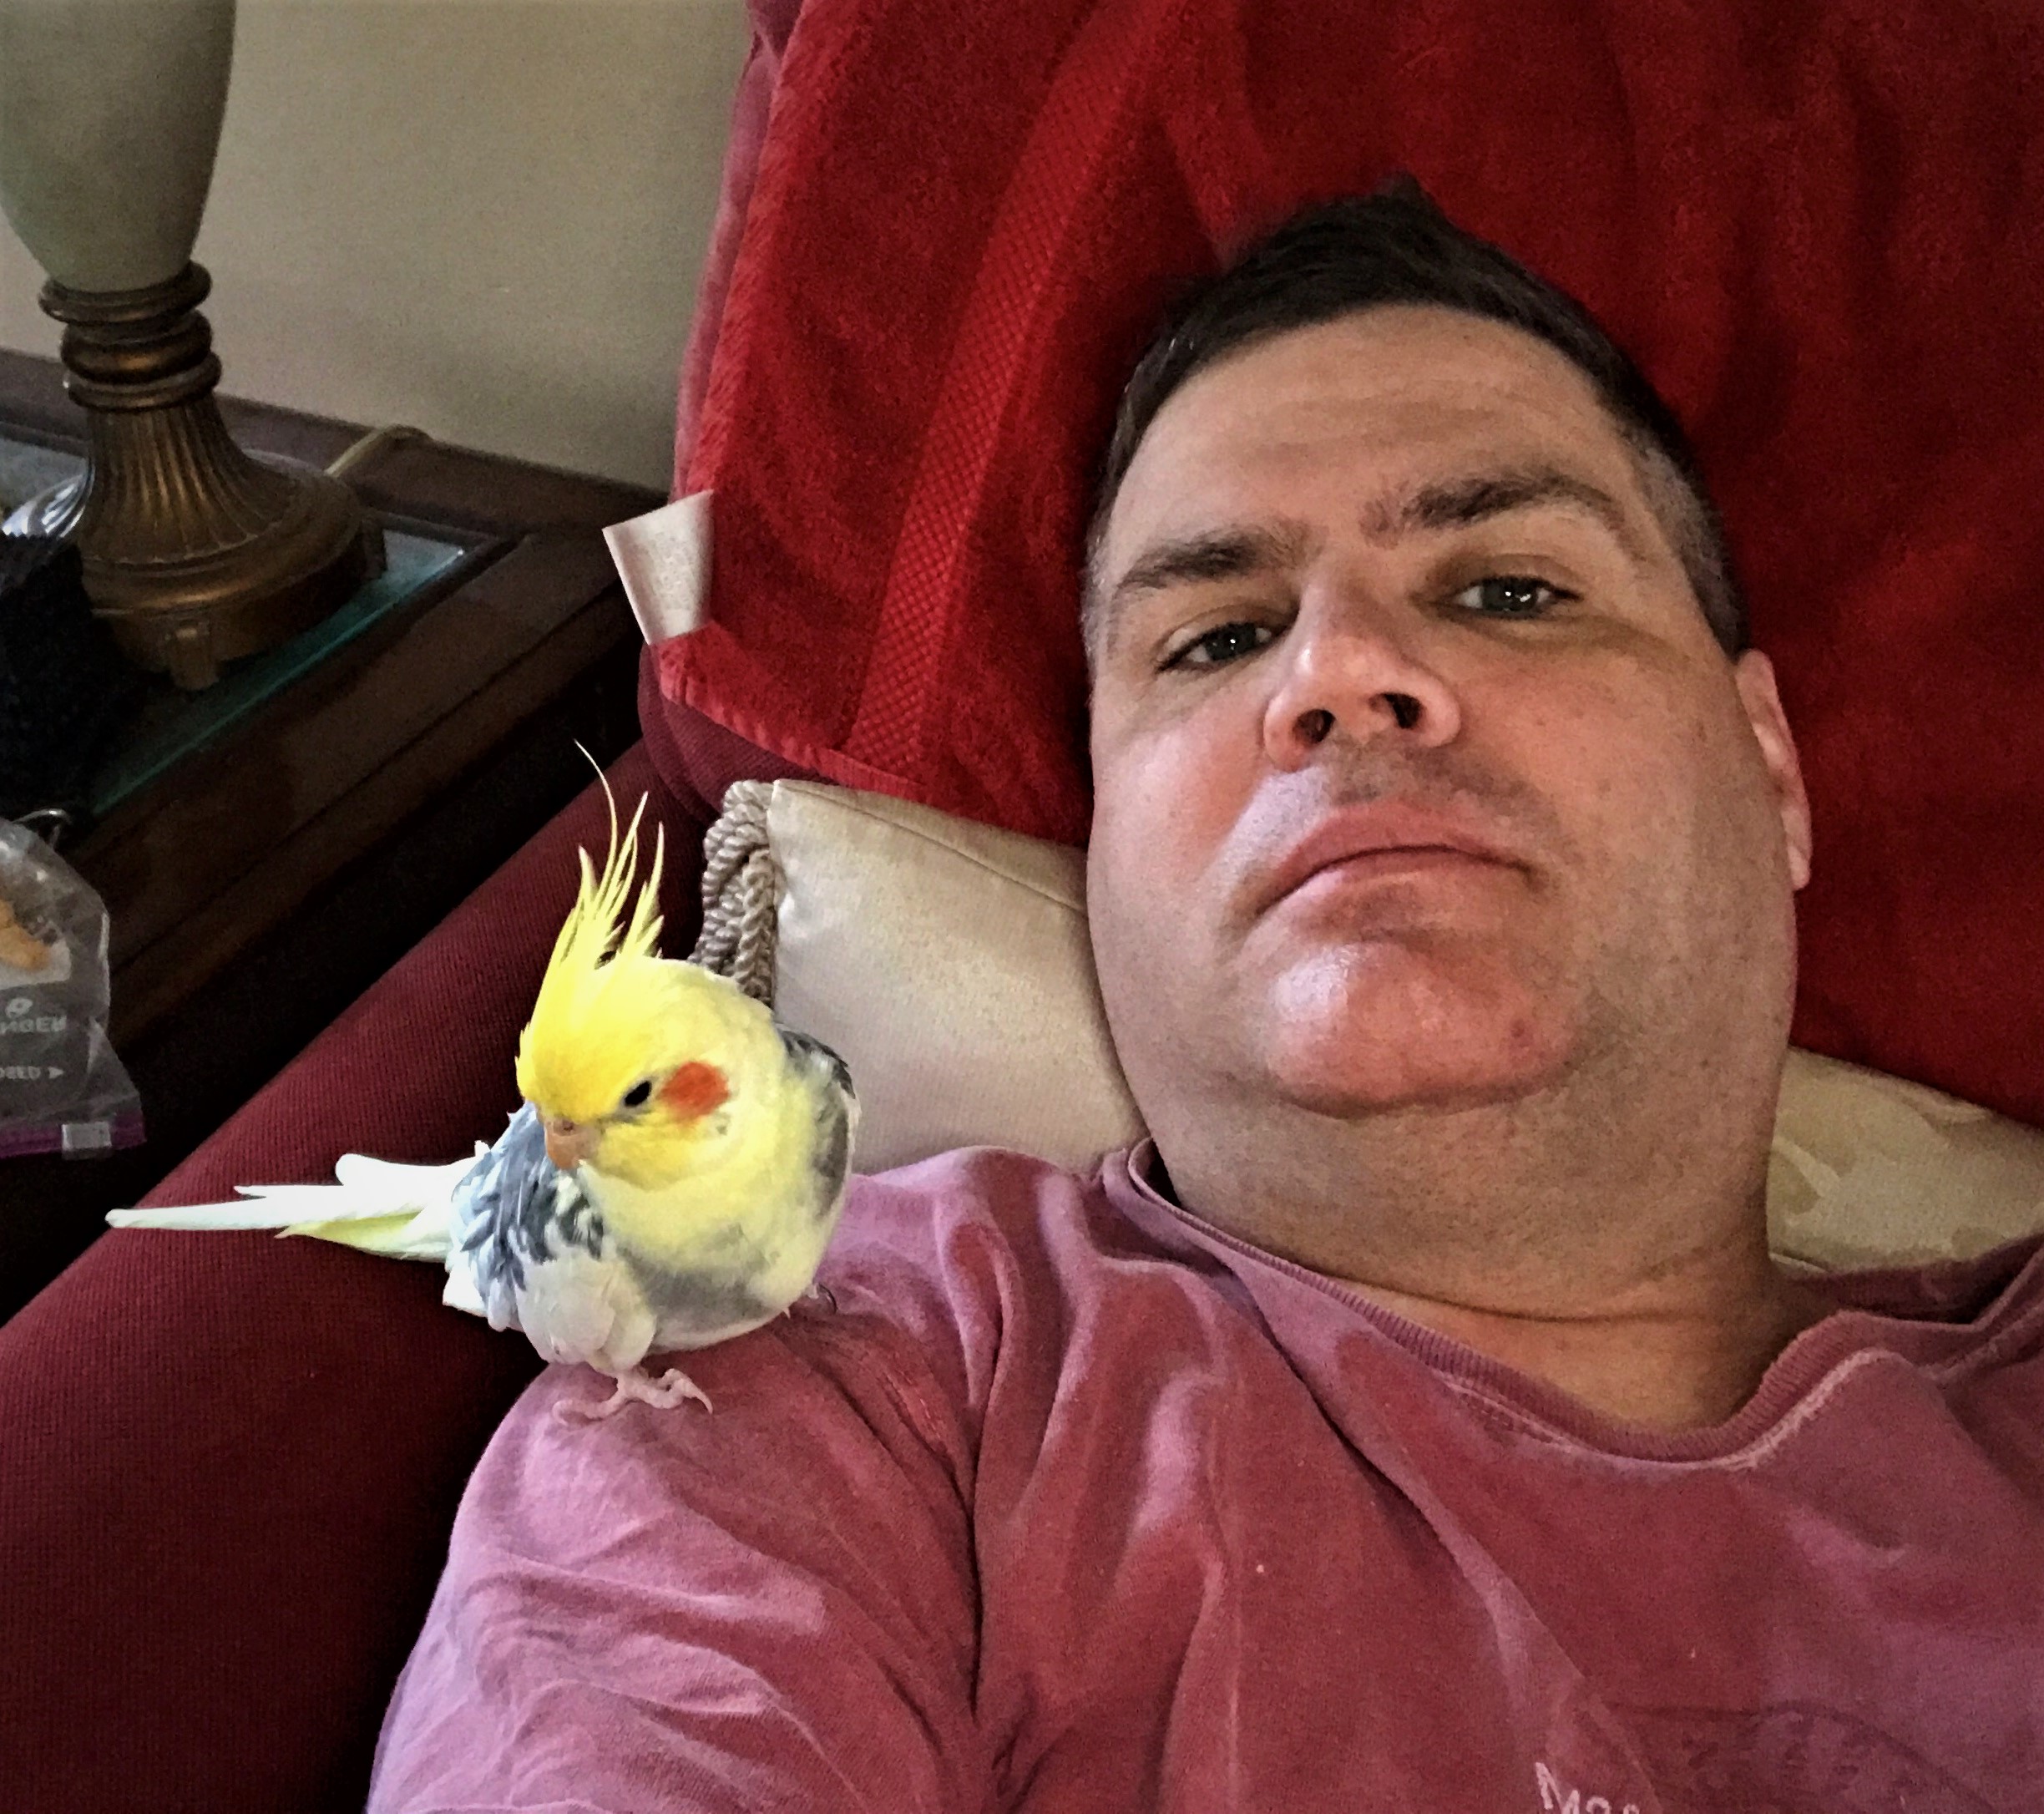
As he aged, I looked to see how long he might live – after all, we knew his loss would be devastating to us. I think the world record is 35, though rarely wo they make 30. Most times it’s 20 and done, if not shorter. Still, he was always there. As I went through multiple surgeries over the years, he kept me company as I recovered.
I said goodnight to him every night, and greeted him every morning. Until last night and this morning that is.
He was the equivalent of a human at 103 years old.
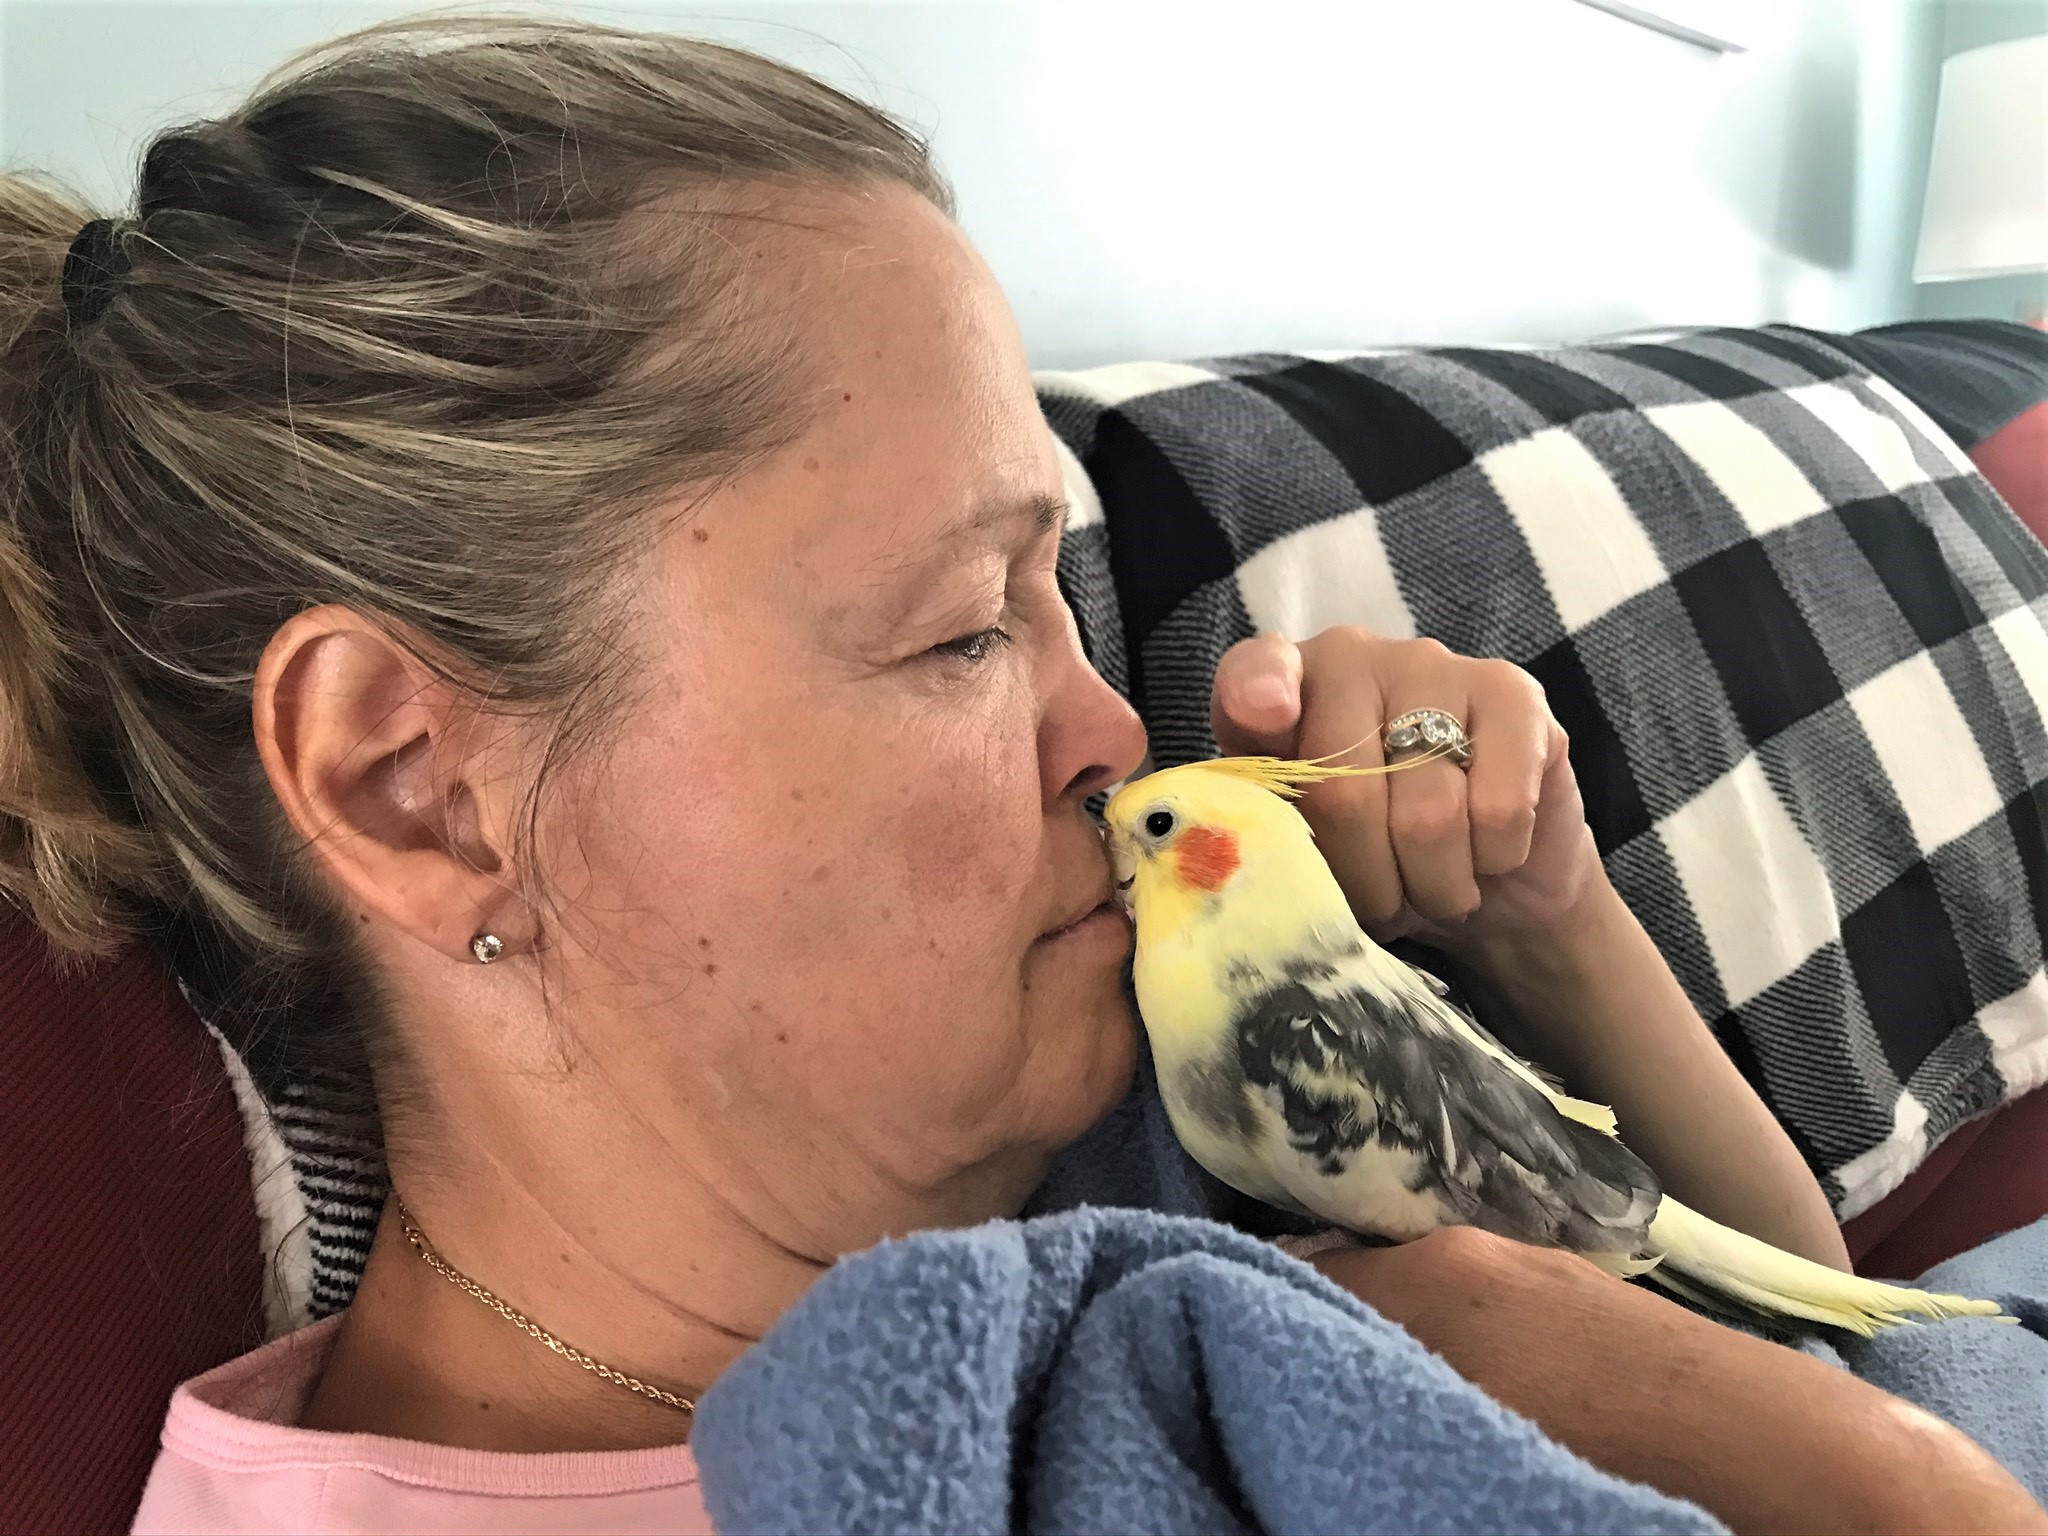
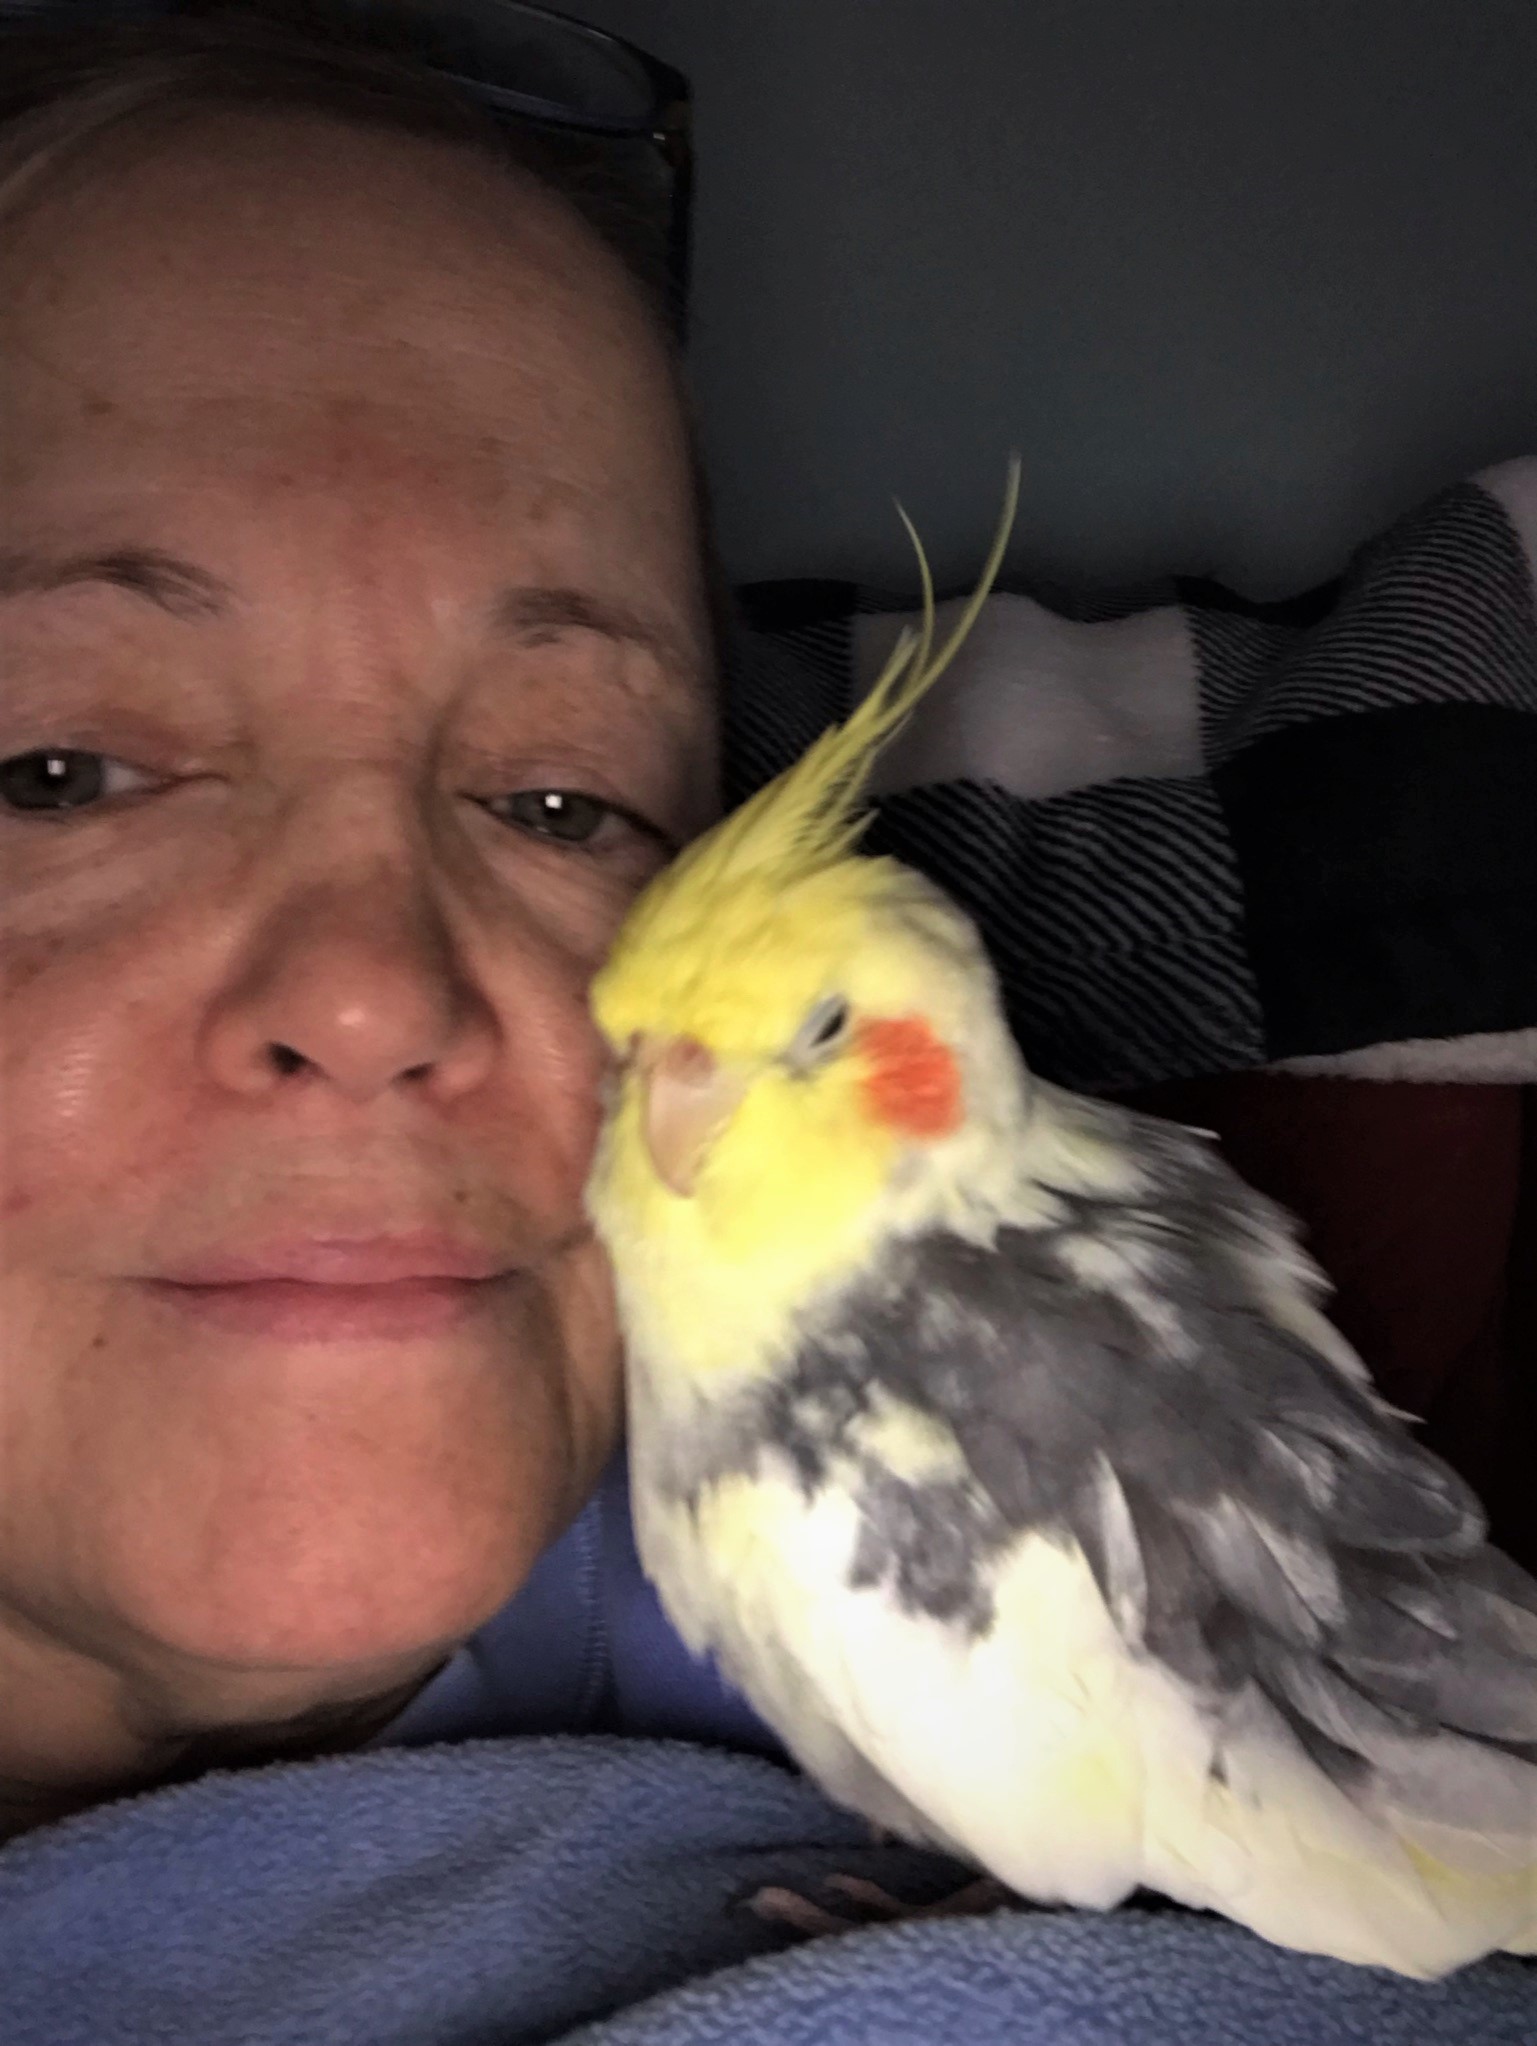
On New Year’s Eve, we usually get lobsters and steamers and this was no exception this year. Caesar was so happy he ate three clam necks and some lobster – warbling his happiness. On New Year’s Day, Lynn took a selfie with him (see photos below), and cuddled with him. By later in the day, he had started getting listless and had trouble walking. He had been arthritic, but this was worse. Lynn cuddled him, and soothed him. Within an hour and a half, he breathed his last and died in her arms.
We are broken hearted of course, but are somewhat comforted in that we know he had a good pampered life. We rarely left him with babysitters (I think only 3 times in 27 years), as Lynn (and I) did not want him to be stressed. Even then, those times were with family he knew.
It has been unseasonably warm here in Massachusetts. To bury him, I had to buy a new shovel as mine was broken. I drove to Klem’s store in Spencer and got a new D-handled shovel – and on the way out looked at the 4 cockatiels in the pet section and cried even more.
Lynn put him in a nice cedar box. For his grave, I dug the hole in the garden by the house in the front yard, right below the window that he looked out of every day. I used some concrete pavers and 5″-high edgers to put in his grave – such that his little coffin was not resting on or under dirt. Basically, I created a little stone box by putting a 16″ x 16″ paving stone in the bottom of the grave with the edgers making walls on top of it. My daughter Ellen and my granddaughter had come by, and we all surrounded his little box with decorative landscaping stones, then I covered it with another 16″ x 16″ paving stone as a gravestone. Then we decorated the rim with the pretty stones.
I’m going to share some photos below – as this is cathartic for me in a way, but I will never stop remembering my little birdie friend. Love ya buddy.
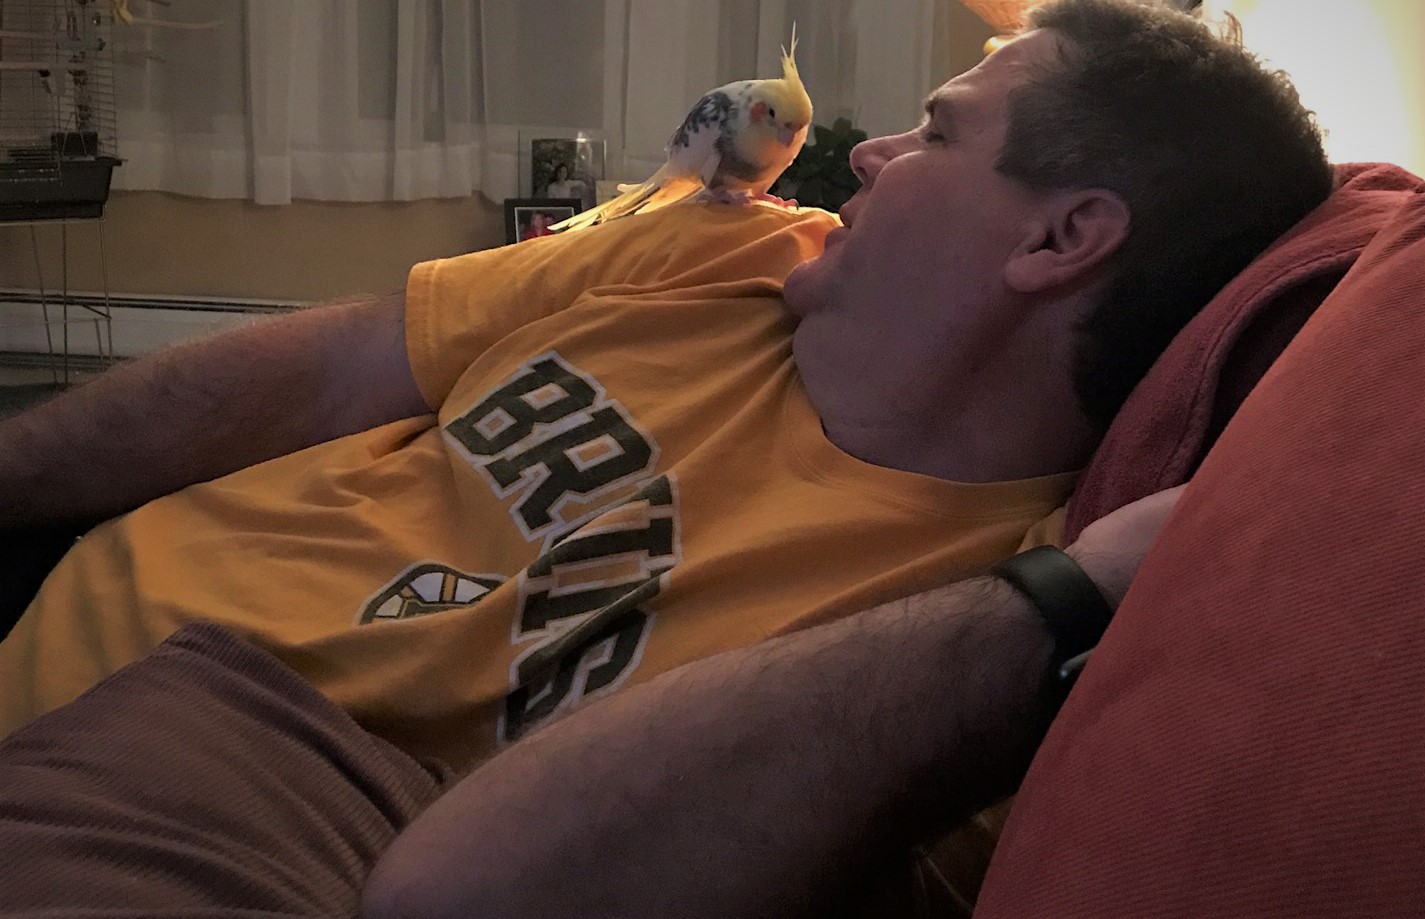
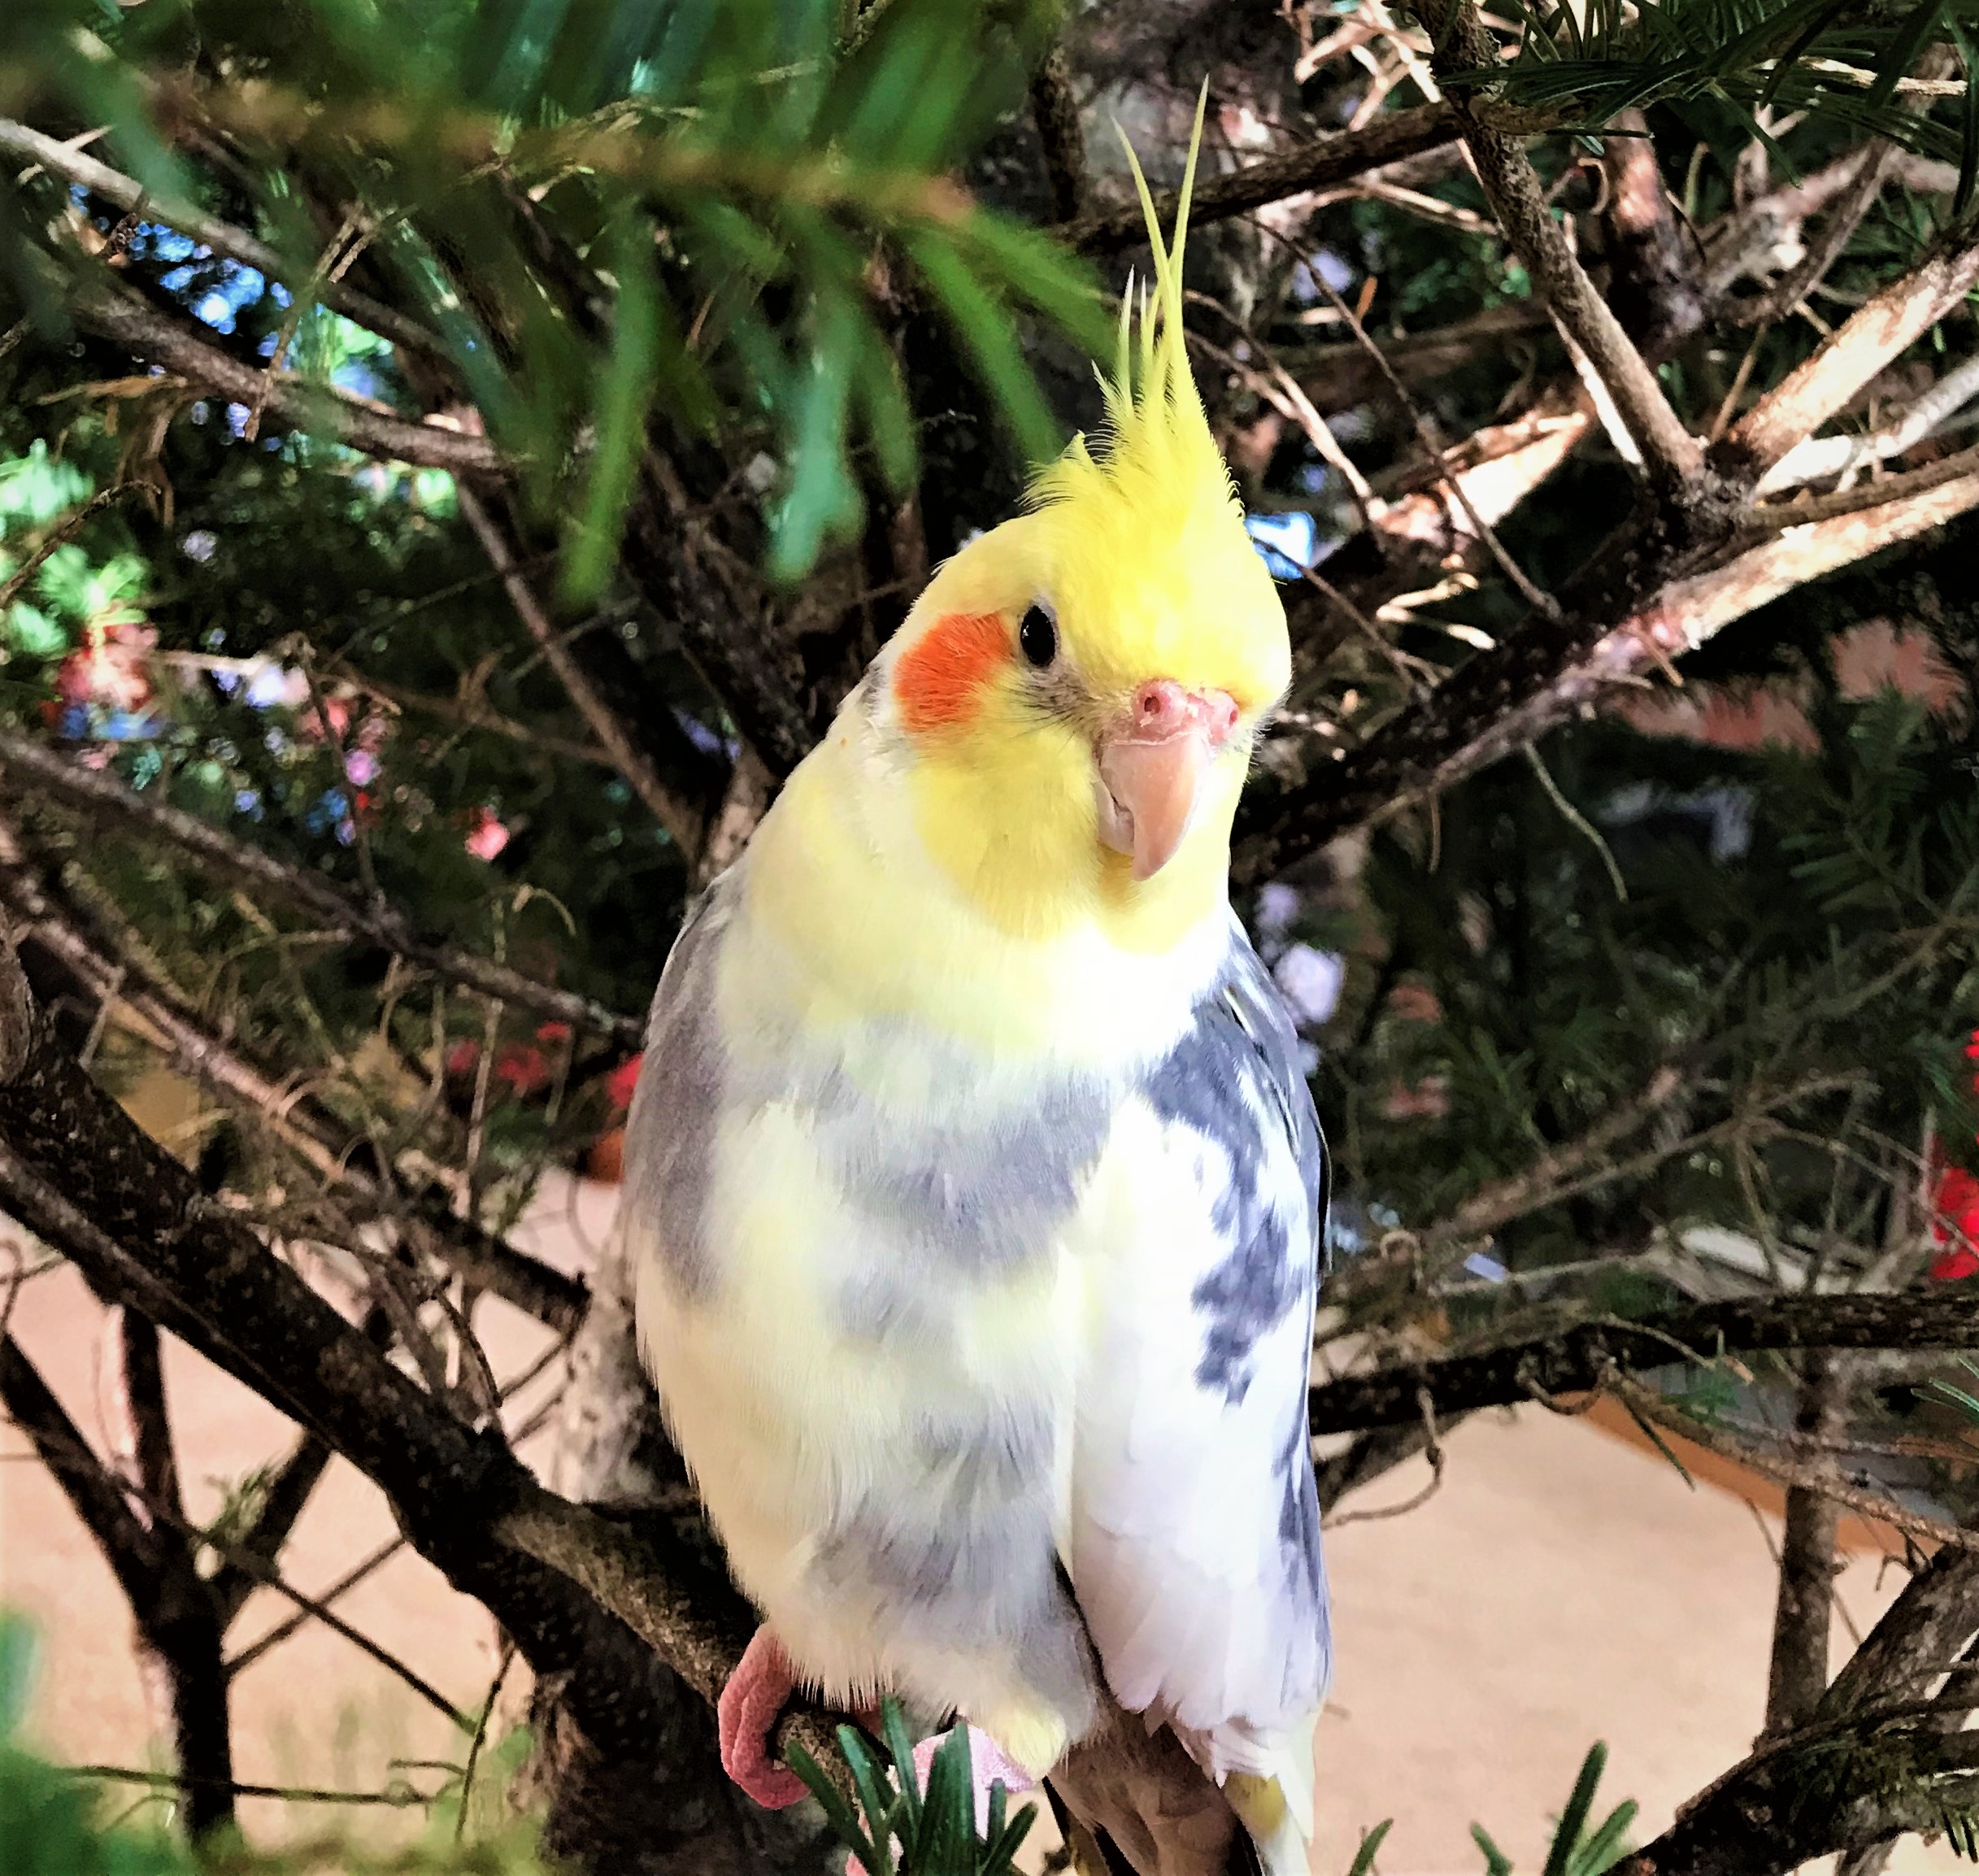
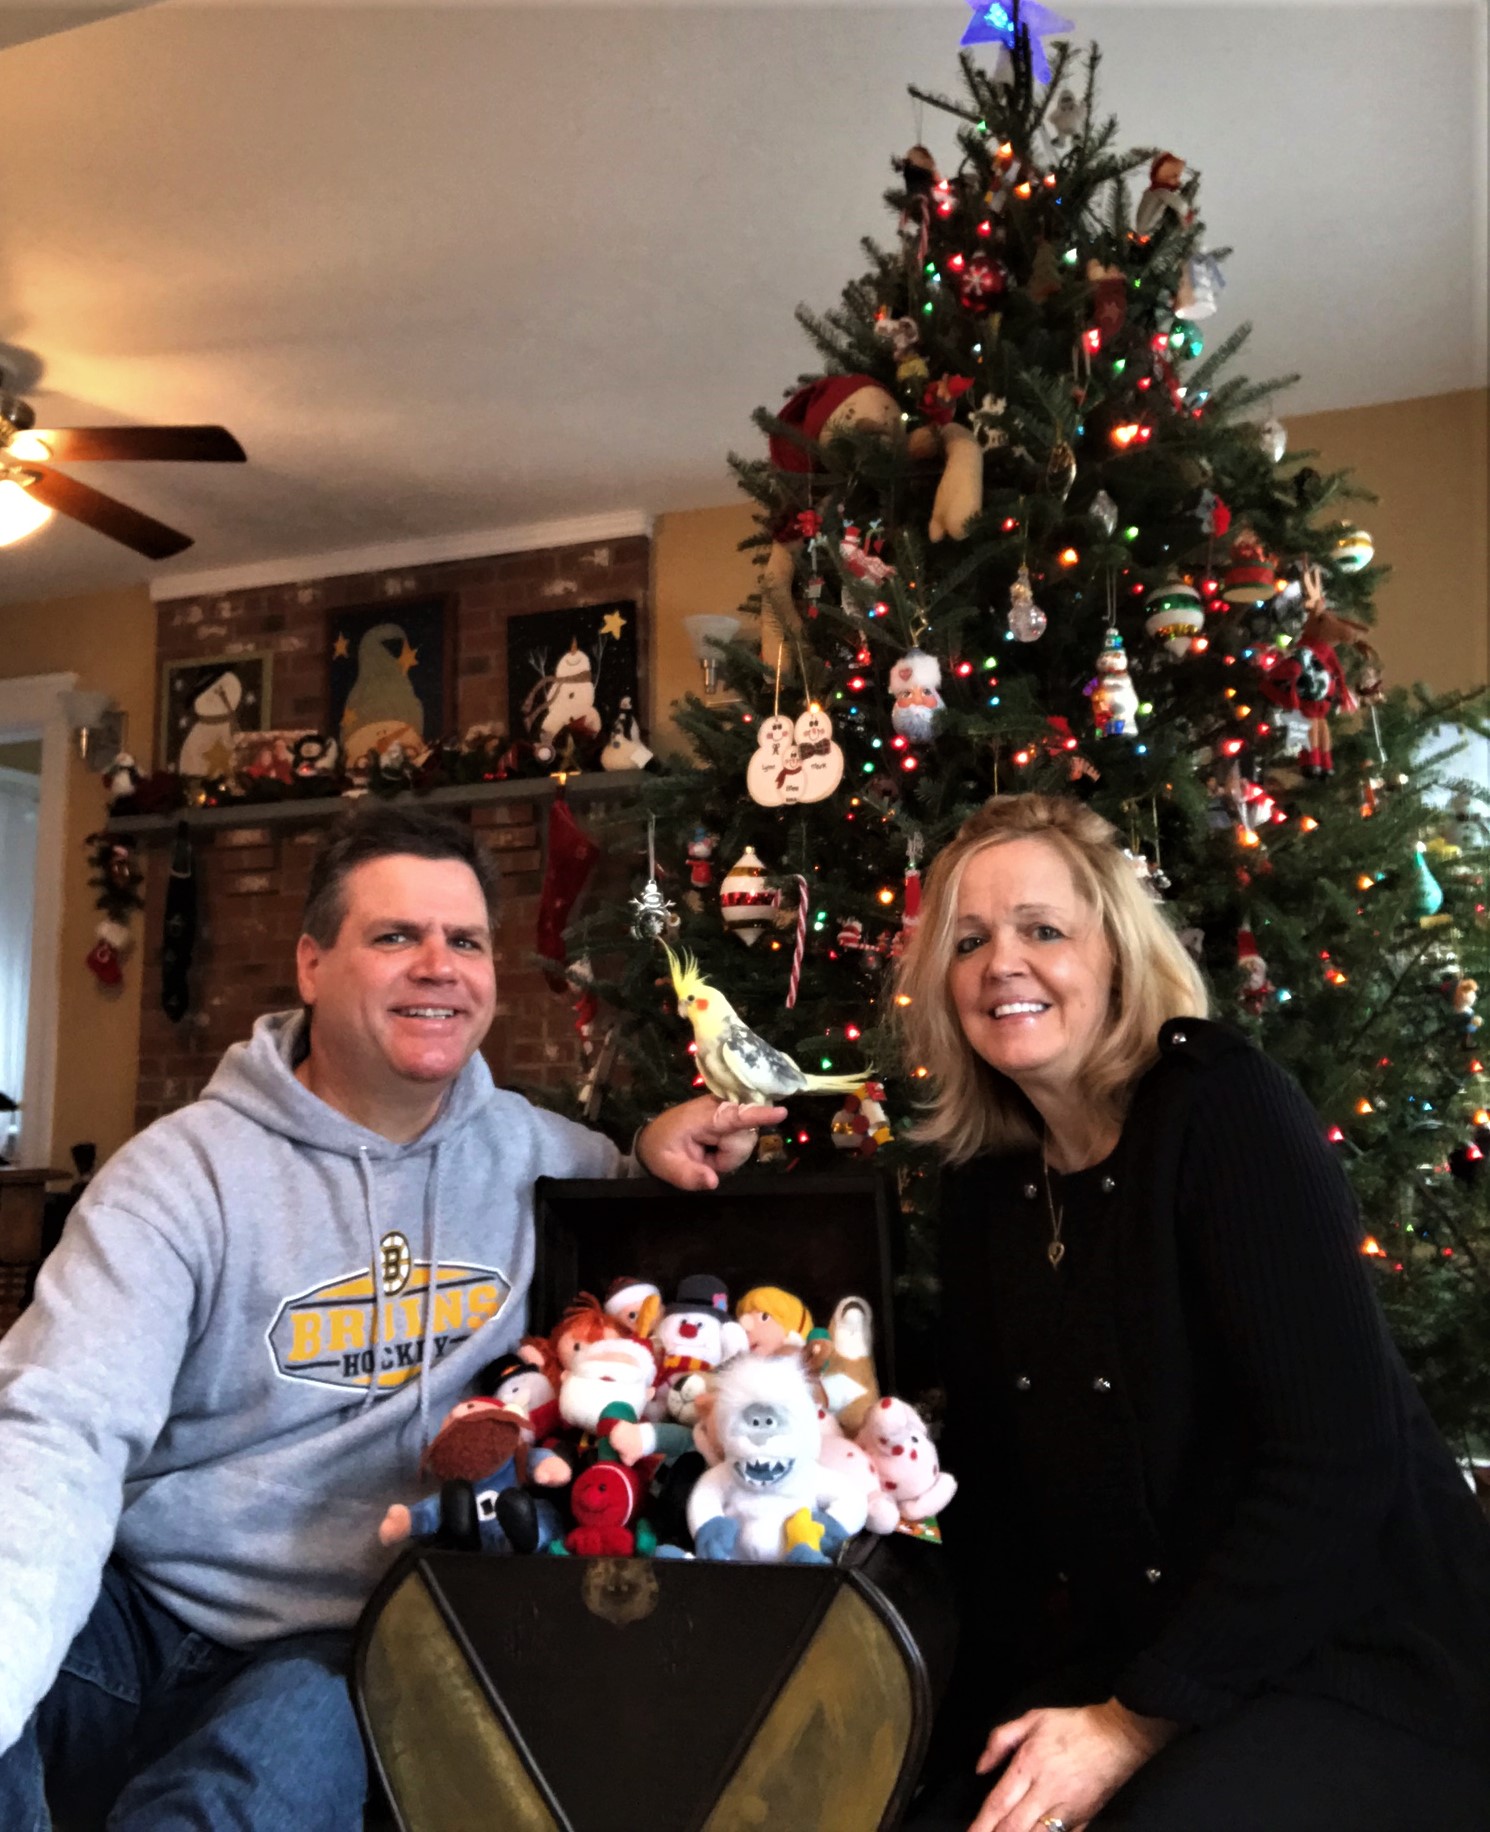
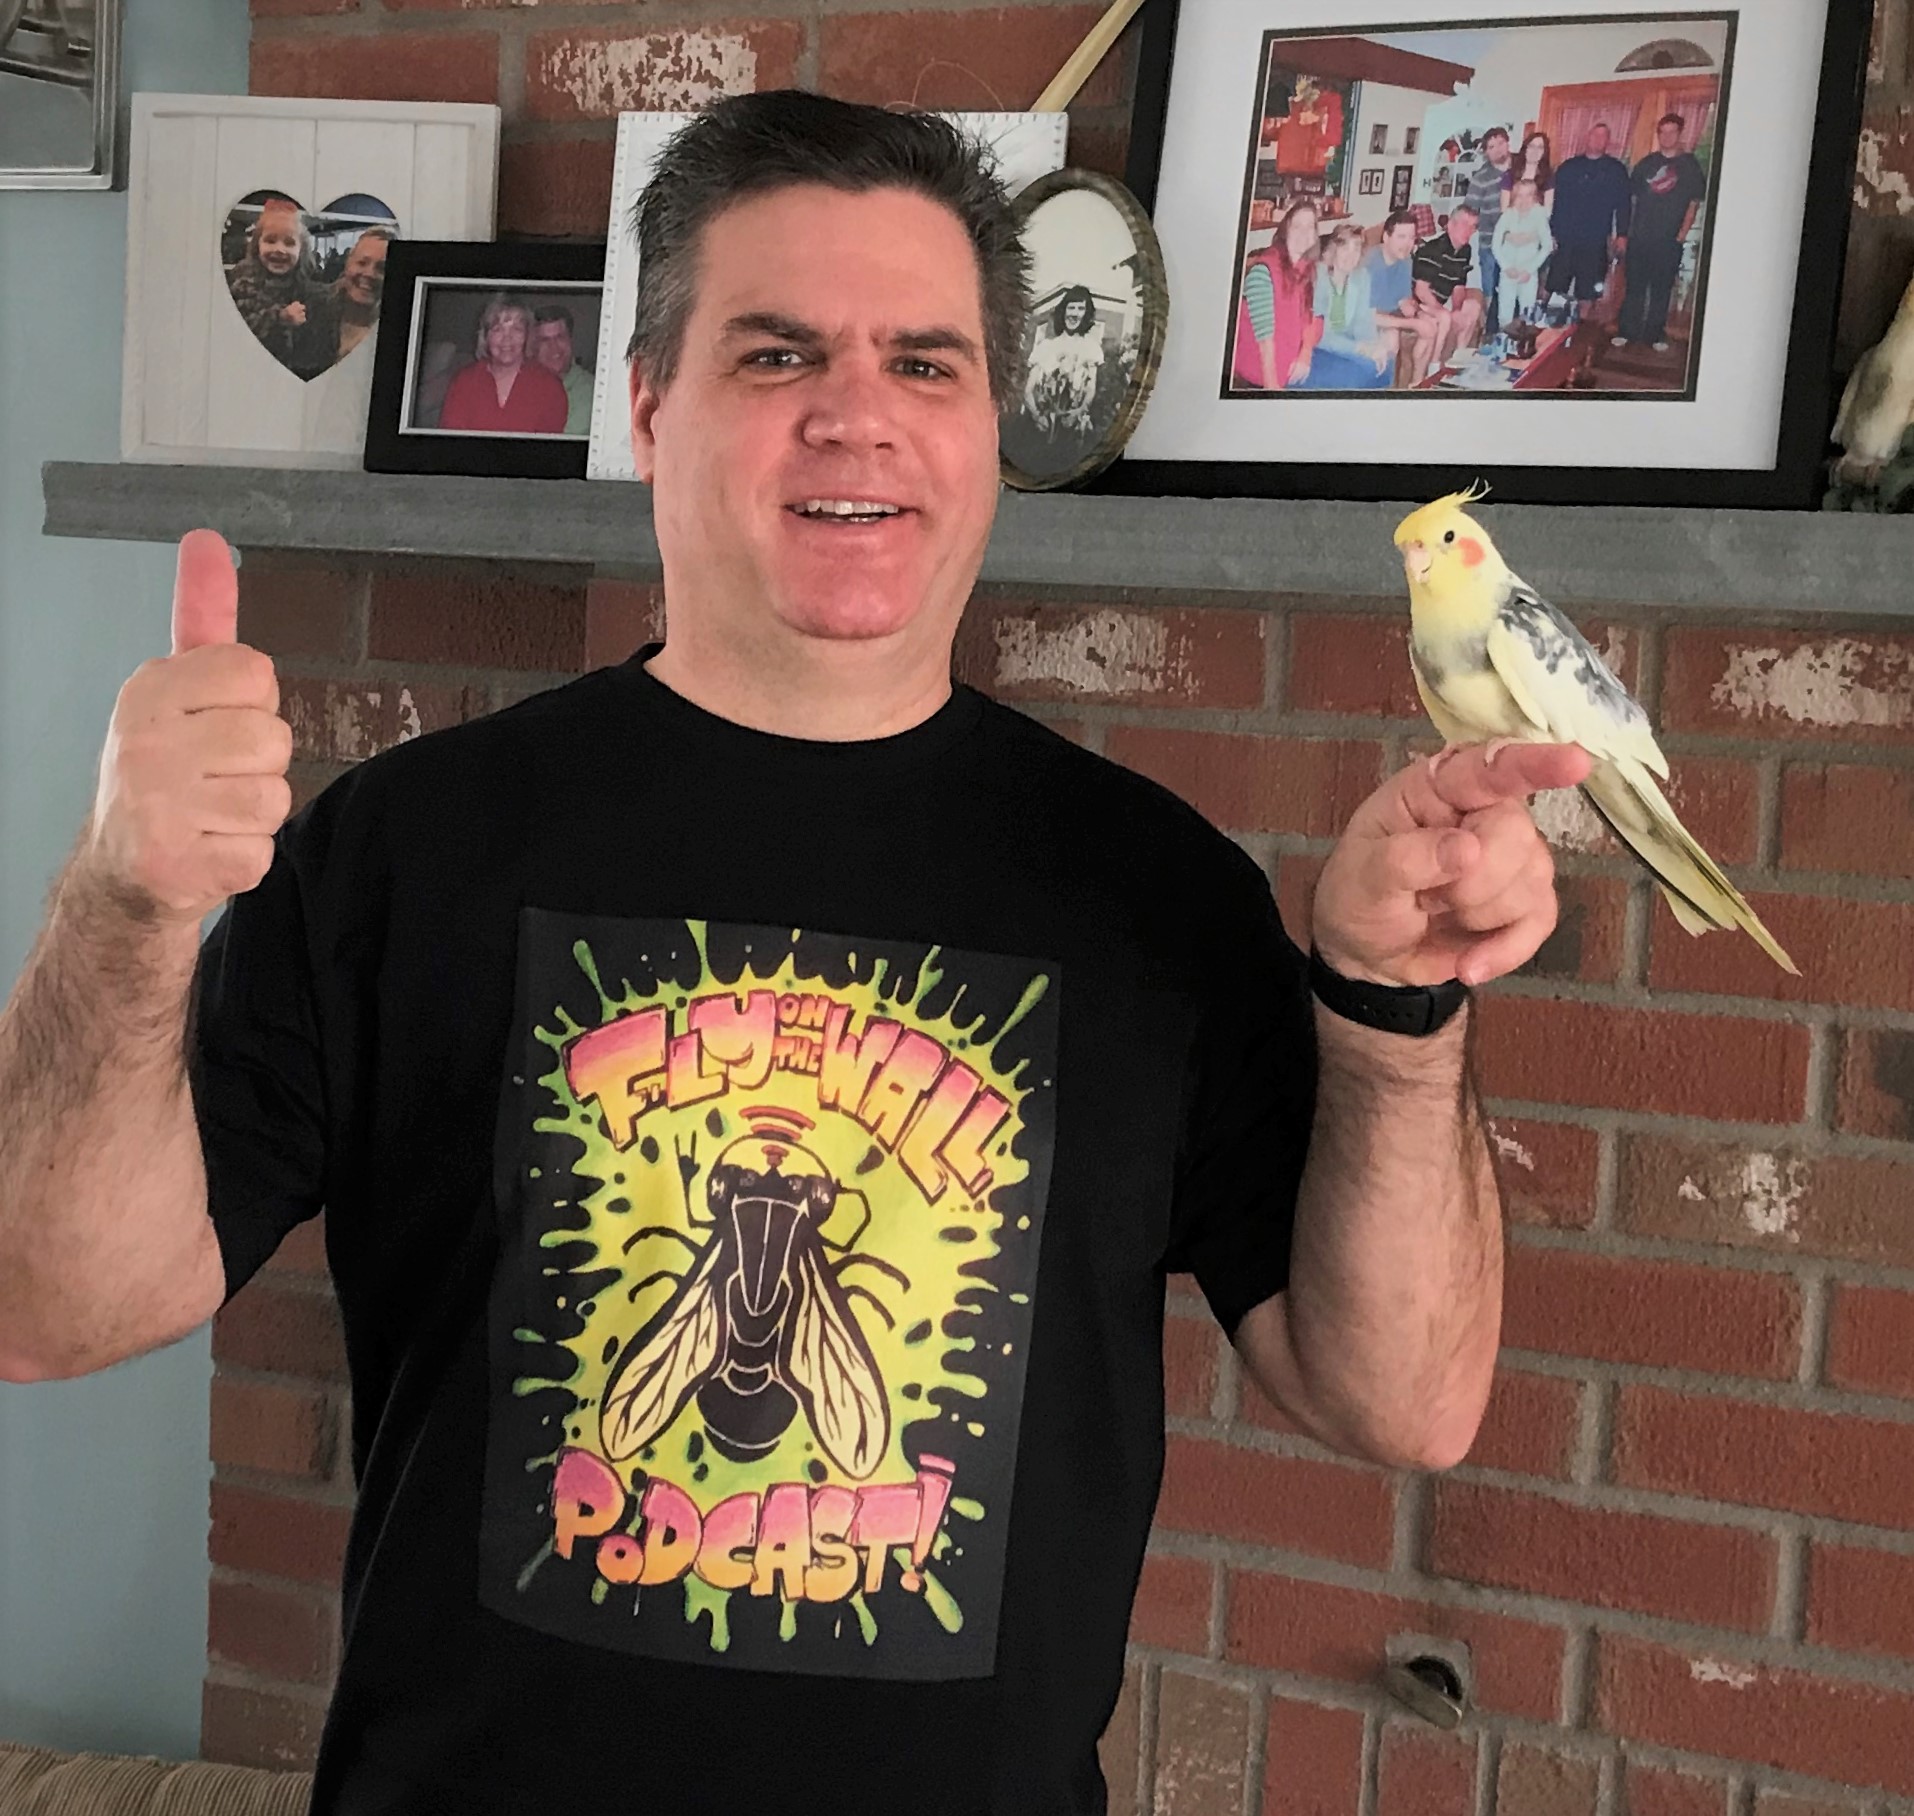
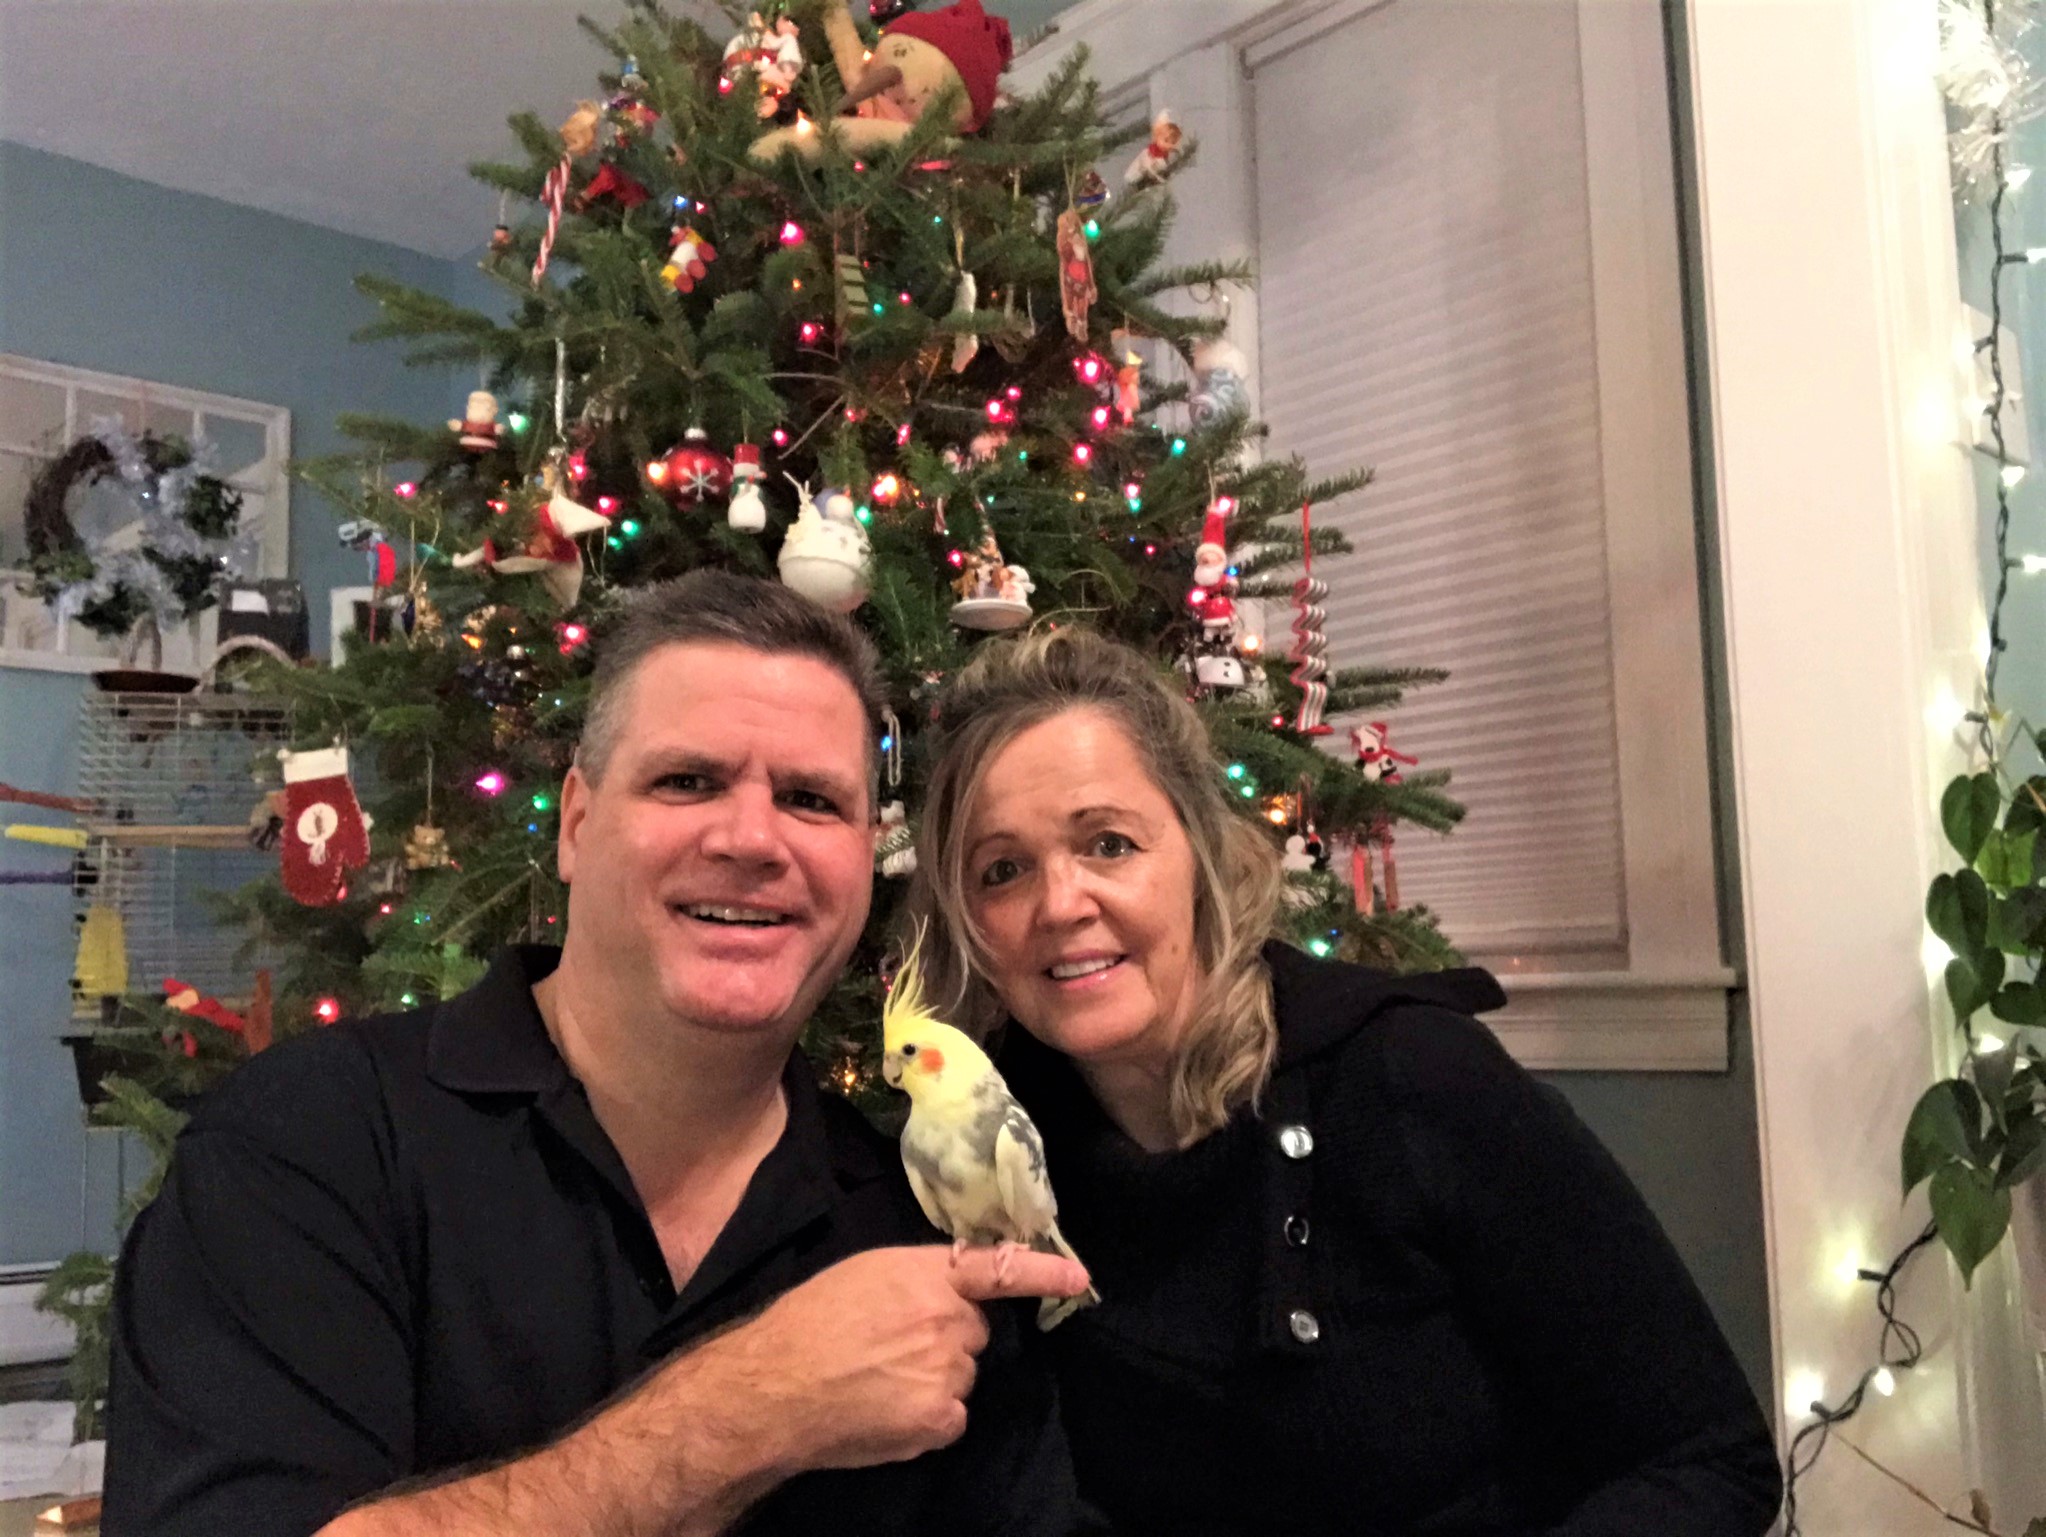
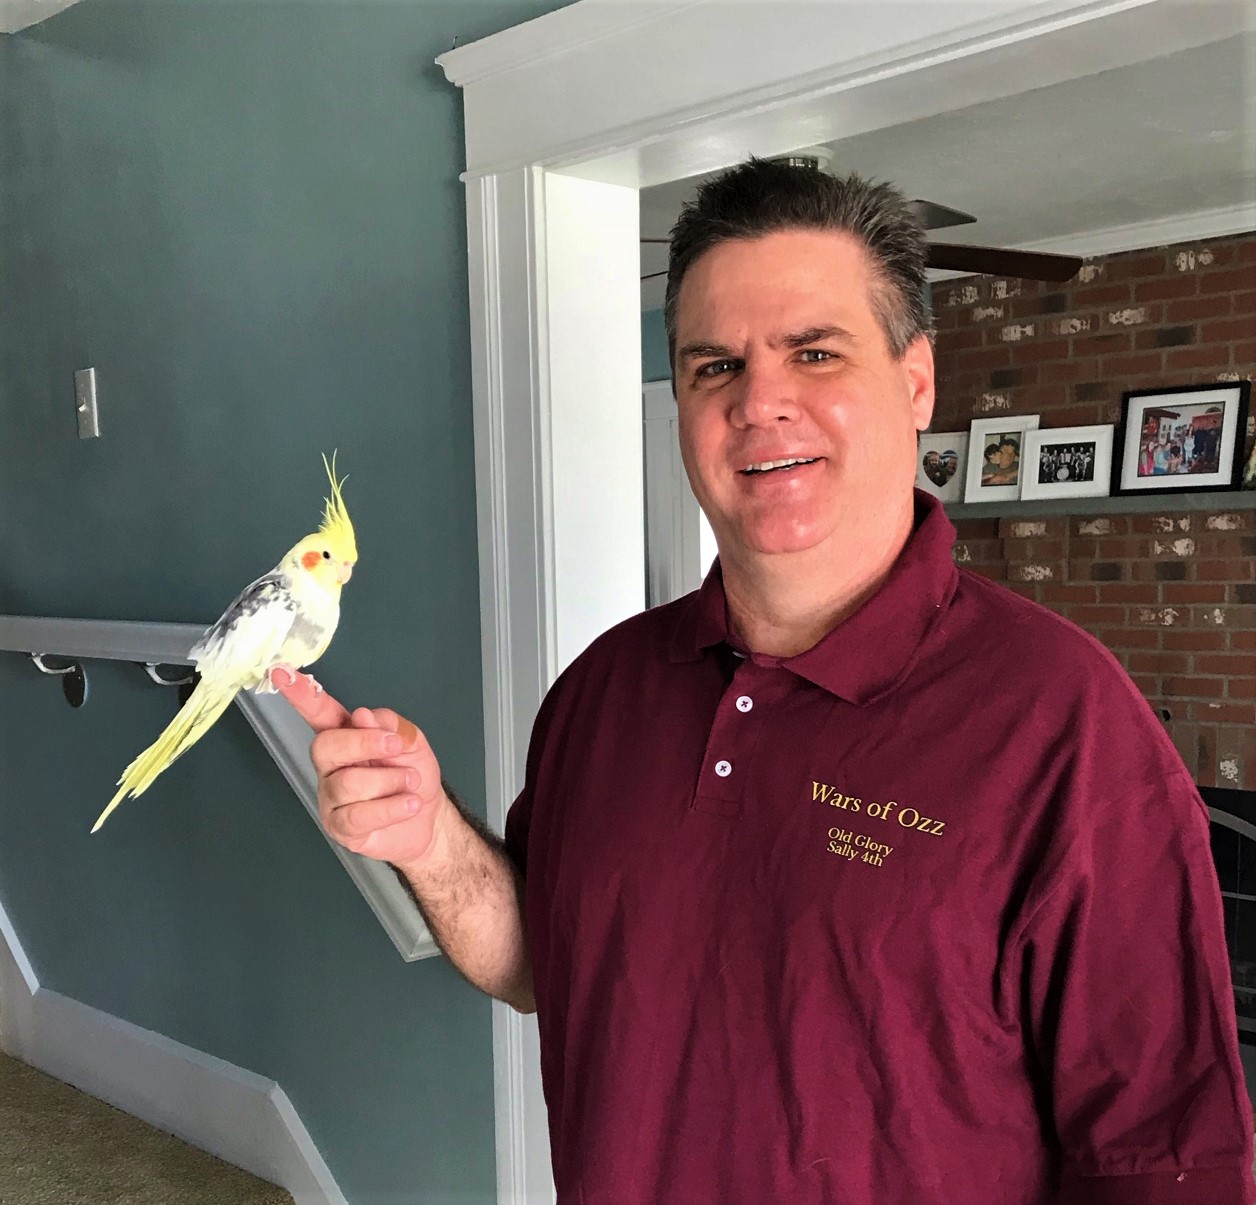
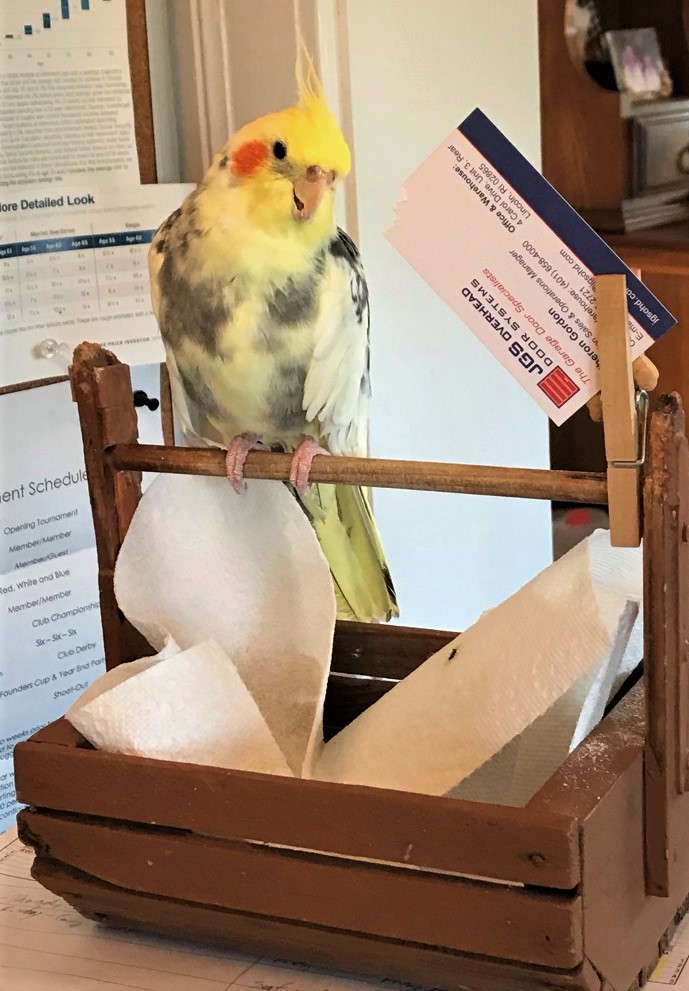
December 2006 he posed as a “Misfit Toy”.Caesar in October 2014 at the ripe old age of 20.Our 2014 Christmas card shot.Caesar loved to have Lynn play with him like this in January 2015. I couldn’t as this was only for mummy.Caesar and Lynn enjoying a summer’s day in July 2015. We got him outside like this on warm days – but kept an eye out for hawks.Rarely would Caesar take a drive – but here we are in September 2016.Looking cute in December 2016.Playing with me under a paper towel on a blanket as I lay on the couch in January 2017. He loved confined spaces.His cage (always open) with his teepee (that he eventually chewed up) in February 2017.He loved cuddling with Lynn – here in March 2017.I’m here recovering from one of my many surgeries in 2017 and Caesar is keeping me company. Caesar enjoying a warm day outside in May 2017.Here you can see his house – he designed it himself!Valentine’s Day 2018 – he’s being photographed here from outside as he enjoys the winter sun.In June of 2018 with Lynn and Tabitha (then 1 and a half).August 2018 – sometimes he cared less about posing…I took this shot in October 2018 and don’t even remember how I filtered it – but I do like the shot.Caesar and me in October 2018,He loved the Christmas tree – well staring at it as it was next to his cage every year. Once in a while – like here in 2018, we got him to pose in it.Christmas card shot for 2018. We probably needed 20 shots to get one!2019 Christmas Card shot.One of the few selfies he let me take without a fuss. He is on his basket, which was his “traveling perch” in the house.The teepee after months of chewing up…As my Aussie buddie Luke sent me his podcast T-shirt, I only thought it proper to take a shot with our resident Aussie bird – well he was American but descended from Aussies.In July 2020 getting love from his mummy.Our 2020 Christmas card shot – unfortunately we did not do one with him in 2021…Caesar and me with my Wars of Ozz shirt in April 2021.In November keeping me company as I do computer work in my office. You can see he’s enjoying chewing on a business card form our garage door vendor. He loved to chew paper and especially cardboard.New Year’s Day, 2022, only hours before he passed, cuddling with his mummy.
Goodbye my little birdie friend, love ya to pieces. I’ll miss you until the day I die.
Yes, it’s been a while since I updated you on the project – a month! It often seems like either everything is going on at the same time, or we are waiting and nothing is happening , and November 2021 was such a month.
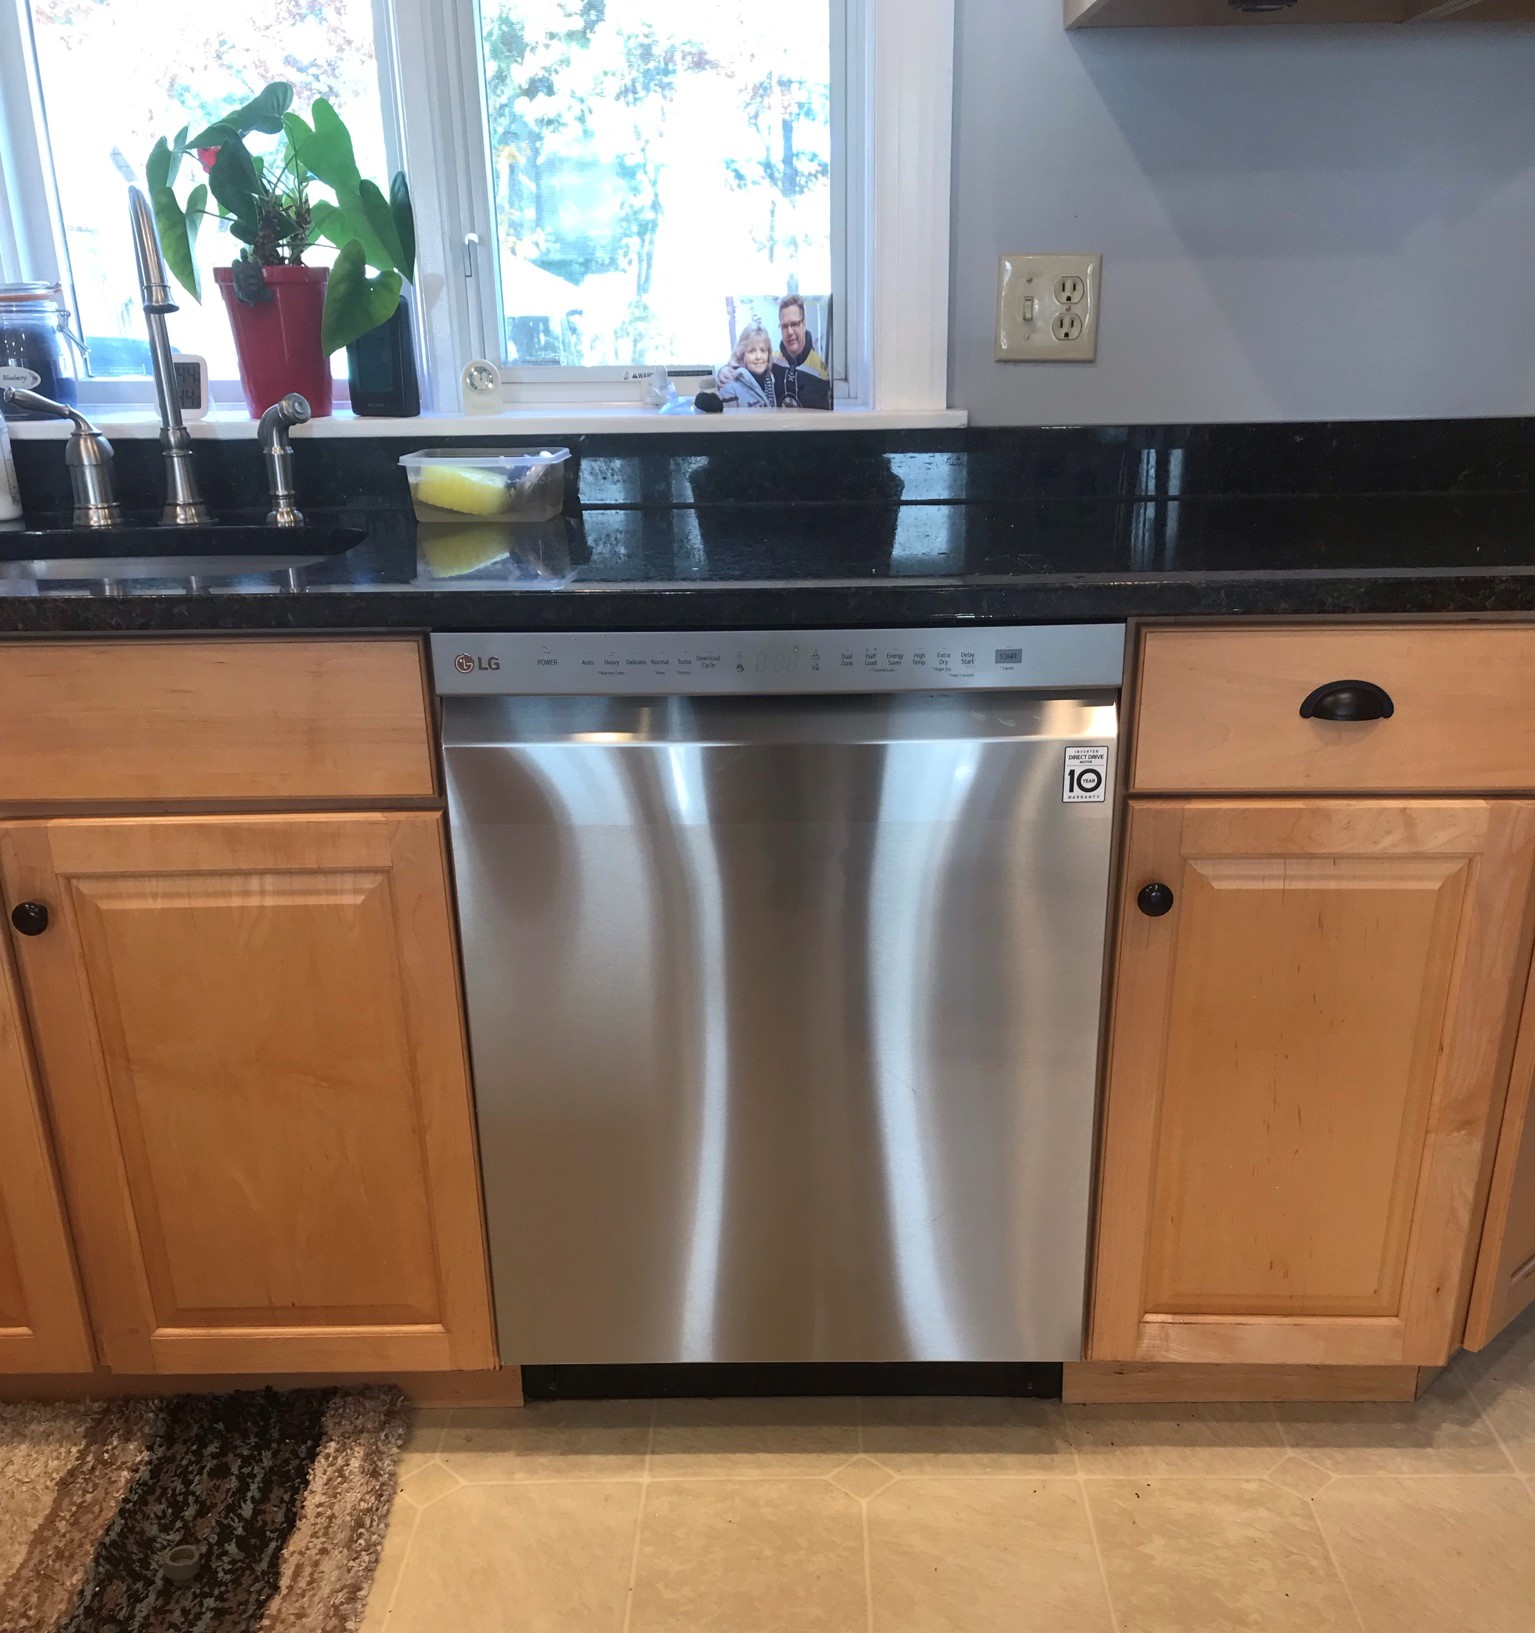
Lots of external and internal issues happened. I had Historicon, surgery, Thanksgiving, and weather to deal with, plus a broken dishwasher and some old school Vikings minis to paint that I just posted about. So, where are we? Like I wrote, some days it was like crazy-town with activity, and others like crickets as we waited for inspections or materials. We are further along but winter is coming – so I’ll give you the progress time line in pictures.
As a reminder – as of November 6th – the project looked like this:
Week 17 – November 7th to 13th
November 9
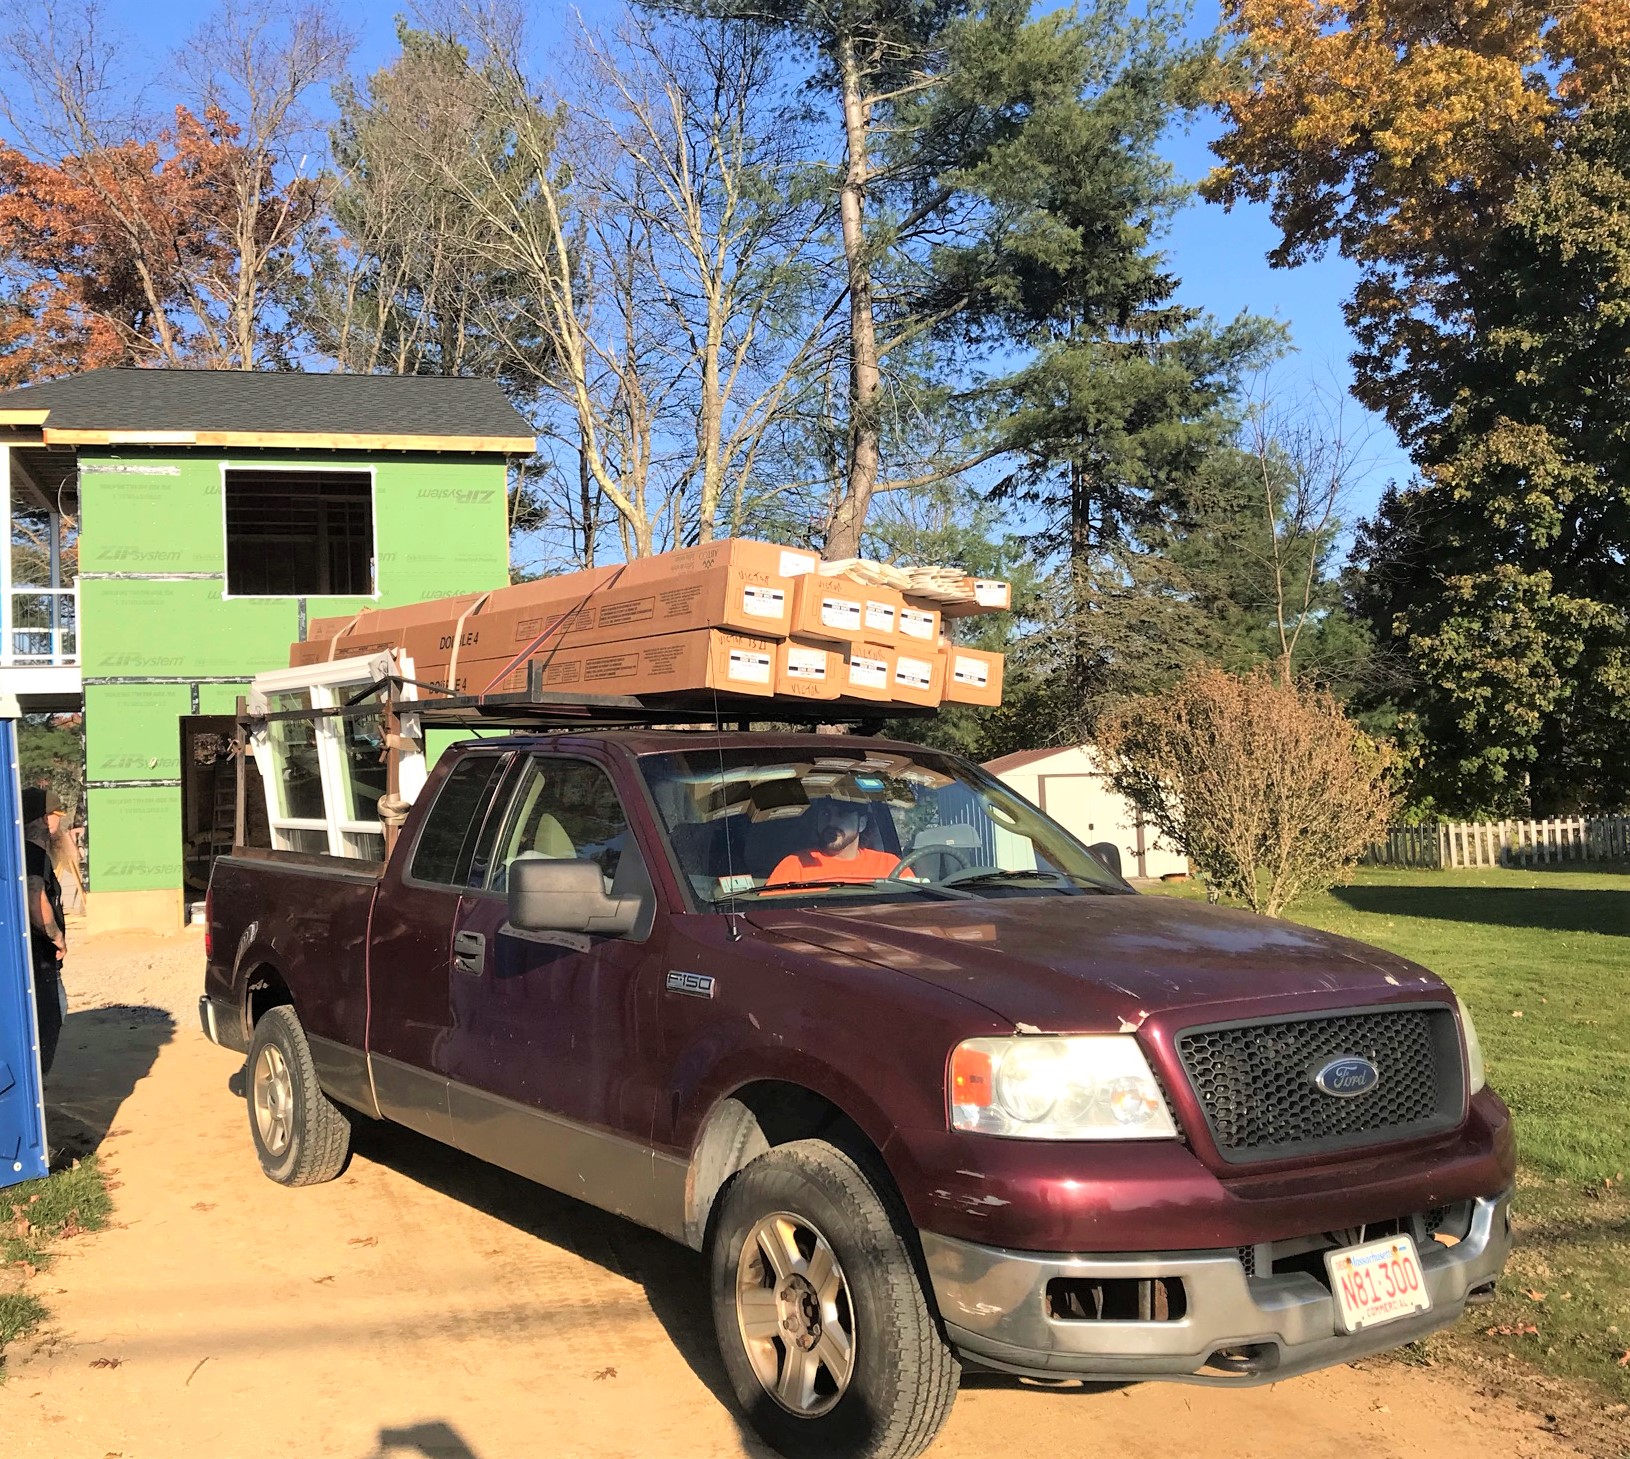
Evandro’s guys excavated the gas line (by hand) into the fire pit area.The windows were prepped for installation.Finally – after a long supply chain delay, windows and siding arrived and were moved onto the job site.
November 10
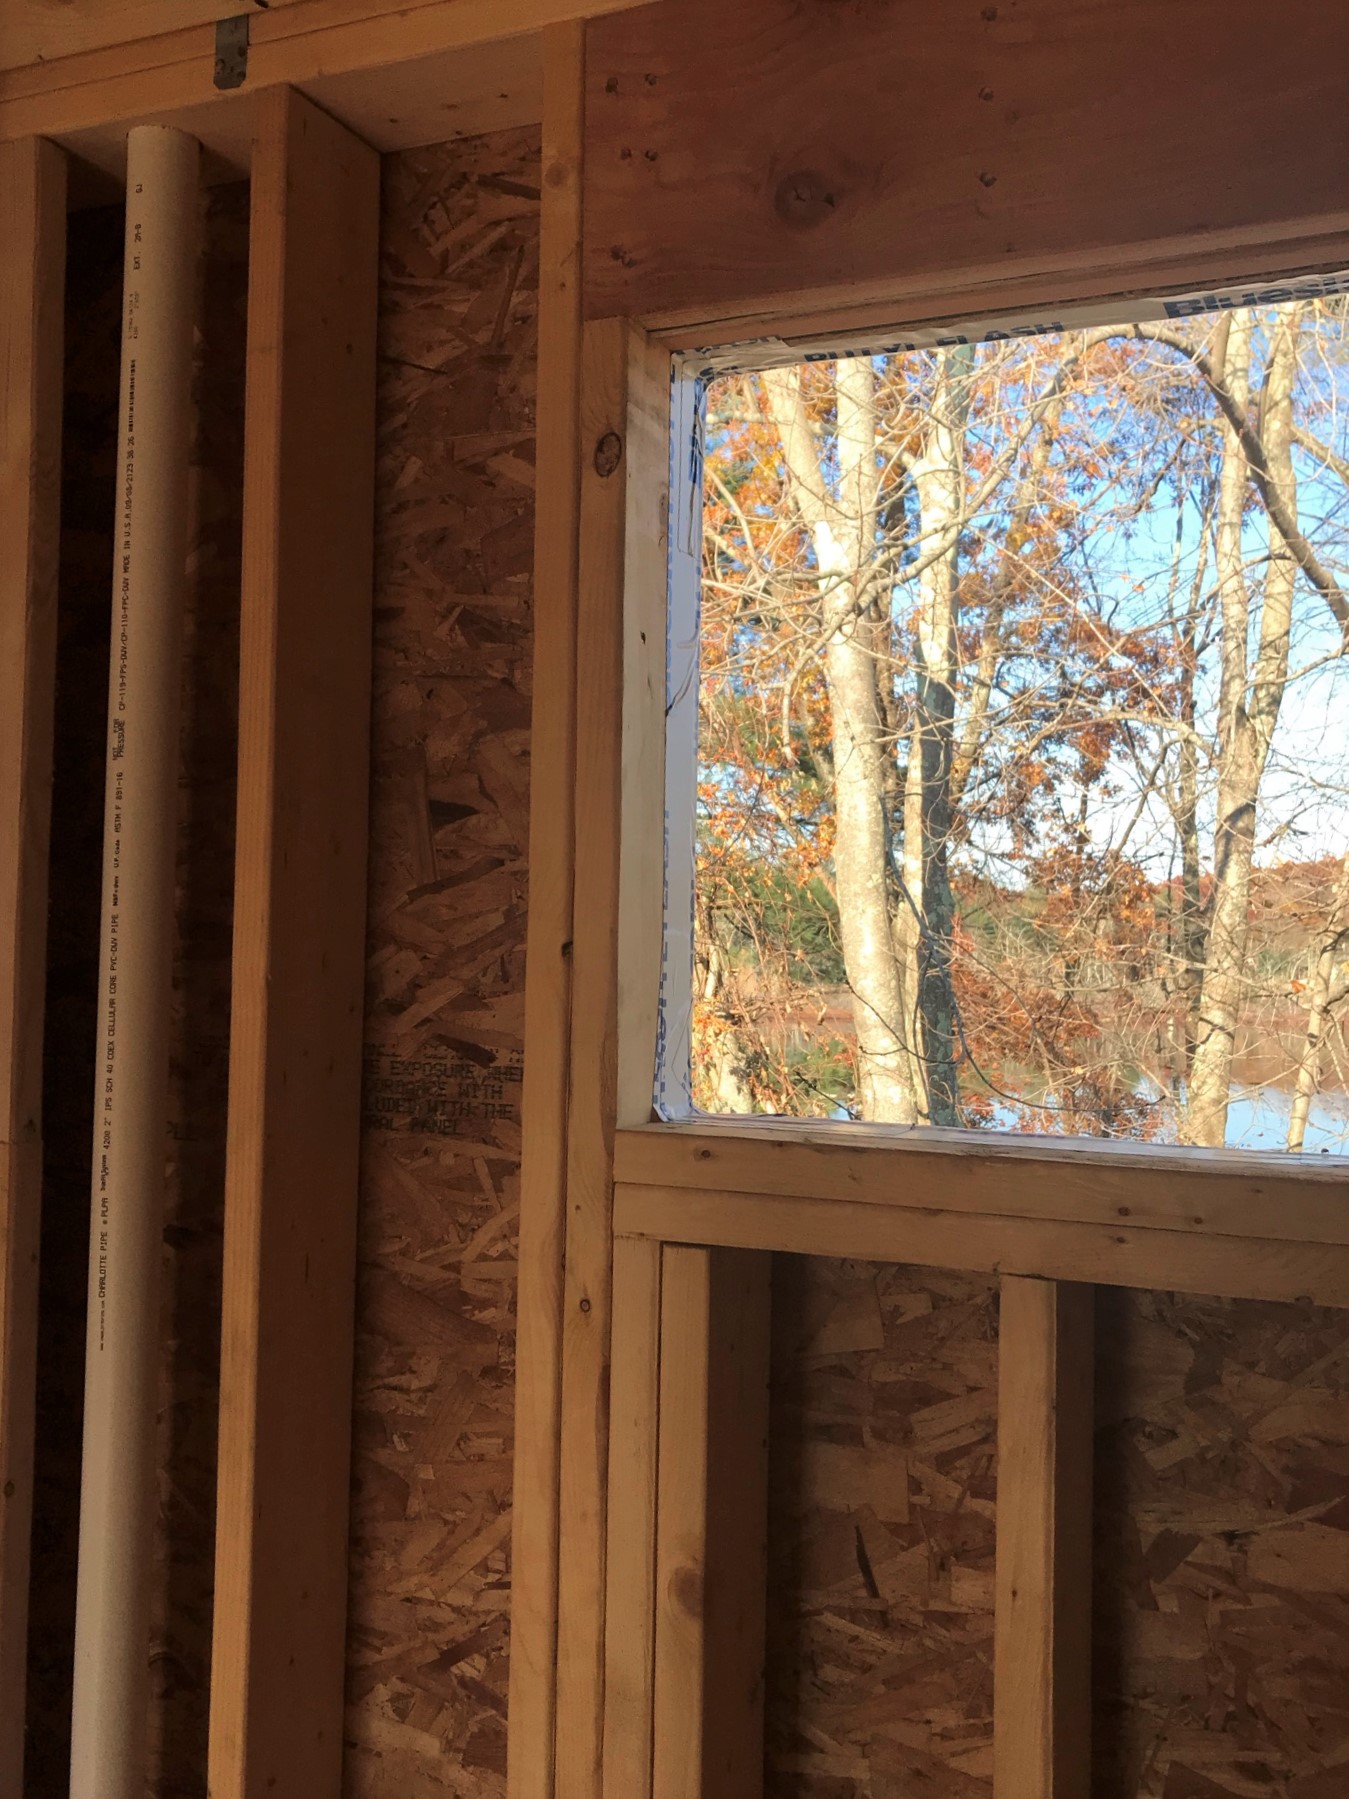
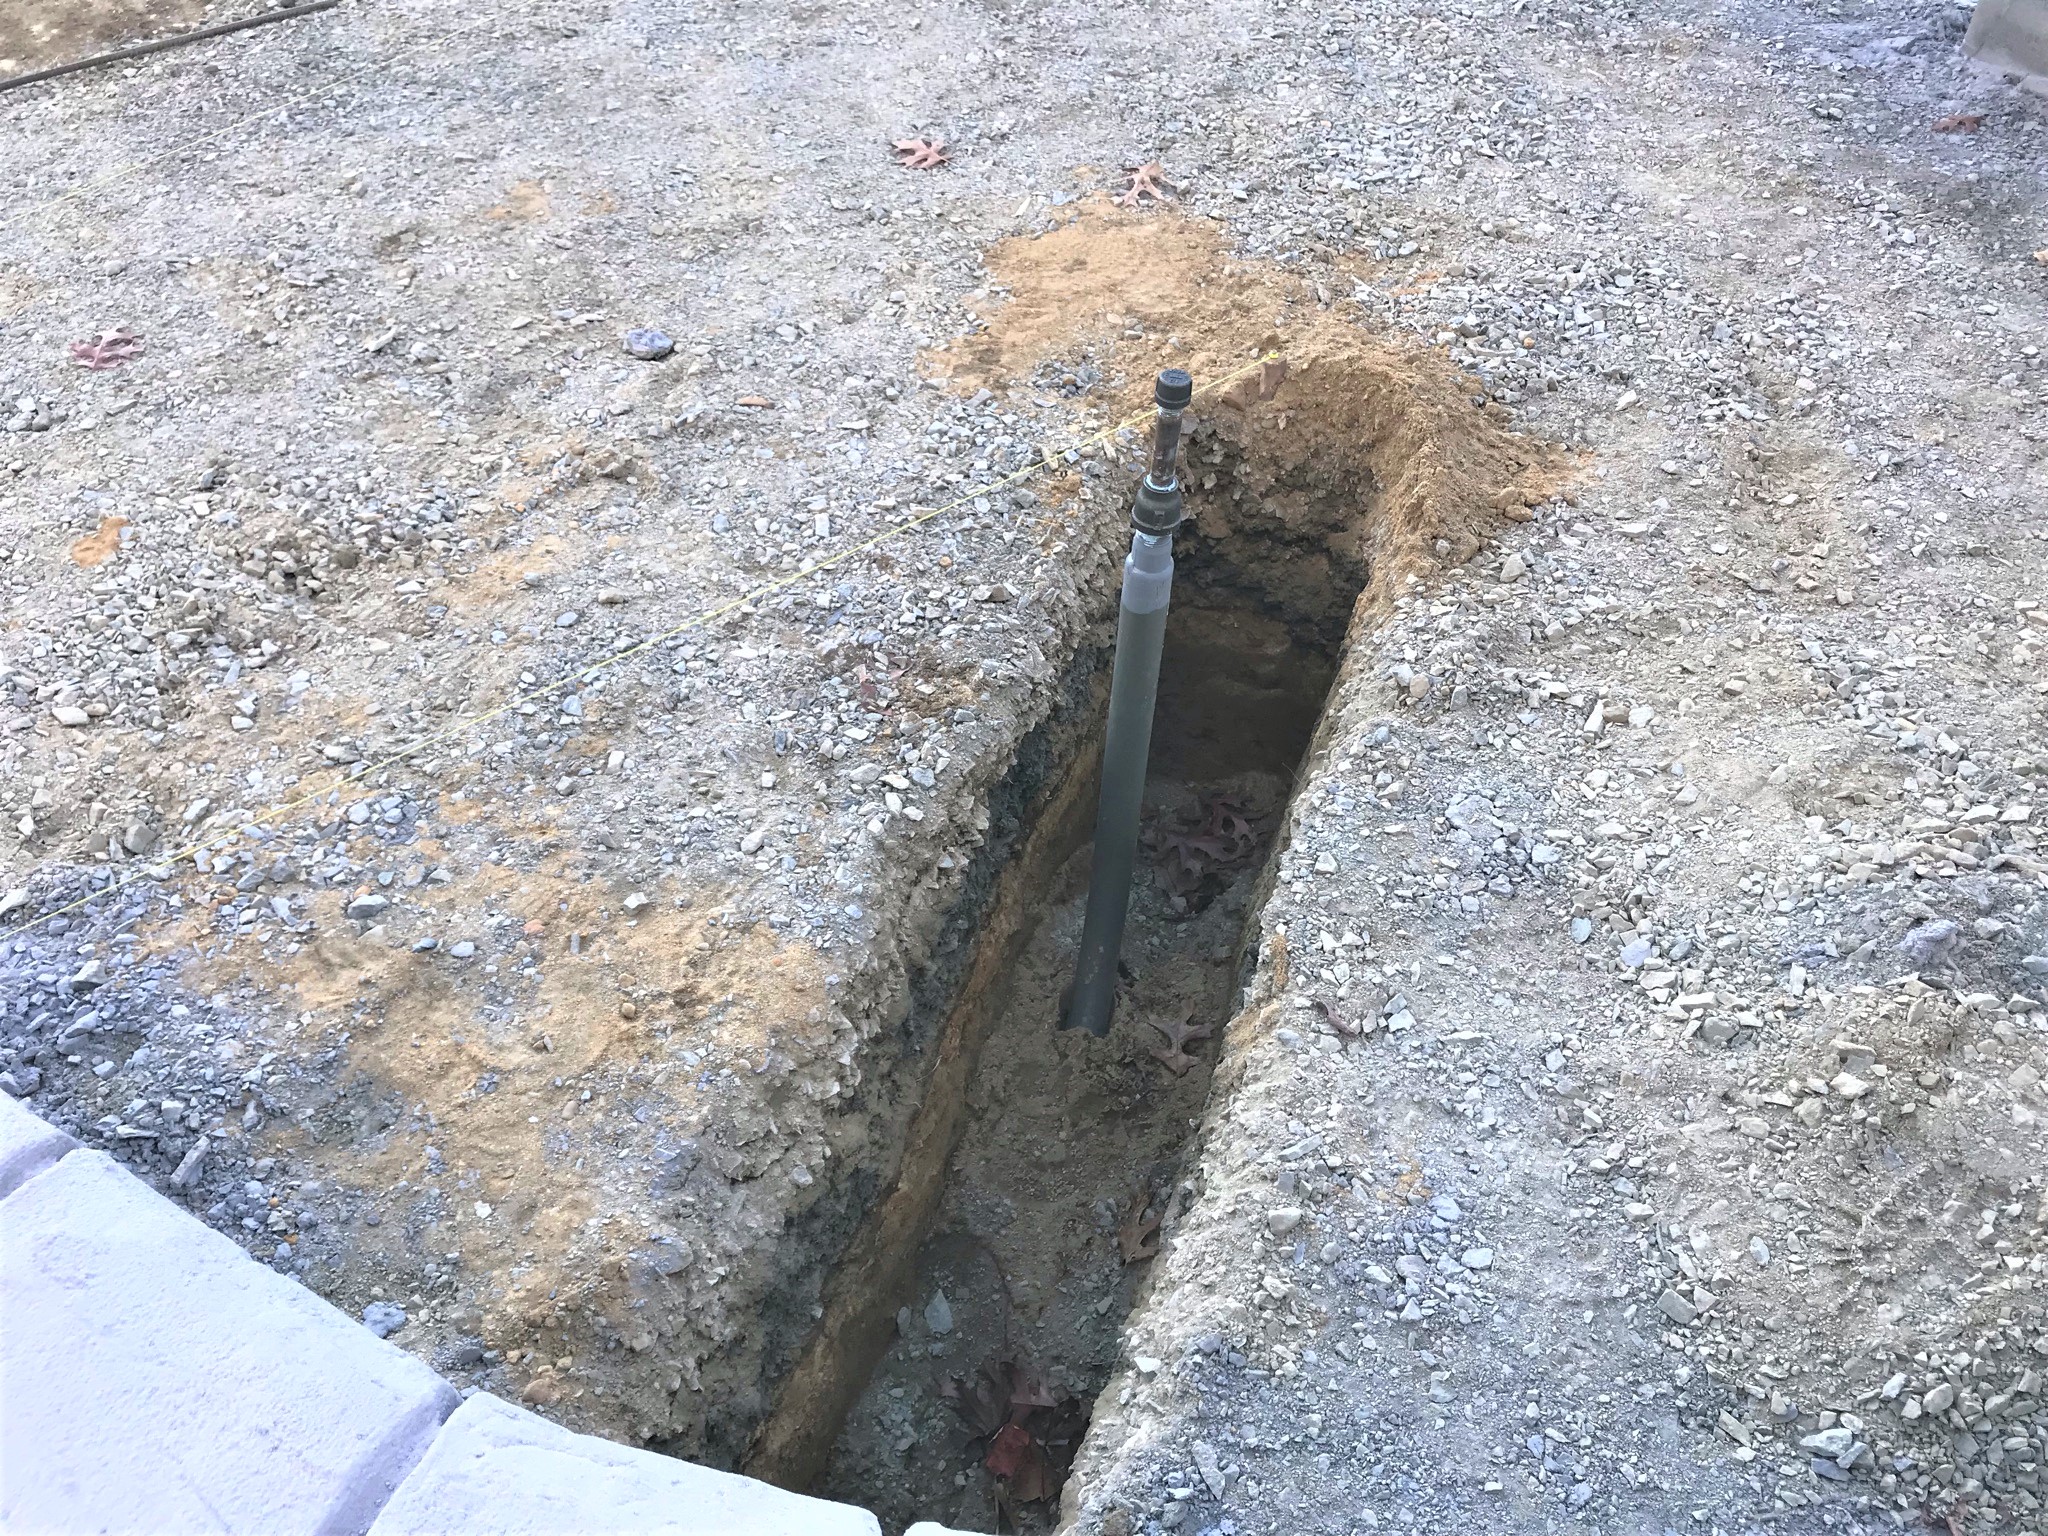
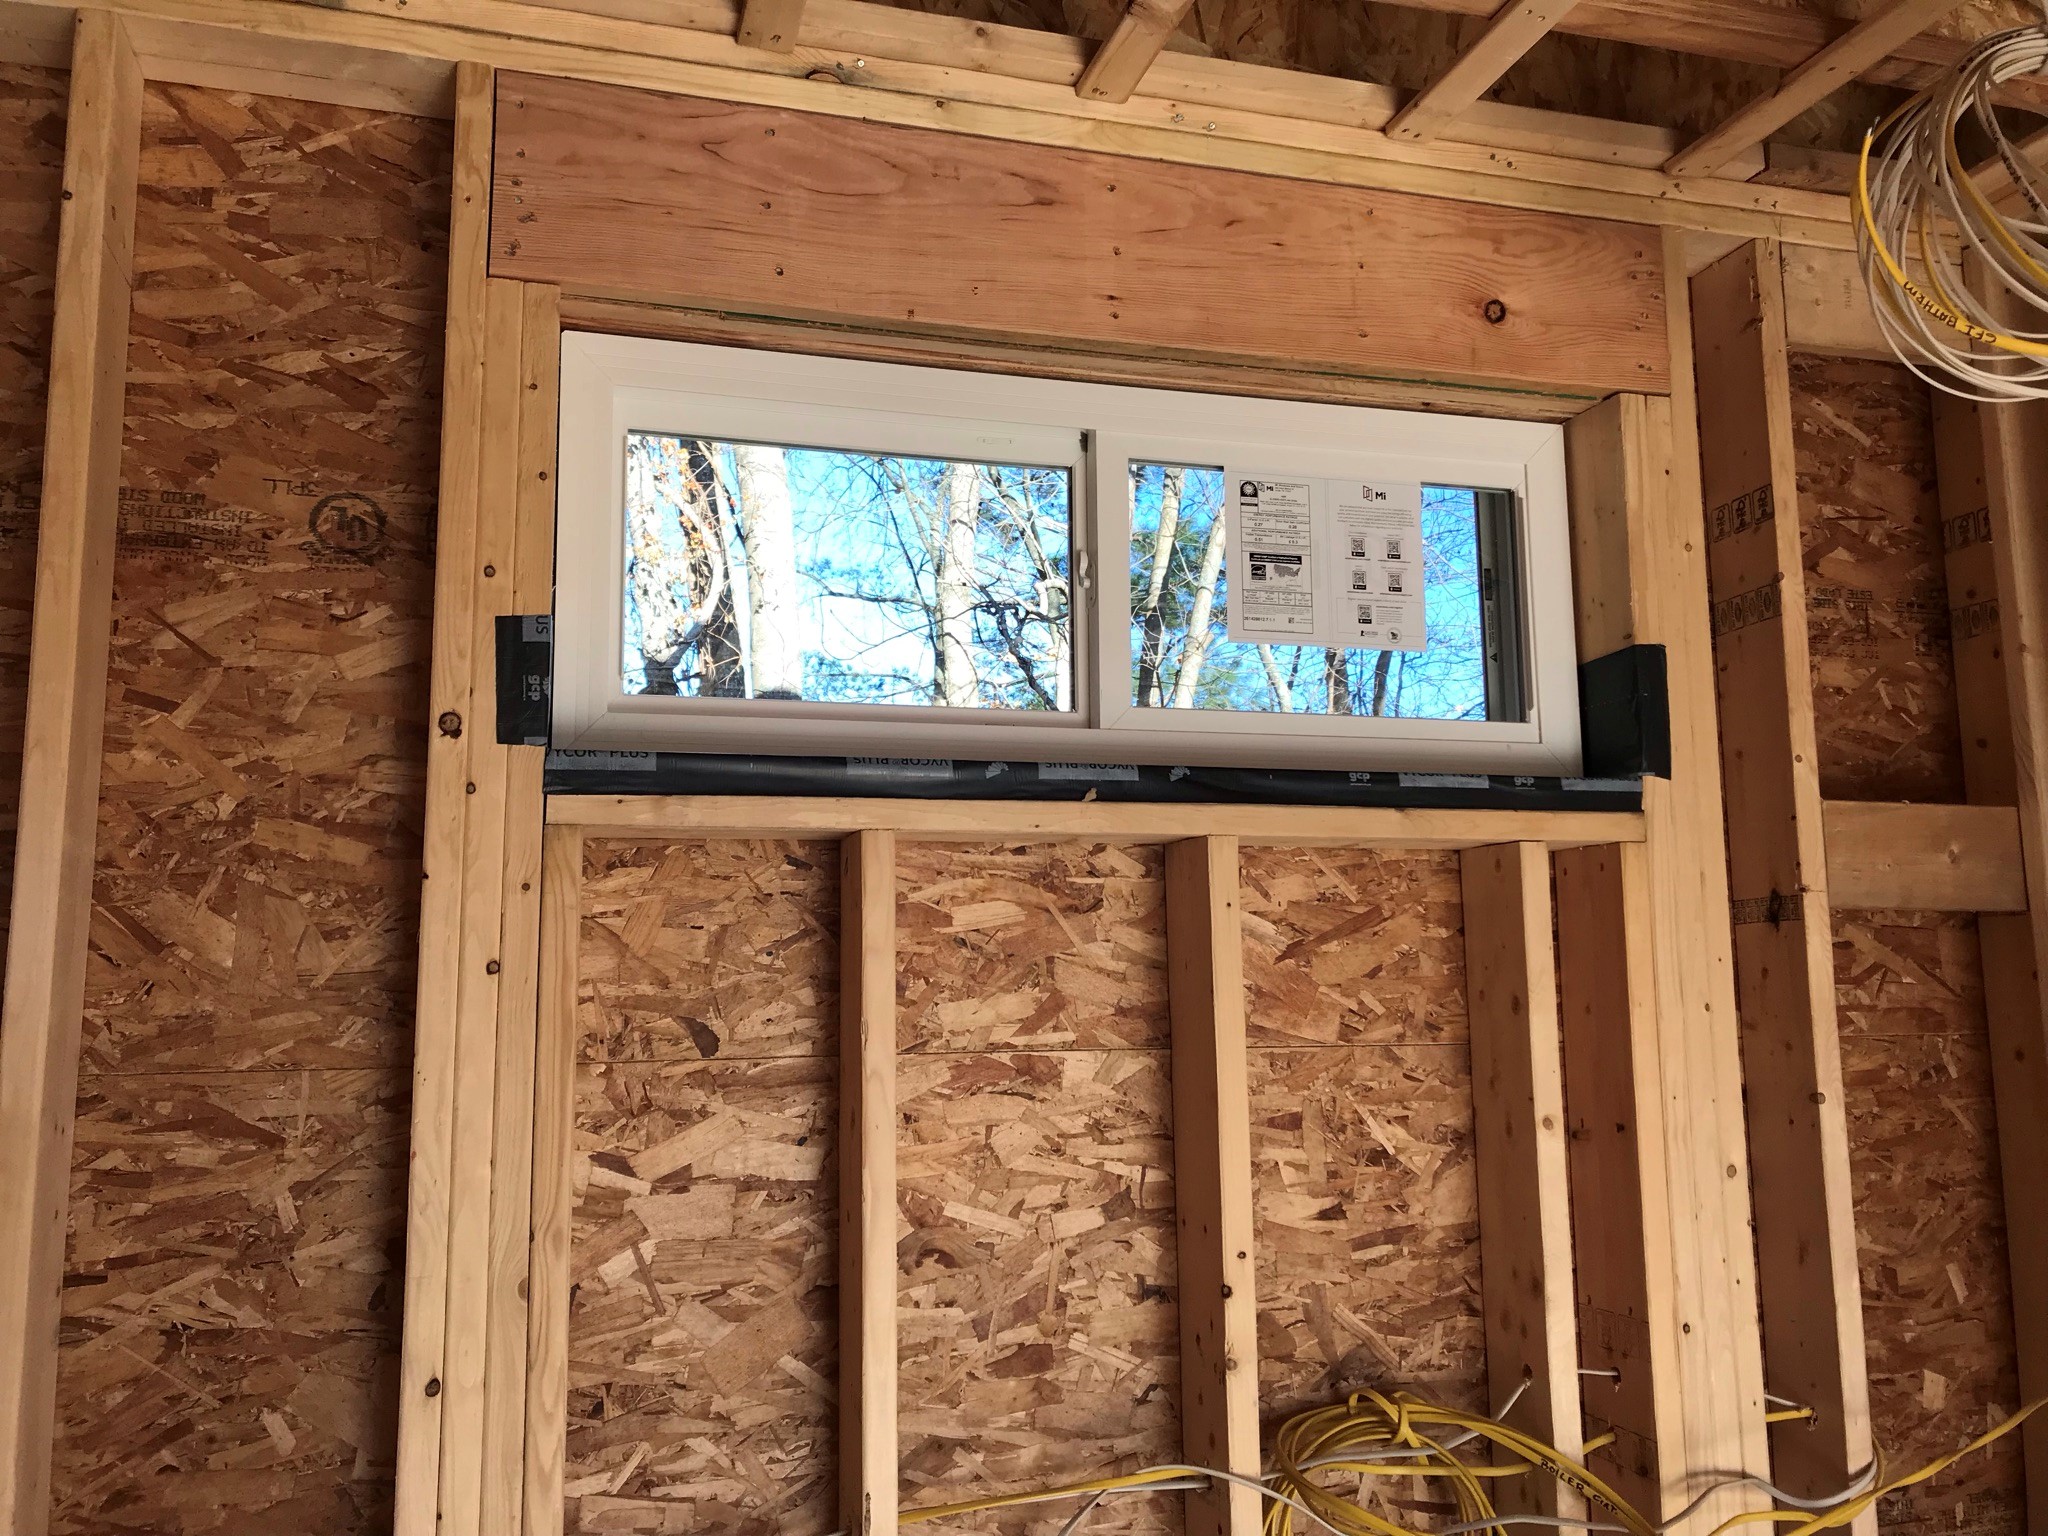
Early Wednesday morning shows the front window getting installed, Don Millette putting the gas line in the trench, and the Victors supervising.
Gas line in trenchGas Line hookup in fire pitGas line installation.The transom windows and door frame.
Frame going in!
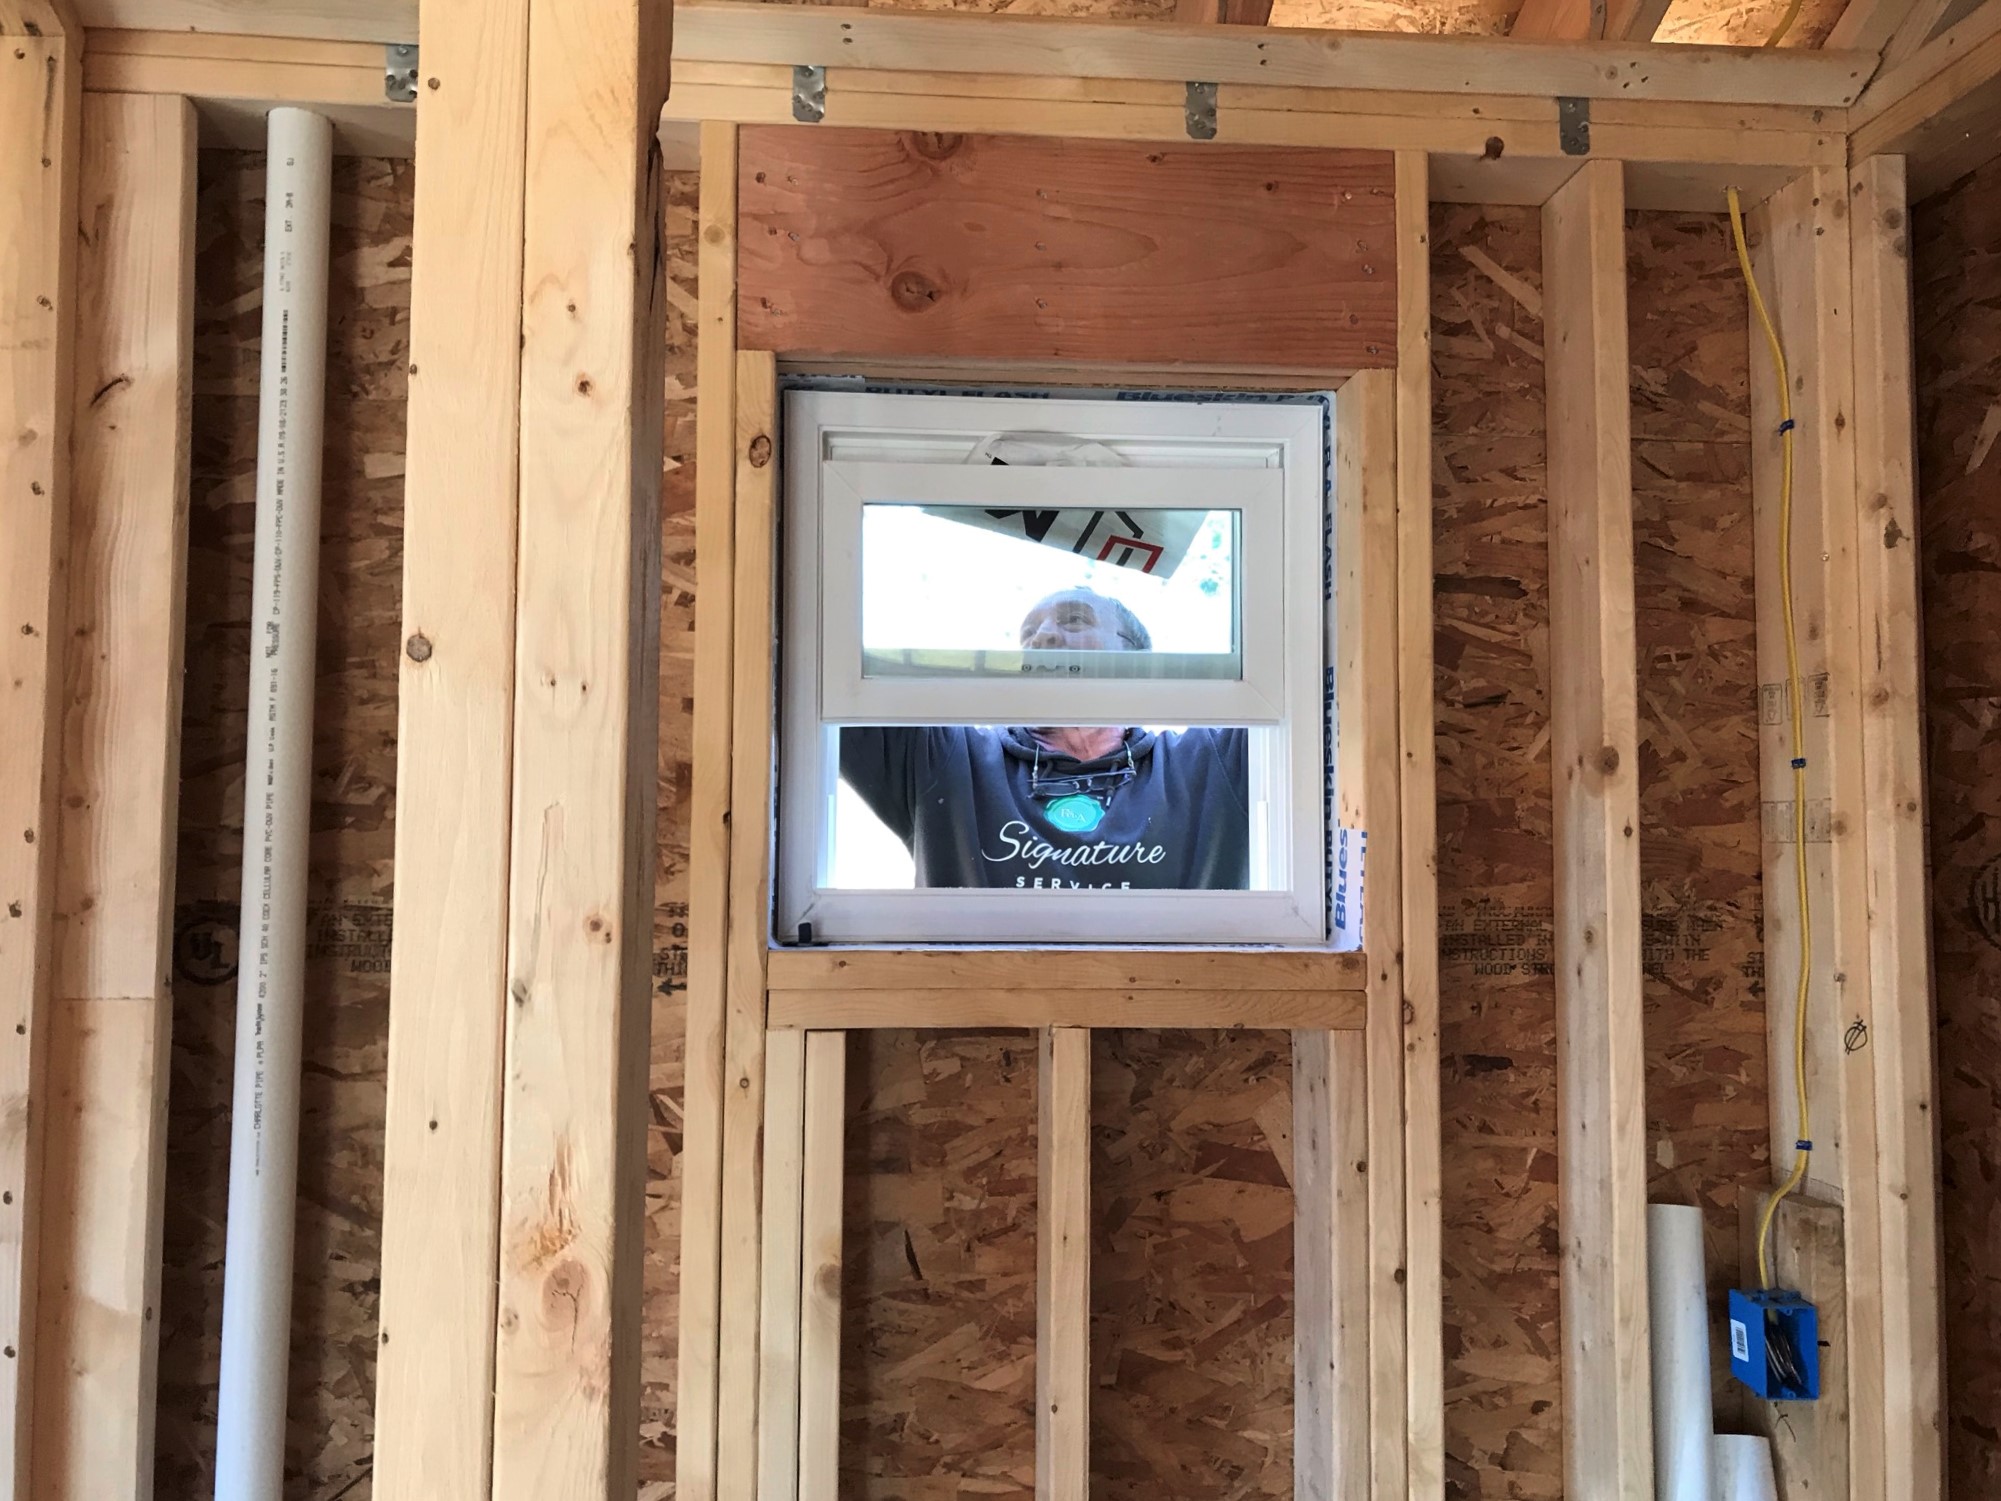
Bathroom window, 2nd floorGarage back windowOther windows went in too.
Back side of the building showing installed windows.
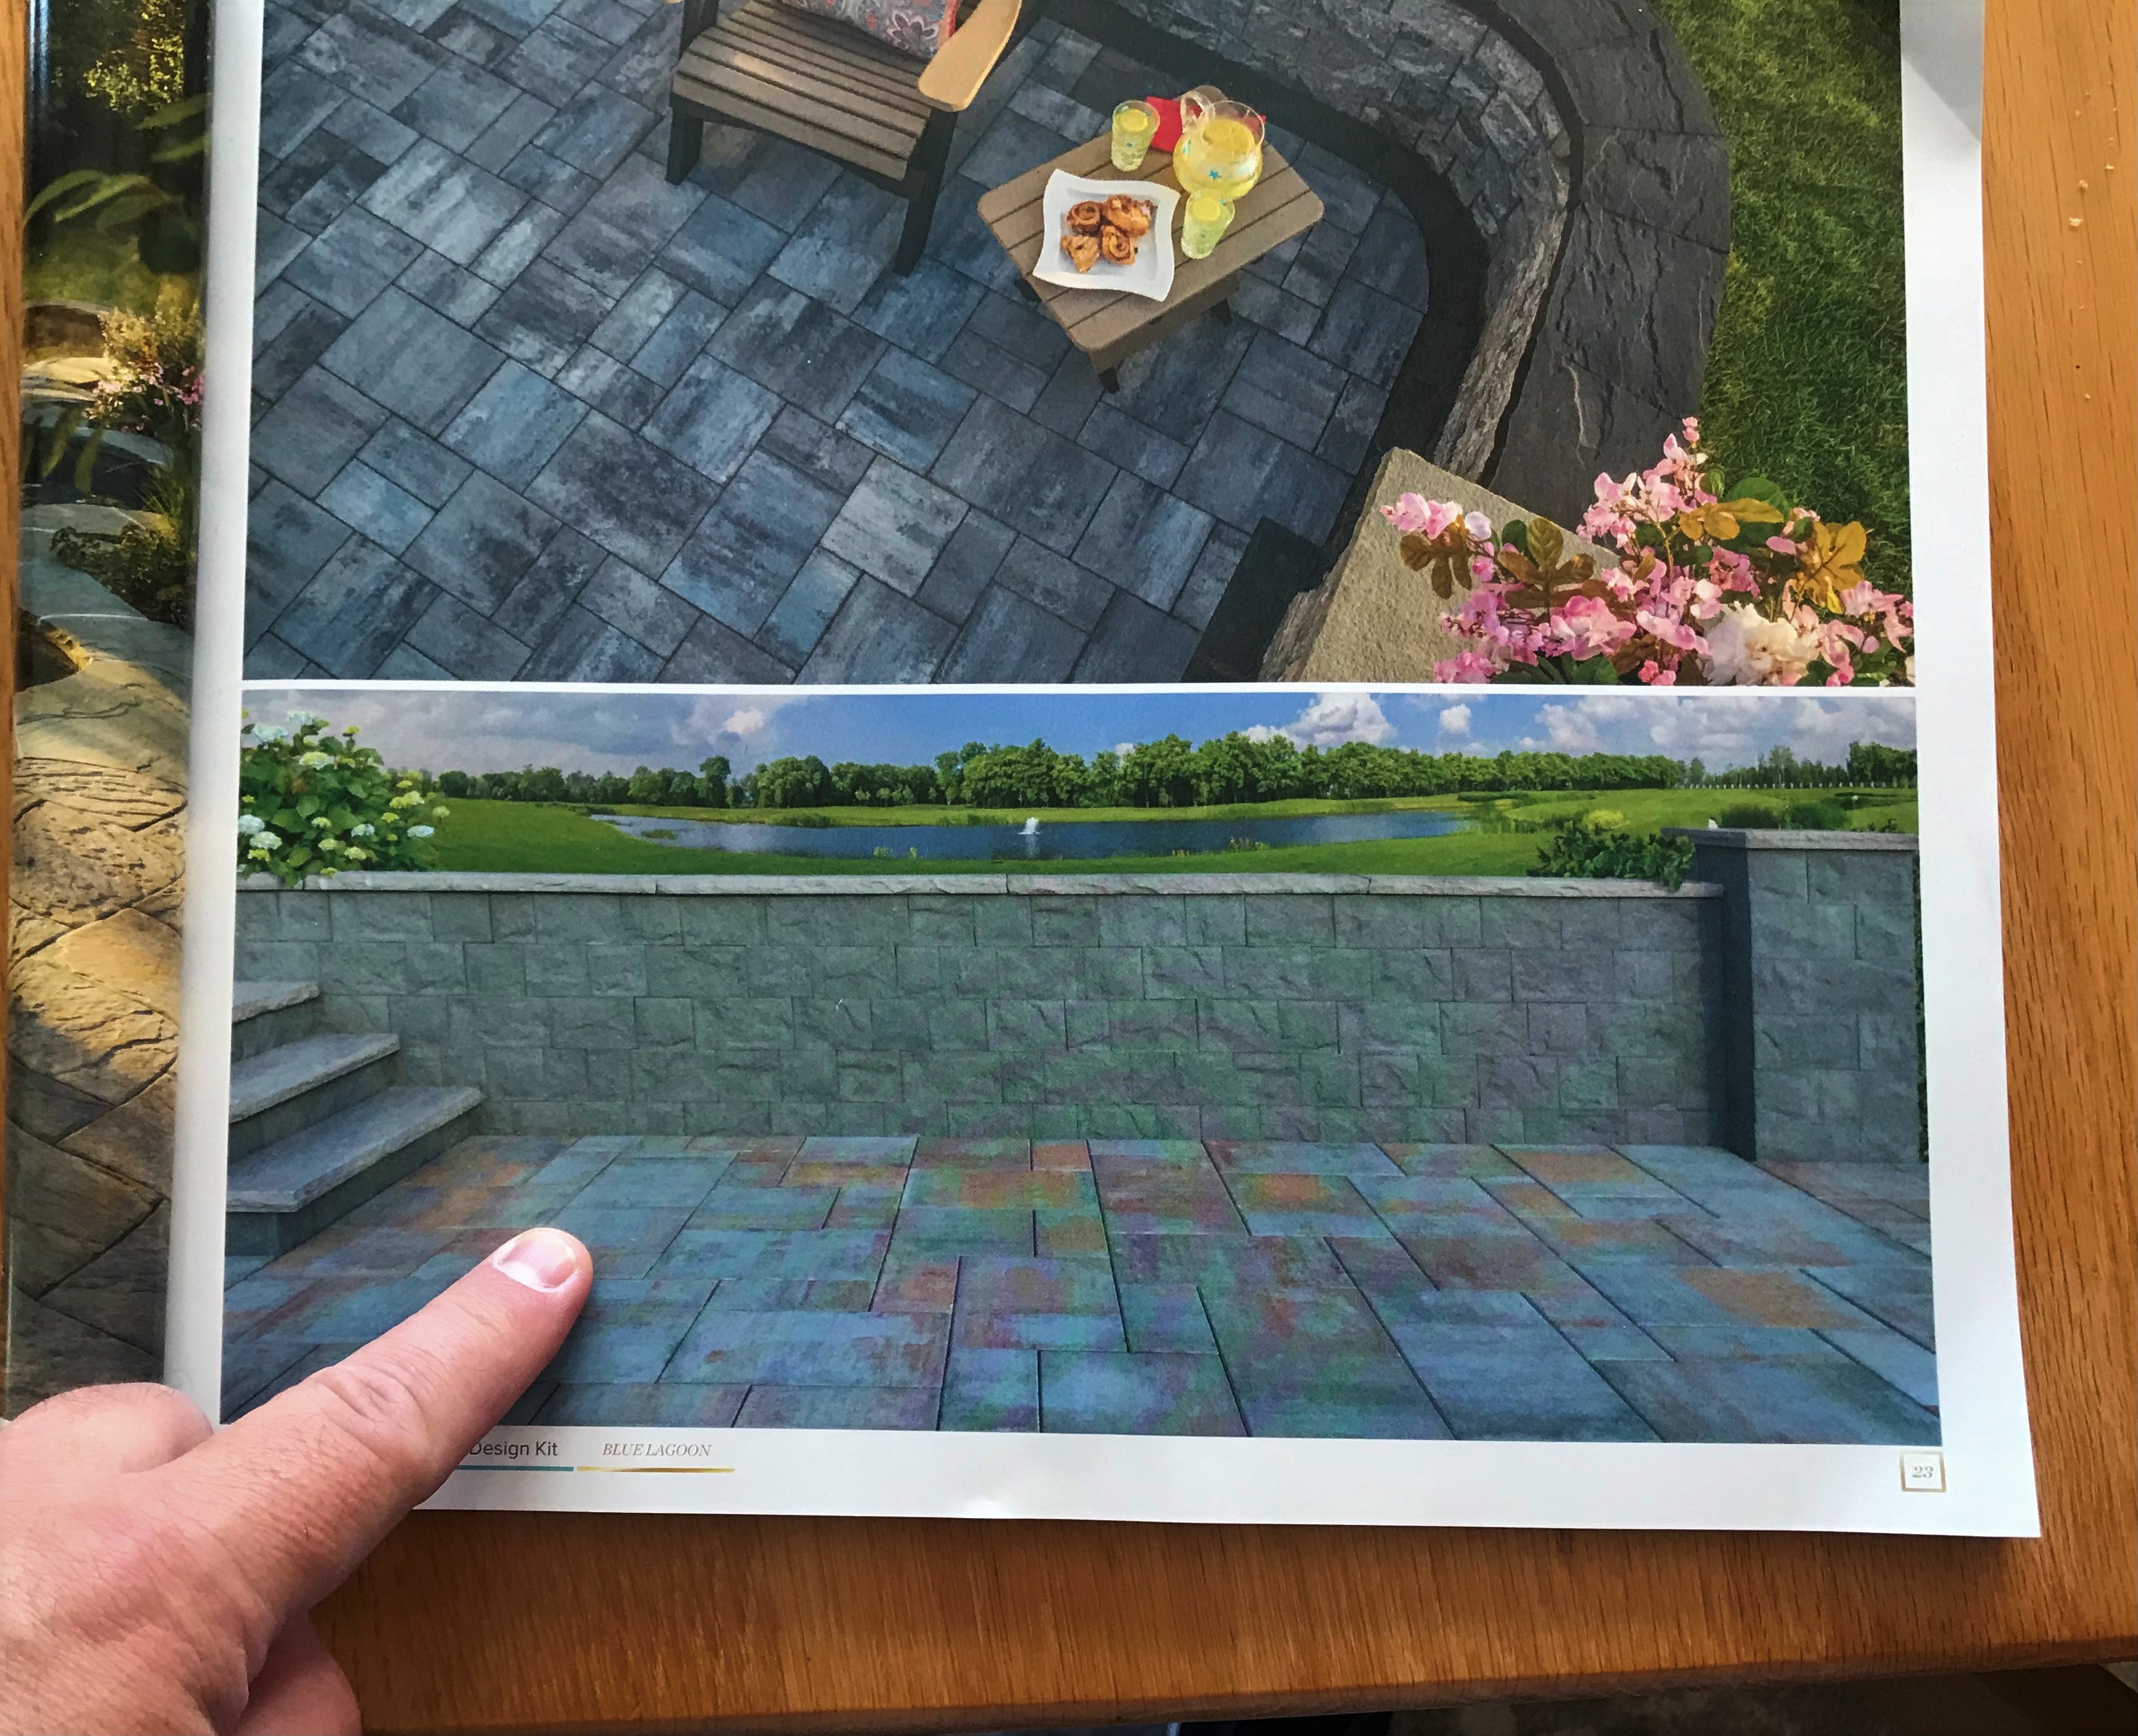
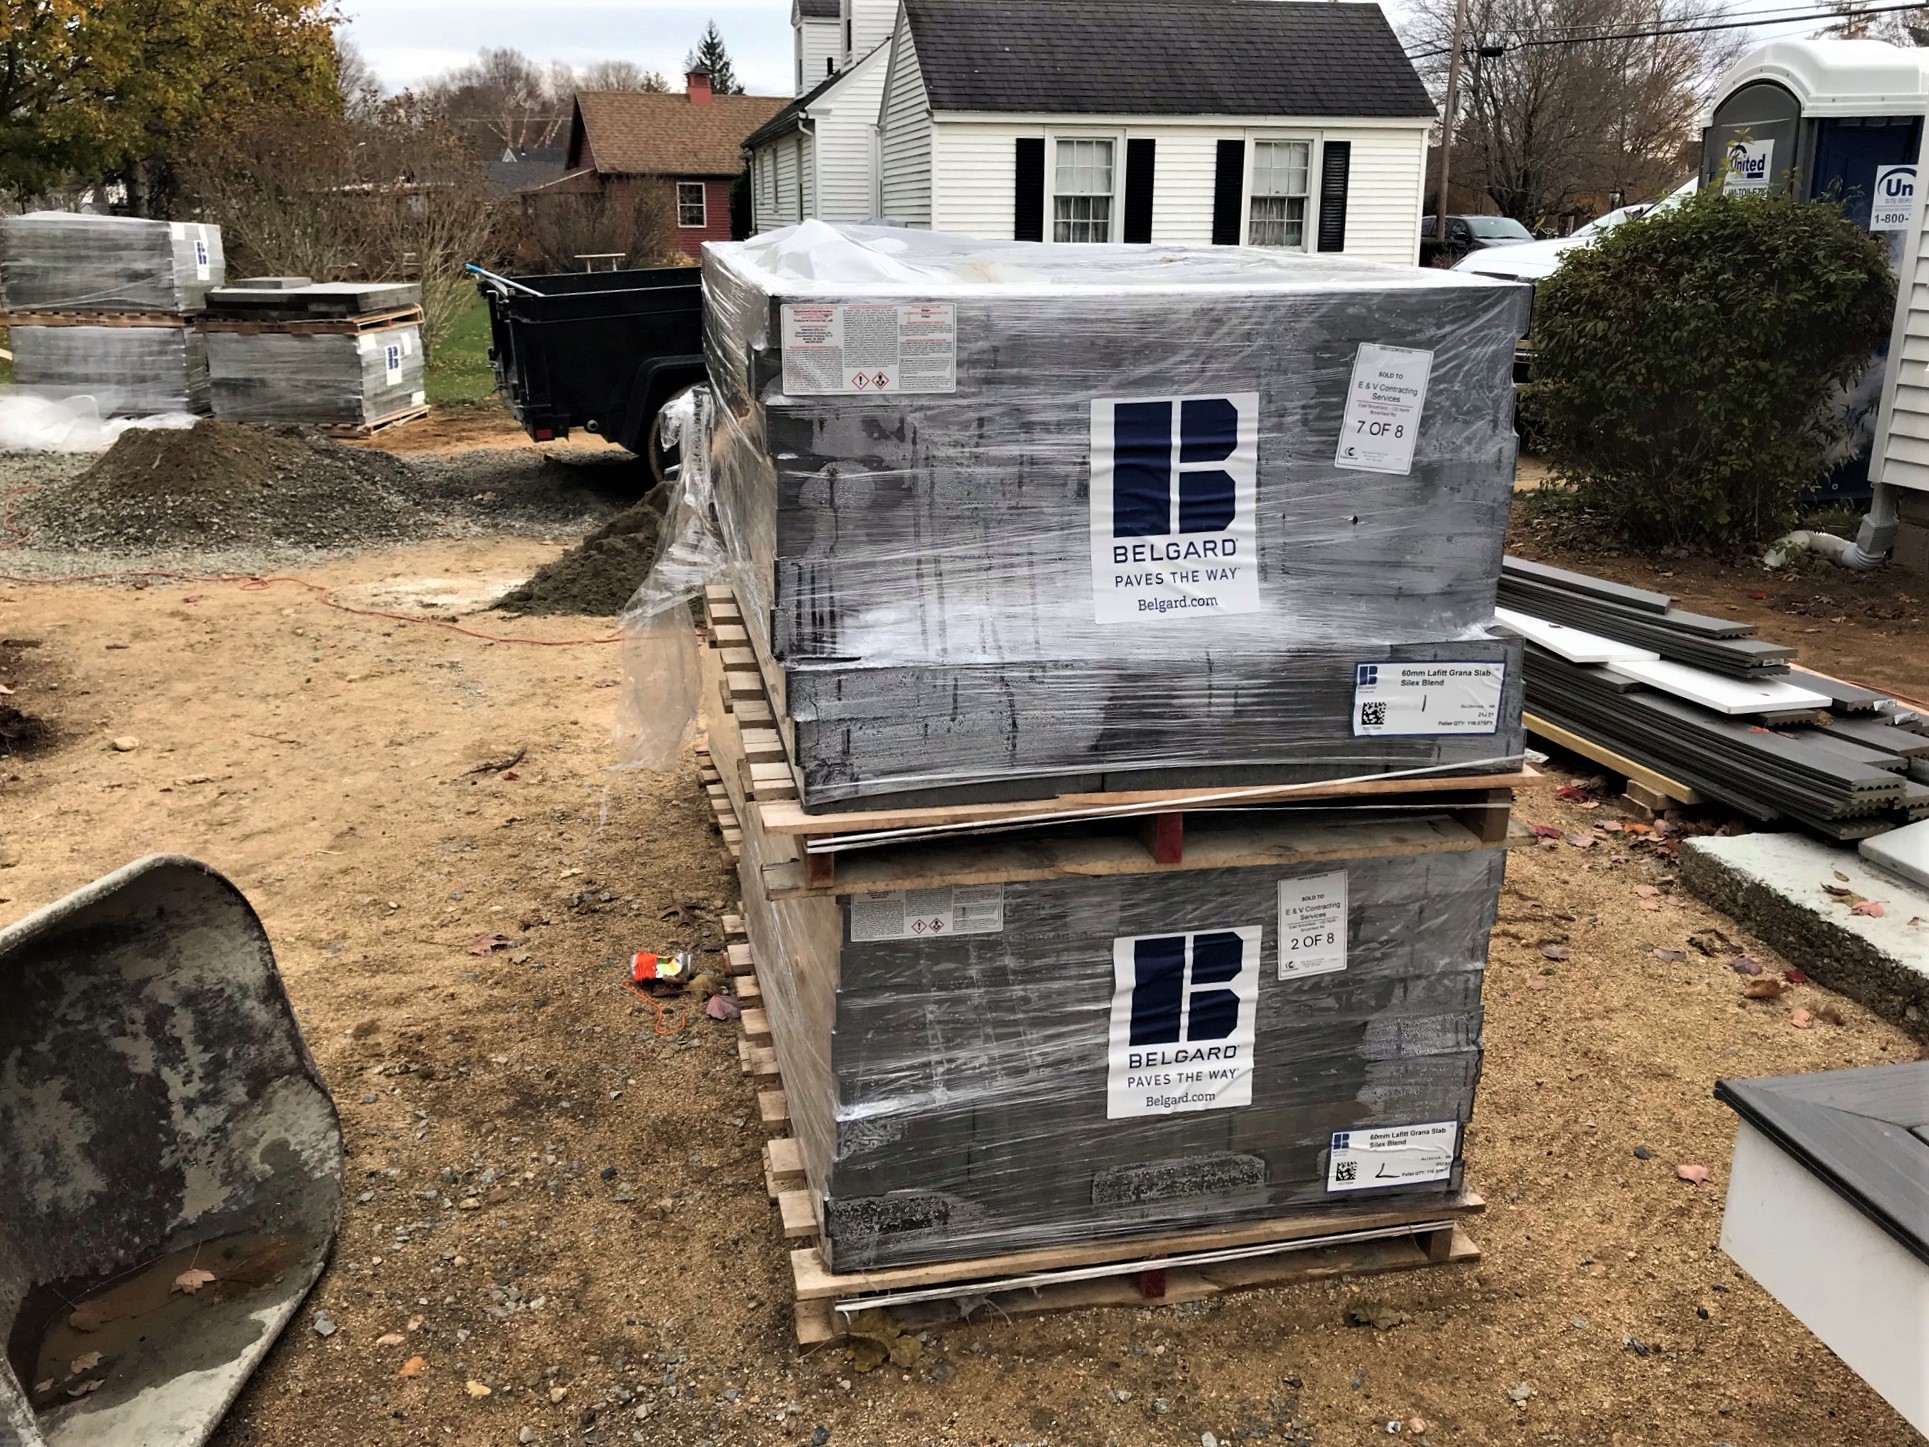
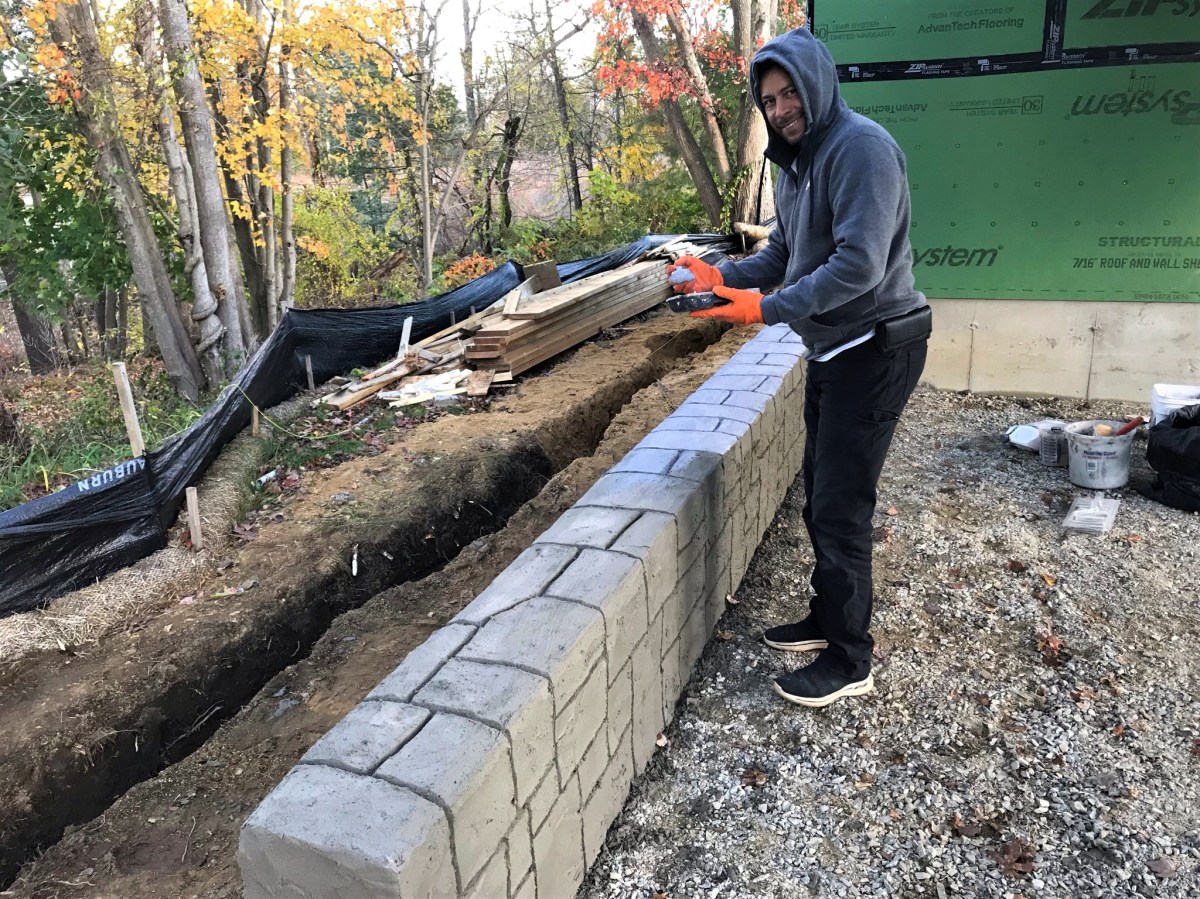
Then, a minor supply-chain-related crisis. Evandro (our masonry guy) found out that the paving stones that we wanted were not available. We would need to scramble. I told Evandro that for this project I was function (what works), and my wife Lynn was form (i.e. she picks colors and similar choices – what looks good). At the time Lynn was at work, and Evandro had a book of stone examples but no physical samples. As it’s a major decision, we asked to see some, and Evandro came back later in the evening (after dark) with probably a dozen full-size paving stones as samples (each weighing maybe 30 pounds). We thought the samples would be, well, small! Anyways, by flashlight we were able to make a choice so Evandro could keep going. The choices are less bluish, but still a nice mixed gray hue.
Original choice – not in stockNext choiceThe paving stone issue.
The next day I was off to Historicon, returning Sunday the 14th.
Week 18 – November 14th to 20th
November 14
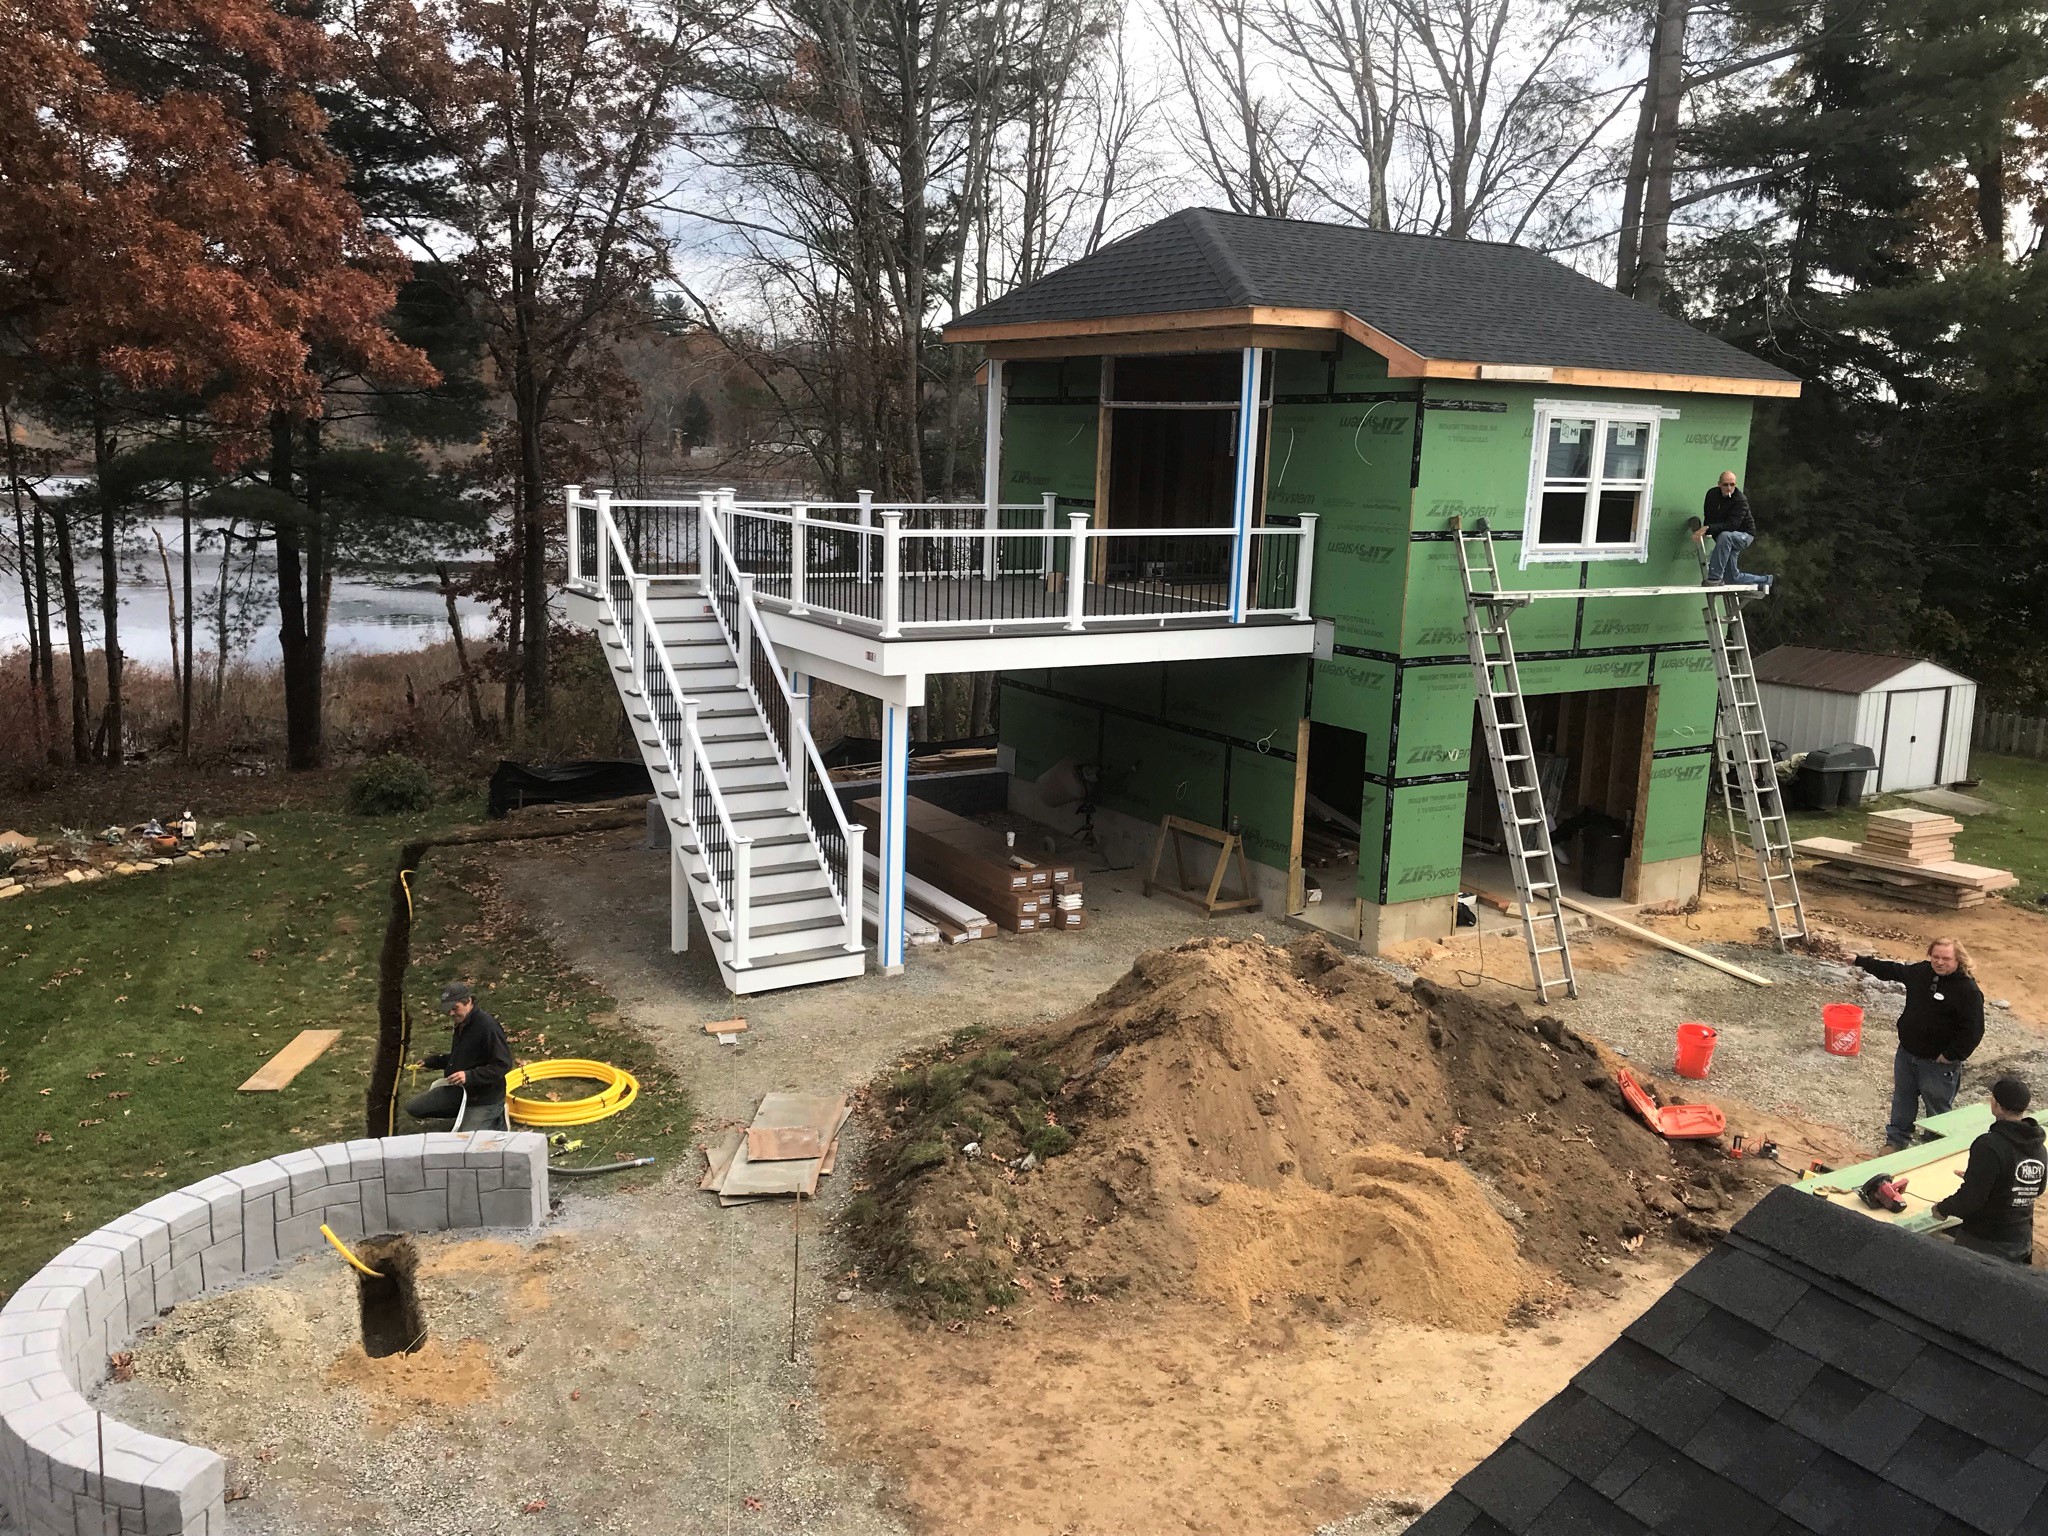
When the sun came up, this was the progress while I was away. You can see progress on the patio and the doors and windows.
Sunday morning November 14th showed me this!
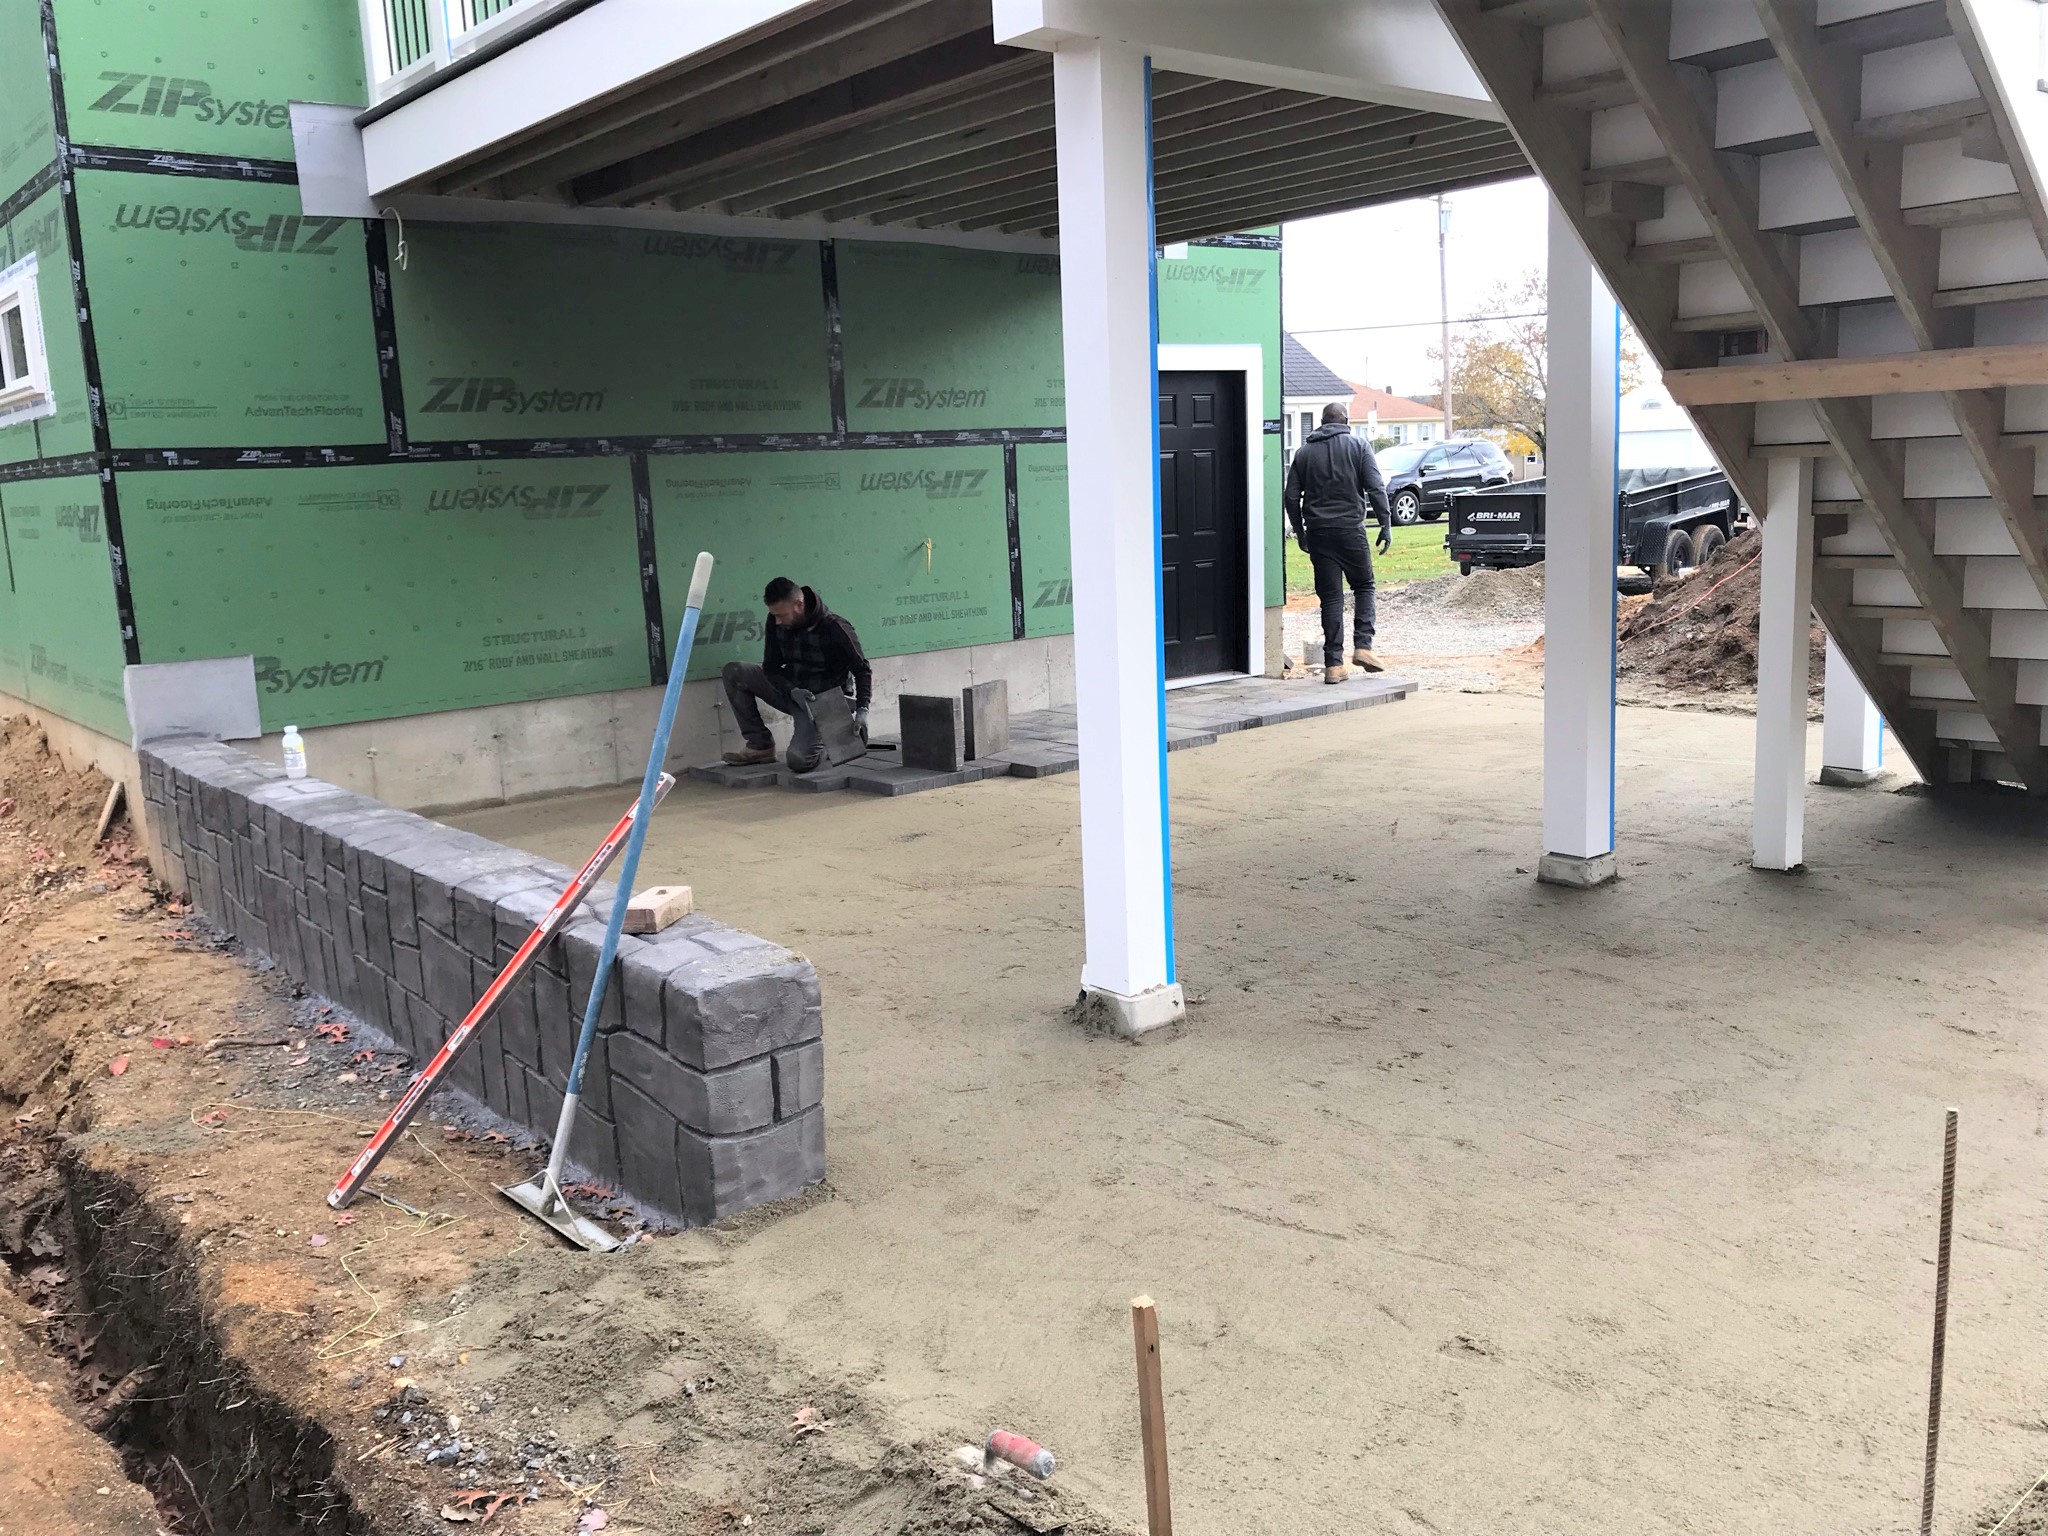
However, Evandro was still at work that Sunday trying to take advantage of the good weather.
Lots of paving stones.
Paving stones going in on smoothed sandReverse angle
The other progress was nice as well on doors and windows.
Deck doorwaySmall garage door
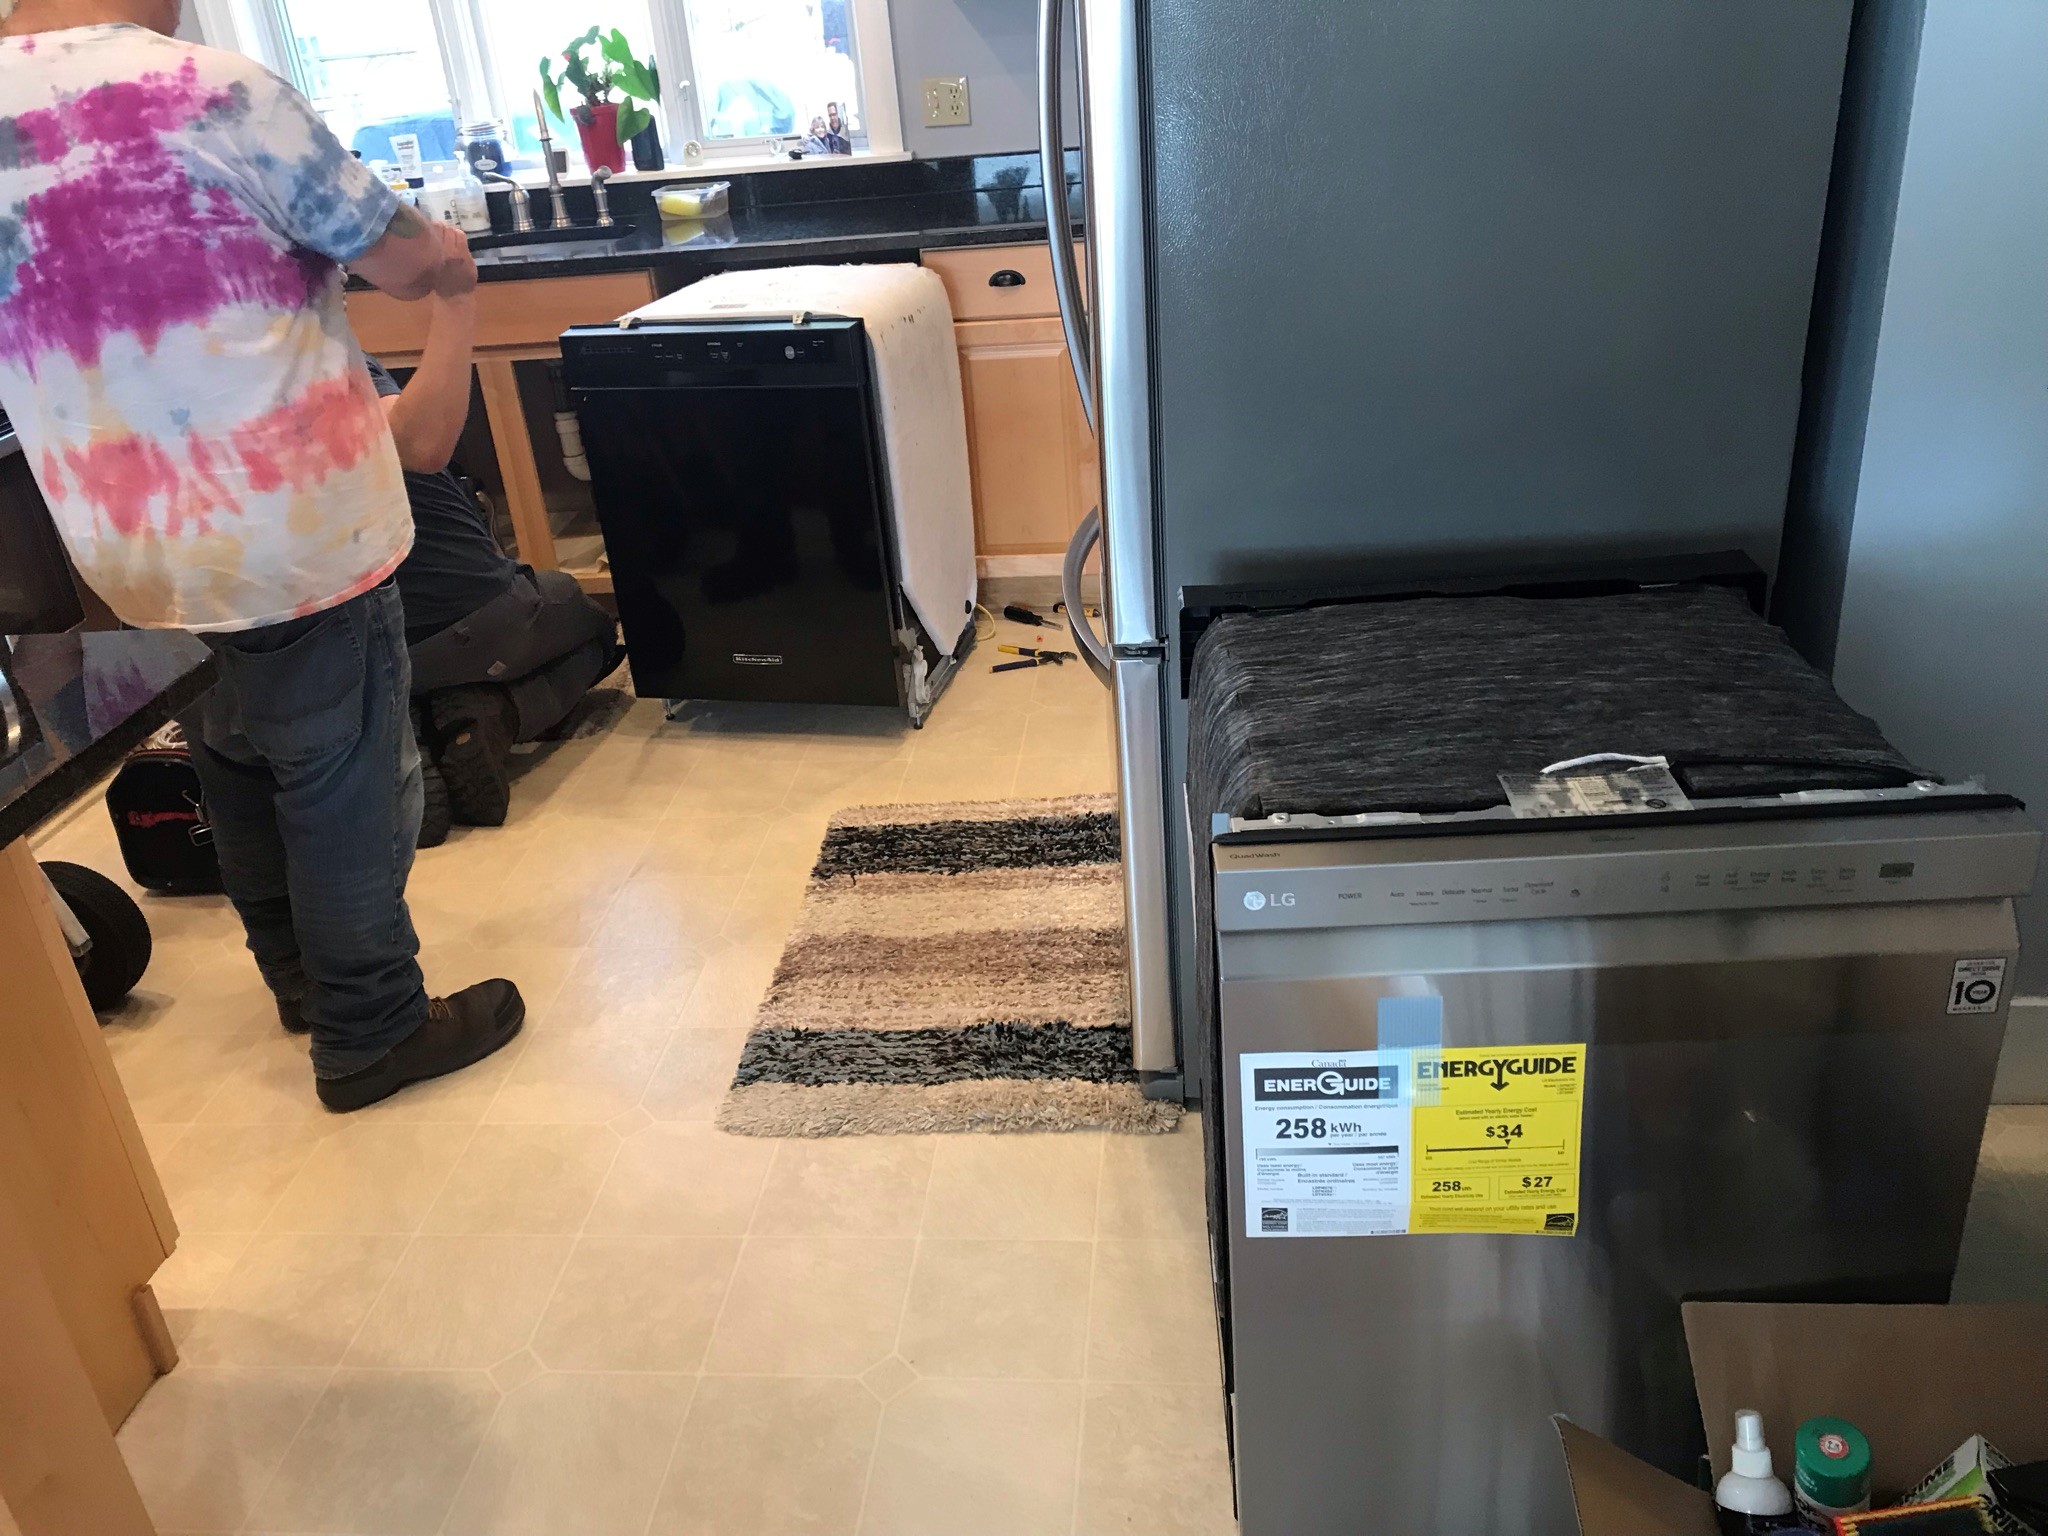
While I was away, our dishwasher decided to shed its mortal coil – or at least to begin to leak. This was not part of the project, but needed attention as we also discovered that we needed new valves under the kitchen sink. Luckily we got a plumber to replace the valves and found a dishwasher model locally for delivery later in the week.
November 15
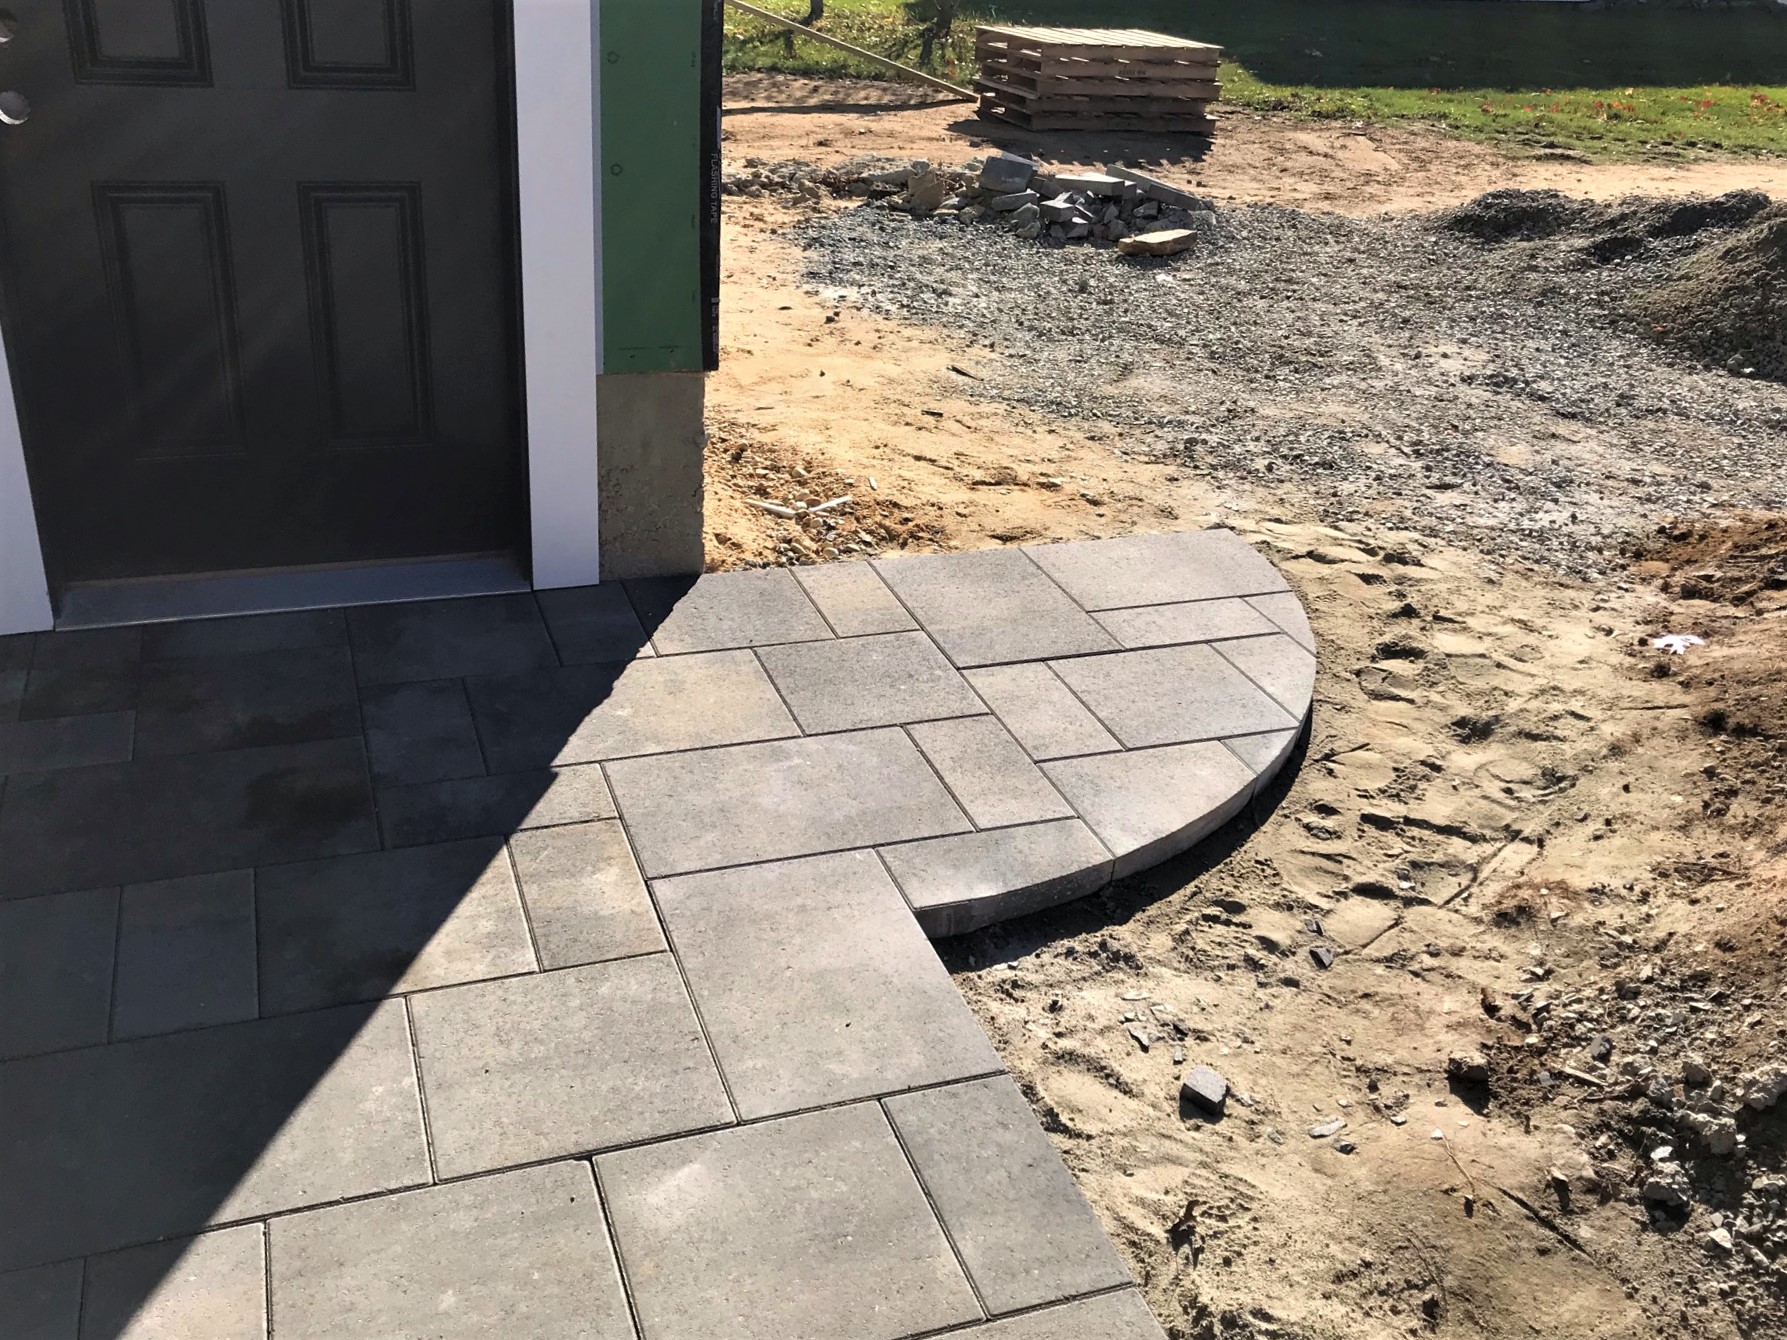
The patio made significant progress on the 15th getting under the stairs.
November 16
On the 16th, Evandro was well into prepping the fire pit for paving stones – but the gas line needed inspection before we could go further.
Gas line passed inspectionThe artistic corner cut by the garage.
November 17
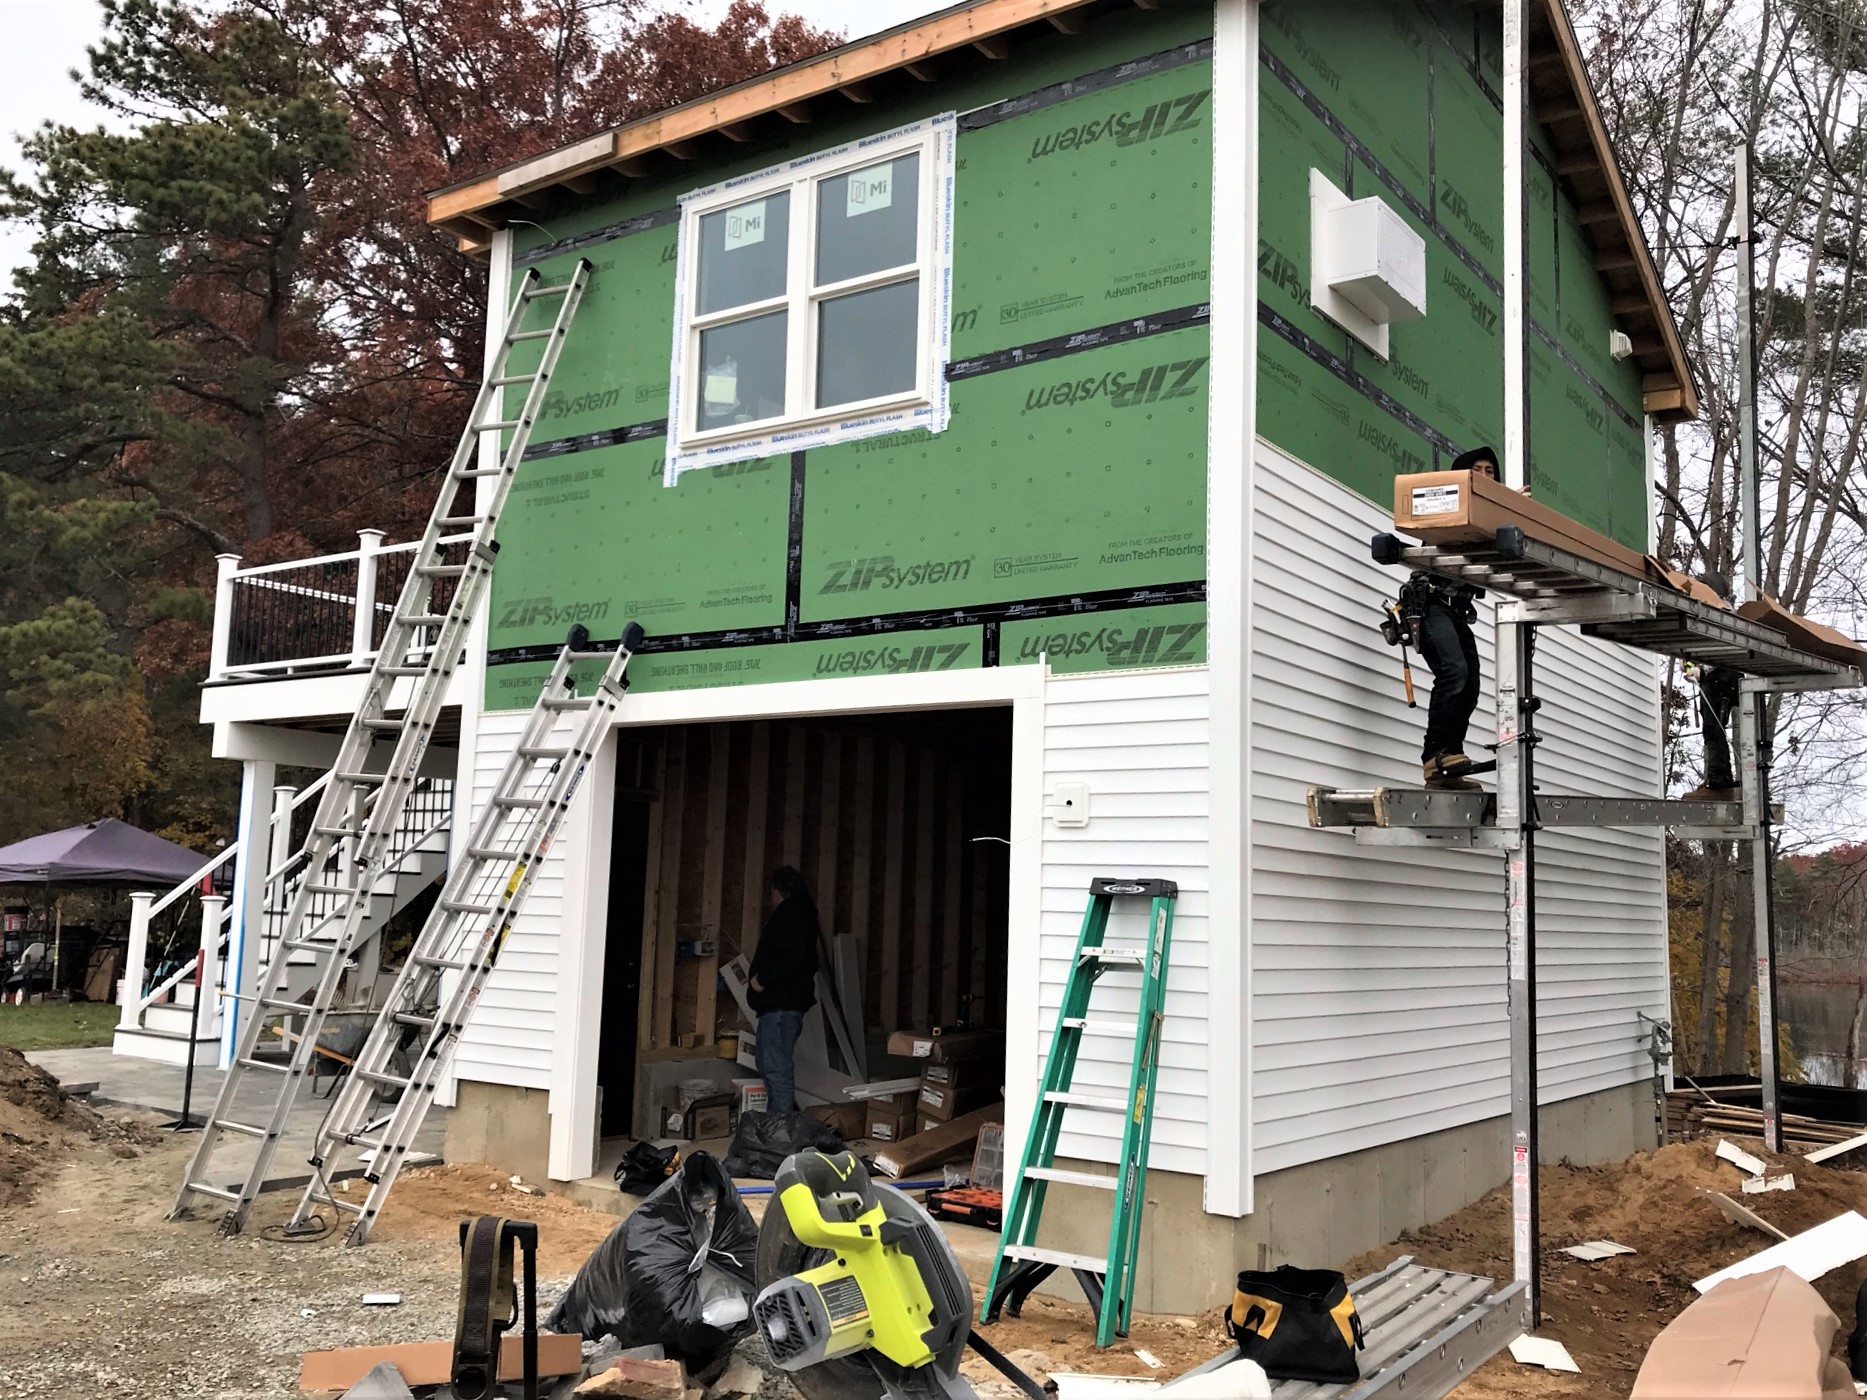
The morning of the 17th there was a heavy frost – yes, my roof is not normally white. Jonny Victor was early and got going on the siding installation.
Siding going up.
November 18
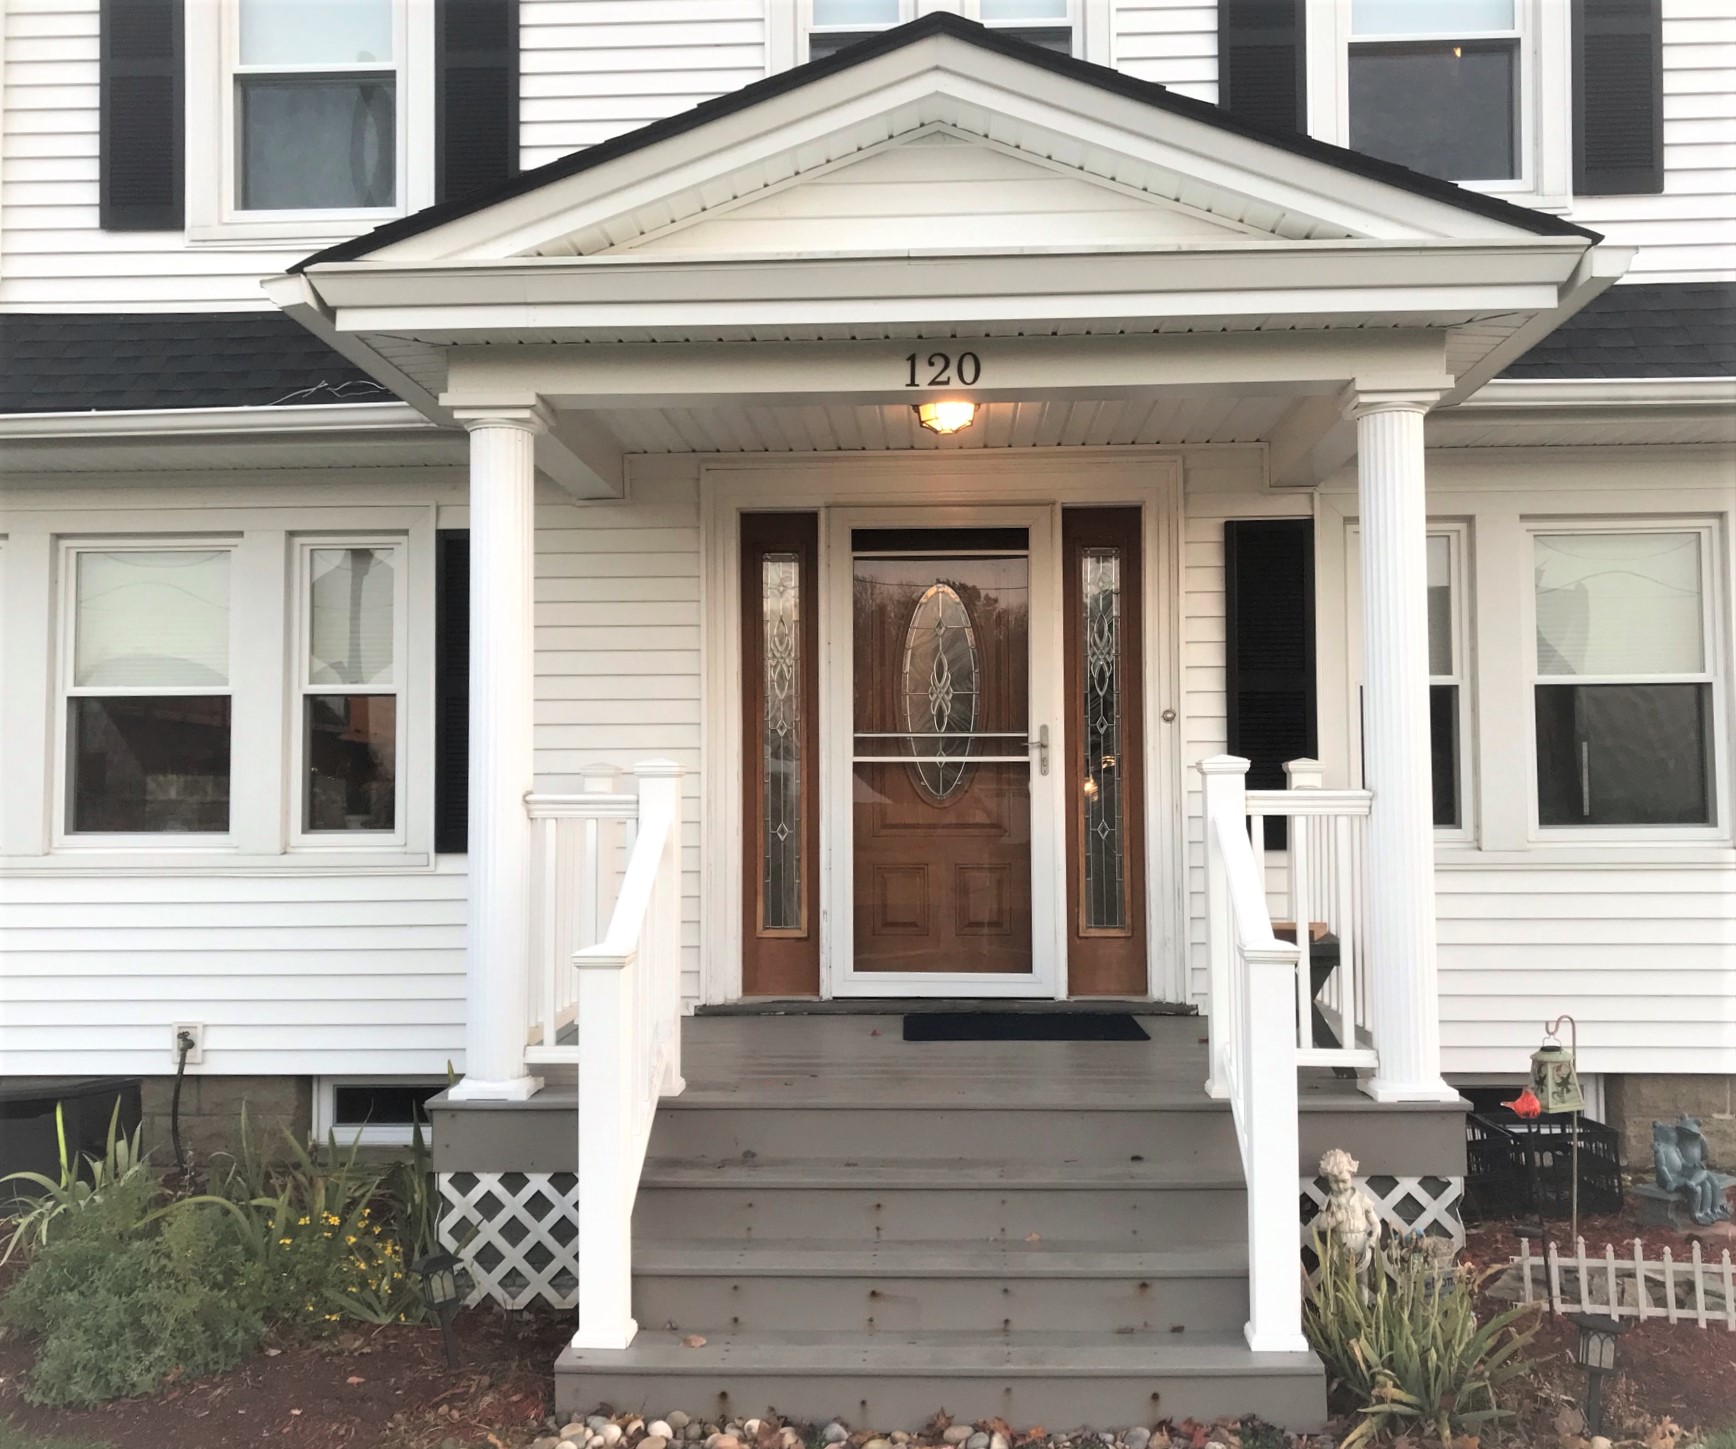
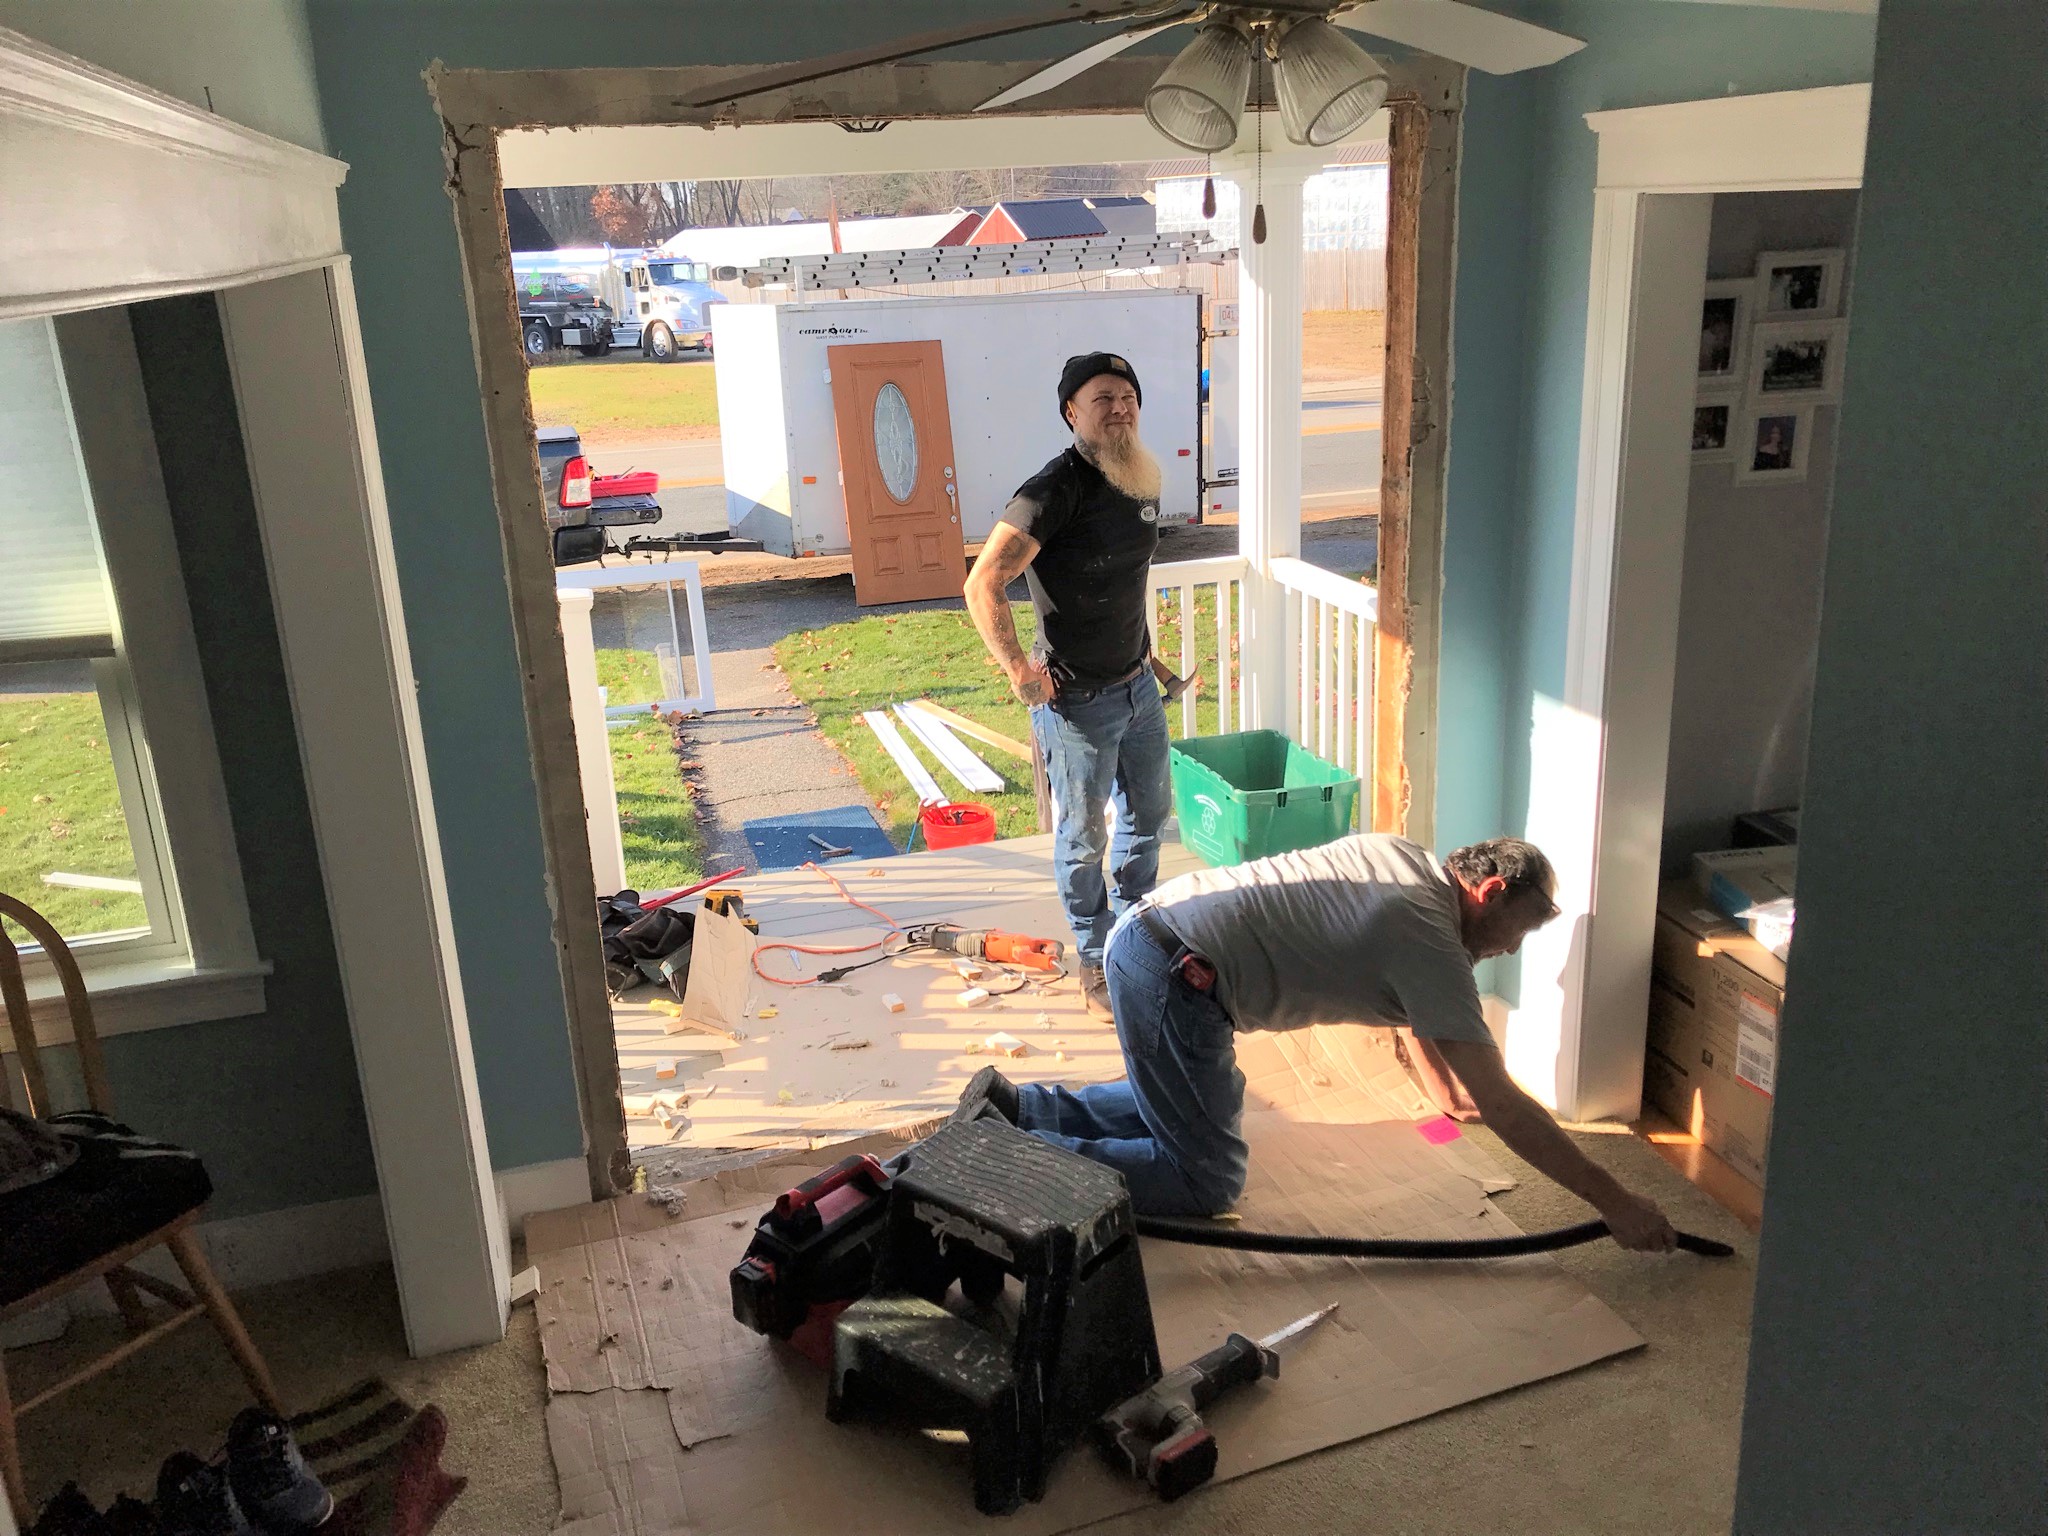
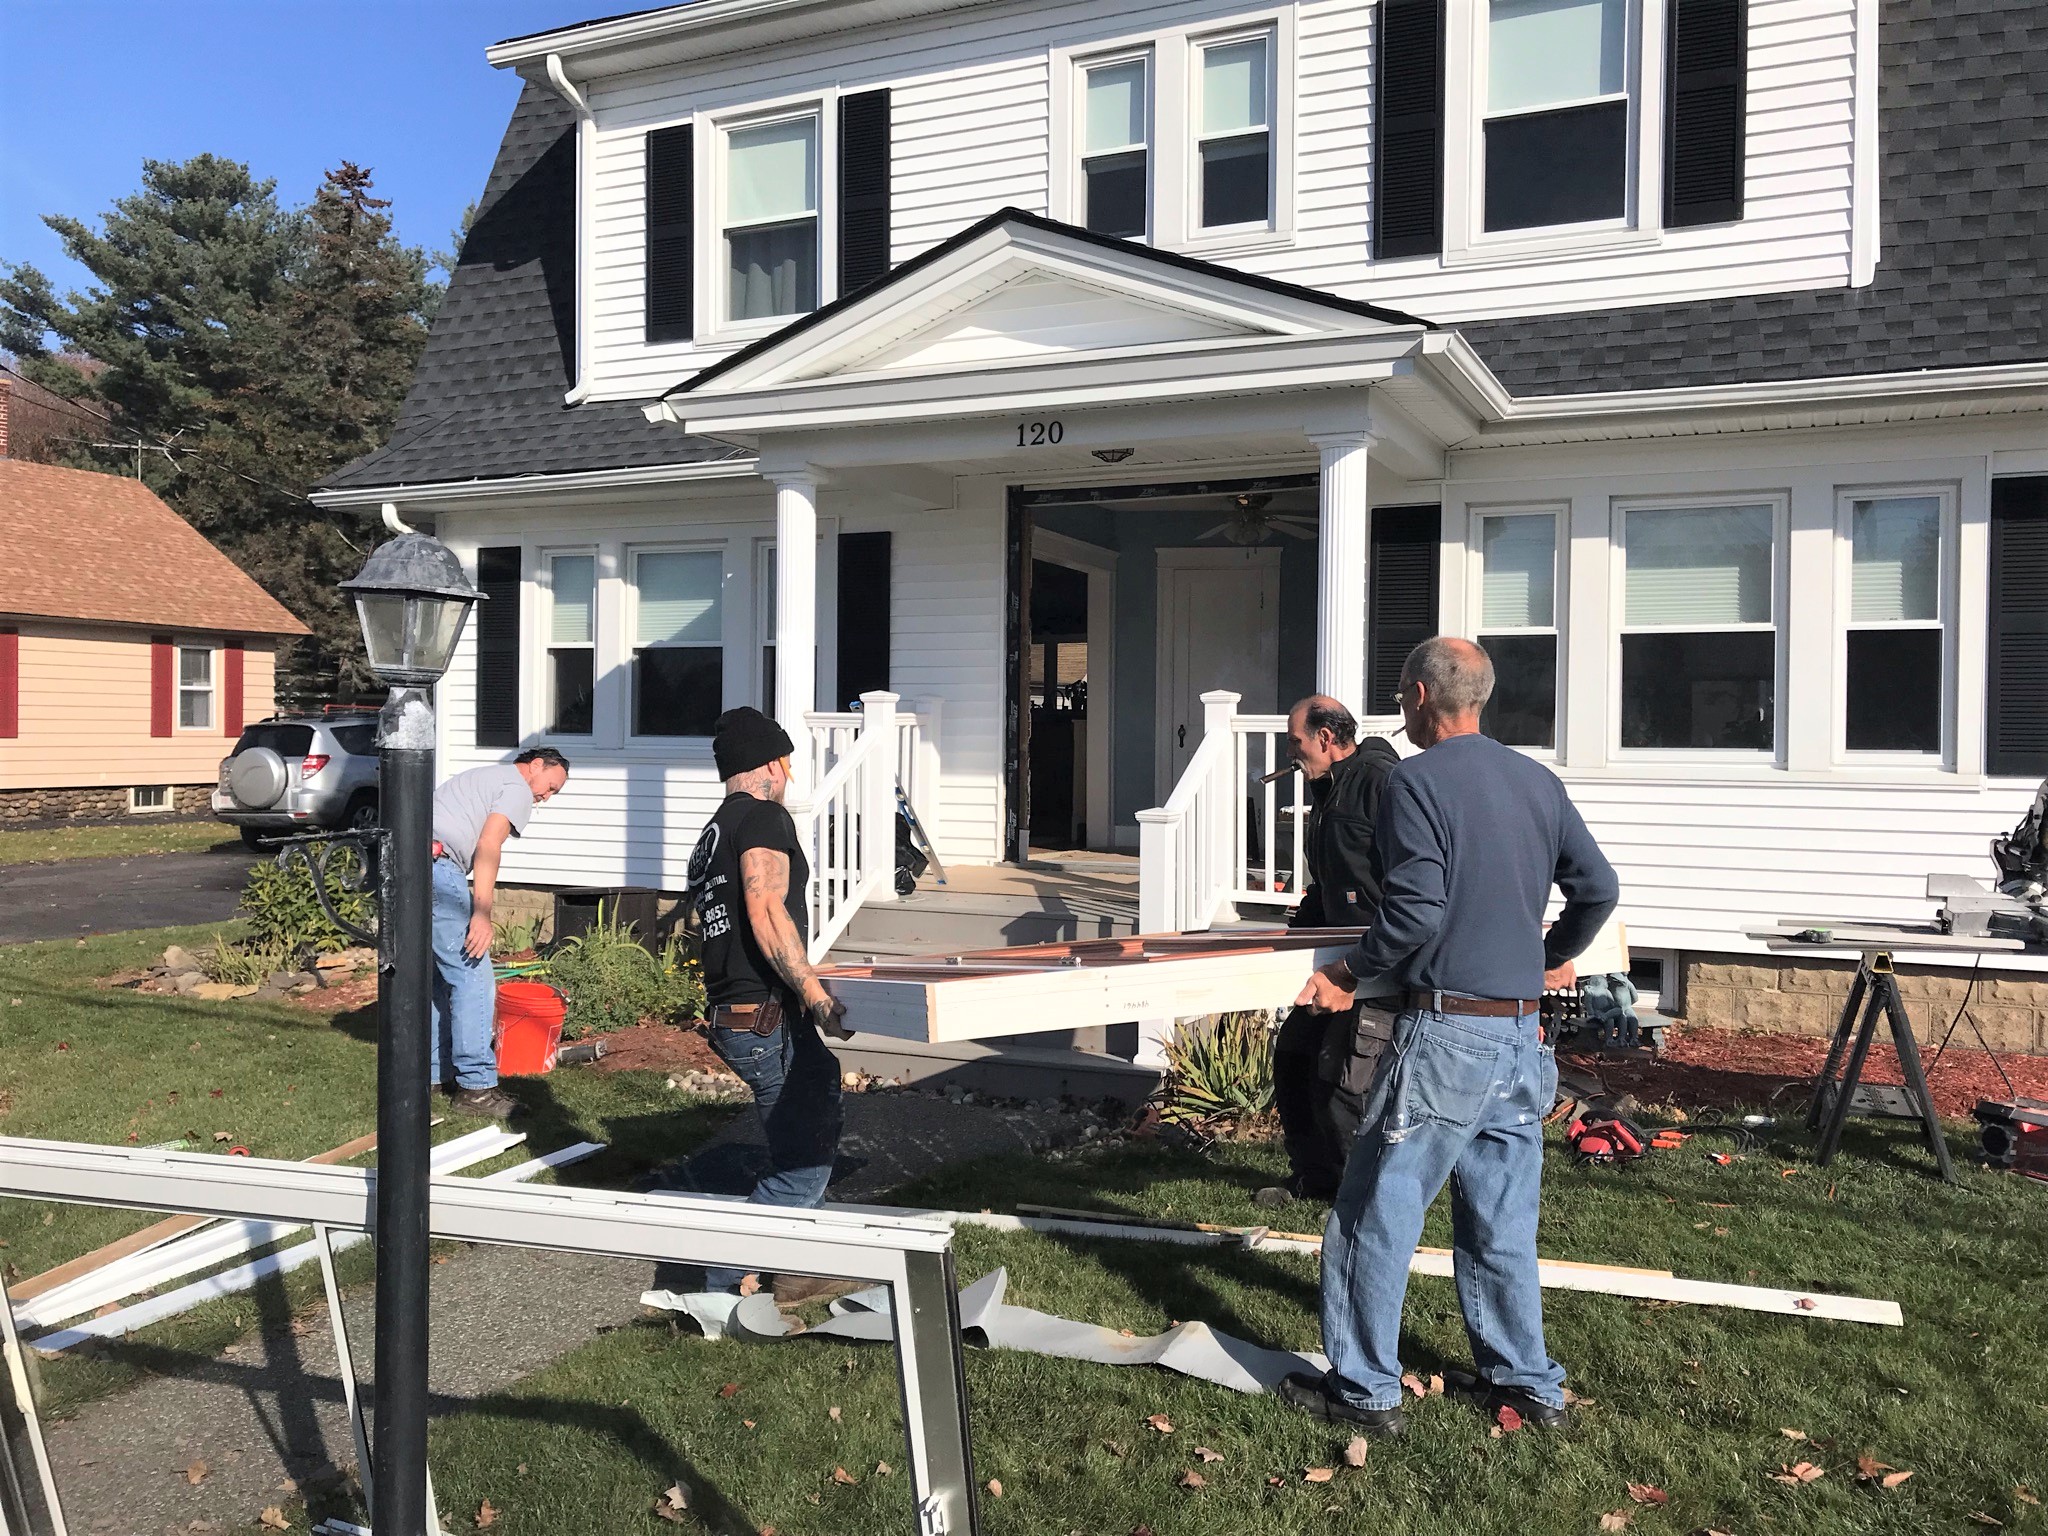
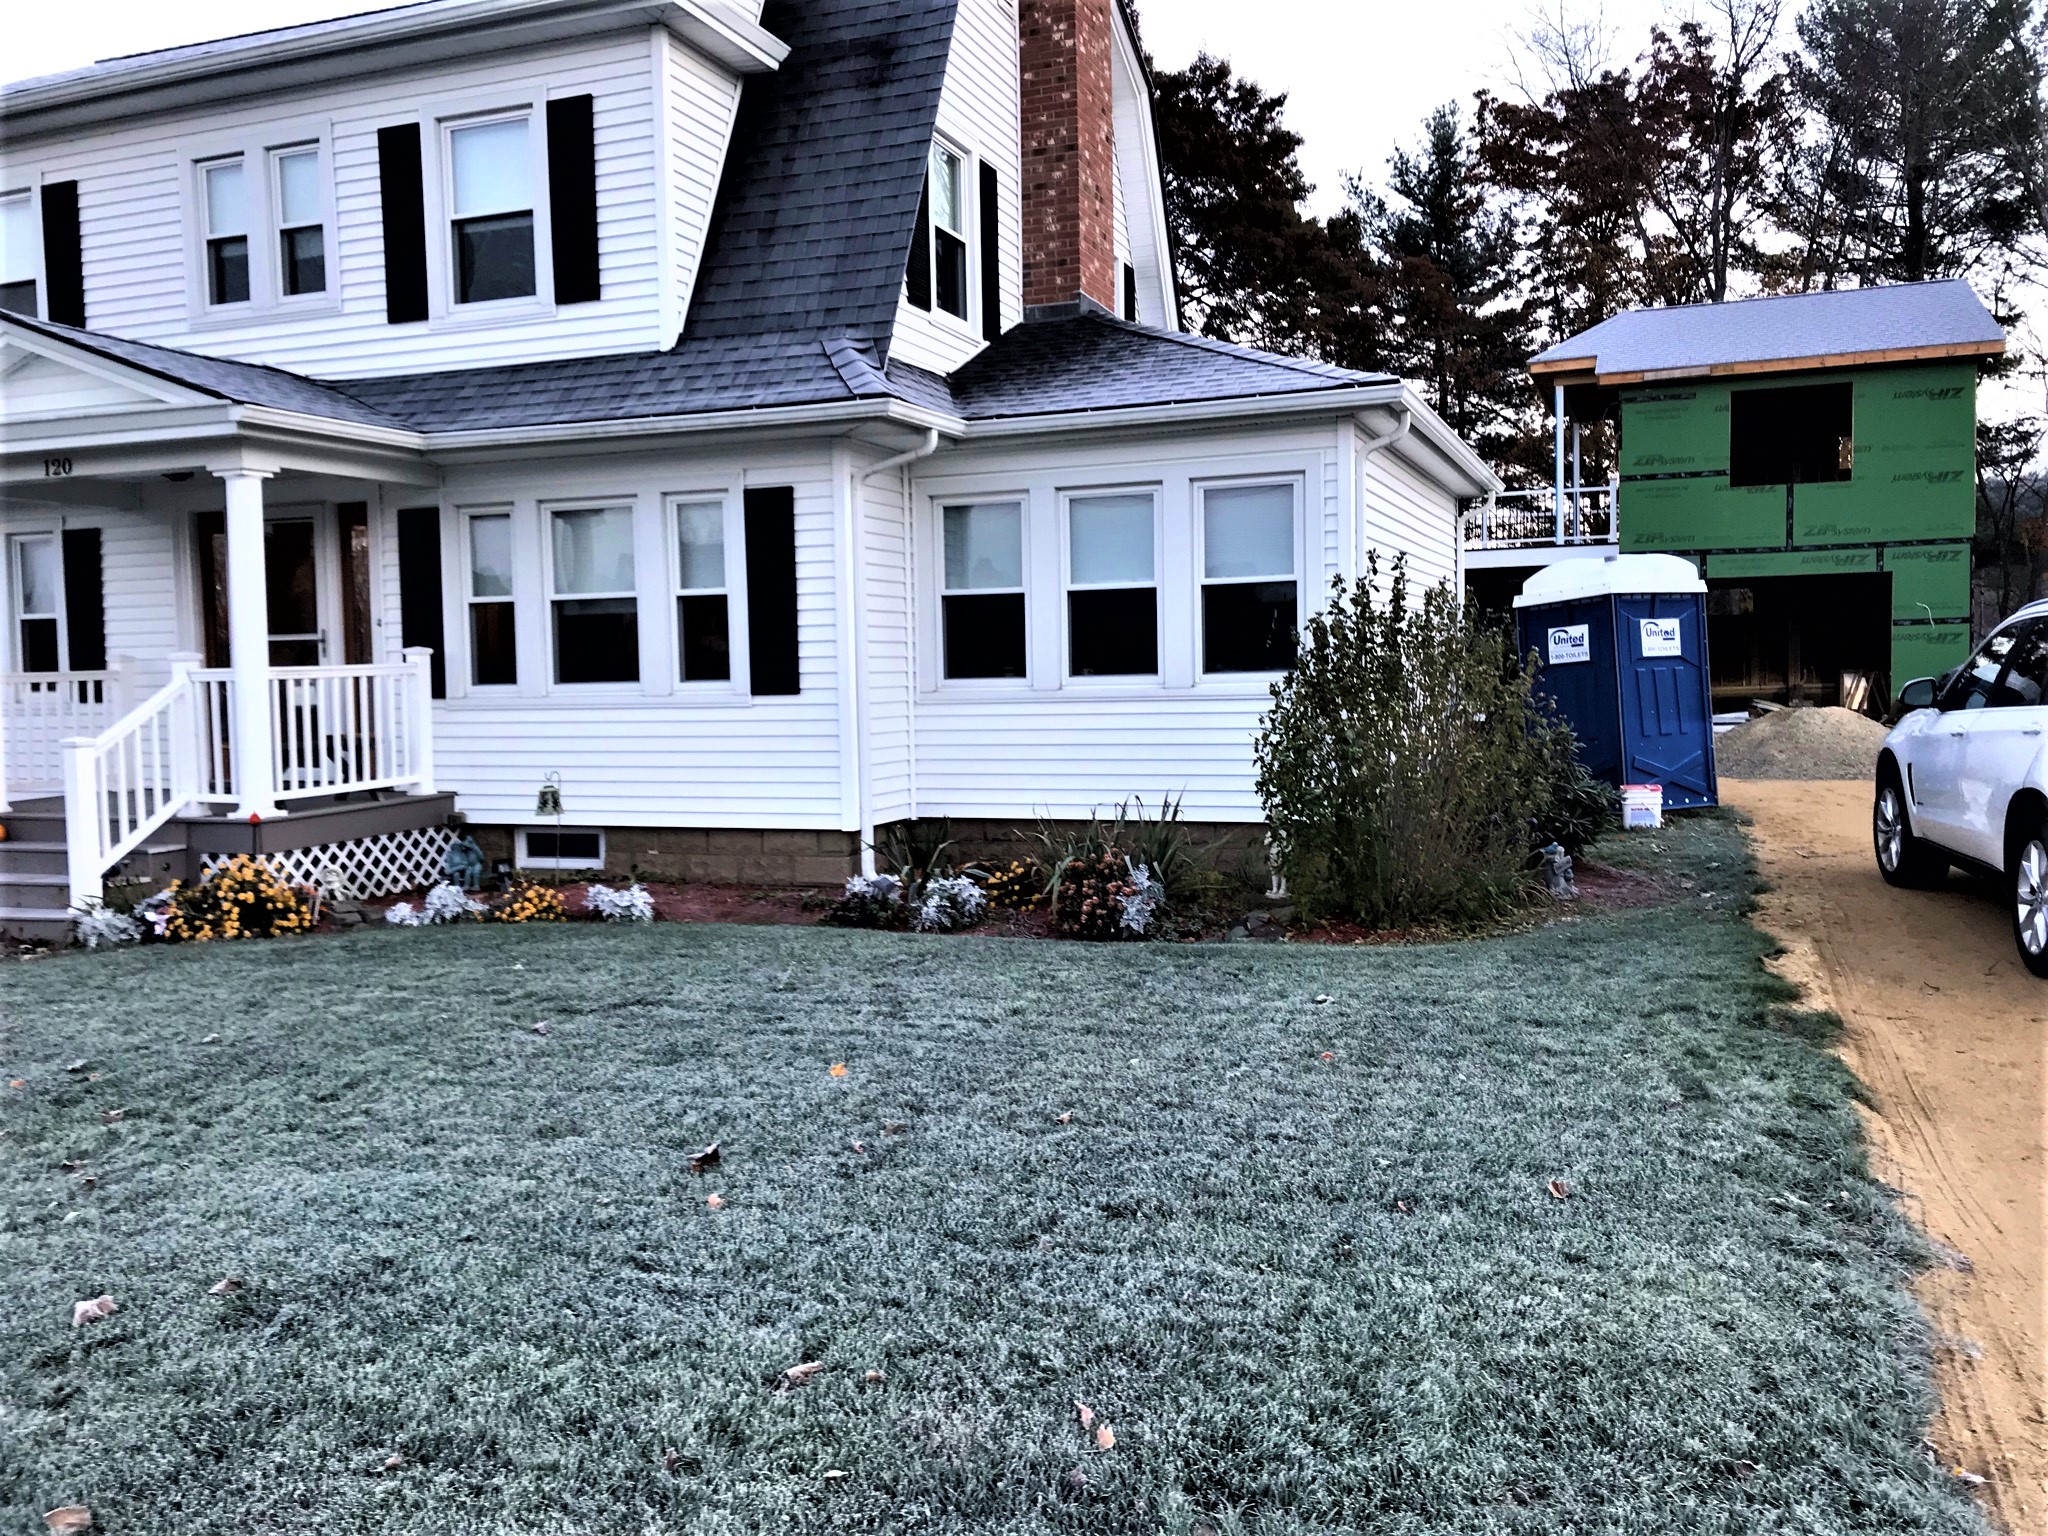
The weather warmed up significantly on the 18th, which made it an ideal day to replace our front door. It had been previously ordered to be installed in the summer, but the retailer screwed up and sent a door with no stain on it. That was sent back, and finally the new one arrived.
The old front door with the storm door over it. The storm door had trapped sunlight (and heat) and delaminated our front door, so it needed replacement.
The old door and side panes are removed.The new door is carried in.
Inside showing the new door, unfortunately it’s defective!
The door width was 1/8″ wider in the middle than at the top! So, it sticks, and will need to be redone – unfortunately – but as it’s a manufacturing defect we should be ok with a replacement. Timing in November is not good, and it only gets colder. At least the old one is gone now.
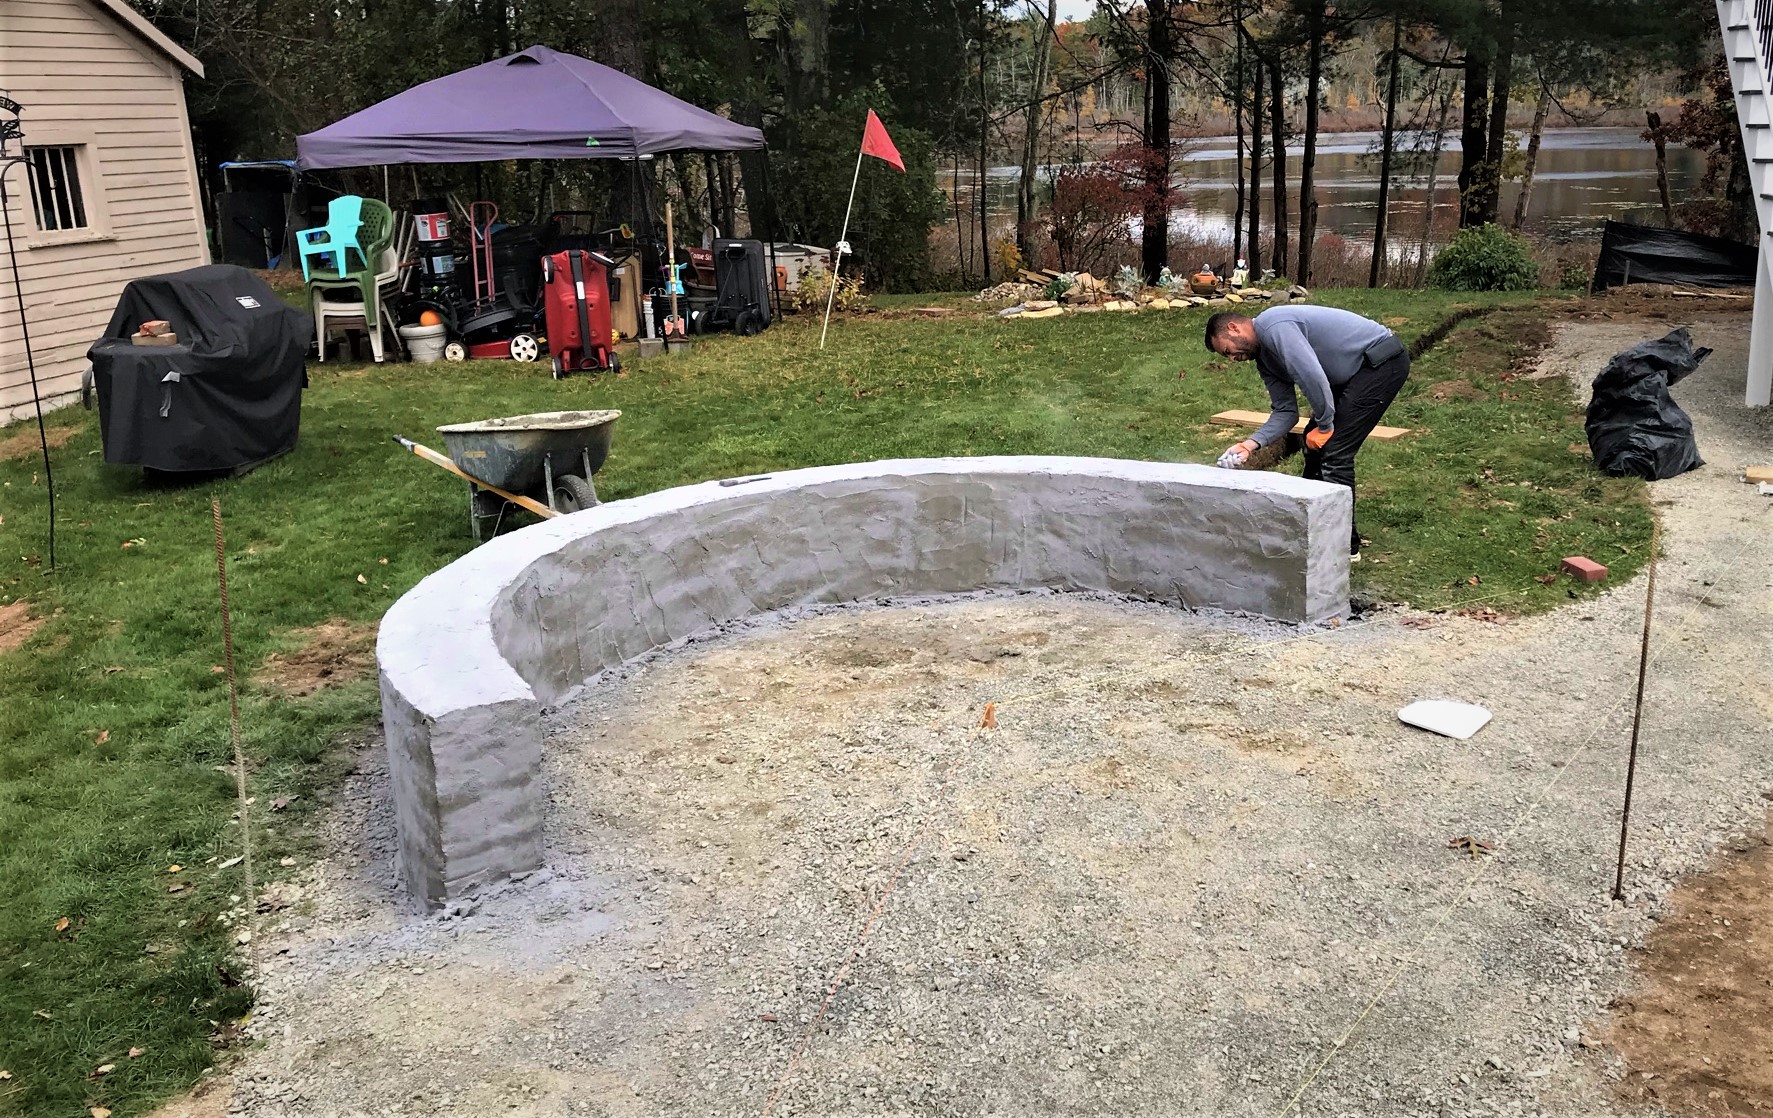
Evandro progressed on paving the fire pit.
And on the same day, the dishwasher was delivered for installation – so yeah, busy.
Out with the old……in with the new.New dishwasher installation happening in the midst of the front door installation.
November 19
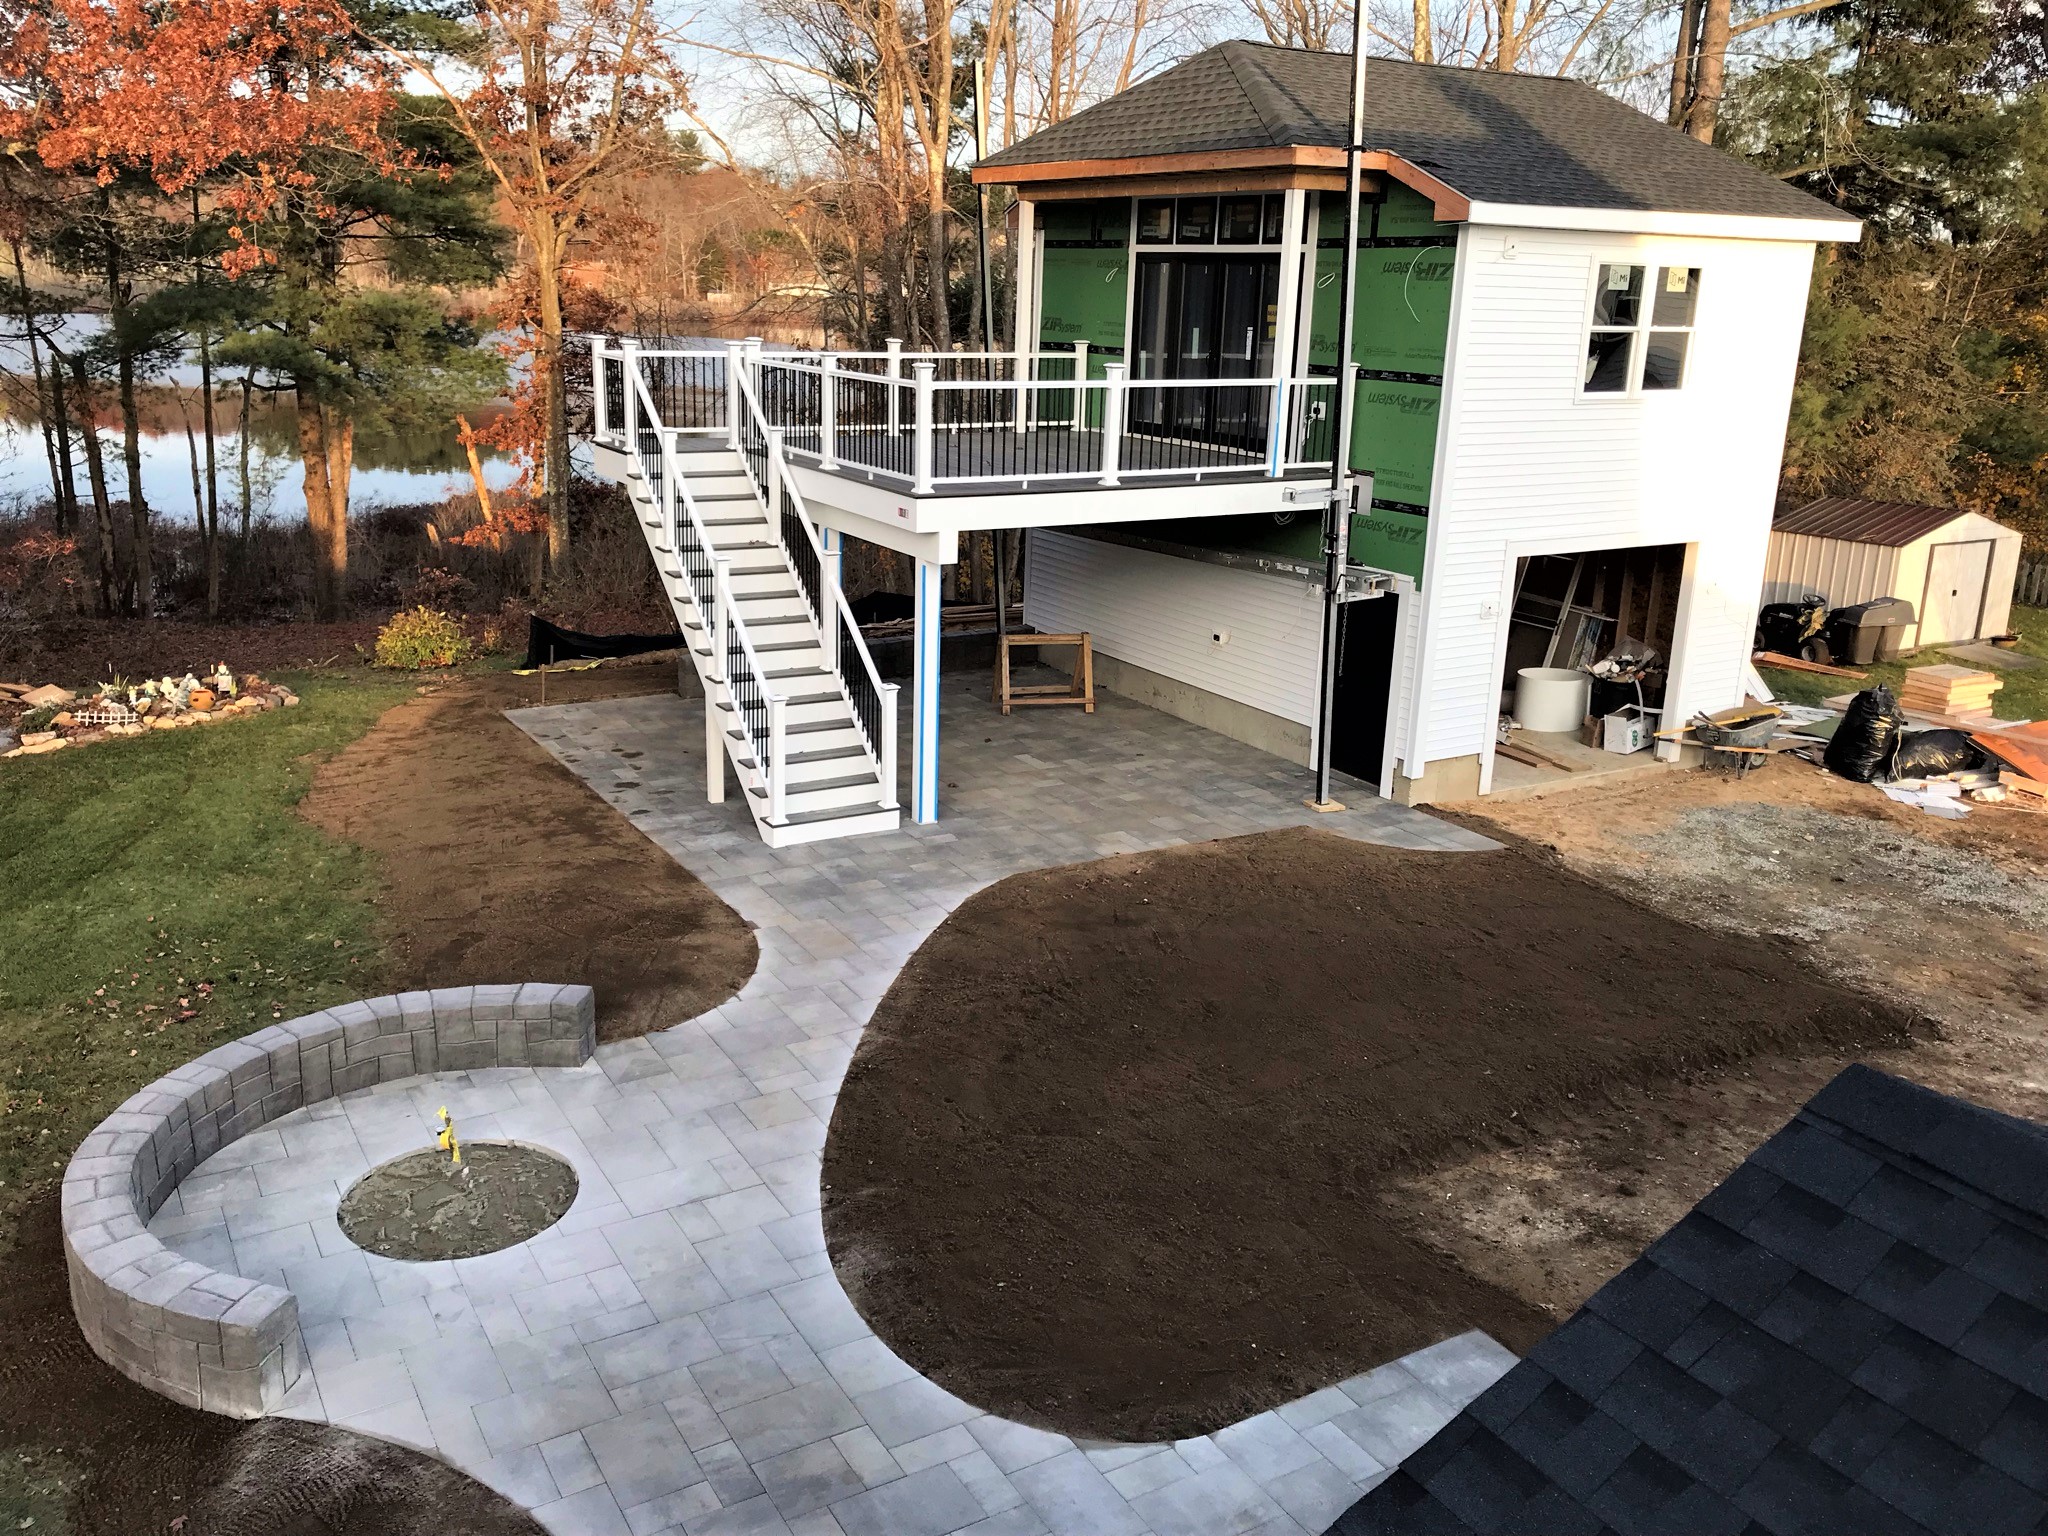
Early morning Friday the 19th showing siding and patio progress around the fire pit. All pavers are cut to shape.
Electrical work connecting the power in the house to the garage went on – plus a fluorescent light was replacement in the cellar with a safer LED.
November 20
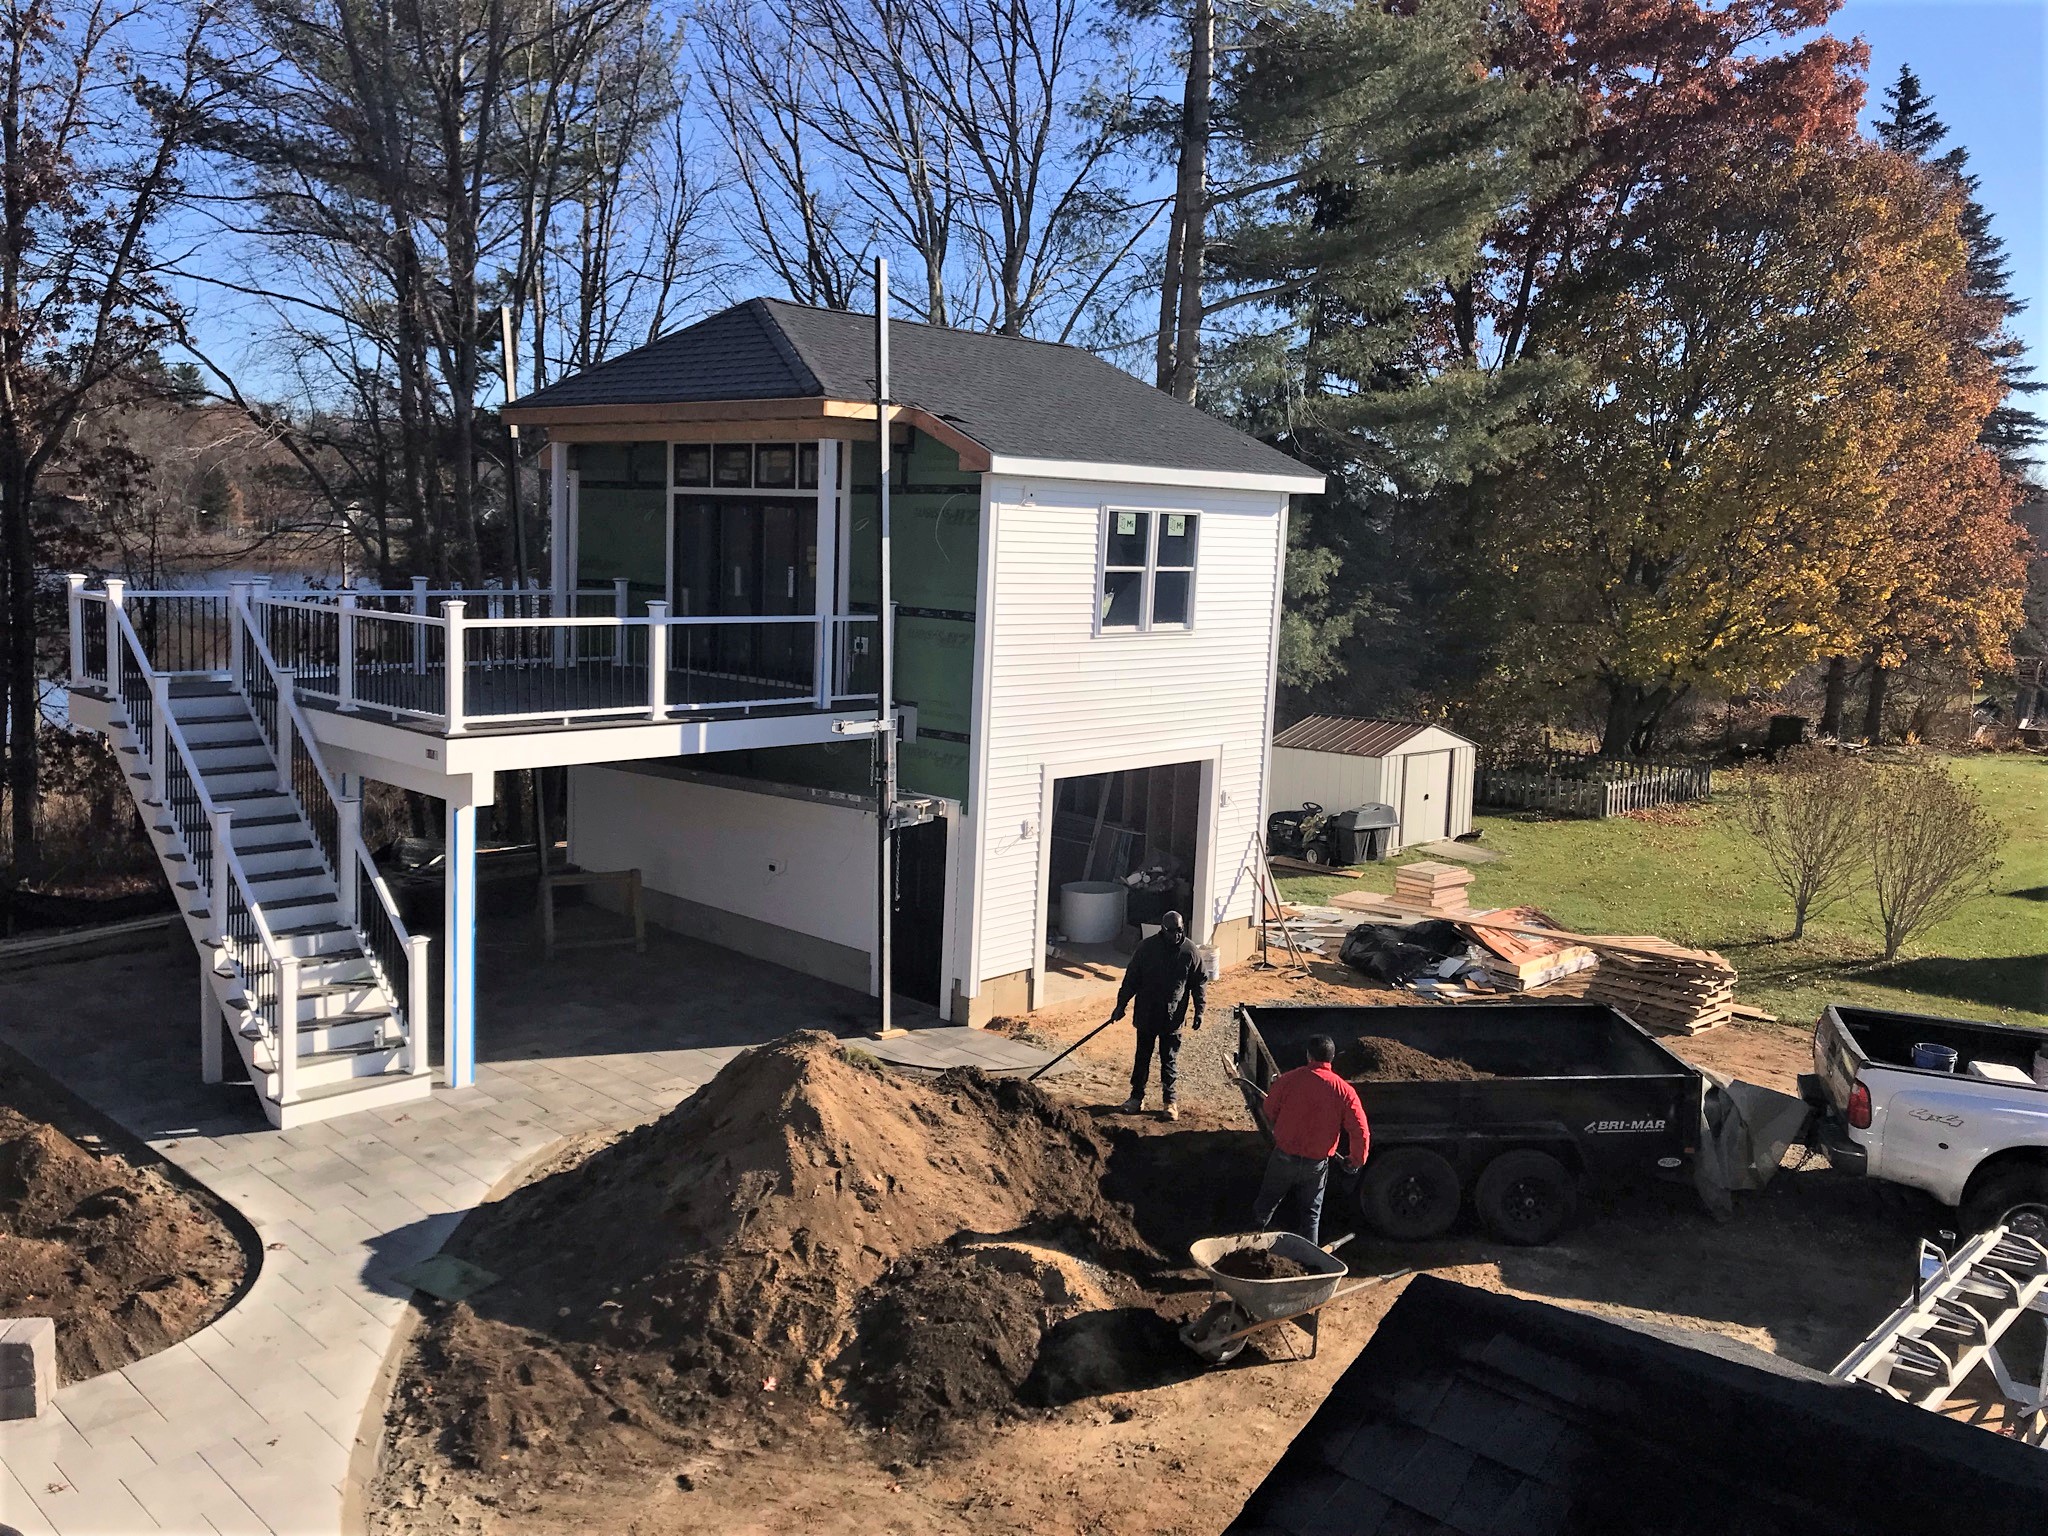
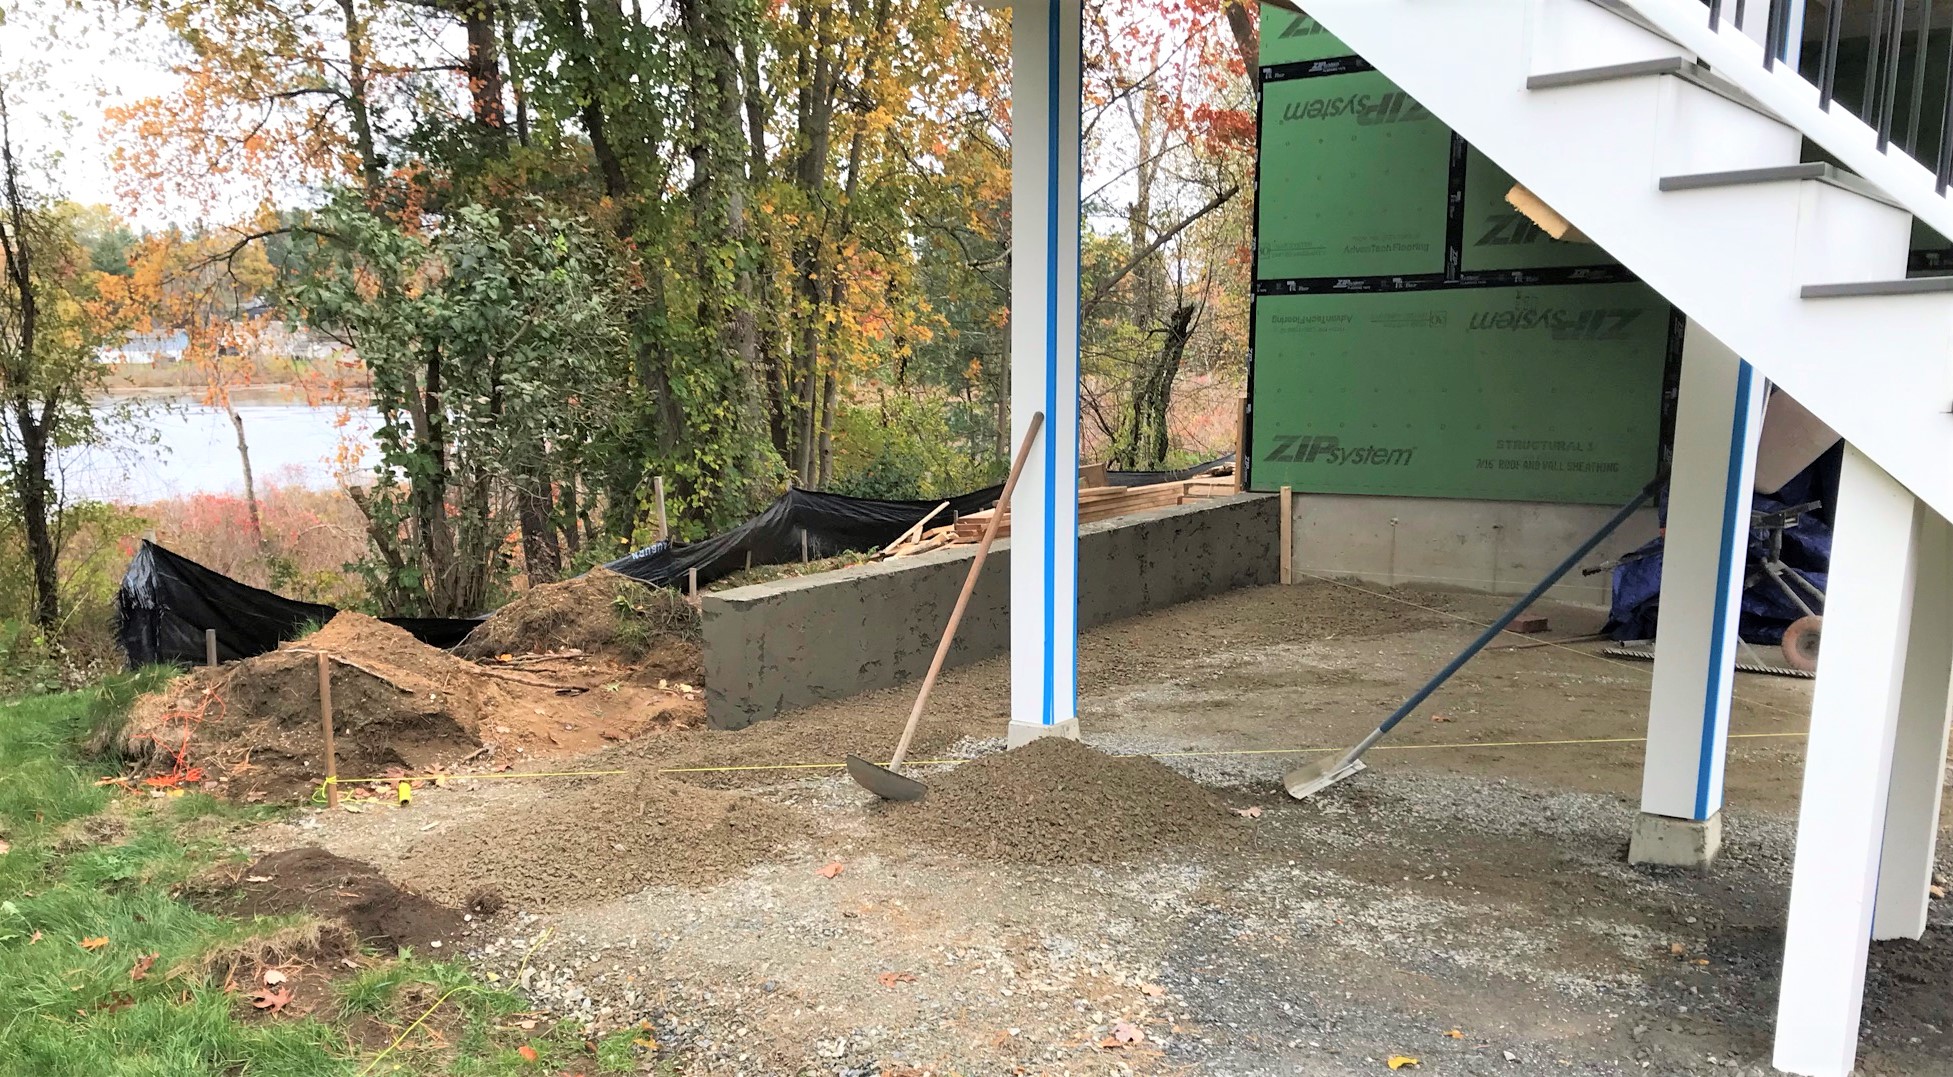
On Saturday, Evandro’s crew kept going – this time attacking the overburden pile of dirt they had previously excavated for the patio and gas line by hand. This was needed as we expected to get the driveway paved with a base course of asphalt within a week.
Moving the overburden by hand.
And it’s gone!
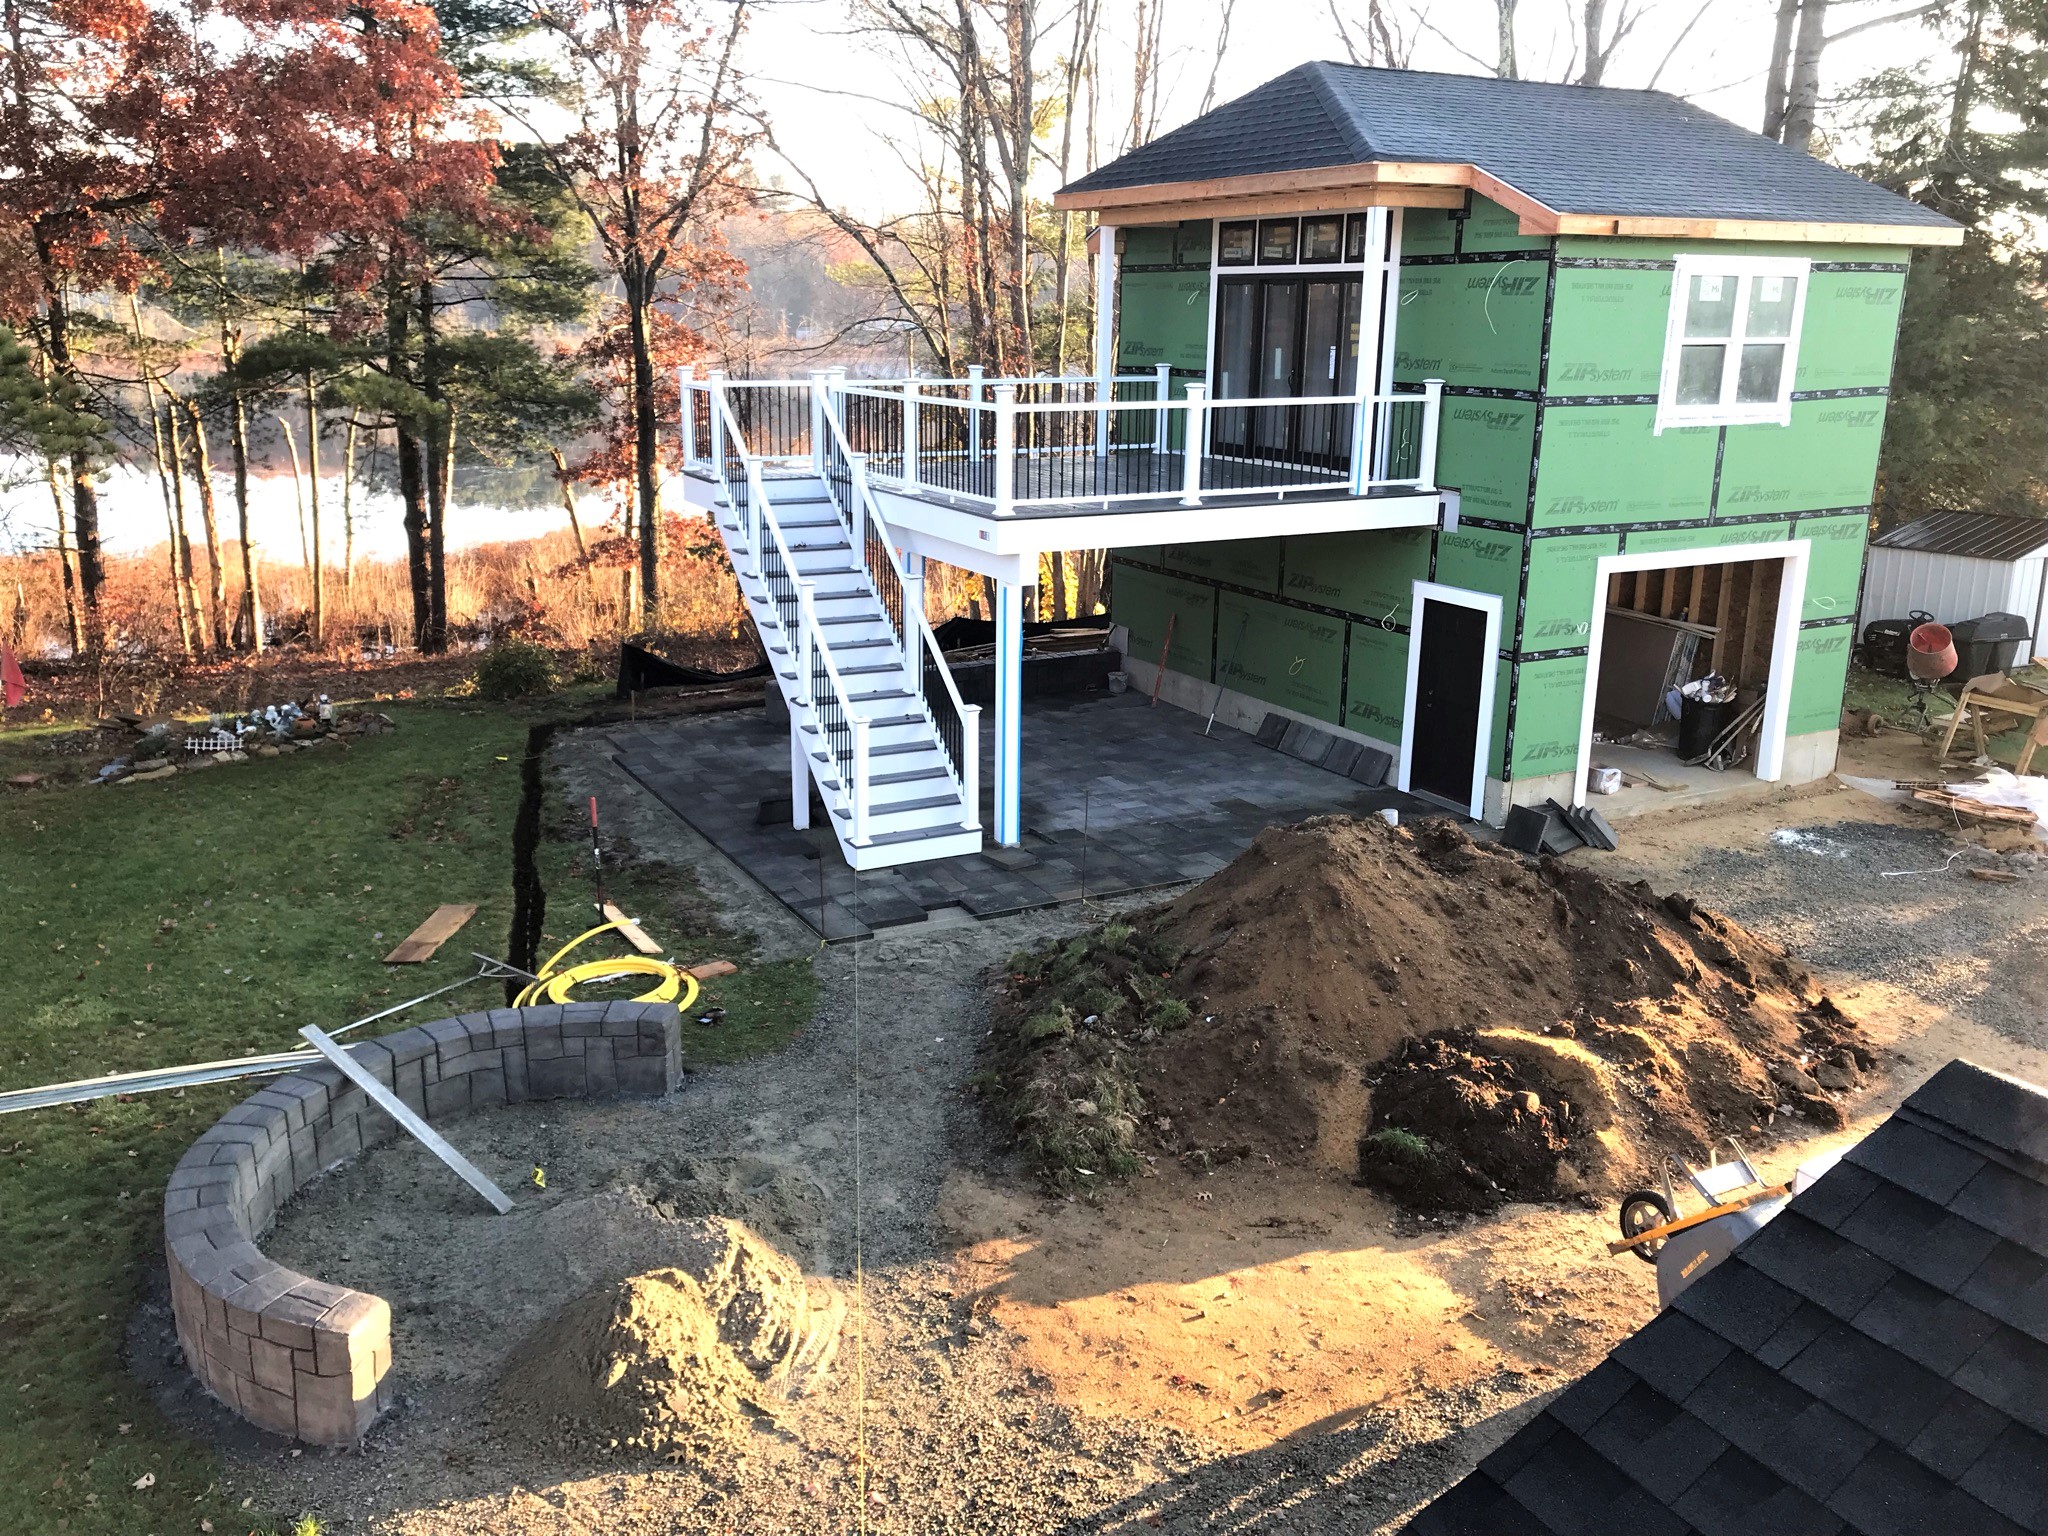
Progress at the end of a very busy week.
Week 19 – November 21st to 27th
November 22
On the 22nd, I was scheduled for minor surgery at noon – and I checked out the project. Siding work continued.
Siding work continuing by the deck door.
The surgery went ok, but I was pretty much out the rest of the day! Anesthesia and I do not work well together…
November 23
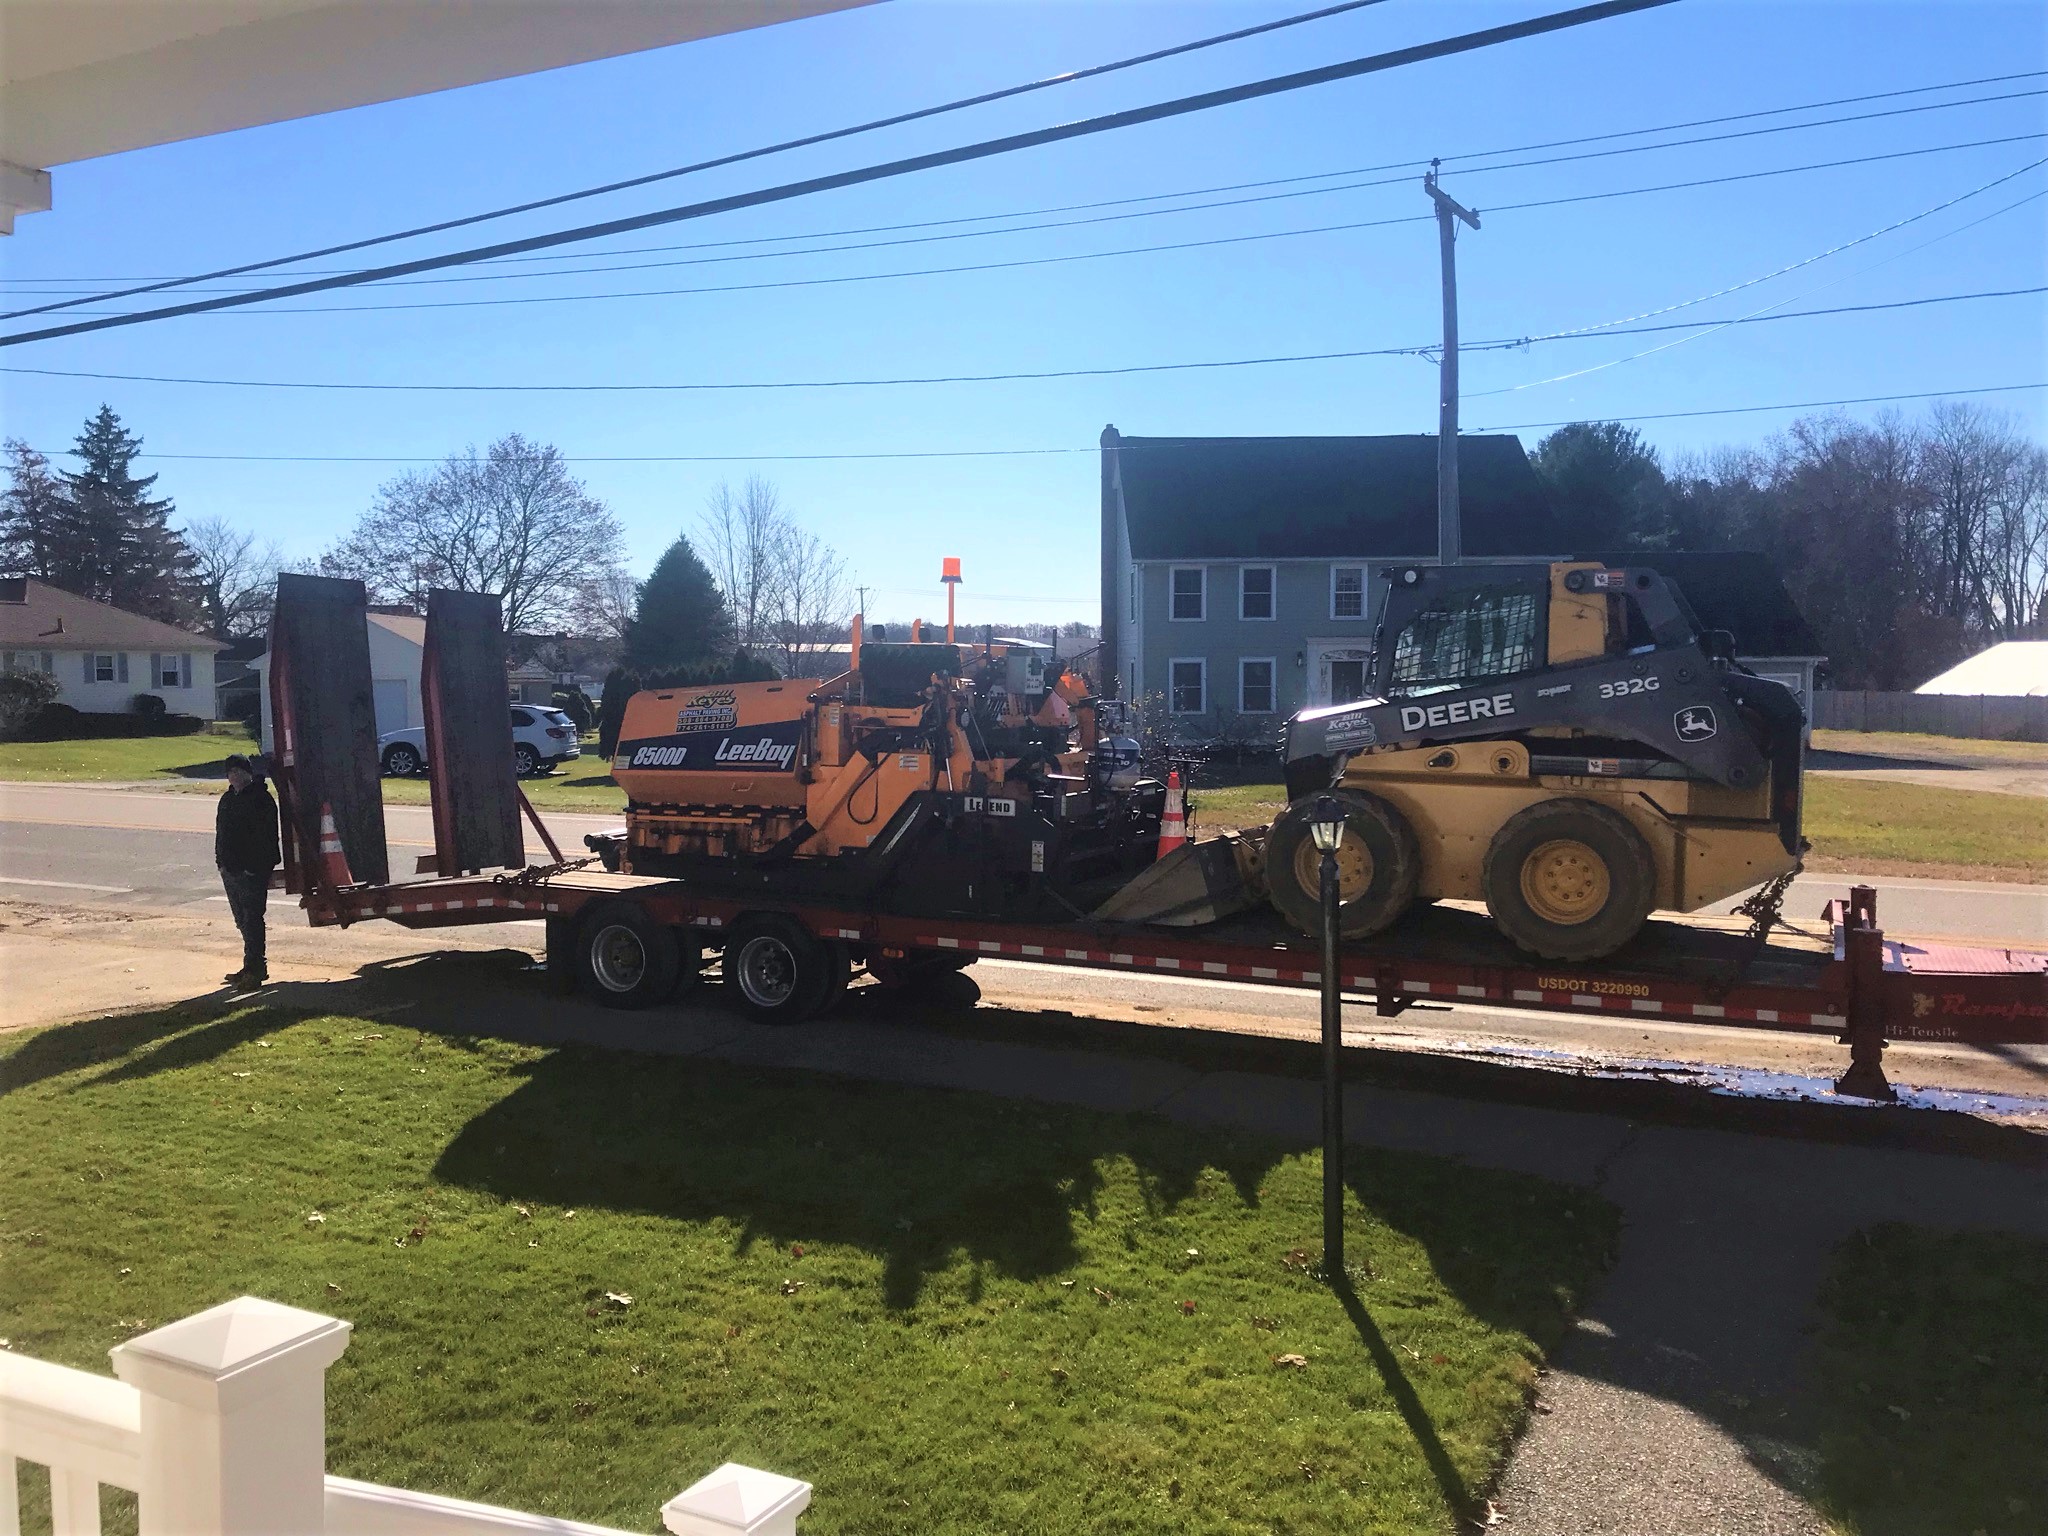
This was a part of the construction project that I really wanted to see close up – Bill Keyes Asphalt doing the paving! However, I was in no shape physically to do much more than poke my head out of the door or through a window to take pictures.
Gravel base materialPaving equipment arrivesGarvel was spread.Gravel leveledGravel compactedAshpalt arrivesSpreading the asphalt by the paving stones.Asphalt operationsAsphalt set and curing (like I was trying to do at the same time in the house).
November 24
The next day, the siders came back and installed the shutters and repaired the siding by the house deck that had to be replaced as a result of the new deck.
Shutters going in – these are for aesthetics only! I know Pat in Australia had asked me about shutters here – just for looks unless your house is 200 years old.
Repairing the siding by the house deck.
November 25
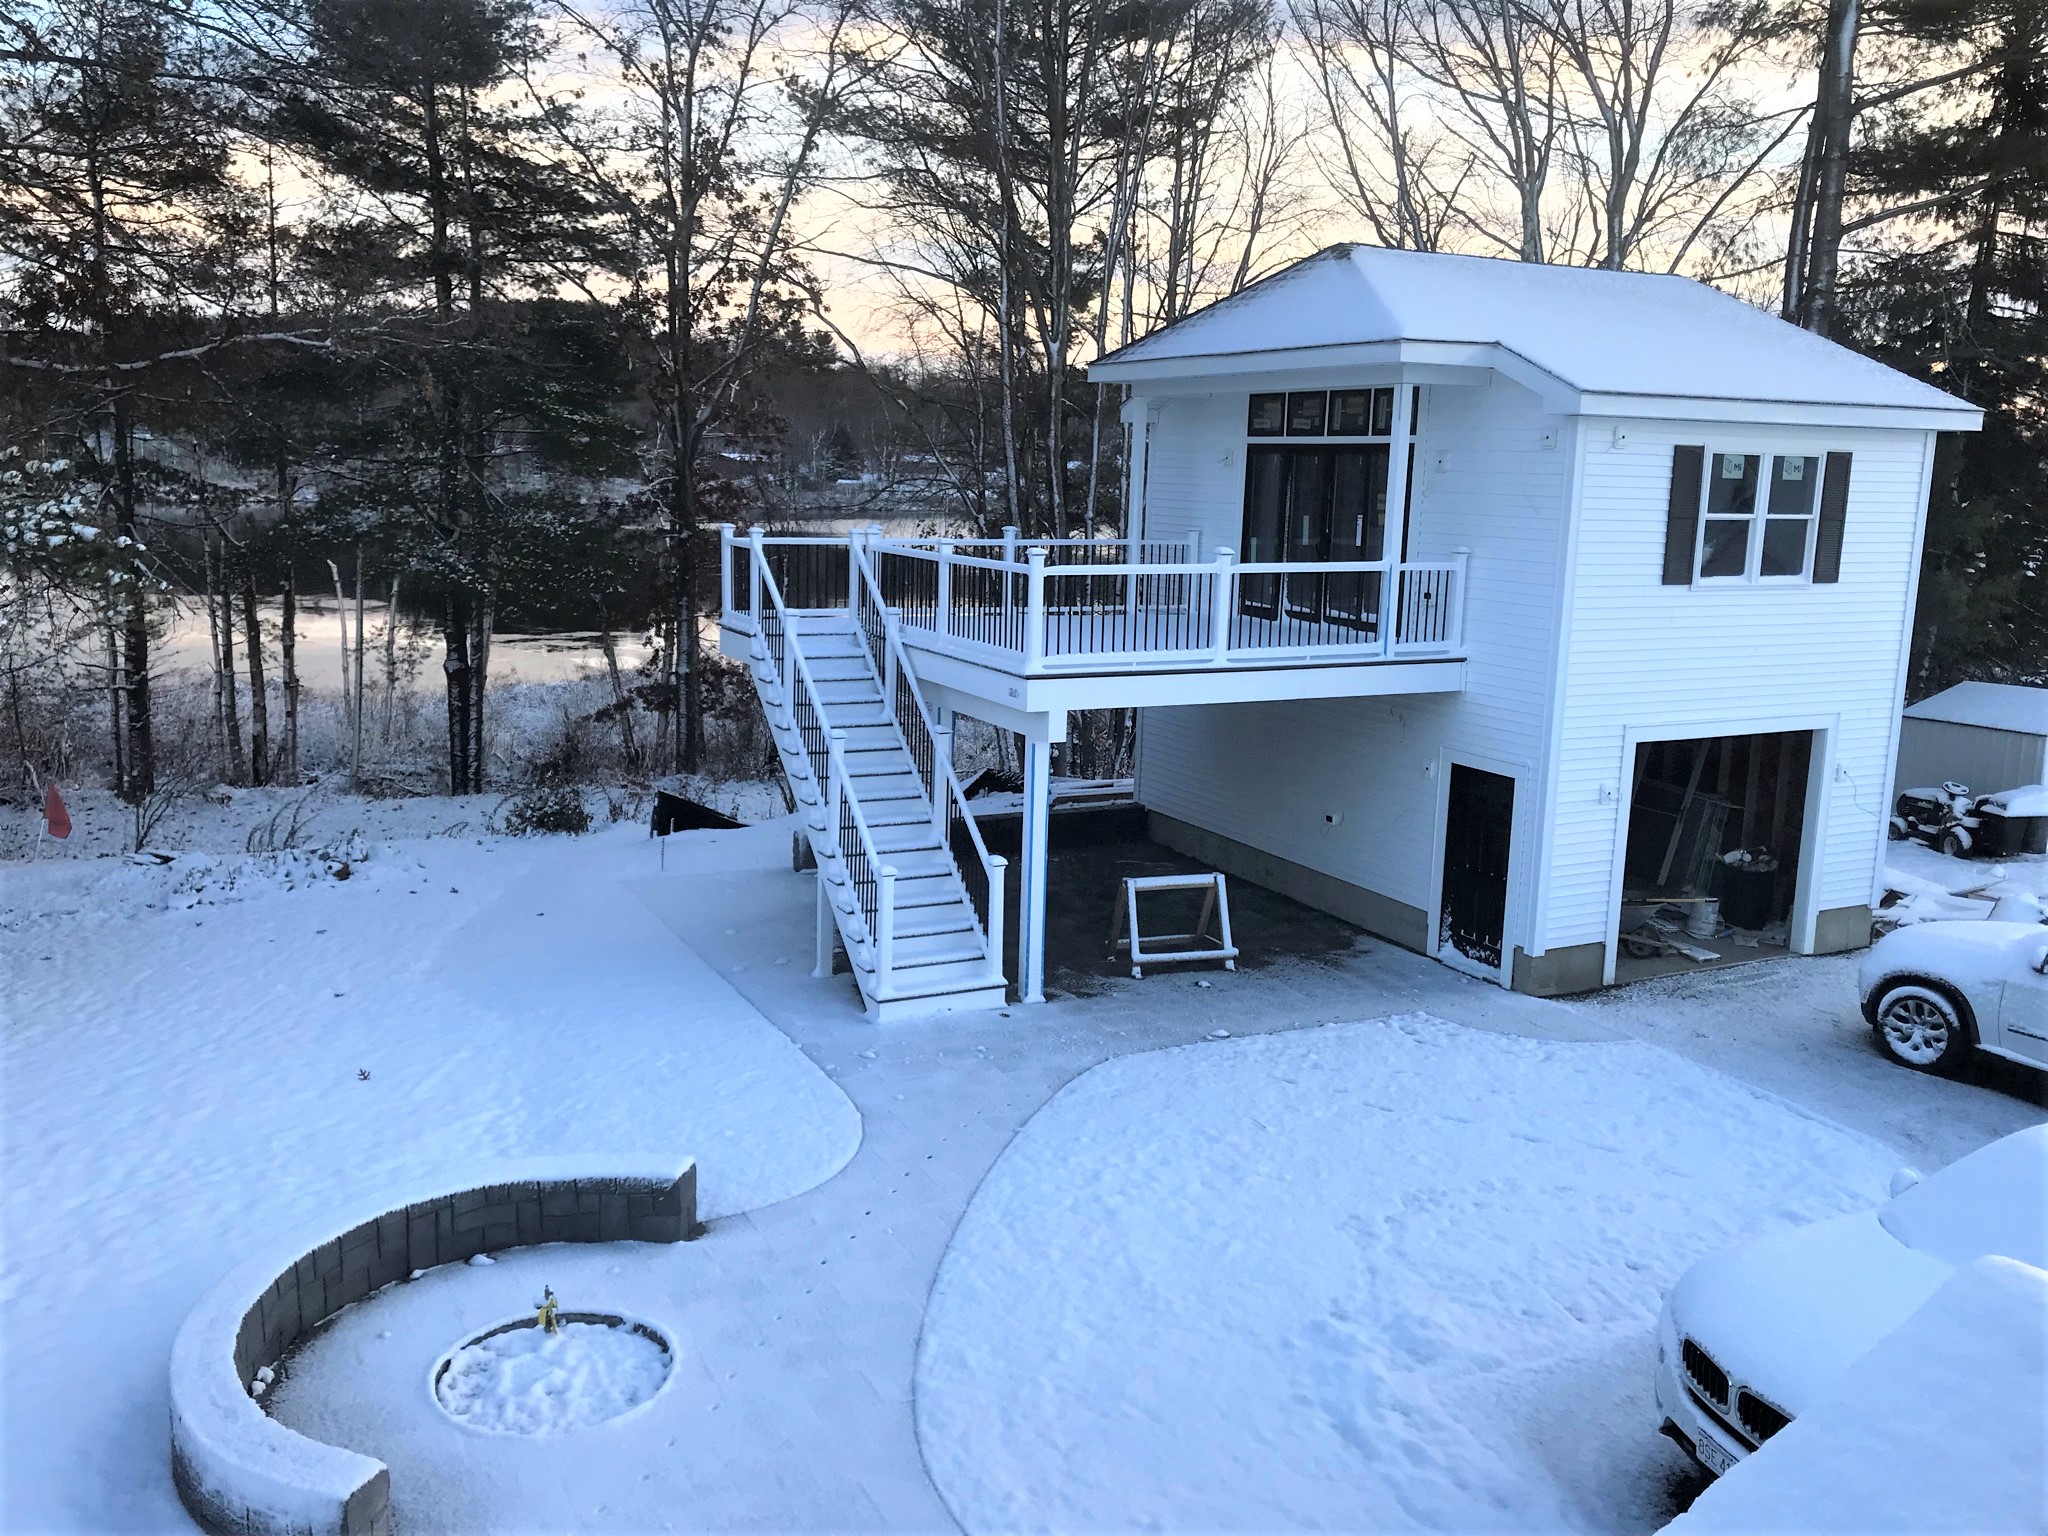
This was Thanksgiving – so no work happened of course. But the project looked like this below – and its getting colder.
Shaping up nicely and we even are parked in the driveway – for now anyways. Yes, that pond is freezing up too.
November 26
This date was our wedding anniversary – normally a day to hit the casino and have fun – but I was still recovering in the house. Of course, this being New England, we got snow anyways.
Well this sucks…
It did not last but it’s still been pretty cold.
Week 20 – November 28th to December 4th
With all the cold and needed inspections, and the Thanksgiving holiday weekend, the progress slowed to a halt. We did pass all of our inspections, and did get a dumpster dropped off to help with all of the rubbish and construction debris that had piled up – especially from the siding.
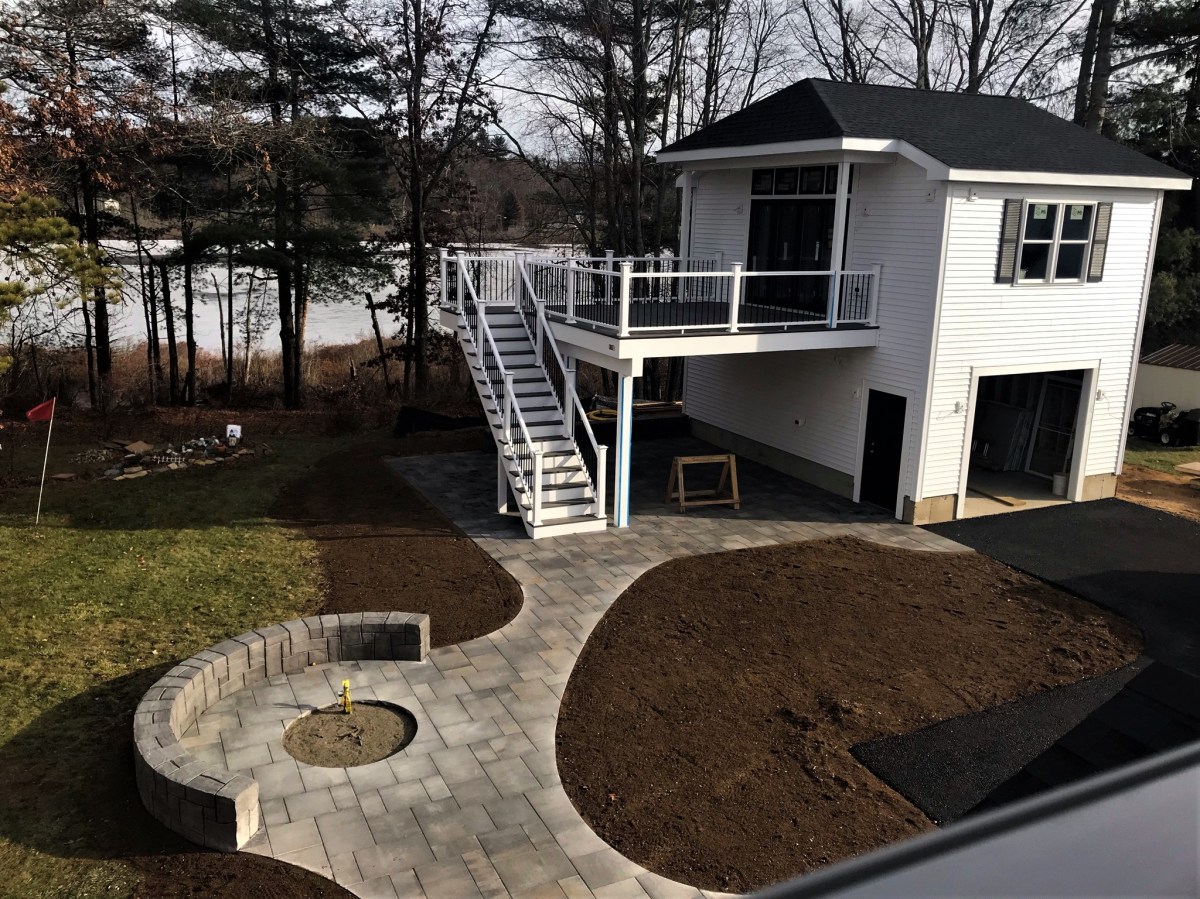
Hopefully, the upcoming week will show gutter installation, insulation, and more. As of now, it looks like this as of Saturday, December 4th.
Latest progress shot – and it’s getting colder and darker every day.
I was originally enticed into the hobby by way of 25mm metal figures from Ral Partha, Grenadier, and Minifigs back in the 1980’s. Some of you of course are remarking to yourselves at this point that you have no idea of those days!
Well, no internet existed such that one could go out and find whatever one wanted with a click. You either ordered from a catalog or got lucky at a hobby store with whatever existed in the shop (insert bad joke here).
Some of the figures were pretty simplistic, others were (and are still) marvels of art. Most readers of this blog will recognize that until recently, I have been very much involved with painting and building figures and terrain for my Civilizations Collide project (Aztecs, Conquistadores, etc. for Feudal Patrol. So, you ask, Mark, what the f**k you doing with old school Vikings?
Well, this is related to my recent trip to Historicon (which I wrote about here). Several of the scenarios that I am developing for the Spanish Conquest require Aztec (and Tlaxcalan) war canoes, which were involved in many of the battles, both along the causeways out of Tenochtitlan and in naval combat with Spanish brigantines on Lake Texcoco. At Historicon, I searched high and low in the vendors area and in the flea market for reasonably priced war canoes. All I found were a Blood and Plunder model for $20 (not reasonable) from a vendor’s booth and a single $3 scratch-built balsa-wood version from the flea market.
I got both as options for considering how to design and scratch-build my own. As I estimate that I need 4-6 war canoes for each of the 4 brigantines that I have in queue. That’s 16-24 canoes – and I am not going to pay $20 per canoe! Shortly after the convention, Greg Priebe (who was with me at Historicon) suggested that he could 3D print canoes for me! I was elated, and I asked him what I could offer in trade. Greg kindly said don’t worry about it. But, I thought that’s unfair, and I could paint some figures for him as a fair exchange.
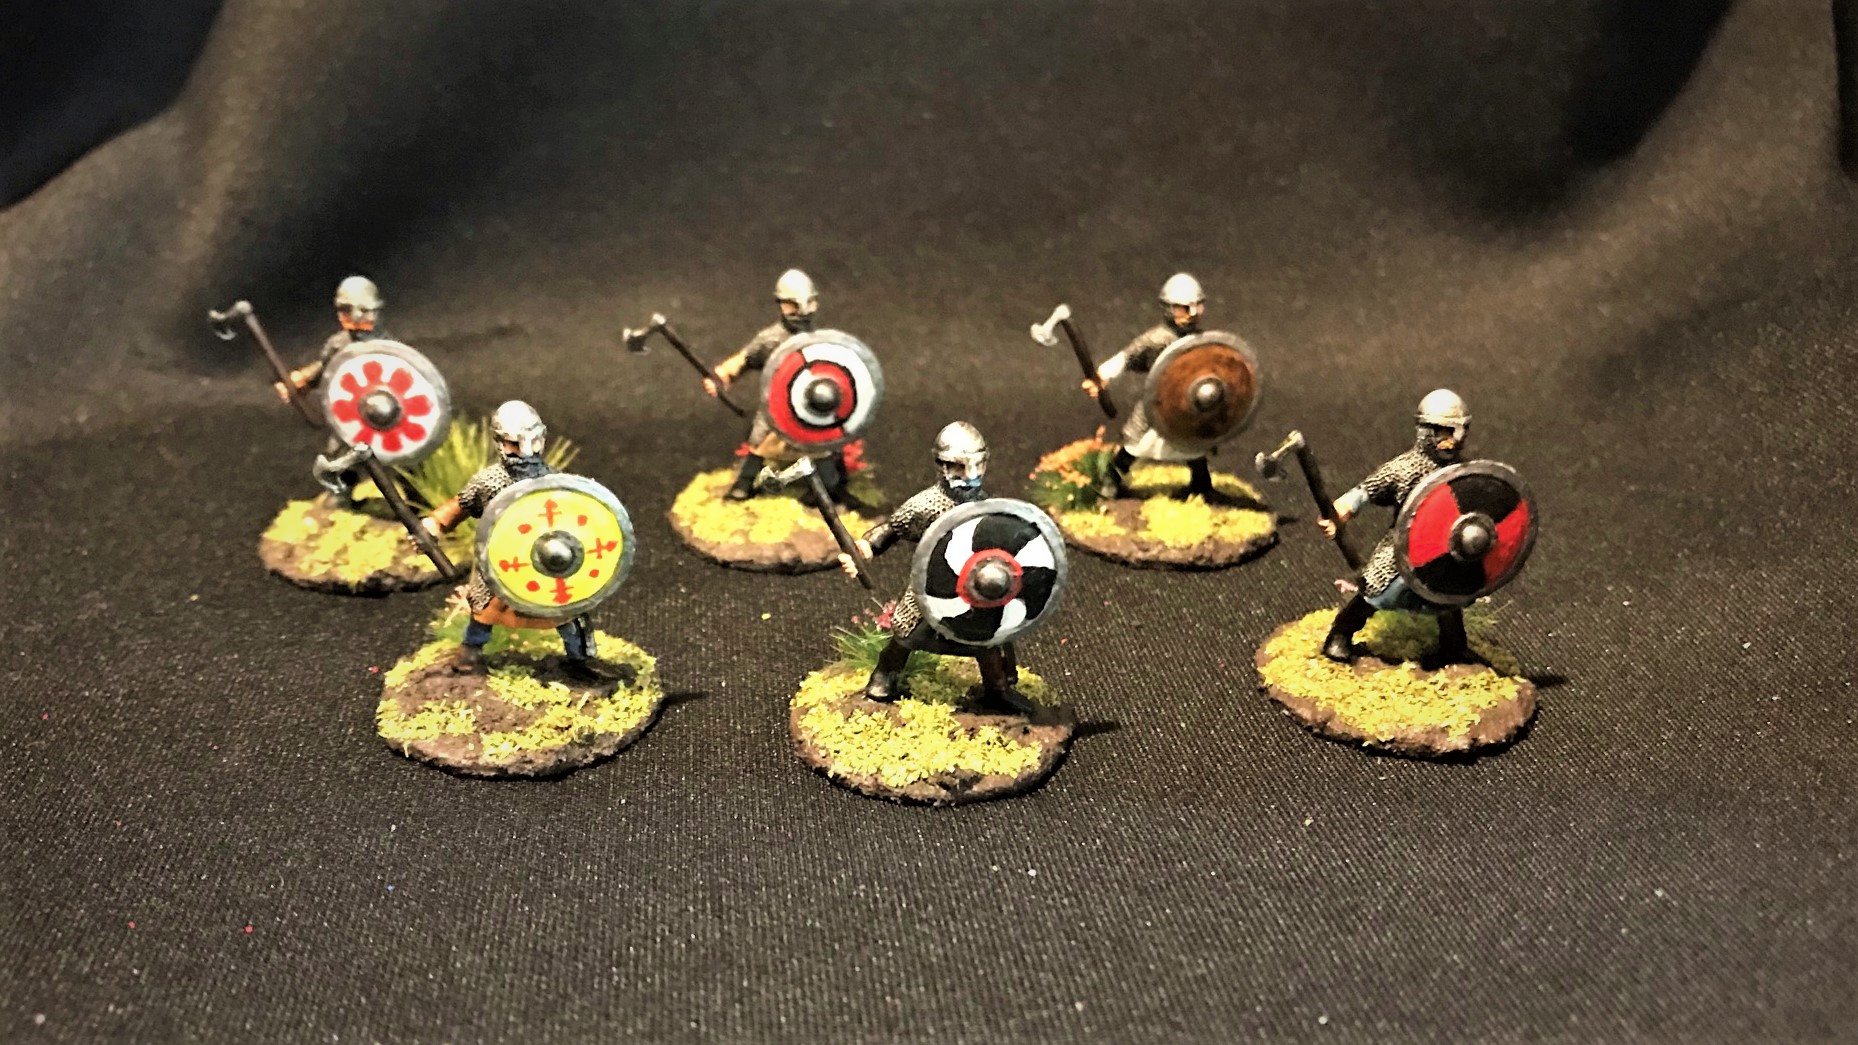
Greg is the author of the Vikings Feudal Patrol supplement (which you can download for free here), so I offered him Vikings. He agreed, and when I got home I went into my unpainted stash to see what I had available.
My supply of unpainted lead includes many figures from the ’80’s. I got a lot of them when I returned to the hobby but have not painted a lot of the 25mm ancient stuff. We conferred, and Greg agreed that he would like ones from three blister’s of 25mm figures and a single 28mm berserker. They all work for skirmish games.
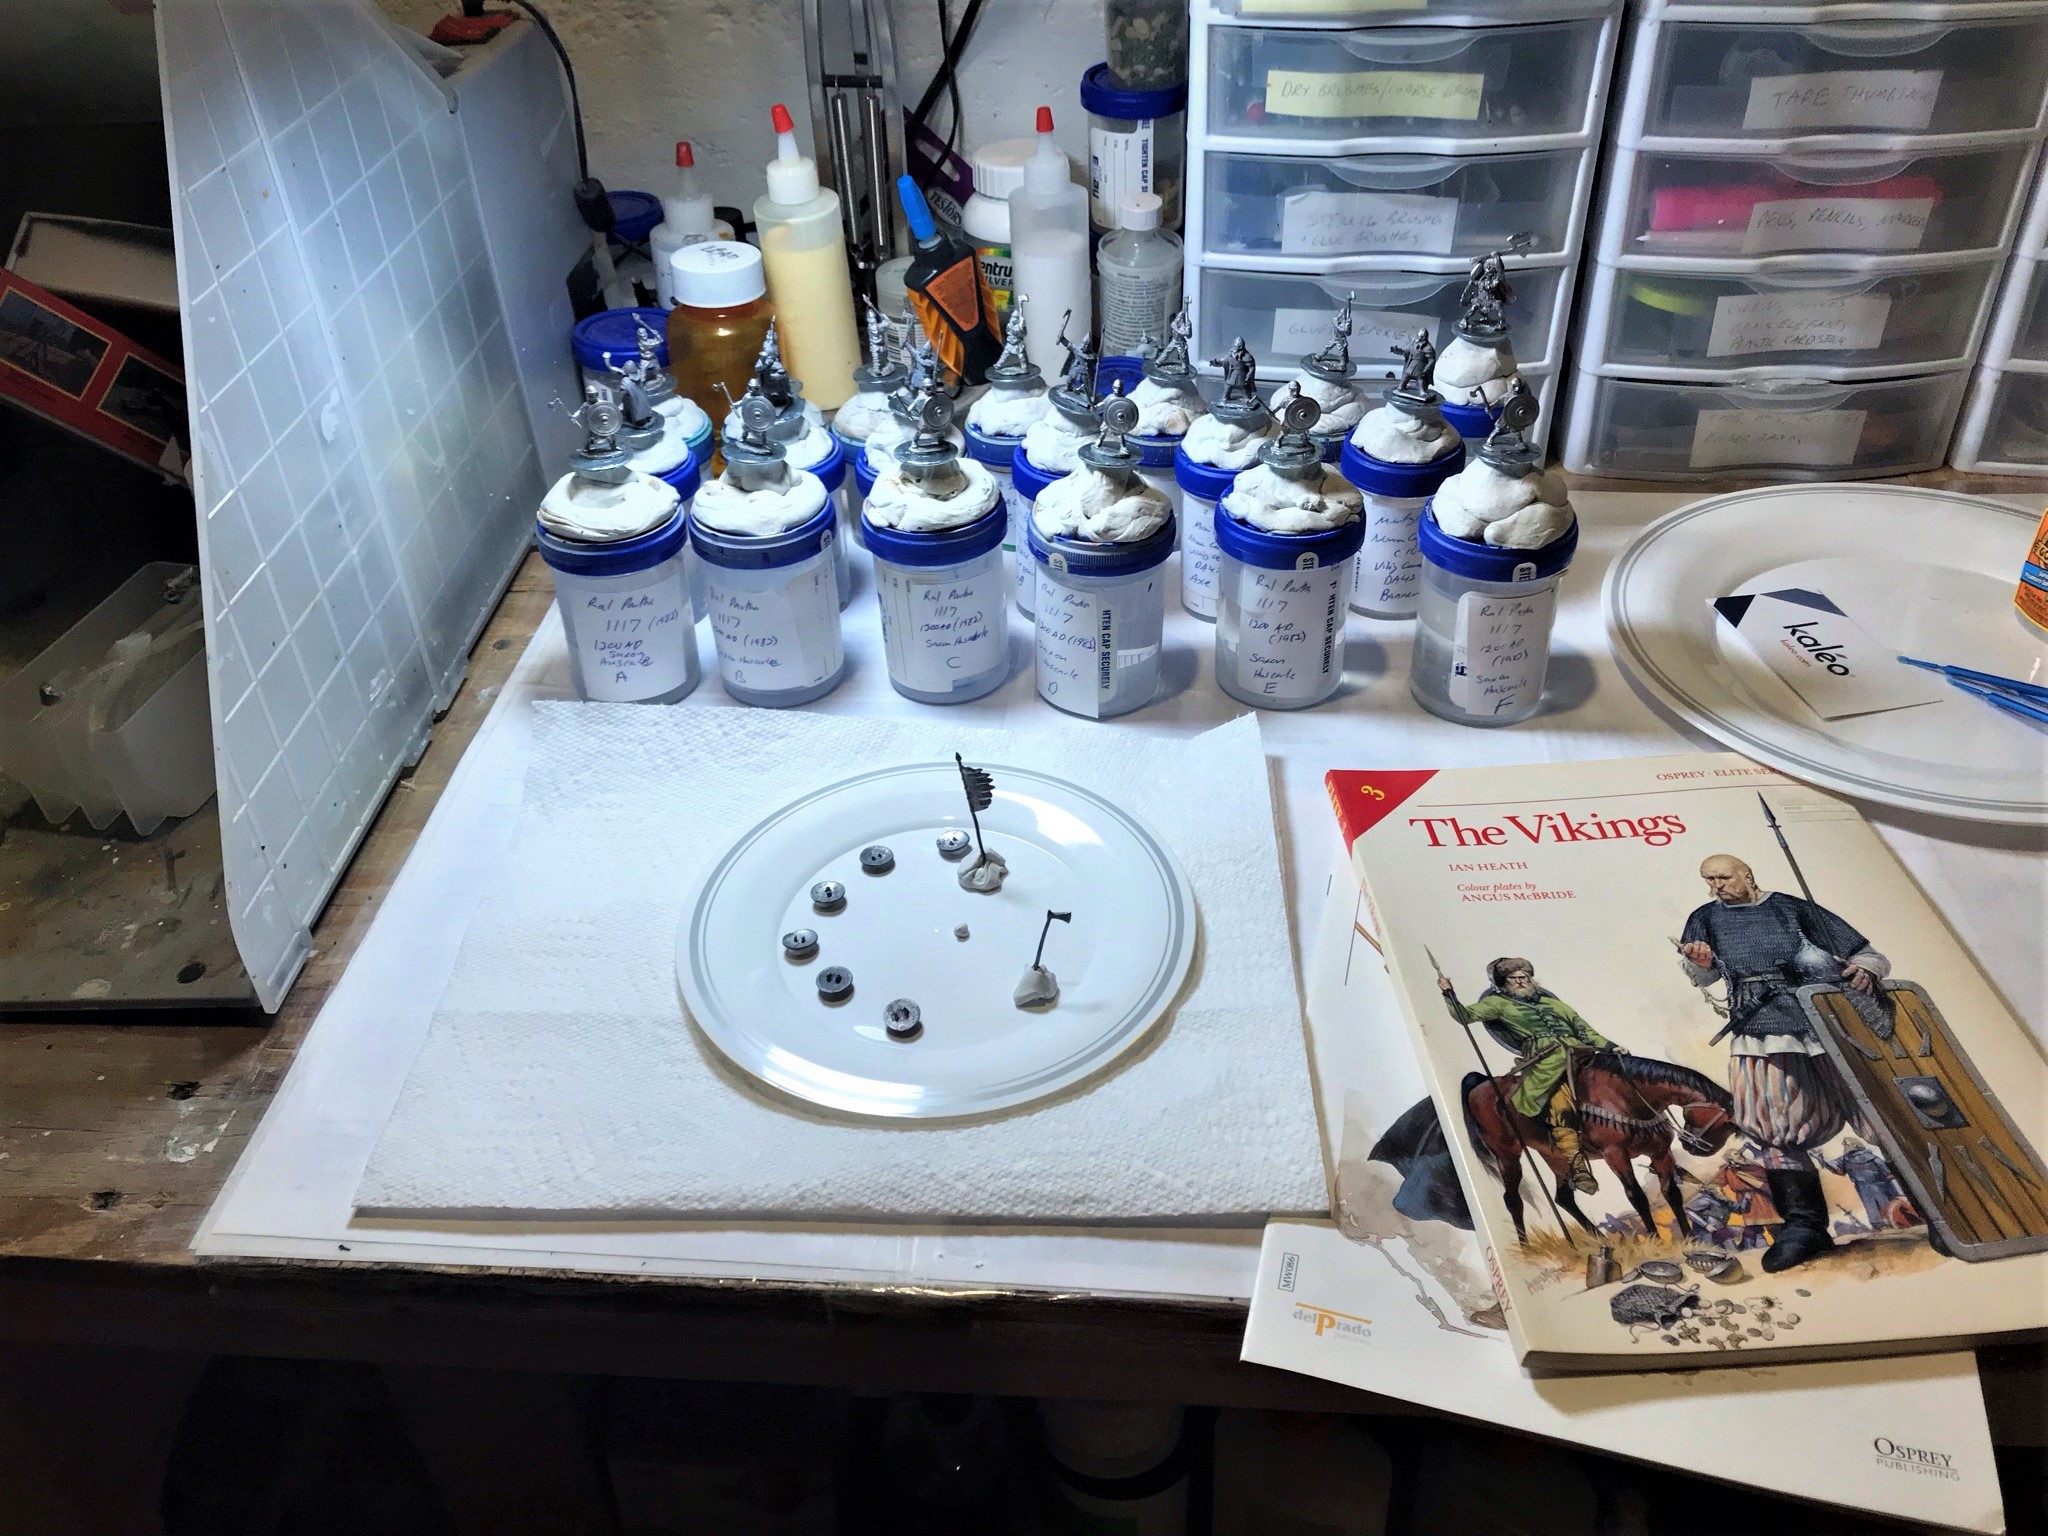
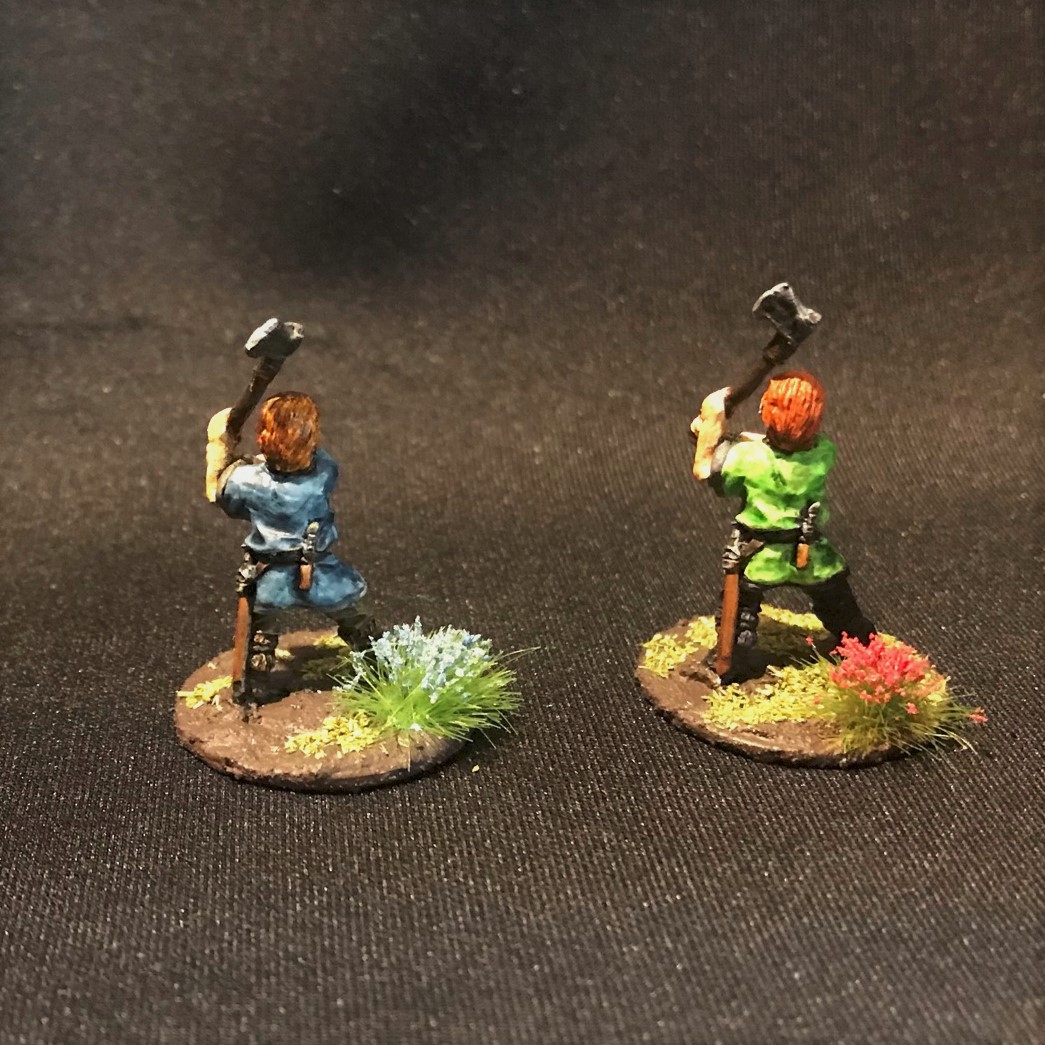
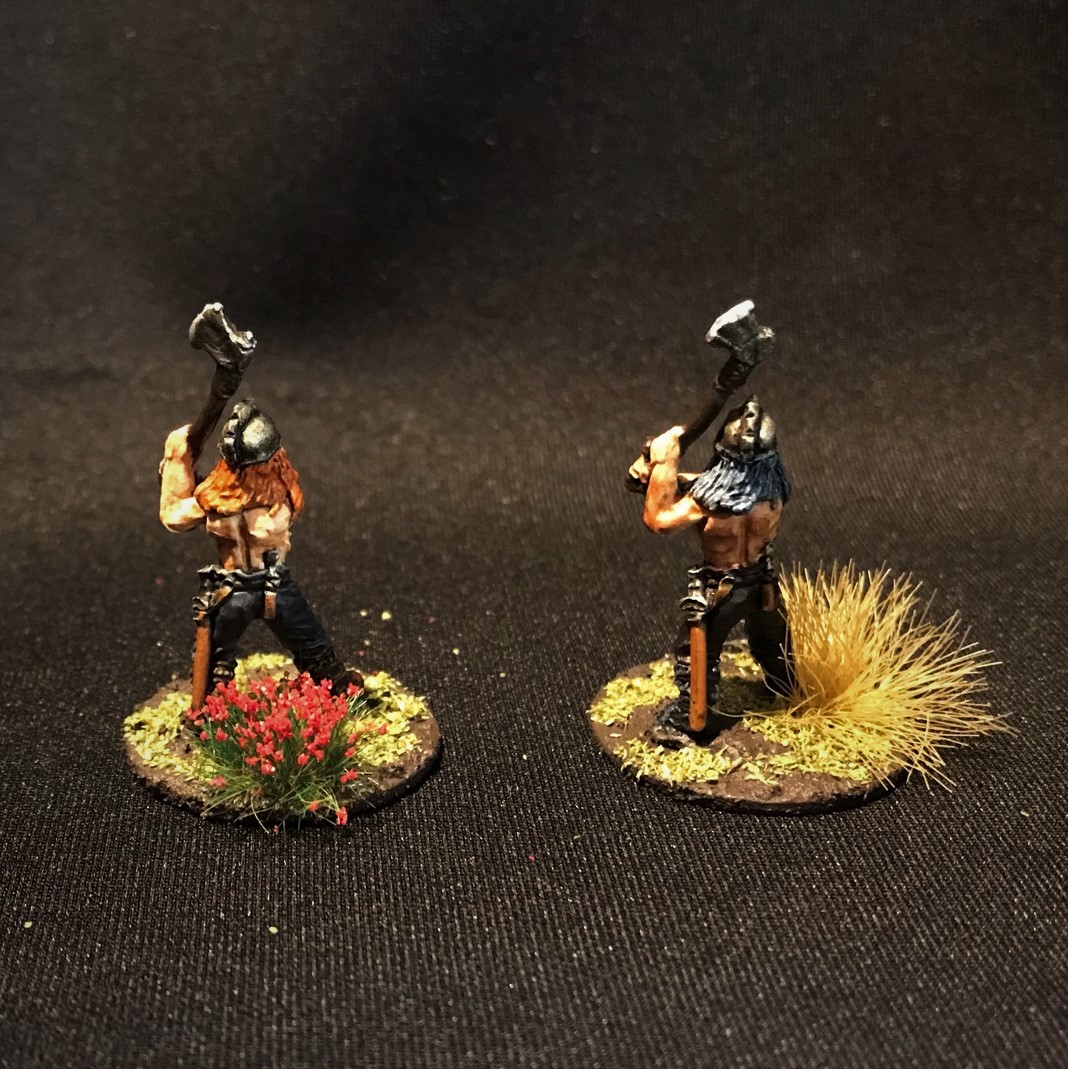
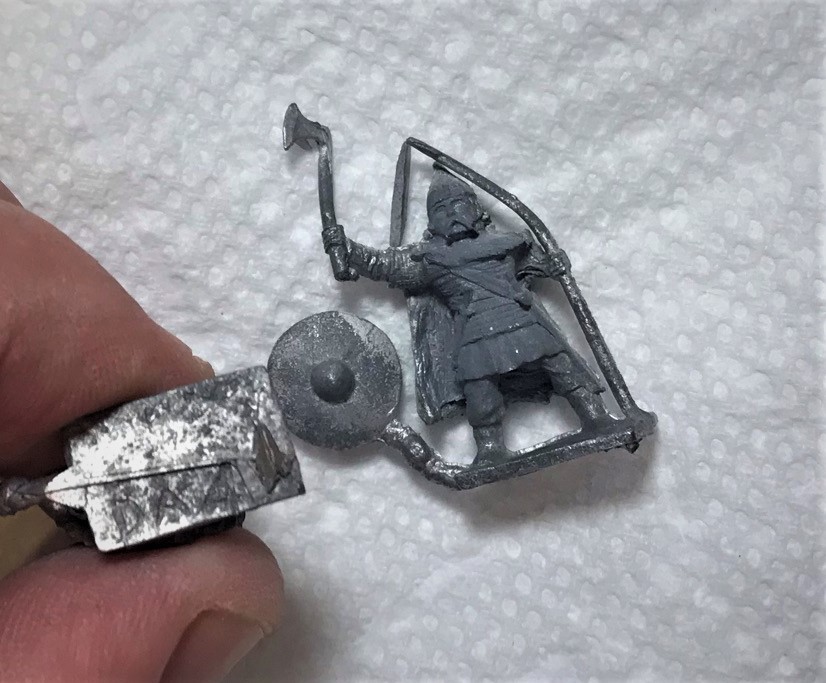
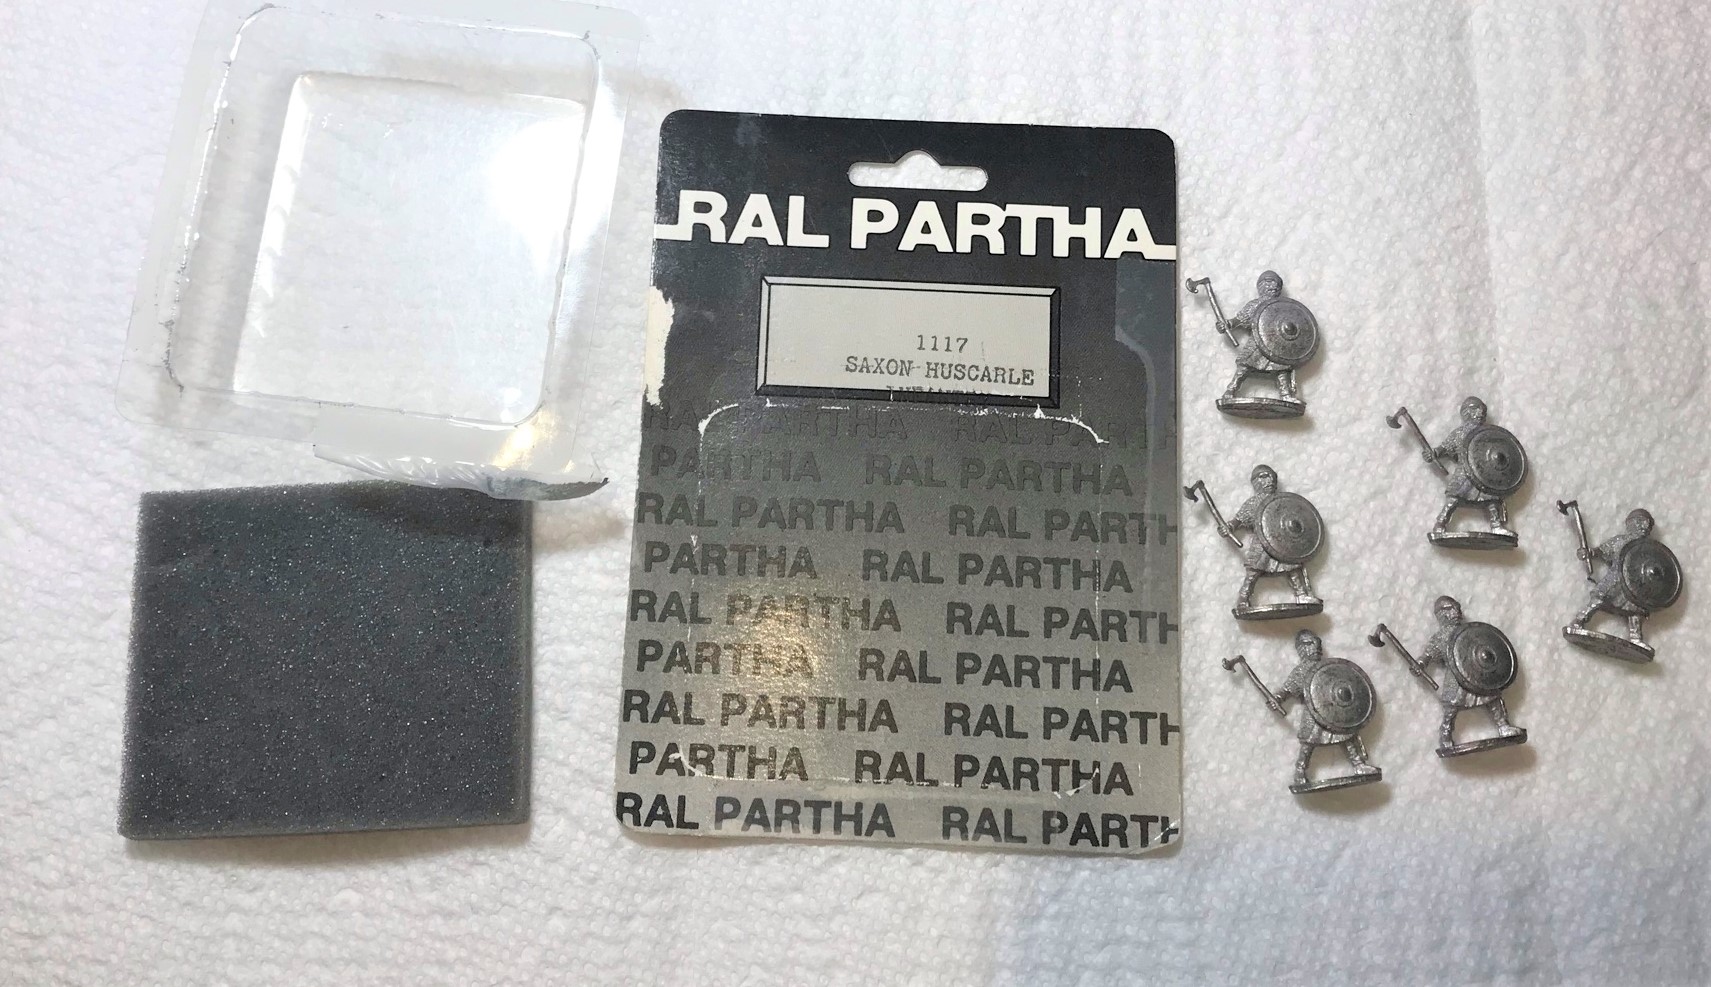
One was a six-figure blister of Ral Partha Imports “Viking Berserkers with Axes” (#DA45) – circa 1982. The second was a six-figure Minifigs “Viking Command” blister pack probably from around 1980-1982. The third was a six-figure pack of Ral Partha “Saxon Huscarle” (#1117) from their “1200 A.D.” line – circa 1982. The last was a single figure from RAFM, “Berserker” from their “Adventurers” line circa 1989. This adds up to 19 figures, and Greg is making me 20 or so canoes. So, the following will describe how I proceeded to paint all of these up.
Ral Partha Imports “Viking Berserkers with Axes“
These were likely made by Citadel and marketed by Ral Partha – a common commercial practice back then. The bases had “1982” and DA45 on them. As my process was modified batch-painting, I’ll include some of the steps I took on all of the models here and spare you a repeat later. There were three poses among the six figures, which was a lot back then (most packs of six had just one pose). But, I needed on all of these to make them different enough for easy identification and for fun on the tabletop.
The blister pack of DA45. Opened after 40+ years,
The figures had substantial mold lines, which was common back then. That issue was easily remedied. Their axe shafts were also a bit bendy (common as well) – and I gave them all a light coat of Gorilla Glue – to stiffen up the shafts (insert bad joke here).
Mold lines seen here. Also bendy axes.
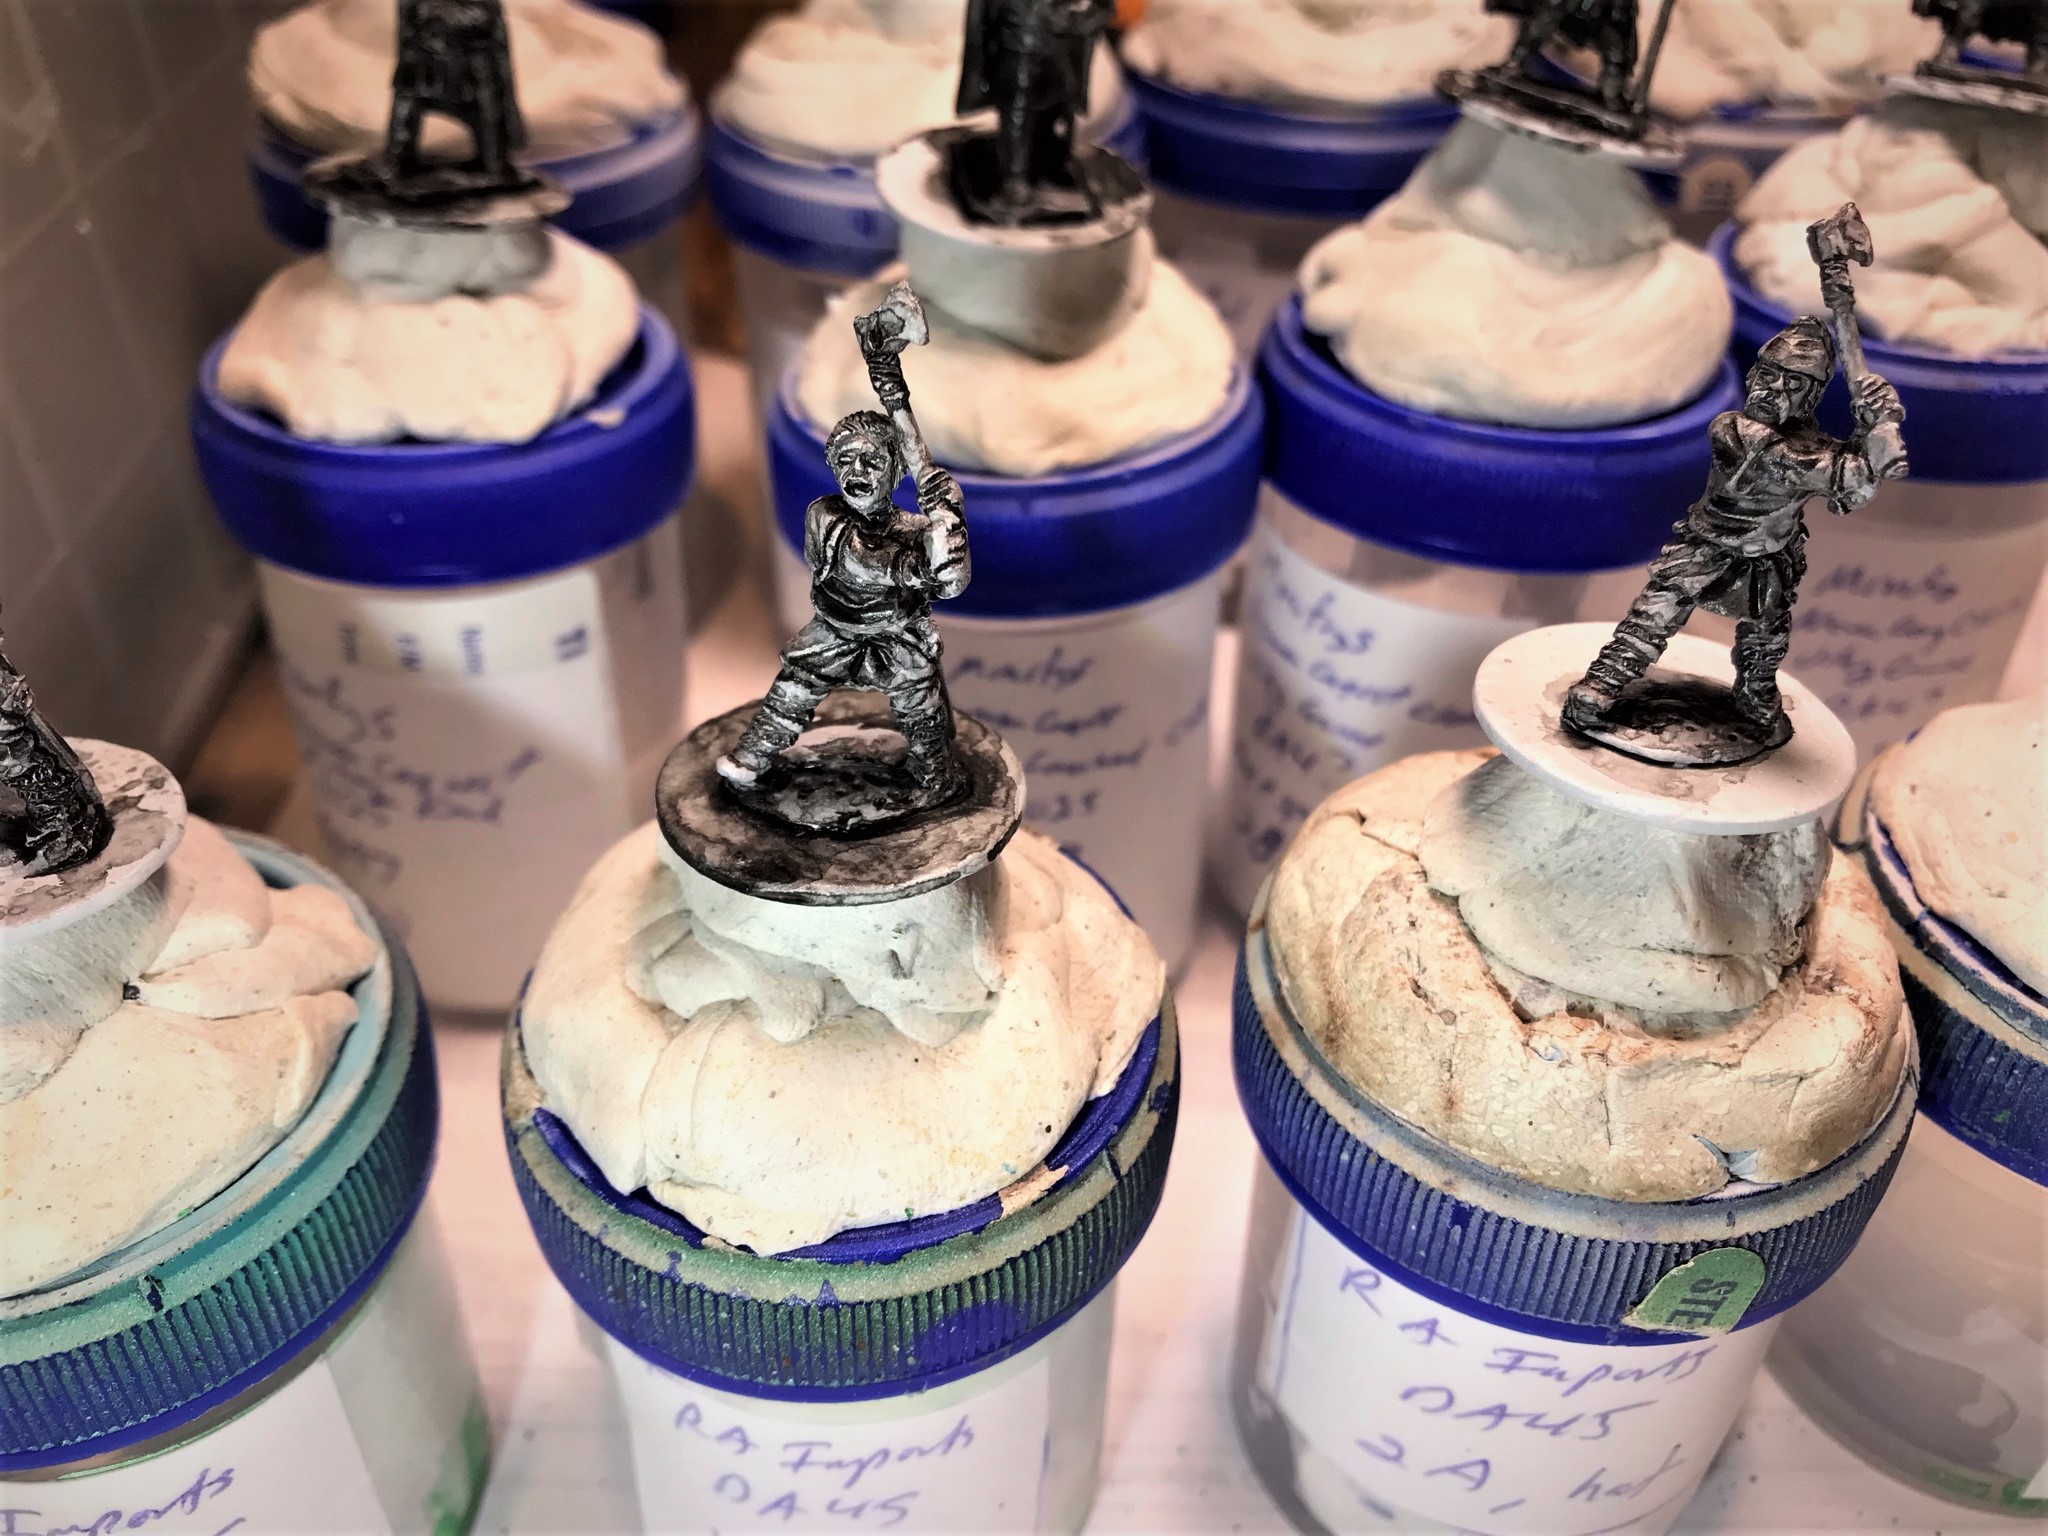
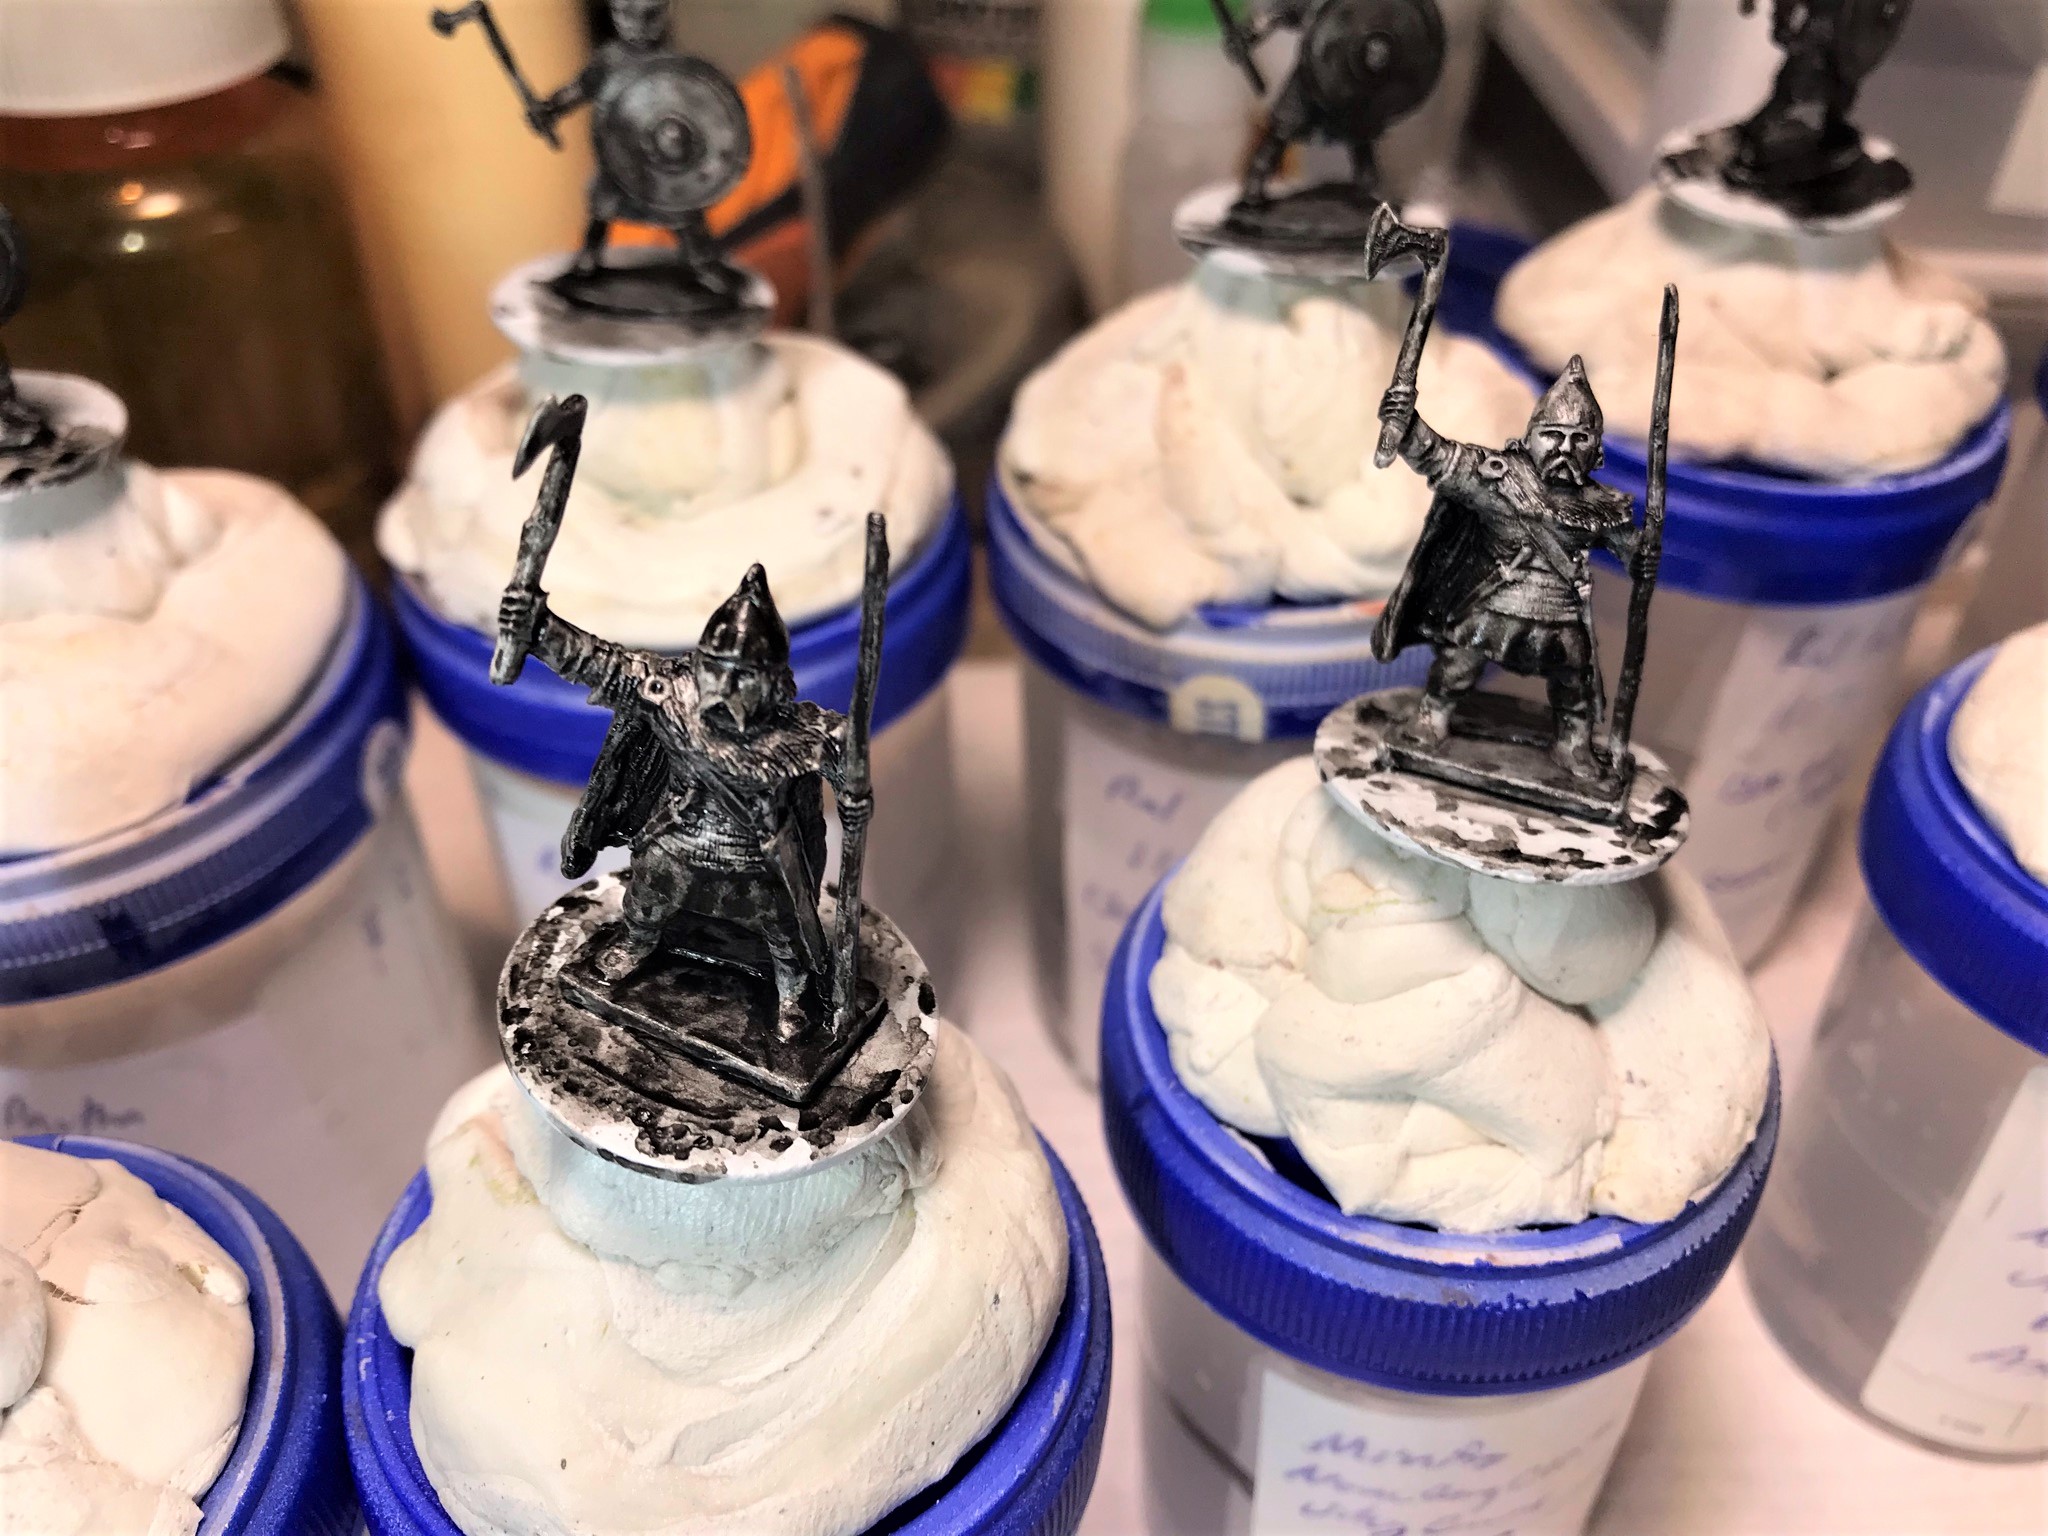
I then mounted all the figures on 1″ steel washers, and put them on poster tack on specimen containers for ease of painting. I primed them all white with my airbrush and after they dried, I washed with “Heavy Body Black” from Secret Weapon Washes (all of the paints that I used will be listed at the end of this post for those interested).
Mounted for paintingAfter prime and HBB washEarlybase coat
Close up of the HBB wash on the Berserkers. It helps me to see details and preshades the models – both very helpful steps with 25mm.
I numbered the six figures by the three poses (1A, 1B, 2A, 2B, 3A, and 3B) so that I could plan differences in painting. At least these had no shields…for the rest that did I needed a plan as well. Yes, I used Excel!
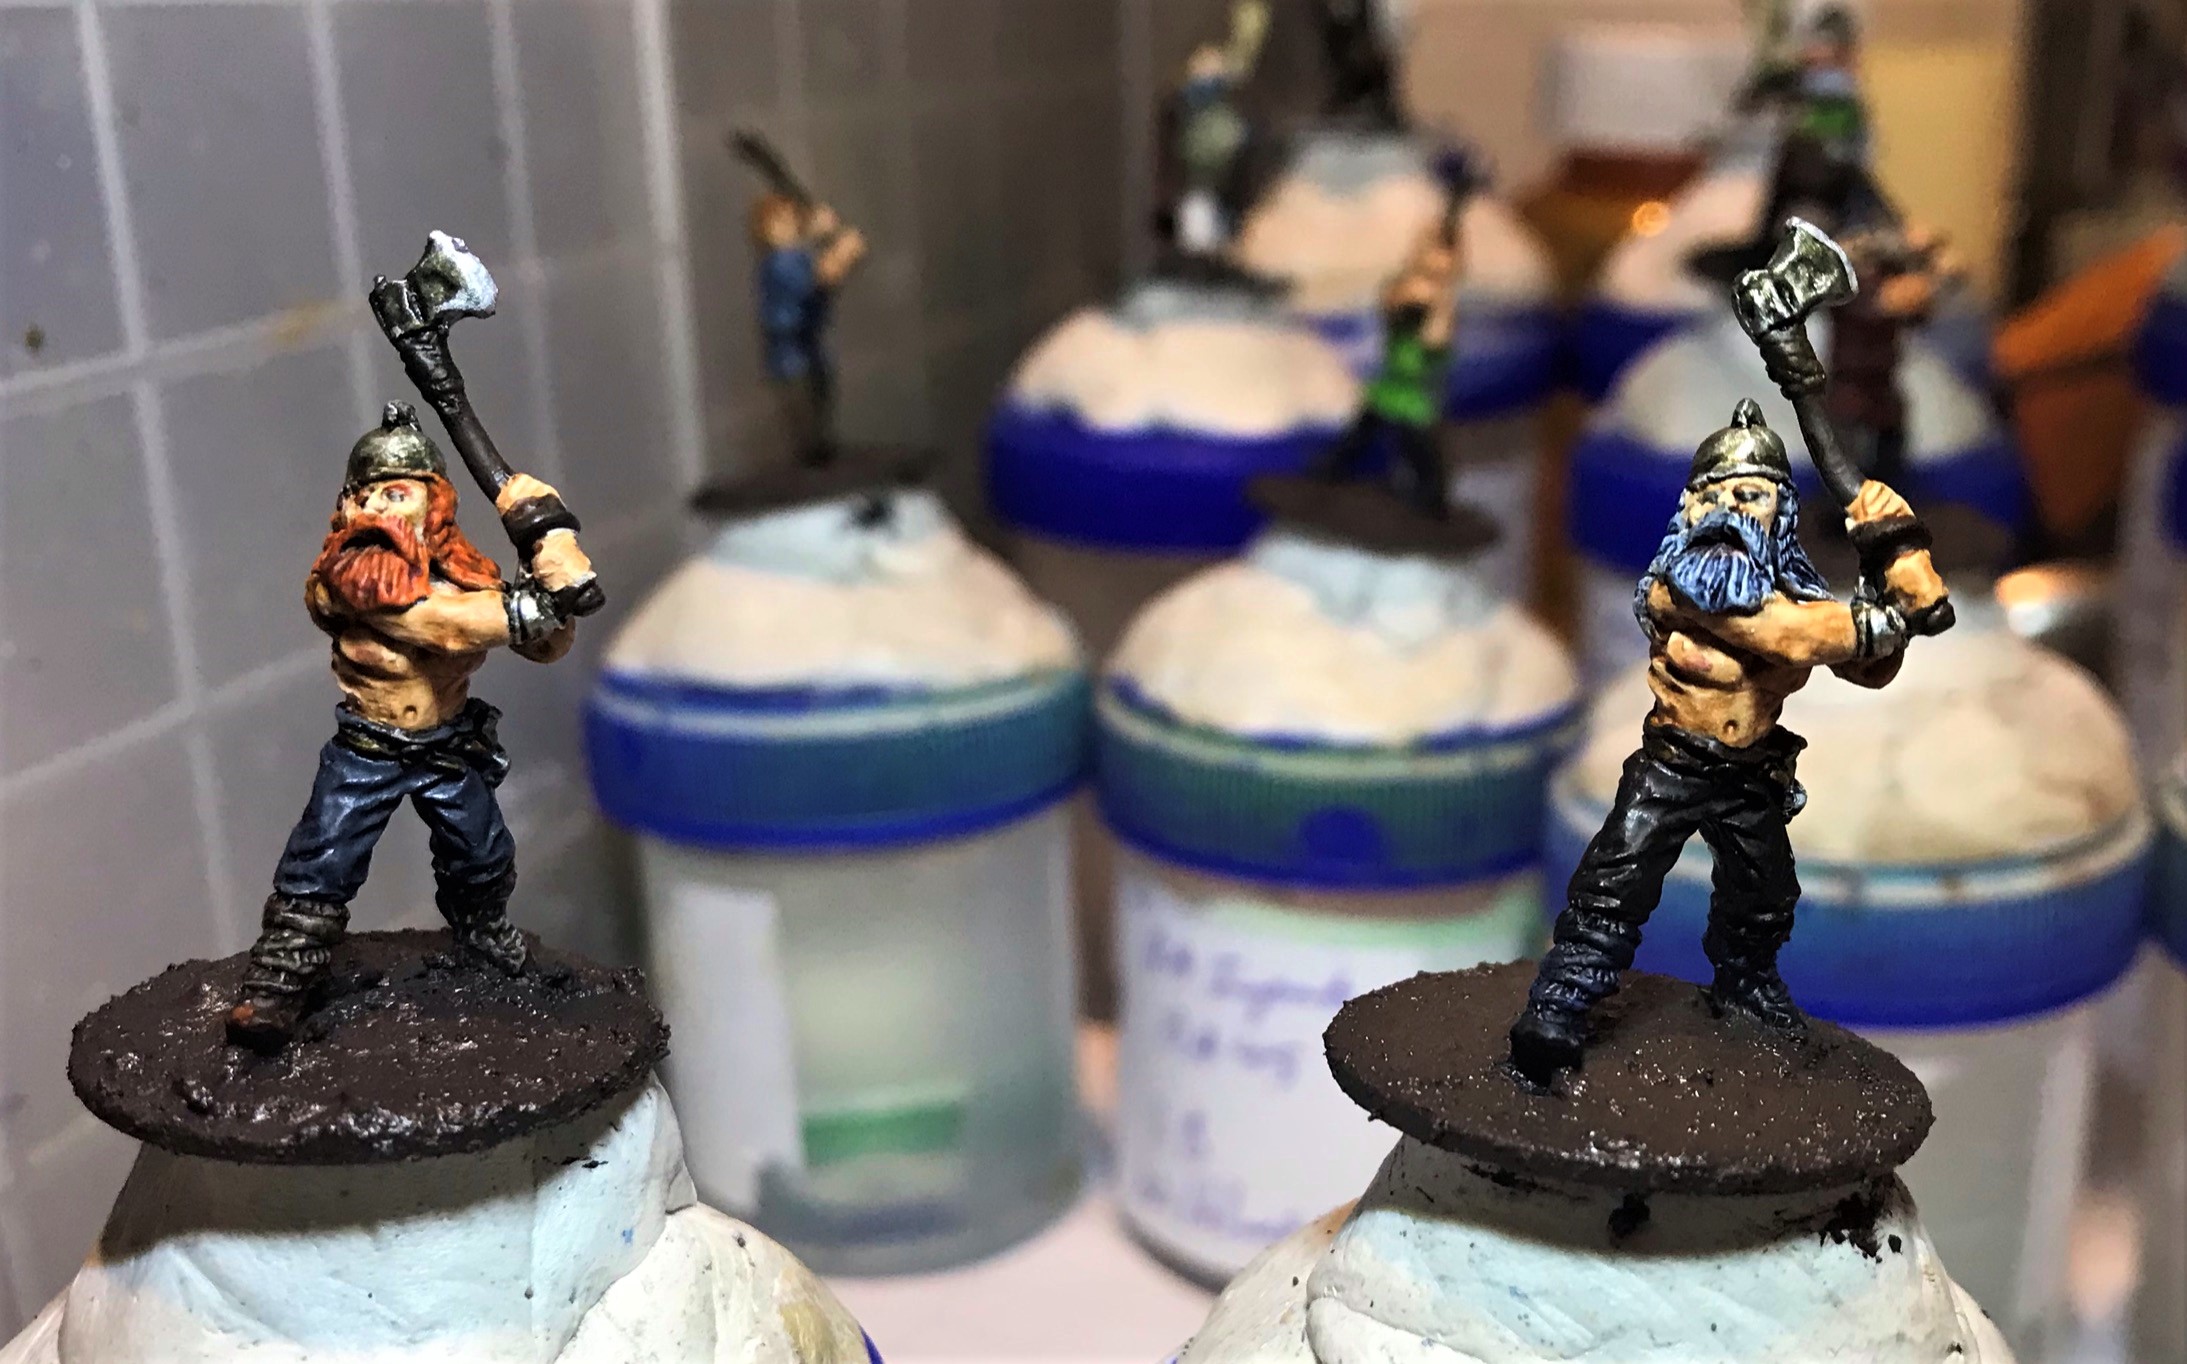
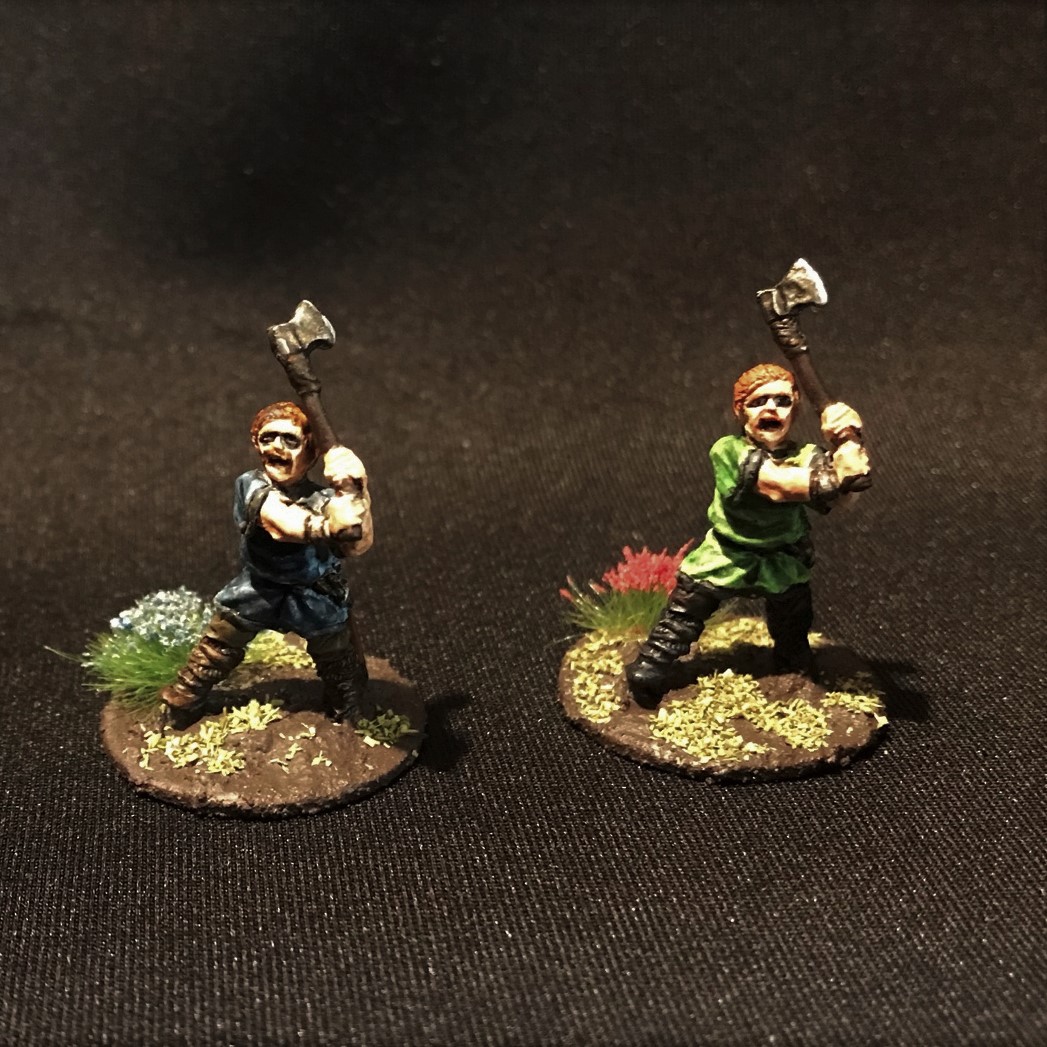
Pose 1Pose 2Pose 3Here all of the 19 figures are ready for varnish, but I did need to work on the shields. More on that in a bit.
On all of these, in terms of painting, I aimed for a good tabletop standard. While I do not think these are badly painted at all, I have done better work – but these reminded me of how much easier painting modern figures is now, especially 28mm. Another challenge was effectively painting blonde hair. I don’t think I’ve done that in 40 years. Anyways, I toned down yellow (very Sailor Moon) with “Snakebite Leather” contrast paint and Seraphim Sepia” wash and worked ok. The ginger hair was easier. I also added differently colored tufts to the bases for ease of identification as well.
Now, let’s see the models from this blister all completed.
The first pose had no helmets.The second pose had caps.The third pose was more of a classic Viking berserker one with no shirts and helmets.The group. I tried to give the eyes a “mascara” look like the show “Vikings” did. At 25mm, this was hard to do, but you can let me know if it worked or not to your eye (pun intended).
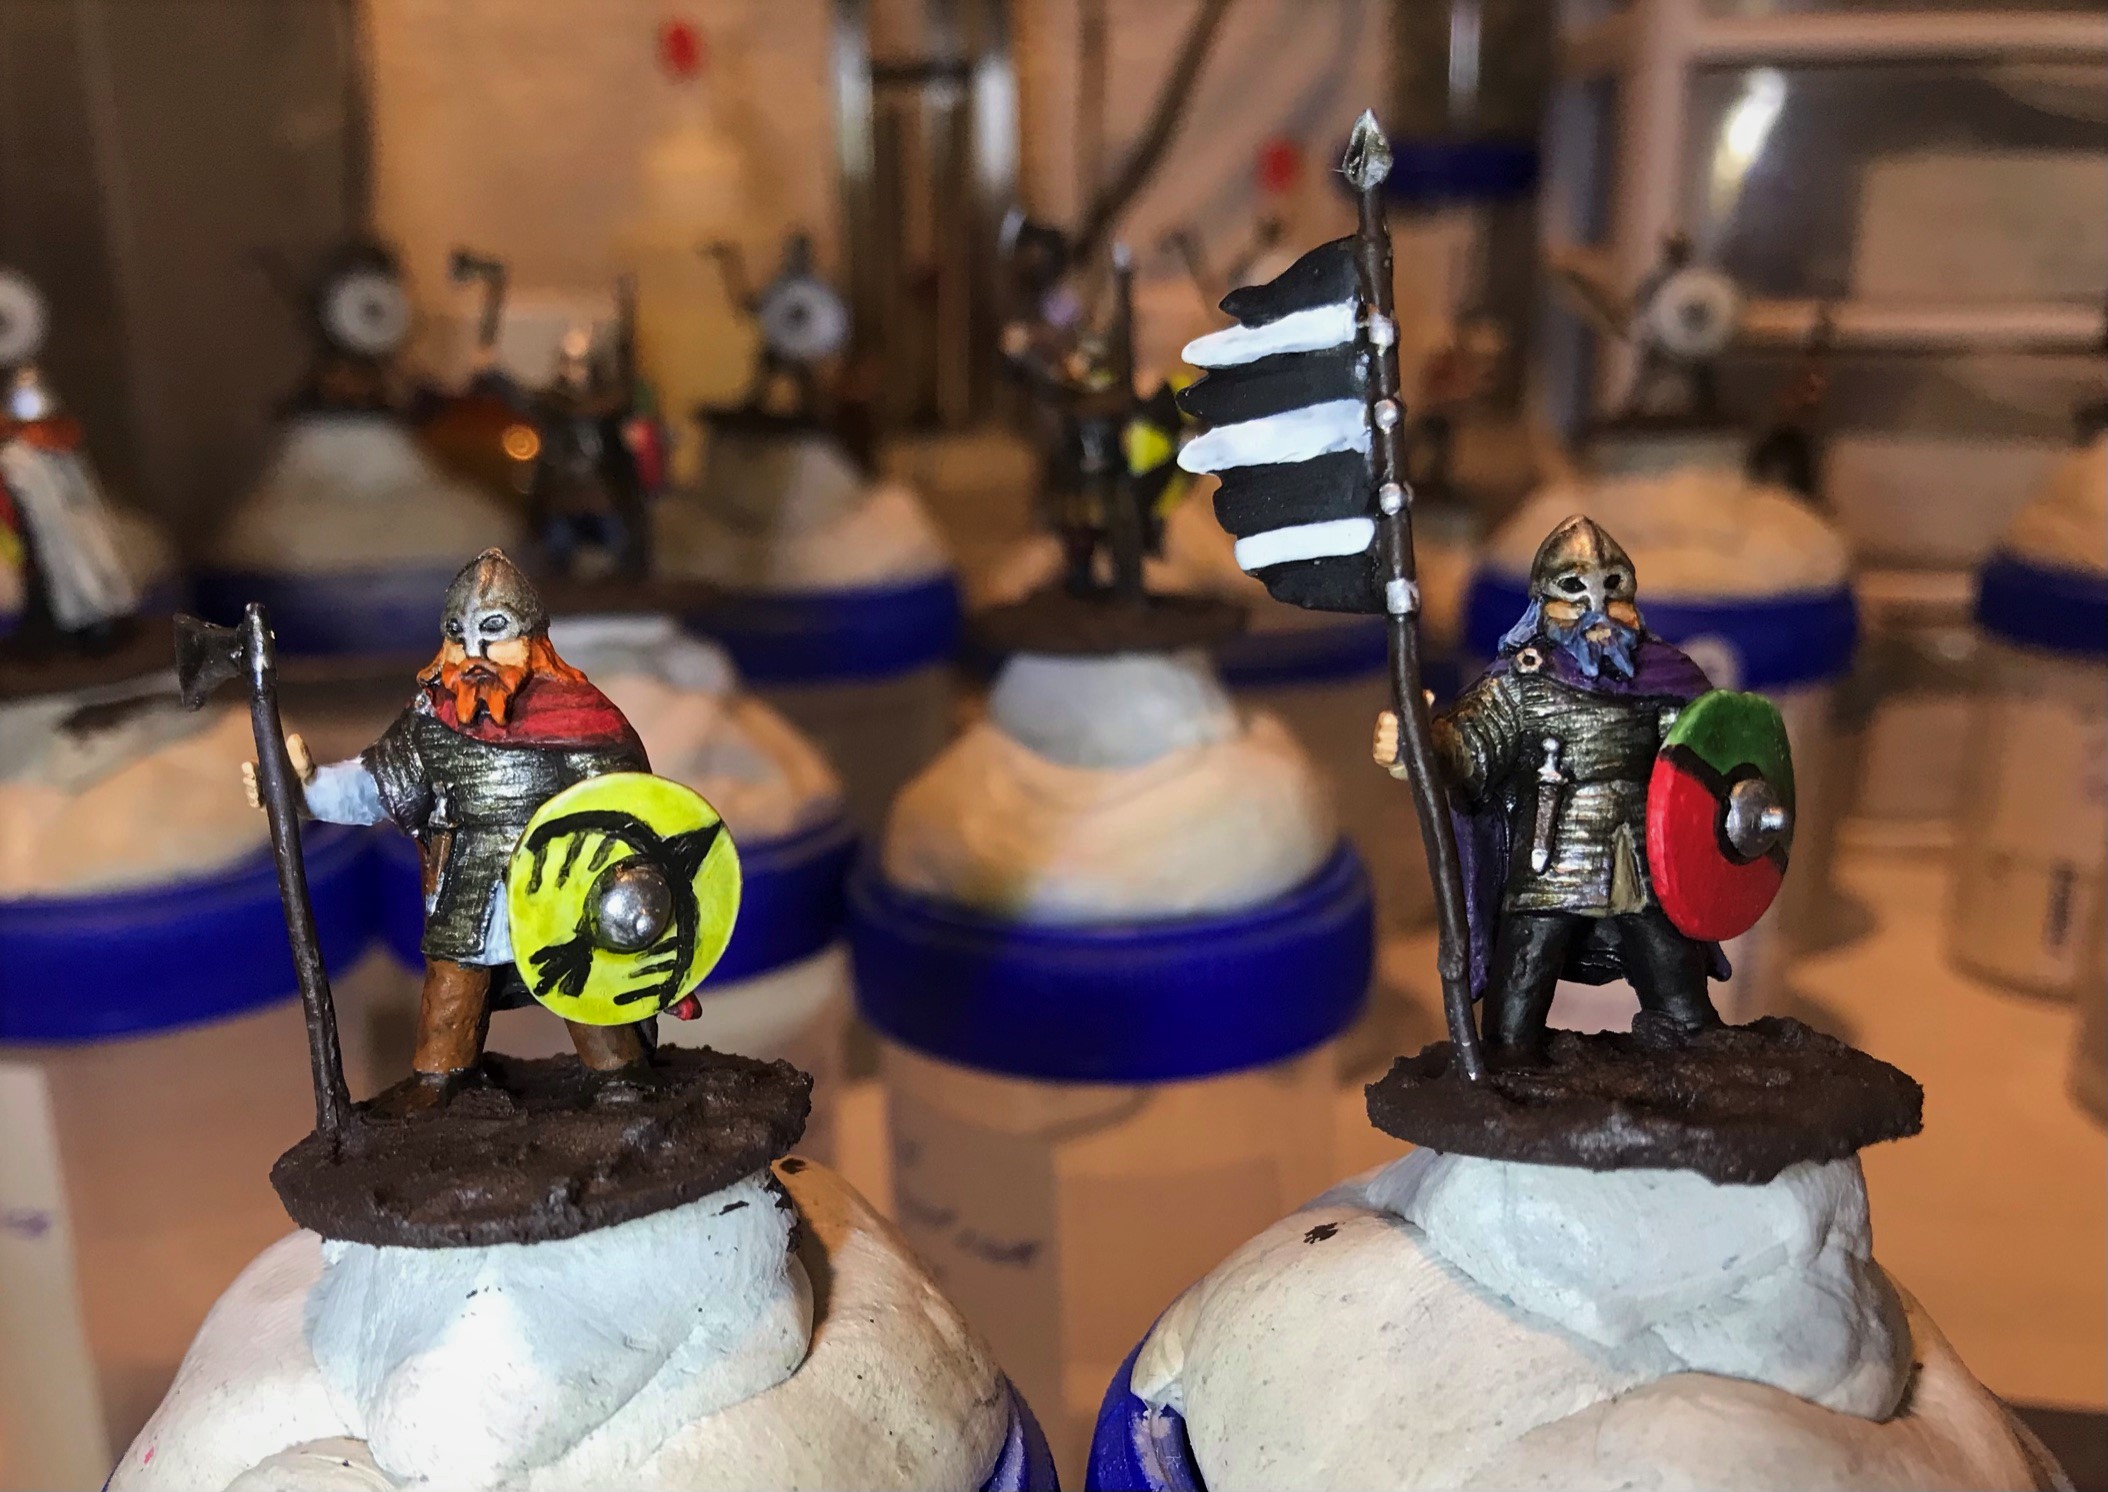
Minifigs Viking Command
I remember painting a number of fantasy Minifig miniatures back in the day. They had square bases and the details were rather plain. These were the same as those. My guess is dating from the early ’80’s or possibly even the late ’70’s.
Unfortunately, these had a severe coating of oxide or something black and crusty on them. I don’t think it was lead rot, but I did clean them up with baking soda just in case. Their spears and banner shafts were even more bendy than the others – which was very much a common issue for this manufacturer back then. I added a second stiffening coat of Gorilla Glue to these bendy shafts, and then proceeded as discussed previously.
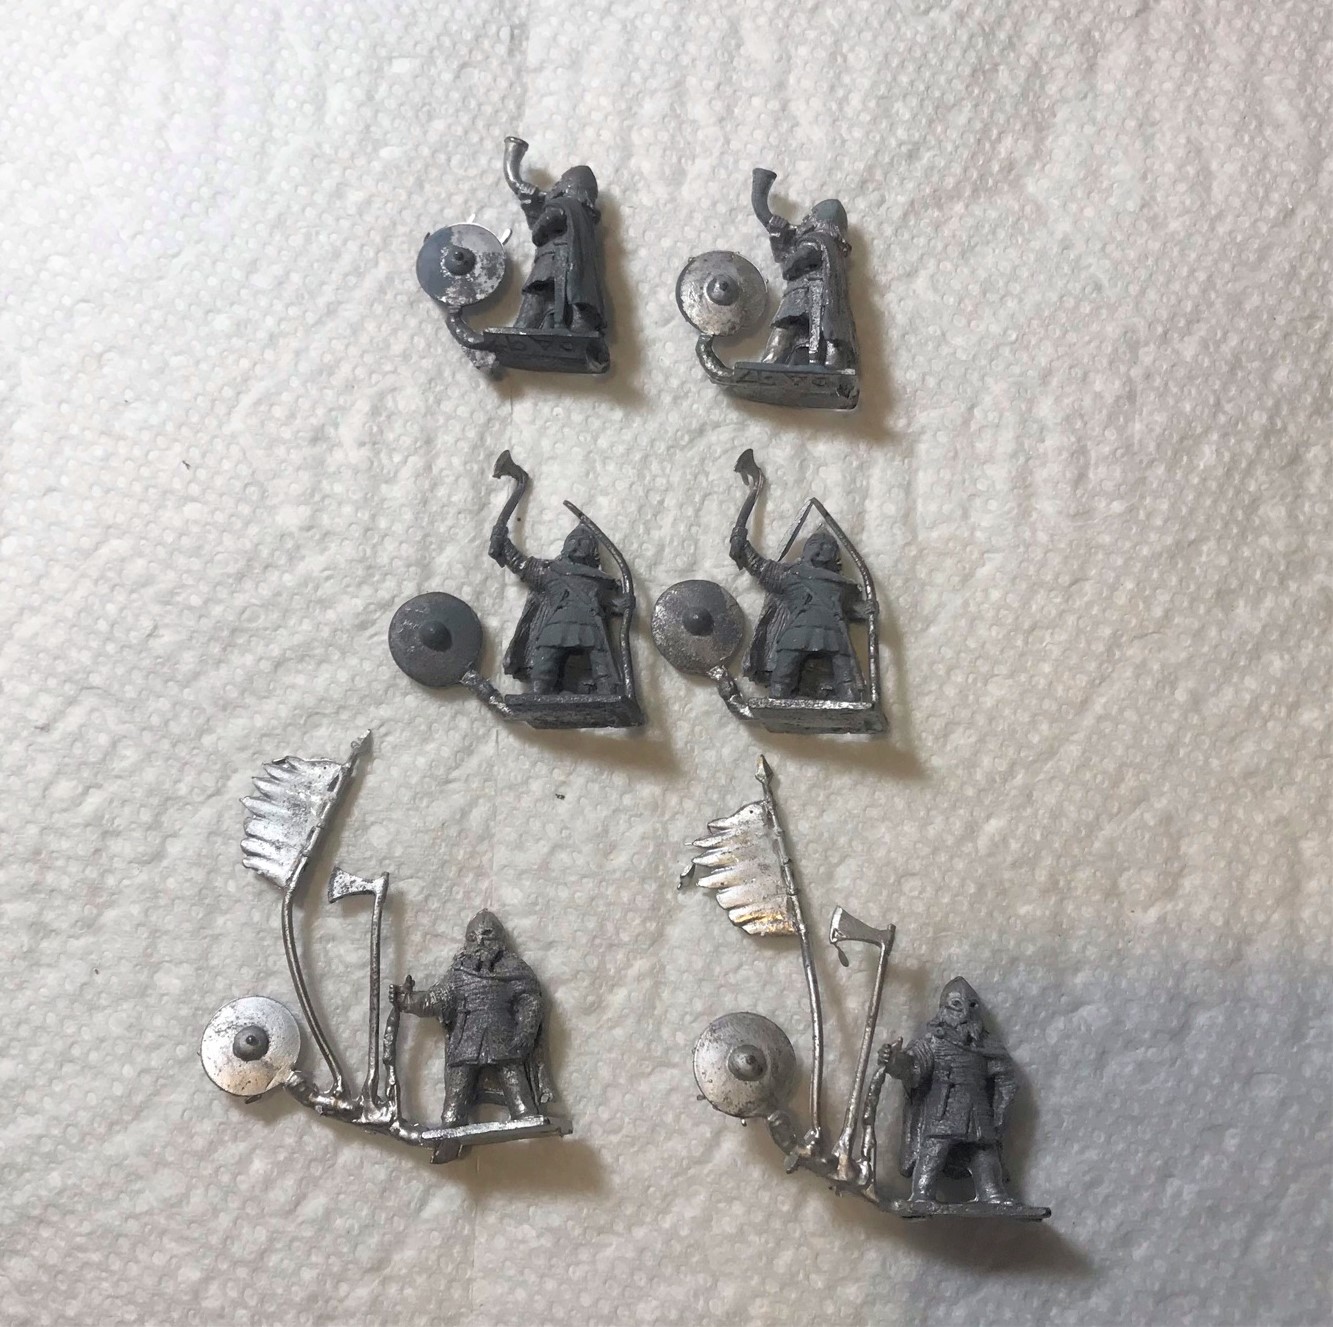
There were three poses here. Two with a horn, two with spears and axes, and two with either a banner or a long-shafted axe. For the last group, I gave one an axe and one a banner. They all had shields (unattached) so I did need to get some references for free-hand painting them.
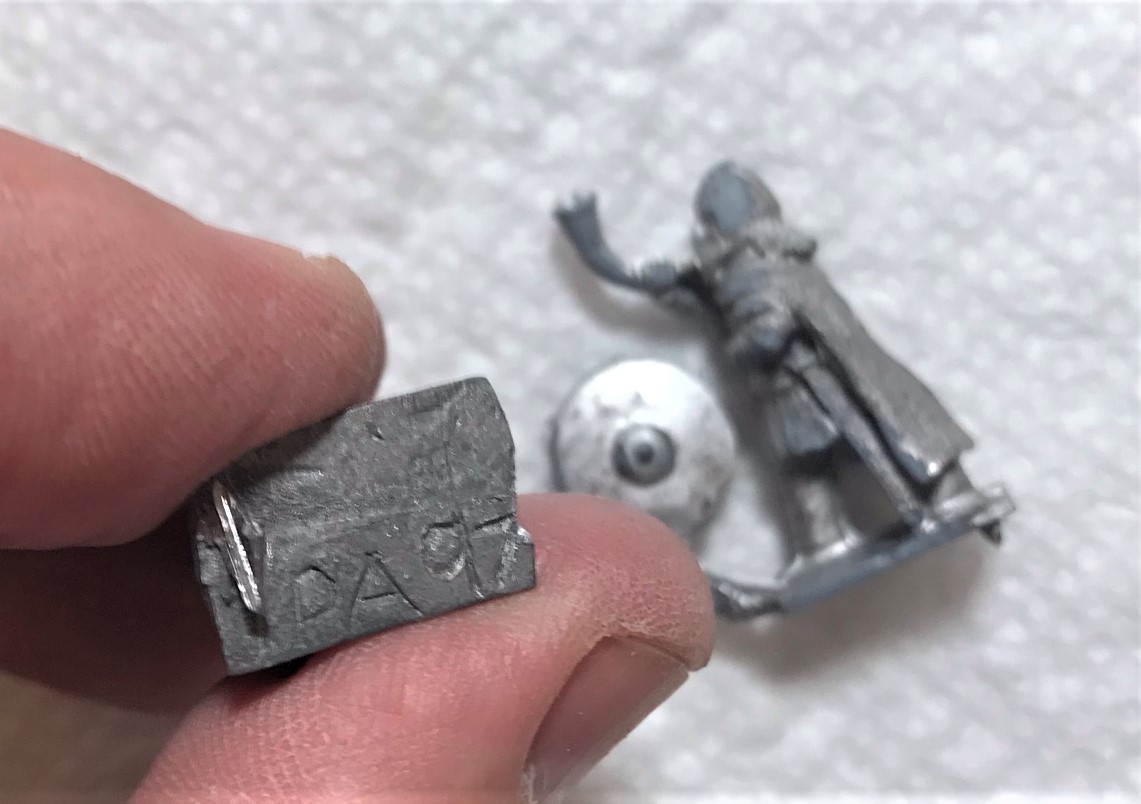
The old blister – $3.98 for six figures!You can see the dark oxidation (if that’s what it was) on all the figures – which needed filing, cleaning, and fixing of the more-bendy shafts.Close-up shot showing issues.
Each of the three poses had a different number on the bases. Pose 1 (with horn) was DA97, pose two (with axe and spear) had only partially DA4-something, and the last one was DA42. I’m assuming DA stood for “Dark Ages”.
DA97DA4?DA42
Second pose after HBB wash.
I tried to give different looks to these as well – again, a painting plan in Excel helped. As for the shields – they were fun the most enjoyable to paint – and different than the Aztec shields to be sure. I chose 6 designs that I thought would work with the colors. Instead of thinner, I used Vallejo Flow Improver with the black on a Newton & Windsor 0000 brush – and that worked (thanks to The Imperfect Modeler for that suggestion).
I would sketch lightly with a .5mm pencil, then line with black paint thinned with flow improver.Painted shields.
After I painted the shields, I gave them a brush of satin varnish. Once they dried, I mounted them to the figures.
Pose 1Pose 2Pose 3
Then after drying time, they were off to varnishing and flocking (similar to the previous group). Below are the finished models.
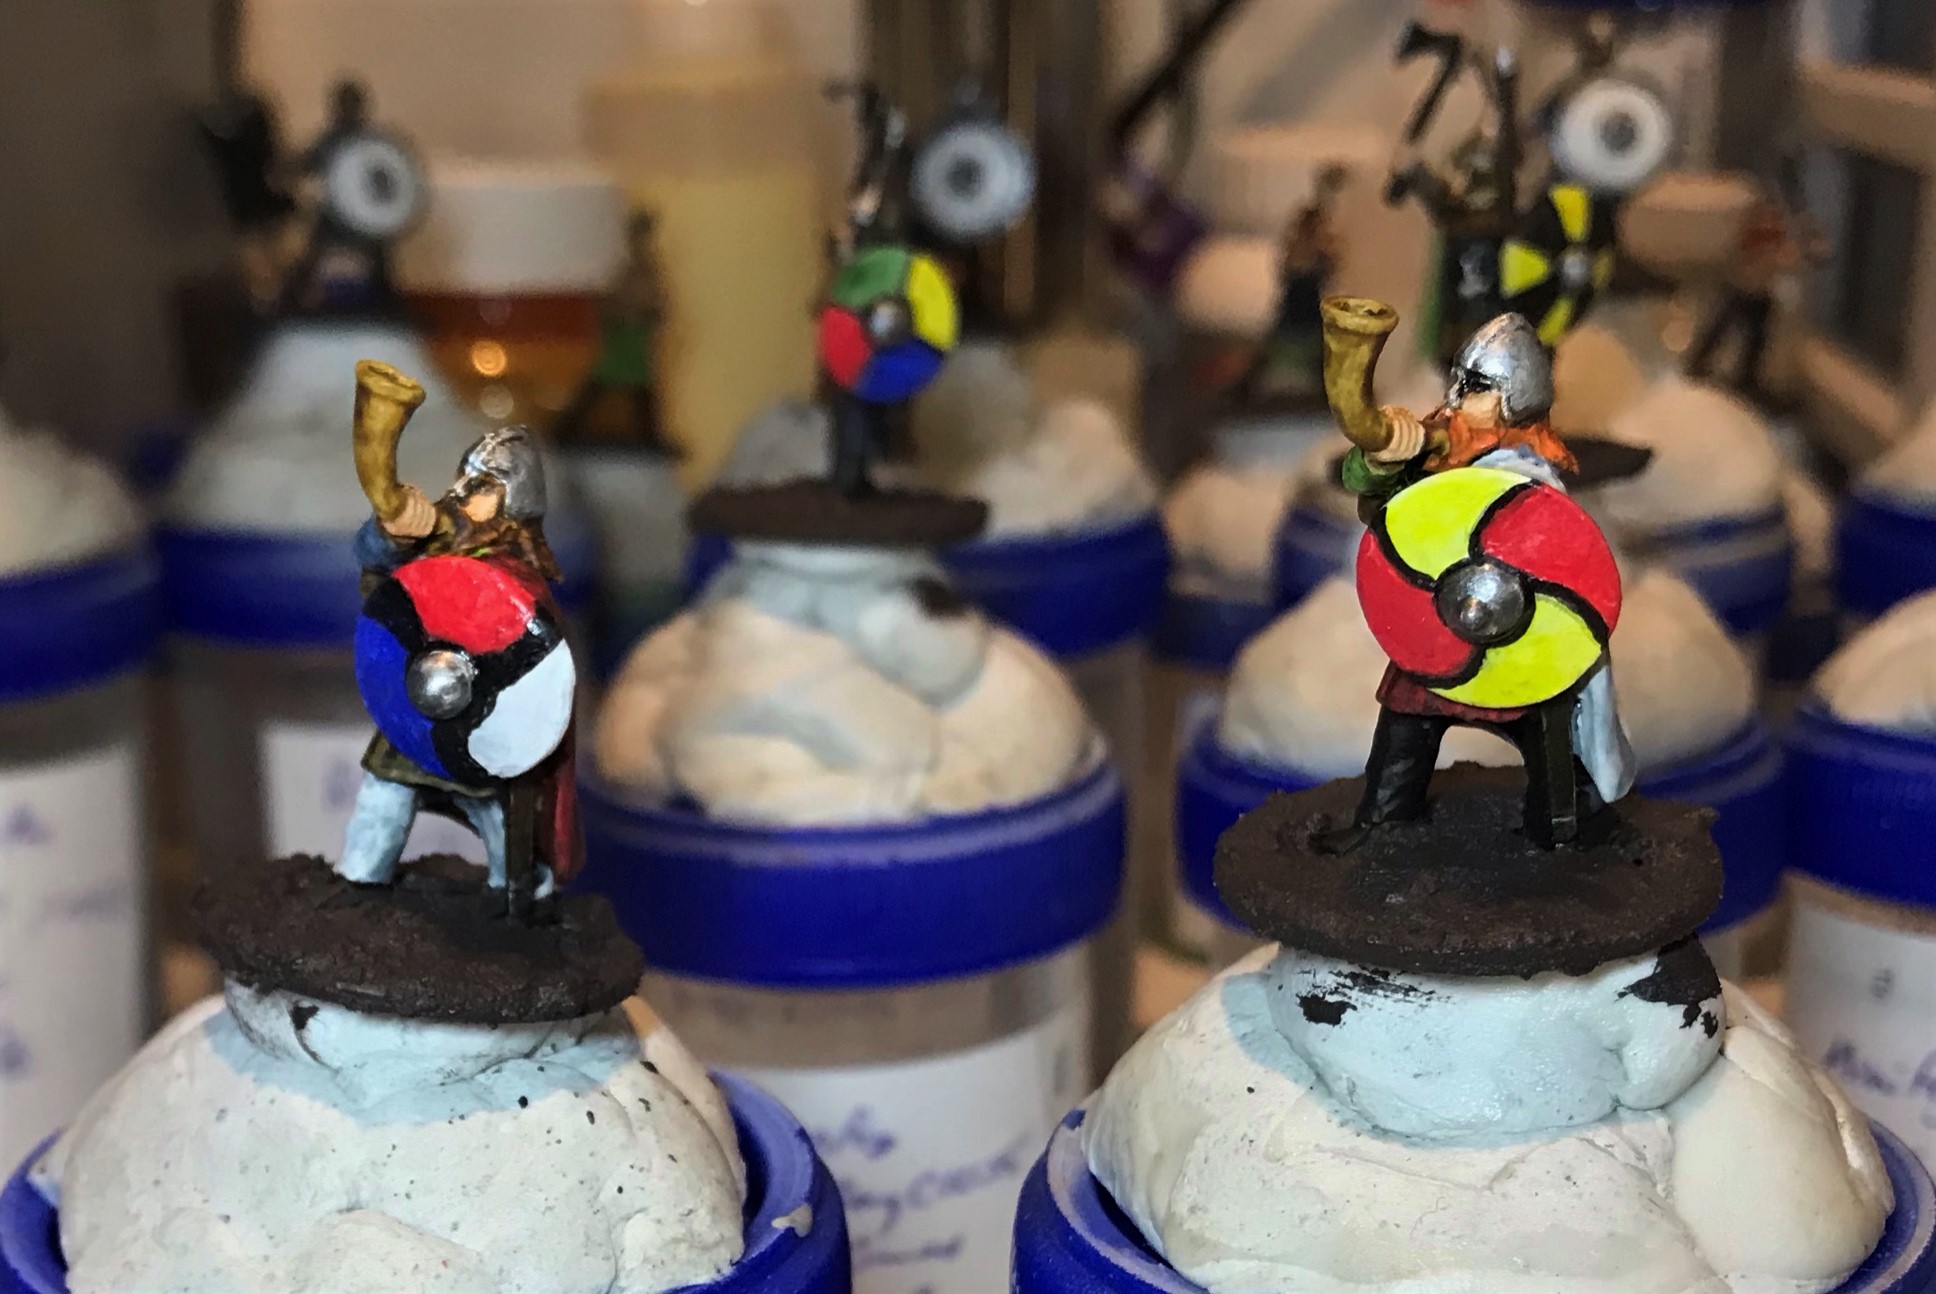
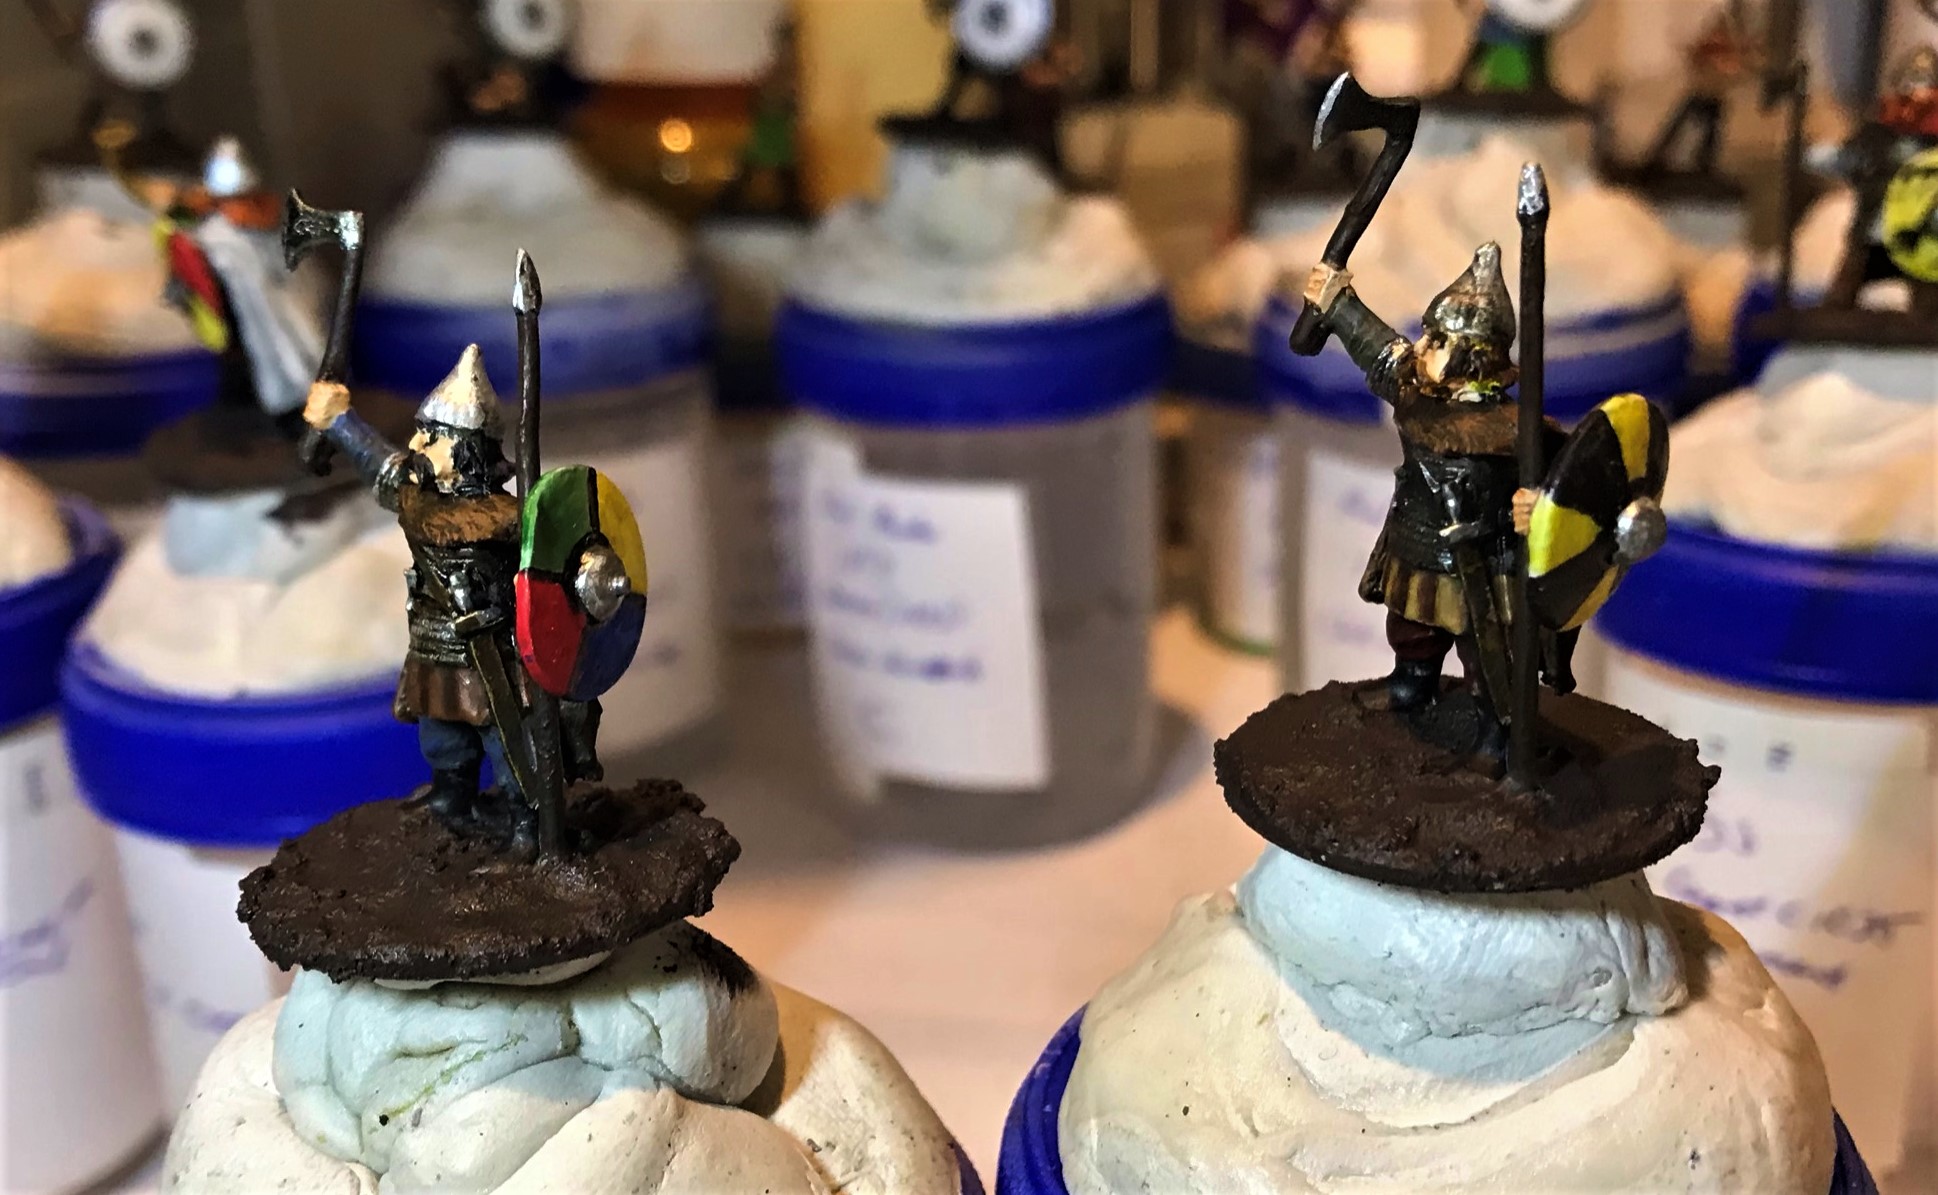
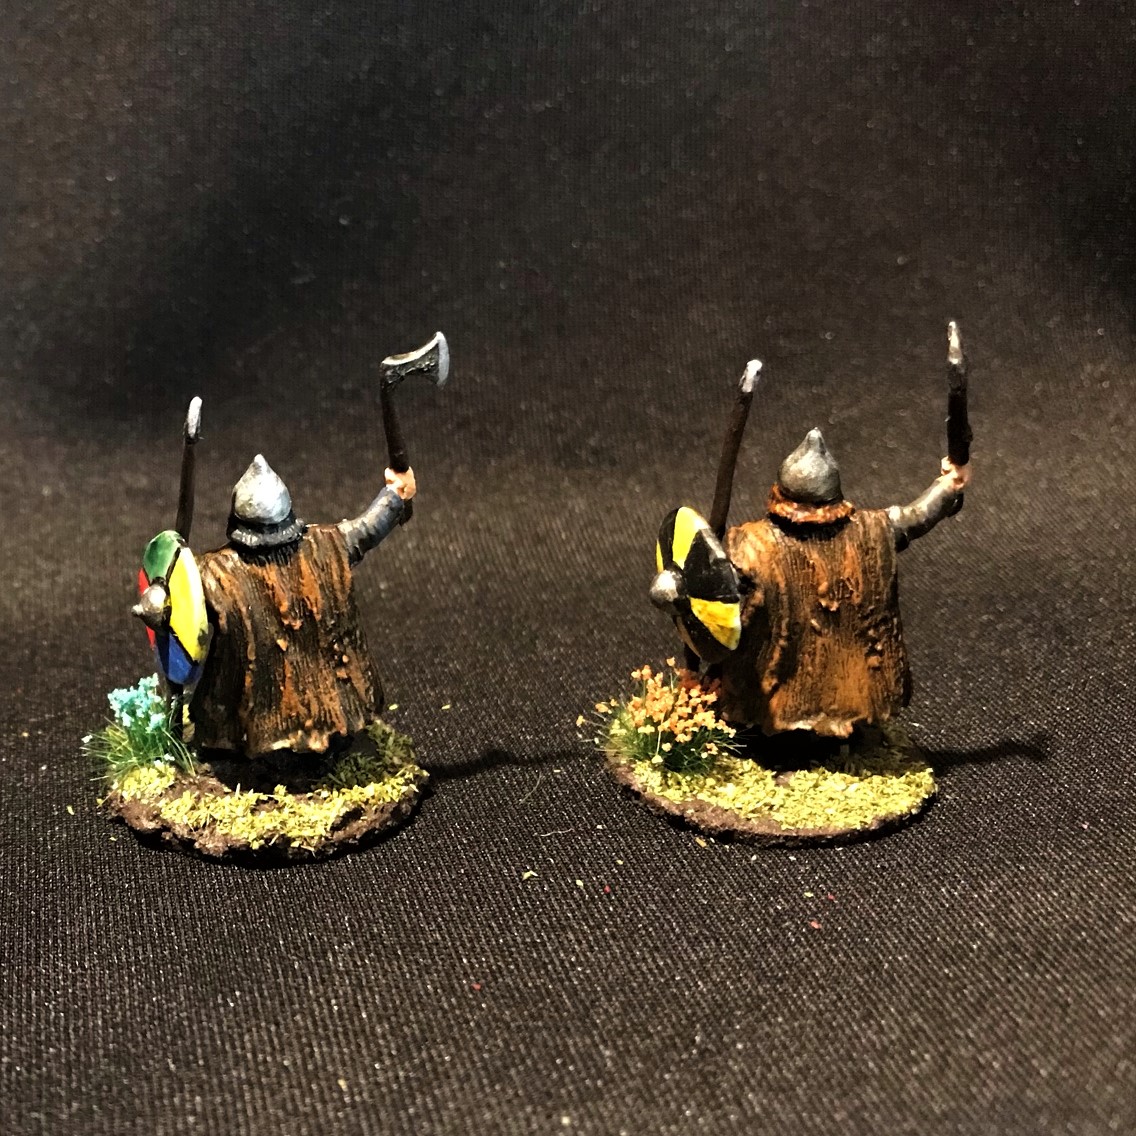
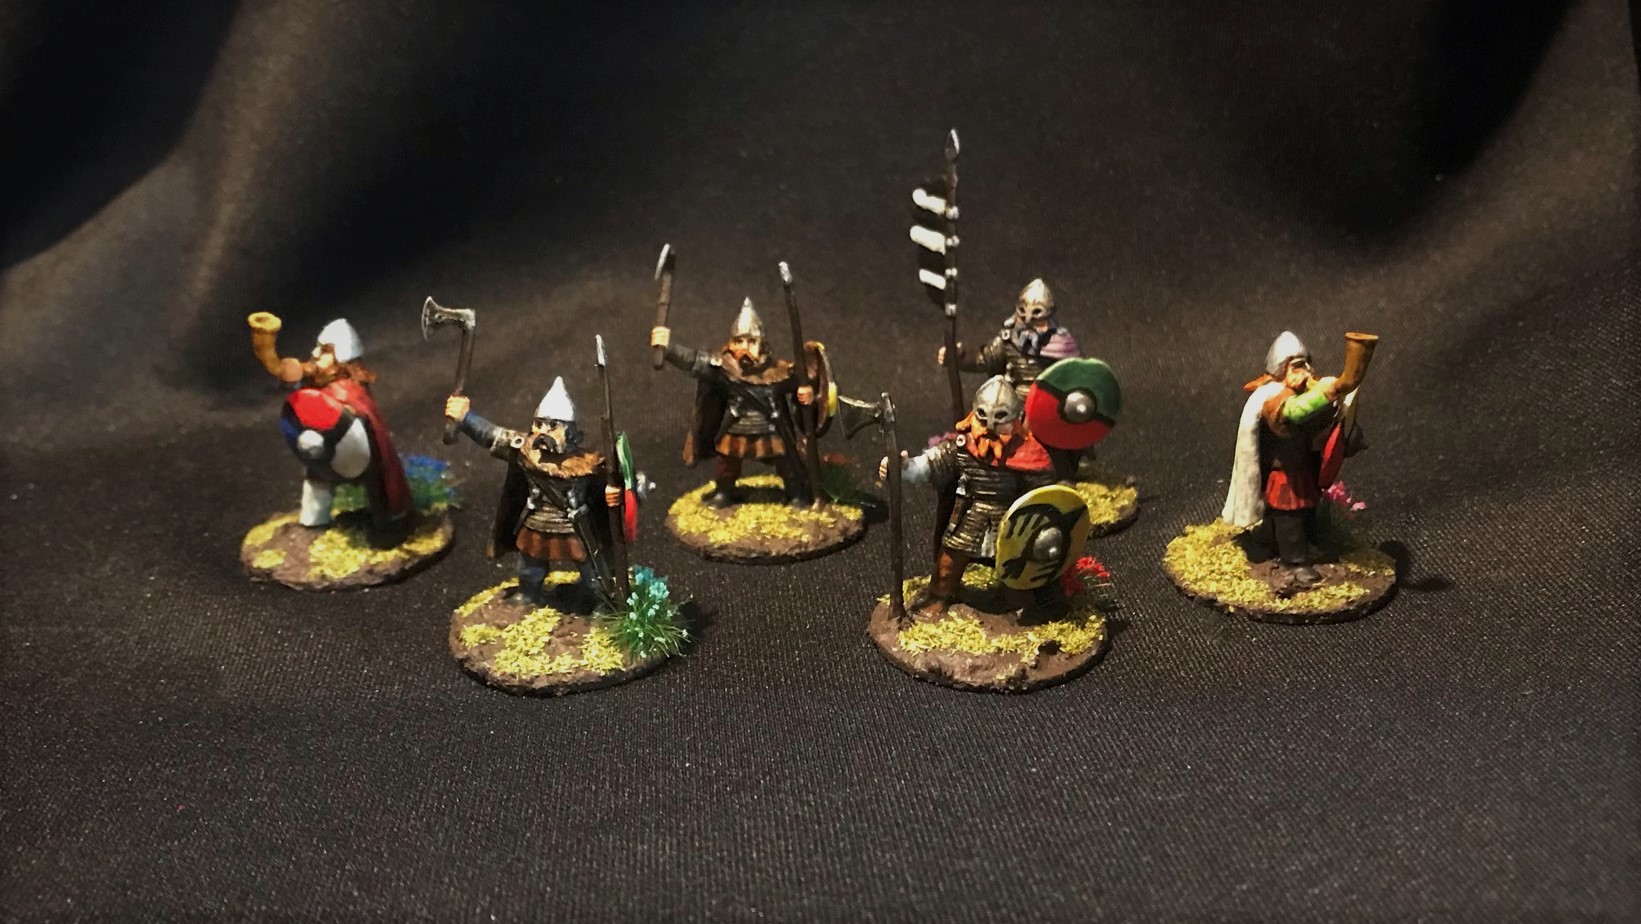
The first pose with the horns. It was easier to give their capes details than it was for their faces.Pose two with the axes and spears. Pose two with the axes and spears.Pose three had the banner or the long axe.The Viking Command Group together.
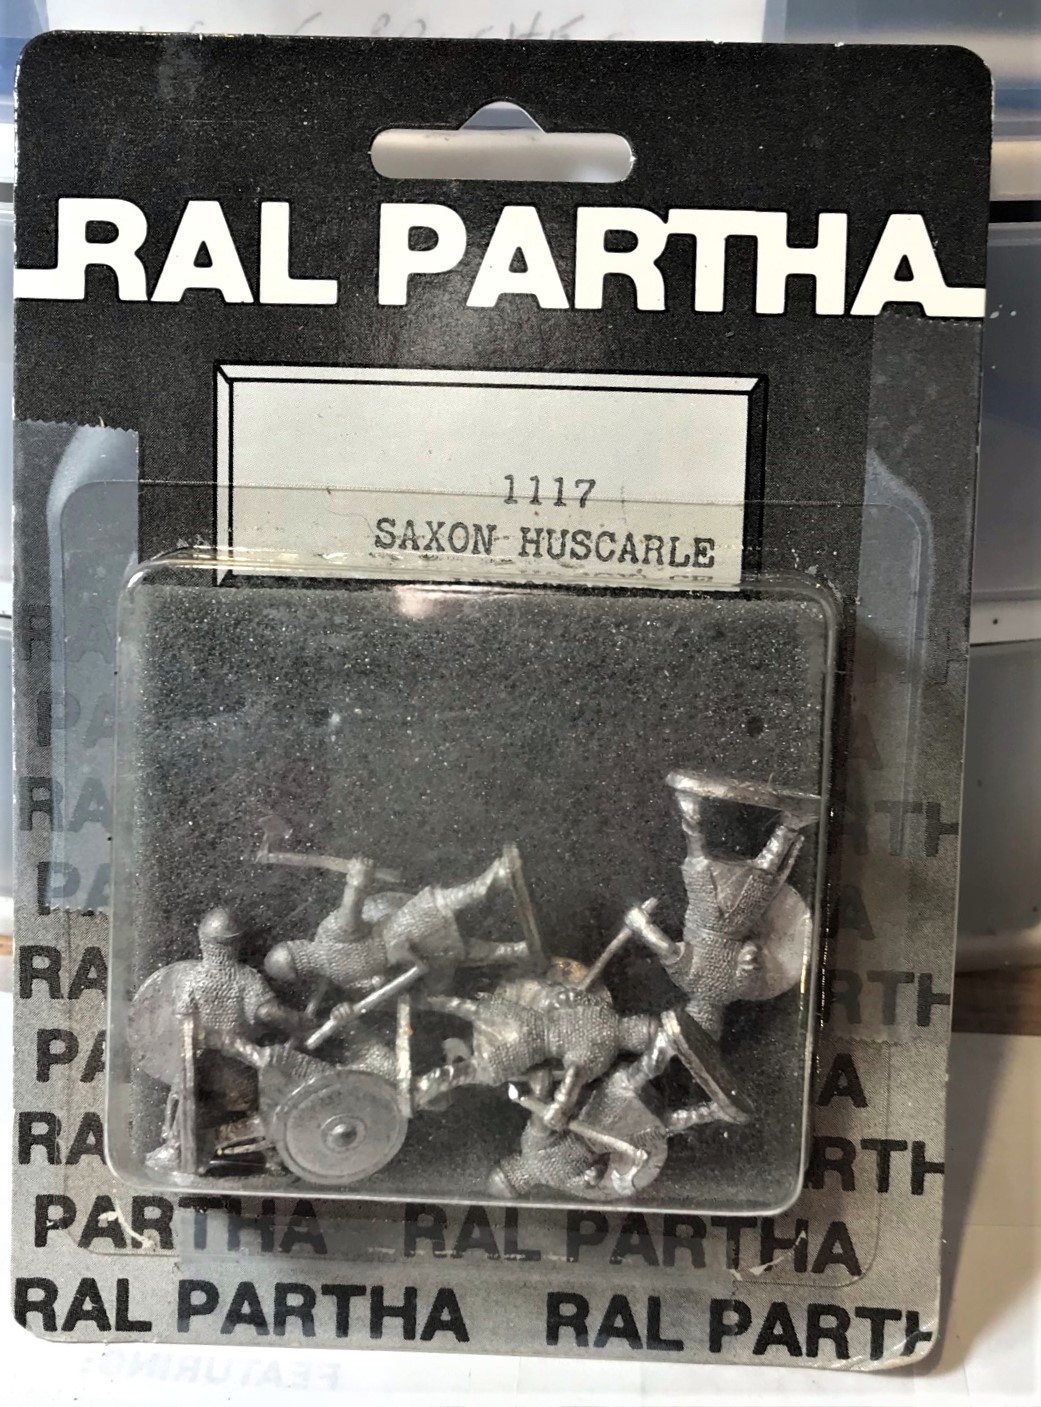
Ral Partha Saxon Huscarle
While housecarles in English is proper, the blister said “Huscarle”, so…
The old blister from the 1200 A.D. line.
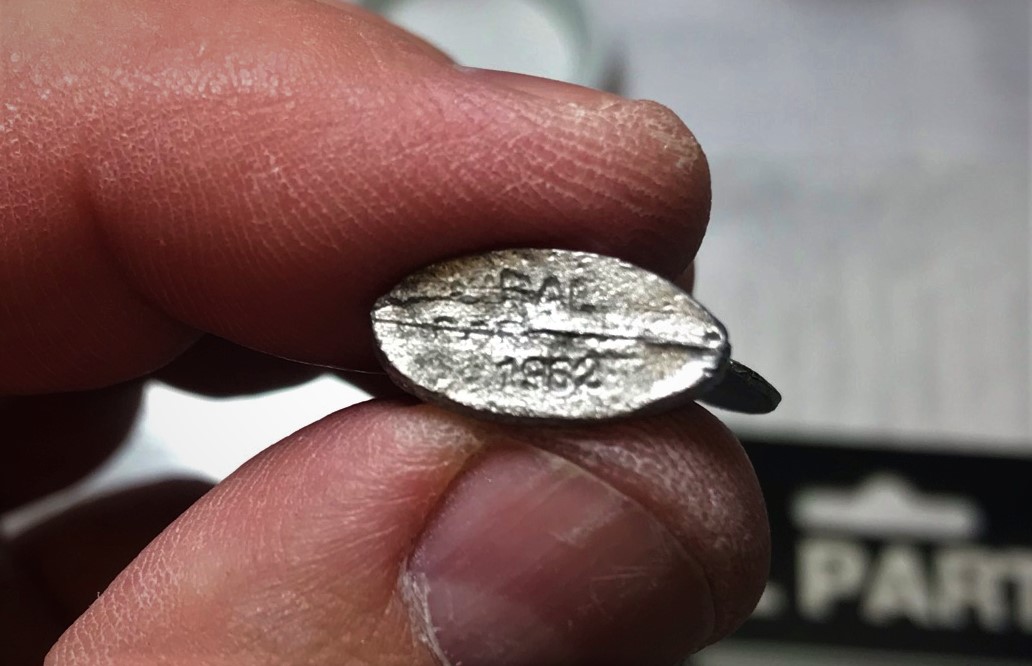
The sculpts were pretty nice – especially the chain mail. However, these were in all the same pose (as was common back when these were launched in 1982). Therefore, differentiation was more needed.
All the same!RAL 1982
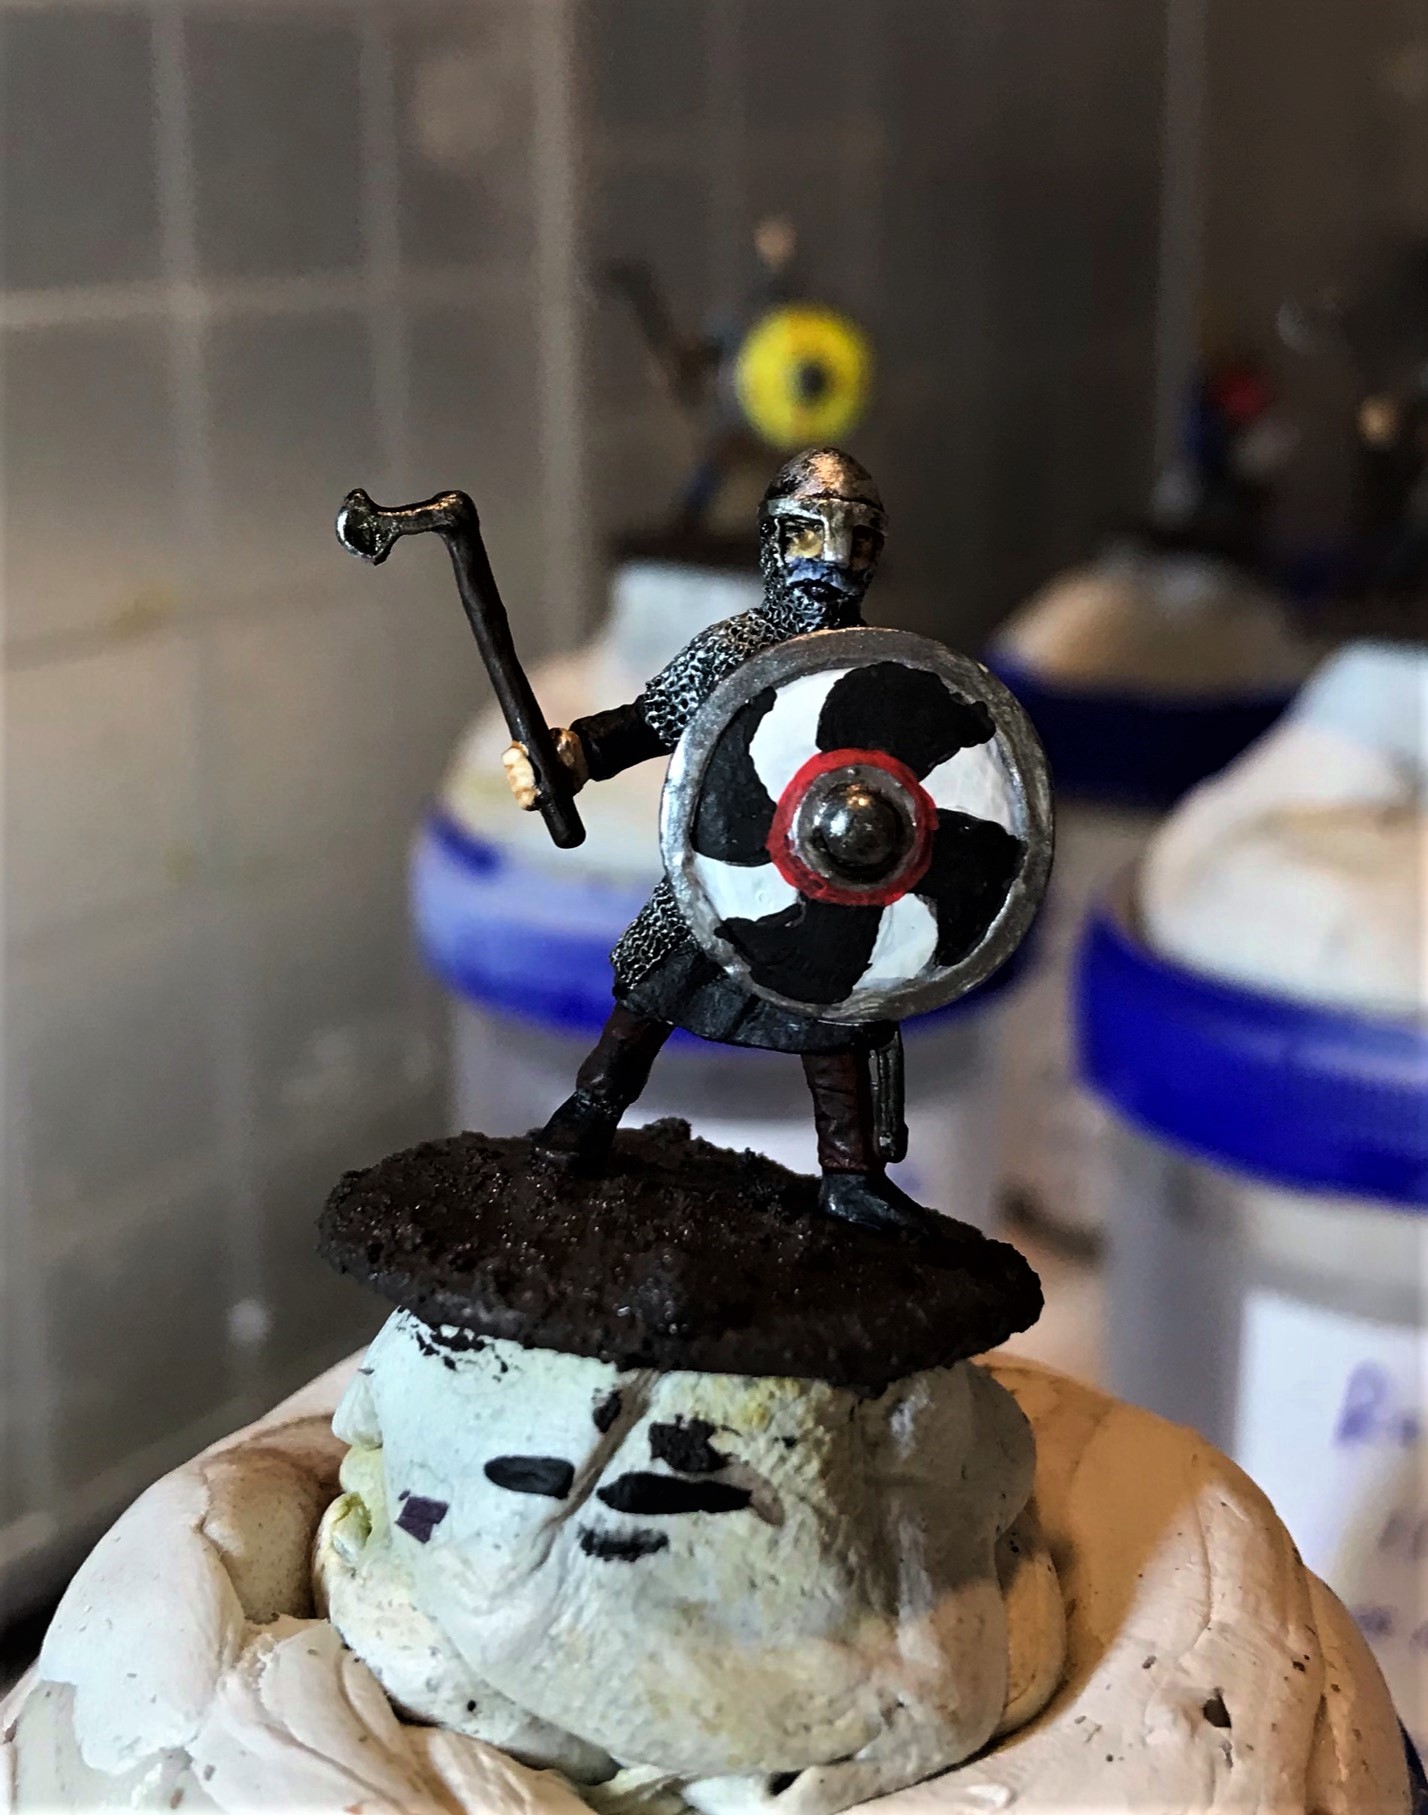
I followed the same process as discussed above with priming and the initial wash application. Another nice thing about these was that the shields were already attached – that and the eyes would not need special attention.
After the priming and the HBB wash application. I could have used Nuln Oil but I thought I’d use the HBB before it became useless.
For shields, I looked up some images for Saxon ones and chose six.
Saxon shield painting.
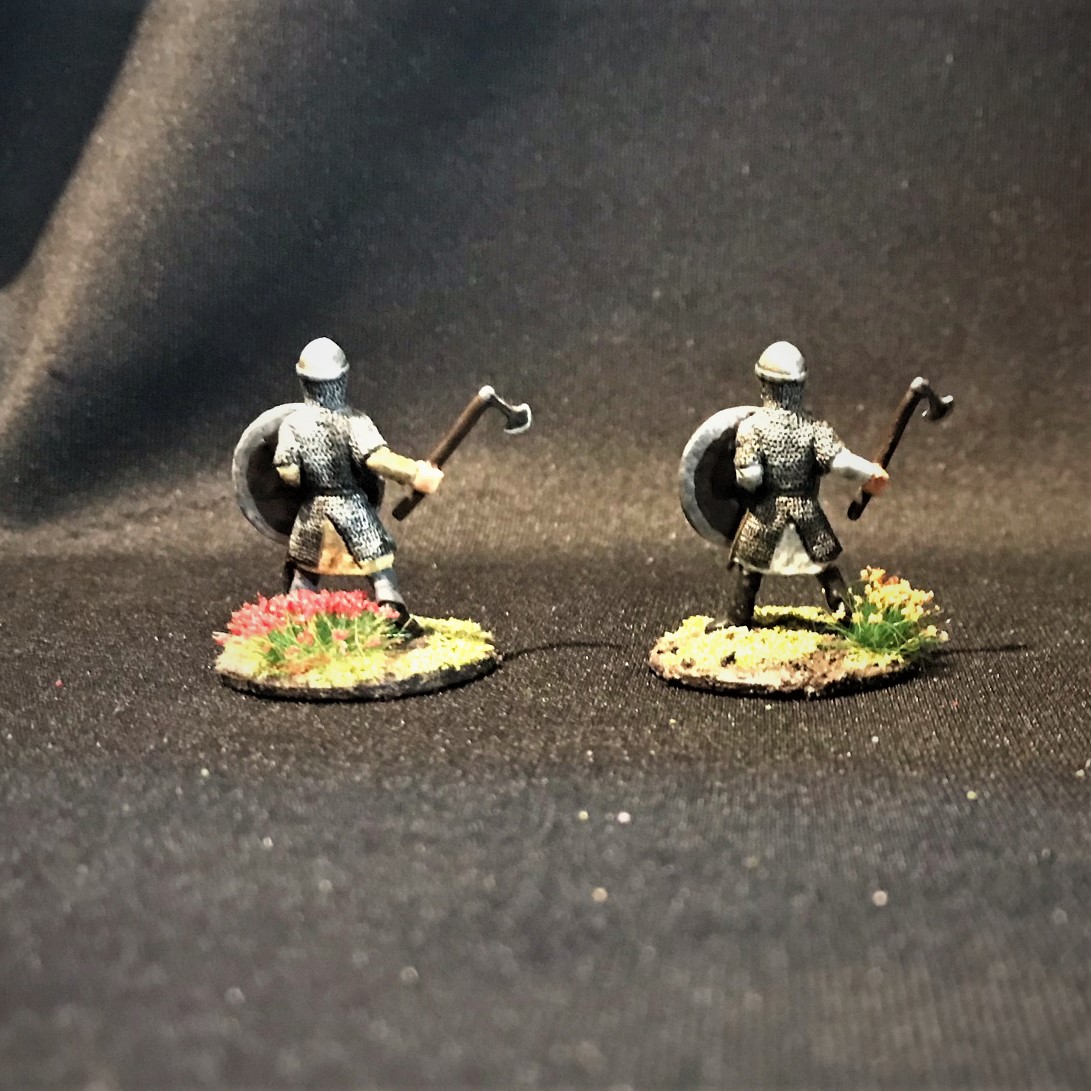
The final six look as follows:
The first and the second Saxon figures.The third and the fourth Saxons.The fifth and the sixth Saxons.The Saxon Huscarle group.
RAFM Berserker
The last figure was a single one – and he looks to be 28mm hero-scale. That makes him a bit off of the others, but maybe he’s like the Mountain from GoT?
Anyways, he looks pretty Viking-like, and Greg wanted him, so he’s in!
In his 1989 blister.Just out of the blister.After priming and wash.
This figure was so much easier to paint as it had virtually no mold lines and was well-sculpted. I only wish his axe was reasonably-sized.
Painted RAFM Berserker.
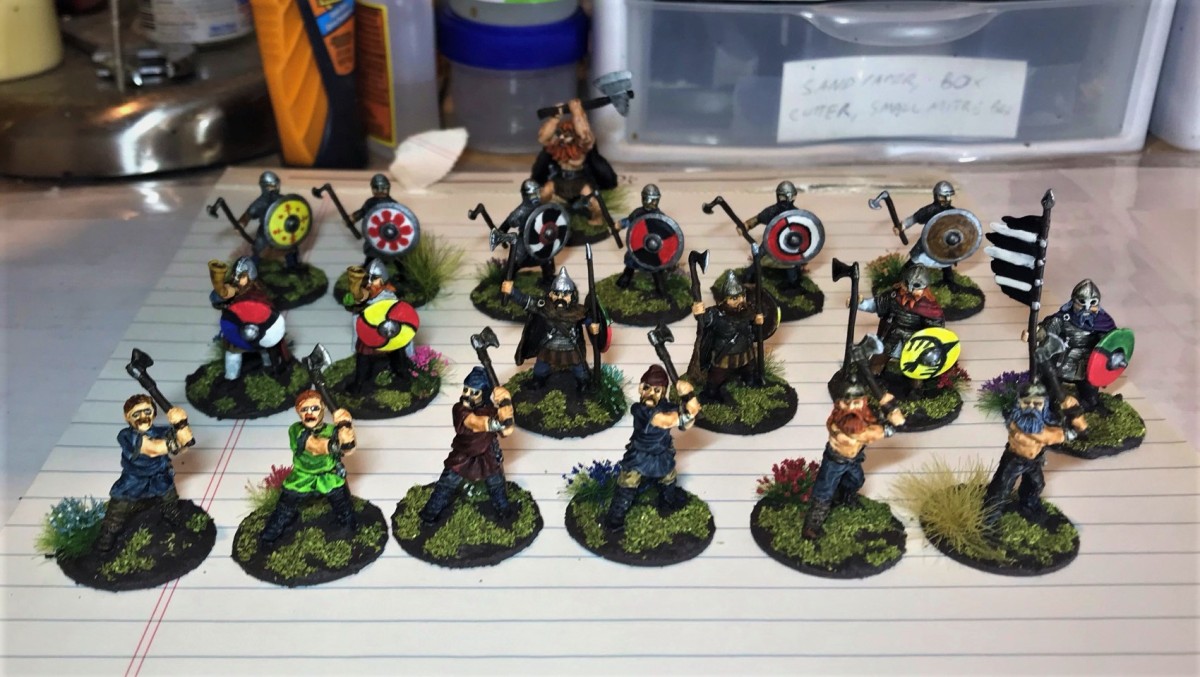
That’s the last of the 19. Here’s a group shot of them finished.
Group Shot. All in the mail to Greg in Maryland now!
I originally wanted to paint them all up as part of Roger’s (over at Rantings Under the Wargame Table) “Mo’vember Challenge”, but between surgery in November, Historicon, Thanksgiving, and my garage +build, it did not happen. Still, check out Roger’s cool roundup – I did get in Cortes…
As you may imagine, making all these figures different took a hell of a lot of paint! The list is at the end, but here’s a shot:
That’s a lot of paint!
I hope that this was enjoyable – and a change of pace was nice for me. Not sure what’s next, probably brigantines, but I do want to post a belated garage+ update by the end of this weekend. Thanks for looking and sharing any thoughts.
PAINTS, INKS, GLAZES, SHADES, WASHES, PIGMENTS, FLOCKING, GLUES AND MORE THAT I USED ON THESE VIKING FIGURES:
Below is a blog post from borderguy190 that some of you may not have seen – I am reblogging it with his permission. I (Mark) met him (Harry) at Historicon and he was a player in my Aztec/Conquistador game. I think he did a nice player review of my game as well as a superb review of the convention. His blog site is here – and I highly recommend you take a look! Now, here is his Historicon post:
One of the biggest joys of my year is getting to attend Fall In!, or as in the case this year, Historicon. Last year was a complete bust for conventions, and here in Michigan, the small local cons got called off for C19 earlier this year. Fall In! was my last hope. At some point […]
This post will cover my wargaming over the extended Veteran’s Day weekend – hopefully you will enjoy the discussion and the photos of the games here. Hell, grab a beer or a wine or whatever! Some cool pics and links to be sure.
I had been planning to attend the last Historicon – but it got moved (I think there was a pandemic or something, I (try) to forget). The event was then rescheduled for November. As Historicon and the other HMGS events have been on my bucket list, I wanted to go as a GM anyways and player too.
Also, as followers of this blog know – I have been deep into building out a series of games for the Spanish Conquest over the last year-and-a-half. This has involved many aspects – writing a rules supplement, painting figures, and building a series of games and battlefields much more for the for Feudal Patrol™ games for the period of the Spanish Conquest in Mesoamerica 500 years ago. I also recently rewrote my supplement Civilizations Collide – which will be a free download (as will a scenario booklet with multiple historic scenarios that I am working on now). So, I was very much looking forward to Historicon 2021.
Therefore, I signed up to run two games – both of which are scenarios on my in-progress booklet. I planned on running both my “Surprise Aztec Raid on the Spanish Outpost” and “Cortes’ Causeway Escape Attempt” games on Thursday night and Saturday morning respectively.
My friend Craig Hogan, myself, and Dave Wood back at USMA – probably Ring Weekend in the Fall of 1983. Craig sadly was killed a few years ago now in a private plan crash.Thanksgiving 1987 in Hagenbach, Rhineland-Pfalz, West Germany, Buck, myself, and my daughter Ellen (who is 34 now). We got together for gaming and the holiday. Buck came up from Vicenza, Italy where he was stationed to my place with a buddy, and we gamed and we had fun.
Through Dave and Buck, I have been lucky to make new friends with others of the H.A.W.K.’s, like Greg Priebe, Chris Palmer, and Duncan Adams (and many more too – like Zeb, Don, Eric and others – please don’t feel left out if I did not mention you). Due to my ongoing garage+ build (of which there are a number of updates that are listed here), I missed BARRAGE in September. So, I was pretty stoked about the opportunity to get together with friends (and make new ones) and push lead around the tabletop.
However, as fate would have it, some folks would not be able to attend Historicon due to personal reasons. As seeing and gaming with friends are as much a draw for me as the convention itself, I needed to make a change in plans. We had a Zoom call, and collectively arrived at a new plan. I would drive down from Massachusetts and meet Dave in Maryland for a gaming afternoon on the 11th at my hotel room. Then on Friday morning I would run my “Surprise Aztec Raid on the Spanish Outpost” game in Chris Palmer’s gaming room in Maryland, and then play in an Ozz game afterwards until I needed to leave for Historicon (about 90 minutes away). Friday night I would drive up to Valley Forge, Pennsylvania to set up my “Cortes’ Causeway Escape Attempt” game for Saturday morning play.
So, on a 28-degree morning in Massachusetts, I defrosted my loaded car (12 boxes of terrain, plus 2 mats, a wagon, plus a suitcase) and headed to Maryland – arriving around mid-day – where it was 4o degrees warmer. Ah, New England!
Frosty morning departure.
Axis & Allies
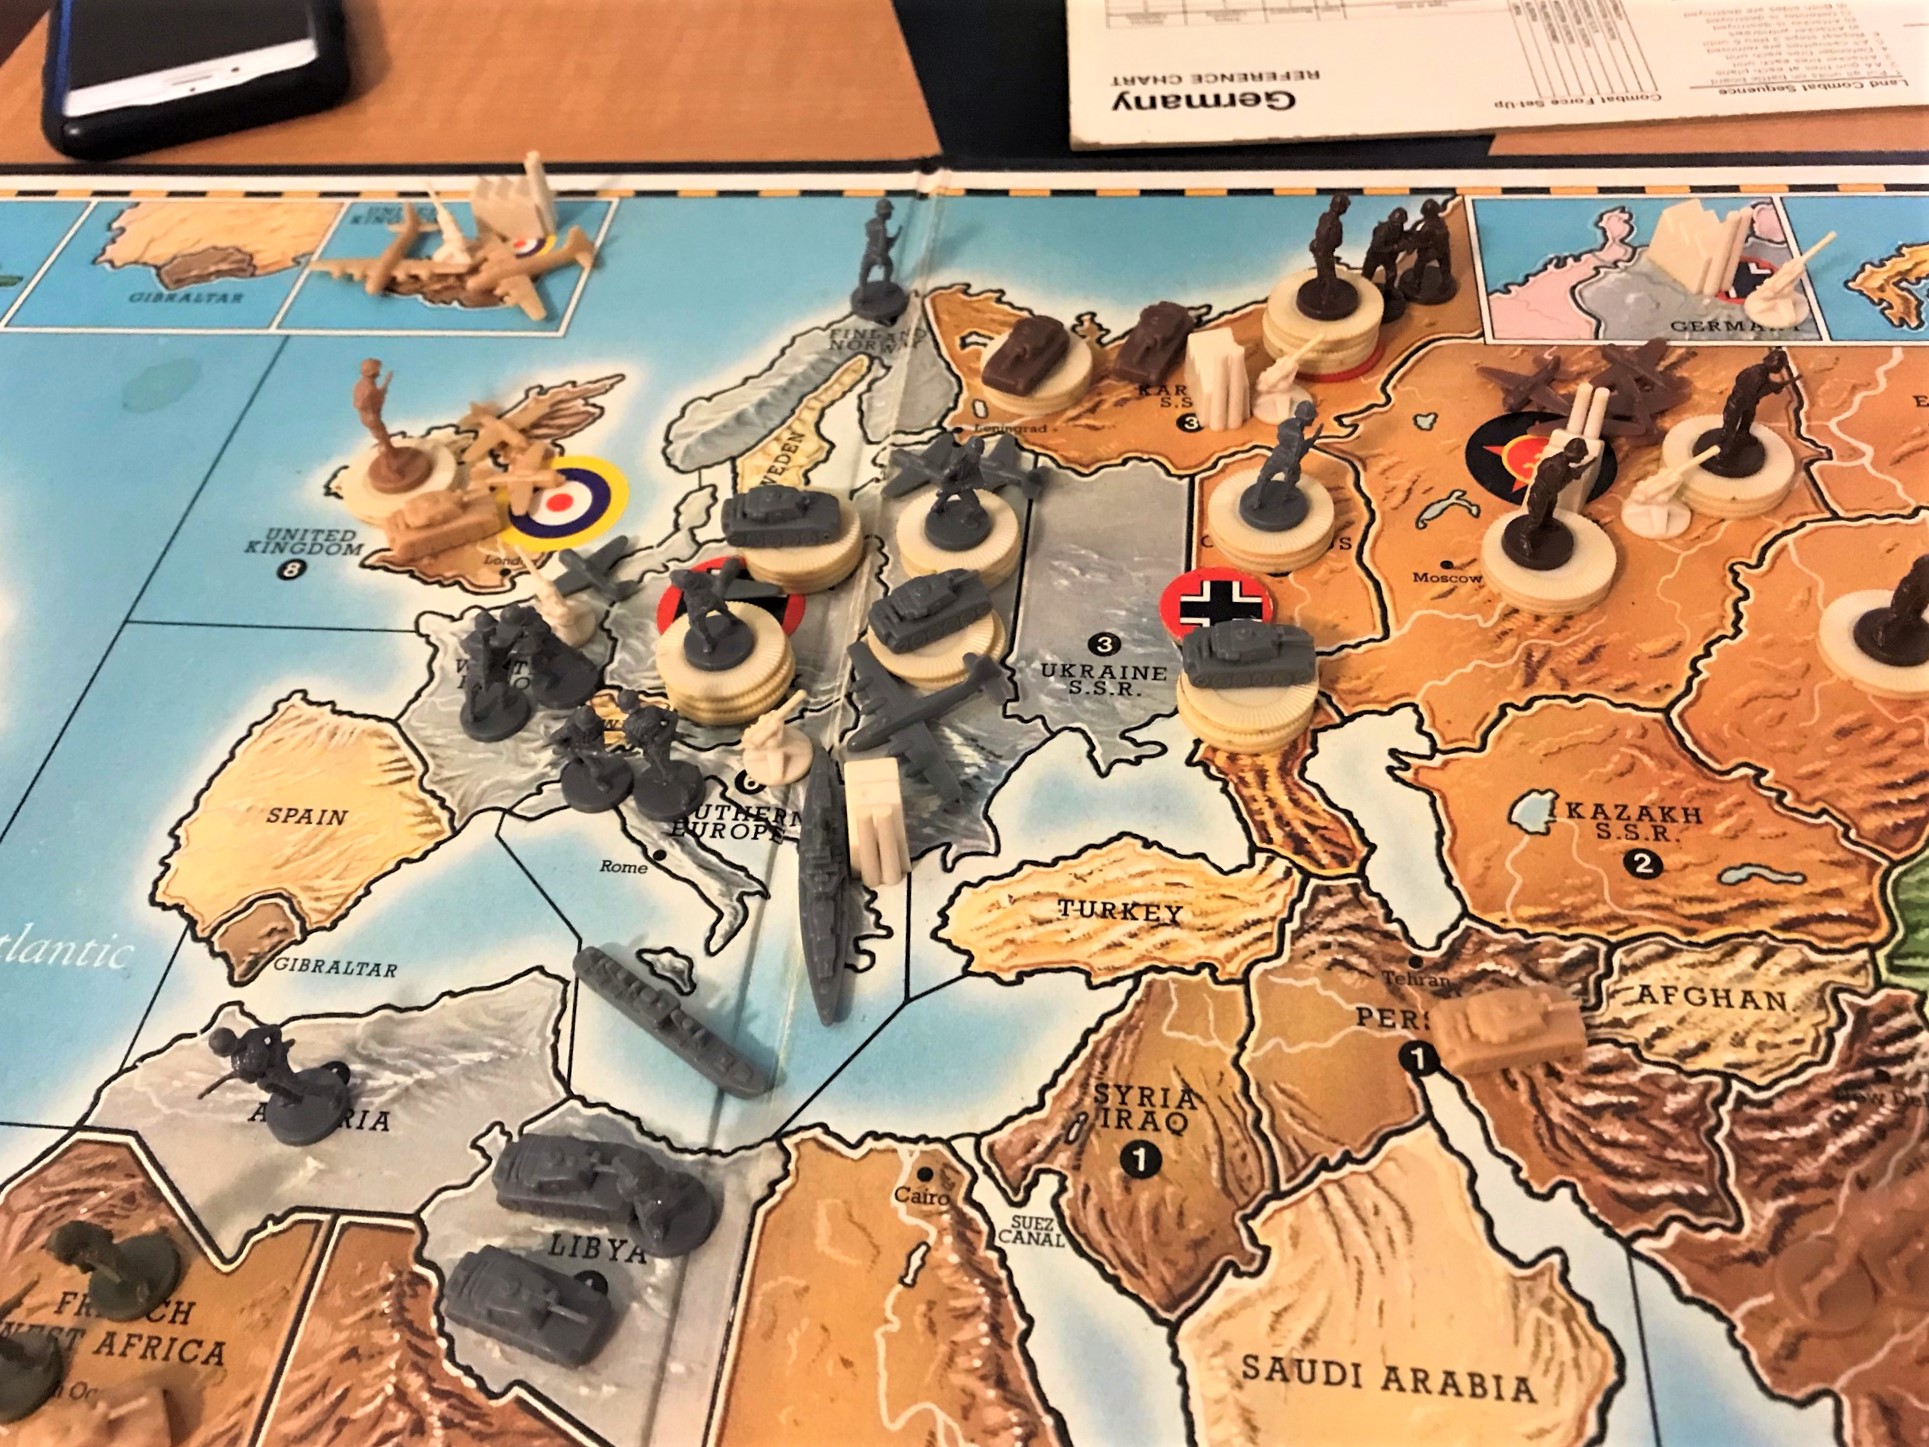
Dave and I have now gamed since 1982 – so coming up on 40 years. We have played Avalon Hill’s “Victory in the Pacific” (as well as other titles) dozens of times over the years. On Thursday, after I arrived, we decided to be different and try Milton Bradley’s “Axis & Allies” this time – a board game with plastic miniatures that we have discussed many times but never played before. I got this game back in the mid-80’s. At one point there was an on-line version but we never got around to playing that either. For this game, we picked sides at random, and Dave played the Axis, and I the Allies. It was Veteran’s Day, and as we are obviously both vets, it was a nice add.
The game went back and forth. A lot. I managed to keep Russia in the game – and built an industrial complex in India for the British. This allowed me to build 3 units per turn there in an attempt to keep the Japanese off the Russian’s back.
After the first turn, I had consolidated a nice position in Mother Russia to try to thwart Dave. And yes, the shirt says what I am impressed with – Dave has run dozens of marathons and many runs up to 50 miles and maybe more in distance.We had a back and forth fight over the Karelia territory that had a factory I did not want to lose. Eventually, I did.
Meanwhile, my Indian gambit attracted a lot of Japanese attention – maybe too much. Dave hammered away at it and while the Japanese were unsuccessful he did attrite my forces and that prevented me from exploiting my force buildup.
Dave made multiple attacks on India supported by carrier-based fighters and land-based bombers. I had sent the American-supported Chinese infantry in to help defend. Meanwhile, Russia fell.
Dave kept hammering away at India, and eventually had his Germans violate Afghan neutrality – hitting India for the decisive blow. Yes, the Germans took India by blitzing panzers through Afghanistan…
I built India up and flew in American air support, but the next turn it fell.
I did desperately roll for Weapon’s Development for both the Americans and the British – with only the British succeeding in getting 3 – Rockets, Super Subs, and Strategic Bombers. My rocket and strategic bomber attacks slowed the German’s production, but it was too late…congrats to Dave!
Christoricon – Surprise Aztec Raid on the Spanish Outpost
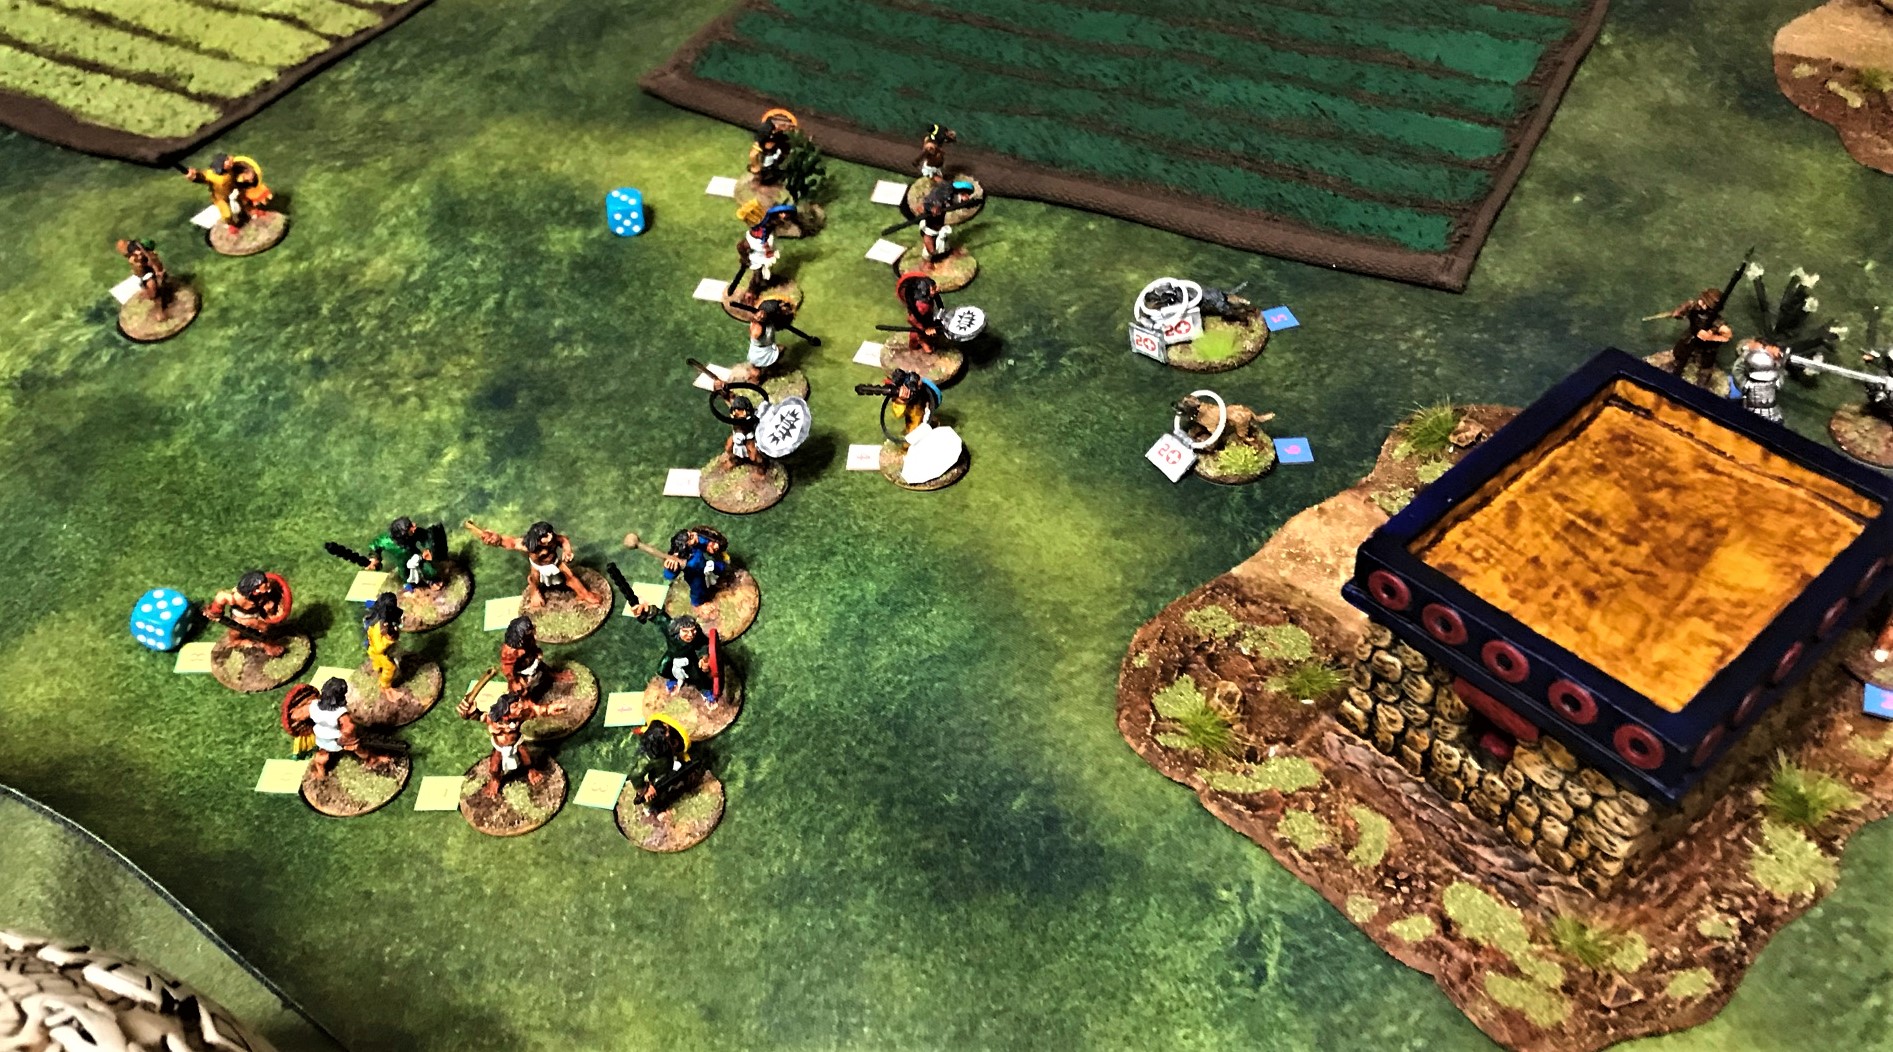
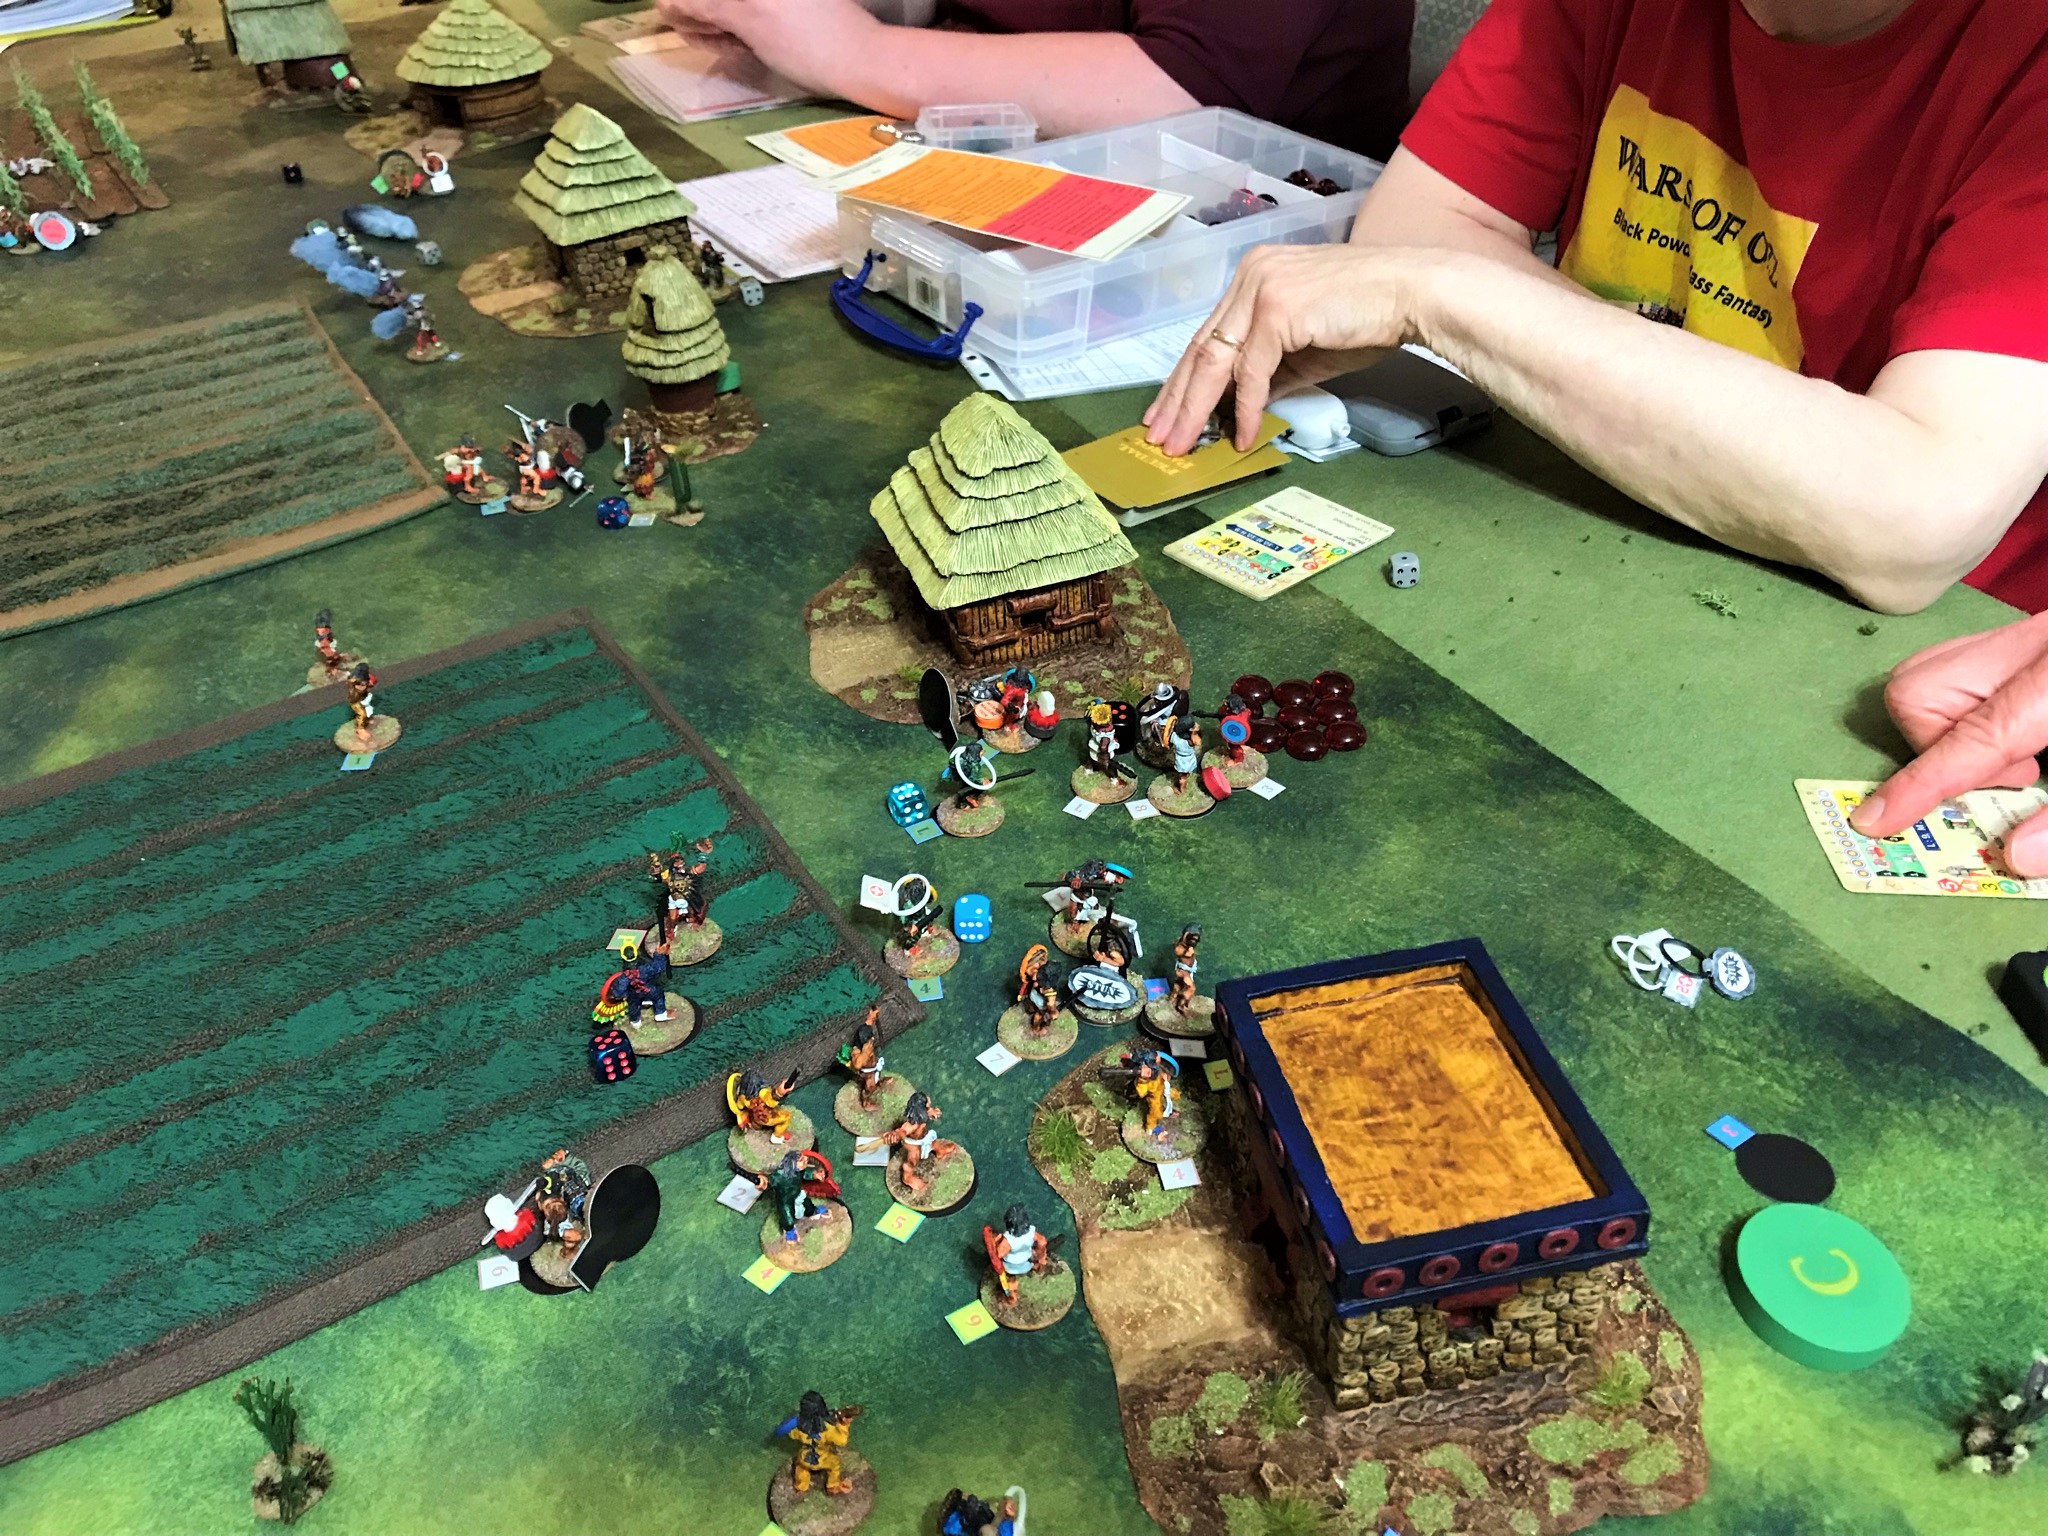
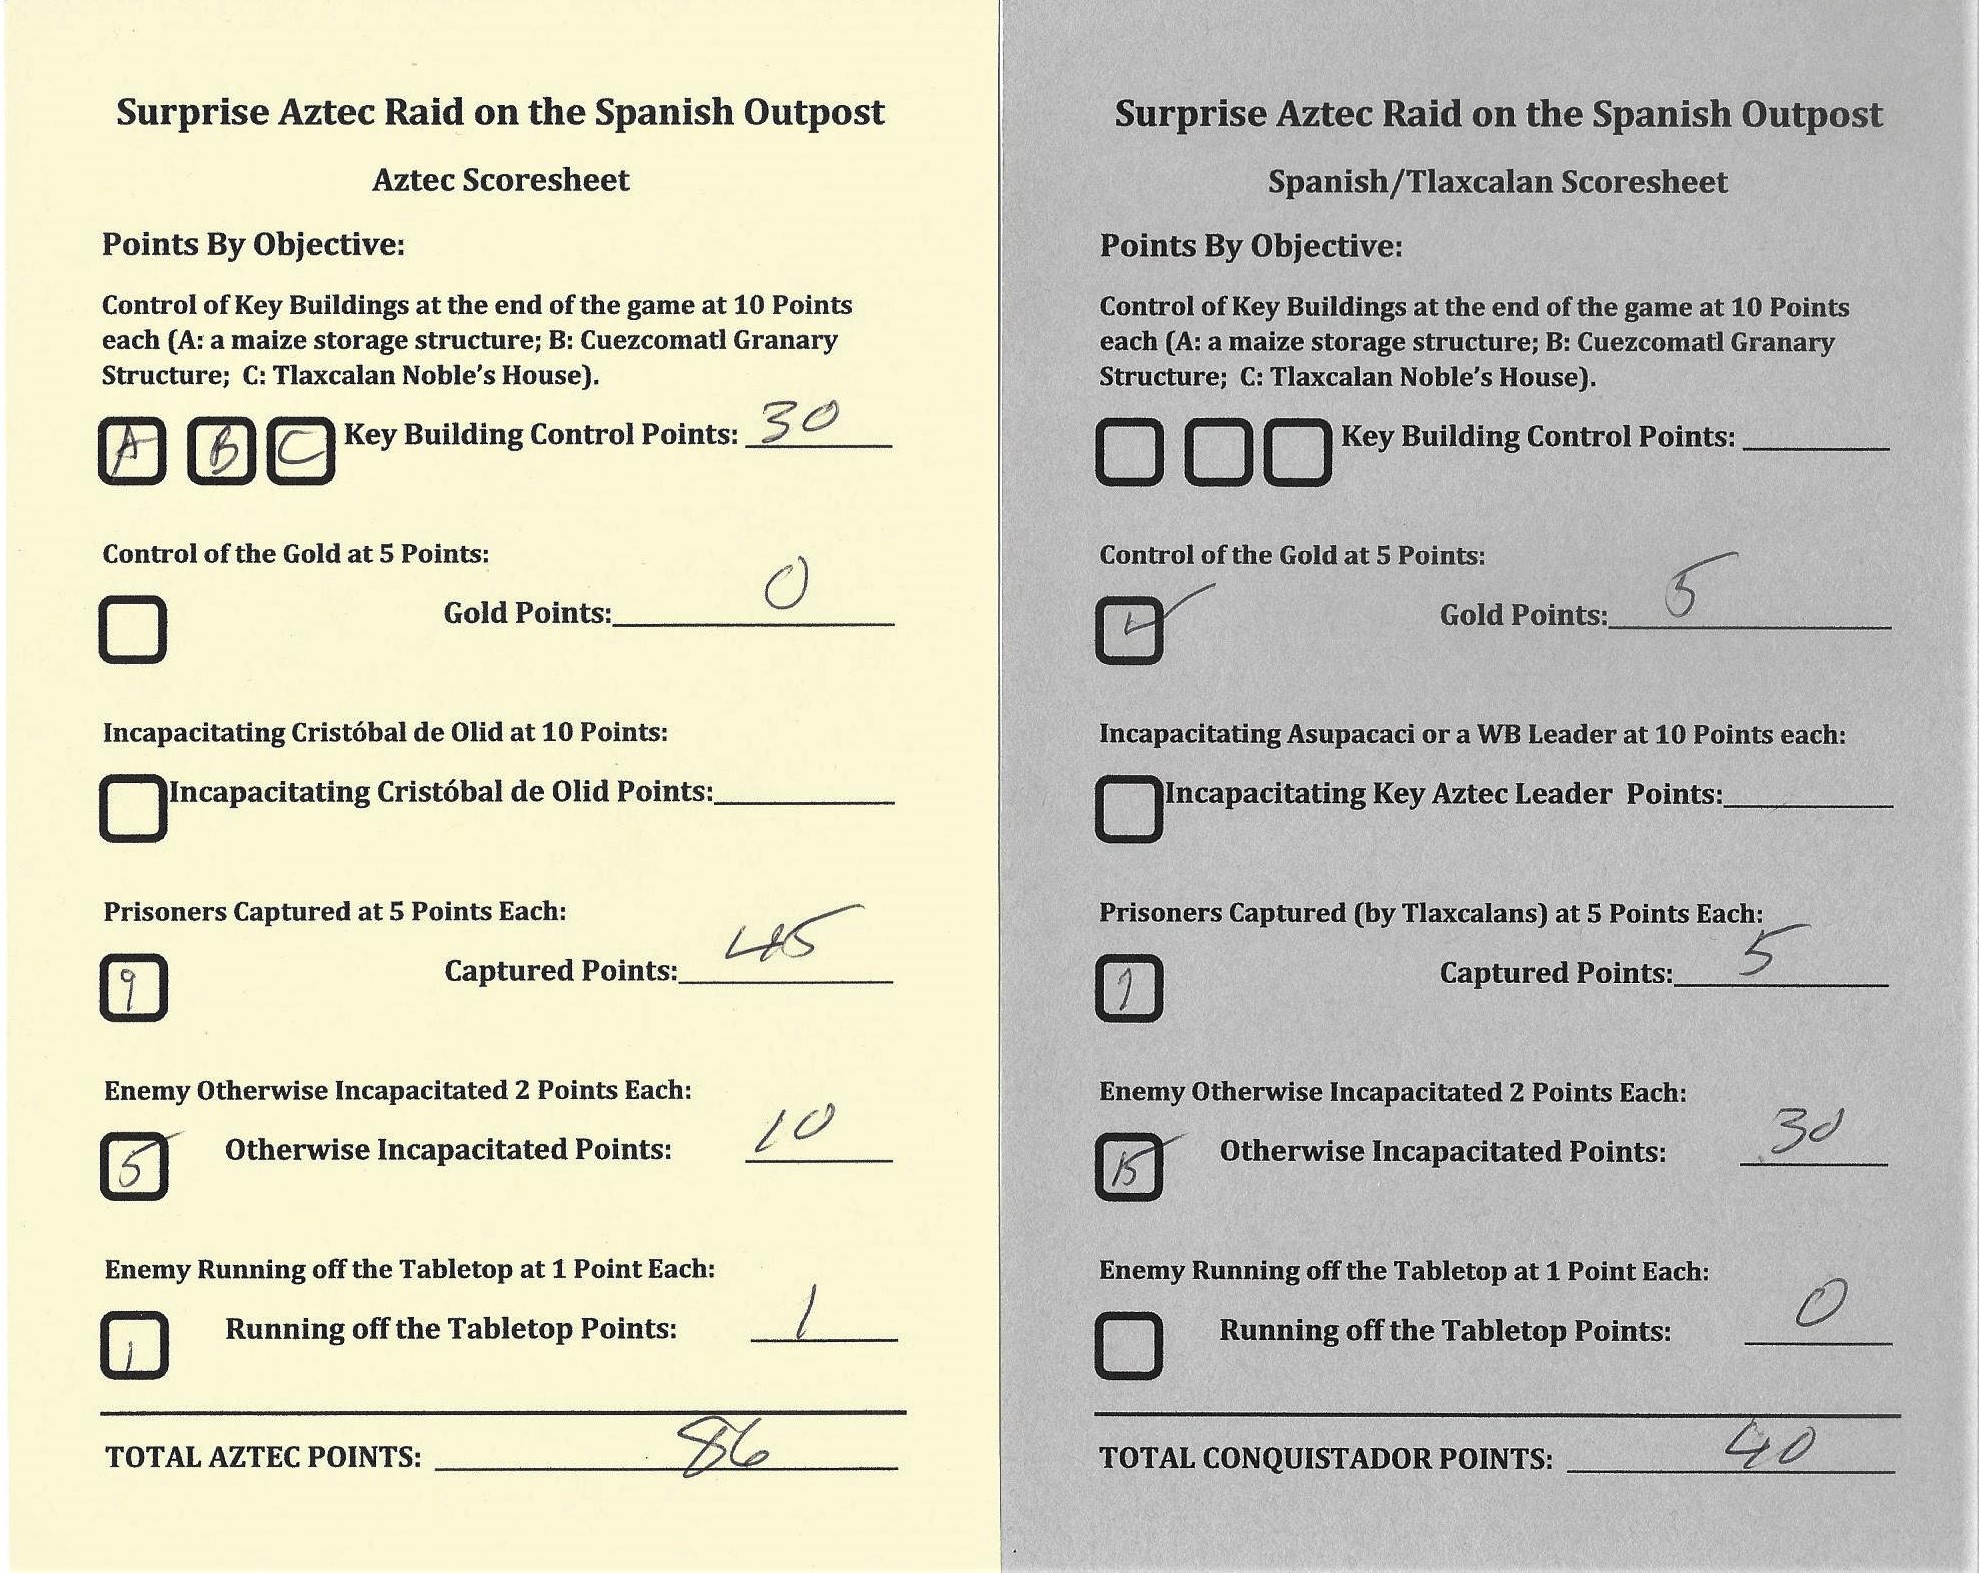
Originally I was supposed to run my one of my games at Historicon on Thursday night – that being a rural one where Aztecs are making a surprise raid on a Tlaxcalan village (acting as a Conquistador supply depot) – only to see that there were indeed some Spanish there. Instead, we went to Chris Palmer’s house and I ran the game on early Friday morning. We joked and called it “Christoricon”. I hosted and there were 5 players – Buck, Duncan Adams, and Dave for the Aztecs, and Chris and Greg Priebe for the Spanish/Tlaxcalans. The defending Spanish/Tlaxcalans had one Warband of three Elements – 23 figures worth 41 points. The attacking Aztecs had two Warbands of 3 Elements each – 53 figures worth 78.25 points. Buck has already written a great post about this game and the others that day on his blog here – and his write-up and pics are great. I took some photos that you see below, but for me, simultaneously being a GM and a photographer is not easy – so I do recommend you take a look. Meanwhile, here are my pics.
The game is ready to begin. Chris and Greg elected to place the Conquistador Element armed with arquebuses further away from their leader in their secret deployment in lieu of their Element of Sword & Buckler men. This meant that they were “pinned” with their black powder weapons only activating at best on half of the turns. They could have “unpinned” but as luck would have it the dice did not let that happen. Note also that Franco the unlucky Conquistador made the trip!
Chris chose to send out his war dogs towards Dave’s Aztecs as a screen, and they promptly took atlatl damage. Dave, Duncan and Buck moved up quickly, while Greg took up a position in the maize field with his dangerous Tlaxcalan bowmen.
Dave moves up his “twinned” Elements of veteran/novice warriors towards a wounded war dog.
The Spanish then had their Catholic Priest take possession of the gold (possession of the gold was one of the game objectives) and drag it to a more secure location while they contested the Noble House (another objective) – (insert joke here).
Battle starting at the Noble House – the war dogs are already going down here. Their priest has already dragged away the gold to a safer location.
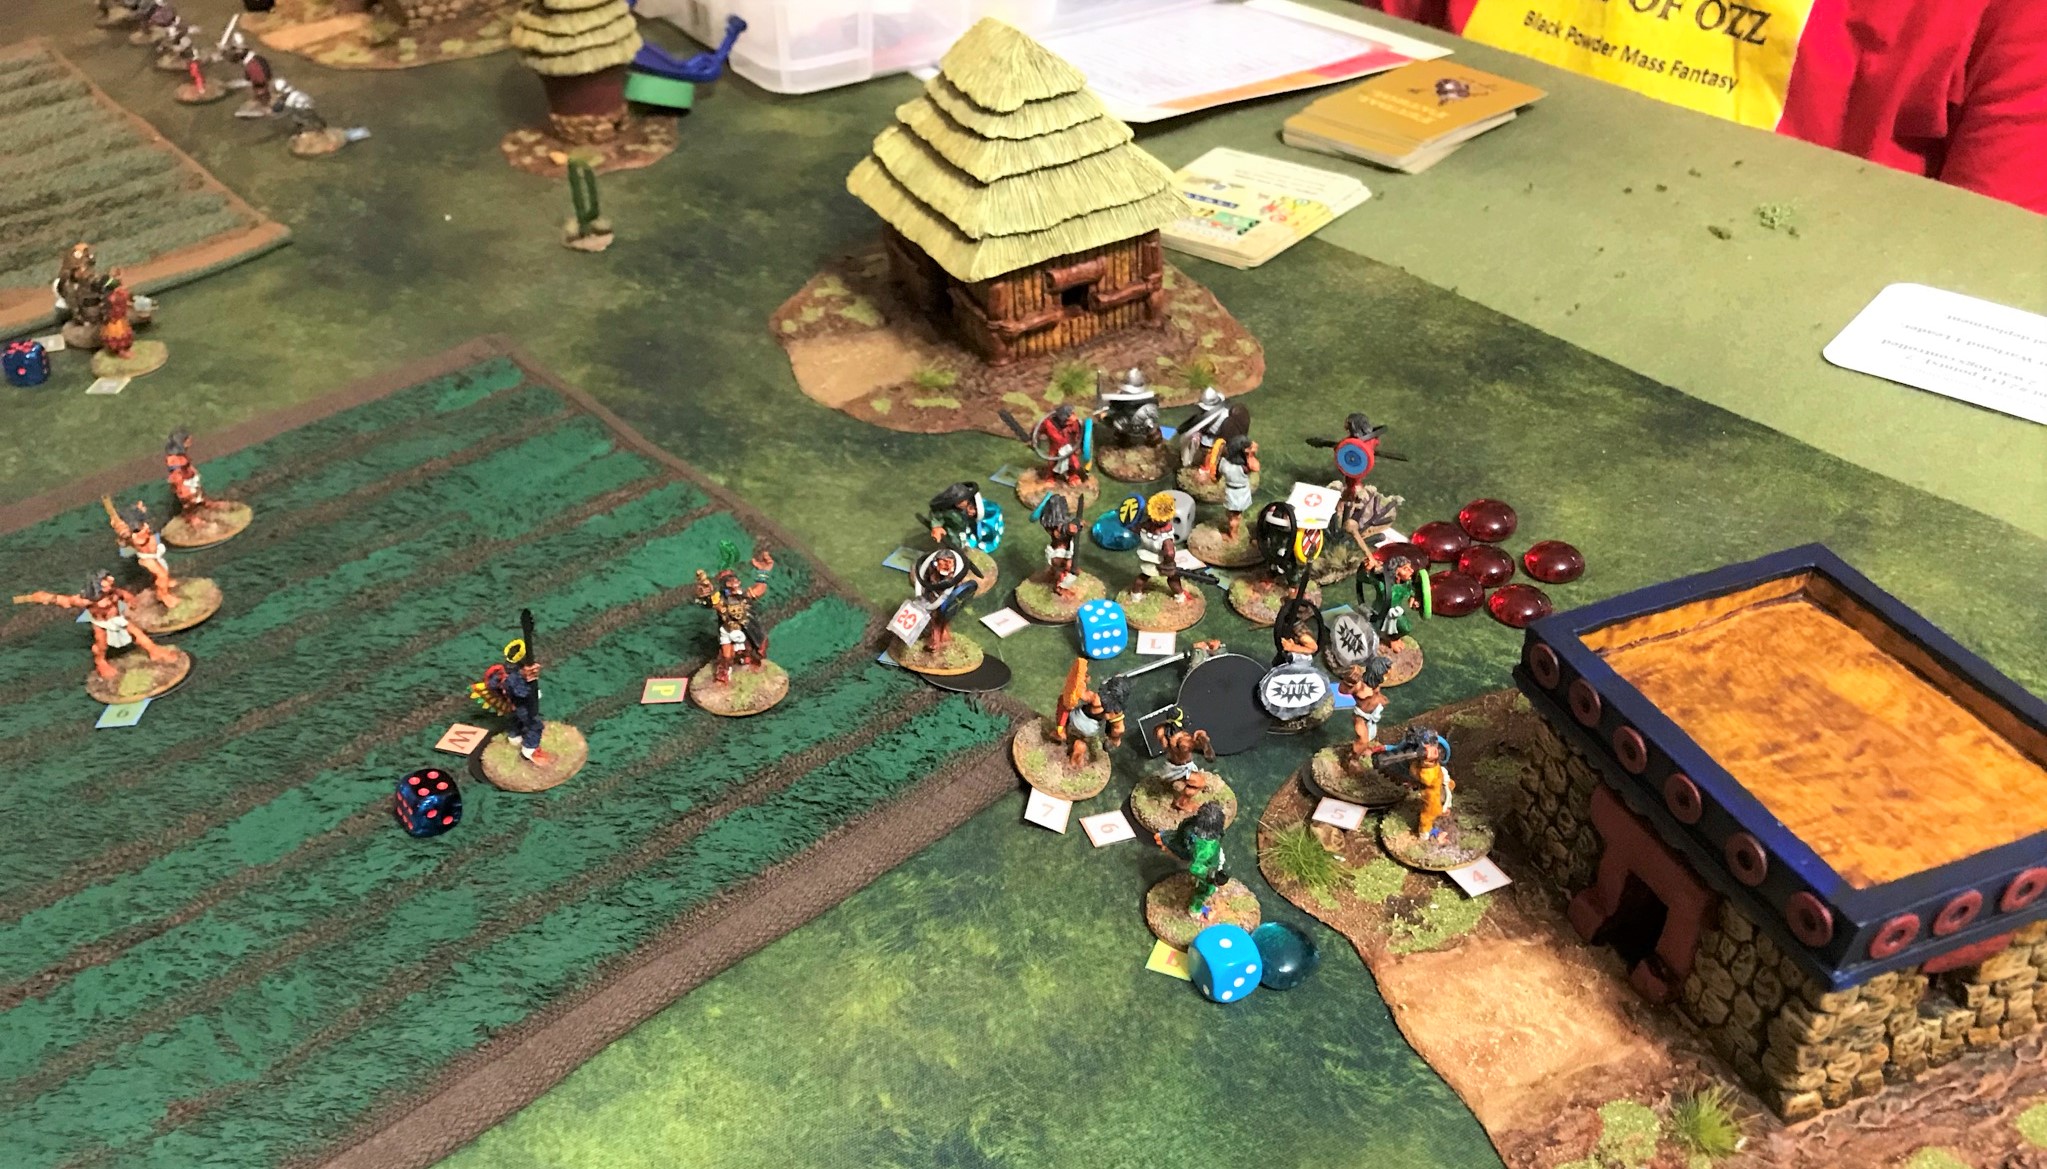
Buck’s advancing Elite Cuahchicque (“Shorn Ones”) took the full volley of arquebus fire from the less-activating pinned Spanish. Despite these Elite Aztecs taking a lot of damage and having a ton of Morale checks to overcome, Buck was able to rally his troops successfully against the odds twice. Meanwhile Duncan moved his Jaguar and Eagle Warriors against Greg’s Tlaxcalan bowmen in the cornfield – hoping to best them in melee.
Dave and Buck confer while surveying Duncan’s advance – and their chances at victory – with concern. This shows the second volley that Buck’s Elite Shorn Ones took and the blue beads are Morale checks he needed to pass. He did. Twice.
Slowly, the tide of battle started turning in the Aztecs’ favor. Dave’s attack on the Aztec right was making headway, and they were gaining control of the objectives.
Priest still dragging the gold away here.Lots of carnage on the tabletop.
Eventually, the Spanish and Tlaxcalans were overwhelmed.
The final break through.
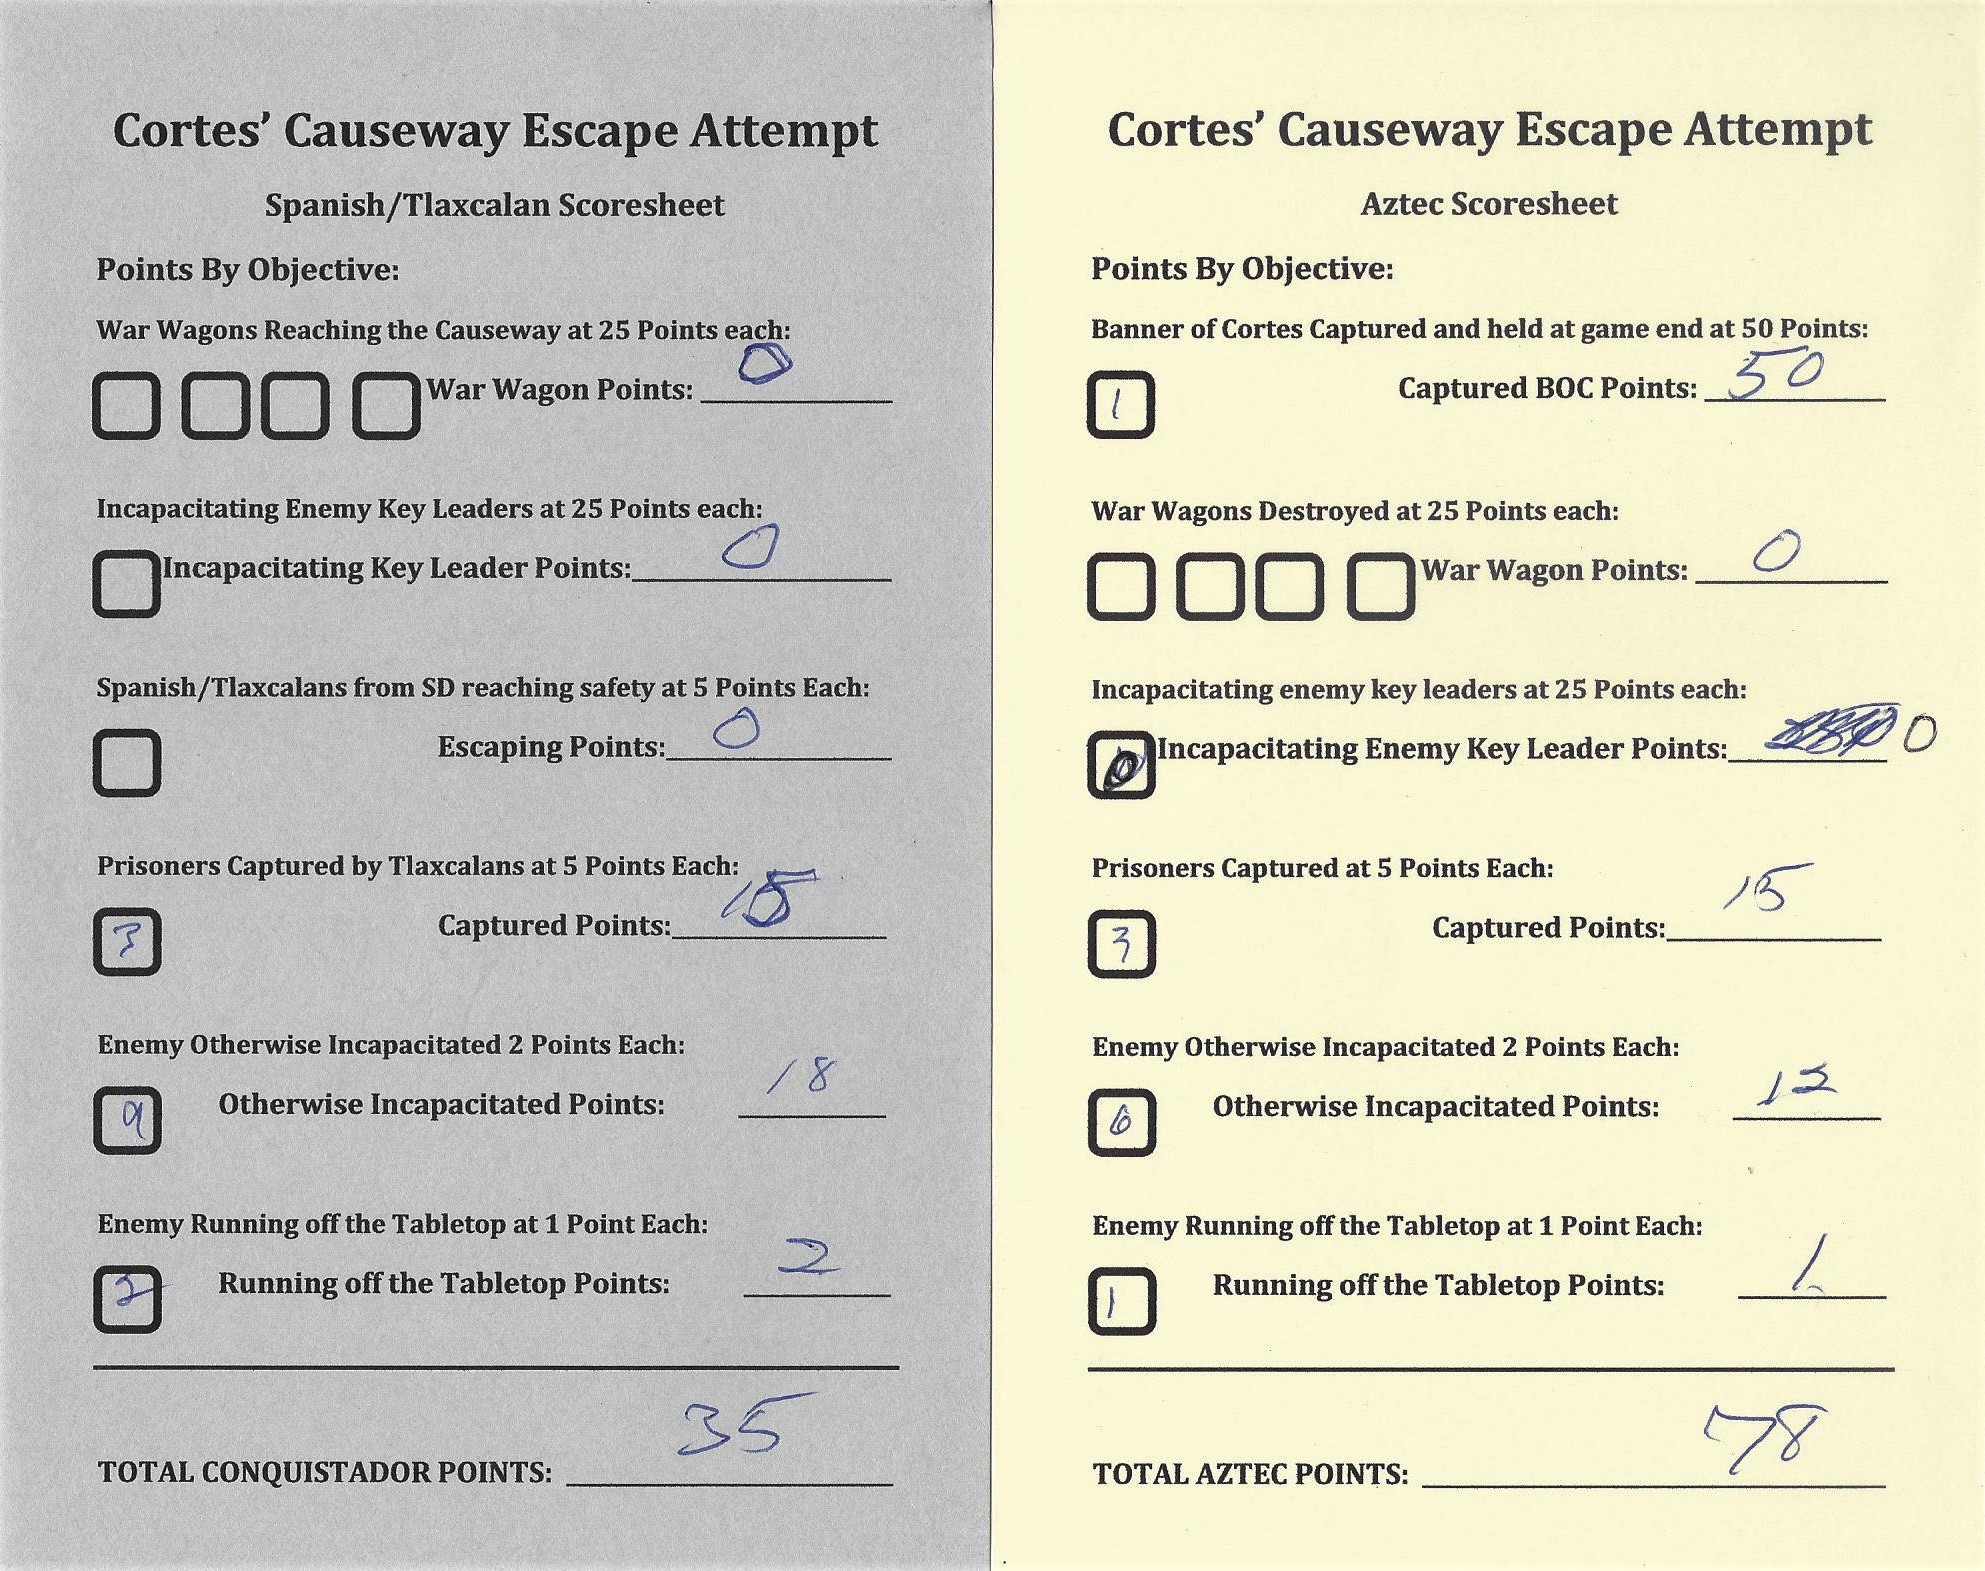
The game ended as a resounding Aztec win, as they had control of three objectives, as well as dragging off 9 pour souls for sacrifice, killing 2 more, and making one run away. The Spanish had only the gold, but did dispatch 15 Aztecs and capture one more. The final score was 86-40 as you see below. I think the players had a good game. Congrats to Dave, Buck, and Duncan!
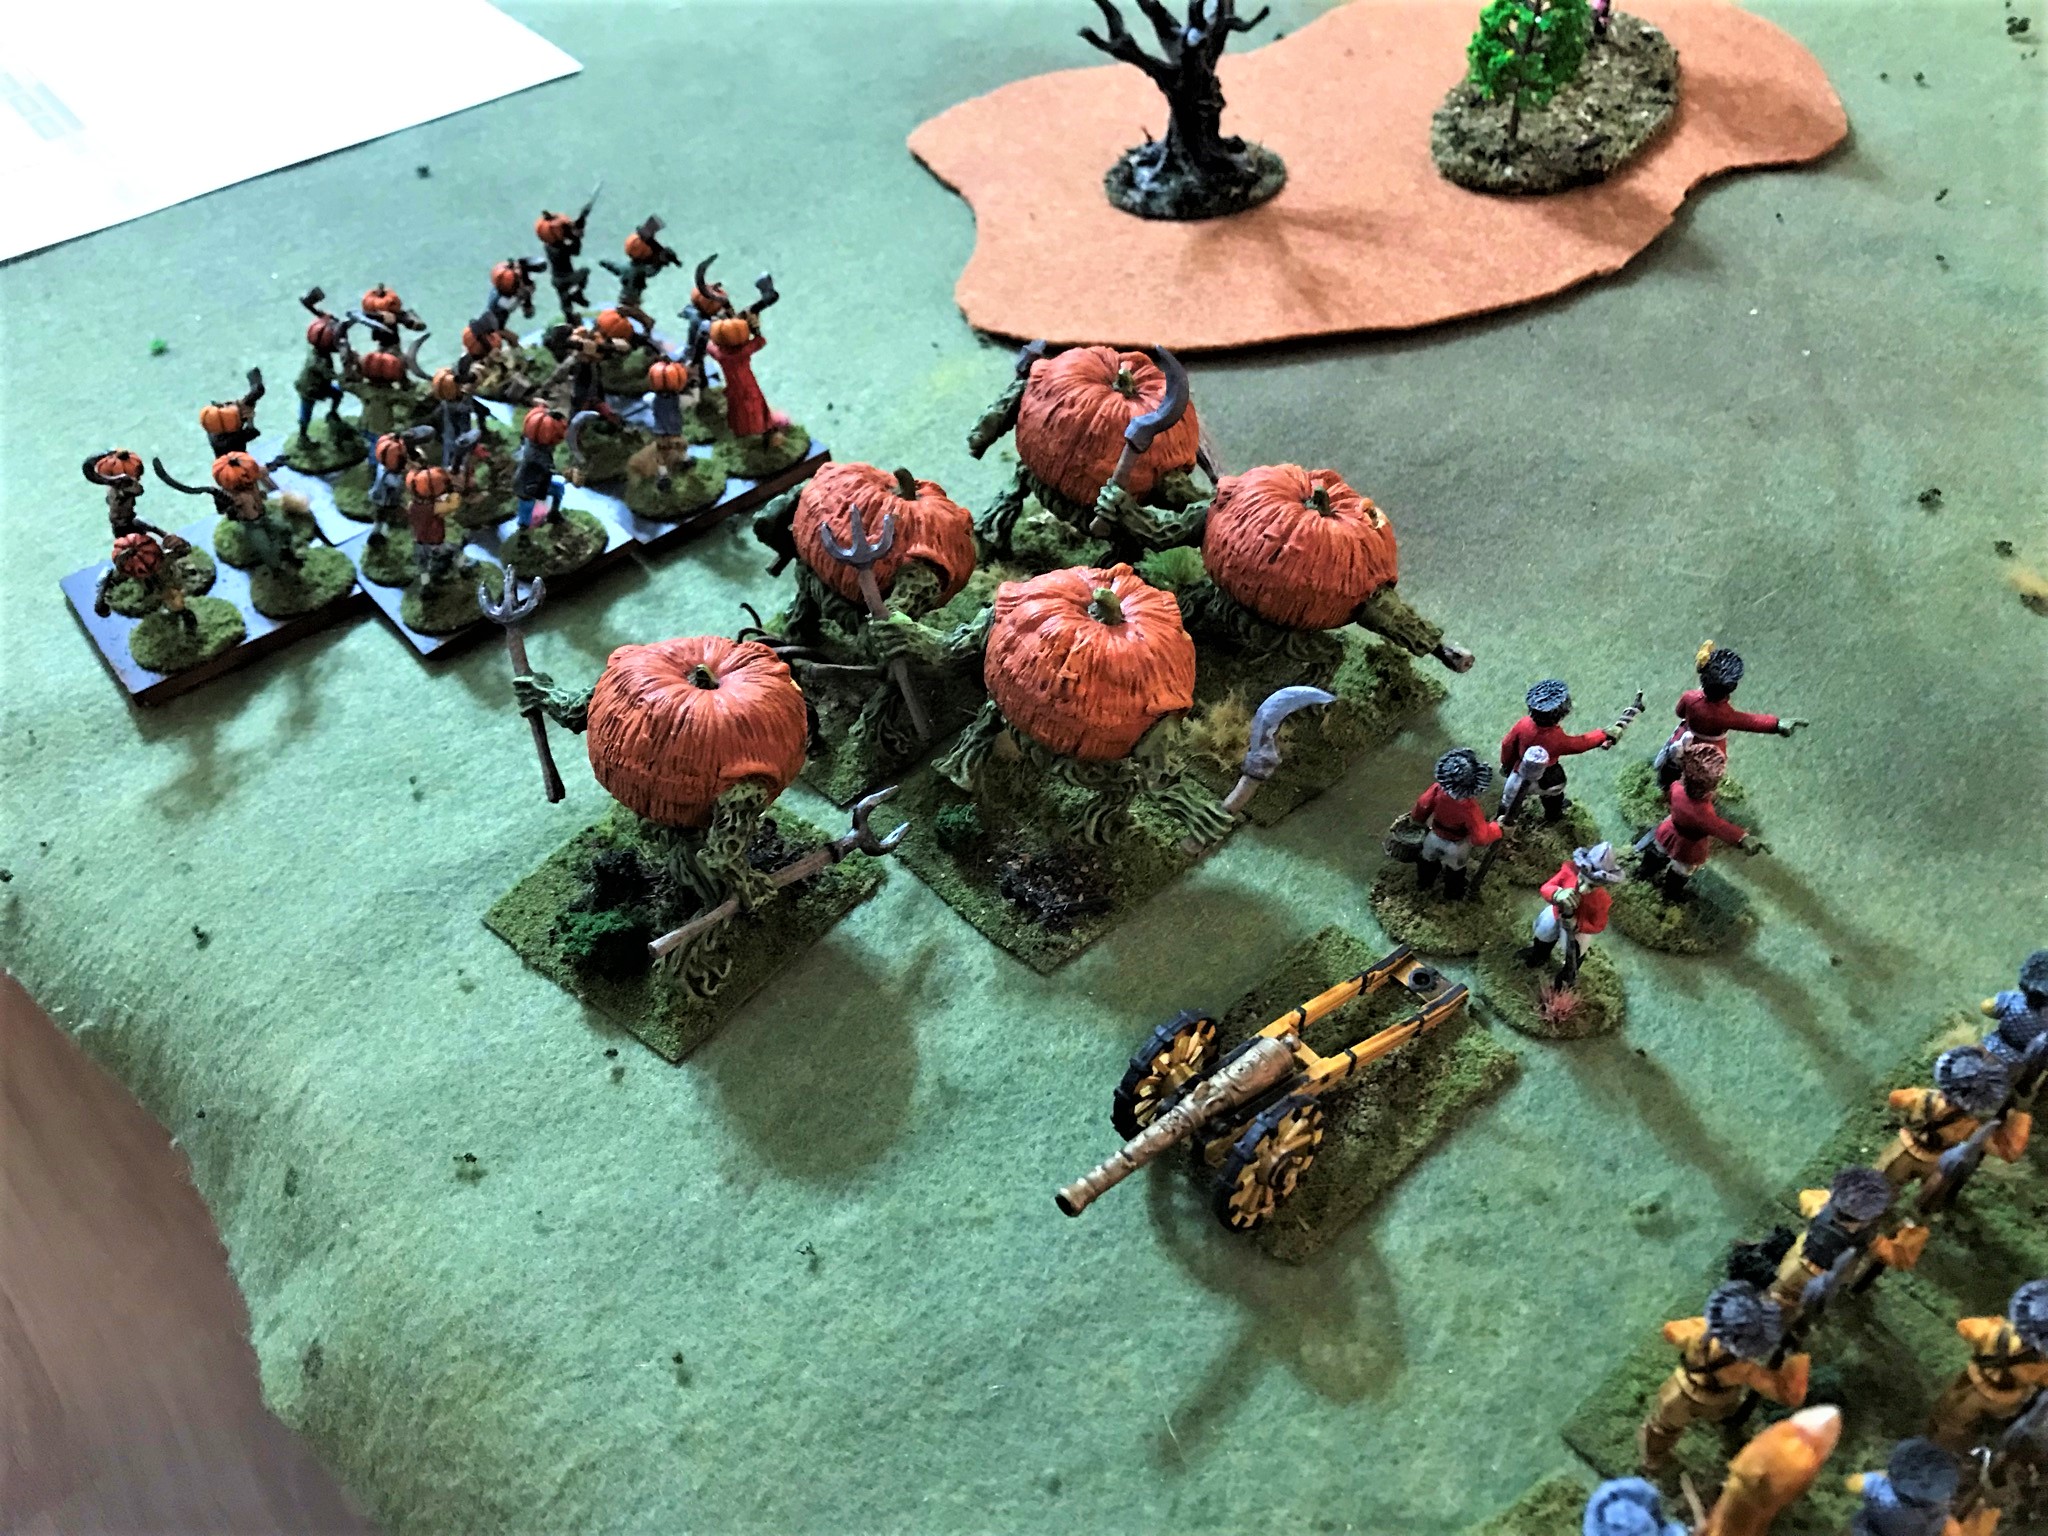
Greater PumpkinheadsI had a Winkie medium cannon……and 2 Winkie RegimentsMy Winkie and Pumpkinhead troops ready to contest control of the Yellow Brick Road.
I love the Ozz figures!
I then drove to Historicon, and set up for Saturday morning’s game.
Historicon – Cortes’ Causeway Escape Attempt
The drive up to Valley Forge Resort Casino was uneventful – though finding the H.A.W.K.’s room was a challenge. The gaming was not located in one location at the resort. Unfortunately, it was also a Friday night at a casino and all the close parking was gone. Luckily, I have a little collapsible wagon and was able to get into the room with my stuff in a few trips and set up the terrain and the troops for Saturday morning’s game, Cortes’ Causeway Escape Attempt.
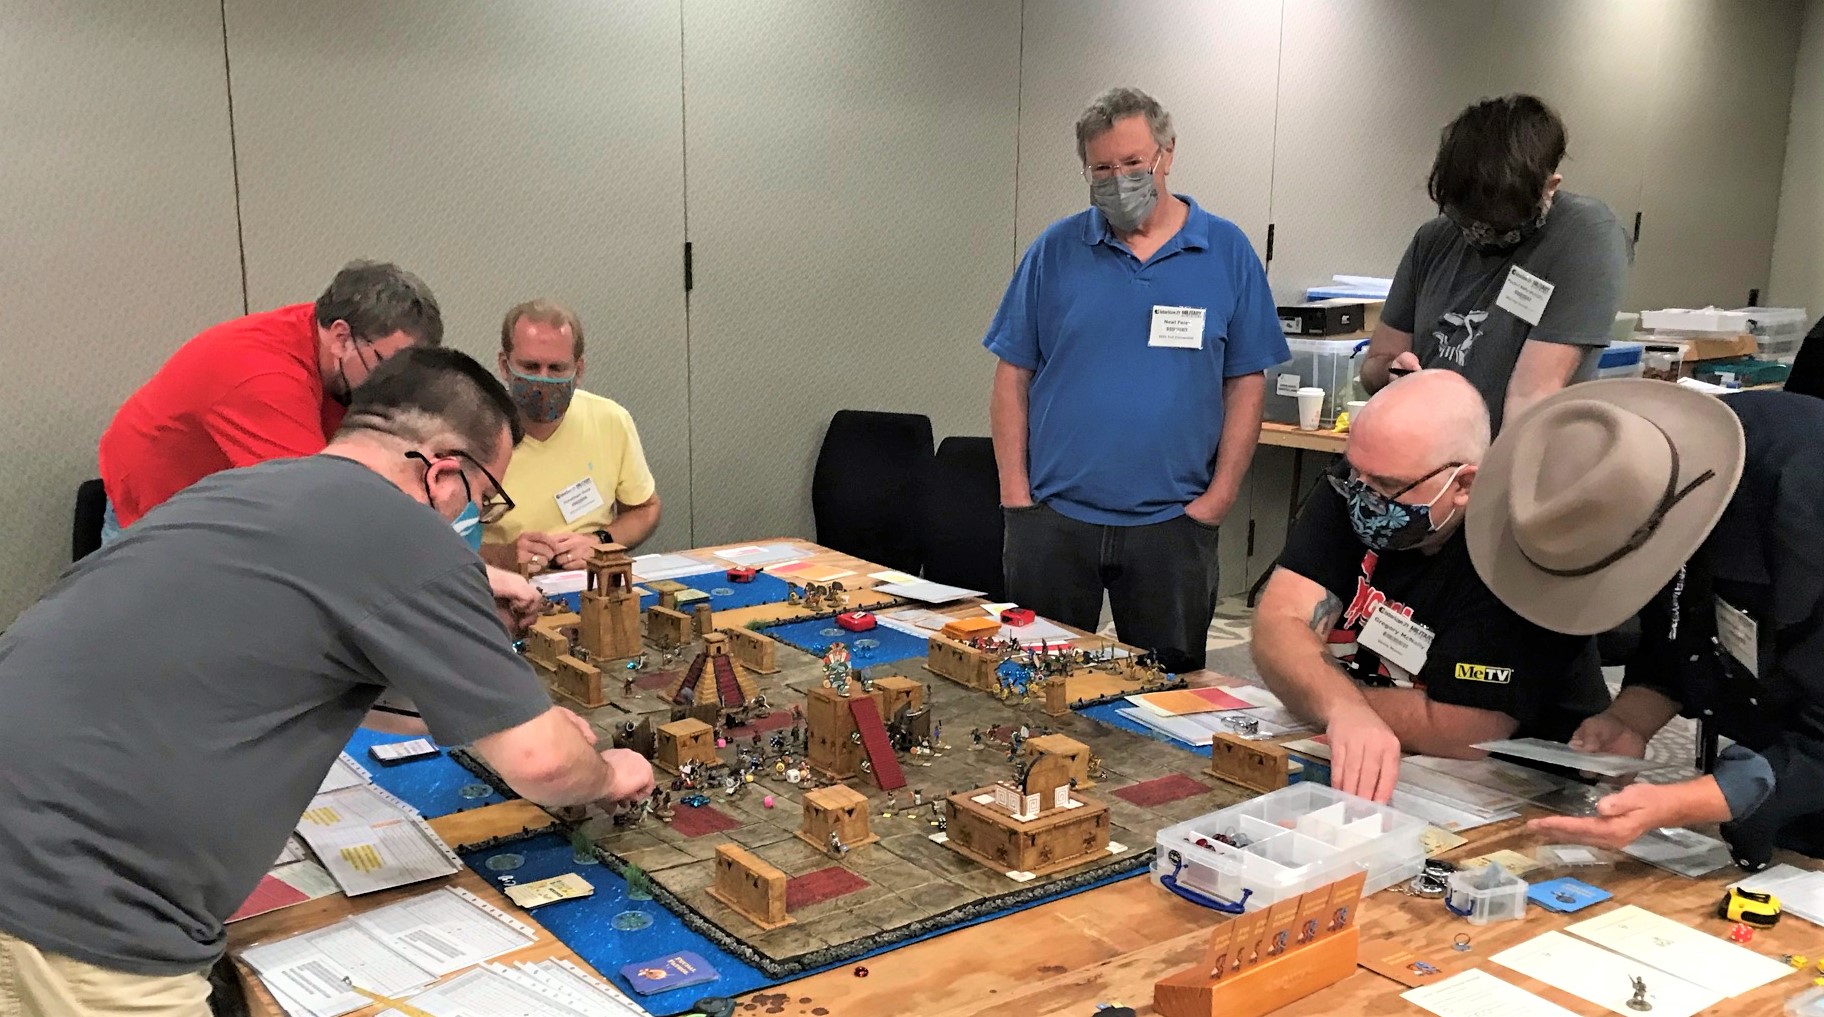
It’s a BIG battle. The Spanish/Tlaxcalans have three Warbands of three Elements (2 Spanish, 1 Tlaxcalan) plus support – 77 figures (including the 4 war wagons) worth 161.75 points. The Aztecs have five Warbands of 2-3 Elements each – 109 figures worth 154.25 points. 186 figures in total. This battle is Cortes’ second attempt to escape. He would do a second on the following day, and three days later a third – La Noche Triste. Originally, on the Historicon listings, the game was supposed to be La Noche Triste – which again happened three days later (and of which I will have that scenario written soon) – but I needed war canoes for that one. Those I don’t have yet, and will be mentioned here in a bit.
Back to the game set up. As I was setting up, I had a number of people come by to remark positively on the game visuals – terrain and figures. They had seen my posts on different forums (or fora both are ok!). To all of you, thank you so much for your kind words and interest.
Besides all of the cityscape – and it’s a lot I know – but with everything predeployed I just needed to put players on their troops and let them know what they needed to do on their part of the battlefield.
As I mentioned before, I had previously needed to cancel my Thursday game – and I got a comment from one of our blog community – Harry (aka borderguy190)- that he was disappointed as he had signed up for the game. I apologized, as I wish I could have ran that too at Historicon as well. But the good news was that he would be playing in this game!
He joined 7 other players. They seemed to grasp the concepts of the game quickly – and I did get some help from Greg Priebe and Buck Surdu in the early turns before they had to help run an Ozz game.
The game set up.Troops deployed and dashboards out. My undermagnets and game markers really have proven their worth – especially in big melee scrums.
In this game, the Conquistadores are surrounded, and need to fight their way out from the Palace of Axayacatl where they were holed up with their hostage/puppet Montezuma II. They have war wagons, and while these are helpful in providing cover against missile weapons, they are also rickety and slow – and prone to breaking. In fact, all of them broke during the game and were unable to move afterwards. The Aztecs are trying to get to the Conquistadores and avenge the massacre that the Spanish perpetrated at the Festival of Toxcatl. Their Tlaxcalan allies are mostly on the other end of the tabletop and trying to break into Tenochtitlan to help their Spanish allies escape.
There were ups and downs for both sides all over the table. The Conquistadores breakout went slowly, but they did take out a lot of Aztecs. On the other end where the Tlaxcalans were trying to help, the two sides traded missile fire and got into a scrum but were unable to change the status quo.
Lots of action! Harry (in red) ponders his next move.Aztecs swarm the war wagons and wound the crossbowmen and arquebusiers inside.Thinks get more contested in Tenochtitlan.
One of the aspects of the game is the importance of The Banner of Cortes. It provides inspiration to the Conquistadores and helps them to reduce negative Morale effects. However, I also made its capture (as well as incapacitating Cortes and dragging him off for sacrifice) game objectives. The Aztecs took some heavy losses BUT were able to take out the bannerman and seize the banner. This lead to the Spanish having to try to satisfy Honor and retake the banner. However, this did not happen before the game’s end. As it was worth 50 points (see below), it was decisive.
The Banner of Cortes is taken!Aztecs won 78-35. The 50 points for the capture of The Banner of Cortes made all the difference!
Thanks so much to all who played! I did not win any awards for the game – though many said I should have. Anyways, the best reward is happy gamers afterwards – and I got that in abundance!!
The gamers! Very cool group – thanks to all!
After the game, I got a lot of positive feedback, and learned of some areas to help make the play easier. Those suggestions have already have already been acted upon when I got home (mainly on the dashboards such as linking the undermagnet colors to the dashboards).
After the game, I then went with Greg and Buck to the vendors and the Flea Market. It was nice to go to the Badger Games booth and actually be remembered! Also, I was looking for canoes to use as war canoes, but only found one from Firelock Games that was $20. That is way too expensive when you need as many as do. I also found one in the Flea Market – a balsa wood scratch-built one from an estate sale- for $3. I am going to use both for gaming and as ideas on how to make my own. Of importance, Greg is a big lover of his 3D printer – and in exchange for me painting up some Viking figures for him, he will make me a good number of canoes! Win-win! So, my next job will be to paint those up.
I look forward to returning to the gaming and convention scene as a GM and a gamer. I hope you found this interesting – thanks for looking.
For all of my previous posts on games, units, and other projects for my 16th Century Spanish Conquest supplement for Feudal Patrol™ – “Civilizations Collide” – please see this page.
Yes indeed folks, I am yet again combining a couple weeks into a single post. This update will cover Weeks 15 & 16 – which comprises October 24th to November 6th. The main reasons are the same – slow progress due to weather and shortages that have been the bane of the projects’ ability to progress.
It’s been very wet, cold, and windy, followed by now heavy morning frost. Anyone in Massachusetts knows that this month can be very variable indeed. I guess we’re lucky no accumulating snow has happened yet (but we have seen the first few flakes flying).
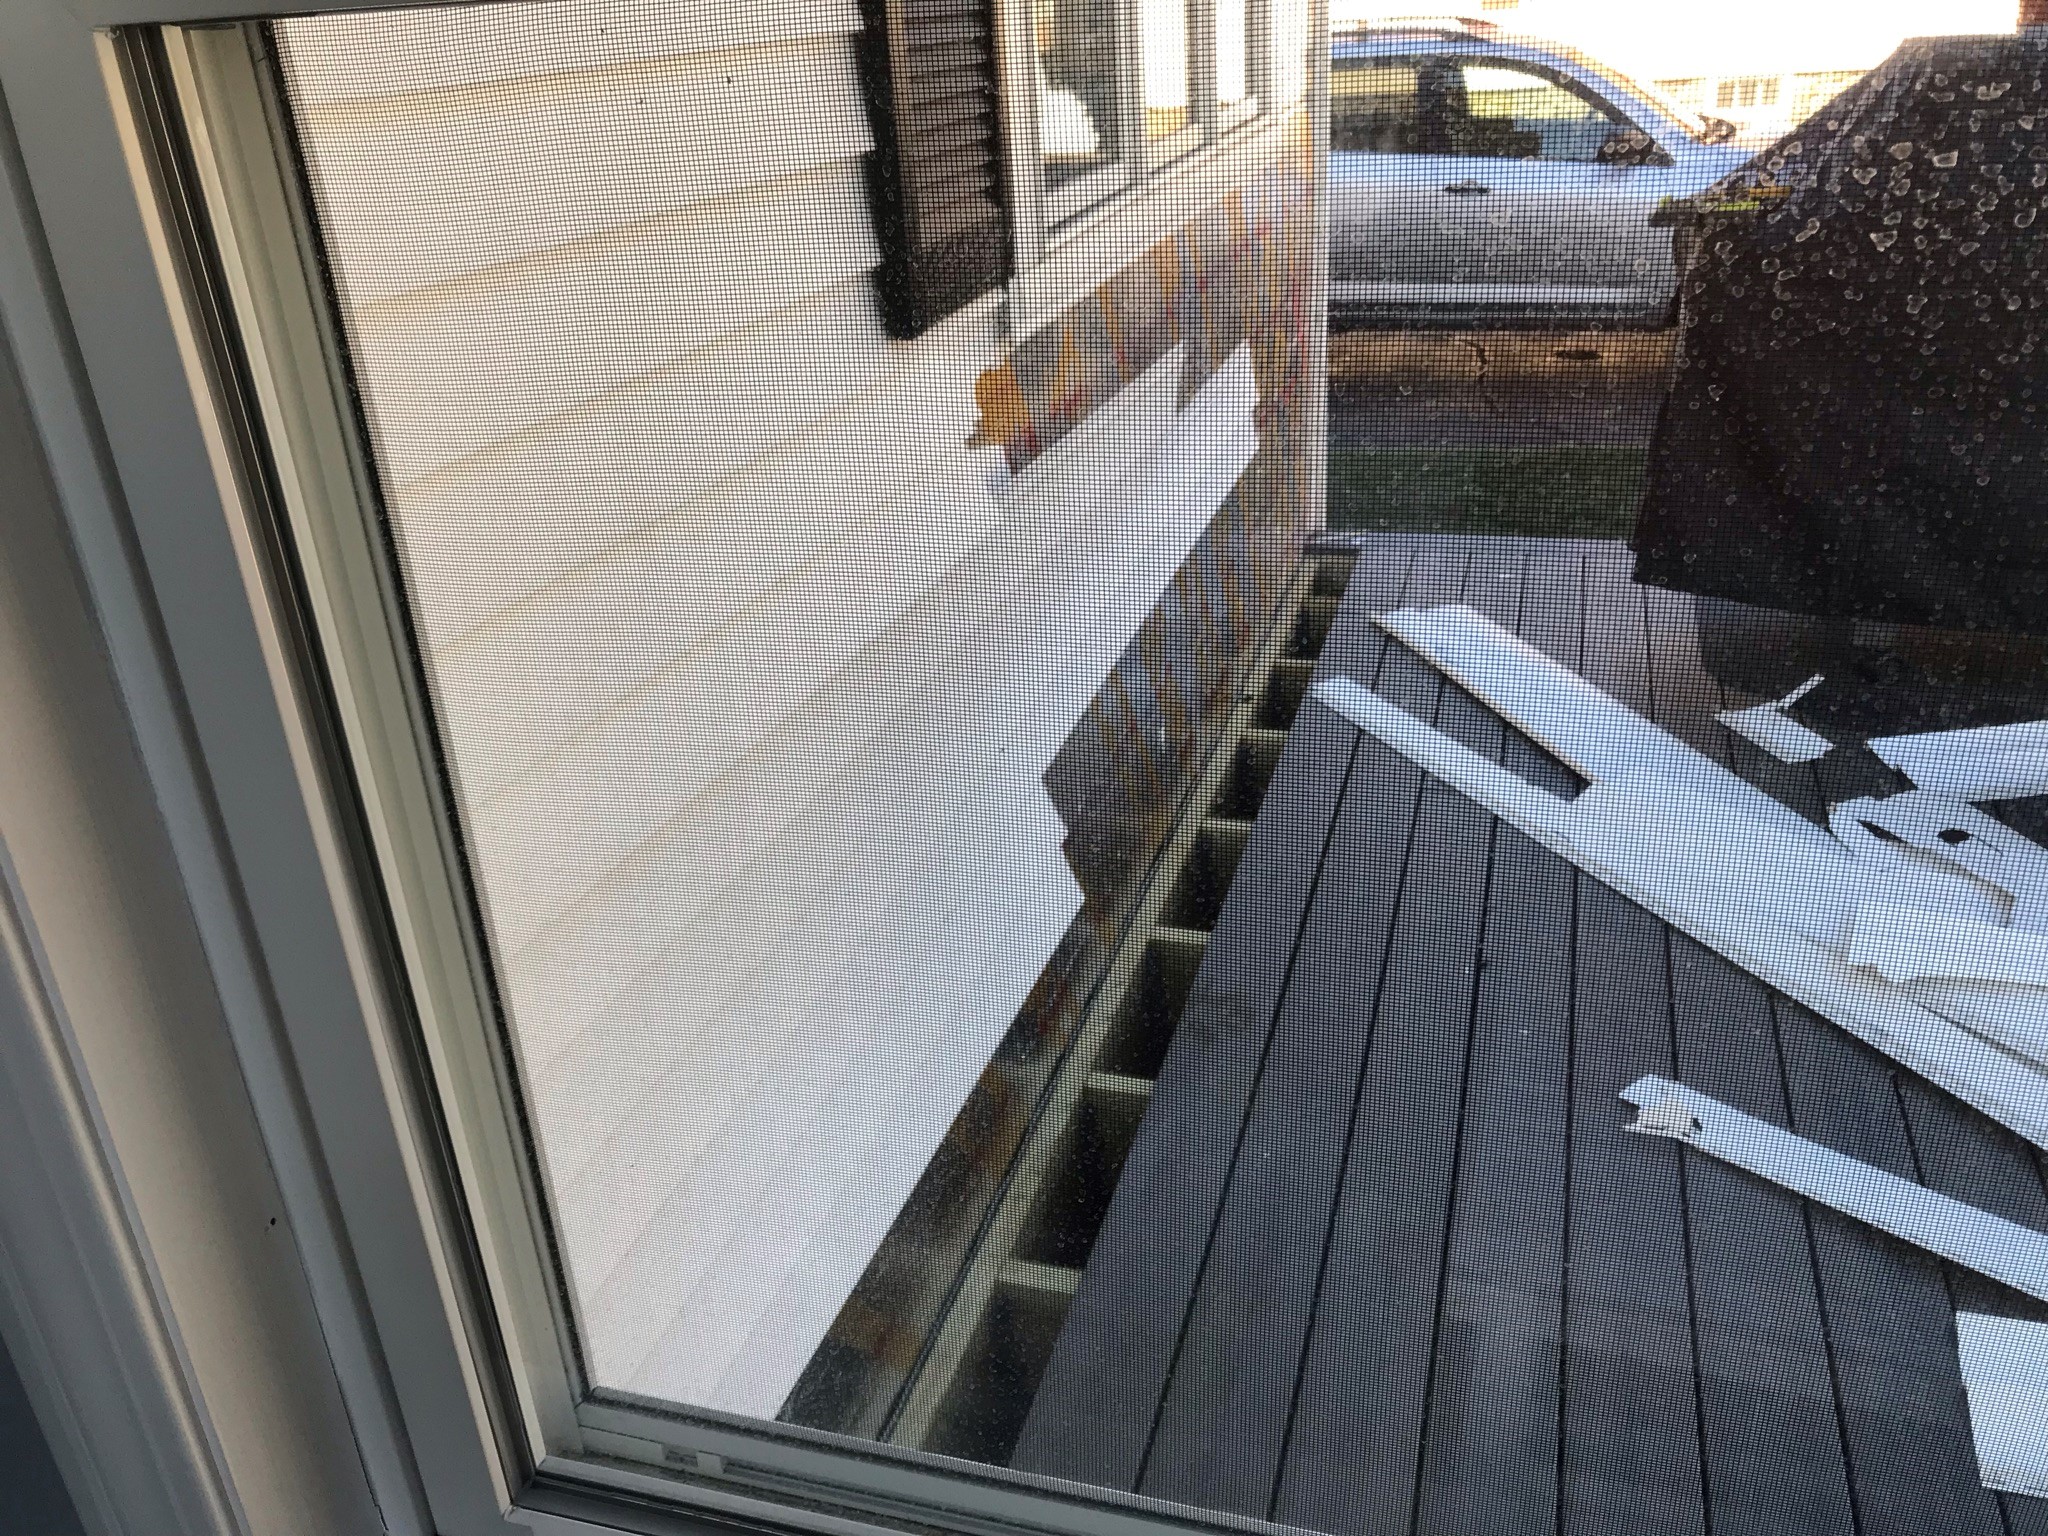
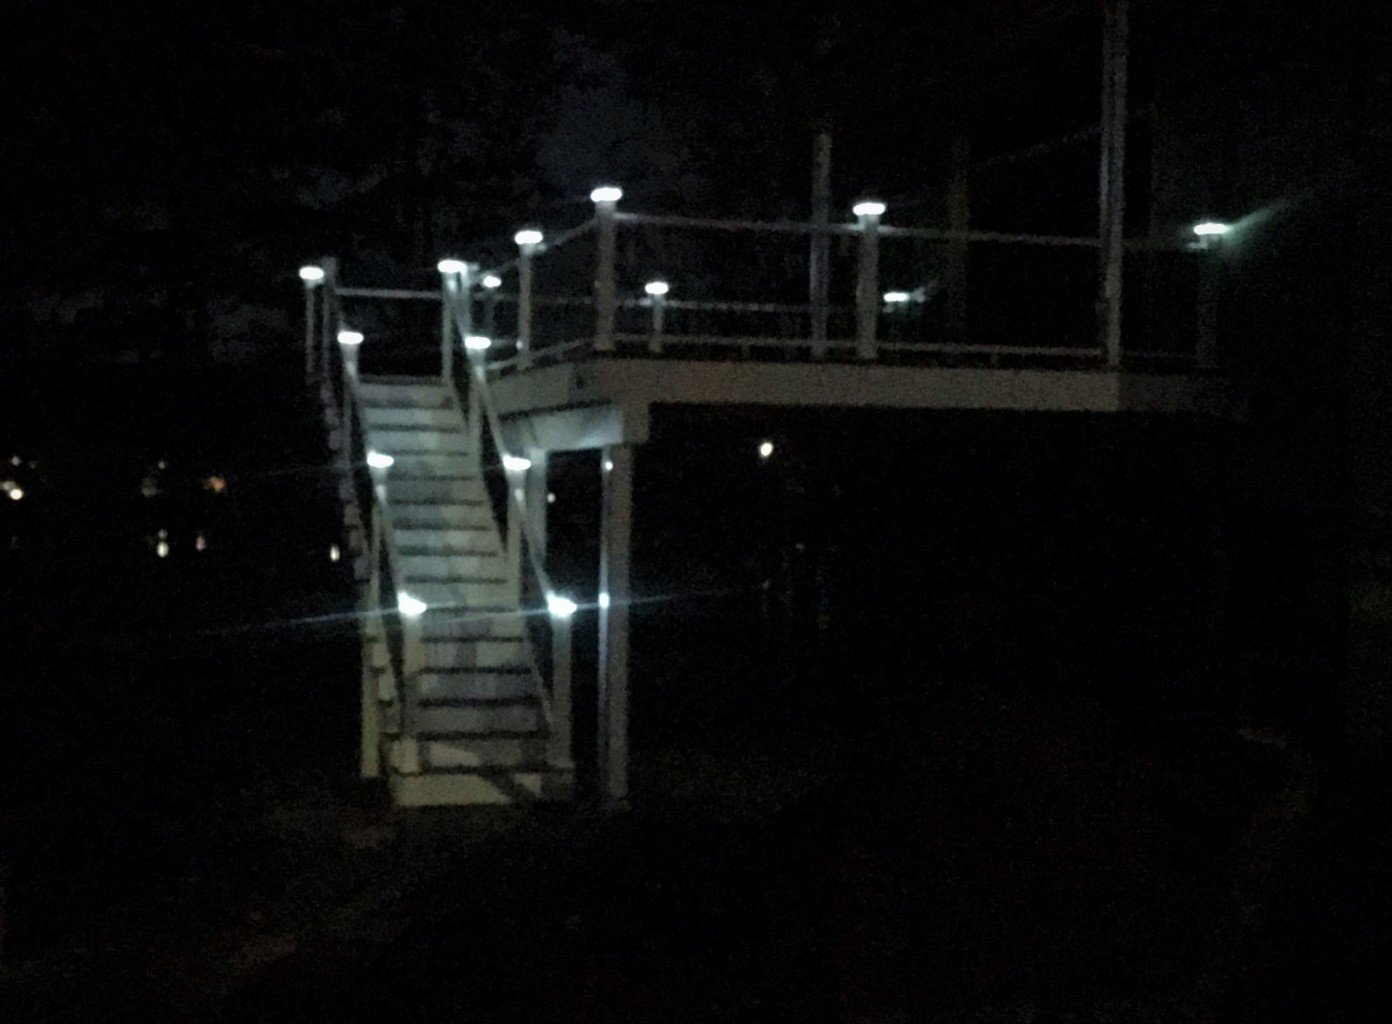
The work here still in these two weeks is focused on the patio – but I thought that first I’d share a picture of the deck at night with the solar caps all lit – my neighbor claims aircraft will be coming in to land!
The deck at night – I had a tough time getting a photo but you get the idea.
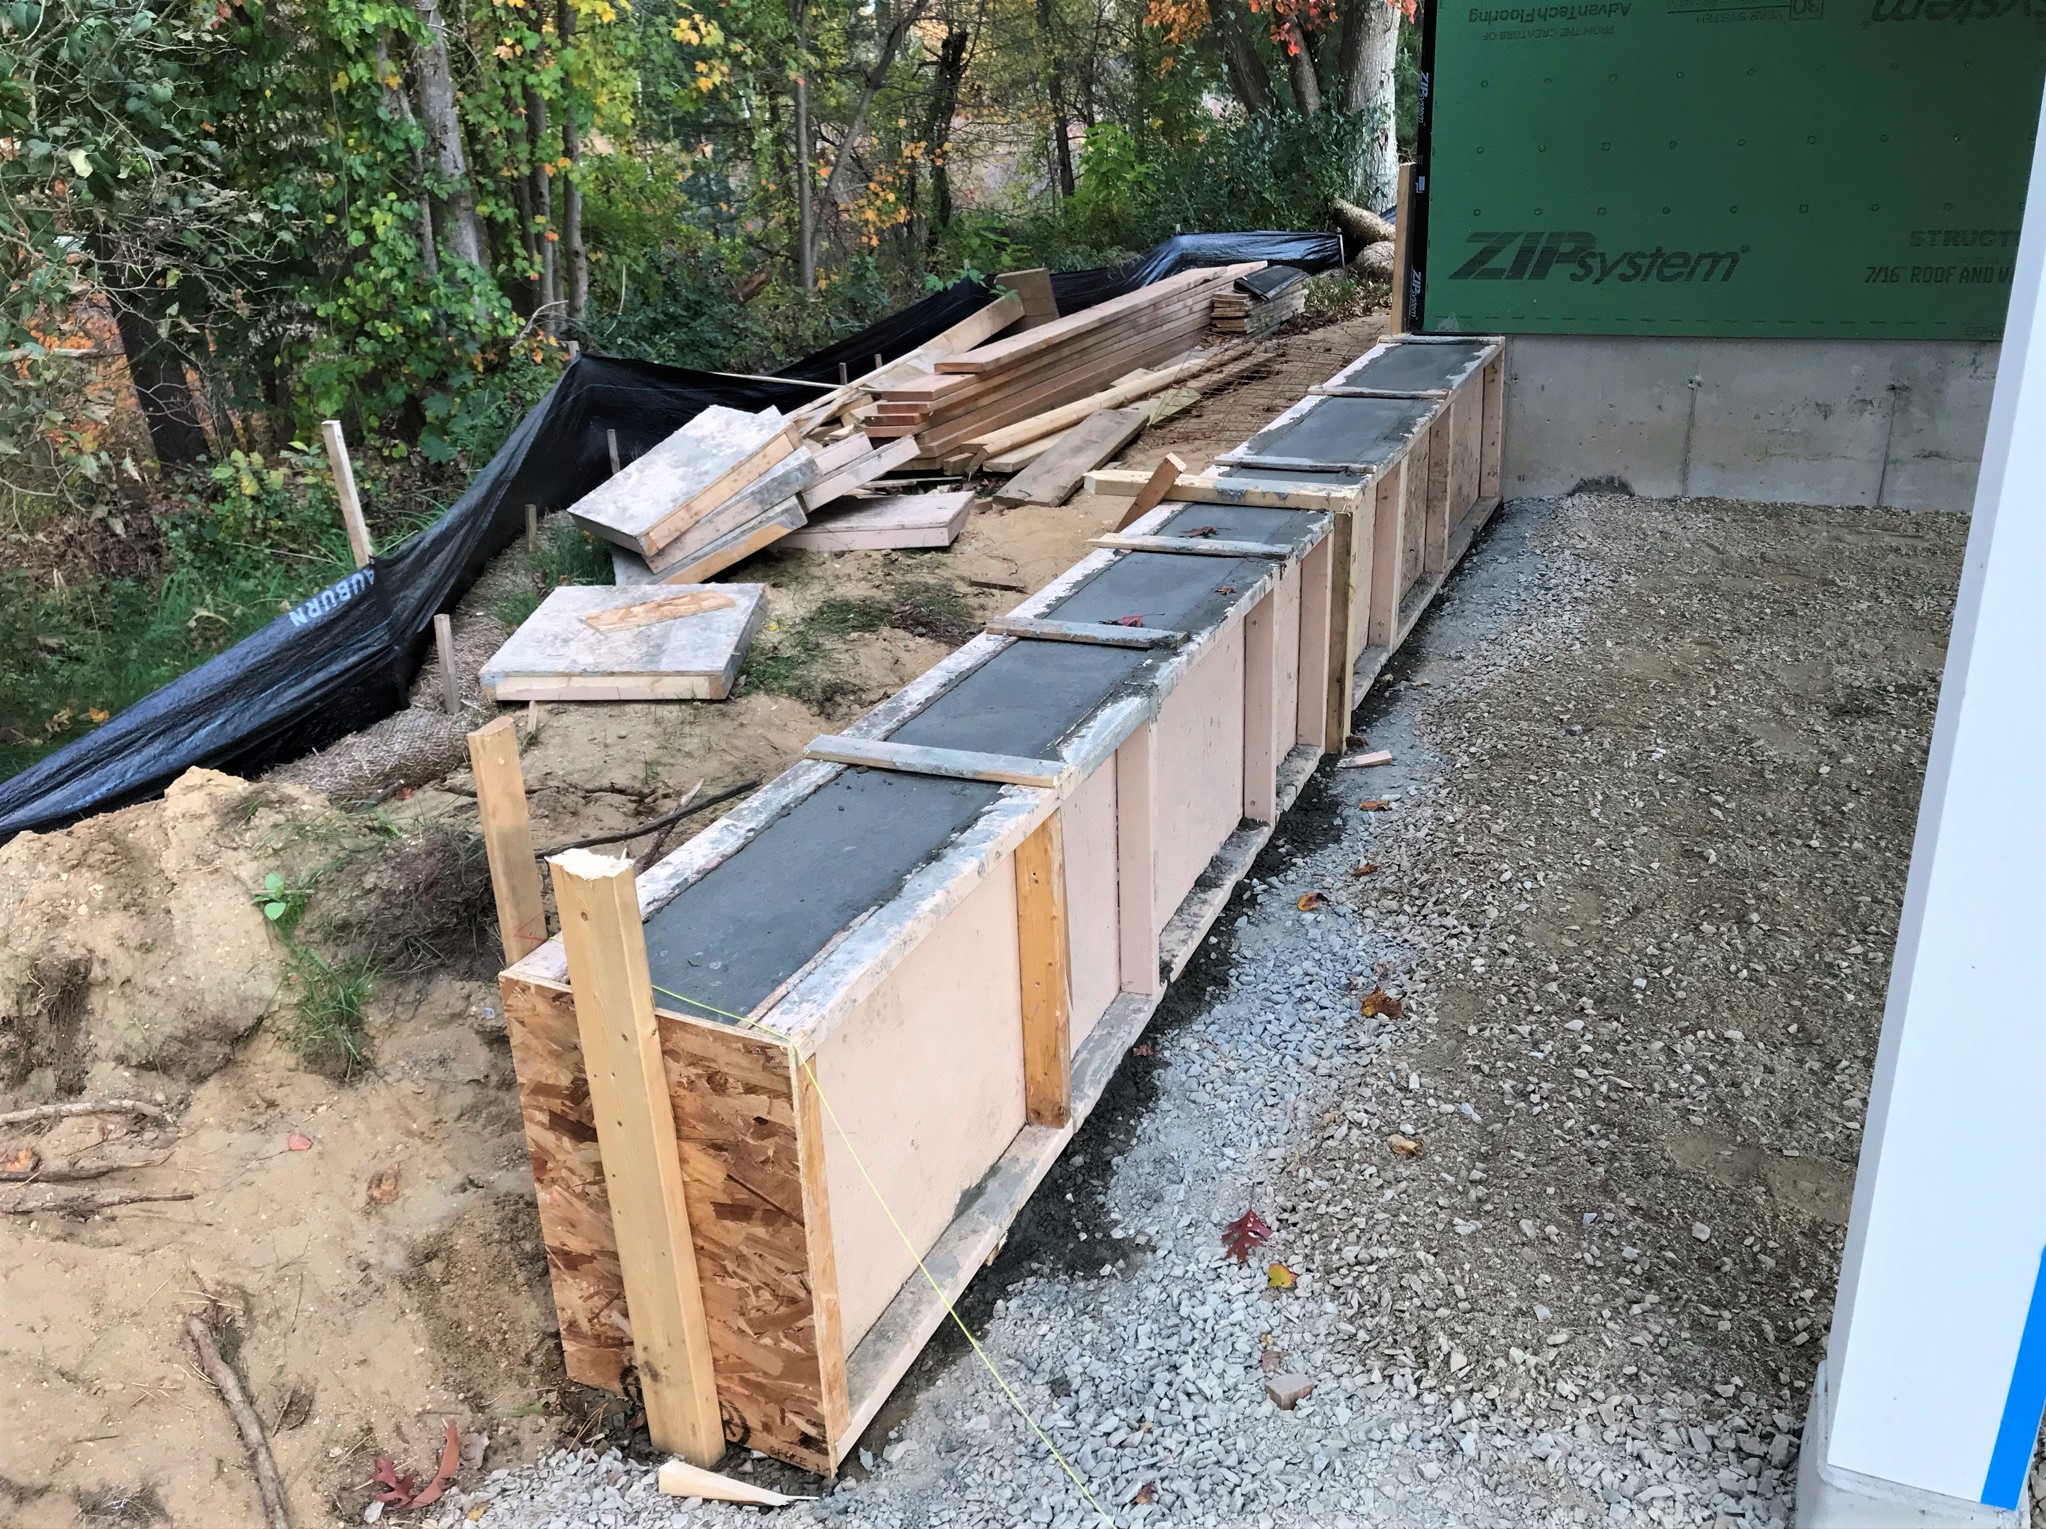
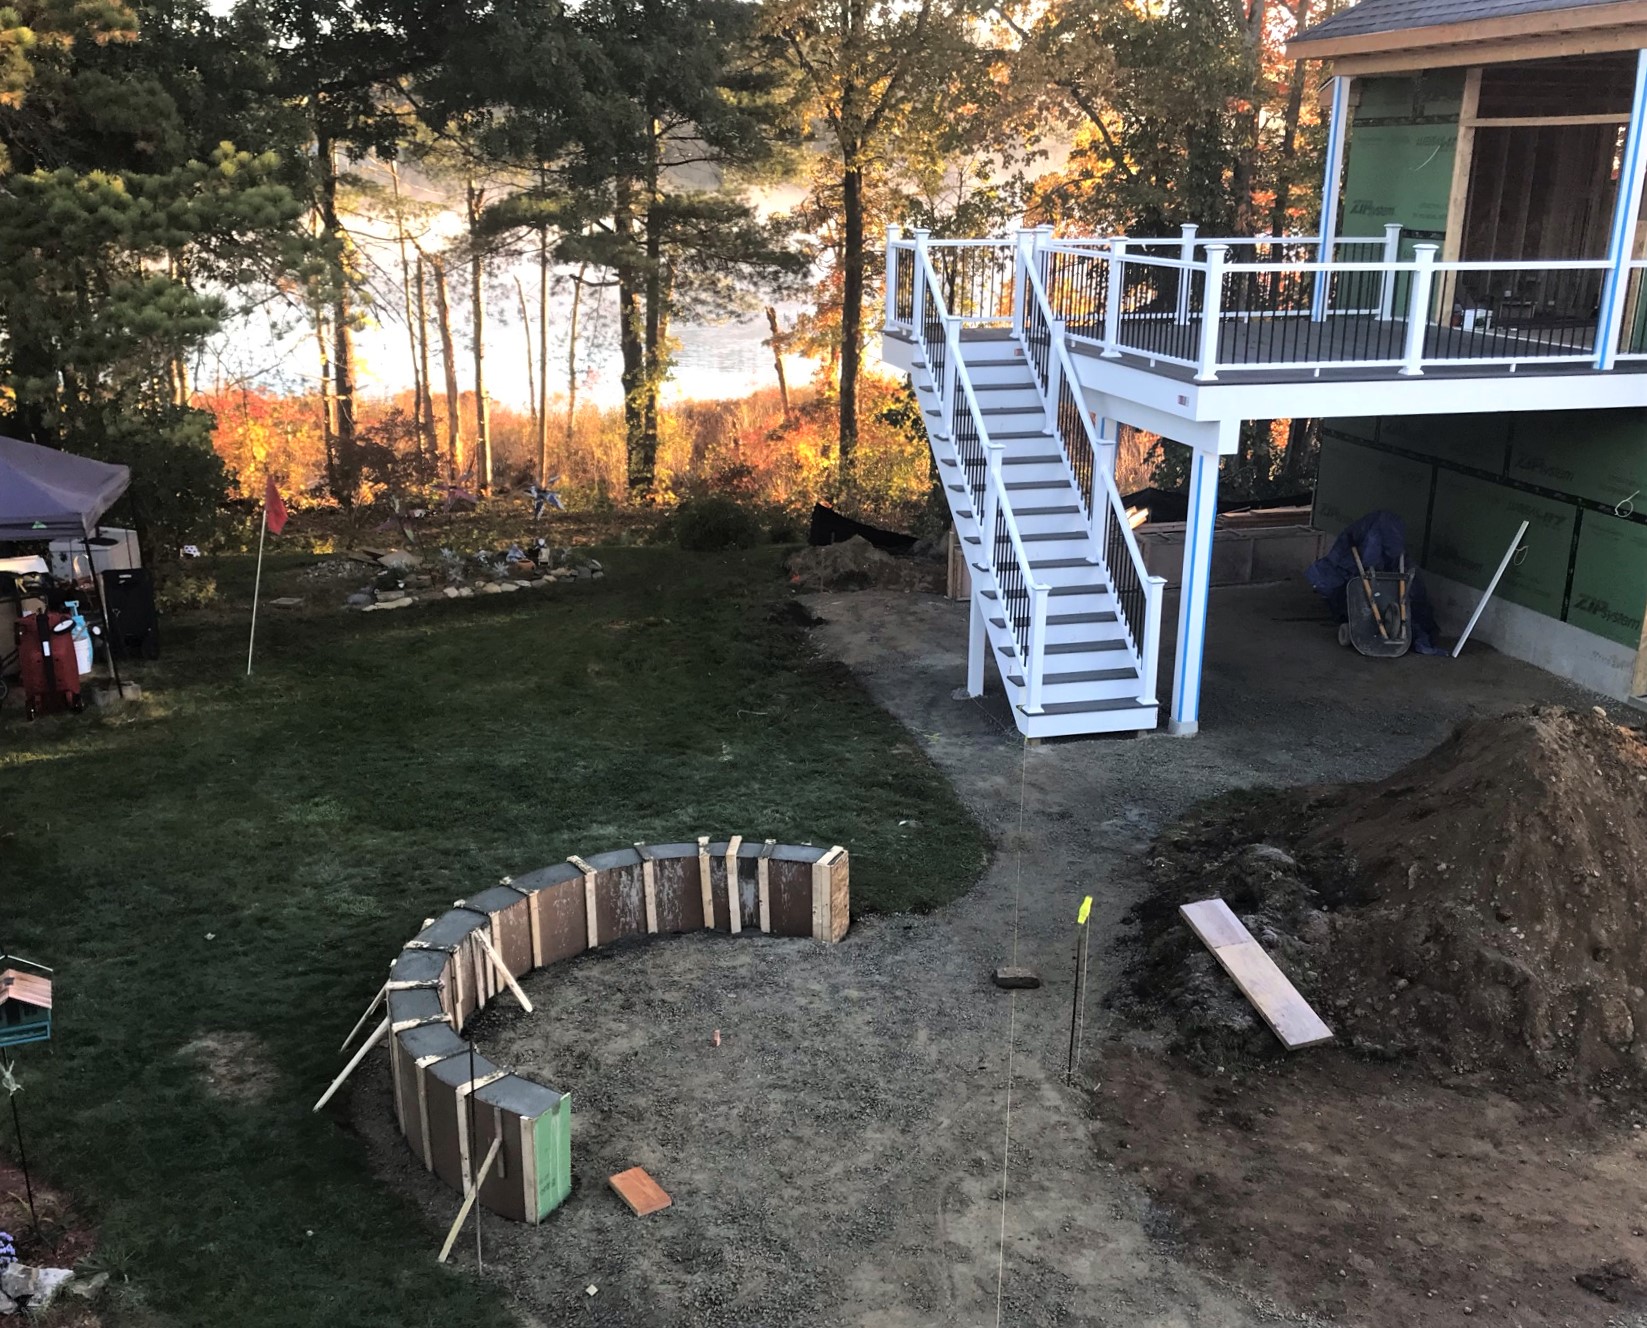
One of the wind-driven rain storms came in from the normal front of the house and hit from the back – where all the trees are. It was a mess, but I cleaned up early before Evandro’s guys came to pull off the forms.
Leaves everywhere – and more to come.Pulling the fire pit wall forms.
Then, they added a screed on the walls and let that set.
Walls with screed,
At the end of the day on October 28th, this was where we were with long shadows hitting the yard.
End of the day – and note I did get the leaves up.
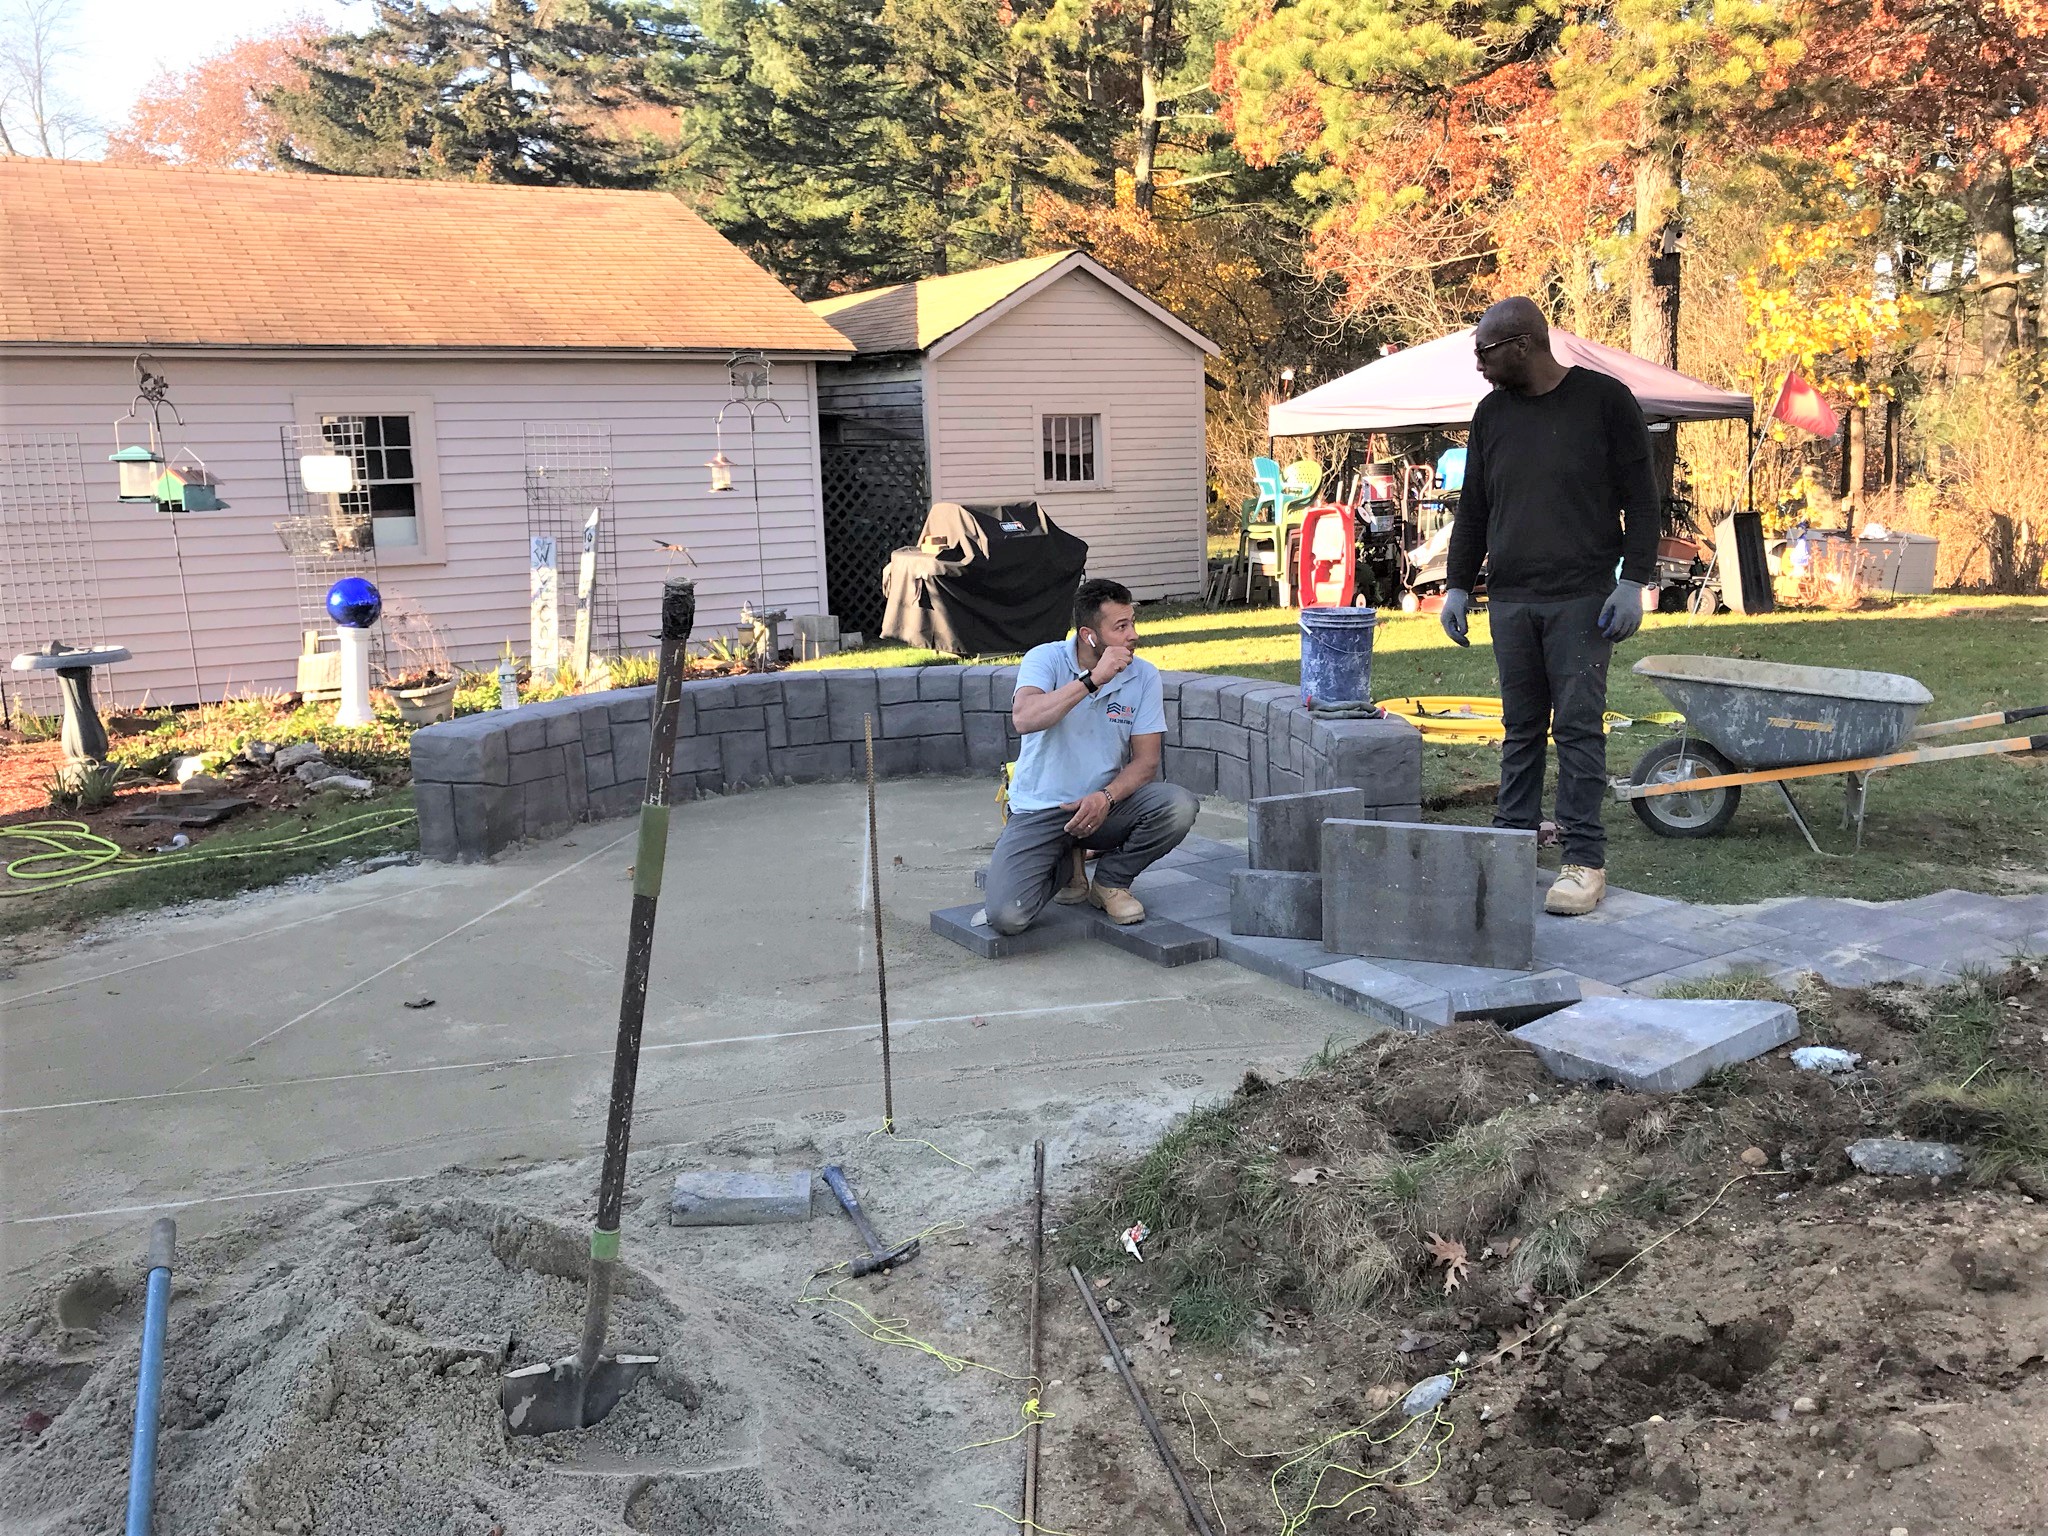
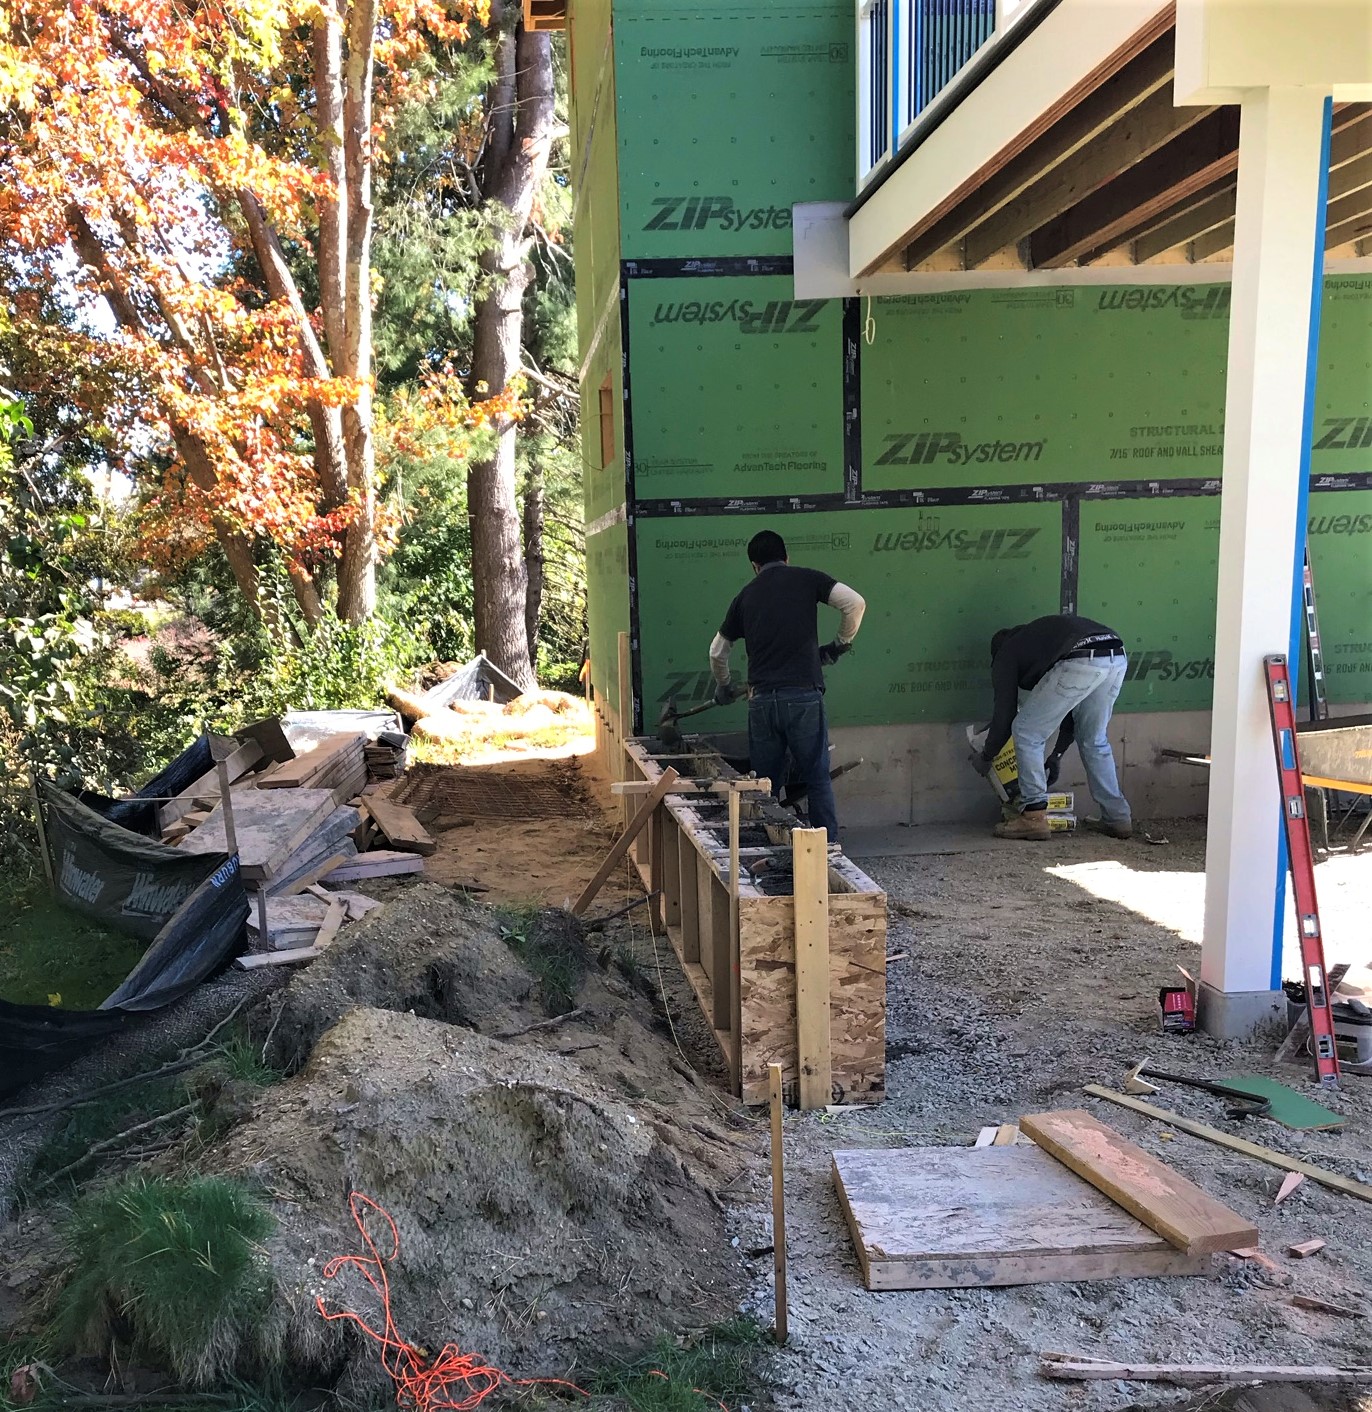
No work continued until November 1st. And then it moved onto coloring the walls with releasing agent (a first step anyways) and digging (by hand) the gas line.
Gas line being dug and walls being colored.Digging the gas line.
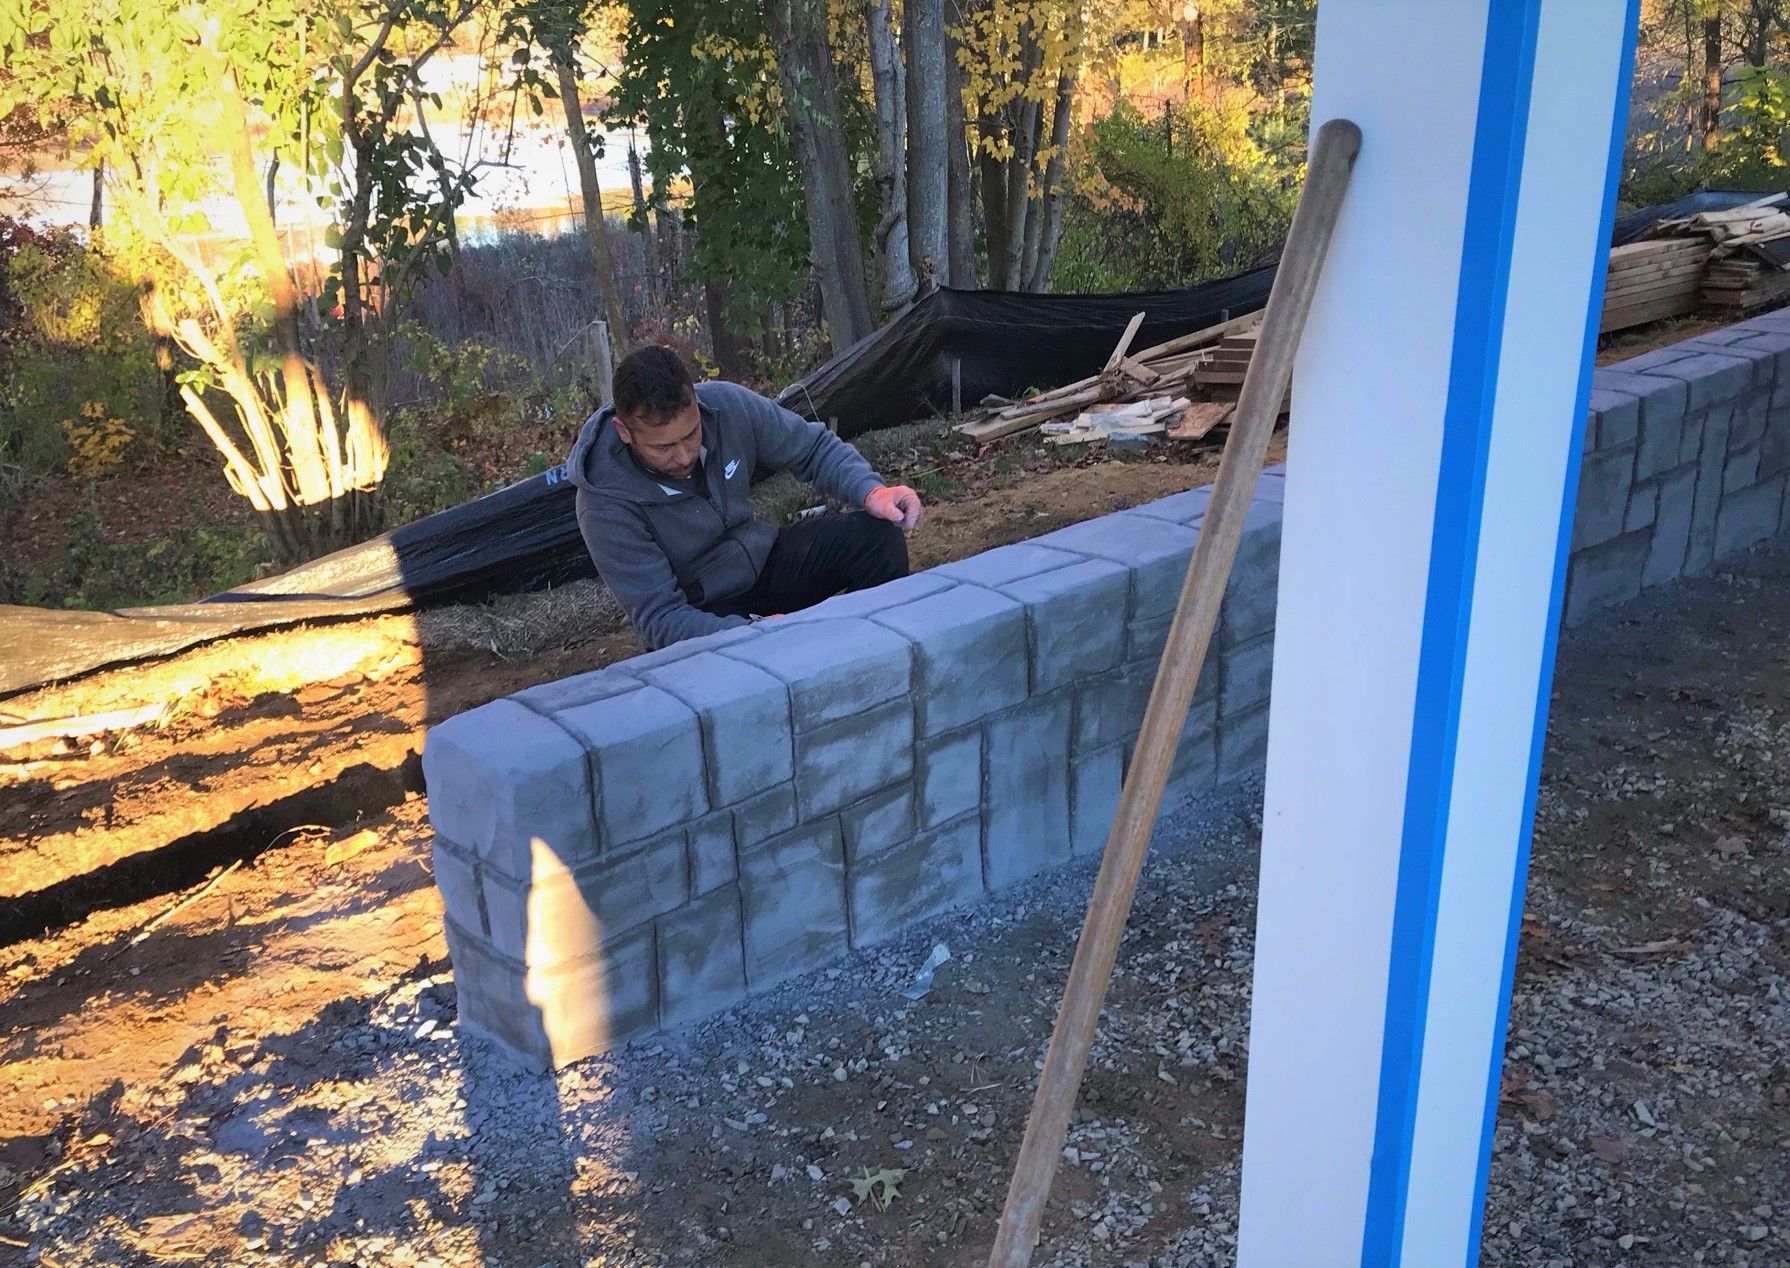
Meanwhile, Evandro began his color applications and shaping.
Evandro working on the back wall.After shaping it, he applied a releasing agent.The releasing agent.
He did the same with the fire pit wall.
Evandro at work.Here you see him literally throwing the dusty agent on the wall.
After this, the weather was lousy the rest of the week. And then it got cold before it got rainy again.
Yes, that is frost everywhere – the temperature was down in the 20’s.
So, not much to show for two weeks. The good news is that this week will hopefully start going a bit gangbusters – there were window and door deliveries, gas line materials are here, and Evandro should finish up soon outside the garage. Stay tuned and I hope that there is more to share at week’s end.
And, for you hobbyists followers out there, I should have a few more posts to share on some small projects I have done in preparation for gaming this weekend with friends in Maryland and at Historicon. There have been some changes in plans – I’ll share soon.
The work shifted this week (October 17-23) to the patio and fire pit – and that meant Evandro and his crew were front and center as Ready Installs awaits window and door deliveries – all delayed by COVID.
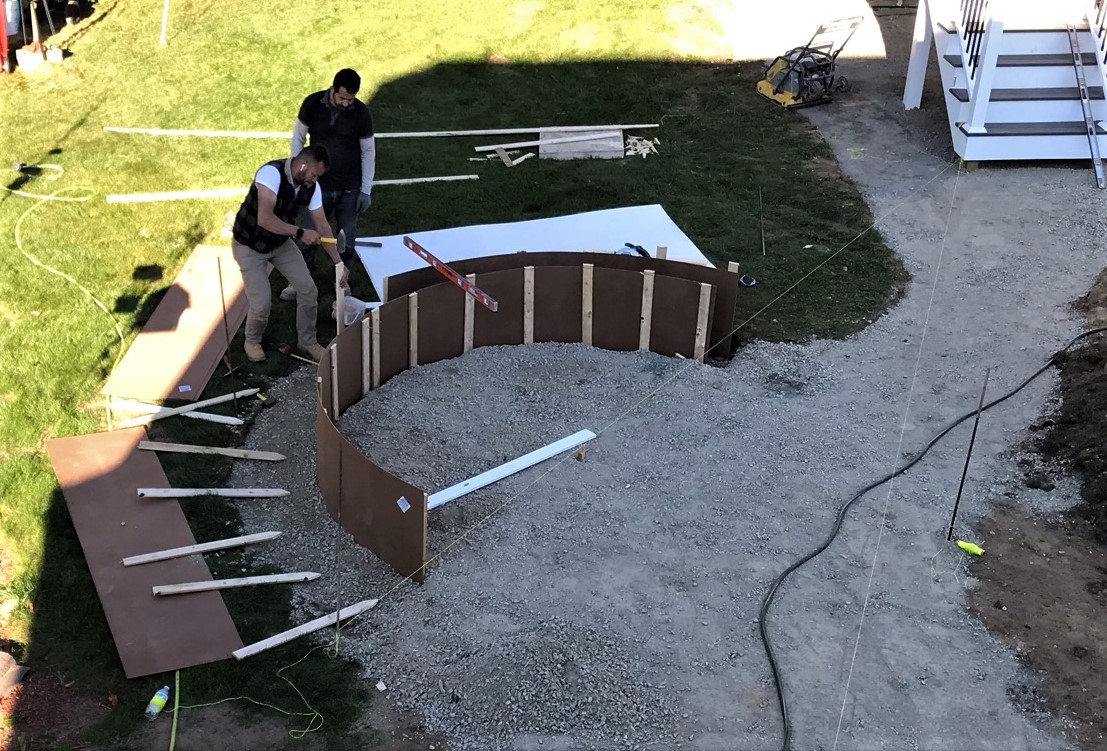
We had decided that we needed to upgrade our plan to include paving stone patios, walkways, a wall, and a gas fire pit. This post will focus primarily on those aspects. Evandro had previously roughly marked out where these new parts would go and link in with the new garage and the new house deck.
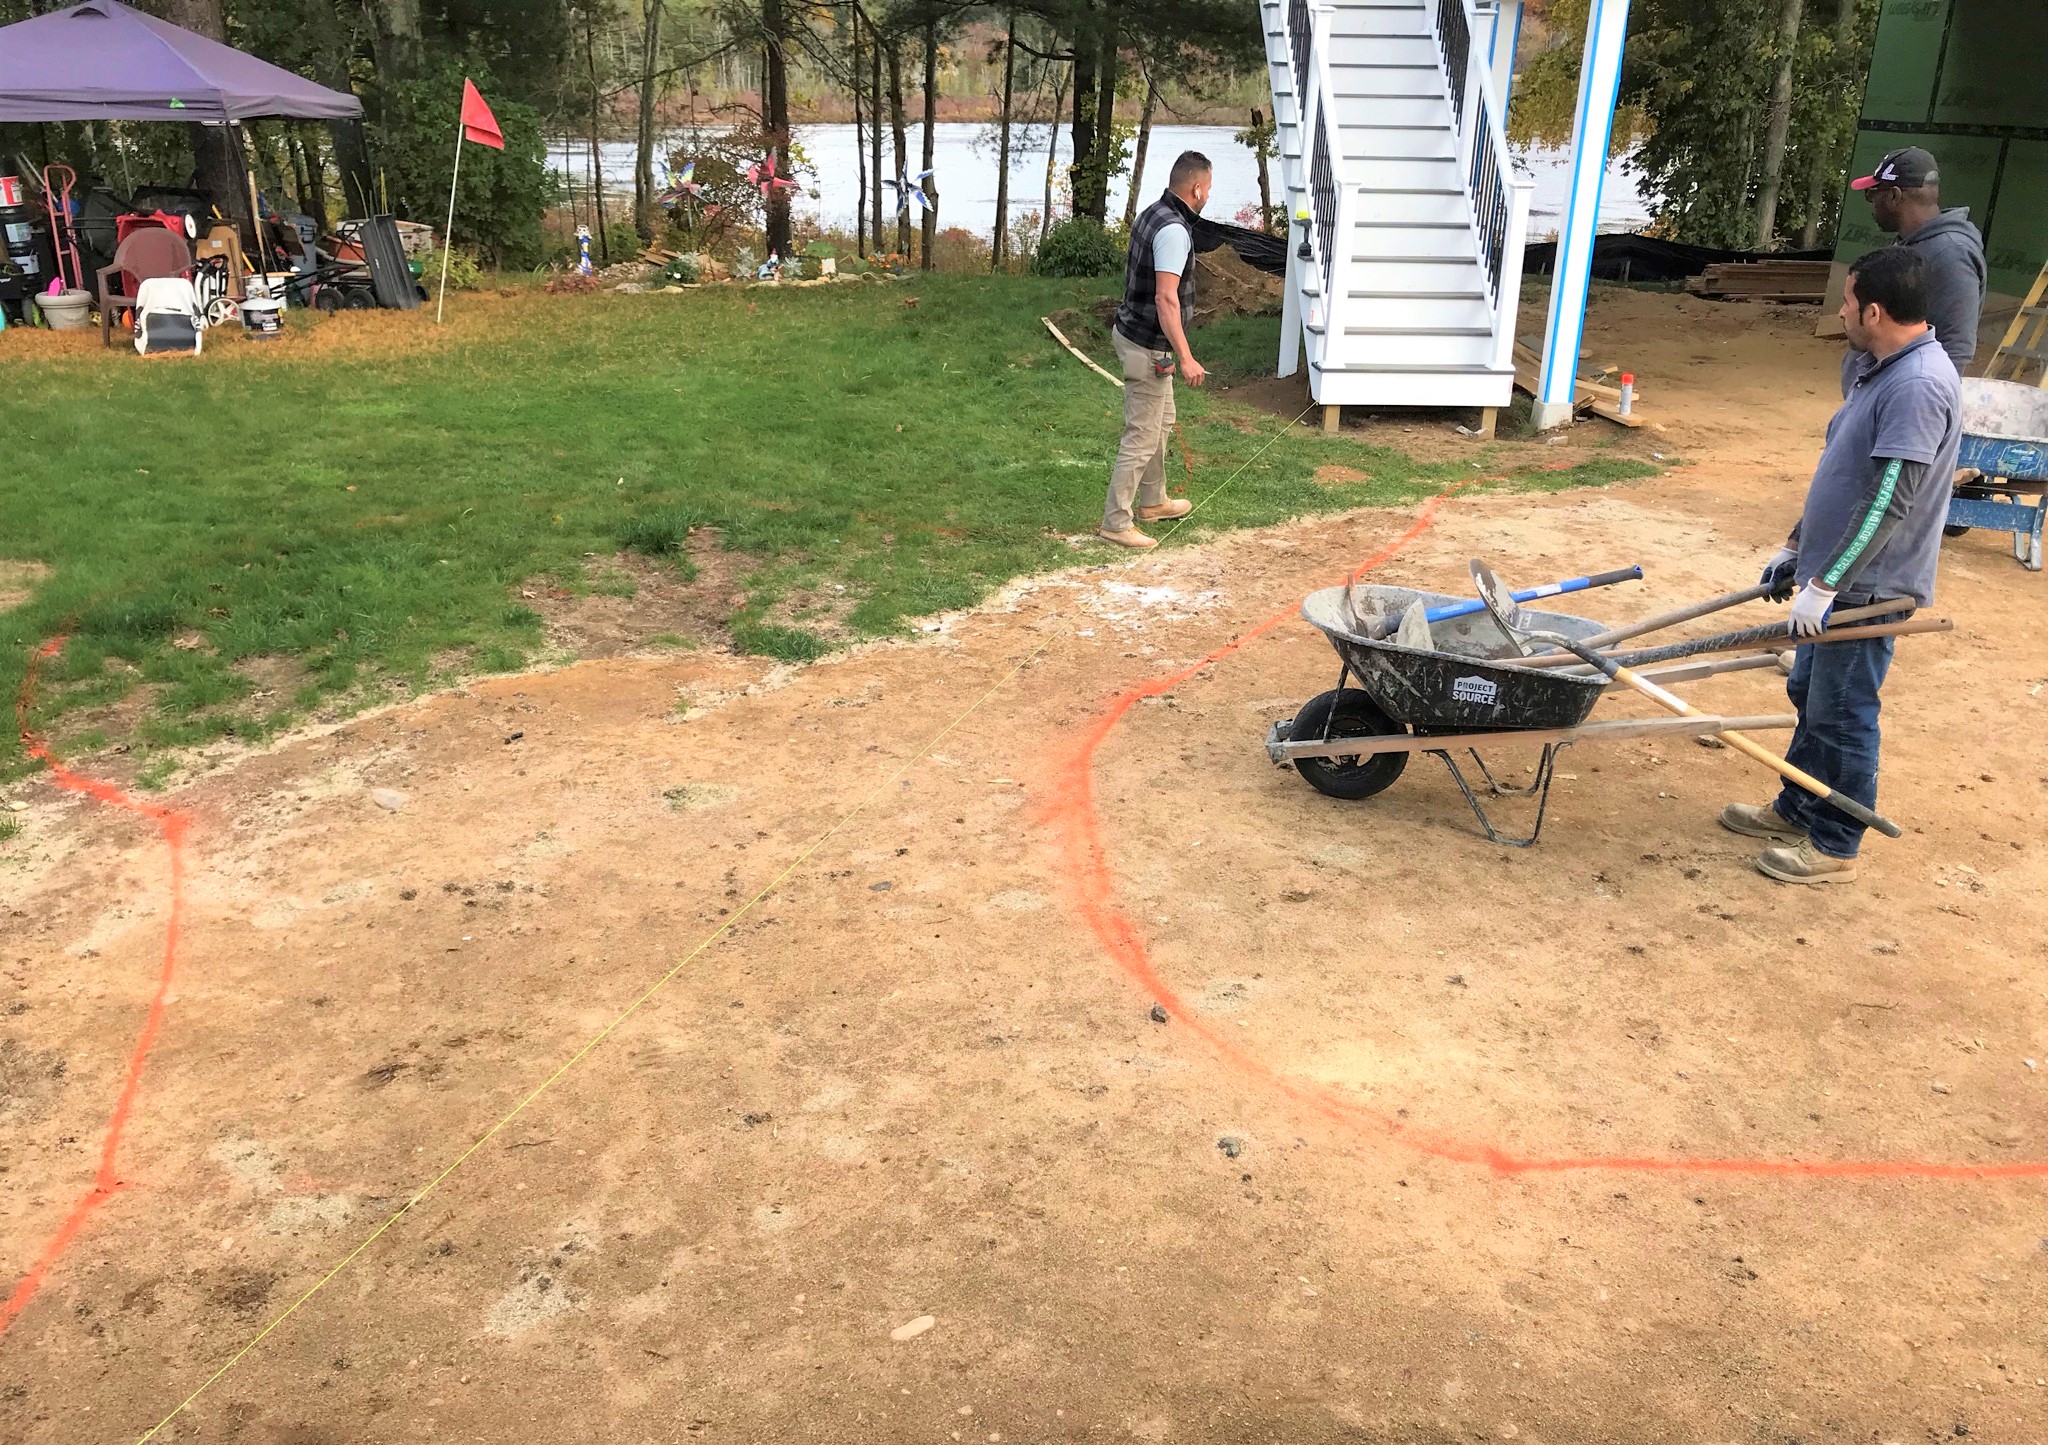
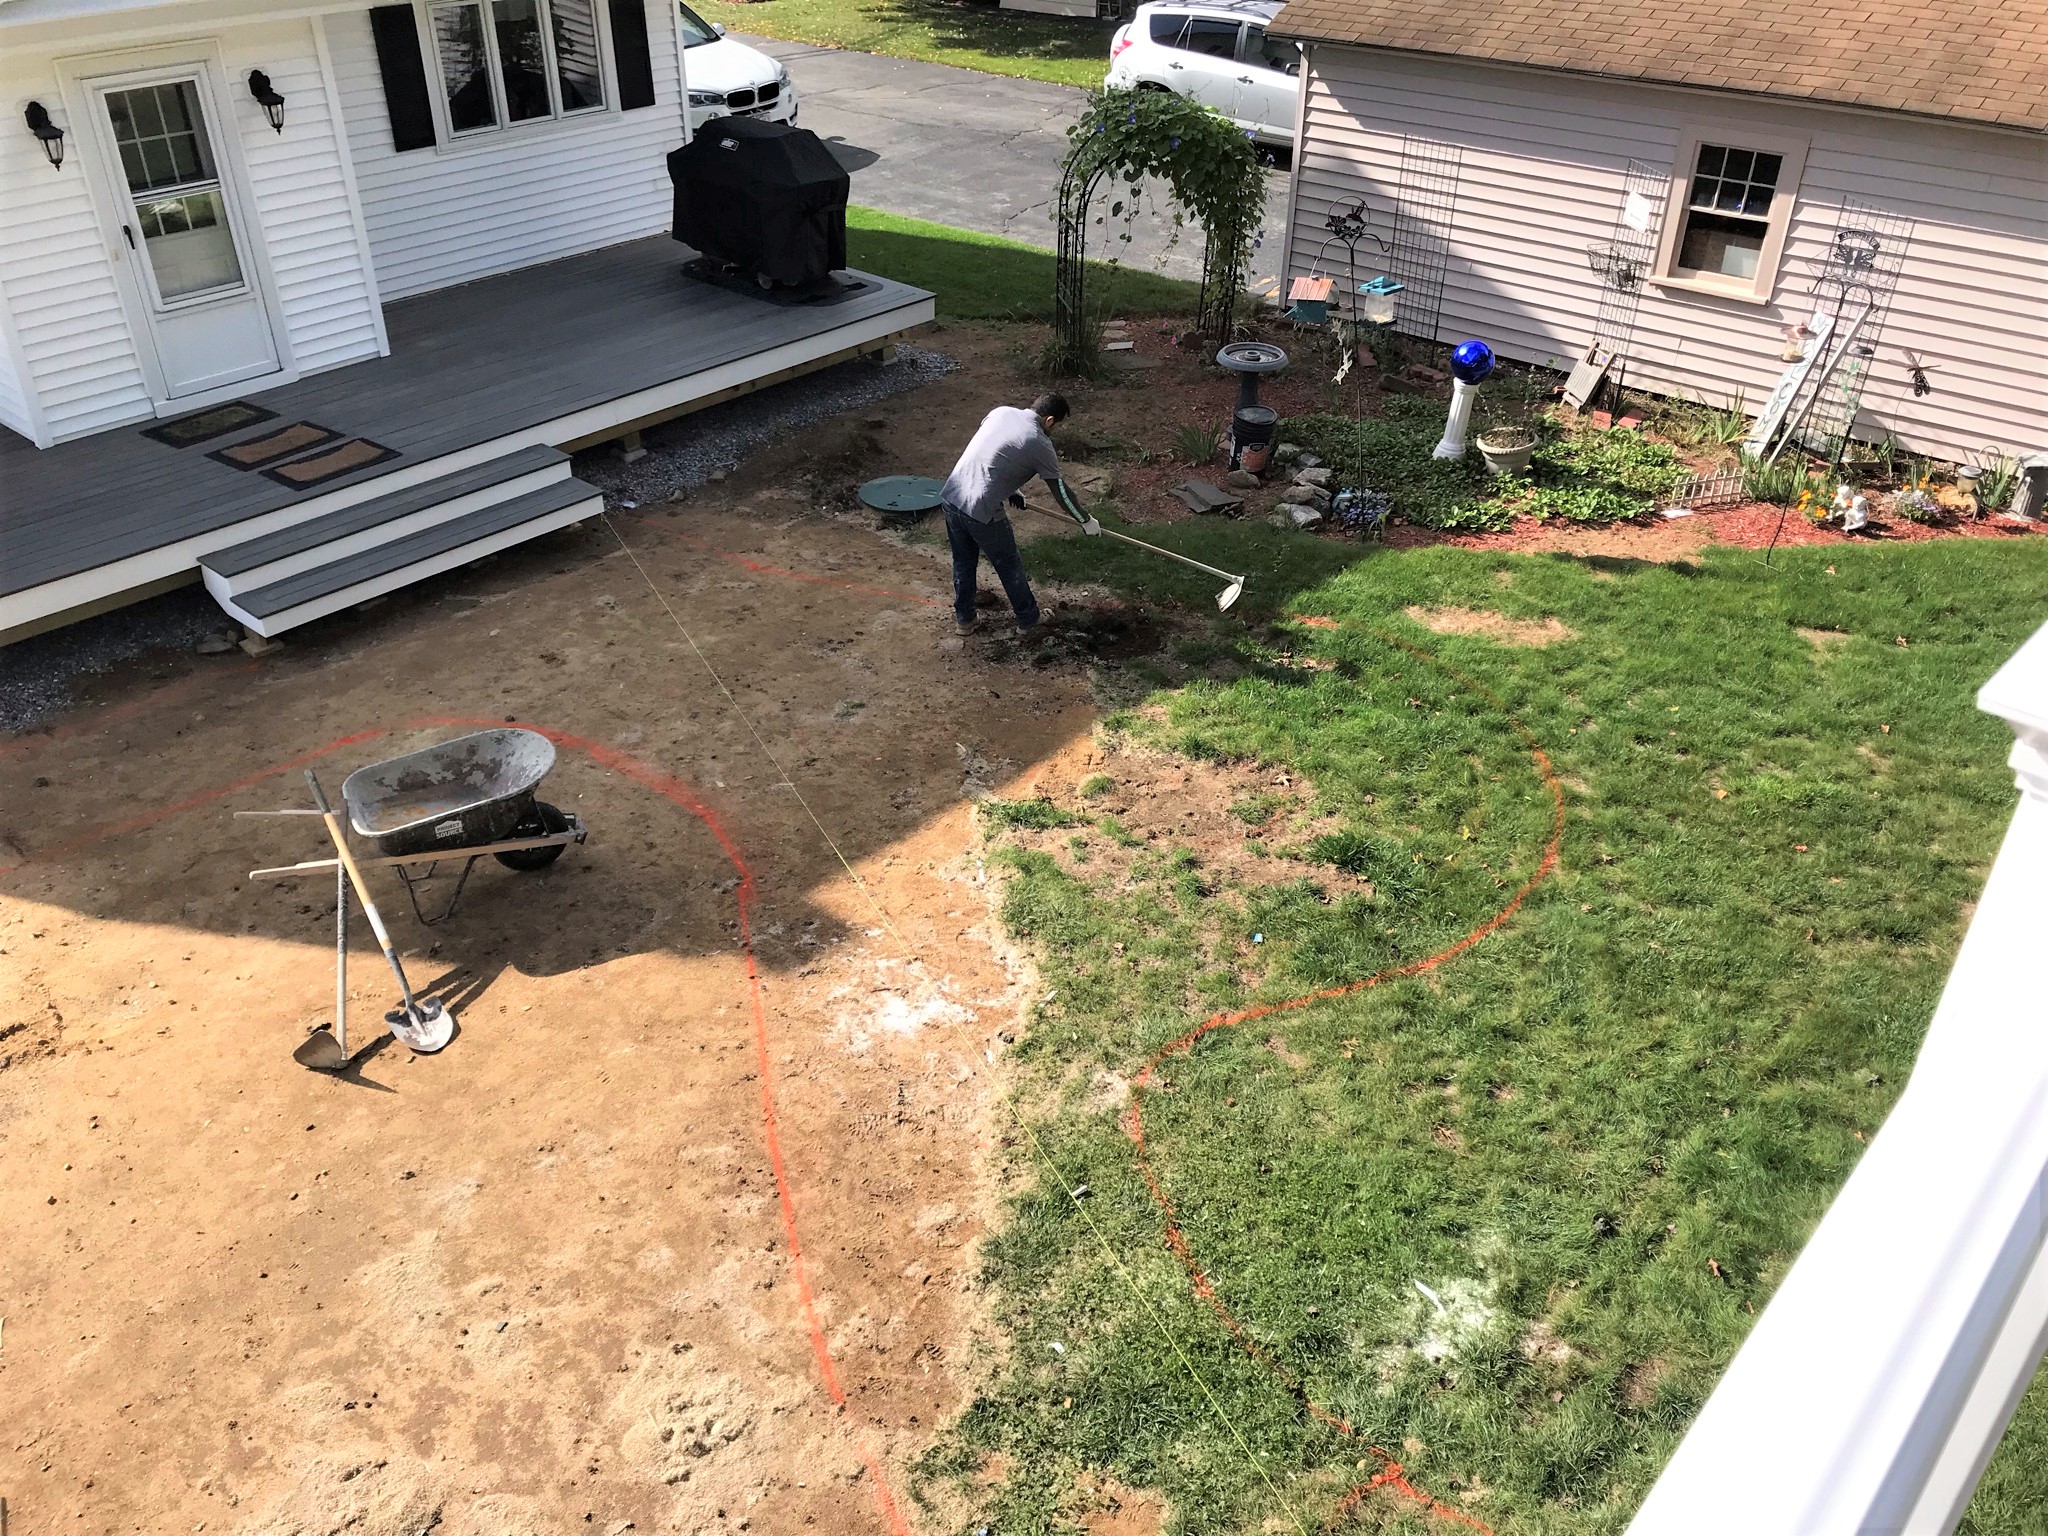
On Monday, Evandro verified his lines and excavation began.
Lines set and digging begins.Monday progress.
There was q lot of digging – and please note that this was done all by hand – no equipment other than hand tools.
Lots of digging by hand.Tuesday’s progress at seen at dawn on Wednesday.
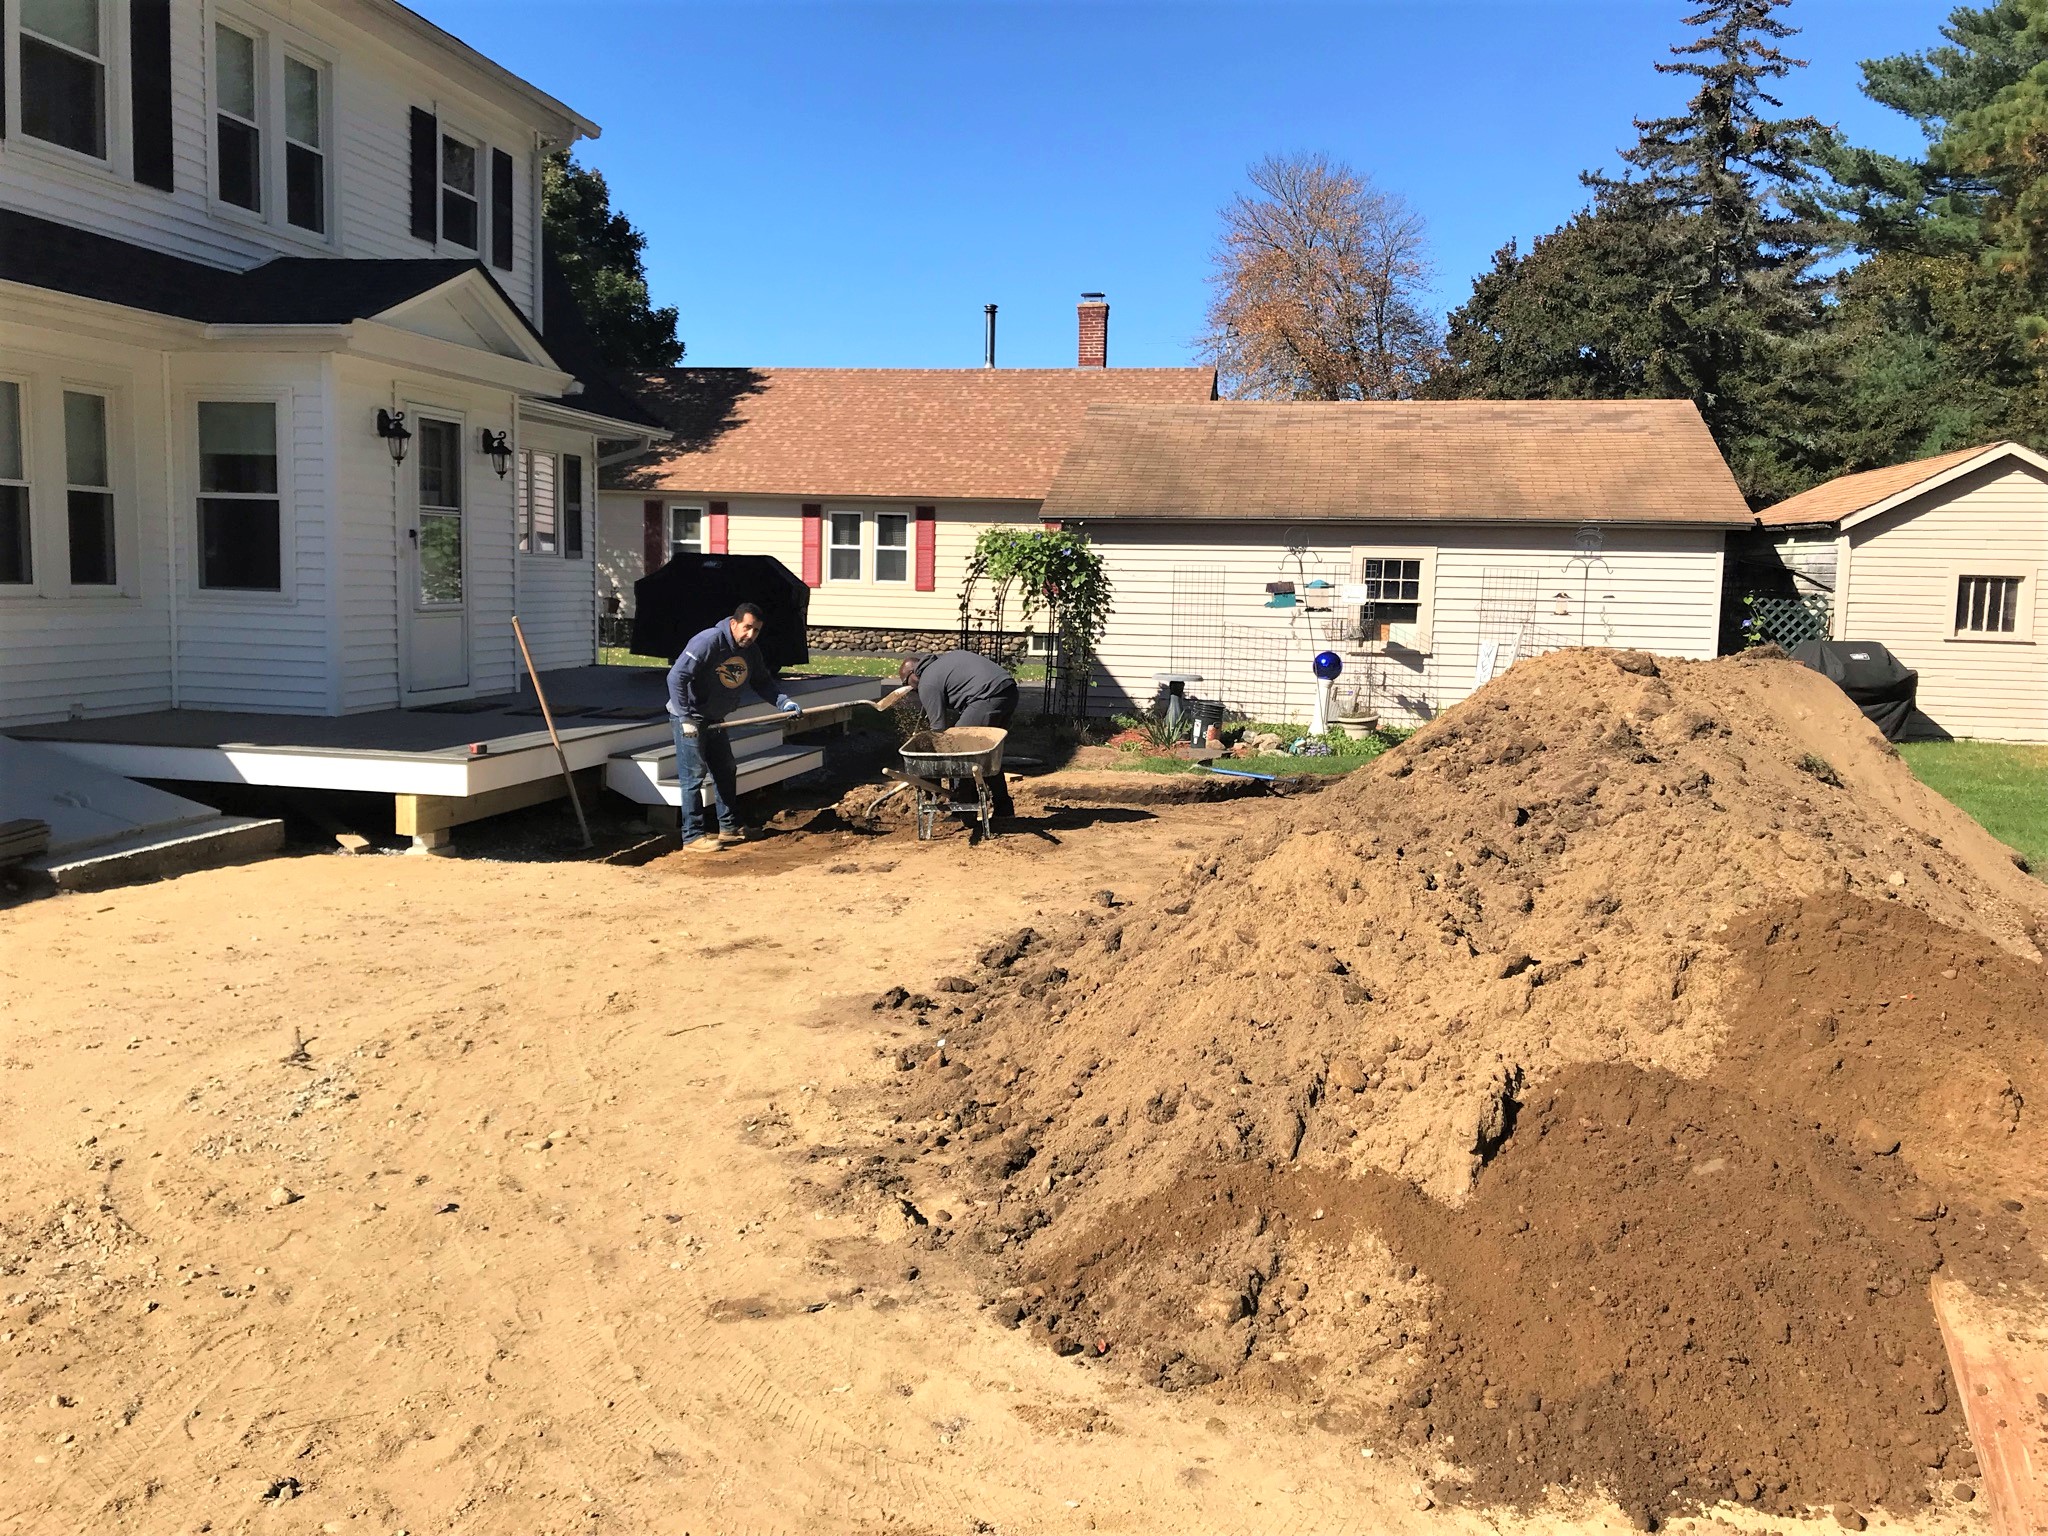
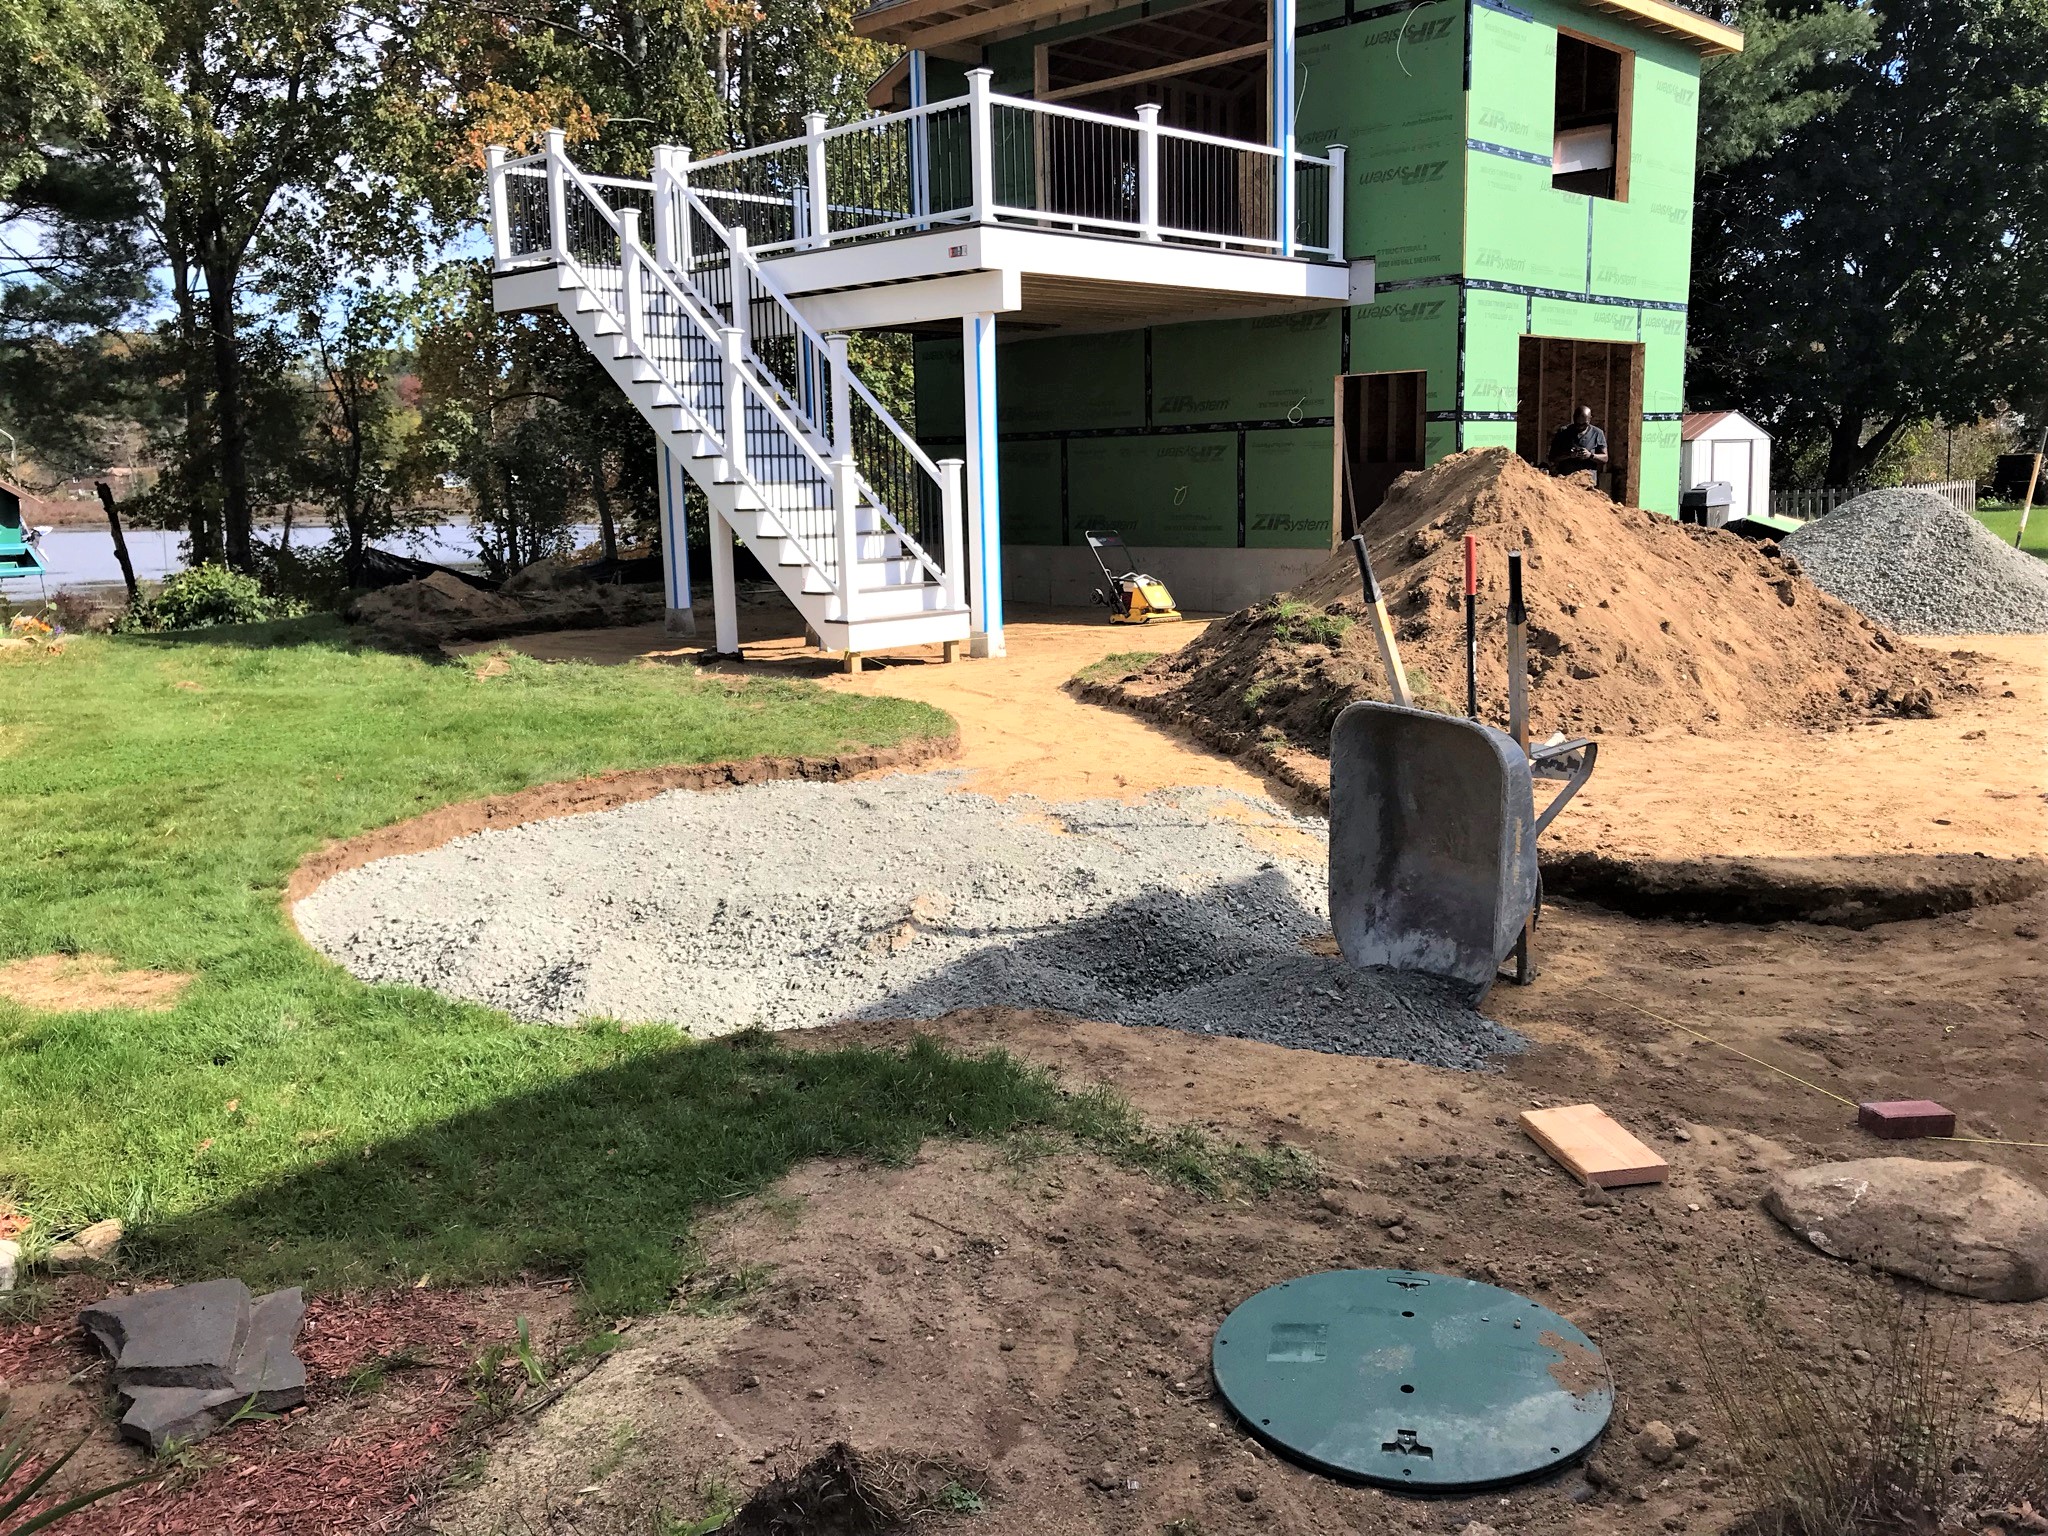
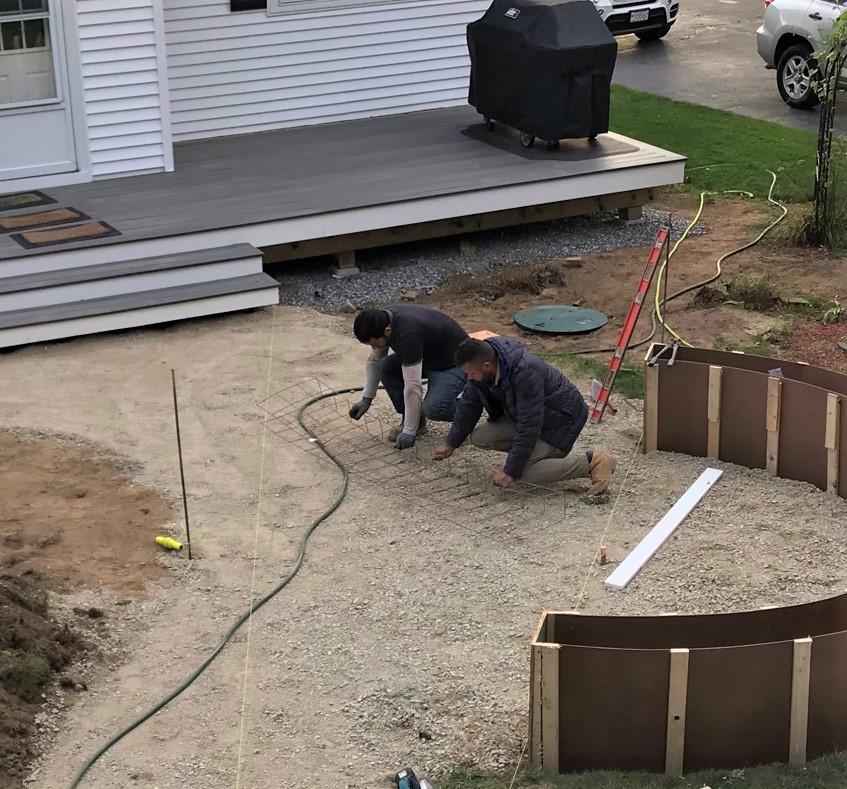
On Wednesday, it rained. Thursday things picked up again. Subbase compaction began – some by hand and some by machine depending on the leach field presence underneath. Then crushed stone started being brought in and spread.
Thursday work in progress.End of Thursday progress.
Friday saw a continuation of Thursday’s efforts.
Friday work.
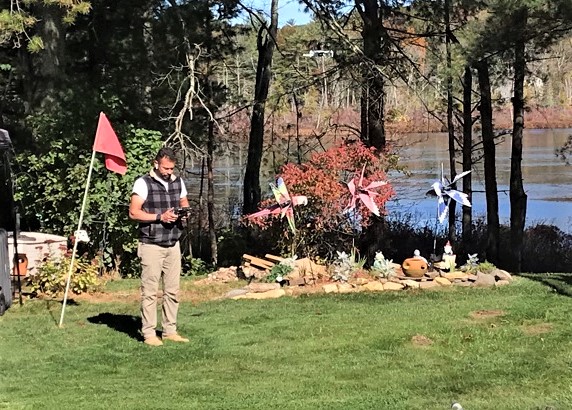
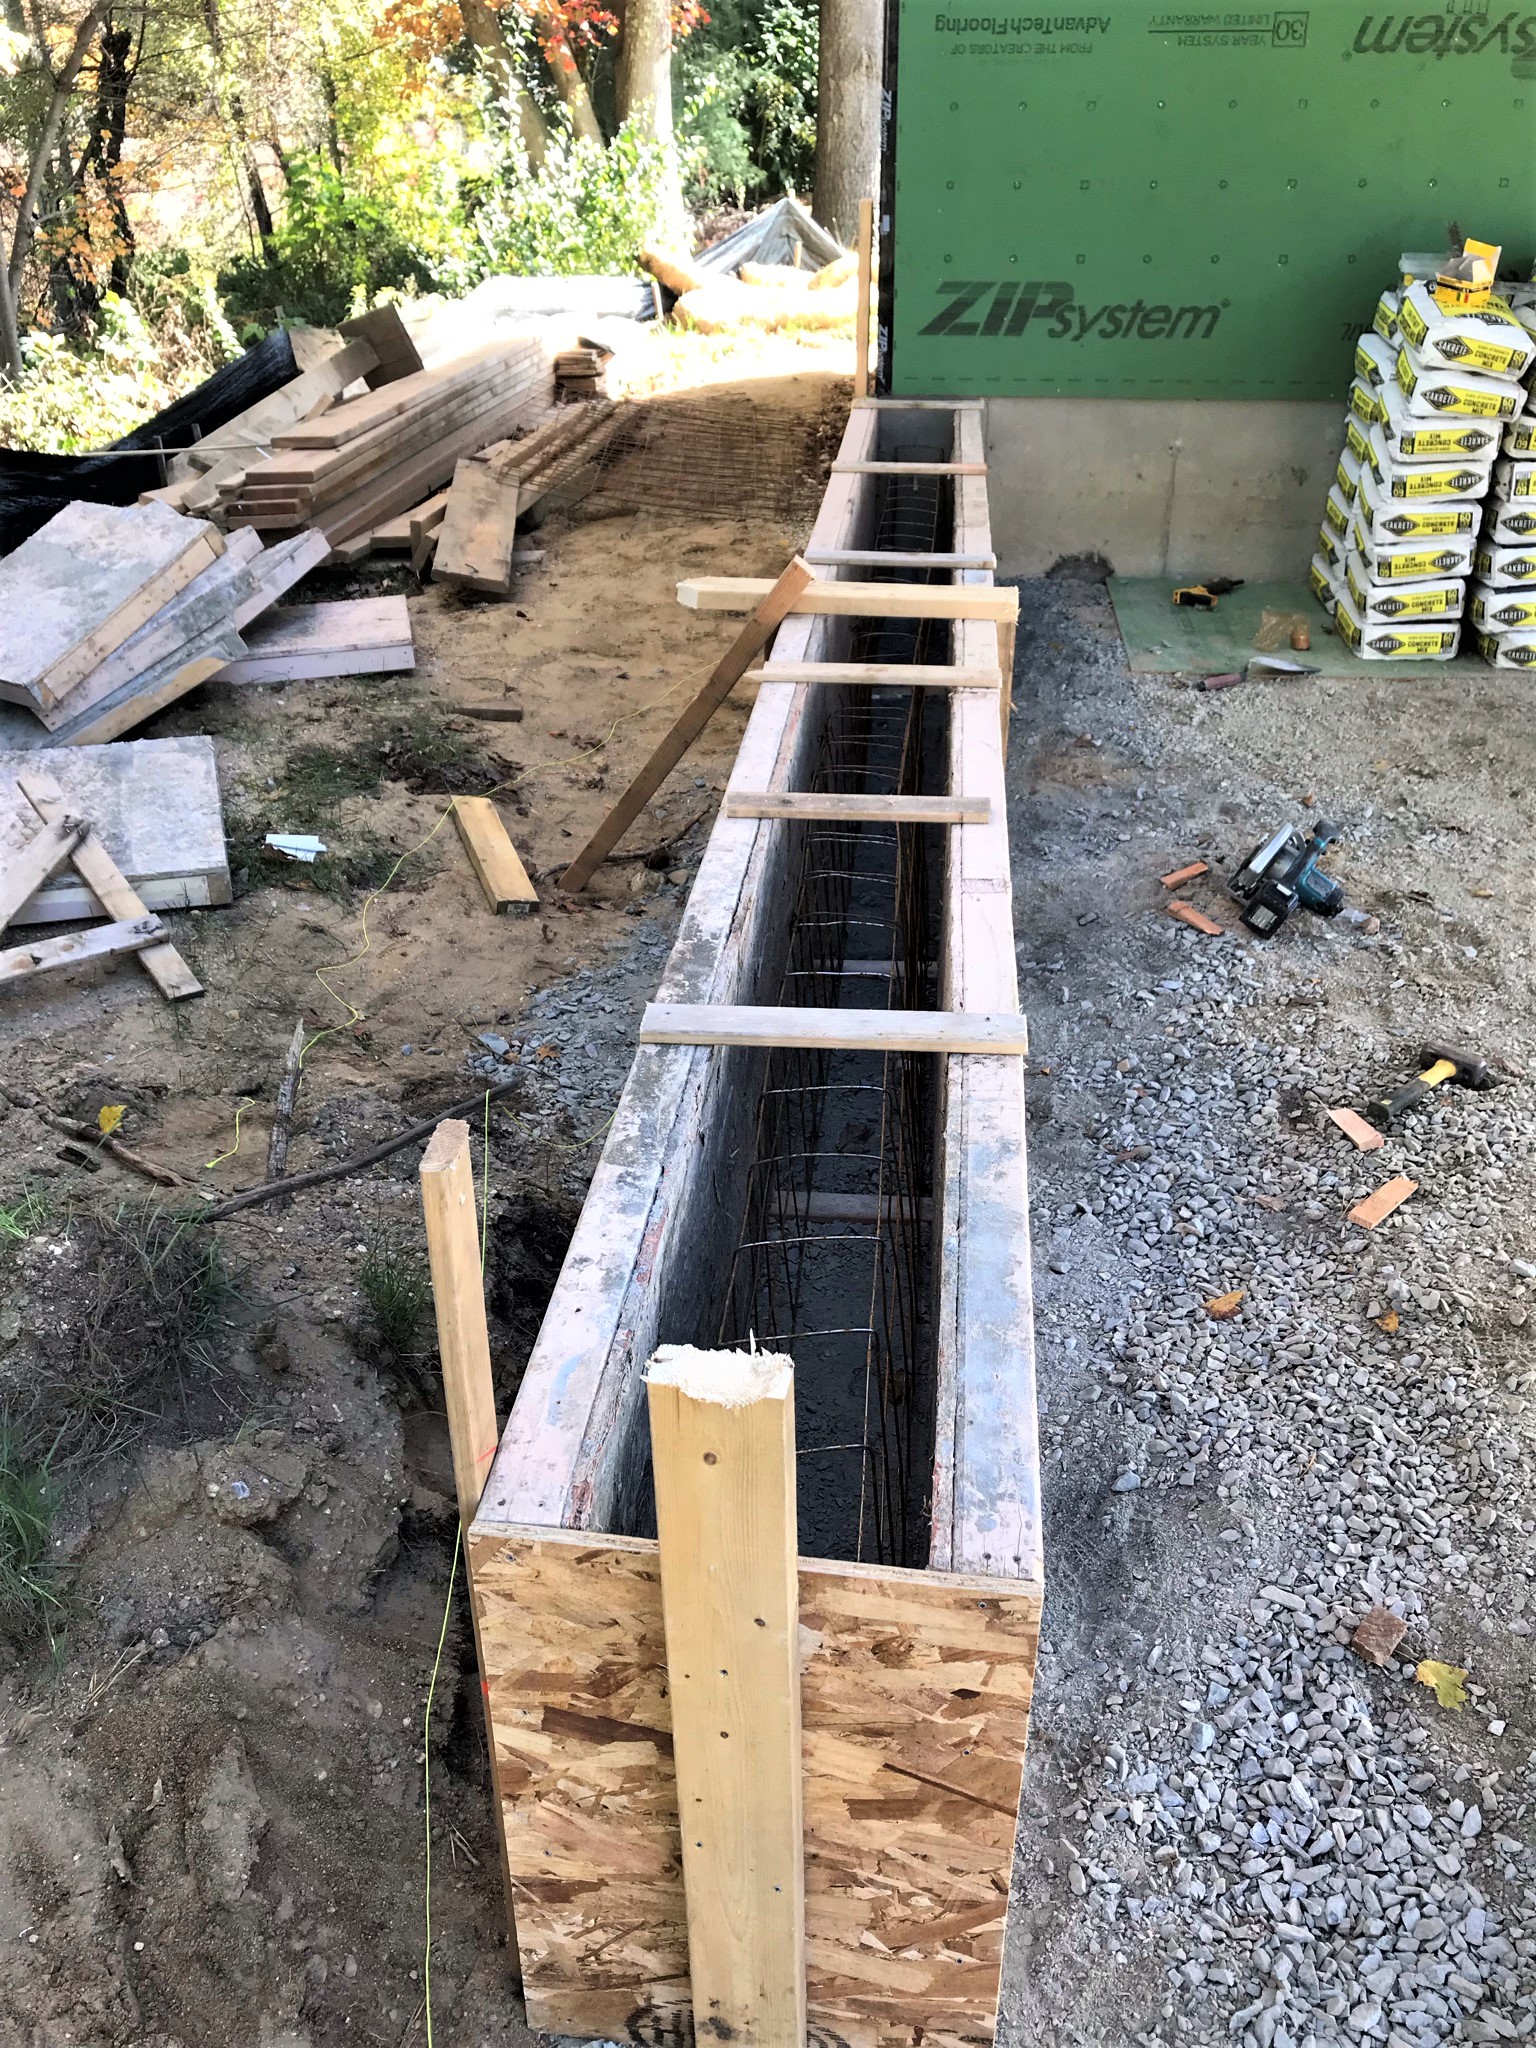
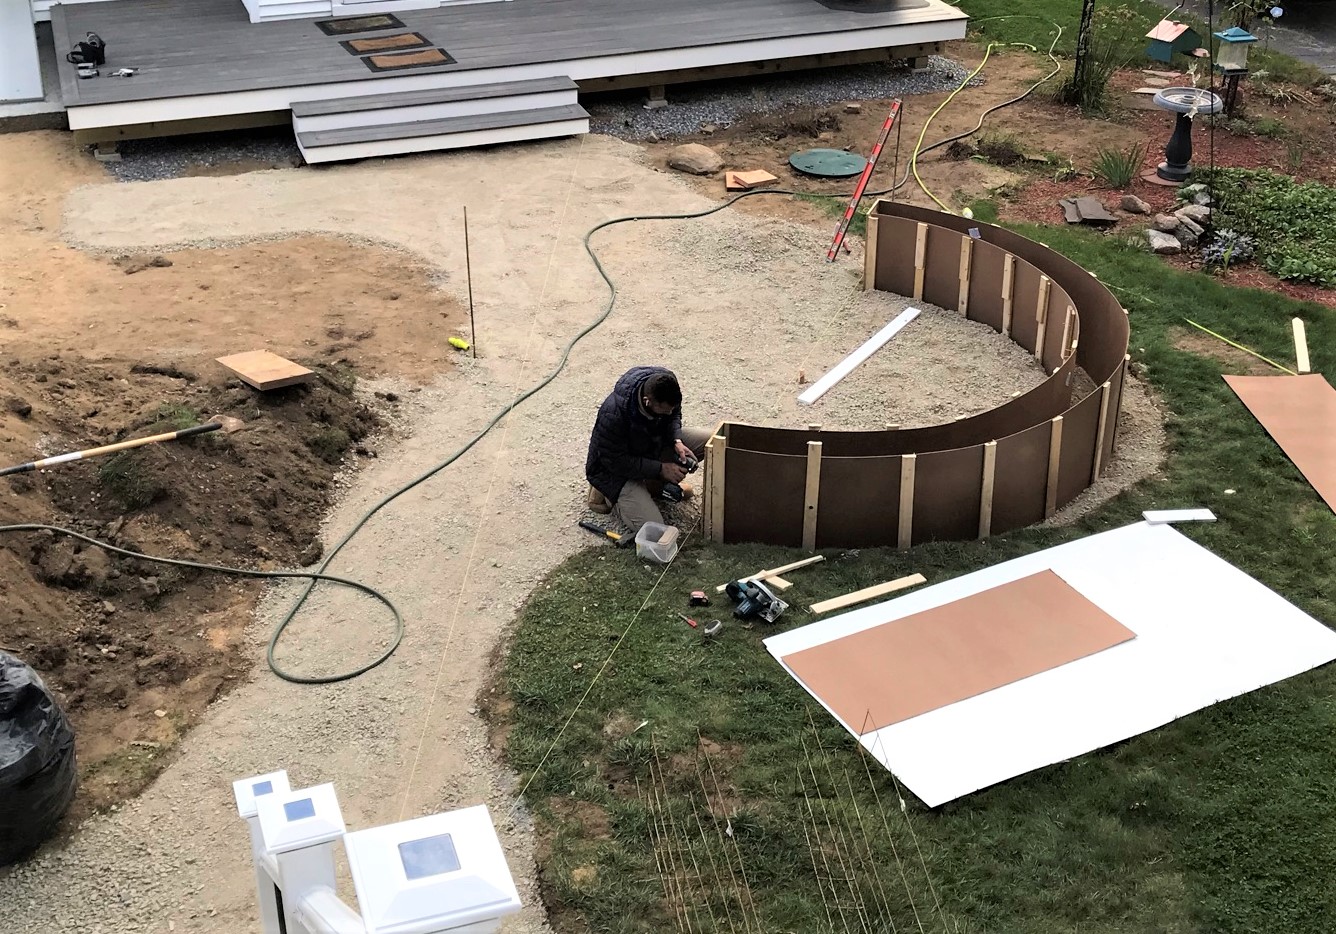
However, it became obvious that Evandro wanted to catch up for Wednesday, so work proceeded on Saturday as well. The work was focused on building concrete forms for the back wall and the fire pit, and lastly placement of hand-mixed concrete. Evandro had an amazing drone that he used to take some photos and videos that will eventually show his work start to finish – and I hope to share a link for that when its available. The drone was able to self-stabilize in the wind and could reach heights of 500 feet!
Evandro and his drone ( you can see it just above the midpoint of the two reddish bird windmills).
The back wall was formed and placed.
Back wall of patio under the deck.
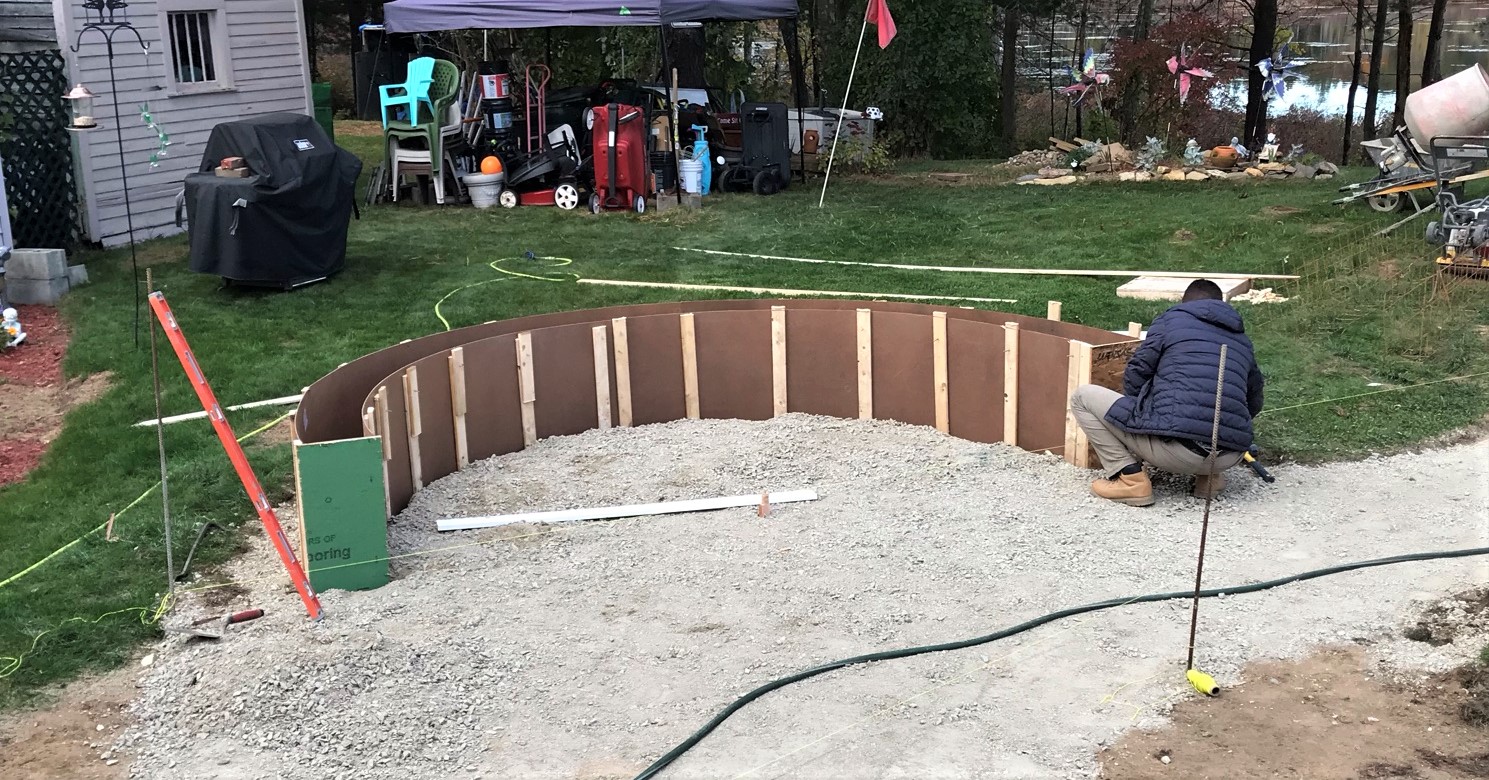
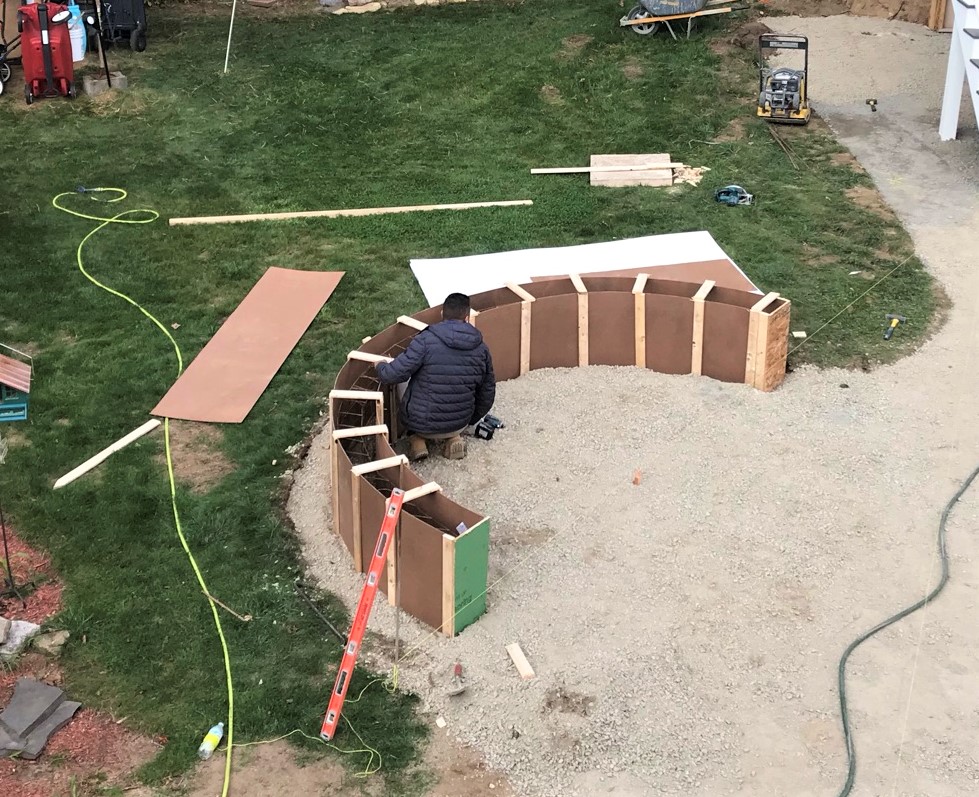
The fire pit wall was started.
Building the forms.
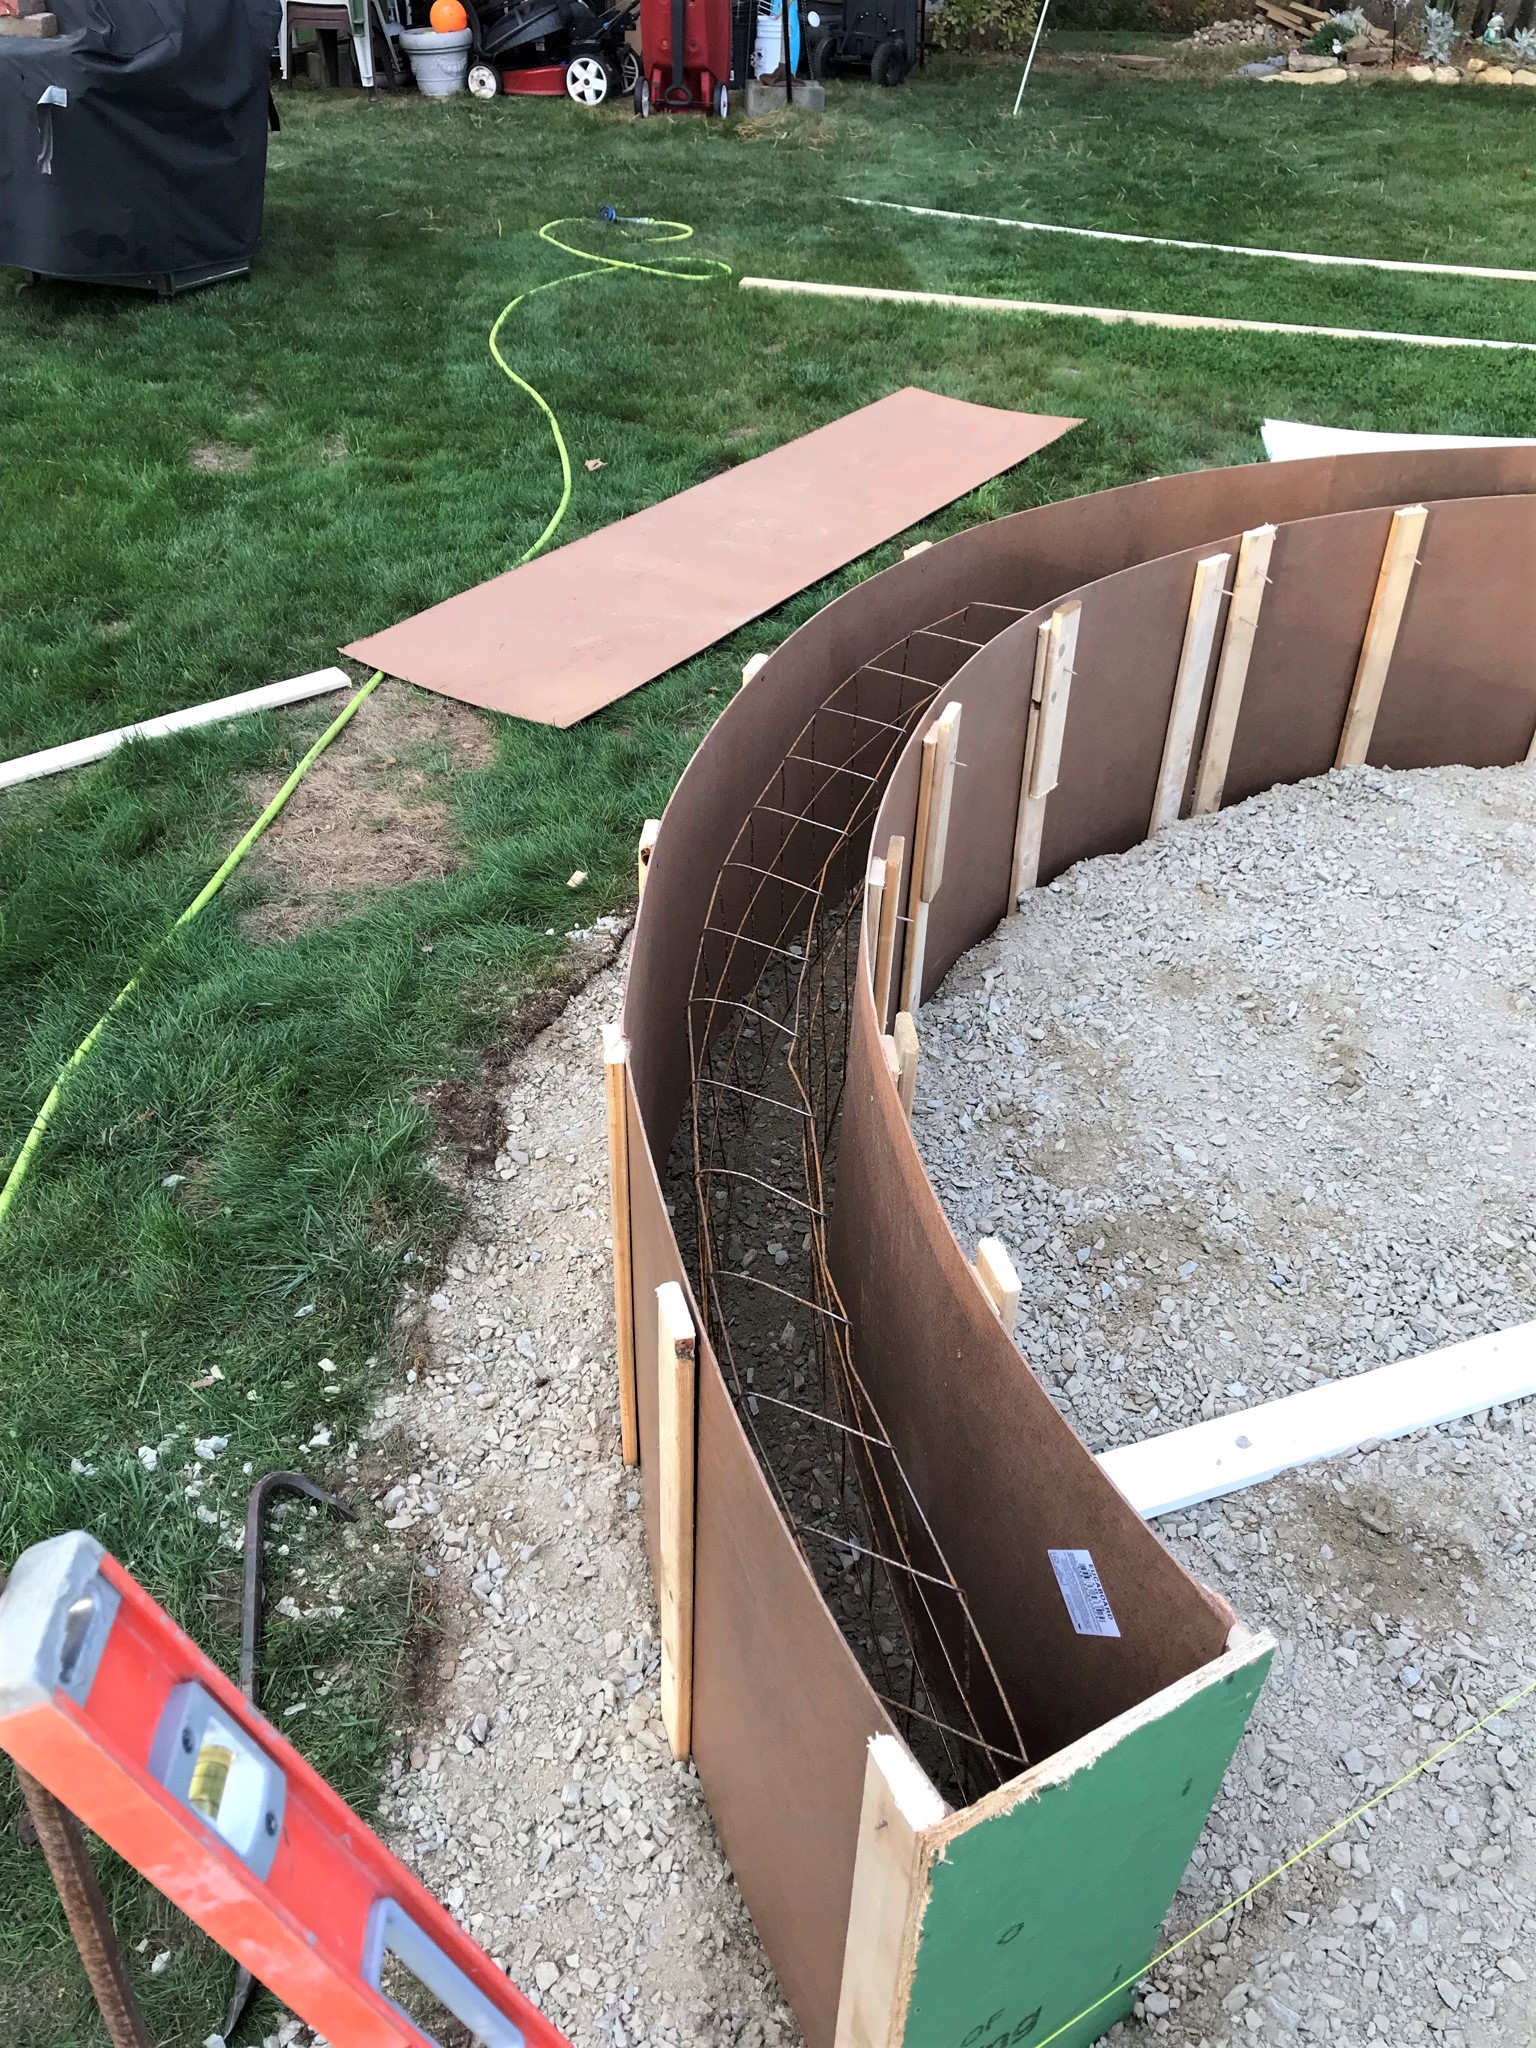
Staking the forms and bending and inserting the steel.
Steel in!
The crew worked past sunset on Saturday, and got good progress – though I had to wait until Sunday to have enough light to take a picture.
Week’s progress as seen at dawn on Sunday the 24th.
As I write this in week 15, it has been rainy and this is as far as we have gotten progress-wise. However, I bet Evandro hits the ground running when it dries up.
I hope this was enjoyable and thanks for taking a look. I may even do a hobby post shortly!