Admiral Jinjur is a female pirate who has gathered females from all of the various main factions of Ozz. As I wrote in my post on my two Admiral Jinjur regiments that I painted up:
In the world of the Wars of Ozz, Pirate-General (Admiral) Jinjur is said to:
…sail on the (Great Nonastic Ocean). She commands a flotilla of ships big and small, all crewed by female pirates. Her pirates board ships and raid seaports, ruthlessly overwhelming any resistance.Wars of Ozz, Section2.6.6, The Lands Beyond Ozz, pages 45-46
Her pirate forces are composed of females from all over Ozz – so her troops are made up of Gillikins, Munchkins, Winkies, and Quadlings – all the main races of Ozz.
There is, however, one other unit that is affiliated with her – Admiral Jinjur’s Personal Band. It is SKU#OZZ-517, and is composed of 7 figures. The unit has no combat capability and can take 4 hits before it is removed. Otherwise it has no Melee, Marksmandship, Resolve, or Elan values. The unit costs 3 points. It has this ability:
The Band may play a rousing tune when it activates instead of moving. All units, friendly or enemy, within 9″ of the band increase their Elan by 1 during its next actvation.
Wars of Ozz unit stats
This ability would be very helpful to get either timid troops or those that have been previously routed to get up the gumption to get into Melee (or at least to stop routing away).
I built out mine as follows:
Band Leader (Quadling)
Trumpeter (Gillikin)
French Horn player (Quadling)
Drummer (Munchkin)
Flautist (Quadling)
Fiddler (Winkie)
Concertina player (Quadling)
Let’s get into the build and painting. First, some:
WIP Shots and Discussion
I started working on the unit on April 9th in conjunction with more stuff (units and individuals that I’ll post about soon). In my collection of potential bases, I had a leftover hexagonal 4″ basswood base that I had made when I painted my Minifig “The World Of Greyhawk 9 Cavemen”waaaay back on April of 2015. I’m glad I saved it, as I did not want to use an artillery MDF base for the band. As this unit only takes 4 hits, having 7 figures on a single base would not make any sense to use (as the artillery bases allow for figure removal to equal hits).
Mocked up on hexagonal baseClose up of unpainted band leader
Then, it was on to filing off the flash, mold lines, and giving the figures a quick wash before priming. The figures are great and have a lot of character. No assembly was required.
Instead of using my airbrush to prime the band, I mixed some old grey and white primer that was no longer airbrush-suitable – but that was certainly fine for hand brushwork.
Cleaned up and awaiting priming.
I did (and do still) have other issues and projects going on as I stated earlier. As you may have noticed, I also am part of a committee that runs the monthly Tour of the Brookfields golf tournament here in Central Massachusetts (the latest one is here). So, in between that, attending and running games at MAYHEM in New Hampshire (which went from April 19-20 for me and for which I still need to do a blog post), other golf, and other units/individuals, I worked on the band with the hope of having the unit done for HUZZAH Goes Hollywood in May. Yeah, retirement is busy!
Back to the band – by April 22nd, I had made some progress.
April 22nd progress.
And by the 28th of April, I had the figures painted and ready for varnishing, basing, and flocking. Chris Palmer’s Pi-Rats that he had painted had inspired me to go back and paint a few of these band member’s pants with stripes. As I did this before with my Conquistadores, it was a nice flashback to many of my previous fond projects.
Gillikin with trumpetQuadling Band LeaderMunchkin DrummerWinkie FiddlerQuadling flautistQuadling concertina playerQuadling concertina player
By April 30th, I had finished the band for April as you can see below!
Admiral Jinjur’s Personal Band Eye Candy
Photographing the unit was a bit difficult given the configuraton that I chose. First some close ups – these ladies of Ozz are all in fine form:
And here is the entire base flocked and done:
I also decided that with my new WordPress plan that I should try to add a video – as that might be of interest as I get to describe more and rotate the unit:
A brief video of the Admiral Jinjur’s Personal Band
I’m probably going to add this unit to a brigade that already has the other Jinjur pirates. We’ll see how I can work that into HUZZAH!
Lastly, Jinjurs in the Jungle:
With apologies to Jethro Tull – Jinjurs in the Jungle, that’s all right by me!
So why the jungle shot? Well, first, pirates are known for hiding out on jungle-infested islands, no? Second. well, this is a tease for my next unit post. Though my next post will likely be a MAYHEM wrap up. To my fellow bloggers, I look forward to more of your stuff too – I have been remiss in commenting, but not in reading. WordPress is intermittenly still not allowing me to “like” your comments on my PC! Grrr…
As always, much thanks for looking!
And yes, I still have much more Ozz to come…
Miscellaneous details and references for those interested in that sort of thing:
For all of my previous posts on Wars of Ozz games, figures, units, and other related projects – please see this page.
PAINTS, INKS, GLAZES, SHADES, WASHES, PIGMENTS, FLOCKING, GLUES AND MORE THAT I USED ON ADMIRAL JINJUR’S PERSONAL BAND:
Homemade 4″ hexagonal base made of 1/8″ basswood
5/16″ Everbilt steel washers (ACA)
Black Sharpie pen
Green Sharpie pen
Poster Tack
Vallejo Surface Primer “Grey”
Vallejo Mecha Primer “White”
Wargames Accessories FOW #1 (1.25″ X 1″ steel base)
Shadow’s Edge Miniatures “6mm Dark Forest Blue” (flocking)
Shadow’s Edge Miniatures “6mm Dark Forest Purple” (flocking)
Gamers Grass “Wild Shrubs” (flocking)
As you may want to check out the excellent Wars of Ozz figures’ range – there are two places to get them and to get the rules (and I make no money from this btw). The game rules and the figures are available from the following two places:
Havoc is the premier miniatures convention of the Northeast and has run continuously for 37 years, well…except for the two Covid-19 years. Havoc XXXVIII (2024) will be held on April 5th thru April 7th, 2024…
Last weekend the latest iteration of the Battle Group Boston’s HAVOC convention was held in Marlborough, MA, at the Best Western Hotel. The BGB folks did a nice job setting up and running the convention, though it did seem like turnout was a bit light compared with previous years. Still, there were a great many wonderful games (not just mine you know). I did not get a chance to watch or play in other games of course, but I did see my neighbor’s awesome Stalingrad Fireball Forward table:
Awesome Stalingrad table (15mm I think)
I have also seen one excellent blog post by Peter Anderson at his site Blunders on the Danube (what a GREAT blog moniker btw!) that showed a number of the wonderful games in their full glory. Here is the link to that site – it is really nice, so please check it out.
This convention was held at the same hotel that TotalCon 38 was in February. At that convention, there were 10 slots, so I ran 10 Wars of Ozz tabletop wargames as a GM. When the HAVOC sign up showed up on the web, I saw that there were as usual 5 slots – 1 on Friday, 3 on Saturday, and 1 on Sunday. I thought, hell, if I can handle 10 in 4 days, I can handle 5 Ozz games in 3 days. The only difference between the conventions was that I had added the Quadling Brigade and heroes that I discussed in my last post. Besides, if you paint them, they will come!
For this post, I took some photos that more or less capture the essence of each of the games. I’ll try to give you a flavor of the action with all the eye candy I can (there’s a LOT).
Friday Evening – “Learn to Play Wars of Ozz“
For my “Learn to Play” (LTP) games, I give each player brigades of 21 points apiece. That usually works out to a Brigade Commander, 3-4 units, and a couple of individual hero/magic users.
Brad waits for the players to arrive. On the left here (Red team) are a Harvest Brigade, the Quadling Brigade, and two Munchkin Brigades. They faced two Gillikin and two Winkie Brigades (Black Team) on the right here.A view from the other side of the table as the players start. This game had 7 players.Black Team’s Dire Tigers from one of the Gillikin Brigades charges the Quadling 1st Regiment’s line with the Dire Wolves on their left.Meanwhile, the Gillikin Goat Riders made a mad charge against the 4th Quadling Infantry Regiment – only to come up short facing their muskets.Bob maneuvers his Munchkin Brigade as he faces off with the Winkie Infantry. His witch (Belinda the Nun) recovers on the left from a critical spell failure. The Aerostat jockies for a key hit on the marauding Winkies. To Bob’s right, Brad’s Munchkin Sharpshooter Regiment faced a massive dual Winkie attack from Leif – who used both Evora’s Body Guard and the Zilk rider cavalry. His Landwehr watched in horror and waited for an activation.Leif brings up the Winkie Sharpshooters to reinforce his offensive.The Great Flying Apes prepare to assault Bob’s Munchkin Aerostat by taking cover in the town. The Winkie Infantry behind them have been routed by the Munchkin Sharpshooters and are running away as Leif moves up his Winkie Sharpshooters.While the Winkies successfully unlimber their artillery on the hill, the Winkie Sharpshooters are then also routed by the Munchkins!The Munchkin Landwehr and Munchkin Sharpshooters both hold out against Evora’s Body Guard, Zilk cavalry, and the Great Owls.On the Red team’s right flank, the Harvest Brigade under Scott sends its female pirates against Gillikin infantry. Their witch, Lady Thistlethorne, had cast a “poppies” spell on the hill to keep the Gillikin skeleton regiment away from its Lesser Pumpkinheads, while the Great Pumpkin Heads wheel around the hill to take on the Gillikin Gugu Forester Regiment.Bob’s Aerostat crew breathes a sigh of relief as the Great Flying Apes attack on them fizzles.Ken’s witch, Glenda, uses a “transport” spell to successfully send the 1st Quadling Infantry Regiment into the Zilk cavalry’s flank.
As time ran out, the battle was called. The score was a victory for the Red Team (Munchkins/Harvest/Quadlings) who had destroyed 26 enemy bases versus the Black Team (Winkies/Gillikins) that had 14.
Saturday Morning – “Learn to Play Wars of Ozz“
For my second LTP game, I moved some brigades around and swapped in some new ones. The table set up is flexible so if the number of players vary from the sign up, I can adjust. Again, each player had brigades of 21 points apiece.
The table reset for Saturday morning.The players are ready – eventually we had 5. because of the shortage – we left off the Harvest and Impkin brigades nearest the camera. This left two Munchkin brigades and a Quadling brigade (Red Team on the left here) versus a Winkie Brigade and two Gillikin brigades (Team Black on the right here).Our 5th player arrived just as Eric and Brad got simultaneous activations and moved to attack.As in the previous game, the Winkie Infantry (lower left) took fire and damage from the Munchkins and fled. Eric then got his Winkie Sharpshooters in good positions atop the hill.Forces converge. Munchkins move up on the left, while Gillikin’s Dire Lions charge out of the forest at the Great Owls.A view of the Gillikins moving forward on the left side of their side of the table.The Dire Tigers show their flank to the Quadling 4th Infantry Regiment as they try to hit the 1st Quadling Light Battery on its flank!The Dire Tigers take out 1 base of the Quadling Artillery, but are pushed back. The Dire Bears try to move up but are hit on both of their flanks by the Quadling 1st Infantry and the artillery.Once again, the Winkie Sharpshooters are routed, but manage to rally, and move forward in single column to get better shots at the Munchkins with reduced Elan.At the game’s end, the Dire Tigers, one of the Dire Bears, and the Dire Wolvere were a skeedaddlin’…
Time ran out and the game ended. Despite the routs, the aggressive attacks of the Black Team (Winkies & Gillikins) had cost them 19 casualties, but they had successfully inflicted 25 on the Red Team (Quadlings and Munchkins) for the victory.
Saturday Afternoon – “Heavy Meeting Engagement”
For my “Heavy Meeting Engagement” (HME) games, I give each player larger brigades of 31 points apiece. That usually works out to a Brigade Commander, 4-6 units, and a couple of individual hero/magic users. I ran the first of these HME games on Saturday afternoon with 4 players. On Team Red were a Munchkin Brigade and an Impkin Brigade. On Team Black were a Harvest Brigade and a Winkie Brigade. I did not take as many photos in this game versus my previous games. We had 4 players.
Impkin musketry causes the forward-based lady pirates of Admiral Jinjur to abandon their safe hard cover in the town and charge the Impkins in the open.The Great Pumpkin Heads and the Impkin Cavalry BOTH could not get up the guts to get into Melee!!!The Jinjur pirates were forced back into the town and the Impkin infantry advanced. Black Team moved up the Carrot Creatures.In the middle of the board, the Munchkins repulsed a skeleton attack.
The game ended, with a very close score, 24-21, very narrowly in favor of the Red Team. I then checked out the vendors during a break, and bought a few supplies. Also saw some old Buck Surdu rules!
Two Buck Surdu rulesets.
Then it was on to the second HME game…
Saturday Evening – “Heavy Meeting Engagement”
Every convention seems to have one game that if you saw it you’ll end up talking about it for years to come.
THIS is that game.
I had 4 players, with Team Red with a Quadling and a Munchkin Brigade, and Team Black with 2 Gillikin Brigades.
This is what they each had for forces:
Team Red for Saturday EveningTeam Black for Sturday Evening
As we only had 4 players, we used half of the table. Brad had the Munchkins and Leif had the Quadlings. The initial moves and attacks from the Gillikin left brigade (Gregg) and their right brigade (Bruce) were nothing stellar. In fact, on the first activation, Gregg failed to reach one of the Quadling Batteries with his Dire Bears, and Leif sent them scurrying towards the other side of the board with short-range artillery fire. Bruce’s goat riders took fire and damage and ran to a town for cover.
Unfortunately for Leif and Brad – that would turn out to be the high water mark of the Red Team in this game.
Leif and Brad on left and Gregg and Bruce on right get ready to rumble!Leif’s initial forces.Here come the Dire Bears – and you know what happened – but Gregg’s “kitties” are behind…Gregg’s Dire Lions subsequently hit the 2nd Quadling Infantry Reiment – unfortunately led by a leader with “The Poltroon” ability – that knocked down their Resolve from a 5 to a 4 – and they routed in the face of the Dire Lions. Leif’s Quadling front was then broken and the Lions were in the gap, with Dire Tigers close behind them. Gregg’s Gillikin Infantry then hit the 2nd Quadling Battery on the flank and the Quadlings abandoned their gun in a rout. Gregg then threatened the Quadling left flank (4th Regiment) with his Gillikin Infantry. The 4th turned to face the Gillikins where the routed gun crew left their gun. Brigade Commander Zeb the Scribe of Ozz can only stare in disbelief as the Quadlings lose a battery and an infantry regiment in short order.View from the Red Team’s right flank as the Dire Lions breach their defenses.Zeb and Glenda are no help.The Dire Tigers rout the other Quadling Infantry Regiment (1st) adn hit the remaining Quadling battery in its flank. It did not last long. Both guns would be lost and spiked.Leif can only look on in amazement at the HAVOC raised by Gregg on his forces…see what I did there?Eventually, all Leif had left was his brigade commander and his witch – with no brigade. He was a good sport as you see here – and Brad is looking on knowing he is in dire straits too.On the other side, Bruce’s Goat Riders maneuvered expertly and took Colonel Tik-Tok’s regiment in the flank (who were dealing with Bruce’s skeletons in their front), nearly wiping it out. Bruce’s Dire Bears were moving up for the kill. Brad was all alone now.The Gillikin Goat Riders then hit the Munchkin Aerostat, which routed off the table. All that Brad had left was 2 stands from Tik Tok’s infantry, a medium battery, his brigade commander, and a witch.The end of the game – Tik Tok was routing and clearly even the medium battery would not have survived an attack on three sides.
I have never before seen an Ozz game become a battle of annihilation – but this game was.
No shade on the defenders, they had some bad luck combined with the attackers good luck and good plan. All had fun though! The final score was 45-13 in favor of Team Black.
Sunday Morning – “The Battle for Toto”
I have ran this game several times and discussed it previously in this blog. Basically, Toto is in the Munchkin-defended town. Converging on that town are two non- allied enemies who both want to seize Toto. The little dog is in a secret place (one of 5 buildings). The attackers want to get Toto – and hate each other. It’s up to them if they fight each other on the way to the Munchkin town, or if they collaborate and fight afterwards. I had 5 players, with Team Red with 2 Munchkin Brigades, facing a force of 2 Impkin Brigades and a force of two Harvest Brigades. As we had too few players, we used just half of the table, and left off the Gillikins and Winkies on the far side.
The game starts.Admiral Jinjur’s Female Pirates (fighting for the Harvest Brigade) and the Great Pumpkin Heads attack Zoraster’s Guard Infantry who are defending a wall outside the town.With an unlucky Morale Roll, Zoraster’s gets antsy and charges OVER the wall – and leaves its protection.The Impkins try to fire on the Munchkin Sharpshooters with the Swamp Guardian Fairies’ bows, while the rooster riding Impkin cavalry tries to go around and get to the town.An overview – at this point Glenn’s Lesser Pumpkinheads attacked the Impkins so the free-for-all was on.Steven had secretly deployed the Savage Apple Trees near the Munchkin walls. Their attack allowed the Eagles to get into the town and search two buildings – without finding Toto.
At this point, A HOTEL FIRE ALARM WENT OFF! We had to leave the building for at least 40 minutes. There of course was no fire, just a malfunctioning alarm.
When we returned, I scored up the game as people (understandably) were ready to go home. The final score was a Munchkin victory at 33 points (10 points for Toto), Harvest 12.5, and Impkins 2.5.
I really want to thank BGB for running the convention. I also want to thank my players, both newbies and veterans all were great.
I ESPECIALLY want to thank Leif and Brad who signed up for EVERY game and helped me throughout the convention. Gregg was a big help as well.
My next convention is MAYHEM in New Hampshire in April and then I have HUZZAH GOES TO HOLLYWOOD in Maine in May. This summer I also plan on Historicon in July.
I hpope this was enjoyable – and if you’ll be at one of these conventions, come and join the Ozz goodness!
Thanks for looking!
Miscellaneous details and references for those interested in that sort of thing:
For all of my previous posts on Wars of Ozz games, figures, units, and other related projects – please see this page.
As you may want to check out the Wars of Ozz figures’ range – there are two places to get them and the rules (and I make no money from this btw). The game rules and the figures are available from the following two places:
With apologies to Paul Revere, of course! (these DO have red coats!)
But this post is not about one Quadling regiment – it is about 3 infantry regiments (63 figures), 2 artillery batteries (12 figures), 2 generic brigade commanders, a named brigade commander (Rolf von Guufling), a Quadling faction witch (Glenda the Sorceress), and 2 hero conversions (Zeb the Scribe of Ozz and Wood the Courier of Ozz). Yes, that’s 81 figures, AN ENTIRE QUADLING BRIGADE!
Quadlings are the “beefy farm boys” of the world of Ozz. They are the most human-like of the factions, and are great friends with the Munchkins. Their color fixation is red. Most of their army is made up of militia. I had not had any of my own Quadlings on the tabletop at previous conventions.
I was about to hit another two gaming conventions (HAVOC and MAYHEM) in April. I am also going to HUZZAH! in May. After 3 weeks of being away on vacation, I returned back from Florida on March 19th, hoping to make a dent in my mass of Quadlings. These I had previously gotten from Greg Priebe (80 figures) and Chris Palmer (1 figure). It would make up an entire Quadling brigade plus two heroes – but the HAVOC convention would start on April 5th – could I do it? In just 17 days? I decided to try to and plow on and get a whole brigade of figures done for my upcoming Wars of Ozz convention games. I finished on April 4th!
As I did not have enough time to do my usual type of post with WIP and all that – I focused on painting these – and getting them fully tabletop-ready. So this post will just be fully painted stuff. I’m not even going to add the paints this time! (ok I might edit and add them later next week).
So enjoy the photos – and if you are coming to an upcoming convention (add HUZZAH! to that list too), these will be in play – so join me!
Here we go – EYE CANDY!
Eye Candy
1st Quadling Infantry Regiment
This (and the other regiments I painted) are all Northern Quadling regiments – with a slighly better Melee value of 7/10 and a Marksmanship value of 6/10 than other Quadlings. Their Resolve and Elan are average at 5/10 and 6/10 respectively. As all of these regiments are the same sculpts, I painted each with slightly different colors to match the flags that Buck Surdu designed. On this regiment I used a blue facing theme of color over white pants. The plumes on the shakos are red. They are all armed with muskets.
2nd Quadling Infantry Regiment
I went with a sallow yellow-facing theme over light grey pants – and put white plumes on the shakos.
And a side view below:
Some close ups:
4th Quadling Infantry Regiment
For the 4th, I went with a bright green-facing theme over dark grey pants – and I put red plumes on the shakos. I skipped the 3rd because its flag is red, and I wanted a contrast with the red coats!
Marching in column:
Lastly, a gallery collection of views:
1st and 2nd Quadling Light Artillery Batteries
These I only varied in the plume colors (white and red). I also painted the guns slightly differently. They have Marksmanship and Melee values of 6/10 and 4/10 respectively. They do have good Resolve at 7/10 and the Elan of 6/10 is good for artillery.
2 Generic Brigade Commanders
Overall I had 7 mounted leader figures to deal with (each regiment had one, I had the leader pack with three from Greg Priebe, and Chris Palmer gave me one at Fall In 2023). This allowed me (if you had not previously noticed above) to vary each regimental commander’s pose for each infantry regiment. I decided to use two of the remaining ones as generic brigade commanders – and save two more as conversions for Ozz heroes for which there are no dedicated figures to buy. For these two, I painted them slightly differently as they were the same pose.
Rolf Von Guufling, named Brigade Commander
A named brigade commander has 2 additional abilities/skills versus generic ones that have only 1. Of course, the generic ones are free to each brigade, and a named one cost 2 points. Greg’s lot of Quadlings included named Rolf, with his plate of cookies (which as anyone who knows me that the cookies HAD to be chocolate chip). He has Magical Protection plus one additional randomly selected skill. I thought that his bringing chocolate chip cookies to the battlefield merited a burgundy/pink theme for his facings – or maybe his magical protection…
A view from the front:
Glenda the Sorceress
Of course each faction has a witch – and this one is Glenda. She has spells: Transport (can send any unit 10″ in any direction – even behind enemy lines), Fleet Feet (can increase a friendly unit’s Movement rate), Confusion (can rattle an enemy unit’s attacks), and Good Luck (can improve a frienly units. She also can act as a commander with the ability of Charismatic as an as overall leader which is very powerful.
And a view from the side:
Ain’t she pretty in pink?
Zeb the Scribe of Ozz
As I mentioned, I converted two of the mounted Quadling commanders (all are mounted on giant boars) to heroes. They could be part of any faction. The first was Zeb the Scribe, an homage to Zeb Cook, a legend of the early days of Dungeon & Dragons and other games. Zeb played in one of my games at TotalCon 38 in February. I found some small resin books and used green stuff to create a sort of book rack for the figure. When attached to a unit, Zeb can rearrange one attribute of that unit to the best value of the four.
Zeb’s theme was very purple and yellow:
From the other side:
Wood the Courier of Ozz
This one I really thought a lot about as well as it is an homage to Dave Wood, my West Point classmate/roommate and longtime buddy. Over the last months, Dave has helped transfer many figures for other GM’s for Ozz games and more support of conventions – hence the “Courier” appellation. Dave is also a ultra-distance runner who thinks marathons are short (seriously). I knew that Dave’s drink of choice is Diet Mountain Dew (caffeine-free if possible as well). But this is Ozz, so what about Munchkin Dew? So, I found some doll house/diorama Mountain Dew bottles, and designed and sculpted a couple of baskets to hold them, and voila! I think it will be fun on the tabletop.
The figure gives +2″ of movement to an attached unit.
Another view:
A nice side view:
Cheers Dave!!
Lastly, I put all of the Quadlings into their own box – with Zeb and Dave joining my box of heroes separately.
That concludes this post. On April 5th – they will be on the tabletop!
I’d love to hear your thoughts on these – any favorites or suggestions on my insanity are all welcome fodder.
Until next time – thanks for looking!
Miscellaneous details and references for those interested in that sort of thing:
For all of my previous posts on Wars of Ozz games, figures, units, and other related projects – please see this page.
As you may want to check out the Wars of Ozz figures’ range – there are two places to get them and the rules (and I make no money from this btw). The game rules and the figures are available from the following two places:
TotalCon 38 was held in Marlborough, Massachusetts between February 22nd, and February 25th, 2024. I was a GM there for 10, count them, 10 games of Wars of Ozz.
It was wonderful – the games were sold out quickly and the players were excited to play the game. I even had more players than I had slots (I let extras in when I could). I have some photos and a brief synopsis – but if you think I can remember all the details of 10 four-hour games over 4 days, well, you have greater faith in me than I have!
I had 67 players over the weekend. Some came ready to play!
Big thanks to the TotalCon38 staff, especially Bryan Clauss, Steve Parenteau, and Gregg Belevick. Extra special thanks to ALL the players. And EXCEPTIONAL thanks to Leif Magnuson, Bradley Gosselin, and Chris Comeau for all their assistance above and beyond the call of duty.
Thanks also to David DeVeau and Ken Howe for some photos.
With that said, here are some photos and descriptions of the games that you might enjoy.
Game 1 – Thursday Morning, February 22nd, at 8 AM
Scenario: “Learn to Play Wars of Ozz.” 6 players out of 6 slots – lining up 3 brigades per side.
Opposing forces: 3 brigades of Gillikins vs. 3 brigades of Munchkins
Objective: Take out more of their bases than they take out of yours.
Duration: 4 Hours
Final Score: Munchkins eke out a 17-15 victory
Game 2 – Thursday Afternoon, February 22nd, at 1 PM
Scenario: “Learn to Play Wars of Ozz.” 5 players out of 6 slots – lining up 3 brigades per side.
Opposing forces: 3 brigades of Gillikins vs. 3 brigades of Munchkins
Objective: Take out more of their bases than they take out of yours.
Duration: 4 Hours
Final Score: Munchkins got a major victory over the Gillikins, 22-8
Game 3 – Thursday Evening, February 22nd, at 7 PM
Scenario: “Rear Guard Action – Pursuit of the Fleeing Gillikins.” 5 players out of 6 slots.
Opposing forces: 4 Brigades (2 Munchkin, 1 Harvest, 1 Impkin) pursue a retreating force of 2 Gillikin brigades.
Objective: Pursuers – destroy as many bases as possible of the Gillikins. Gillikins – escape and save as many troops as possible to fight another day.
Duration: 4 Hours
Final Score: Gillikins manage a narrow victory over the attackers, 23-20, by having a light battery abandon its gun to save the crew – yielding a 4-point swing on the last turn of the game.
Game 4 – Friday Morning, February 23rd, at 8 AM
Scenario: “Learn to Play Wars of Ozz.” 8 players out of 8 slots – lining up 4 brigades per side.
Opposing forces: 2 brigades of Winkies and 2 brigades of Gillikins vs. 2 brigades of Munchkins and 2 brigades of Harvest
Objective: Take out more of their bases than they take out of yours.
Duration: 4 Hours
Final Score: Munchkins eke out another narrow victory, 25-23.
Game 5 – Friday Afternoon, February 23rd, at 1 PM
Scenario: “Heavy Meeting Engagement” 7 players out of 6 slots (worked in an extra and I played to round out the game) – lining up 4 brigades per side.
Opposing forces: 4 brigades of Winkies and Harvest vs. 4 brigades of Munchkins and Impkins
Objective: Take out more of their bases than they take out of yours.
Duration: 4 Hours
Final Score: The Munchkin/Impkin alliance got a major victory over the forces of Winkies and Harvest by a score of 38-27.
Game 6 – Friday Evening, February 23rd, at 7 PM
Scenario: “Attack on the Border Post.” Again, 7 players out of 6 slots – they shared.
Opposing forces: 1 brigade of Munchkins is holding up in a town, attacked by 4 brigades (2 Winkie and 2 Gillikins). Another Munchkin brigade is moving in as a relief force.
Objective: The Winkies and Gillikins need to clear all Munchkins from the town and be in the town at the game’s end. Also, points are awarded for each base taken out on both sides.
Duration: 4 Hours
Final Score: The attackers nearly succeeded in clearing the town, which would have gotten them 6 points. However, the spirited defense by the Munchkins exacted a heavy toll on the attackers. The final score was 42-30 for the Munchkin defenders.
Game 7 – Saturday Morning, February 24th, at 8 AM
Scenario: “Learn to Play Wars of Ozz.” 8 players out of 8 slots – lining up 4 brigades per side.
Opposing forces: 2 brigades of Winkies and 2 brigades of Harvest vs. 2 brigades of Impkins and 2 brigades of Gillikins (this was a “Munchkin-free zone”).
Objective: Take out more of their bases than they take out of yours.
Duration: 4 Hours
Final Score: This was the bloodiest game of the weekend with 73 bases taken out. The Winkie/Harvest team won by 41-32 over the Gillikins.
Game 8 – Saturday Afternoon, February 24th, at 1 PM
Scenario: “Heavy Meeting Engagement.” 8 players out of 8 slots– lining up 4 brigades per side.
Opposing forces: 4 brigades of Winkies/Harvest/Impkins vs. 4 brigades of Munchkins and Gillikins
Objective: Take out more of their bases than they take out of yours.
Duration: 4 Hours
Final Score: The Munchkin/Gillikin temporary alliance got a major victory over the forces of Winkies/Harvest/Impkins by a score of 36-23.
Game 9 – Saturday Evening, February 24th, at 7 PM
Scenario: “The Battle for Toto.” 5 players out of 8 slots.
Opposing forces: 10 brigades are involved here on three sides. The Winkies are allied with the Impkins (2 brigades each on opposite sides of the tabletop longways). They are vying with the team of the Gillikins and Harvest forces (also with 2 brigades each on opposite sides of the tabletop longways). In the middle, in a town with Toto in a secret location, are 2 Munchkin brigades.
Objective: Possession of Toto is worth 10 points. Each base taken out is worth a point for the appropriate force.
Duration: 4 Hours
Final Score: The Impkins found Toto – gaining the bonus – and ended up with a final score of 19. The Munchkins dispatched 19 bases, so despite the loss of Toto they tied the Winkie/Impkin team. The Gillikin/Harvest alliance got 14 points in third place – despite turning on the Winkies with a sneak attack by Dire Bears on the Winkie artillery.
Photo by David DeveauPhoto by Ken Howe as I GMPhoto by David Deveau
Game 10 – Sunday Morning, February 25th, at 10 AM
Scenario: “The Battle for Toto.” 8 players out of 8 slots.
Opposing forces: 10 brigades are involved here on three sides. The Winkies are allied with the Impkins (2 brigades each on opposite sides of the tabletop longways). They are vying with the team of the Gillikins and Harvest forces (also with 2 brigades each on opposite sides of the tabletop longways). In the middle, in a town with Toto in a secret location, are 2 Munchkin brigades.
Objective: Possession of Toto is worth 10 points. Each base taken out is worth a point for the appropriate force.
Duration: 4 Hours
Final Score: The game went slowly – and was called at 3 hours as players needed to leave. In the end, the score was not close, with the Munchkins keeping Toto, and getting 18 points total. The Winkies/Impkins got 8, and the Gillikins and Harvest got 0.
That’s all for now – I’ll be silent for a bit here as far as posting for a bit – but I will be back! To those whose blogs I follow, I will be checking them out while I am out.
Hope you enjoyed these photos – if you like them let me know – I’ll be running more of these games at HAVOC, MAYHEM, and HUZZAH!
In the world of the Wars of Ozz, Pirate-General (Admiral) Jinjur is said to:
sail on the (Great Nonastic Ocean). She commands a flotilla ofships big and small, all crewed by female pirates. Her pirates board ships and raid seaports, ruthlessly overwhelming any resistance.
Wars of Ozz, Section2.6.6, The Lands Beyond Ozz, pages 45-46
Her pirate forces are composed of females from all over Ozz – so her troops are made up of Gillikins, Munchkins, Winkies, and Quadlings – all the main races of Ozz.
Because I participated in the Kickstarter for Ozz a few years ago, I got a bonus of 4 of these figures for Admiral Jinjur’s Female Pirates (AJFP), SKU #OZZ-516 with my initial order. Later, when I bought a number of Gillikin-affiliated Ozz units from a UK estate sale – I was surprised to see that three fully-painted stands of AJFP had been thrown in the shipment. This left me with a need for another just 4 figures to round out the group for a full regiment of 5 stands/20 figures. Russ Dunaway was kind enough to get me not just 4, but 10 more – which if you are doing the math added up to 4 (Kickstarter) + 12 (estate sale) + 10 (Russ) = 26! Now, I could have said, ok, that’s enough for 20, but part of me decided to push the envelope for two full regiments. Rather than beg Russ again, I decided to roust out from my lead pile 14 Old School female warriors – mainly Amazons, halflings, and female fantasy types, and convert them into appropriate AJFP’s. These would be 25mm Ral Partha, Citadel, Ral Partha Imports, RAFM, and Grenadier figures, that were 30-40+ years old. I would give them new weapons and paint them up as members of the the various Ozz factions and size them to be close to the 28mm originals in terms of faction assignment.
This post is a definite result of my predilection for being focused on completion of a project. I could simply not move on to the Quadlings and leave these AJFP undone! While I am not IRO when it comes to converting figures, nor Roger when it comes to sculpting with green stuff, hopefully the figures that I will share below will be fine enough for my standards for the tabletop. After finding the suitable candidates for “drafting” into the AJFP, the next question I had was how to organize and use the figures these “draftees”. I decided that because the 12 already-painted estate sale figures had a sandy/beach base, I would make that regiment entirely of original AJFP Wars of Ozz figures on sandy bases. This would take adding two stands – one of Quadlings and one of part Munchkin/part Gillikin.
The other regiment would be based on grassy terrain, with a mix of original Ozz and the Old School warriors from the 1980’s. As I like to track where the Old School stuff actually came from, I will be sharing that research as well. Below you see my starting point – with all of the figures plus some of the conversion weapons. Some of the weapons were left over from other projects, and some were some I cast myself years ago. These would help me convert the draftees into more appropriate-looking Ozz types. While I hardly ever deviate from the “official” figures, I thought that this would be fine and a chance to paint up some older stuff and that was most intriguing.
All of the 40 figures shown here at the start – including many Old School figures still ensconced in their blister packs for the last 40 years or so.
Let’s start with the sandy-based regiment. As I mentioned, all of the figures were canon – original Ozz stuff. I think the three stands of estate sale figures were painted well enough. However, they were not fully varnished, and where they were, it was gloss – and I prefer matte as a final coat. Additionally, there was some paint loss/wear – and I would need to try to have the two new stands look similar to the estate sale stands – which also needed work.
A stand from the estate sale – showing the paint loss on a hat, some glossy varnish, and a base that needed work.
All three estate stands with the steel bases I added underneath.
For all of the figures that I would paint here – each would be painted in their faction colors – so red for Quadlings, purple for Gillikins, blue for Munchkins, and yellow for Winkies.
Early work on Quadling baseGetting close to the finish for the Quadling base
Below are in-progress close up shots of the three original OZZ-516 Munchkins and the one Gillikin that I used on the sandy-based AJFP regiment.
These 4 Quadlings, 3 Munchkins, and the the Gillikin figure, would go onto the green stuff covered polystyrene bases you see below, and then be flocked in conjunction with the estate sale bases.
Ready to be based with the three estate stands.
It turned out that flocking these to match each other was more involved than I initially anticipated. I ended up using a combination of chinchilla dust, cork rocks, washes, and tufts to try to make them look alike. The chinchilla dust came out more looking like snow so I needed to darken that up. The rocks and tufts helped. My two stands ended up thicker than the estate sale three, but I don’t think that will be a problem.
Sandy-Based Regiment
After finishing – here are the estate stands:
As for the two stands that I painted for this regiment – first the base with Munchkins and Gillikins:
3 Munchkins and a Gillikin
And now the Quadling base – btw painting these gave me an ear worm of Queen’s “Fat Bottomed Girls”:
And a group shot:
Now, let’s move onto the grassy-based AJFP regiment! Of course, there was a LOT more work to be done on the grassy-based regiment as it involved so many conversions.
Below you see the source of all of the figures I used for the grassy-based AJFP regiment – and I was able to find the origin of each except for one (and if you know that one please let me know!). The research here was not easy – even with the help of the Lost Minis Wiki and The DnD Lead websites – but those really helped. Check out both of them to see what you young folks missed – or what you old folks might remember.
As you can see from the chart above, six of the figures in this AJFP regiment were original OZZ-516 Wars of Ozz figures. They would primarily go on two bases – one with 4 Winkies and one with 4 Gillikins.
Here are a few shots of the original Winkies in progress for the grassy-based regiment:
Here are a few photos of the original Gillikins in progress:
Now onto the conversion figures. Six of these were Grenadier #3102, and were repackaged by Mirliton as female warriors. They were originally sculpted around 1992 by Sandra Garrity, and were called “Women of War”. Grenadier was later bought by Mirliton, and many of their miniatures were repackaged post-acquisition. These are not found on the Mirliton website so OOP.
I gave these warriors hats and pistols, plus I bent a few swords to look like cutlasses. My sculpting efforts here as I said are not great – and I learned to my chagrin that using old green stuff with the consistency of used hardened bubblegum (like from under a desk) is NOT what you want to use. Still, I used all as female Winkies due to their poses and sizes.
Below is one of the conversions – I made all to have a different look.
With a new big pistol and a big hat.
A few shots of the 6 Grenadier “Women of War” later in the project:
Added a slouchy hatAdded a bandanaAdded a tricorn hat and a pistol Bent her sword to look like a cutlassBent her sword to look like a cutlass and gave her a pistolGave her a bicorn hat and a freehand skull & crossbones
The next figure was also a Grenadier figure, but much older, and came to me in an eBay lot. I remember stripping off her bad paint job years ago, but that was all that I did with her. She is Grenadier 102 (v2) from the Fantasy Lords First Series “Females”. The figure is called “Female Assassin”, and dates from 1981. I gave her a bicorn hat and designated her as a Gillikin.
Next up are the Munchkin surrogates. I found 3 loose little female halfling figures in my stash that could stand in as Munchkins. I discovered that they were from the Ral Partha AD&D Adventurers Series. The figure is named “Female Halfling Fighter Thief” #11-102 (b) from “Halfling Fighter Thieves” circa 1989. This figure is the “b” version, and is a Tom Meier/Dennis Mize sculpt. I removed the staff, and modified one with a leftover Munchkin carbine from the Munchkin Light Cavalry project, one with a pistol, and one with a cutlass. Plus, no one got furry feet painted…
With a pistol and a bandanaWith a little garrison-like cap and a cutlassWith a Munchkin carbine.
The next one was to be a Gillikin. She is an Amazon figure originally sourced from Ral Partha Imports Fantasy Adventurers Series – FA-27 “Amazon with Sword” – from 1986. Back in the 1980’s, Ral Partha imports took Citadel figures and marketed them in the US under licence. I made her a Gillikin and left her alone – except to give her a purple shield. Maybe it was her chain mail bikini…
FA-27 in her blister pack. Nice price for back then – but “historical miniatures”? I missed that chapter in history!After priming, dry brushing, and an initial washReady to get based
The next figure was a bit of a mystery to research. It started with her blister package. As you can see below – the figure’s blister was mislabeled as FFA35 “Necromancer Slime Beast with Sword”.
Needless to say – she is not a necromancer. Her base had FA-19 on it, which allowed me to dig deeper and find her image here. The figure is actually FA-19 V2 “Female Fighter with Breastplate and Sword”. She was sourced from Citadel Miniatures US FA-19 (v2) from “Fantasy Adventurers” line circa 1982. From what I can tell, similar to Ral Partha Imports, this brand was either manufactured or imported by Ral Partha in the 1980’s. I modified the figure with a bicorn hat. As I thought she looked more as if she was wearing a tunic versus a breastplate – I painted her accordingly and as a Gillikin.
FA-19 on baseAfter conversion
The penultimate figure in the group of draftees was a RAFM figure of a female ranger and her hawk on her right arm. It appears that the figure was initially sculpted around 1986. Many RAFM figures (including this one) are still commercially available as Silver Fox Productions (SFP) now owns the RAFM lines. I sourced it from RAFM at some point maybe 8 years ago. It is RAFM Miniatures#3908 “Female Ranger”. I gave her a bandana and painted her as Winkie.
Love the handwritten SKU#!Later in the project
The last of the 20 draftees is a female figure with a dagger. That’s all I know as the figure’s base was devoid of any markings and I could not discover her origin. As it was the last female figure I found (that was not topless – I couldn’t bring myself to put topless Amazons into Ozz – and I have a bunch of those). As she is, she seemed ok, so she was in. I painted her as a Gillikin but added nothing else.
The mystery stabbing Gillikin.
Let’s see the finished AJFP grassy-based regiment:
Grassy-Based Regiment
This first base has 4 Winkies – 3 from OZZ-516, plus one Grenadier “Women of War” figure. The die is a 12mm die.
The second base has three Gillikins that are original plus the Grenadier 102 (v2) “Female Assassin”.
The third base has three of the Grenadier “Women of War” figures and the RAFM Miniatures#3908 “Female Ranger”, all as Winkies.
The fourth base has three Munchkins (the converted Ral Partha “Female Halfling Fighter Thief” #11-102 (b) figures) and the unknown Gillikin figure.
Rounding out the grassy-based AJFP regiment, the fifth base is composed of two of the converted Grenadier “Women of War” figures in the front rank, with two Gillikins in the back rank – the Ral Partha Imports Fantasy Adventurers Series – FA-27 “Amazon with Sword” and the Citadel FA-19 V2 “Female Fighter with Breastplate and Sword”.
Group shot of the AJFP on the grassy bases
These two AJFP regimentscount as my sixth and seventh unit respectively for Dave Stone’s “PAINT WHAT YOU GOT CHALLENGE 2023/2024” painting challenge that runs from December 26th, 2023 to February 29th, 2024.
Both regiments will play a major role in many of my upcoming games for the multiple gaming conventions that I plan on supporting as a GM. The good news is that they will provide some firepower to a brigade as they are treated as having carbines. The regiments are good at missile combat – having a Marksmanship value of 6/10. As for Melee, they are middle of the road with a value of 5/10. Their Resolve value is similar at 5/10, but their Elan value is a little better at 6/10. Each unit costs 5 points. As Buck says, it’s nice for players to have some “shooty units”!
My convention games are coming up fast. At present, that support level is now at 25 four-hour games from February through May across 4 different conventions in Massachusetts, Maine, and New Hampshire (TotalCon38, HAVOC, Mayhem, and HUZZAH!). Check them out and maybe just come?
A quick side note: I also got a surprise during the painting of these two regiments. My good friend Buck Surdu sent two more individual figures that can act as heroes in the game. One is “Boom Boom Palmer” (named after Chris Palmer). This figure can attach to an artillery unit and make it more effective. The other is Grand Admiral Priebe, who can give an attached infantry unit the ability to charge cavalry. THANKS BUCK!!
I did enjoy getting to paint both of these AJFP regiments- and to incorporate the Old School stuff really was a nice and fun change. But, now it’s back to more Ozz stuff!
As always, much thanks for looking!
And yes, I still have much more Ozz to come…
Miscellaneous details and references for those interested in that sort of thing:
For all of my previous posts on Wars of Ozz games, figures, units, and other related projects – please see this page.
PAINTS, INKS, GLAZES, SHADES, WASHES, PIGMENTS, FLOCKING, GLUES AND MORE THAT I USED ON THE TWO ADMIRAL JINJUR FEMALE PIRATE REGIMENTS:
Three original figure stands of Admiral Jinjurs Female Pirates
Old School miniatures as detailed above
Plastruct #91107 2.5mm polystyrene sheet
2″ square steel bases from Wargames Accessories (#21)
Shadow’s Edge Miniatures “6mm Dark Forest Plum” (flocking)
Shadow’s Edge Miniatures “6mm Dark Forest Blue” (flocking)
Gamers Grass “Yellow Flowers” (flocking)
Citadel “Agrax Earthshade” (wash/shade)
As you may want to check out the Wars of Ozz figures’ range – there are two places to get them and the rules (and I make no money from this btw). The game rules and the figures are available from the following two places:
Let’s say you are on a battlefield in the world of Ozz as a either of the two witches Evora or Arella. Your recruiting efforts among your respective Winkie or Gillikin towns has not been stellar – so how to fix that? The Summoning Bell!
The Summoning Bell is a Wars of Ozz unit that has intrigued me since I first saw it on pages 24, 26, and 82 of the rulebook. Especially as the competing witch sisters Evora (Empress of the Winkies) and Arella (Empress of the Gillikins) have fought many times over posession of the Bell – with each having success. It is powerful for either the Winkies or the Gillikins – as it can summon skeletal troops to augment their forces. While ostensibly it is a Winkie unit – the Gillikins could have it too. The background is described in the rulebook as follows:
When Evora first appeared she was lugging about with her the Summoning Bell. This is an understatement; it is an enormous bell, so large it had to be toted about by slaves. It is not a creation of the Last Great War. It dates to a time much earlier and draws on powers that defy science. Where Evora found the bell and how she learned to use it is her secret. With it she can raise masses of skeleton soldiers with a single thunderous toll.
Its power has not escaped her sister, Arella. She has seen it used on the battlefield, both as an ally and against her. She has lusted for its power, and what Arella wants, she often gets. And in this case, that has been more than once. The two sisters have literally fought wars over the Bell…
Wars of Ozz rulebook, section 2.2.2.2, page 24
True, the concept of summoning the dead for a battle was already one used by J.R.R. Tolkien in The Lord of the Rings. But, it’s a concept seen in many other games as well since that time. I always find it cool.
The Summoning Bell is SKU# OZZ-315. According to the website, it is supposed to have “1 Large Summoning Bell on Cart pulled by 8 Skeletons and 1 Hooded Character Striking the Bell”. The hooded dude is “The Taskmaster”. The bell and the figures are all 28mm in size and cast in metal, while the Bell is cast in resin.
I was fortunate in that when it arrived I found that it mistakenly had an extra two skeletons – so 10 versus 8 (thanks Russ!). Given that more is better, I definitely would incorporate the extra two skeletons into the model. According to the rules, the Summoning Bell can – similar to the “Raise the Dead” spell – raise a stand/base of skeletons as long as it is in the command radius (12″) of Evora or Arella and if the roll is successful. I am assuming that it would succeed by rolling under a spell value of 8 (so successful 70% of the time – the same as Arella or Evora). Each base of skeletons so summoned could be used in three ways – as a stand-alone unit; incorporated into an existing skeleton unit that has had losses; or to augment a previously summoned unit. The maximum number of stands/bases that can be summoned is 5. Now, Arella can also try to raise the dead on her own – so that potentially increases the maximum summoned to 10 stands or 2 full regiments of skeletons.
The Summoning Bell movement rate is quite variable and likely slow as it only has a movement rate of 1d10, not the best of 2d10. It is worth only 3 points – so it is relatively cheap. It fights poorly in Melee at 4/10. Its Resolve (desire to stay in a fight) and its Elan (desire to take the fight to the enemy) are both less than average at 5/5. As its use is not usually in Melee combat, this is moot I think, as long as it can generate skeletons. While the Bell is treated as infantry, similar to an artillery base it can take 5 hits – though when it gets to 4 hits the unit is eliminated.
The Summoning Bell is my final Winkie unit unit at this time. (I am counting it as a Winkie unit in my inventory). This is my fifth unit for Dave Stone’s “PAINT WHAT YOU GOT CHALLENGE 2023/2024” painting challenge that runs from December 26th, 2023 to February 29th, 2024. It’s also going to play a major role in many of my upcoming games for the multiple gaming conventions that I plan on supporting as a GM. At present, that support level is now at 25 four-hour games just through May across 4 different conventions in Massachusetts, Maine, and New Hampshire (TotalCon38, HAVOC, Mayhem, and HUZZAH!).
Building this unit was more of a modeling challenge than most – but painting it was also related as I needed to vary many steps – plus allow for the drying of glues, varnishes, and paints. As a result, I have many more, hopefully fun, WIP shots than I have in recent posts. Lastly, I’ll share some eye candy shots and list the paints and other materials that I used.
WIP shots…
I started the work on January 12th. The first challenge was to figure out the size of the base needed and what materials to use. I mocked up the 10 skeletons and the cart and figured that I needed a 5″ by 10″ base.
Determining that the base needed to be 5″ x 10″.
I took a sheet of polystyrene, and laid out a general idea of where everything would fit.
Sketching out a mock up on the polystyrene sheet.
Cutting the polystyrene sheet – the Hyde tool is perfect for this purpose. It scores nice and clean lines.
The model came with what appears to be 28-gauge wire to use as ropes with which the skeletons are supposed to pull the cart. I thought that given the backstory that chains would be far more appropriate. I had used jewelry chains similarly before with my Frinx glyptodon mounts. All I needed to do here was to drill small gaps on the skeleton figures to accomodate the chains later on and to make the chains look ancient and rusty. I cut a good length and bathed them for a while in a cup filled with rust texture paint and rust wash.
Rusting up the chains.
By January 17th I had primed all of the components as well as some dry brushing of the wood sections (that are made of metal). I also saw that the Bell had flames on it – as well as a skull. I decided that, unlike the photos in the rulebook, my Bell would have magical evil flames adorning it to announce the arrival of dead warriors.
On January 17th – I was on to priming and early dry brushing of the cart and the 6 wheels and prepping the bell for the painting of flames.
As for the augmented “skeleton crew” (there’s an oxymoron, no?) and the Taskmaster, they painted up easily and were pretty much done by January 17th less varnish and flocking. Luckily, there were 5 that would carry the rope or chain over their left shoulders, and 5 over their right – which was perfect for the model.
Skeleton crew and the Taskmaster by January 17th.
January 18th saw me doing a LOT of dry brushing of three colors plus washes to achieve a weathered wood look on the cart. I also tried to give its ironwork an appropriate rusted look. I drilled a hole through the Bell top and the metal of the Bell mount to reinforce with a paper clip wire – so that all the weight of the bell would not be supported by just glue. This might have been unnecessary as the Bell is light, but I did it anyways.
January 18th dry brushing progress.
The rest of the day was used to put on the cart’s wheels and to paint the Bell as shown below. I lined the edge of the Bell with black so as to give the three colors of the flames some depth. You can see how the drilled hole in the Bell helped with painting.
Painting the Summoning Bell.
As it was late – and I wanted to sleep on it – I put the cart on the base with the bell to see how I could mount it to the slippery polystyrene. I was concerned that the heavy cart would be needing some support, especially after the Bell structures were added. At that point, I needed to sleep on it…
The lower part of the cart and the Bell were done – but the supports and mountings remained.
A top view of the previous photo with the proposed wheel positions marked in pencil.
By the morning of January 19th, I thought that I needed to chock the wheels in some subtle way that I could hide with flocking. The solution came by way of an MDF OZZ-BAS2 artillery base frame that I had saved for future use. I used half of it to glue onto the PS base along the line of the cart wheels. Always save your MDF frames!
January 19th – I cut off one edge of the MDF frame and then cut that into two equal-sized pieces. This made alignment easy.
The frame pieces were then glued down, and I carefully carved out the holes to match the cart wheels. I also mounted the front chain mount to the cart using Gorilla Glue in conjunction with a small eyelet that I had rusted up to look like the chains.
The frame sections glued down with the cart used as a template. I also applied PVA all over the base except where the skeletons would go.
While the PVA dried, I assembled and glued the cart pieces and the Bell together.
While the cart PVA glue dries – rubber bands assist the connections getting glued correctly.
Once assembled, I varnished the cart/Bell and crew with two coats of varnish with an airbrush, and went back to the base. After the PVA on the base had dried, I covered most of the base with a Vallejo ground texture – and then let that dry.
The base after the texture paint was applied.
When that texture paint had dried sufficiently, I gave the base a flocking of grass. This would take care of the area under the cart flocking-wise.
The skeletons look on as the base gets its first grass and a Pendraken 12mm MDF dice frame.
The last thing I did on January 19th was to mount the cart in the holes, add PVA to the holes, and go to sleep with hope for the morning!
The cart mounted for overnight glue setting.
The end of January 19th – awaiting January 20th to finish!
In the morning of January 20th – I was pleased to see the cart was securely affixed to the PS base. The MDF’s frames absorbency, especially for PVA, really helped with the fastening. I now needed to mount the crew – and affix the chains – but first I flocked the base so as to have better room to do that. I used both yellow and purple flowers to represent the Winkies and Gillikins respectively. I also used a variety of green and tan tufts to create a field-like look. Then, I was able to meticulously affix two skeletons at a time and then their chains. I secured the chains to the skeletons’ little hand holes with Gorilla Glue applied by a toothpick. I later covered up the shiny dried glue with rust or paint so it would not detract from the model’s aesthetics.
Mounting the skeletons.
How I serially mounted the skeletons and their chains. Doing two at a time gave me much more flexibility in this process.
And yes, I finished this bad boy on January 20th!
Success!
Skeleton-level view.
The model is relatively heavy at 1.3665 pounds!
While the cart, the Bell, and the base are not metal – the supports are!
Finishing this was gratifying to say the least – now for some Summoning Bell…
Eye Candy
The Summoning Bell – left side.
The Summoning Bell – right side.
The Summoning Bell – from the front.
The Summoning Bell – back side.
The Summoning Bell – close up on right side.
The Summoning Bell – close up on left side.
The Summoning Bell – close up of the crew. I like my skeletons grungy.
I appreciate your indulgence at all of these photos. I thought that this would be a unit where all the WIP might be more interesting or possibly helpful you, to the reader. You can let me know in the comments section.
As mentioned above, the Summoning Bell is my final Winkie unit unit at this time. I think that this was an epic way to finish the faction off.
While I am counting it as a Winkie unit in my inventory – I will let the Gillikins use it too – especially in some of the convention games. I will be transitioning to a different faction next – but will also be busy getting stuff ready for the conventions that start next month. I hope that I can get more done for Dave’s challenge.
As always, much thanks for looking!
And yes, I still have much more Ozz to come…
Miscellaneous details and references for those interested in that sort of thing:
For all of my previous posts on Wars of Ozz games, figures, units, and other related projects – please see this page.
PAINTS, INKS, GLAZES, SHADES, WASHES, PIGMENTS, FLOCKING, GLUES AND MORE THAT I USED ON THE SUMMONING BELL:
Plastruct #91107 2.5mm polystyrene sheet
Vallejo Surface Primer “Black”
Green Stuff (kneadatite)
Gorilla Glue
Poster Tack
Beach Landing Jewelry Chain
Vallejo Mecha Weathering “Rust Texture”
Vallejo Mecha Weathering “Dark Rust Wash” (wash)
Vallejo Mecha Weathering “Light Rust Wash” (wash)
Citadel “Dryad Bark”
Vallejo Mecha Color “Off White”
Citadel “Ushabti Bone”
Army Painter “Speed Paint – Pallid Bone 1.0”
Army Painter “Speed Paint – Speed Paint Medium 1.0”
Citadel “Contrast Paint – Baal Red”
Battlefront “Sherman Drab”
Vallejo “Thinner Medium”
Citadel “Longbeard Grey” (dry)
Vallejo Model Air “Black ” (metallic)
Army Painter “Light Tone” (wash/shade)
Vallejo Mecha Color “Dark Steel”
Citadel “Contrast Paint – Magmadroth Flame”
Citadel “Contrast Paint – Bad Moon Yellow”
Reaper MSP “Pure Black”
Citadel “Contrast Paint – Apothecary White”
Citadel “Contrast Paint – Snakebite Leather”
Citadel “Contrast Paint – Ratling Grime”
Army Painter “Red Tone” (wash/shade)
Paperclip wire
Artillery Battery MDF sabot base frame piece from Old Glory/Wars of Ozz Miniatures
Steel Eyelet
Vallejo Ground Texture “Rough Grey Pumice”
Vallejo “Flow Improver”
Vallejo “Airbrush Thinner”
Vallejo Mecha Varnish “Matte Varnish”
Pendraken 12mm dice frames
Elmer’s PVA Glue
Gamers Grass “Dense Green Wild 6mm Tufts” (flocking)
Gamers Grass “Dry Green XL Wild 12mm Tufts” (flocking)
Shadow’s Edge Miniatures “6mm Dark Forest Purple” (flocking)
Shadow’s Edge Miniatures “6mm Dark Forest Plum” (flocking)
Army Painter “Battlefield Field Grass” (flocking)
As you may want to check out the Wars of Ozz figures’ range – there are two places to get them and the rules (and I make no money from this btw). The game rules and the figures are available from the following two places:
Last year I painted up a Winkie Light Artillery Battery (WLAB). I thought it was high time that the Winkies got a longer-range artillery battery to start 2024. They were sick of the Munchkins out-ranging them. To that end, I painted up a Winkie Medium Artillery Battery (WMAB) – the subject of this post.
As described previously in my posts on the Winkies, they are much more interested in fighting hand-to-hand in melee with a foe versus shooting a weapon at one. I posted this on the WLAB post last year – but it bears repeating:
Winkies (the orcs of Ozz basically) are not overly bright in general, and certainly are not very educated. According to the Wars of Ozz rulebook,
“…Winkie artillery is something of an afterthought. Numerous battles and sieges have shown the usefulness of a strong artillery arm, but it is simply not a glorious or honourable role according to the Winkie mindset. Few Generals are chosen from the ranks of the artillery. Chieftains’ sons would much rather be leading a regiment of spearmen or jaegers. The artillery requires too much thinking, the guns can’t compete with the workshops of the Munchkins, and there is too much heavy lifting to be glorious. Consequently, the commanders of the batteries are an eccentric lot. They range from brilliant to simply odd. Except for the master gunners, most of the crew are conscripts secretly happy to be well back from the front line.”
Wars of Ozz by John R. “Buck” Surdu, Section 2.2.2.5, page 25
The WMAB is SKU #OZZ-307. It, like the WLAB, has 5 figures plus the gun in total. I again used an MDF sabot base for all of the figures. The battery is 28mm in scale, and the figures are metal. It is worth 5 points – one more than a WLAB and the same cost as a regular Winkie infantry unit. It does outrange the WLAB. In the game, light artillery has a short/long range combination of 6″/18″ versus that of a medium battery like this which has a short/long range of 8″/24″. It can take 5 hits – represented by the 5 figures – though when it gets to 4 the unit is eliminated.
The WMAB has the exact same uniform colors as the WLAB. I started painting the unit in parallel with Evora’s BodyGuard Infantry Regiment. This is my fourth unit for Dave Stone’s “PAINT WHAT YOU GOT CHALLENGE 2023/2024” painting challenge that runs from December 26th, 2023 to February 29th, 2024. It’s also going to play a major role in many of my upcoming games for the multiple gaming conventions that I plan on supporting as a GM. At present, that support level is now at 25 four-hour games just through May across 4 different conventions in Massachusetts, Maine, and New Hampshire (TotalCon38, HAVOC, Mayhem, and HUZZAH!.
First, I’ll share some (well VERY few) WIP shots, then some eye candy of the WMAB.
WIP shots…
The WMAB as received.
Regarding my painting, I mostly followed my usual process, except I did the gun first. It came out too coppery versus brass at first – and Army Painter “Talos Bronze”, while a nice metallic speed paint, is indeed very copper-colored. A switch to a craft metallic paint - Martha Stewart Crafts “Brushed Bronze” – did the trick. I could have gone with steel, but I like the look of bronze cannon.
With Army Painter “Talos Bronze”With MS Crafts “Brushed Bronze”
The crew was easy to do:
Early paintingAfter varnishing
And here is the WMAB finished on its magnetized MDF sabot base:
The WMAB!
Now for some WMAB…
Eye Candy
The WMAB – frontal view.
WMAB – view of the left front.
Right front view of the WMAB.
A view of the top of the battery.
As with all of my artillery units, the magnetized MDF sabot base allows for the gun to be turned around 180 degrees so as to designate it being limbered.
Group shot
The two Winkie artillery batteries are shown here below. As the crews are uniformed identically , I gave the WMAB red flowers on their bases to differentiate them from the WLAB bases’ yellow flowers.
The Winkie Medium Artillery Battery on the left and the Winkie Light Artillery Battery on the right.
The WMAB represents my penultimate Winkie unit at this time (I love that word but I hardly ever get to use it!). I do hope that you enjoyed seeing it and reading the post. Next up will be my final Winkie unit and yet another entry for Dave’s challenge – and soon. Thanks for looking!
And yes, I still have much more Ozz to come…
Miscellaneous details and references for those interested in that sort of thing:
For all of my previous posts on Wars of Ozz games, figures, units, and other related projects – please see this page.
PAINTS, INKS, GLAZES, SHADES, WASHES, PIGMENTS, FLOCKING, GLUES AND MORE THAT I USED ON THE WINKIE MEDIUM ARTILLERY BATTERY:
Gorilla Glue
1/2″ x 1/2″ square steel bases from Wargames Accessories (#16)
Artillery Battery MDF sabot base from Old Glory/Wars of Ozz Miniatures
P3 “Brown Ink” (ink)
1 1/4″ x 1″ steel base from Wargames Accessories (#FOW1)
1/8″ neodymium magnets
Everlast steel ABA 3/4″ washers
Elmer’s PVA Glue
Red Sharpie pen
Poster tack
Vallejo Premium Primer “White”
Vallejo “Flow Improver”
Vallejo “Airbrush Thinner”
Citadel “Nuln Oil” (wash)
Vallejo Model Color “White”
Citadel “Contrast Paint – Ironjawz Yellow”
Citadel “Contrast Paint – Baal Red”
Army Painter “Speed Paint – Talos Bronze 2.0”
Vallejo Model Air “Black ” (metallic)
Martha Stewart Crafts “Brushed Bronze”
Citadel “Cryptek Armourshade” (wash/shade)
Citadel “Nuln Oil GLOSS” (wash/shade)
Army Painter “Battlefields Grass Green” (flocking)
As you may want to check out the Wars of Ozz figures’ range – there are two places to get them and the rules (and I make no money from this btw). The game rules and the figures are available from the following two places:
According to the canon of the world of the Wars of Ozz, Evora was the first witch to appear after the founding of Ozz. She had the power to raise massive skeletal armies of the dead (which were sadly plentifully available in the apocalyptic era after the end of the Last Great War). Despite their combat prowess, the Winkies at that time were not unified in any major way, so Evora was able to conquer them, subjugate them, and carve out her empire from their lands. In early 2023, I painted up an Evora figure that you can read about here.
Evora’s capital and court were centered on the Yellow Castle. One of the regiments available to her Winkie army is called, unsurprisingly, Evora’s Bodyguard Infantry Regiment (let’s shorten that to EBIR). I saw the unit on the Wars of Ozz website, and decided that it would be a good regiment to add to my Winkie army.
According to the rules, the EBIR is a very potent unit. As befits the Winkie ethos of warfare, they fight only with melee weapons – in this case big honking thrusting spears and swords. With regards to Melee, the EBIR has the same attribute as other Winkie Infantry Regiments – that of 7/10, which is very good. Where the EBIR differs is in its Resolve and Elan attributes – as well as with regards to its point cost. The Resolve value (the measure of the unit’s desire to stick in a fight) for the EBIR is a whopping 9/10 versus a regular Winkie Infantry Regiment’s 6/10. The Elan attribute for the EBIR (the desire to take the fight to the enemy) is the strongest possible at 10/10 versus a regular Winkie Infantry Regiment’s already strong 8/10. This is greater than any other unit in the game (outside of the Whim Whim Janissaries which also has an Elan of 10/10). The EBIR is expensive however, at 6 points, while a normal Winkie regiment will cost 5 points. There can only be one EBIR in any brigade. As with most other Ozz infantry regiments, they are based 4 apiece to a 2″ square base – so five bases for the regiment plus the regimental commander on his own separate MDF base.
The unit (not the commander) is very Egyptian-looking – almost as if it were recruited from fanatics – which I suppose one must be to get into it. Very much the troopers look like cultists – dressed in robes for the most part, with a mix of Aztec-like cotton armor vests, steel scale, or mail armor. The soldiers have ancient Egyptian-style hats festooned with some sort of an idol. They all have very large shields which looked to be made of wicker. Some have boots, and some are in sandals (why I don’t know – combat flip flops?!). Most surprising were the canon colors. As Winkies are very yellow-oriented with regards to color, one might expect that the EBIR would be yellow too.
Nope.
Orange coats, purple facings, and grey trousers! Clearly the Madness Bombs color mania struck here!
No assembly was required for the unit other than to mount the shields, to add the flags, and to assemble the regimental commander and his Zilk (carniverous bird) mount. As I always do, I mixed and matched the figure types and poses such that no two bases of the five in the regiment were identical in terms of the figures. The SKU for the regiment is OZZ-301. There are 21 figures for the regiment – this includes the mounted regimental commander and 20 trooper figures. All of the figures are metal and 28mm in size. I decided to stay with more orange instead of any yellow as I thought that looked better and would be in canon agreement. The contrast between the orange and the purple was interesting.
This is my third unit for Dave Stone’s “PAINT WHAT YOU GOT CHALLENGE 2023/2024” painting challenge that runs from December 26th, 2023 to February 29th, 2024. It’s also going to play a major role in many of my upcoming games for the multiple gaming conventions that I plan on supporting as a GM – right now at a schedule of 25 four-hour games just through May across 4 different conventions.
As I have mentioned previously, I am still recovering from pre-Christmas knee surgery, but now my painting opportunities have been better. I tried to take a few more WIP shots for this project. I’ll share those and then some eye candy.
WIP shots
Evora’s Bodyguard Infantry Regiment – after cleanup of any mold lines and washing. Yes, 17 shields to paint up. I started work on December 29th.
The unit primed in white with the shields primed separately. Note that there are 16 shields, not 17! Later in the project, I would find that one rogue shield had disappeared under a paper towel and had to be painted separately.
Early painting – using my normal habit of applying a dark wash over the white and dry brushing white over that before adding colors. I found that these figures had several more difficult-to-access painting areas (those that were hard to paint without getting paint where I did not want it) – than most other Ozz figures. This was mainly due to the arm and head positions – not a terrible challenge, but I thought that it took me more time to paint.
By January 4th I had pinned and assembled the regimental commander and his mount, and painted it as you see below. I had started to get some orange onto the troopers as you see on the left below.
Troopers Jan 4thRegimental Commander
Jan 5th progress.
January 8th saw us getting about a foot of snow. This snow interrupted my work as even in my gimping state I could use the snowblower (slowly and methodically). Luckily, Lynn has no fear of hard shovel work. Once done, we lit the fire pit briefly.
I was back in the saddle painting through the 8th of January.
Troopers painted.Trooper close up
By the 9th of January, I had the regiment painted, shields attached, and varnished on their specimen jars. I drilled though the shields and tried to get them multiple gluing points in terms of attachment for the sake of durability on the tabletop. Again, these were BIG shields. Next, I needed to mount the figures on the bases and get the flocking done. Glue does take time to dry…always…
Mounting the figures on their steel and MDF bases.
I then applied the flocking and flags. For the flocking, I decided that purple and orange flowers with green grass and undergrowth would work. At least the flip flops were less visible!
Flags to cut out with the flocked command base.
I was finally done on Jan 10th.
The EBIR completed.
Eye Candy
Select and click on any photo for a better look.
Regimental Commander Base
Base 1
Base 2
Base 3
Base 4
Command Base
Group Shots
The EBIR in line formation with the regimental commander leading the way.
Top view of the flocking.
The EBIR in column moving to the left.
The EBIR in column moving to the right.
Admittedly, early work on the color scheme and the painting and shield difficulties I encountered were dampening my enthusiasm for this unit. However, once I completed it, I found that I really do like it.
I’d be very interested in your feedback on the unit and its colors as they are far from run of the mill. Ozz is supposed to be colorful – and these guys certainly fit that bill.
I do hope that you enjoyed seeing the EBIR and reading the post. Next up will be a new Winkie artillery unit for Dave’s challenge – and soon. Thanks for looking!
And yes, I still have much more Ozz to come…
Miscellaneous details and references for those interested in that sort of thing:
For all of my previous posts on Wars of Ozz games, figures, units, and other related projects – please see this page.
PAINTS, INKS, GLAZES, SHADES, WASHES, PIGMENTS, FLOCKING, GLUES AND MORE THAT I USED ON EVORA’S BODYGUARD INFANTRY REGIMENT:
Rectangular Brigade MDF base (used as a Regimental base) from Old Glory
2″ square steel bases from Wargames Accessories (#21)
1.25″ x 1″ square steel base from Wargames Accessories (#FOW1)
Army Painter “Speed Paint – Speed Paint Medium 1.0”
Citadel “Nuln Oil GLOSS” (wash/shade)
Battlefront “Sherman Drab”
Citadel “Agrax Earthshade” (wash/shade)
Vallejo Mecha Varnish “Gloss Varnish”
Vallejo Mecha Varnish “Matte Varnish”
Pendraken 12mm dice frames
Army Painter “Battlefield Grass Green” (flocking)
Army Painter “Battlefield Field Grass” (flocking)
Small stones
Twigs
Army Painter “Lowland Shrubs” (flocking)
Gamers Grass “Green Meadow Tufts” (flocking)
Army Painter “Battlefield XP Woodland Tufts” (flocking)
Shadow’s Edge Miniatures “6mm Dark Forest Dark Purple Tufts” (flocking)
Gamers Grass “Orange Flowers” (flocking)
Blue Sharpie pen
Brown Sharpie pen
Flags printed on card stock
As you may want to check out the Wars of Ozz figures’ range – there are two places to get them and the rules (and I make no money from this btw). The game rules and the figures are available from the following two places:
It’s that time again – when I take a look back and see how well I did – or did not do – versus the goals that I set out to accomplish for myself back in January of 2023. This post will also be where I set myself some realistic (and hopefully challenging) benchmarks/goals for 2024 in the areas of Life, Golf, Miniatures, & Other Distractions (after all that is the title of this blog since its inception back in 2015!). It’s more for my own motivation, but I have found that others have enjoyed the ride (especially the spreadsheets for Roger and John!) – so here we go.
2023 was, like 2022, one very busy year on multiple hobby, golf, and life fronts. I did set some pretty aggressive goals for all aspects. Some were around gaming, some around hobby production, some were around golf, and more.
How did I do versus my 2023 goals?
Paint 250 figures or more
Well, I blew goal that out of the park and had my most productive miniature painting year ever – mostly Wars of Ozz figures obviously! I managed to paint 330 miniatures – 128 more than I did in 2022.
2023 Production
Complete a brigade of Winkies for Wars of Ozz.
This was a big part of the 330 – 107 Winkie figures painted – and much bigger than just a single brigade! 1 witch, 3 leader bases, 1 cavalry regiment, 1 artillery battery, and 5 infantry regiments as shown below.
2023 Winkie units and leaders production.
Complete a brigade of Land of Harvest creatures for Wars of Ozz.
I really fell in love with the Great Land of Harvest figures – and painted 111 of them. 4 leaders, 1 witch, 9 infantry 1egiments, and an artillery battery. This was close to just not 1 brigade but 2+ brigades.
2023 Harvest Production
Run and play more games – track them too.
Leif Magnuson, me with my wife’s least favorite headgear, and Brad Gosselin at TotalCon37. They both played in multiple Feudal Patrol and Wars of Ozz games at multiple cons and were EXCELLENT wing men.
The Battle of Lake Texcoco at HMGS Fall In.
Wars of Ozz at HUZZAH! 2023.
Wars of Ozz at EllisCon.
Yes indeed, I did both run AND play, and track them as well. I attended and ran games at several conventions and club nights. The conventions included 2023’s TotalCon37, HAVOC, HMGS Cold Wars, HUZZAH!, HMGS Fall In, and EllisCon. I also played in several. All tallied, I played as a player in 12 games – 8 Wars of Ozz, 1 Feudal Patrol, 1 Axis & Allies Miniatures, and 2 Eagles and Empires games. I acted as GM for no less than 20 games - 9 Wars of Ozz, 10 Feudal Patrol (Mesoamerican era/Spanish Conquest skirmish, and 1 What a Tanker game.)
Complete the scenario booklet for Civilizations Collide.
That’s a miss – though I have written 10/16 scenarios.
Try to get my Nomonhan WaT project off the ground. Note I said “try”.
Nope – not enough time, but this stays on my list.
Get the Mass Pikemen more active.
The Battle for Toto (Wars of Ozz) playtest at the Mass Pikemen.
I think that happened at about the same rate as last year, so not more active, but active.
Have another nice trip to Florida.
In Orlando at golf school with Lynn.
We had a nice escape from dreary cold New England to sunny warm Florida for fun and Golf School. Also got to get together with Buck Surdu and play Eagles & Empires.
Eagles and Empires in Buck’s amazing gaming room.
Post on the blog 48 times or more – make them of good quality
I exceeded this – mainly because I started using the blog for The Tour of the Brookfields golf tournaments – to share information and to share results. As we do have a Facebook page – but not everyone is on it – this blog became crucial to sharing information. Also, this kept it free from the FB bots that, for example, decided that a post of a winning putt “violated community standards”. I posted on the blog 54 times - a good average for me.
Be a good blog follower – still a goal but one that I cannot measure!
Always on the list – but others can decide (like you dear reader).
Have multiple Zoom chats with fellow hobbyists.
I had a few very nice ones – can always do more.
Go to a golf school and get my golf handicap down below 18. This time.
Well, did hit the school, and I barely got under 18 – but done!
Stats on my handicap history. And a Siri circle!
Yes! As shown above, I managed to get to 17.6.
Update my golf tournament progress on my blog – either as posts or a page or both.
OK, I did not record my individual tournament progress – though I did start to use the blog for the Tour of the Brookfields, so I’m going to say yes. Certainly, I left off most of the club tournaments that I played in, but still posted a few. It certainly rained – A LOT.
Play golf (in season) at least twice a week.
Exceeded this as I had 86 handicap rounds plus maybe 8-10 others that were scrambles.
Win my flight in the Championship.
Nope – not even close.
Be a competitive golfer.
I had my moments – and did do well in the annual Club Derby. Knee injury in August (and playing on a bad leg) did not keep me down too badly.
Tom & I win!2/3 was Tom, 1/3 was me – or less.
Personal Highs in 2022
For the second year in a row – the Florida trip and golfing with my wife (she’s getting better)!
Getting together with family especially my daughter Ellen and my granddaughter Tabitha.
Winning my second “PELA” GM award at HMGS Cold Wars for the Battle of Lake Texcoco.
Winning my third “Al” award for the game with the most stunning visual appeal at the Battle Group Boston HAVOC Convention for the Wars of Ozz!
Knocking out 330 figures and terrain for the Wars of Ozz!
Having EXCELLENT wingmen in Brad Gosselin and Leif Magnuson at MULTIPLE conventions.
Getting together with Dave Wood, Buck Surdu, Greg Priebe, Chris Palmer, and Duncan Adams, Eric Schlegel, and all of the other HAWKS in person.
Getting honored by Old Glory by them putting my painted Great Pumpkinheads on t-shirts!
Being on the Committees for the Tour of the Brookfields tournaments and the New England Service Academy golf tournaments.
Having fun Zoom chats.
As a team, winning the Club Derby with Tom Orszulak by one stroke over 36 holes over two days.
And again, being with my wife Lynn, every day (seriously, and she won’t likely read this).
Tabitha & Lynn
My daughter Ellen, grandaughter Tabitha, my Mom, and me.
Winning te PELA.
Chris Palmer, Dave Wood, and me sporting some cool t-shirts!
Personal Lows for 2021
Knee injury in August.
Knee surgery in December – though that’s a long-term plus for my golf game (I hope).
My goals for 2024
Well, its time to set my Life, Golf, Miniatures, & Other Distractions goals for 2024.
Paint 365 figures or more.
Complete 2 brigades of Quadlings for Wars of Ozz.
Complete a brigade of Whim Whim & Noobi for Wars of Ozz.
Complete a brigade of Temujicans for Wars of Ozz.
Continiue to run and play more games – and continue tracking them too.
Attend and run games at conventions. This would include TotalCon38, HAVOC, COLD BARRAGE, MAYHEM, HUZZAH!, HMGS Fall In, EllisCon, and others..
Complete one more scenario for my scenario booklet for Civilizations Collide.
Paint up a platoon from Wargames Supply Dump for Combat Patrol™ .
Try to get my Nomonhan WaT project off the ground. Note I said “try”. Again.
Get the Mass Pikemen more active.
Have another nice trip to Florida.
Post on the blog 50 times or more – make them of good quality.
Be a good blog follower – still a goal but one that I cannot measure!
Have multiple Zoom chats with fellow hobbyists.
Go to a golf school and get my golf handicap down below 16.
Update the Tour of the Brookfields on my blog.
Play golf (in season) at least twice a week – get in 80 rounds.
Win my flight in the Club Championship.
Defend in the Club Derby
Be a competitive golfer.
Be a good friend.
Of course, MUCH thanks to all who make the time to read this blog and comment on my stuff, craziness, and madness – Happy 2024!
The last Wars of Ozz unit of 2023! Fittingly, it is also my last Munchkin unit – at least for the near future. As I shared in my last post on the Munchkin Landwehr, I am still recovering well from my knee surgery, and I have able to work on a few things. The Munchkin Light Artillery Battery was one of those.
A year ago, I painted up a medium battery for the Munchkins. That unit, with it’s 8″ short and 24″long range, has had the longest range of any of my Ozz units in 2023. To level the playing field/tabletop – and to provide a bit more variety for scenarios, I have decided to get the Munchkins this Light Battery – and to get the Winkies their own medium battery as well (coming soon I hope). Maybe at some point I’ll address this shortfall for the Gillikins, but not now! Again, Dave Stone is also currently is painting challenge “PAINT WHAT YOU GOT CHALLENGE 2023/2024”. This is my second unit for that challenge.
The Munchkin Light Artillery Battery (MLAB) has a short range of range of 6″ and a long range of 18″. Otherwise, the stats for the MLAB and crew are the same as the larger MMAB except for cost. Both units are good at missile combat with either their cannon or their carbines – with a Marksmanship value of 6/10. As for Melee (which is obviously not ideal for artillery), the MLAB and MMAB are both below average at 4/10 as one would expect. The Resolve value (the measure of the unit’s desire to stick in a fight) for both types is great at 7/10, and as for Elan (the desire to take the fight to the enemy), both are at an average 5/10. The MLAB is cheaper at 4 points, versus the MMAB cost of 5 points. Having two types of artillery give a lot of flexibility to a player or to myself as a GM.
The MLAB’s SKU is #OZZ-106. All of the figures are metal and 28mm in size. Artillery batteries in Wars of Ozz games are composed of 5 figures plus the gun. While an infantry or cavalry regiment has 5 bases – each of which can take 4 hits per base – a battery can only take 5 hits (one per figure). Each hit removes a figure and loses a die for the unit when it fires. The scale is 28mm and these figures are metal.
As with the Landwehr, I did not take many WIP shots, but I’ll share what I have and then go into some eye candy.
WIP shots…
Painted MLAB figures gluing to MDF sabot base inserts.
After varnishing and flocking.
This was also a time to work on models with my grandaughter post-Christmas. We built a Pokemon Mew model, and then a Grogu. She just turned 7, so I was impressed with how well she did. Yes, this was fun too!
Back to the MLAB, here are some…
Eye Candy
The crew and gun without the sabot base.
Detail of the MDF sabot base, showing the bloody spots for future casualties as the figures get removed.
The MLAB on its base, frontal view.
The MLAB on its base, left front view.
The MLAB on its base, right side view.
The MLAB on its base, top view.
Both the MLAB and MMAB for comparison.
This project’s completion brings my completed forces for the Munchkins to 8 units and 3 individuals (not counting the 4 Adventurers of Ozz):
I appreciate your looking at this artillery unit. Next up I’ll be doing my annual 2023 year end round-up and 2024 goal-setting post. That’s mainly for me to hold myself accountable! (somebody has to…)
Thanks for checking this post out and please let me know what you think in the comments section. Yes, I still have more to come…
Miscellaneous details and references for those interested in that sort of thing:
For all of my previous posts on Wars of Ozz games, figures, units, and other related projects – please see this page.
PAINTS, INKS, GLAZES, SHADES, WASHES, PIGMENTS, FLOCKING, GLUES AND MORE THAT I USED ON THIS MUNCHKIN LIGHT ARTILLERY BATTERY:
MDF Artillery sabot base from Wars of Ozz Miniatures
Elmer’s PVA Glue
1/2″ x 1/2″ square steel bases from Wargames Accessories (#16)
1 1/4″ x 1″ square steel bases from Wargames Accessories (#FOW1)
Poster tack
Vallejo “Flow Improver”
Vallejo “Airbrush Thinner”
Vallejo Premium Primer “White”
Secret Weapon Washes “Heavy Body Black” (wash)
Citadel “Nuln Oil” (wash)
1/8″ neodymium magnets
3/4″ steel washers
Vallejo Model Color “White”
The Armory “Dark Blue”
Vallejo “Thinner Medium”
Army Painter “Speed Paint – Hoard Bronze 2.0”
Army Painter “Speed Paint – Crusader Skin 1.0”
DecoArt “Peacock Pearl”
Gorilla Glue
Citadel “Nuln Oil GLOSS” (wash/shade)
Vallejo Model Color “Dark Prussian Blue”
Army Painter “Blue Tone” (wash)
P3 “Brown ink” (ink)
Citadel “Contrast Paint – Contrast Medium”
Citadel “Contrast Paint – Apothecary White”
Vallejo Mecha Color “Off White”
Citadel “Contrast Paint – Bad Moon Yellow”
Citadel “Contrast Paint – Baal Red”
Citadel “Contrast Paint – Karandras Green”
Pendraken 12mm dice frame
Army Painter “Speed Paint – Hardened Leather 1.0”
Vallejo Model Color “Wood Grain”
Army Painter “Speed Paint – Glittering Gold 2.0”
Vallejo Mecha Color “SZ Red”
Martha Stewart Crafts “Brushed Bronze”
Vallejo Model Air “Steel”
P3 “Midland Flesh”
Citadel “Blood fro the Blood God”
Army Painter “Speed Paint – Royal Robes 2.0”
Citadel “Contrast Paint – Aggaros Dunes”
Army Painter “Flesh Wash” (wash)
Battlefront “Sherman Drab”
Vallejo Mecha Varnish “Gloss Varnish”
Vallejo Mecha Varnish “Matte Varnish”
Army Painter “Battlefield Grass Green” (flocking)
Small stones
Twig
Pillow batting
Gamers Grass “Green Meadow Set”
Army Painyer Battlefield XP “Woodland Tufts”
Army Painter “Battlefields Field Grass” (flocking)
Shadow’s Edge Miniatures “6mm Dark Forest Dark Blue Tufts” (flocking)
Shadow’s Edge Miniatures “6mm Dark Forest Light Blue Tufts” (flocking)
As you may want to check out the Wars of Ozz figures’ range – there are two places to get them and the rules (and I make no money from this btw). The game rules and the figures are available from the following two places:


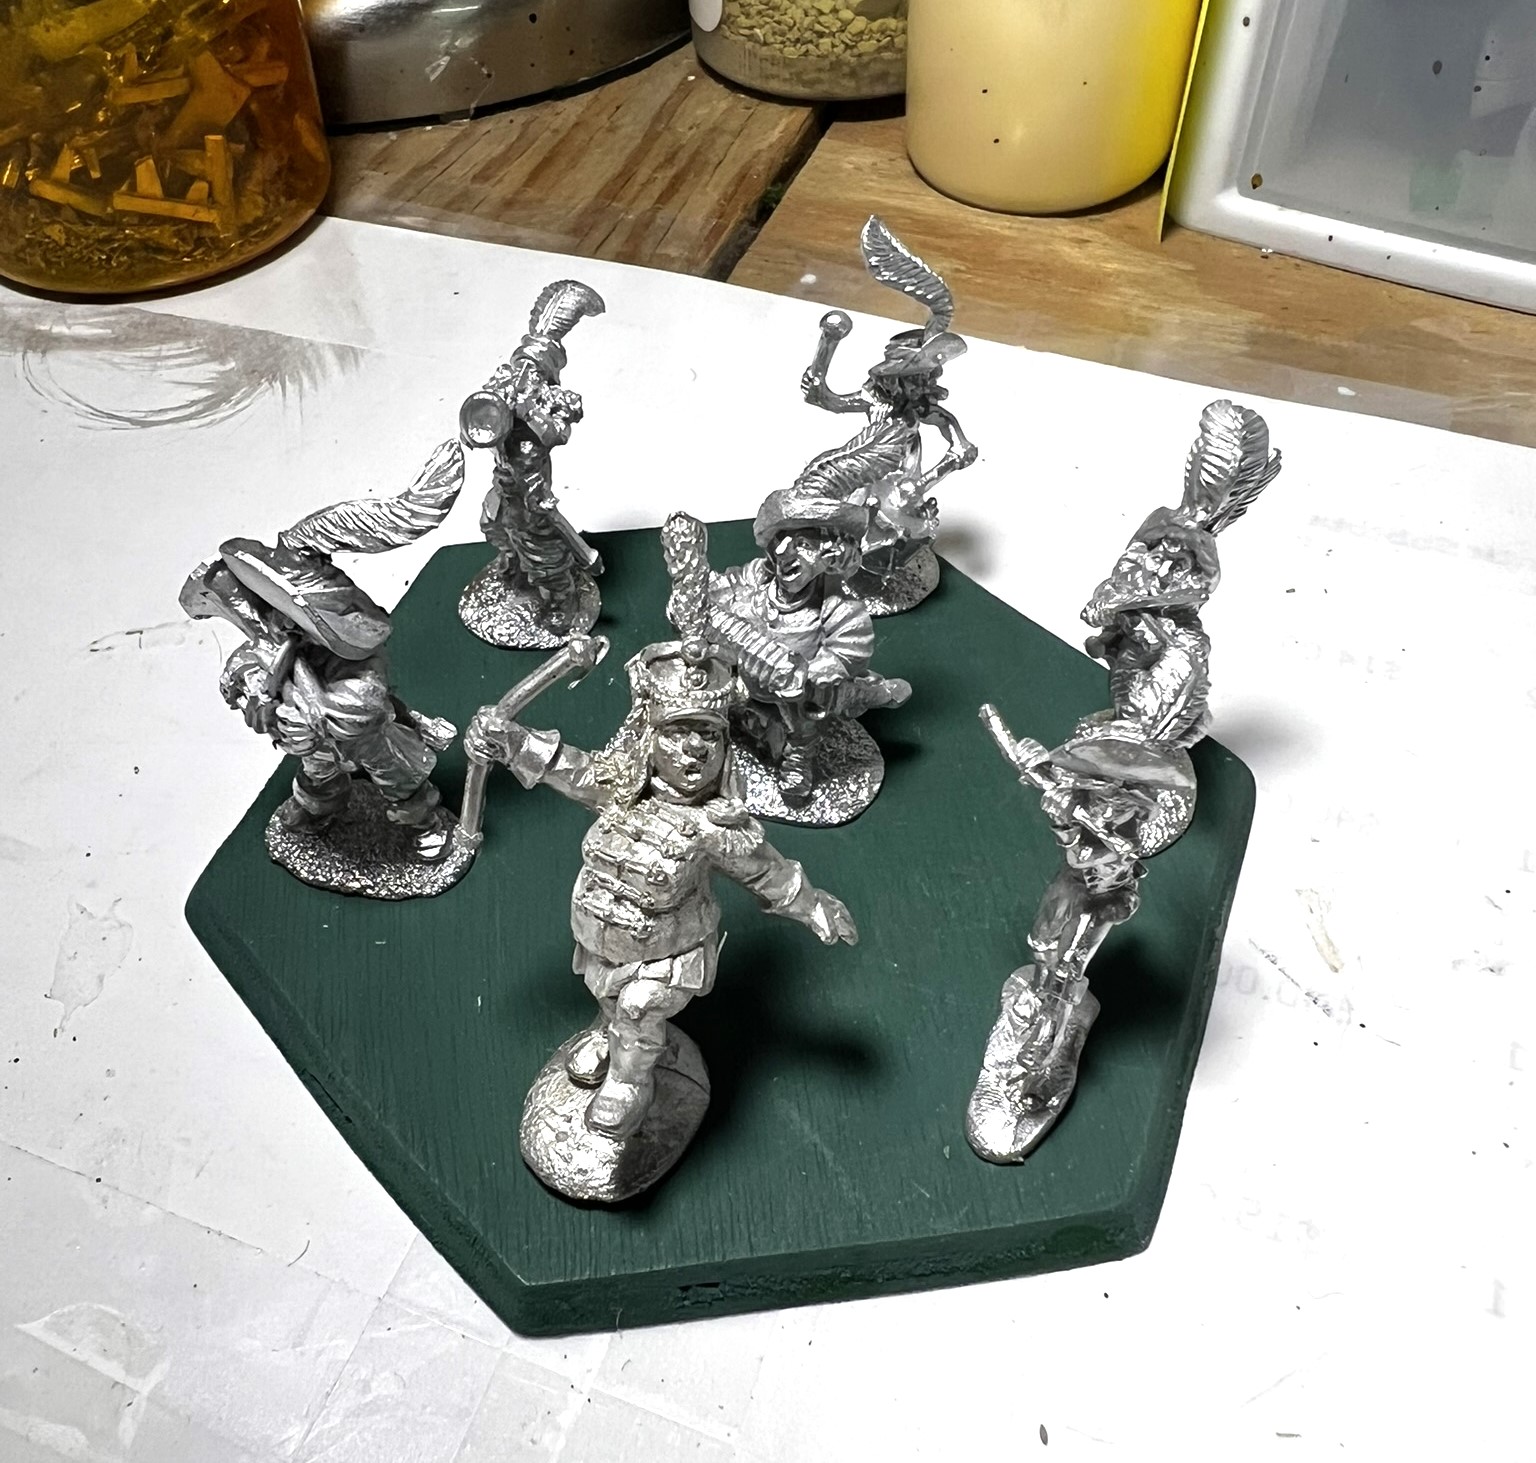
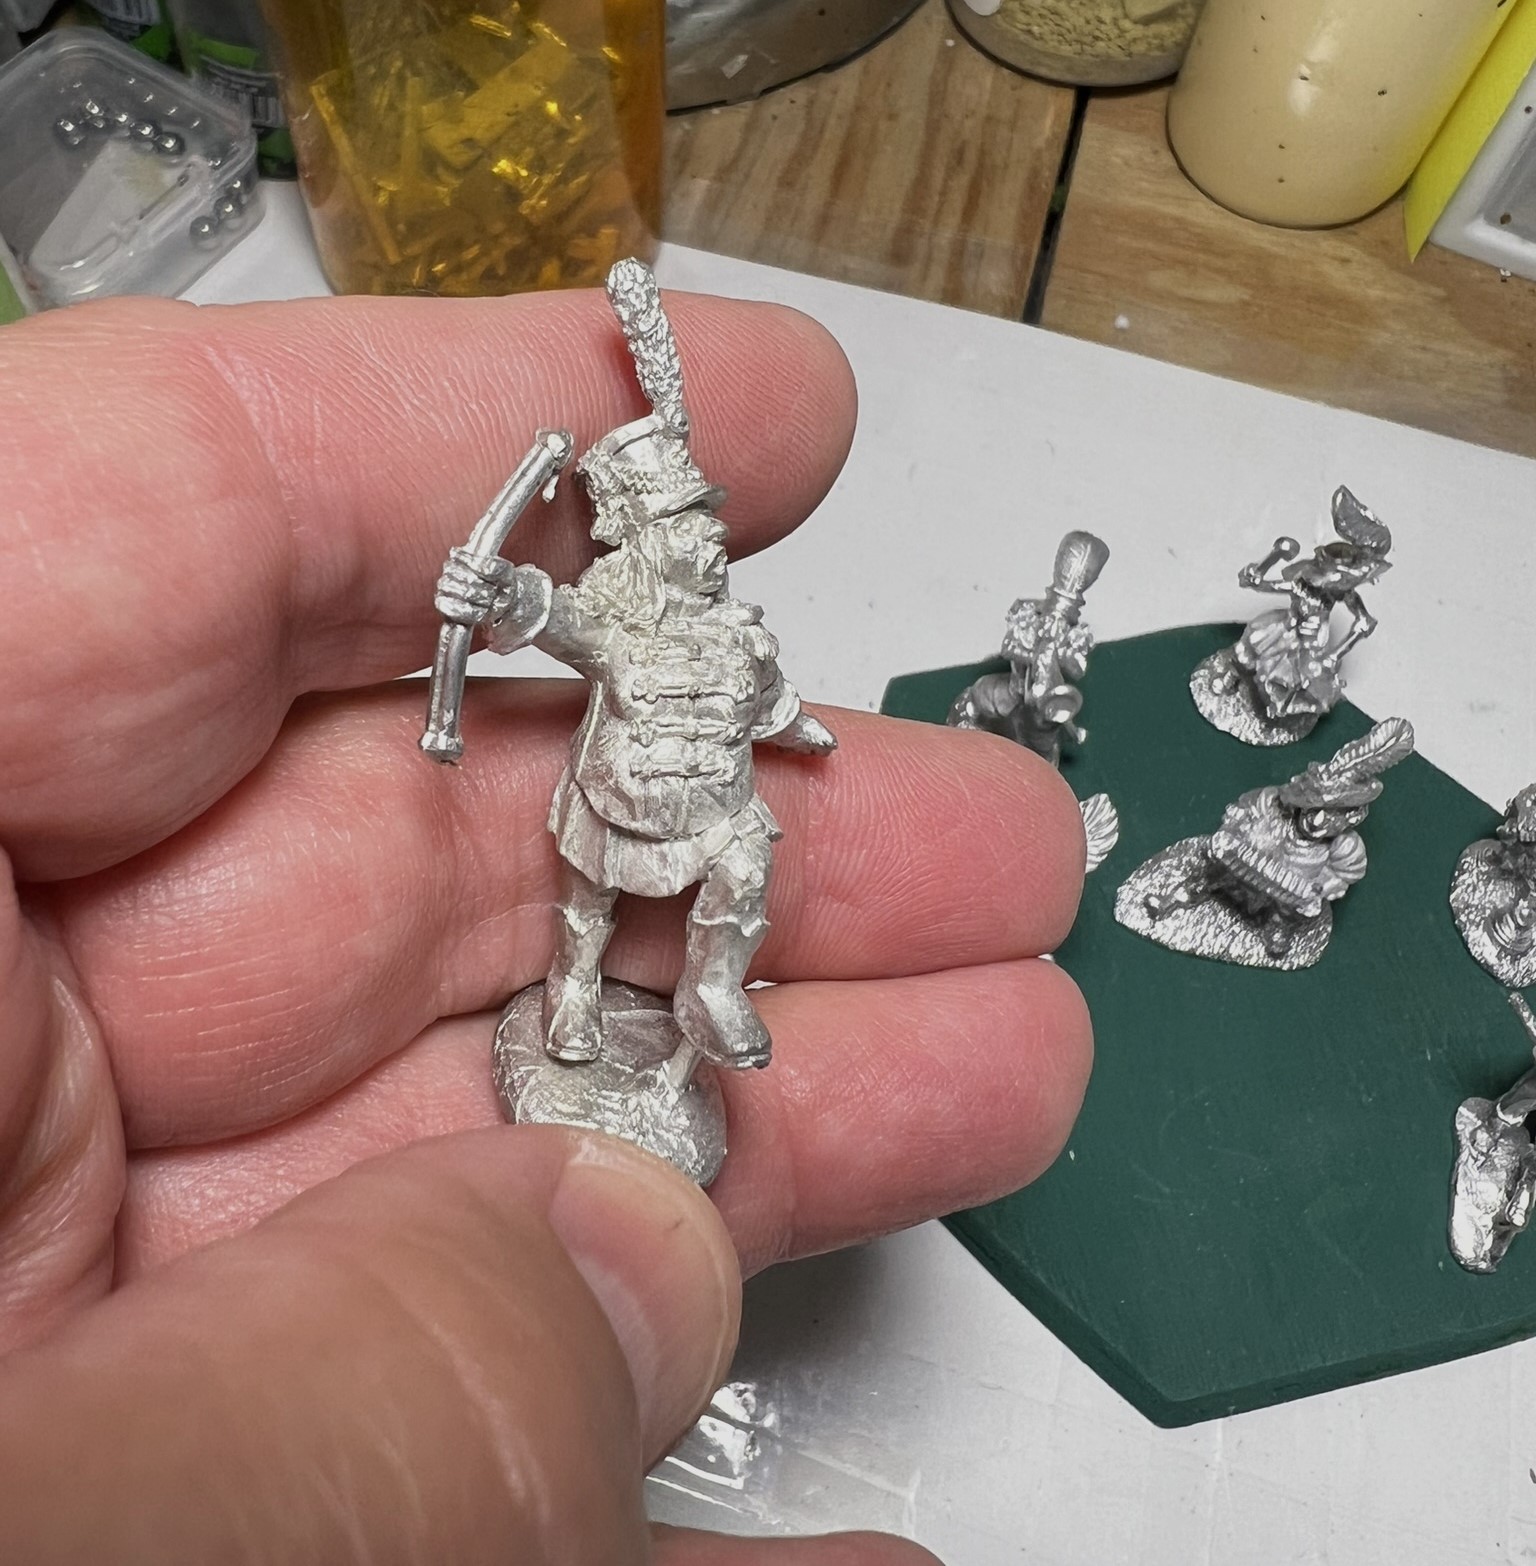
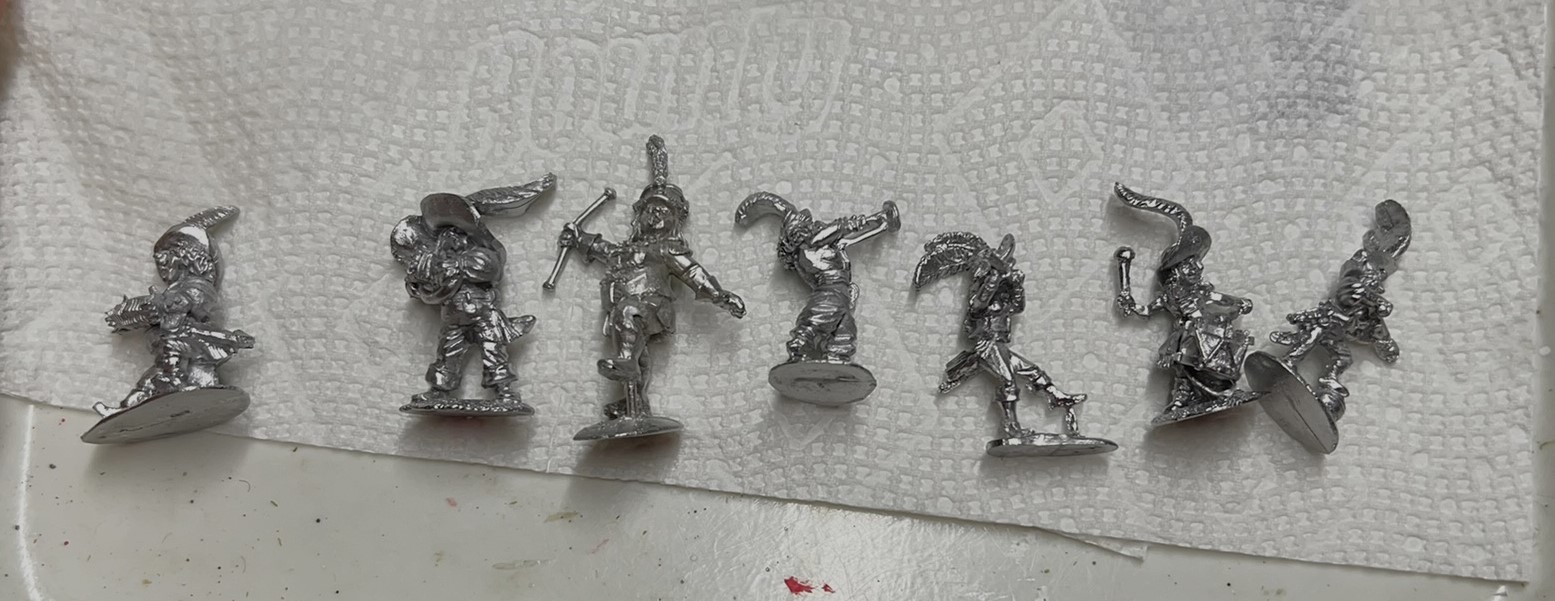


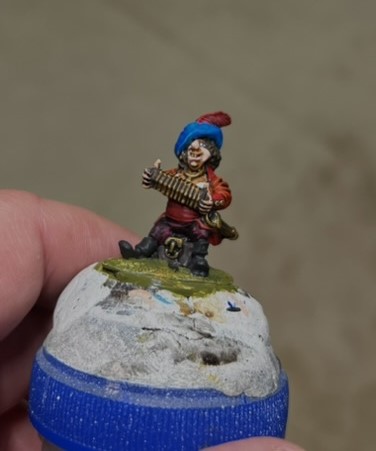

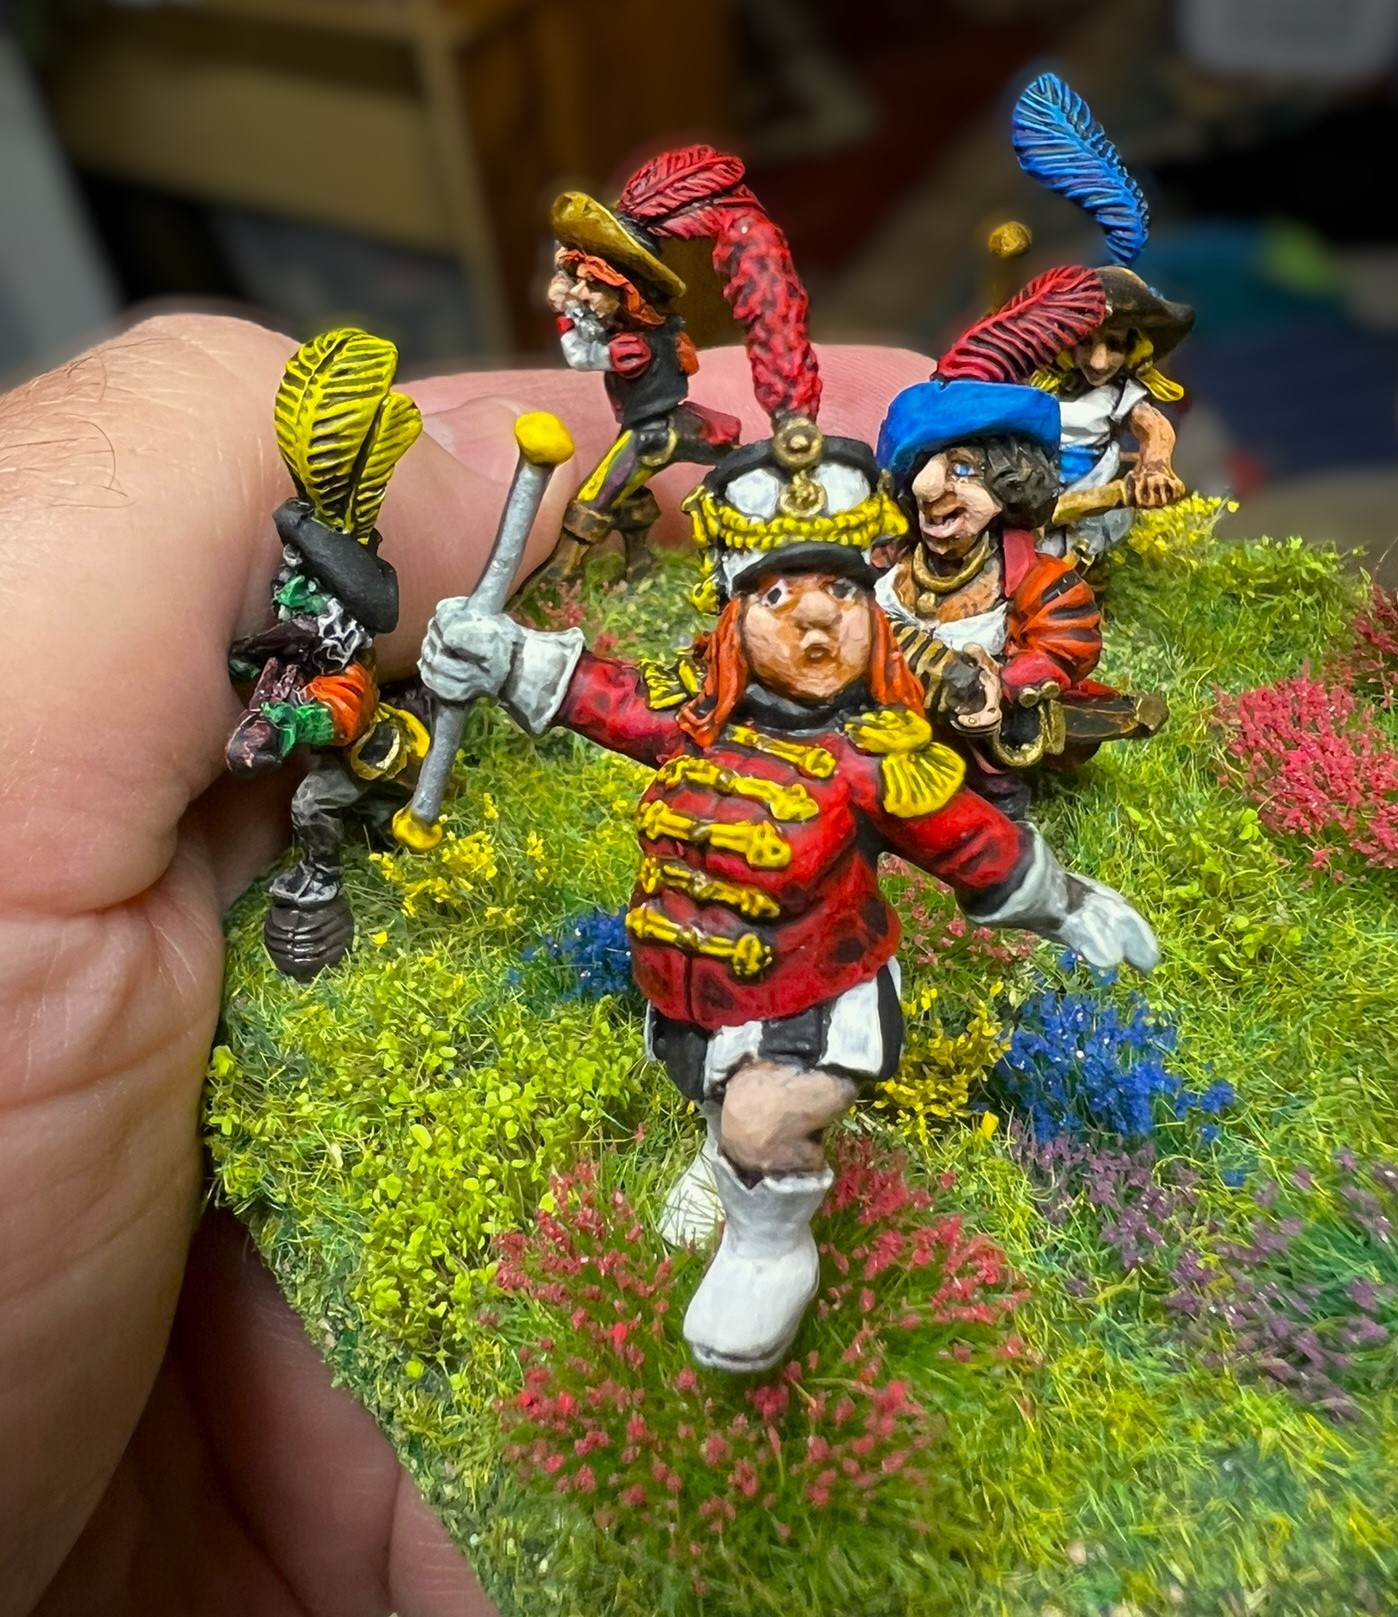
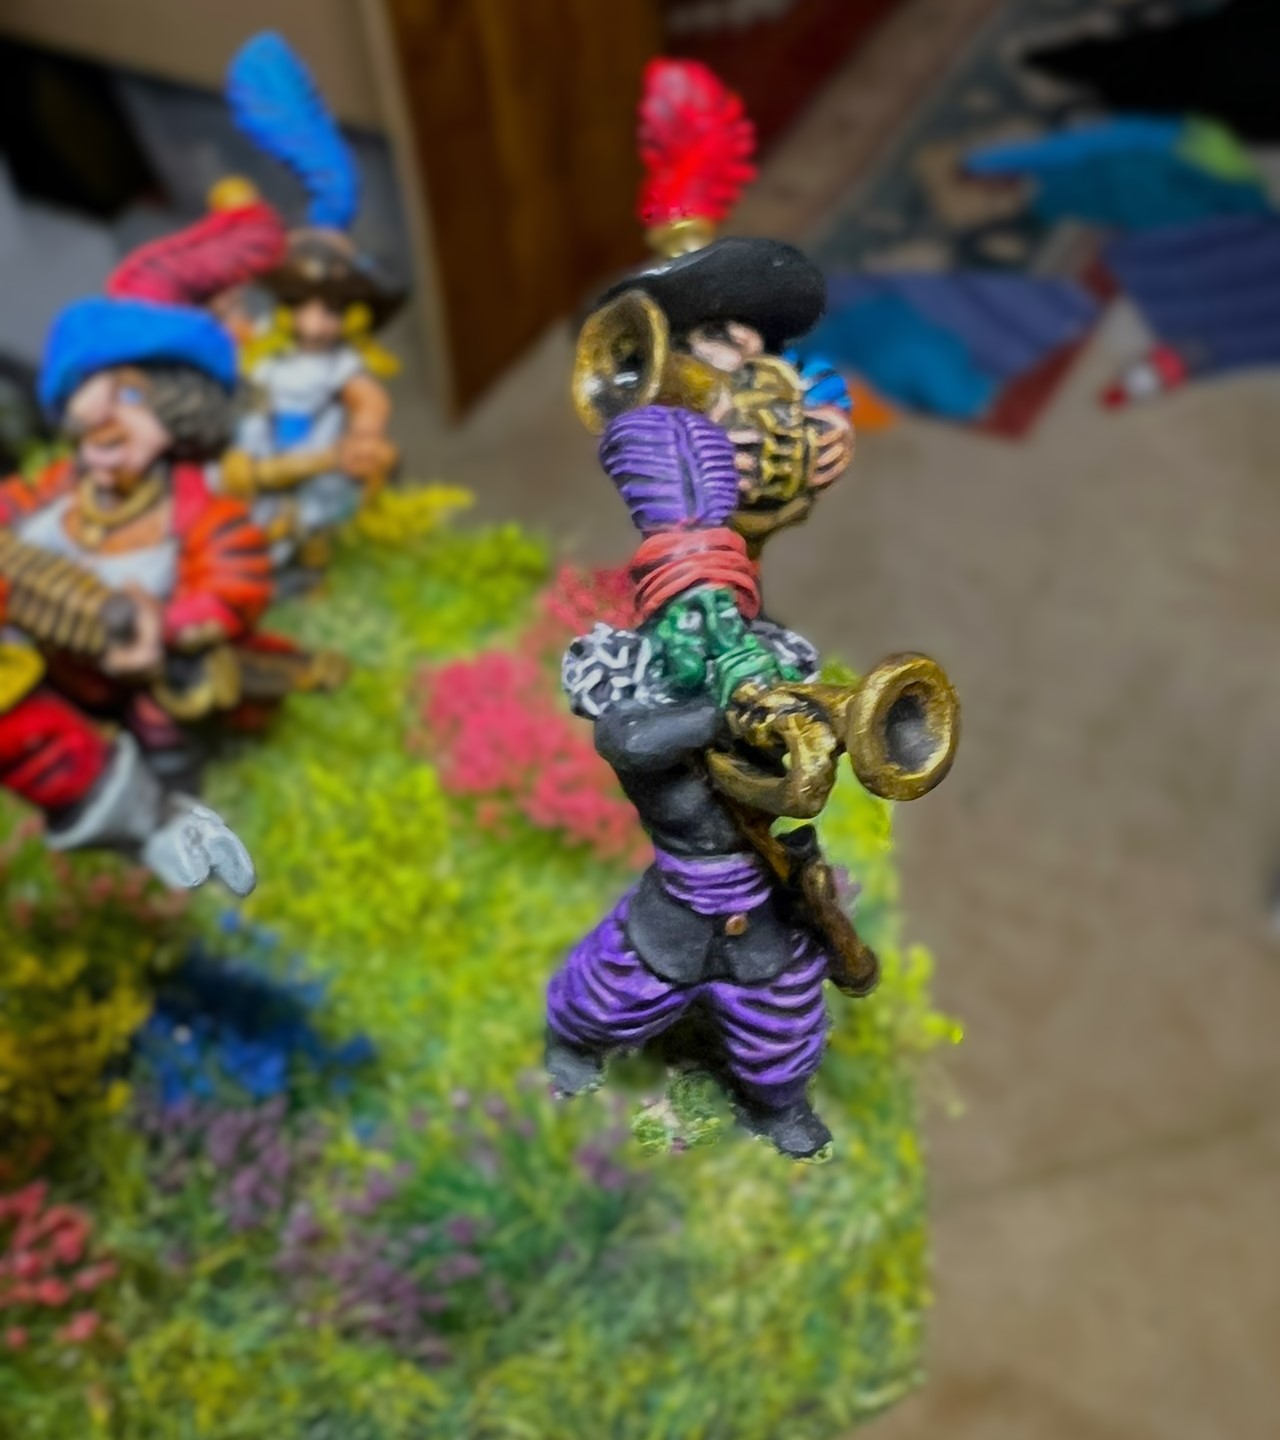
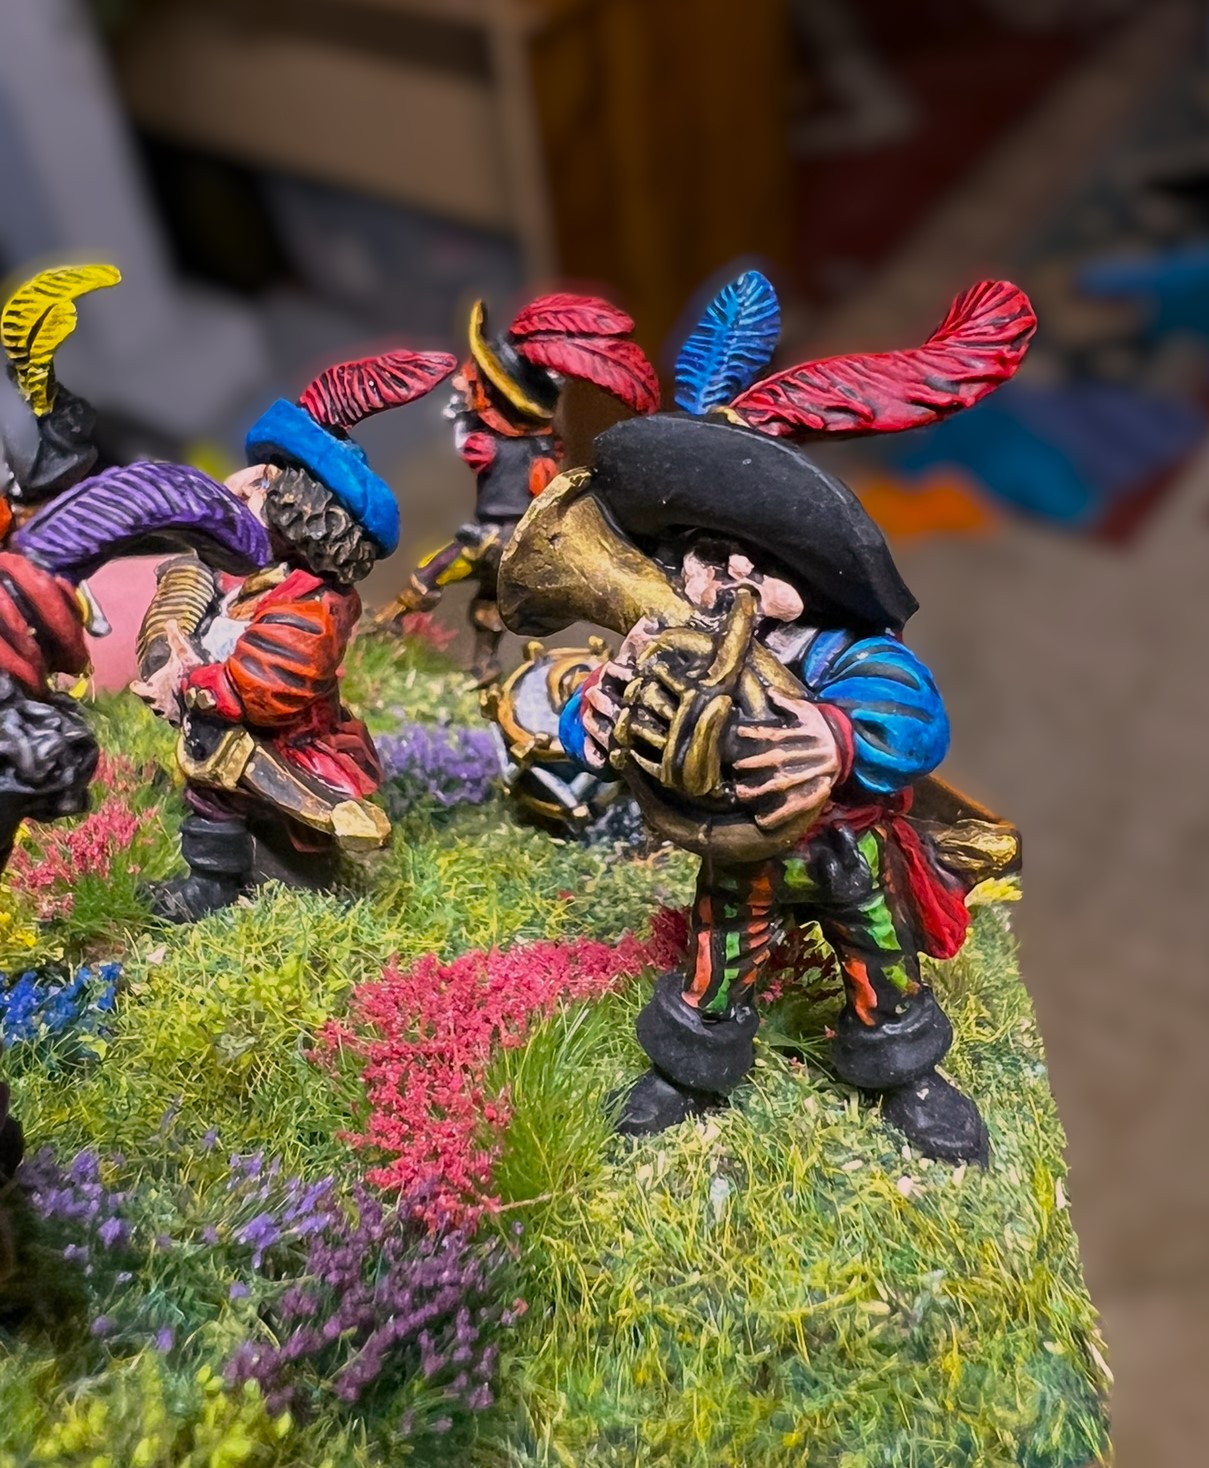
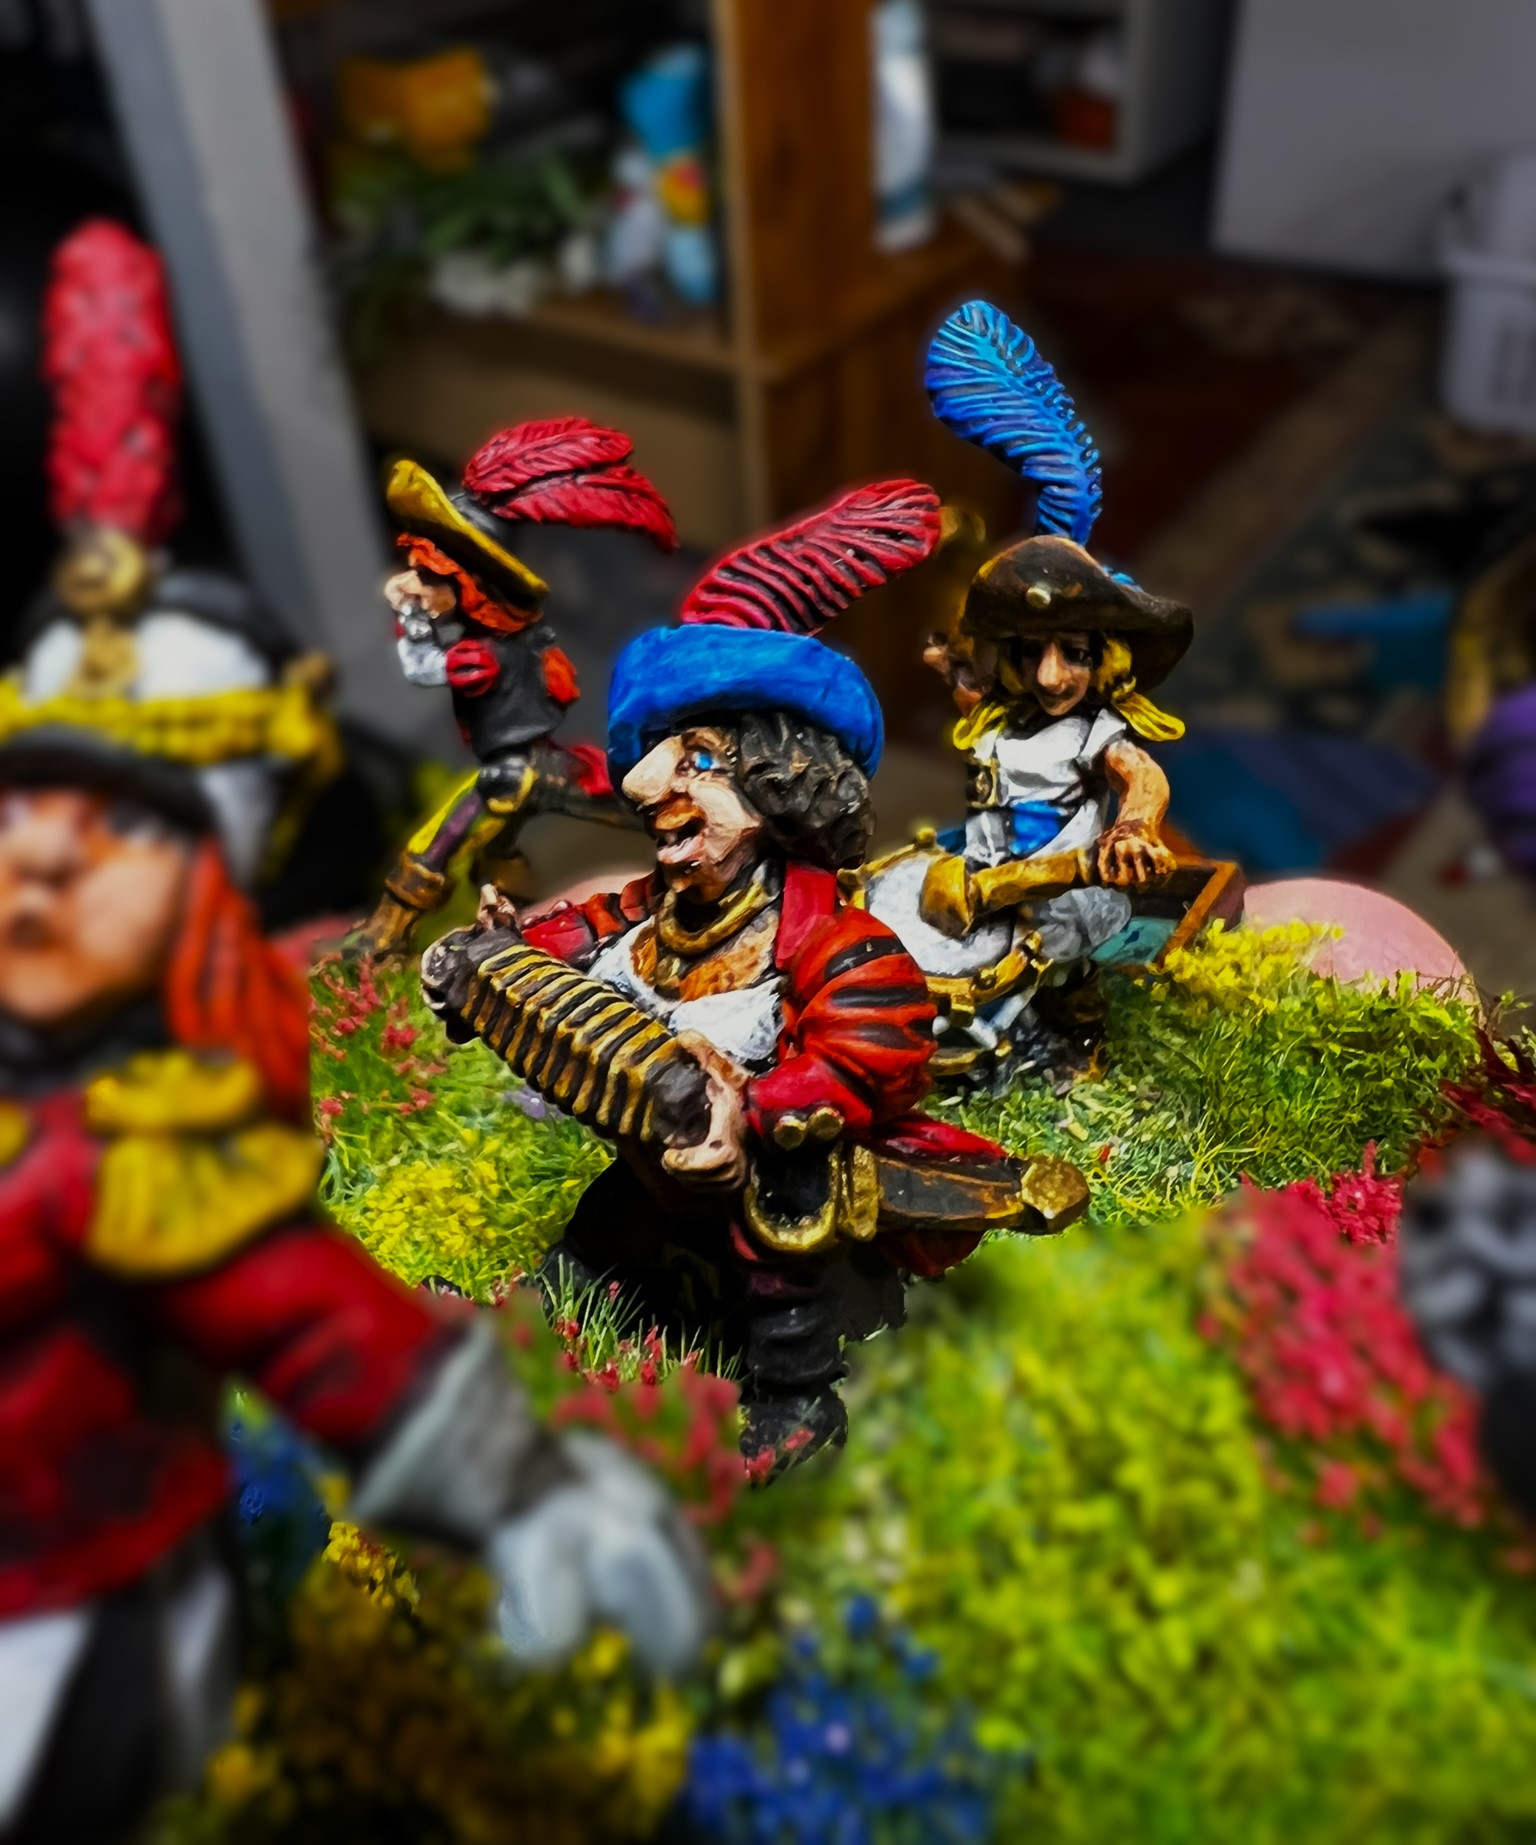
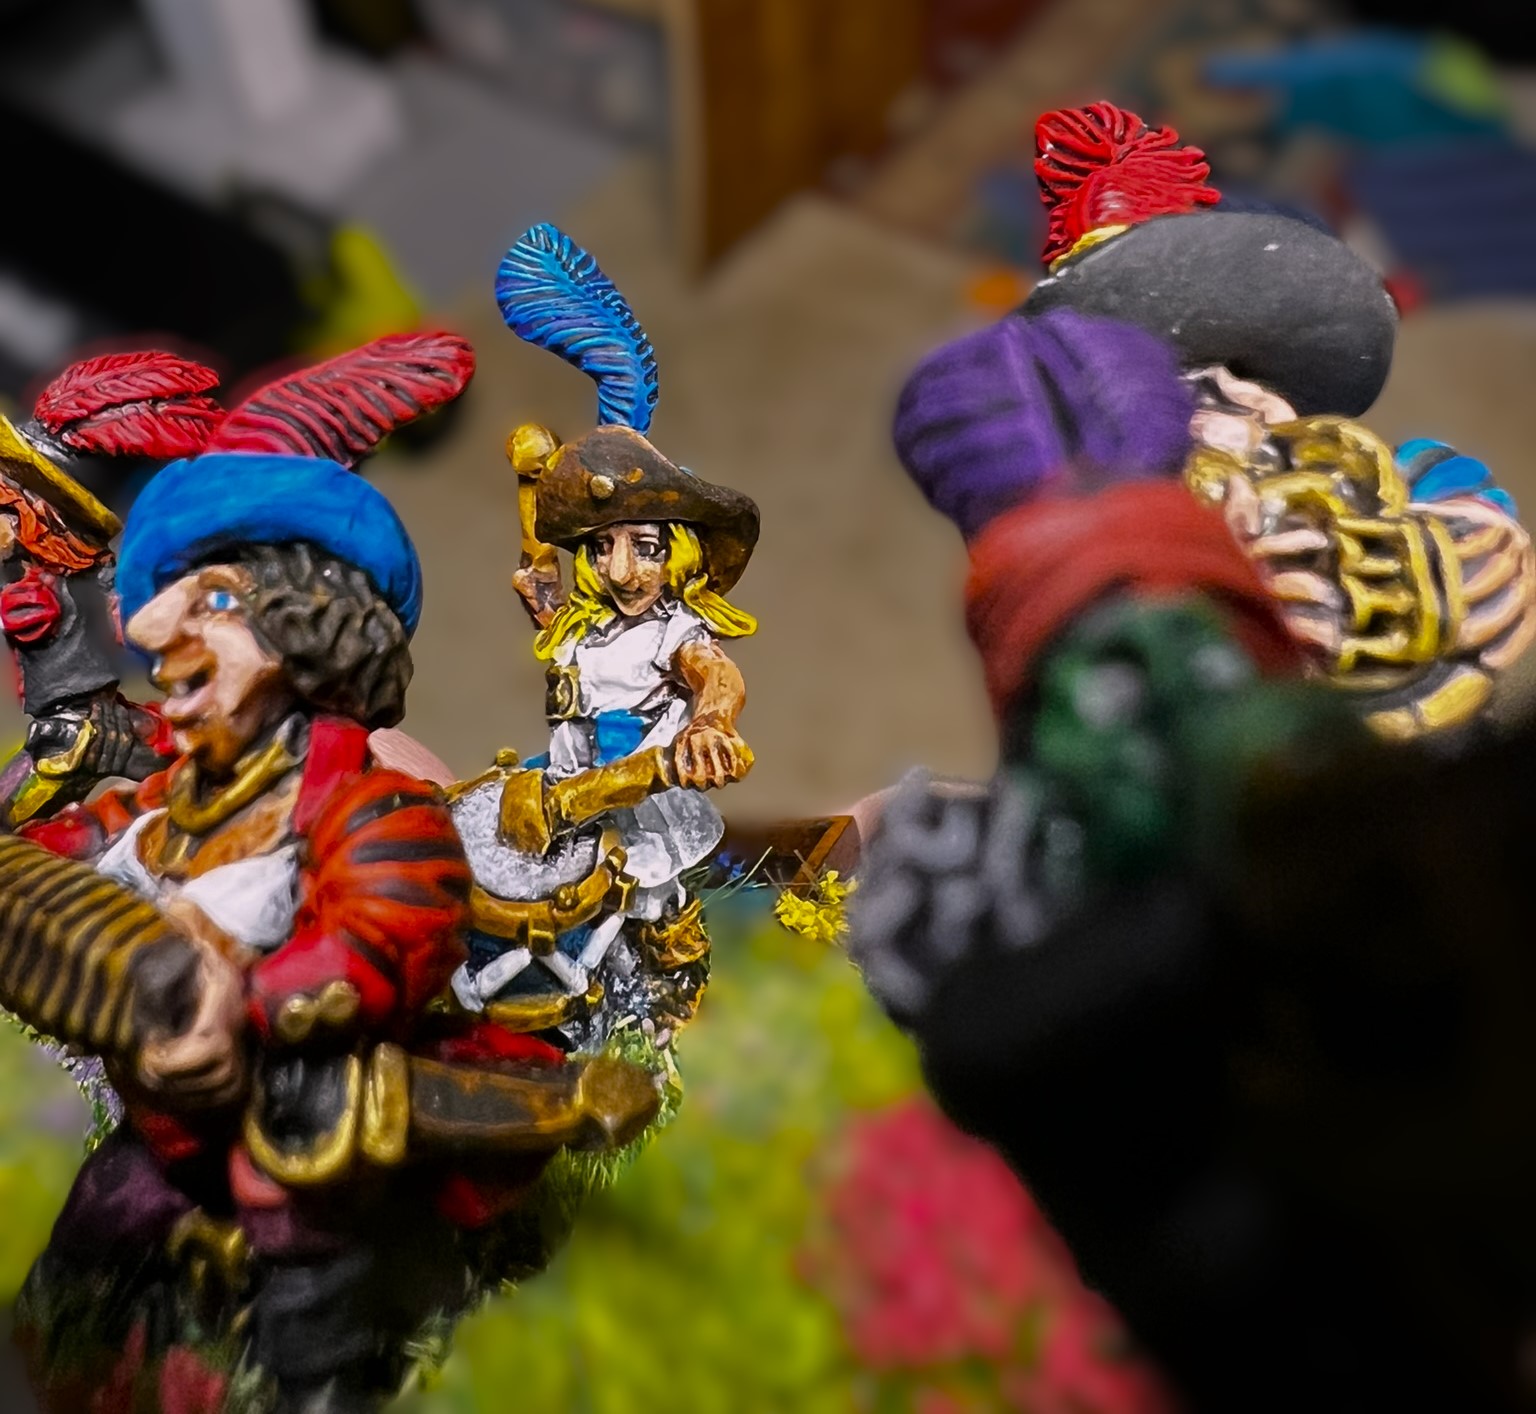

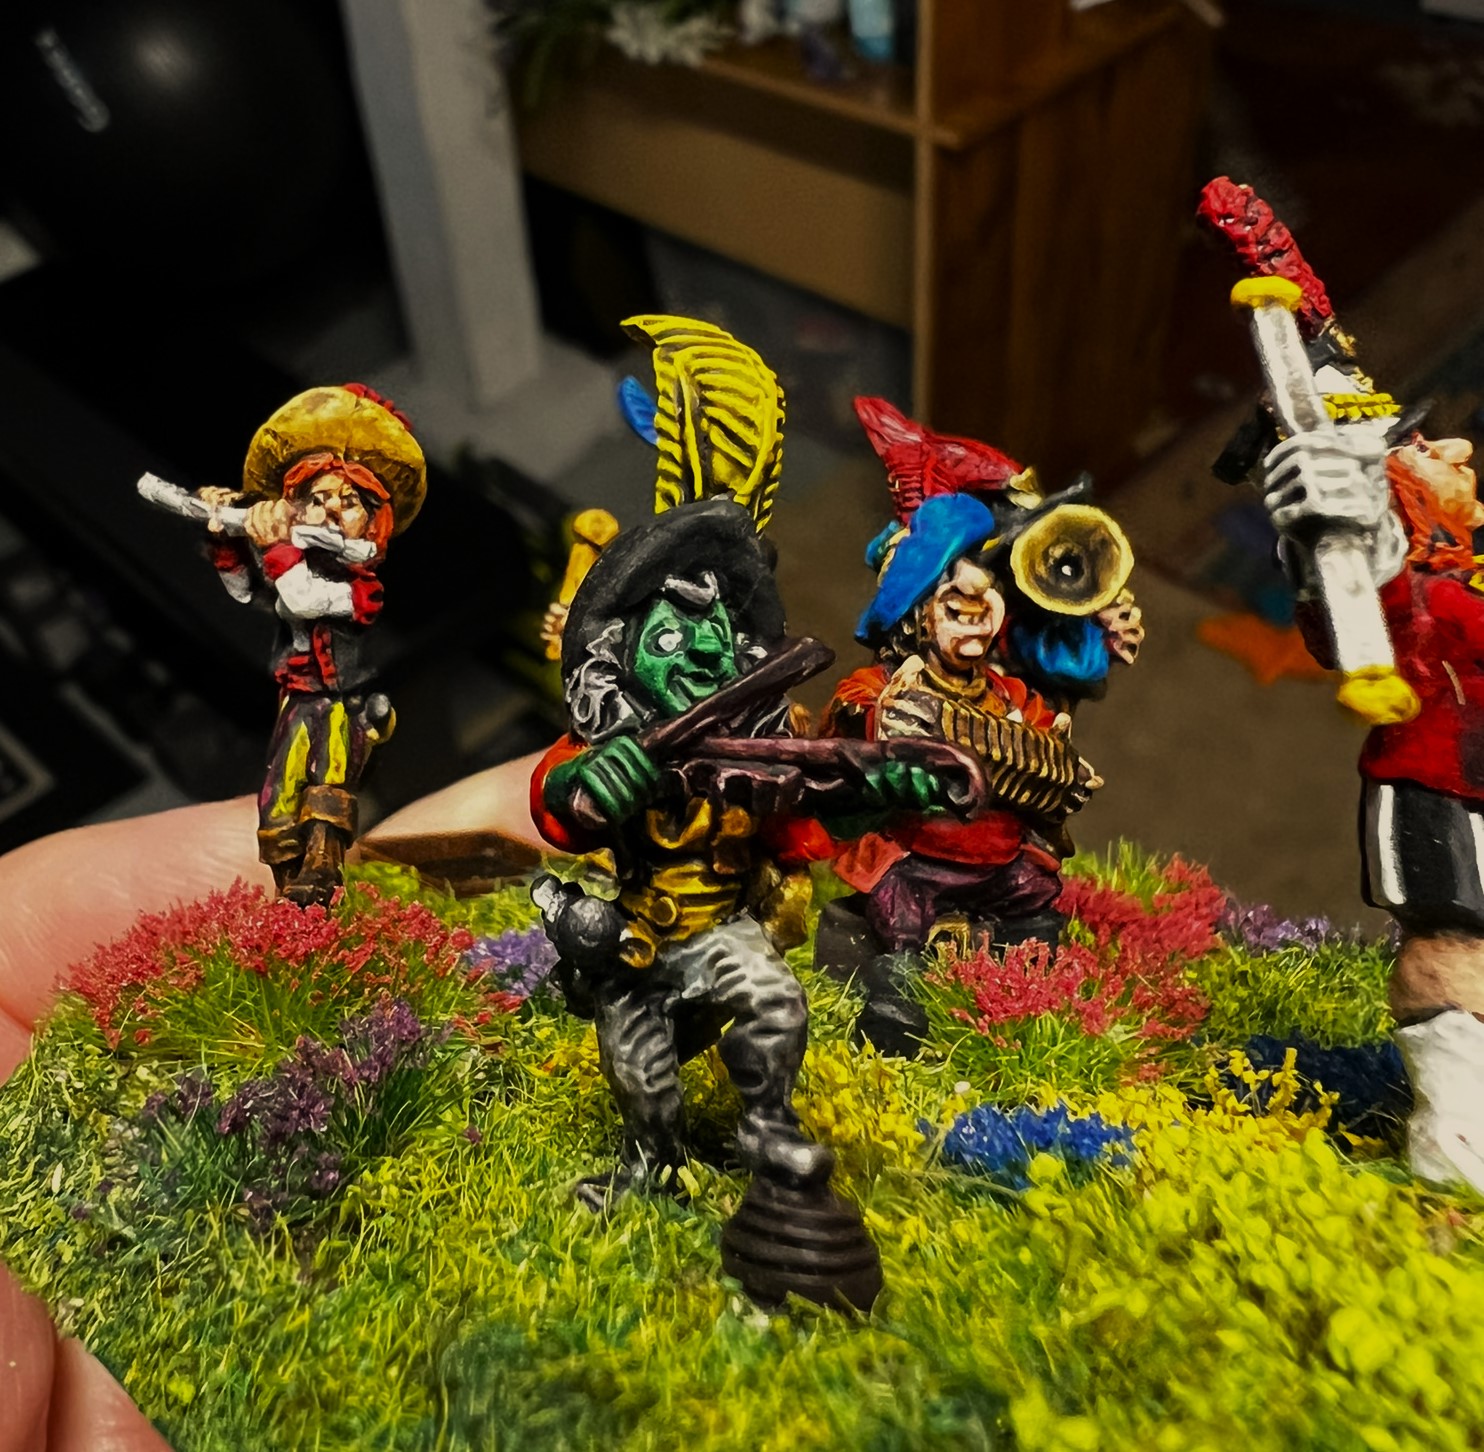
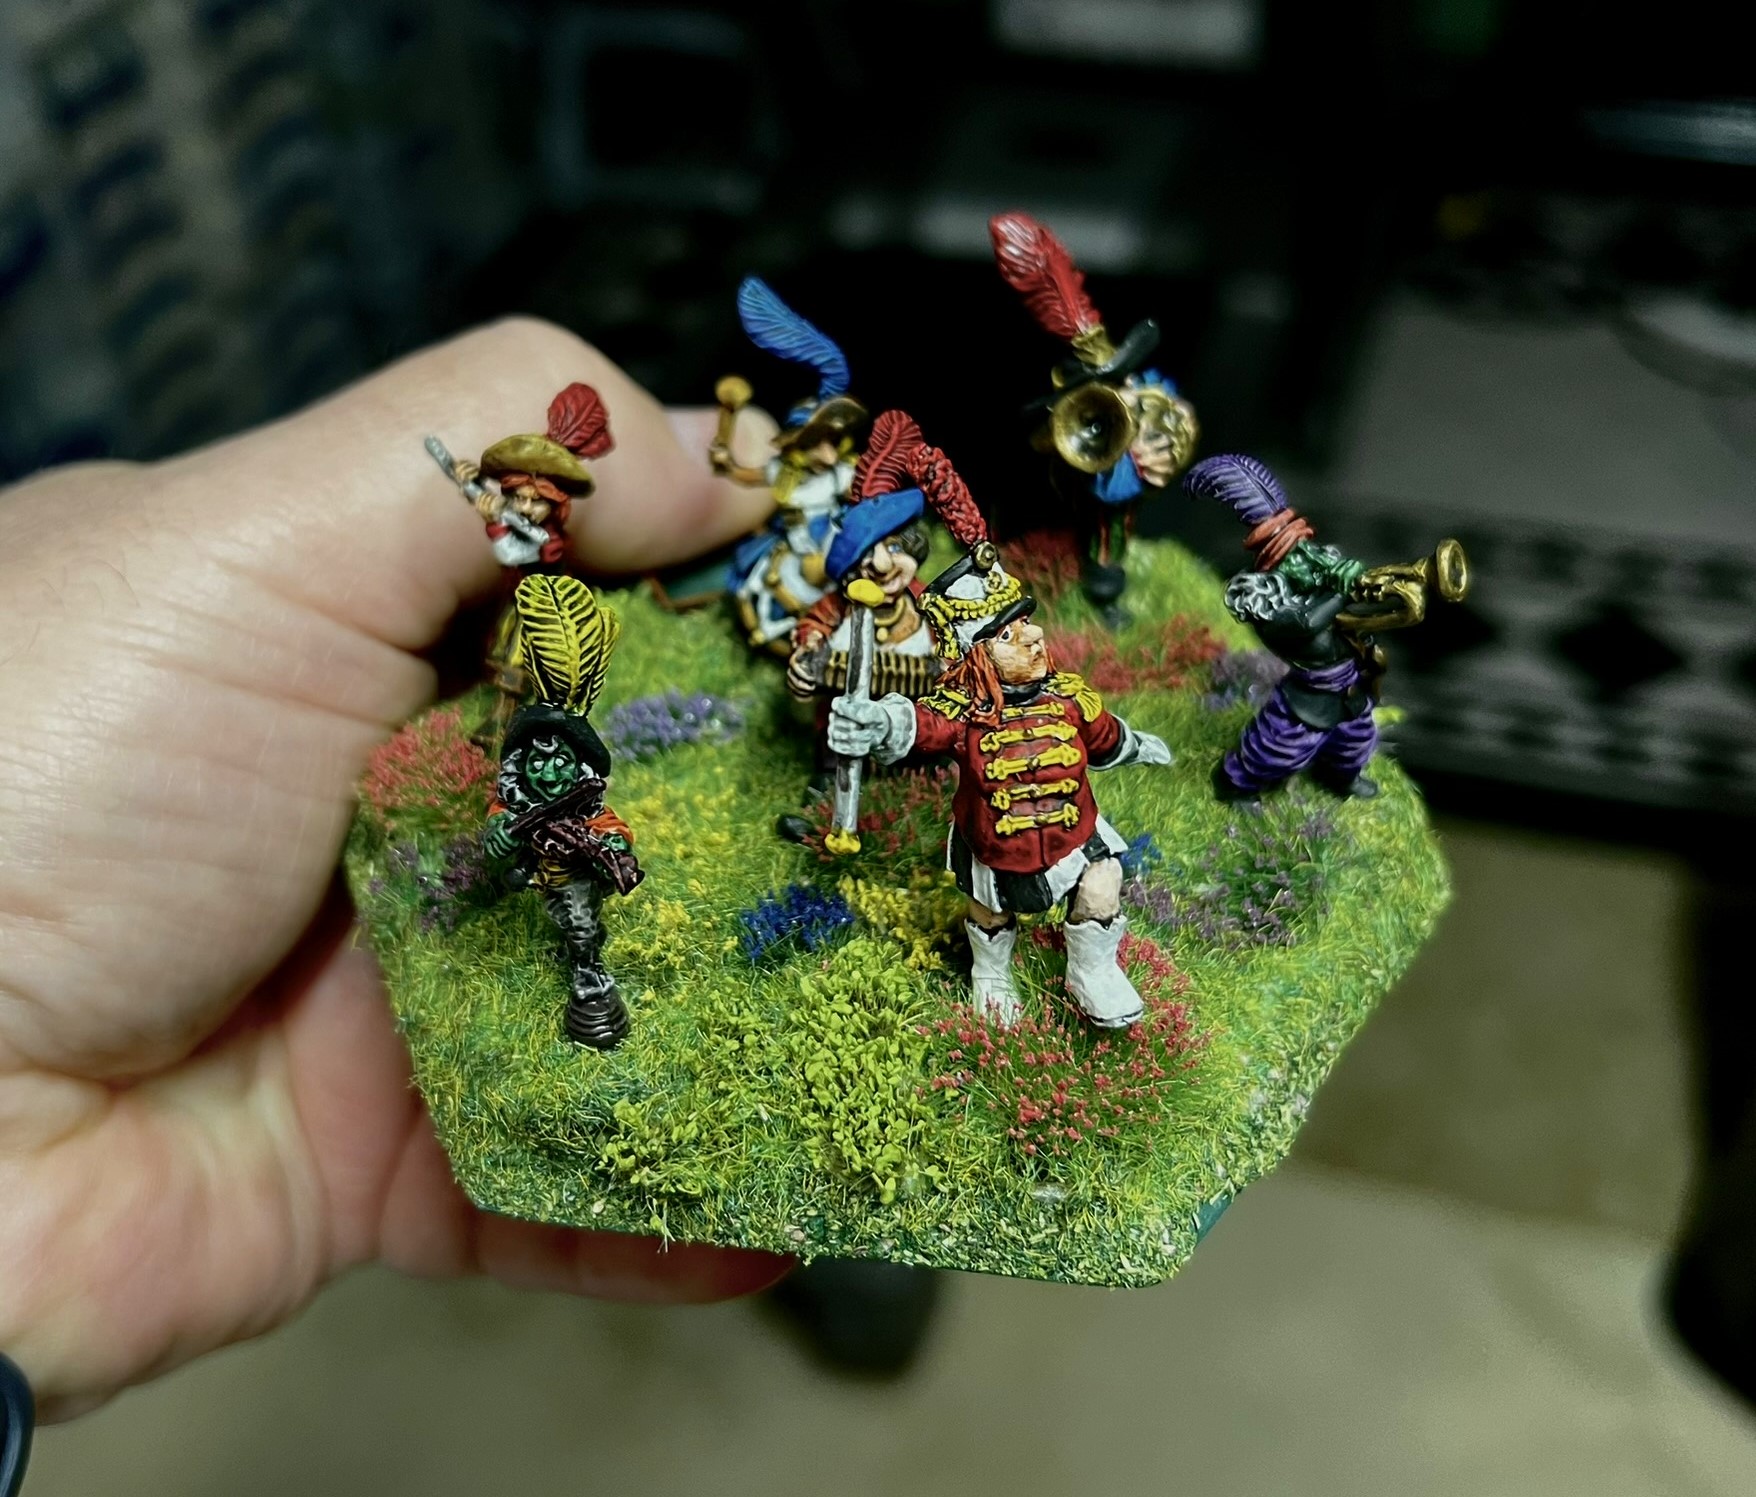


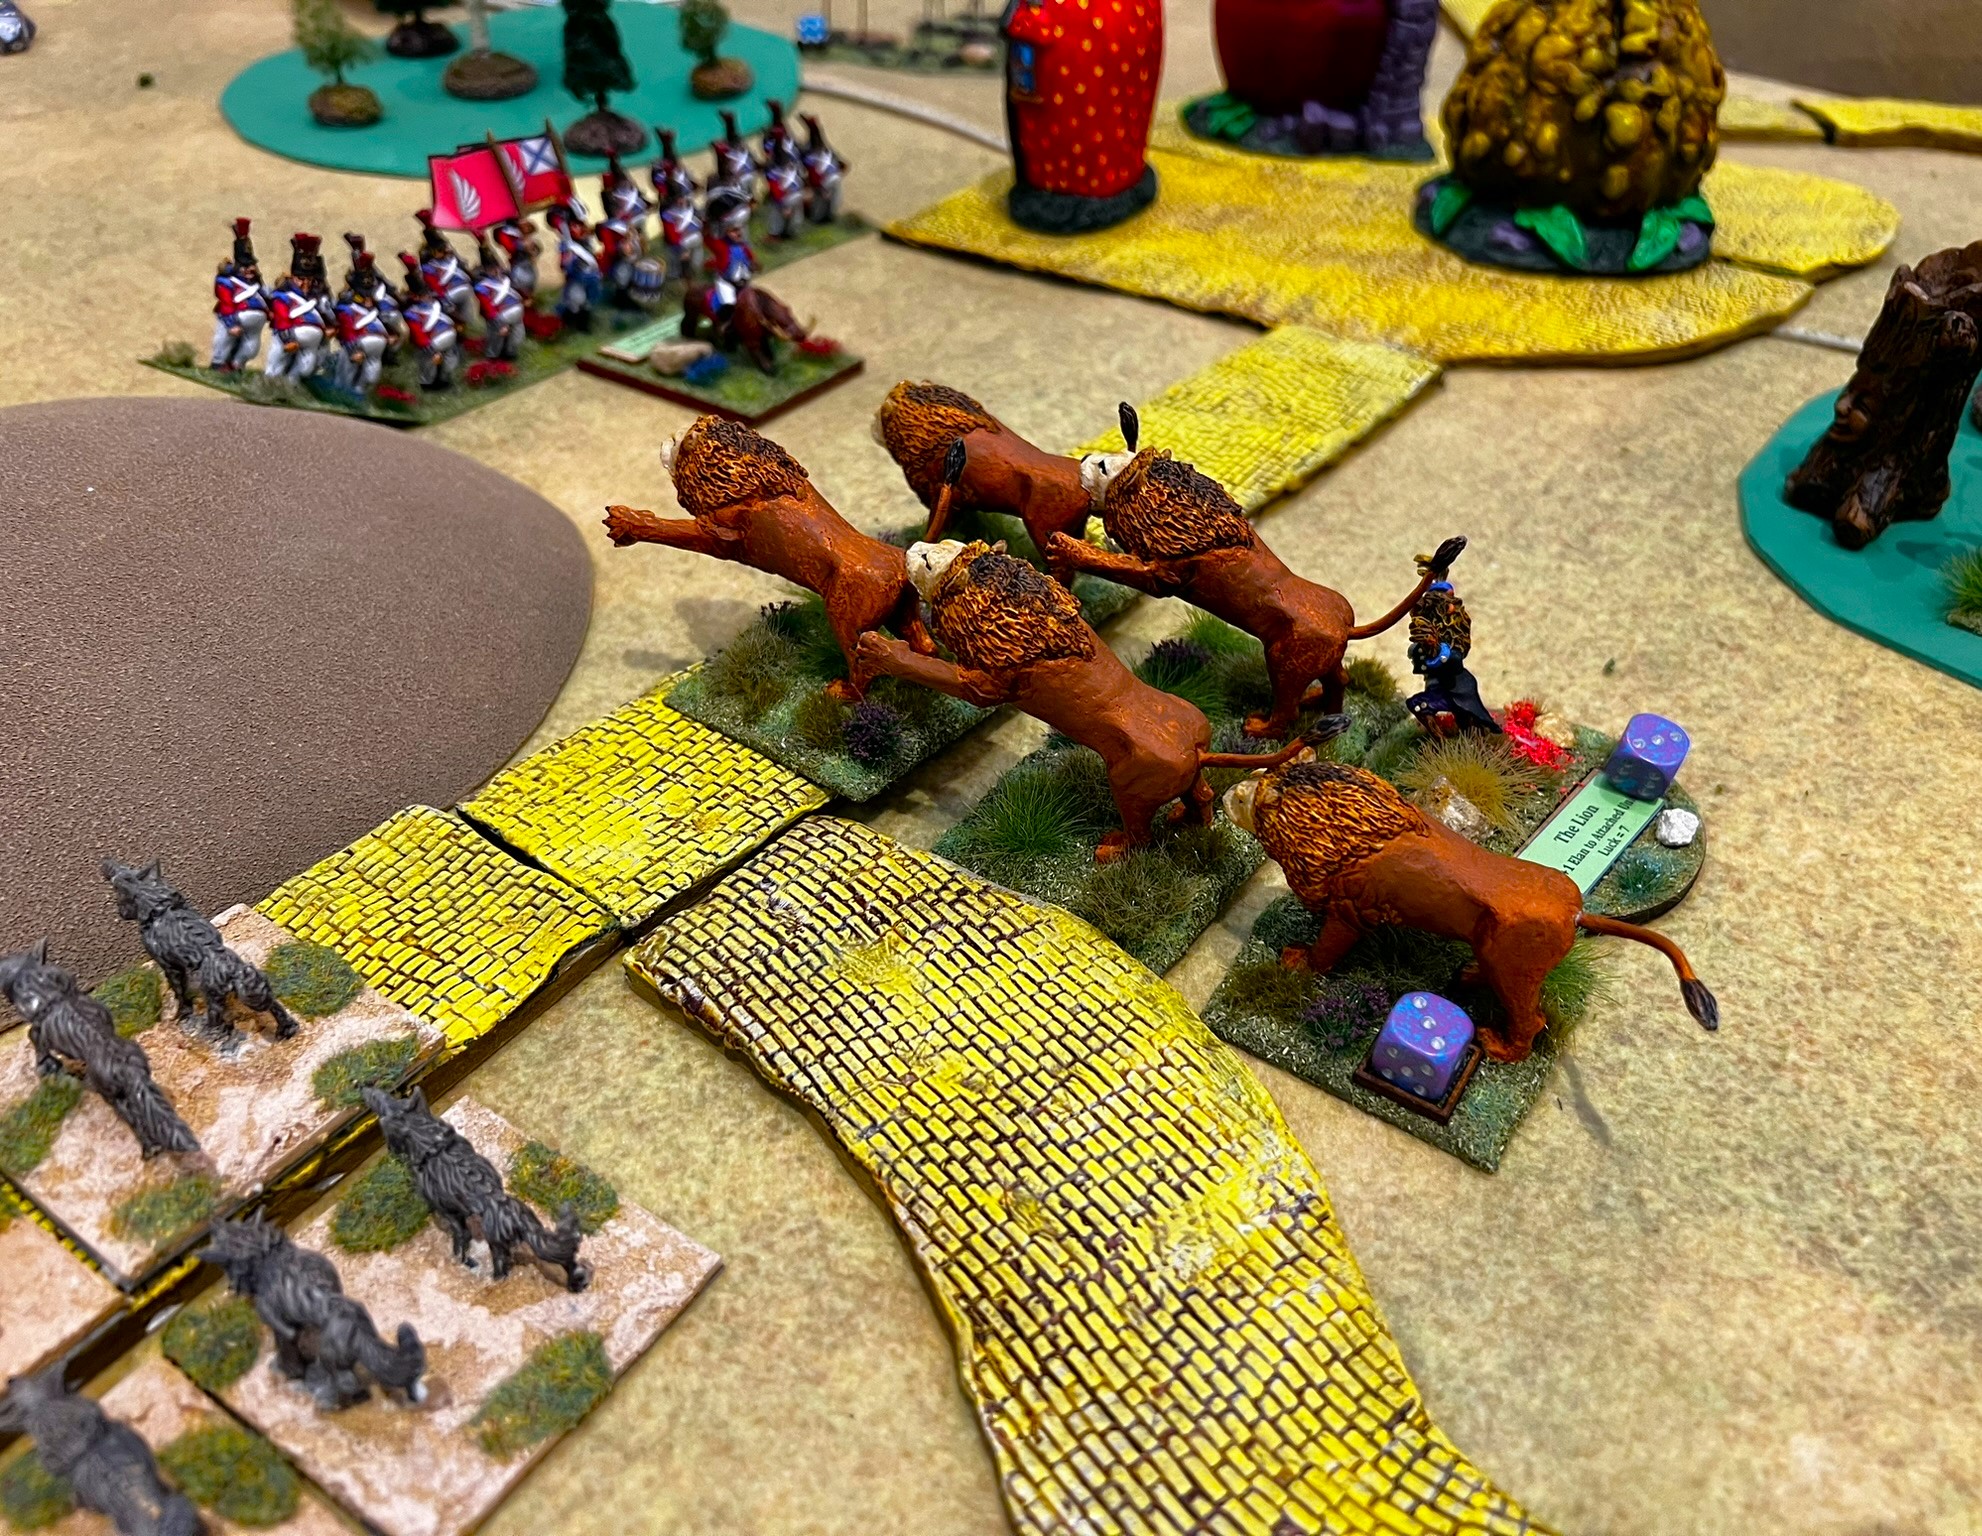
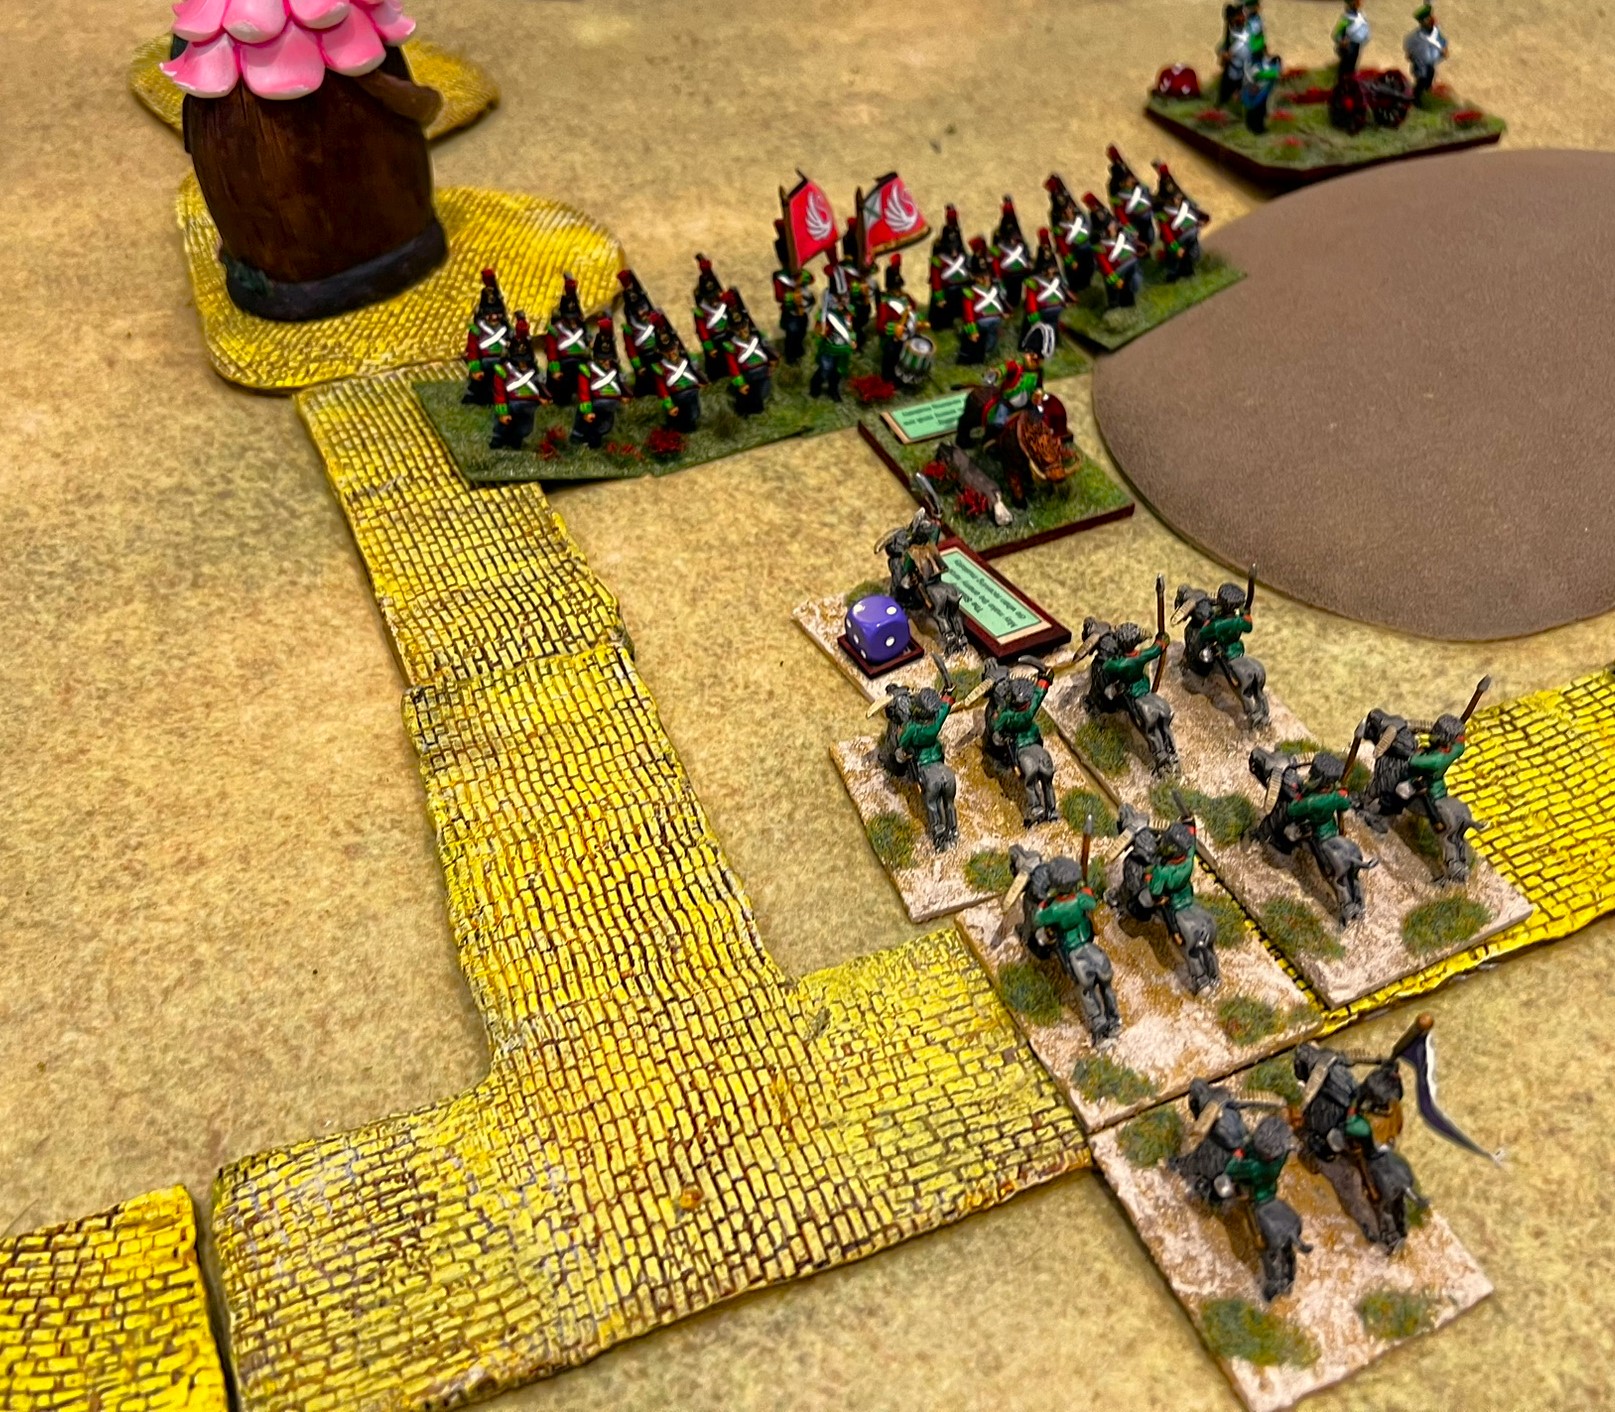
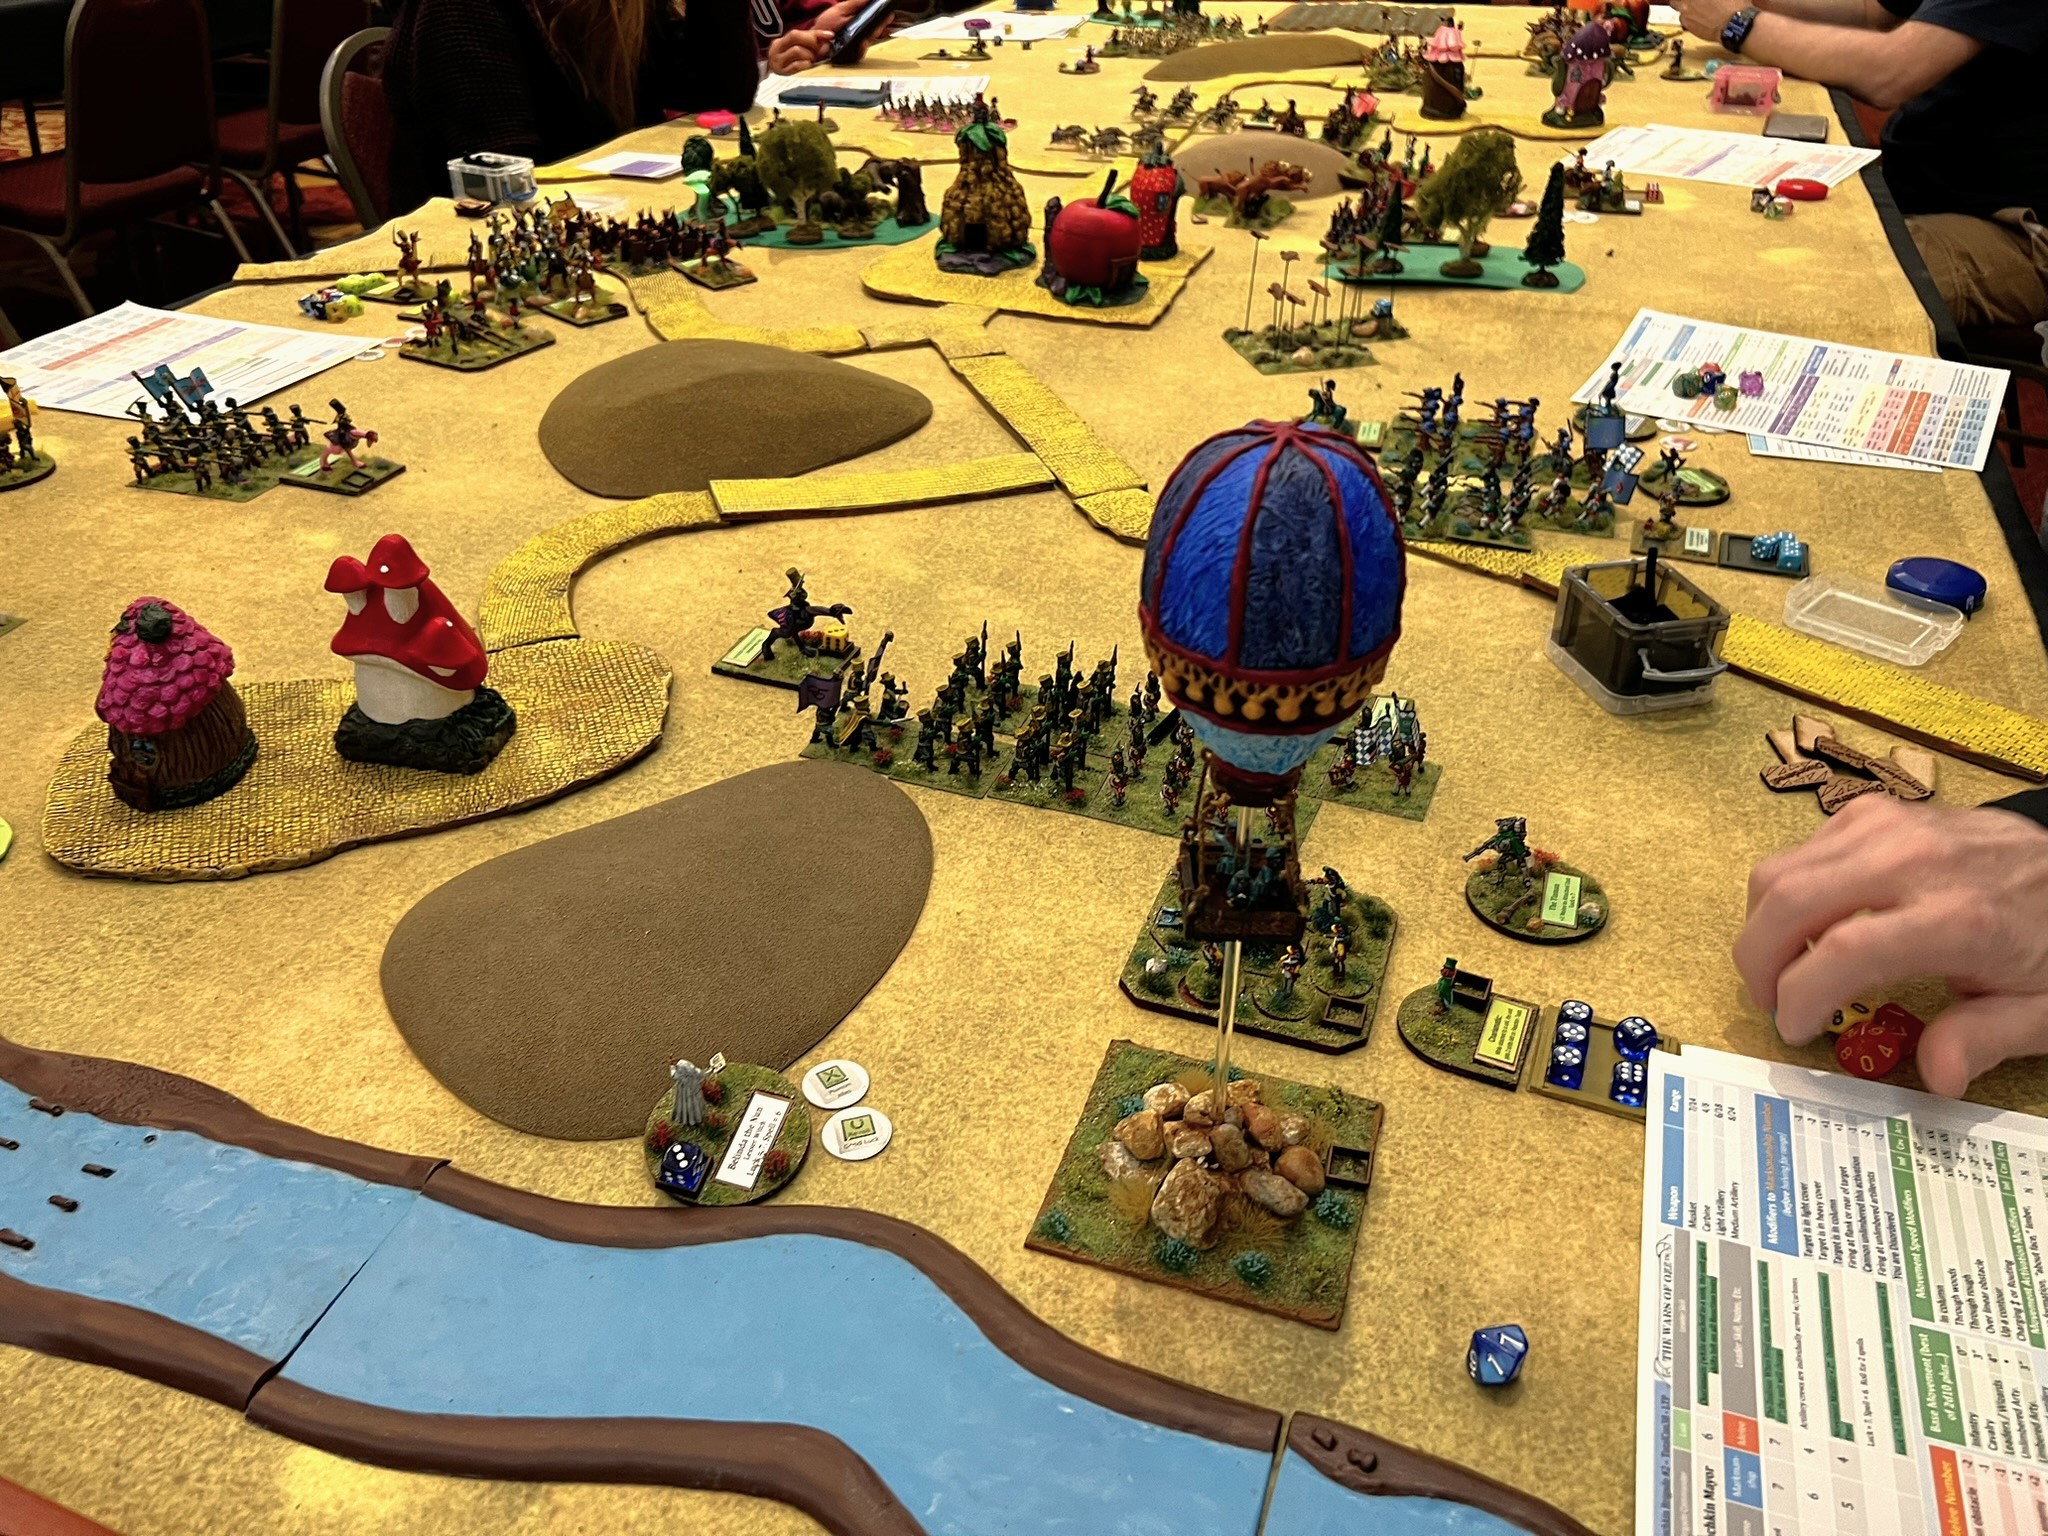
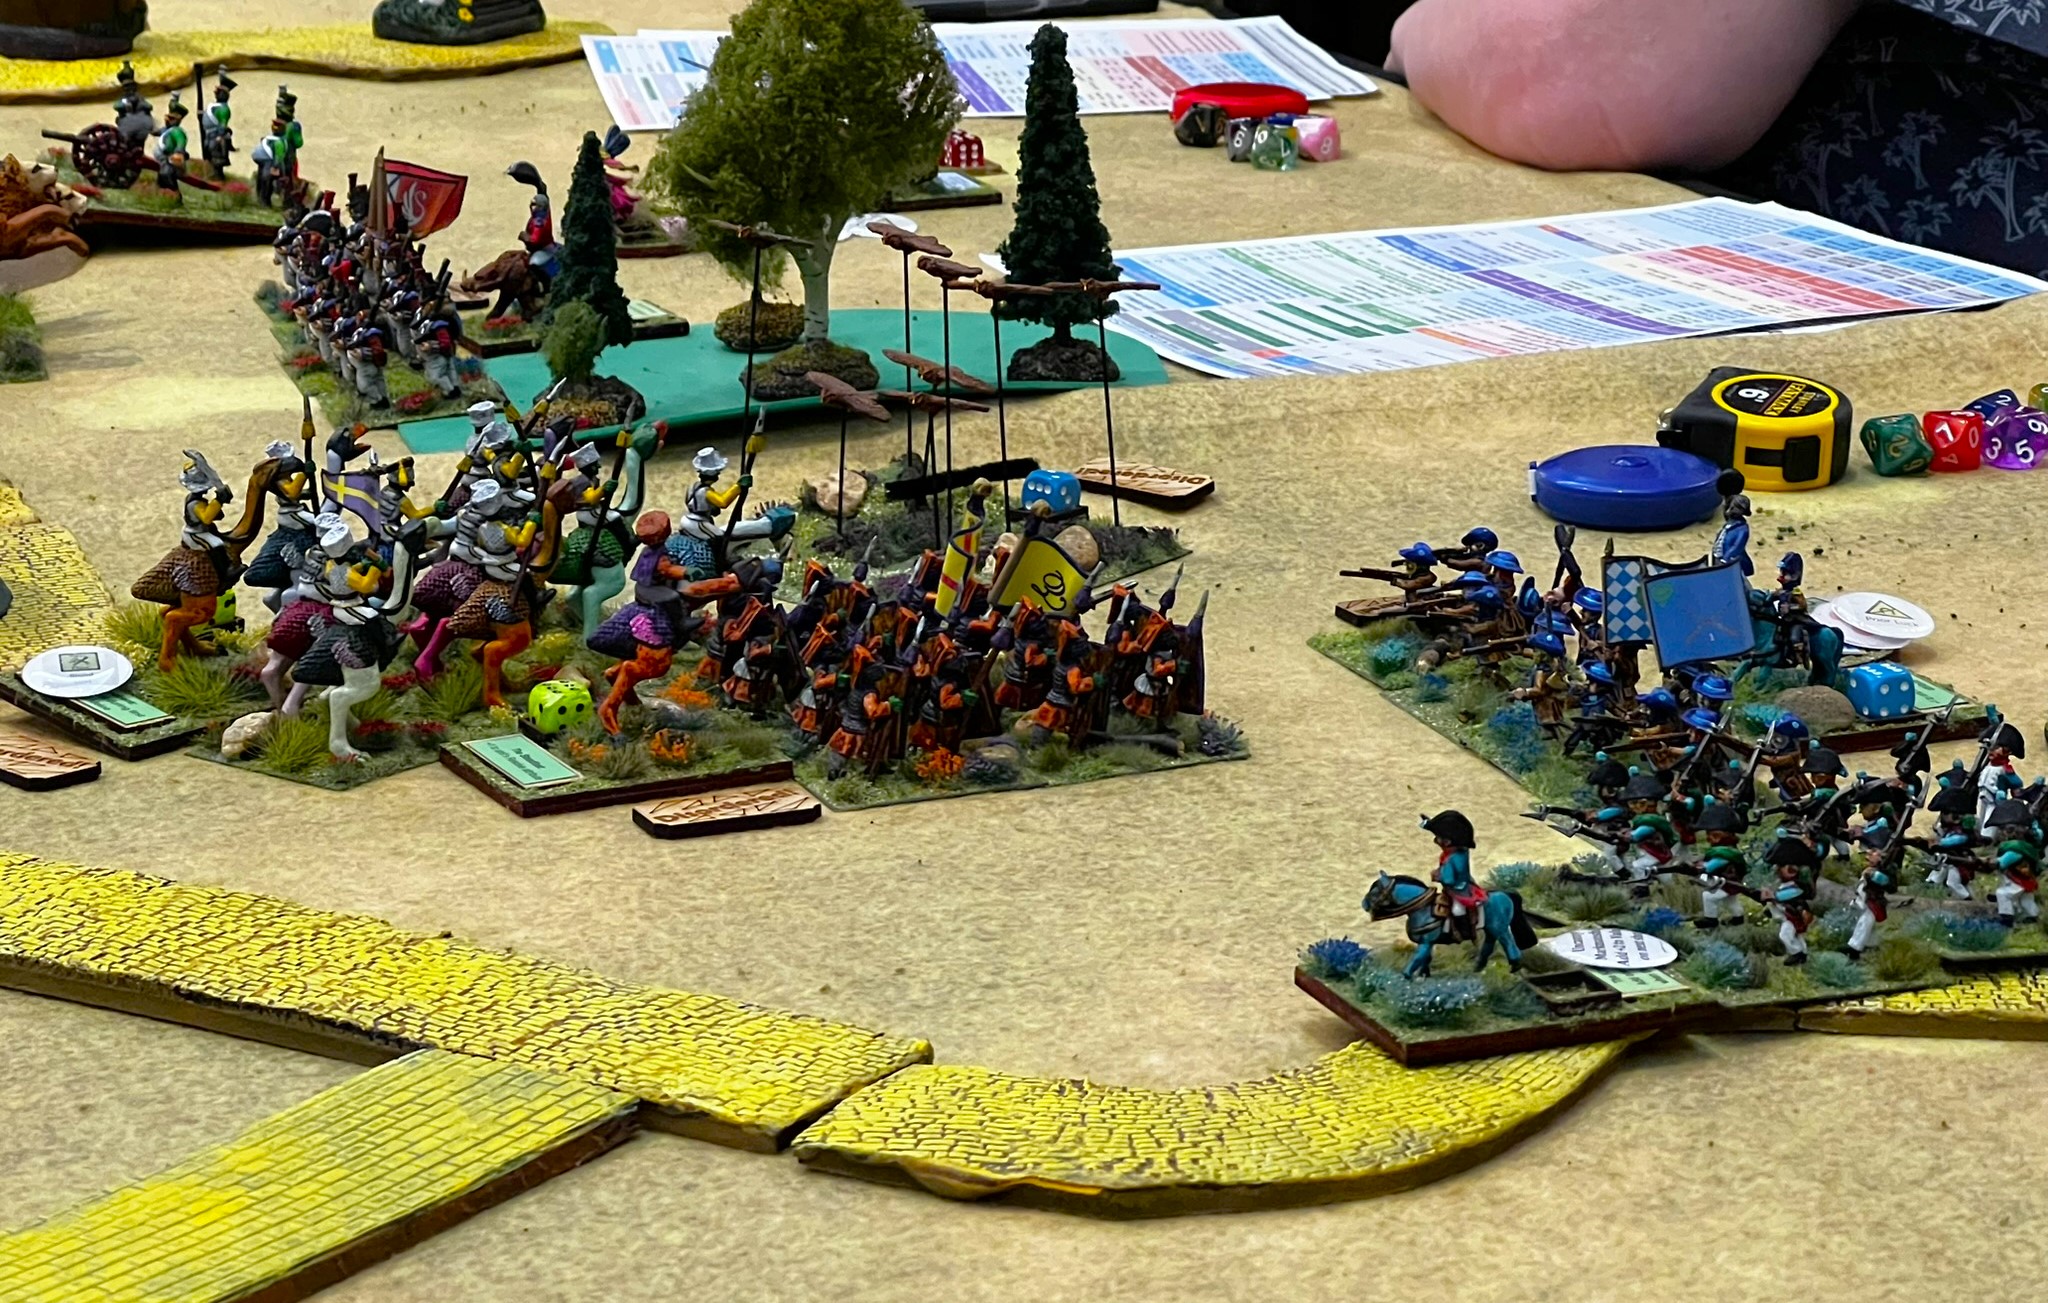
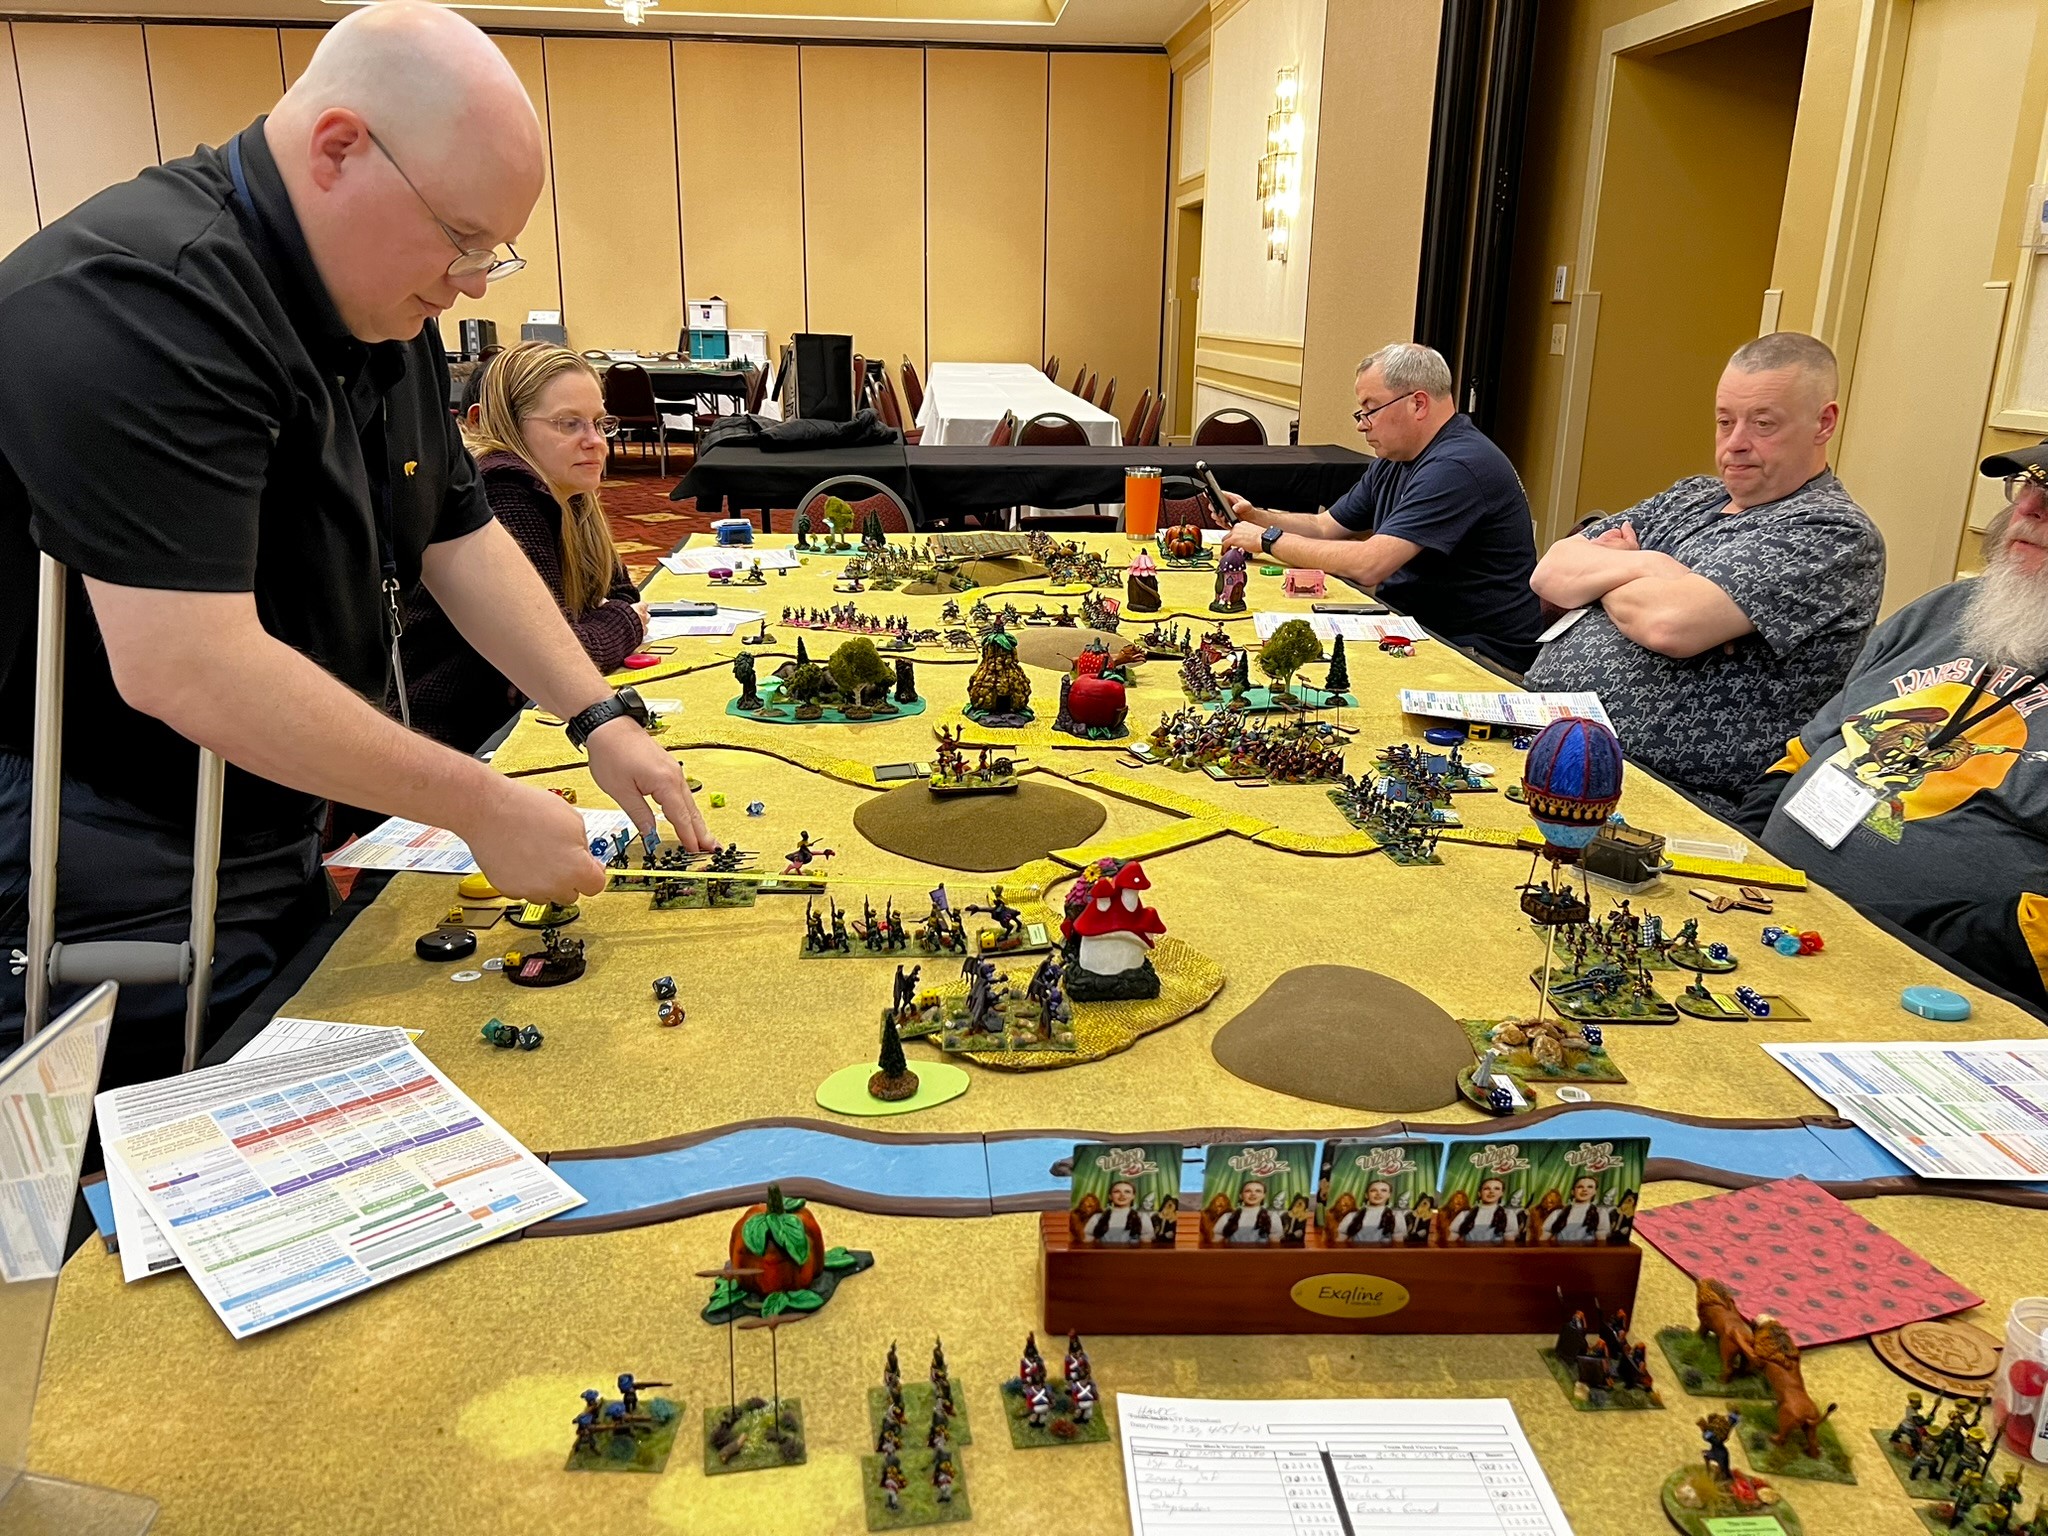
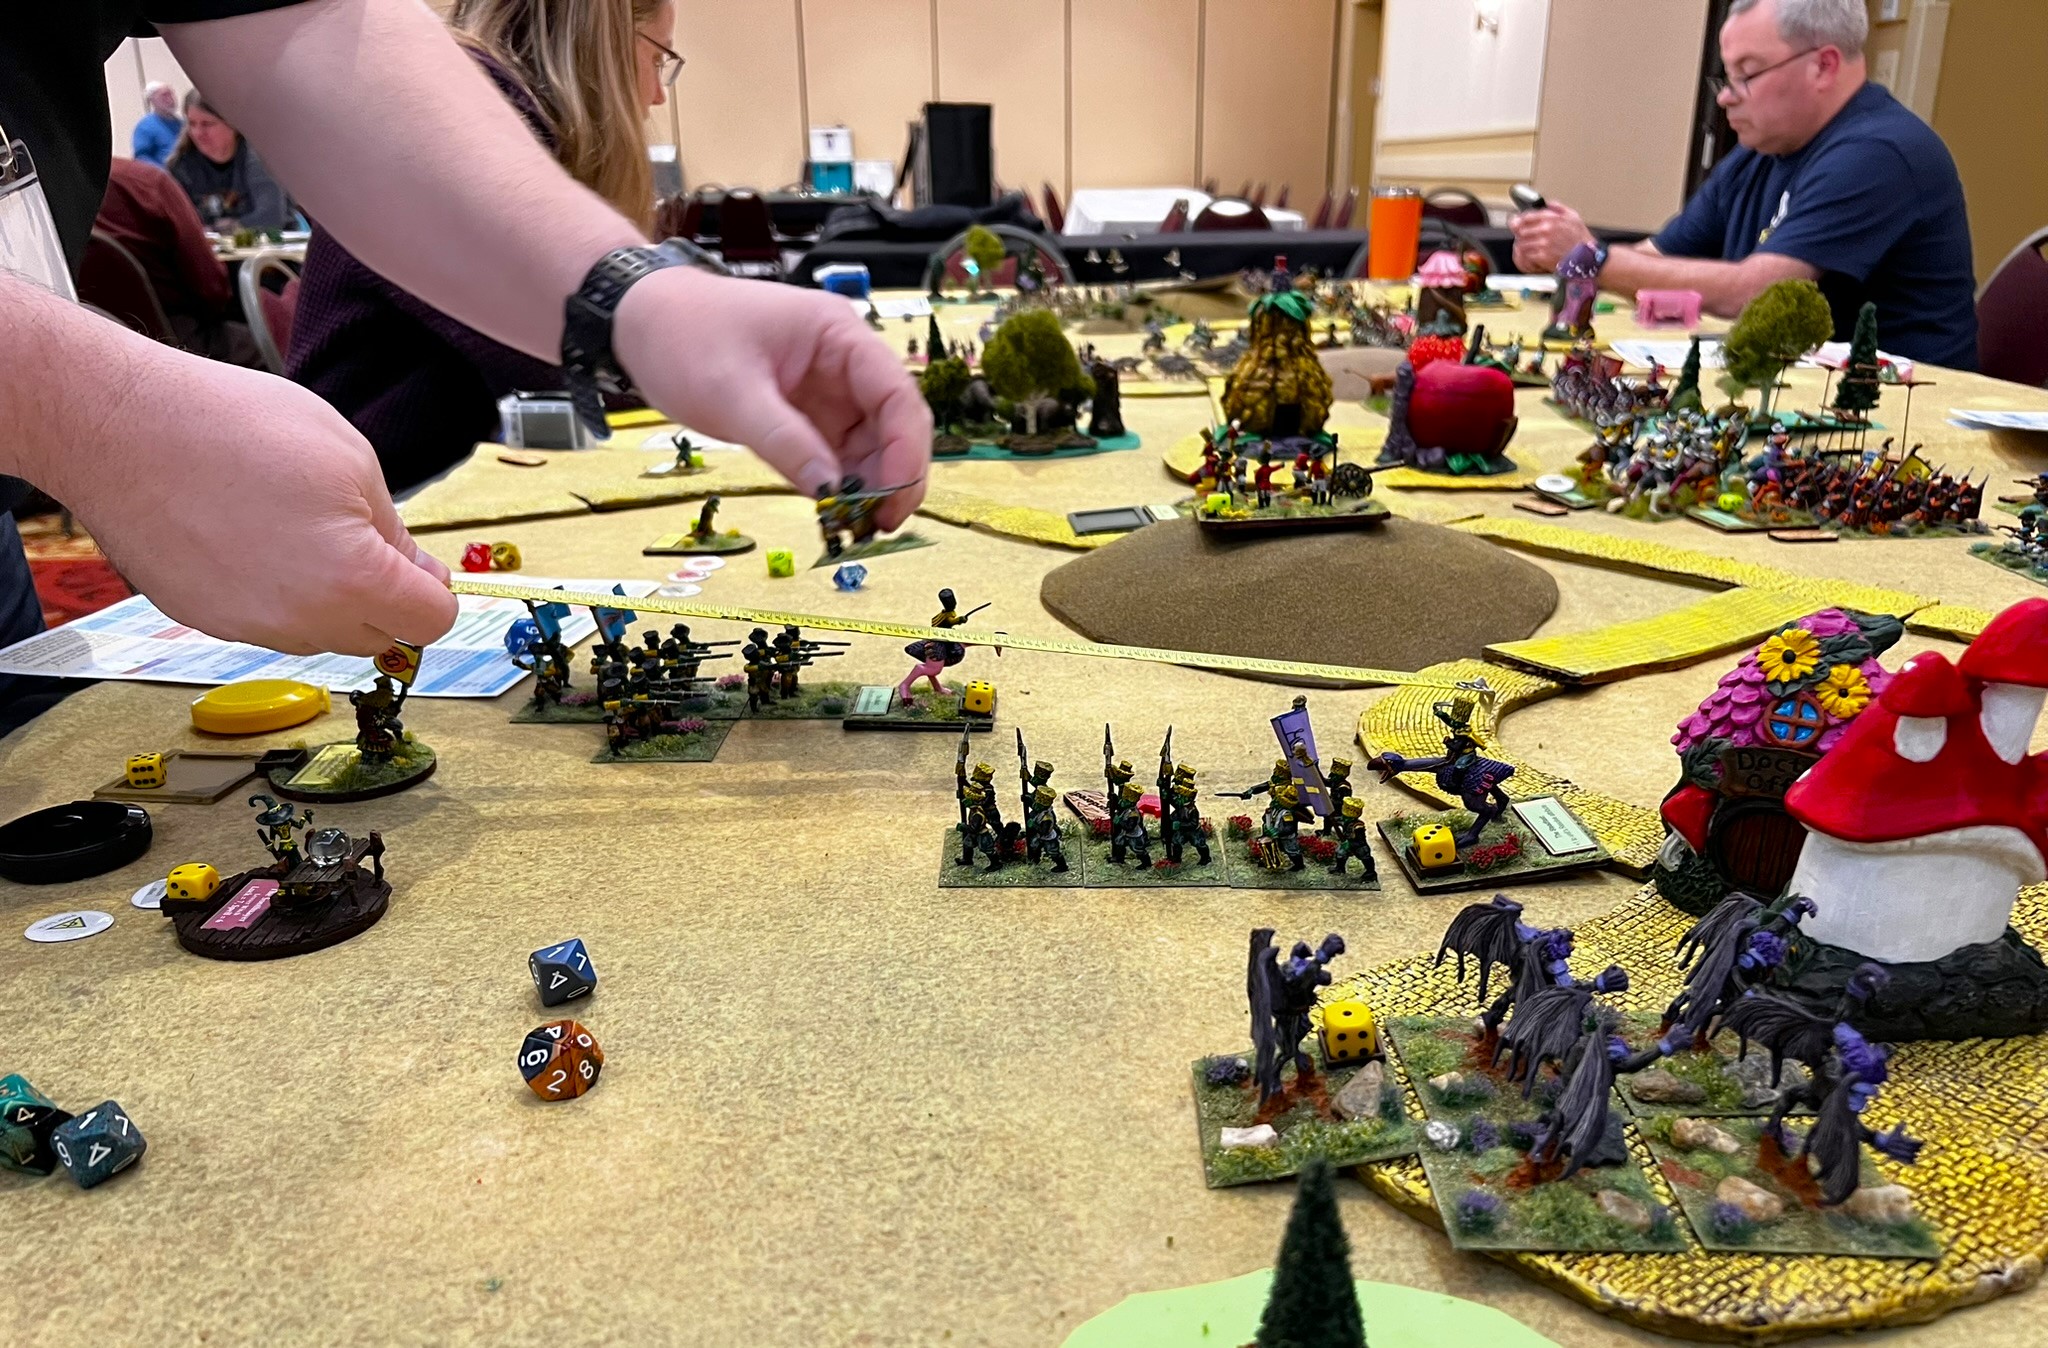
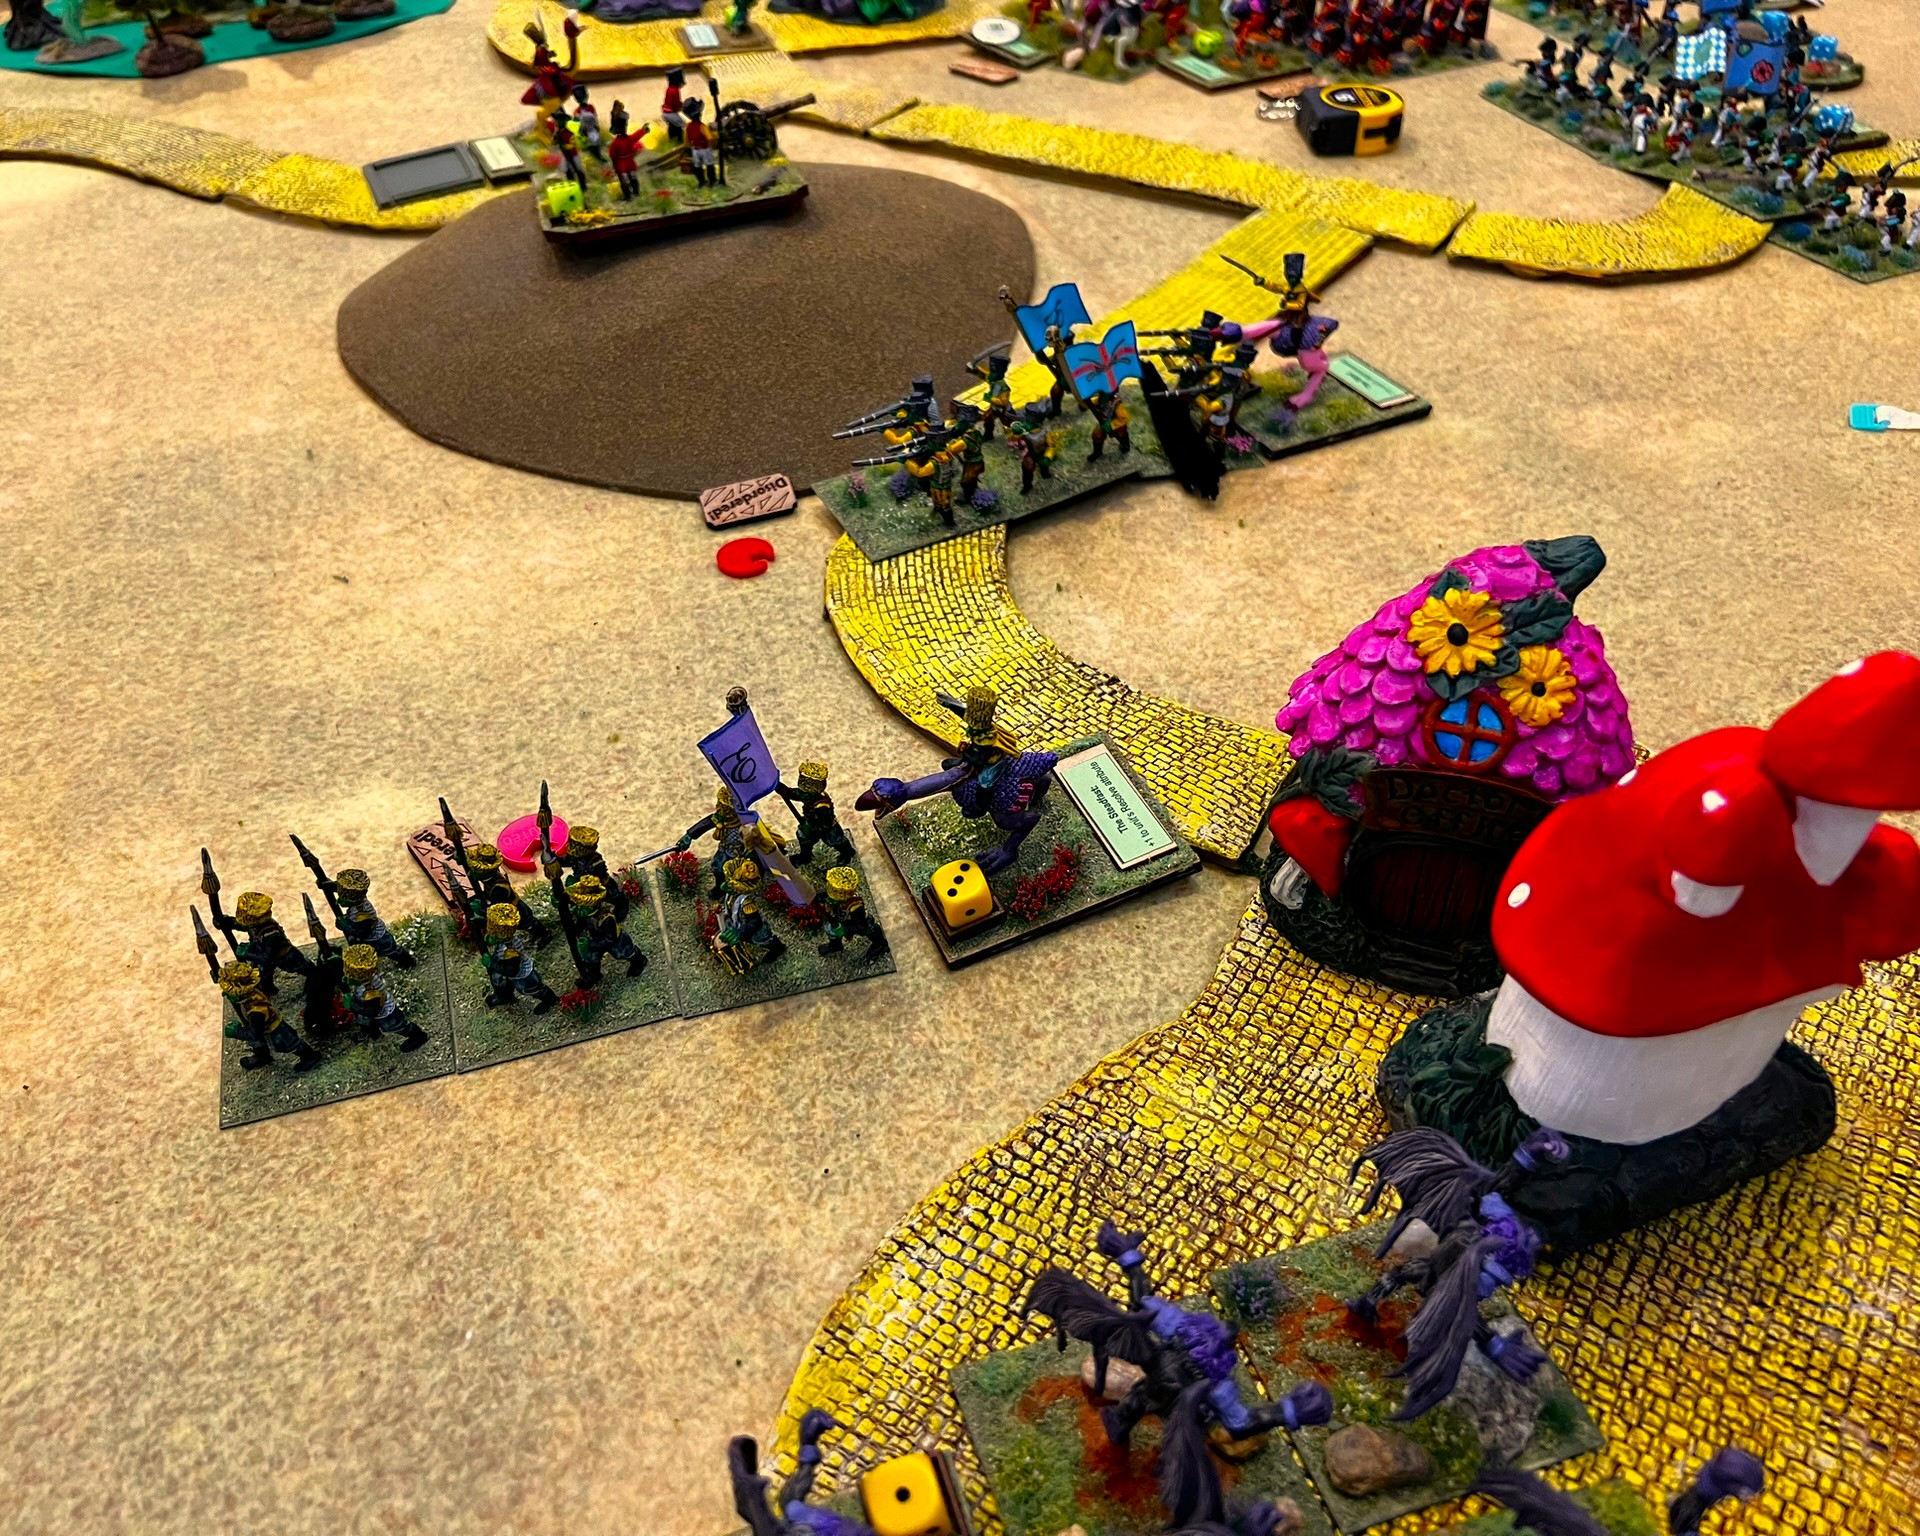

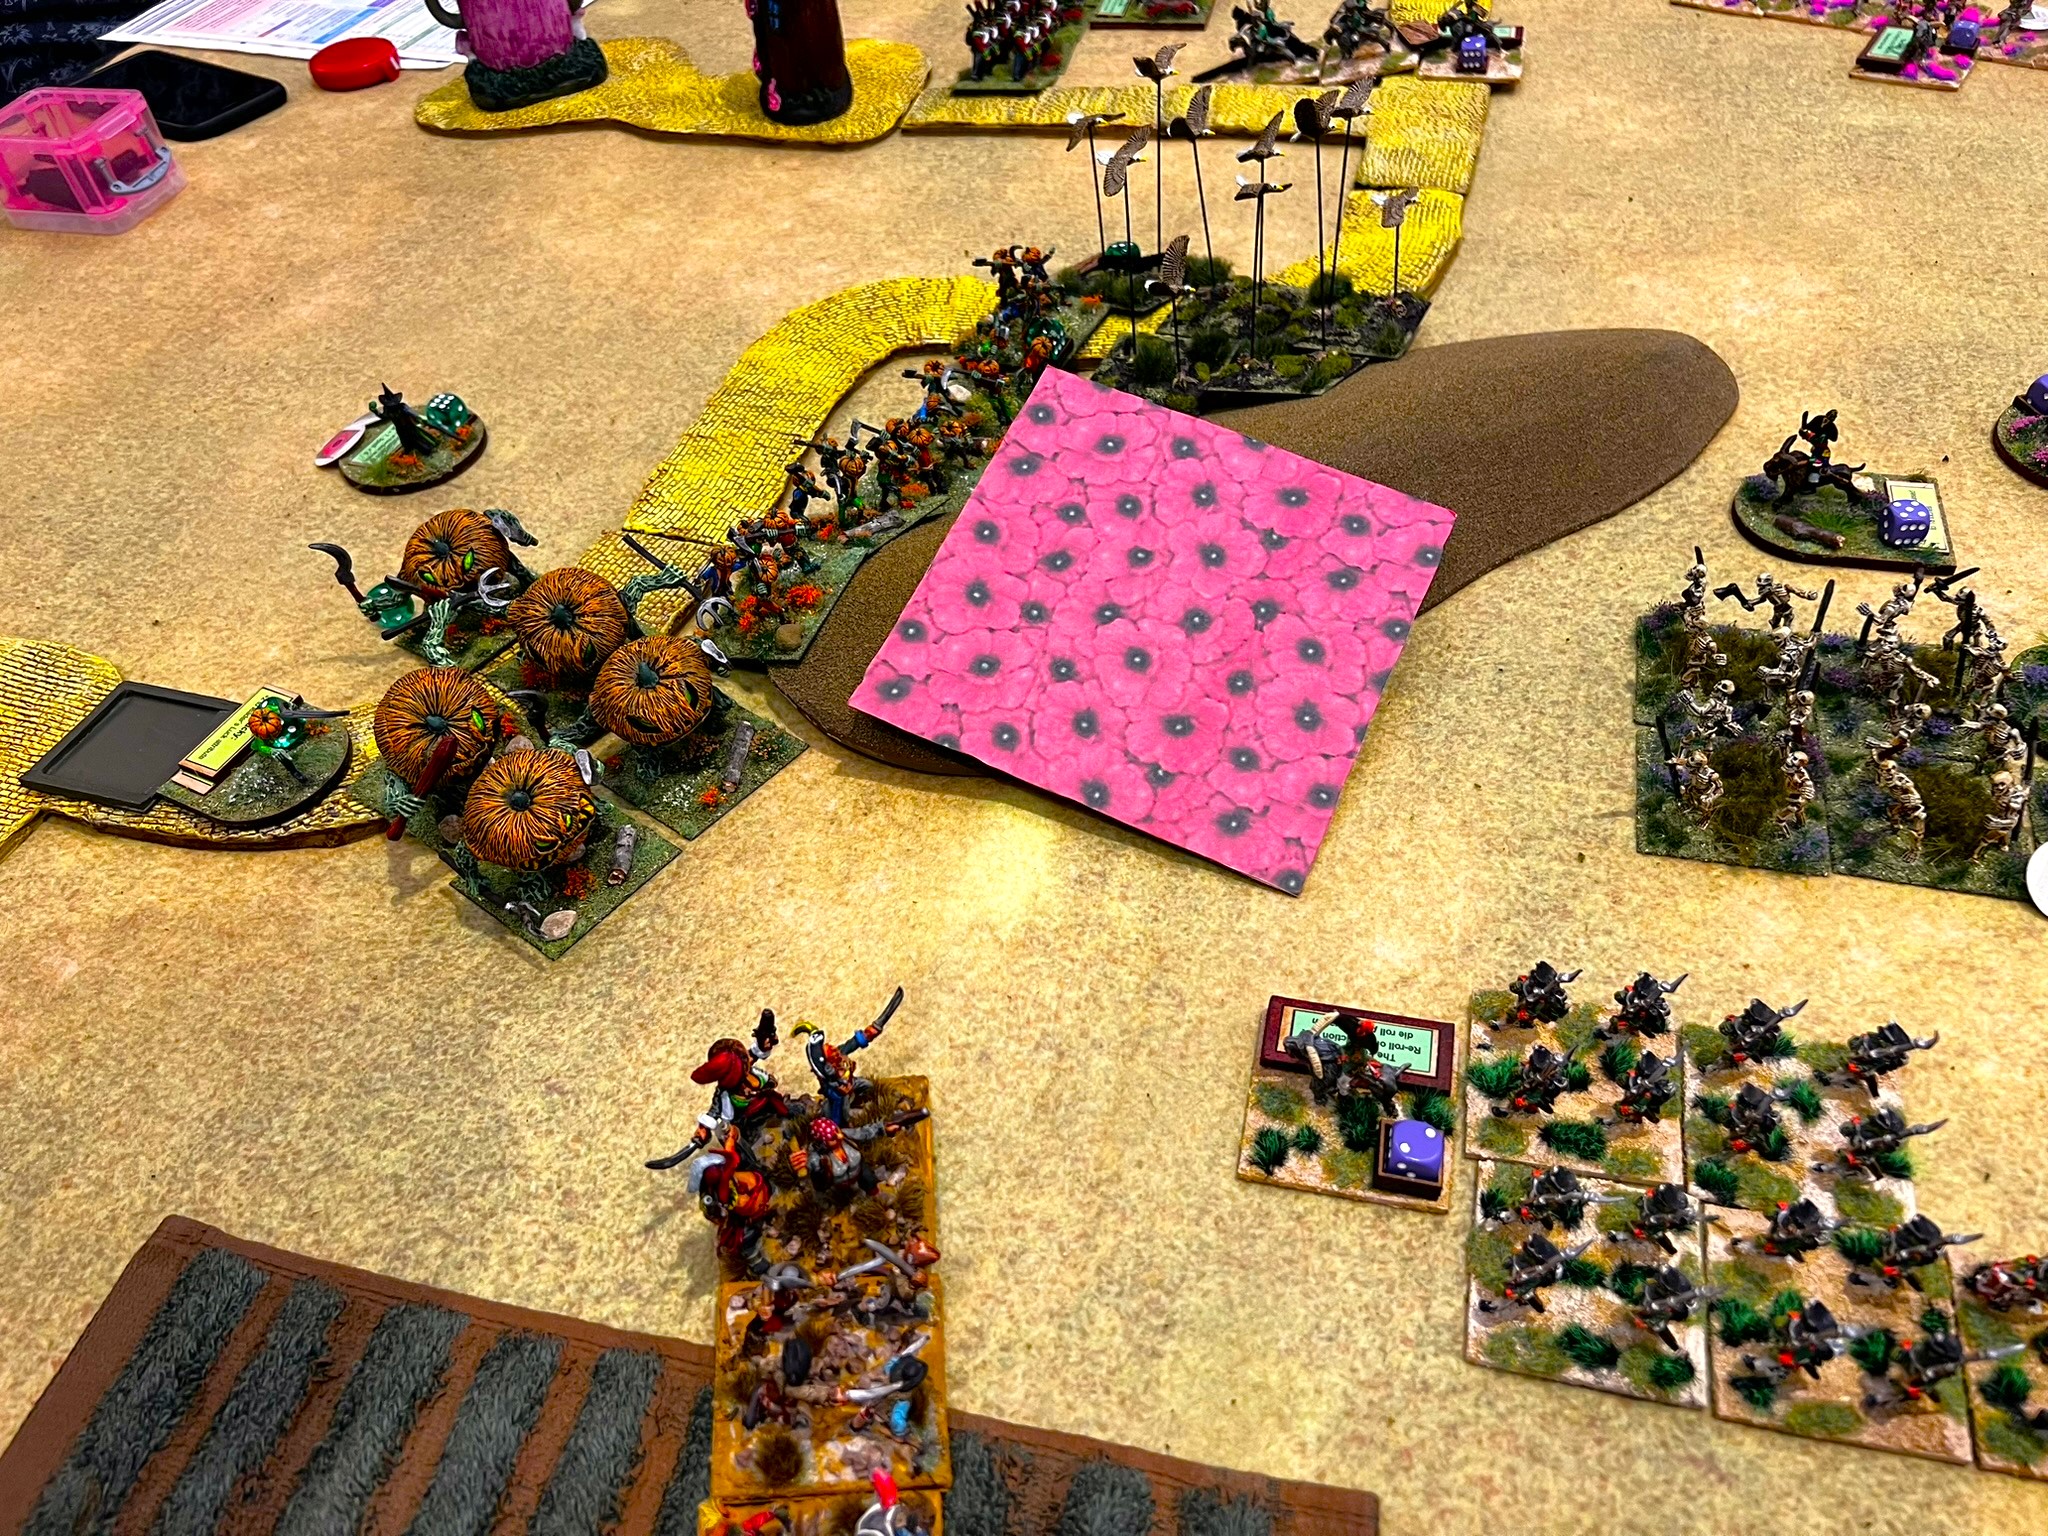
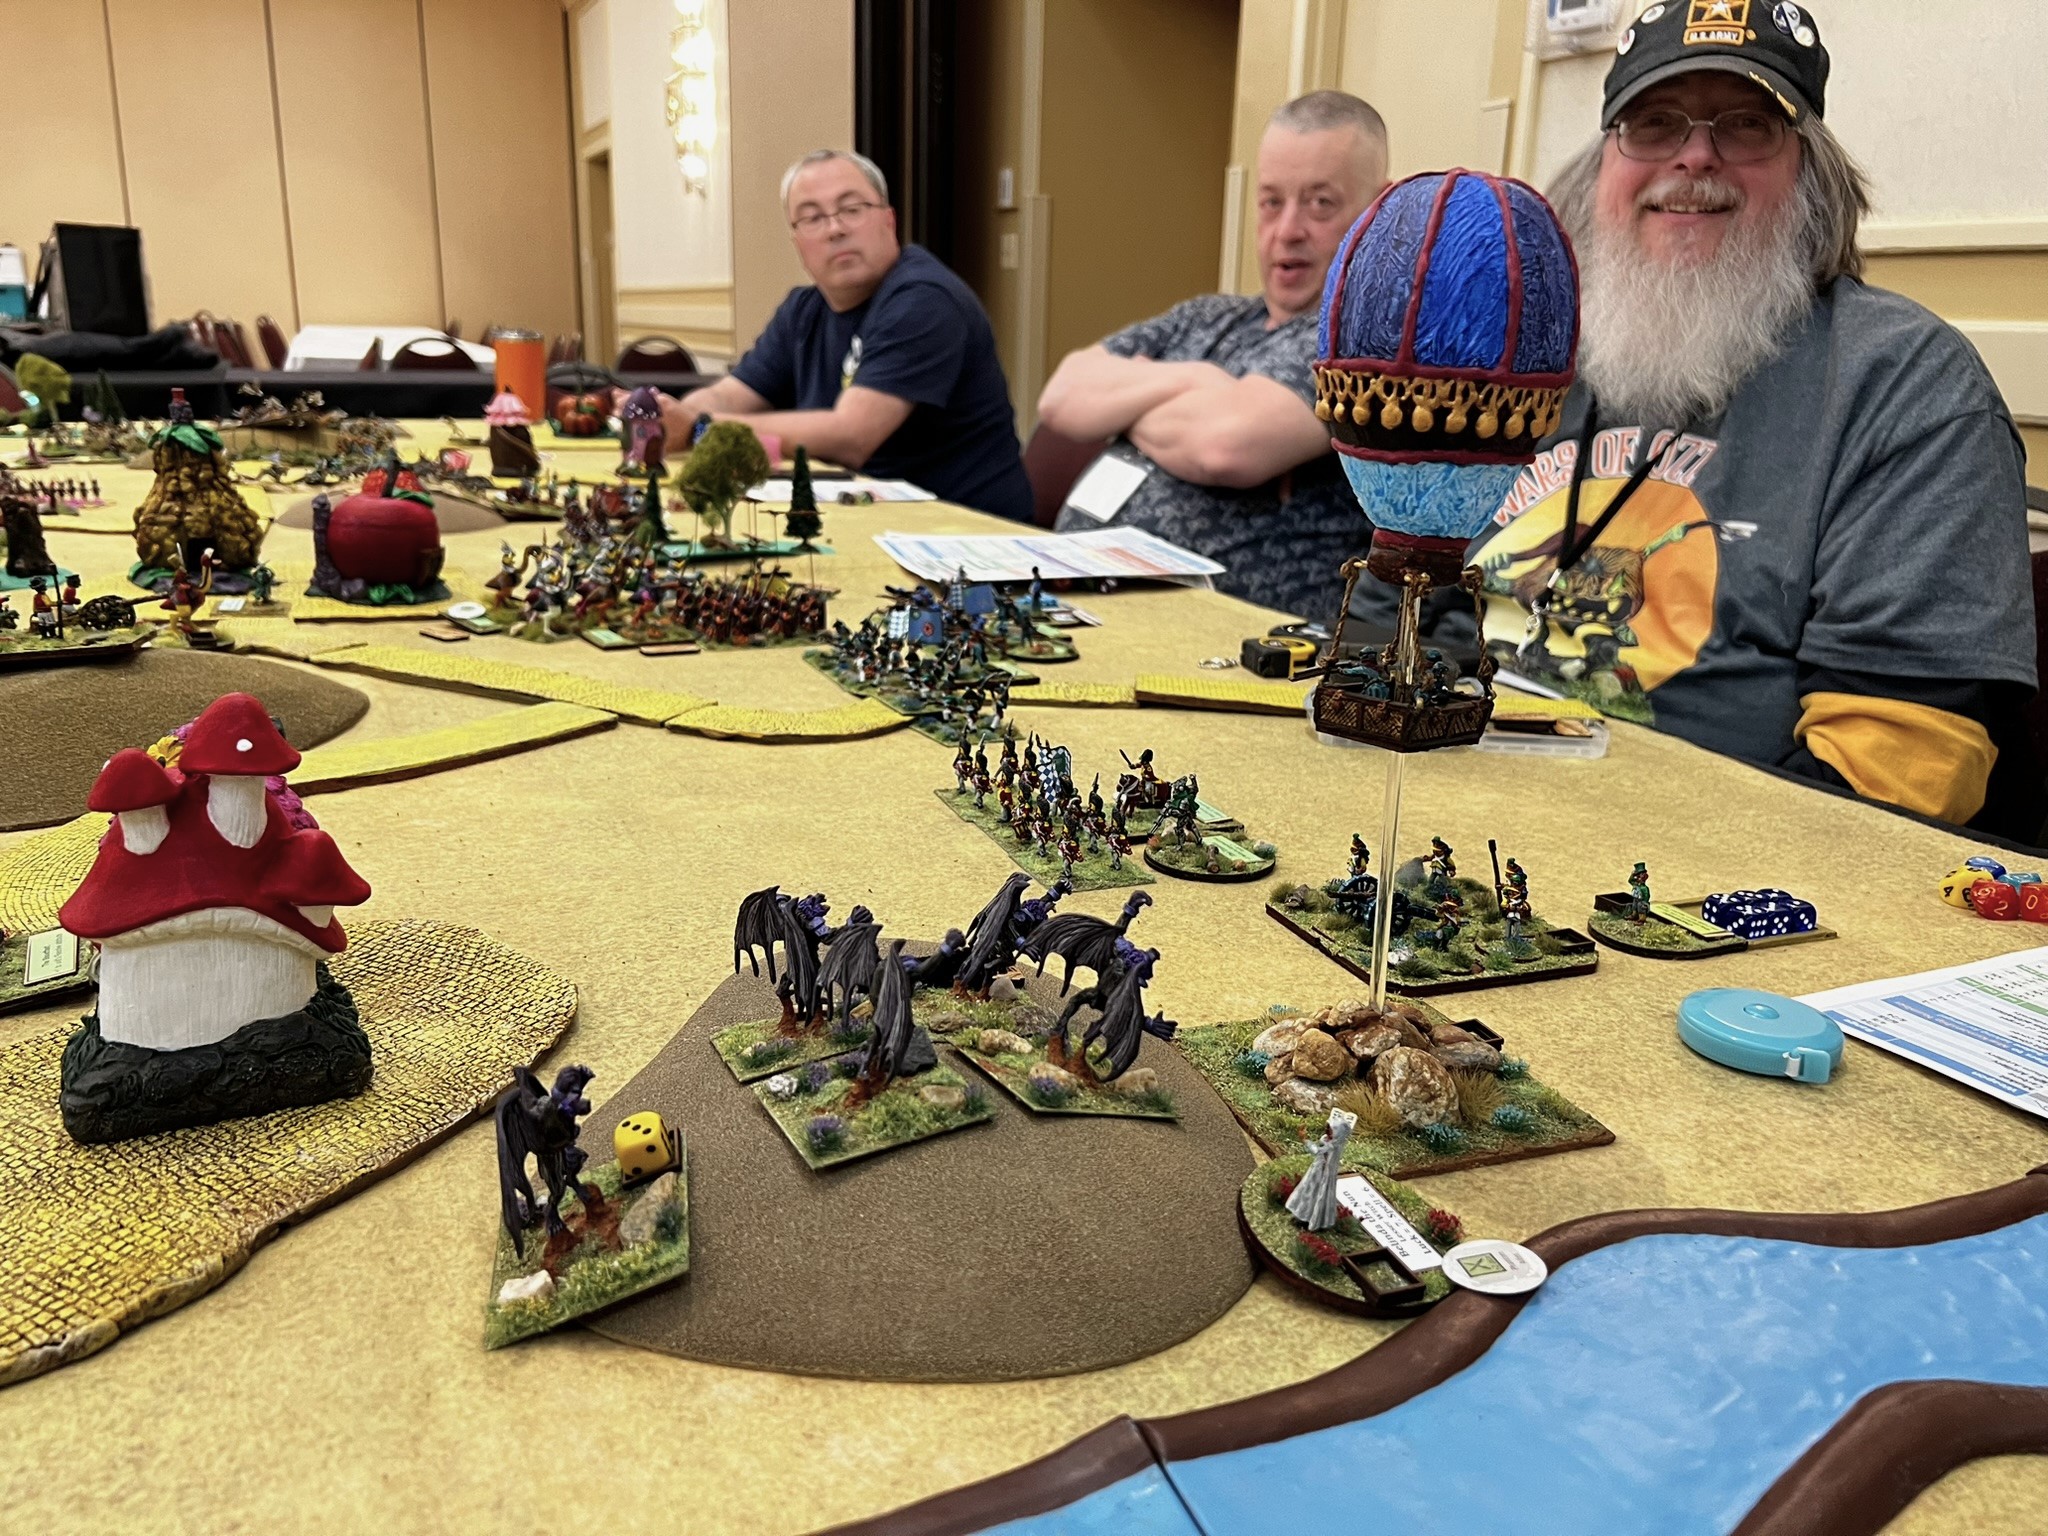
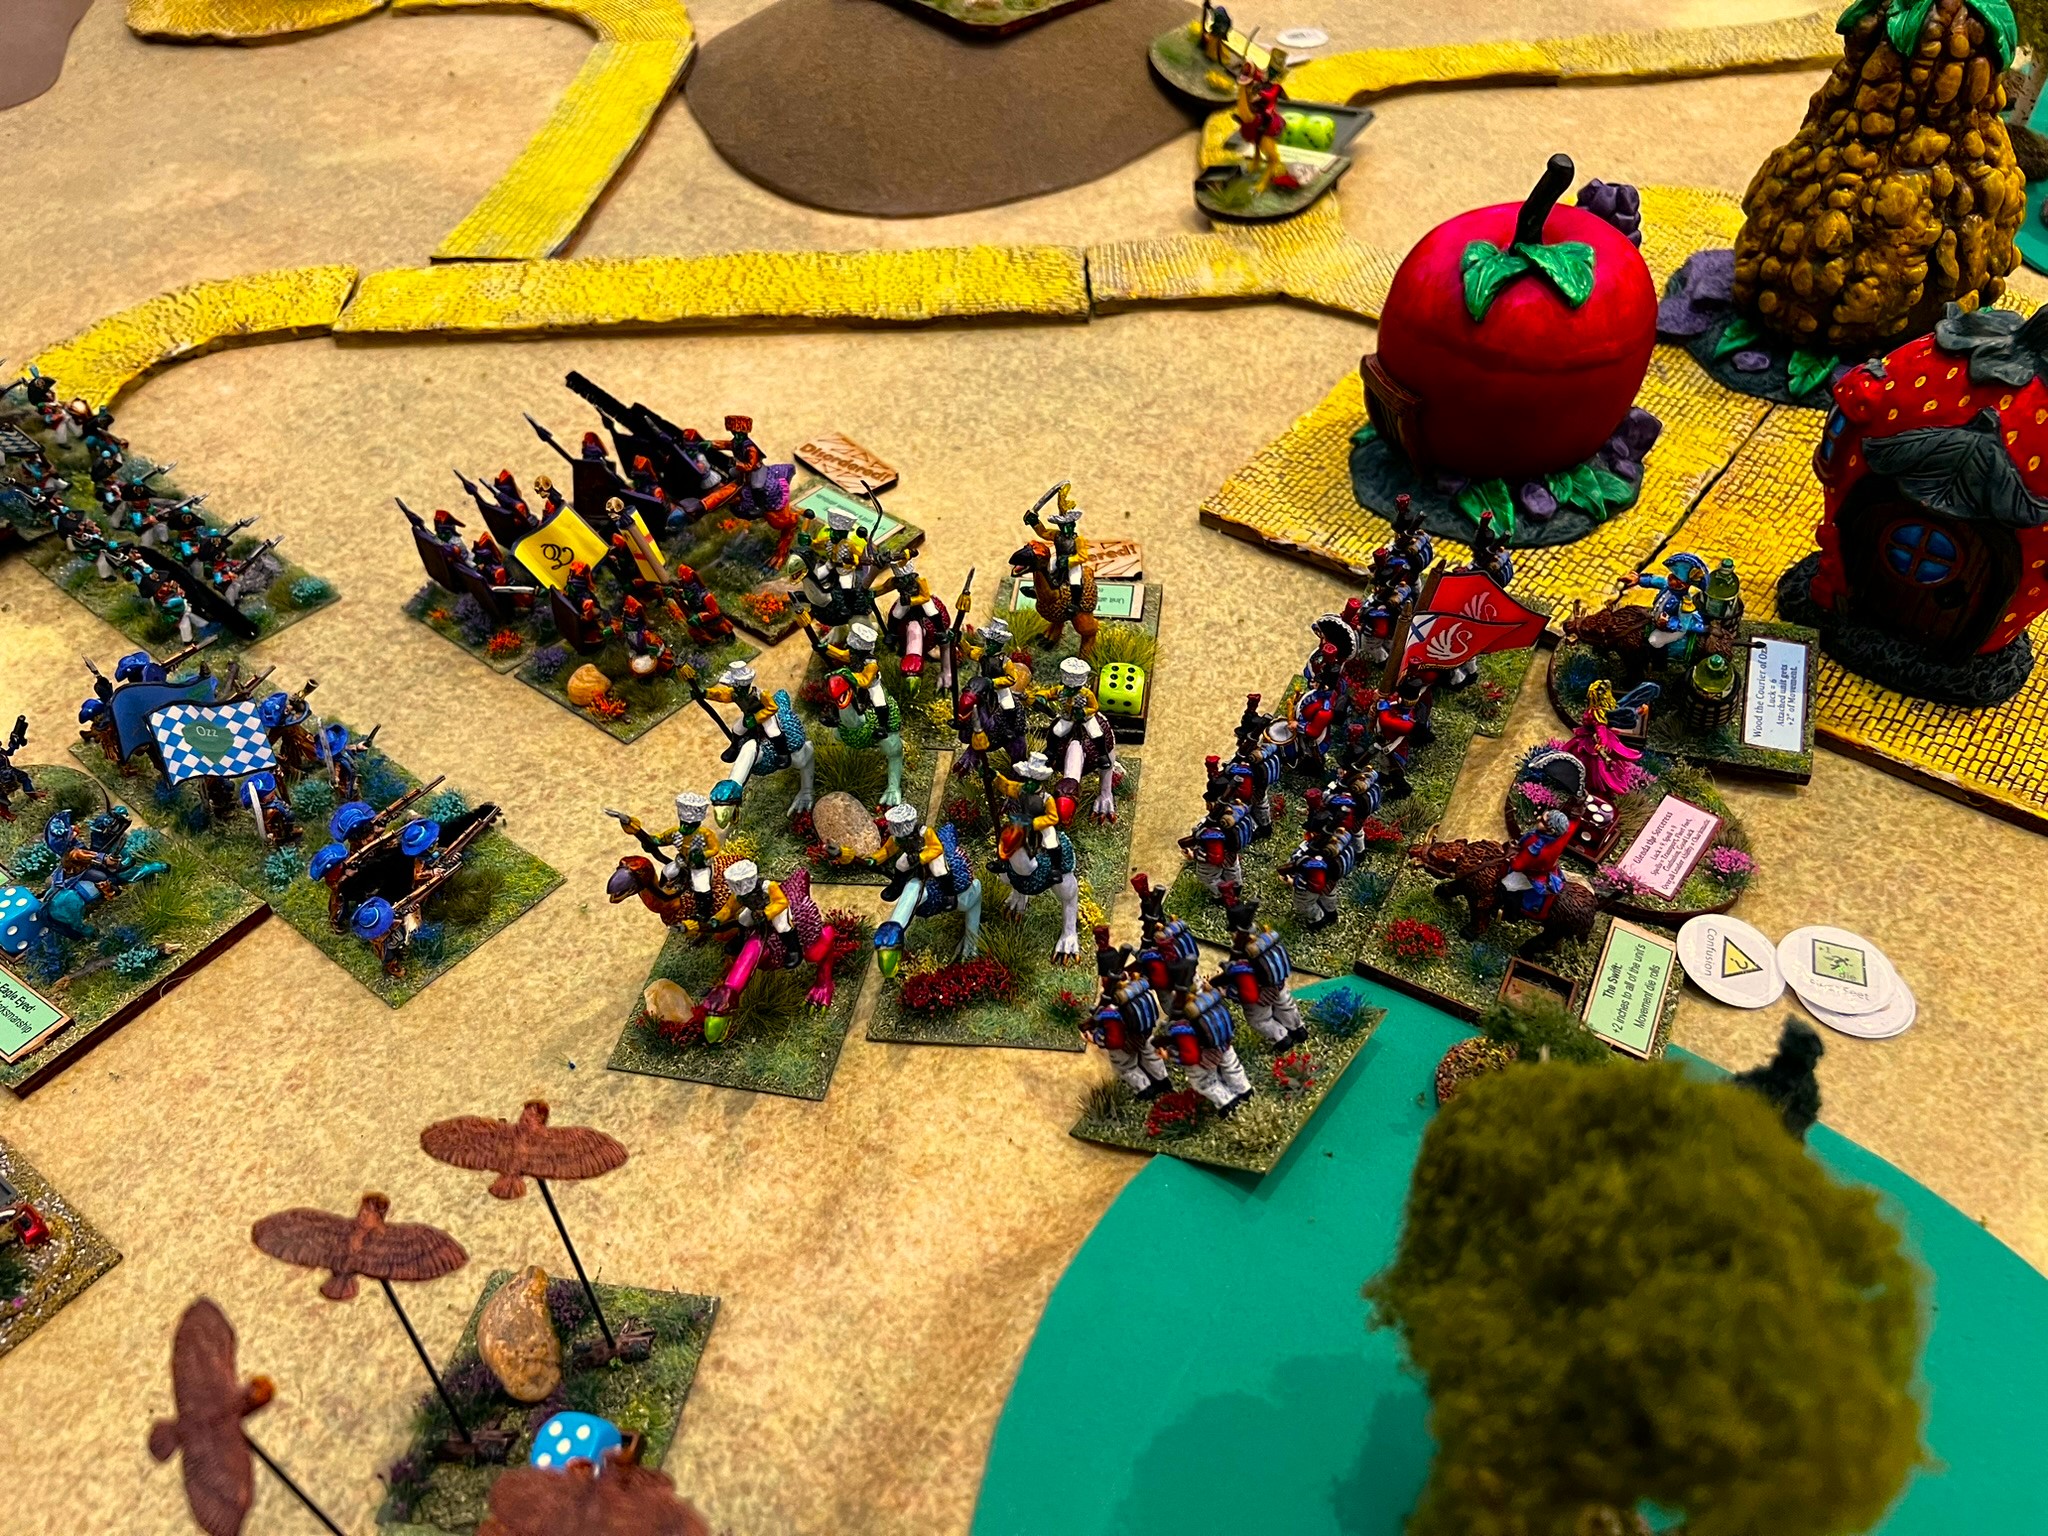
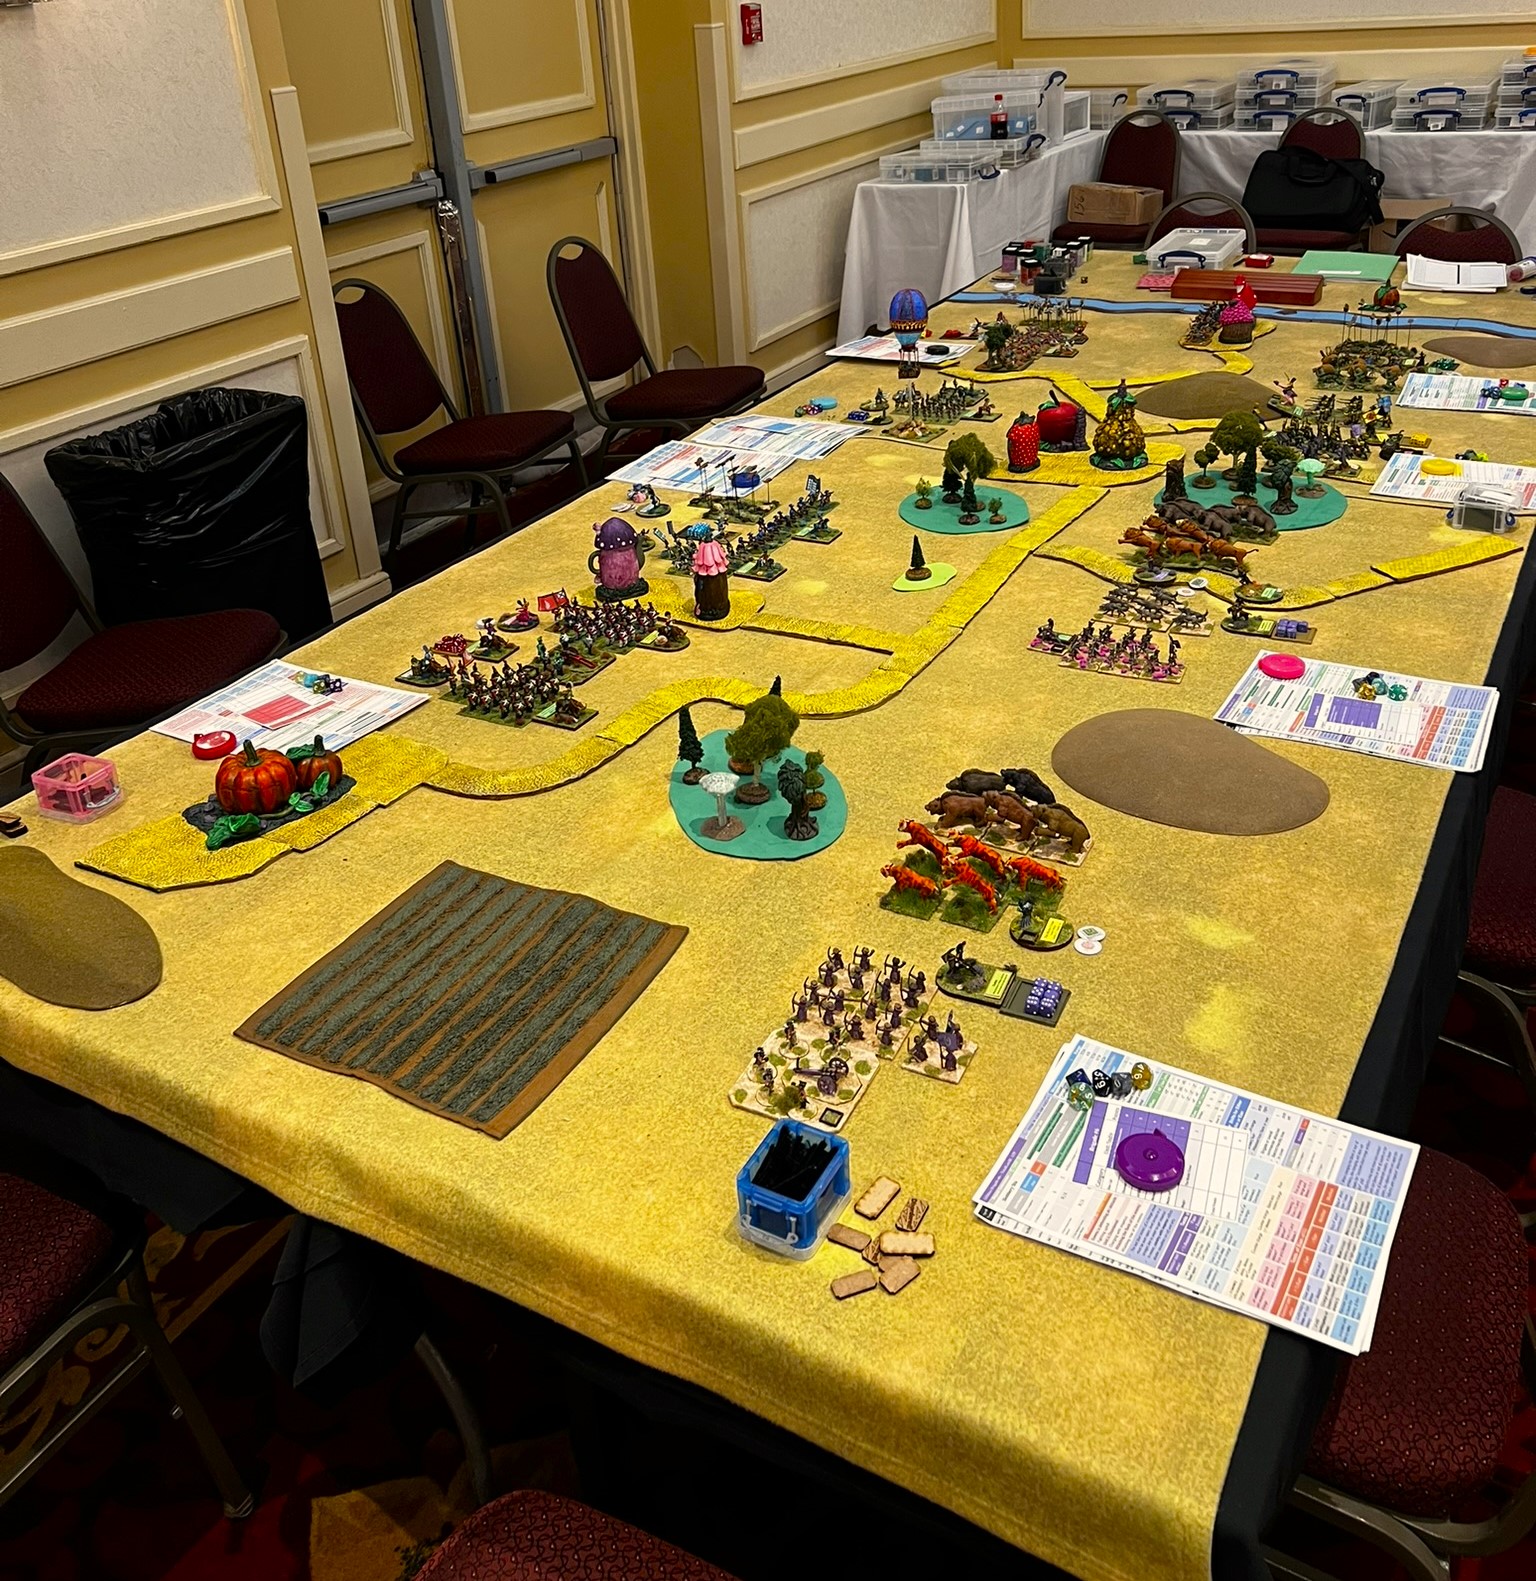
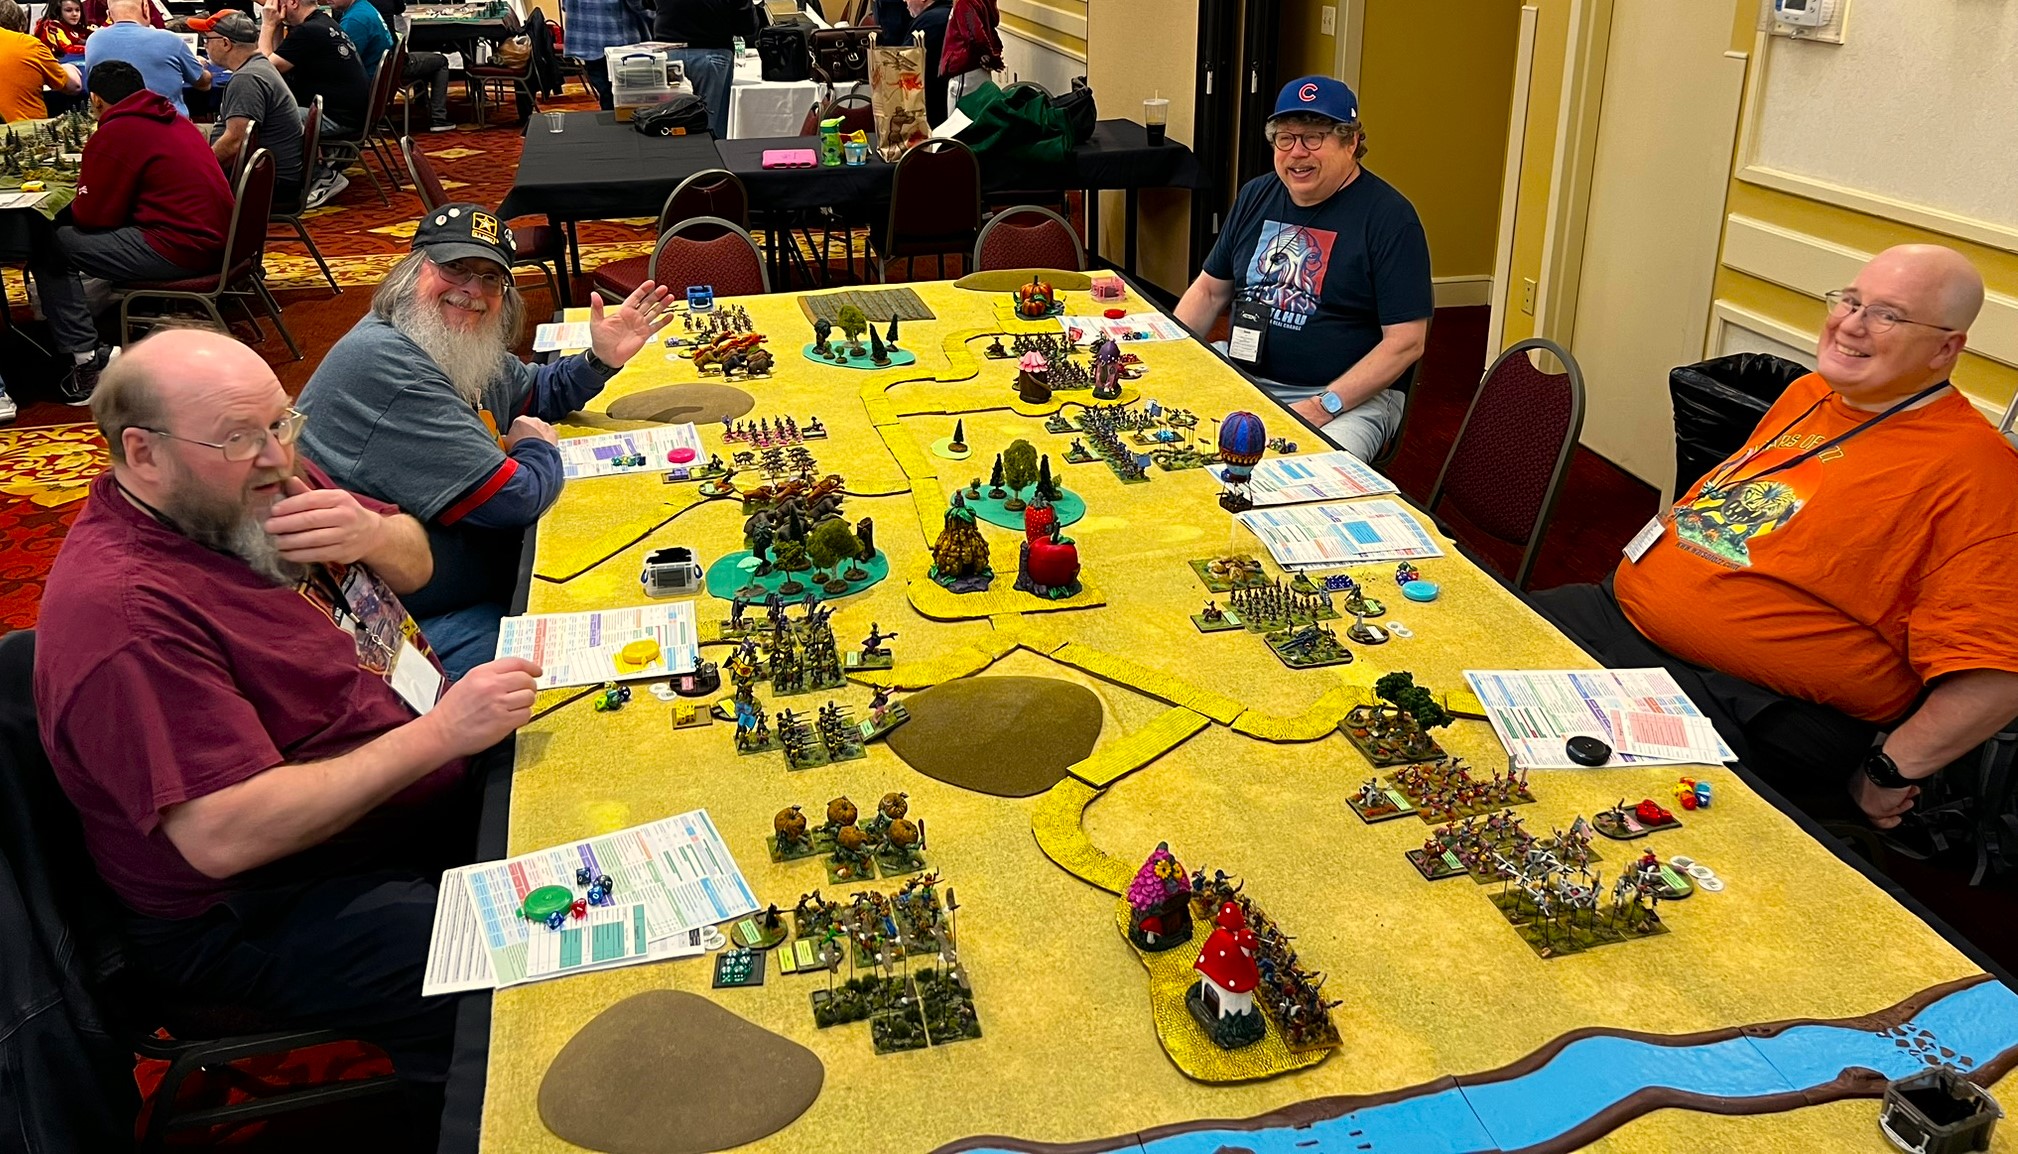
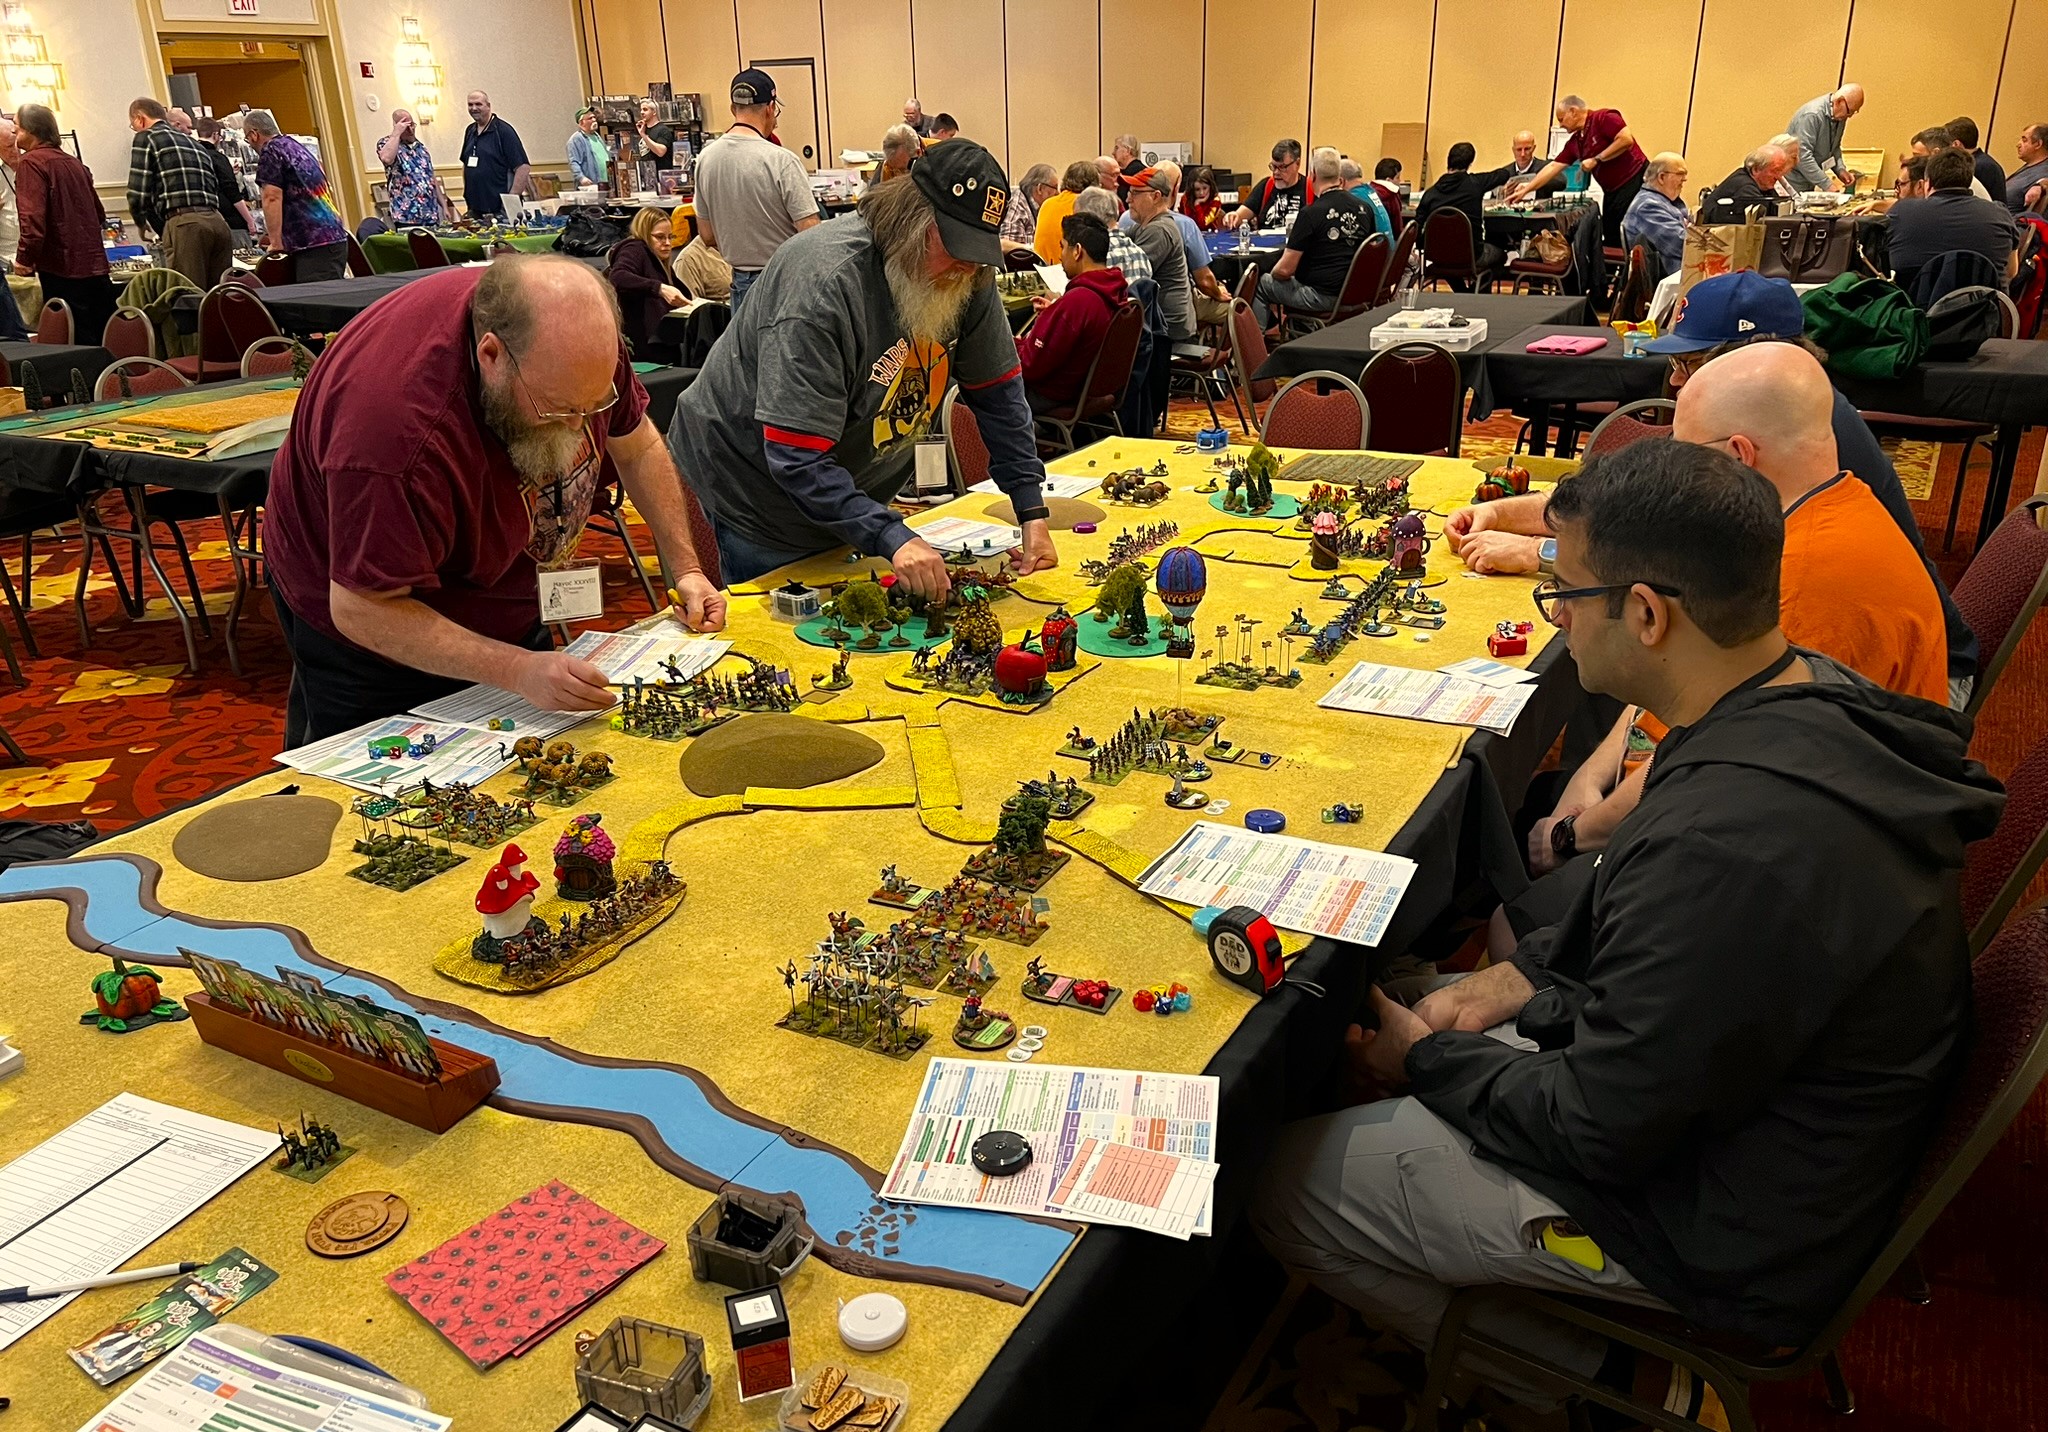
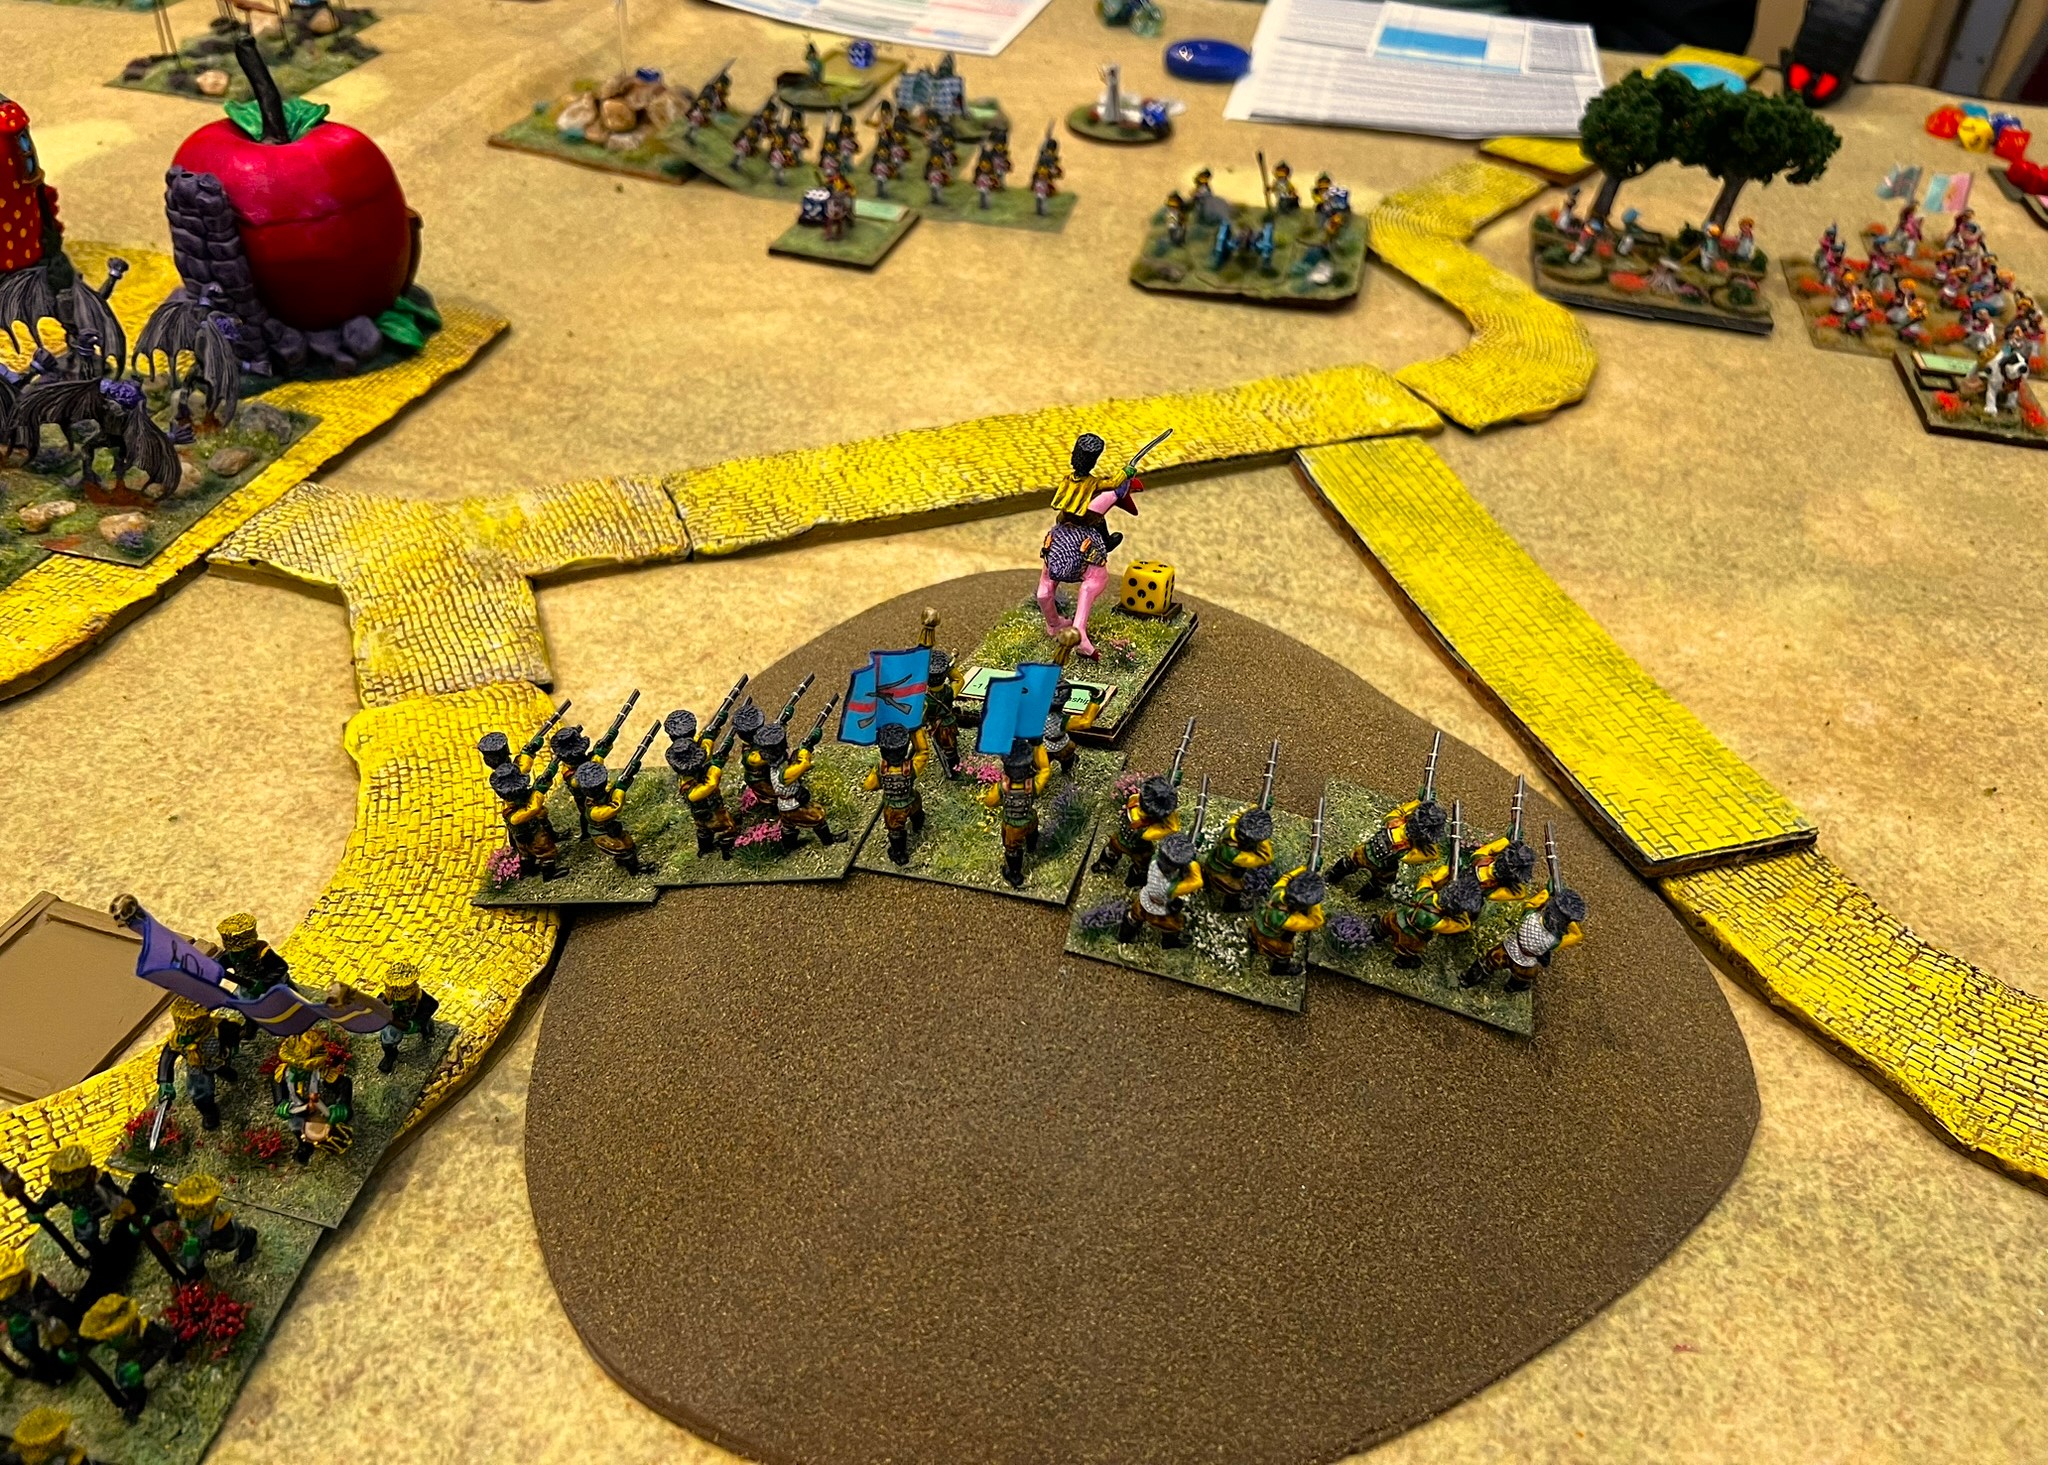

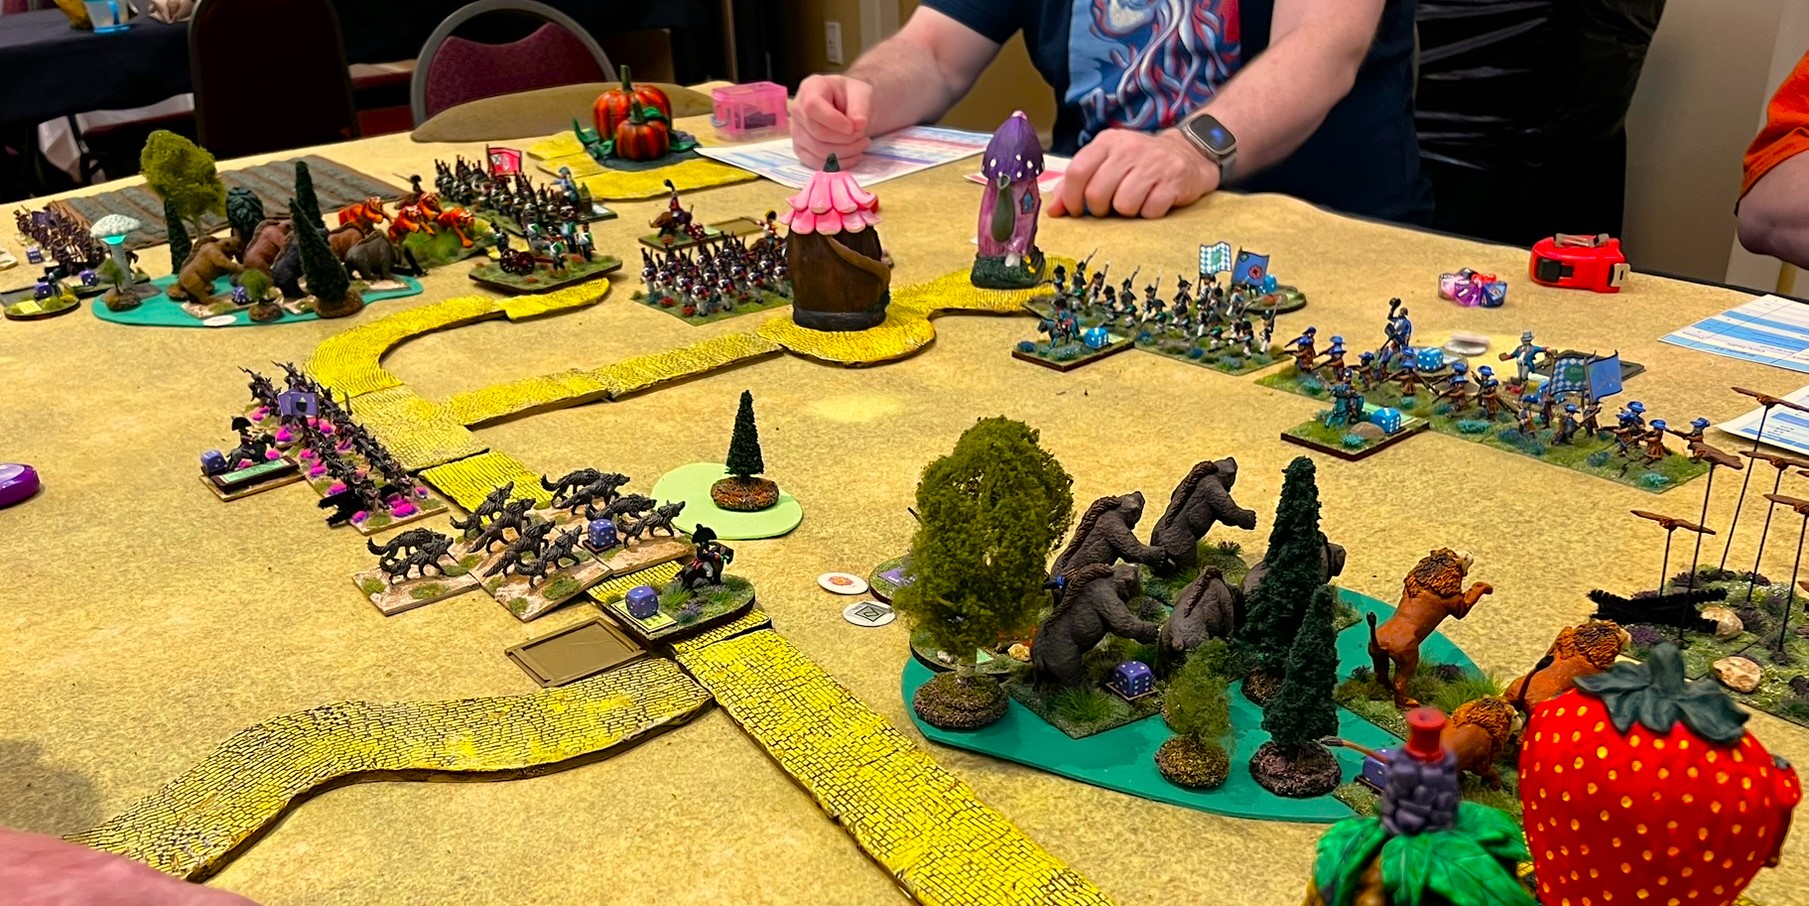
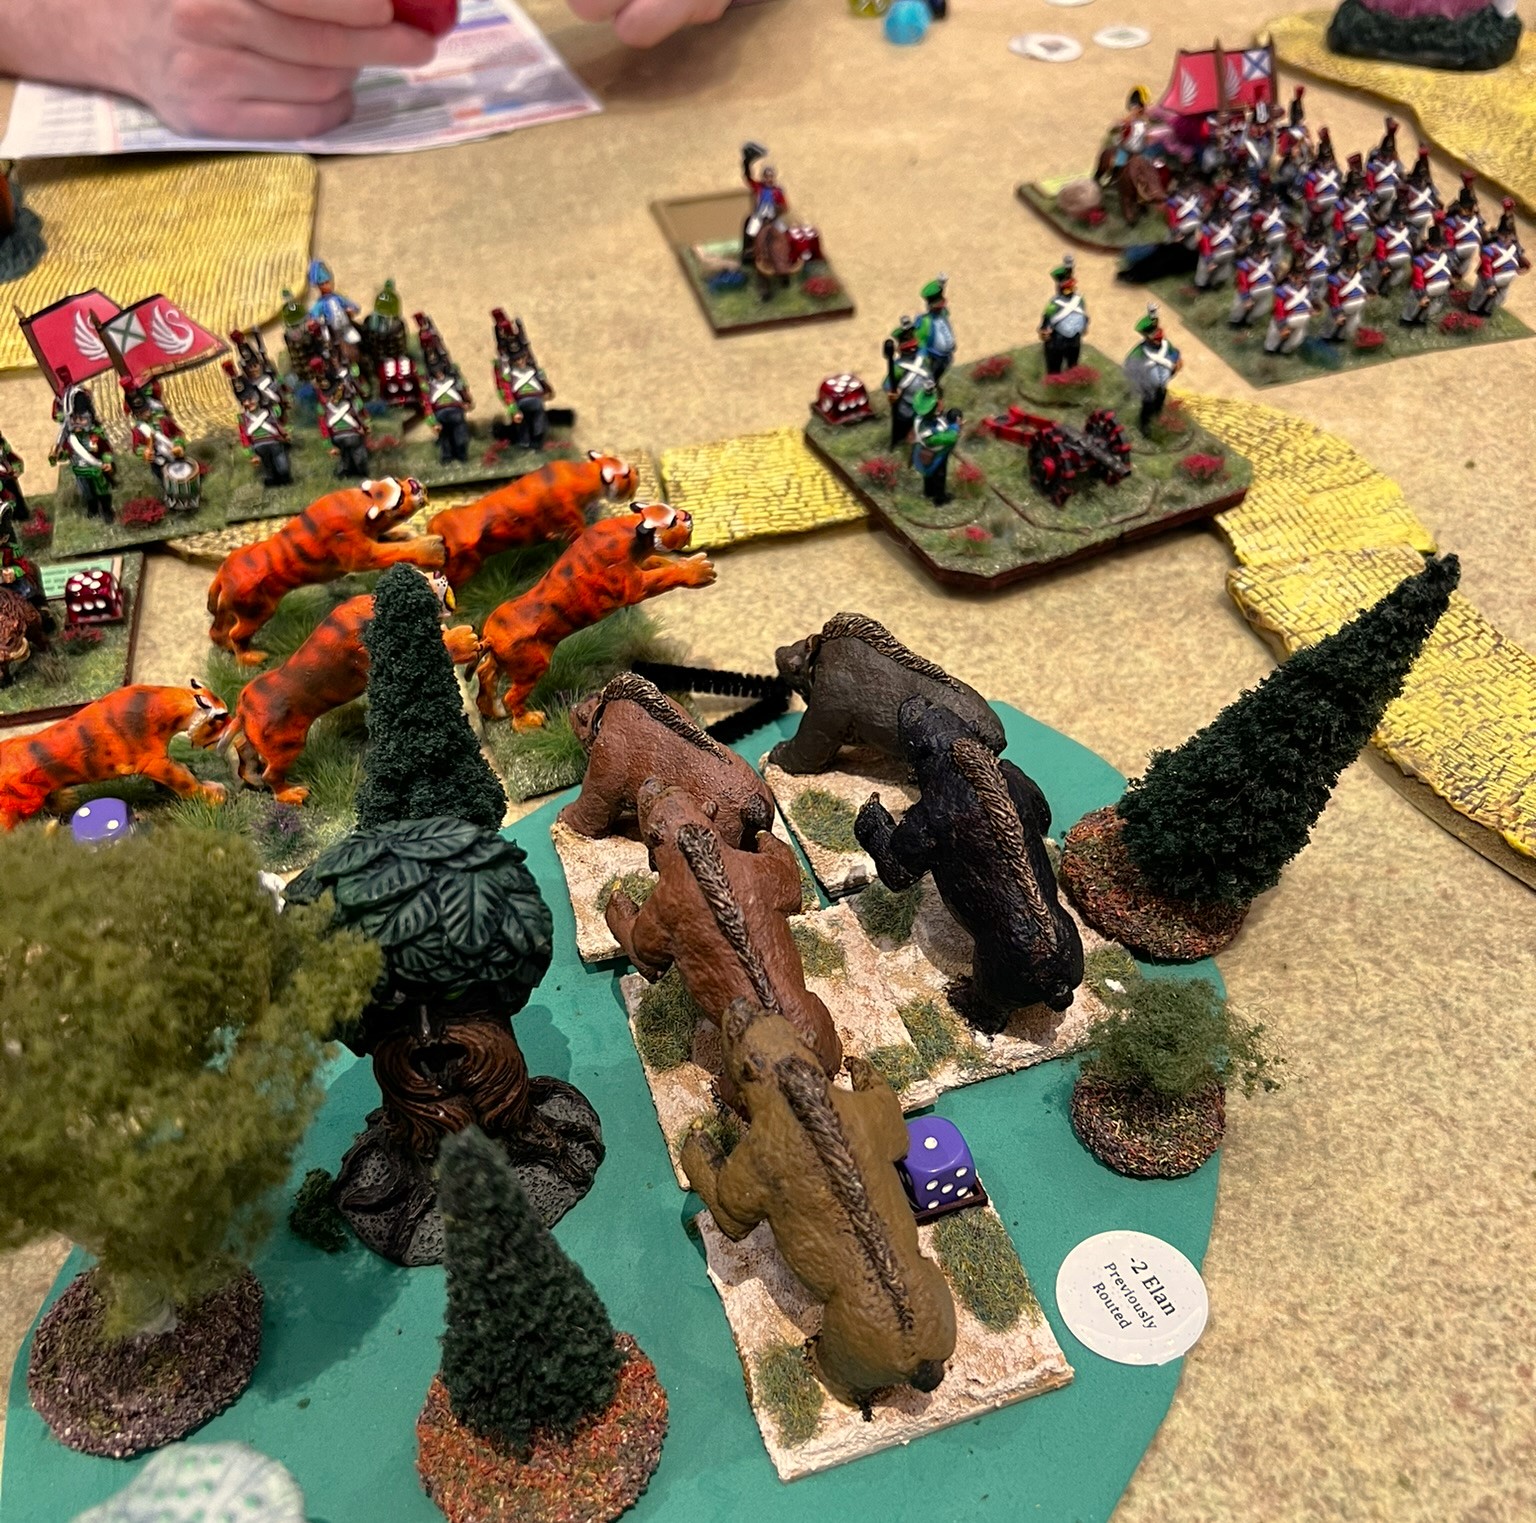

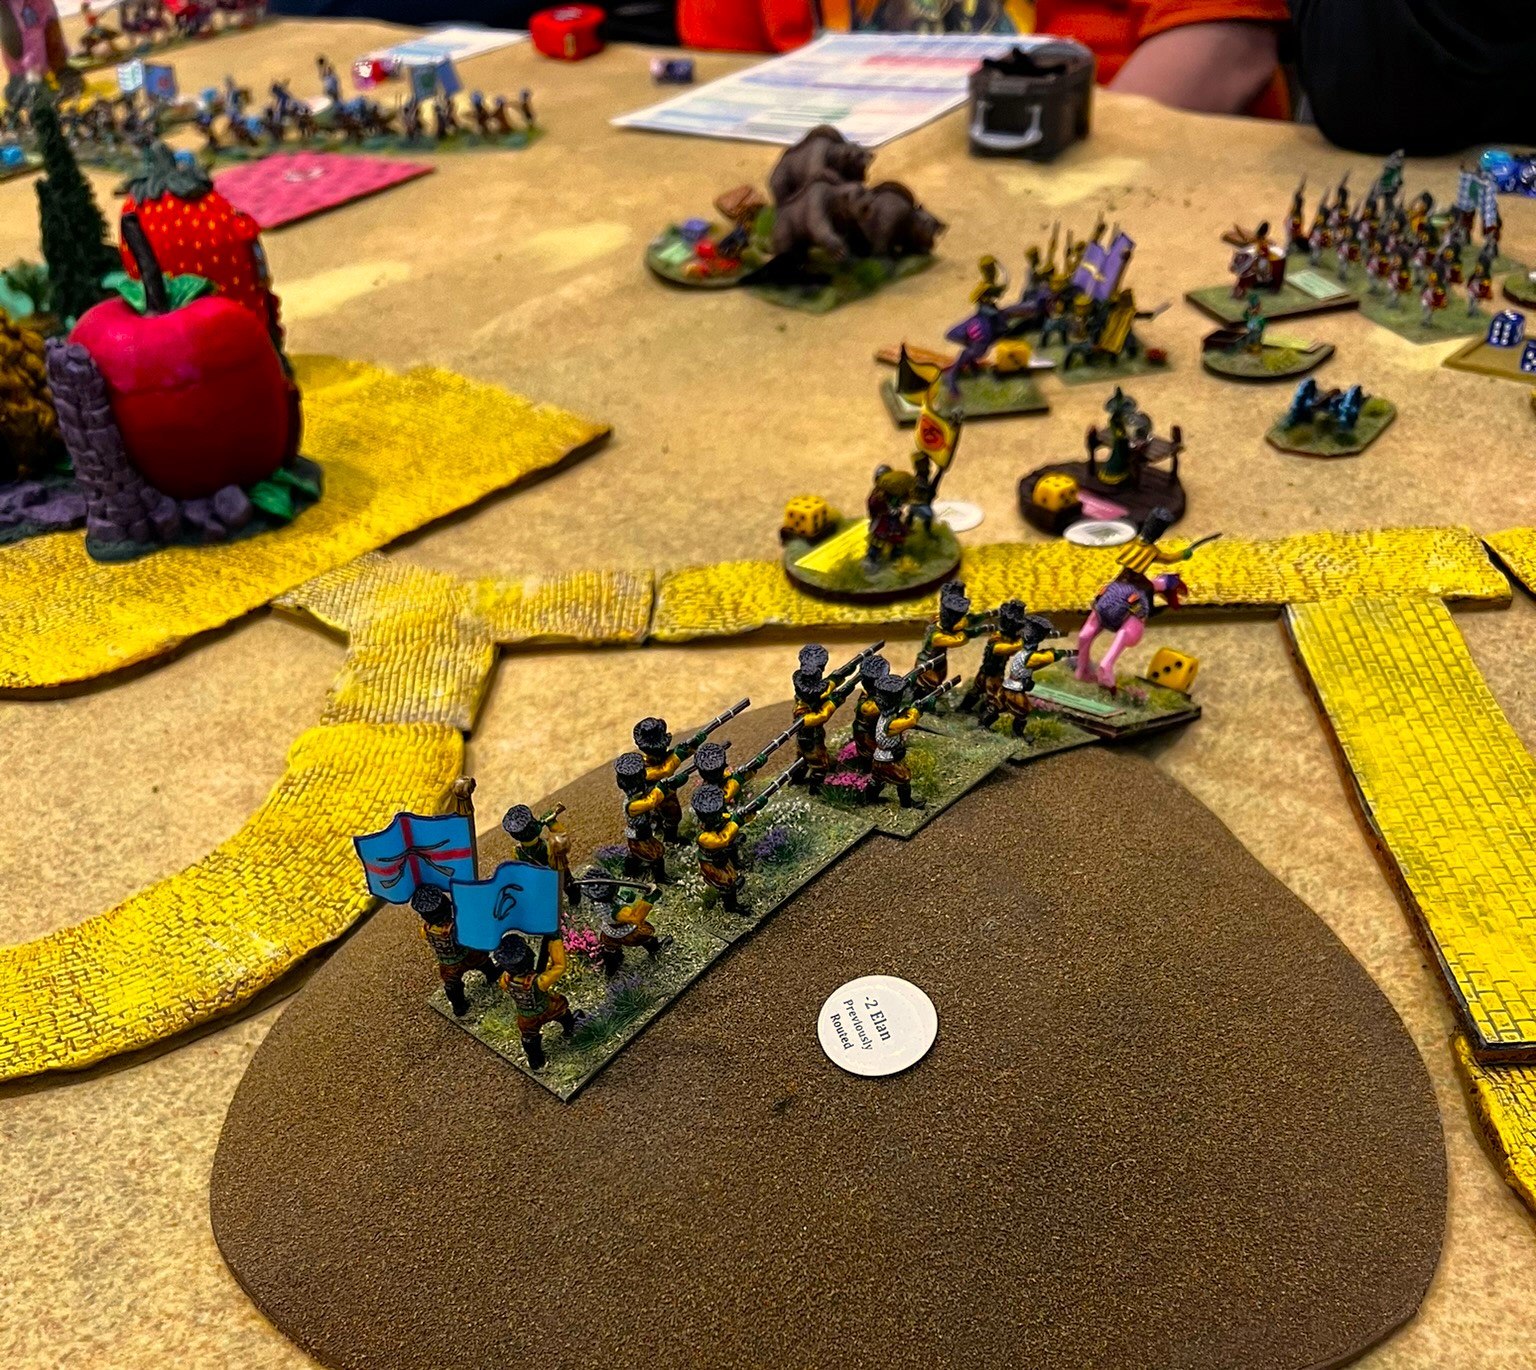


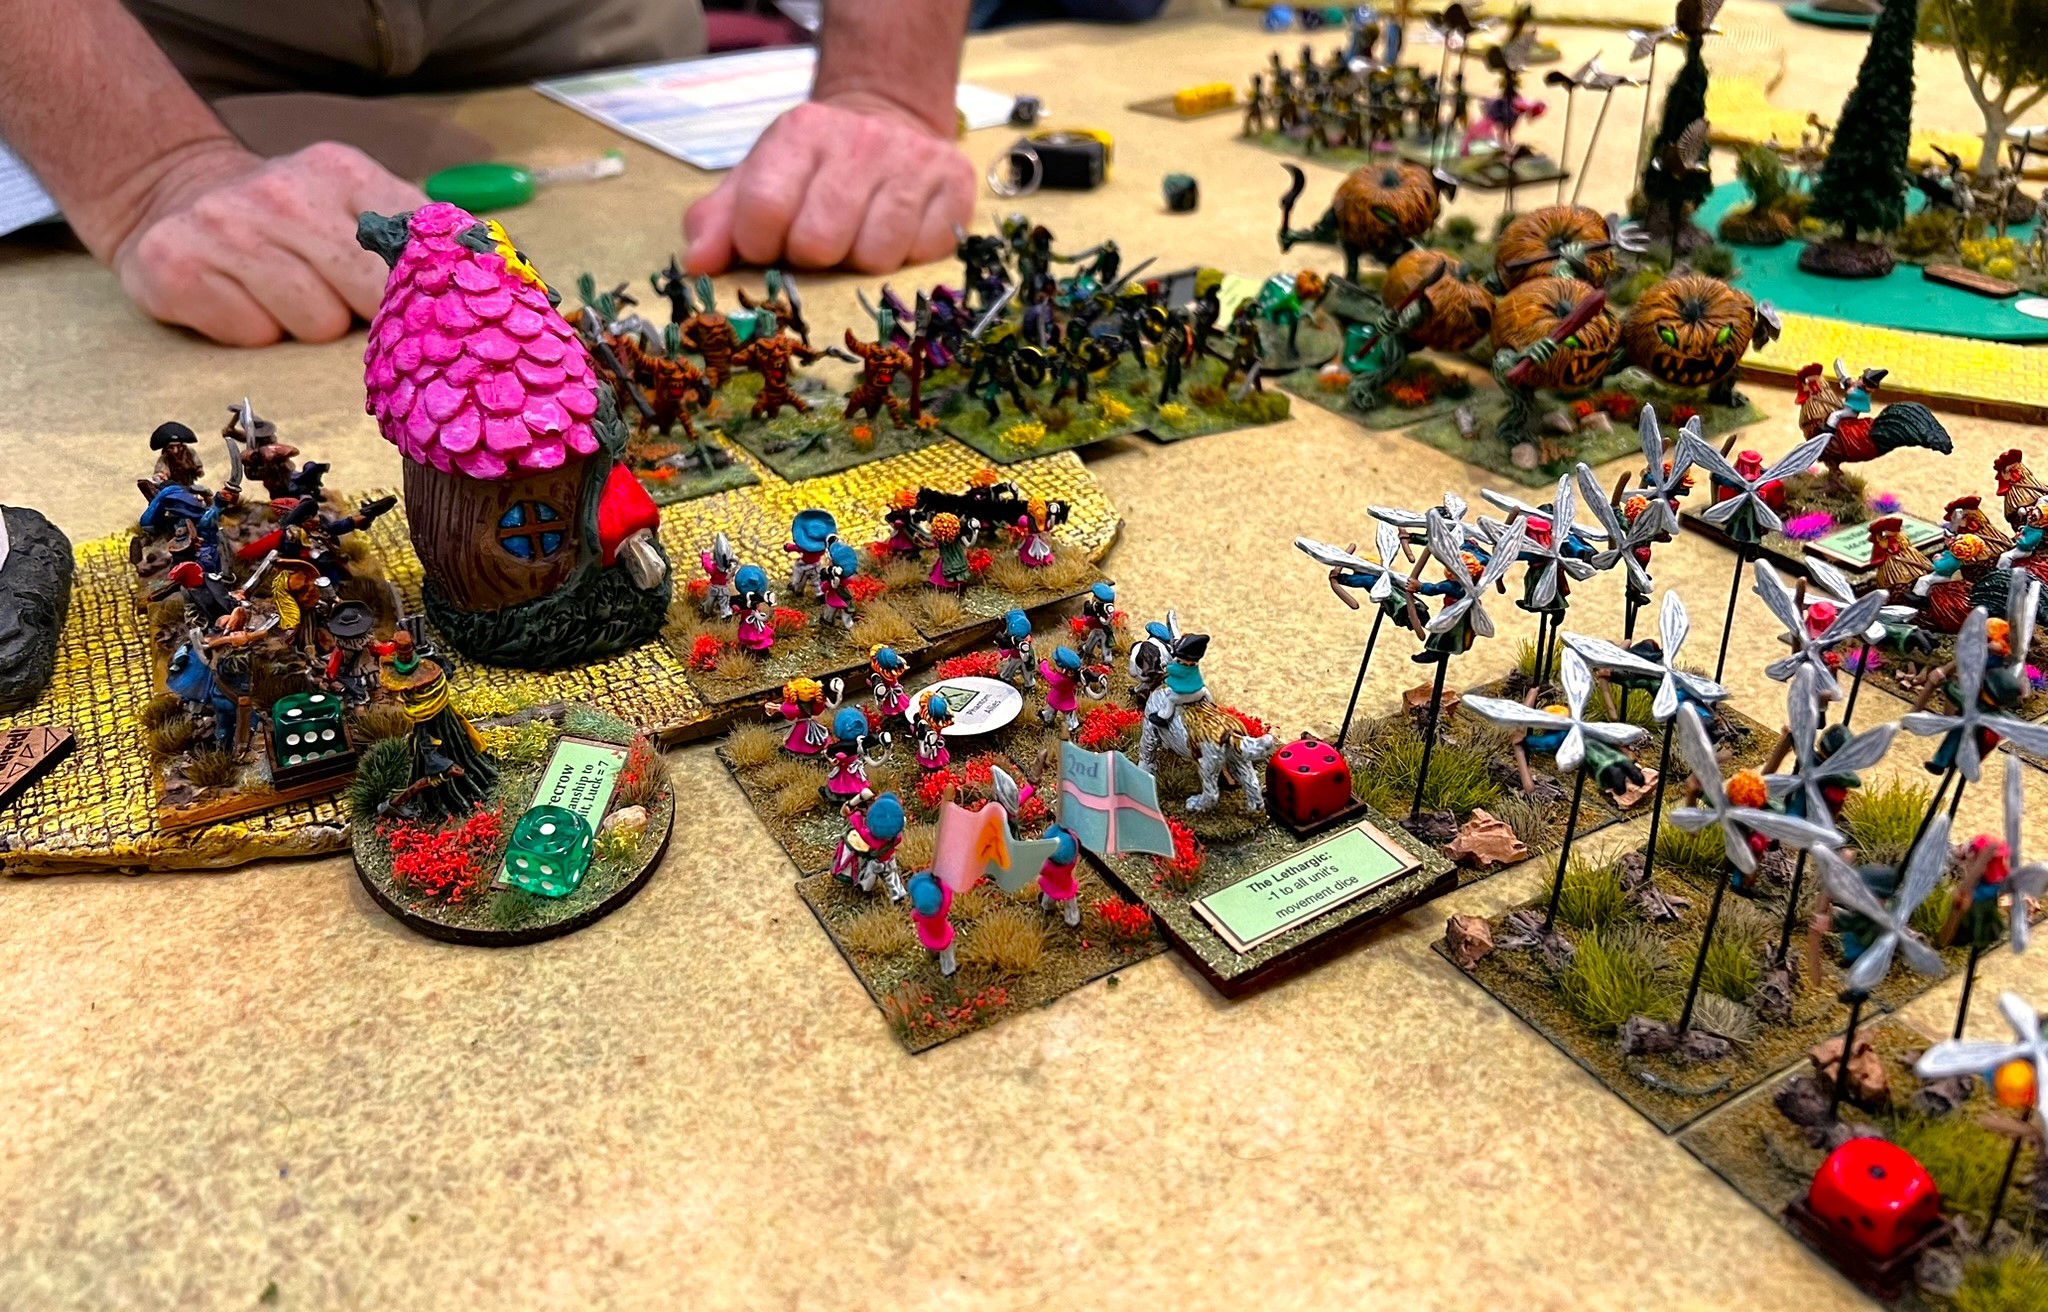
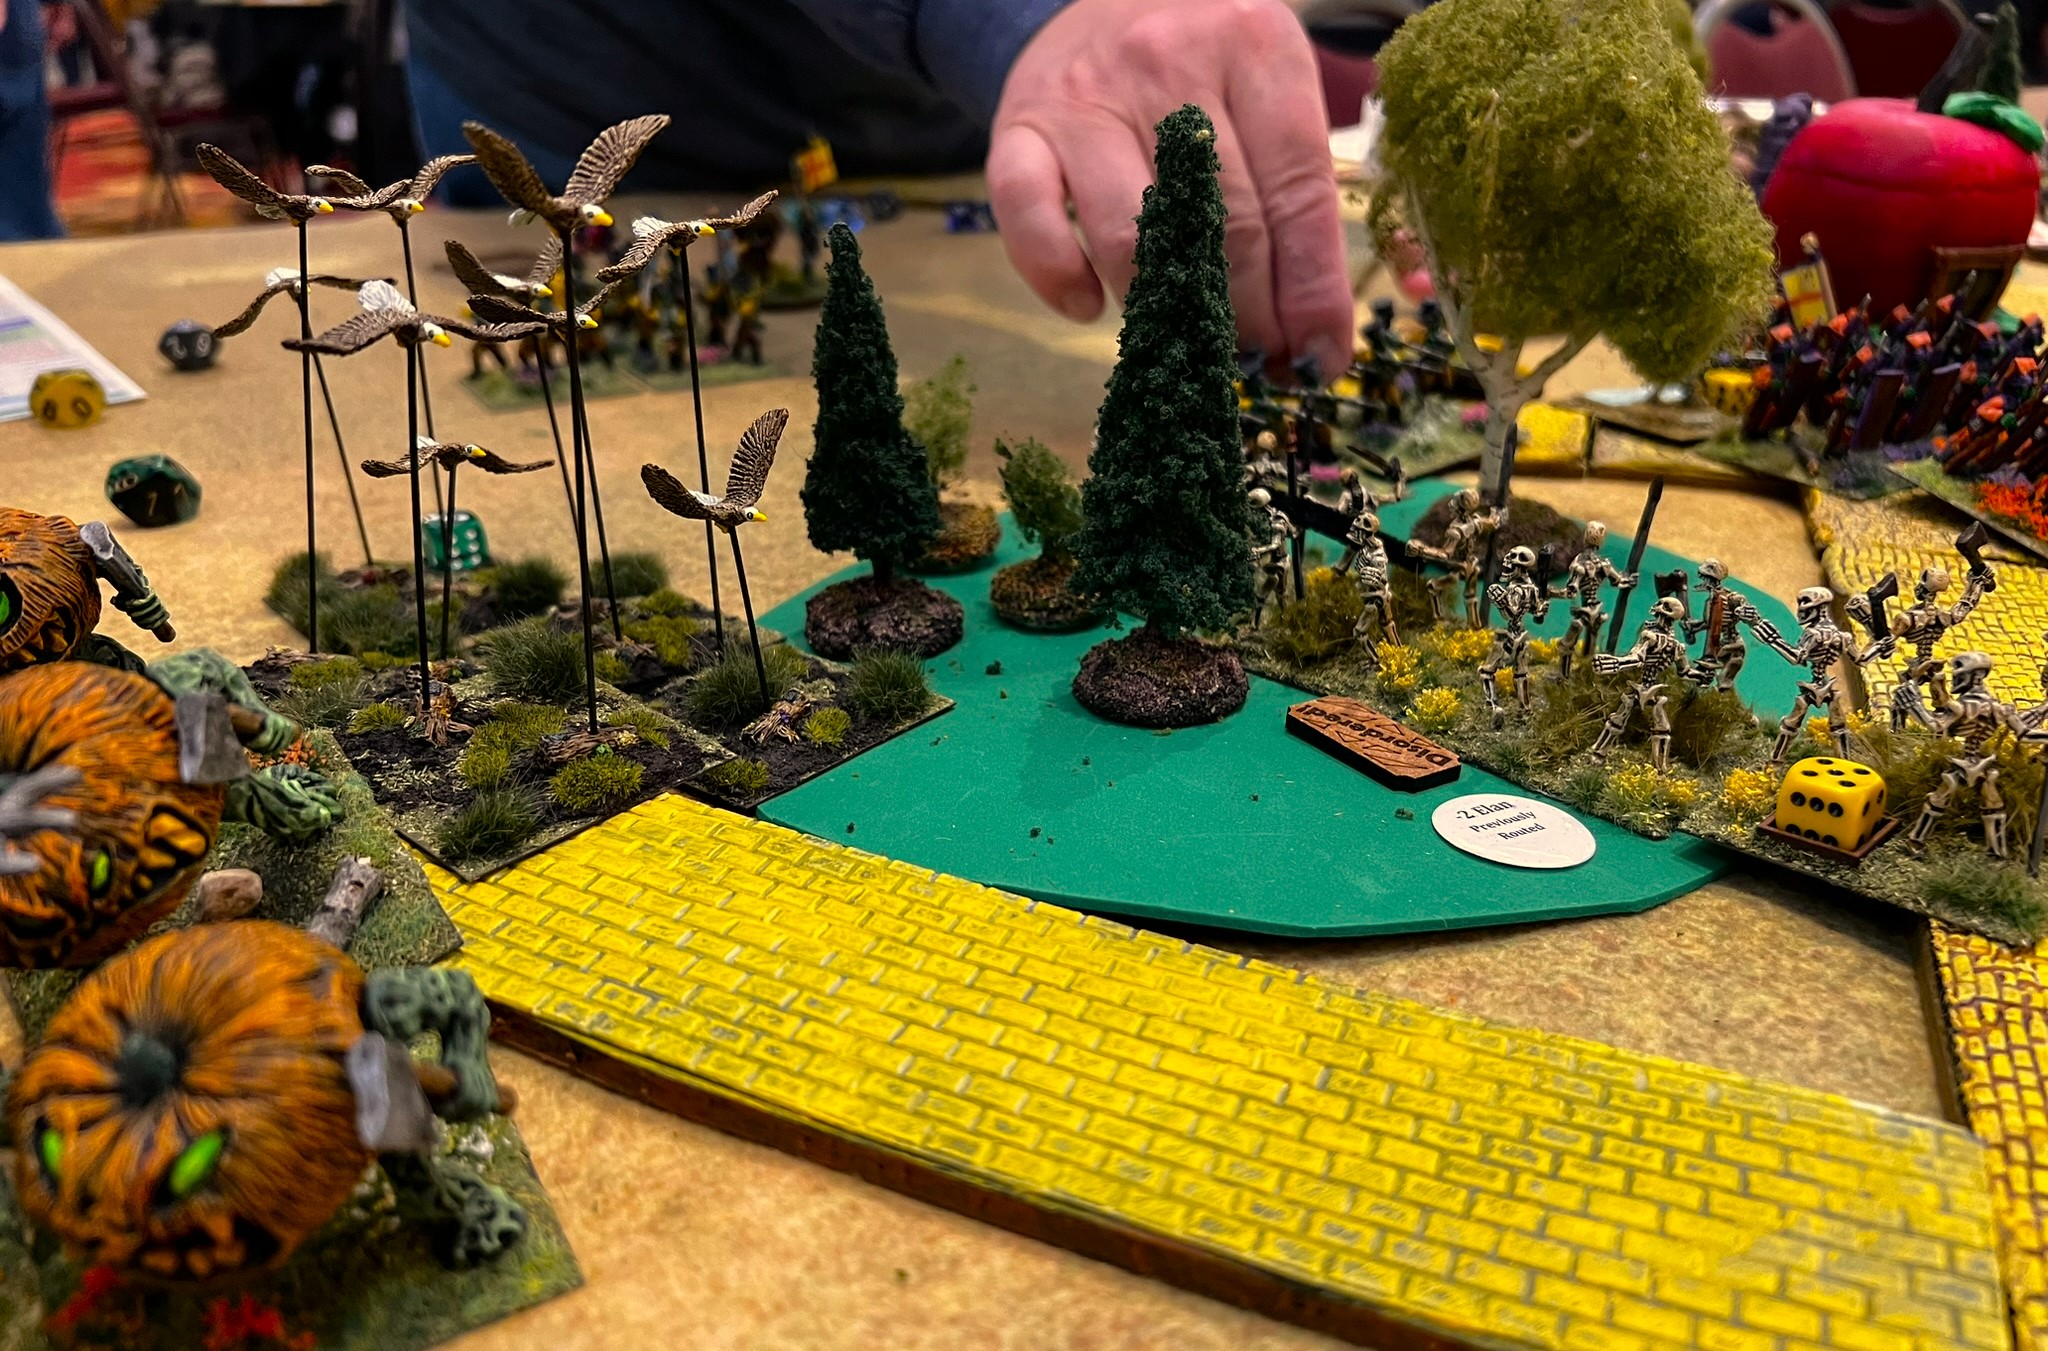
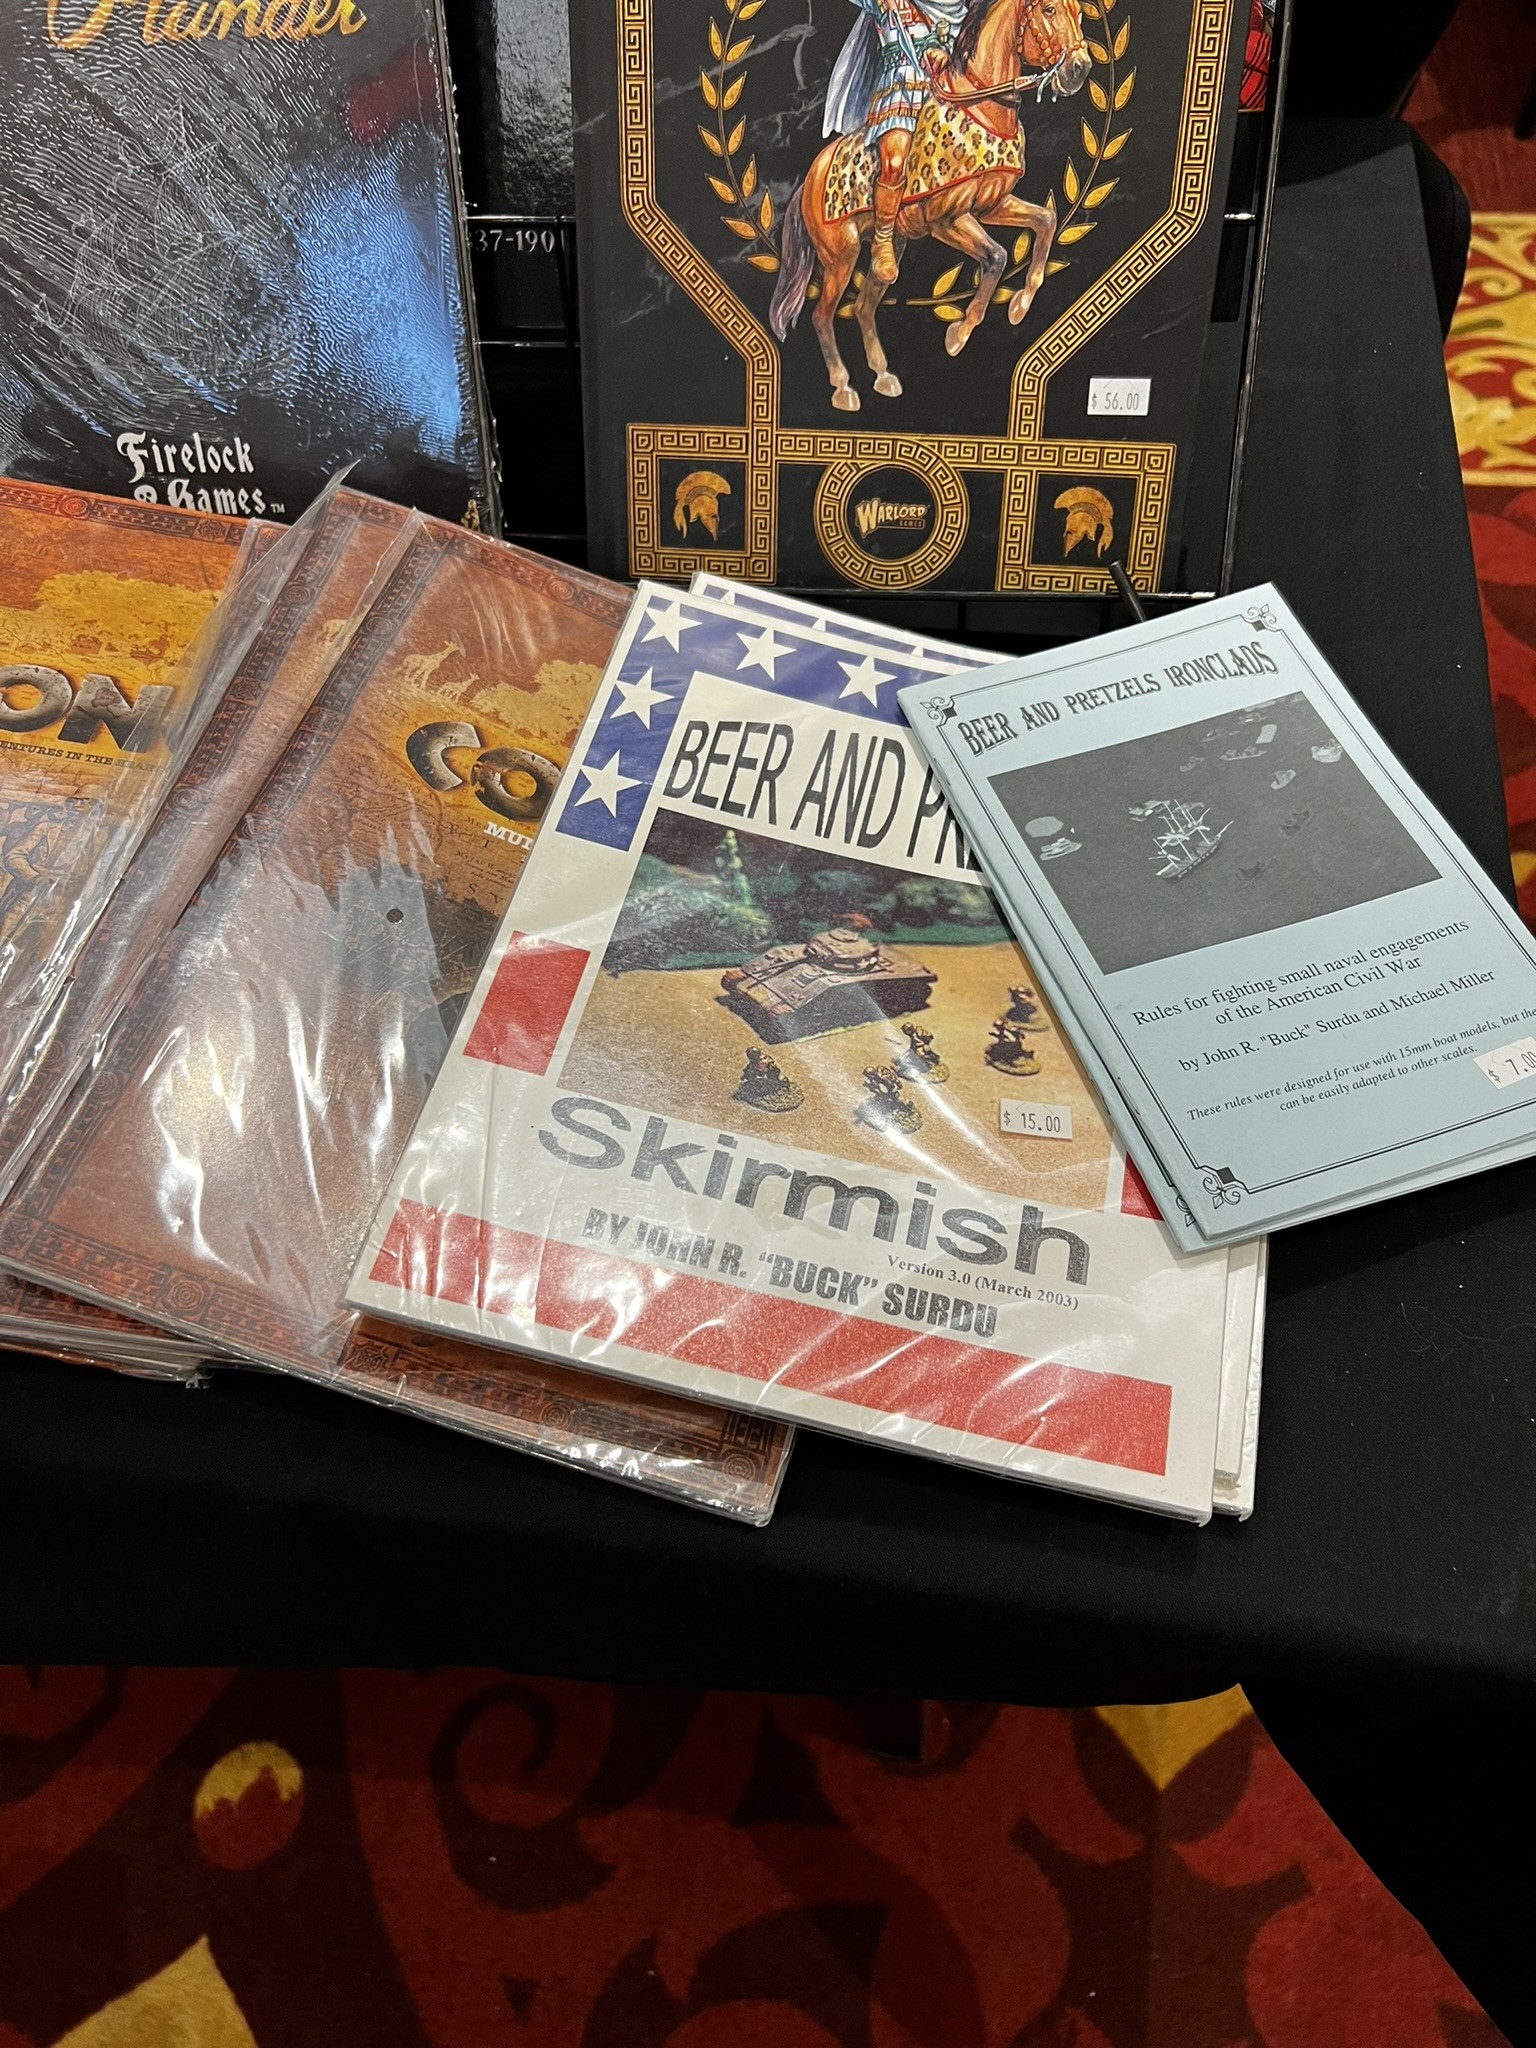


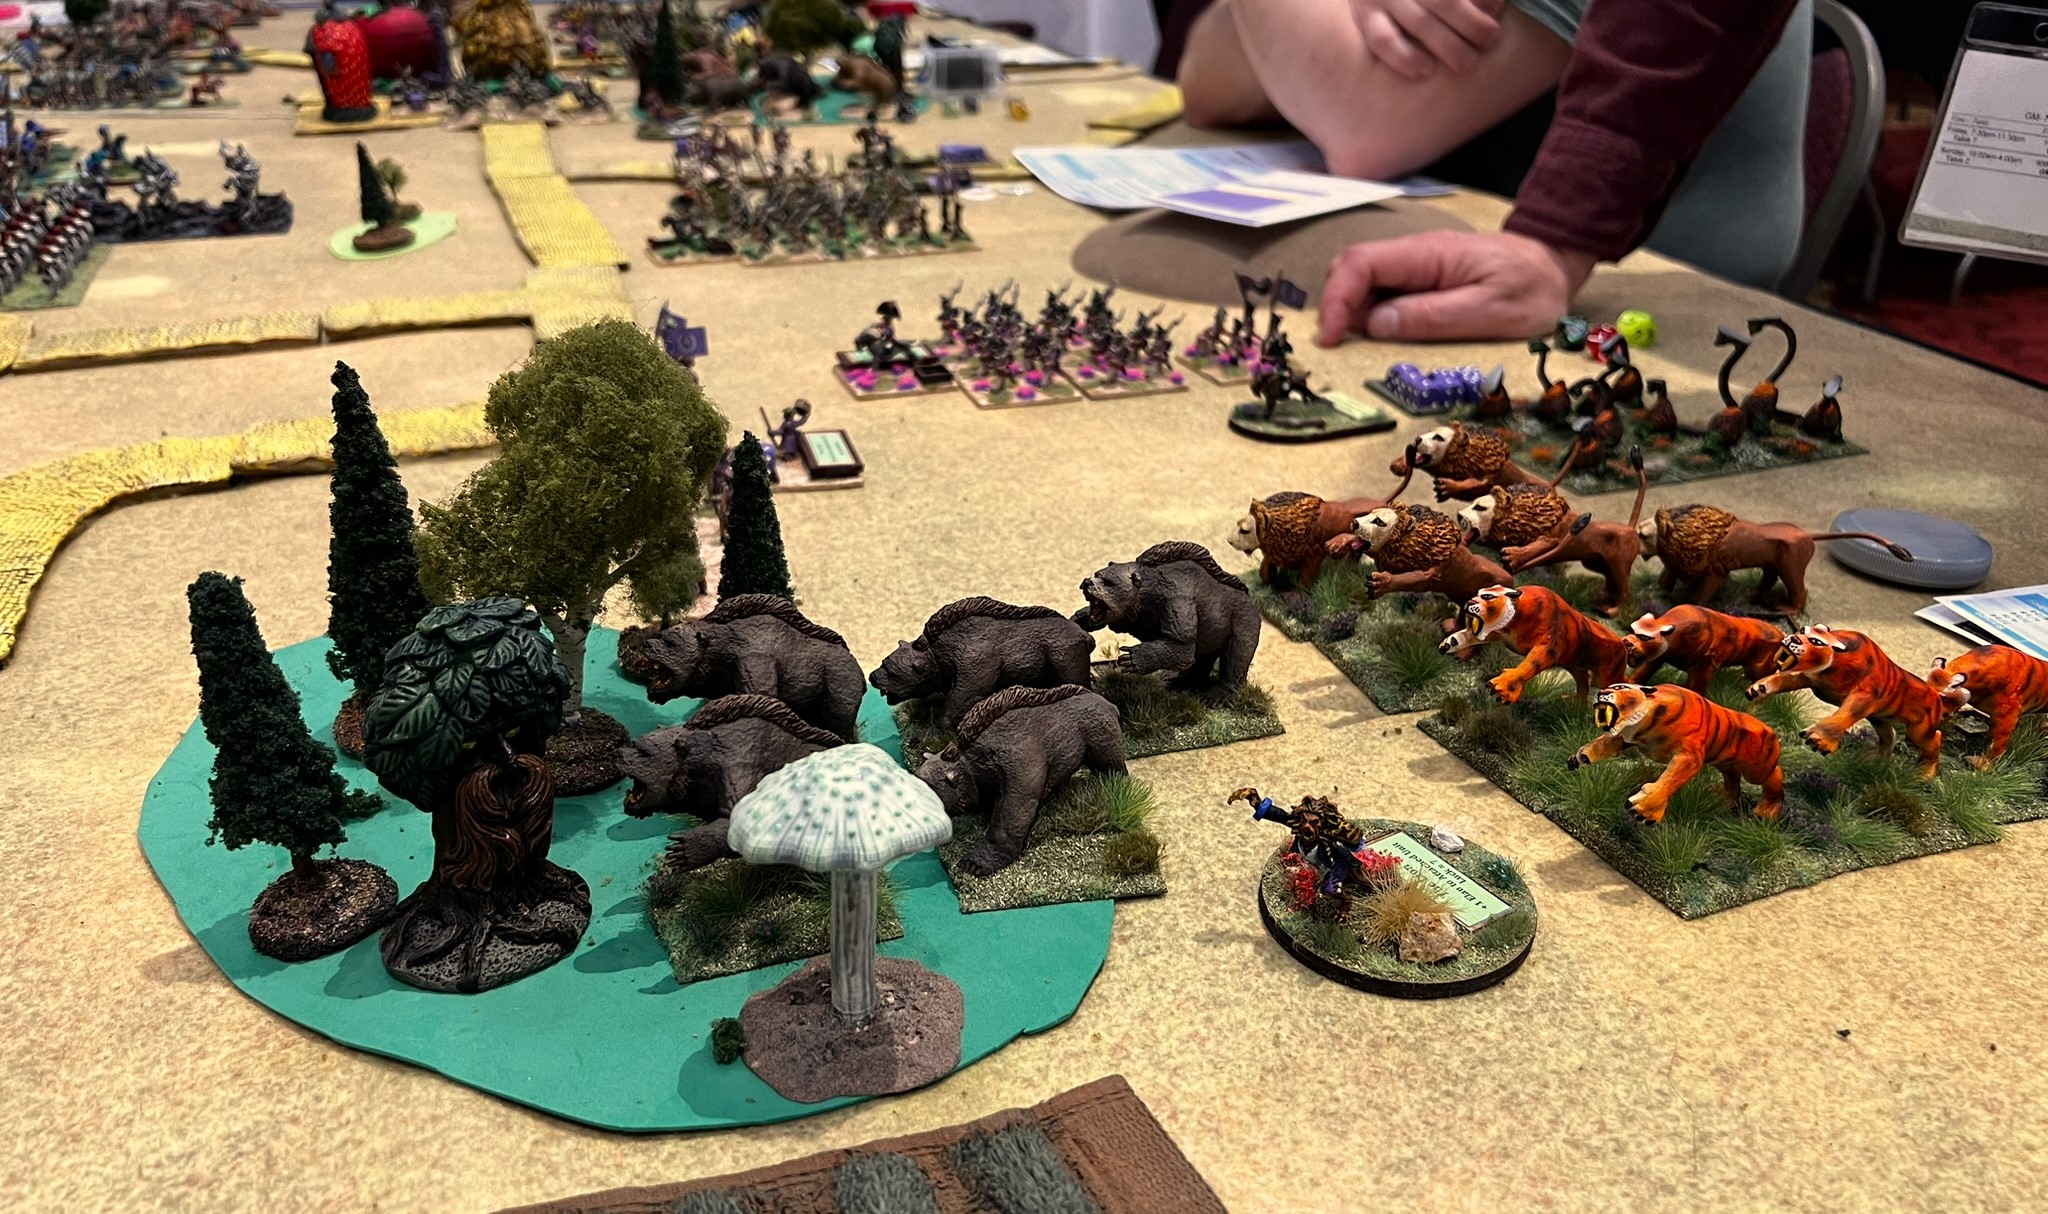
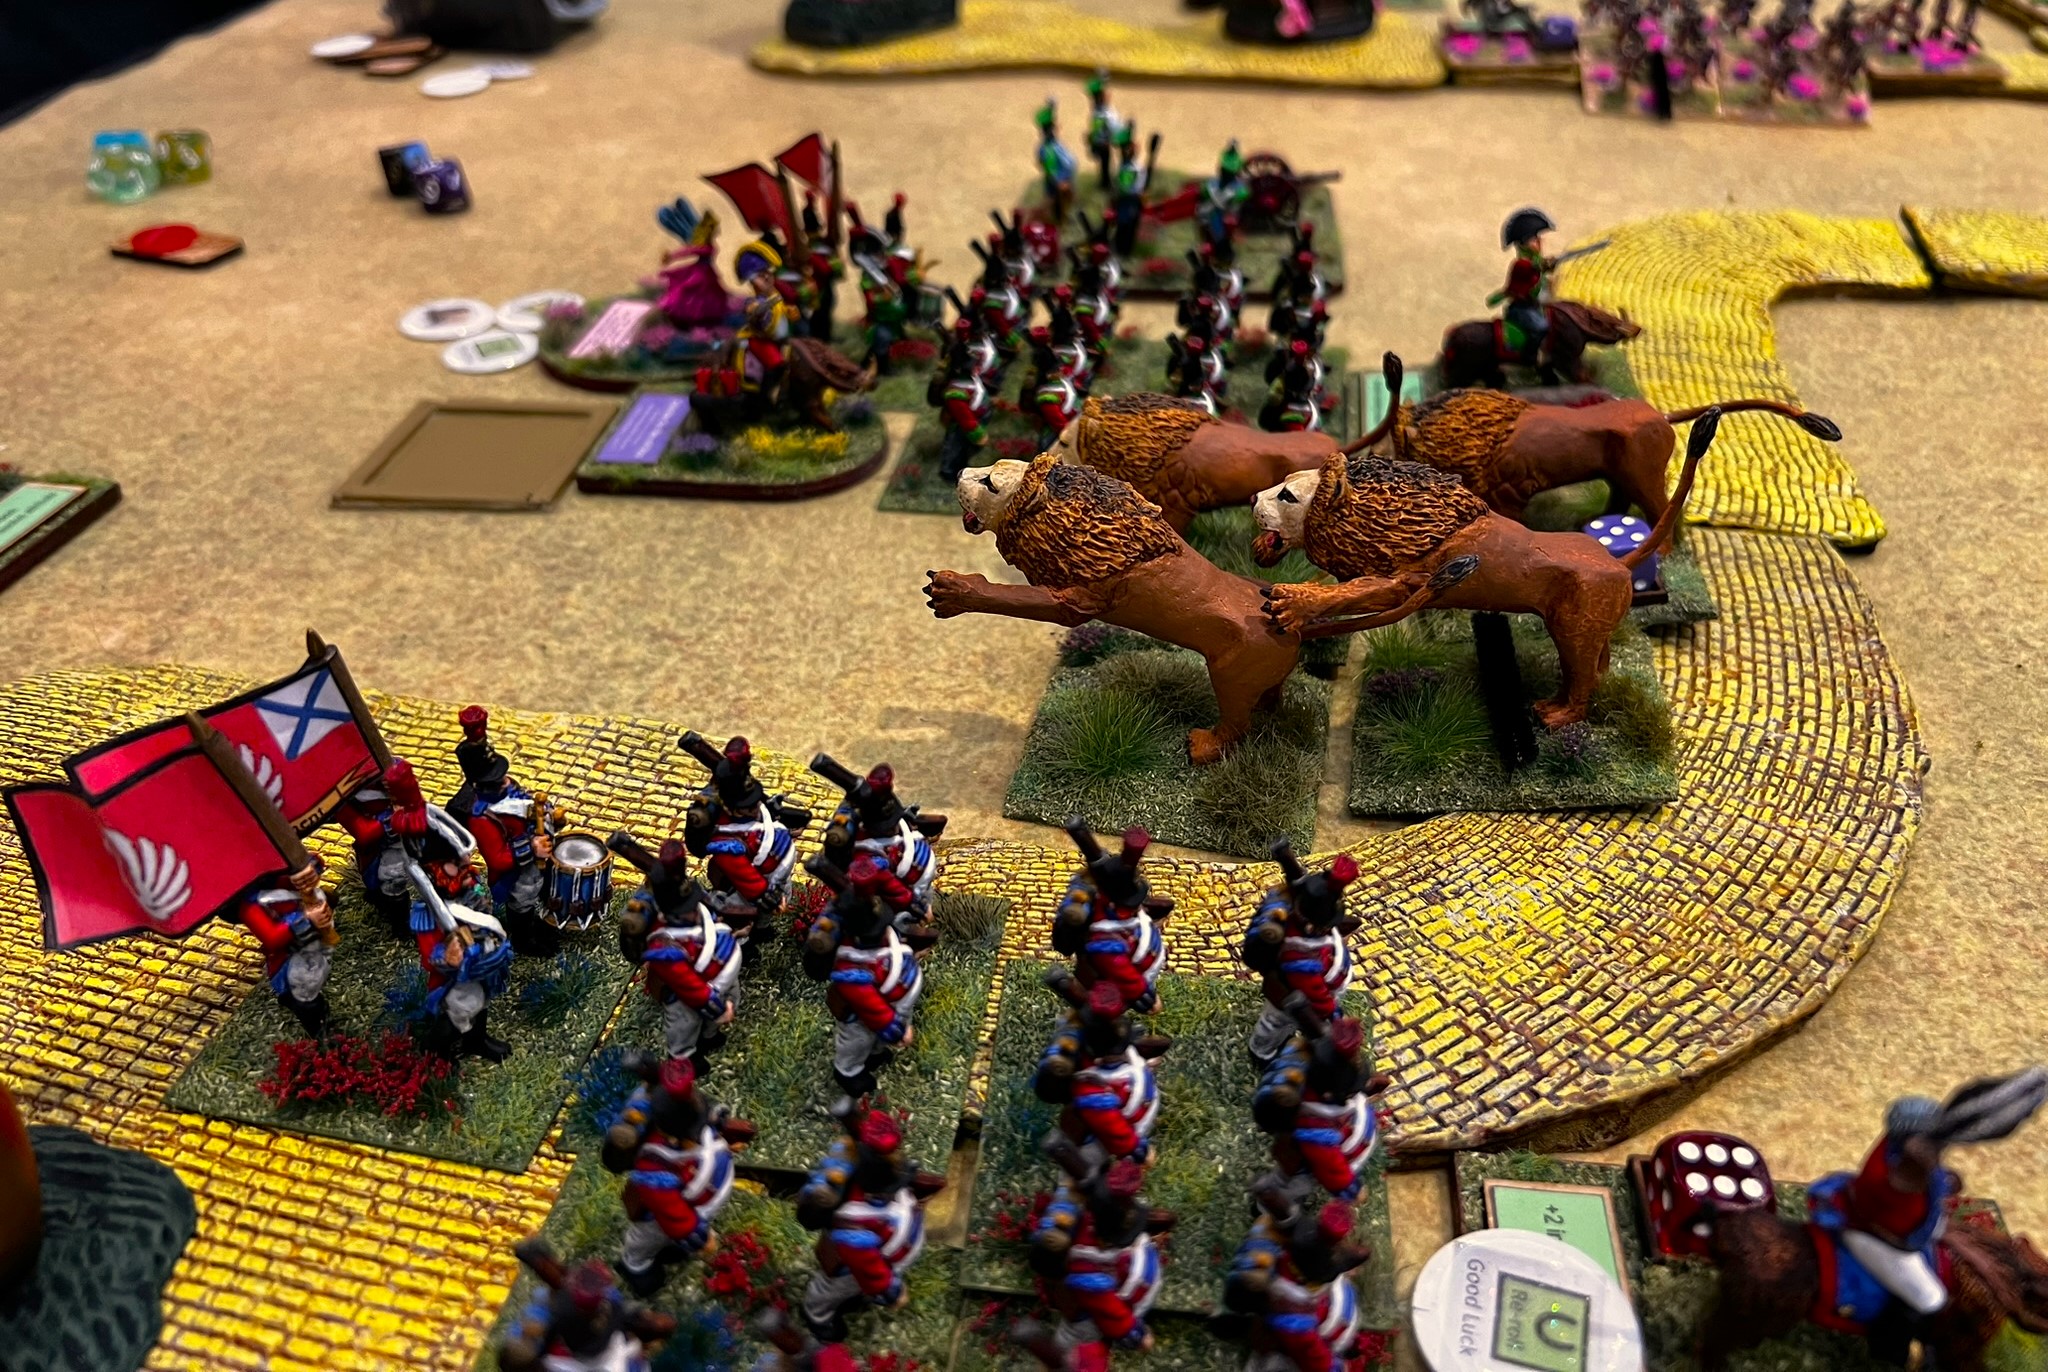

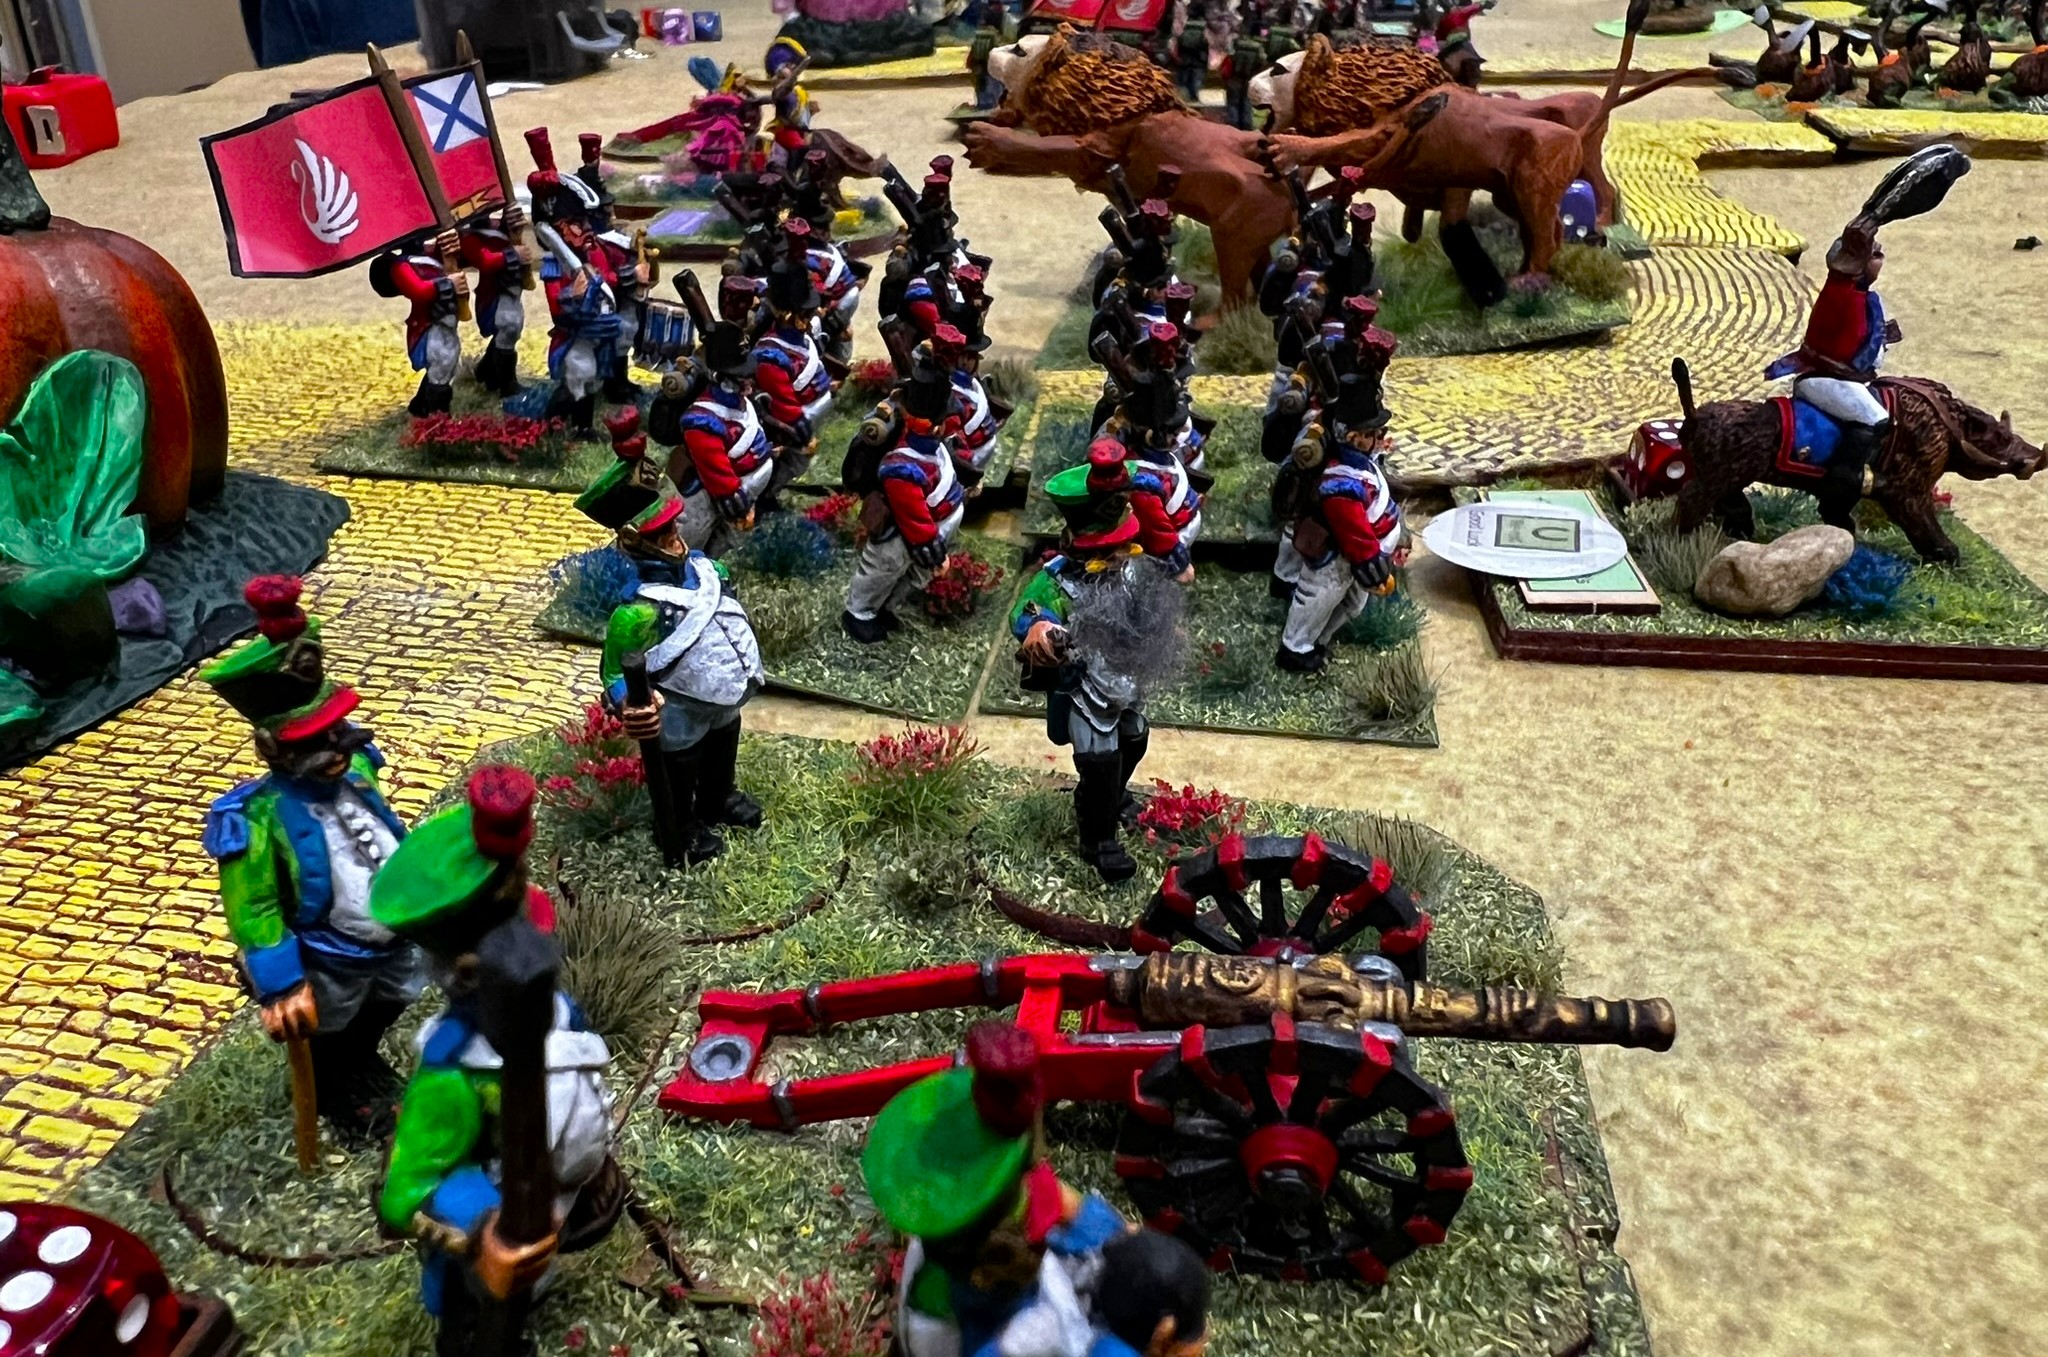
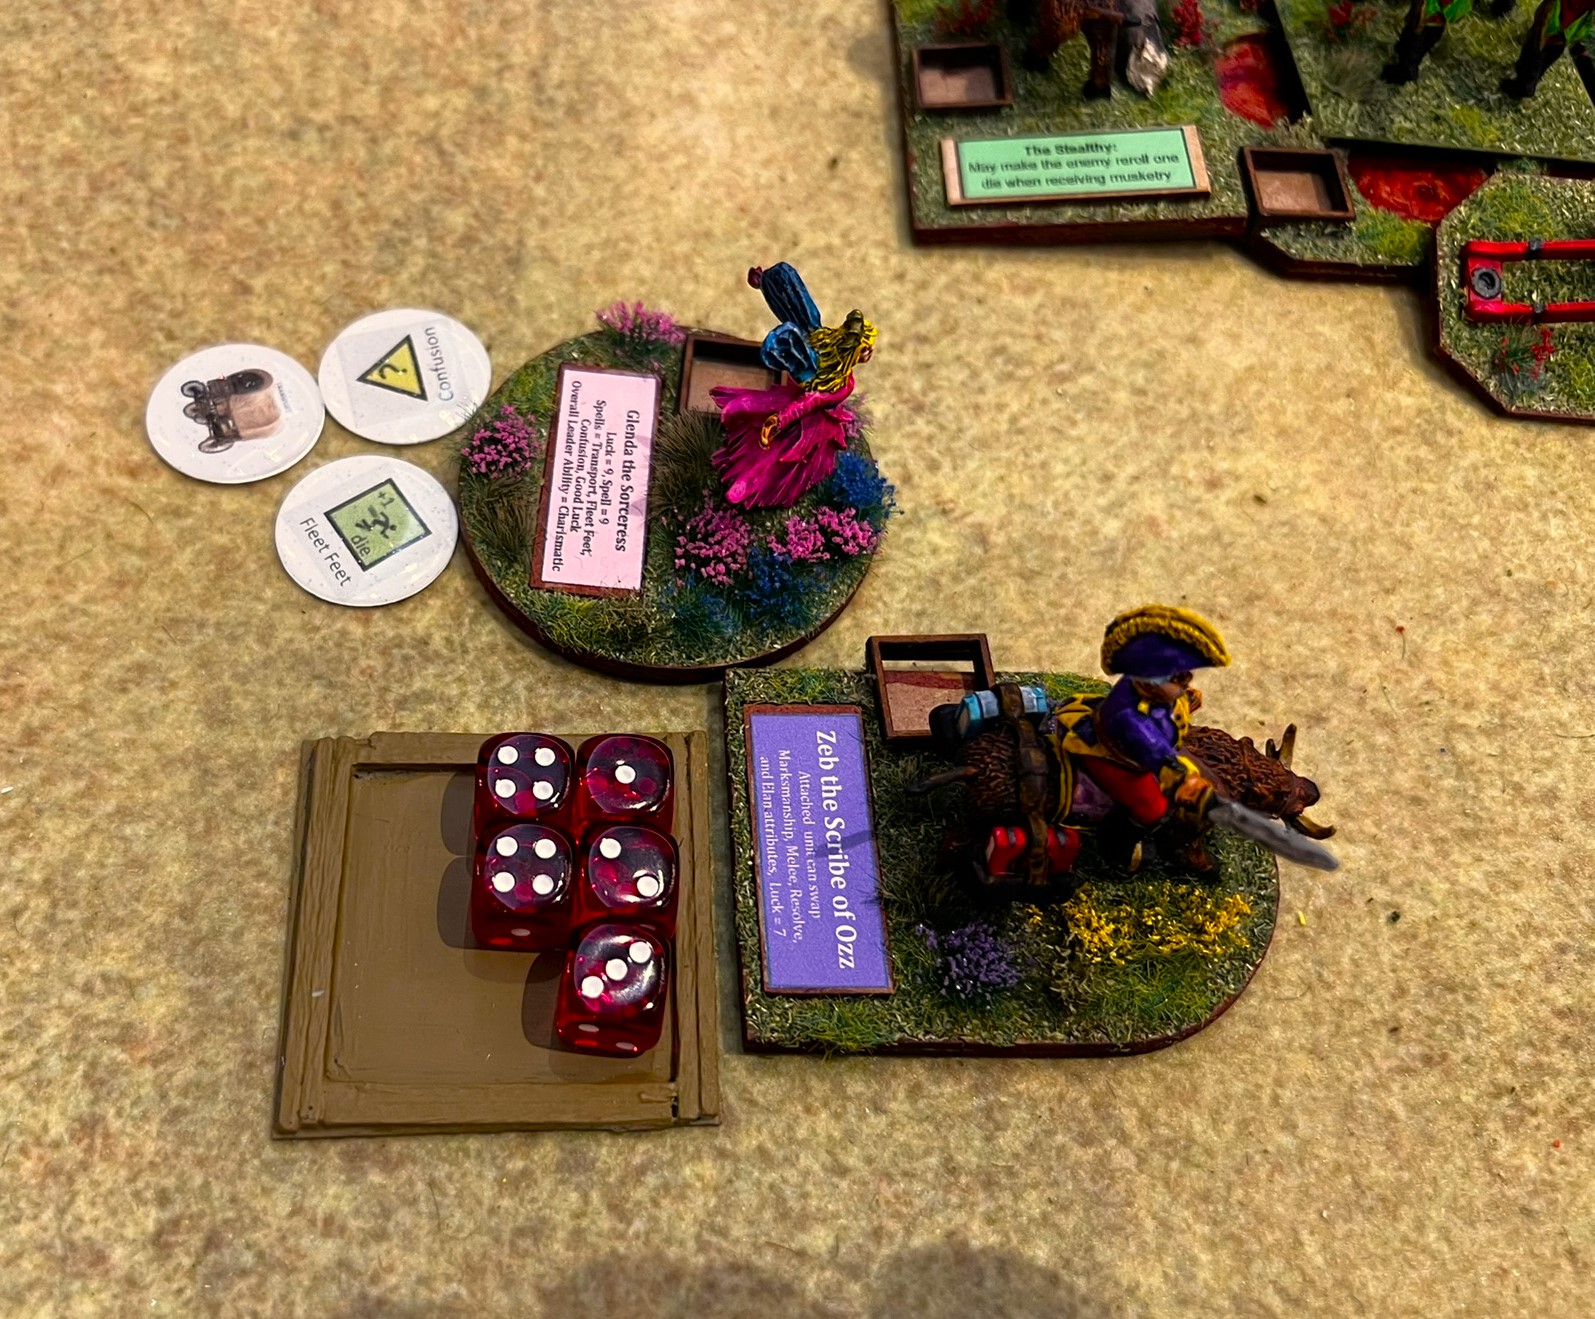


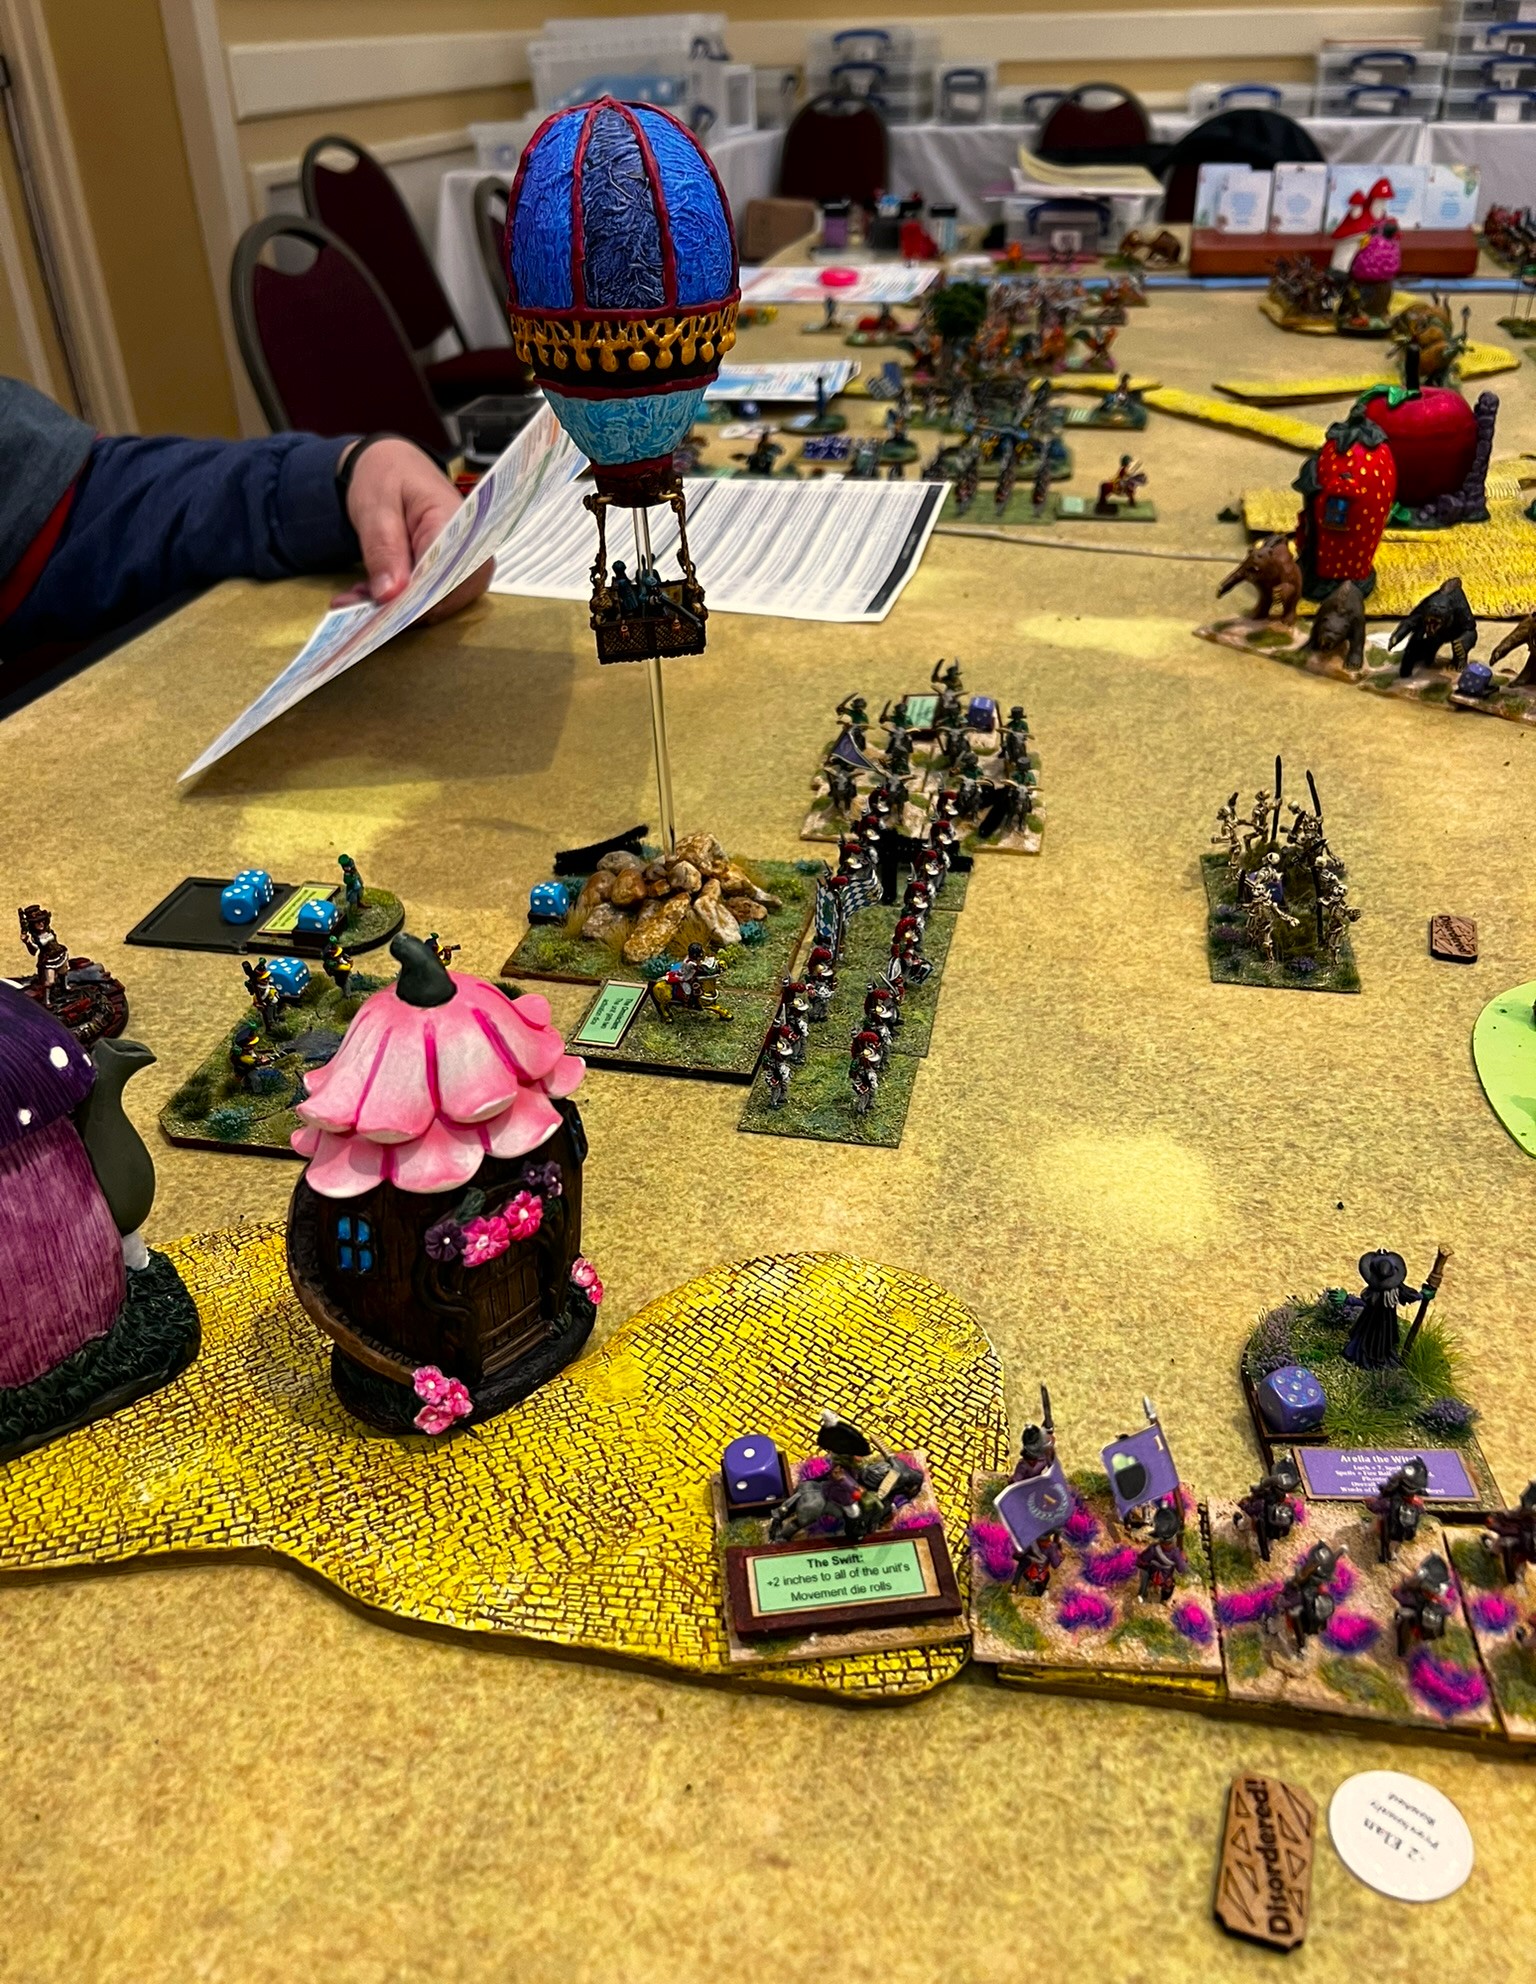

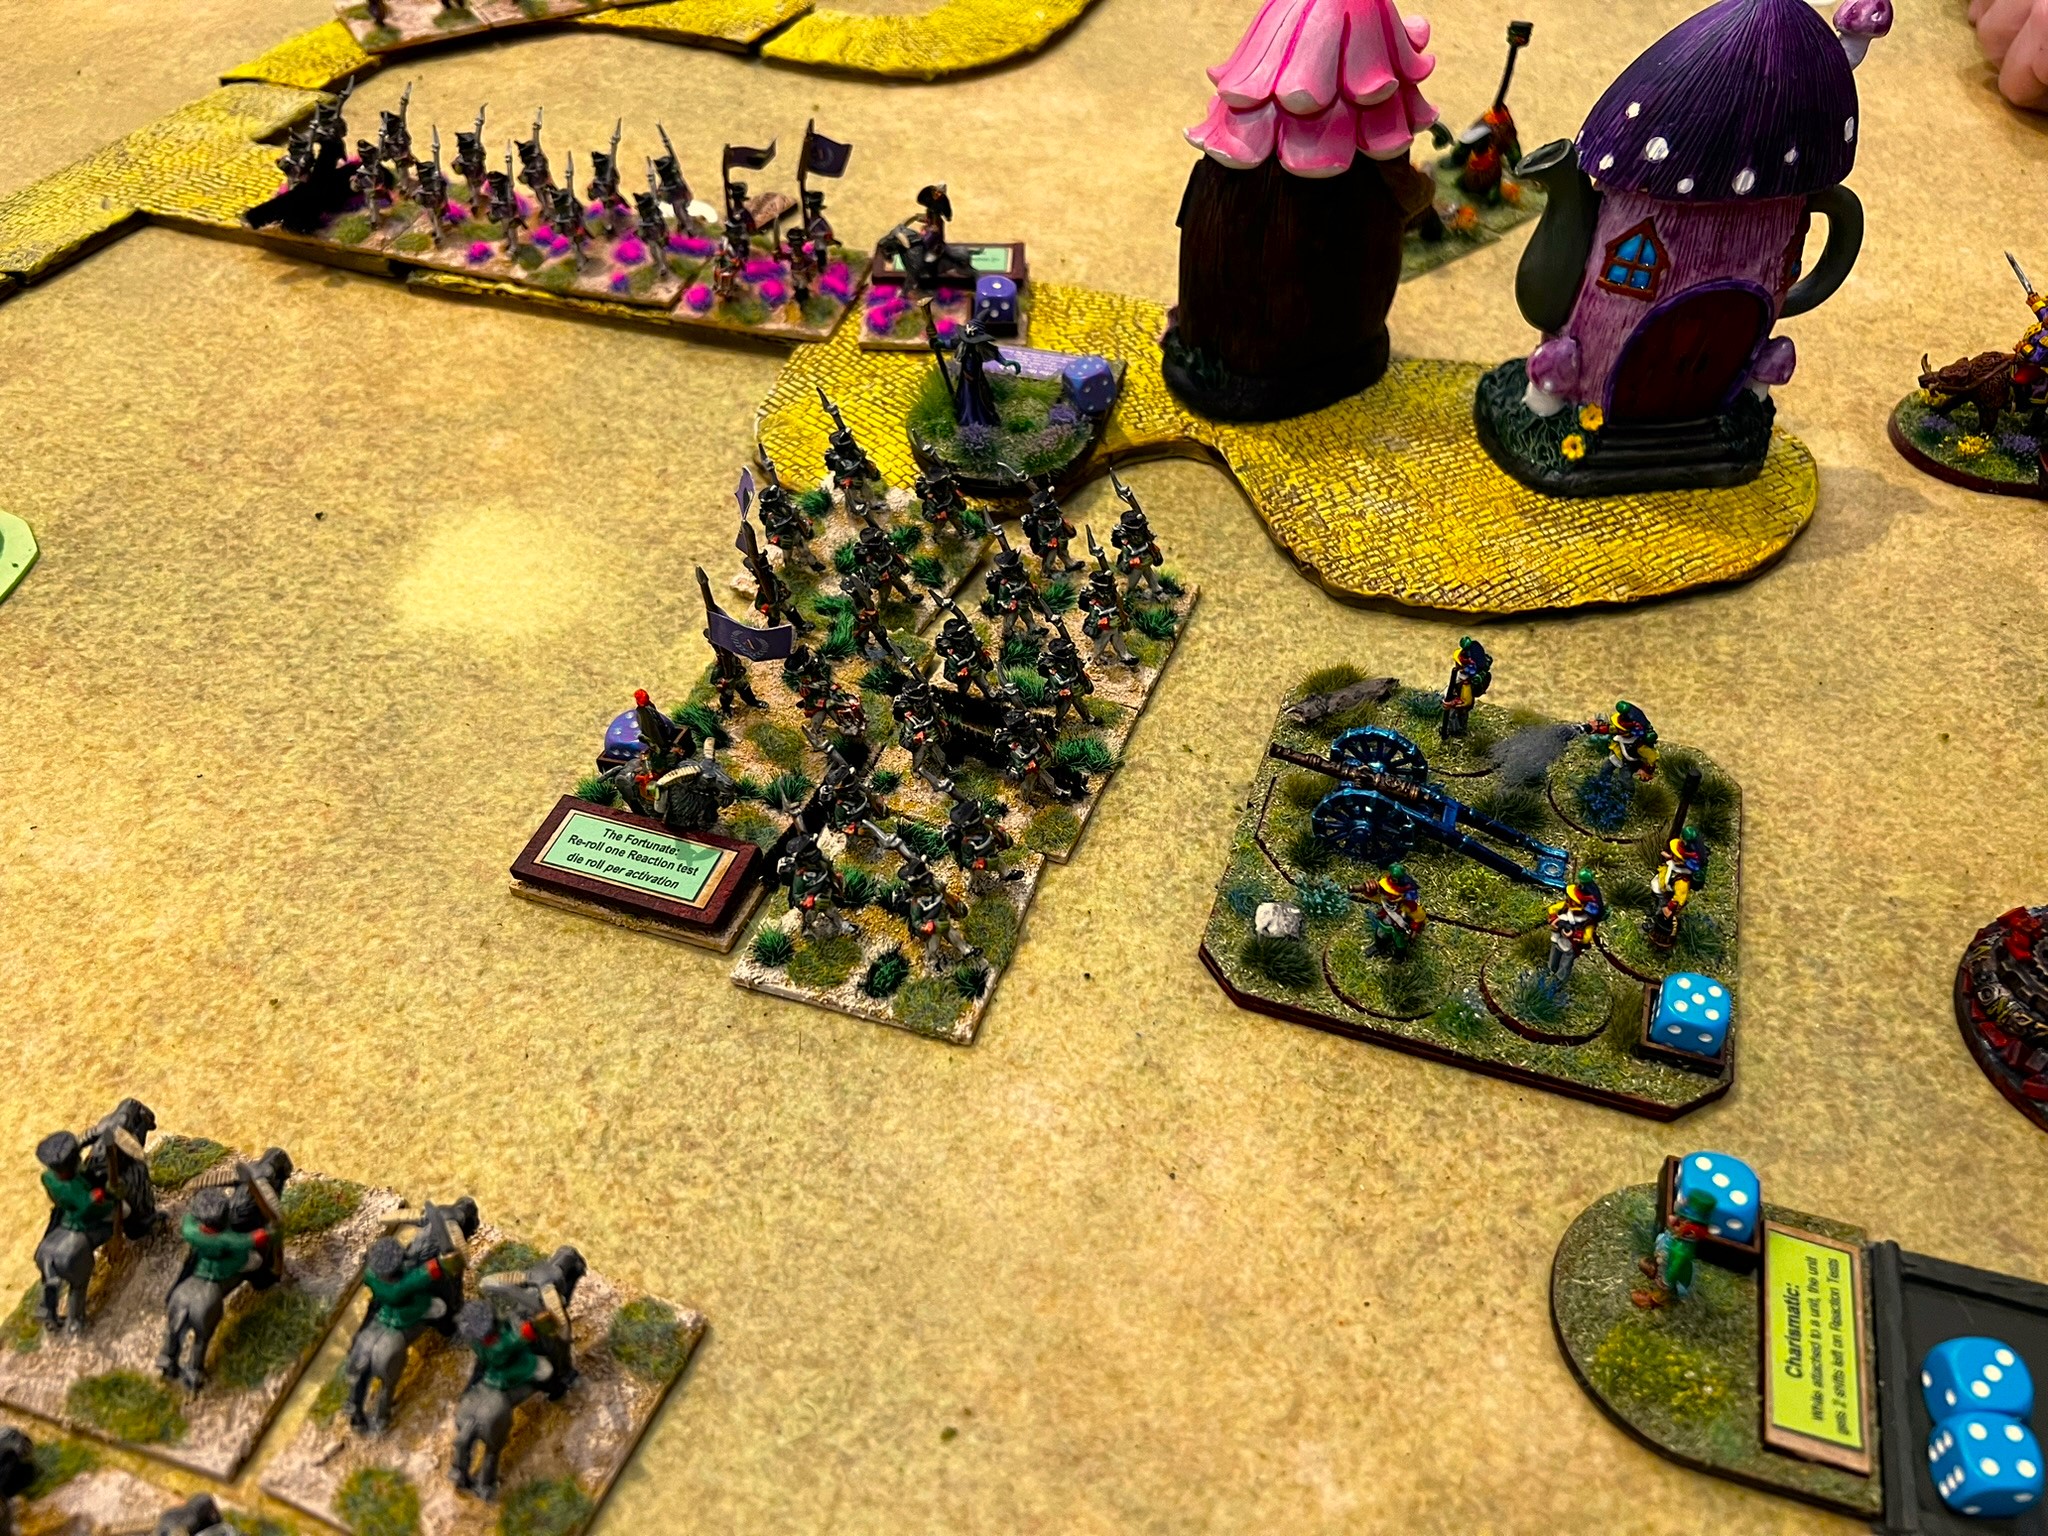

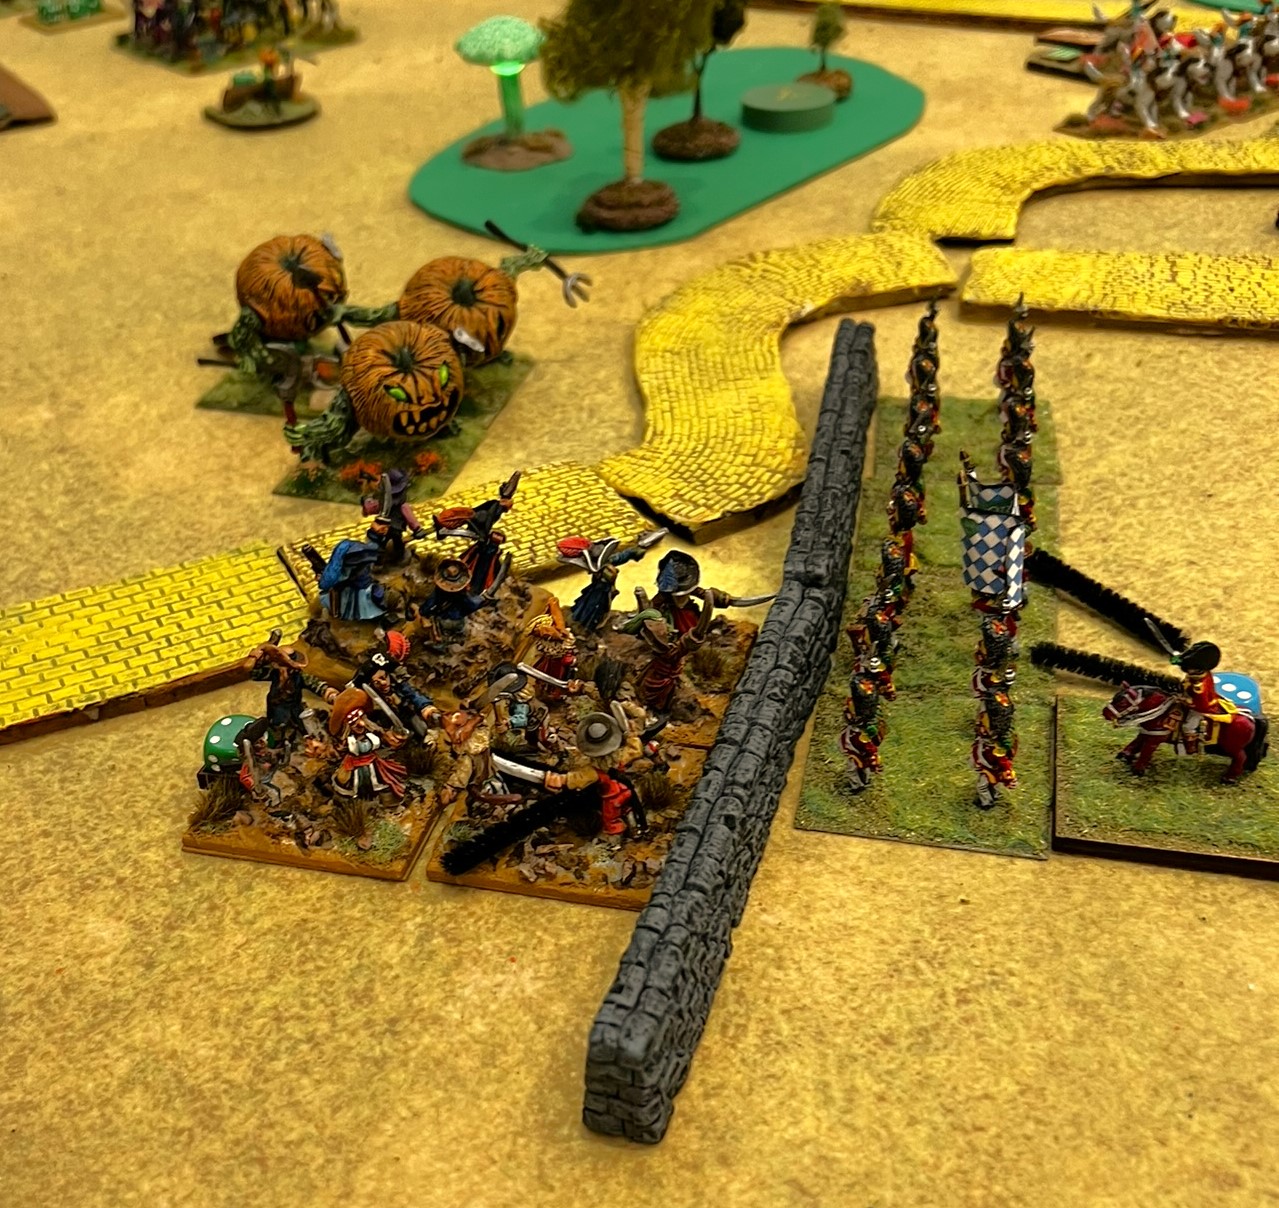


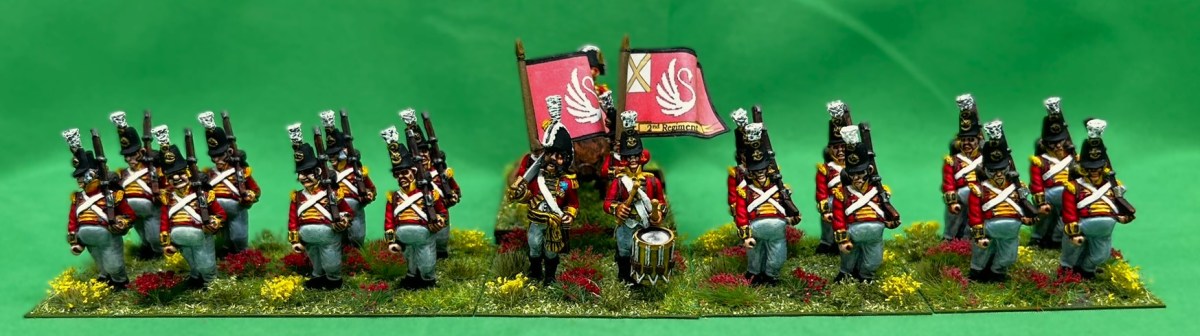
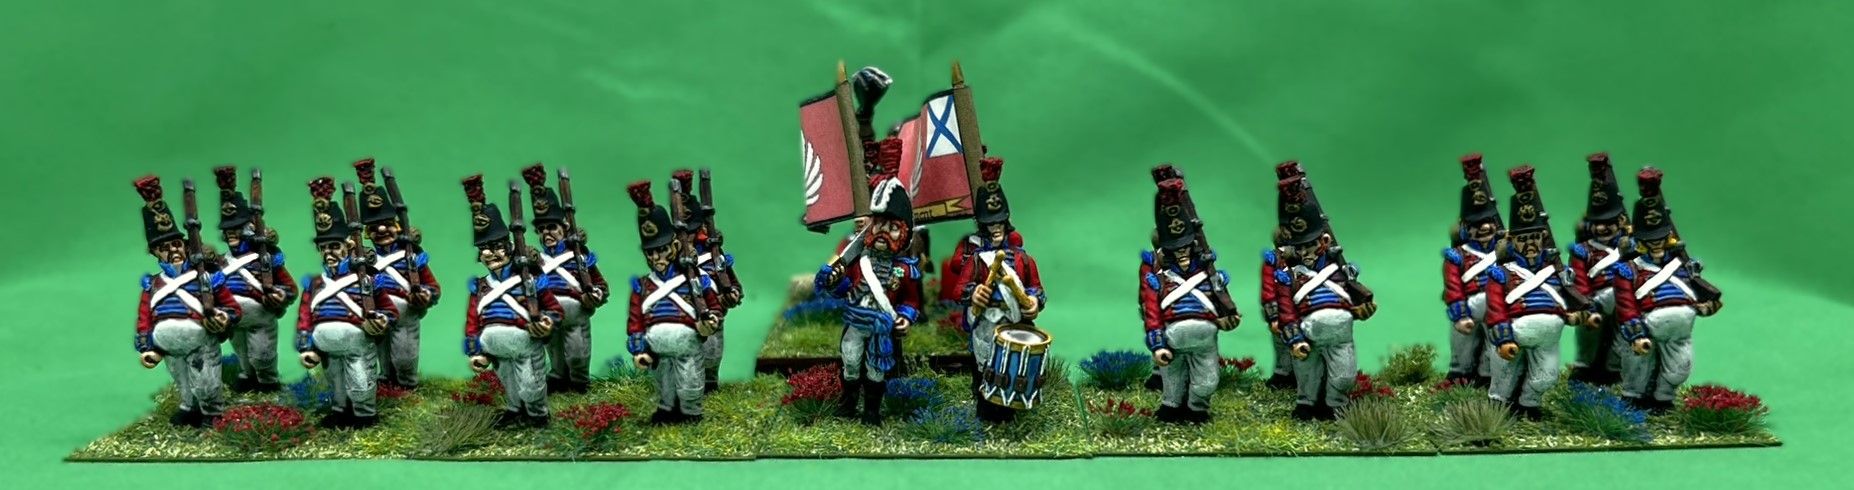
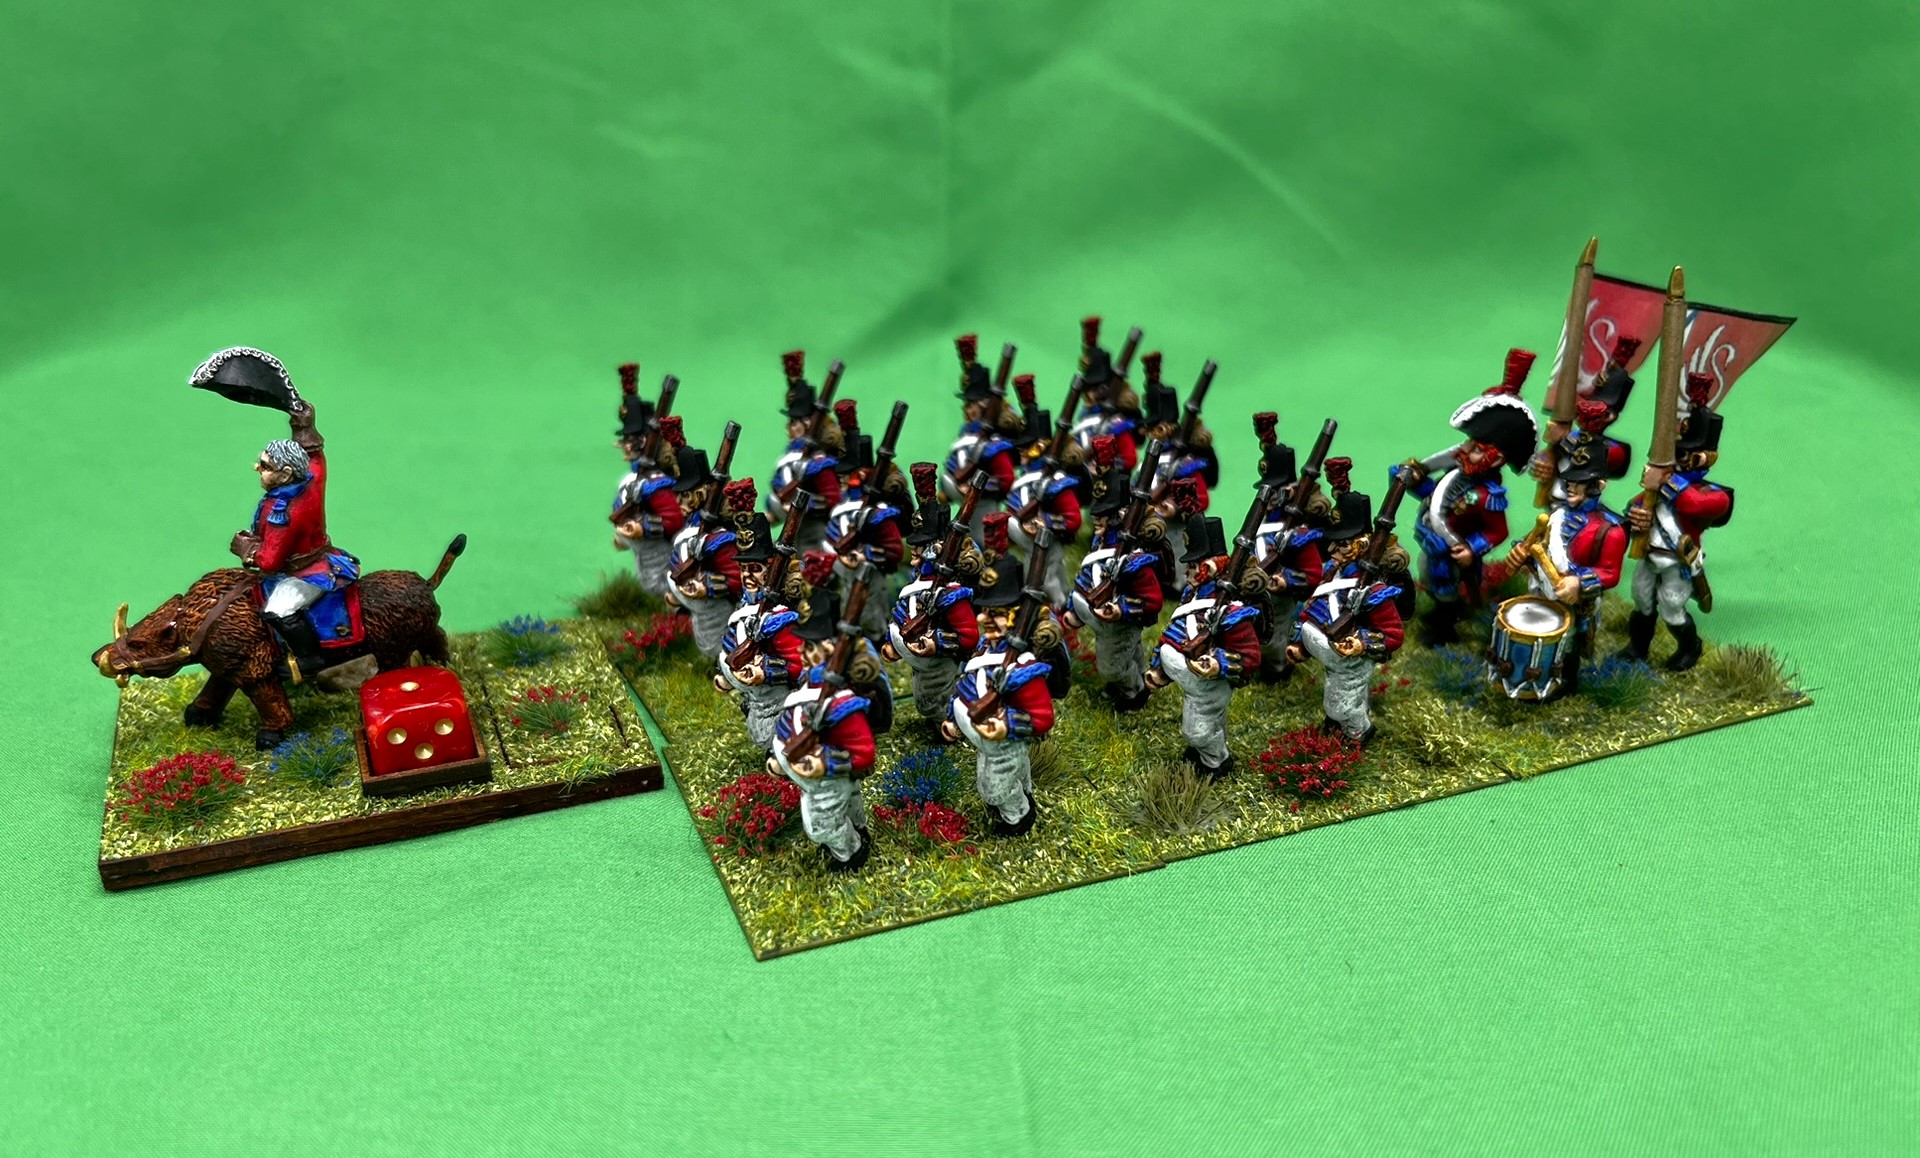
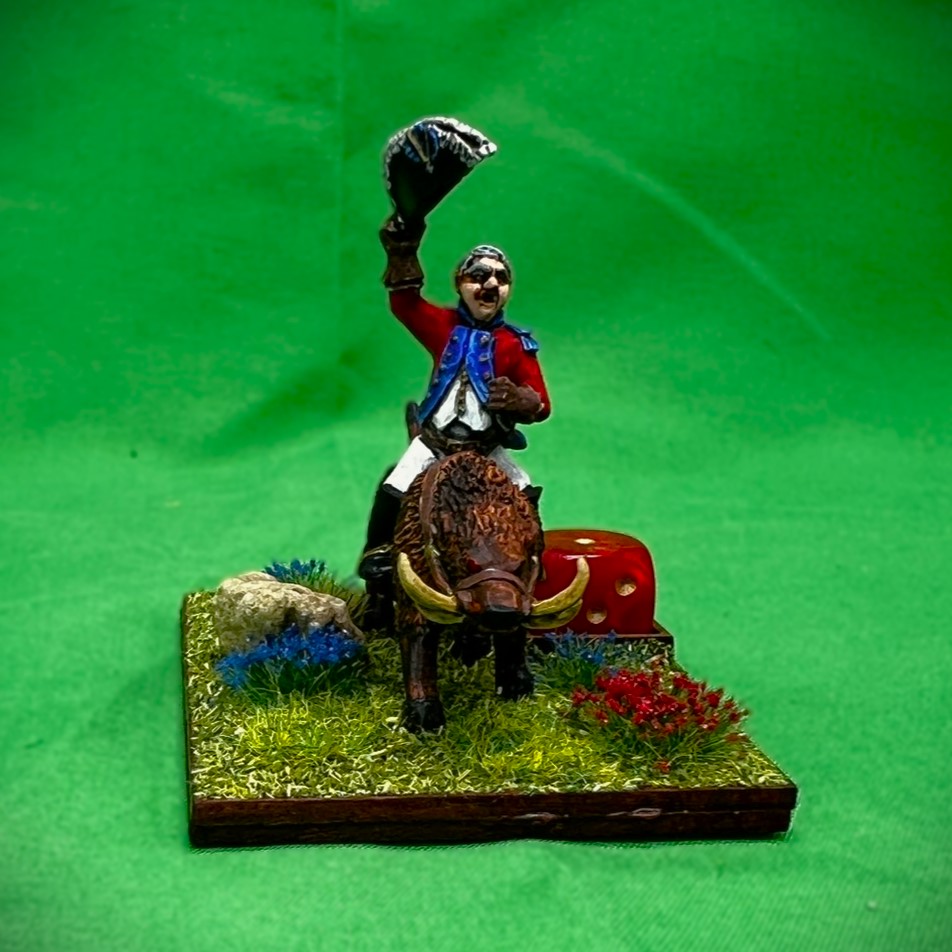
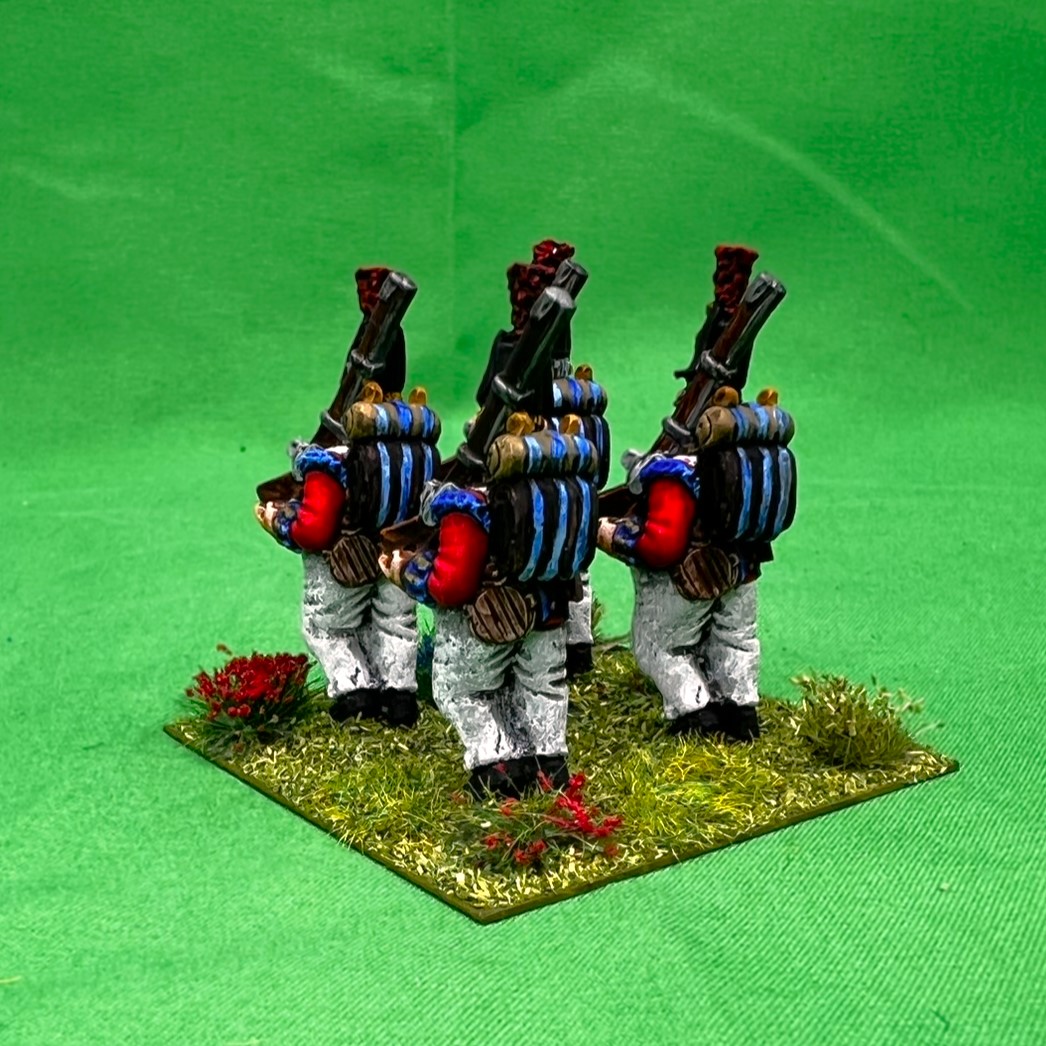


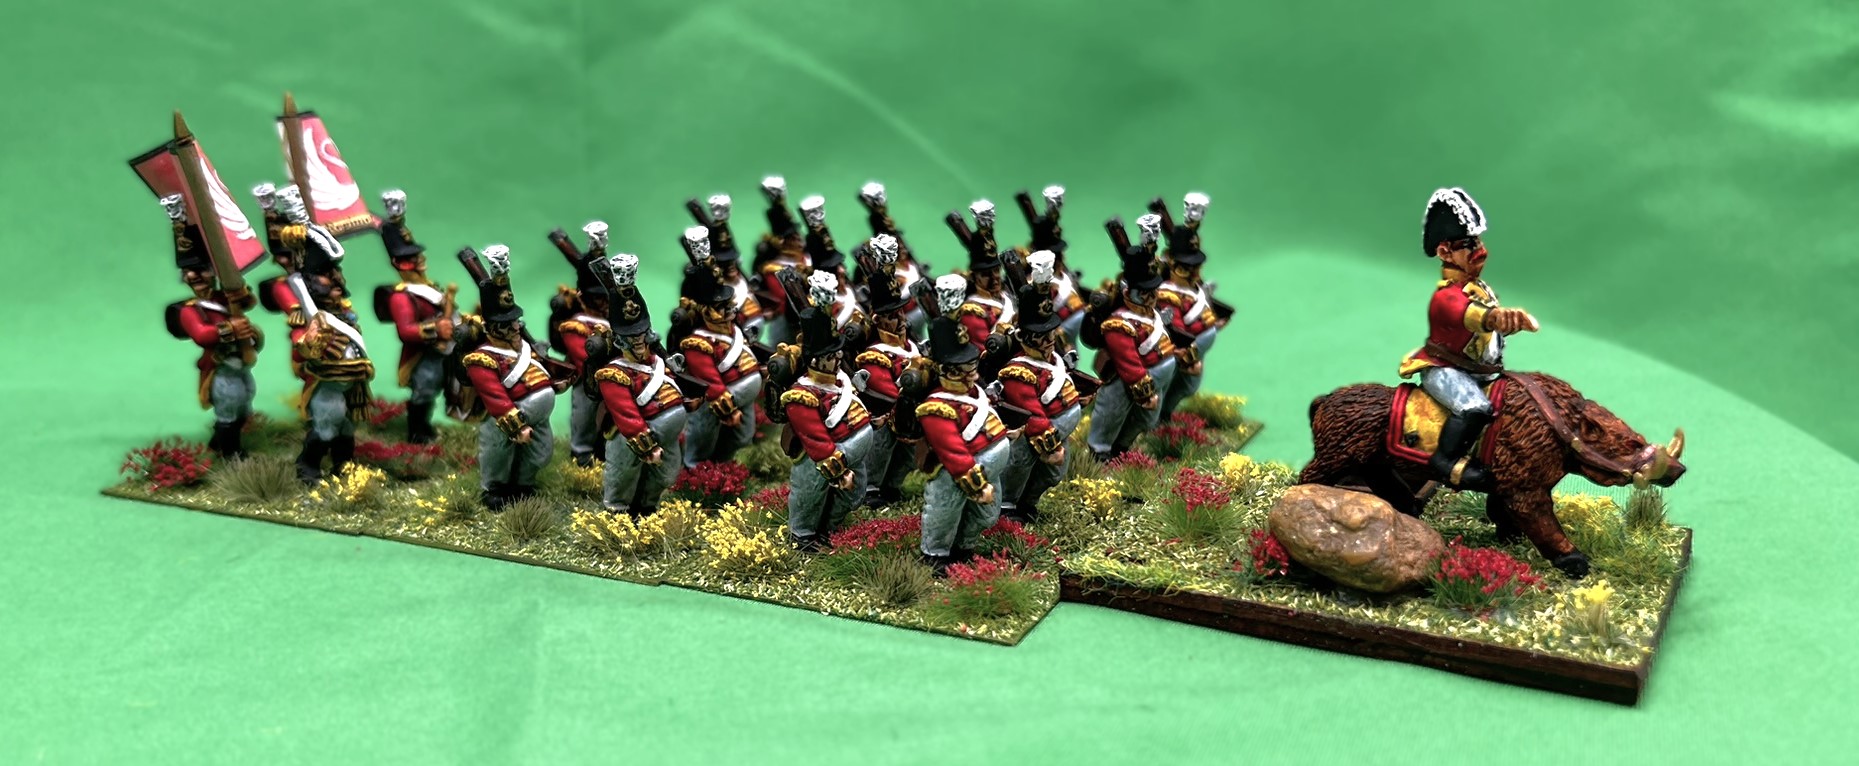

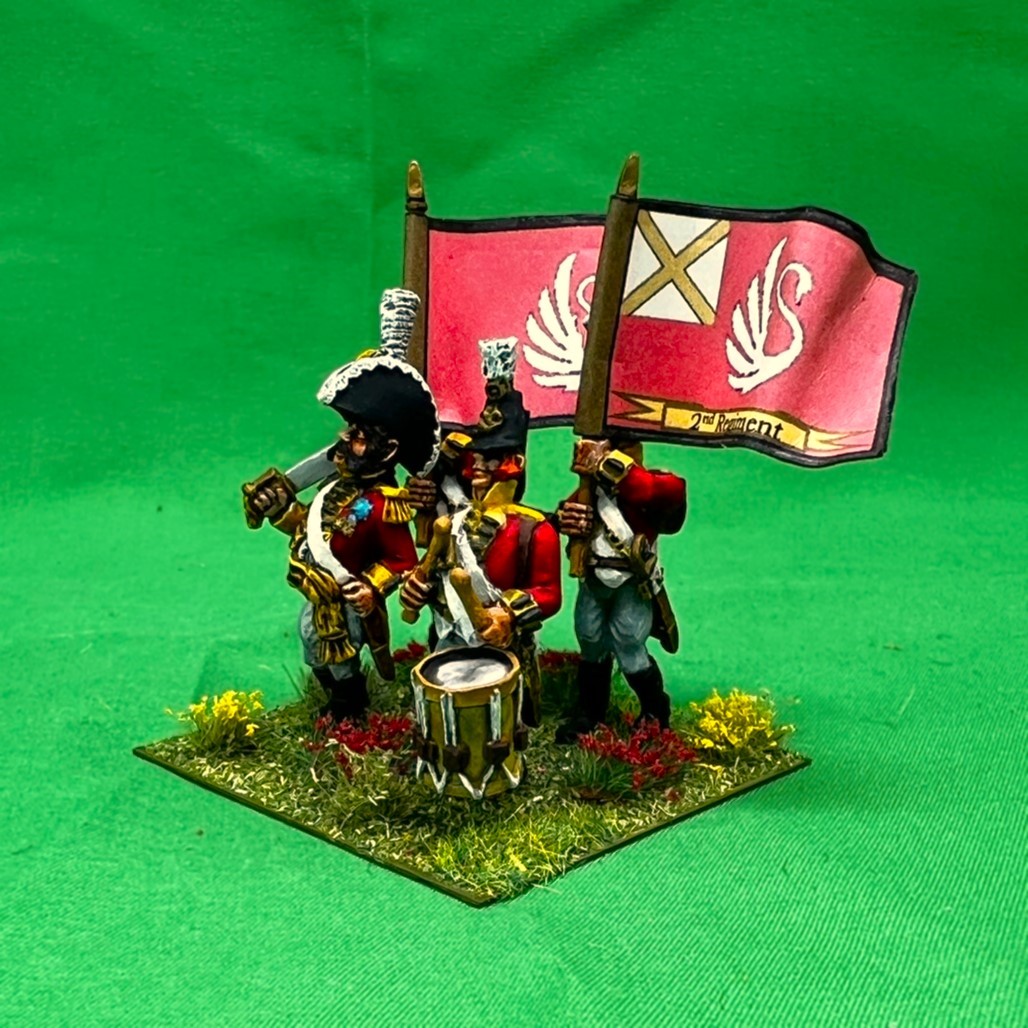


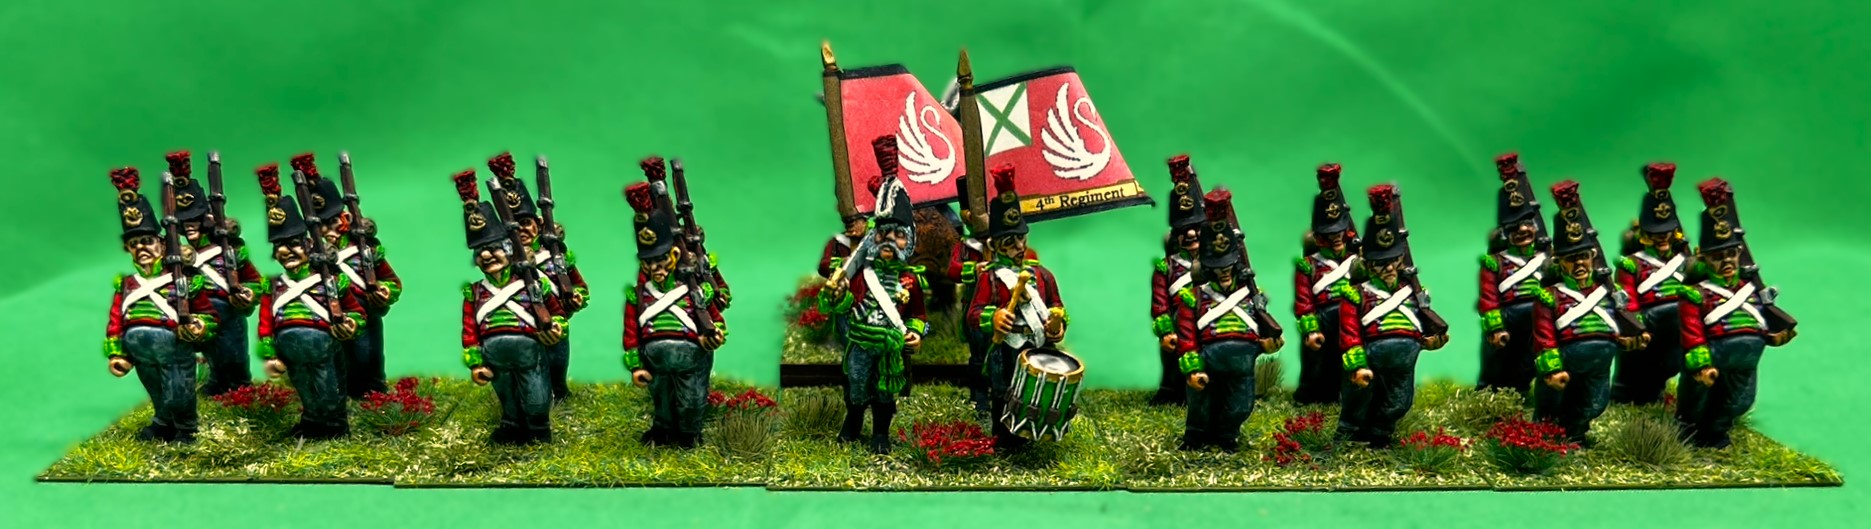

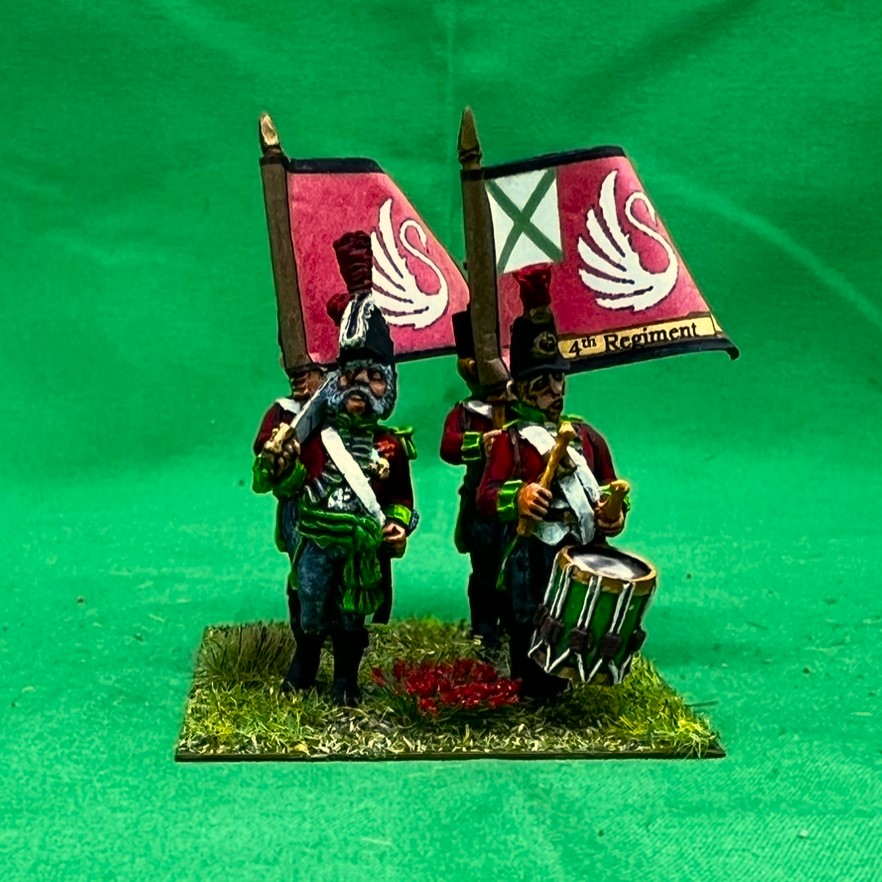
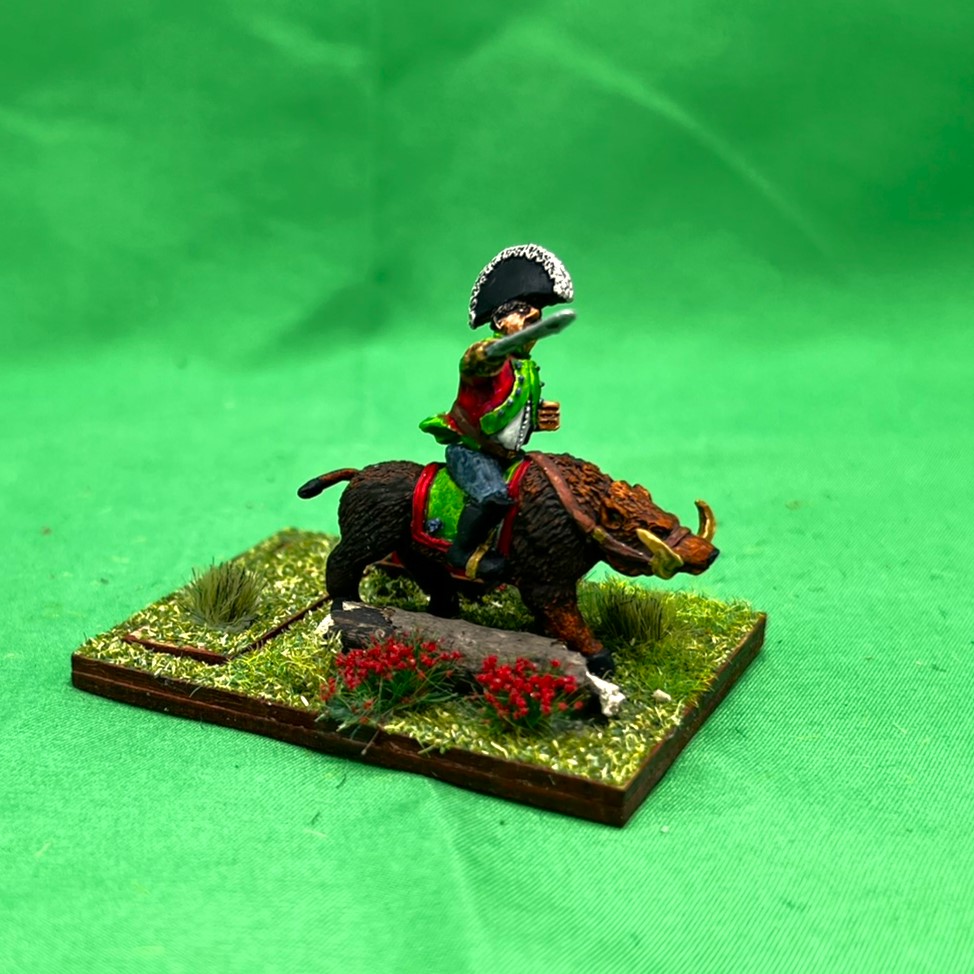
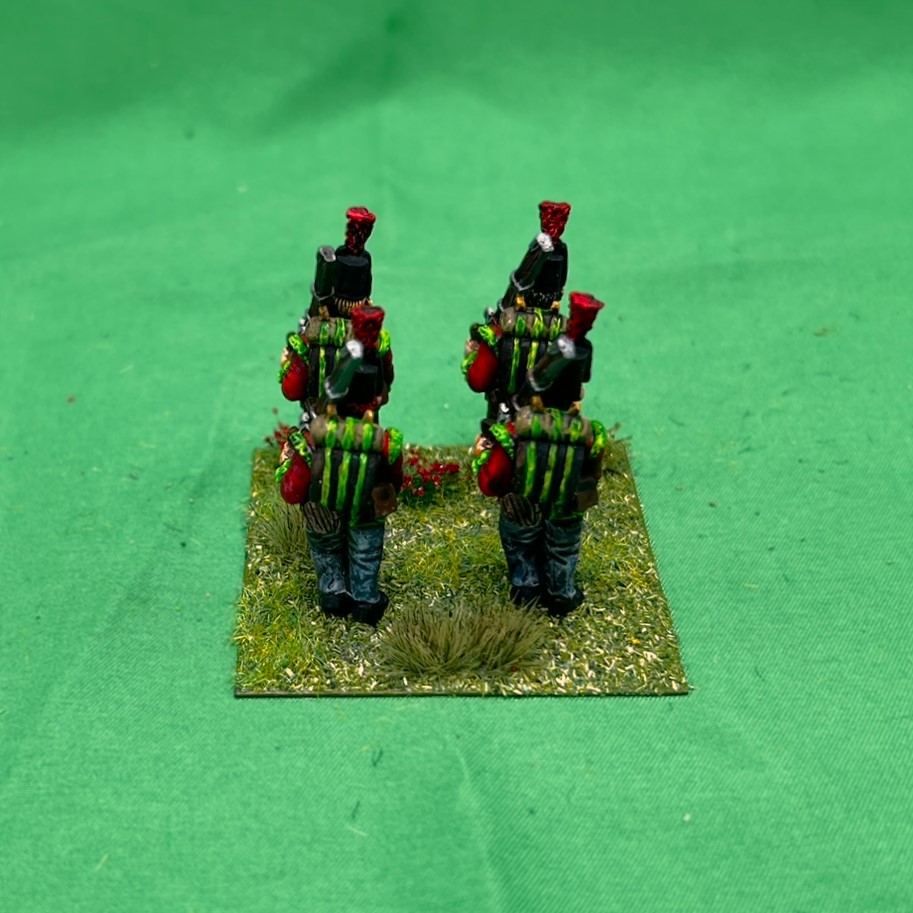

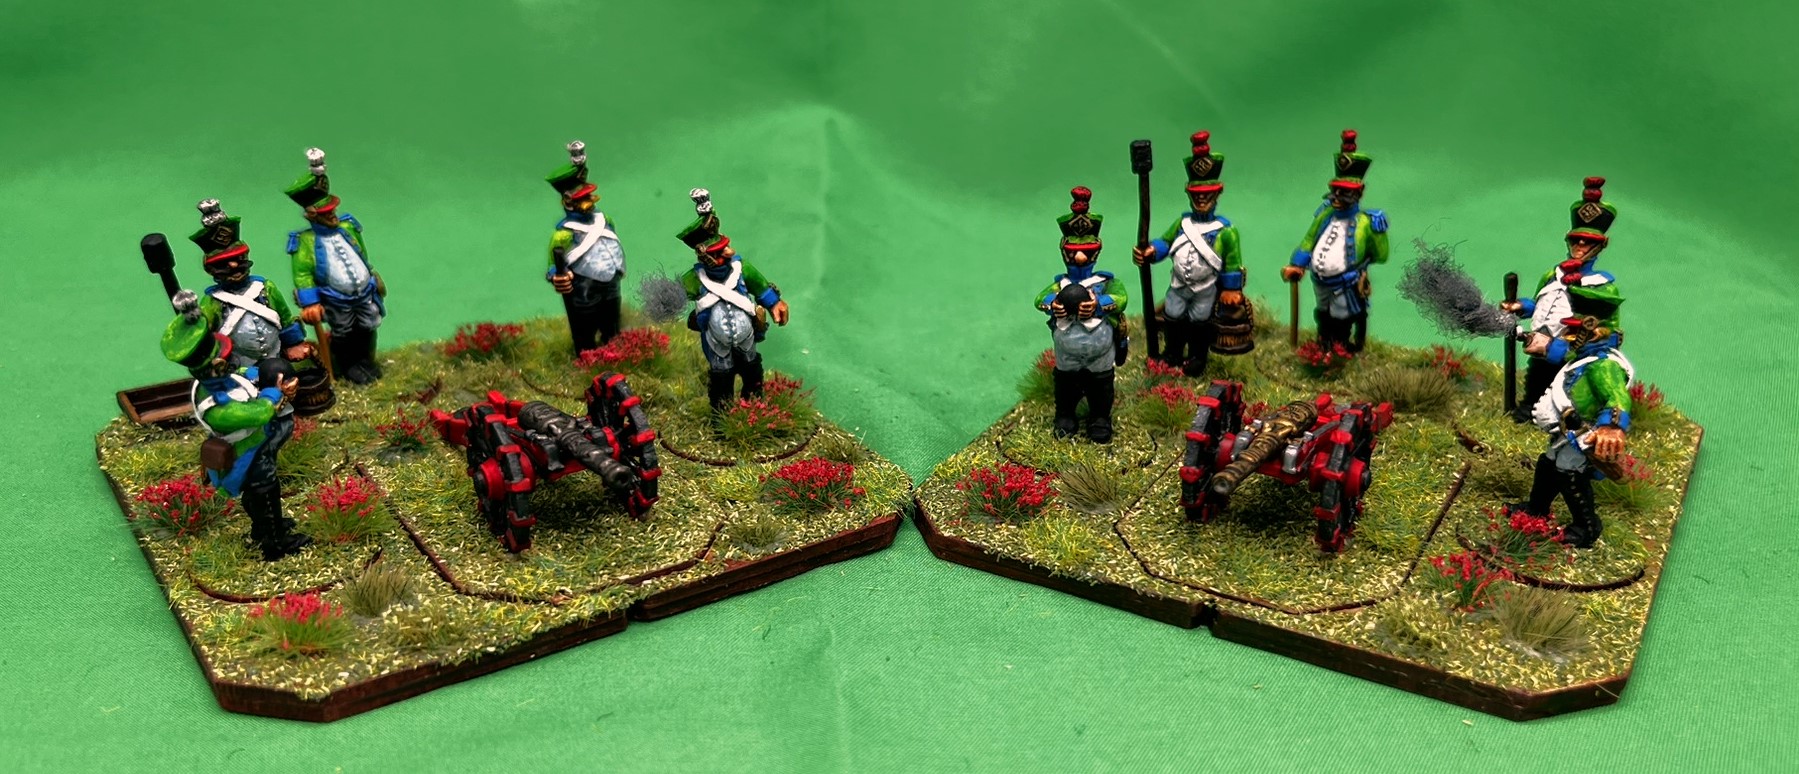


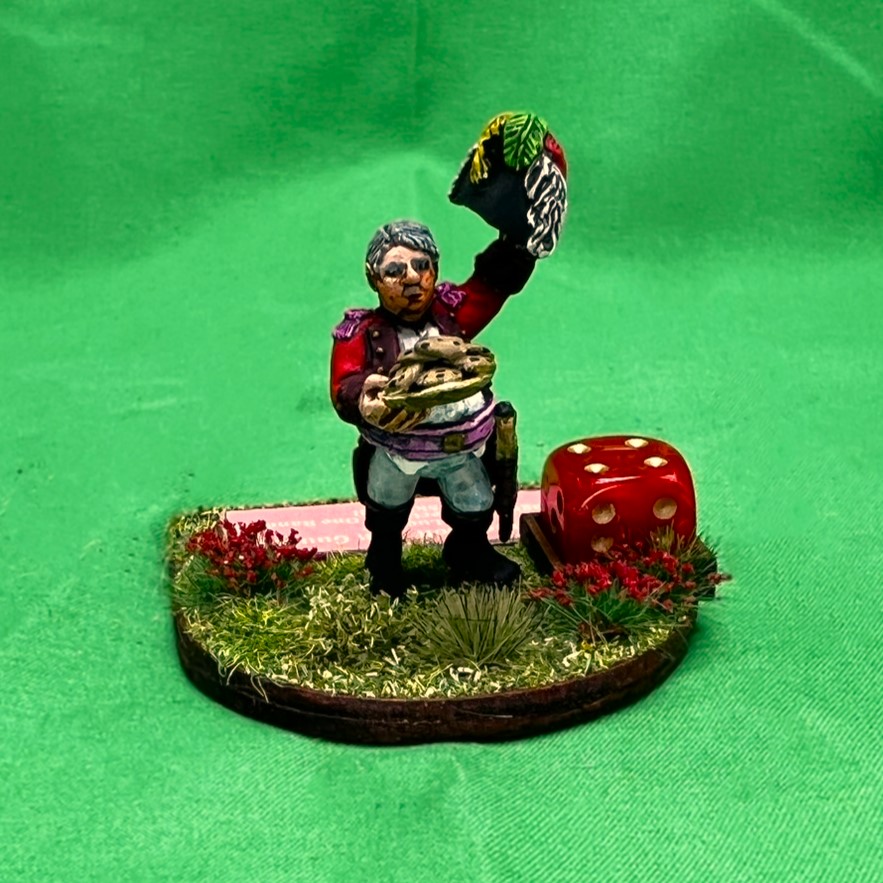


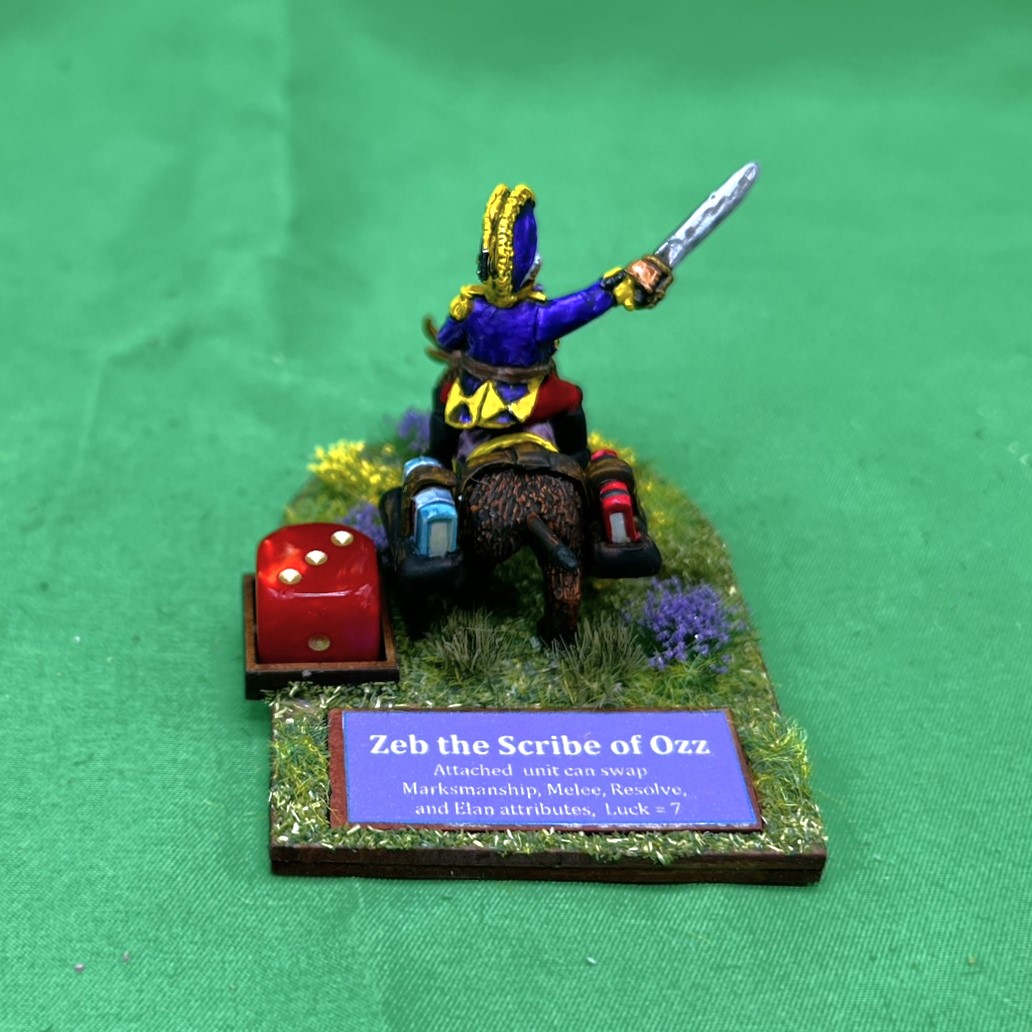

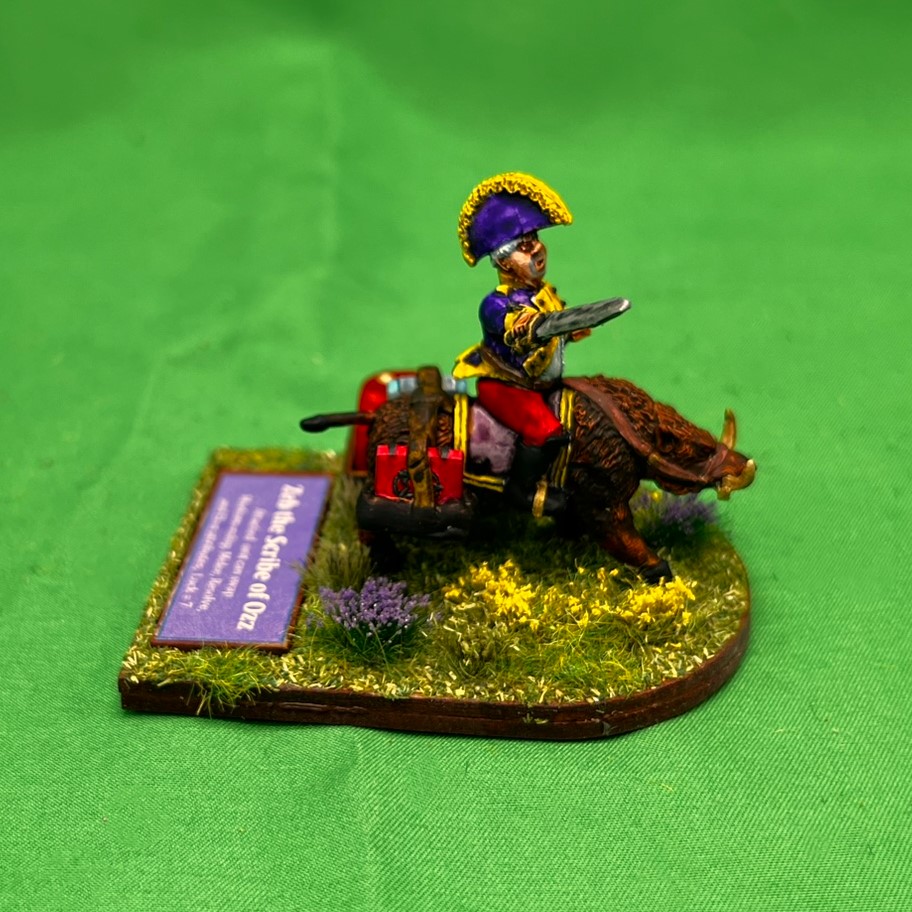


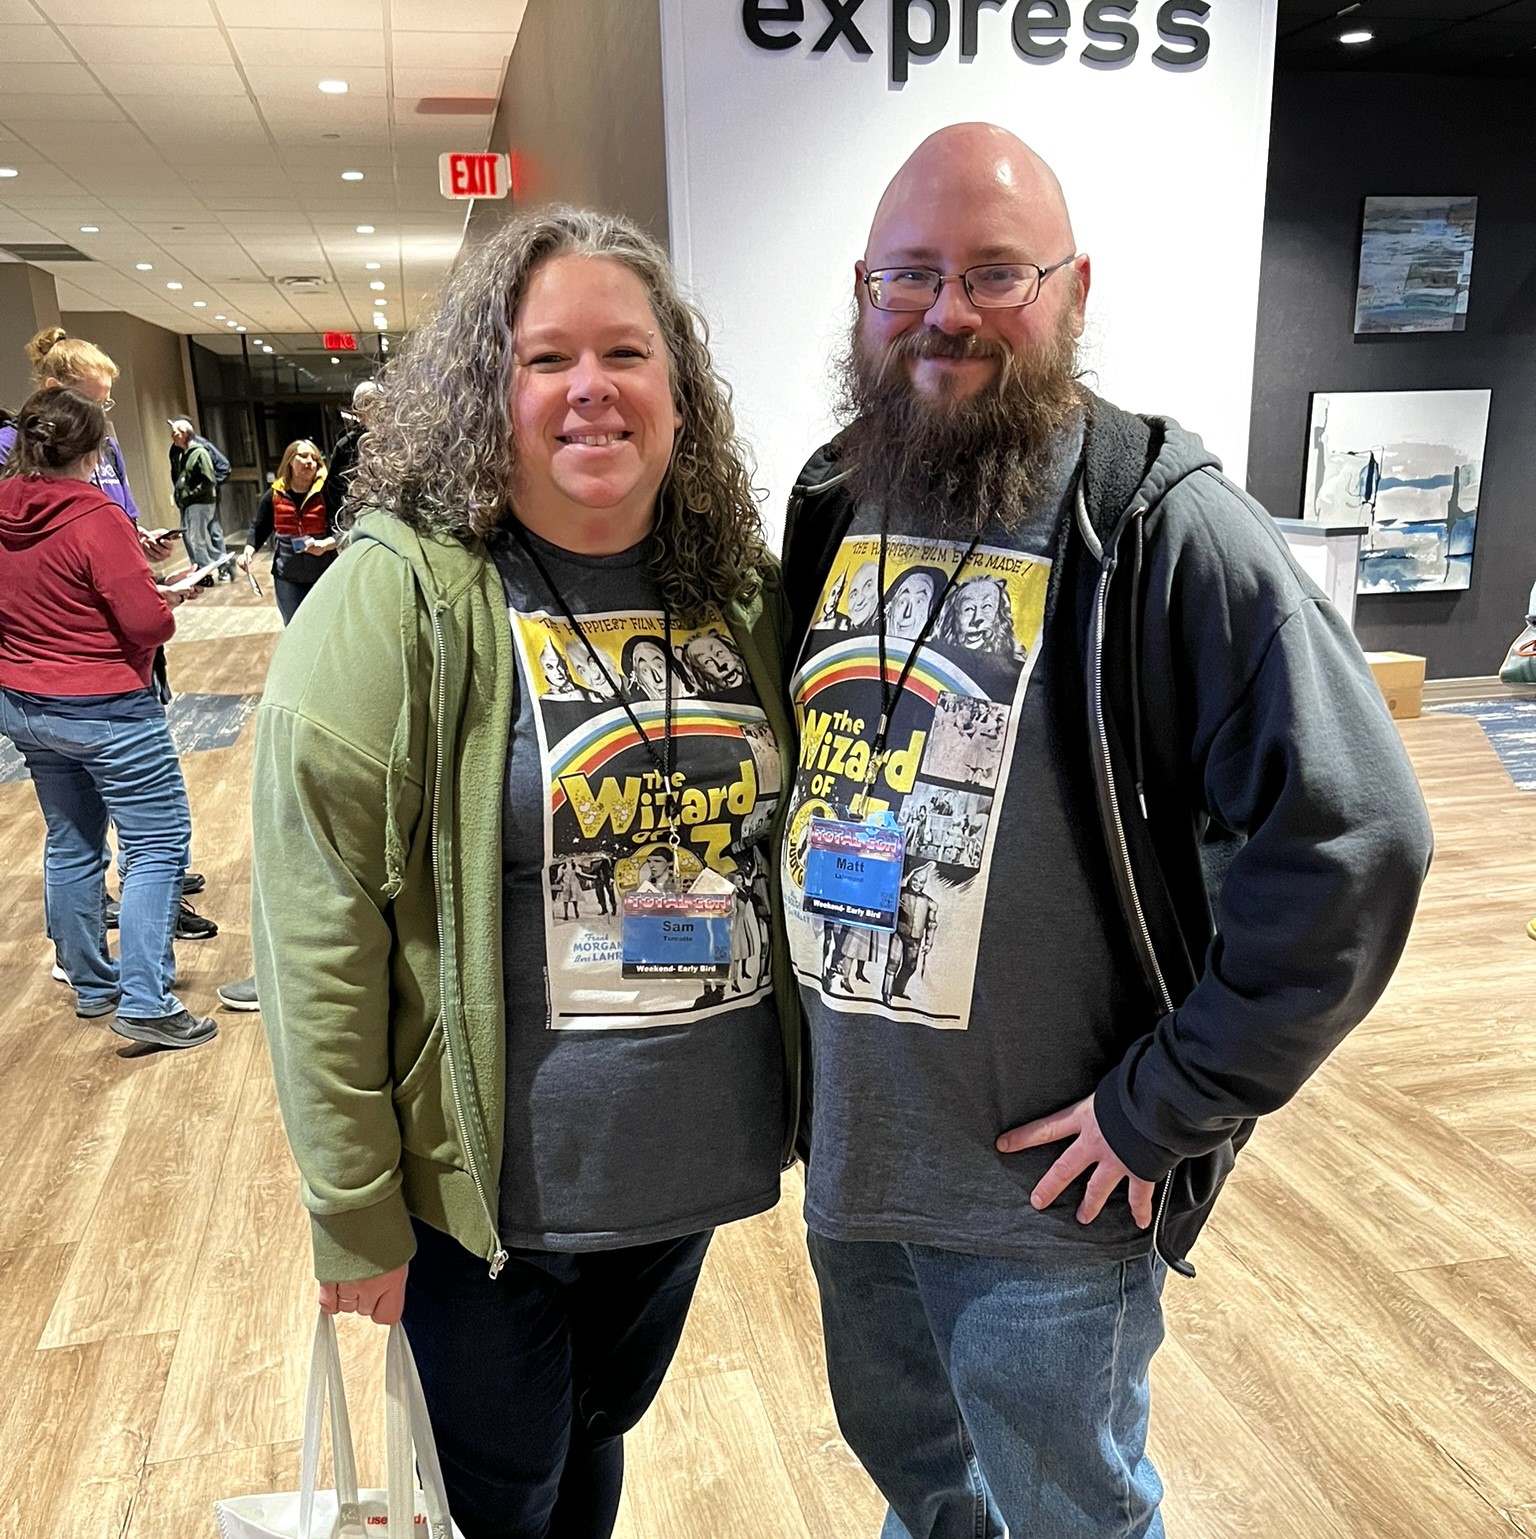

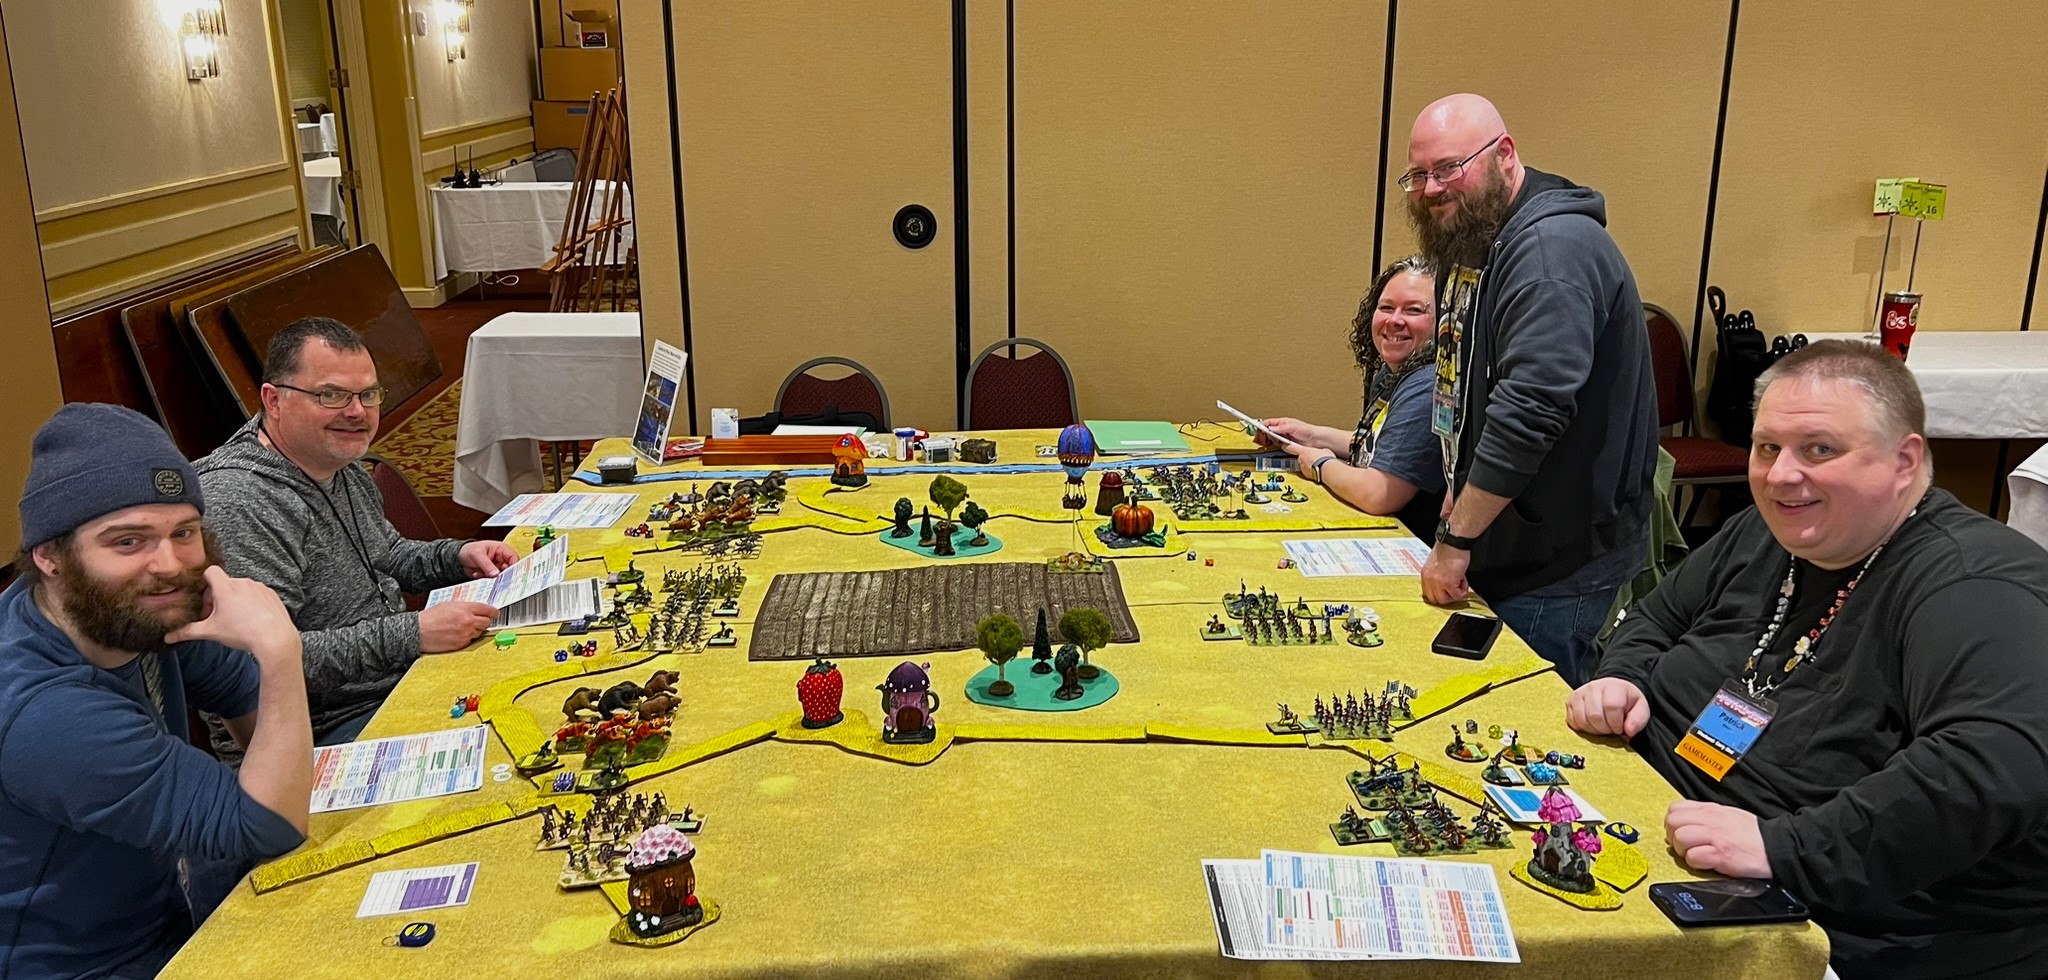
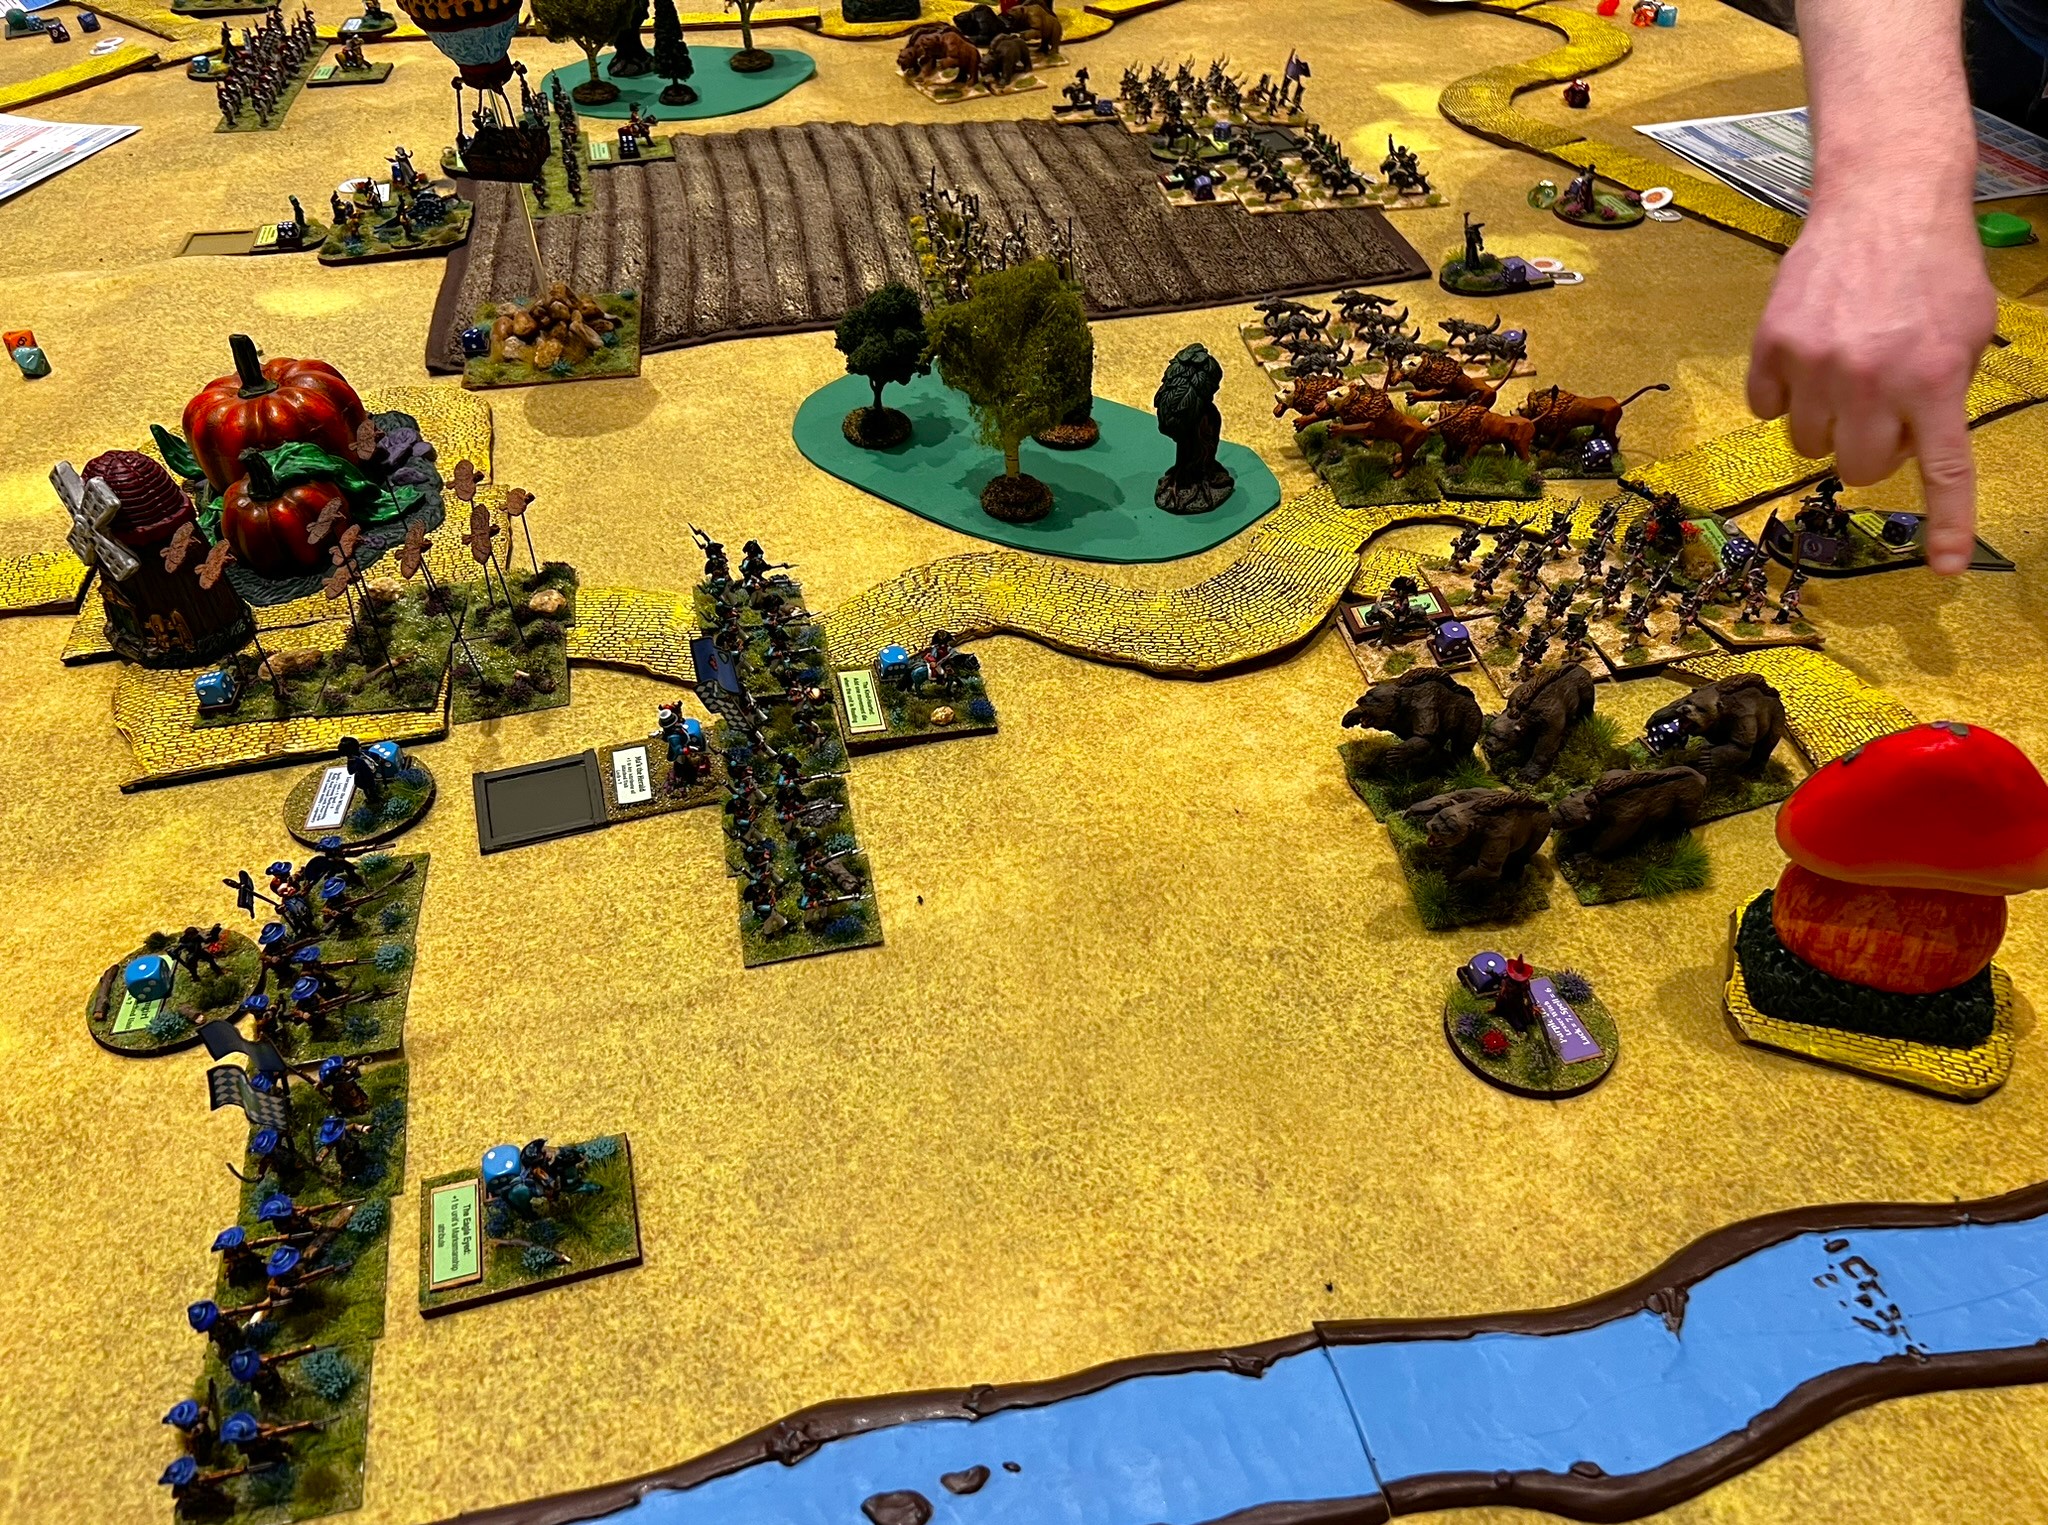
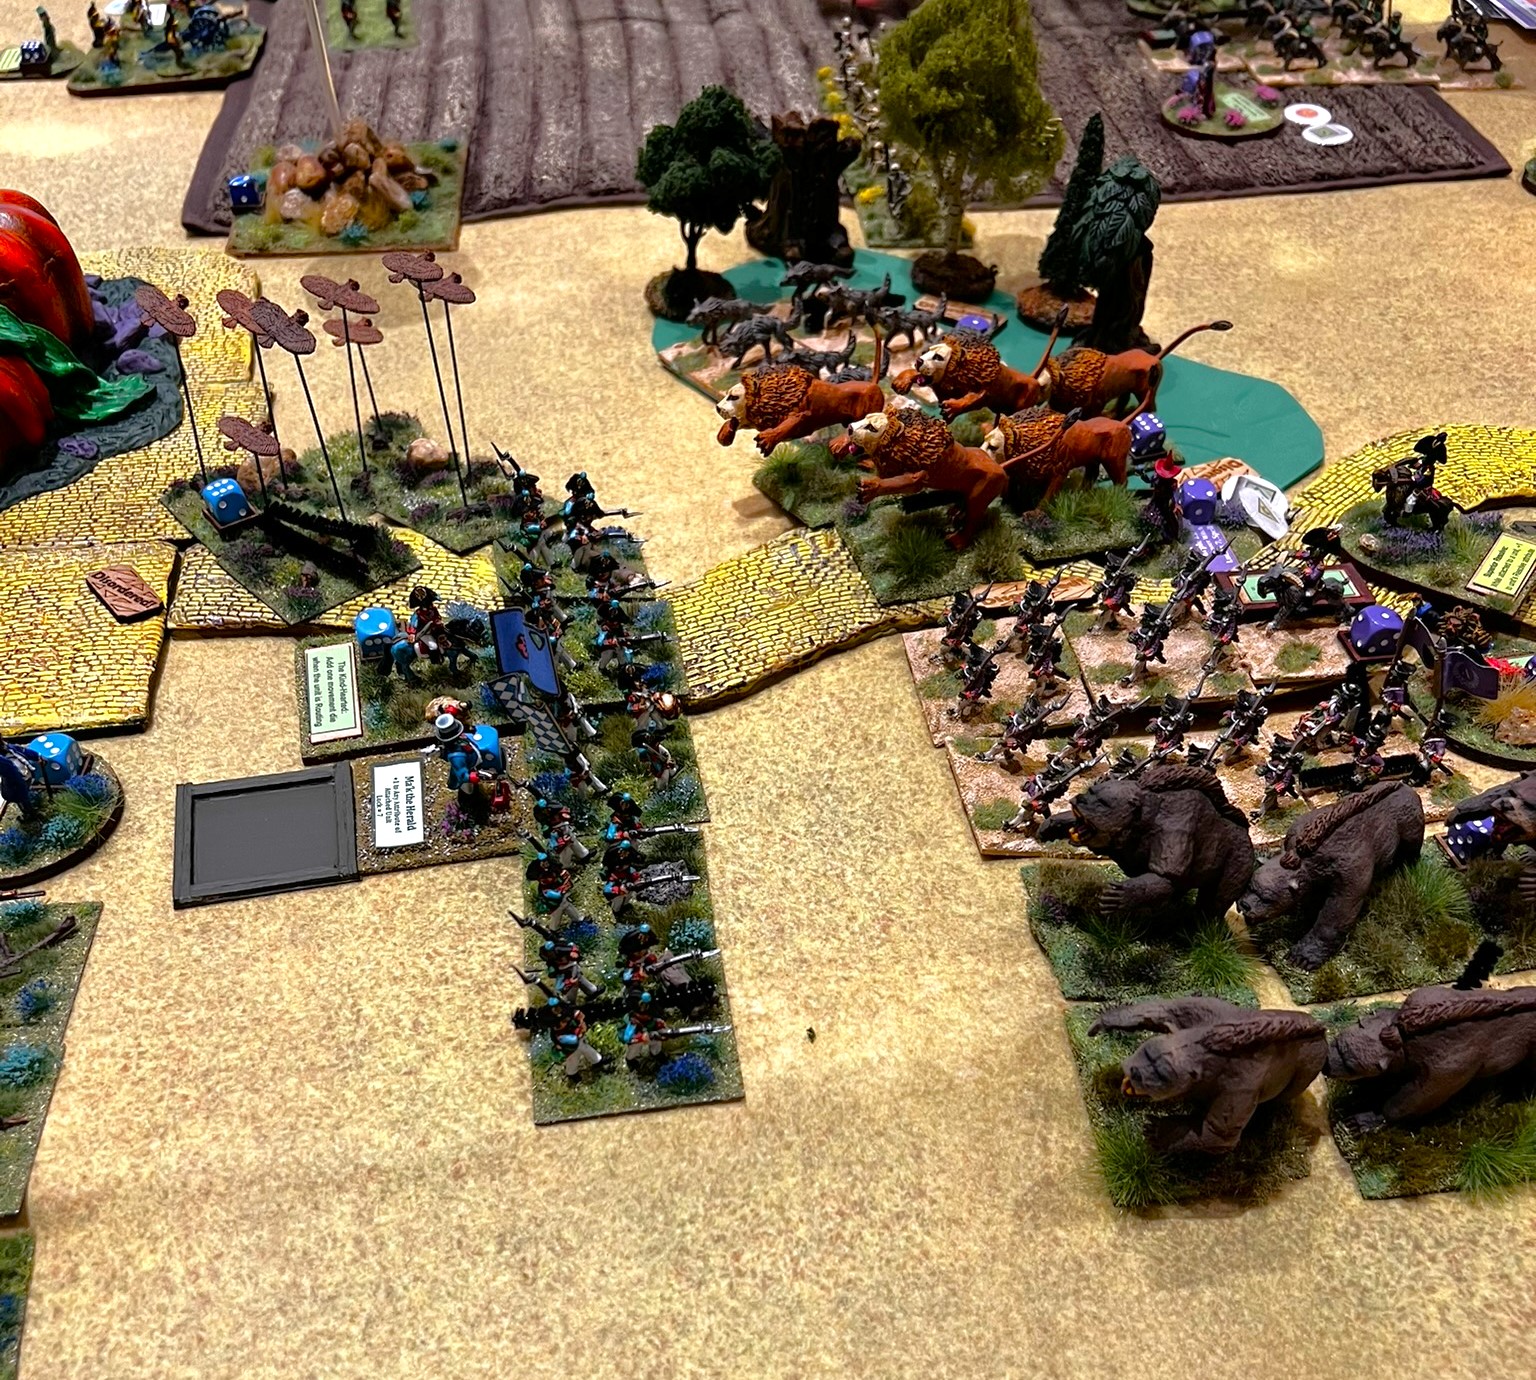

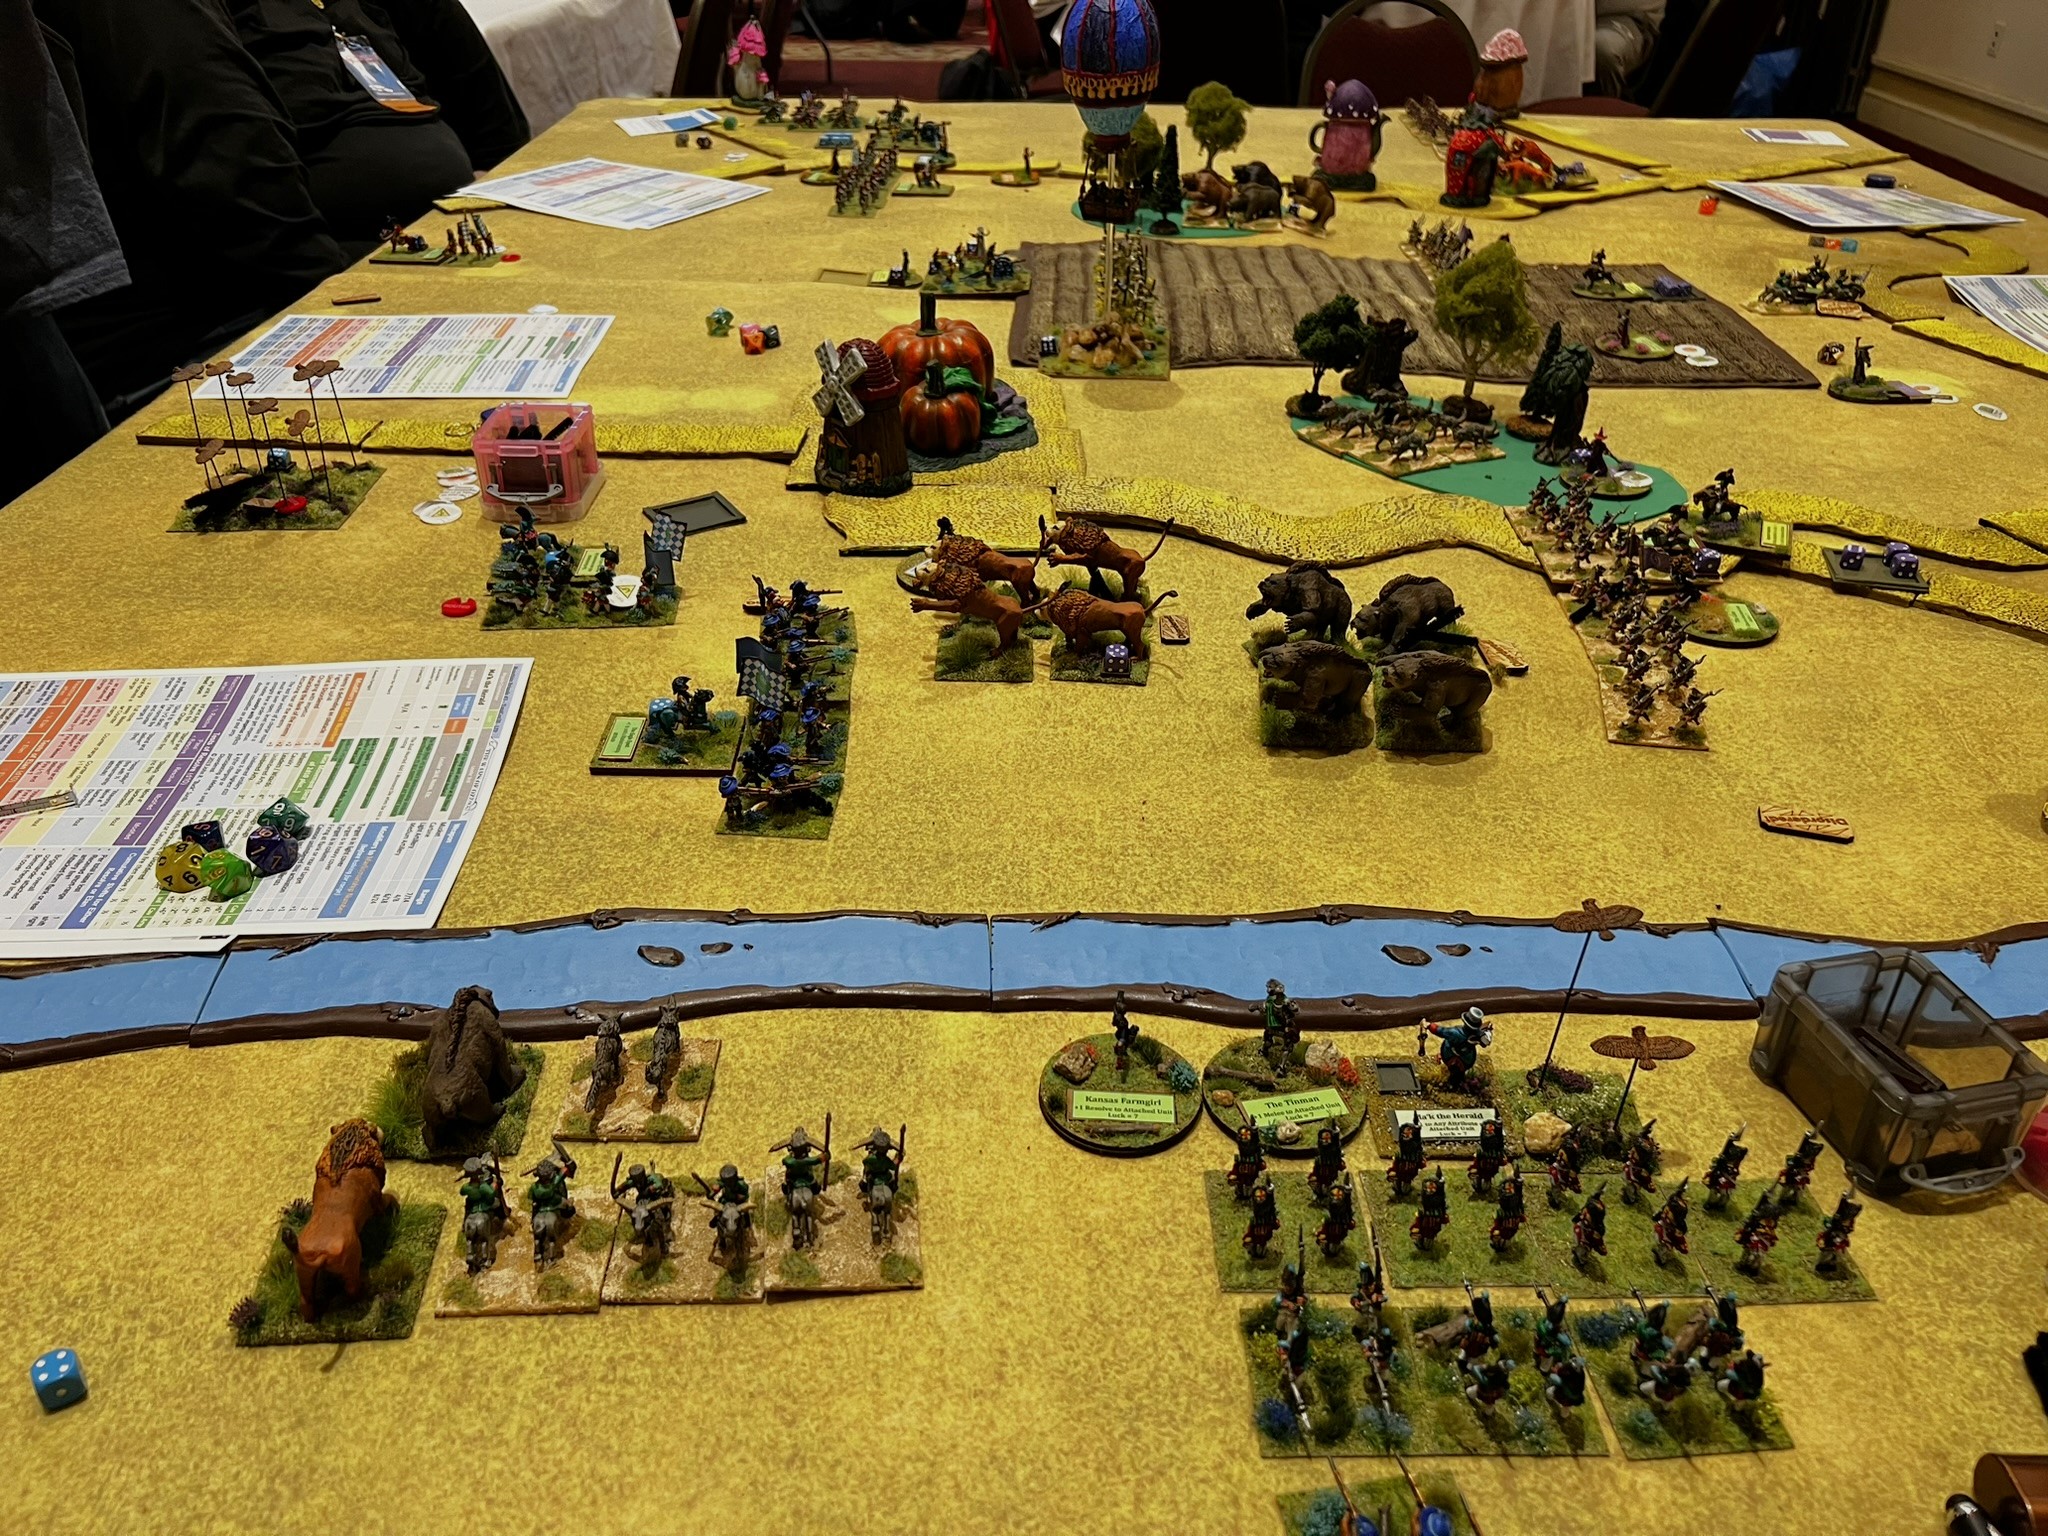
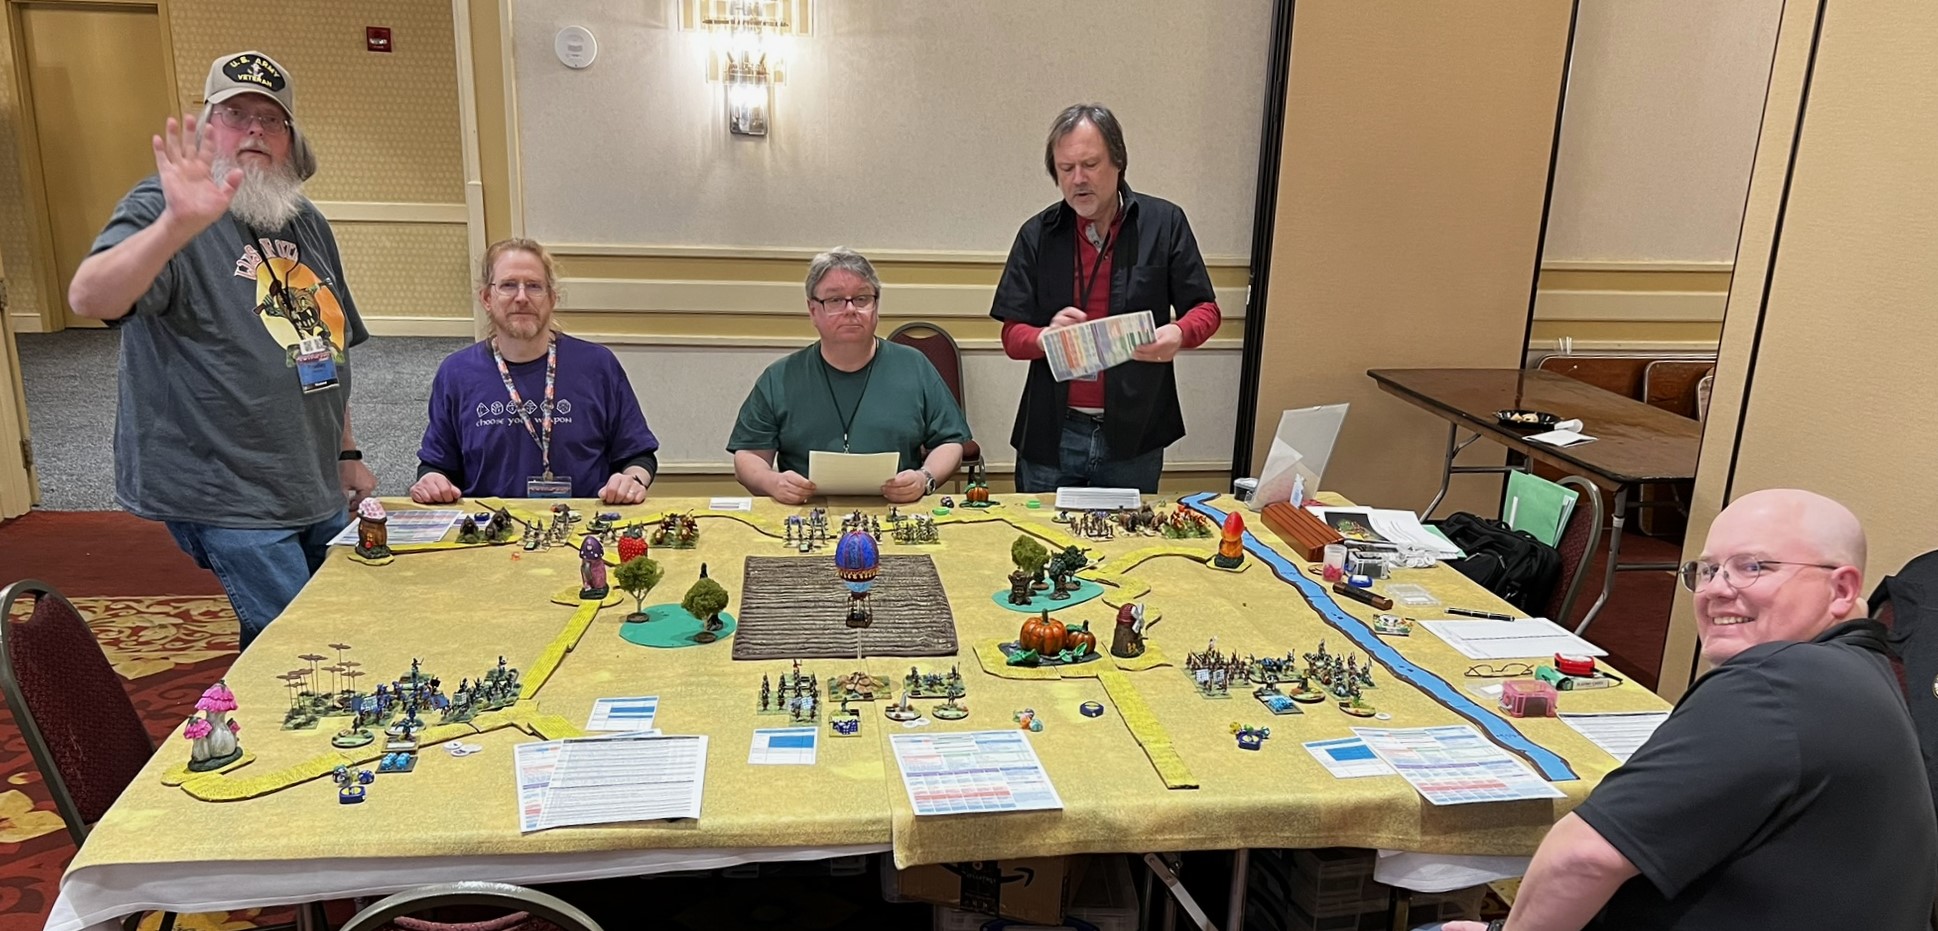
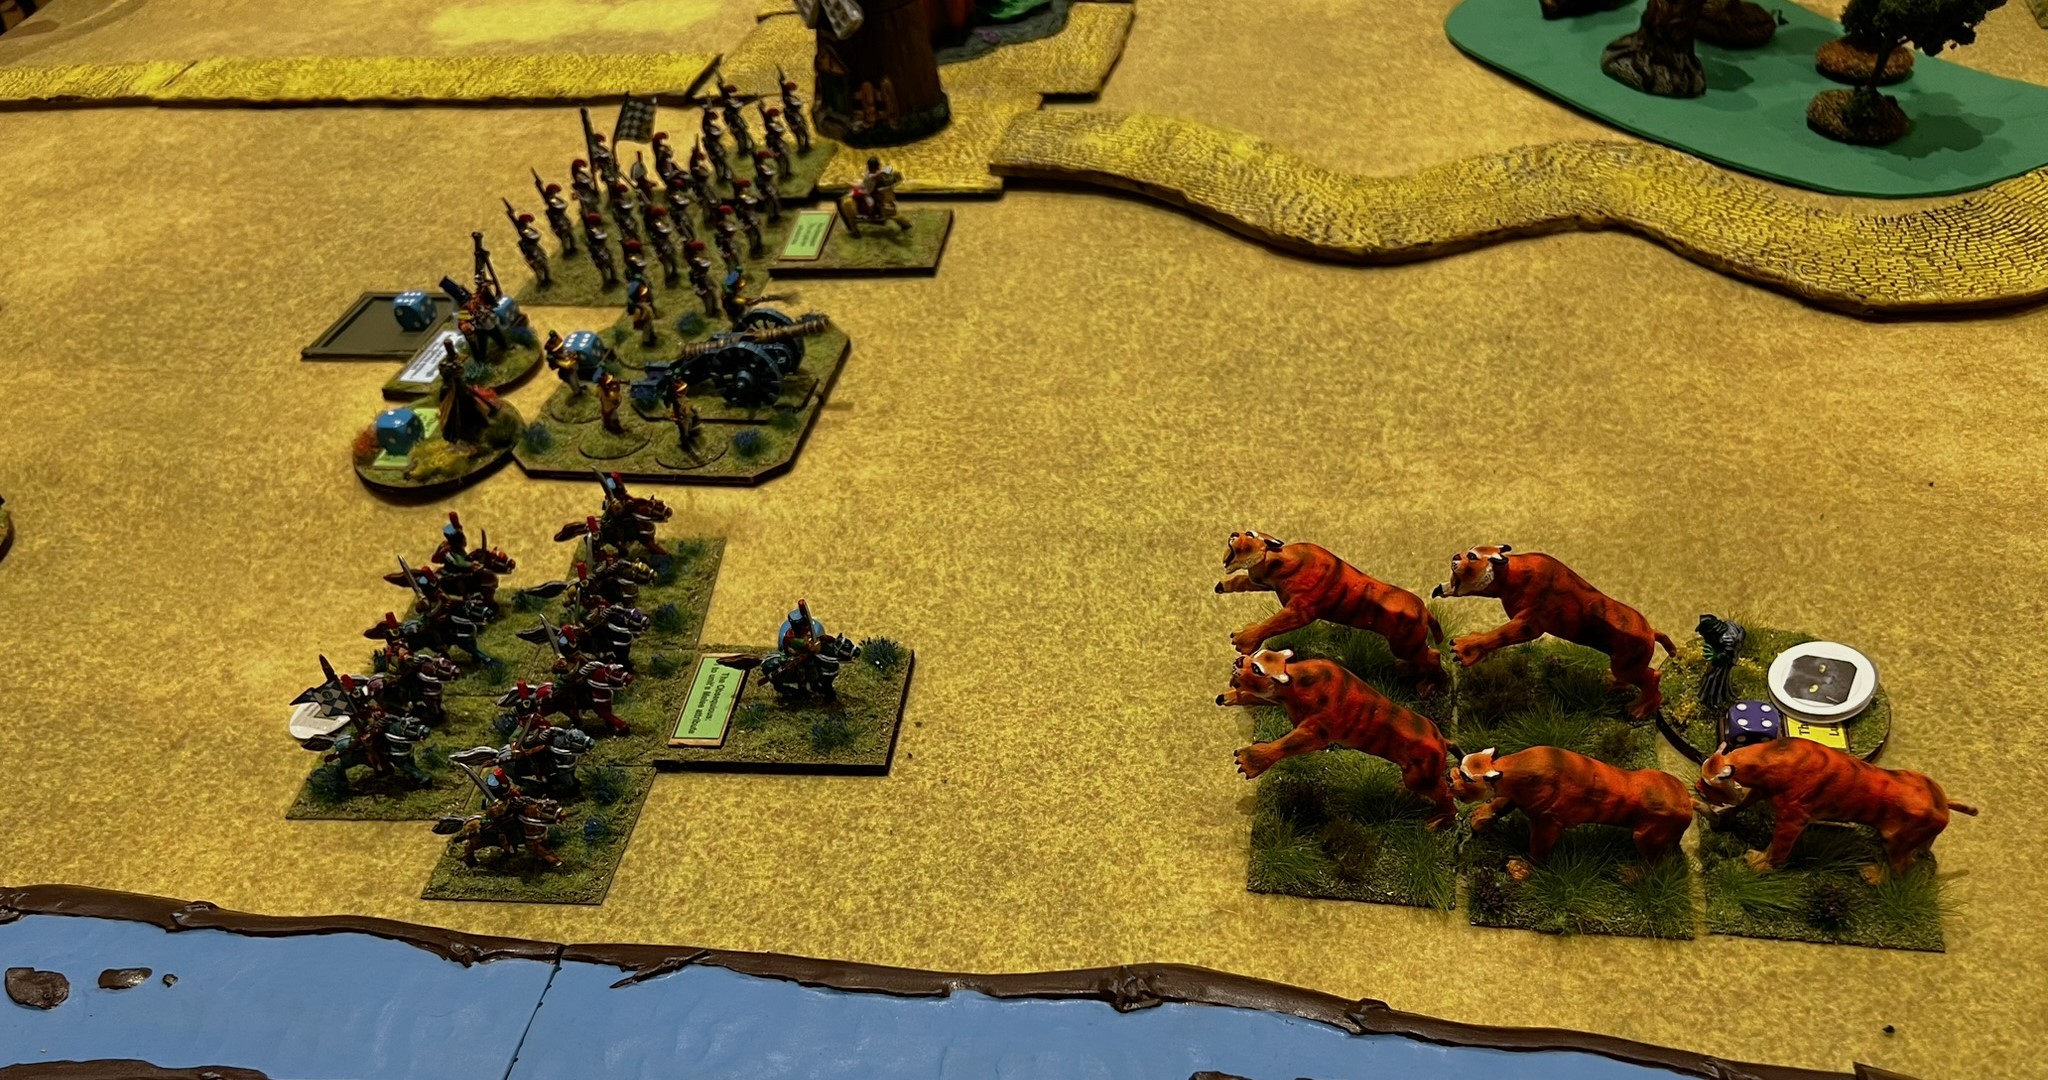
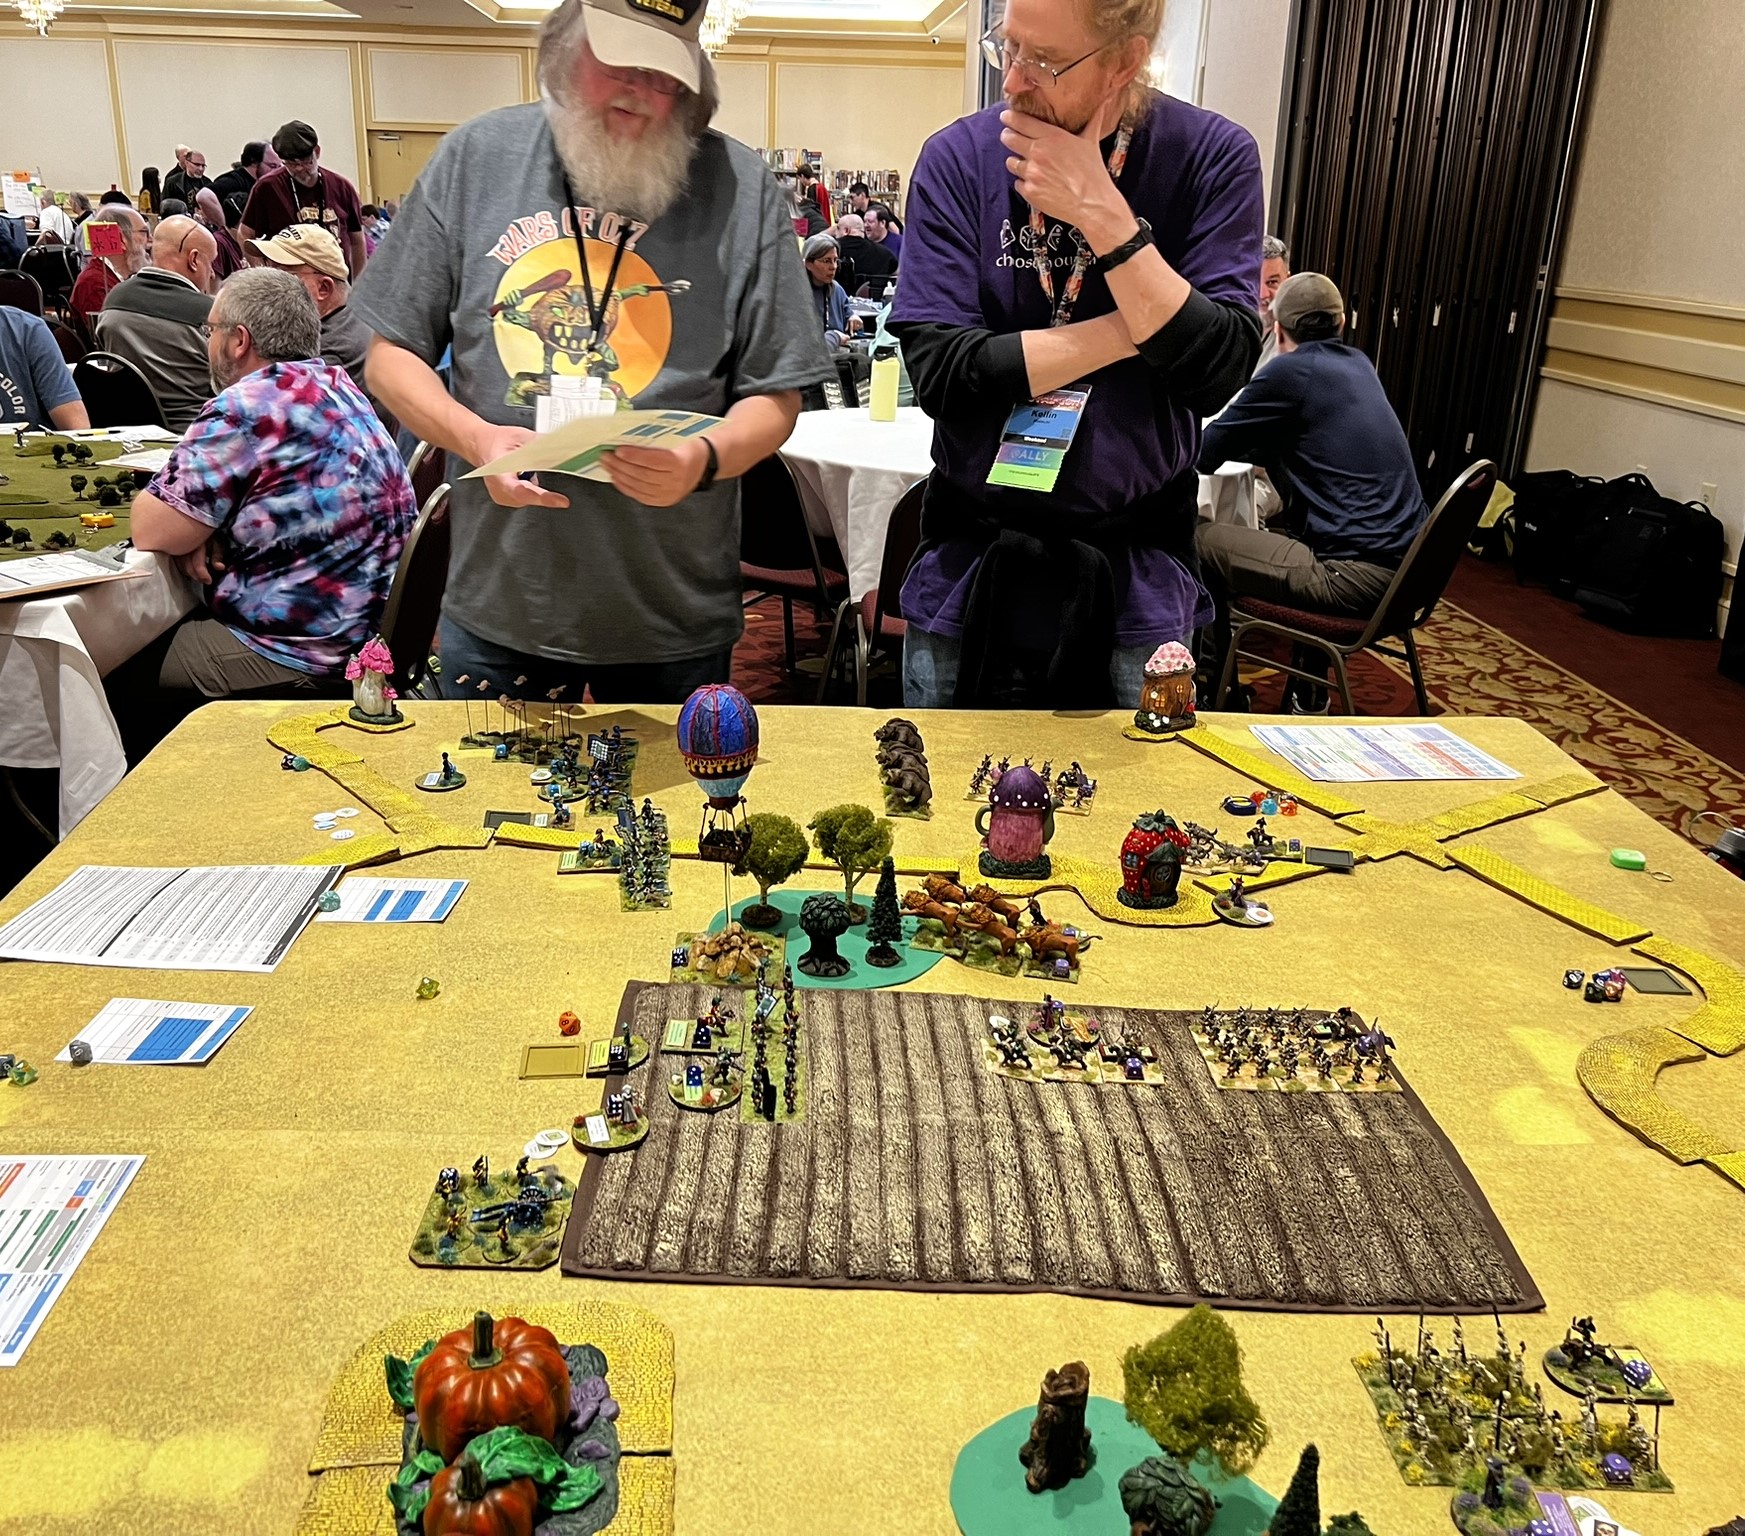
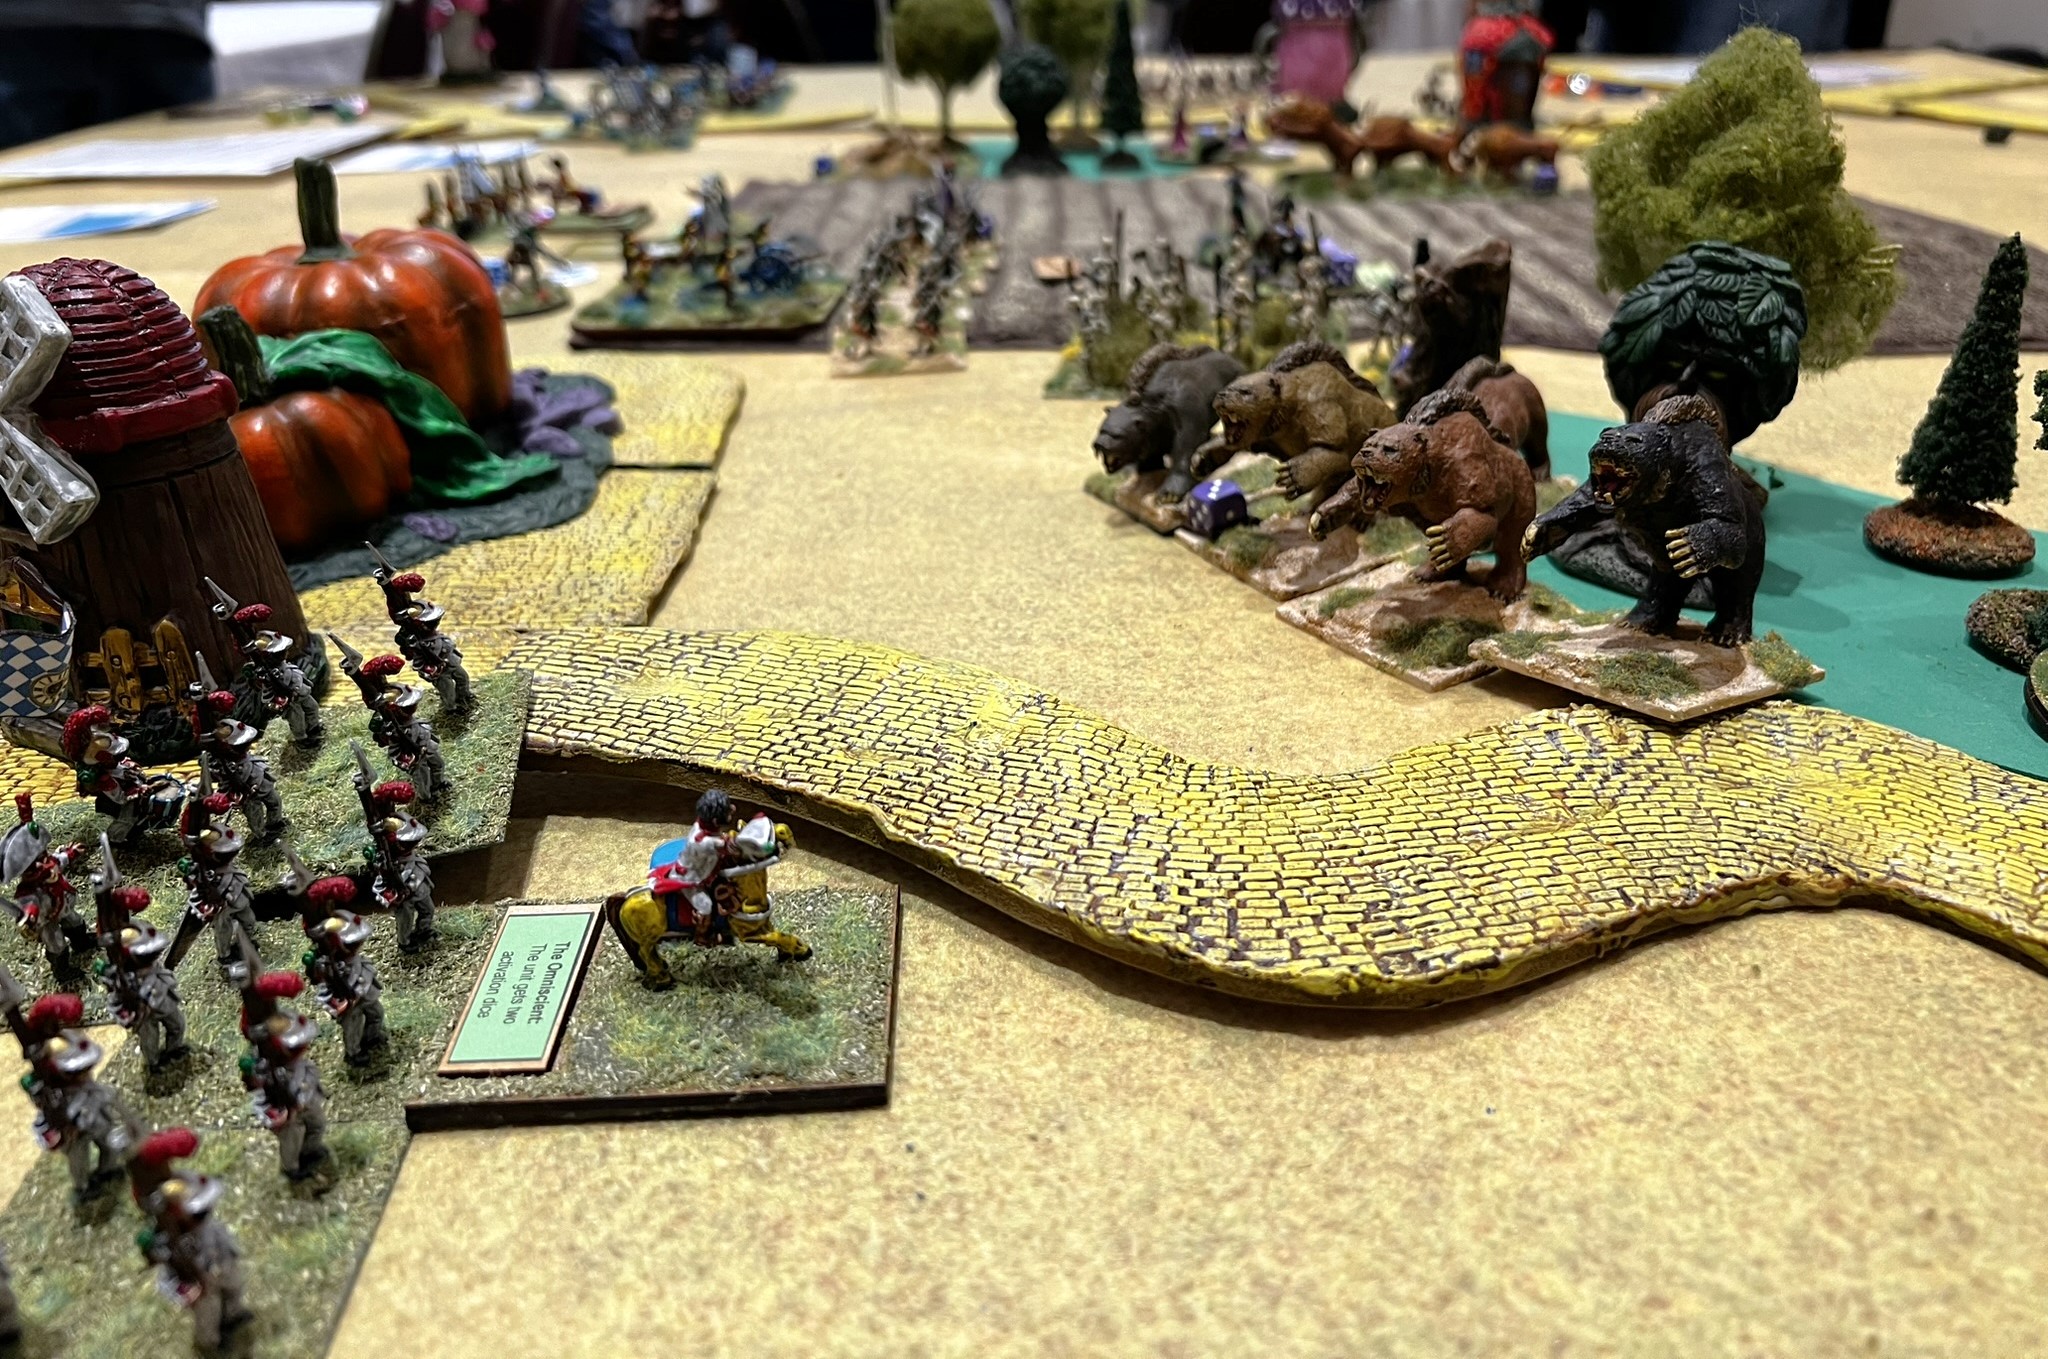

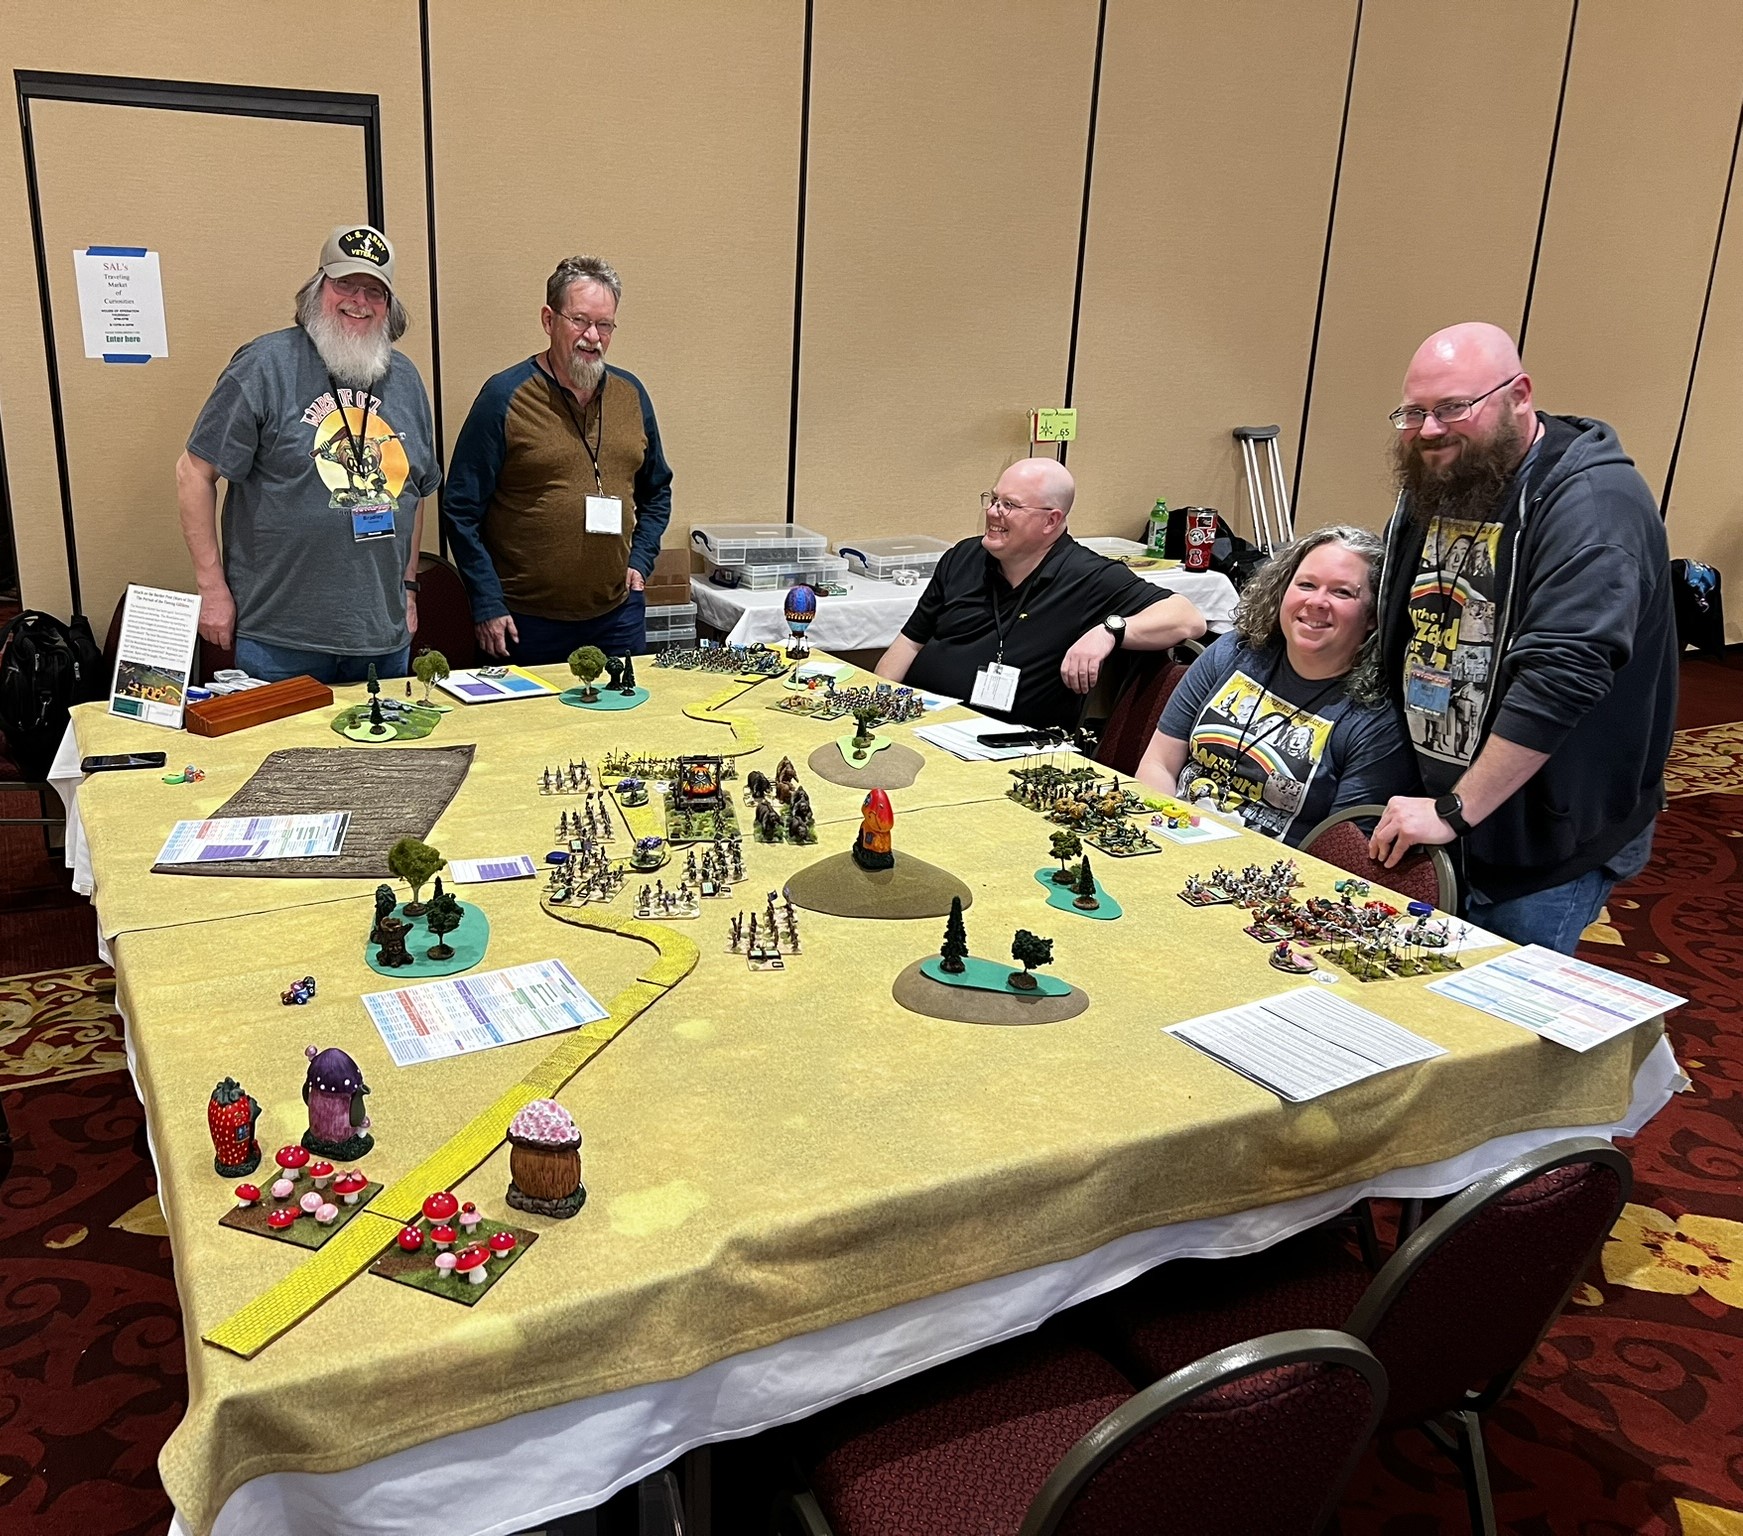


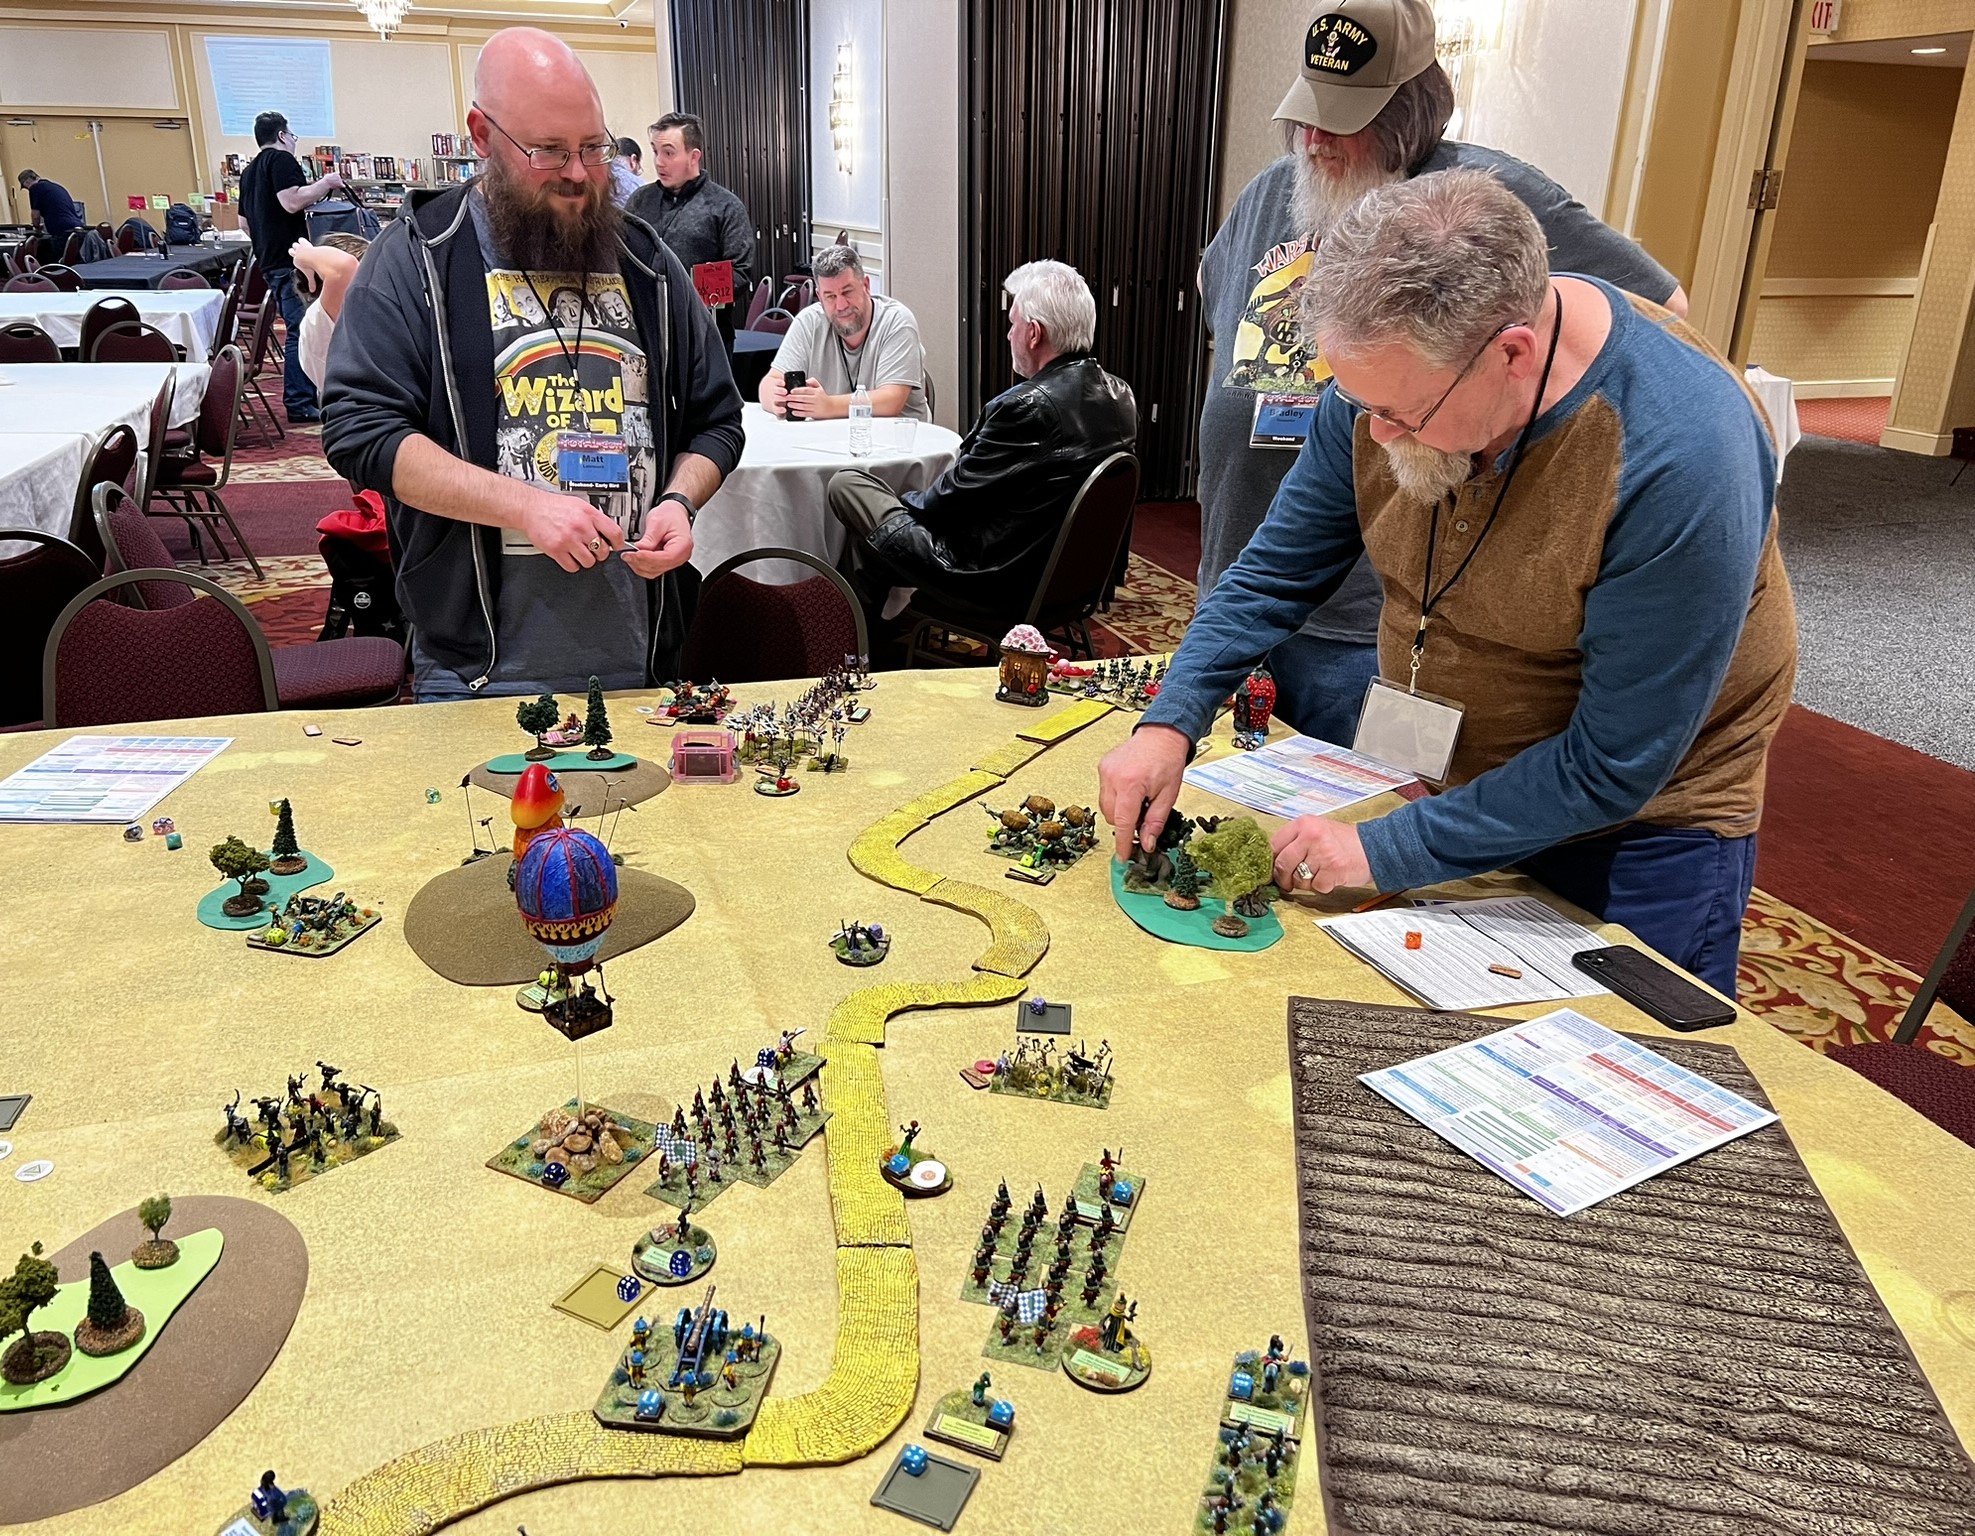
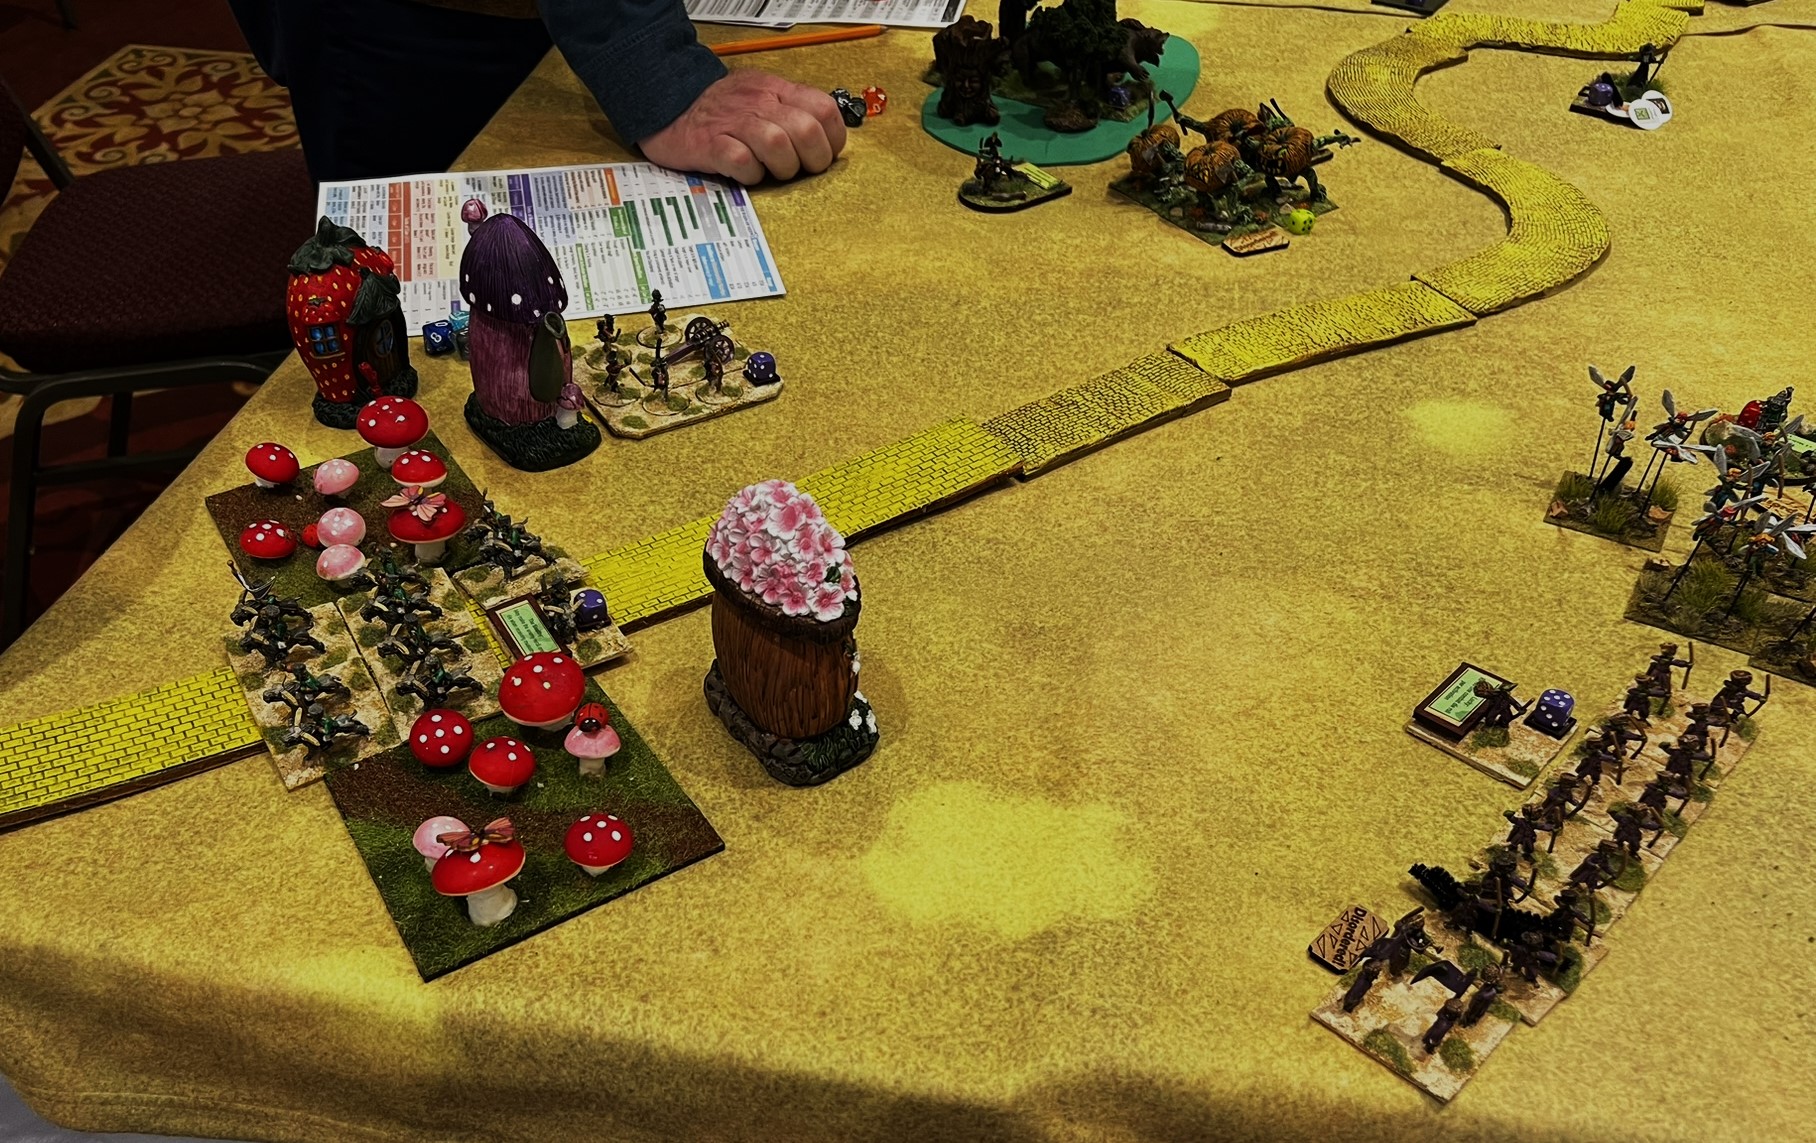
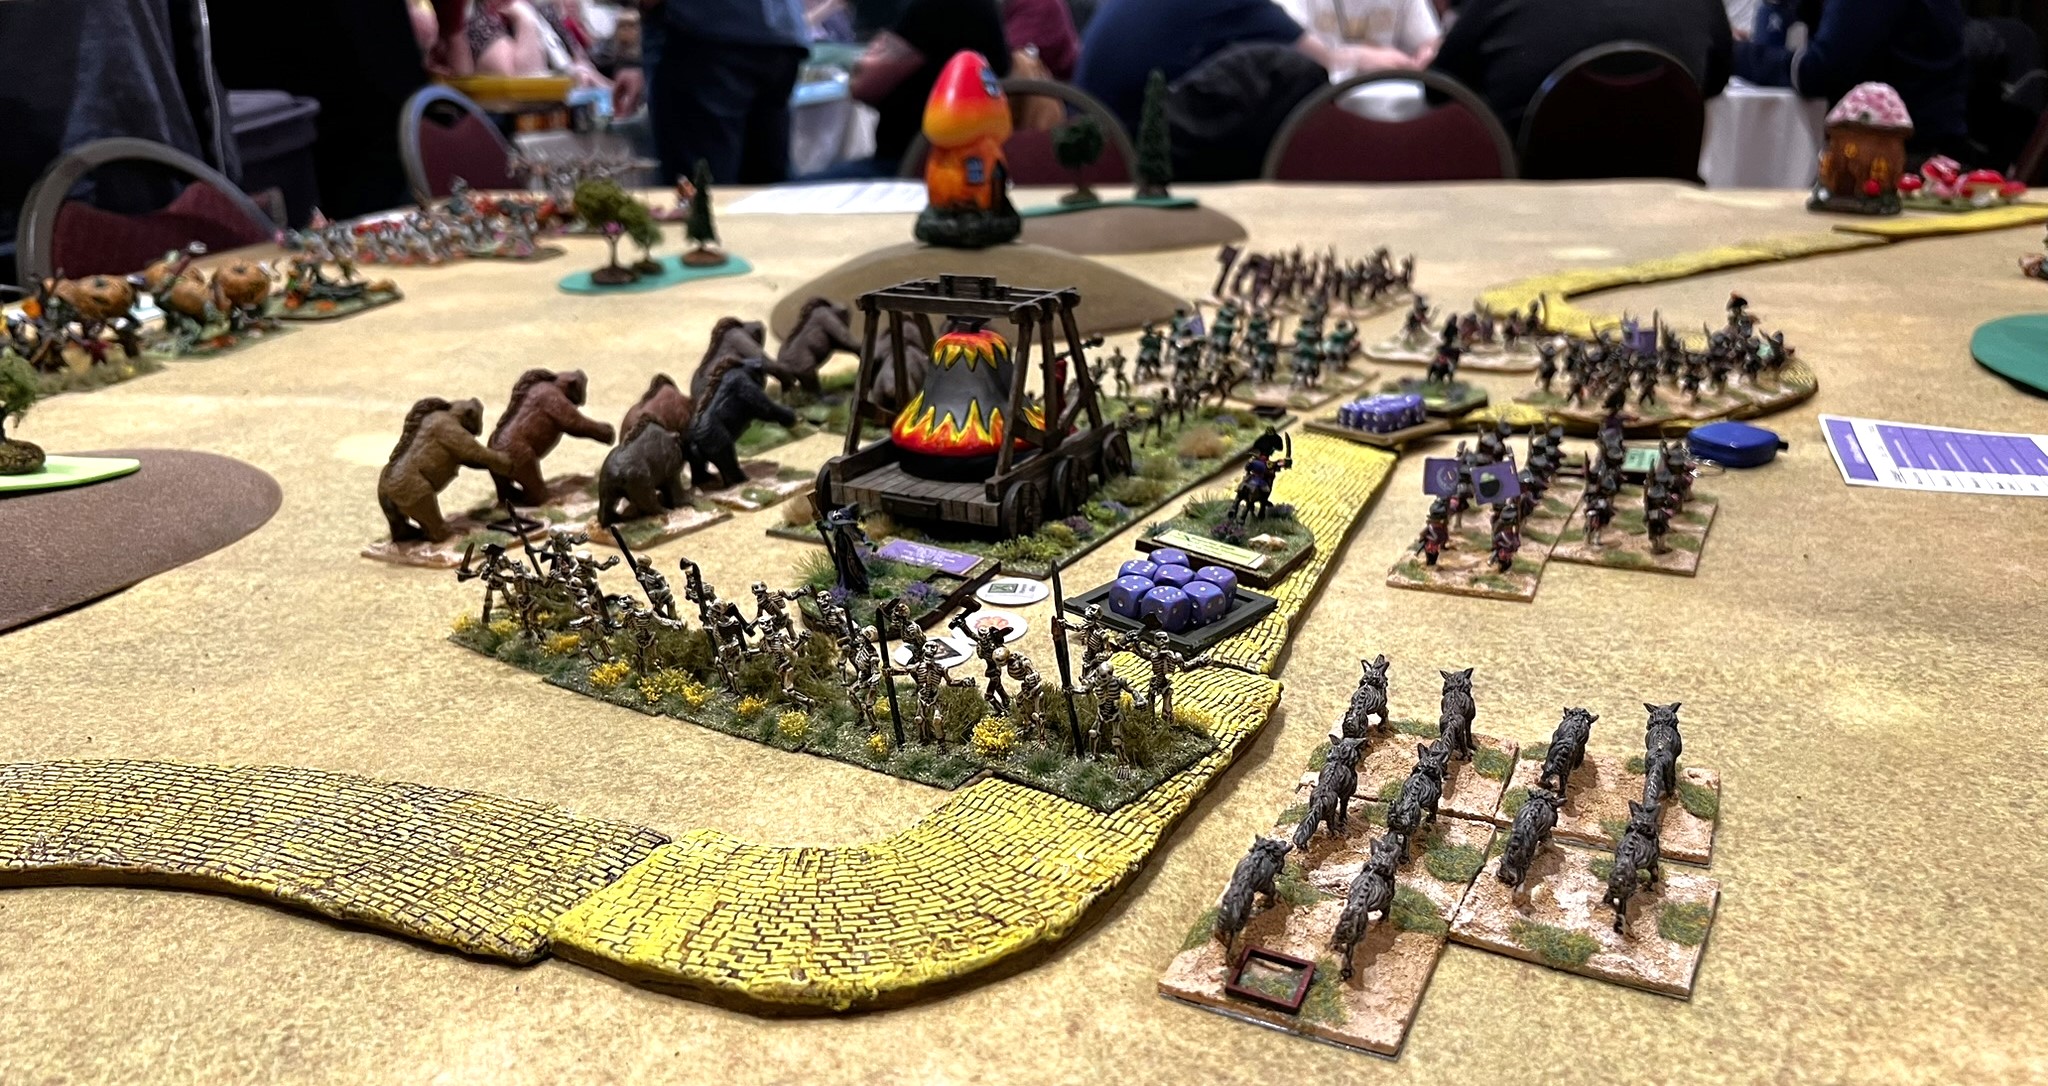

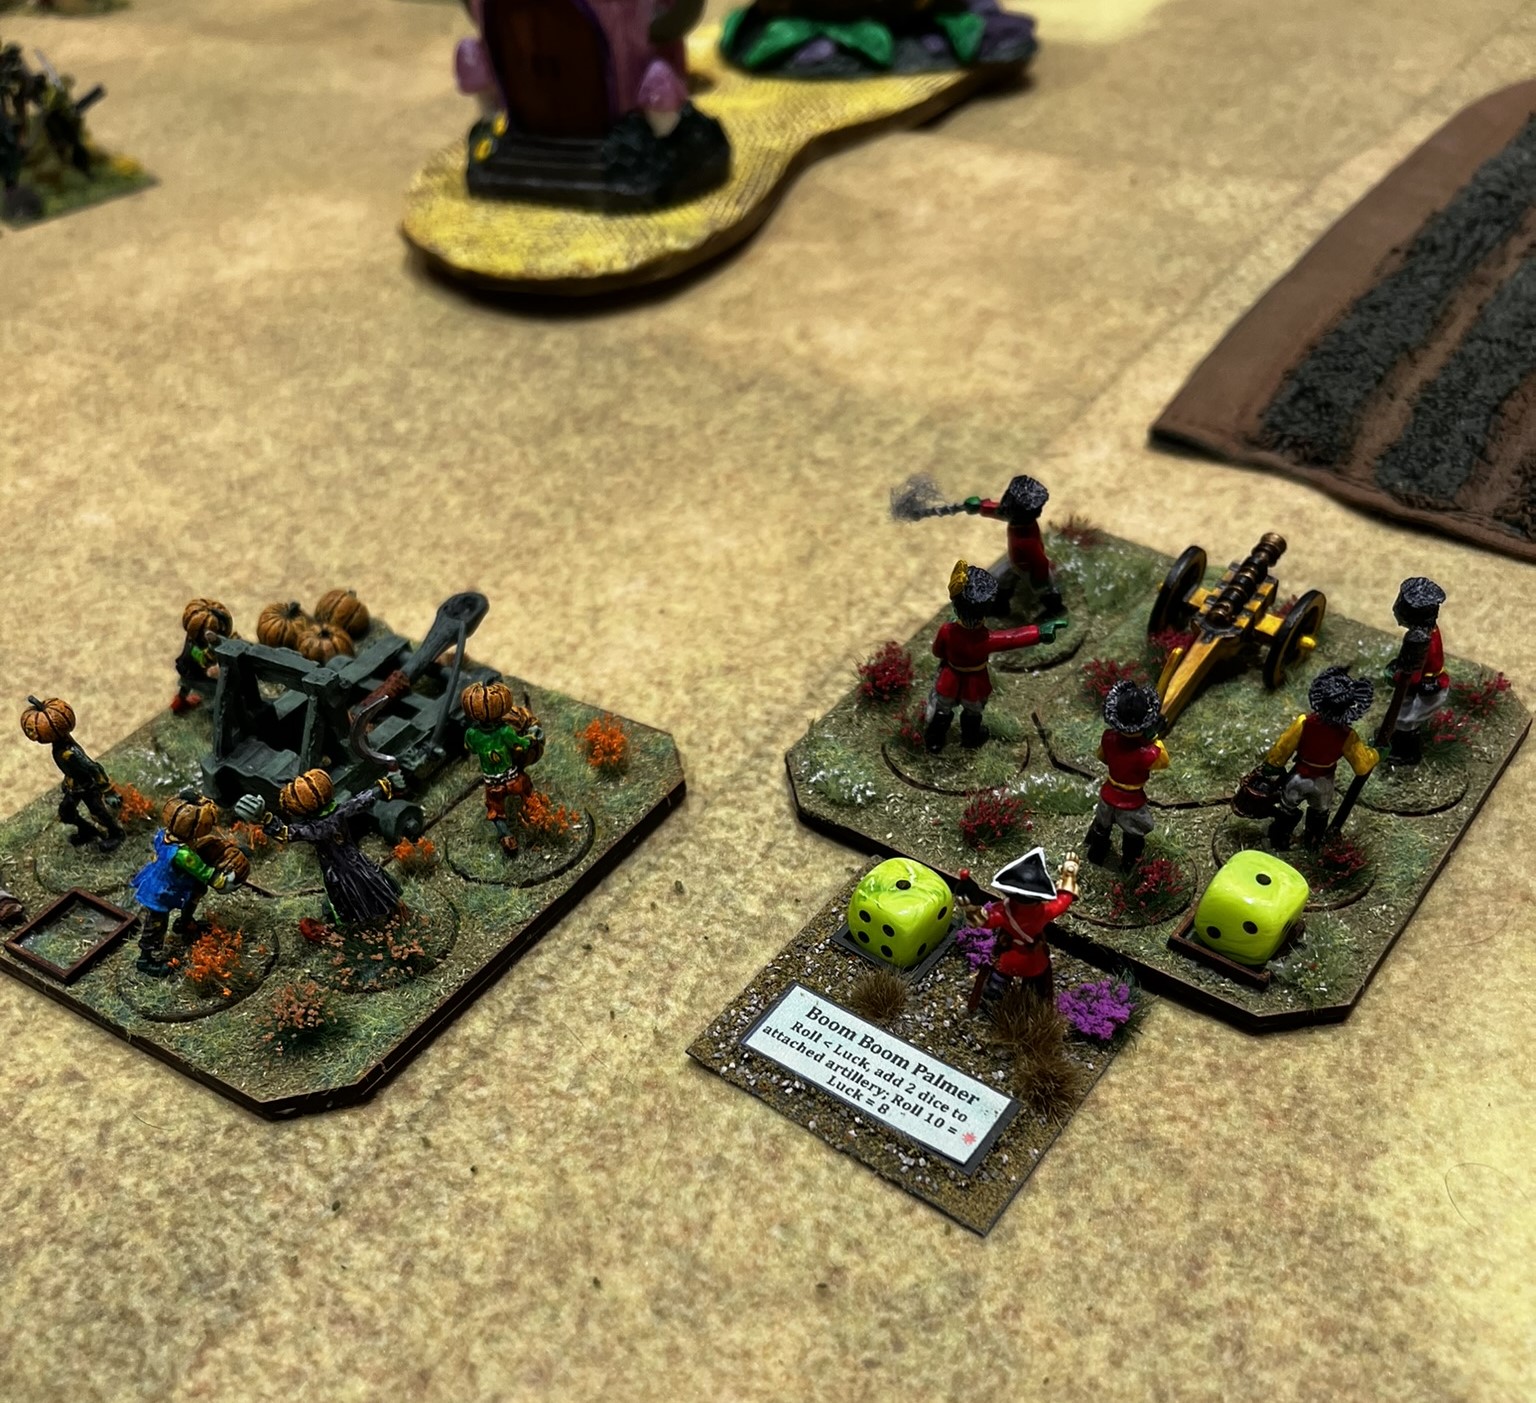
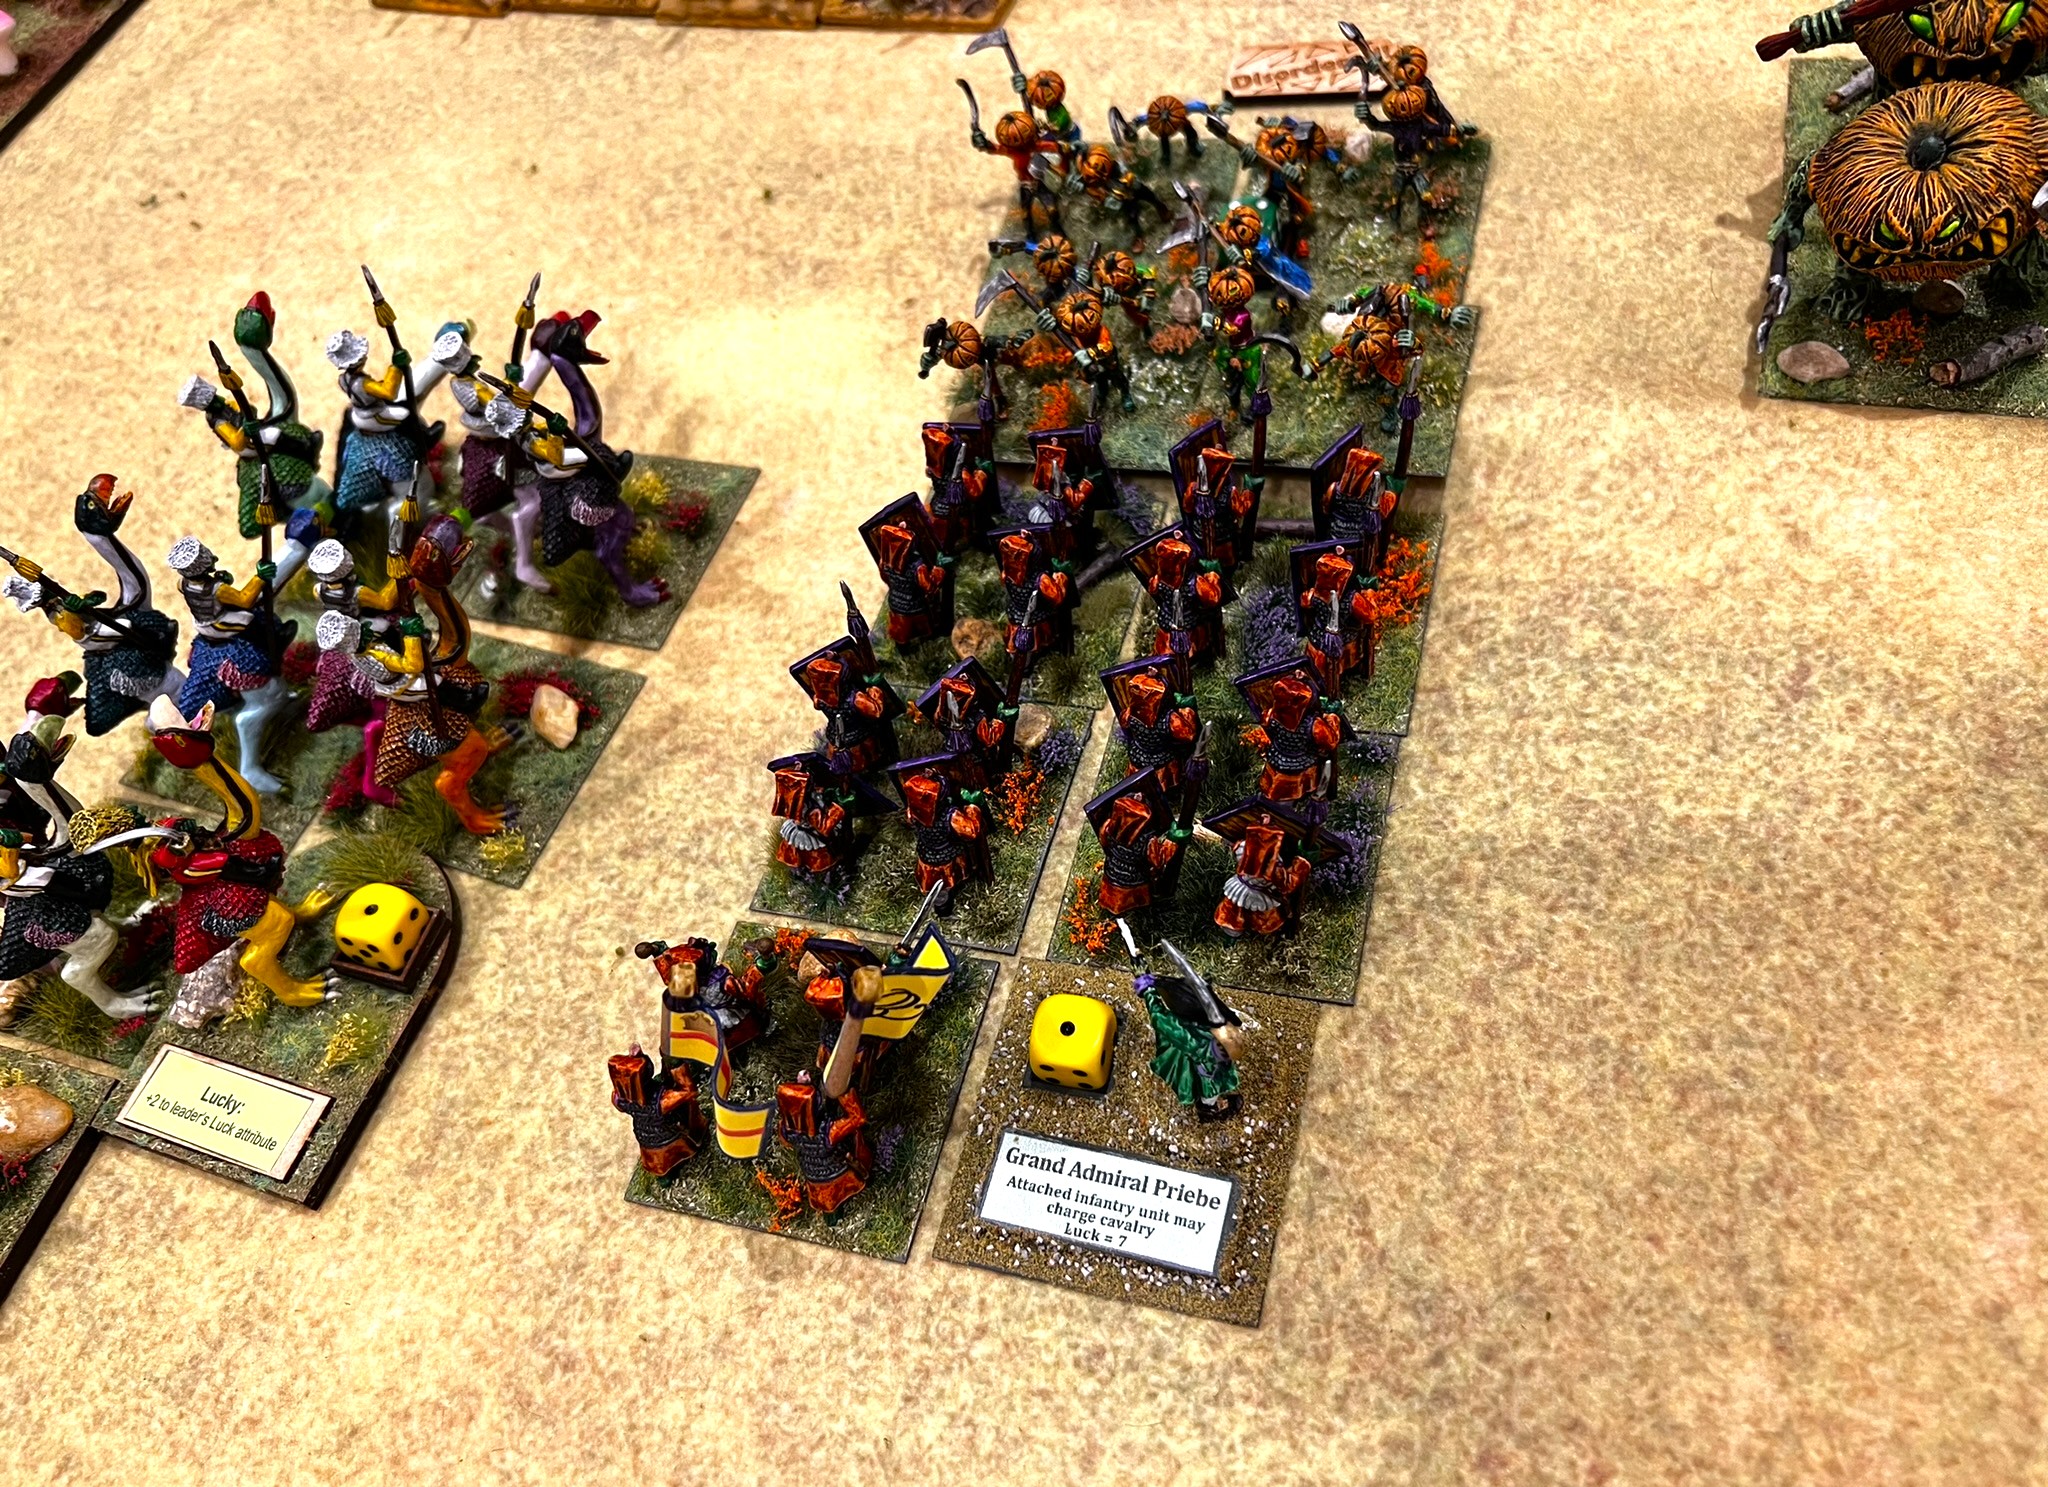


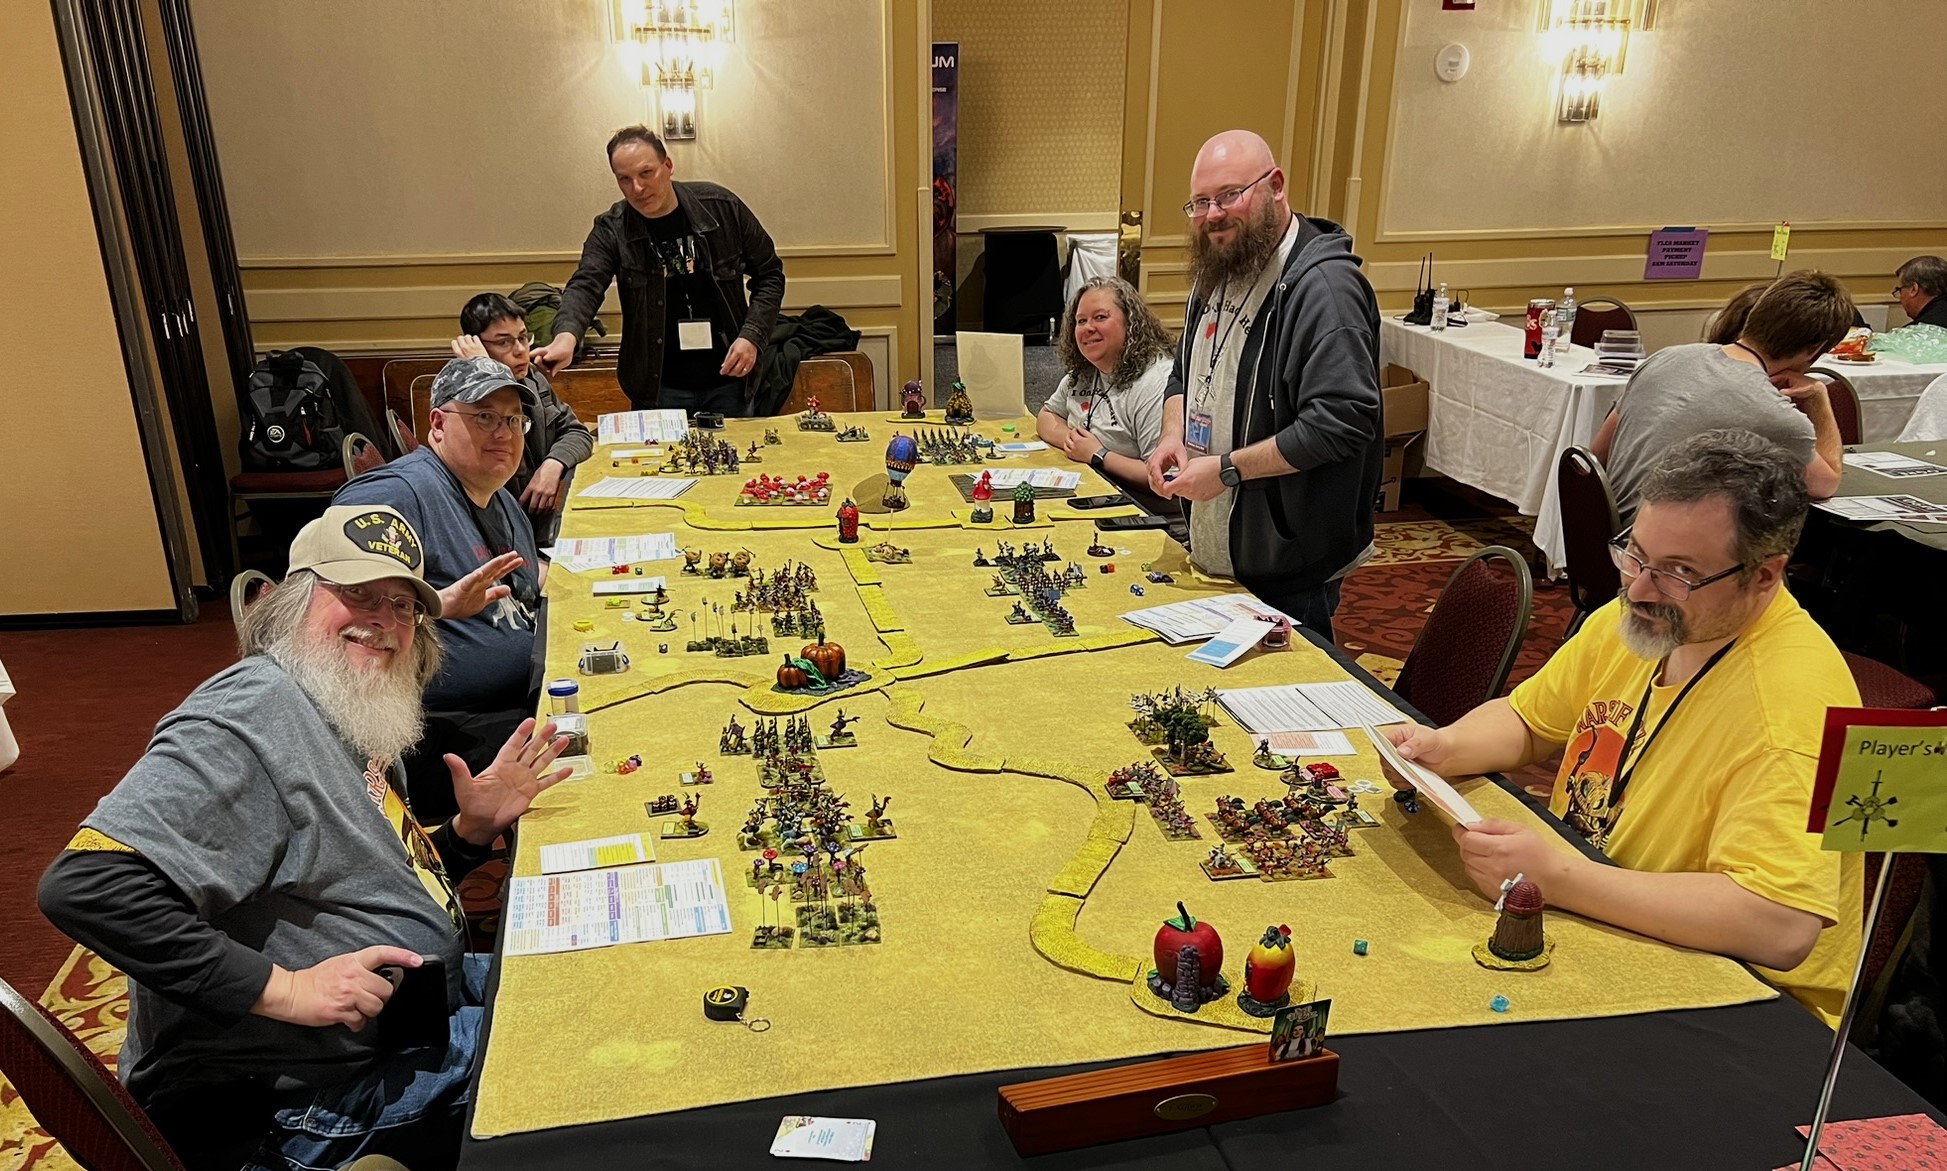
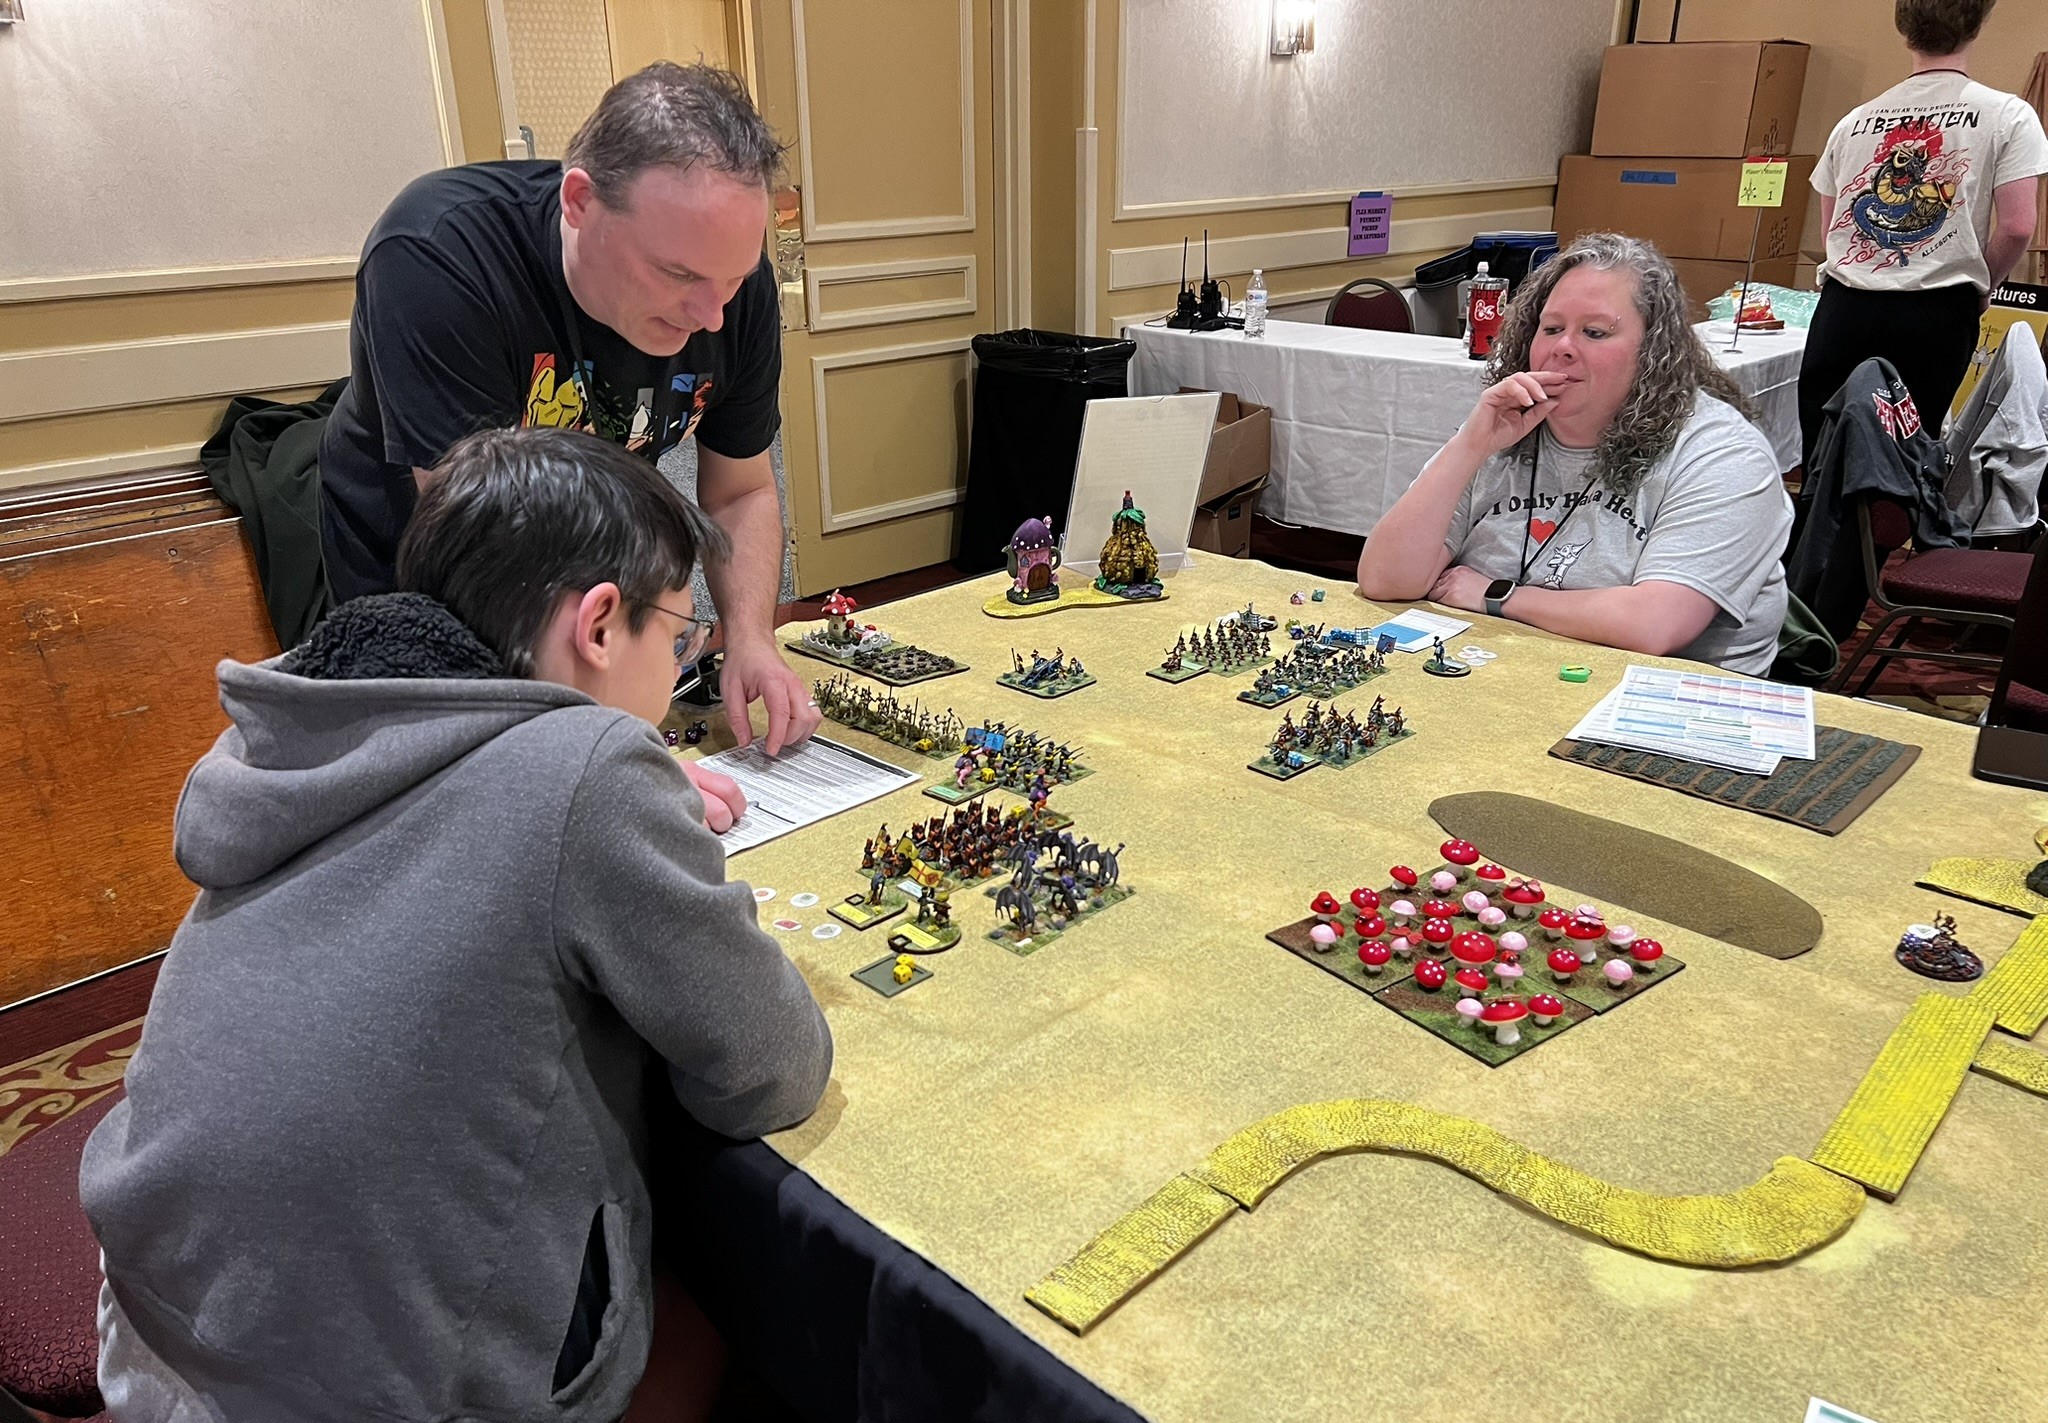
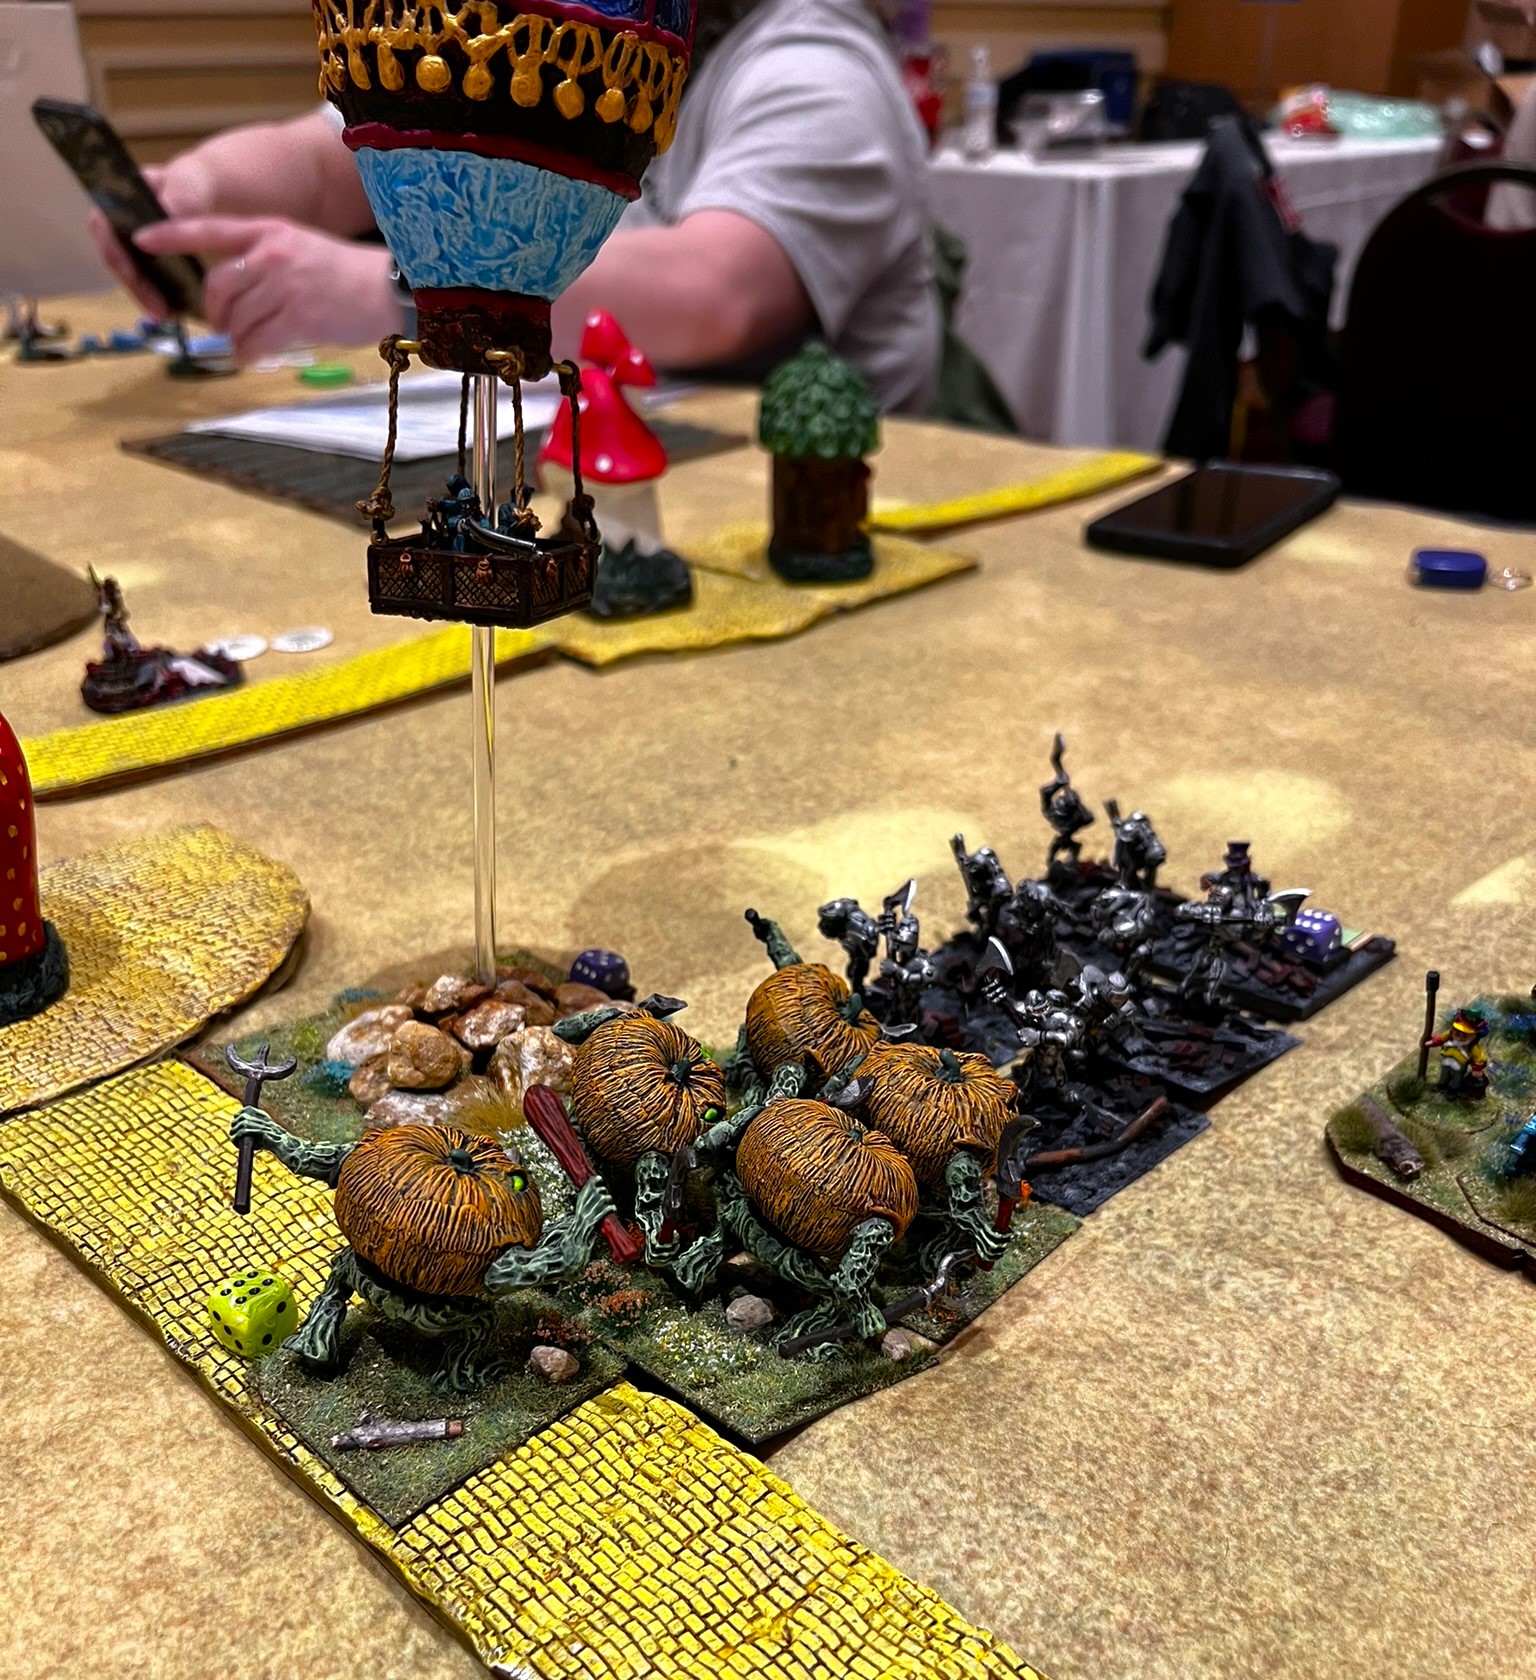


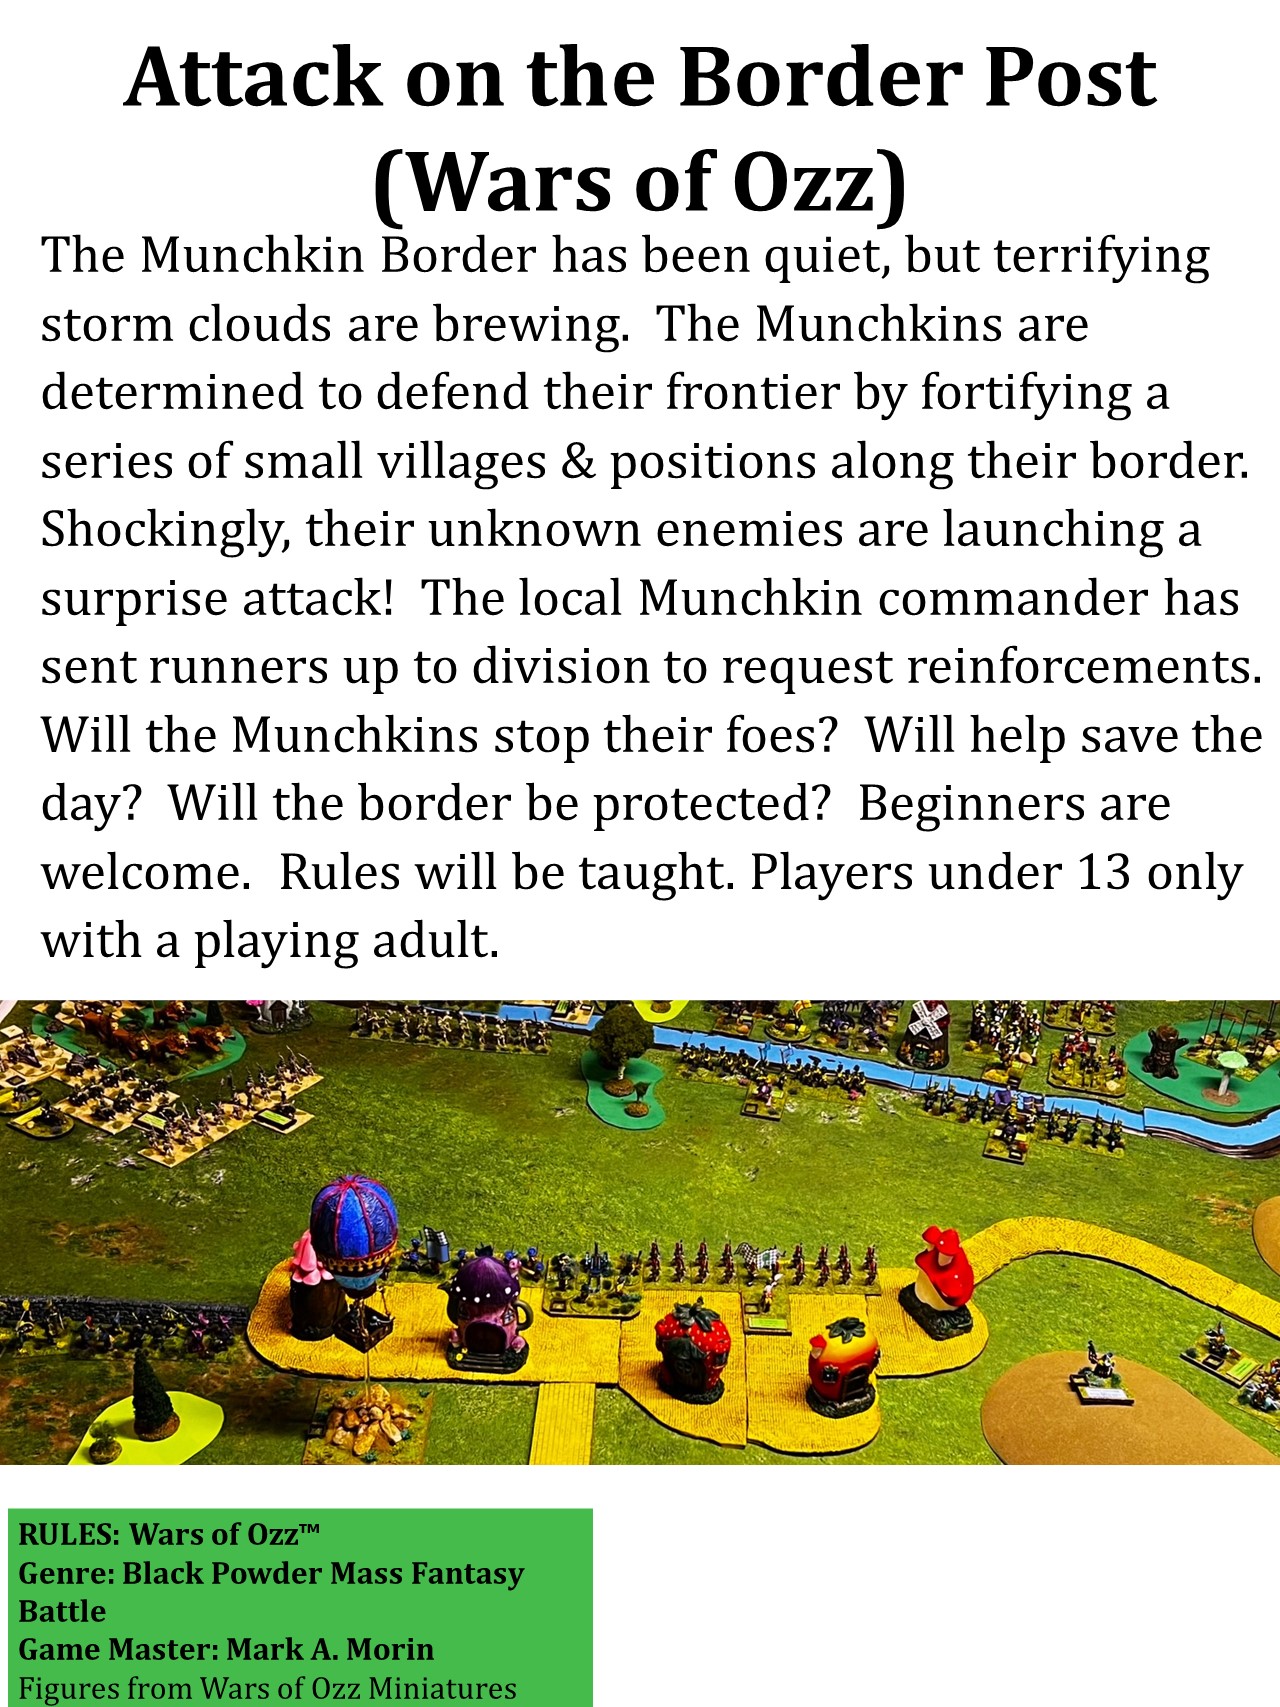

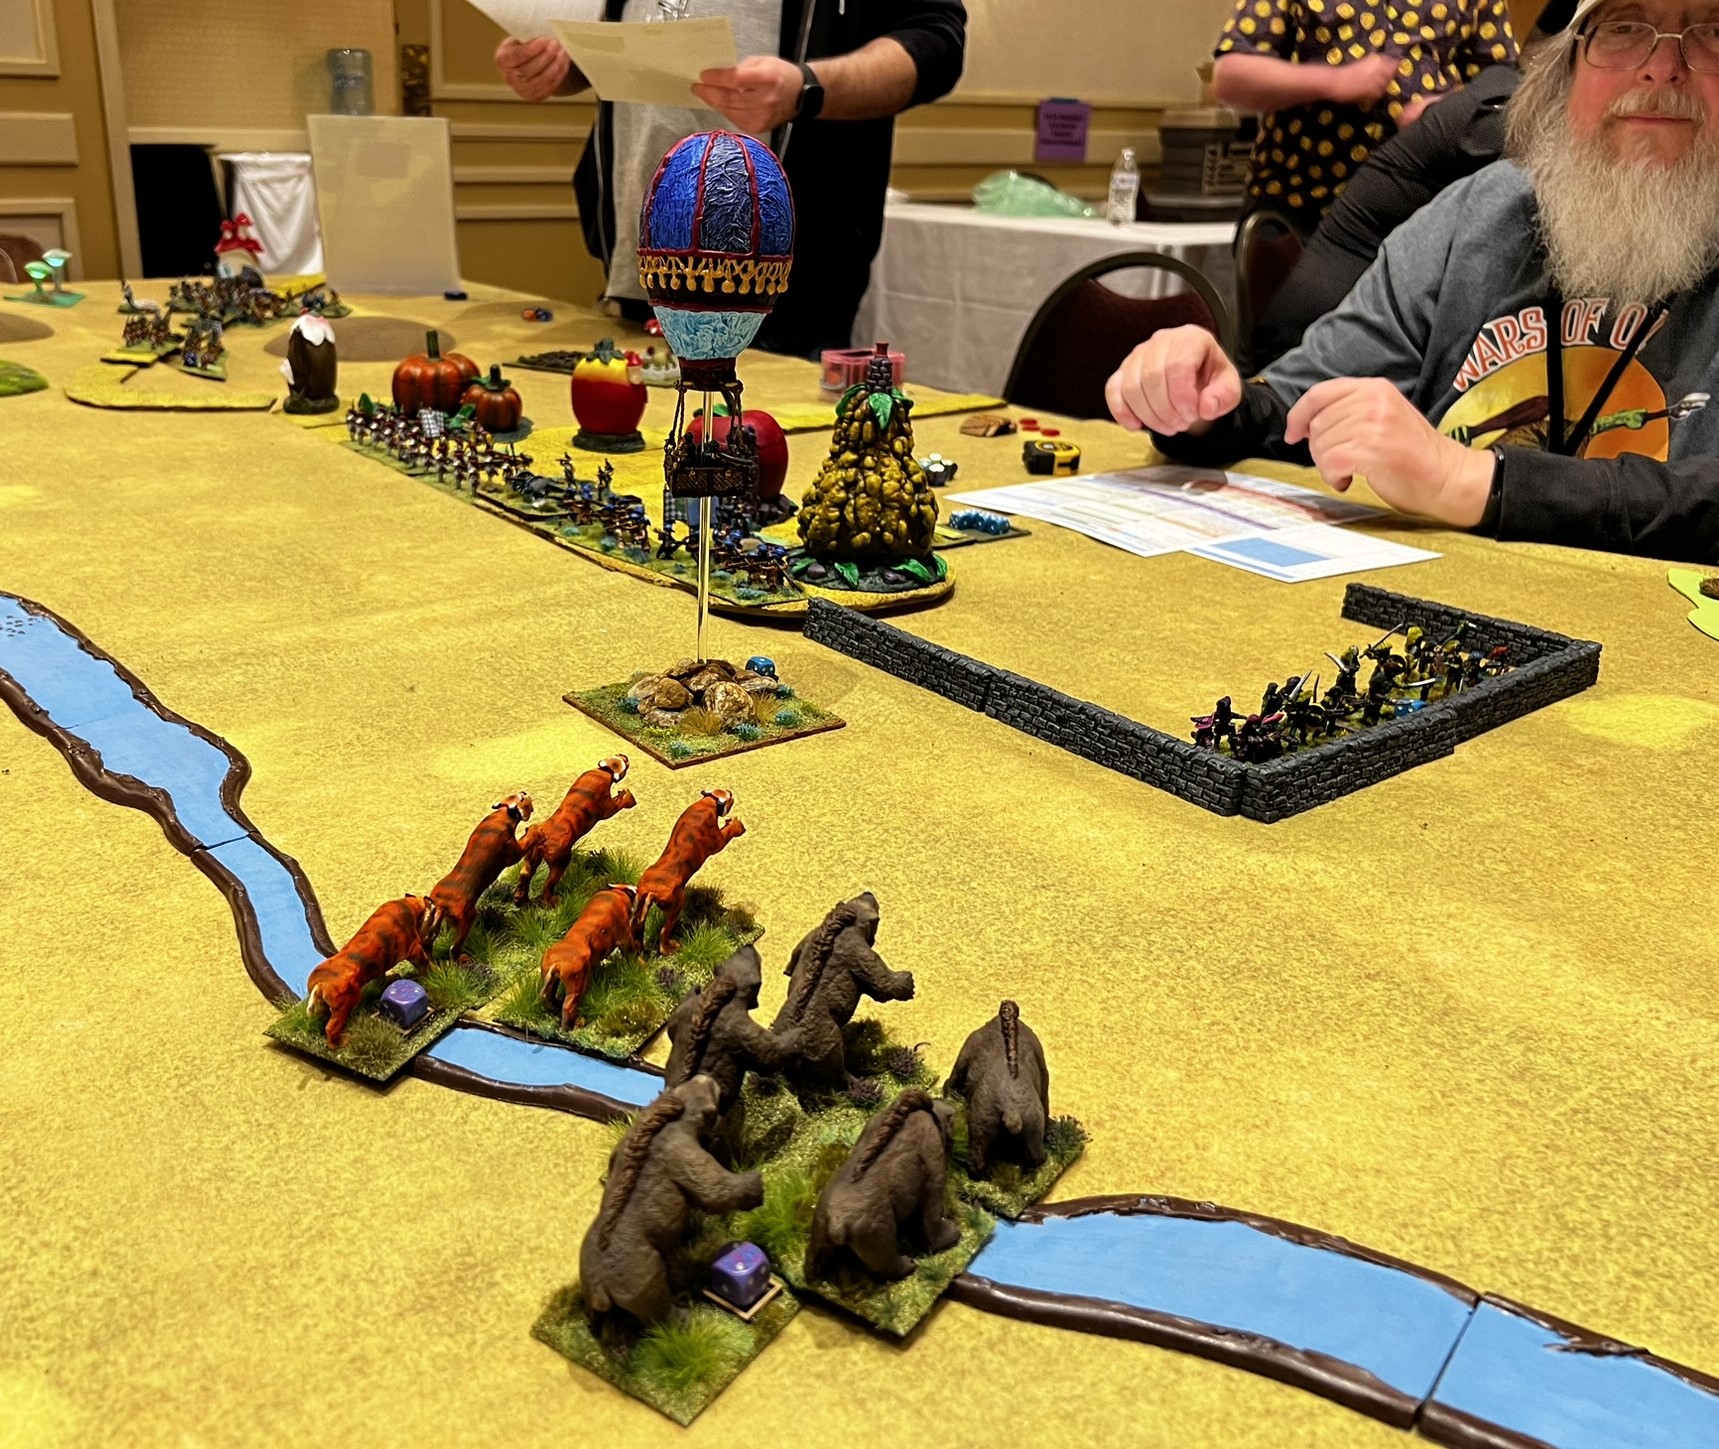
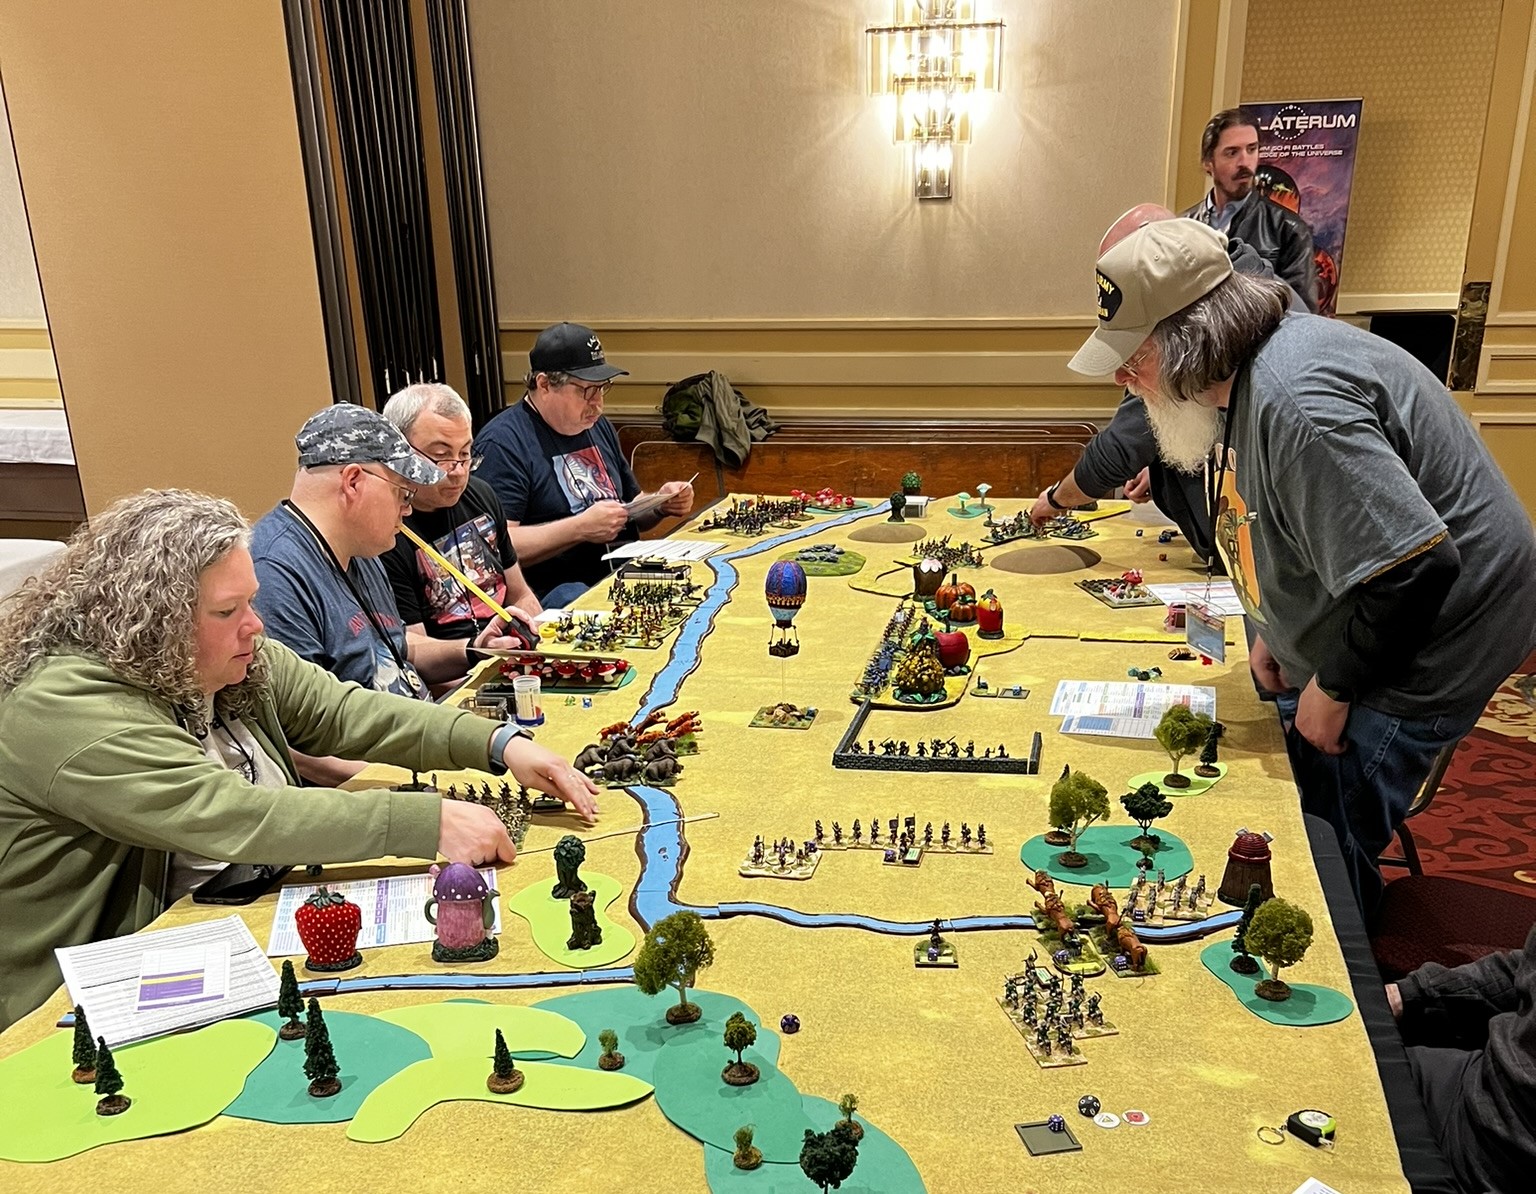


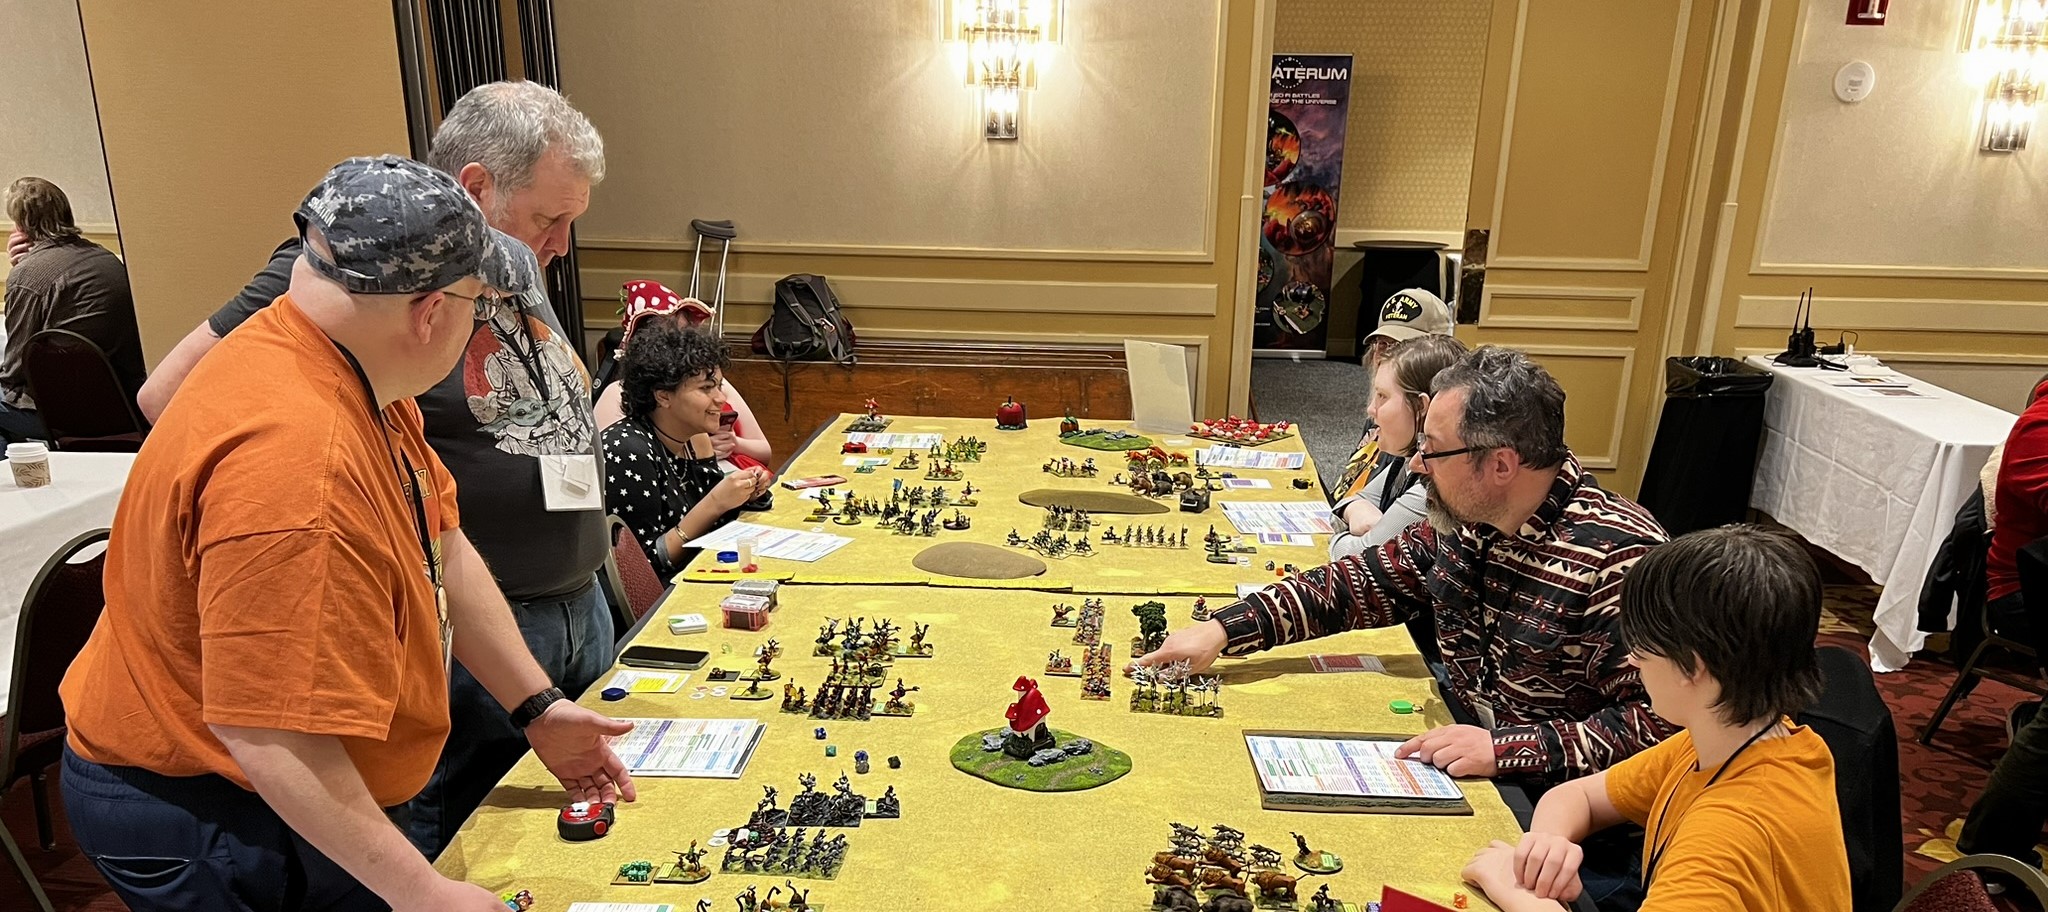
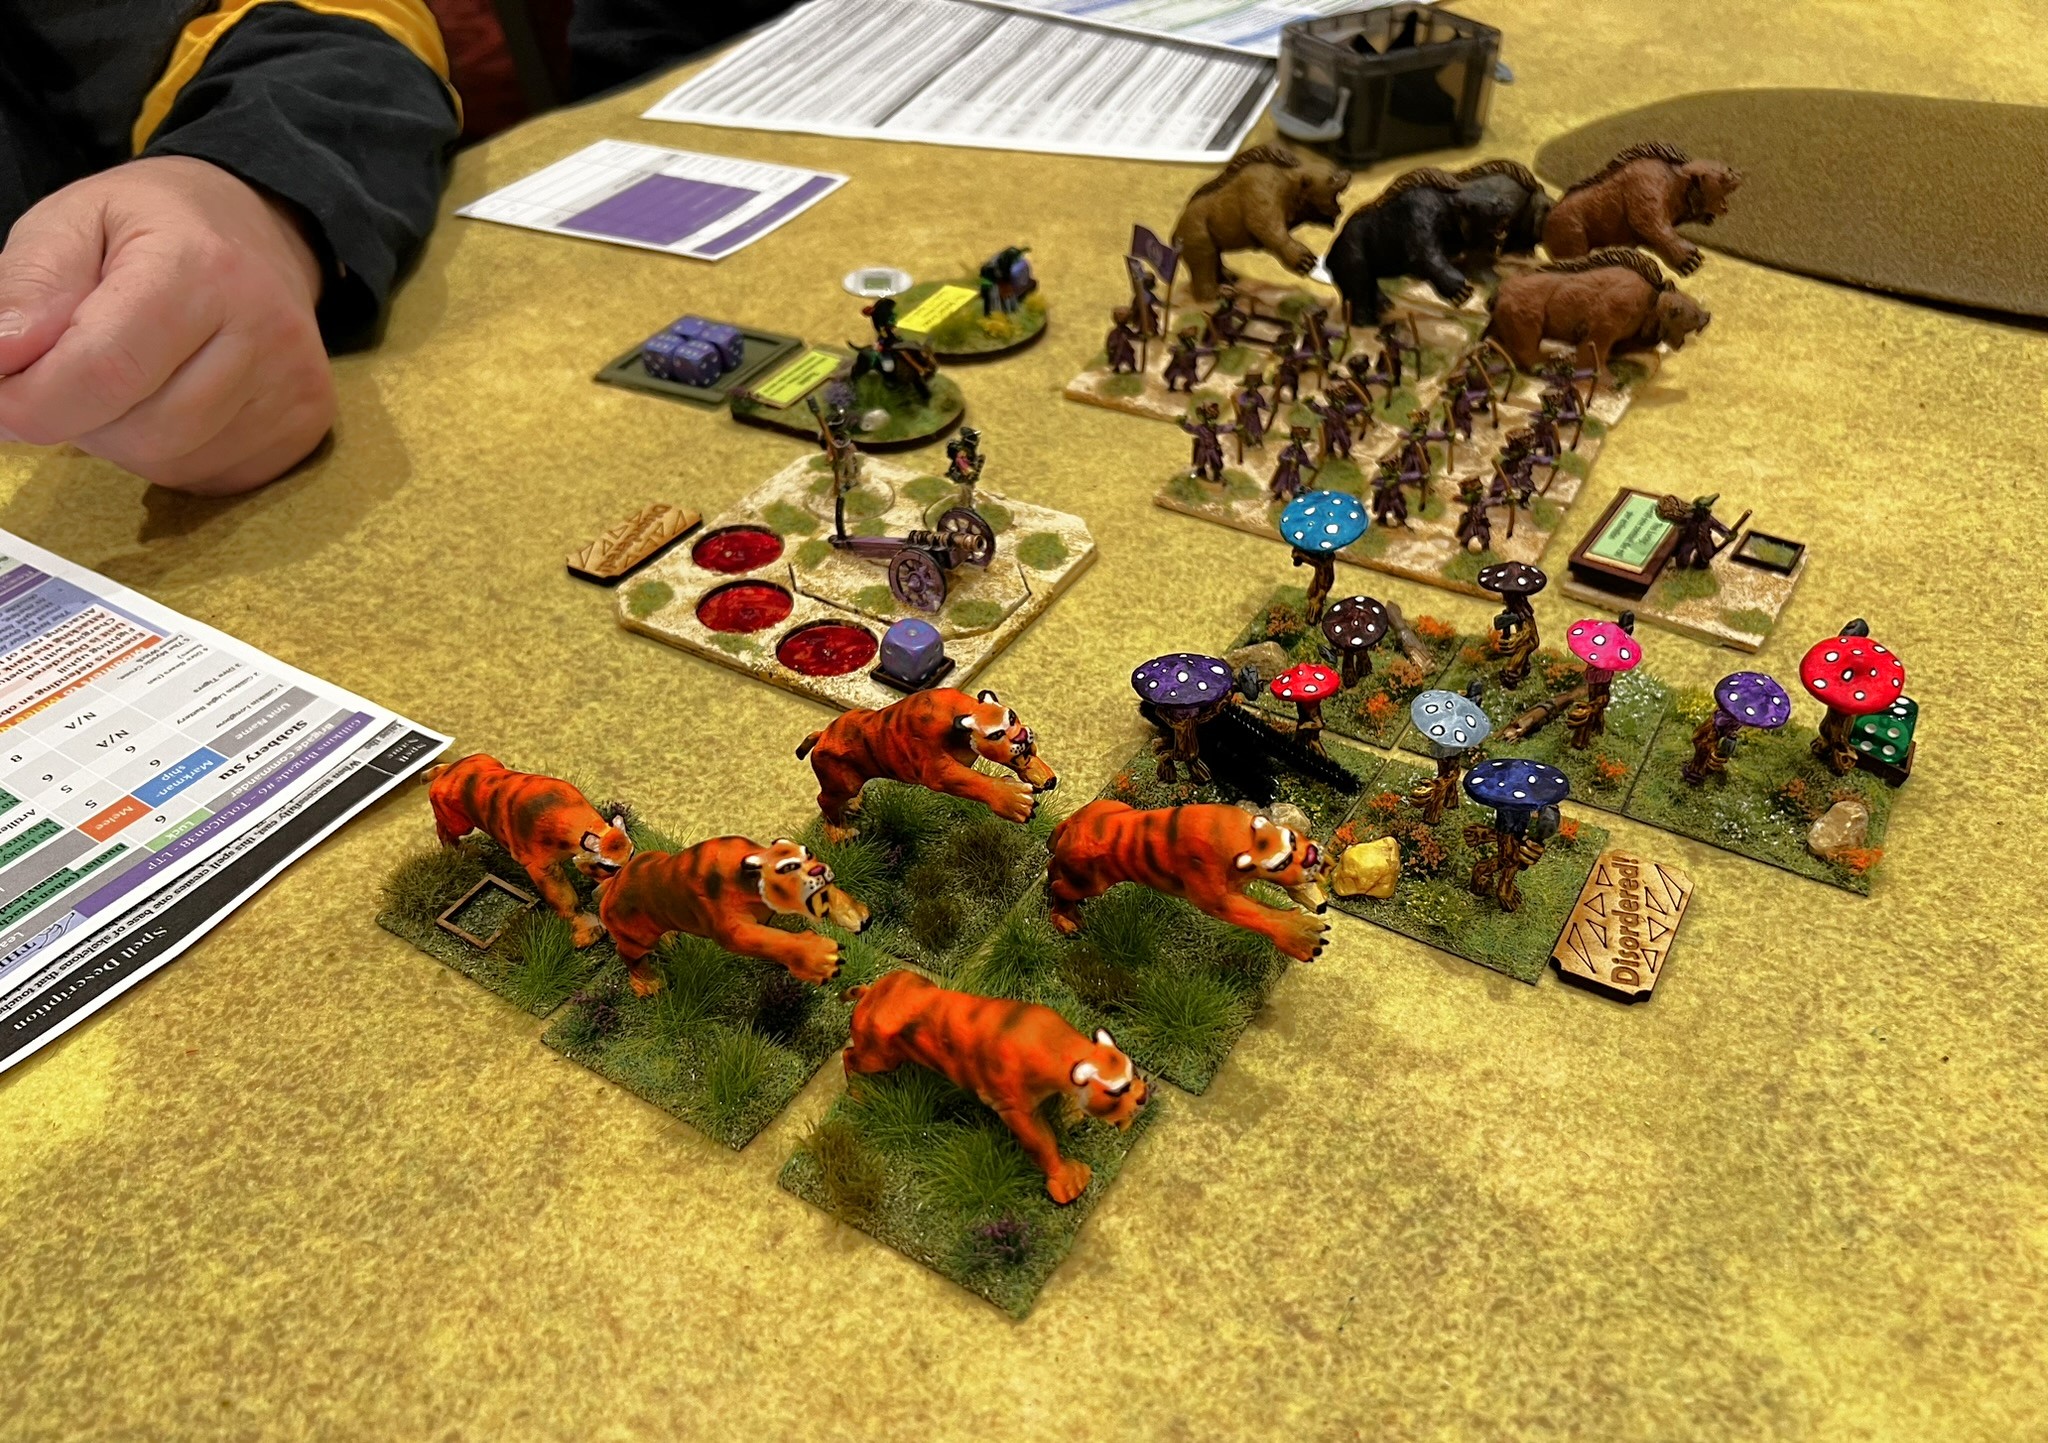
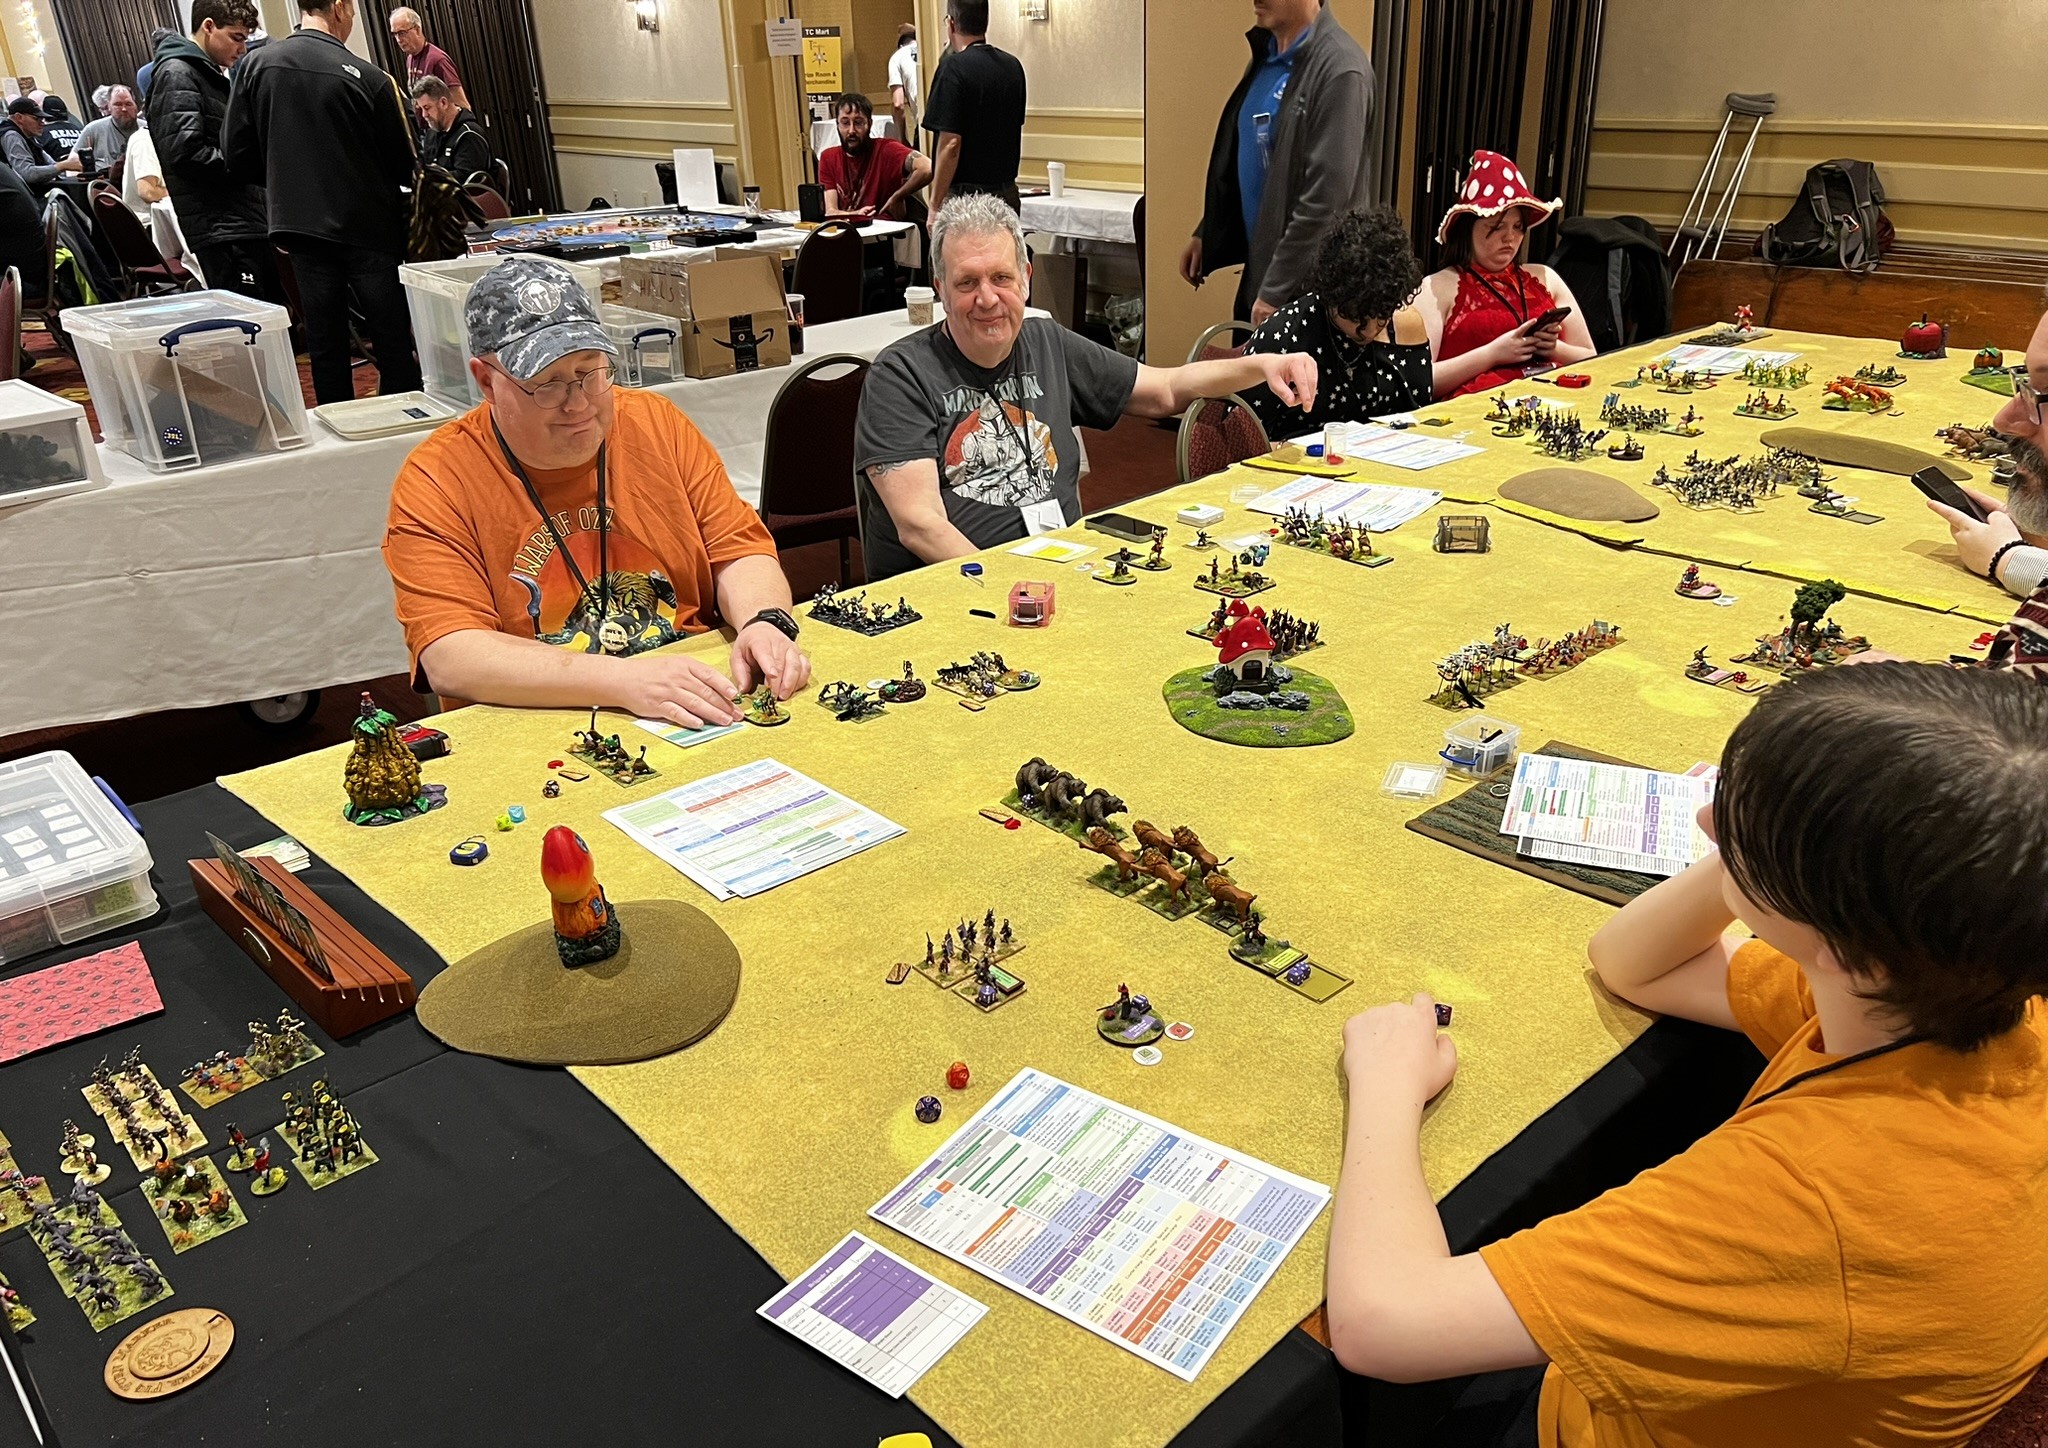
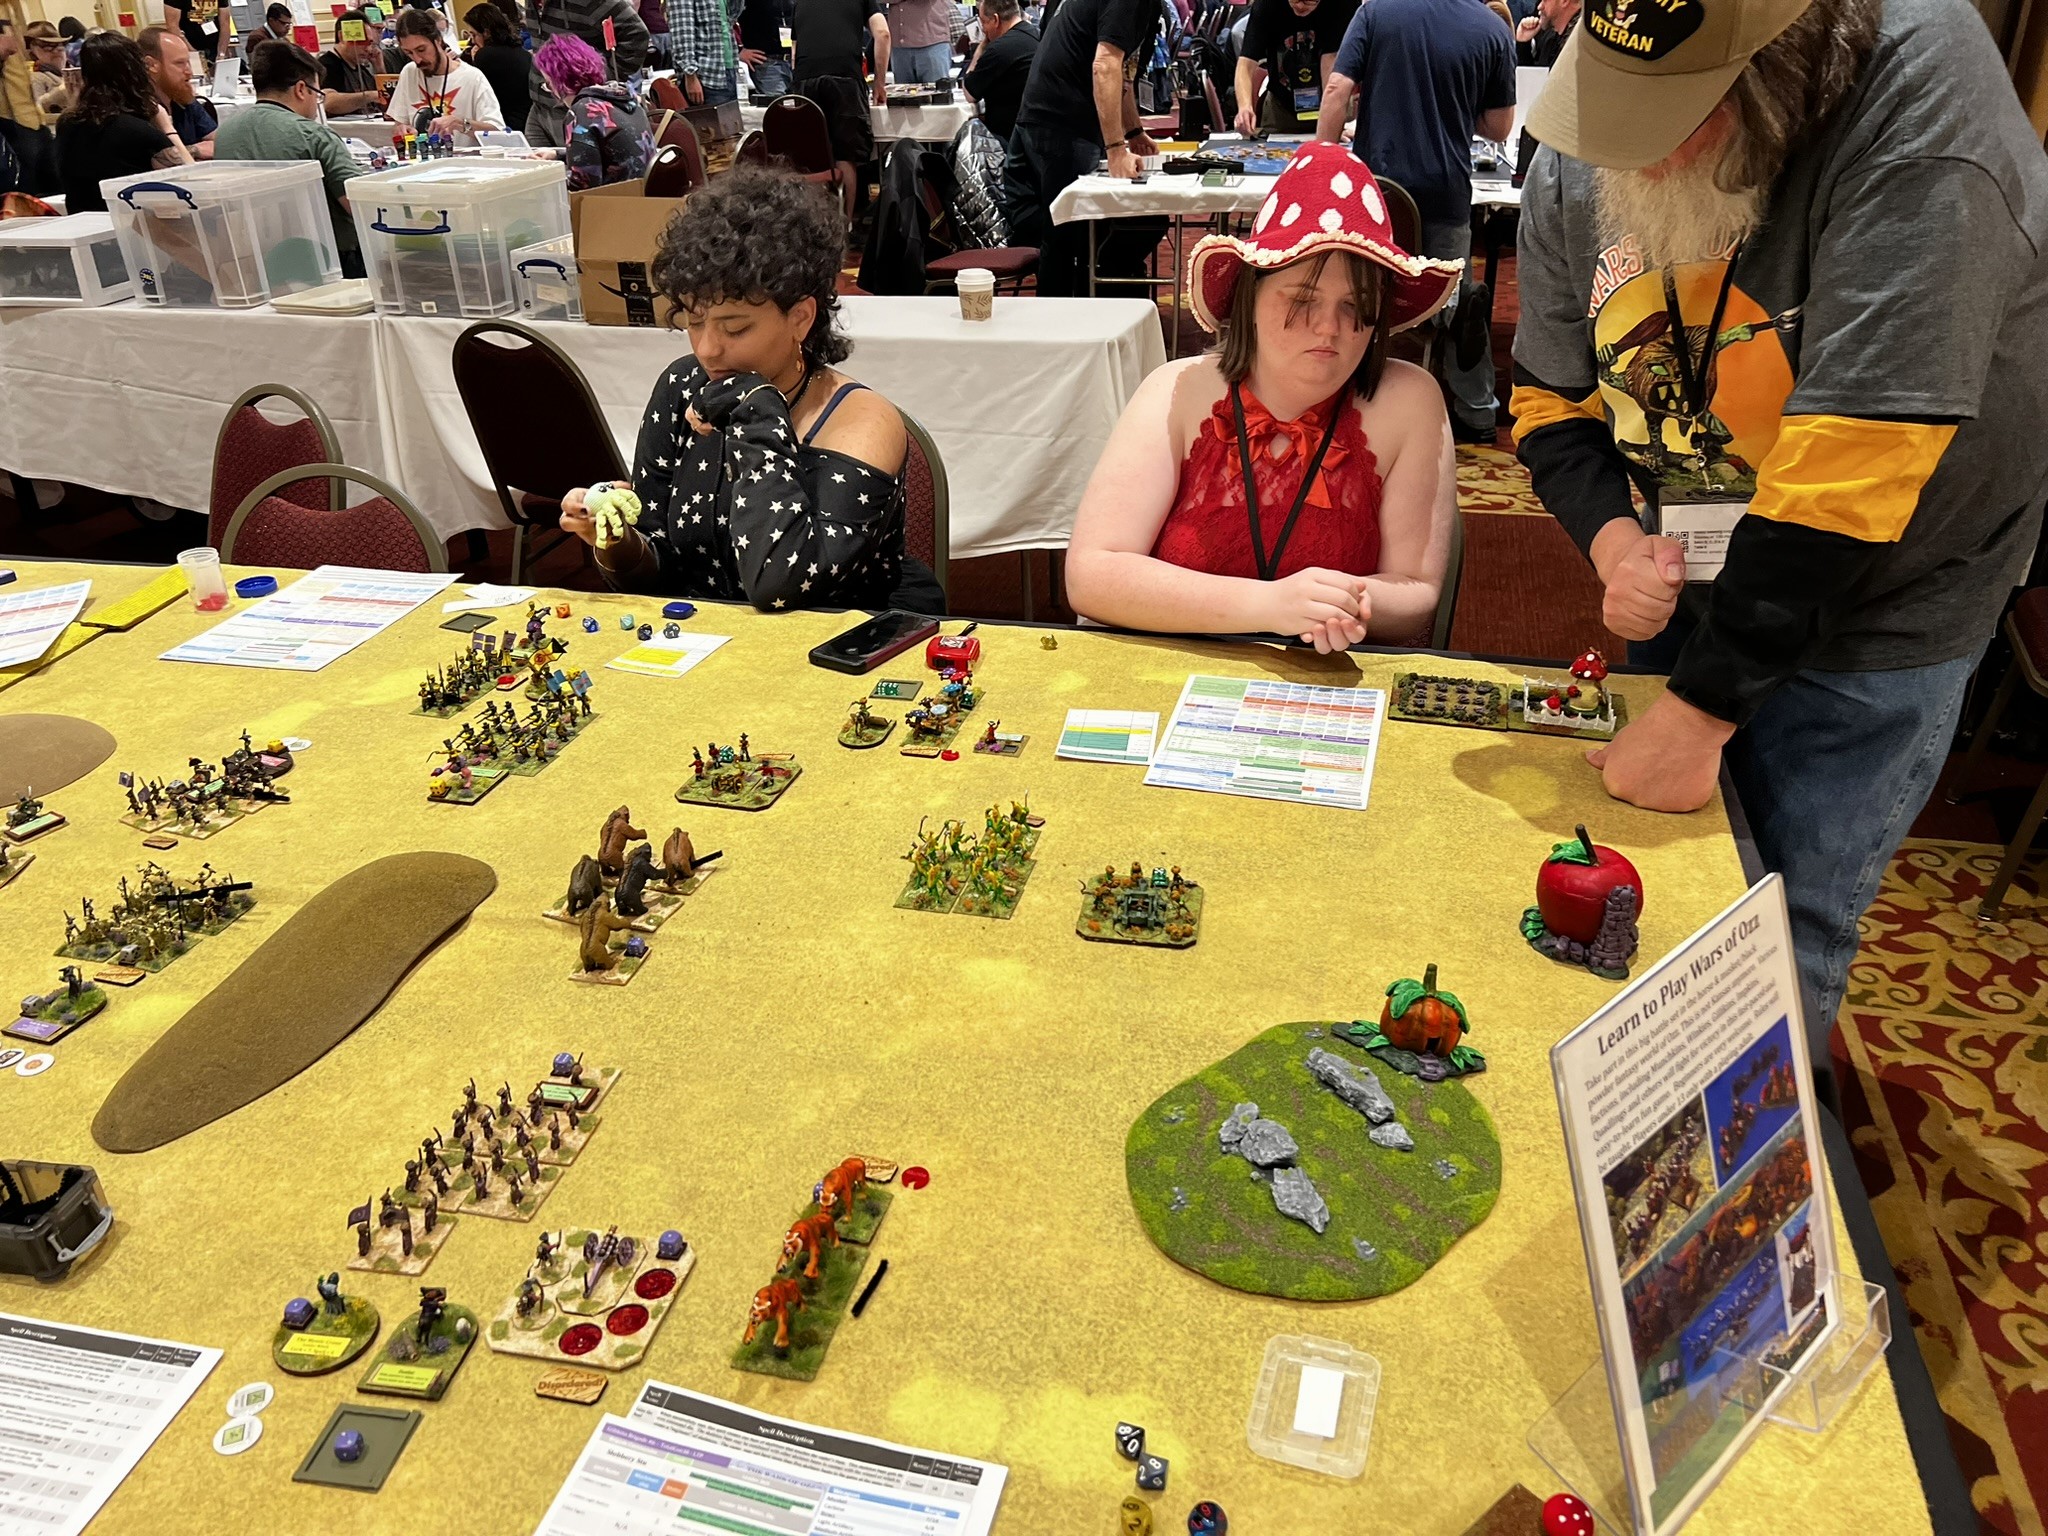
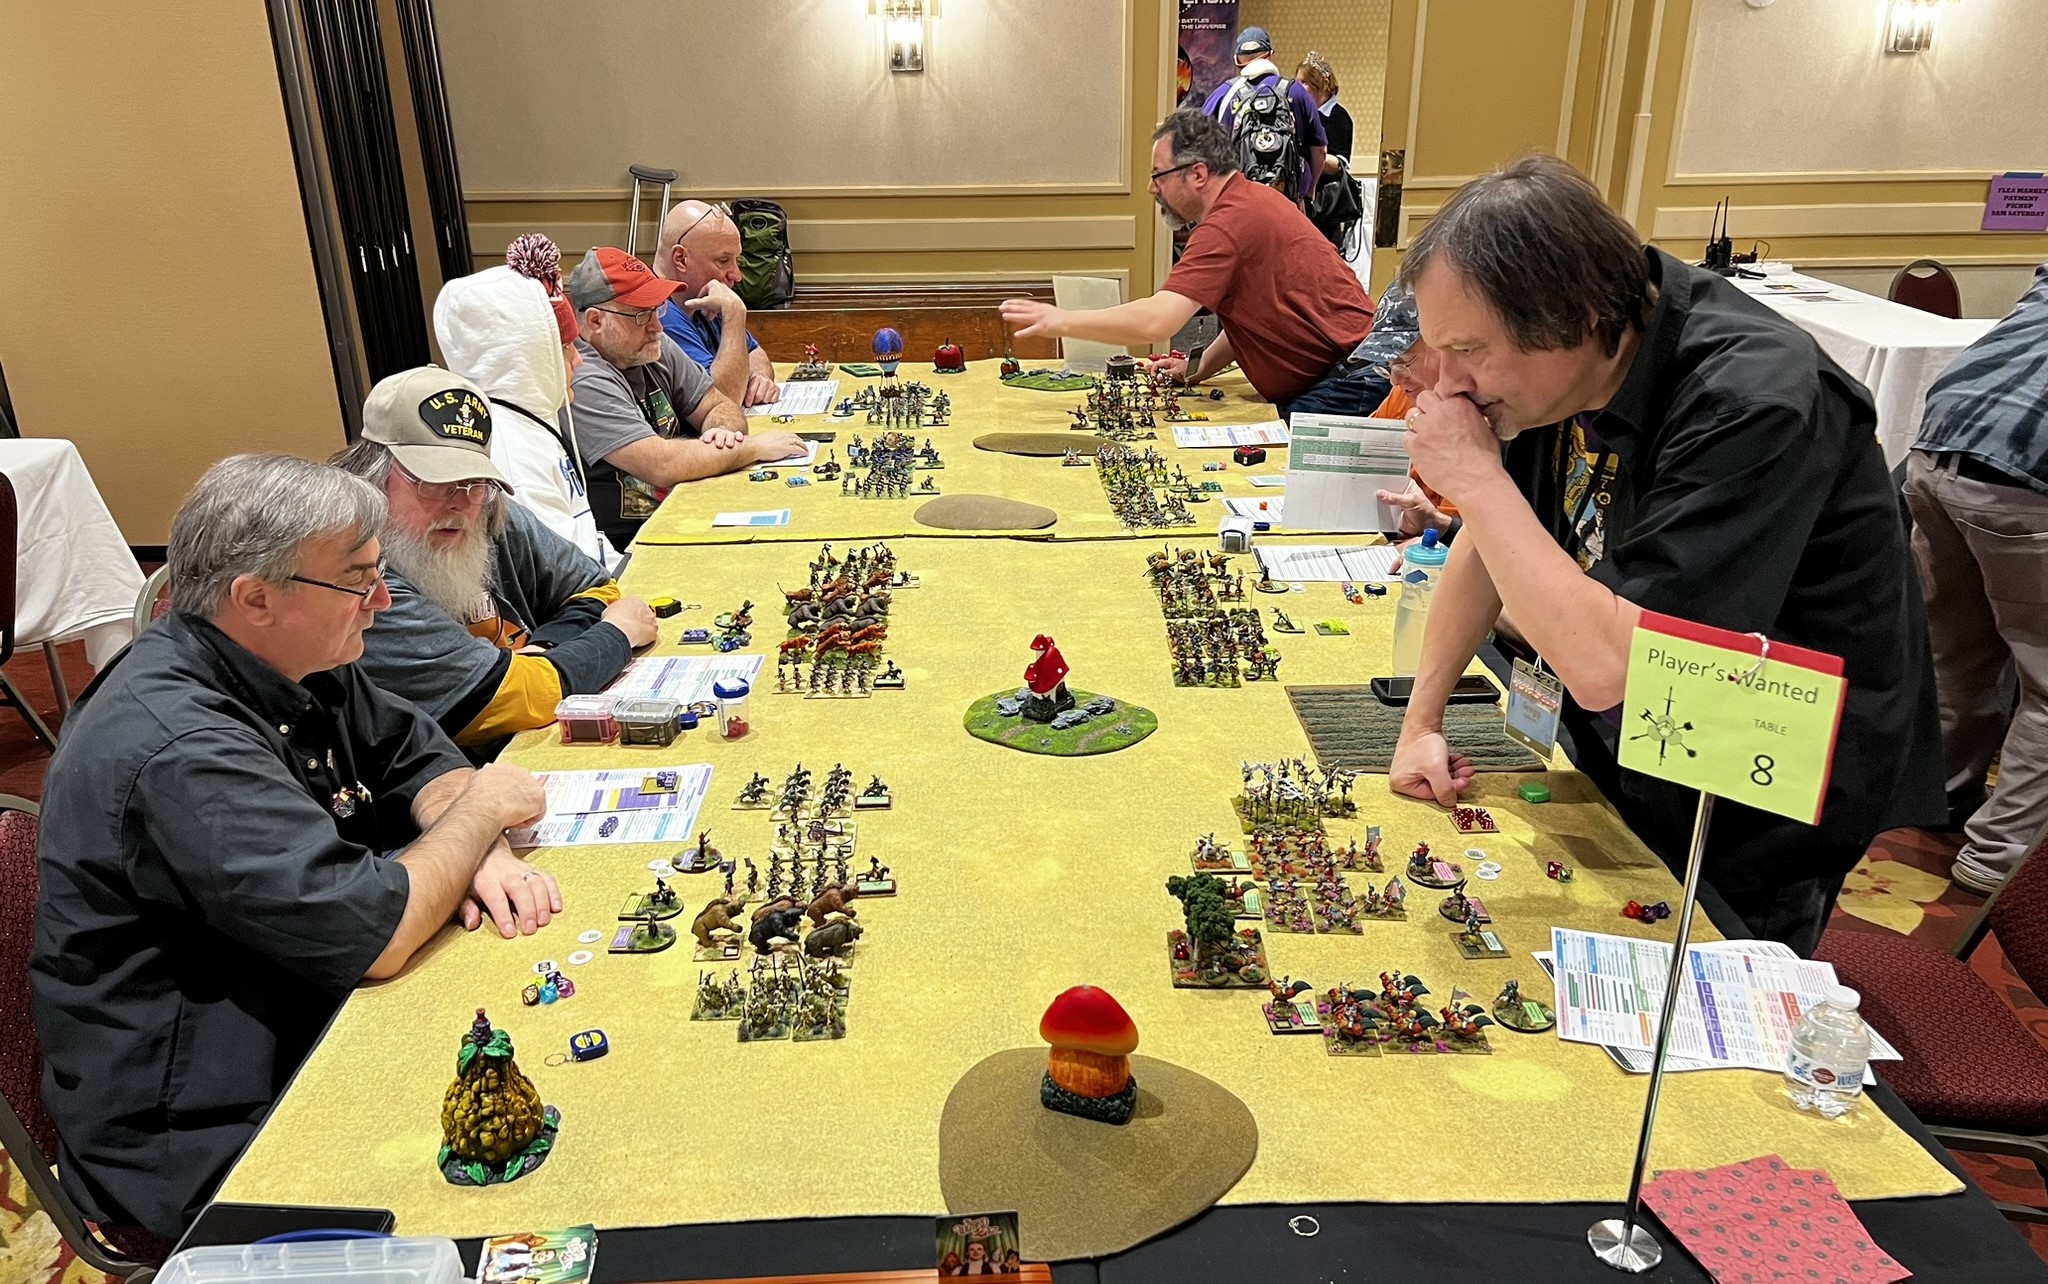


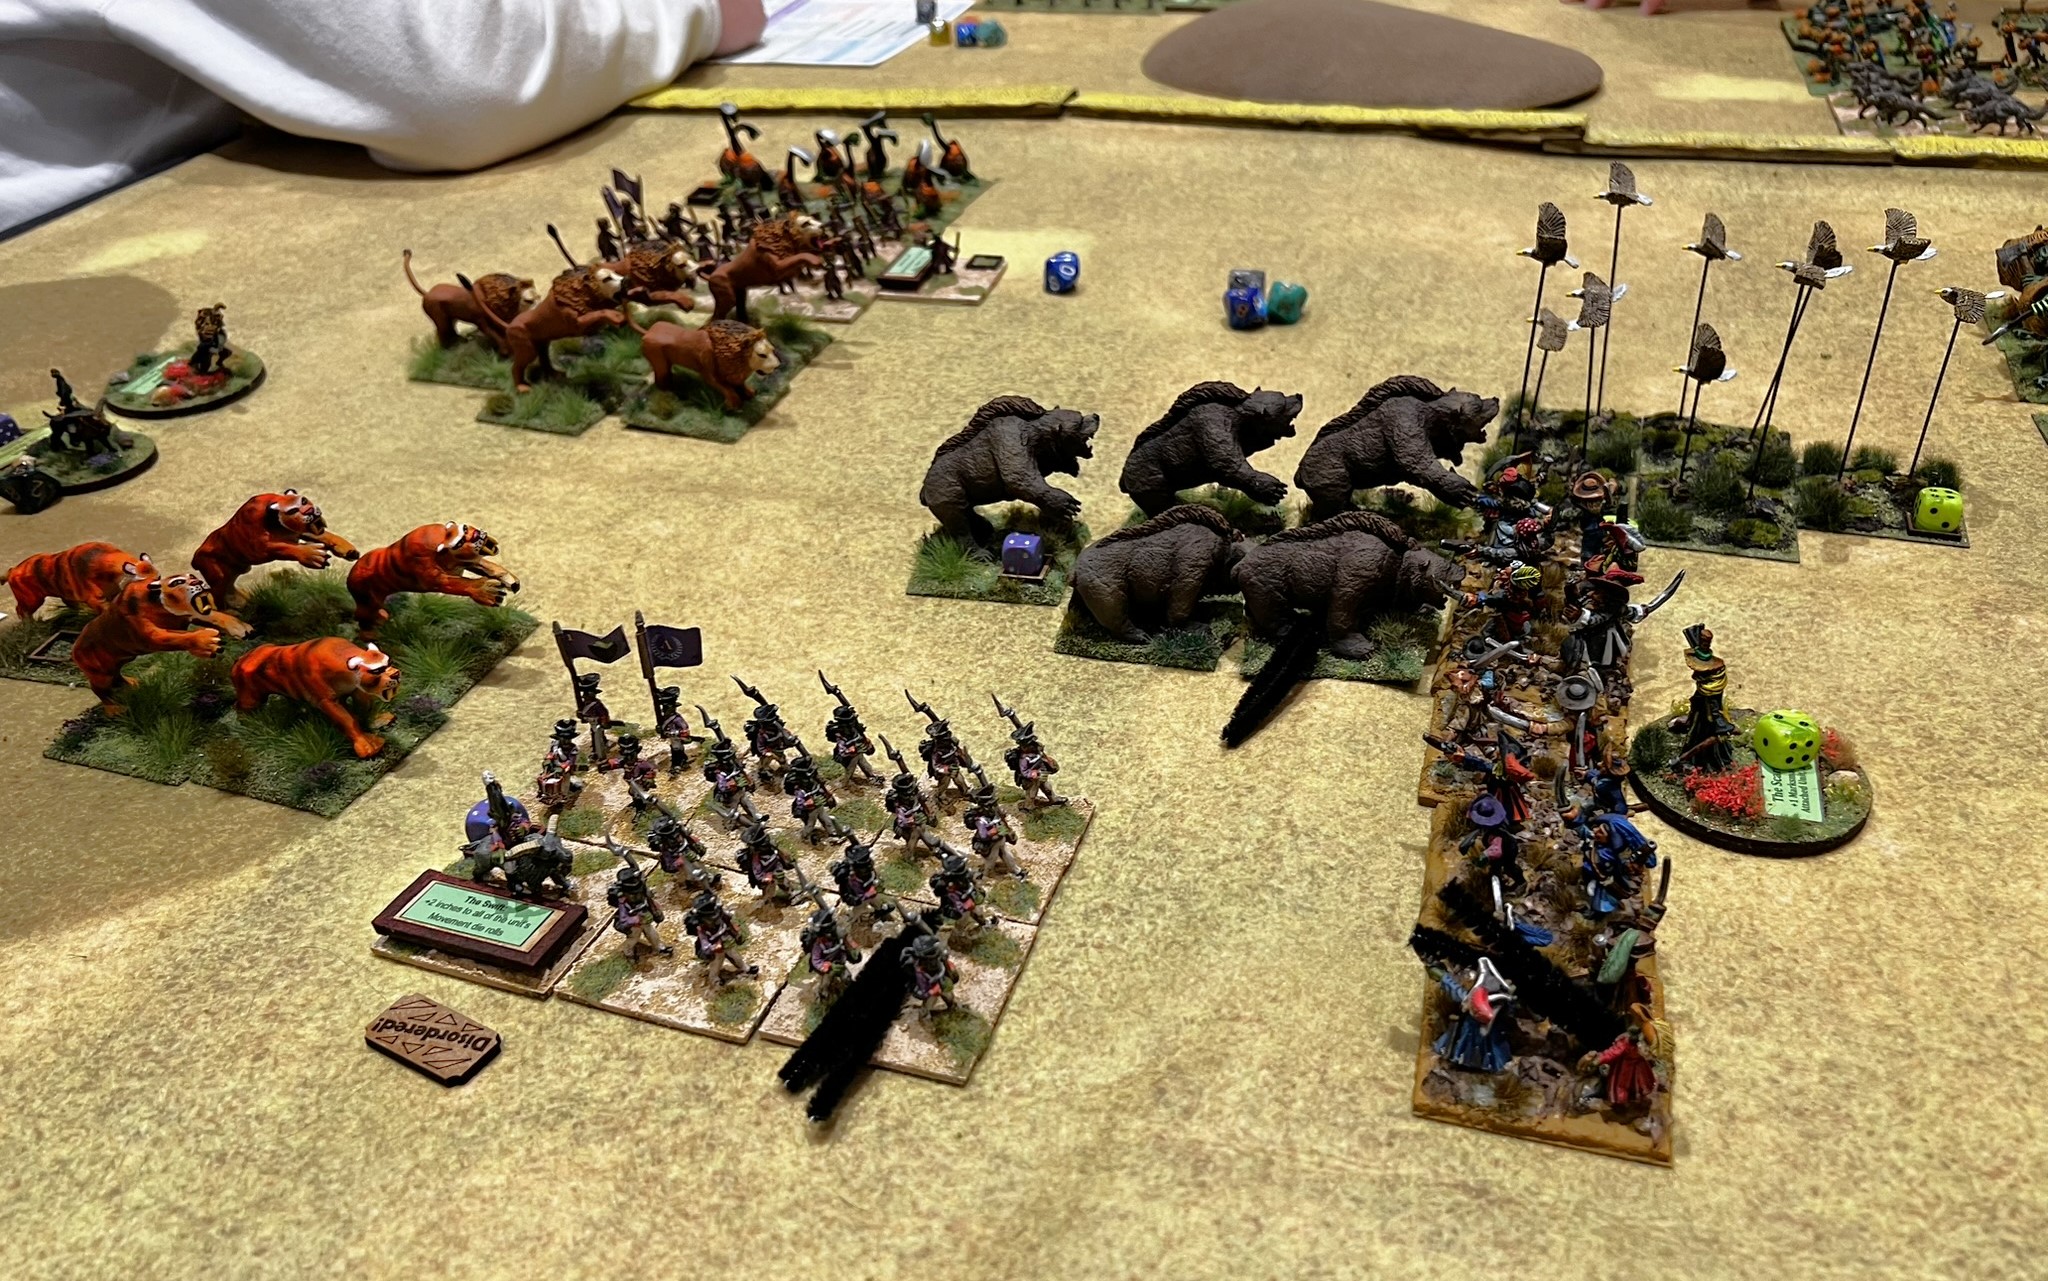


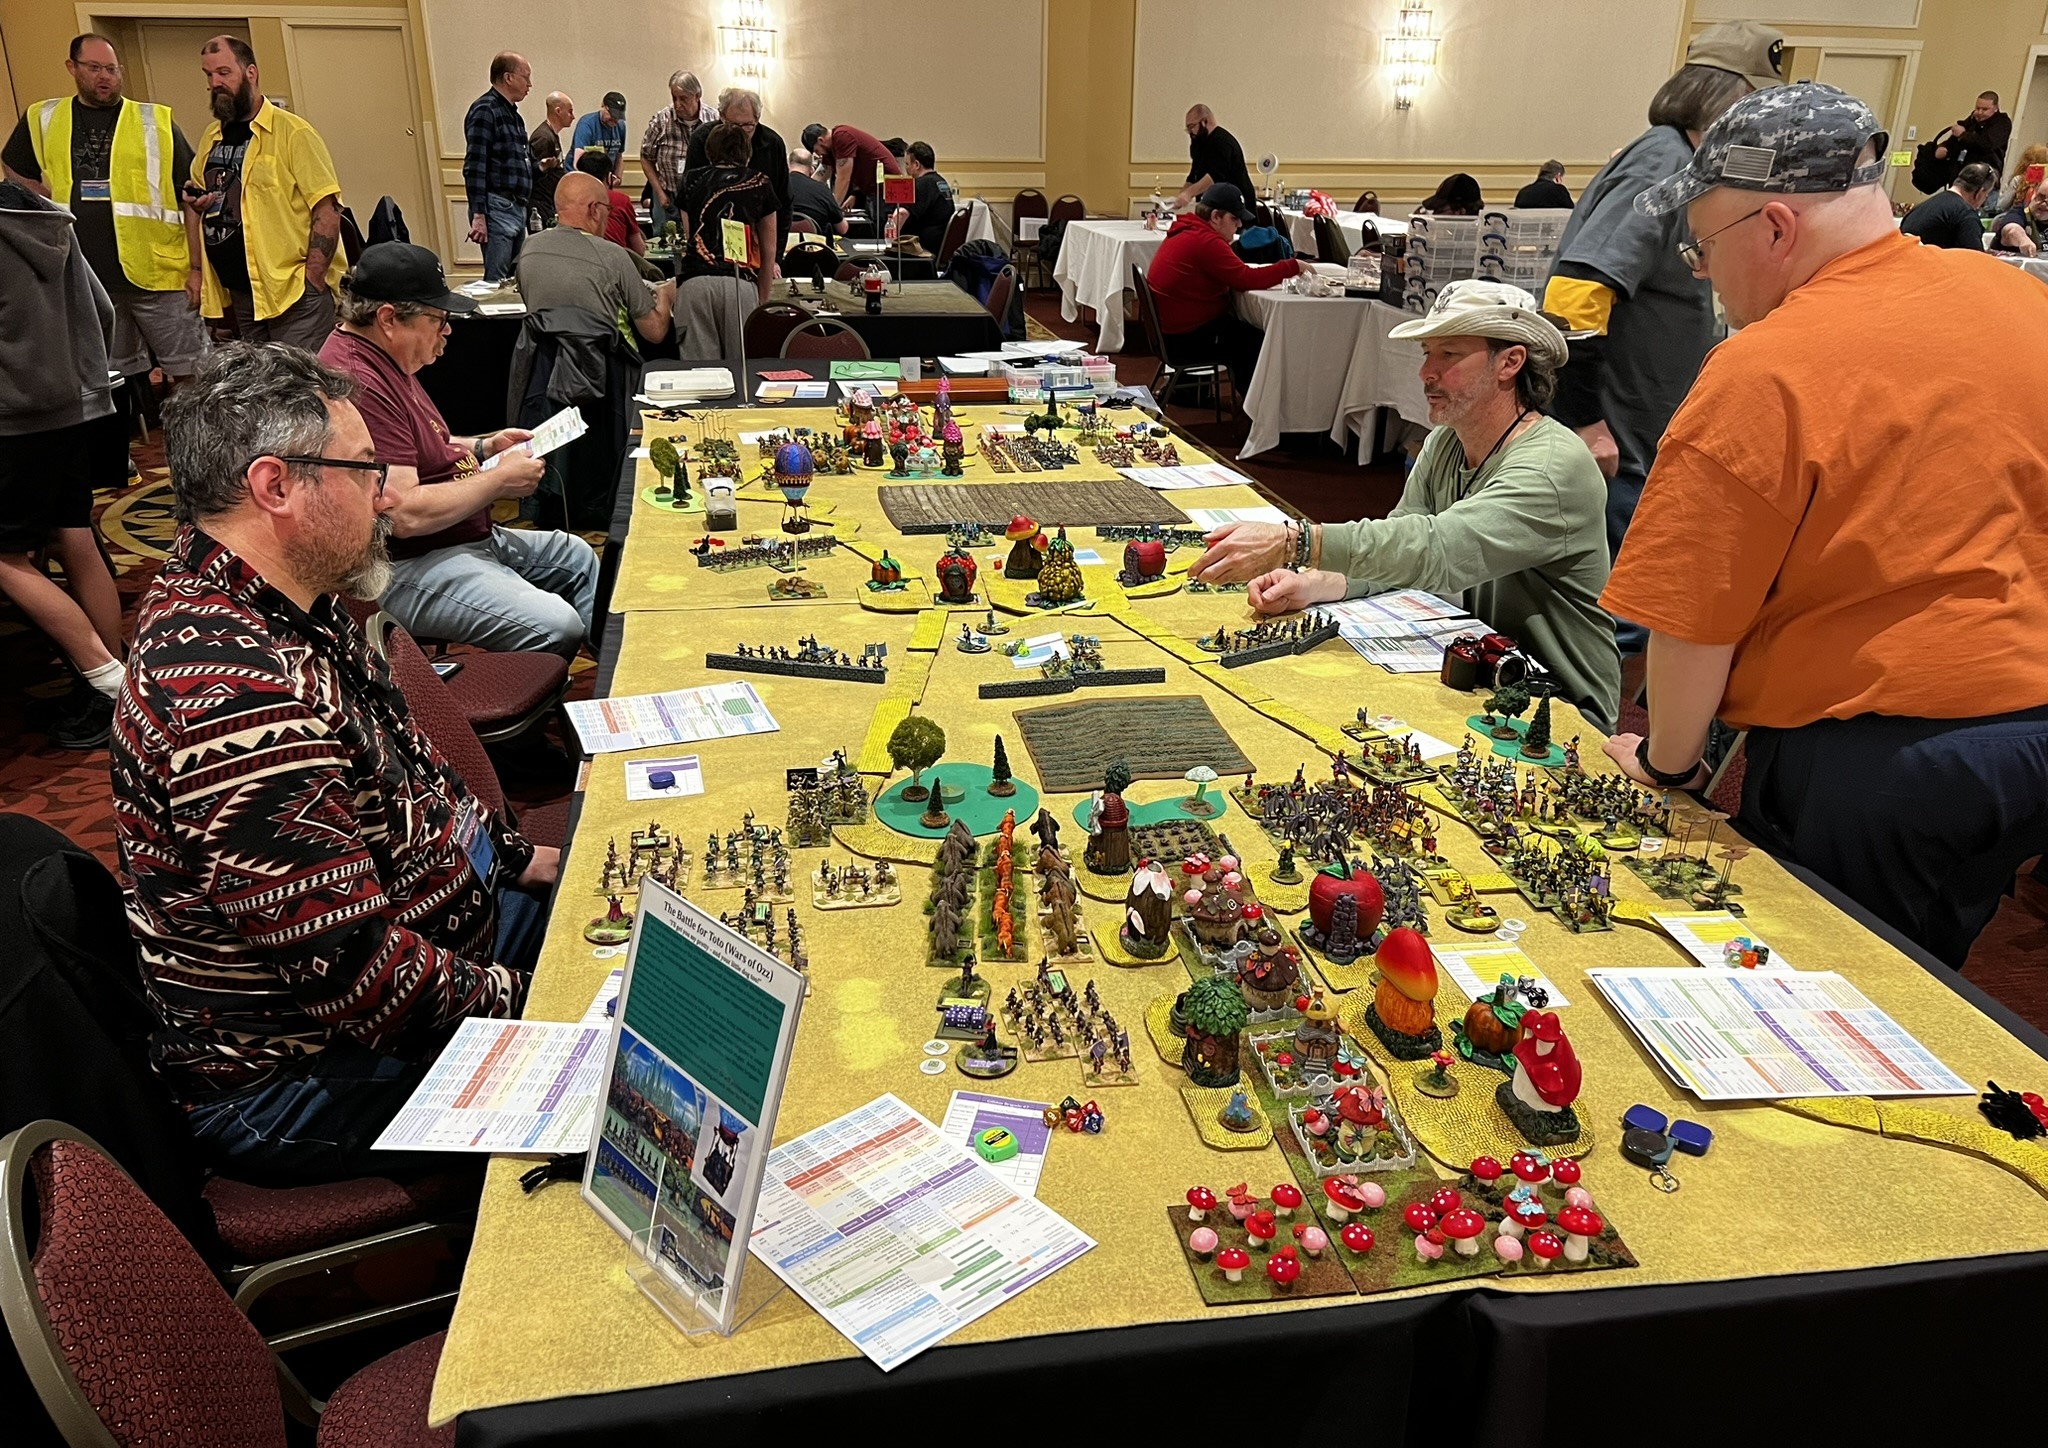


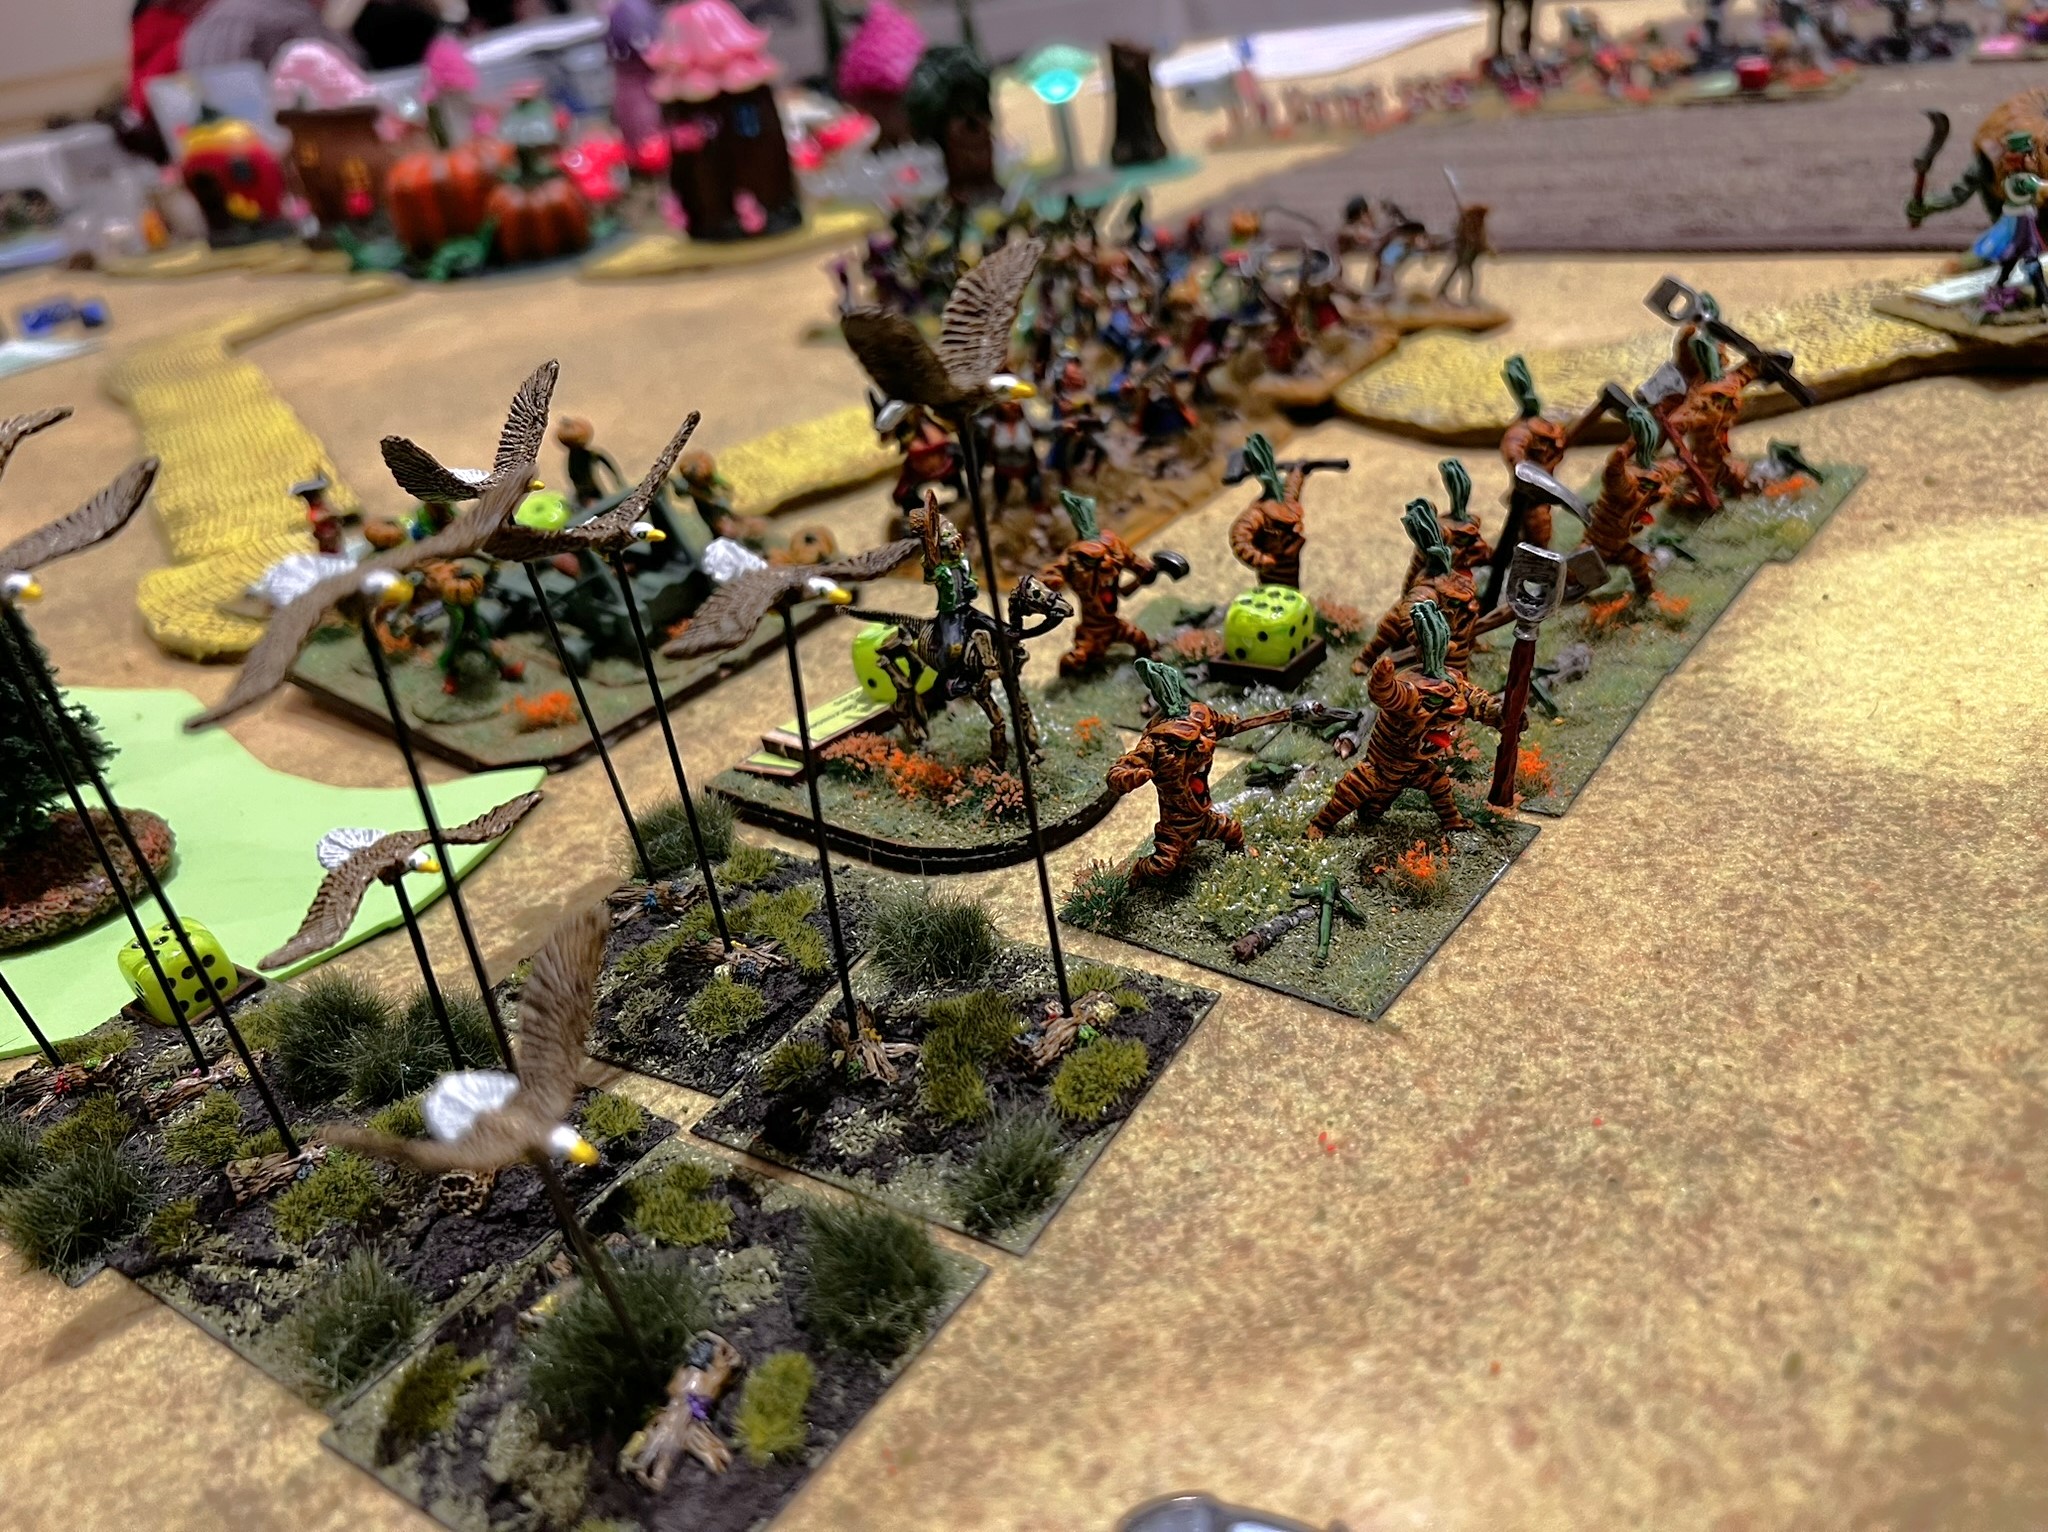

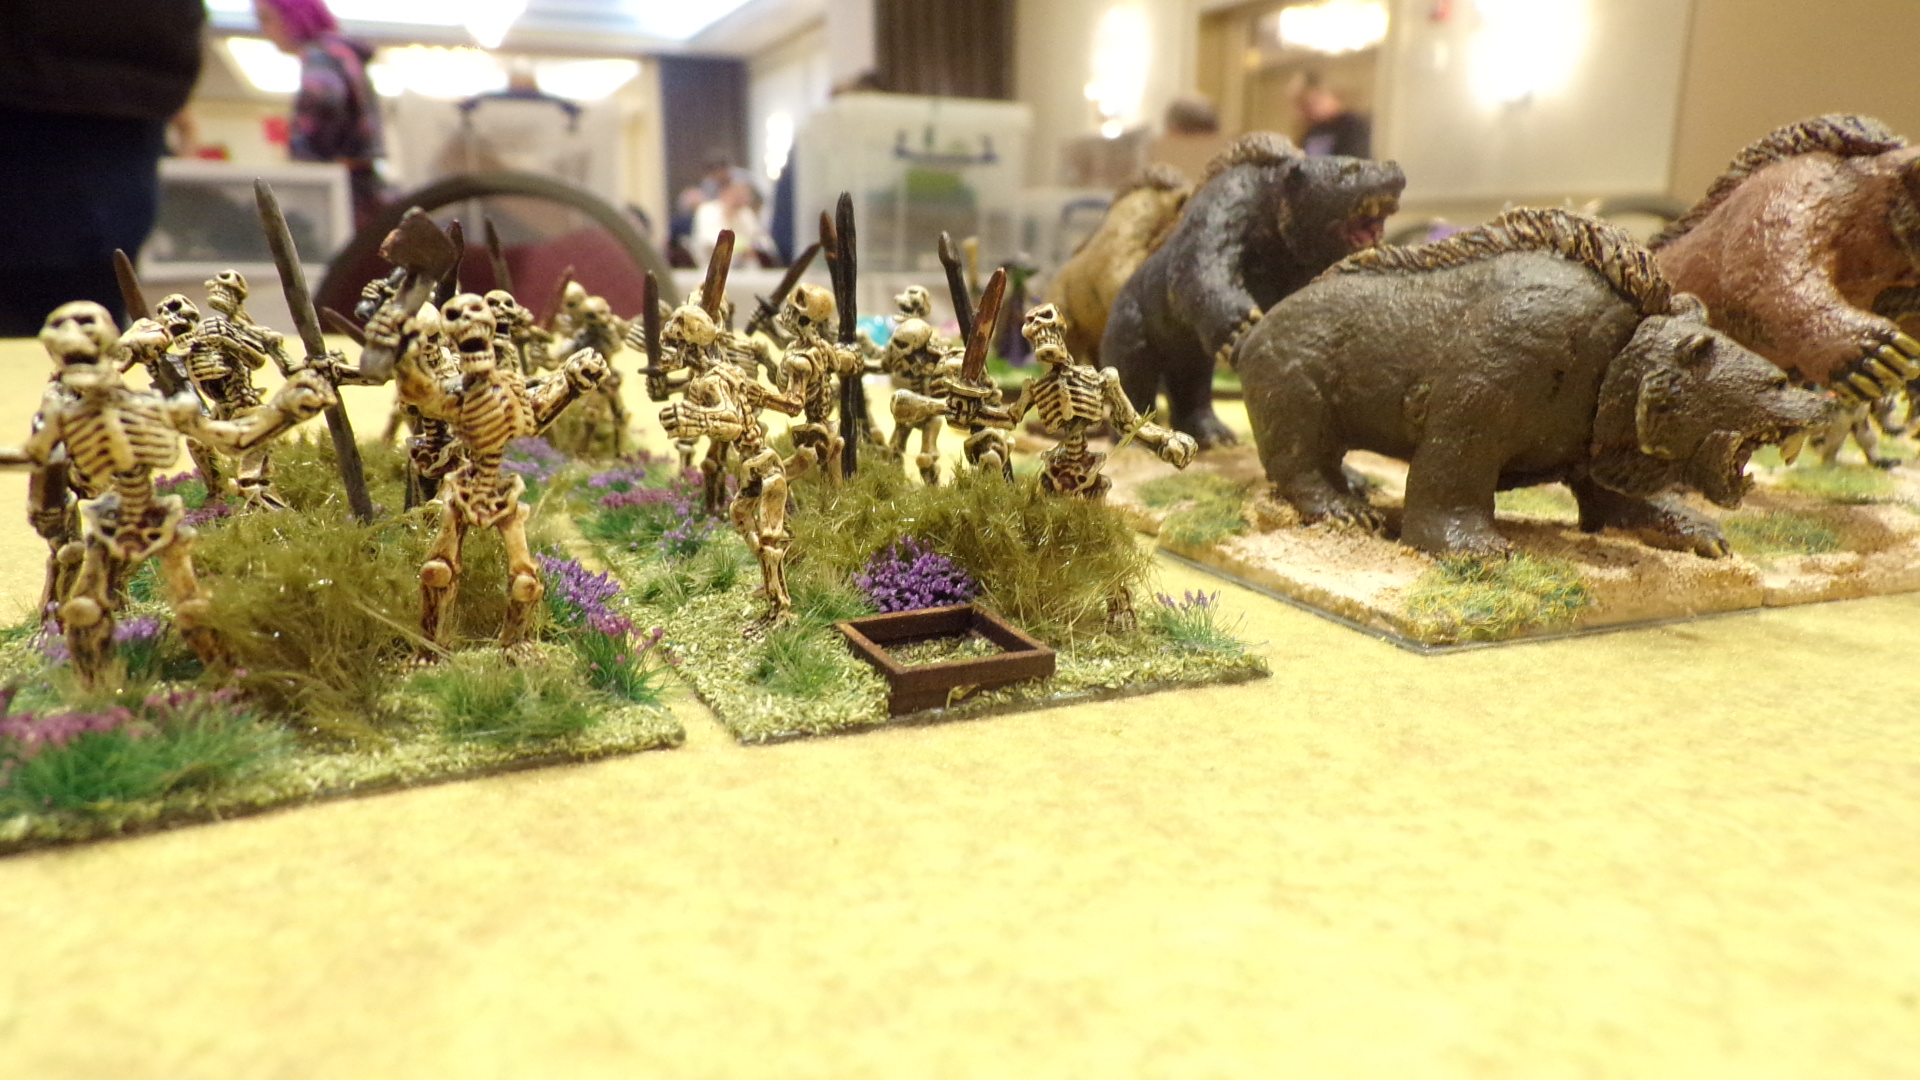


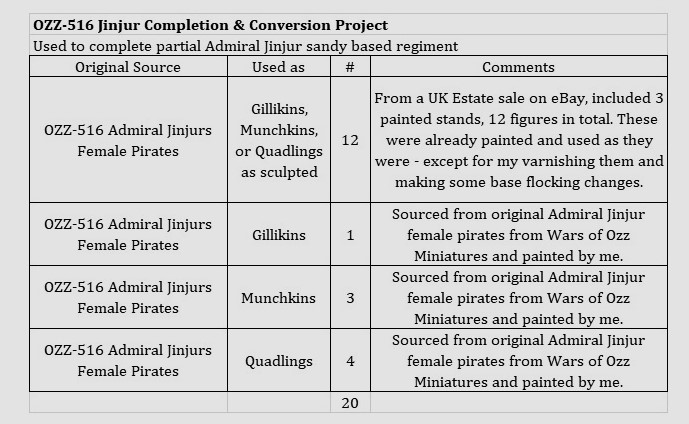


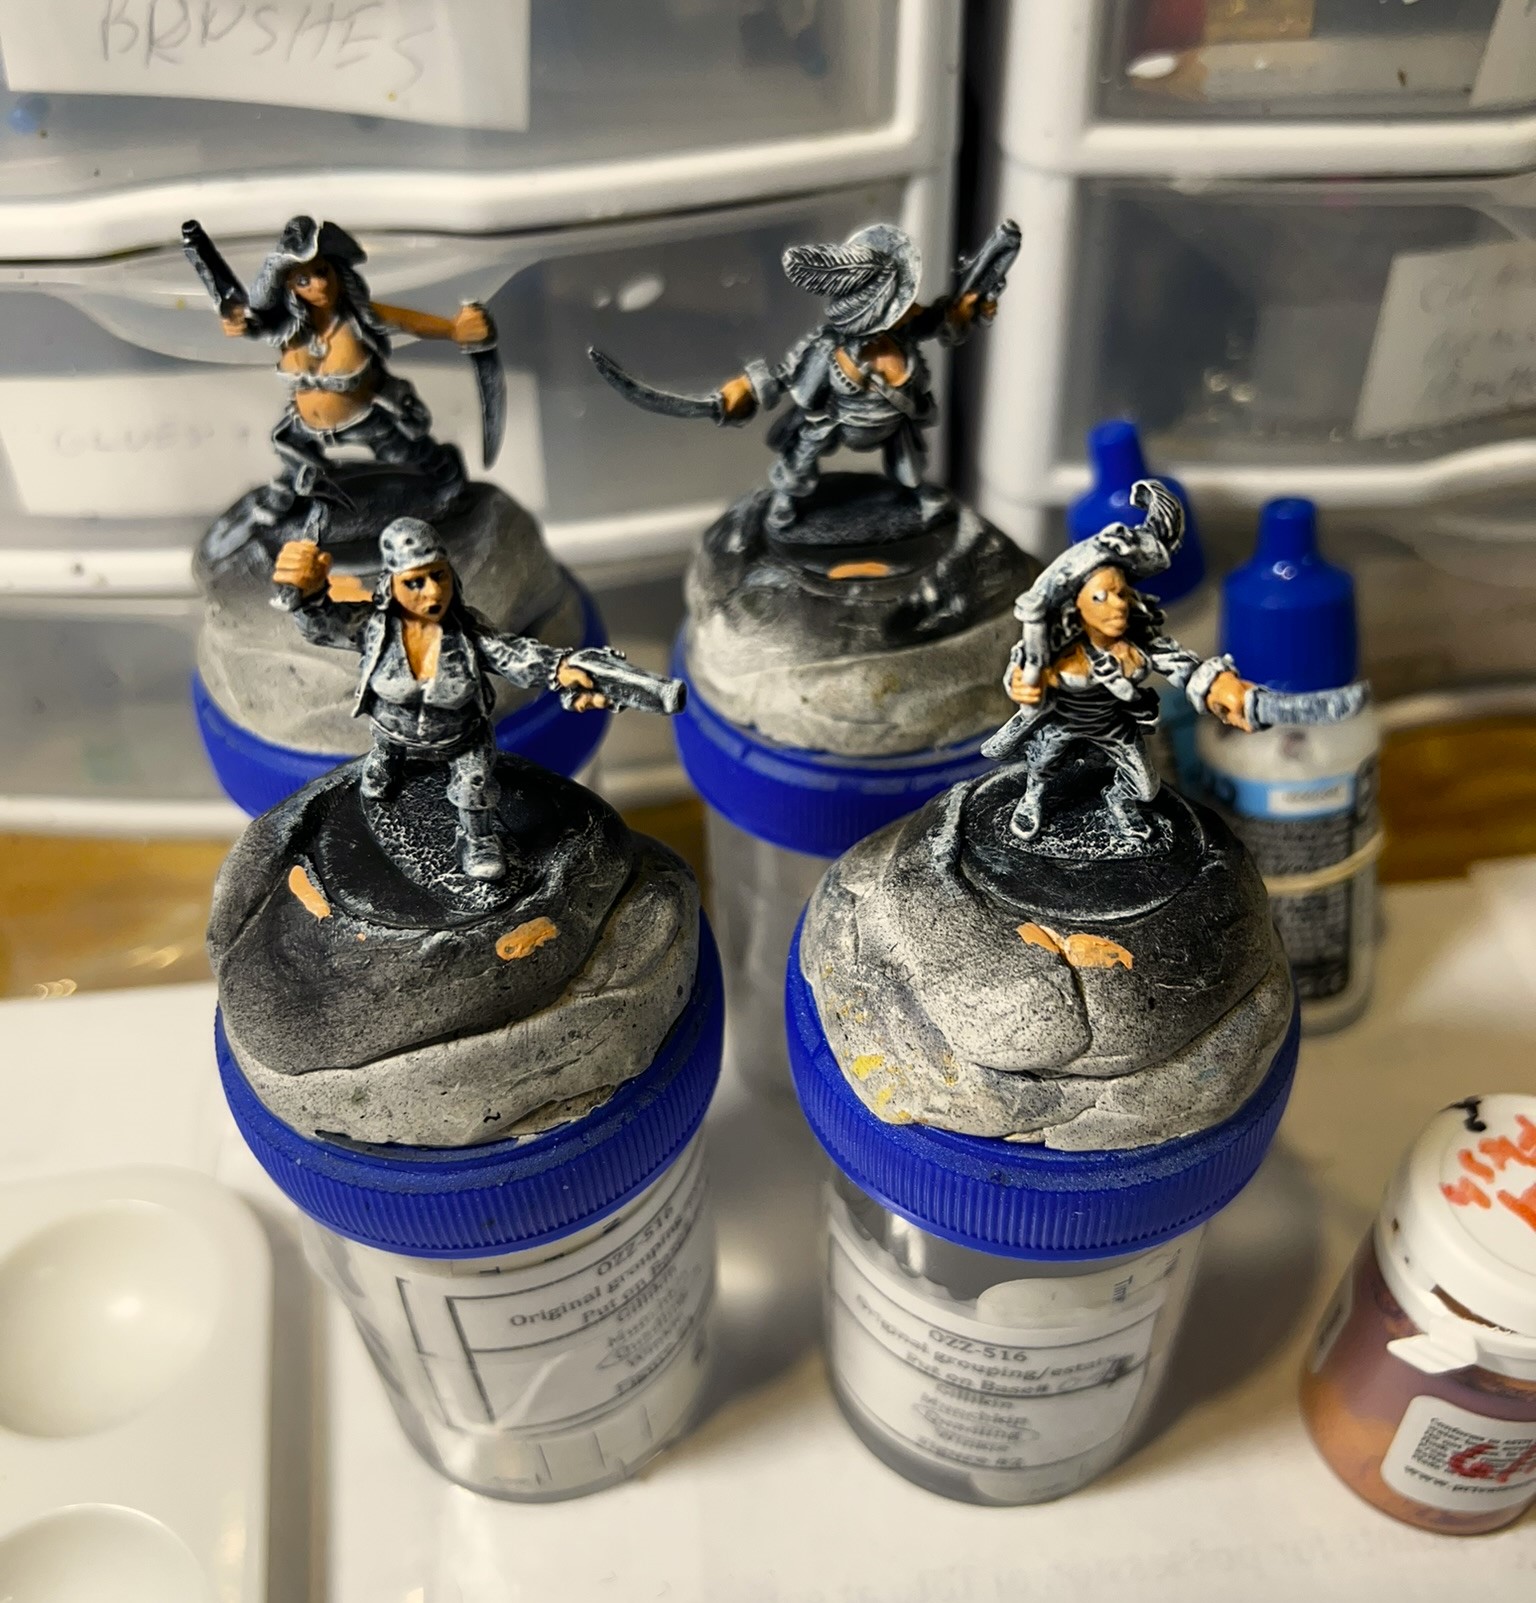
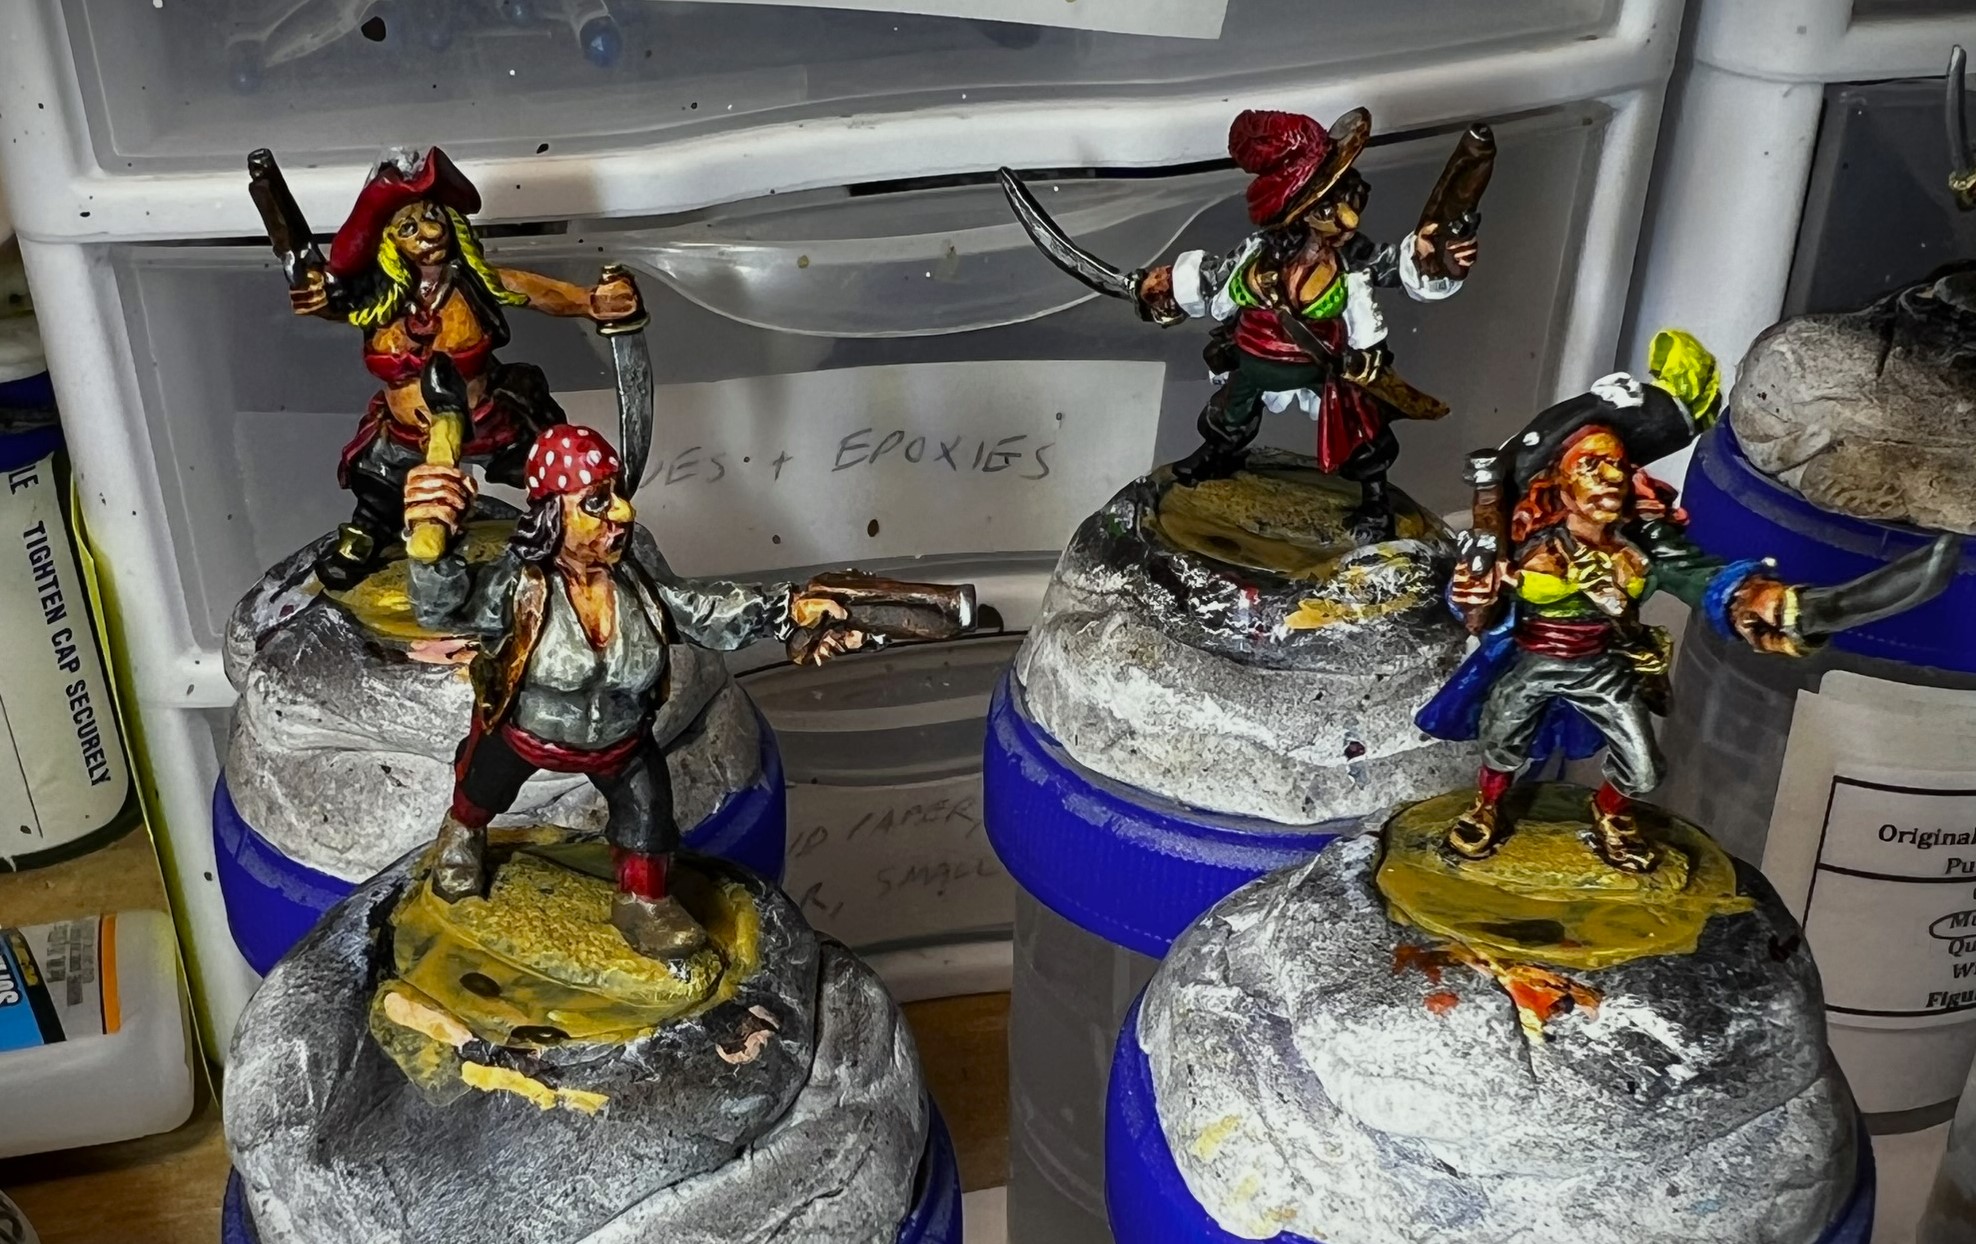
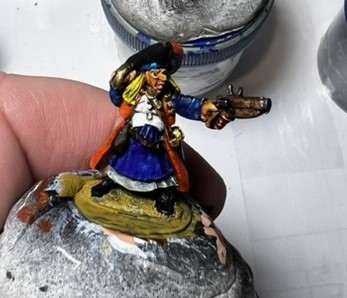
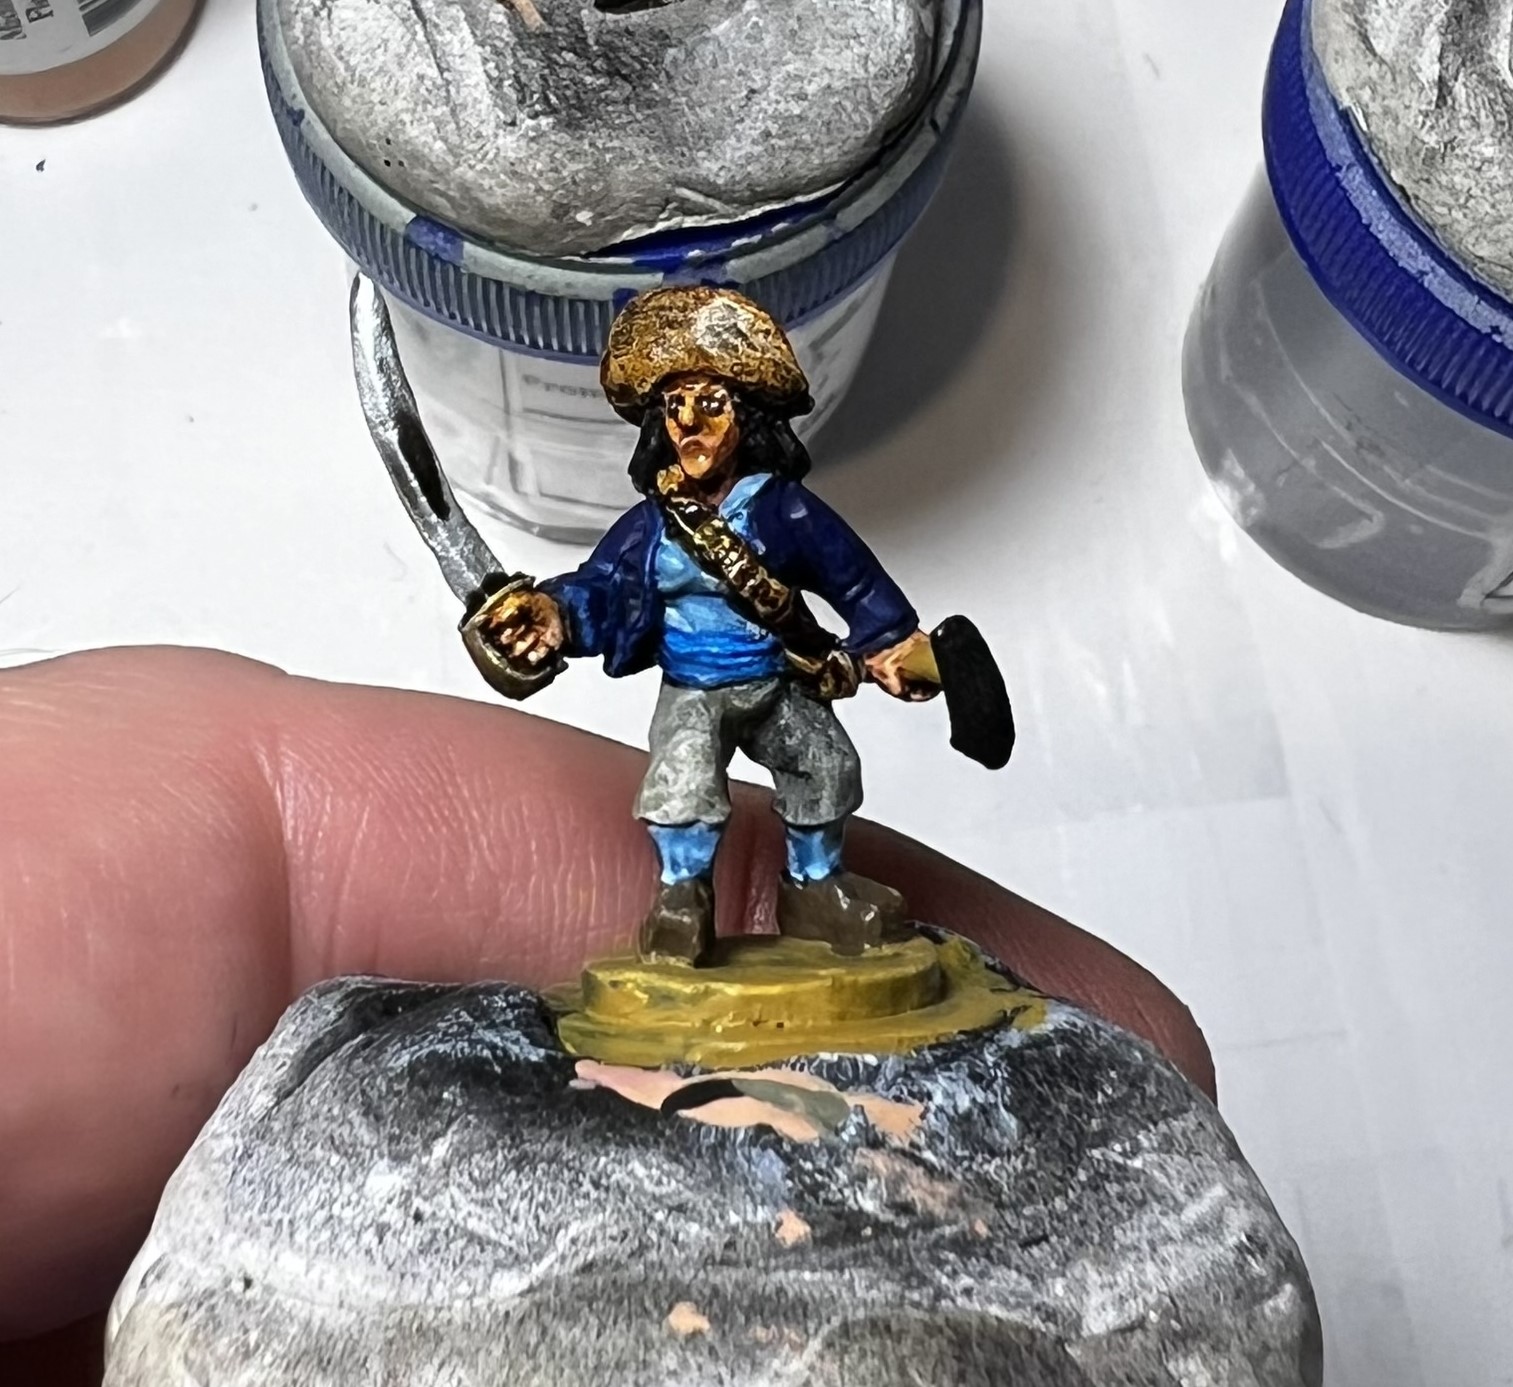
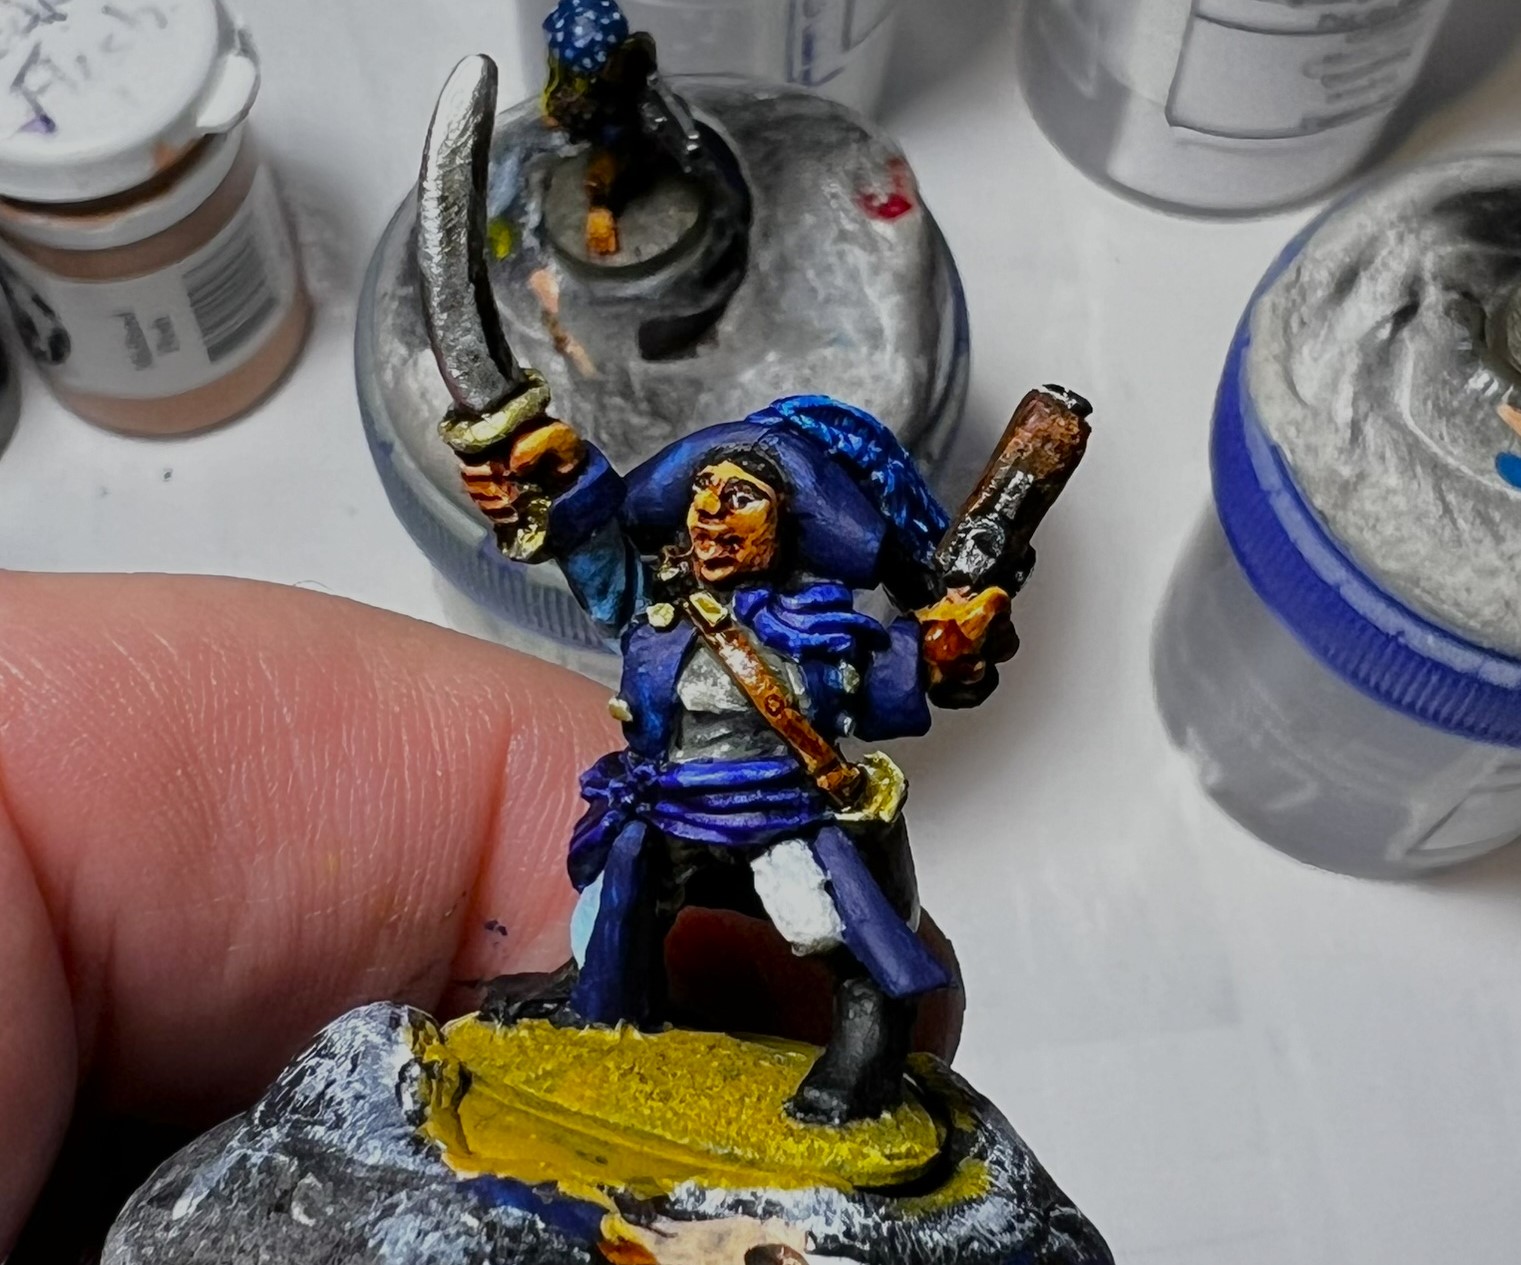
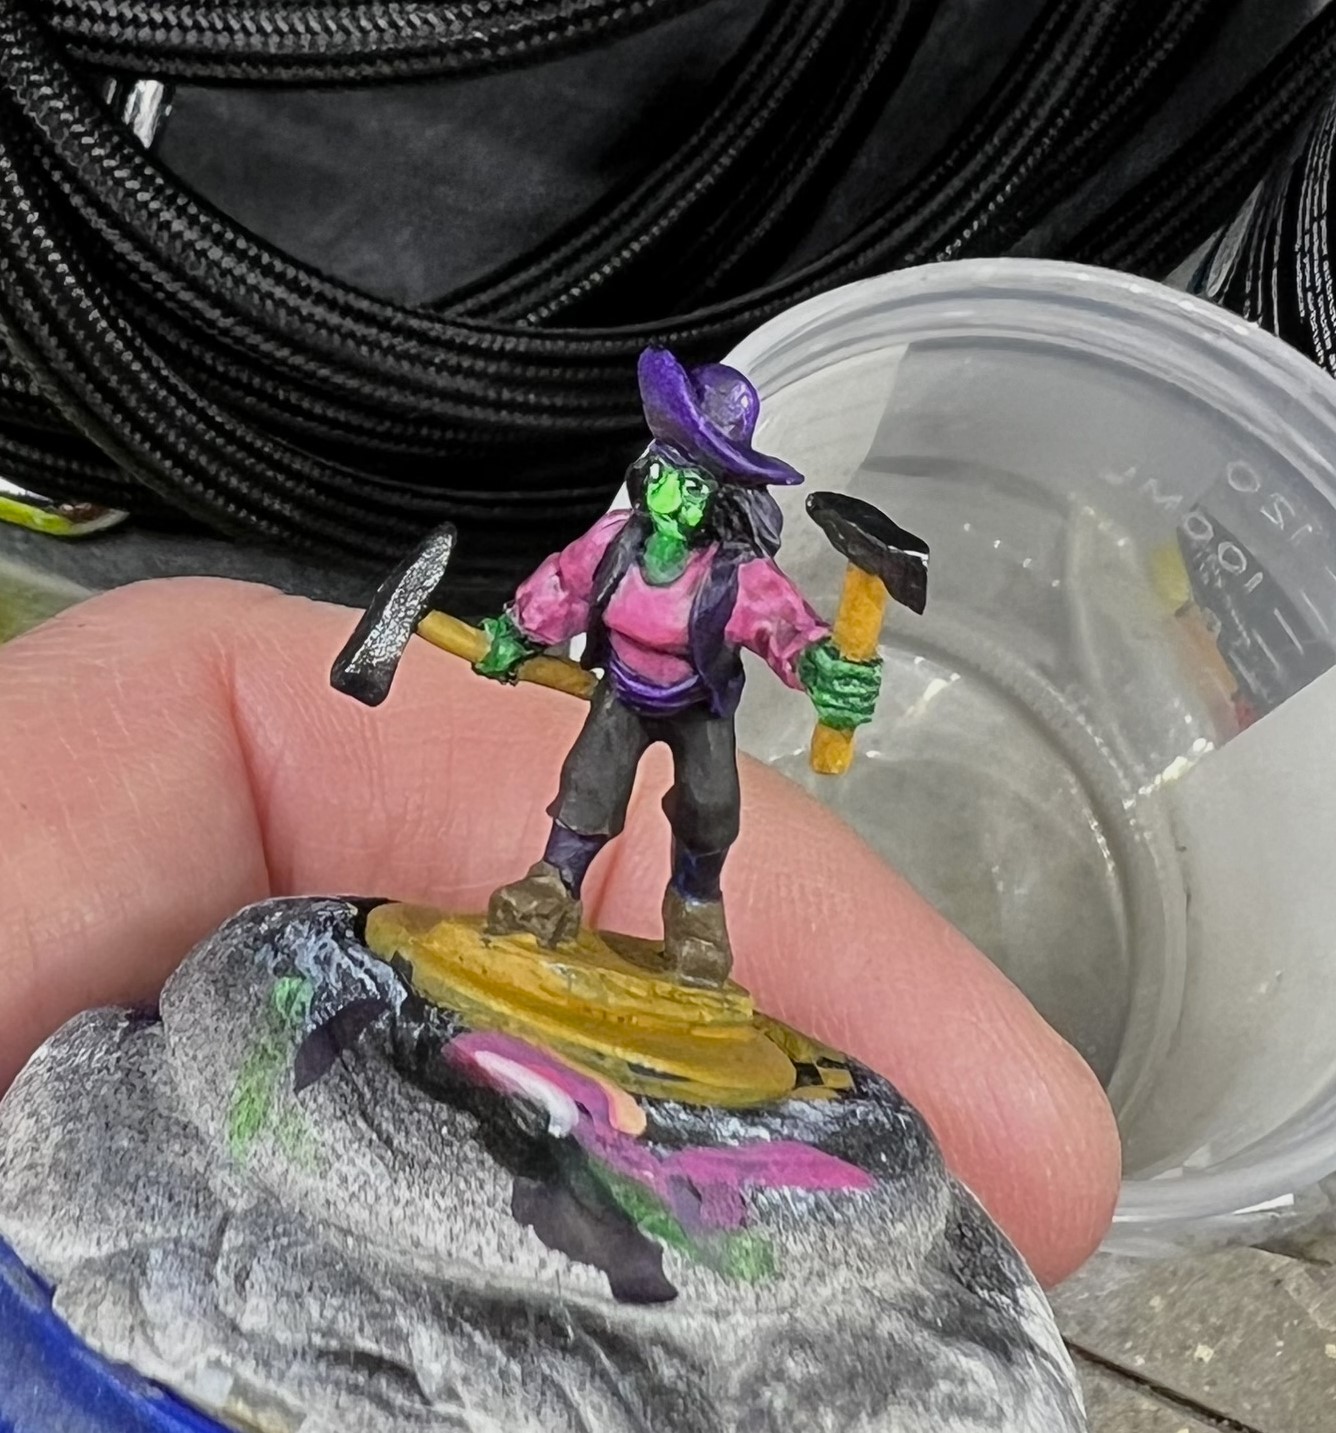
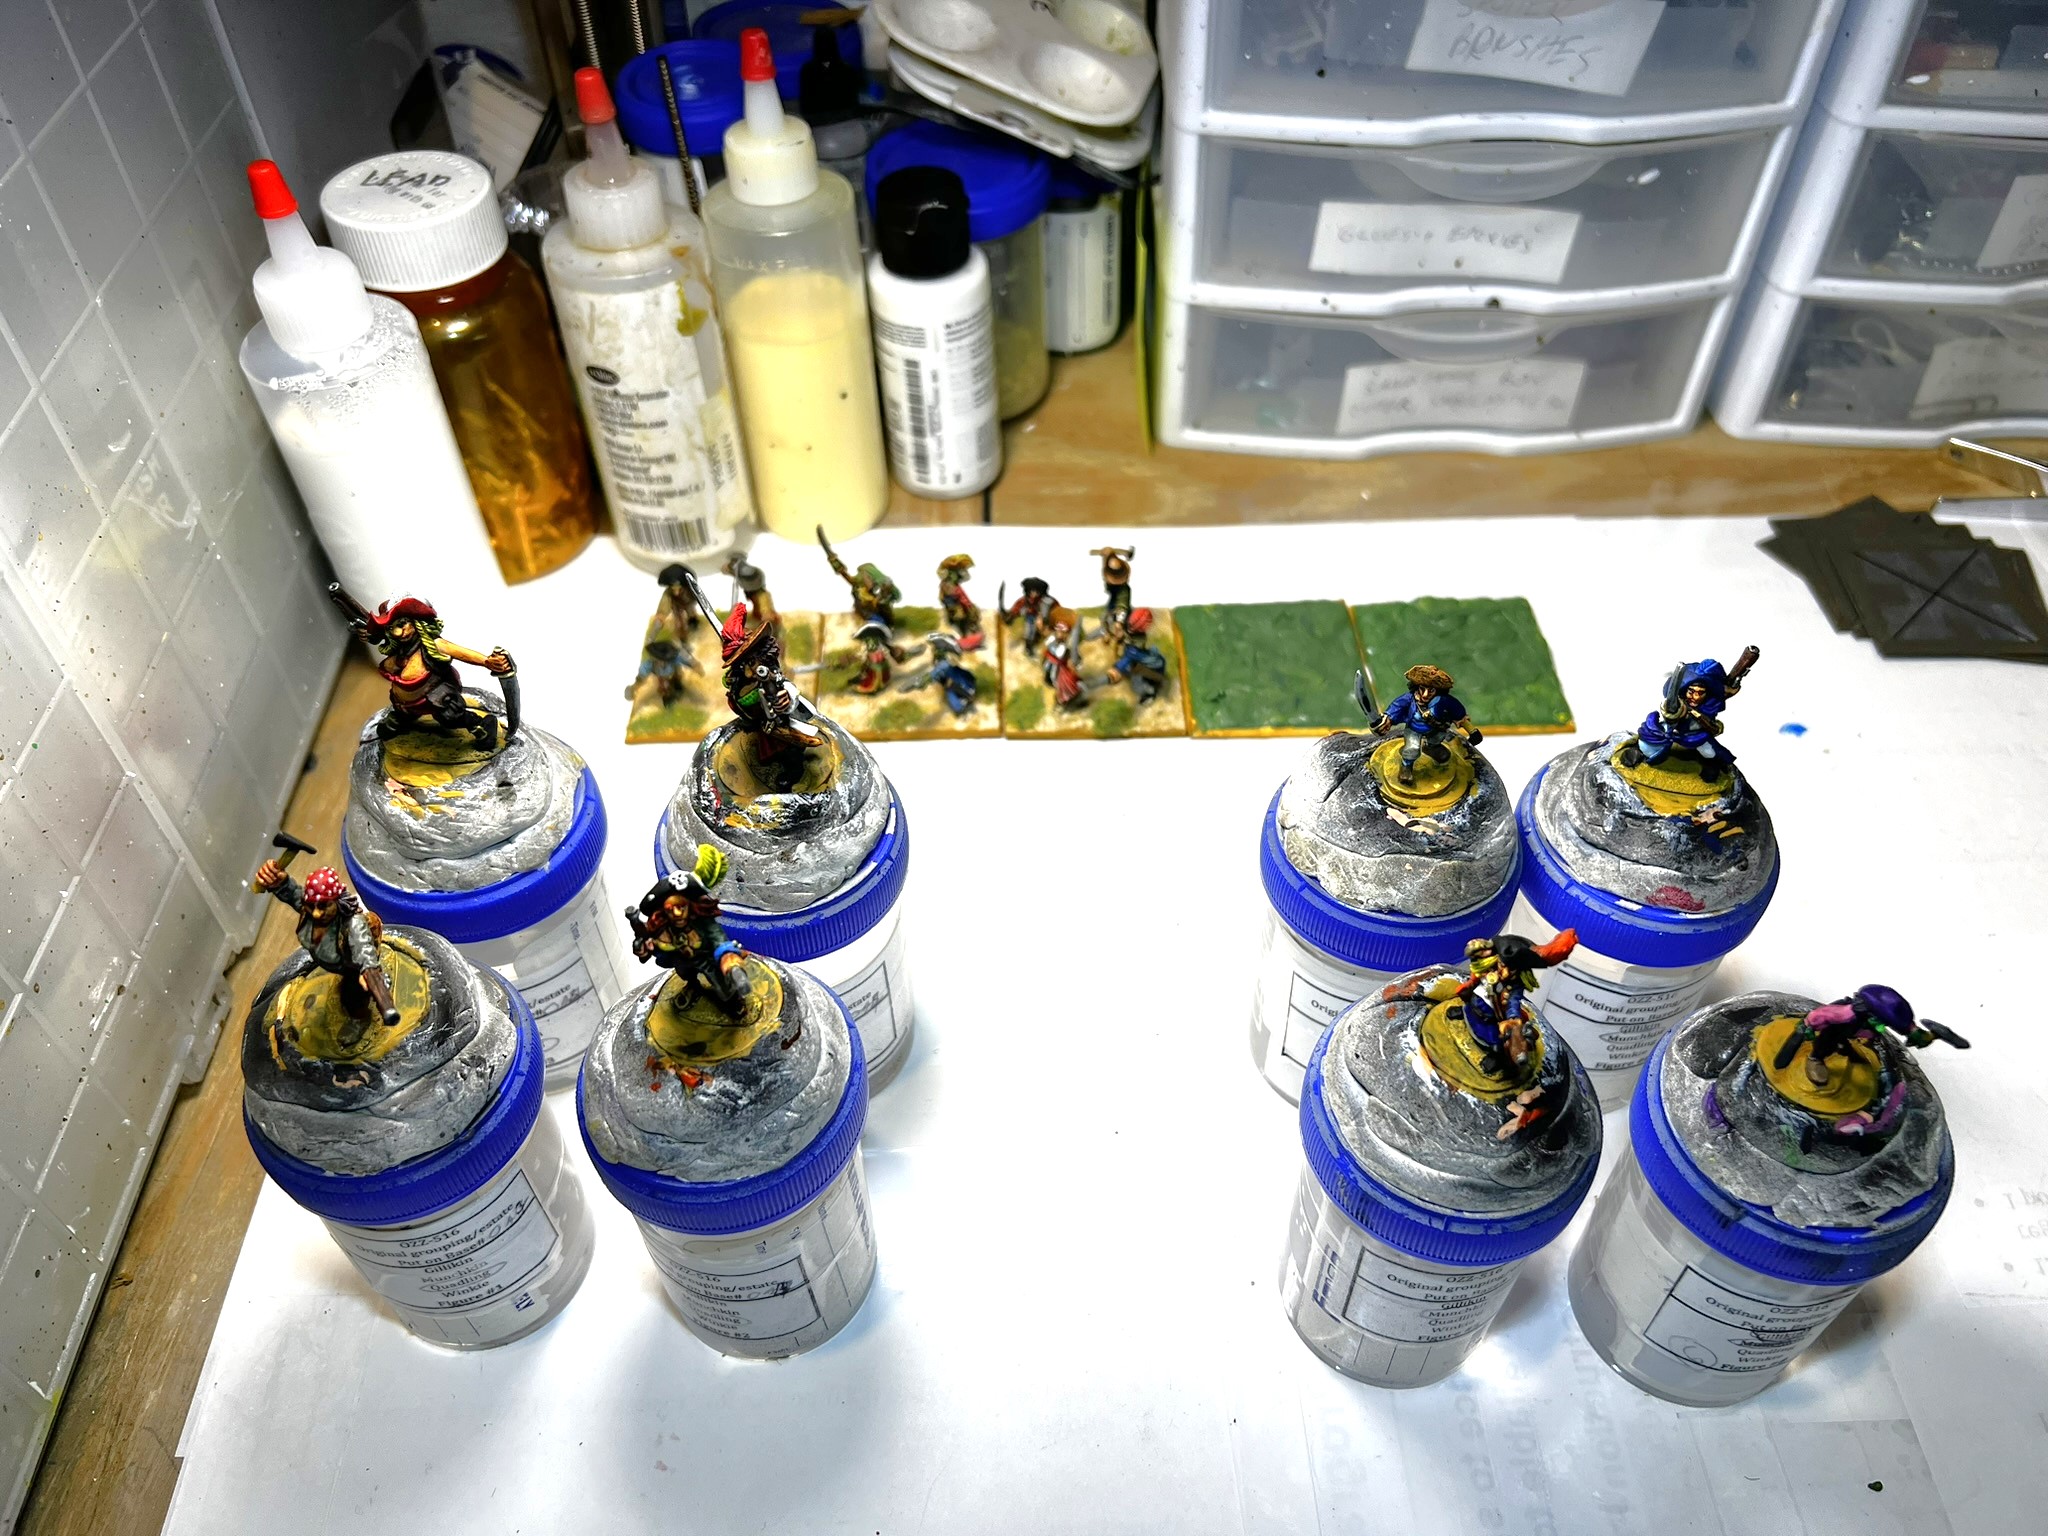
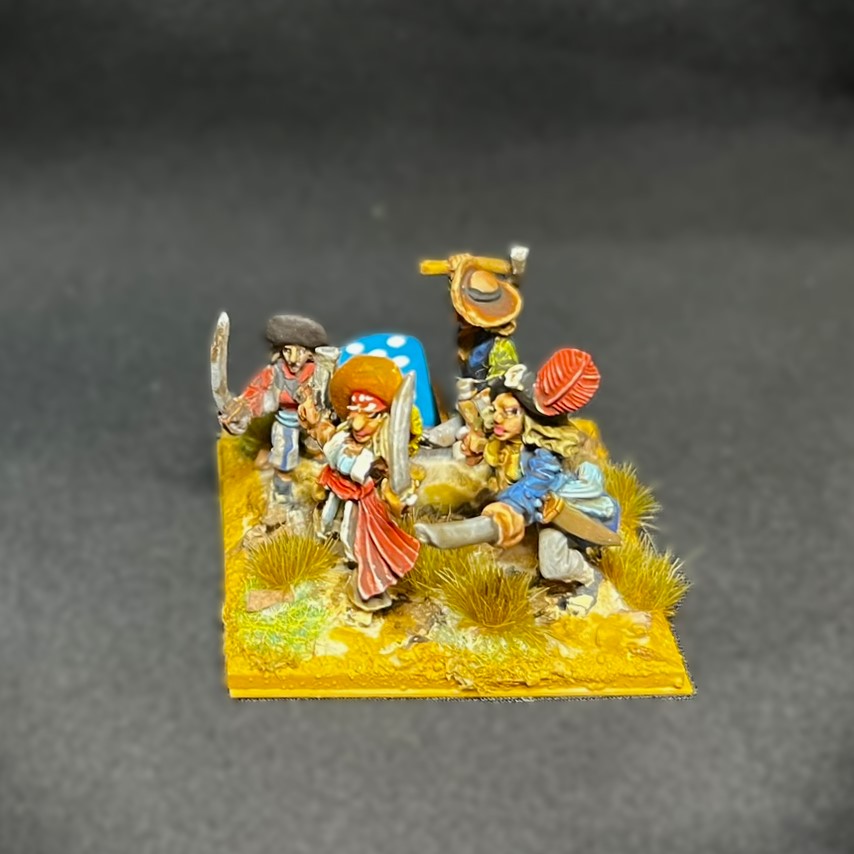
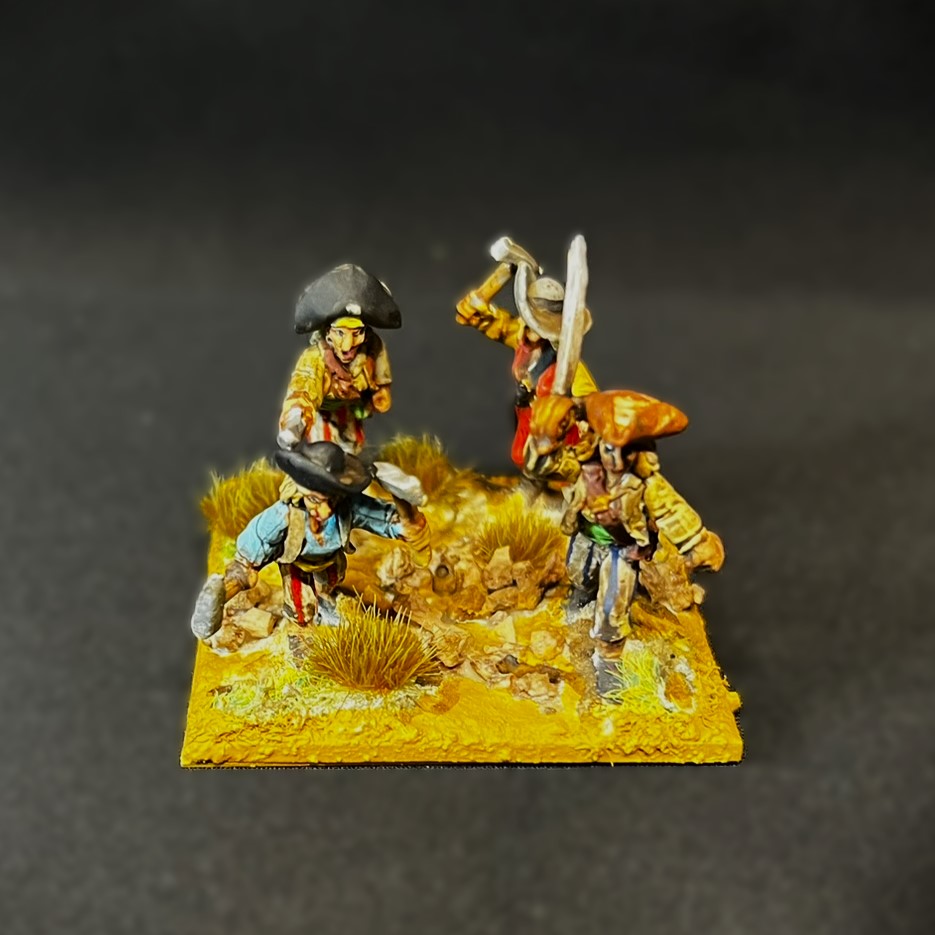
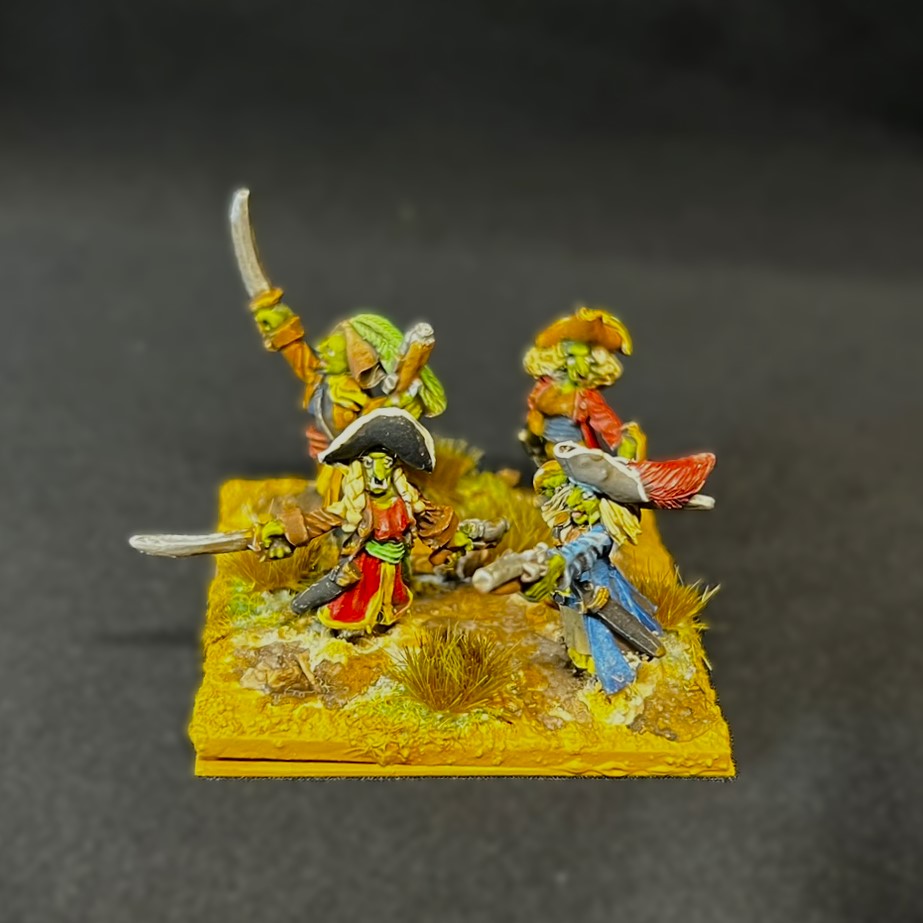


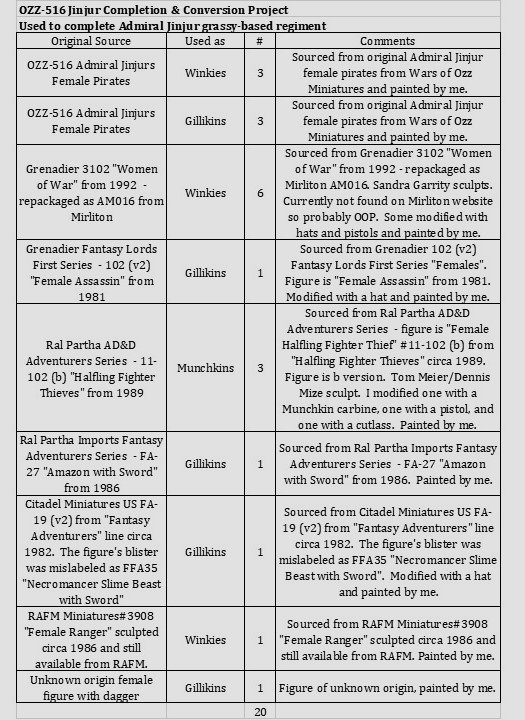


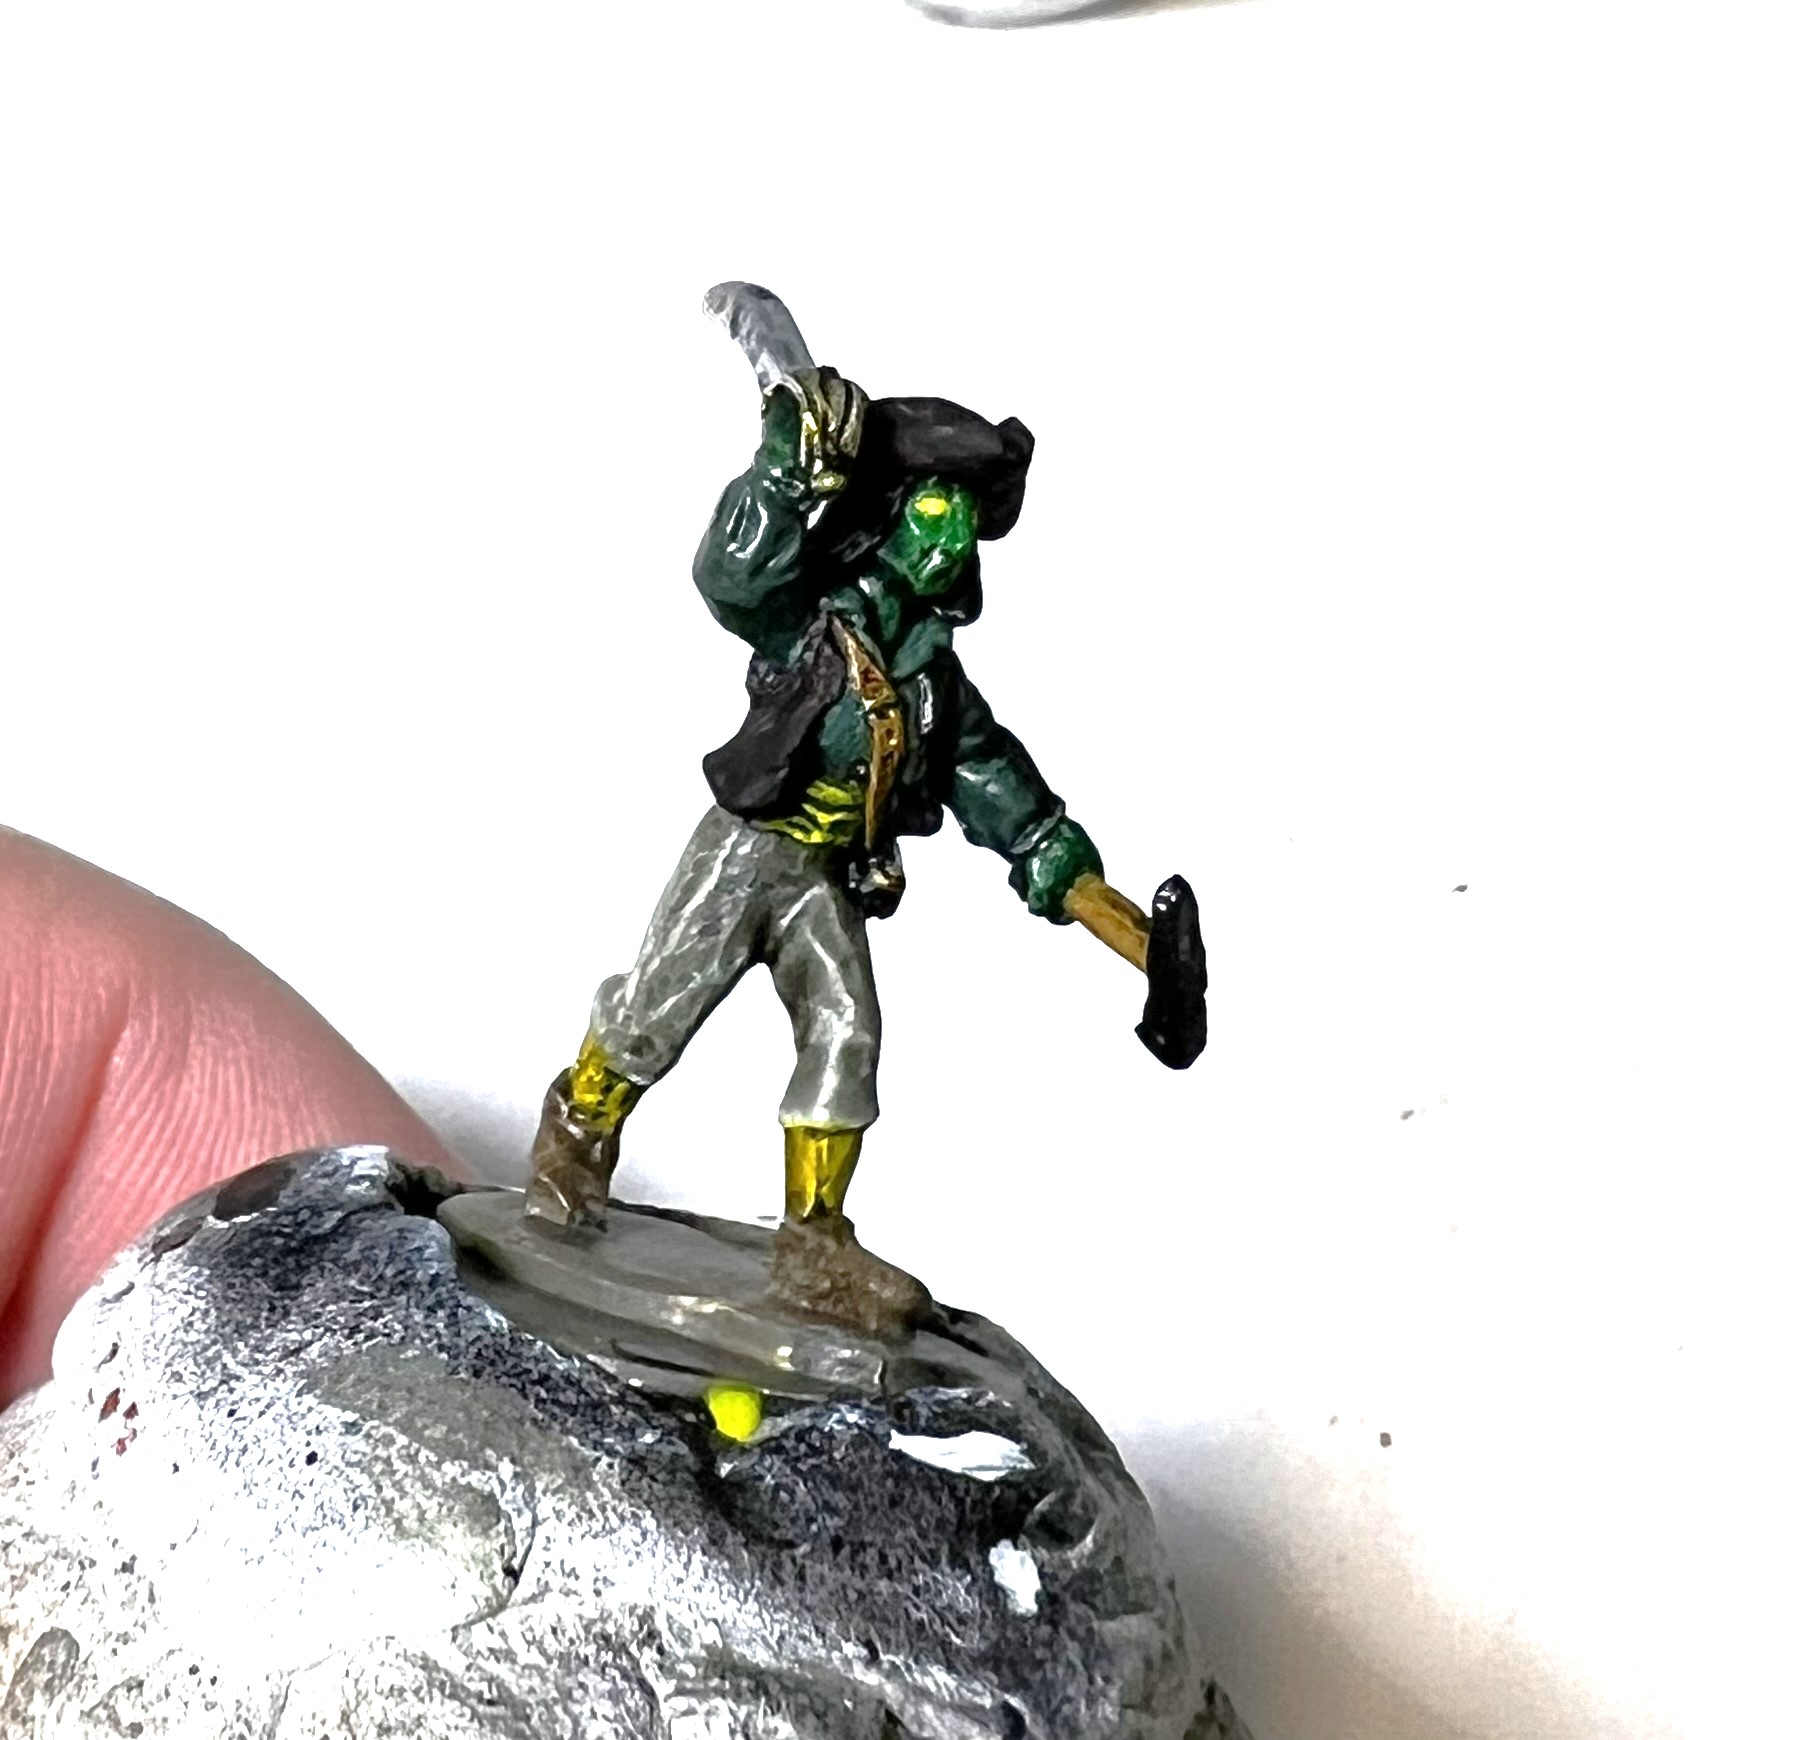


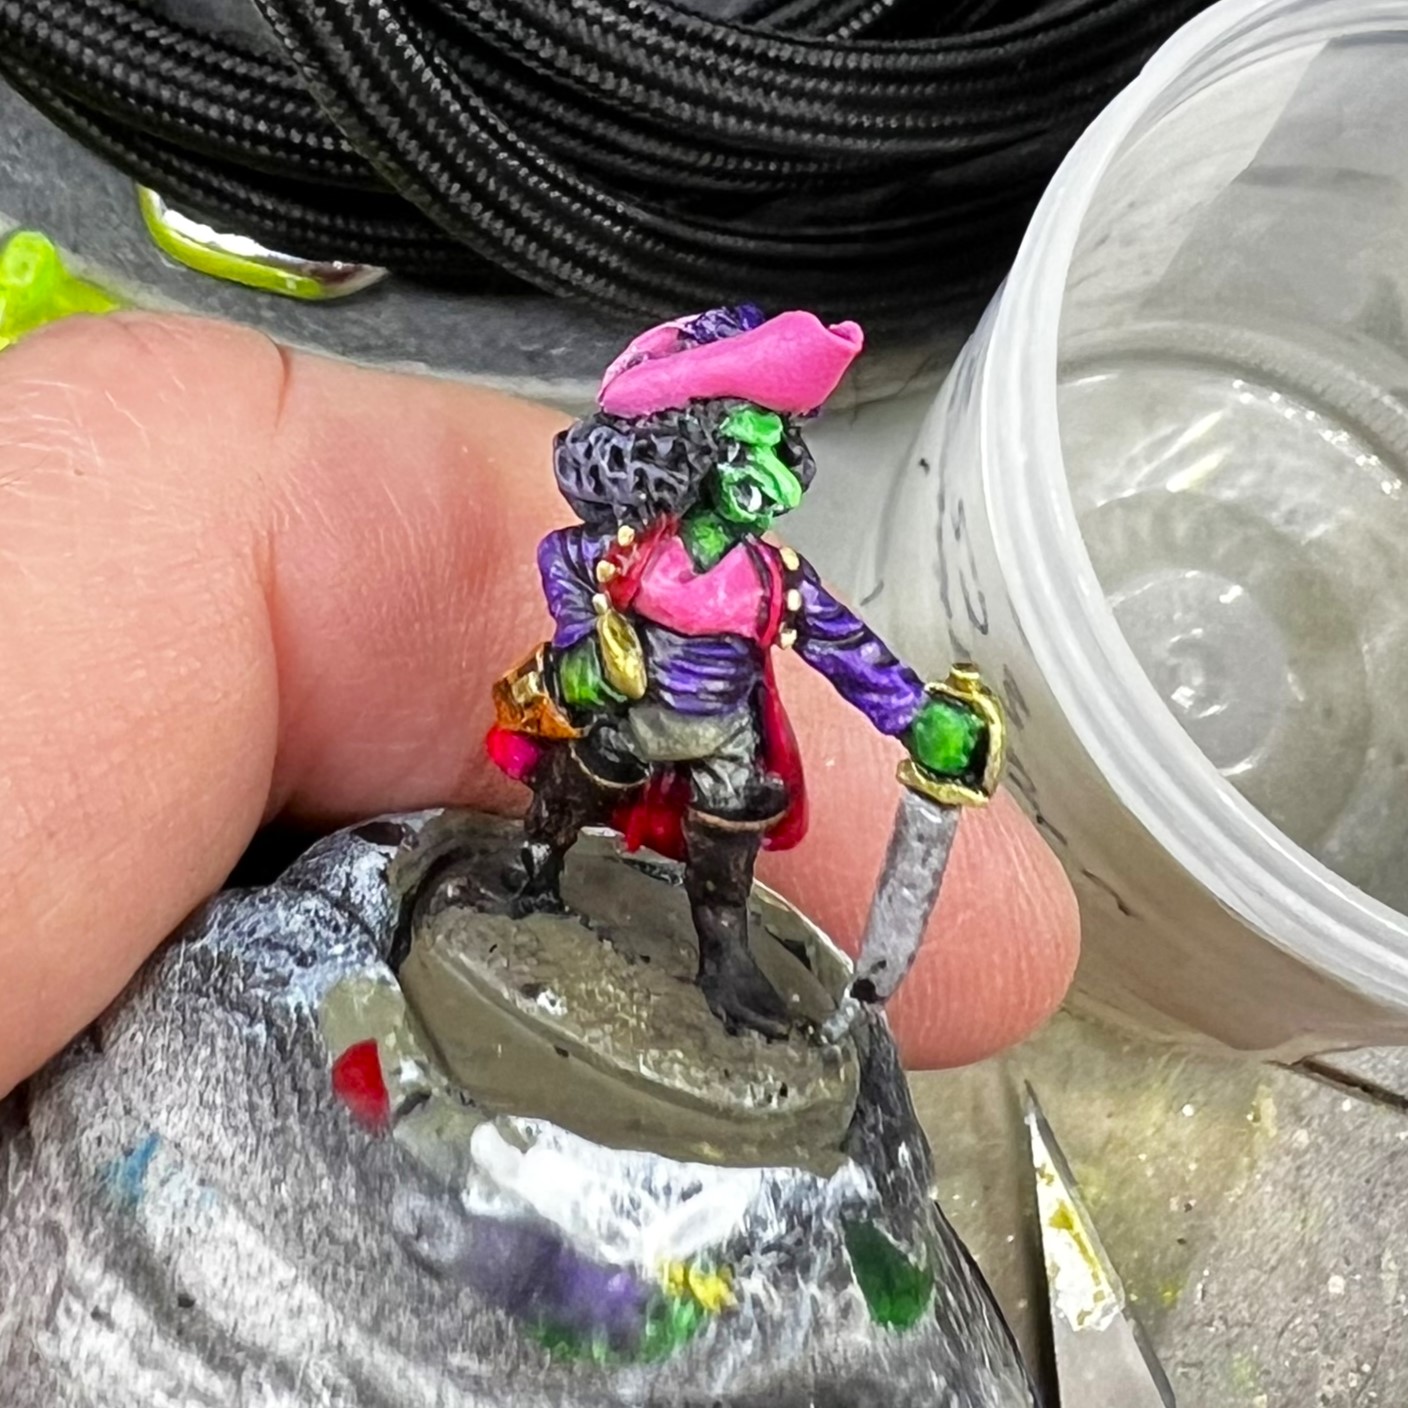


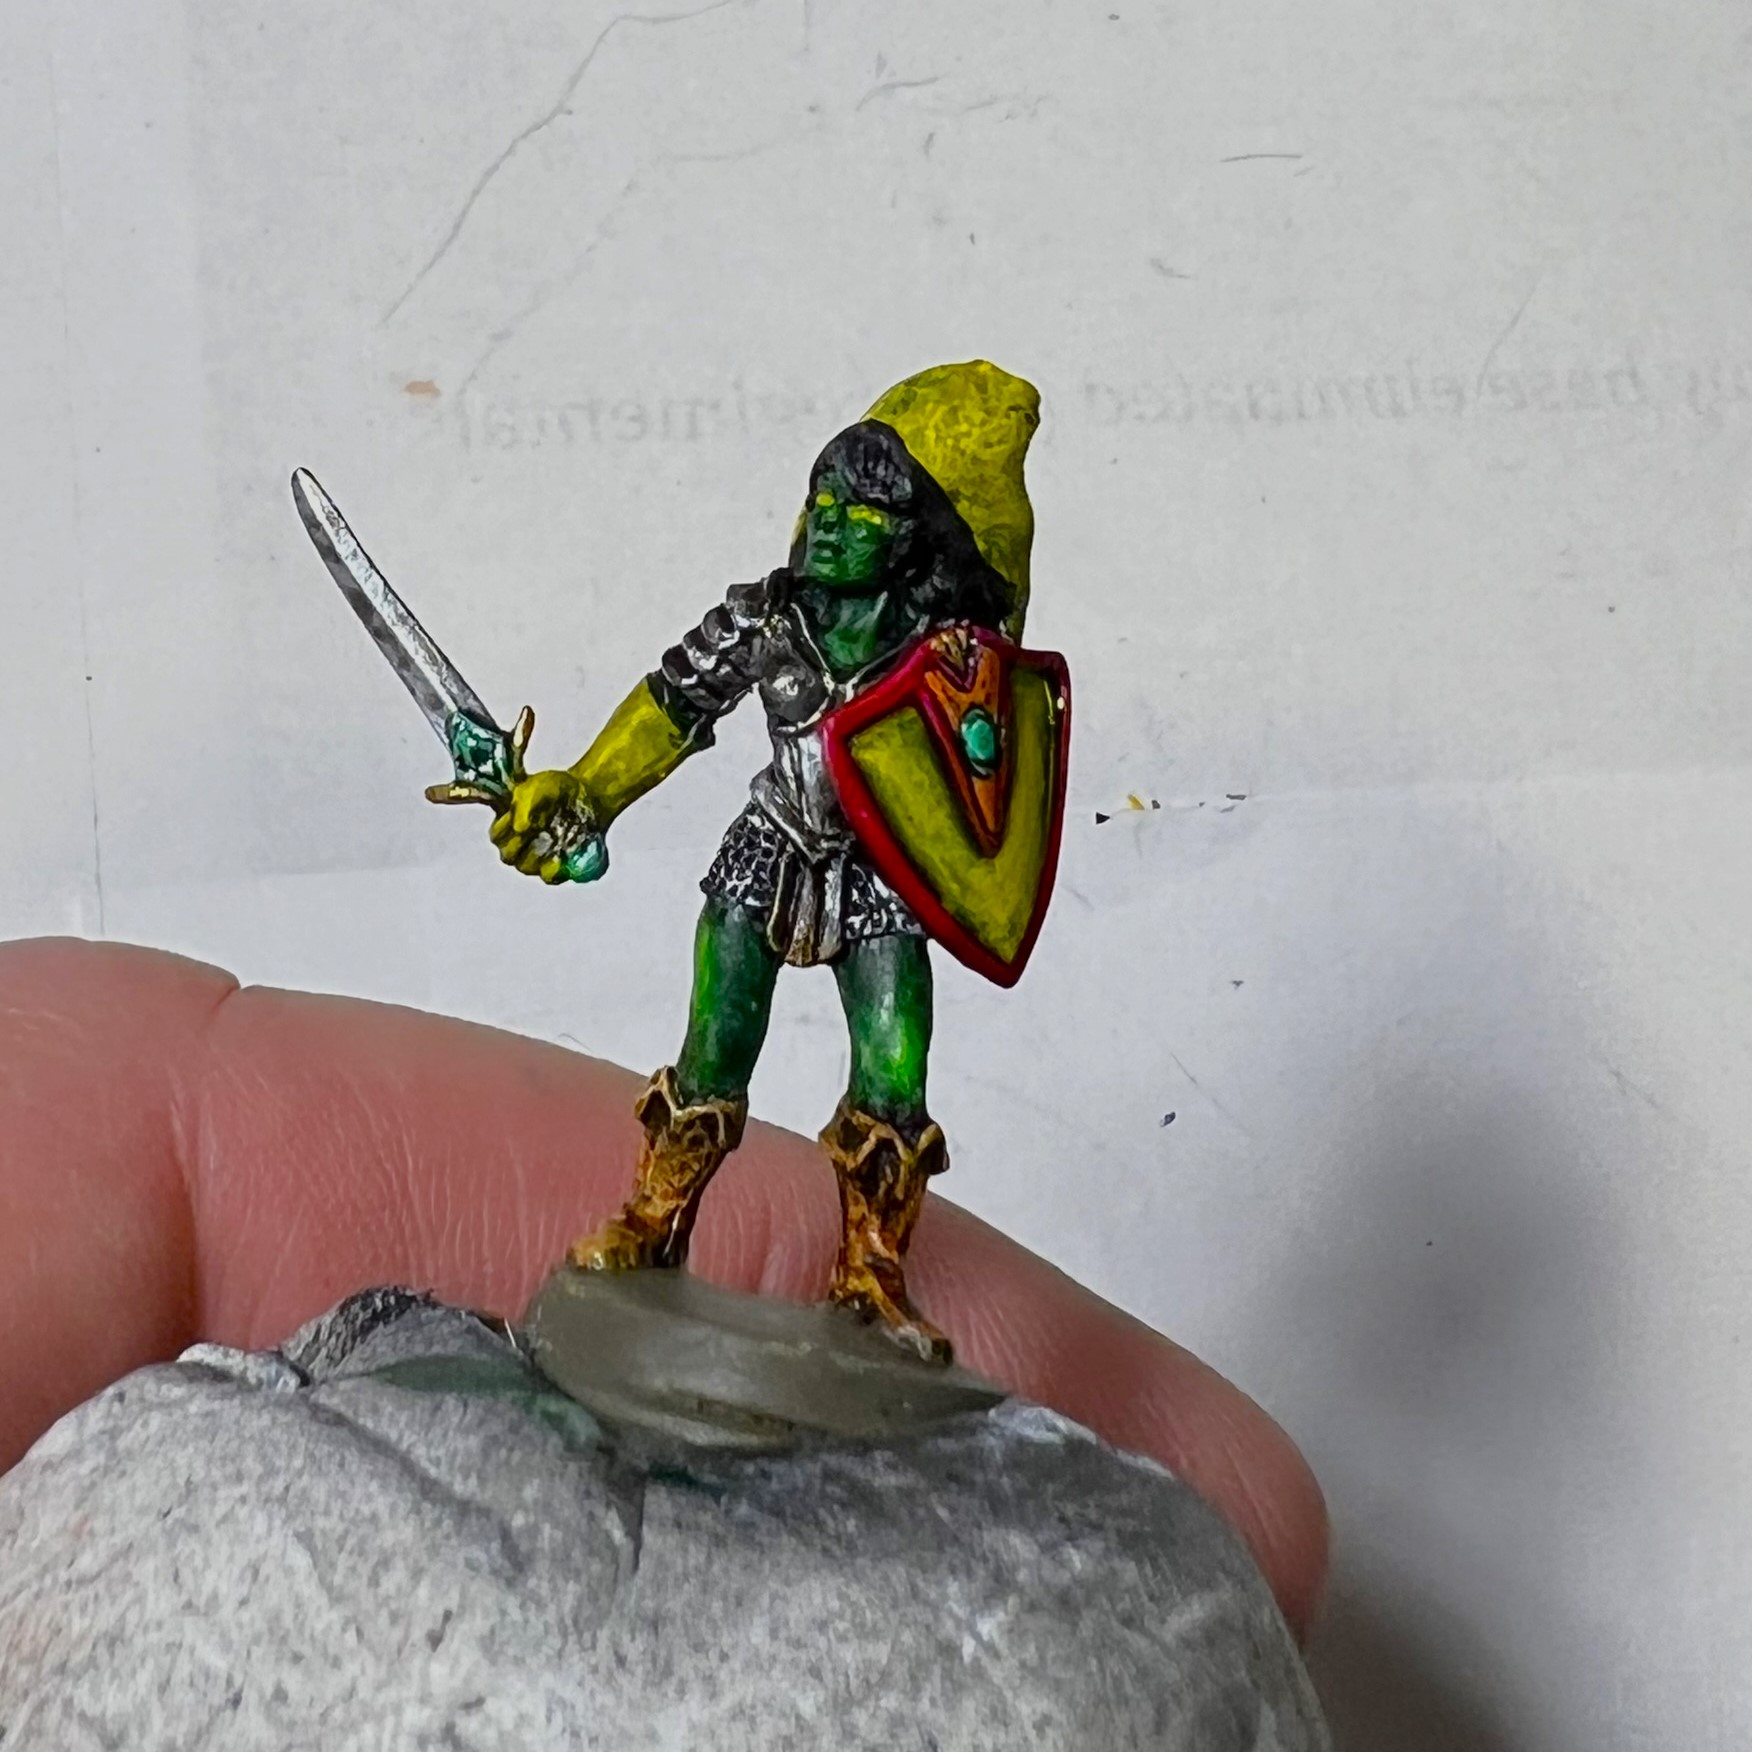
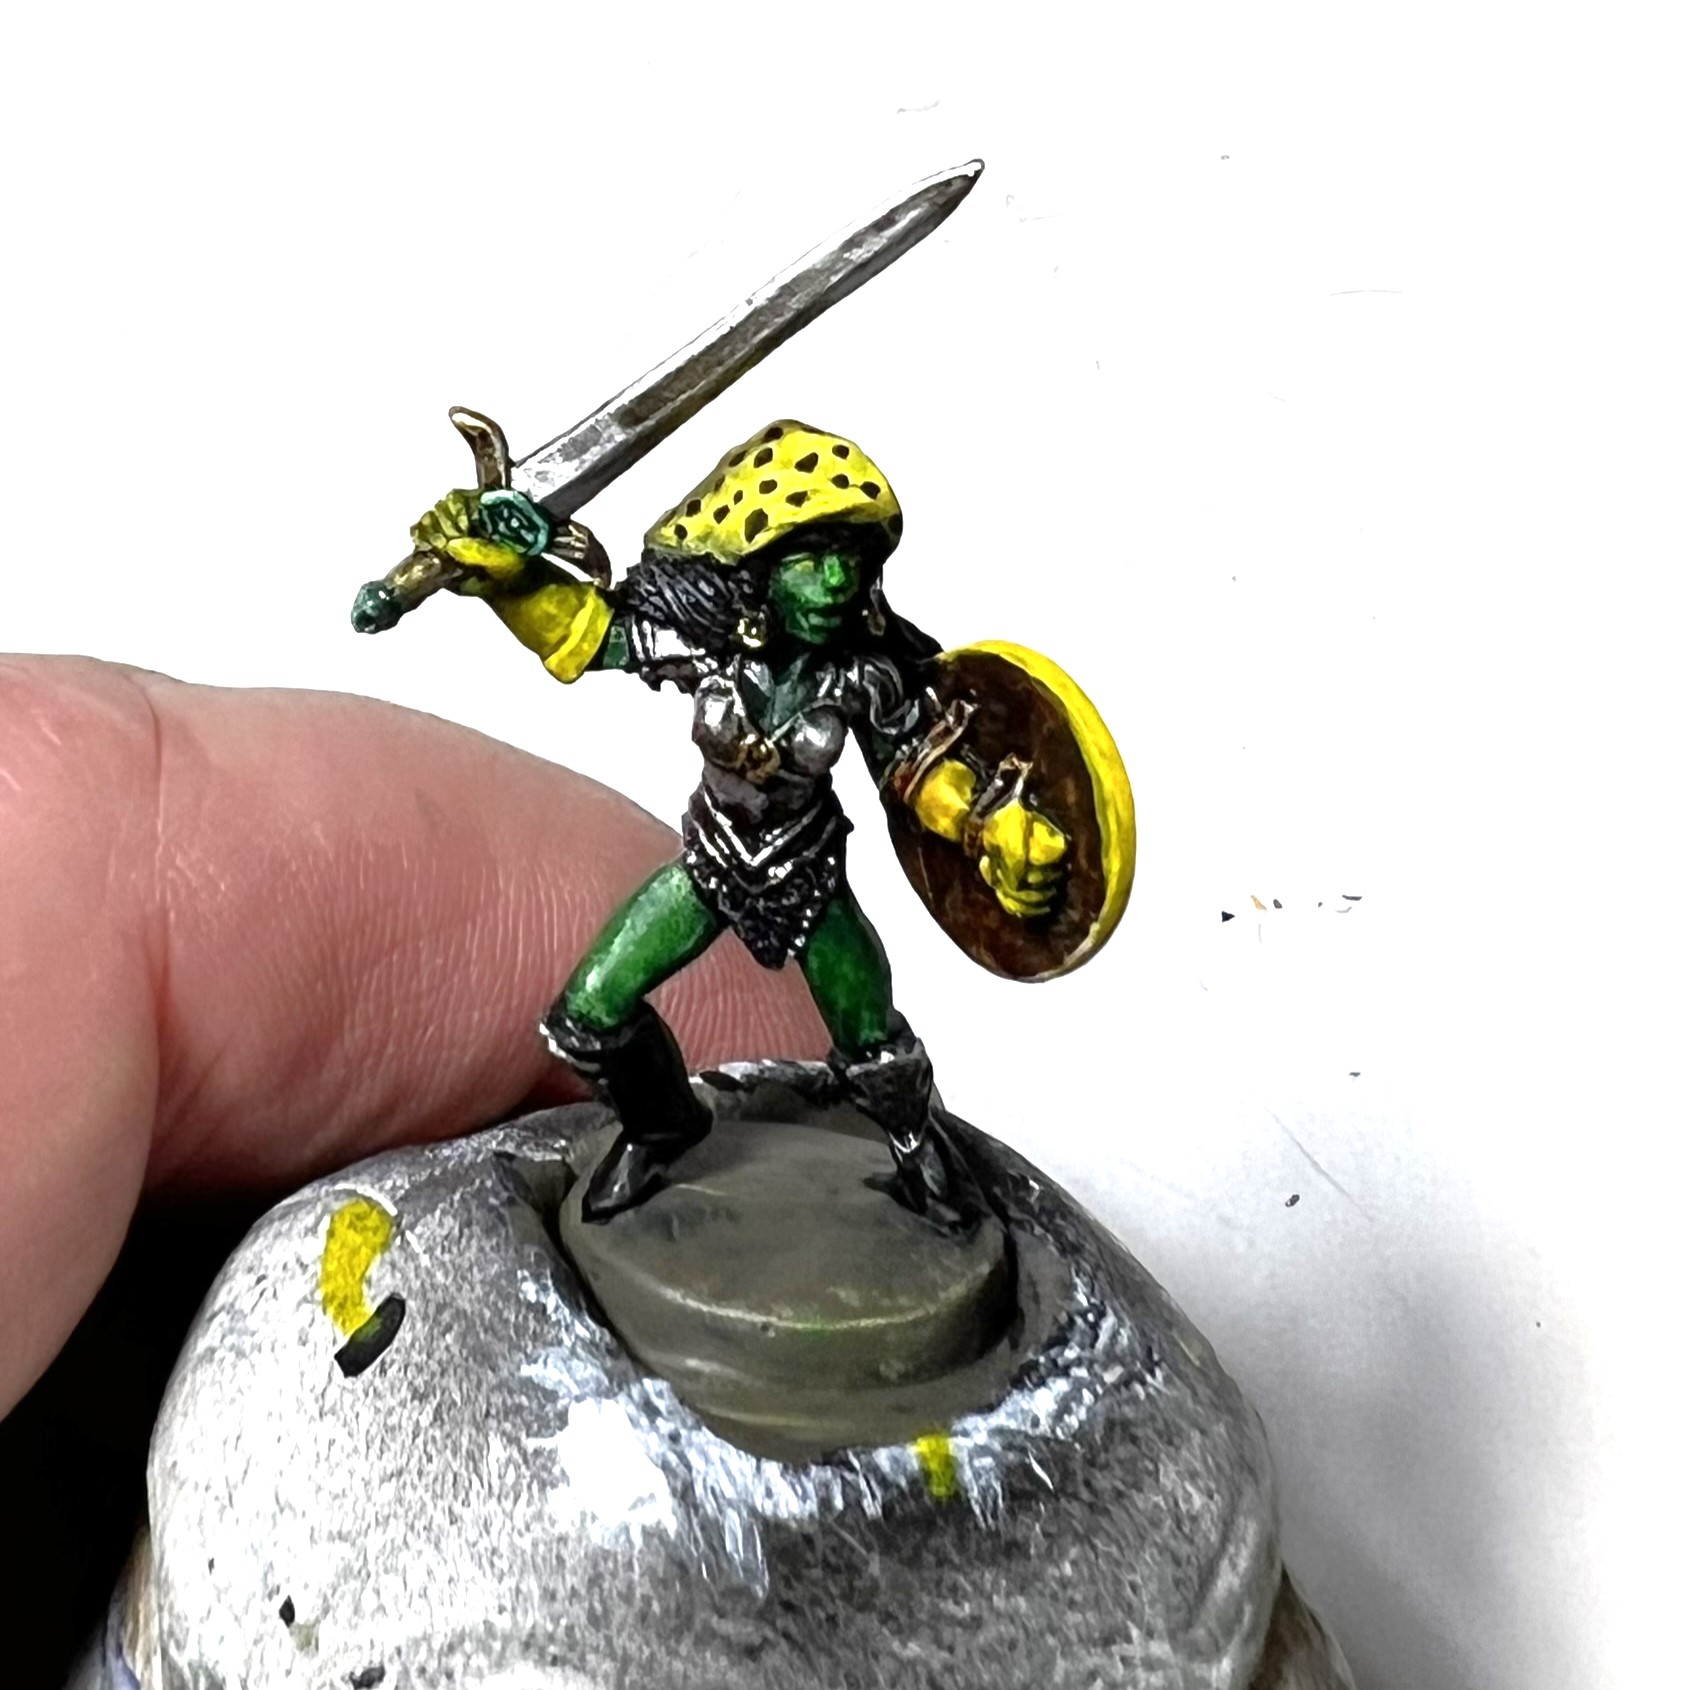

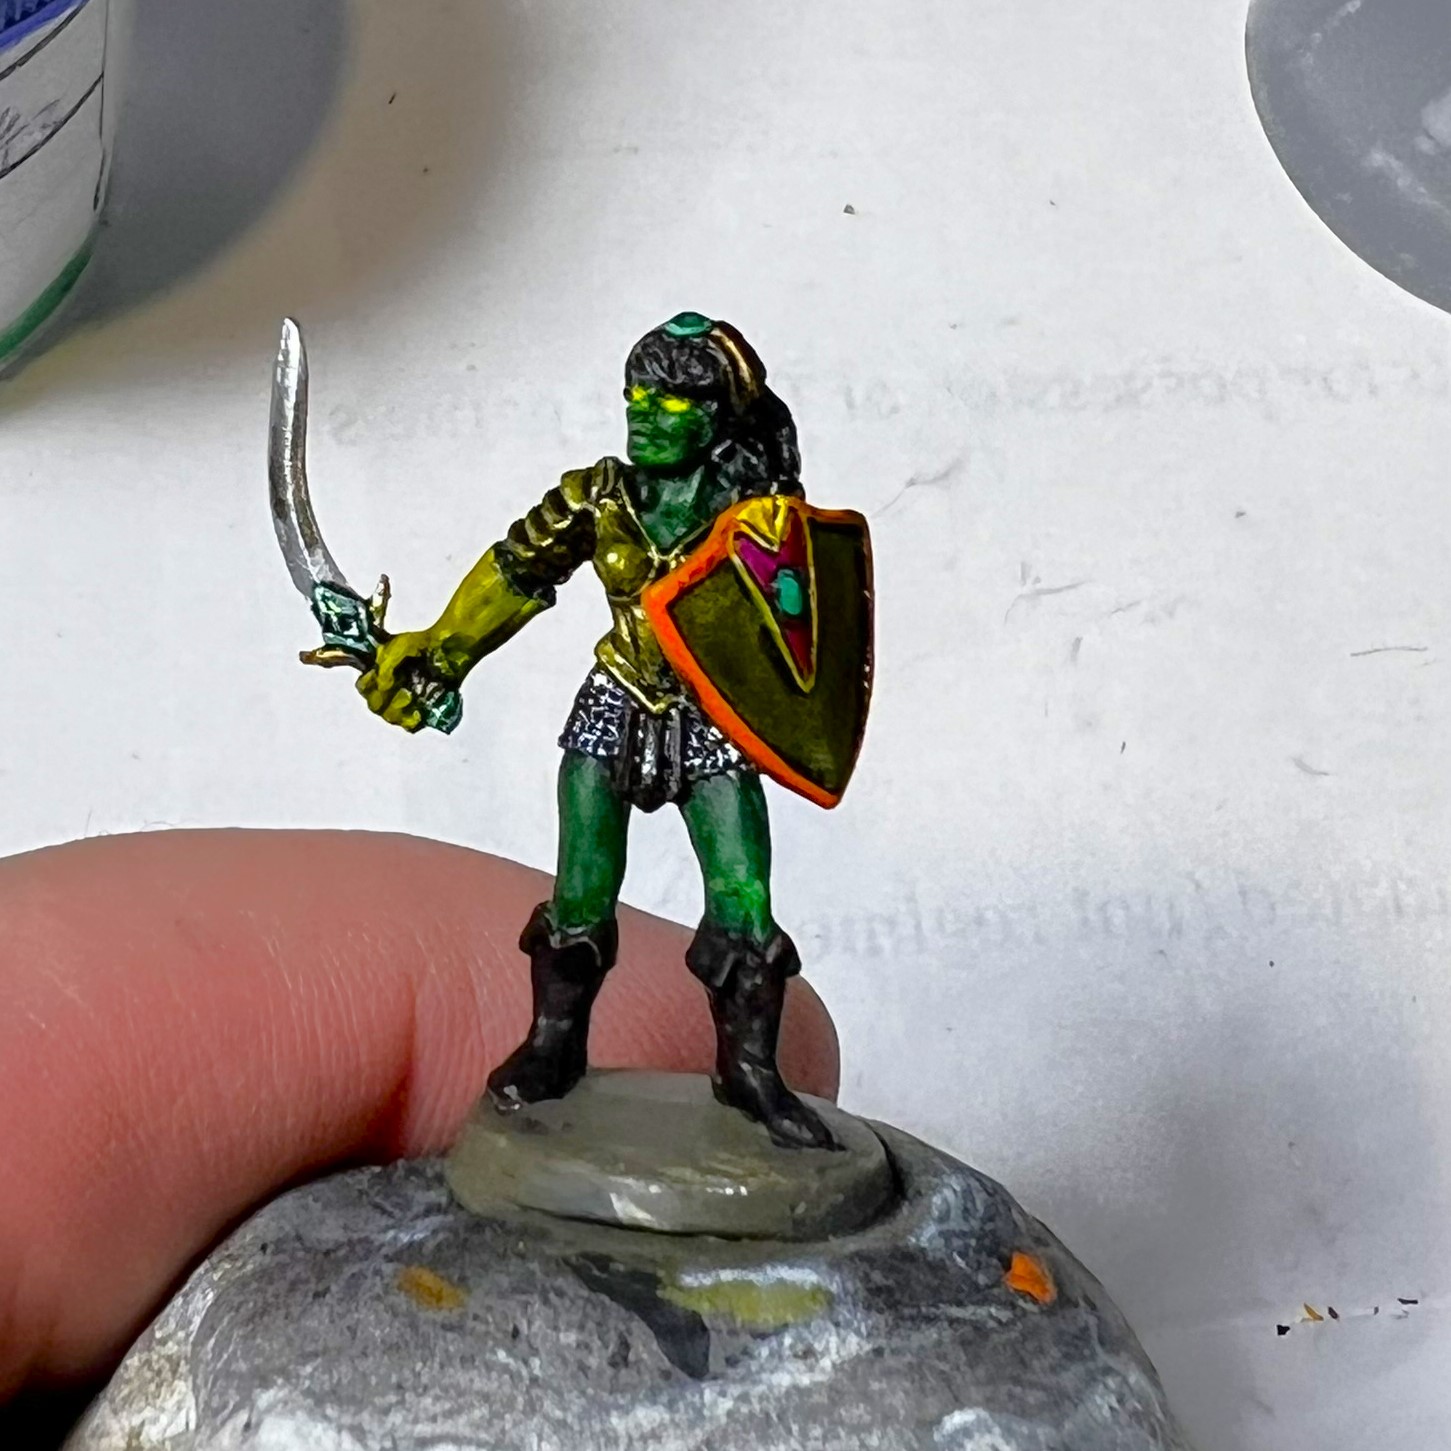


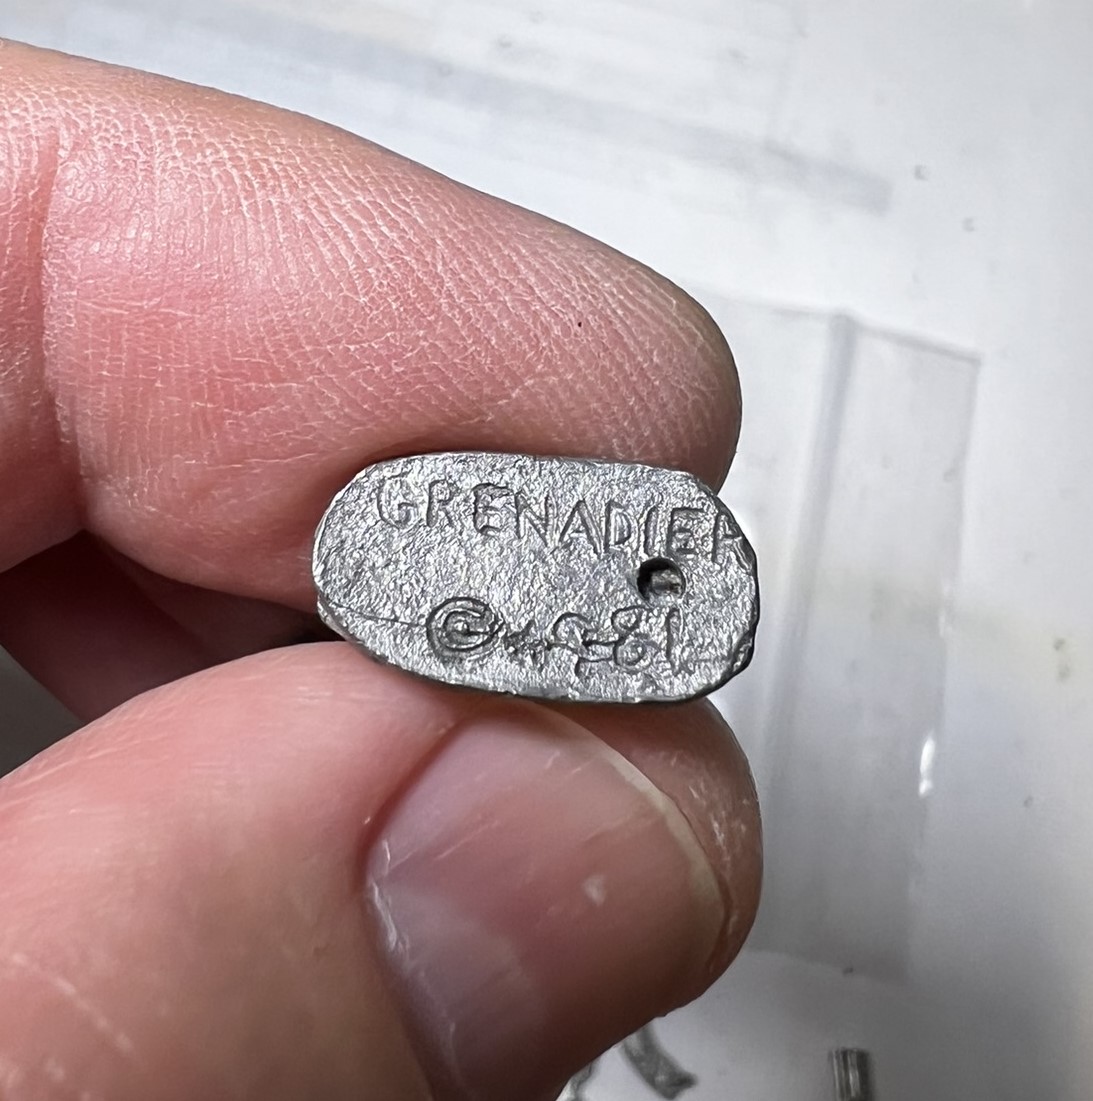
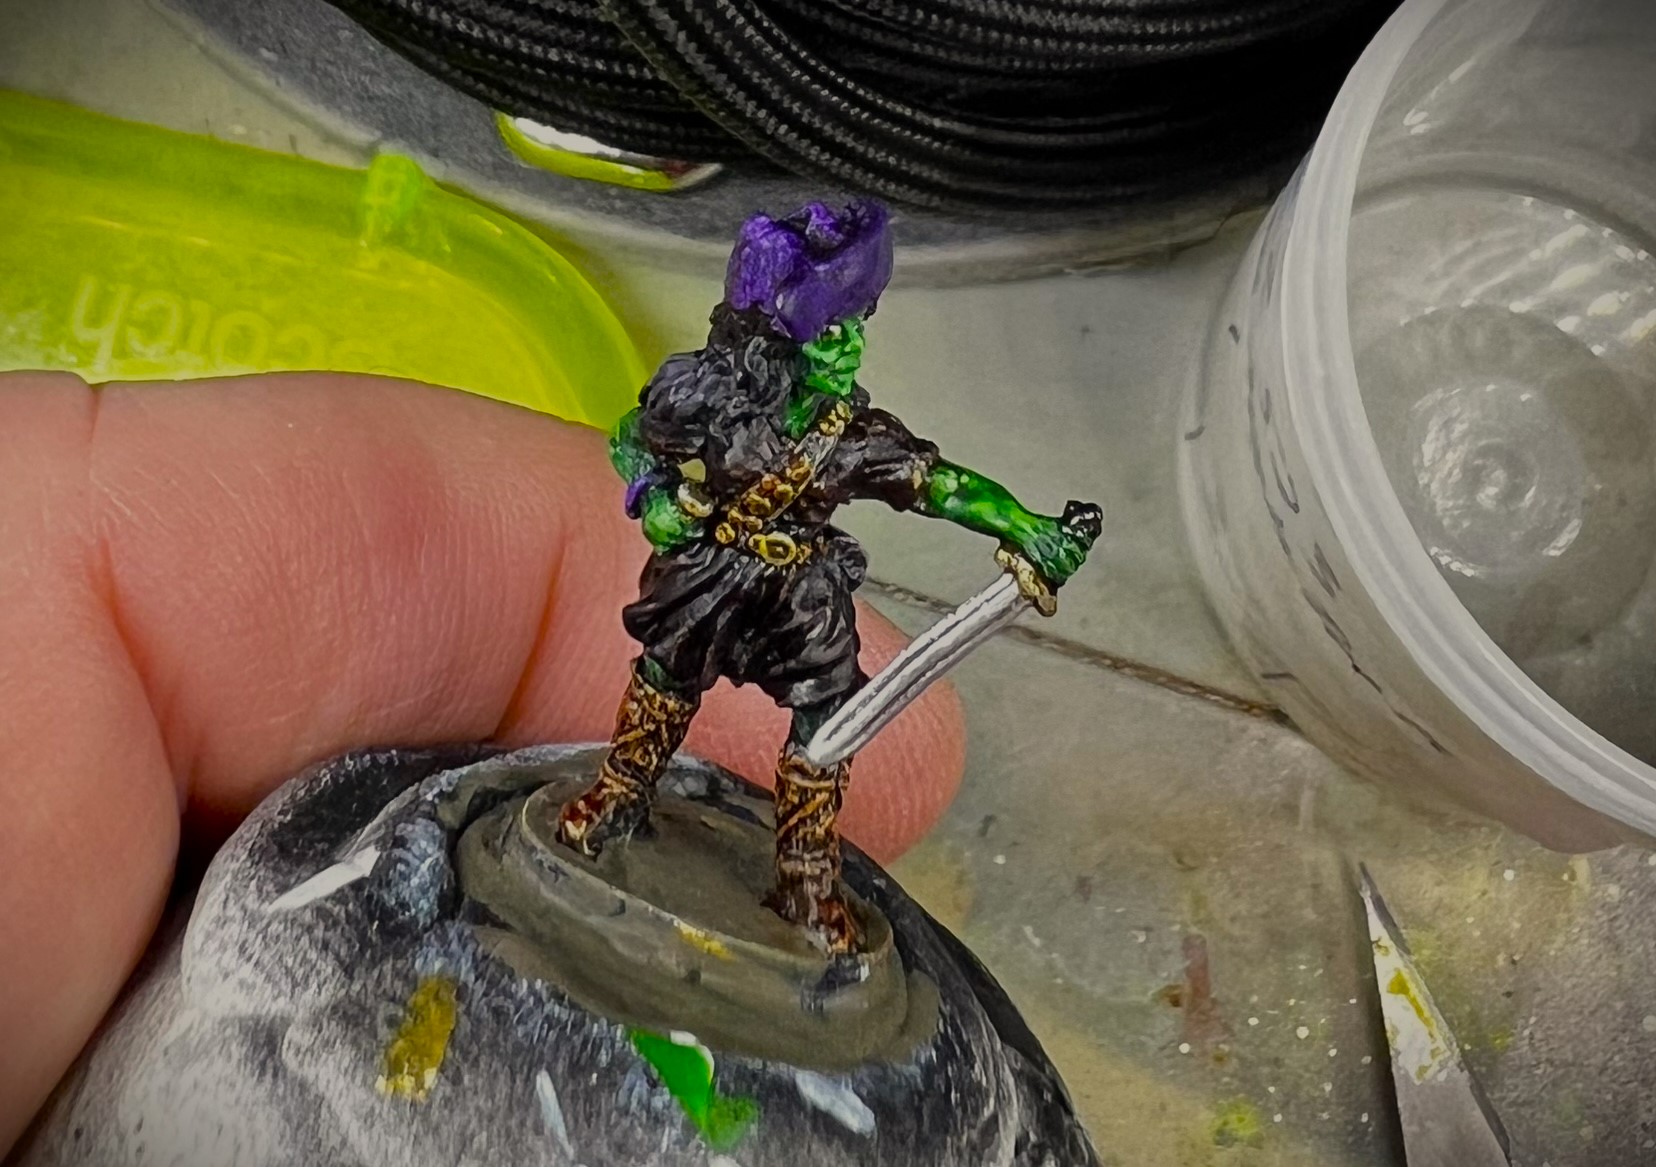
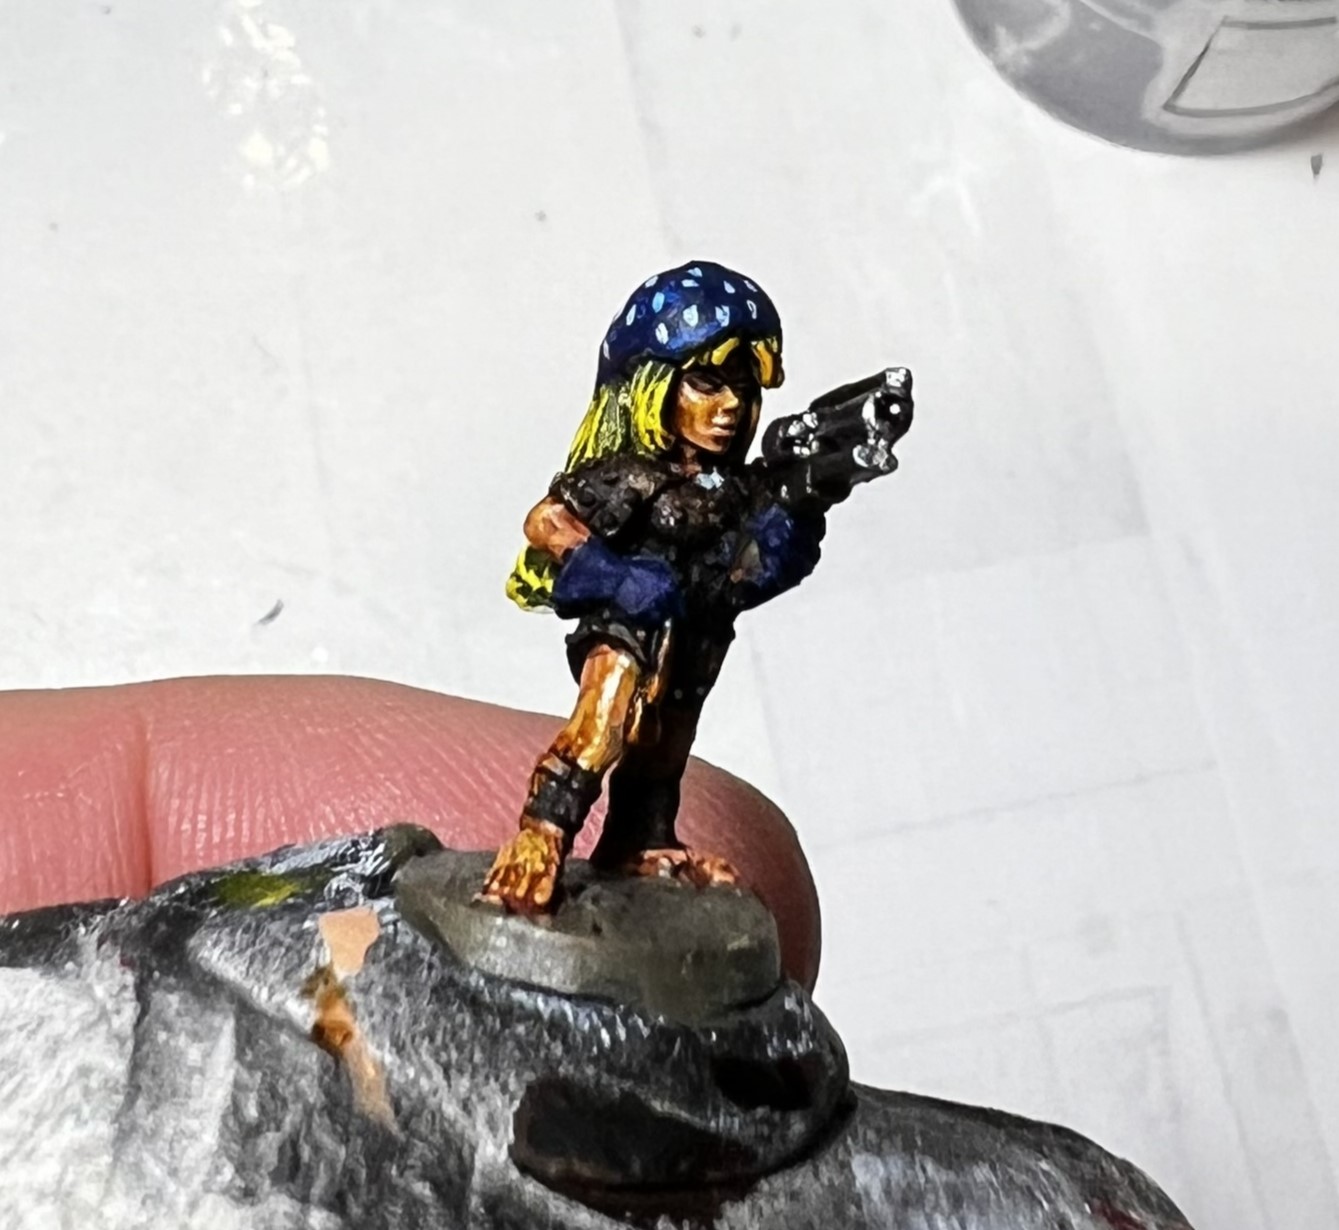

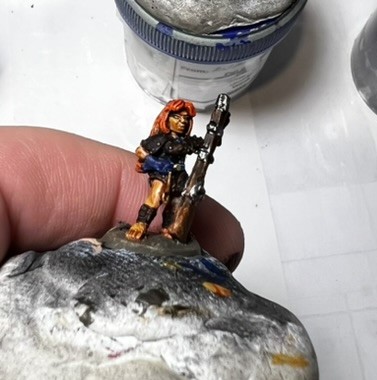


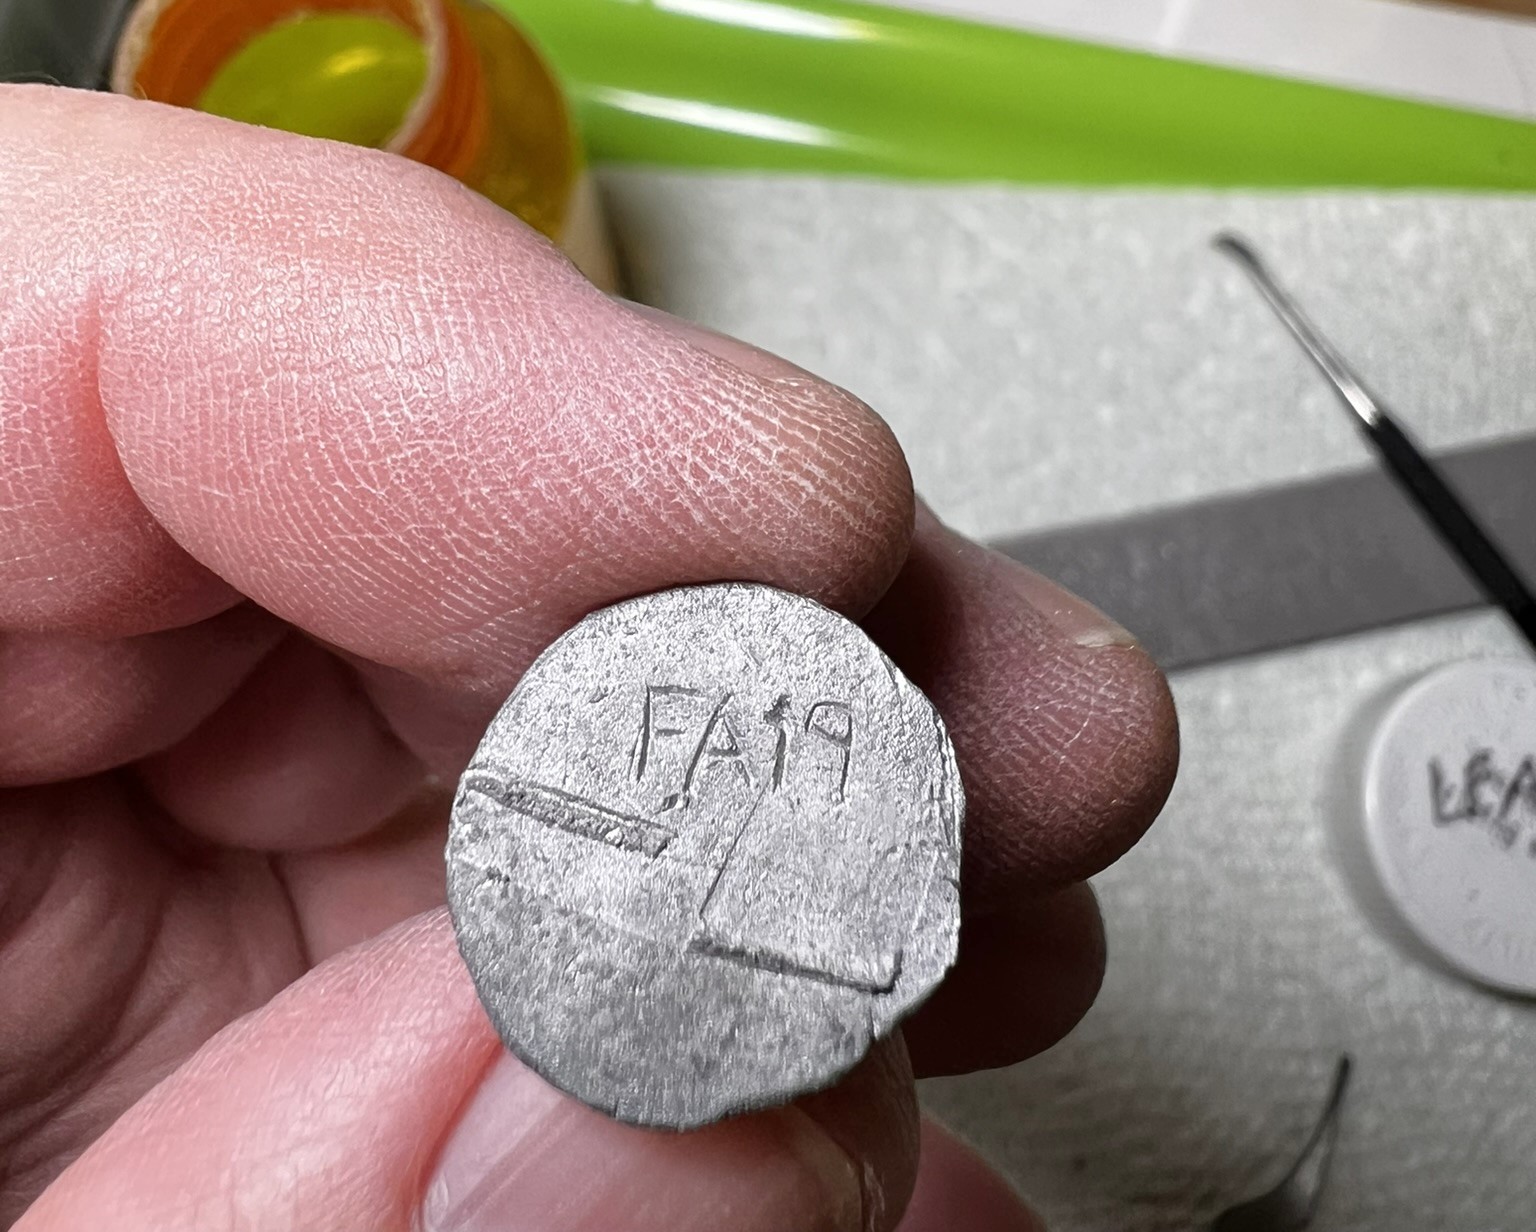


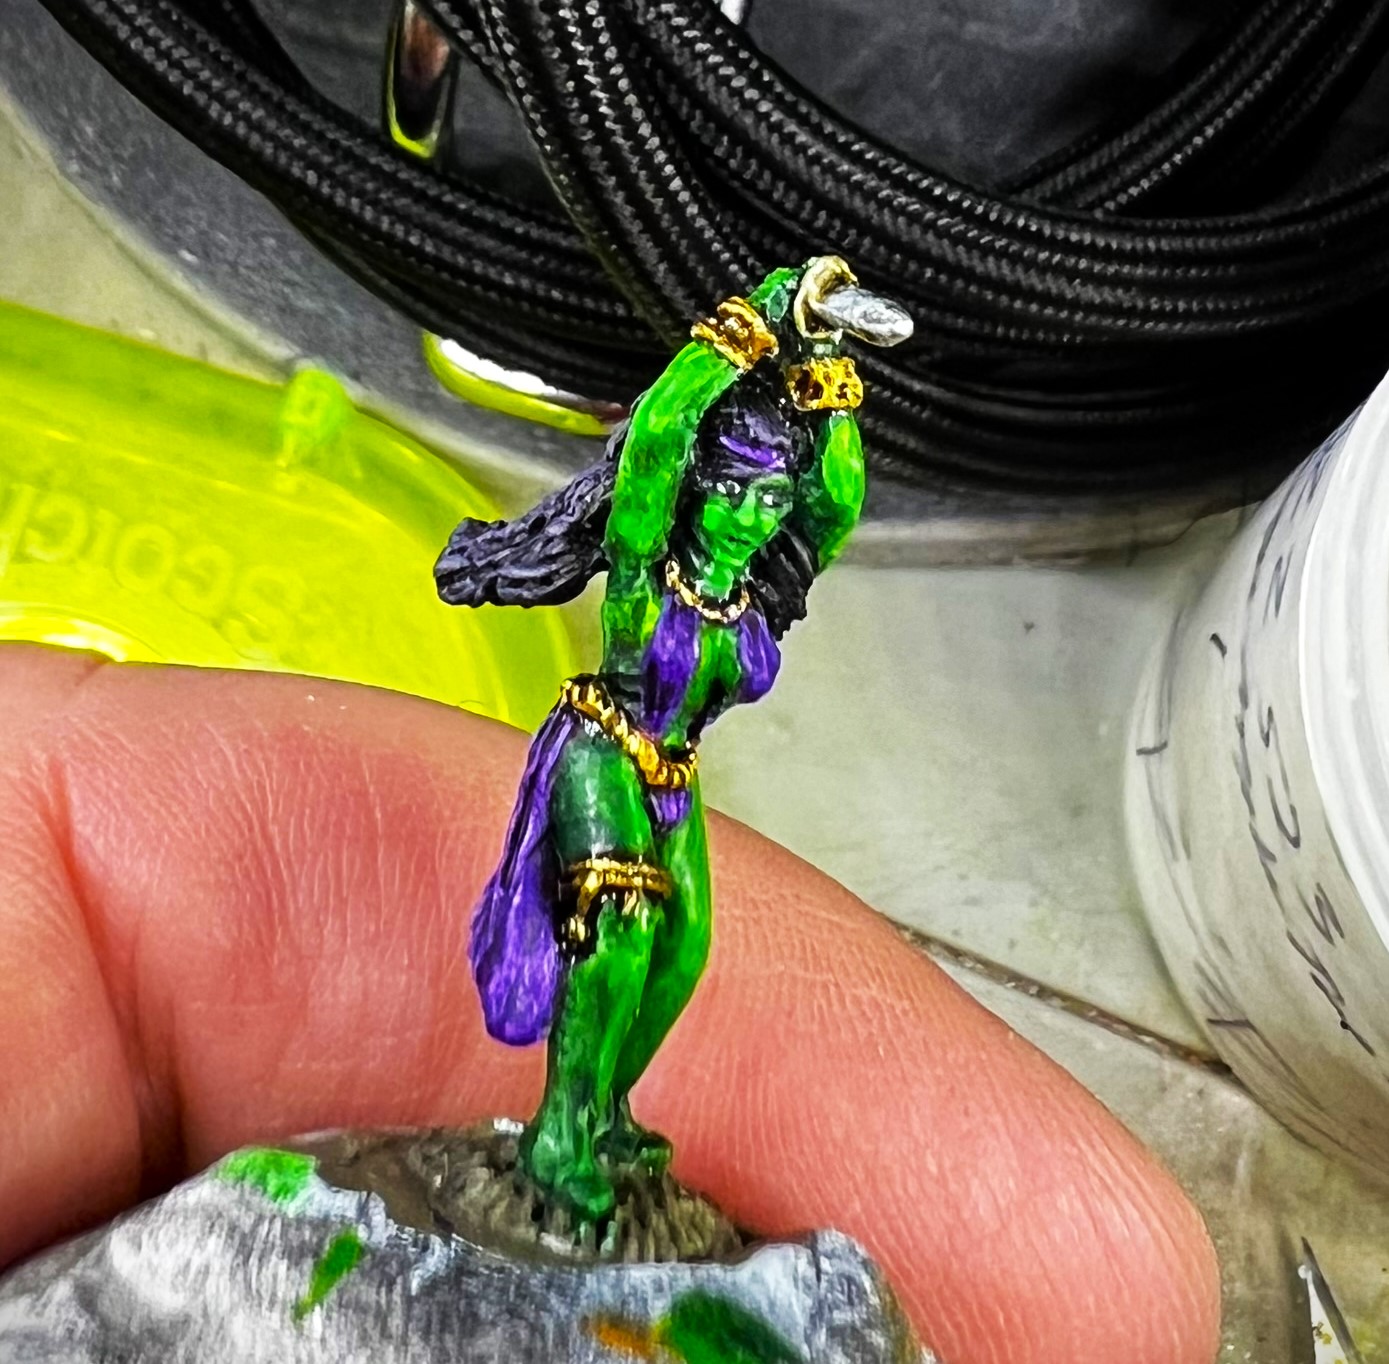
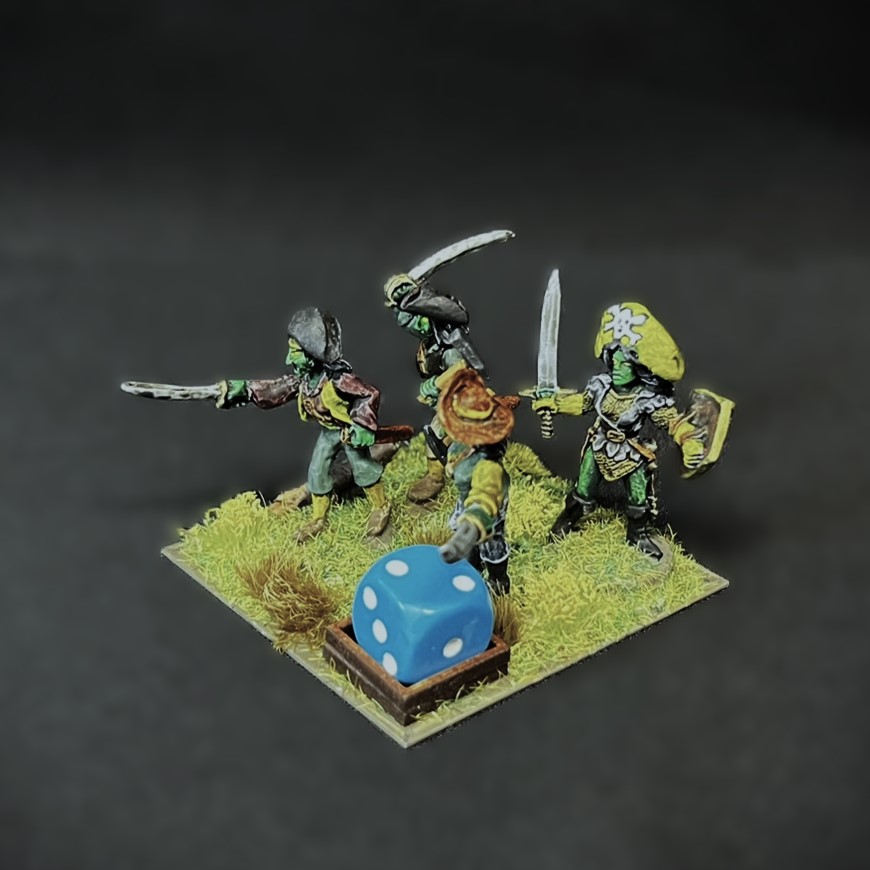

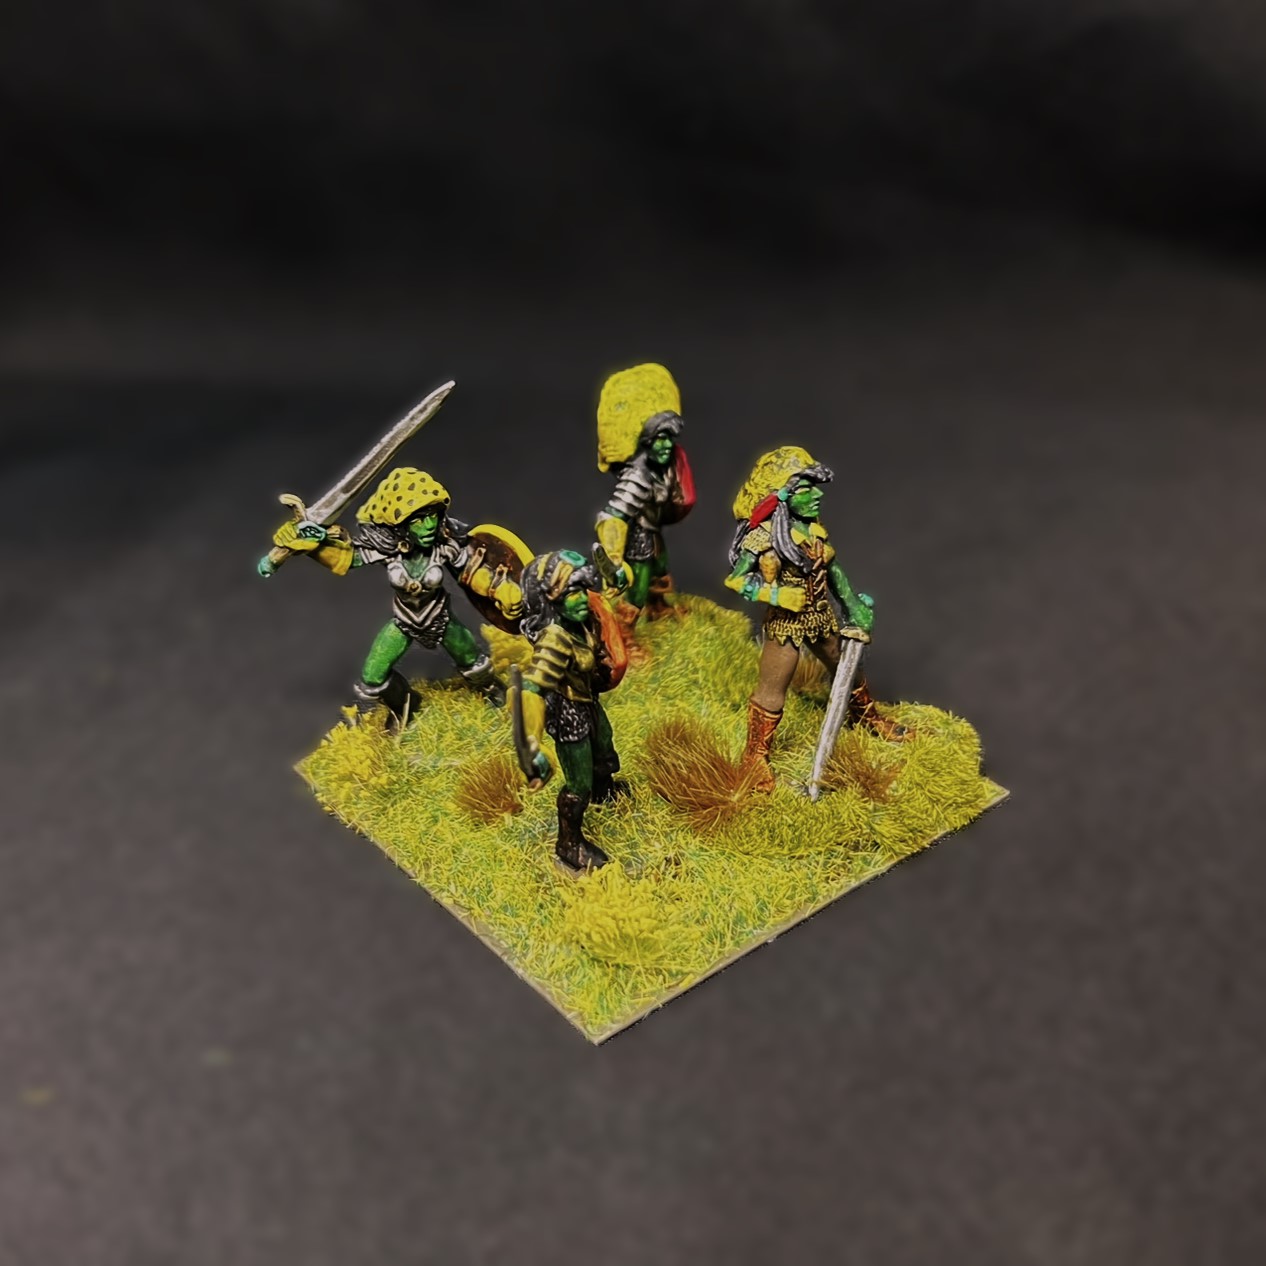
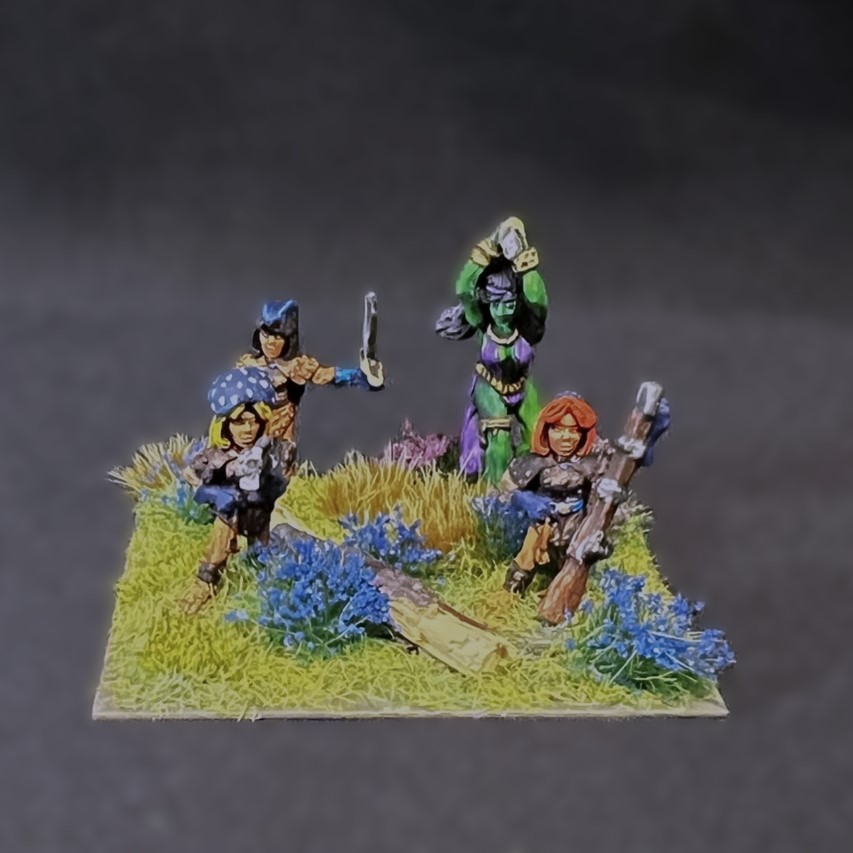


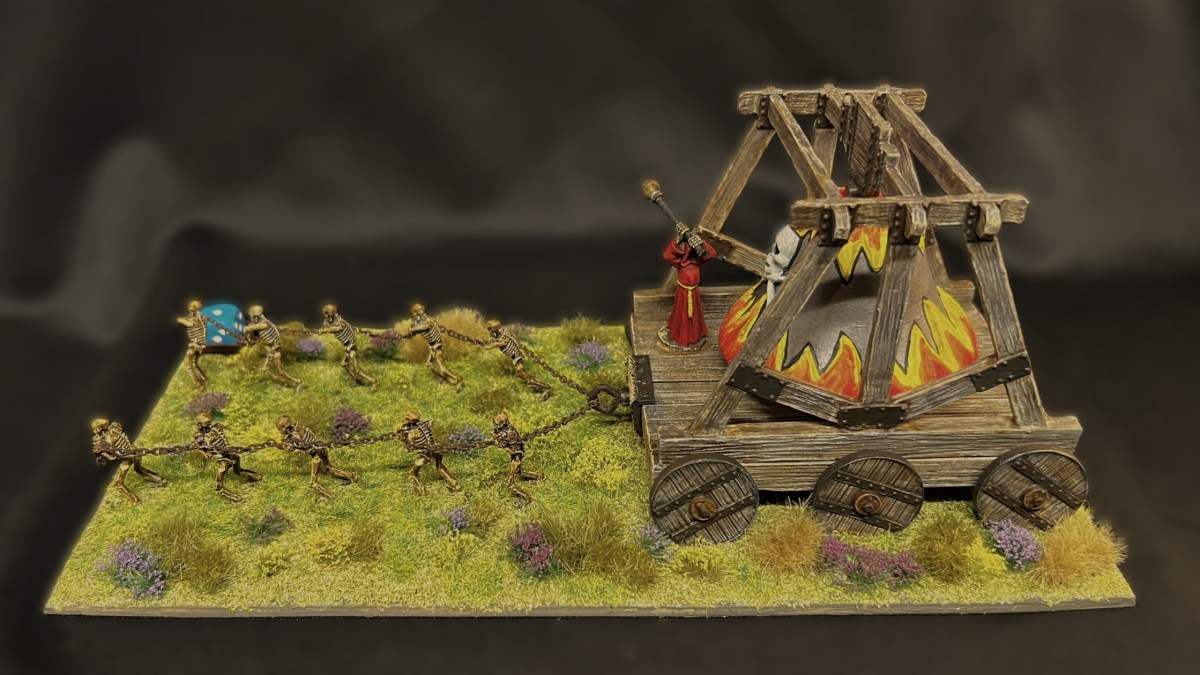


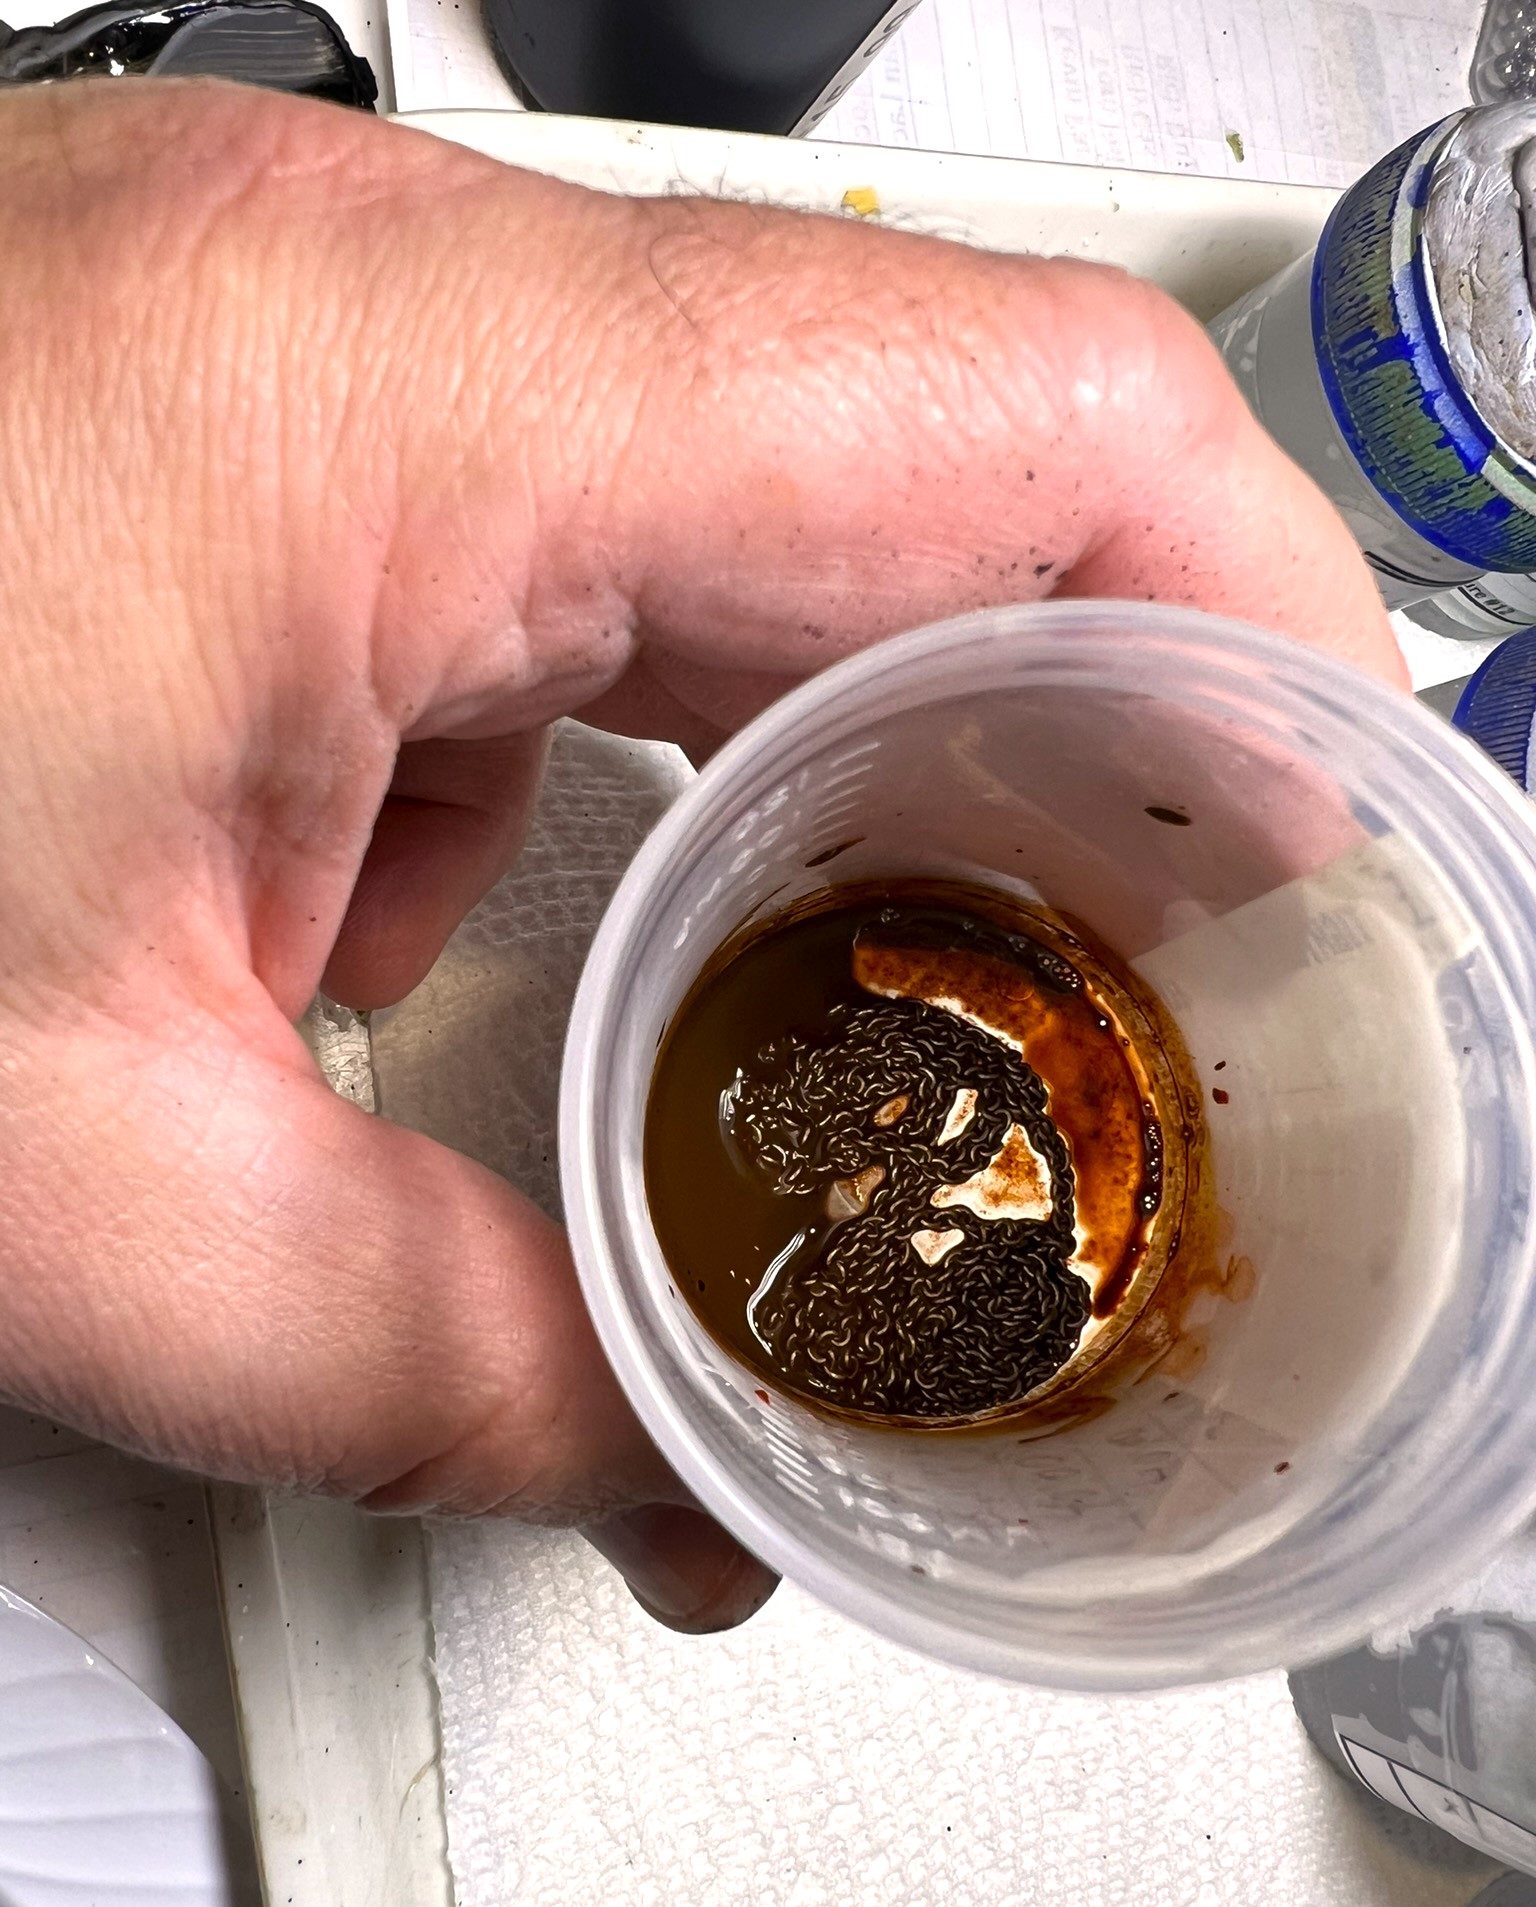


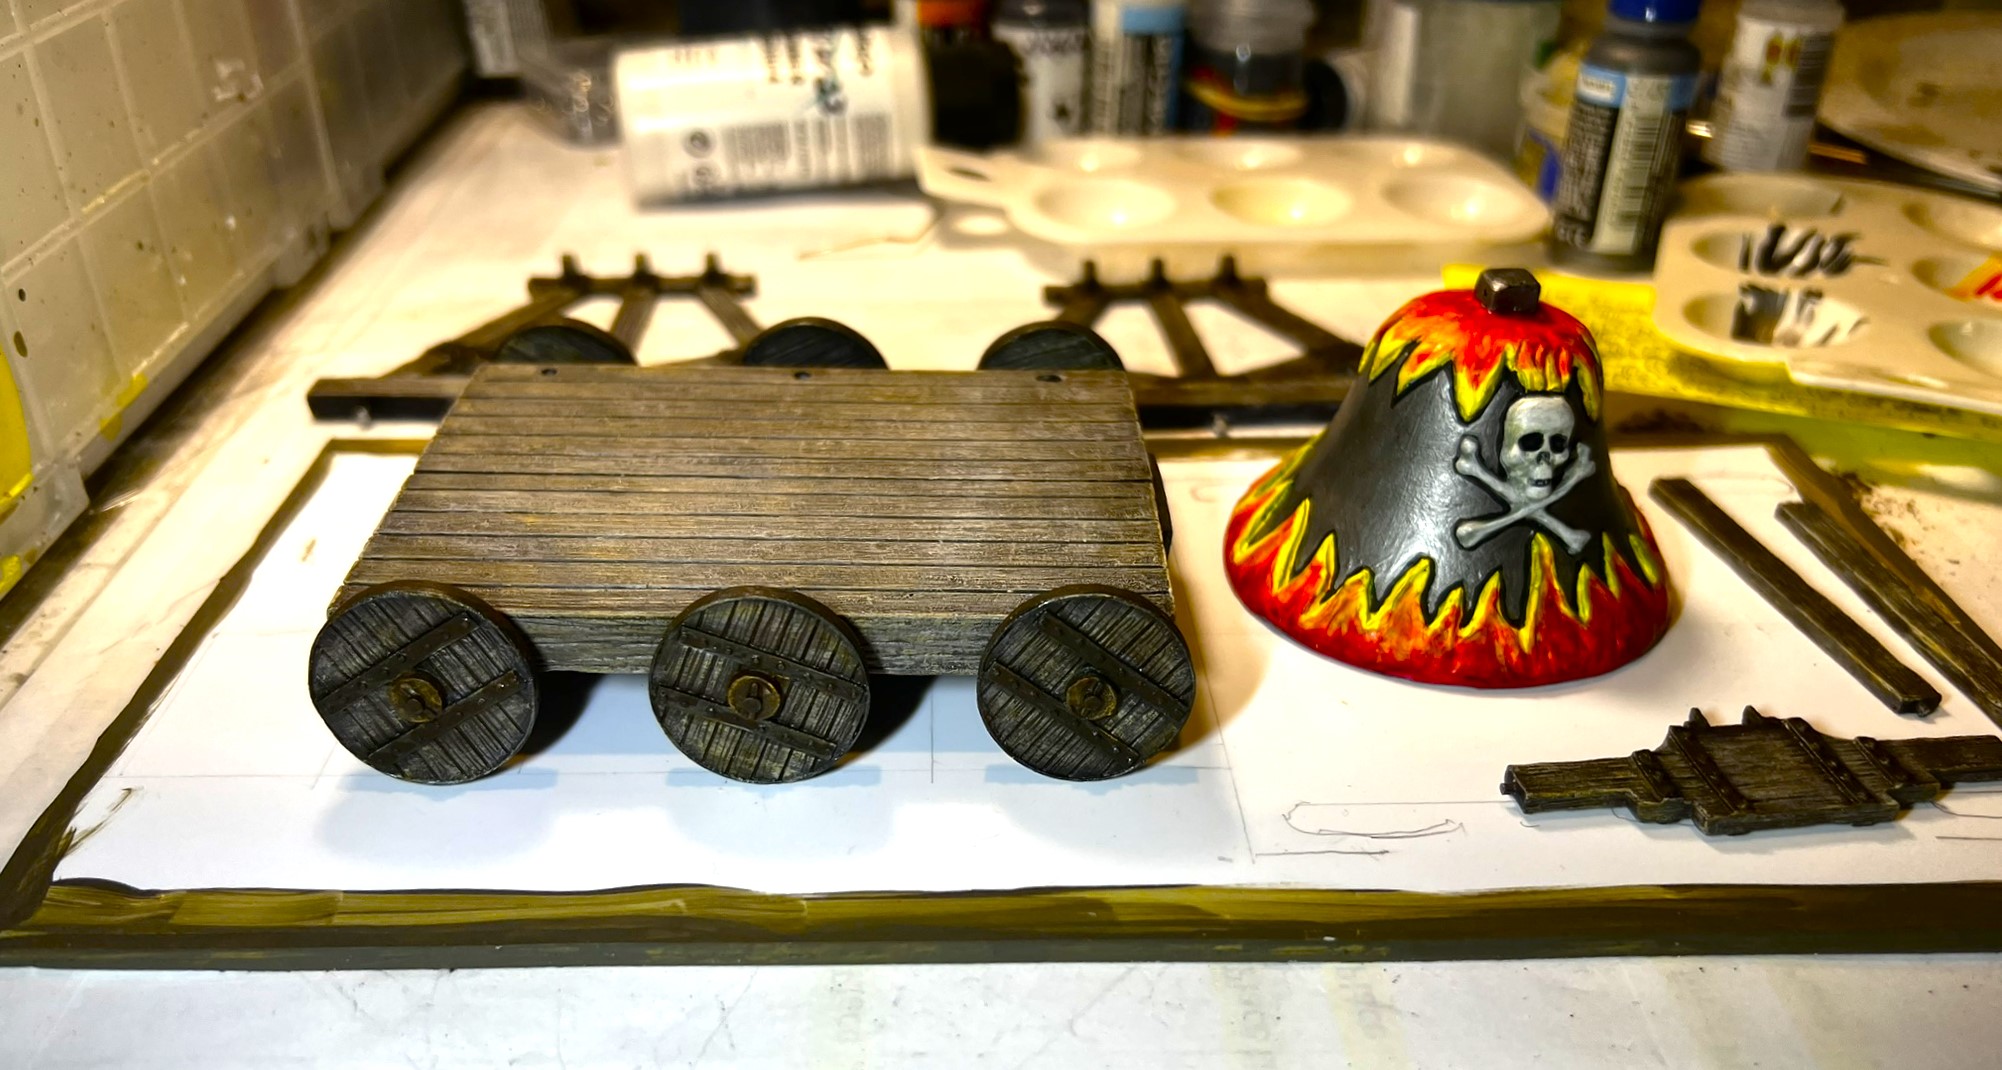

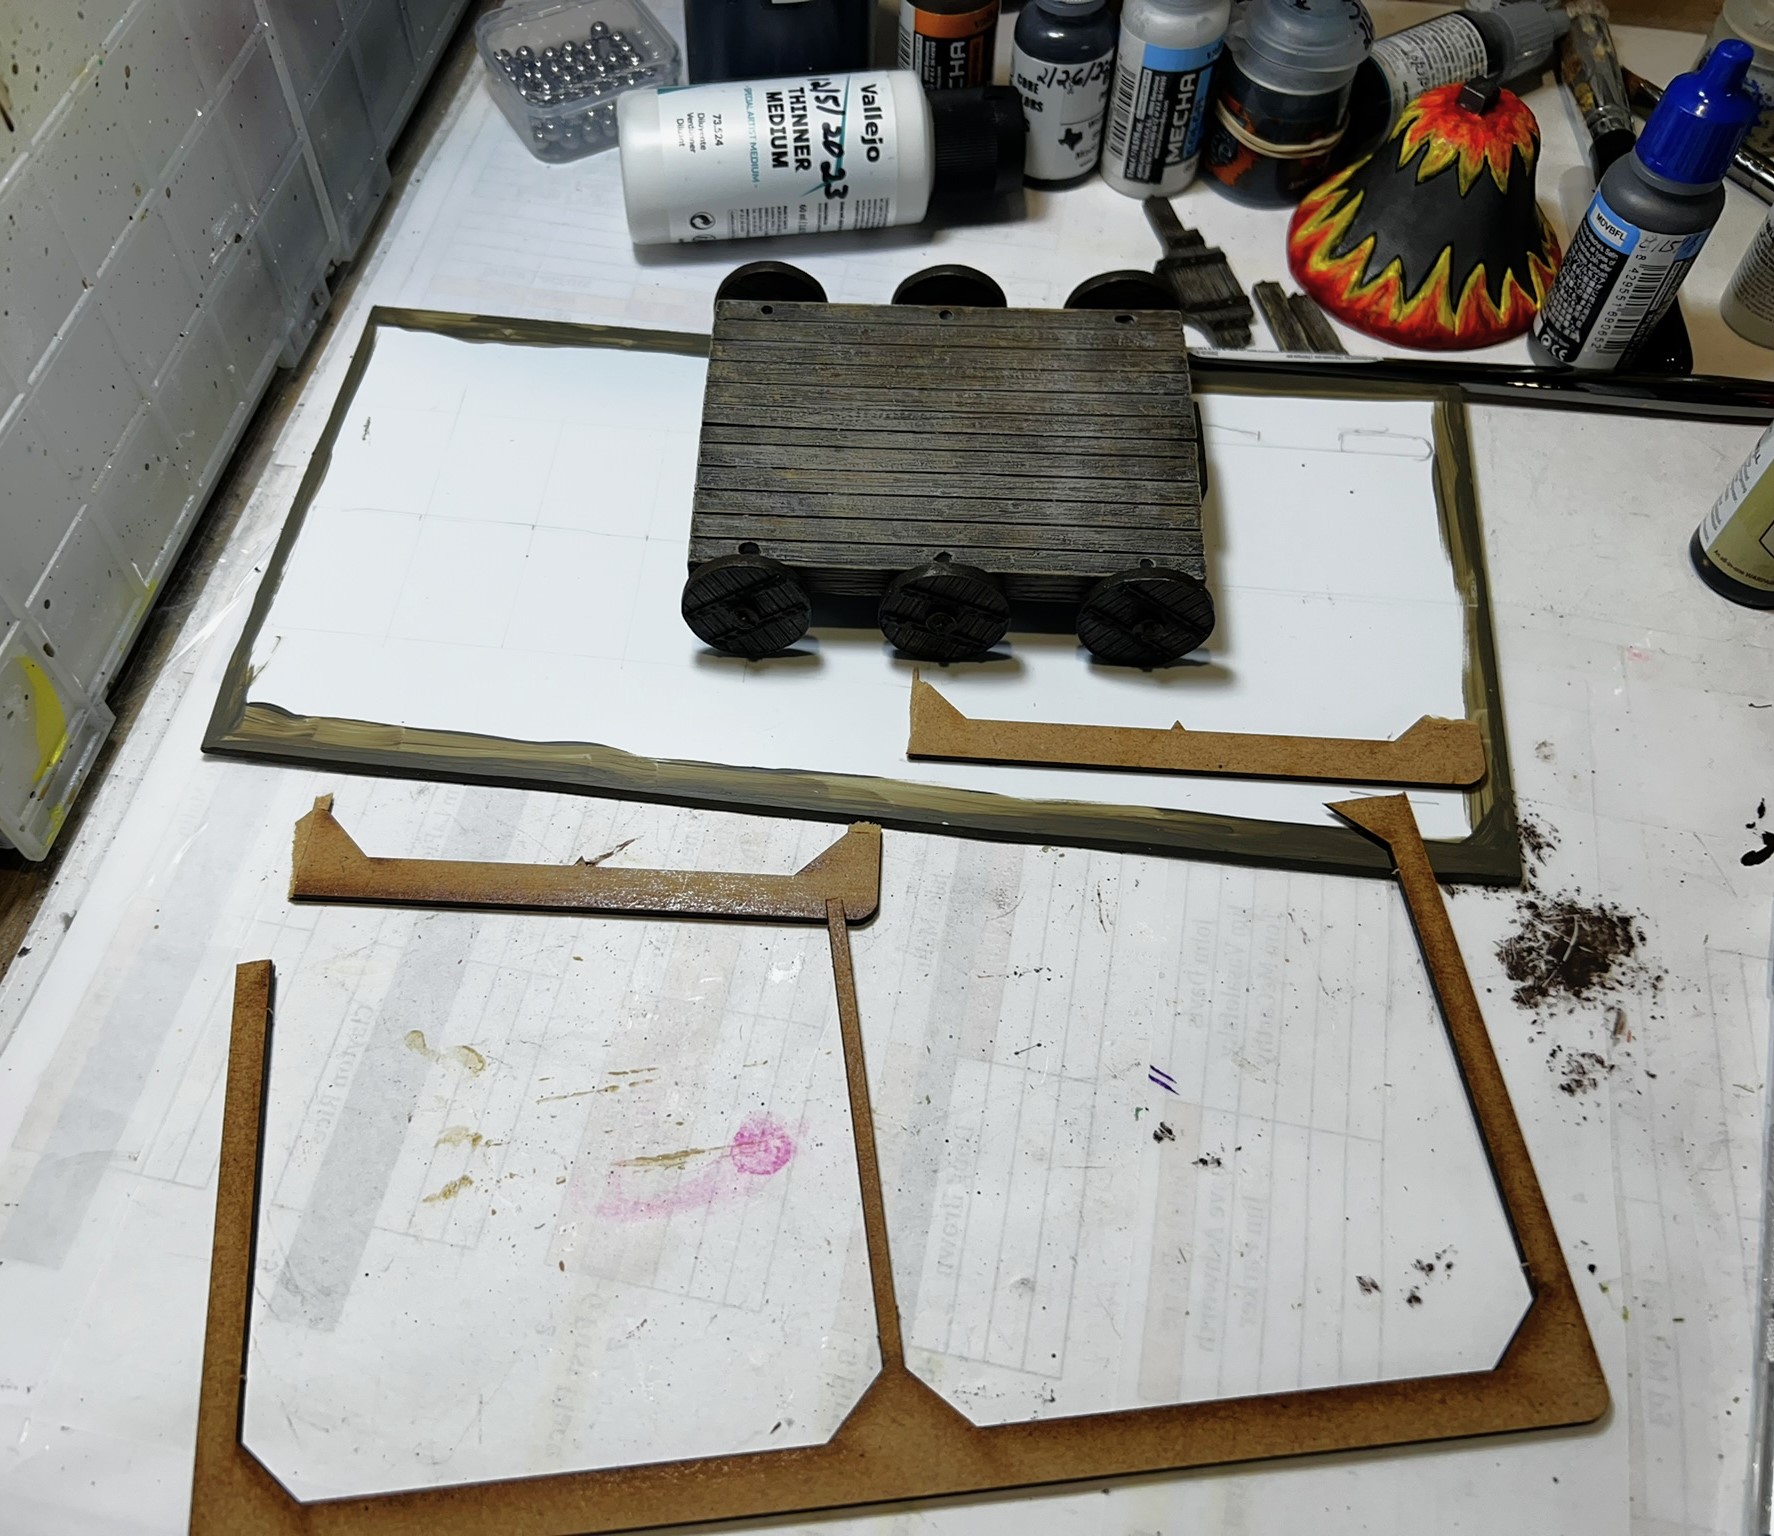
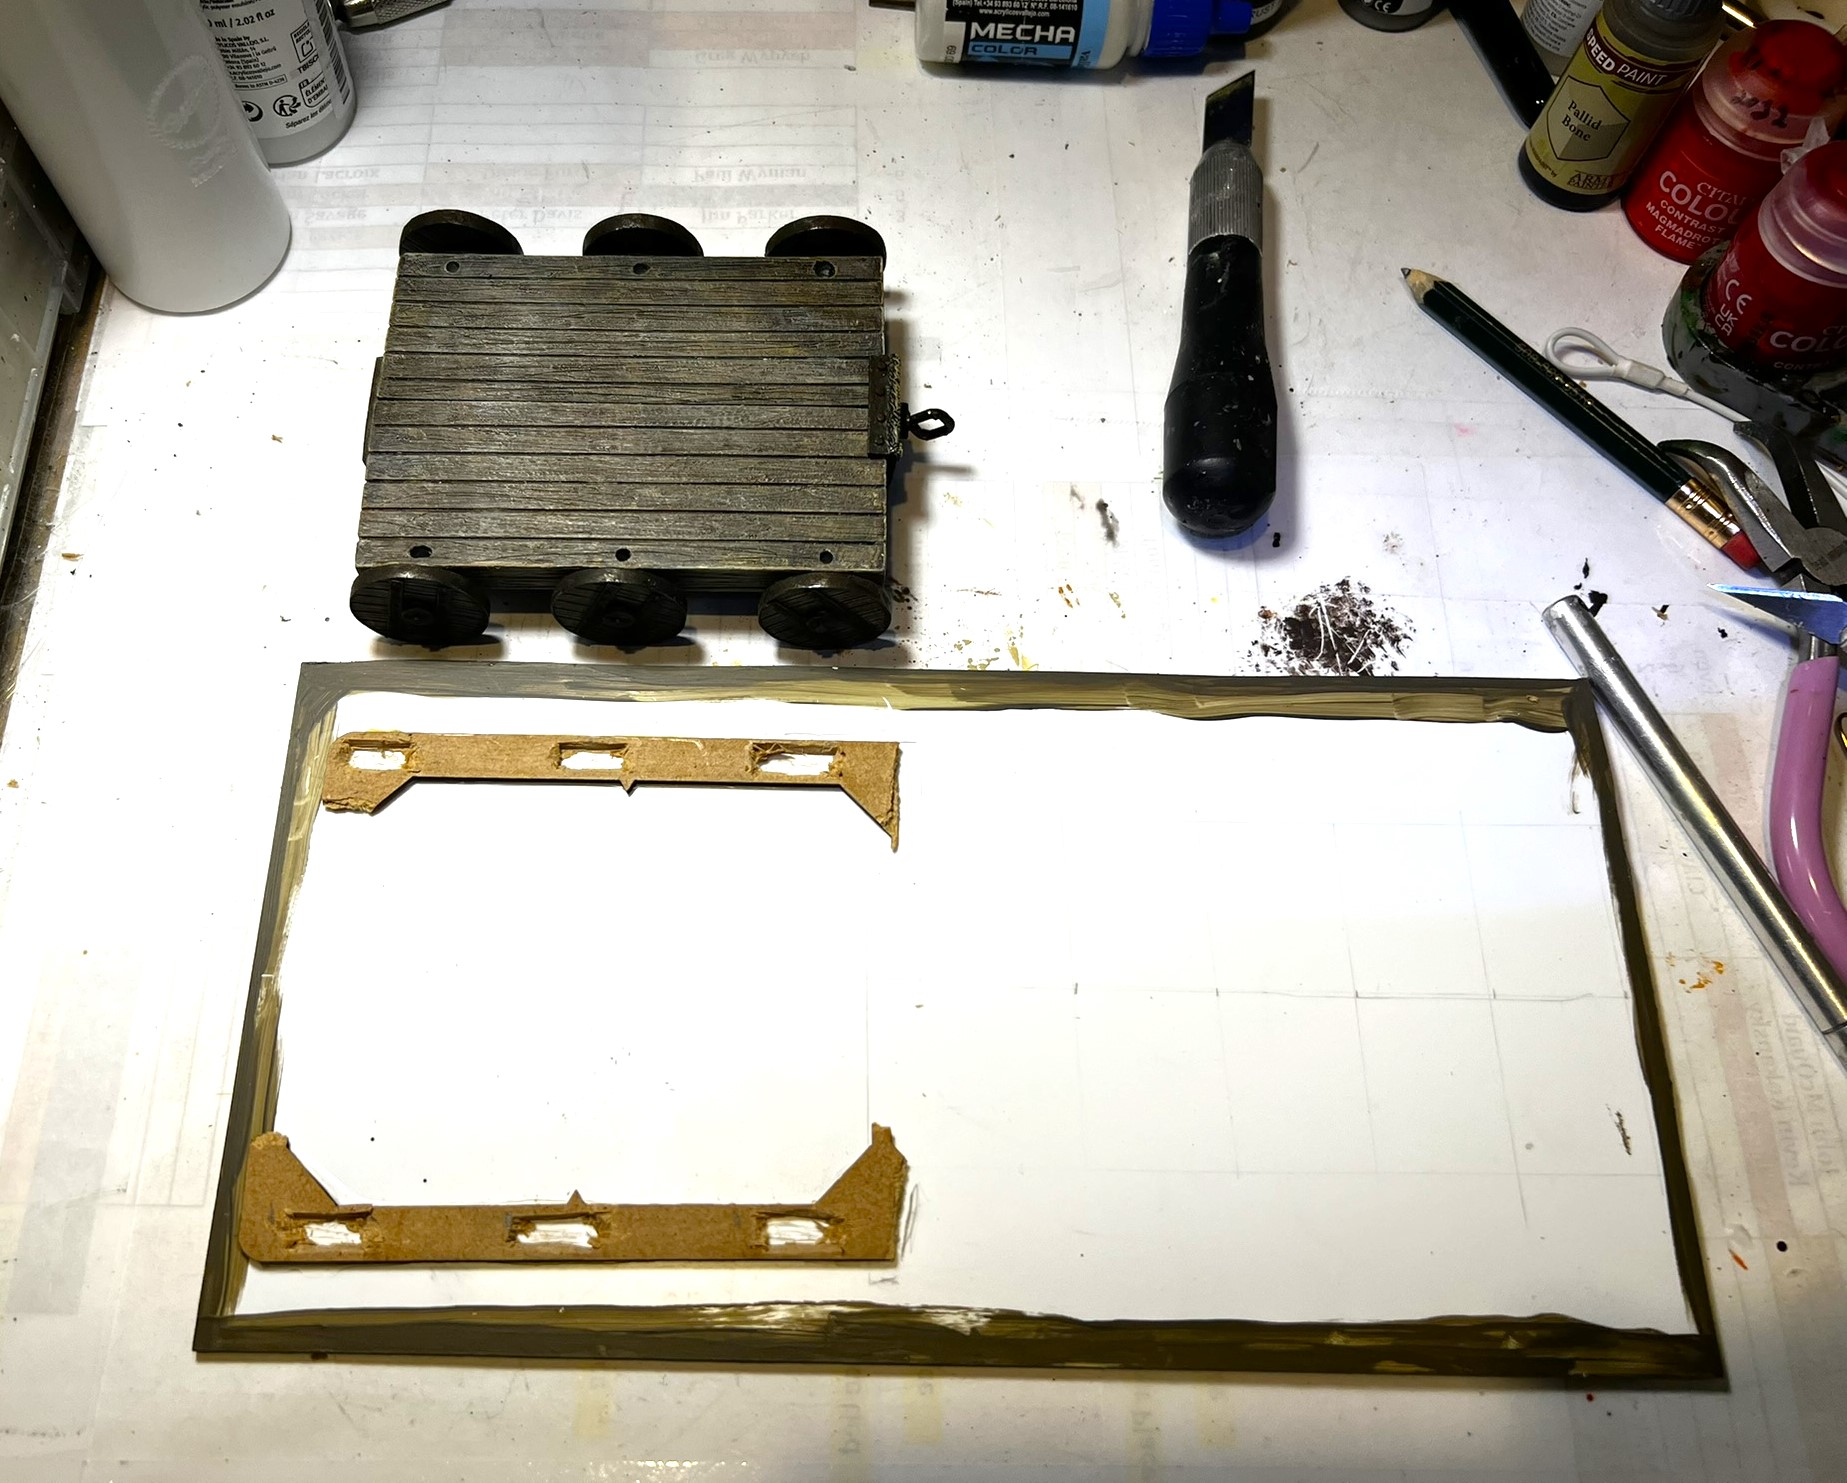

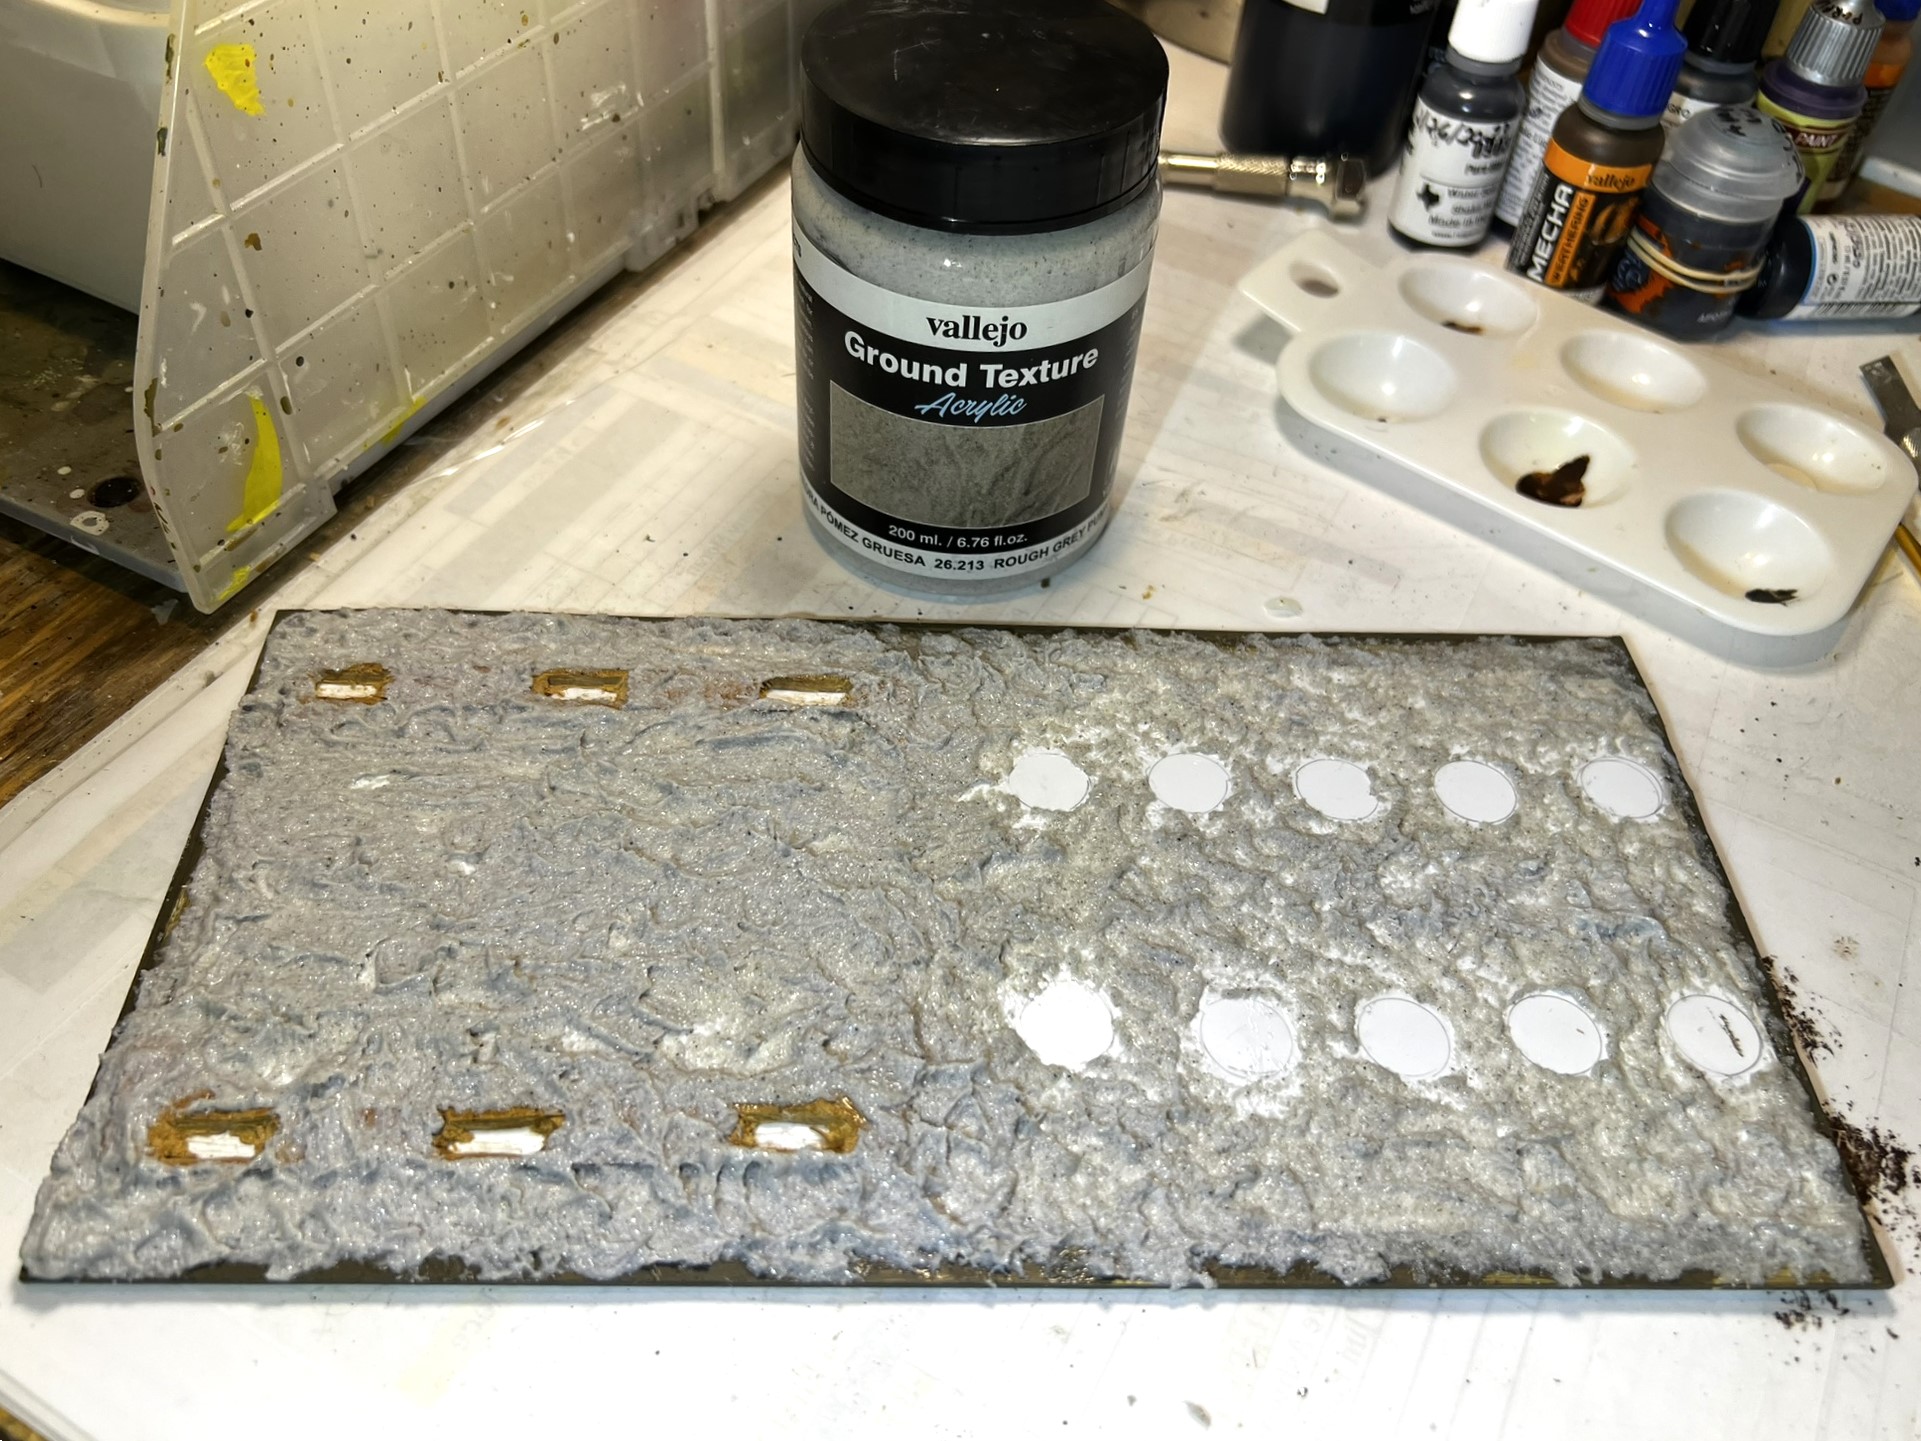
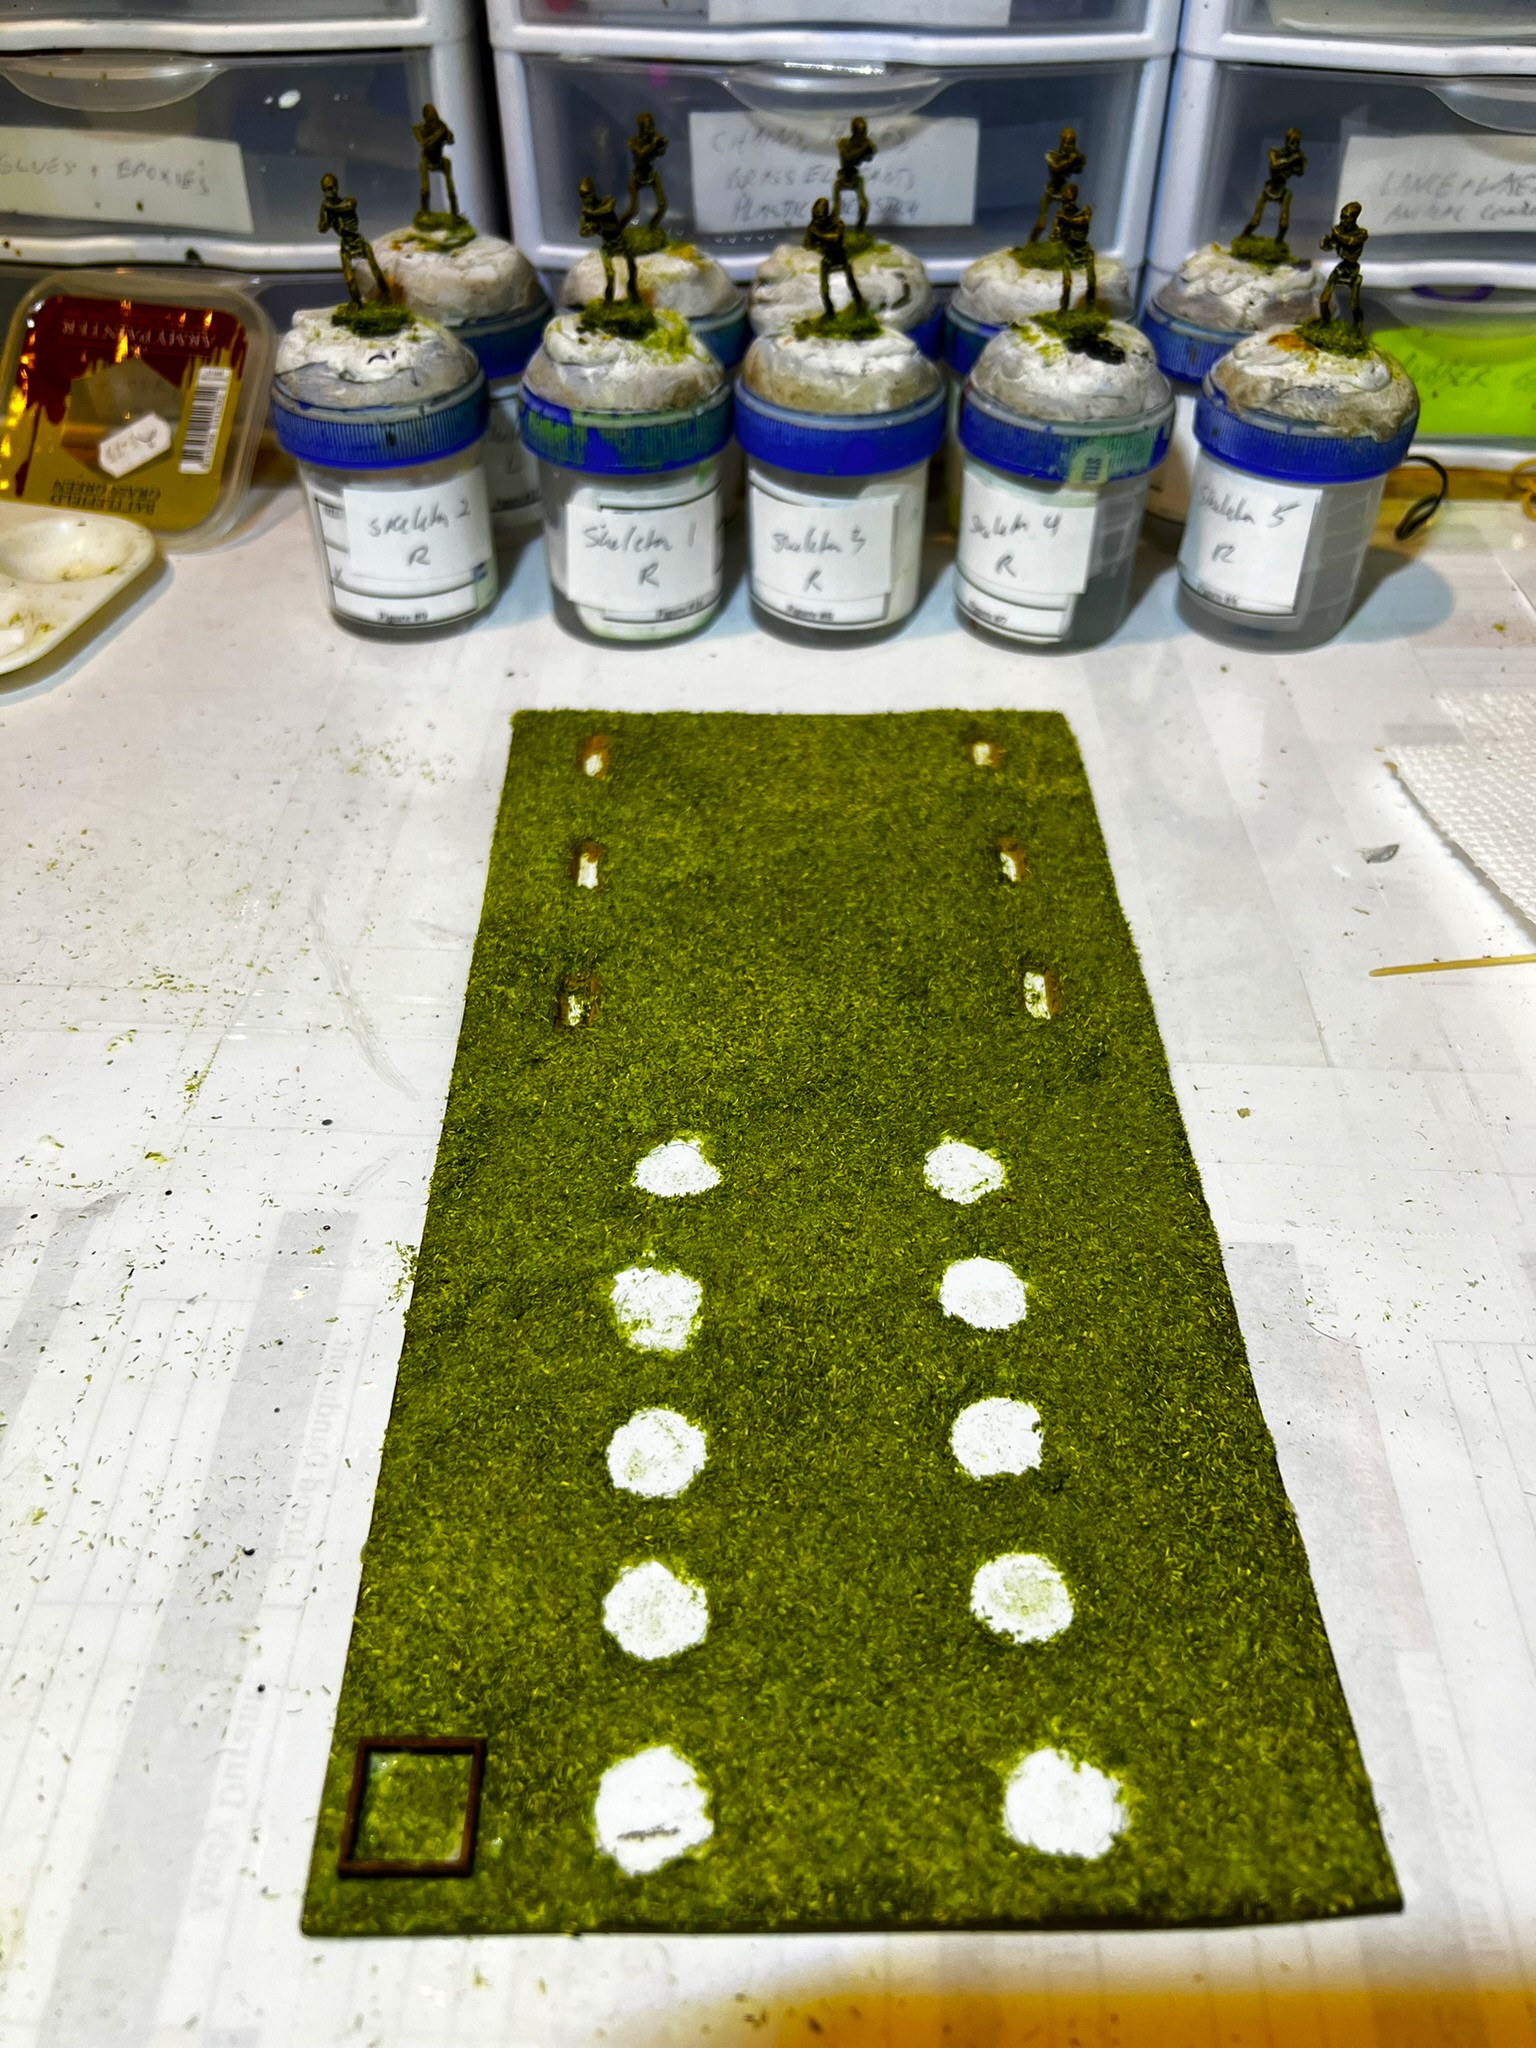
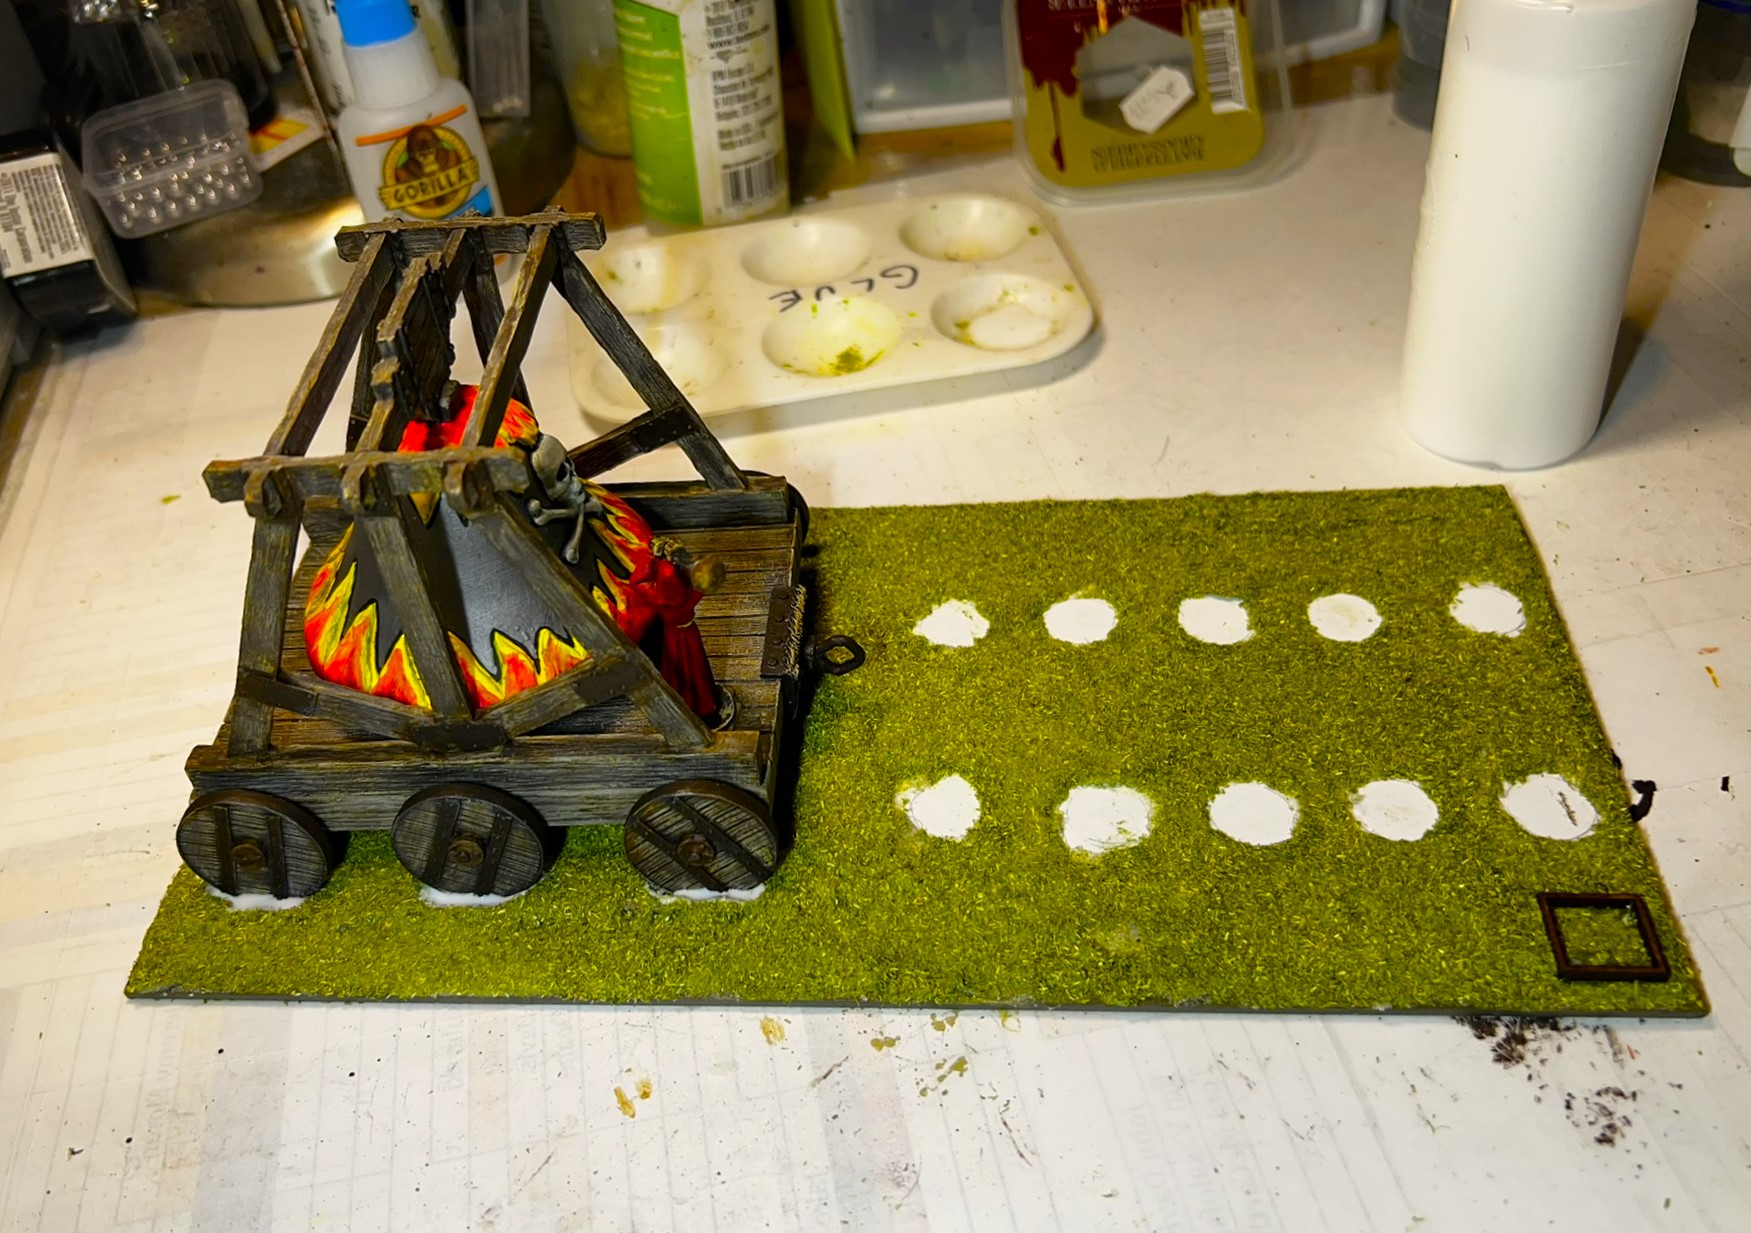


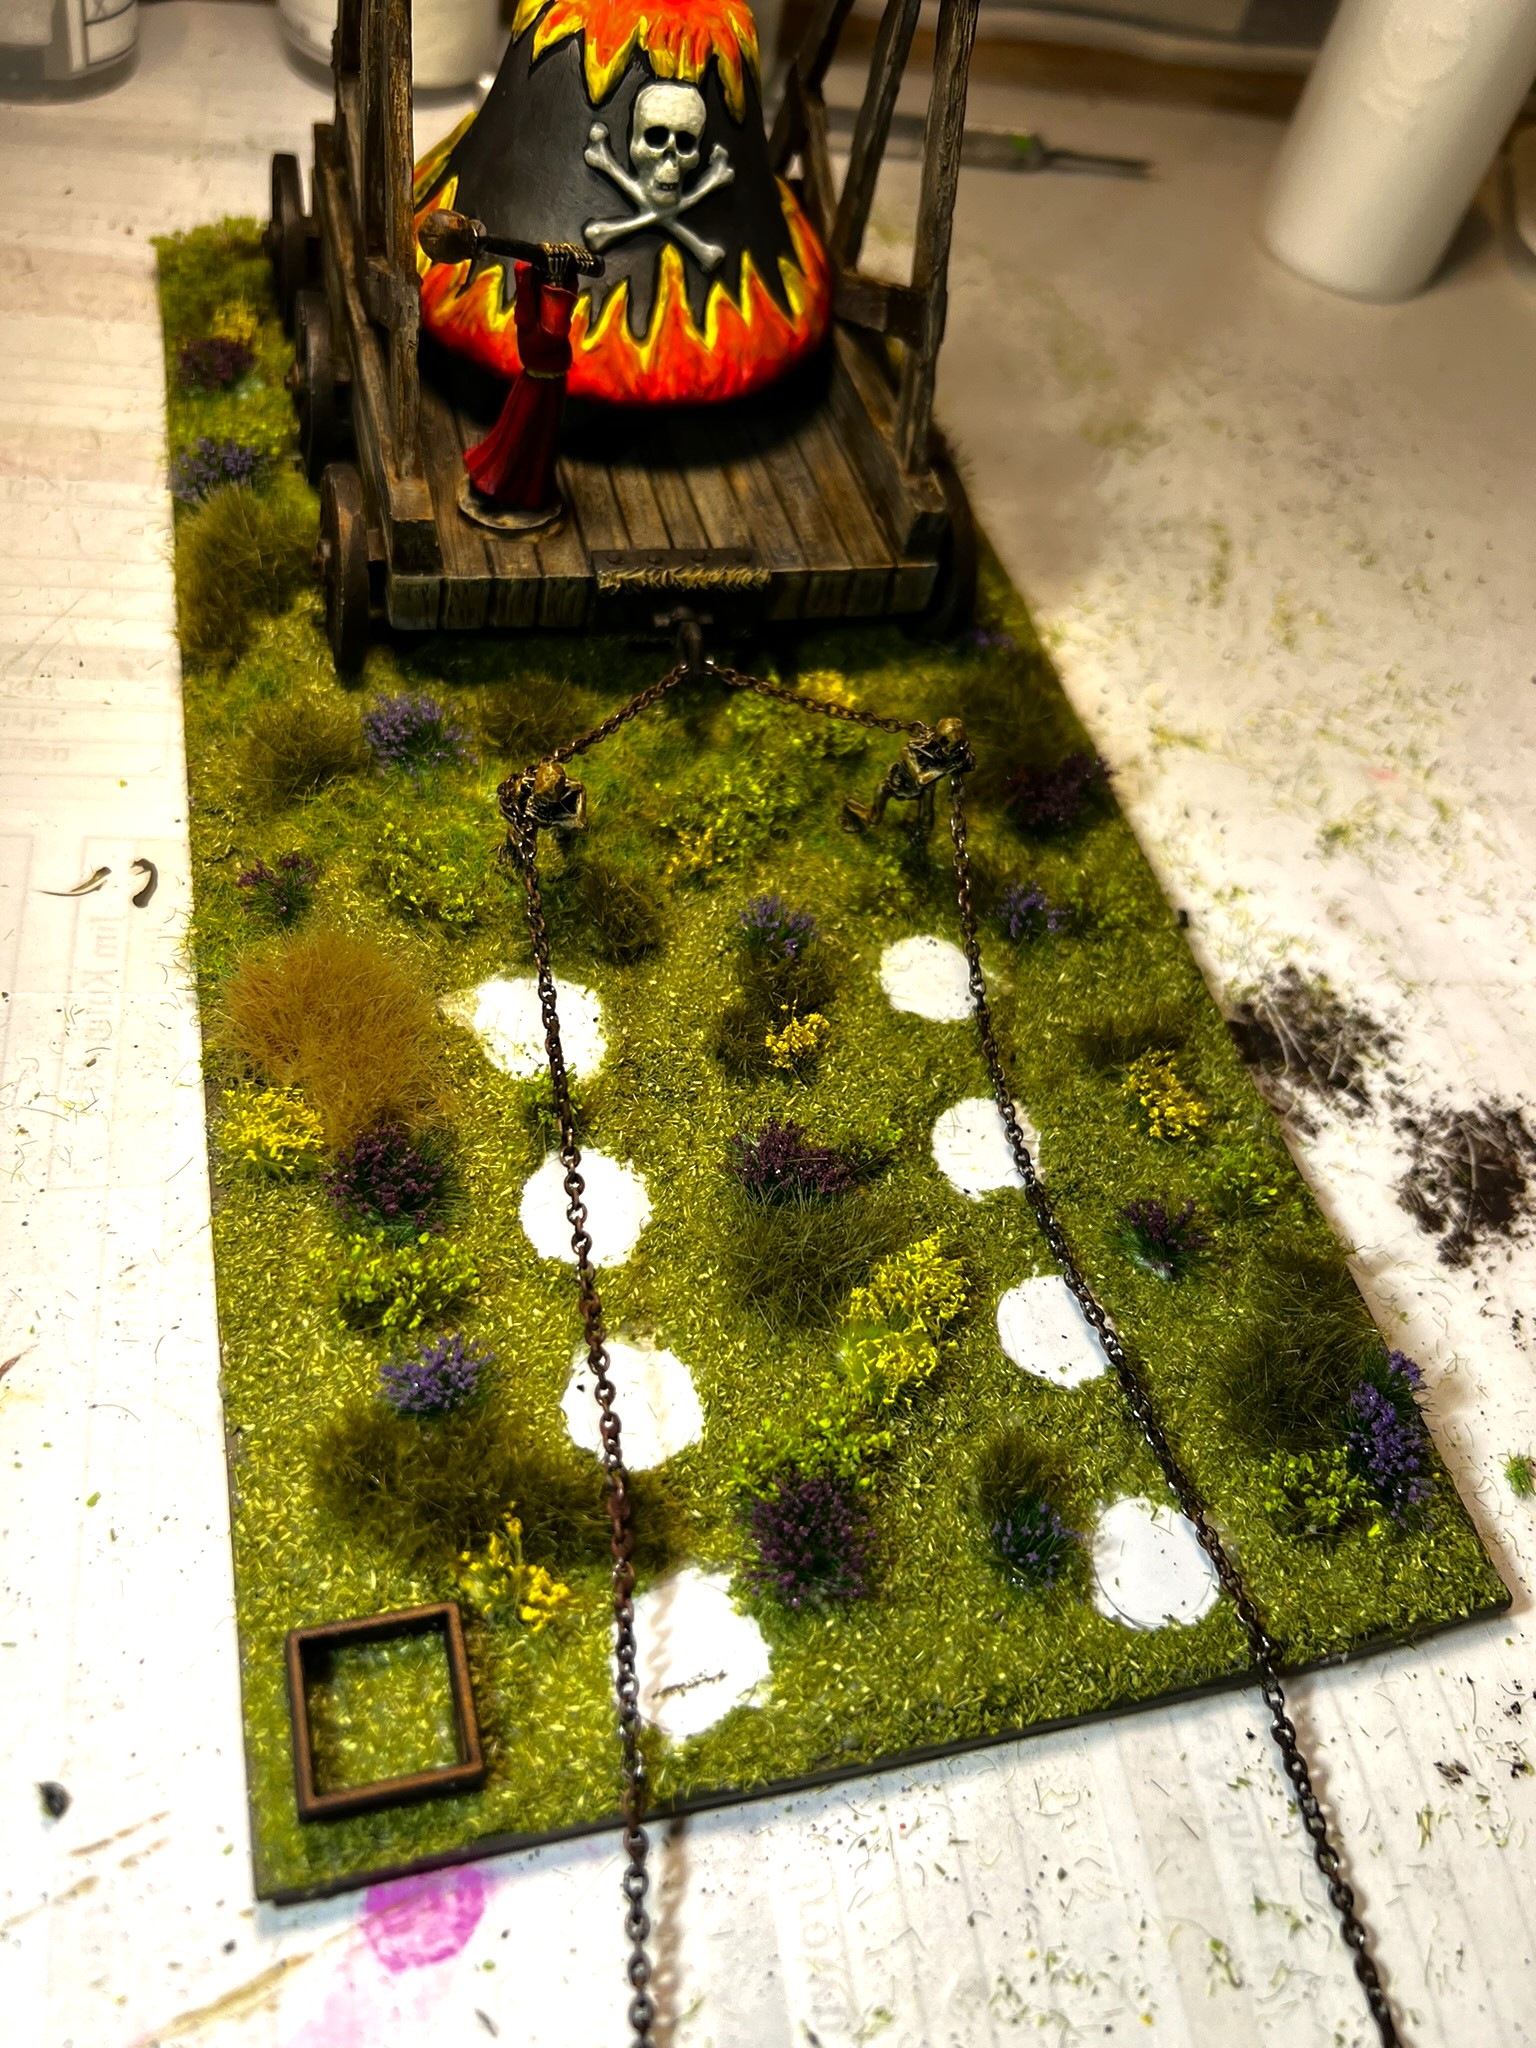
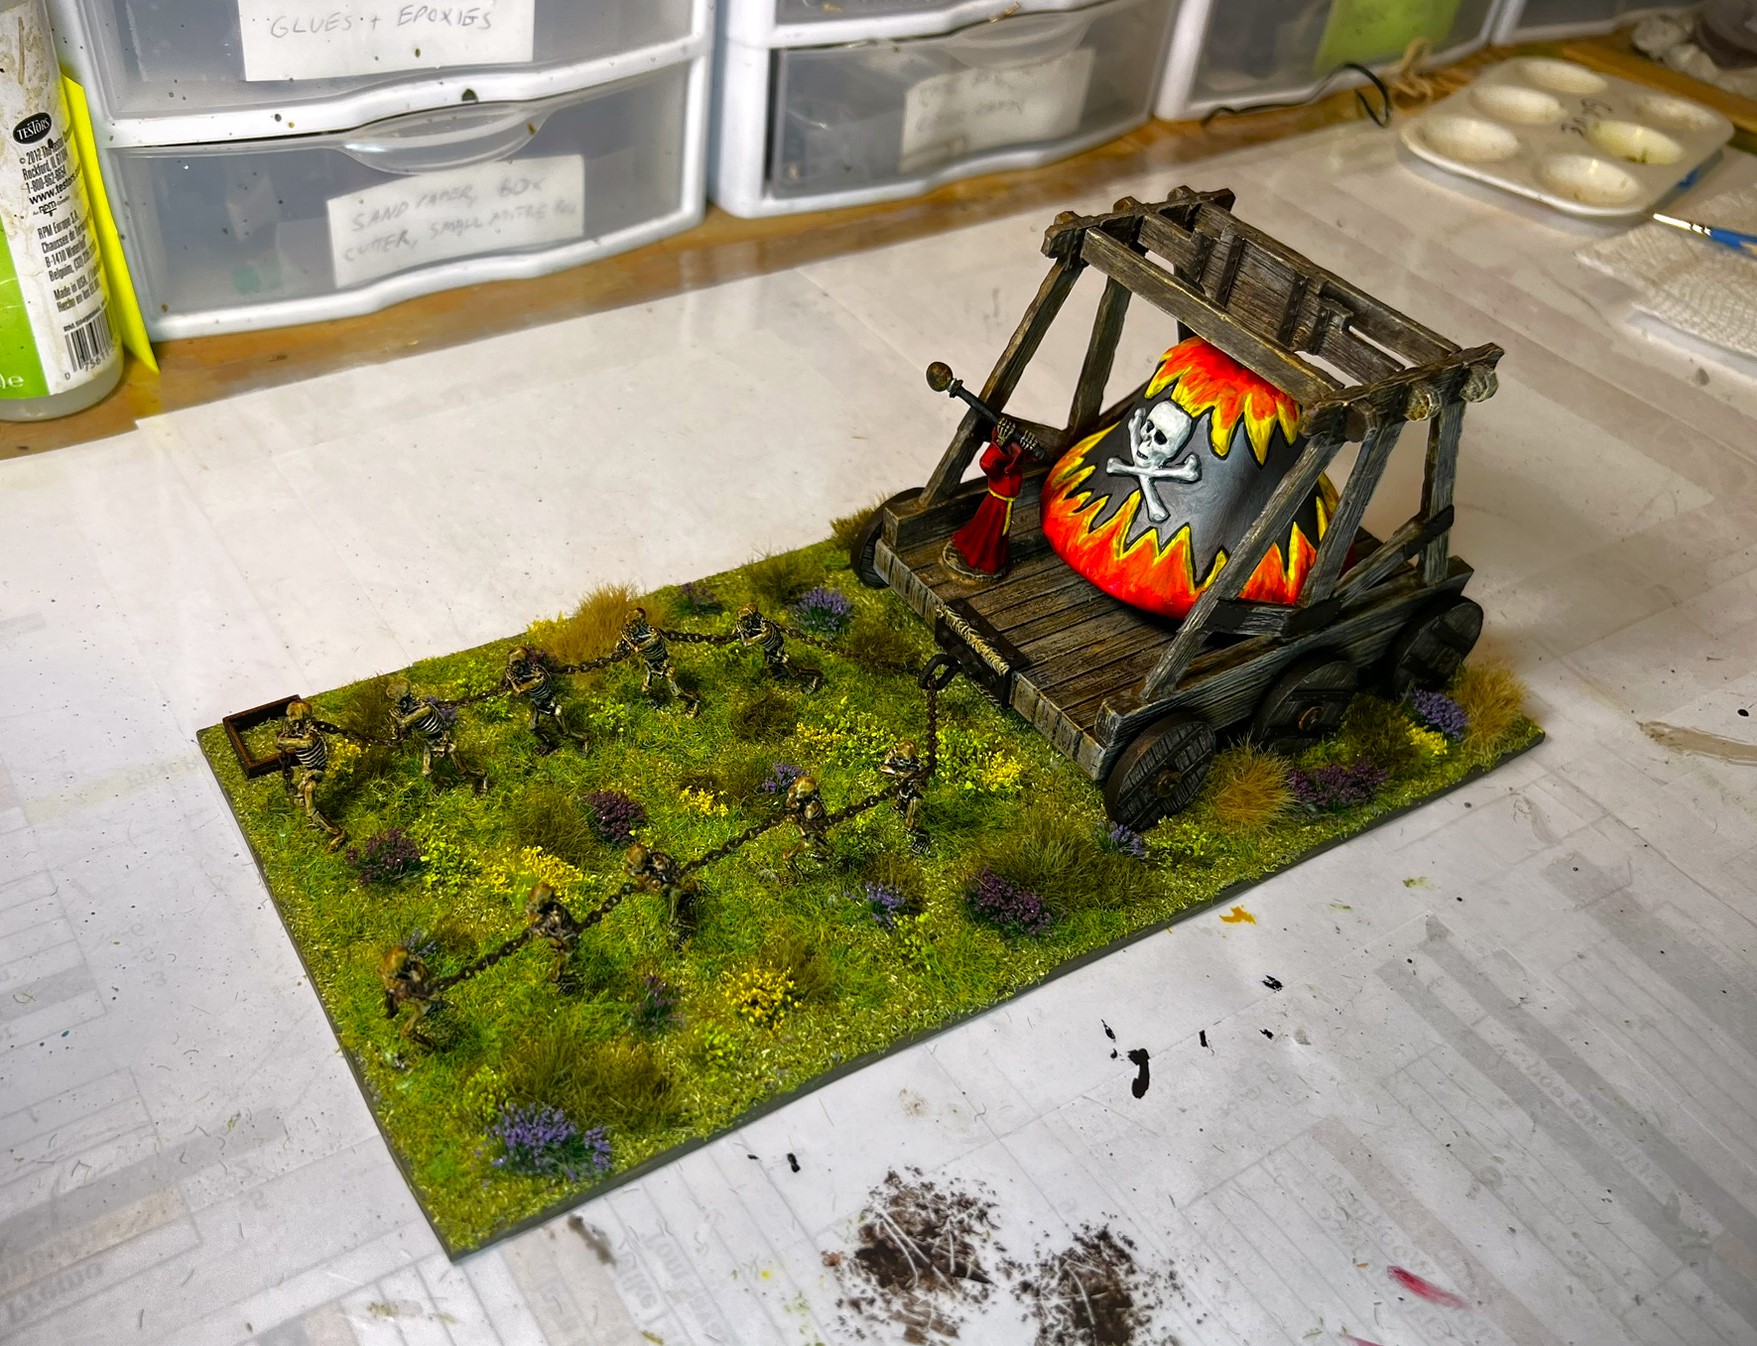


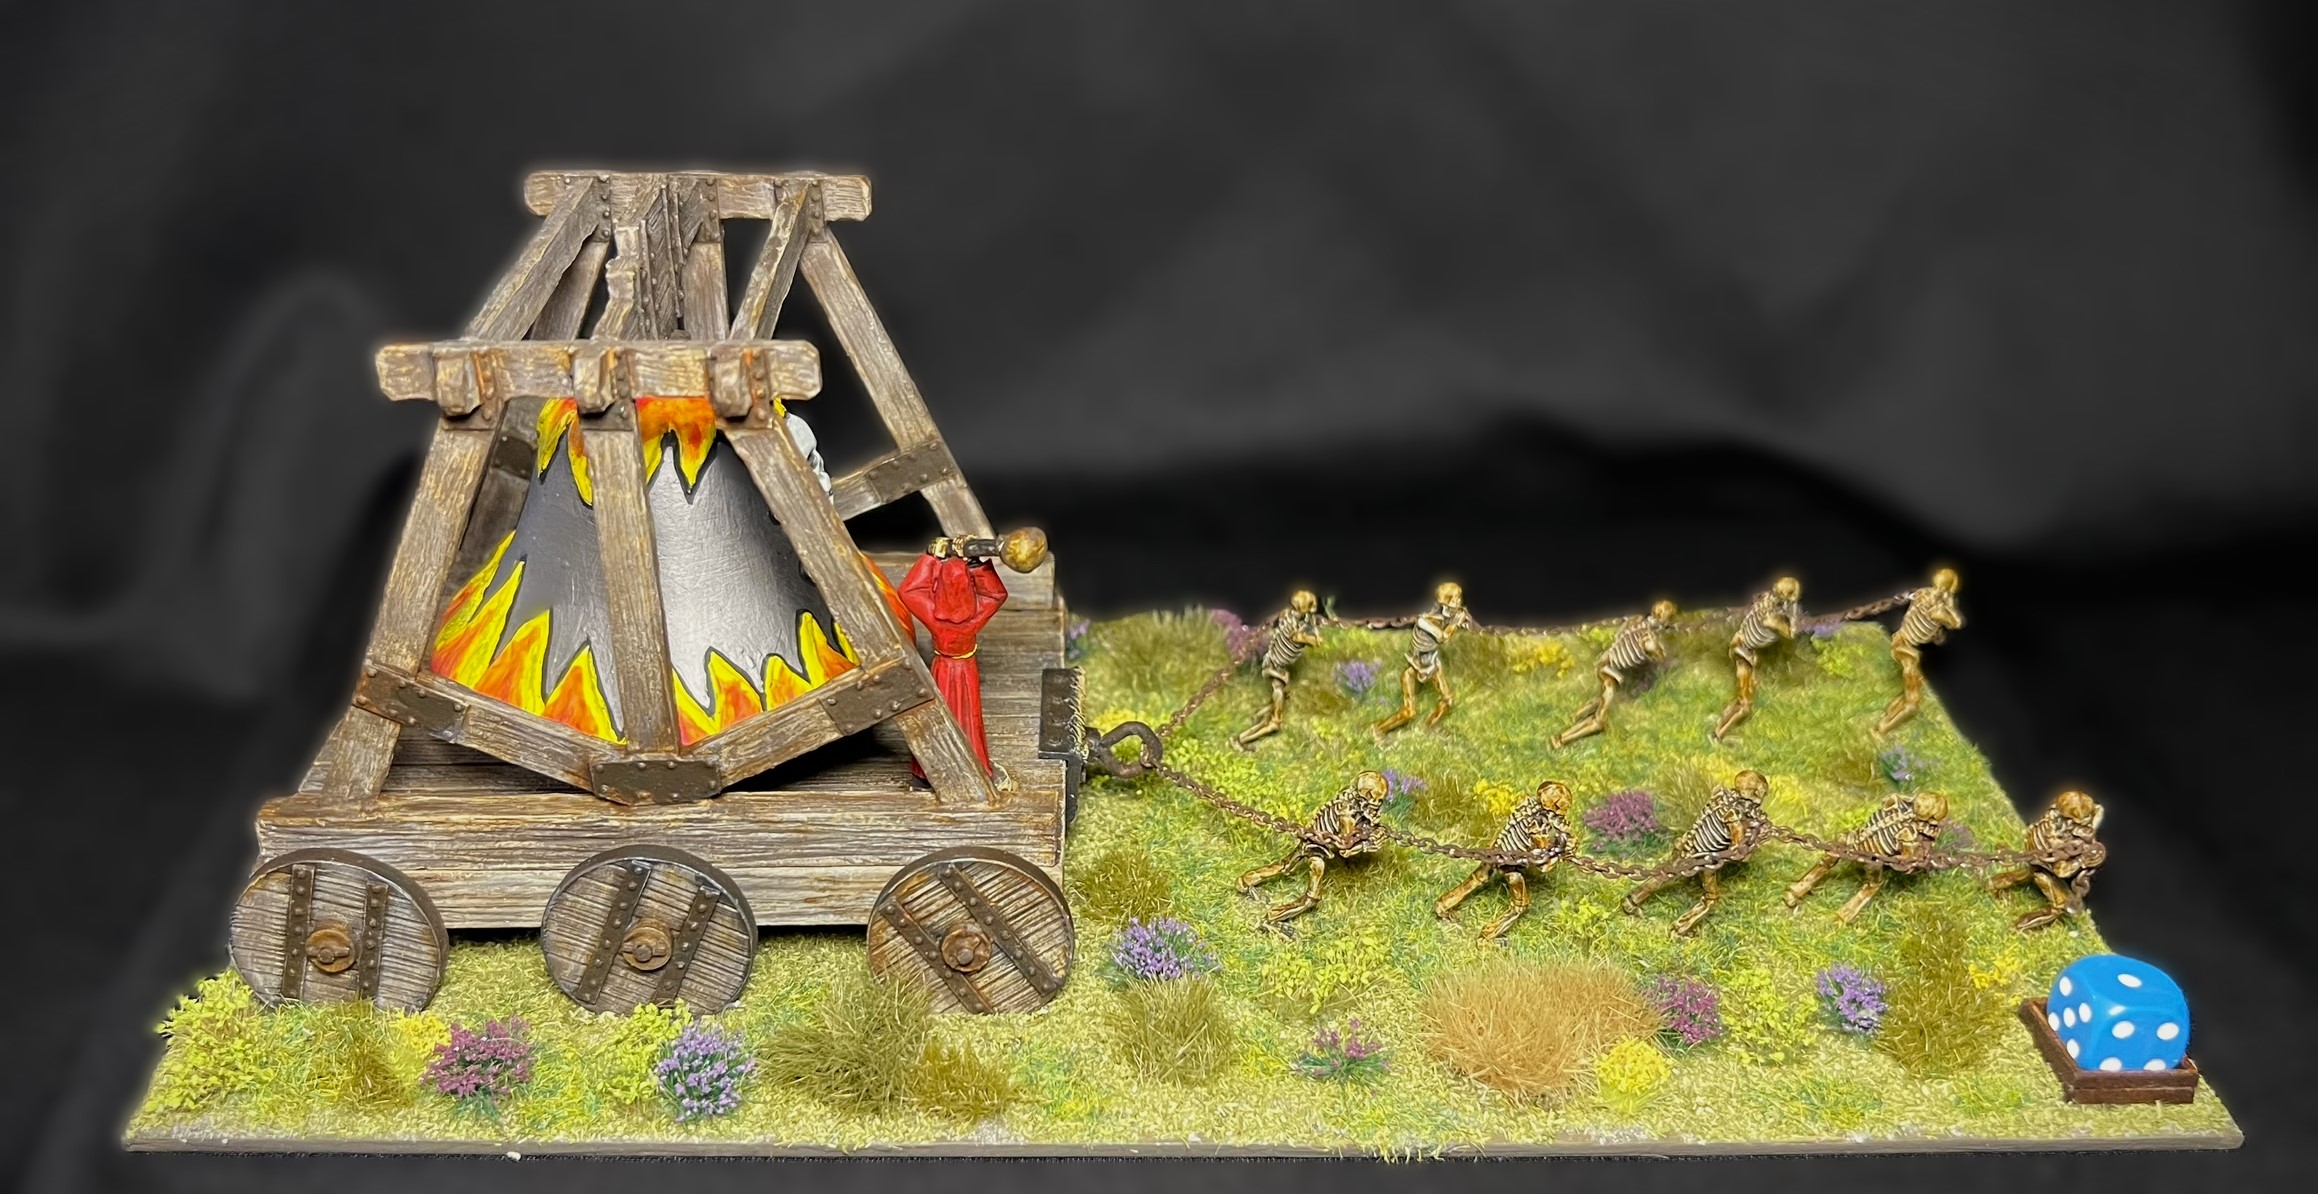
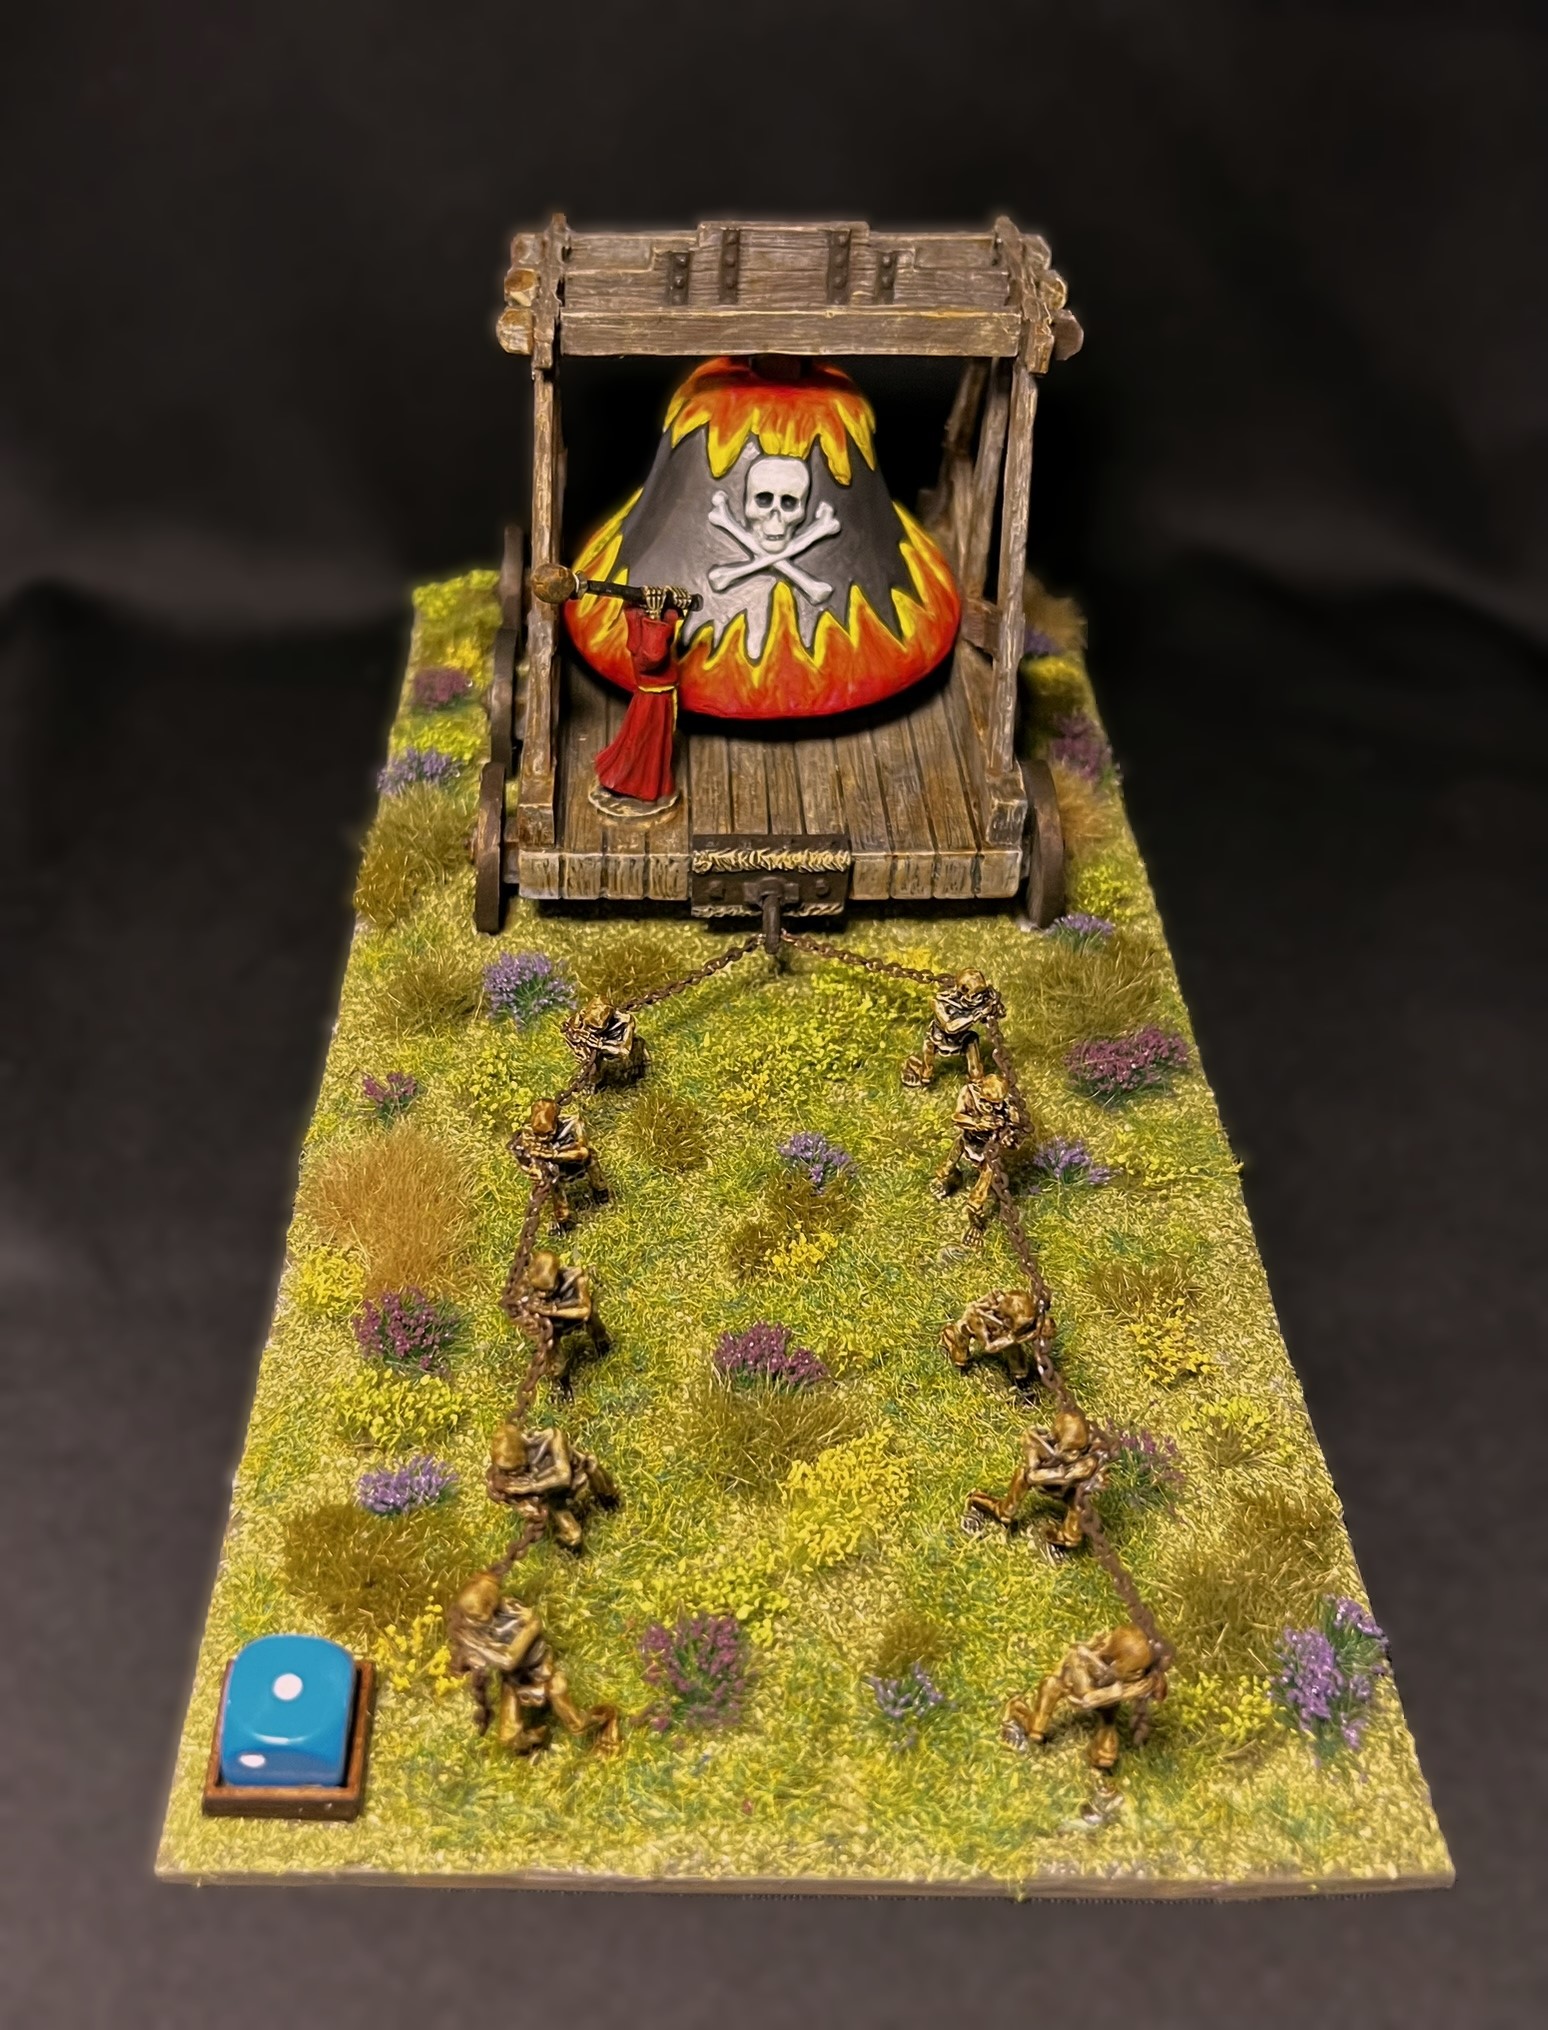


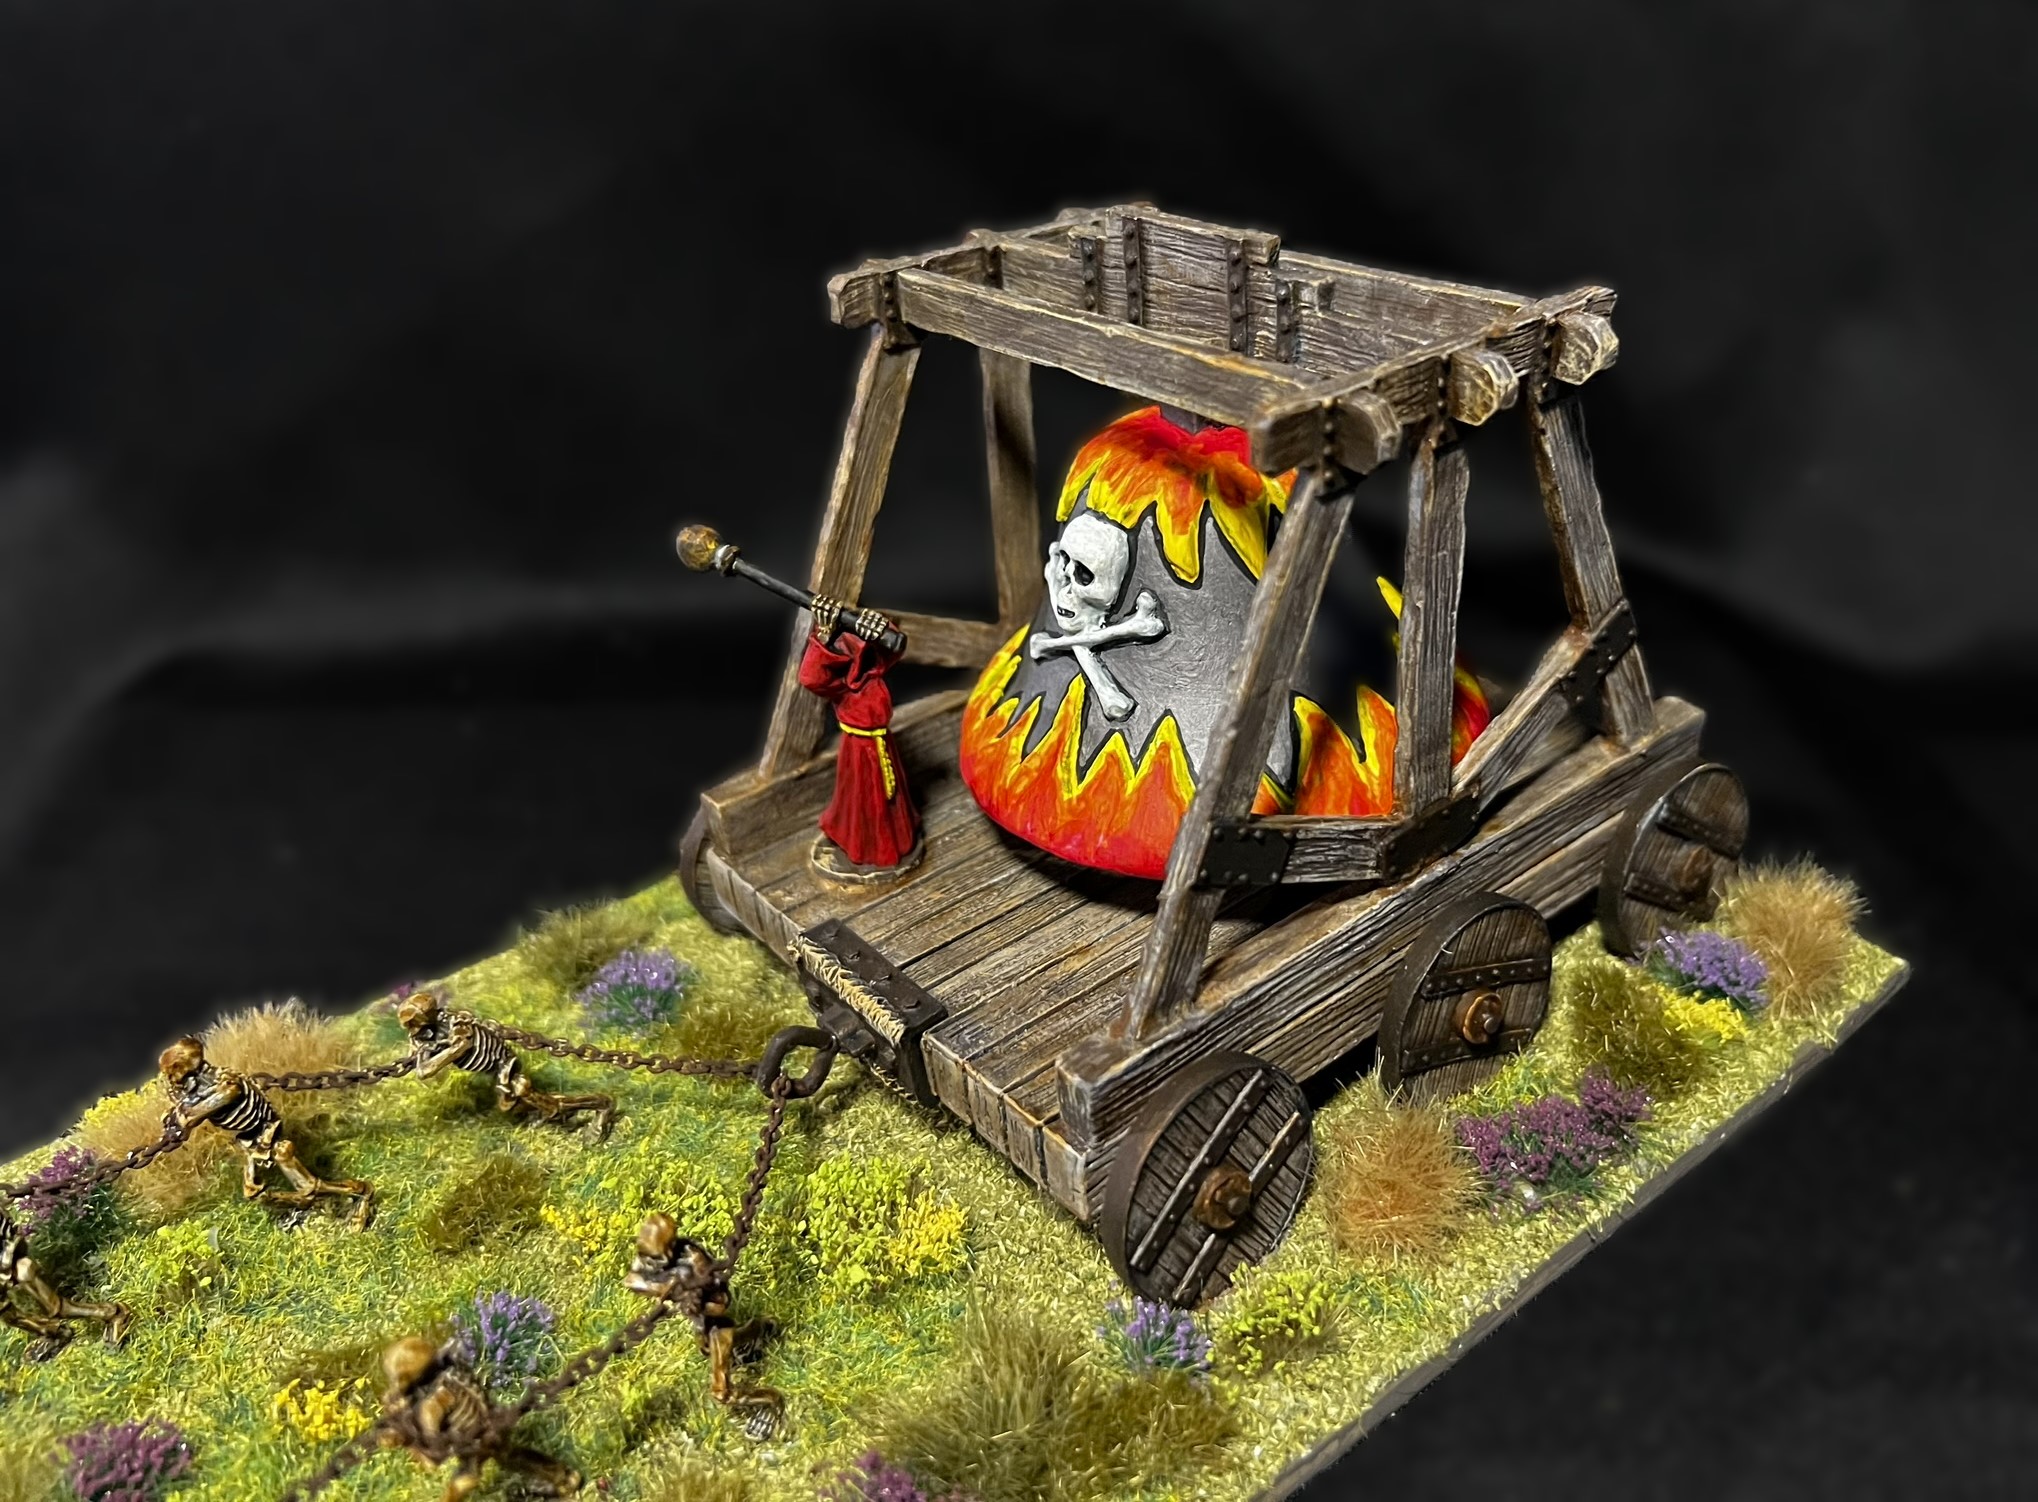
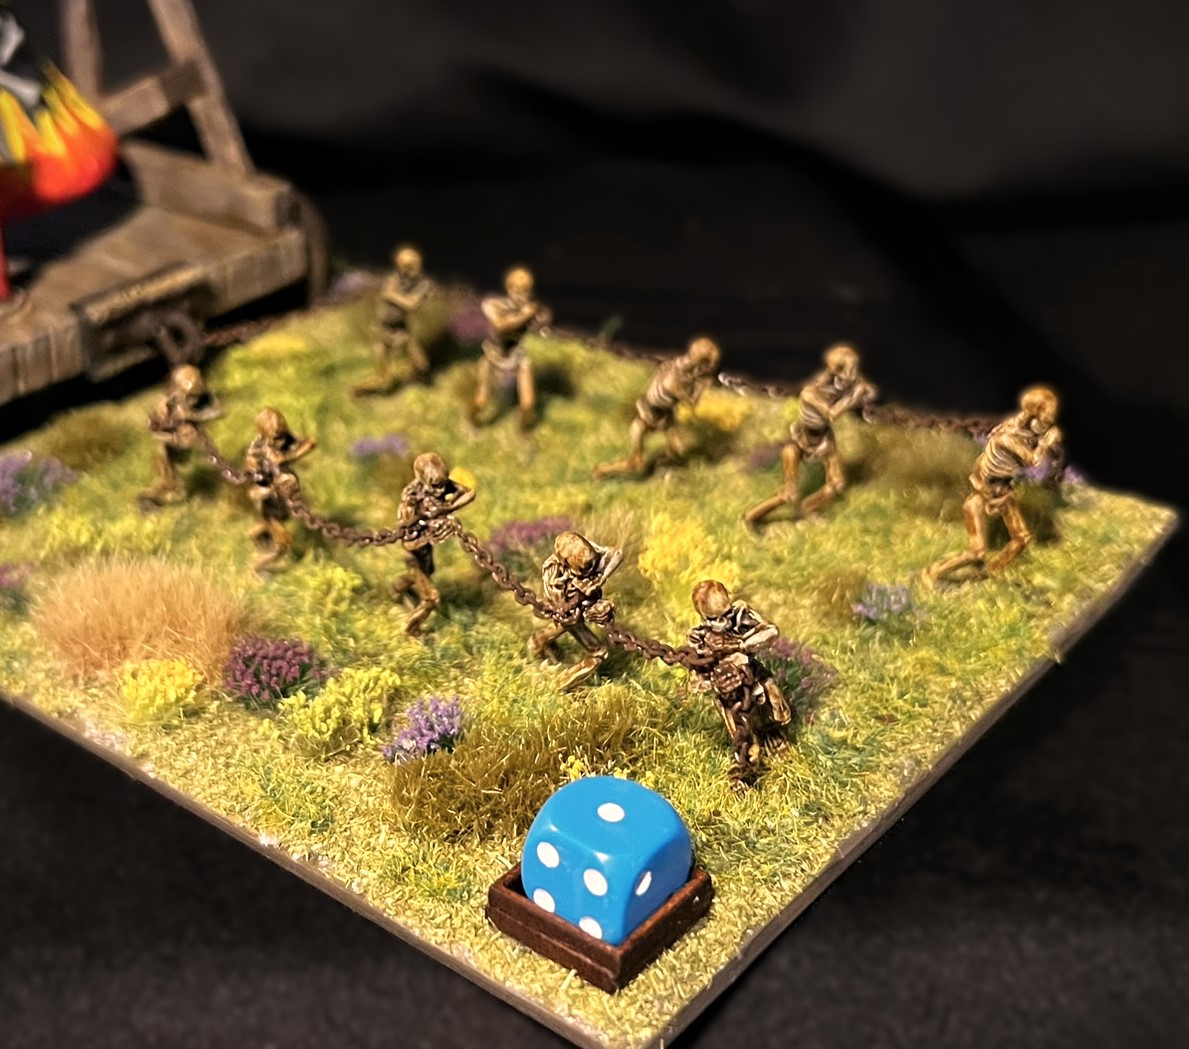

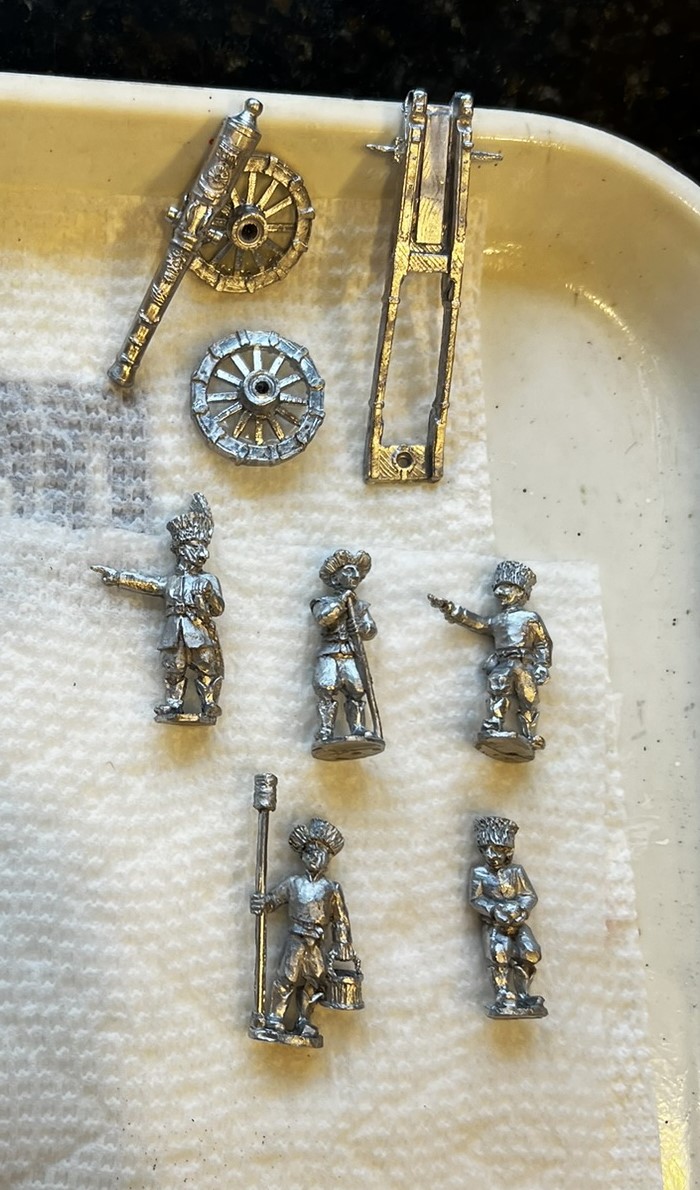
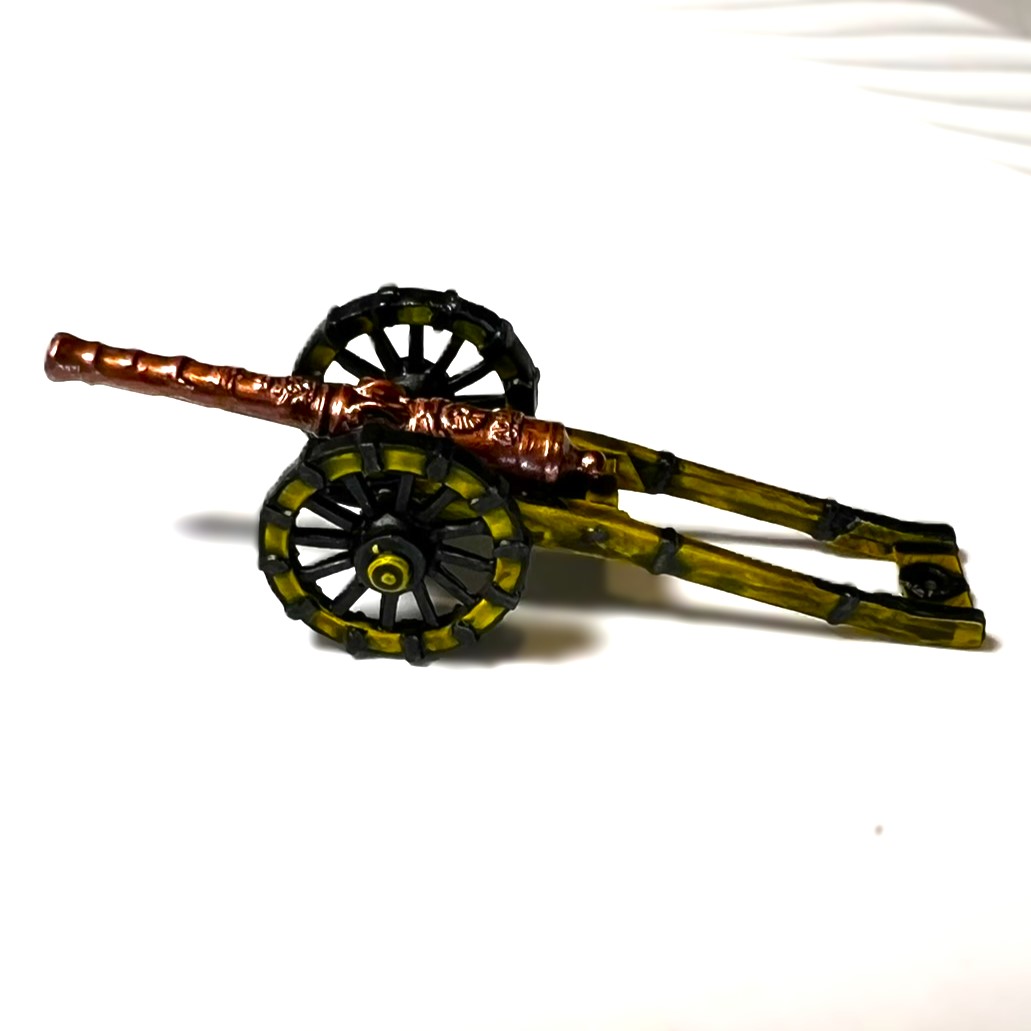


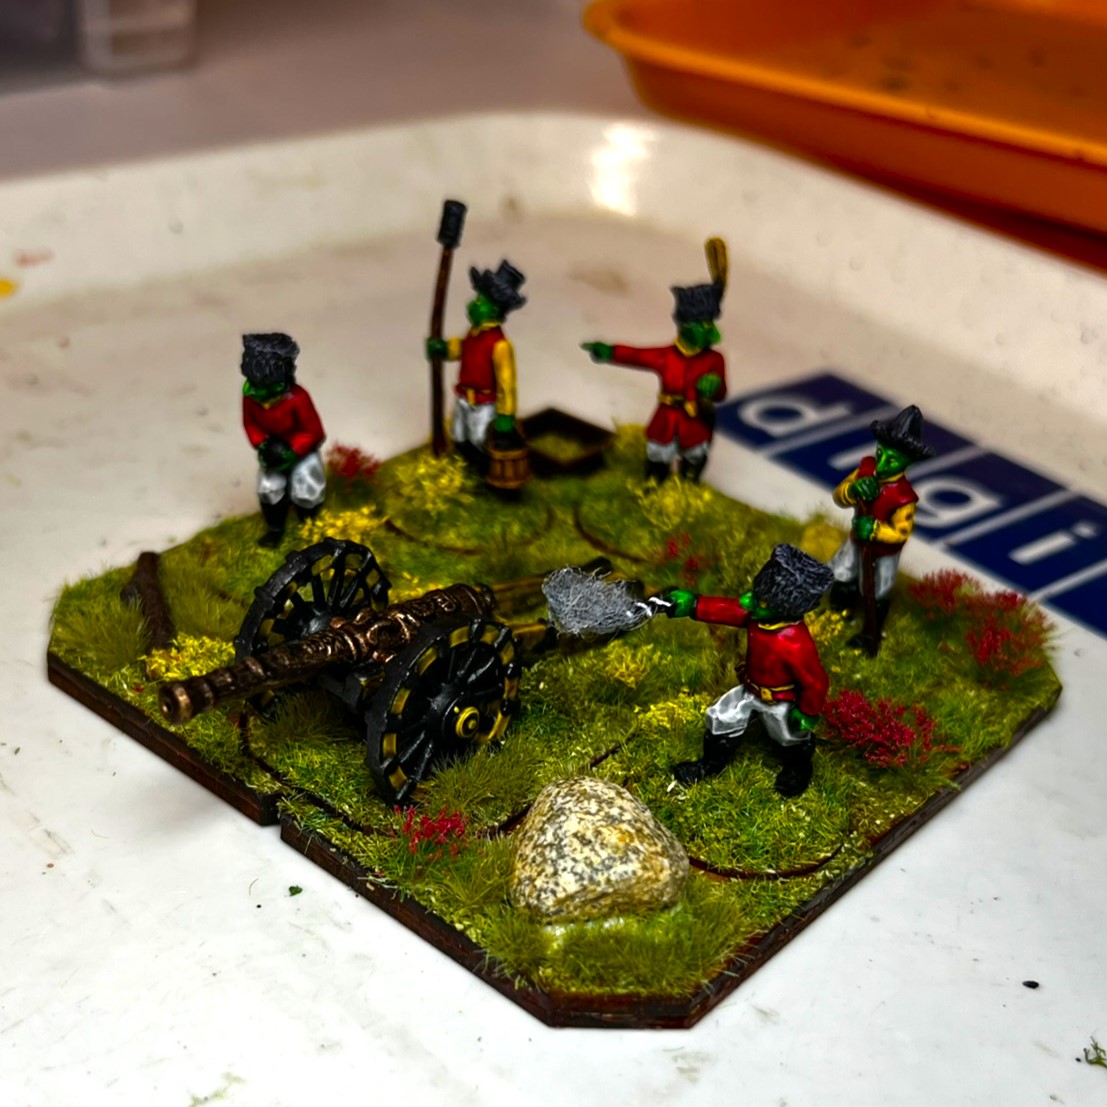
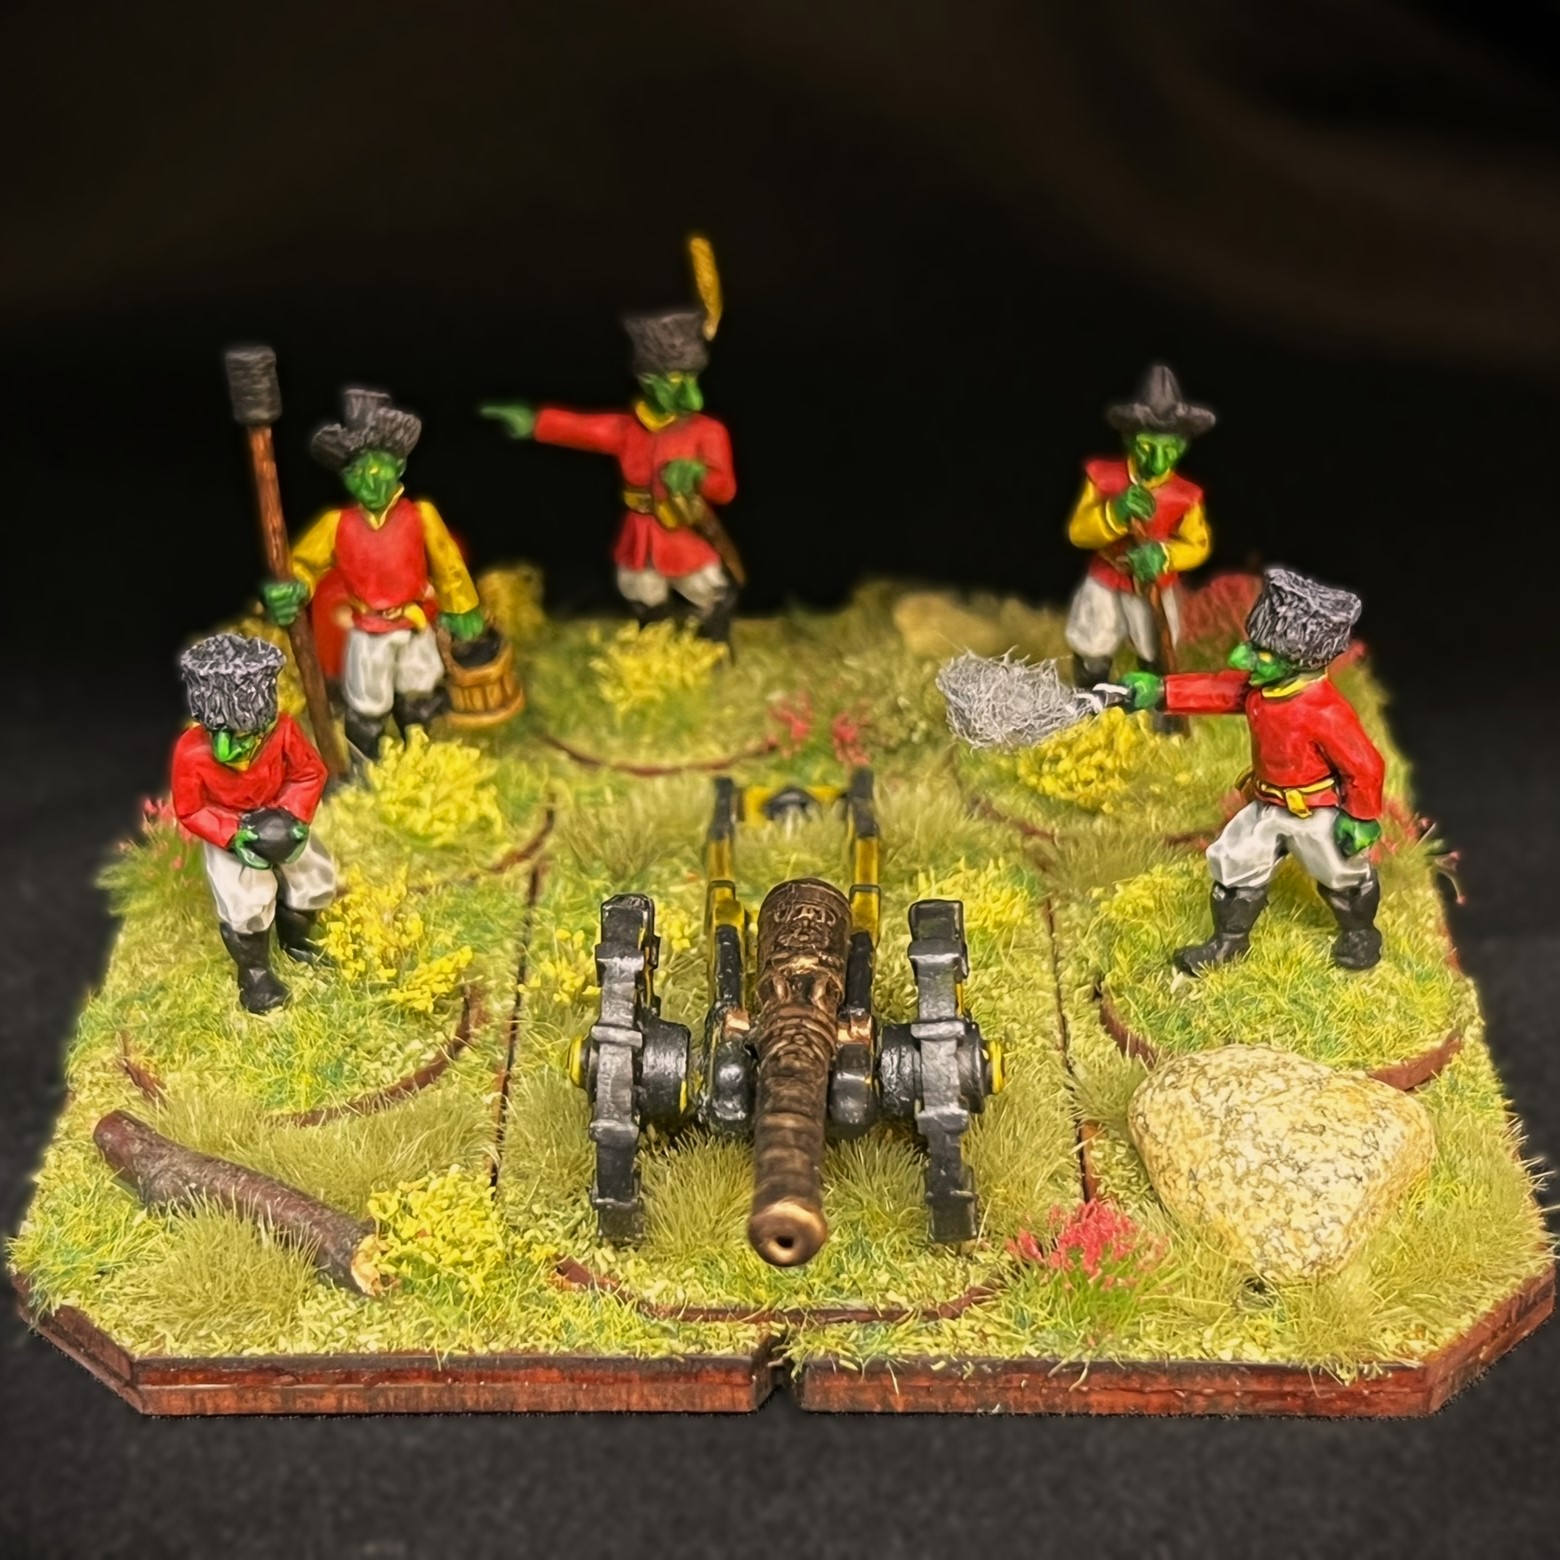

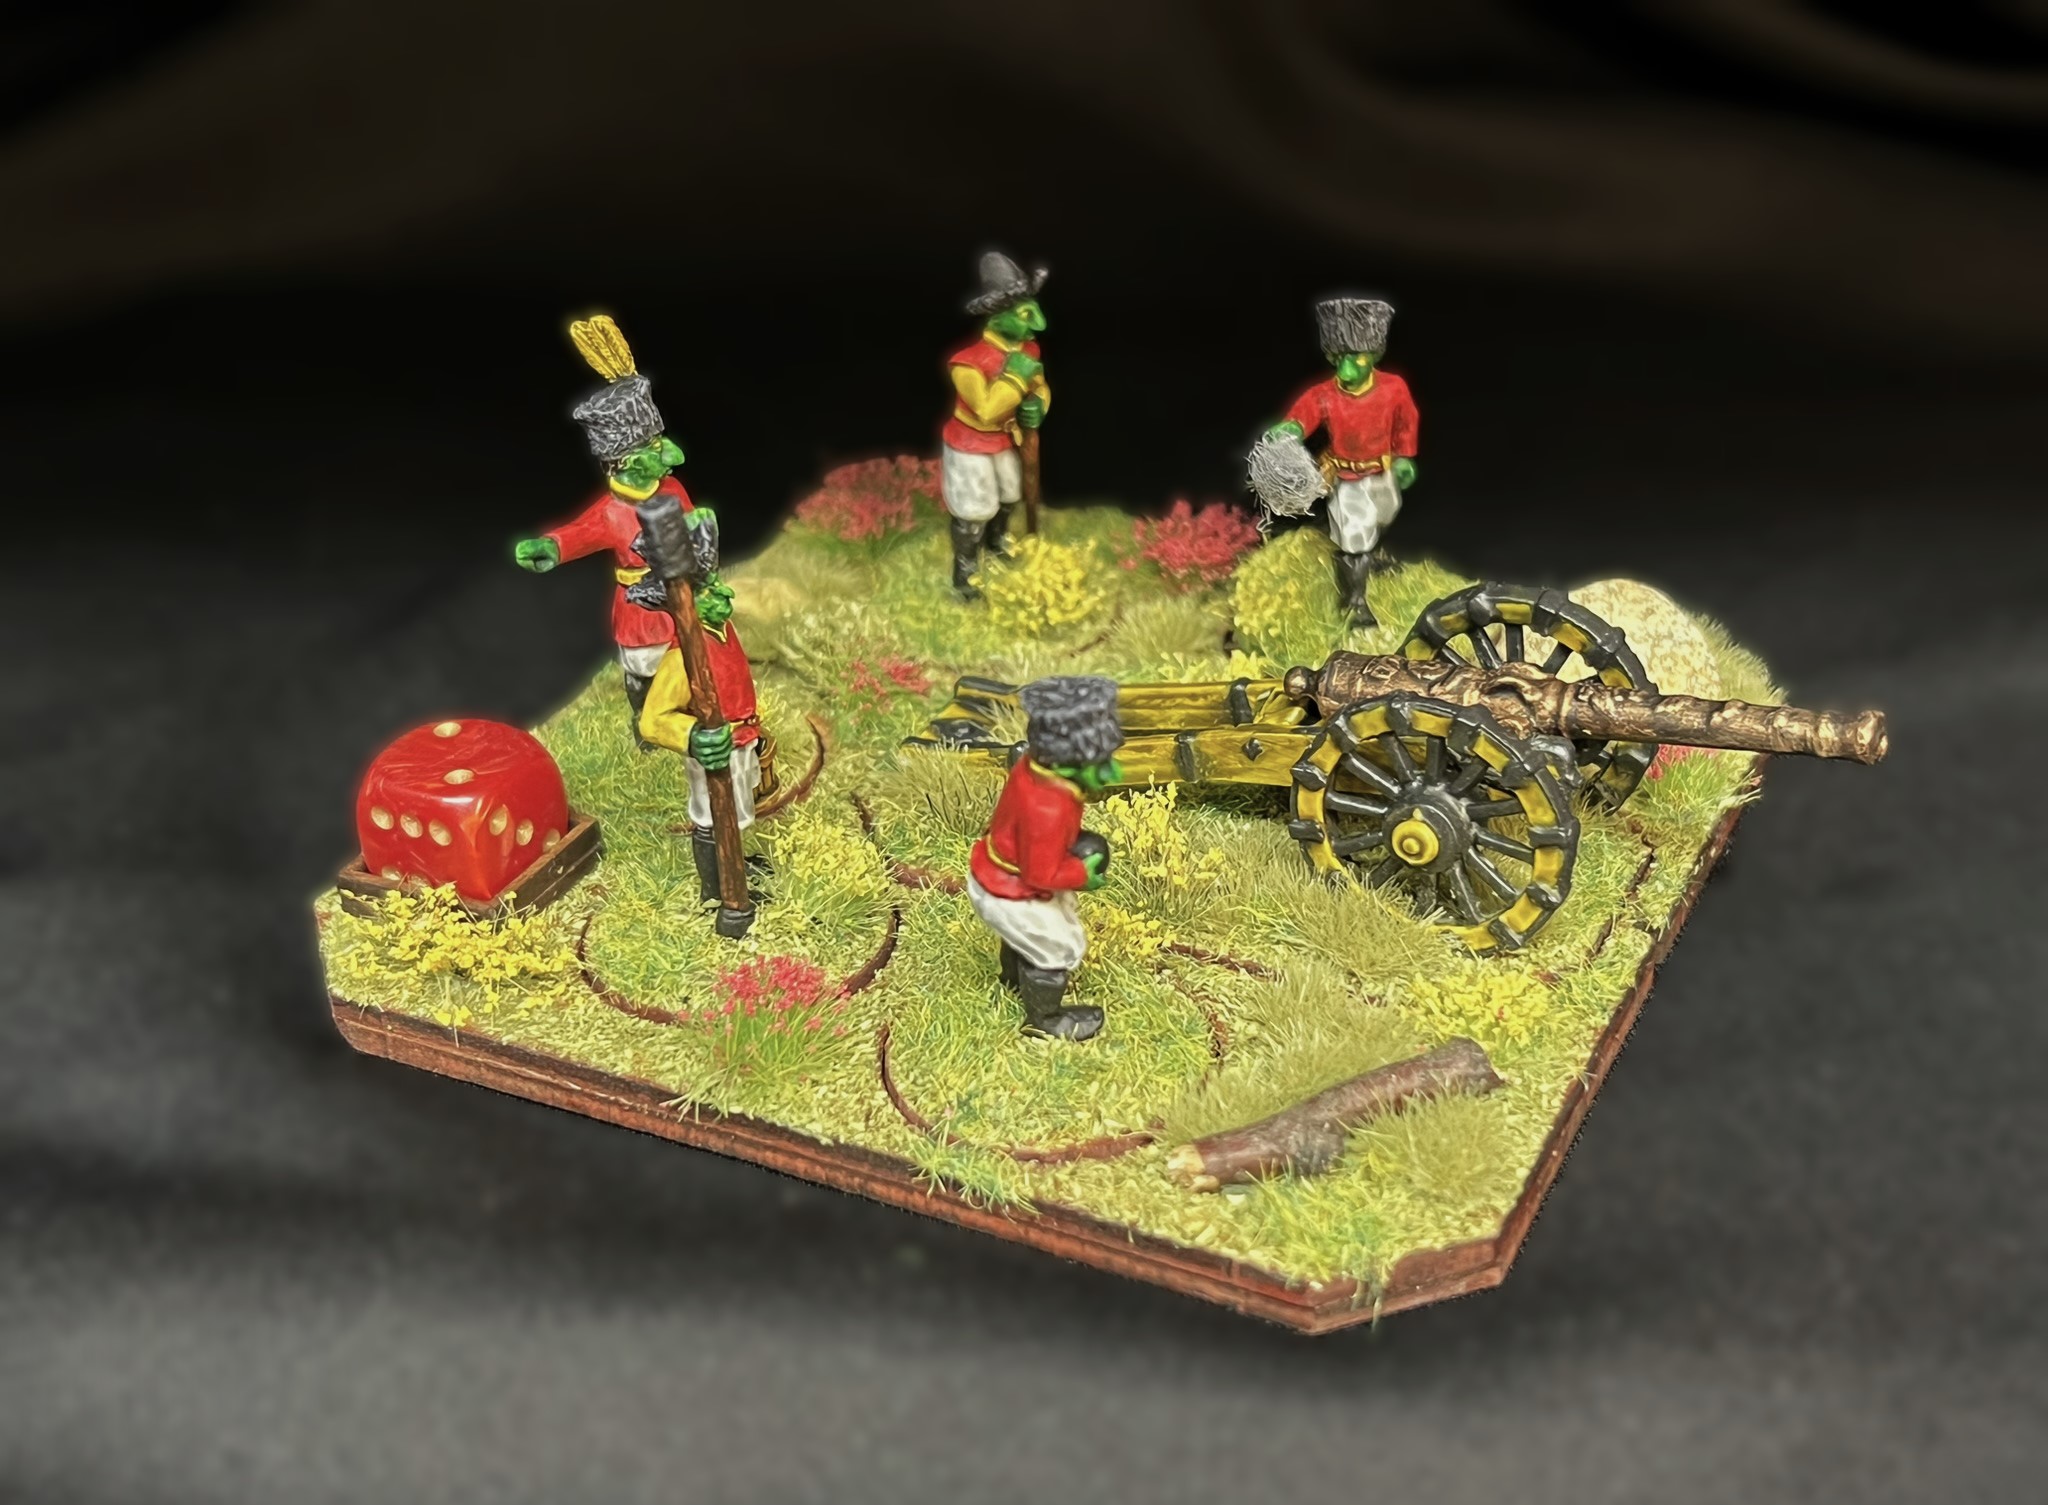
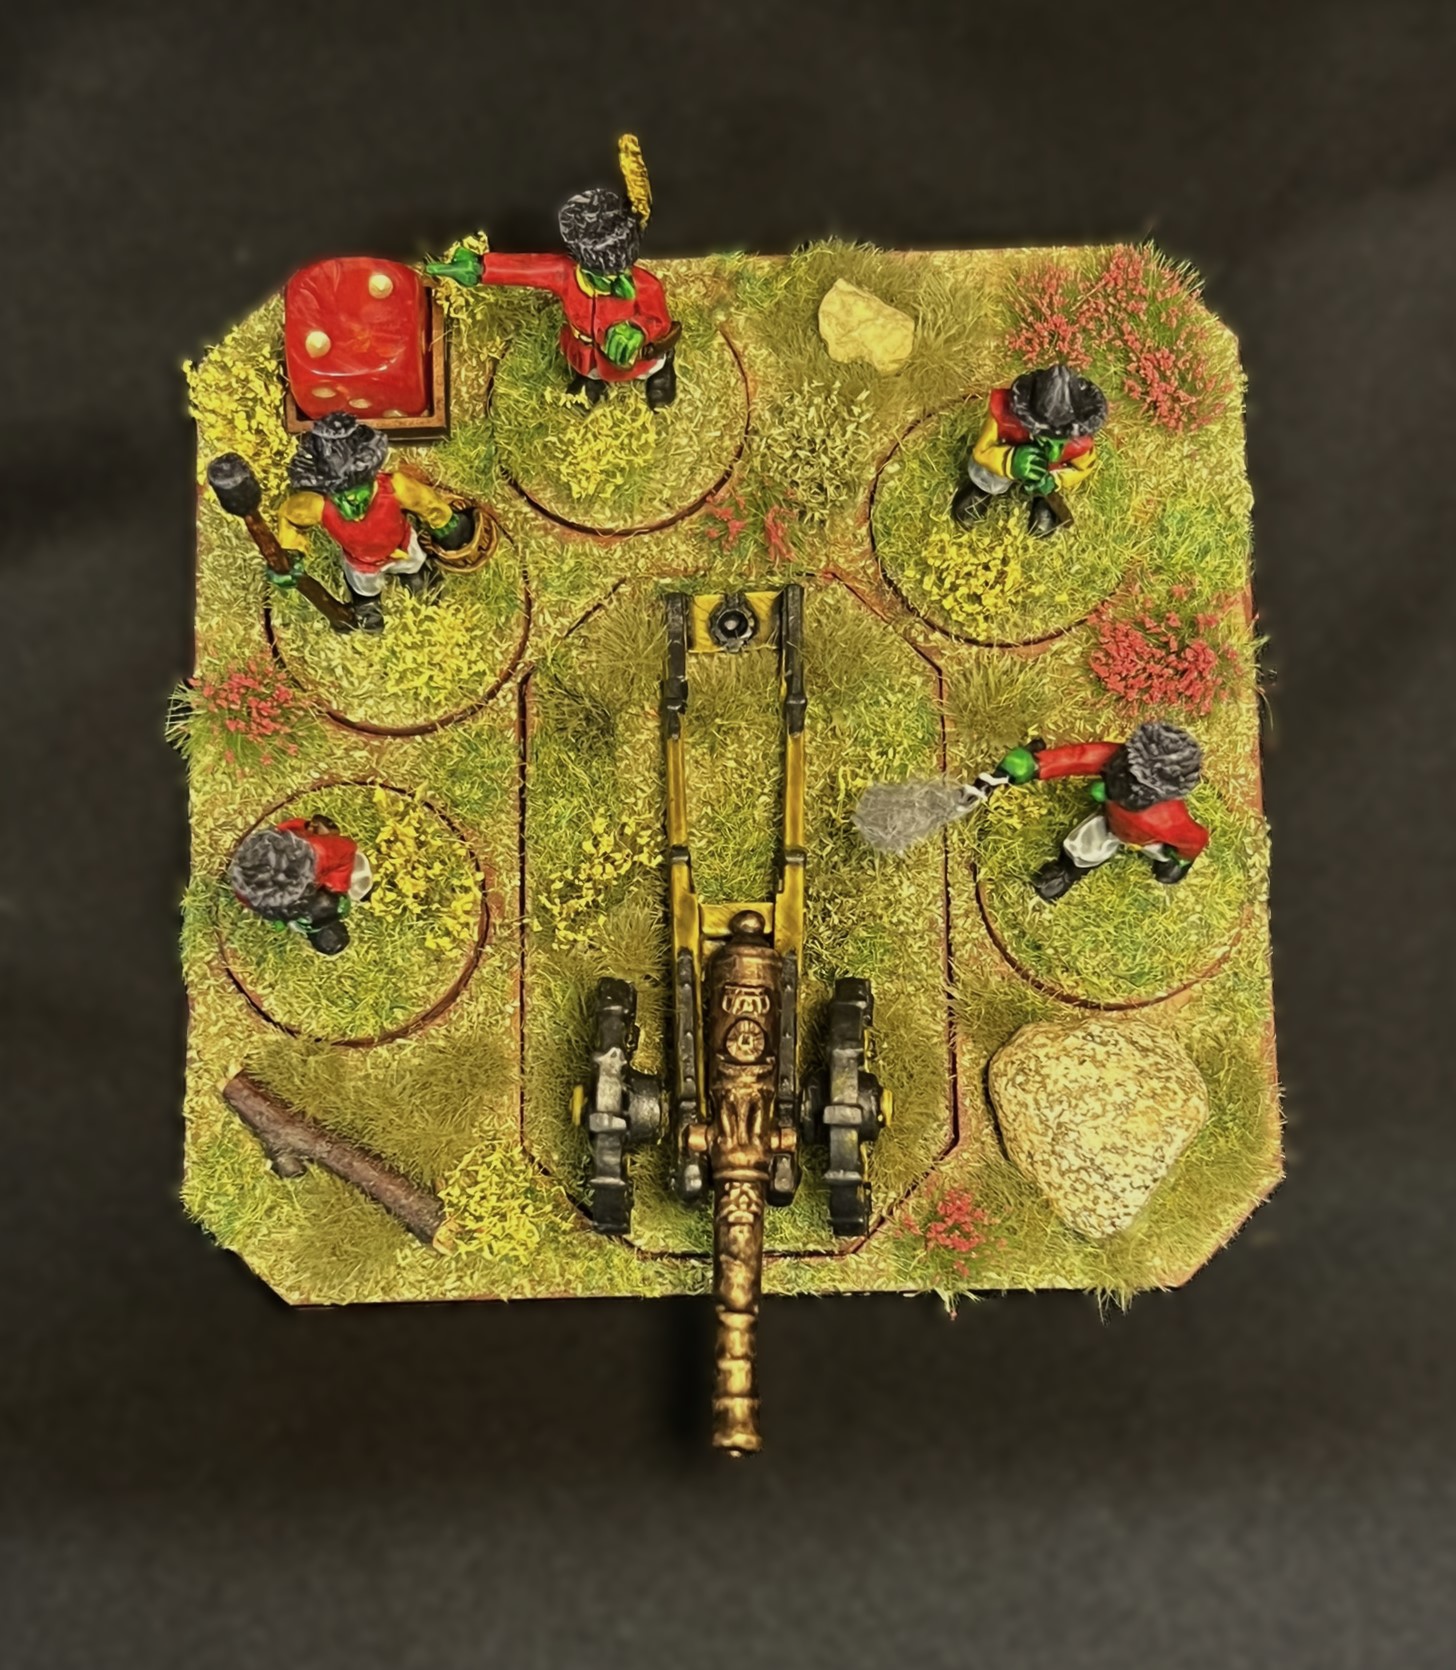
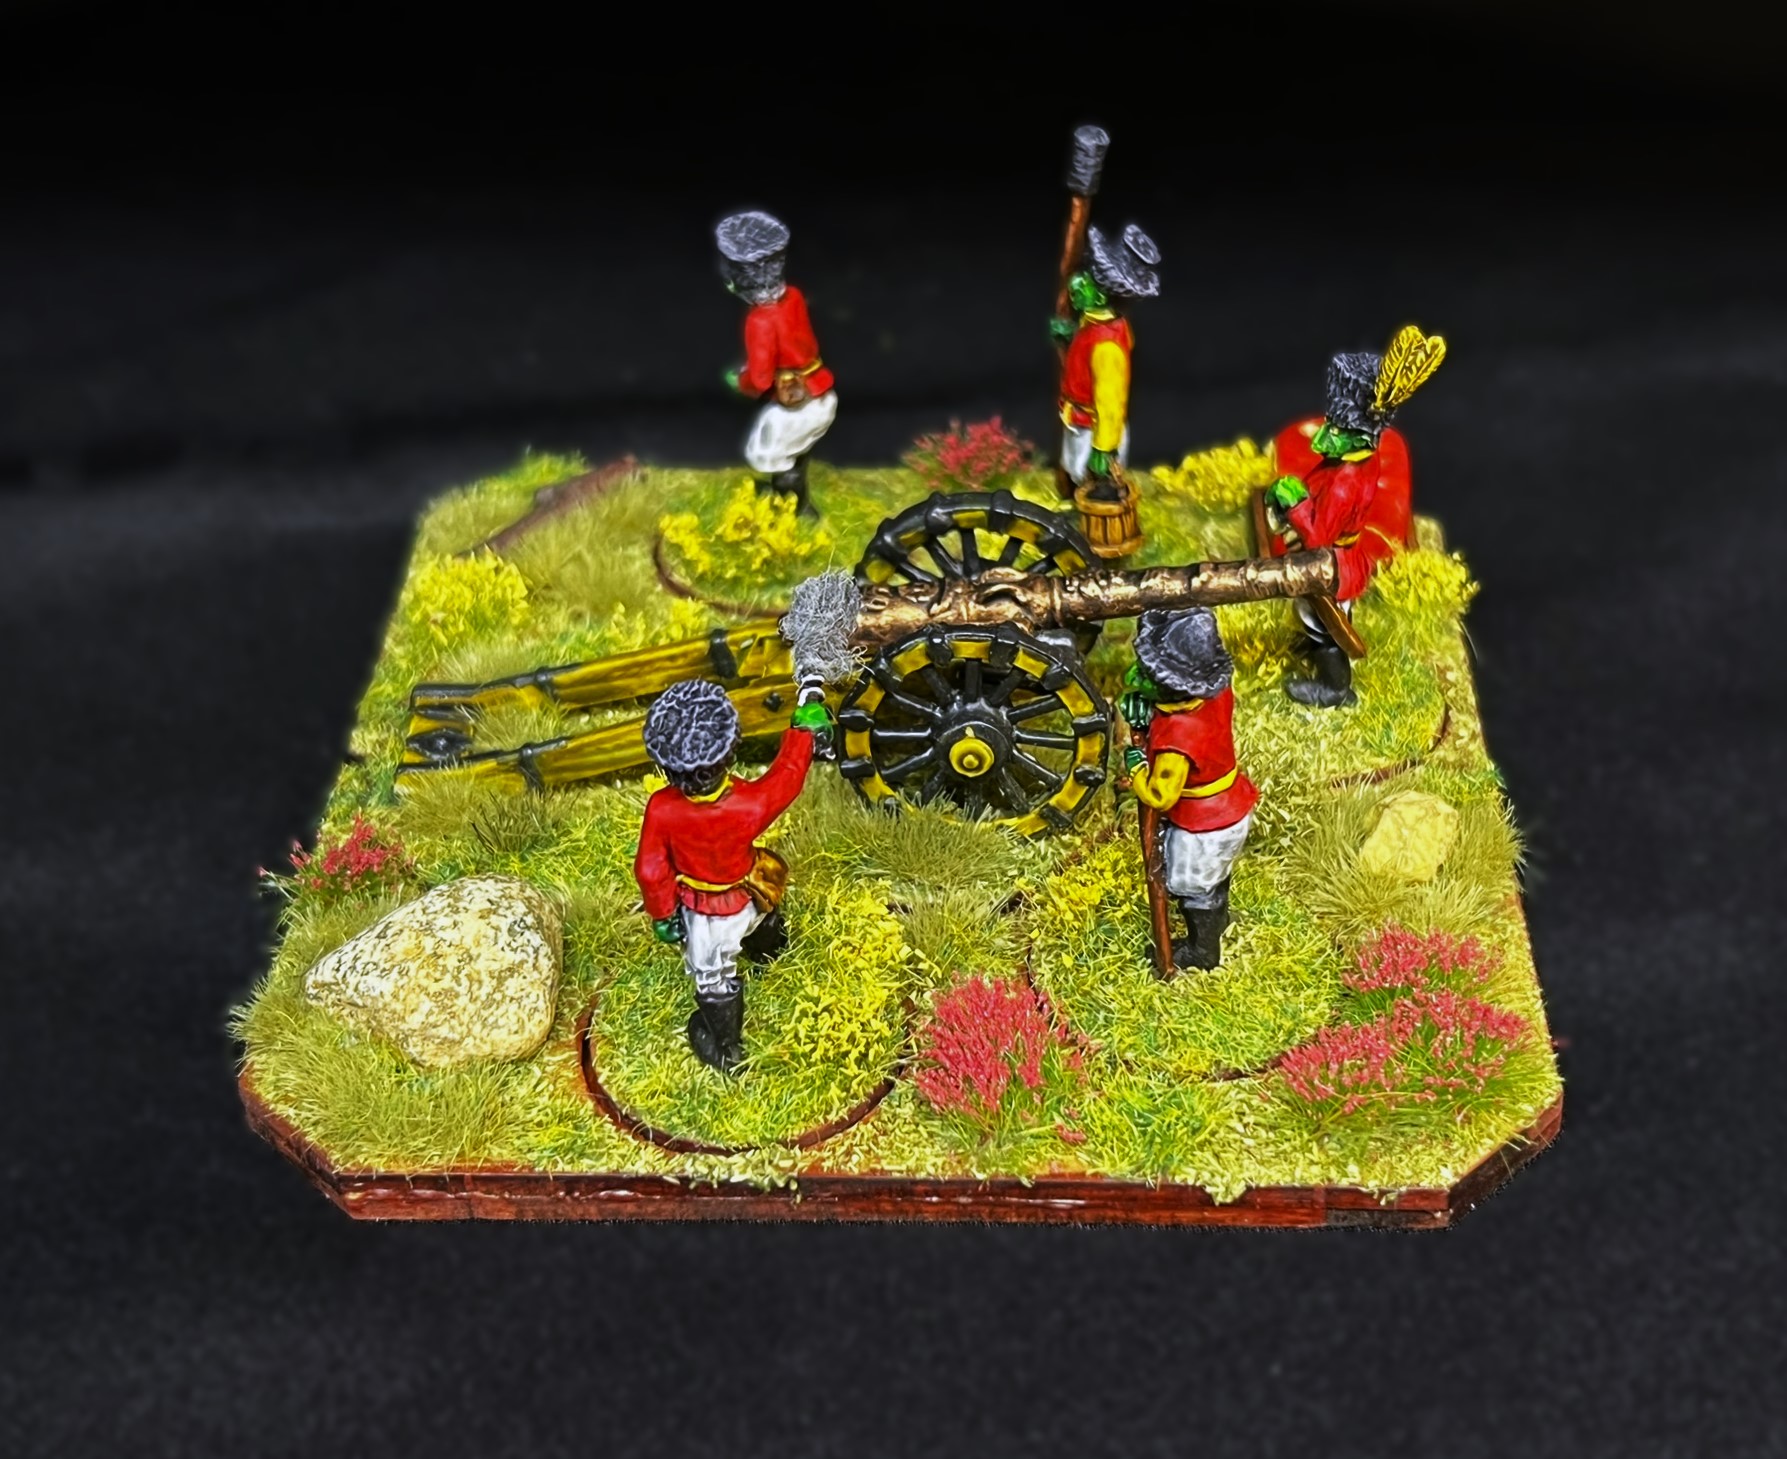

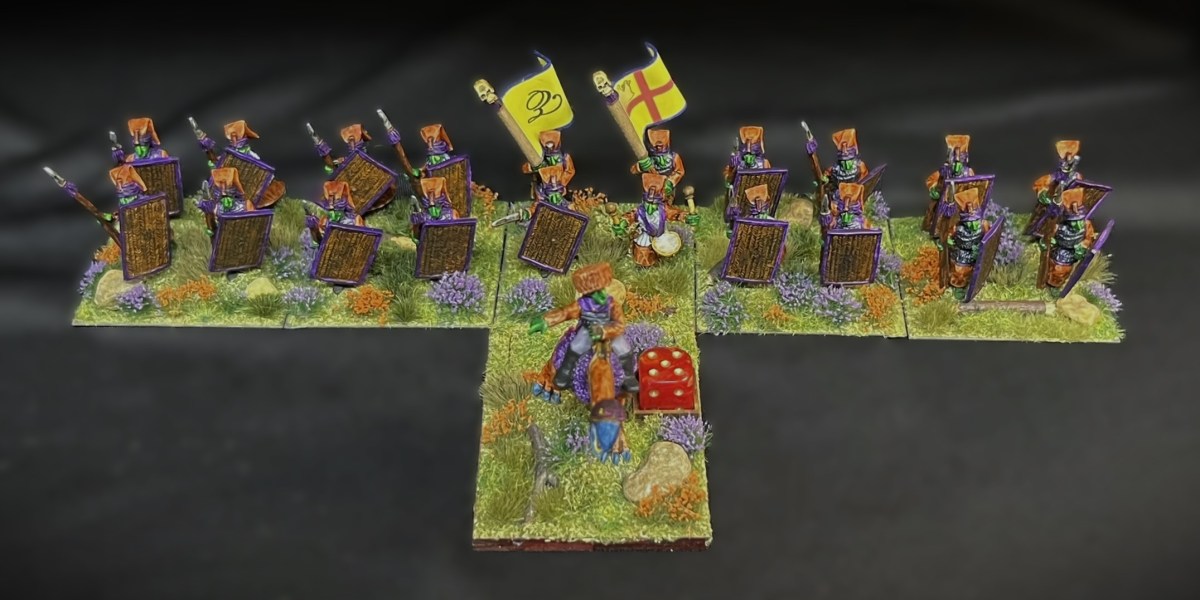
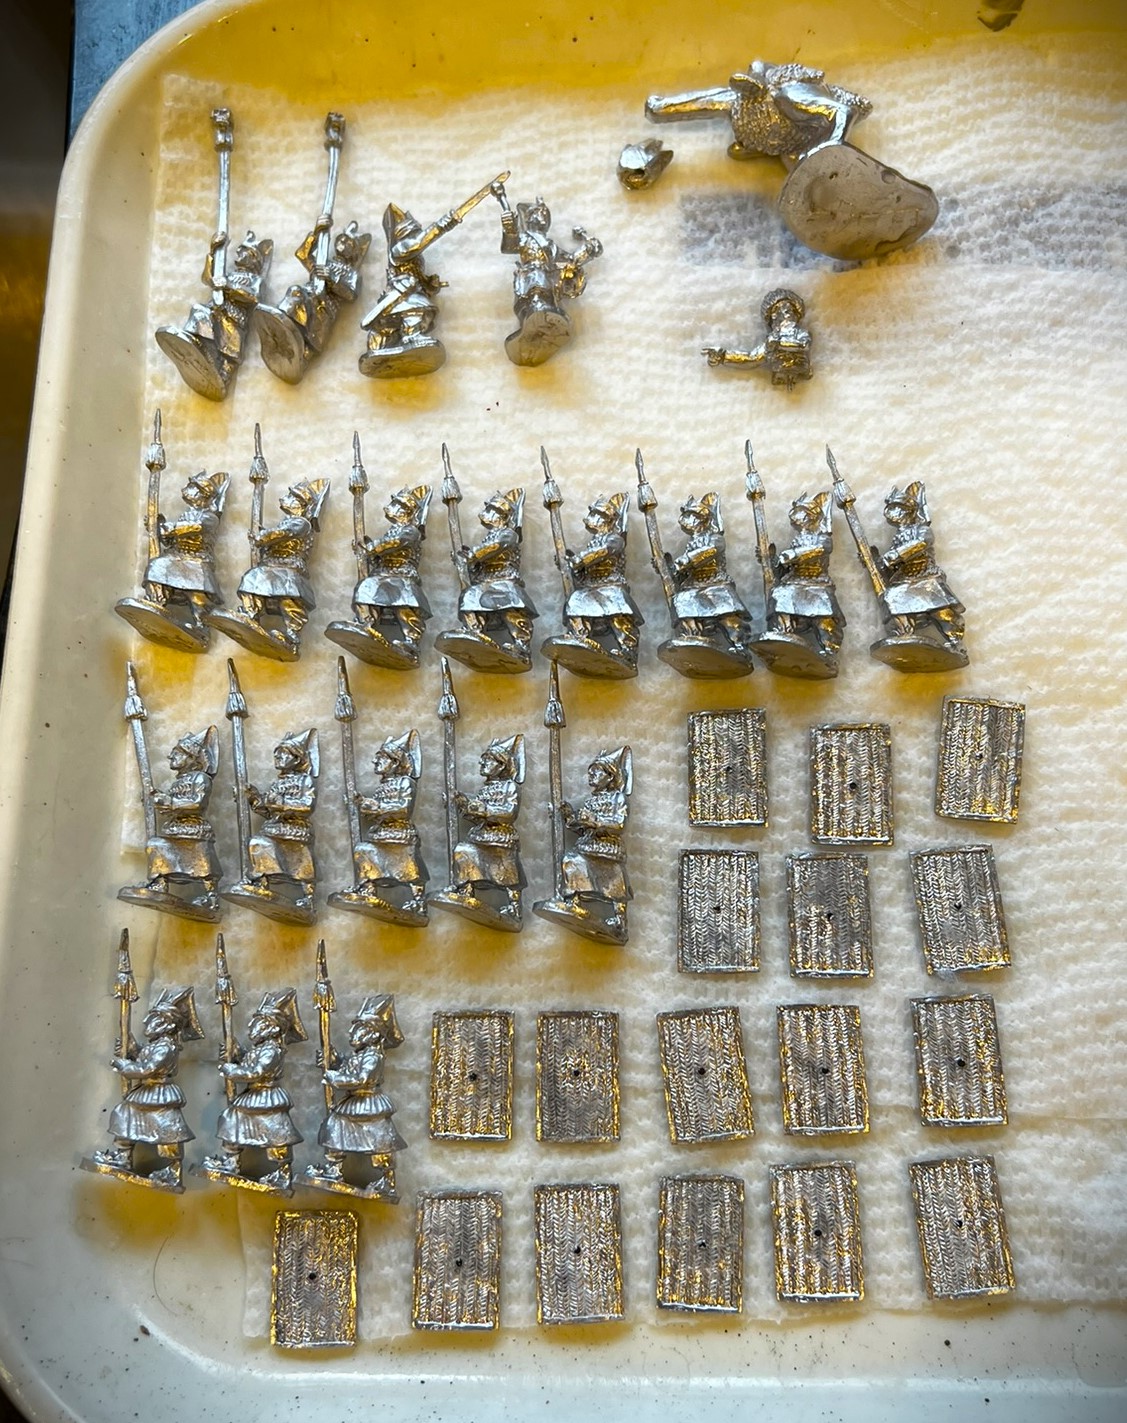
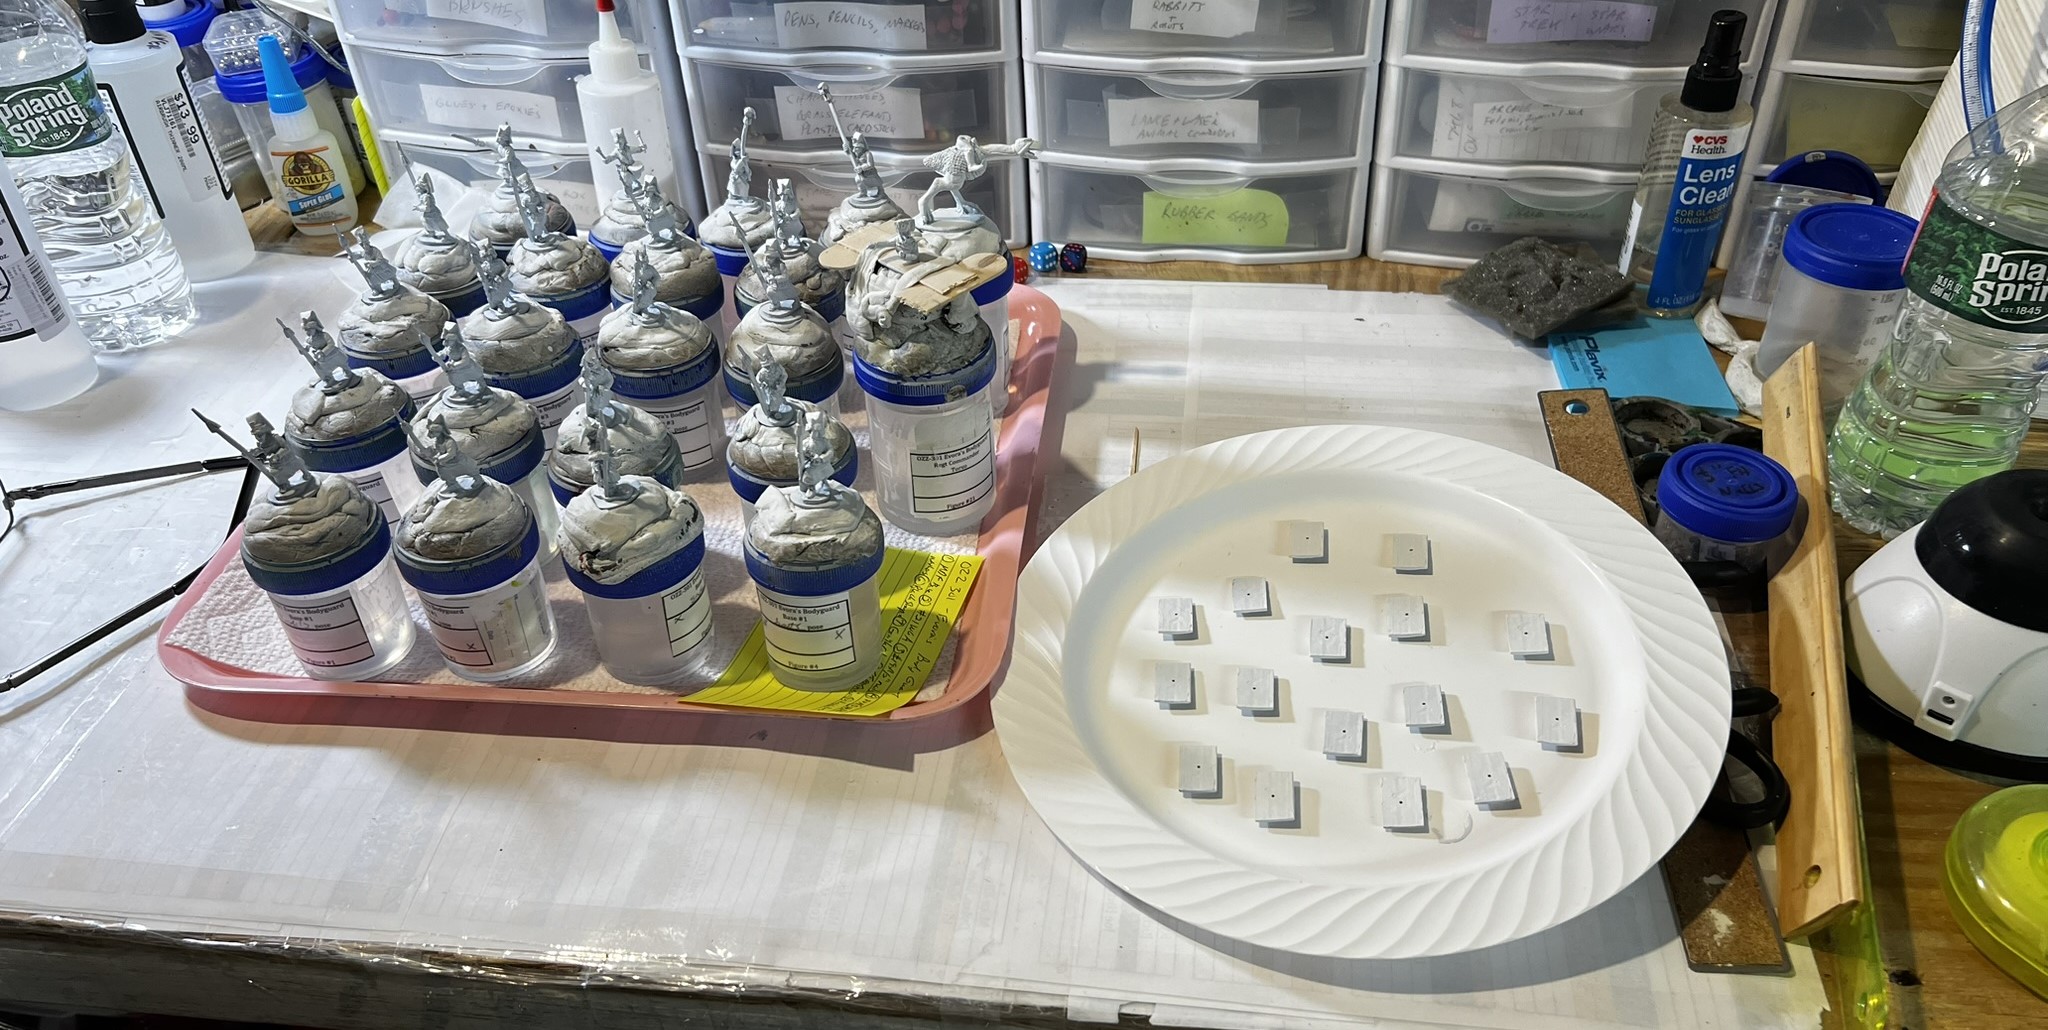

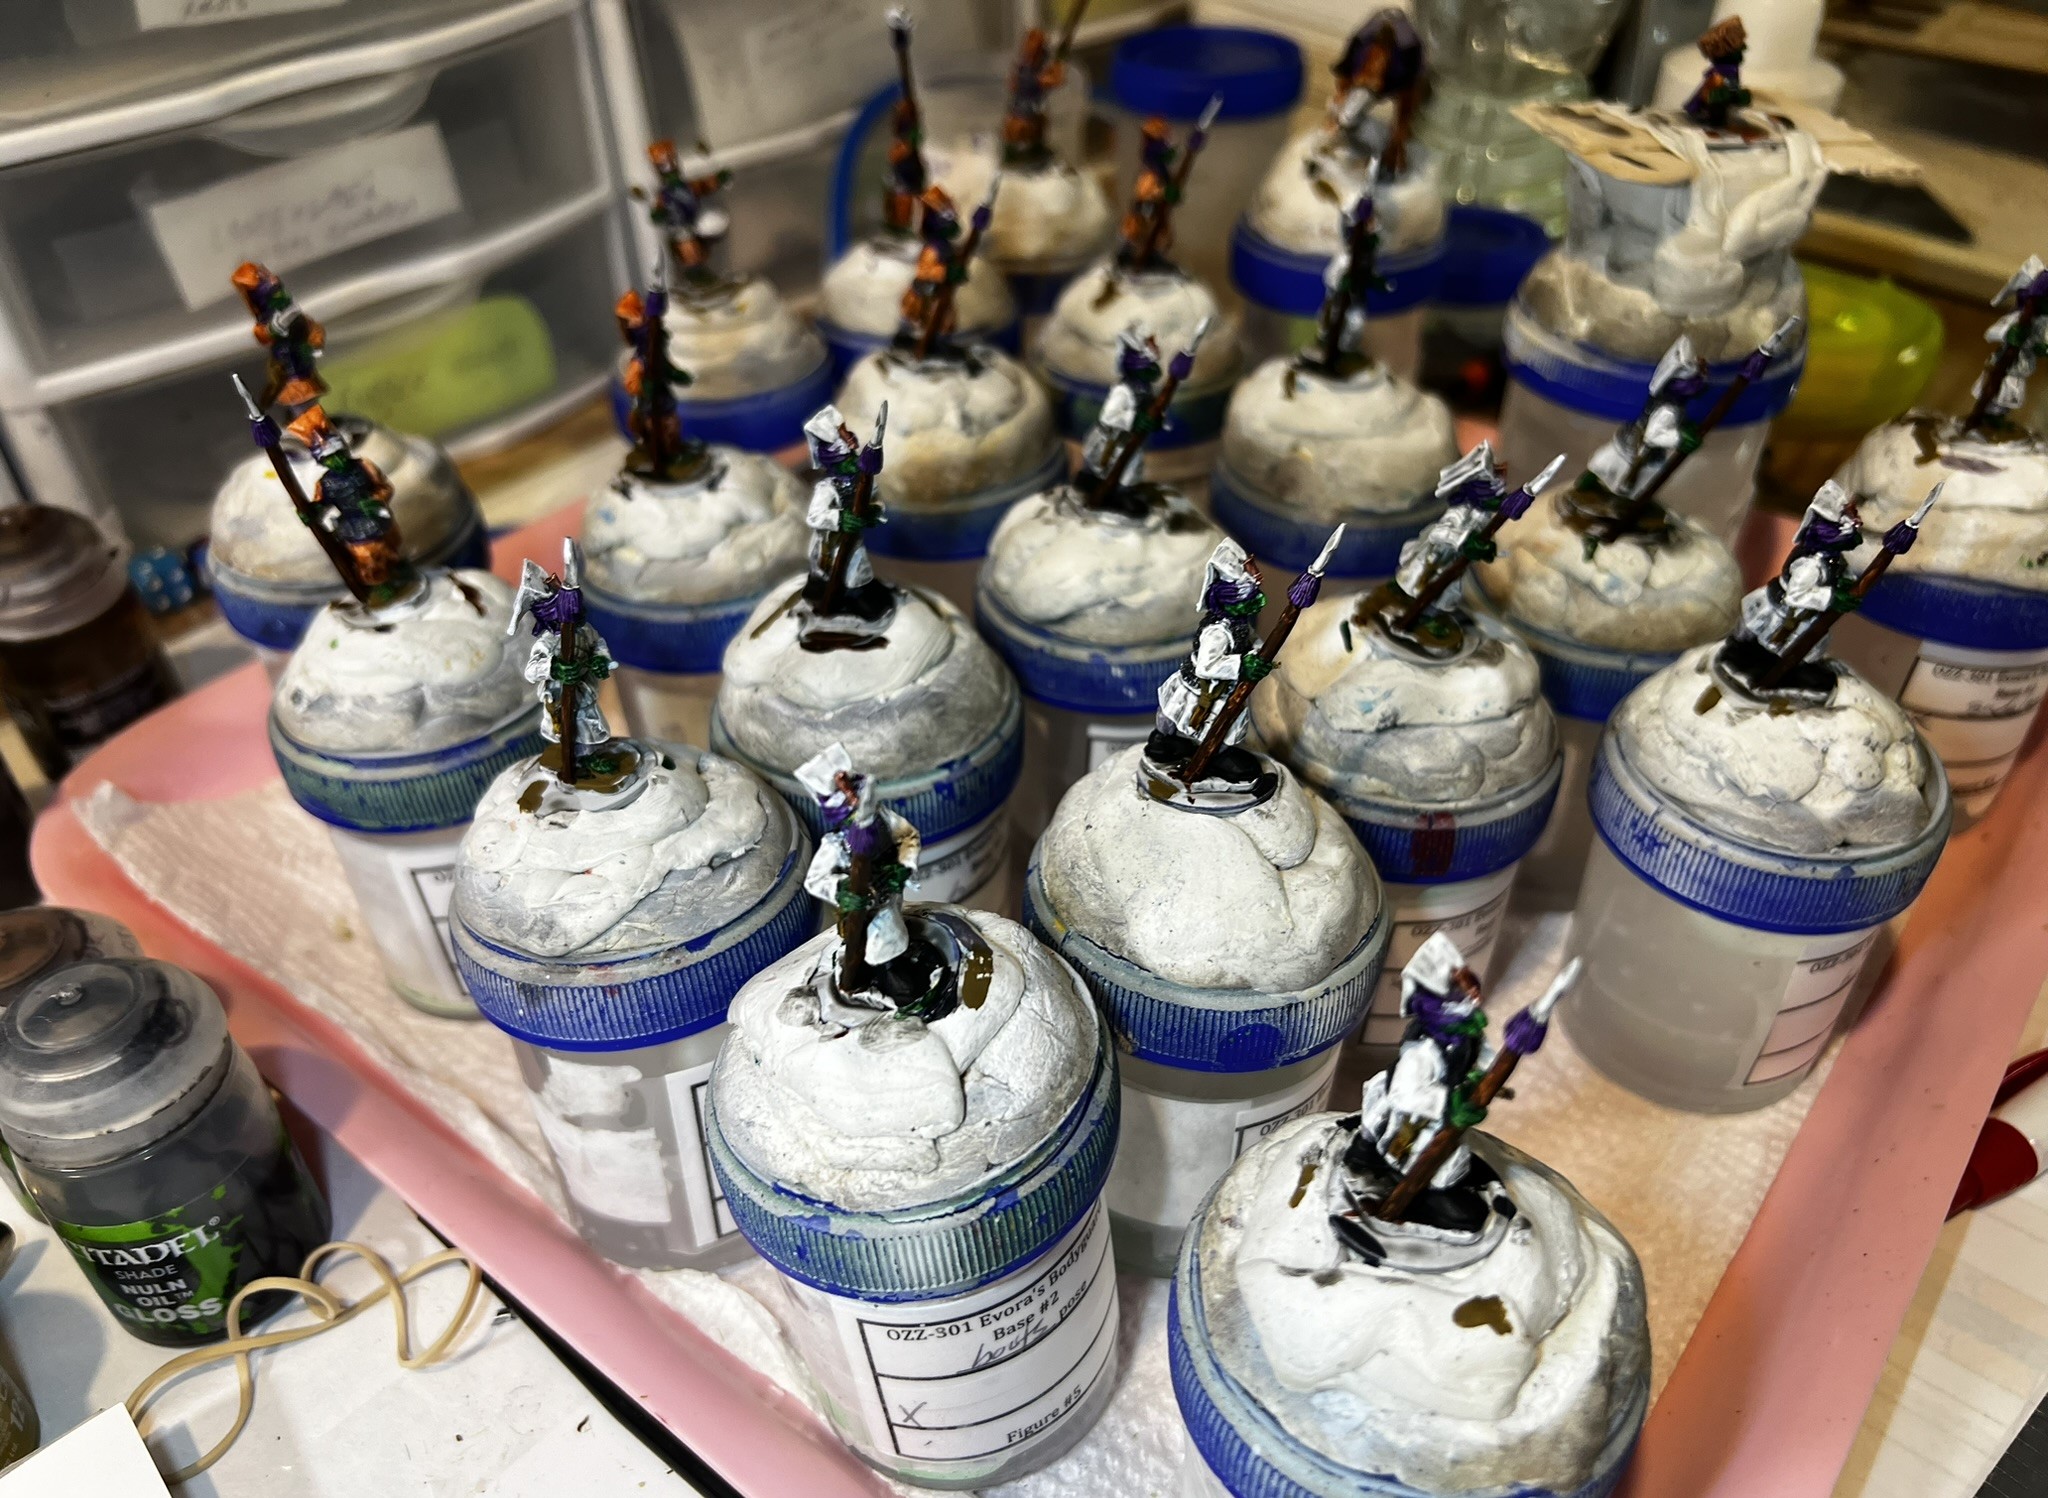
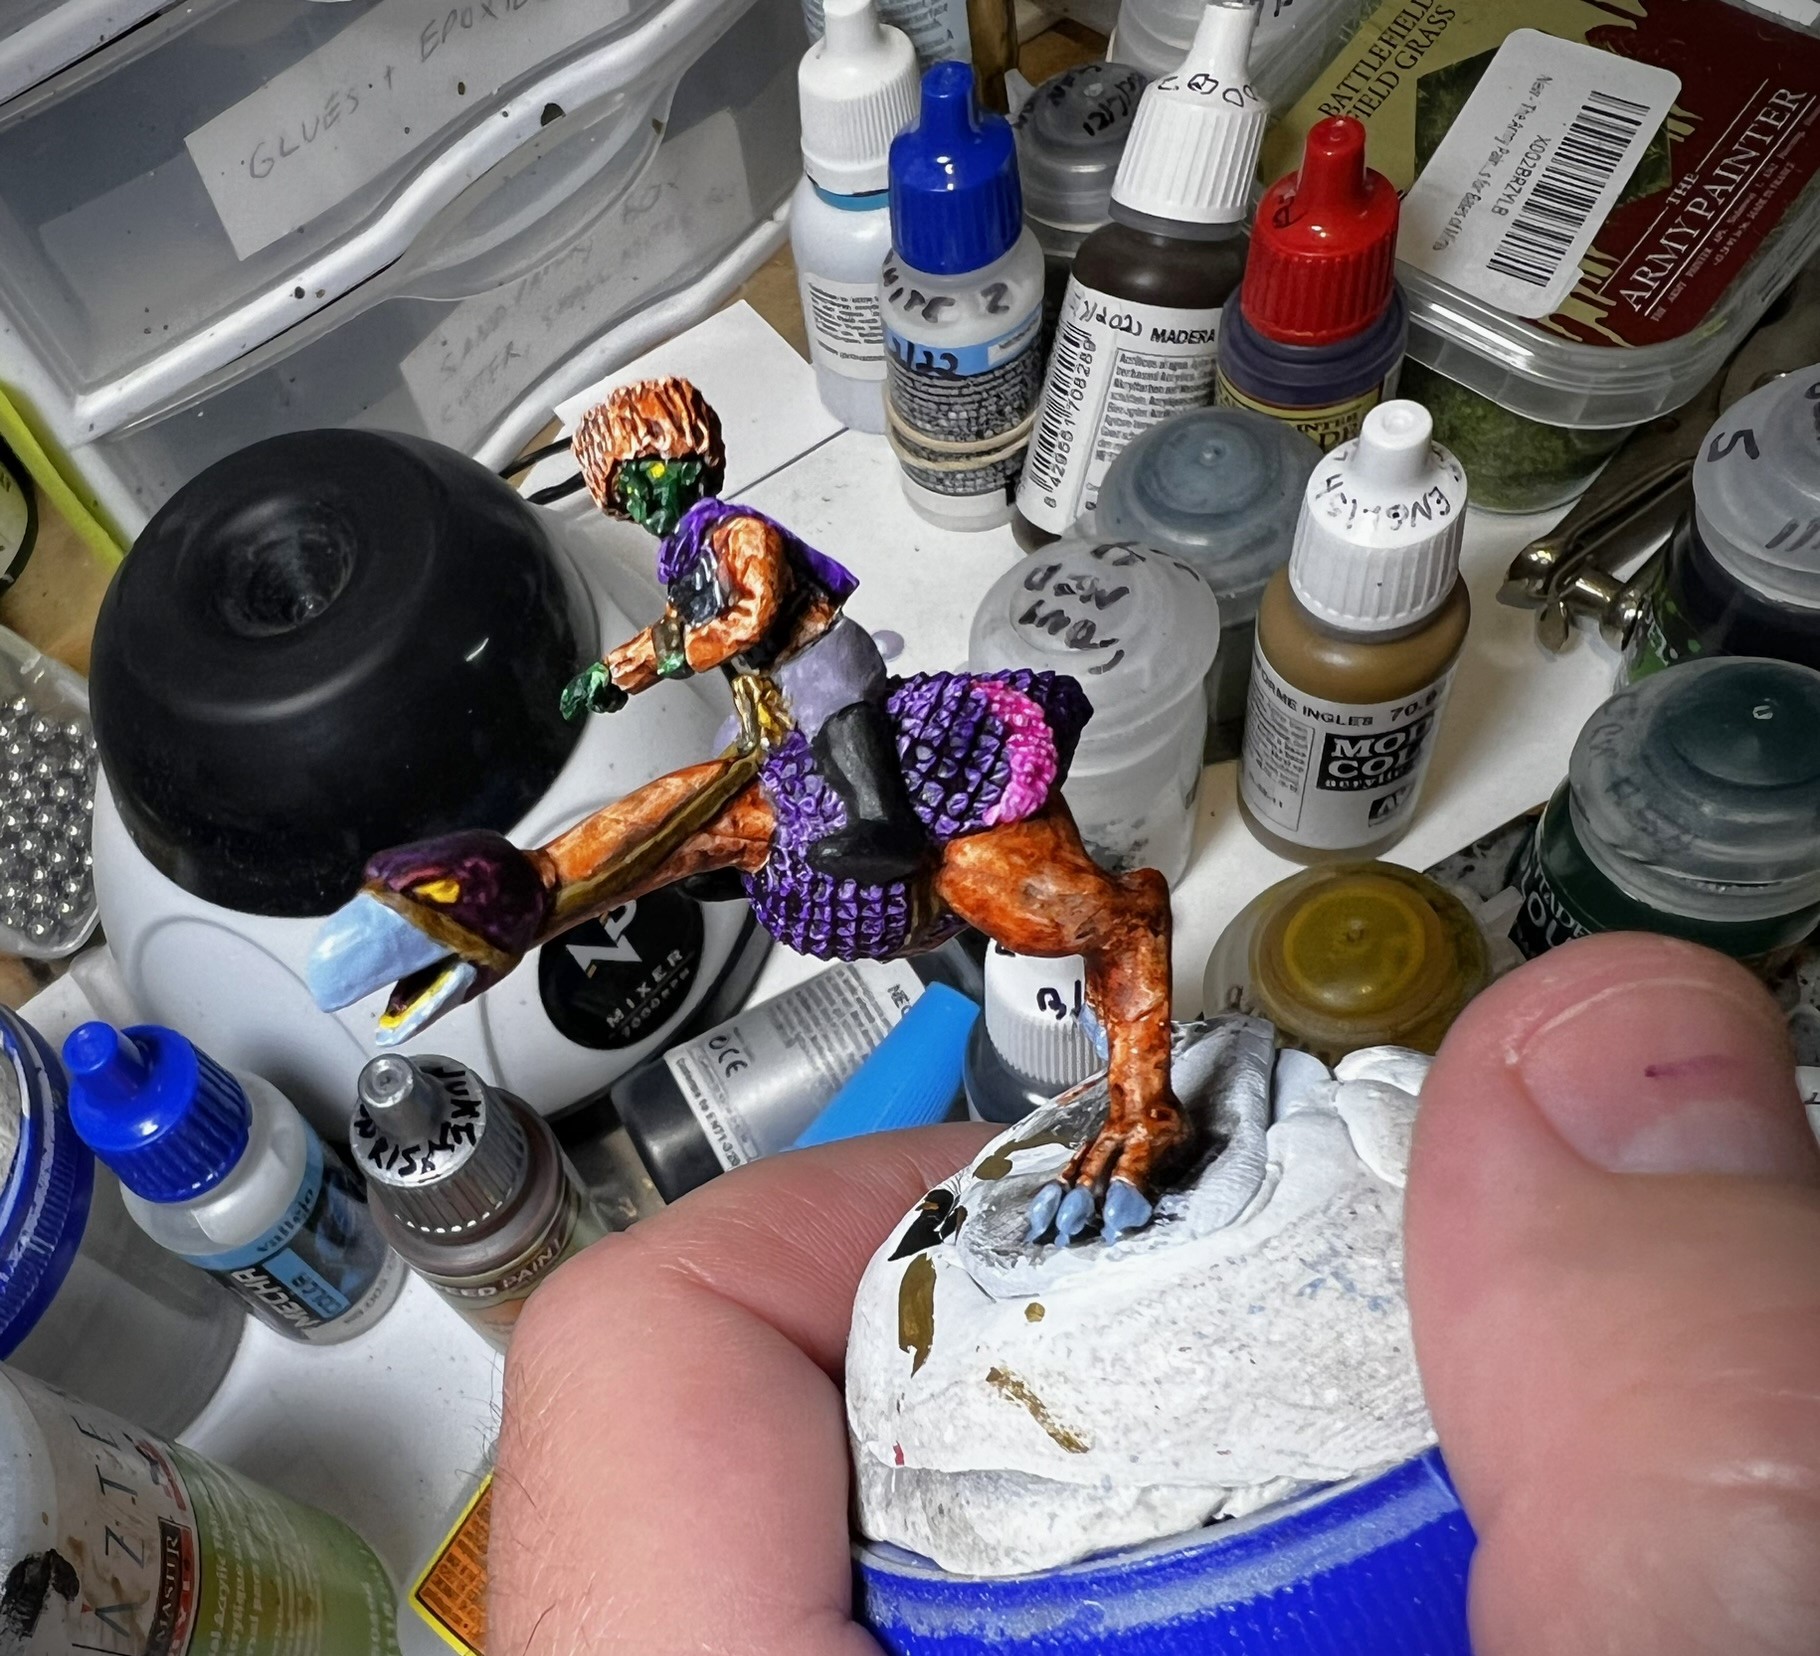
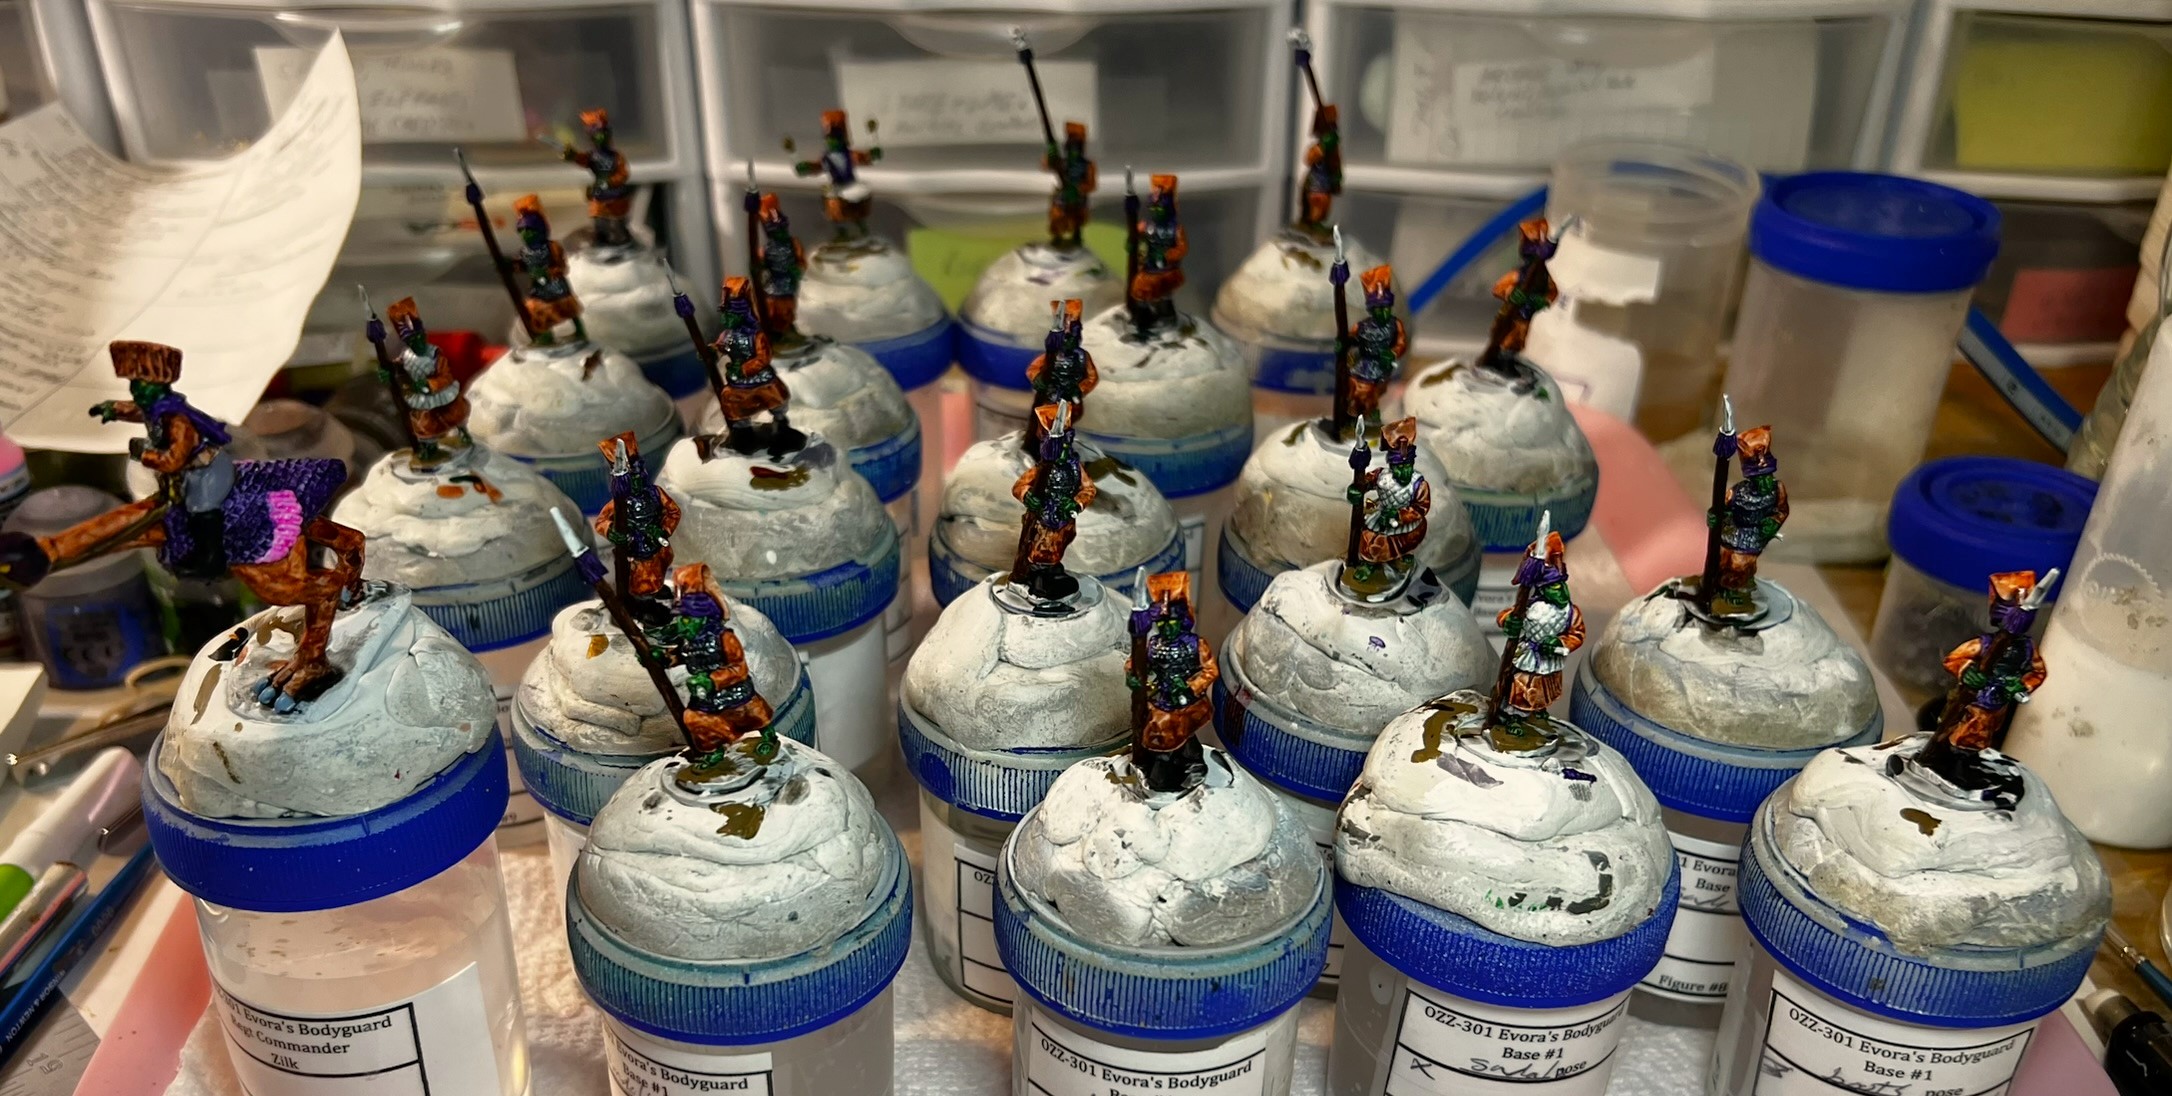
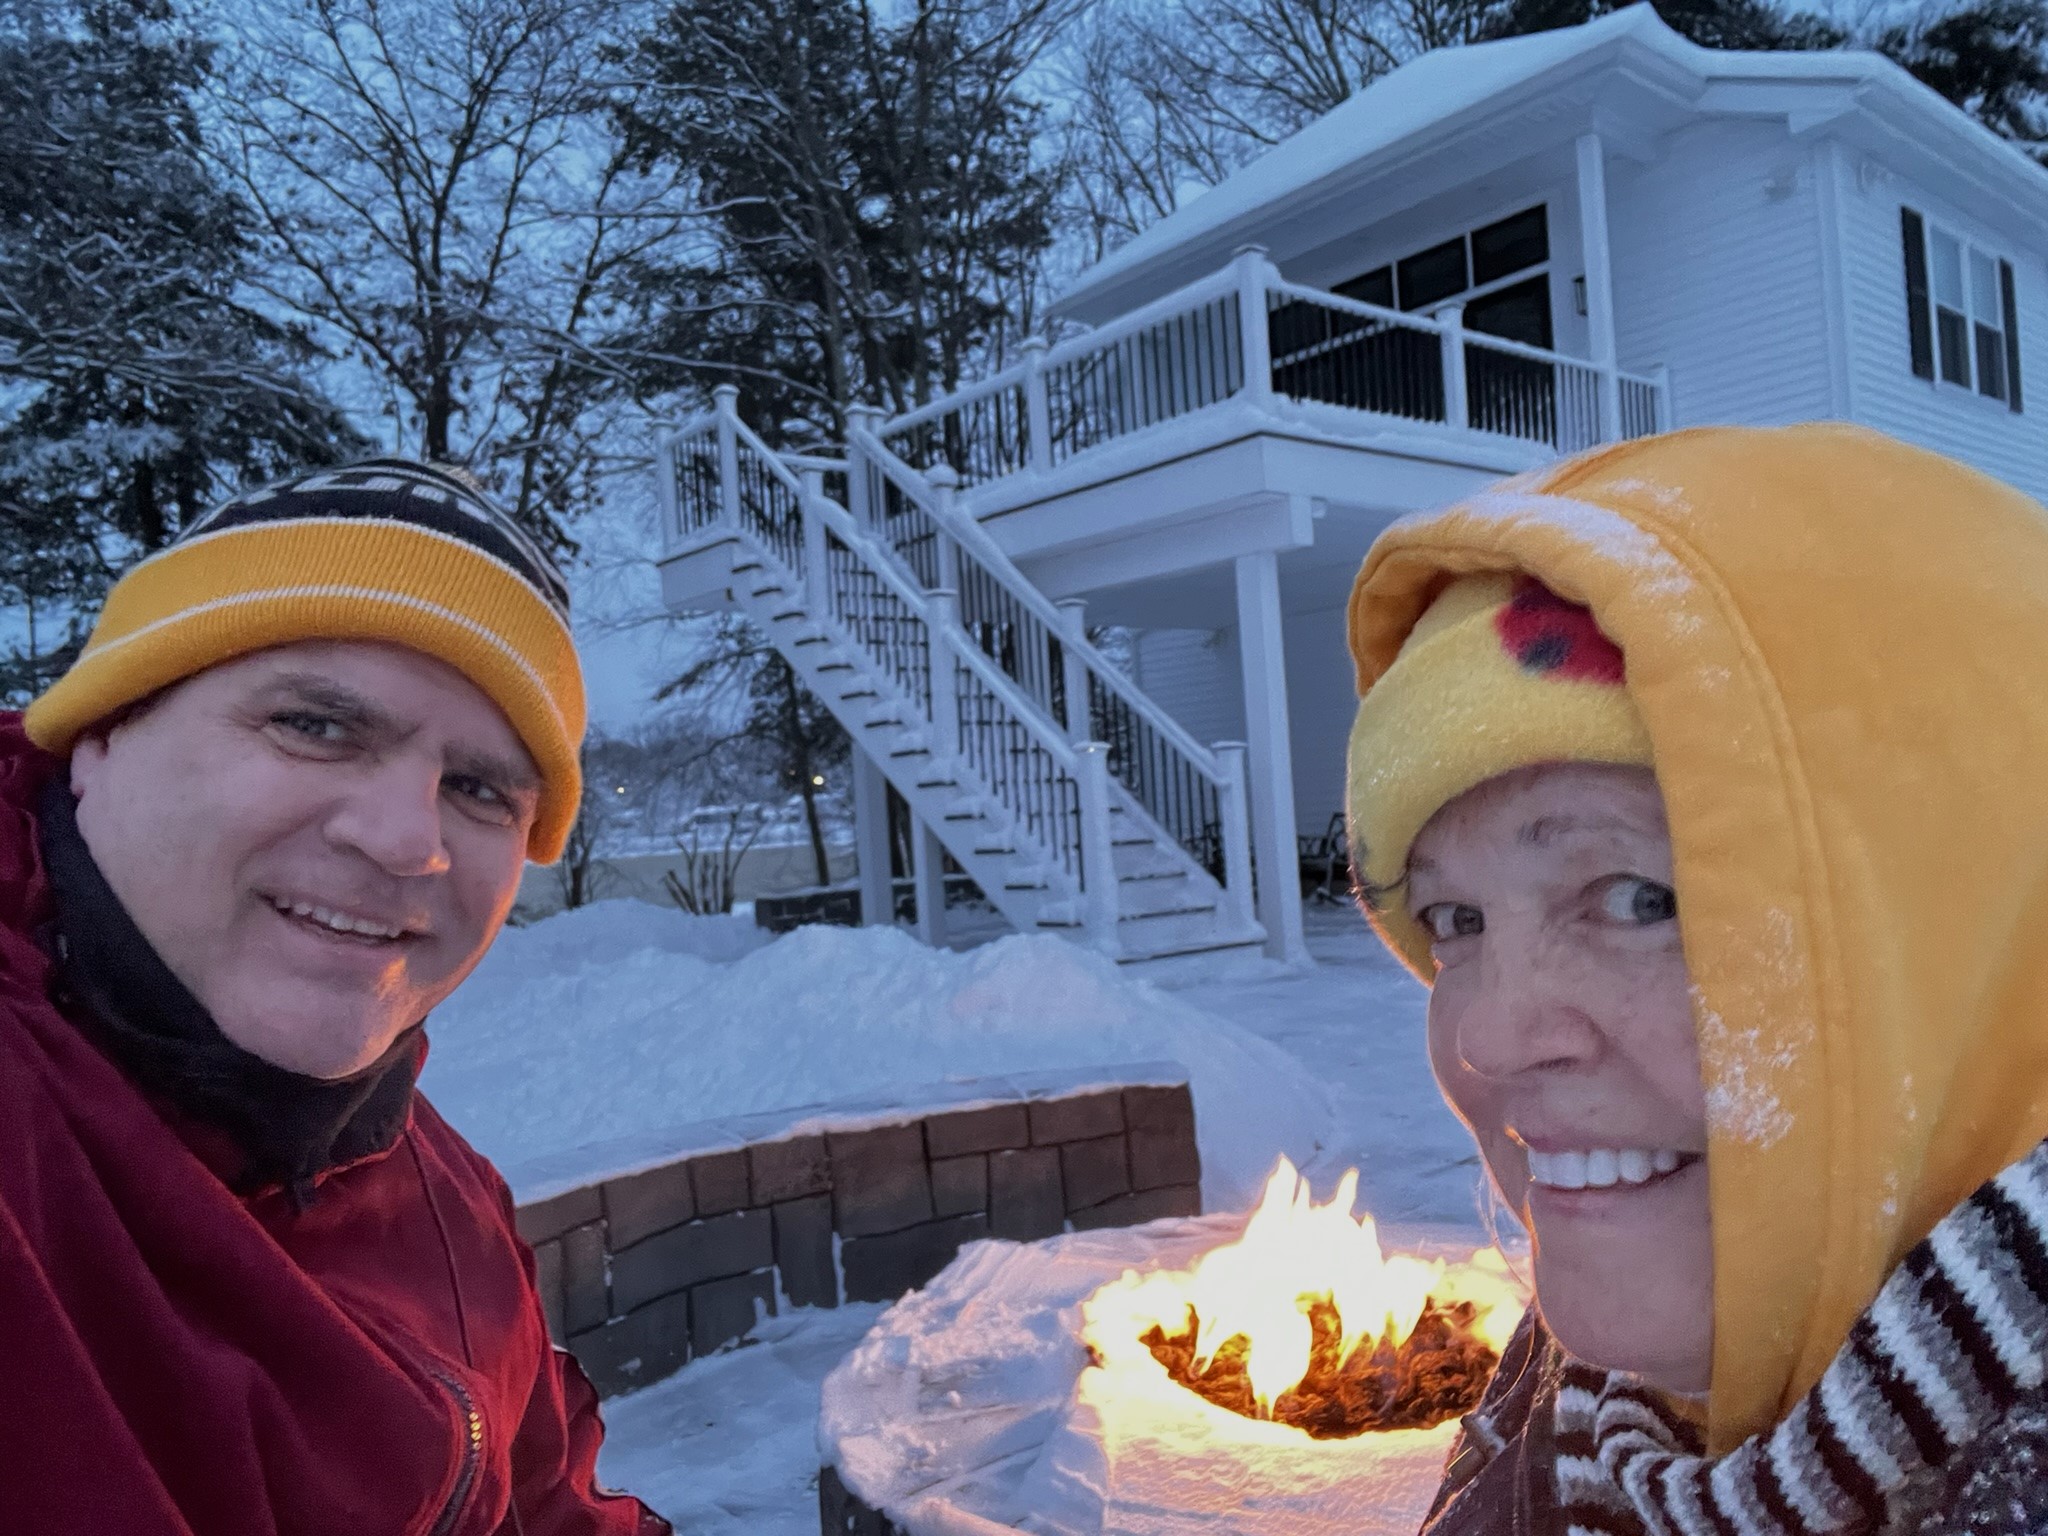

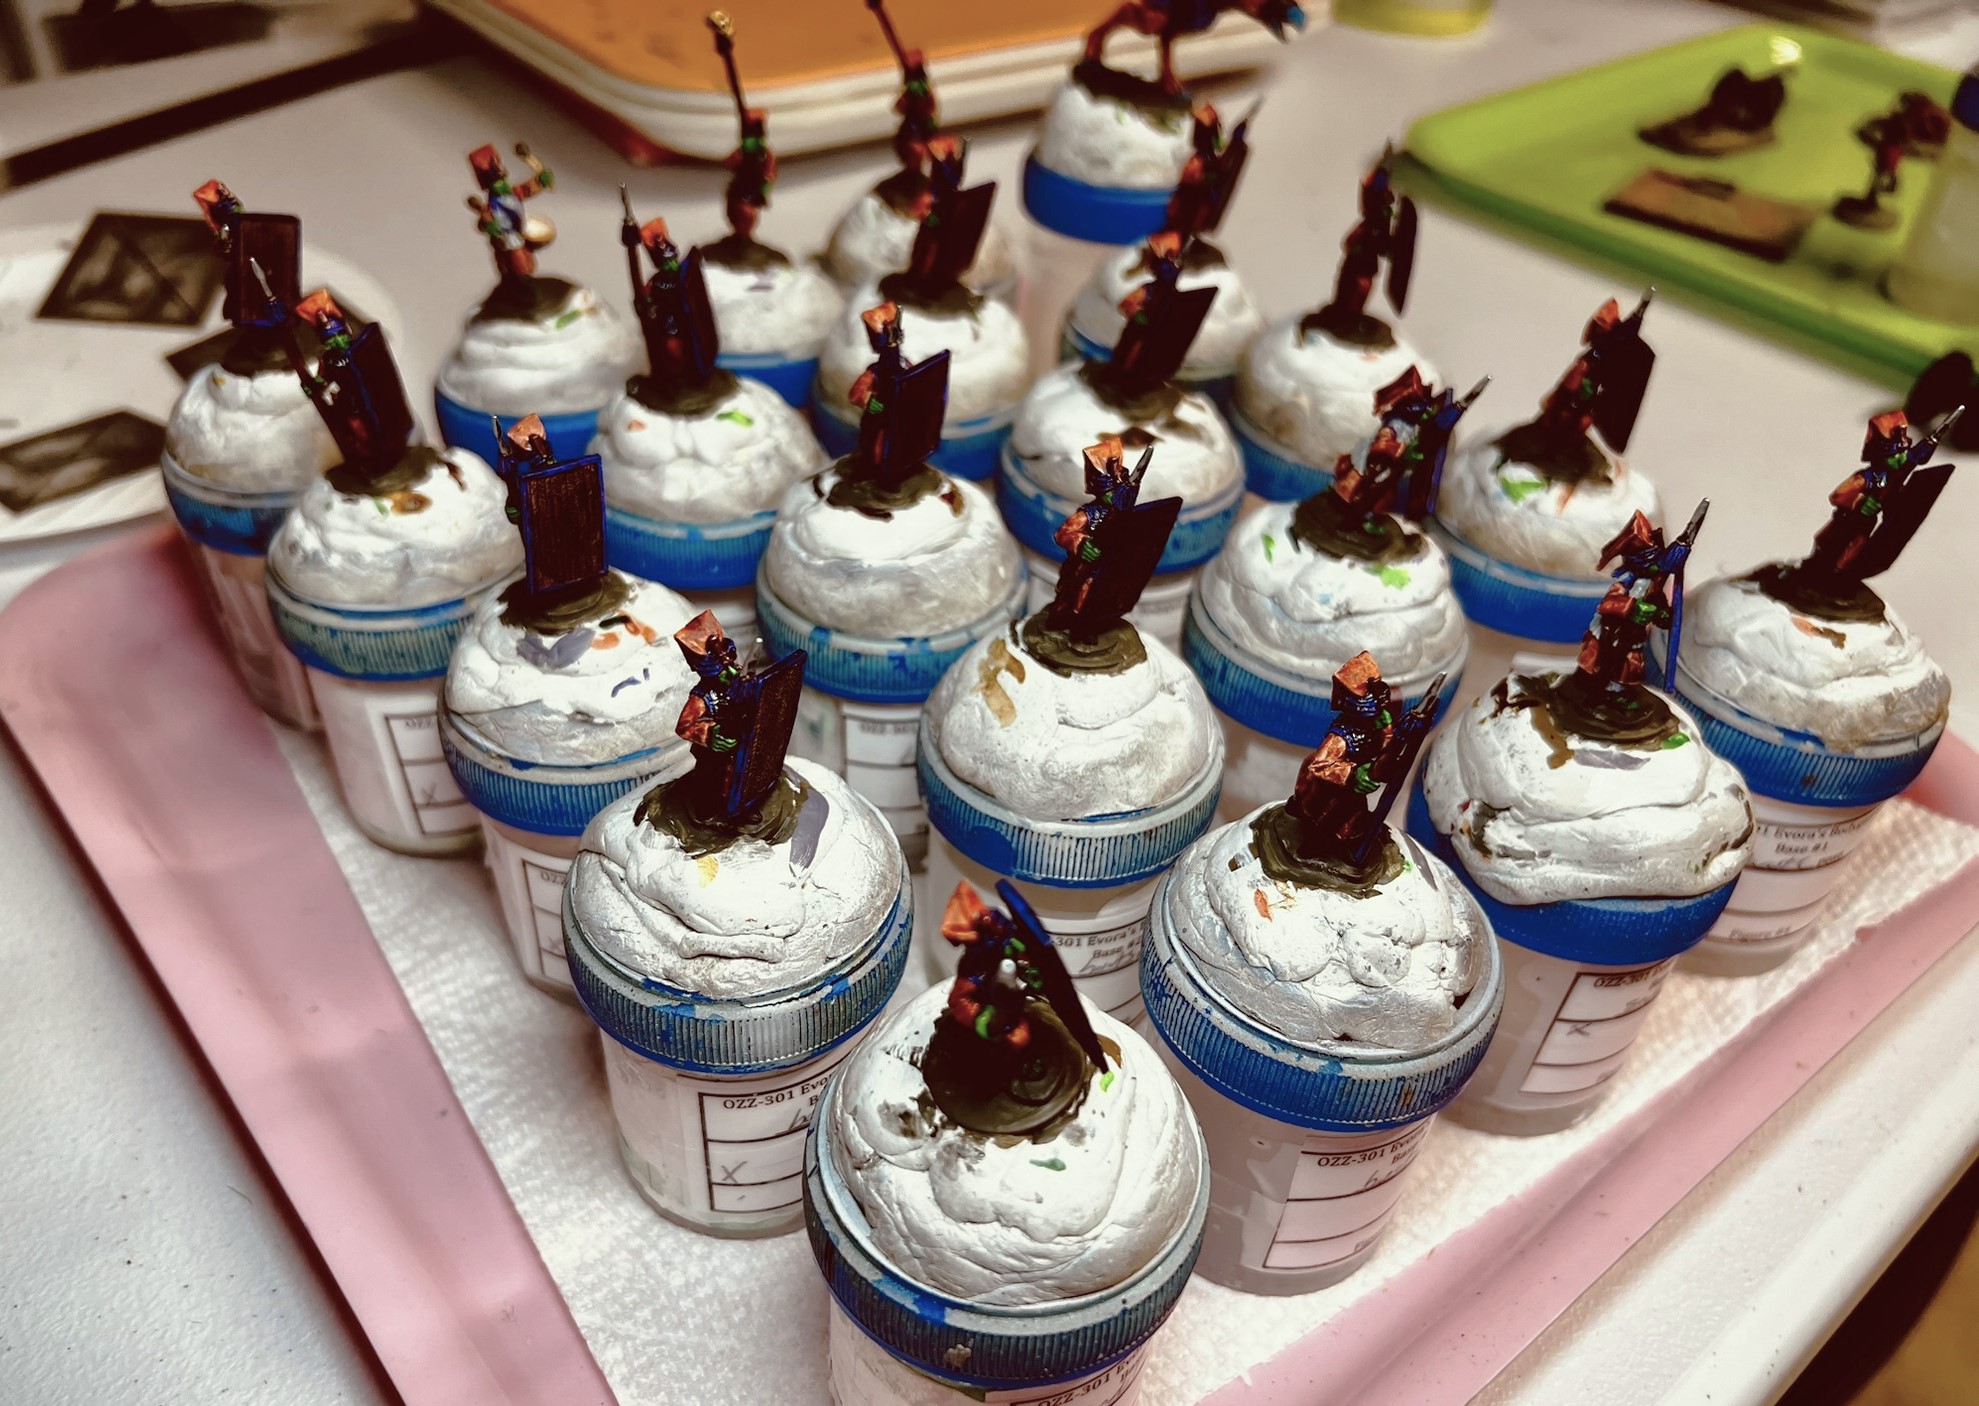
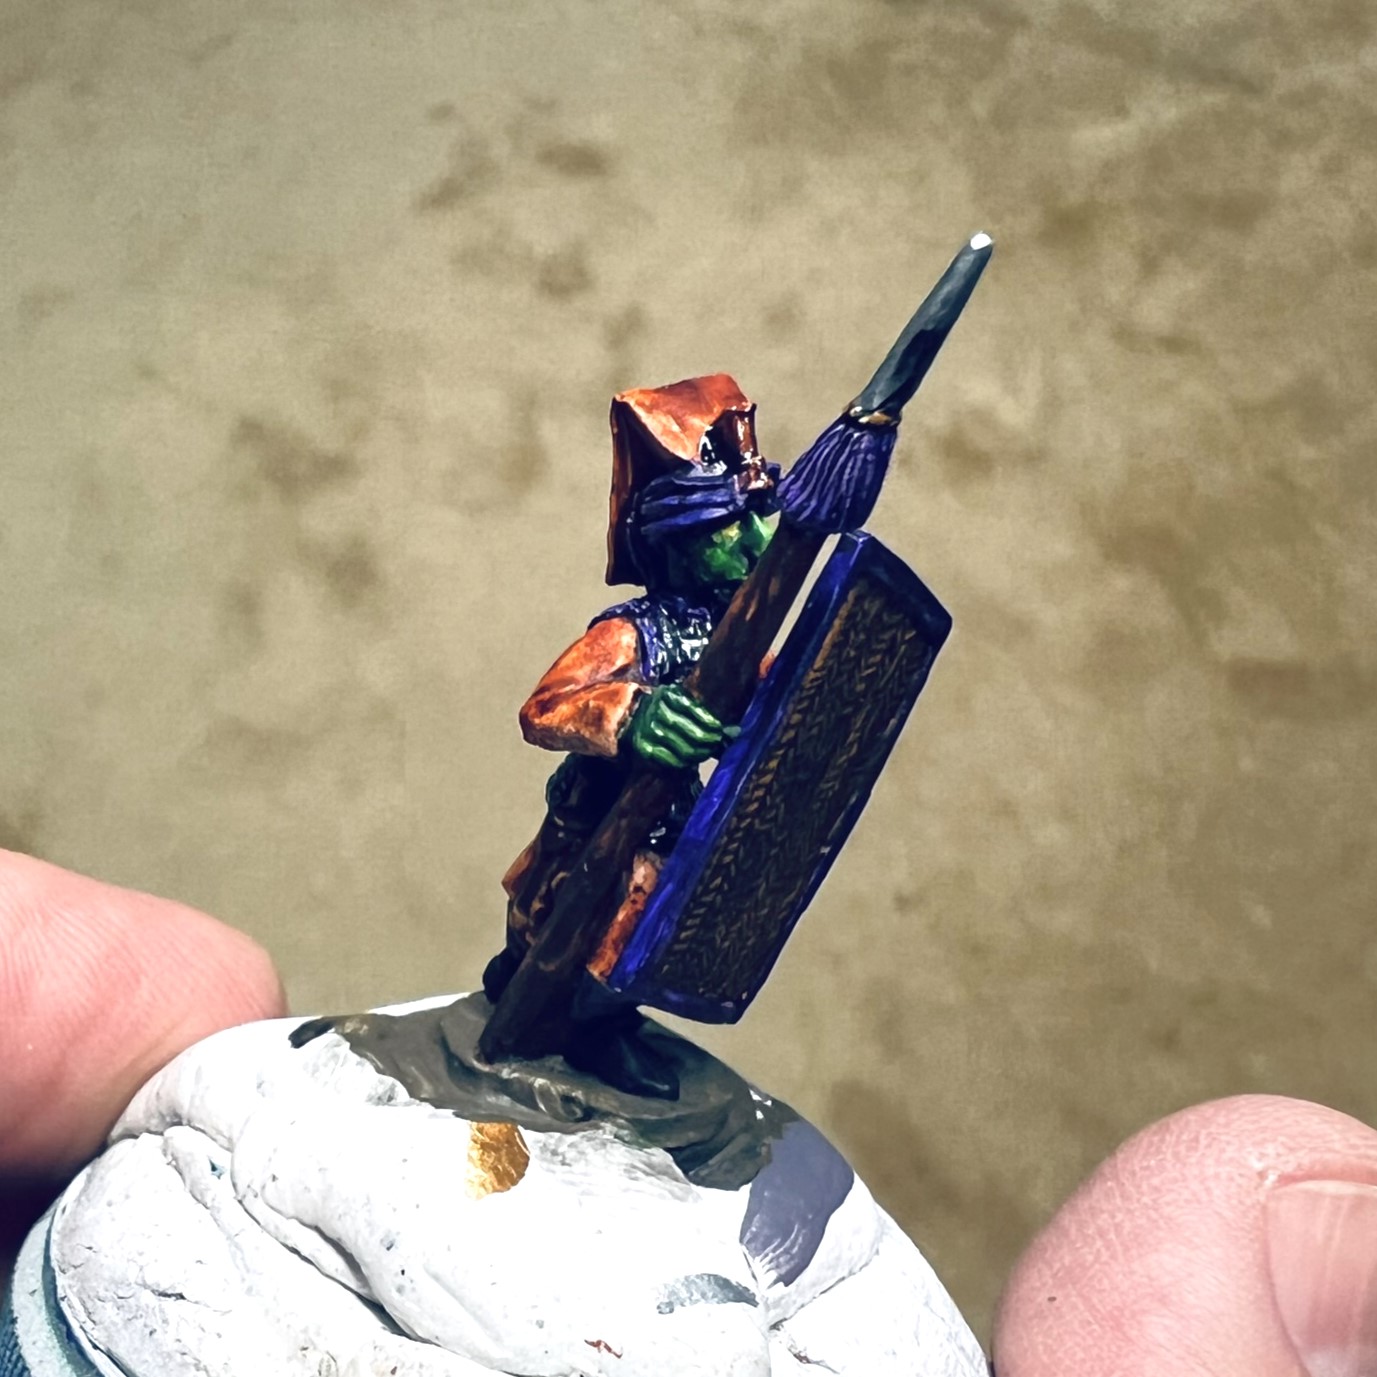

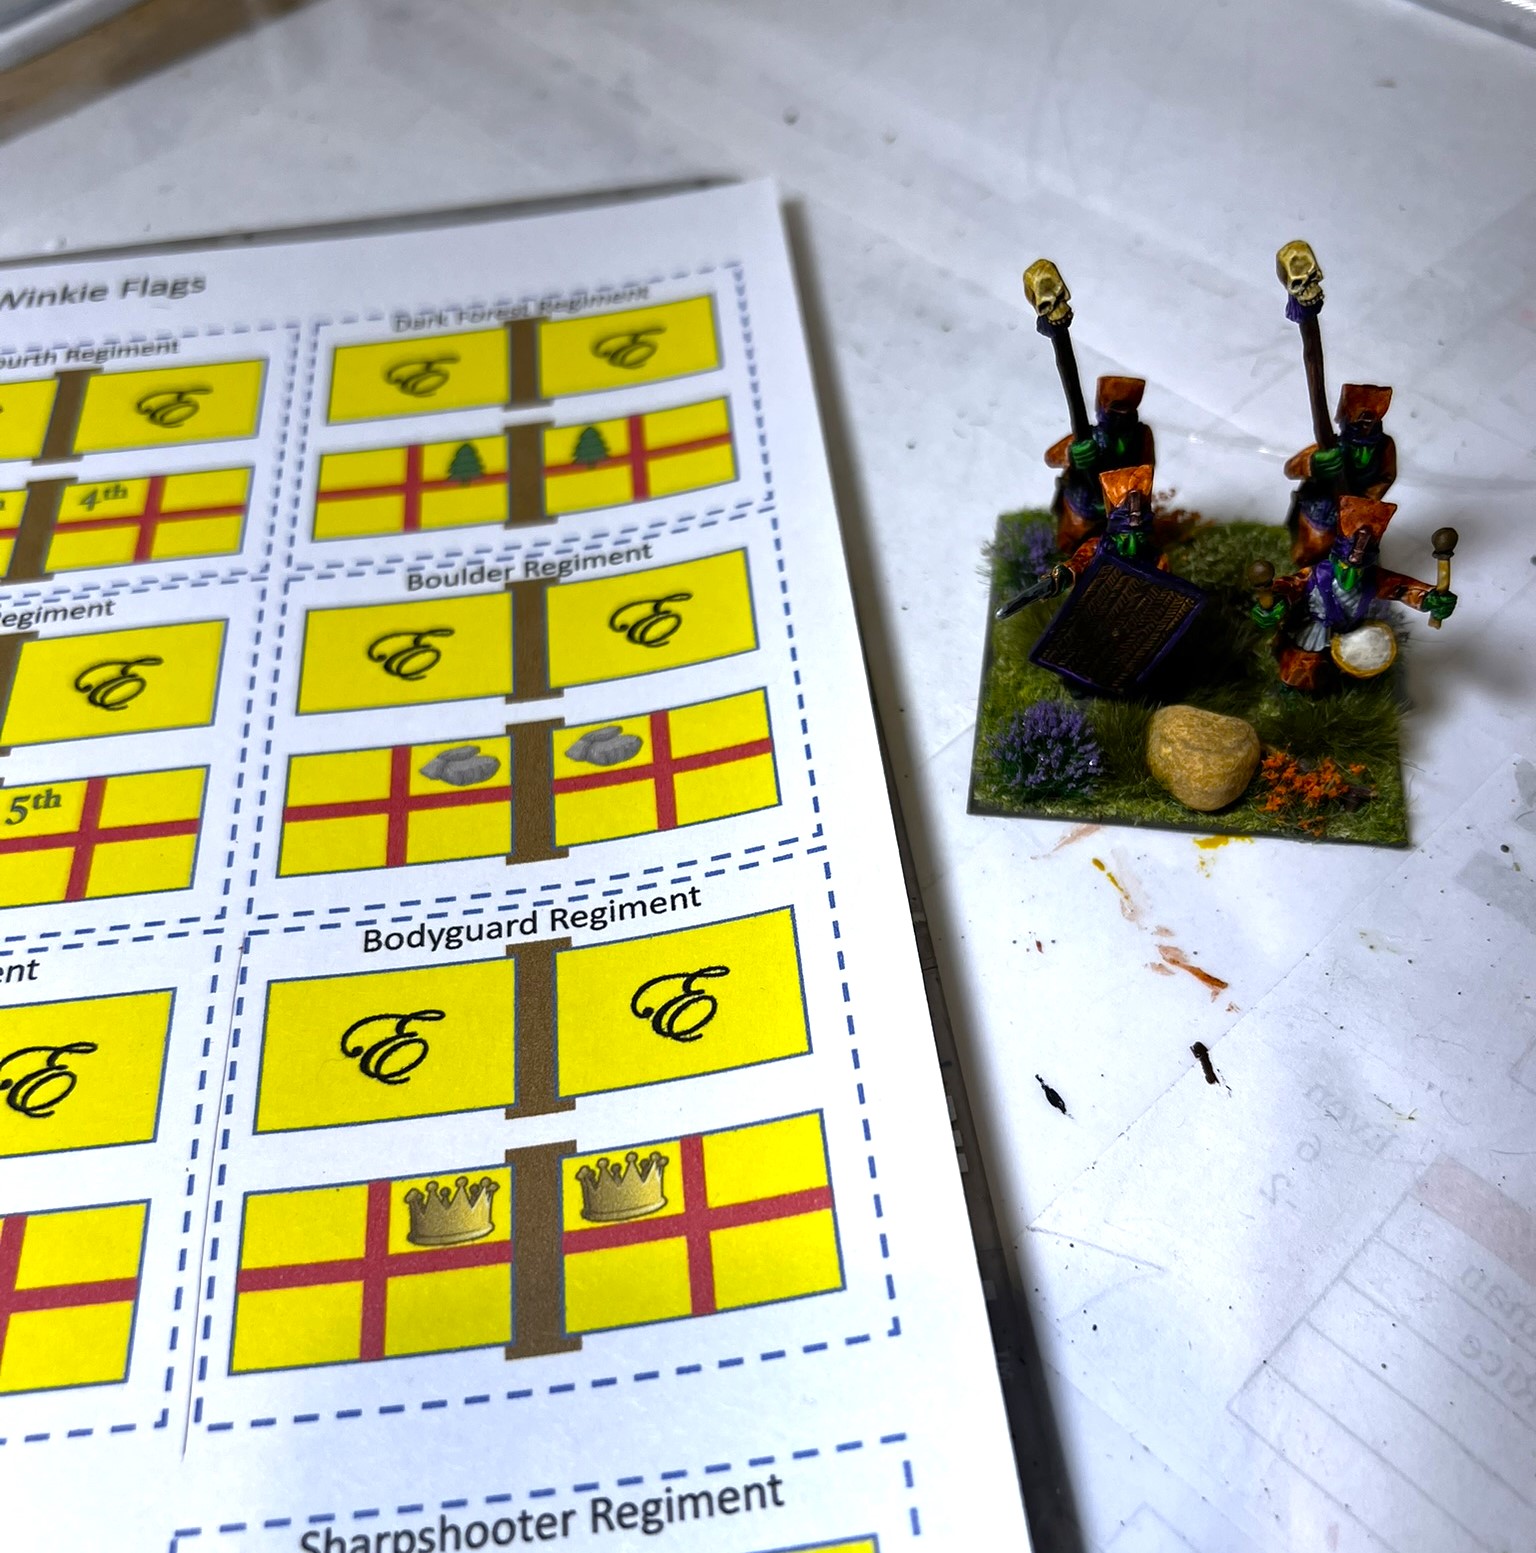
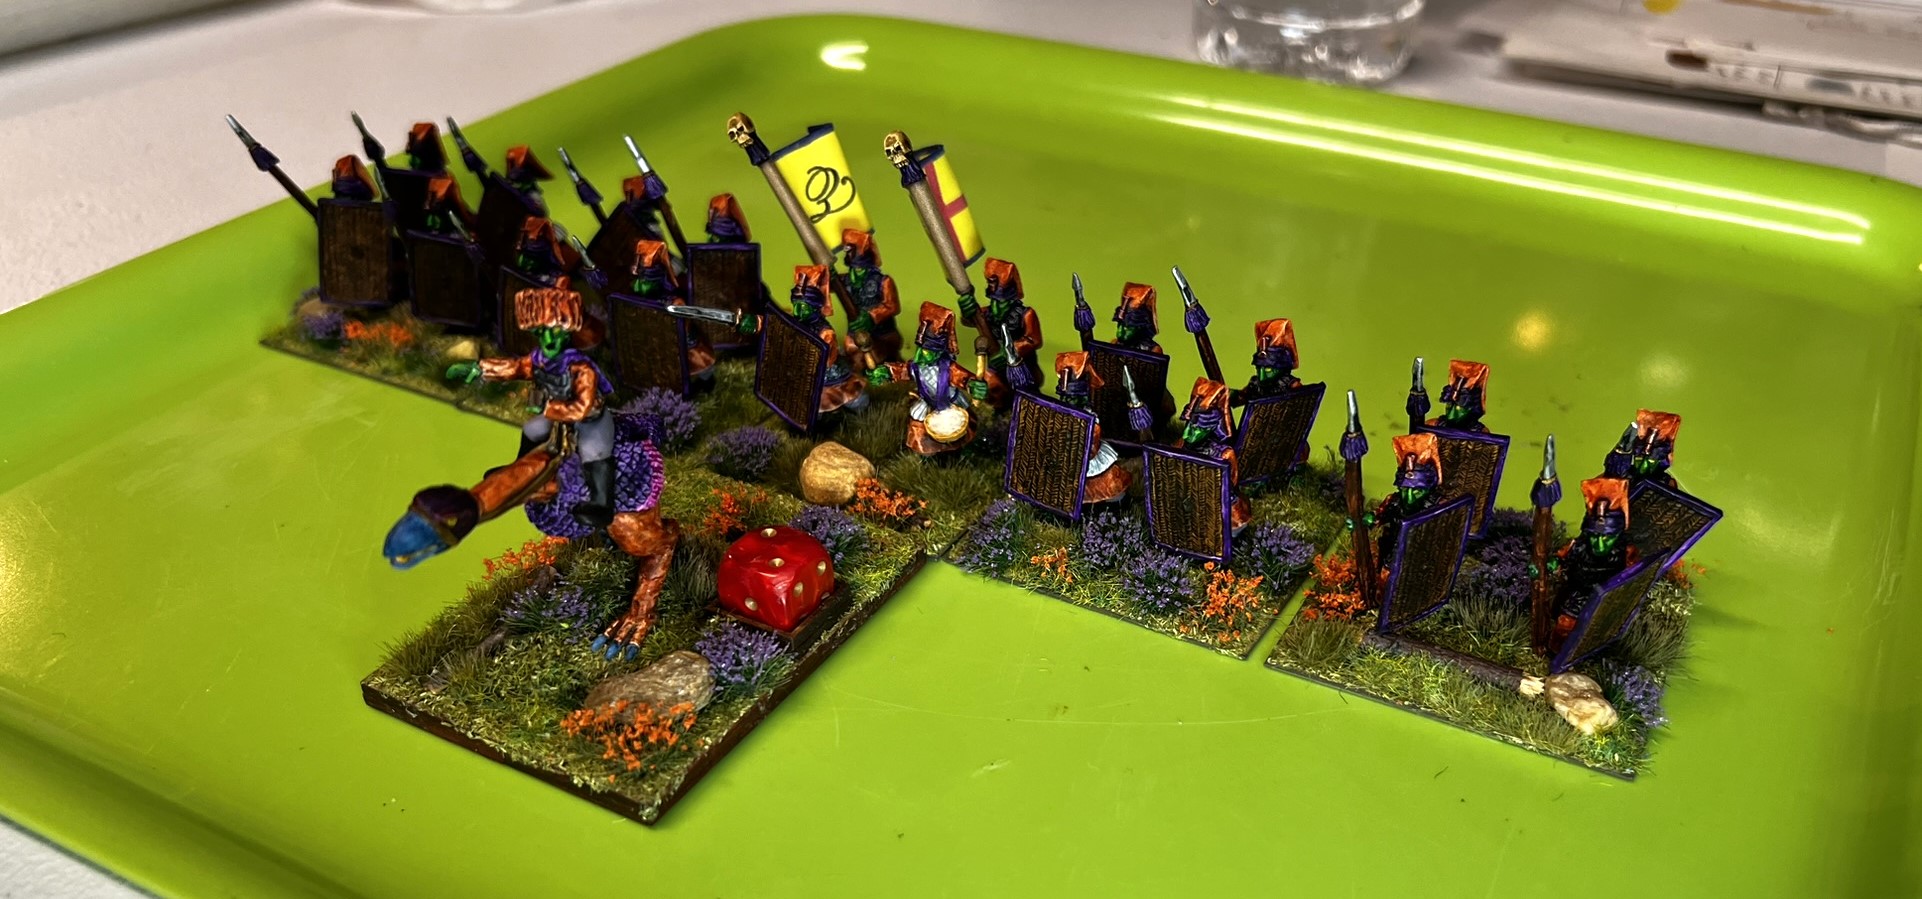

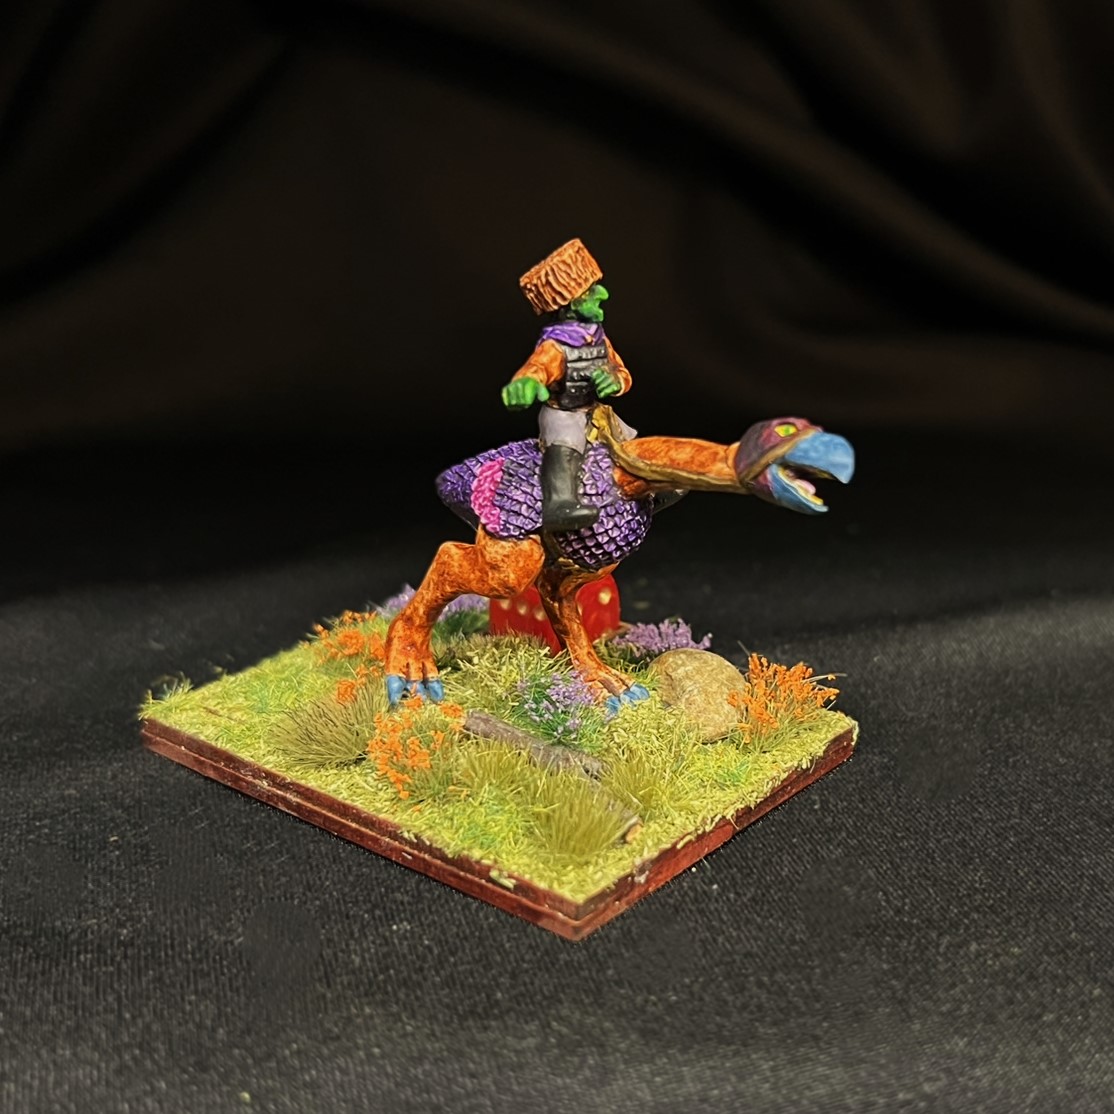
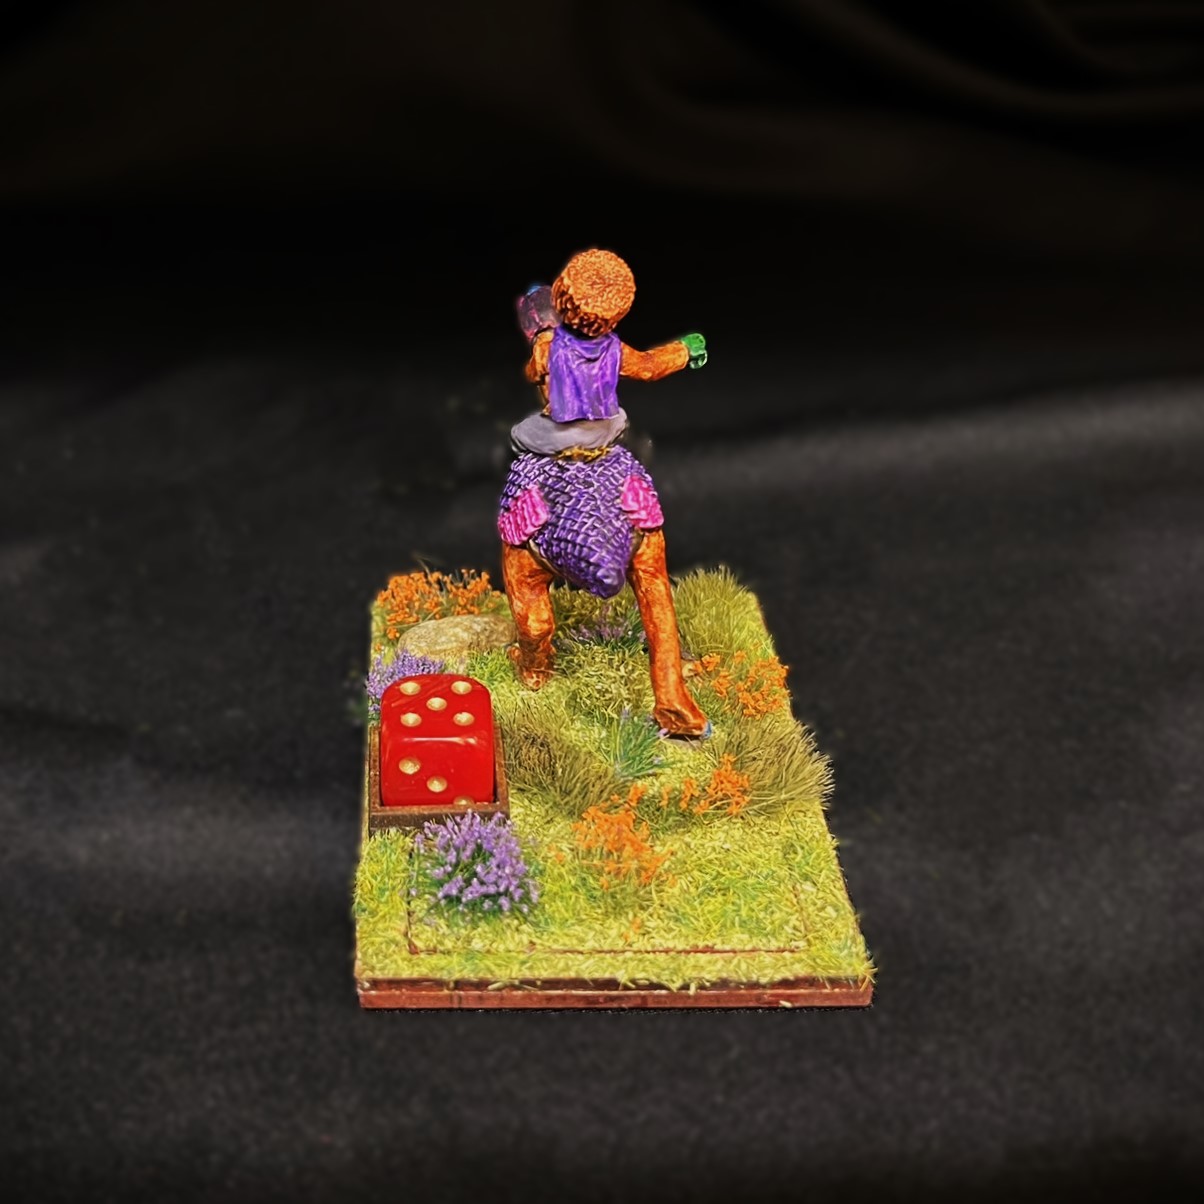

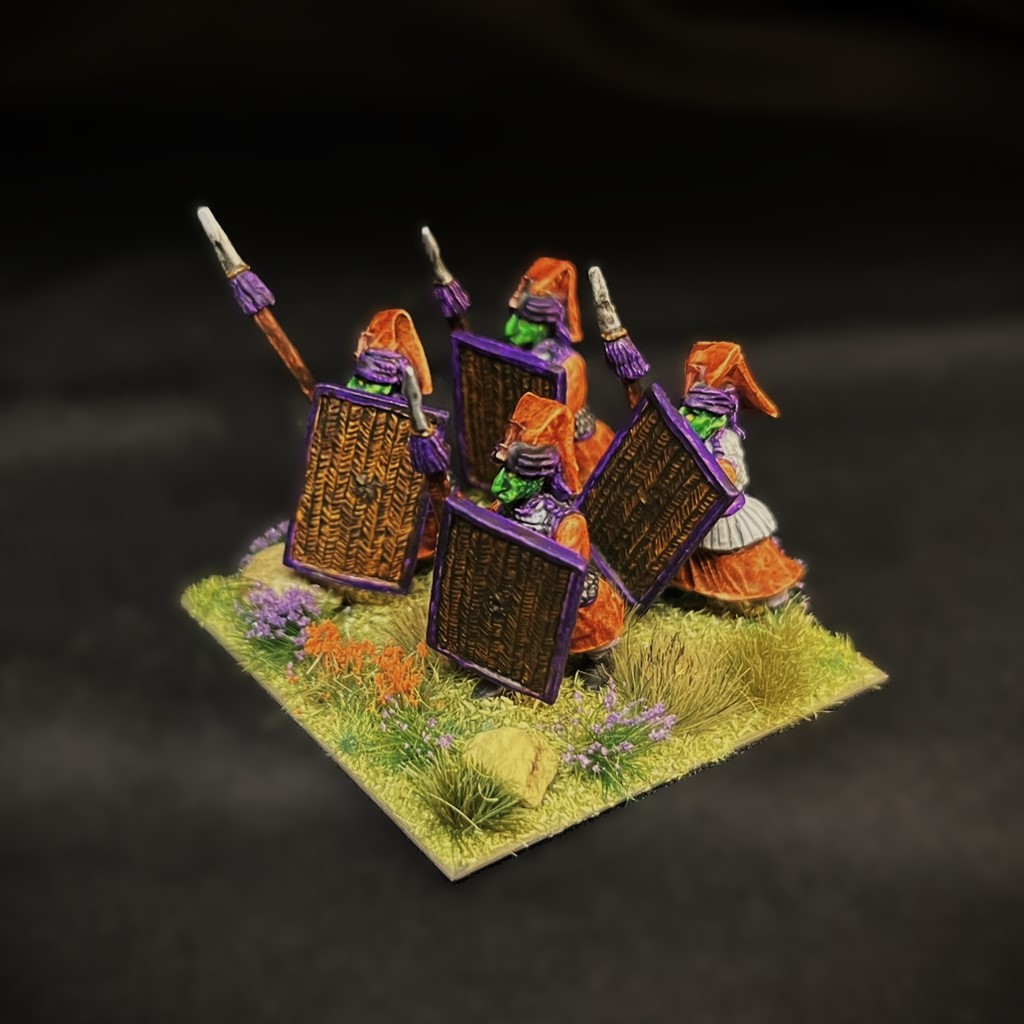
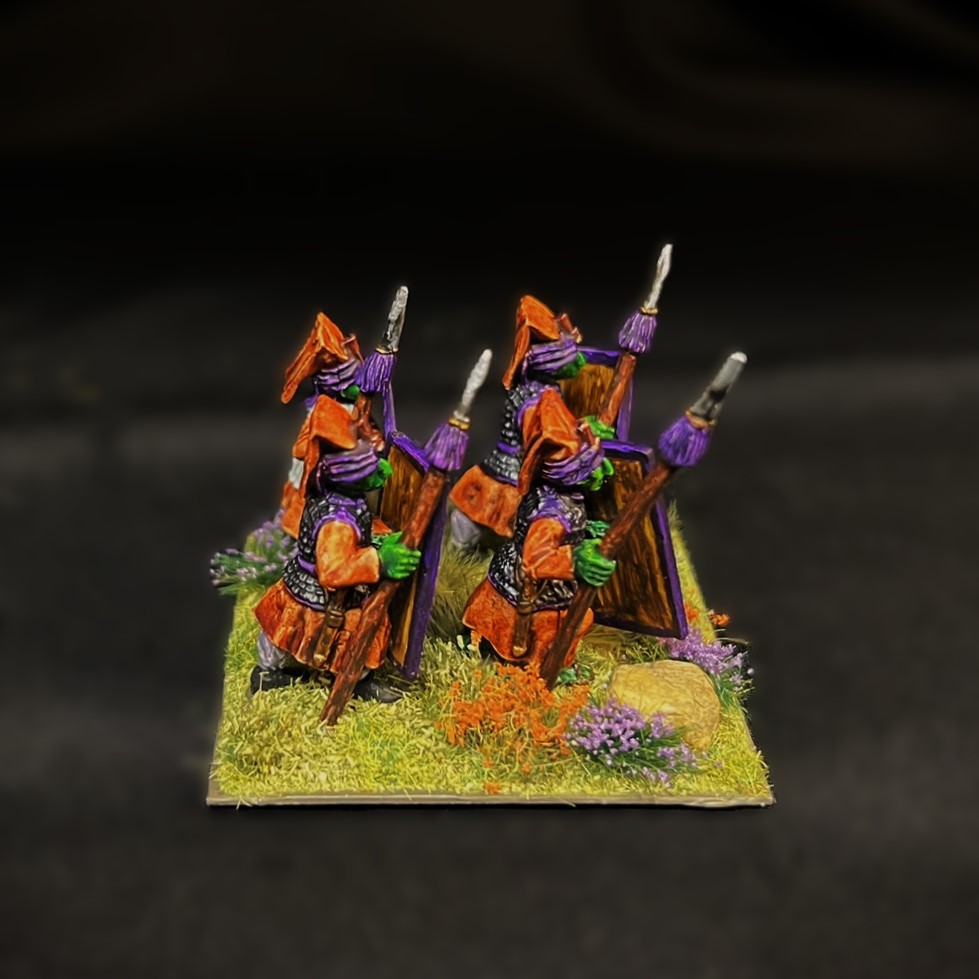
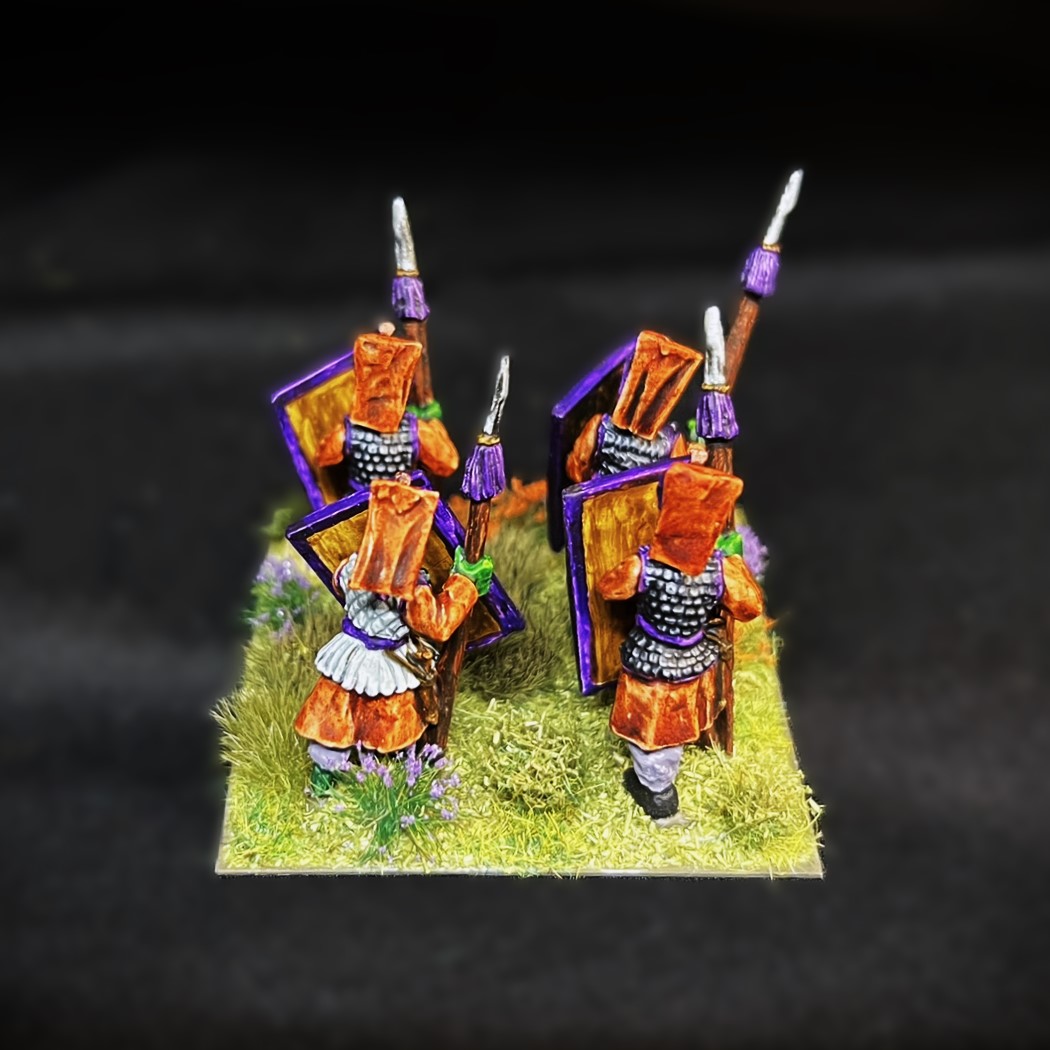
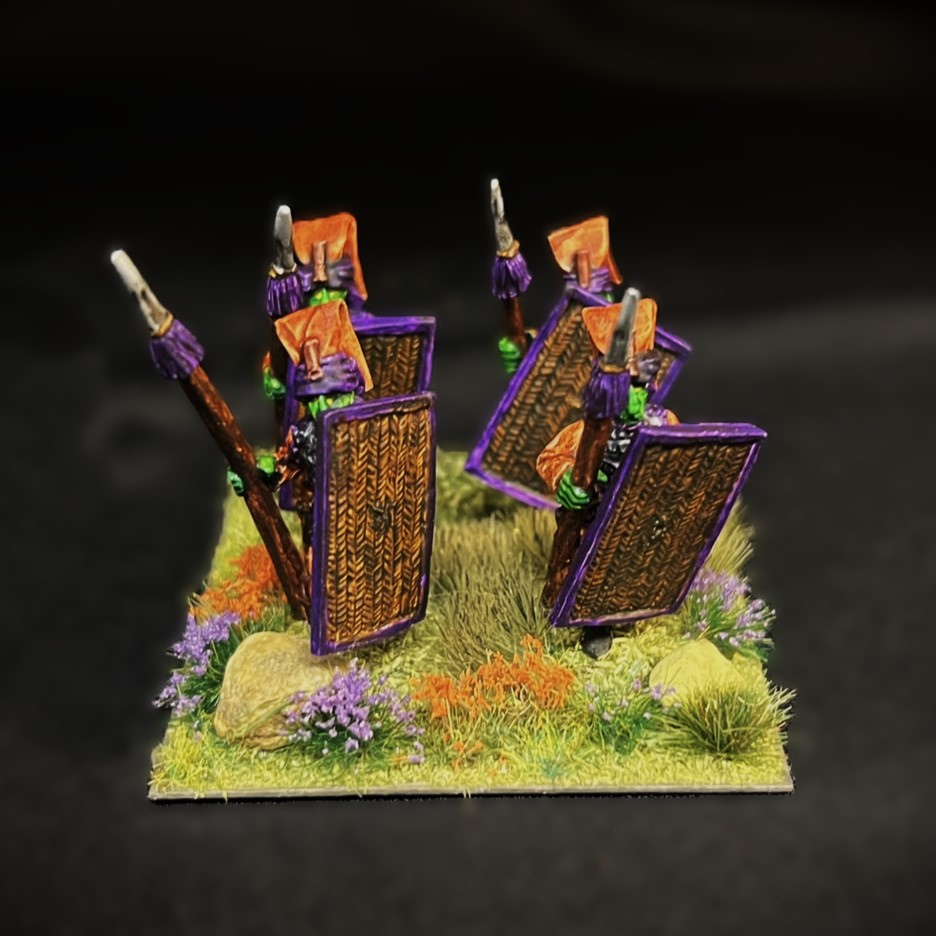
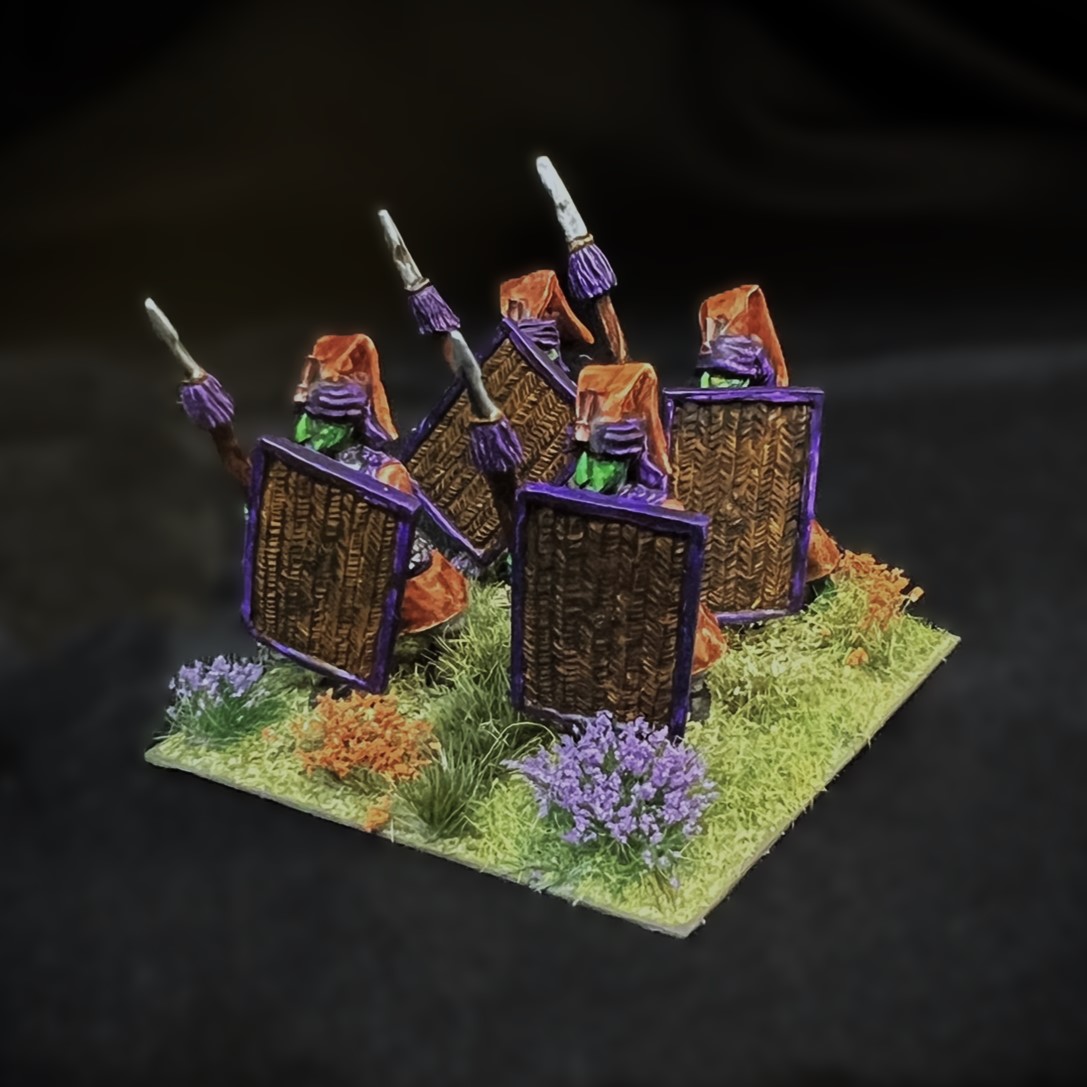
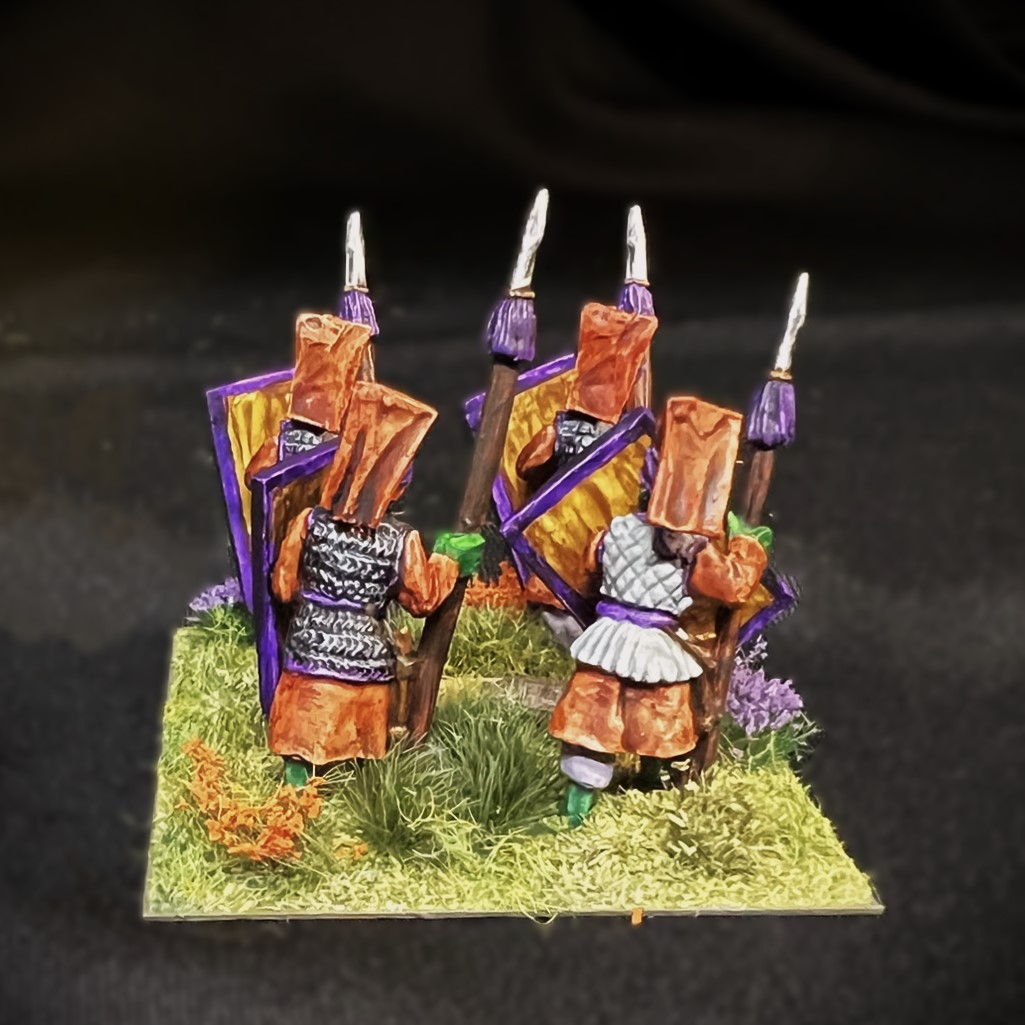
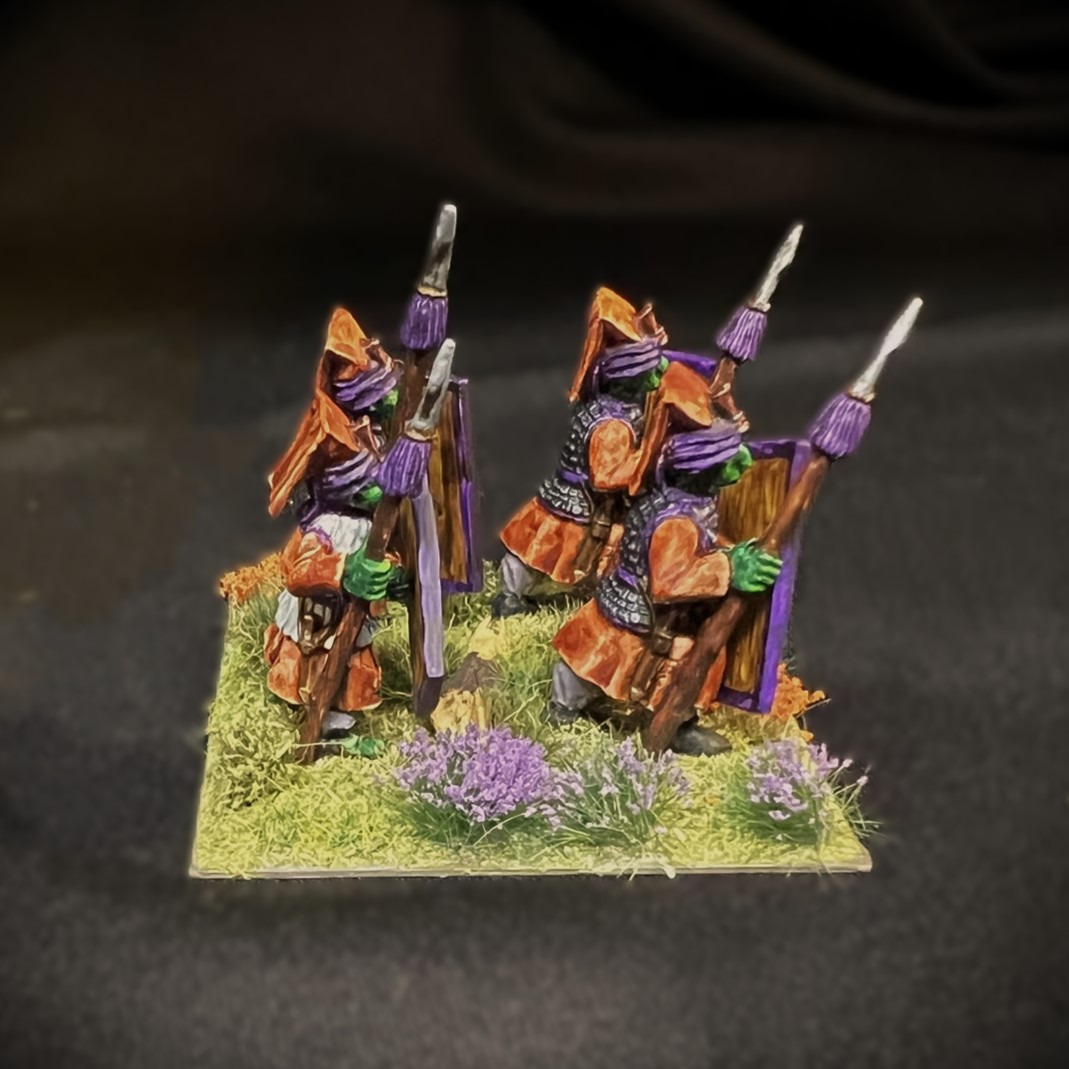
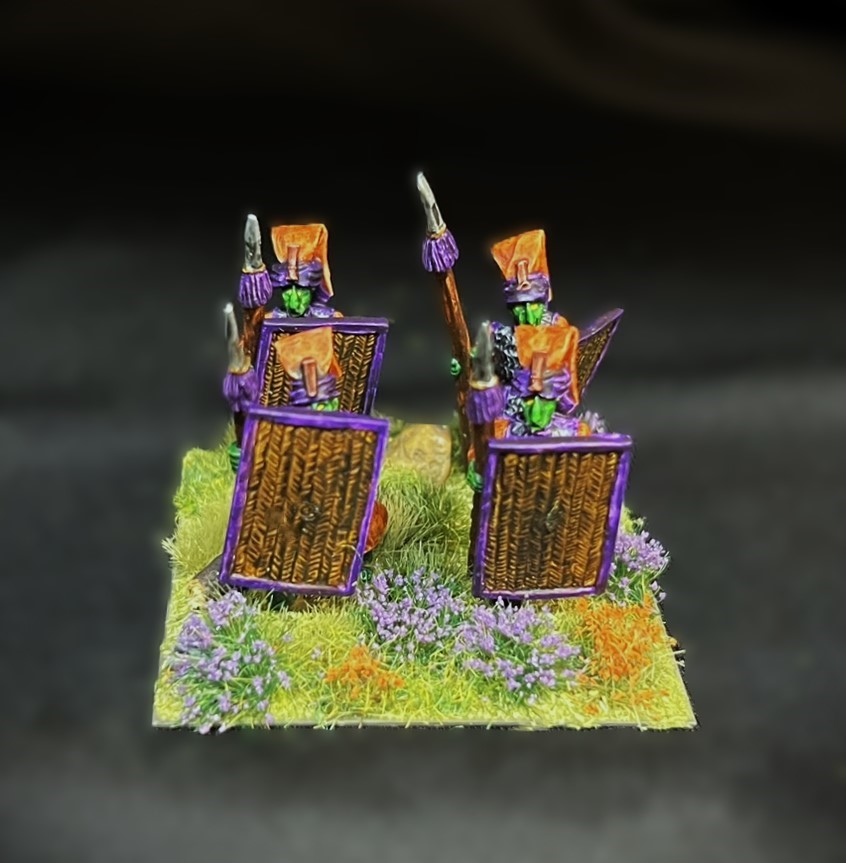


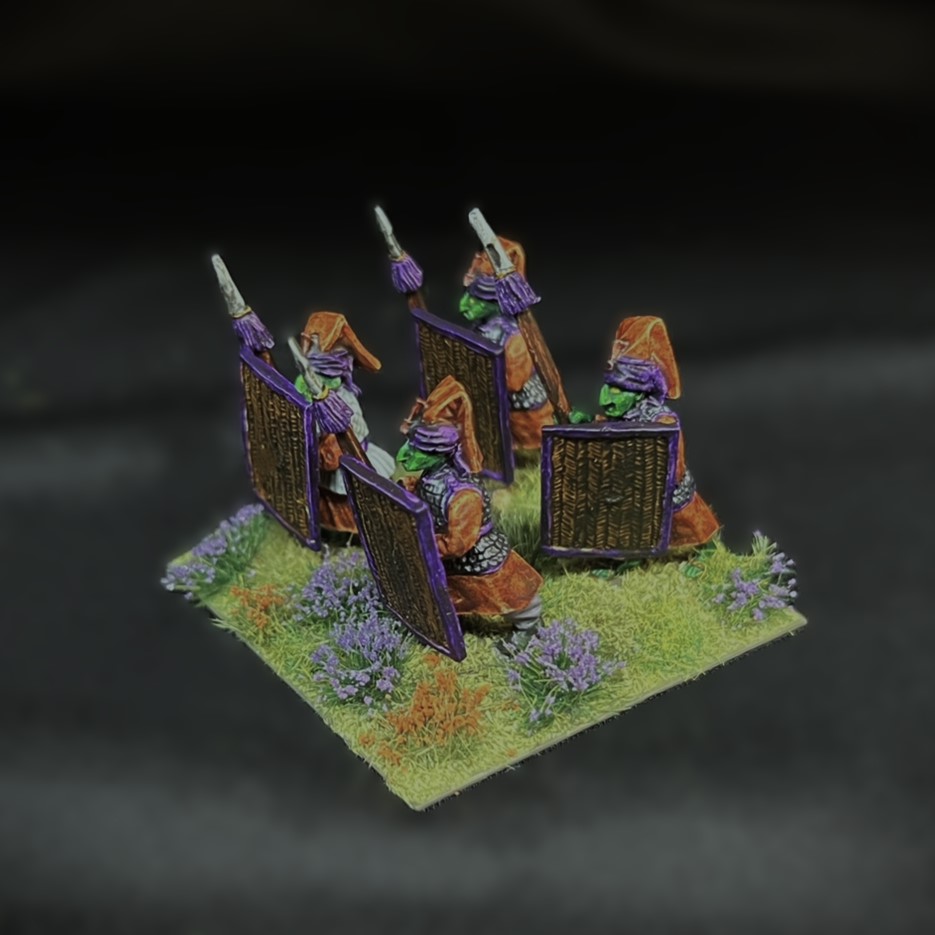


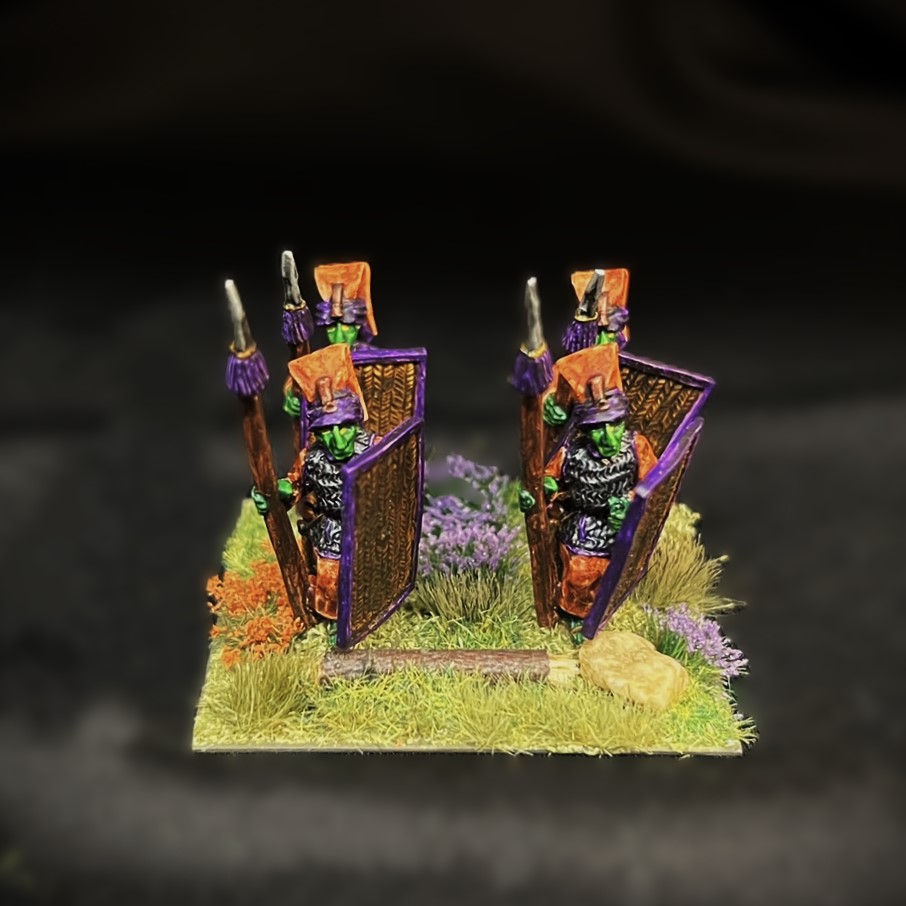
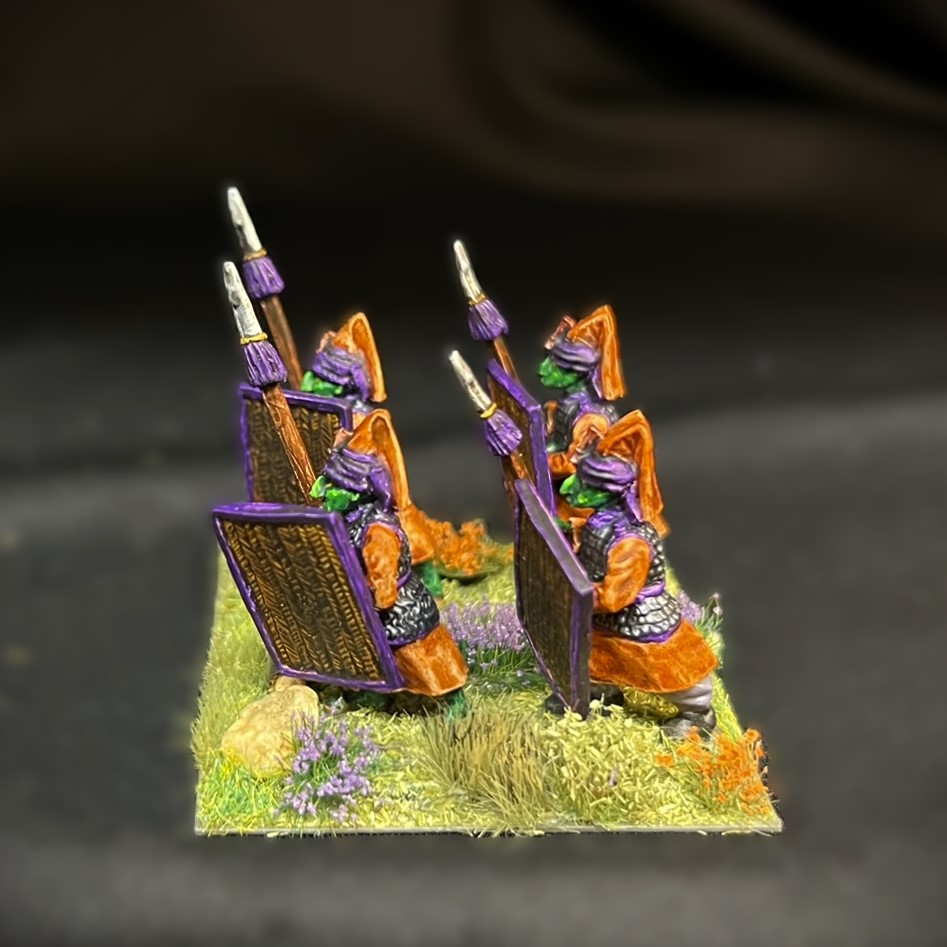

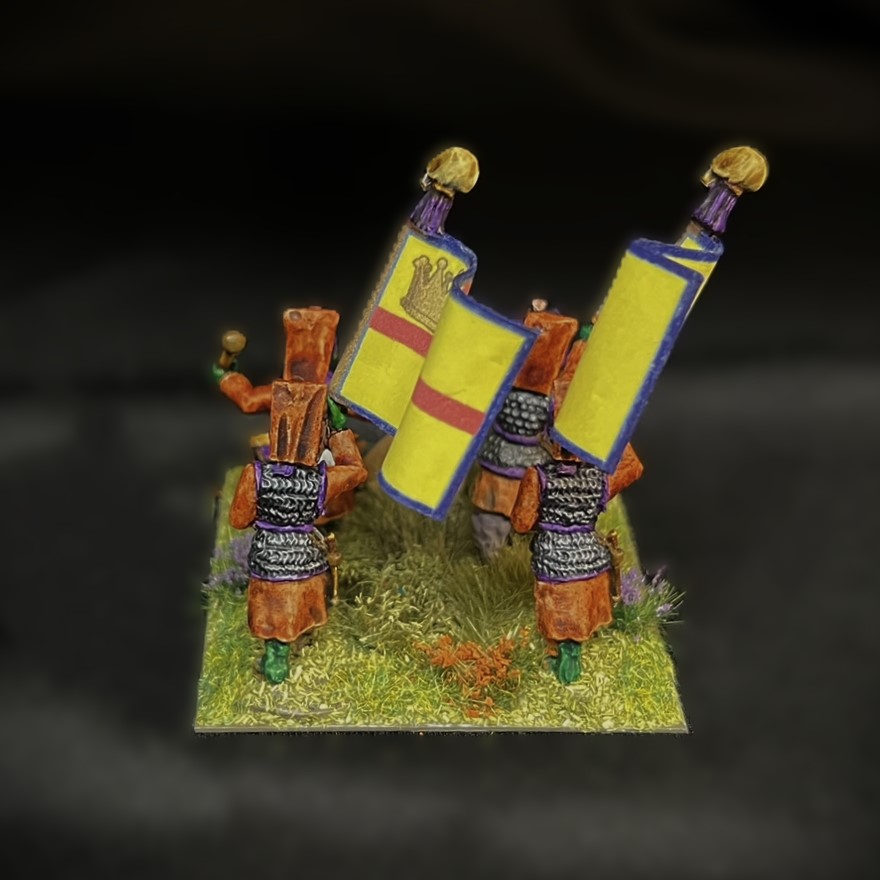


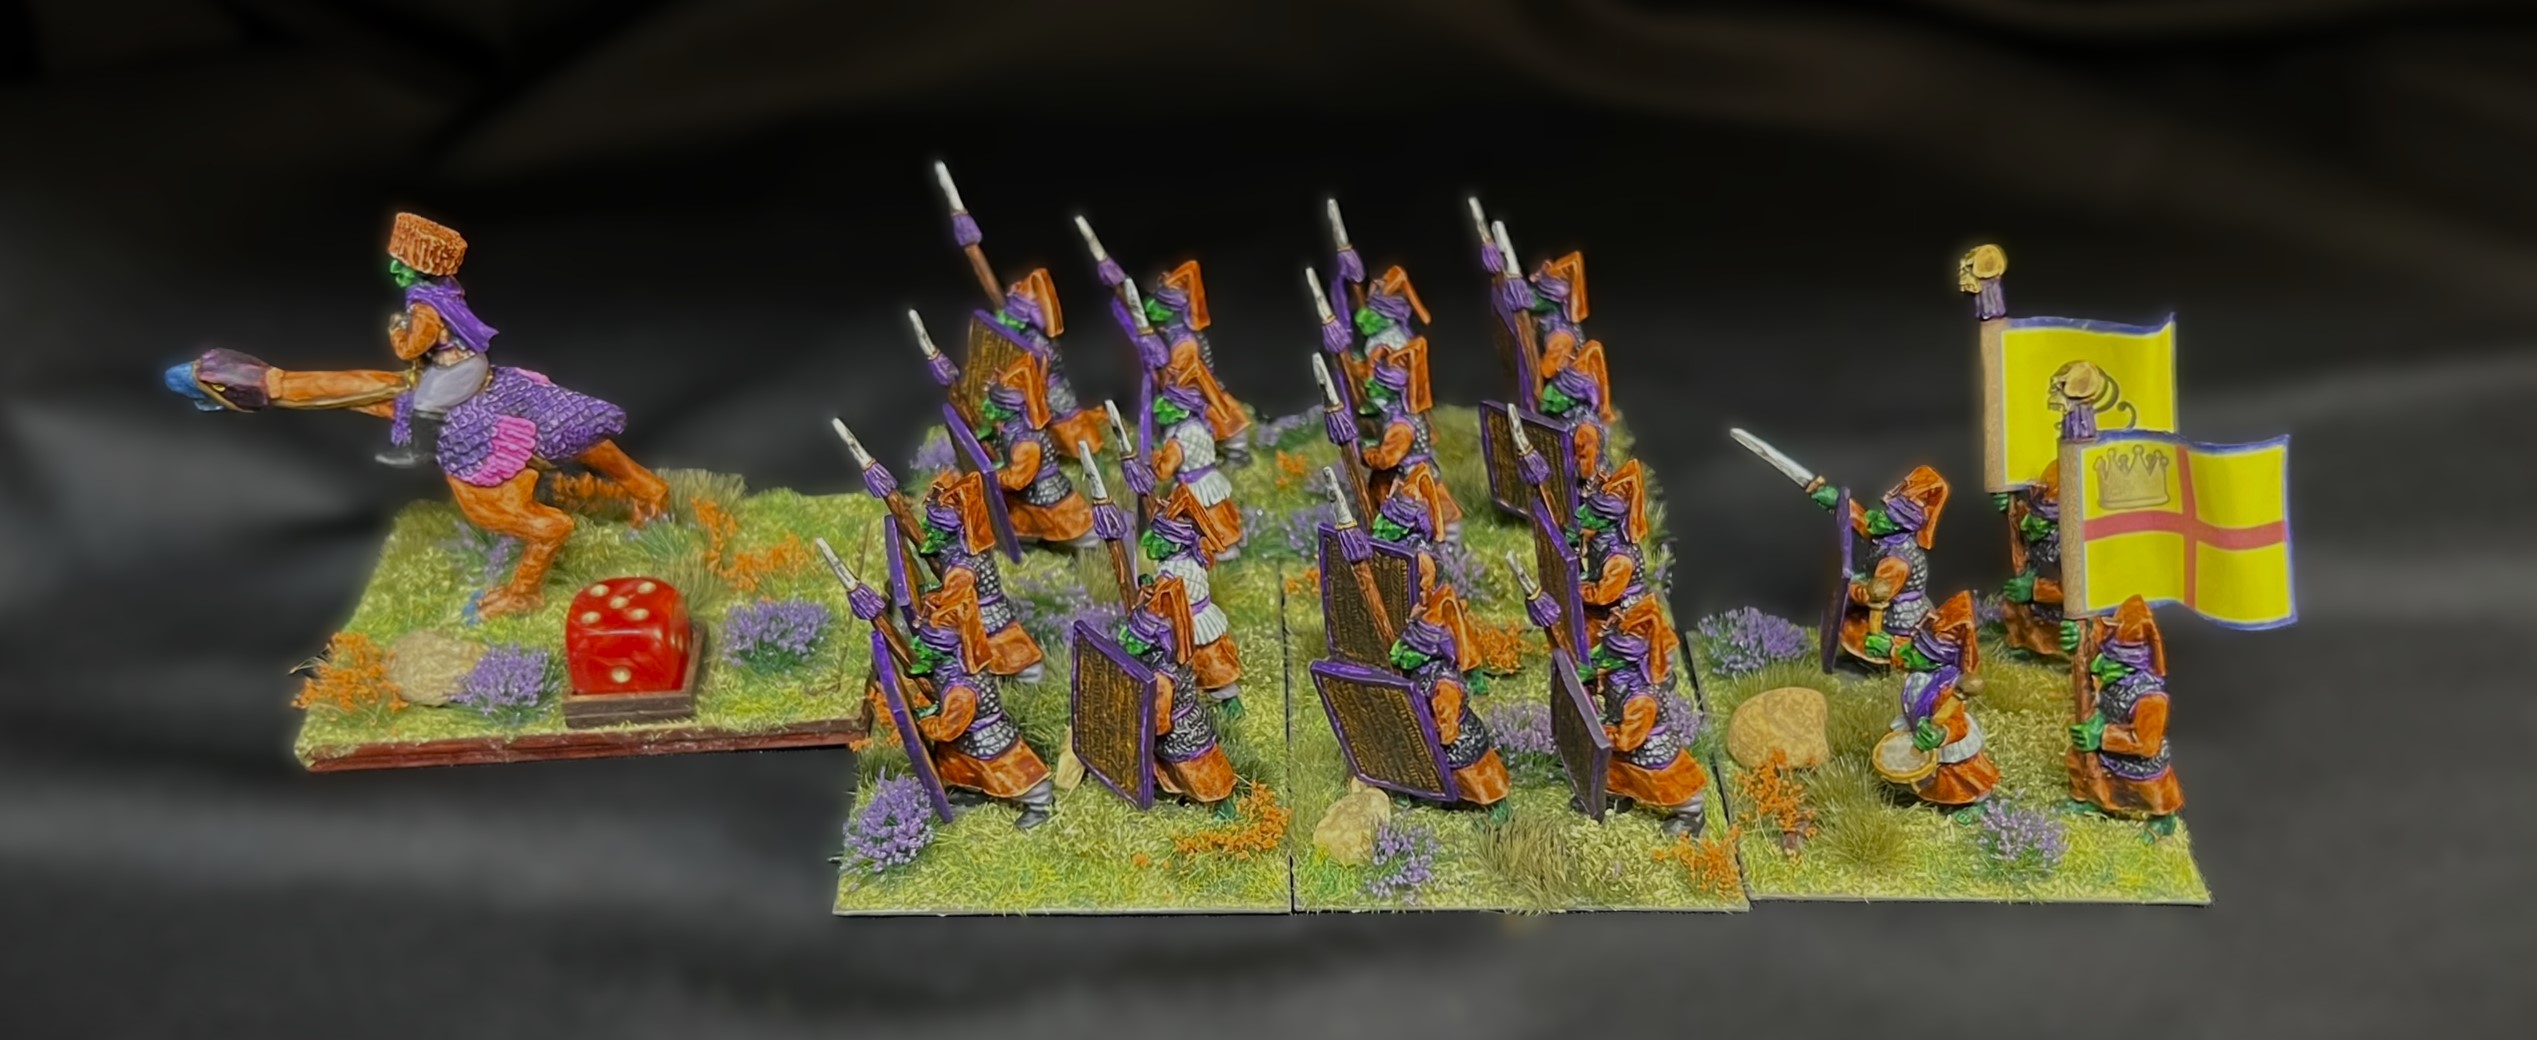


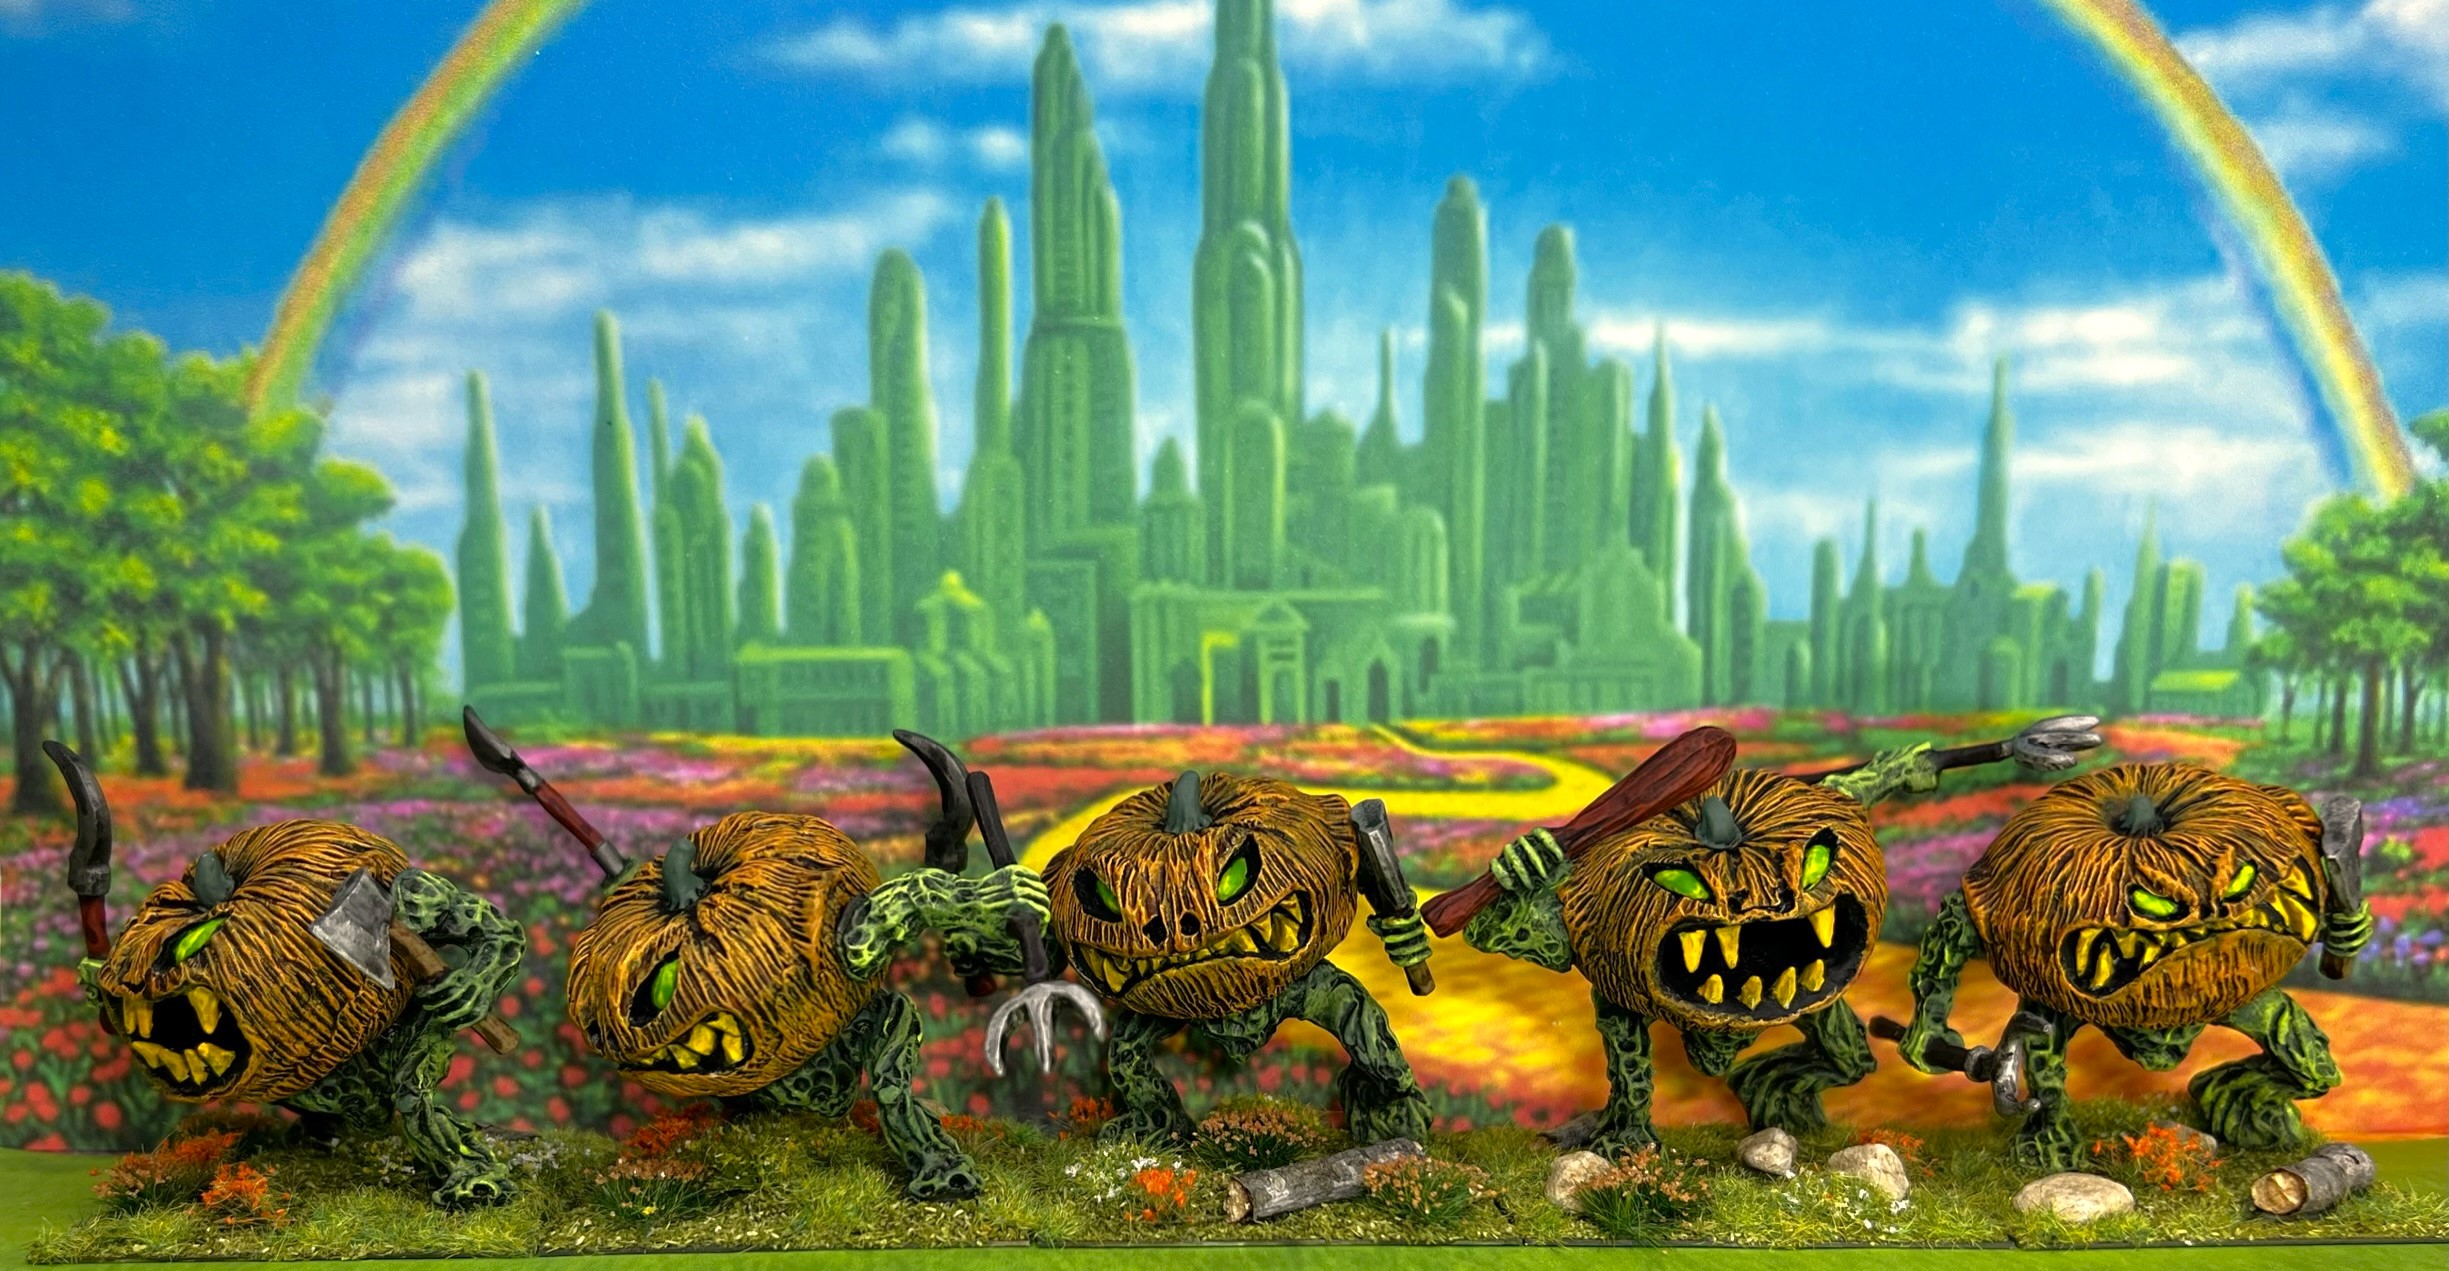
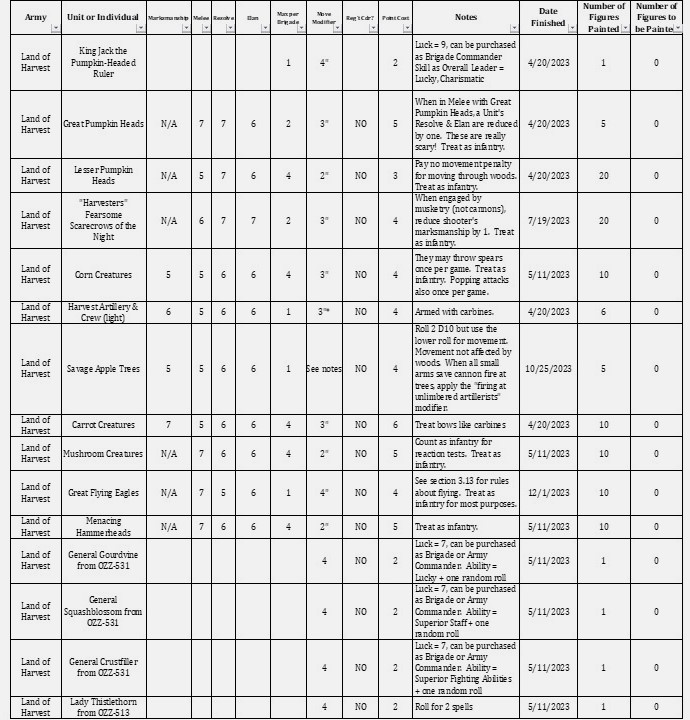


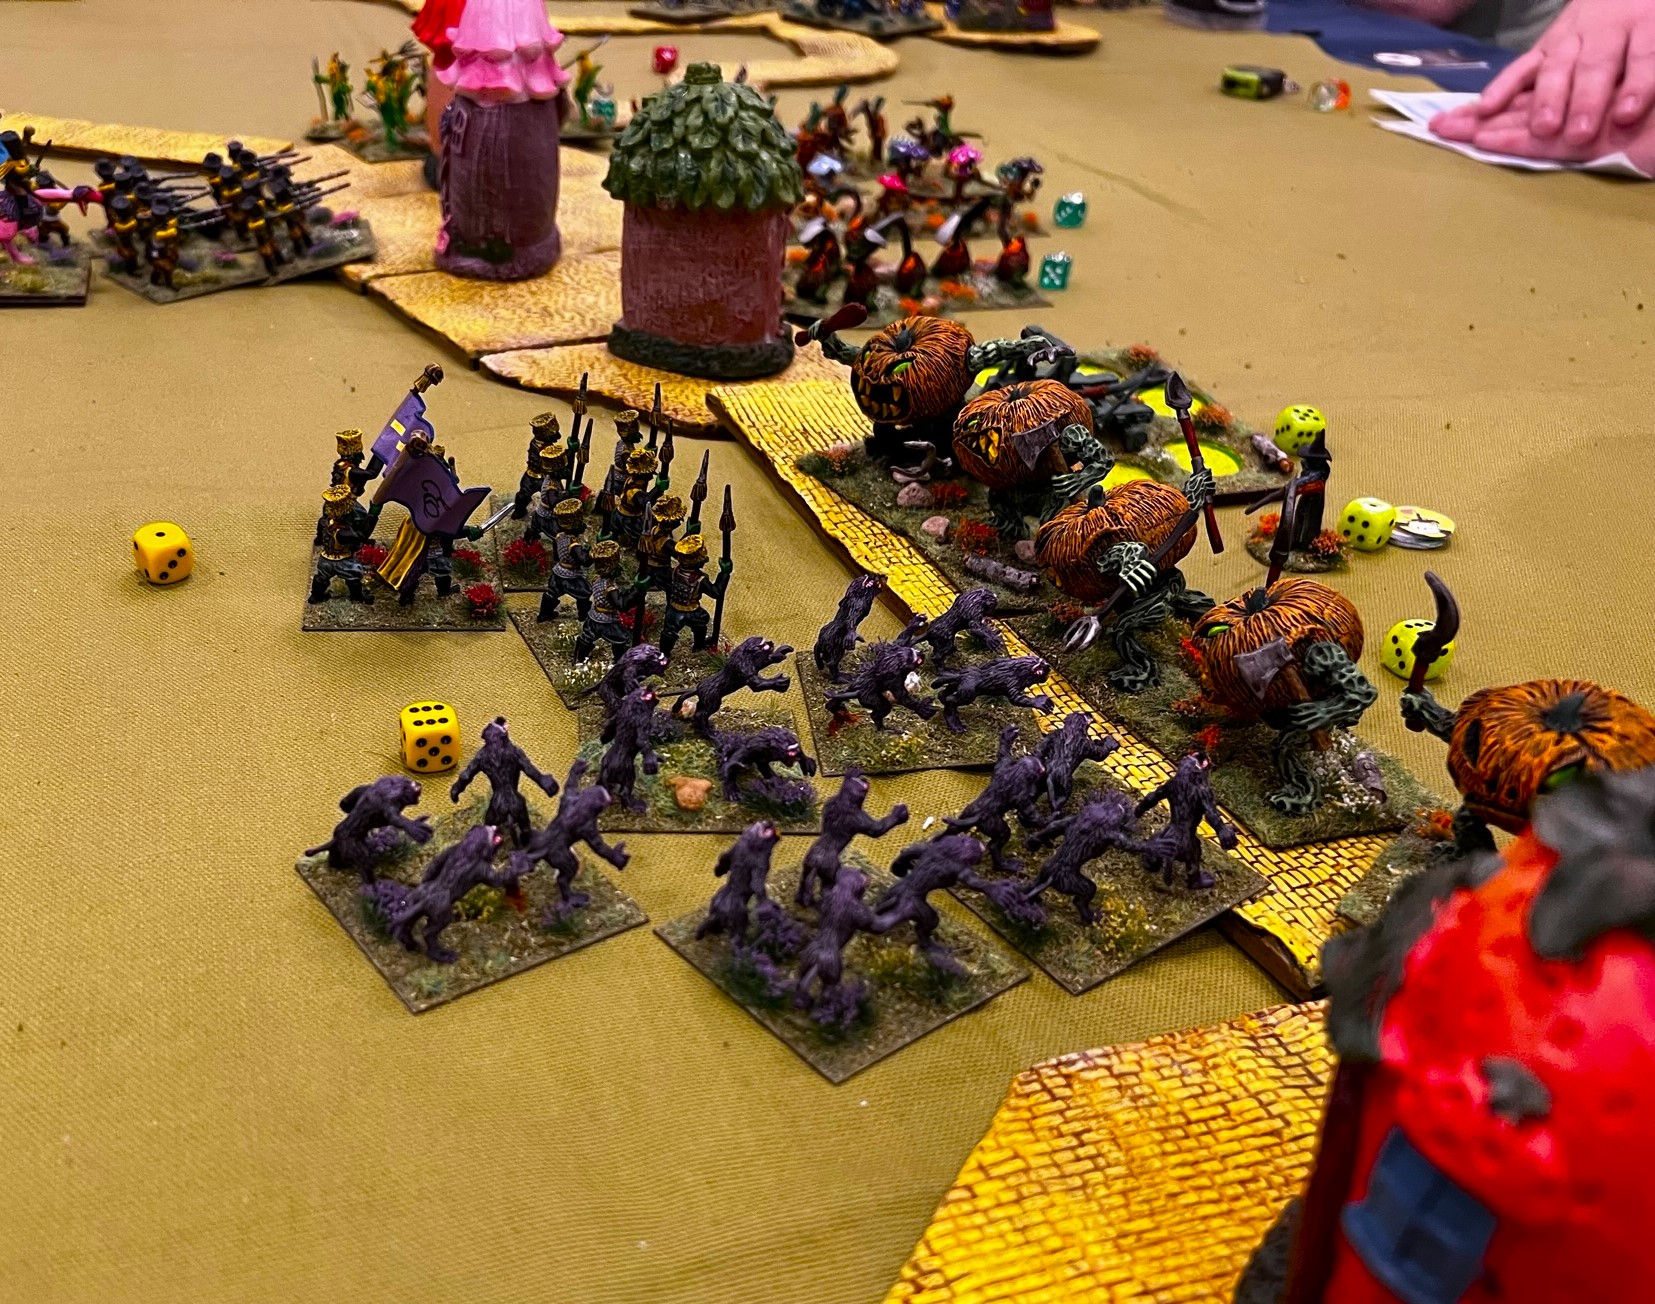

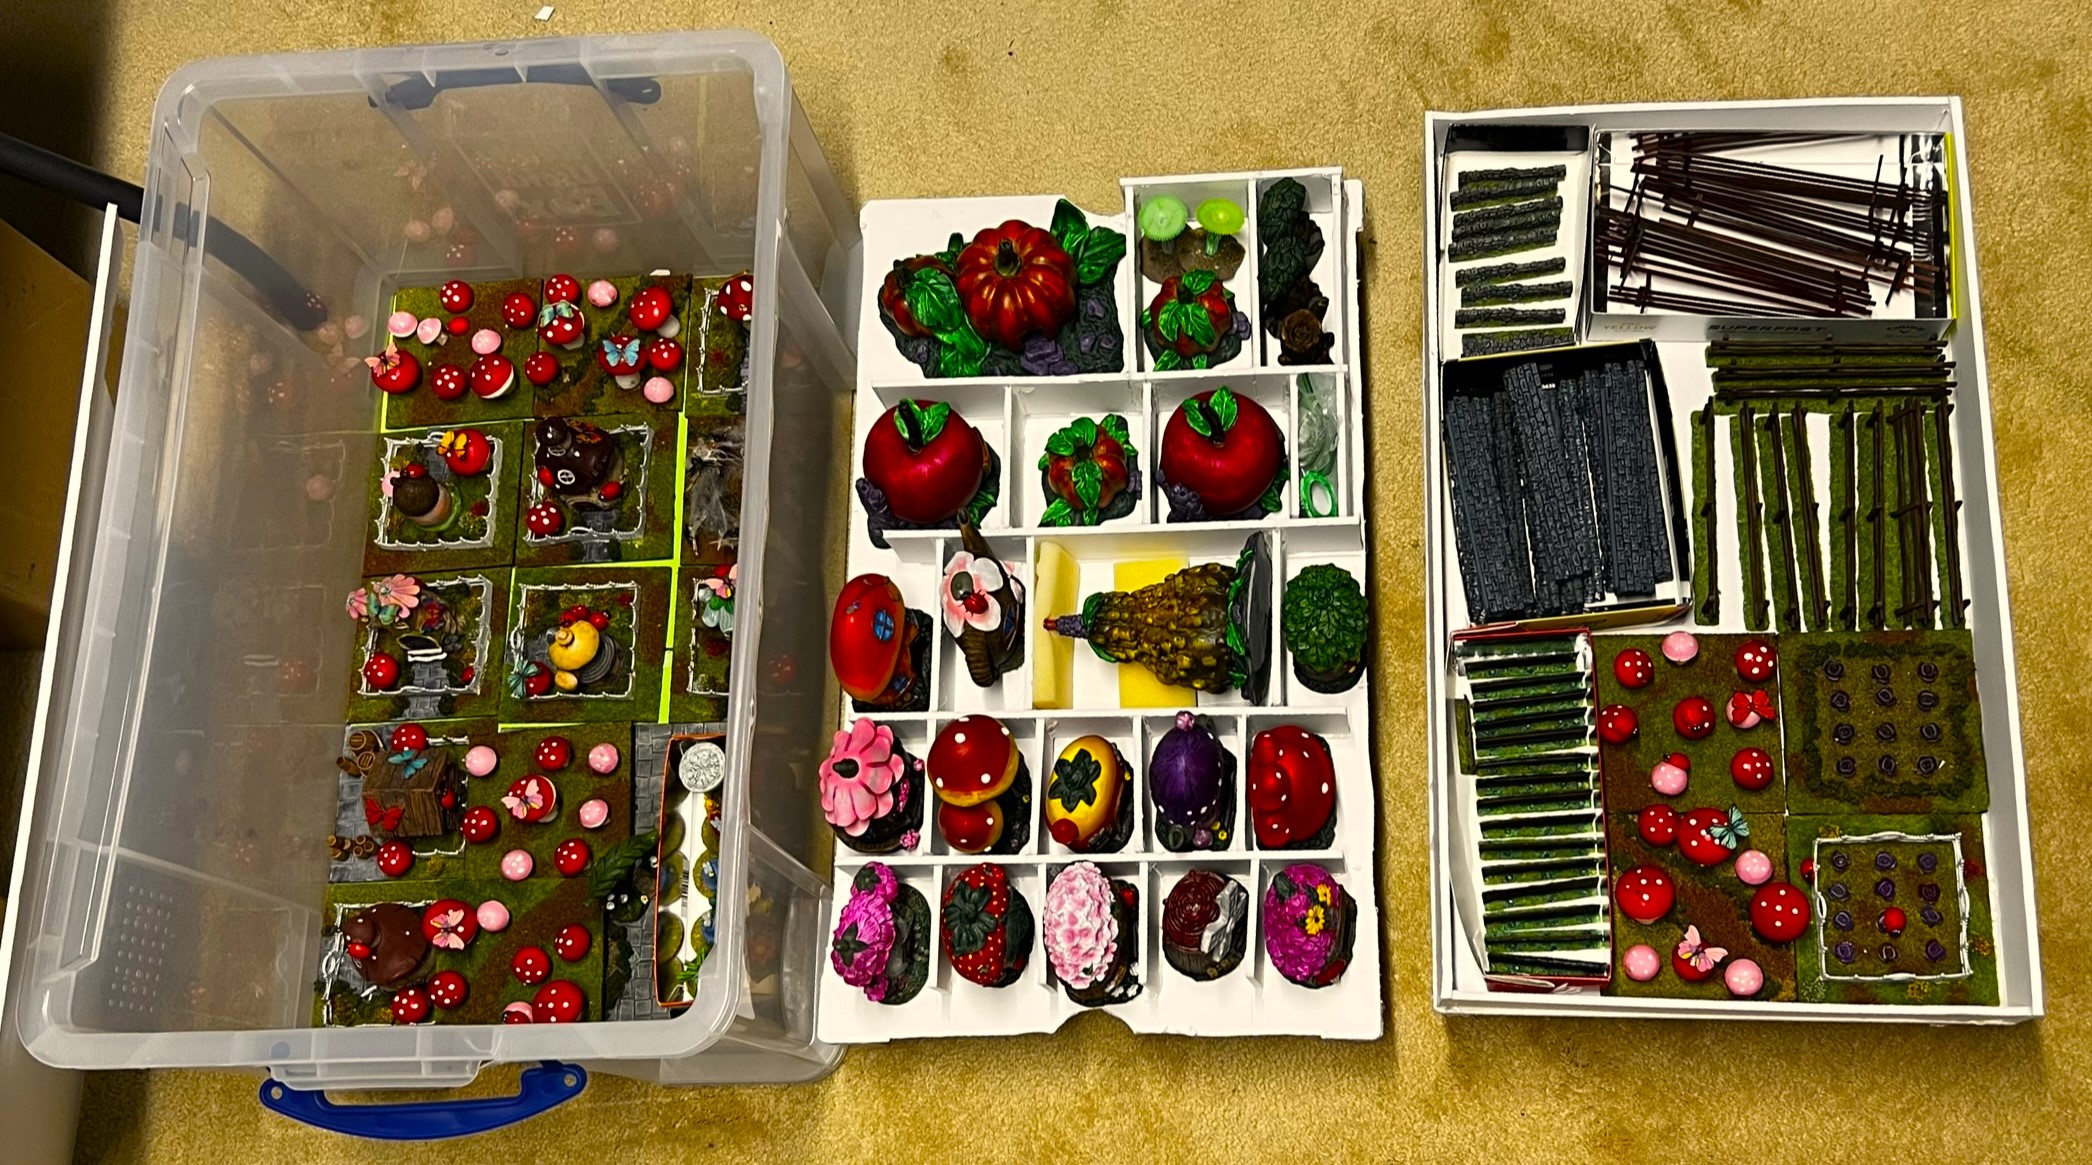
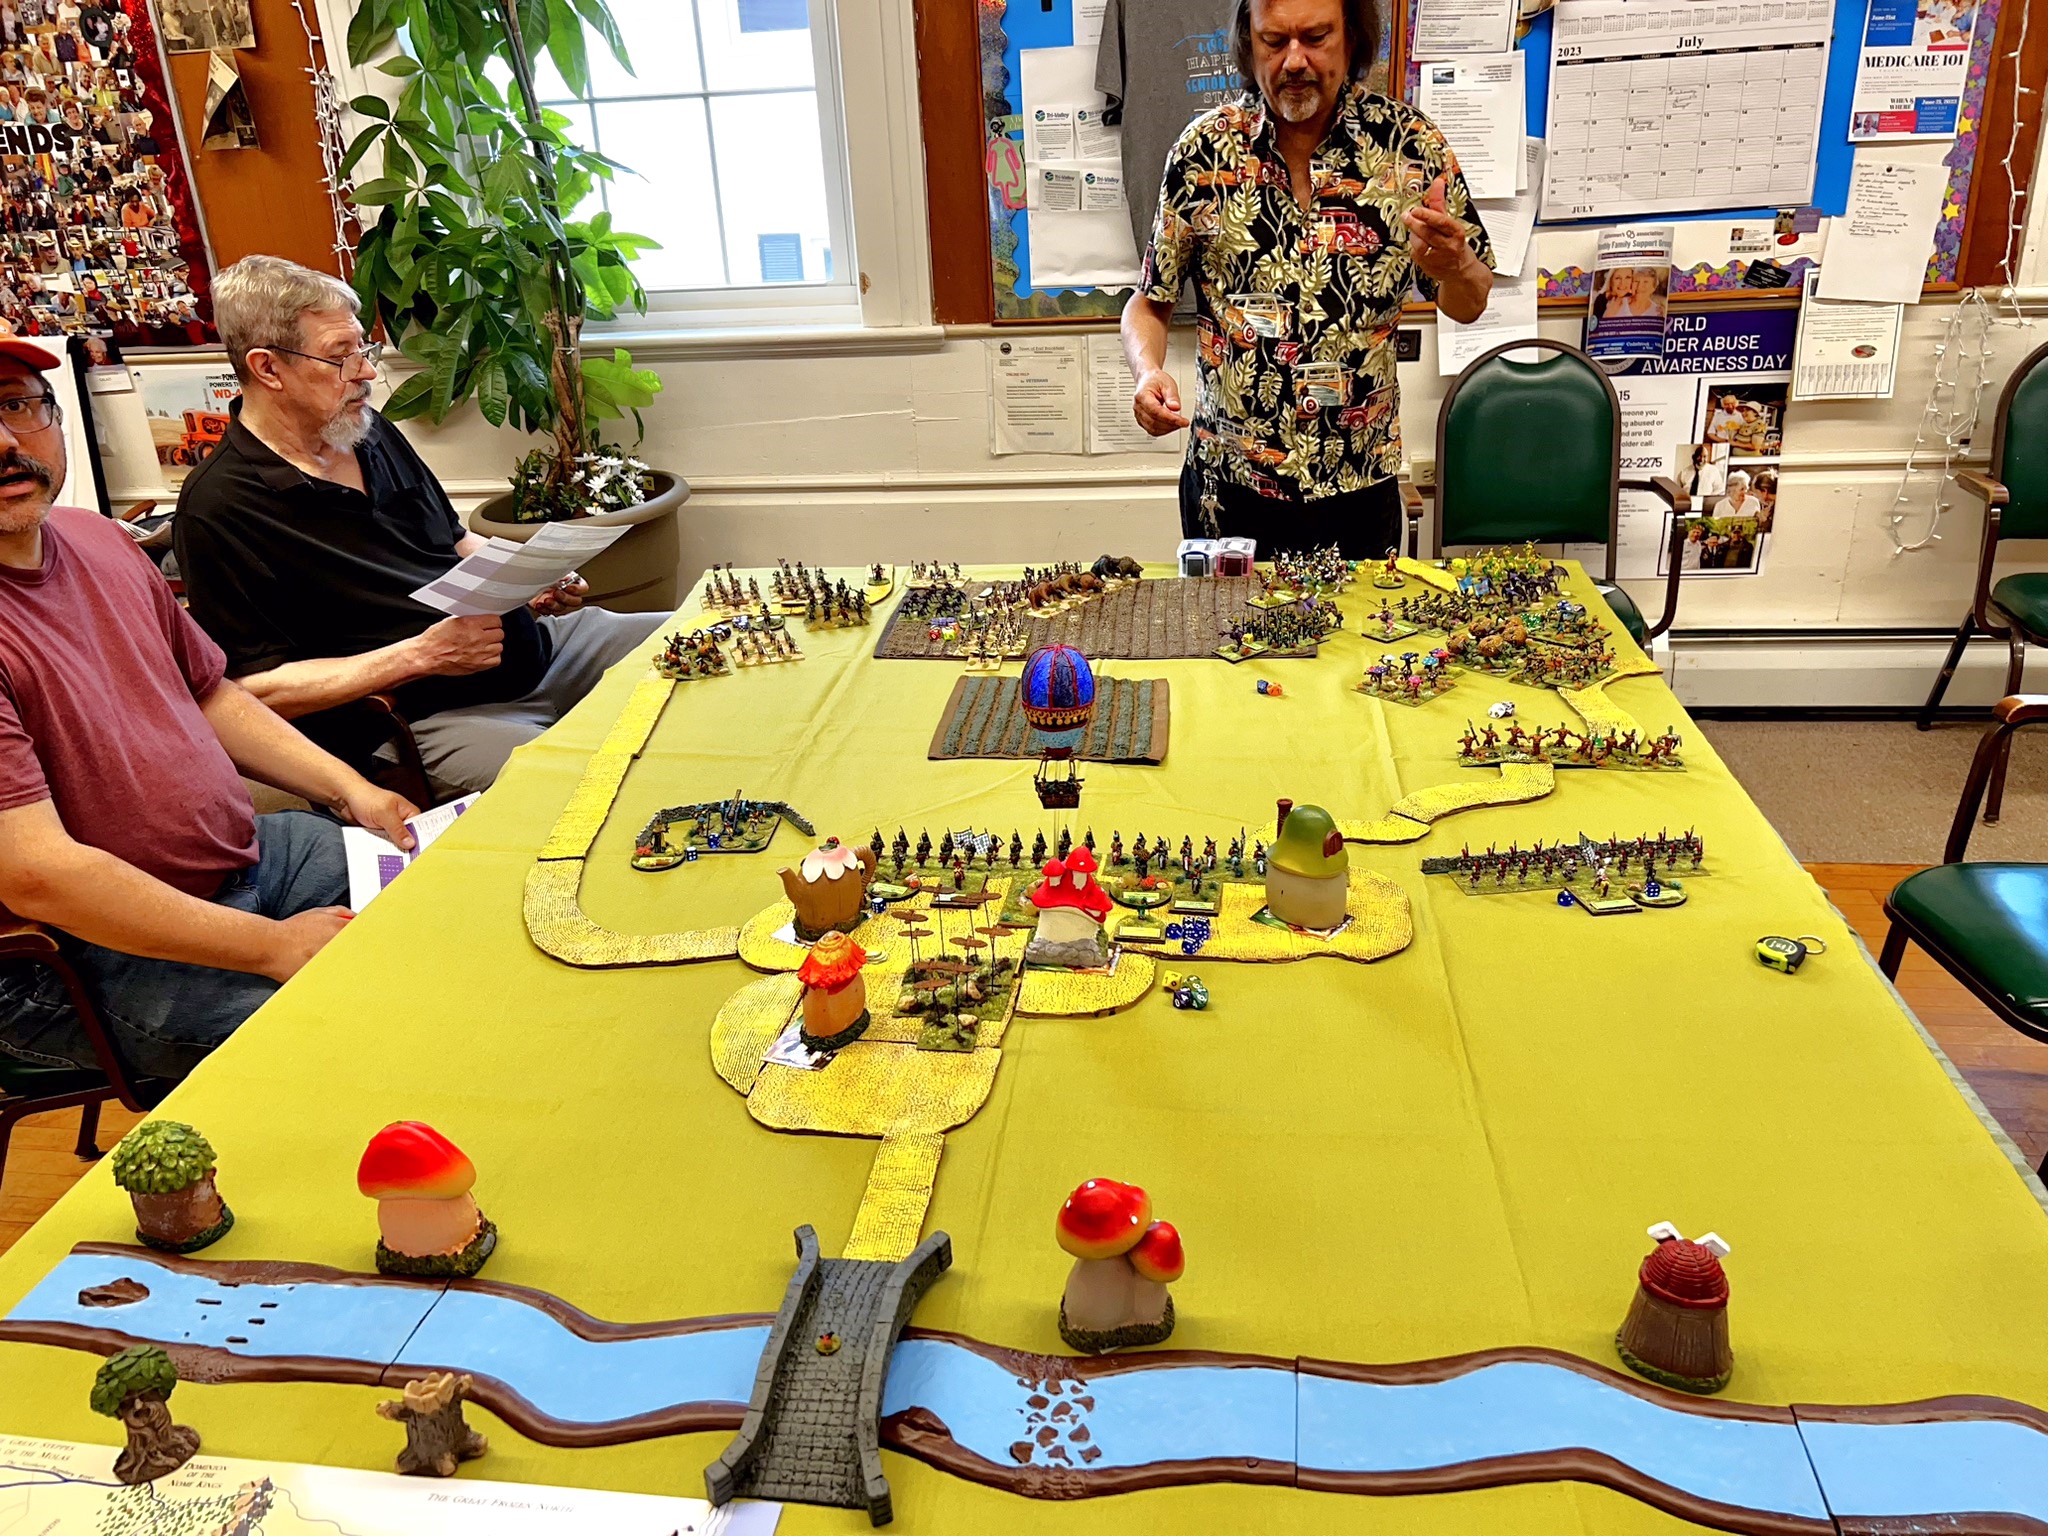

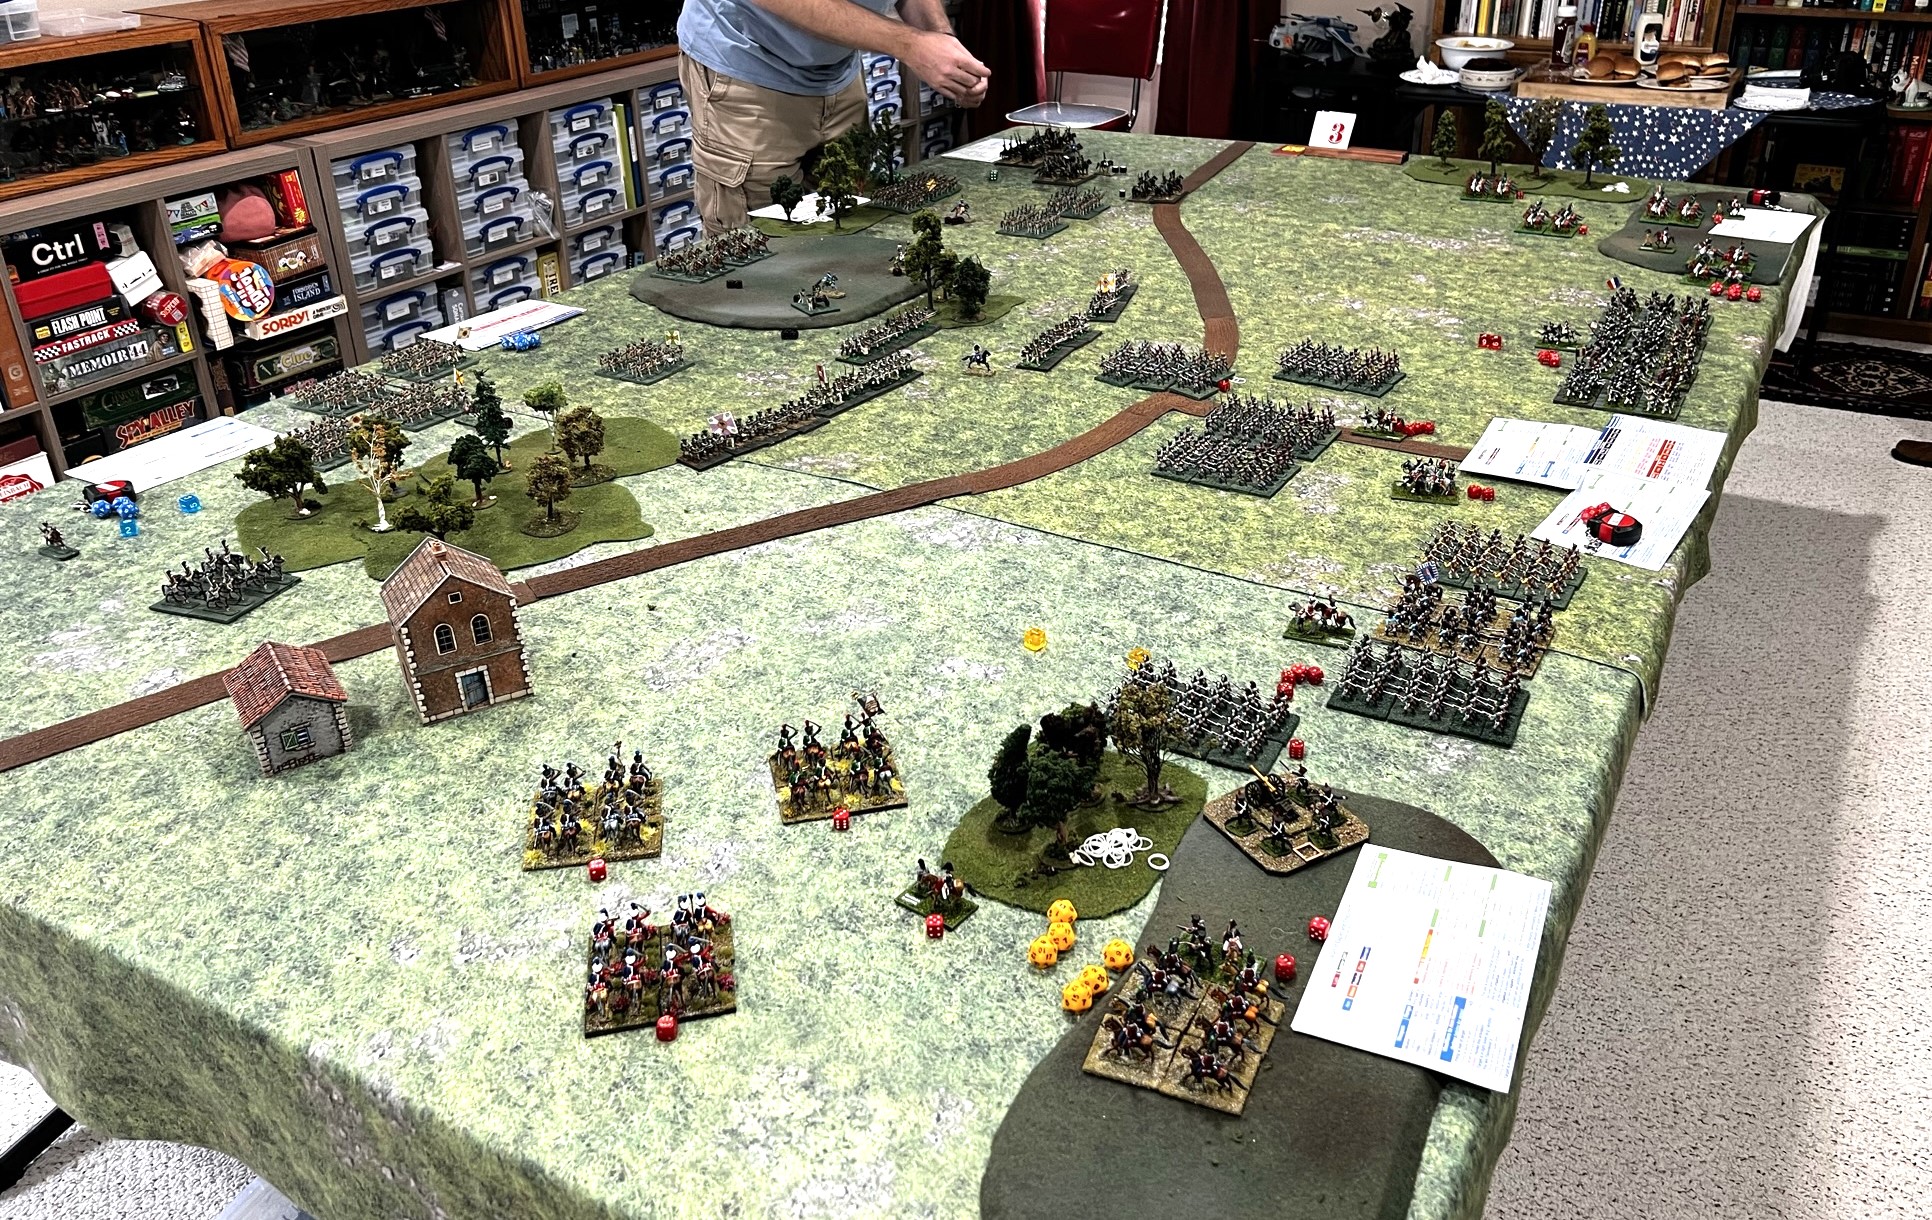
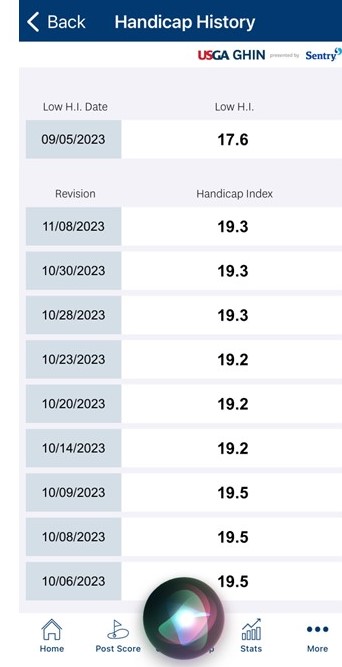


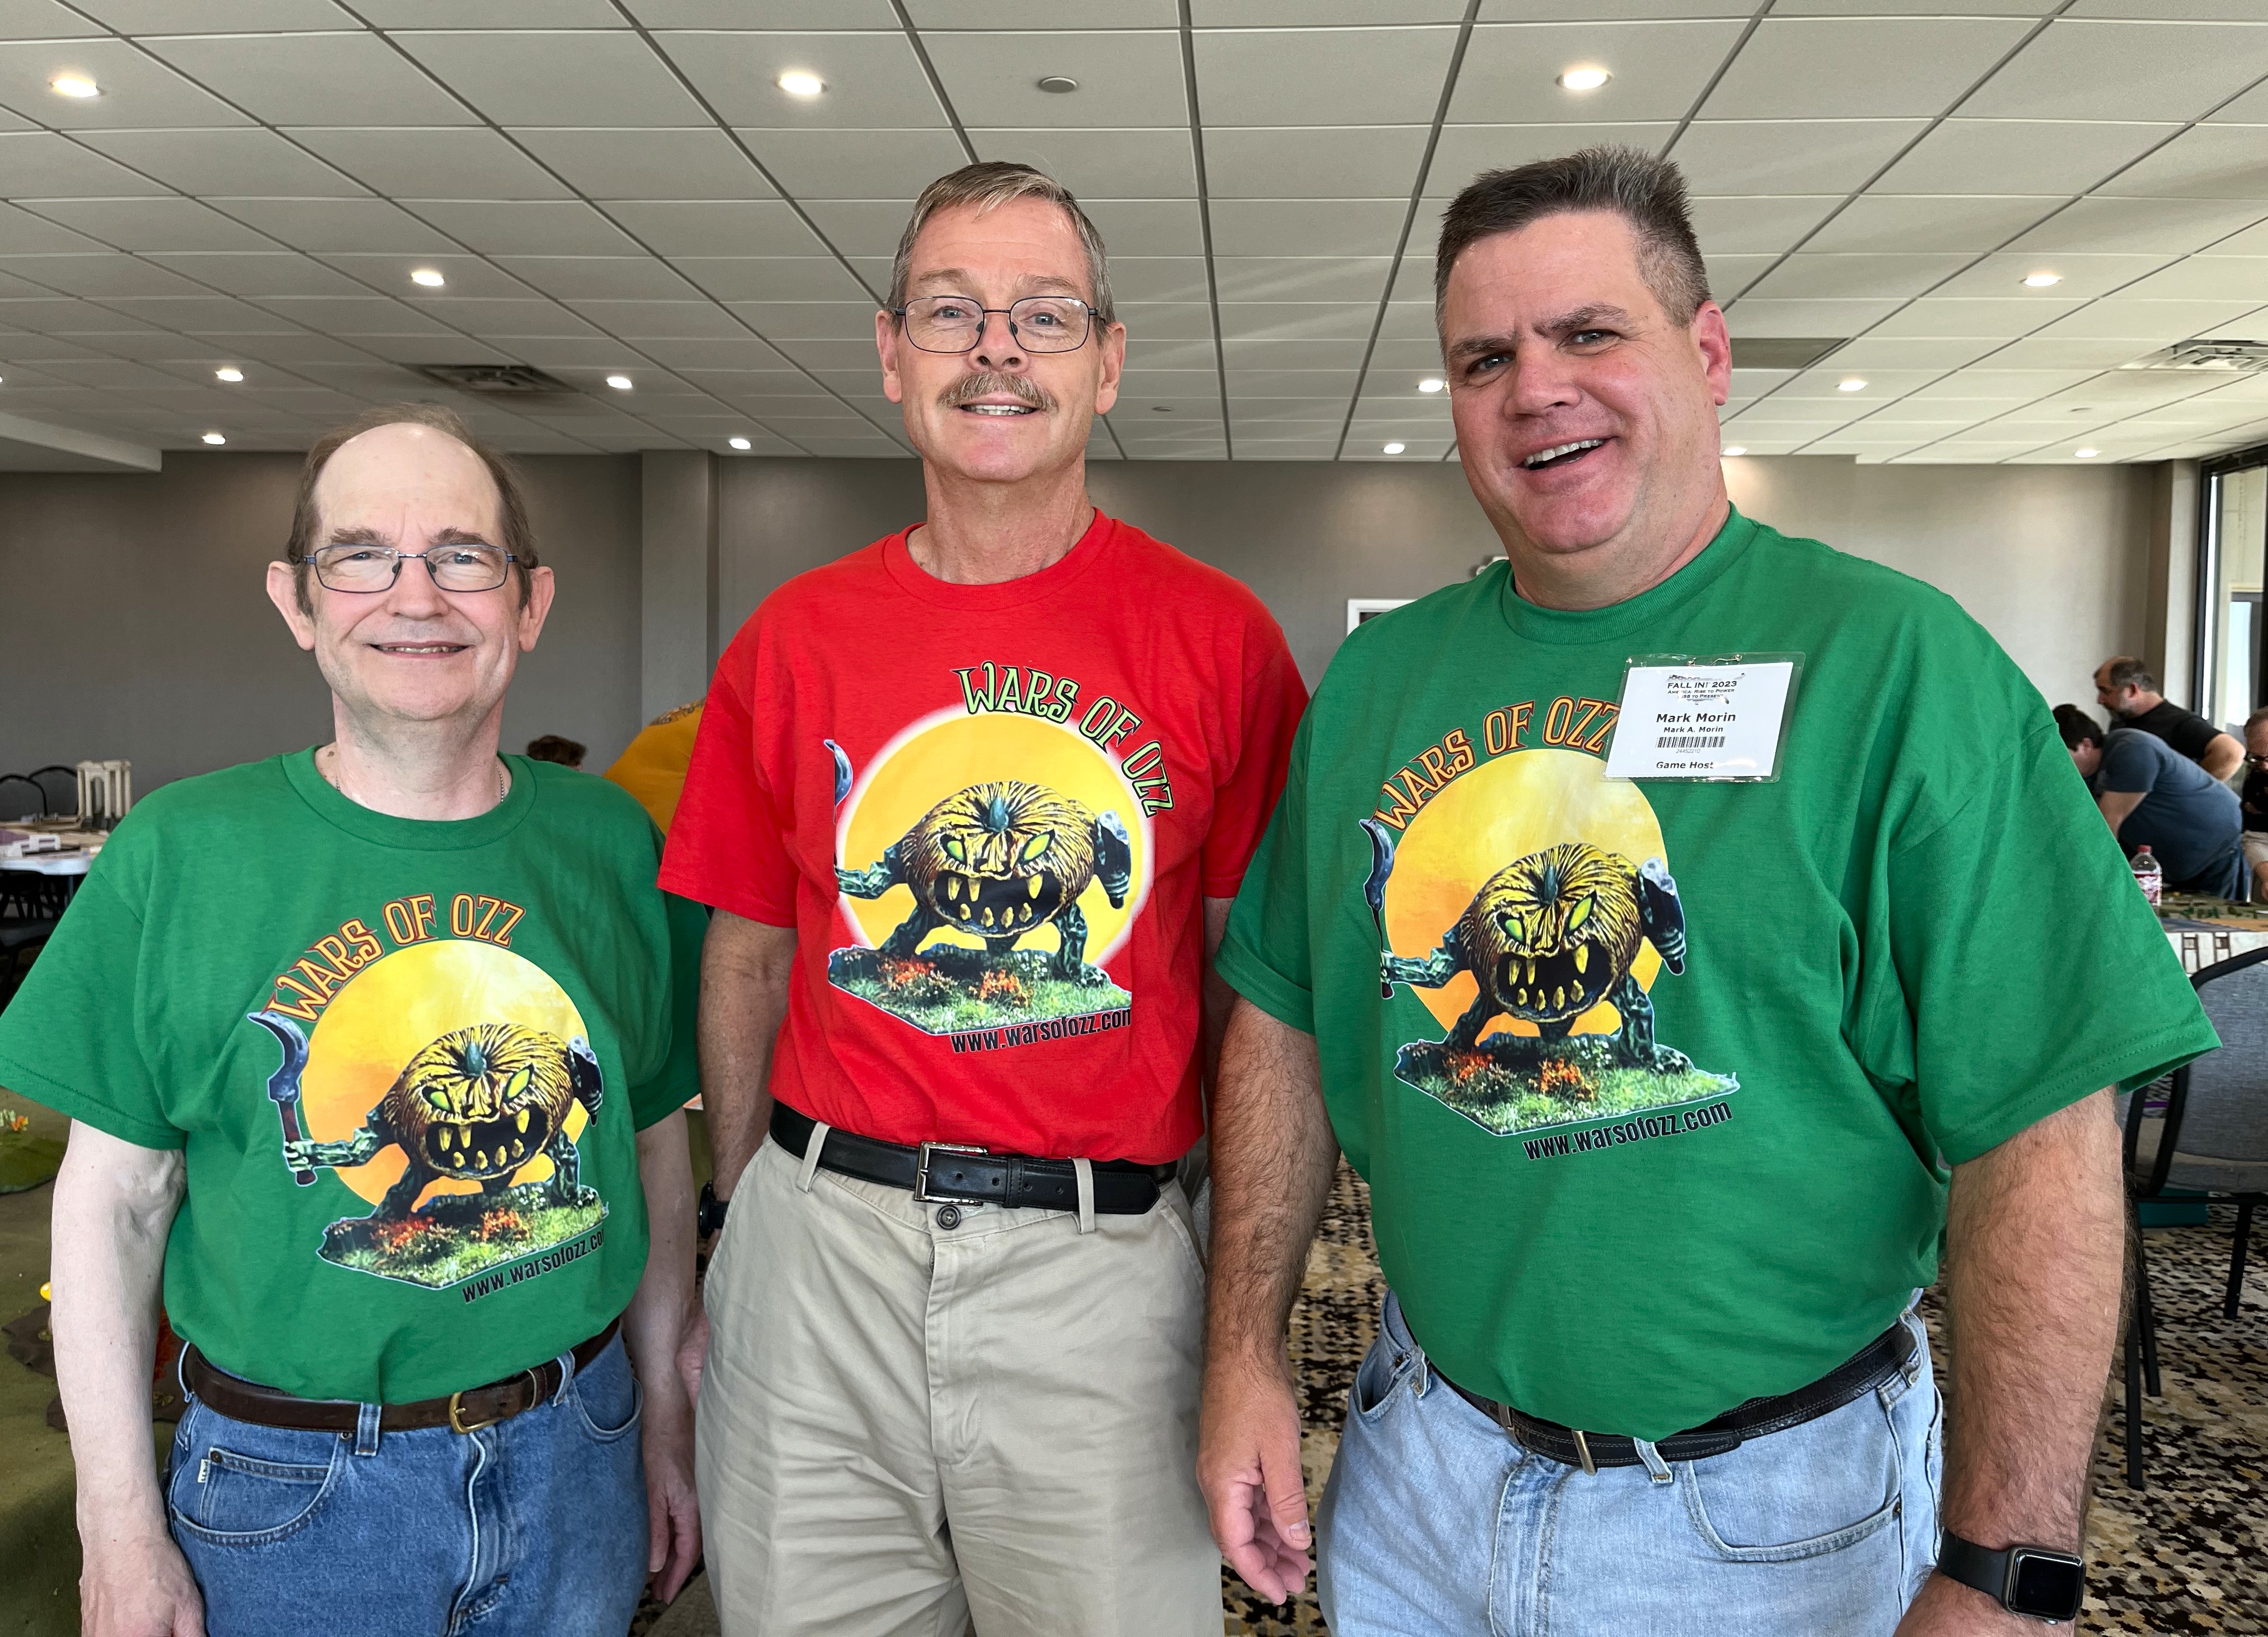

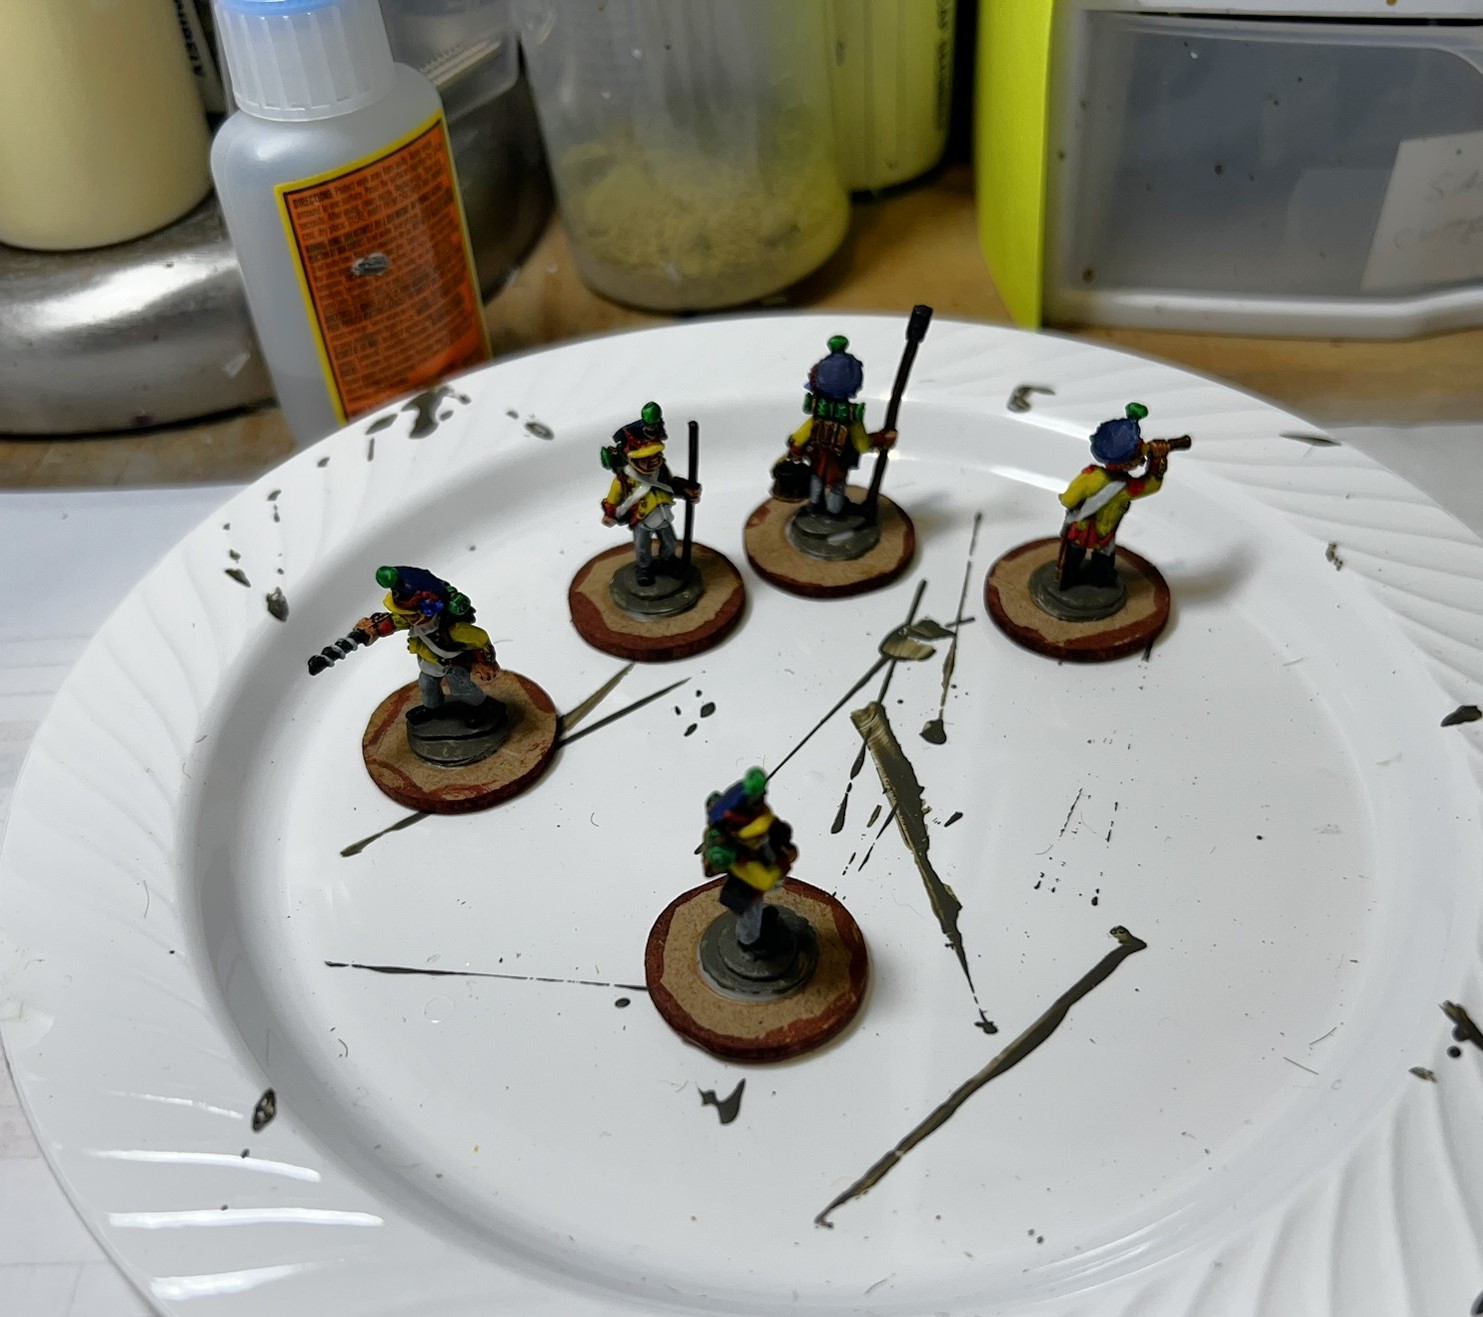


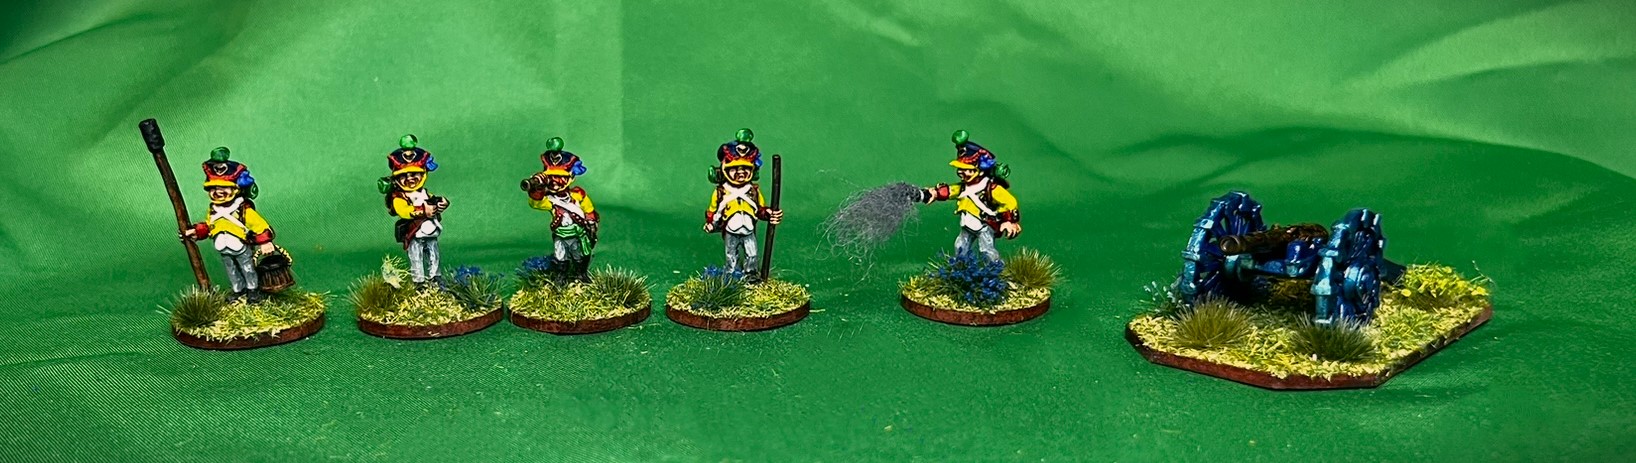
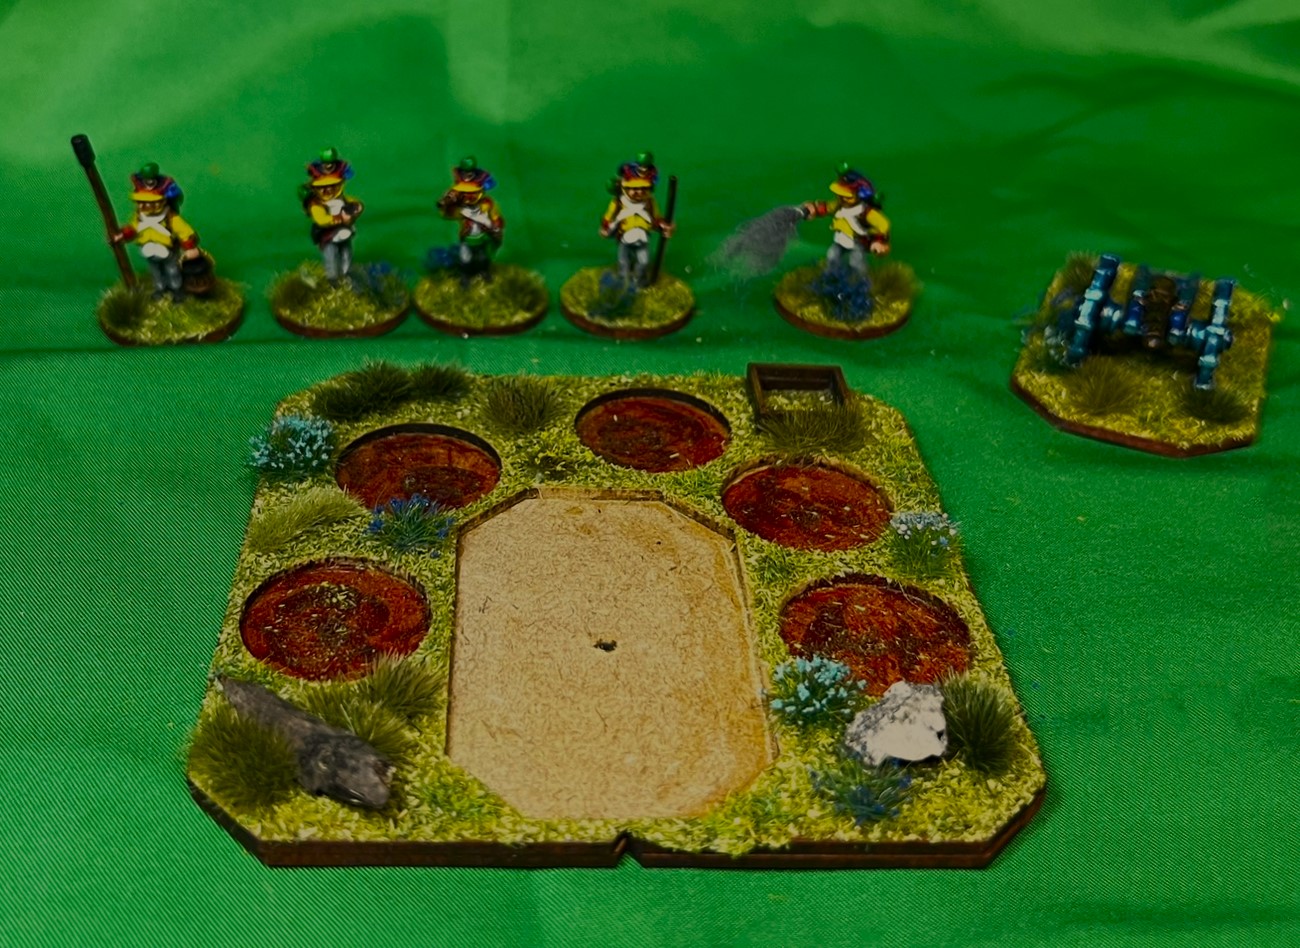
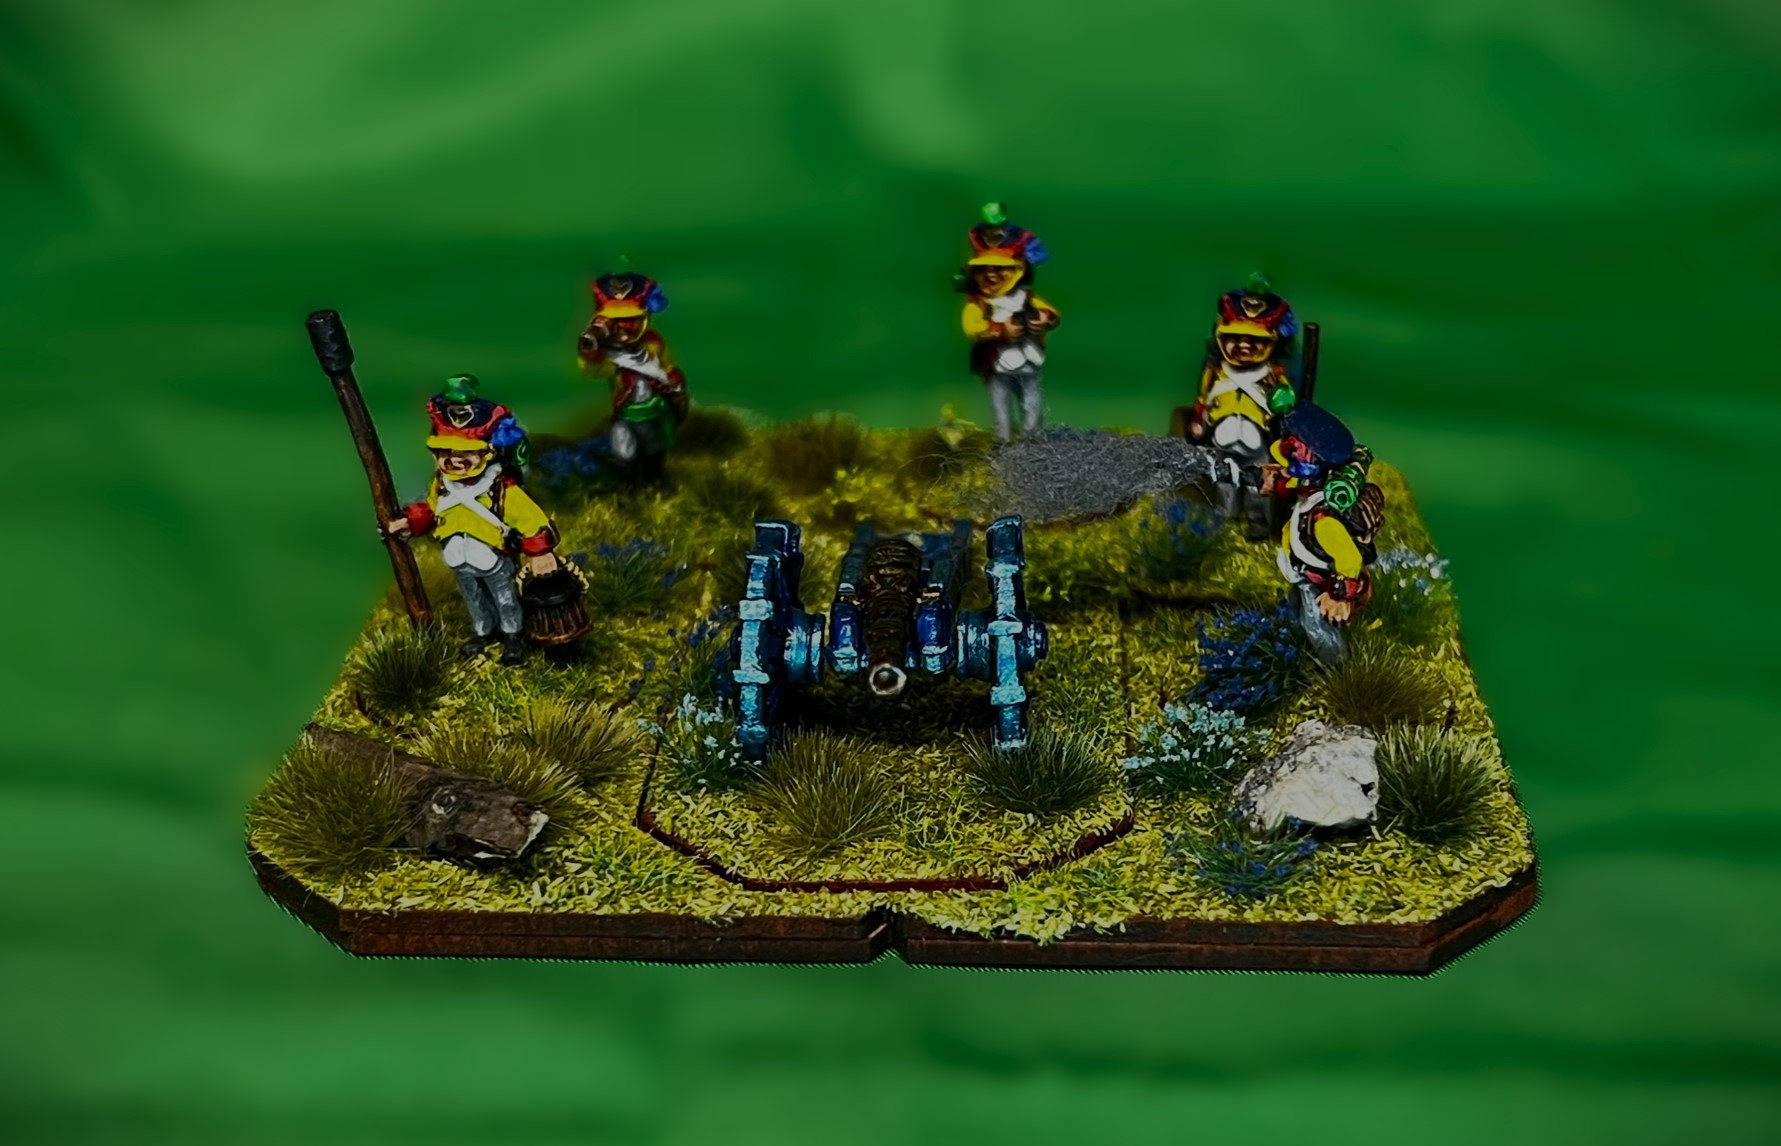


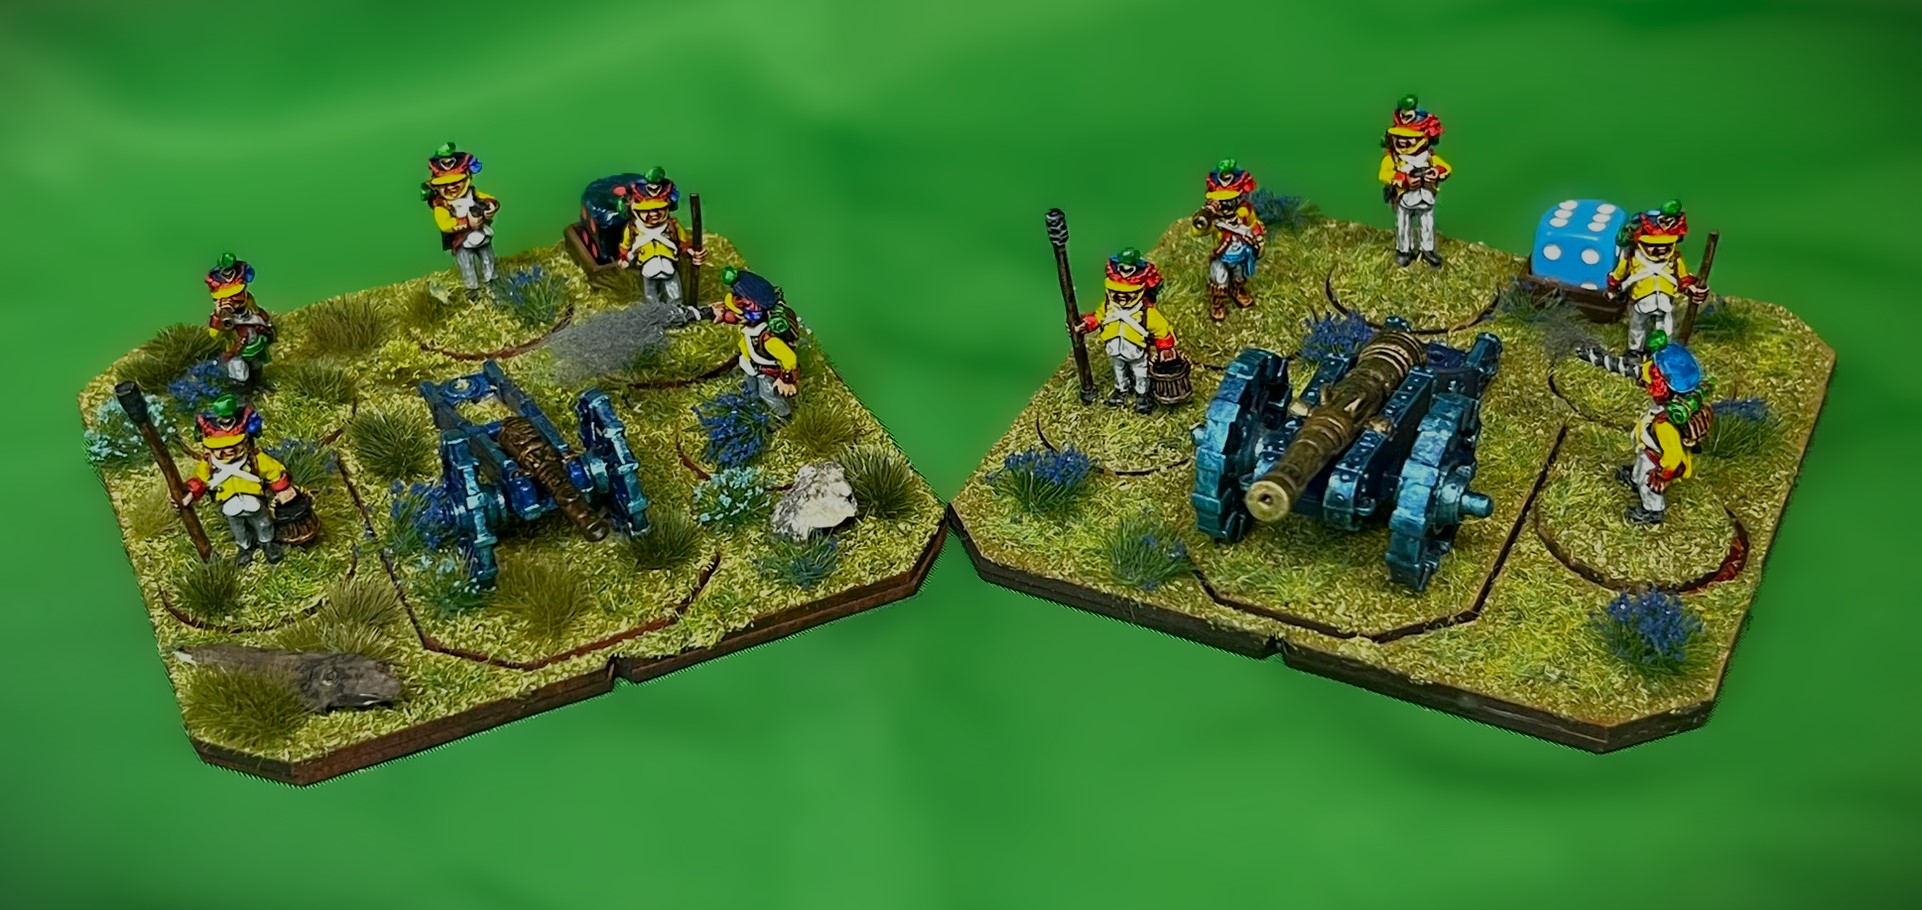
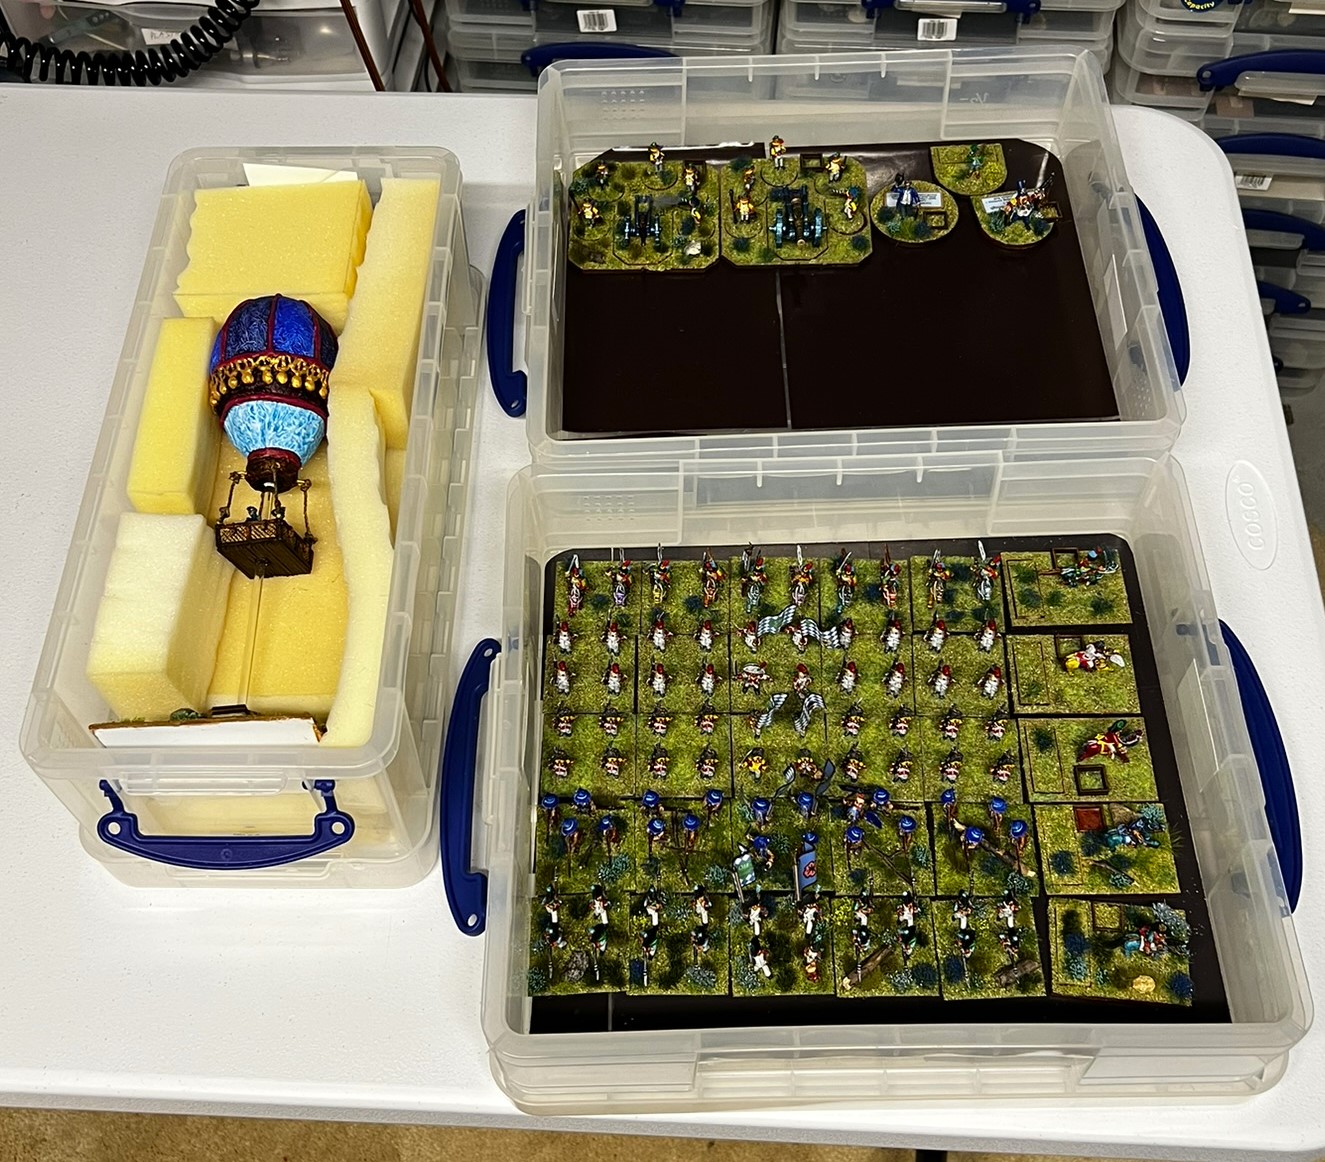
