Whim Whim Spearmen Regiments and Brigade Commanders (Wars of Ozz)

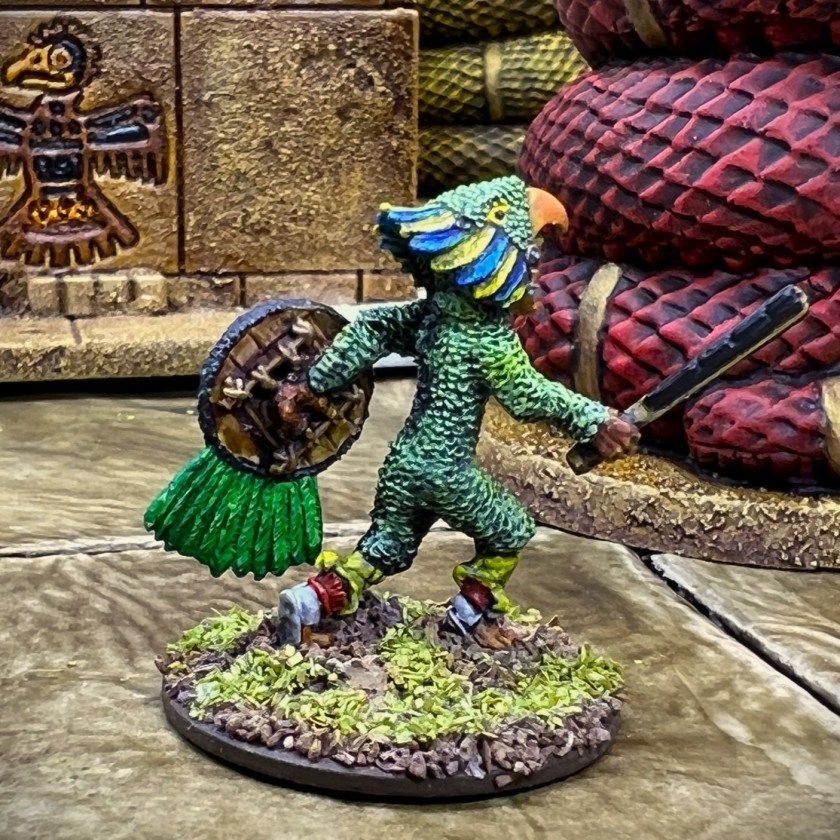
It’s been a while since I had a chance to finish a blog post on any new Wars of Ozz units. That doesn’t mean that I have not been working on any – in fact between golf since April (which you have seen a bit about here in this blog), HUZZAH in May, I have posted about the Noobi, allies of the Whim Whim. I have been working my way through some Whim Whim units.

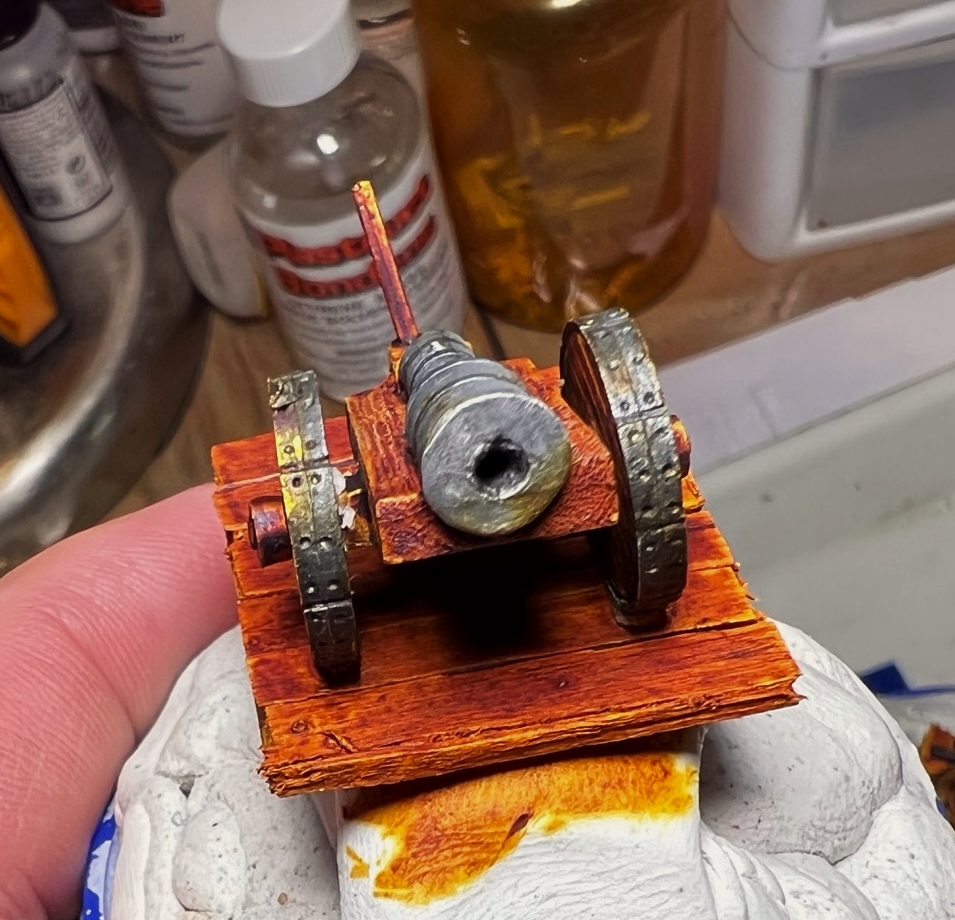
The Whim Whim are nomadic tribesmen who hail from the southern “underbelly” of Ozz. This faction has many very cool units, especially in terms of cavalry and infantry. (However, artillery? Nothing – as is appropriate for these nomads.)

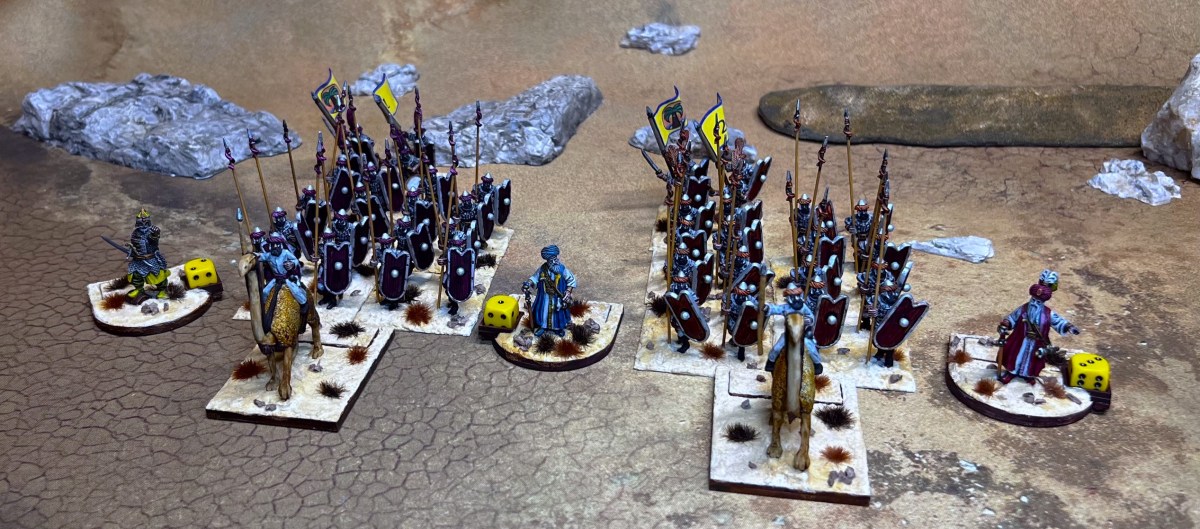
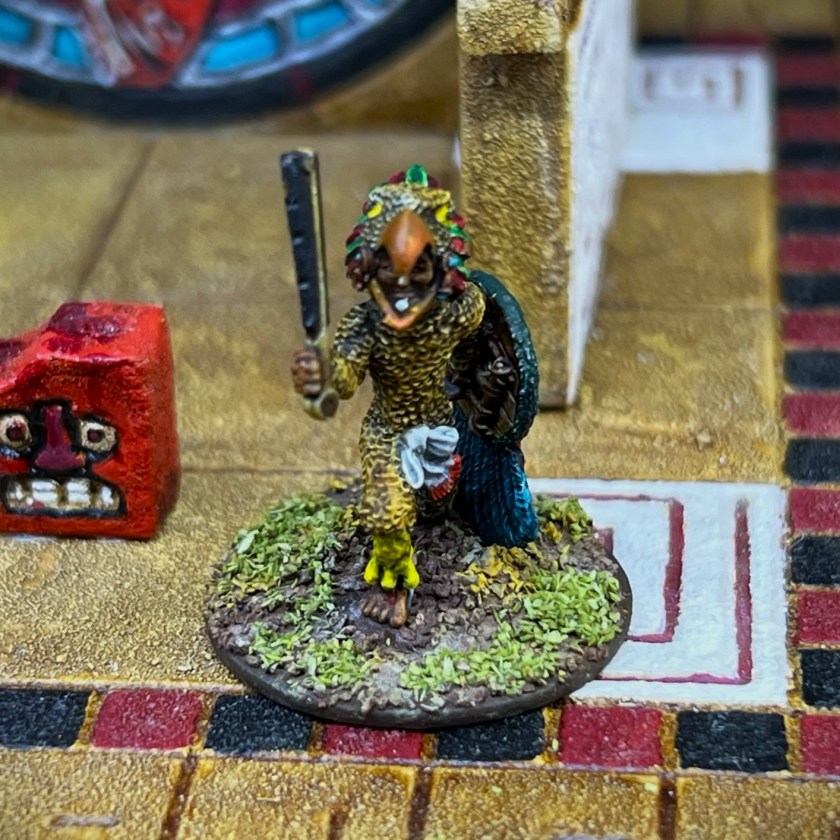
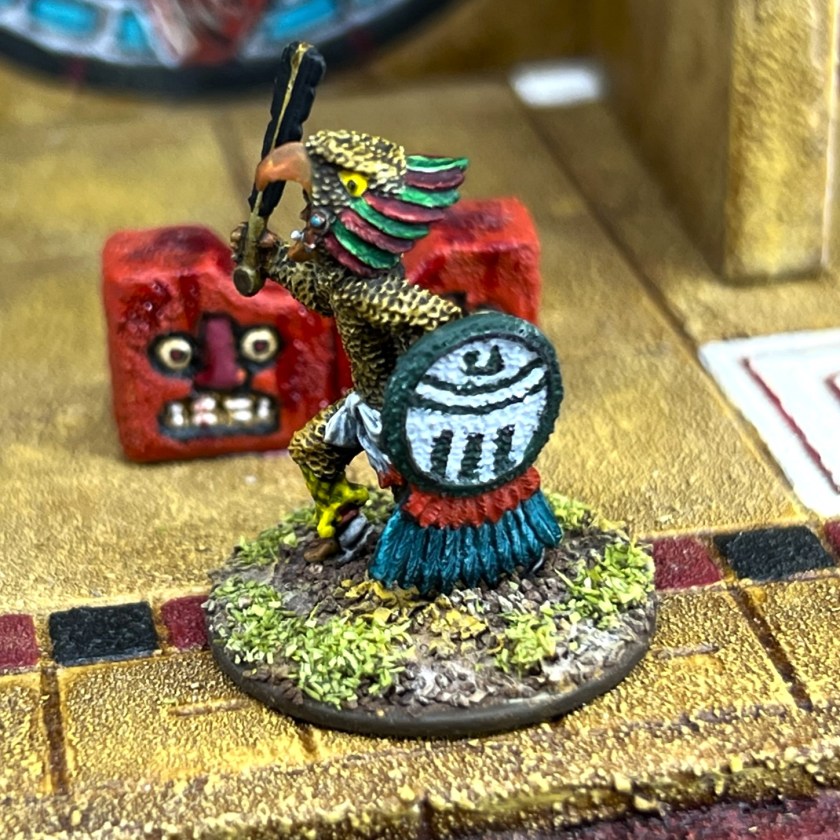
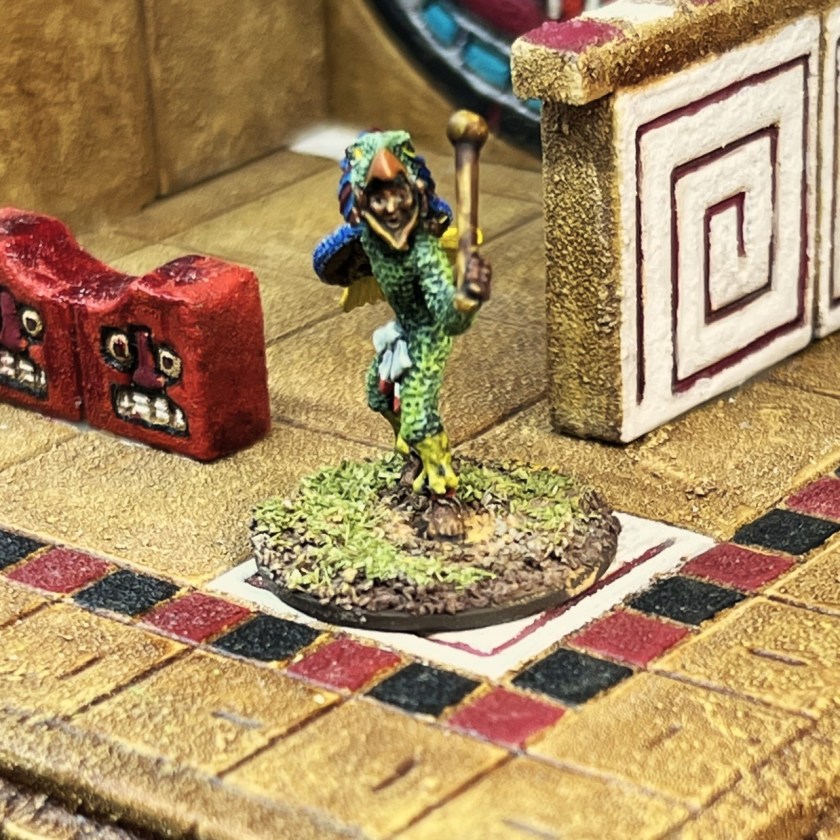
Still, I have enough figures to build two brigades for the Whim Whim in concert with the Noobi. I decided to start with an infantry core – with 2 Whim Whim Spearmen Regiments (WWSR’s). As a Whim Whim brigade can have up to 6 WWSR’s, this seemed to me to be a good start on the brigades. Of course, the two brigades would need leaders. My good friend Greg Priebe also 3D printed some “Ottoman Noble Admirals” for me that will serve as either ersatz brigade or divisional commanders until more are avaialble from Old Glory. I worked on the leaders at the same time as I did on the WWSR’s.

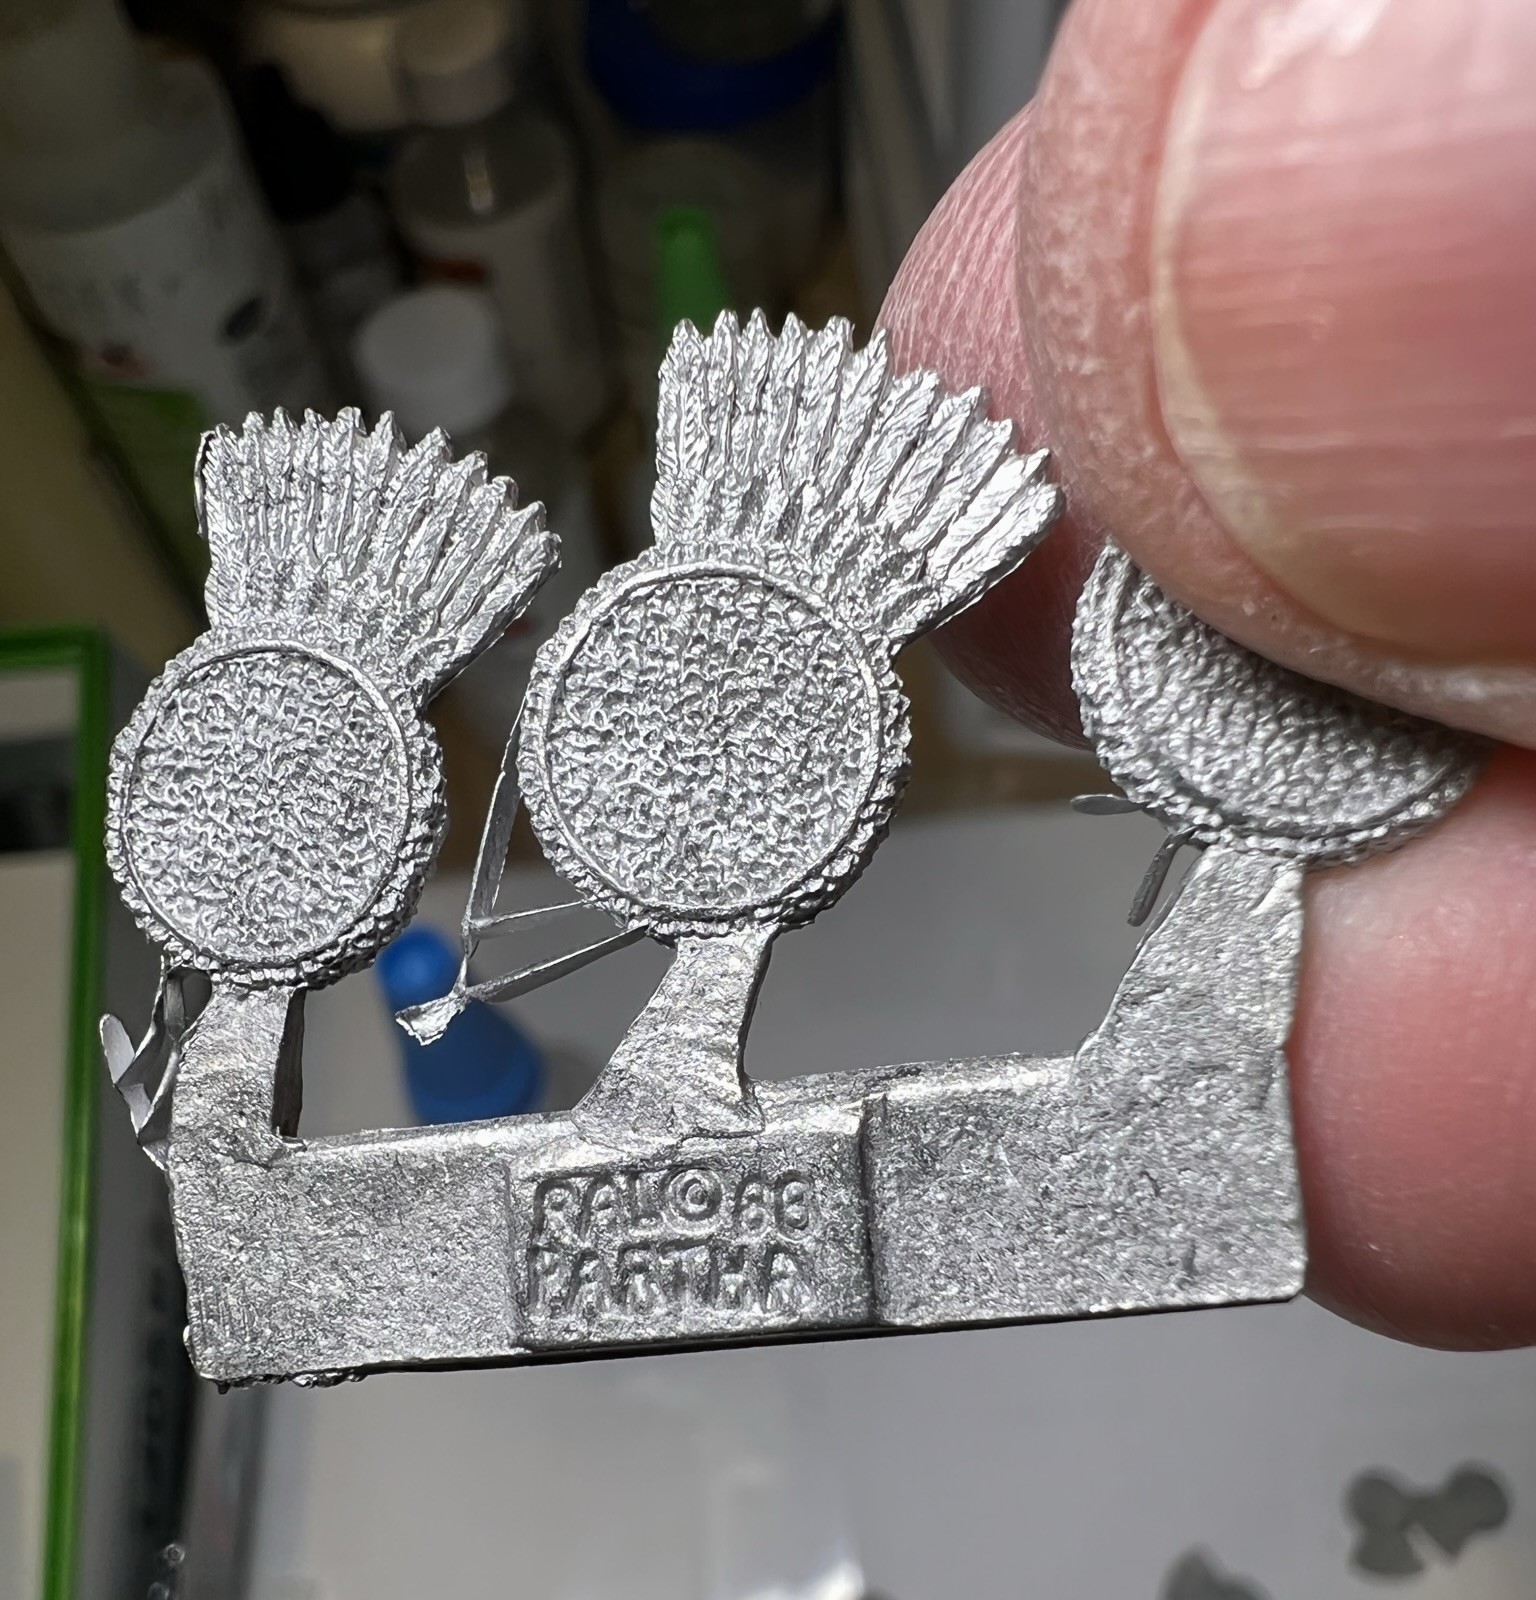
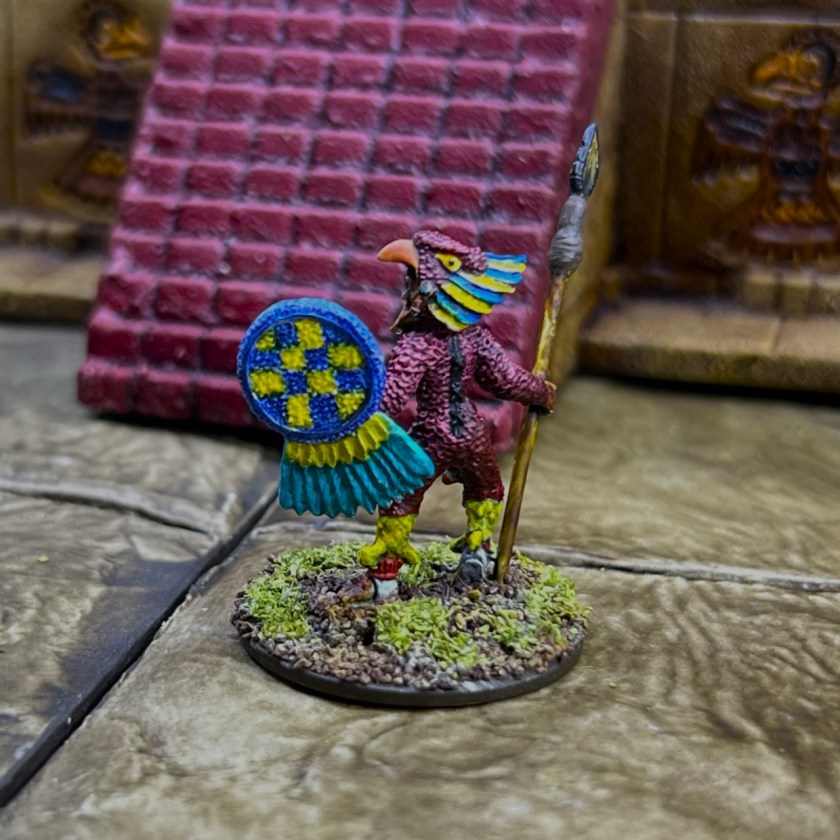
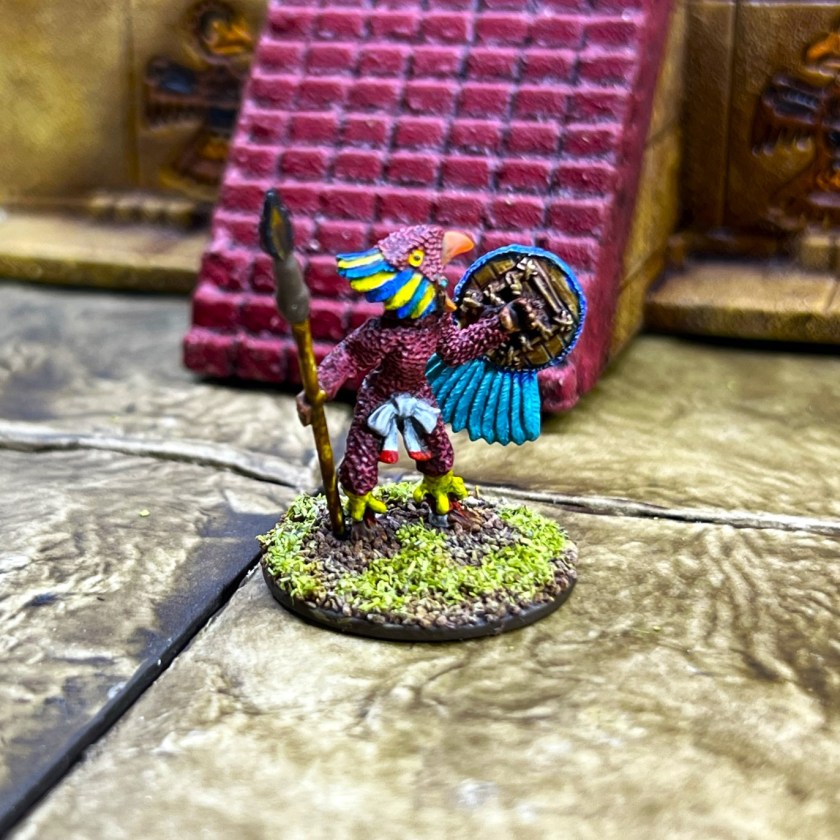
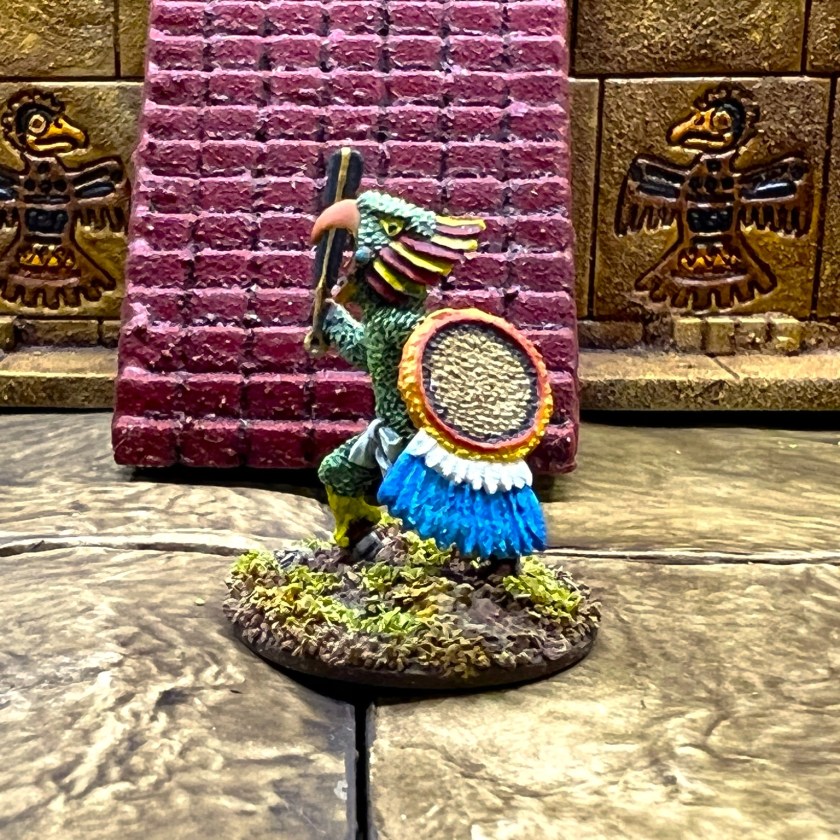
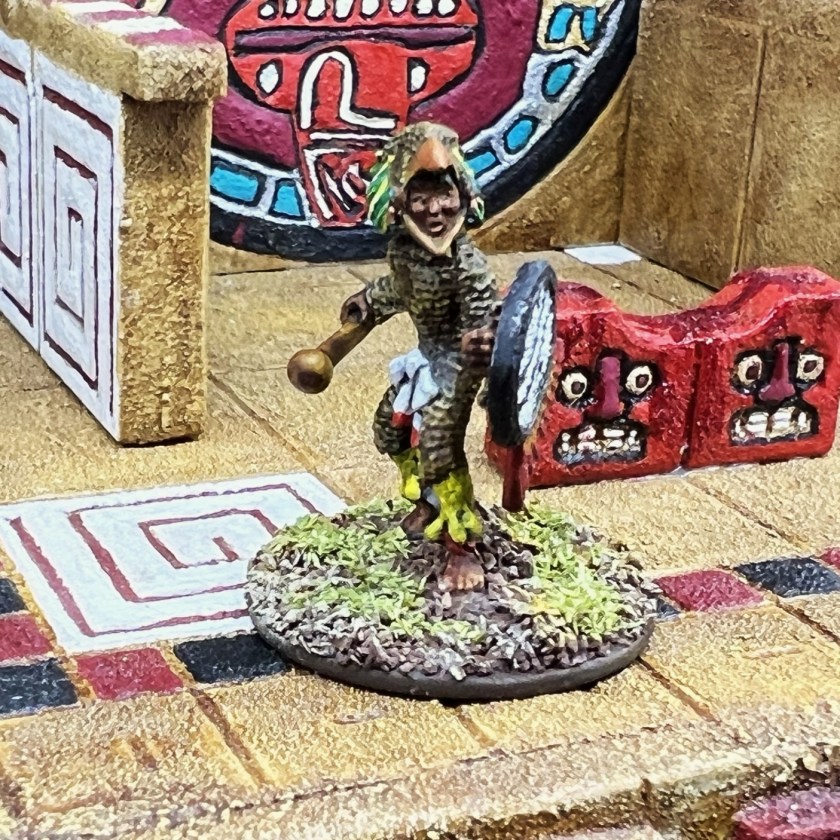
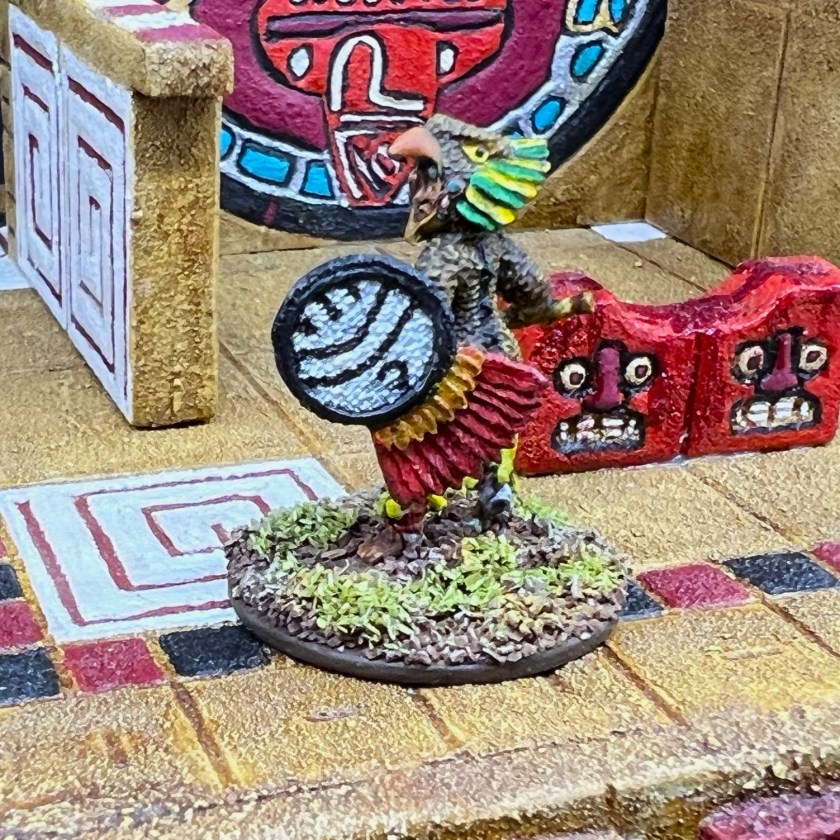
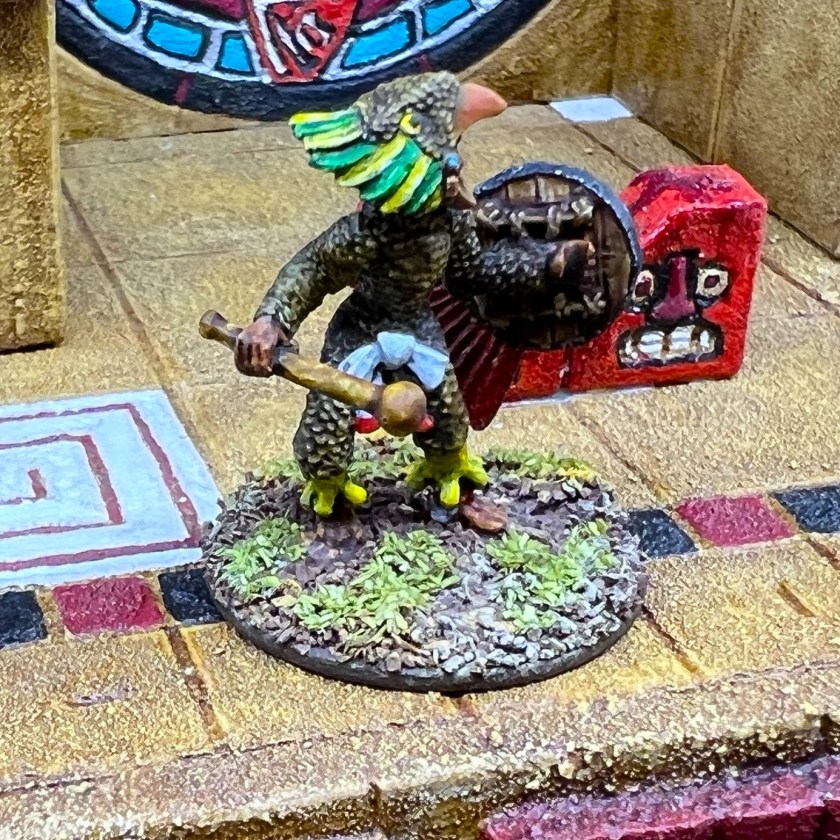
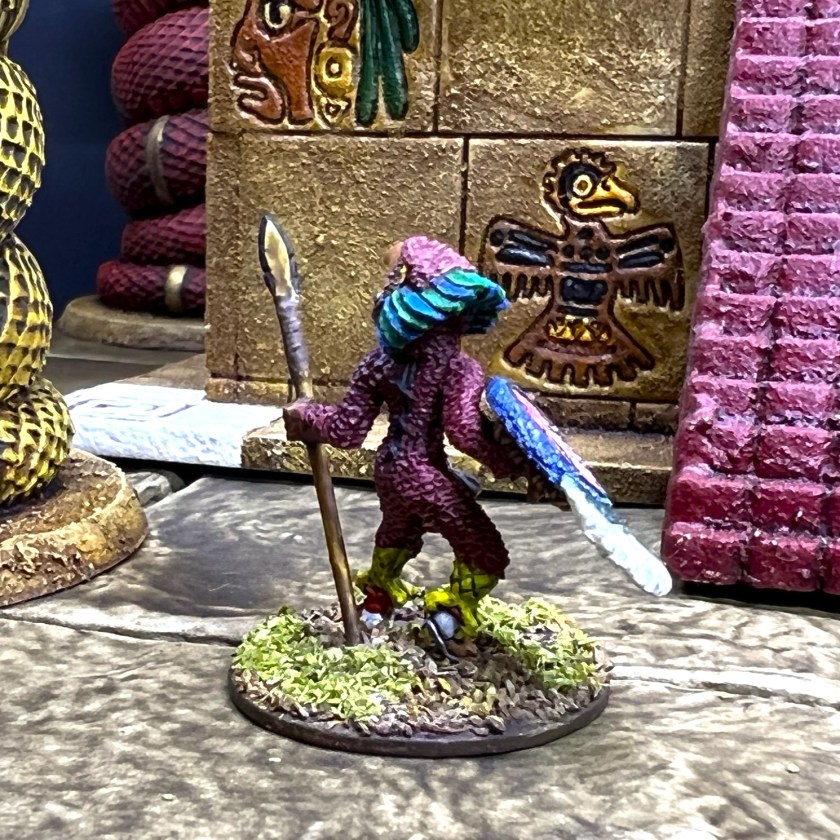
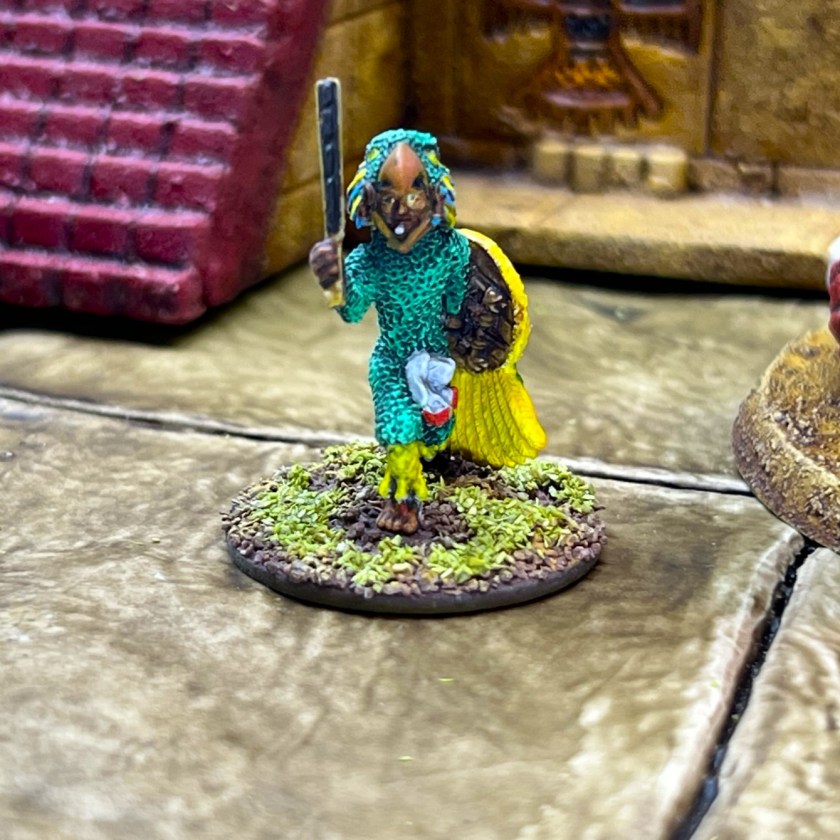
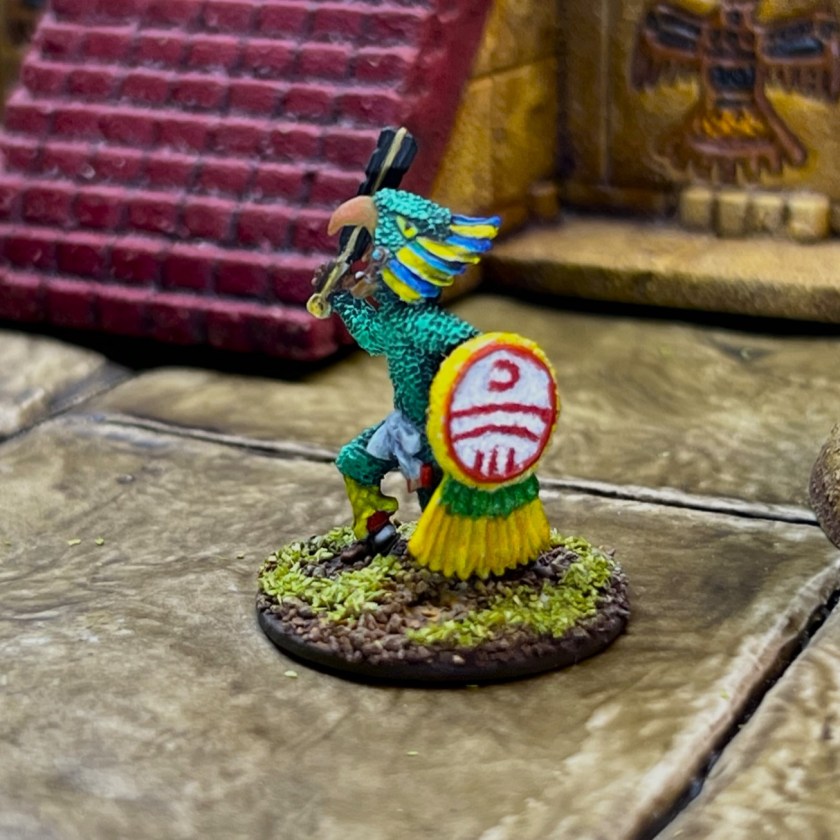
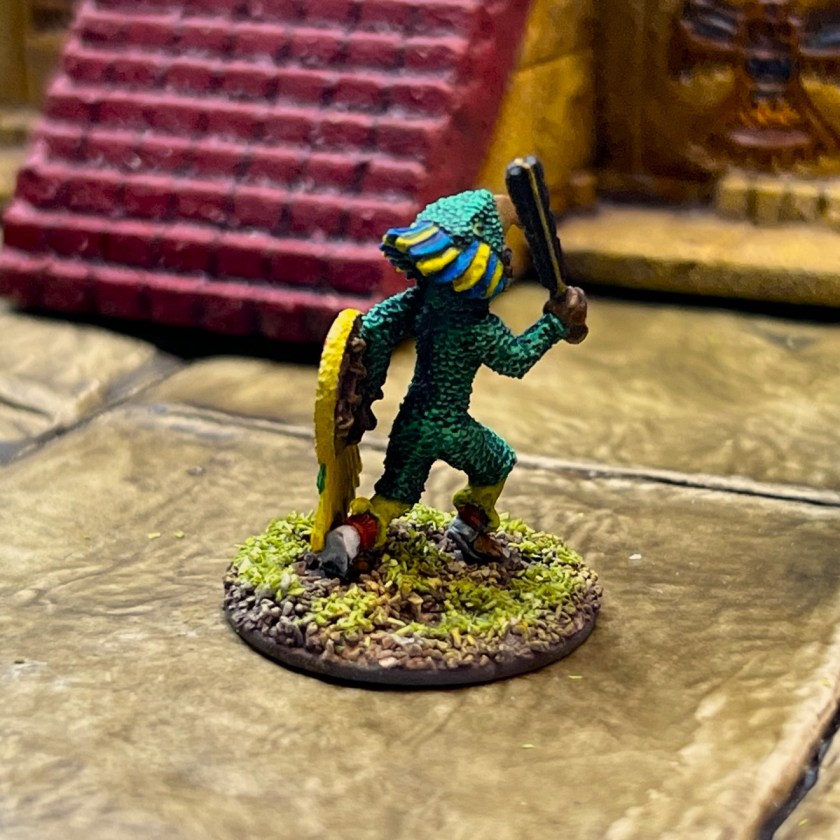
The regiments are listed on the website under “The Kingdom of Whim Whim Tribes” as SKU#1400, “Whim Whim Spearmen with Command”. There are 4 command figures, 16 spearmen, and a regimental leader mounted on a siliyiplix in each regiment. Don’t worry – I cannot pronounce it (the mount) either – but it’s the common one for the WW. Apparently it’s a camel-like animal with 6 eyes and a double tail. This is Ozz after all… That makes a total of 42 figures for both WWSR’s together.

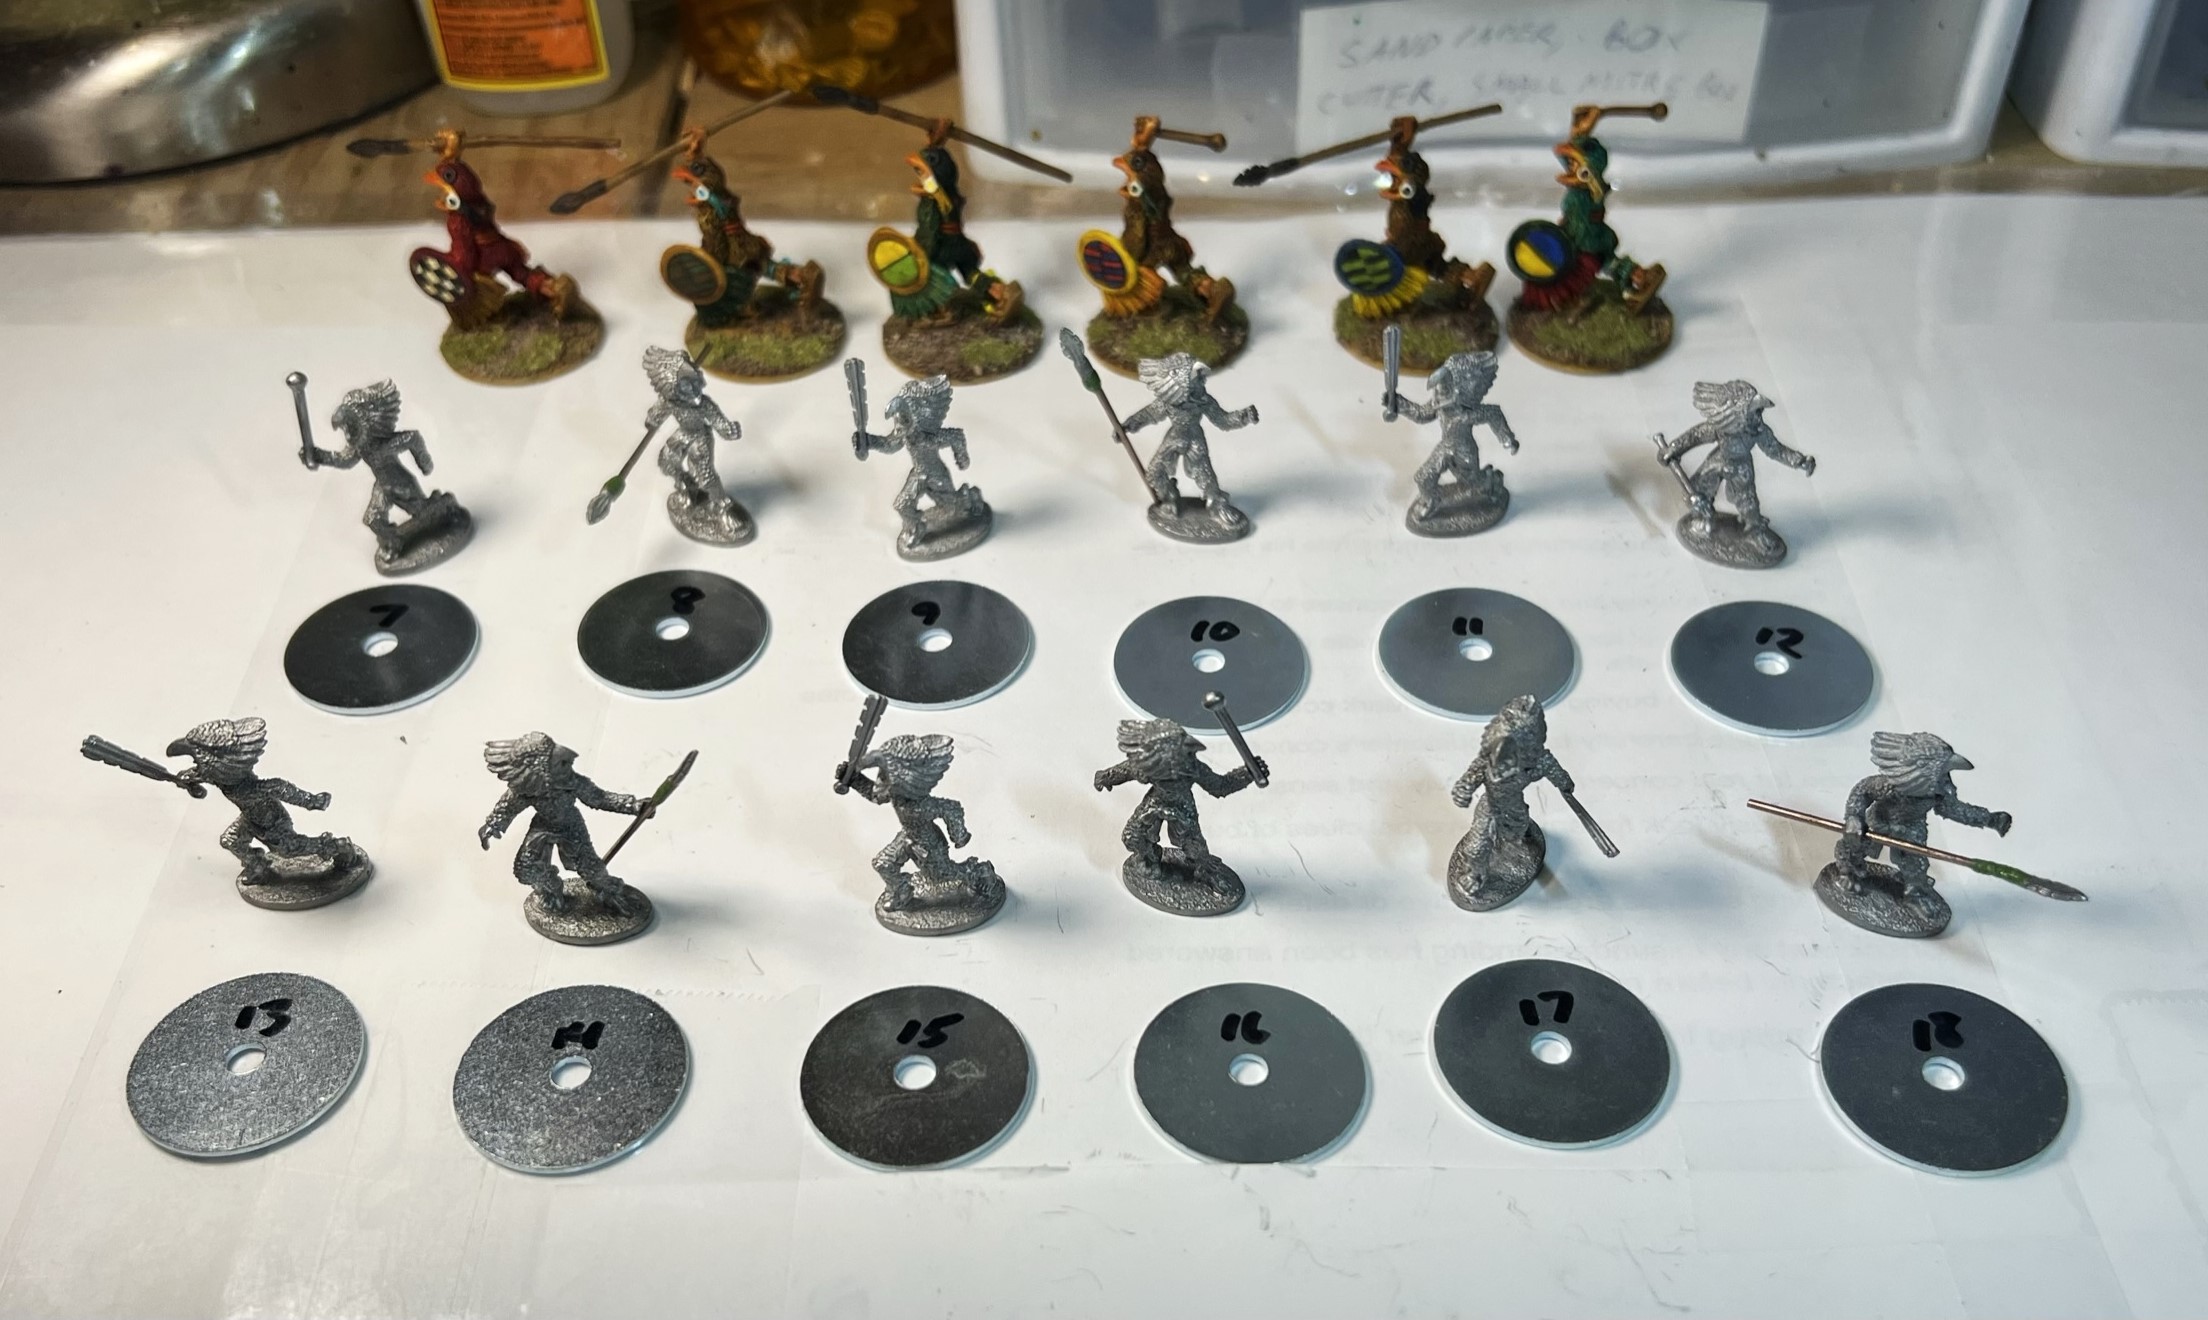
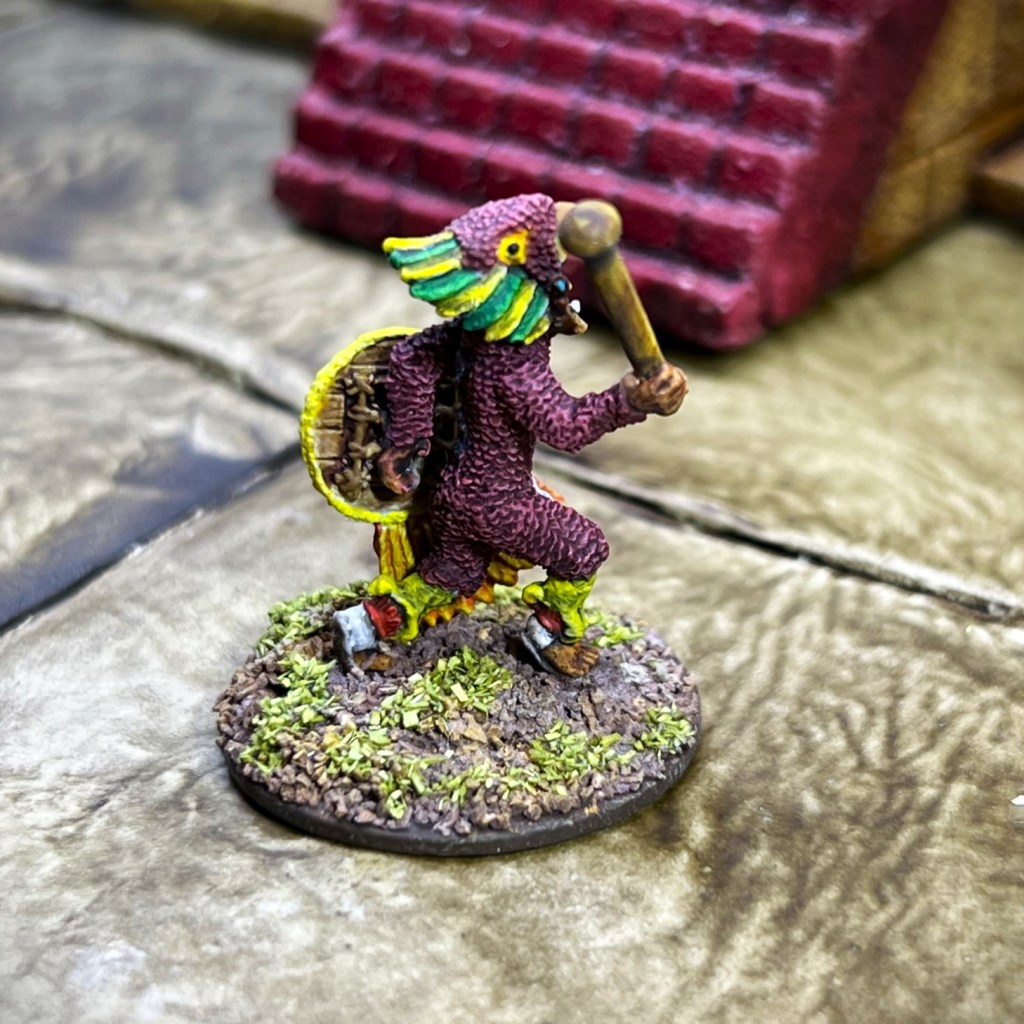
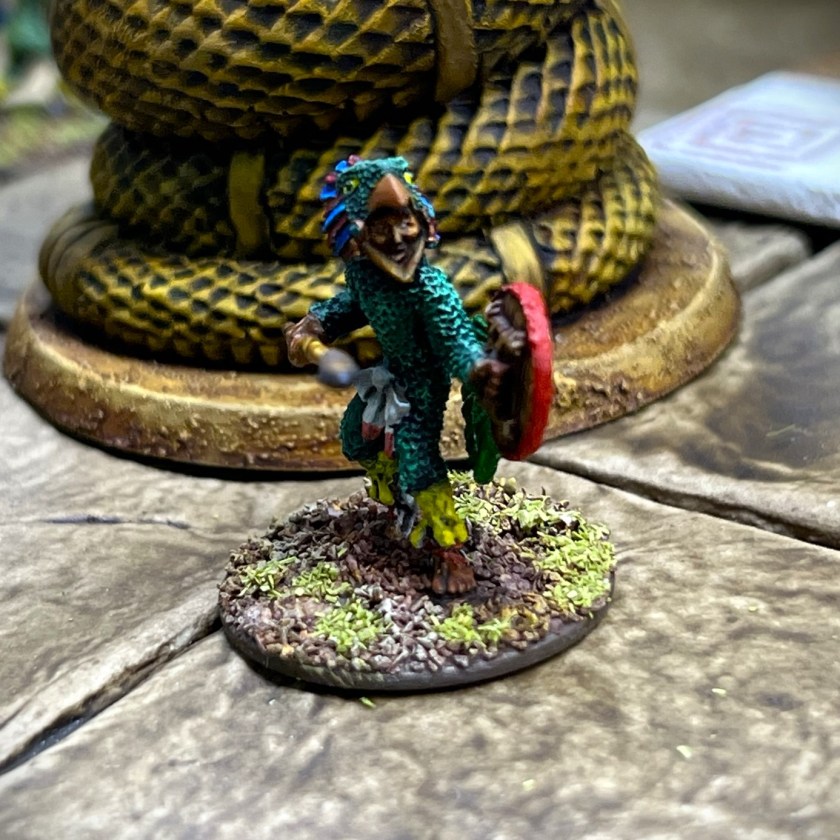
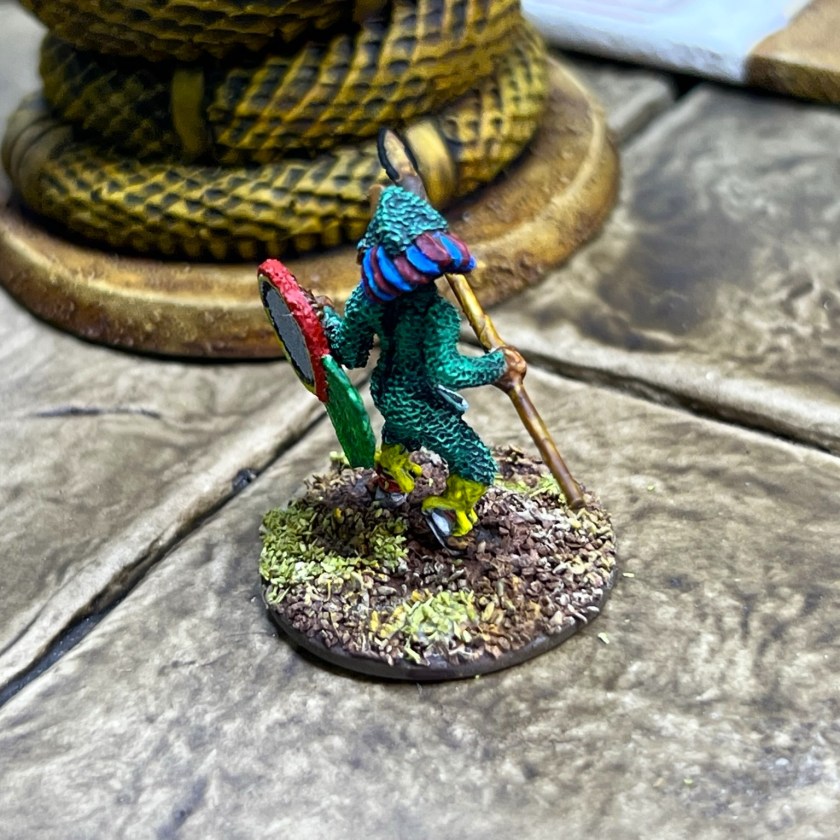
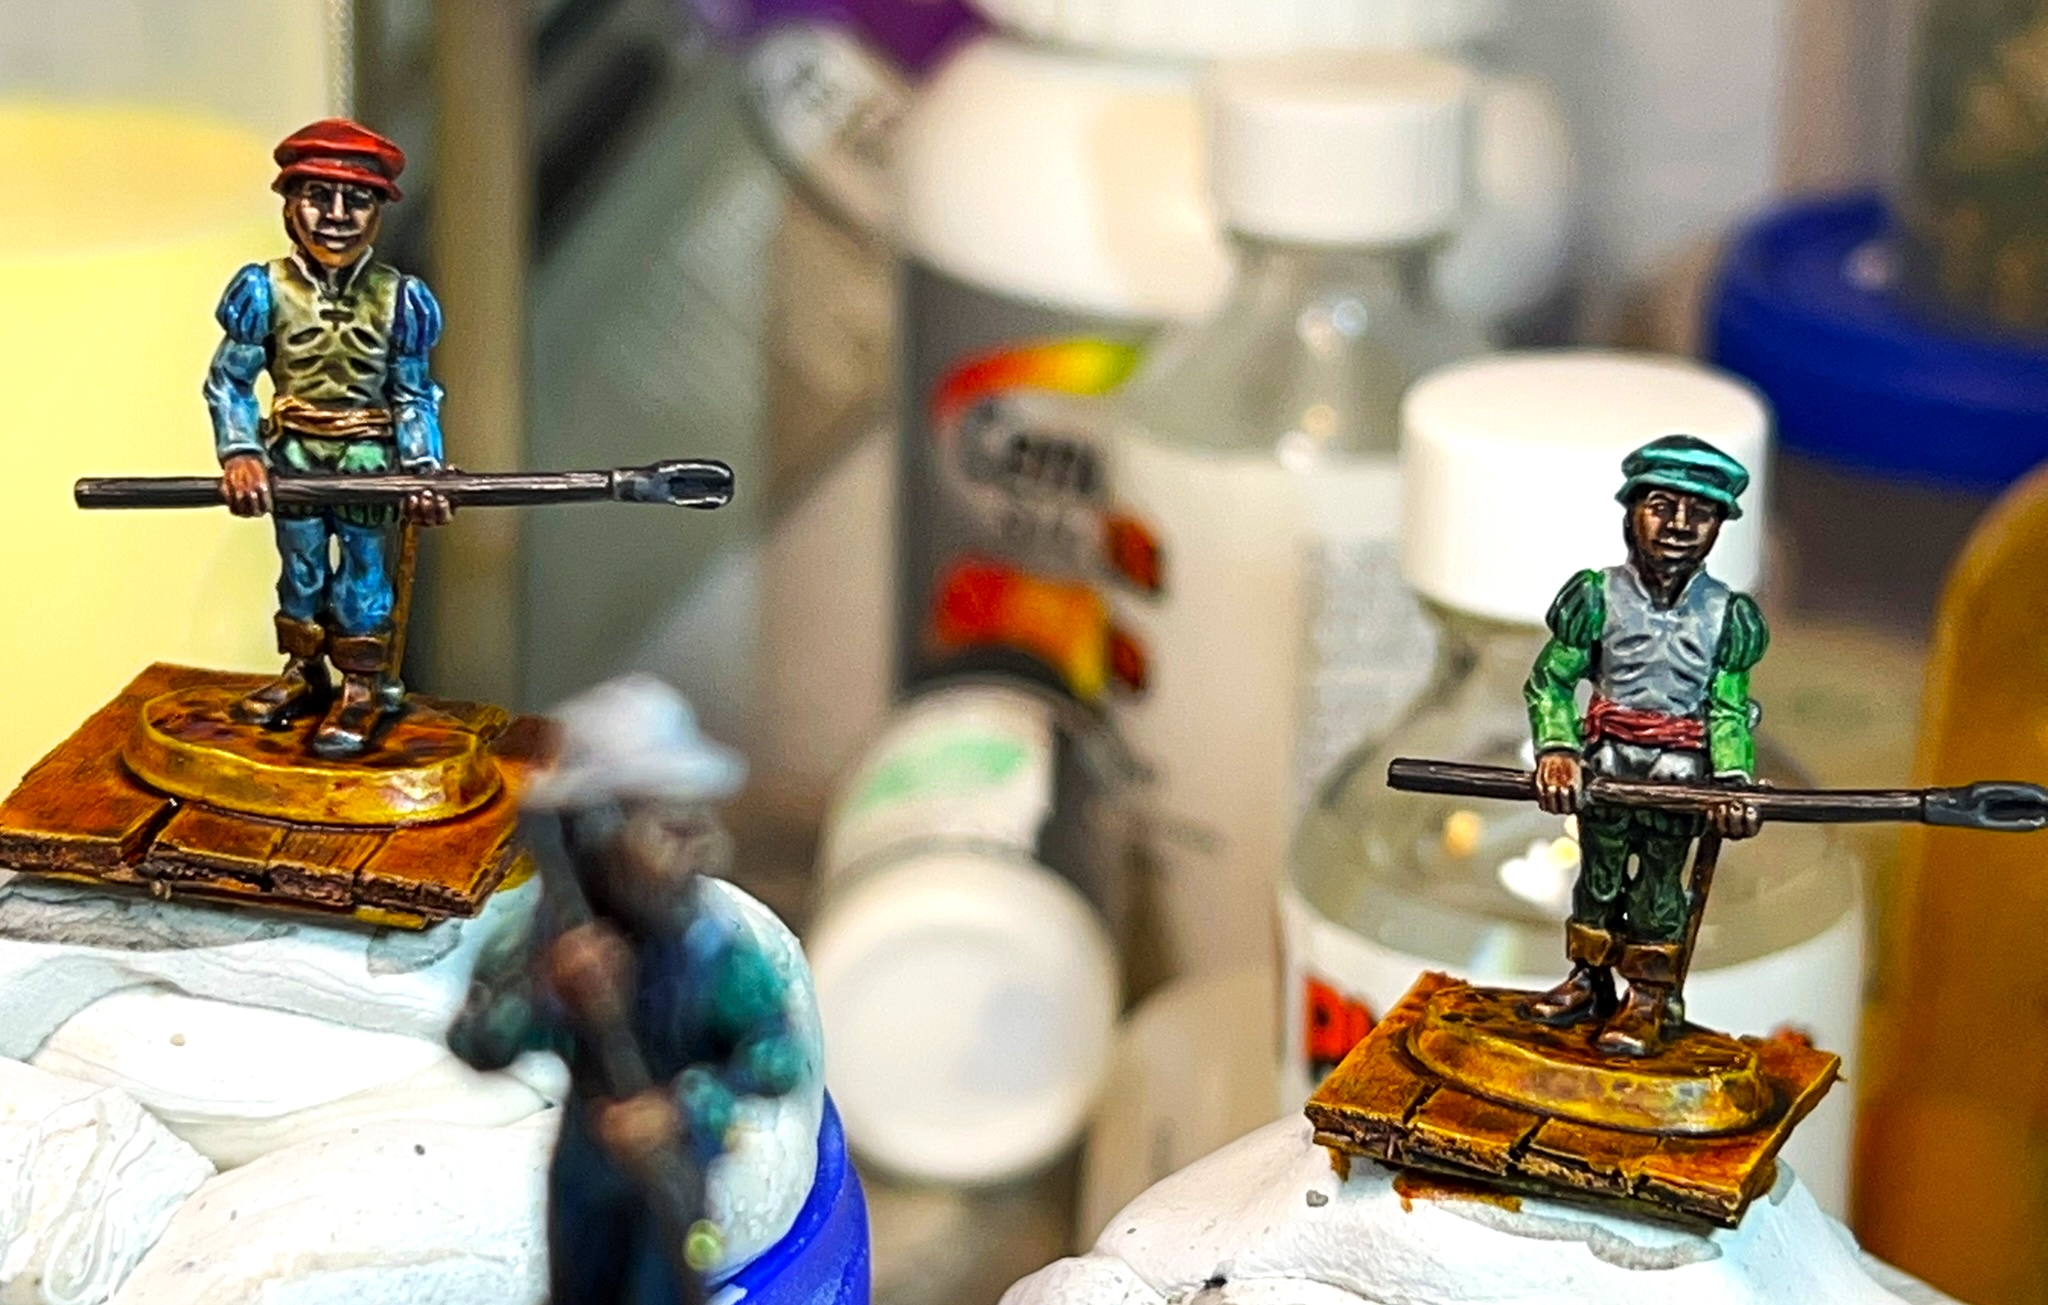
As the WWSR’s are only armed with long thrusting spears, Marksmanship is irrelevant for them. The WWSR’s are, however, very good in Melee with a value of 7/10 – plus they get an extra die in the first round of Melee, giving them a nice shock advantage. As far as their ability to stand against an attack, the WWSR’s are average with a Resolve value of 6/10. They do more enjoy more getting into and remaining in a fight with an Elan value of 8/10. Point-wise, they cost 5 points per WWSR. The figures are 28mm and metal. There are a few very subtle differences among the spearmen as far as the individual sculpts go.

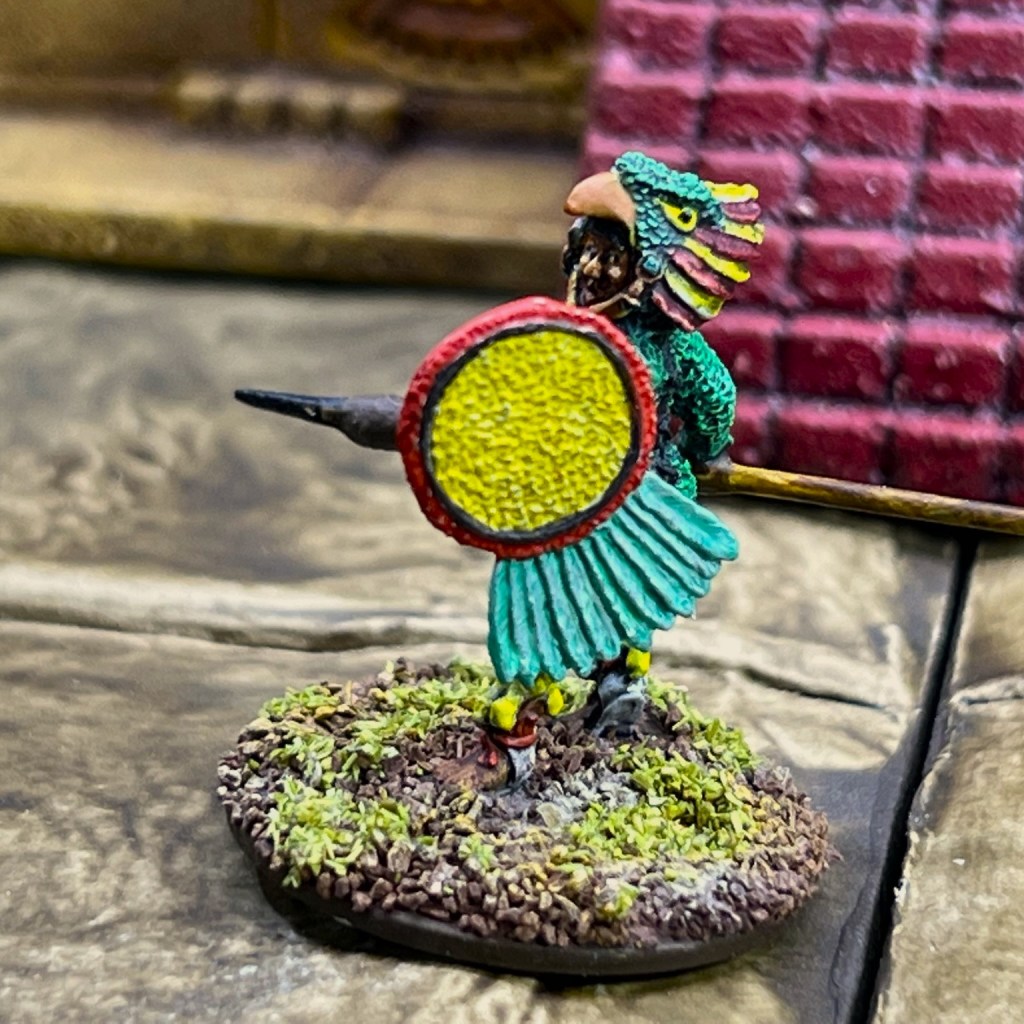
On the website, the WWSR photo has them with paper pennons attached to their spears. Additionally, there are no protrusions from their shields where the little holes are. The website photo is below.

Photo from the Wars of Ozz website

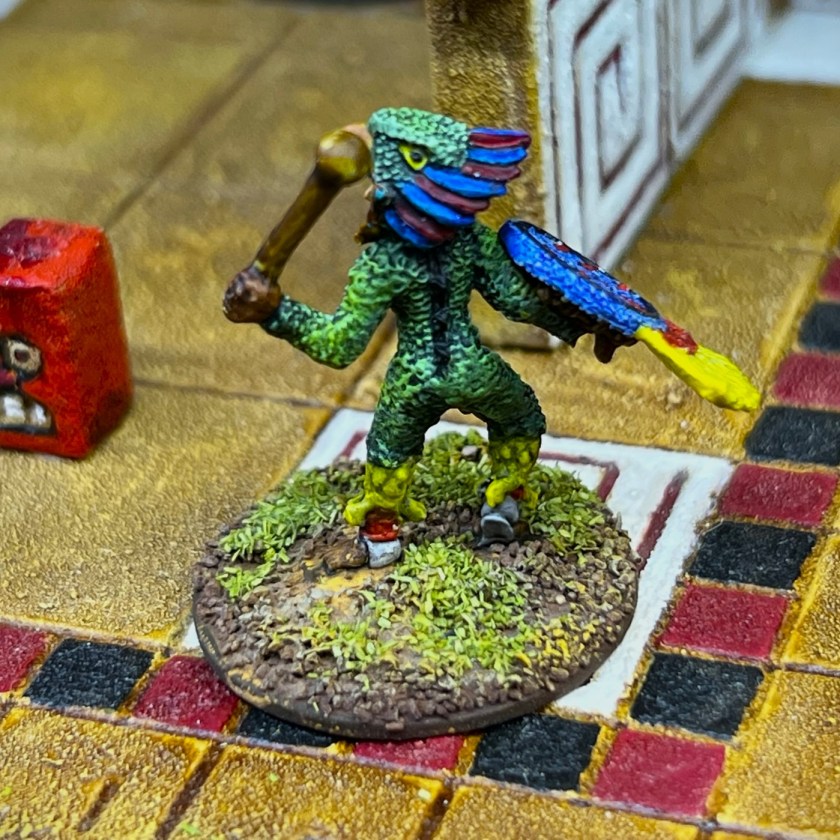
I decided that I would modify my WWSR’s in these two areas. First, I would change the spear tips with an Iron Wind Metals spear tips product that I remember using in my Ral Partha Rooman project that I did a while back. That product is now sold under IWM, is very reasonably priced, and is called SKU#DH-507 “Banner Spear Head Sprue”. There are 6 tips per sprue.

DH-507 spear tips sprue

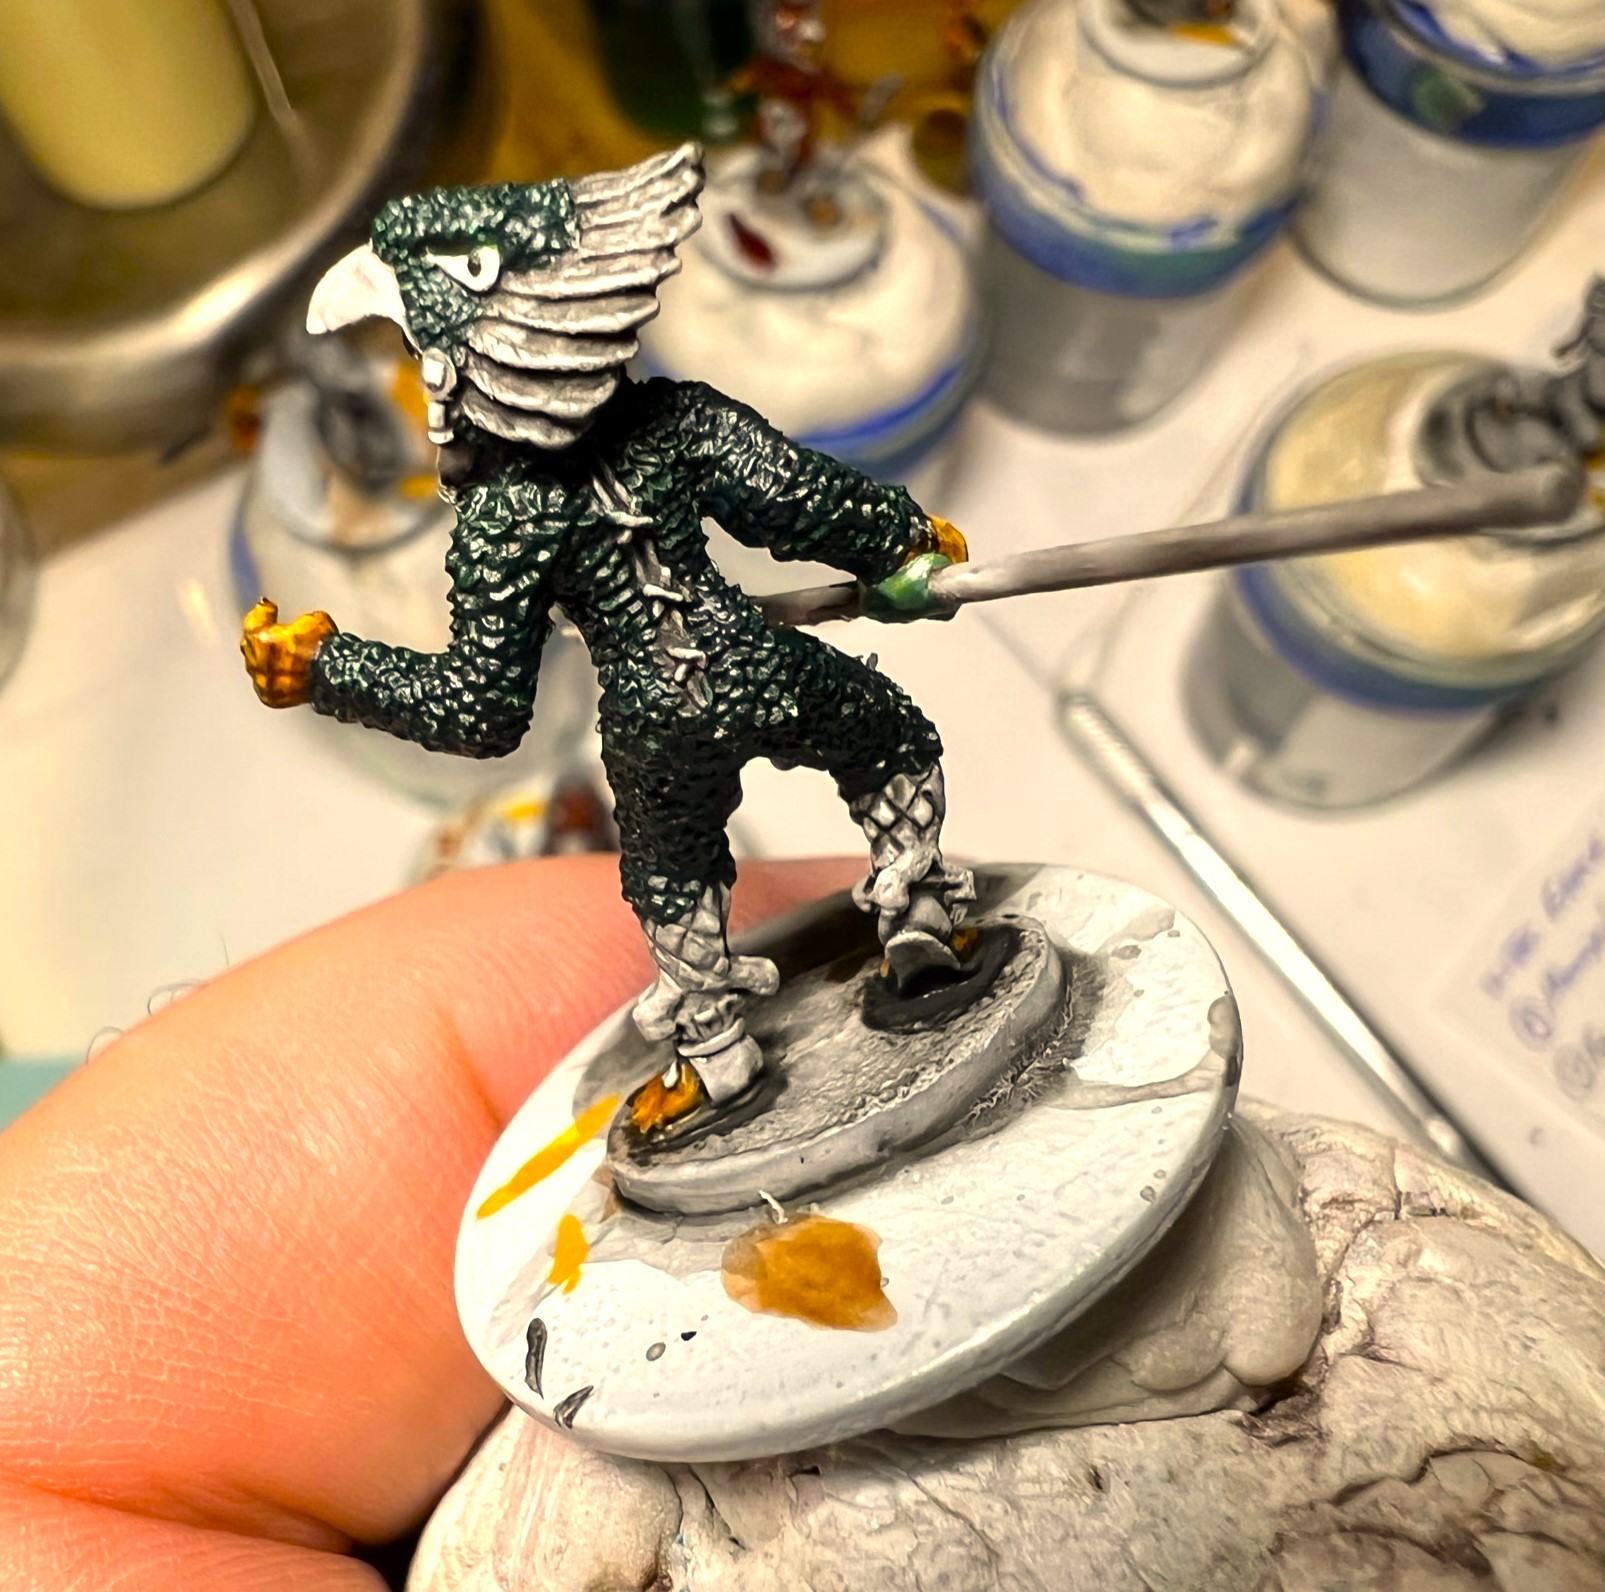
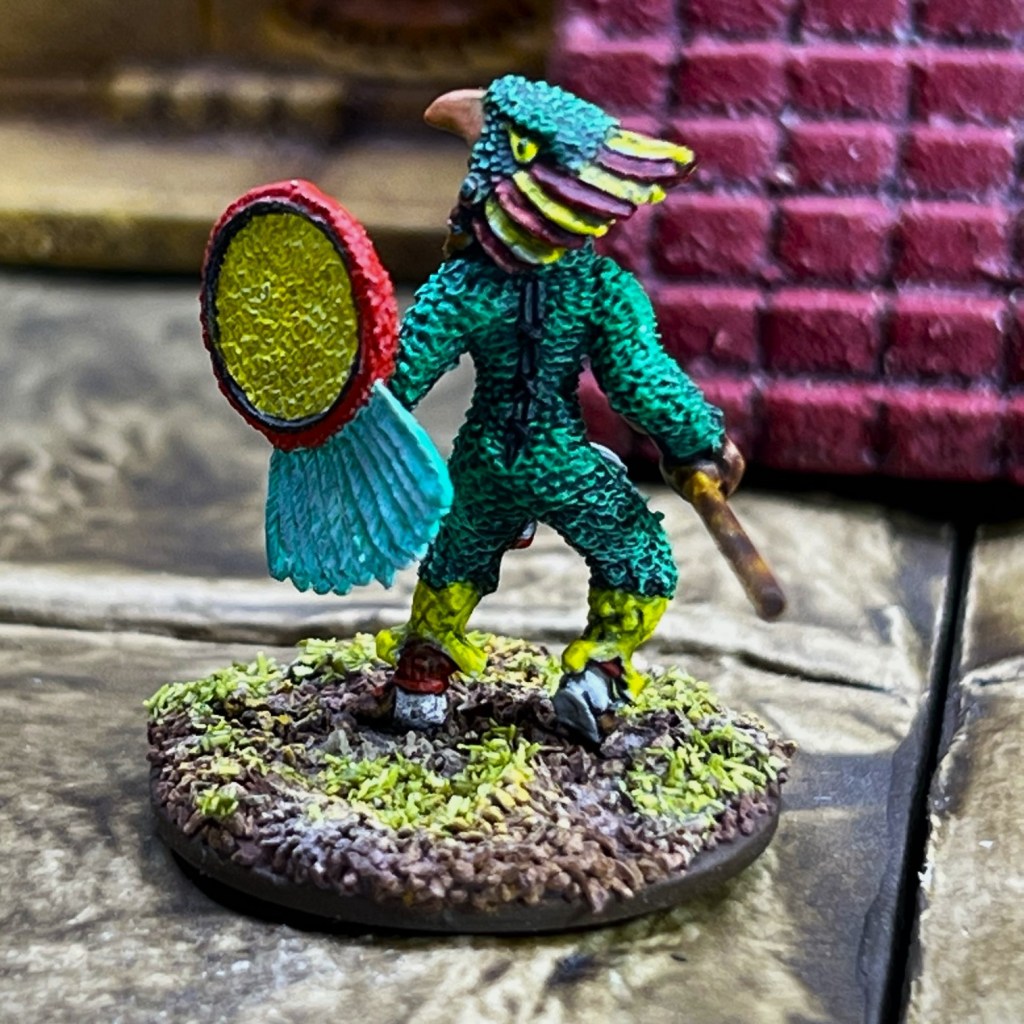
The other modification that I made was to disassemble the little balls from a pull-chain (the kind that lights use), and add them to the shield fronts where the holes are. As for colors, the 1st Regiment would have a purple theme, and the 2nd an orange theme – which is completely fine with the canon. I started working on these back in late May.

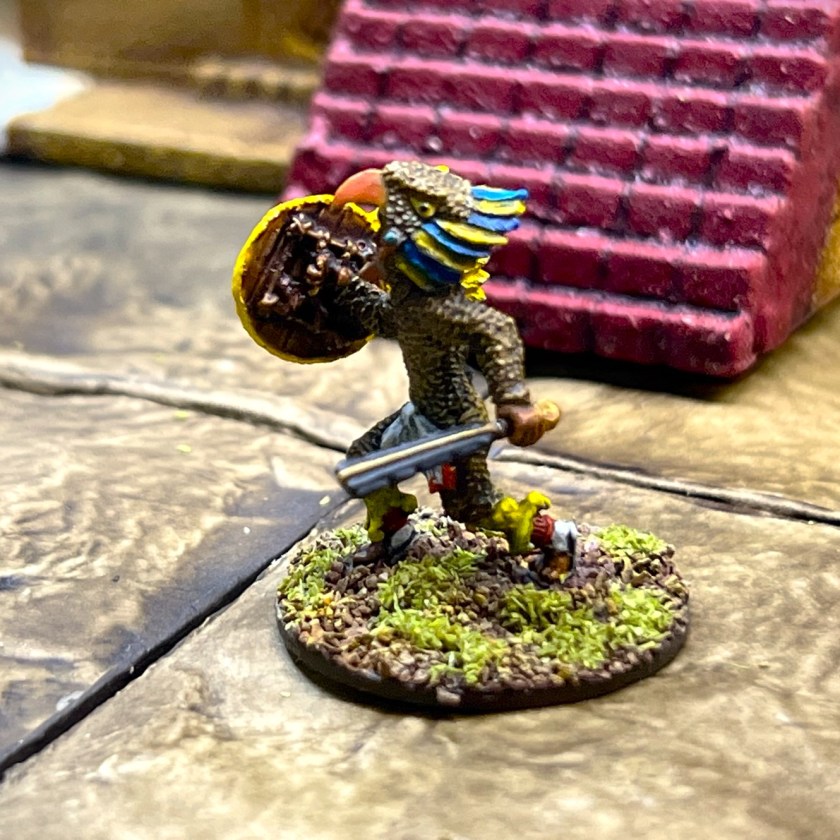
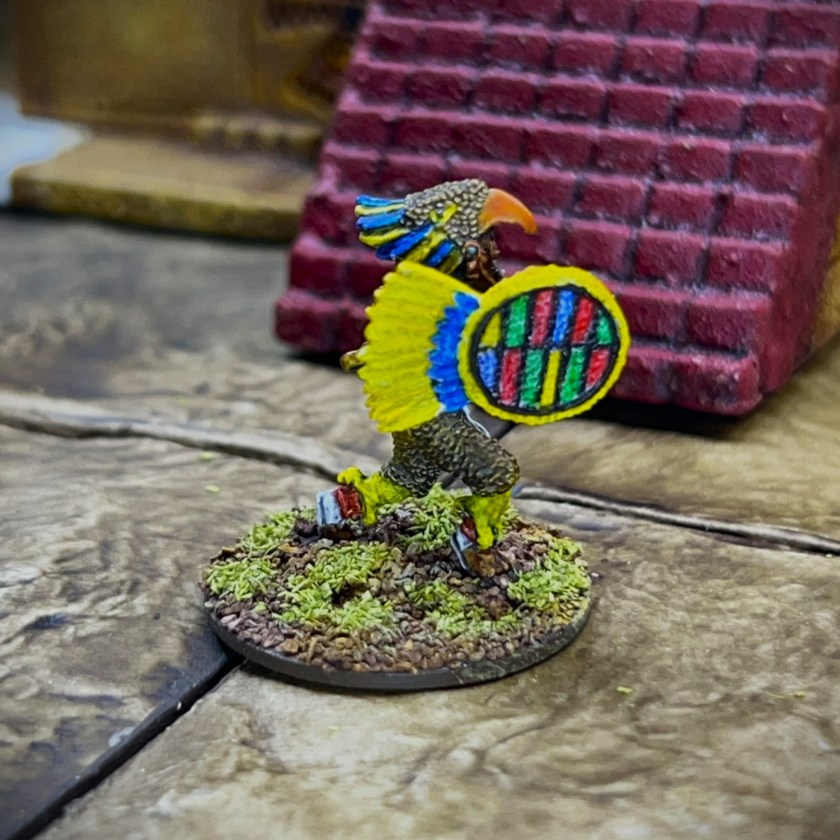
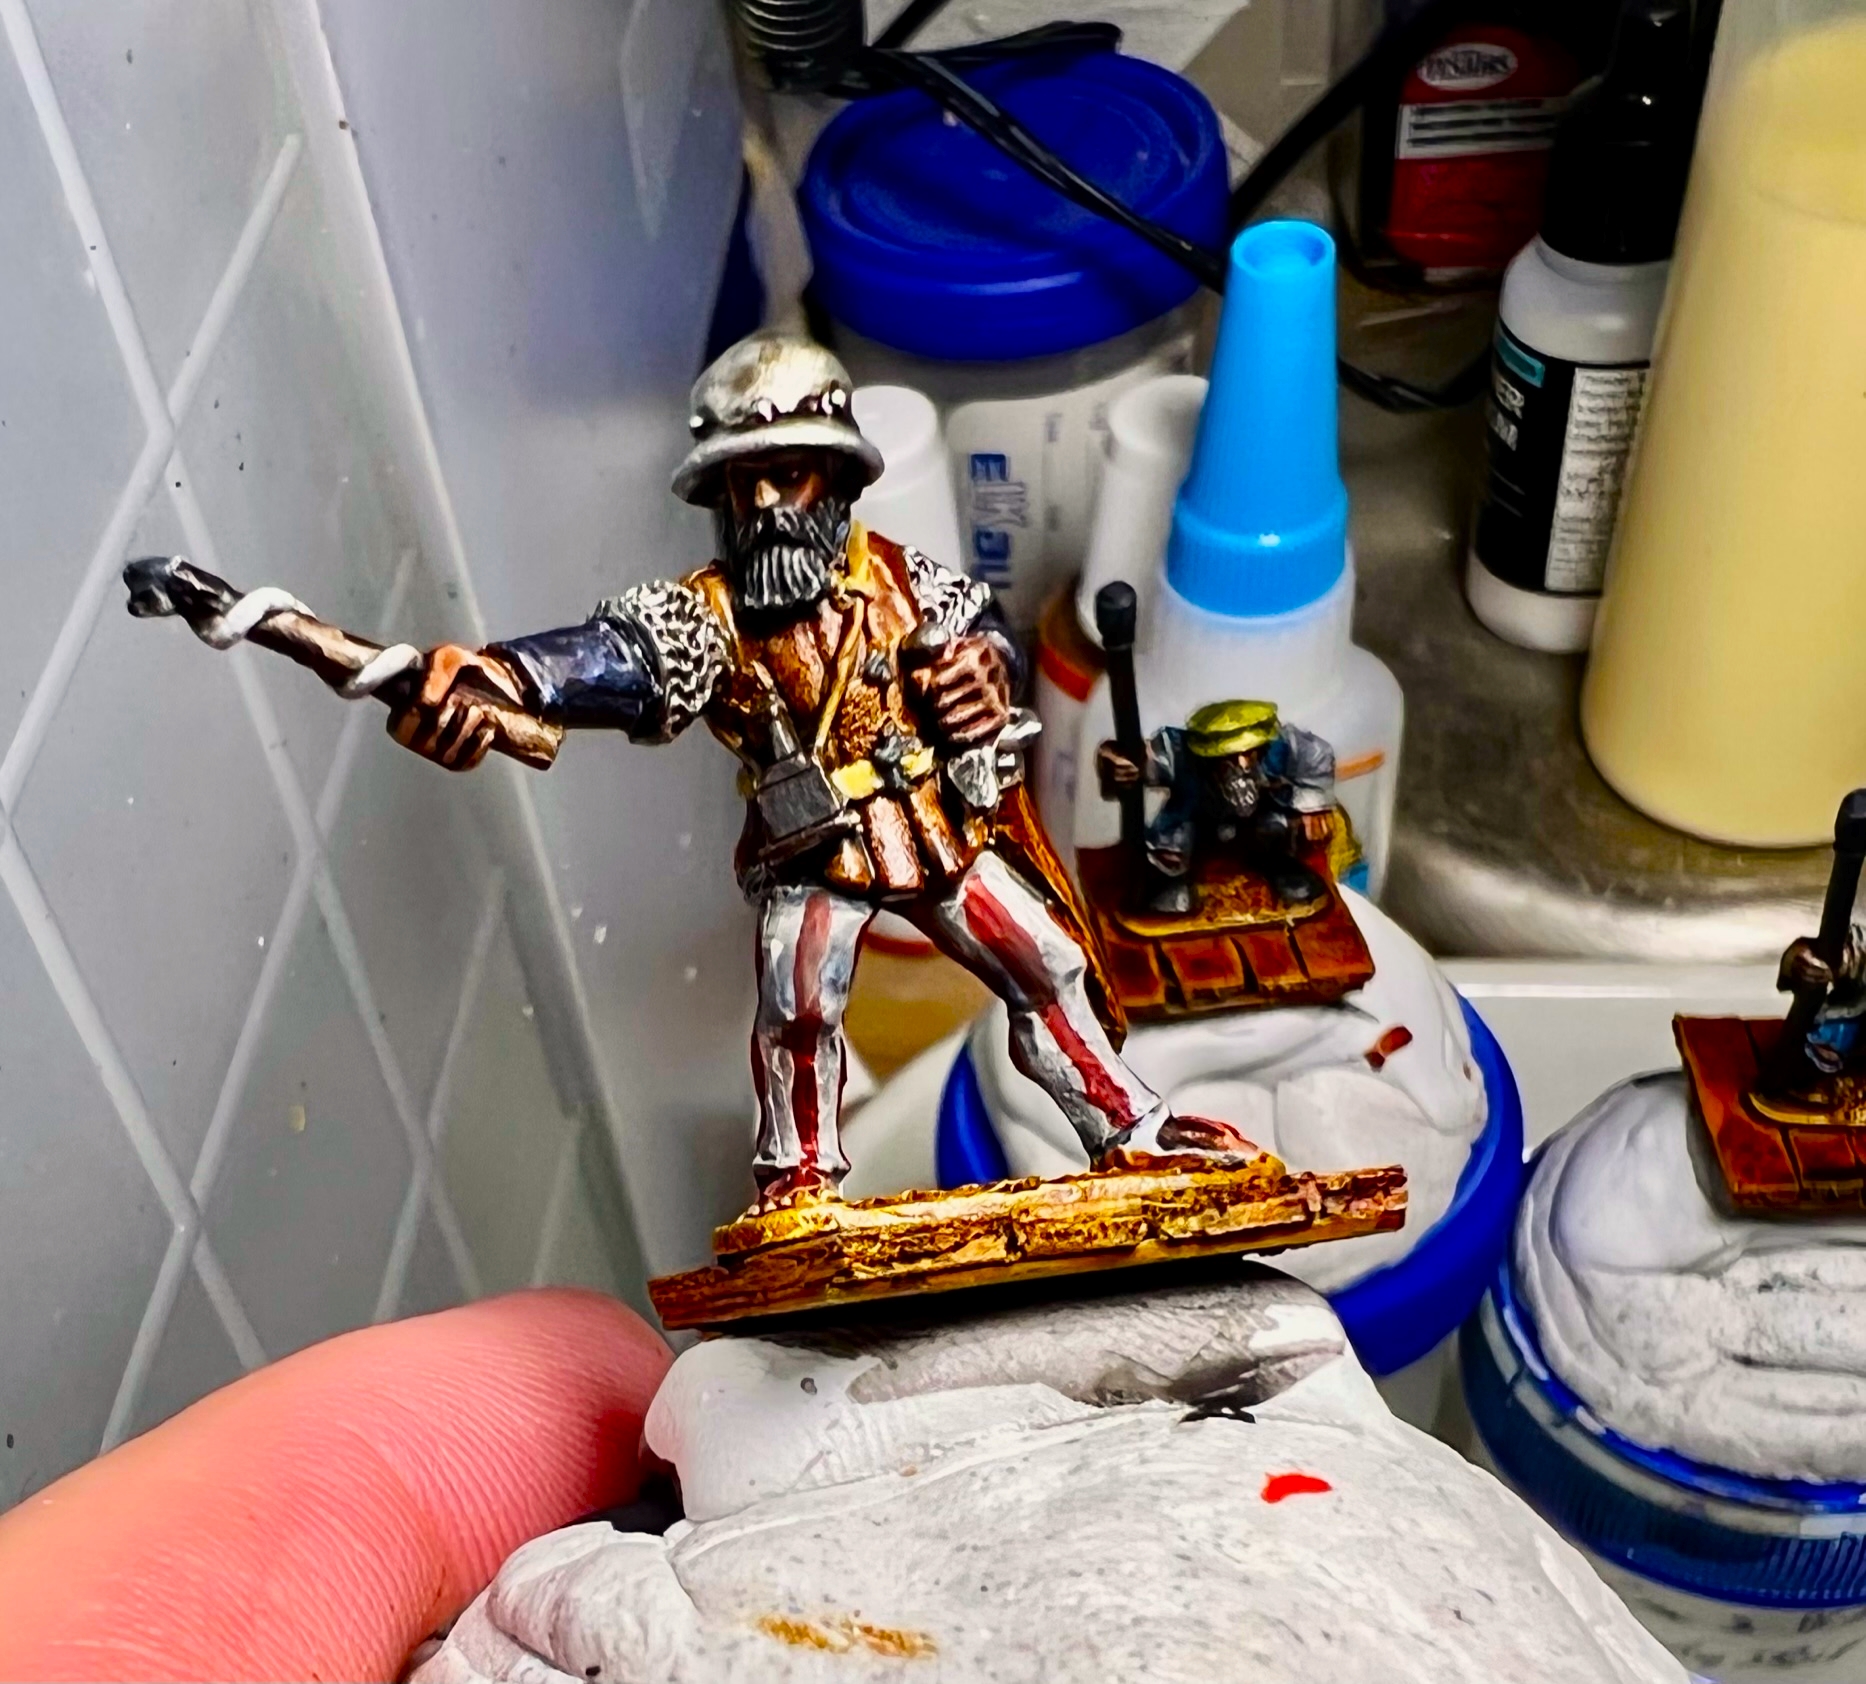
As for the leaders, Greg printed up Wargames Atlantics SKU WAAD00063, “Ottoman Noble Admirals”. He mailed me 5, of which 3 bodies and 5 heads survived the USPS journey.

The Admirals.
The figures curing in Greg’s Laboratory of fun.

I started work on all of these (45 figures in total) back in May – and with my modifications it took a while (there was a LOT of drilling and gluing). Another issue really added to the time for this project – 1.0 versions of Speed Paint.

I mistakenly forgot that one of the the purple paints that I used (Army Painter “Purple Alchemy”) and one of the orange ones (Army Painter “Fire Giant Orange”) were not 2.0 but were instead 1.0 versions. As a result, I didn’t mix them initially with Citadel “Contrast Medium” – which I normally do to avoid the notorious bleeding in the 1.0’s. AARGH!

This led to a lot of repainting, but luckily it was mainly on the shields. I do want you to know that after mixing with the Citadel “Contrast Medium”, no bleeding occurs in my experience. I just have many more 2.0’s than 1.0’s, so I forgot – and I have had no bleeding issues with the 2.0’s.

Now onto WIP shots for both the WWSR’s and the leaders!

Whim Whim Spearmen WIP Shots and Discussion

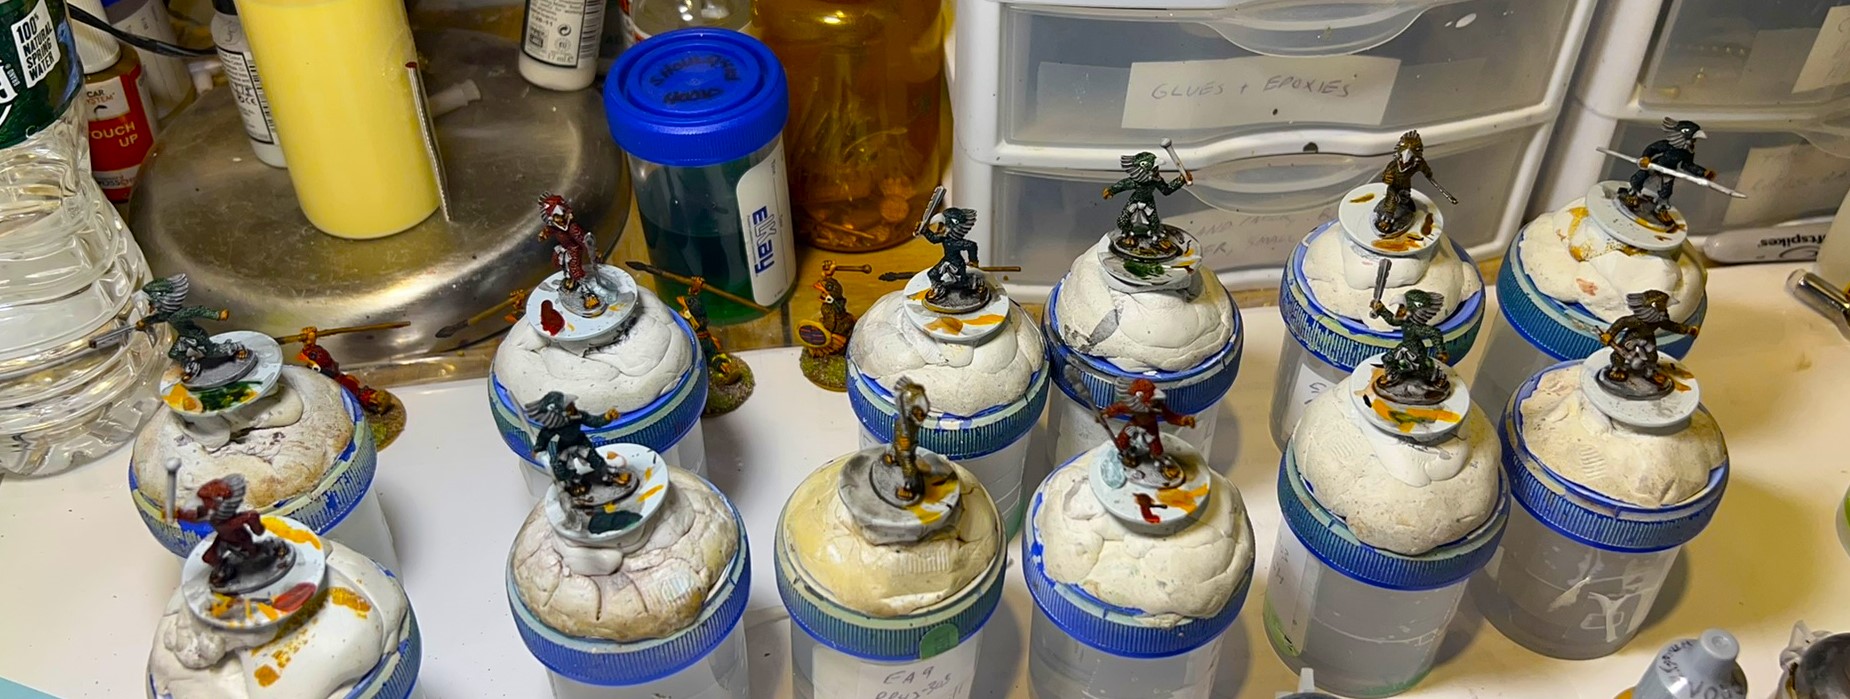
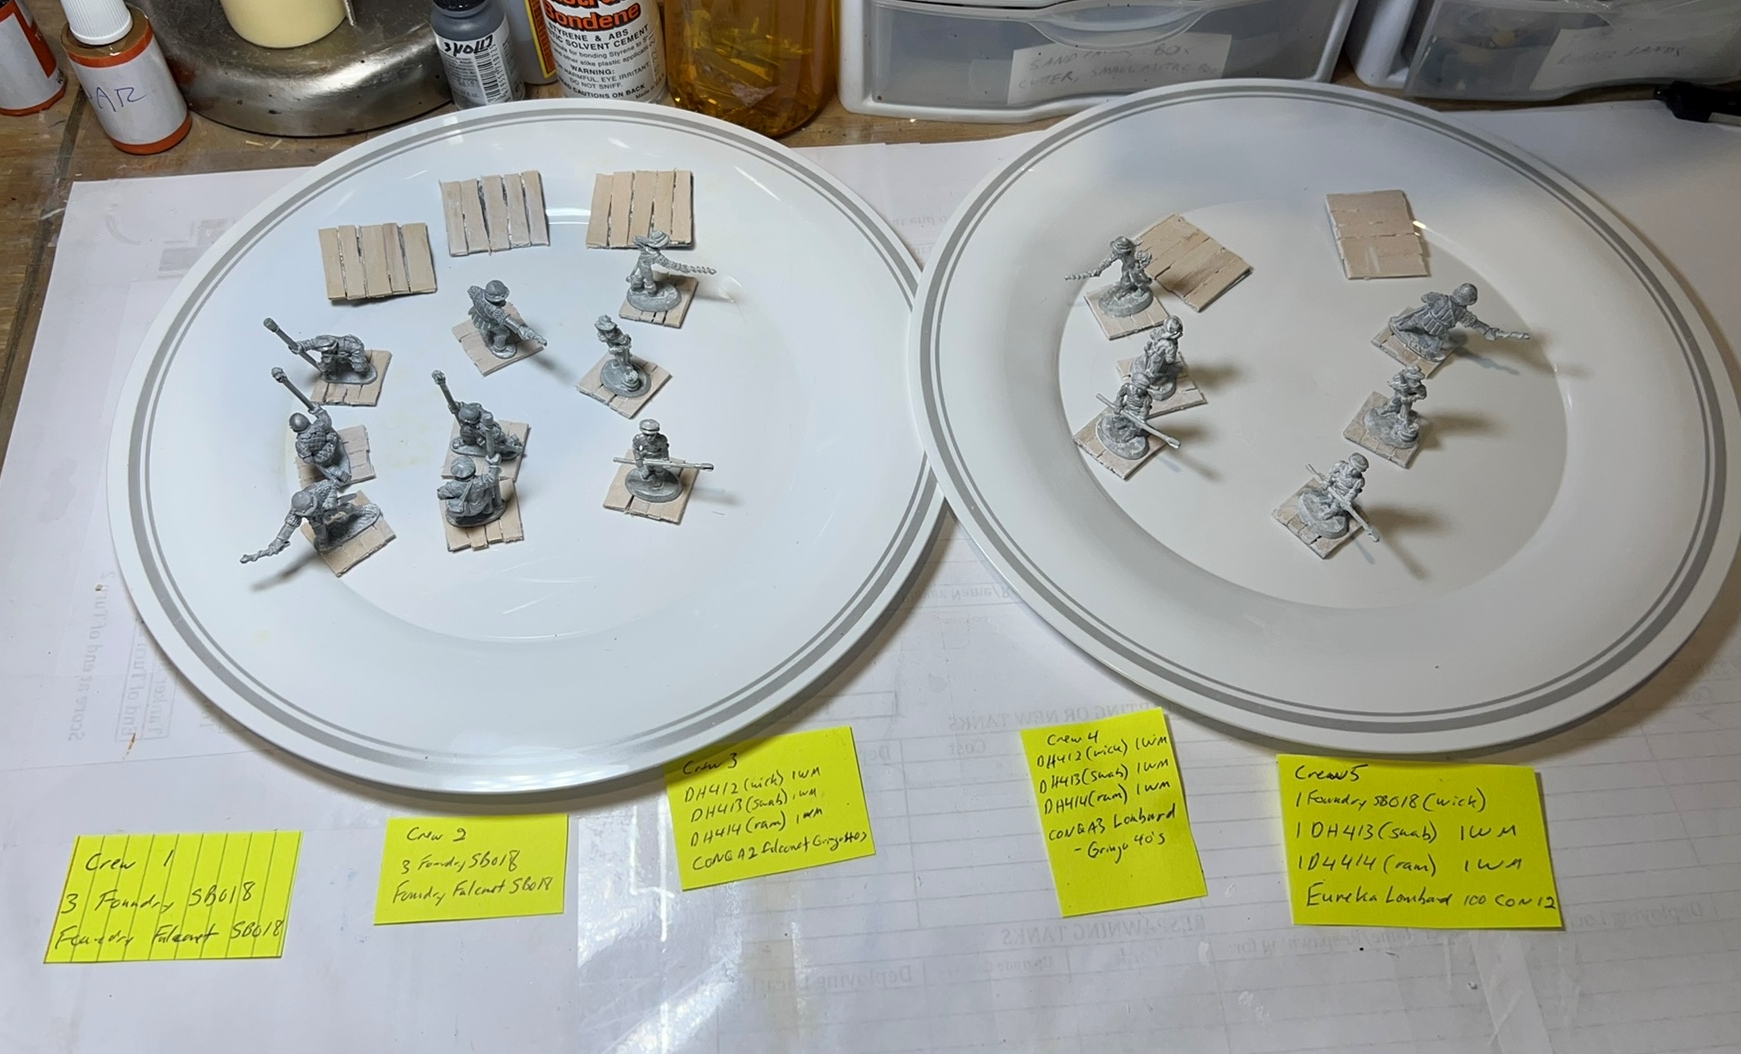
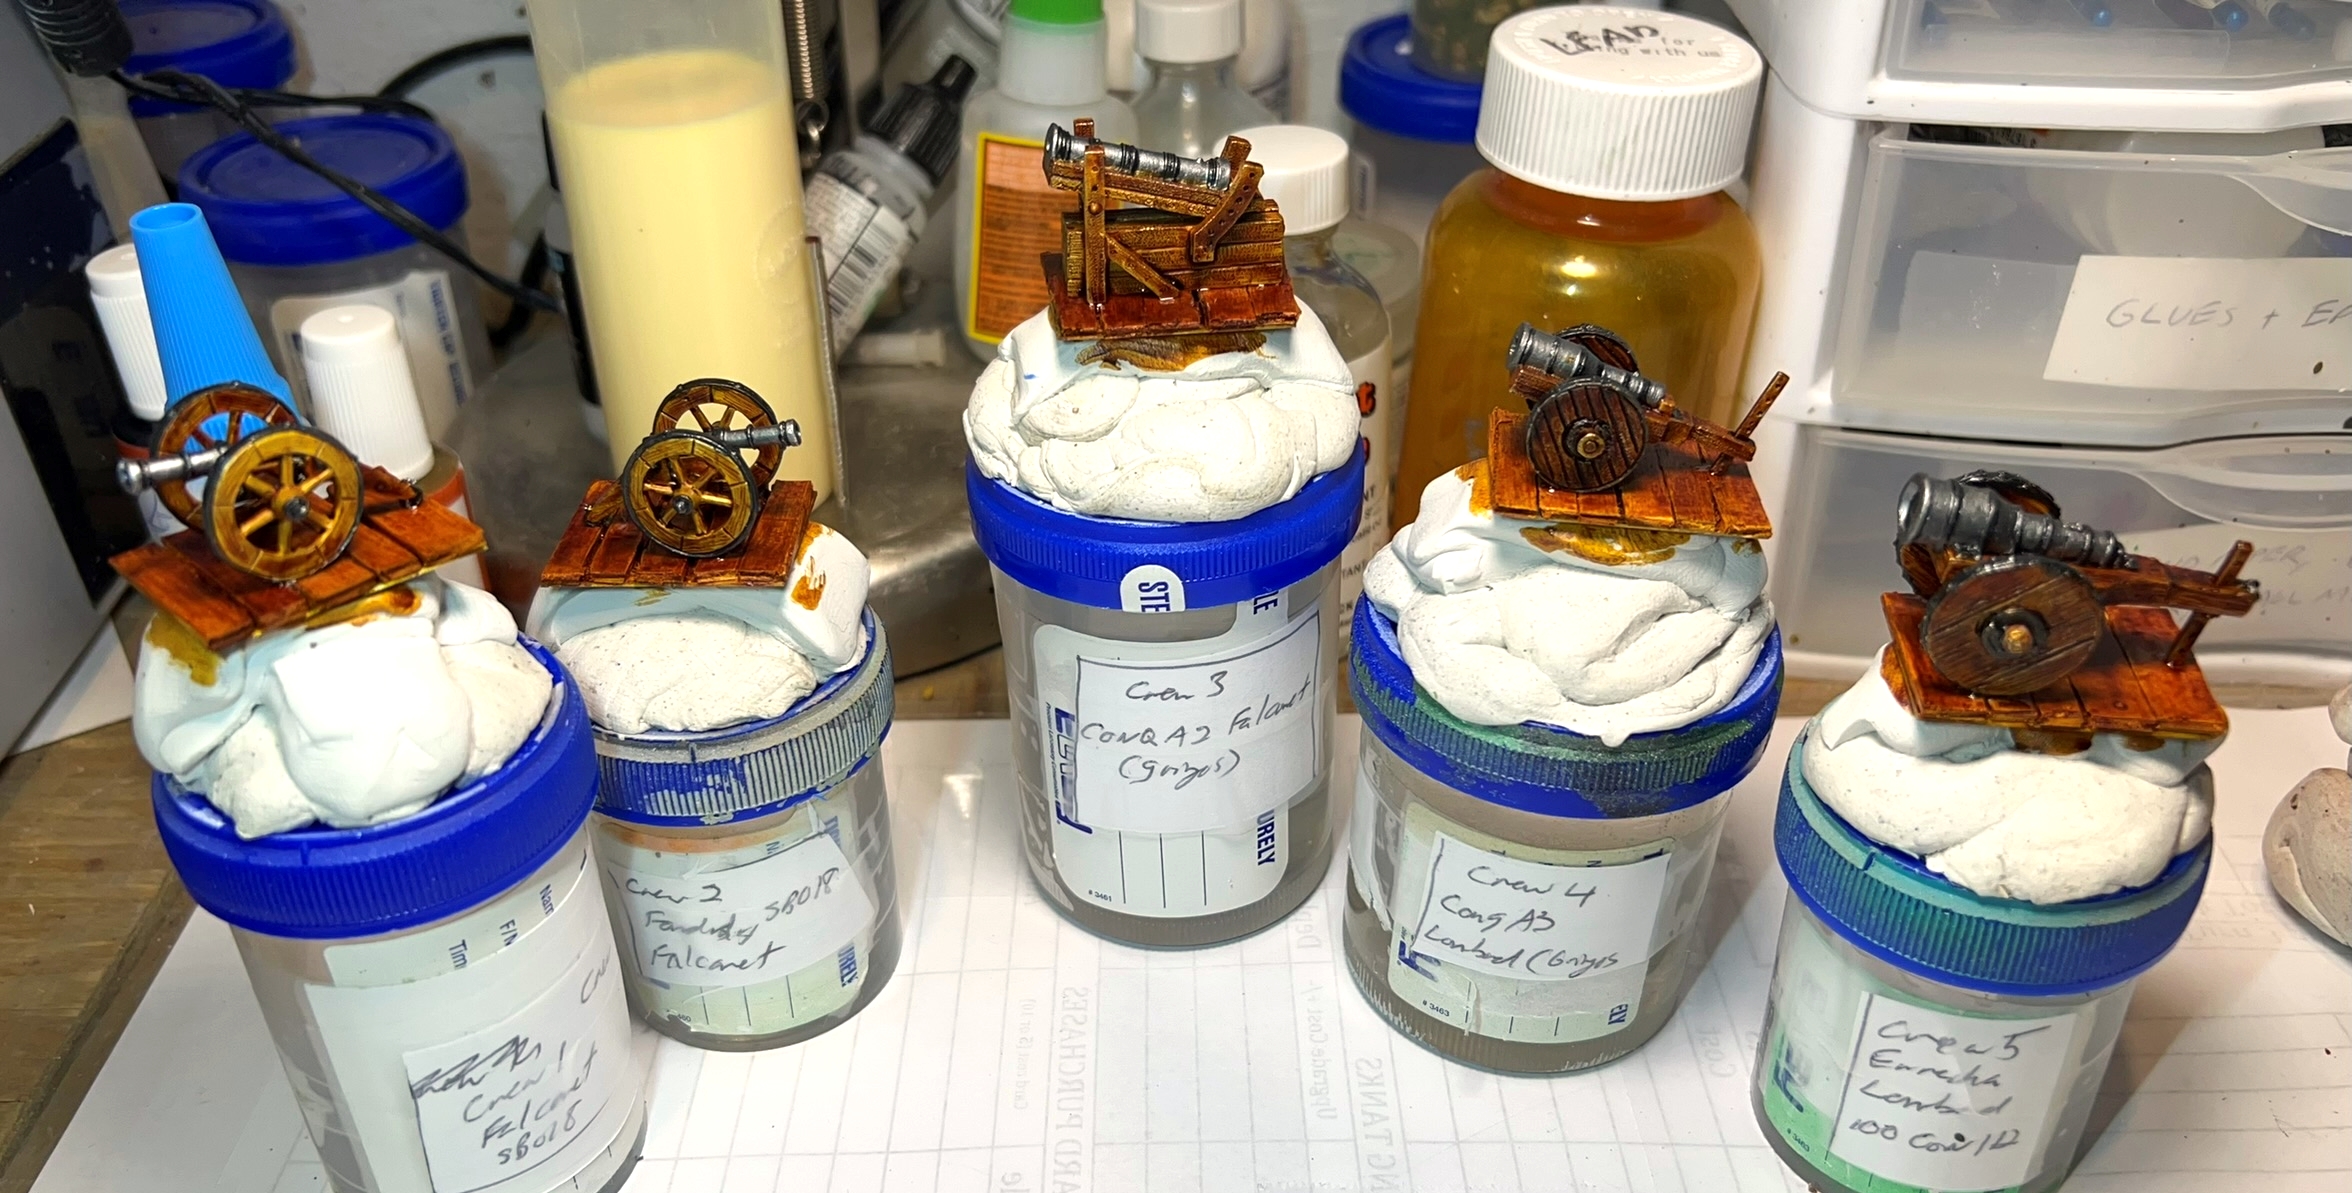
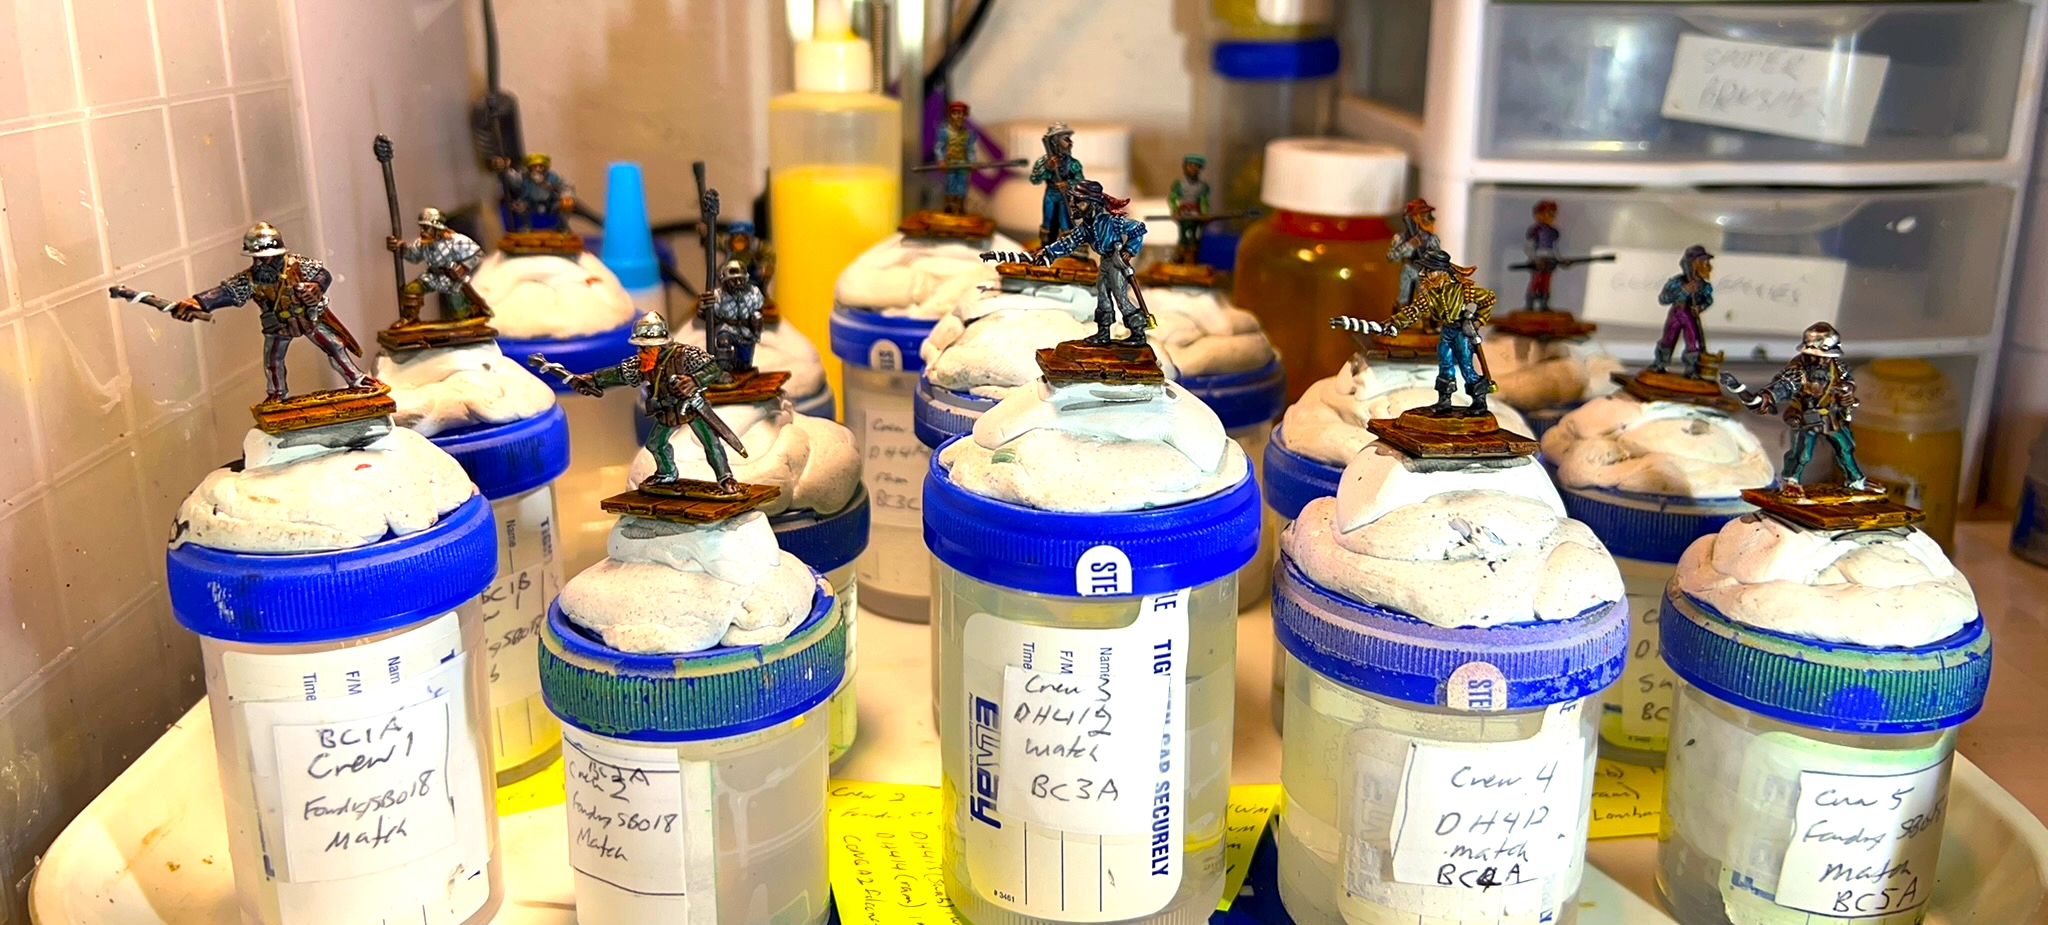
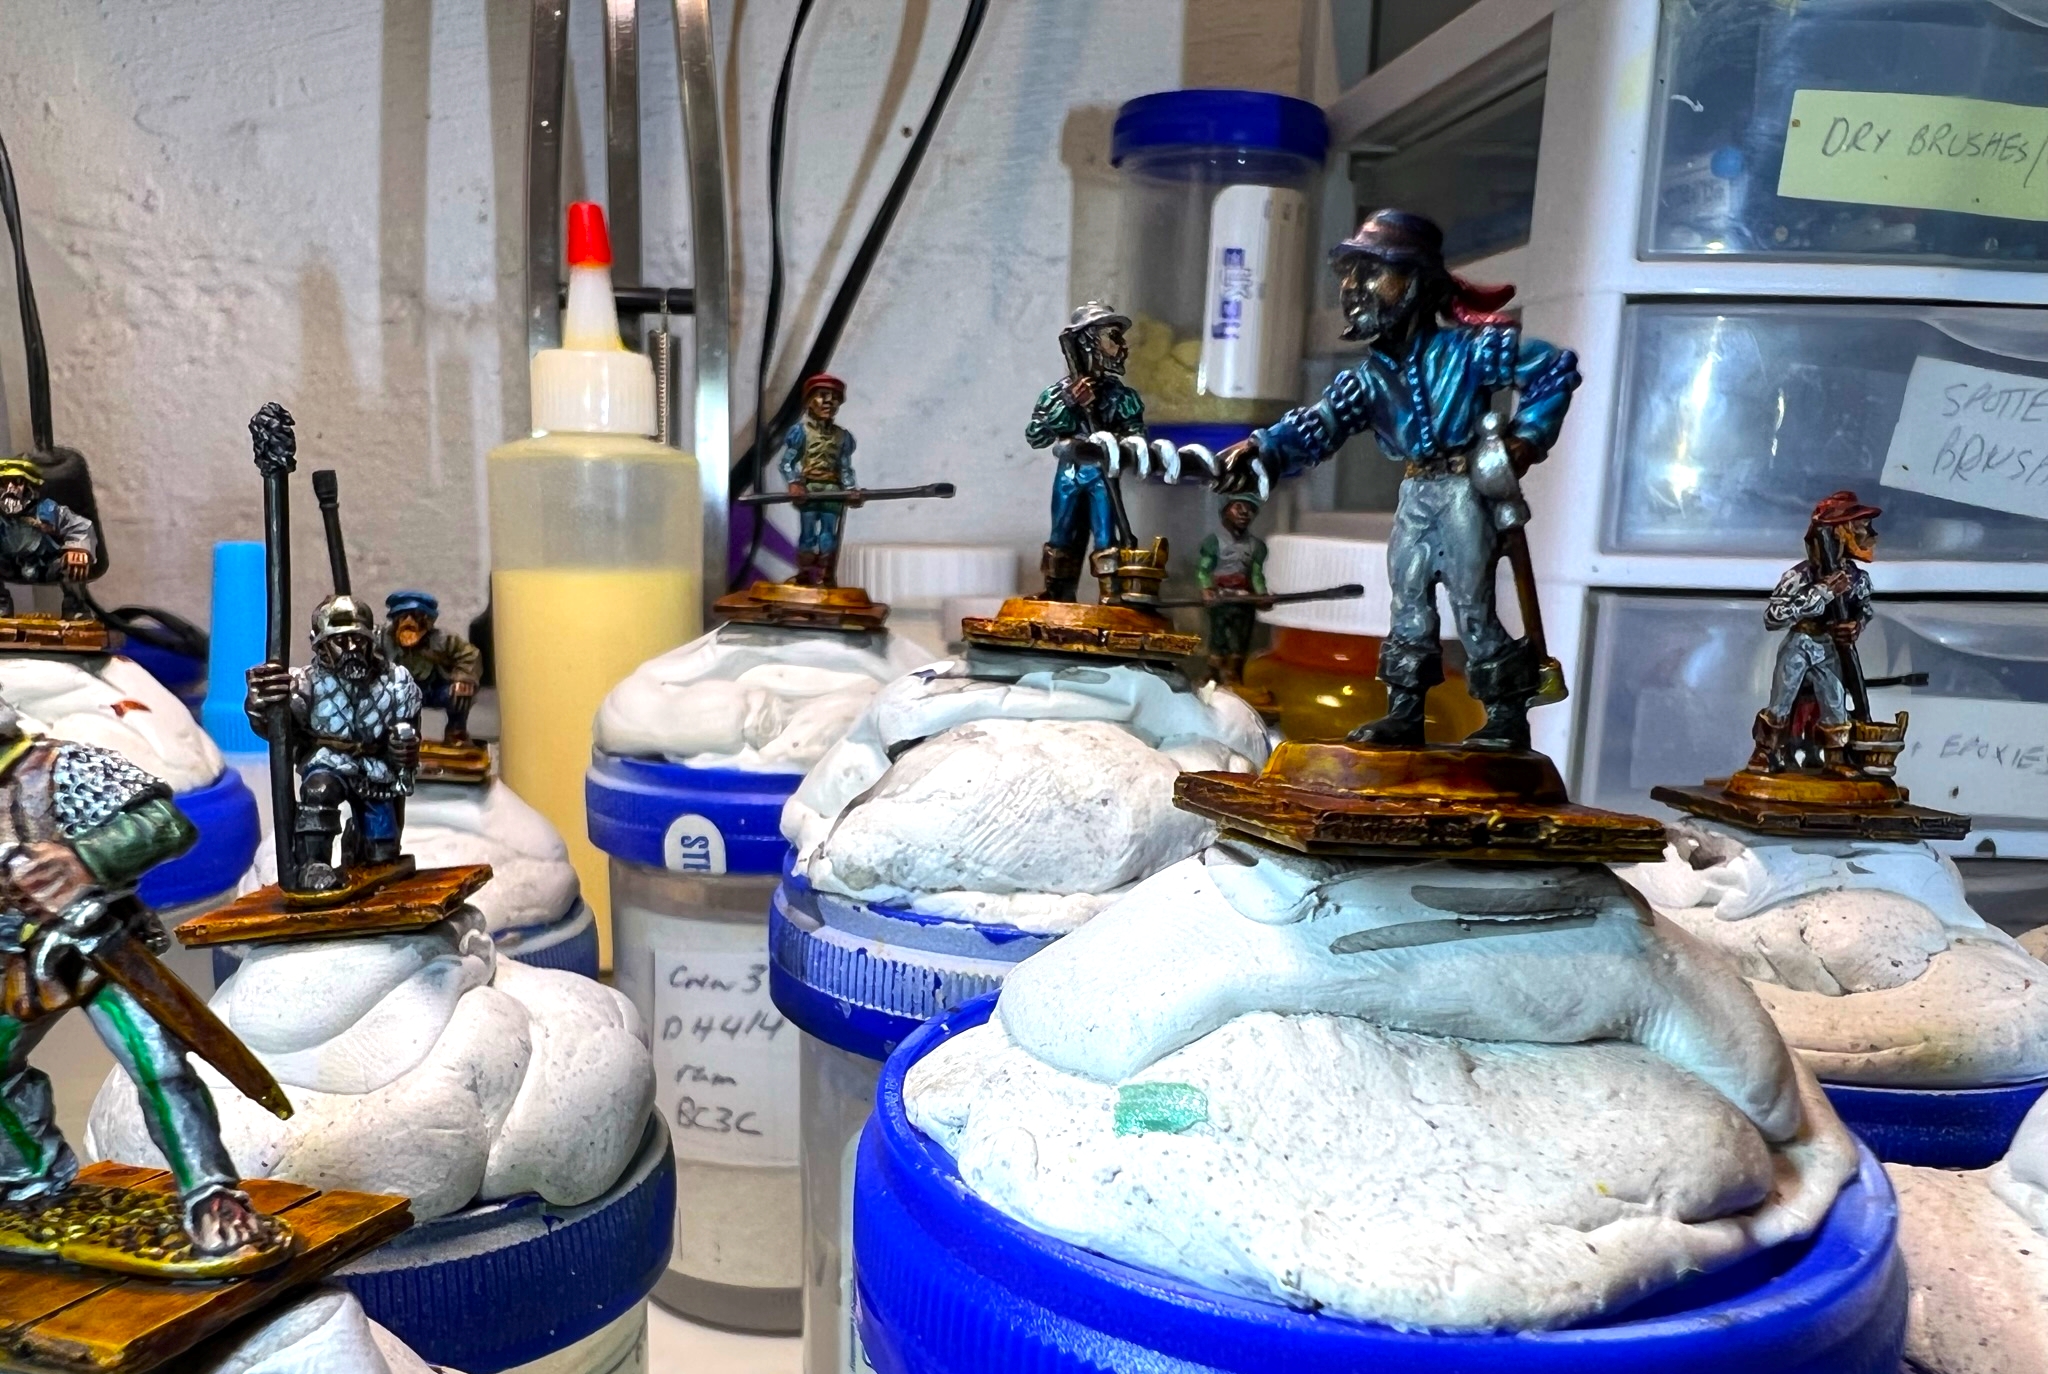
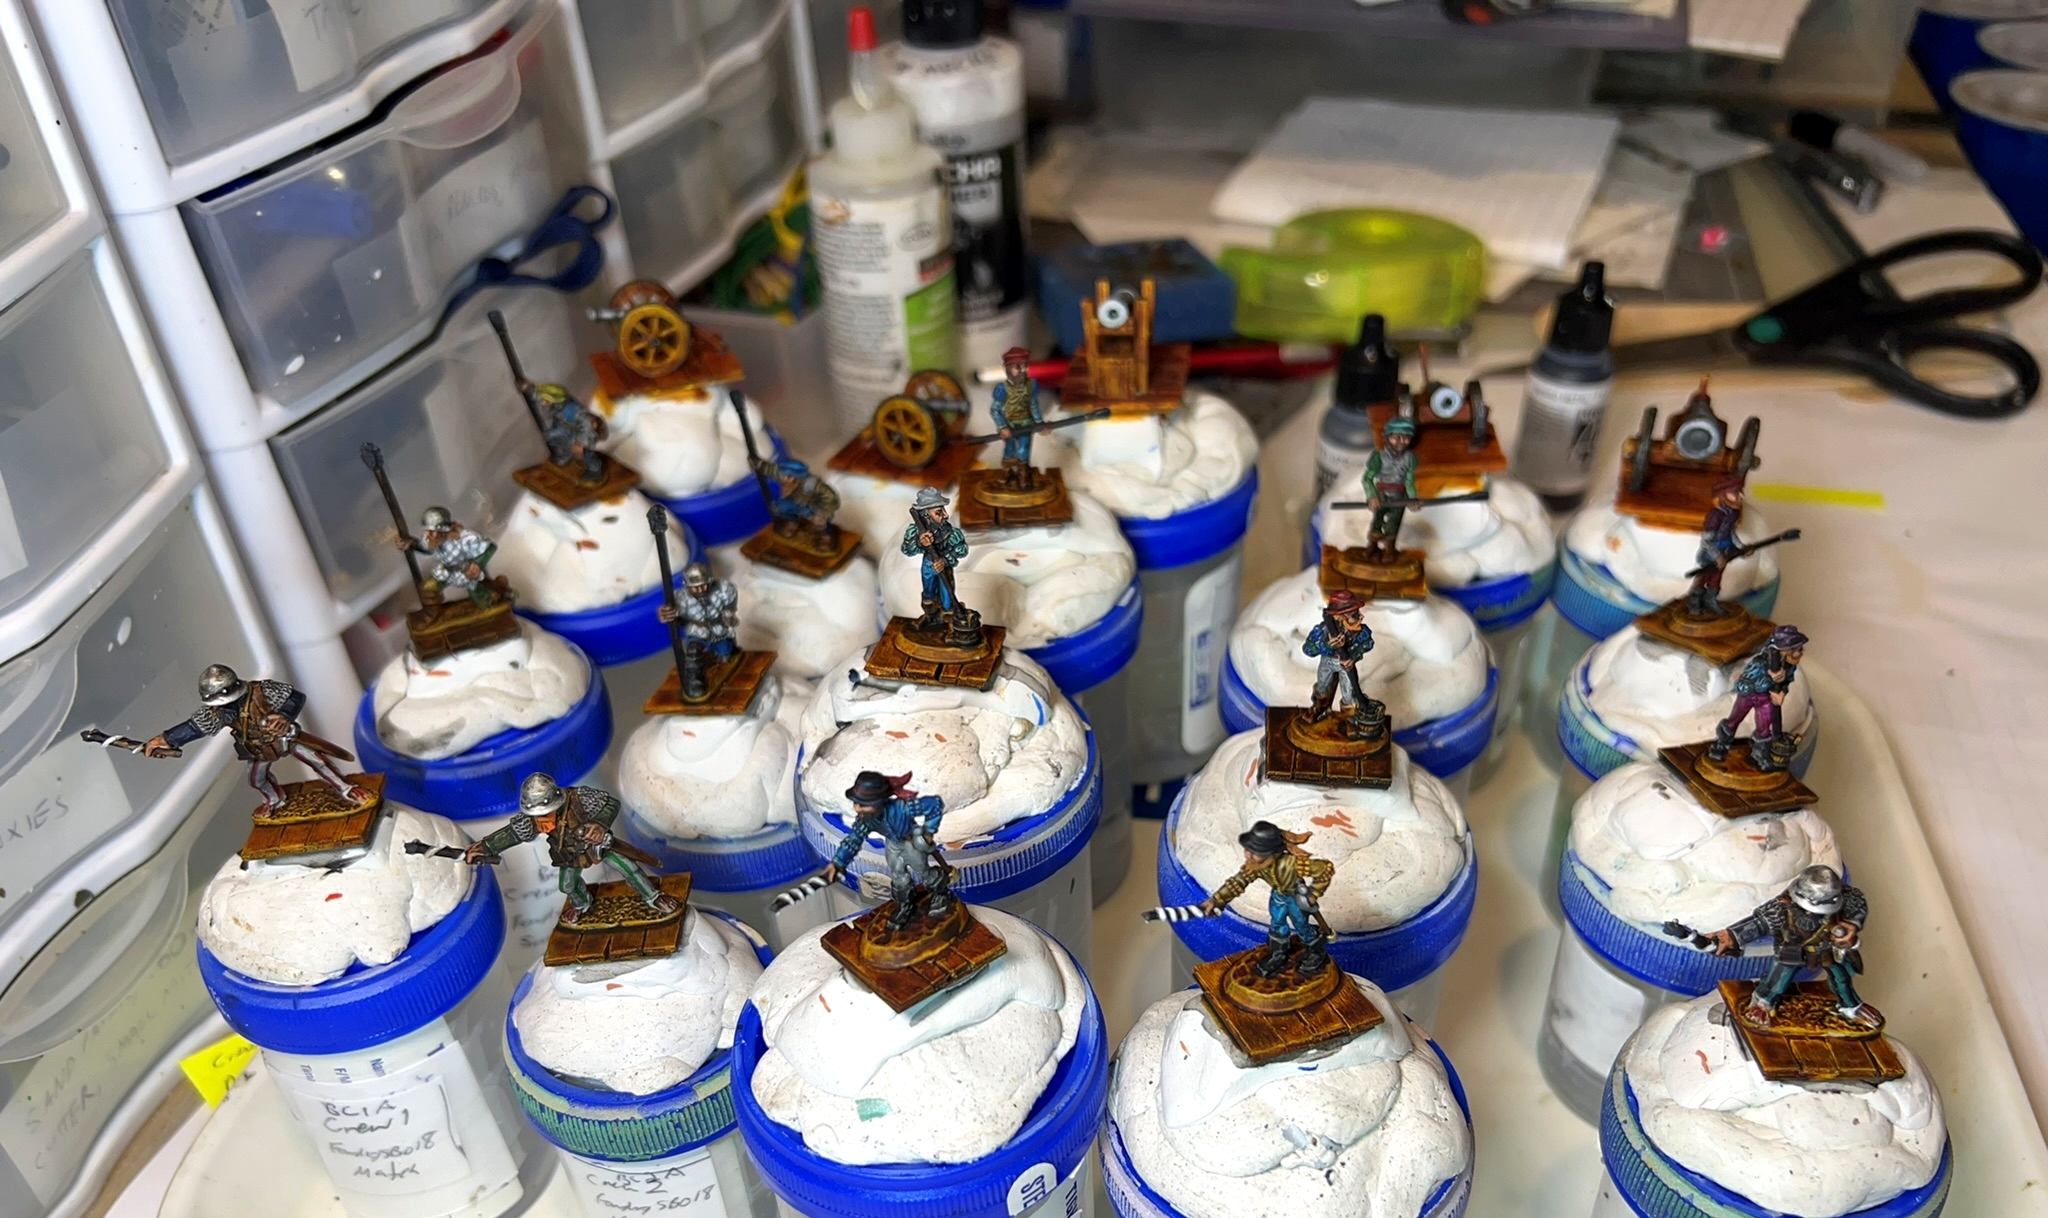
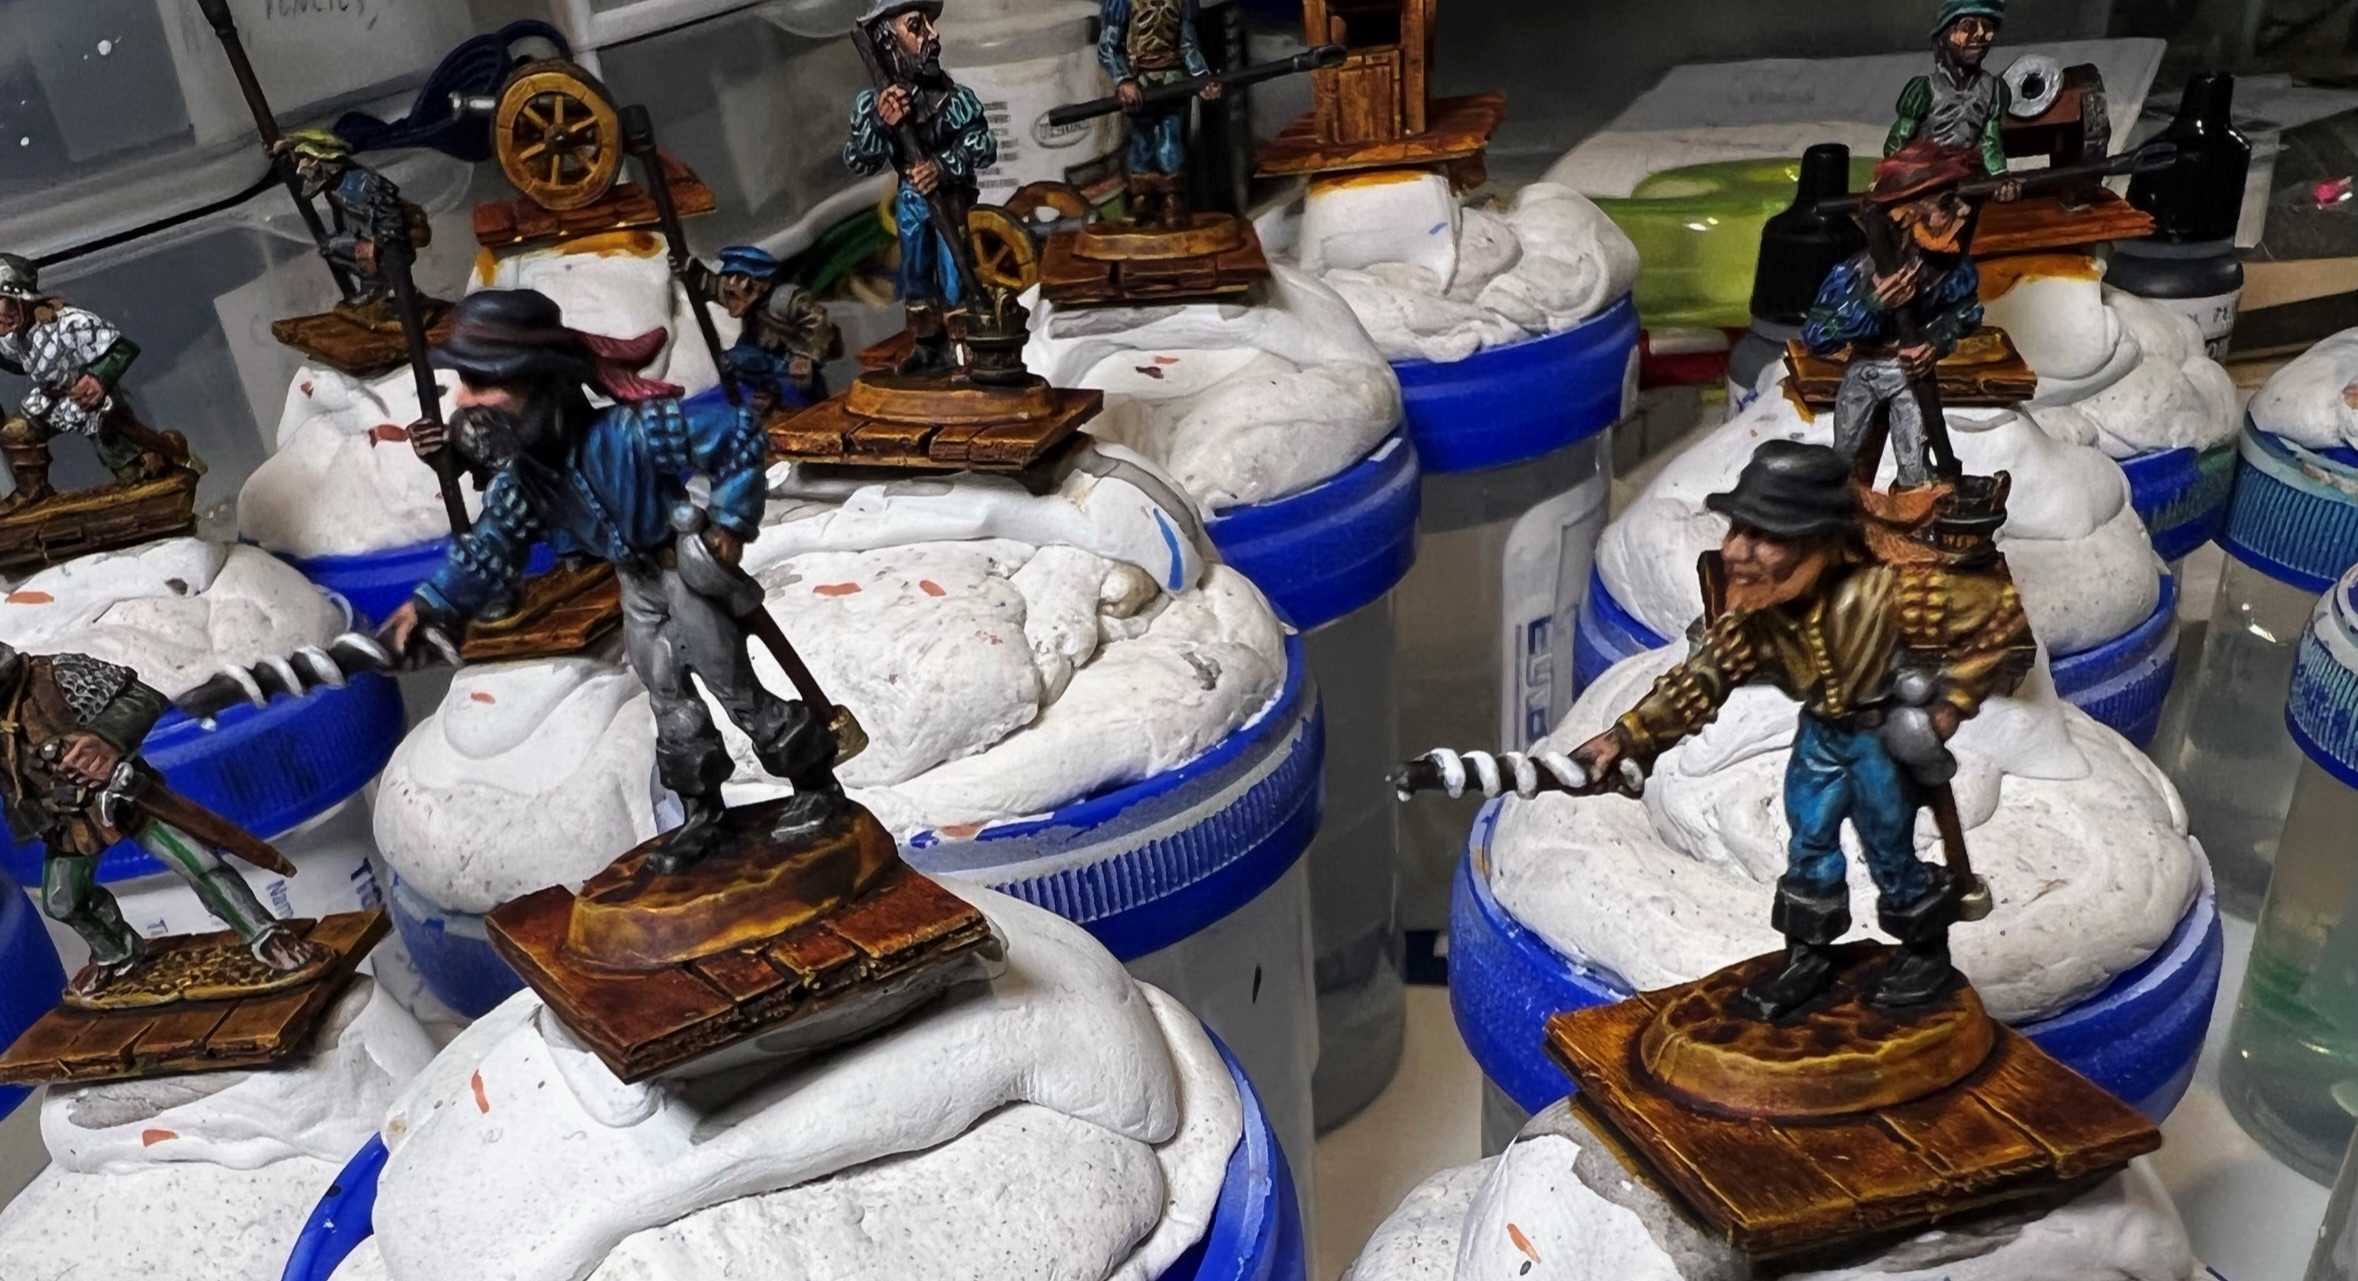
I mounted the figures themselves on popsicle sticks for painting instead of the specimen jars that I usually use to save space.

By the end of May I had the WWSR’s drilled out (for shields, heads, and spears!), primed, washed and dry brushed.

I needed a jig to hold the spears while they were assembled and paint dried on them – not ideal but it worked.

32 modified spears.

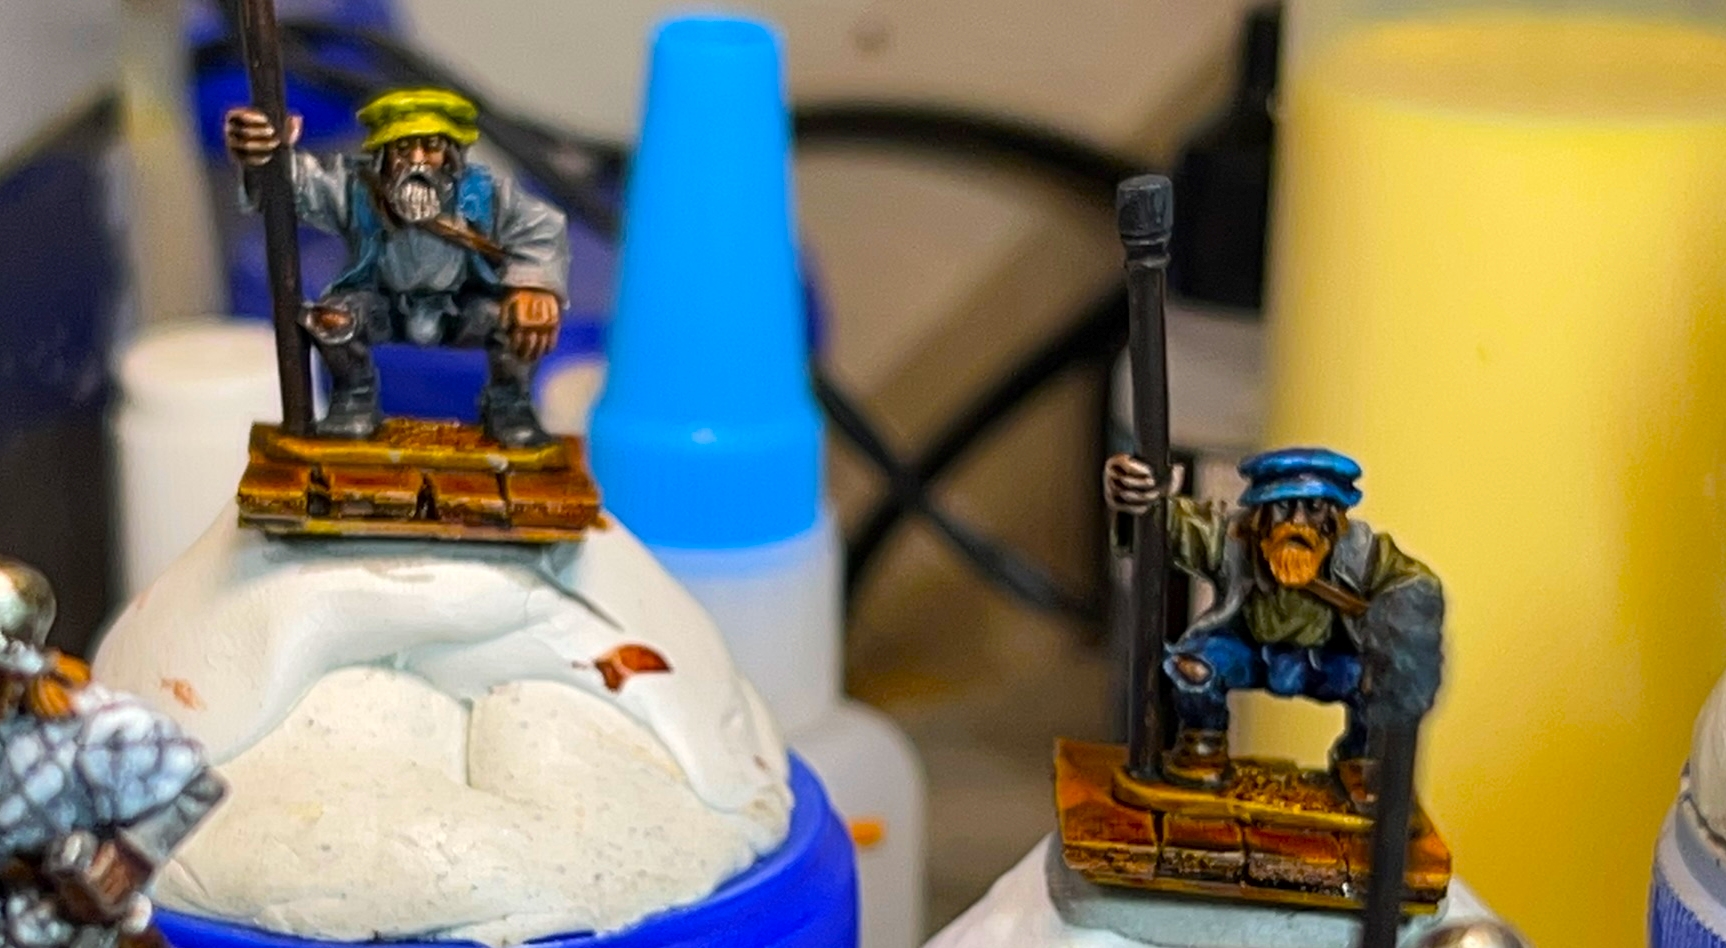
Then I worked on the two regimental commanders and their siliyiplixes (is that the plural???).

I used a new (to me) pumice sand-basing paint/paste on the bases. I acquired it from Shadow’s Edge Miniatures and it is called Shadow’s Edge Miniatures Earth Works Dirt Colors “Sand Dust”. It comes in a 230ml/8 oz jar and I really liked it a lot. The only downside is that there is no photo on the website – you just have to choose “Sand Dust”. I have a photo below of the jar mid-project after using a lot!

Shadow’s Edge Miniatures “Earth Works Dirt Colors Sand Dust”

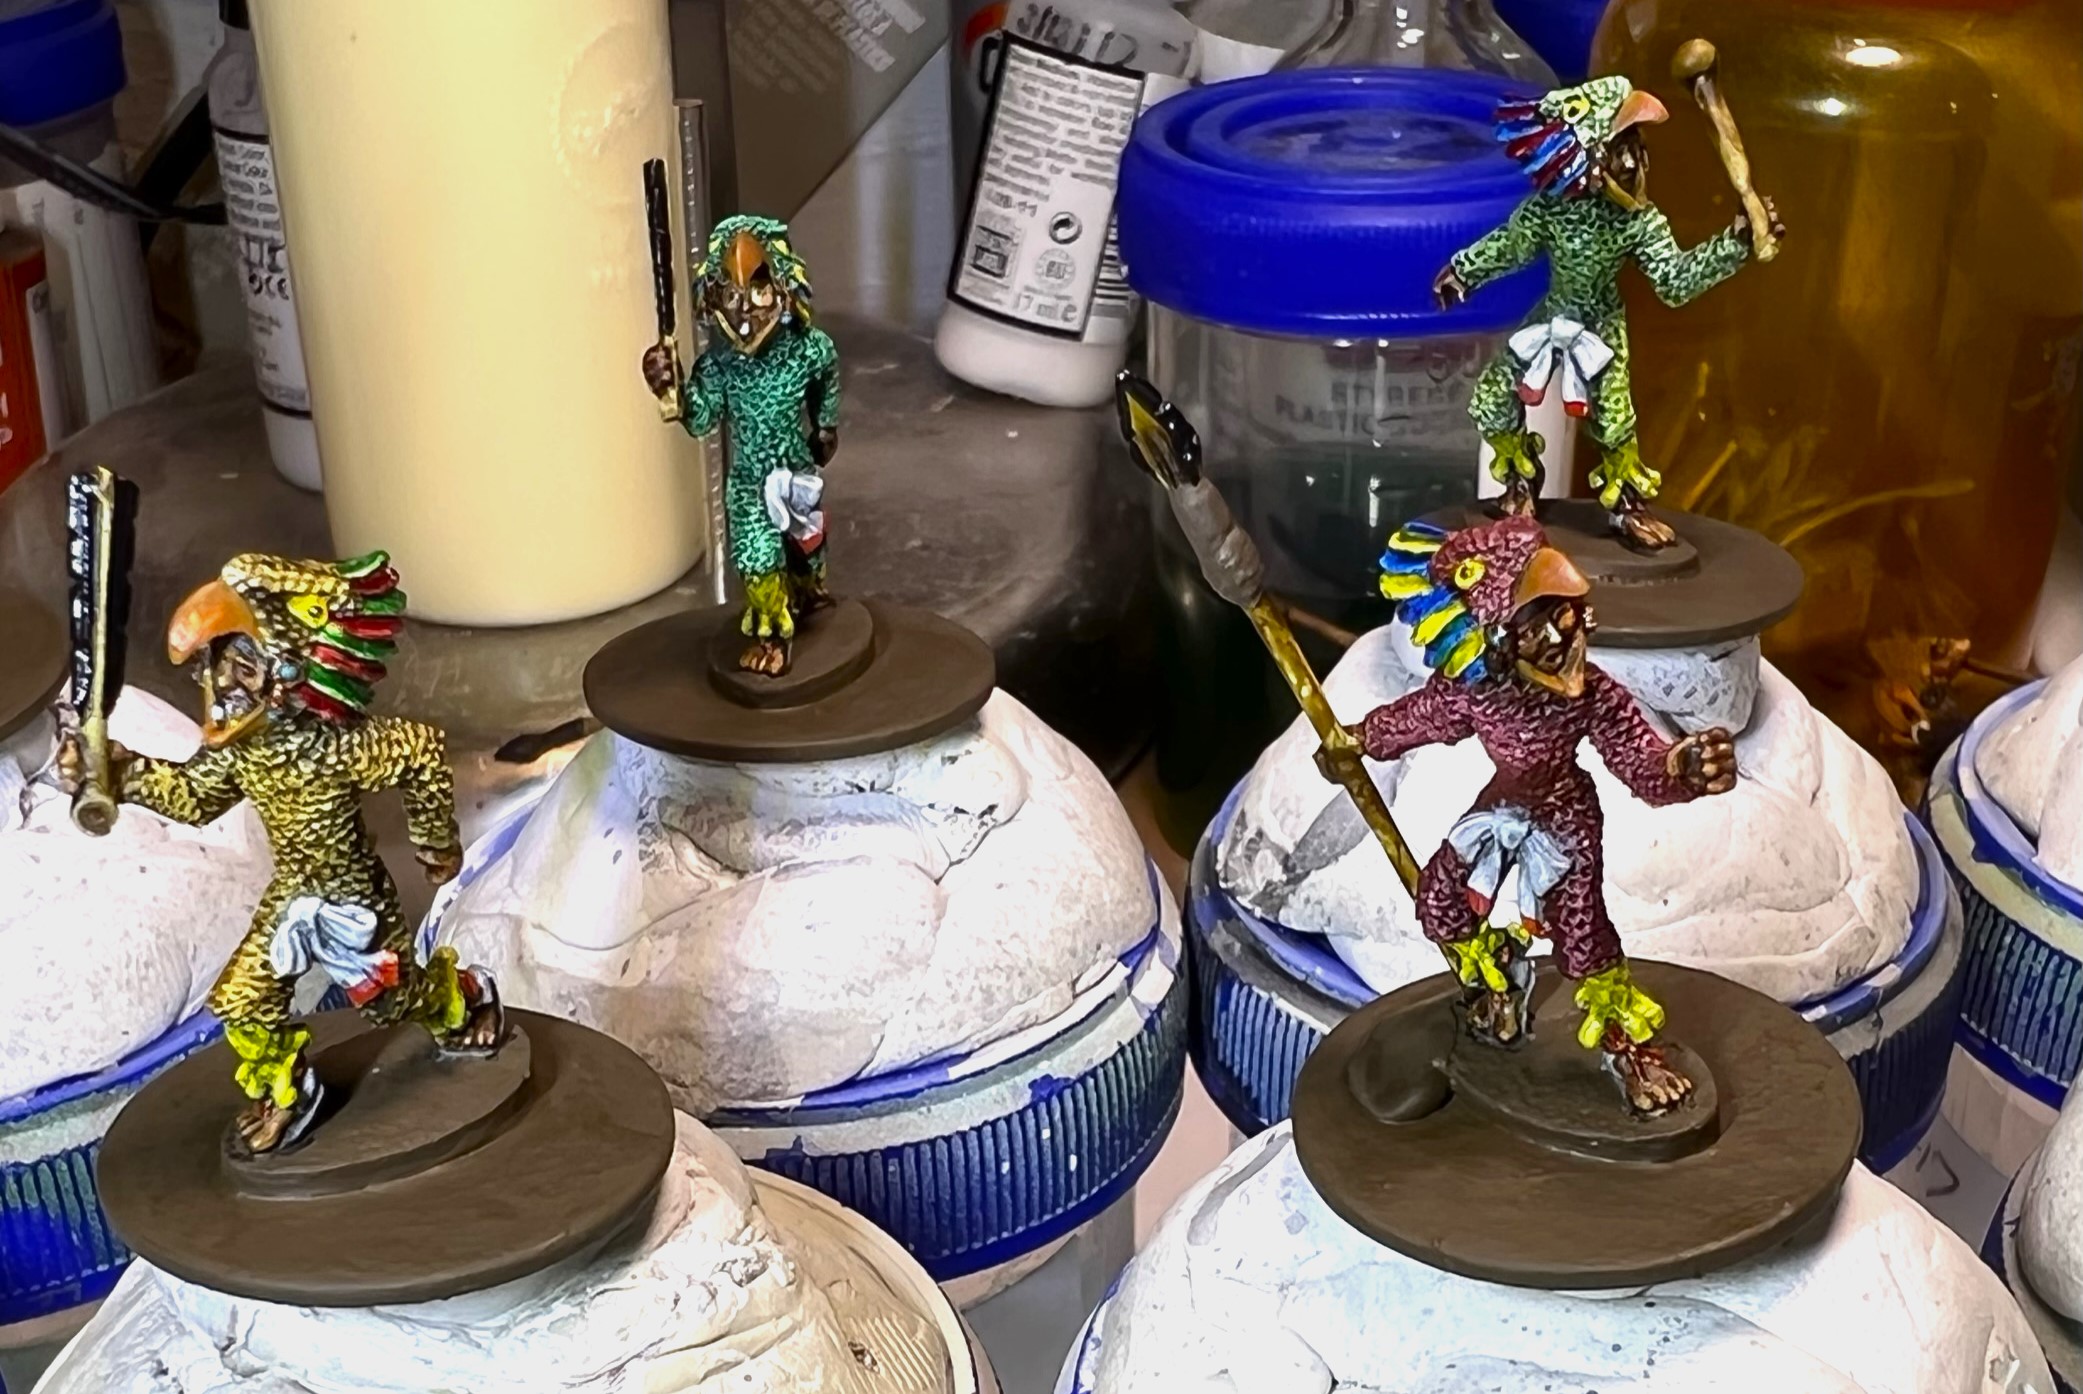
By mid-June I had the infantry figures mainly painted and ready for weapons and shields.

We need spears – and shields!

You notice that I alternated drilling out on the forearms and the hands for the shield mounting so as to give more differentiation.

Armed!

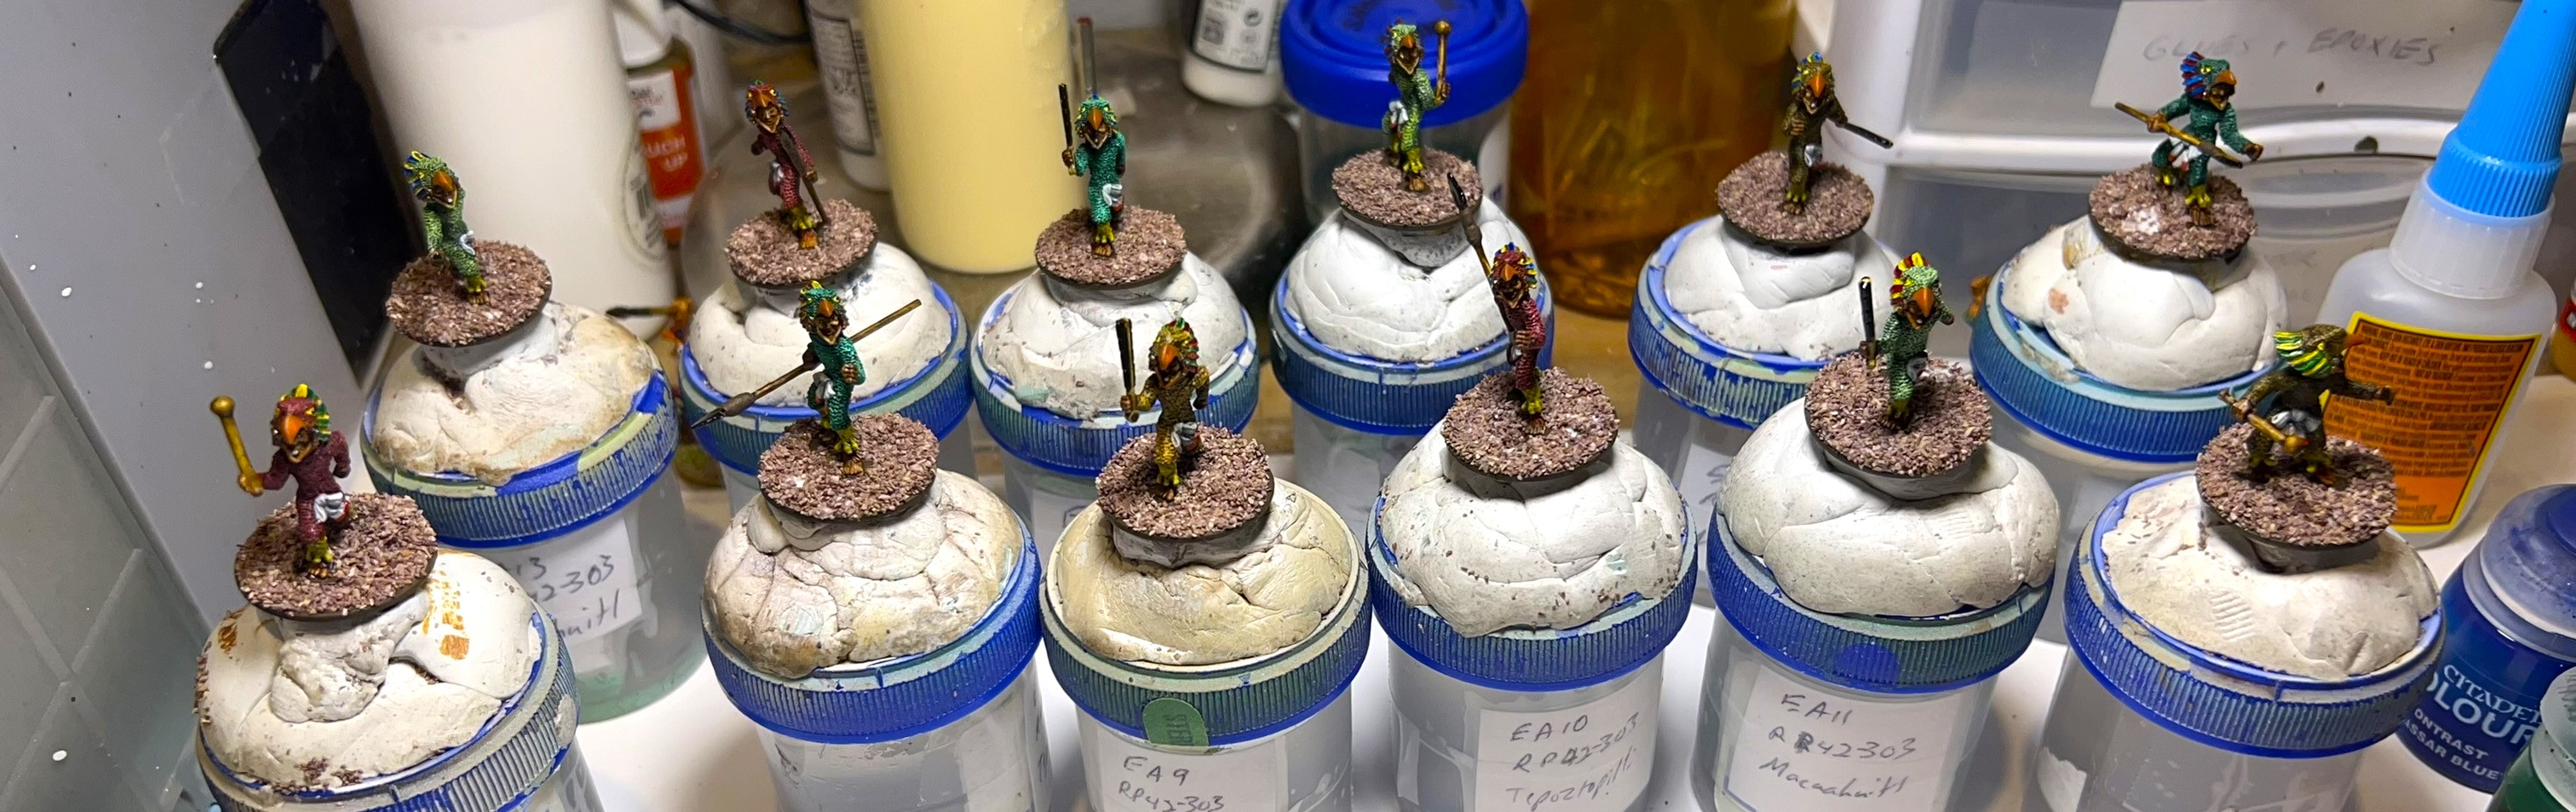
With the final proximity of each figure to each other on a 2″ base, I needed to sequentially add the basing paste. First, I added the basing texture where the figures were to be affixed with Gorilla Glue. I got help from my granddaughter Tabitha who had fun doing this.

Tabitha at work!!
Here you can see the sequential process that I followed – which allowed much easier application of the “Sand Dust” texture paint between the figures – but this added TIME.

After the “Sand Dust” had dried, I added three pigments to give better subtlety to the sand (and all the paints that I used are listed at the end of the post). Then I added varnish and flocking. By the end of June I had them completed and varnished as well as the leaders – but let’s get to their WIP next.

Whim Whim Brigade Commanders WIP Shots and Discussion

The brigade commanders went much more quickly as the drilling was limited to their heads! The figures looked great.

At the start – heads drilled out.

After assembly, I followed the same procedure as with the WWSR’s.

Two of the heads on paper clip wire after dry brushing
Bodies after drybrushing. I painted the figures then assembled them.

Before basing, I had these looking pretty good.

Then I was on to basing them like the WWSR’s, except this time on MDF bases.

Basing showing the figures with and without pigments on the sand on their bases.

Enough WIP I’d say – let’s jump into some…
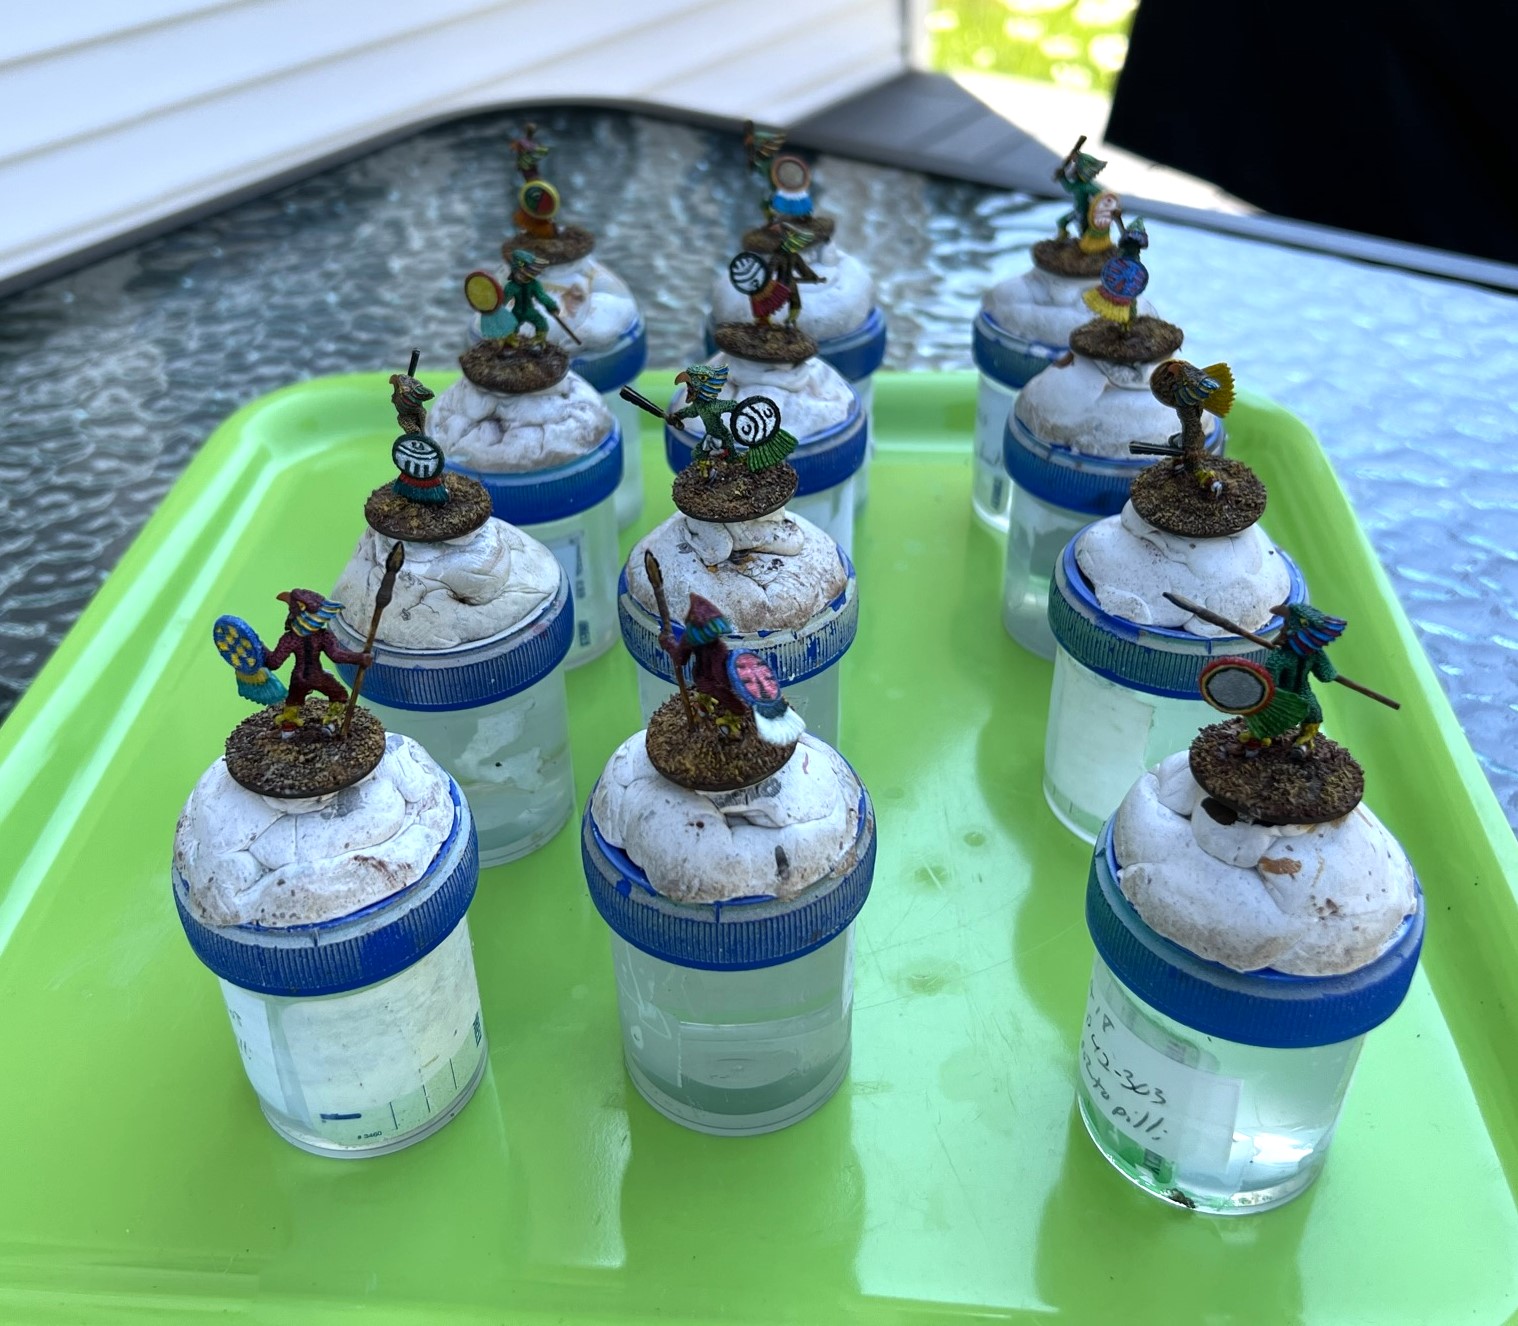
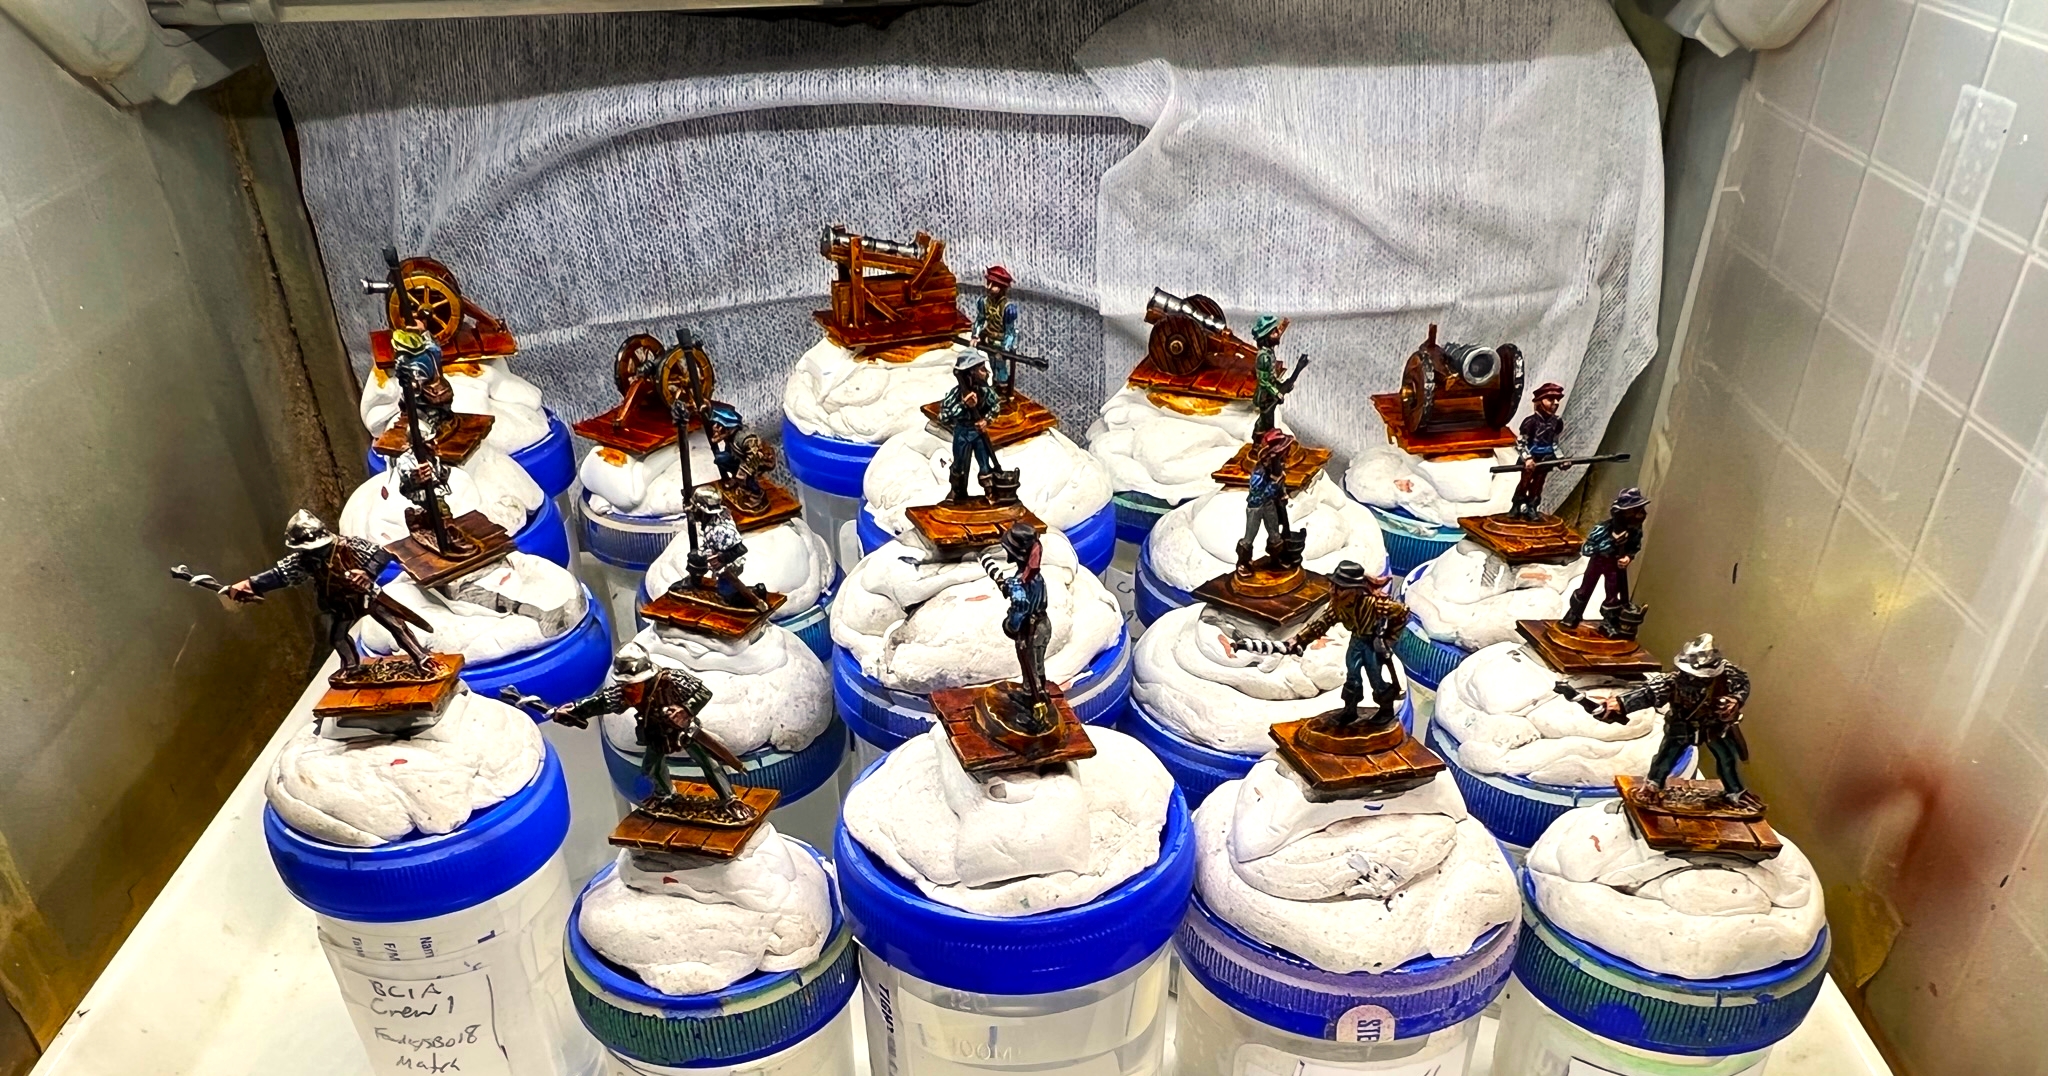
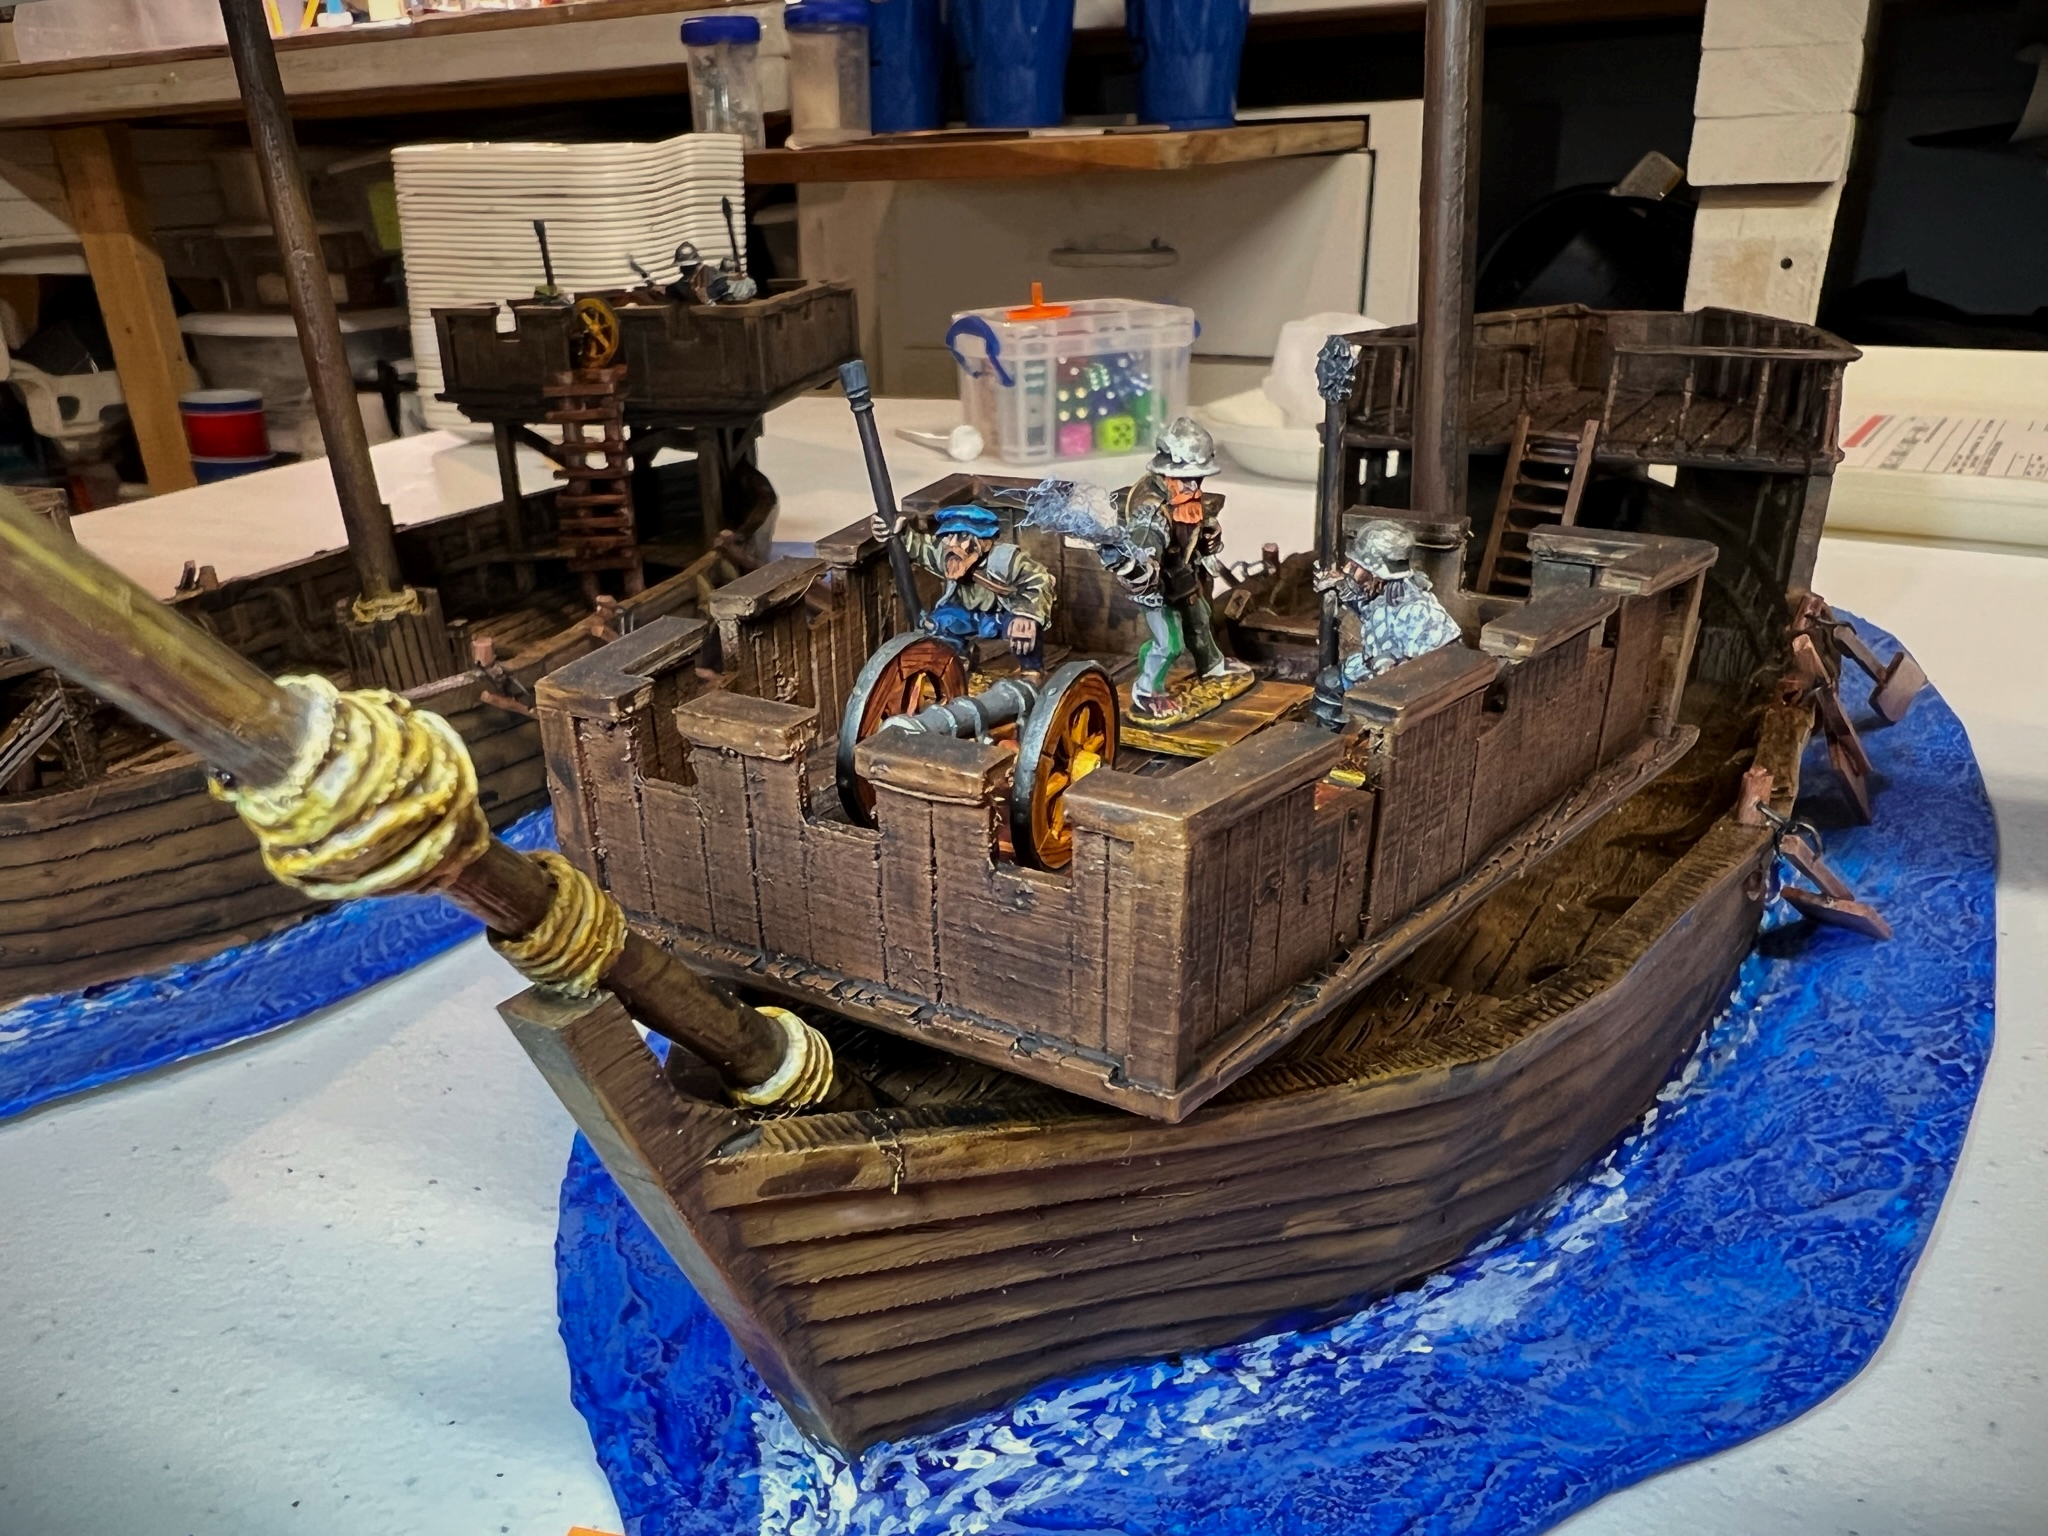
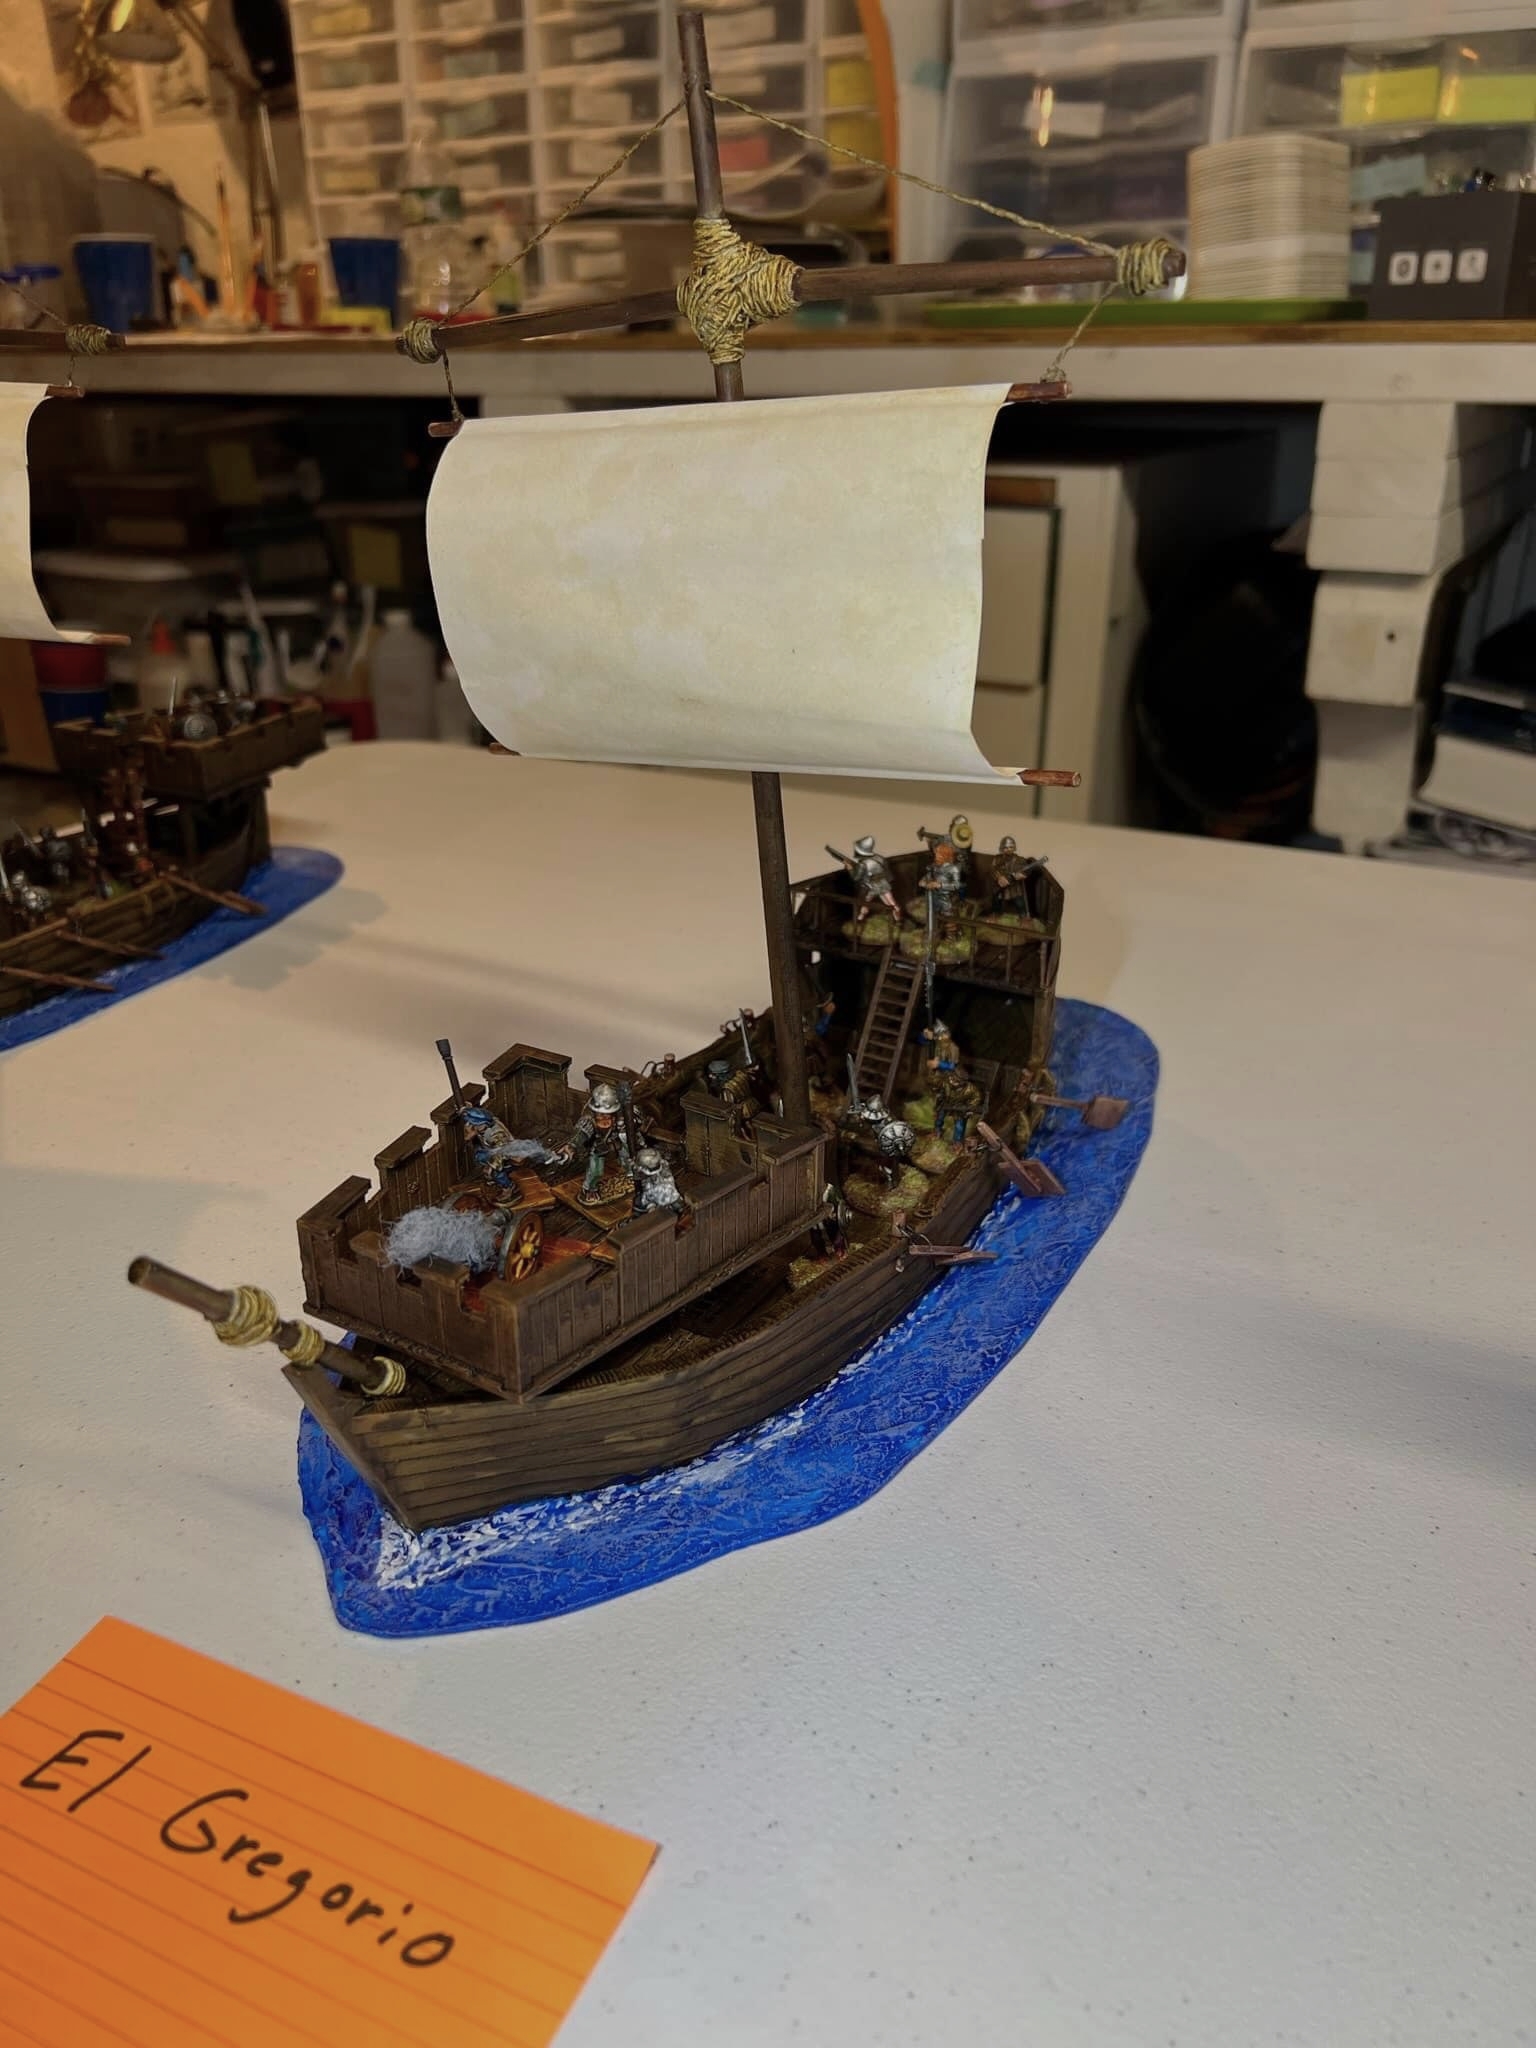
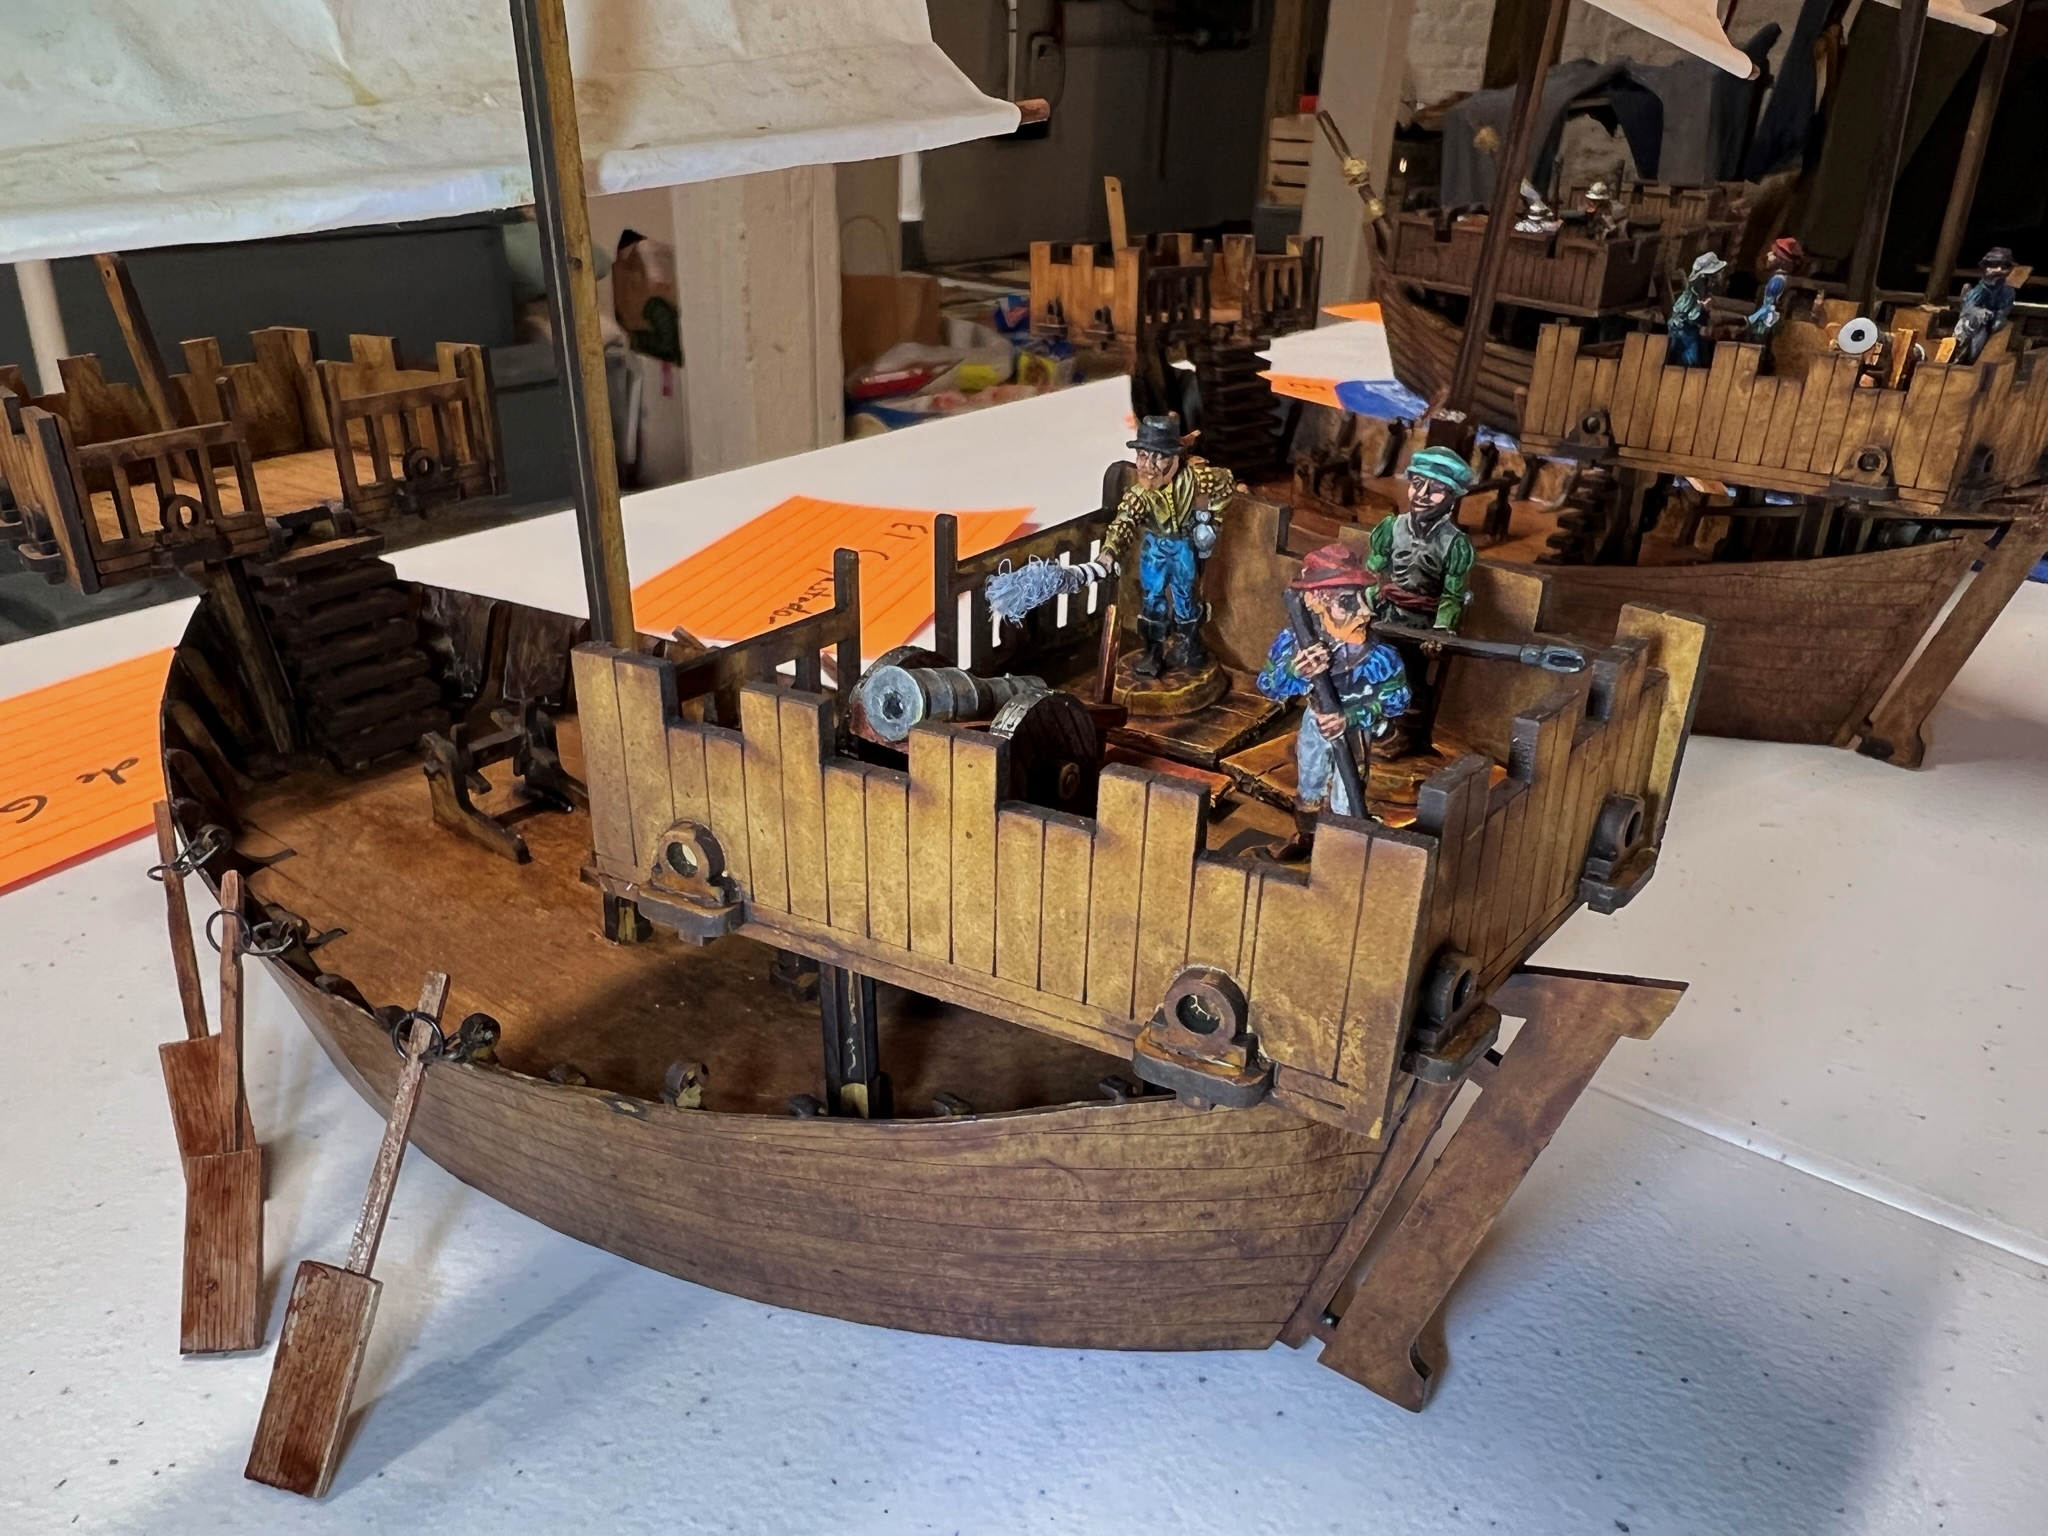
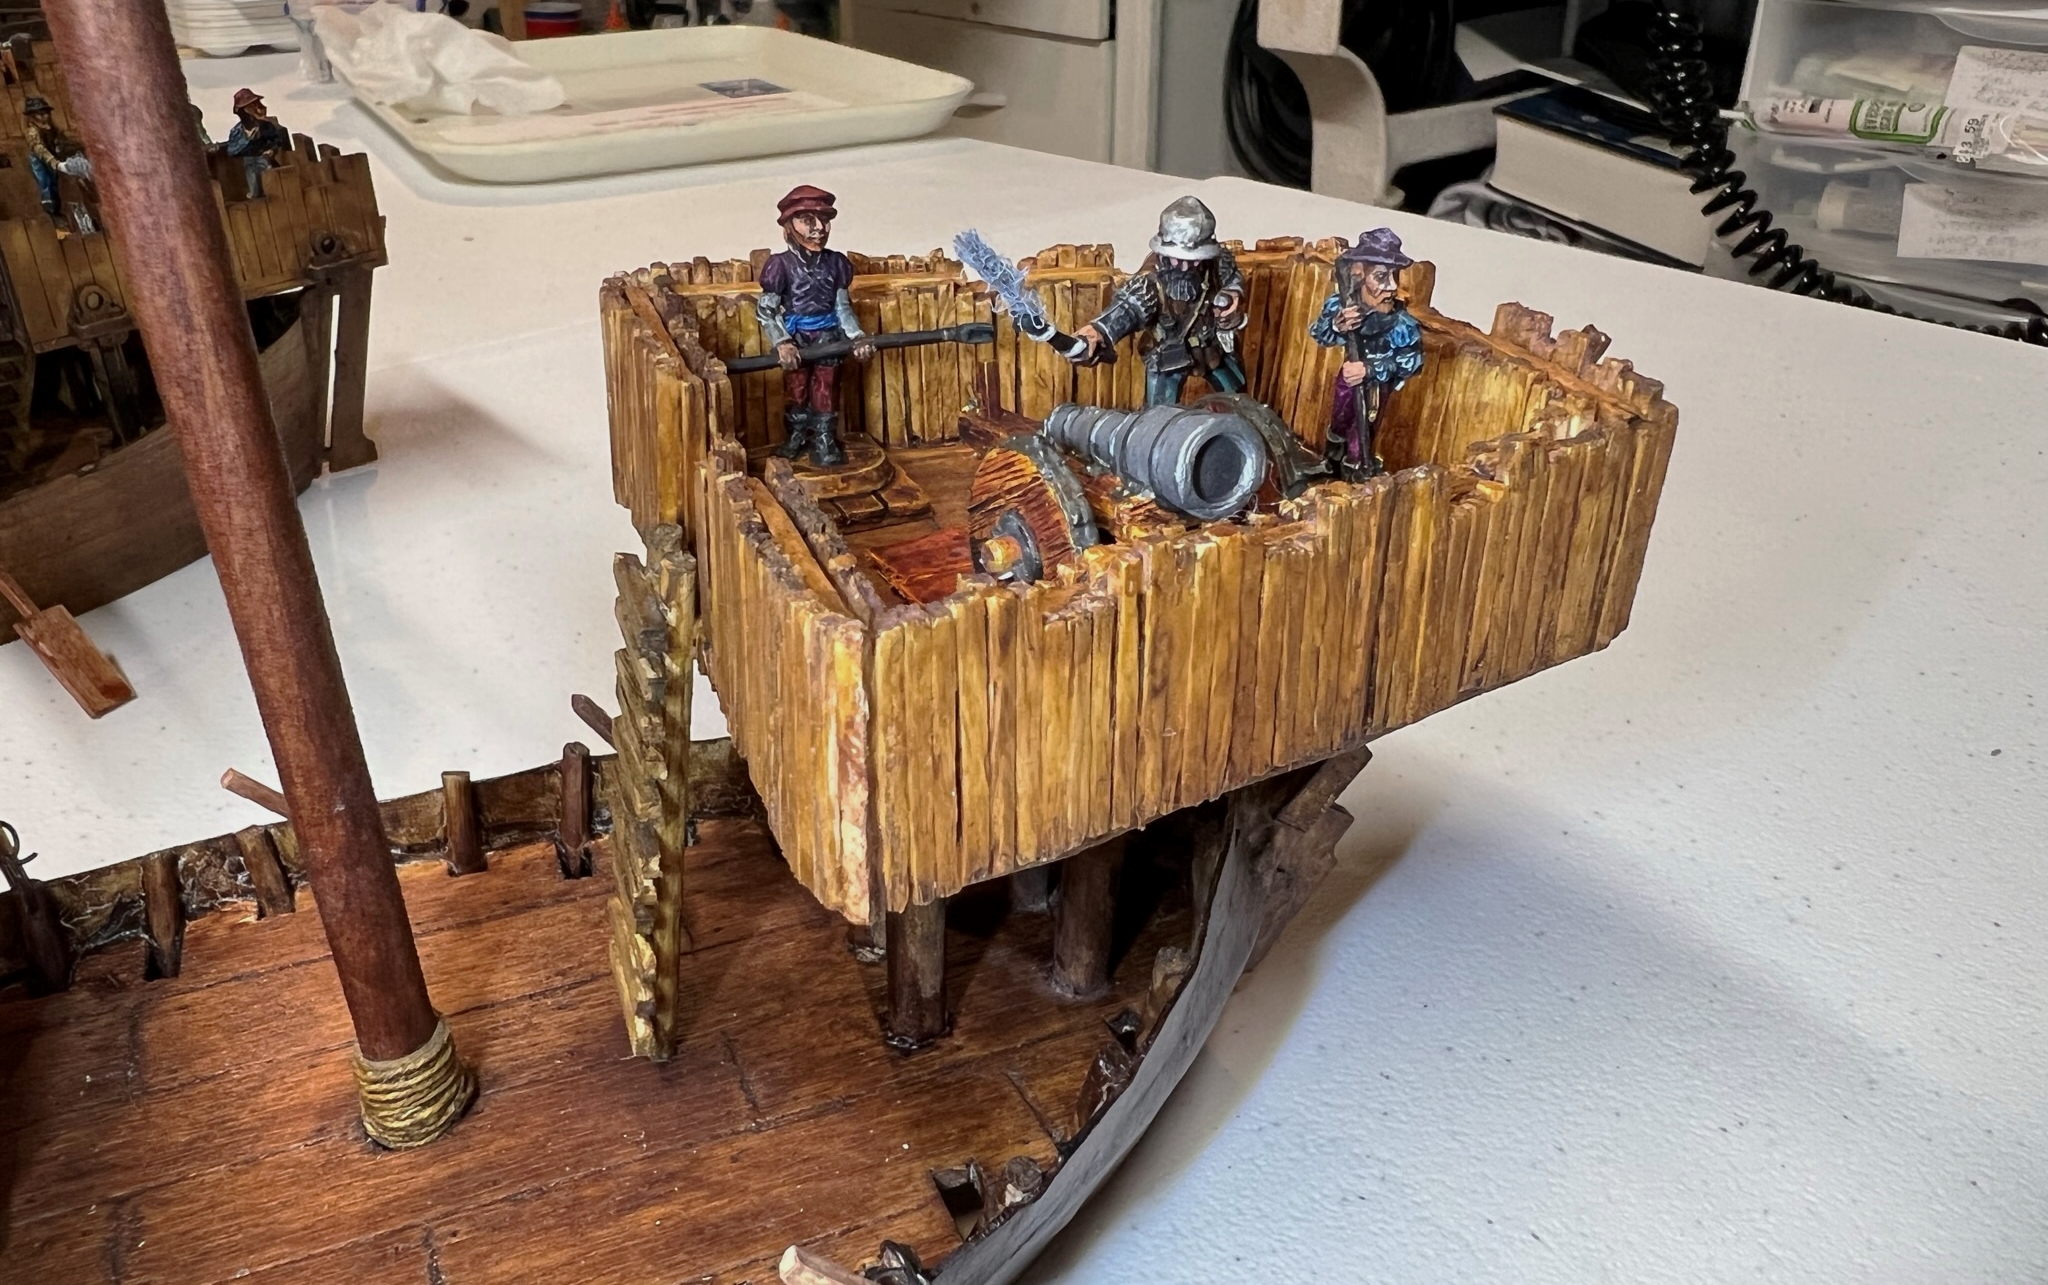
Eye Candy

1st WWSR from the front in line formation
1st WWSR in column formation
2nd WWSR in line formation from the front
2nd WWSR in column formation

And the leaders:

Leader with a blue turban from the front
Leader with a Blue turban from the side
Leader in armor from the front
Leader in armor from the side
Older Leader with a red turban from the front
Older Leader with a red turban from the side
Both WWSR’s and the three Brigade Leaders assembled

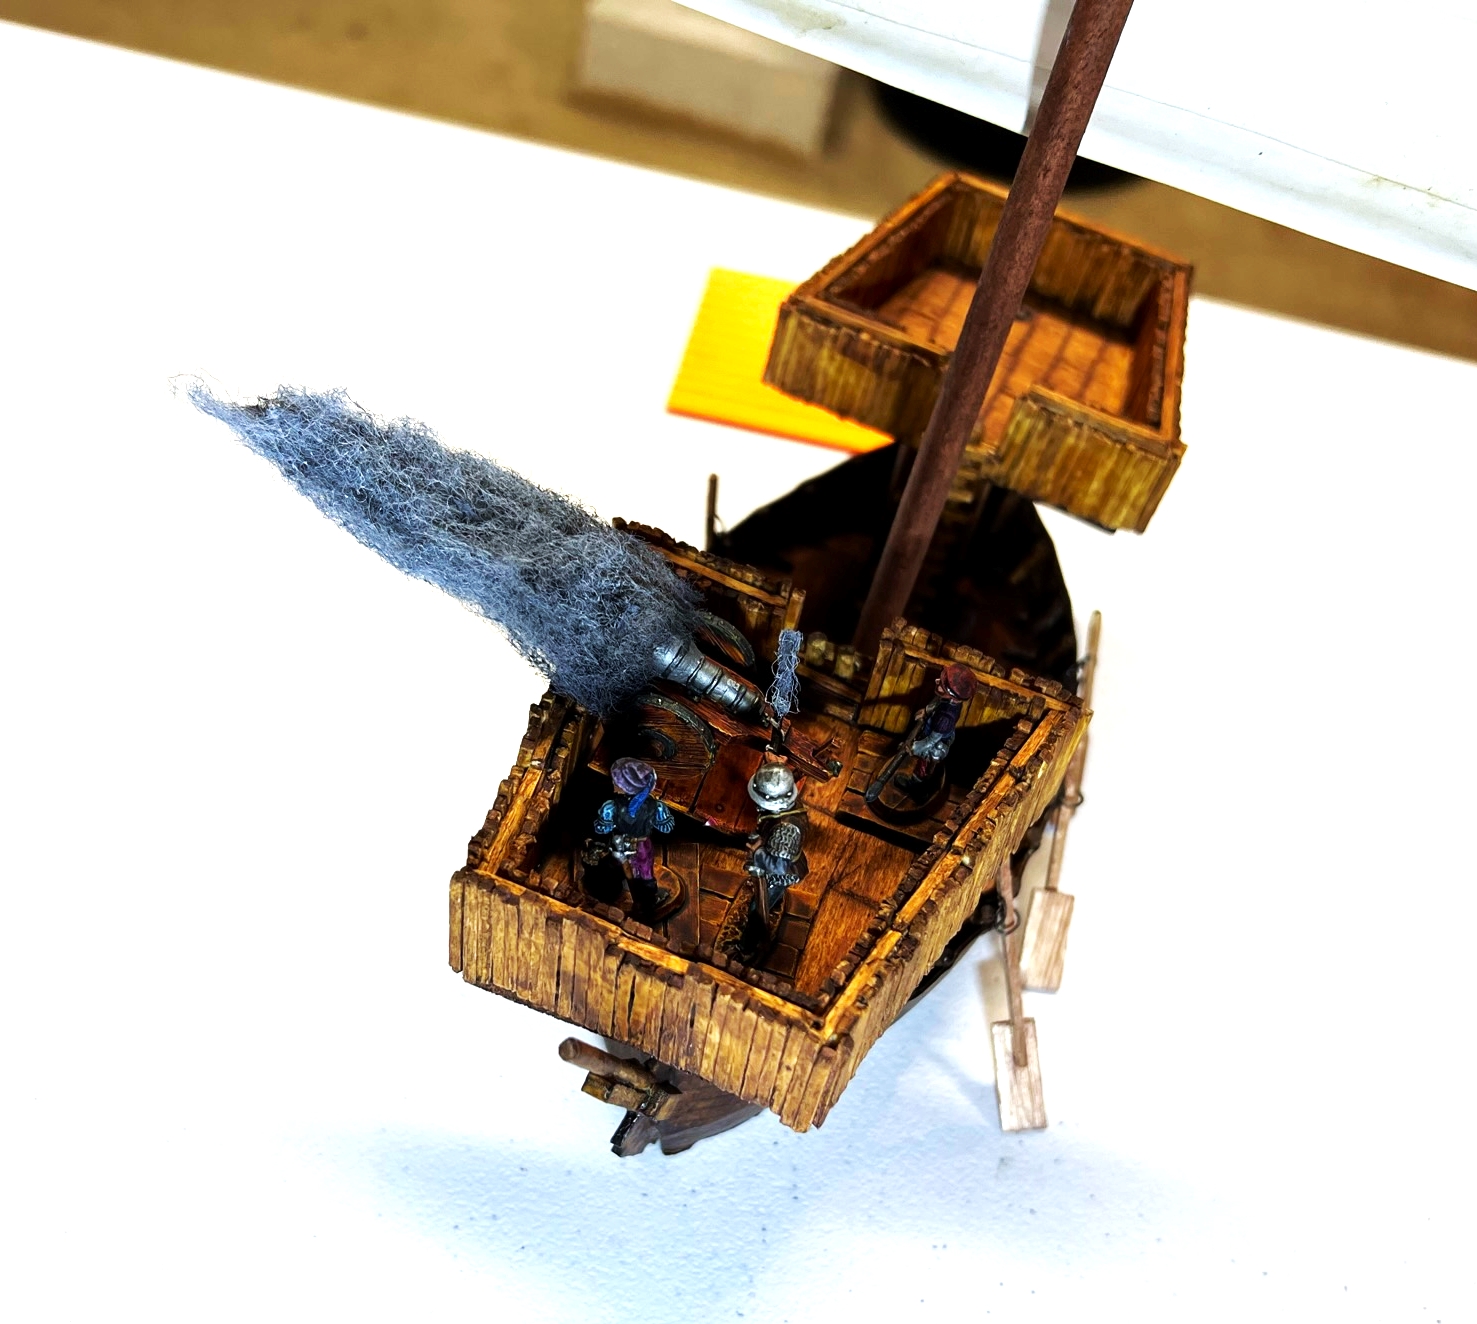
These did make their first tabletop battle at Historicon in July, as did another Whim Whim unit – but I’ll save those pics for the next post. That will be coming shortly (so I can get caught up)! Let’s just say it will be cavalry units that required some modeling for sure.

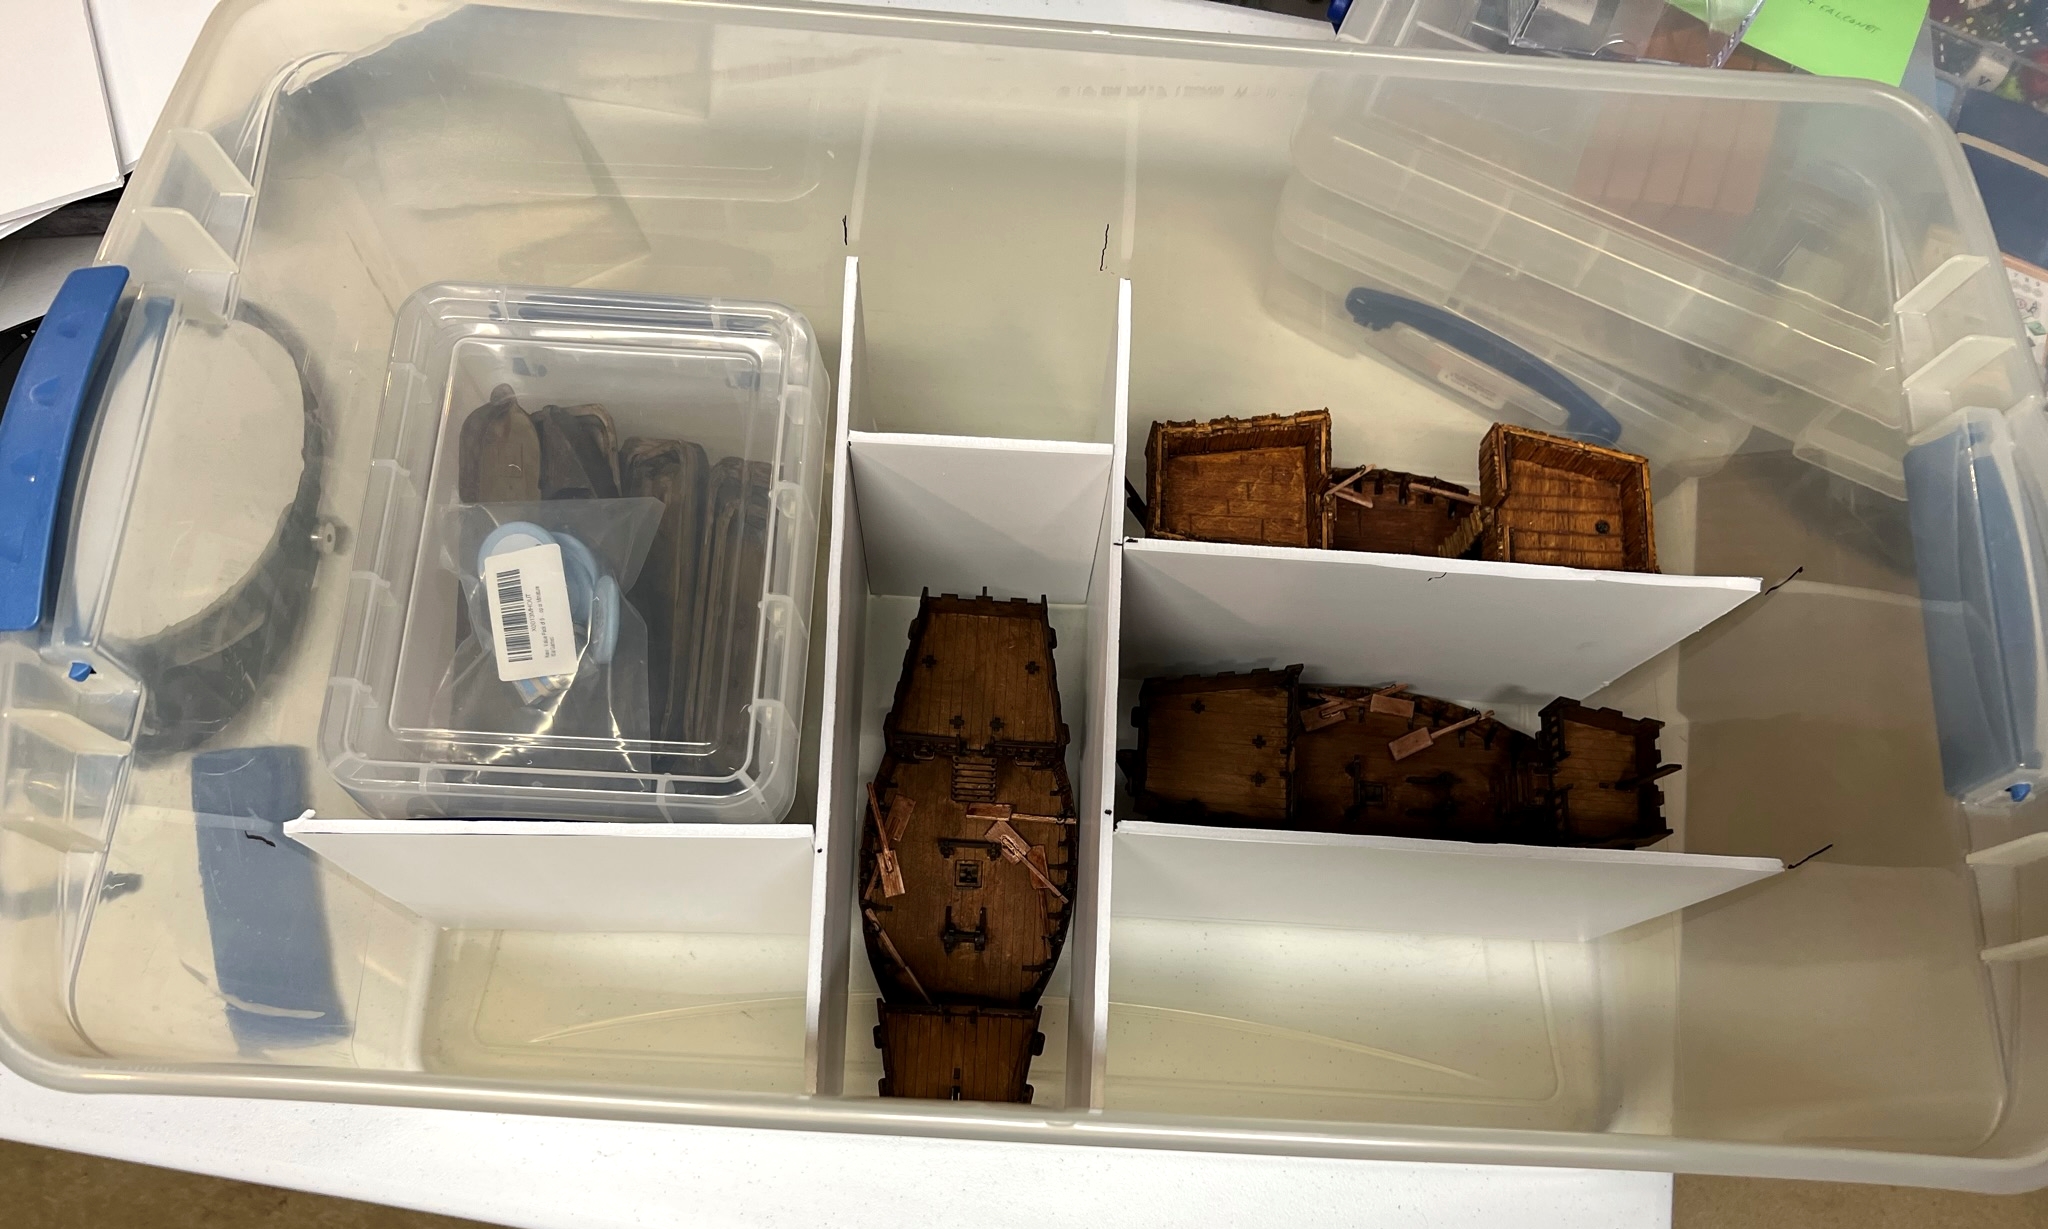
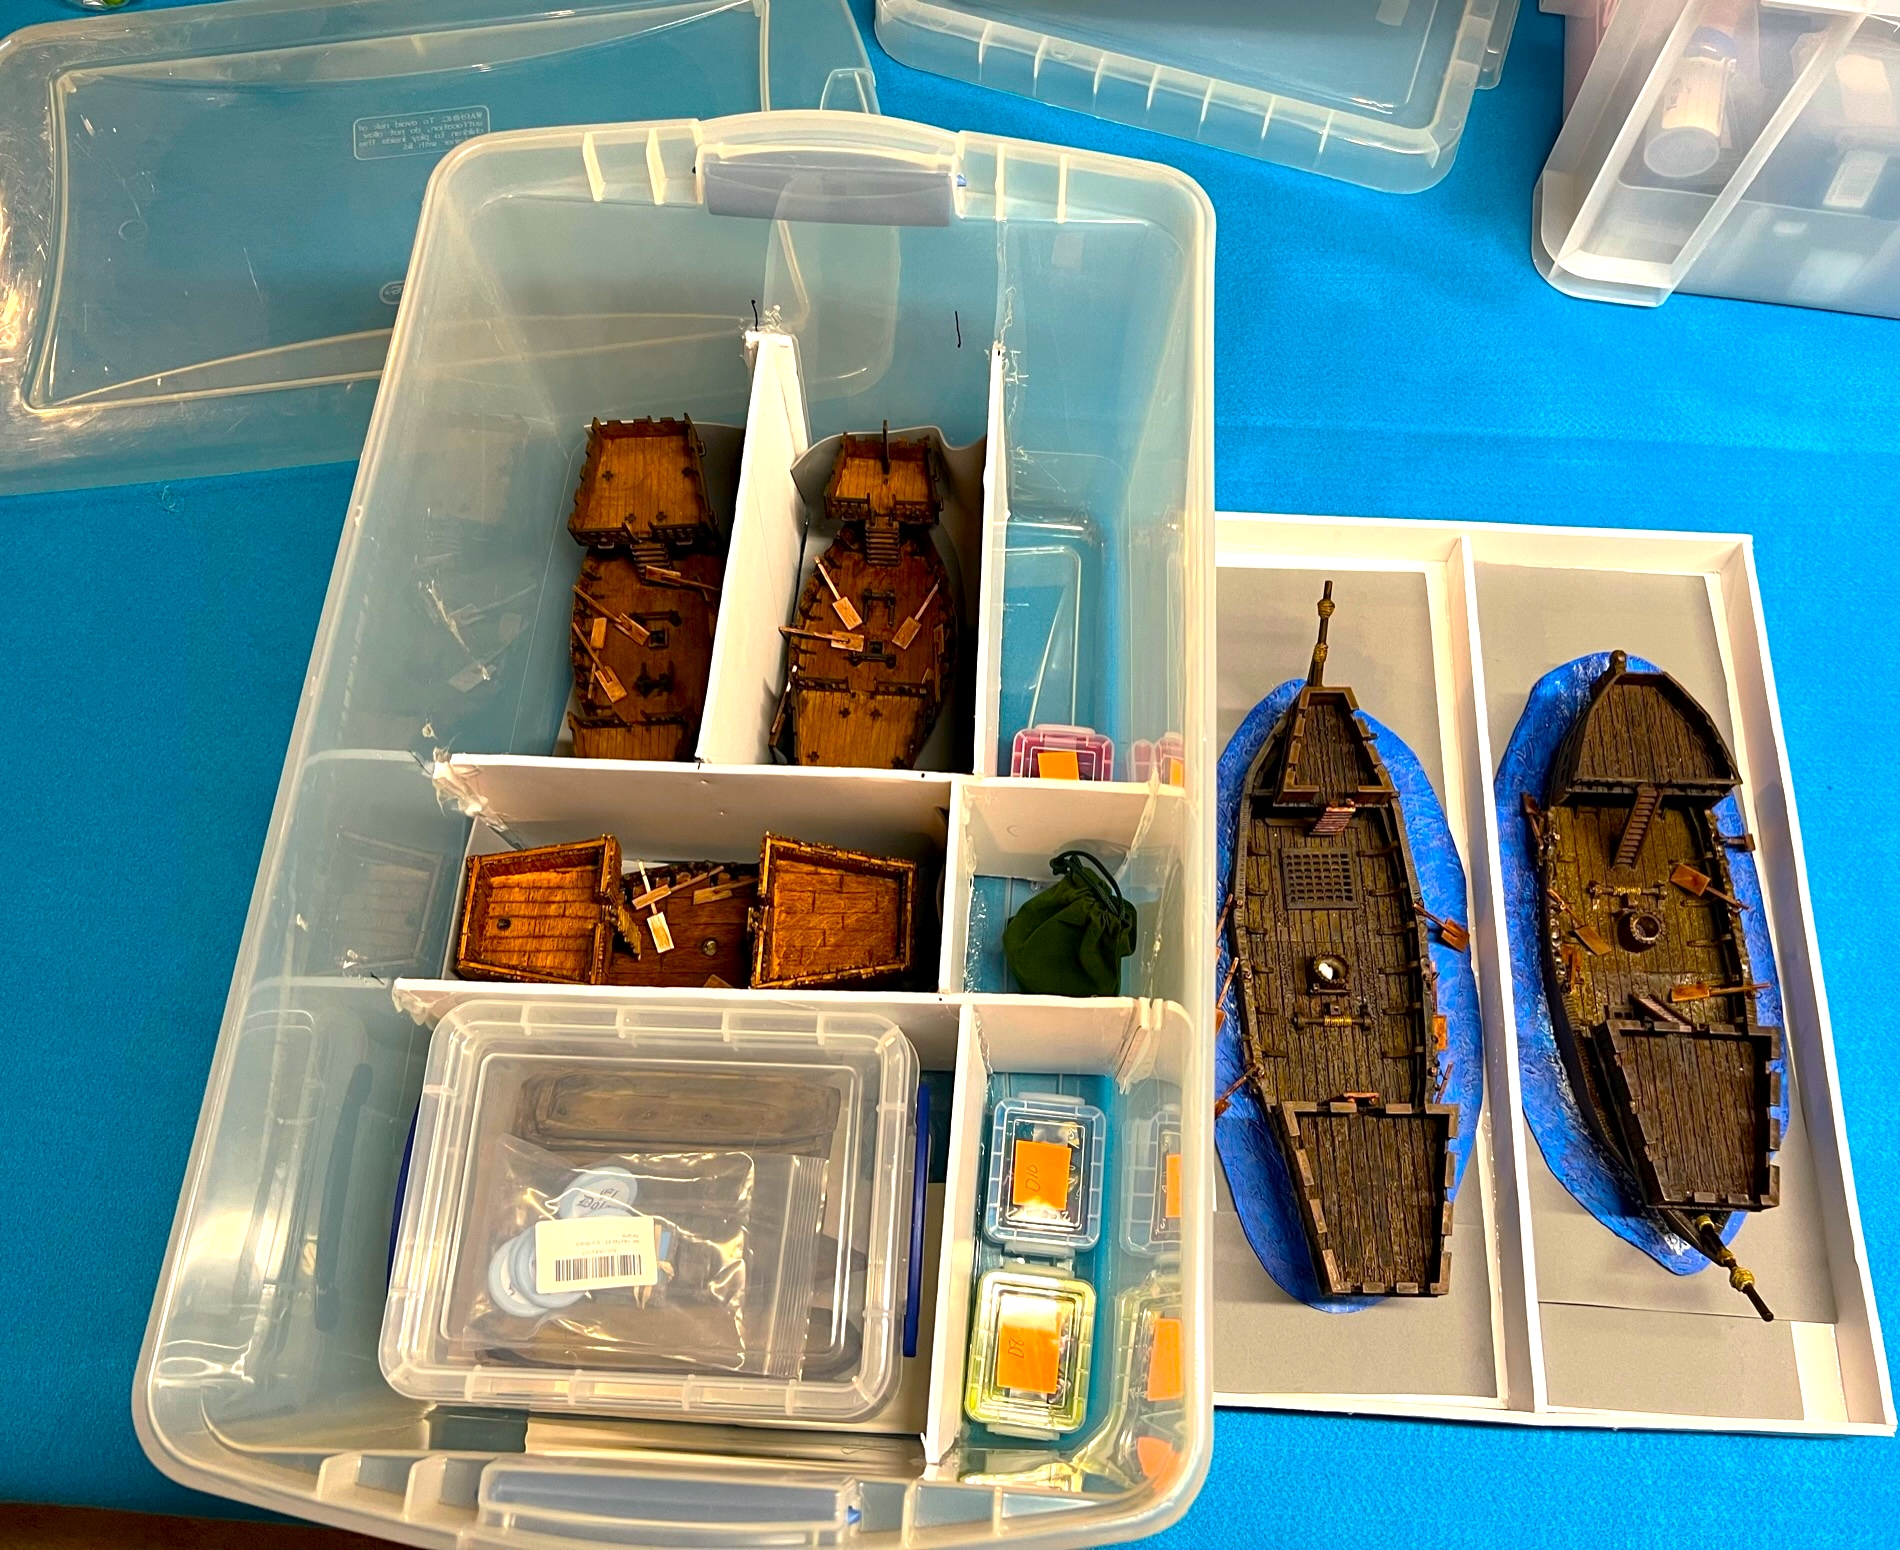
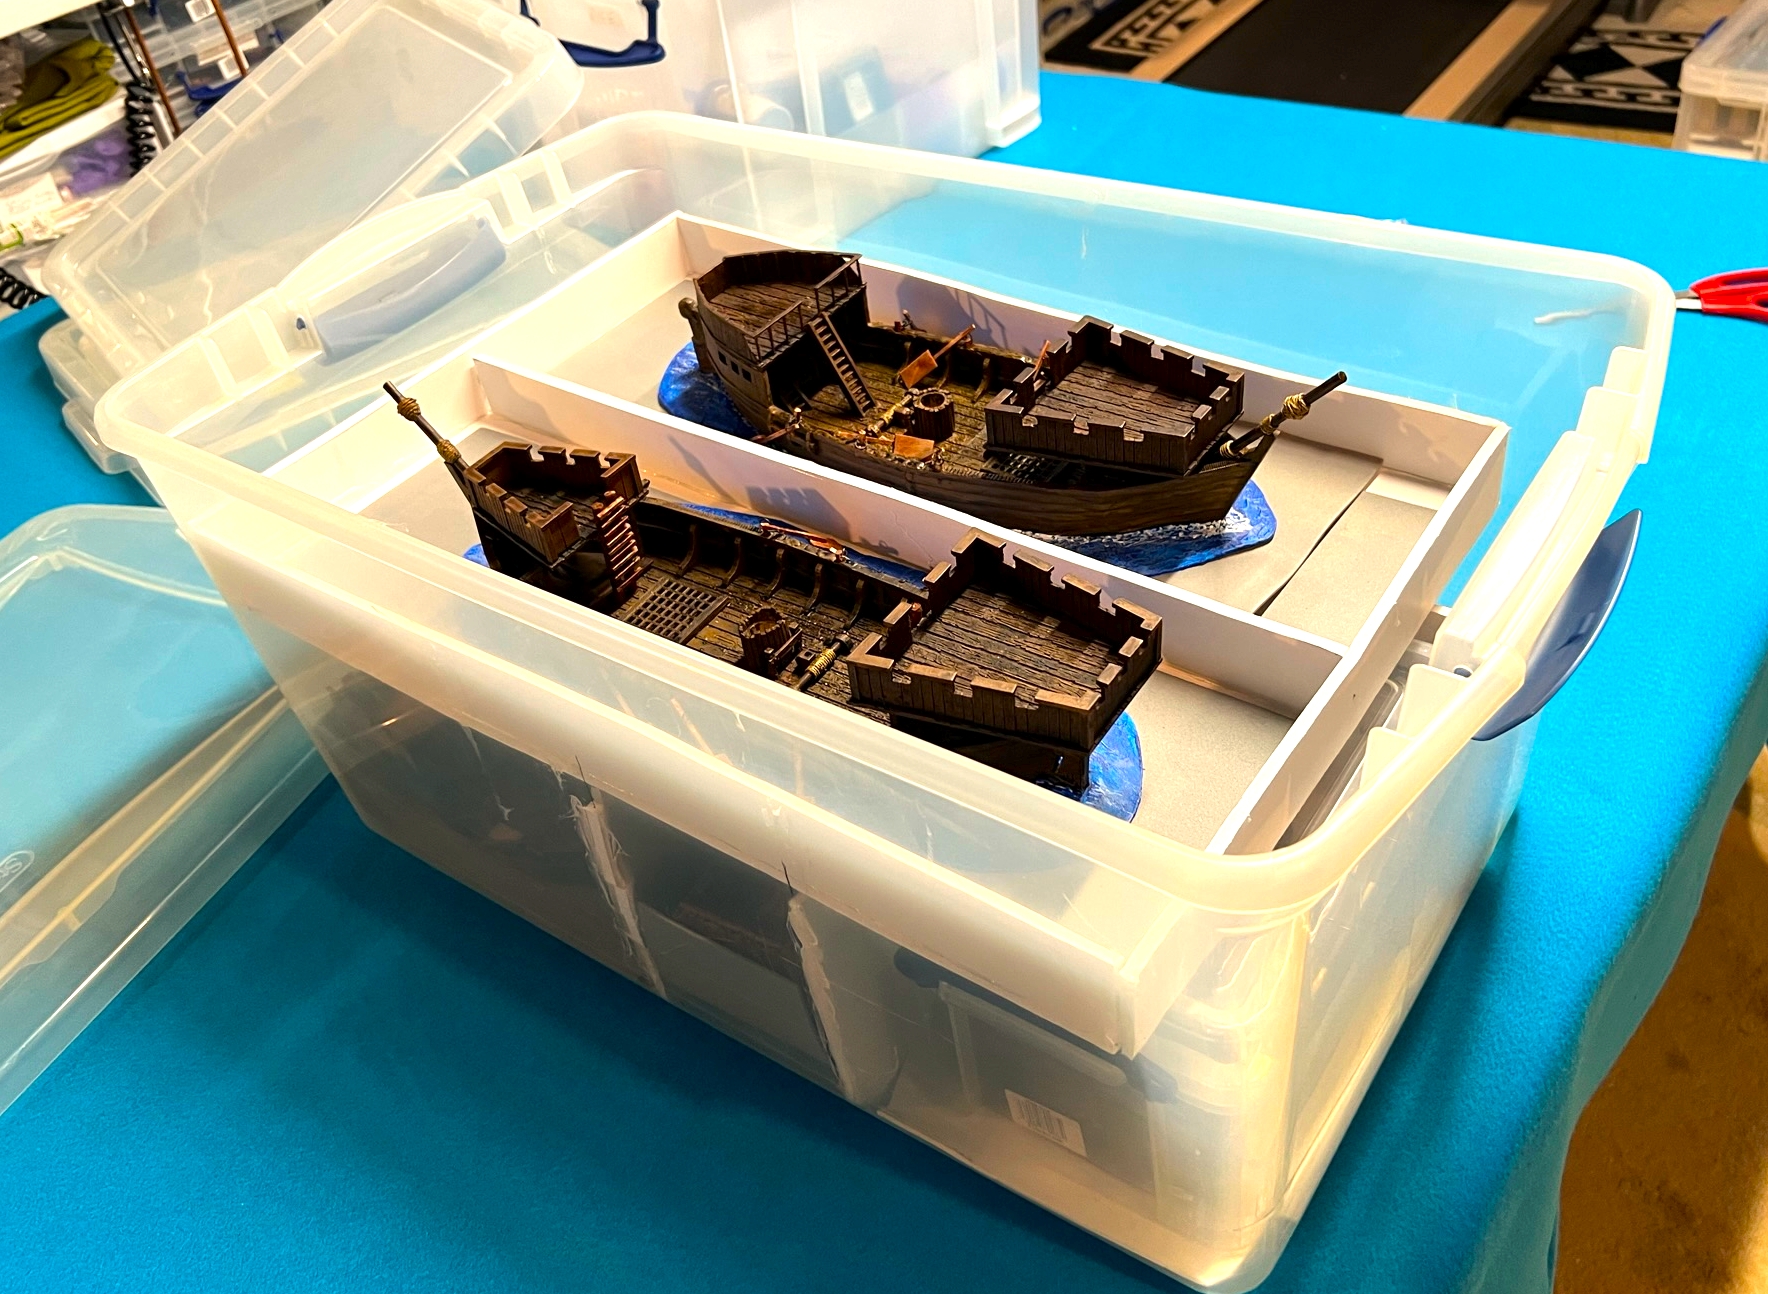
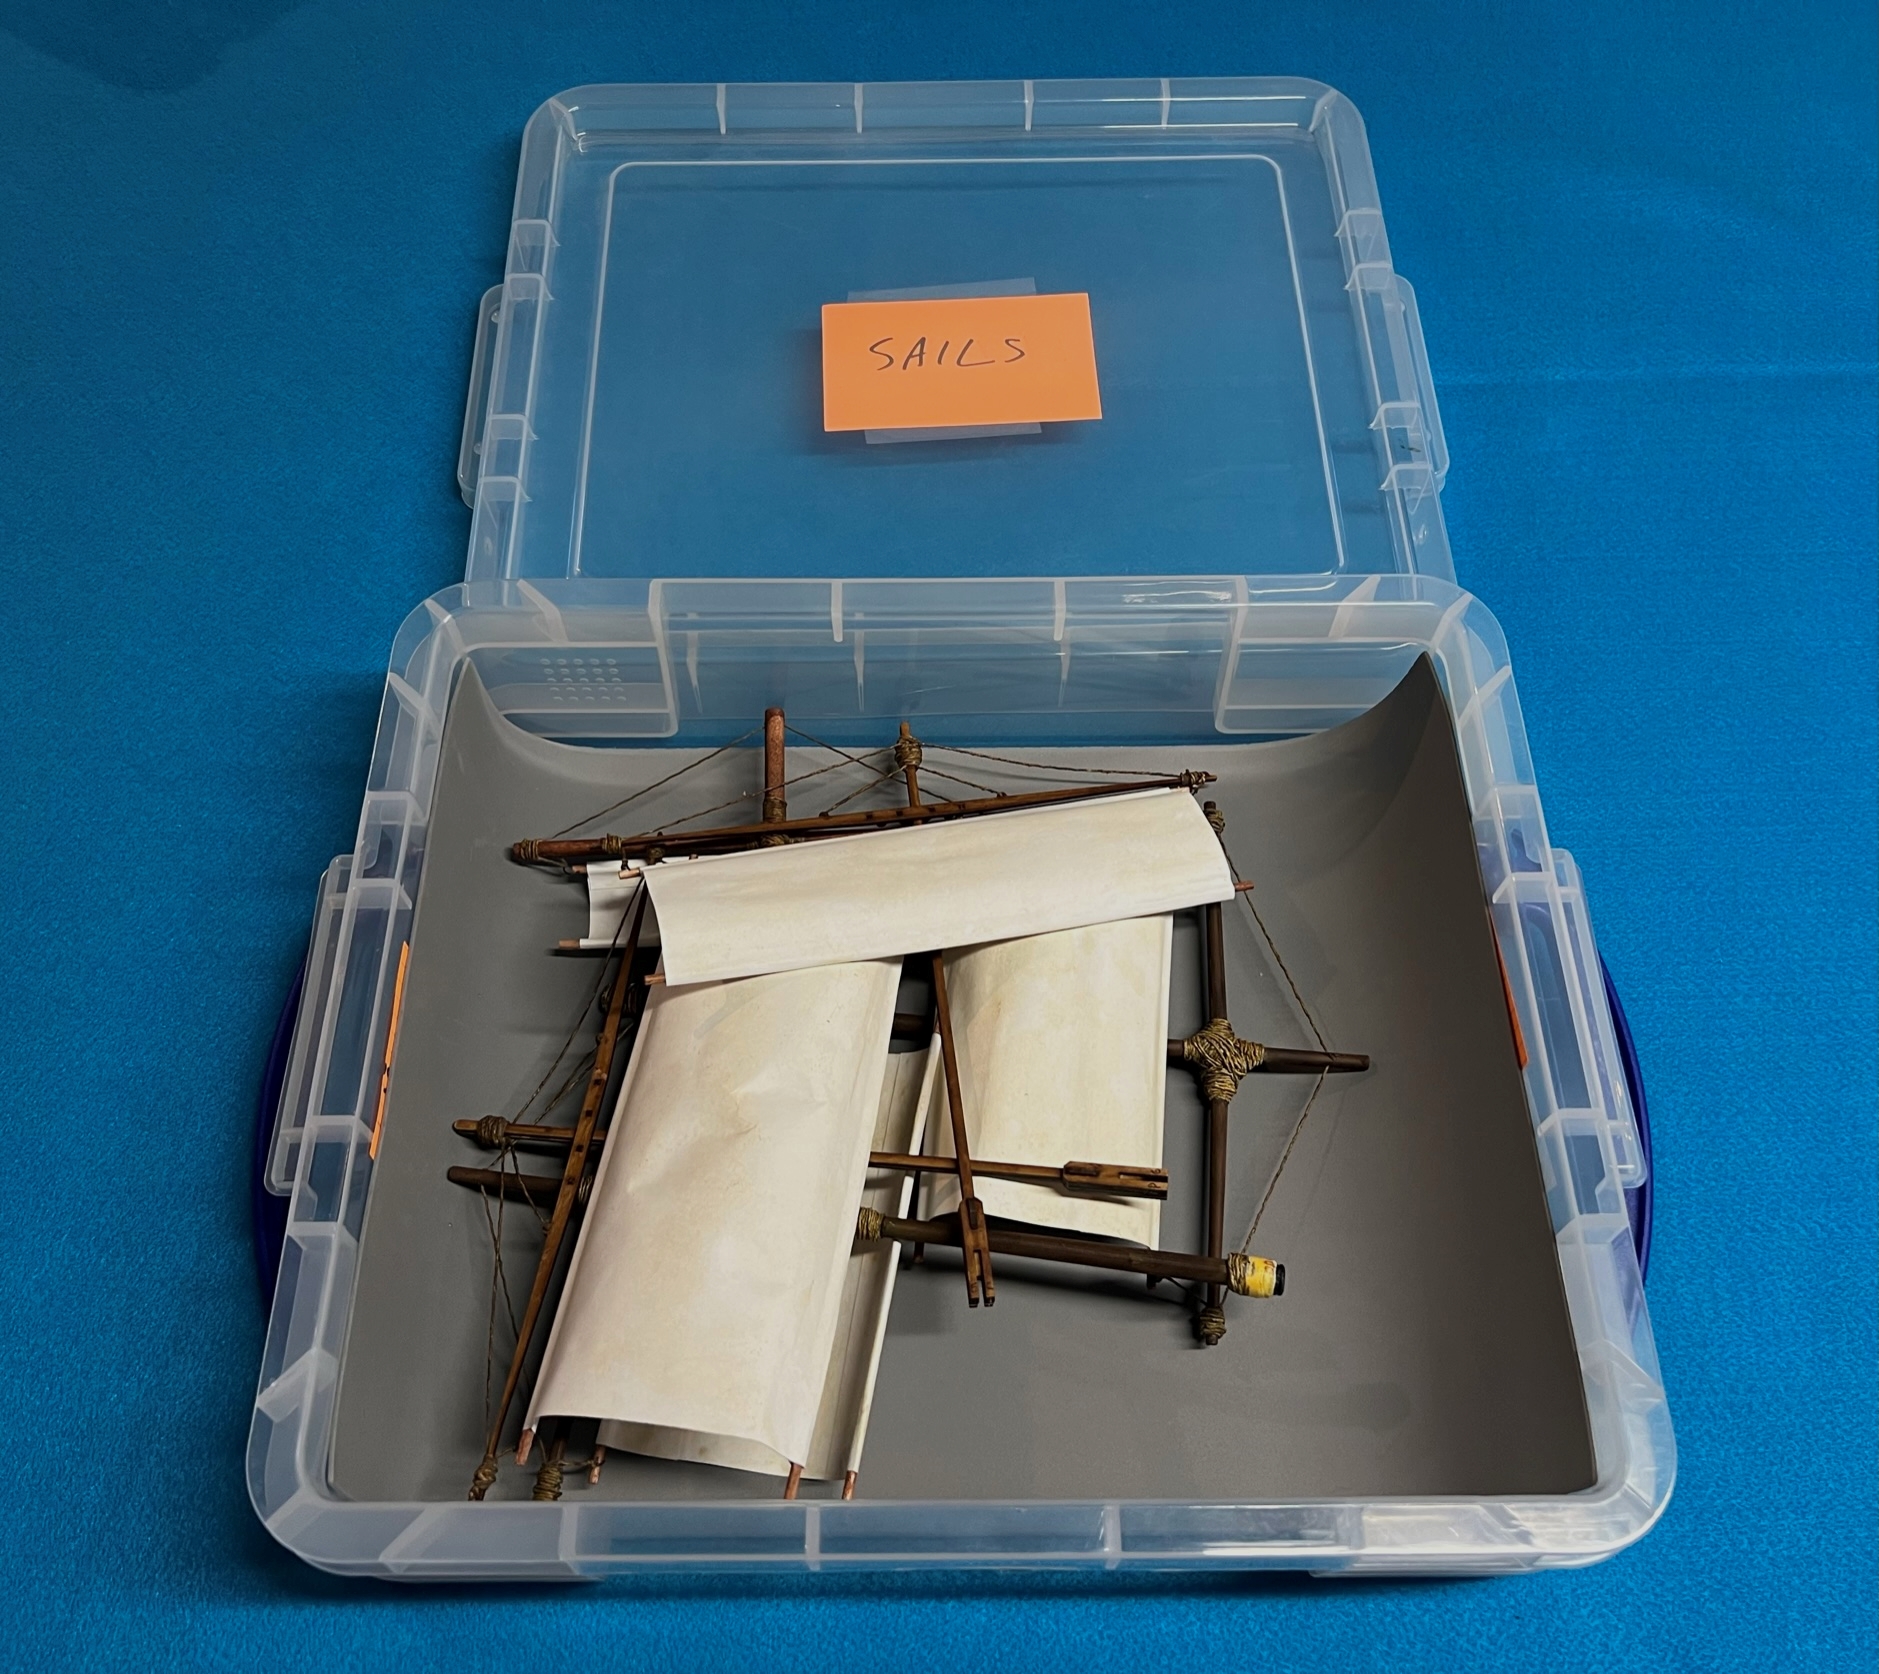
I now have a full box of Whim Whim and Noobi – though in retrospect I should have slightly trimmed the spear shafts to fit better height-wise in the Really Useful Box.

One box of Whim Whim and Noobi!

I hope that this was enjoyable to read. Your feedback in the comments section is always appreciated – and thank you for looking!

And yes, I still have much more Ozz to come…

Miscellaneous details and references for those interested in that sort of thing:

For all of my earlier posts on Wars of Ozz games, figures, units, and other related projects – please see this page.

PAINTS, INKS, GLAZES, SHADES, WASHES, PIGMENTS, FLOCKING, GLUES AND MORE THAT I USED ON THESE TWO WHIM WHIM SPEARMEN REGIMENTS:

  1. Number 6 steel washers
  2. Iron Wind Metals Banner Spear Head Sprues SKU
  3. Pull chain remnants
  4. Wars of Ozz Miniatures MDF bases
  5. Vallejo Game Ink “Brown”
  6. Elmer’s PVA Glue
  7. Wargames Accessories #21 bases (2″ square steel bases)
  8. Wargames Accessories FOW #1 (1.25″ X 1″ steel bases)
  9. Vallejo Surface Primer “Grey”
  10. Vallejo Mecha Primer “White”
  11. Vallejo “Airbrush Thinner”
  12. Popsicle sticks
  13. Green Sharpie pen
  14. Army Painter “Dark Tone” (wash)
  15. Wargames Accessories #17 bases (1″ X 1.5″ steel bases)
  16. Citadel “Contrast Paint – Magos Purple”
  17. 3/4″ Everbilt steel washers (ABA)
  18. 7/8″ Everbilt steel washers (ACA)
  19. Army Painter “Speed Paint – Fire Giant Orange 1.0”
  20. Army Painter “Speed Paint – Purple Alchemy 1.0”
  21. Vallejo Model Air “Wood”
  22. Vallejo Model Air “Chrome”
  23. Vallejo Mecha Varnish “Gloss Varnish”
  24. Vallejo Mecha Color “Off White”
  25. Battlefront “Worn Canvas”
  26. Citadel “Seraphim Sepia” (wash/shade)
  27. Citadel “Contrast Paint – Contrast Medium”
  28. Army Painter “Speed Paint – Crusader Skin 1.0”
  29. Citadel “Morghast Bone”
  30. Army Painter “Speed Paint – Sand Golem 1.0”
  31. Army Painter “Speed Paint – Ruddy Fur 2.0”
  32. Army Painter “Speed Paint – Satchel Brown 2.0”
  33. Army Painter “Speed Paint – Carmine Dragon 2.0”
  34. Citadel “Tesseract Glow” (Technical)
  35. Army Painter “Warpaint Air – Blue Flux”
  36. Army Painter “Light Tone” (shade)
  37. Citadel “Contrast Paint – Apothecary White”
  38. Citadel “Contrast Paint – Snakebite Leather”
  39. Citadel “Gehenna’s Gold”
  40. Vallejo Model Air “Steel”
  41. Vallejo Model Air “Black” (metallic)
  42. Citadel “Contrast Paint – Black Templar”
  43. Pendraken 12mm dice frames
  44. Shadow’s Edge Miniatures Earth Works Dirt Colors “Sand Dust” (texture/basing paste)
  45. Vallejo Mecha Color “Steel”
  46. Army Painter “Speed Paint – Aztec Gold 2.0”
  47. Vallejo Mecha Color “Magenta Fluorescent”
  48. Gorilla Glue
  49. Paper clip wire
  50. Wooden toothpicks
  51. Blue Sharpie pen
  52. Regimental Flags from Wars of Ozz Facebook page
  53. Vallejo “Dark Yellow Ochre” (pigment)
  54. Vallejo “Light Yellow Ochre” (pigment)
  55. Vallejo “Desert Dust” (pigment)
  56. Vallejo Mecha Varnish “Matte Varnish”
  57. Vallejo “Flow Improver”
  58. Army Painter “Battlefield Rocks” (flocking)
  59. Shadow’s Edge Miniatures “4mm Badlands Tufts” (flocking)
  60. Shadow’s Edge Miniatures “6mm Scorched Earth Tufts” (flocking)

PAINTS, INKS, GLAZES, SHADES, WASHES, PIGMENTS, FLOCKING, GLUES AND MORE THAT I USED ON THESE WHIM WHIM BRIGADE COMMANDERS:

  1. Number 6 steel washers
  2. Gorilla Glue
  3. Paper clip wire
  4. Vallejo Surface Primer “Grey”
  5. Vallejo Mecha Primer “White”
  6. Vallejo “Airbrush Thinner”
  7. Popsicle sticks
  8. Army Painter “Dark Tone” (wash)
  9. Wars of Ozz Miniatures MDF bases
  10. Vallejo Game Ink “Brown”
  11. Pendraken 12mm dice frames
  12. Vallejo Mecha Color “Off White”
  13. Citadel “Contrast Paint – Contrast Medium”
  14. Army Painter “Speed Paint – Crusader Skin 1.0”
  15. Vallejo Model Air “Chrome”
  16. Vallejo Mecha Color “Steel”
  17. Army Painter “Speed Paint – Carmine Dragon 2.0”
  18. Army Painter “Warpaint Air – Blue Flux”
  19. Citadel “Contrast Paint – Bad Moon Yellow”
  20. Citadel “Tesseract Glow” (Technical)
  21. Vallejo Game Air “Chainmail Silver”
  22. Citadel “Gehenna’s Gold”
  23. Citadel “Spritstone Red” (Technical)
  24. Army Painter “Speed Paint – Battleship Grey 2.0”
  25. Wargames Accessories FOW #1 (1.25″ X 1″ steel bases)
  26. Army Painter “Speed Paint – Aztec Gold 2.0”
  27. Army Painter “Speed Paint – Aged Hide 2.0”
  28. Citadel “Contrast Paint – Magos Purple”
  29. Army Painter “Warpaints Metallic – Plate Mail Metal”
  30. Citadel “Contrast Paint – Snakebite Leather”
  31. Shadow’s Edge Miniatures Earth Works Dirt Colors “Sand Dust” (texture/basing paste)
  32. Vallejo Model Air “Black” (metallic)
  33. Army Painter “Warpaints Metallic – Rough Iron”
  34. Vallejo Model Color “Wood Grain”
  35. Elmer’s PVA Glue
  36. Wargames Accessories #17 bases (1″ X 1.5″ steel bases)
  37. Vallejo Mecha Varnish “Gloss Varnish”
  38. Army Painter “Light Tone” (shade)
  39. Vallejo “Dark Yellow Ochre” (pigment)
  40. Vallejo “Light Yellow Ochre” (pigment)
  41. Vallejo “Desert Dust” (pigment)
  42. Vallejo Mecha Varnish “Matte Varnish”
  43. Vallejo “Flow Improver”
  44. Army Painter “Battlefield Rocks” (flocking)
  45. Shadow’s Edge Miniatures “4mm Badlands Tufts” (flocking)
  46. Shadow’s Edge Miniatures “6mm Scorched Earth Tufts” (flocking)

As you may want to check out the excellent Wars of Ozz figures’ range – there are two places to get them and to get the rules (and I make no money from this btw). The game rules and the figures are available from the next two places:

In the US Old Glory has a site – Wars of Ozz Miniatures.

In the UK go to Sally 4th.

Aztec Eagle Knights, Ral Partha 42-303, circa 1986

The first figures that I got to paint came from a triad of companies – Ral Partha, Minifig, and Grenadier – back in the 1980’s. There were others too – but Ral Partha was my favorite company, as I was mainly into buying, painting (and casting) 25mm fantasy figures in those days. I left the hobby in the late 1980’s, and subsequently came out of my hobby time machine in early 2015 with the Nightmare Legion. To my surprise, I found that Ral Partha – and many others – were gone or subsumed into other entities. For example the Ral Partha lines now can be found at now Iron Wind Metals. Also, for many manufacturers, metal figures were being replaced by – dare I say it – PLASTIC. Oh, the horror.

Anyways, I discovered that there were still a good many metal options available and I have stayed mostly with metal figures. One of the lots that I bought on eBay around 2016 was a bunch of unopened and opened Ral Partha Aztec figure blisters. I sorted them and put them away. Then in 2019 Buck Surdu asked for collaboration on supplements for his new rules set called Feudal PatrolTM  . I jumped in, and now most of you know it resulted in my writing my supplement called Civilizations Collide in late 2019/early 2020. It’s free to download at that link (and you should!).

I then started painting figures and terrain for the period in April of 2020. Now, after two years, having painted and assembled 254 figures (109 Aztecs, 113 Conquistadores, 32 Tlaxcalans), 21 war canoes, 5 brigantines, a TON of terrain, and written 55+ blog posts (you can see the list of posts here), I felt I was ready to move on to my 34 Maya figures and finish up. After a whirlwind of preparation for gaming at HAVOC! 2022 and HUZZAH! 2022, I thought that I was prepared to move on to my 34 Maya figures…

Or was I…

I had painted or given away all of my original eBay lot score – all except 12 remaining Aztec Eagle Warriors. They were metal (of course) Ral Partha figures – so 25mm not 28mm, in two blisters (one opened and one not). The SKU designation for them is #42-303 “Aztec Eagle Knights”, circa 1986, sculpted by R. Kerr. From their storage location I heard them desperately cry out – “don’t leave us behind – it’s already been 36 years since we were cast! You need us to join your Aztecs!”. Funny, they cried out in English and not Nahuatl…

So, being somewhat of a completionist (insert sarcastic comment here), I decided to finish the LAST of my Aztecs. Besides, this would bring me to an even 300 figures of all types for the period (once the 34 remaining Maya were done) and that seemed to me to be an auspicious number to round out the project.

The 2 blister packs. One of the opened figures was partially painted and needed to be stripped.
Curiously, this was in the unopened blister pack – I had never seen this before – and I wonder – where is now?

Historical Background

Aztec Eagle Warriors were, along with the Jaguar Warriors and the Shorn Ones, at the apex of the Aztec warrior classes. They would be armed with melee weapons, in particular the macuahuitl obsidian-edged club/sword, the tepoztopilli (obsidian-bladed thrusting spears)and the cuauhololli (round-headed club).  To be a member of any of these classes required that one had captured many quality enemies for sacrifice on the Altar of Huitzilopochtli. Indeed, while they battled almost incessantly, the status and rewards were great for them. Here is a good summary of the history of the Eagle Warriors.

Painting and Assembly Plan

I had previously assembled and painted 6 Eagle Warriors from Tin Soldier UK (documented in this post). I numbered those EA01-EA06. These will be EA07-18. As I have 17 Jaguar Warriors that seems good. Similar to the previous Eagle Warrior project, I found that the#42-303 Ral Partha Eagle Knight tepoztopilli were way too soft and bendy. While the macuahuitl were small and bendable, I found that both five of those and three of the cuauhololli that would work.

I replaced four of the shafts of the tepoztopilli with leftover North Star shafts I had cut for my Conquistador pikemen. I drilled out the ends and used green stuff to bind them together. The other challenge were the limited poses. In each blister of 6 there are just TWO poses – one with a left arm forward and one with a right arm forward. (FYI these two are still available from Iron Wind Metals less any shields or weapons here). At least mine have weapons and shields!

The two poses.

As before, my plan was to reorient each of their arms into different poses, and to give each one a different weapon that was also oriented slightly differently. I would also give them a variety of colors for their suits (tlahuiztli), using red, light green, dark green, and light brown. Add to that I would use different shield patterns and different feather colors for authenticity and ease of tabletop play.

And yes, I had a painting plan matrix in writing!

Assembly, Modifications, and Painting

My first task was to redo the tepoztopilli (thrusting spears).

The stripped one and the rest now washed (I always wash metal before painting) and ready for pose adjustment and priming.

Using pliers, I carefully and slowly reoriented the arms as best as I could to turn 2 poses into 12 – or close enough to it. Then, I repaired any flattened spots by stippling with an Exacto knife point.

The Eagle Knights with their weapons affixed. I ended up using green stuff to affix the weapons to the ones armed with tepoztopilli (thrusting spears). I made three of them left-handed warriors. In the rear are my Tin Soldier UK Eagle Warriors – watching the new additions/recruits in progress. They look like a conga line, and I wanted more variety of poses with the Ral Partha ones.

Then it was on to priming and applying a dark wash.

A close up of the wash-over-prime effect.

Then I base coated the figures – using several contrast paints.

Then I dry brushed and washed each painted figure to achieve the color variations. Additionally, I painted (well, inked) the feathers on each helmet differently so no two are alike. Then I added gloss varnish to the feathers so that later when matted down the colors will “pop” a bit more. It also helps protect the inks I used here.

Then it was on to adding the initial flocking before returning to work on the shields.

Initial flocking before pigments added. After the two pigments set, I dry brush the bases with three colors.

The shields here are quite difficult to paint up with patterns. The surfaces are not smooth, and of course they are tiny. Below are the patterns I gave them under a gloss varnish – again to protect the colors.

The shields – painted and all glossy here.

Then it was time to mount them to the figures, add a matte varnish, and then add some grass.

Give us each a shield please!
It was hot out so I took these outside to speed the curing of the matte varnish.
All done and ready for play – and eye candy!

As promised…eye candy – note the color variations here and different poses.

Eye Candy

EA-07

EA-08

EA-09

EA-10

EA-11

EA-12

EA-13

EA-14

EA-15

EA-16

EA-17

EA-18

Group Shots

The four Eagle Knights armed with tepoztopilli.
Three were armed with cuauhololli.
The final 5 are armed with macuahuitl.
Here is a size comparison with a Tin Soldier UK Eagle Warrior. It will work ok on the tabletop!
All of the Ral Partha Eagle Knights together on my Things From the Basement Aztec Temple Sacrificial Altar!

I hope that you enjoyed this post and the photos – I tried playing around with my new iPhone and lighting – I’m not 100% sure I’ve got it down yet. I painted these in between a LOT of golf, so I’m happy that they are done. If you have any feedback, I’d love to read it in the comments section.

My Aztec figures now count up at 121:

I still can’t believe I painted all these…

As a second FYI, these Ral Partha figures are still available from IWM – here is the link. (Only again now they come without shields or weapons). I am sure that the lead content is no longer there too.

The Aztecs are DONE! On to the MAYA!

Miscellaneous details and references for those interested in that sort of thing:

For all of my previous posts on games, units, and other projects for my 16th Century Spanish Conquest supplement for Feudal Patrol™ – “Civilizations Collide” – please see this page.

PAINTS, INKS, GLAZES, SHADES, WASHES, PIGMENTS, FLOCKING, GLUES AND MORE THAT I USED ON THESE EAGLE KNIGHT FIGURES:

  1. Kneadatite (green stuff)
  2. Shafts from North Star Military Figures 100mm wire spears (leftover from building Conquistador Pikemen)
  3. Gorilla Glue
  4. 1/8″ x 1″ Everbilt Fender Washers
  5. Gorilla Glue Gel
  6. Poster tack
  7. North Star Military Figures 100mm wire spears
  8. Vallejo Mecha Primer “White”
  9. Vallejo “Flow Improver”
  10. Vallejo “Airbrush Thinner”
  11. Citadel “Nuln Oil” (wash)
  12. Vallejo Mecha Color “Off-white”
  13. Vallejo Mecha Color “Black”
  14. Vallejo Game Color “Bronze Fleshtone”
  15. Citadel “Contrast Paint – Fyreslayer Flesh”
  16. Battlefront “Skin Shade”
  17. Citadel “Contrast Paint – Blood Angels Red”
  18. Citadel “Contrast Paint – Dark Angels Green”
  19. Citadel “Contrast Paint – Skeleton Horde”
  20. Citadel “Contrast Paint – Creed Camo”
  21. Citadel “Contrast Paint – Contrast Medium”
  22. Americana “Kelly Green”
  23. Vallejo Model Color “White”
  24. Americana “Apple Green”
  25. Vallejo Game Color “Bloody Red”
  26. Citadel “Carroburg Crimson” (wash)
  27. Secret Weapon Washes “Fallout” (wash)
  28. Secret Weapon Washes “Green” (wash/ink)
  29. Citadel “Contrast Paint – Iyandan Yellow”
  30. Vallejo Game Air “Moon Yellow”
  31. Citadel “Contrast Paint – Aggaros Dunes”
  32. Citadel “Lamenters Yellow” (glaze)
  33. Vallejo Model Color “Burnt Umber”
  34. Citadel “Contrast Paint – Warp Lightning”
  35. Citadel “Contrast Paint – Talassar Blue”
  36. Citadel “Contrast Paint – Flesh Tearers Red”
  37. Vallejo Game Ink “Yellow”
  38. Citadel “Gehenna’s Gold”
  39. Citadel “Contrast Paint – Apothecary White”
  40. Vallejo Mecha Color “Turquoise”
  41. Vallejo Model Color “Glossy Black”
  42. Citadel “Tallarn Sand”
  43. Citadel “Cryptek Armourshade Gloss” (shade)
  44. Battlefront “Chocolate Brown”
  45. Vallejo Mecha Varnish “Gloss Varnish”
  46. Citadel “Contrast Paint – Terradon Turquoise”
  47. Vallejo Model Color “Dark Blue”
  48. Secret Weapon Washes “Just Red” (wash/ink)
  49. Vallejo Model Color “Black Green”
  50. Secret Weapon Washes “Yellow Snow” (wash/ink)
  51. Vallejo Game Ink “Green”
  52. Vallejo Game Ink “Red”
  53. Vallejo Game Ink “Blue”
  54. Citadel “Contrast Paint – Aethermatic Blue”
  55. E6000 epoxy
  56. Vallejo “Dark Yellow Ochre” (pigment)
  57. Vallejo “Burnt Umber” (pigment)
  58. Elmer’s PVA Glue
  59. Army Painter “Brown Battleground” (flocking)
  60. Vallejo Model Color “English Uniform”
  61. Army Painter “Mid Brown” (shade)
  62. Citadel “Karak Stone”
  63. Vallejo Mecha Varnish “Matt Varnish”
  64. Army Painter “Grass Green” (flocking)

Conquistador-crewed Falconets & Lombards for my Brigantines in Feudal Patrol Games

Now that’s not a short title – and this was a big project. But as I shared in my last post on Building Cortes’ Conquistador Fleet, I needed to kit out my Spanish brigantines with artillery and appropriate crews for my scenarios for my games of Feudal PatrolTM  using my supplement for Civilizations Collide.

This post will cover that effort, as well as a brief review of the Army Painter “Speed Paints” that I used on the five crews. I also will share some additional photos of the firing/smoke markers and the storage/transport solution I arrived at for the fleet. The five are again El Dólar (The Buck), El Gregorio (The Greg), El Perro de Guerra (The War Dog), El Conquistador, and El Marcos (The Mark).

After looking at each ship, I decided that each crew would be a warband unto itself and be generally composed of three elements plus their Warband Leader:

  • 1 Warband Leader
  • Rowing/tiller Element – 6 Conquistadors rowing (3 per side), plus one at the tiller acting as their leader (7 total in that Element)
  • Artillery Element – One falconet or lombard crew of three figures plus the gun with one of the crew acting as a leader
  • Arquebus/crossbow Element – One to four figures deployed in the opposite castle (fore or stern) from the ship’s Artillery Element

I needed a few criteria to be satisfied here. First, I wanted the 28mm crews and guns to be different both in terms of paint scheme and in terms of figures/poses. Given that, sourcing the crew proved to be a bit of a challenge. I found the one two-man crew set from Outpost Wargames (via Badger Games) that I previously painted for land warfare (detailed here) to be lacking for my needs here on ships due to size and composition. (I do like that set but not on a ship.)

Secondly, I wanted their bases to reflect a ship’s deck. And yes – my other Conquistadors would still have ground-flocked bases – but the artillery needed to belong to a specific ship in my view and look just like that. Thirdly, deck space on the ships was tight. So, getting a three-man crew to fit with any gun would require that I use smaller bases than my usual 1″ bases – and I ended up using Wargames Accessories square .75″ for the crew members and 1.25″ x 1″ steel bases for the guns.

Wargames Foundry has a nice set (#SB018) available from Badger, and I used two of them – less the halberdier that I added to my land-based forces (and also used some as leaders/helmsmen). For the other three, I did a cobbling together of figures and guns from Gringo 40’s, Iron Wind Metals, and Eureka Miniatures.

This project was going to have to be squeezed in between HAVOC 2022, my Florida trip, and get finished before HUZZAH 2022 where they would debut on the tabletop. I also received my Army Painter “Speed Paint” set and decided that this was a good time to try them out as completion speed was indeed of the essence.

The crews and guns ended up as follows for each brigantine:

  • El Dólar: a falconet and three crewmen from Wargames Foundry #SB018 to be deployed in the stern castle facing to the starboard side
  • El Gregorio: a falconet and three crewmen from Wargames Foundry #SB018 to be deployed in the forecastle facing forward
  • El Conquistador: a Gringo 40’s lombard (#CONQA3), crewed by three Iron Winds Metals figures #DH412 (wick/match), #DH413 (swab), and #DH414 (ram) to be deployed stern castle facing to the port side
  • El Perro de Guerra: a Gringo 40’s falconet (#CONQA2) , crewed by three Iron Winds Metals figures #DH412 (wick/match), #DH413 (swab), and #DH414 (ram) to be deployed stern castle facing to the port side
  • El Marcos: a Eureka Miniature’s lombard (#100CON12), crewed by one figure from Wargames Foundry #SB018 (wick/match), and two Iron Winds Metals figures #DH413 (swab), and #DH414 (ram) to be deployed in the forecastle facing forward
The figures sorted.
Organizing the crews.
Mocking up the guns to see what size bases would work.
I broke up popsicle sticks and made each base look like the decks.
I lightly primed each figure and gun base lightly. I decided to paint the guns and then affix them to the bases.

I broke into the Speed Paint set and made a comparison chart.

First, I painted the guns.

I used mostly AP “Sand Golem” on the wooden parts of the carriages, with Vallejo Model Air “Gun Metal” as the base colors for these. All of the paints used are listed at the end of this post for those interested.

I needed a painting plan (starting point anyway) for the 15 figures. I tried to use as many of the Speed Paints as possible.

A painting plan of sorts.

I returned from Florida on April 28th – and HUZZAH was 13 days away! I hit the Speed paints again.

I did not take a lot of pics during the painting – but these are good I think.

April 28 progress.
By April 29th, I had basically had the figures painted and saw that washes on the metals and highlights on the flesh were definitely needed.
April 29 close up.
More April 29 progress close ups.
These are DH414’s on April 29. The flesh needed highlights.
A Wargames Foundry figure on April 29th.

Next up was varnishing on April 30th. I waited as I had read on Azazel’s blog that the Speed Paints can reactivate – so I wanted to leave 24 hours+ to dry.

Before varnishing with an airbrush.

I did see some of the Speed Paint (“Sand Golem”) on the guns reactivate and migrate – but that was it. It was easily fixed.

After varnishing.
Close up showing the Speed Paint “migration” on this gun. Apparently the Speed paint reactivated and splashed onto the gun and wheels during airbrush varnishing. Again, easily fixed – but not desirable. I’ll use the Speed Paints again, but with caution.
April 30 varnished close up shot .
April 30 varnished close up shot #3.

I then needed to add smoke to the figures lighting the fuses – and make smoke markers for the falconets and lombards.

Added wisps of smoke to the matches. I think these came out fine for tabletop play.

Then I was on to making some big smoke markers.

Finished eye candy time! Here are the completed cannon crews on each ship – plus I loaded up the ships with their entire crews for good measure.

El Dólar

El Dólar falconet and artillery Element
El Dólar with entire crew

El Gregorio

El Gregorio falconet and artillery Element
El Gregorio with entire crew

El Conquistador

El Conquistador lombard and artillery Element
A fully crewed El Conquistador

El Perro de Guerra

El Perro de Guerra falconet and artillery Element
El Perro de Guerra and her entire crew

El Marcos

El Marcos lombard and artillery Element
El Marcos firing
El Marcos fully crewed.

The Fleet Fully Crewed

Ready for HUZZAH! – oh wait, what about transport and storage?

Oh yeah, to get these ships safely to conventions I built a transport box for the hulls with posterboard and hot glue (and minor burns) and used a Really Useful Box for the sails (the crews go with my other figures). I also used the box to fit in my war canoe box.

All of this got done just under the wire – next up I’ll show you how they did at HUZZAH 2022!

(hint – they were a big hit)…stay tuned…

Miscellaneous details and references for those interested in that sort of thing:

For all of my previous posts on games, units, and other projects for my 16th Century Spanish Conquest supplement for Feudal Patrol™ – “Civilizations Collide” – please see this page.

PAINTS, INKS, GLAZES, SHADES, WASHES, PIGMENTS, FLOCKING, GLUES AND MORE THAT I USED ON THESE CONQUISTADOR ARTILLERY CREWS AND GUNS:

  1. War Games Accessories .75″ square bases
  2. War Games Accessories 1.25″ x 1″ rectangular bases
  3. Gorilla Glue
  4. Elmer’s PVA Glue
  5. Popsicle sticks
  6. Army Painter Speed Paint “Sand Golem”
  7. Citadel “Nuln Oil” (wash)
  8. Vallejo Mecha Primer “White”
  9. Vallejo “Flow Improver”
  10. Vallejo “Airbrush Thinner”
  11. Poster tack
  12. Vallejo Model Air “Gun Metal”
  13. Vallejo Model Air “Black”
  14. Army Painter Speed Paint “Crusader Skin”
  15. Citadel “Runefang Steel”
  16. Army Painter Speed Paint “Malignant Green”
  17. Army Painter Speed Paint “Magic Blue”
  18. Army Painter Speed Paint “Cloudburst Blue”
  19. Army Painter Speed Paint “Holy White”
  20. Army Painter Speed Paint “Speed Paint Medium”
  21. Army Painter Speed Paint “Blood Red”
  22. Army Painter Speed Paint “Grim Black”
  23. Army Painter Speed Paint “Plasmatic Bolt”
  24. Army Painter Speed Paint “Hive Dweller Purple”
  25. Army Painter Speed Paint “Orc Skin”
  26. Army Painter Speed Paint “Gravelord Grey”
  27. Citadel “Skrag Brown”
  28. Army Painter Speed Paint “Fire Giant Orange”
  29. Army Painter Speed Paint “Slaughter Red”
  30. Army Painter Speed Paint “Camo Cloak”
  31. Army Painter Speed Paint “Hardened Leather”
  32. Vallejo Model Air “Chain Mail”
  33. Army Painter Speed Paint “Pallid Bone”
  34. Army Painter Speed Paint “Runic Grey”
  35. Army Painter Speed Paint “Highlord Blue”
  36. Army Painter Speed Paint “Zealot Yellow”
  37. Army Painter Speed Paint “Absolution Green”
  38. Army Painter Speed Paint “Purple Alchemy”
  39. Army Painter Speed Paint “Dark Wood”
  40. Vallejo Mecha Color “Off-white”
  41. Citadel “Balor Brown”
  42. Vallejo Model Color “Black Grey”
  43. Vallejo Model Air “Bright Brass”
  44. Citadel “Nuln Oil GLOSS” (wash)
  45. Army Painter “Tanned Flesh”
  46. Army Painter “Flesh Wash” (wash)
  47. Citadel “Agrax Earthshade GLOSS” (wash)
  48. Vallejo Model Air “Armour Brown”
  49. Vallejo Mecha Varnish “Matt Varnish”
  50. Vallejo Game Air “Black”
  51. Vallejo Model Air “Base Grey”
  52. Vallejo Game Air “Wolf Grey”
  53. Pillow batting
  54. Hot Glue
Man of TIN blog two

Toy Soldiers, Gaming, ImagiNations

Gisby's Gaming Blog

Miniatures gaming projects, products, and reviews

Carrion Crow's Buffet

Narrative Wargaming, Fiction and General Musings on the Universe

Despatches from Fort Syllabub

An account of fictional adventures on the North West Frontier - and other times and places, real or imagined

Man of Tin blog

Toy soldiers, gaming, Imagi-Nations

Zauberwurfs Blog

Ein Blog über Tabletop und Miniature Wargames.

Frank Tank Rants

musings of a fat old bloke on tanks and wargames

Dragons of Lancasm

Games, miniatures, painting, books and more games

Tiny Painted Heroes

The Adventures of a lifelong Tabletop Gamer, Game Design hobbyist, and full-time Software Engineer

Steve's Paint Brush

Grimdark model making and mini painting

Wargamesculptors Blog

Life, Golf, Miniatures, & Other Distractions

Dead Dick's Tavern and Temporary Lodging

Life, Golf, Miniatures, & Other Distractions

Guru Pig - the gaming Guru

Guru's thoughts on wargaming, life, and the universe!

Wisely lead... without a head!

History, Miniatures and Wargaming

Kuribo's Painting

Fallout Wasteland Warfare, Warhammer, and Hellboy Painting, Terrain, Dioramas, and Battle Reports

Don't Give Greg Ideas

Seriously, just don't

War Across the Ages, and other dark horrors

A discussion of miniatures collecting, painting and gaming.

Classic Warhammer 40K

Painting diary focused on Warhammer 40K 2nd ed., 5th ed. WHFB, related GW games, and miscellaneous whimsy

Colonel Mustard

WW2 Modelling in 1/72 Scale

Bogenwald

Random painting and terrain making.

Pat's 1:72 Military Diorama's

Scale diorama tips and ideas

Arcade Dreams

Building the Arcade Dream

P.B.Eye-Candy

Phil's 20th century wargame pages

SP's Projects Blog

A futile fight against entropy or 'Every man should have a hobby'? Either way it is a blog on tabletop wargames, board games and megagames

30mmdave

Wargaming Plausible reality?

The Imperfect Modeller

Miniature Figure Painting and Diorama Modelling

Double Down Dice

Painting miniatures and rolling dice!

Just Needs Varnish!

My ongoing wargames projects!

miniaturepopcorns

Sculpting some worlds

Despertaferres

Wargaming with the ability of a dull nine year old

Dawn of the Lead

Miniature wargaming and the occasional zombie

Rantings from under the Wargames table

Wargames, Figures, Sculpting and Converting Miniatures

Simple as War

Miniatures & Terrains

Buck's Blog

Life, Golf, Miniatures, & Other Distractions

IRO aka Imperial Rebel Ork

- I model - therefore I am -