I will be running 4 Feudal Patrol™ games at the HMGS Fall In® gaming convention next week in Lancaster, PA. In 2022, I have been running Aztec/Mesoamerica/Spanish Conquest themed games at multiple gaming conventions – and they all have been well-received. I am really looking forward to running these games at Fall In® in the H.A.W.K.’s room – and I hope to see some of you there.
So, you ask, what are you running Mark, and when? Well, I aim to please – so let me answer that!
Friday, November 4th from 9 AM to 1 PM, Paradise Room
I will be running my “Raid to Satisfy Huitzilopochtli”. It’s a pre-Spanish Conquest fight between the Aztecs and their neighbors the Tlaxcalans. The Aztecs attempt to conduct a raid of a Tlaxcalan village to gain captives for slavery and blood sacrifice, and the Tlaxcalans will fight back!
Friday, November 4th from 7 PM to 11 PM, Paradise Room
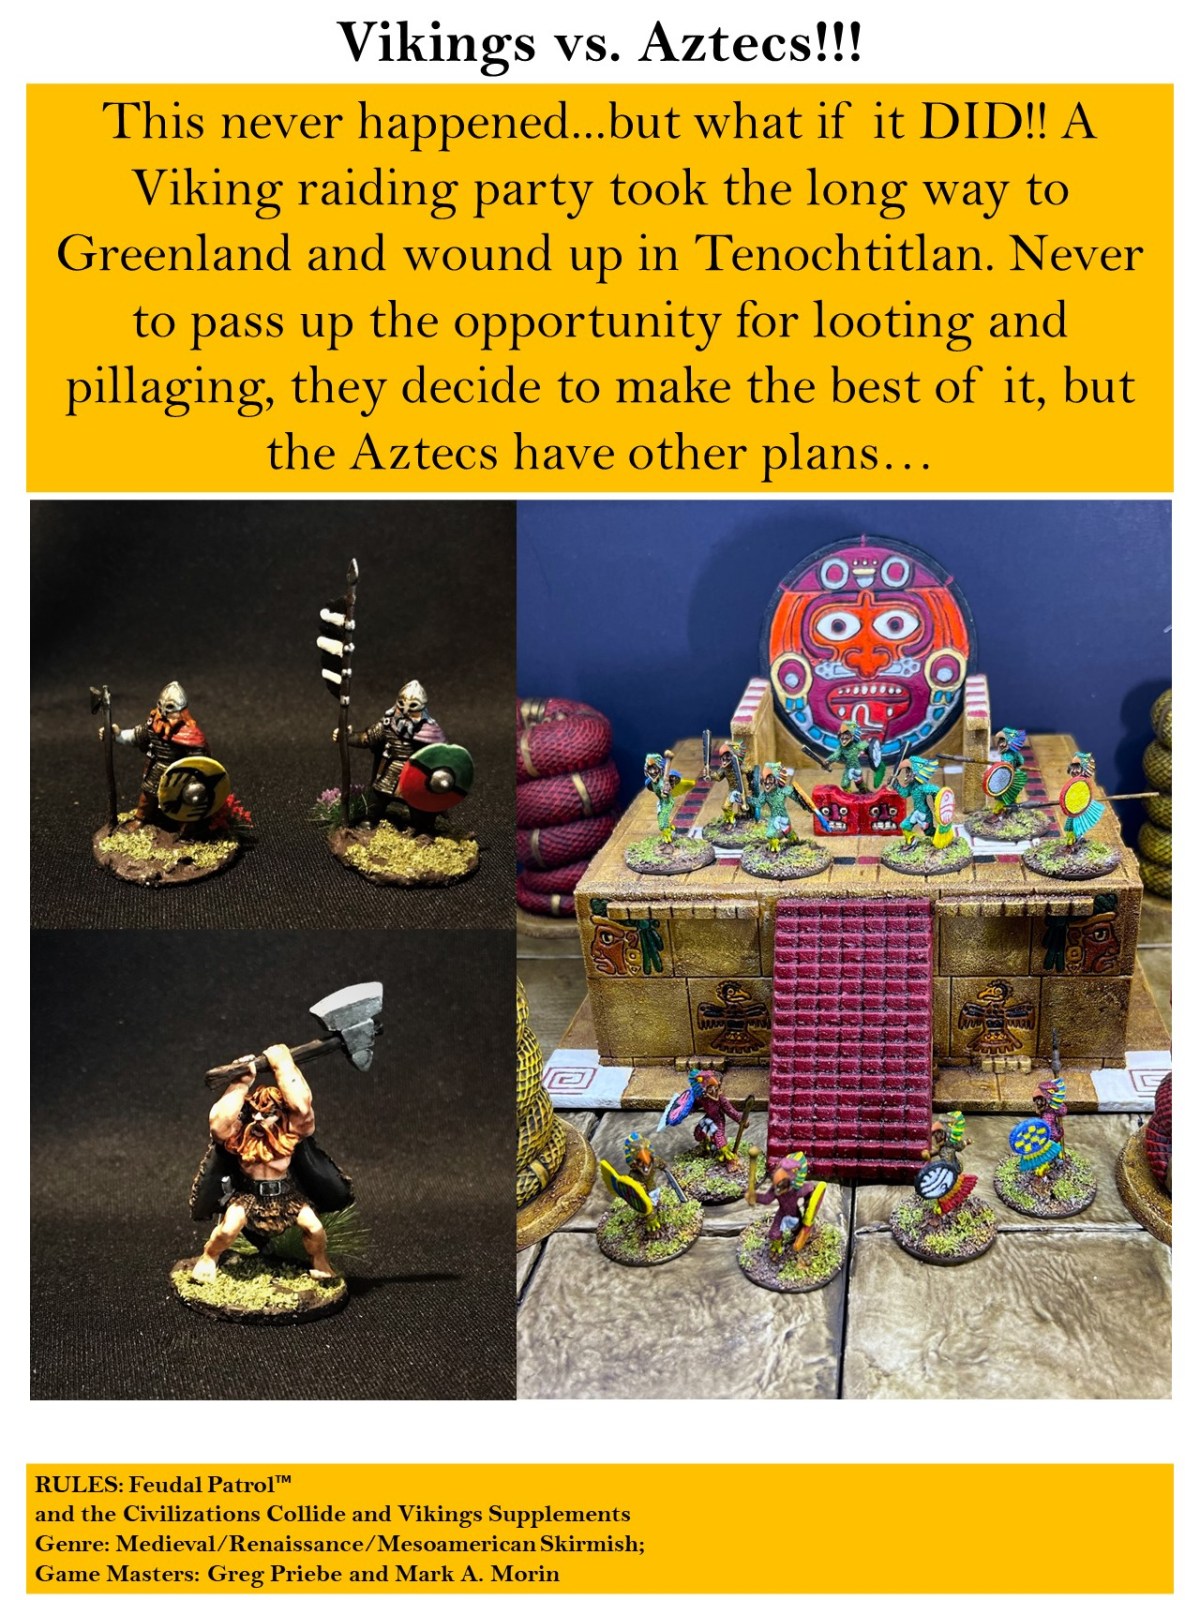
Later that day, I will be teaming up with Greg Priebe of the H.A.W.K.’s to run a “what if” scenario. Let’s say a Viking raiding party got lost and while trying to get to Greenland and wound up in Tenochtitlan. Never to pass up the opportunity for looting and pillaging, they decide to make the best of it, but the Aztecs have other plans. I think this will be a LOT of fun. Greg wrote the rules for the Feudal Patrol™Vikings supplement – and we will use my Aztec supplement rules as well (Civilizations Collide). featuring a 1200’s Viking raid on the Aztec capital of Tenochtitlan!
Saturday, November 5th from 2 PM to 6 PM, Paradise Room
AND
Saturday, November 5th from 7 PM to 11 PM, Paradise Room
On Saturday, I will be running a Feudal Patrol™ naval game – this time the epic Battle of Lake Texcoco.
TWICE! Once in the afternoon and once in the evening. After I ran this at HUZZAH! in Maine – I knew it was a hit.
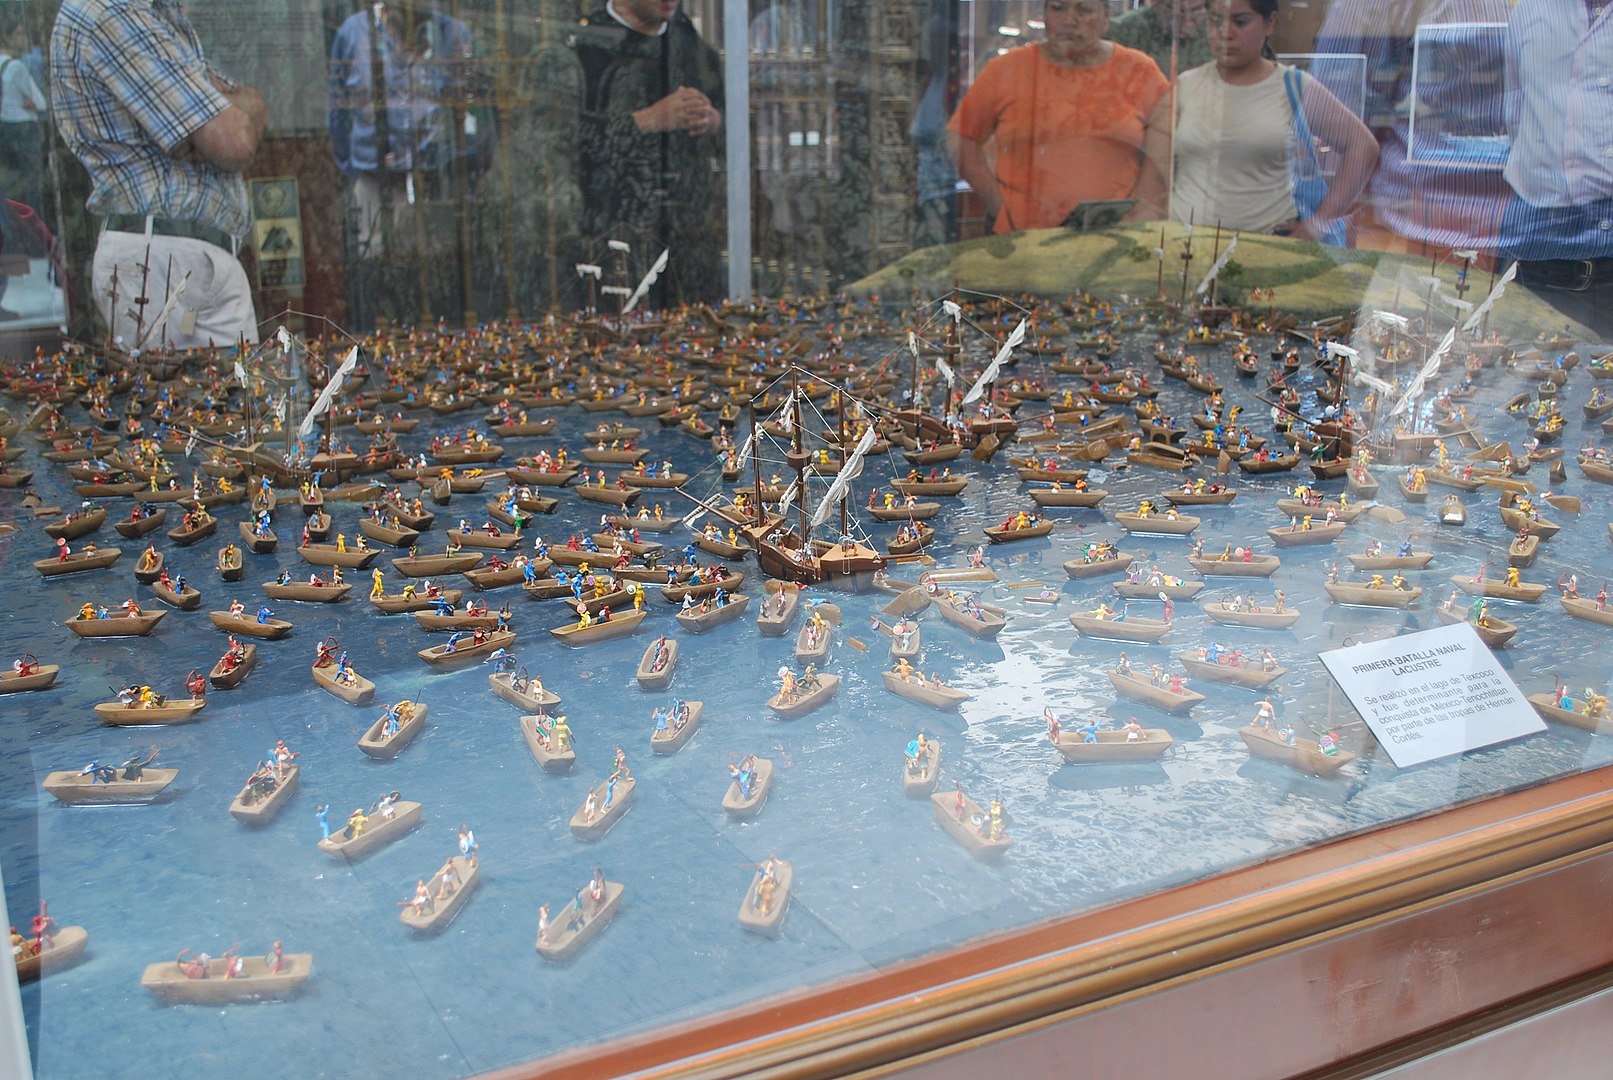
The history is this – back in the summer of 1521 Cortes had a problem. To seize control of the Aztec island capital of Tenochtitlan, he realized that he needed to control the surrounding waters of Lake Texcoco (where Mexico City is now – the lake is long-gone). This meant building a fleet. Cortes had his troops build small brigantines in sections. These prefabricated pieces were then carried by his Tlaxcalan allies to the shore of Lake Texcoco, where they were assembled, and made ready for combat on the lake. While simultaneously he sent land-based conquistadores to attack Tenochtitlan’s causeways, Cortes launched his brigantines to attack Tenochtitlan.
In his way were hundreds of Aztecs canoes waiting to swarm over the Spanish. This is the basis of this game.
So, you will have two chances to jump in on this game!
To my regular readers – YES I have been neglecting this blog – more a case of a lot hitting my schedule (mostly golf) – and I will be catching up with some of the miniatures that I have painted up and some games that I have run going forward. In the meantime, I am looking forward to reconnecting with you al soon – and I appreciate those who kindly checked in on me to see if I had assumed room temperature yet.
Now that’s not a short title – and this was a big project. But as I shared in my last post on Building Cortes’ Conquistador Fleet, I needed to kit out my Spanish brigantines with artillery and appropriate crews for my scenarios for my games of Feudal PatrolTM using my supplement for Civilizations Collide.
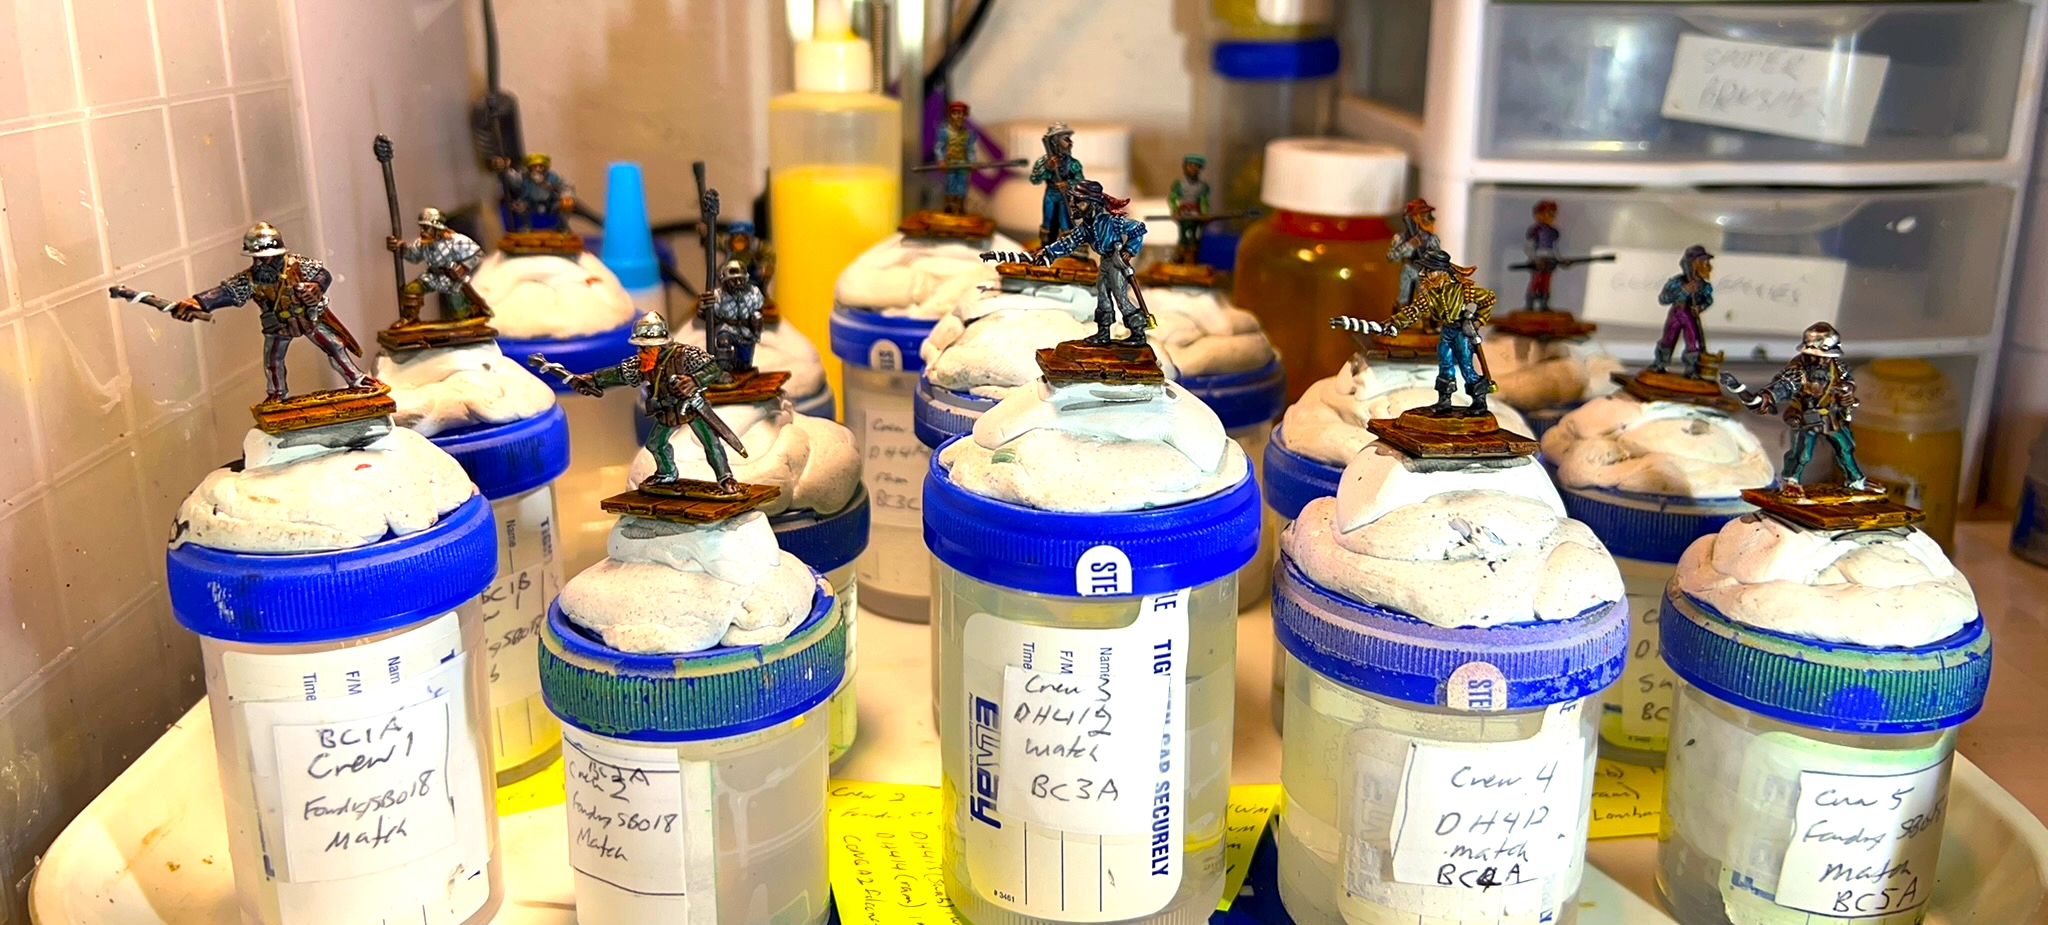
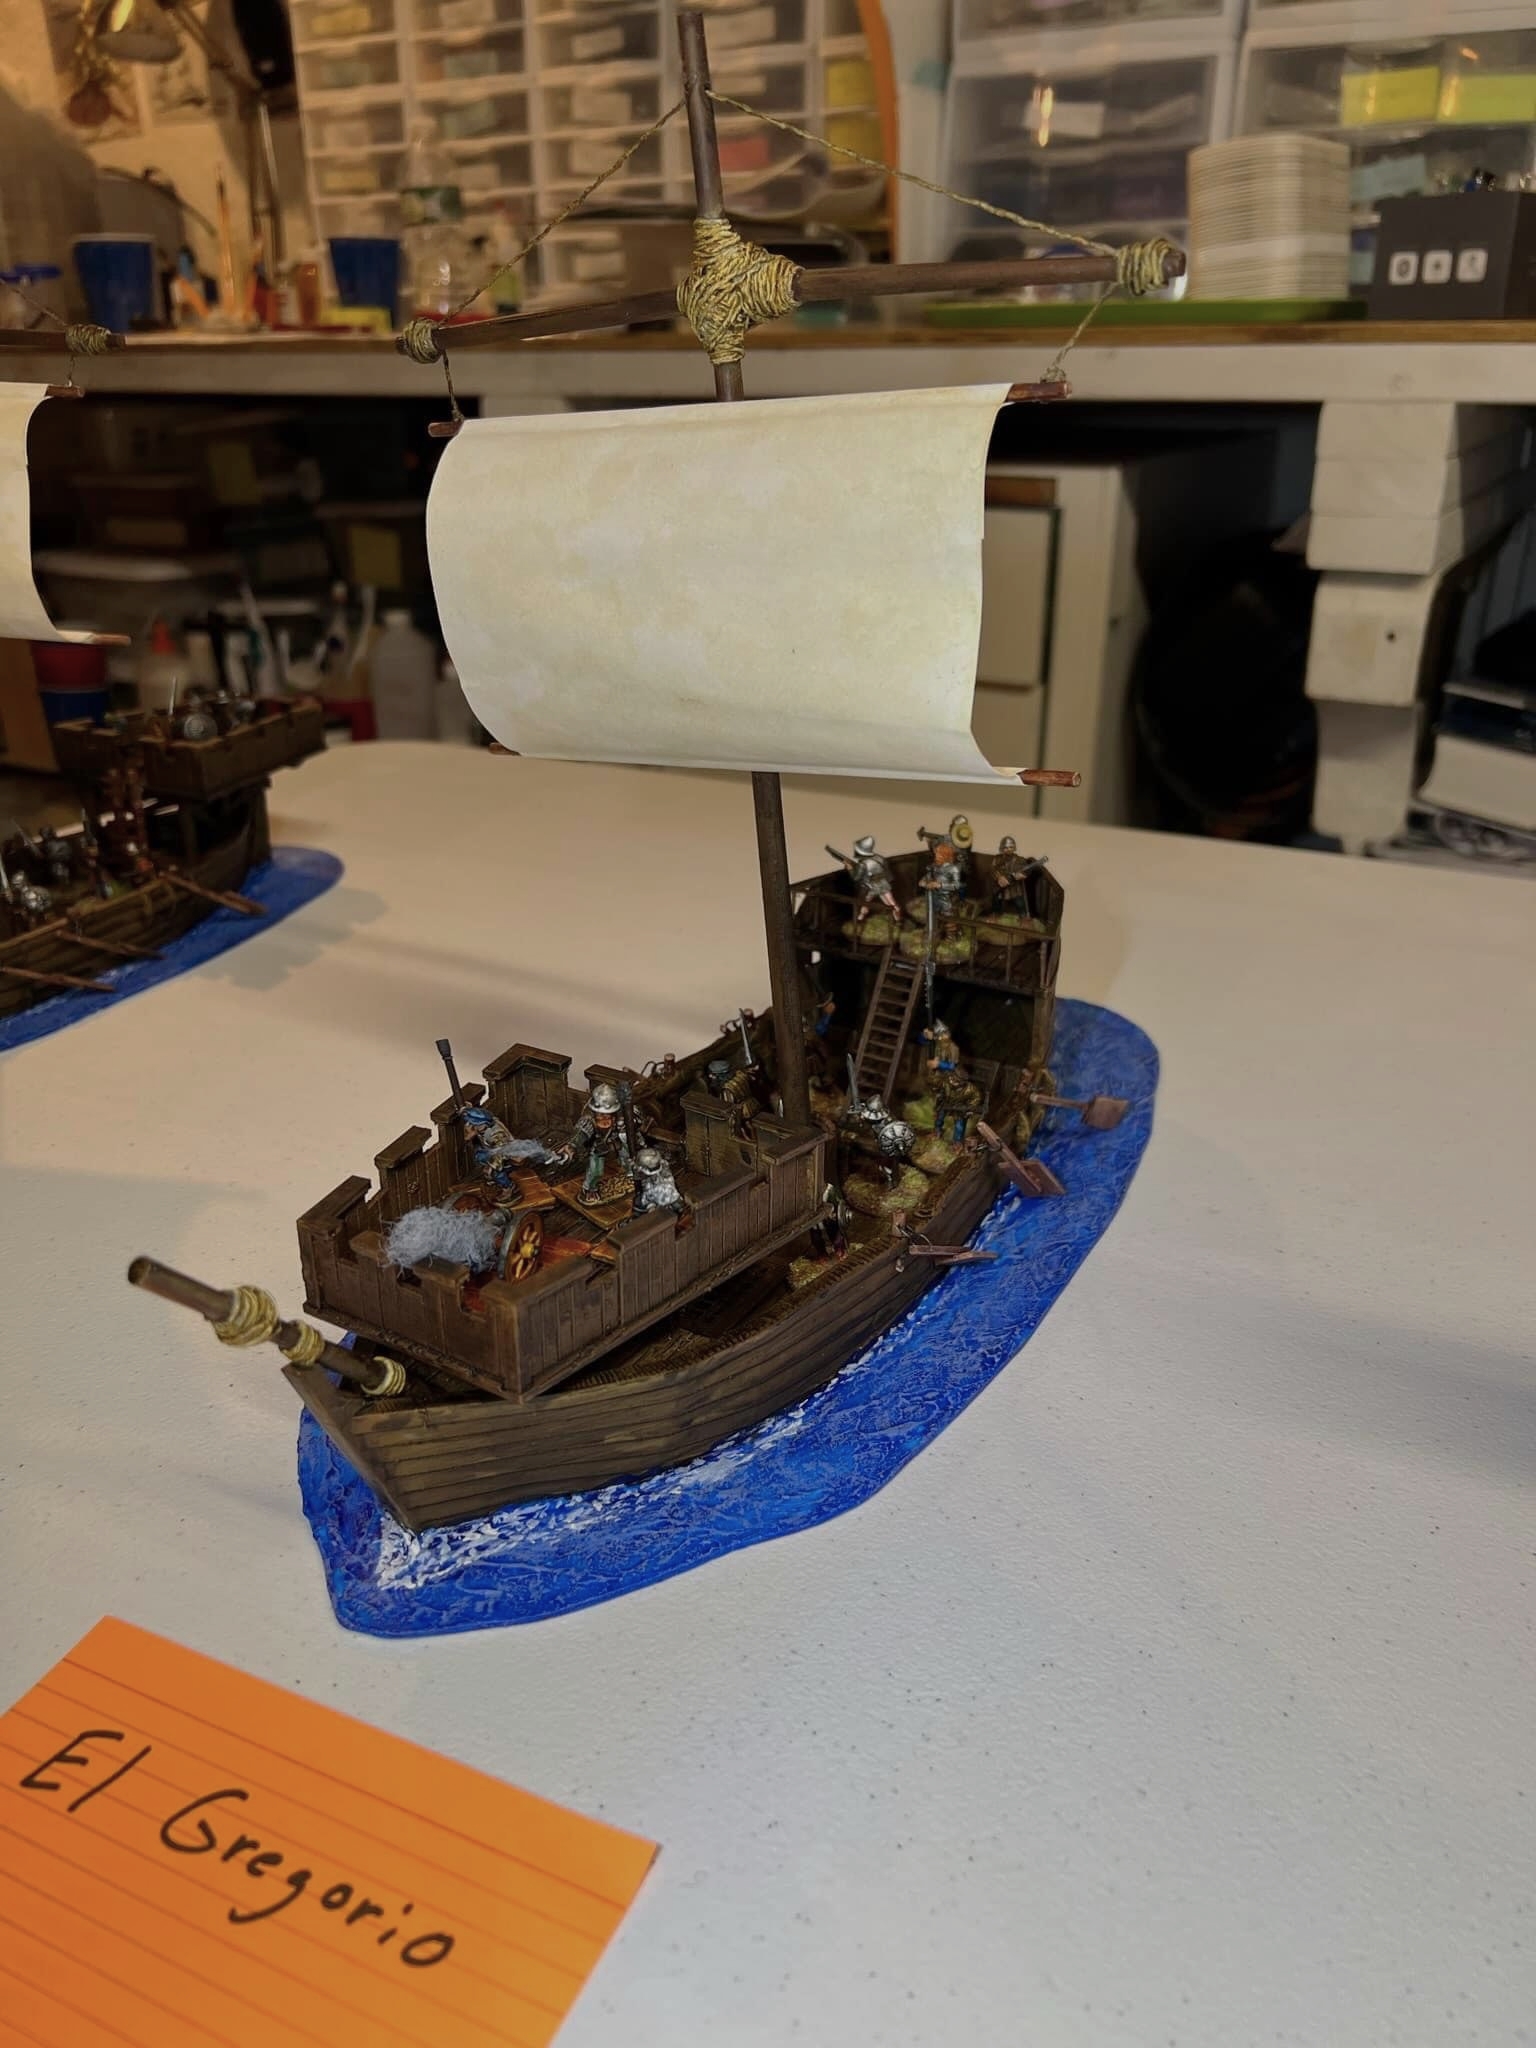
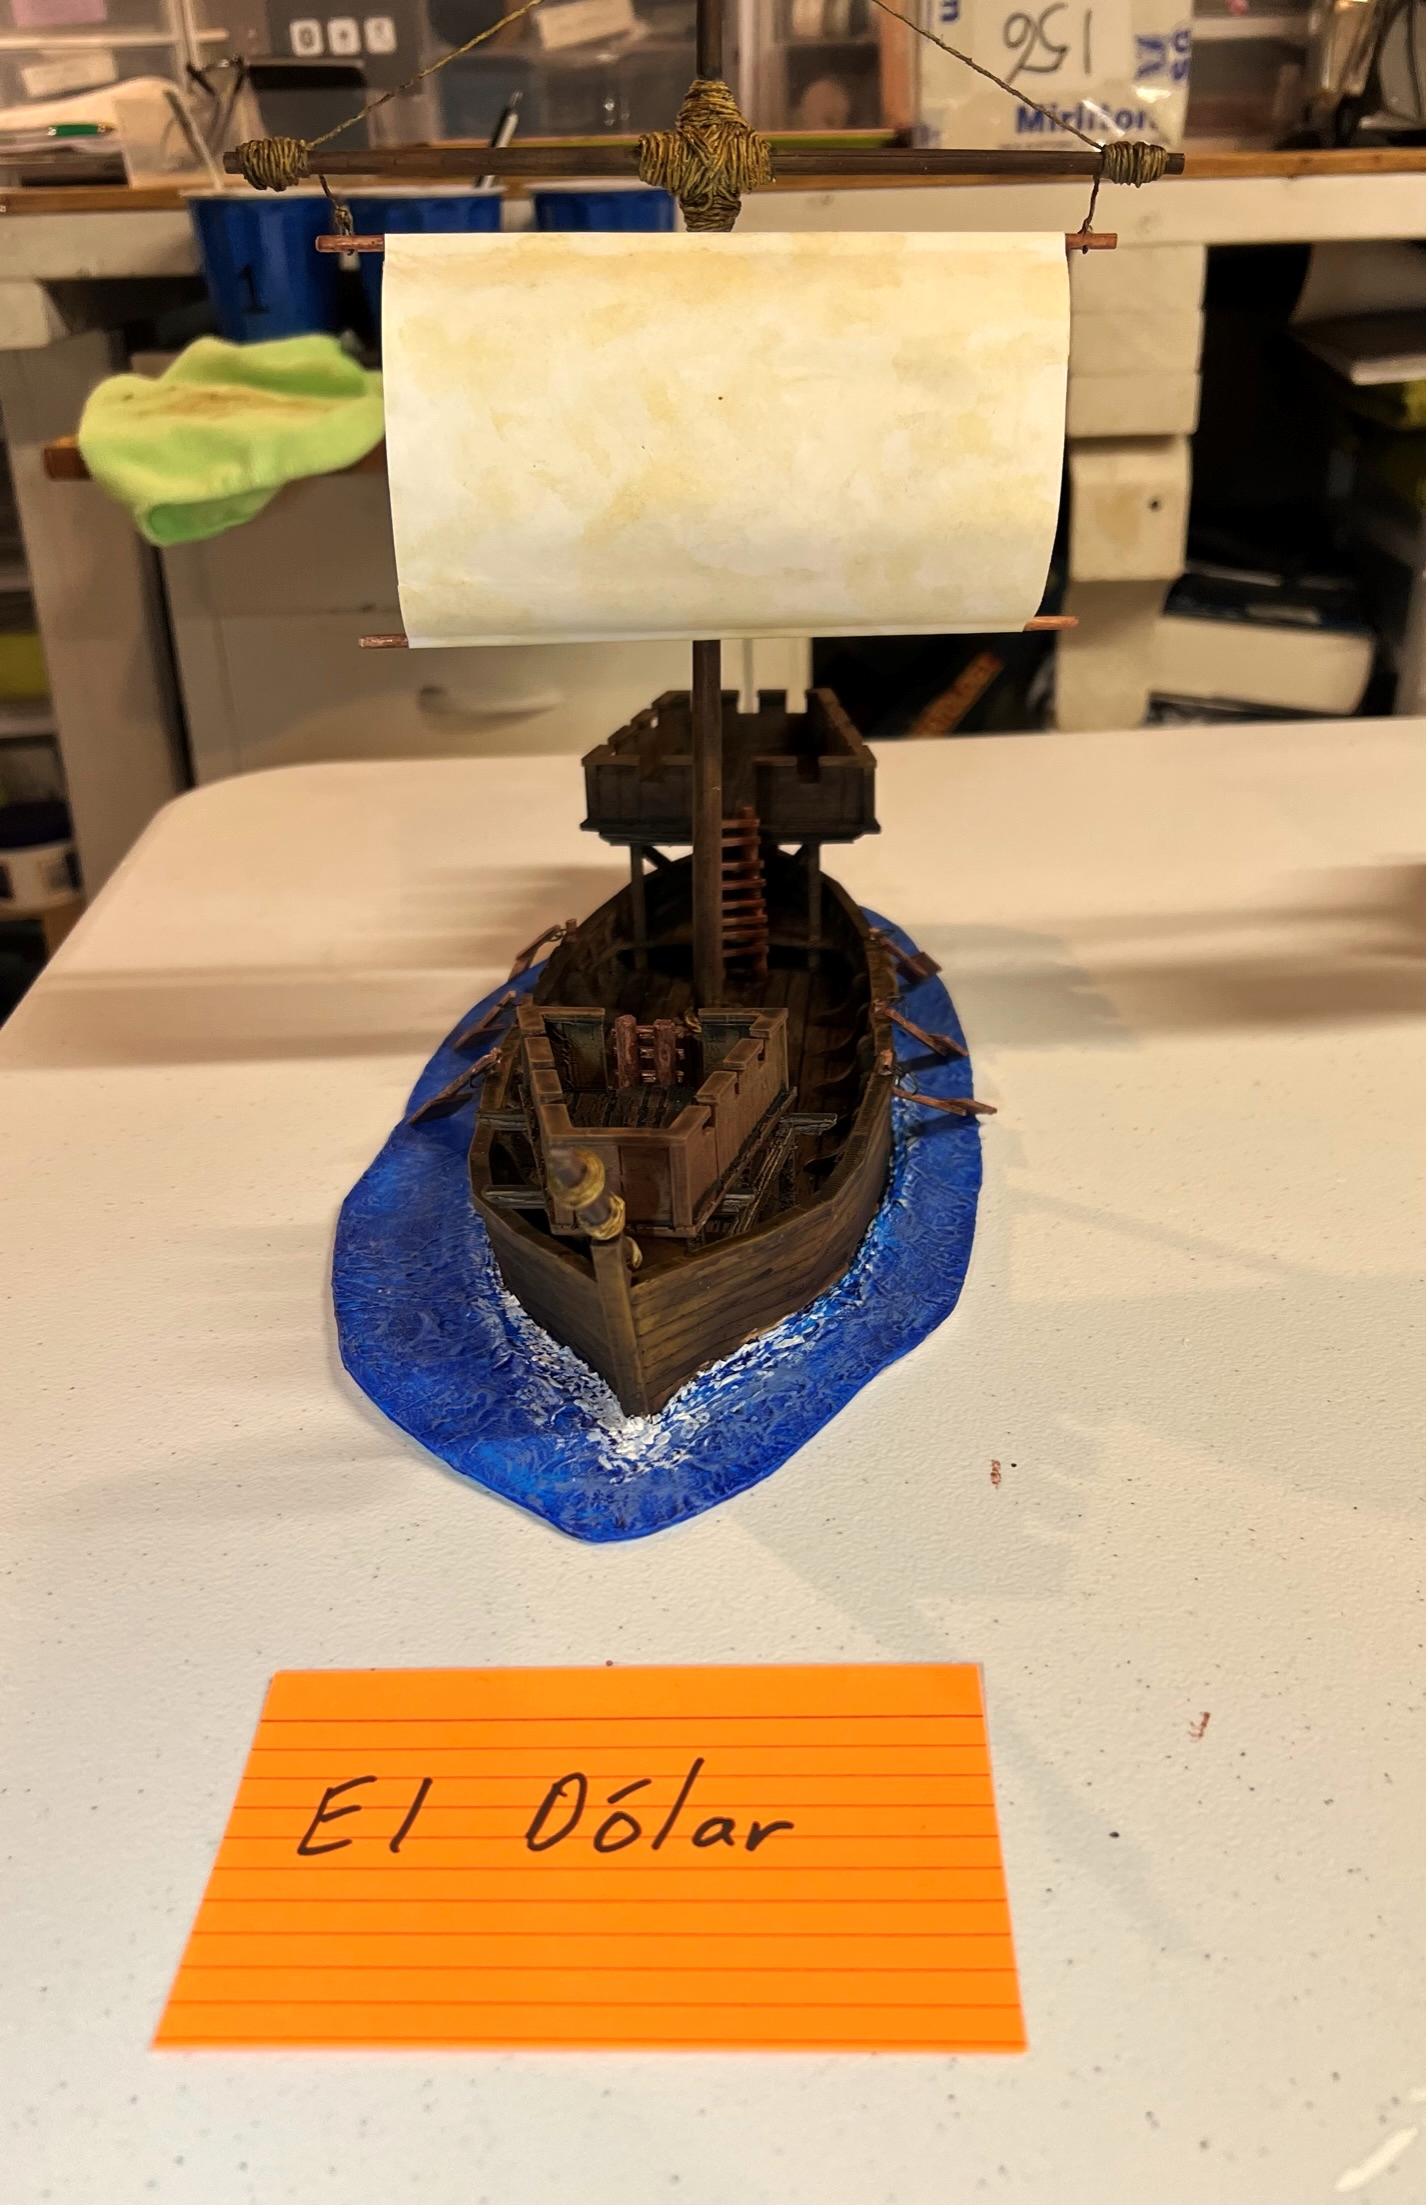
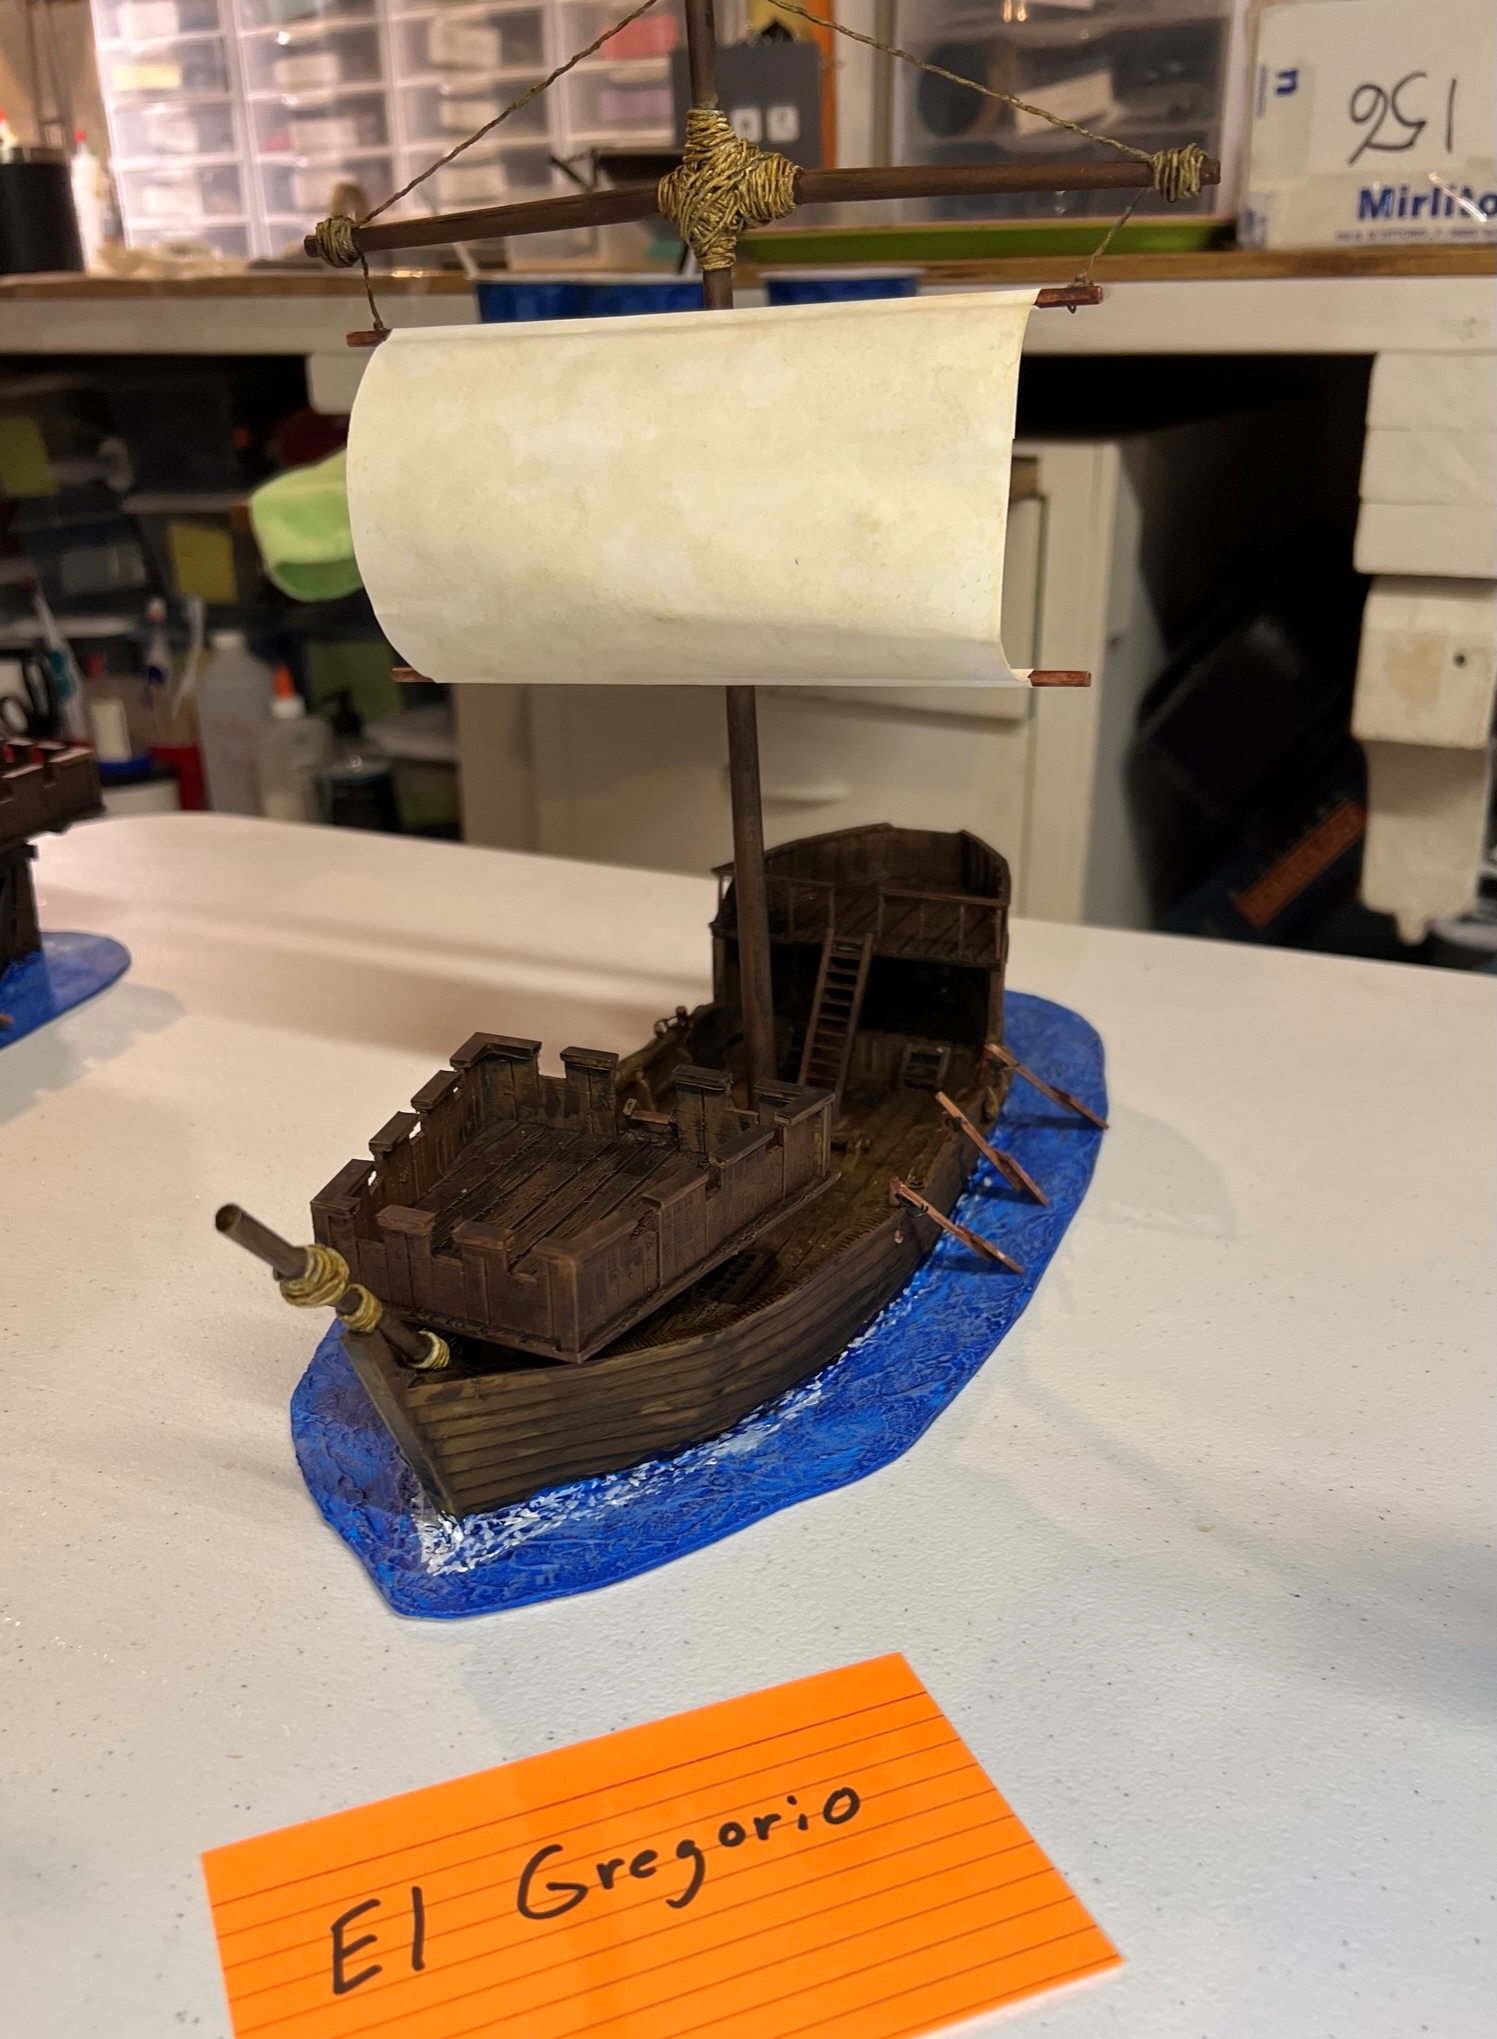
This post will cover that effort, as well as a brief review of the Army Painter “Speed Paints” that I used on the five crews. I also will share some additional photos of the firing/smoke markers and the storage/transport solution I arrived at for the fleet. The five are again El Dólar (The Buck), El Gregorio (The Greg), El Perro de Guerra (The War Dog), El Conquistador, and El Marcos (The Mark).
After looking at each ship, I decided that each crew would be a warband unto itself and be generally composed of three elements plus their Warband Leader:
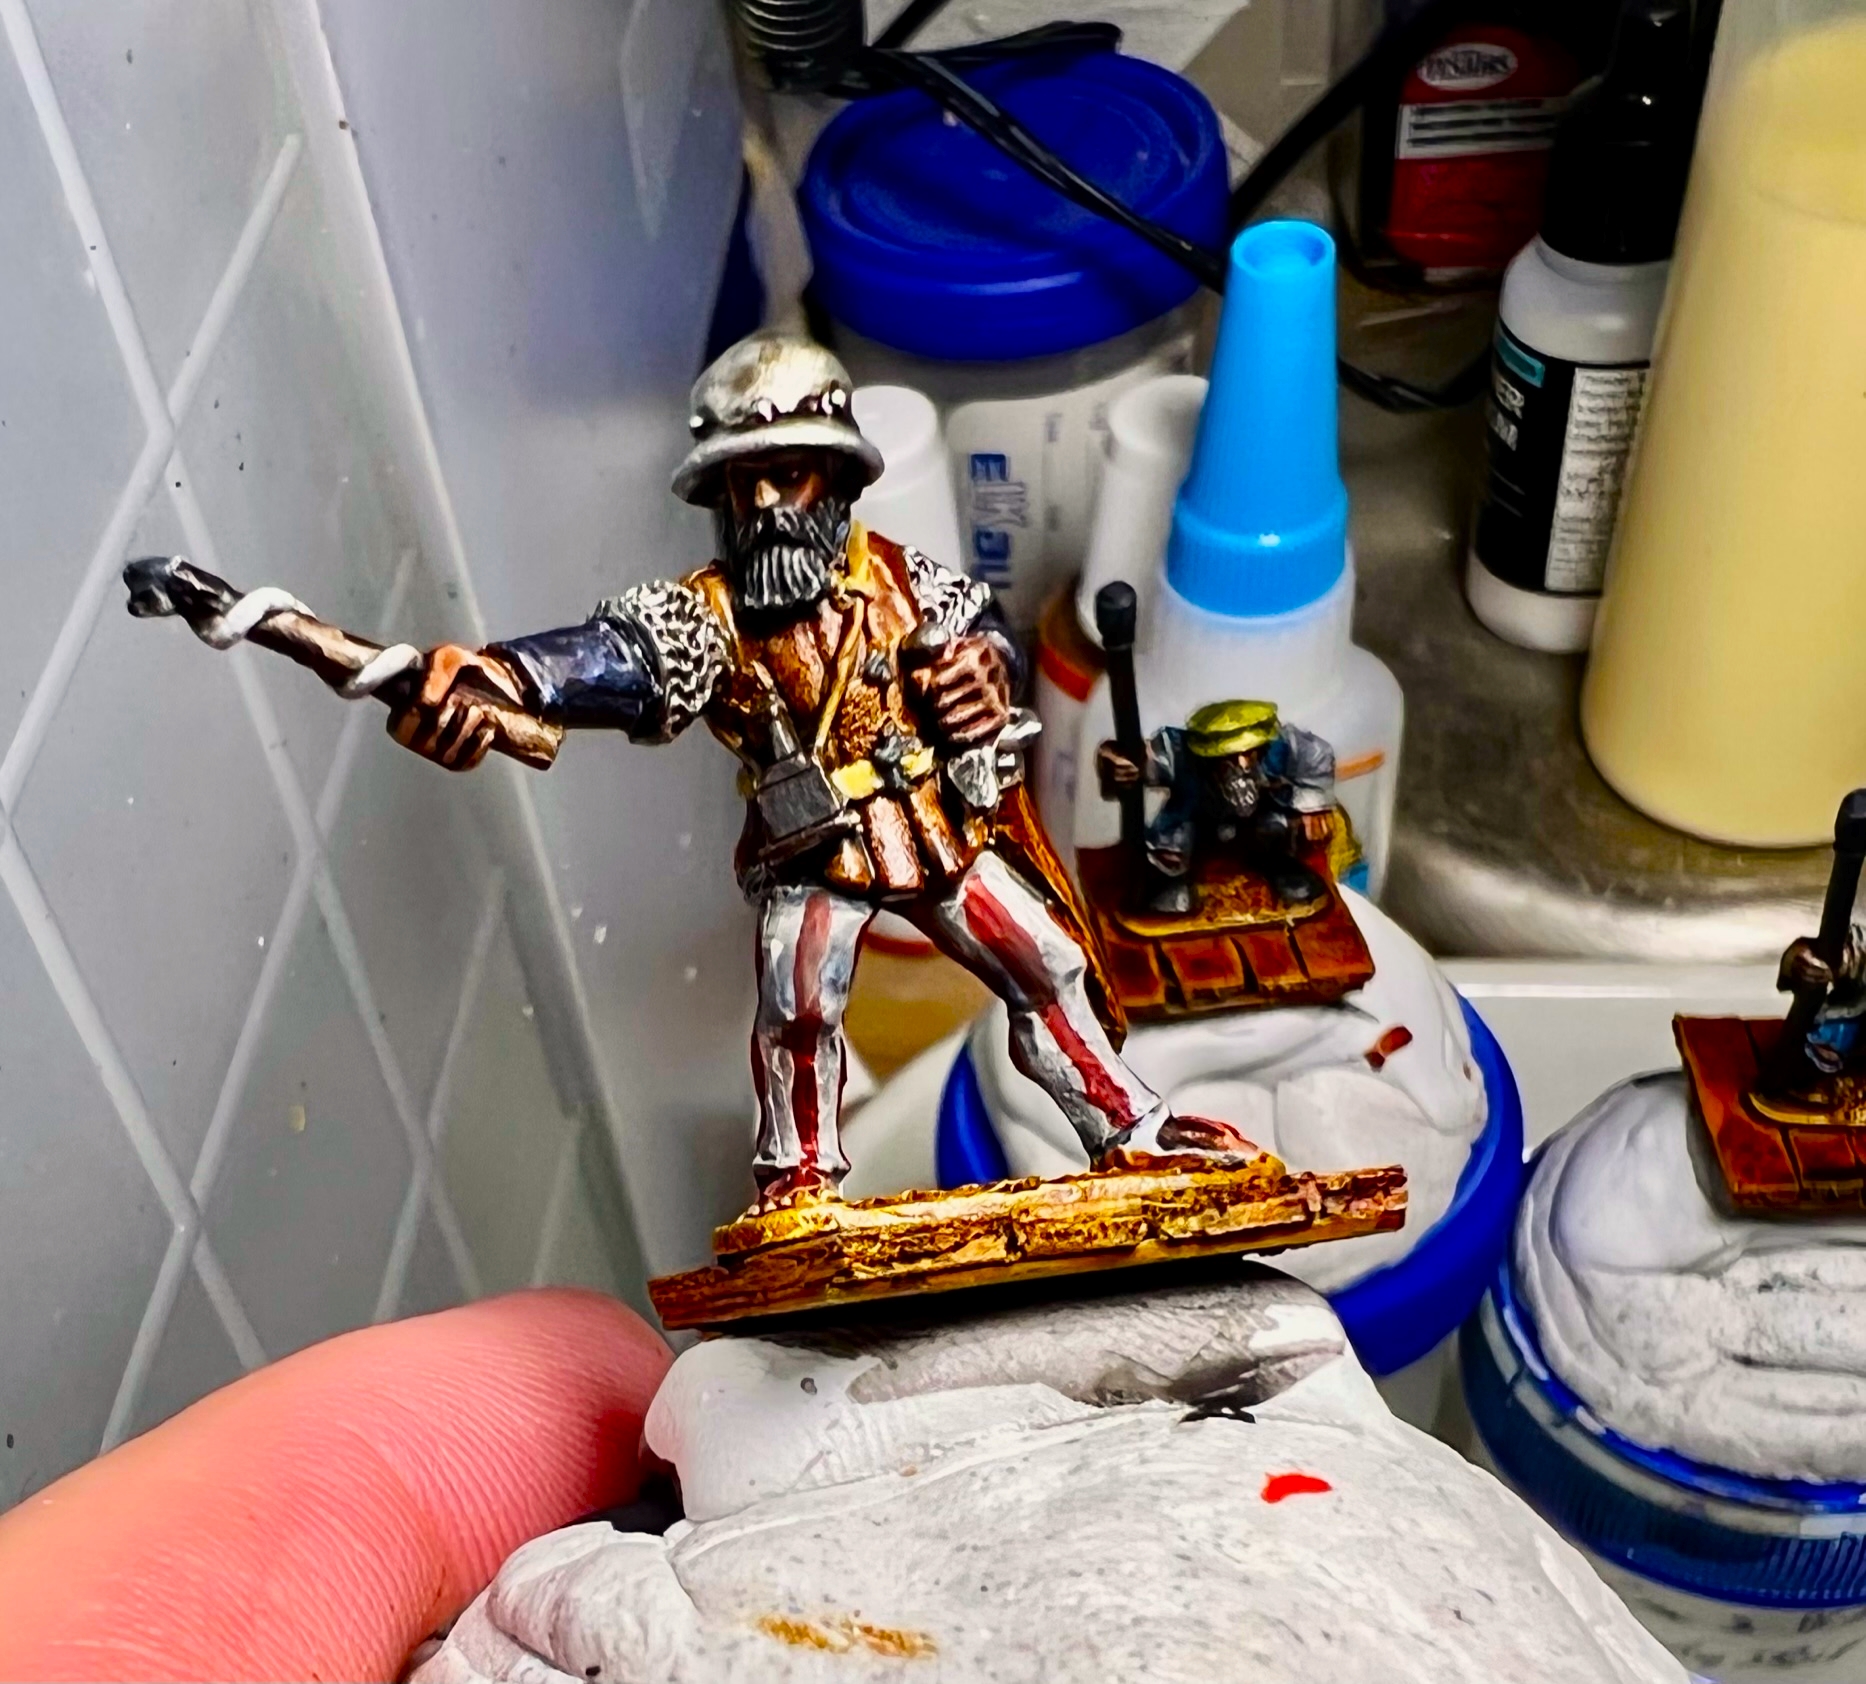
1 Warband Leader
Rowing/tiller Element – 6 Conquistadors rowing (3 per side), plus one at the tiller acting as their leader (7 total in that Element)
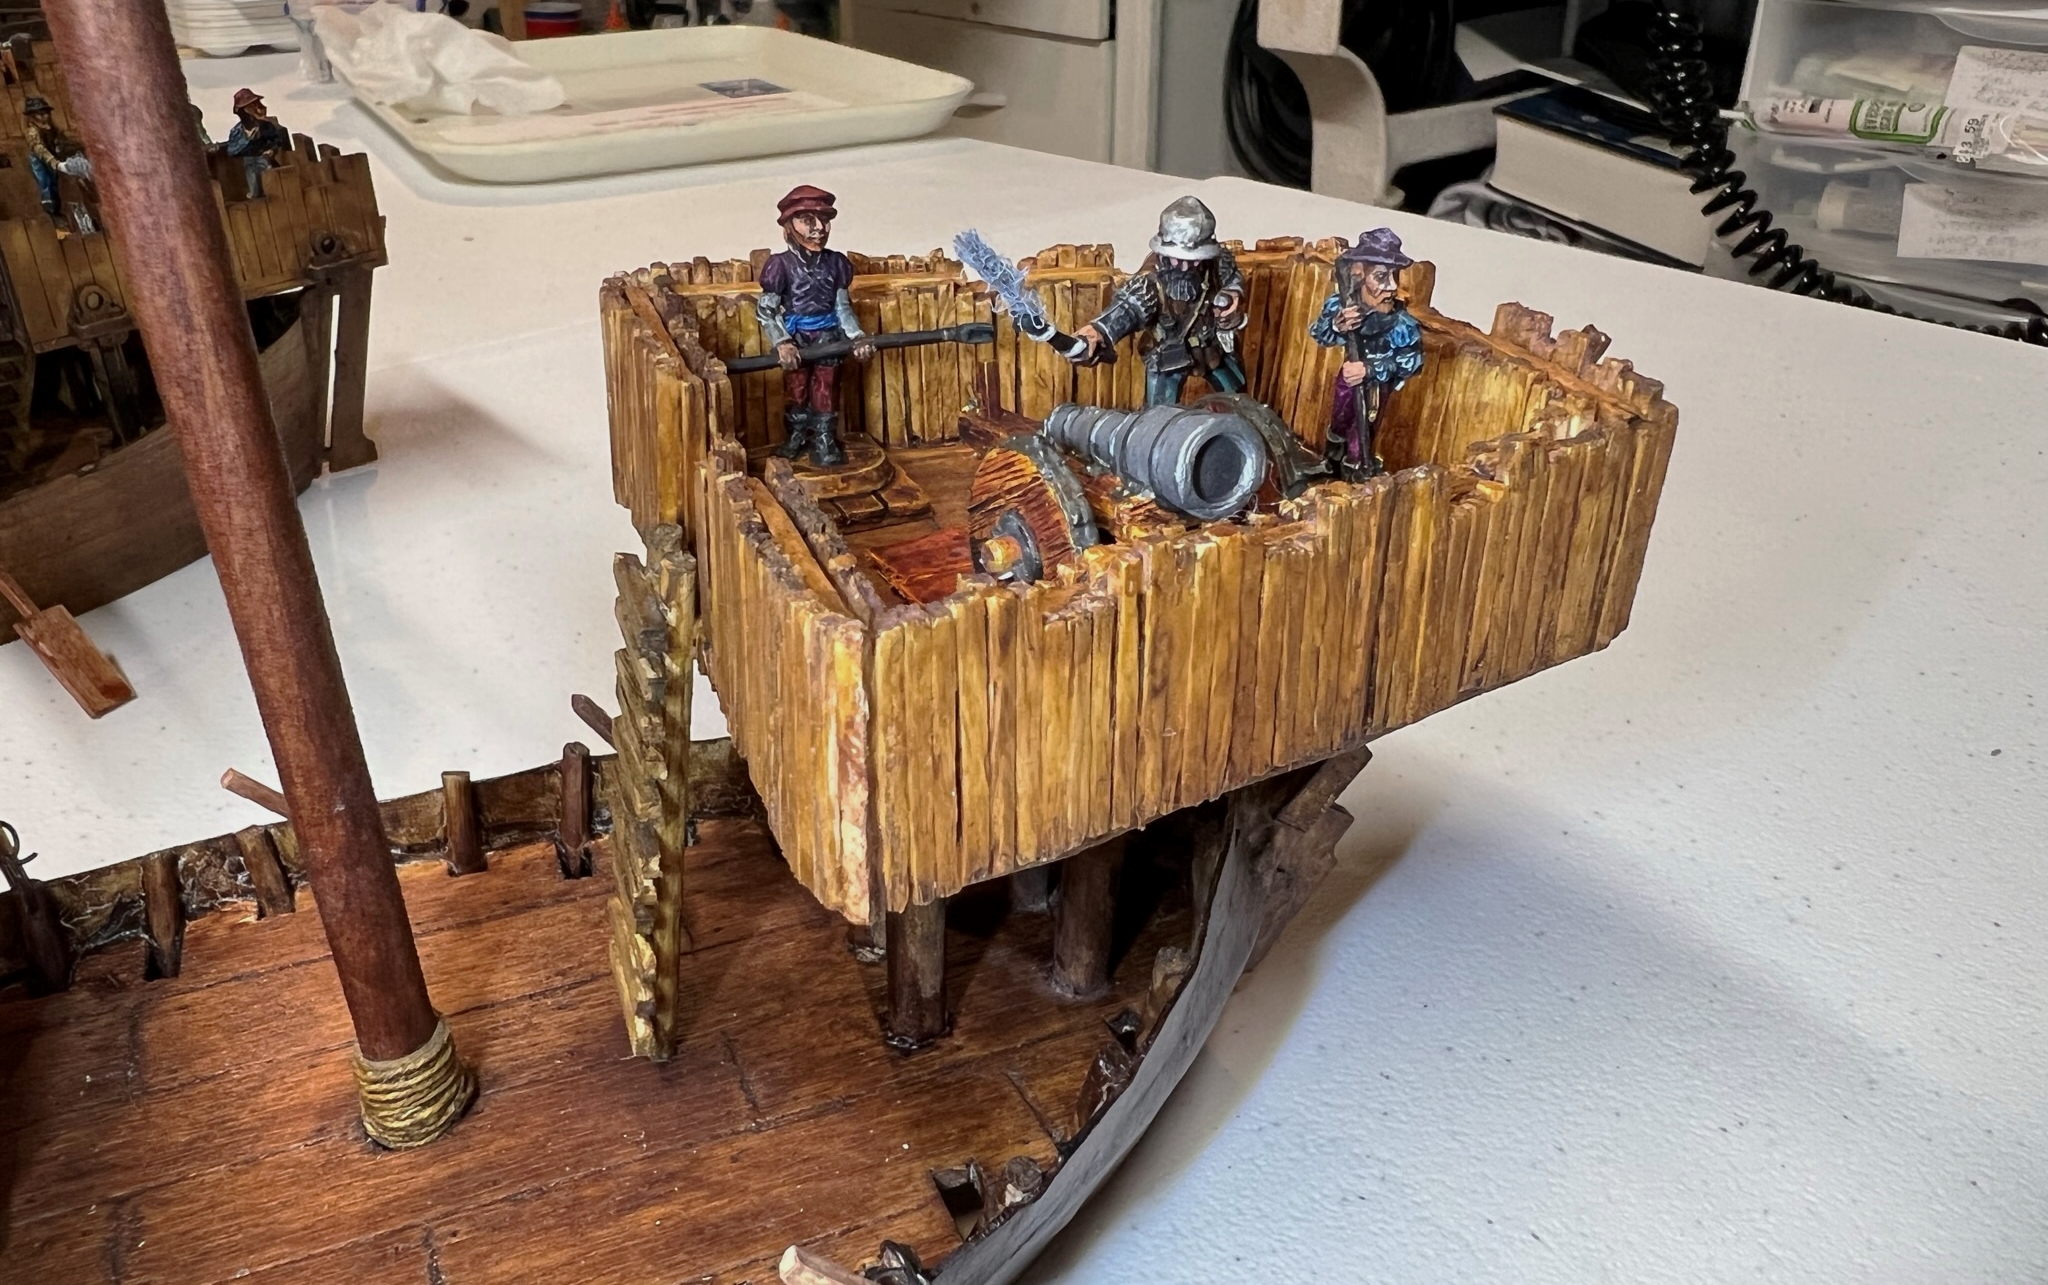
Artillery Element – One falconet or lombard crew of three figures plus the gun with one of the crew acting as a leader
Arquebus/crossbow Element – One to four figures deployed in the opposite castle (fore or stern) from the ship’s Artillery Element
I needed a few criteria to be satisfied here. First, I wanted the 28mm crews and guns to be different both in terms of paint scheme and in terms of figures/poses. Given that, sourcing the crew proved to be a bit of a challenge. I found the one two-man crew set from Outpost Wargames (via Badger Games) that I previously painted for land warfare (detailed here) to be lacking for my needs here on ships due to size and composition. (I do like that set but not on a ship.)
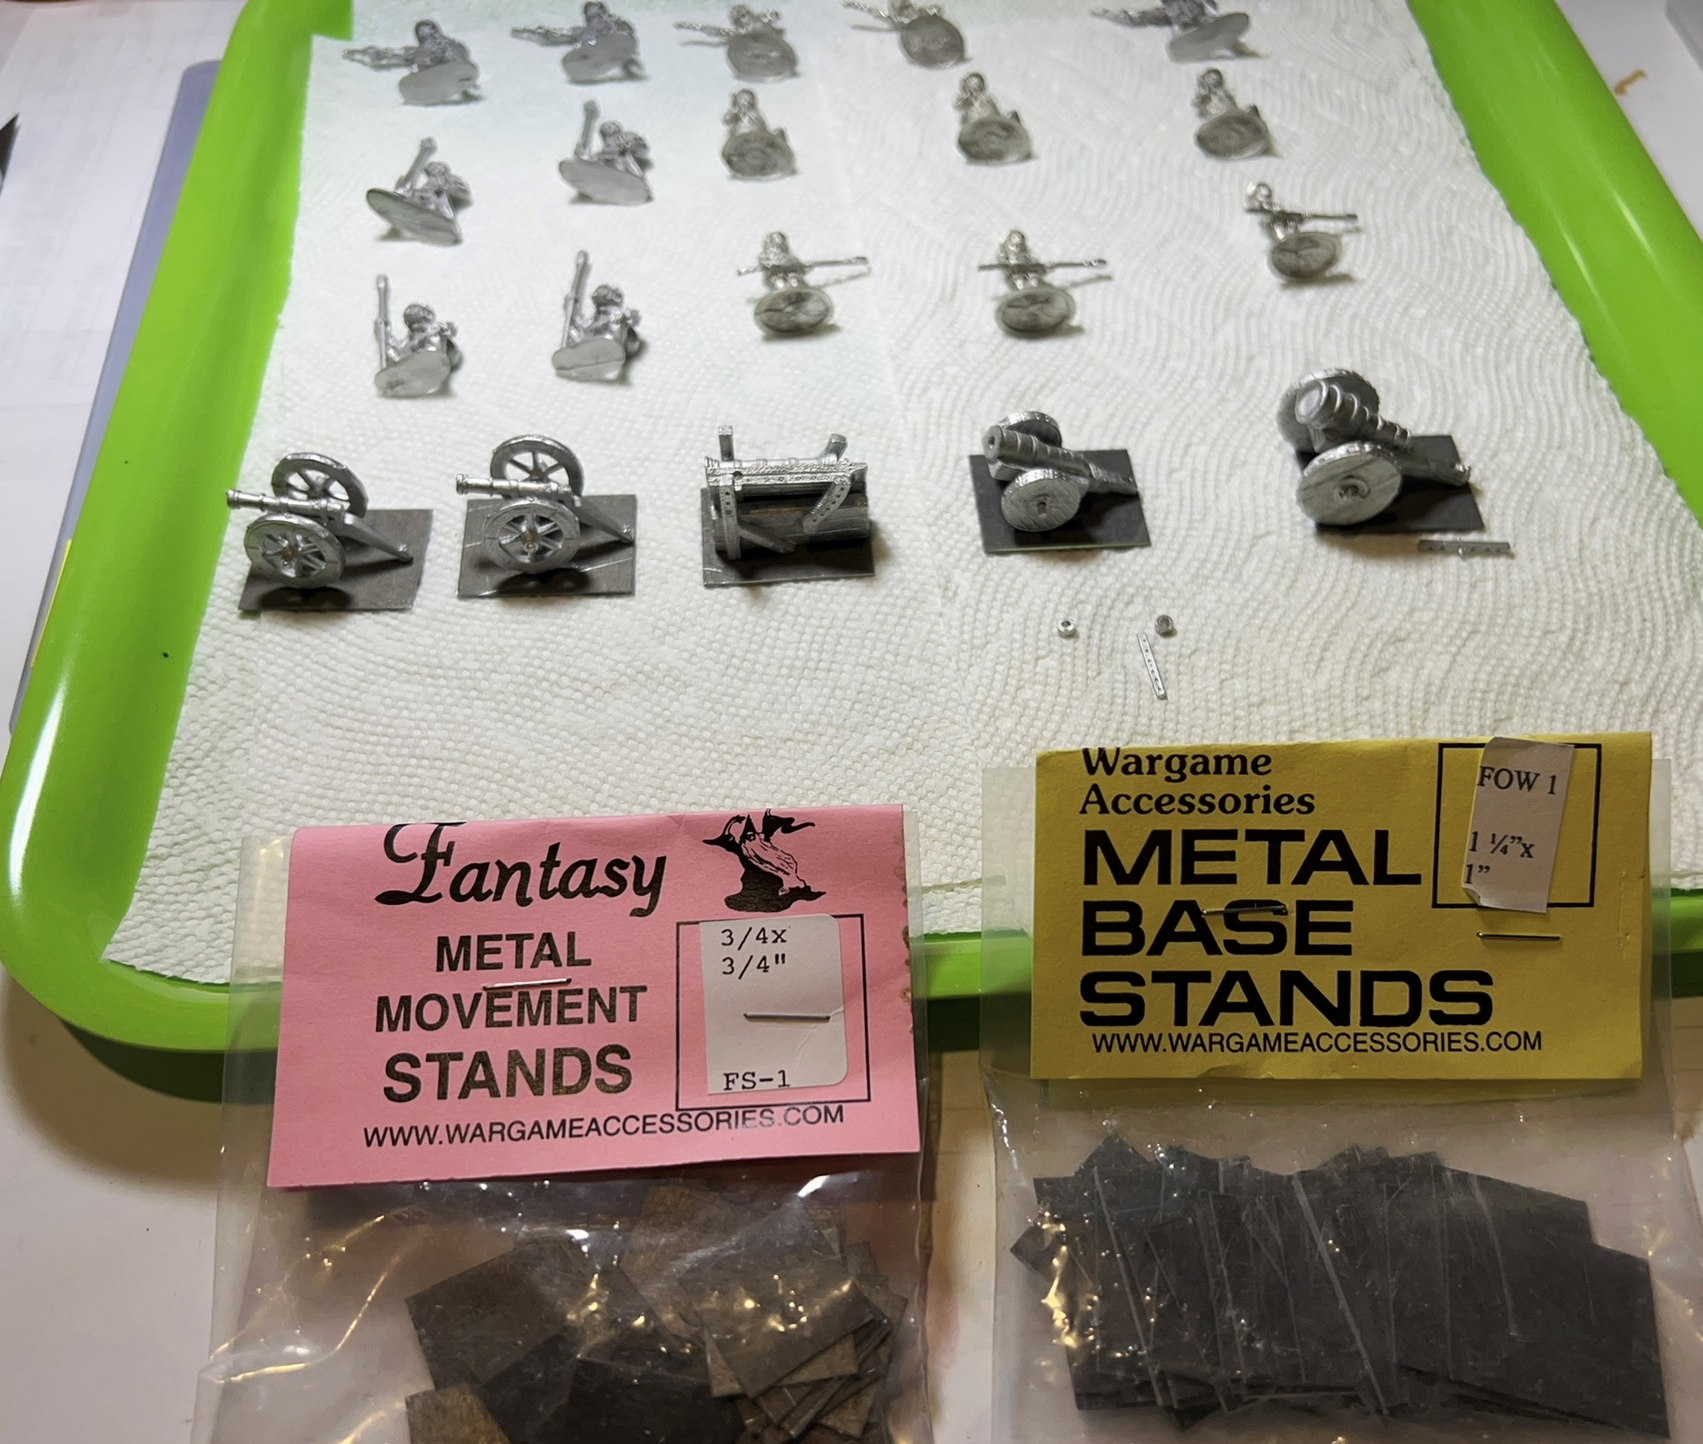
Secondly, I wanted their bases to reflect a ship’s deck. And yes – my other Conquistadors would still have ground-flocked bases – but the artillery needed to belong to a specific ship in my view and look just like that. Thirdly, deck space on the ships was tight. So, getting a three-man crew to fit with any gun would require that I use smaller bases than my usual 1″ bases – and I ended up using Wargames Accessories square .75″ for the crew members and 1.25″ x 1″ steel bases for the guns.
Wargames Foundry has a nice set (#SB018) available from Badger, and I used two of them – less the halberdier that I added to my land-based forces (and also used some as leaders/helmsmen). For the other three, I did a cobbling together of figures and guns from Gringo 40’s, Iron Wind Metals, and Eureka Miniatures.
This project was going to have to be squeezed in between HAVOC 2022, my Florida trip, and get finished before HUZZAH 2022 where they would debut on the tabletop. I also received my Army Painter “Speed Paint” set and decided that this was a good time to try them out as completion speed was indeed of the essence.
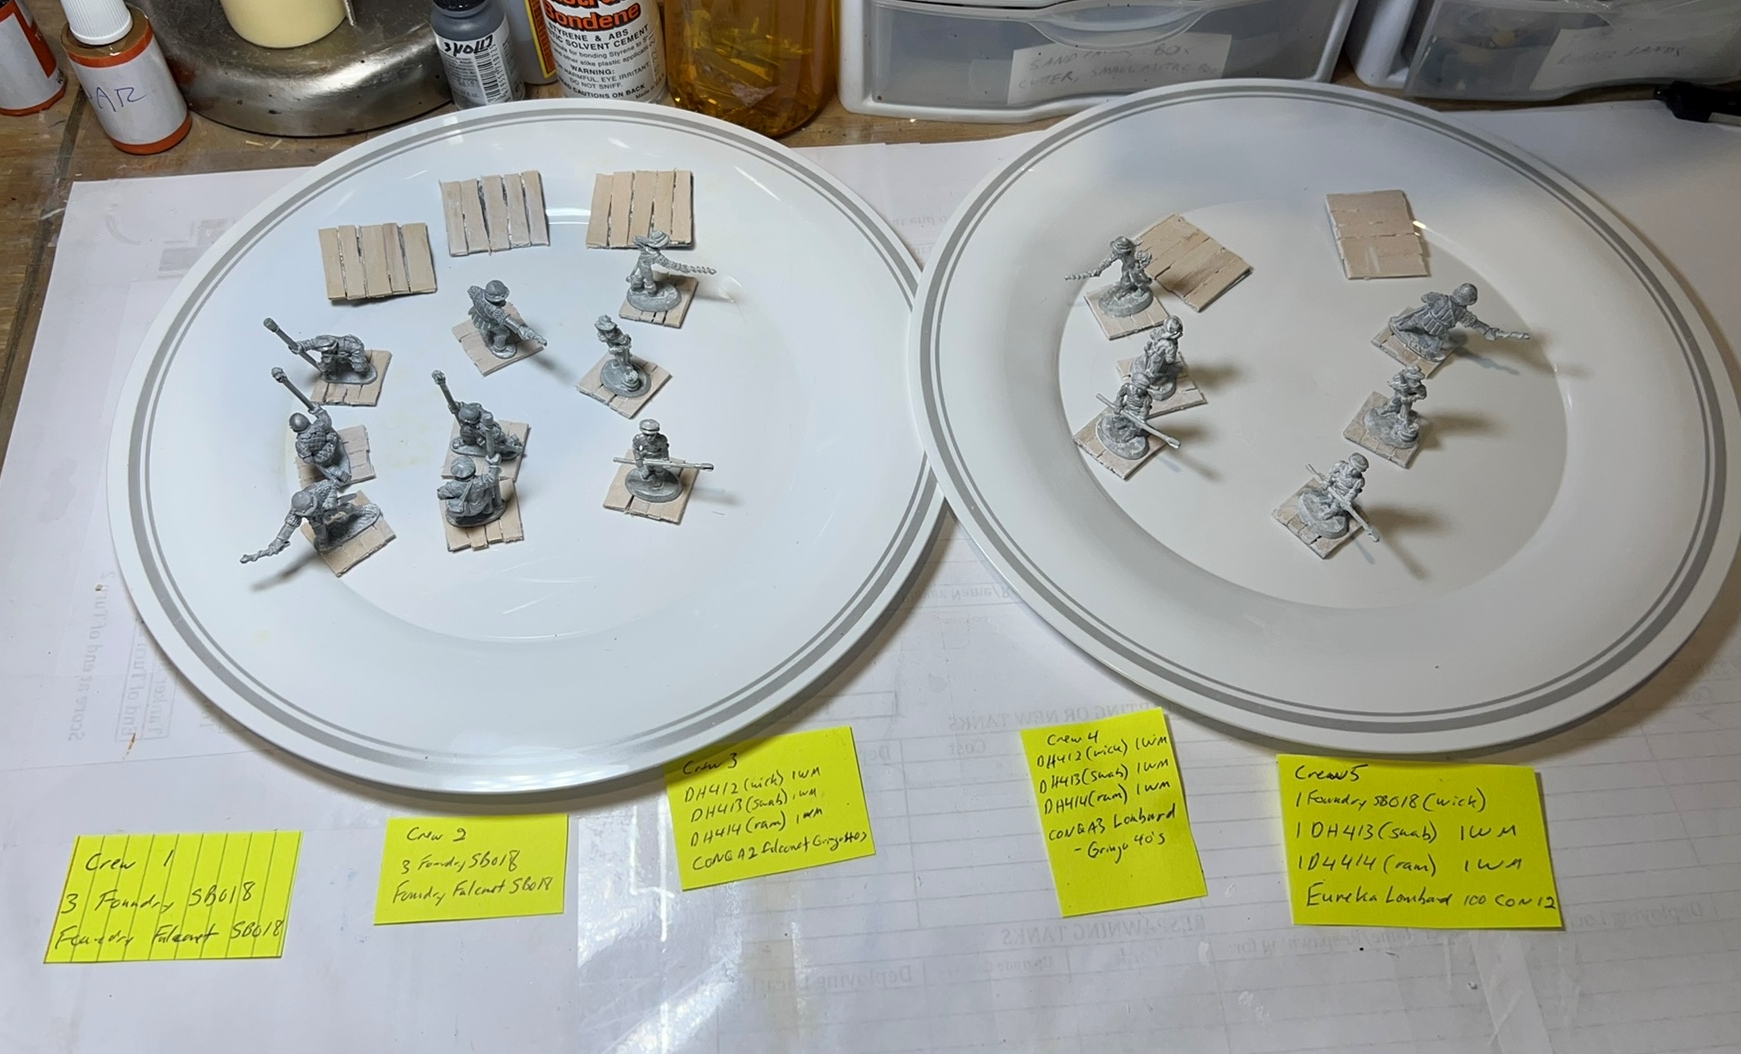
The crews and guns ended up as follows for each brigantine:
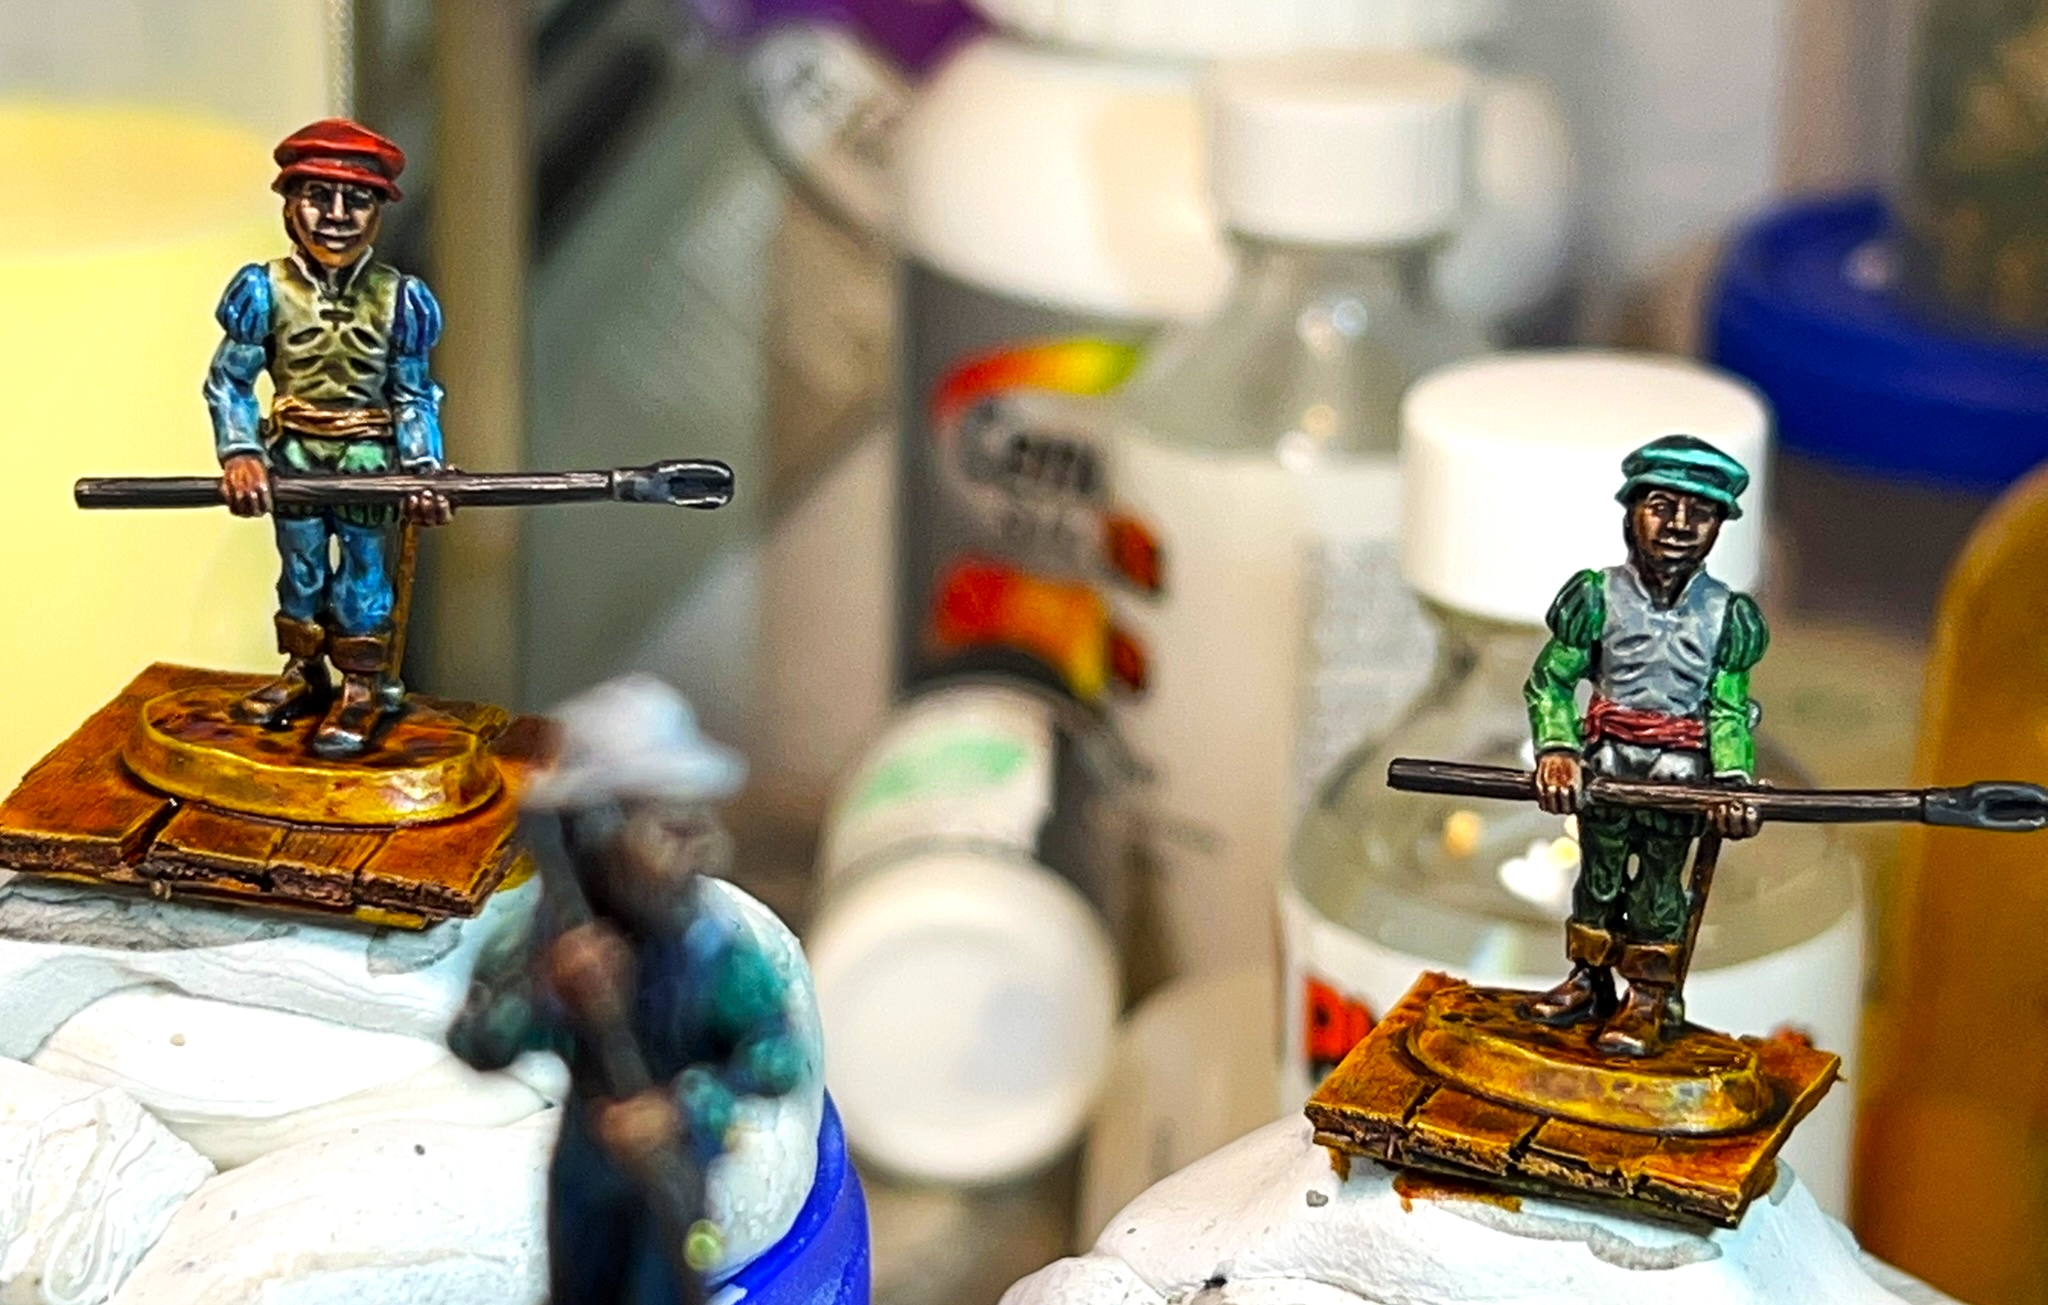
El Dólar: a falconet and three crewmen from Wargames Foundry #SB018 to be deployed in the stern castle facing to the starboard side
El Gregorio: a falconet and three crewmen from Wargames Foundry #SB018 to be deployed in the forecastle facing forward
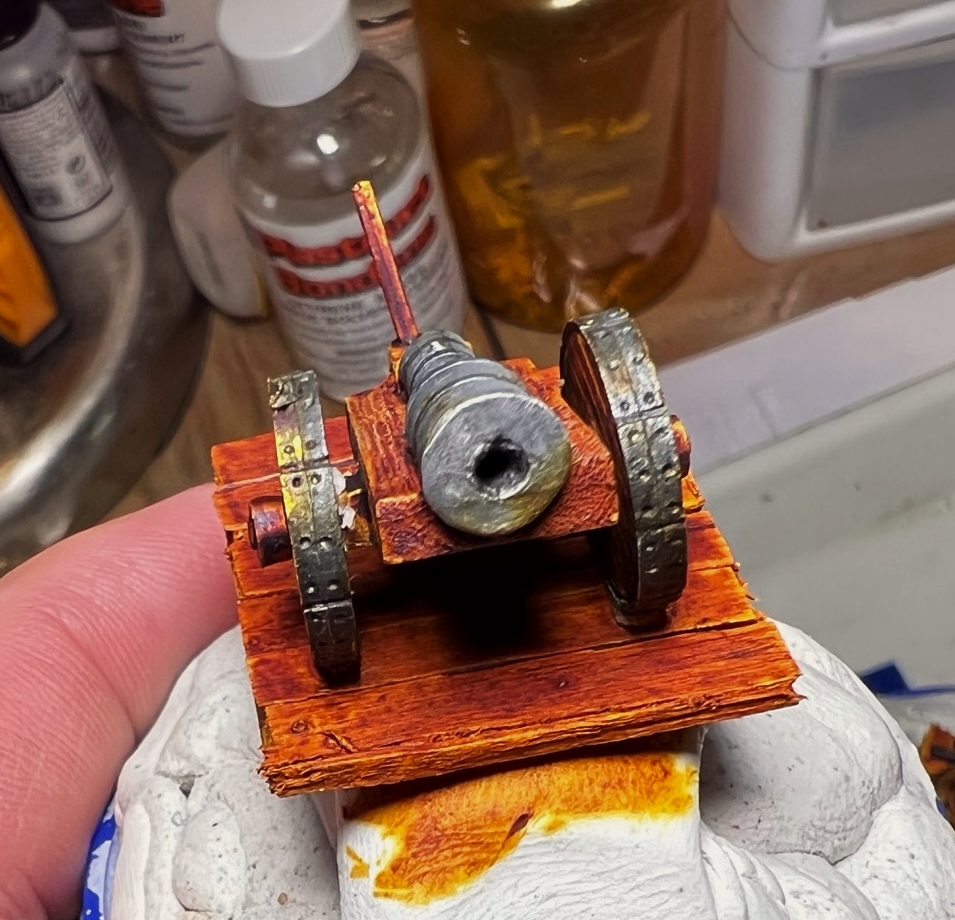
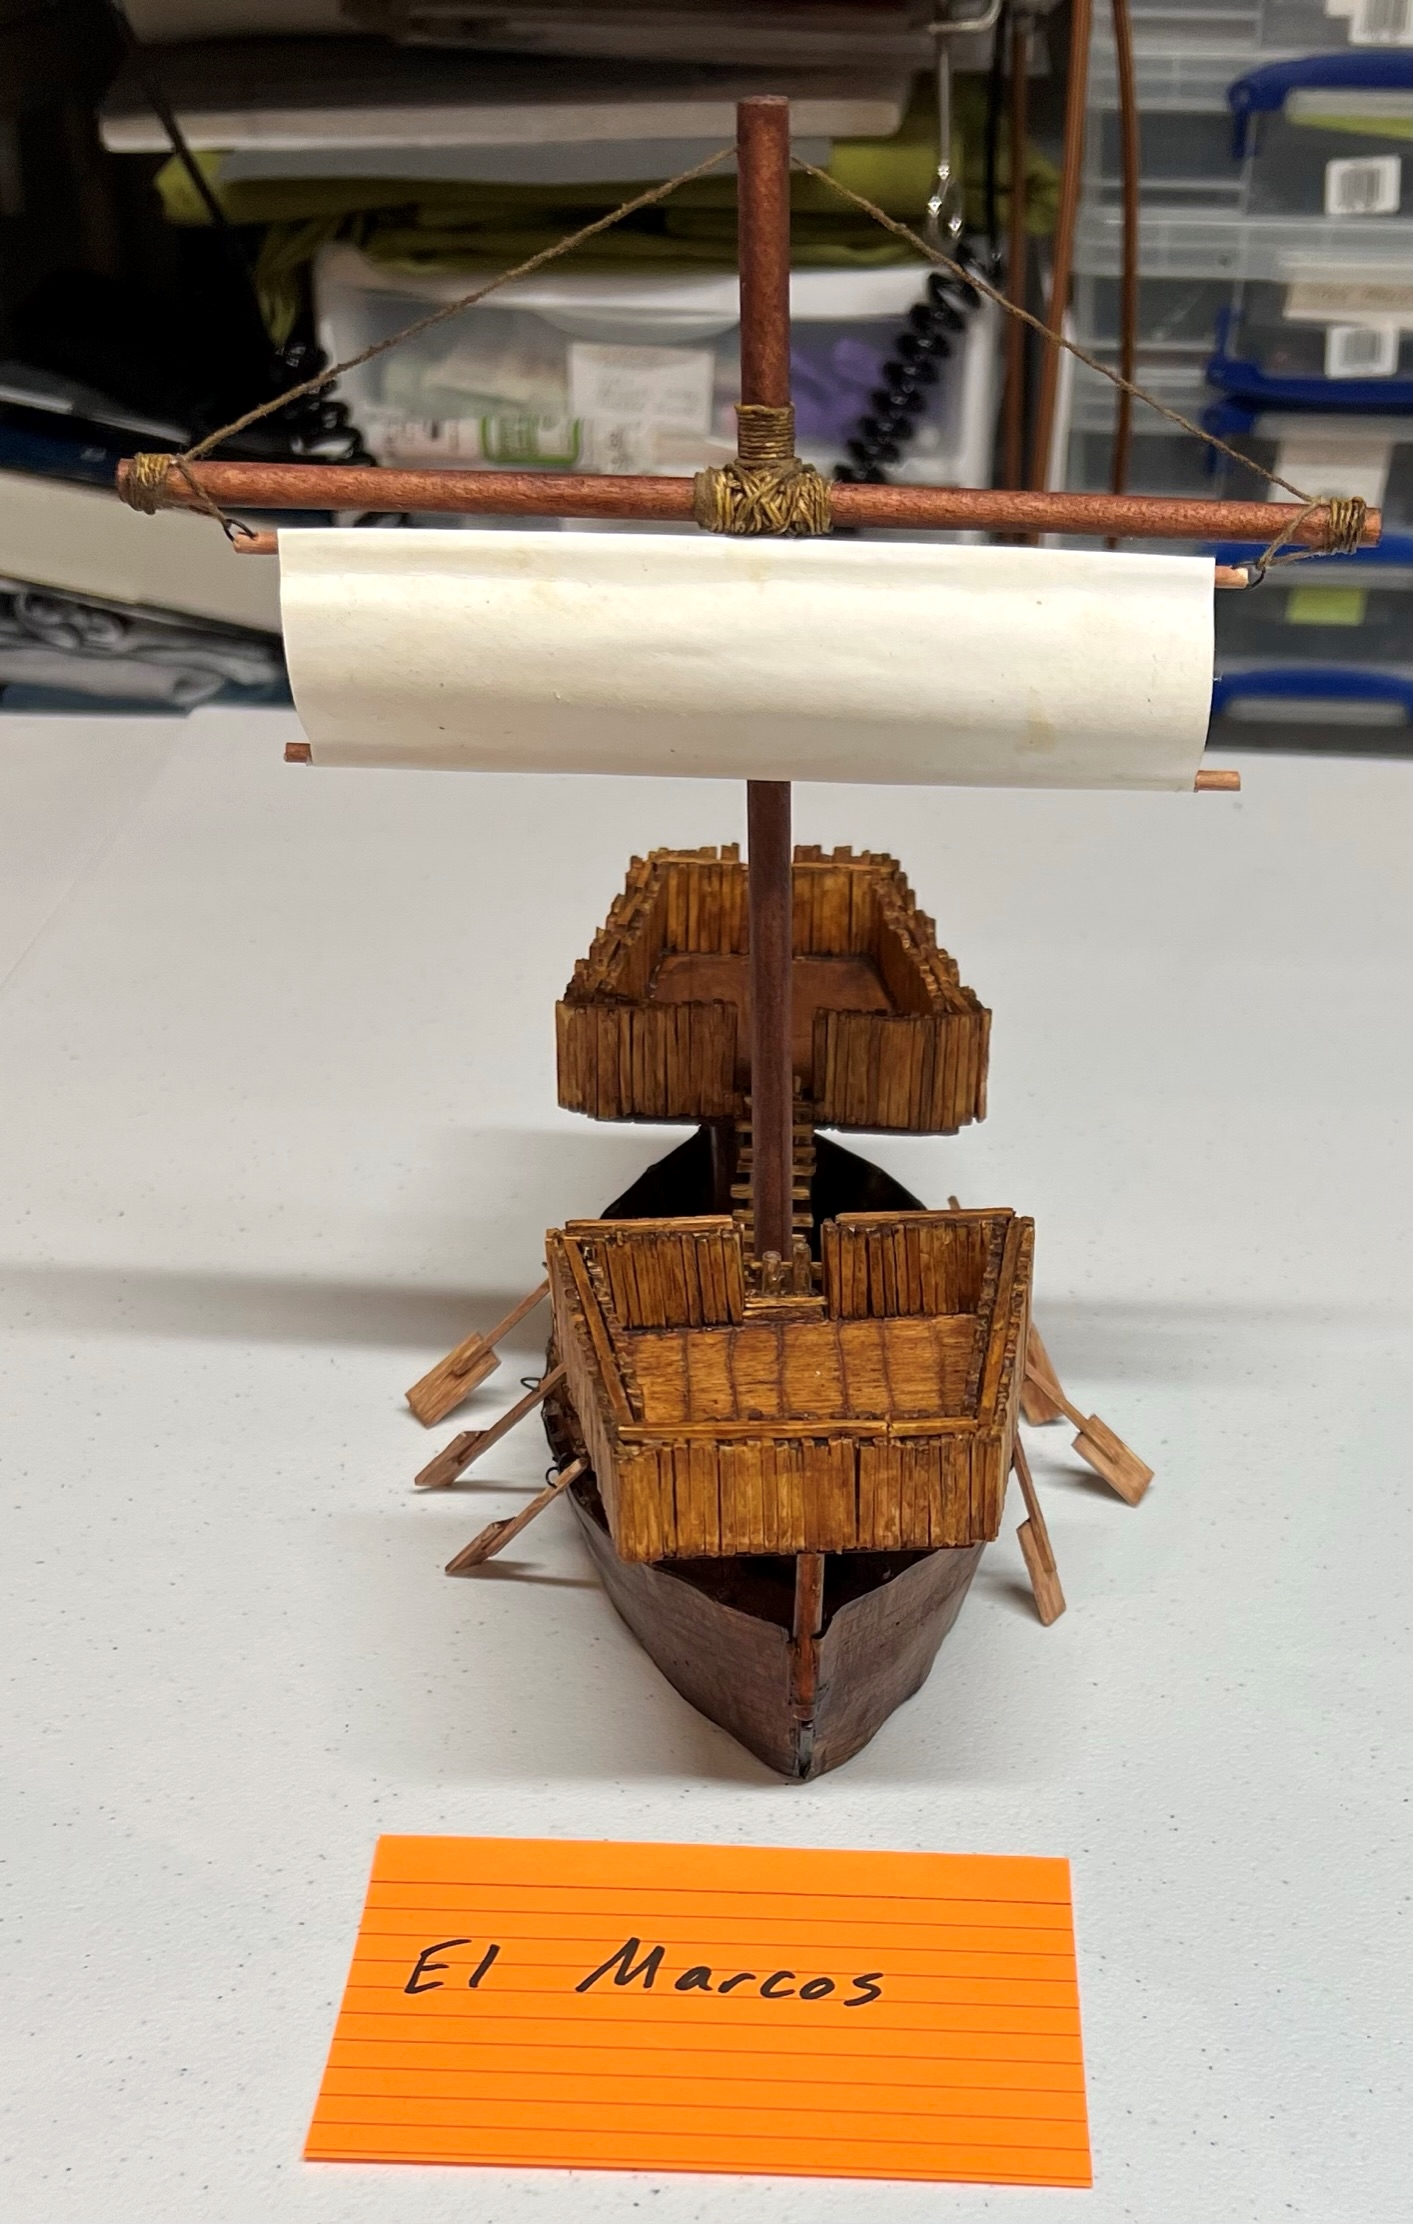
El Marcos: a Eureka Miniature’s lombard (#100CON12), crewed by one figure from Wargames Foundry #SB018 (wick/match), and two Iron Winds Metals figures #DH413 (swab), and #DH414 (ram) to be deployed in the forecastle facing forward
The figures sorted.Organizing the crews.Mocking up the guns to see what size bases would work. I broke up popsicle sticks and made each base look like the decks.I lightly primed each figure and gun base lightly. I decided to paint the guns and then affix them to the bases.
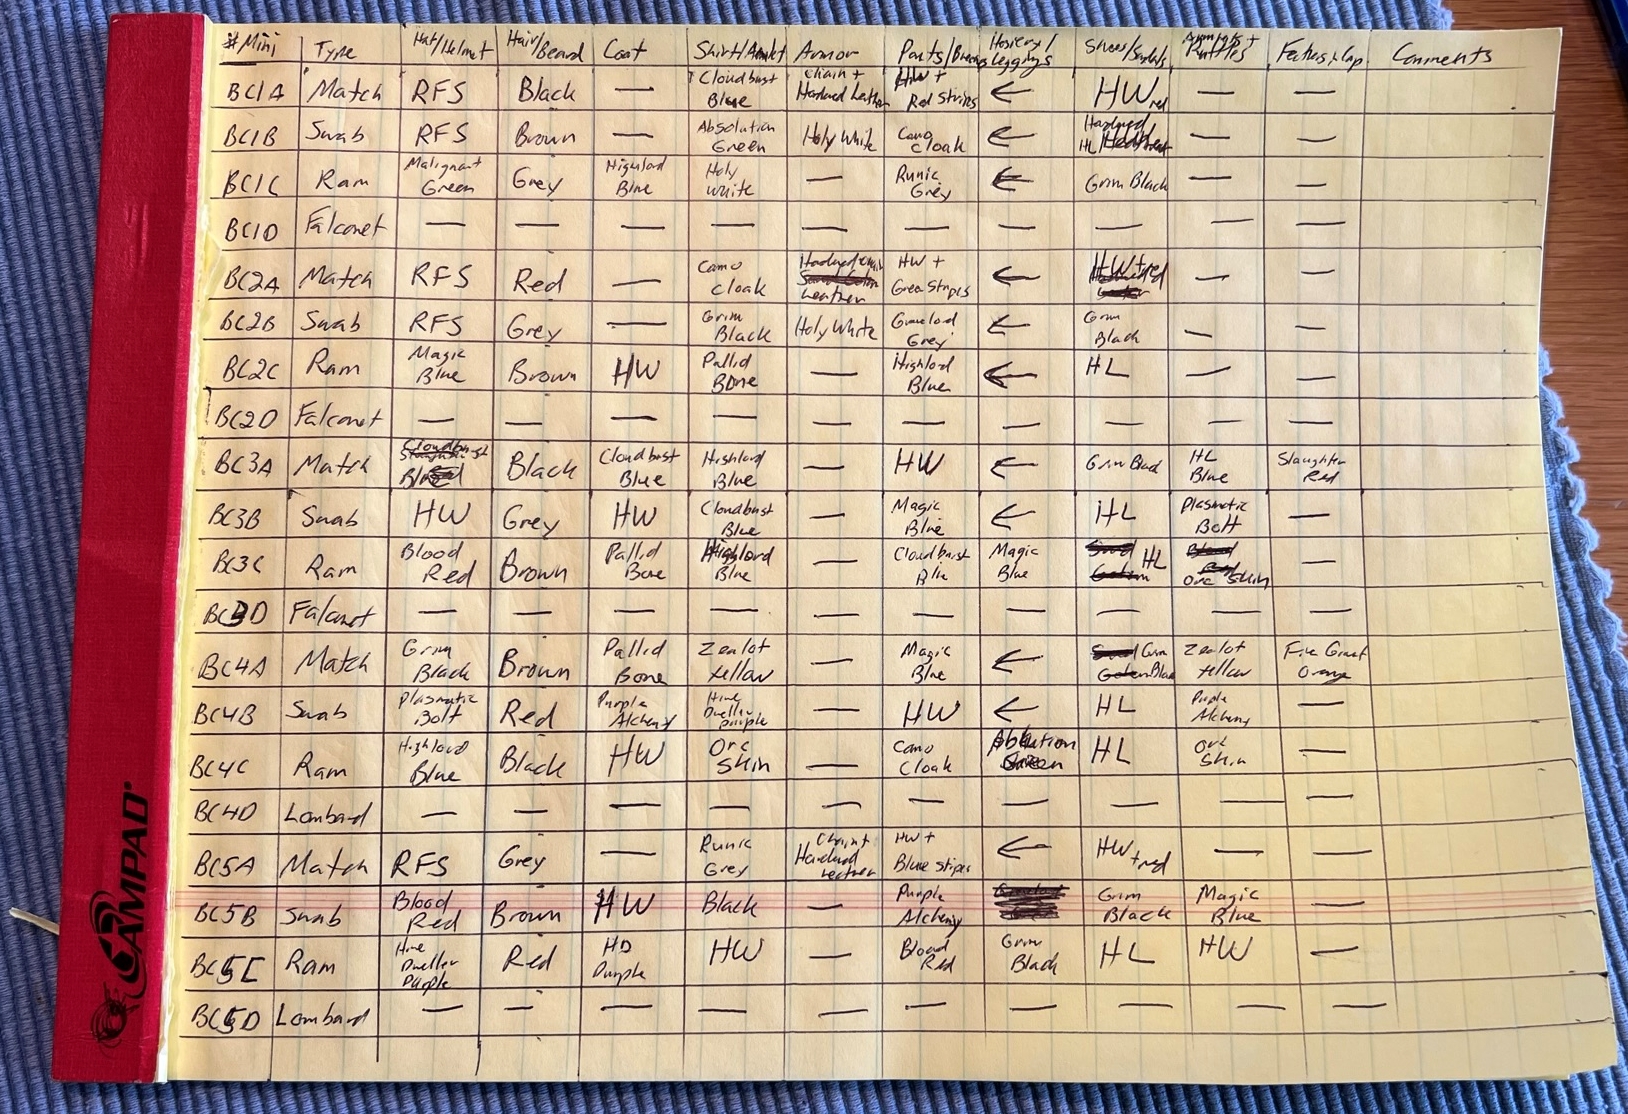
I broke into the Speed Paint set and made a comparison chart.
First, I painted the guns.
I used mostly AP “Sand Golem” on the wooden parts of the carriages, with Vallejo Model Air “Gun Metal” as the base colors for these. All of the paints used are listed at the end of this post for those interested.
I needed a painting plan (starting point anyway) for the 15 figures. I tried to use as many of the Speed Paints as possible.
A painting plan of sorts.
I returned from Florida on April 28th – and HUZZAH was 13 days away! I hit the Speed paints again.
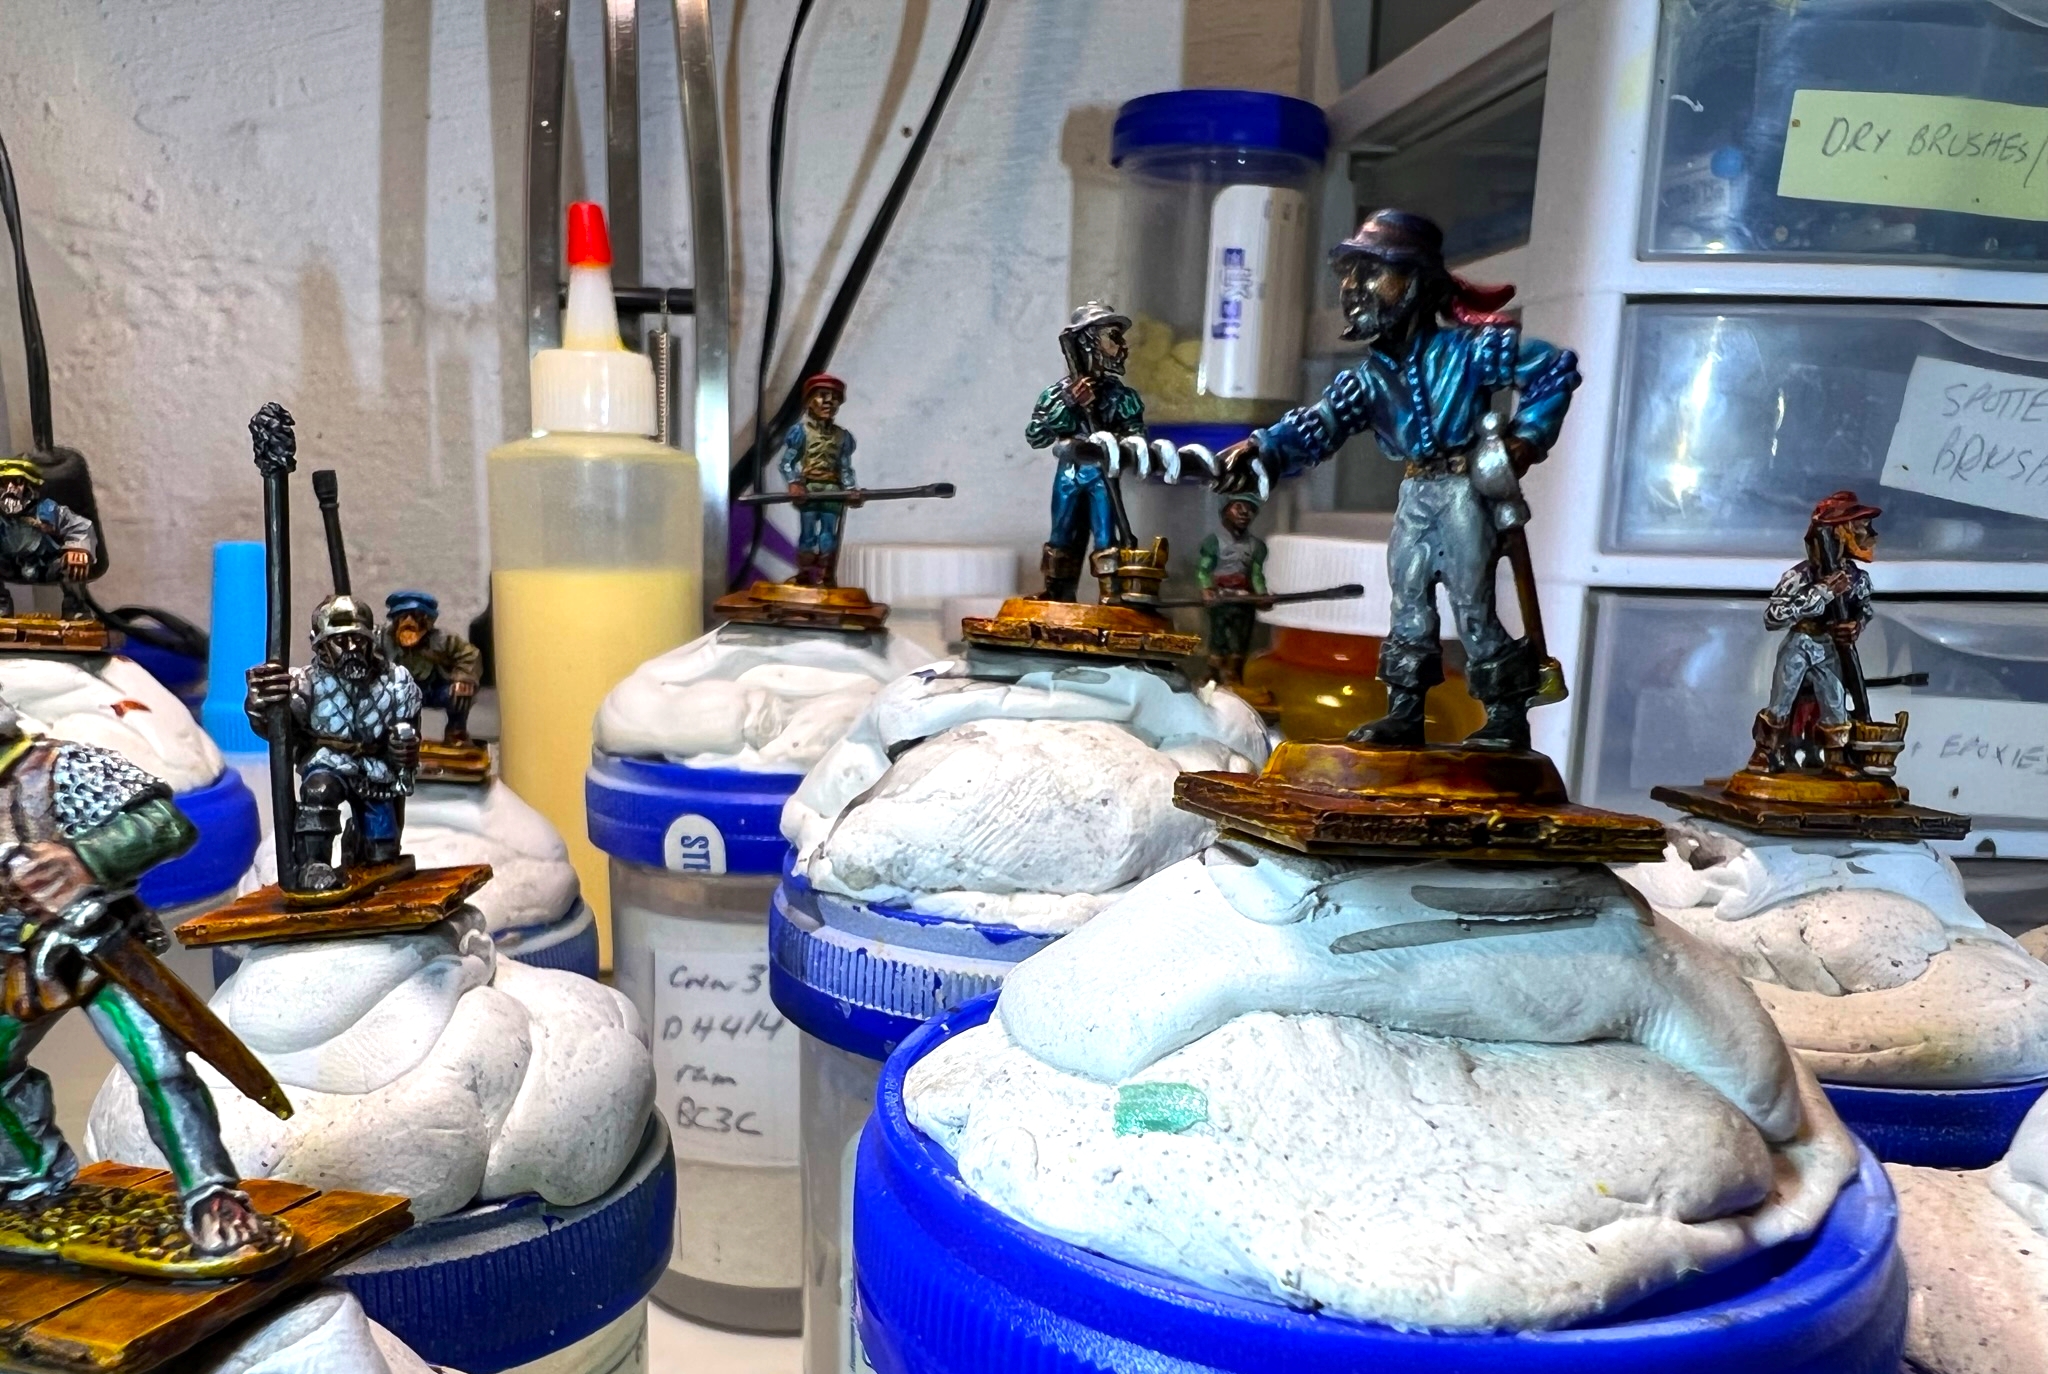
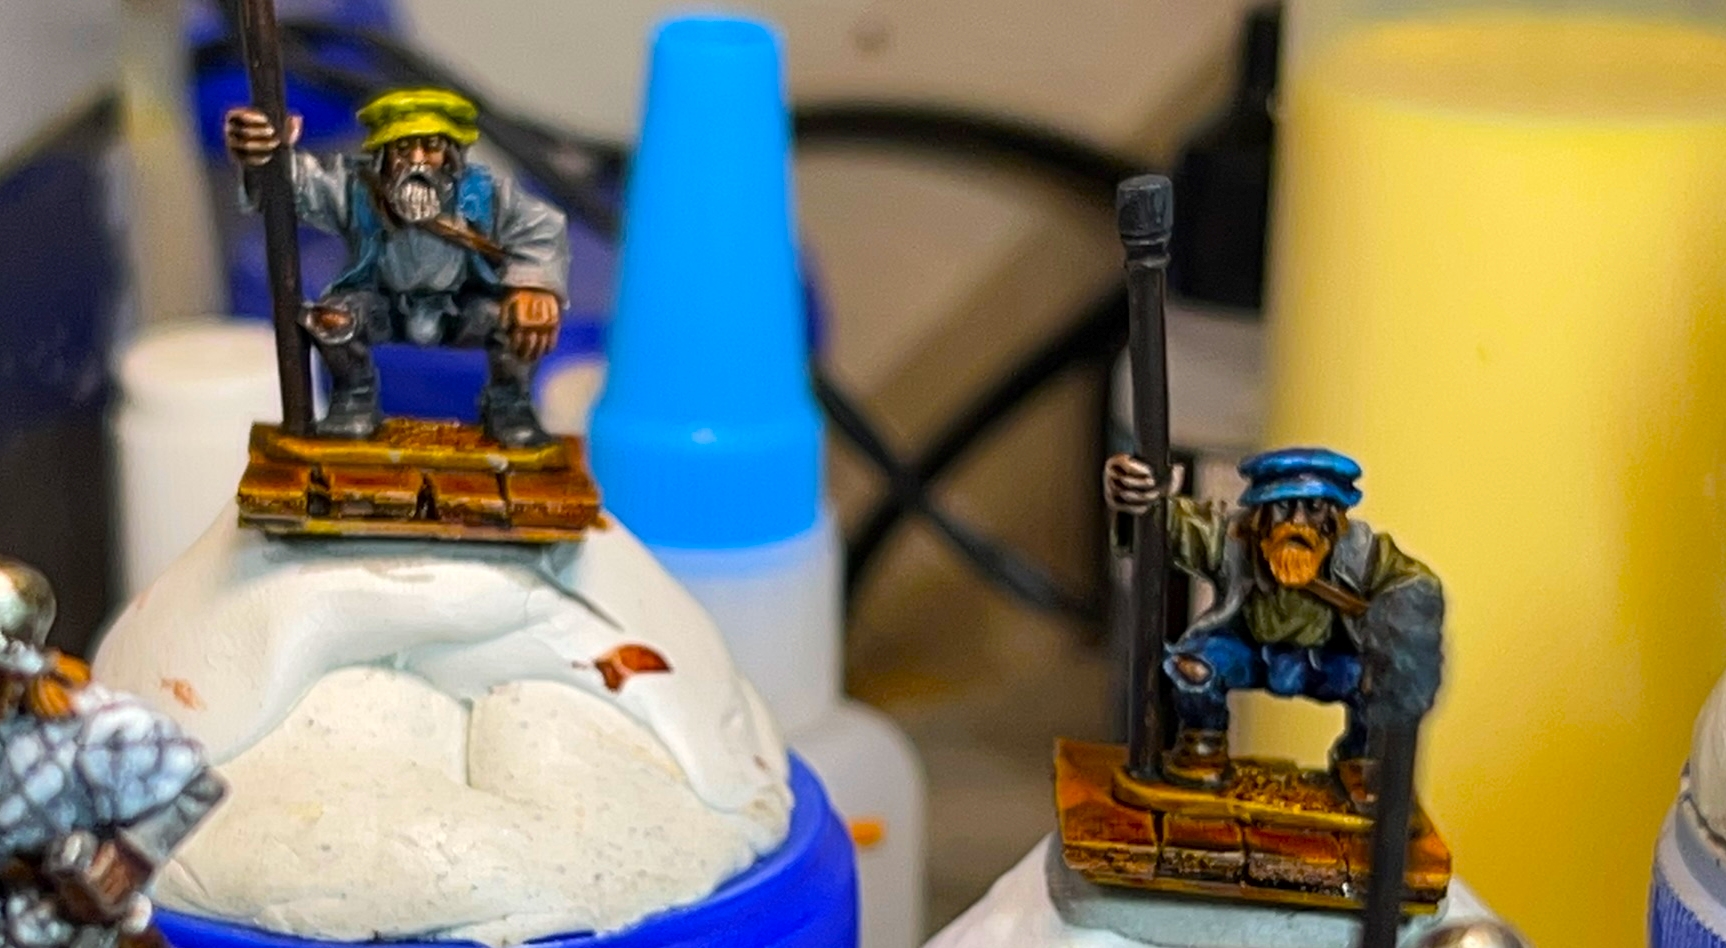
I did not take a lot of pics during the painting – but these are good I think.
April 28 progress.By April 29th, I had basically had the figures painted and saw that washes on the metals and highlights on the flesh were definitely needed.April 29 close up.More April 29 progress close ups.These are DH414’s on April 29. The flesh needed highlights.A Wargames Foundry figure on April 29th.
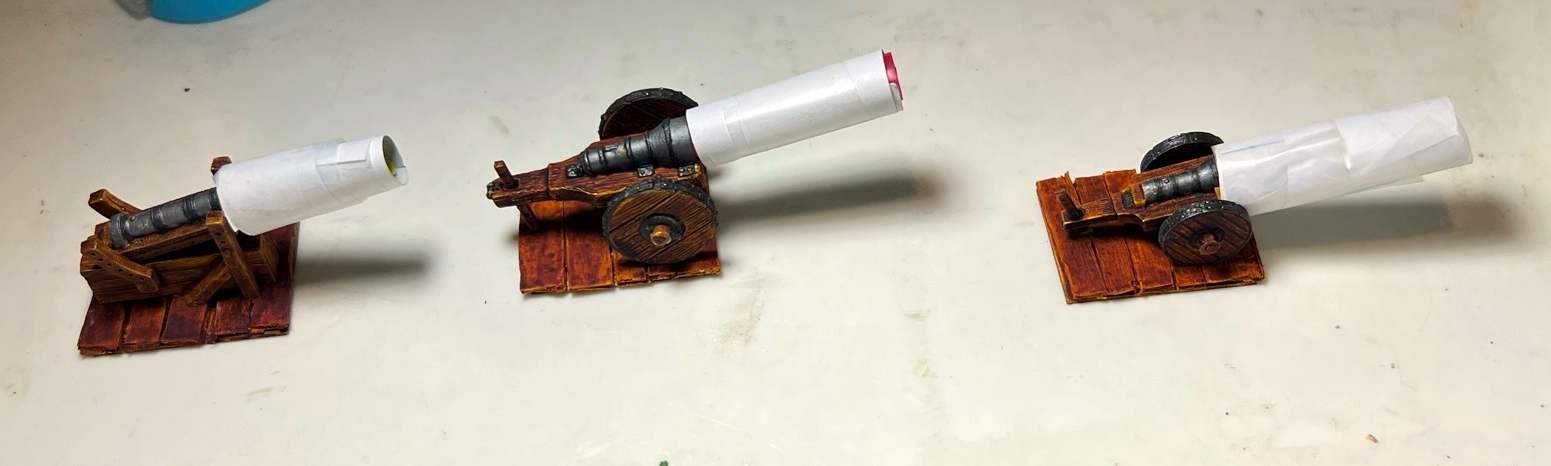
Next up was varnishing on April 30th. I waited as I had read on Azazel’s blog that the Speed Paints can reactivate – so I wanted to leave 24 hours+ to dry.
Before varnishing with an airbrush.
I did see some of the Speed Paint (“Sand Golem”) on the guns reactivate and migrate – but that was it. It was easily fixed.
After varnishing.Close up showing the Speed Paint “migration” on this gun. Apparently the Speed paint reactivated and splashed onto the gun and wheels during airbrush varnishing. Again, easily fixed – but not desirable. I’ll use the Speed Paints again, but with caution.April 30 varnished close up shot #1.April 30 varnished close up shot #2.April 30 varnished close up shot #3.
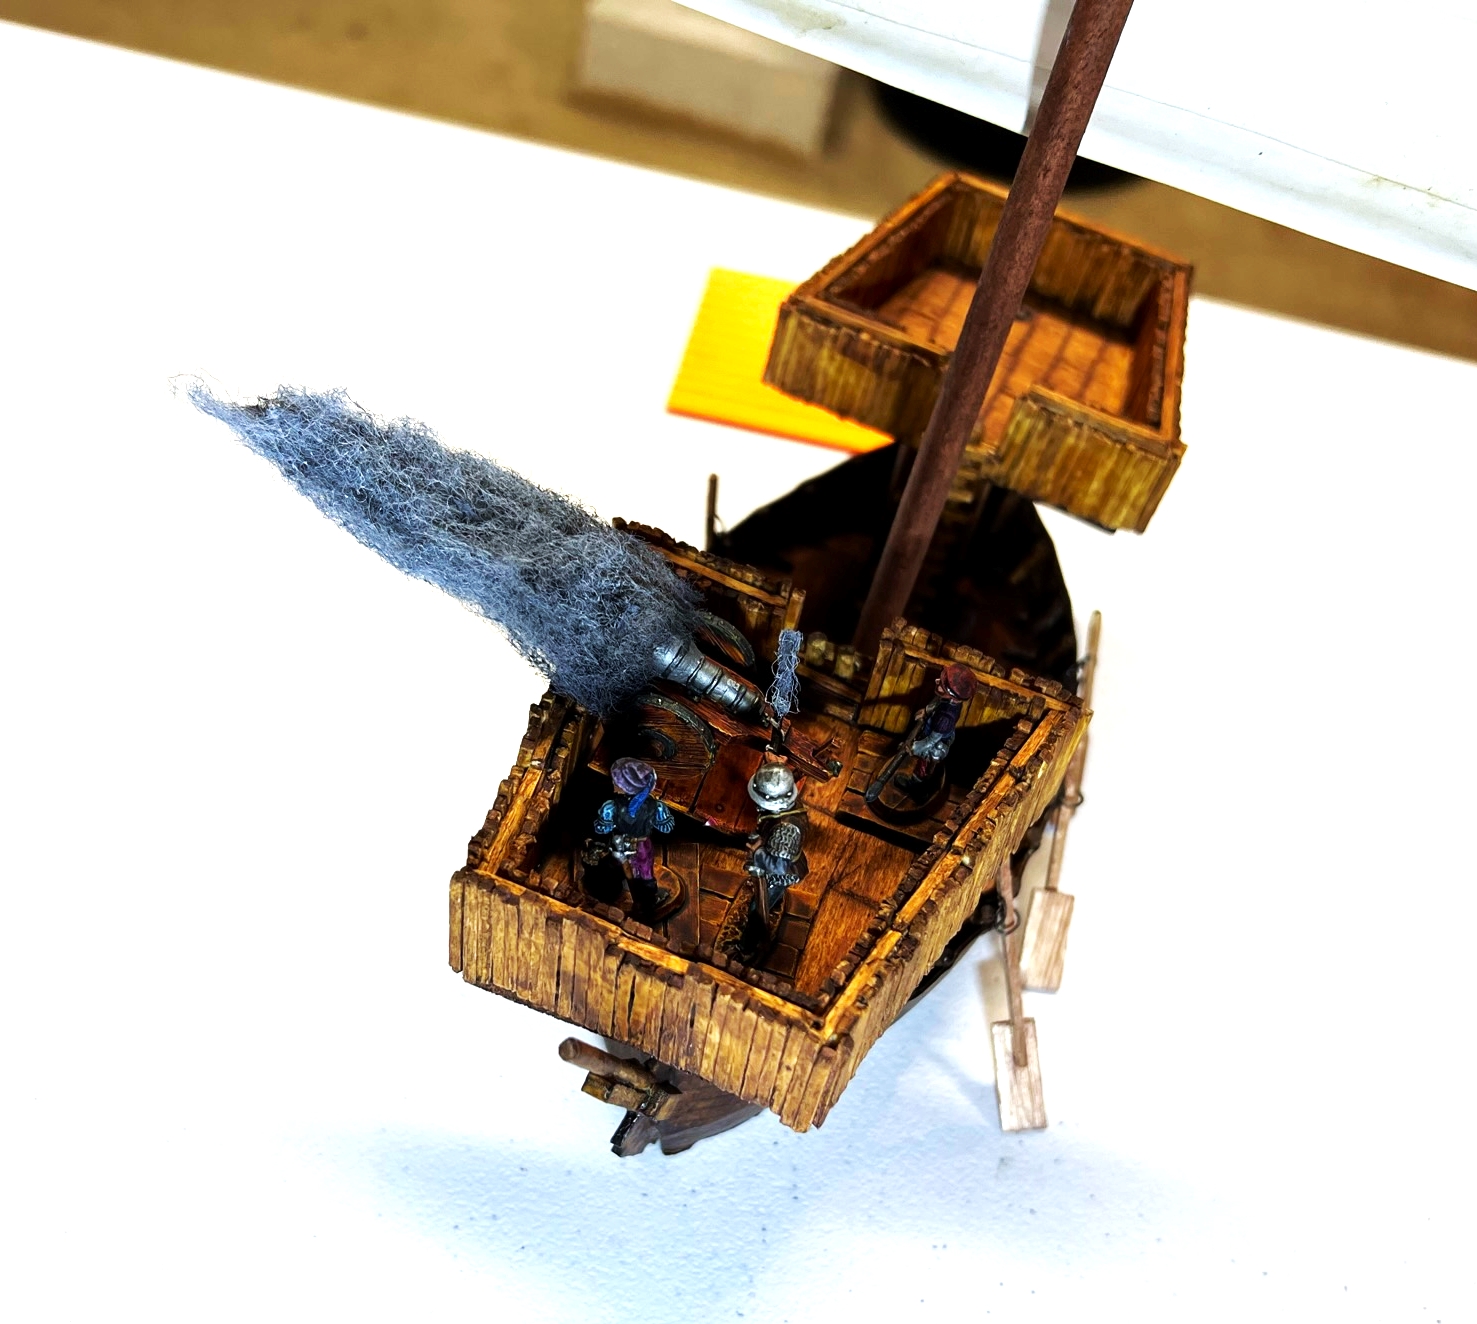
I then needed to add smoke to the figures lighting the fuses – and make smoke markers for the falconets and lombards.
Added wisps of smoke to the matches. I think these came out fine for tabletop play.
Then I was on to making some big smoke markers.
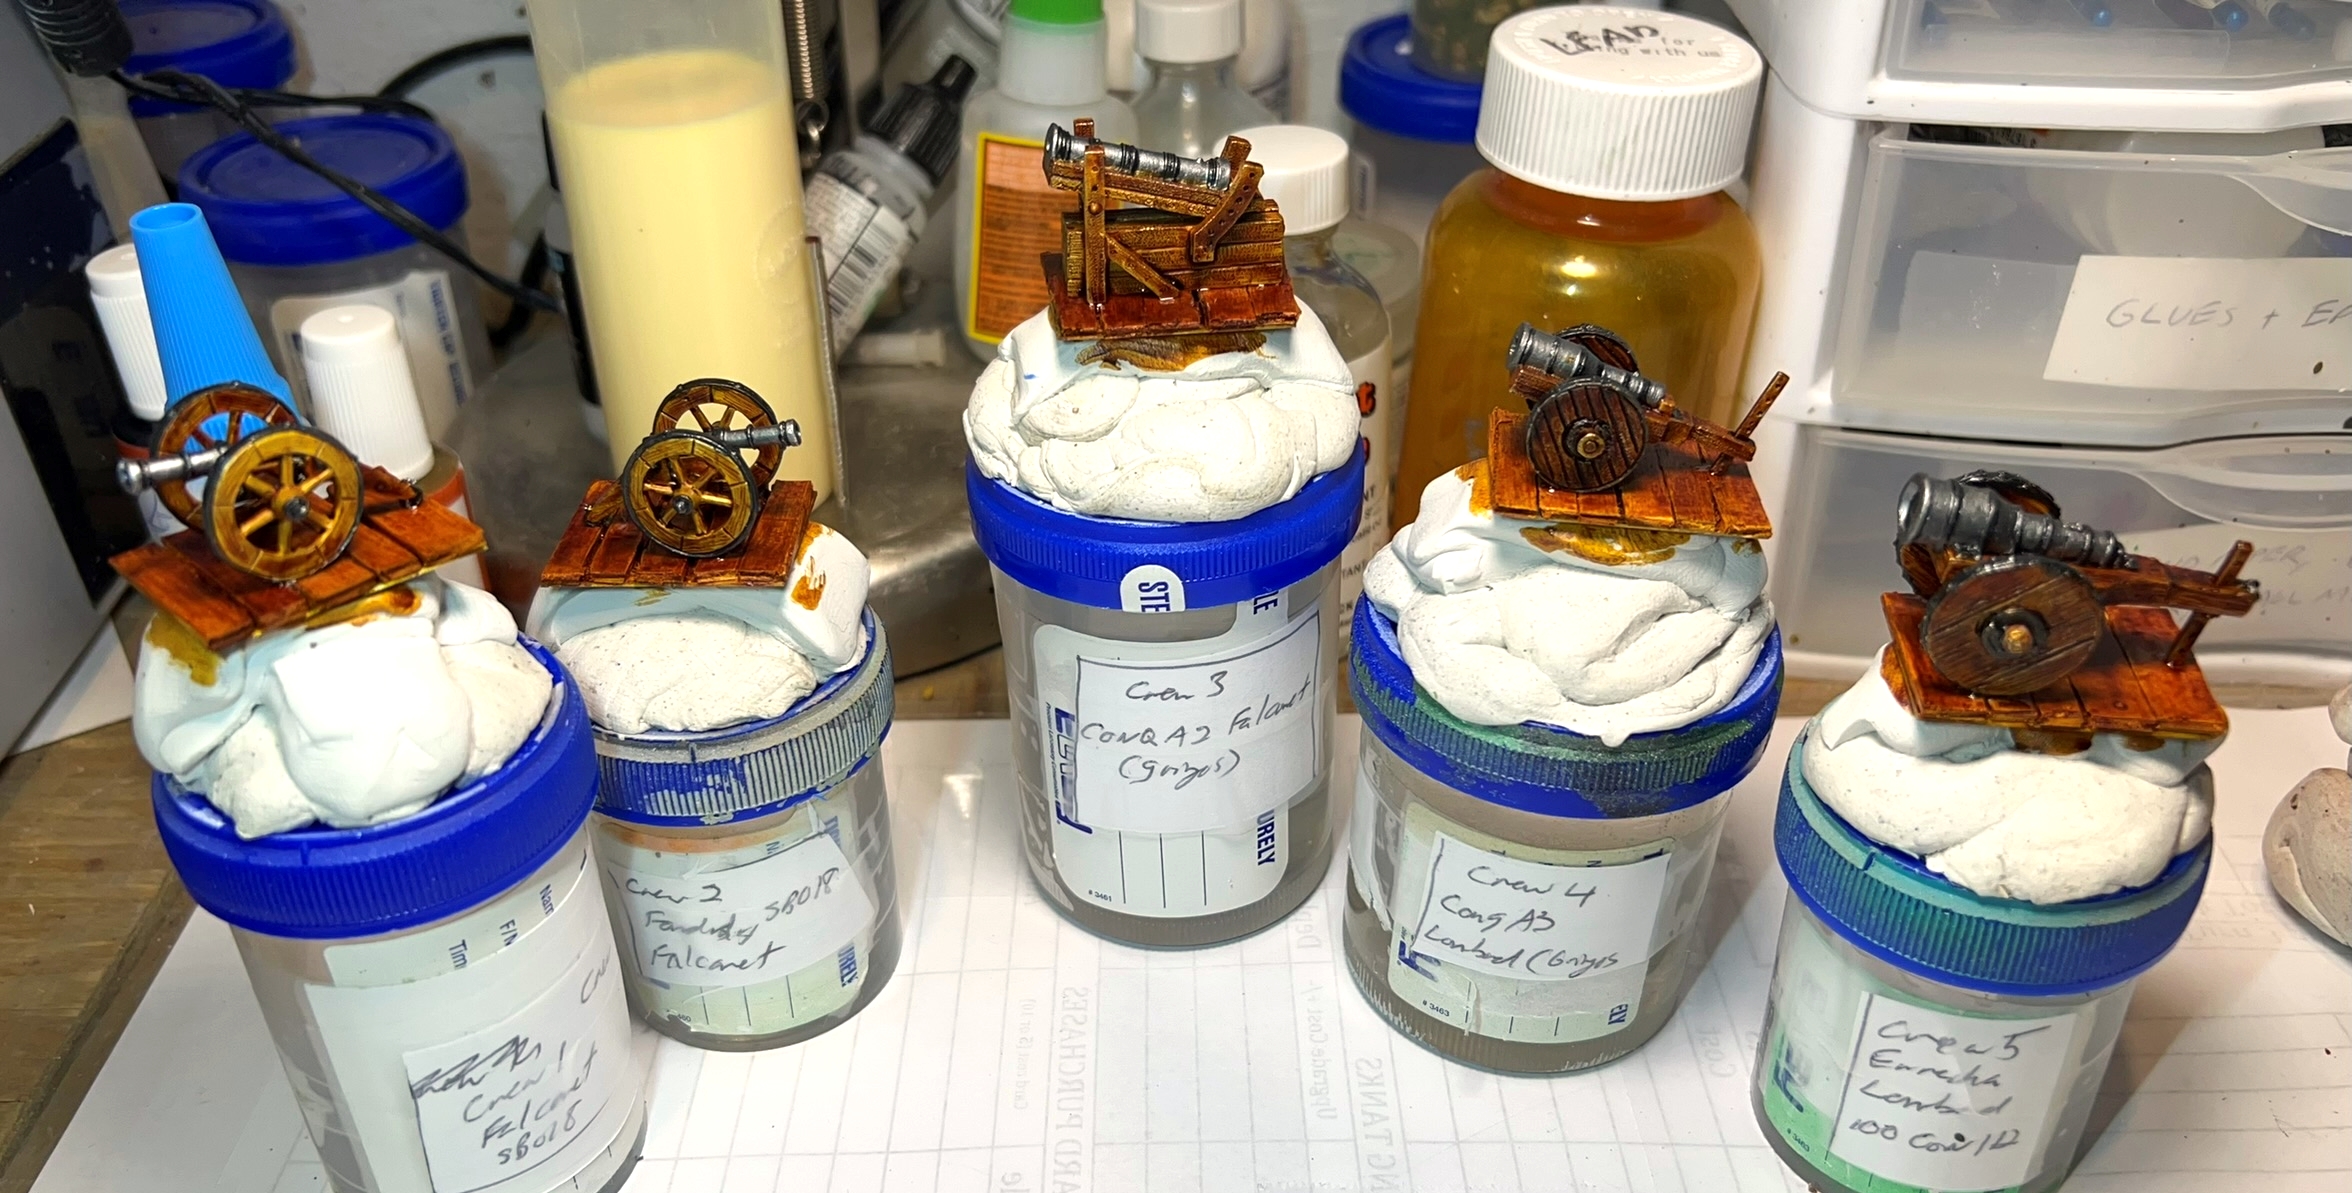
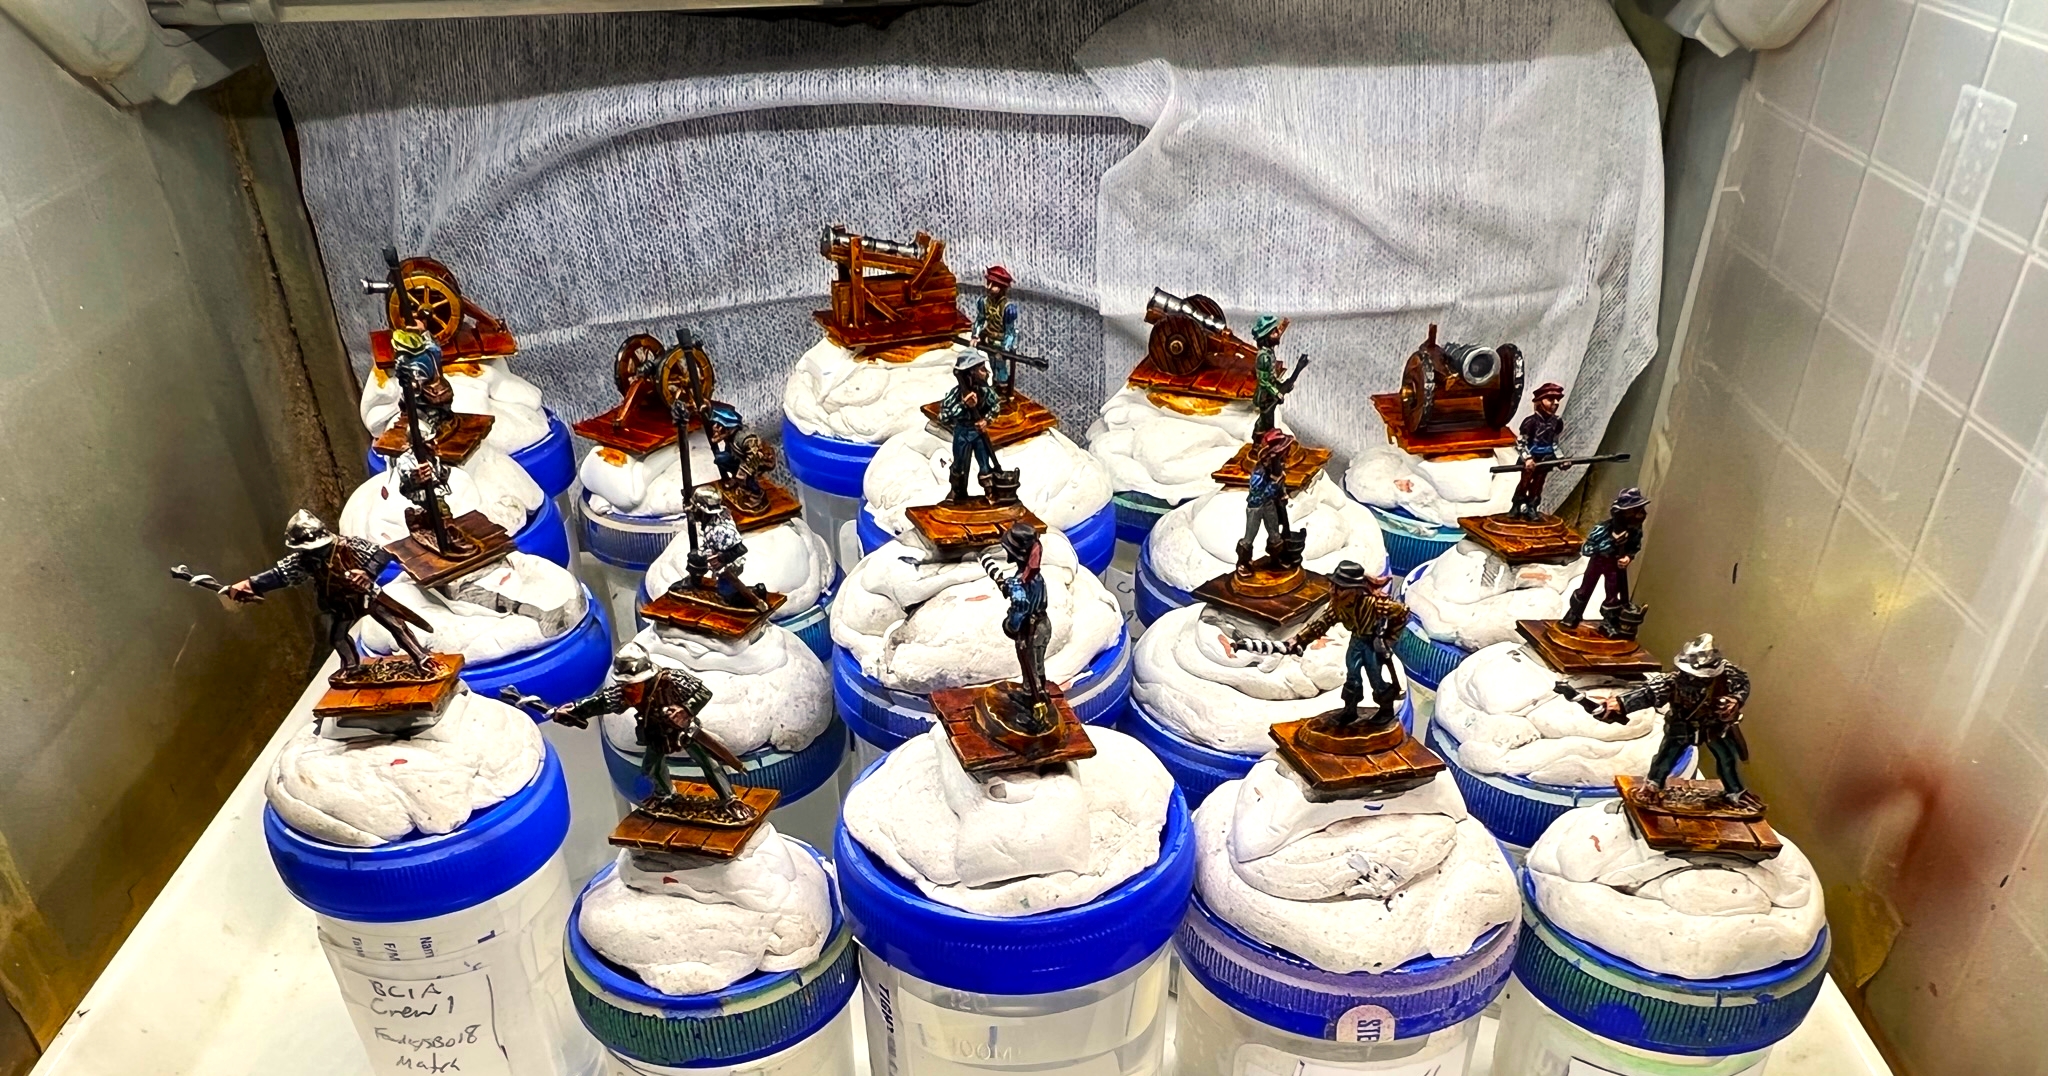
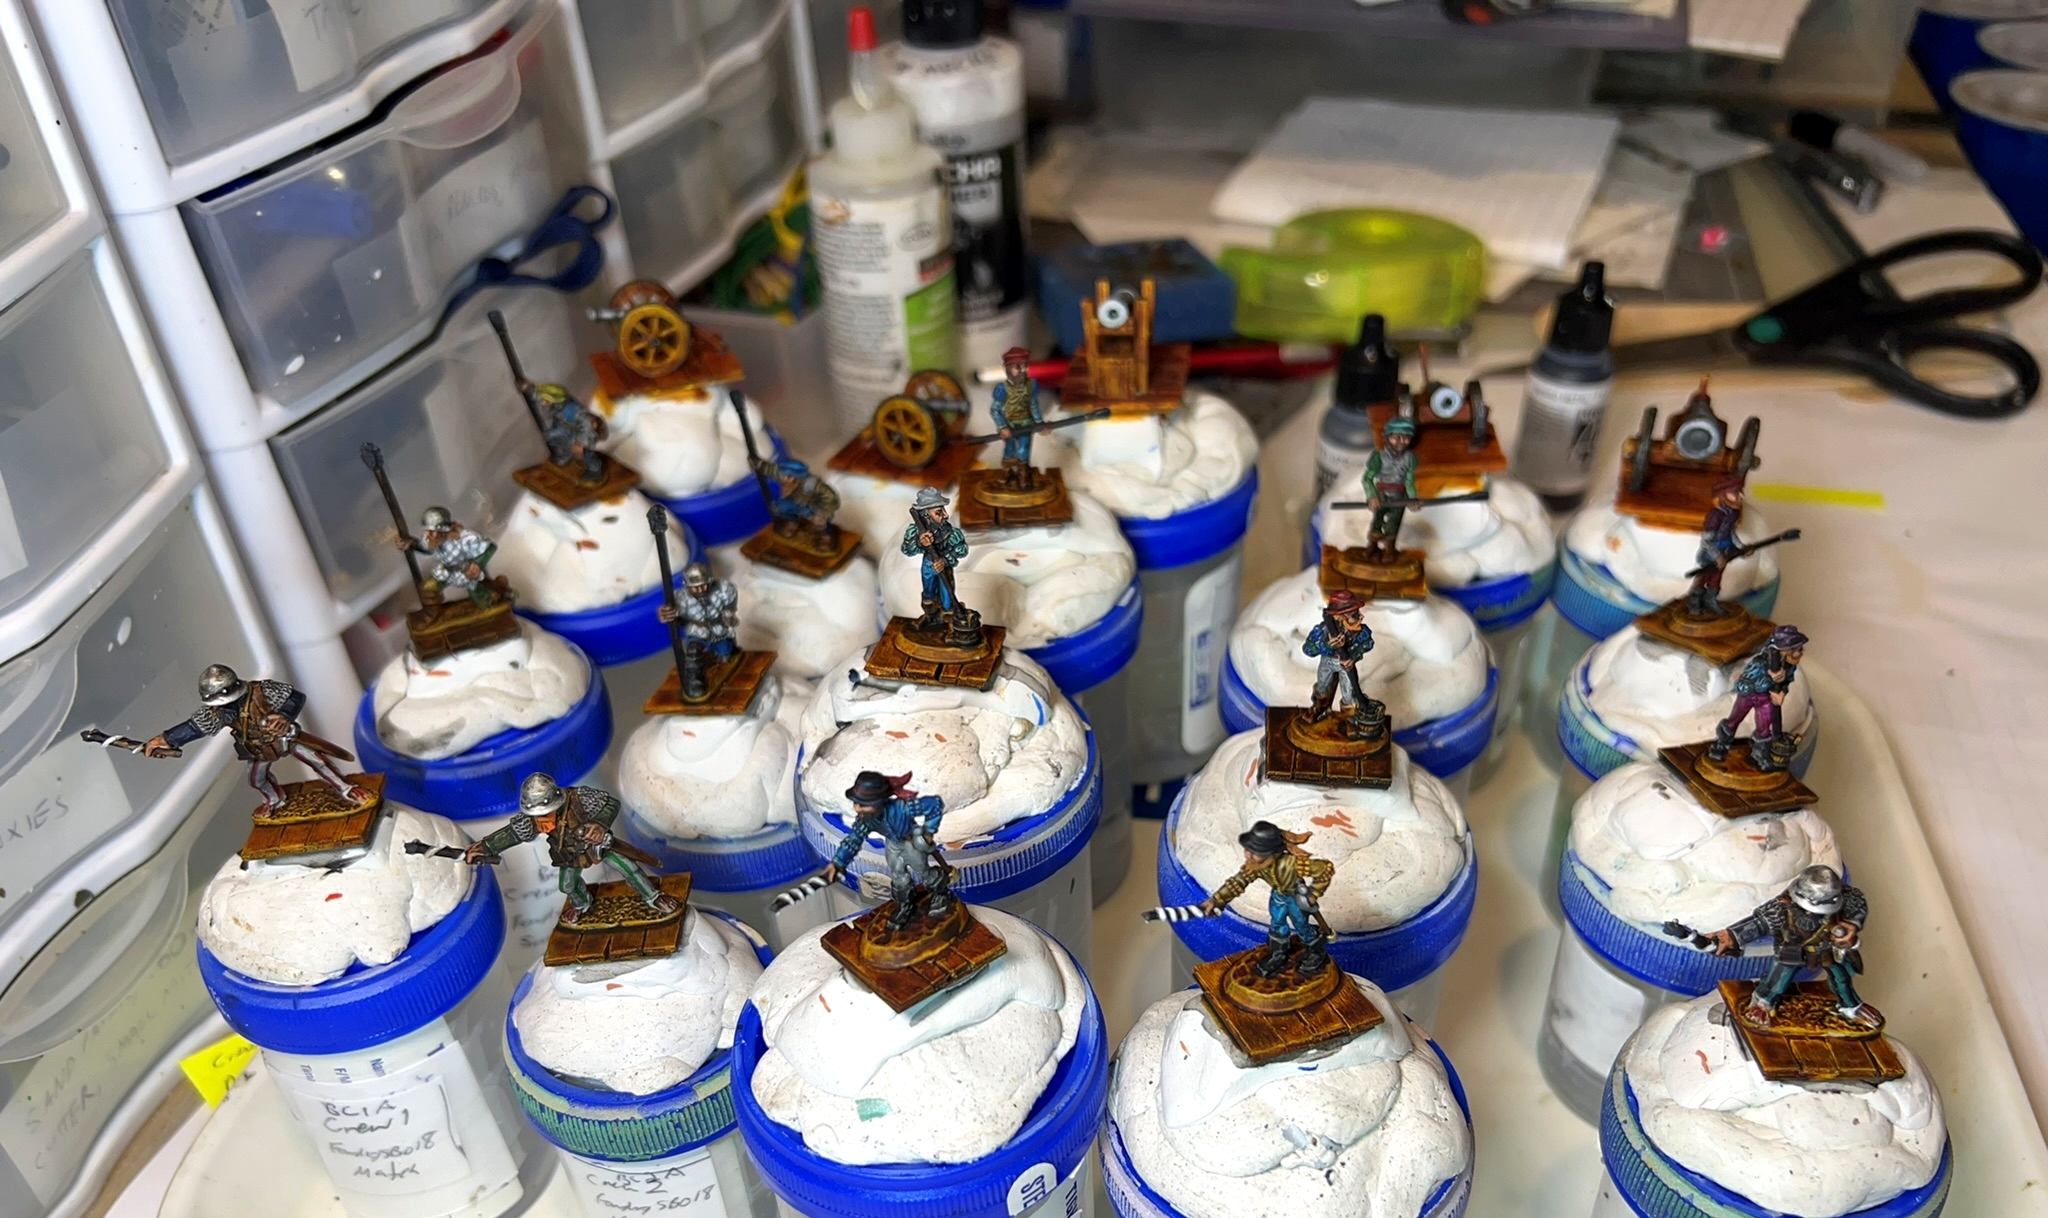
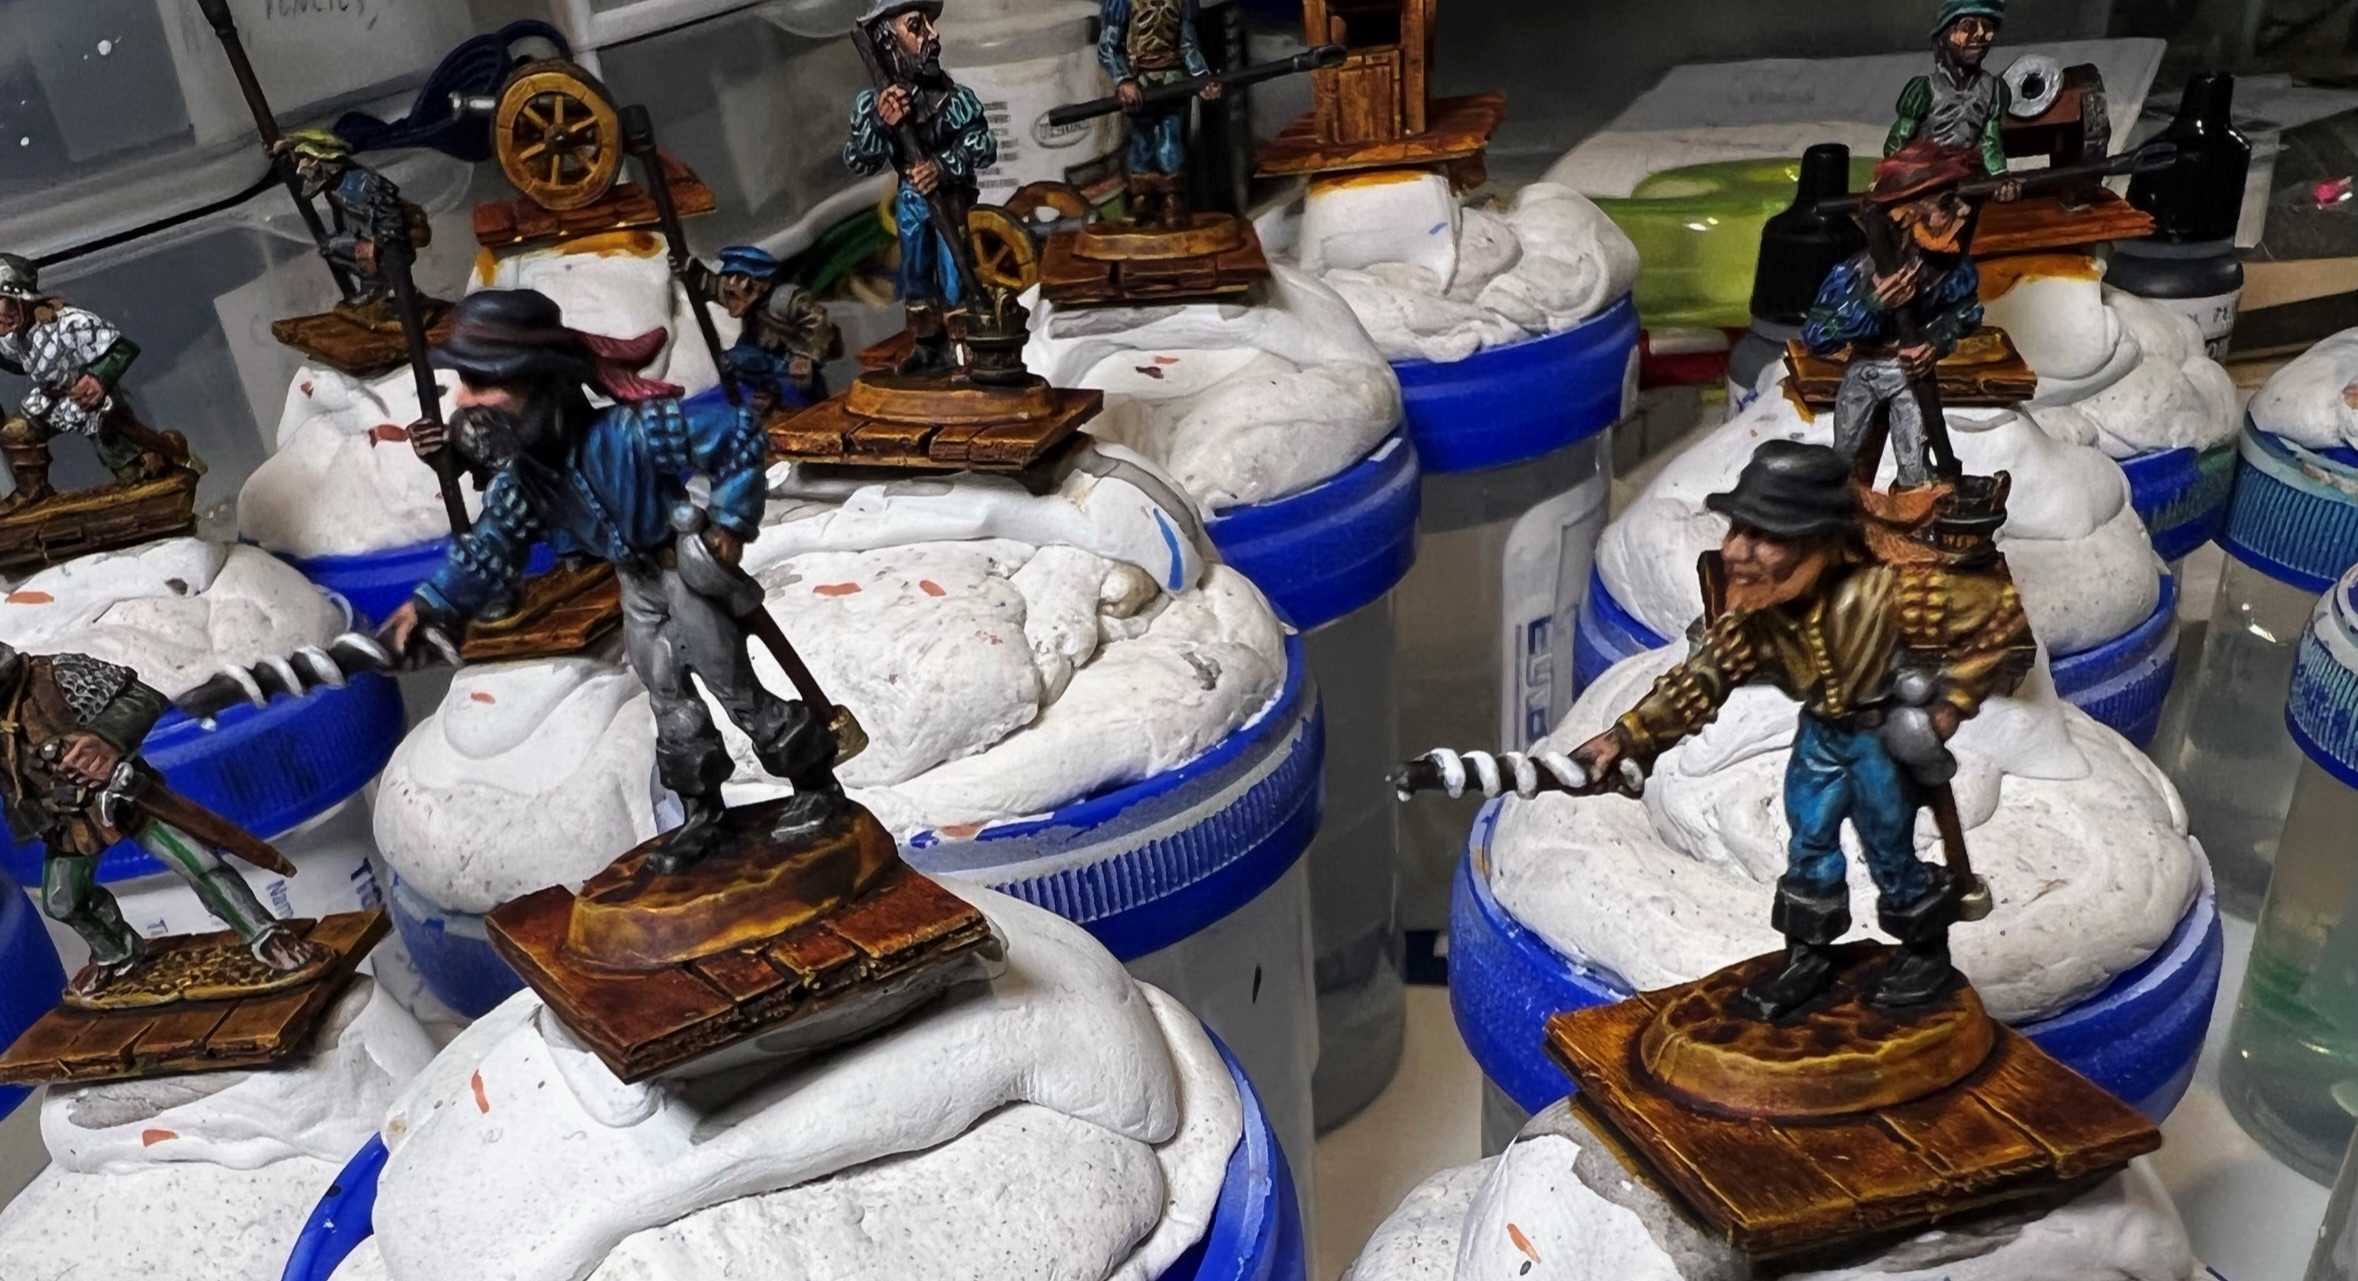
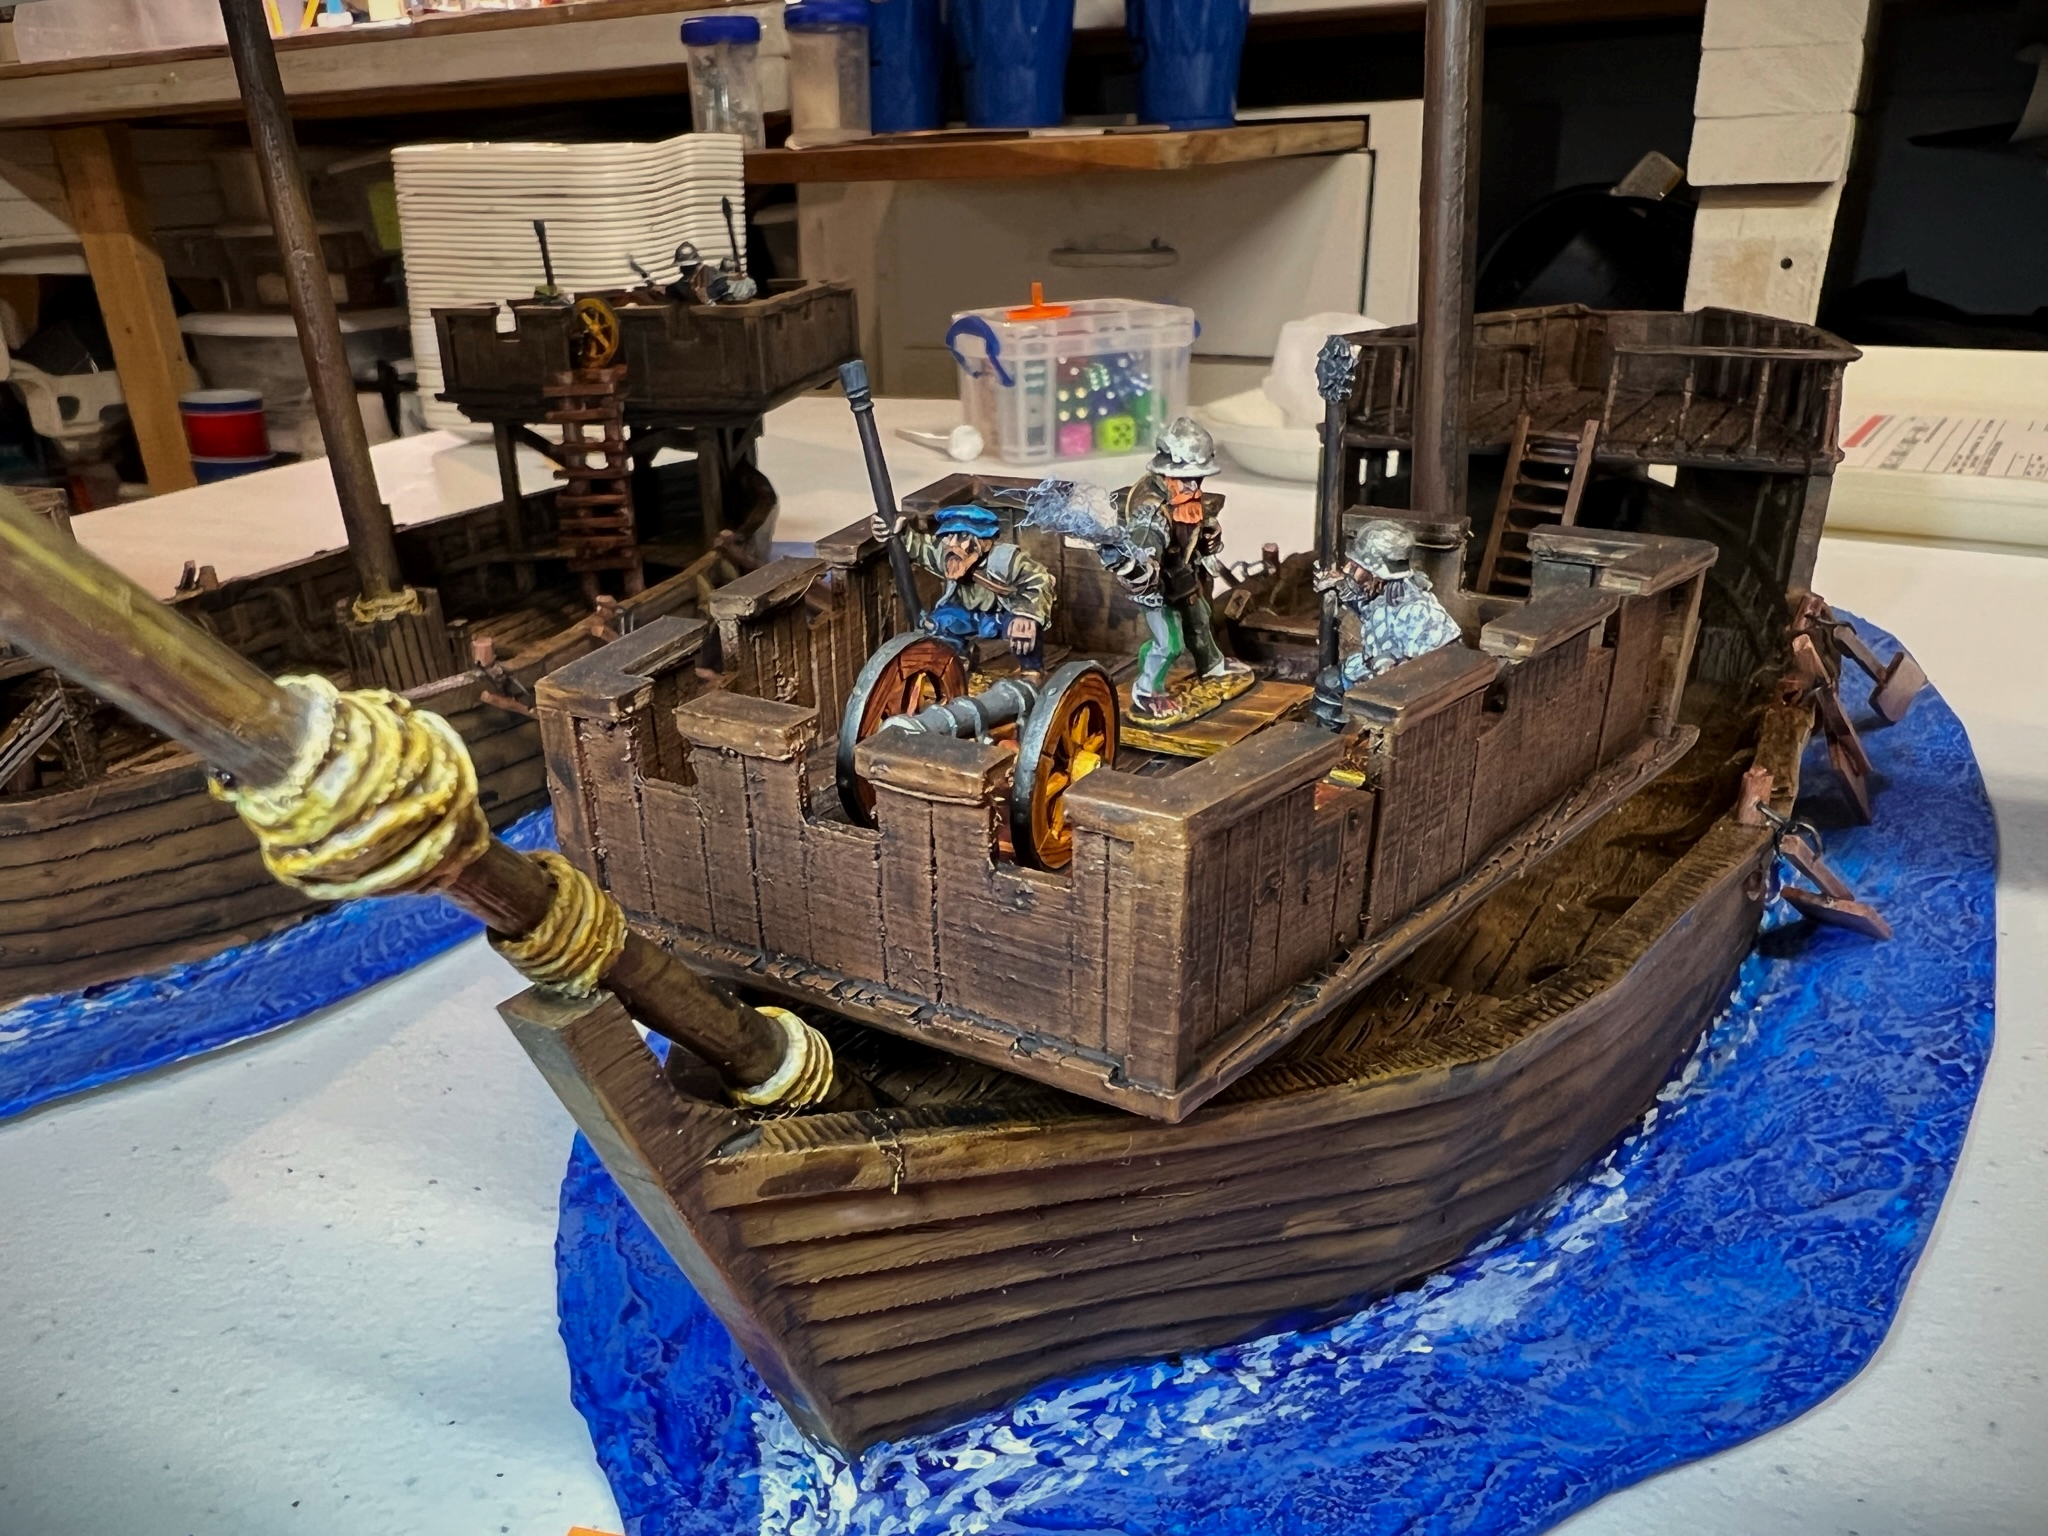
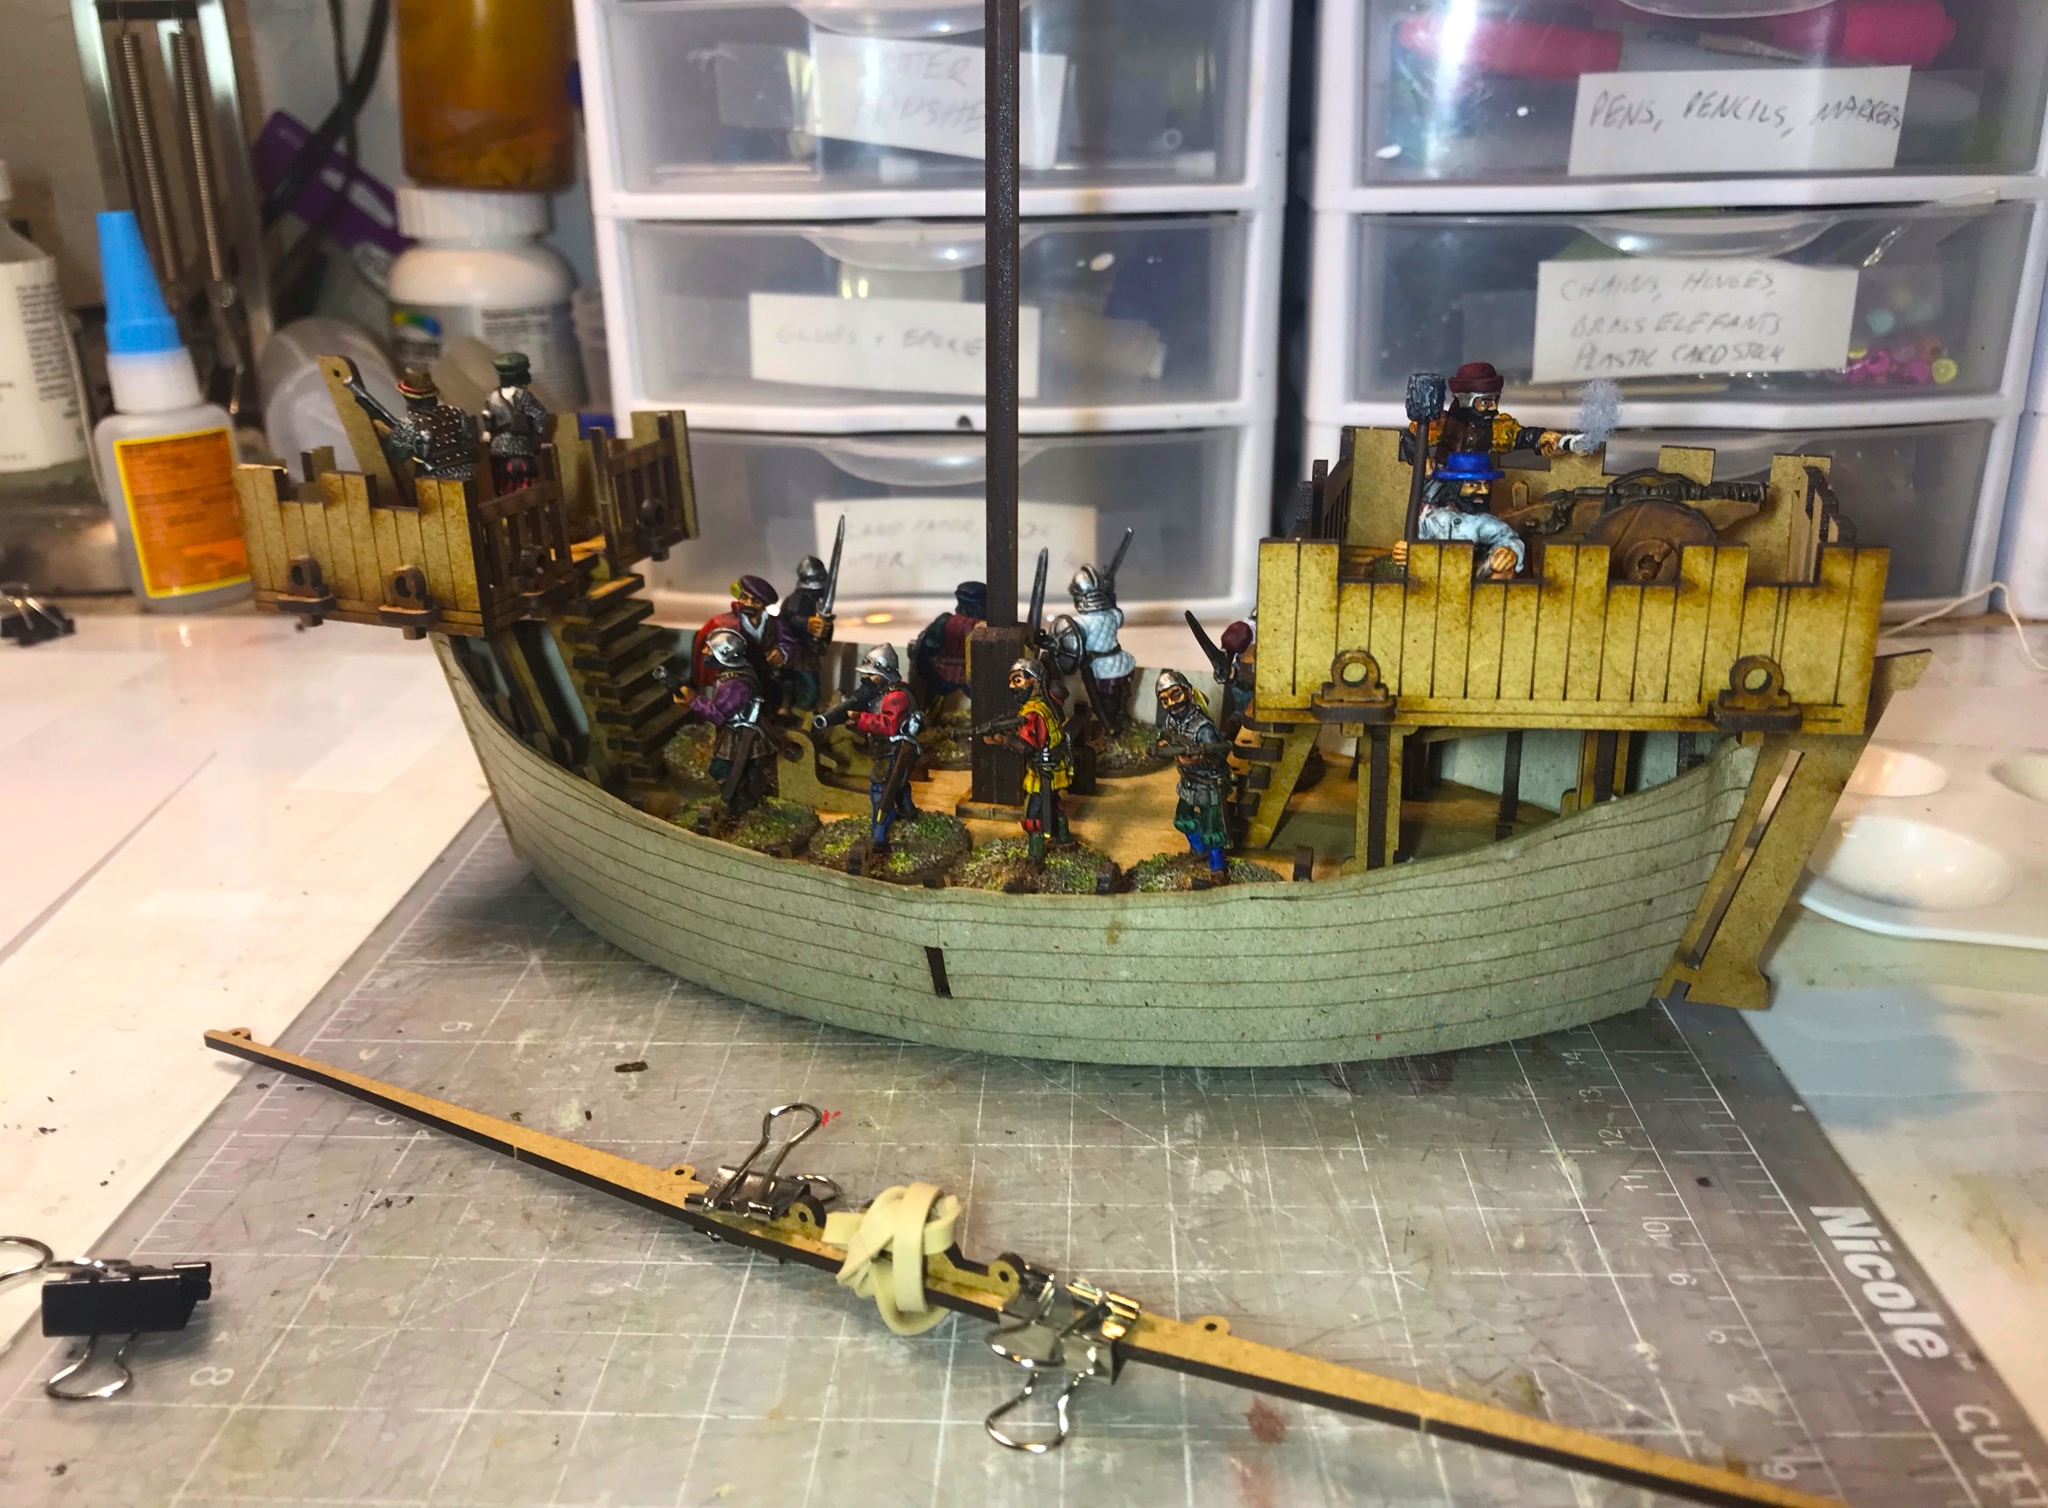
Finished eye candy time! Here are the completed cannon crews on each ship – plus I loaded up the ships with their entire crews for good measure.
El Dólar
El Dólar falconet and artillery ElementEl Dólar with entire crew
El Gregorio
El Gregorio falconet and artillery ElementEl Gregorio with entire crew
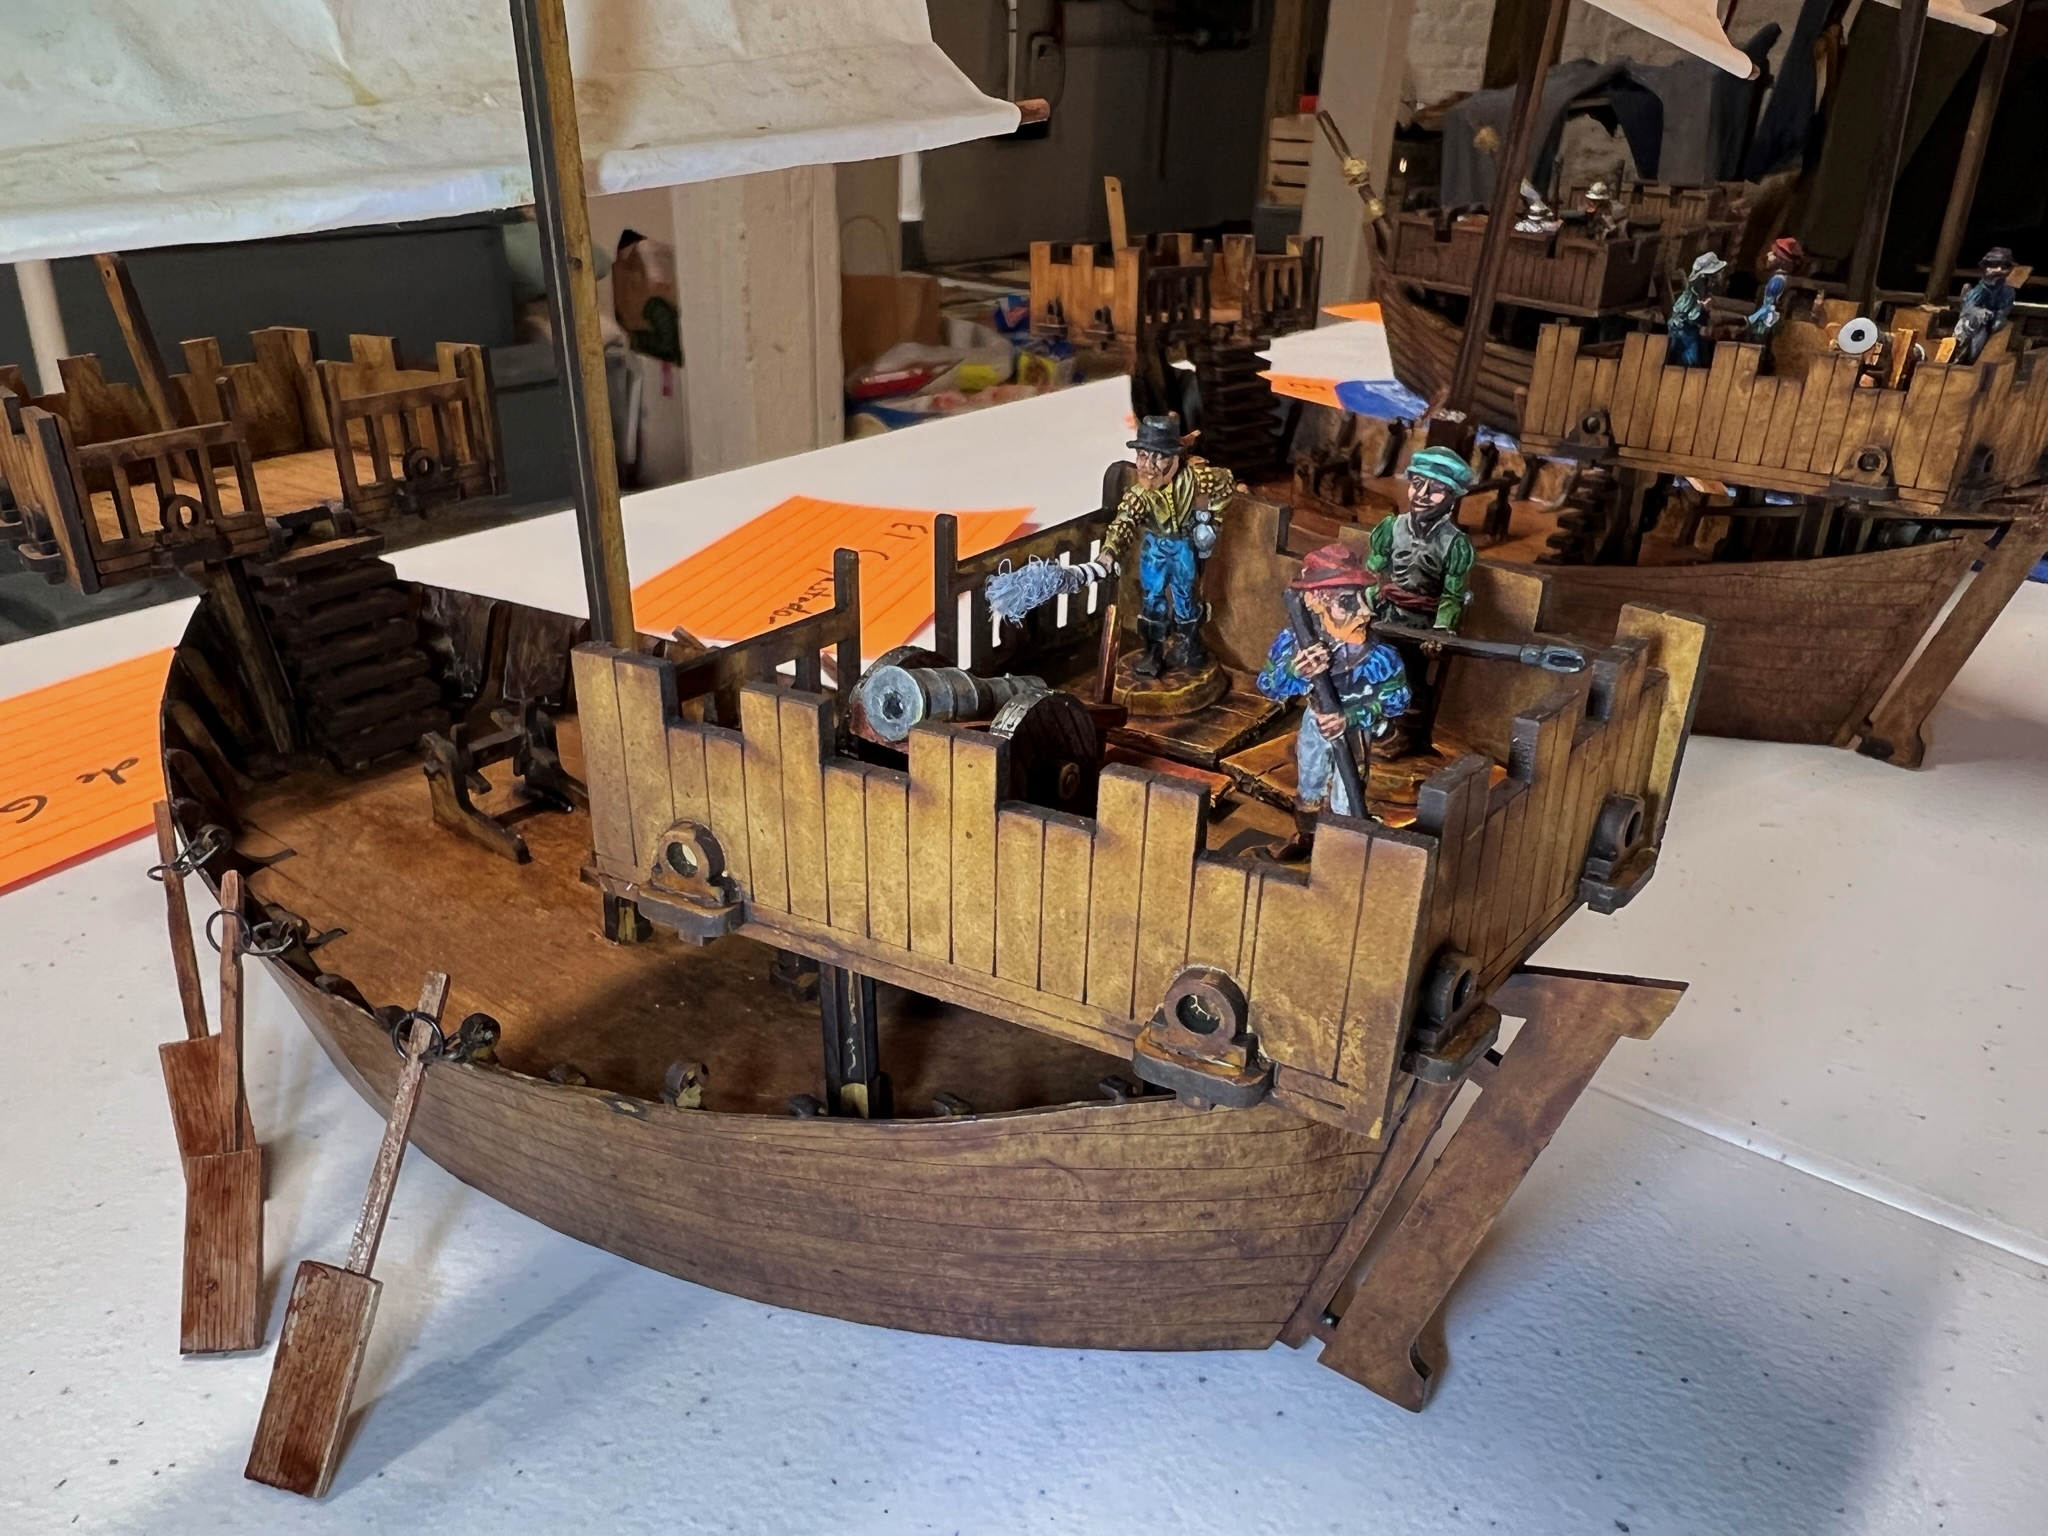
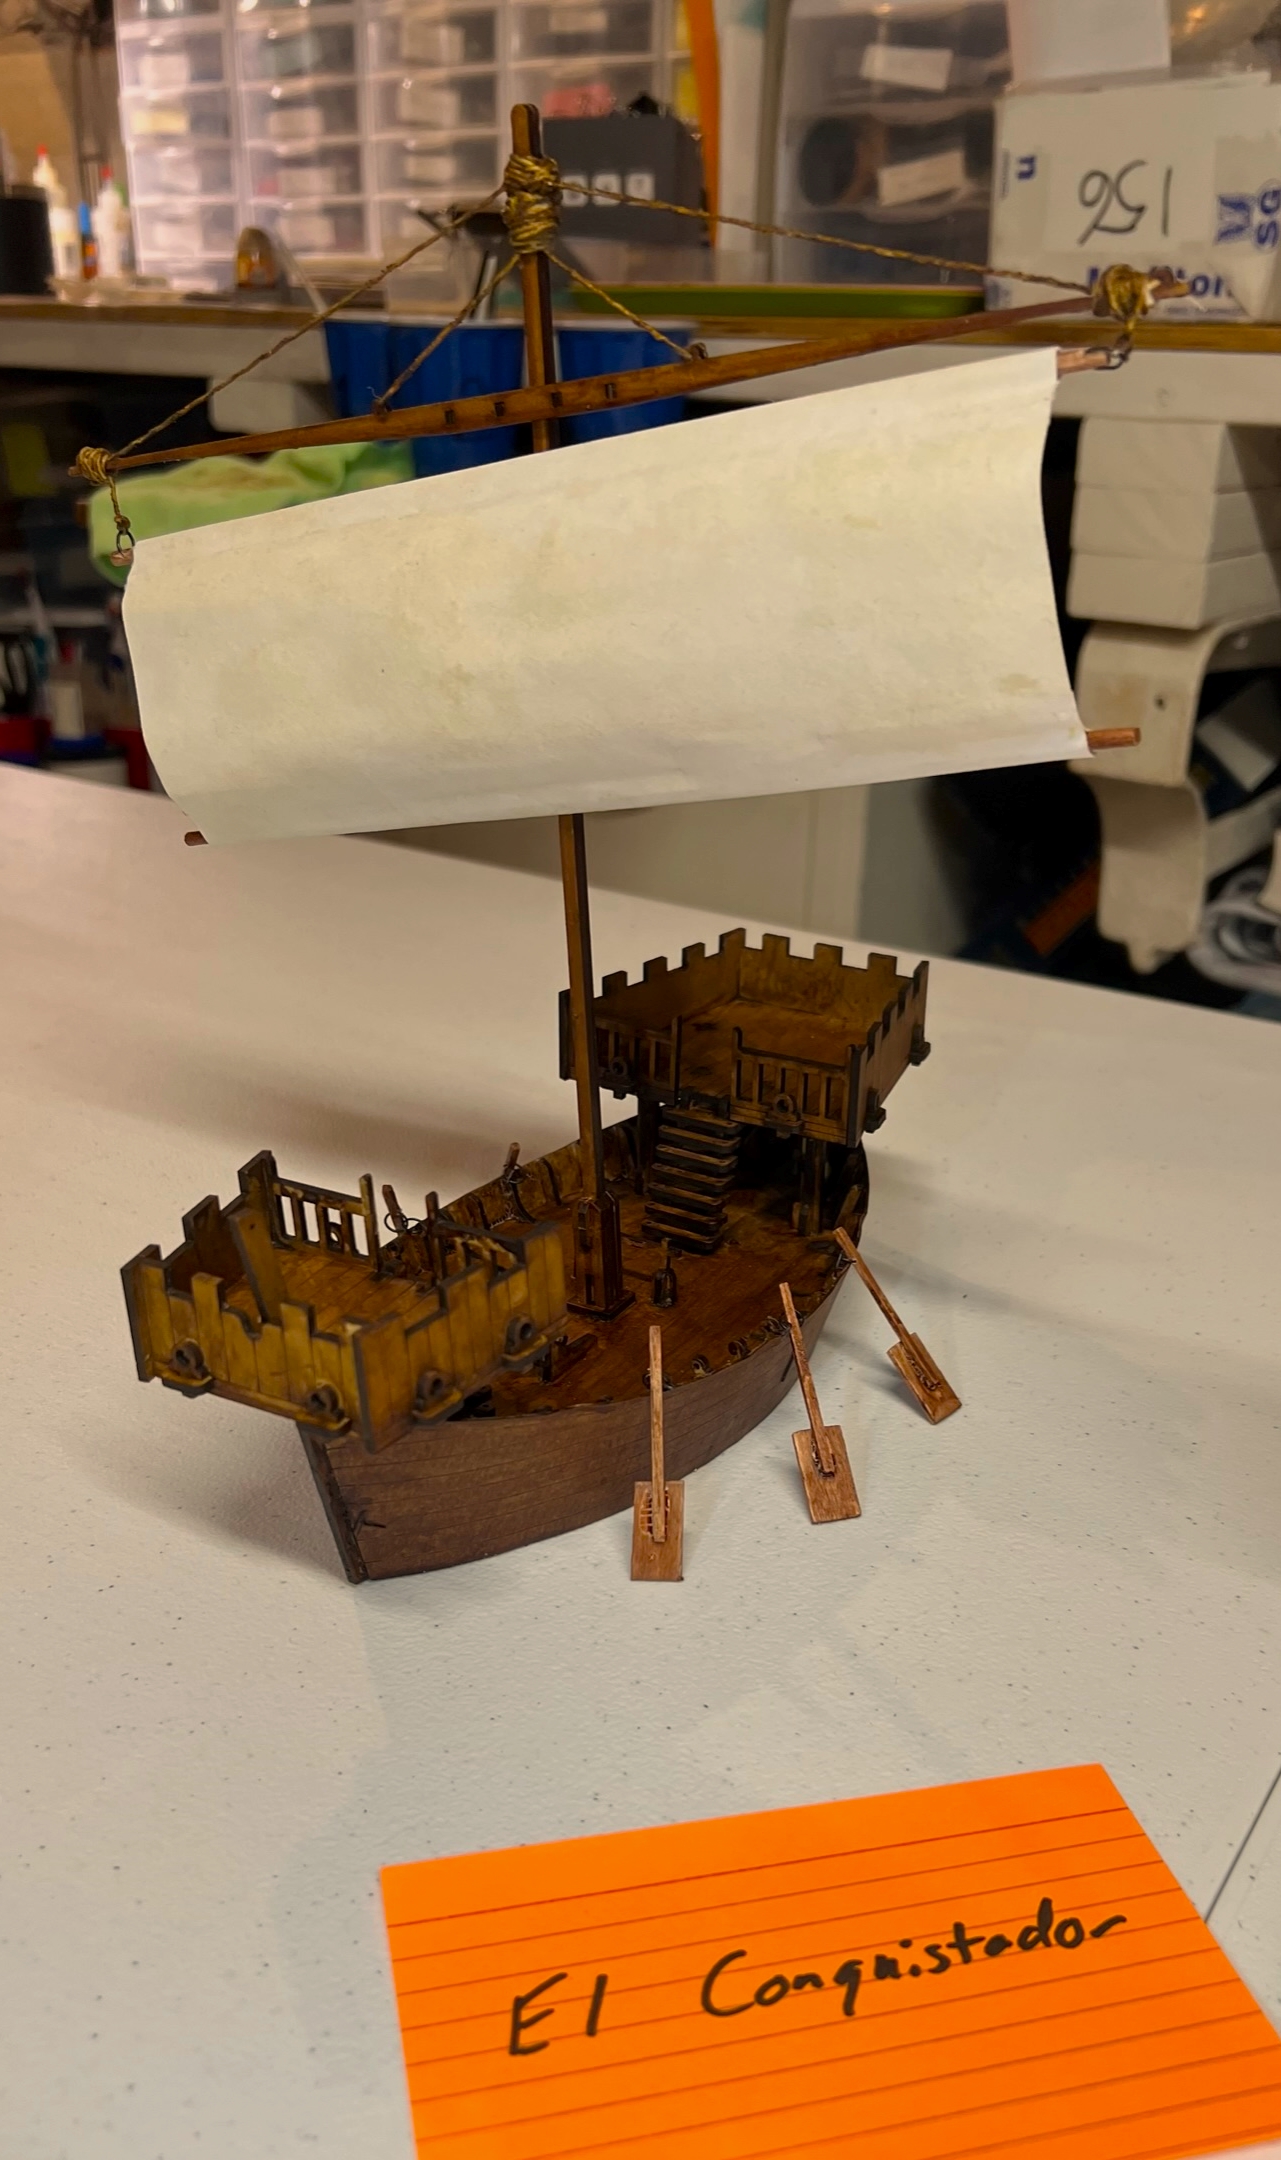
El Conquistador
El Conquistador lombard and artillery ElementA fully crewed El Conquistador
El Perro de Guerra
El Perro de Guerra falconet and artillery ElementEl Perro de Guerra and her entire crew
El Marcos
El Marcos lombard and artillery ElementEl Marcos firingEl Marcos fully crewed.
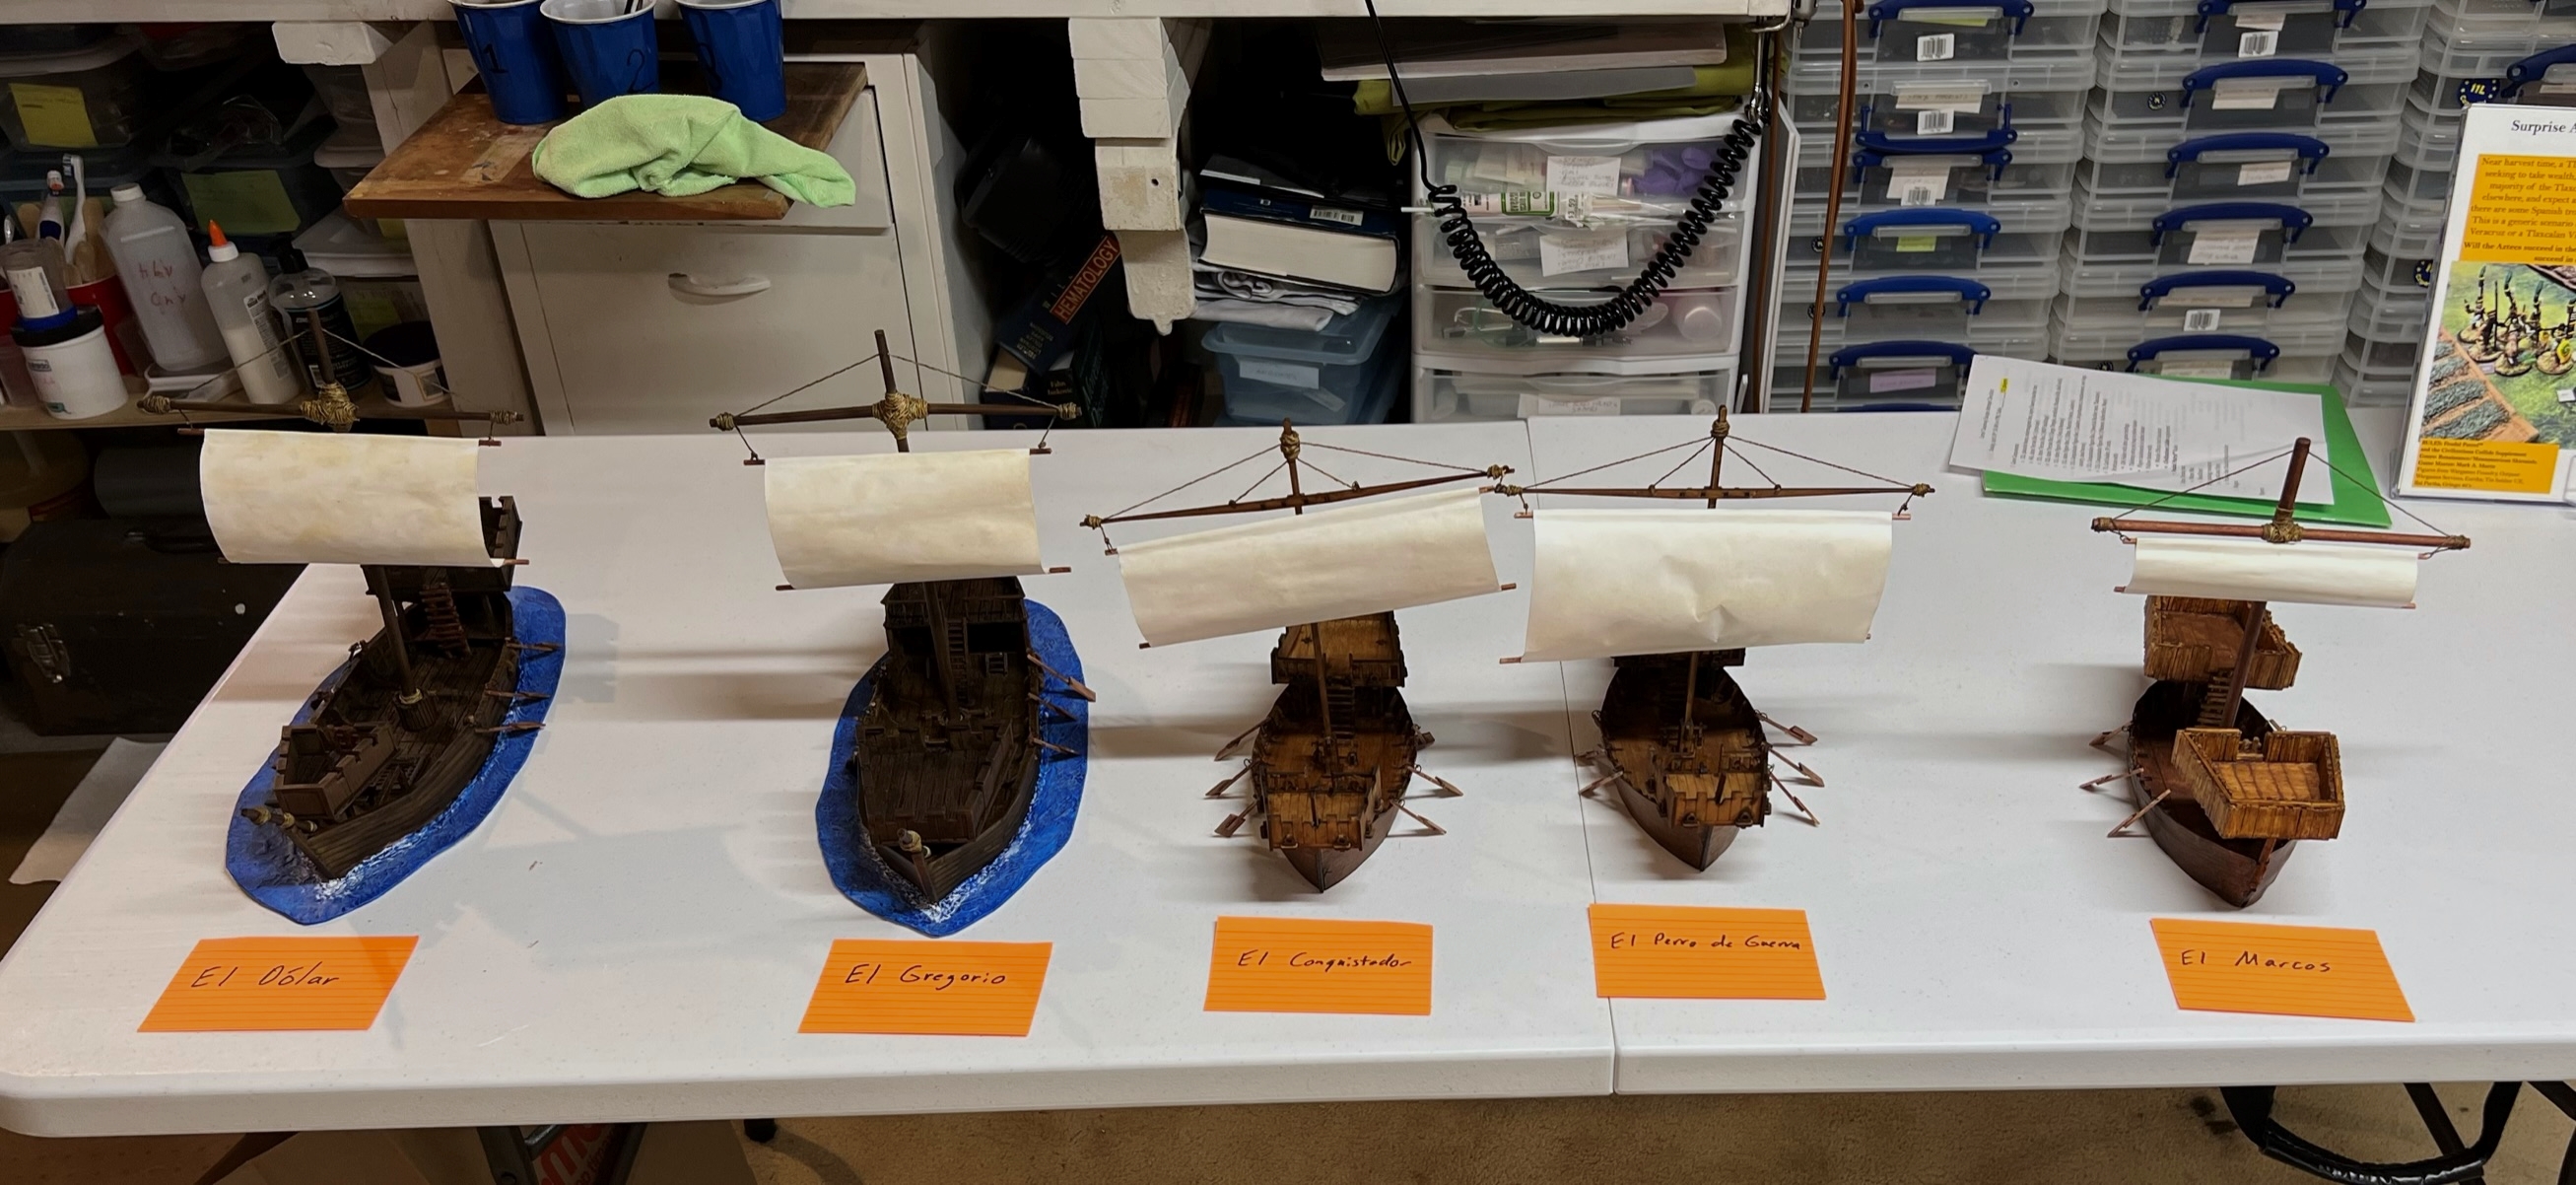
The Fleet Fully Crewed
Ready for HUZZAH! – oh wait, what about transport and storage?
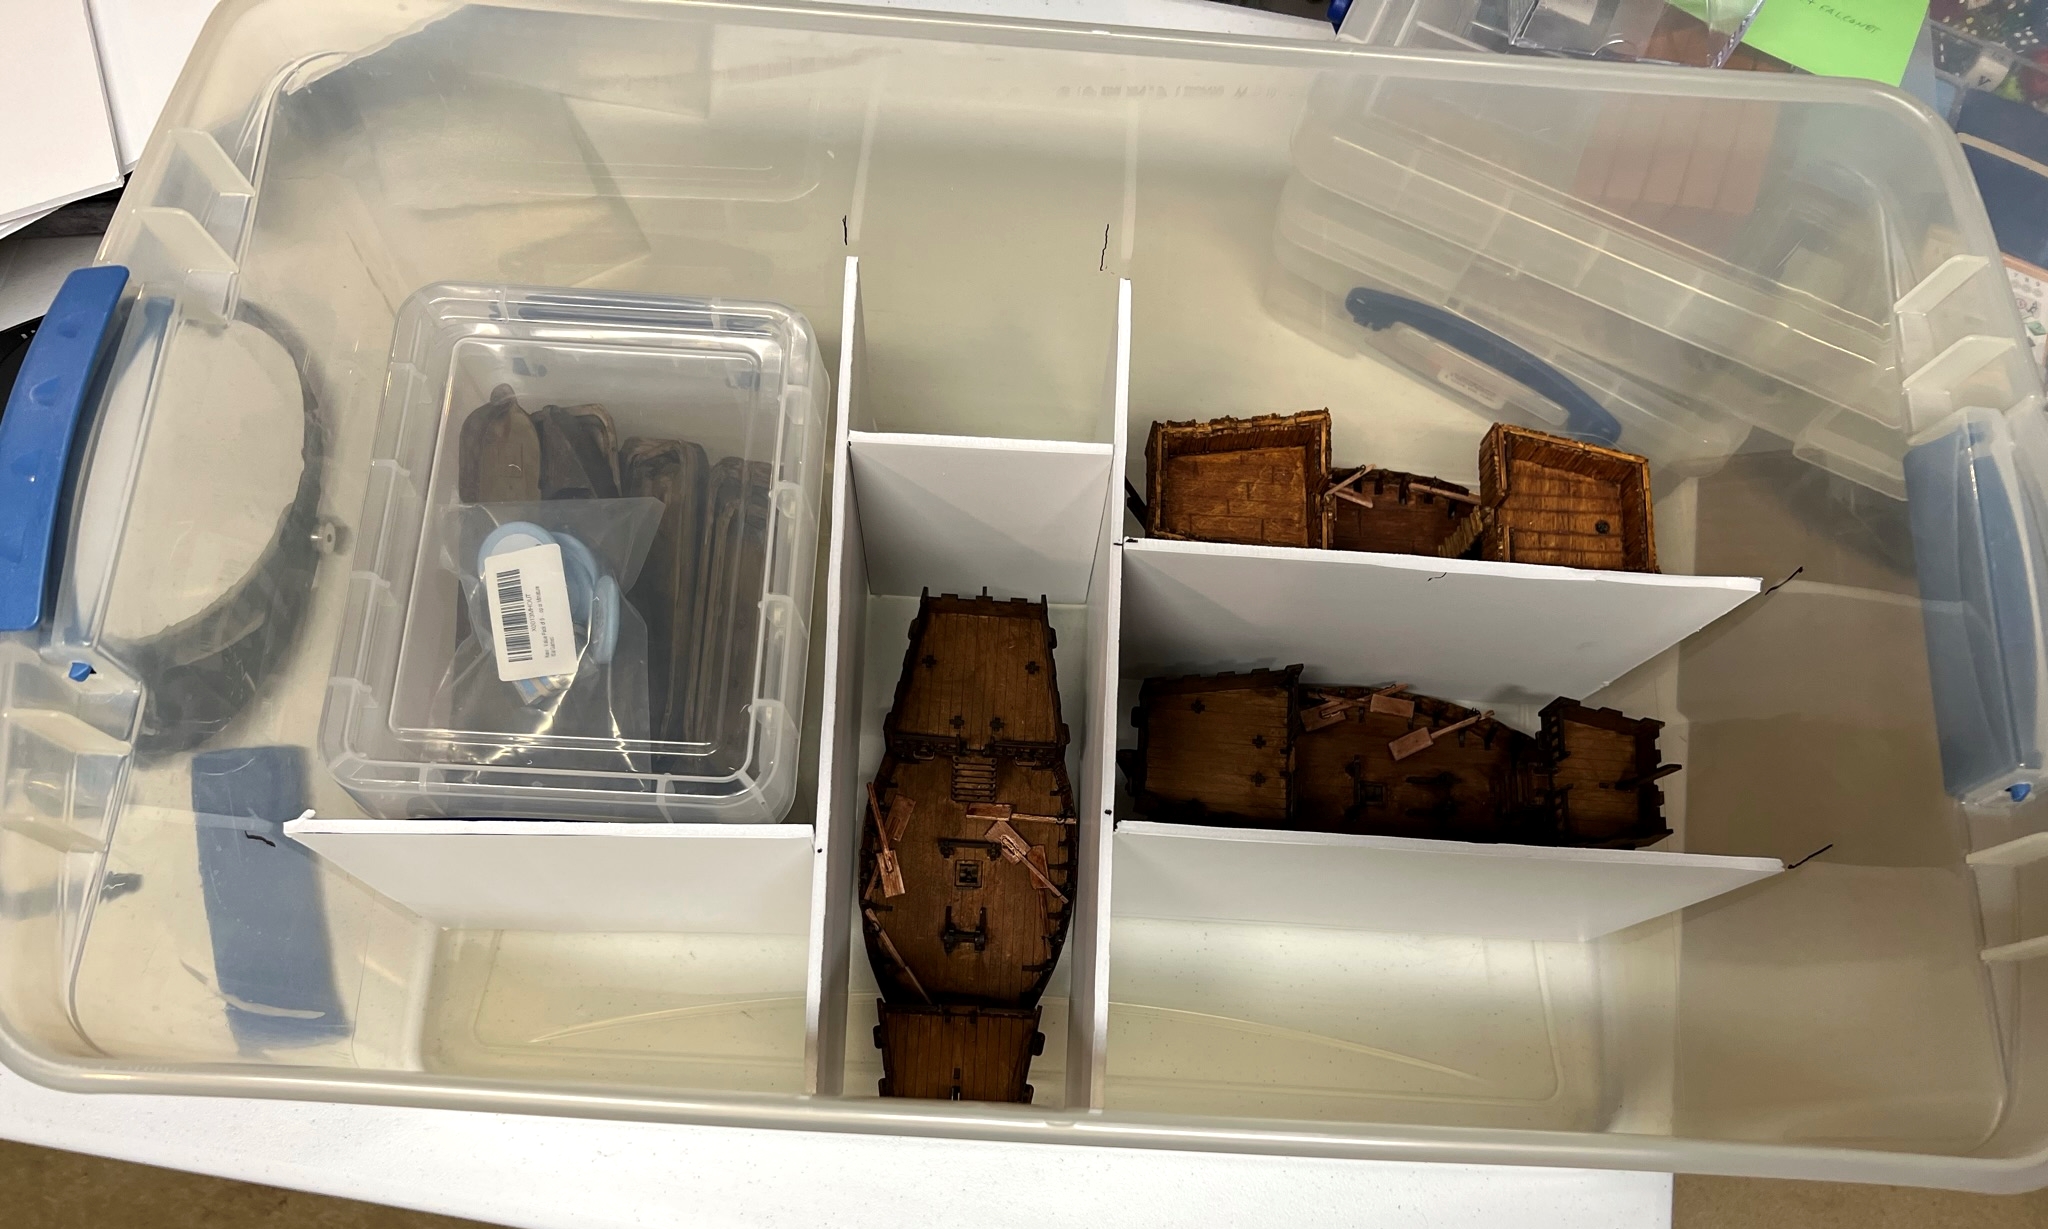
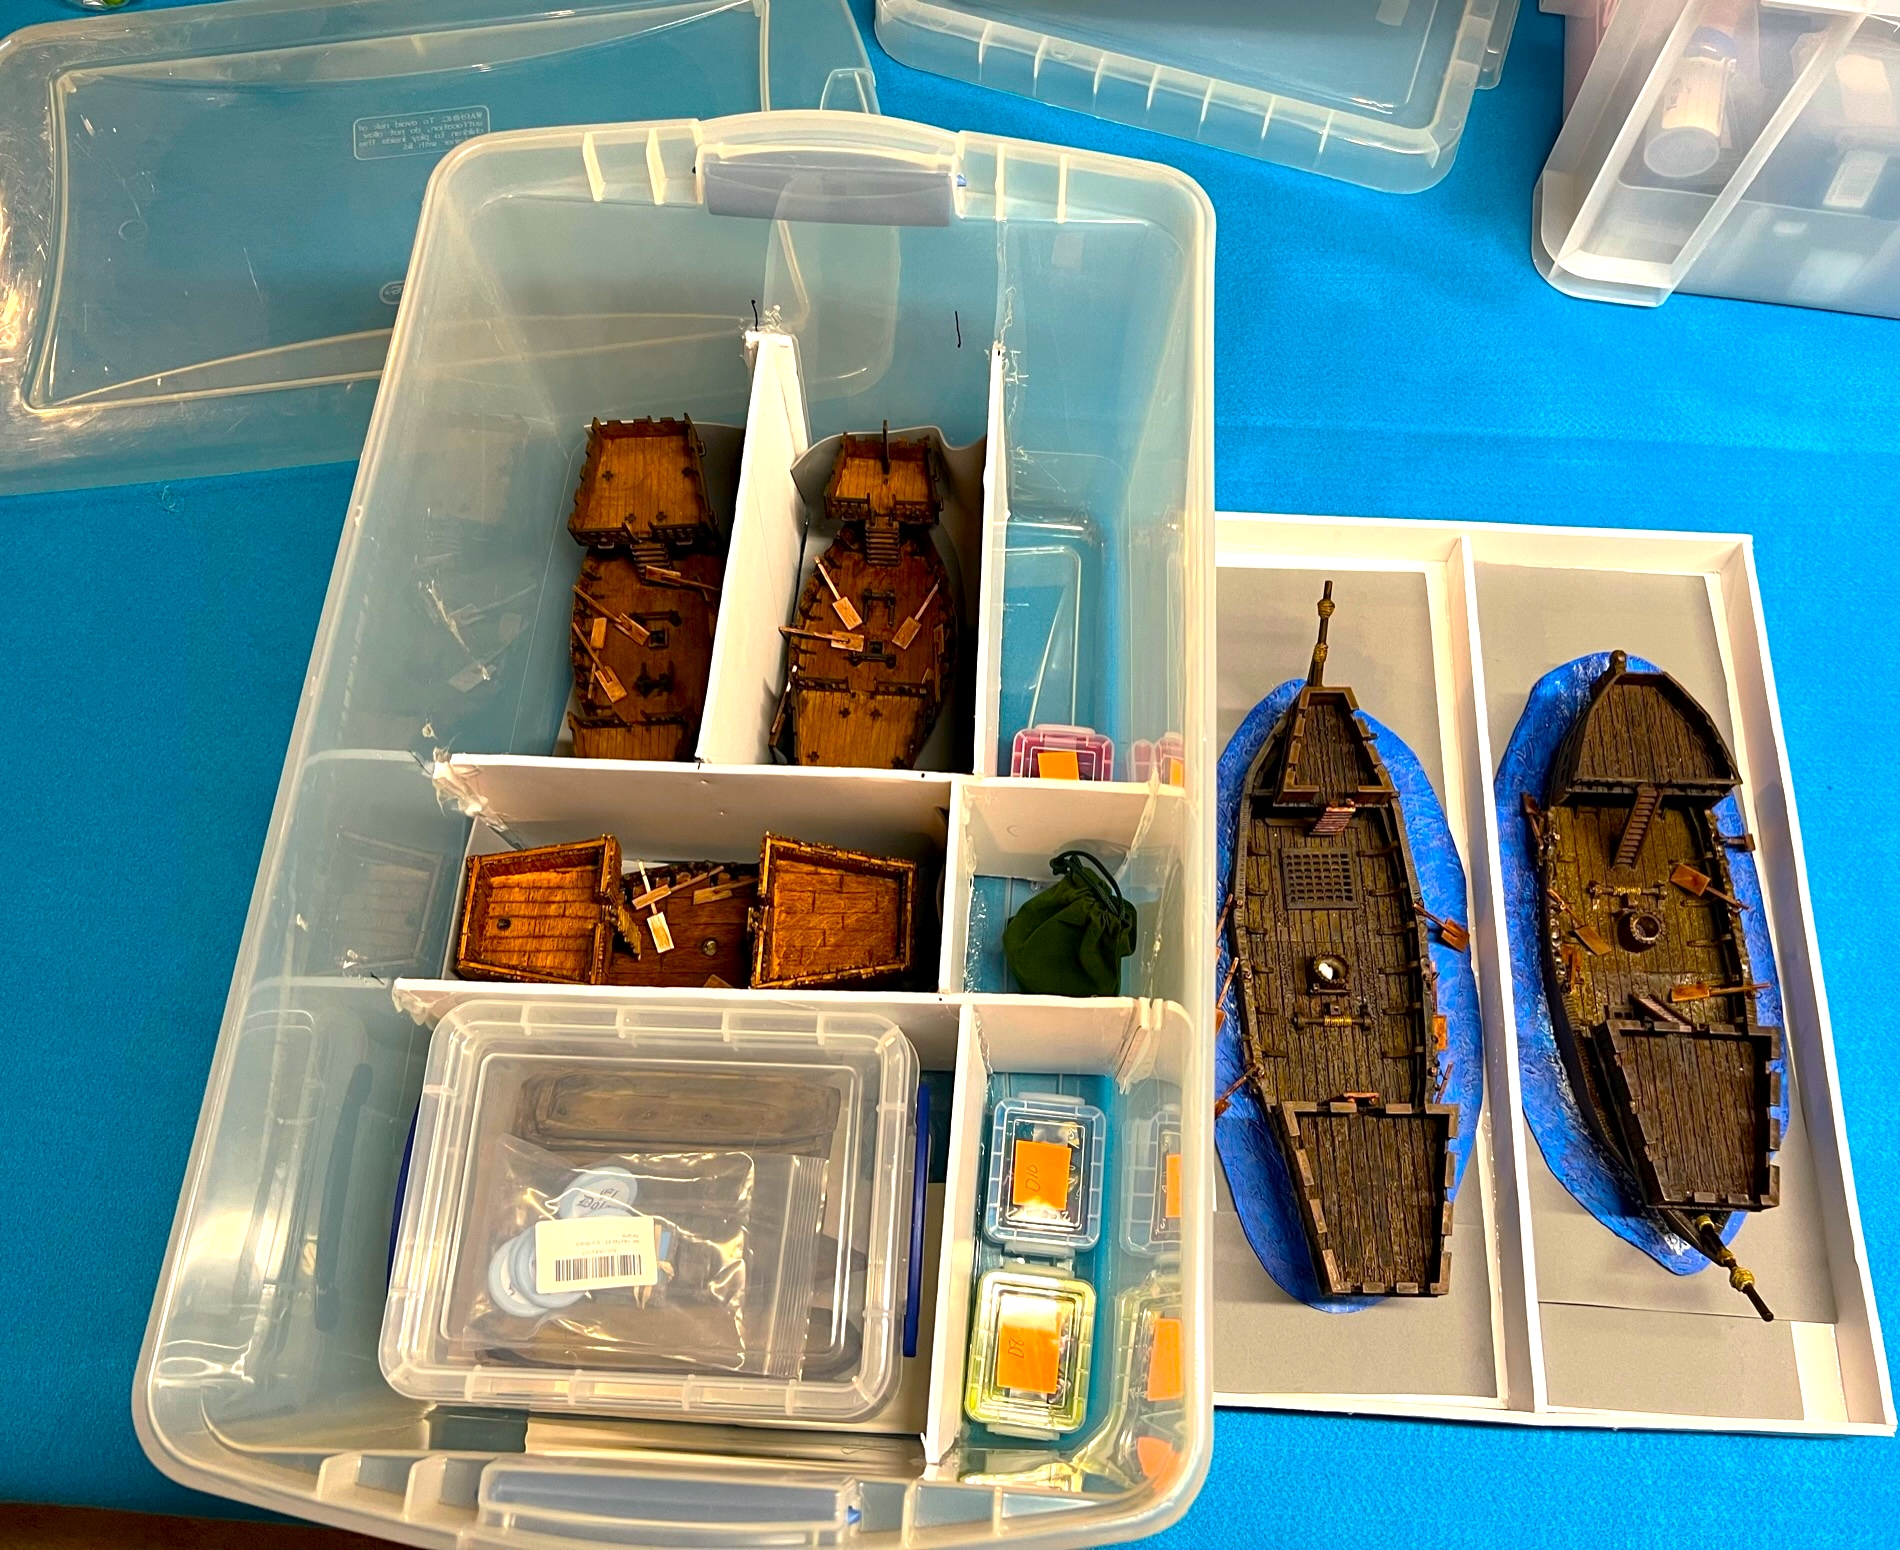
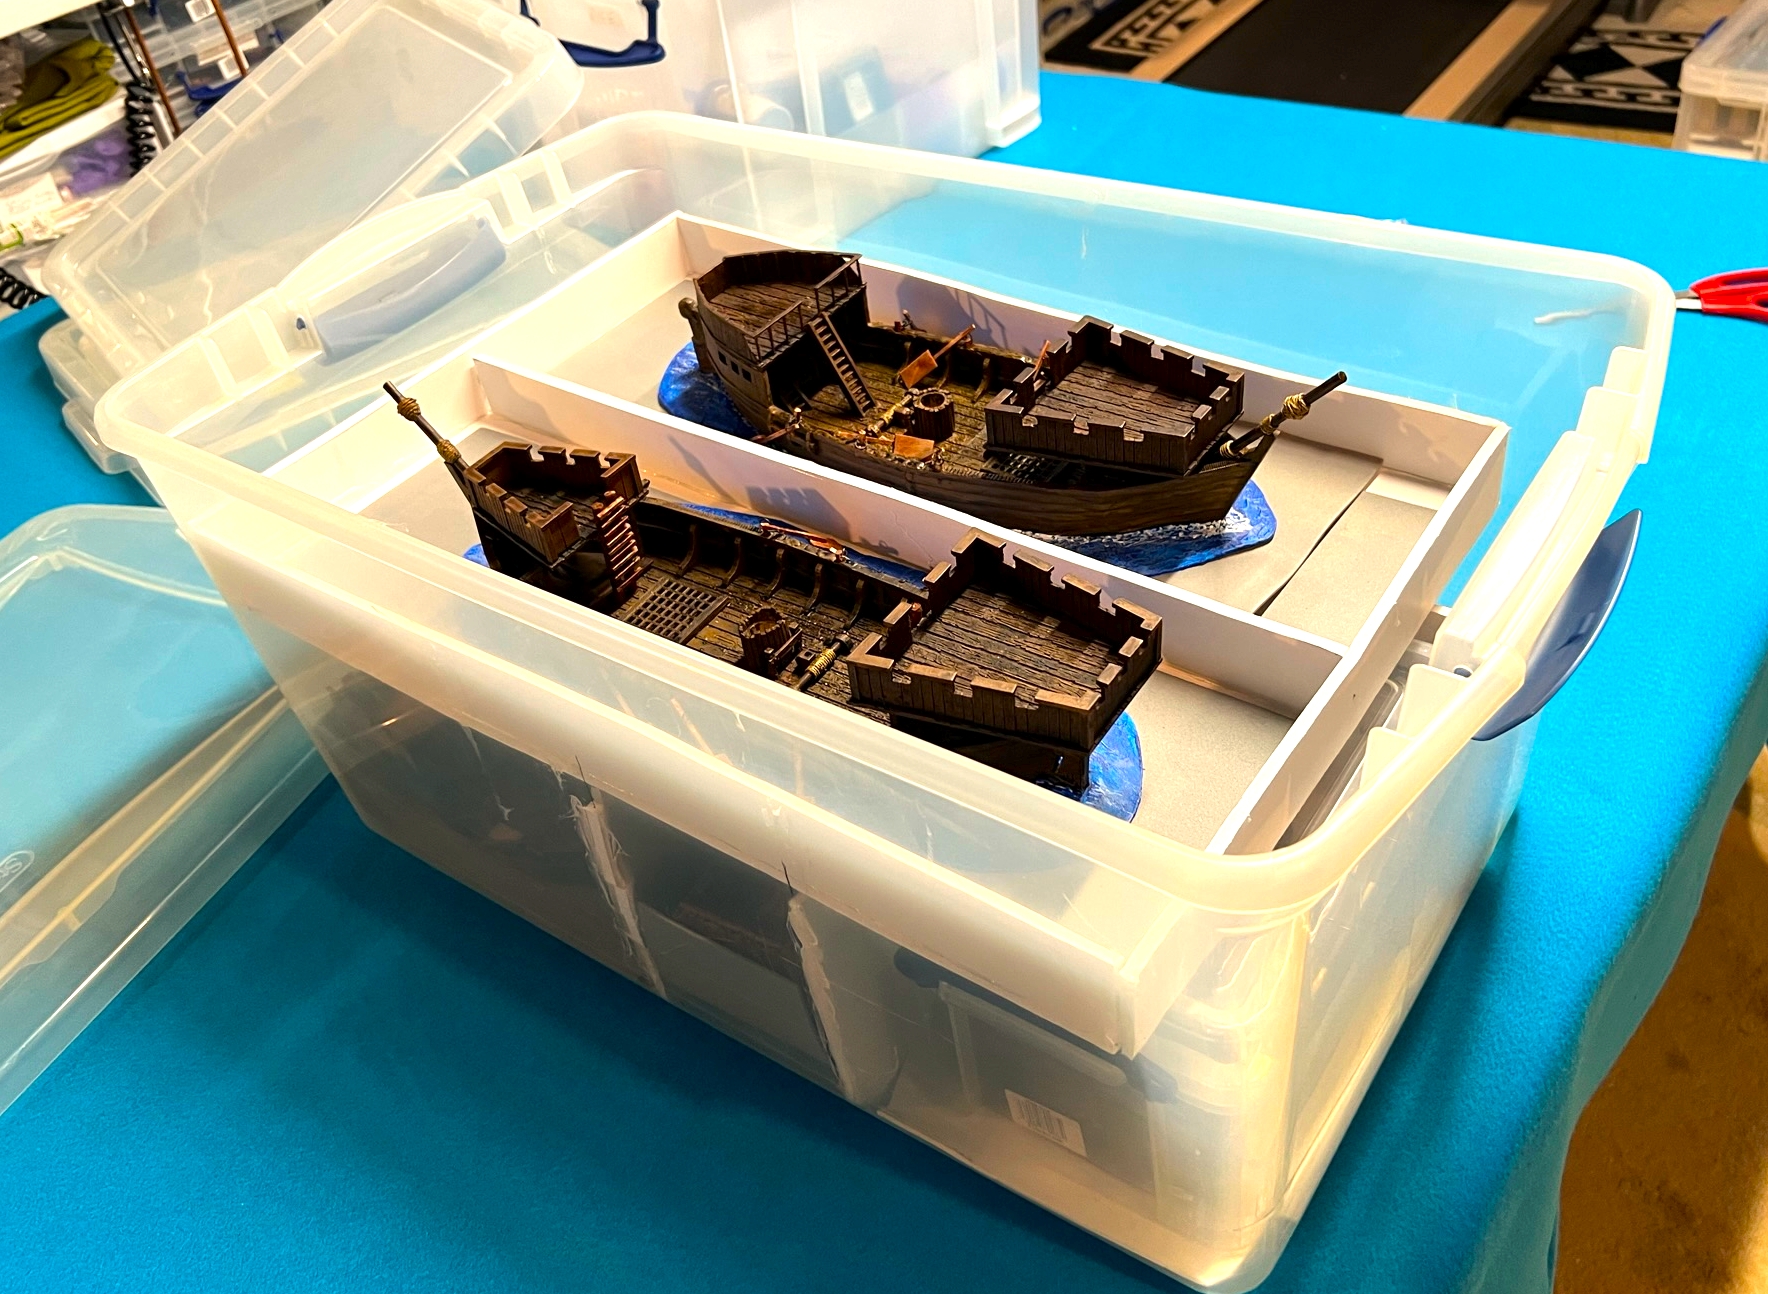
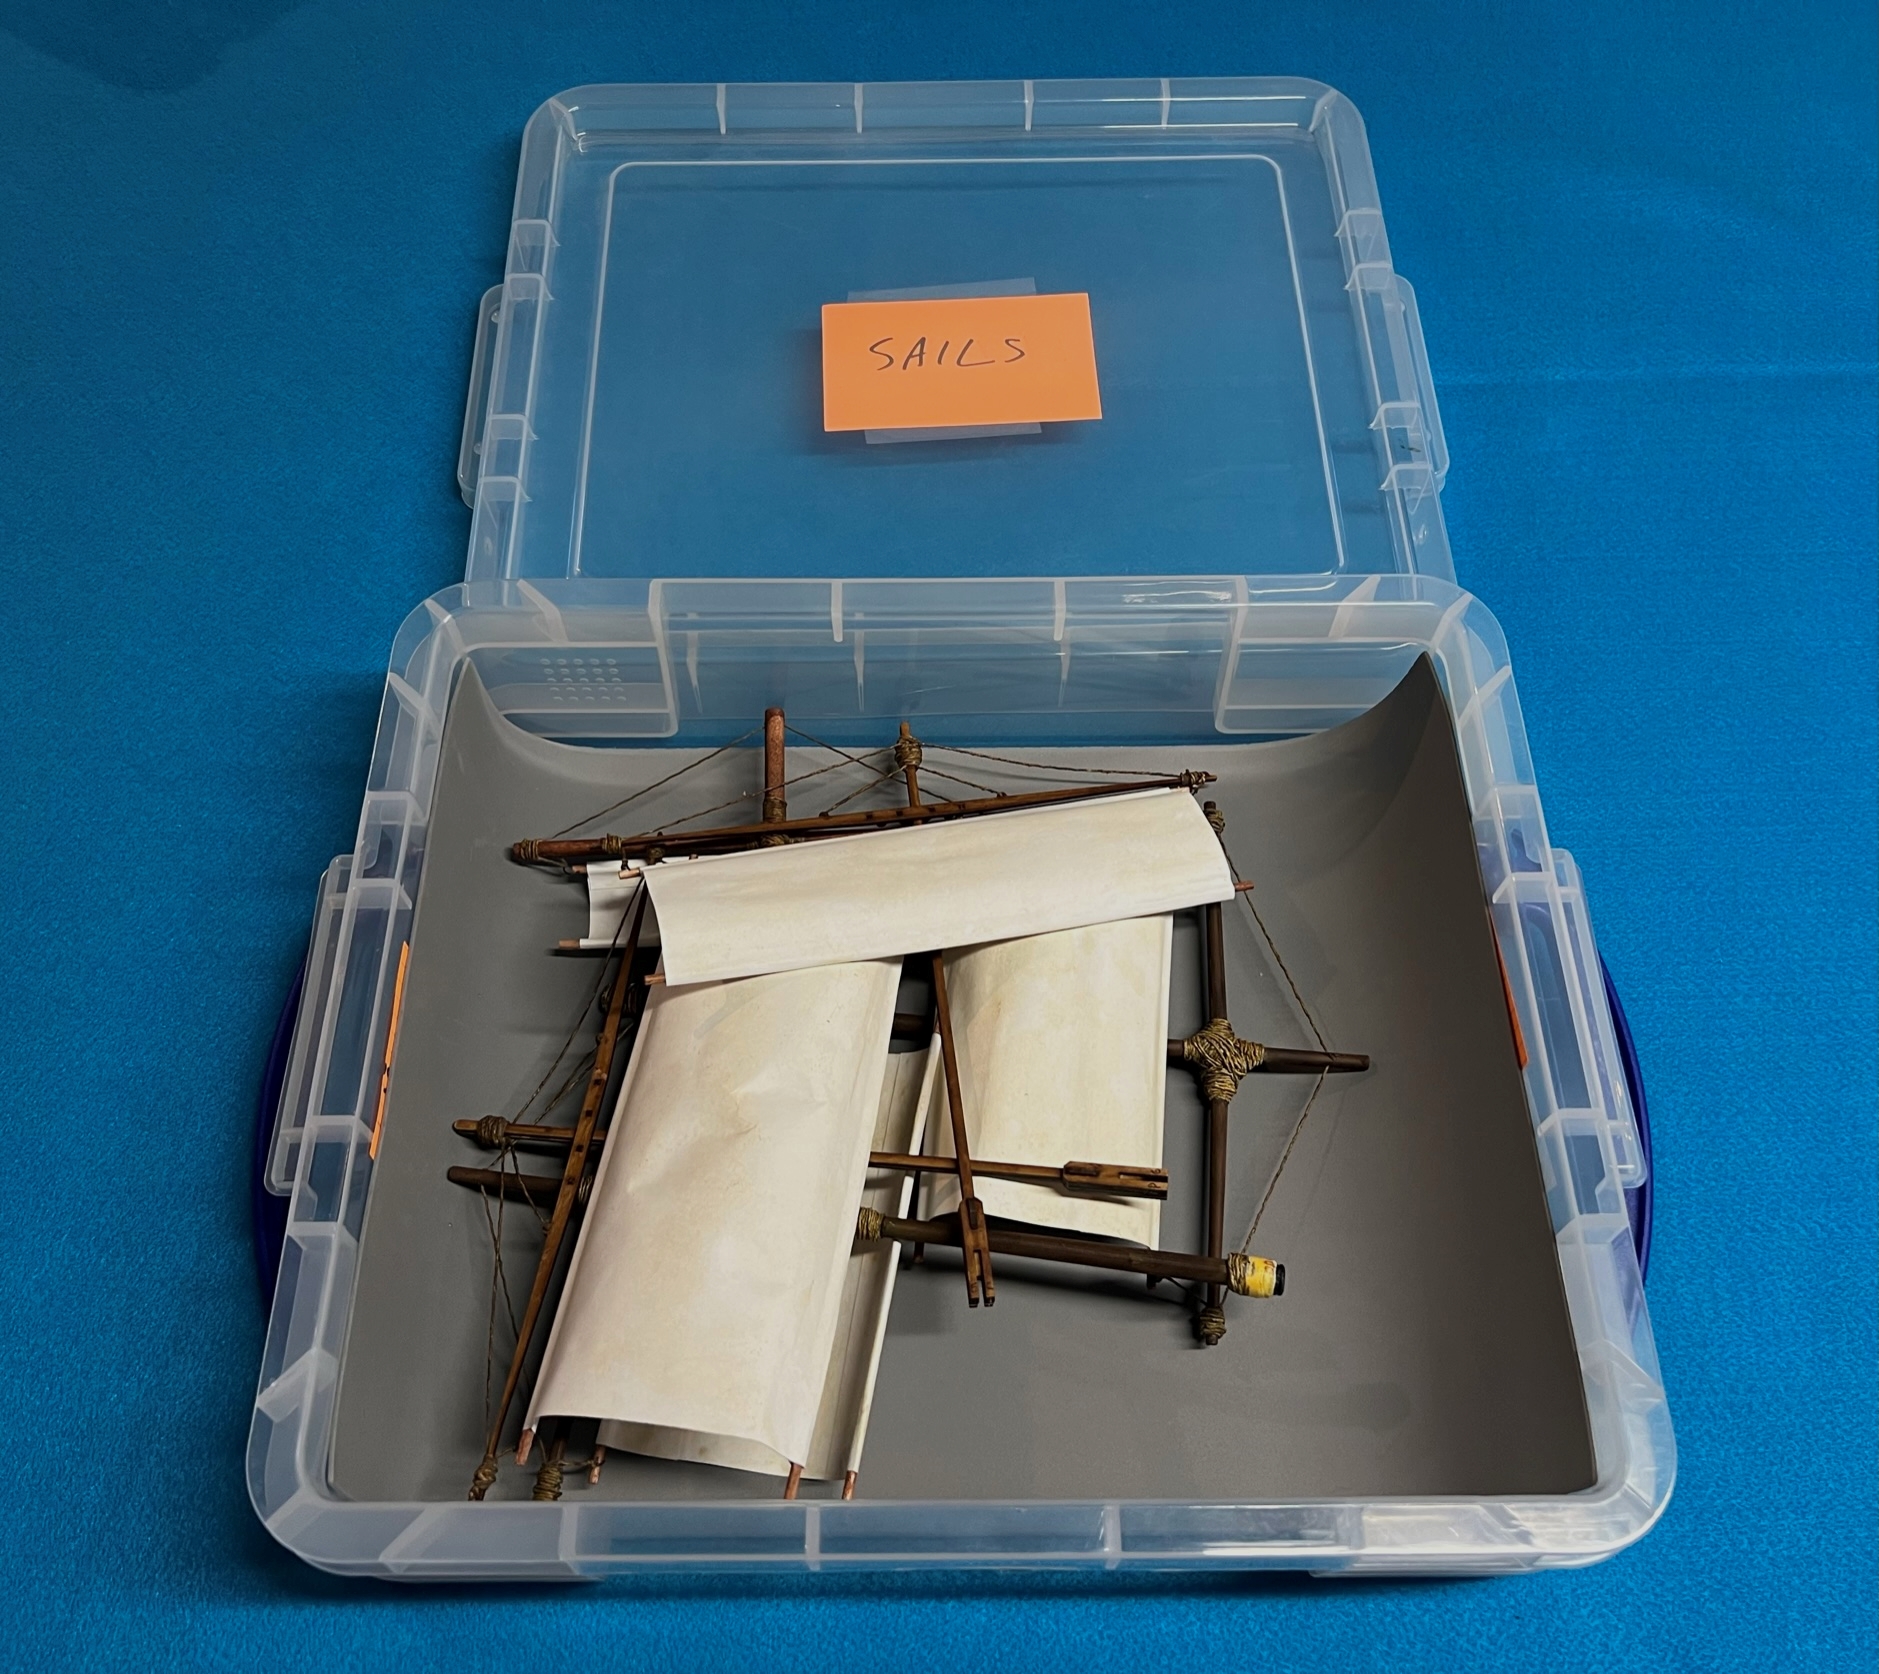
Oh yeah, to get these ships safely to conventions I built a transport box for the hulls with posterboard and hot glue (and minor burns) and used a Really Useful Box for the sails (the crews go with my other figures). I also used the box to fit in my war canoe box.
All of this got done just under the wire – next up I’ll show you how they did at HUZZAH 2022!
(hint – they were a big hit)…stay tuned…
Miscellaneous details and references for those interested in that sort of thing:
For all of my previous posts on games, units, and other projects for my 16th Century Spanish Conquest supplement for Feudal Patrol™ – “Civilizations Collide” – please see this page.
PAINTS, INKS, GLAZES, SHADES, WASHES, PIGMENTS, FLOCKING, GLUES AND MORE THAT I USED ON THESE CONQUISTADOR ARTILLERY CREWS AND GUNS:
War Games Accessories .75″ square bases
War Games Accessories 1.25″ x 1″ rectangular bases
One of the most fascinating aspects of the Spanish Conquest of the Aztec Empire is the story of how Hernan Cortes and his Conquistadores built a ragtag fleet of small brigantines to seize control of Lake Texcoco. This body of water – (located then where Mexico City is now) – in the 16th Century surrounded the Aztec island capital of Tenochtitlan. To defeat the Aztecs, Cortes knew that he must control that lake as well as the lands around it. But how?
Cortes realized that he needed to build a fleet. To accomplish this, Cortes used scavenged lumber from his previously-scuttled seafaring vessels to build small brigantines in pieces in the safe haven of his native allies in Tlaxcala. The ships’ prefabricated pieces were then man-portaged by the Tlaxcalans to the shore of Lake Texcoco. Here they were assembled, and made ready for combat on the lake in the spring of 1521. Then, Cortes simultaneously sent land-based conquistadores to attack Tenochtitlan’s causeways while launching his brigantines to attack Tenochtitlan. These ships were manned by conquistador infantry and had significant firepower – to include lombards and falconets with their crews. In Cortes’ way were swarms of Aztecs in hundreds of war canoes waiting to swarm over the Spanish vessels.
A photo of the diorama of the Battle of Lake Texcoco at the Mexican Naval Museum. This photo inspired me!
Looking at this image, I had a good concept for the war canoes – and I decided to that the Spanish would likely would have used simple designs for their prefab brigantines – like medieval cogs.
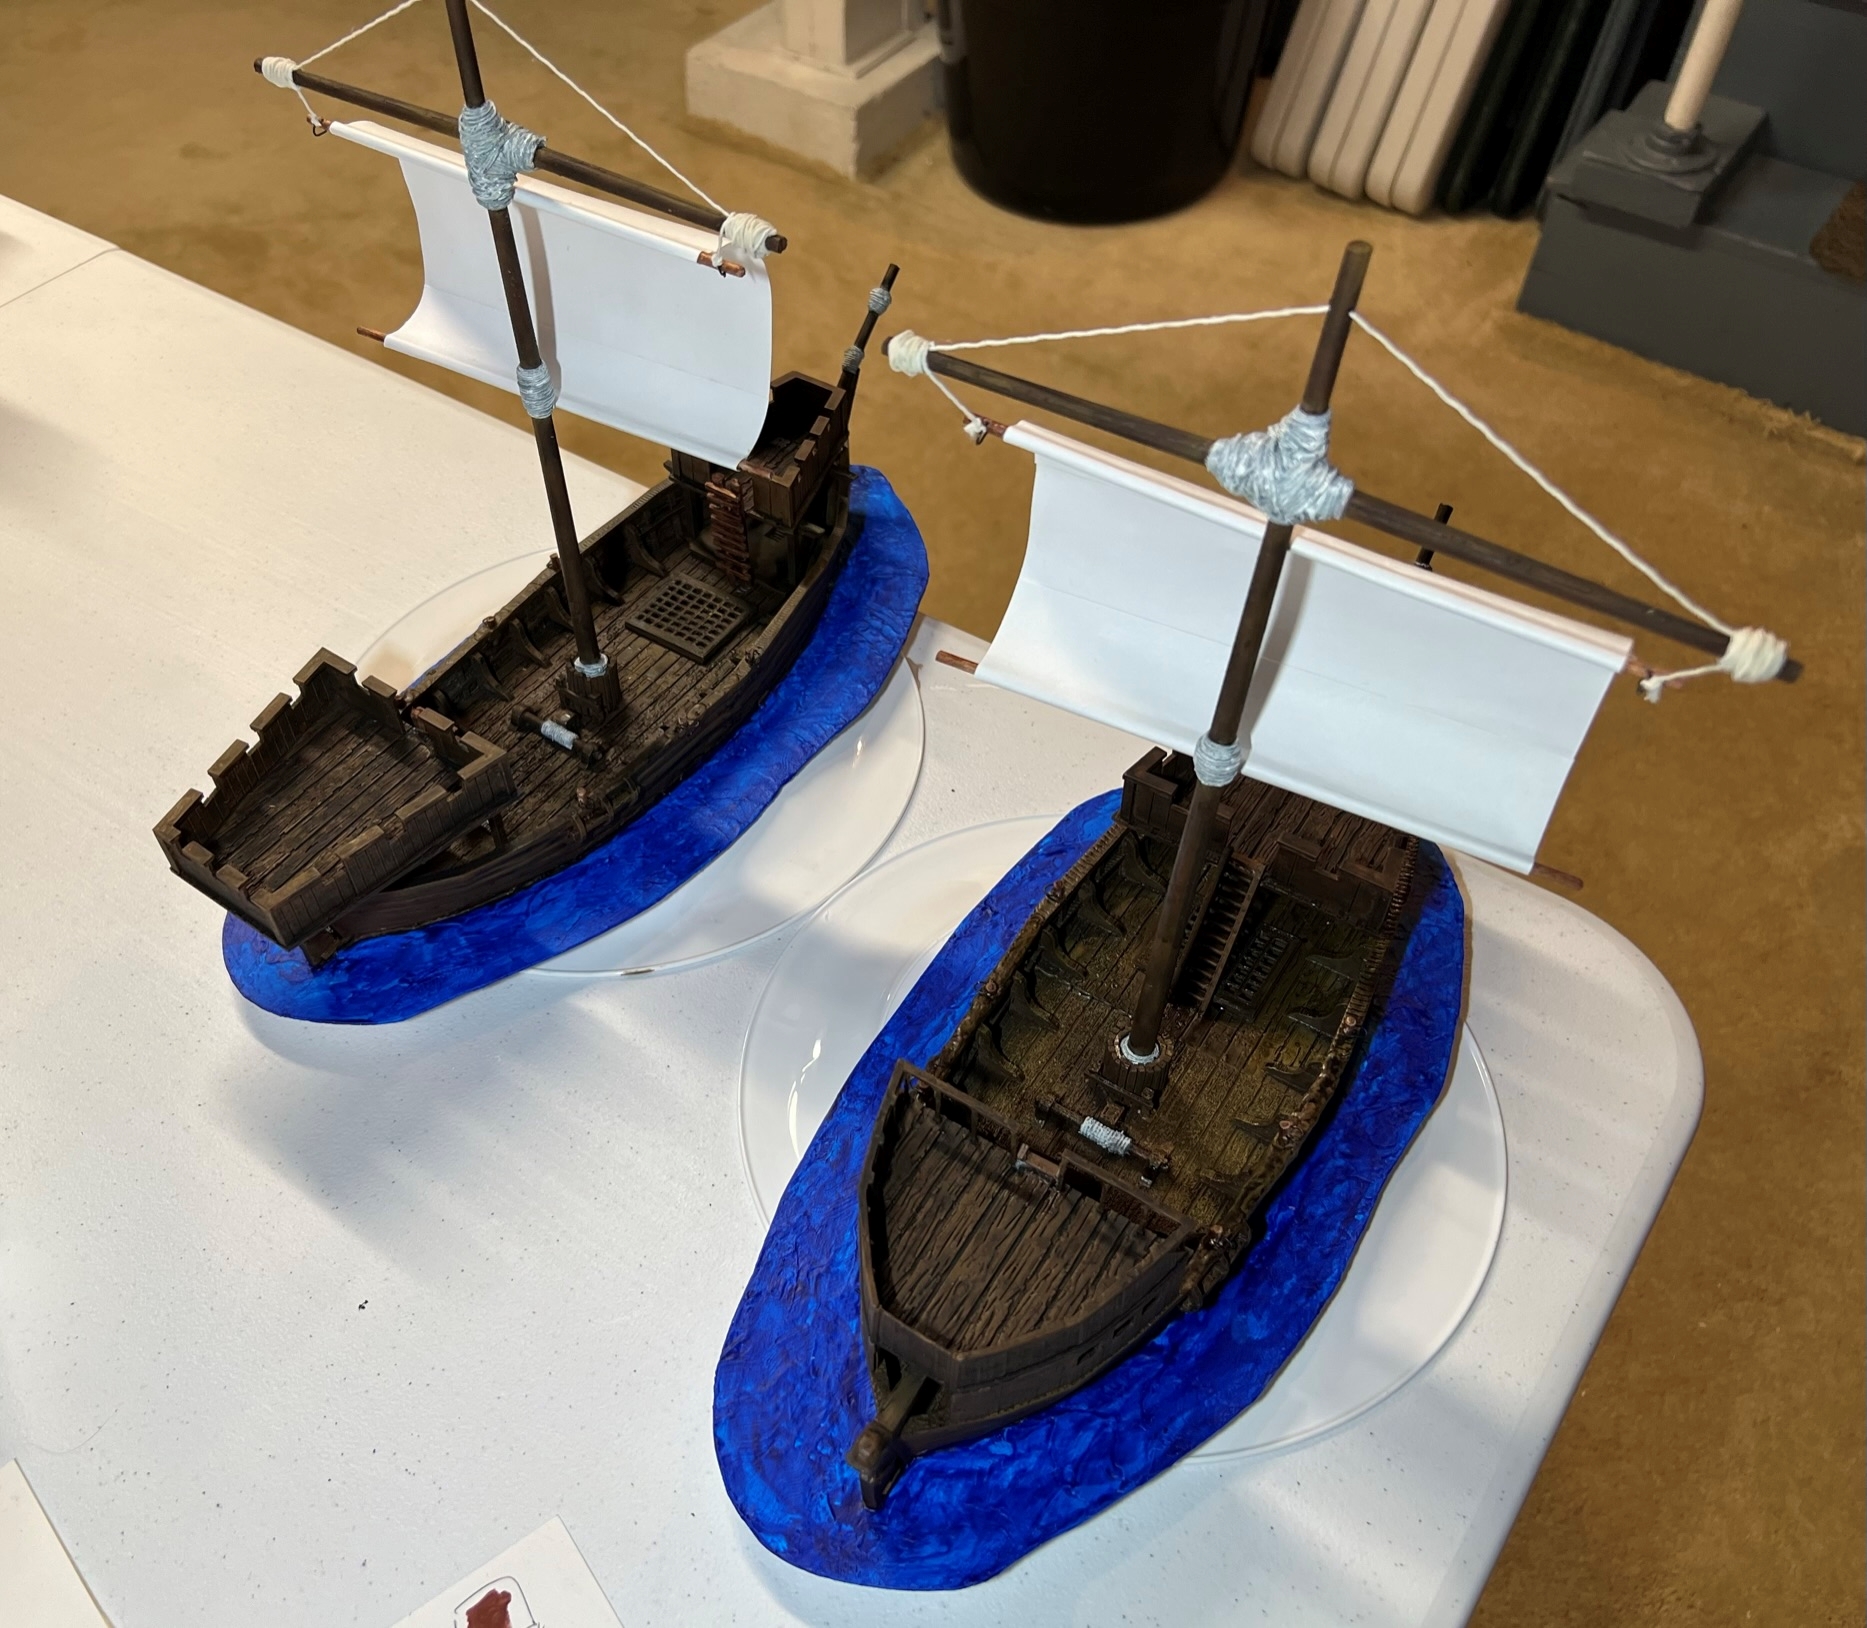
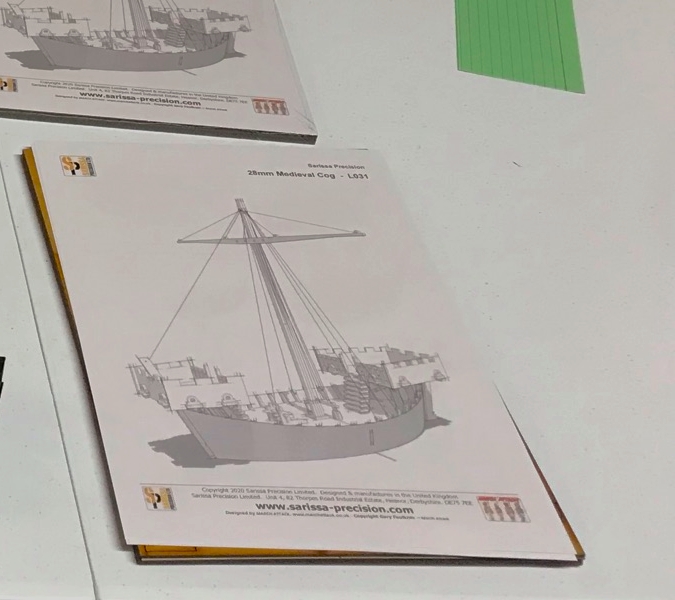
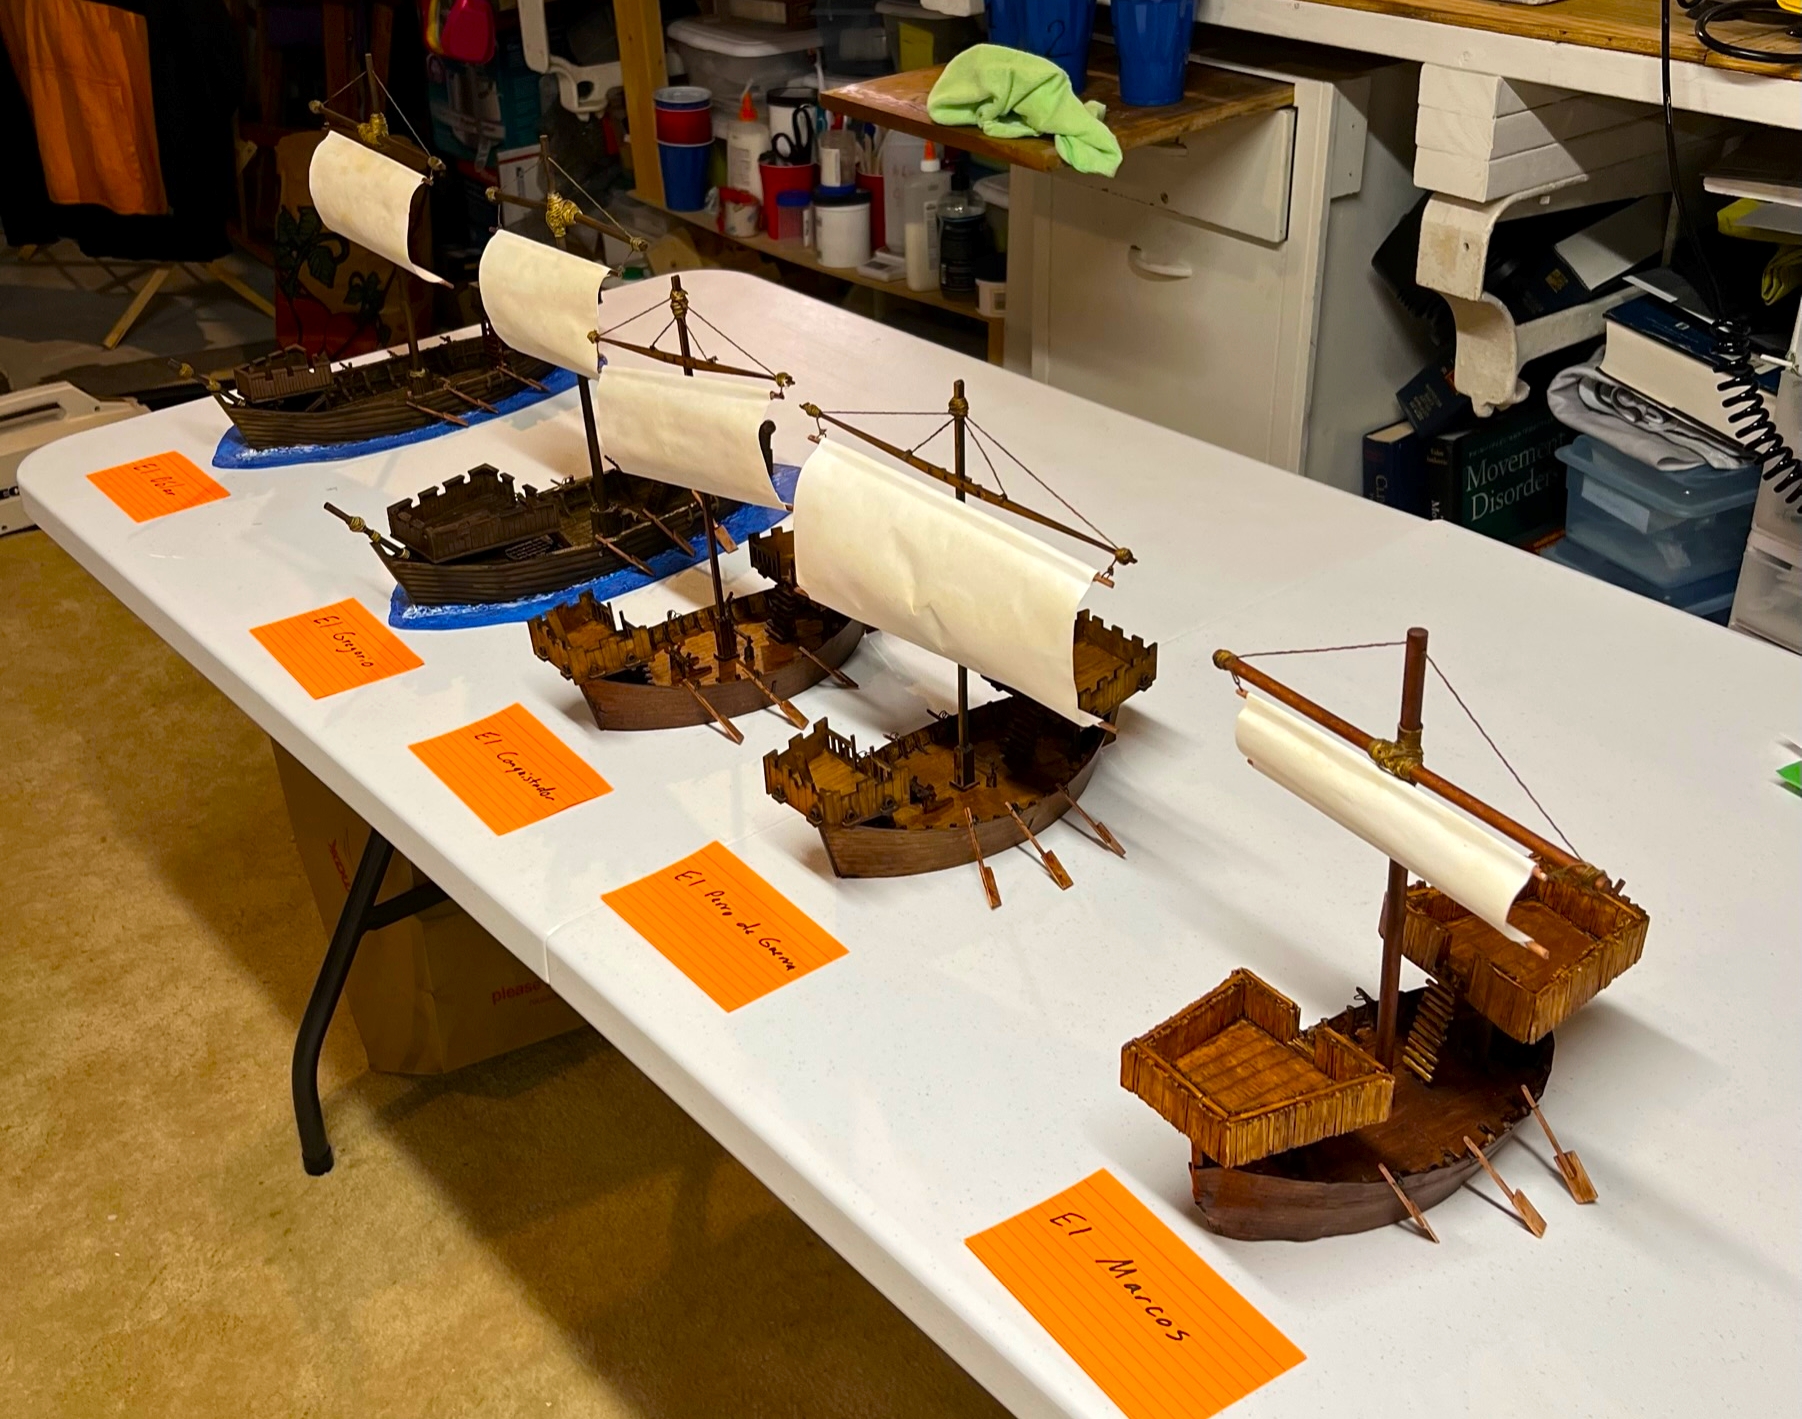
I decided that for a game I would need 5 brigantines to go up against my 21 war canoes. Sourcing these ships became a challenge but help arrived from Buck Surdu and Greg Priebe who kindly offered to assist me in the way of two different 28mm scale medieval cog models that were 3D printed! Meanwhile, I found that Sarissa had a medieval cog kit (#L031), and I ordered two. By early March of 2022, I had all four ships in the building queue, and I had decided as well to scratch-build one as well so that I would have a varied fleet of five. Naming them became the next step – so the 3D models became (for obvious reasons) El Dólar (The Buck) & El Gregorio (The Greg). I named the Sarissa models El Perro de Guerra (The War Dog), & El Conquistador (The Conquistador of course). Lastly, for totally self-aggrandizing reasons that escape me now, I decided that my yet-to-be-designed scratch-build would be El Marcos (The Mark).
I will go through each ship’s build and share some photos and my processes of both building and painting them. Building these and painting these (and building the last one) were FAR more work than I had imagined at the start. Still, I think the MANY pics below will tell the story (it was a big project).
El Dólar & El Gregorio
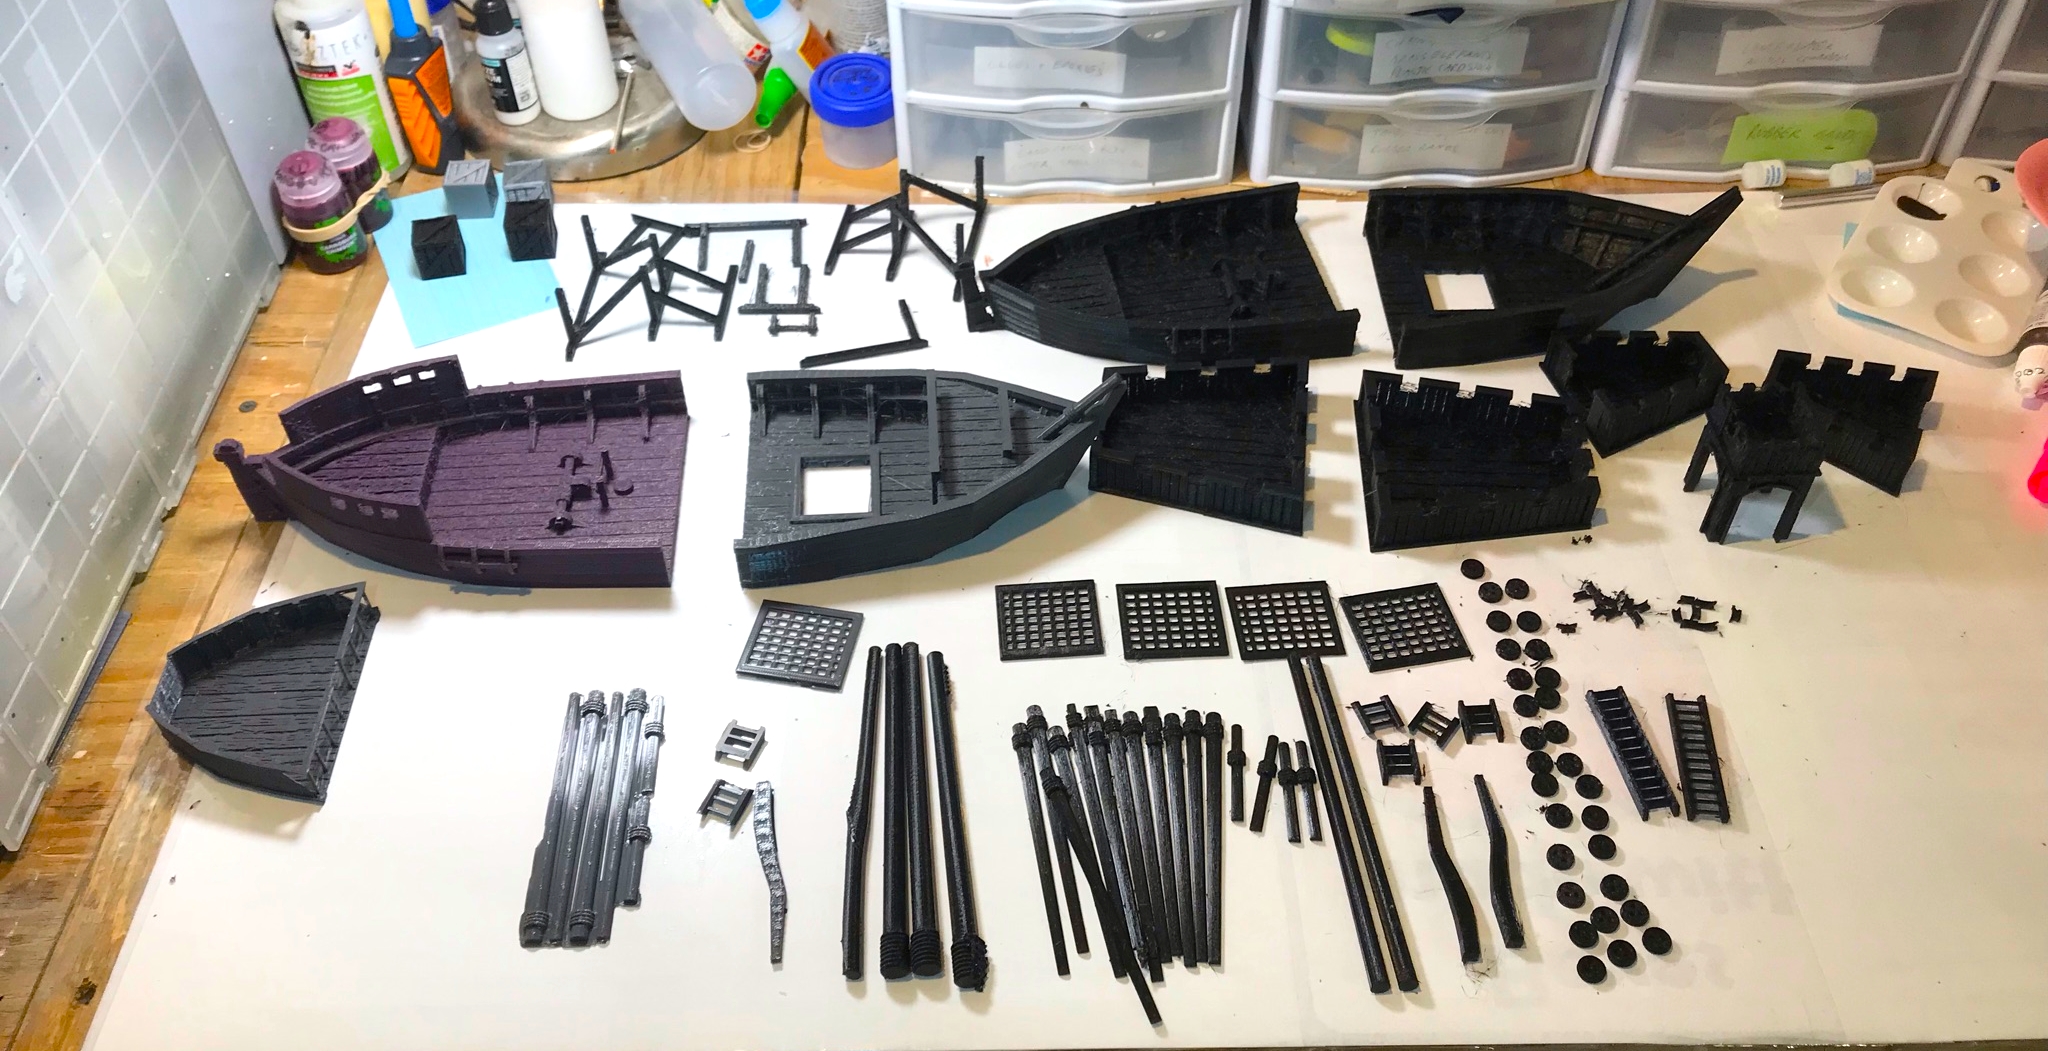
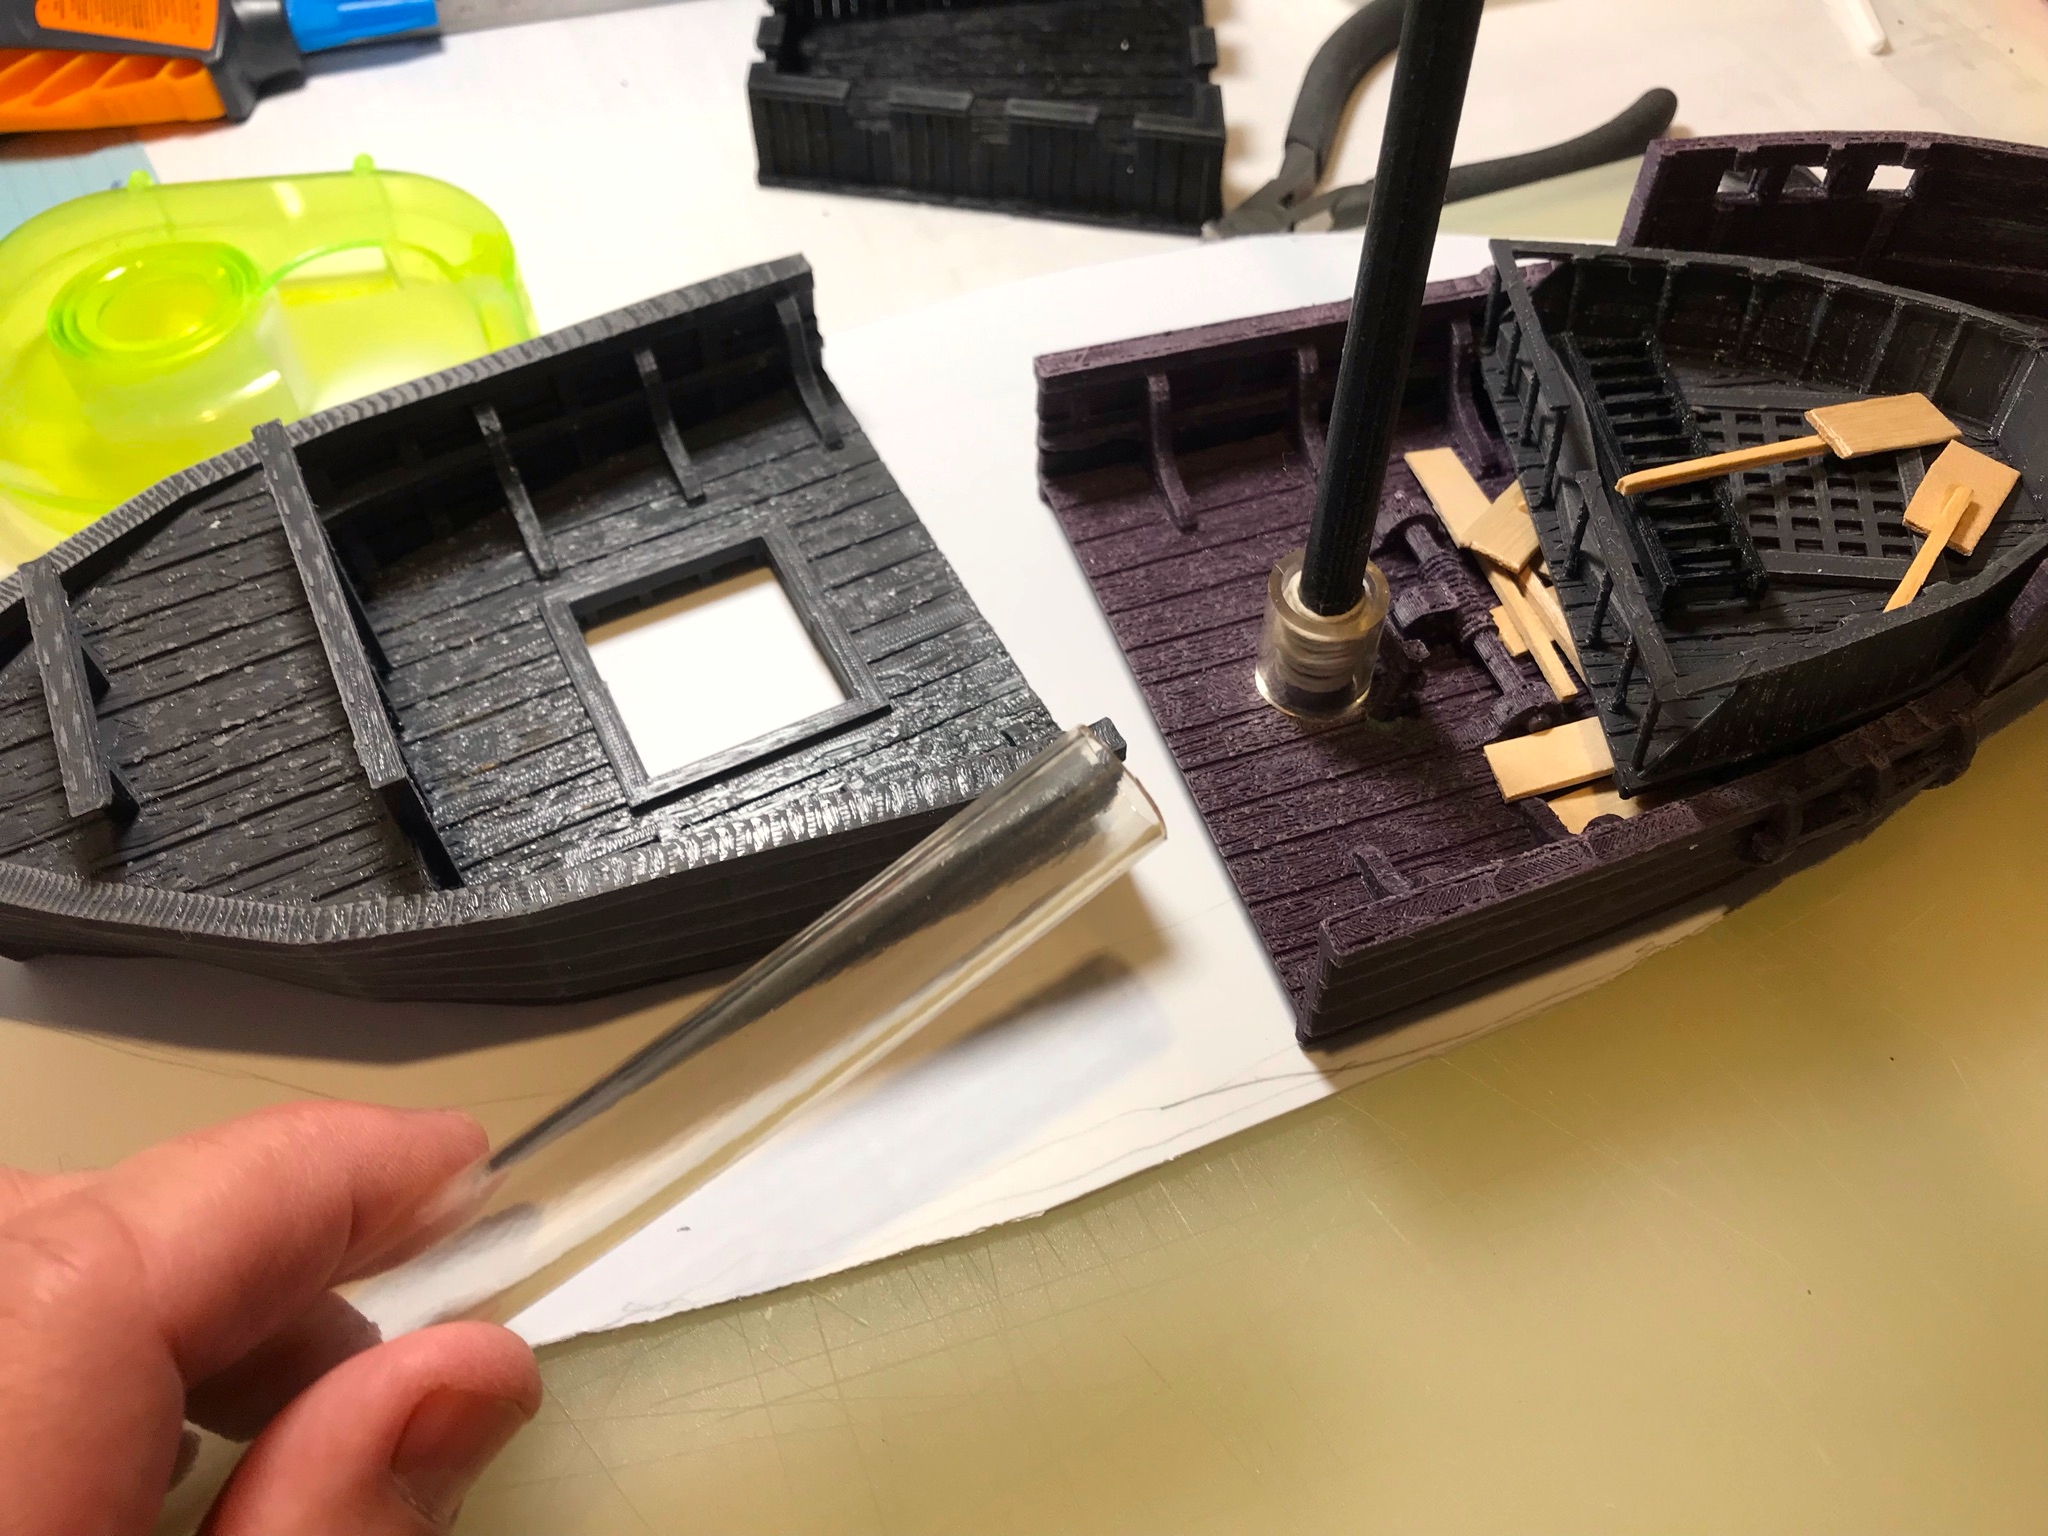
These two had similar hulls, but different forecastles and stern castles. They came in bags that Buck and Greg had put together – and I needed to figure out how to assemble them by looking at photos from the 3D printer file. I decided that I would double-prime them then paint them with a series of airbrush browns. I also would modify all of the brigantines to have rowers as well as sails as historically that was the case.
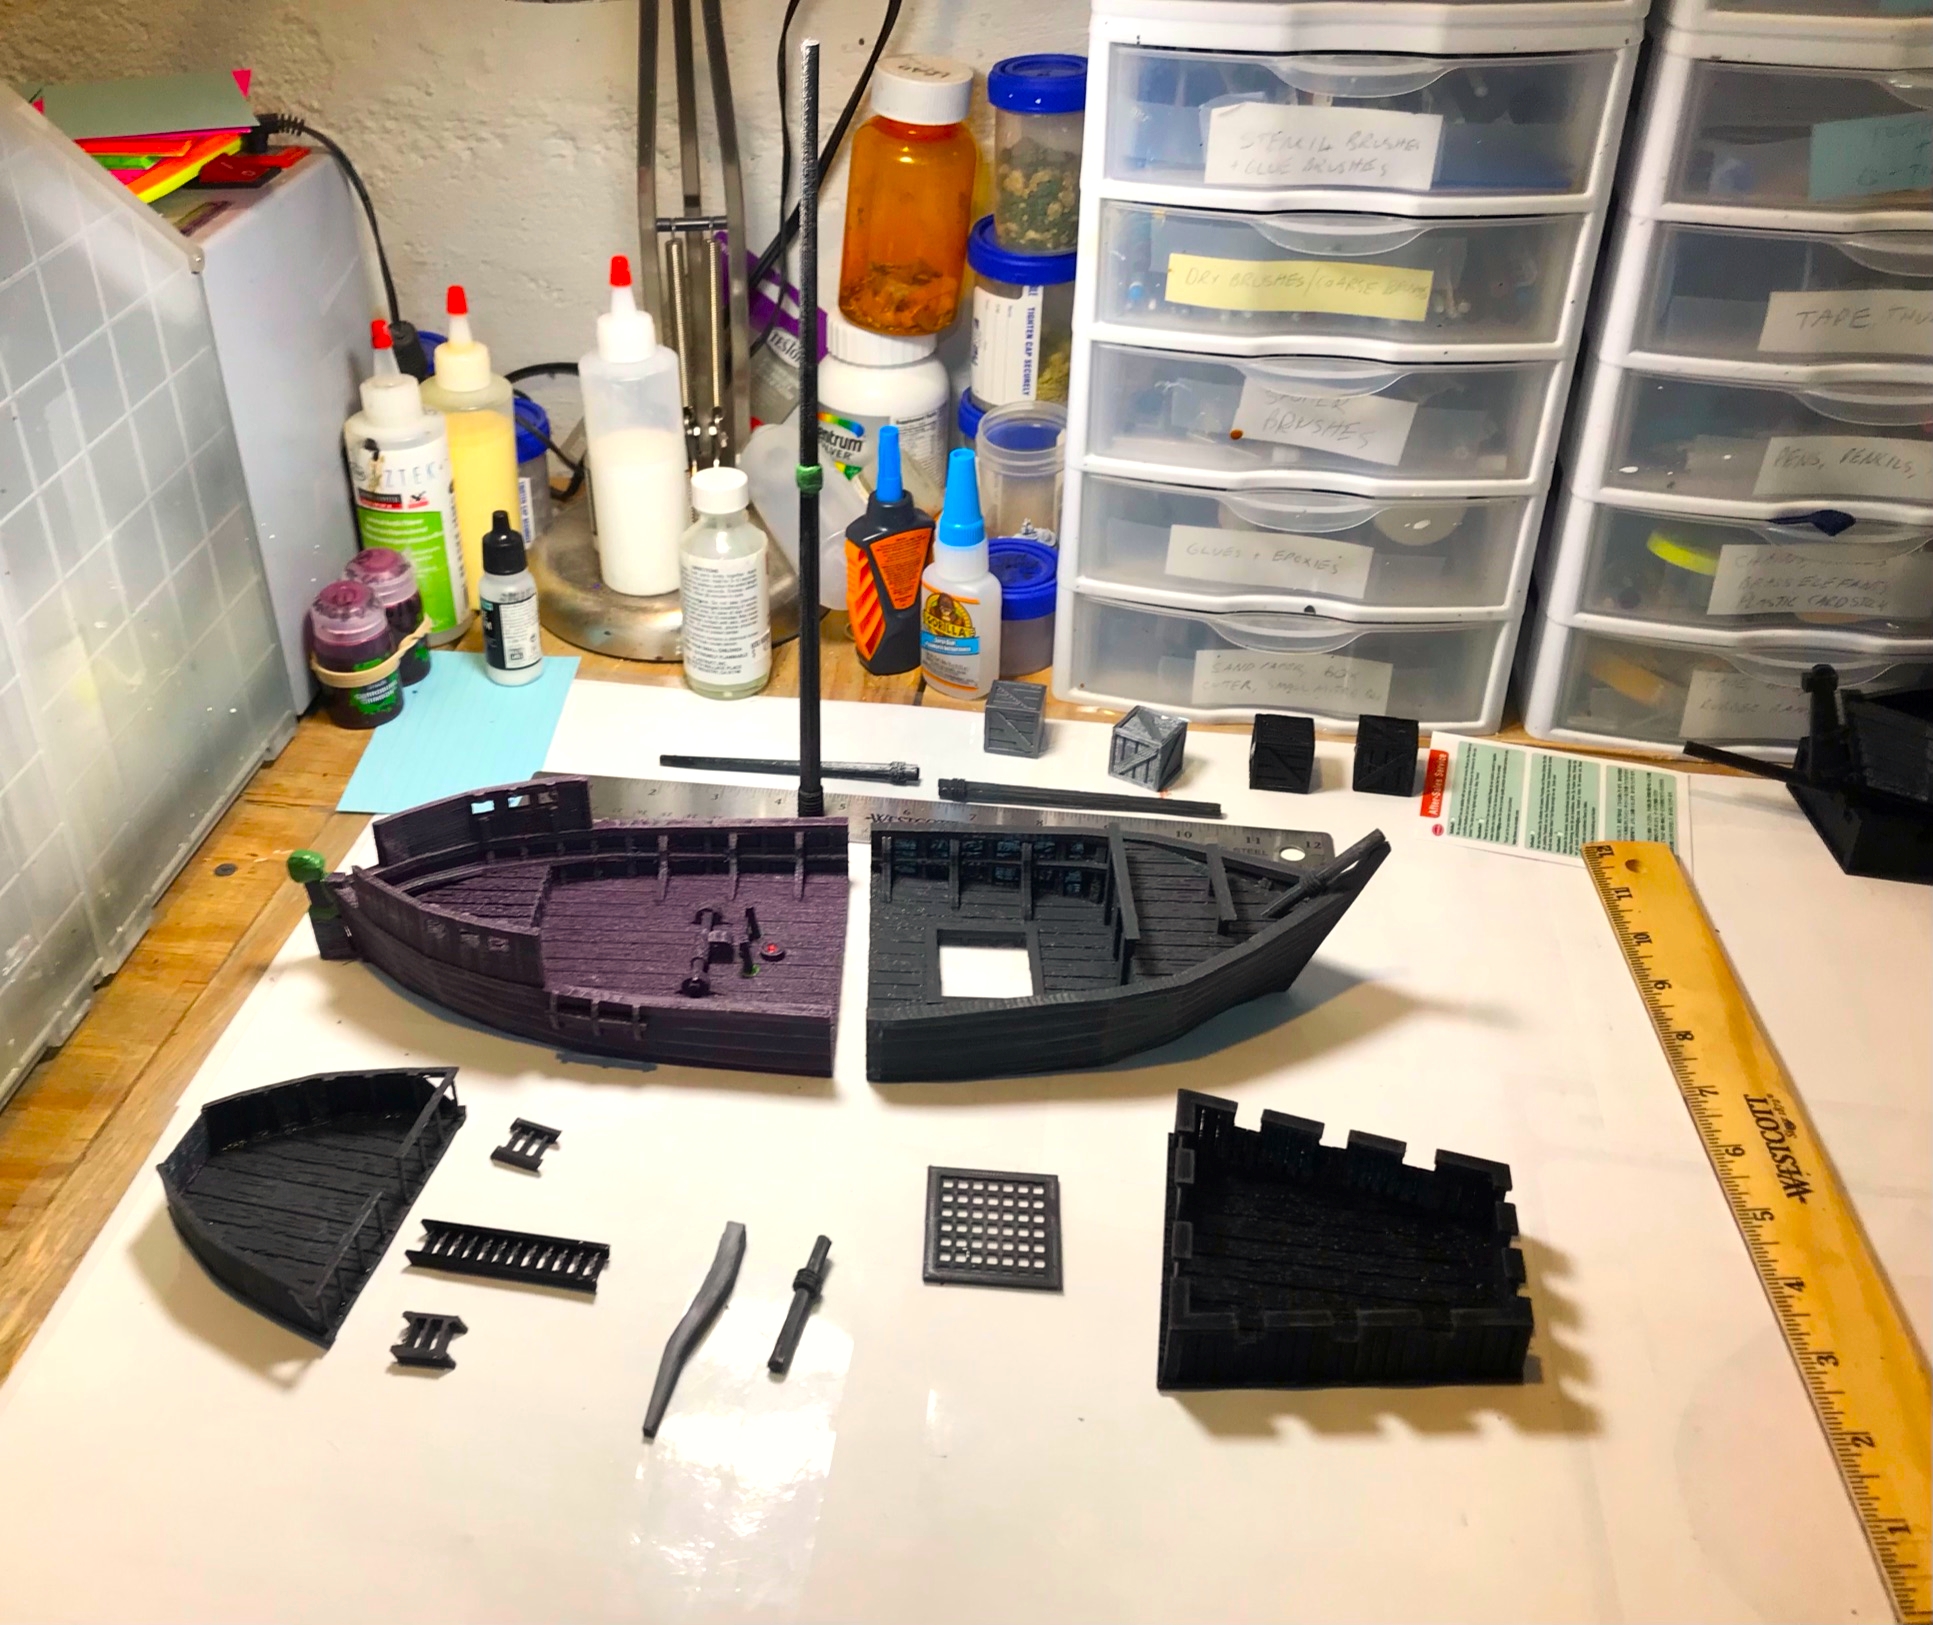
Lots of 3D printed pieces to figure out!! It turned out I would use most – but not all of them. On the left is El Gregorio with the half-purple half- gray plastic hull, with the black El Dólar hull at top. There were multiple stern and forecastle options.El Gregorio showing sanding after washing the plastic.El Gregorio mock up. I had already glued the mast pieces together and used green stuff to secure the different pieces. I also had drilled out holes for neodymium magnets in the main mast and the hull, and inserted these as you see here.
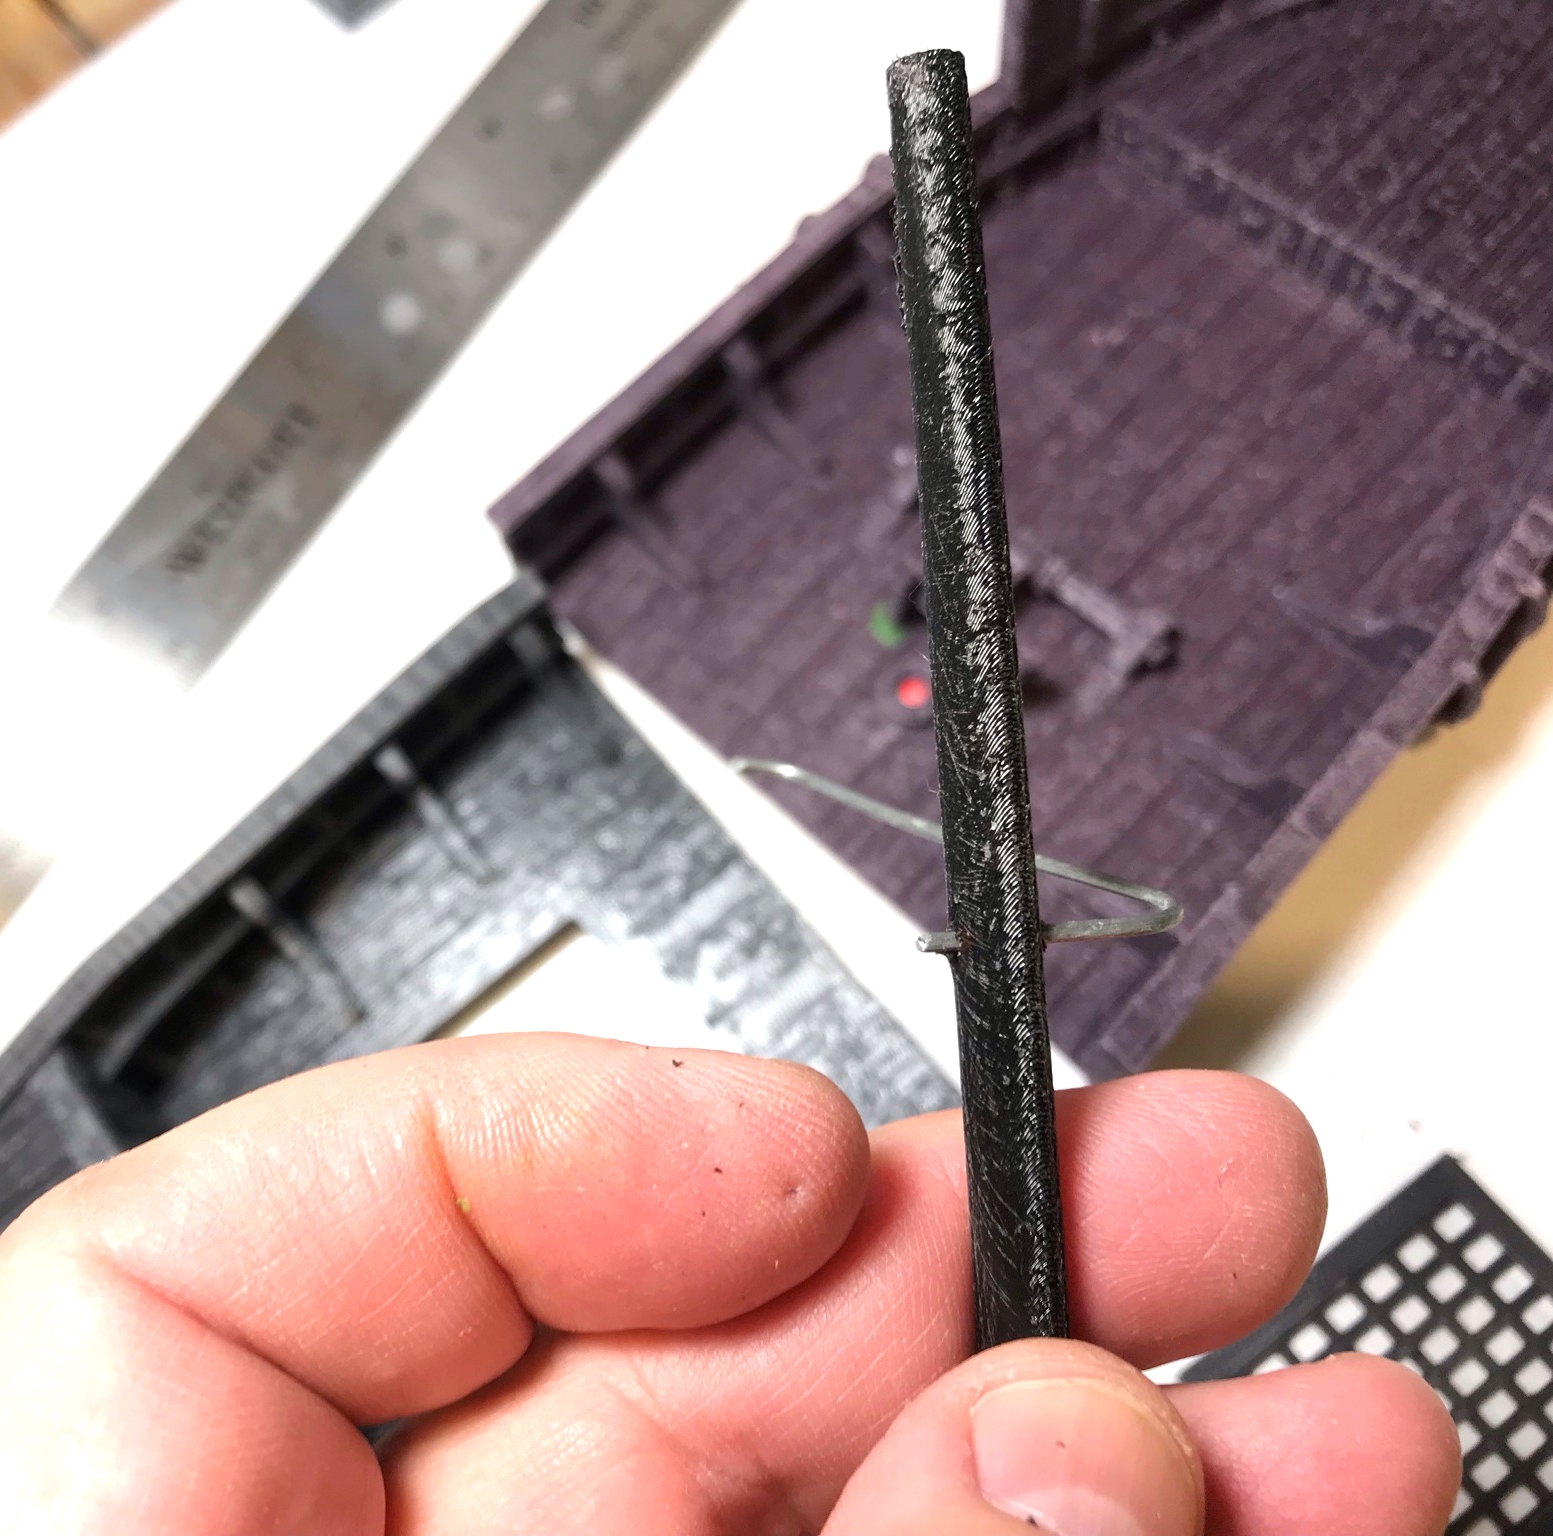
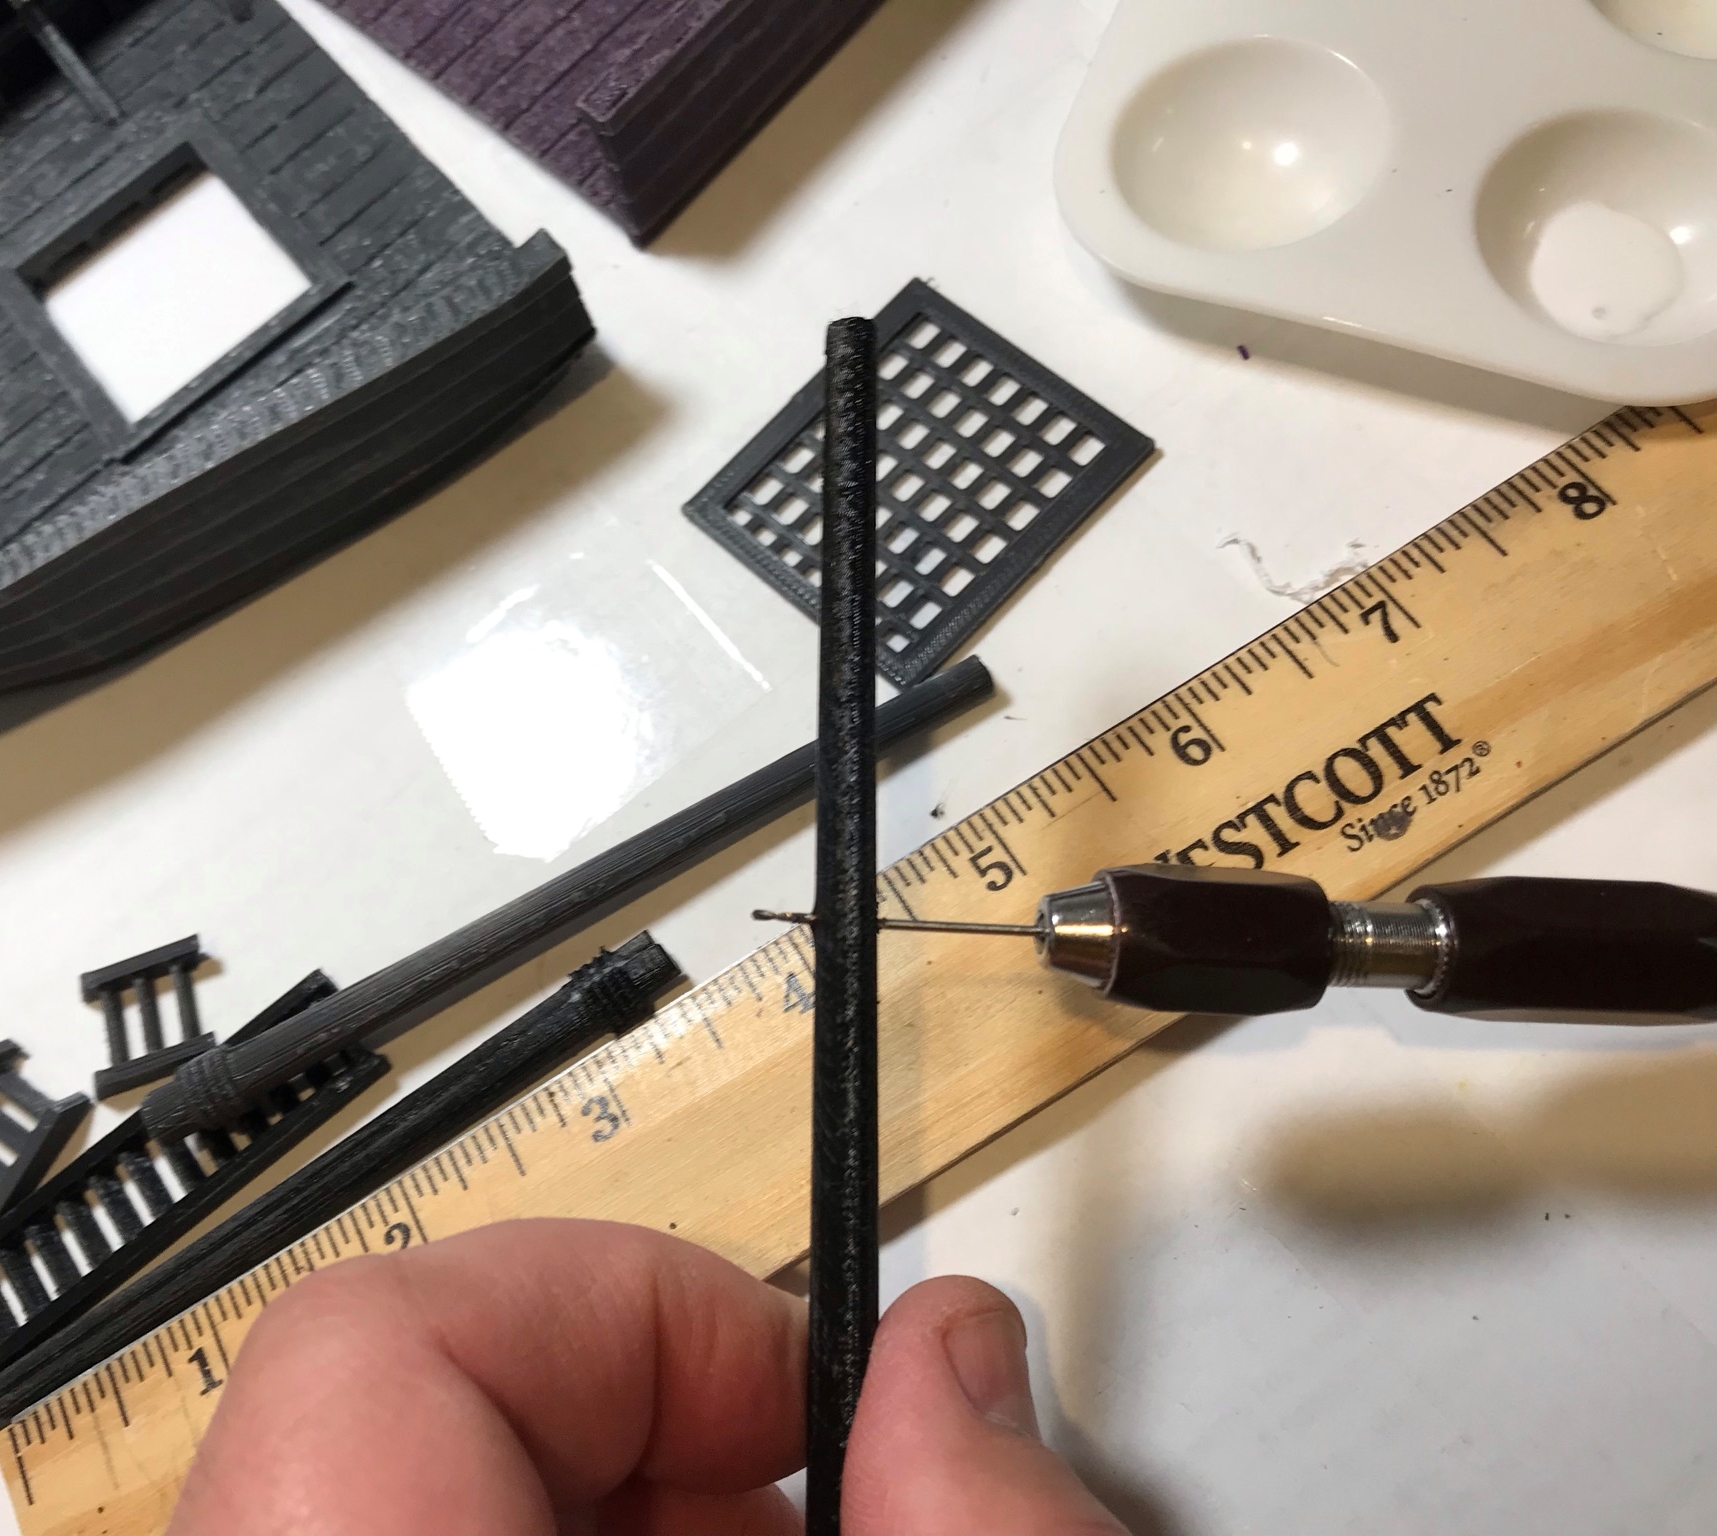
I ended up needing to do a lot of drilling, pinning, and sculpting with green stuff to create the masts, and yards/spars. By the way, if I misname any parts here my defense is that I am a graduate of West Point, and NOT Annapolis! Though if you feel the need to correct me that’s all good – and GO ARMY BEAT NAVY! Ok, back to the builds…click on the pics for a better view.
Mast gluingDrilling out mast for yardCovering where the mast pieces come together with green stuff for strengthDrilling out yards to become one pieceAfter drilling, sealing with green stuffAttaching with green stuffCompleted – well almost – mast. I would also wrapped each rope-type area with cotton twine strands that I had unwound and coated with PVA.
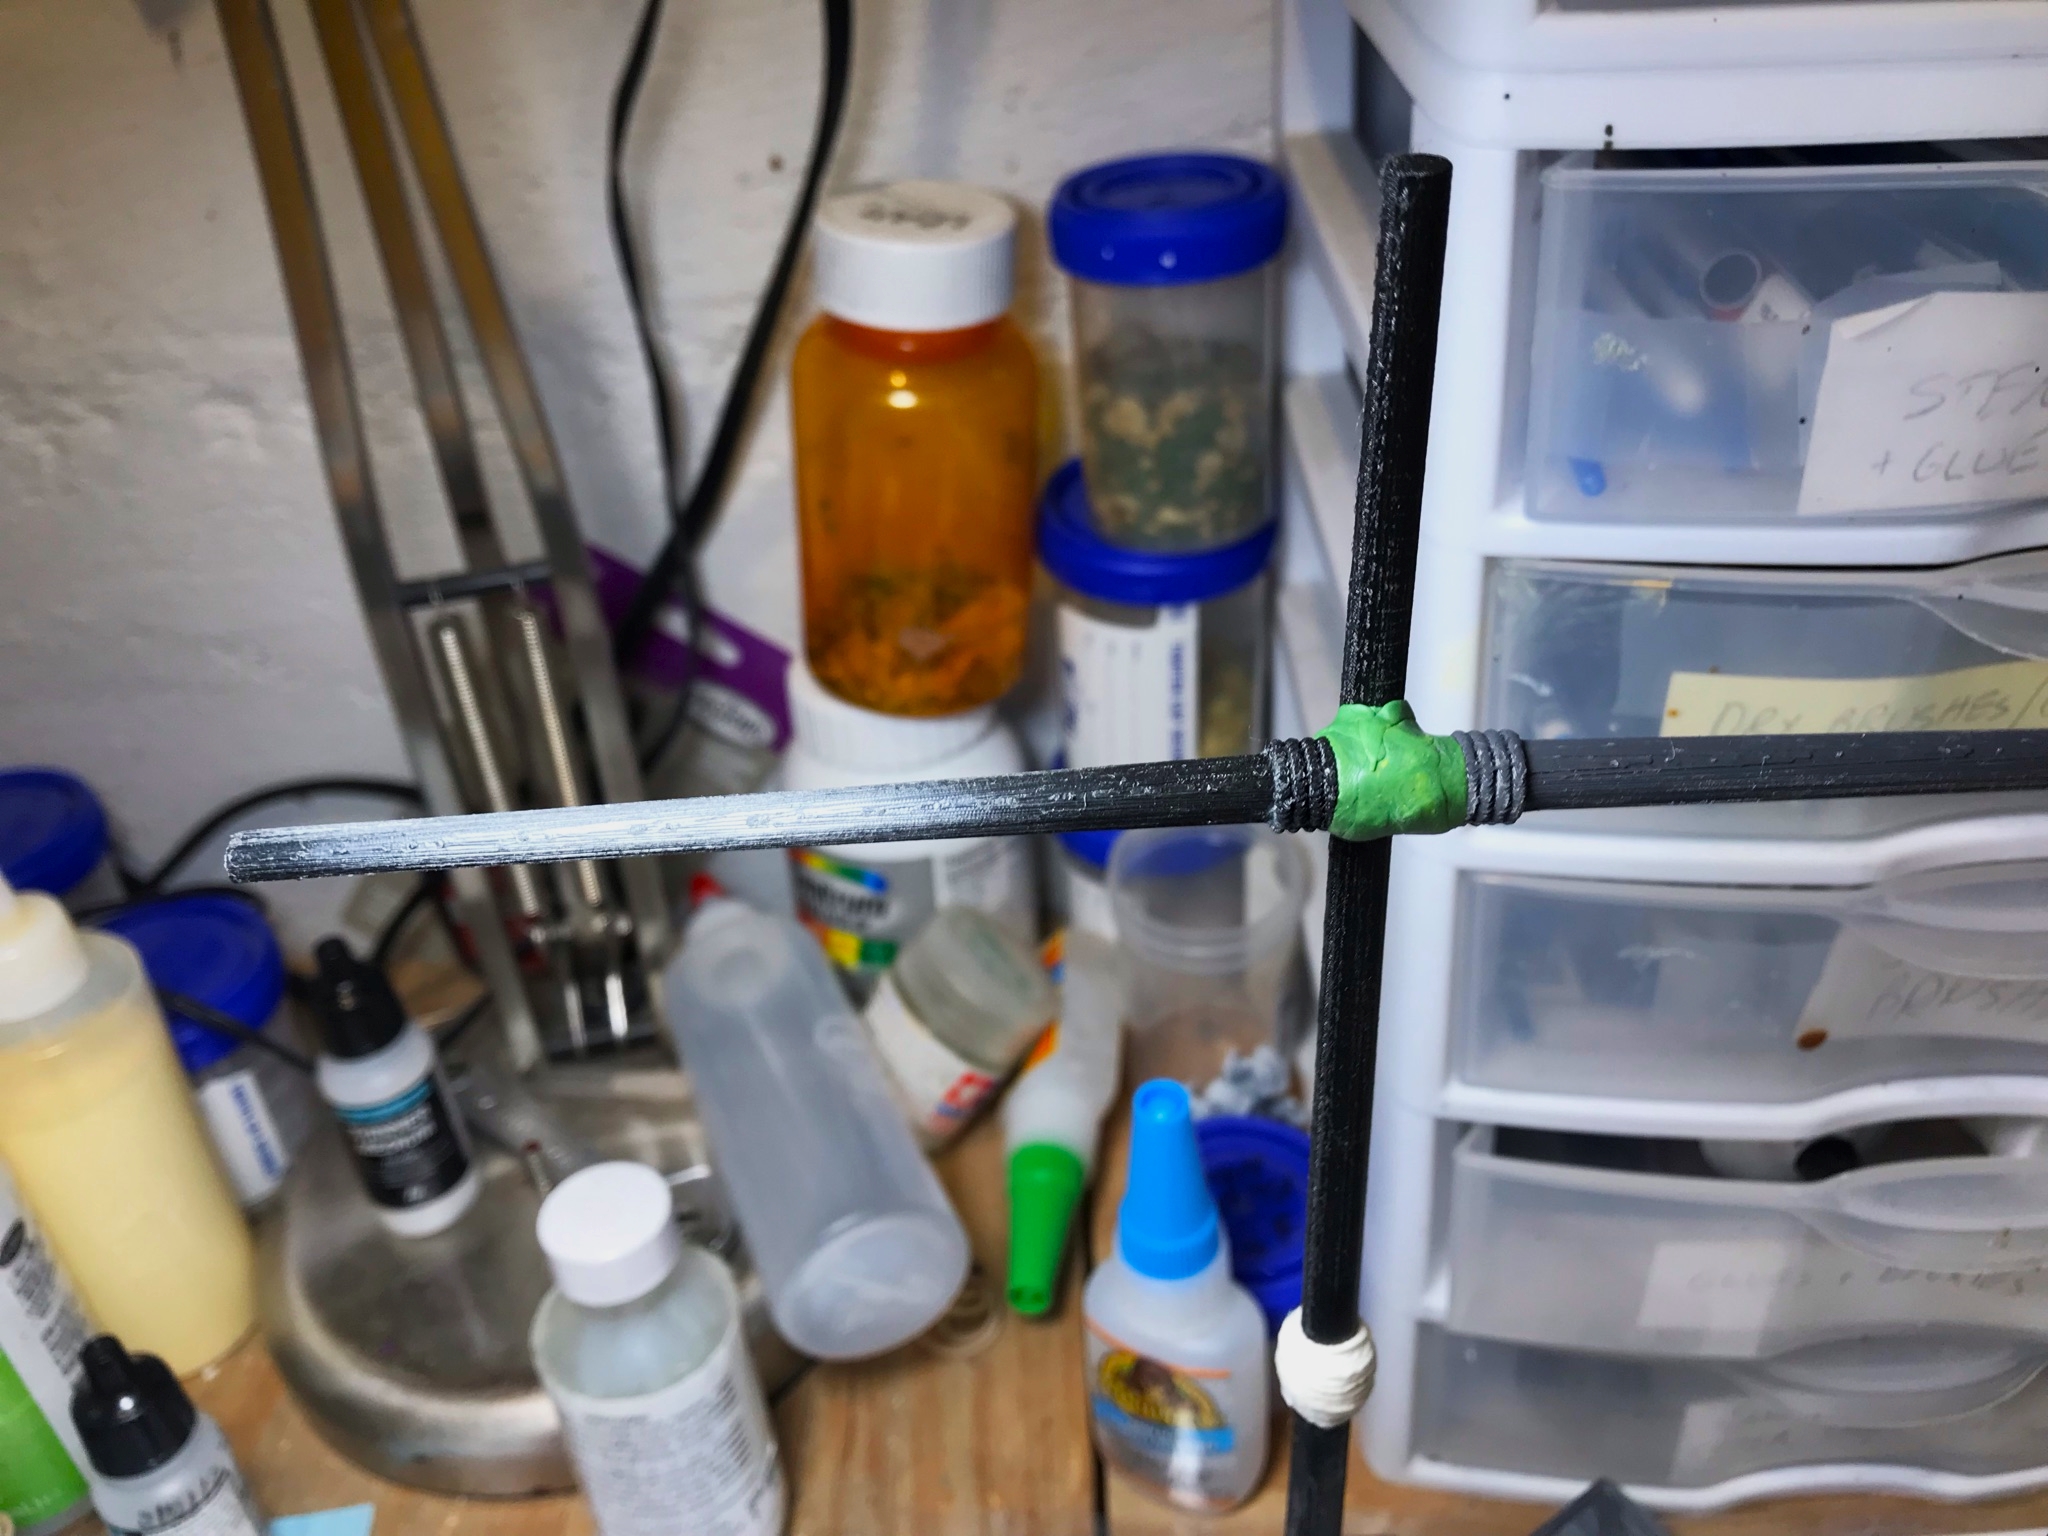
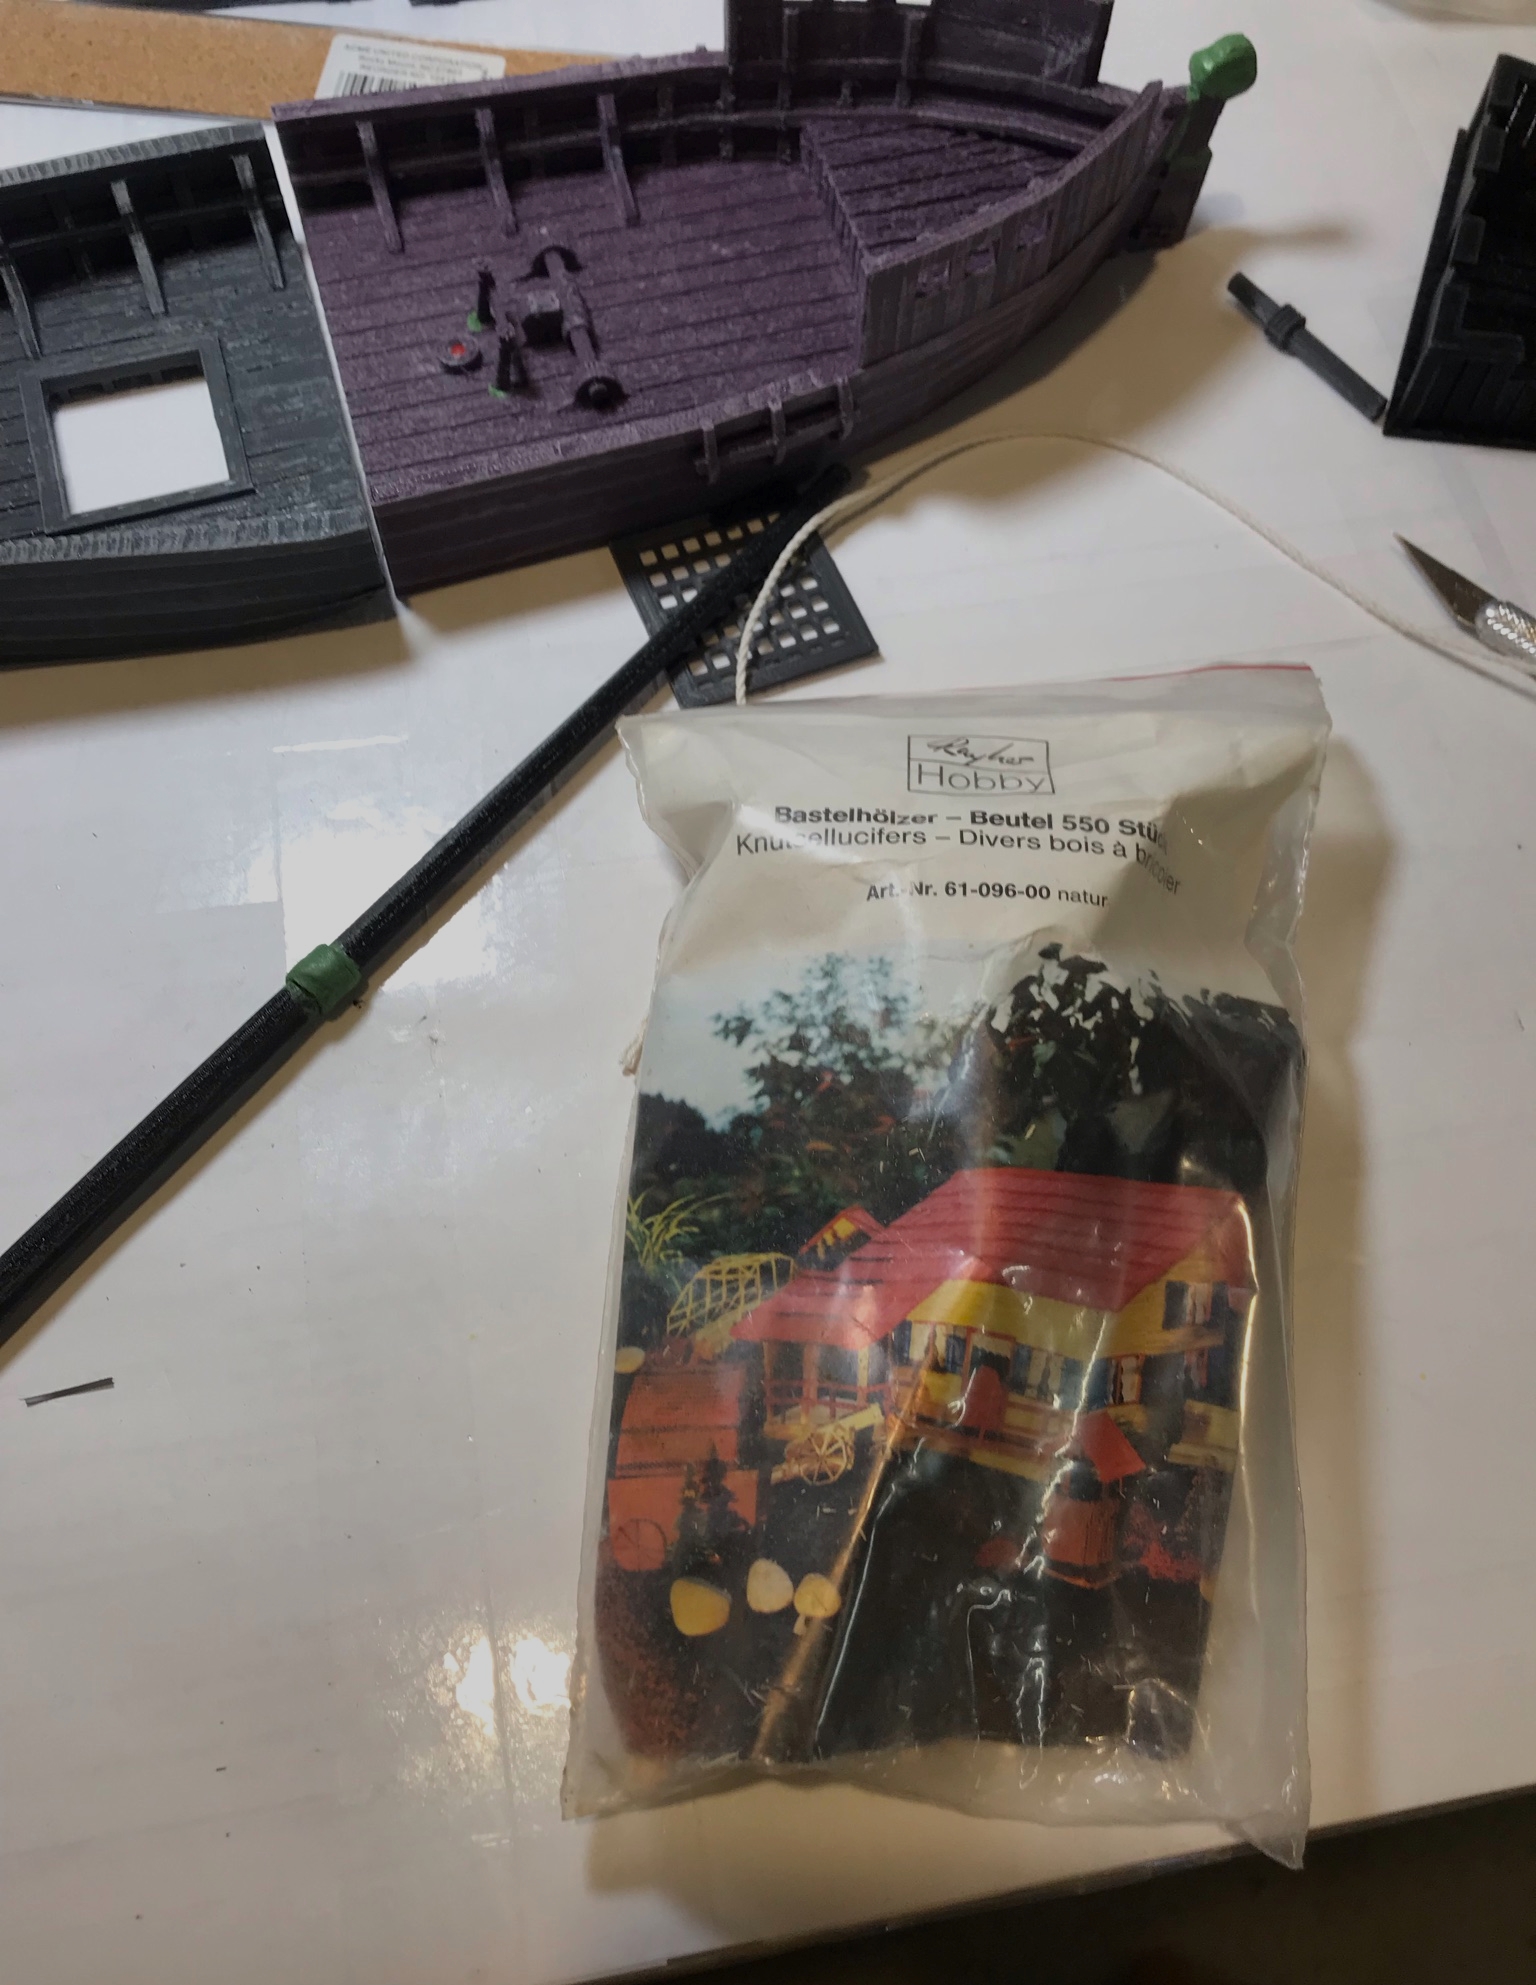
The magnets I had inserted into the mast bases and the decks were insufficiently strong to suitably secure the masts to each hull. While I wanted to be able to remove the masts for transport, the situation was such that the masts would just easily fall over. My solution came in the form of some excess vinyl/rubber tubing I had lying around and hobby matchsticks I had purchased while stationed in West Germany in 1987! Real Cold War era matchsticks REALLY absorb PVA!
Nothing like 35 year old matchsticks!Take leftover tubing…Glue on matchsticksAnd the mast has a support!Side view of the mast support – (would need to fix this gap in the hull)View of mast support
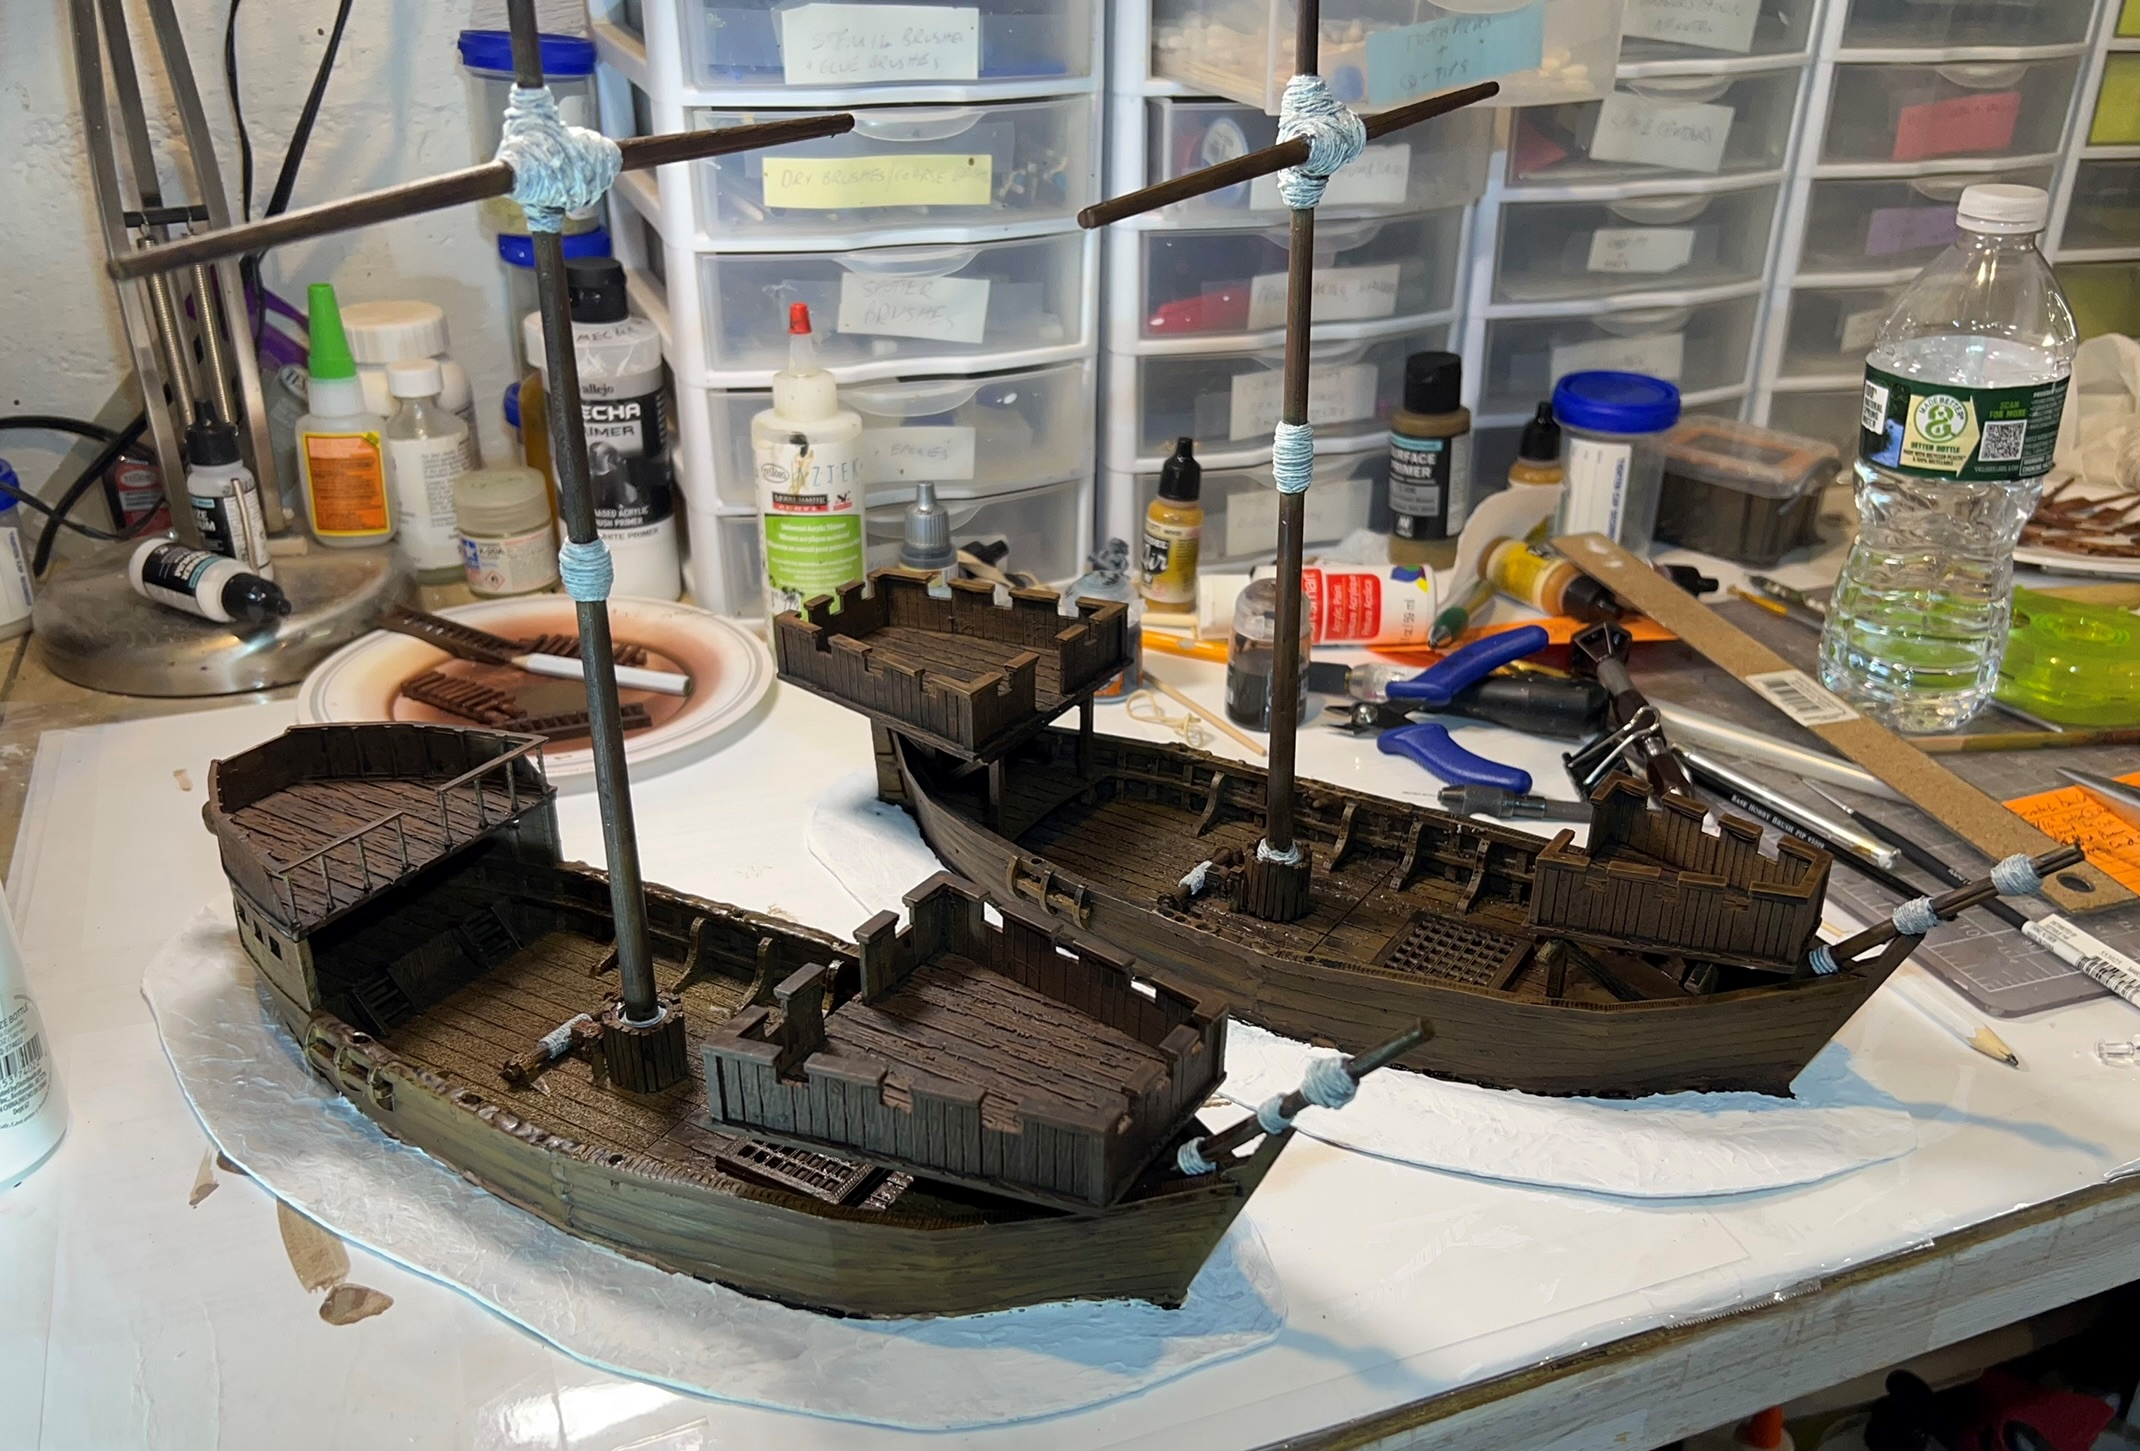
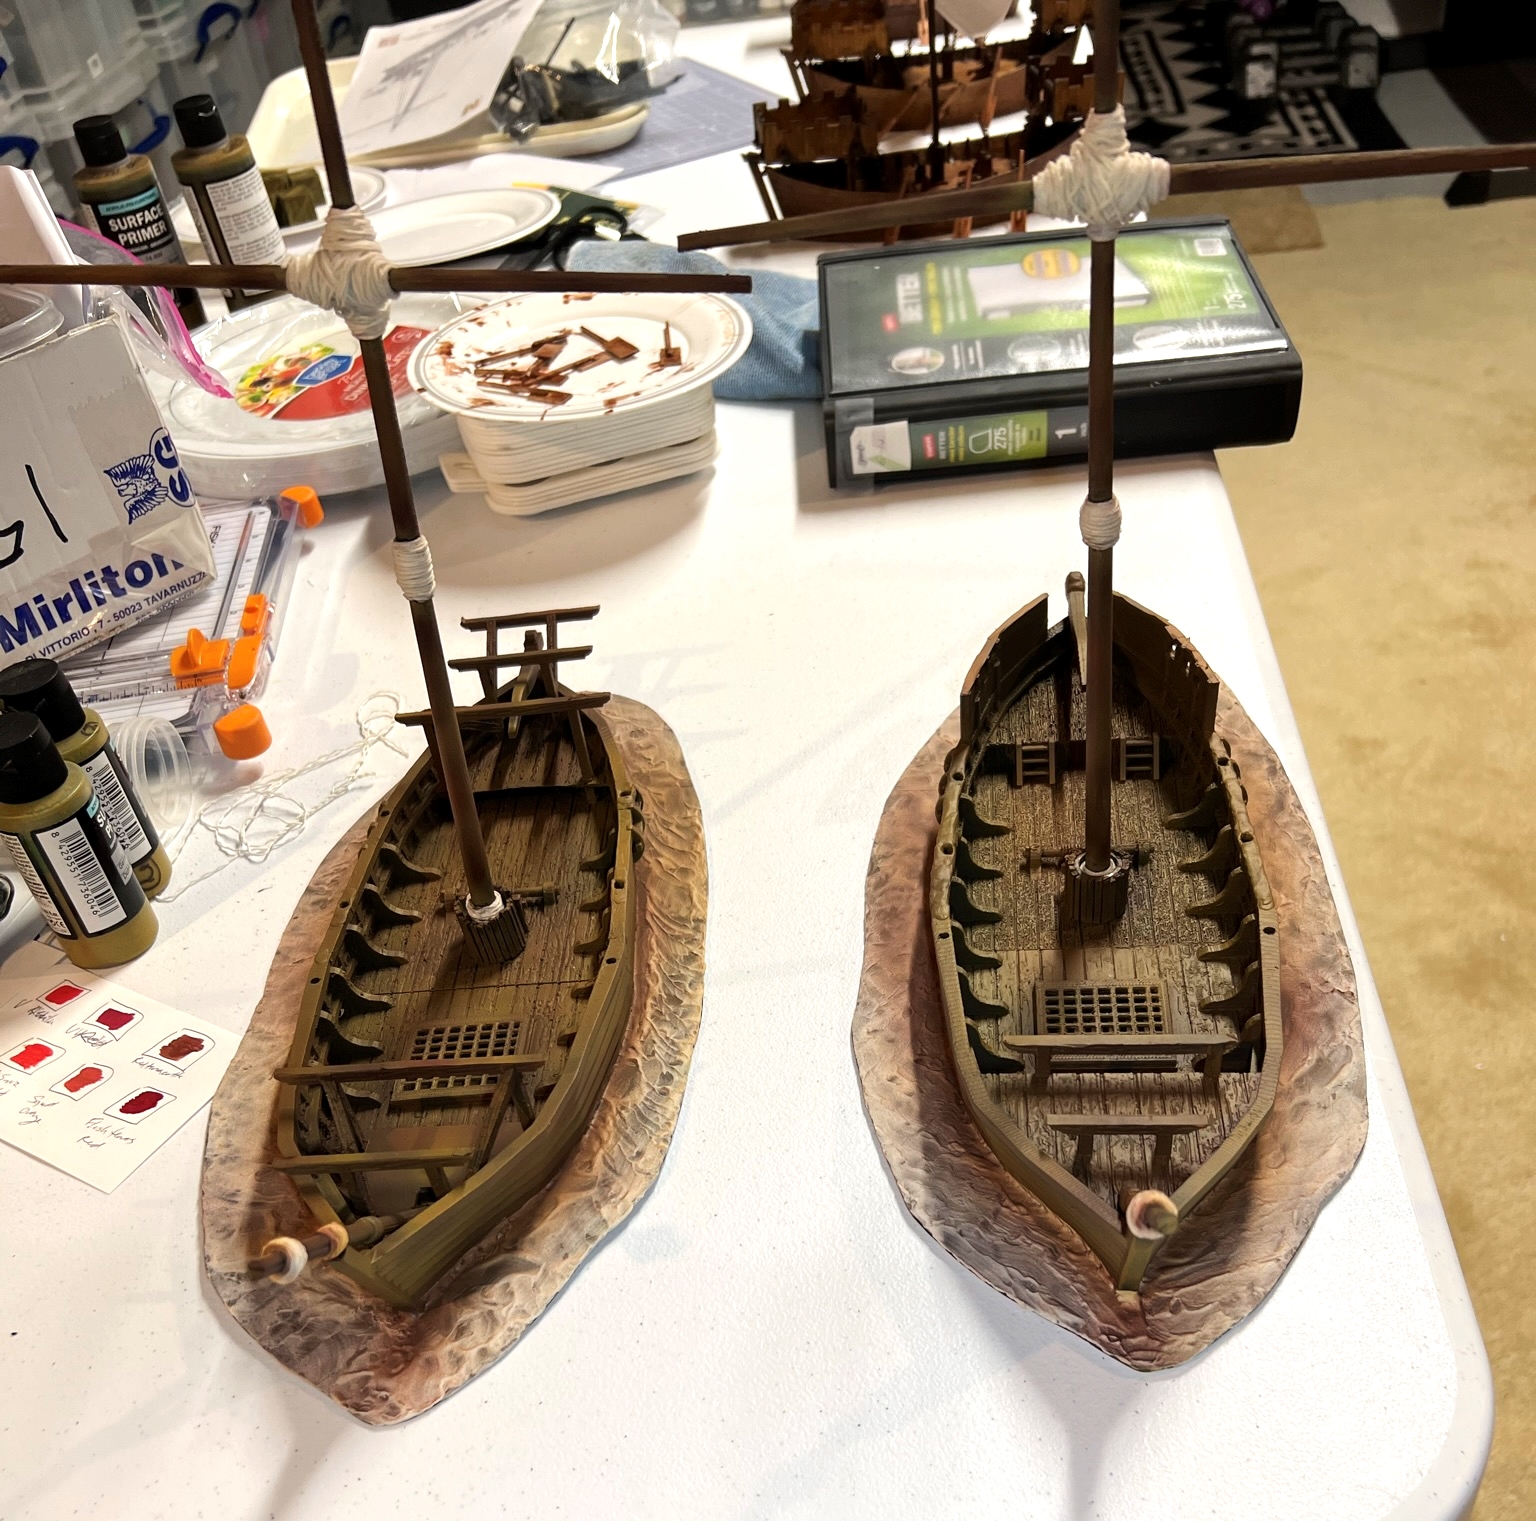
By using the cotton twine fibers and PVA, I was able to custom fit the masts into each support. Importantly, as these two had two hull pieces, I used some styrene sheets to affix them together. This way there was more strength than just gluing together the hull halves. – and I could paint them to look like they were moving through the water. As a side note, I did not give the other three a water base so that I could use them for an Aztec raid scenario where they are in assembly on land and the Spanish are surprised.
I also mocked up the oars and put some together to see how they would go together.
Styrene sheet base halvesOar mock upsEl Gregorio parts ready for primingEl Gregorio on the left and El Dólar on the right ready for priming. The Sarissa kits are on the right (more on them in a bit).
I masked up the twine sections with painters masking tape and double-primed the components outside on the first day that was warm enough in March to use a rattle can. I had separated the pieces so I could more easily paint all of them and then assemble everything afterwards. It proved to be a good call.
Rattle can priming
These were now all brown. I wanted to add some styrene on El Dólar so that its forecastle supports would mount better. I also prepped all of the oar locks by drilling out holes for 1/8″ wooden dowels. This caused some unwanted damage to the brittle plastic, so I then fixed/strengthened each hole with green stuff and brush-primed the oarlocks. Then I serially applied different browns via airbrush in a zenithal fashion until I was happy with the base color on both ships.
At some point in the past I had bought some Pebeo Studio Acrylics “Auxiliaries Modeling Paste HD. I added some in a wavy pattern to the water bases.
Regarding the color of the ropes, I was unhappy with the look of the ropes. I had used “Apothecary White” and hated the look. I redid them (thanks to a suggestion from Chris Palmer) with “Skeleton Horde” – and I liked them much better.
The old rigging color – no good. I would adjust this.Added styrene to El DólarAdded oarlock holesReprimed green stuff and styrene sections, and added modeling pasteEl Dólar on left and on El Gregorio on right after serial airbrushing.
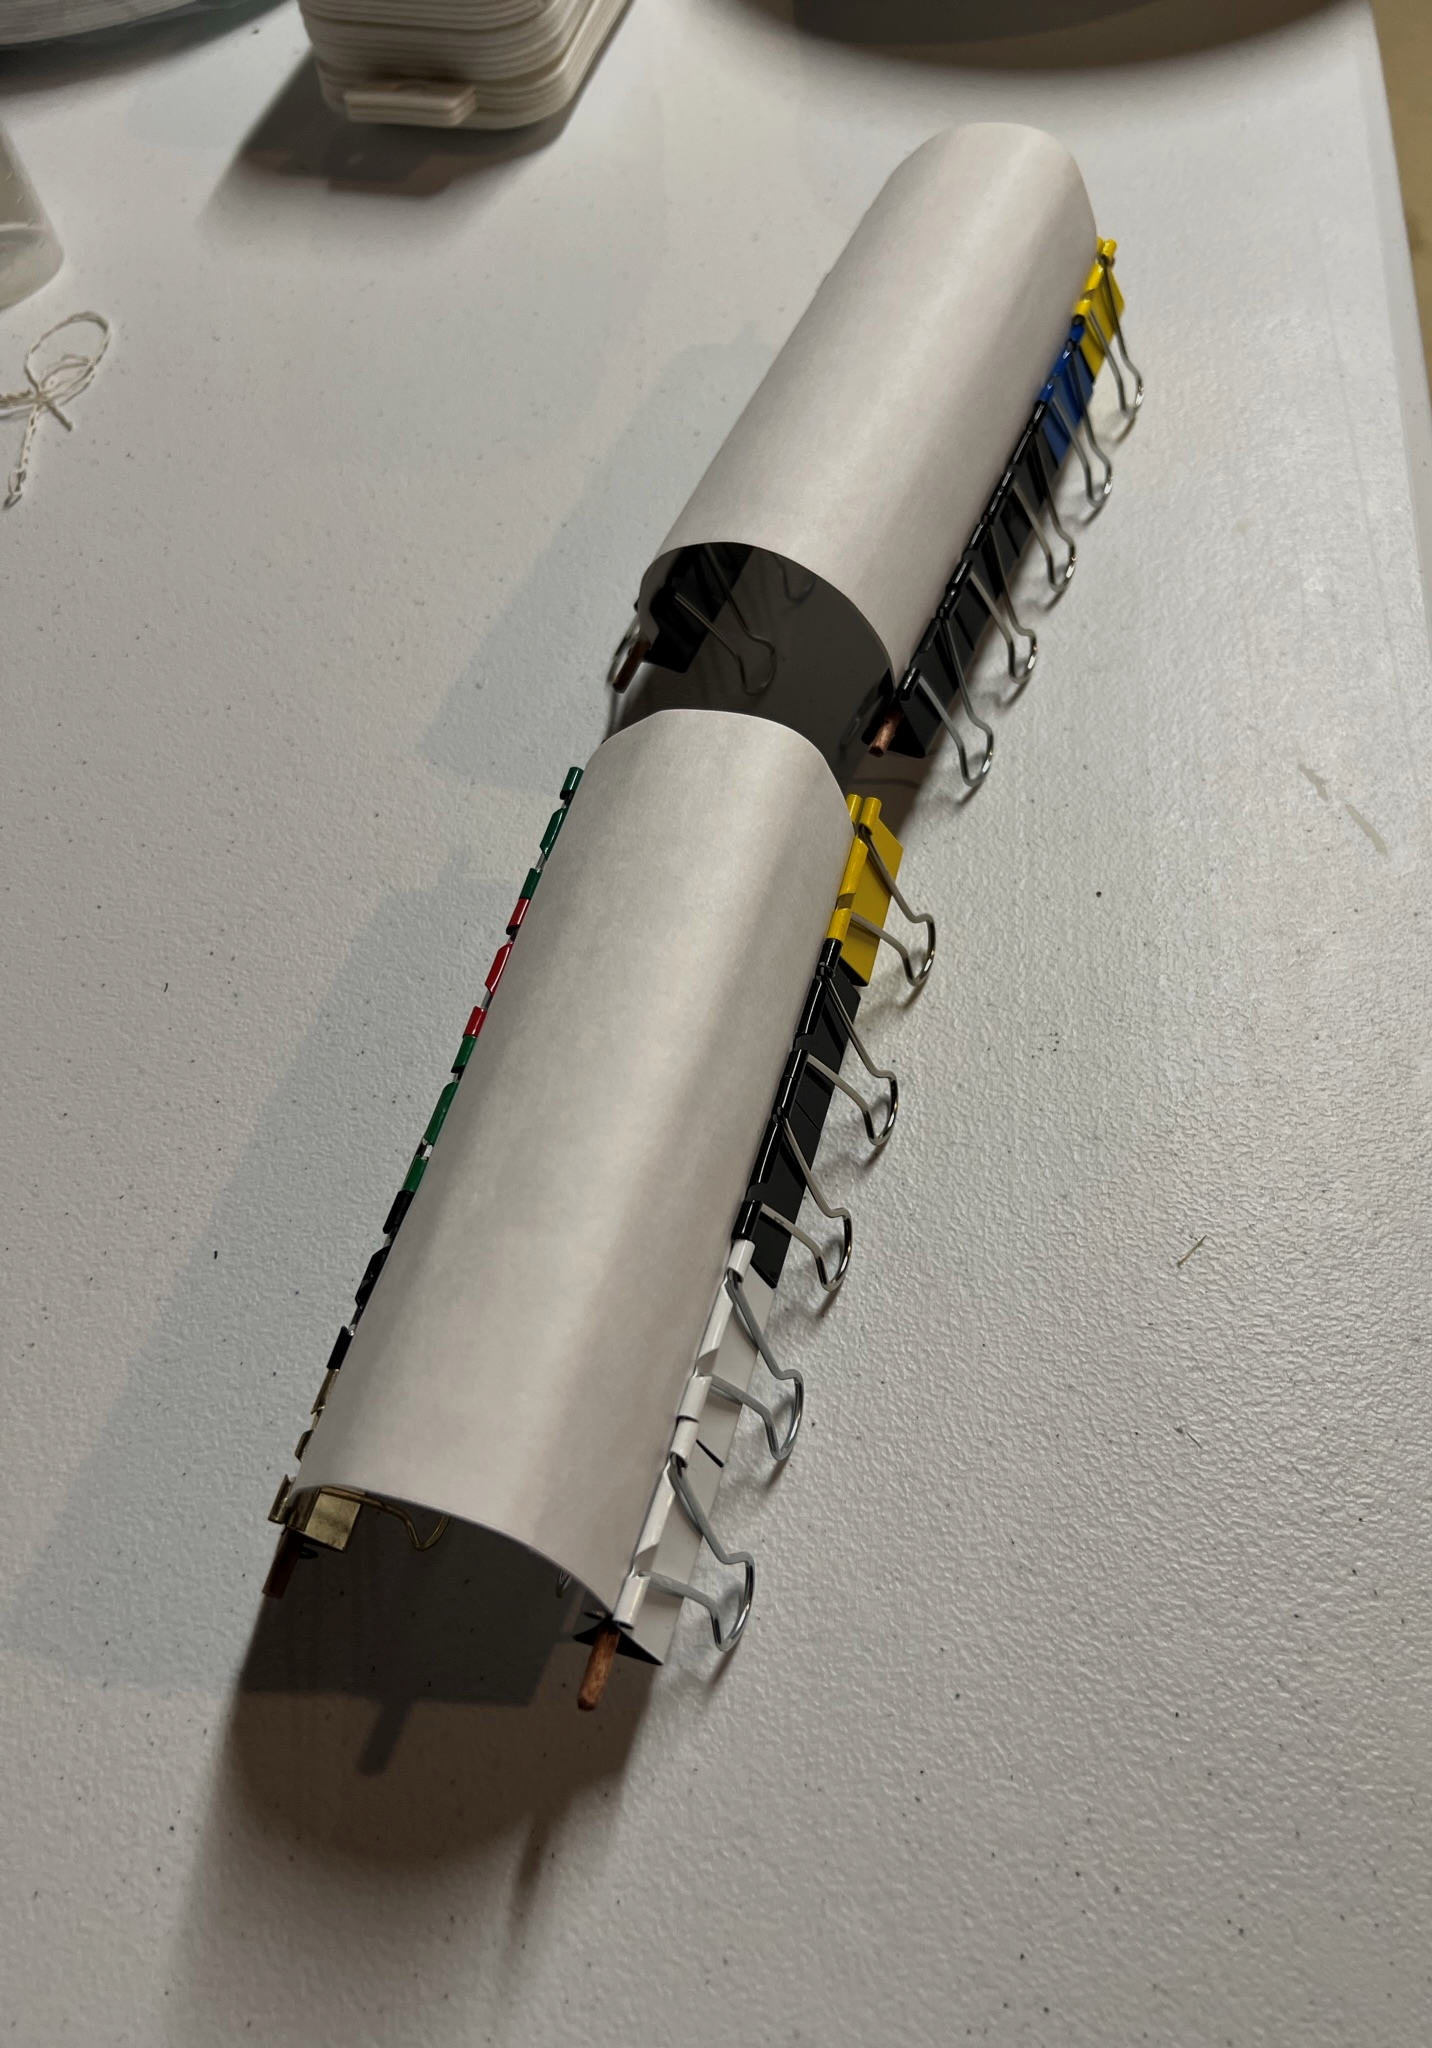
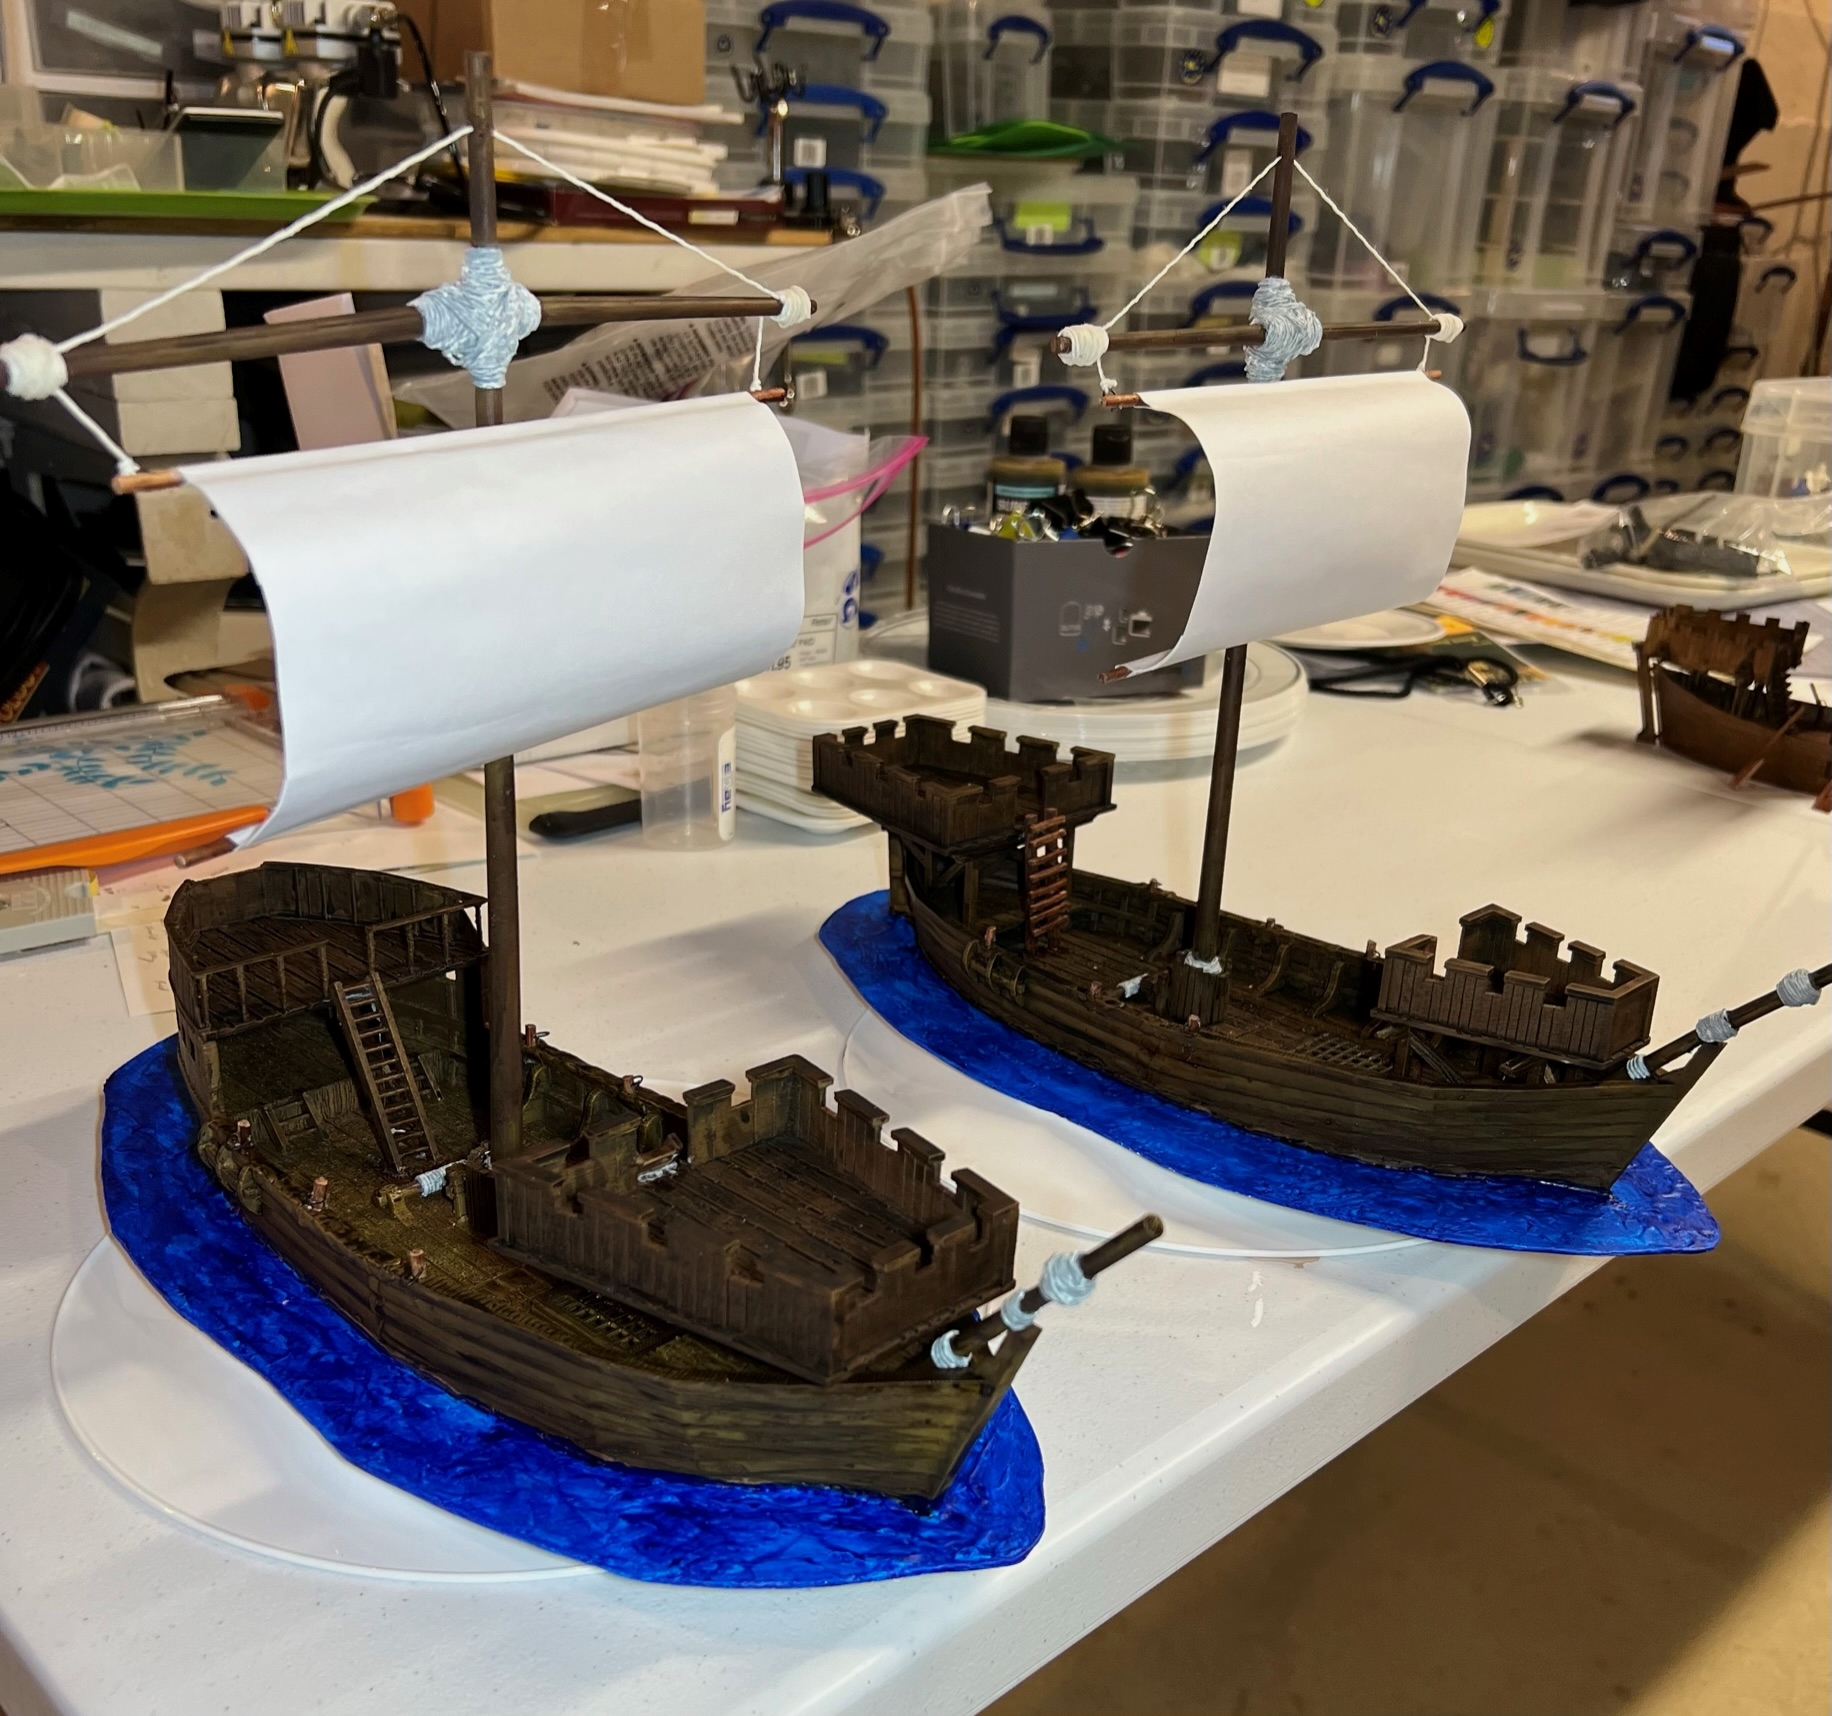
It was then time to work on the sails, more rigging, and the water base. I made the sails with dowels and card stock and PVA. Binder clips helped immensely with the shape. I mounted the sails with tiny metal jewelry rings through holes I drilled in the dowels . I also made ladders for El Dólar., and dry brushed everything on the ships wood – then shaded as needed. The water was dry brushed as well
Making sails with card stock, dowels, PVA, and binder clipsAdding more rigging and mounting the sailsNeed dry brushing!El Dólar (on left) and El Gregorio. The water on El Dólar’s base has not yet been dry brushed.
I then thought that the sails were too pristine. As I was drinking some Darjeeling tea, I used the tea bag to stain up the sails – and I would do this for all 5 ships eventually.
Good thing I’m a tea drinker.
Lastly, I want to show the completed 3D printed ships:
I was pretty happy with these – but now it was time for the Sarissa MDF kits!
El Conquistador & El Perro de Guerra
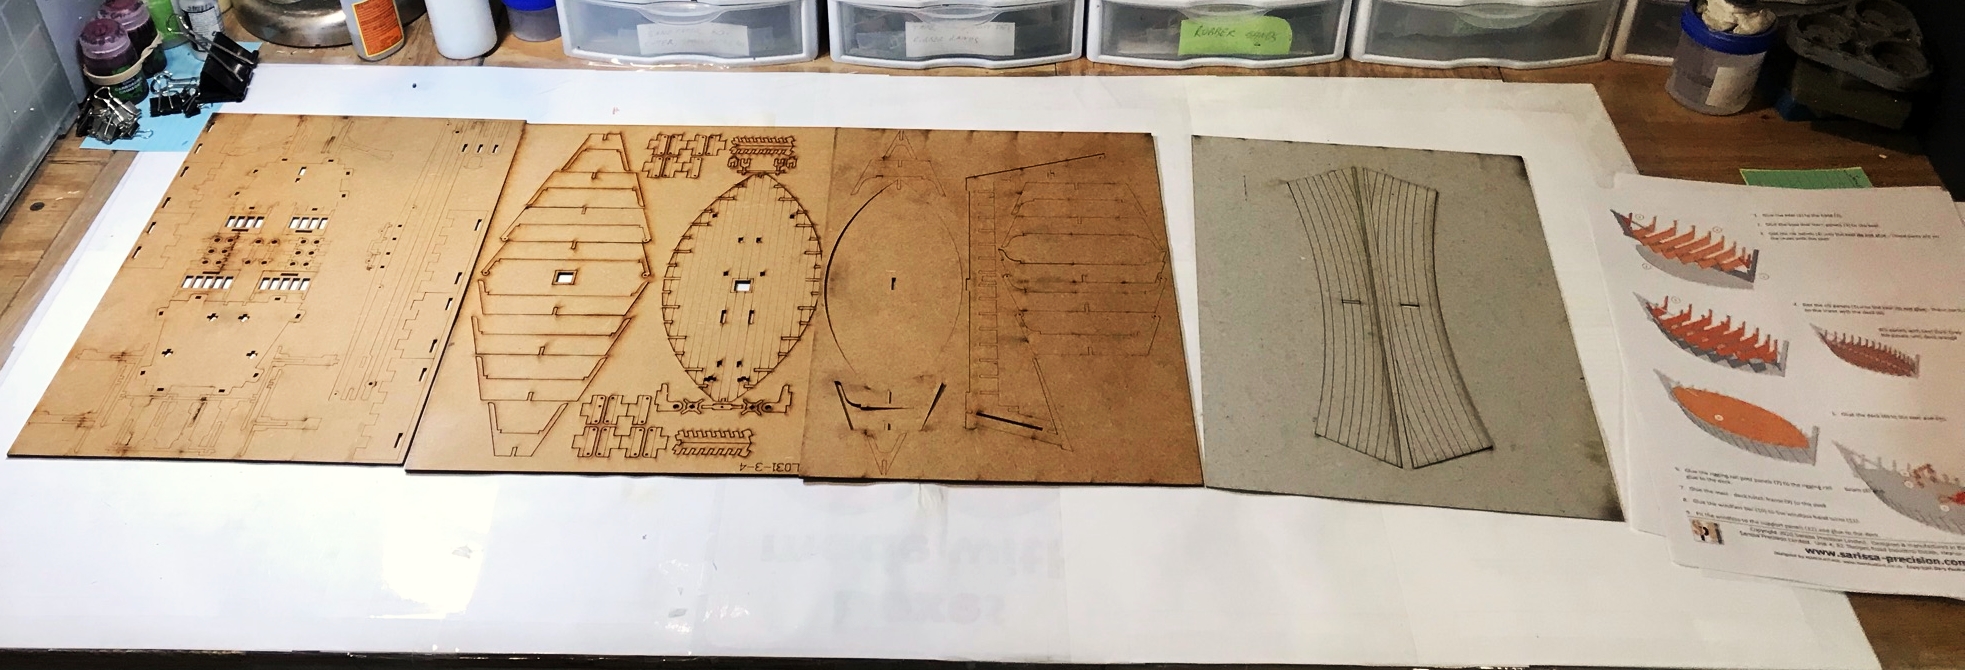
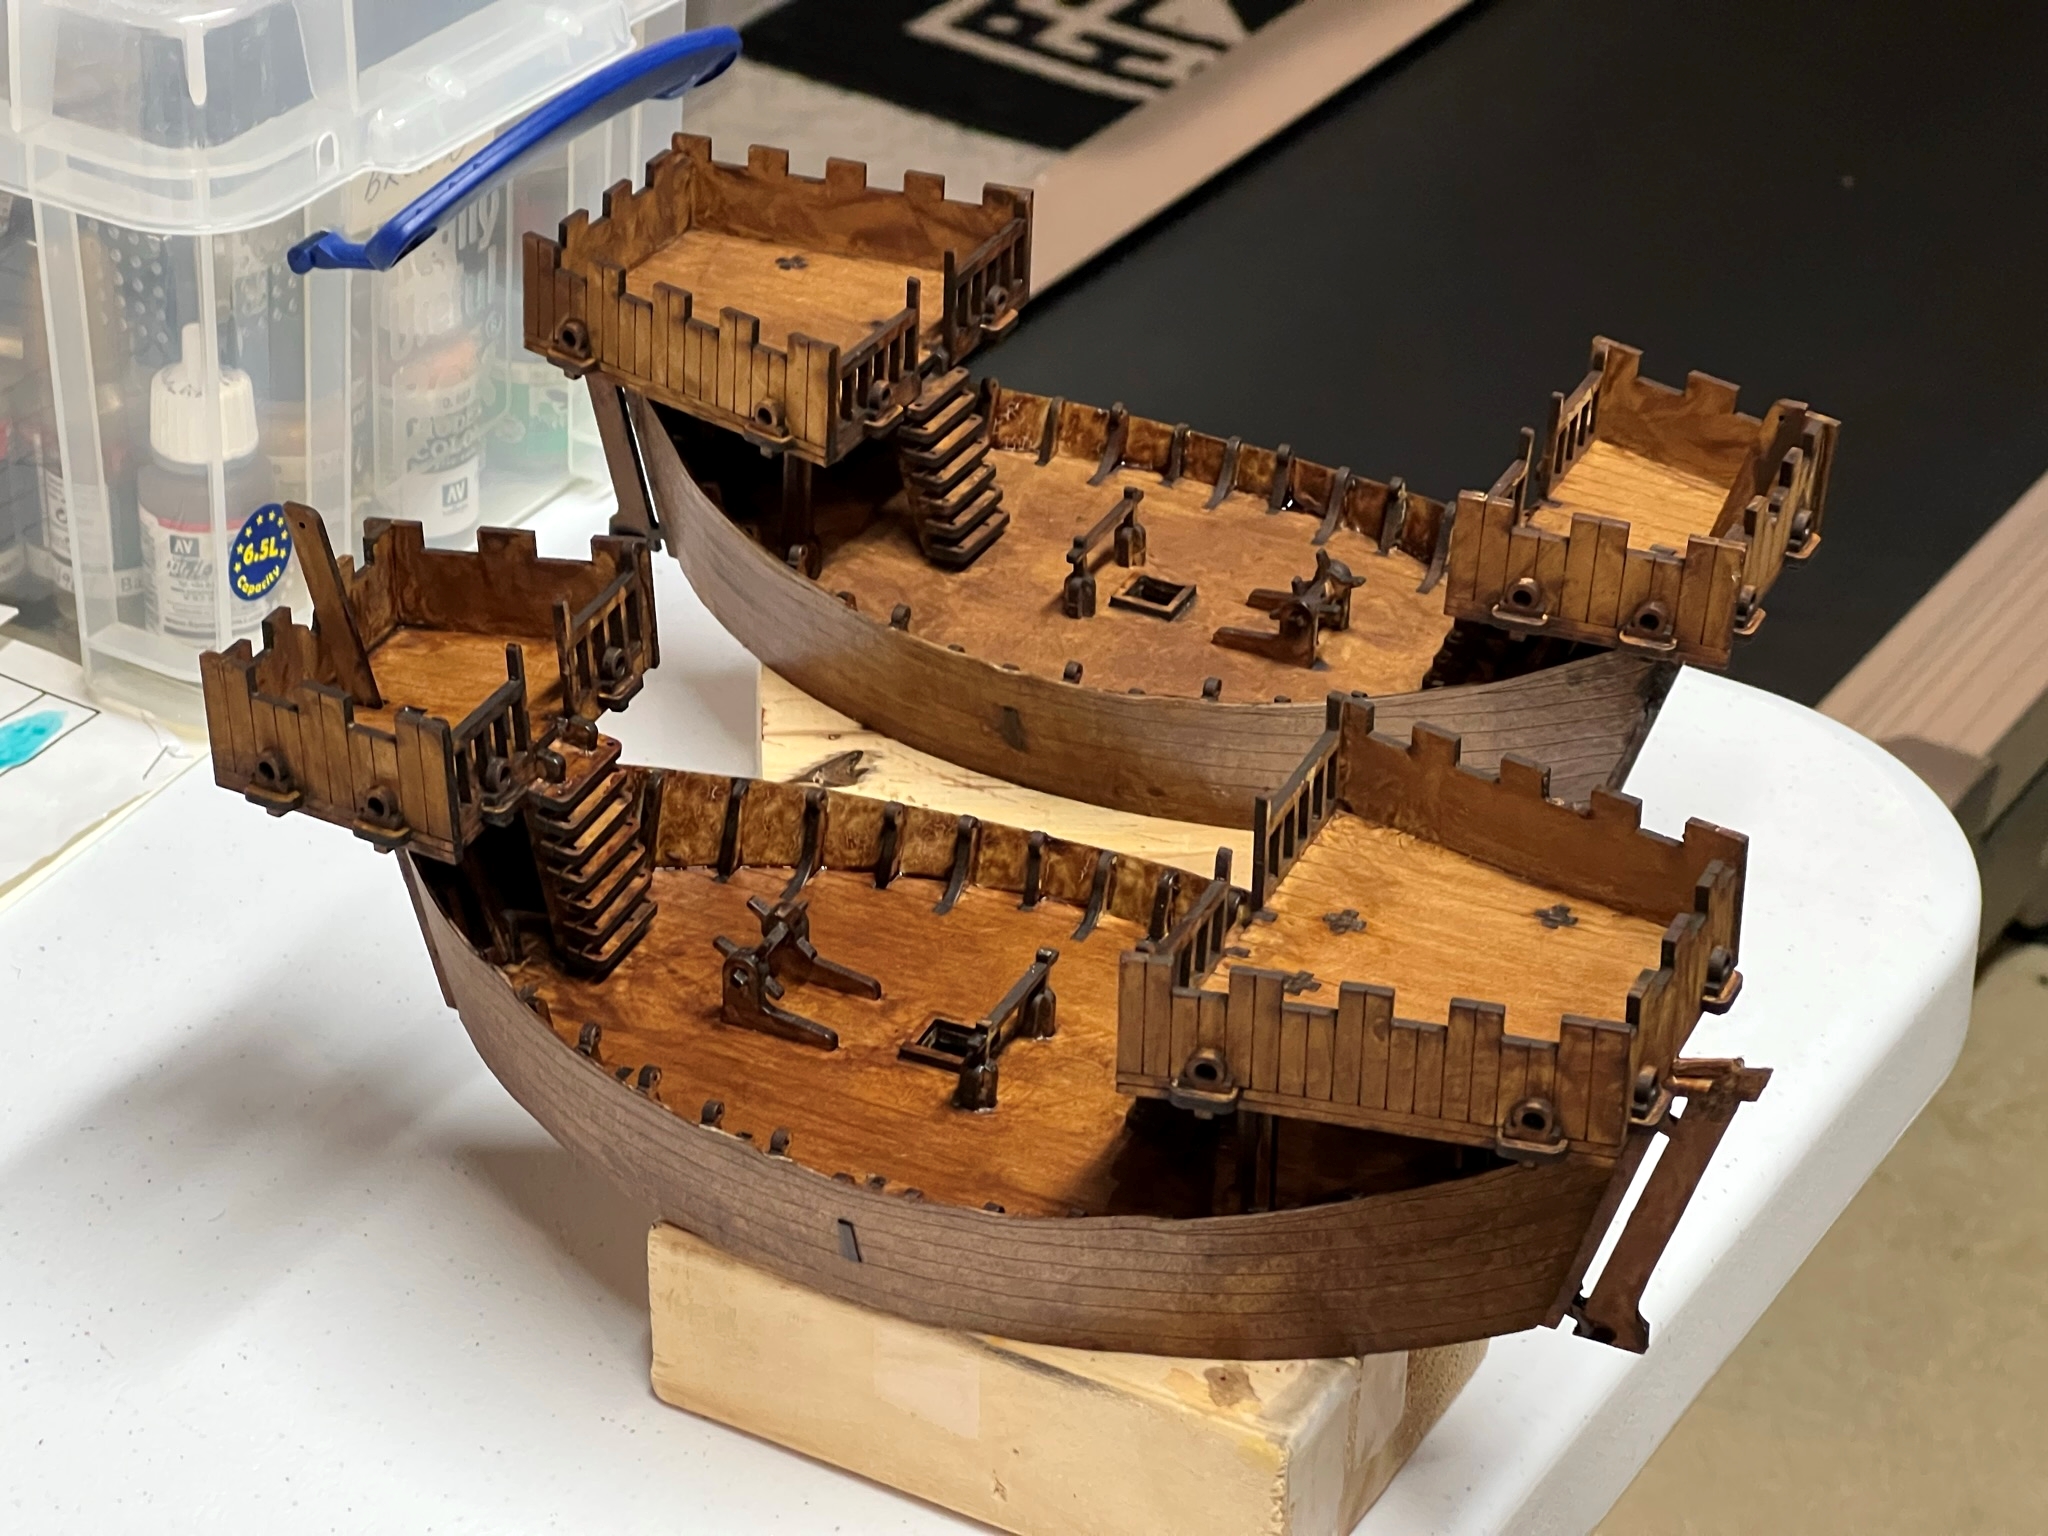
These two models were a bit smaller than the 3D ones. Unsurprisingly, these took a lot of gluing and patience. I did need to modify some damage to one of the tillers as well when a rubber band snapped it off of one. Still, the kits were fun and well-made – I just needed to try to match the colors (relatively) of the 3D versions. For this I relied more on washes than paint. I also needed to modify these with oars and sails. Here are the photos:
The kits unopened.What is inside.
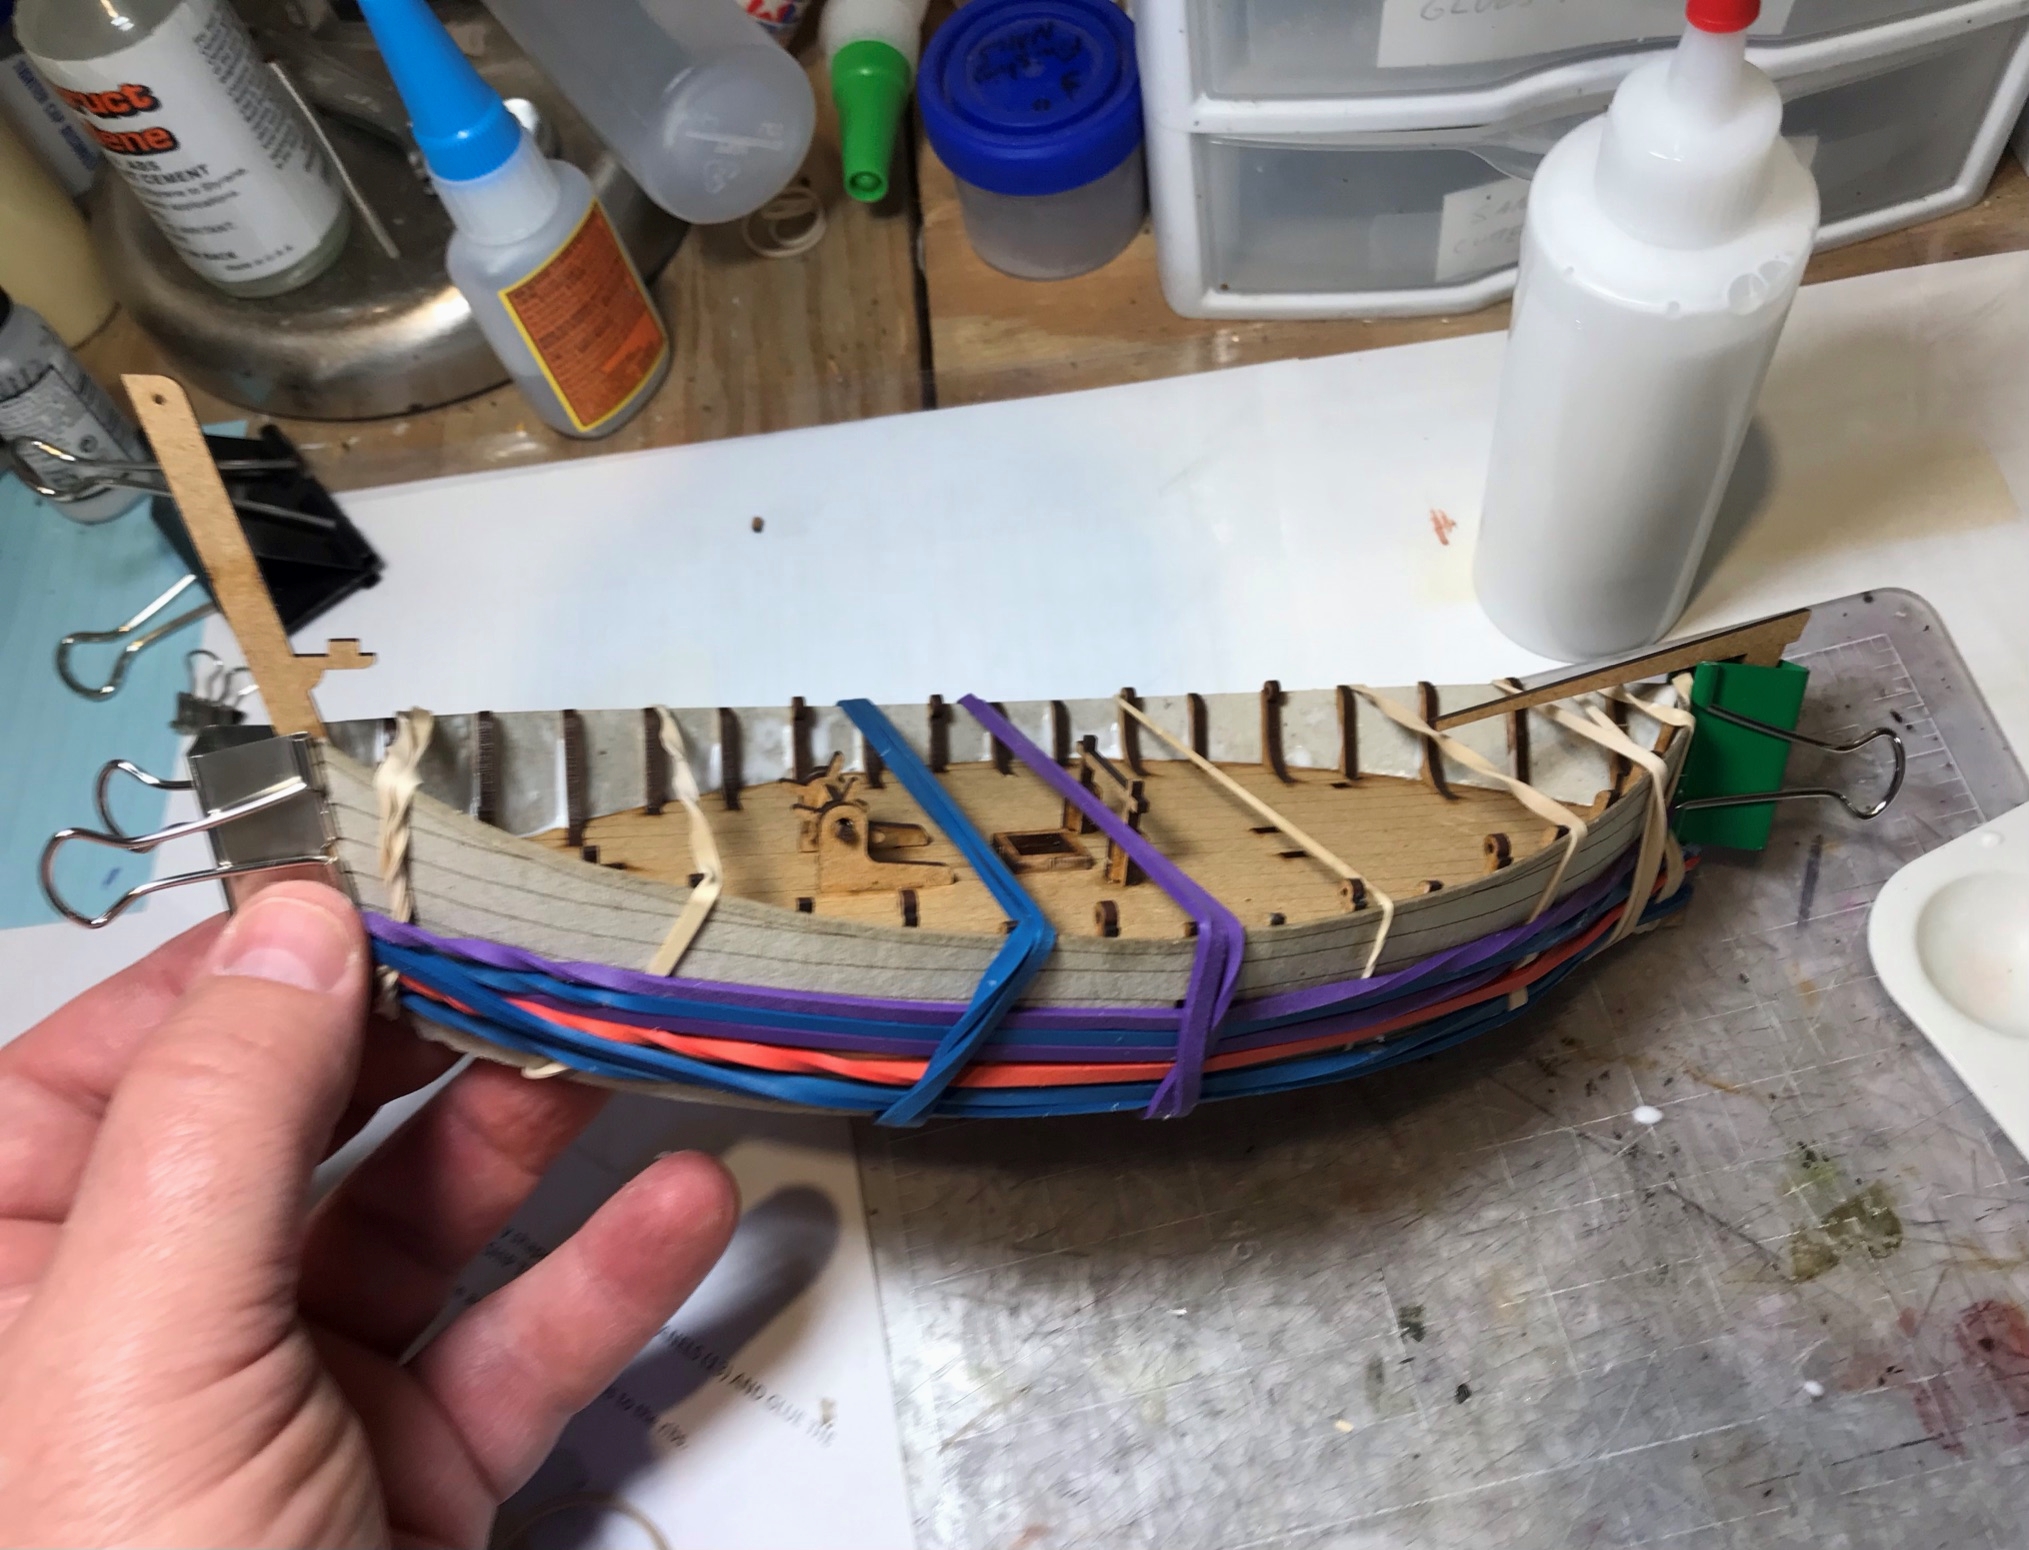
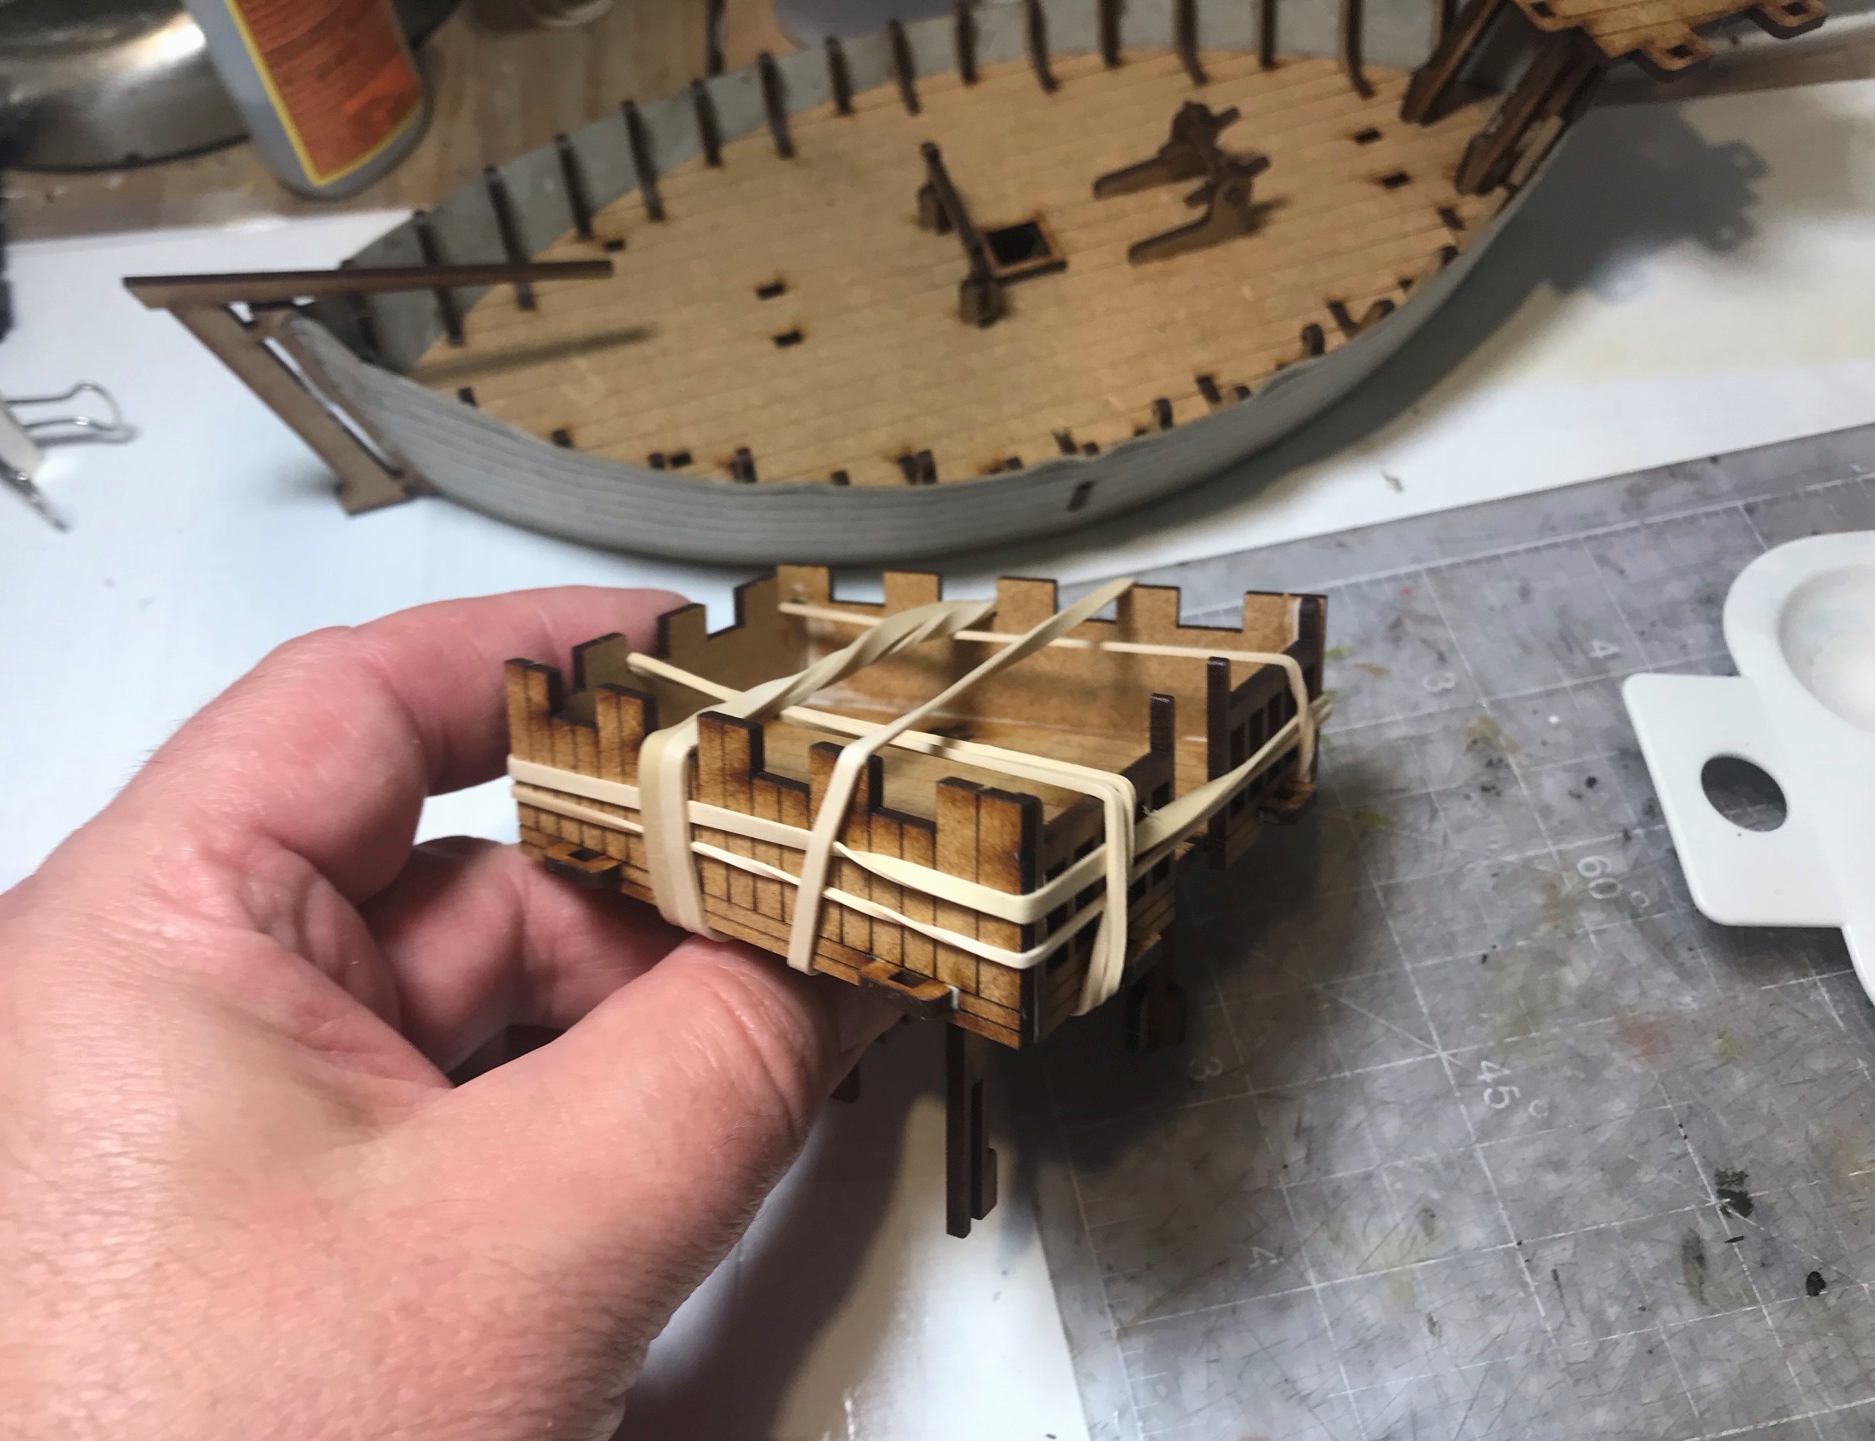
Then LOTS of gluing…
Hull gluingAfter gluingStern castle gluing
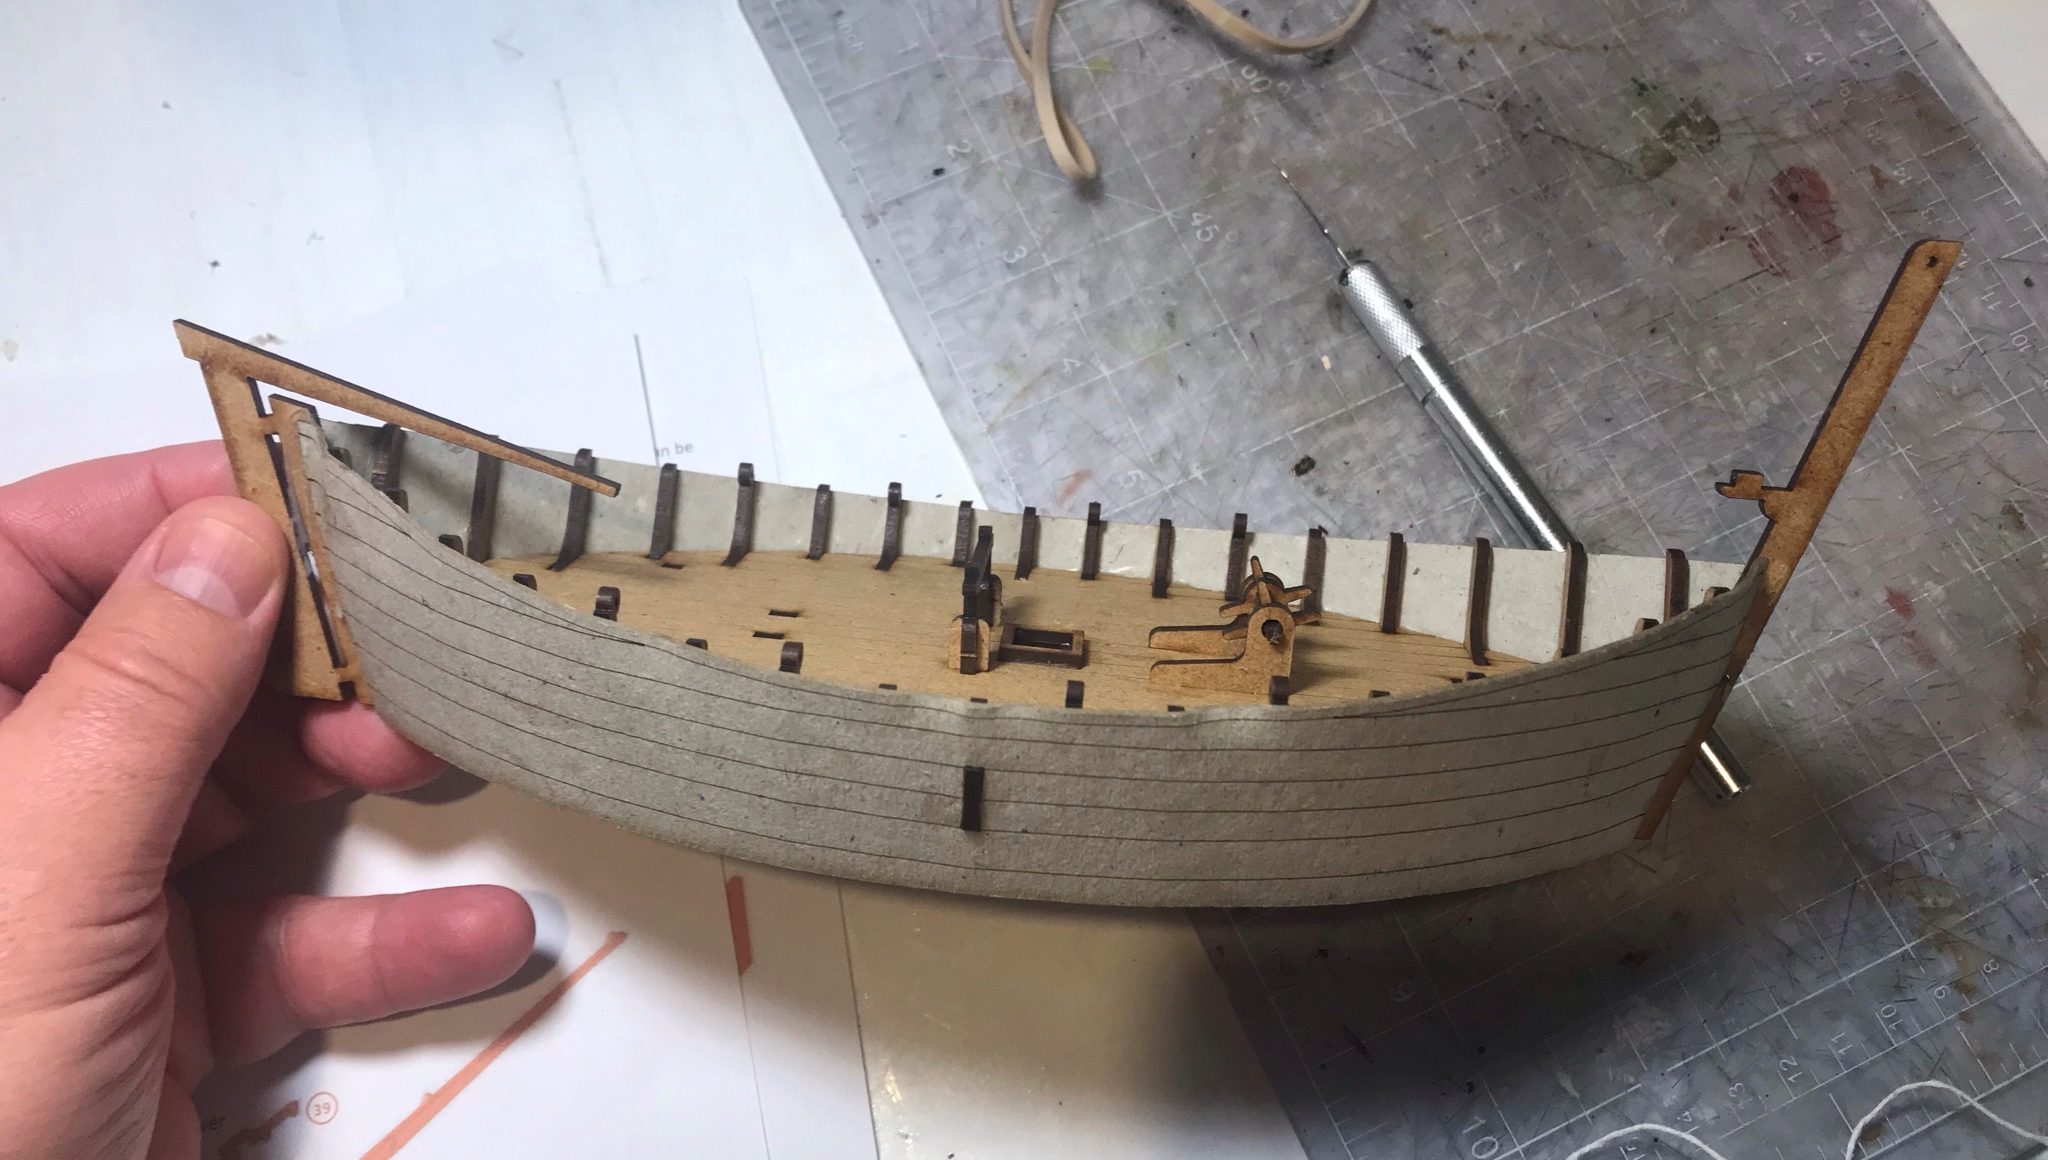
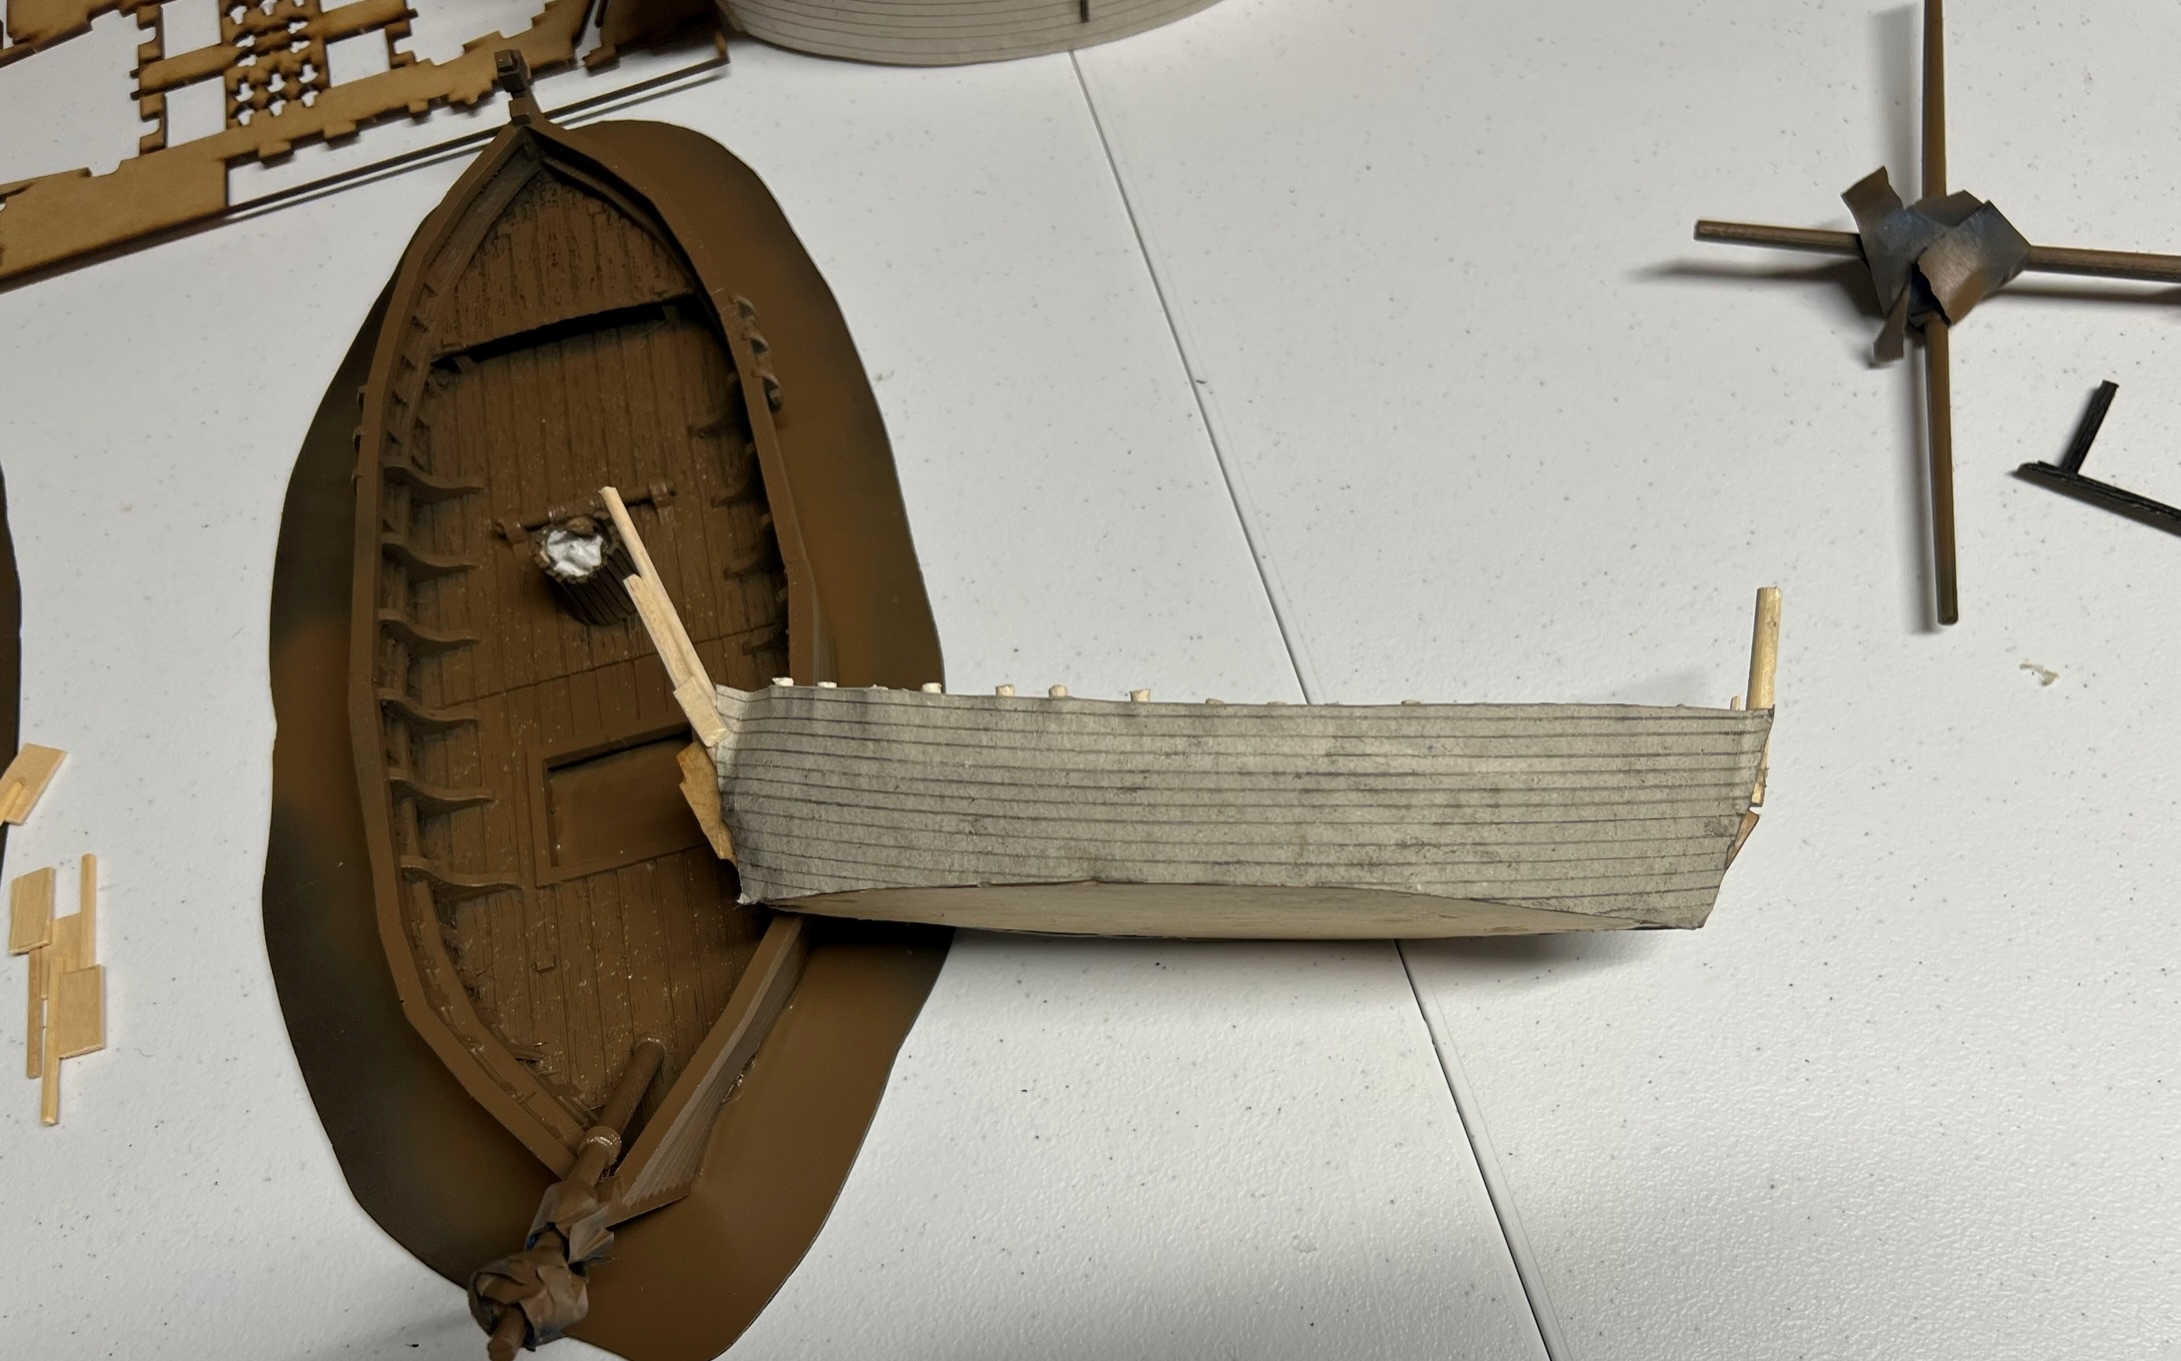
I mocked up one to see how the figures might fit inside.
Mock up of a Sarissa model – I had yet to work on the masts or sails.
In the above photo you can see the two-man falconet crew are looking less than ideal size-wise. At that point I ordered more falconets, lombards, and crew to better suit the brigantines – but that’s another upcoming post!
Then it was washing time – lots of washing…Army Painter must be happy…
Hull washing.
Then I moved on to sails and rigging.
Sails, oars, and rigging done – though the sails and rigging need work yet here with paint and Darjeeling.
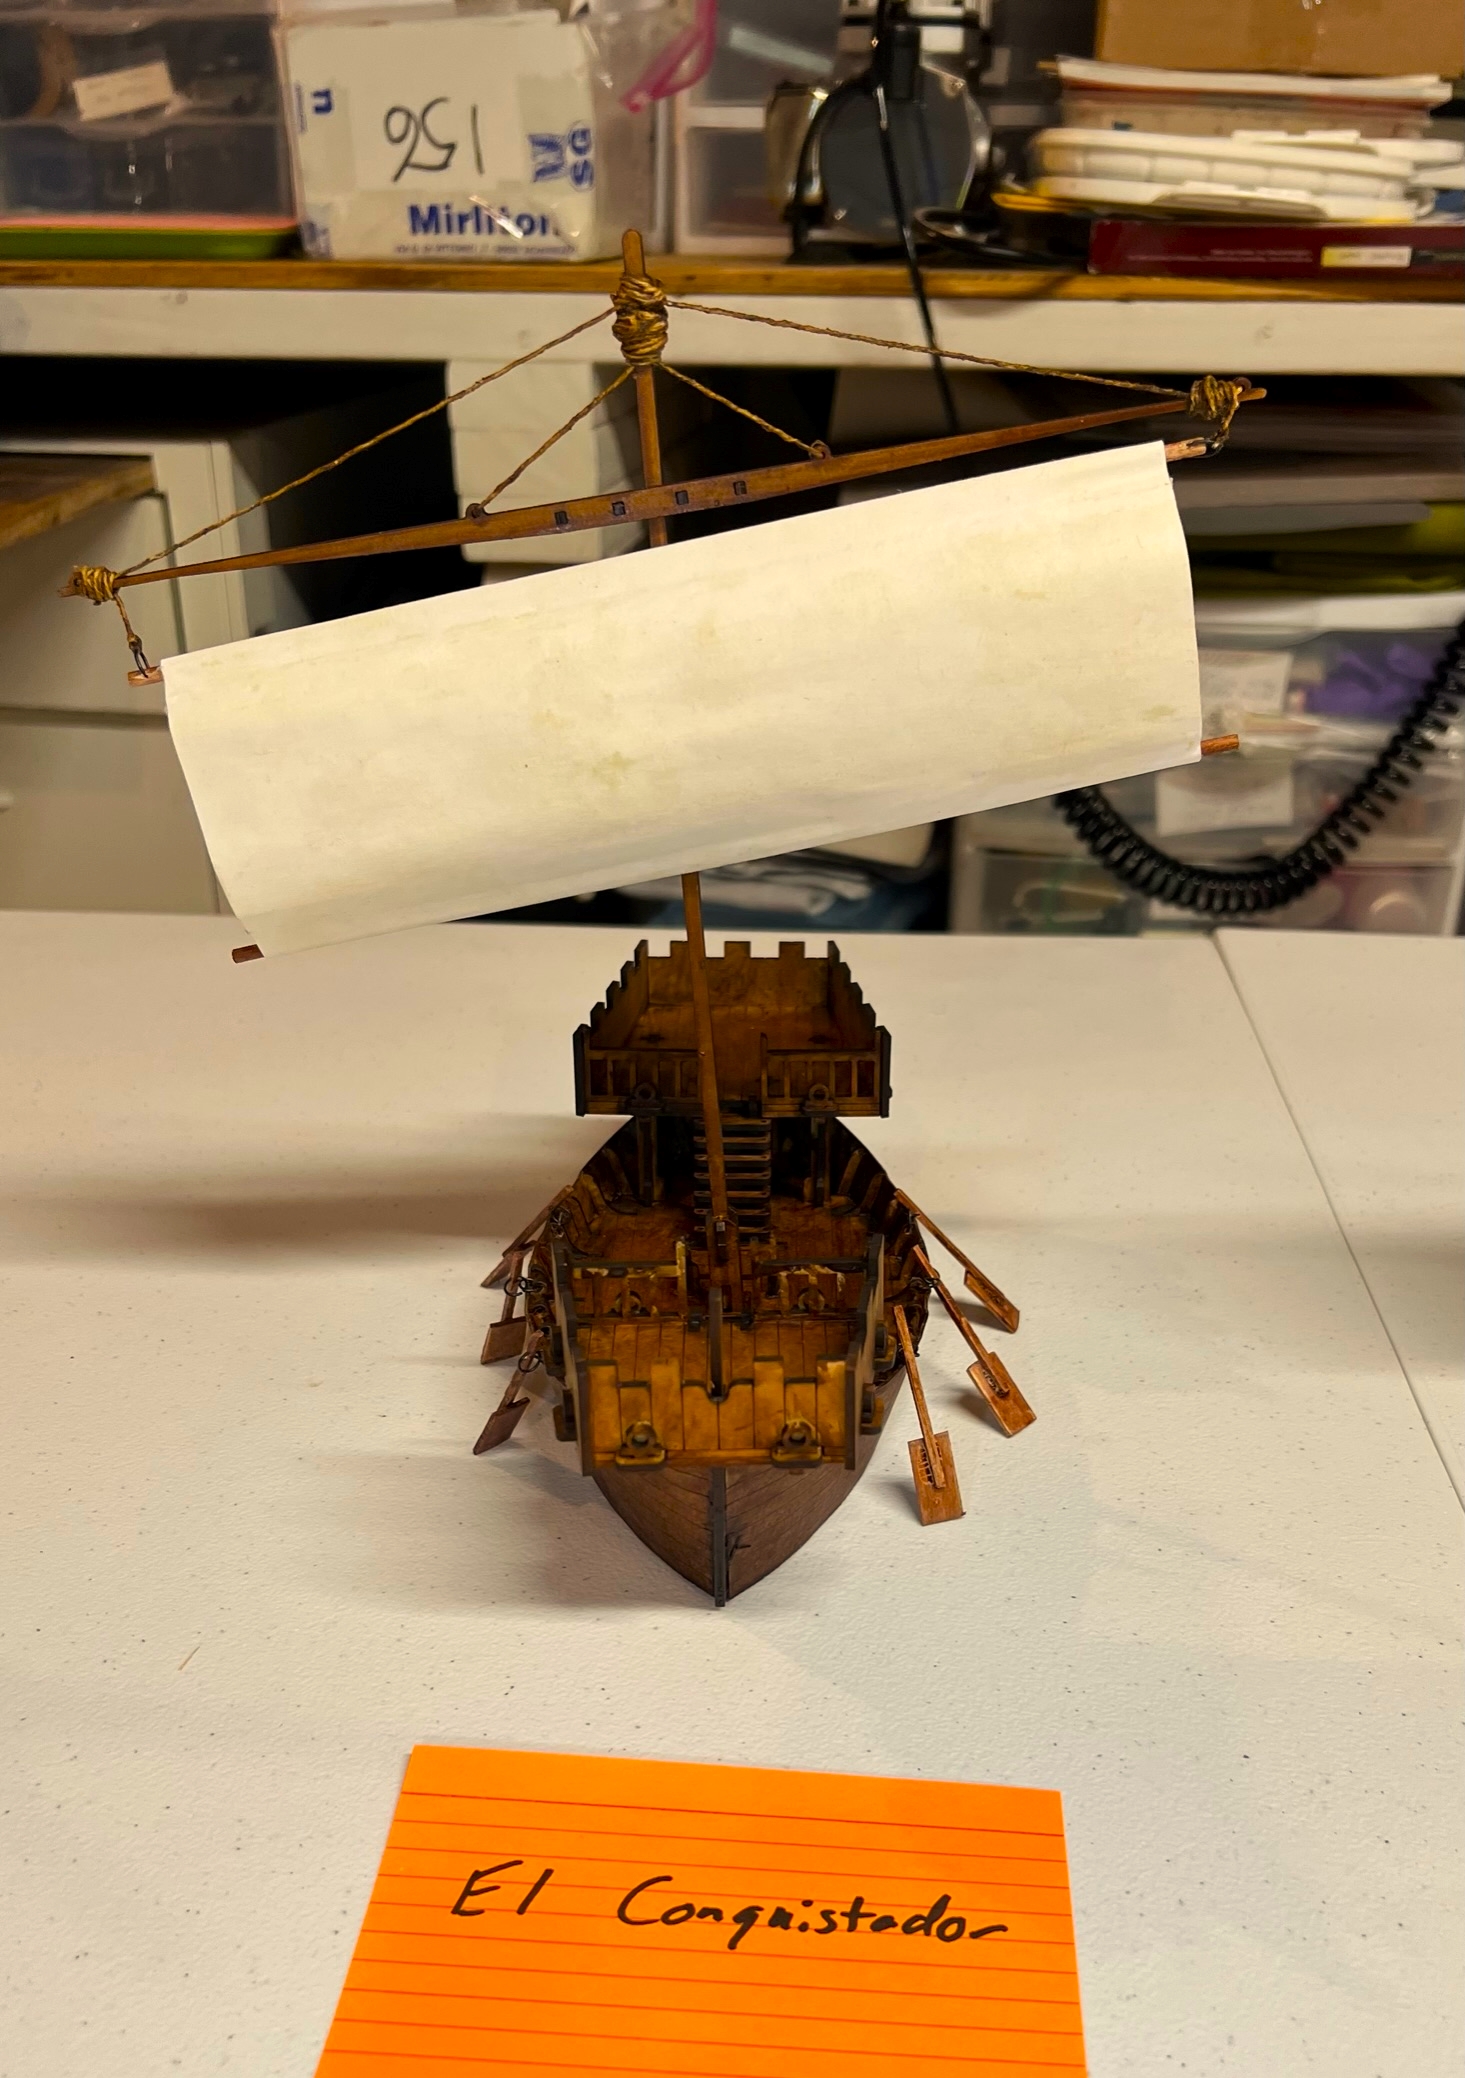
Now let’s see El Conquistador and El Perro de Guerra as completed:
El Conquistador frontEl Conquistador port sideEl Conquistador top viewEl Perro de Guerra frontEl Perro de Guerra port sideEl Perro de Guerra top view
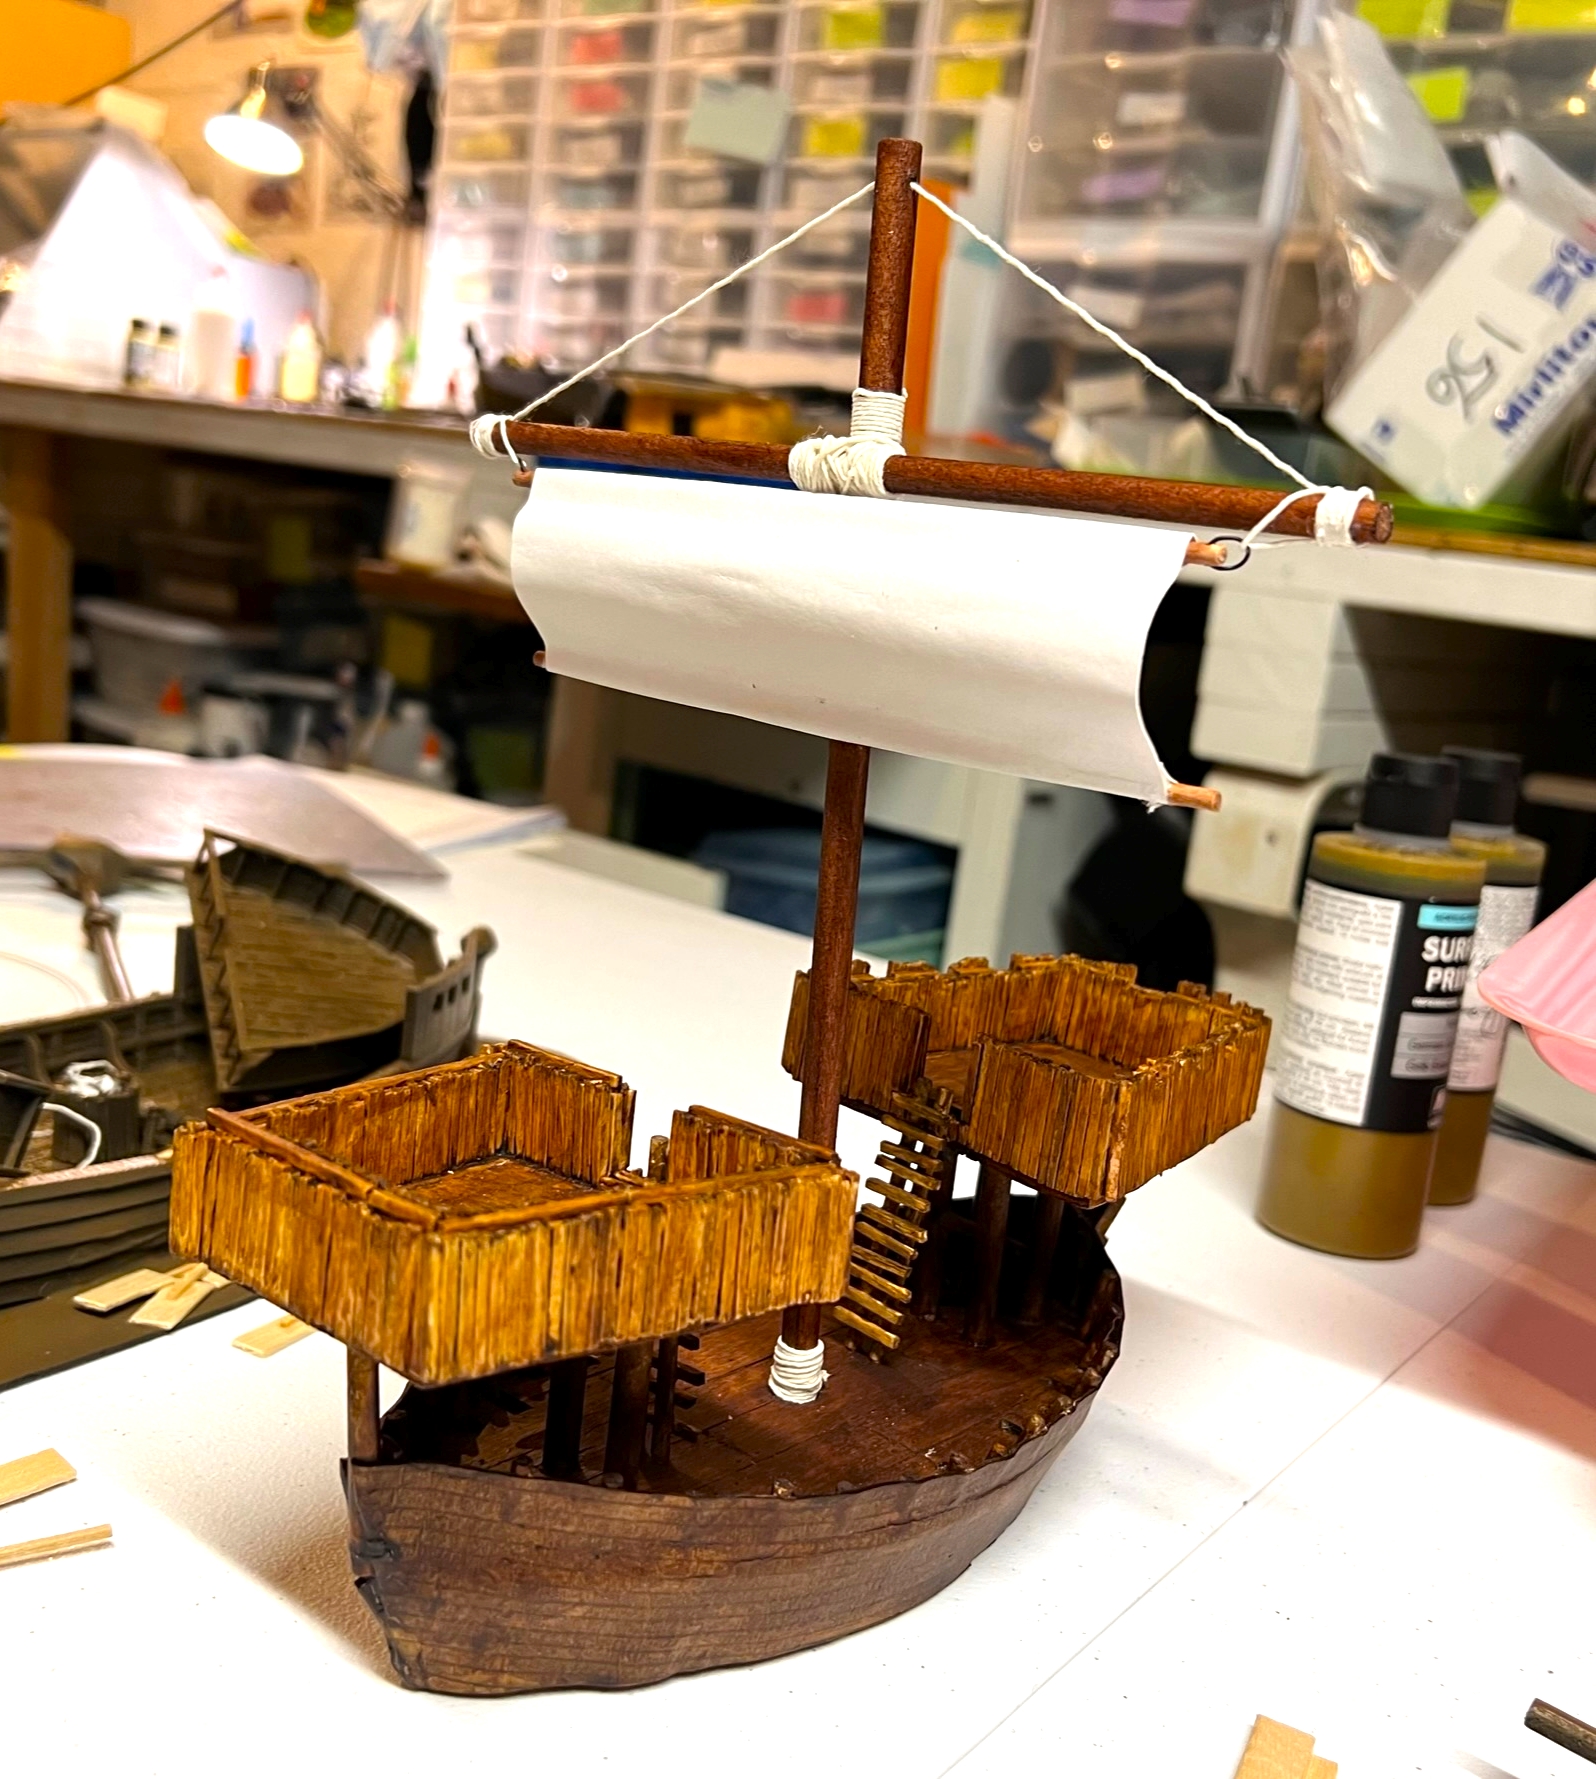
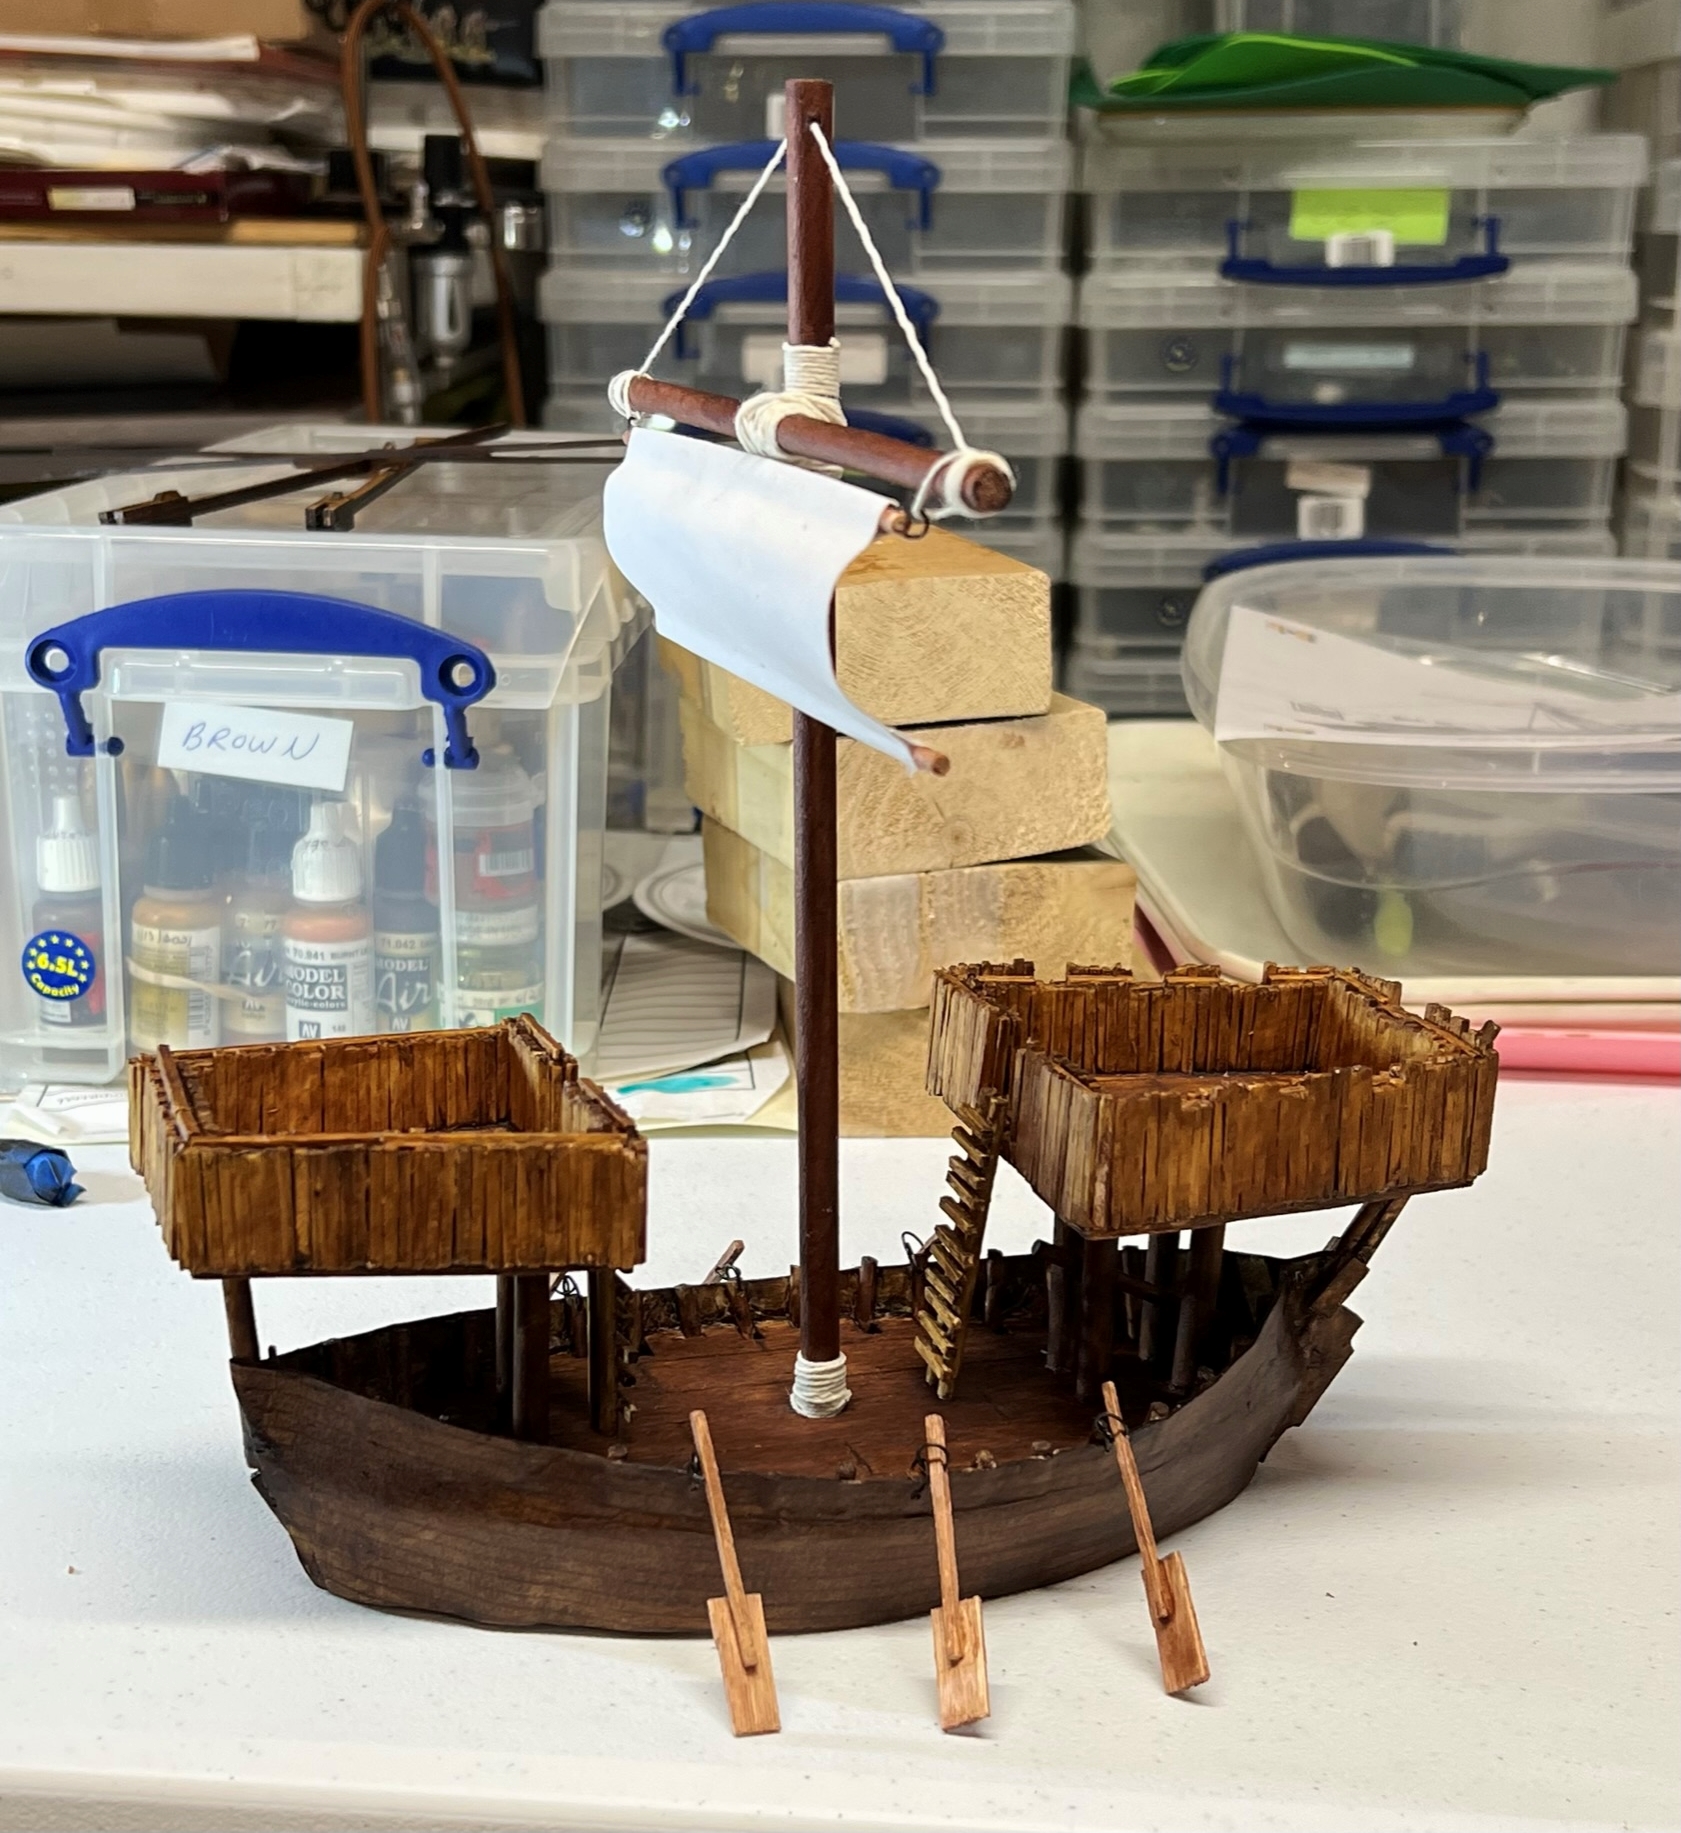
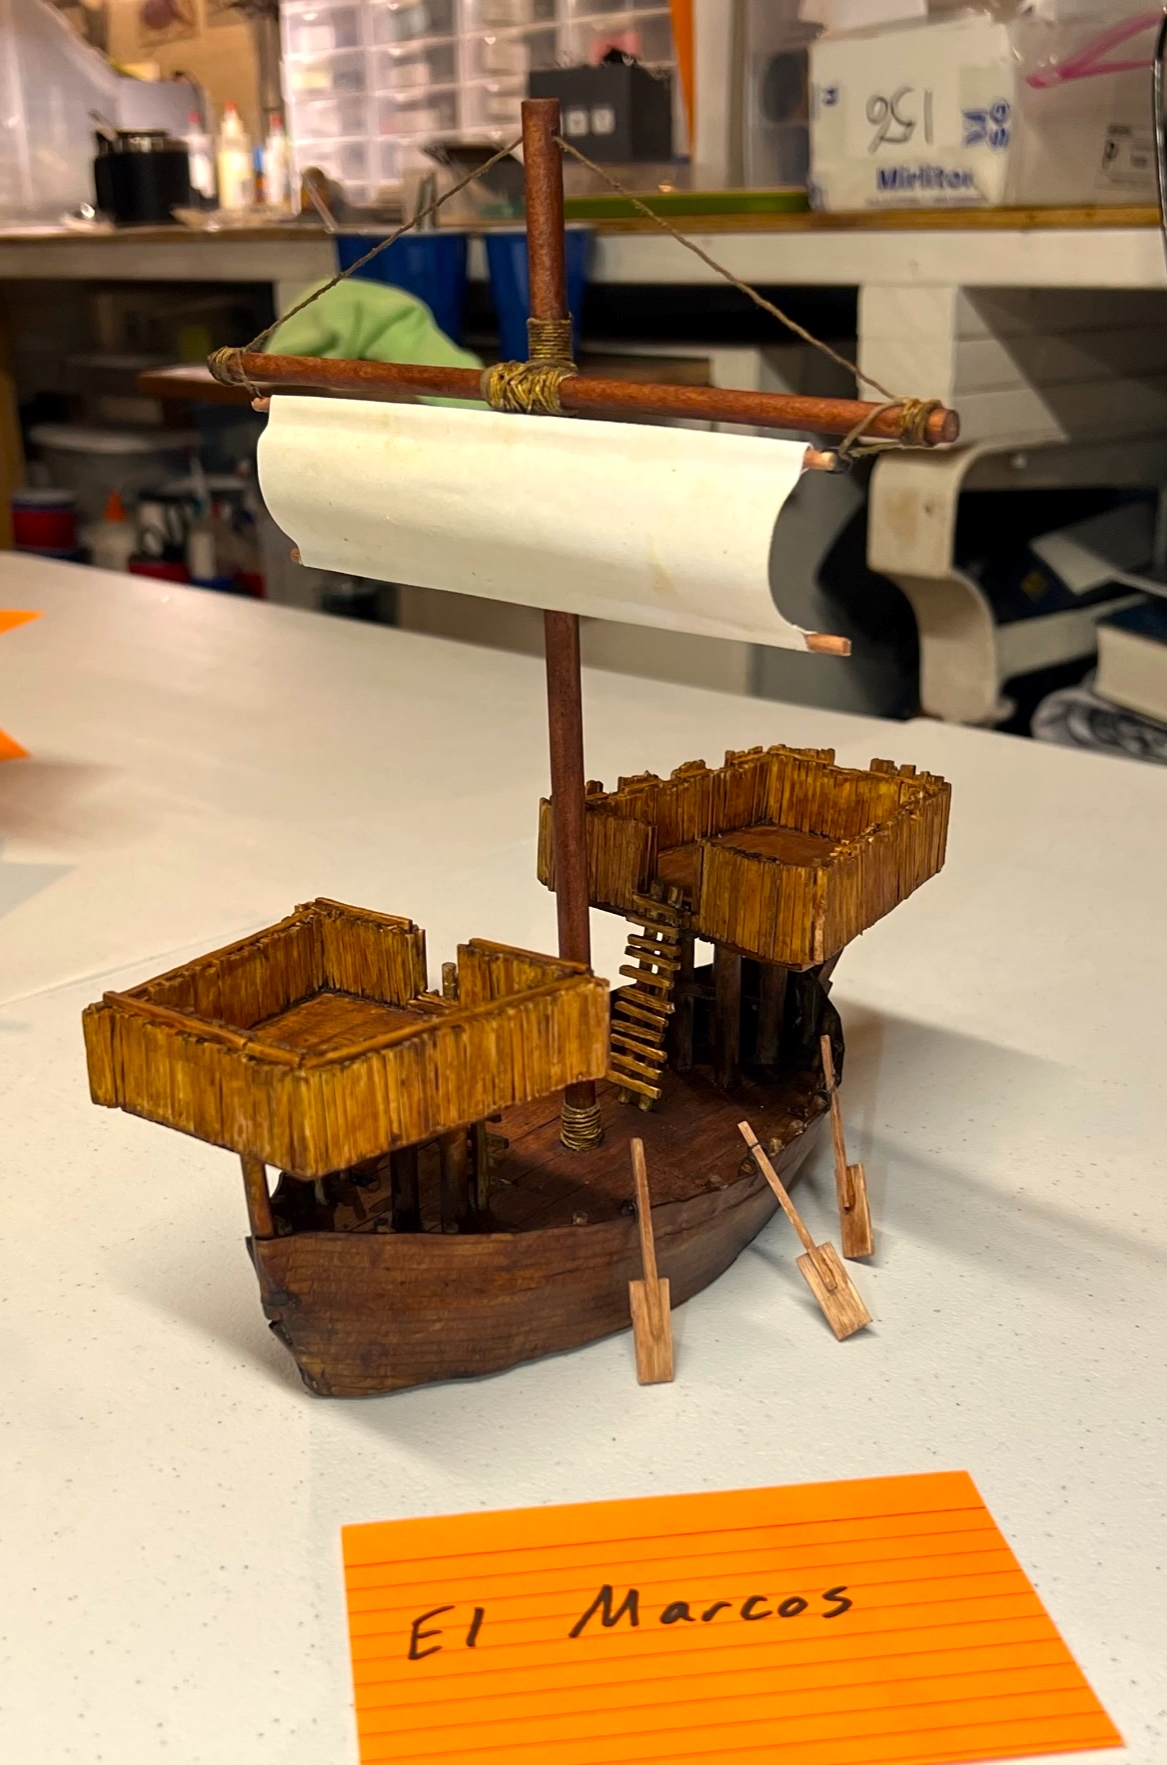
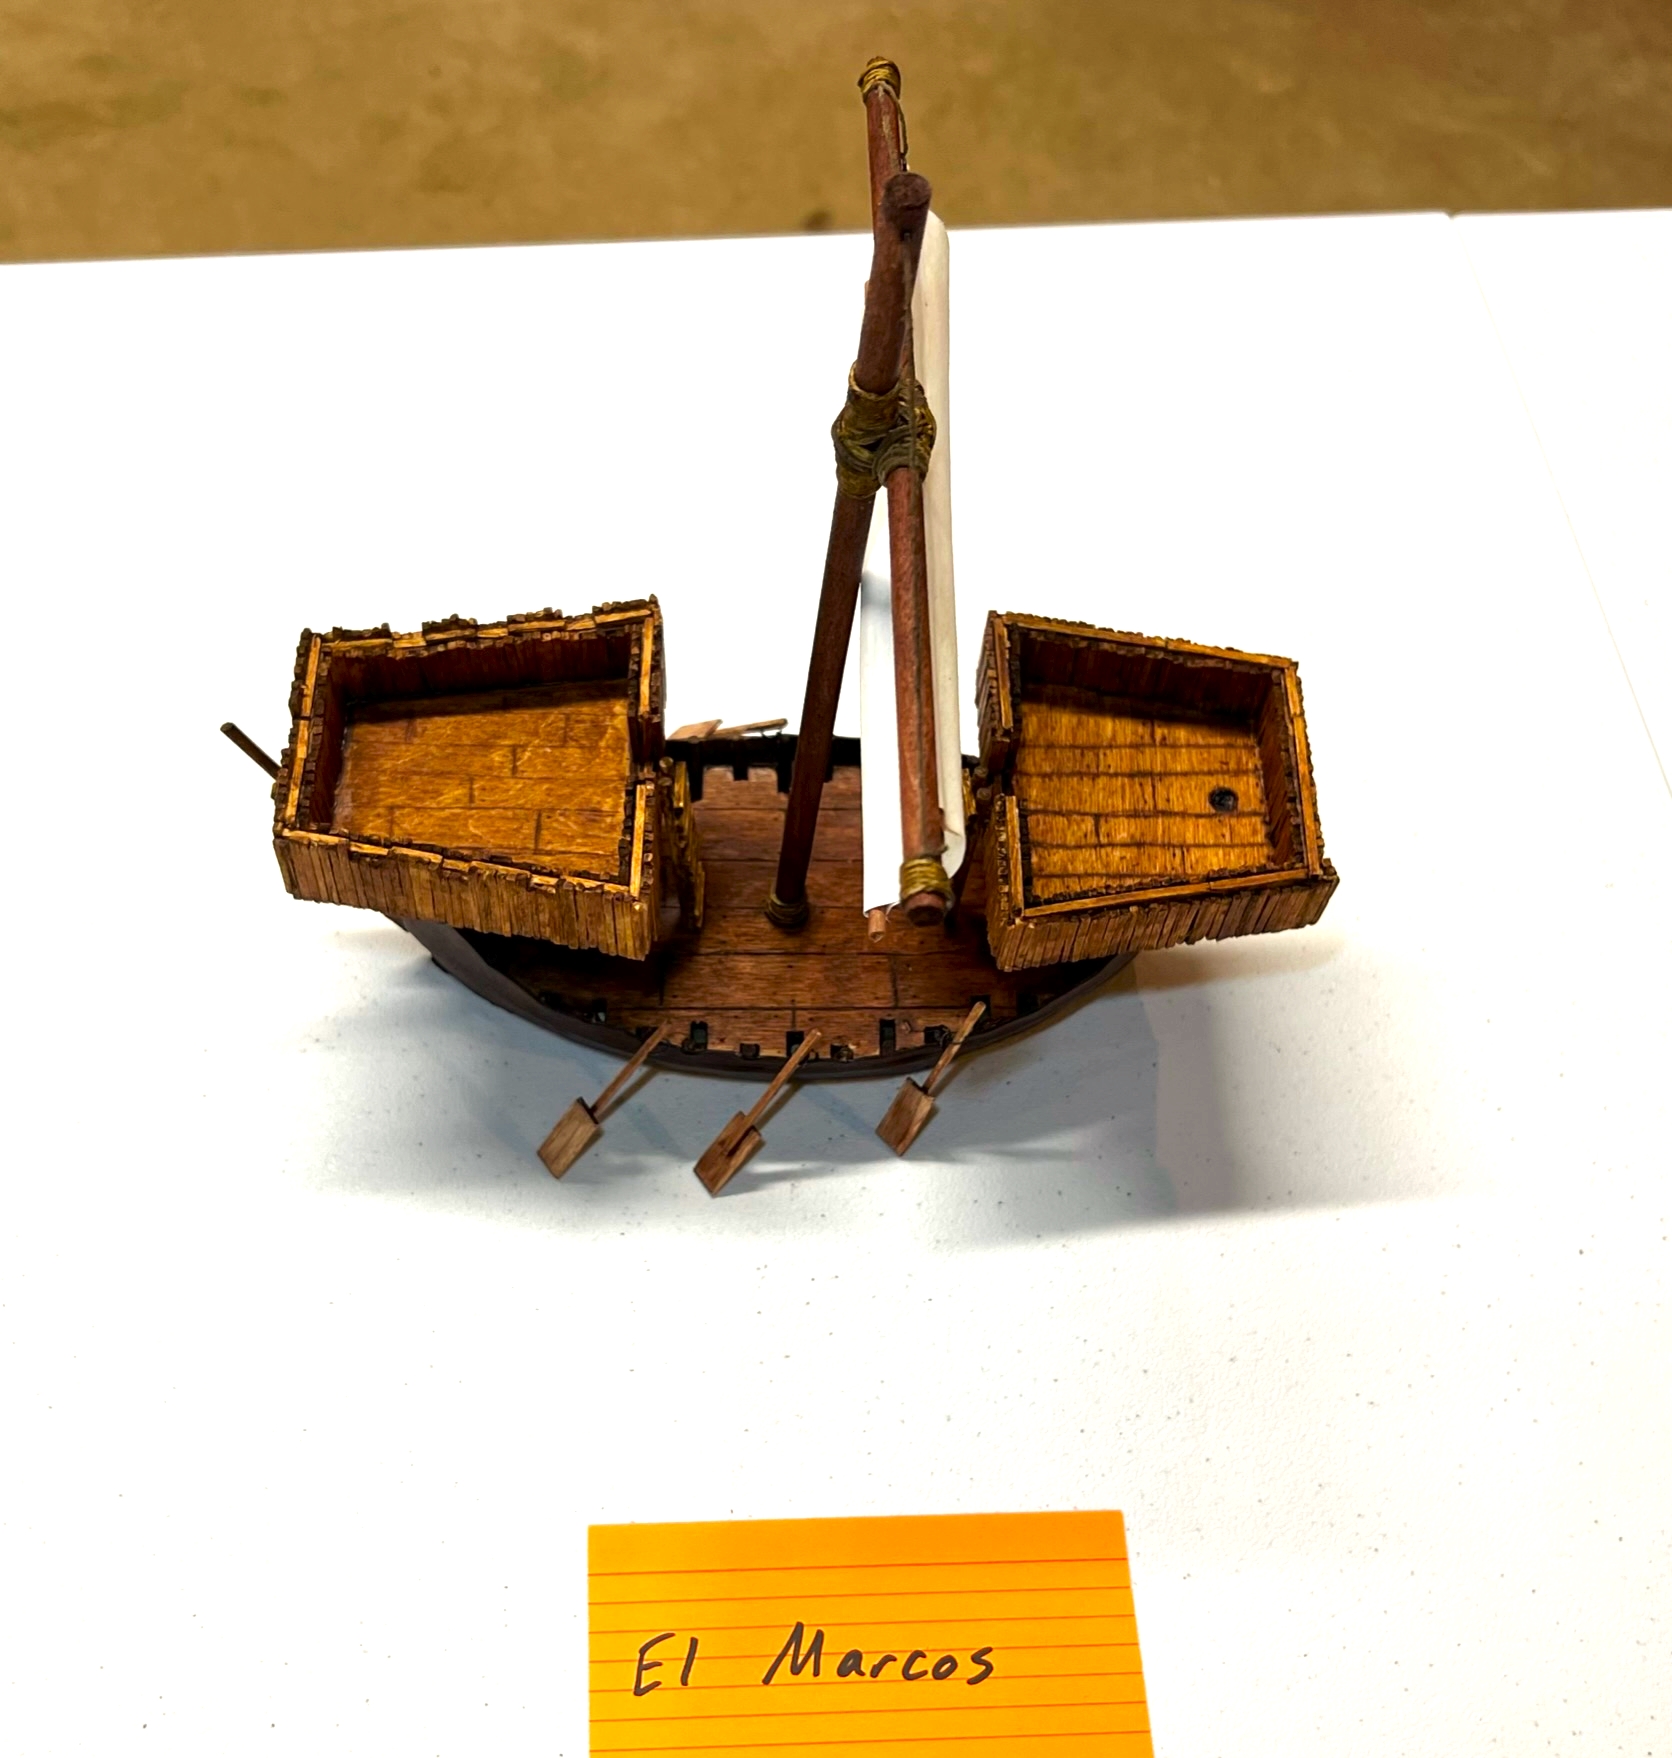
El Marcos
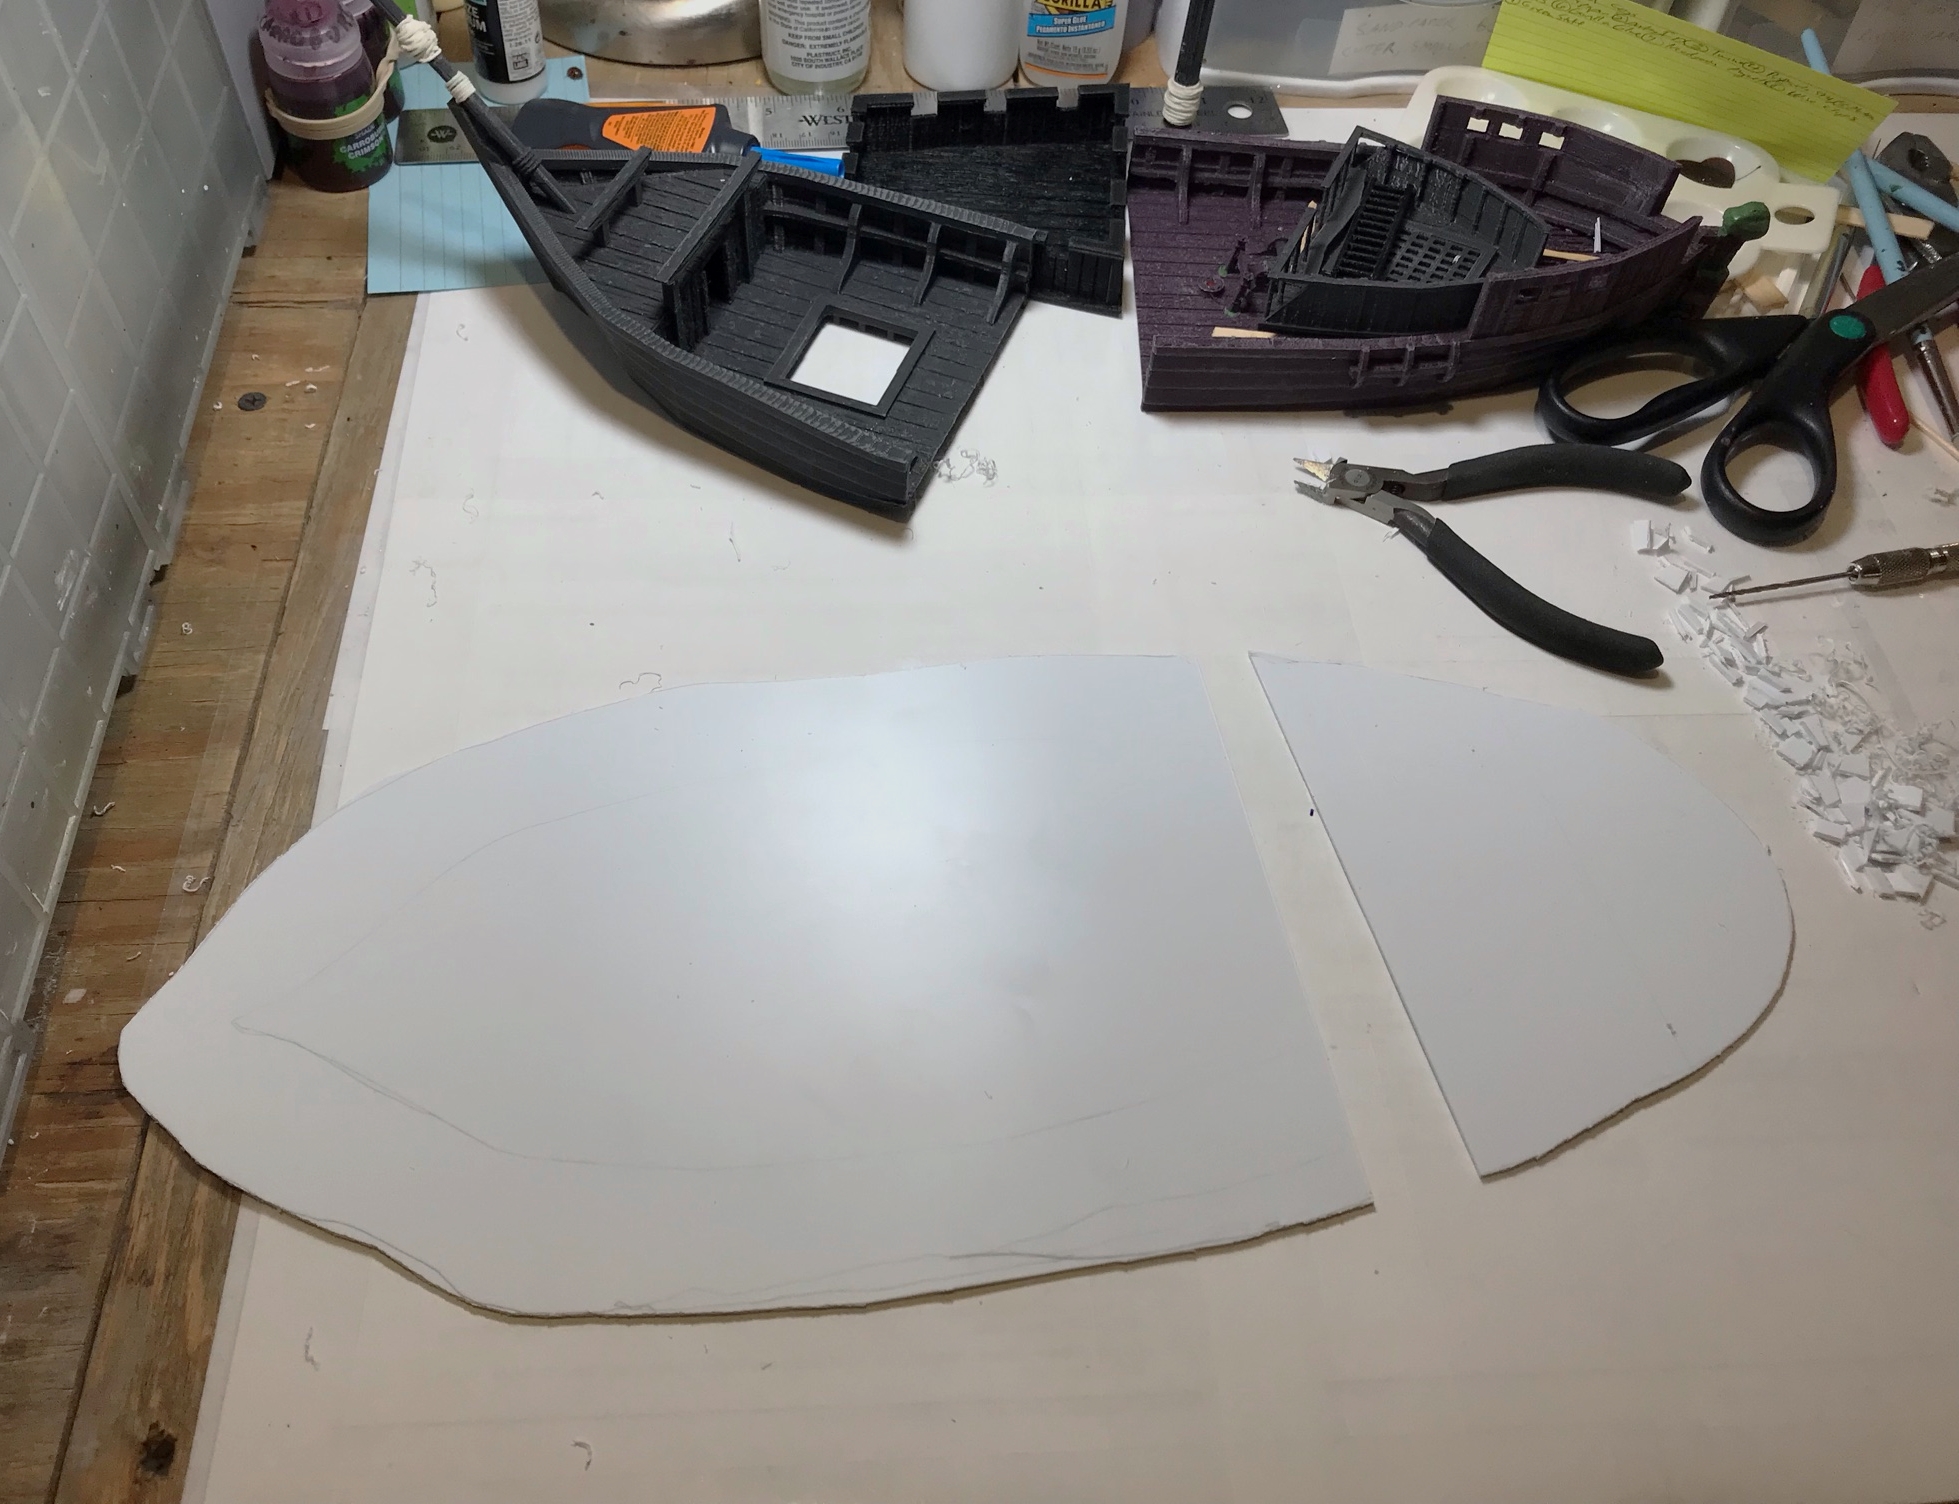
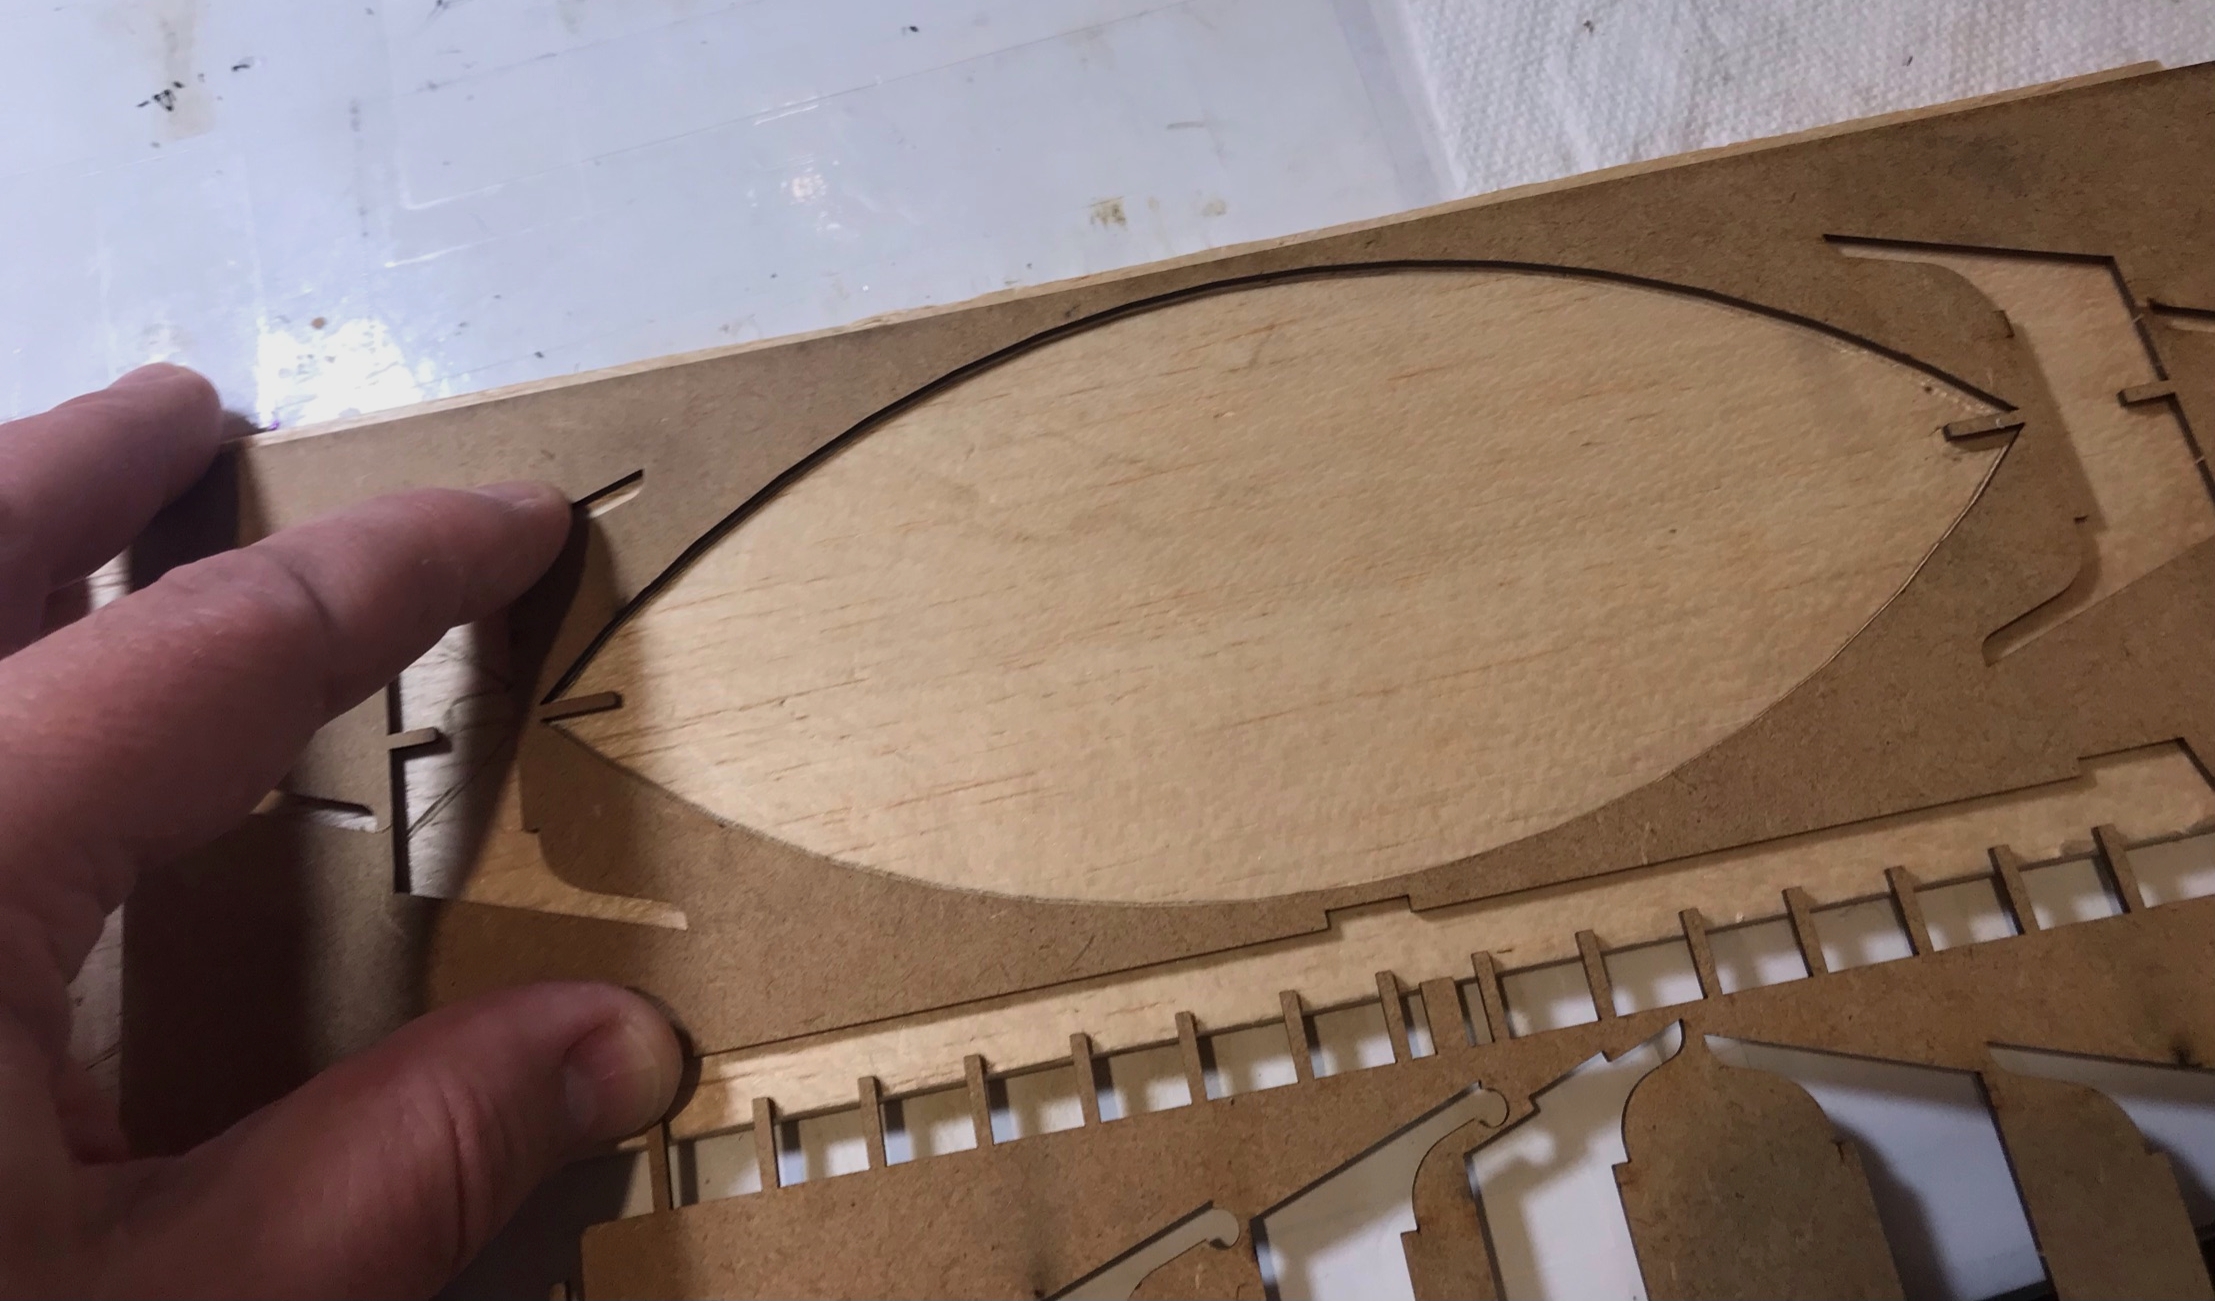
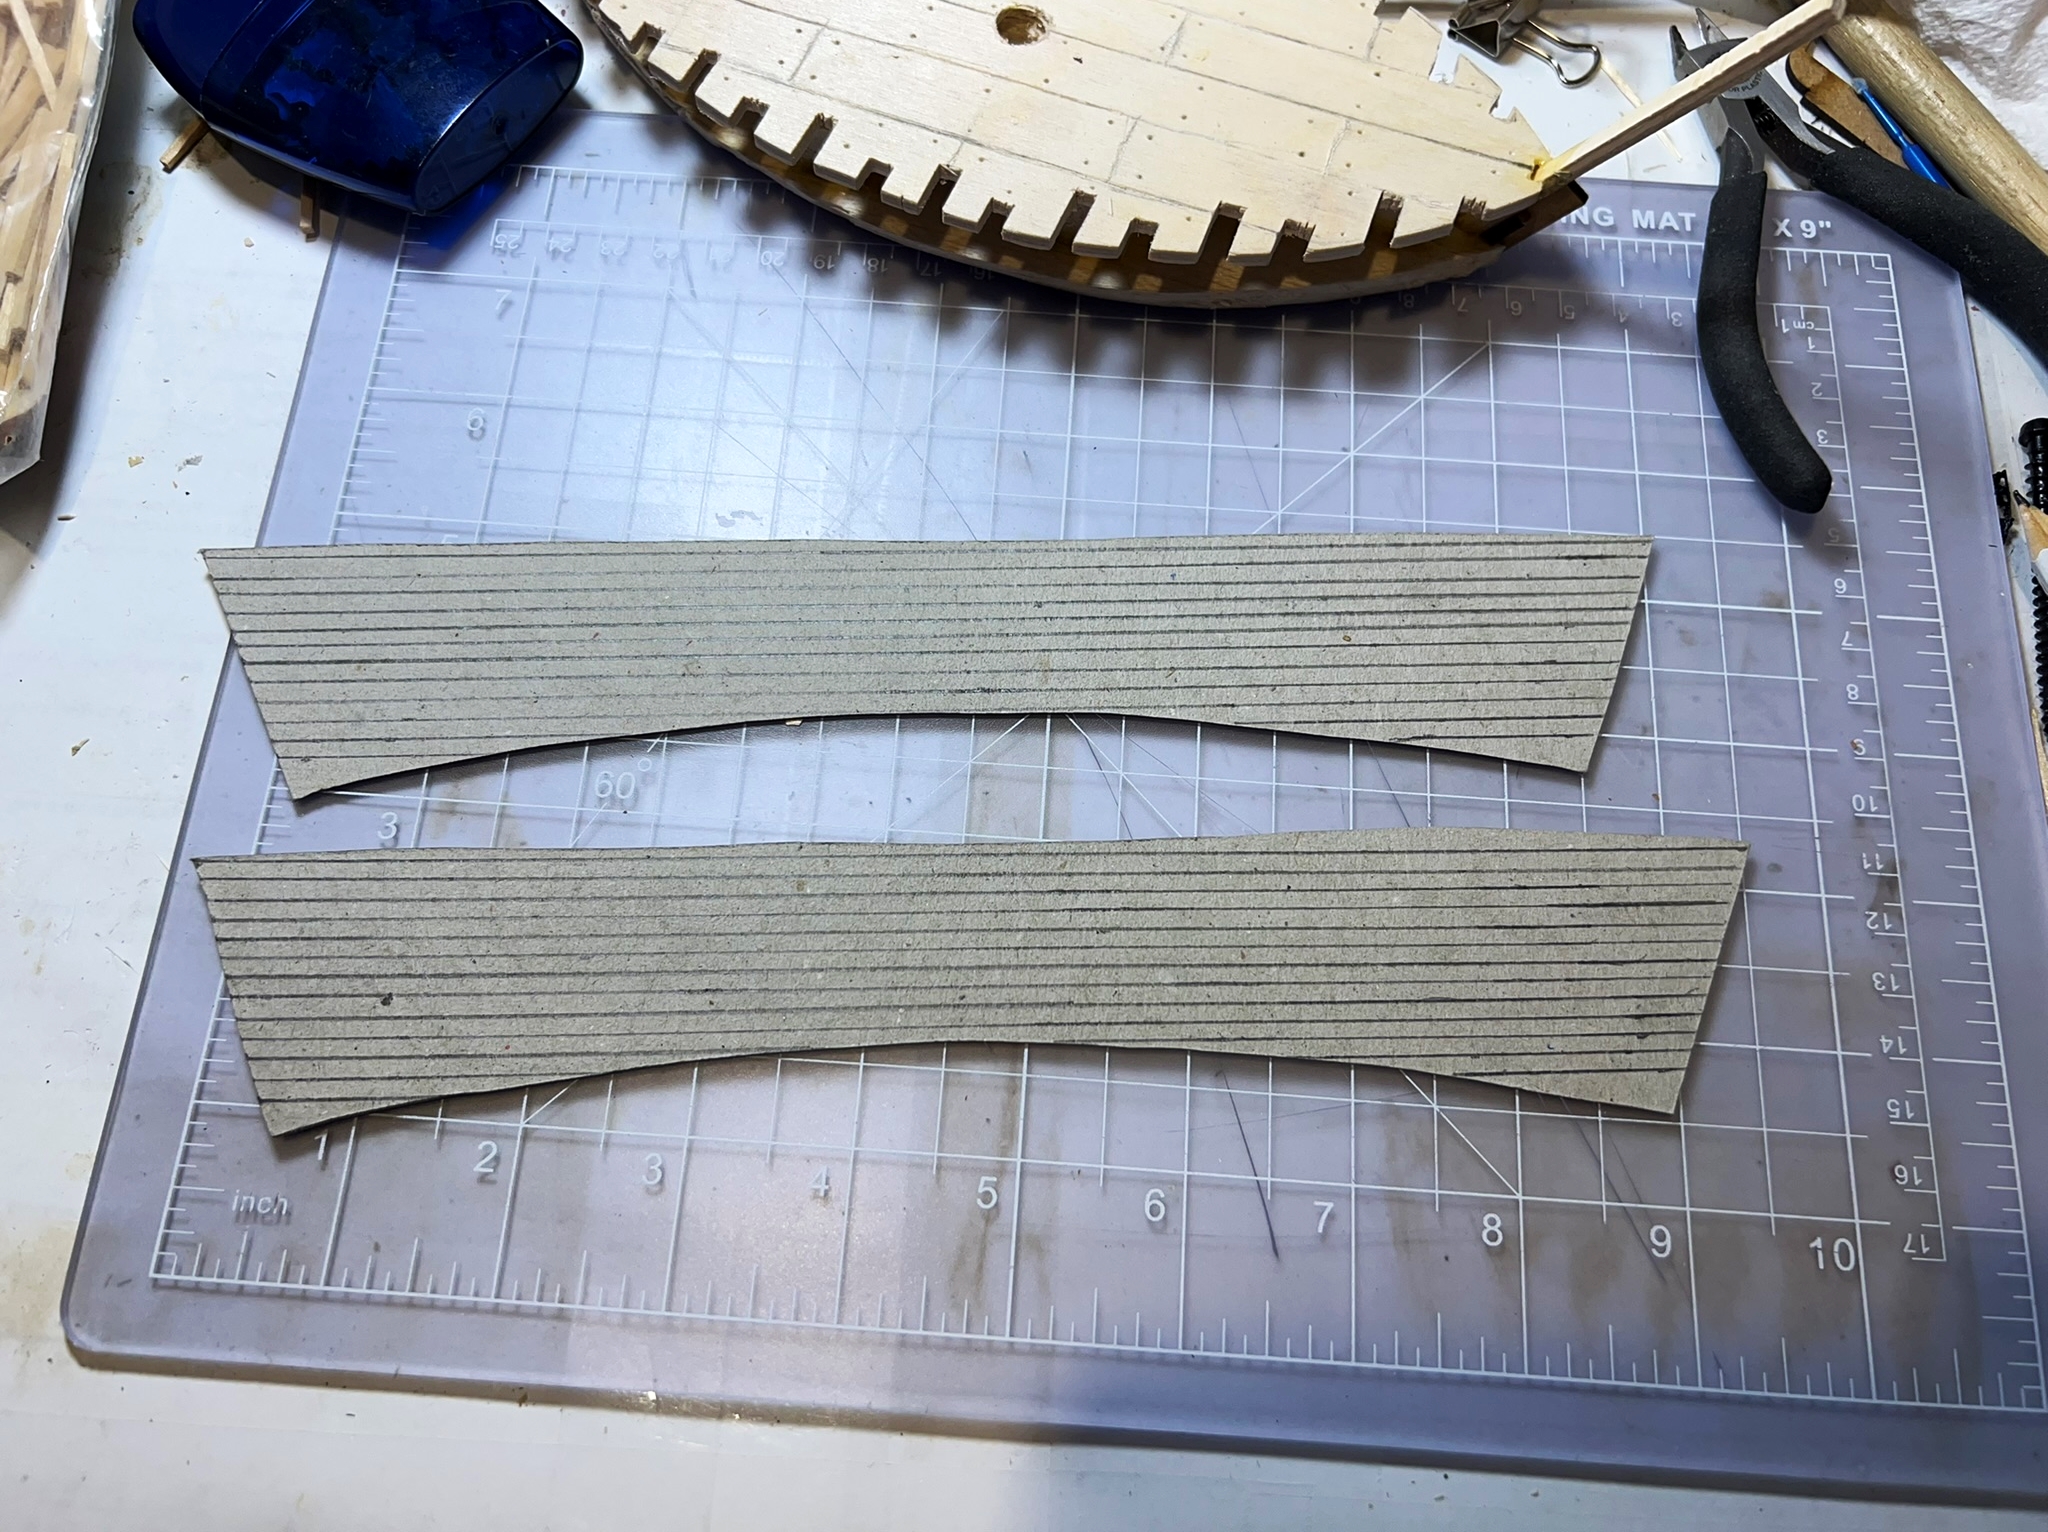
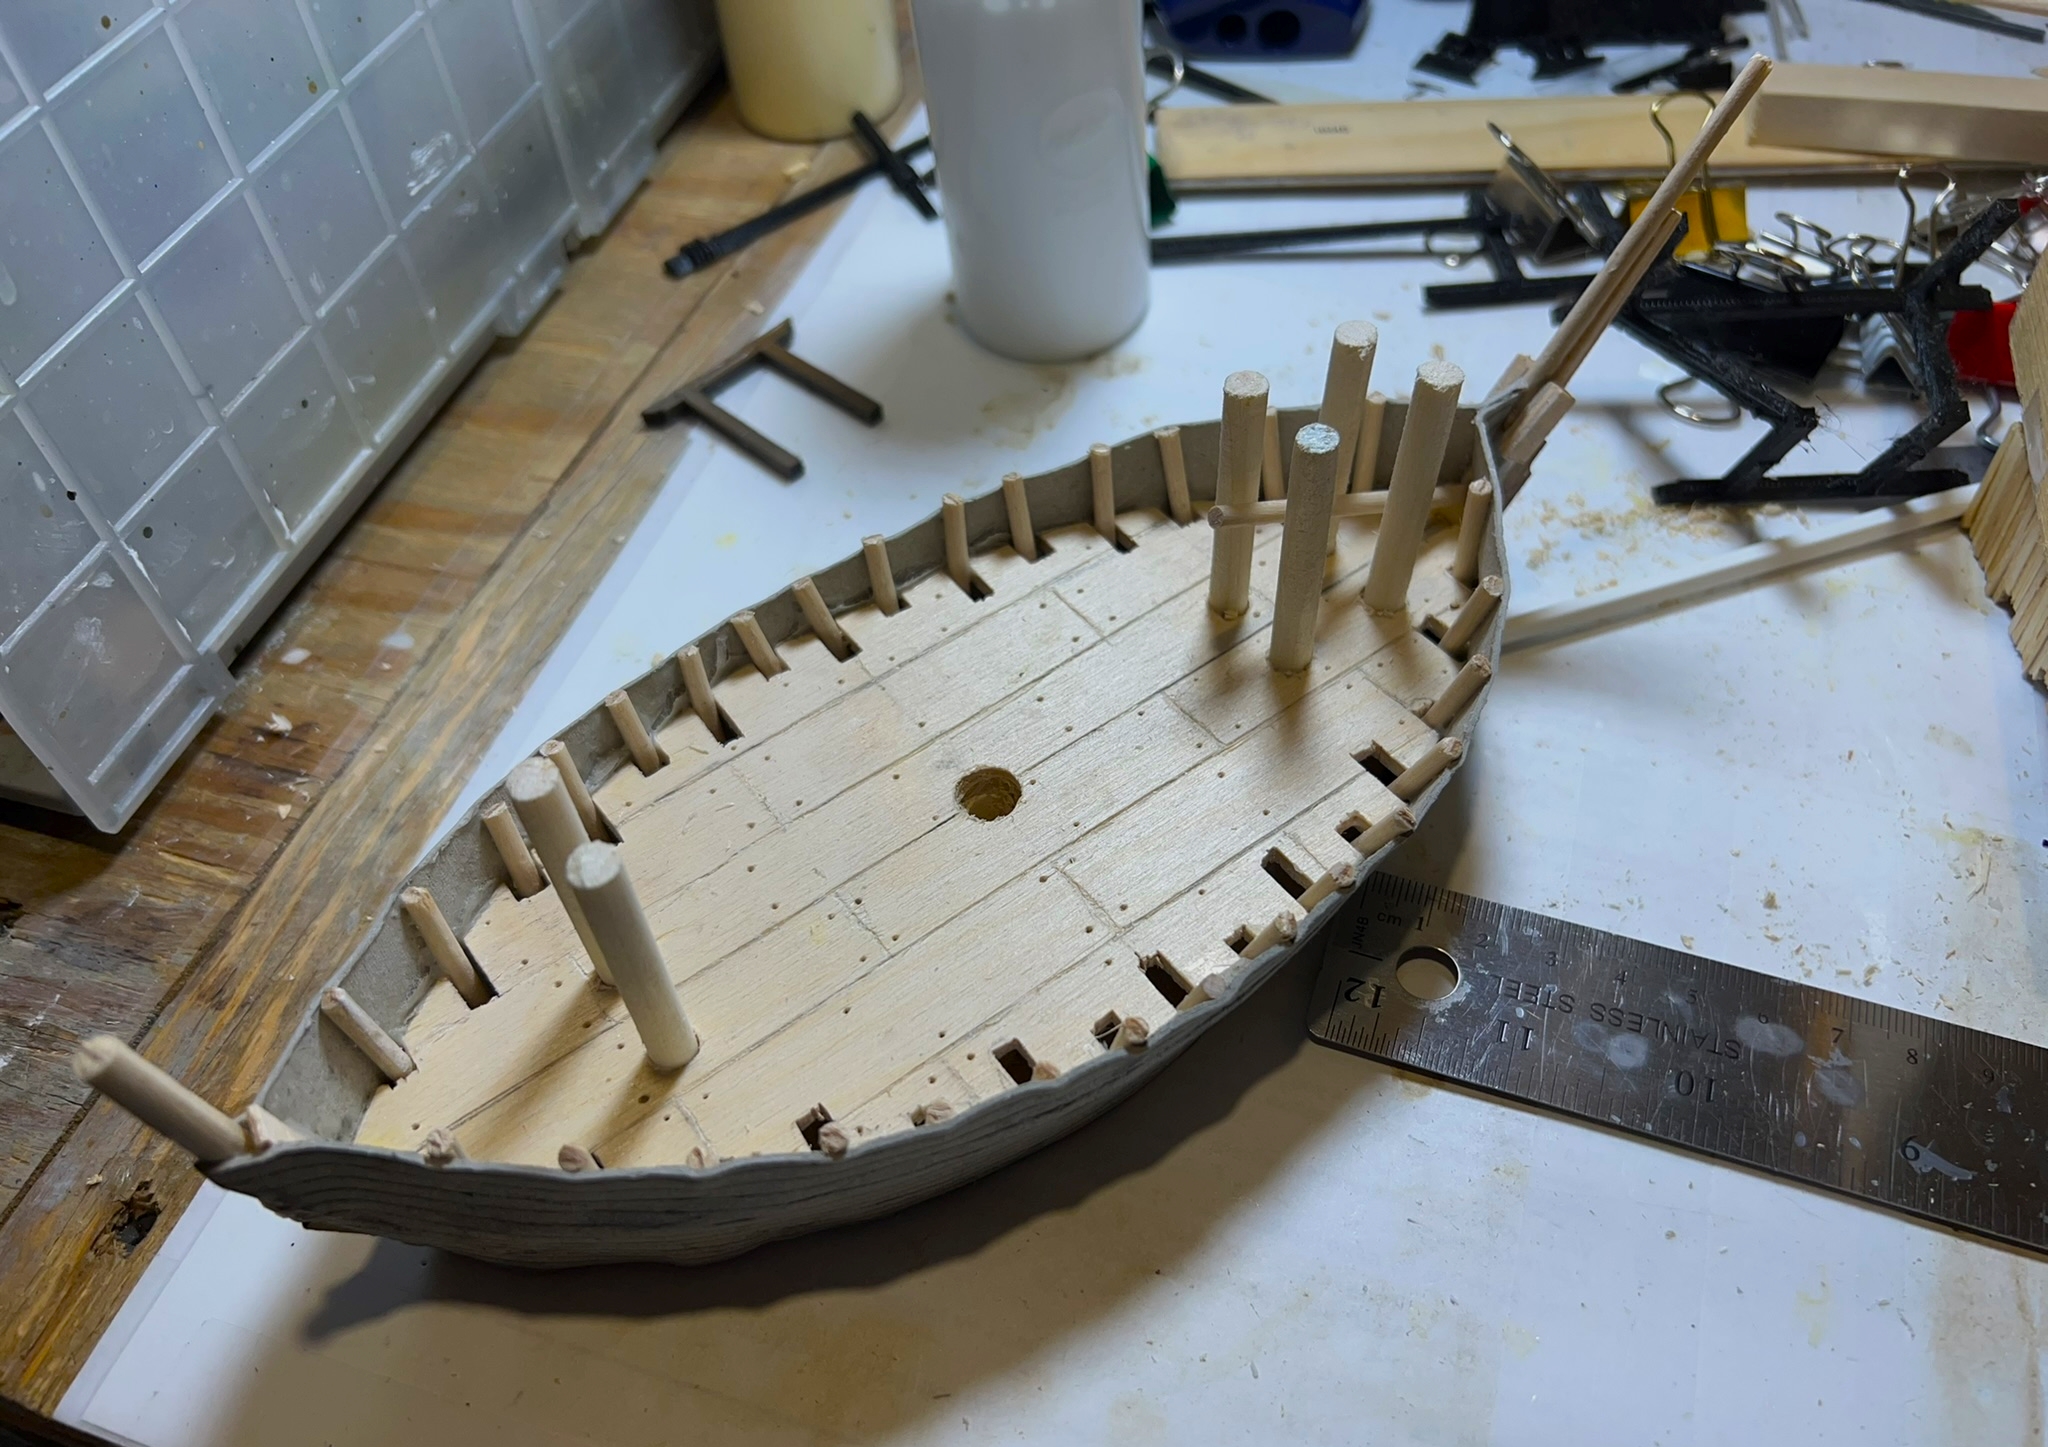
I decided to give scratch-building a brigantine a go – if only because I wanted the challenge. Luckily, I had learned a bit from the previous models, though as you will see below there was overlap during my builds. Also, I was able to repurpose some leftover MDF as a template for a new hull and keel!
The Sarissa leftover was a nice templateI traced out the keel on thick balsa wood (1/4″)I traced out the deck on a piece of 1/4″ basswood.Using my scroll saw, I cut out the deck. The cut out keel is in the background.I used square dowels on the keel to support the deck. I drilled out a hole for the mast and scored the deck to represent planks.
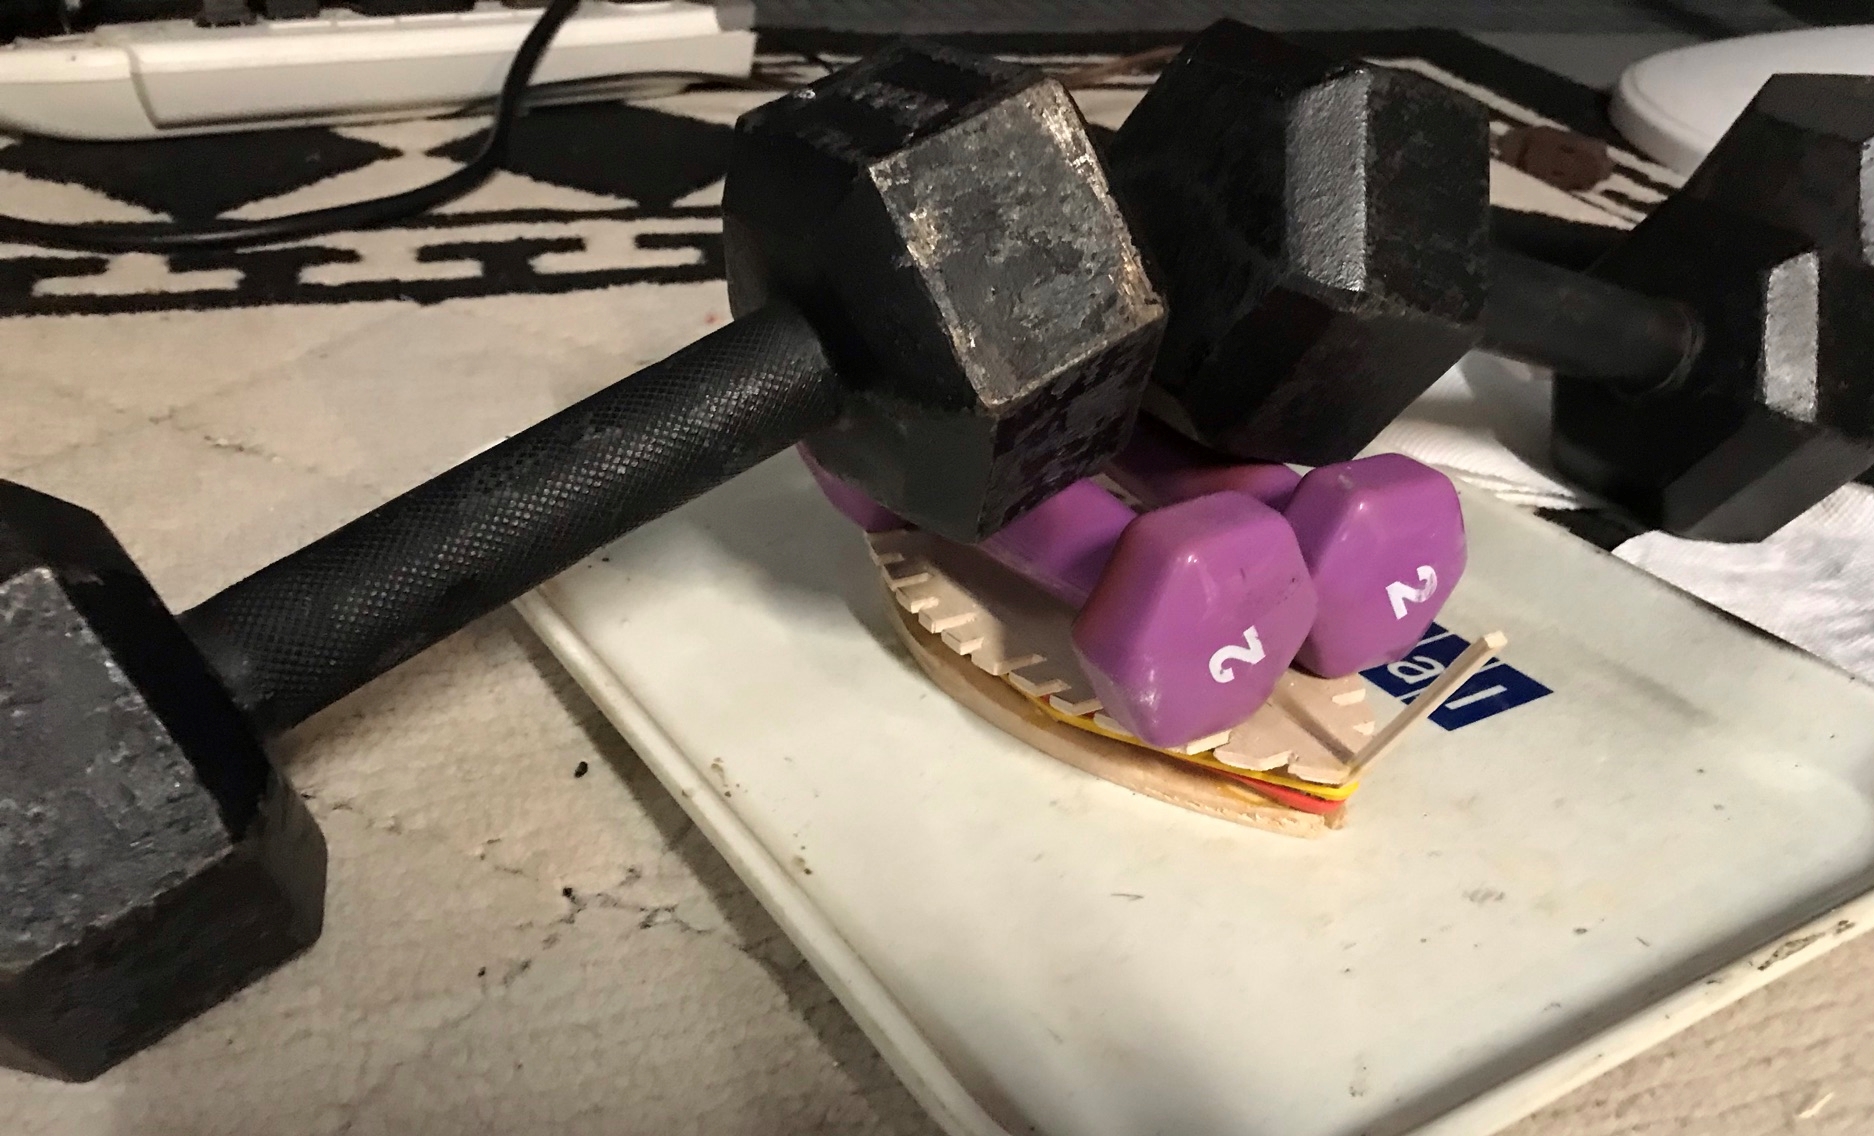
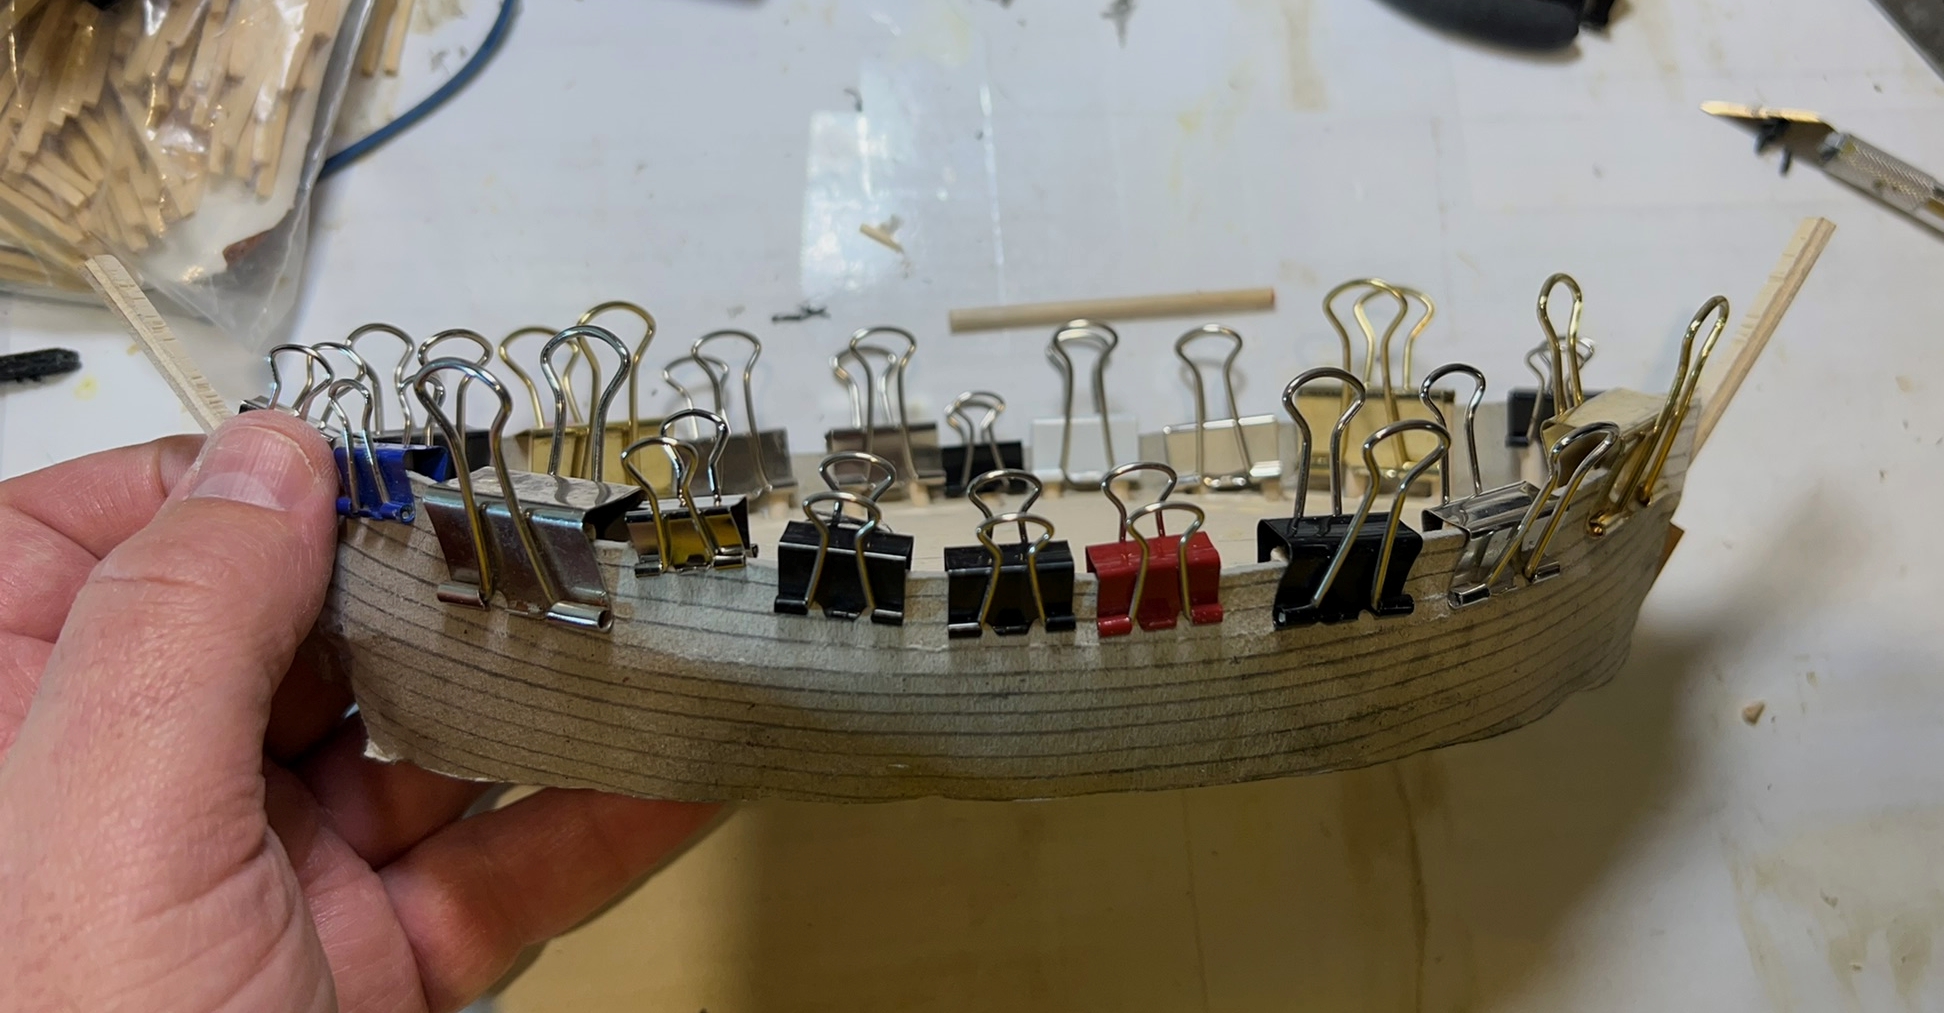
Unlike the Sarissa models, where the hull glued to the ribs of the cogs, I glued the deck to the square dowels and then added the hull by gluing it to the combination of deck and keel. Then I inserted 1/8″ dowels as ribs into the slots – gluing them to the inner hull and keel.
The deck and keel gluedI used some dumbbells to help set the two overnight I cut out two hull sections from the leftover kit card stock and scored itThe hull gluingI glued the ribs by inserting them and using binder clips to get a good attachment to the hull and deck
At this point, I had the hull basically constructed.
The hull showing the dowel ribsSide view of the hull
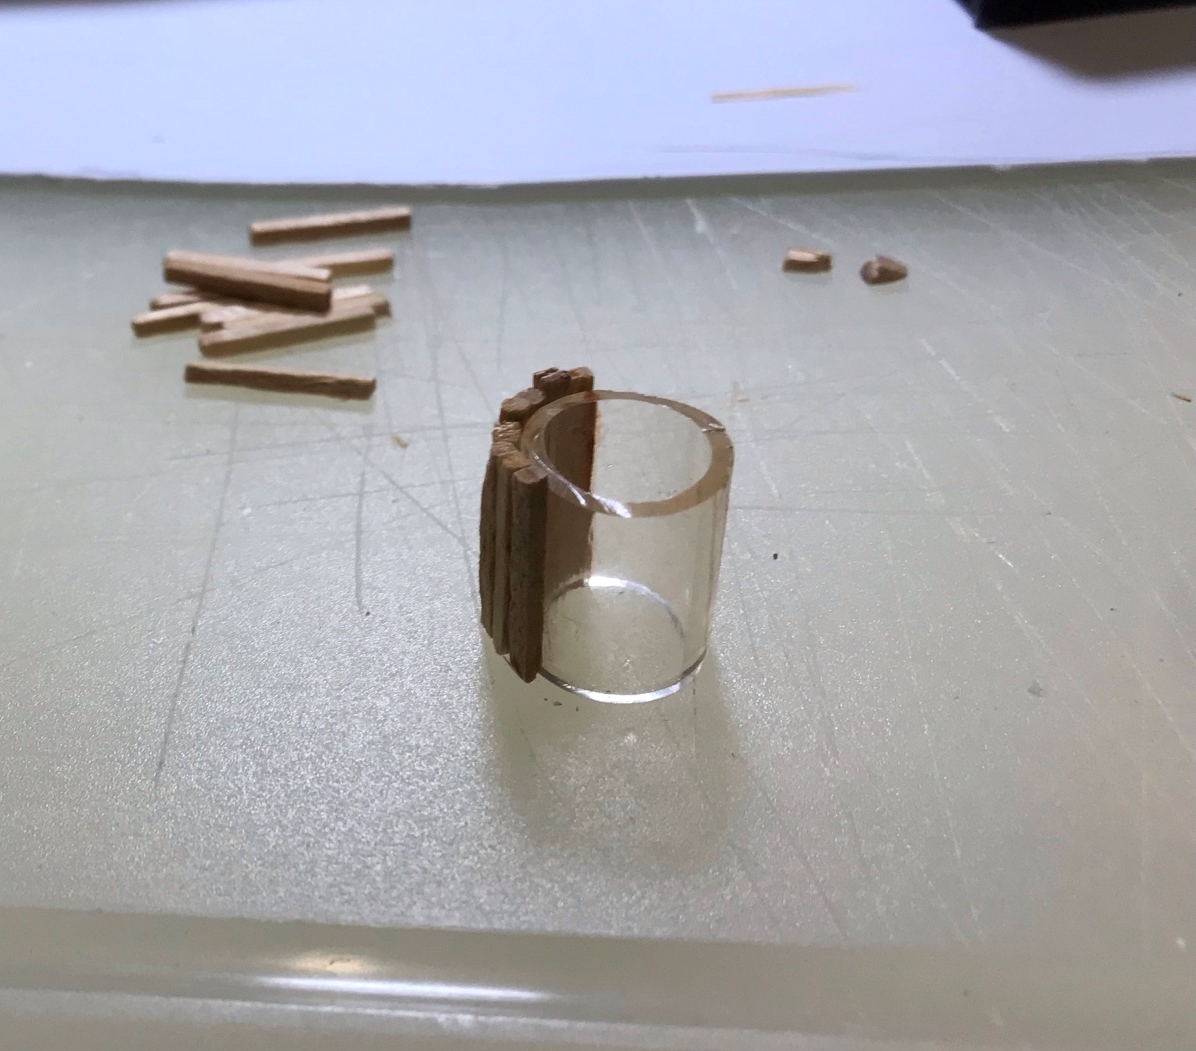
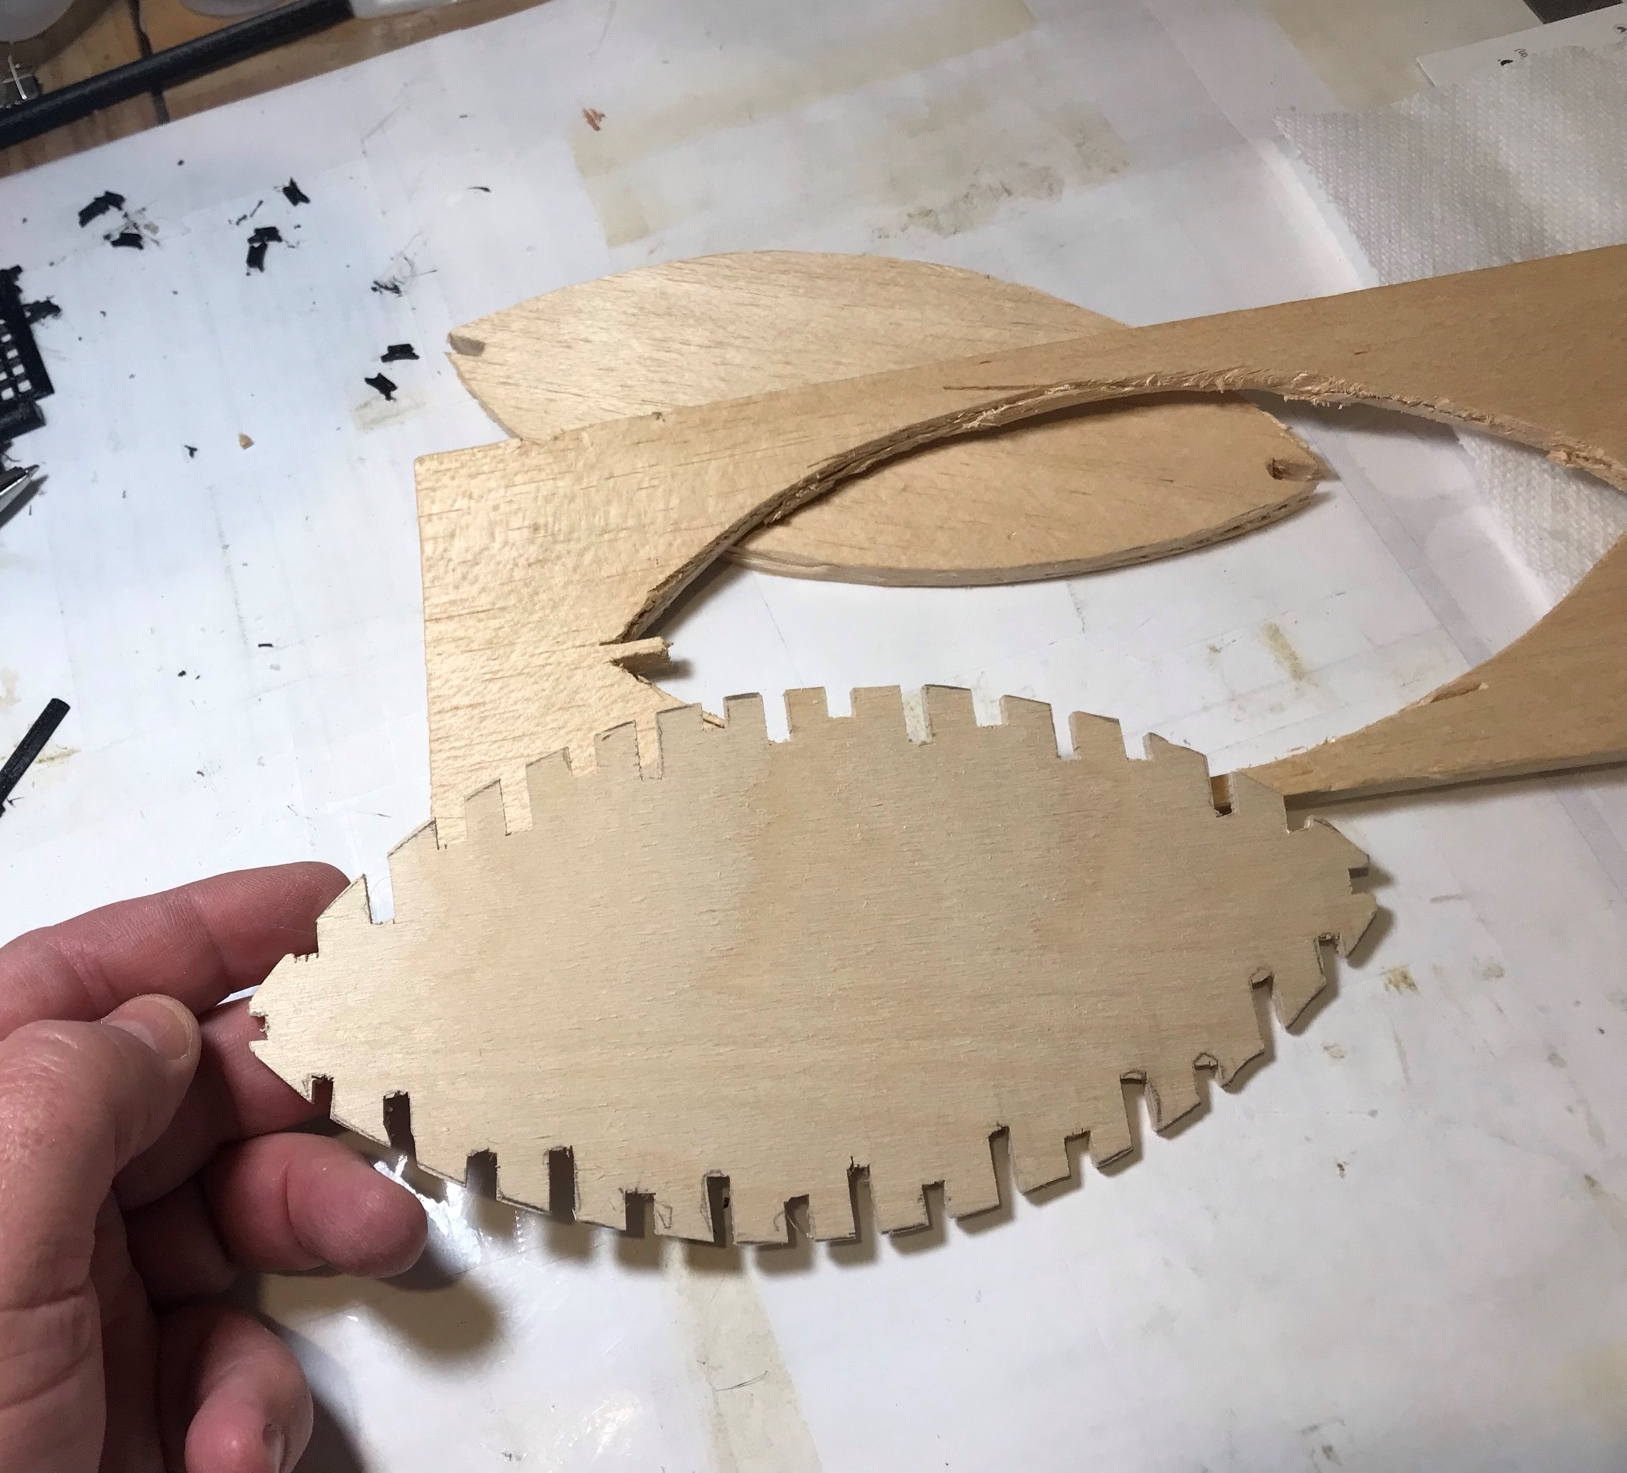
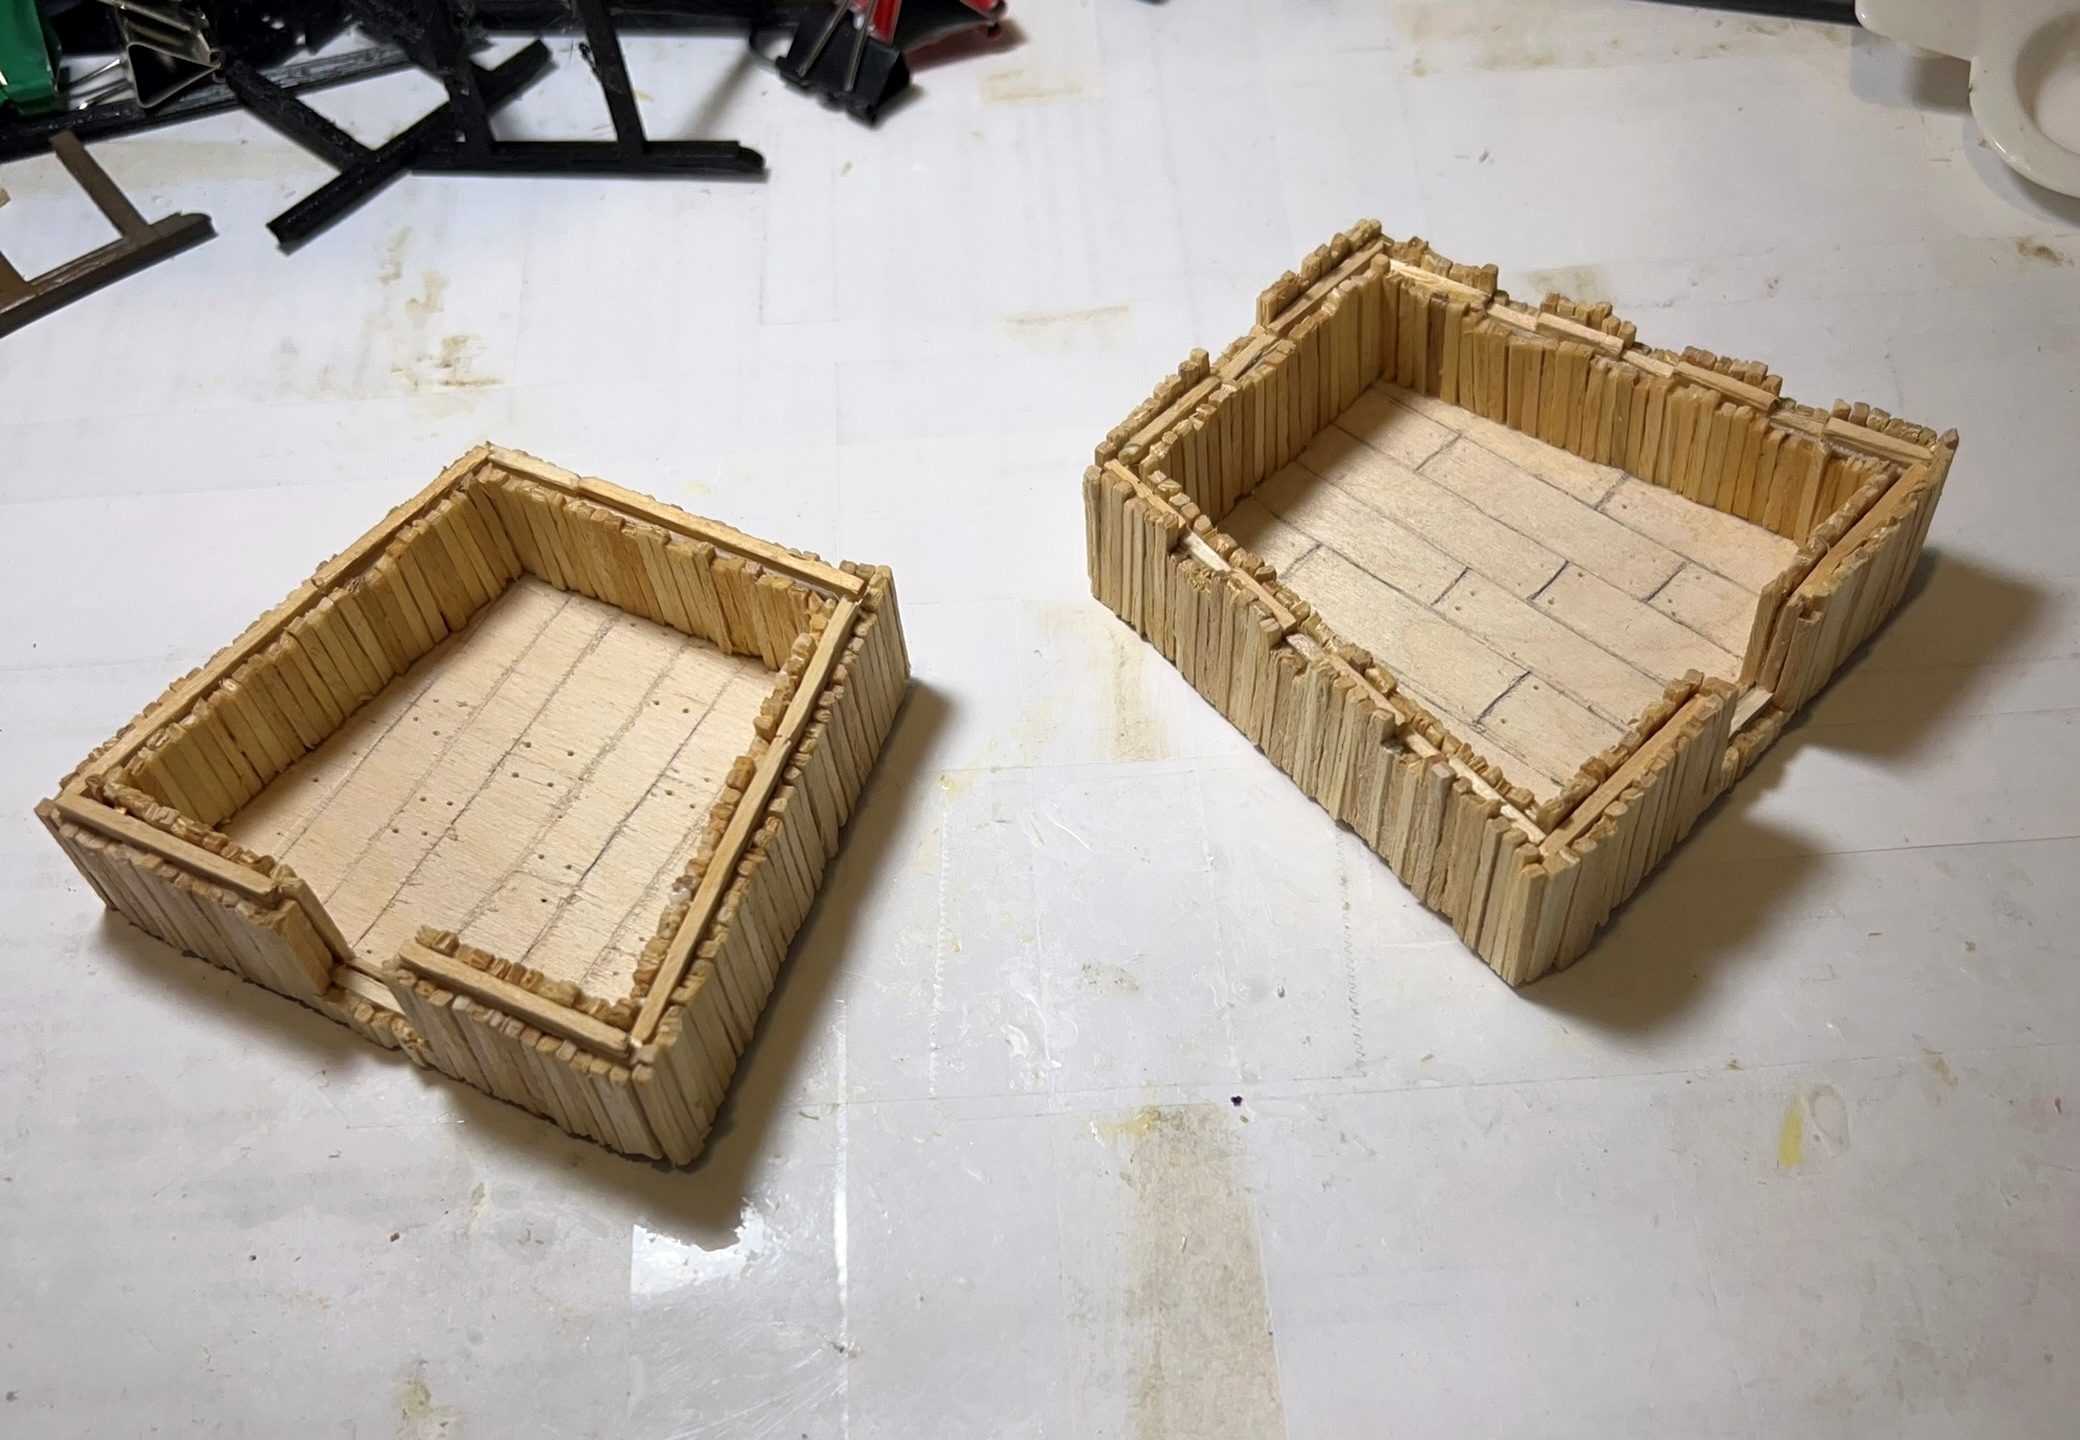
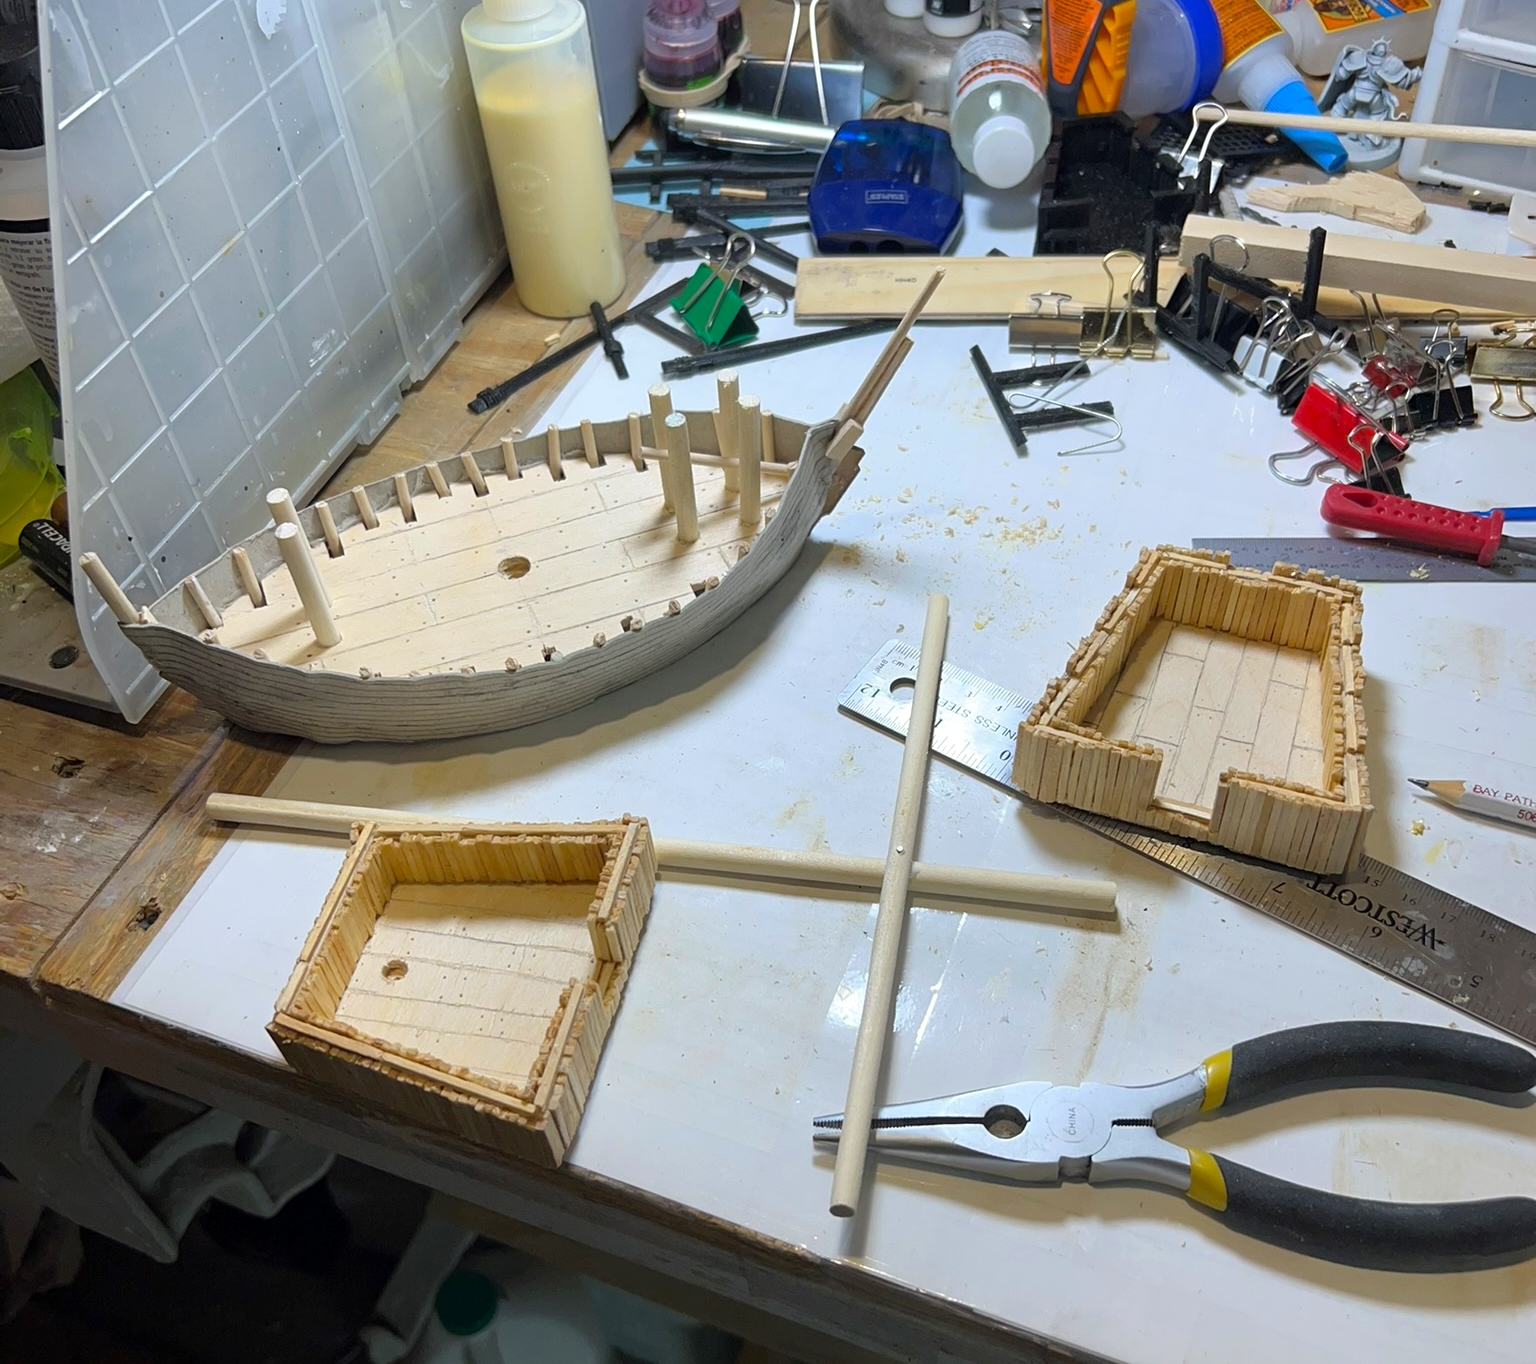
For the stern and forecastles, I used basswood. I was not happy with the look as the basswood was too smooth. I decided to glue a bazillion (I think) custom-cut matchsticks inside and out of the castles to give them a more rustic look.
Gluing on the matchsticks one by one…Added a castle look by sizing the matchsticks differentlyThe two castlesI think I was going glue-crazy with so much gluing!
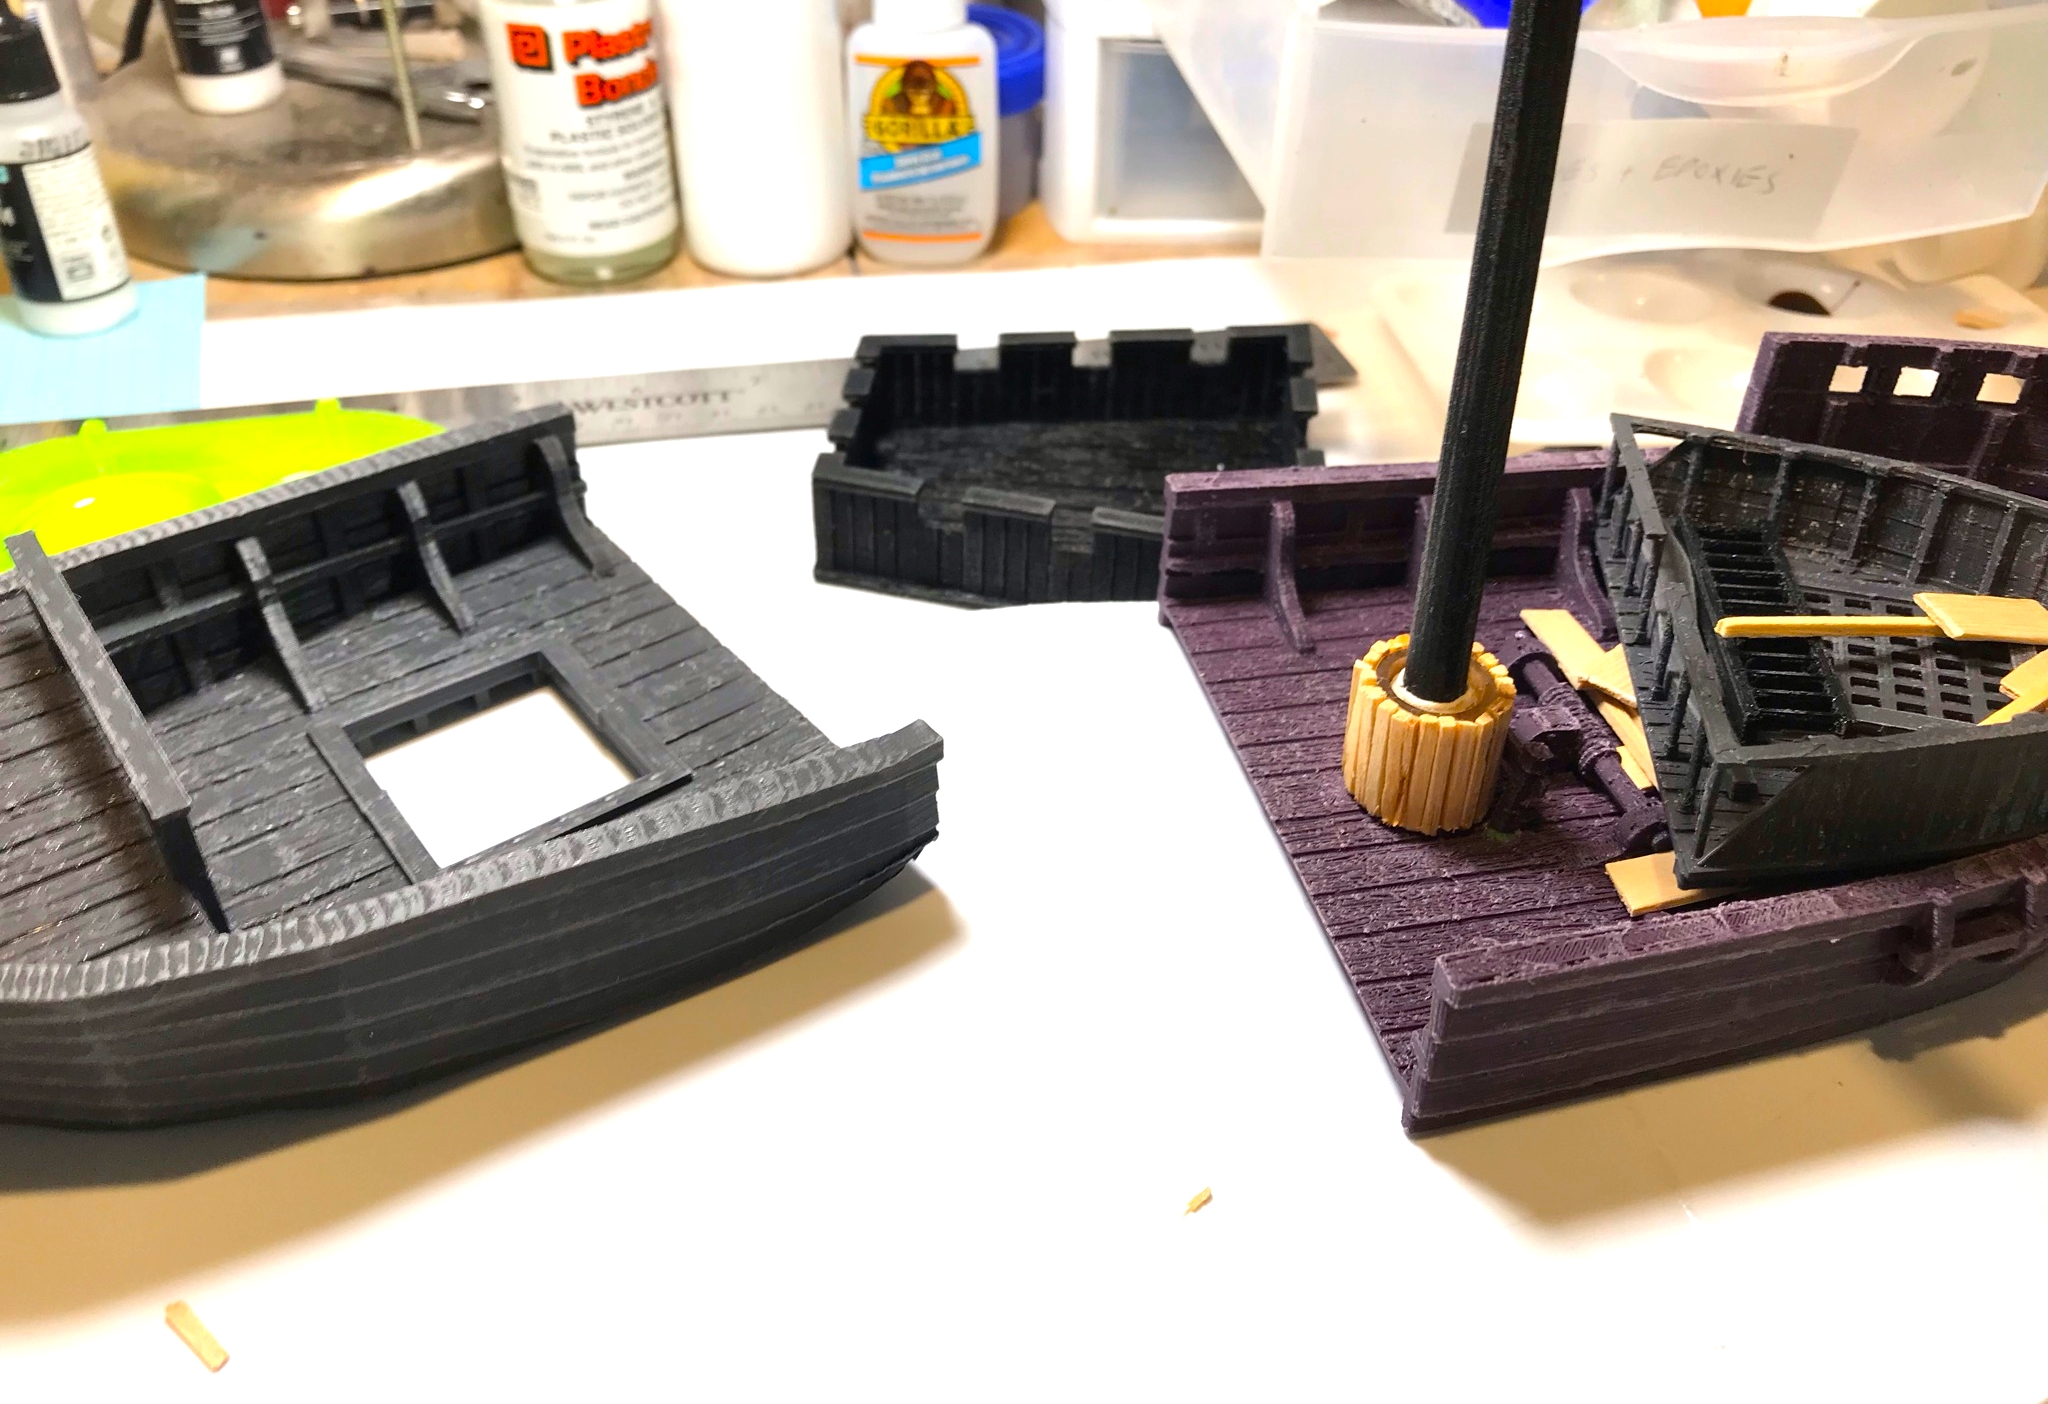
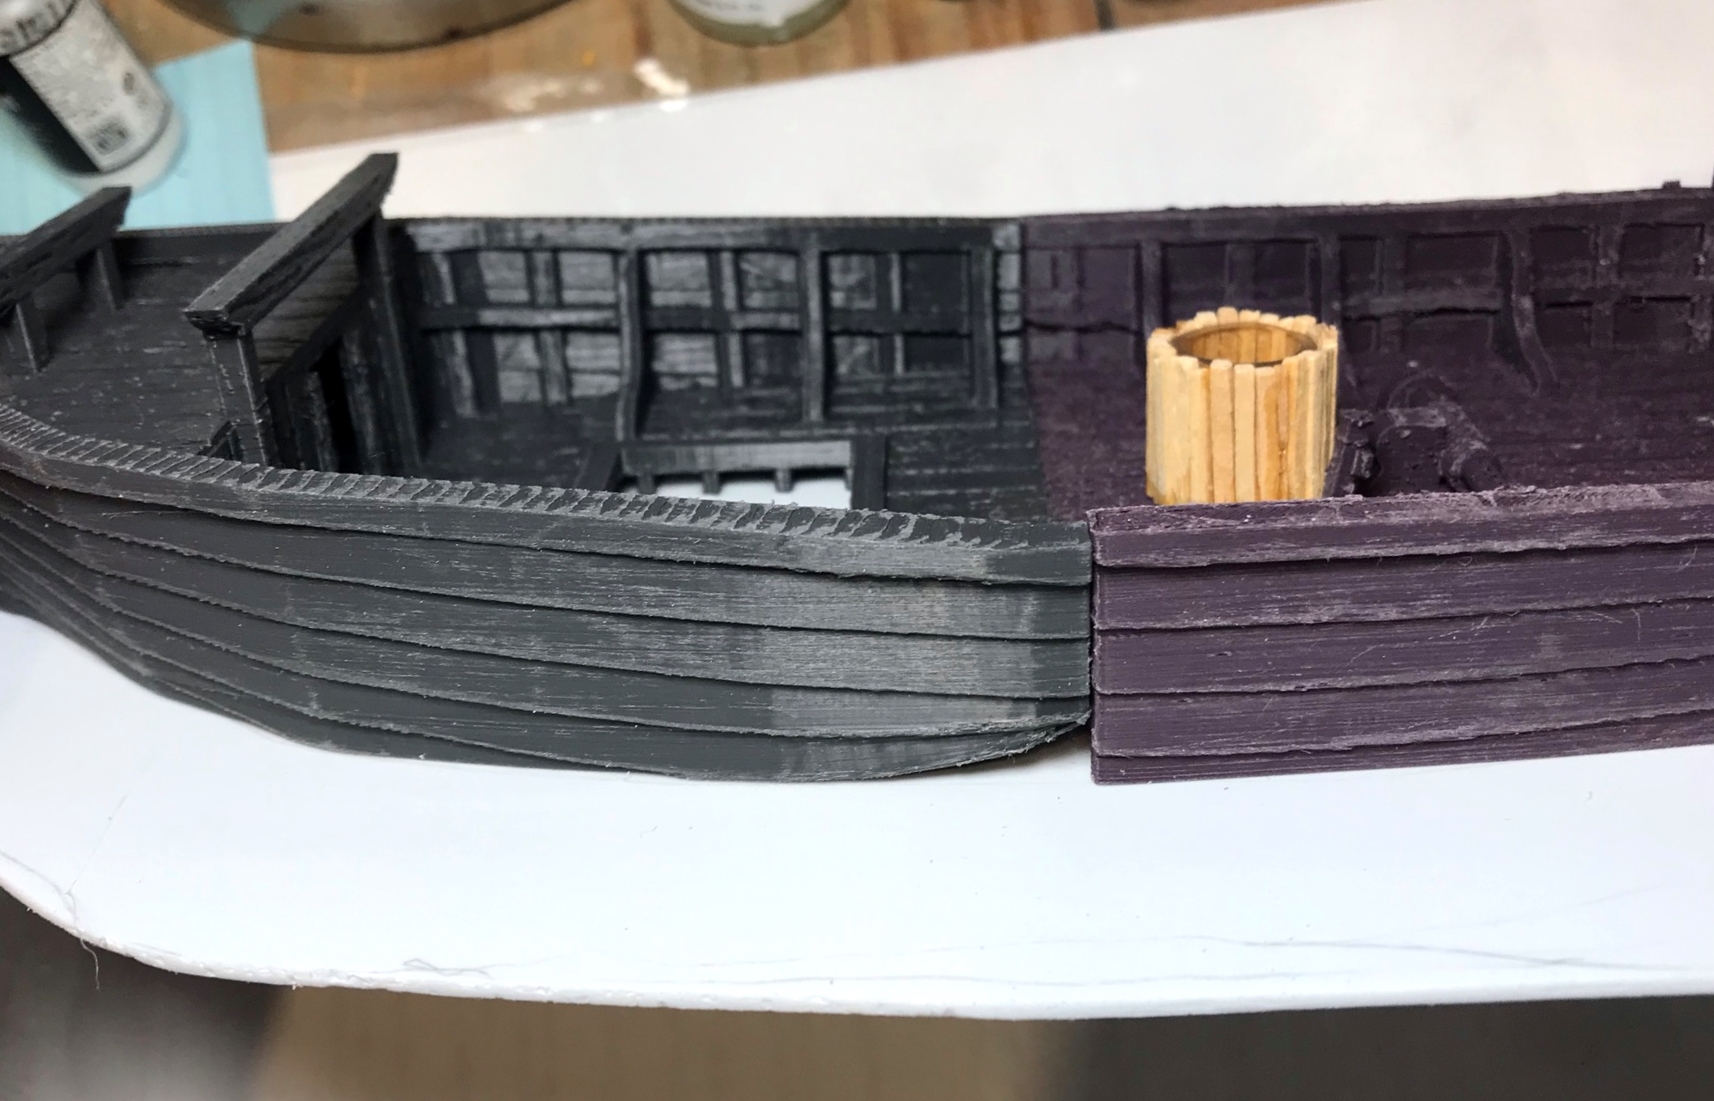
The next step was to mount the castles – which I did by drilling out holes for dowel supports. Then I adjusted the heights of the supports with 1/4″ steel washers to get the right look. I also made the mast and yard.
Added a dowel as a tiller for the helmsmanCastle supportsMaking the mastAdjusting the support heights with washers.
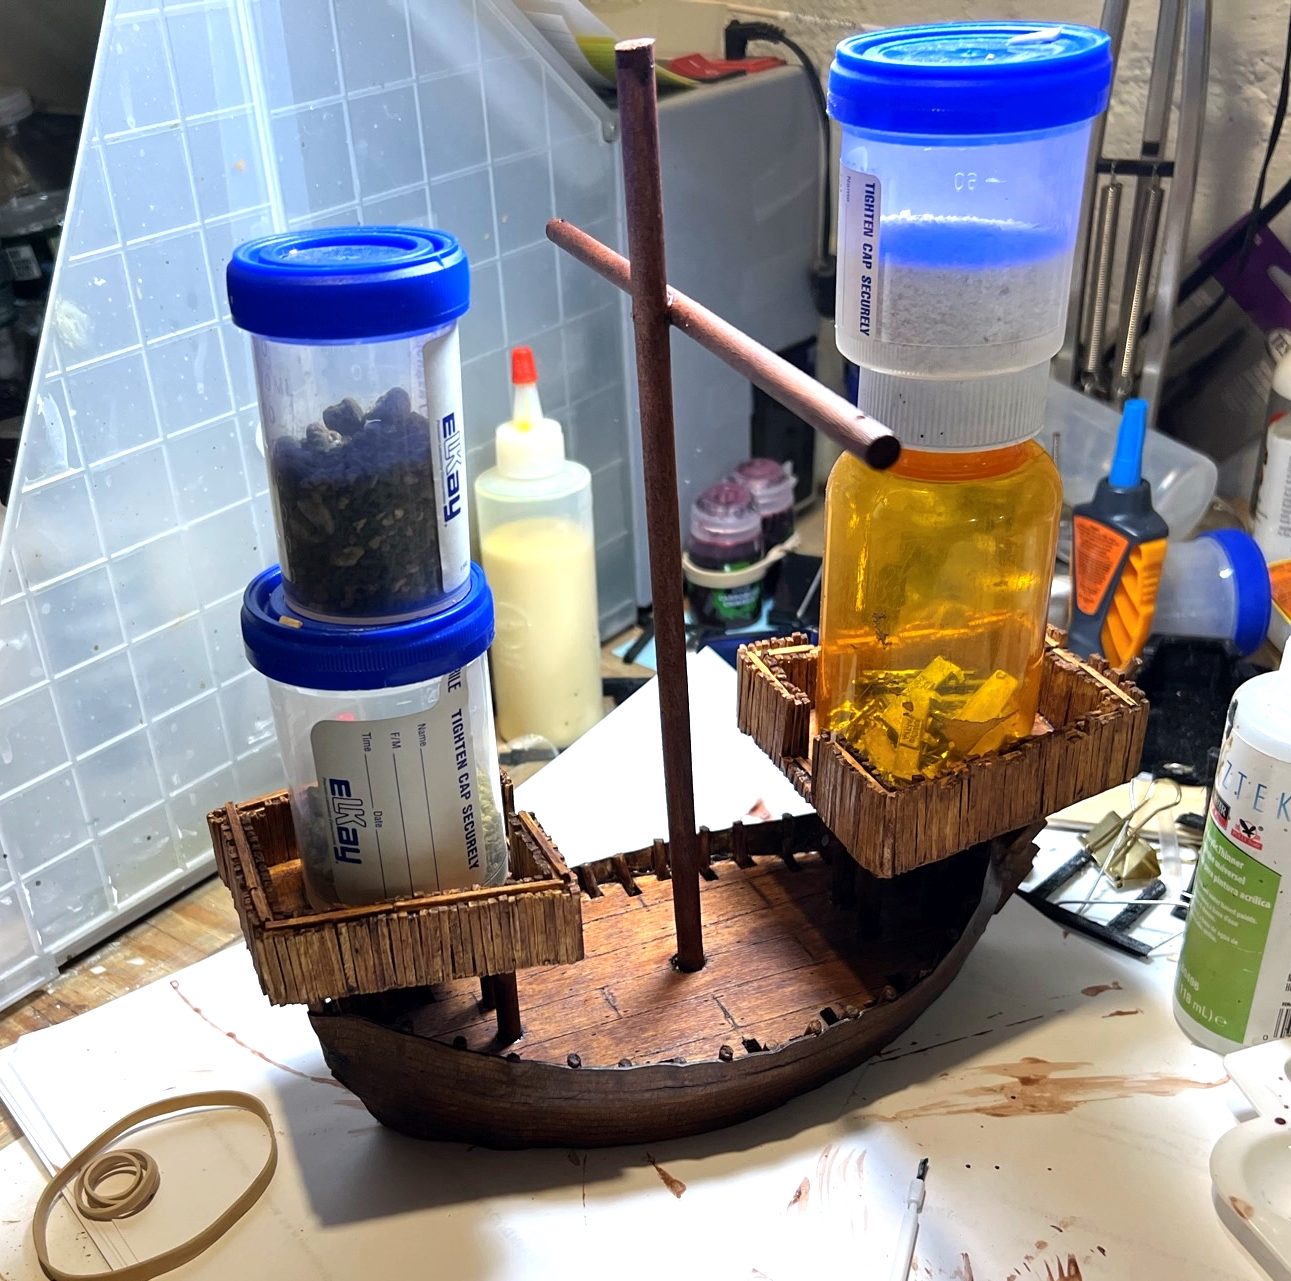
Once again during this project, I had to wait for the glue to dry. On a side note, that need alone dragged the duration time out every time I needed to glue something – which seemed unending. I then started the washing and painting of the brigantine as I found that easier to do before adding the castles.
Mounting the stern and forecastles and letting the glue set…again…I made ladders and sails – and eventually painted the rigging – once the glue dried
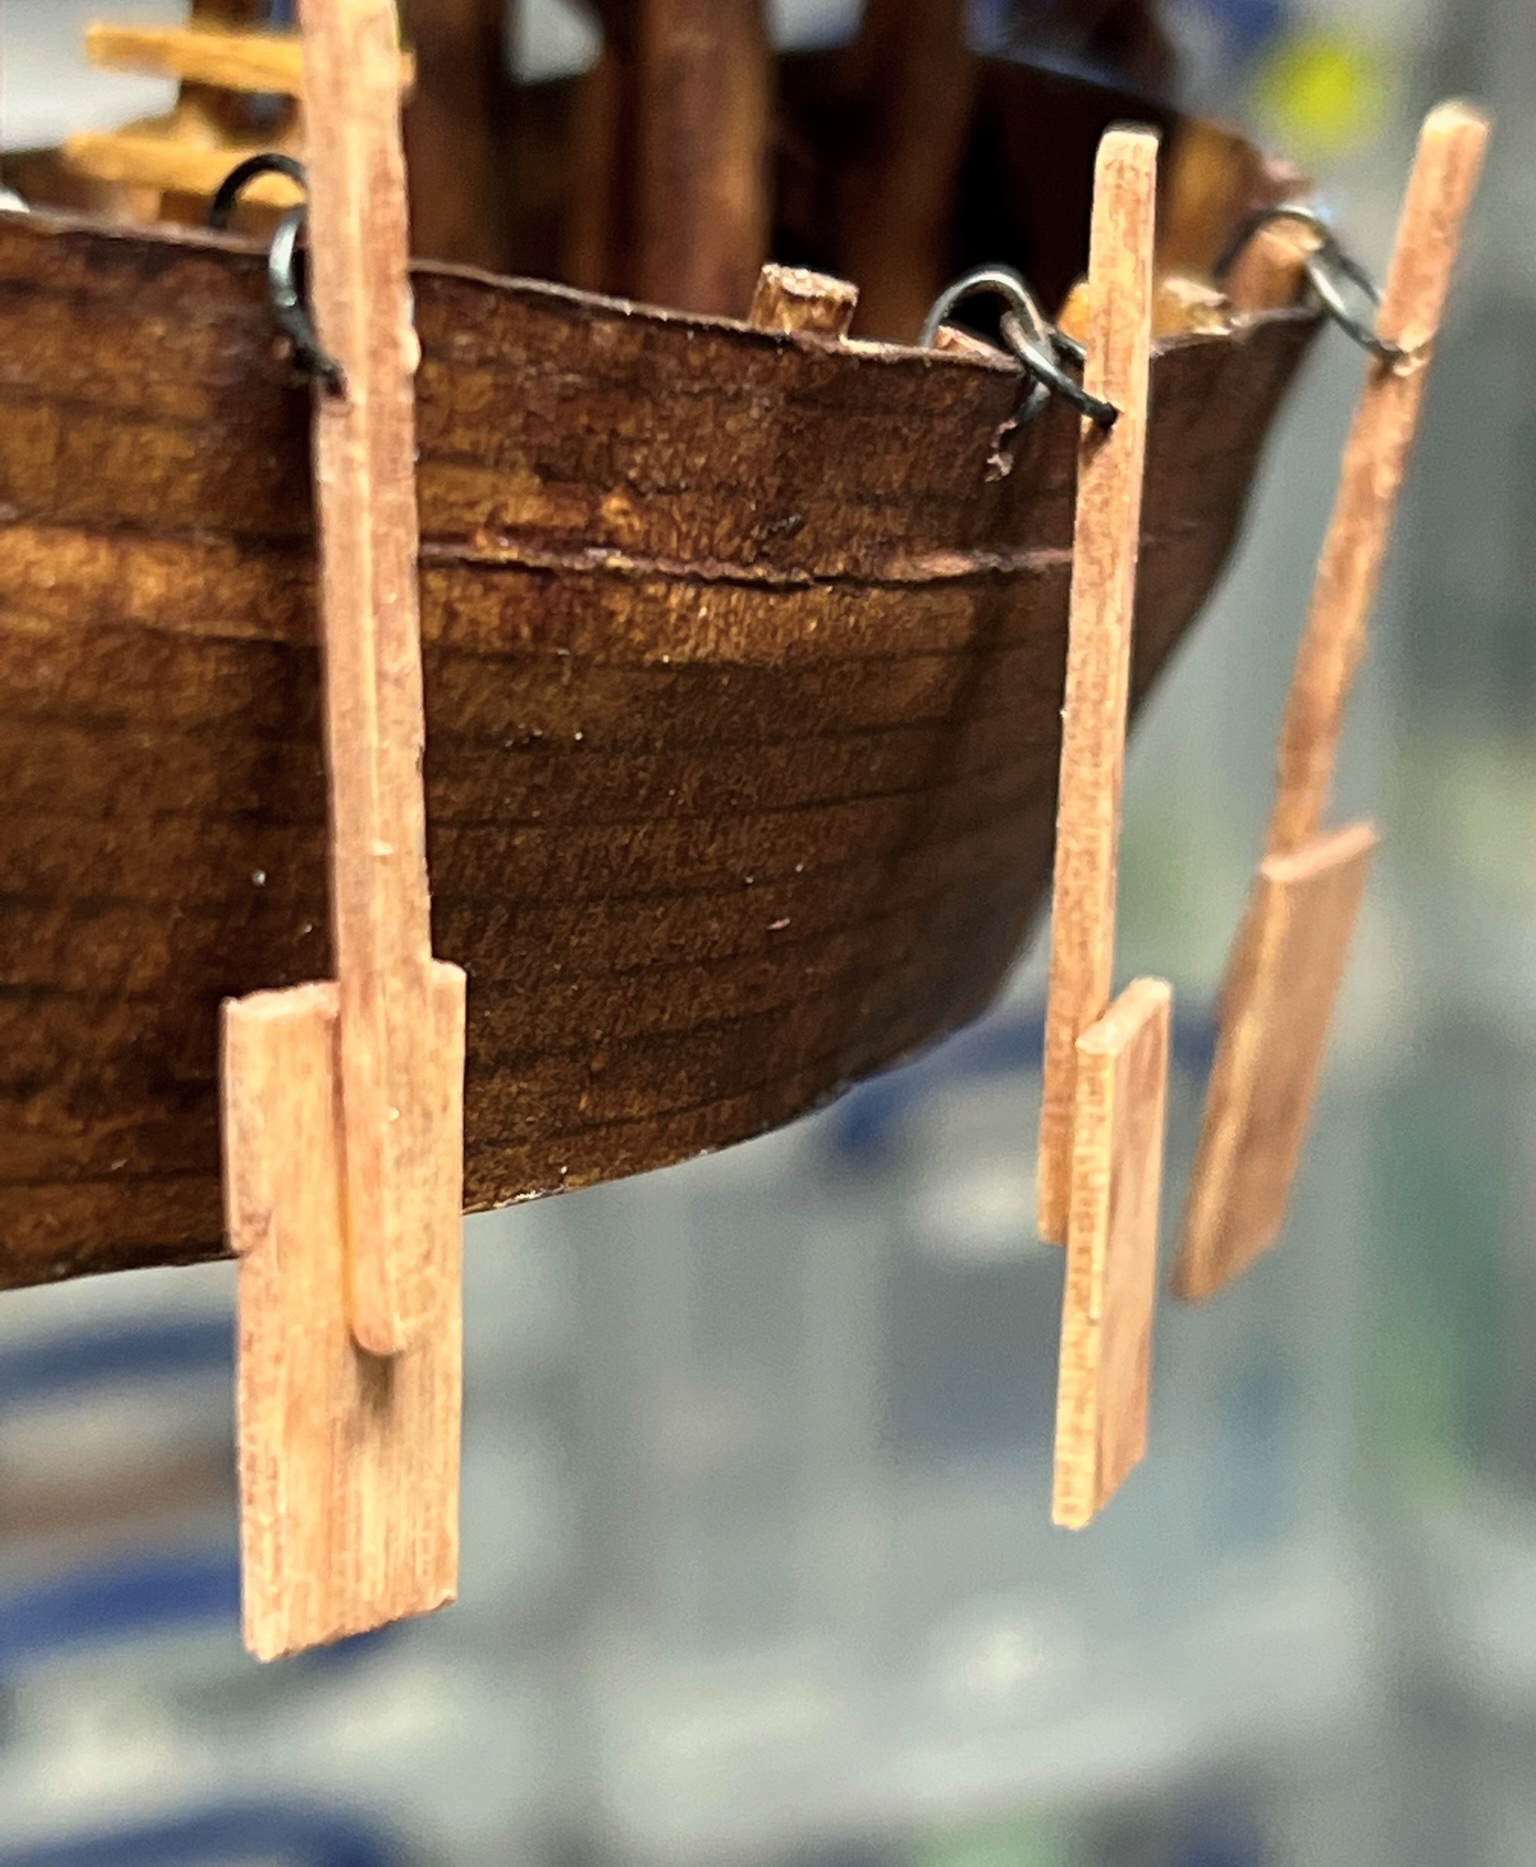
I also needed oars and oar locks.
After adding the oarsSide viewClose up of the oars. Yes, you can drill out a matchstick!
After some work on El Marcos‘ rigging, she was done.
El Marcos bow viewEl Marcos port sideEl Marcos top view
So now I had the five brigantines – and only two were exactly alike (the Sarissa models). I hoped to outfit them all with different lombards and falconets (both early cannon) plus crew. As I built these just before HAVOC 2022, this post had to wait, as after HAVOC was my vacation trip. And as mentioned – I had 5 cannon and 15 cannon crew to build for these brigantines – plus game aids for the battle. I hope to post about that project next. But first let me share a couple of group shots.
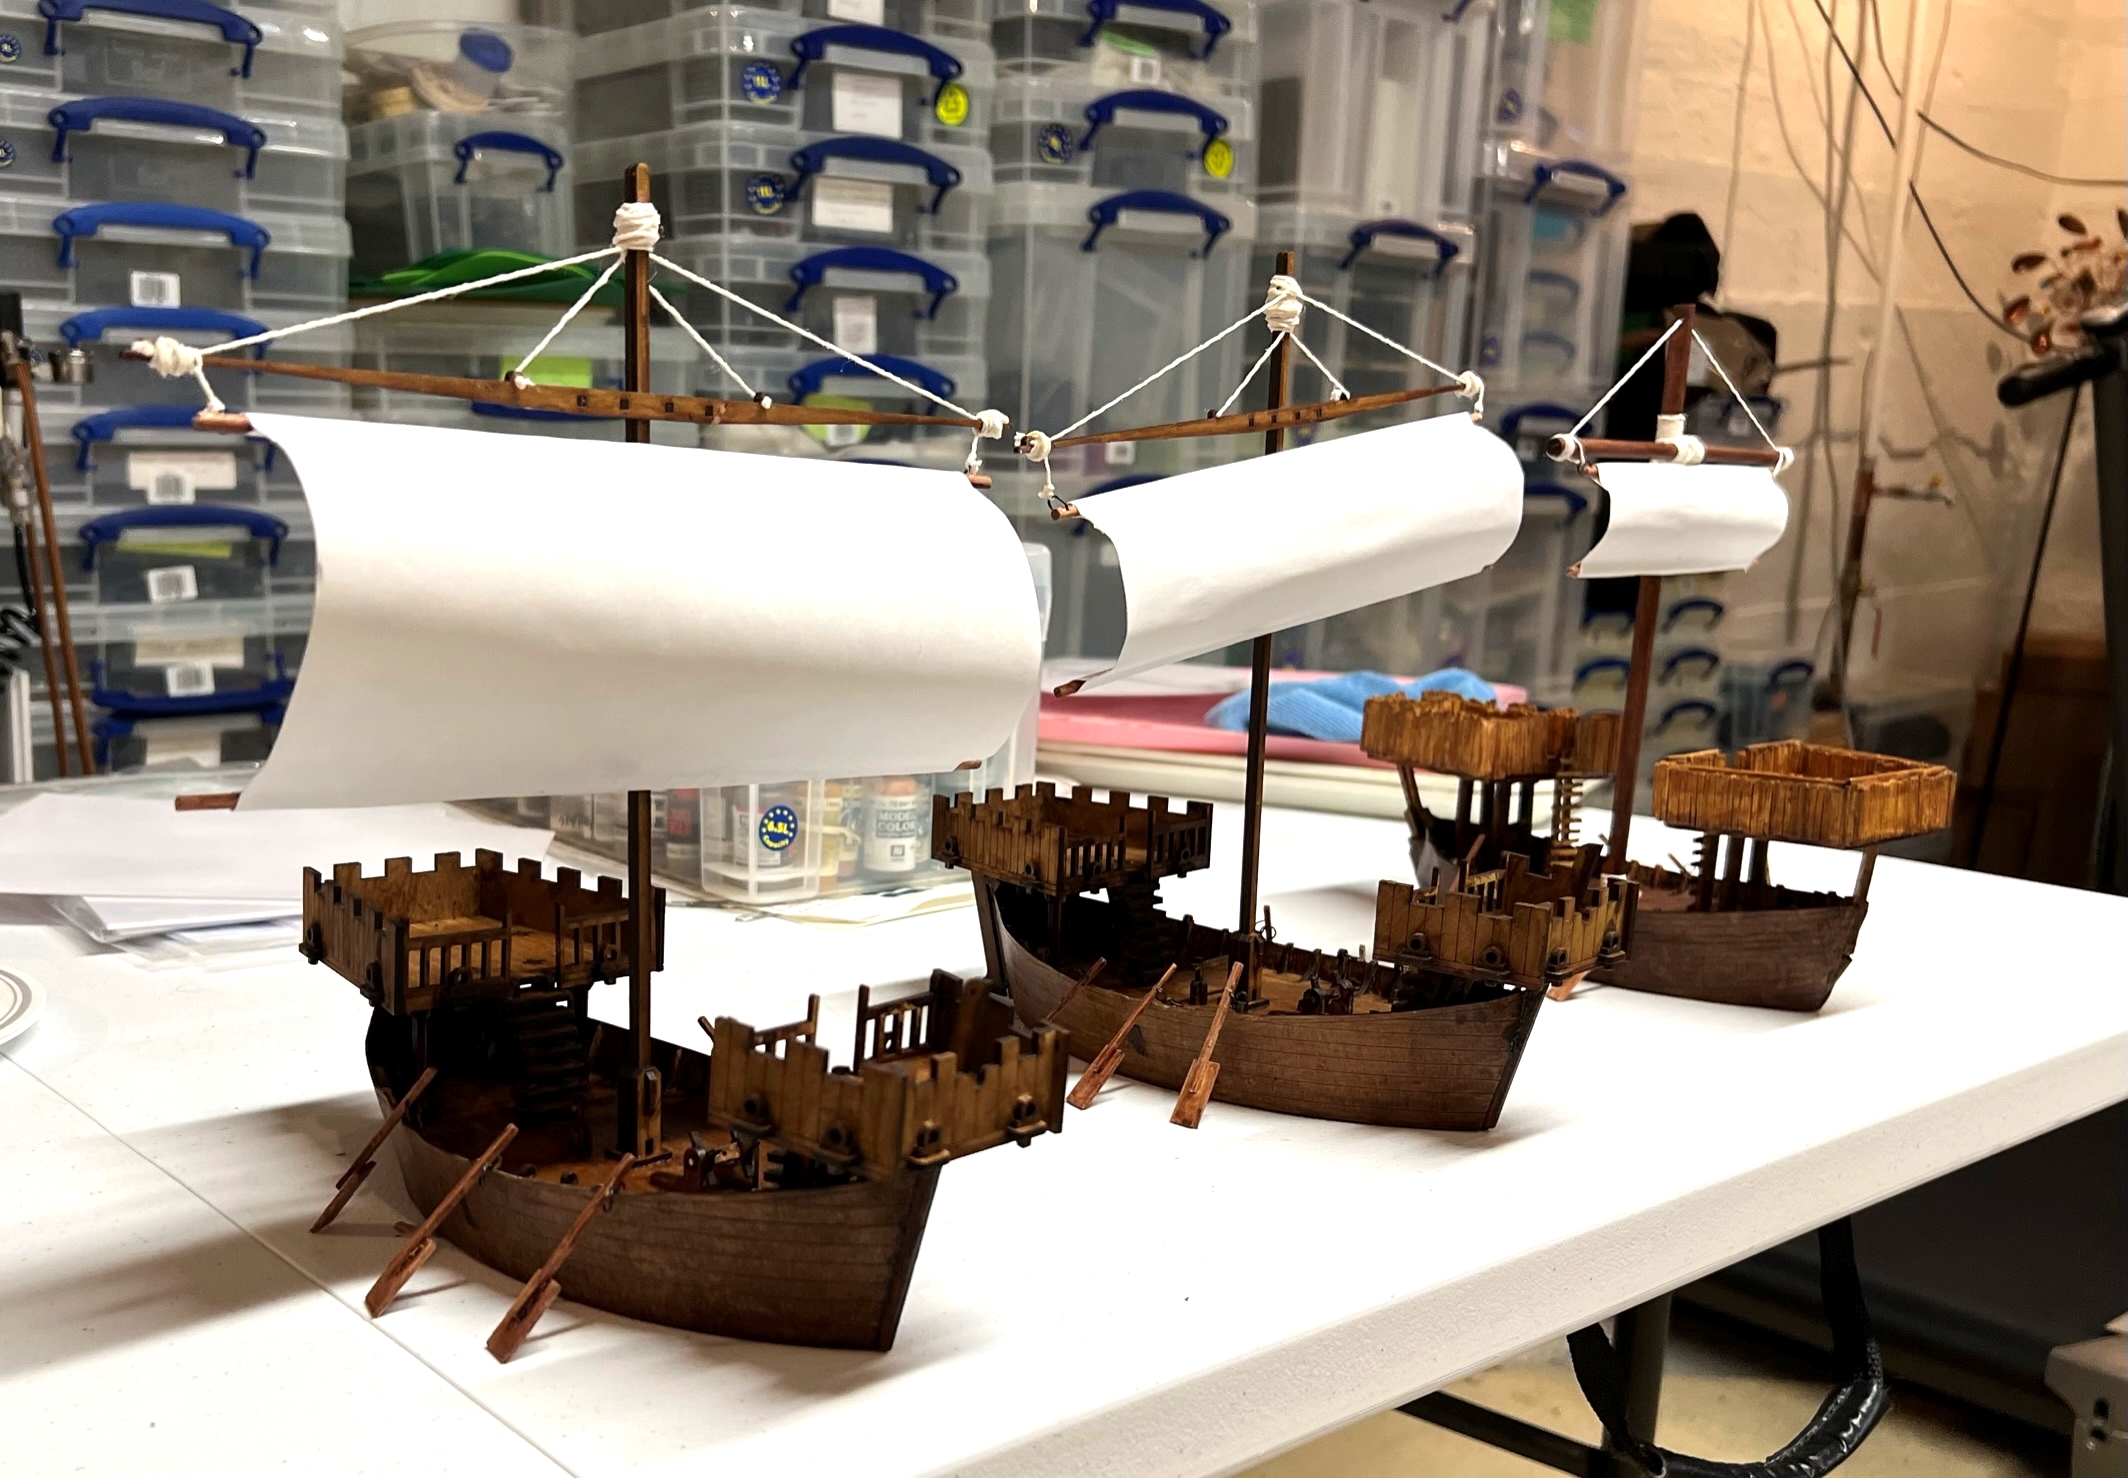
The fleet!All assembled.
Thanks for checking out this post – it was a lot to build and if PVA was toxic I’d already be dead after this. Let me know which of these you liked best (or liked least) I’d love to read any thoughts you have on this project. More to come!
Miscellaneous details and references for those interested in that sort of thing:
For all of my previous posts on games, units, and other projects for my 16th Century Spanish Conquest supplement for Feudal Patrol™ – “Civilizations Collide” – please see this page.
PAINTS, INKS, GLAZES, SHADES, WASHES, PIGMENTS, FLOCKING, GLUES AND MORE THAT I USED ON THESE SHIPS:
On the 3D-Printed Brigantines (El Dólar & El Gregorio):
3D printed Medieval Cog ship kits from Buck Surdu and Greg Priebe
Gorilla Glue
Hobby matchsticks (from West Germany in 1987!)
½” rubber tubing
Rustoleum black spray primer
Army Painter “Dark Leather” primer
Vallejo Surface Primer “German Green Brown”
Cotton twine
Wooden popsicle sticks
Wooden dowels (3/8″ and 1/8″)
Small (tiny) nails
1/8″ neodymium magnets
Paper clip wire
Jewelry/bead wire rings
Green stuff
White card stock
Elmer’s PVA Glue
Plastruct 1.5mm styrene sheets
Plastruct Bondene cement
SCI Grip Fast Set solvent cement
Pebeo Studio Acrylics “Auxiliaries Modeling Paste HD”
Vallejo Model Air “Armour Brown”
Vallejo Model Air “First Light”
Vallejo Model Air “Brown”
Vallejo Model Air “Wood”
Army Painter “Mid-Brown” (shade)
Citadel “Contrast Paint – Apothecary White”
Citadel “Contrast Paint – Skeleton Horde”
Citadel “Agrax Earthshade” (wash)
Citadel “Contrast Paint – Talassar Blue”
Citadel “Chronus Blue”
Craftsmart “White”
Darjeeling tea bags
On the Sarissa MDF Kit Brigantines (EL CONQUISTADOR & El Perro de Guerra):


