

One of the most fascinating aspects of the Spanish Conquest of the Aztec Empire is the story of how Hernan Cortes and his Conquistadores built a ragtag fleet of small brigantines to seize control of Lake Texcoco. This body of water – (located then where Mexico City is now) – in the 16th Century surrounded the Aztec island capital of Tenochtitlan. To defeat the Aztecs, Cortes knew that he must control that lake as well as the lands around it. But how?
Cortes realized that he needed to build a fleet. To accomplish this, Cortes used scavenged lumber from his previously-scuttled seafaring vessels to build small brigantines in pieces in the safe haven of his native allies in Tlaxcala. The ships’ prefabricated pieces were then man-portaged by the Tlaxcalans to the shore of Lake Texcoco. Here they were assembled, and made ready for combat on the lake in the spring of 1521. Then, Cortes simultaneously sent land-based conquistadores to attack Tenochtitlan’s causeways while launching his brigantines to attack Tenochtitlan. These ships were manned by conquistador infantry and had significant firepower – to include lombards and falconets with their crews. In Cortes’ way were swarms of Aztecs in hundreds of war canoes waiting to swarm over the Spanish vessels.
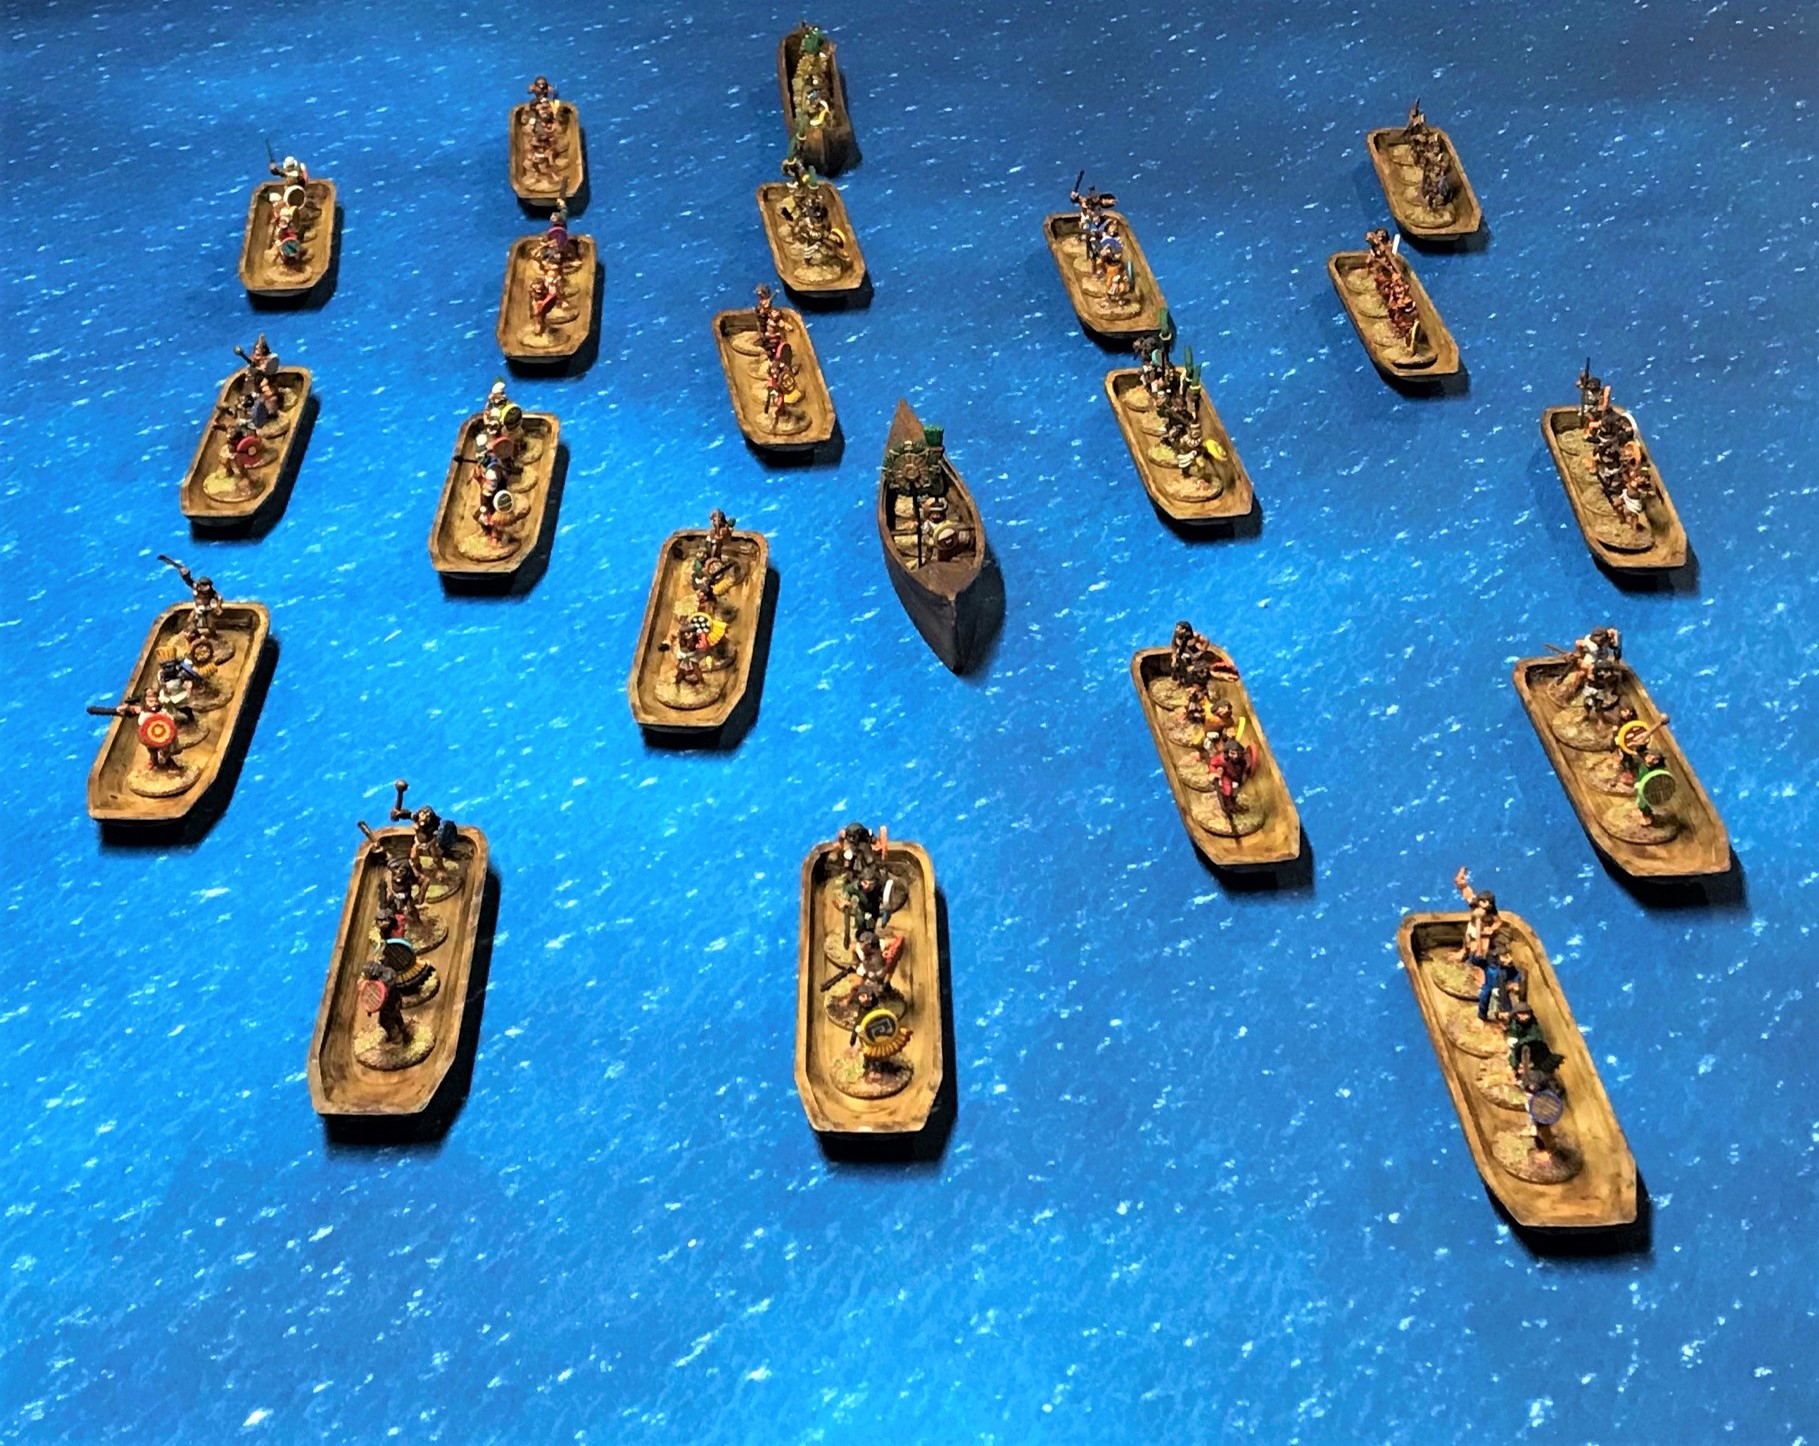
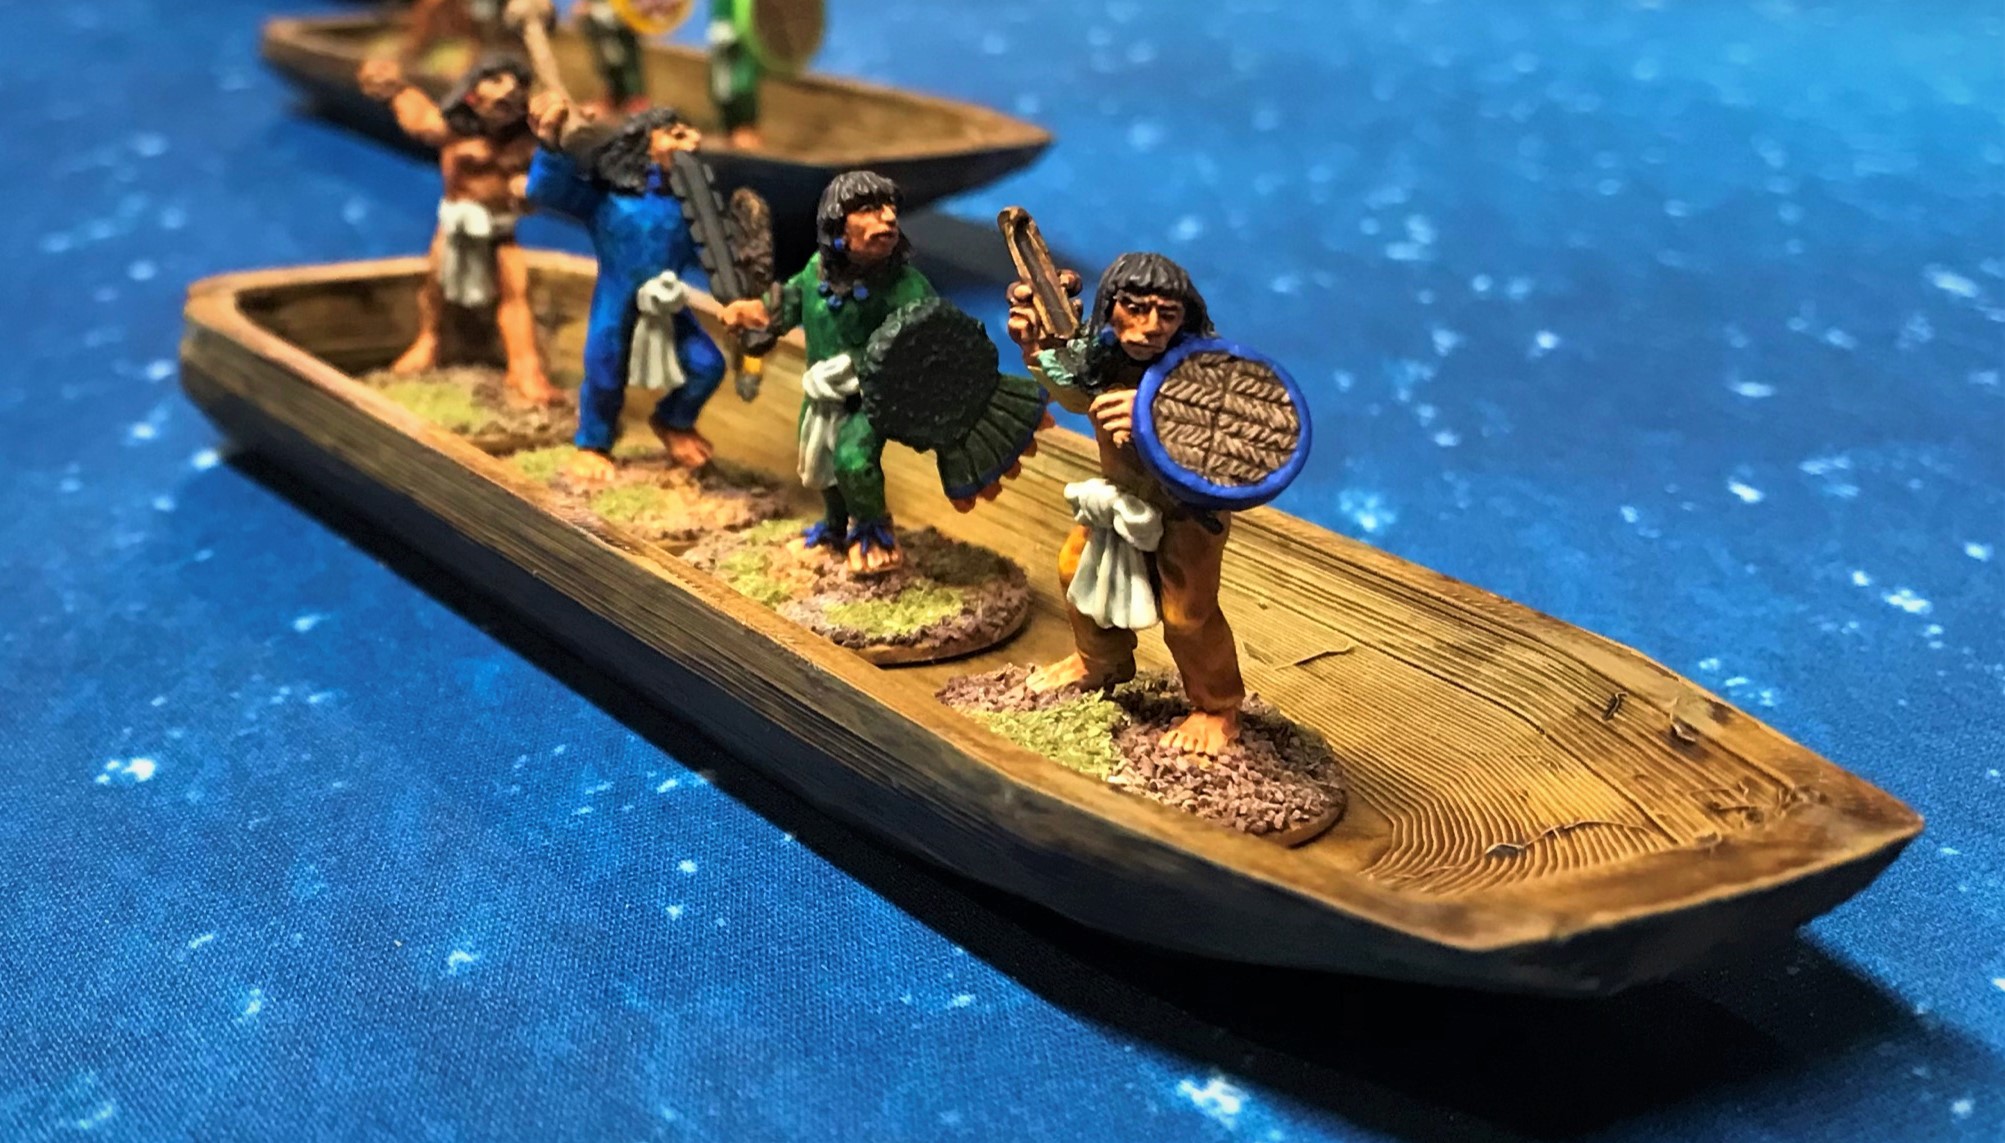
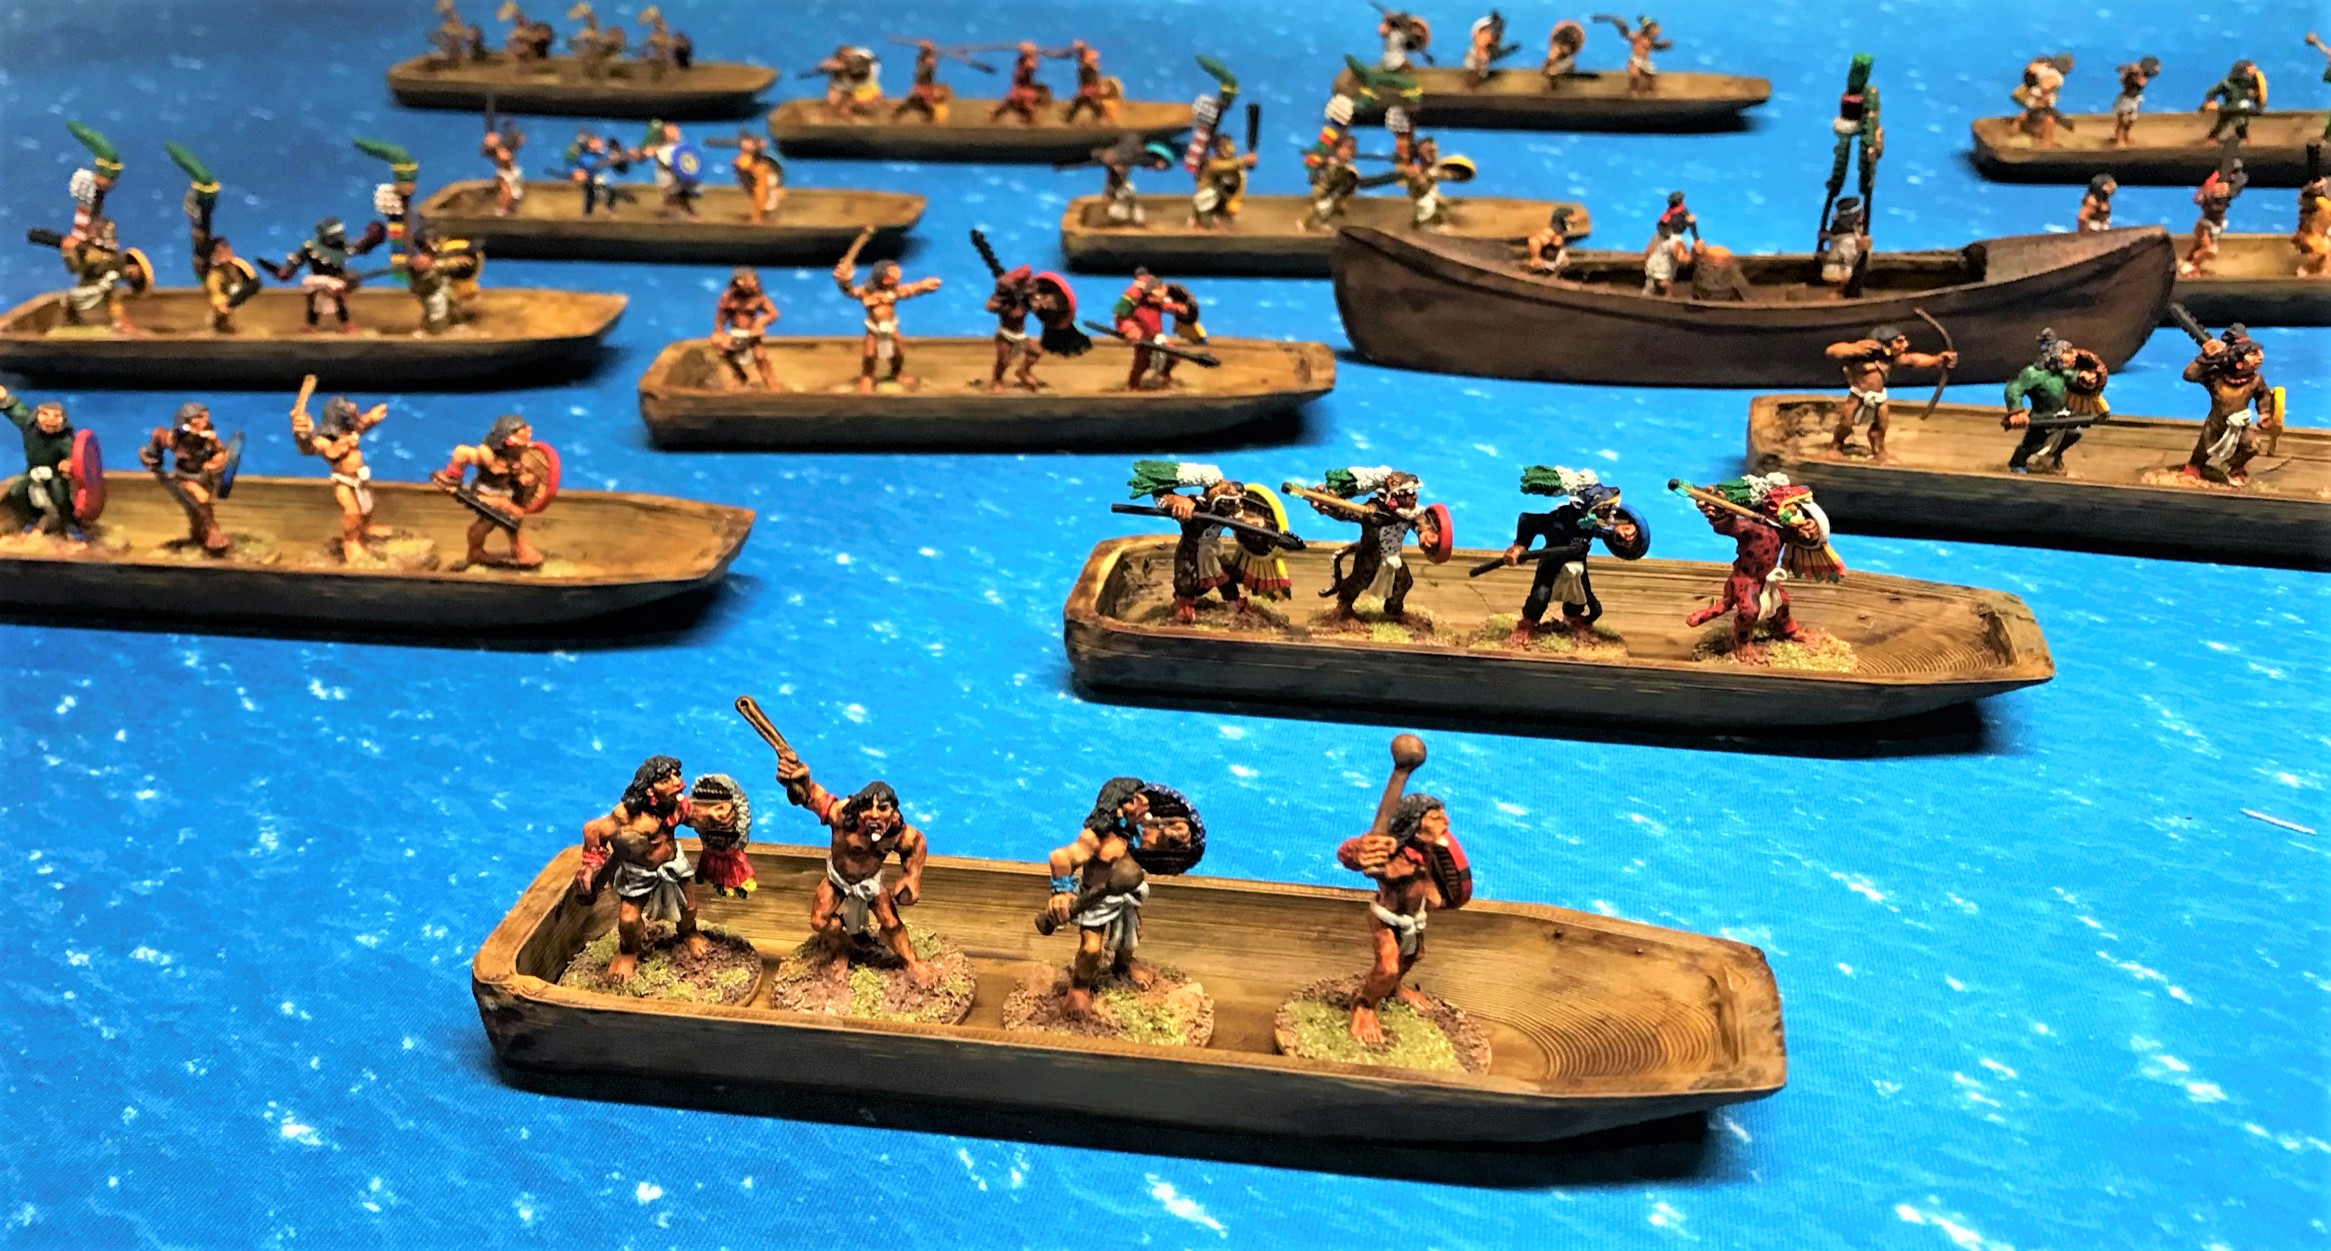
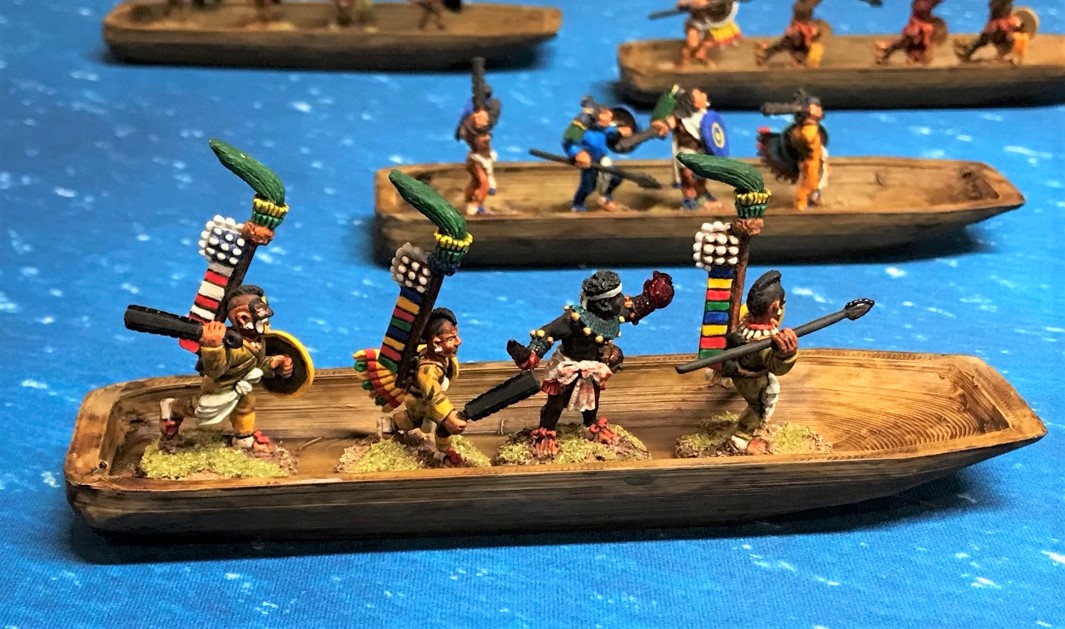
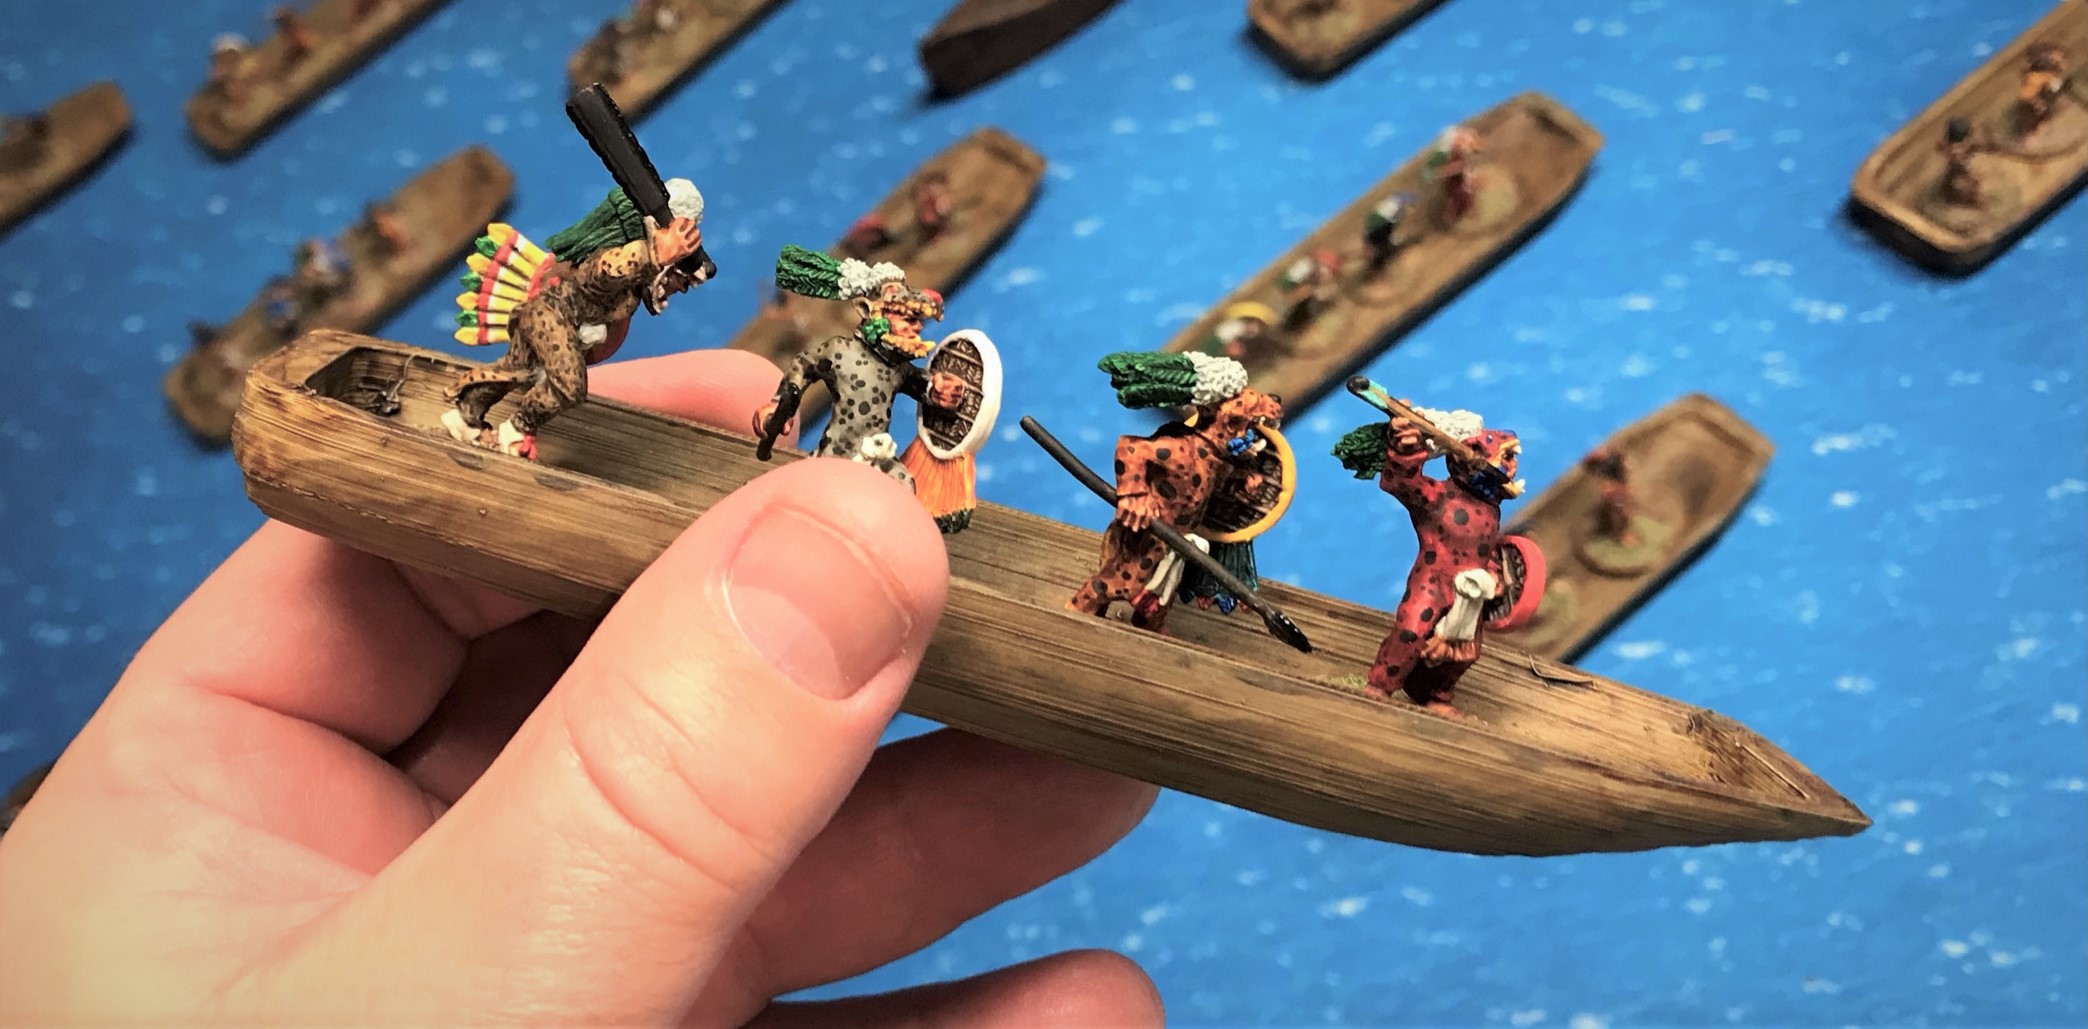
To me, this sounded like an incredible scenario for tabletop wargaming. As covered numerous times in this blog, I have been developing tabletop wargaming scenarios for games of Feudal PatrolTM using my supplement for Civilizations Collide. I had previously amassed and painted the war canoes…but I needed a fleet for the Spanish. Of course, there were no “dedicated” models for the types of ships the conquistadores would have manned. After seeing an image from the Mexican Naval Museum of a diorama of the battle by Alejandro Linares Garcia via Wikimedia Commons I was inspired.
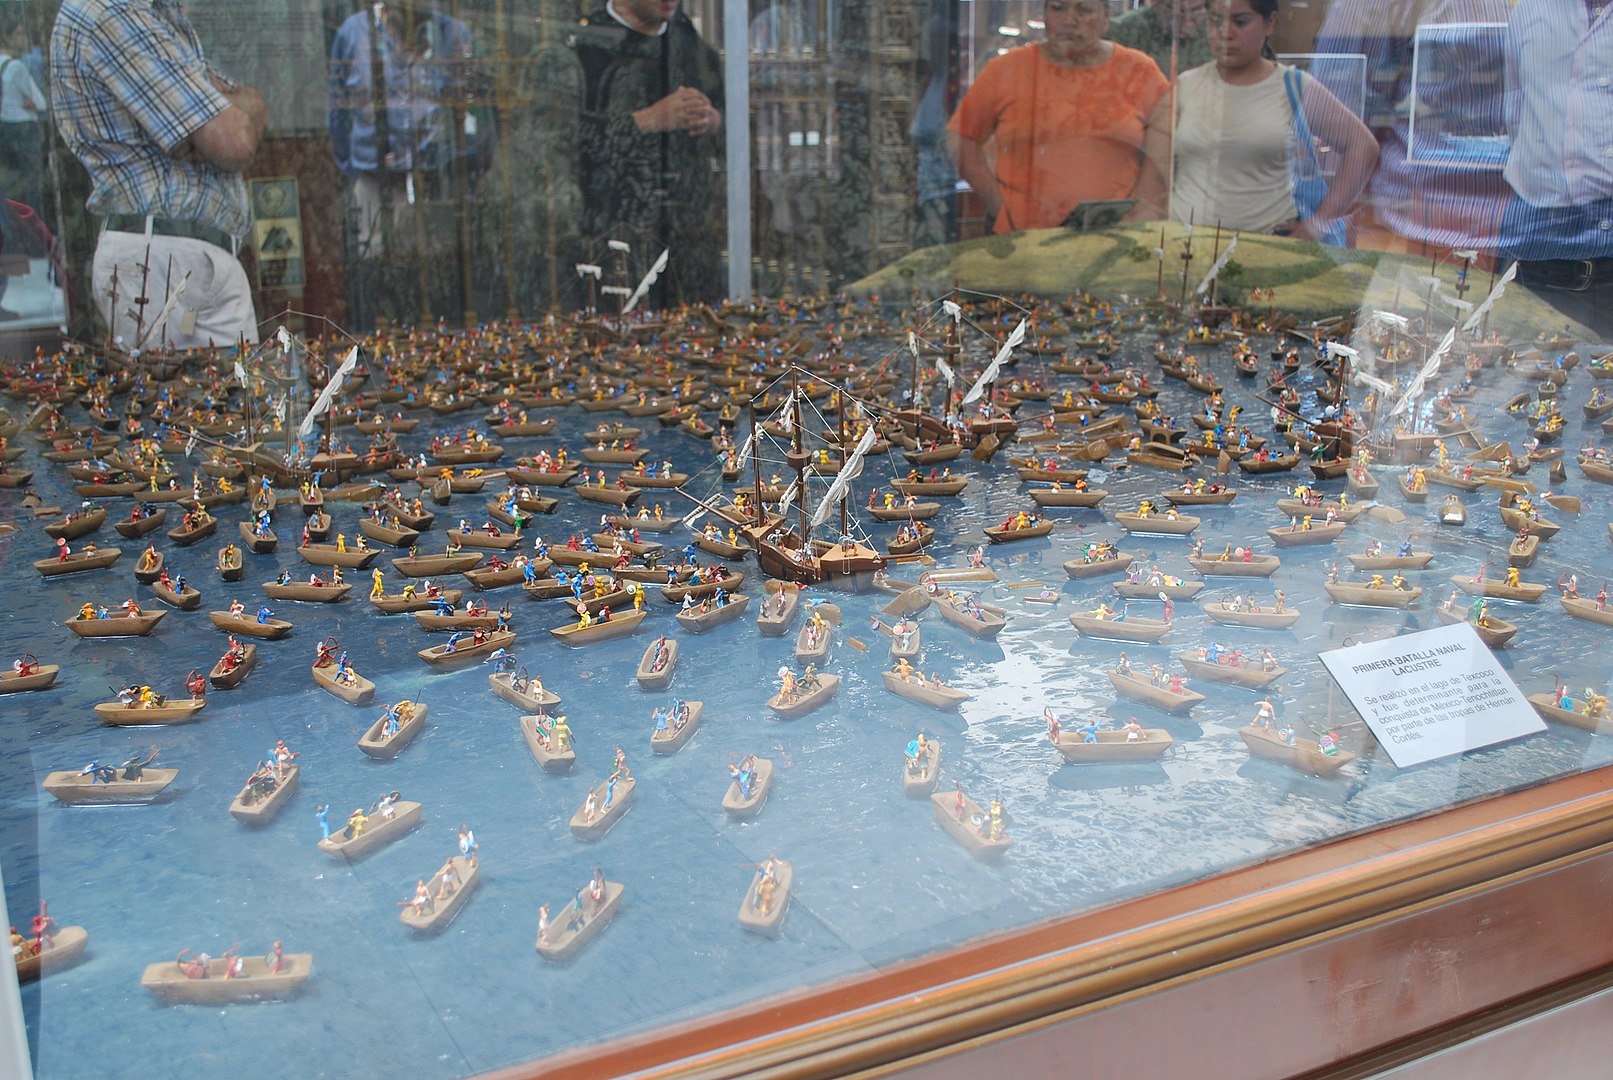
Looking at this image, I had a good concept for the war canoes – and I decided to that the Spanish would likely would have used simple designs for their prefab brigantines – like medieval cogs.
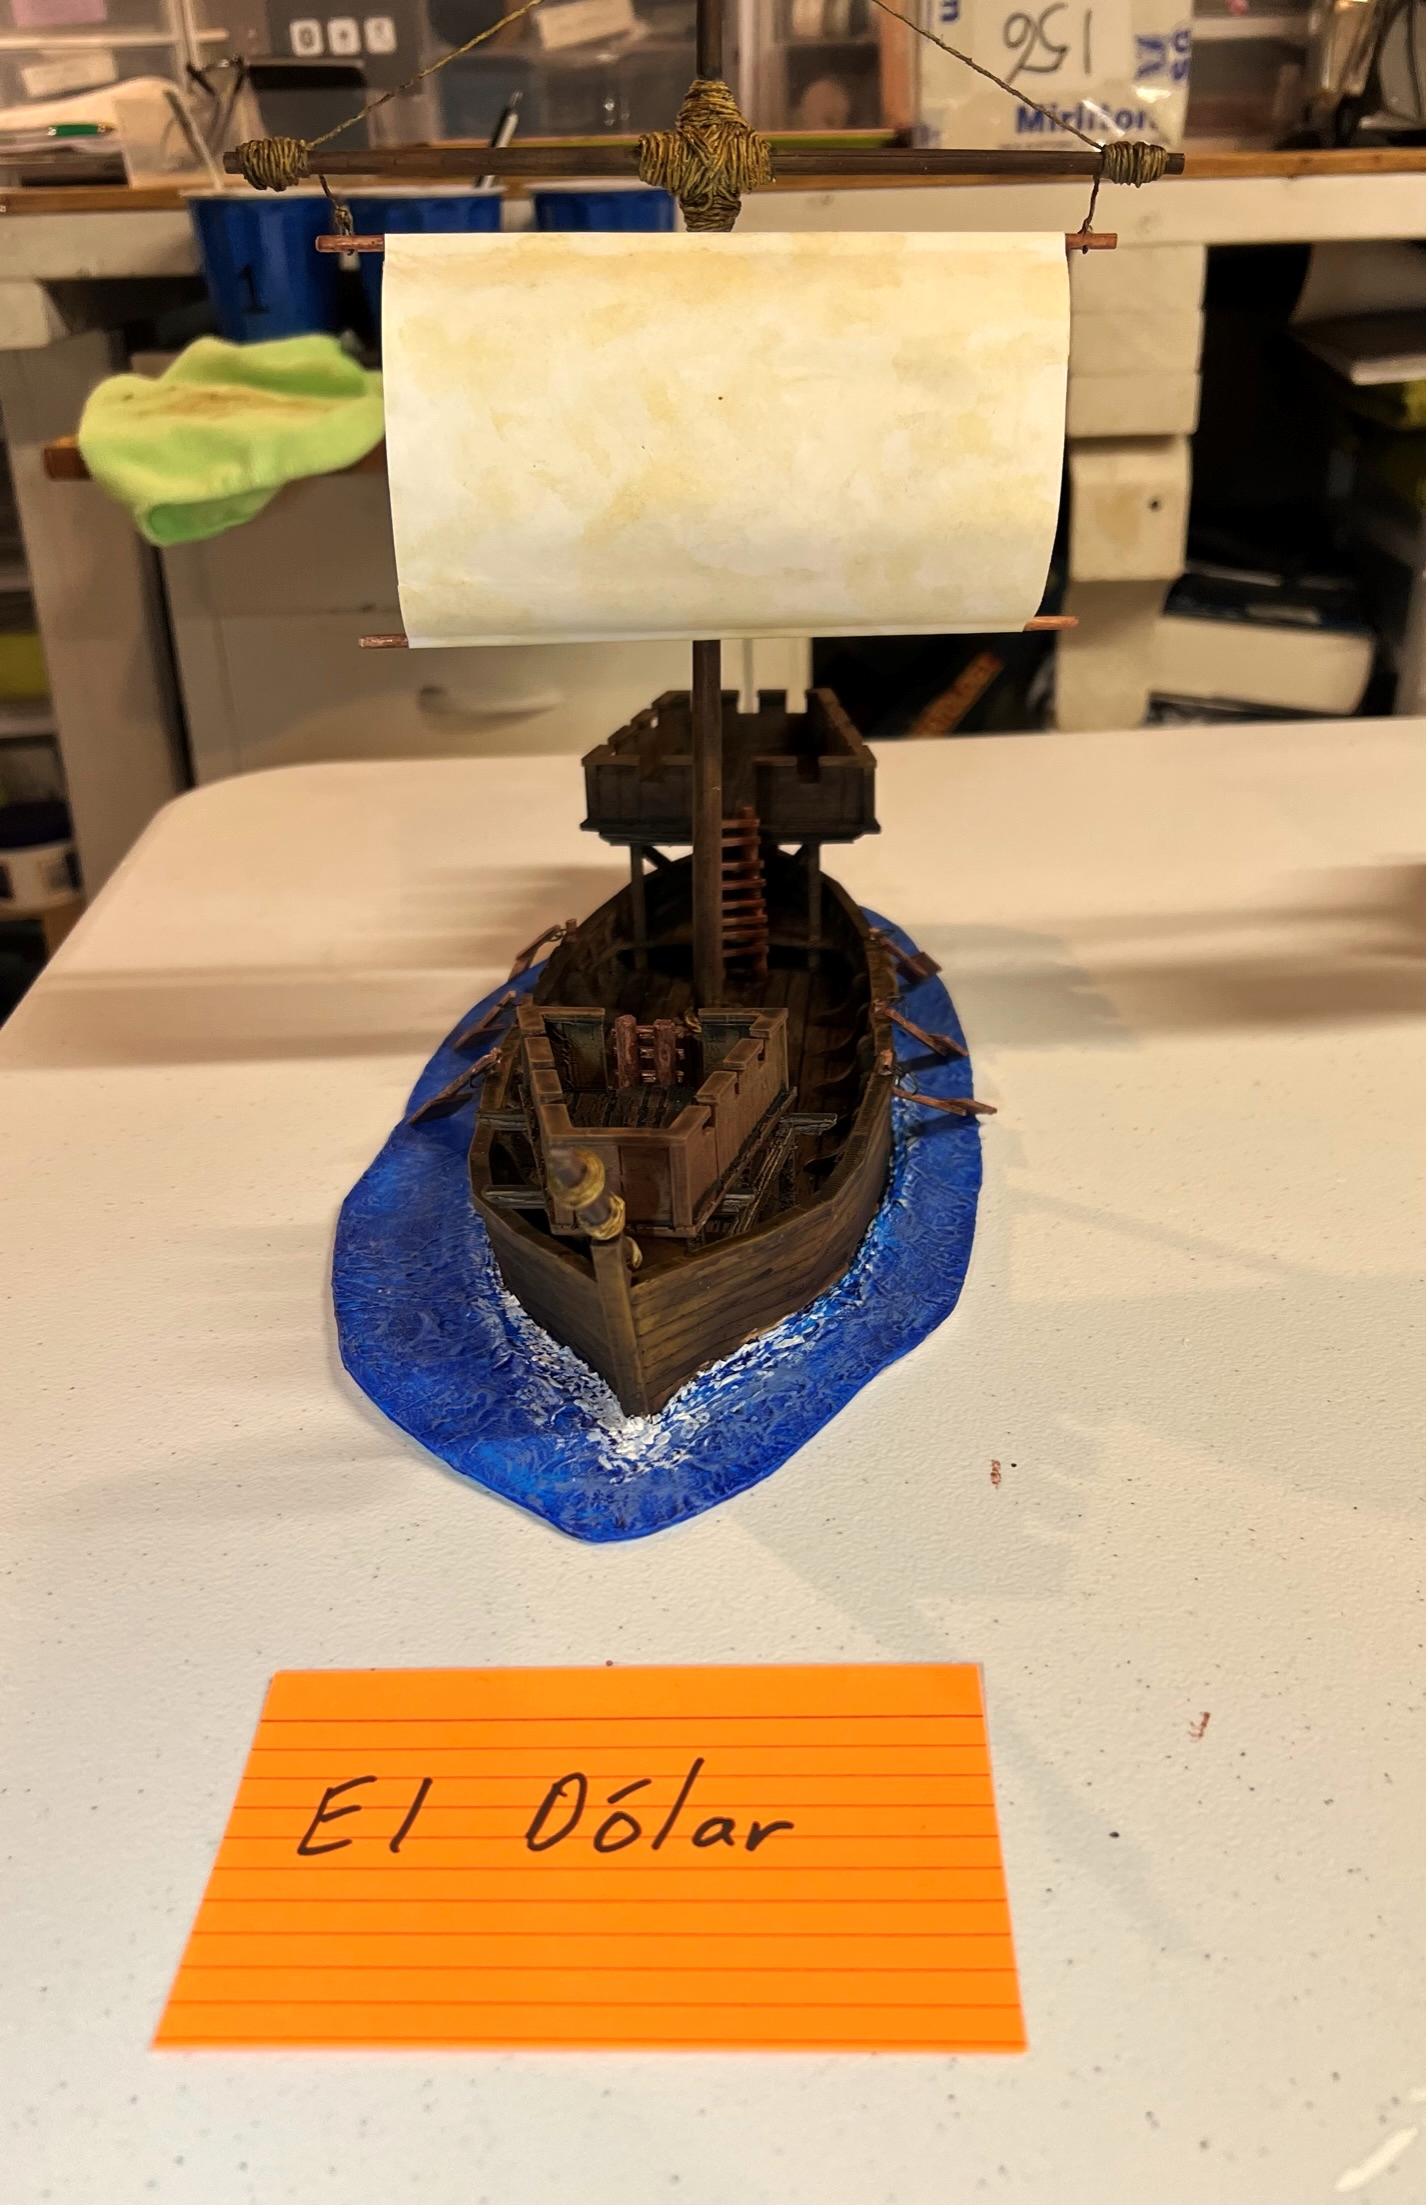
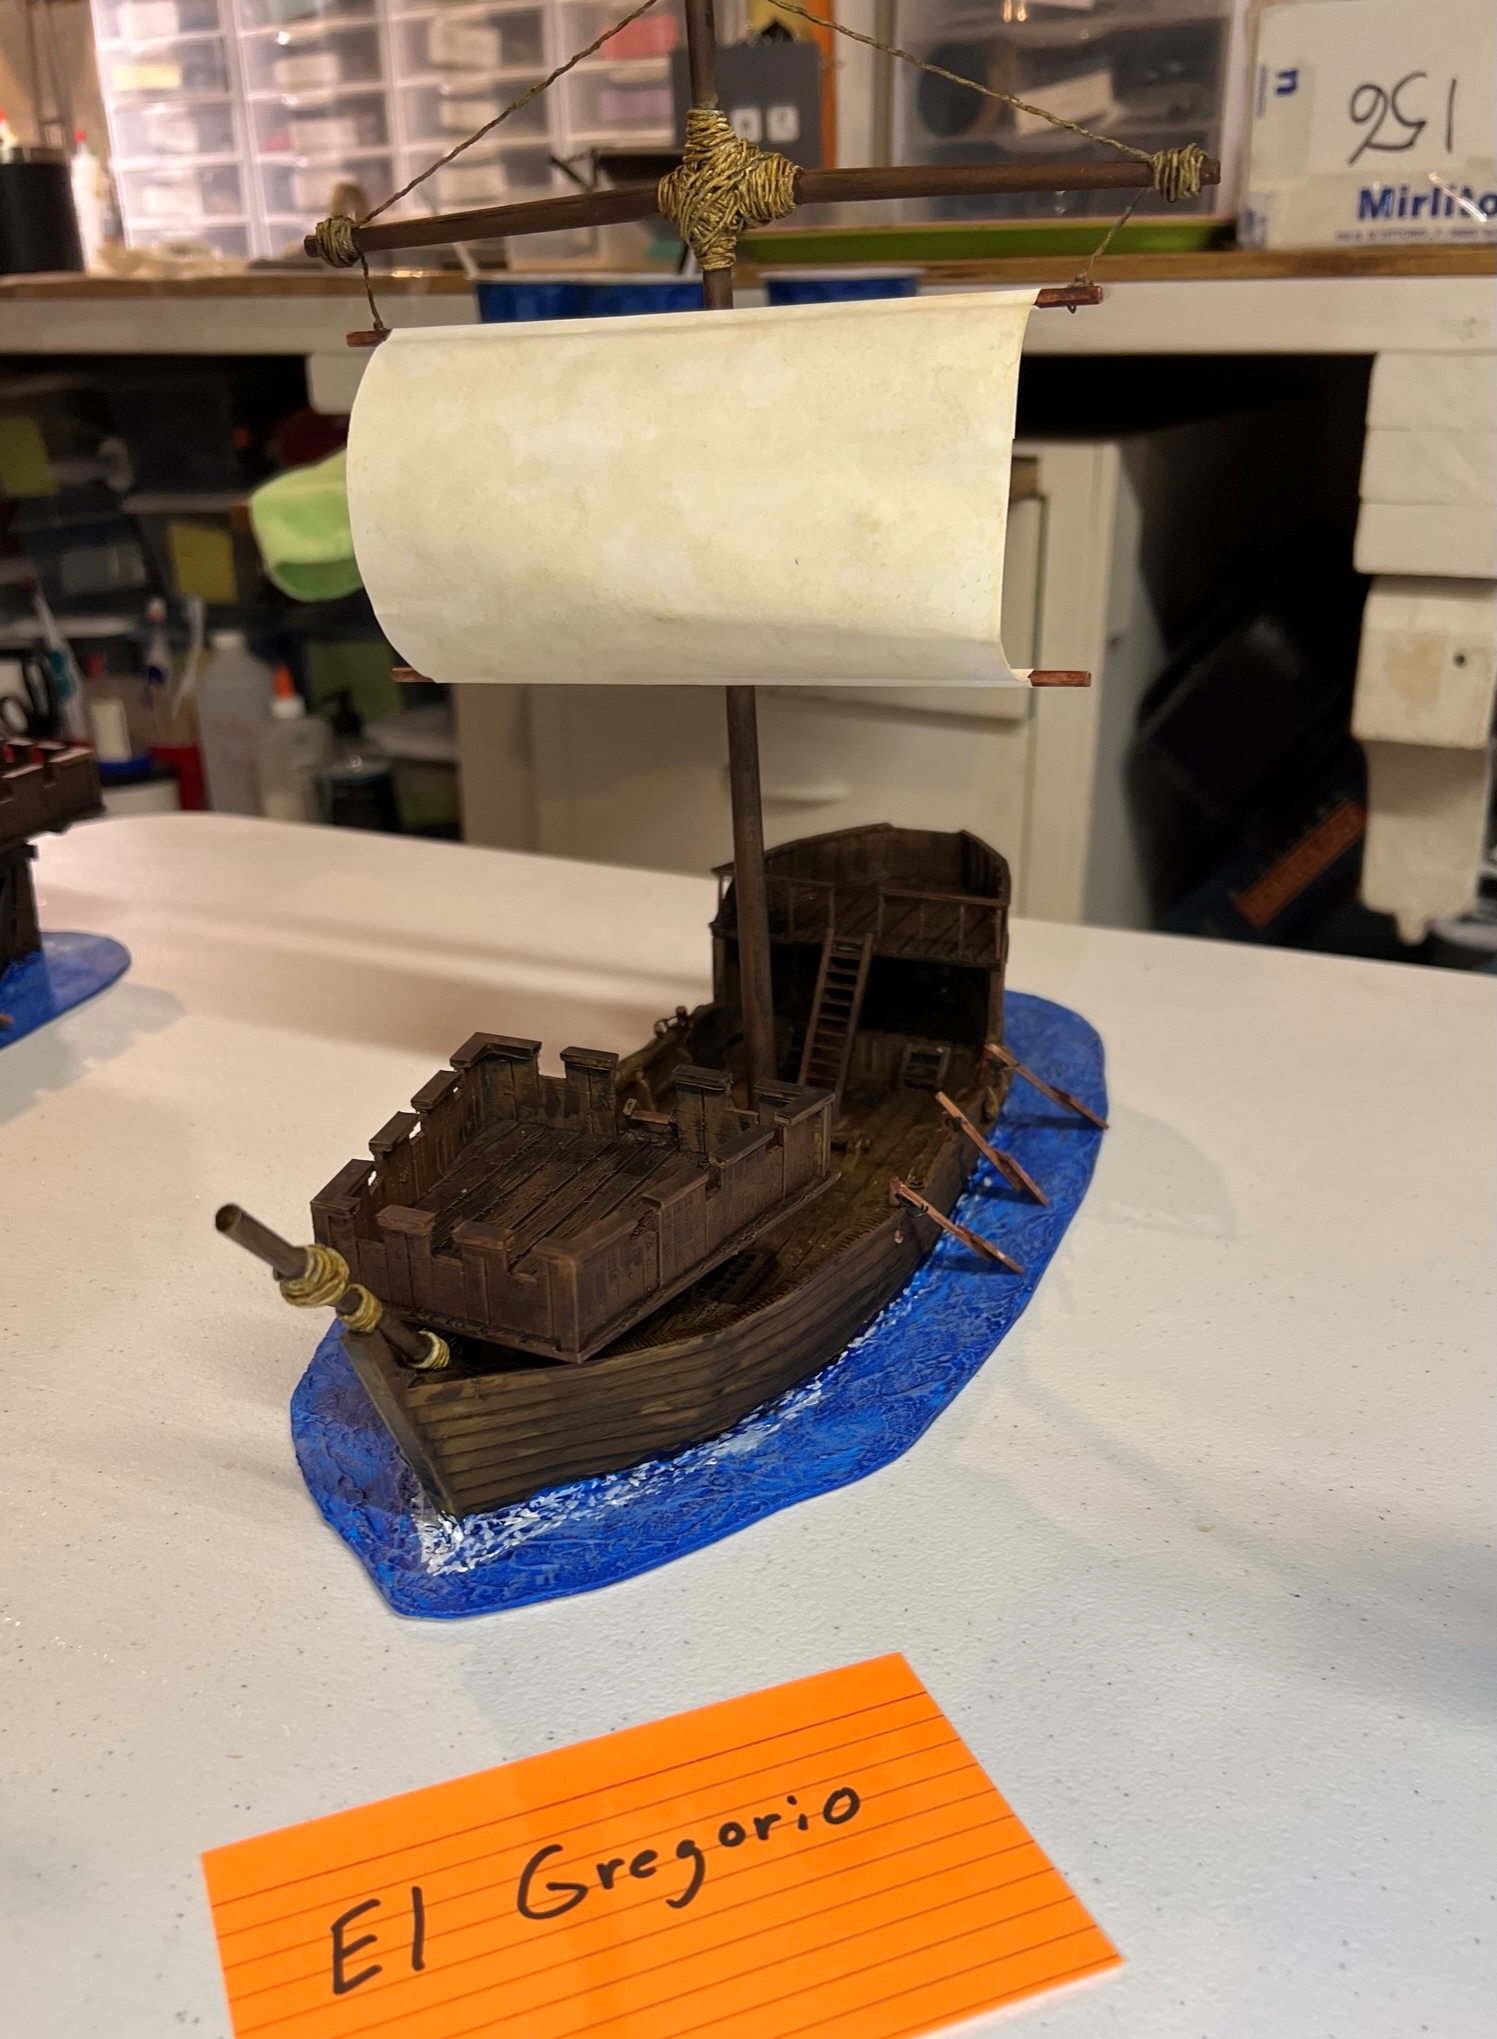
I decided that for a game I would need 5 brigantines to go up against my 21 war canoes. Sourcing these ships became a challenge but help arrived from Buck Surdu and Greg Priebe who kindly offered to assist me in the way of two different 28mm scale medieval cog models that were 3D printed! Meanwhile, I found that Sarissa had a medieval cog kit (#L031), and I ordered two. By early March of 2022, I had all four ships in the building queue, and I had decided as well to scratch-build one as well so that I would have a varied fleet of five. Naming them became the next step – so the 3D models became (for obvious reasons) El Dólar (The Buck) & El Gregorio (The Greg). I named the Sarissa models El Perro de Guerra (The War Dog), & El Conquistador (The Conquistador of course). Lastly, for totally self-aggrandizing reasons that escape me now, I decided that my yet-to-be-designed scratch-build would be El Marcos (The Mark).
I will go through each ship’s build and share some photos and my processes of both building and painting them. Building these and painting these (and building the last one) were FAR more work than I had imagined at the start. Still, I think the MANY pics below will tell the story (it was a big project).
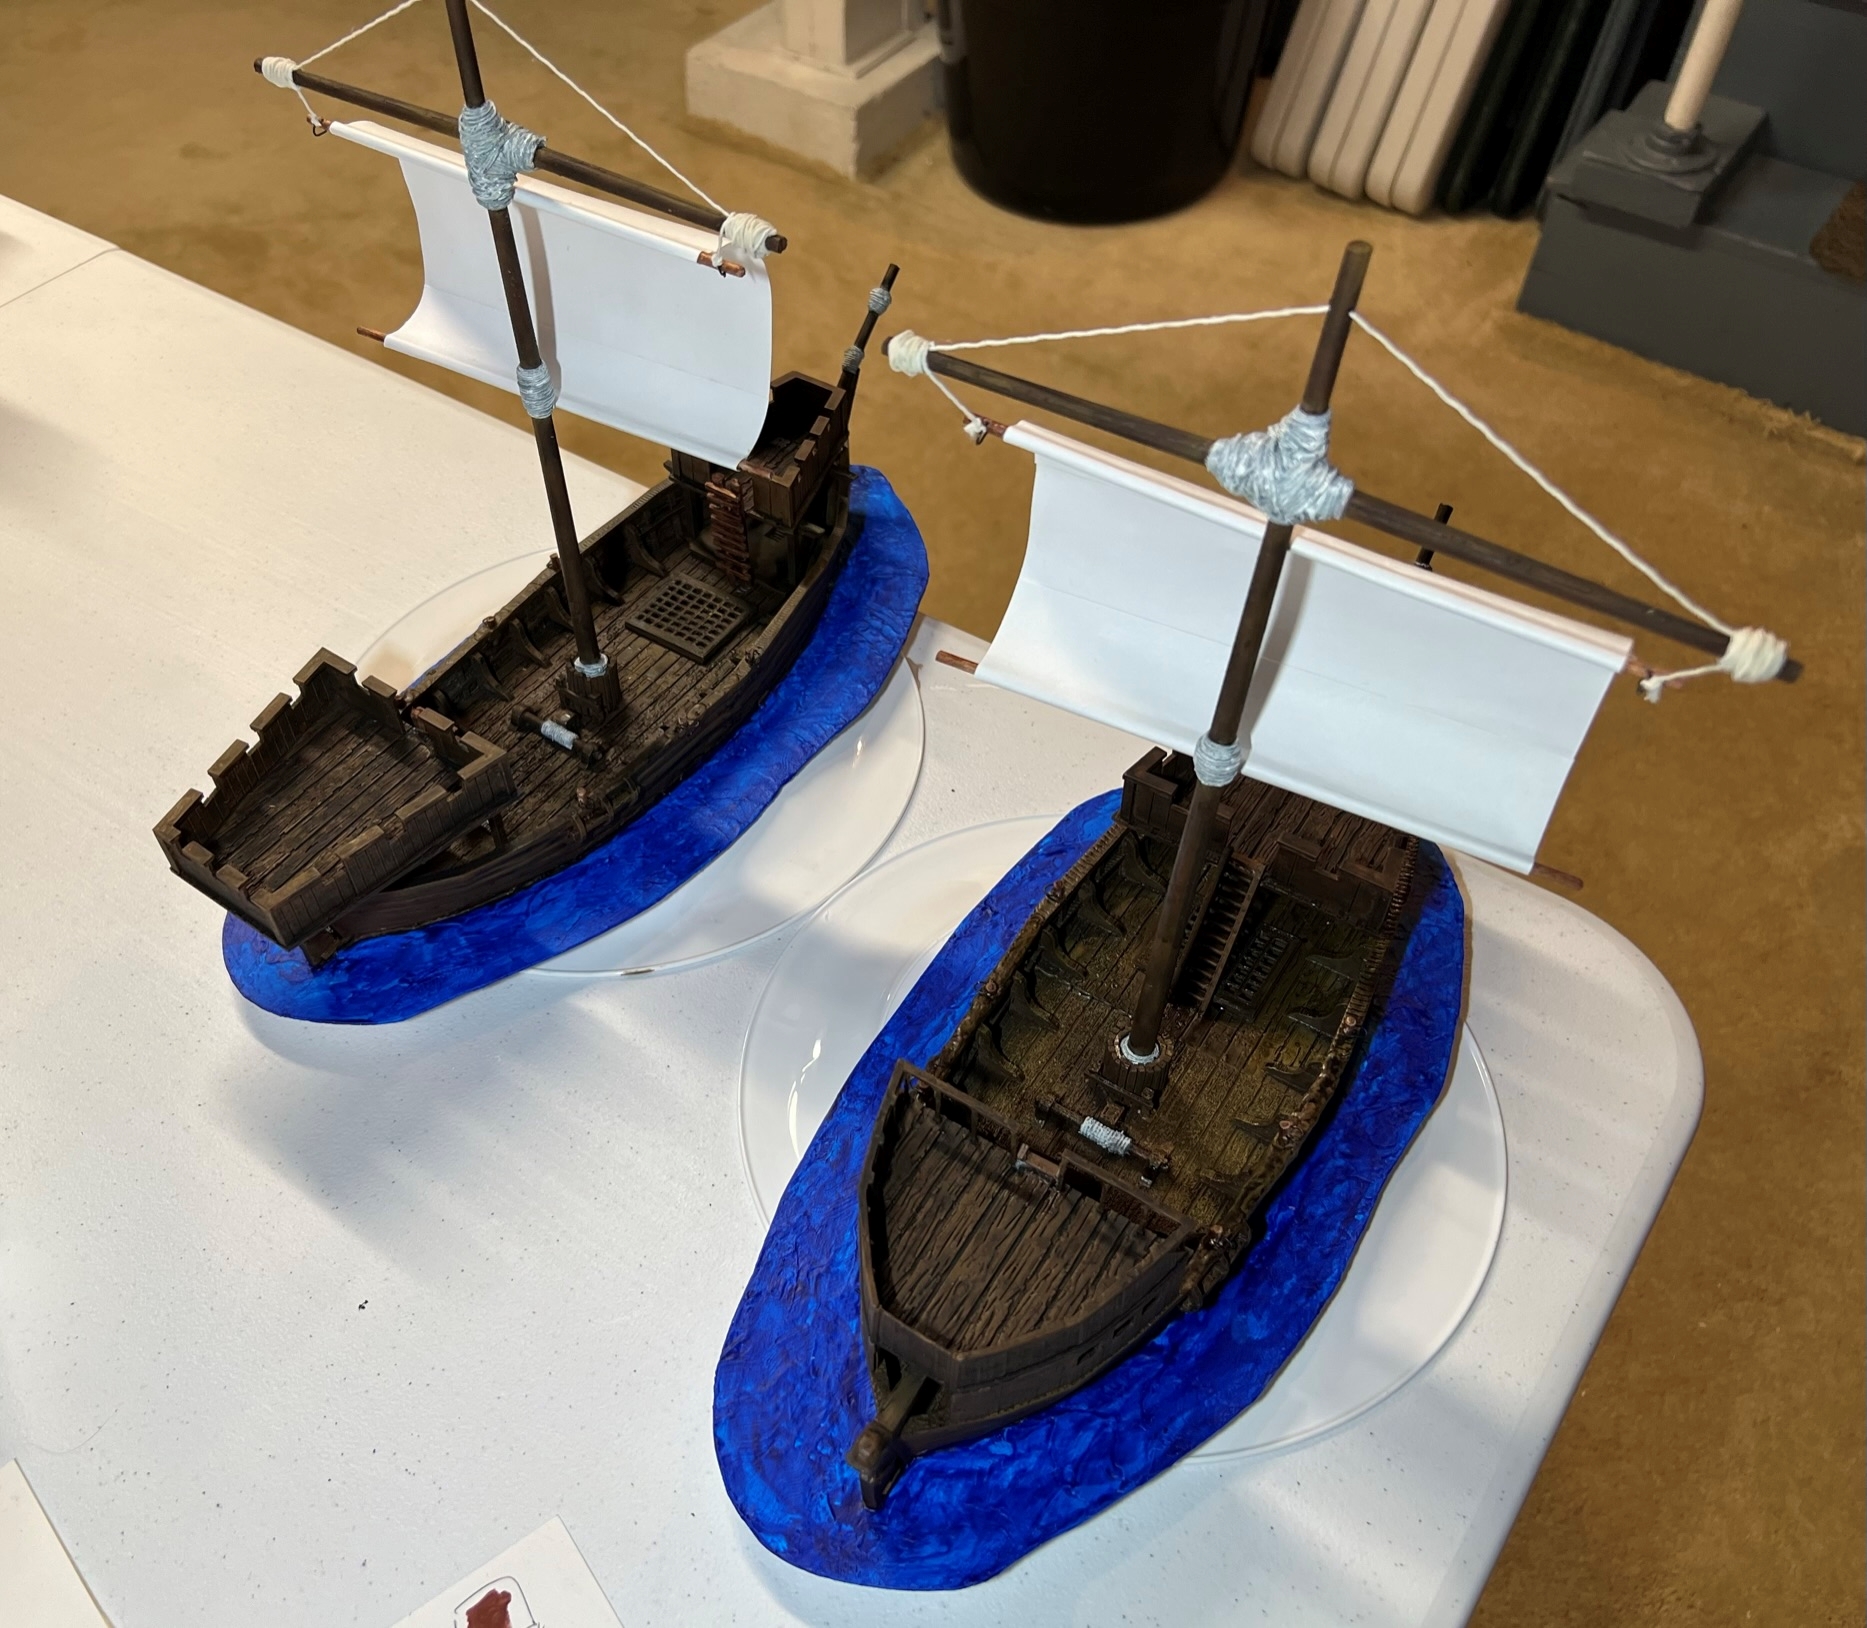
El Dólar & El Gregorio
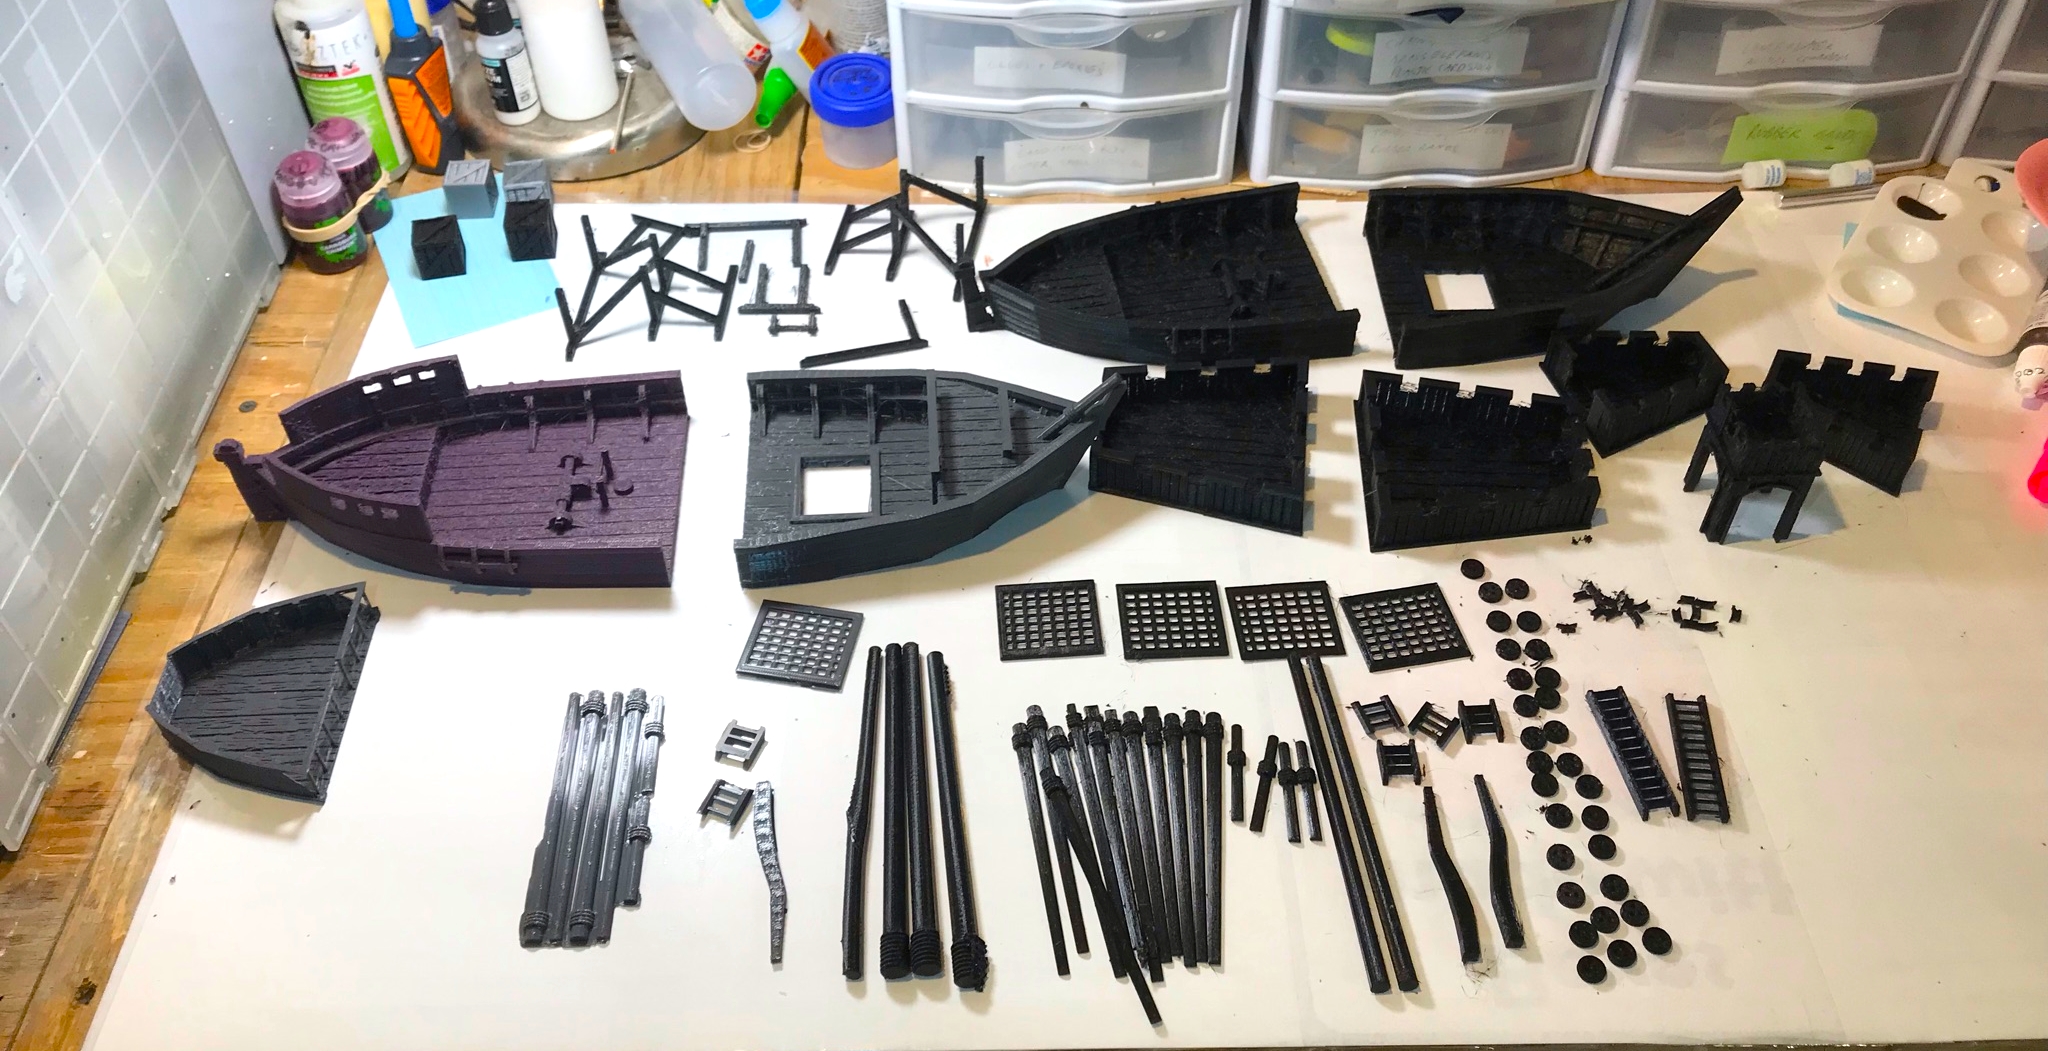
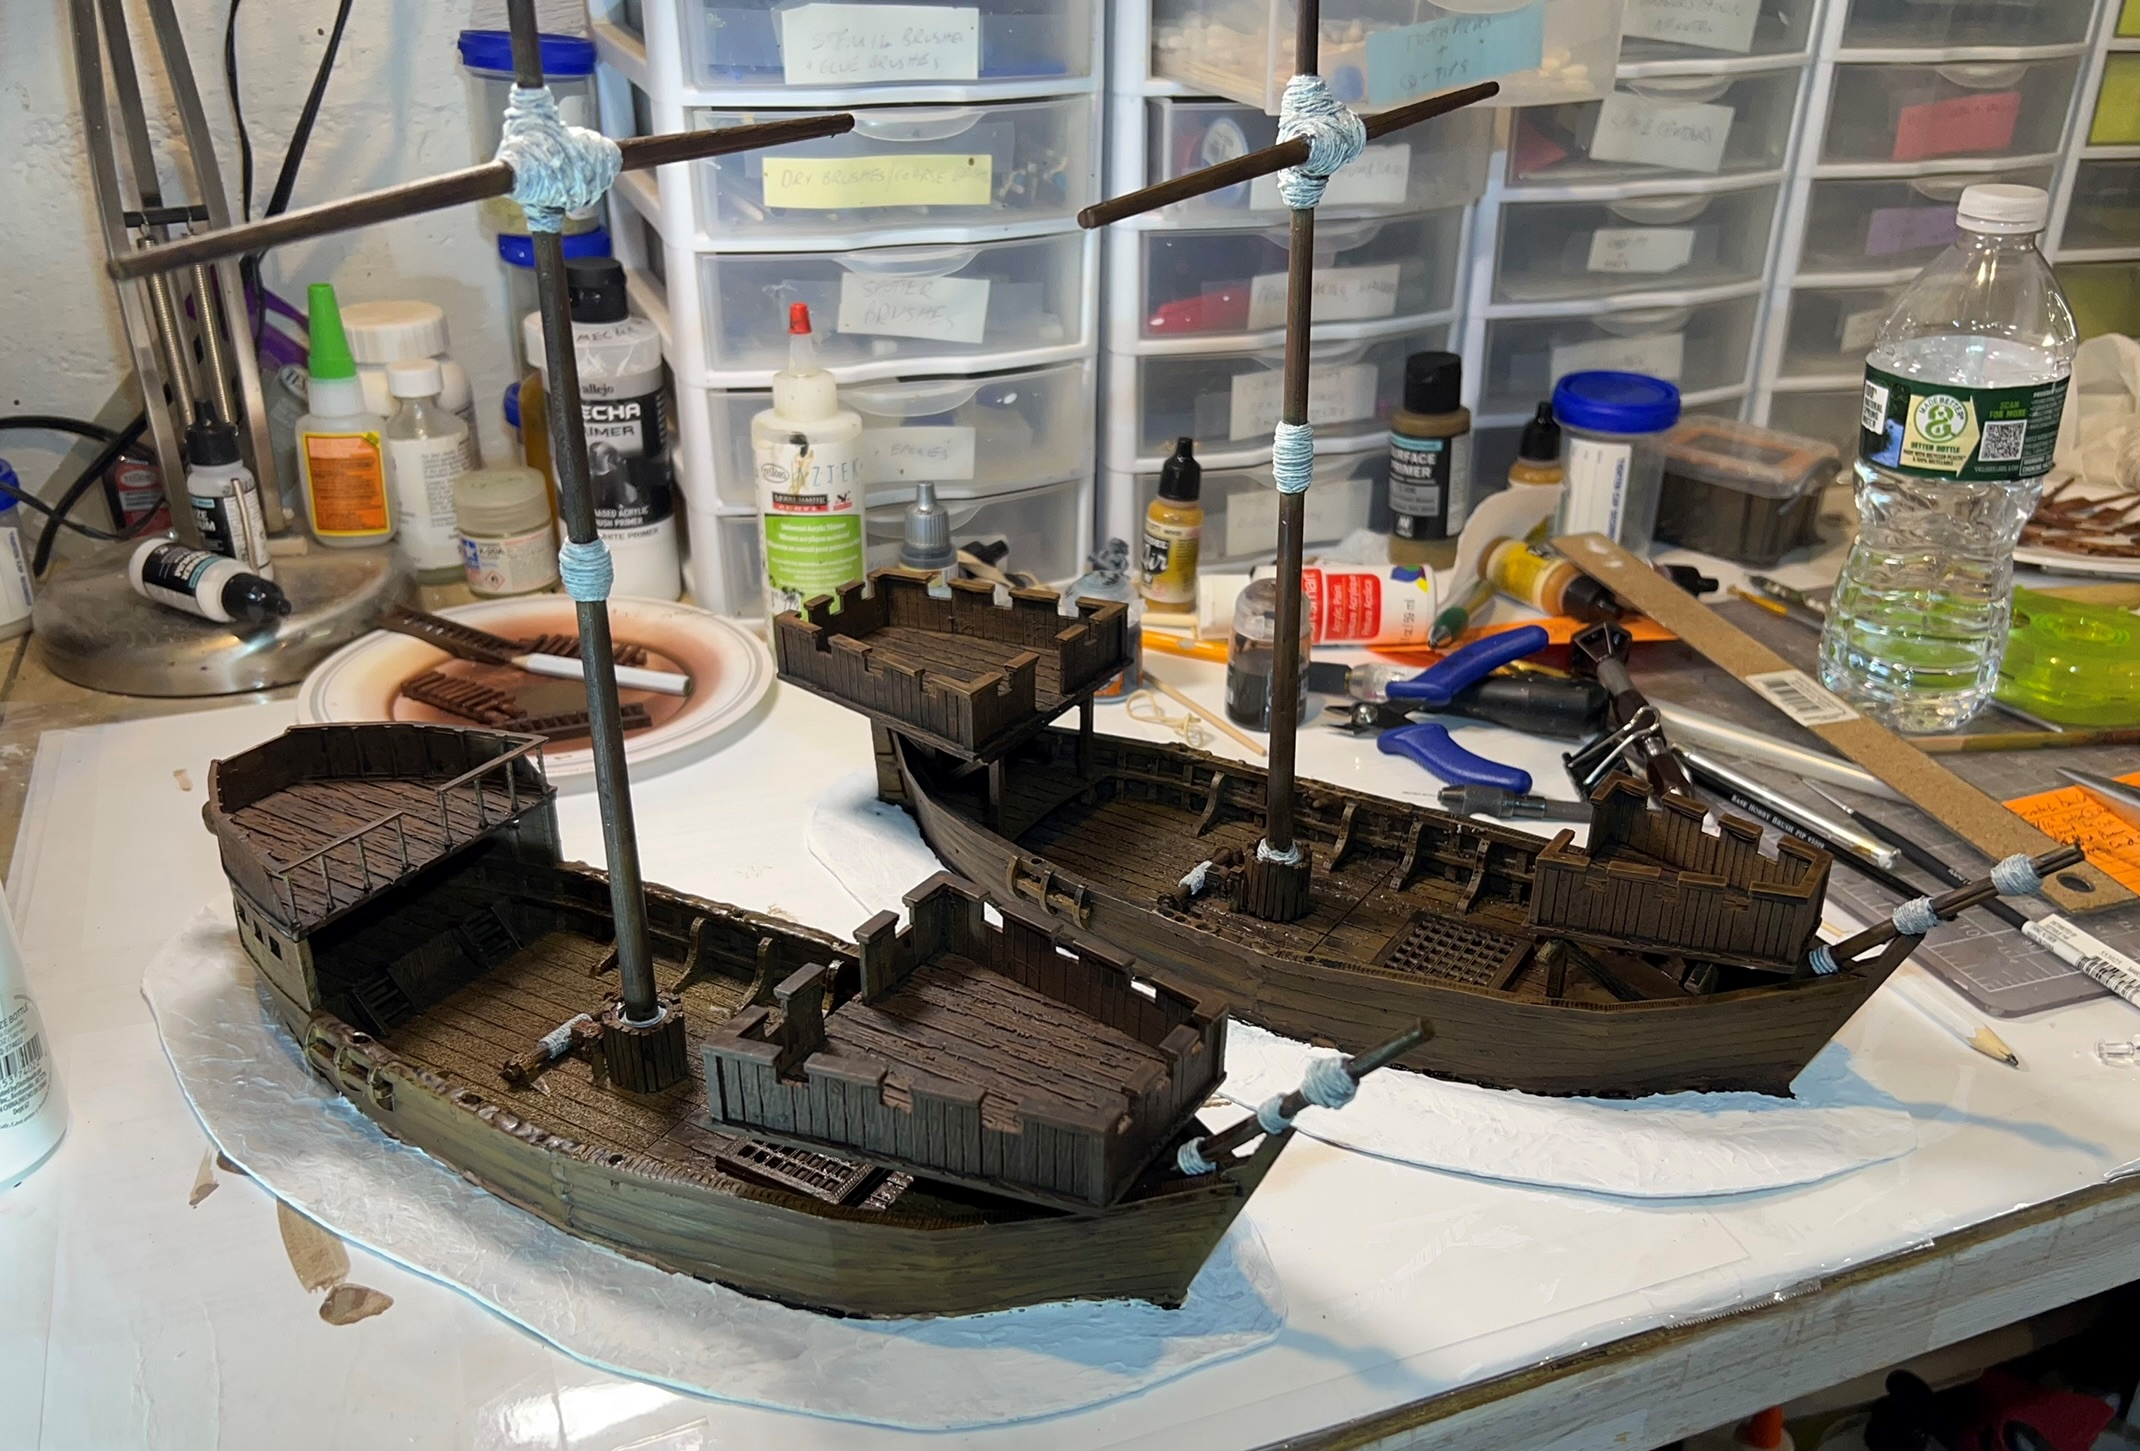
These two had similar hulls, but different forecastles and stern castles. They came in bags that Buck and Greg had put together – and I needed to figure out how to assemble them by looking at photos from the 3D printer file. I decided that I would double-prime them then paint them with a series of airbrush browns. I also would modify all of the brigantines to have rowers as well as sails as historically that was the case.

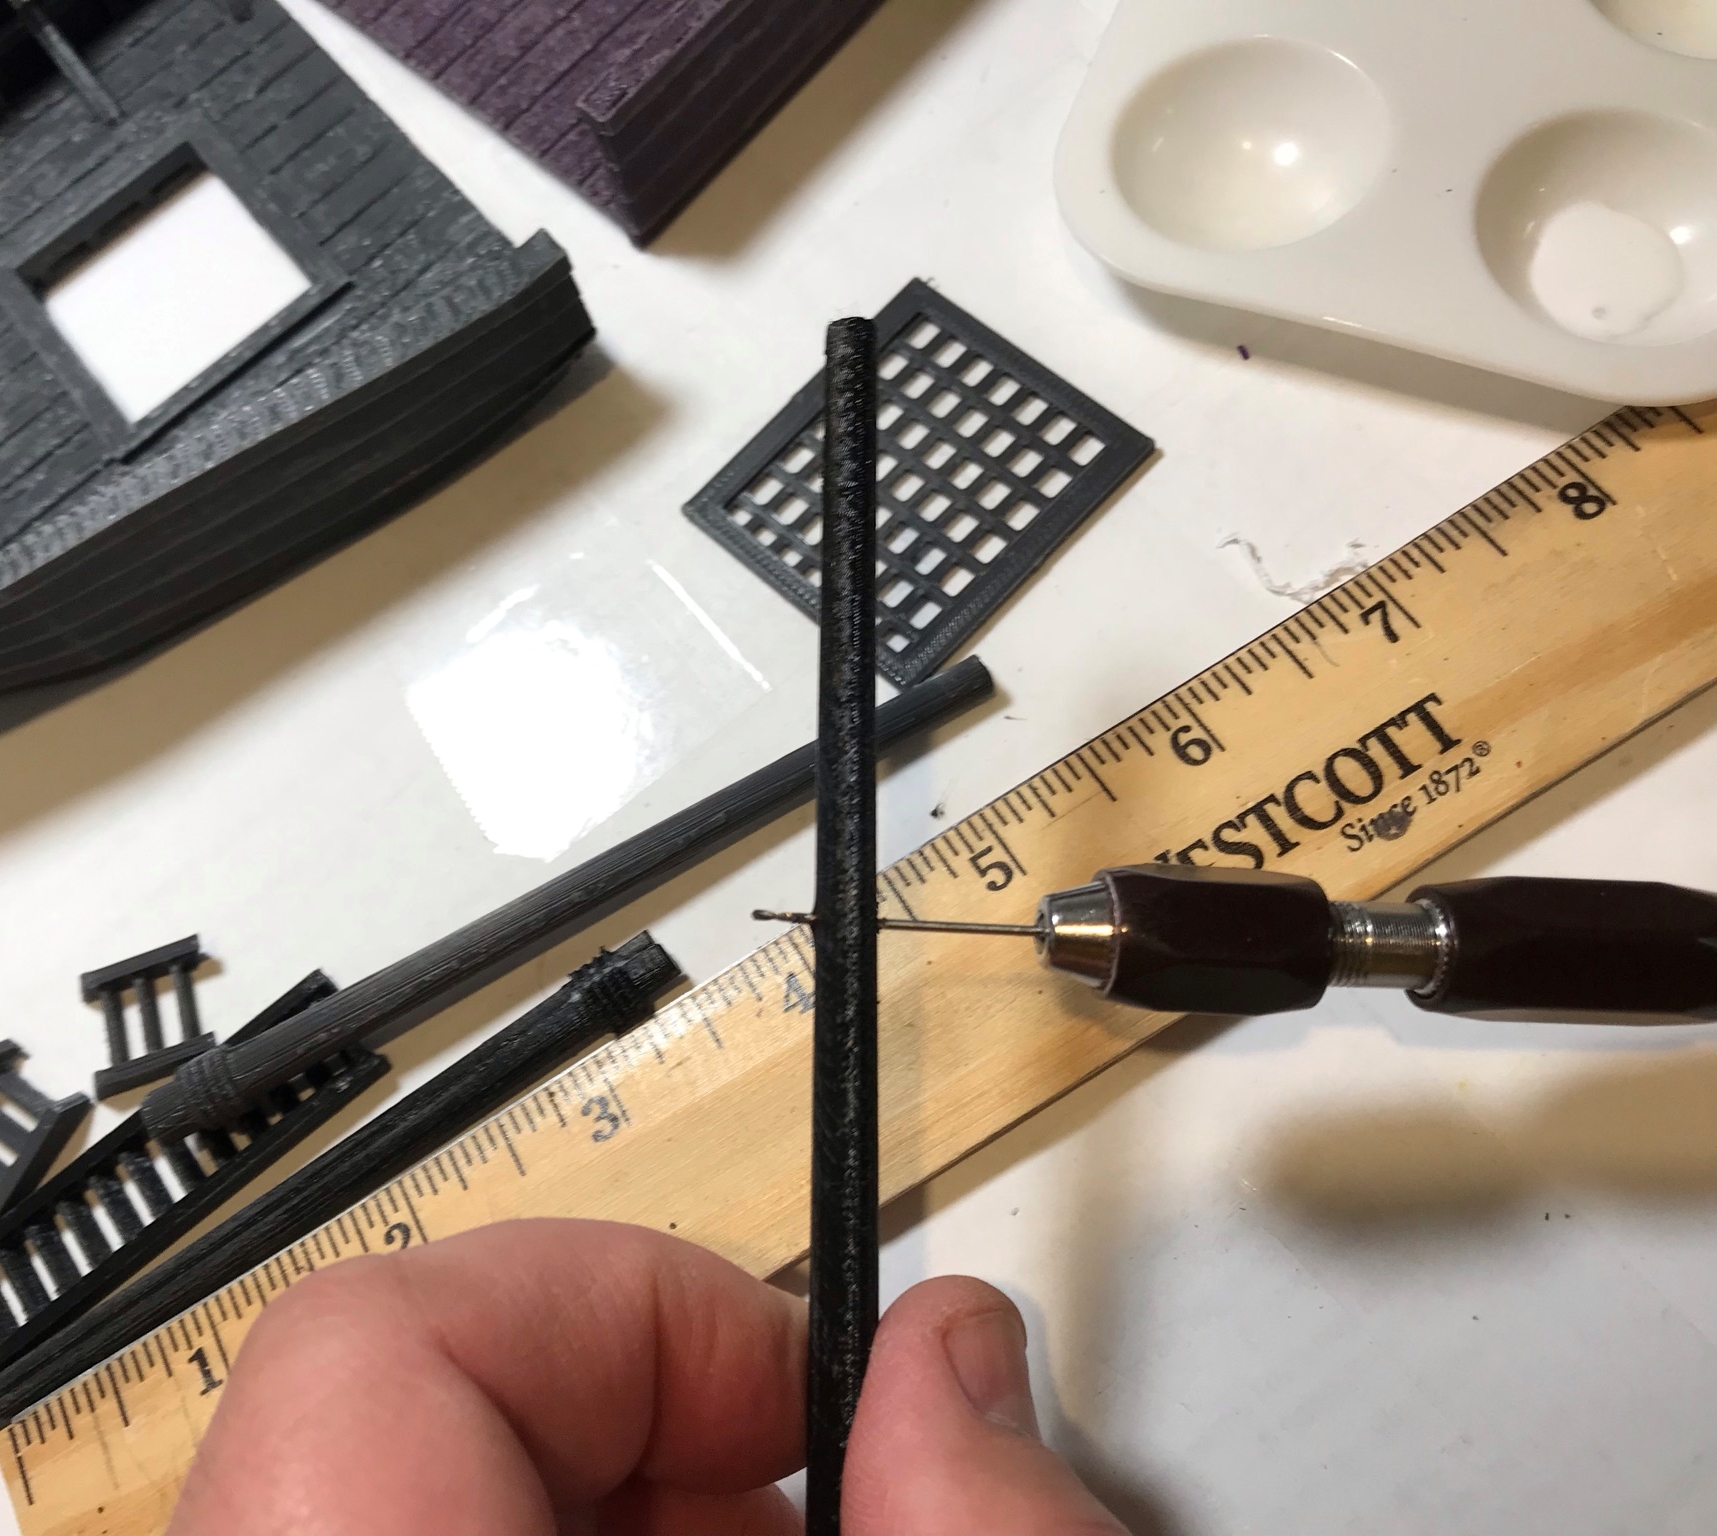
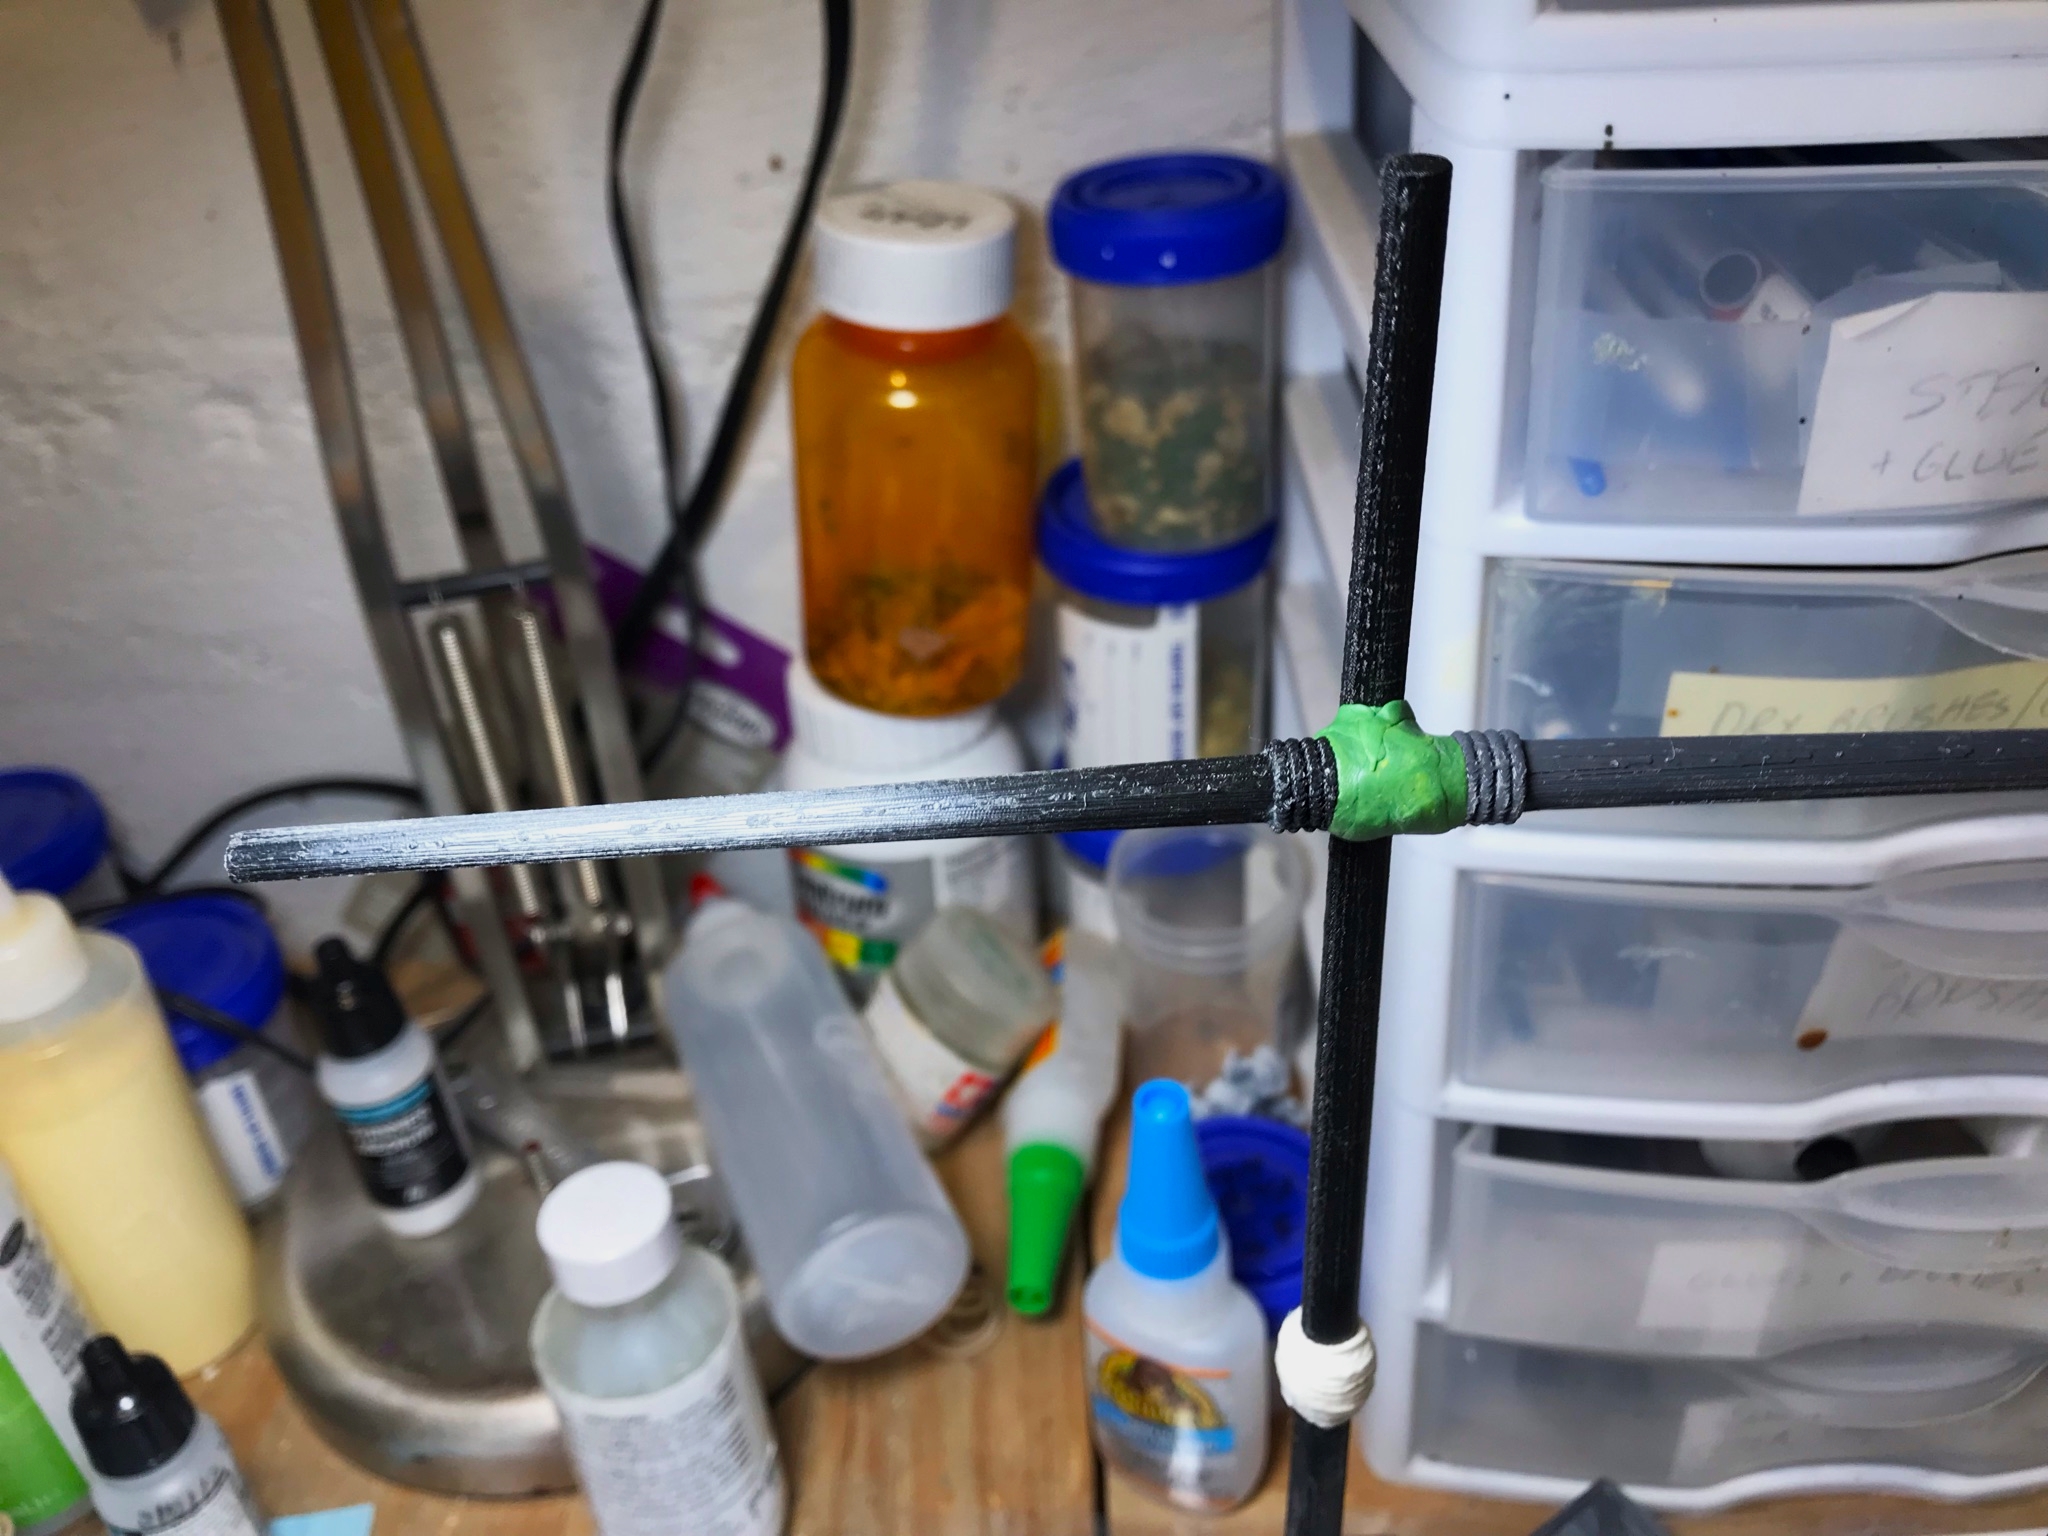
I ended up needing to do a lot of drilling, pinning, and sculpting with green stuff to create the masts, and yards/spars. By the way, if I misname any parts here my defense is that I am a graduate of West Point, and NOT Annapolis! Though if you feel the need to correct me that’s all good – and GO ARMY BEAT NAVY! Ok, back to the builds…click on the pics for a better view.
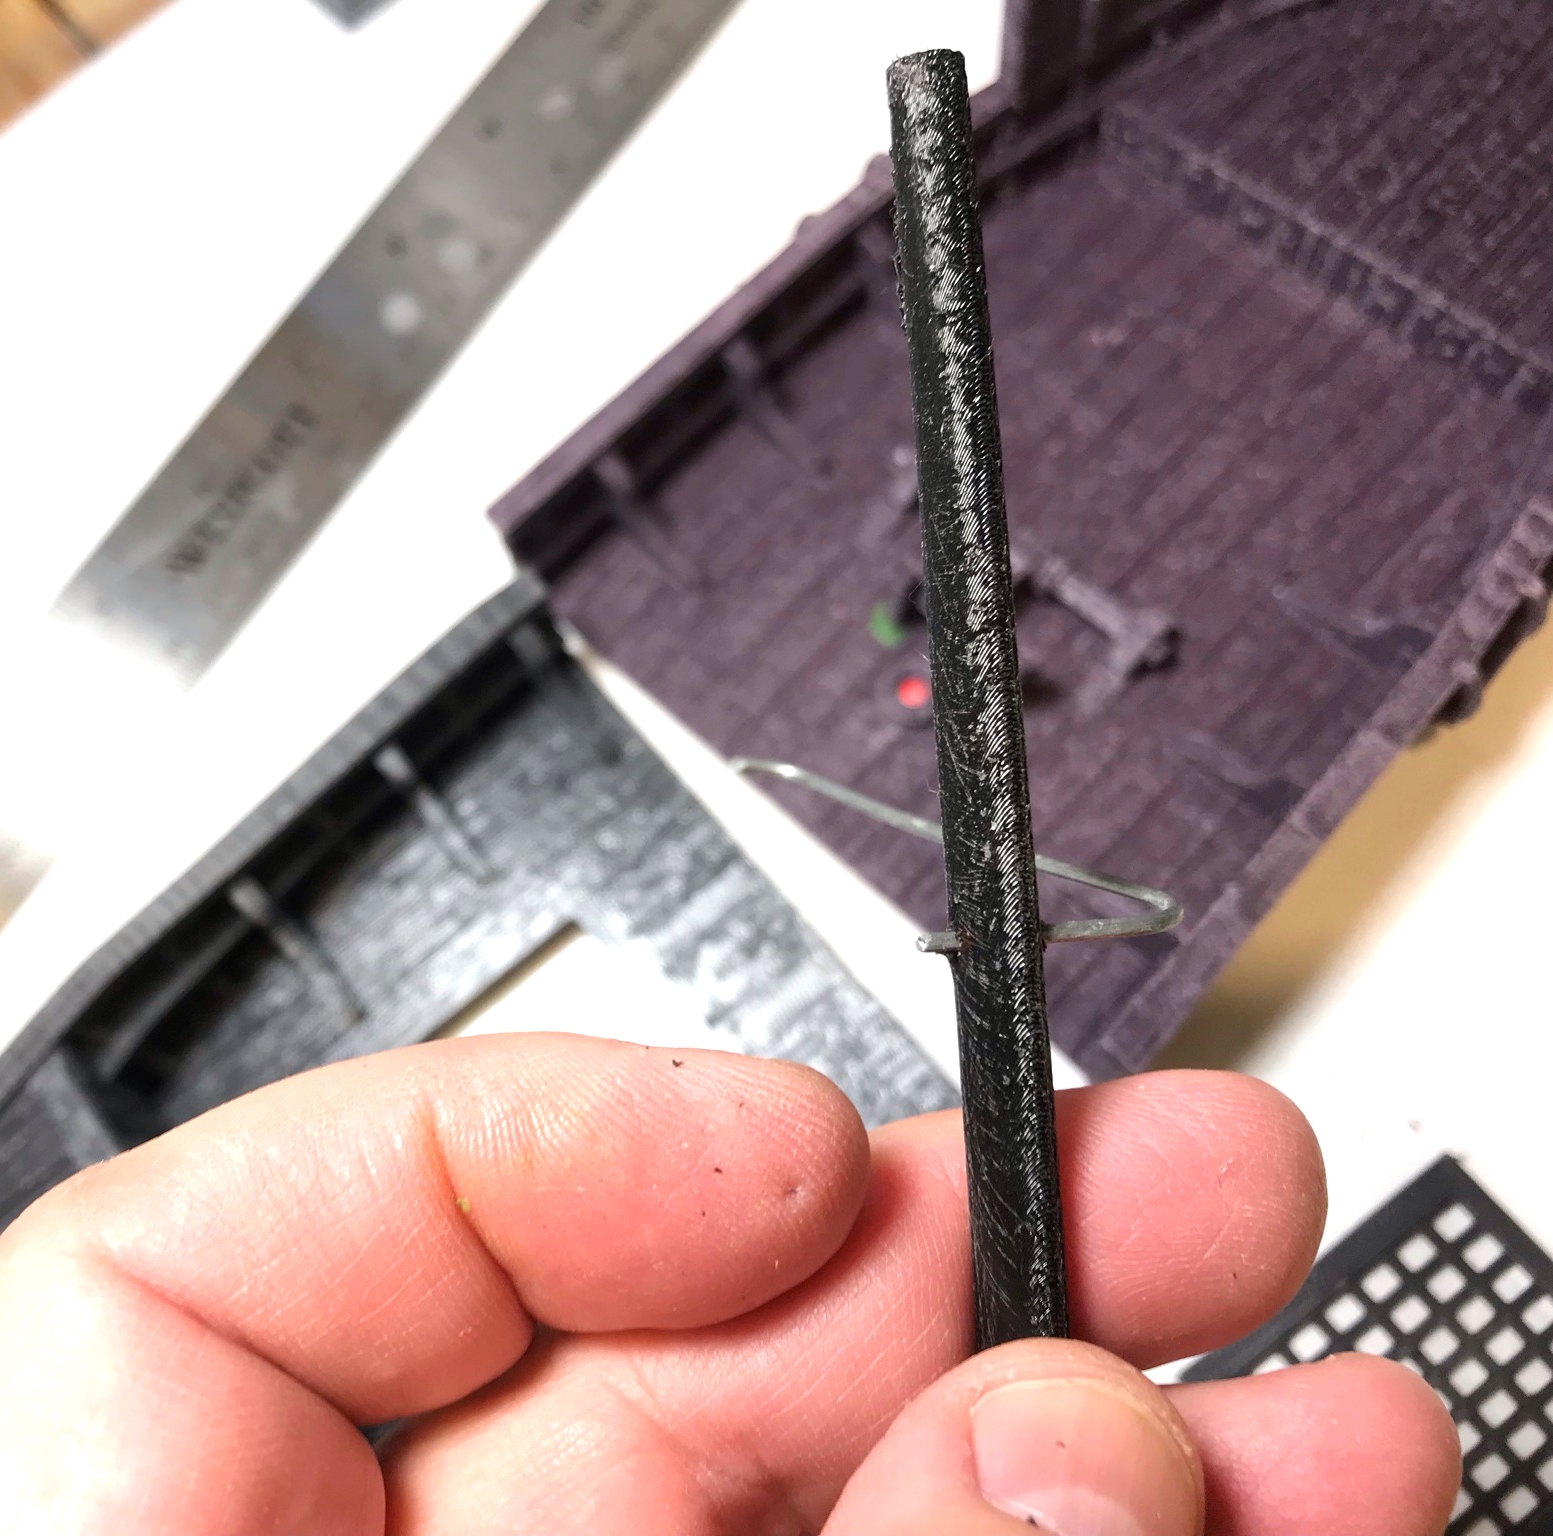


The magnets I had inserted into the mast bases and the decks were insufficiently strong to suitably secure the masts to each hull. While I wanted to be able to remove the masts for transport, the situation was such that the masts would just easily fall over. My solution came in the form of some excess vinyl/rubber tubing I had lying around and hobby matchsticks I had purchased while stationed in West Germany in 1987! Real Cold War era matchsticks REALLY absorb PVA!
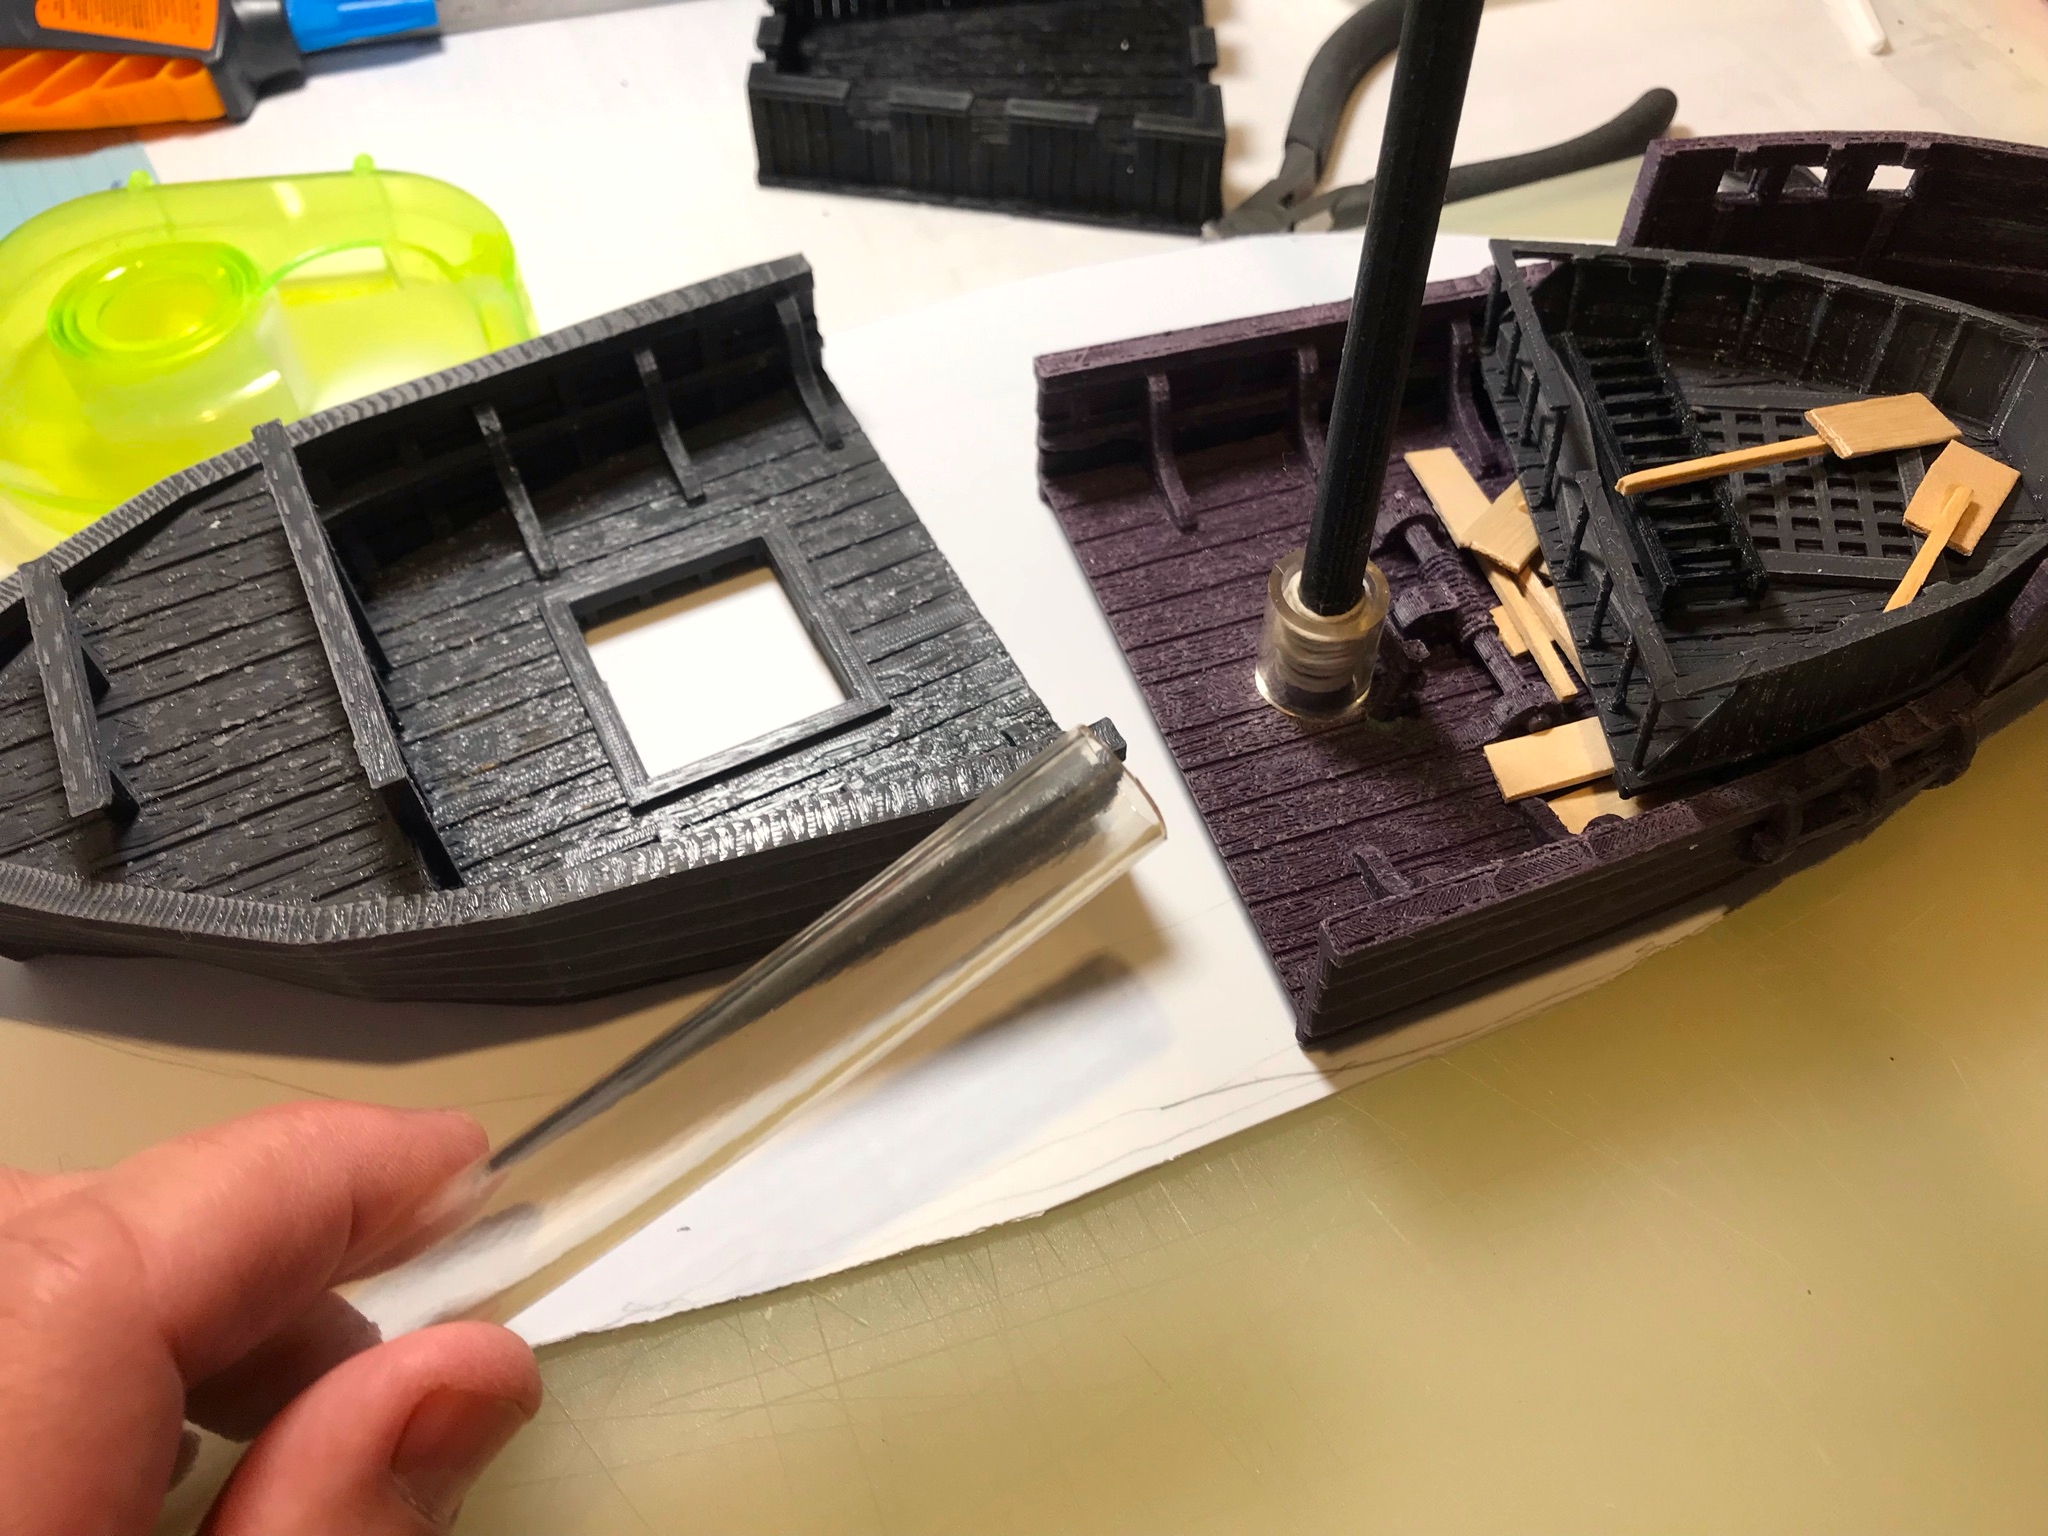
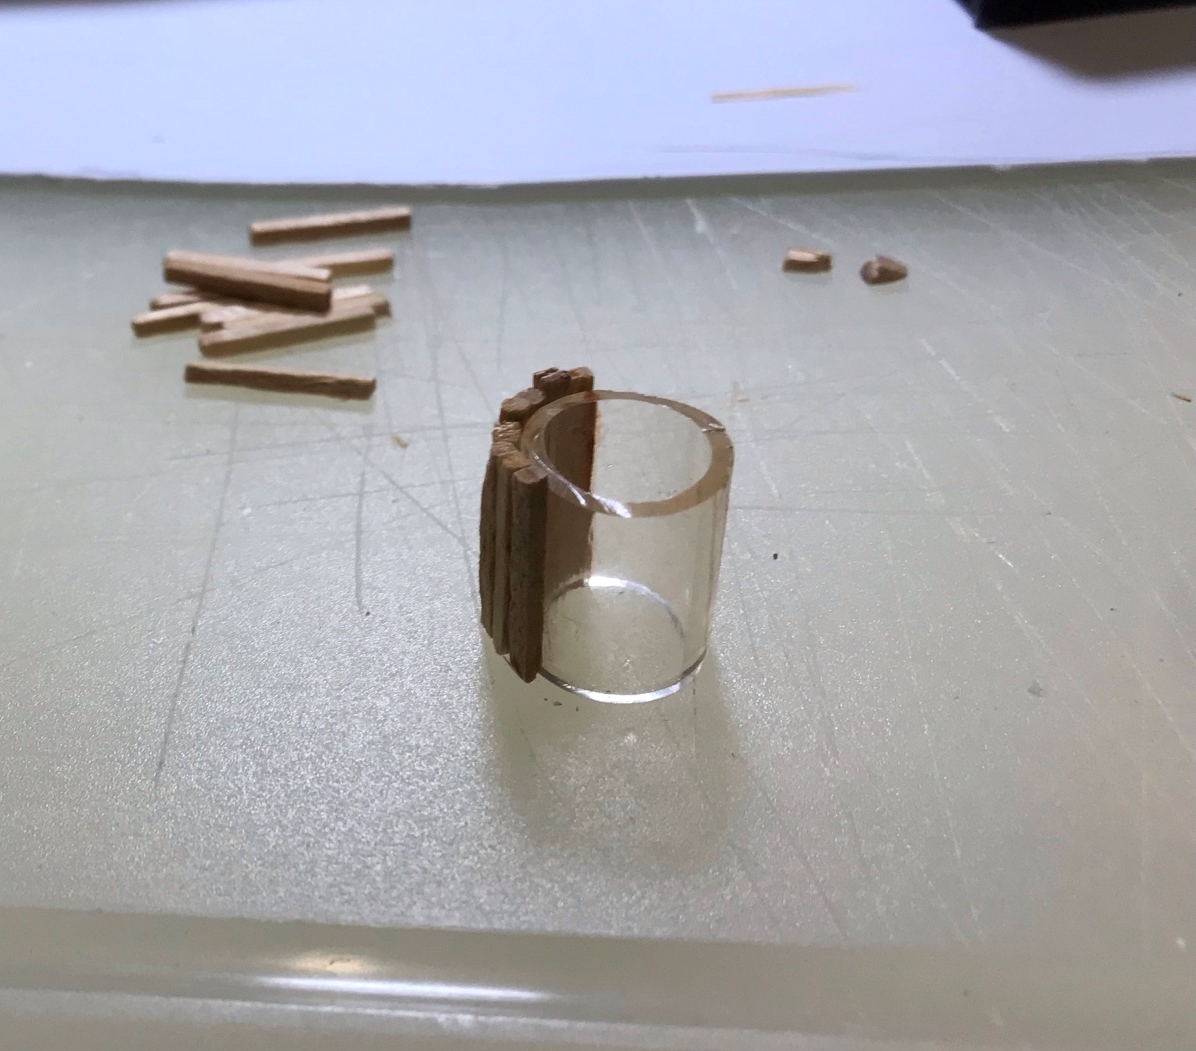
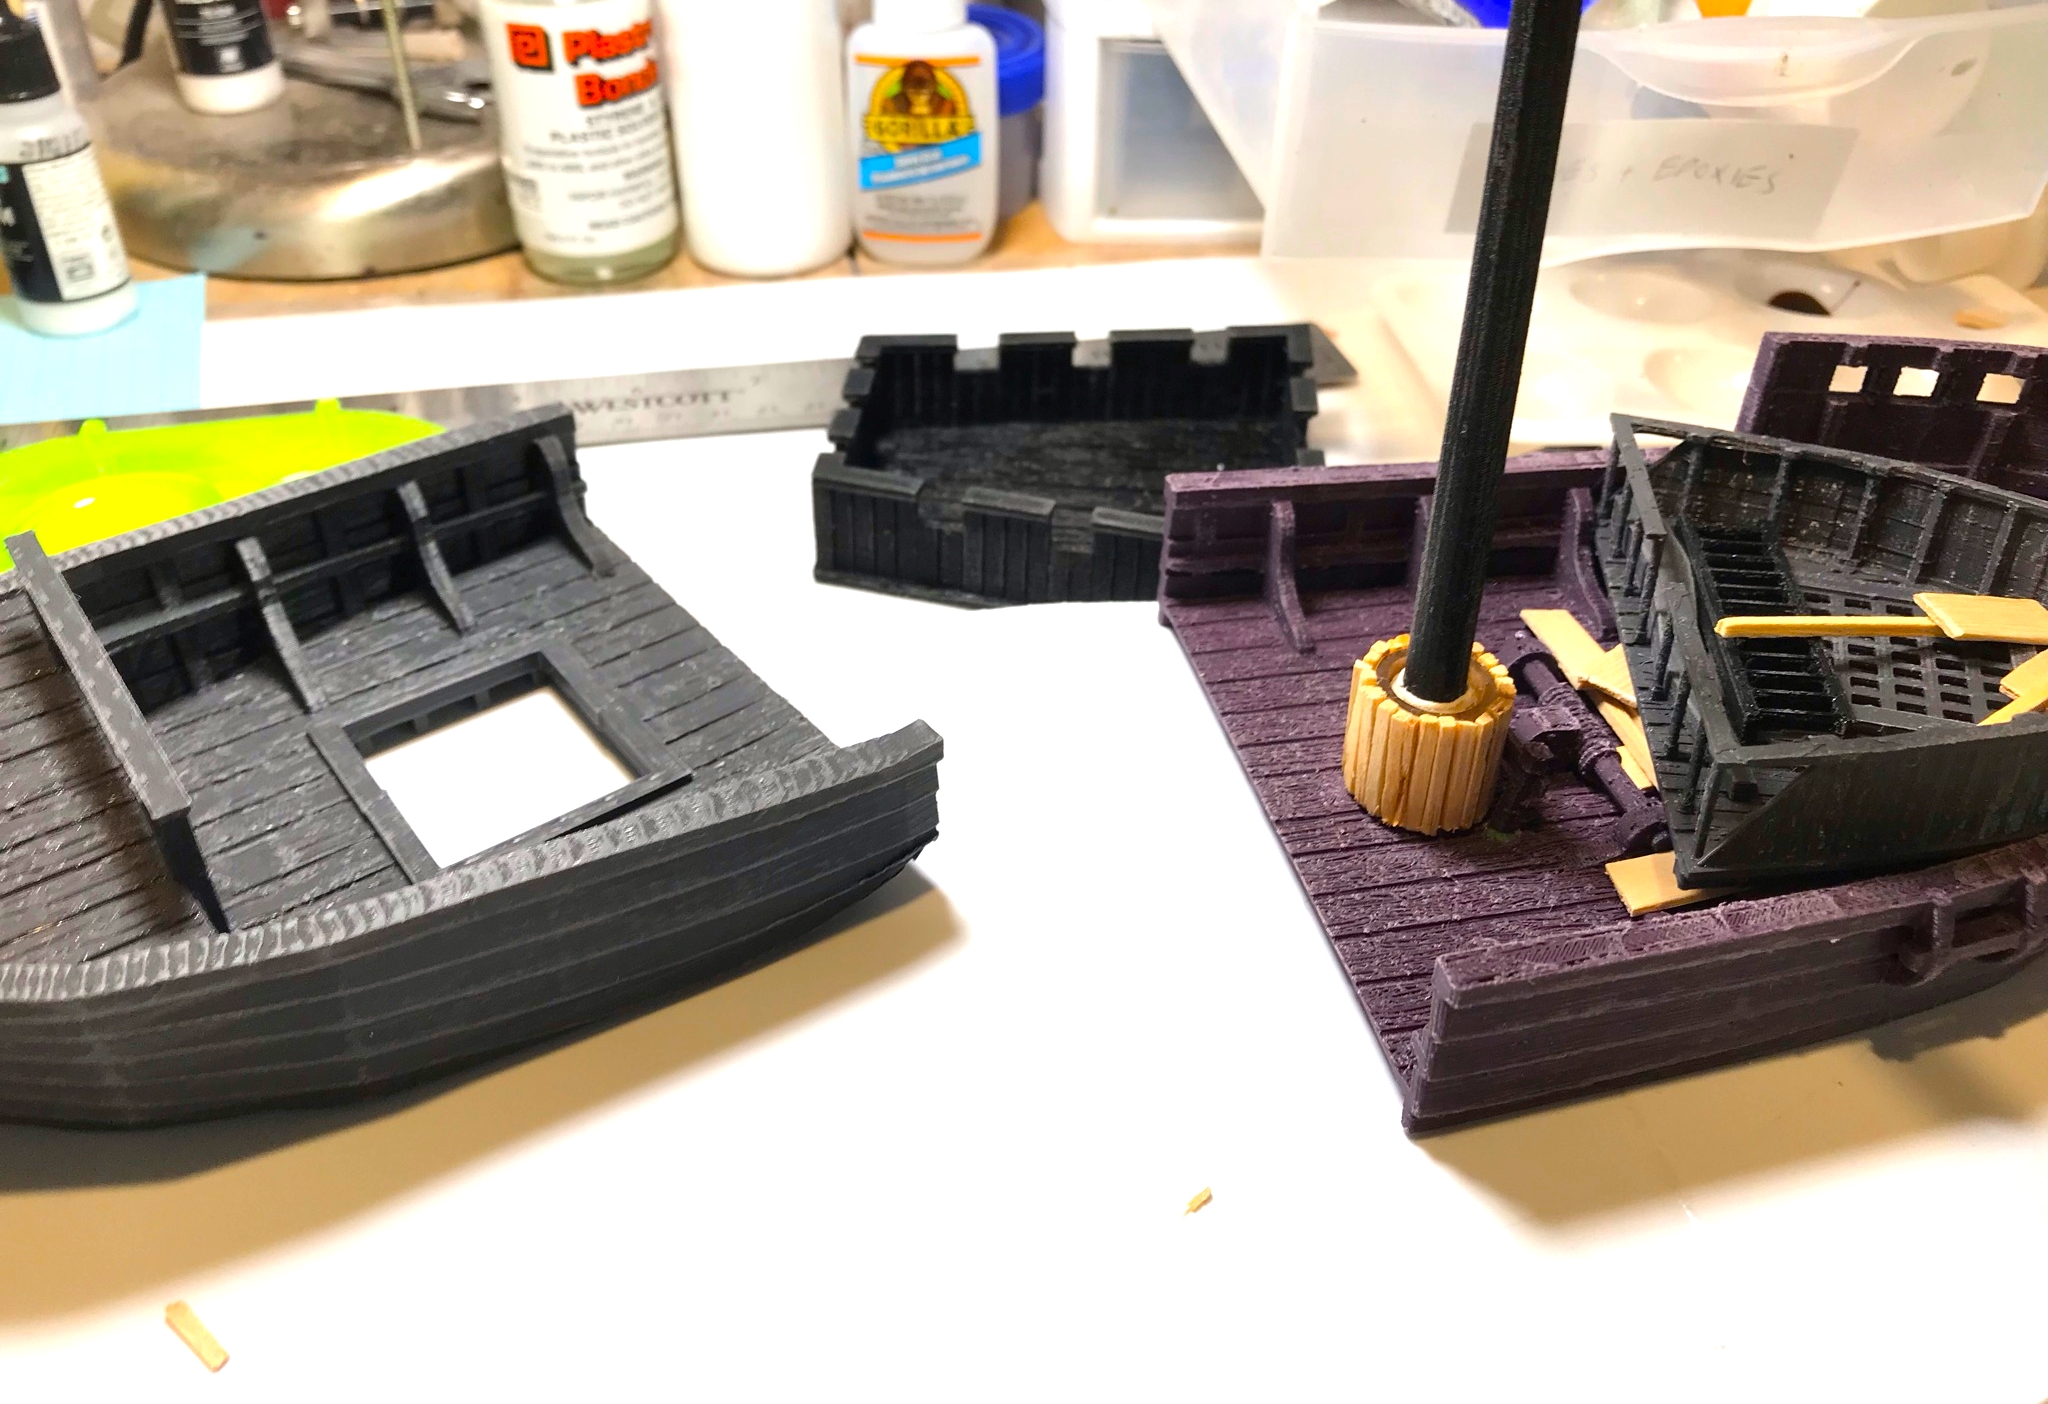
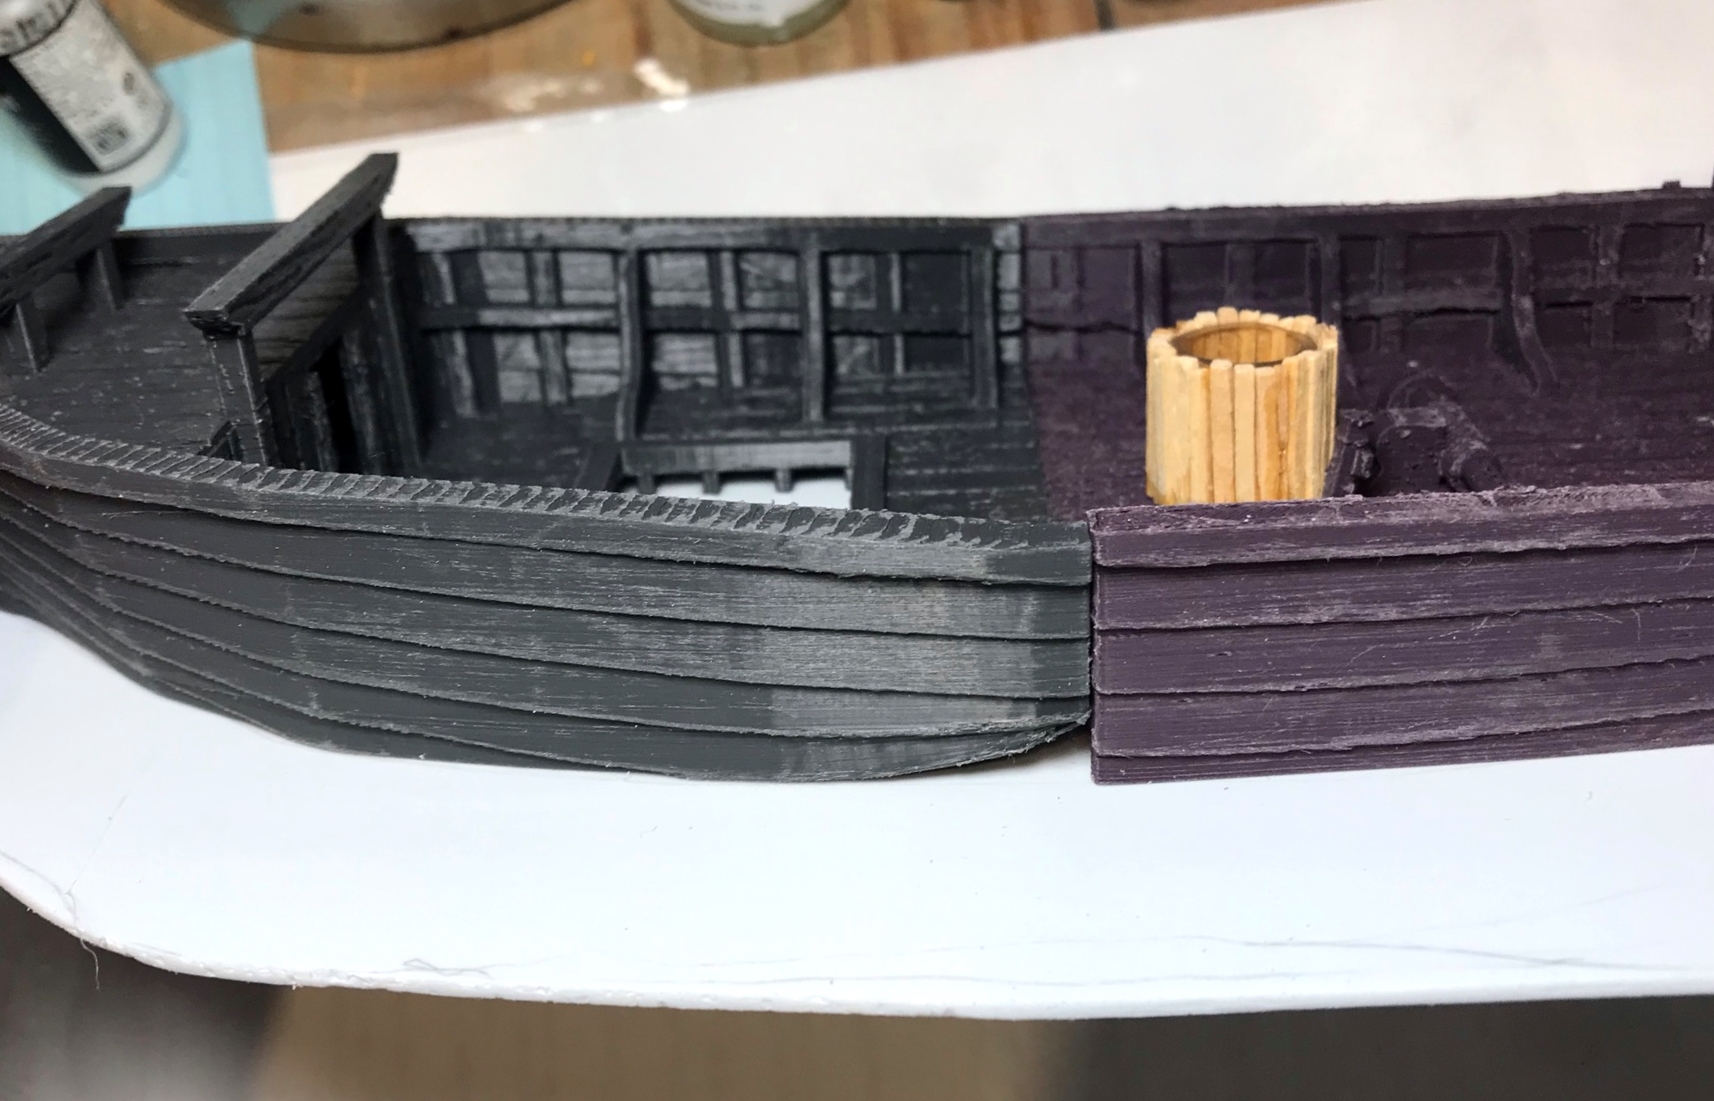

By using the cotton twine fibers and PVA, I was able to custom fit the masts into each support. Importantly, as these two had two hull pieces, I used some styrene sheets to affix them together. This way there was more strength than just gluing together the hull halves. – and I could paint them to look like they were moving through the water. As a side note, I did not give the other three a water base so that I could use them for an Aztec raid scenario where they are in assembly on land and the Spanish are surprised.
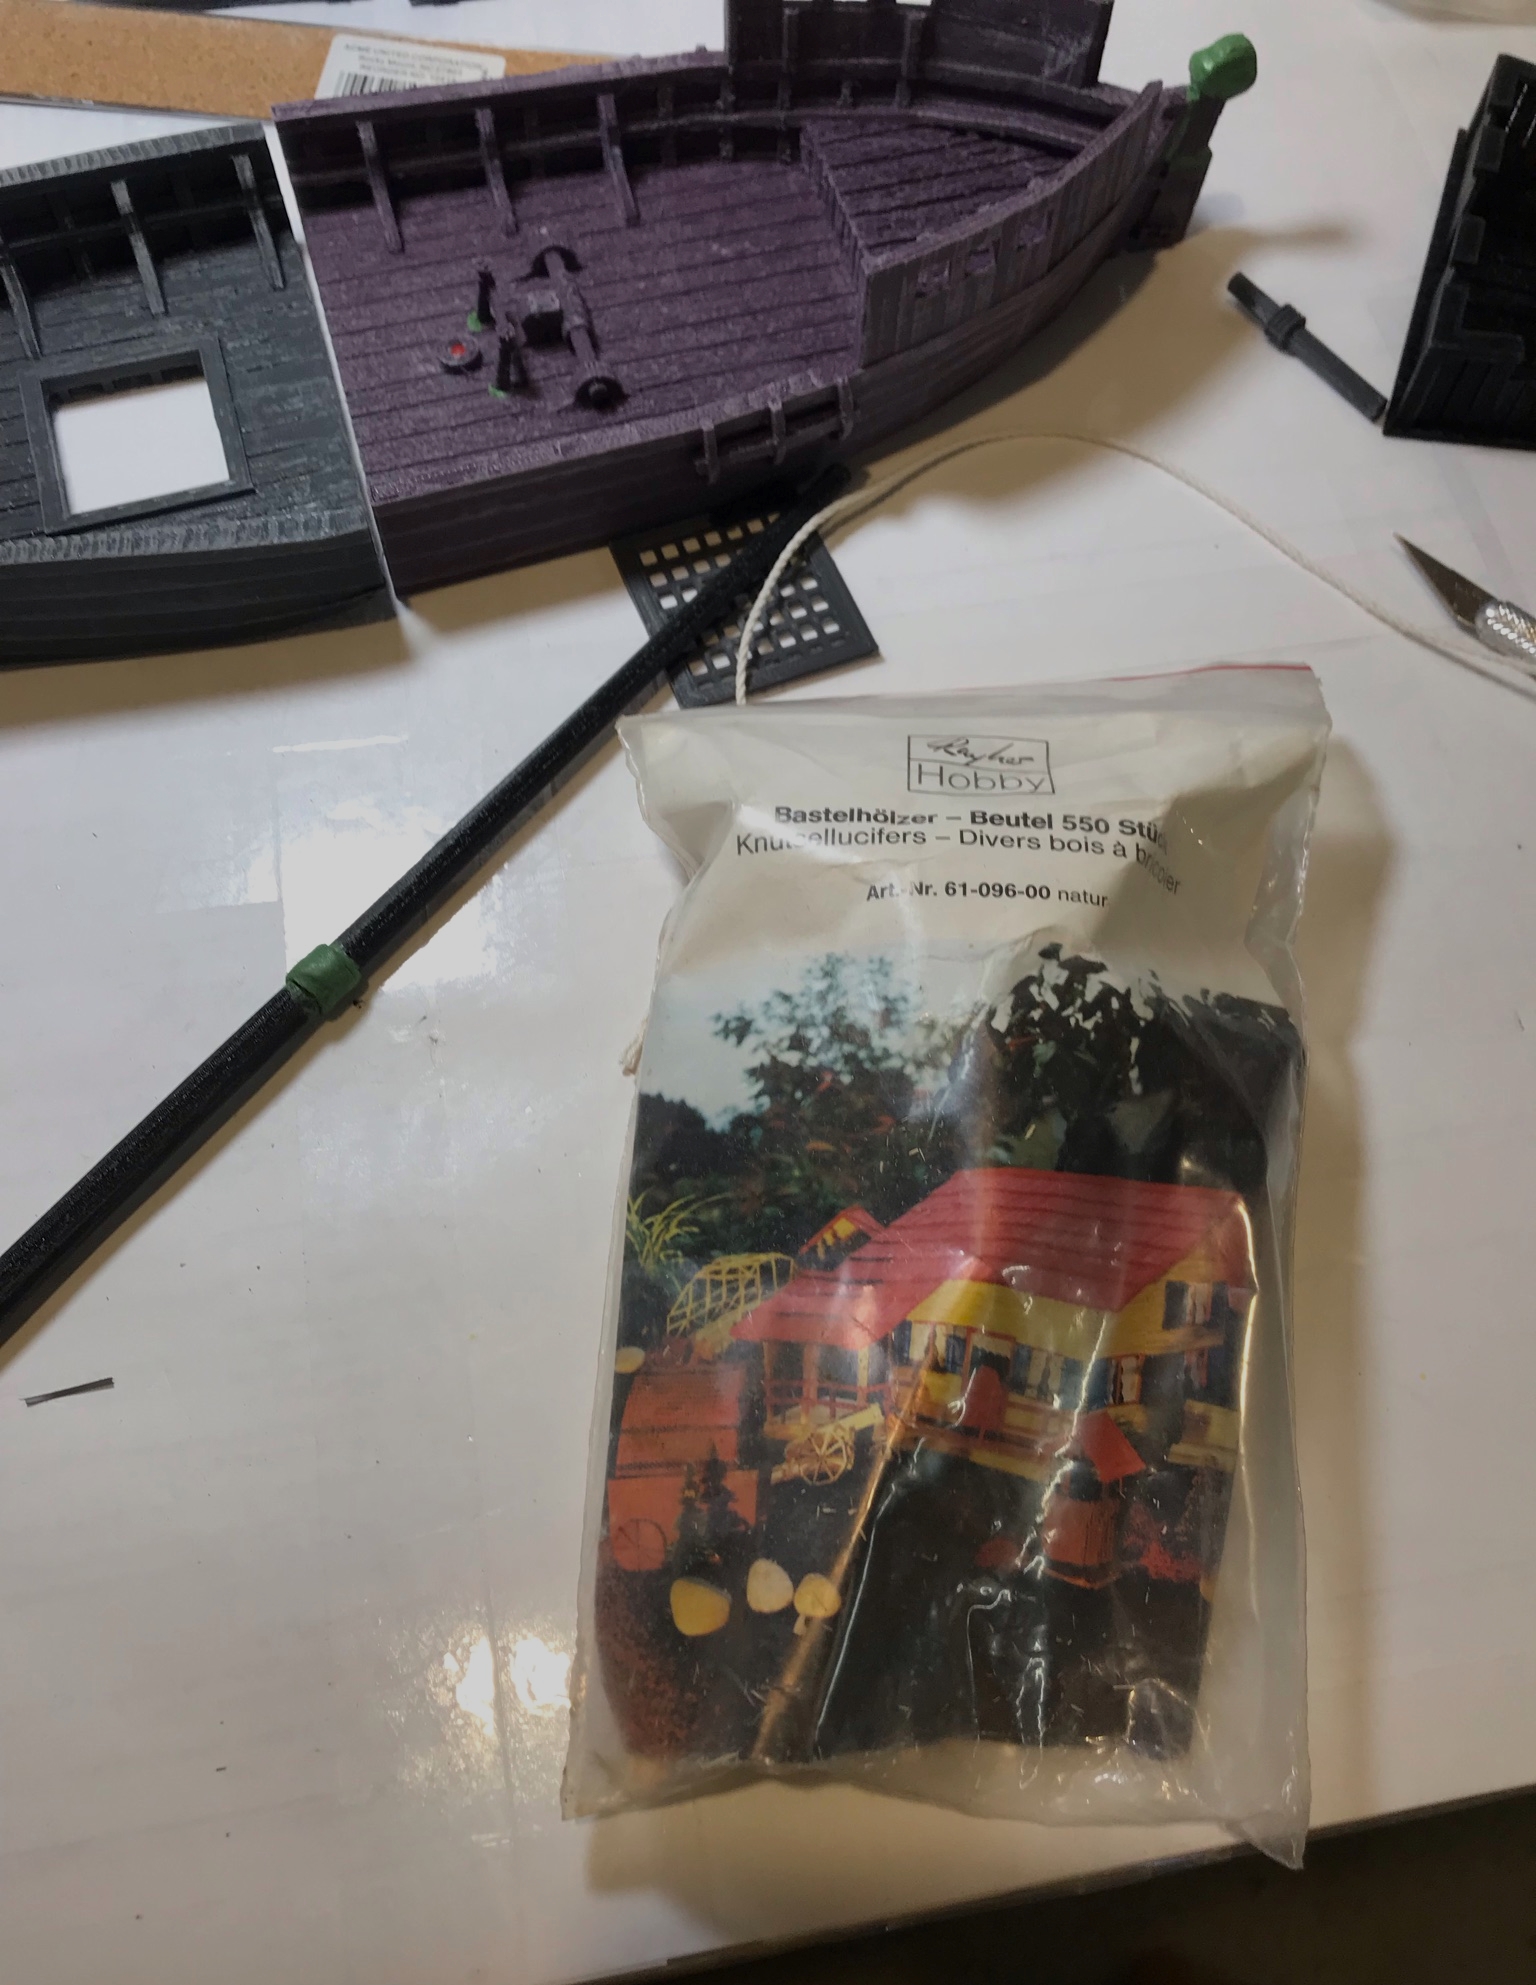
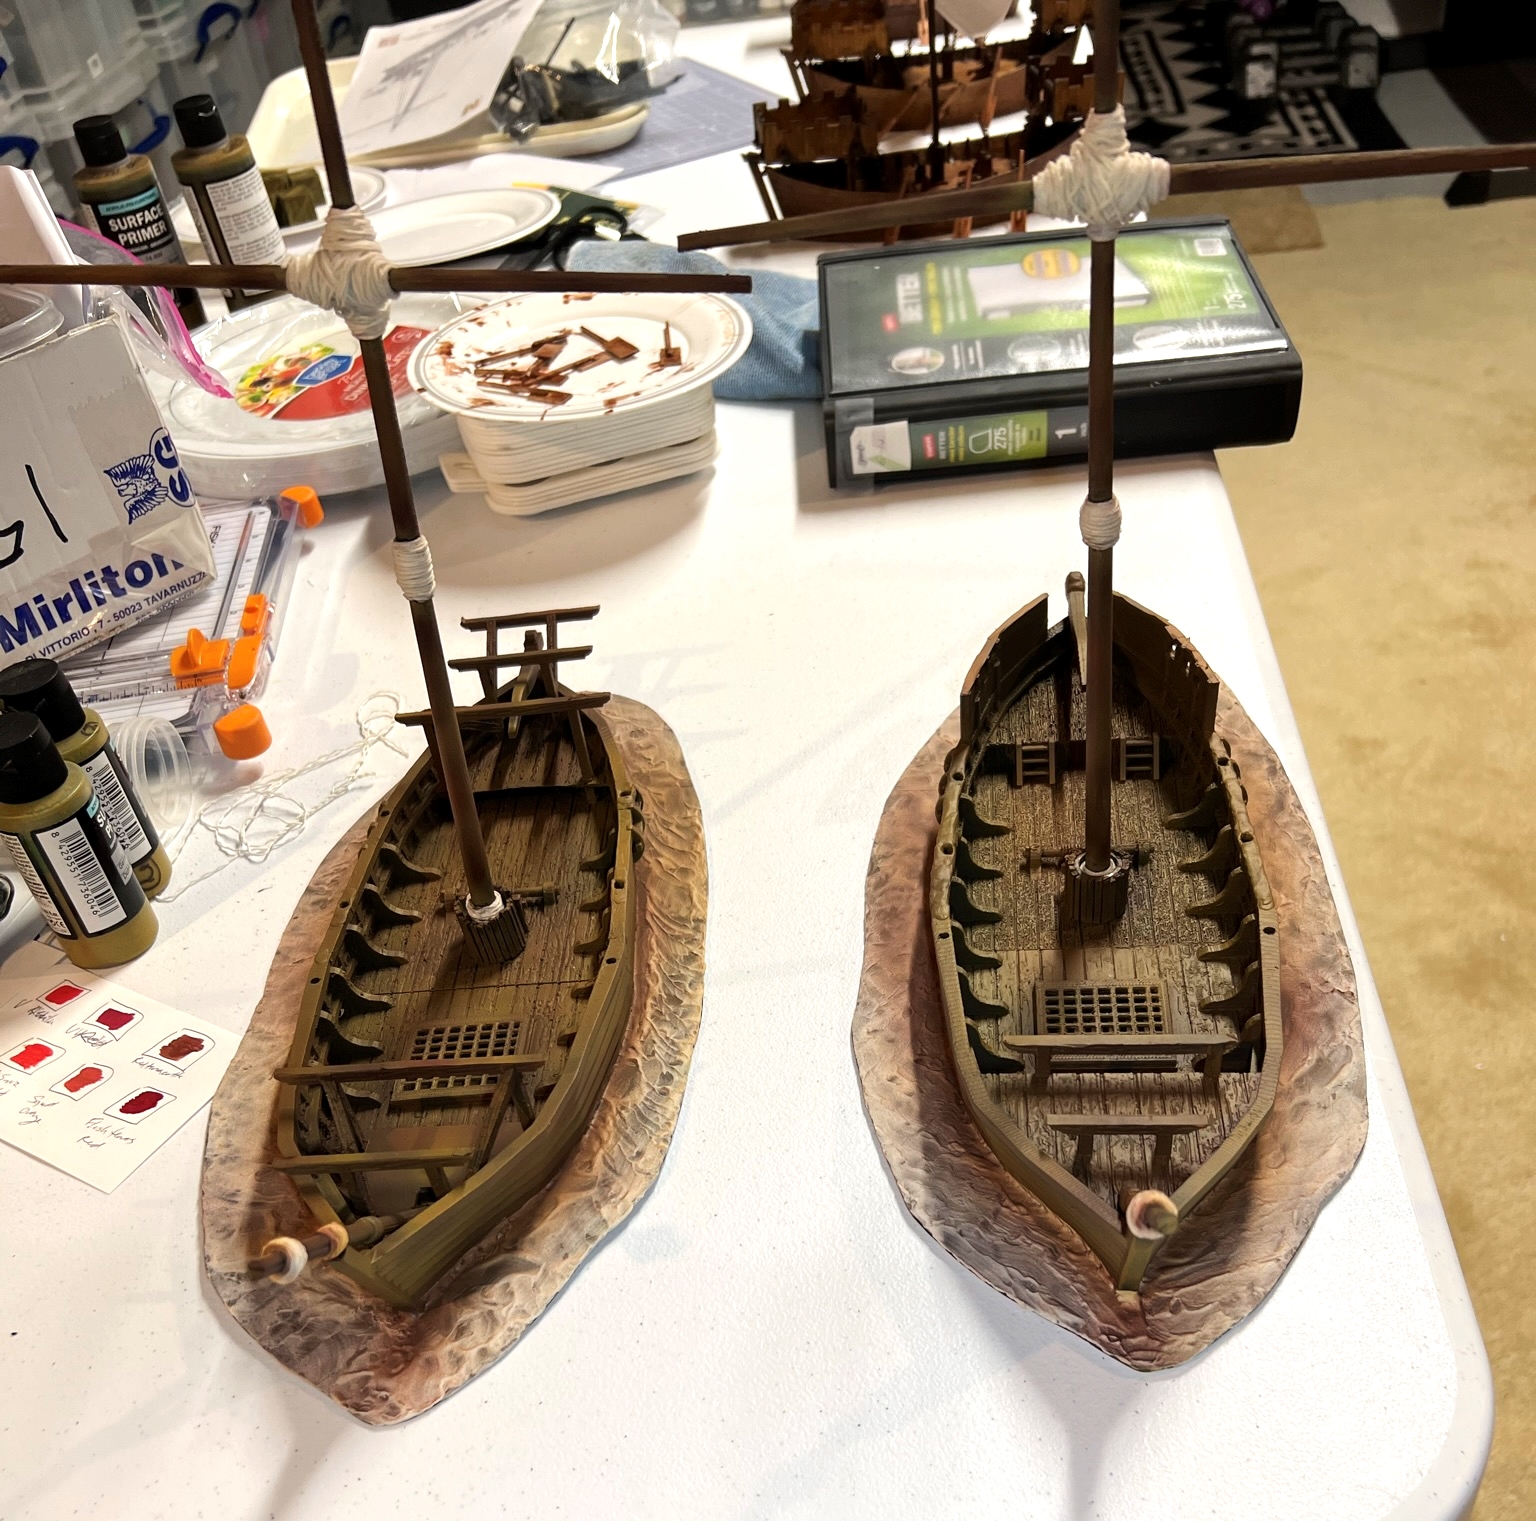
I also mocked up the oars and put some together to see how they would go together.


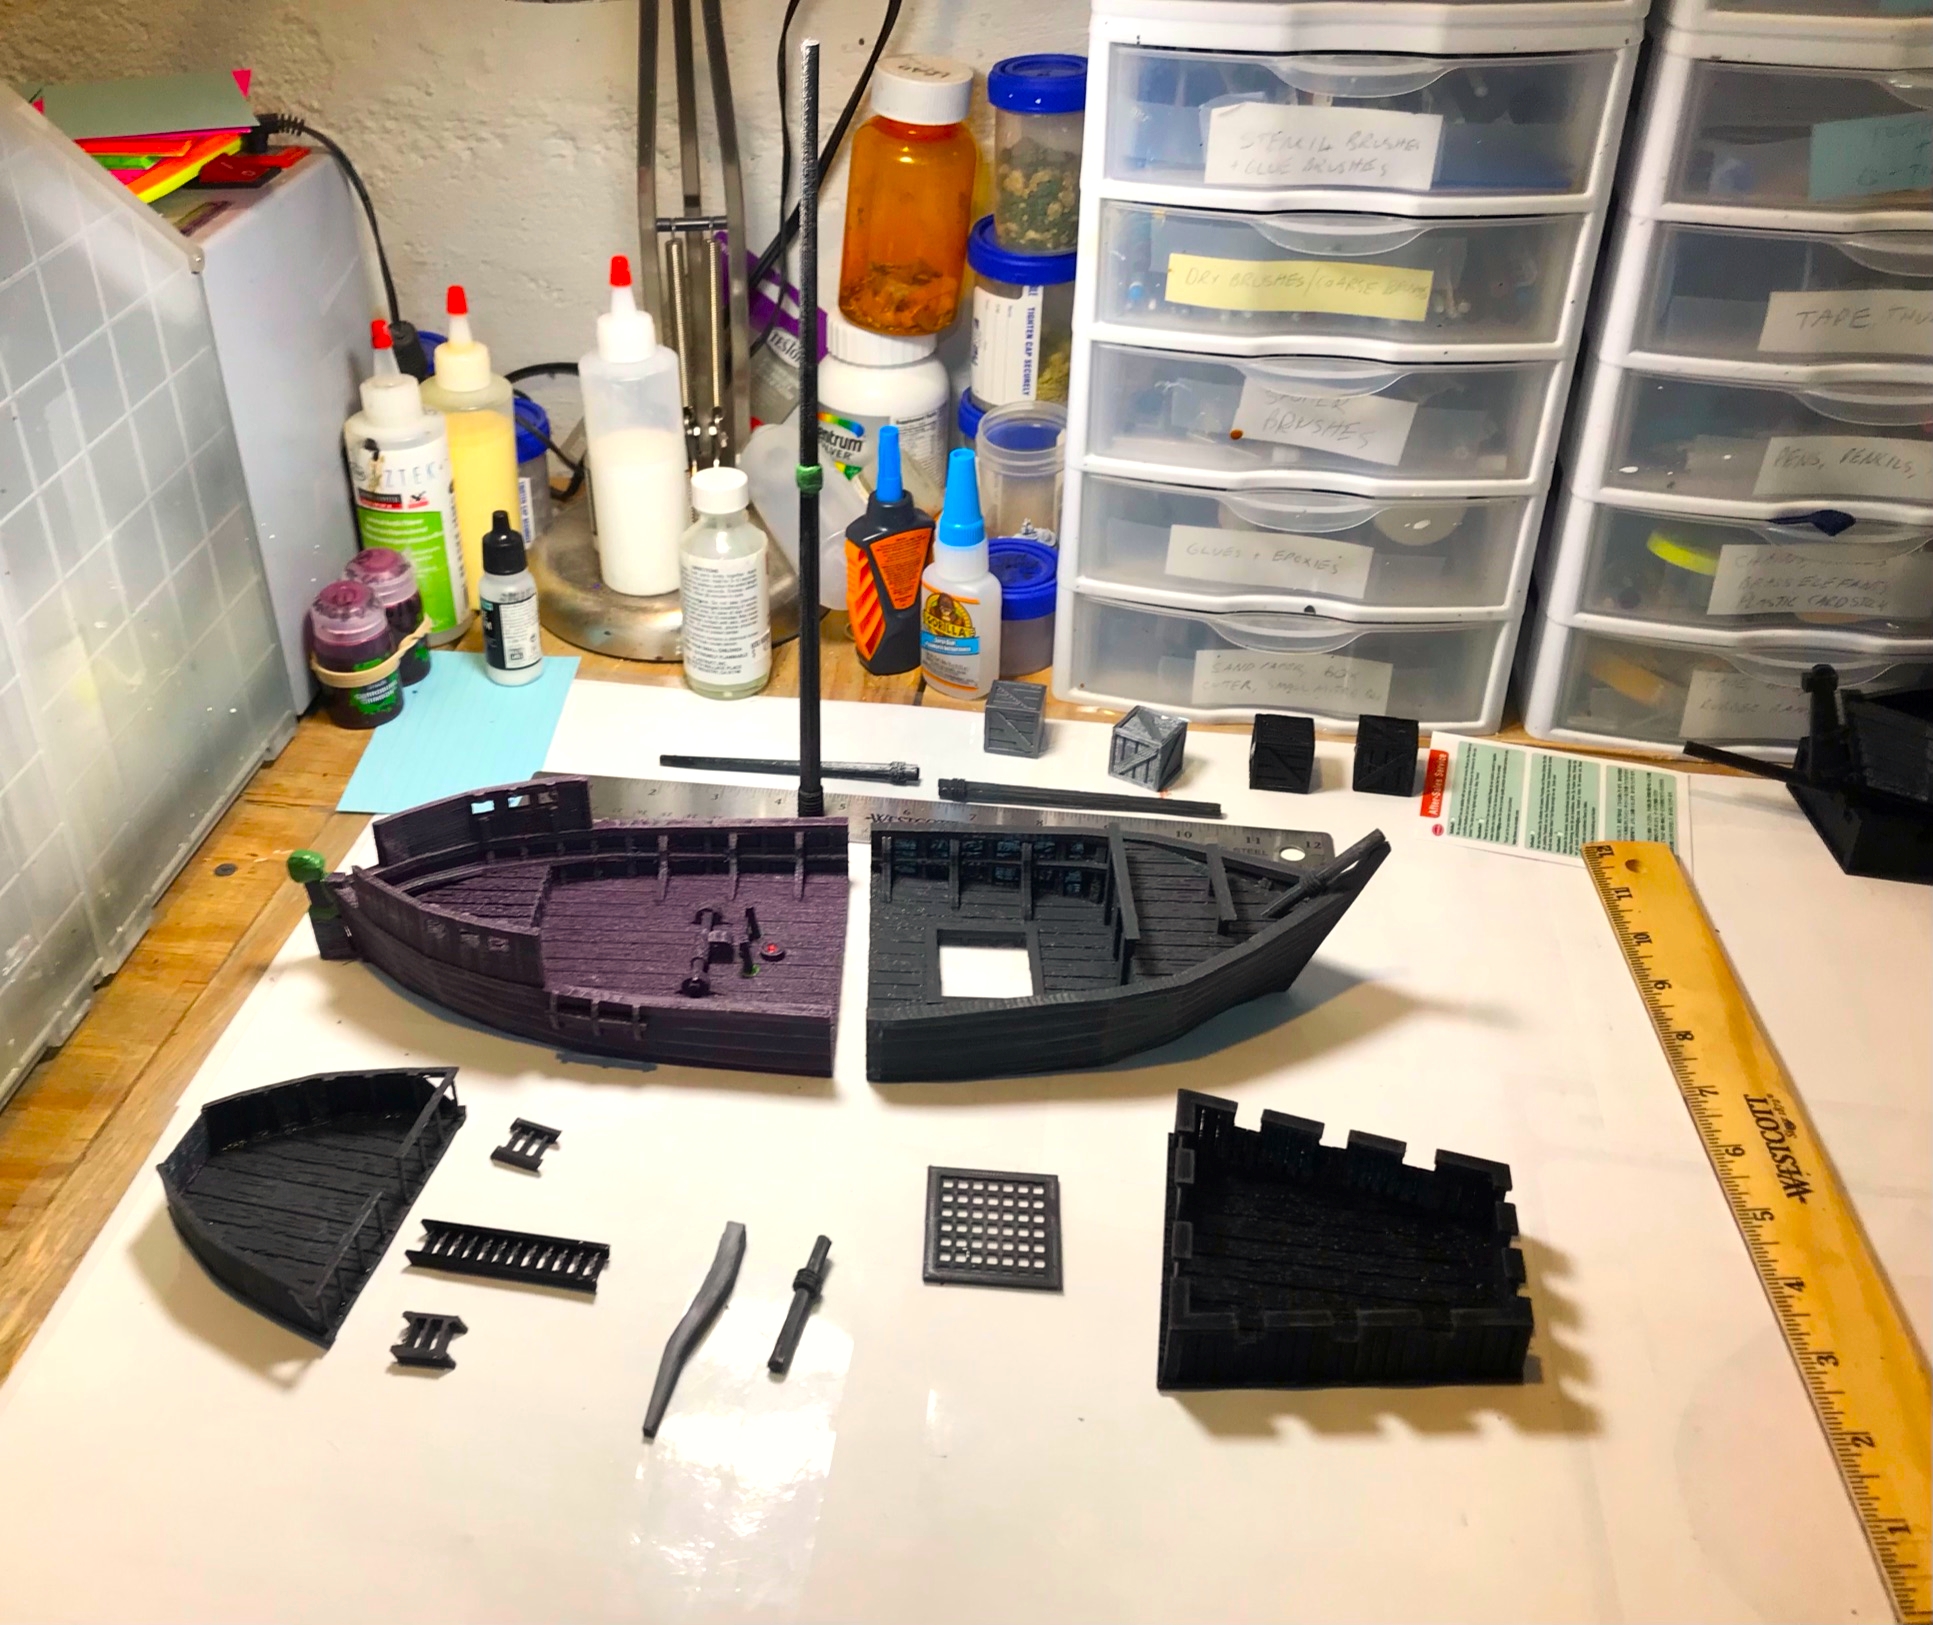
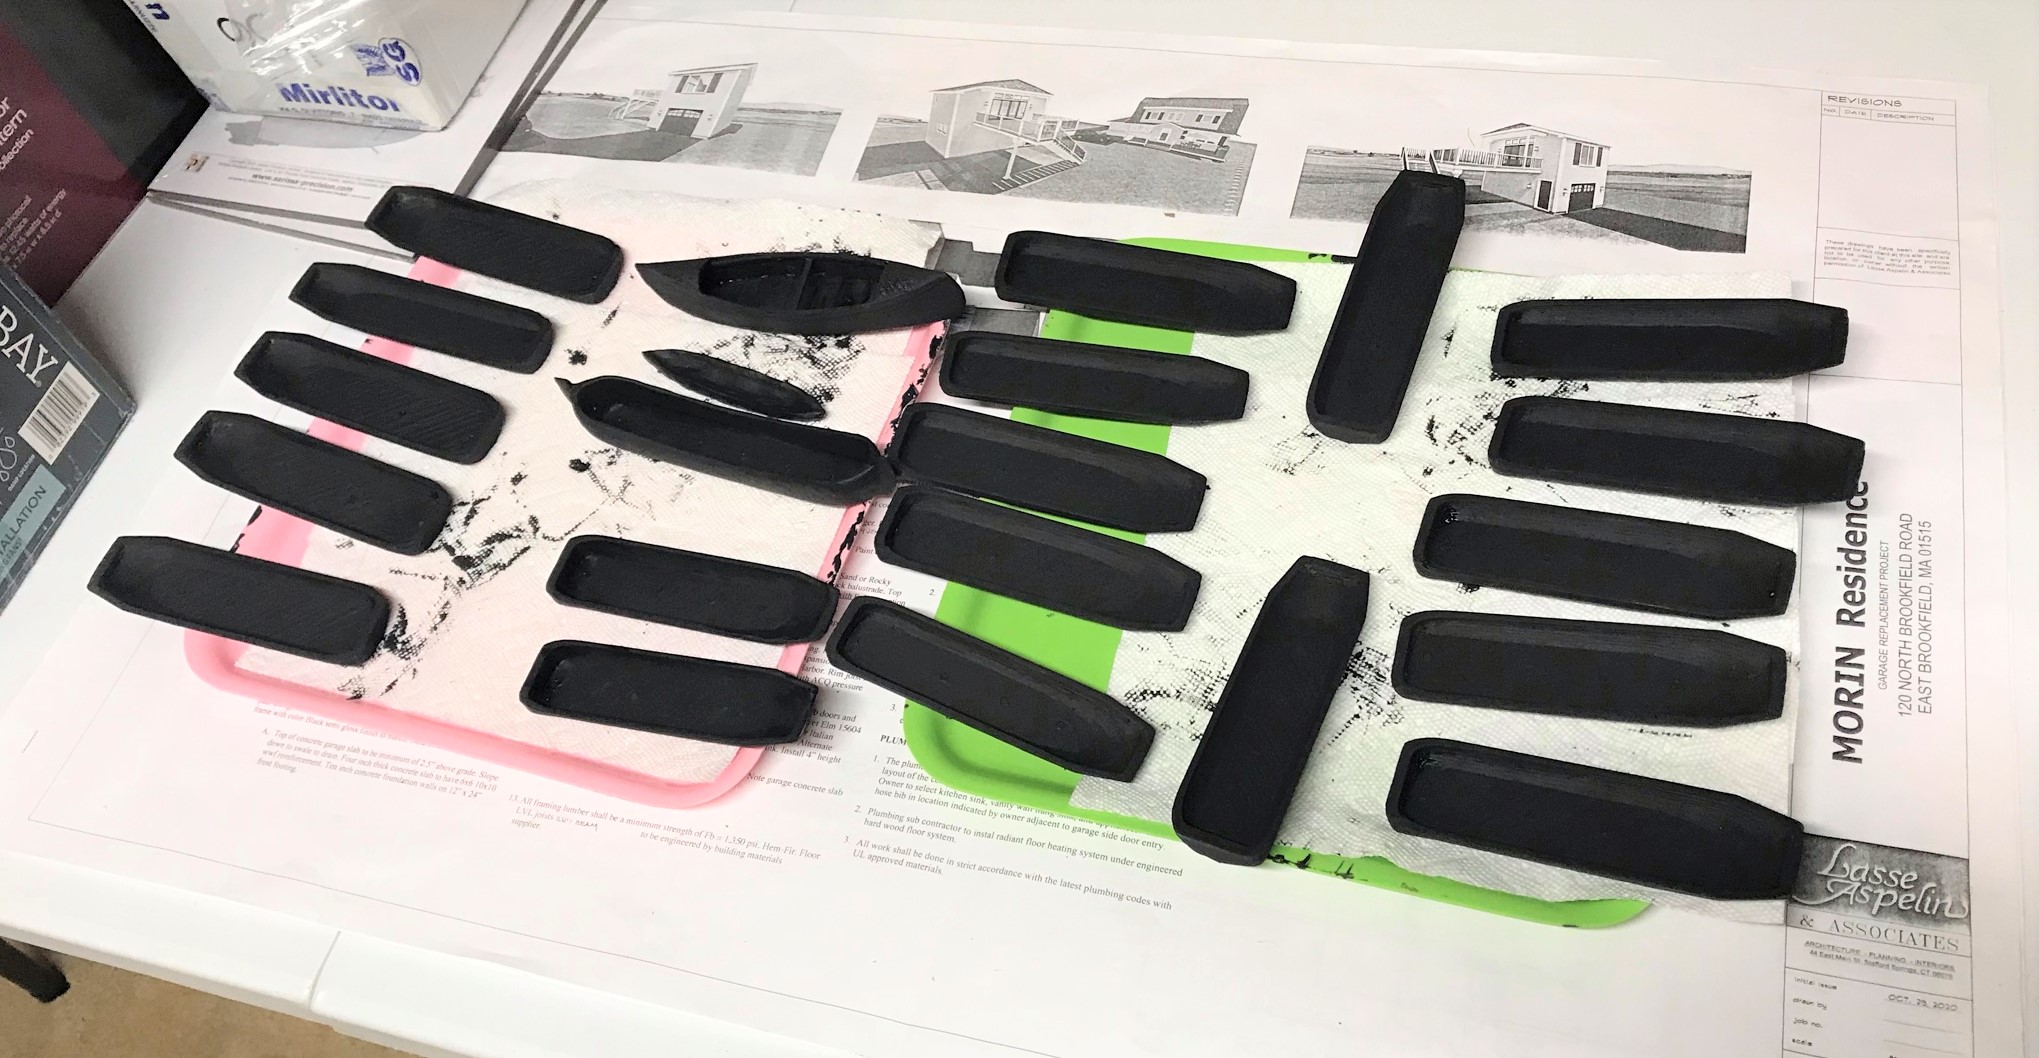
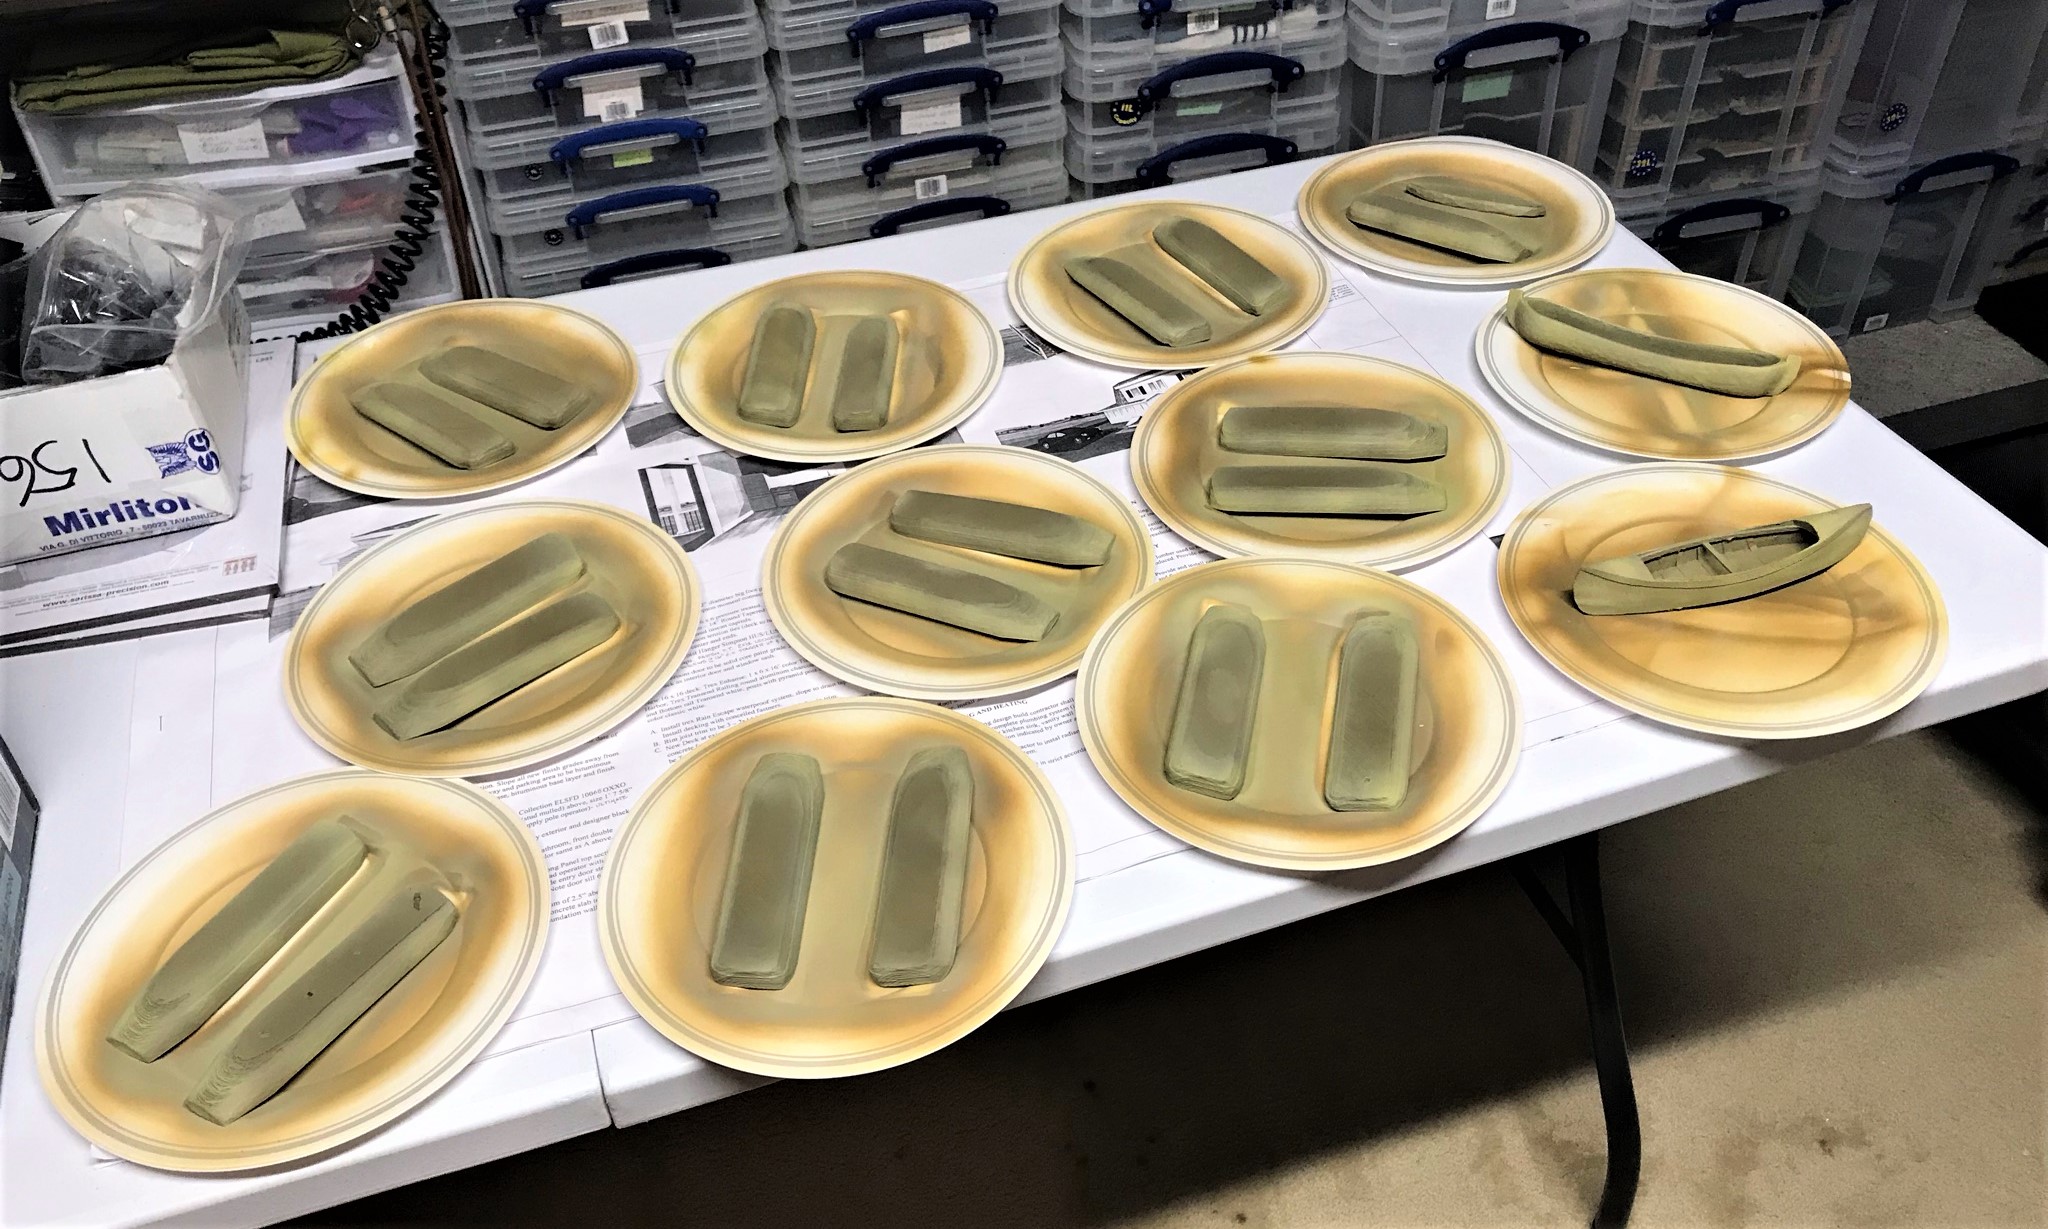
I masked up the twine sections with painters masking tape and double-primed the components outside on the first day that was warm enough in March to use a rattle can. I had separated the pieces so I could more easily paint all of them and then assemble everything afterwards. It proved to be a good call.

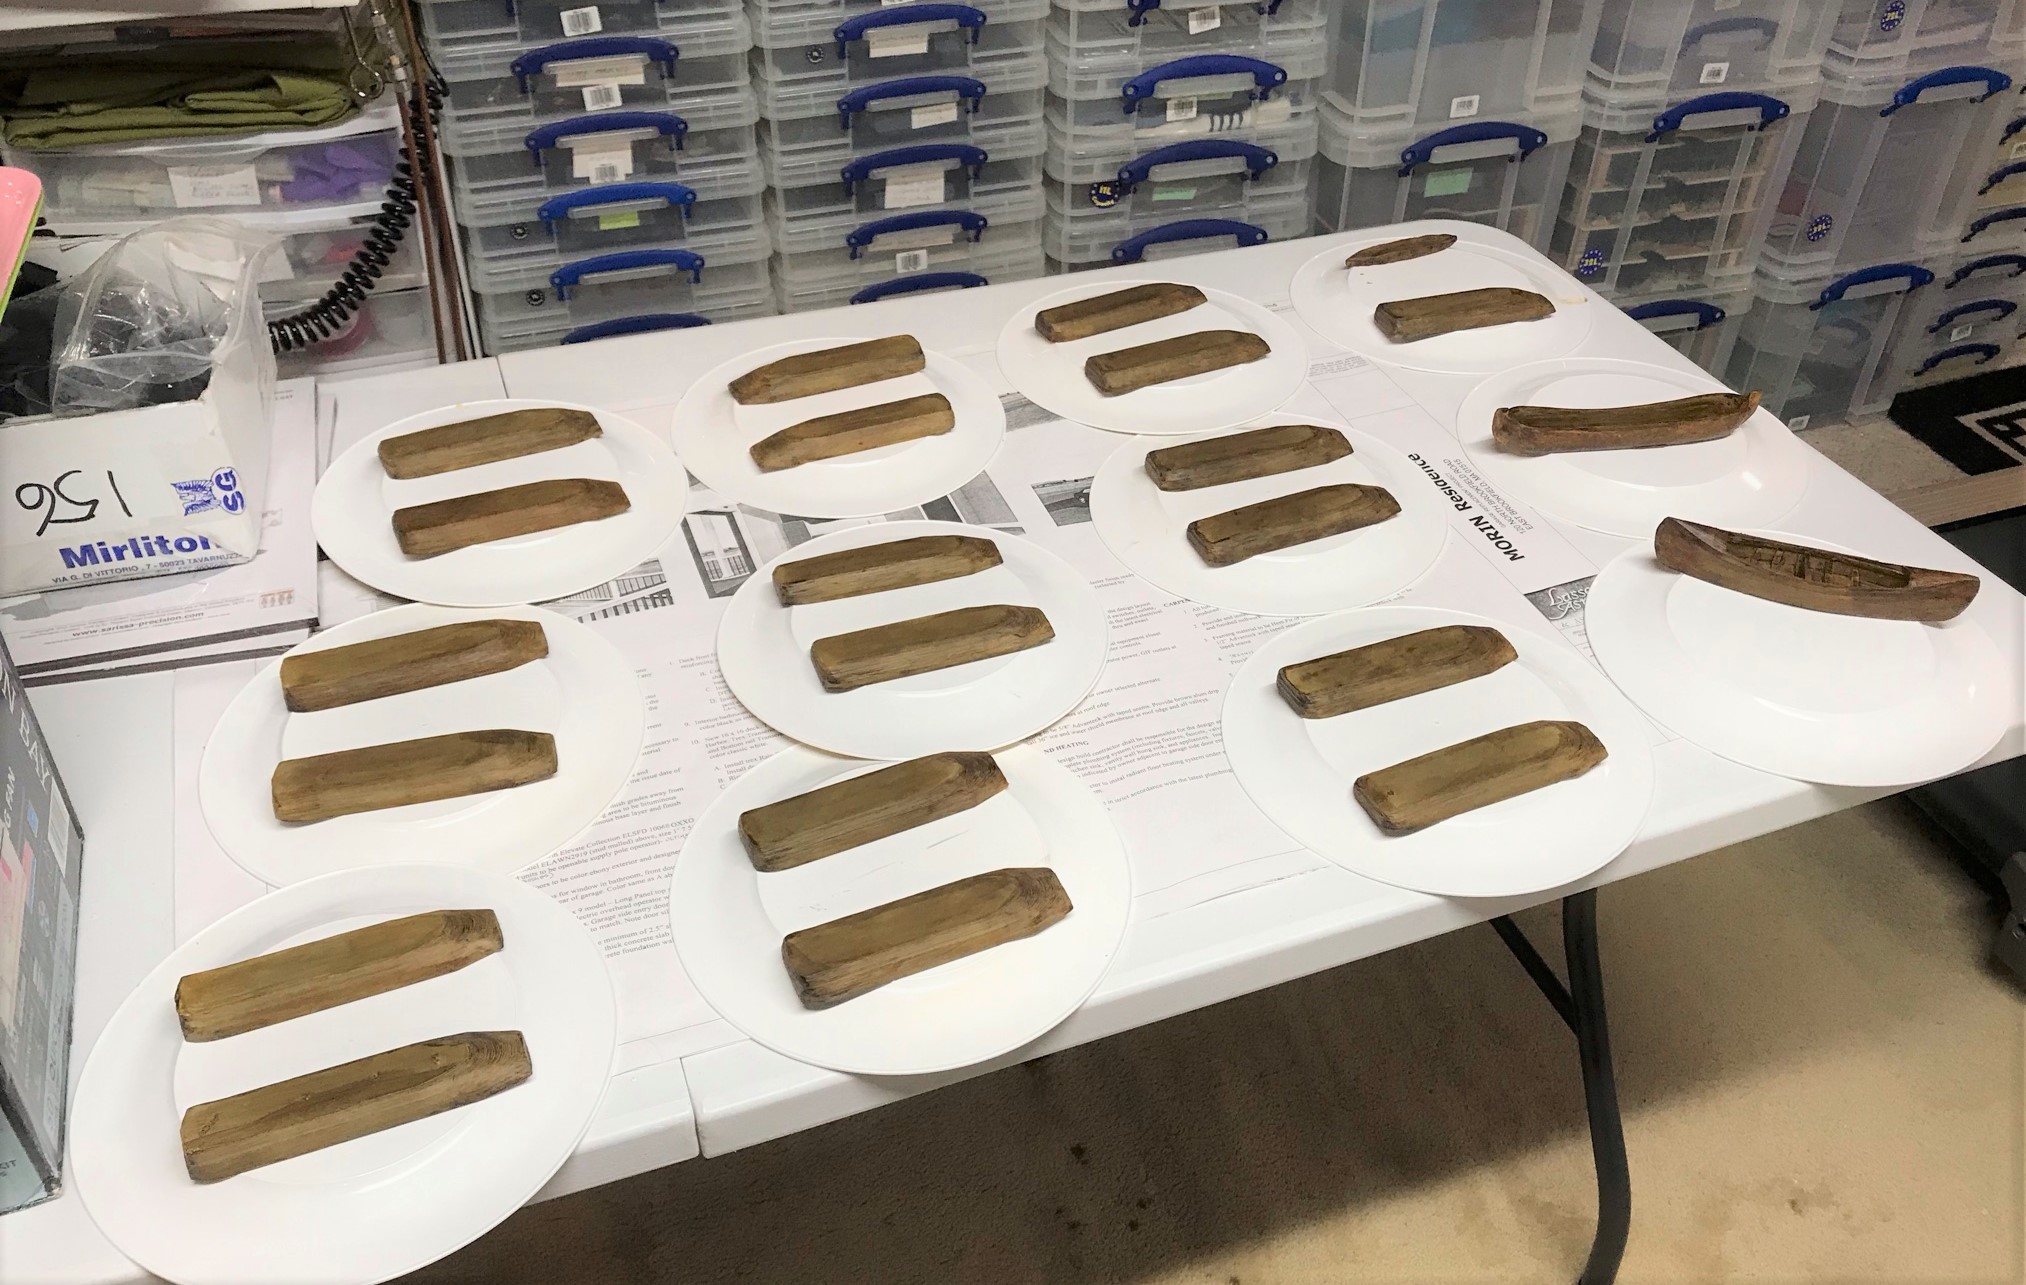
These were now all brown. I wanted to add some styrene on El Dólar so that its forecastle supports would mount better. I also prepped all of the oar locks by drilling out holes for 1/8″ wooden dowels. This caused some unwanted damage to the brittle plastic, so I then fixed/strengthened each hole with green stuff and brush-primed the oarlocks. Then I serially applied different browns via airbrush in a zenithal fashion until I was happy with the base color on both ships.
At some point in the past I had bought some Pebeo Studio Acrylics “Auxiliaries Modeling Paste HD. I added some in a wavy pattern to the water bases.
Regarding the color of the ropes, I was unhappy with the look of the ropes. I had used “Apothecary White” and hated the look. I redid them (thanks to a suggestion from Chris Palmer) with “Skeleton Horde” – and I liked them much better.


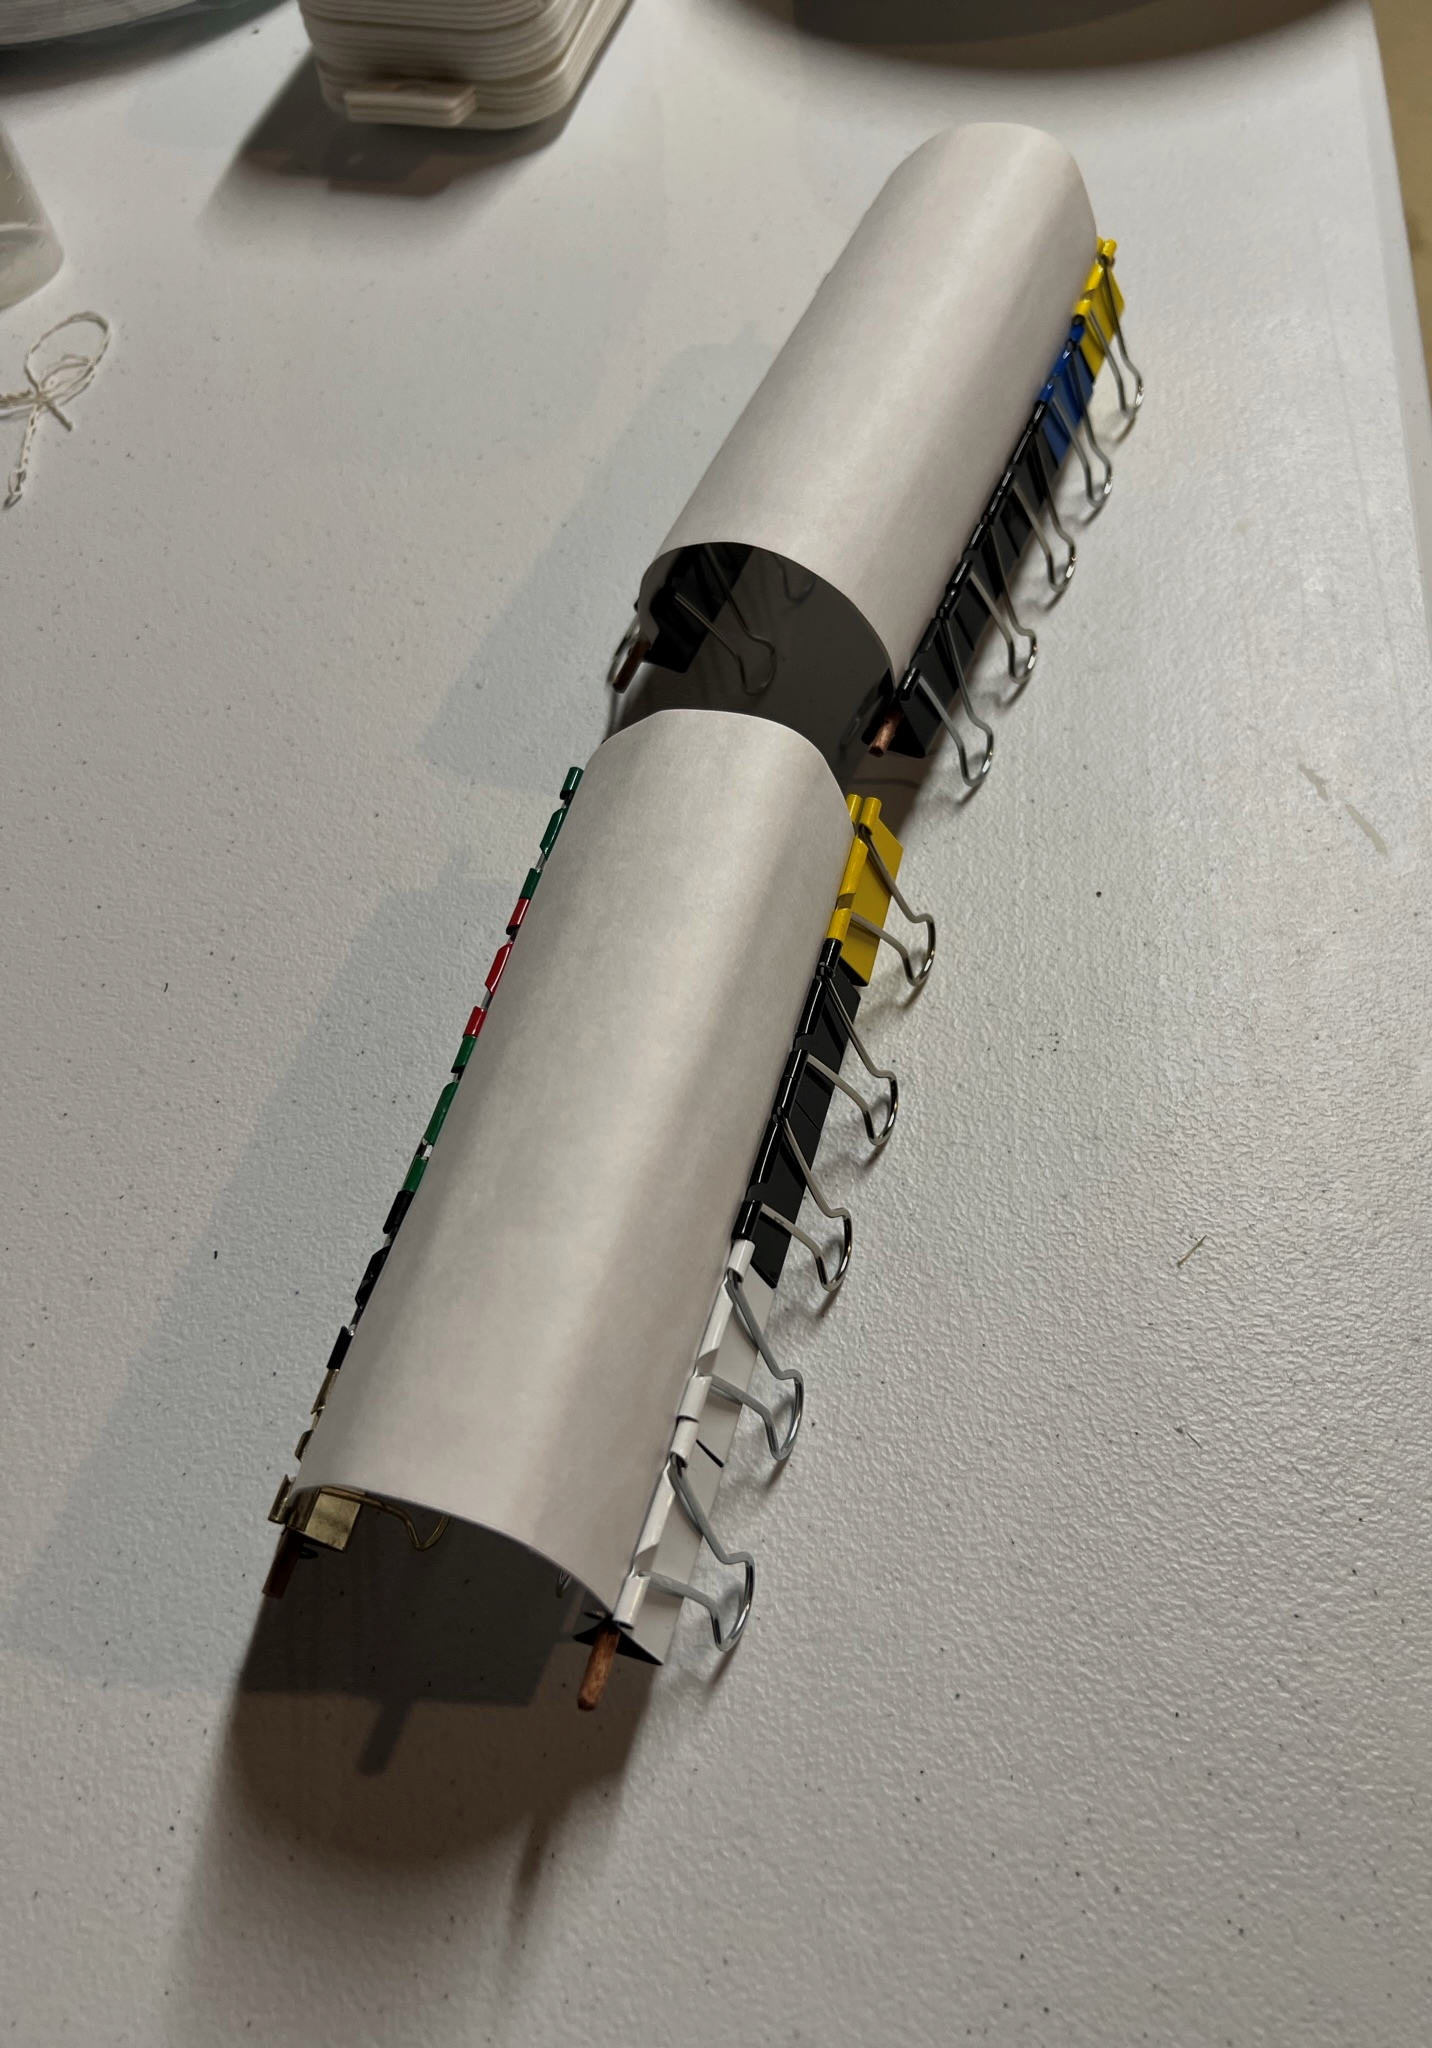
It was then time to work on the sails, more rigging, and the water base. I made the sails with dowels and card stock and PVA. Binder clips helped immensely with the shape. I mounted the sails with tiny metal jewelry rings through holes I drilled in the dowels . I also made ladders for El Dólar., and dry brushed everything on the ships wood – then shaded as needed. The water was dry brushed as well
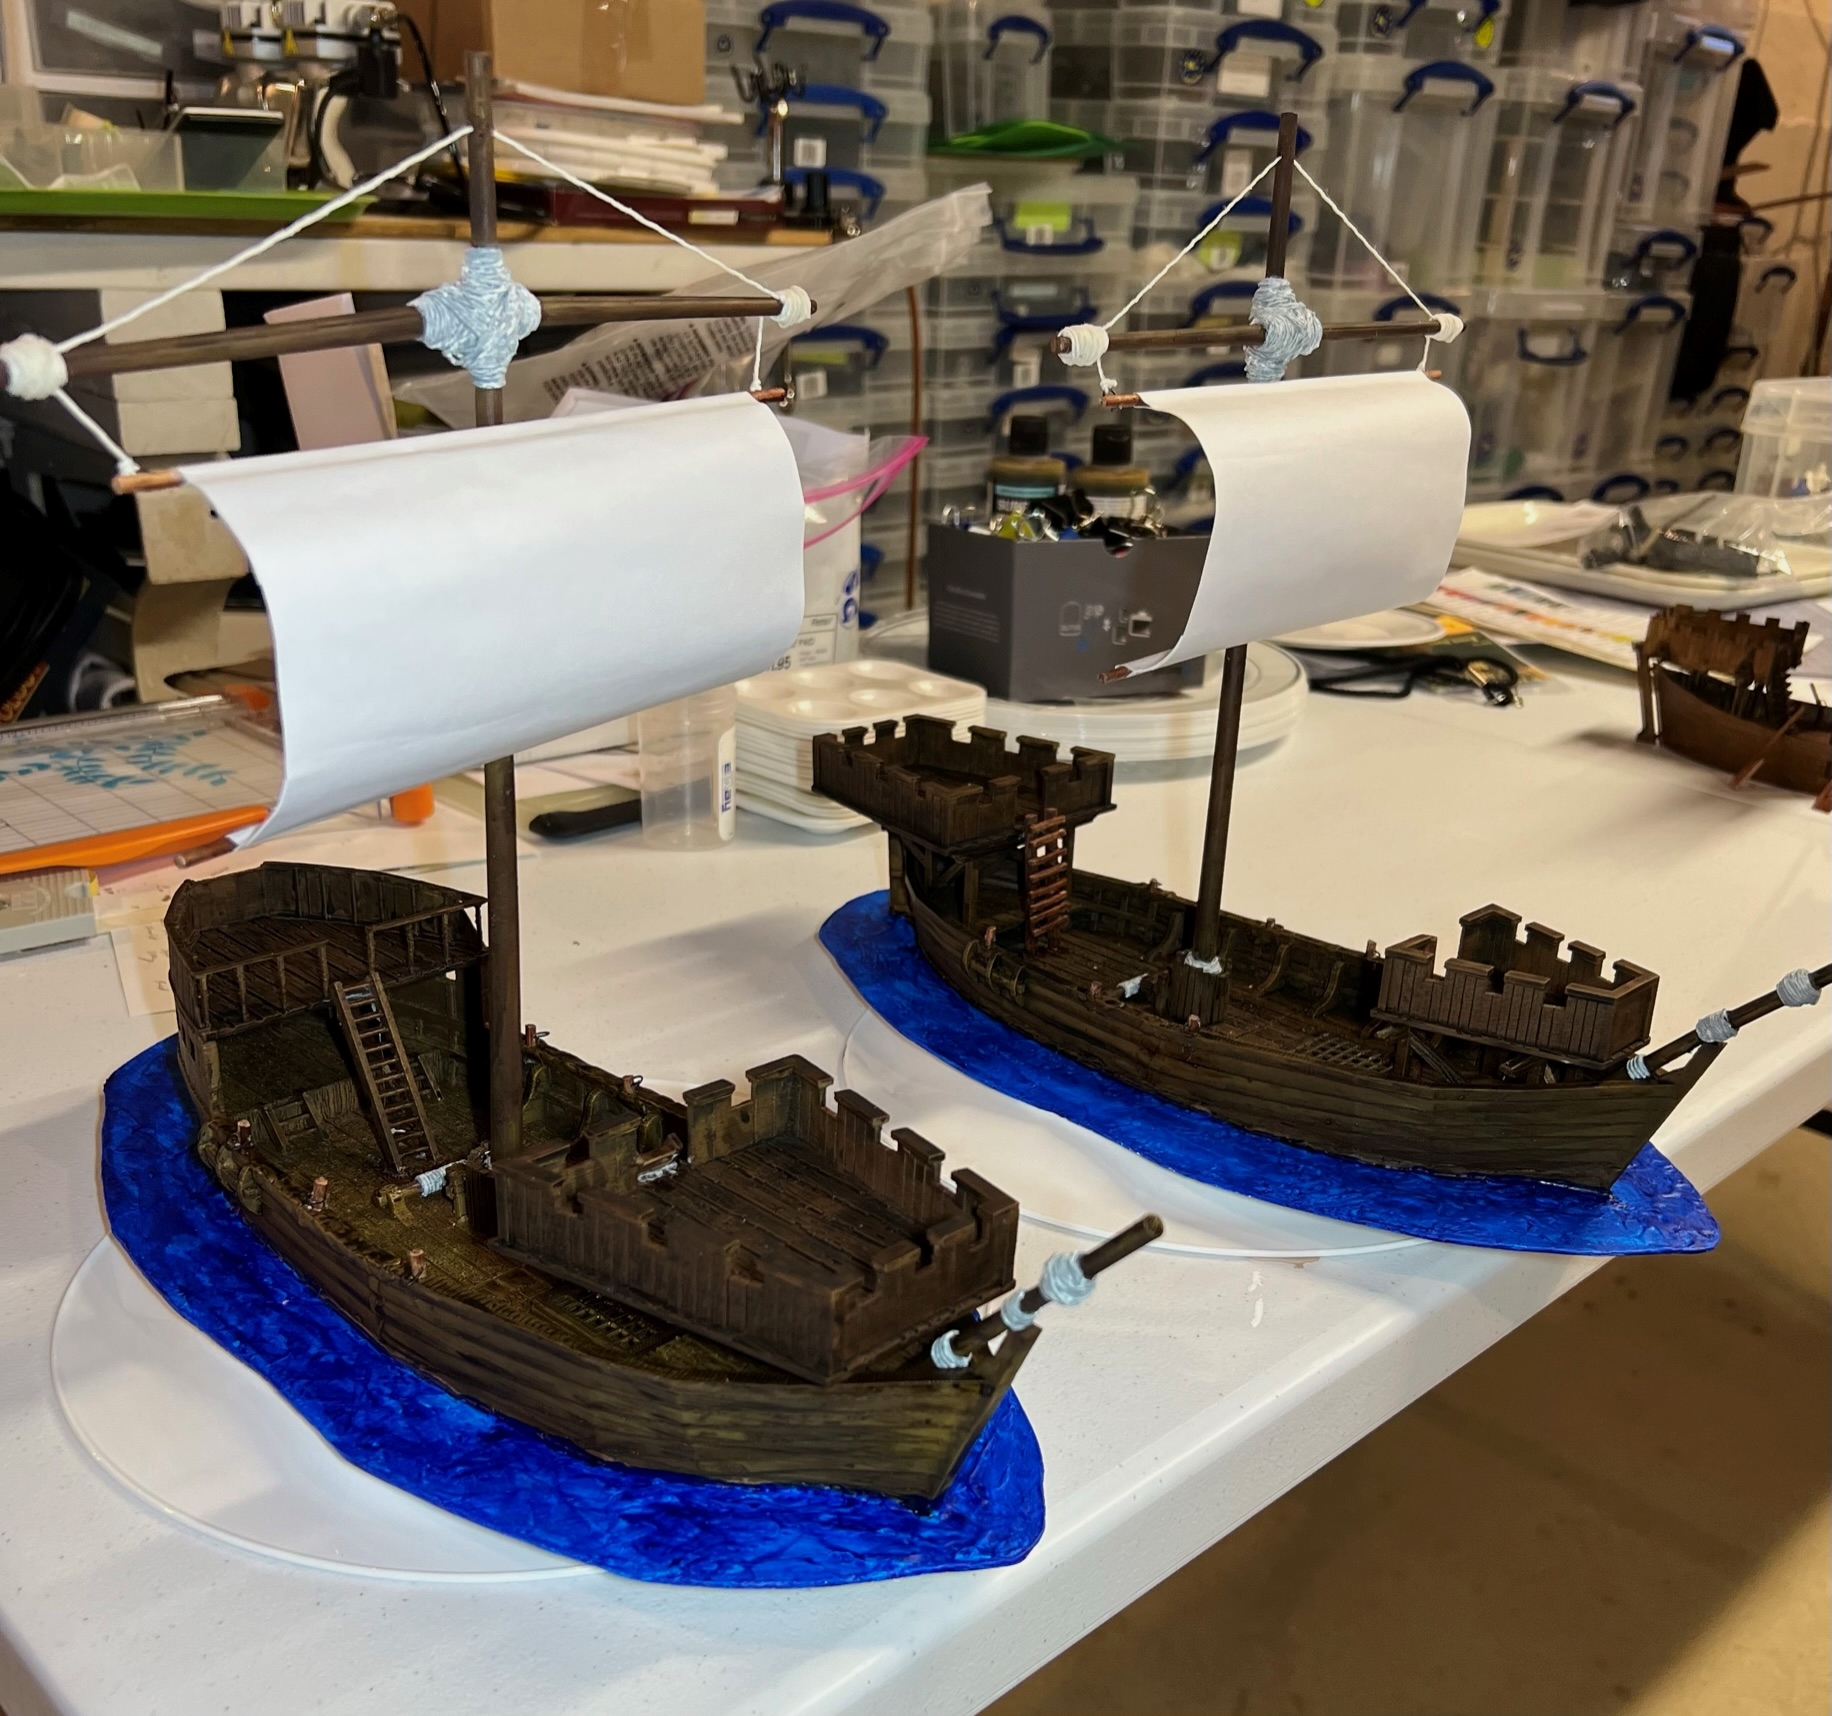

I then thought that the sails were too pristine. As I was drinking some Darjeeling tea, I used the tea bag to stain up the sails – and I would do this for all 5 ships eventually.

Lastly, I want to show the completed 3D printed ships:


I was pretty happy with these – but now it was time for the Sarissa MDF kits!
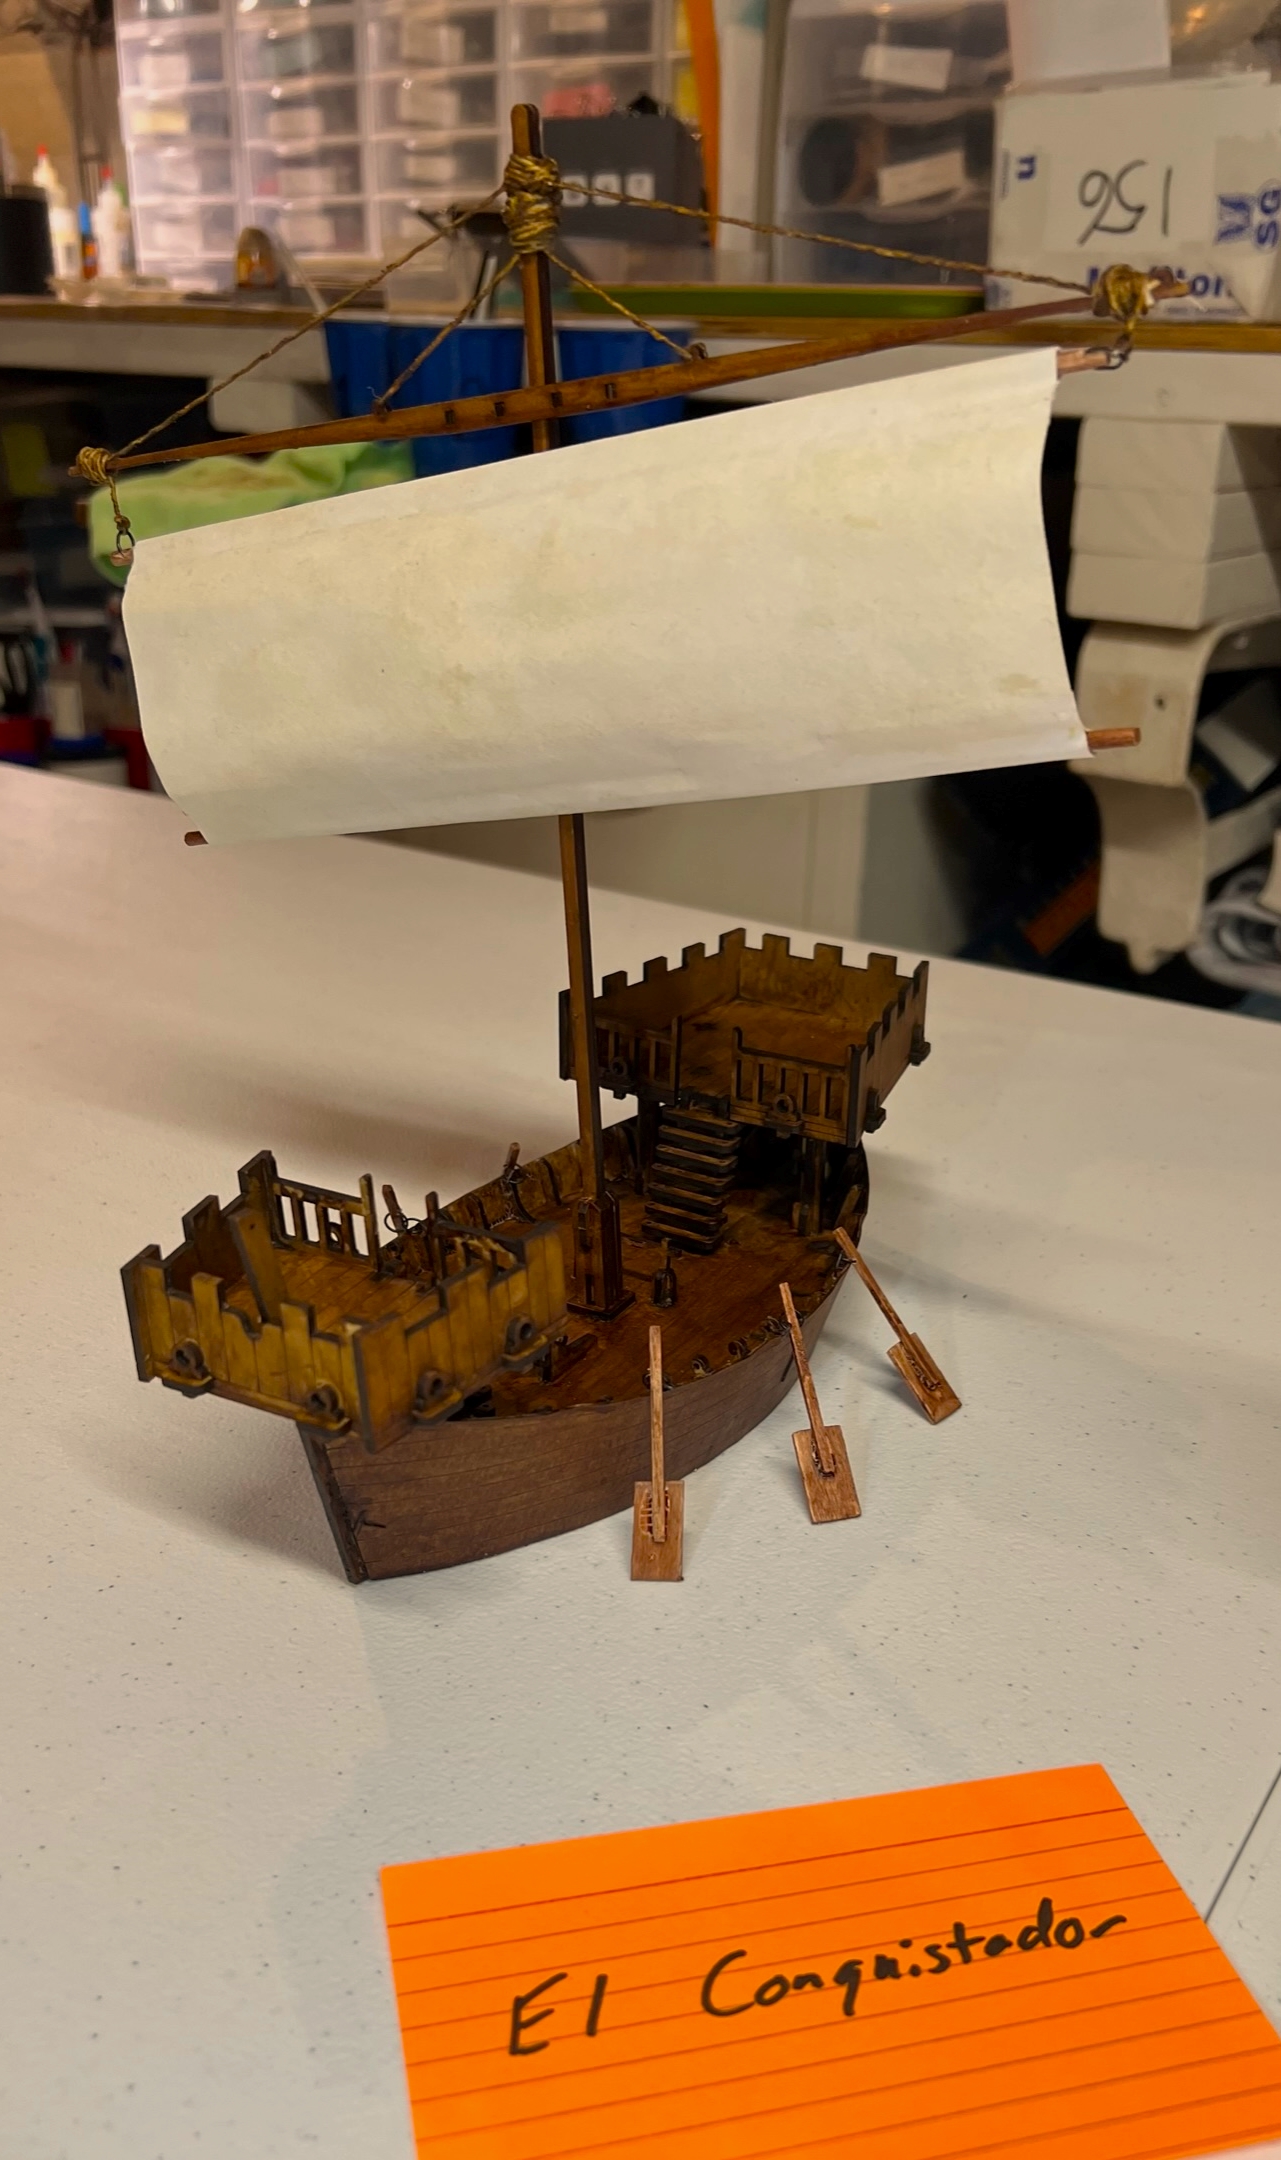
El Conquistador & El Perro de Guerra
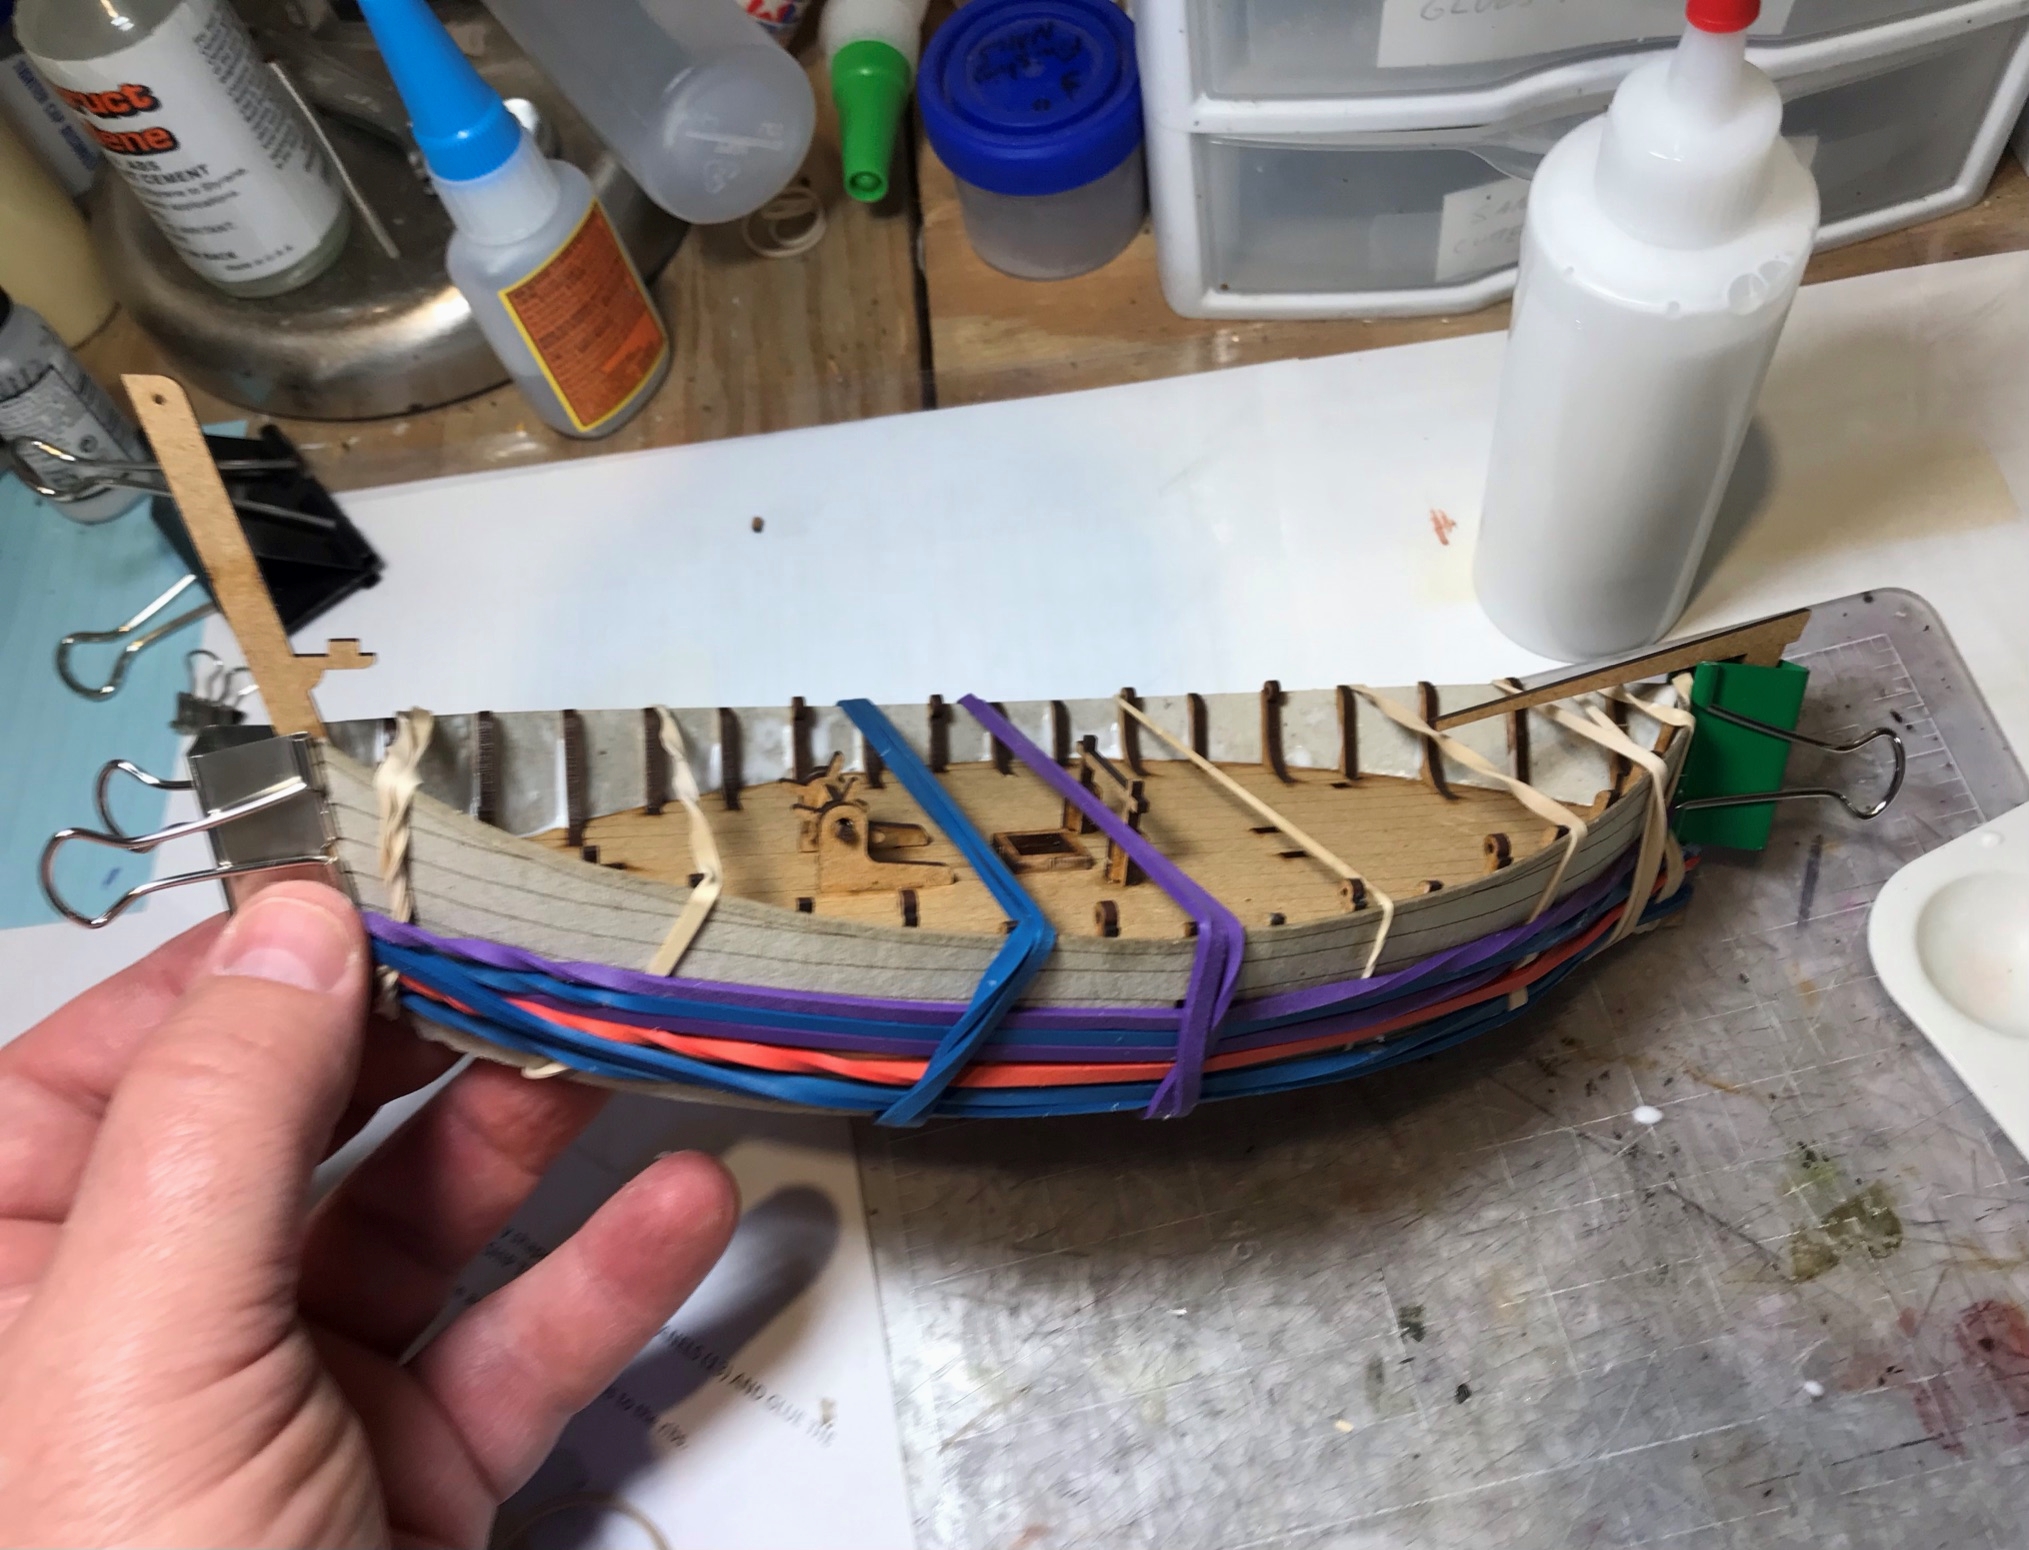
These two models were a bit smaller than the 3D ones. Unsurprisingly, these took a lot of gluing and patience. I did need to modify some damage to one of the tillers as well when a rubber band snapped it off of one. Still, the kits were fun and well-made – I just needed to try to match the colors (relatively) of the 3D versions. For this I relied more on washes than paint. I also needed to modify these with oars and sails. Here are the photos:
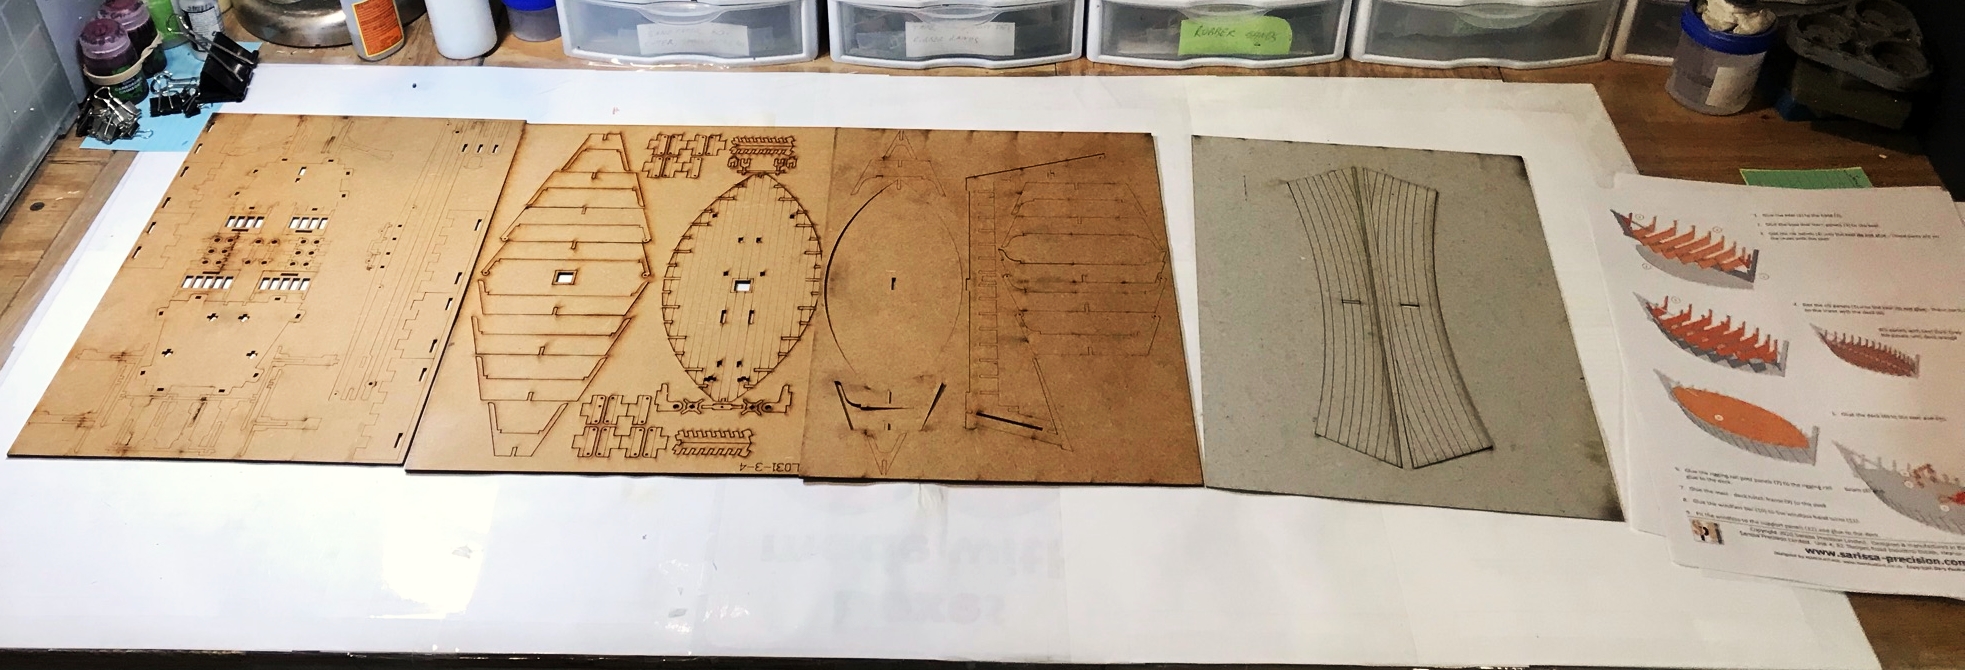
Then LOTS of gluing…
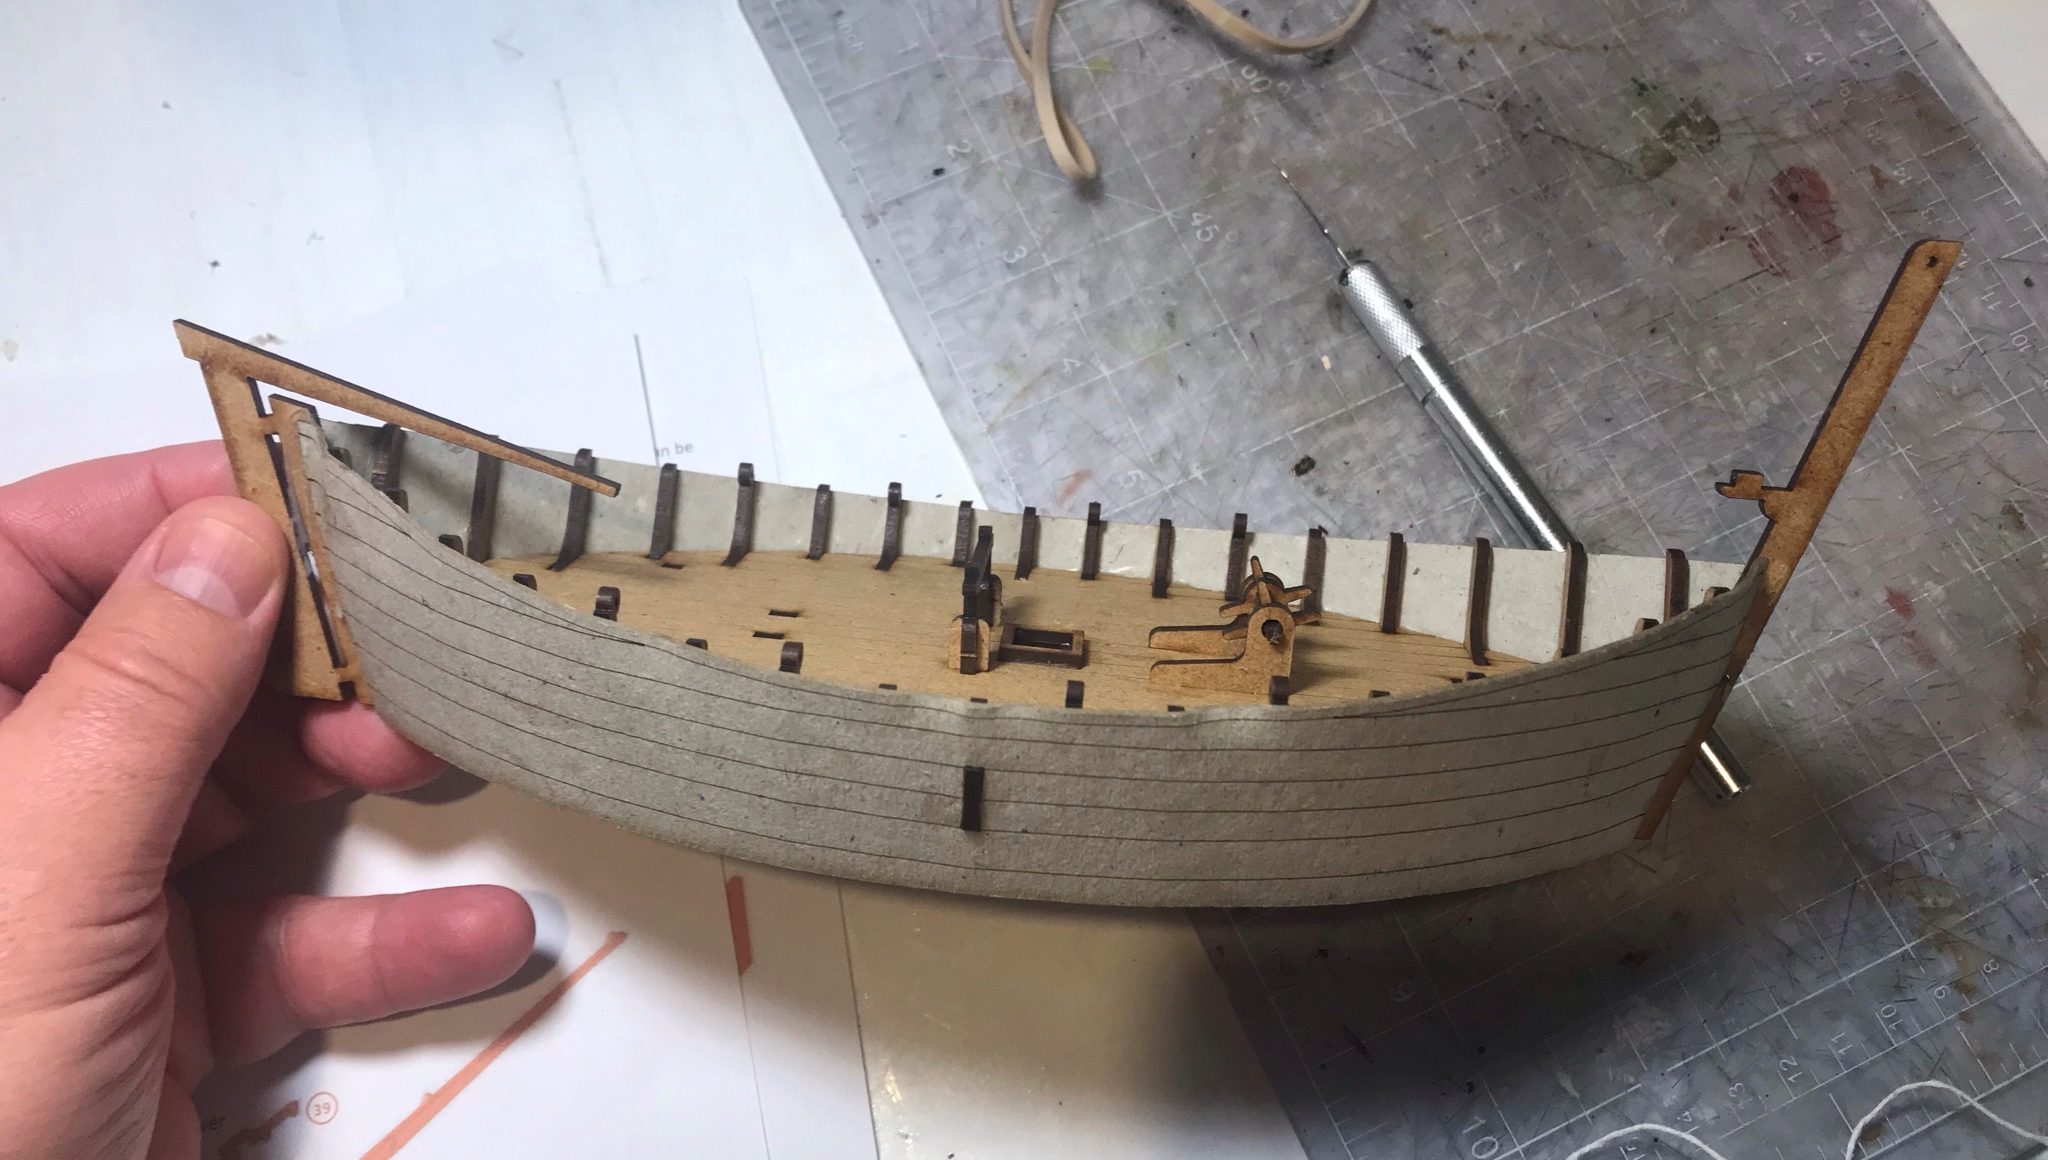
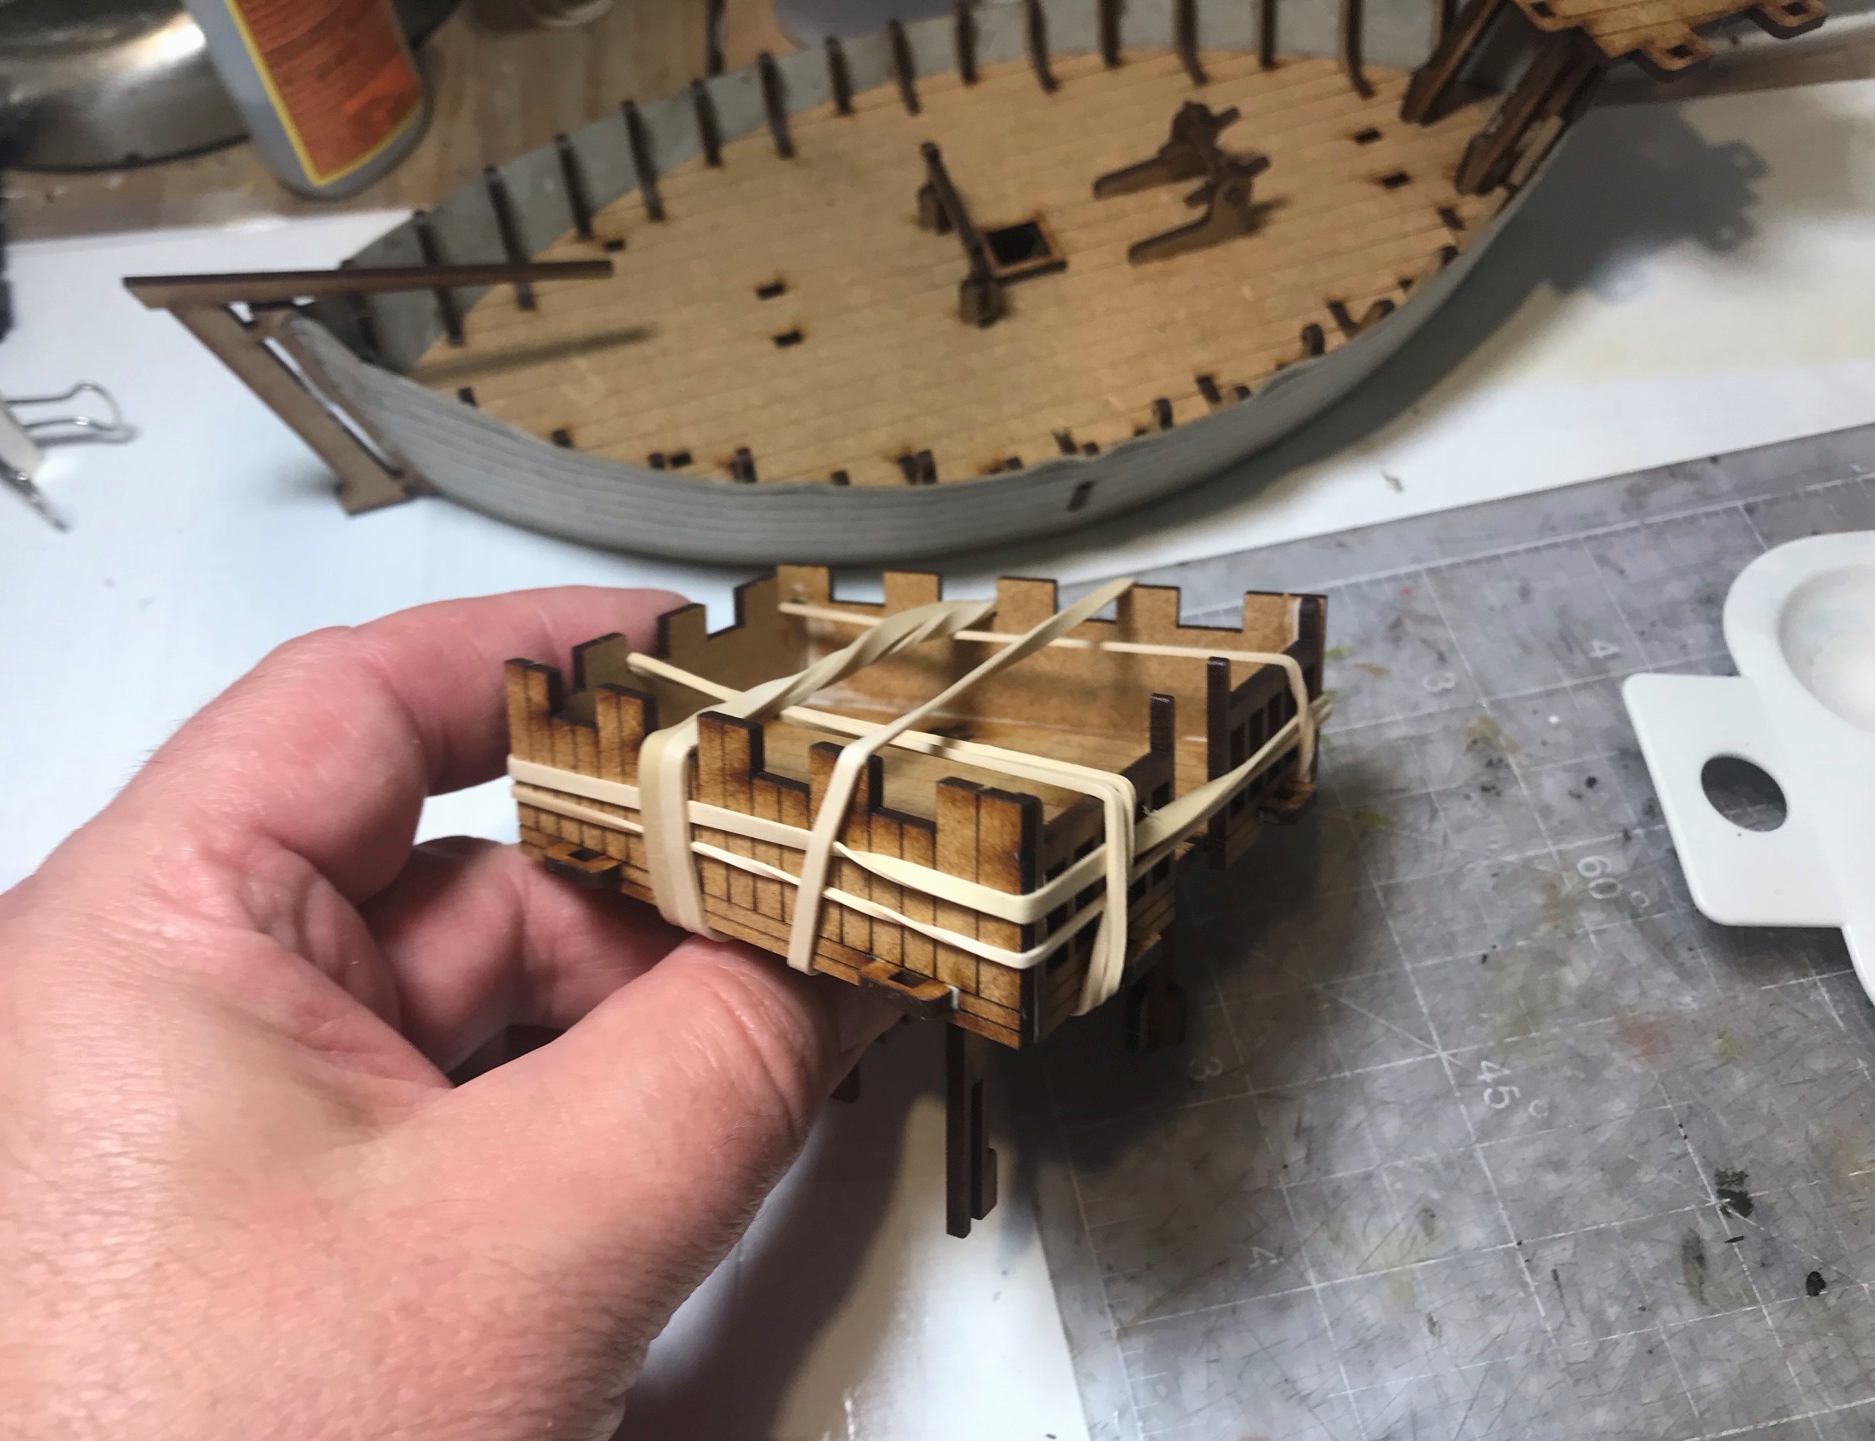
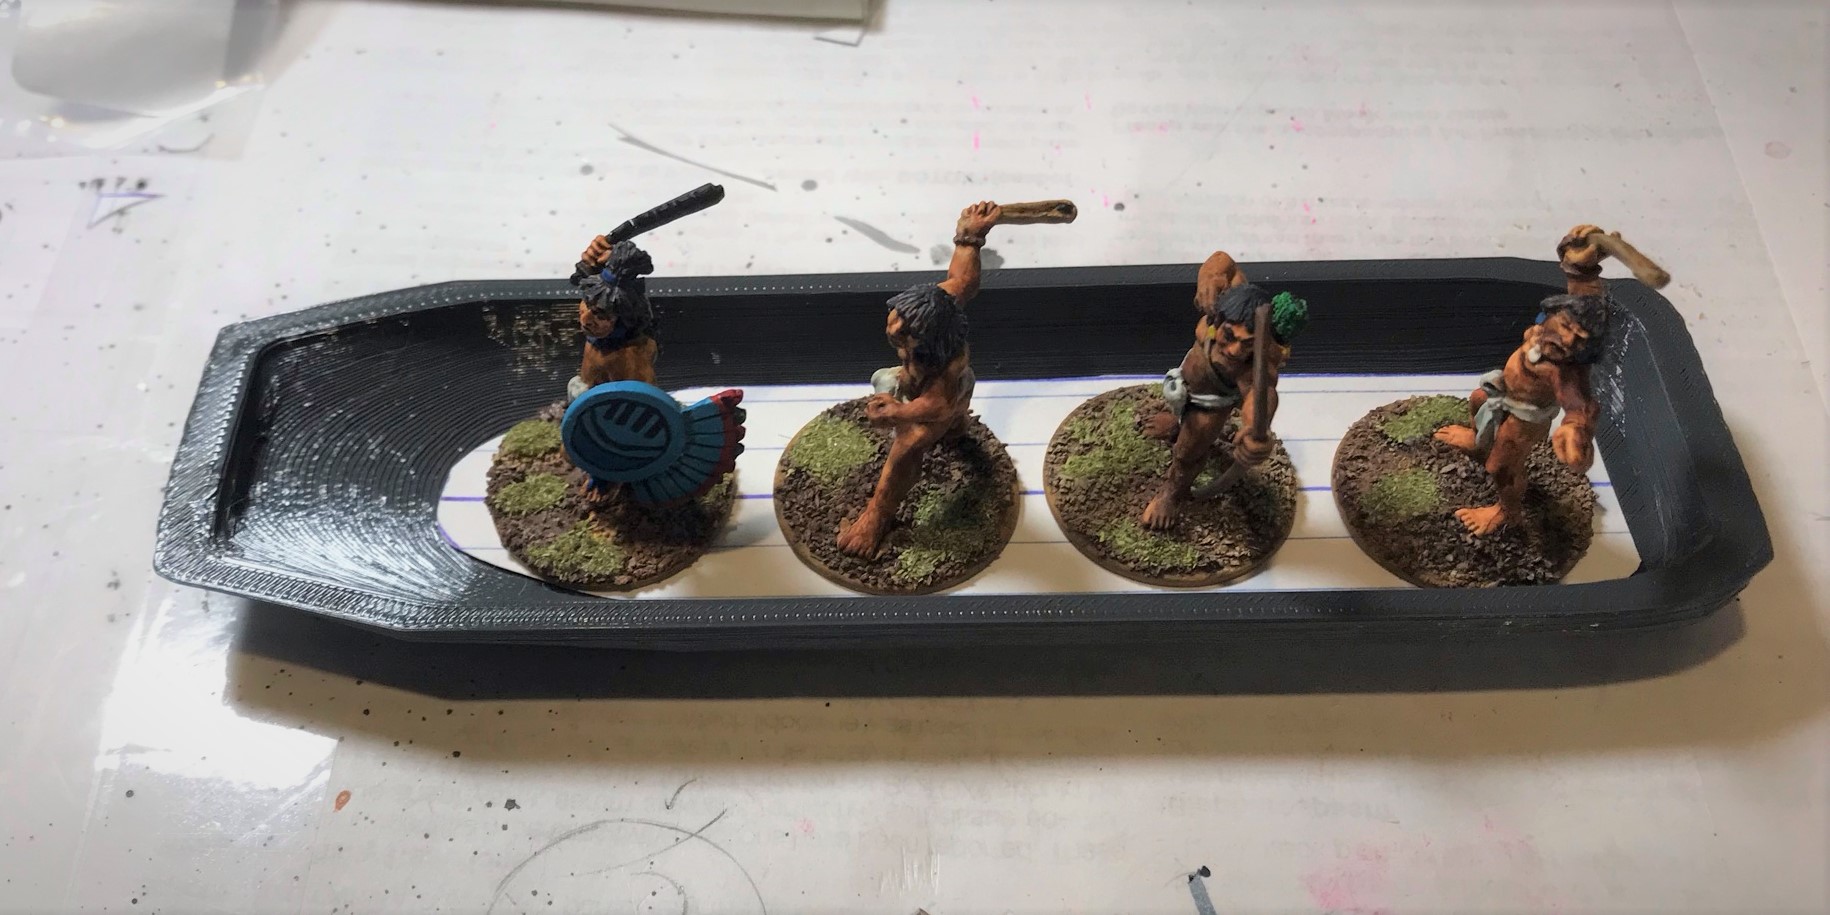
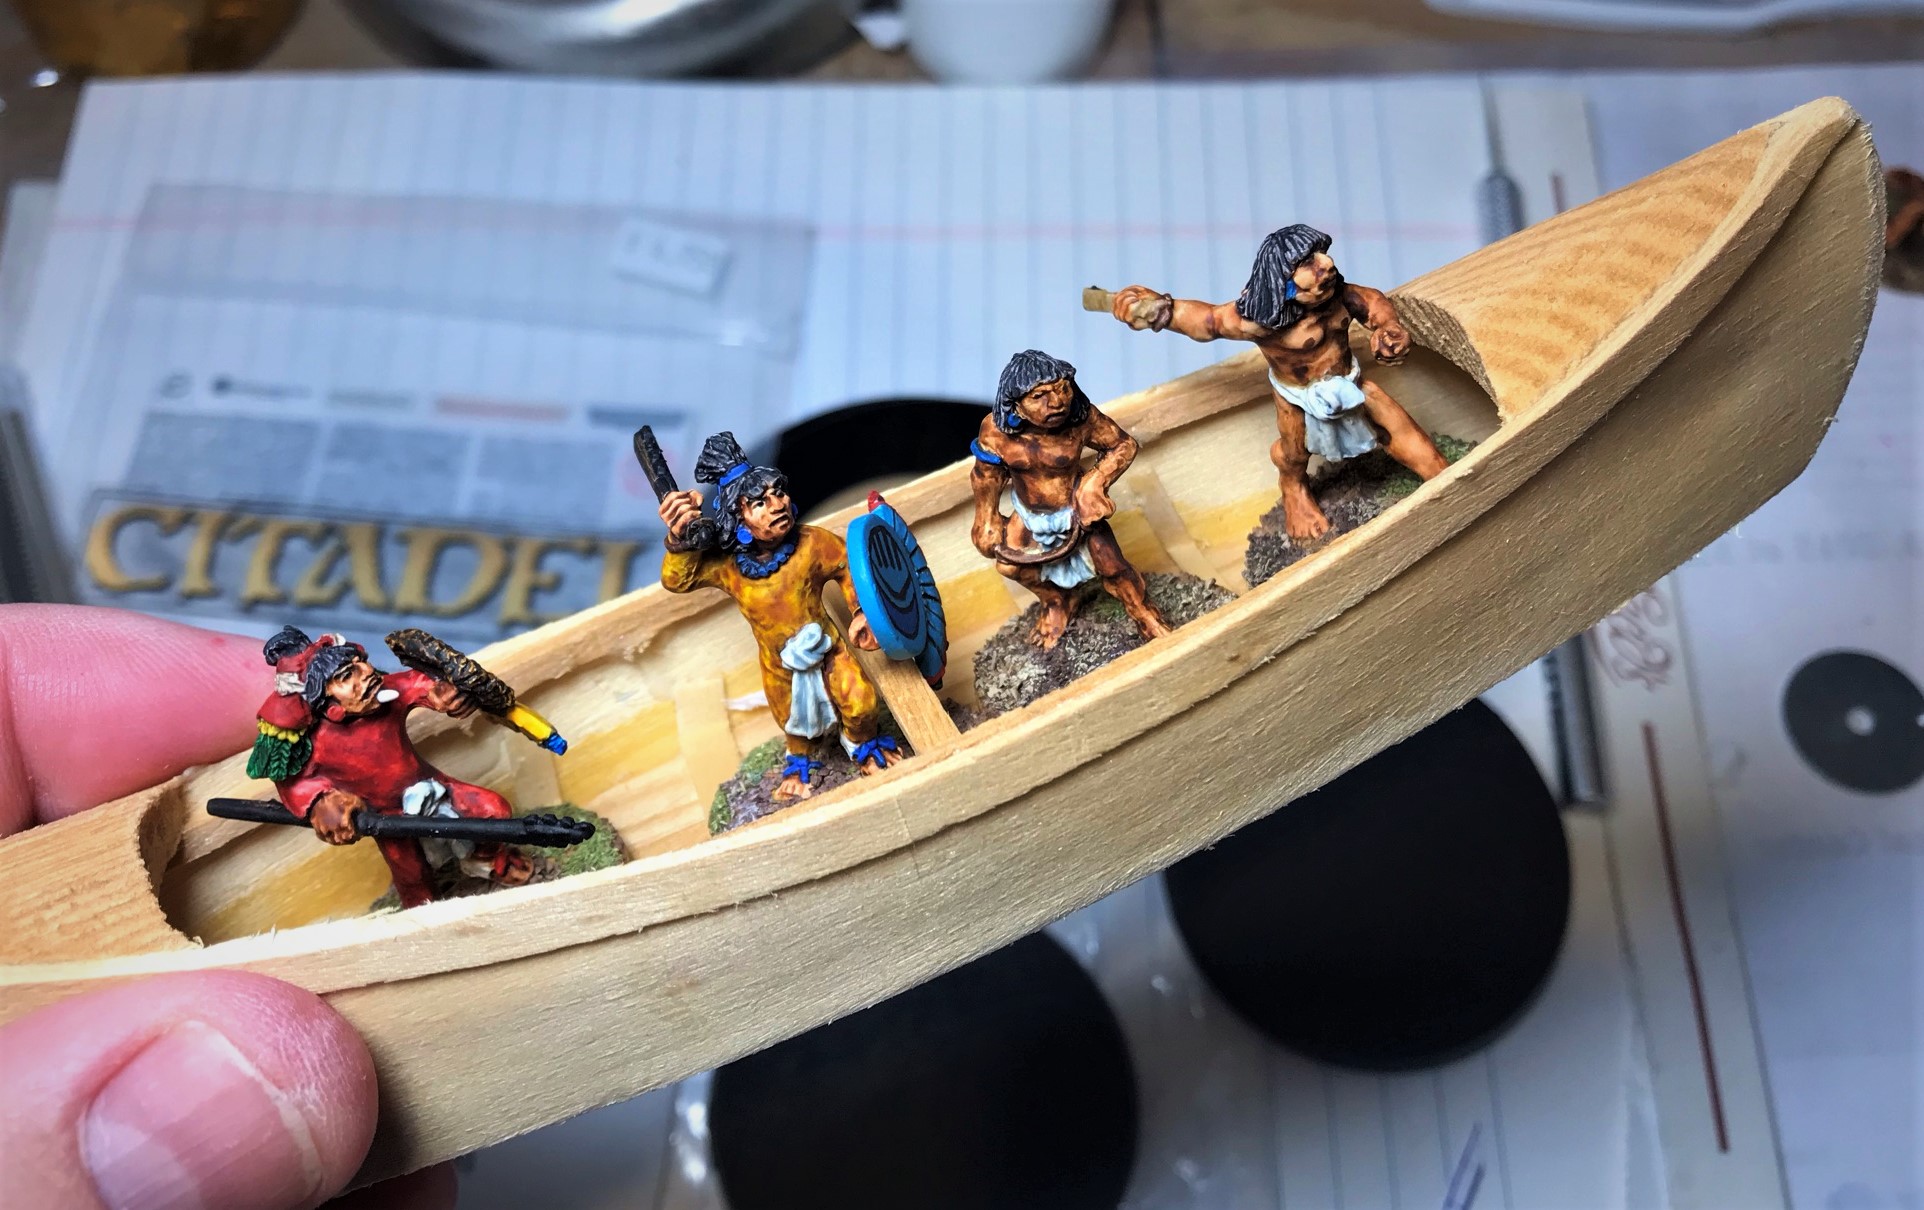
I mocked up one to see how the figures might fit inside.
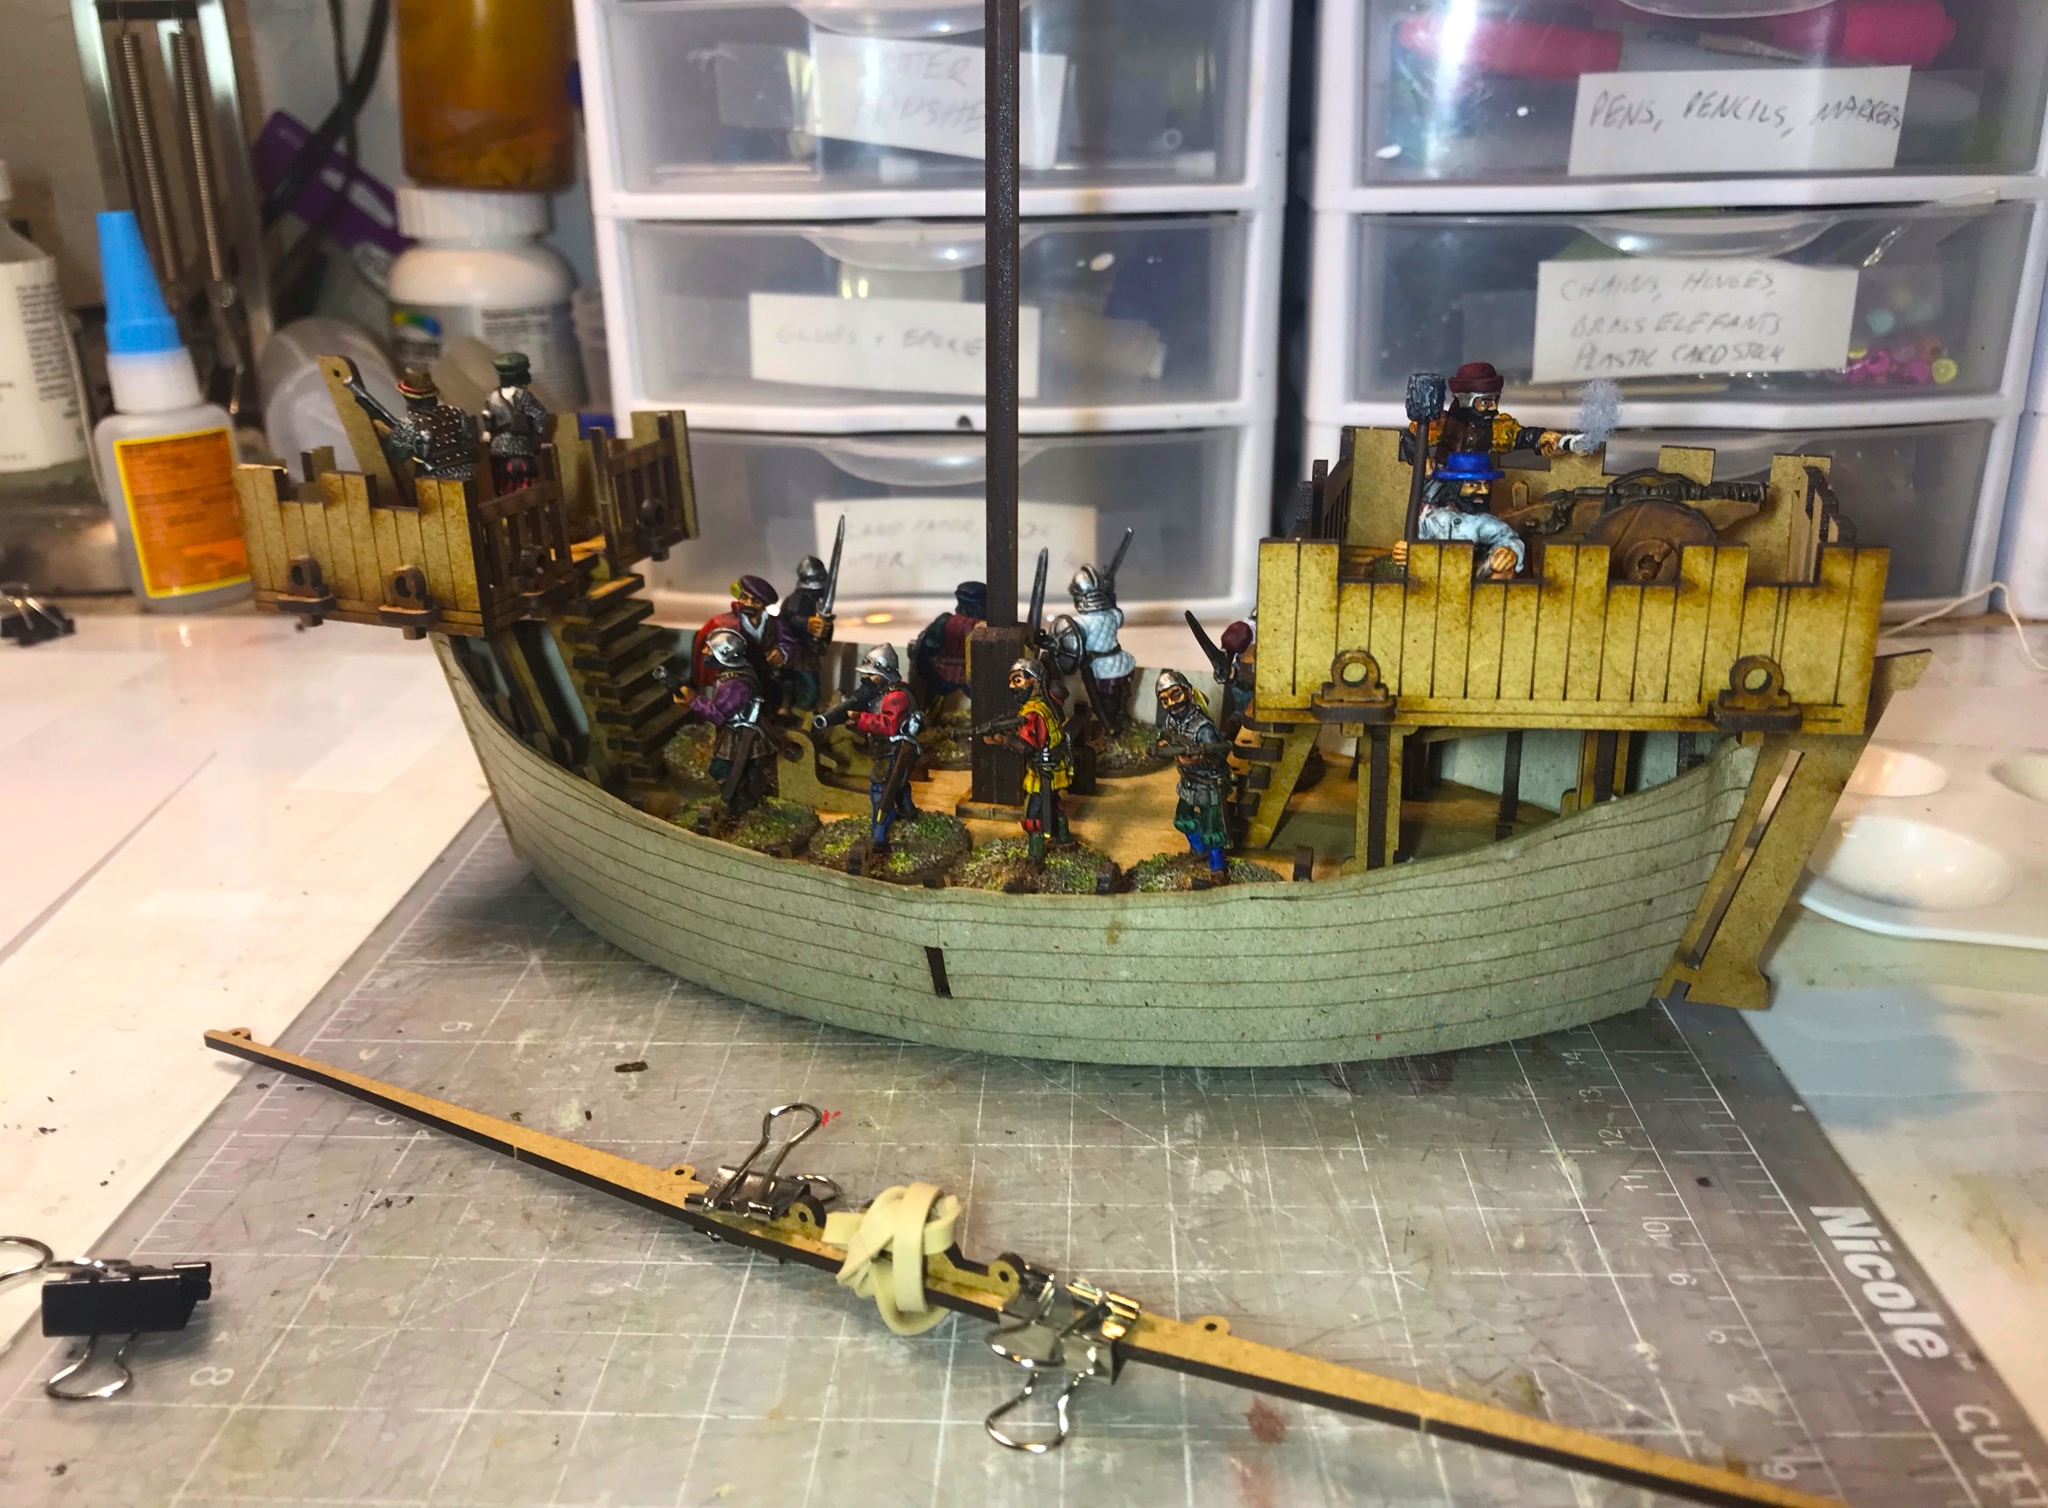
In the above photo you can see the two-man falconet crew are looking less than ideal size-wise. At that point I ordered more falconets, lombards, and crew to better suit the brigantines – but that’s another upcoming post!
Then it was washing time – lots of washing…Army Painter must be happy…
Then I moved on to sails and rigging.
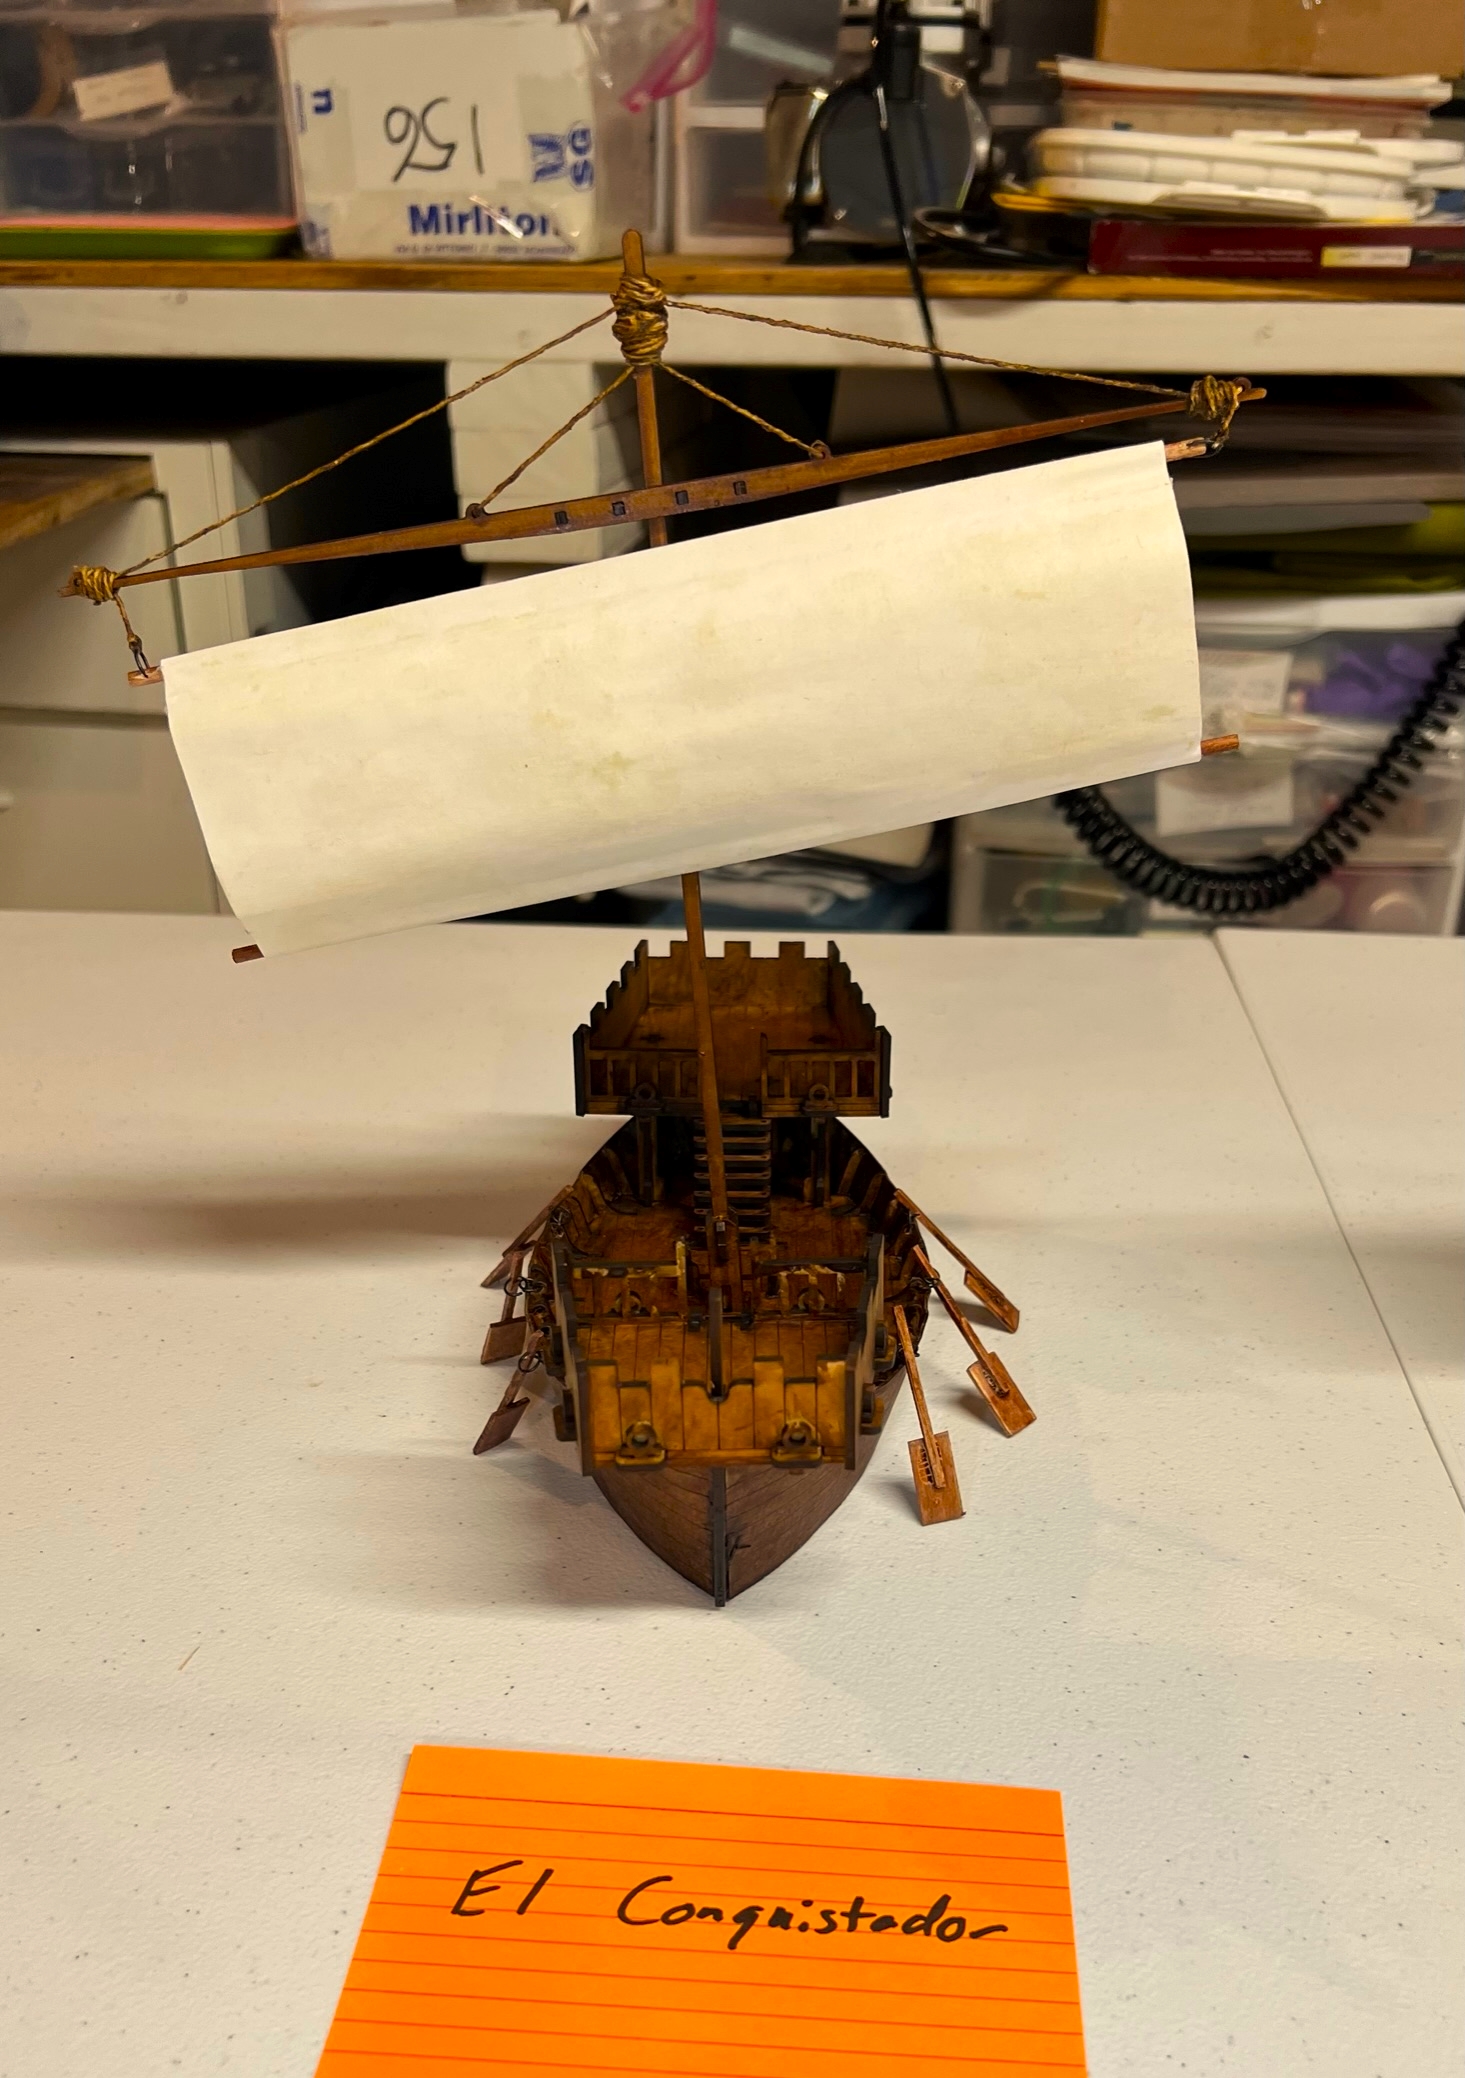
Now let’s see El Conquistador and El Perro de Guerra as completed:


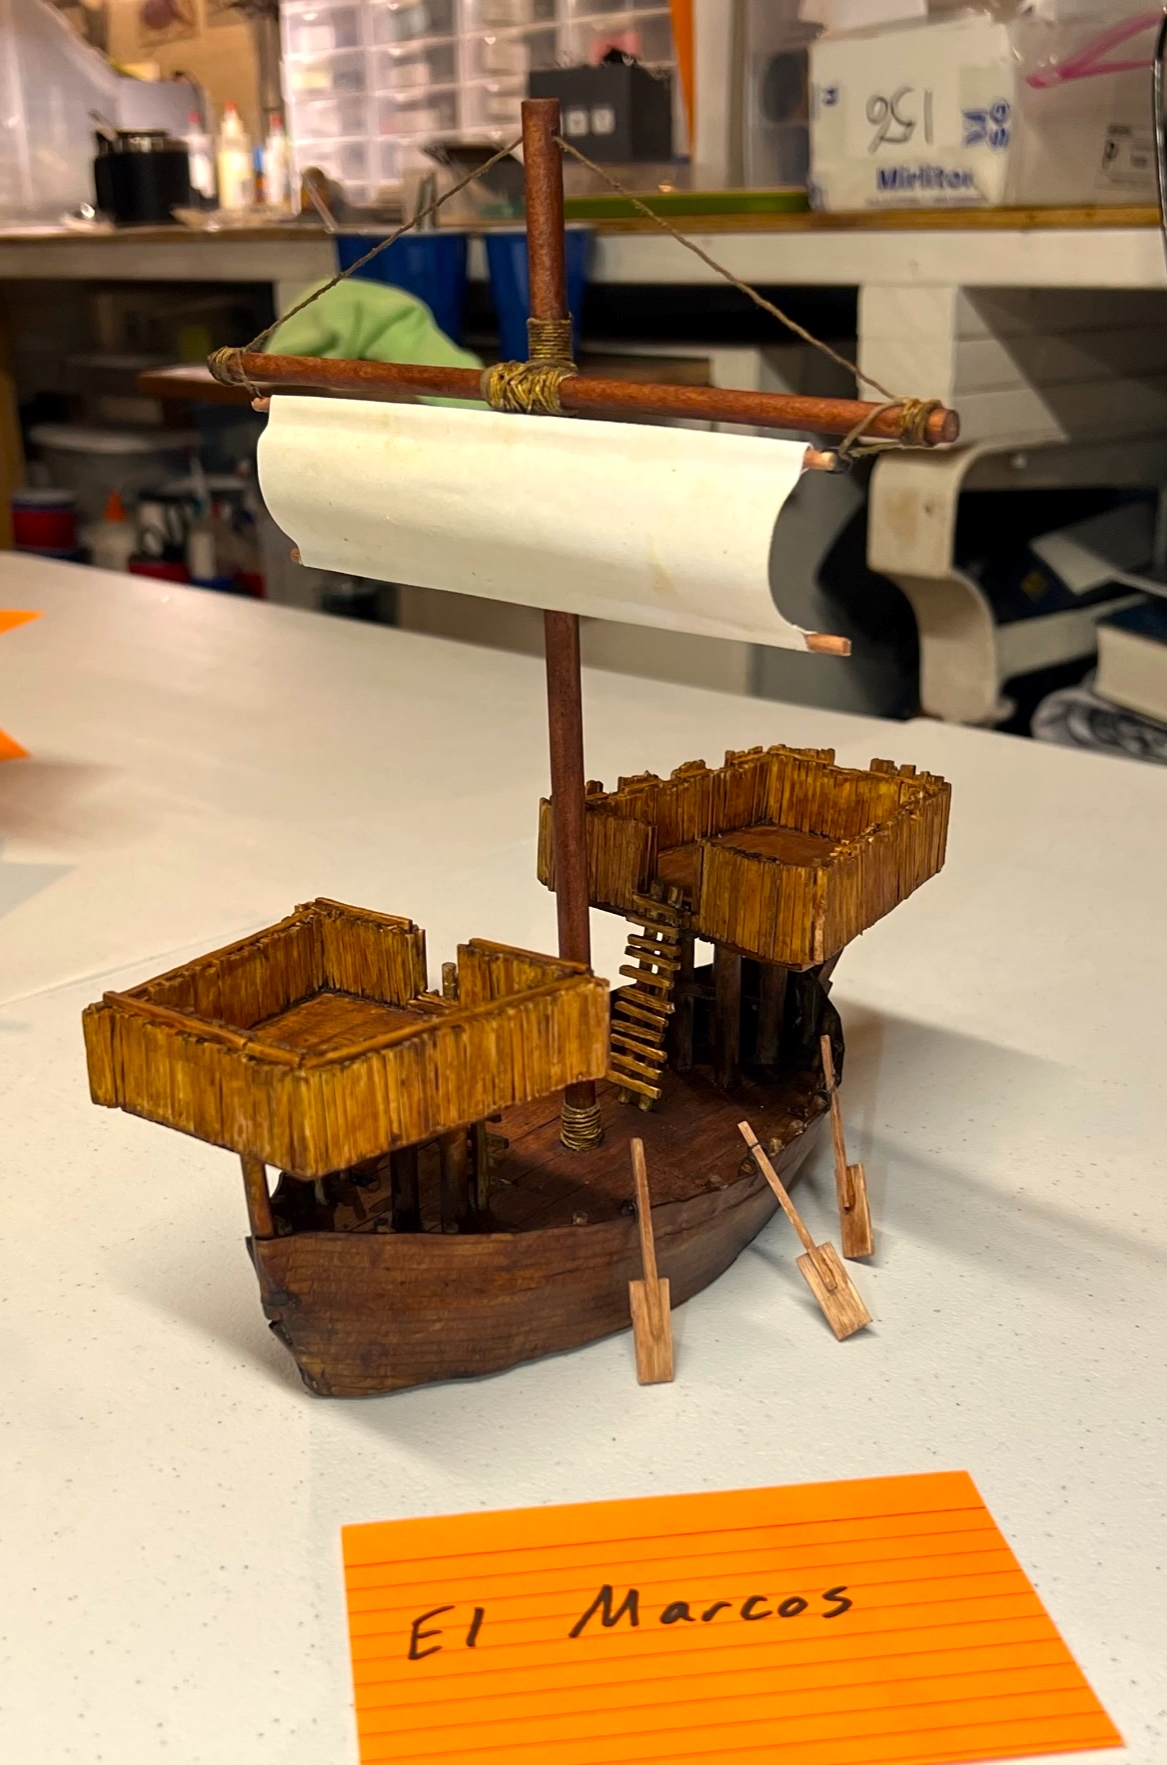
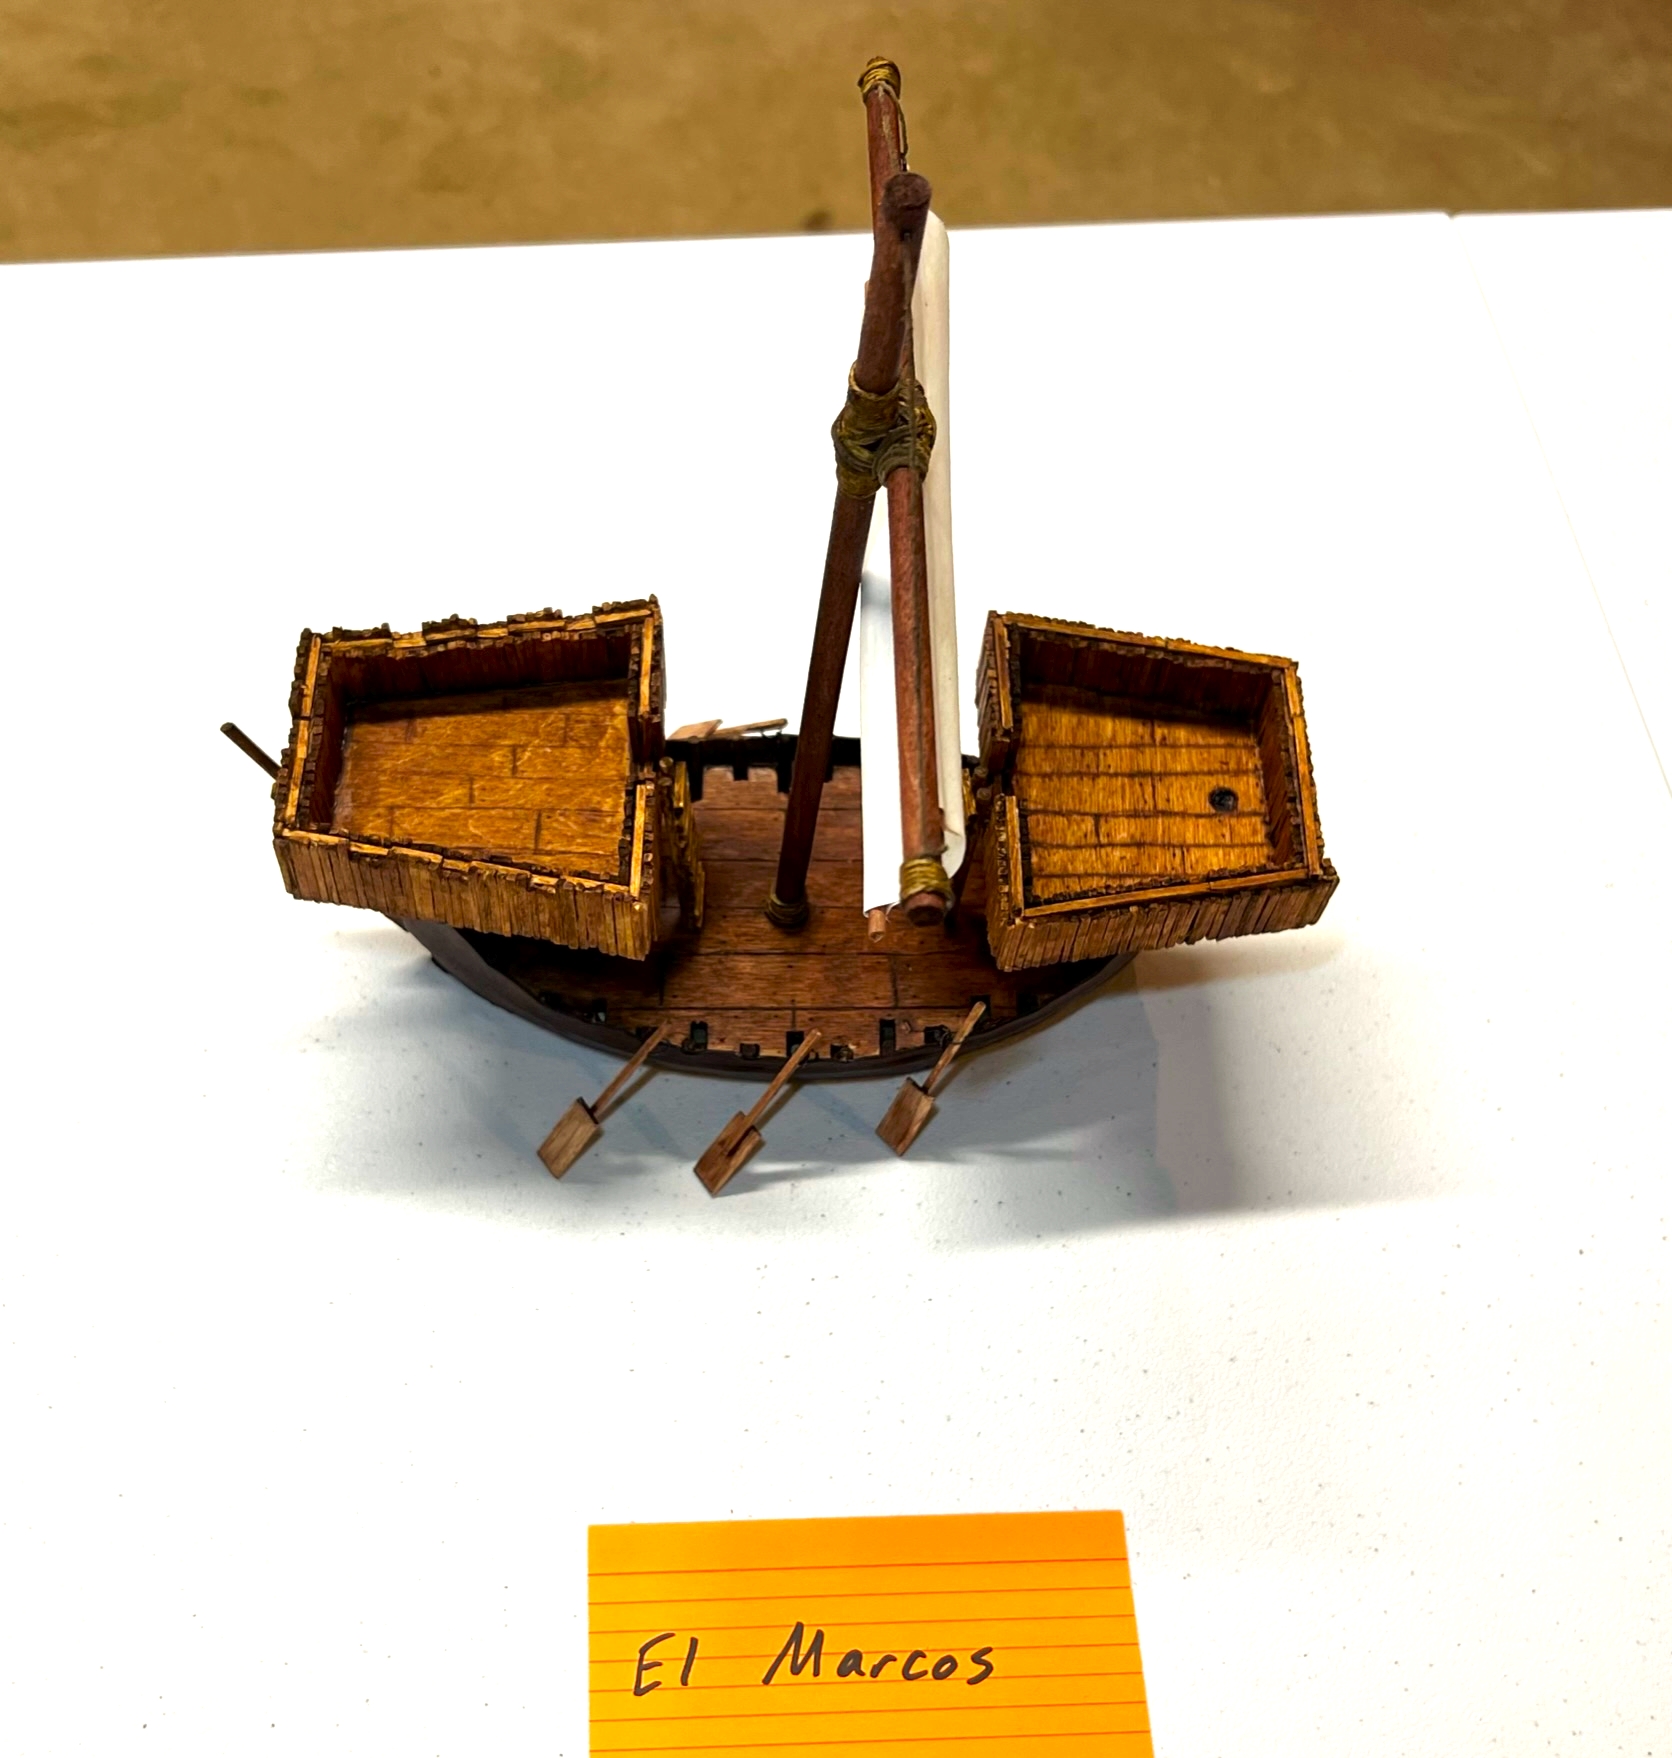
El Marcos
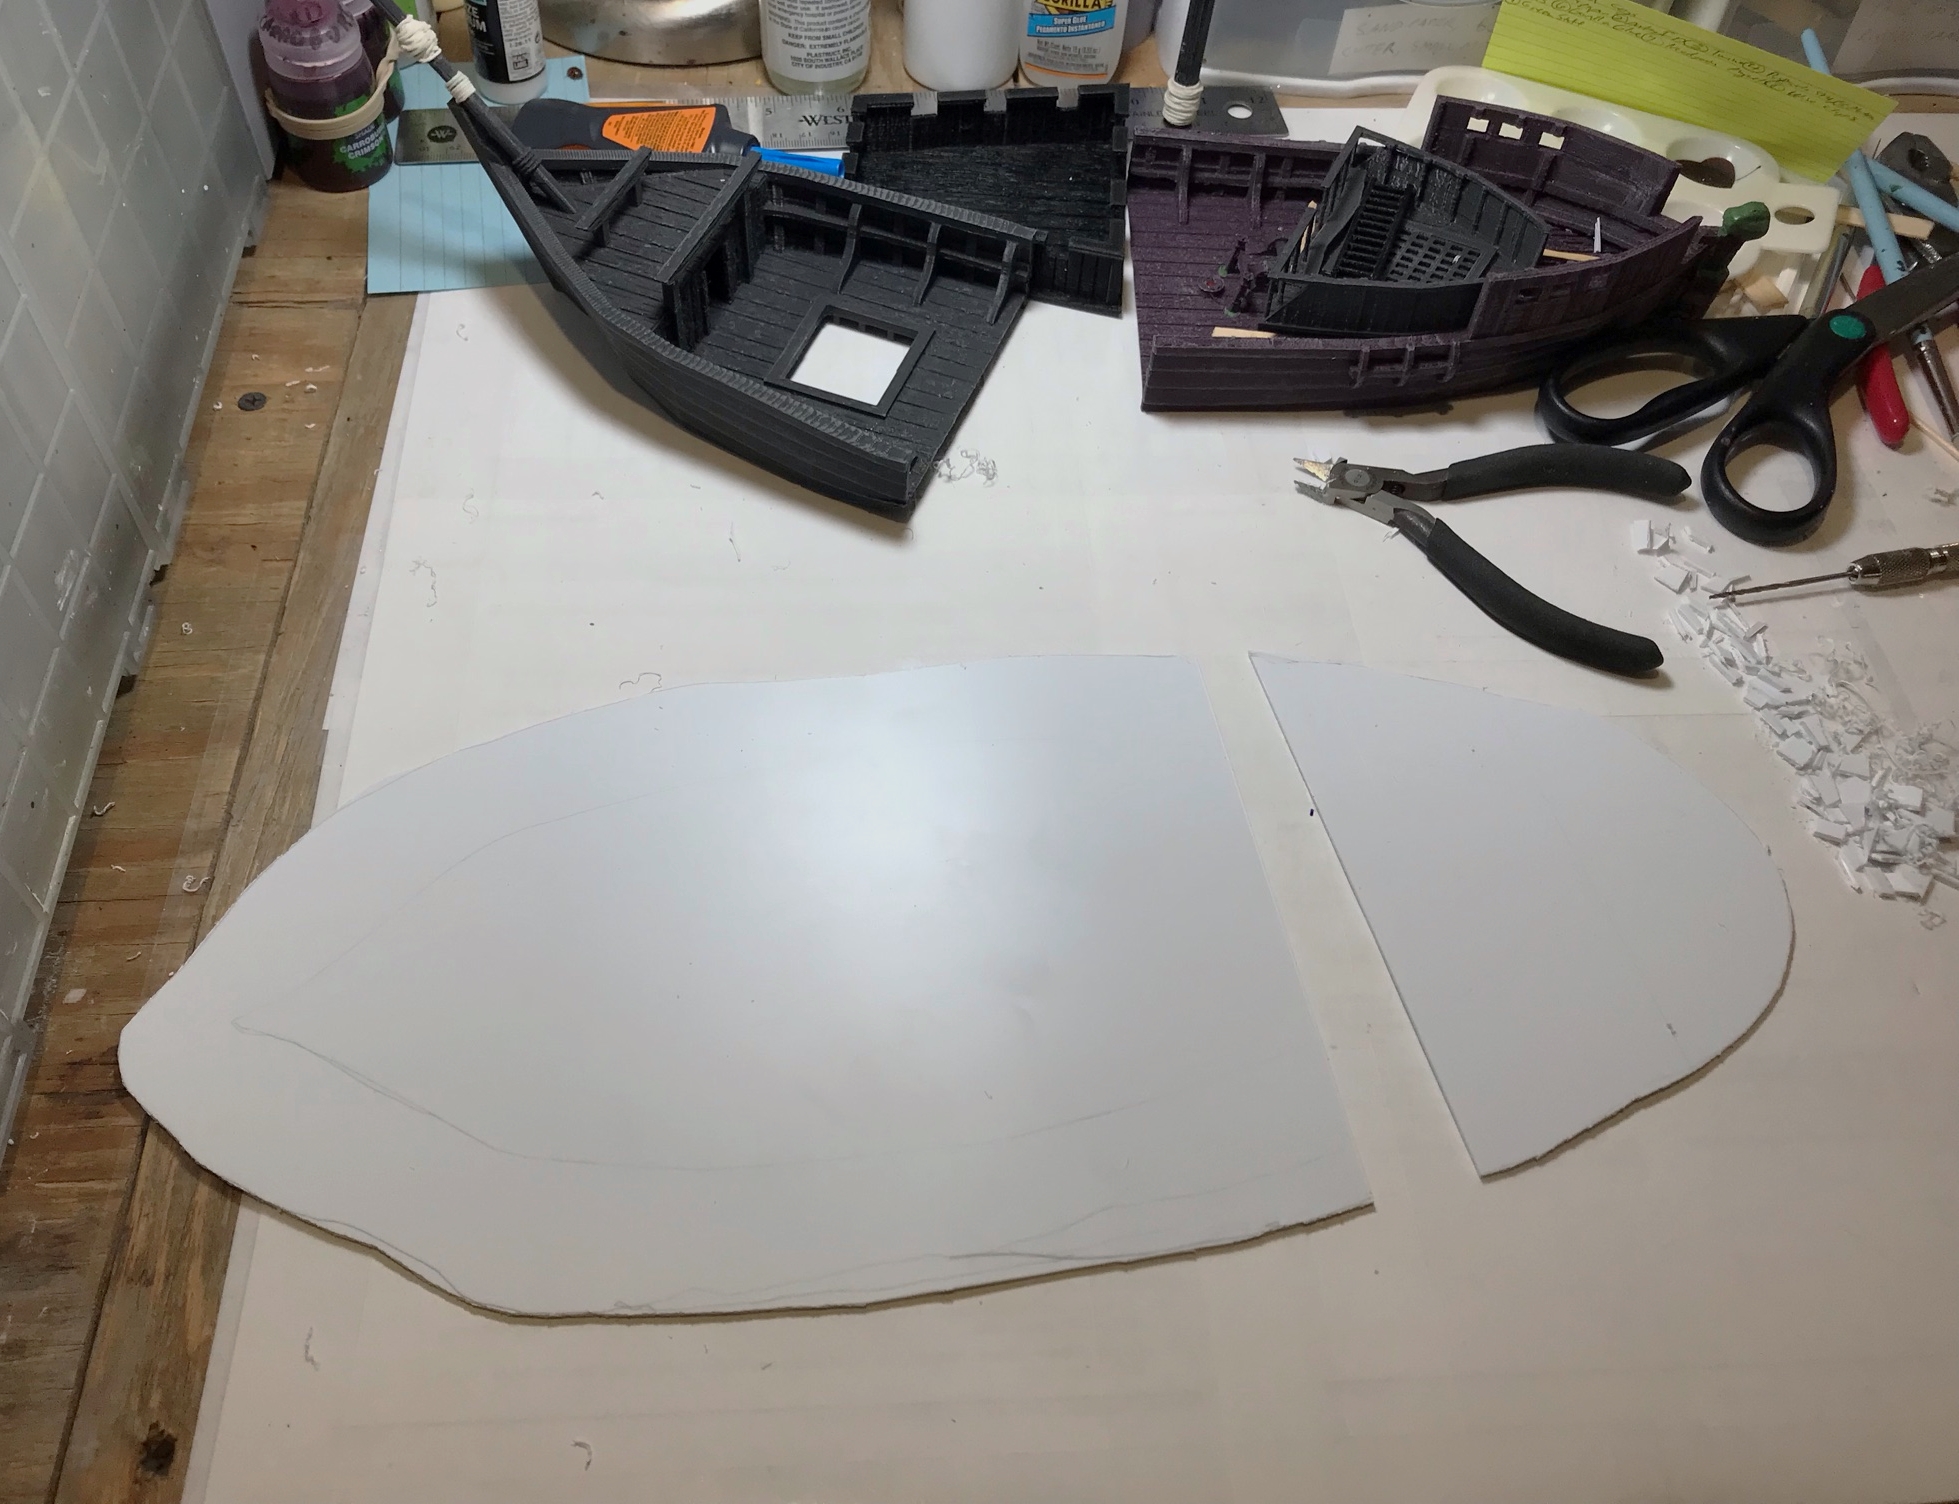
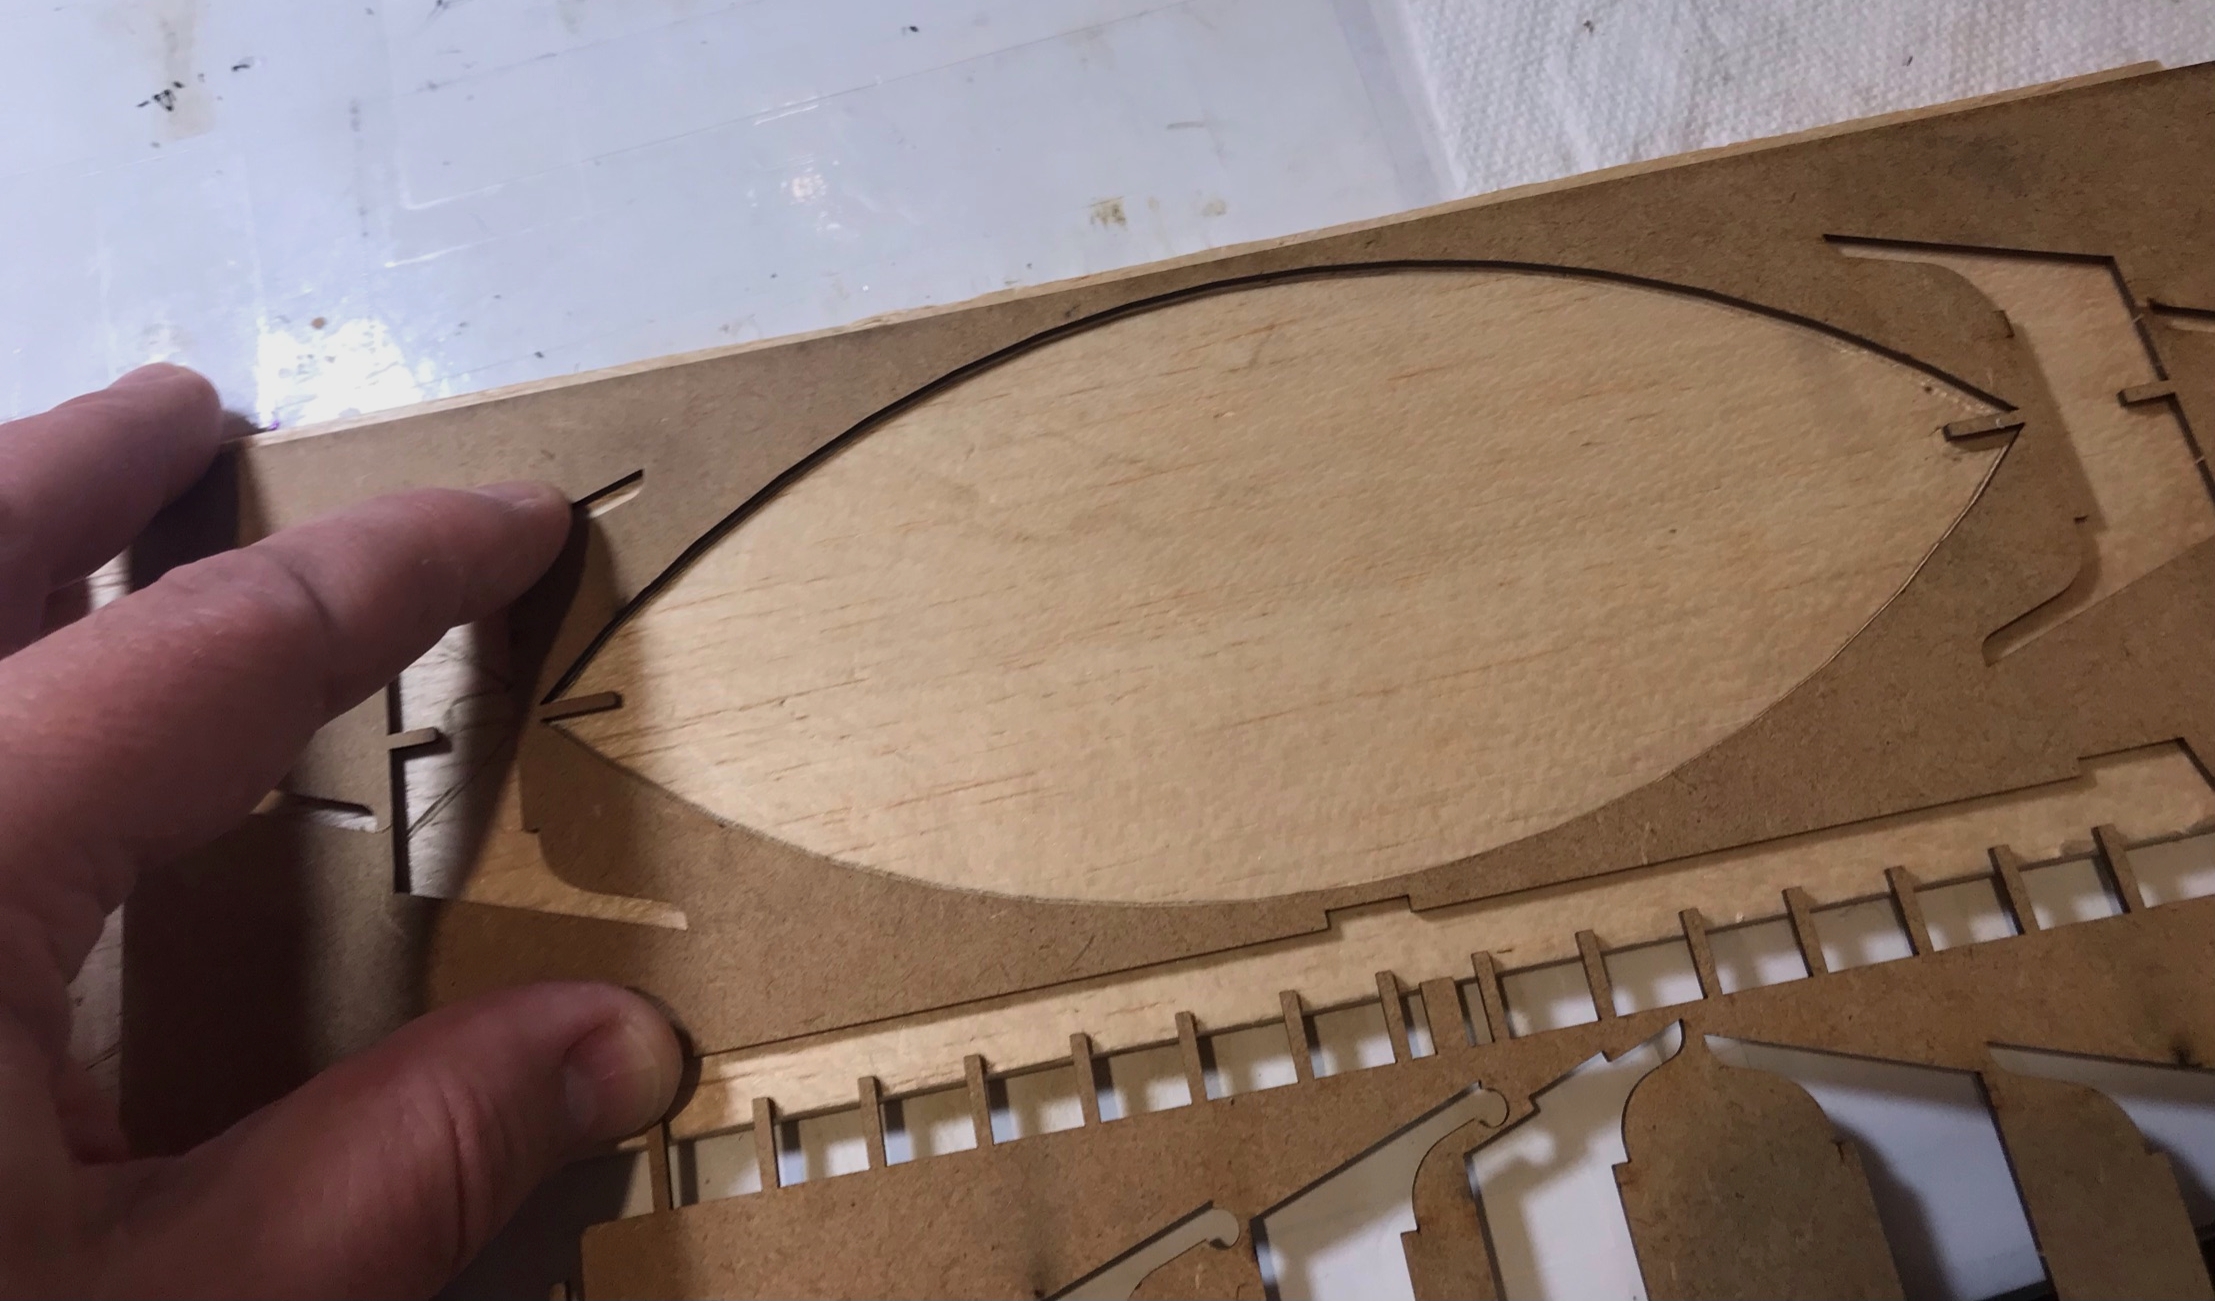
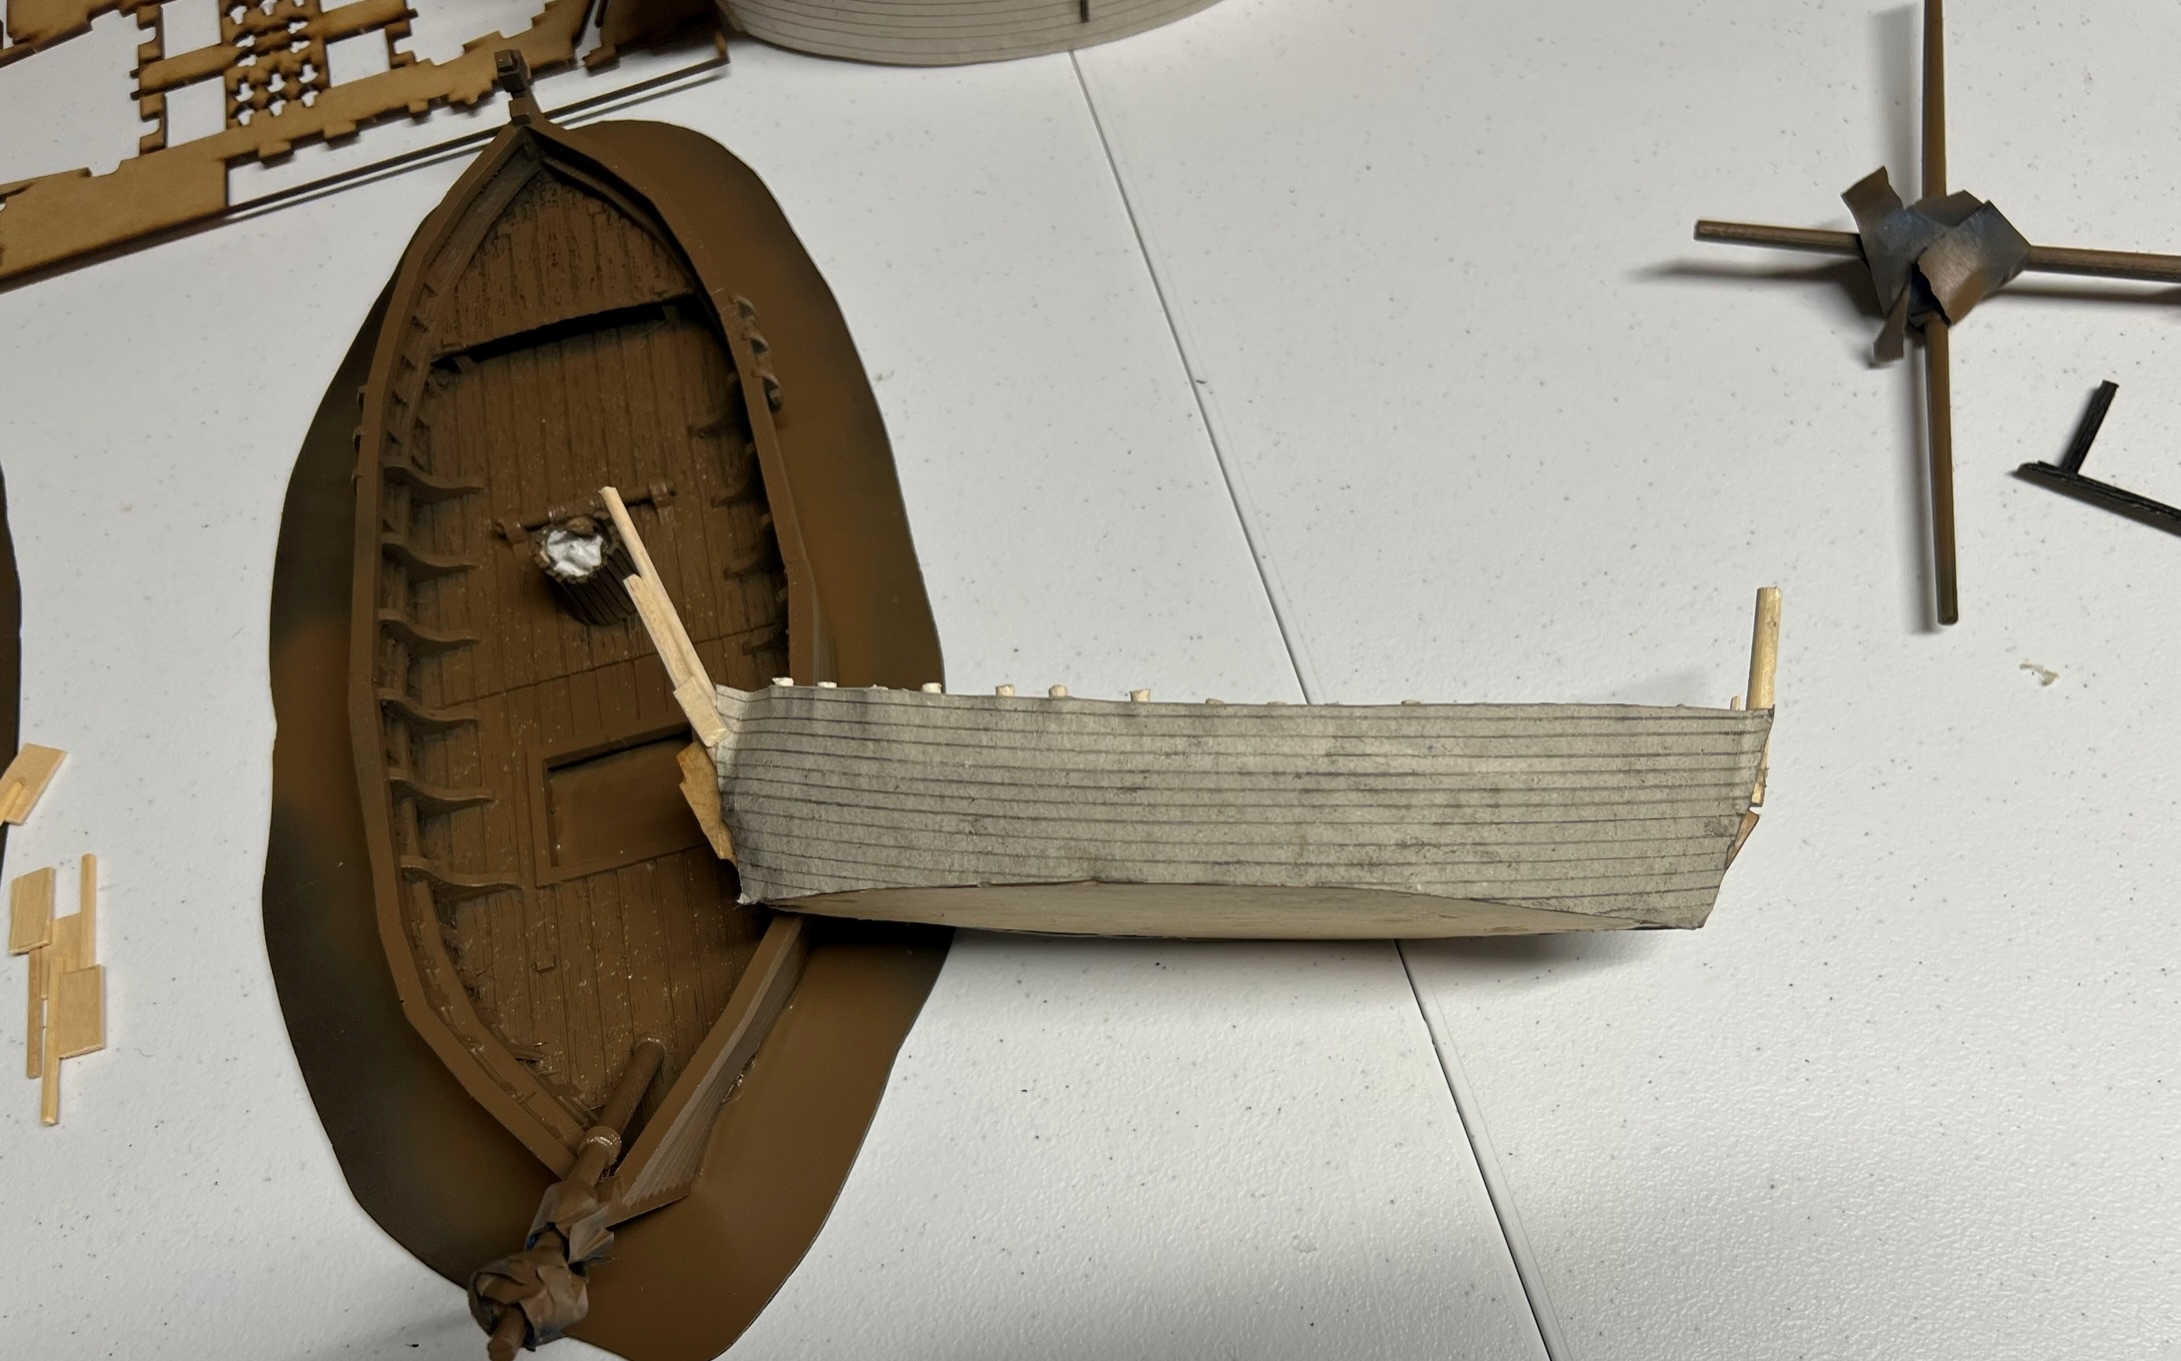
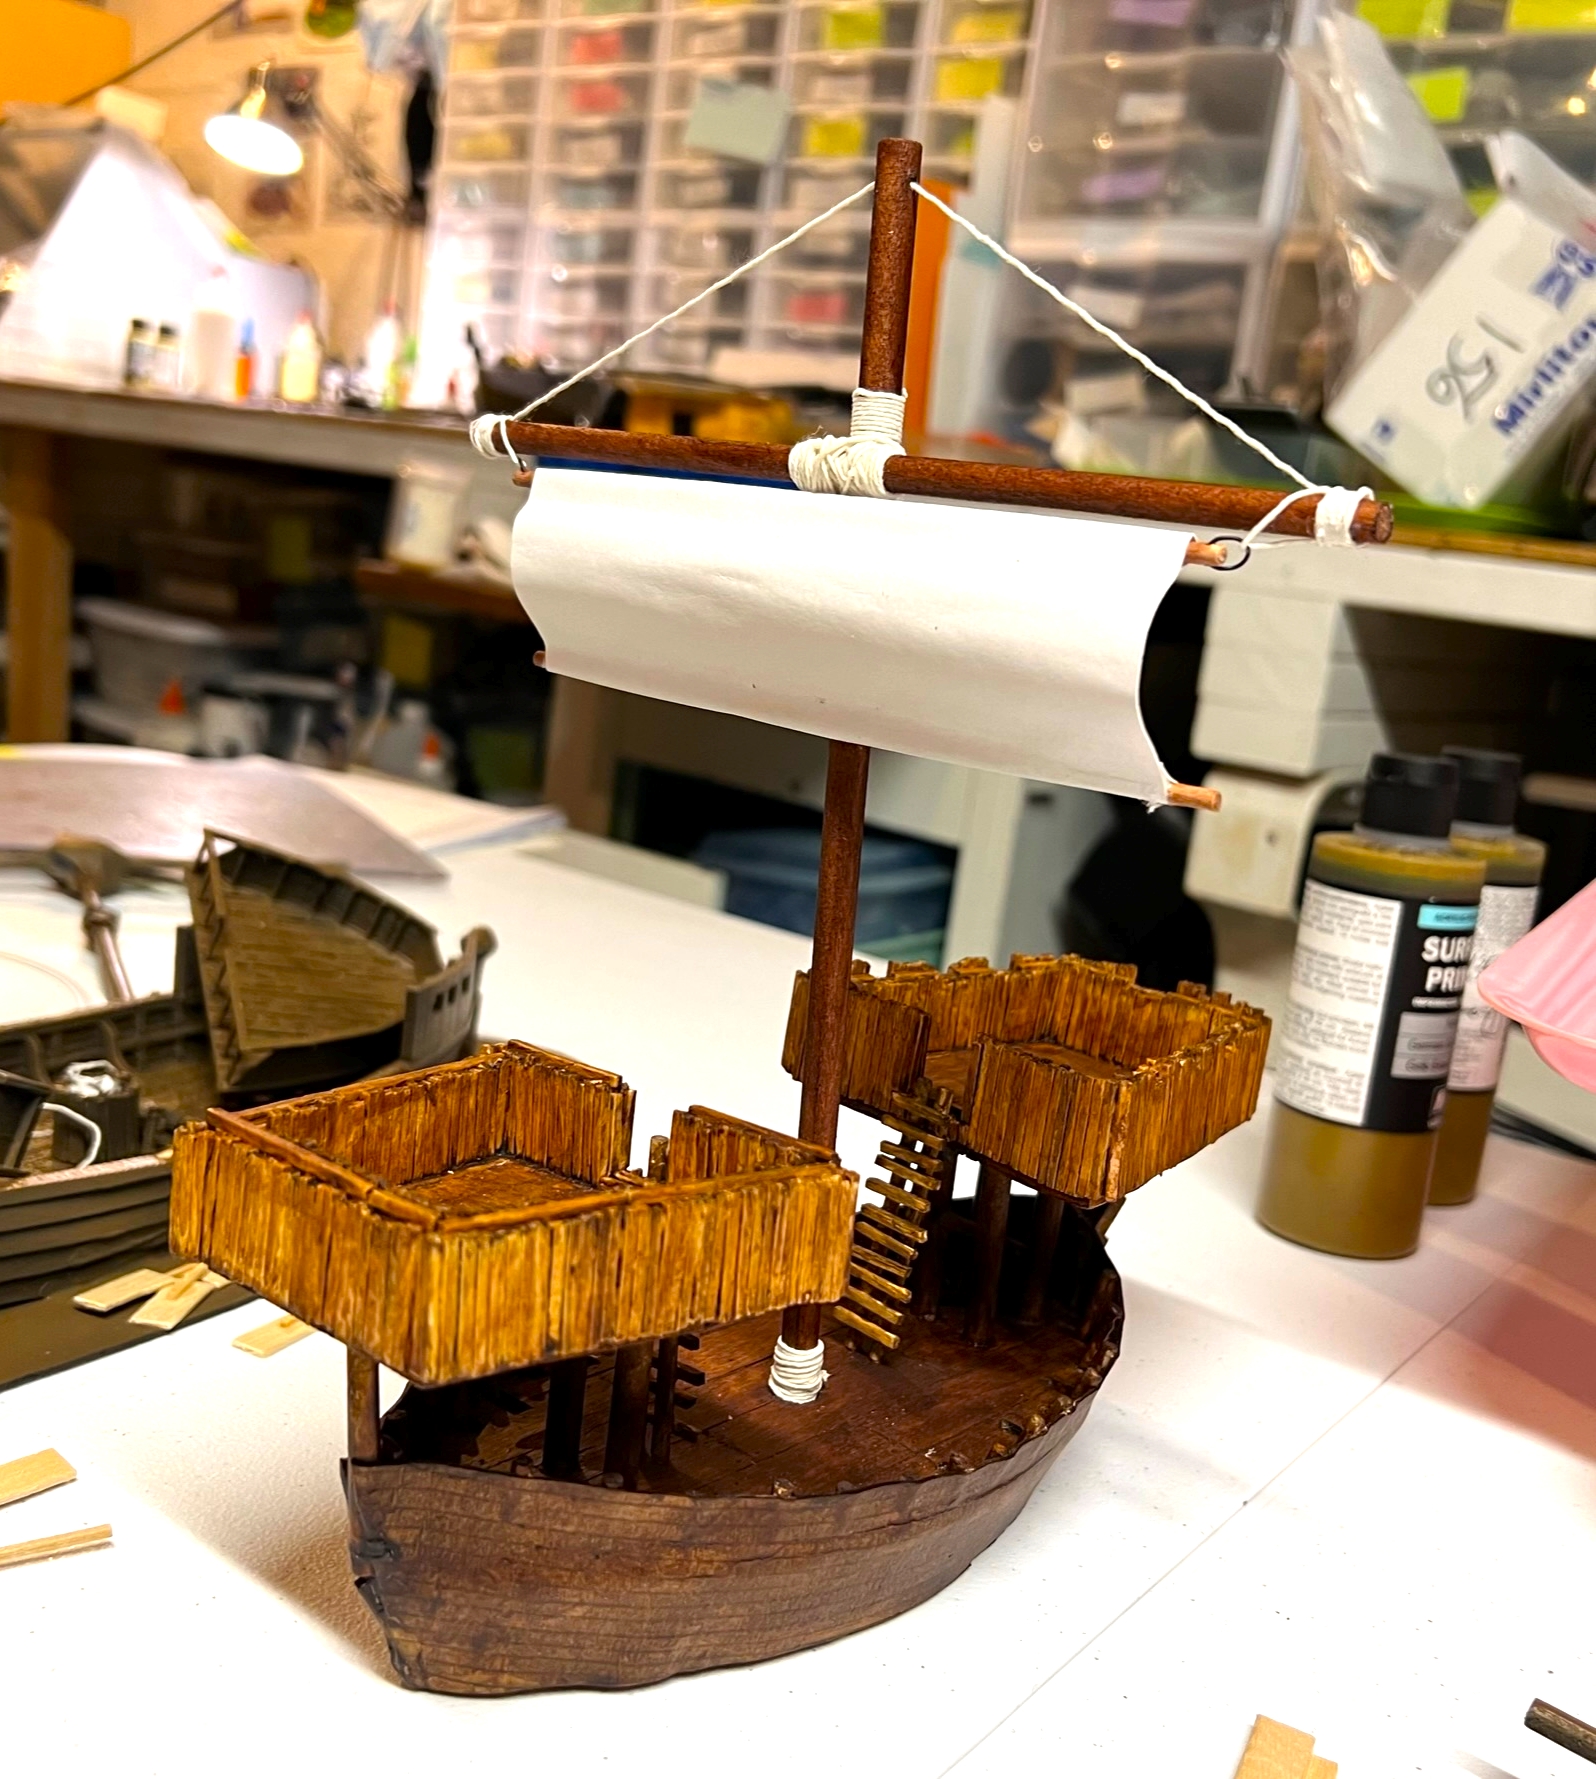
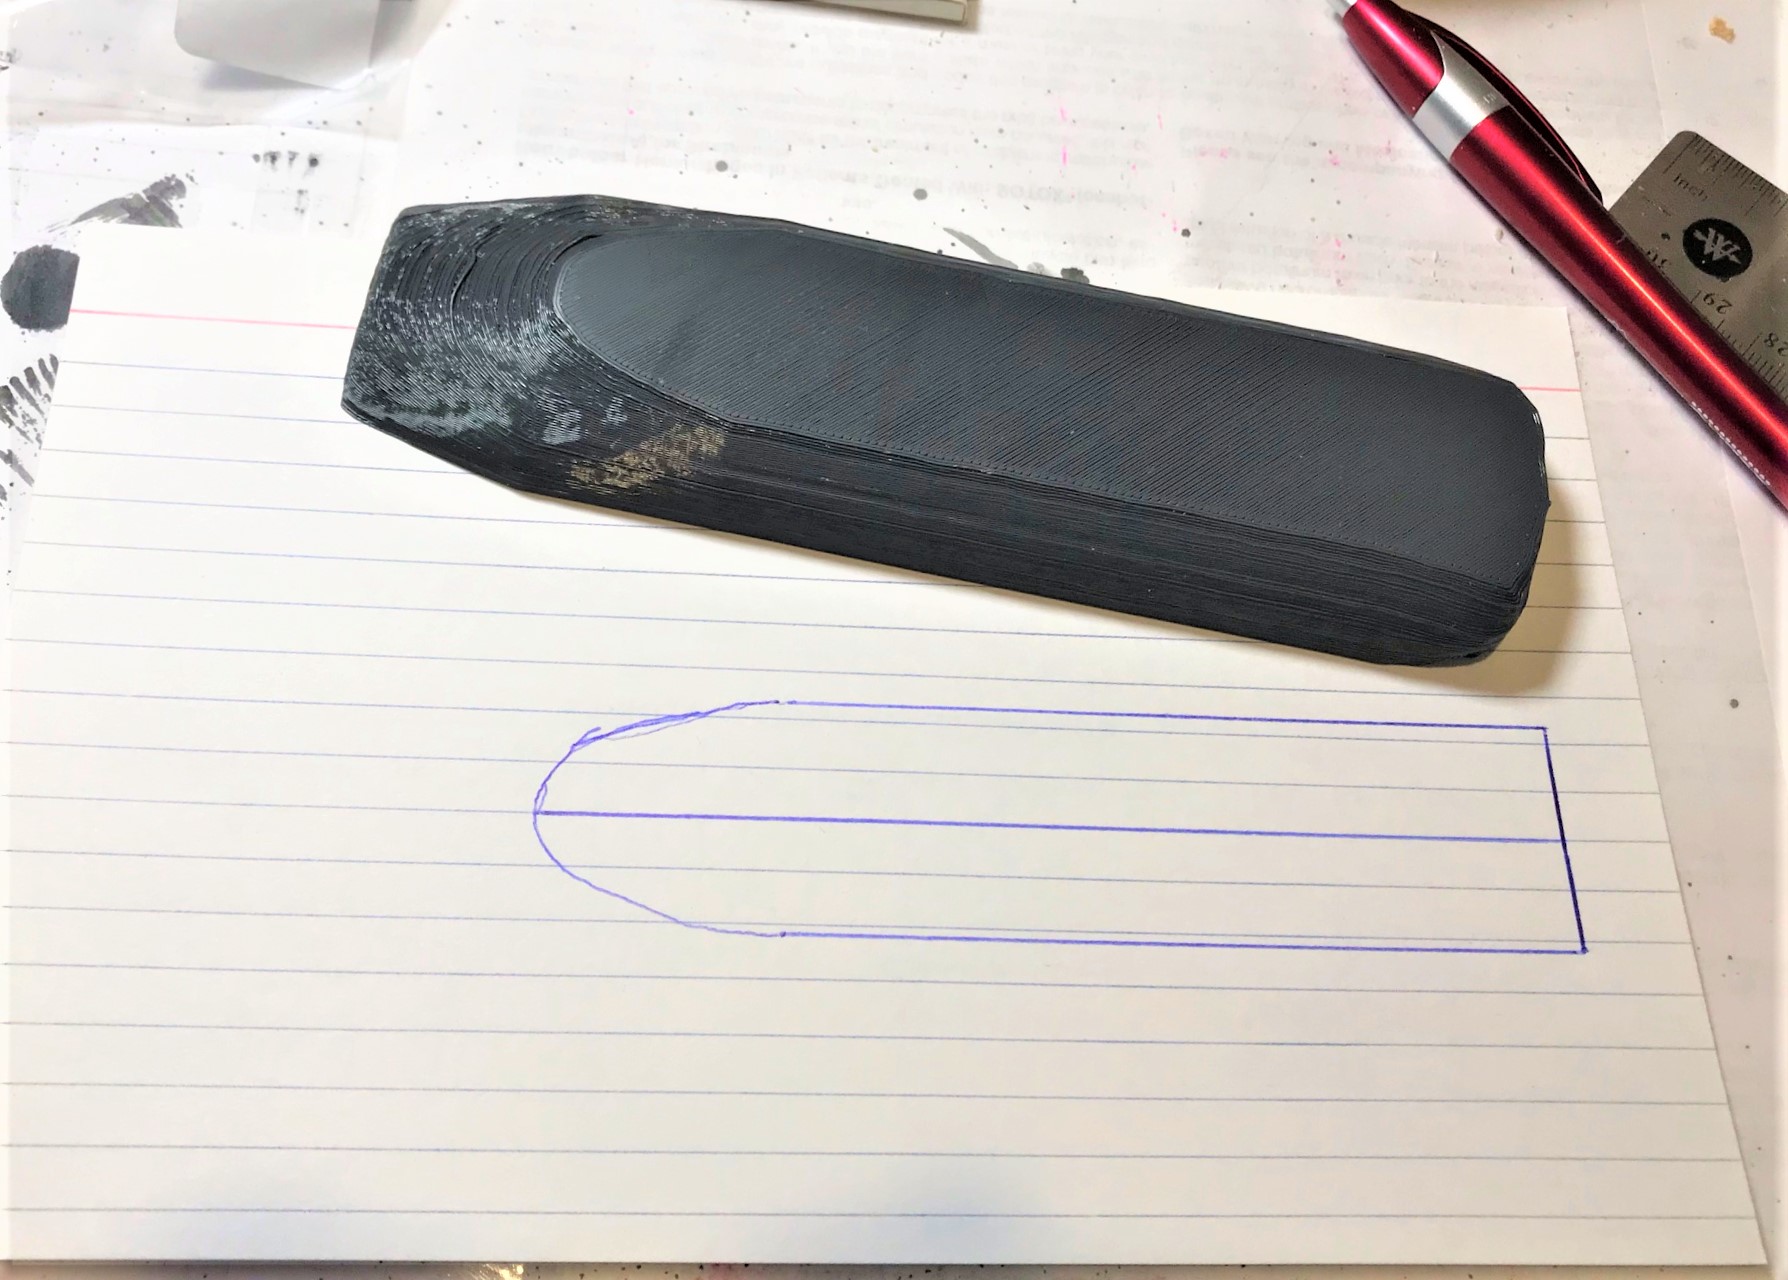
I decided to give scratch-building a brigantine a go – if only because I wanted the challenge. Luckily, I had learned a bit from the previous models, though as you will see below there was overlap during my builds. Also, I was able to repurpose some leftover MDF as a template for a new hull and keel!


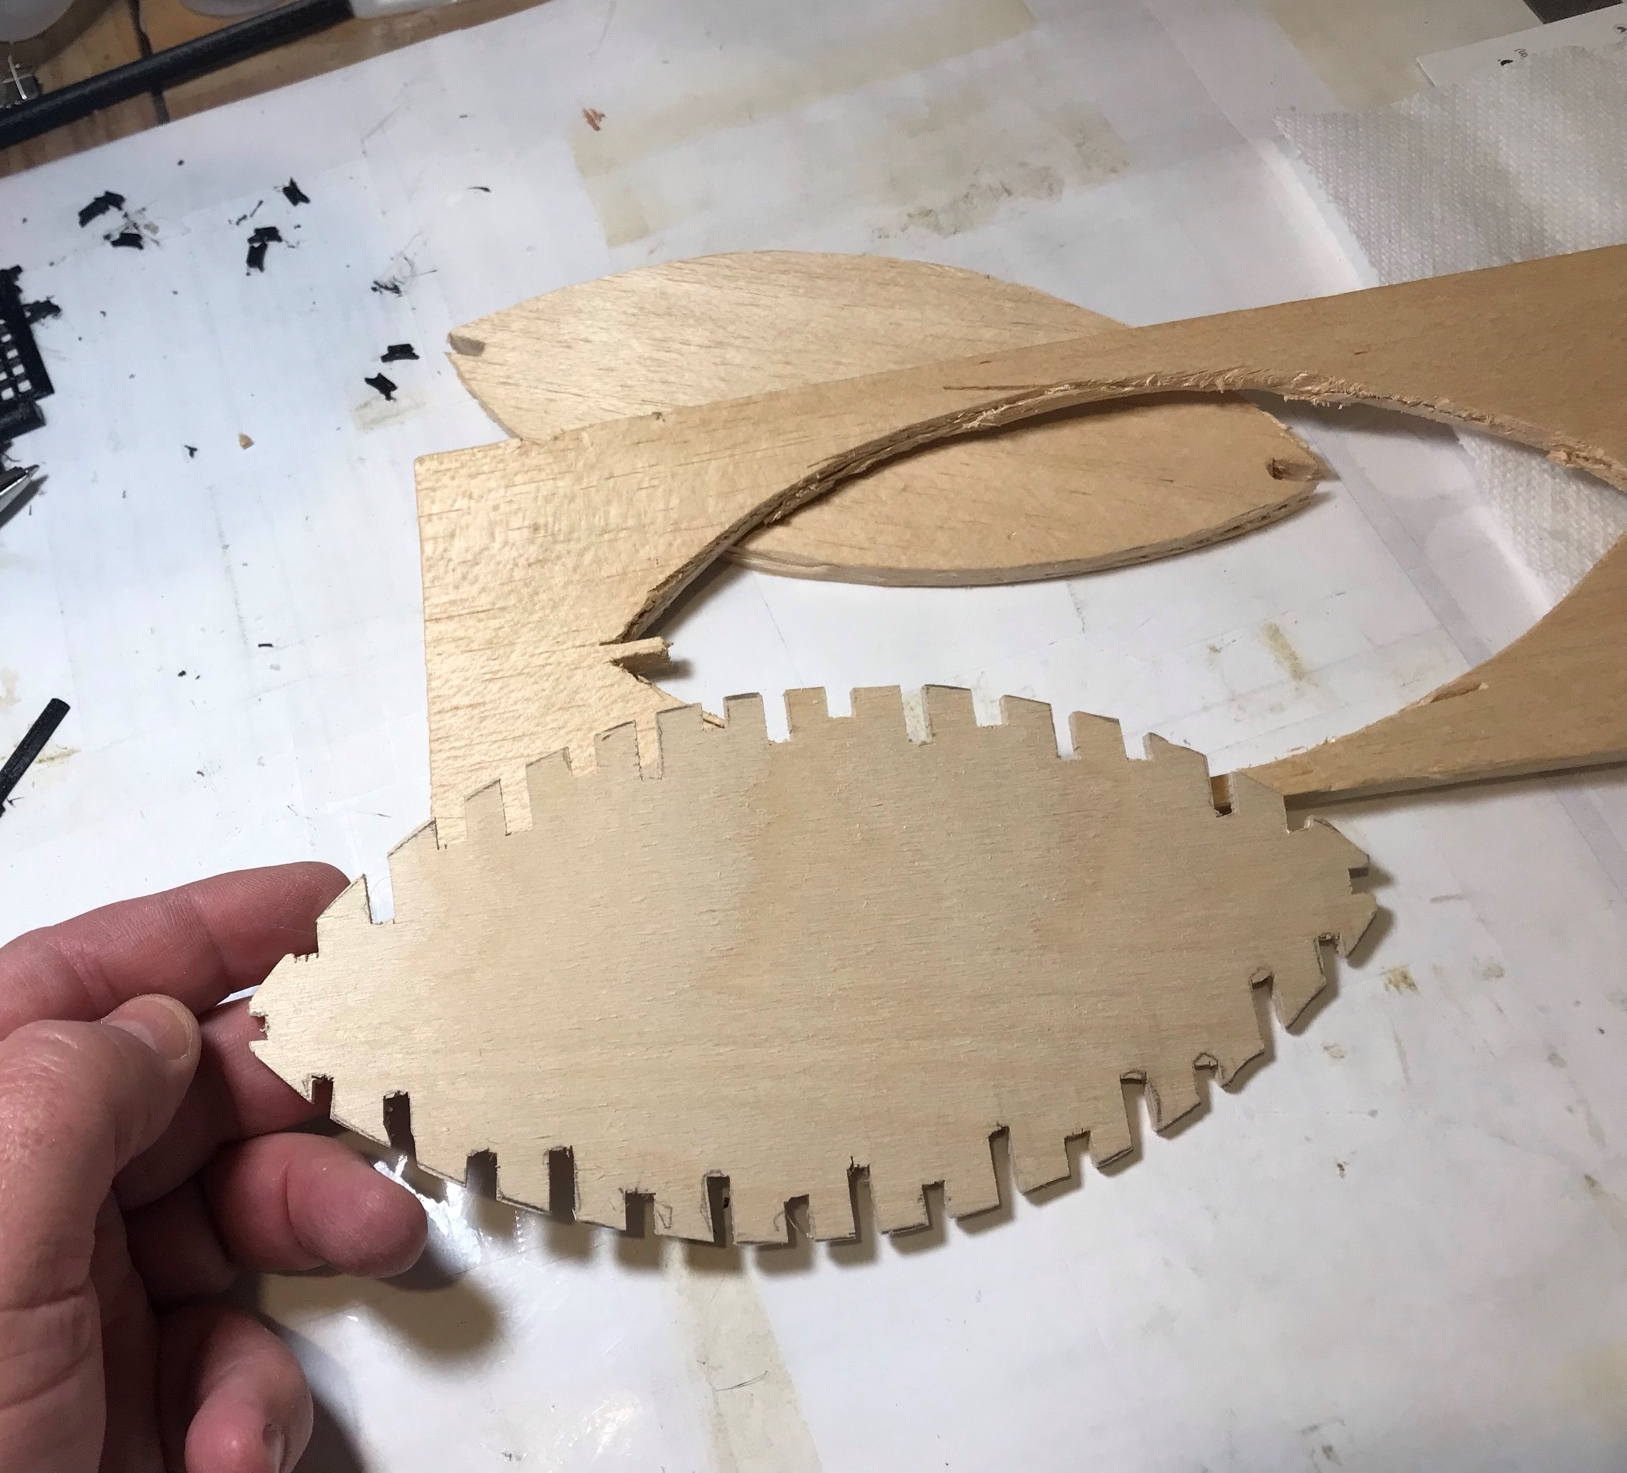

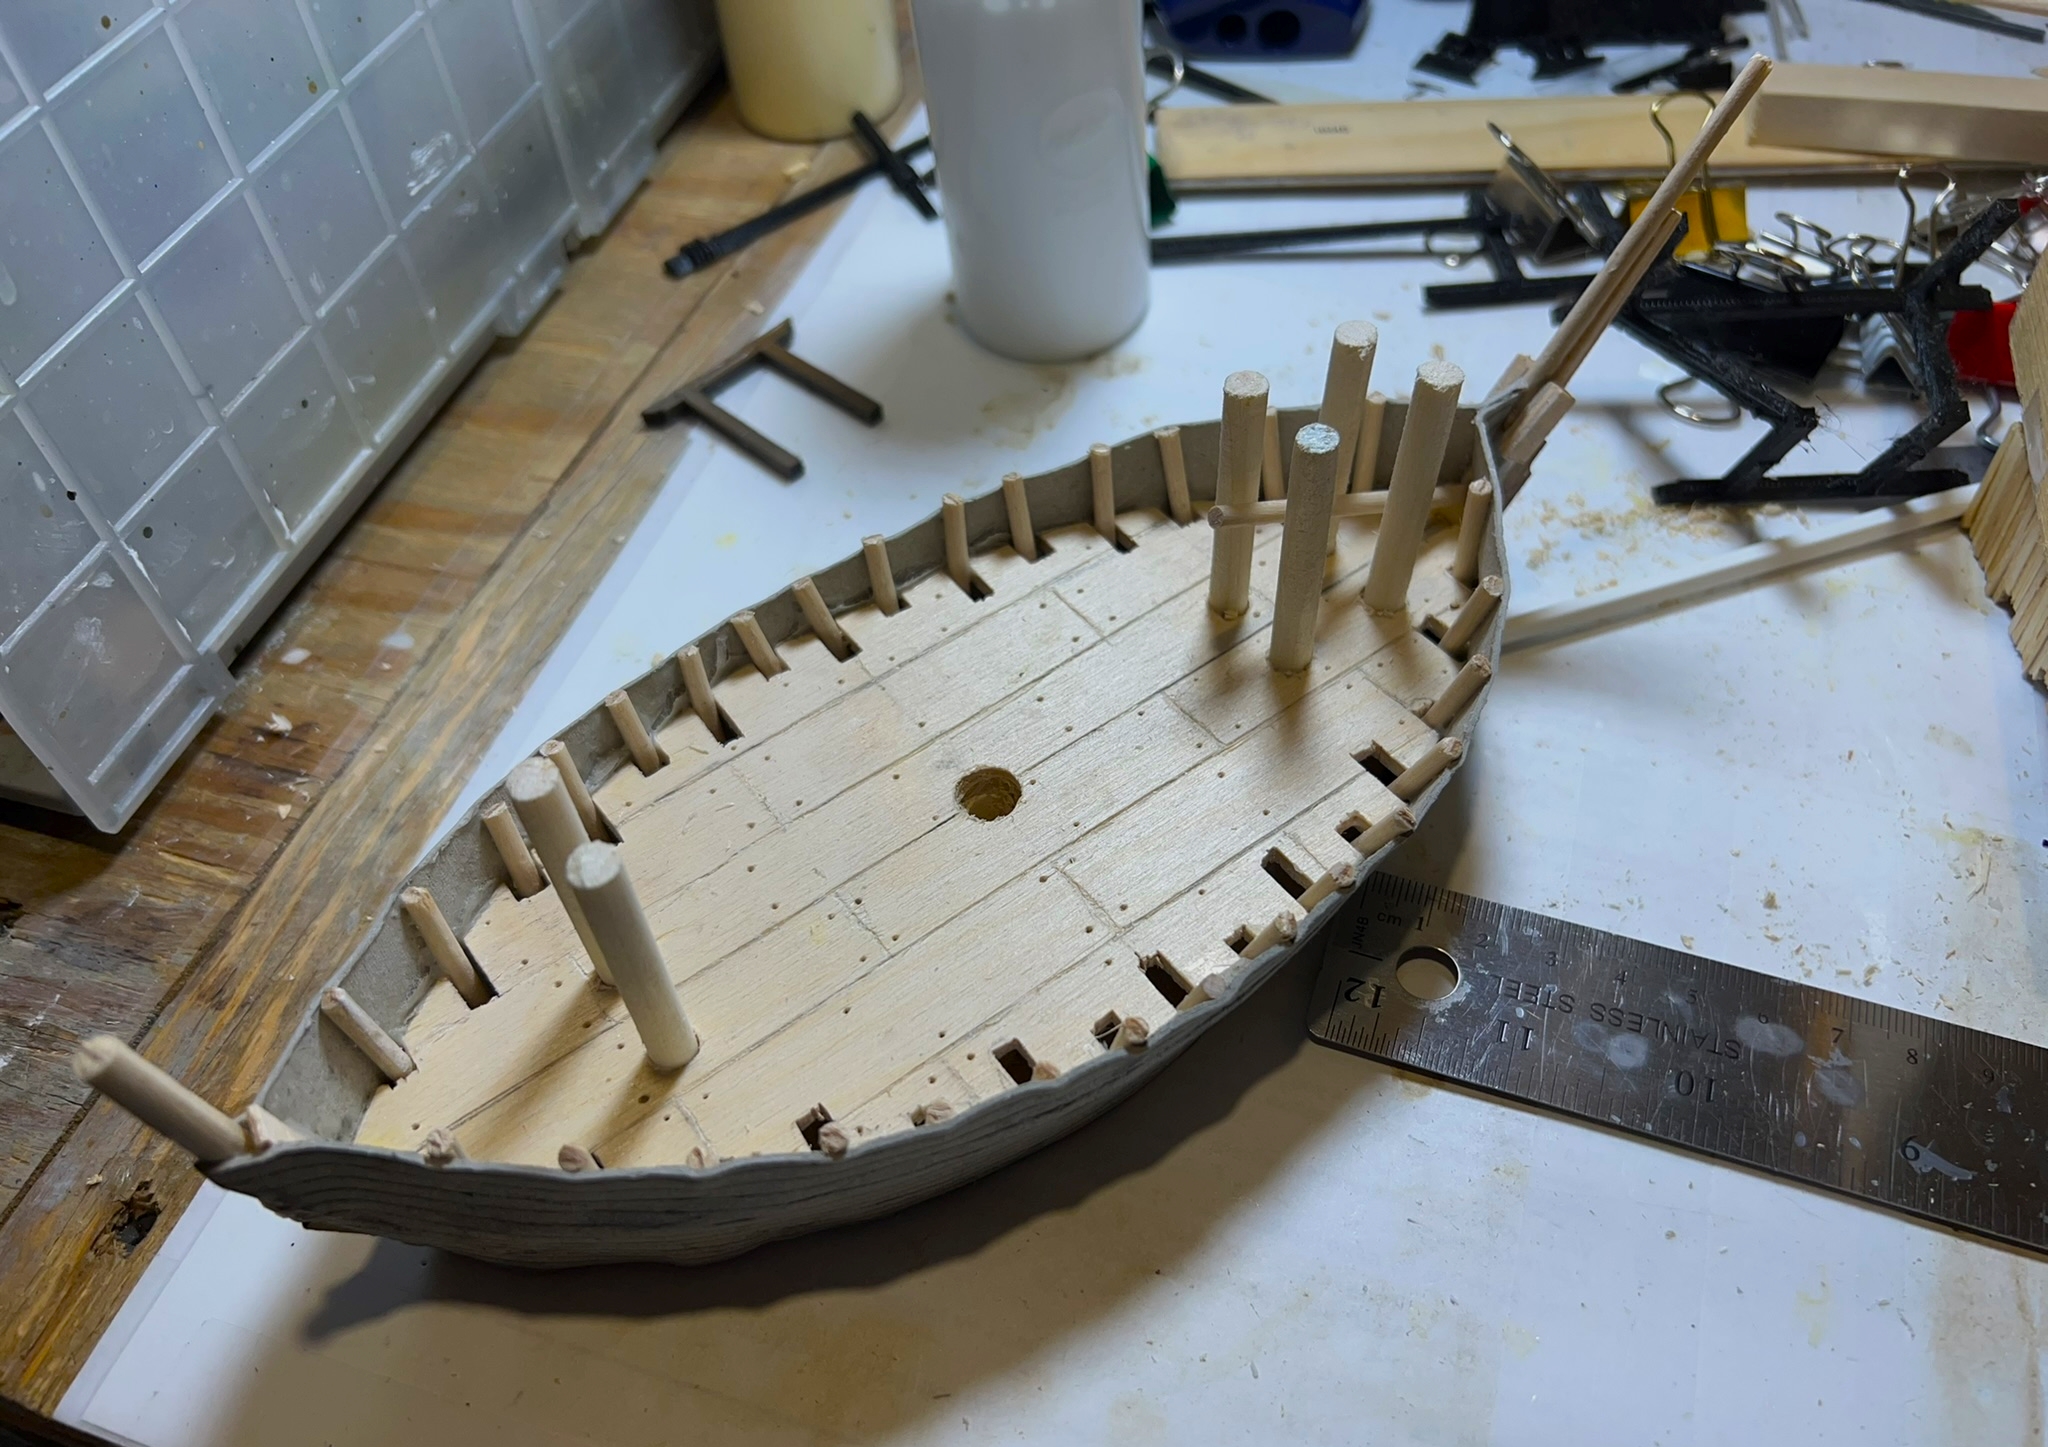
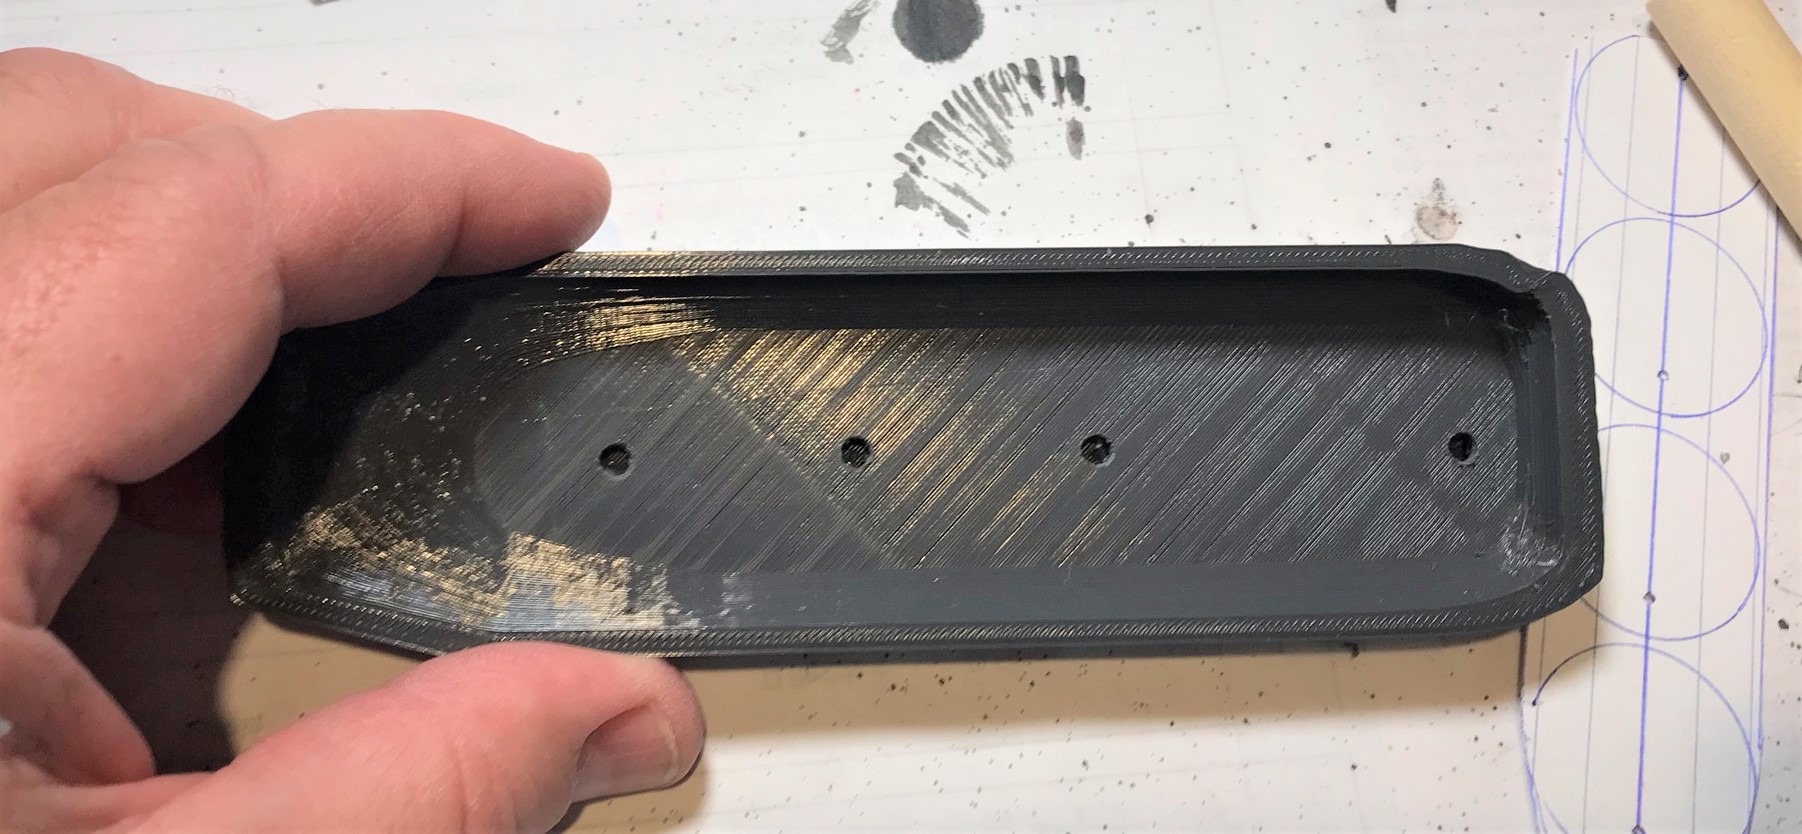
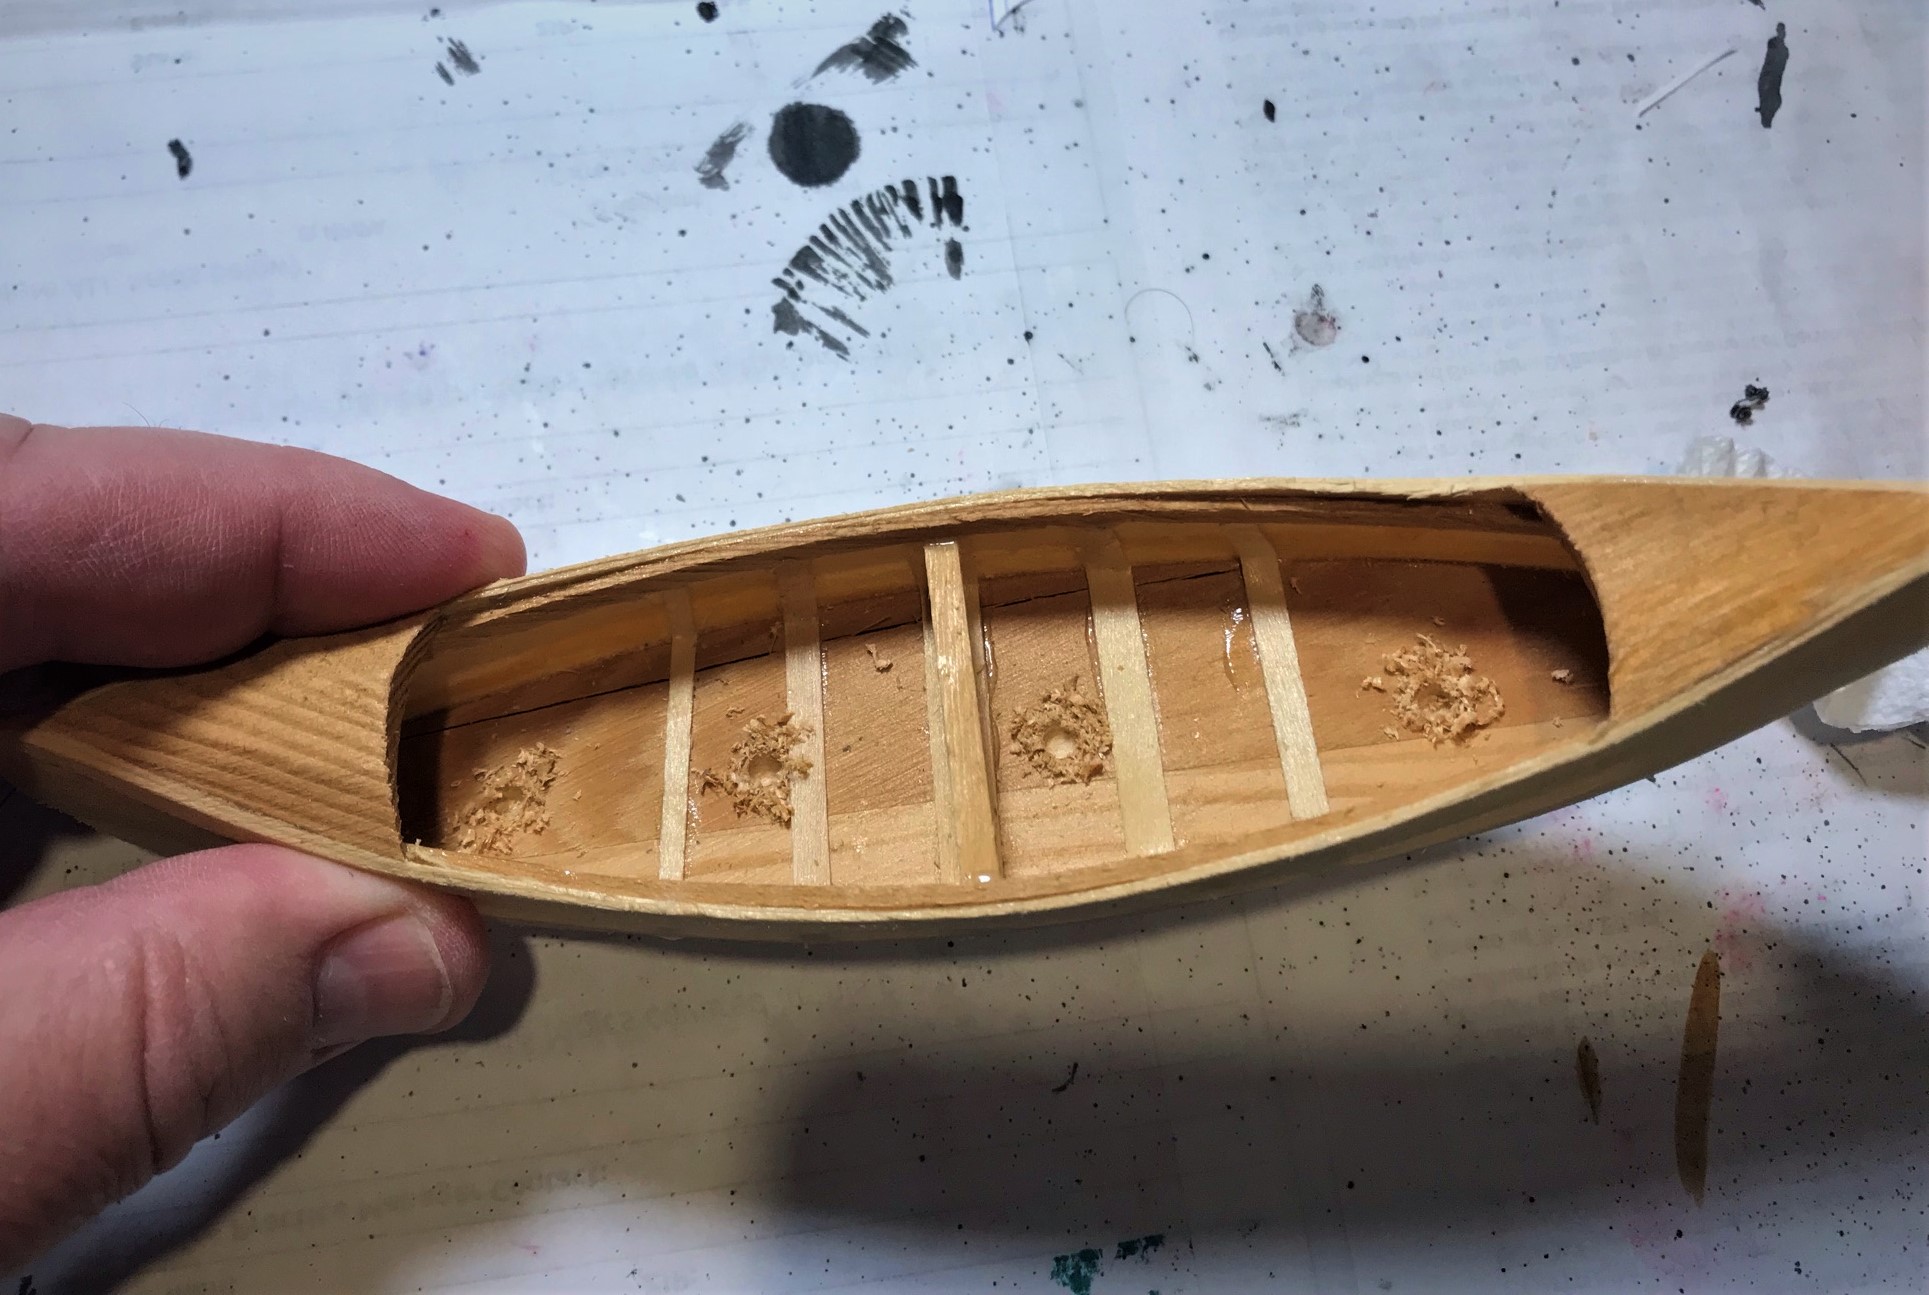
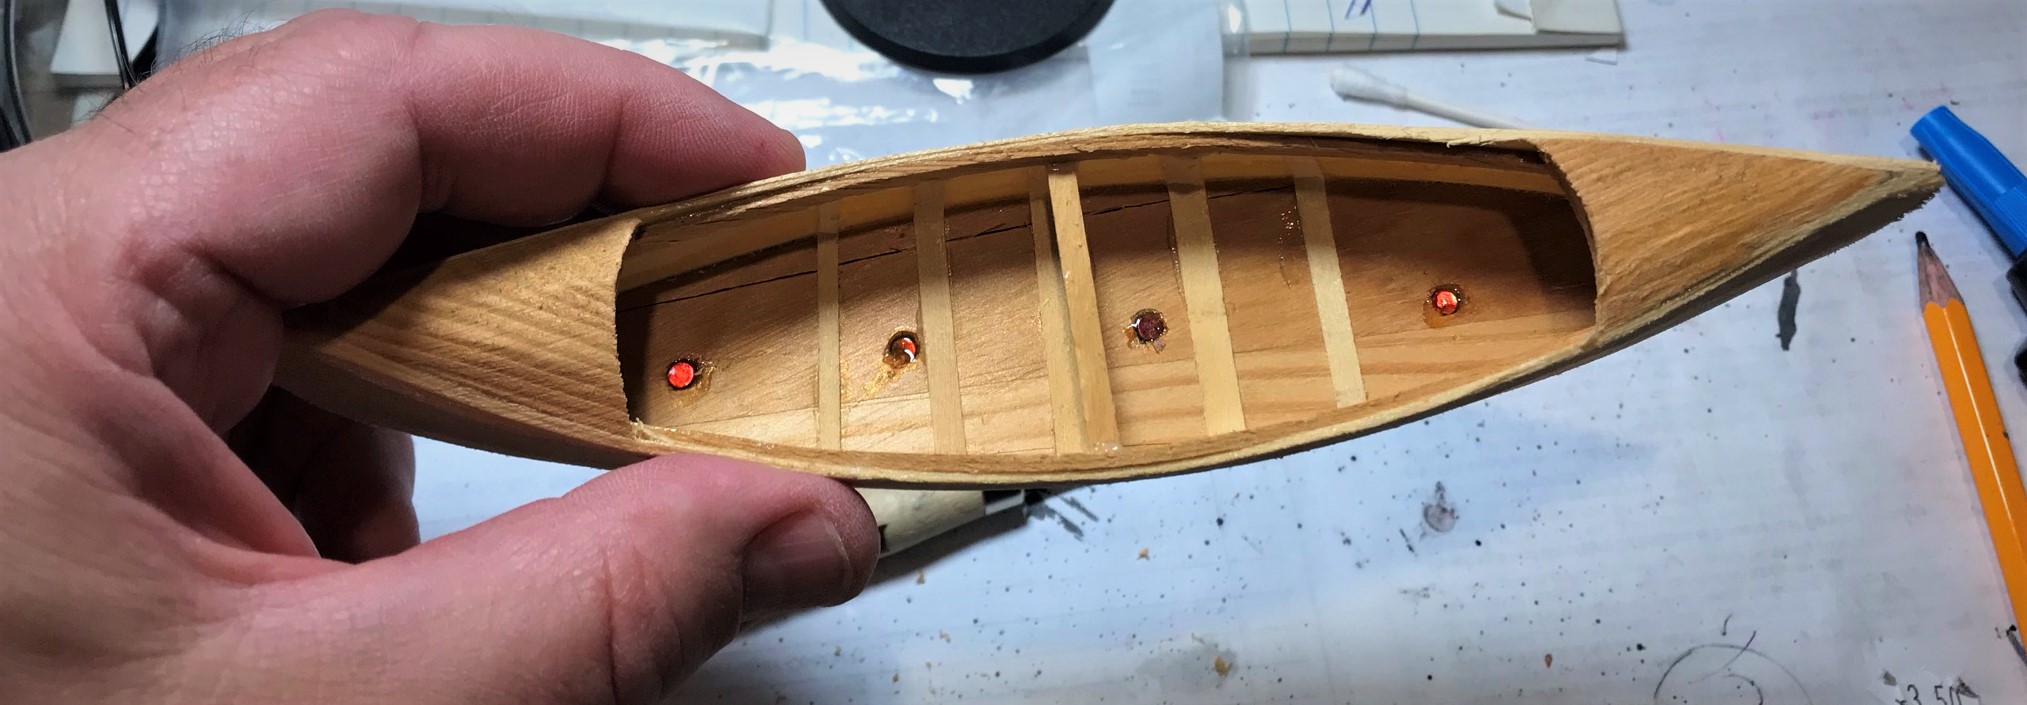
Unlike the Sarissa models, where the hull glued to the ribs of the cogs, I glued the deck to the square dowels and then added the hull by gluing it to the combination of deck and keel. Then I inserted 1/8″ dowels as ribs into the slots – gluing them to the inner hull and keel.

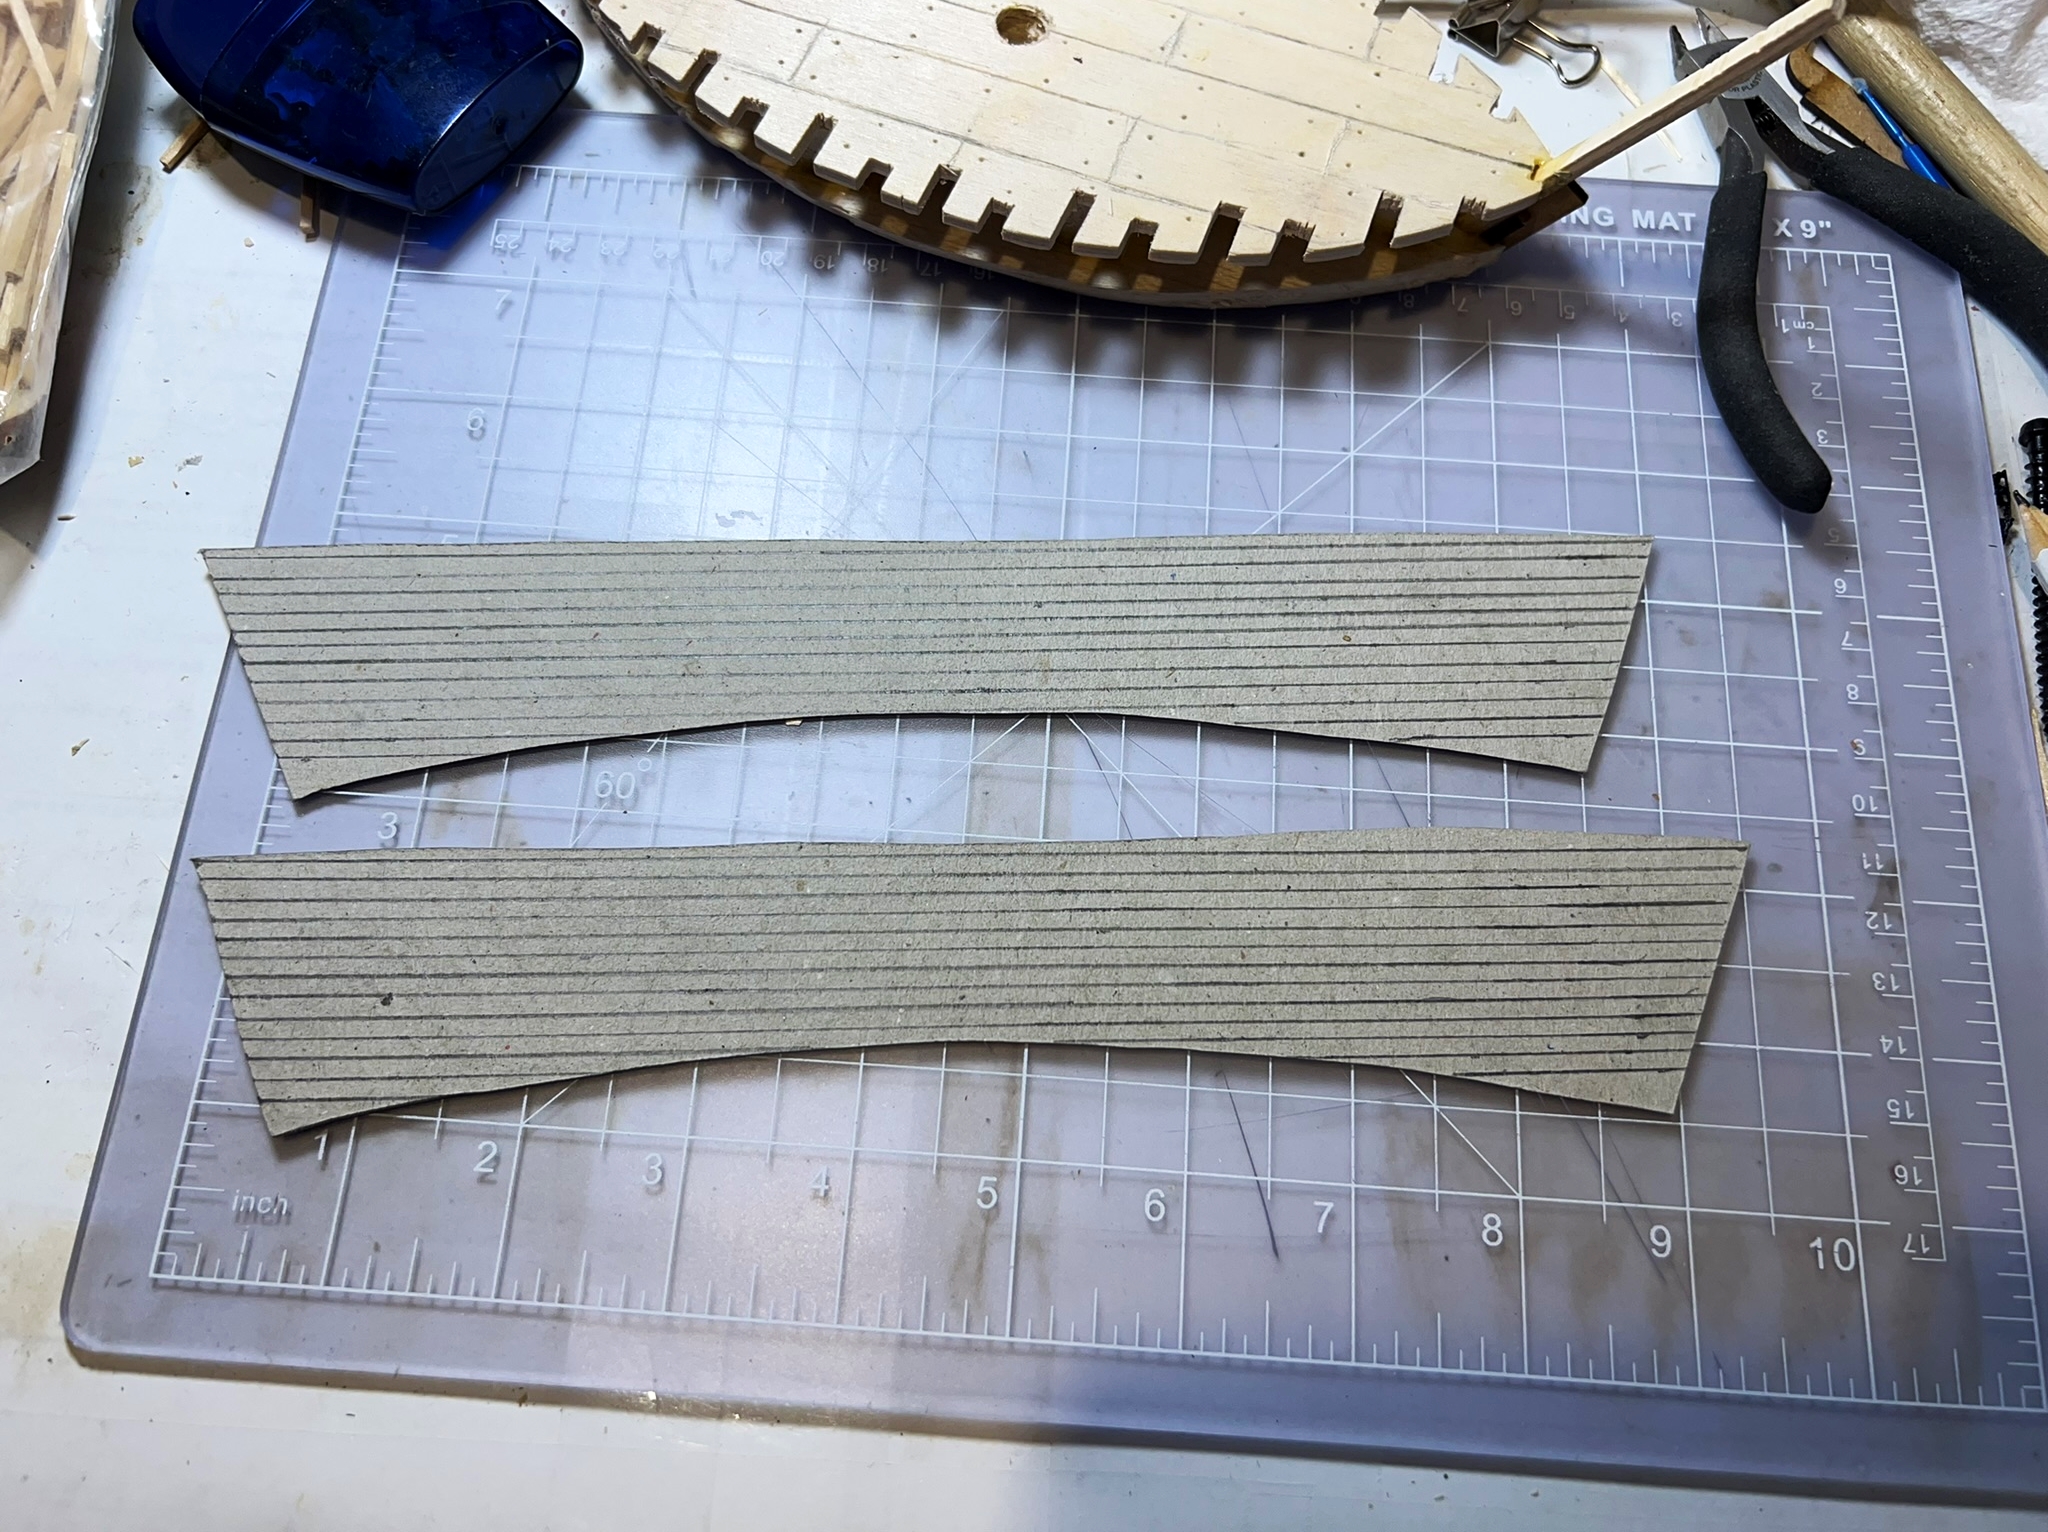

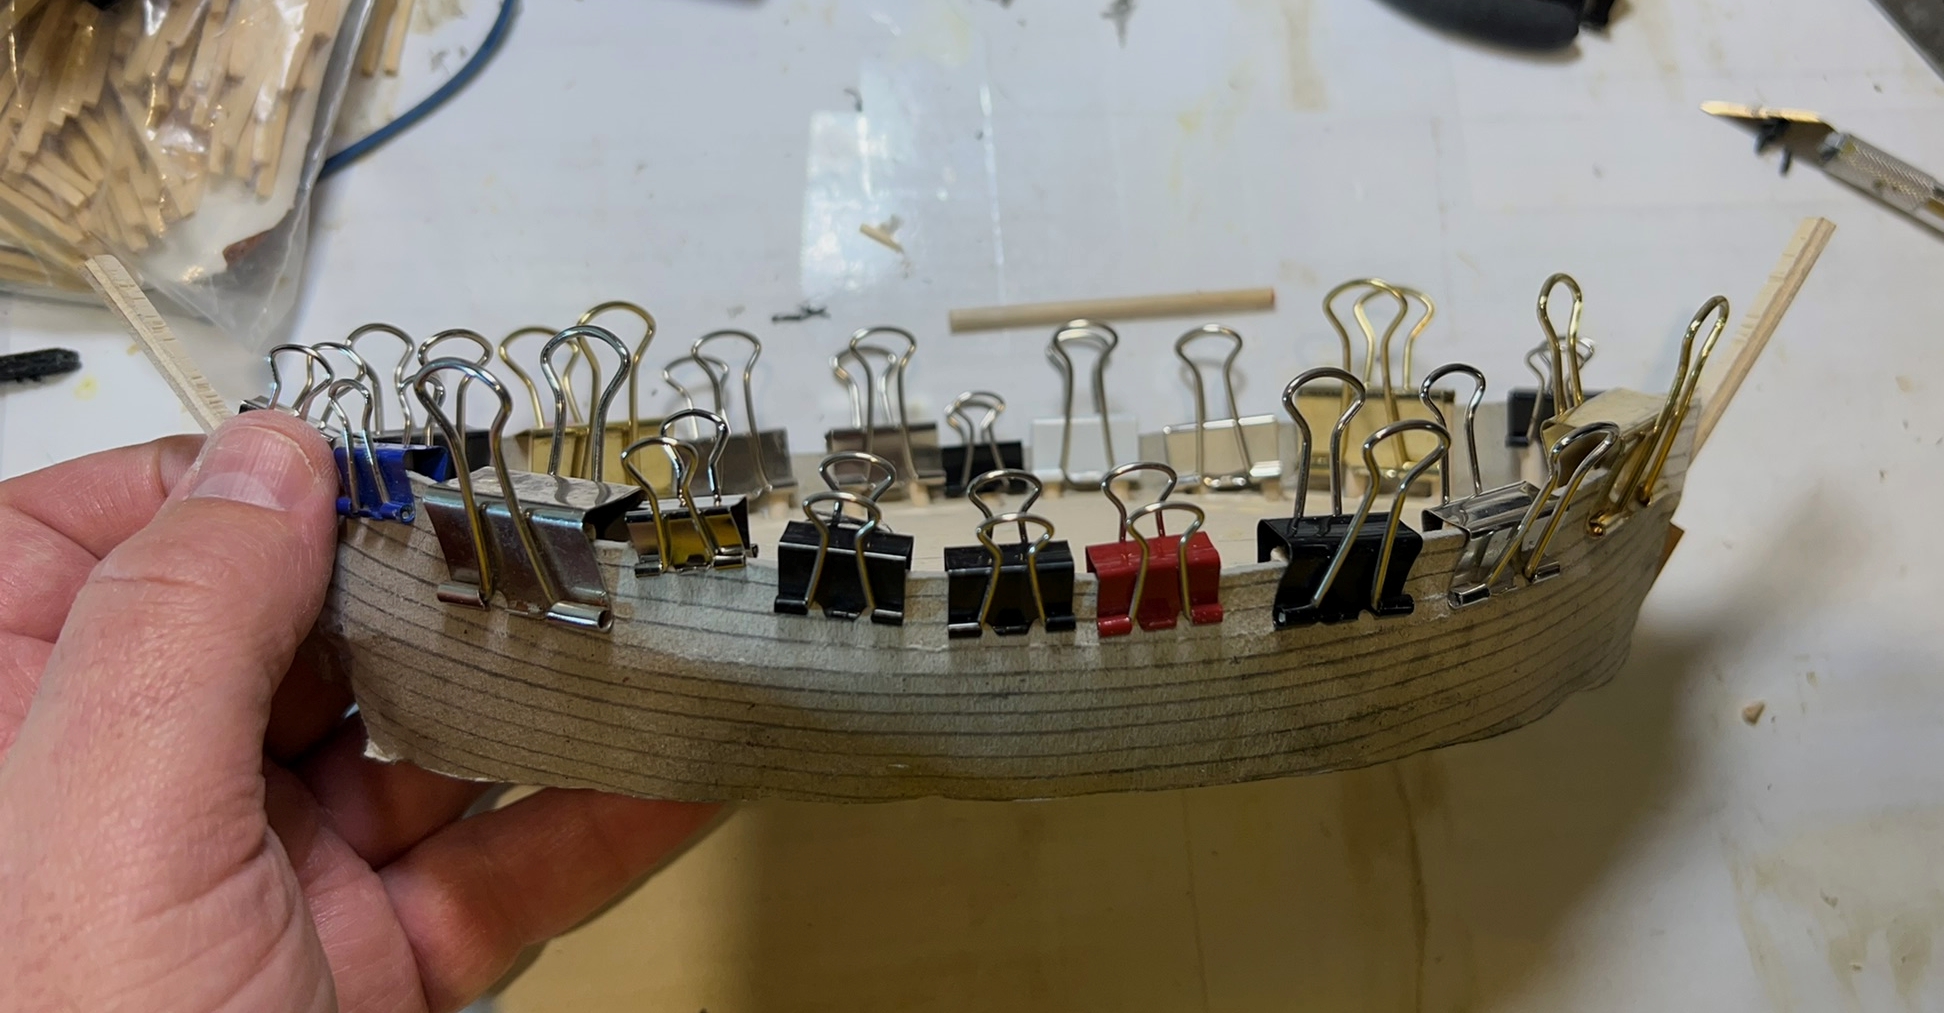
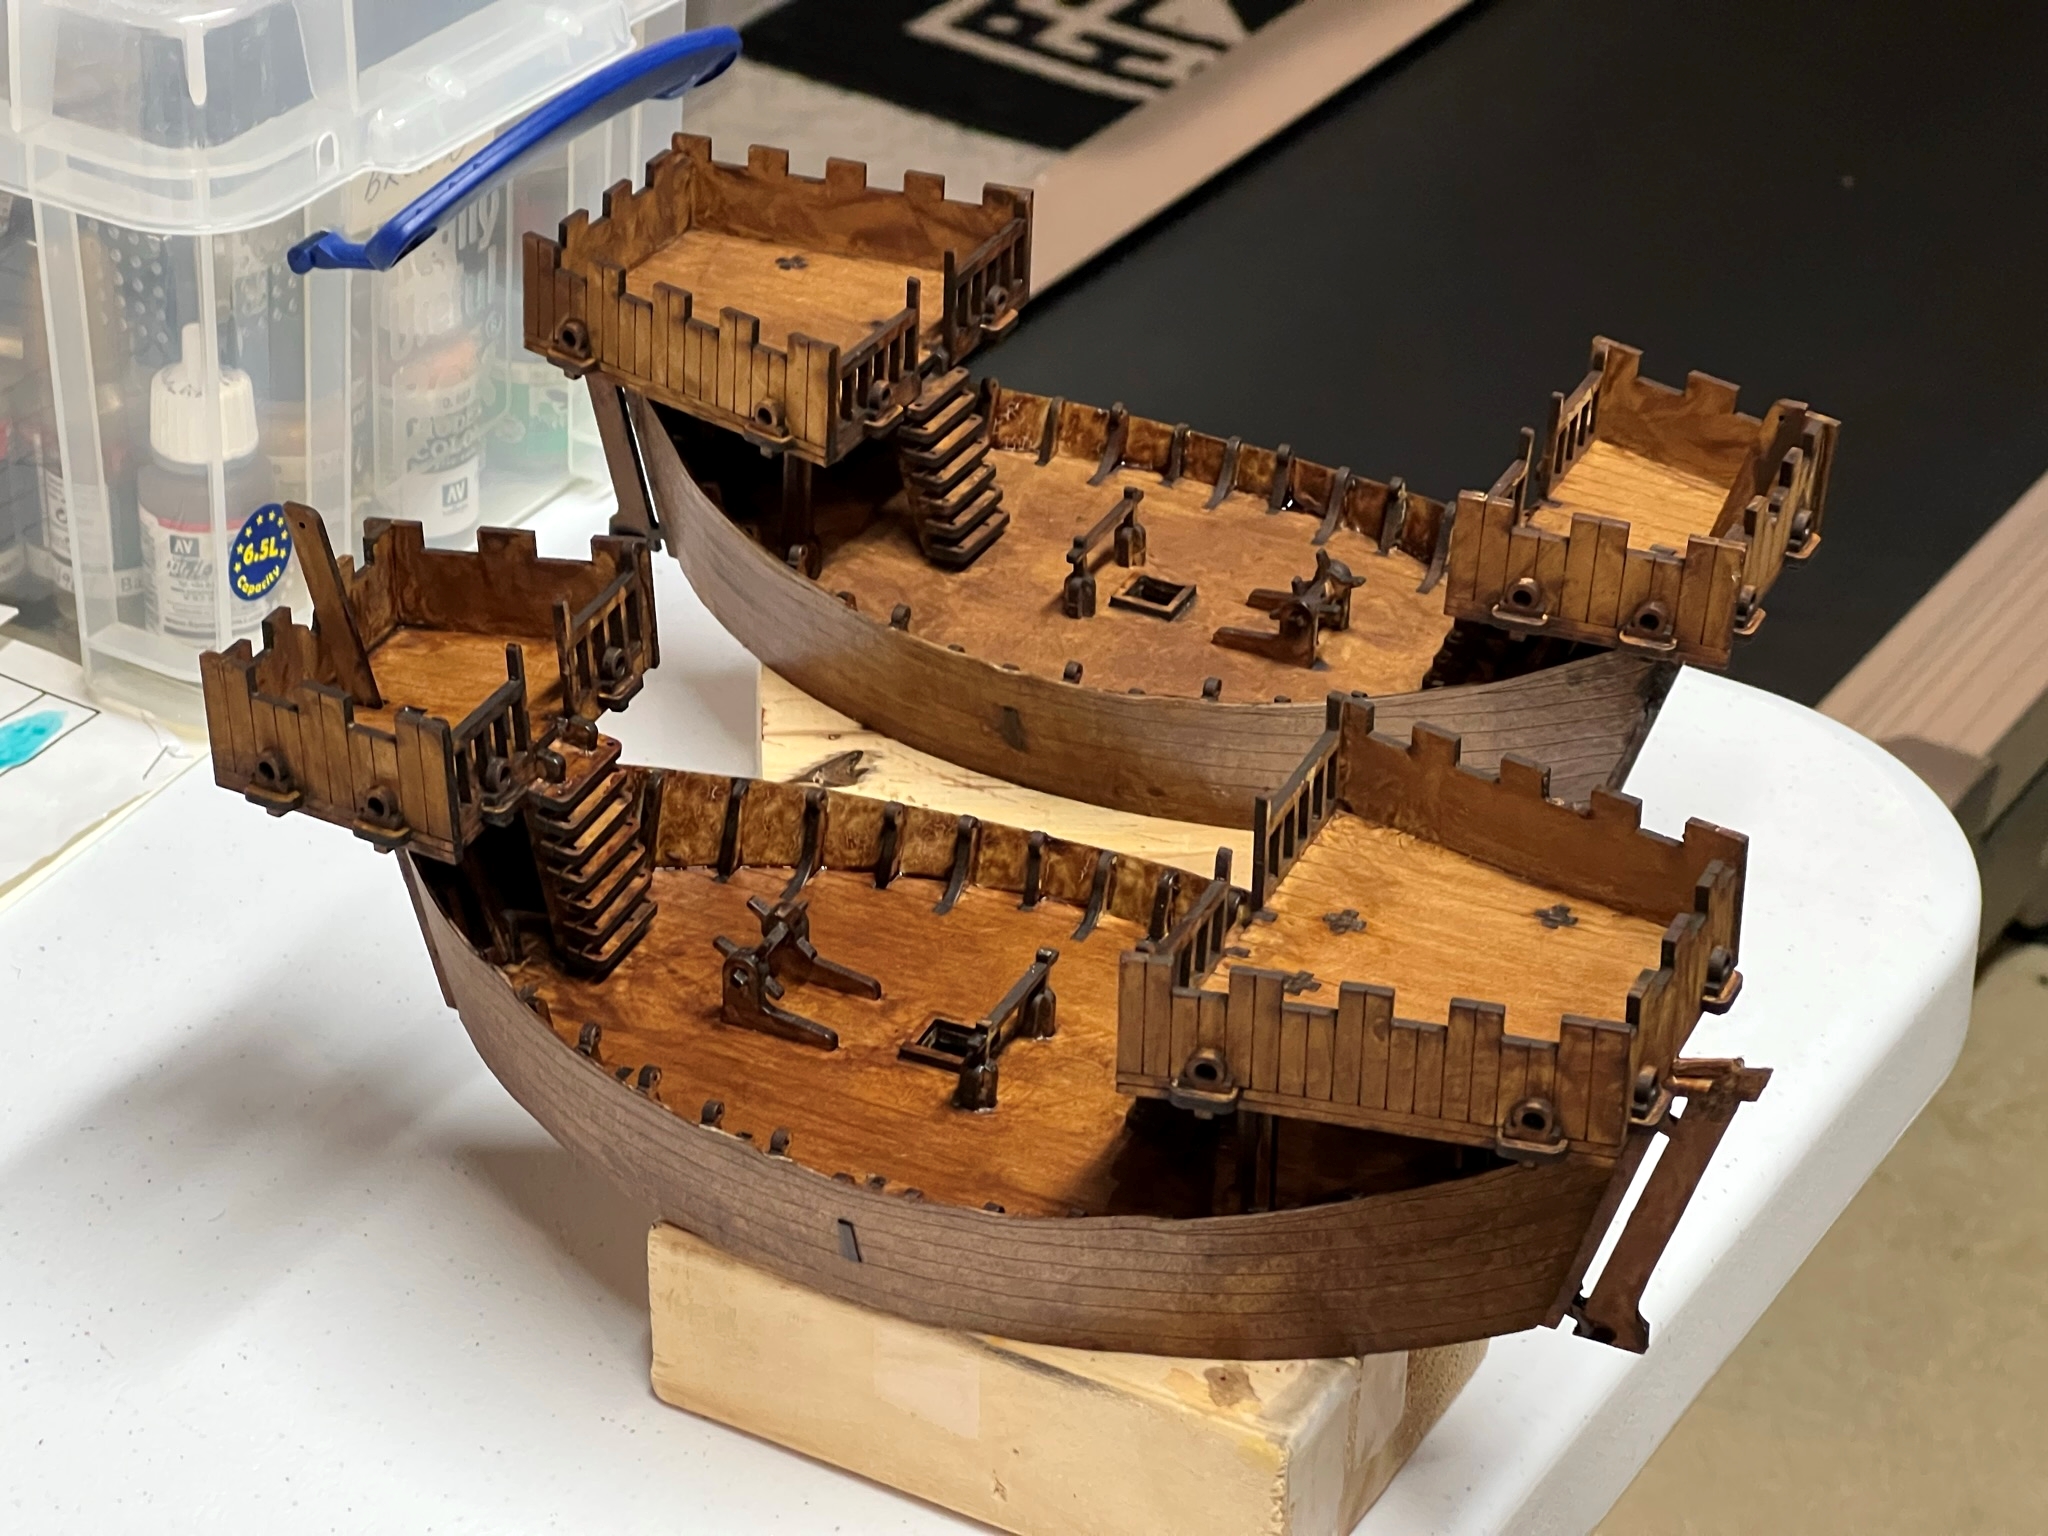
At this point, I had the hull basically constructed.

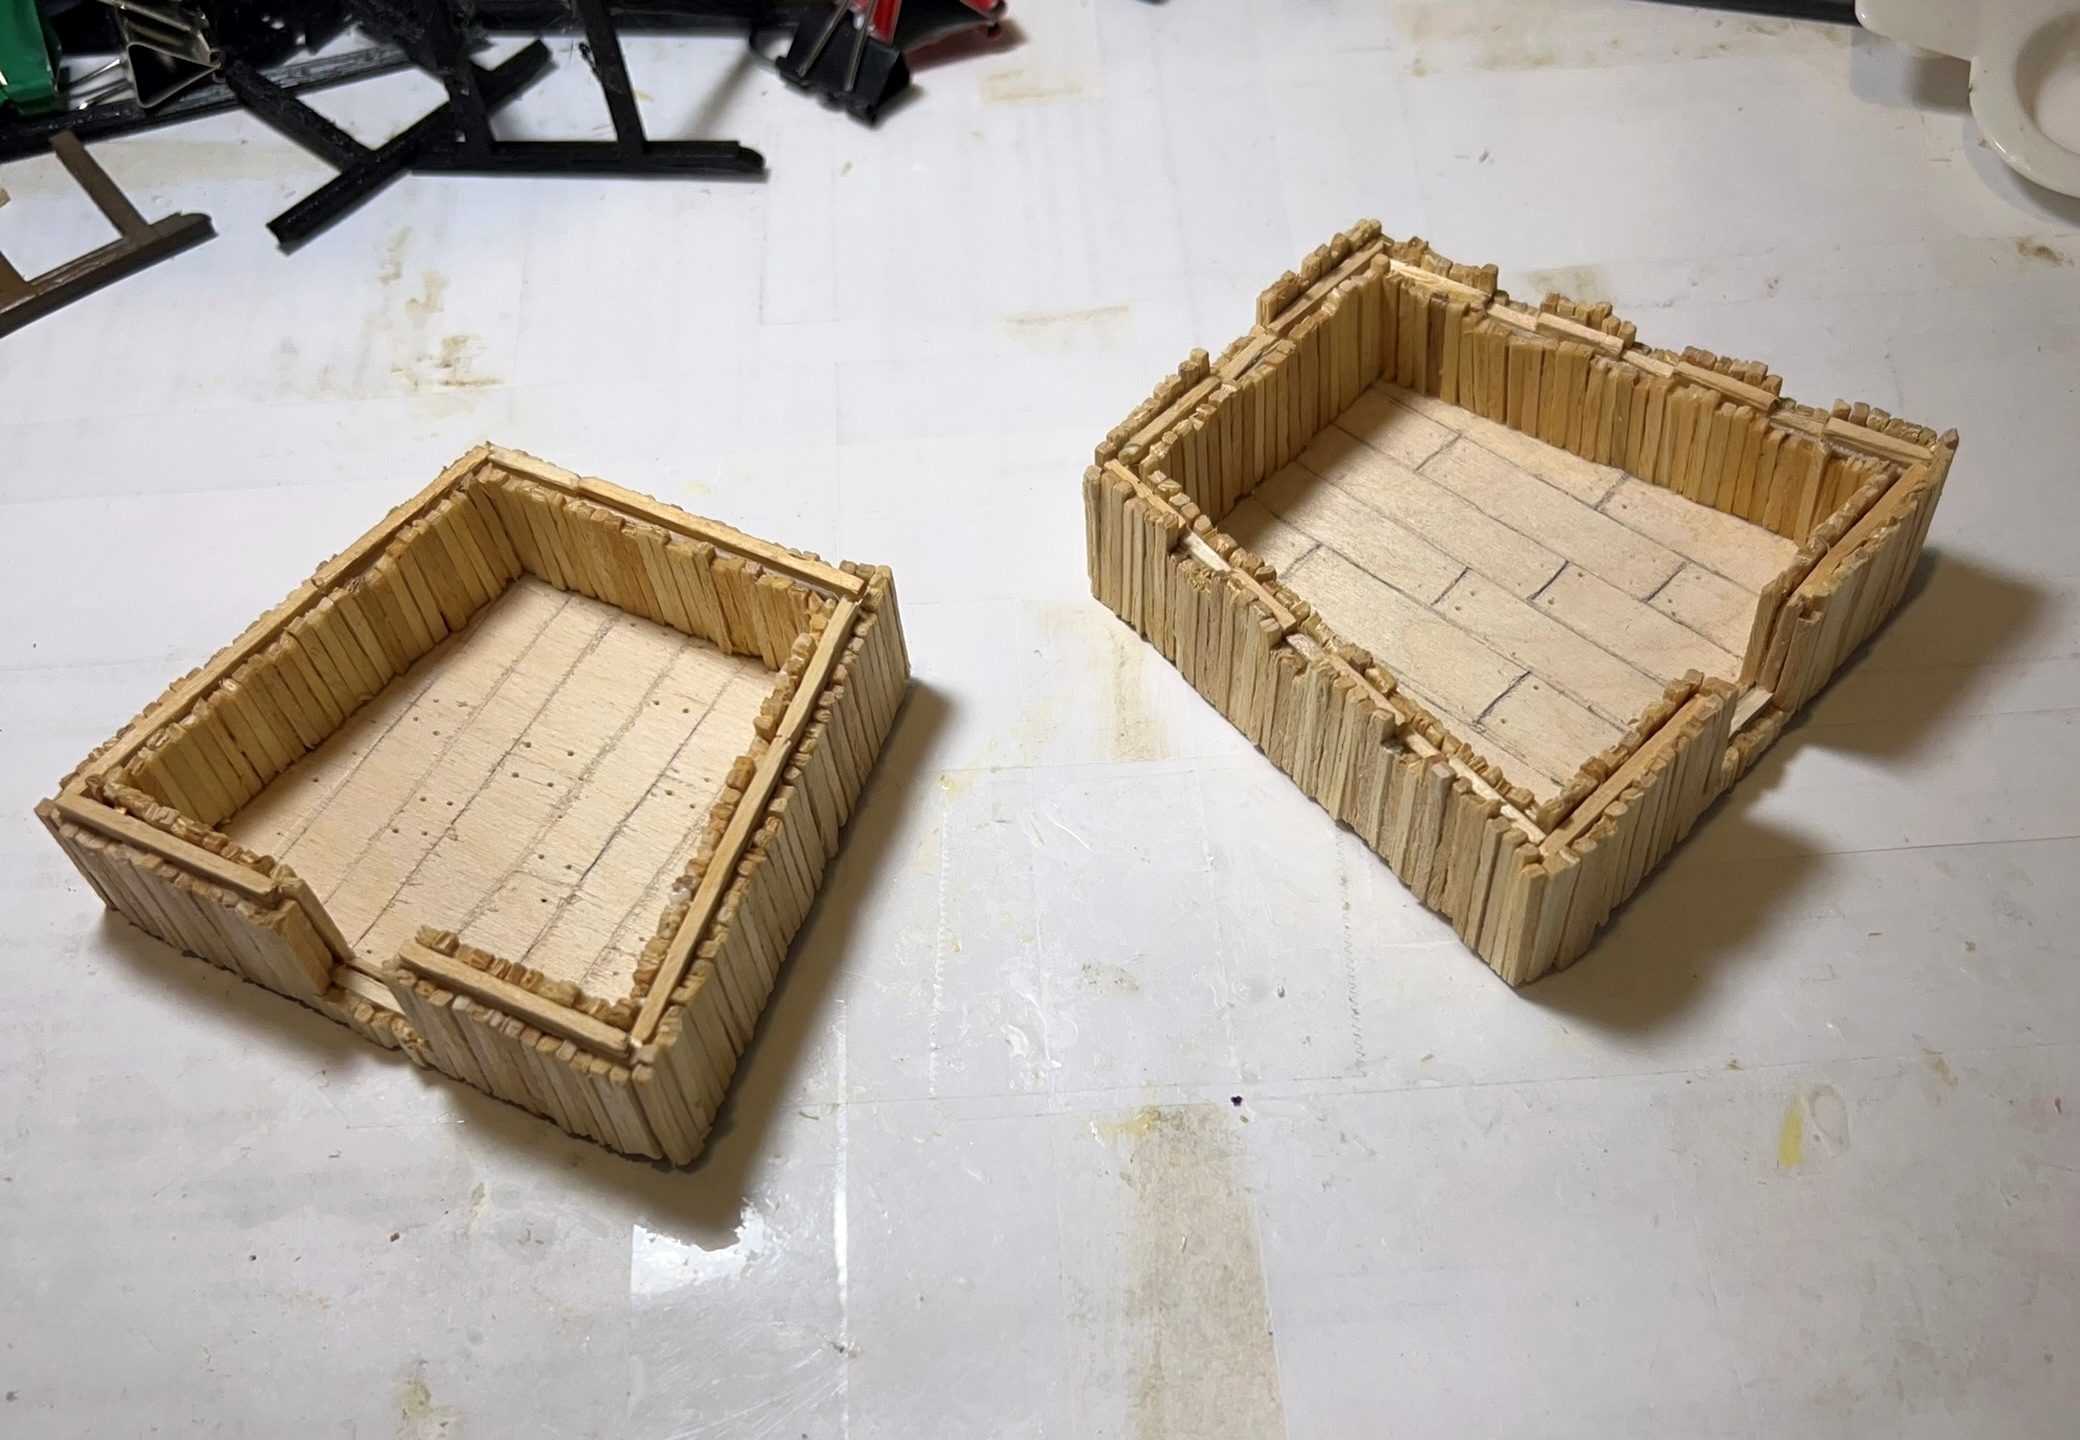
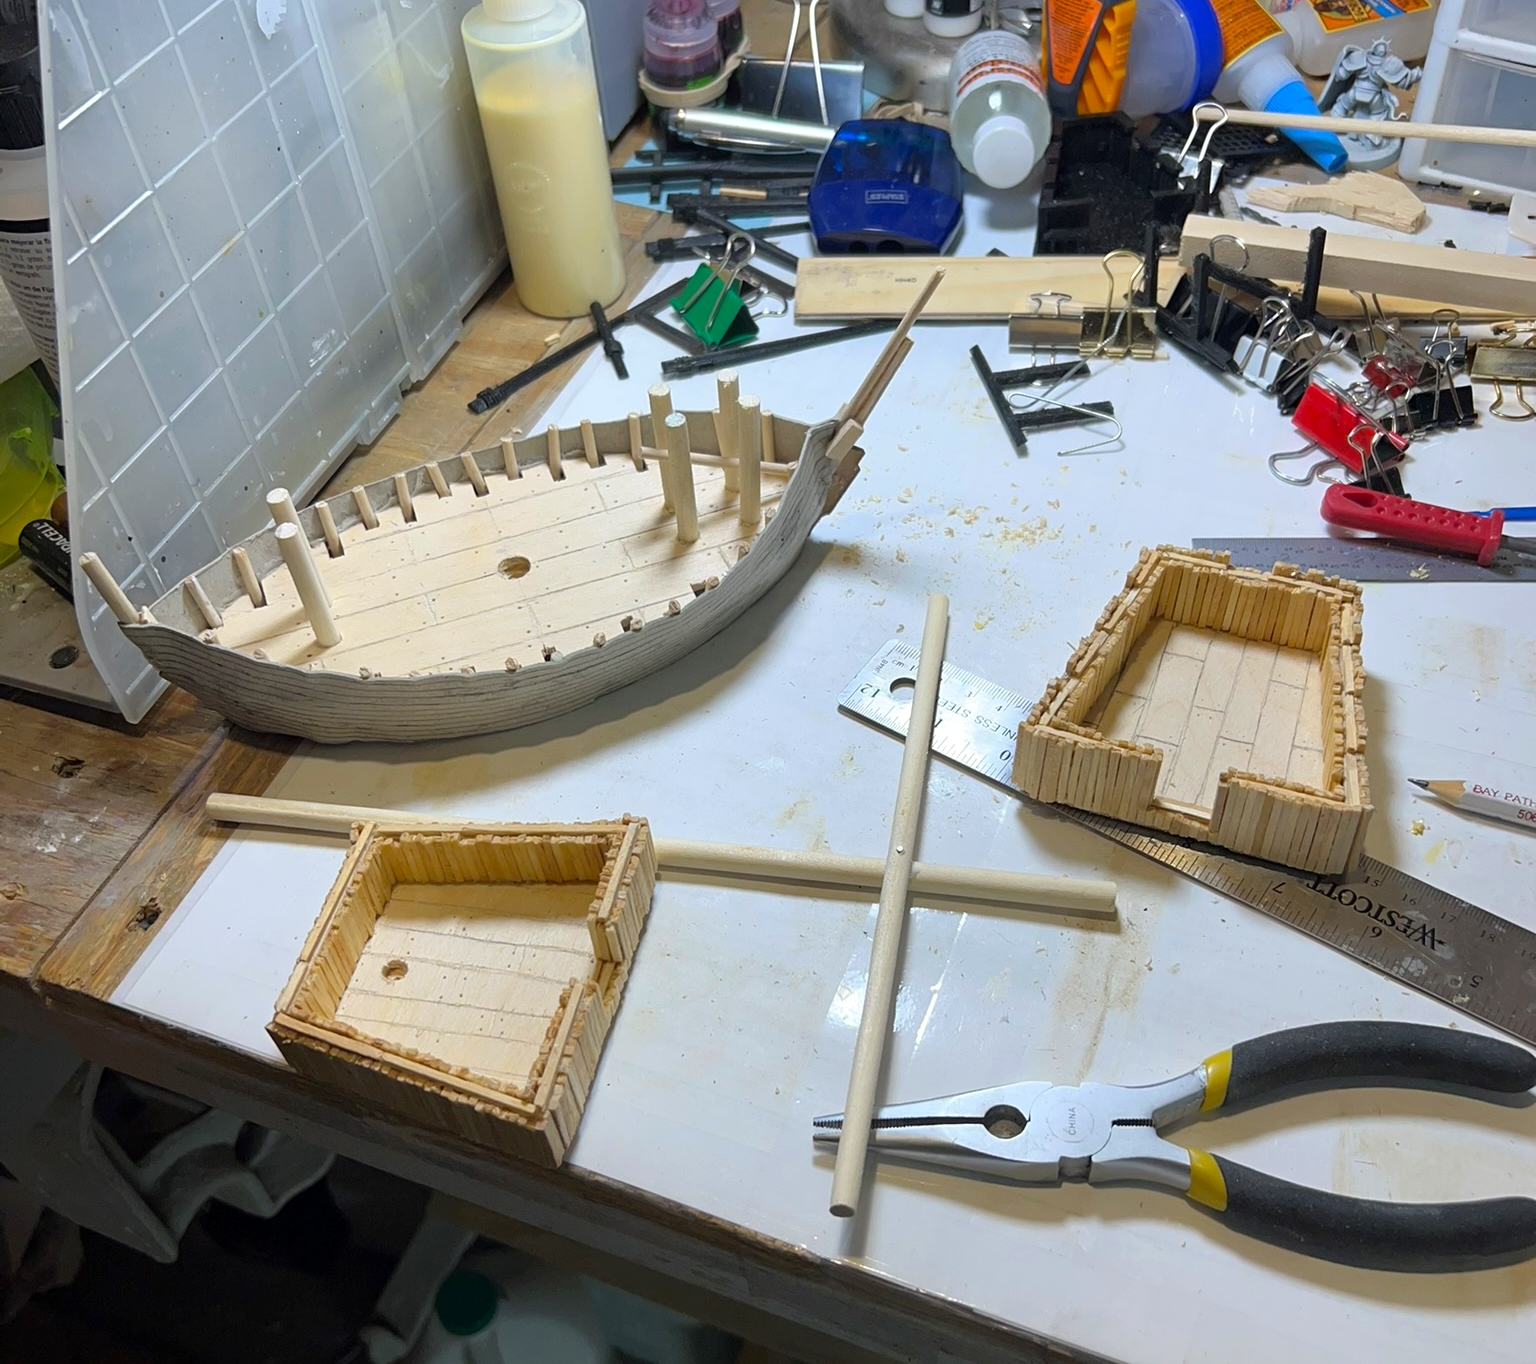
For the stern and forecastles, I used basswood. I was not happy with the look as the basswood was too smooth. I decided to glue a bazillion (I think) custom-cut matchsticks inside and out of the castles to give them a more rustic look.


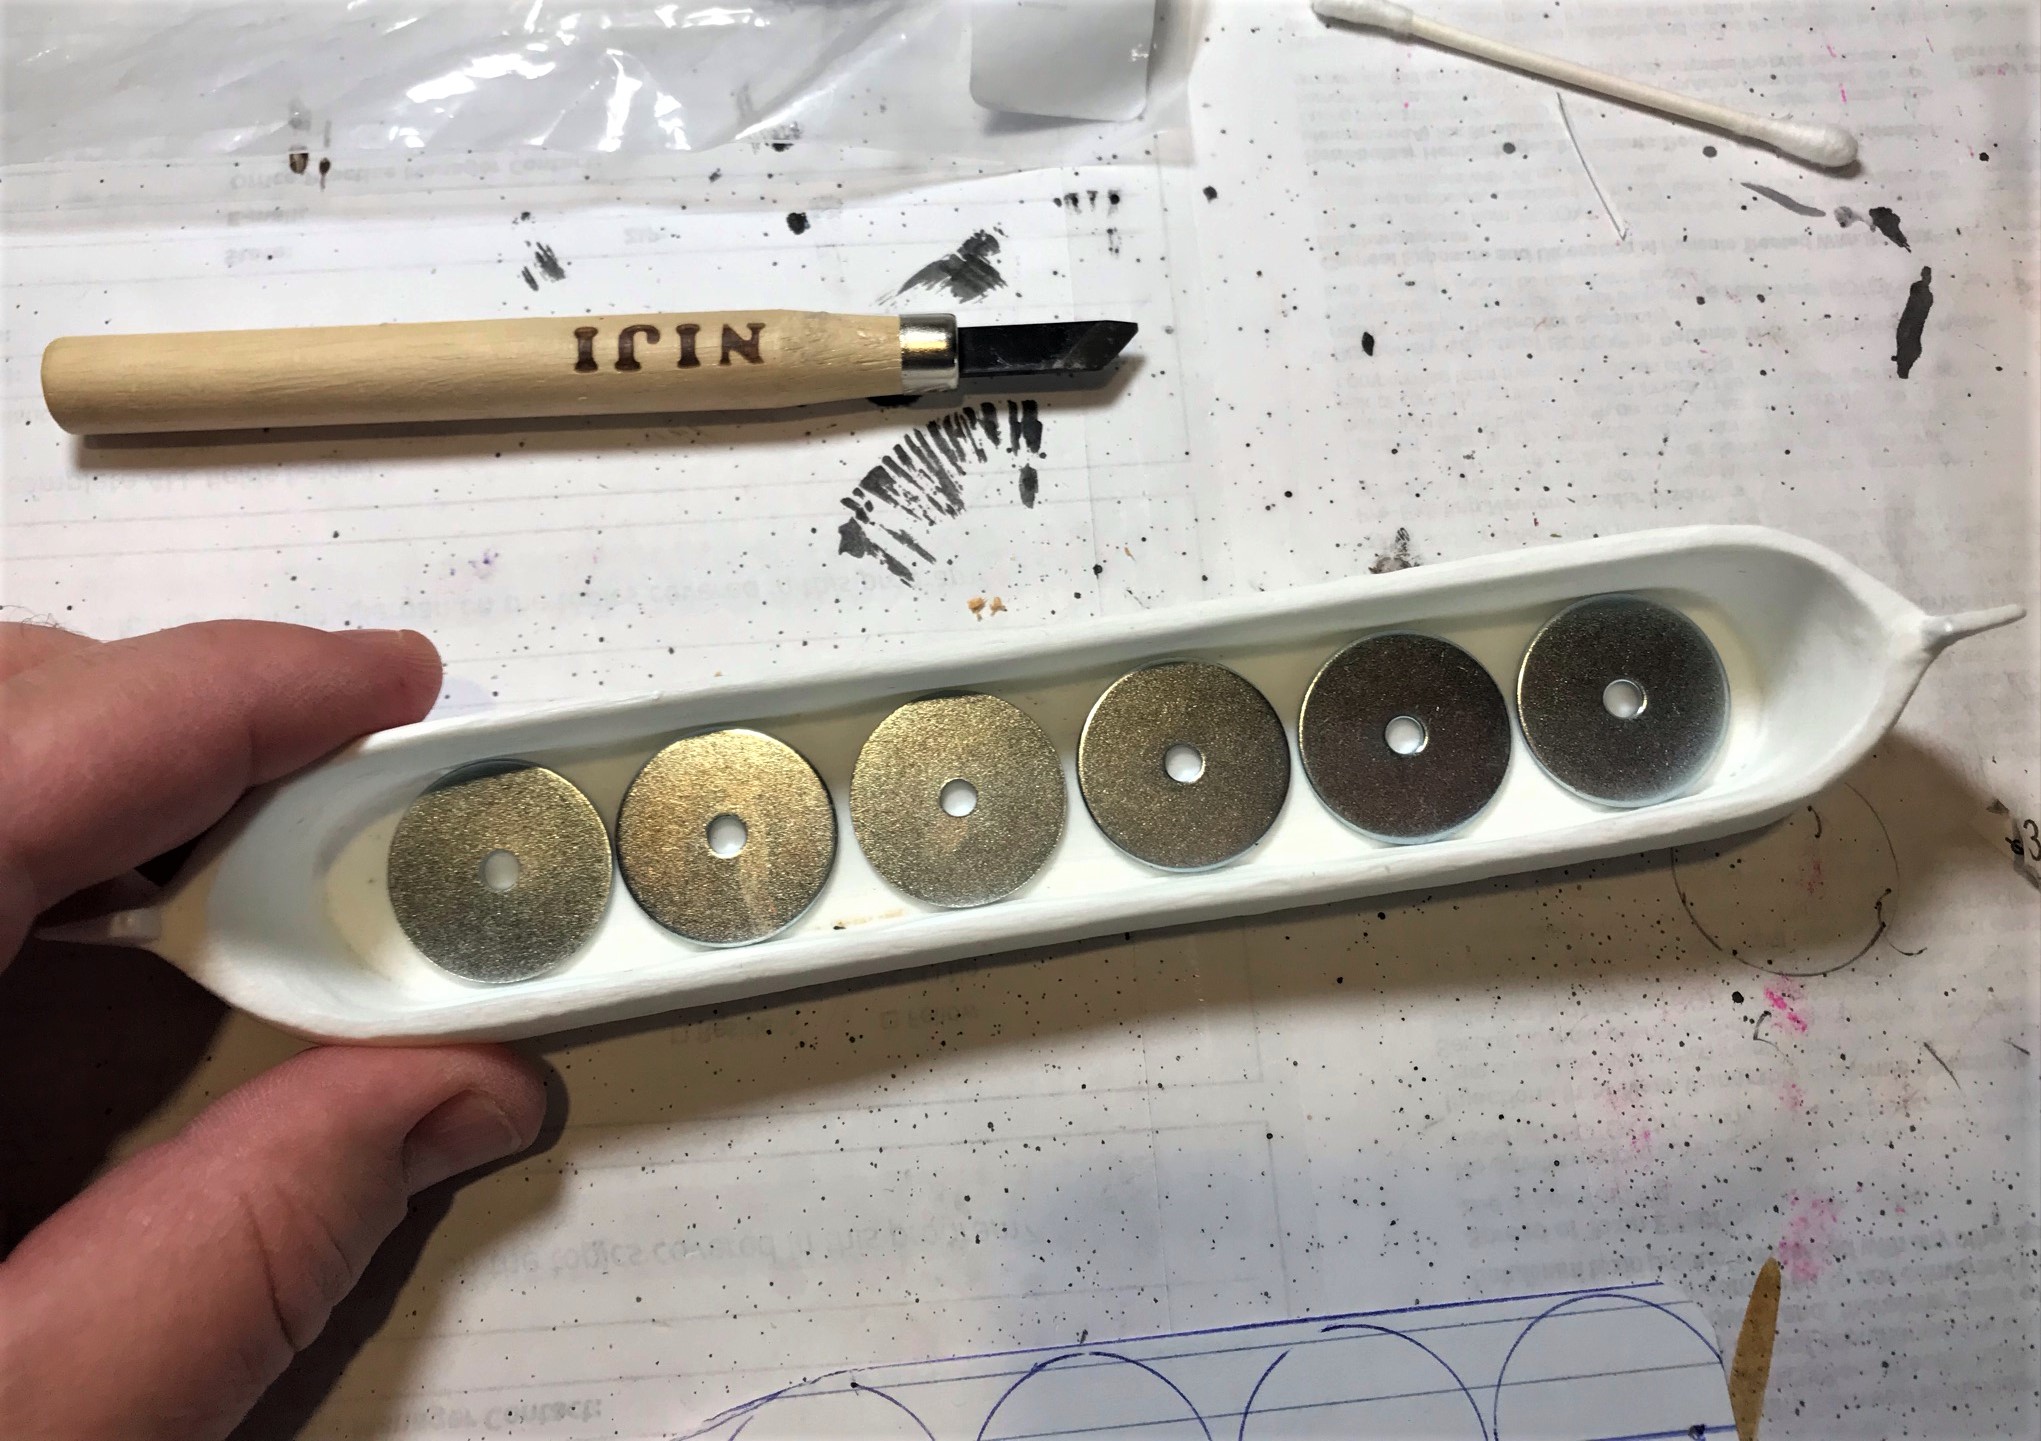
The next step was to mount the castles – which I did by drilling out holes for dowel supports. Then I adjusted the heights of the supports with 1/4″ steel washers to get the right look. I also made the mast and yard.


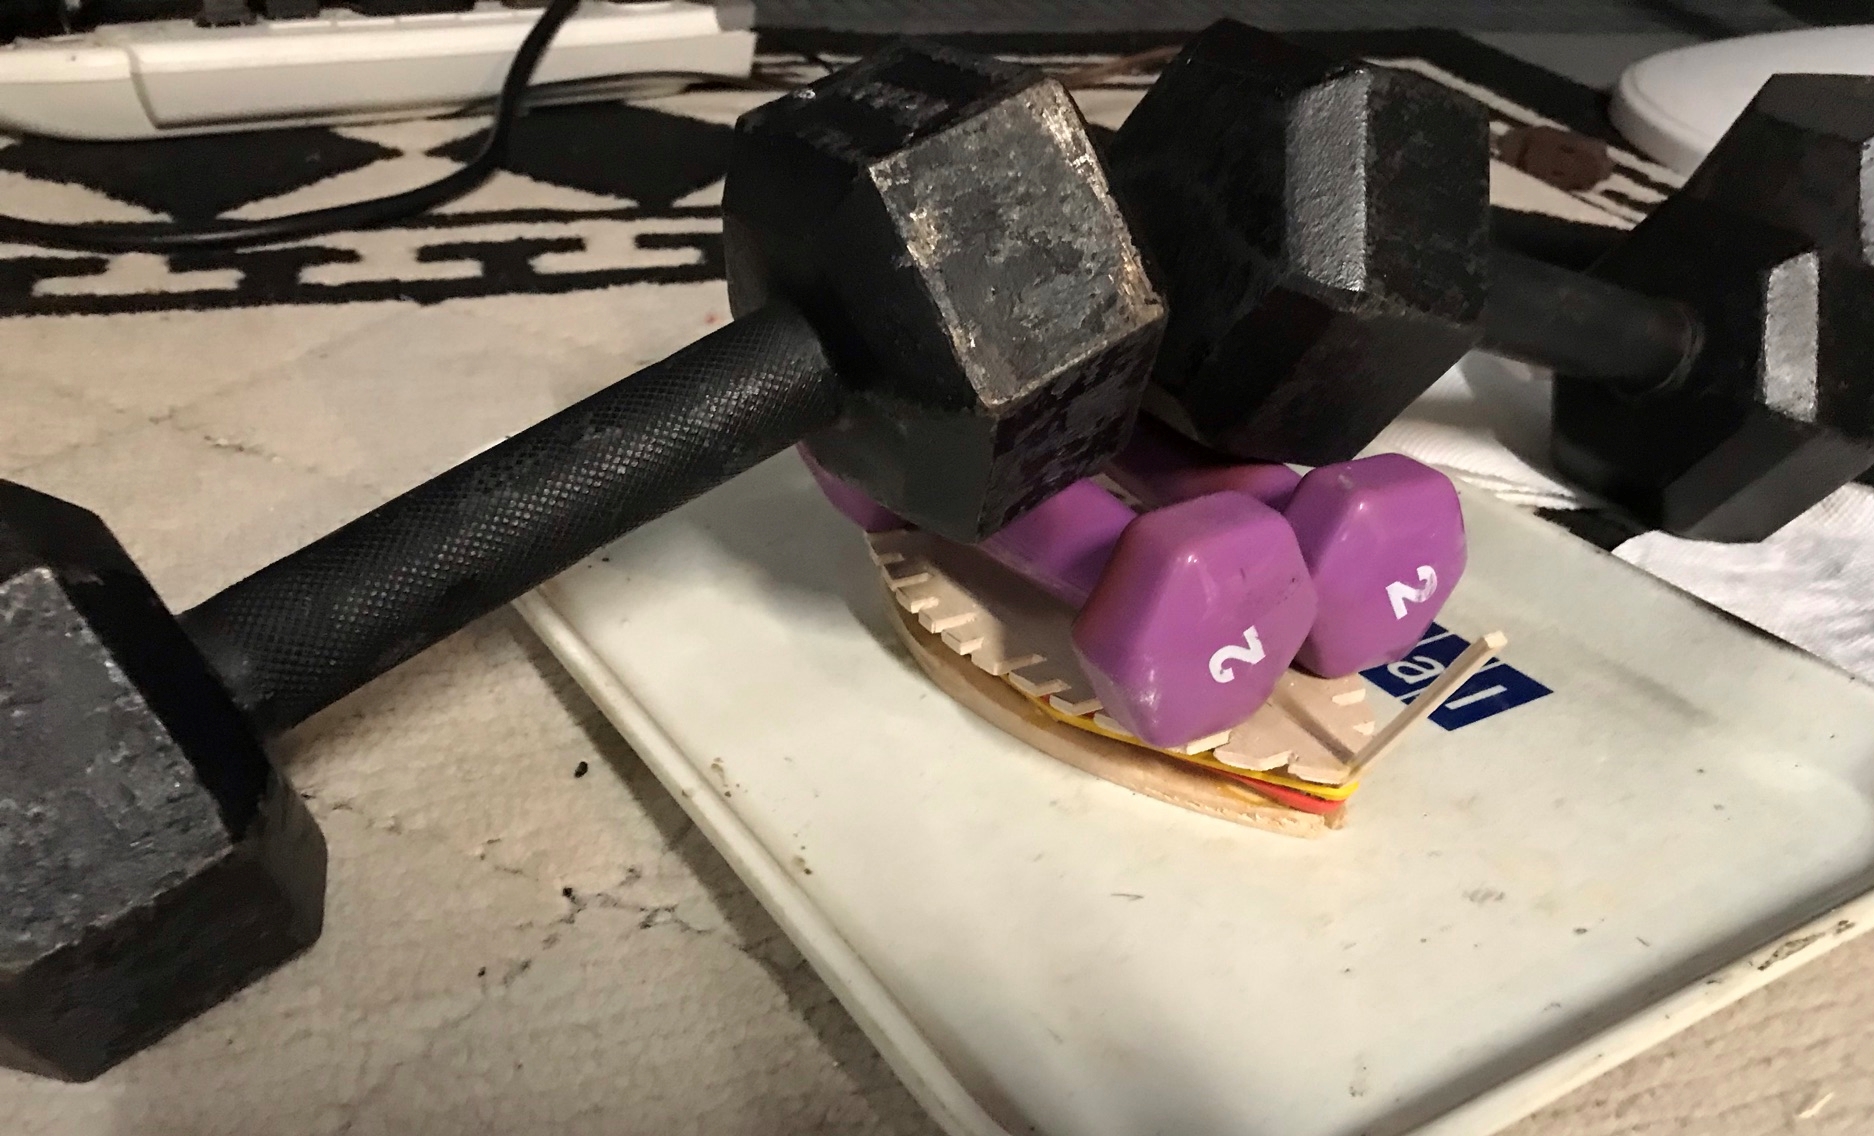
Once again during this project, I had to wait for the glue to dry. On a side note, that need alone dragged the duration time out every time I needed to glue something – which seemed unending. I then started the washing and painting of the brigantine as I found that easier to do before adding the castles.
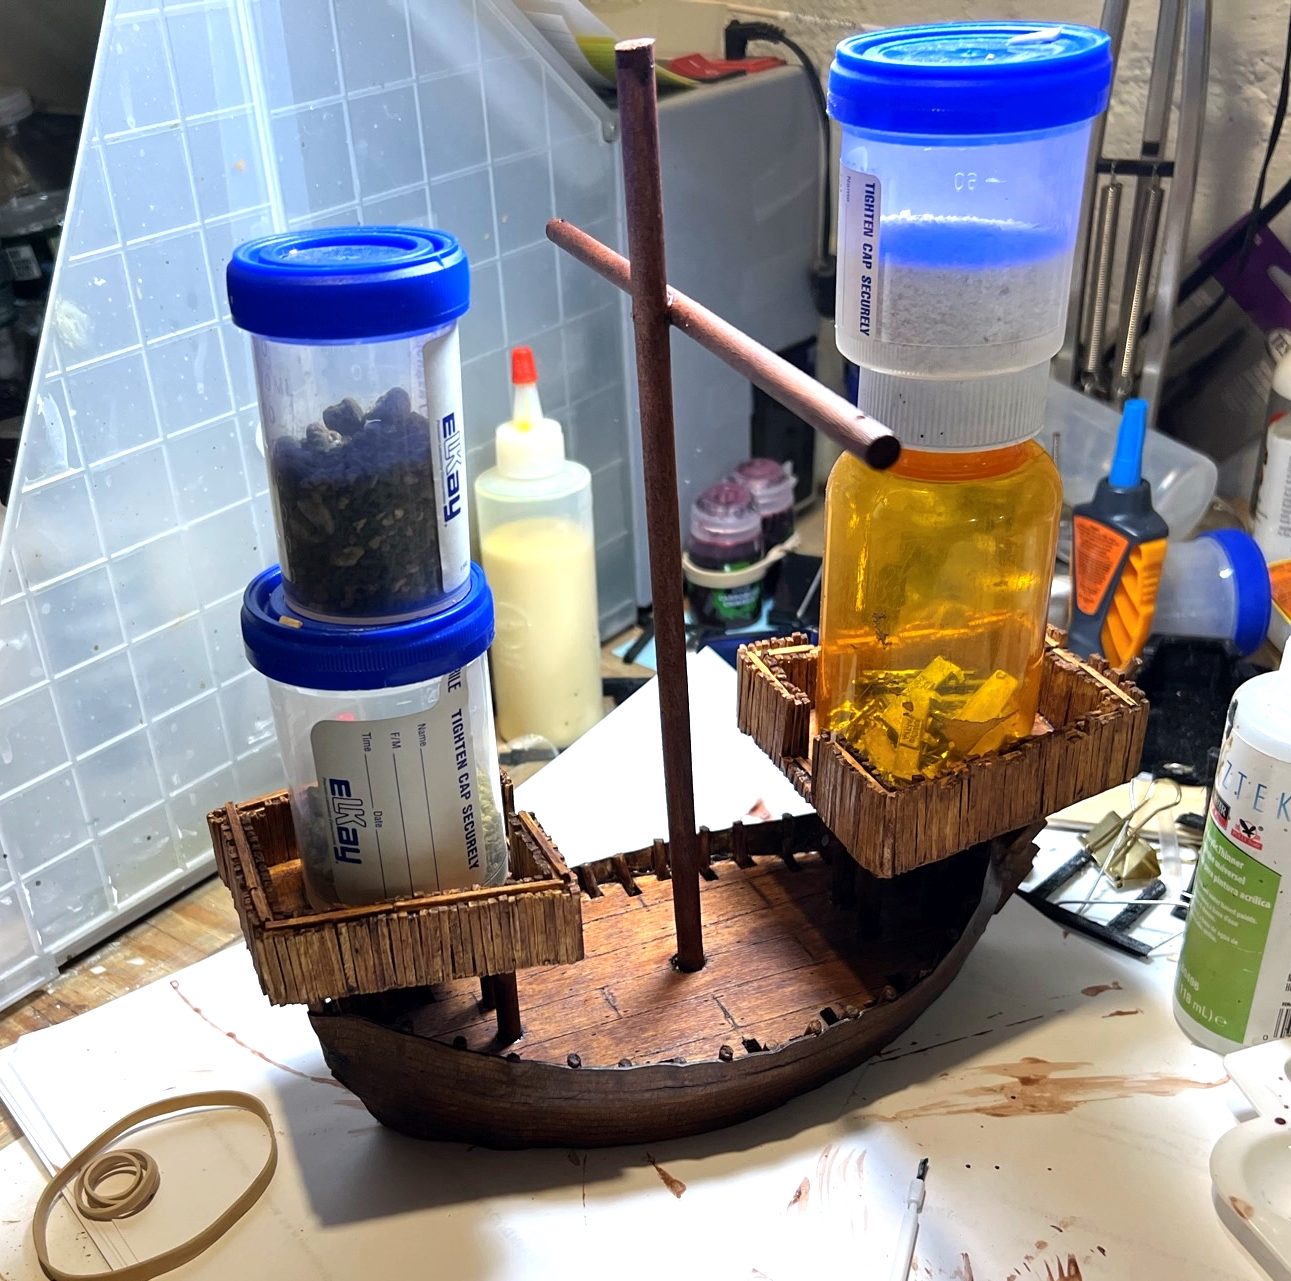
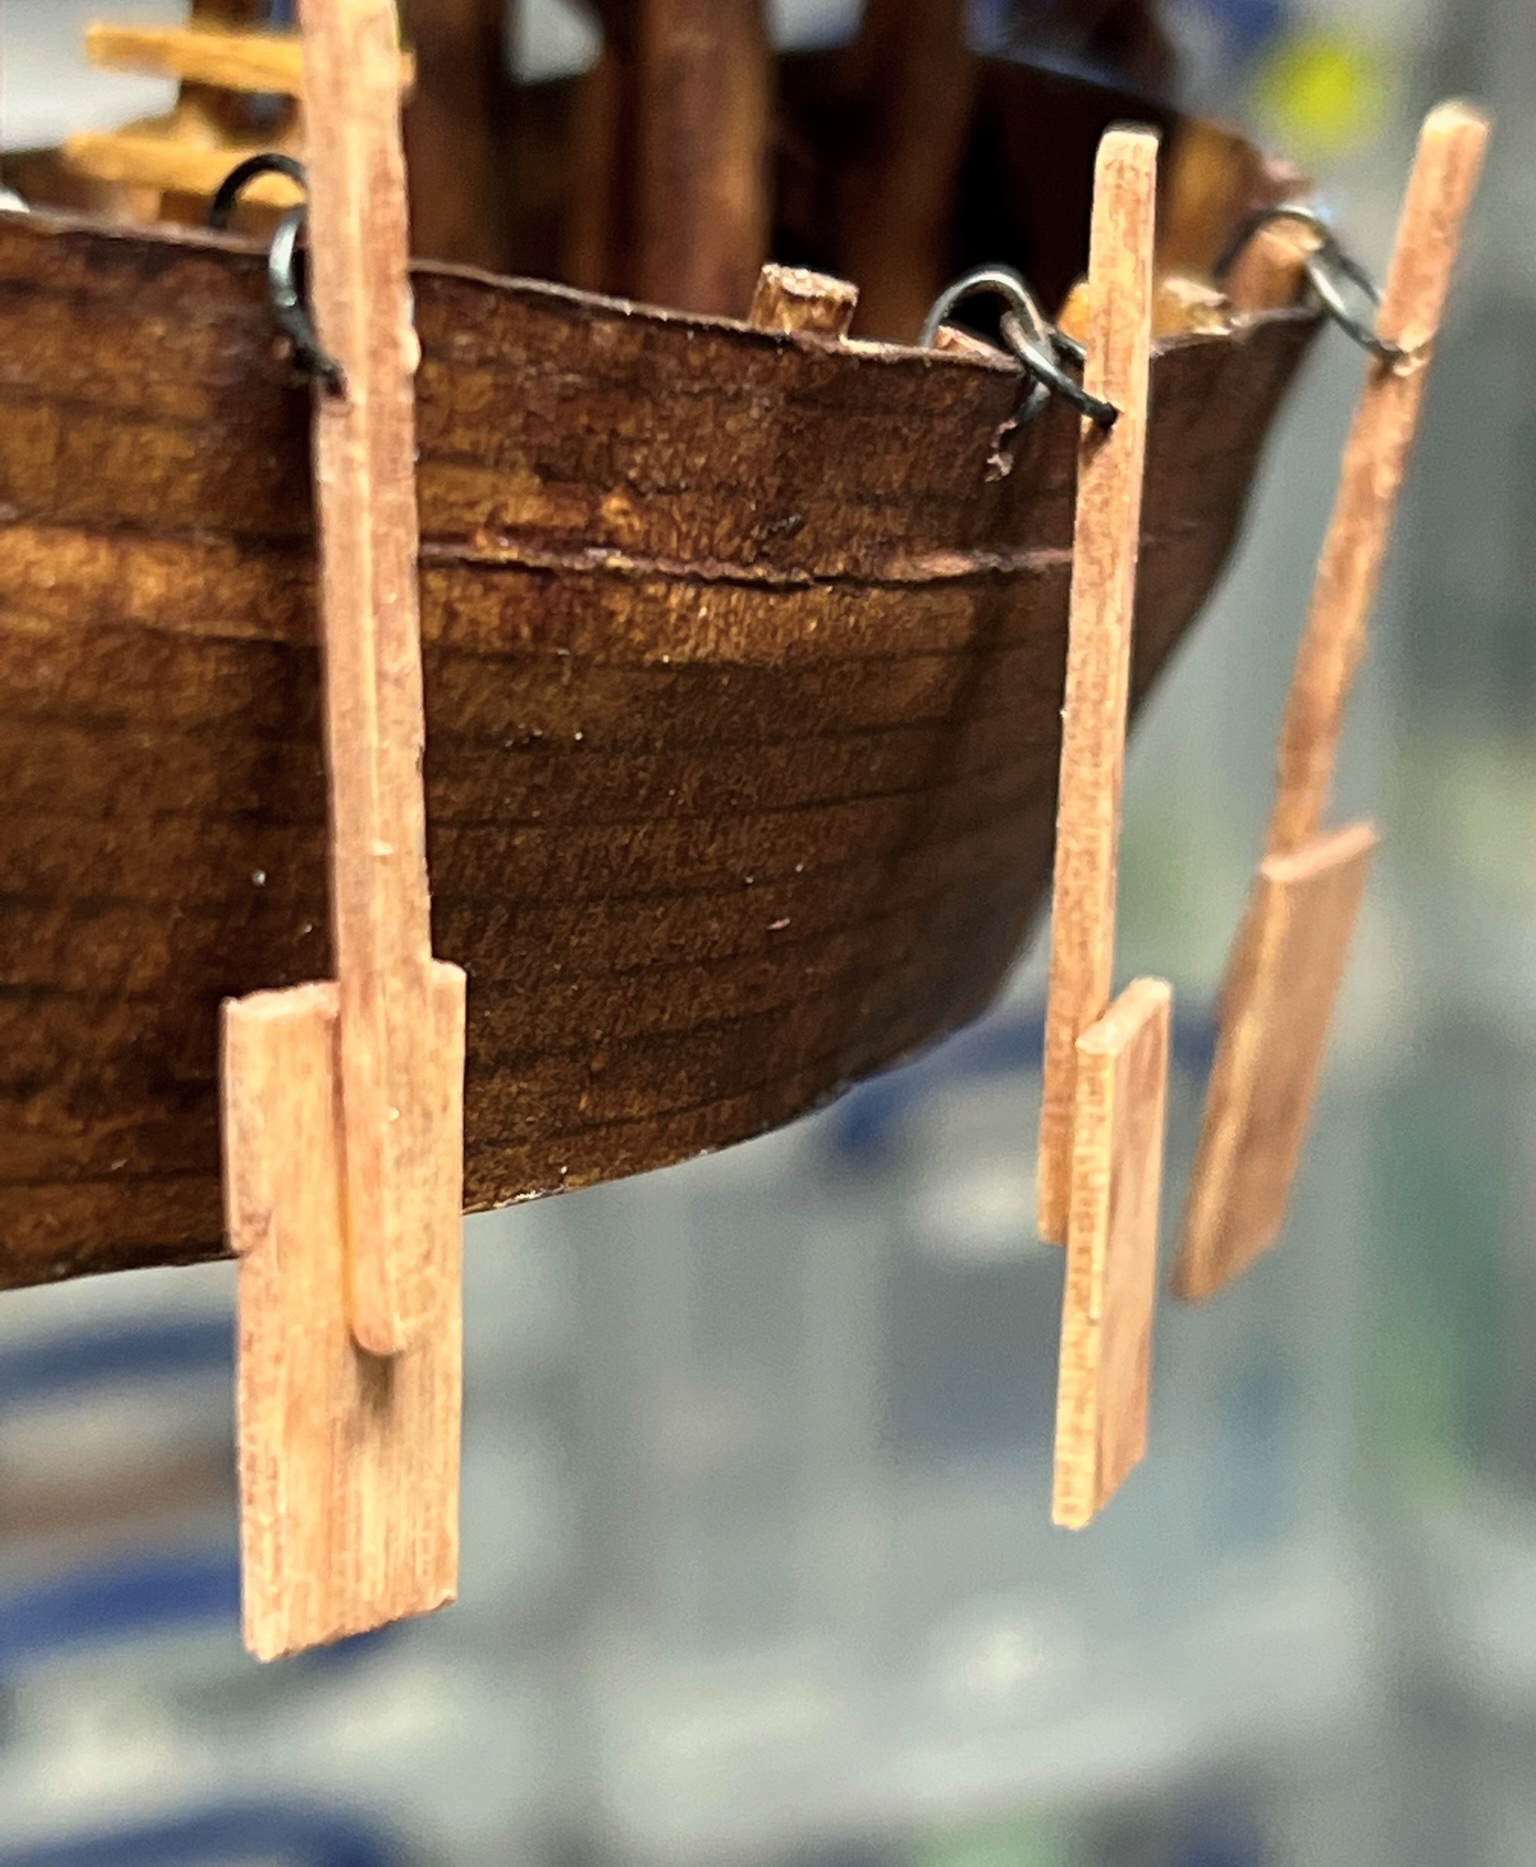
I also needed oars and oar locks.

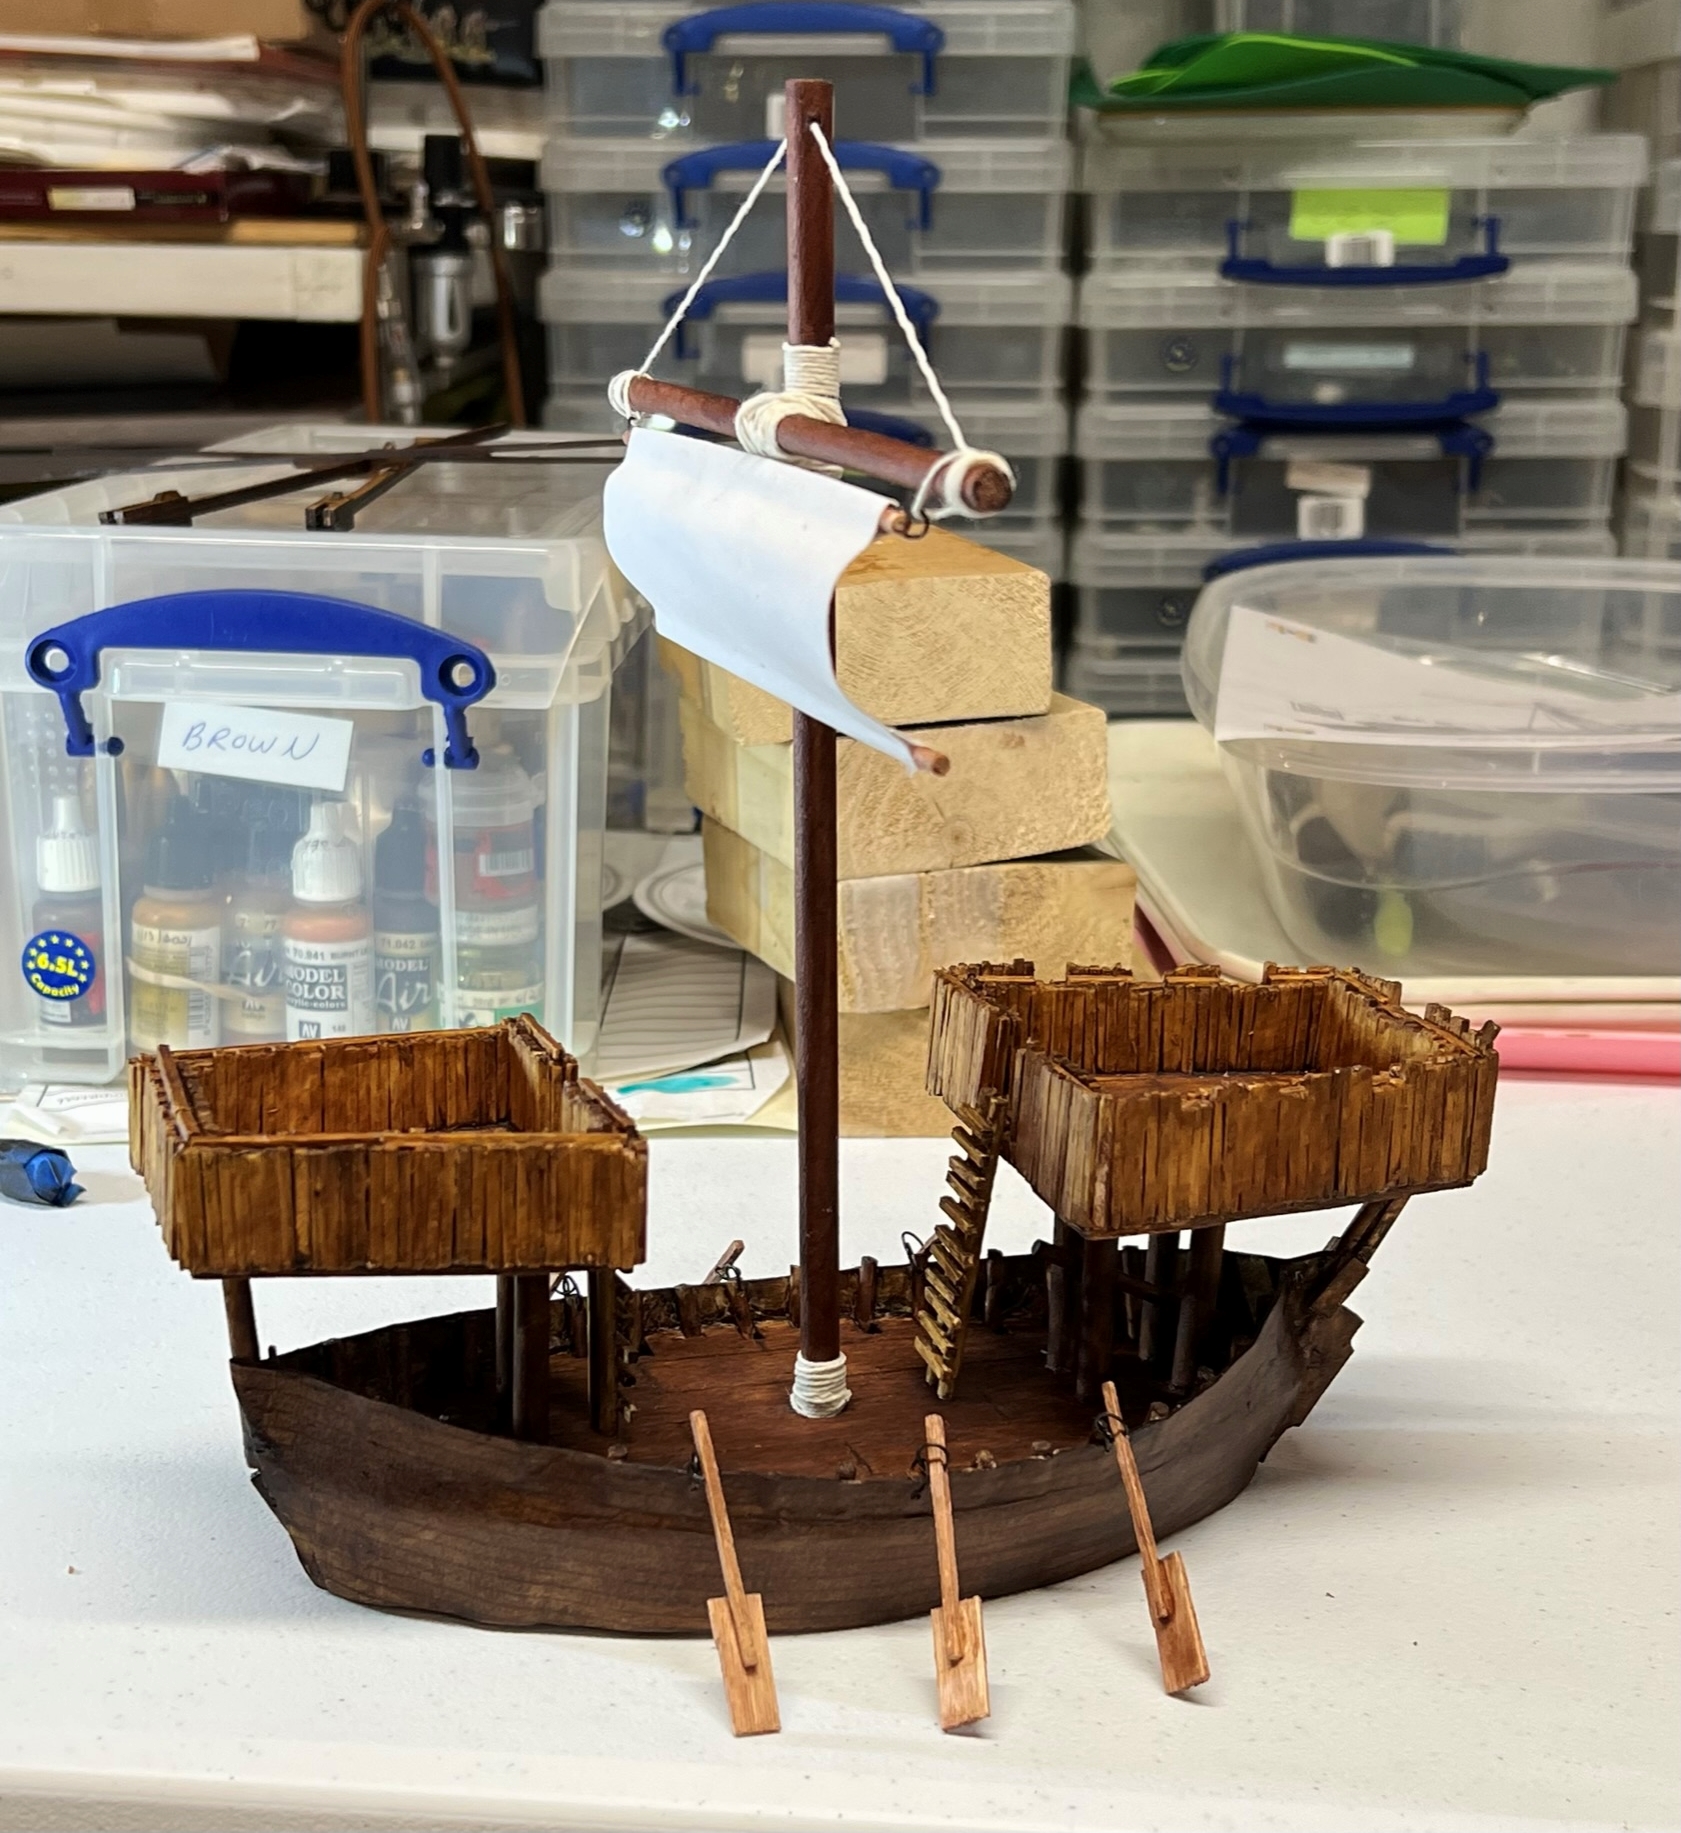
After some work on El Marcos‘ rigging, she was done.
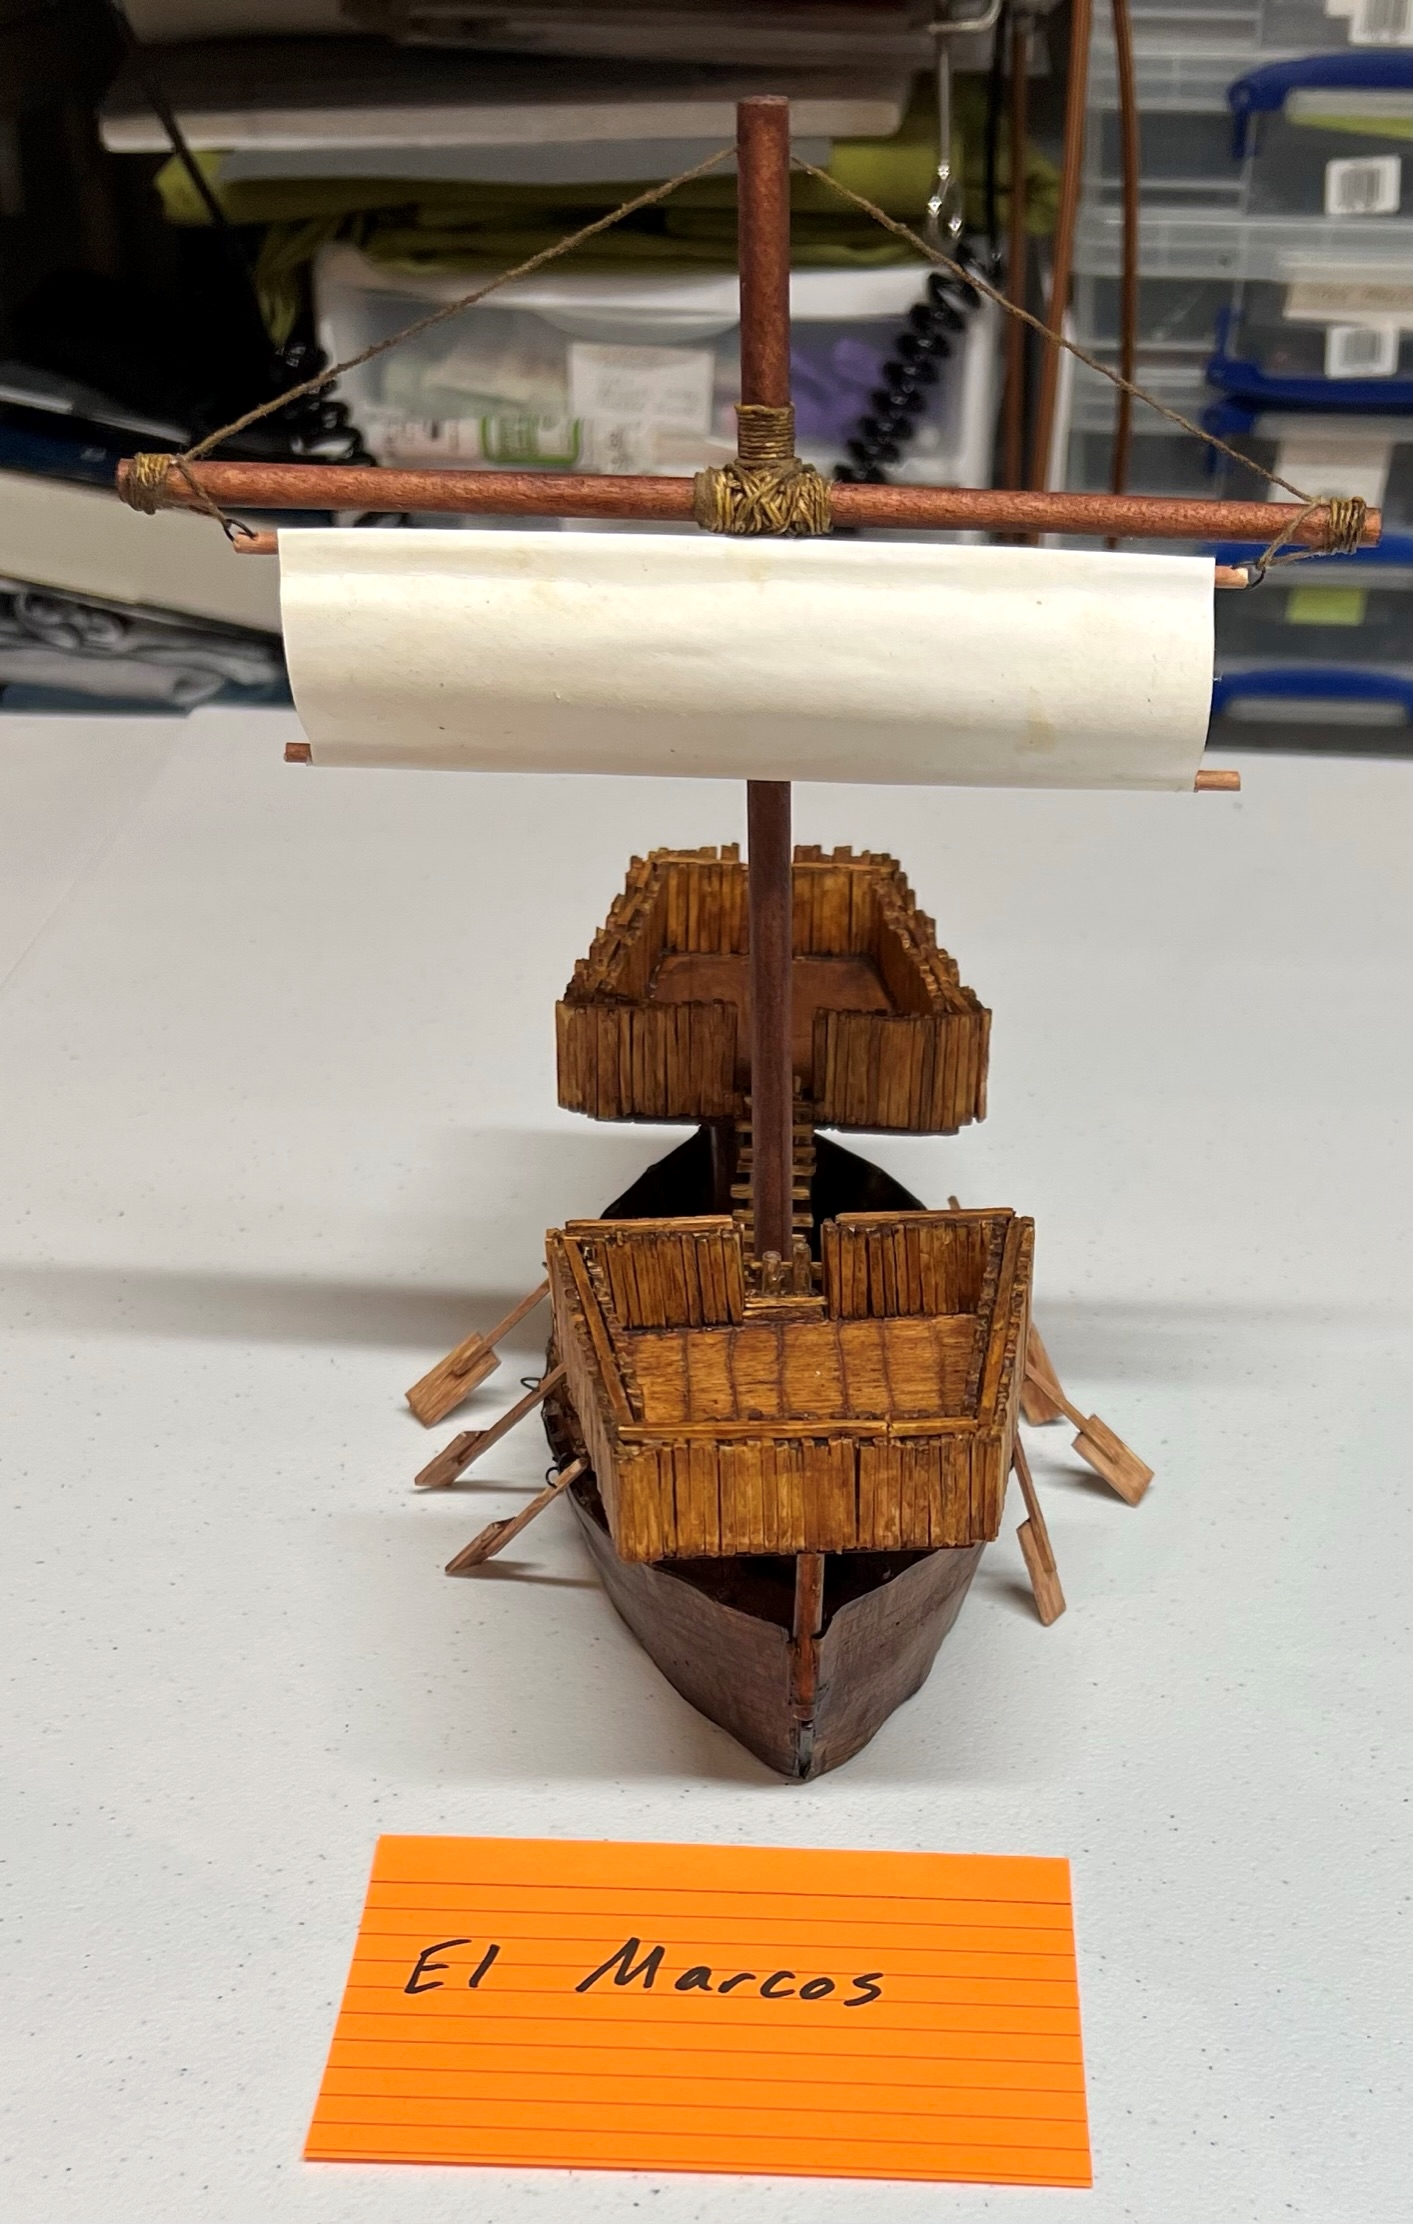
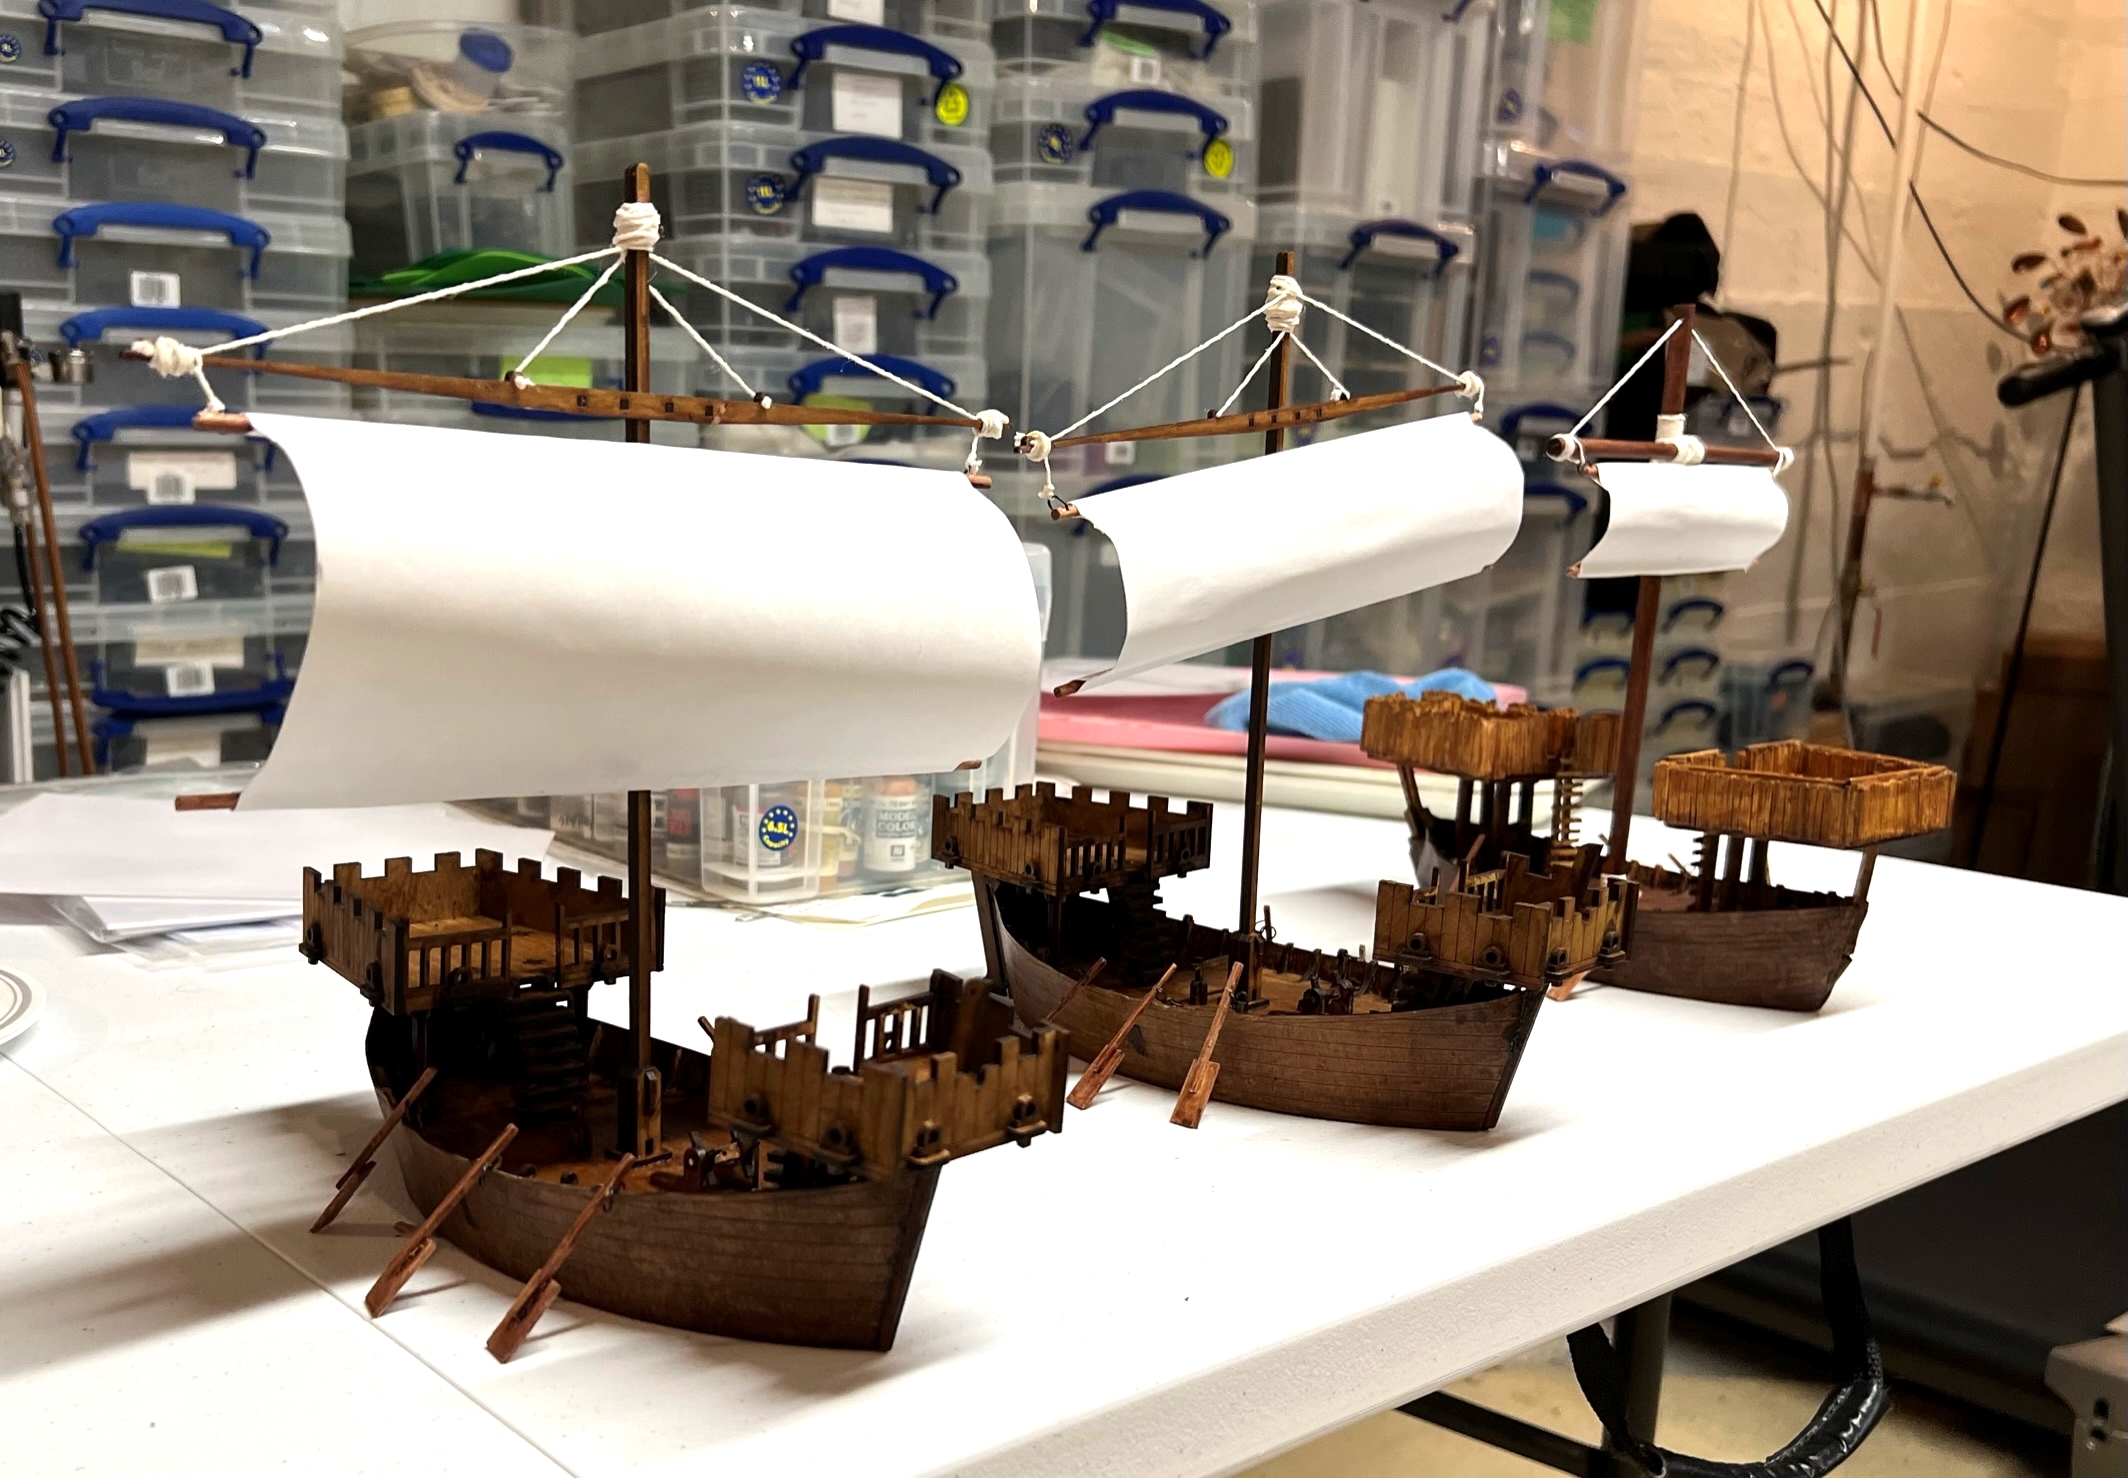
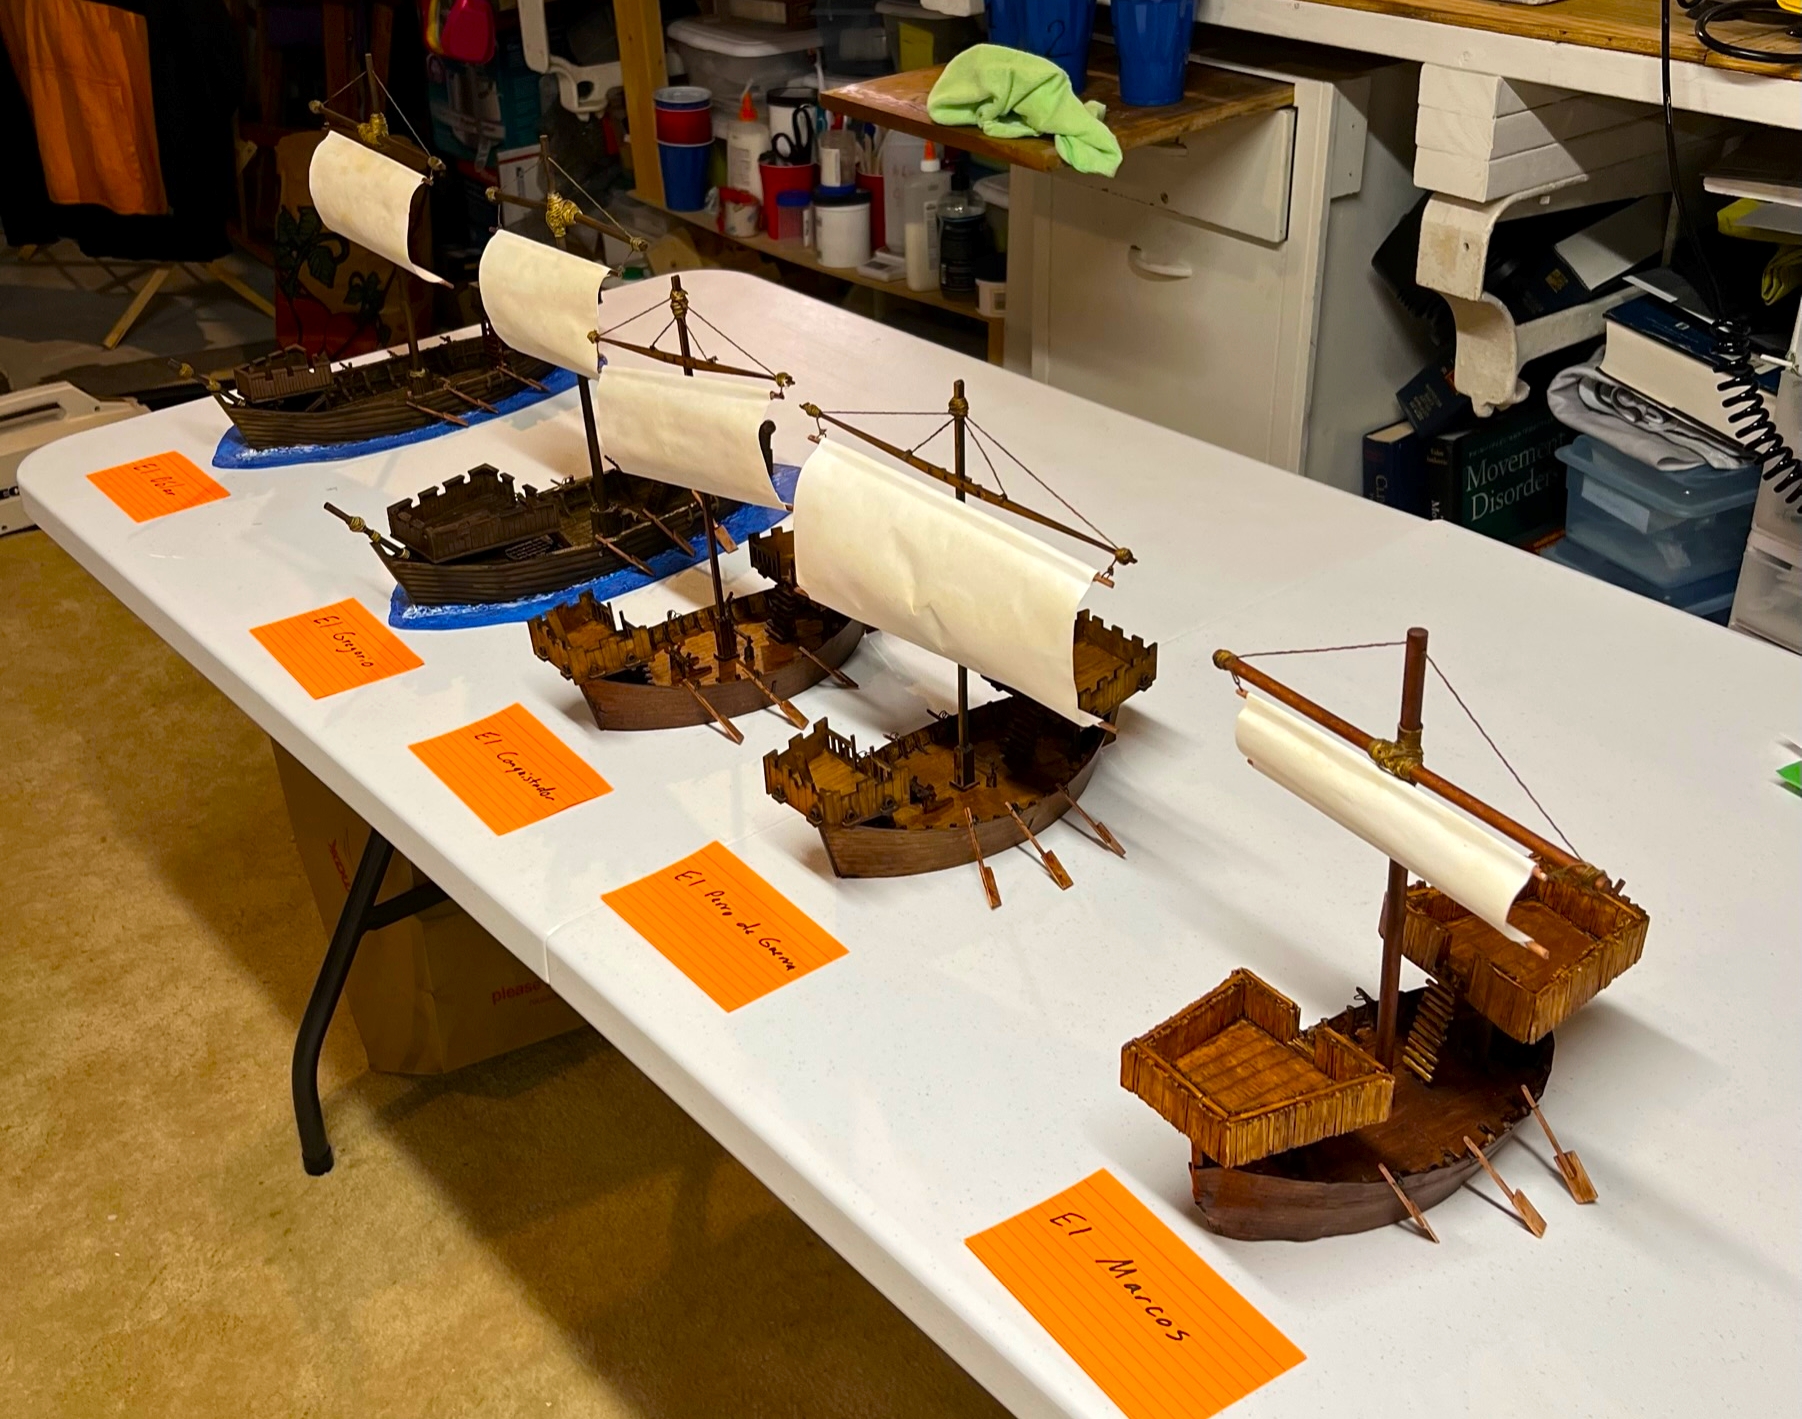
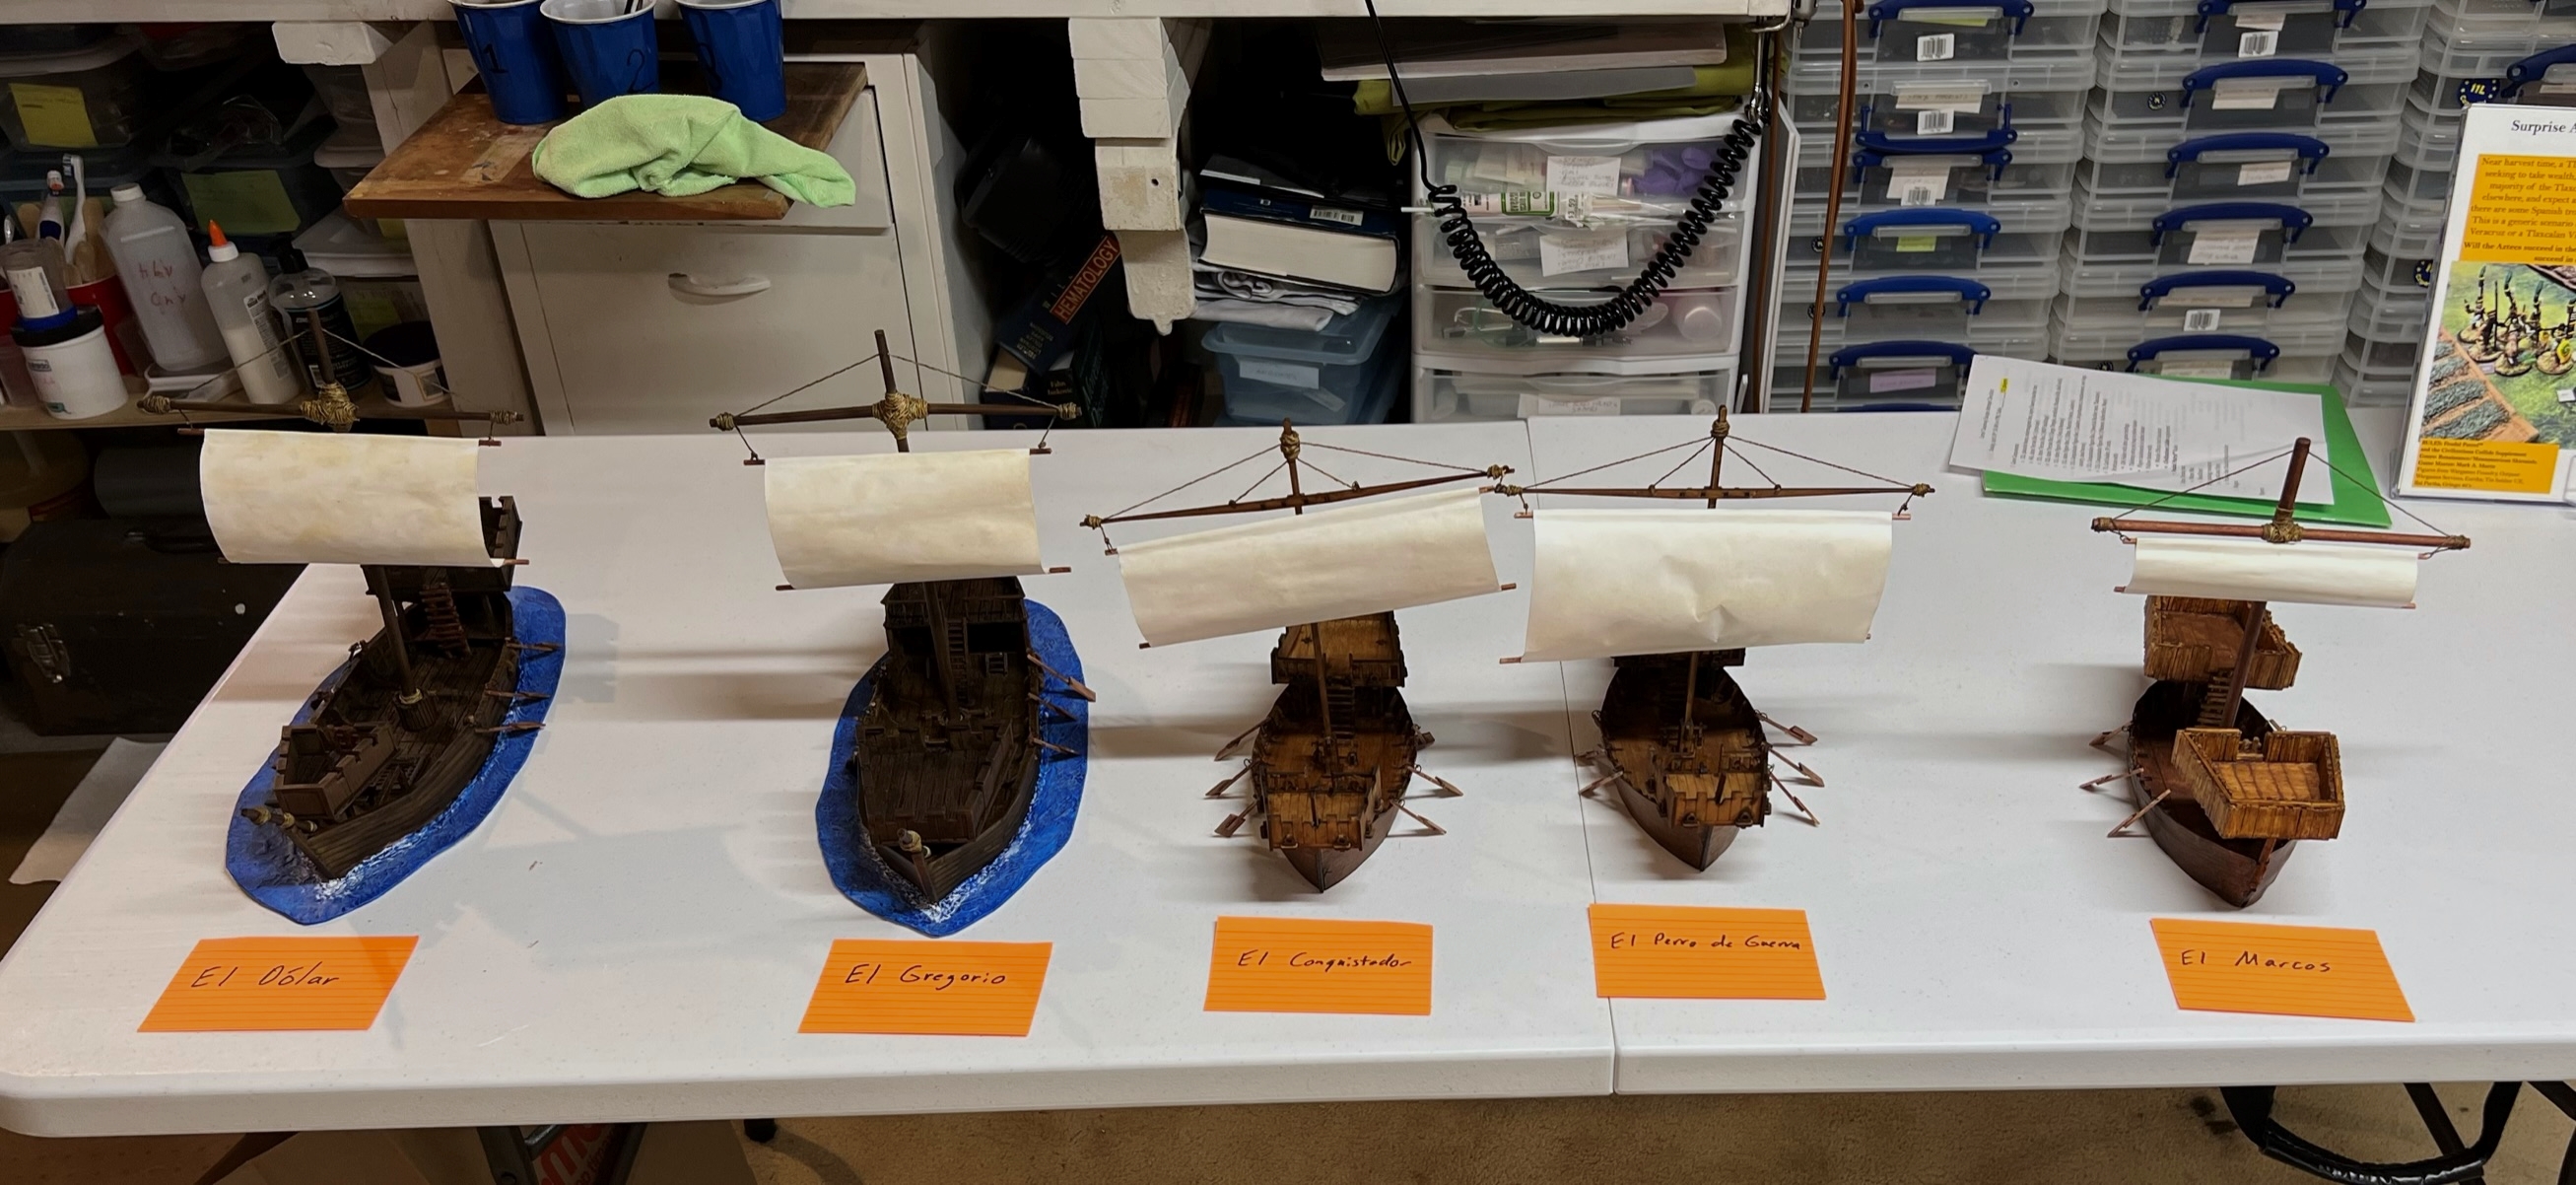
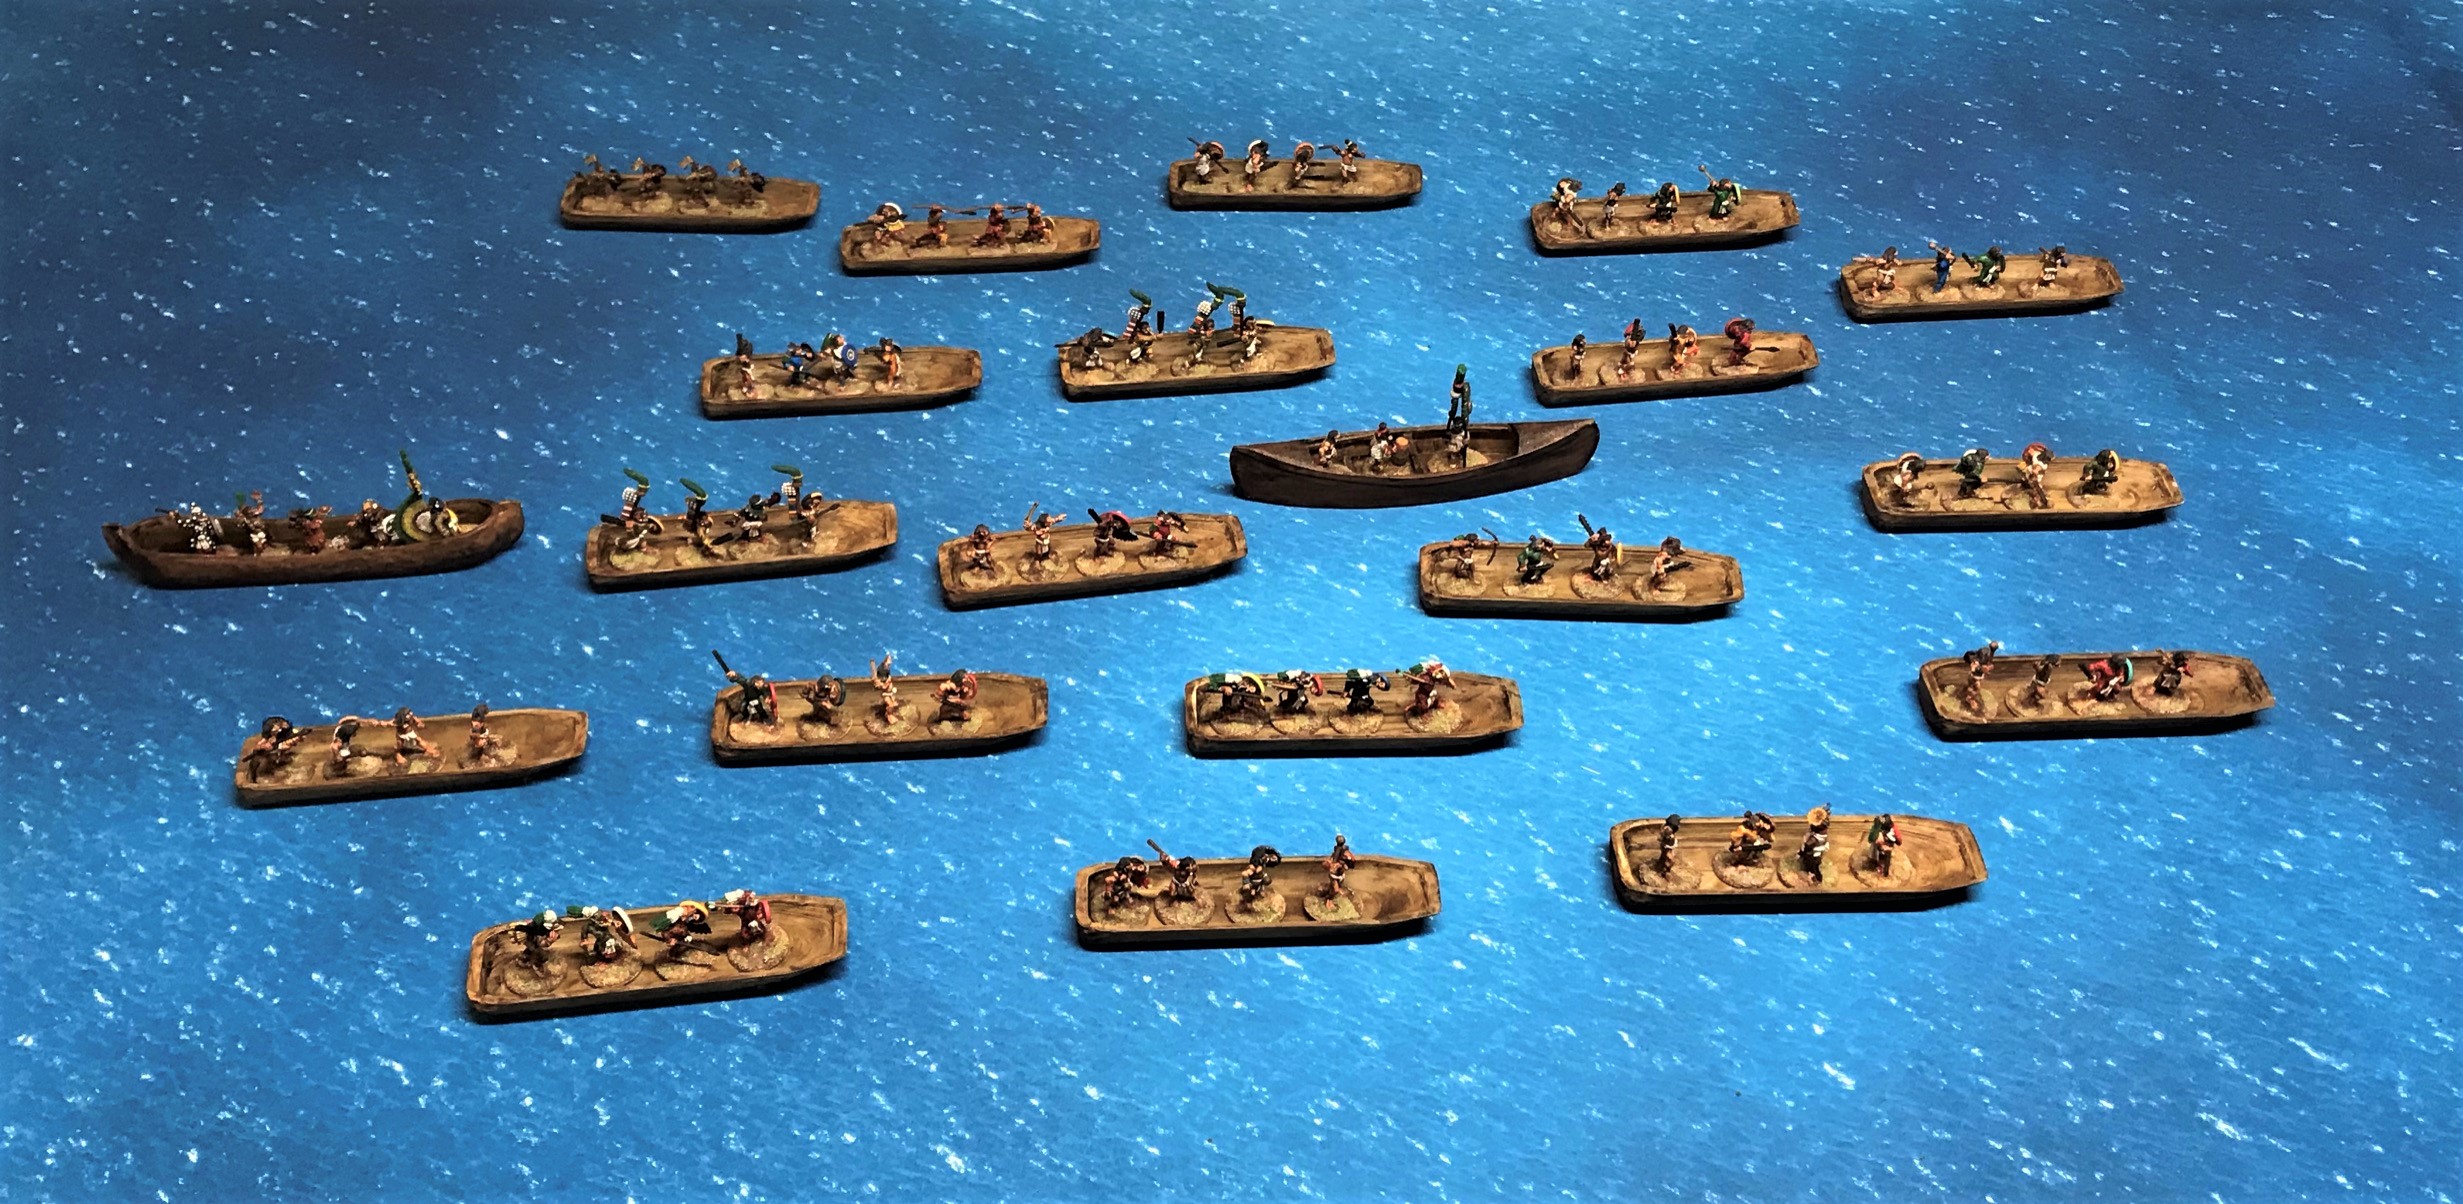
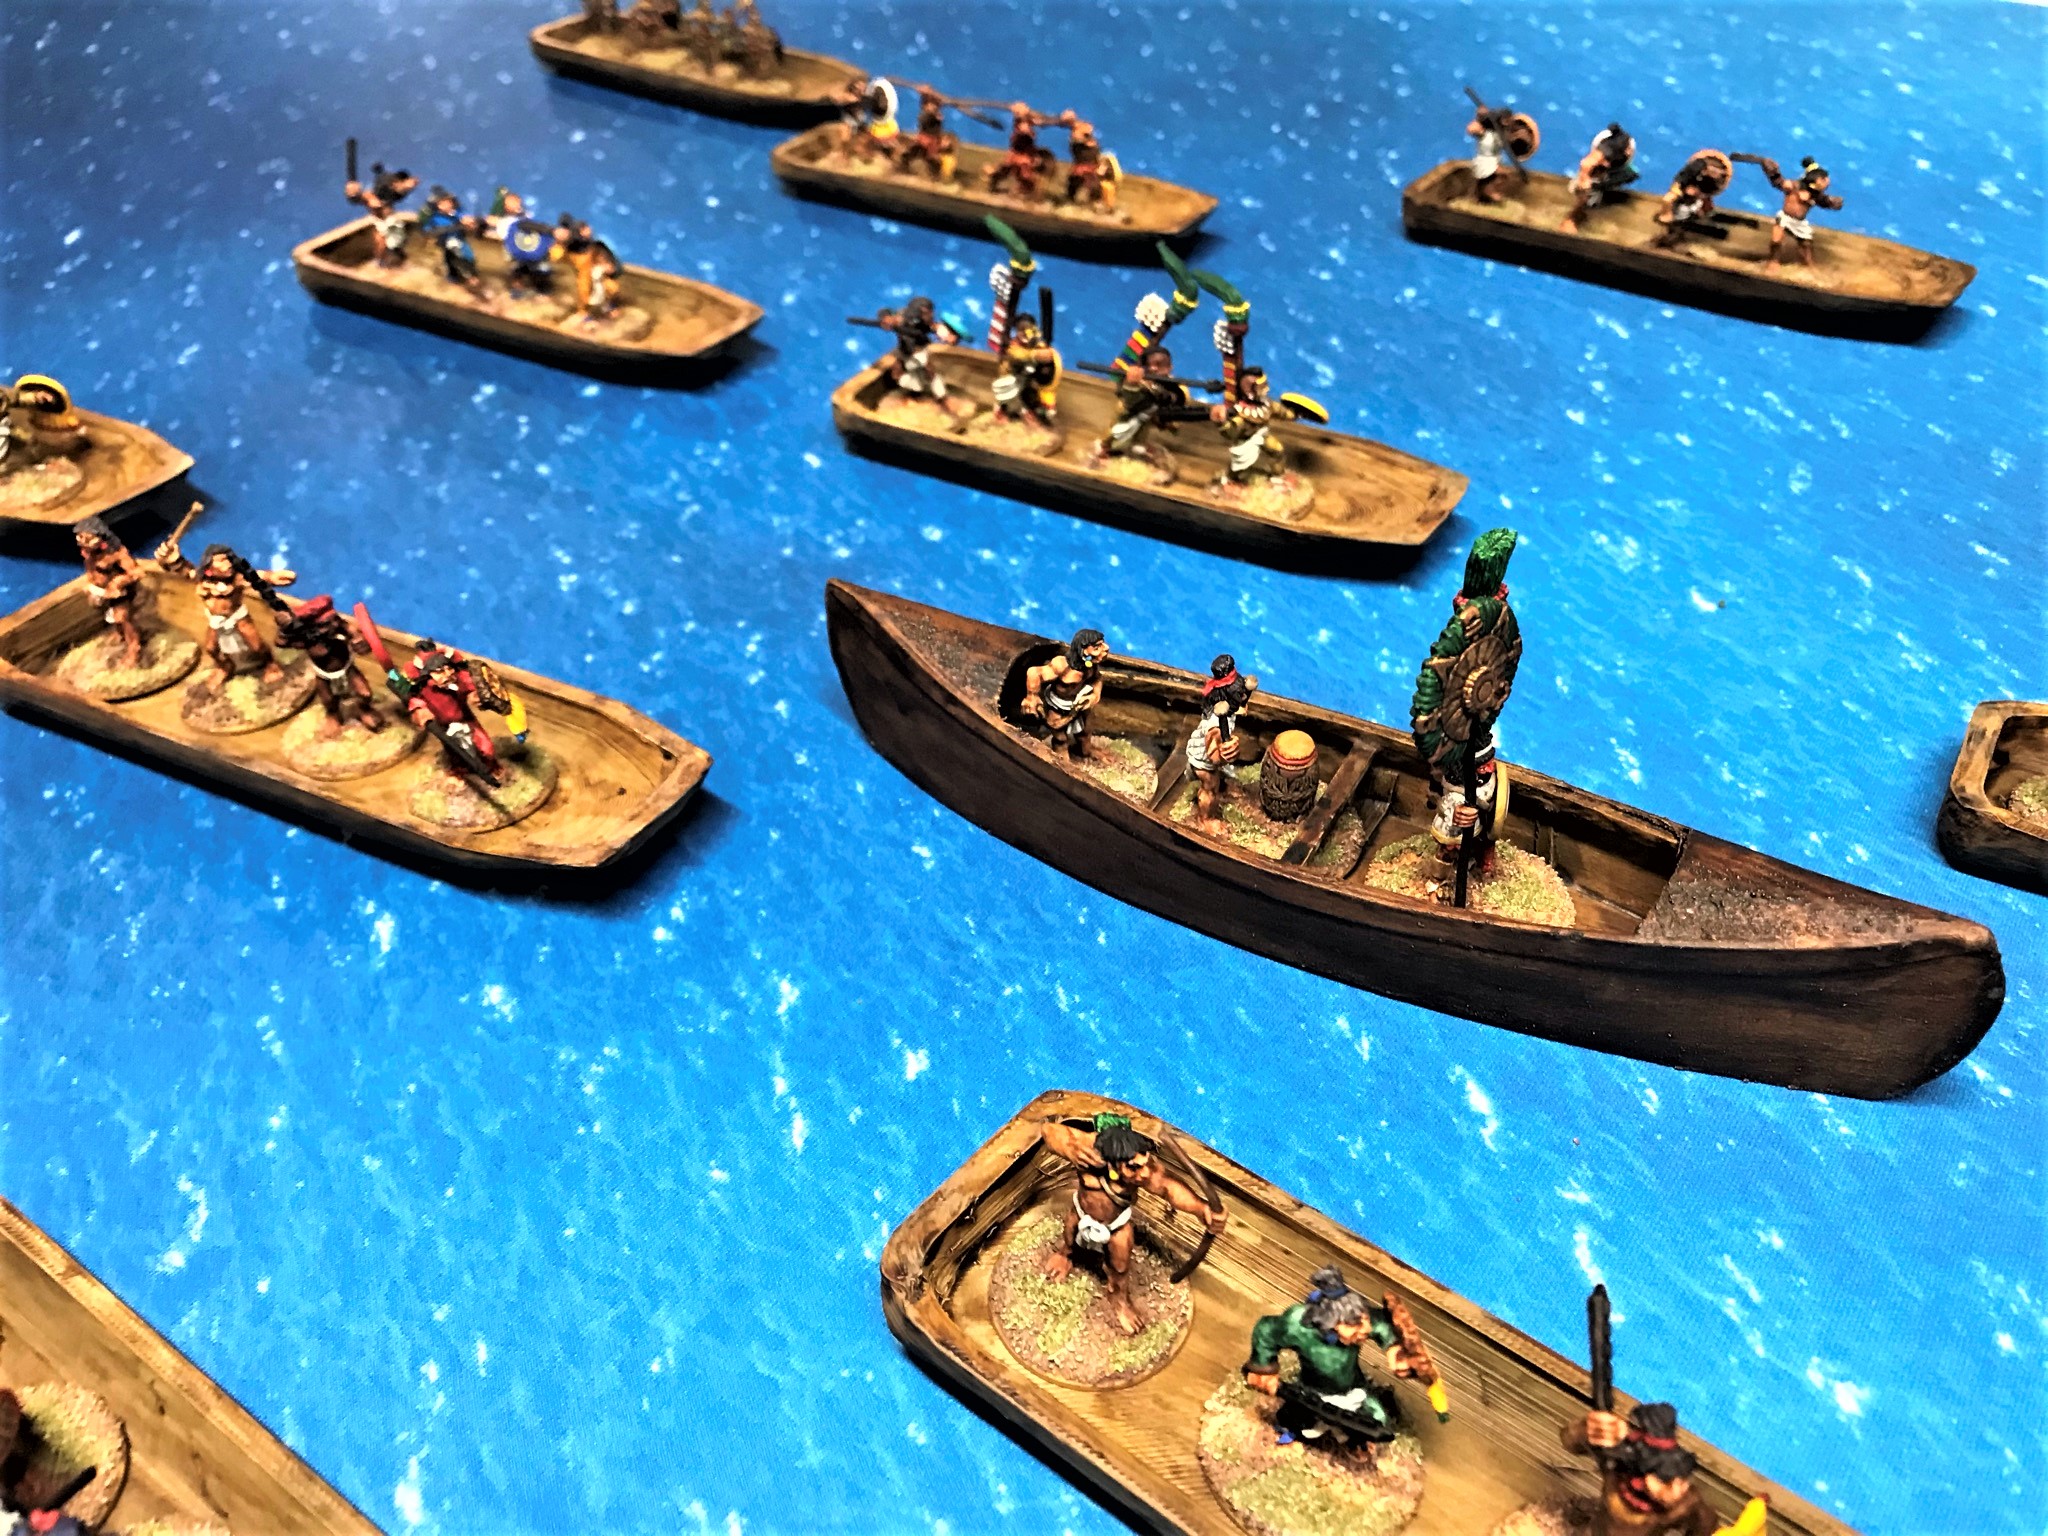
So now I had the five brigantines – and only two were exactly alike (the Sarissa models). I hoped to outfit them all with different lombards and falconets (both early cannon) plus crew. As I built these just before HAVOC 2022, this post had to wait, as after HAVOC was my vacation trip. And as mentioned – I had 5 cannon and 15 cannon crew to build for these brigantines – plus game aids for the battle. I hope to post about that project next. But first let me share a couple of group shots.
Thanks for checking out this post – it was a lot to build and if PVA was toxic I’d already be dead after this. Let me know which of these you liked best (or liked least) I’d love to read any thoughts you have on this project. More to come!
Miscellaneous details and references for those interested in that sort of thing:
For all of my previous posts on games, units, and other projects for my 16th Century Spanish Conquest supplement for Feudal Patrol™ – “Civilizations Collide” – please see this page.
PAINTS, INKS, GLAZES, SHADES, WASHES, PIGMENTS, FLOCKING, GLUES AND MORE THAT I USED ON THESE SHIPS:
On the 3D-Printed Brigantines (El Dólar & El Gregorio):
- 3D printed Medieval Cog ship kits from Buck Surdu and Greg Priebe
- Gorilla Glue
- Hobby matchsticks (from West Germany in 1987!)
- ½” rubber tubing
- Rustoleum black spray primer
- Army Painter “Dark Leather” primer
- Vallejo Surface Primer “German Green Brown”
- Cotton twine
- Wooden popsicle sticks
- Wooden dowels (3/8″ and 1/8″)
- Small (tiny) nails
- 1/8″ neodymium magnets
- Paper clip wire
- Jewelry/bead wire rings
- Green stuff
- White card stock
- Elmer’s PVA Glue
- Plastruct 1.5mm styrene sheets
- Plastruct Bondene cement
- SCI Grip Fast Set solvent cement
- Pebeo Studio Acrylics “Auxiliaries Modeling Paste HD”
- Vallejo Model Air “Armour Brown”
- Vallejo Model Air “First Light”
- Vallejo Model Air “Brown”
- Vallejo Model Air “Wood”
- Army Painter “Mid-Brown” (shade)
- Citadel “Contrast Paint – Apothecary White”
- Citadel “Contrast Paint – Skeleton Horde”
- Citadel “Agrax Earthshade” (wash)
- Citadel “Contrast Paint – Talassar Blue”
- Citadel “Chronus Blue”
- Craftsmart “White”
- Darjeeling tea bags
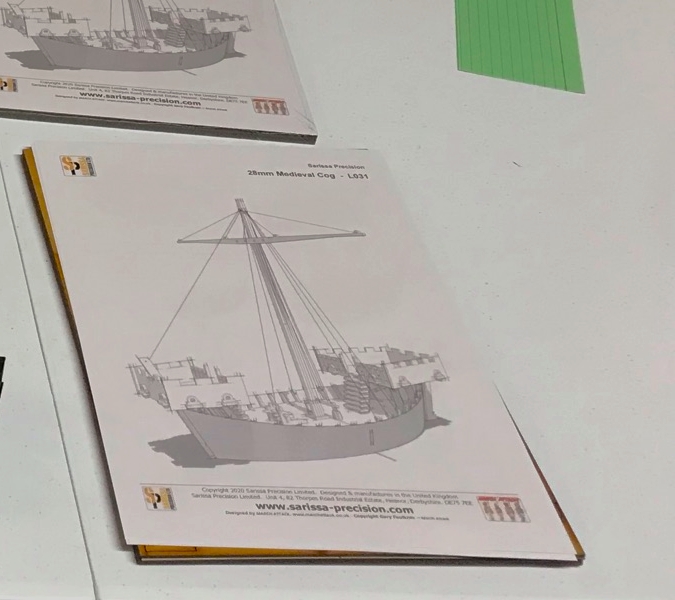
On the Sarissa MDF Kit Brigantines (EL CONQUISTADOR & El Perro de Guerra):
- Sarissa Medieval Cog ship kits #L031
- Elmer’s PVA Glue
- Gorilla Glue
- Hobby matchsticks (from West Germany in 1987!)
- Wooden popsicle sticks
- Army Painter “Mid-Brown” (shade)
- Jewelry/bead wire rings
- White card stock
- Citadel “Contrast Paint – Skeleton Horde”
- Citadel “Agrax Earthshade” (wash)
- Darjeeling tea bags
On the Scratch-built Brigantine (El Marcos):
- Recycled MDF from the Sarissa #L031 leftover MDF
- Elmer’s PVA Glue
- 3/16″ balsa wood
- Revell 1/8″ Basswood
- Gorilla Glue
- Hobby matchsticks (from West Germany in 1987!)
- Wooden popsicle sticks
- Vallejo Surface Primer “German Green Brown”
- Cotton twine
- Wooden popsicle sticks
- Wooden dowels (,1/4″, 3/8″ and 1/8″)
- 1/4″ steel washers
- Small (tiny) nails
- 1/8″ neodymium magnets
- Paper clip wire
- Jewelry/bead wire rings
- White card stock
- Vallejo Model Air “Armour Brown”
- Vallejo Model Air “First Light”
- Vallejo Model Air “Brown”
- Vallejo Model Air “Wood”
- Army Painter “Mid-Brown” (shade)
- Citadel “Contrast Paint – Skeleton Horde”
- Citadel “Agrax Earthshade” (wash)
- Darjeeling tea bags


