Last year I painted up a Winkie Light Artillery Battery (WLAB). I thought it was high time that the Winkies got a longer-range artillery battery to start 2024. They were sick of the Munchkins out-ranging them. To that end, I painted up a Winkie Medium Artillery Battery (WMAB) – the subject of this post.
As described previously in my posts on the Winkies, they are much more interested in fighting hand-to-hand in melee with a foe versus shooting a weapon at one. I posted this on the WLAB post last year – but it bears repeating:
Winkies (the orcs of Ozz basically) are not overly bright in general, and certainly are not very educated. According to the Wars of Ozz rulebook,
“…Winkie artillery is something of an afterthought. Numerous battles and sieges have shown the usefulness of a strong artillery arm, but it is simply not a glorious or honourable role according to the Winkie mindset. Few Generals are chosen from the ranks of the artillery. Chieftains’ sons would much rather be leading a regiment of spearmen or jaegers. The artillery requires too much thinking, the guns can’t compete with the workshops of the Munchkins, and there is too much heavy lifting to be glorious. Consequently, the commanders of the batteries are an eccentric lot. They range from brilliant to simply odd. Except for the master gunners, most of the crew are conscripts secretly happy to be well back from the front line.”
Wars of Ozz by John R. “Buck” Surdu, Section 2.2.2.5, page 25
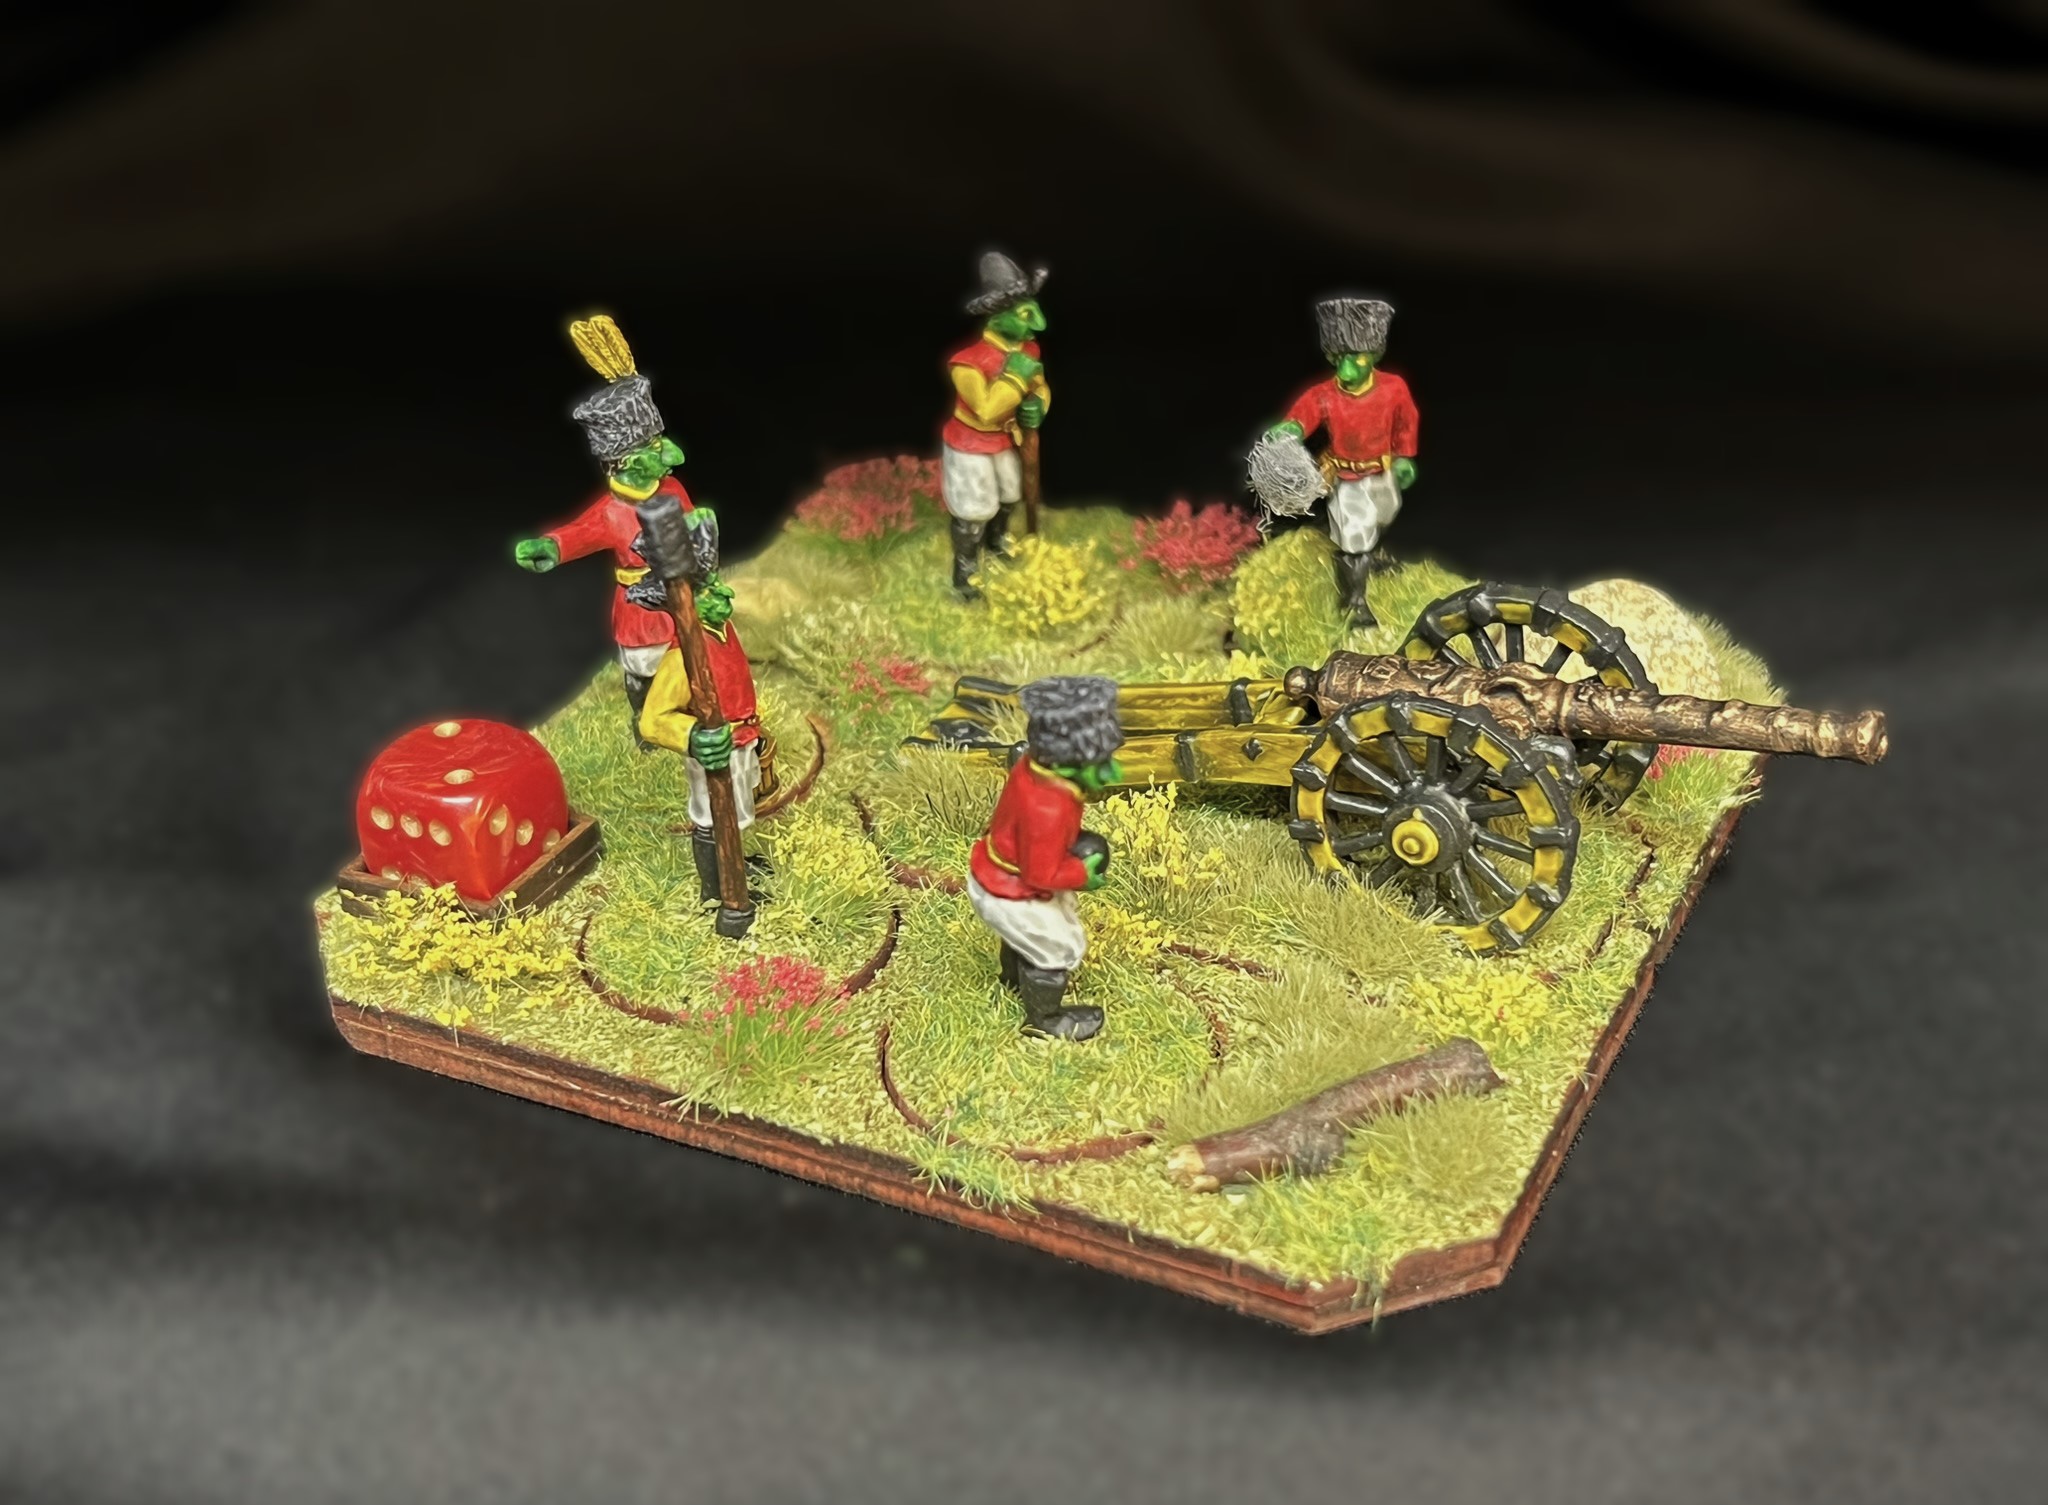
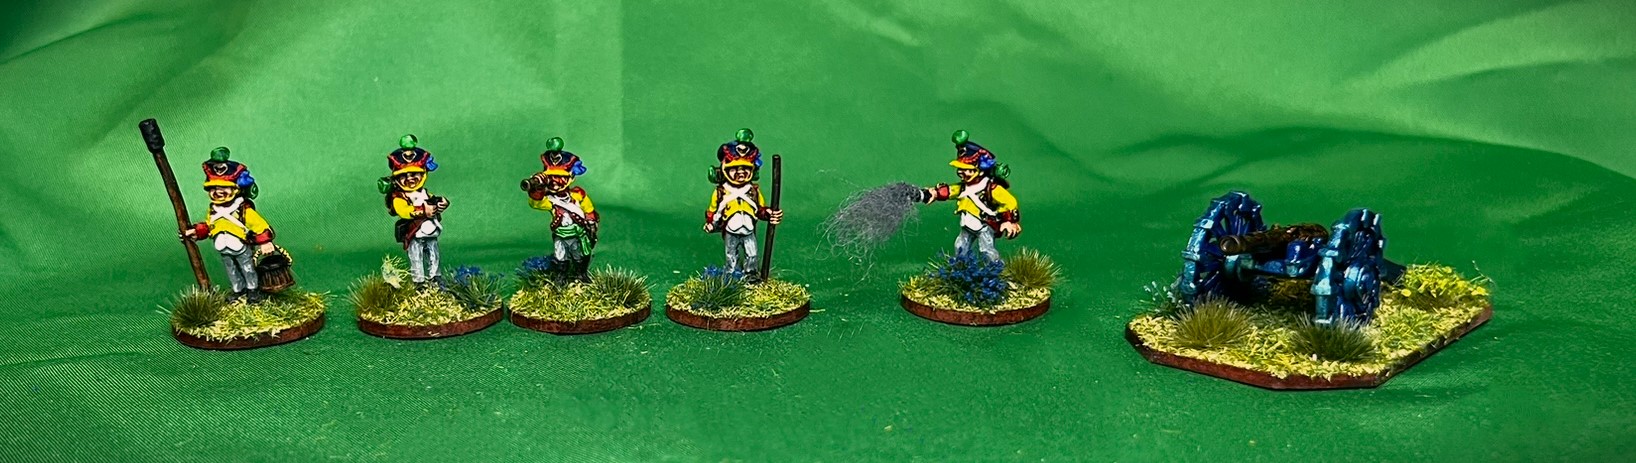
The WMAB is SKU #OZZ-307. It, like the WLAB, has 5 figures plus the gun in total. I again used an MDF sabot base for all of the figures. The battery is 28mm in scale, and the figures are metal. It is worth 5 points – one more than a WLAB and the same cost as a regular Winkie infantry unit. It does outrange the WLAB. In the game, light artillery has a short/long range combination of 6″/18″ versus that of a medium battery like this which has a short/long range of 8″/24″. It can take 5 hits – represented by the 5 figures – though when it gets to 4 the unit is eliminated.
The WMAB has the exact same uniform colors as the WLAB. I started painting the unit in parallel with Evora’s BodyGuard Infantry Regiment. This is my fourth unit for Dave Stone’s “PAINT WHAT YOU GOT CHALLENGE 2023/2024” painting challenge that runs from December 26th, 2023 to February 29th, 2024. It’s also going to play a major role in many of my upcoming games for the multiple gaming conventions that I plan on supporting as a GM. At present, that support level is now at 25 four-hour games just through May across 4 different conventions in Massachusetts, Maine, and New Hampshire (TotalCon38, HAVOC, Mayhem, and HUZZAH!.
First, I’ll share some (well VERY few) WIP shots, then some eye candy of the WMAB.
WIP shots…
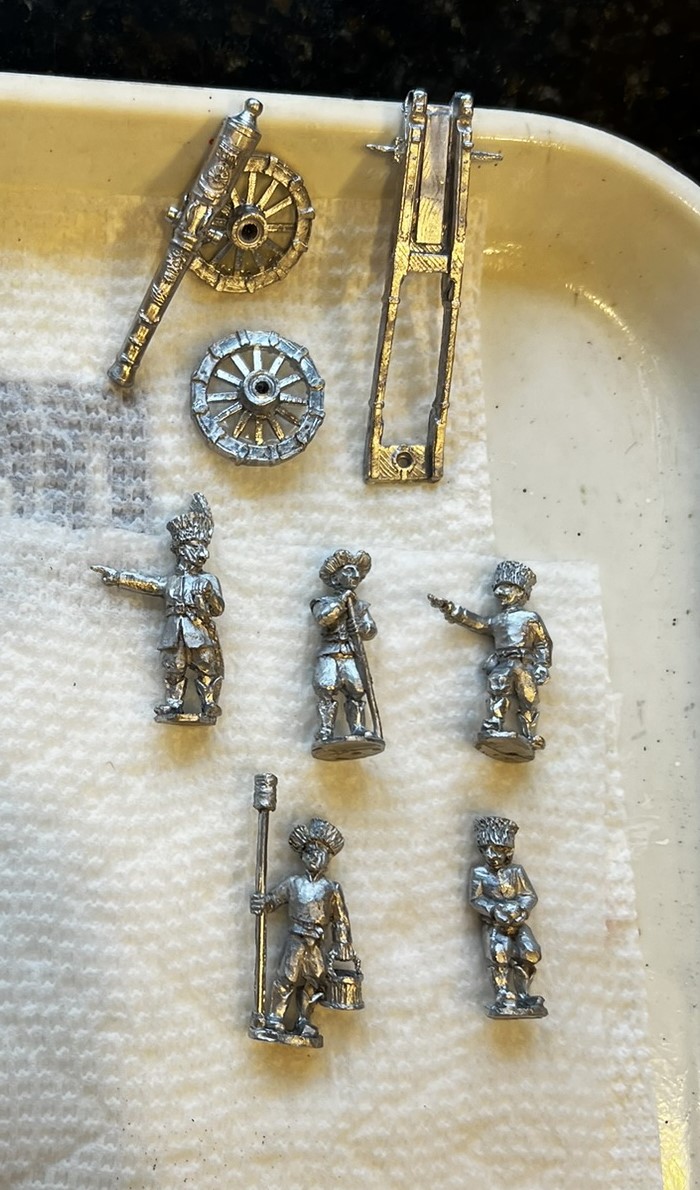
The WMAB as received.
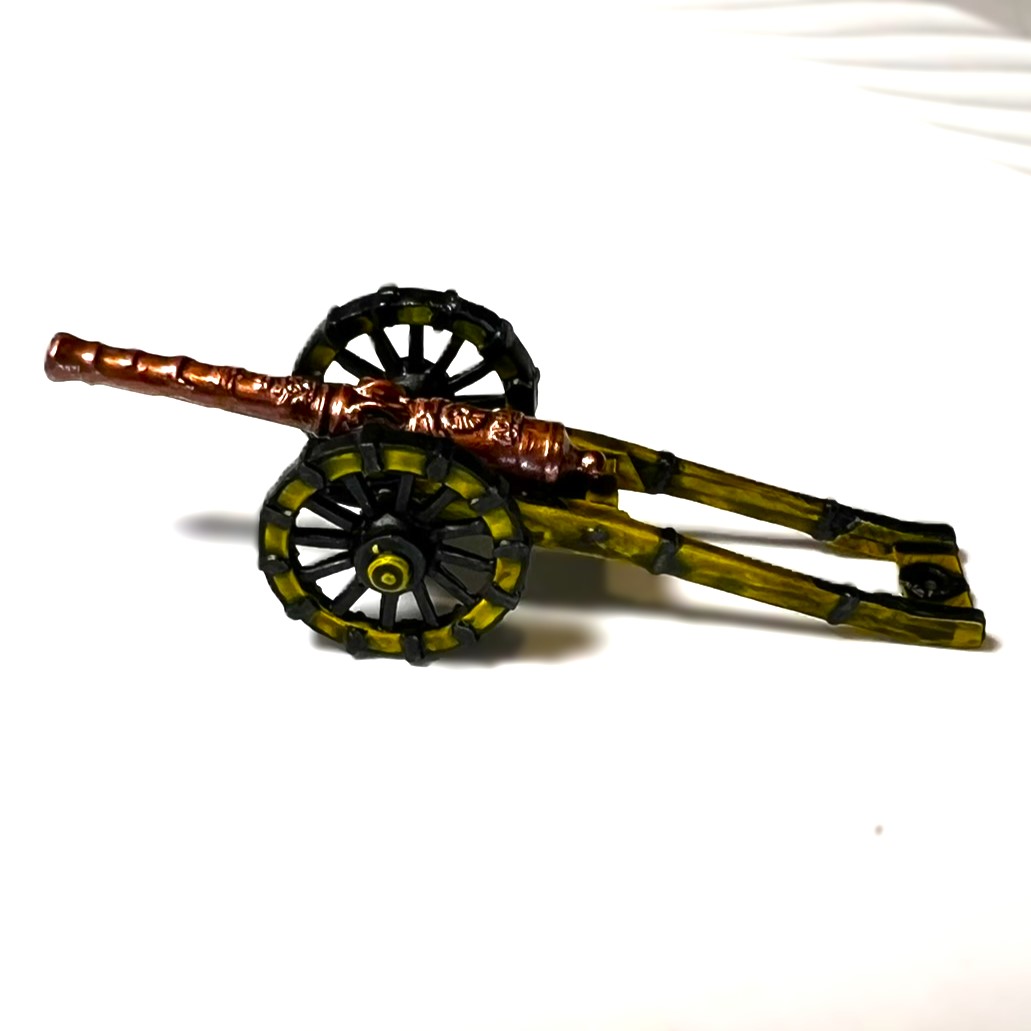
Regarding my painting, I mostly followed my usual process, except I did the gun first. It came out too coppery versus brass at first – and Army Painter “Talos Bronze”, while a nice metallic speed paint, is indeed very copper-colored. A switch to a craft metallic paint - Martha Stewart Crafts “Brushed Bronze” – did the trick. I could have gone with steel, but I like the look of bronze cannon.
With Army Painter “Talos Bronze”With MS Crafts “Brushed Bronze”
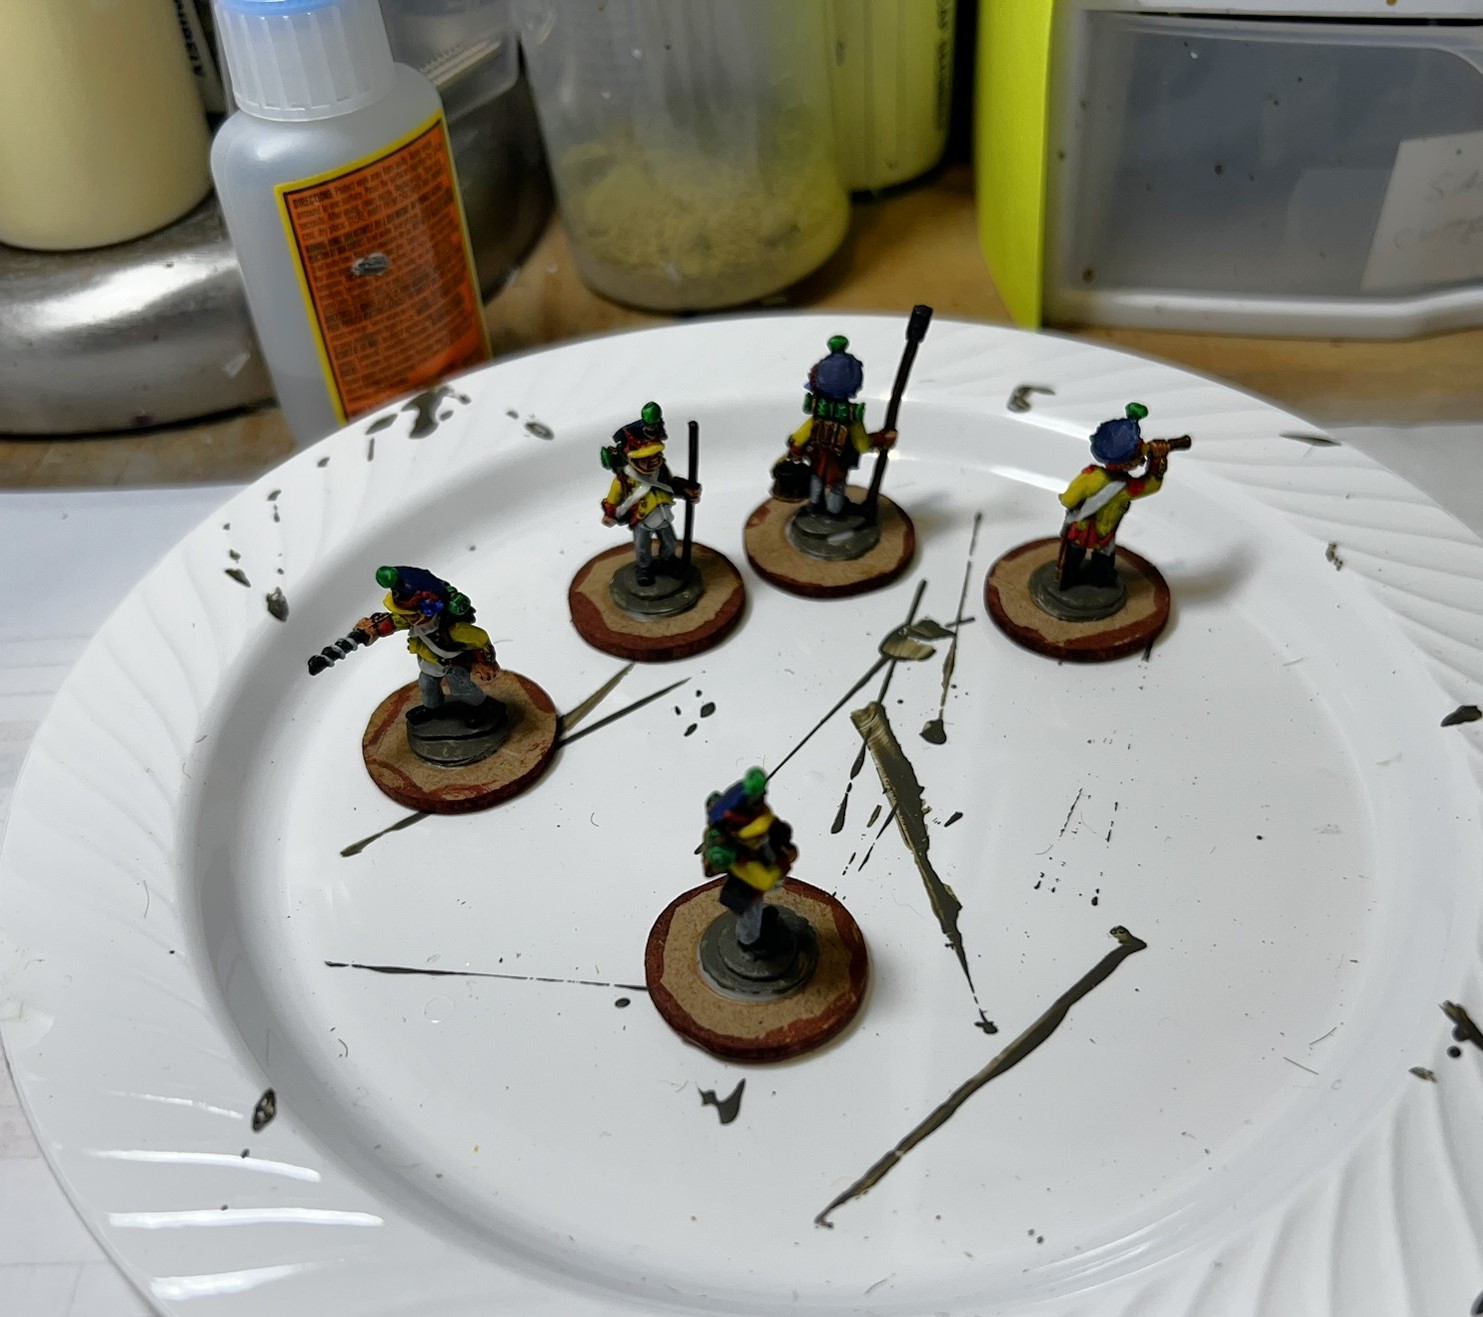
The crew was easy to do:
Early paintingAfter varnishing
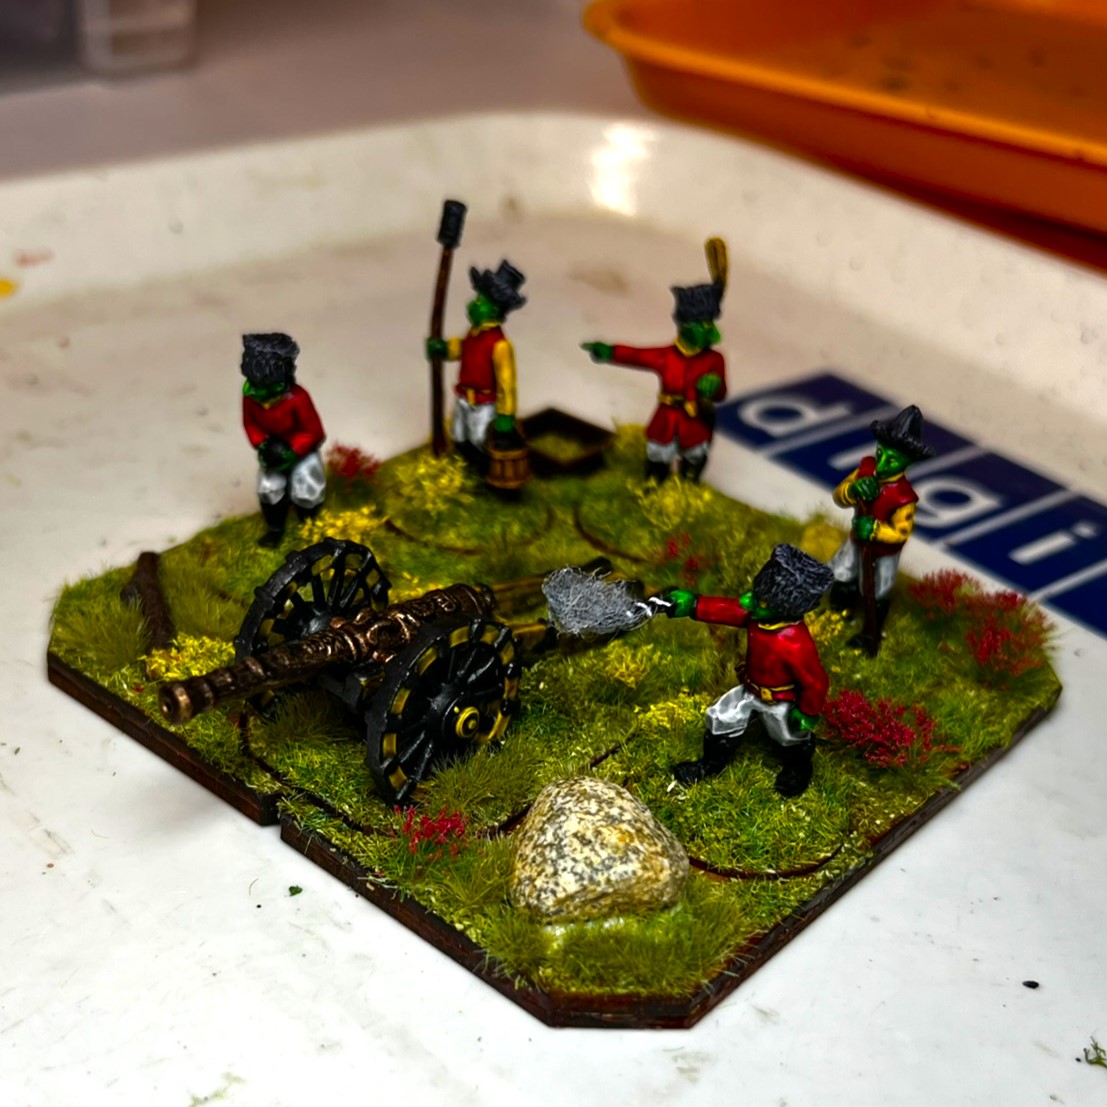
And here is the WMAB finished on its magnetized MDF sabot base:
The WMAB!
Now for some WMAB…
Eye Candy
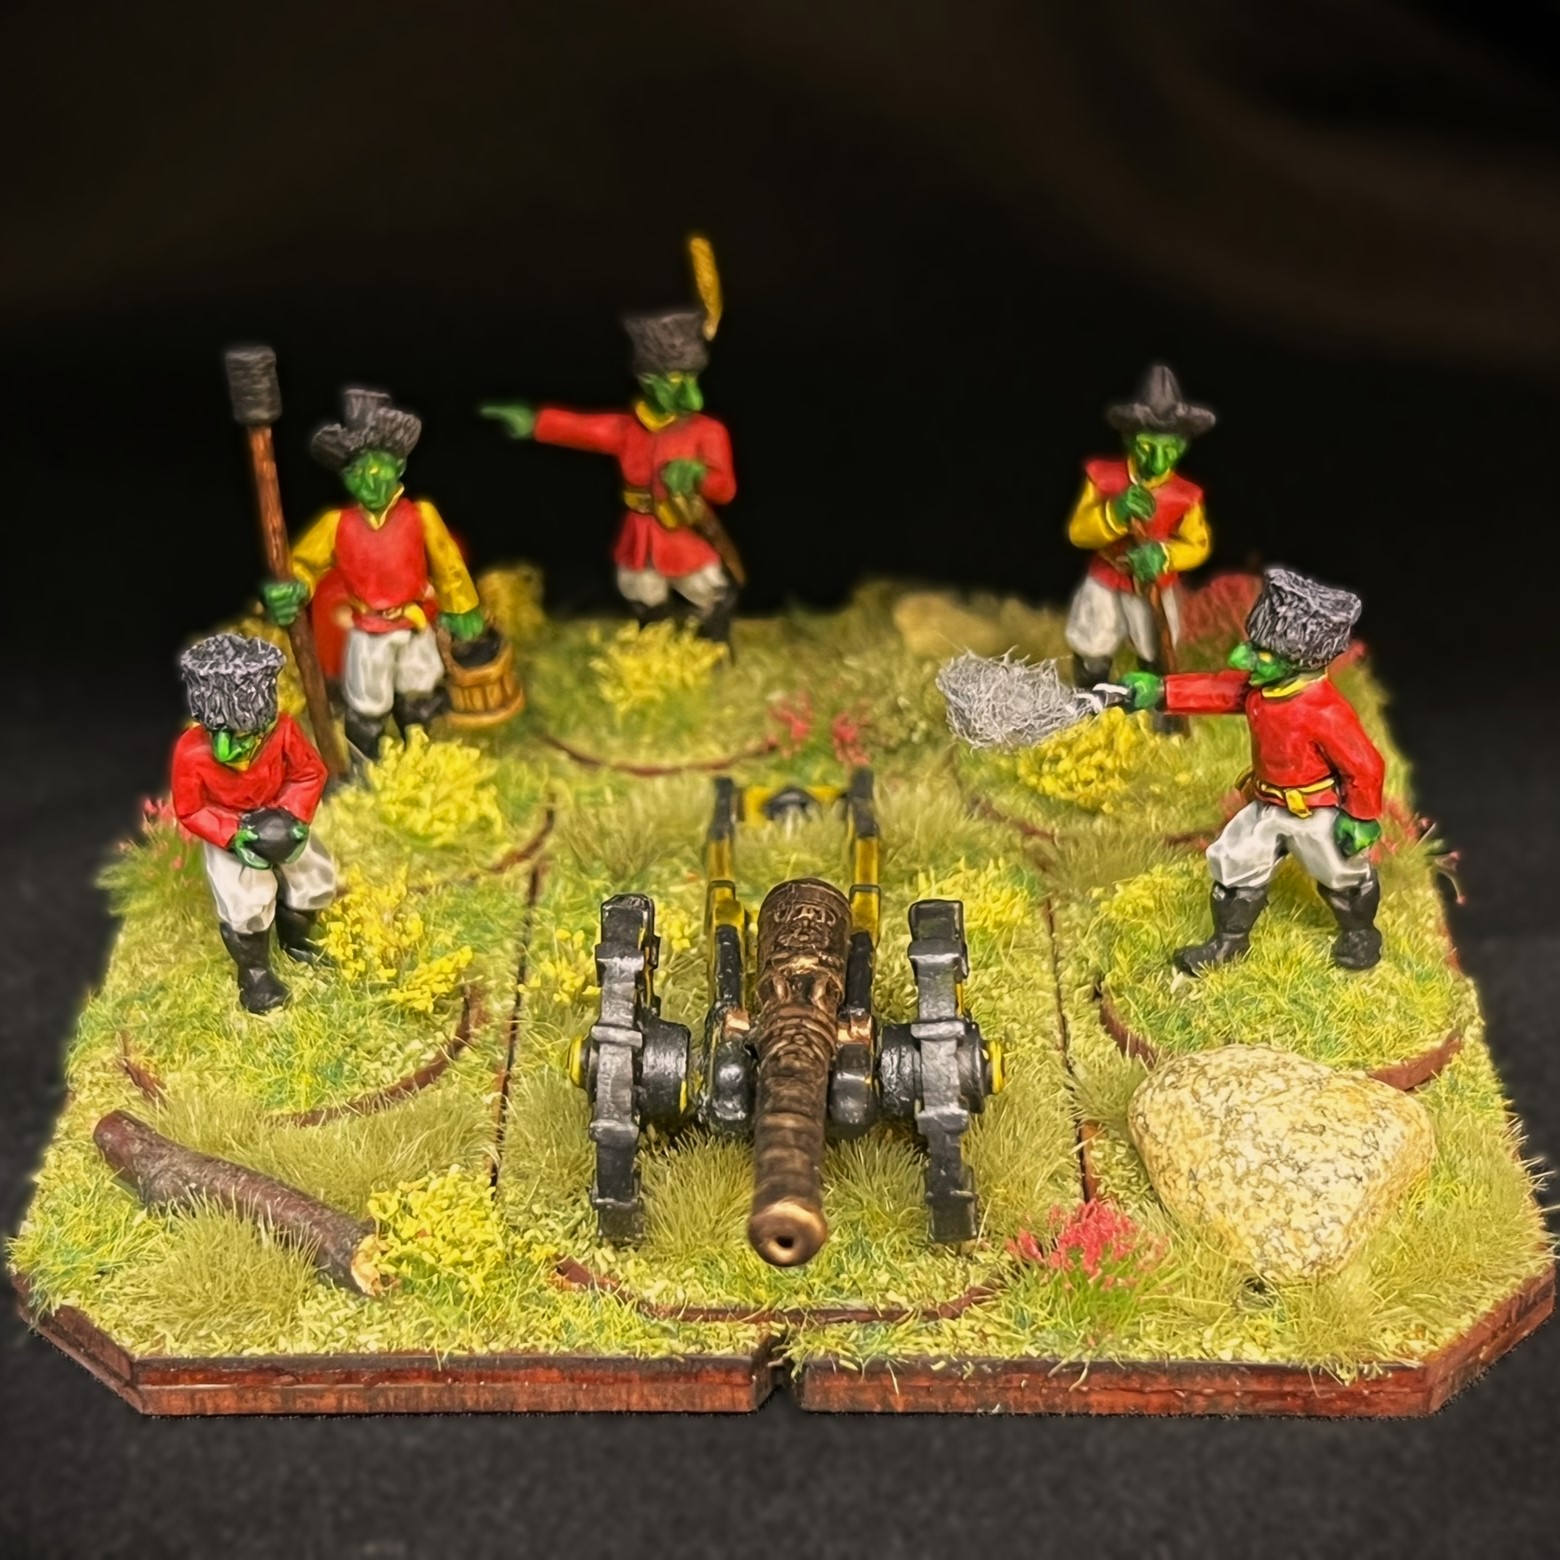
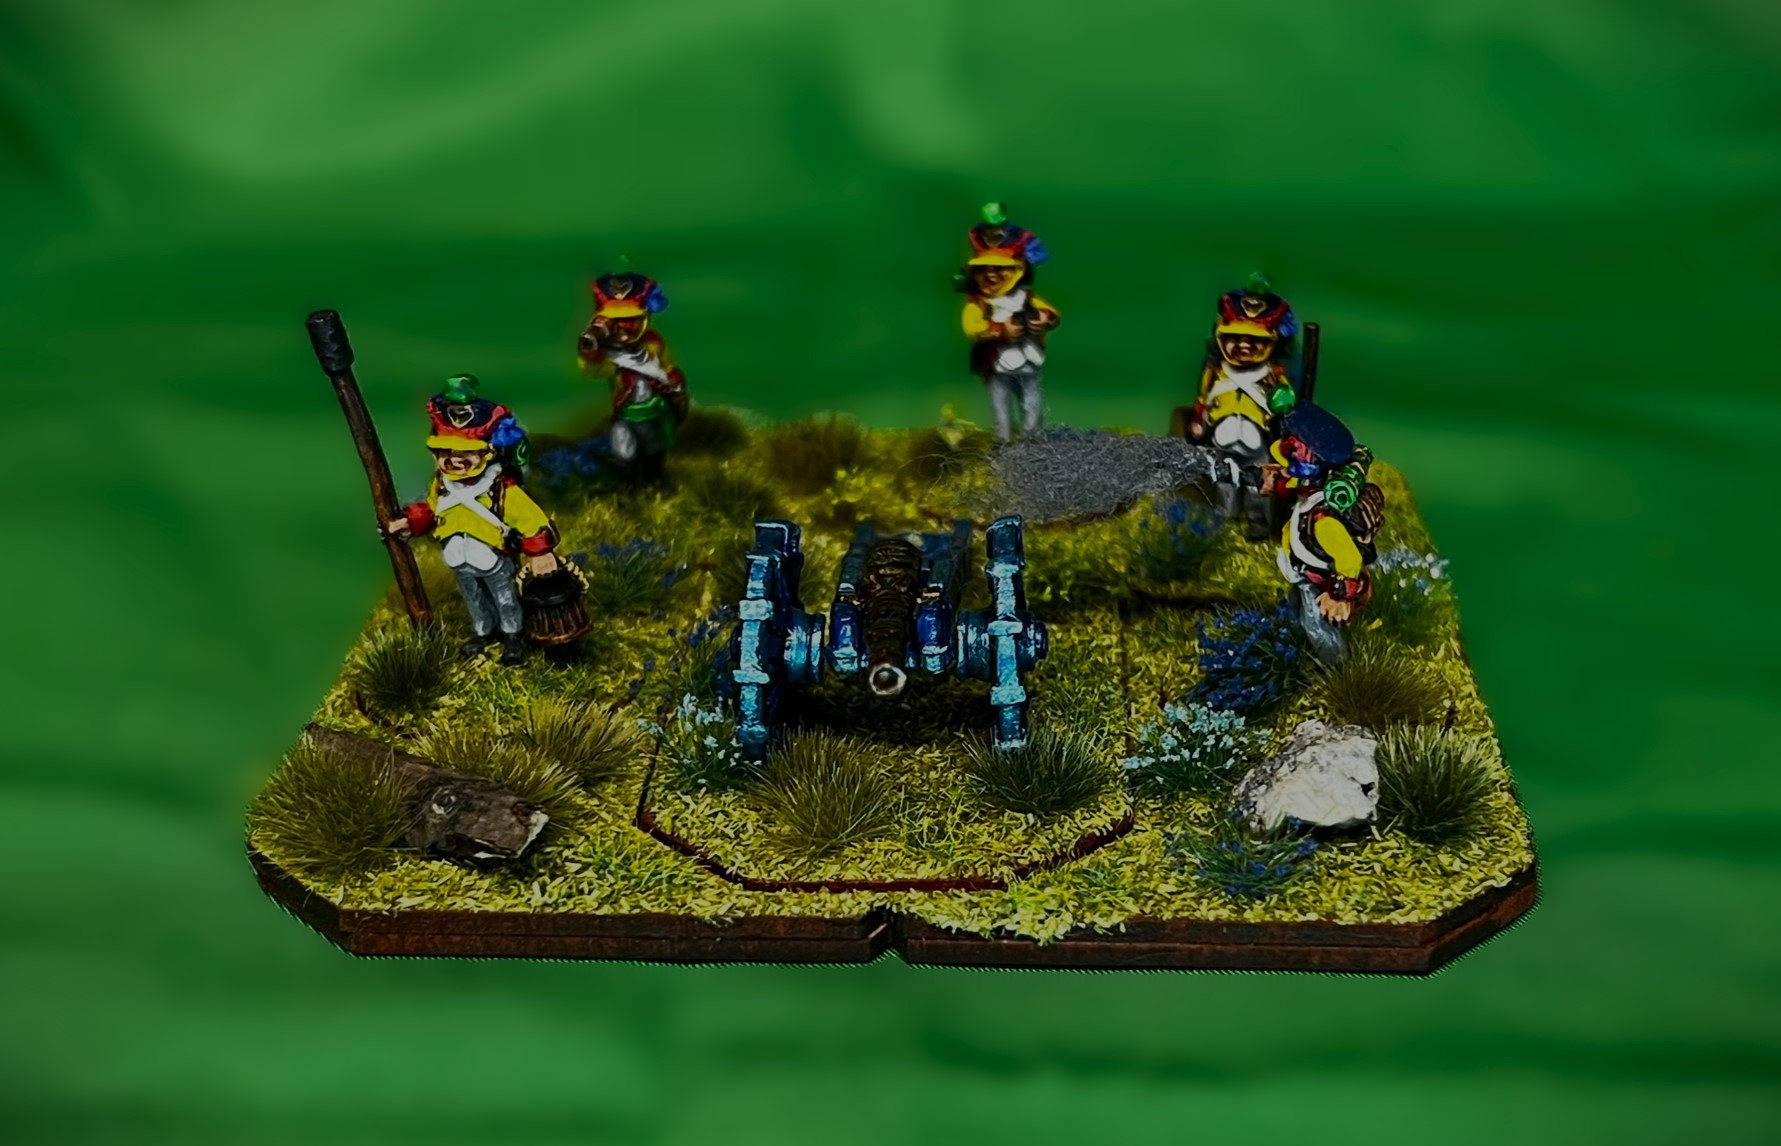
The WMAB – frontal view.
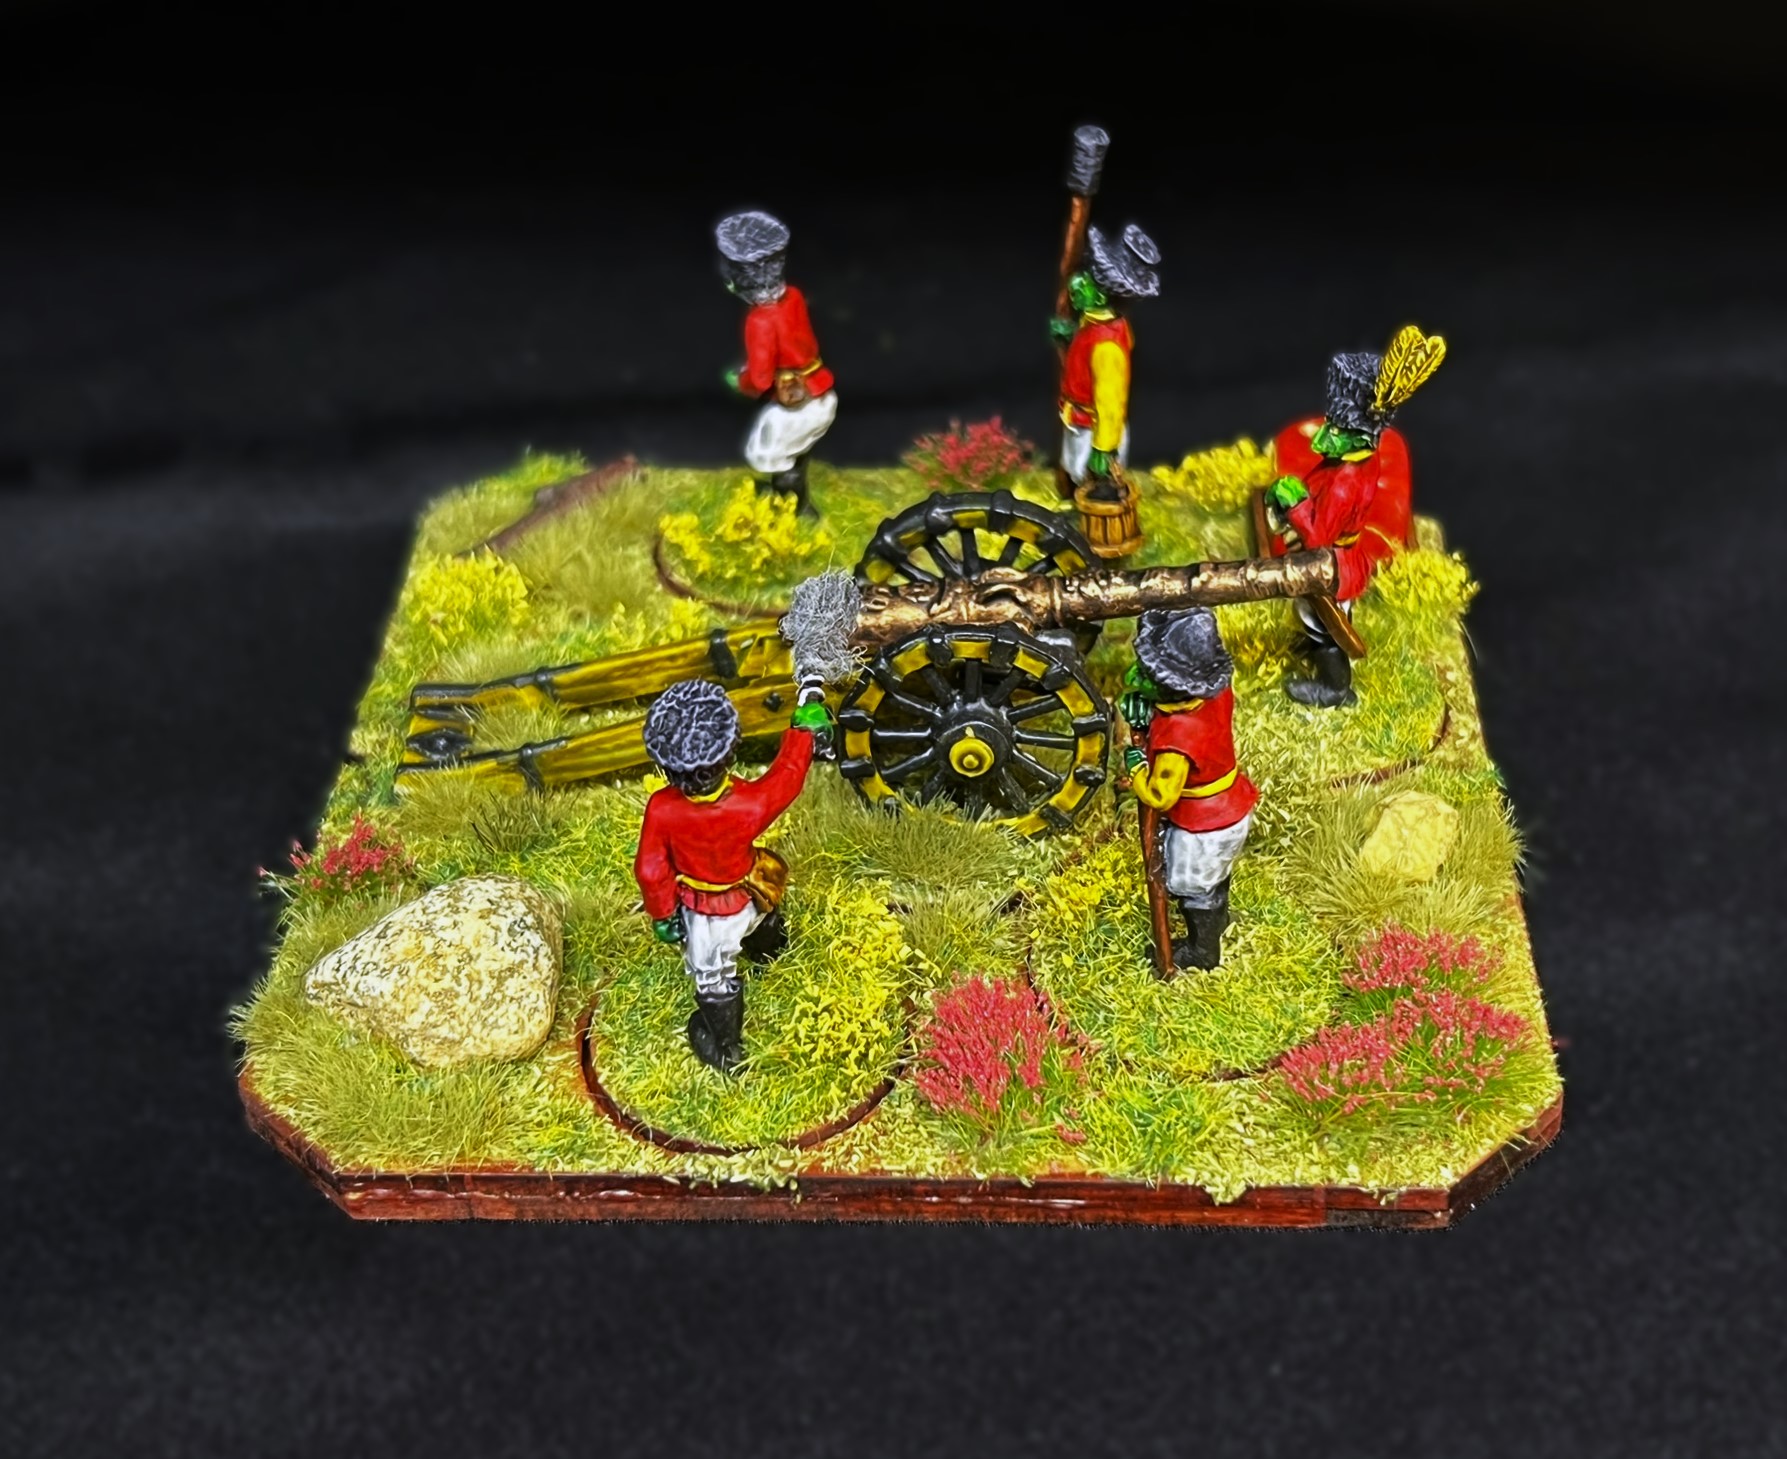
WMAB – view of the left front.
Right front view of the WMAB.
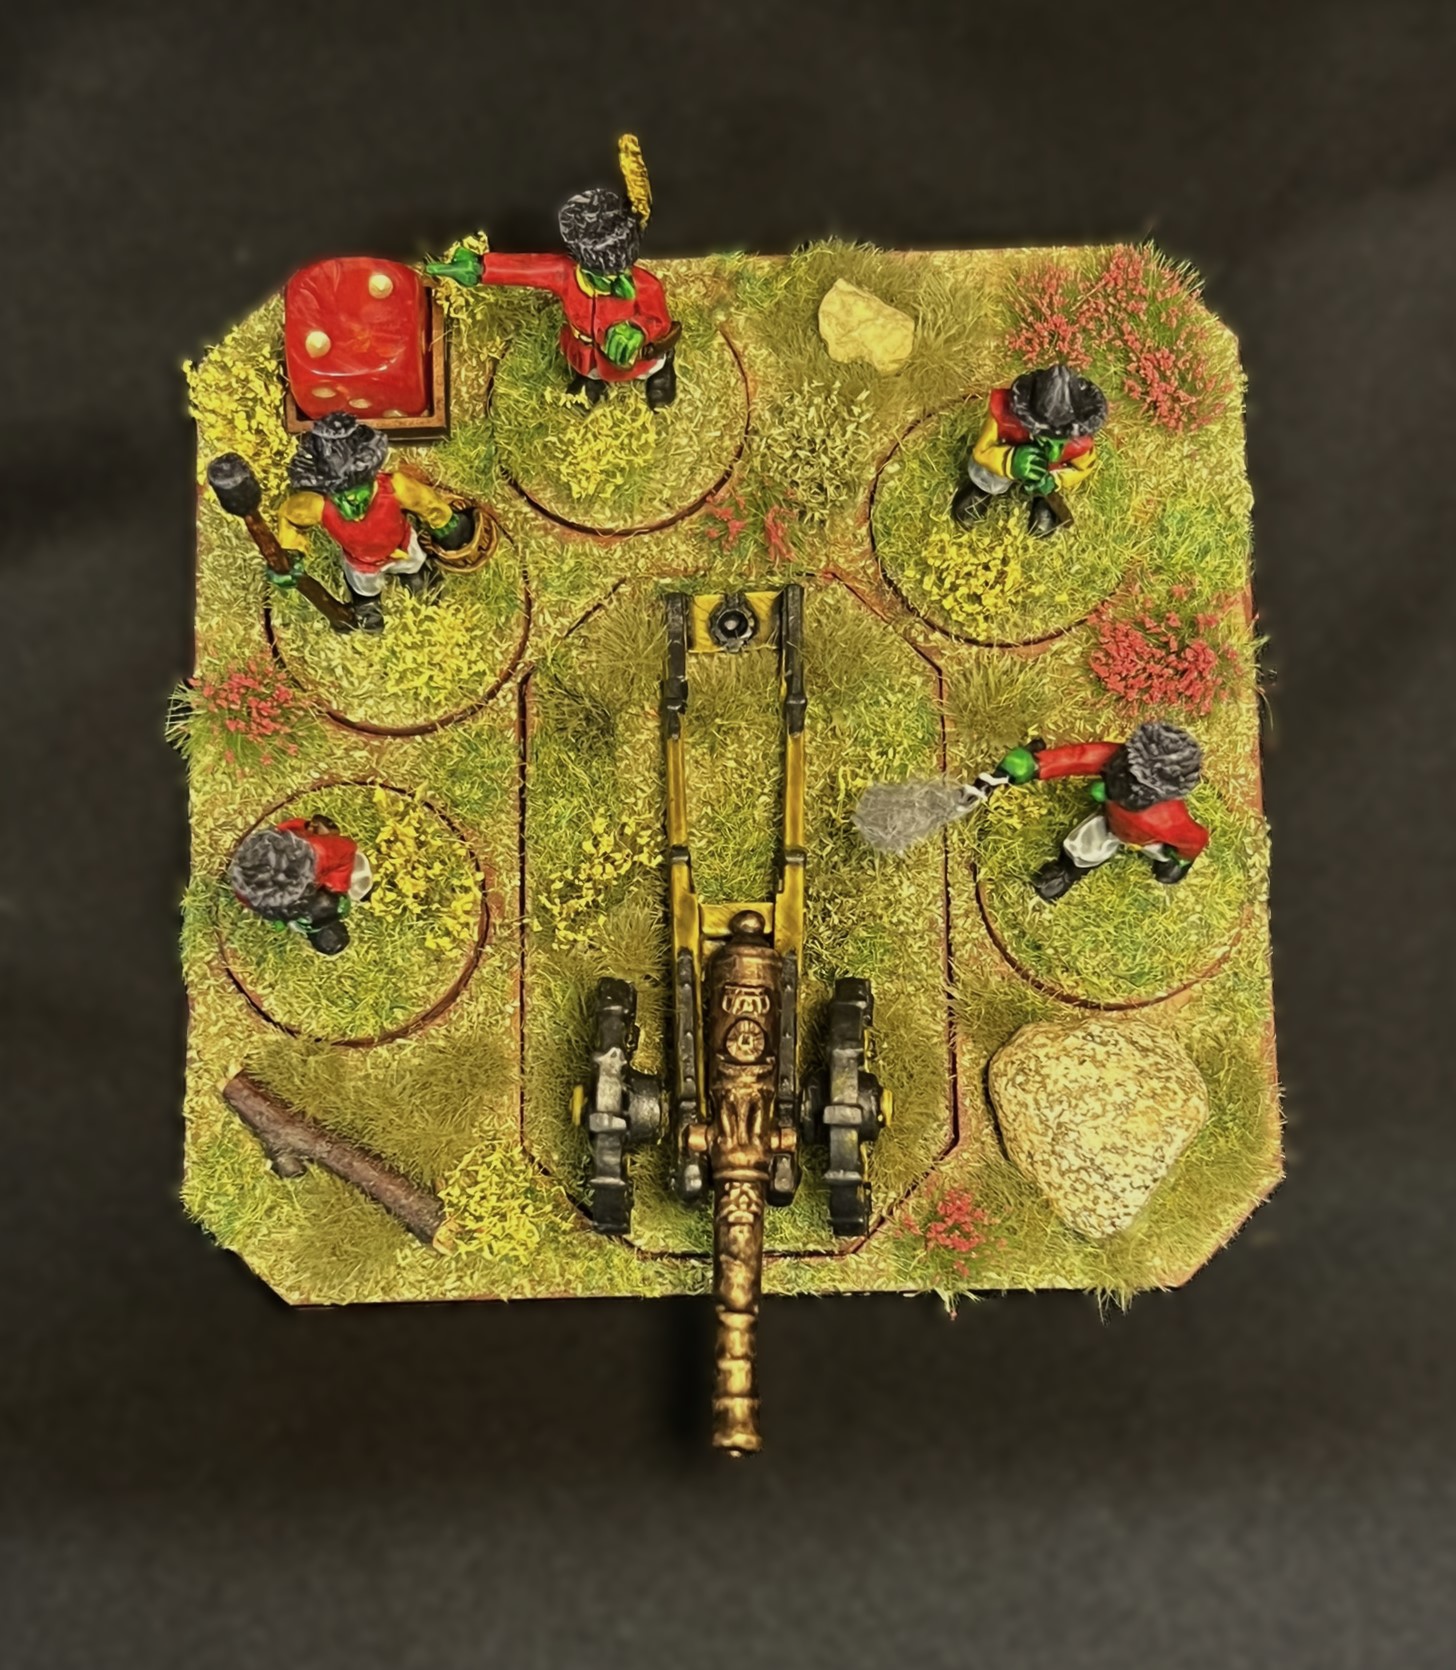
A view of the top of the battery.
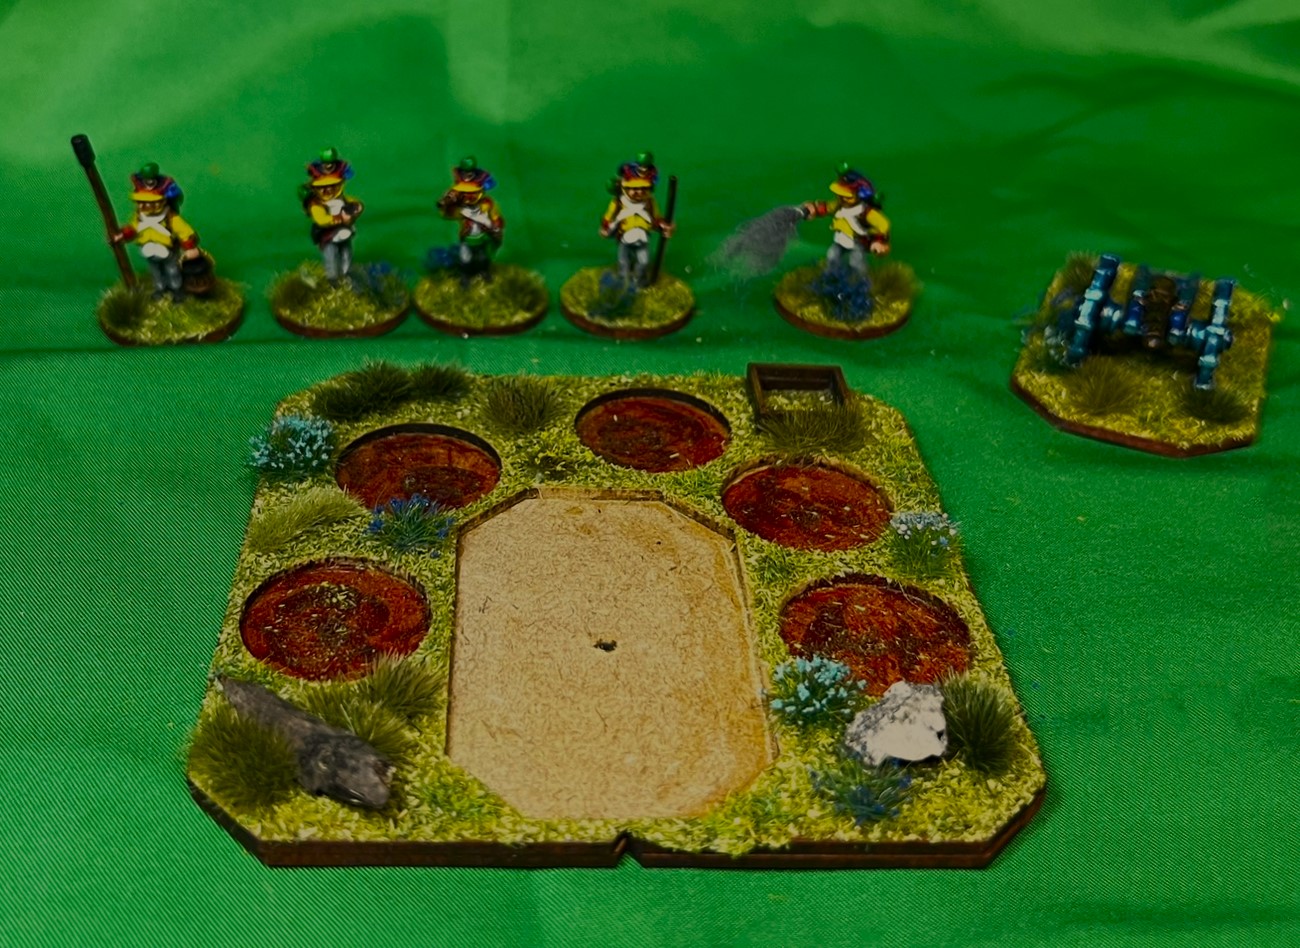
As with all of my artillery units, the magnetized MDF sabot base allows for the gun to be turned around 180 degrees so as to designate it being limbered.
Group shot
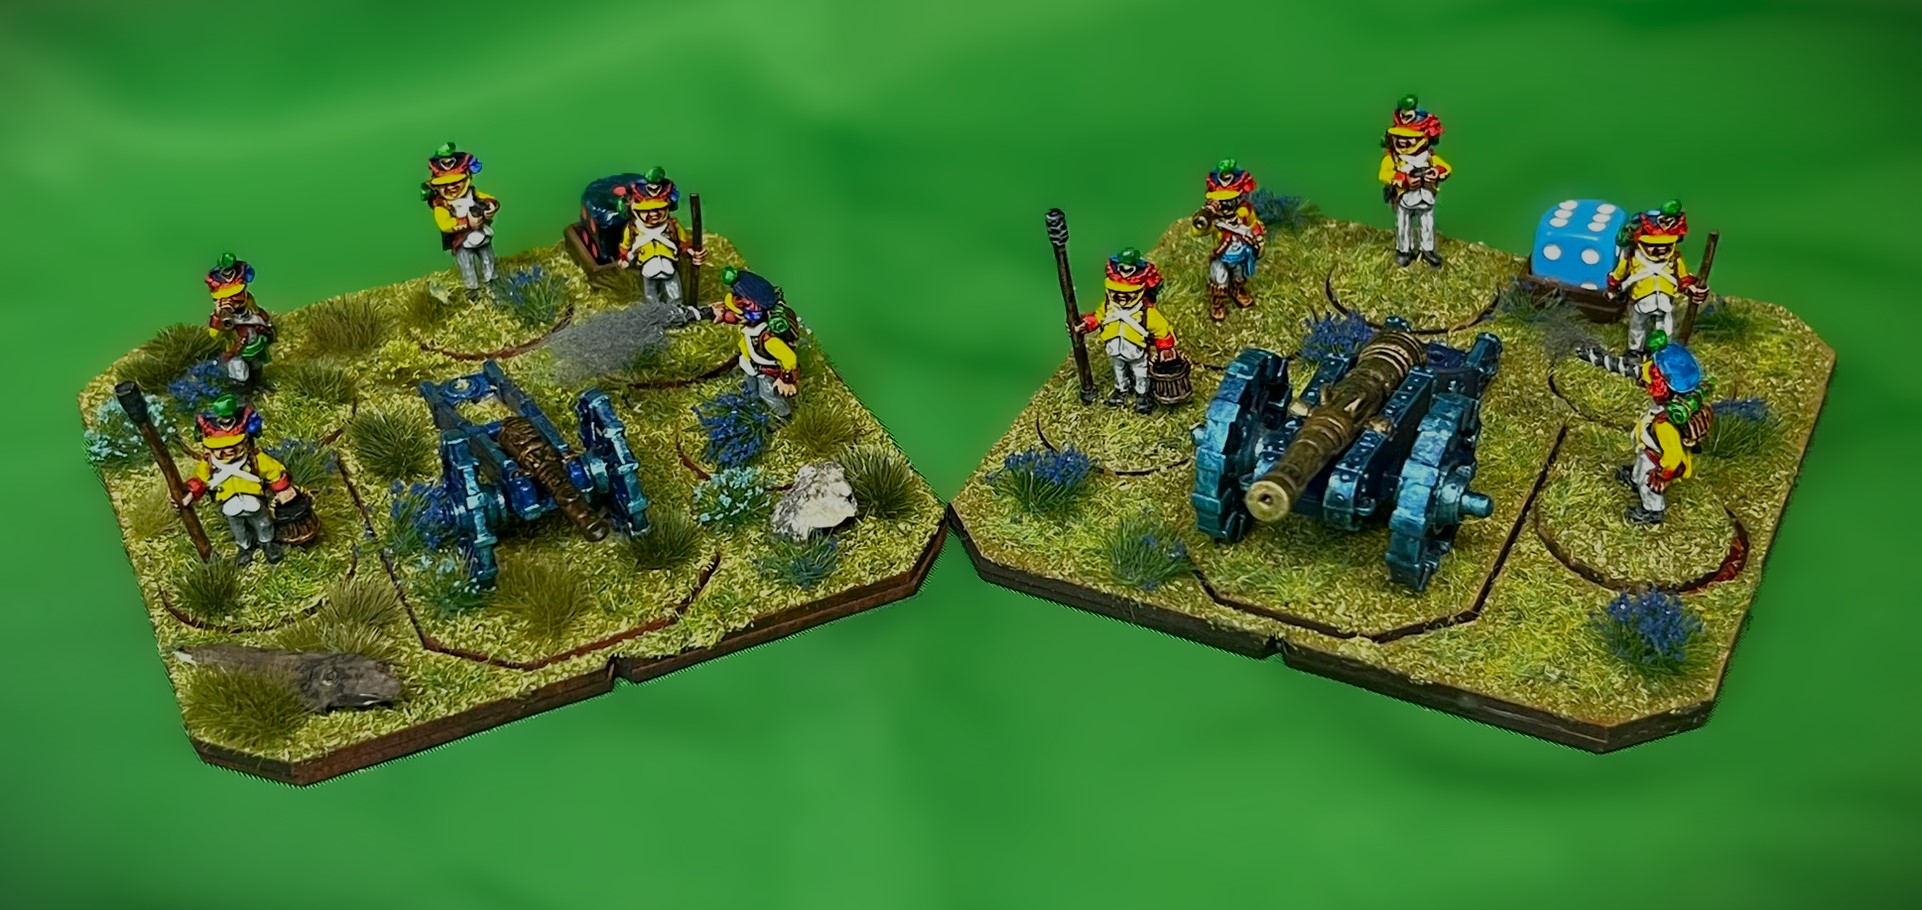
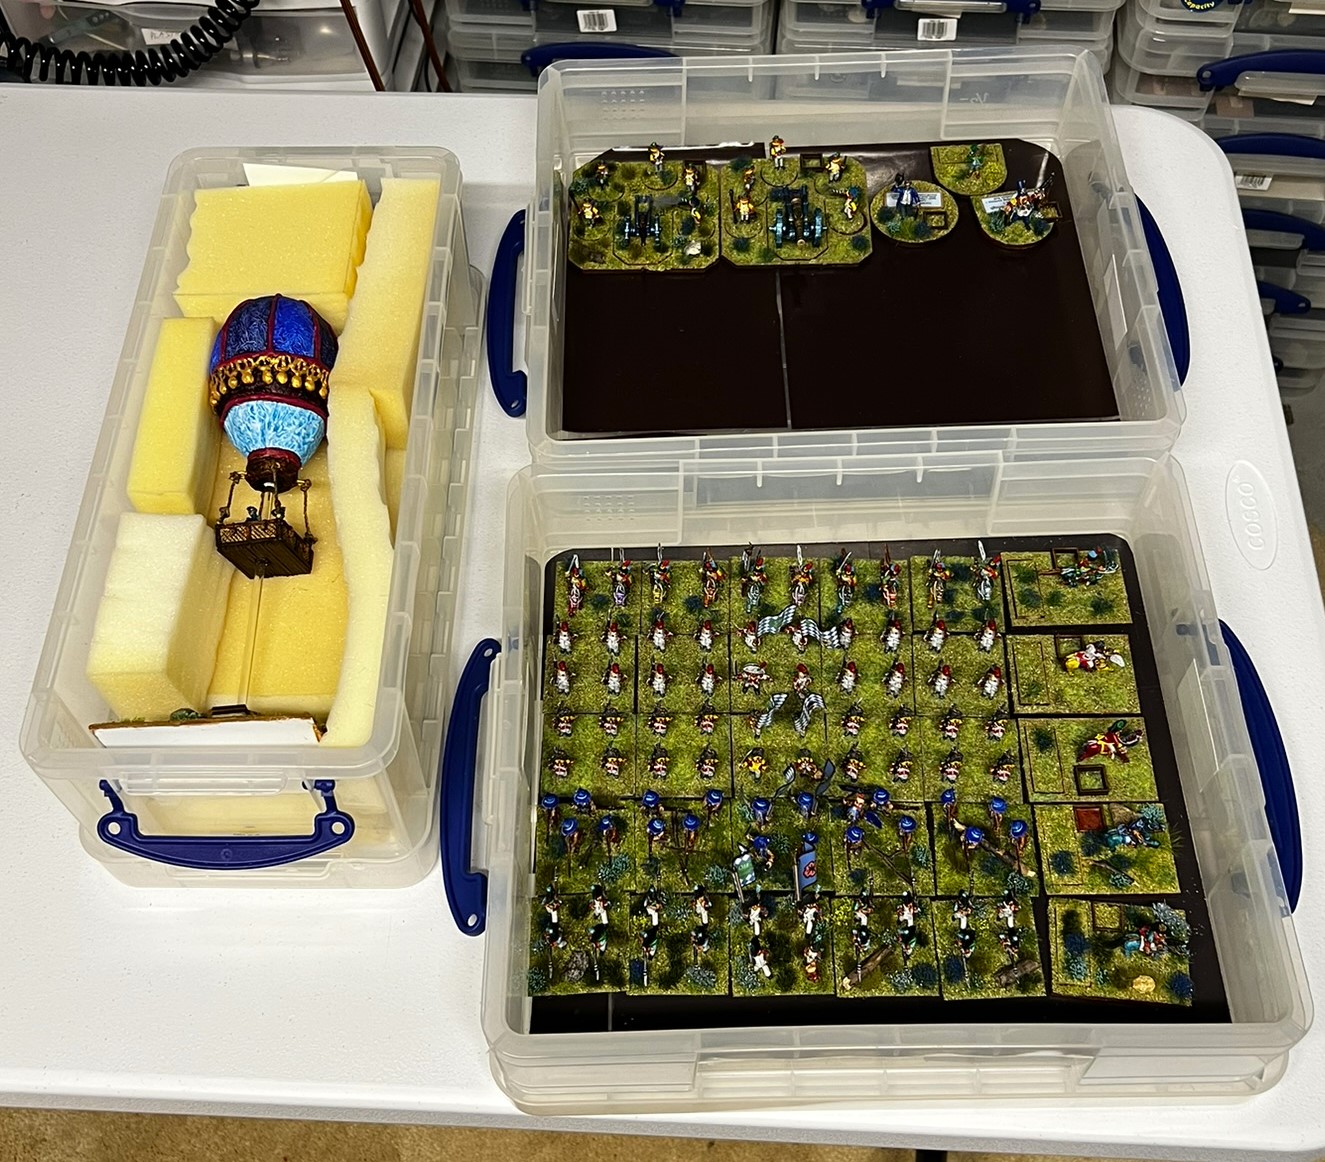
The two Winkie artillery batteries are shown here below. As the crews are uniformed identically , I gave the WMAB red flowers on their bases to differentiate them from the WLAB bases’ yellow flowers.
The Winkie Medium Artillery Battery on the left and the Winkie Light Artillery Battery on the right.
The WMAB represents my penultimate Winkie unit at this time (I love that word but I hardly ever get to use it!). I do hope that you enjoyed seeing it and reading the post. Next up will be my final Winkie unit and yet another entry for Dave’s challenge – and soon. Thanks for looking!
And yes, I still have much more Ozz to come…
Miscellaneous details and references for those interested in that sort of thing:
For all of my previous posts on Wars of Ozz games, figures, units, and other related projects – please see this page.
PAINTS, INKS, GLAZES, SHADES, WASHES, PIGMENTS, FLOCKING, GLUES AND MORE THAT I USED ON THE WINKIE MEDIUM ARTILLERY BATTERY:
Gorilla Glue
1/2″ x 1/2″ square steel bases from Wargames Accessories (#16)
Artillery Battery MDF sabot base from Old Glory/Wars of Ozz Miniatures
P3 “Brown Ink” (ink)
1 1/4″ x 1″ steel base from Wargames Accessories (#FOW1)
1/8″ neodymium magnets
Everlast steel ABA 3/4″ washers
Elmer’s PVA Glue
Red Sharpie pen
Poster tack
Vallejo Premium Primer “White”
Vallejo “Flow Improver”
Vallejo “Airbrush Thinner”
Citadel “Nuln Oil” (wash)
Vallejo Model Color “White”
Citadel “Contrast Paint – Ironjawz Yellow”
Citadel “Contrast Paint – Baal Red”
Army Painter “Speed Paint – Talos Bronze 2.0”
Vallejo Model Air “Black ” (metallic)
Martha Stewart Crafts “Brushed Bronze”
Citadel “Cryptek Armourshade” (wash/shade)
Citadel “Nuln Oil GLOSS” (wash/shade)
Army Painter “Battlefields Grass Green” (flocking)
As you may want to check out the Wars of Ozz figures’ range – there are two places to get them and the rules (and I make no money from this btw). The game rules and the figures are available from the following two places:
According to the canon of the world of the Wars of Ozz, Evora was the first witch to appear after the founding of Ozz. She had the power to raise massive skeletal armies of the dead (which were sadly plentifully available in the apocalyptic era after the end of the Last Great War). Despite their combat prowess, the Winkies at that time were not unified in any major way, so Evora was able to conquer them, subjugate them, and carve out her empire from their lands. In early 2023, I painted up an Evora figure that you can read about here.
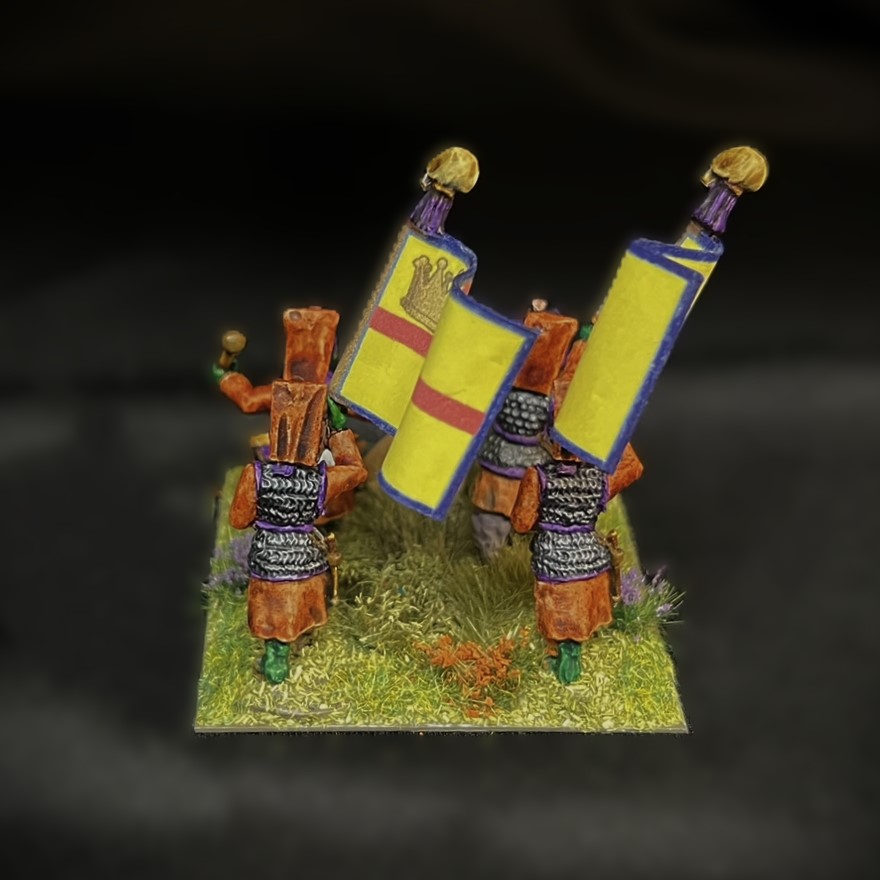
Evora’s capital and court were centered on the Yellow Castle. One of the regiments available to her Winkie army is called, unsurprisingly, Evora’s Bodyguard Infantry Regiment (let’s shorten that to EBIR). I saw the unit on the Wars of Ozz website, and decided that it would be a good regiment to add to my Winkie army.
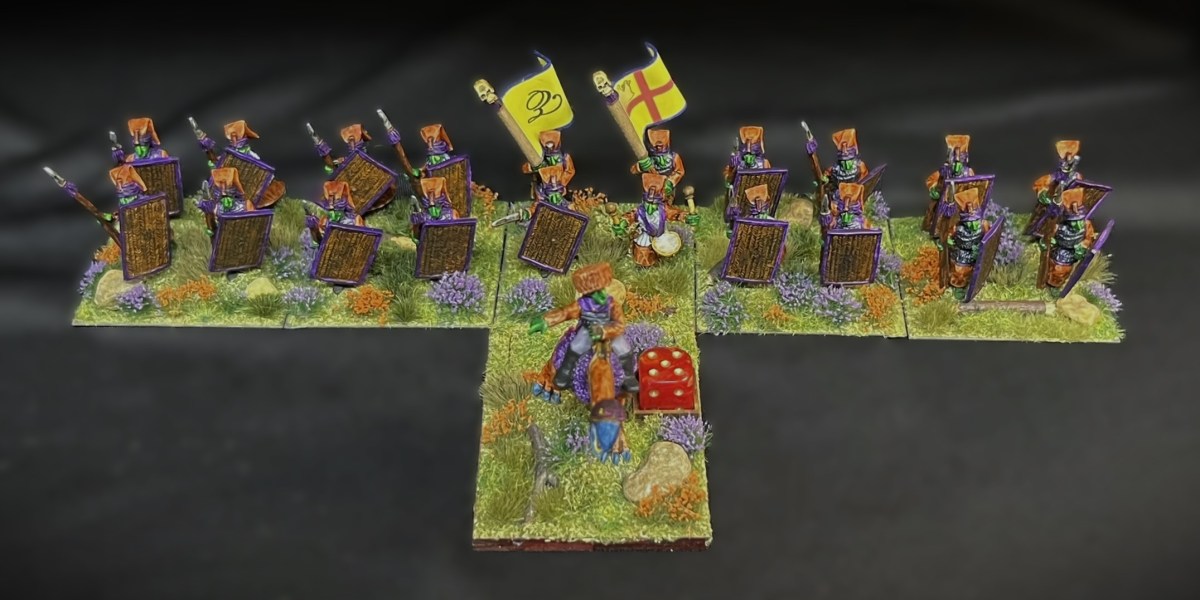
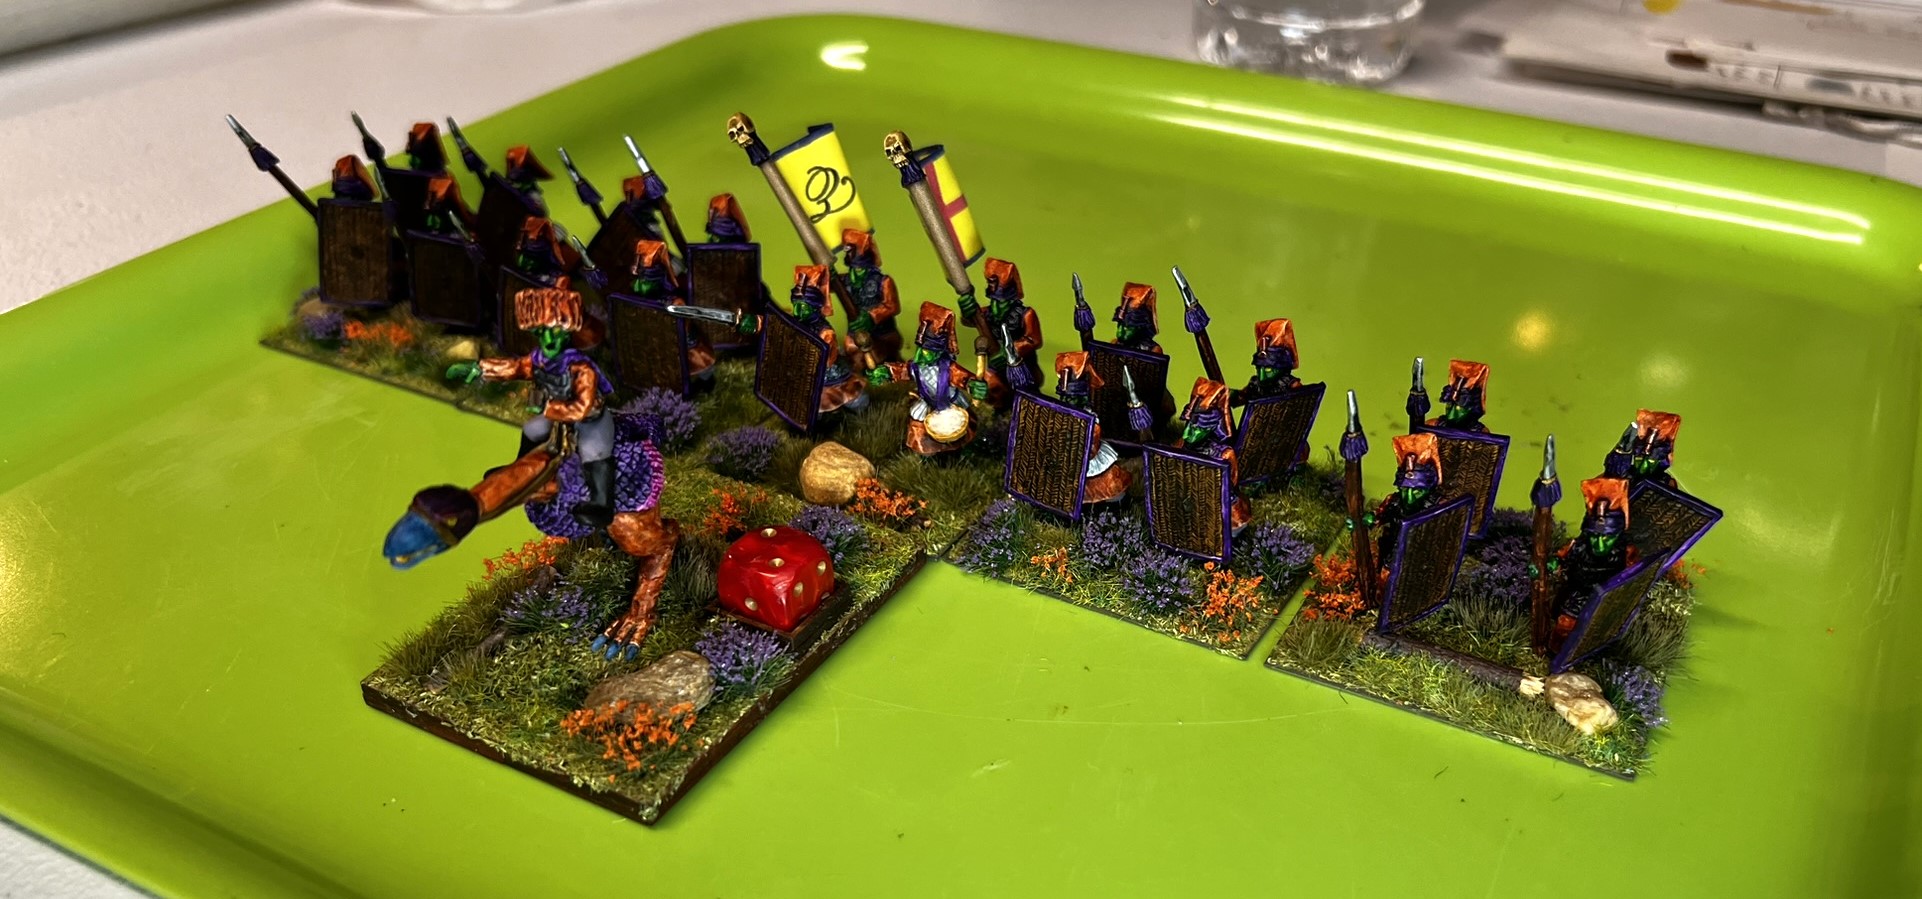
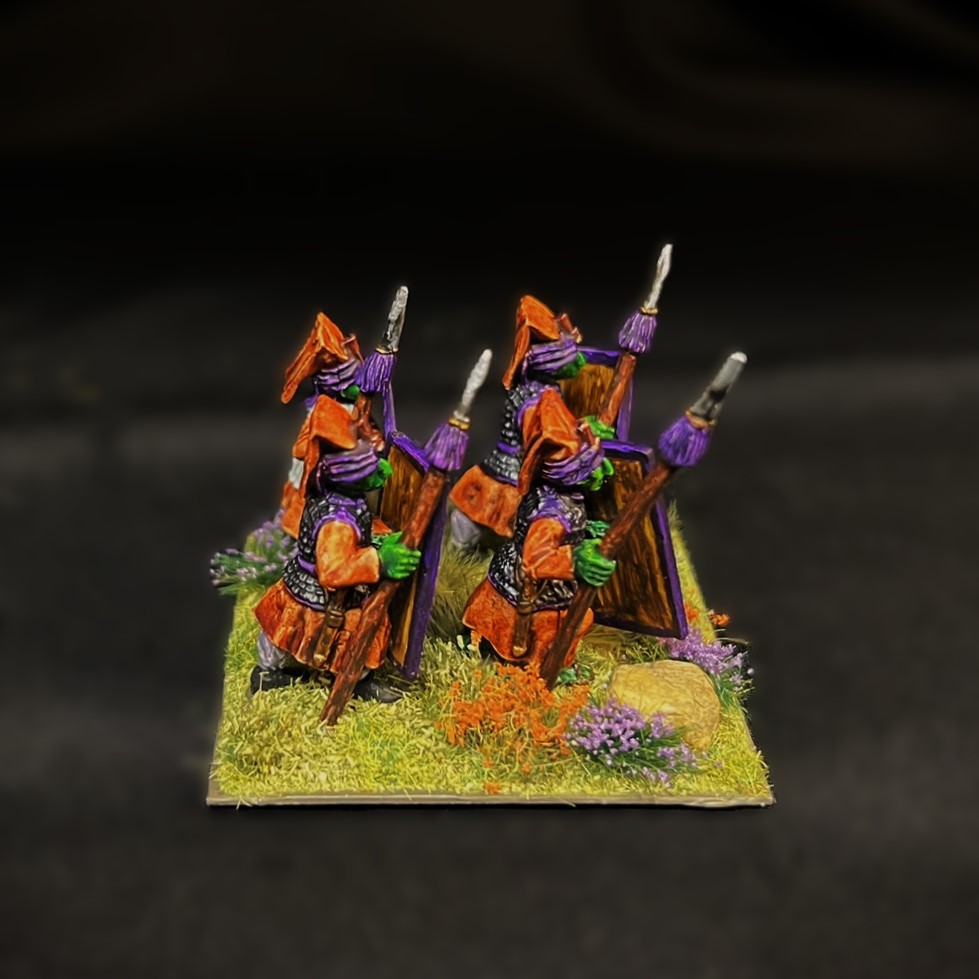
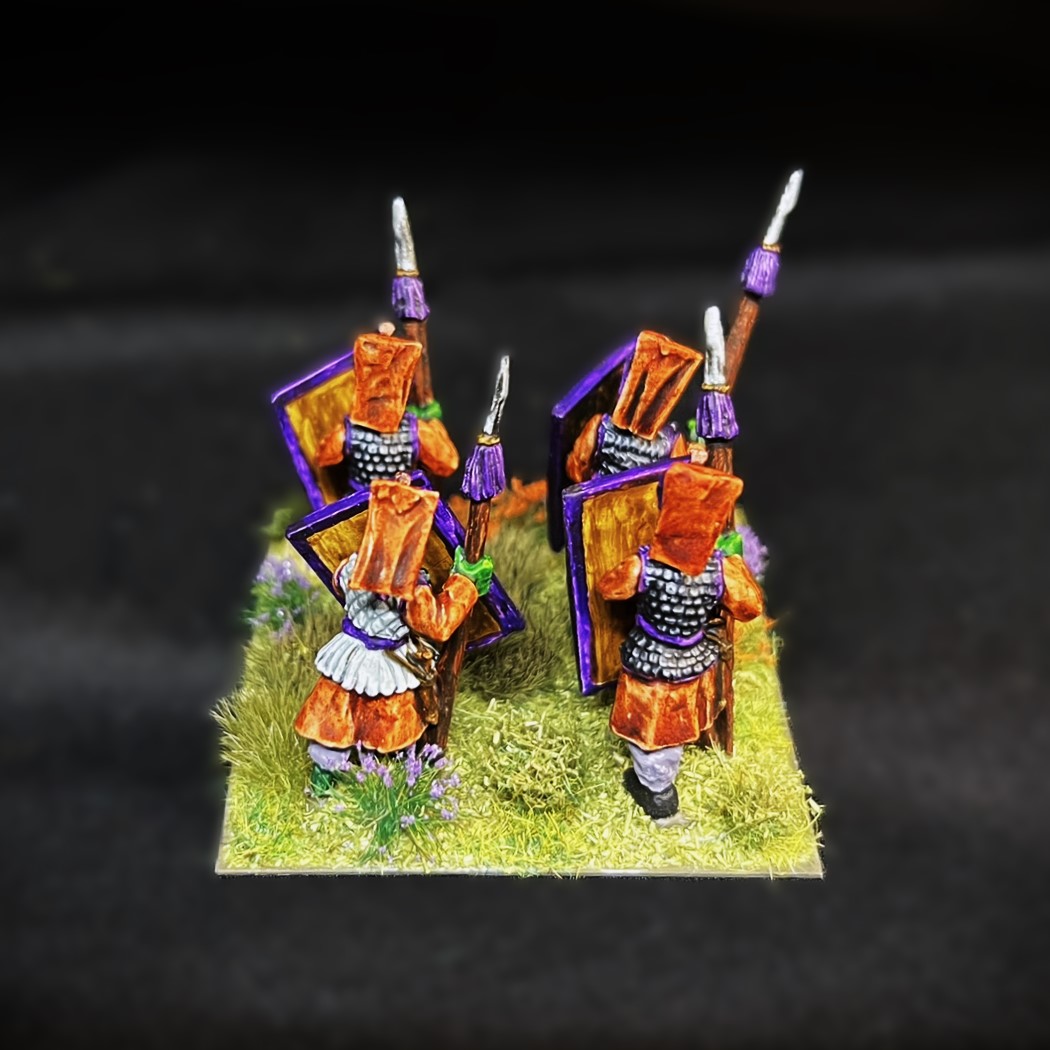
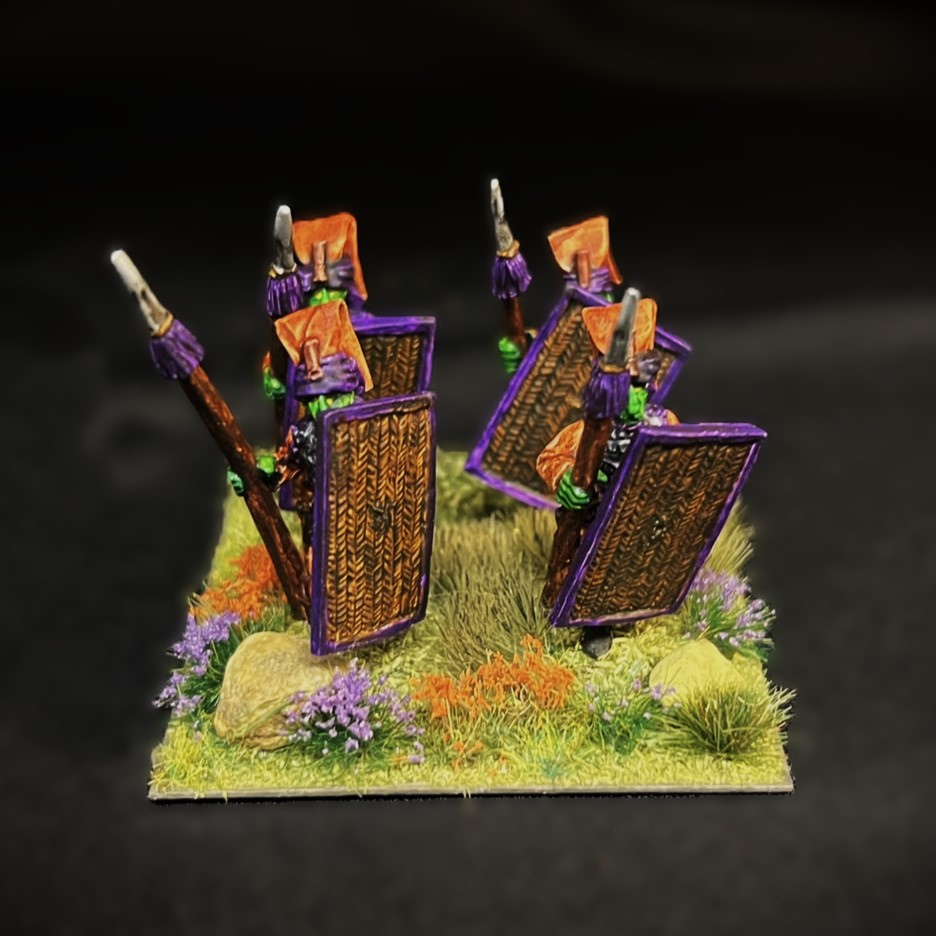
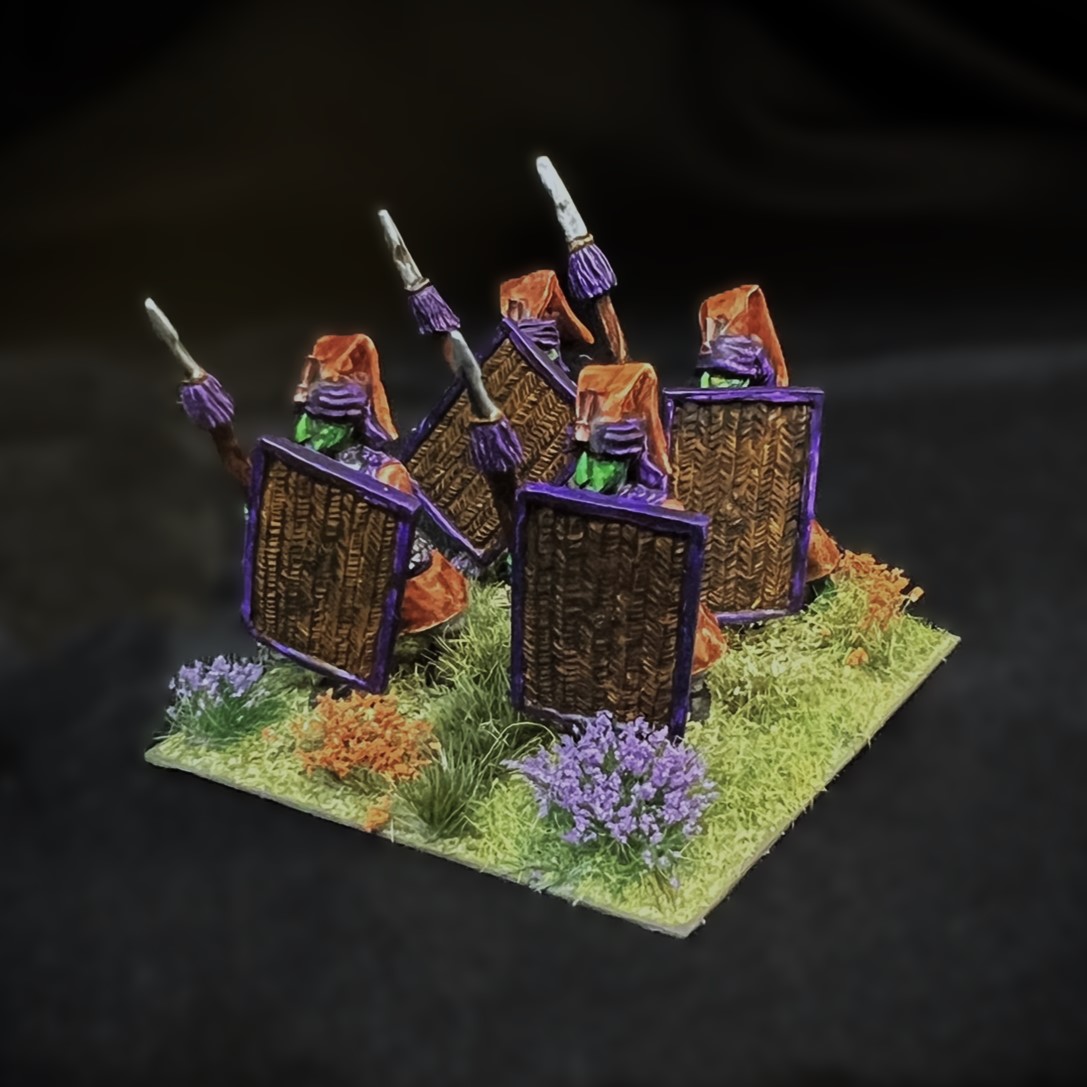
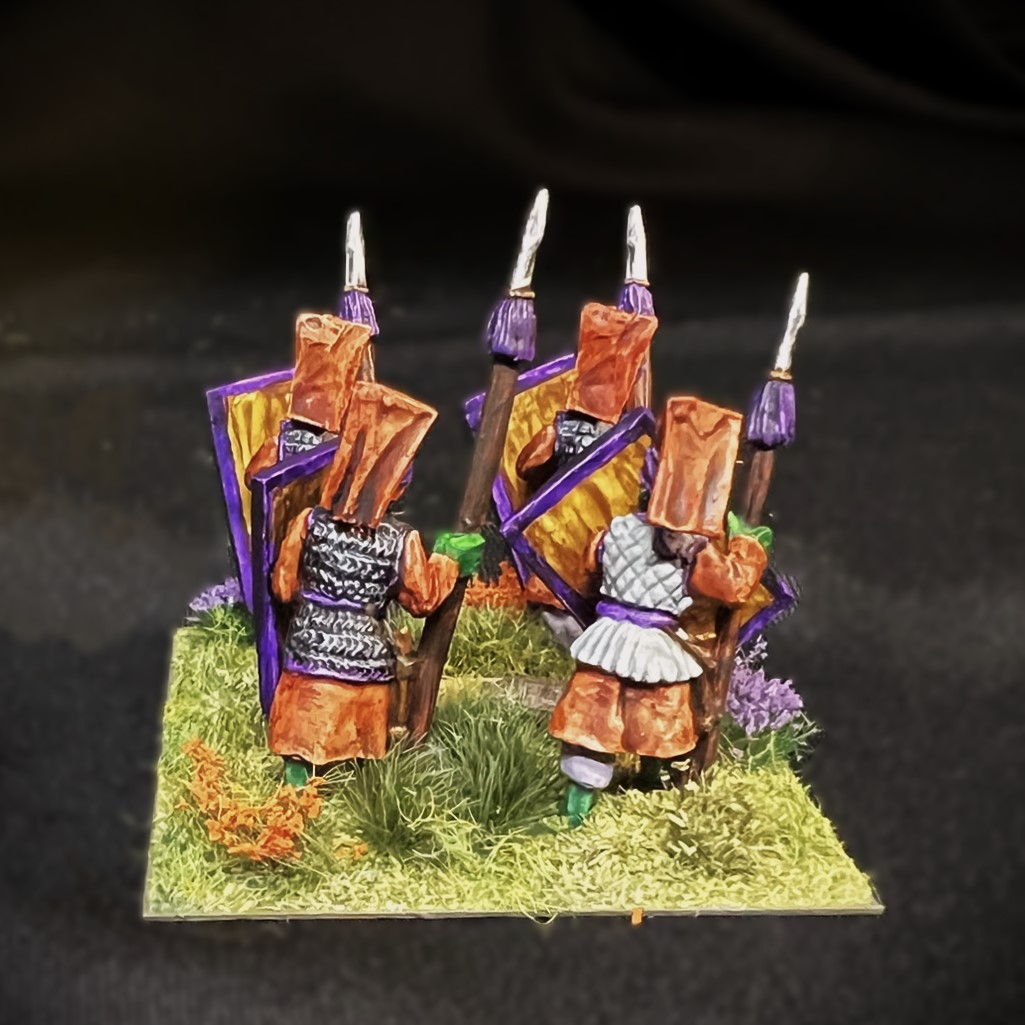
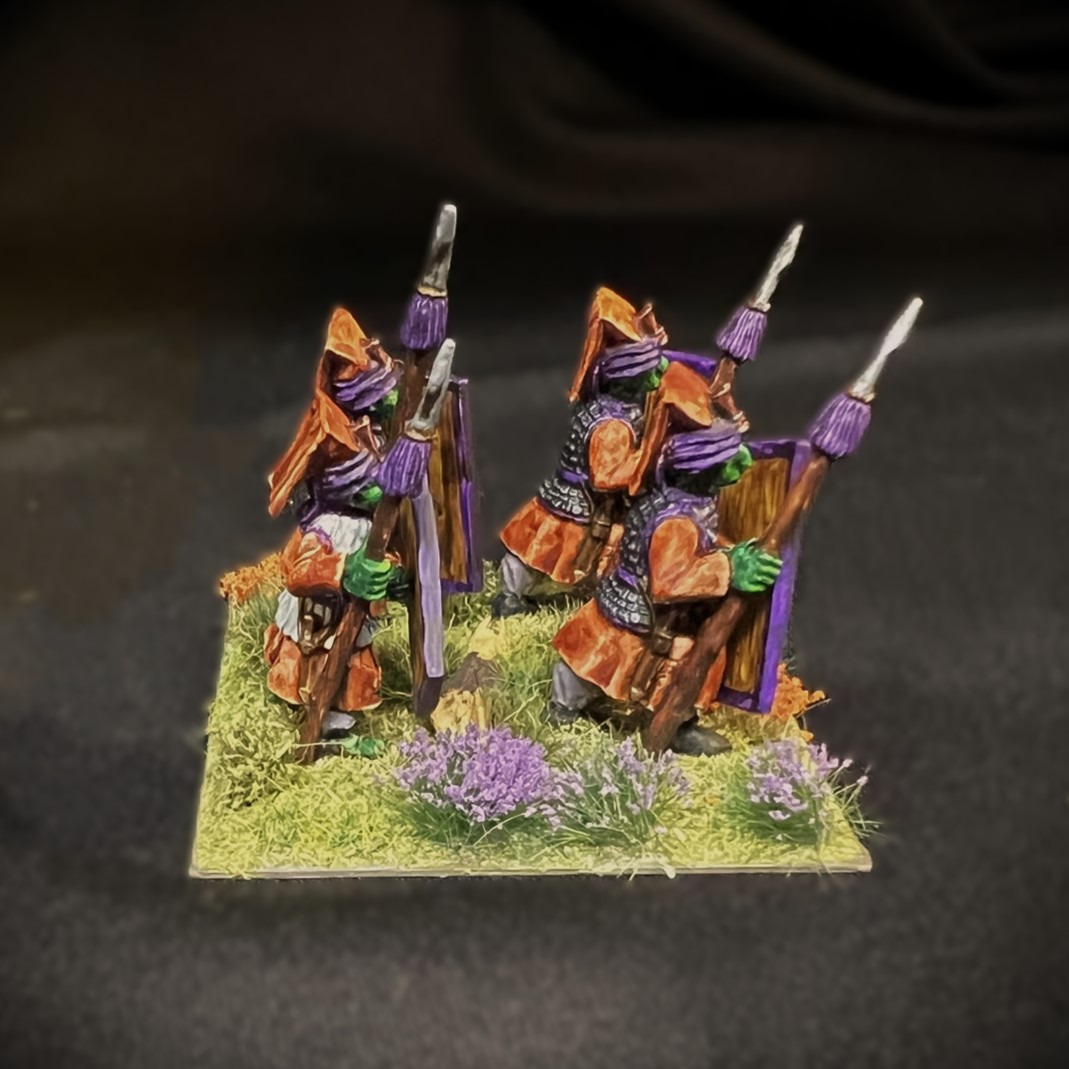
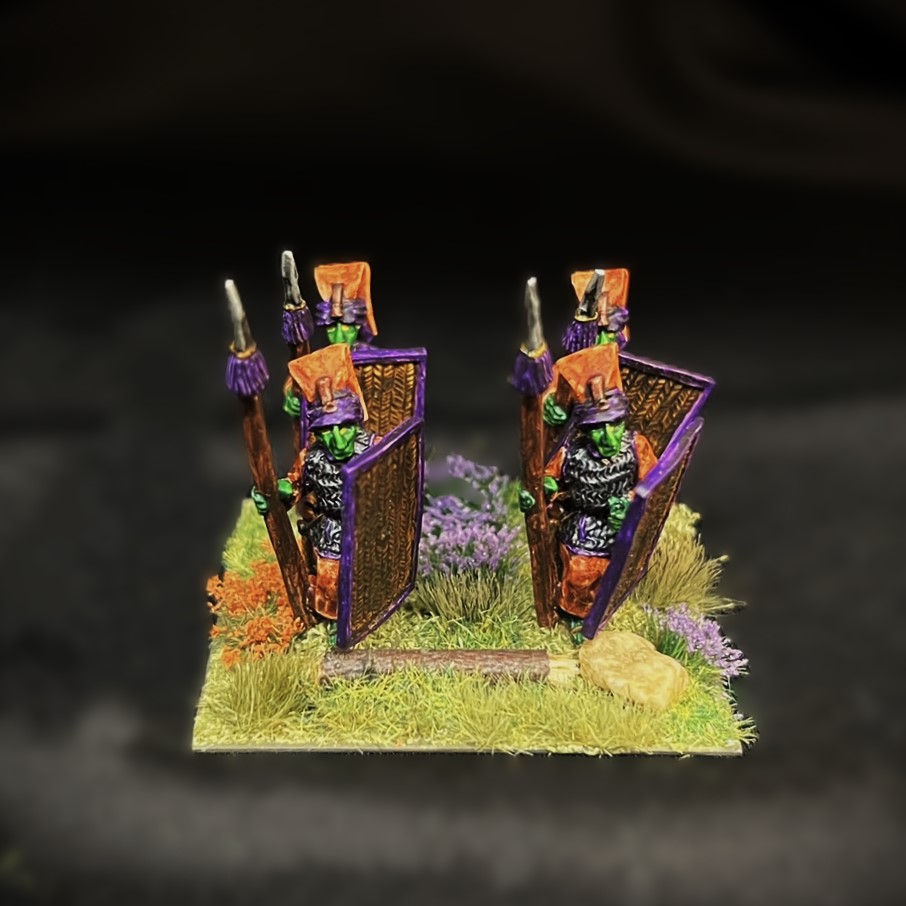
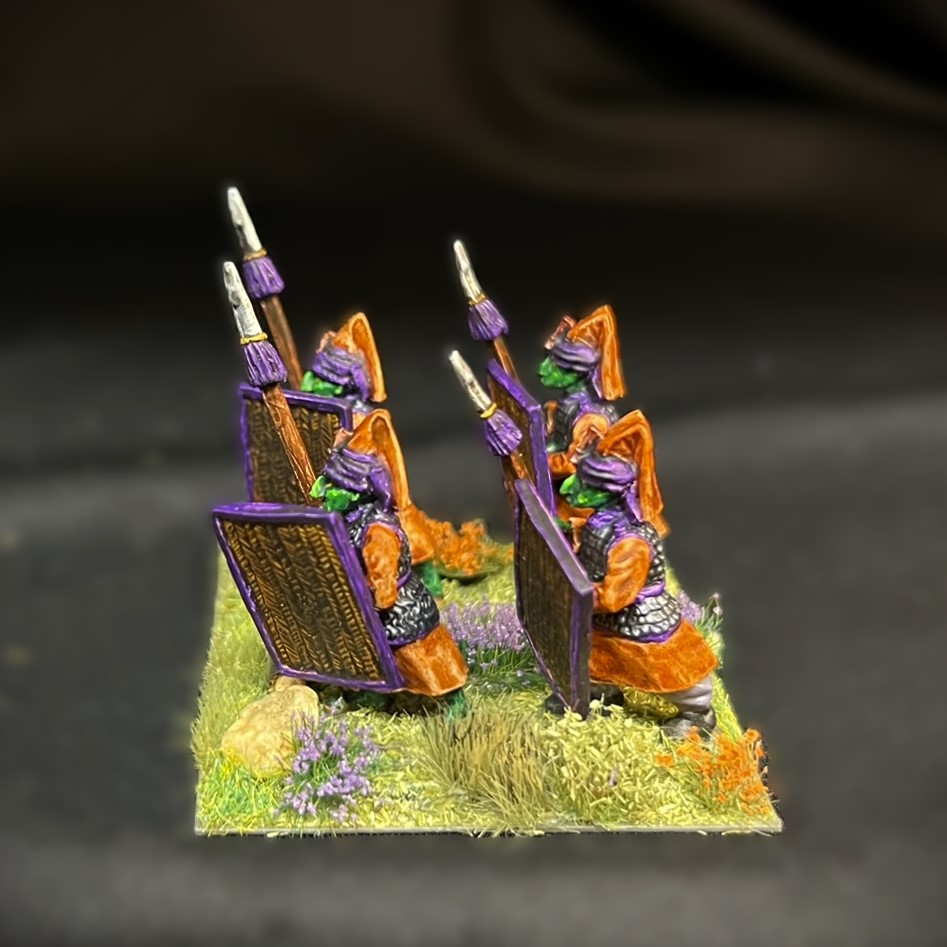
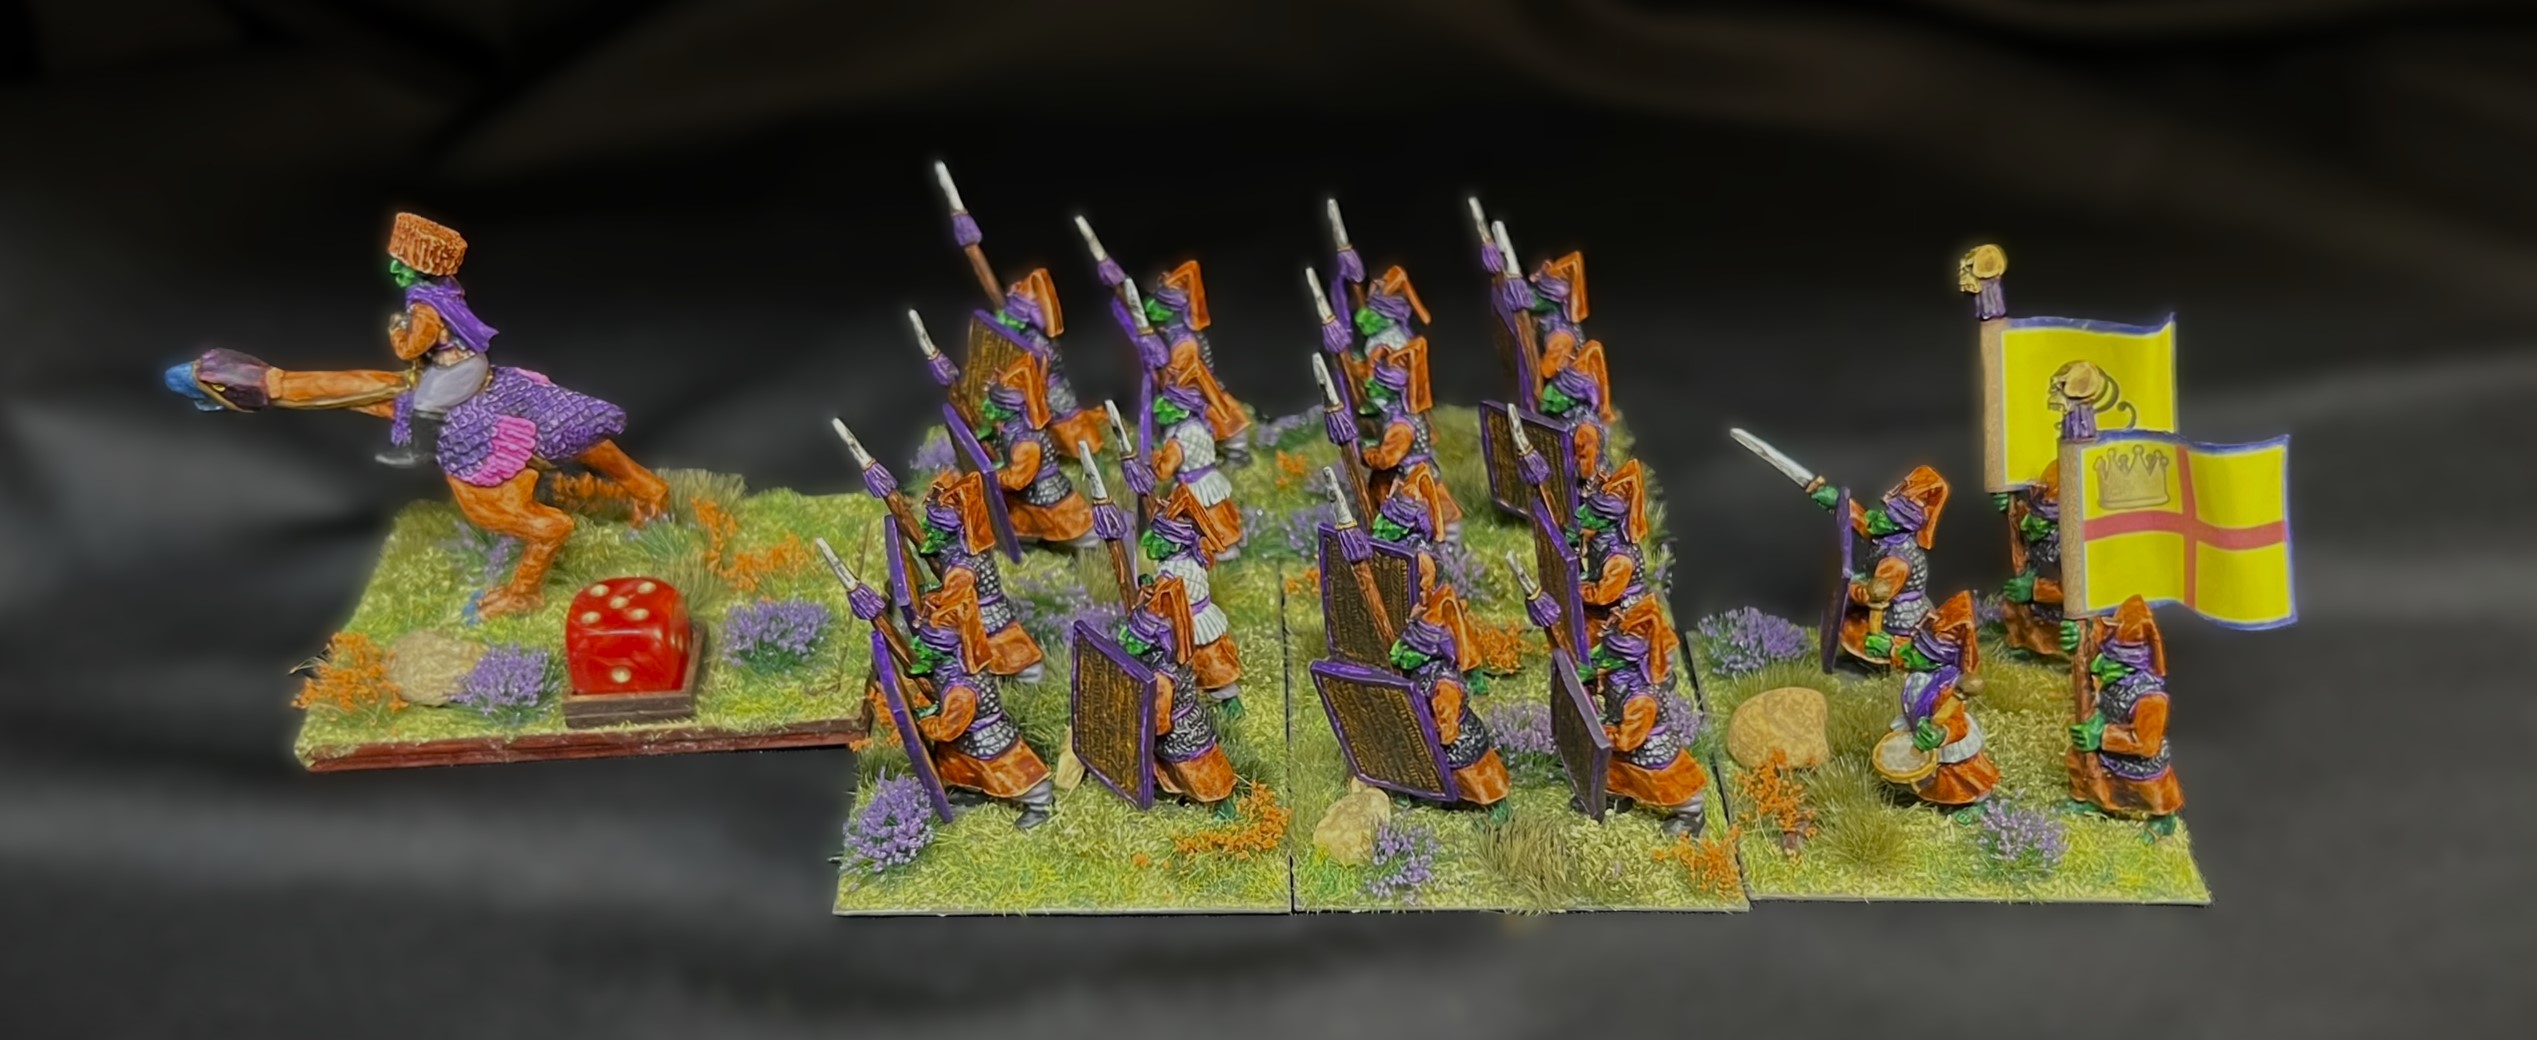
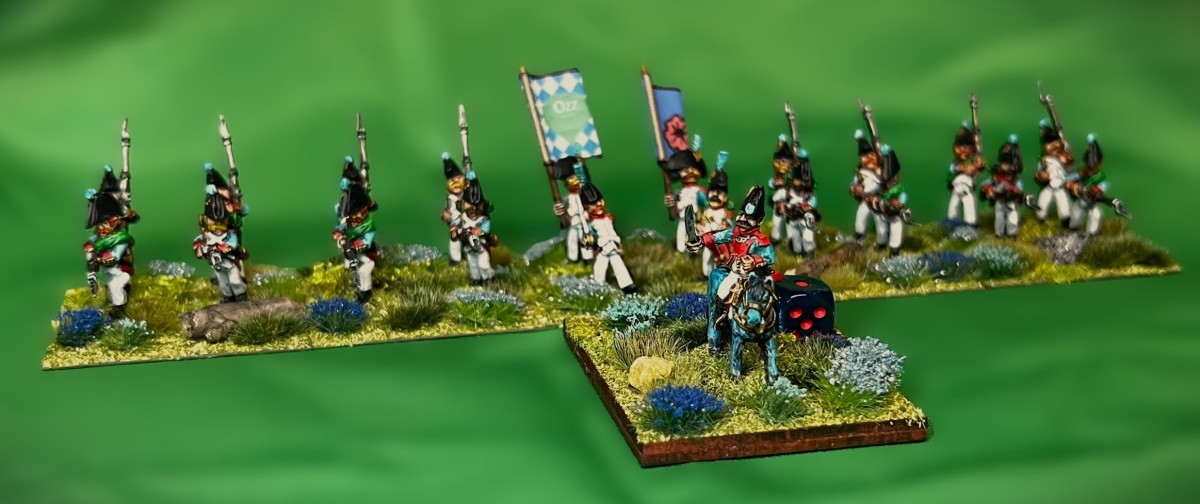
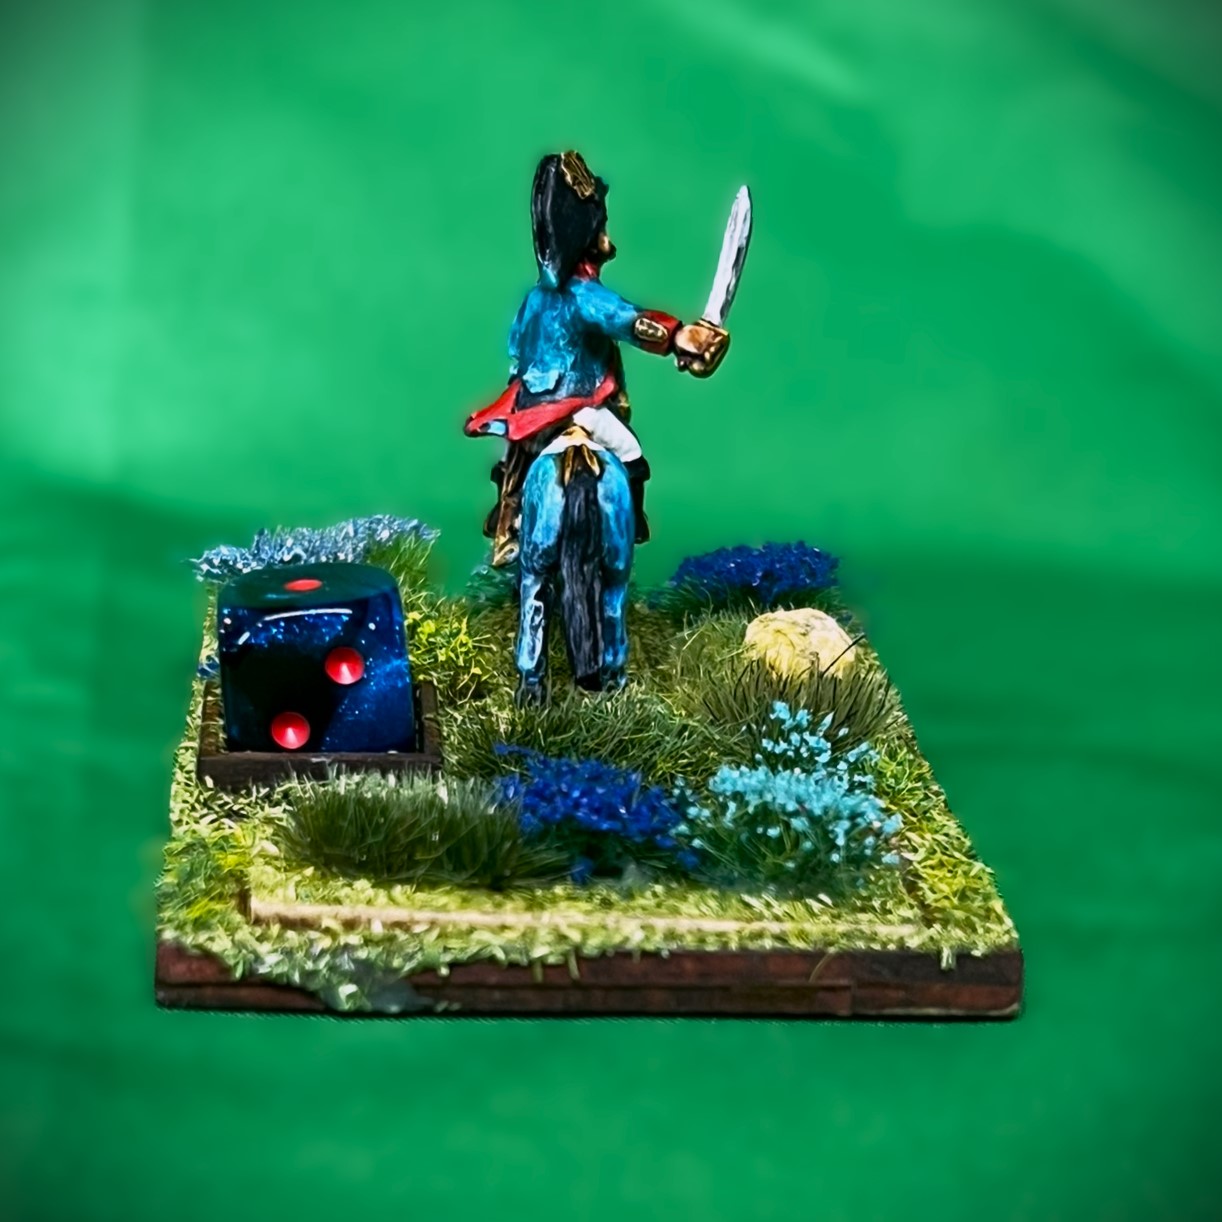
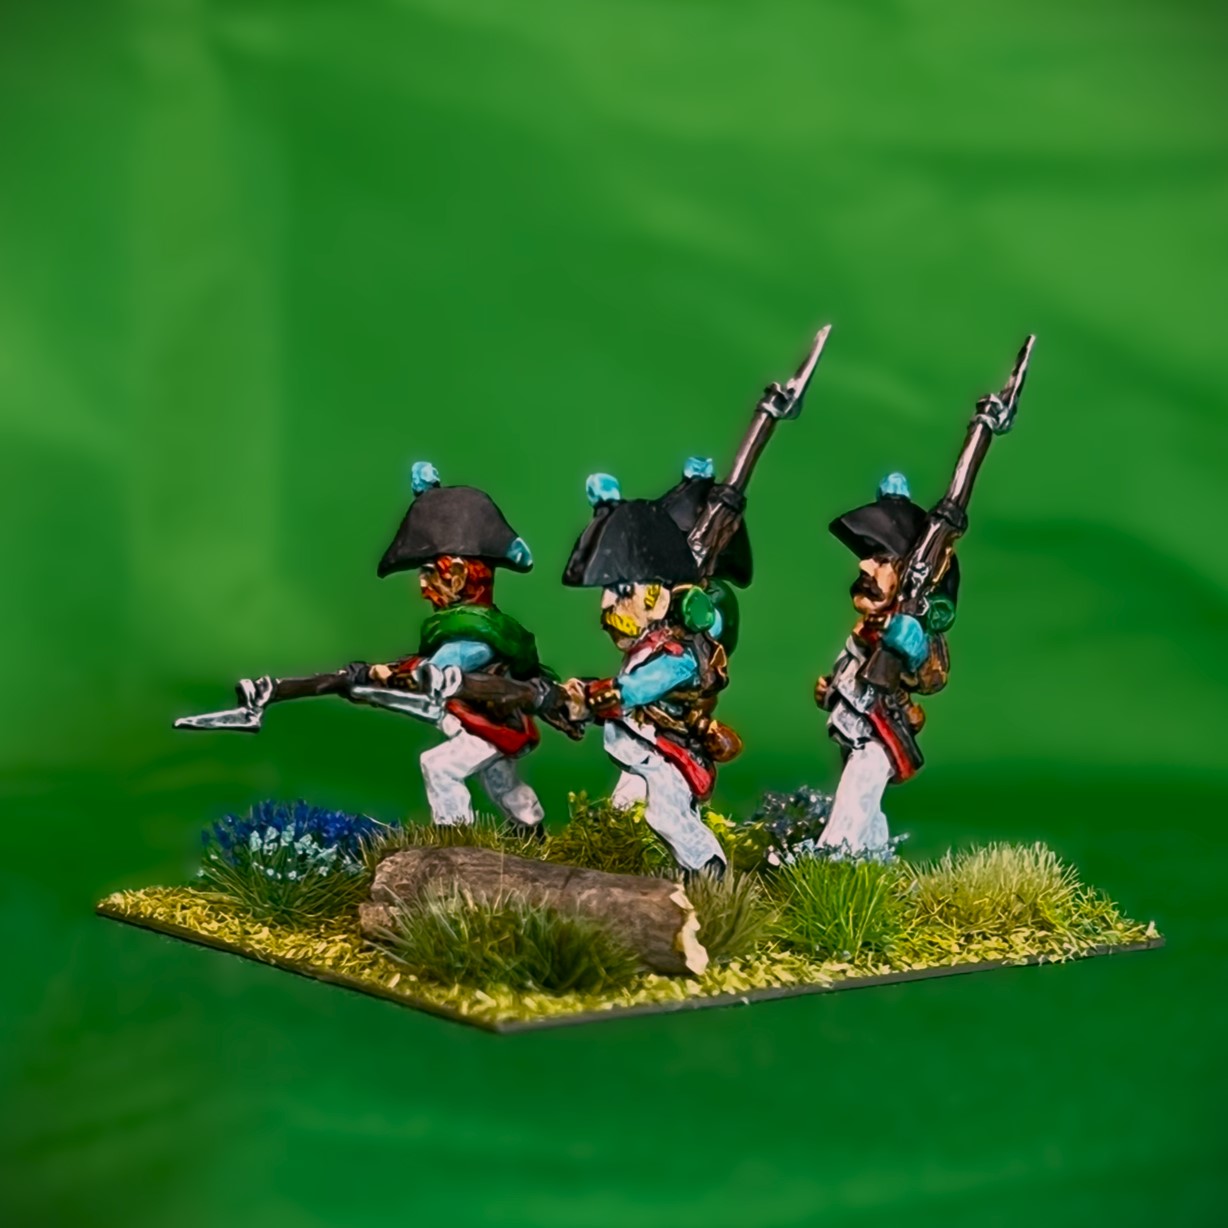
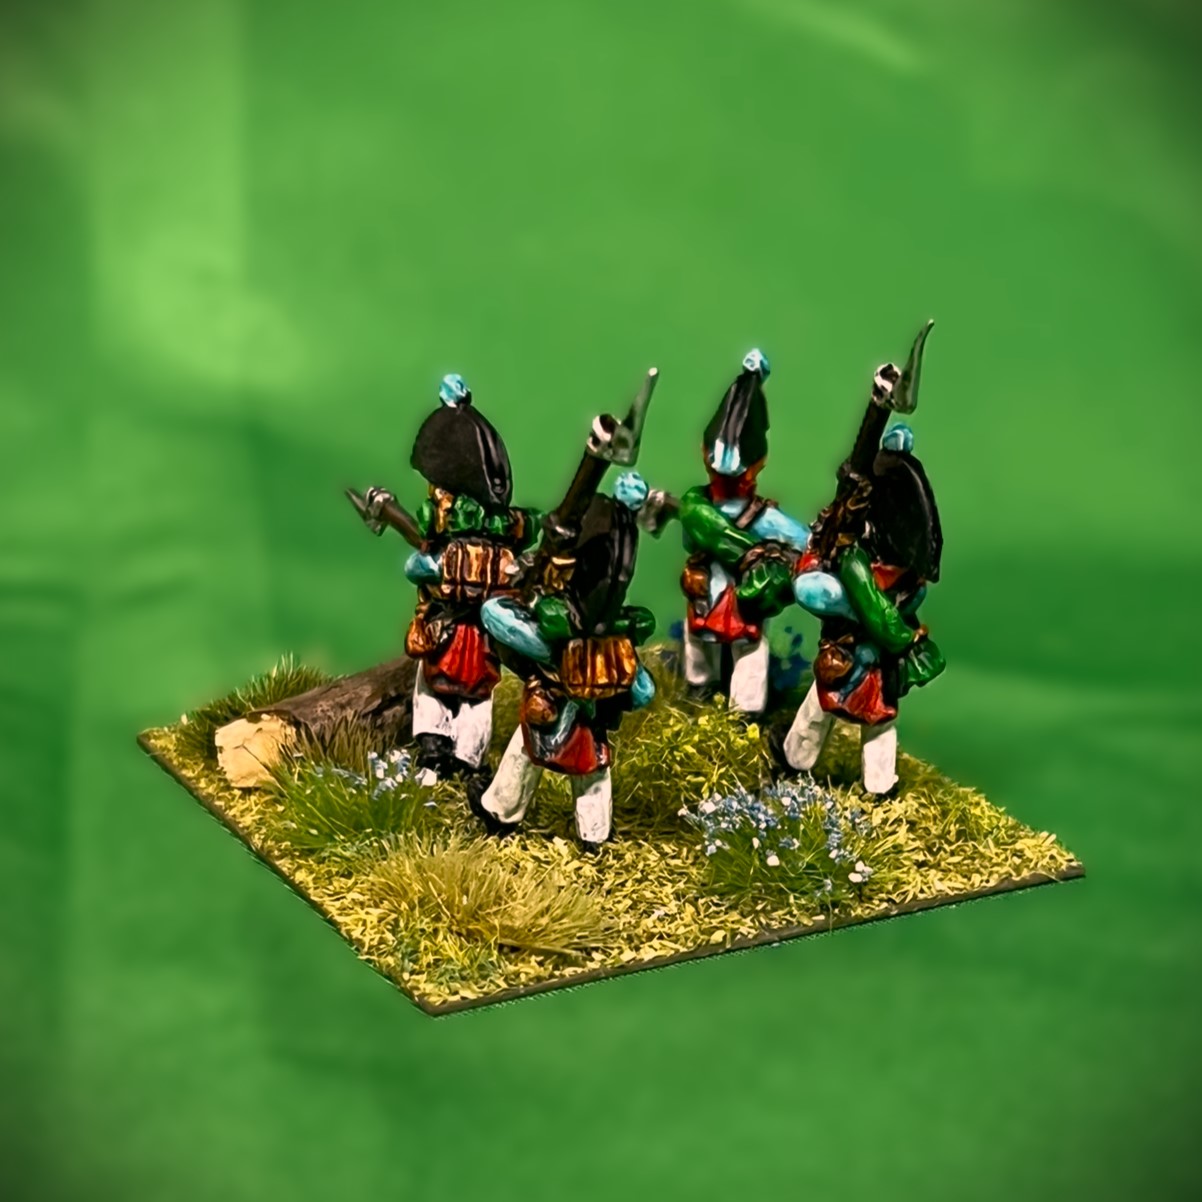
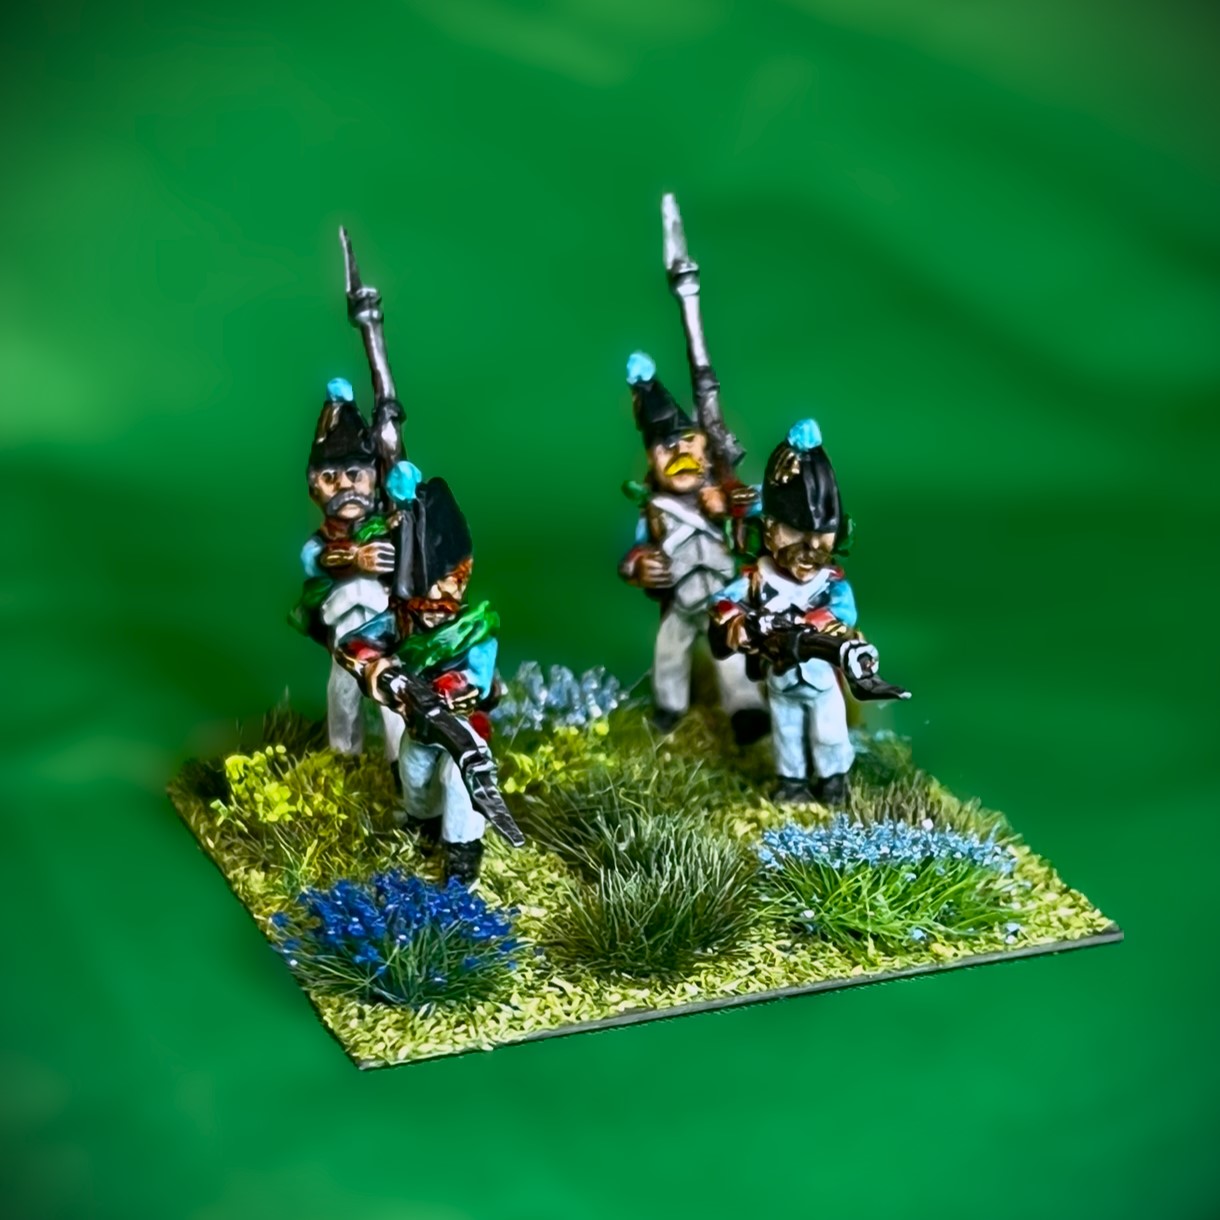
According to the rules, the EBIR is a very potent unit. As befits the Winkie ethos of warfare, they fight only with melee weapons – in this case big honking thrusting spears and swords. With regards to Melee, the EBIR has the same attribute as other Winkie Infantry Regiments – that of 7/10, which is very good. Where the EBIR differs is in its Resolve and Elan attributes – as well as with regards to its point cost. The Resolve value (the measure of the unit’s desire to stick in a fight) for the EBIR is a whopping 9/10 versus a regular Winkie Infantry Regiment’s 6/10. The Elan attribute for the EBIR (the desire to take the fight to the enemy) is the strongest possible at 10/10 versus a regular Winkie Infantry Regiment’s already strong 8/10. This is greater than any other unit in the game (outside of the Whim Whim Janissaries which also has an Elan of 10/10). The EBIR is expensive however, at 6 points, while a normal Winkie regiment will cost 5 points. There can only be one EBIR in any brigade. As with most other Ozz infantry regiments, they are based 4 apiece to a 2″ square base – so five bases for the regiment plus the regimental commander on his own separate MDF base.
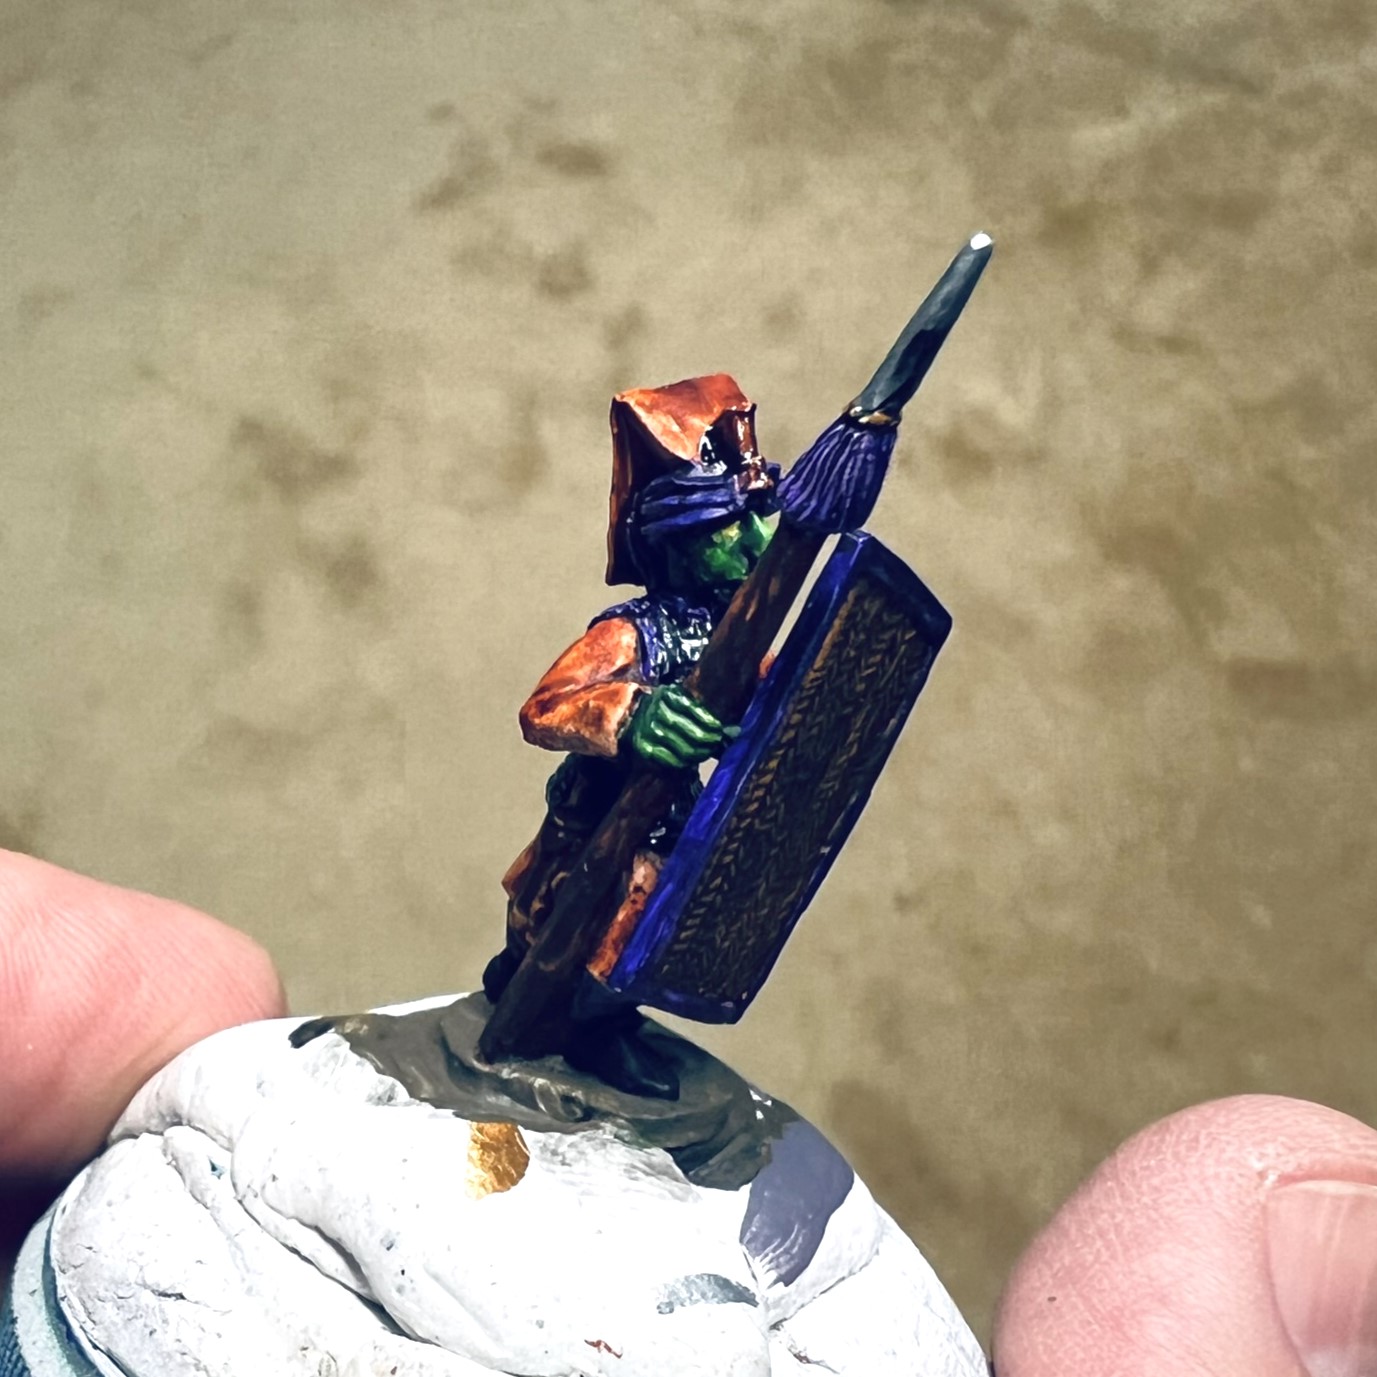
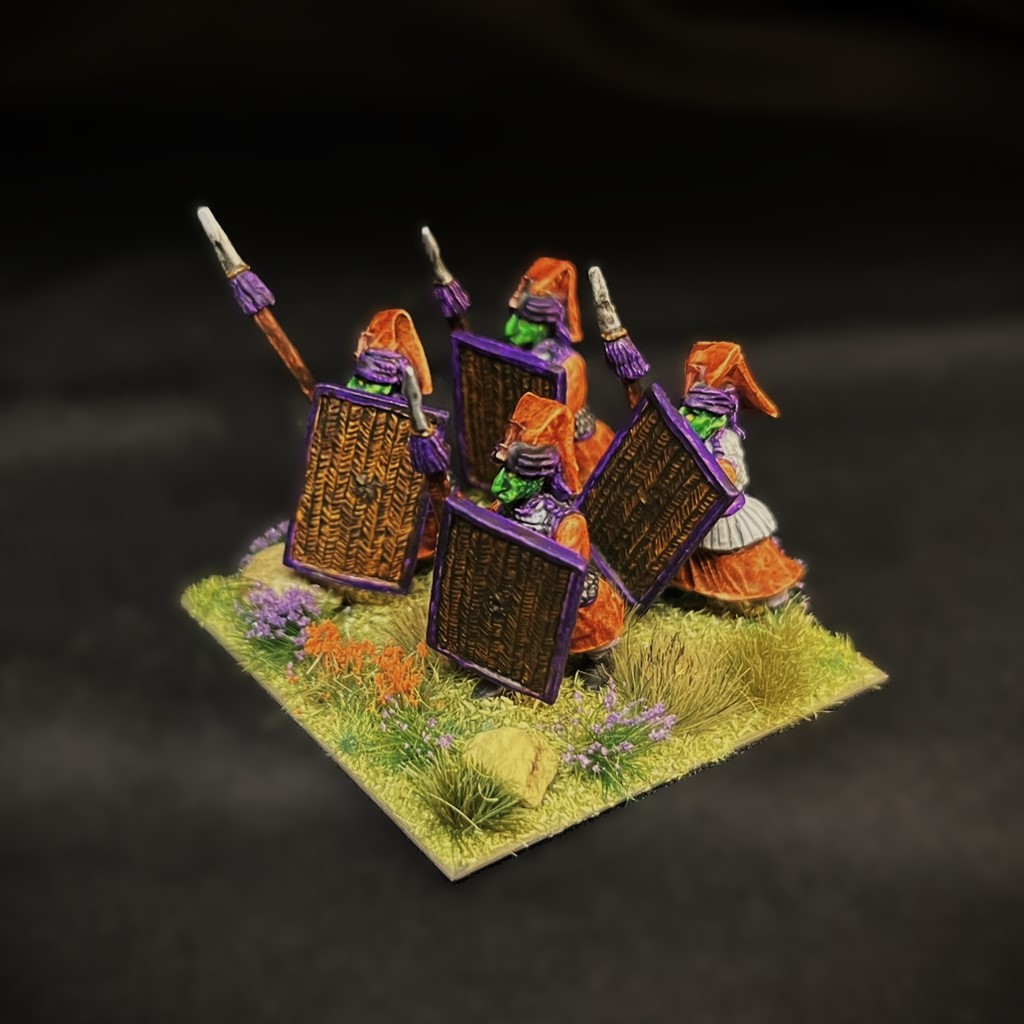
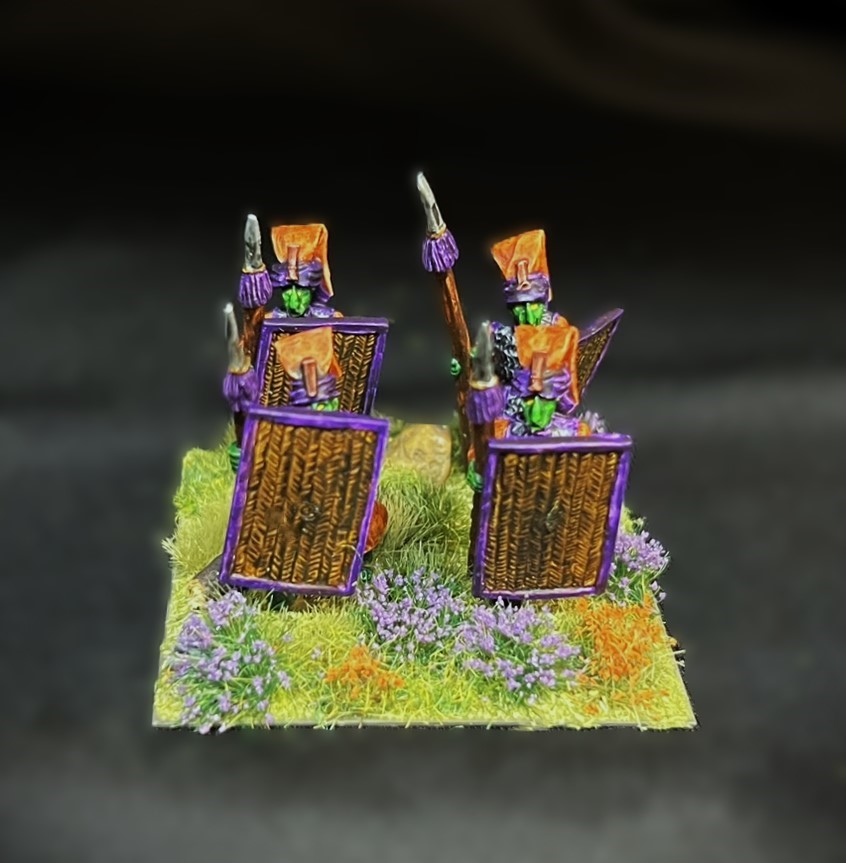
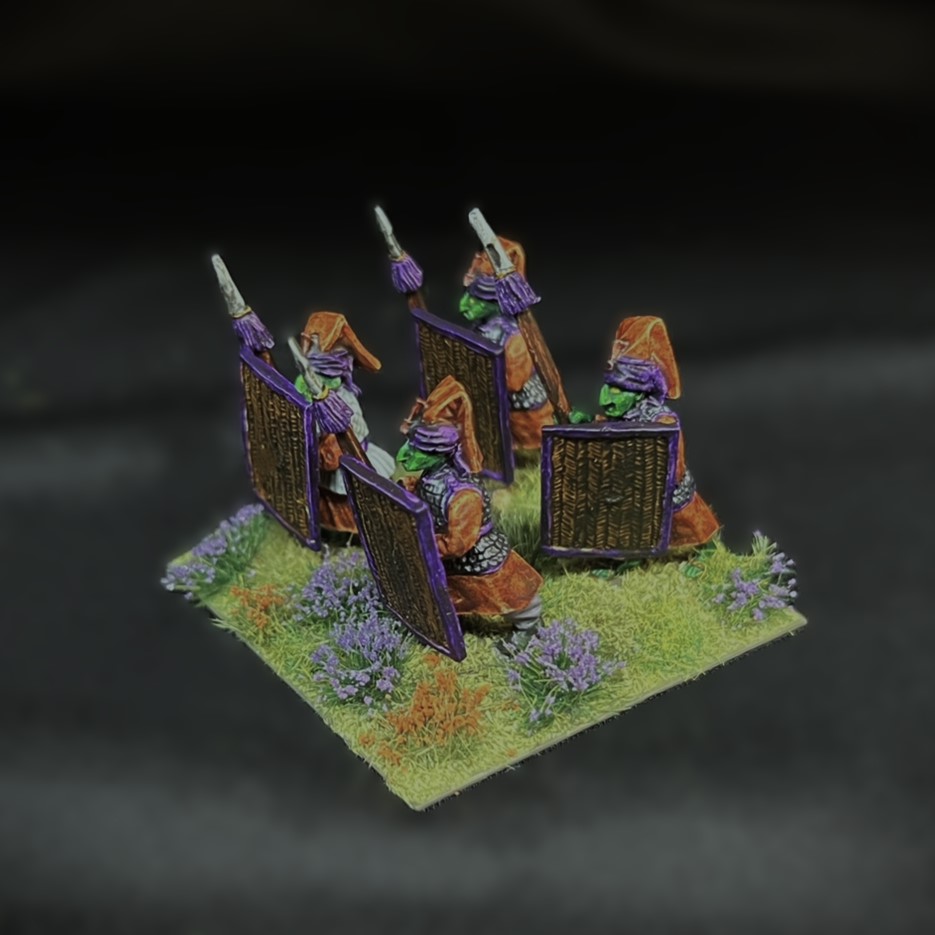
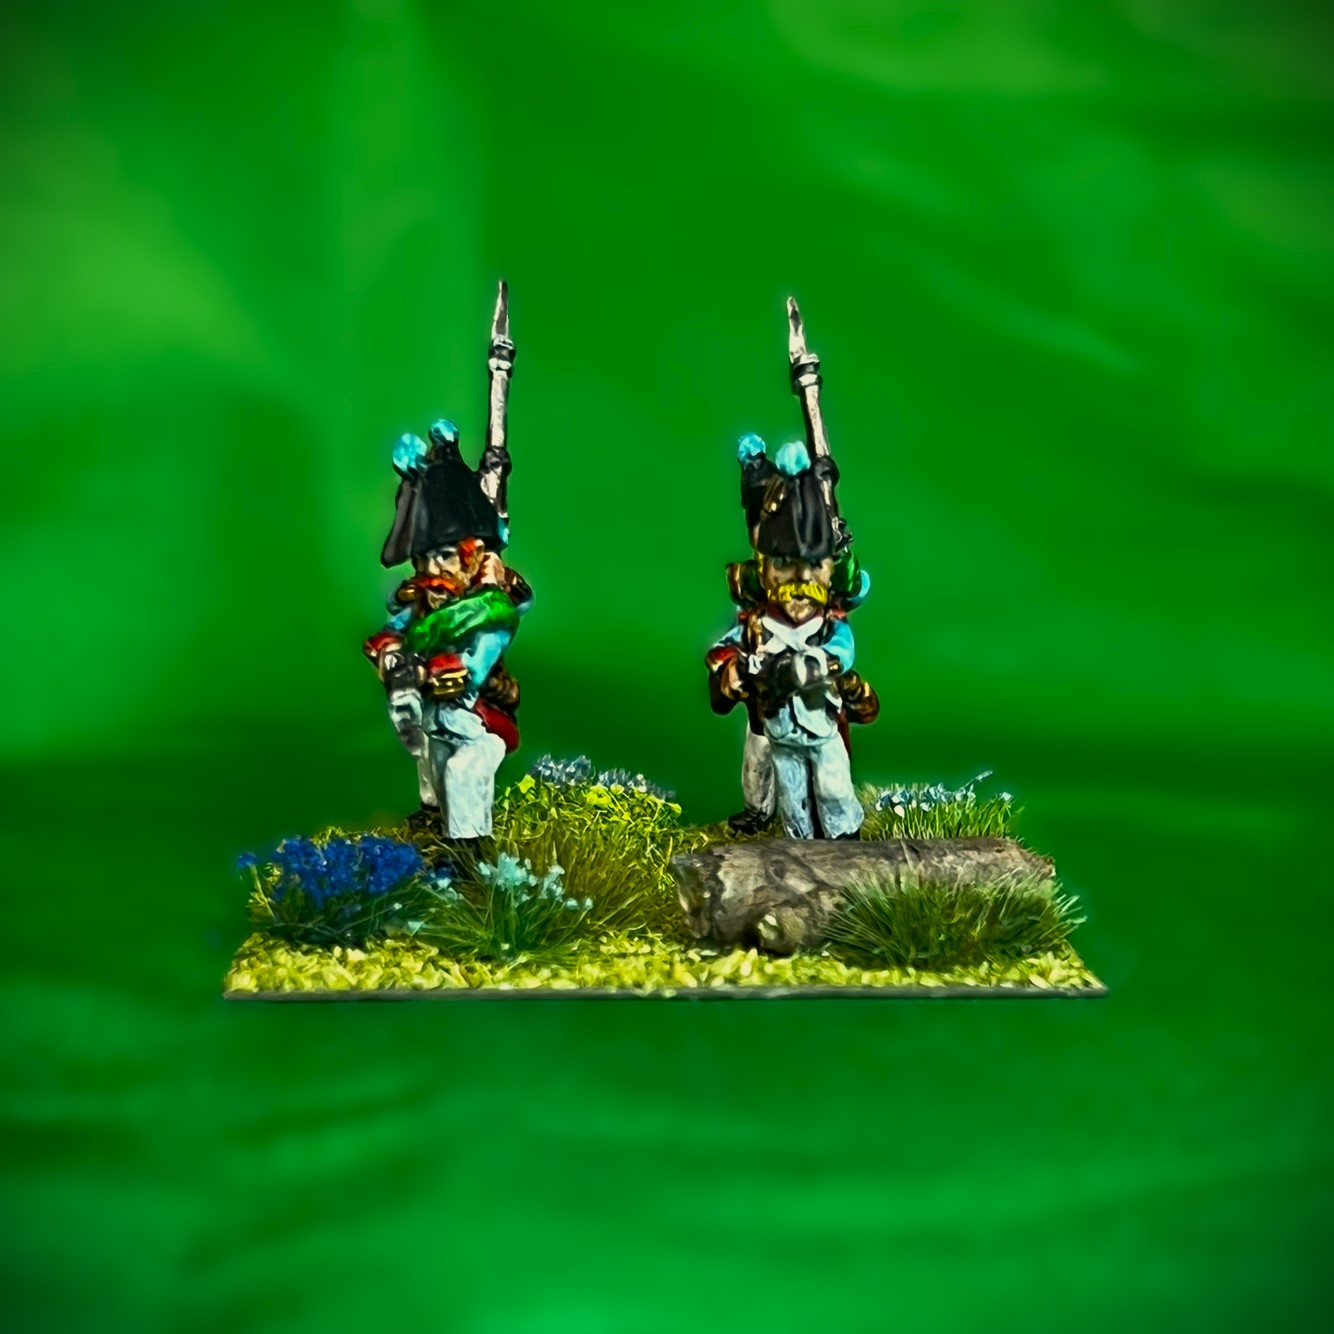
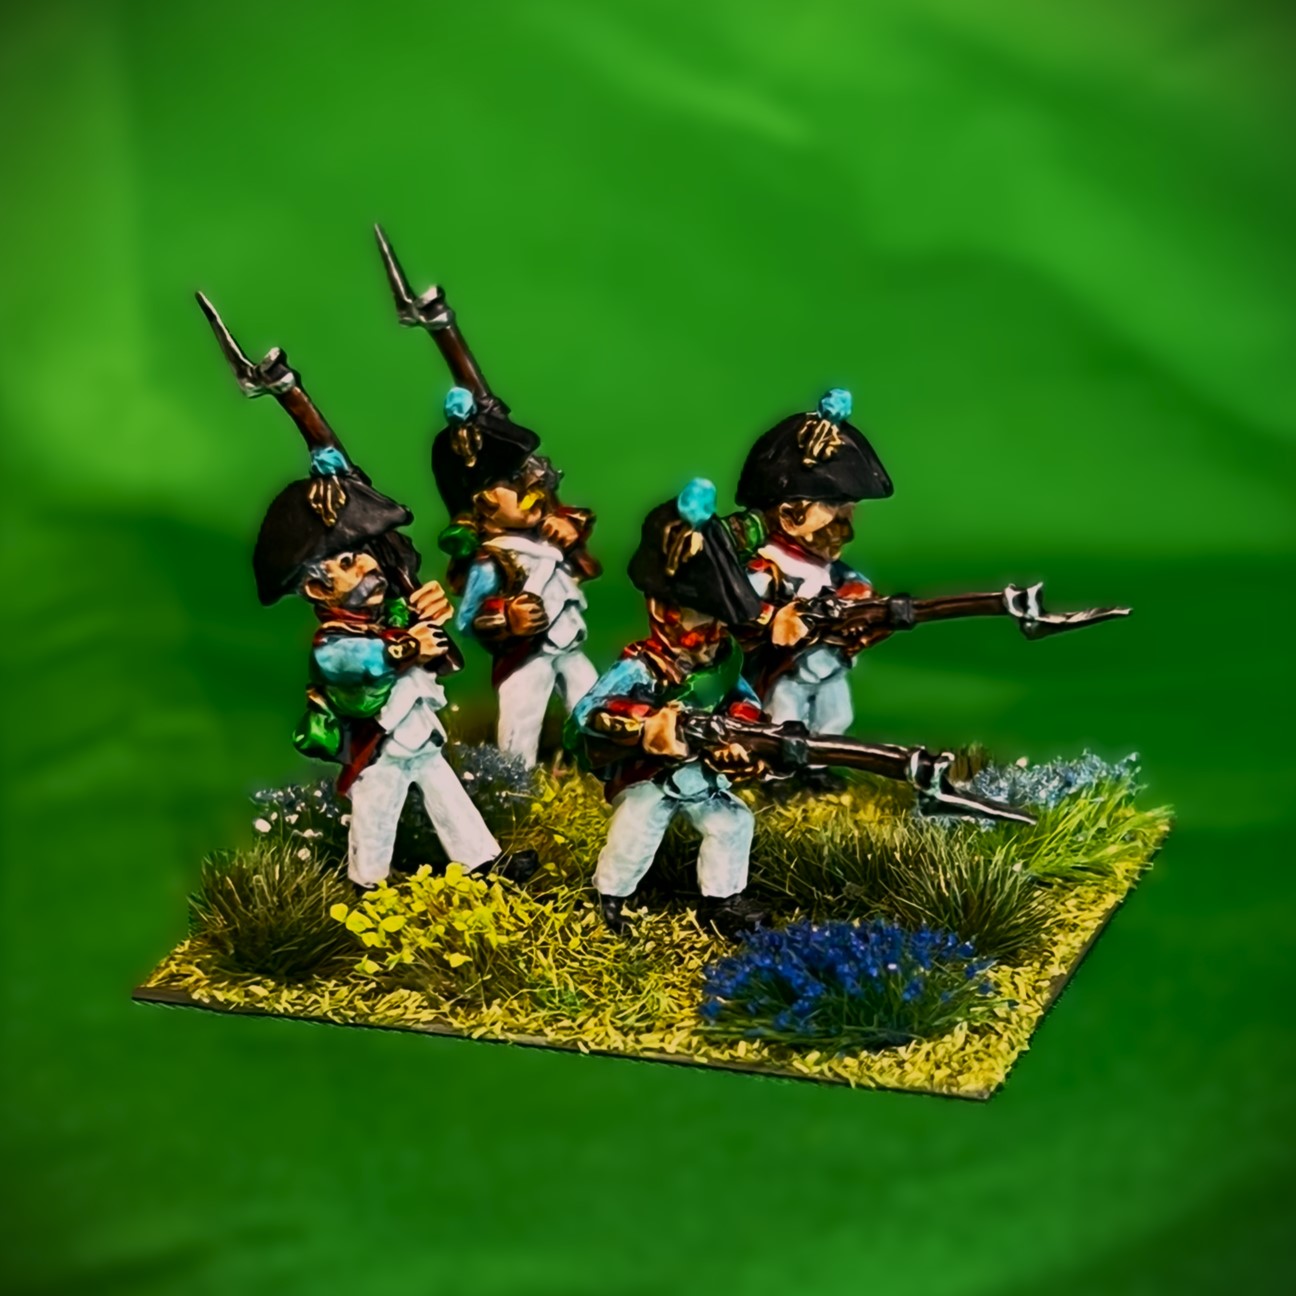
The unit (not the commander) is very Egyptian-looking – almost as if it were recruited from fanatics – which I suppose one must be to get into it. Very much the troopers look like cultists – dressed in robes for the most part, with a mix of Aztec-like cotton armor vests, steel scale, or mail armor. The soldiers have ancient Egyptian-style hats festooned with some sort of an idol. They all have very large shields which looked to be made of wicker. Some have boots, and some are in sandals (why I don’t know – combat flip flops?!). Most surprising were the canon colors. As Winkies are very yellow-oriented with regards to color, one might expect that the EBIR would be yellow too.
Nope.
Orange coats, purple facings, and grey trousers! Clearly the Madness Bombs color mania struck here!
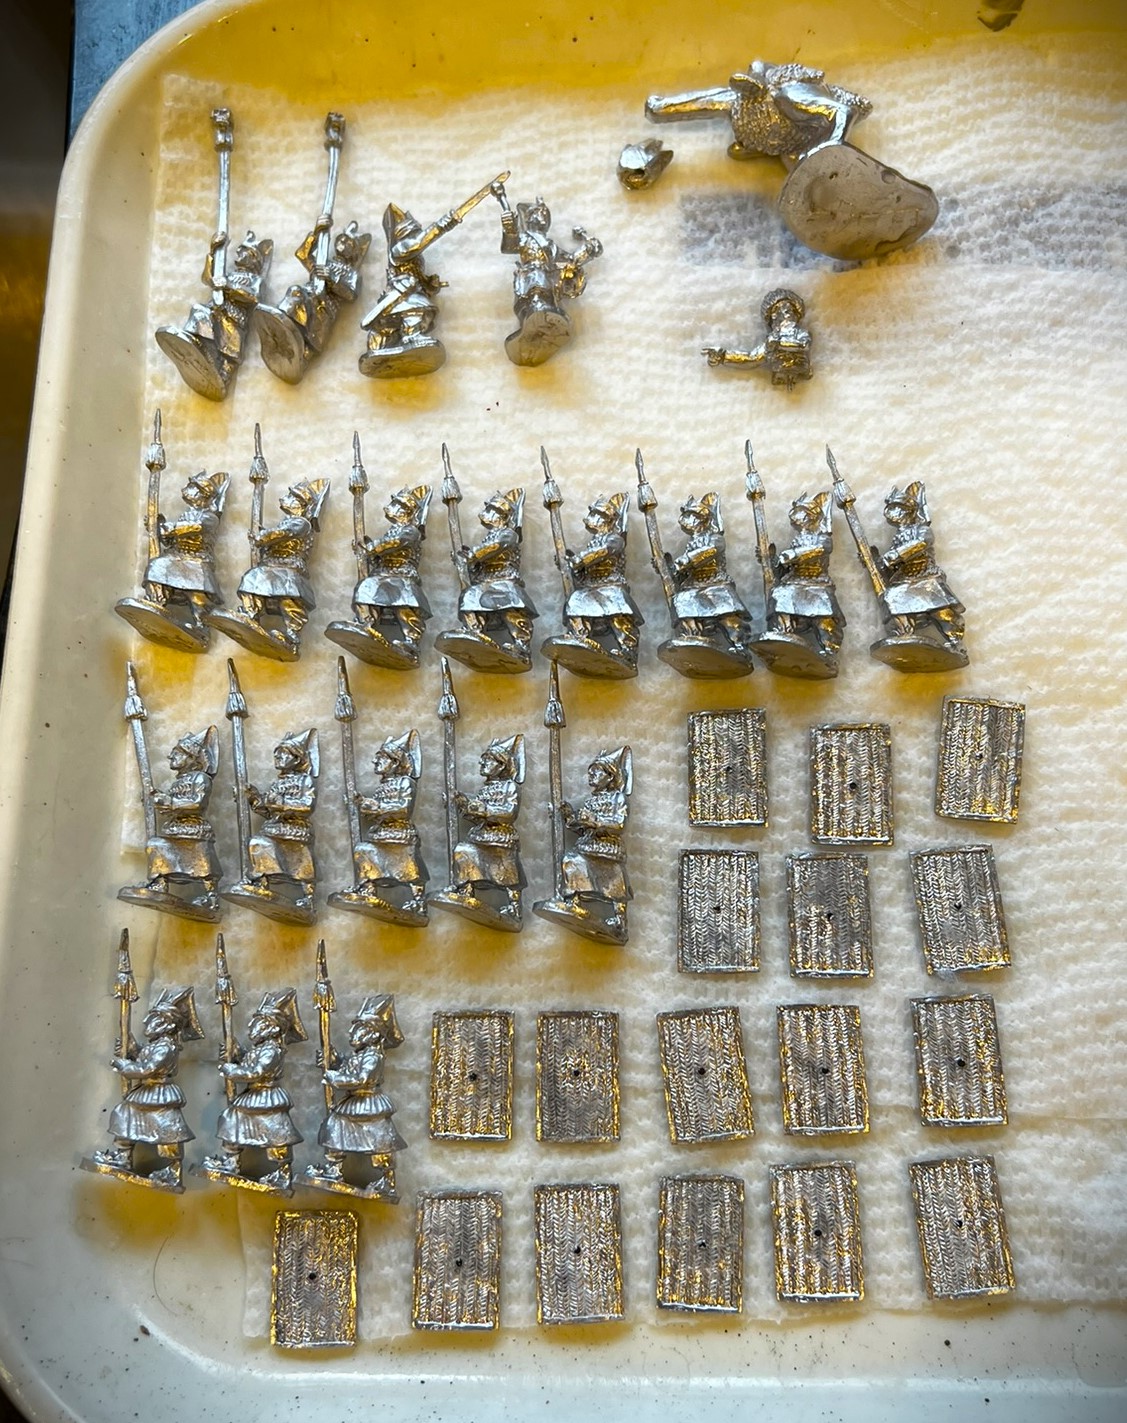
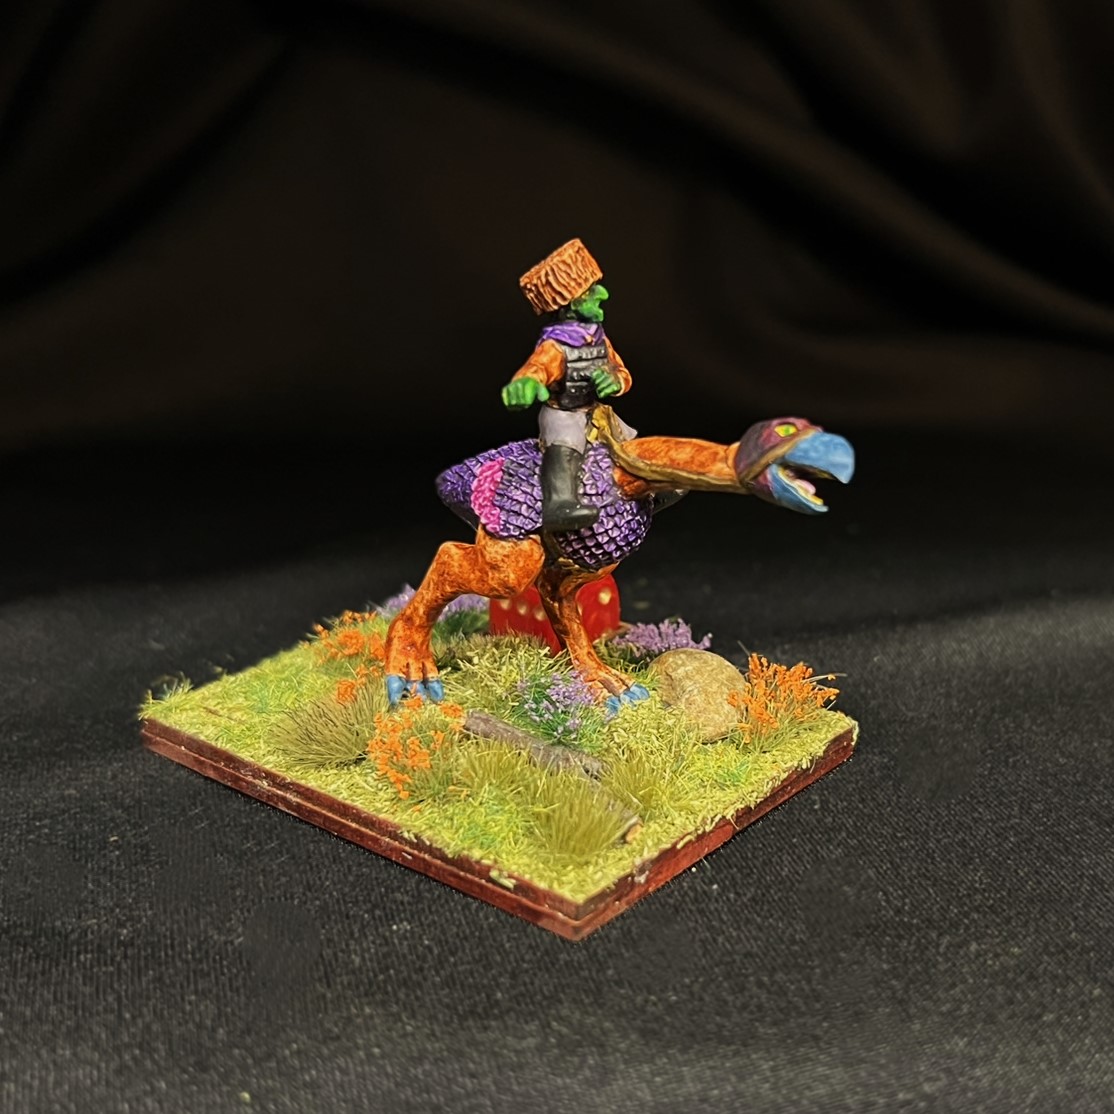
No assembly was required for the unit other than to mount the shields, to add the flags, and to assemble the regimental commander and his Zilk (carniverous bird) mount. As I always do, I mixed and matched the figure types and poses such that no two bases of the five in the regiment were identical in terms of the figures. The SKU for the regiment is OZZ-301. There are 21 figures for the regiment – this includes the mounted regimental commander and 20 trooper figures. All of the figures are metal and 28mm in size. I decided to stay with more orange instead of any yellow as I thought that looked better and would be in canon agreement. The contrast between the orange and the purple was interesting.
This is my third unit for Dave Stone’s “PAINT WHAT YOU GOT CHALLENGE 2023/2024” painting challenge that runs from December 26th, 2023 to February 29th, 2024. It’s also going to play a major role in many of my upcoming games for the multiple gaming conventions that I plan on supporting as a GM – right now at a schedule of 25 four-hour games just through May across 4 different conventions.
As I have mentioned previously, I am still recovering from pre-Christmas knee surgery, but now my painting opportunities have been better. I tried to take a few more WIP shots for this project. I’ll share those and then some eye candy.
WIP shots
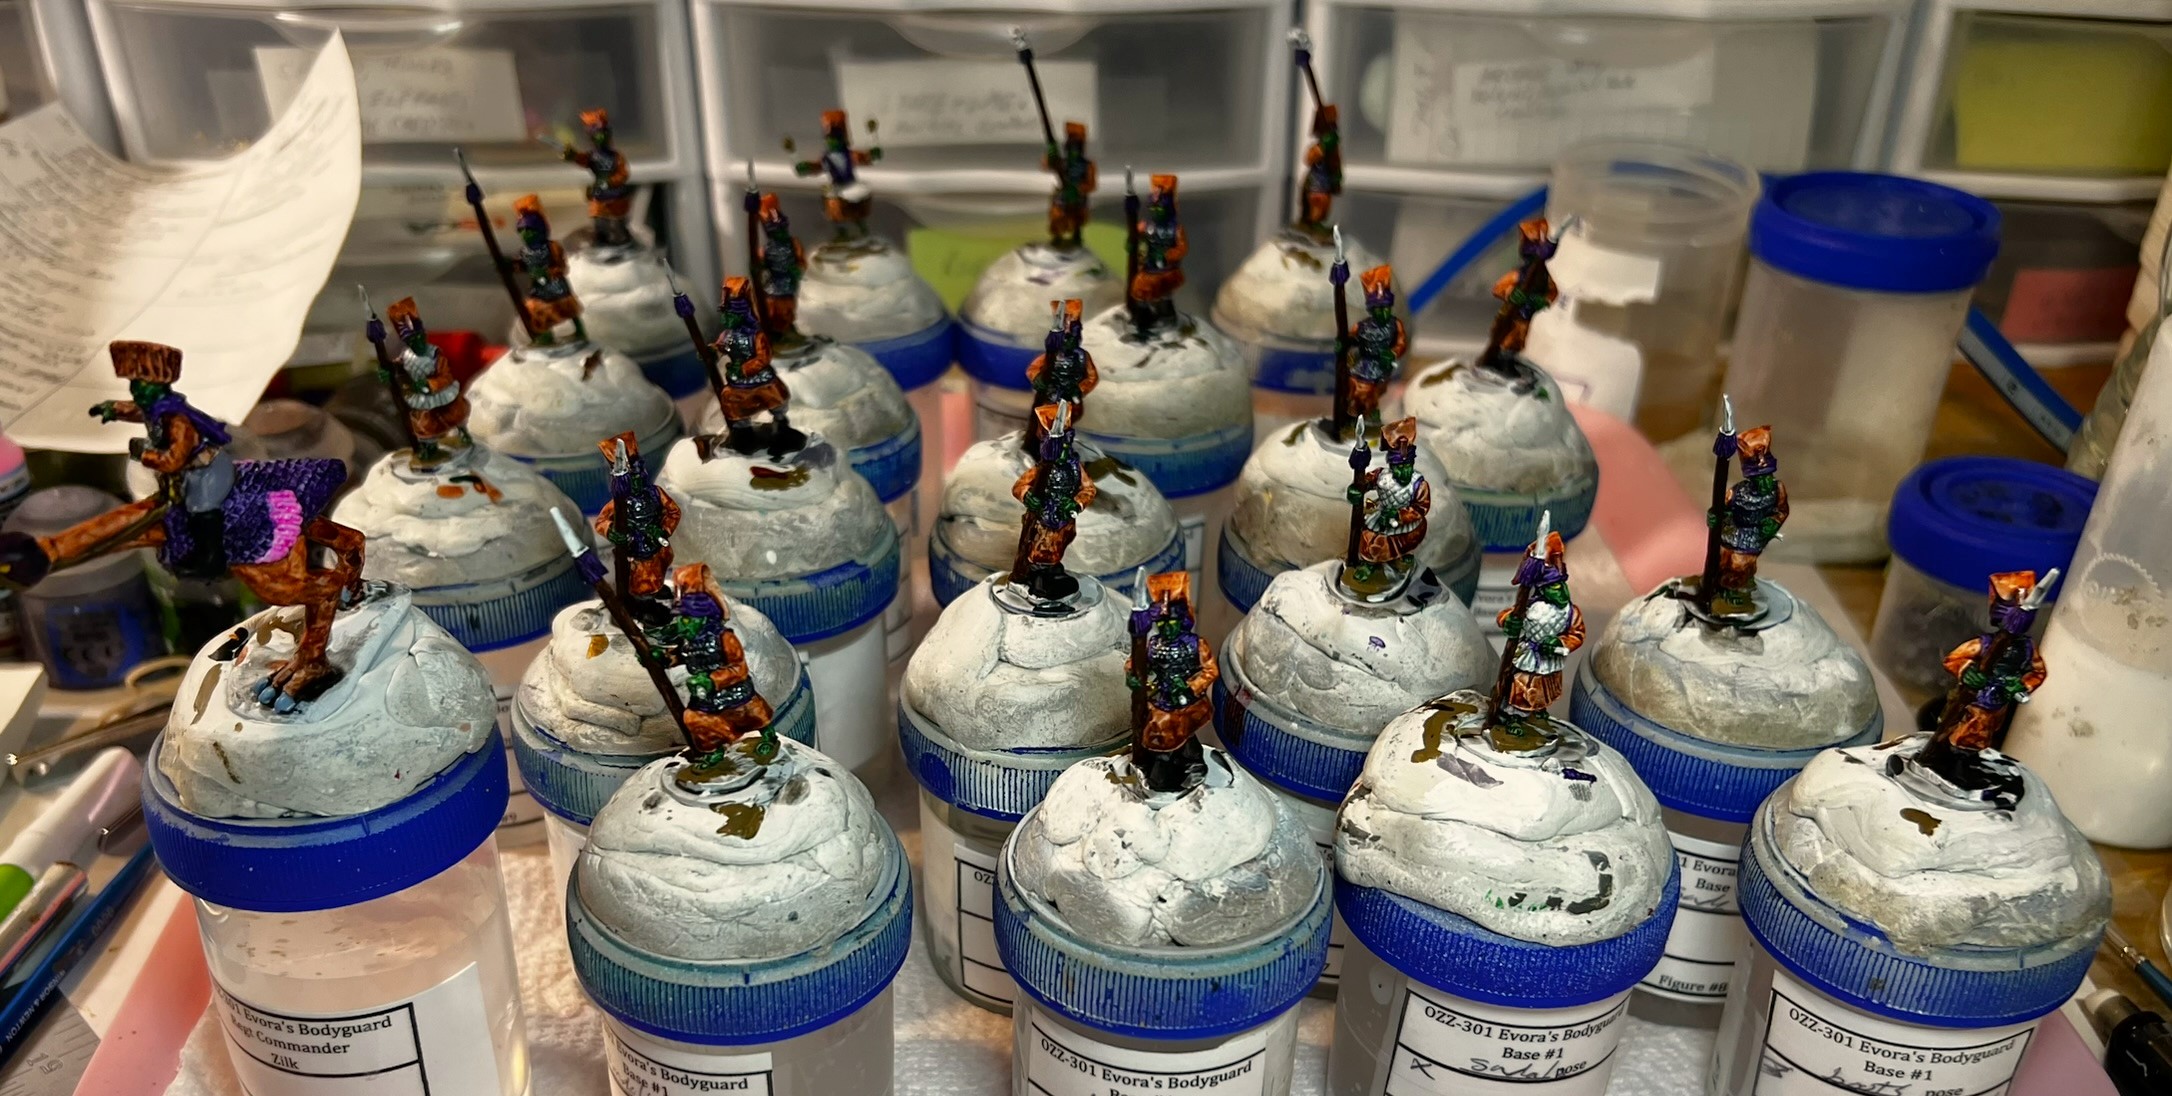
Evora’s Bodyguard Infantry Regiment – after cleanup of any mold lines and washing. Yes, 17 shields to paint up. I started work on December 29th.
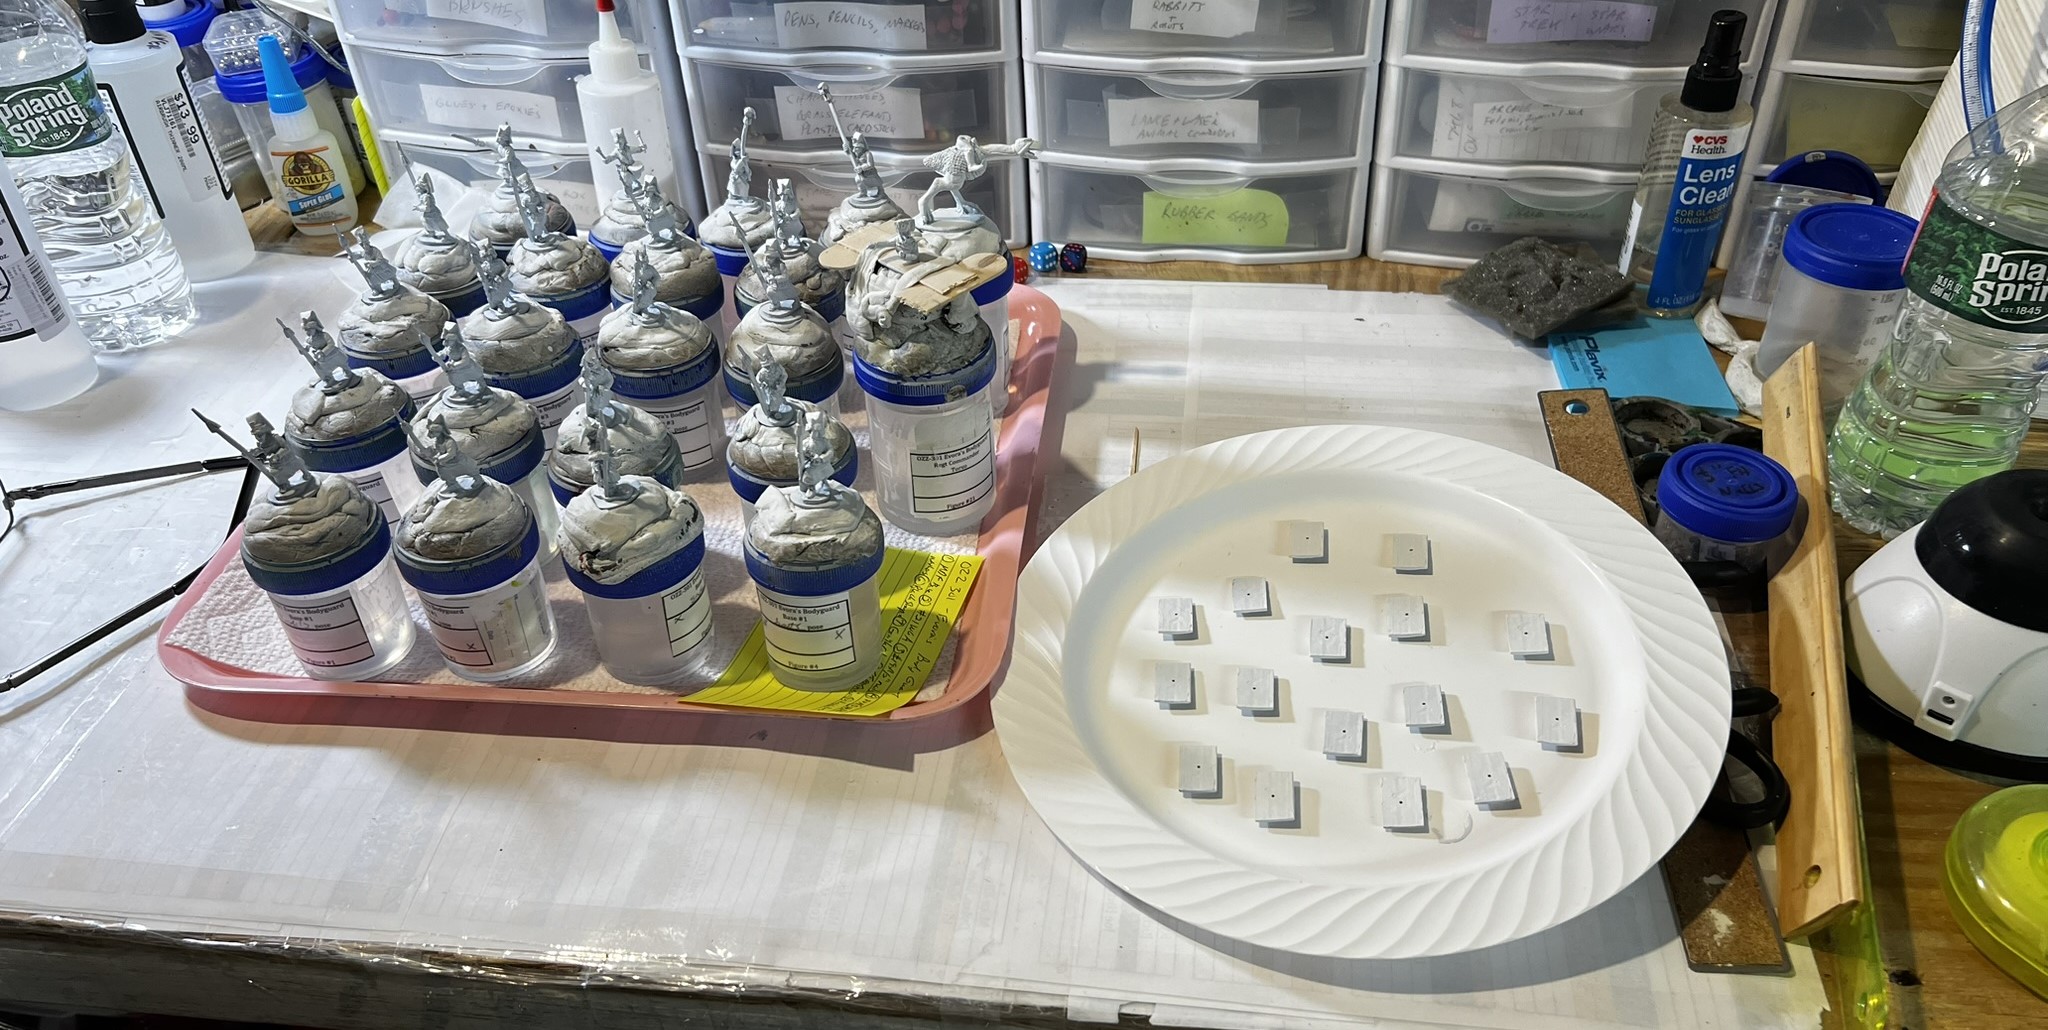
The unit primed in white with the shields primed separately. Note that there are 16 shields, not 17! Later in the project, I would find that one rogue shield had disappeared under a paper towel and had to be painted separately.
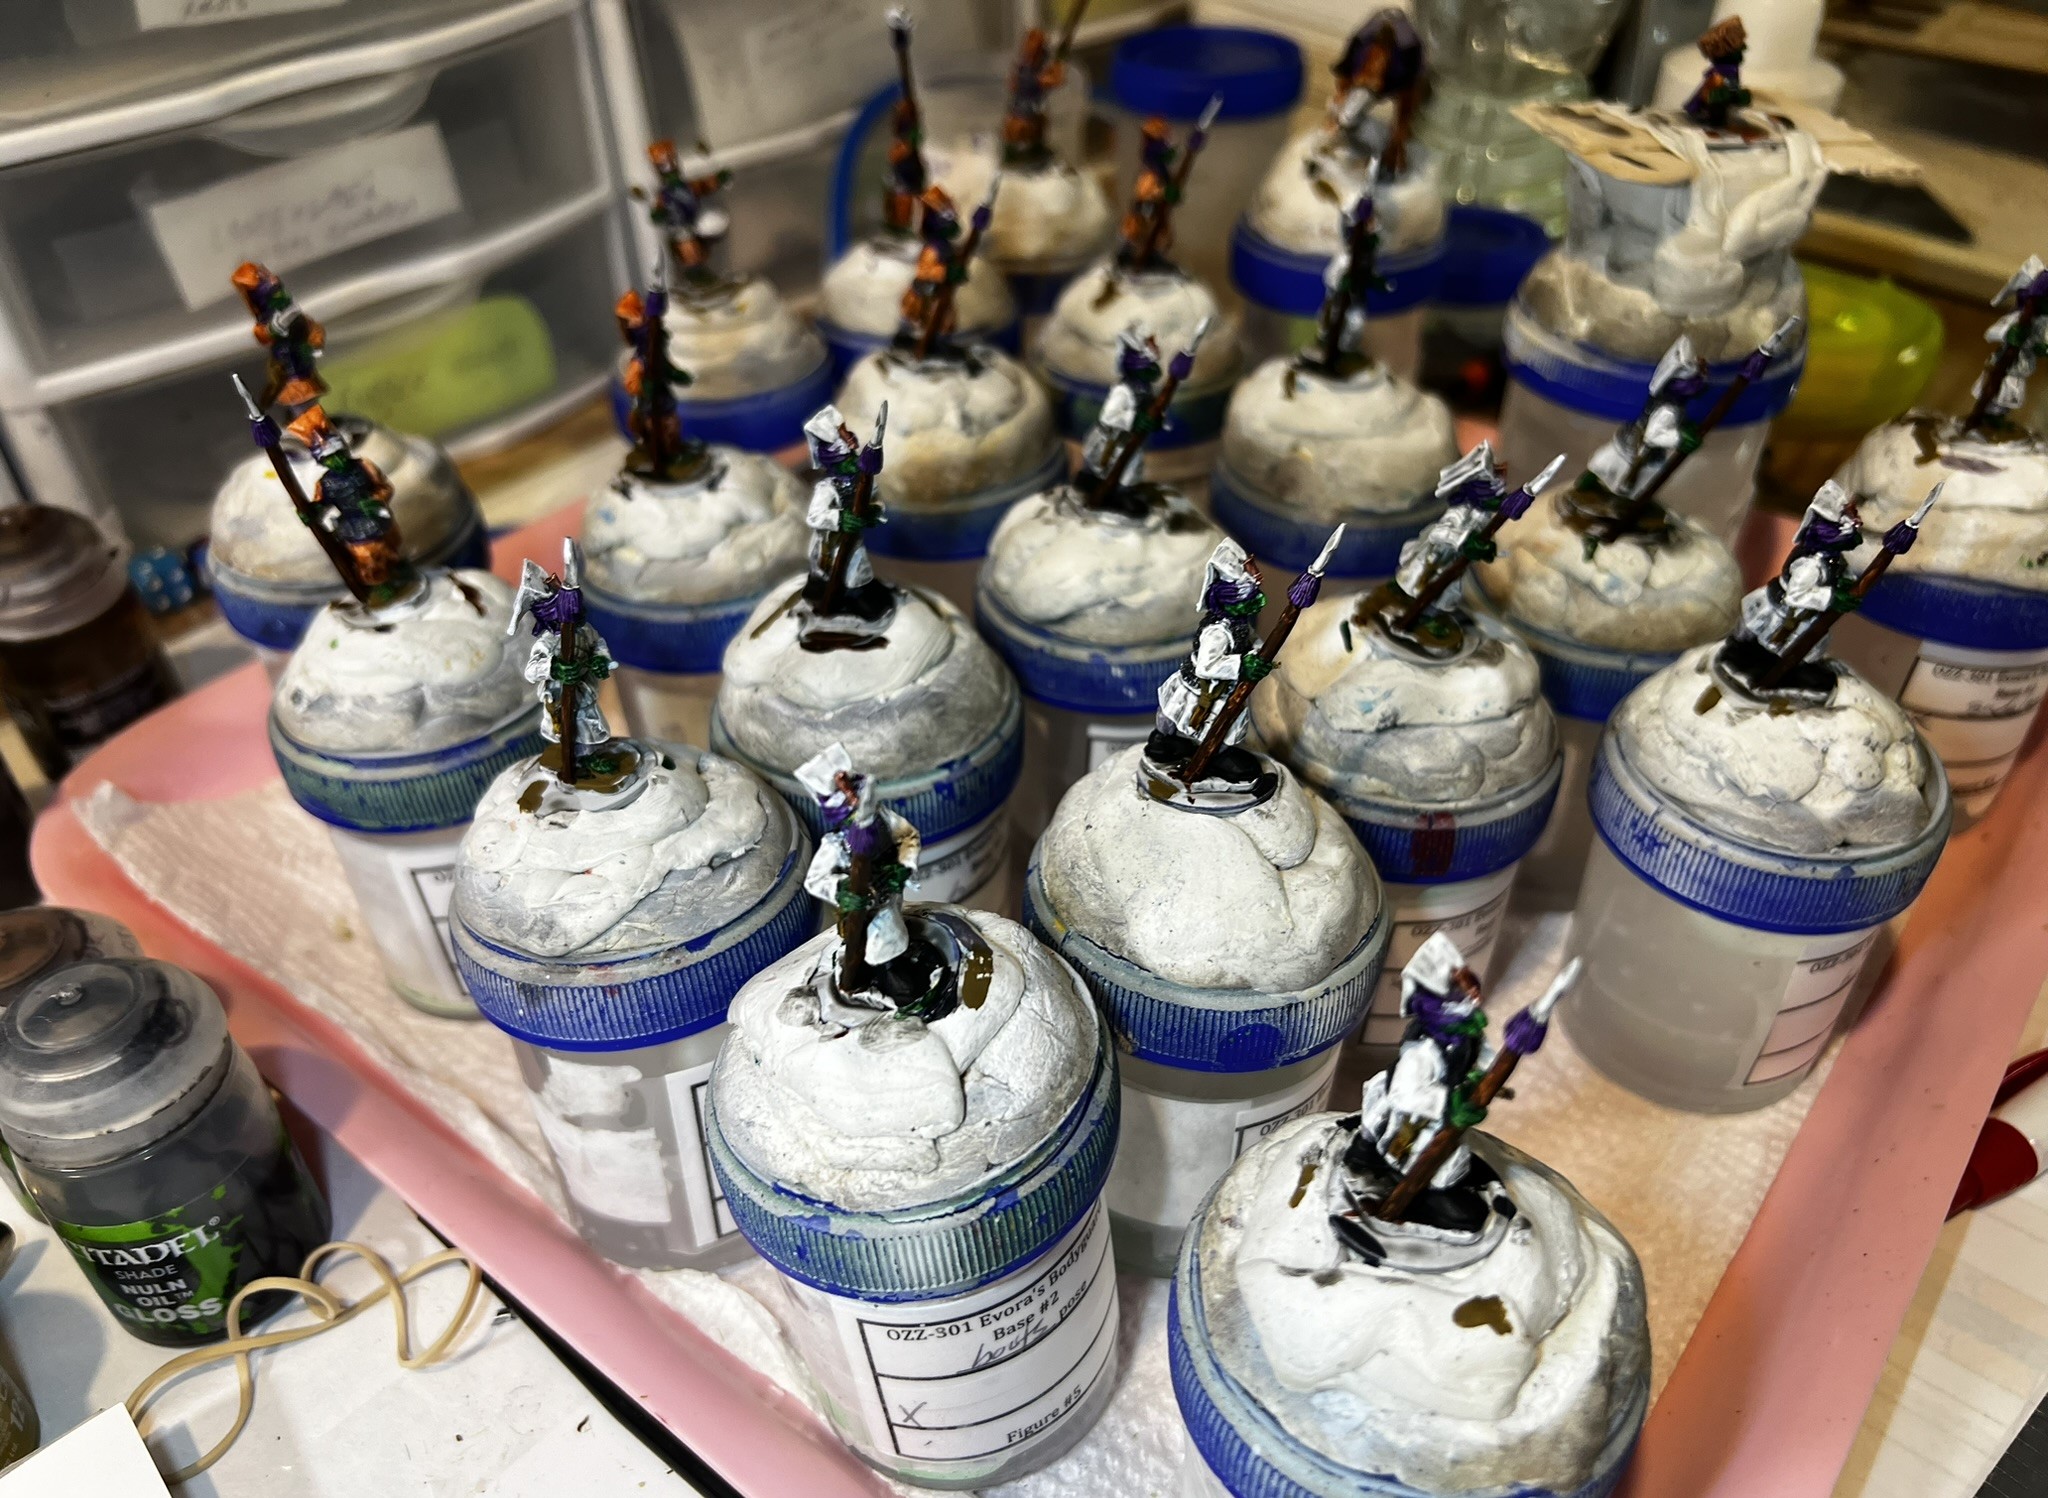
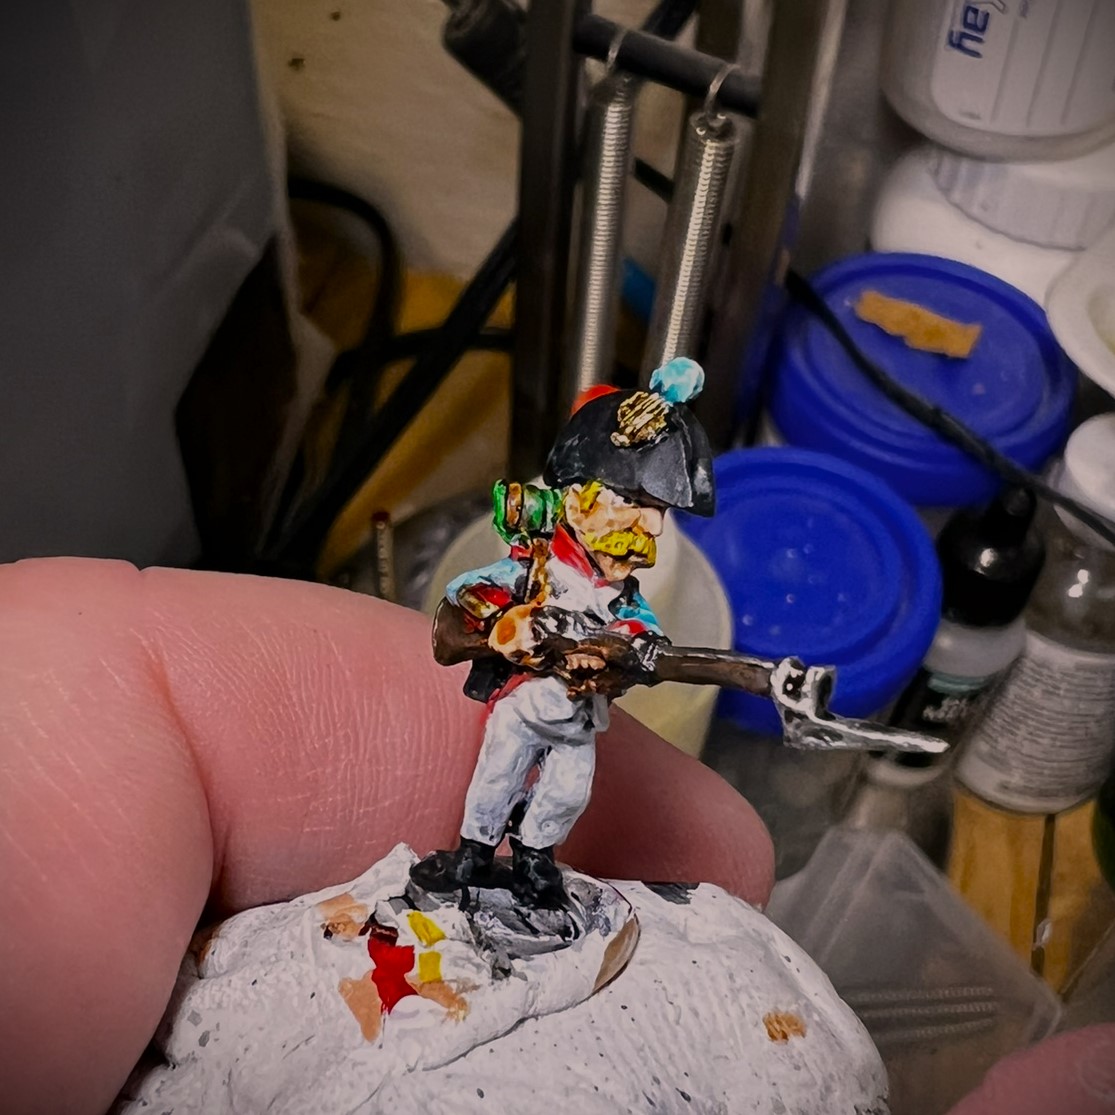
Early painting – using my normal habit of applying a dark wash over the white and dry brushing white over that before adding colors. I found that these figures had several more difficult-to-access painting areas (those that were hard to paint without getting paint where I did not want it) – than most other Ozz figures. This was mainly due to the arm and head positions – not a terrible challenge, but I thought that it took me more time to paint.
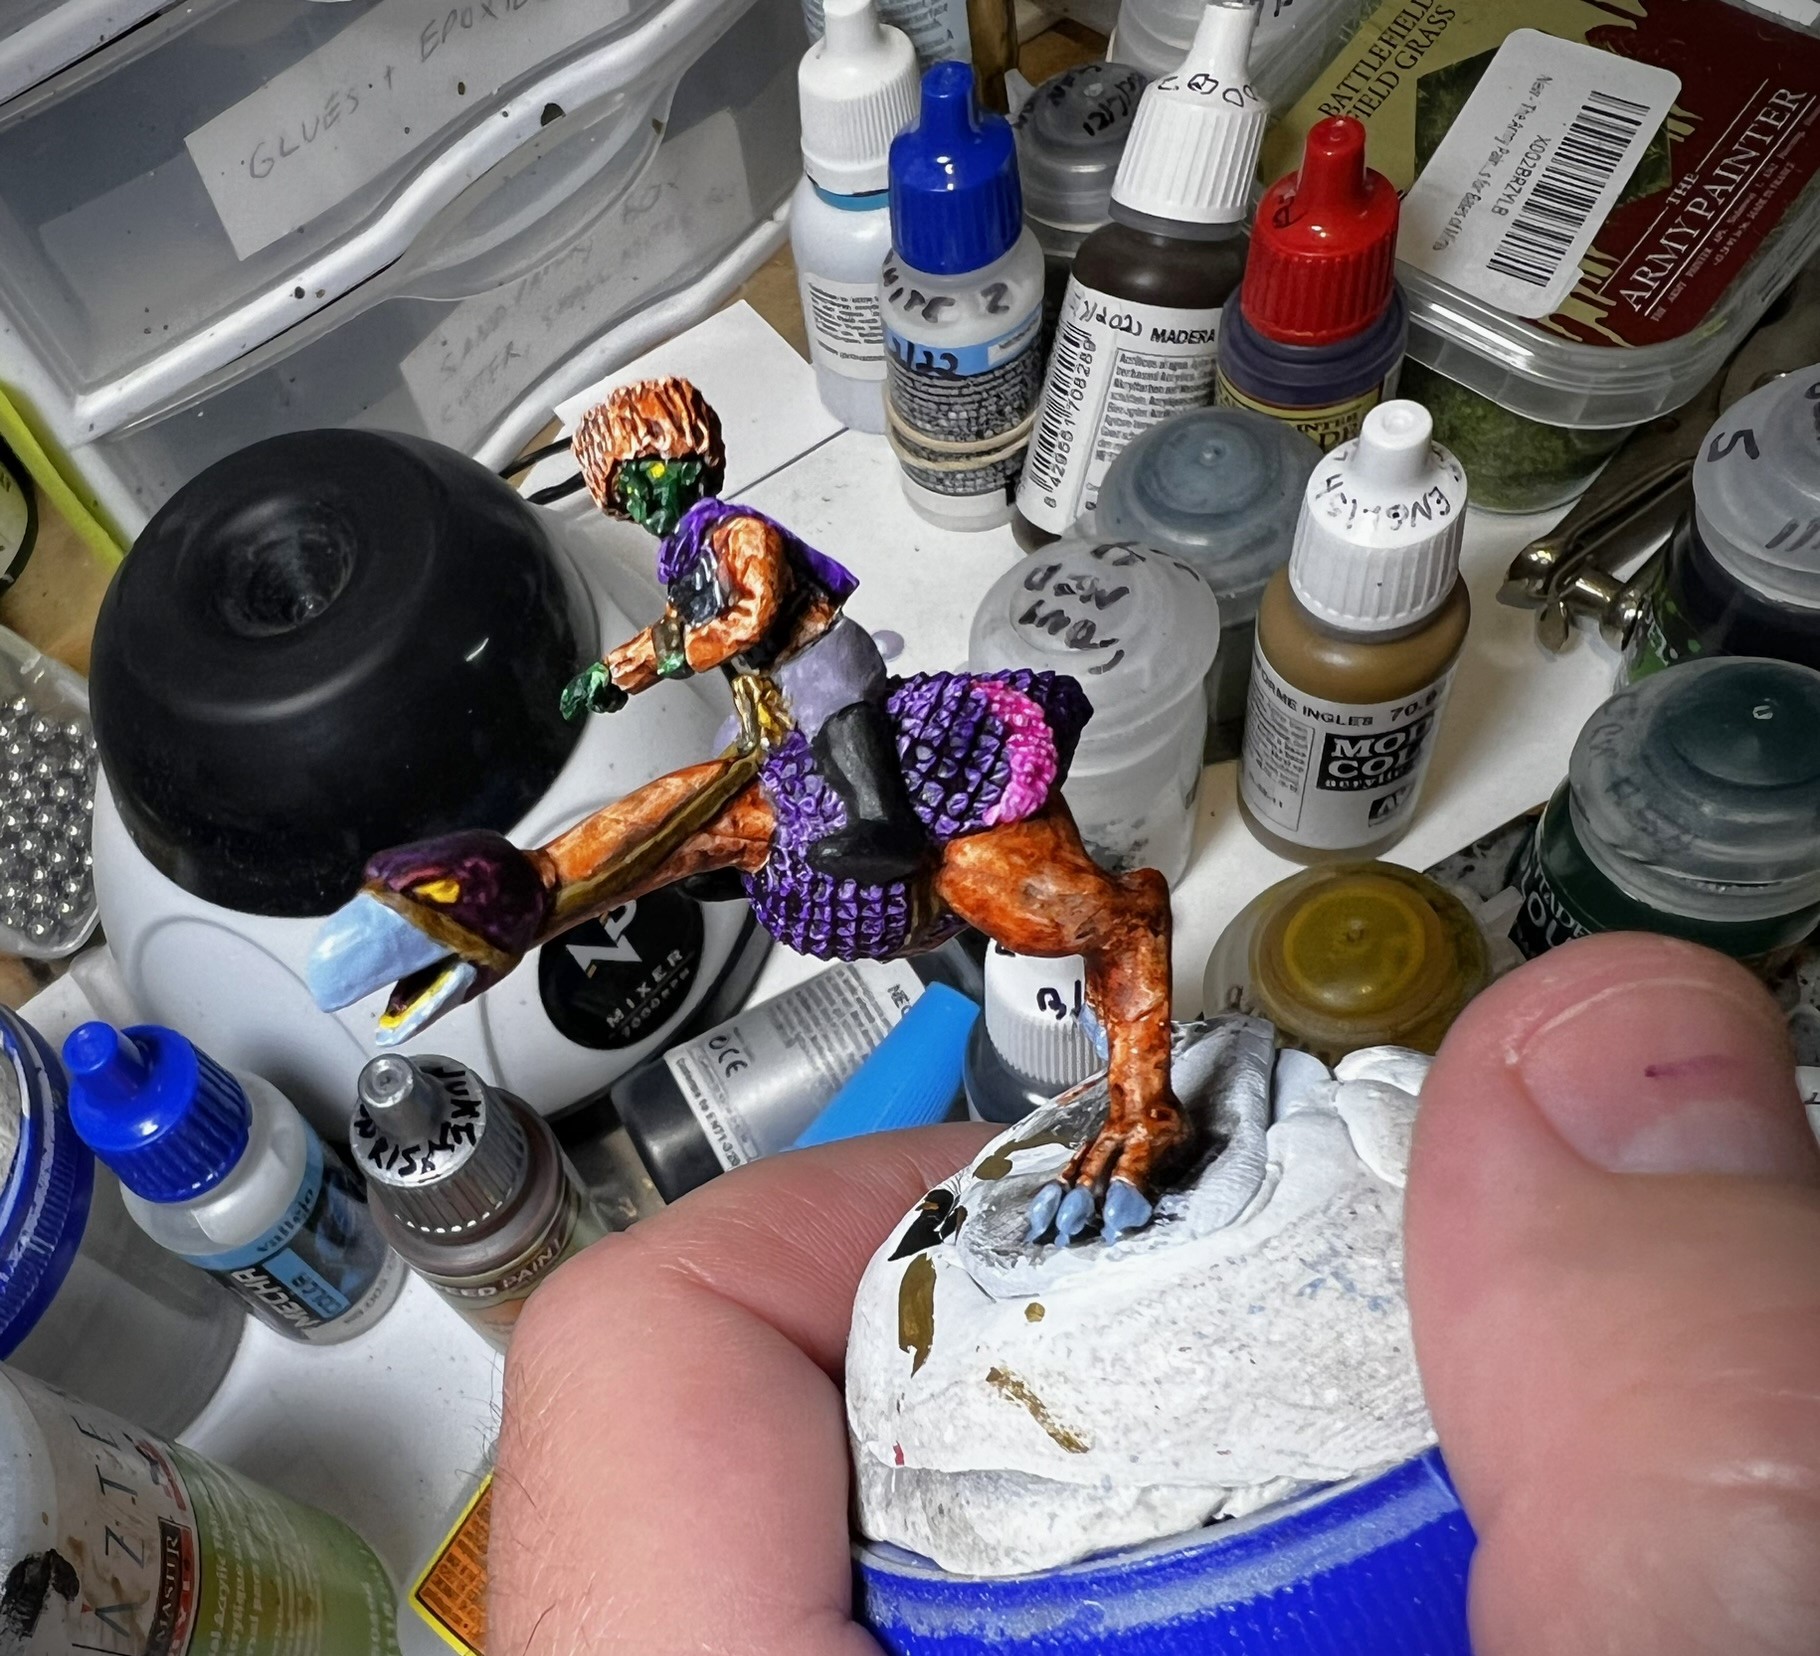
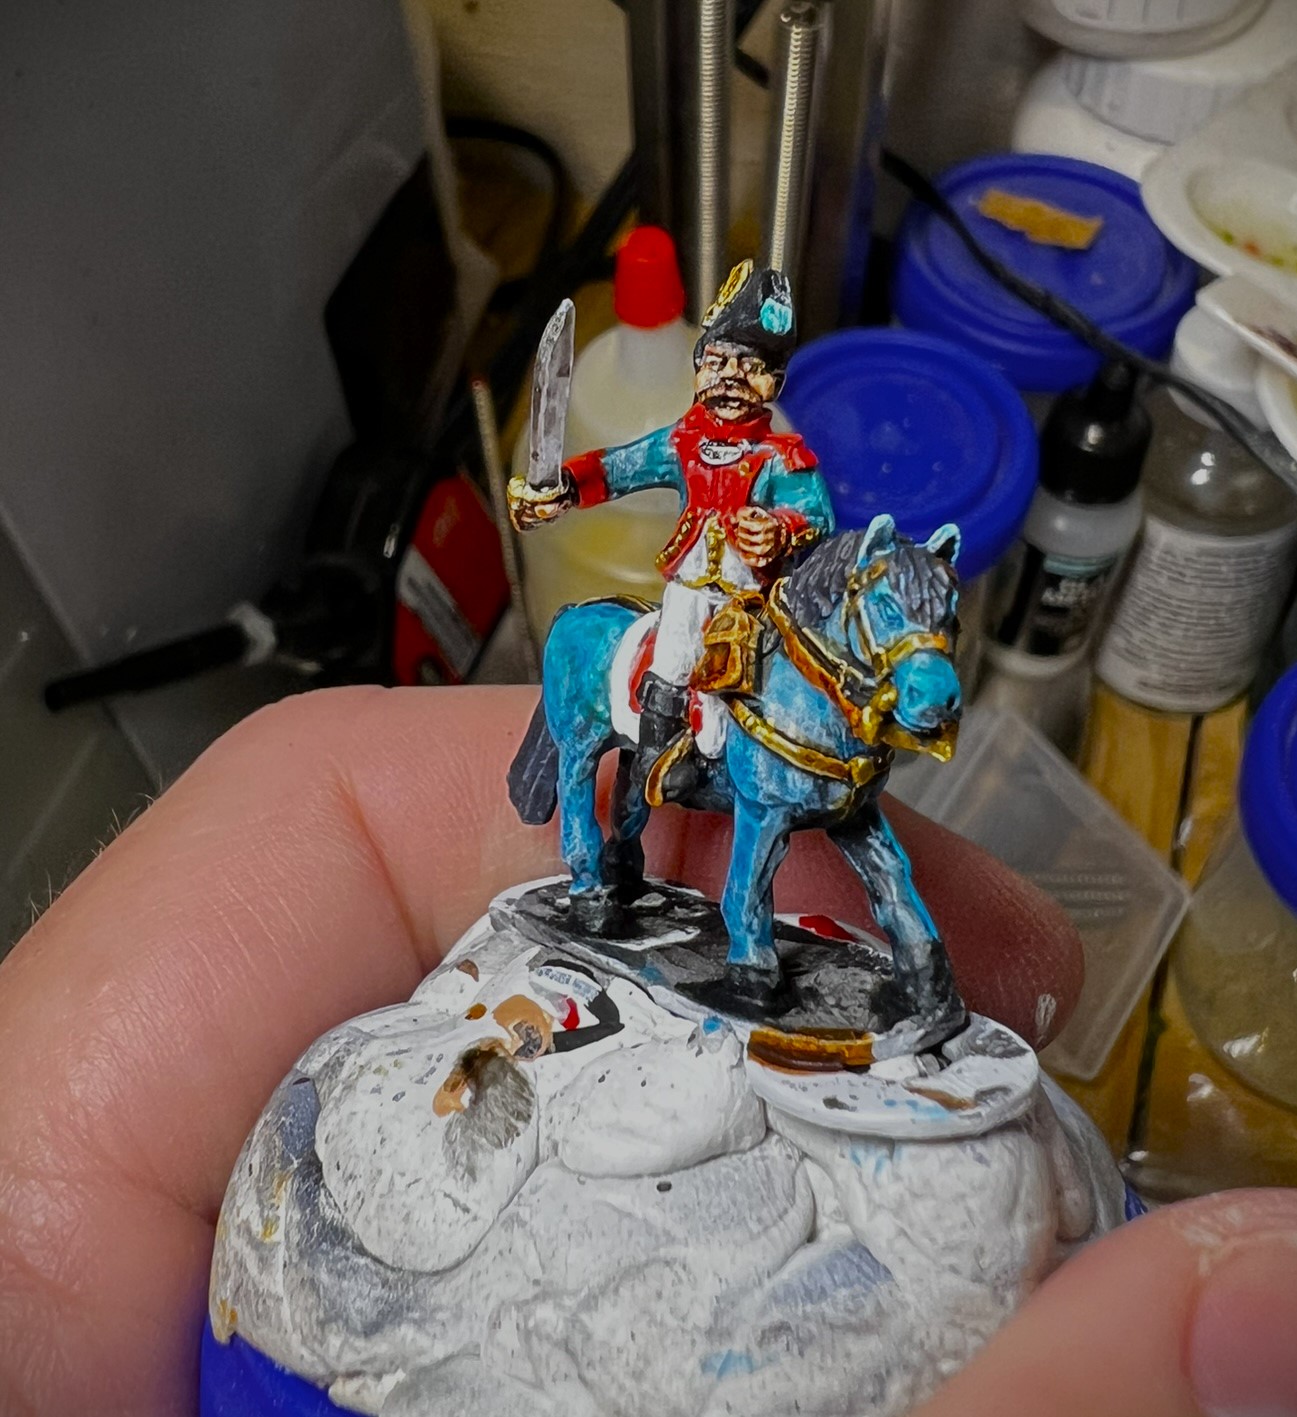
By January 4th I had pinned and assembled the regimental commander and his mount, and painted it as you see below. I had started to get some orange onto the troopers as you see on the left below.
Troopers Jan 4thRegimental Commander
Jan 5th progress.
January 8th saw us getting about a foot of snow. This snow interrupted my work as even in my gimping state I could use the snowblower (slowly and methodically). Luckily, Lynn has no fear of hard shovel work. Once done, we lit the fire pit briefly.
I was back in the saddle painting through the 8th of January.
Troopers painted.Trooper close up
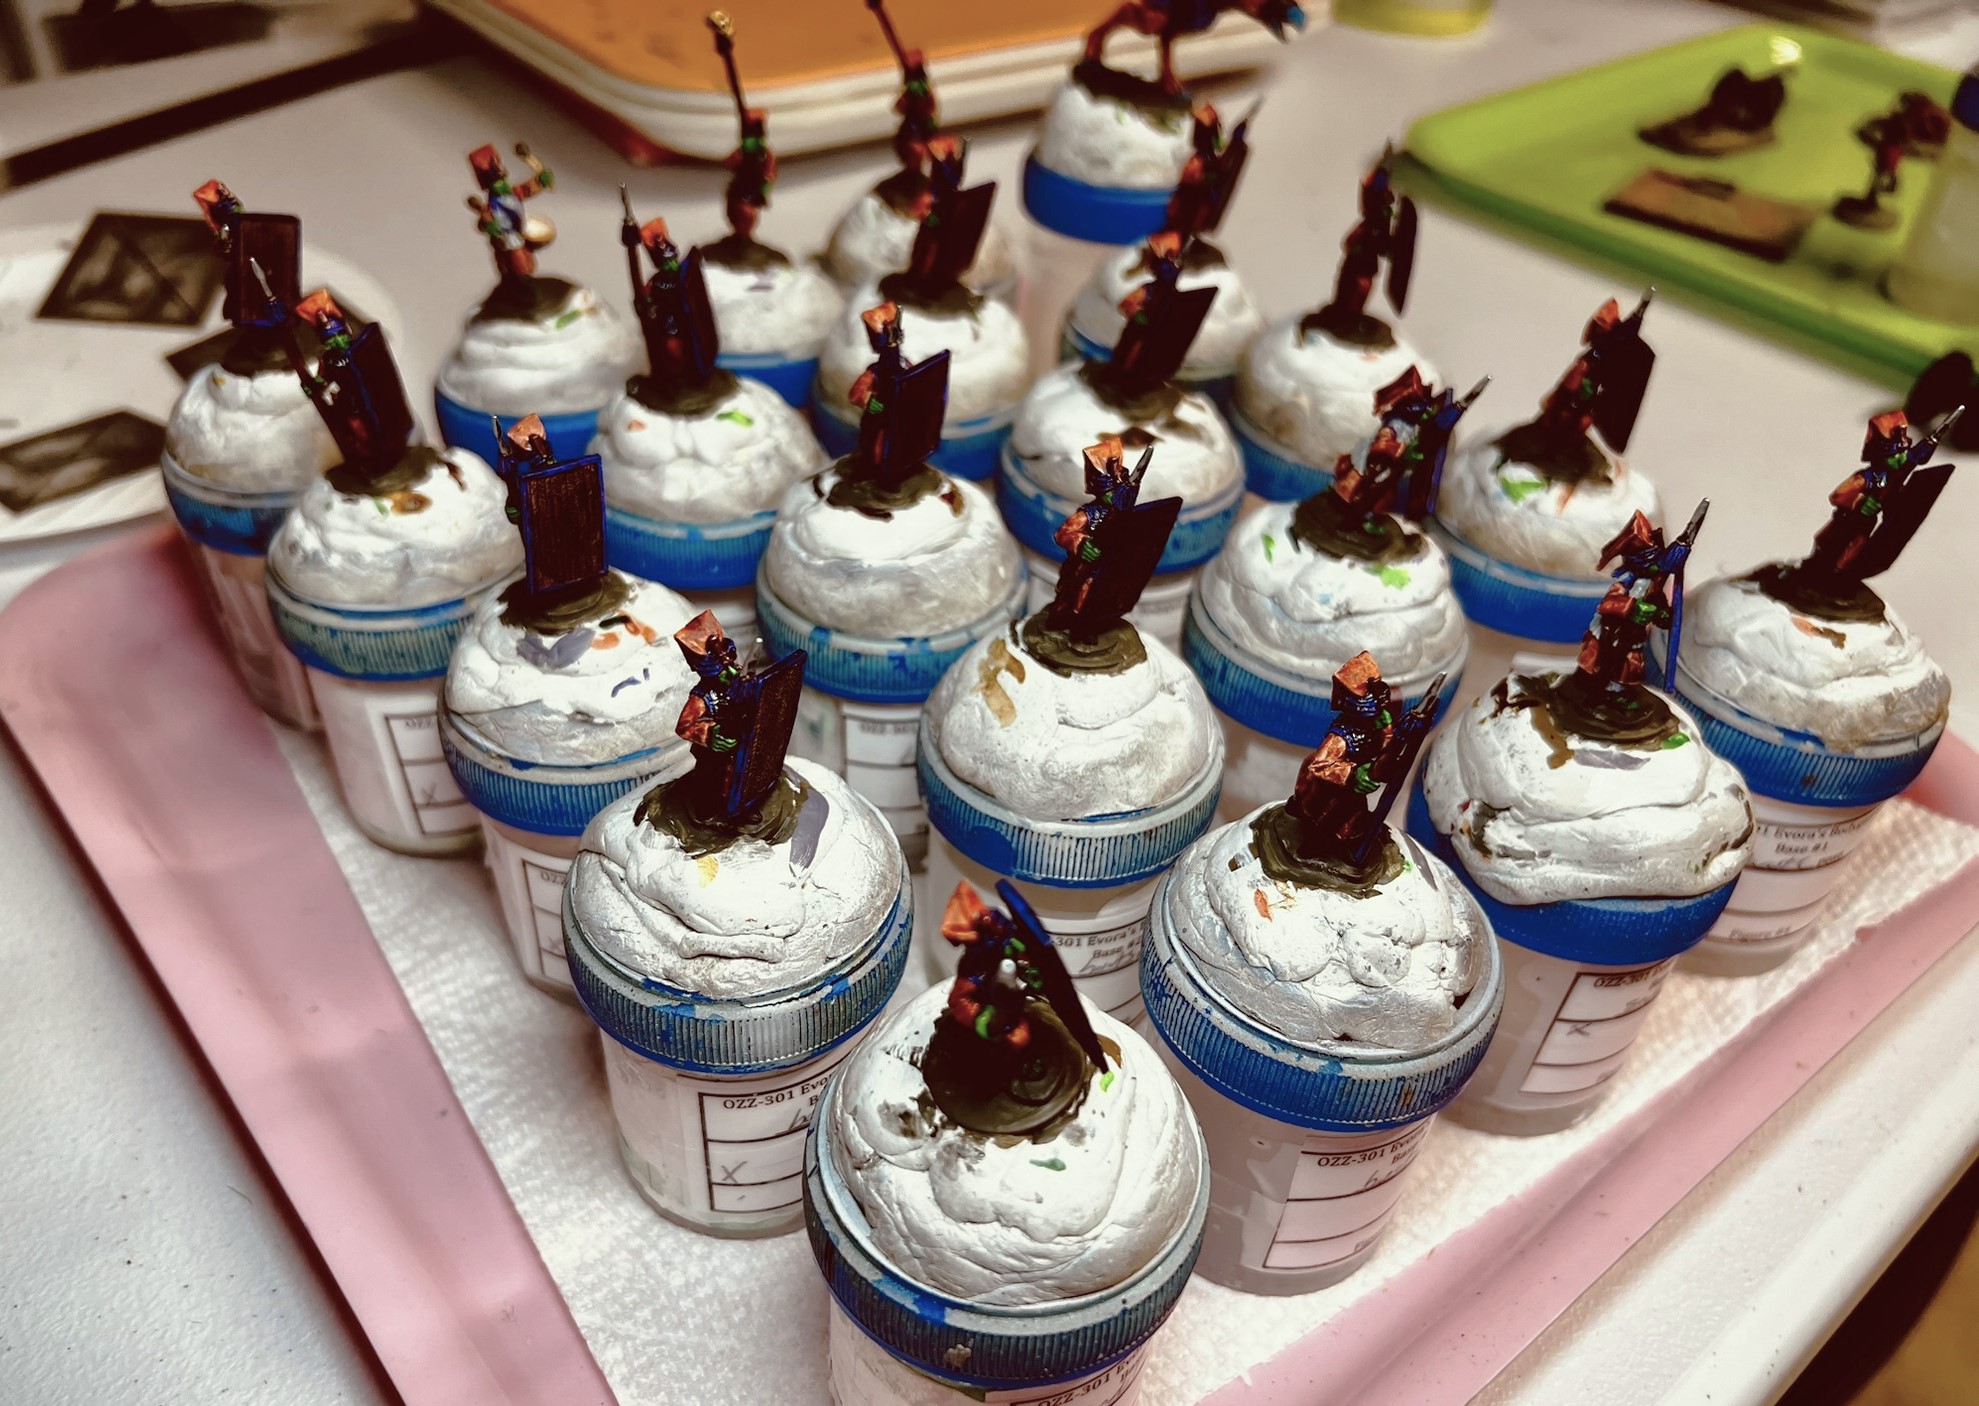
By the 9th of January, I had the regiment painted, shields attached, and varnished on their specimen jars. I drilled though the shields and tried to get them multiple gluing points in terms of attachment for the sake of durability on the tabletop. Again, these were BIG shields. Next, I needed to mount the figures on the bases and get the flocking done. Glue does take time to dry…always…
Mounting the figures on their steel and MDF bases.
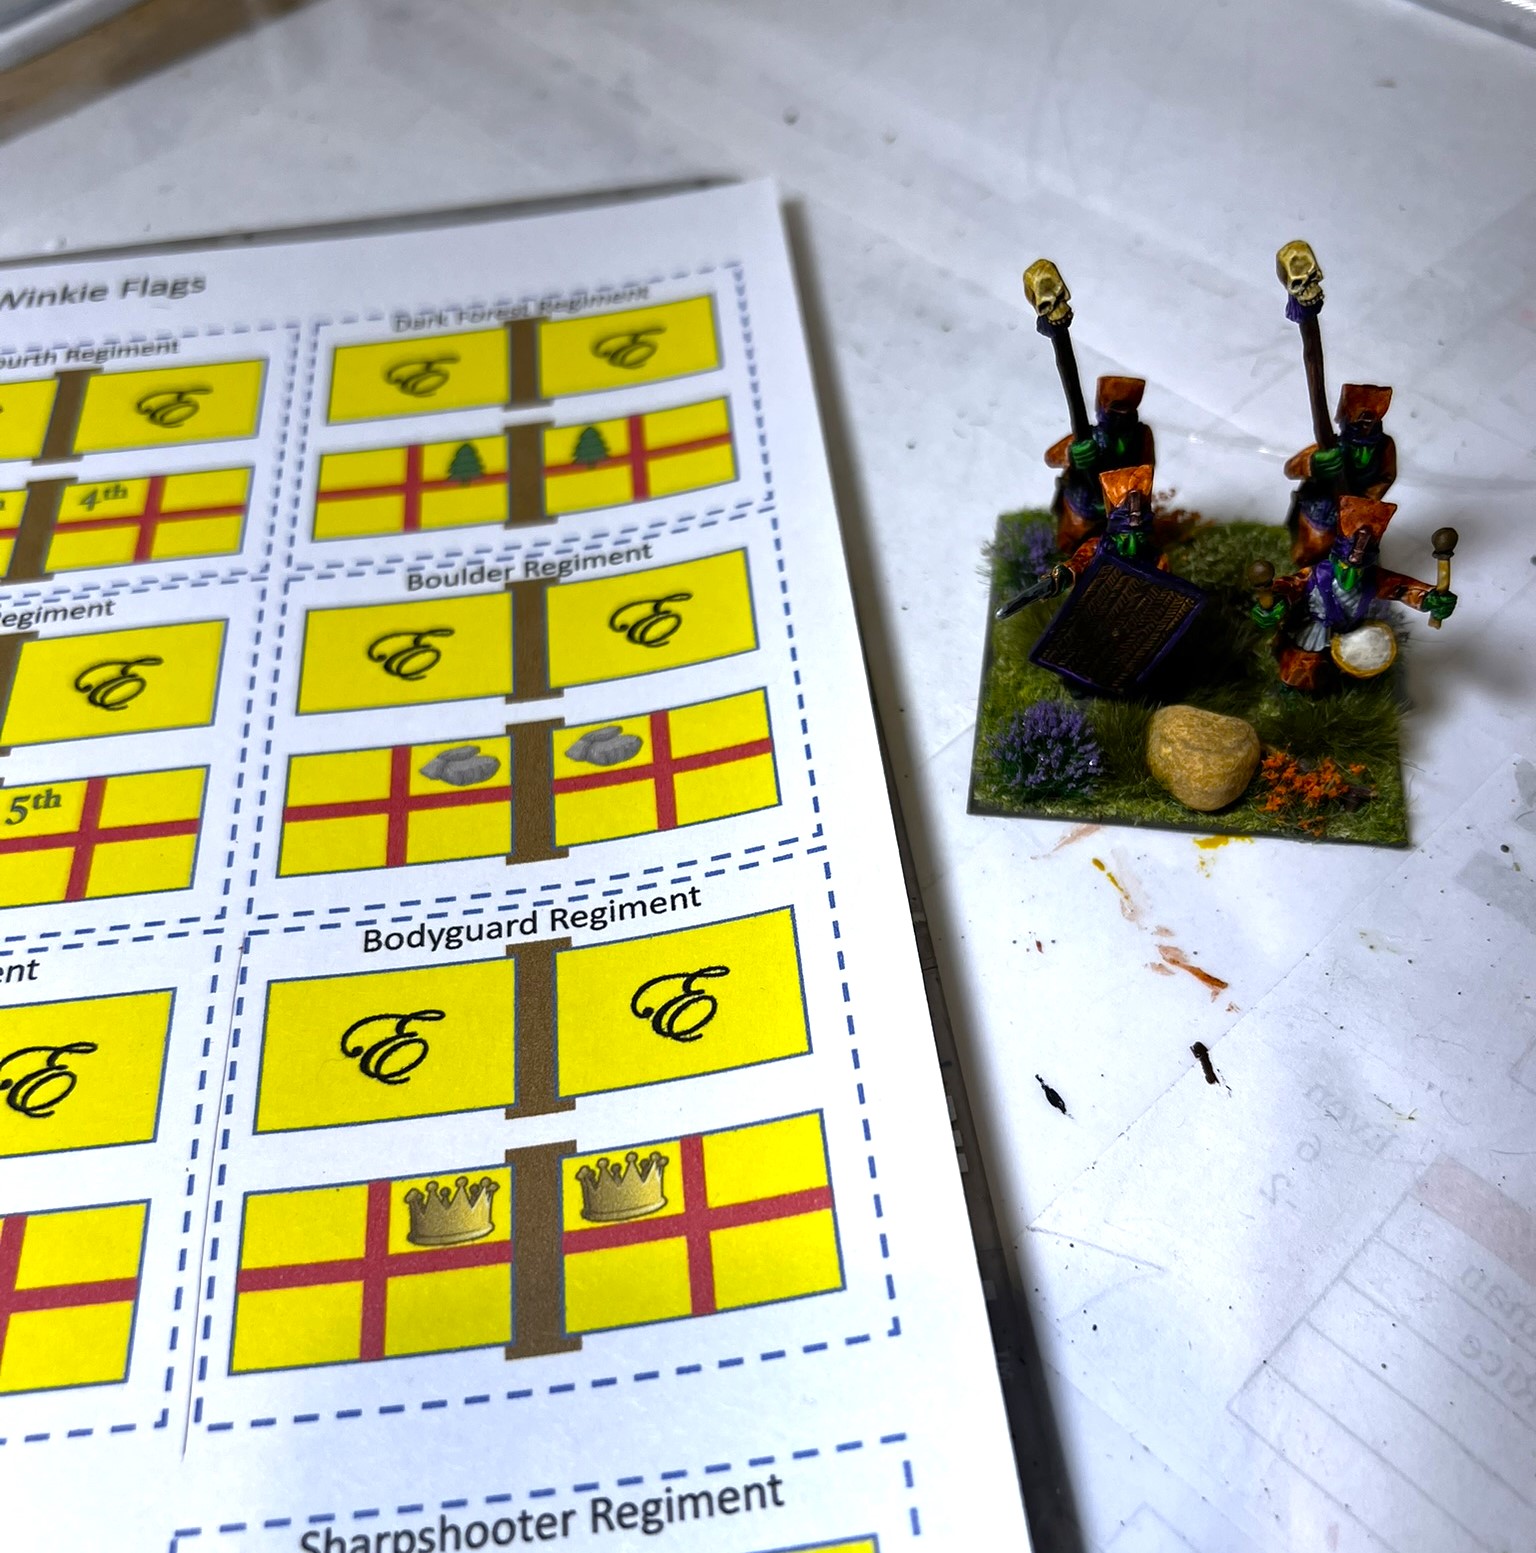
I then applied the flocking and flags. For the flocking, I decided that purple and orange flowers with green grass and undergrowth would work. At least the flip flops were less visible!
Flags to cut out with the flocked command base.
I was finally done on Jan 10th.
The EBIR completed.
Eye Candy
Select and click on any photo for a better look.
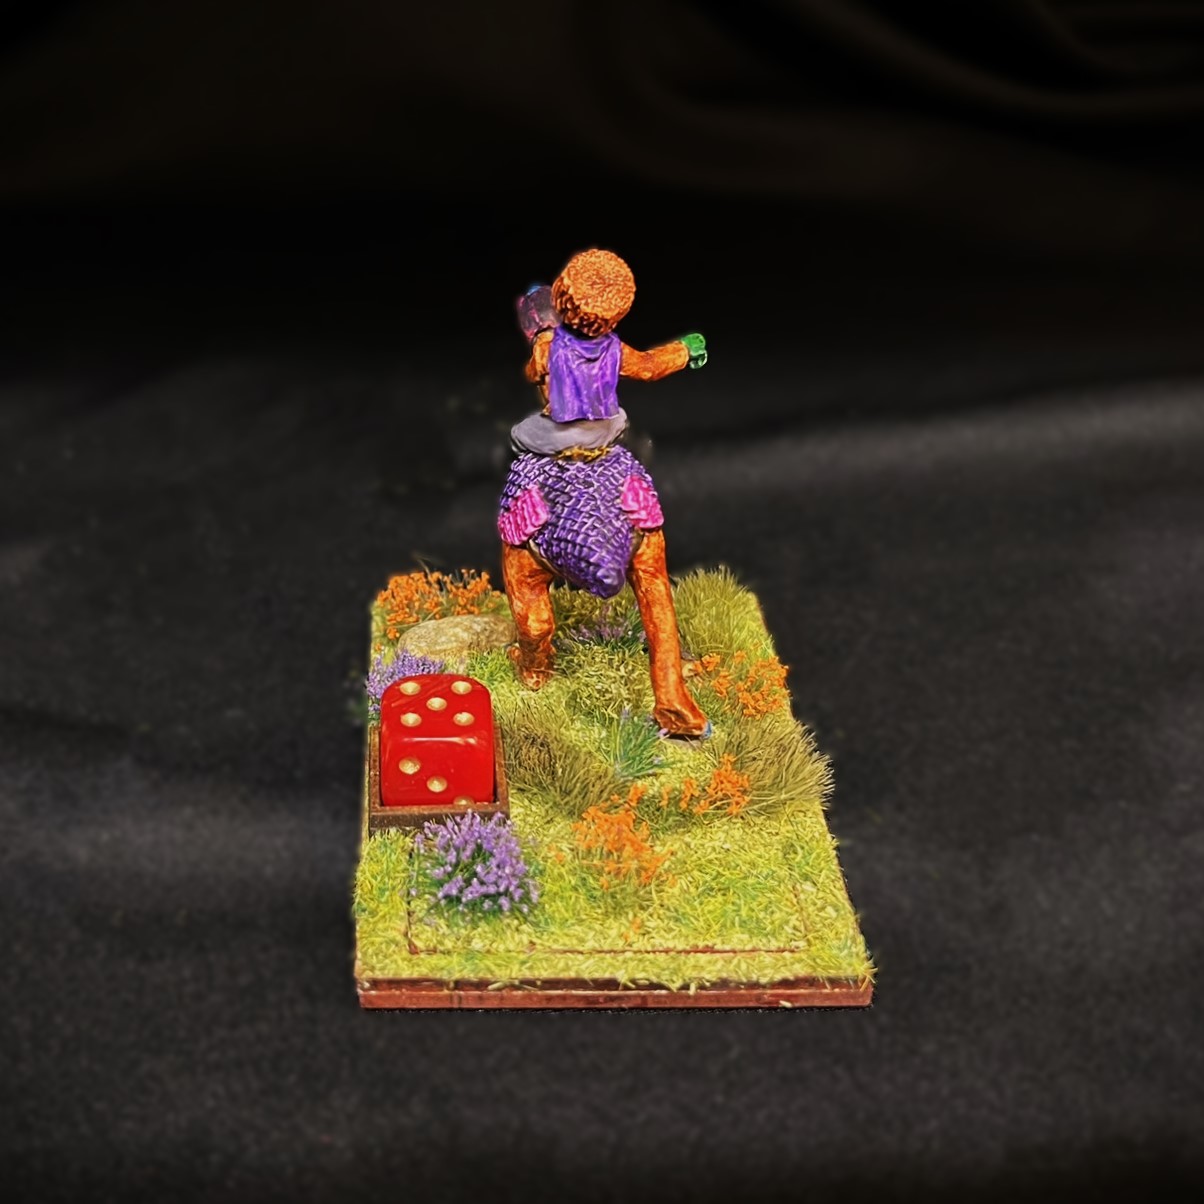
Regimental Commander Base
Base 1
Base 2
Base 3
Base 4
Command Base
Group Shots
The EBIR in line formation with the regimental commander leading the way.
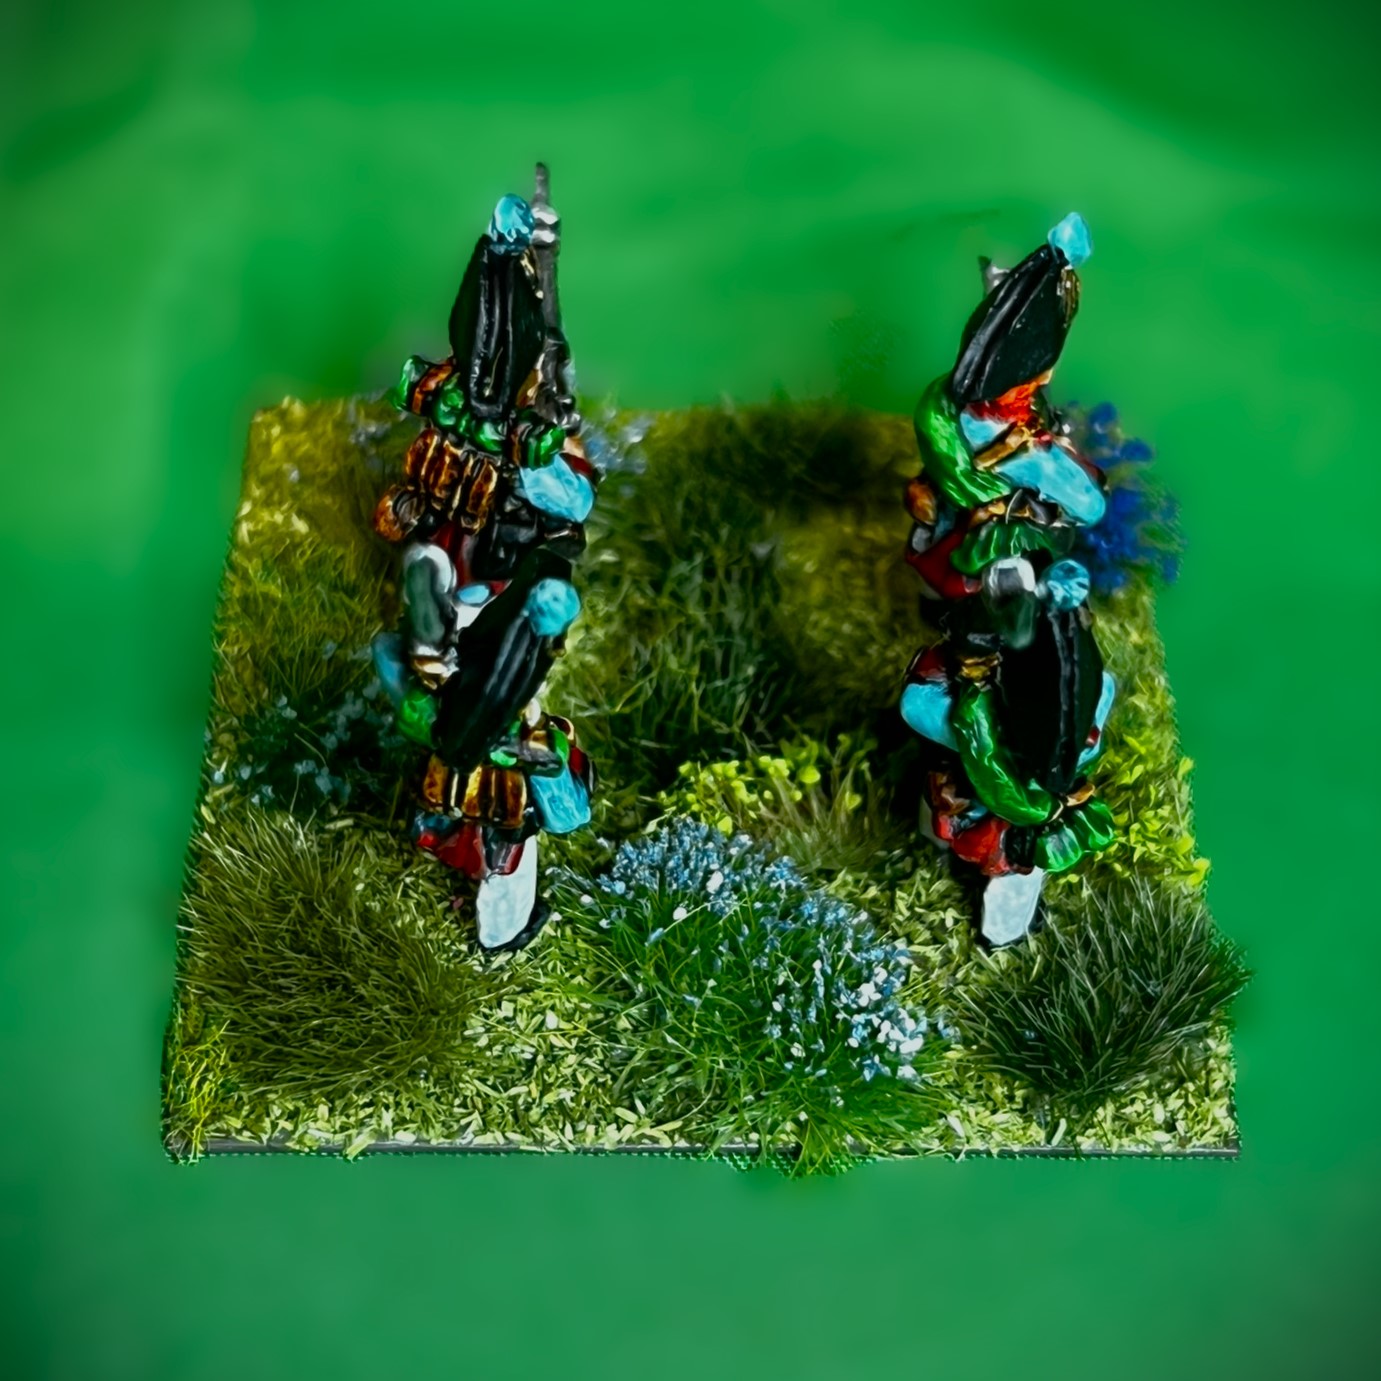
Top view of the flocking.
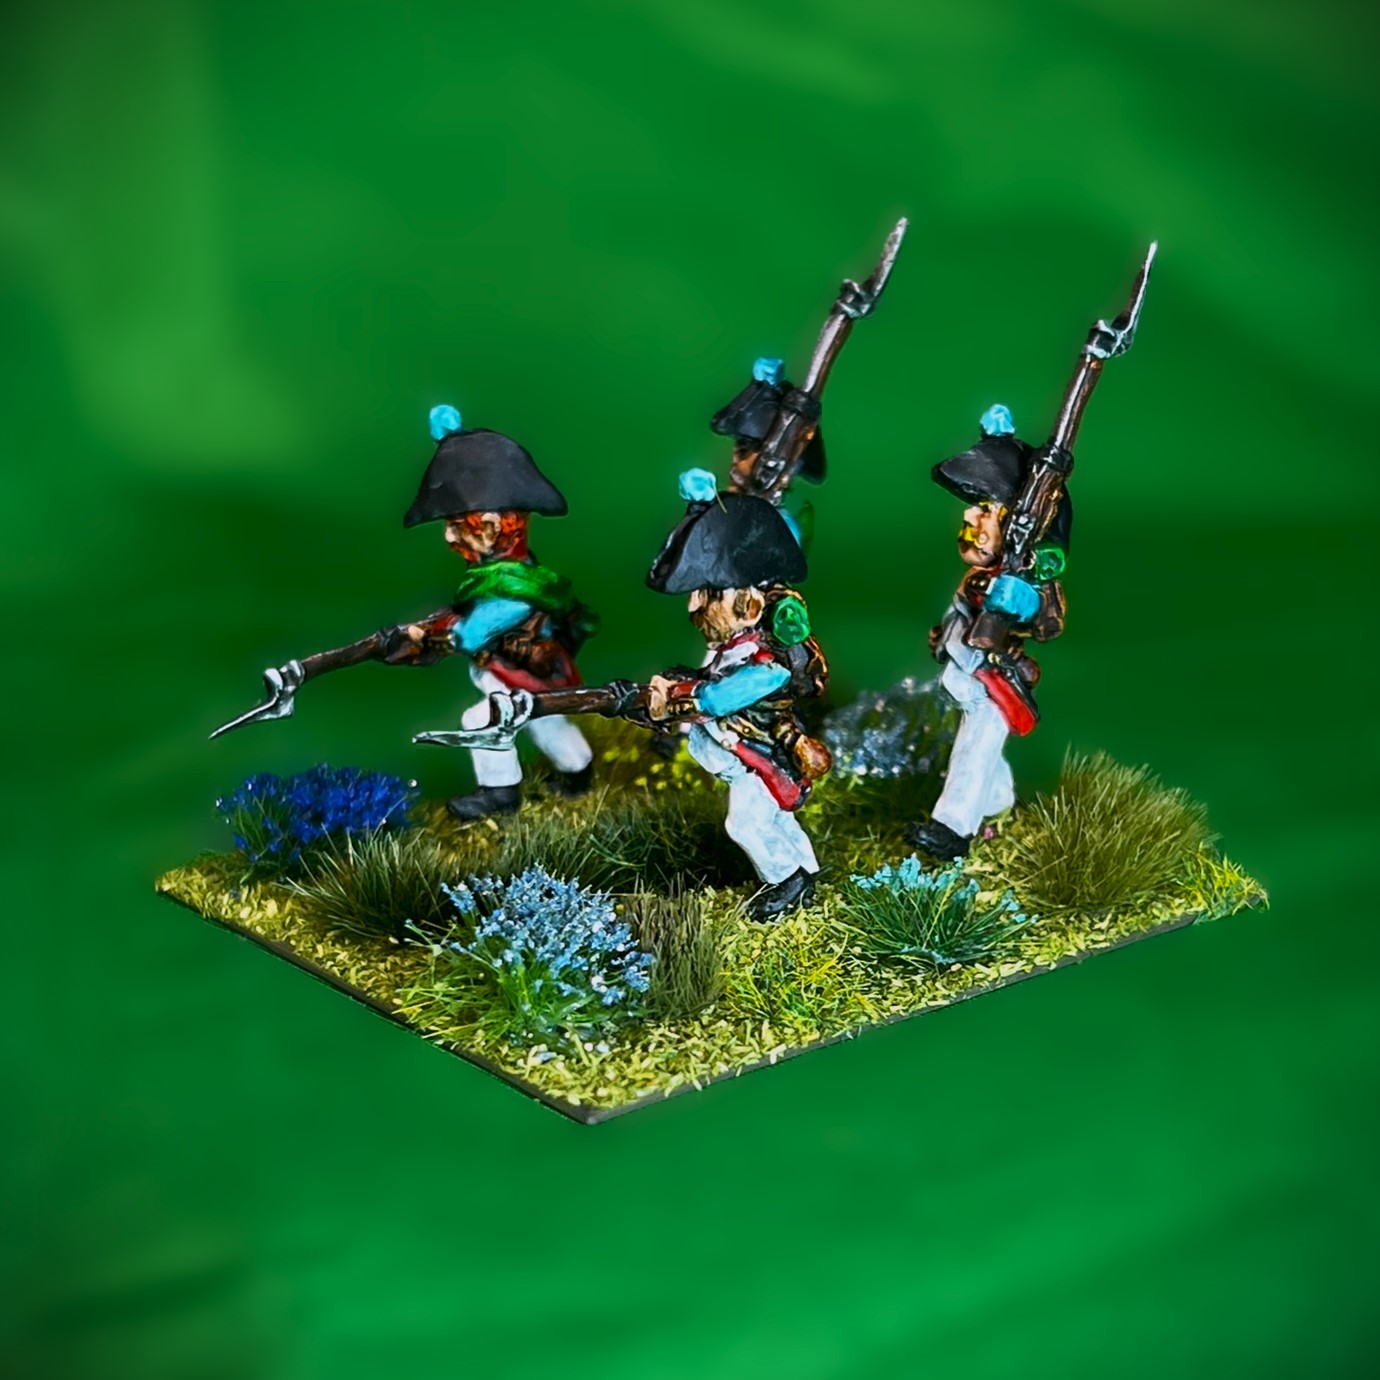
The EBIR in column moving to the left.
The EBIR in column moving to the right.
Admittedly, early work on the color scheme and the painting and shield difficulties I encountered were dampening my enthusiasm for this unit. However, once I completed it, I found that I really do like it.
I’d be very interested in your feedback on the unit and its colors as they are far from run of the mill. Ozz is supposed to be colorful – and these guys certainly fit that bill.
I do hope that you enjoyed seeing the EBIR and reading the post. Next up will be a new Winkie artillery unit for Dave’s challenge – and soon. Thanks for looking!
And yes, I still have much more Ozz to come…
Miscellaneous details and references for those interested in that sort of thing:
For all of my previous posts on Wars of Ozz games, figures, units, and other related projects – please see this page.
PAINTS, INKS, GLAZES, SHADES, WASHES, PIGMENTS, FLOCKING, GLUES AND MORE THAT I USED ON EVORA’S BODYGUARD INFANTRY REGIMENT:
Rectangular Brigade MDF base (used as a Regimental base) from Old Glory
2″ square steel bases from Wargames Accessories (#21)
1.25″ x 1″ square steel base from Wargames Accessories (#FOW1)
Army Painter “Speed Paint – Speed Paint Medium 1.0”
Citadel “Nuln Oil GLOSS” (wash/shade)
Battlefront “Sherman Drab”
Citadel “Agrax Earthshade” (wash/shade)
Vallejo Mecha Varnish “Gloss Varnish”
Vallejo Mecha Varnish “Matte Varnish”
Pendraken 12mm dice frames
Army Painter “Battlefield Grass Green” (flocking)
Army Painter “Battlefield Field Grass” (flocking)
Small stones
Twigs
Army Painter “Lowland Shrubs” (flocking)
Gamers Grass “Green Meadow Tufts” (flocking)
Army Painter “Battlefield XP Woodland Tufts” (flocking)
Shadow’s Edge Miniatures “6mm Dark Forest Dark Purple Tufts” (flocking)
Gamers Grass “Orange Flowers” (flocking)
Blue Sharpie pen
Brown Sharpie pen
Flags printed on card stock
As you may want to check out the Wars of Ozz figures’ range – there are two places to get them and the rules (and I make no money from this btw). The game rules and the figures are available from the following two places:
It’s that time again – when I take a look back and see how well I did – or did not do – versus the goals that I set out to accomplish for myself back in January of 2023. This post will also be where I set myself some realistic (and hopefully challenging) benchmarks/goals for 2024 in the areas of Life, Golf, Miniatures, & Other Distractions (after all that is the title of this blog since its inception back in 2015!). It’s more for my own motivation, but I have found that others have enjoyed the ride (especially the spreadsheets for Roger and John!) – so here we go.
2023 was, like 2022, one very busy year on multiple hobby, golf, and life fronts. I did set some pretty aggressive goals for all aspects. Some were around gaming, some around hobby production, some were around golf, and more.
How did I do versus my 2023 goals?
Paint 250 figures or more
Well, I blew goal that out of the park and had my most productive miniature painting year ever – mostly Wars of Ozz figures obviously! I managed to paint 330 miniatures – 128 more than I did in 2022.
2023 Production
Complete a brigade of Winkies for Wars of Ozz.
This was a big part of the 330 – 107 Winkie figures painted – and much bigger than just a single brigade! 1 witch, 3 leader bases, 1 cavalry regiment, 1 artillery battery, and 5 infantry regiments as shown below.
2023 Winkie units and leaders production.
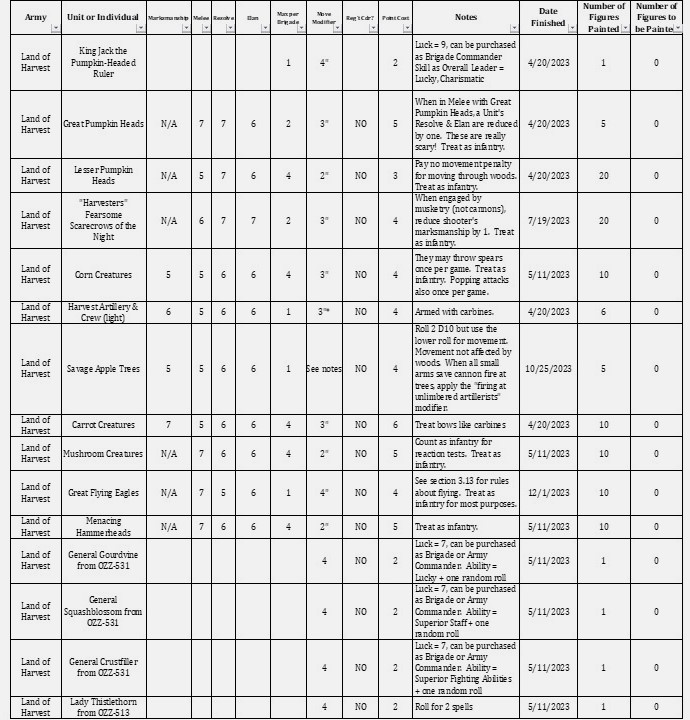
Complete a brigade of Land of Harvest creatures for Wars of Ozz.
I really fell in love with the Great Land of Harvest figures – and painted 111 of them. 4 leaders, 1 witch, 9 infantry 1egiments, and an artillery battery. This was close to just not 1 brigade but 2+ brigades.
2023 Harvest Production
Run and play more games – track them too.
Leif Magnuson, me with my wife’s least favorite headgear, and Brad Gosselin at TotalCon37. They both played in multiple Feudal Patrol and Wars of Ozz games at multiple cons and were EXCELLENT wing men.
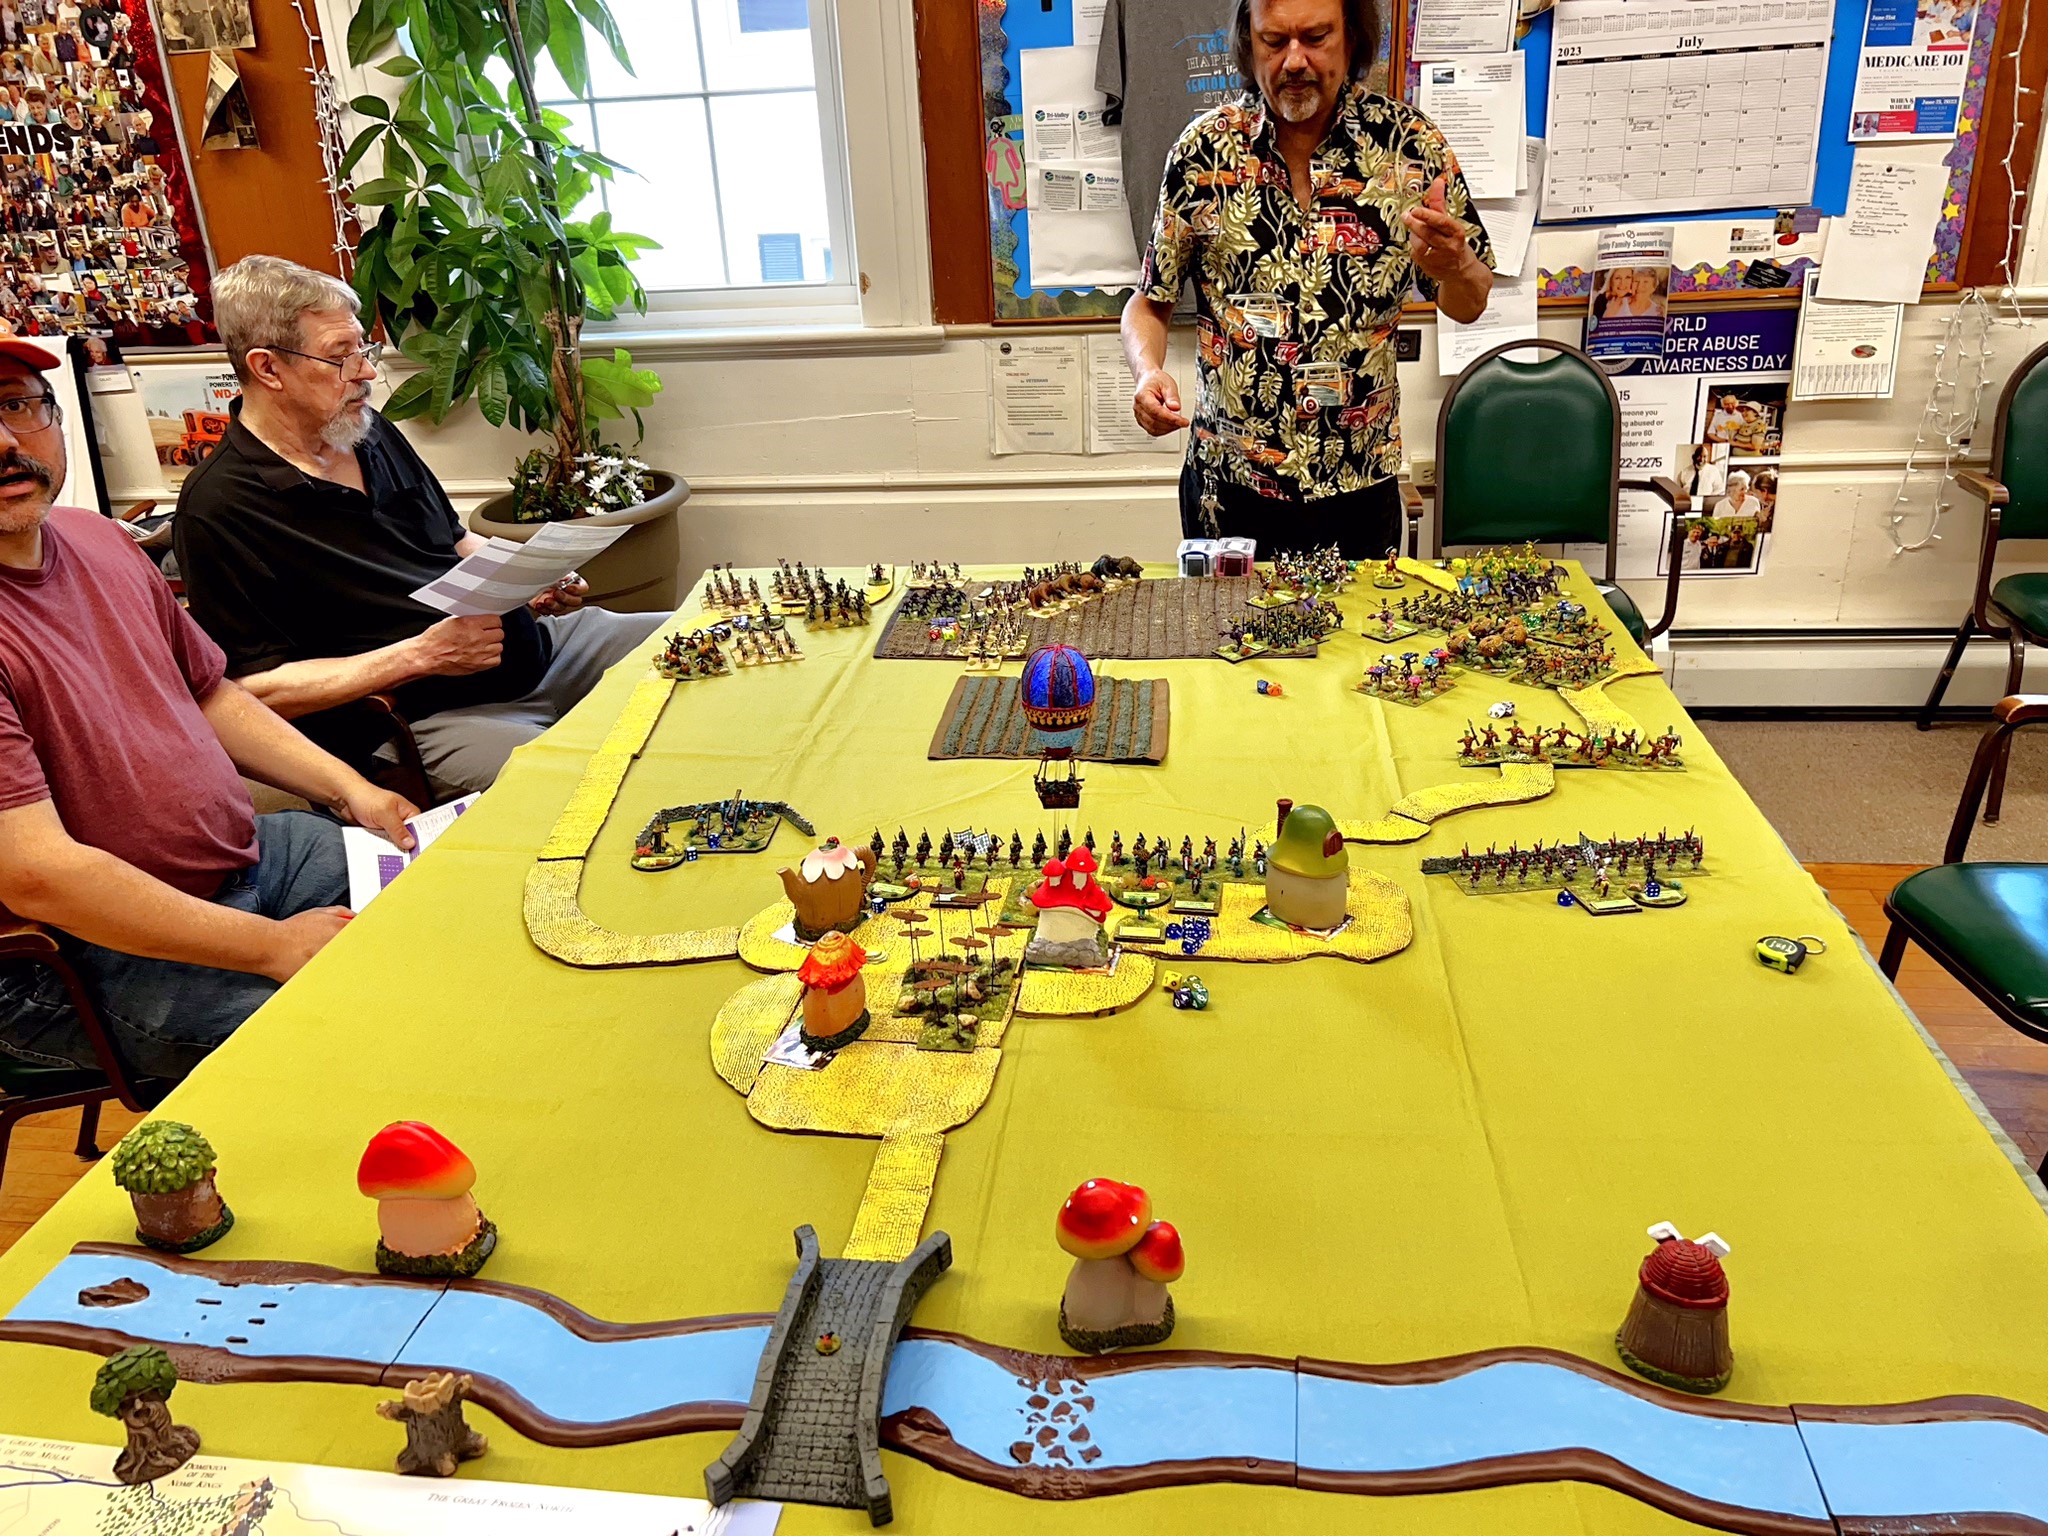
The Battle of Lake Texcoco at HMGS Fall In.
Wars of Ozz at HUZZAH! 2023.
Wars of Ozz at EllisCon.
Yes indeed, I did both run AND play, and track them as well. I attended and ran games at several conventions and club nights. The conventions included 2023’s TotalCon37, HAVOC, HMGS Cold Wars, HUZZAH!, HMGS Fall In, and EllisCon. I also played in several. All tallied, I played as a player in 12 games – 8 Wars of Ozz, 1 Feudal Patrol, 1 Axis & Allies Miniatures, and 2 Eagles and Empires games. I acted as GM for no less than 20 games - 9 Wars of Ozz, 10 Feudal Patrol (Mesoamerican era/Spanish Conquest skirmish, and 1 What a Tanker game.)
Complete the scenario booklet for Civilizations Collide.
That’s a miss – though I have written 10/16 scenarios.
Try to get my Nomonhan WaT project off the ground. Note I said “try”.
Nope – not enough time, but this stays on my list.
Get the Mass Pikemen more active.
The Battle for Toto (Wars of Ozz) playtest at the Mass Pikemen.
I think that happened at about the same rate as last year, so not more active, but active.
Have another nice trip to Florida.
In Orlando at golf school with Lynn.
We had a nice escape from dreary cold New England to sunny warm Florida for fun and Golf School. Also got to get together with Buck Surdu and play Eagles & Empires.
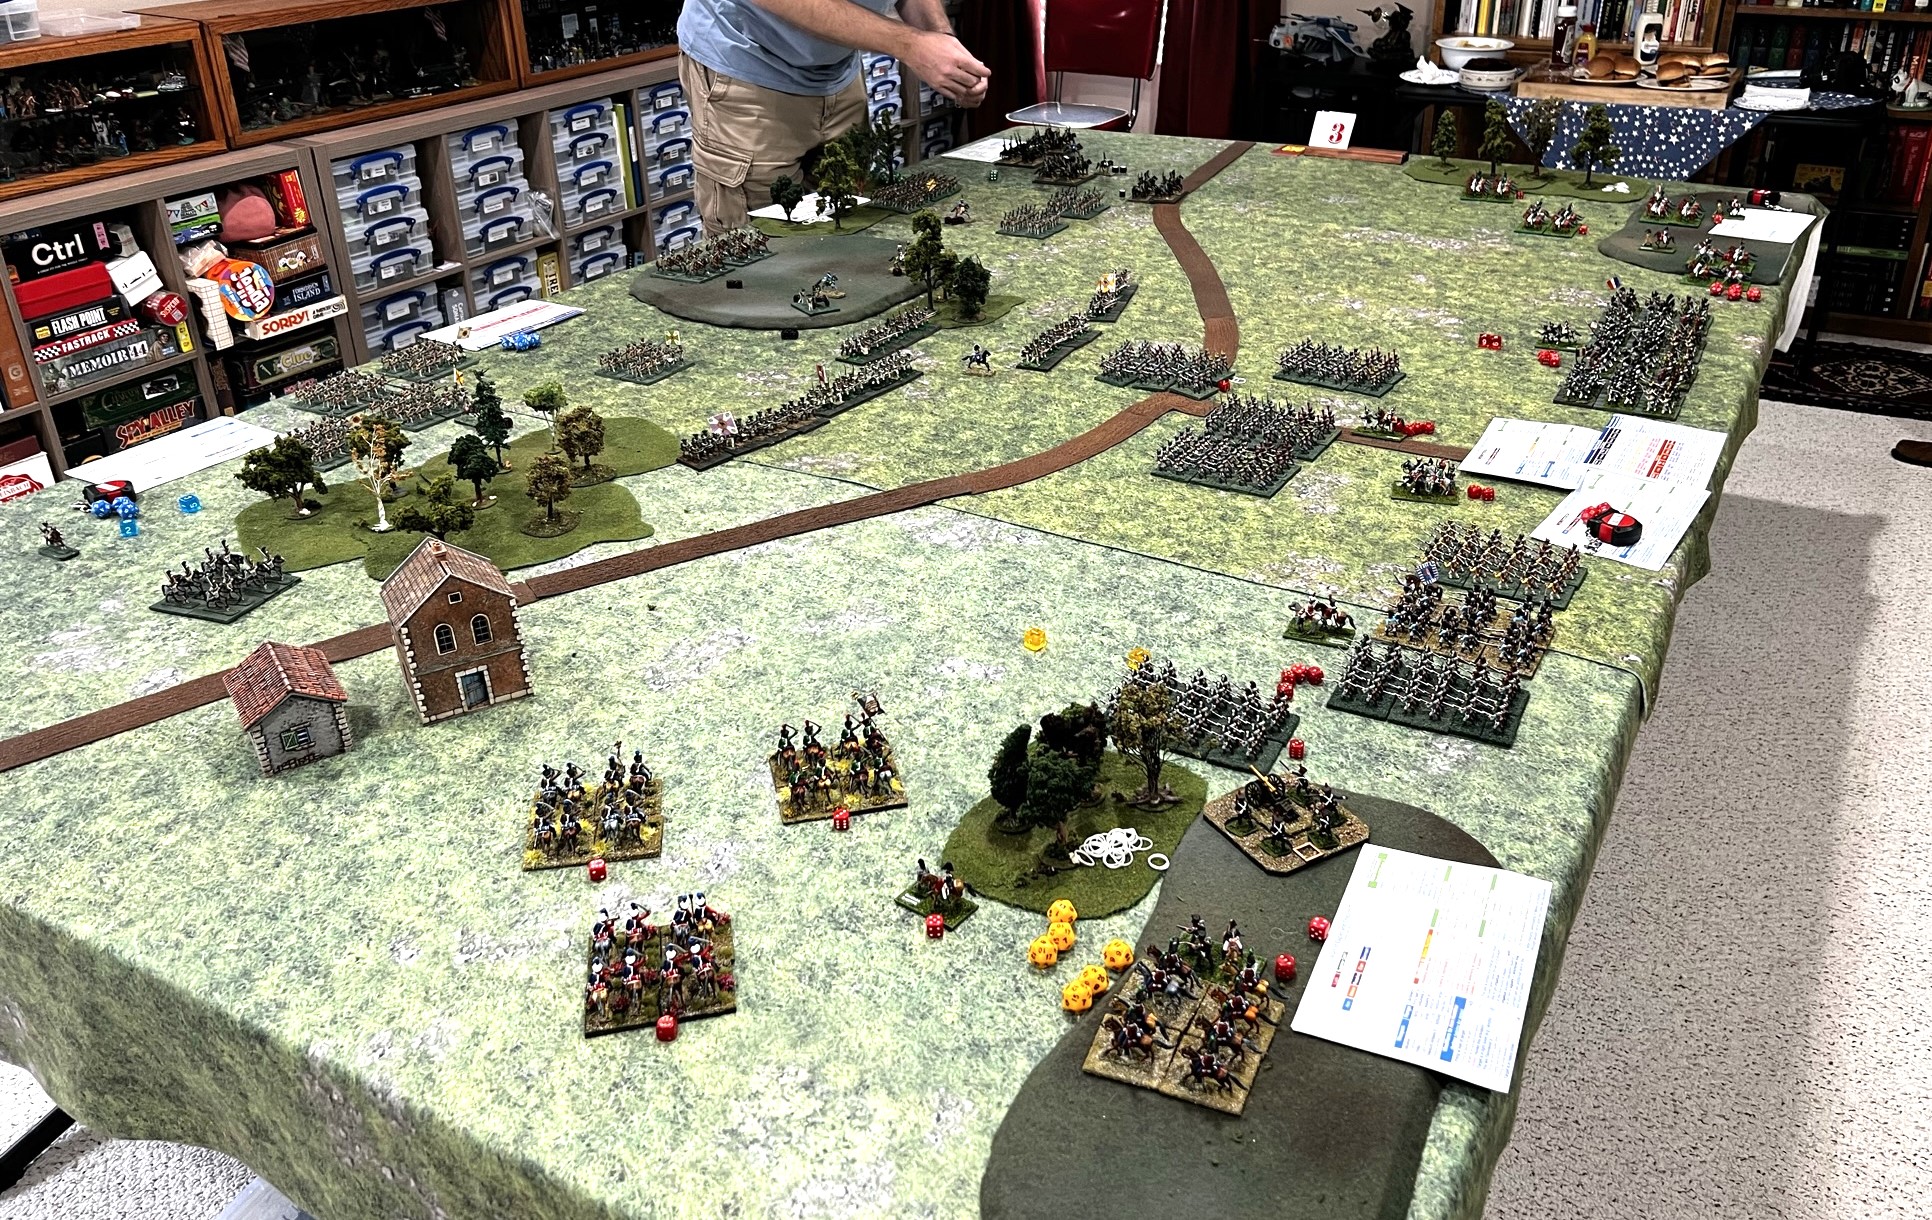
Eagles and Empires in Buck’s amazing gaming room.
Post on the blog 48 times or more – make them of good quality
I exceeded this – mainly because I started using the blog for The Tour of the Brookfields golf tournaments – to share information and to share results. As we do have a Facebook page – but not everyone is on it – this blog became crucial to sharing information. Also, this kept it free from the FB bots that, for example, decided that a post of a winning putt “violated community standards”. I posted on the blog 54 times - a good average for me.
Be a good blog follower – still a goal but one that I cannot measure!
Always on the list – but others can decide (like you dear reader).
Have multiple Zoom chats with fellow hobbyists.
I had a few very nice ones – can always do more.
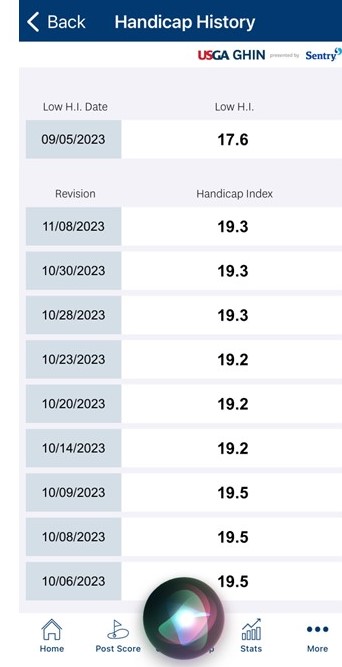
Go to a golf school and get my golf handicap down below 18. This time.
Well, did hit the school, and I barely got under 18 – but done!
Stats on my handicap history. And a Siri circle!
Yes! As shown above, I managed to get to 17.6.
Update my golf tournament progress on my blog – either as posts or a page or both.
OK, I did not record my individual tournament progress – though I did start to use the blog for the Tour of the Brookfields, so I’m going to say yes. Certainly, I left off most of the club tournaments that I played in, but still posted a few. It certainly rained – A LOT.
Play golf (in season) at least twice a week.
Exceeded this as I had 86 handicap rounds plus maybe 8-10 others that were scrambles.
Win my flight in the Championship.
Nope – not even close.
Be a competitive golfer.
I had my moments – and did do well in the annual Club Derby. Knee injury in August (and playing on a bad leg) did not keep me down too badly.
Tom & I win!2/3 was Tom, 1/3 was me – or less.
Personal Highs in 2022
For the second year in a row – the Florida trip and golfing with my wife (she’s getting better)!
Getting together with family especially my daughter Ellen and my granddaughter Tabitha.
Winning my second “PELA” GM award at HMGS Cold Wars for the Battle of Lake Texcoco.
Winning my third “Al” award for the game with the most stunning visual appeal at the Battle Group Boston HAVOC Convention for the Wars of Ozz!
Knocking out 330 figures and terrain for the Wars of Ozz!
Having EXCELLENT wingmen in Brad Gosselin and Leif Magnuson at MULTIPLE conventions.
Getting together with Dave Wood, Buck Surdu, Greg Priebe, Chris Palmer, and Duncan Adams, Eric Schlegel, and all of the other HAWKS in person.
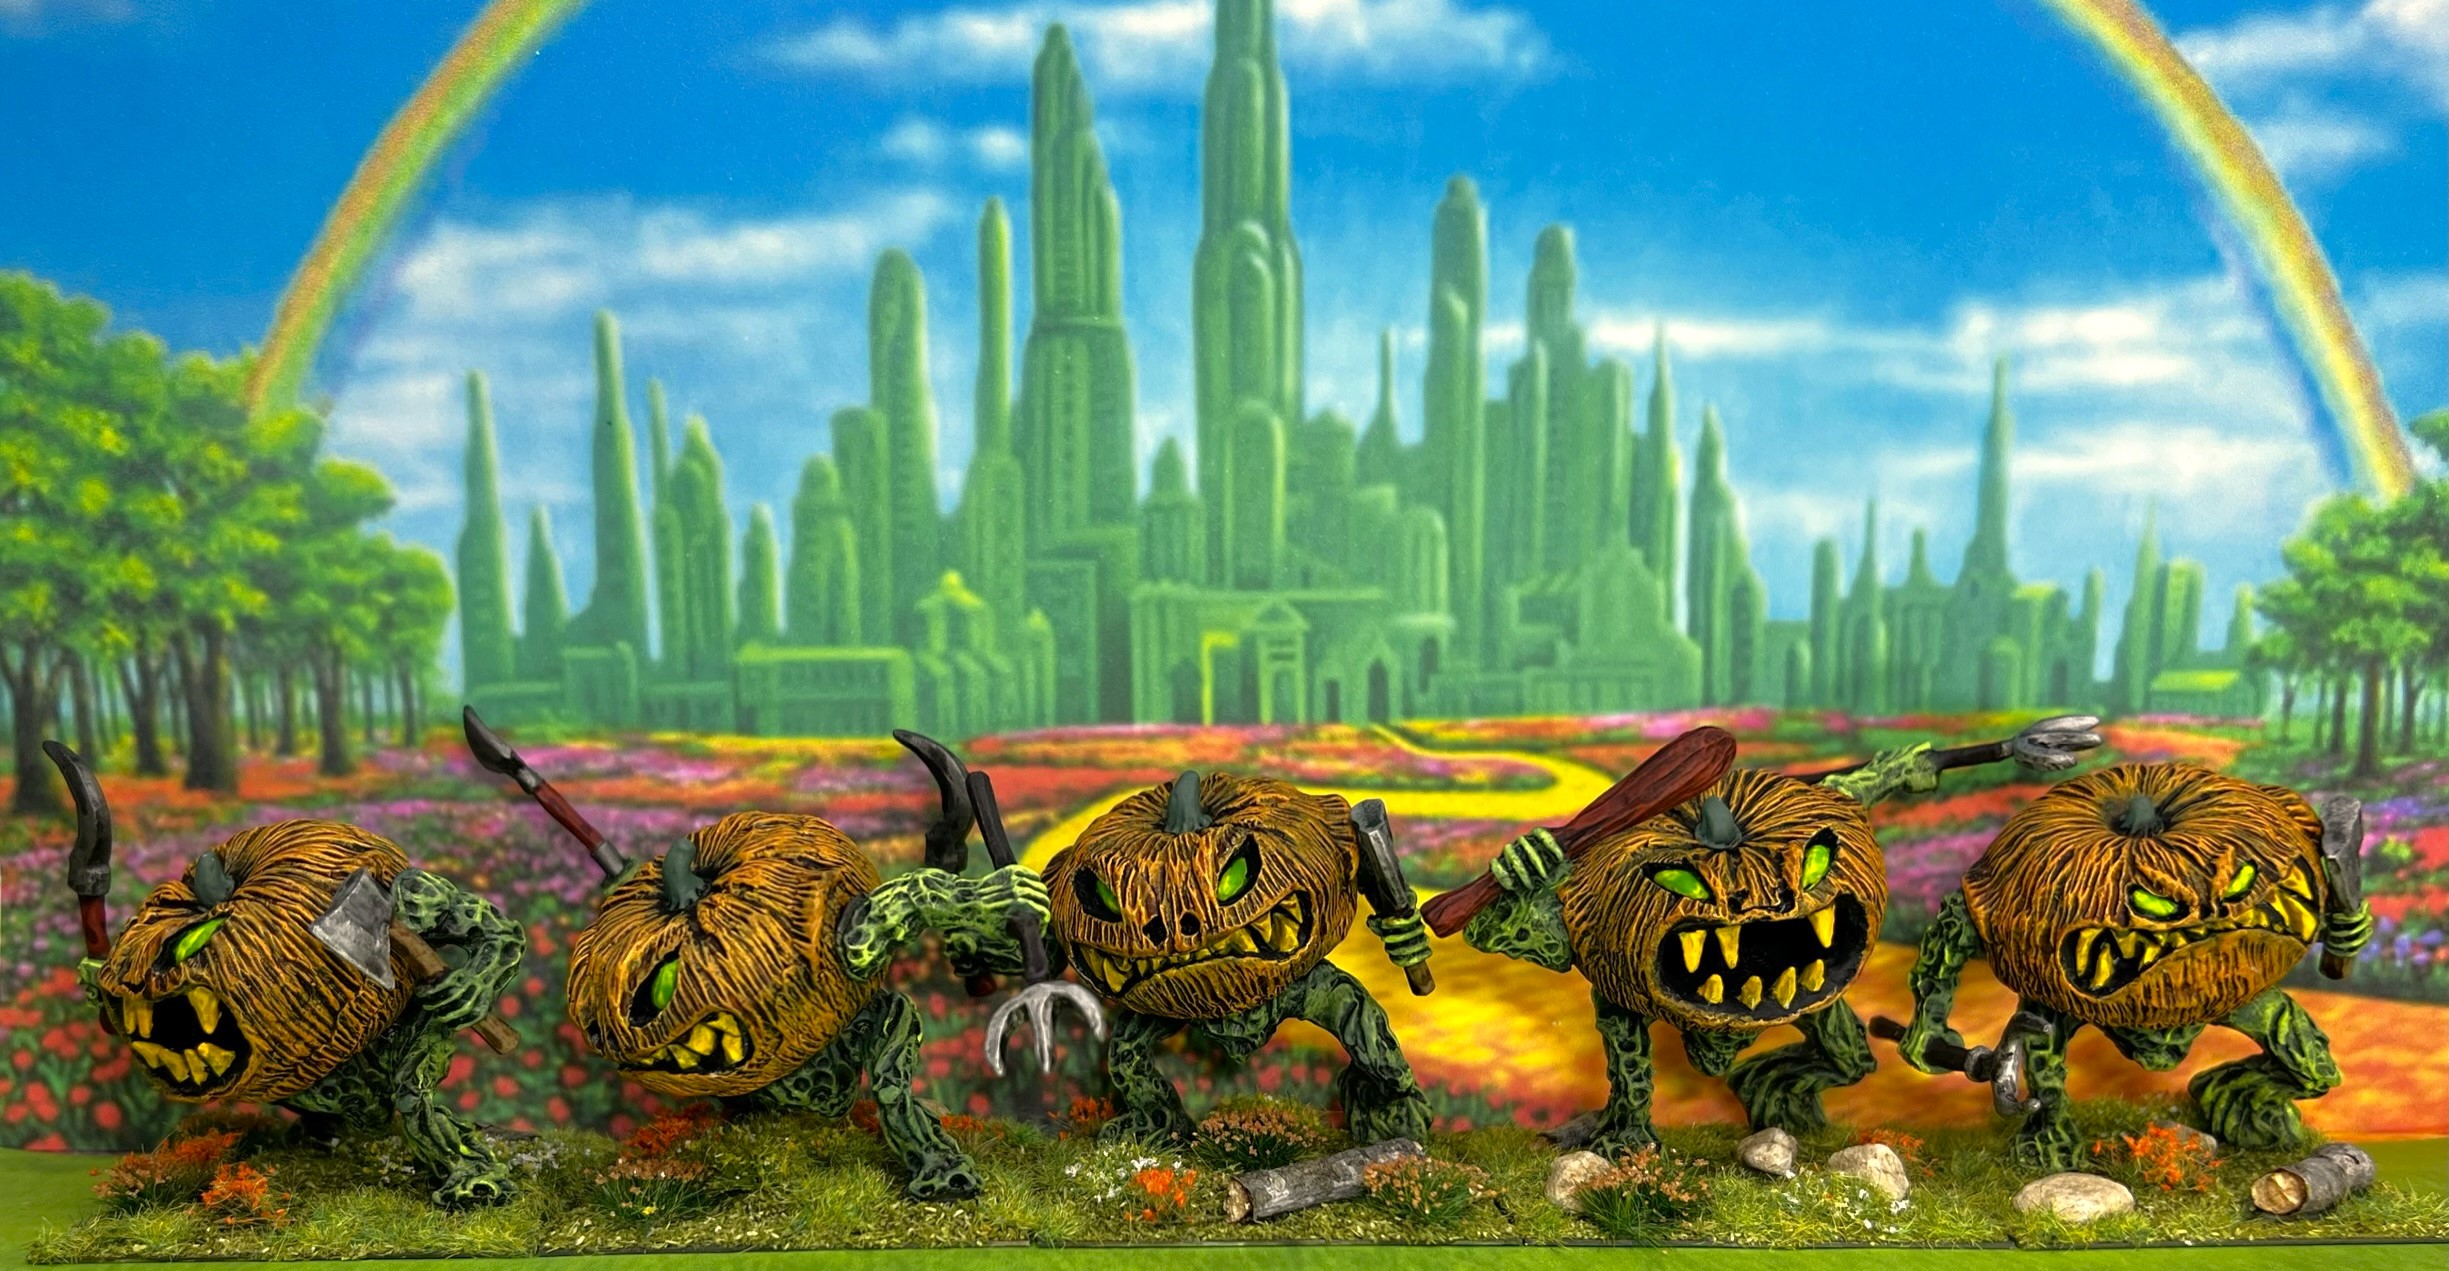
Getting honored by Old Glory by them putting my painted Great Pumpkinheads on t-shirts!
Being on the Committees for the Tour of the Brookfields tournaments and the New England Service Academy golf tournaments.
Having fun Zoom chats.
As a team, winning the Club Derby with Tom Orszulak by one stroke over 36 holes over two days.
And again, being with my wife Lynn, every day (seriously, and she won’t likely read this).
Tabitha & Lynn
My daughter Ellen, grandaughter Tabitha, my Mom, and me.
Winning te PELA.
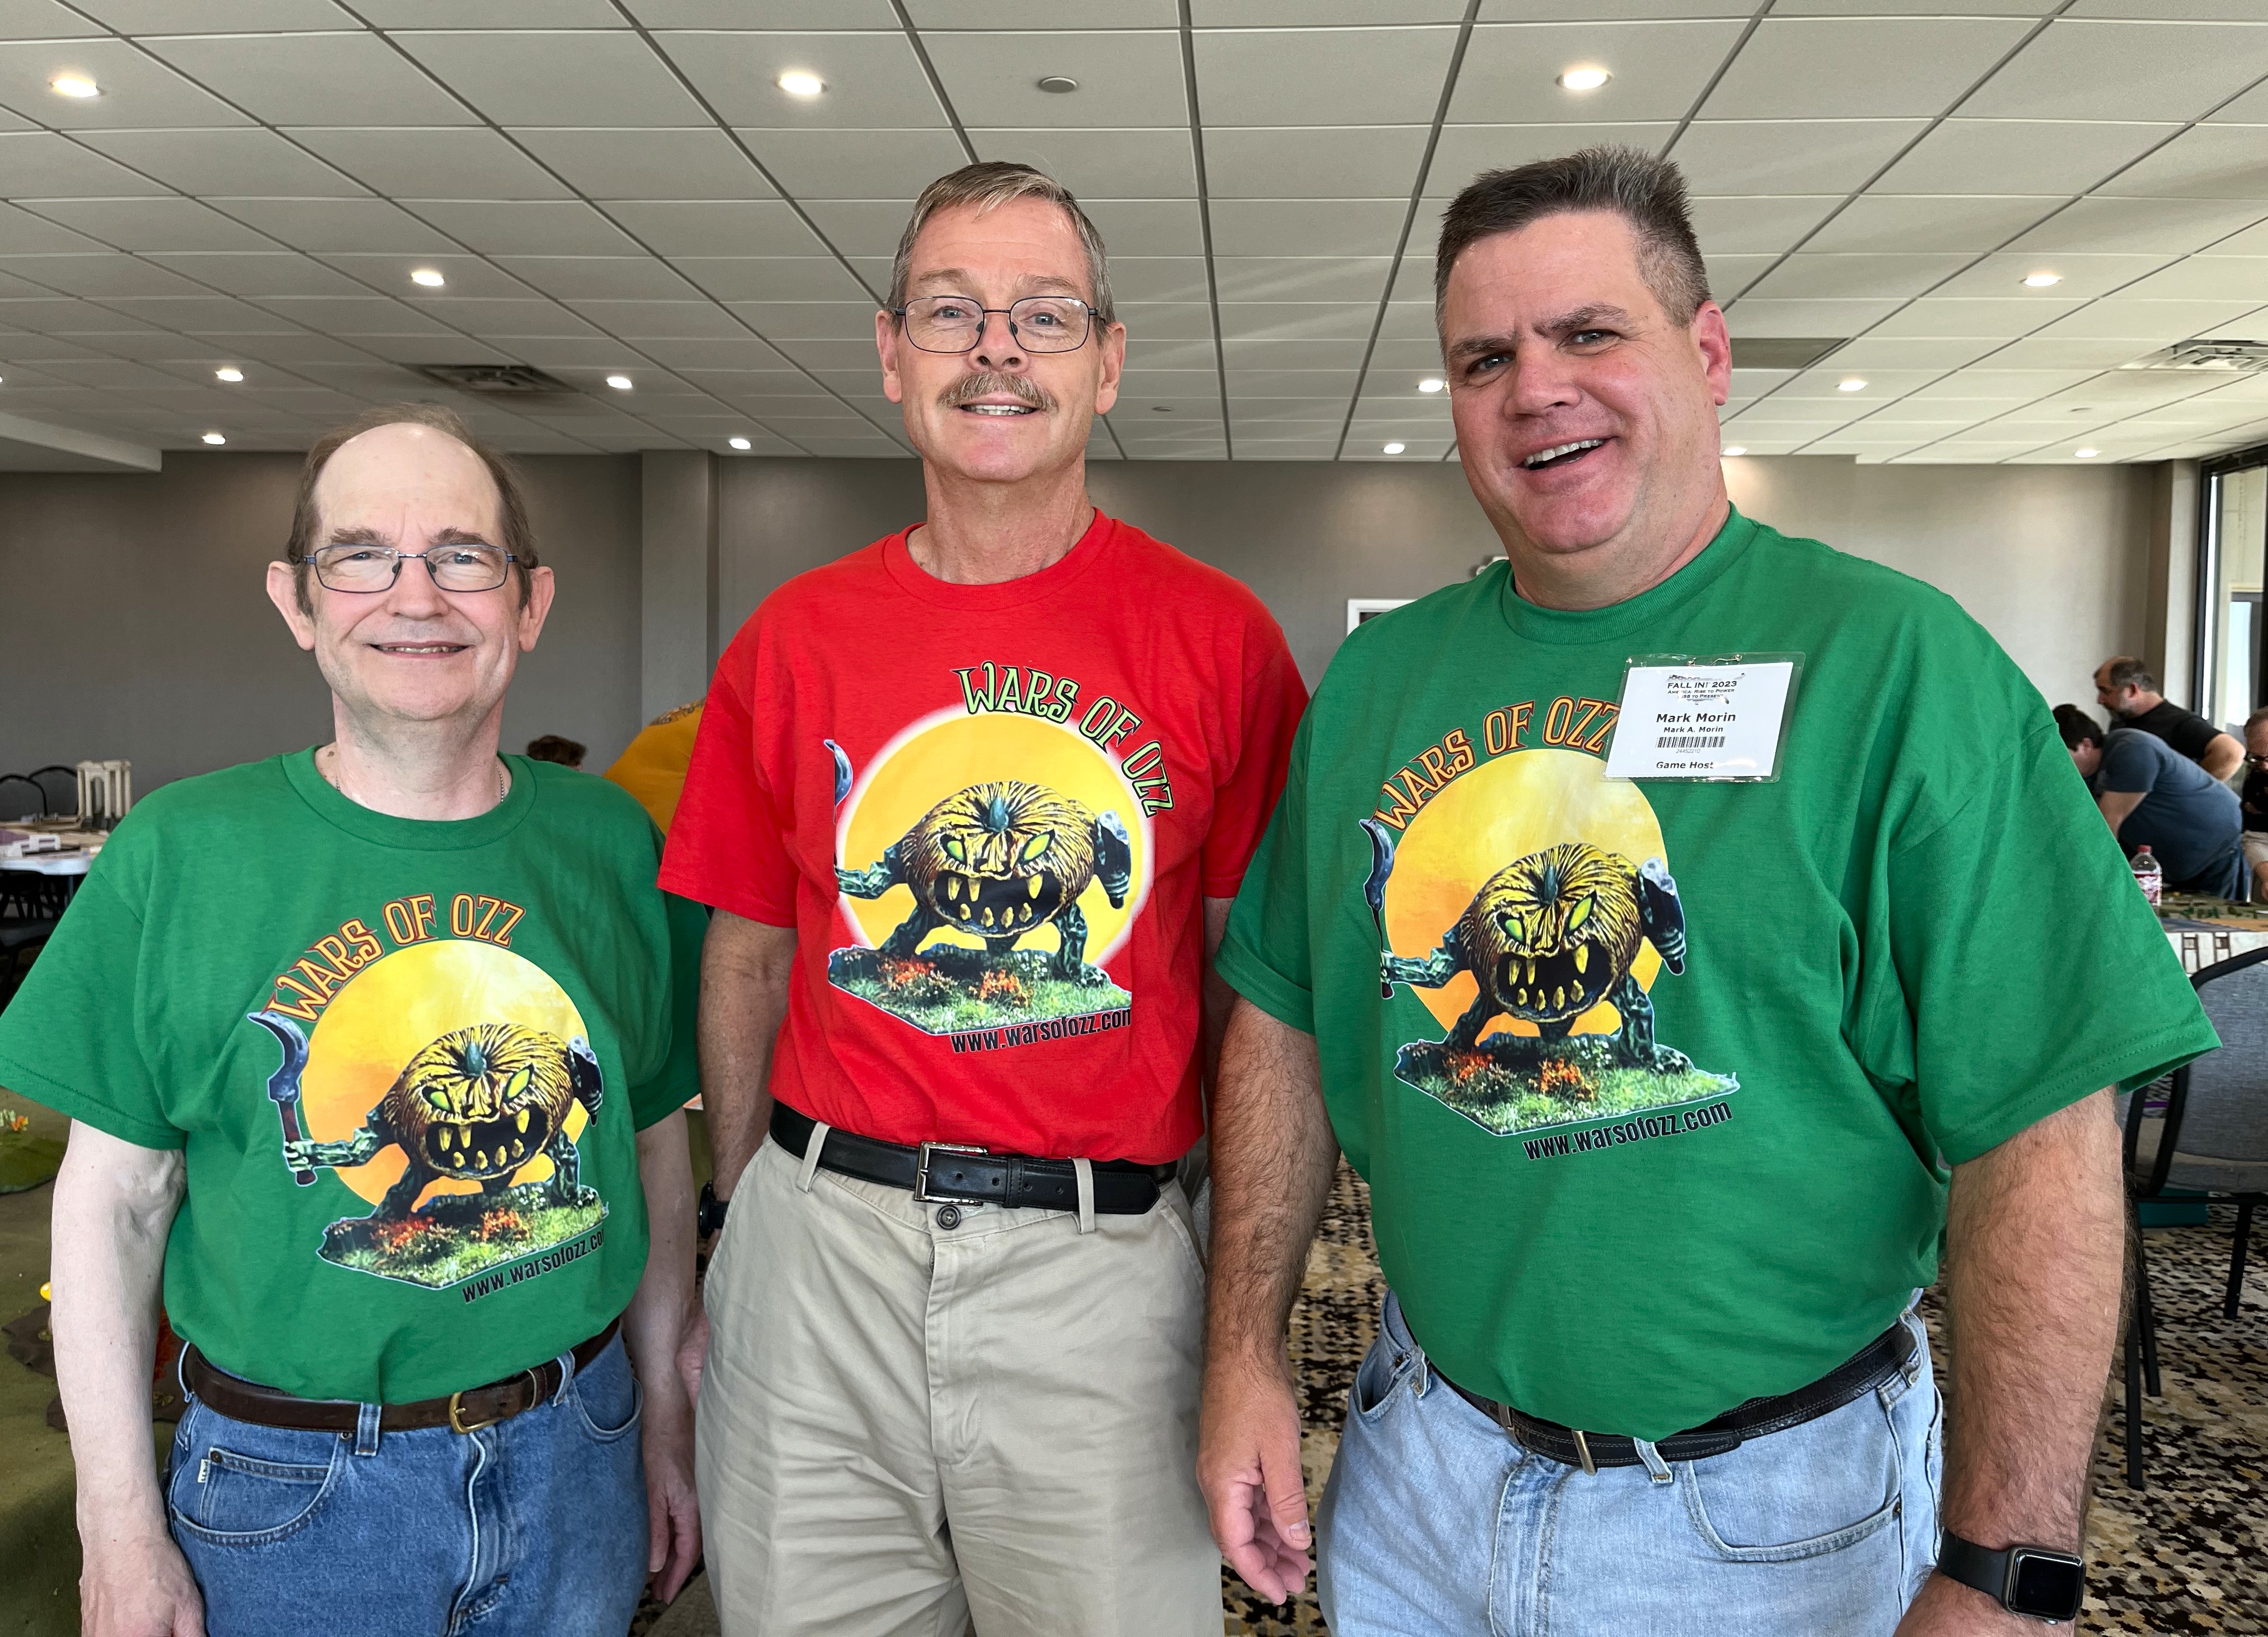
Chris Palmer, Dave Wood, and me sporting some cool t-shirts!
Personal Lows for 2021
Knee injury in August.
Knee surgery in December – though that’s a long-term plus for my golf game (I hope).
My goals for 2024
Well, its time to set my Life, Golf, Miniatures, & Other Distractions goals for 2024.
Paint 365 figures or more.
Complete 2 brigades of Quadlings for Wars of Ozz.
Complete a brigade of Whim Whim & Noobi for Wars of Ozz.
Complete a brigade of Temujicans for Wars of Ozz.
Continiue to run and play more games – and continue tracking them too.
Attend and run games at conventions. This would include TotalCon38, HAVOC, COLD BARRAGE, MAYHEM, HUZZAH!, HMGS Fall In, EllisCon, and others..
Complete one more scenario for my scenario booklet for Civilizations Collide.
Paint up a platoon from Wargames Supply Dump for Combat Patrol™ .
Try to get my Nomonhan WaT project off the ground. Note I said “try”. Again.
Get the Mass Pikemen more active.
Have another nice trip to Florida.
Post on the blog 50 times or more – make them of good quality.
Be a good blog follower – still a goal but one that I cannot measure!
Have multiple Zoom chats with fellow hobbyists.
Go to a golf school and get my golf handicap down below 16.
Update the Tour of the Brookfields on my blog.
Play golf (in season) at least twice a week – get in 80 rounds.
Win my flight in the Club Championship.
Defend in the Club Derby
Be a competitive golfer.
Be a good friend.
Of course, MUCH thanks to all who make the time to read this blog and comment on my stuff, craziness, and madness – Happy 2024!
The last Wars of Ozz unit of 2023! Fittingly, it is also my last Munchkin unit – at least for the near future. As I shared in my last post on the Munchkin Landwehr, I am still recovering well from my knee surgery, and I have able to work on a few things. The Munchkin Light Artillery Battery was one of those.
A year ago, I painted up a medium battery for the Munchkins. That unit, with it’s 8″ short and 24″long range, has had the longest range of any of my Ozz units in 2023. To level the playing field/tabletop – and to provide a bit more variety for scenarios, I have decided to get the Munchkins this Light Battery – and to get the Winkies their own medium battery as well (coming soon I hope). Maybe at some point I’ll address this shortfall for the Gillikins, but not now! Again, Dave Stone is also currently is painting challenge “PAINT WHAT YOU GOT CHALLENGE 2023/2024”. This is my second unit for that challenge.
The Munchkin Light Artillery Battery (MLAB) has a short range of range of 6″ and a long range of 18″. Otherwise, the stats for the MLAB and crew are the same as the larger MMAB except for cost. Both units are good at missile combat with either their cannon or their carbines – with a Marksmanship value of 6/10. As for Melee (which is obviously not ideal for artillery), the MLAB and MMAB are both below average at 4/10 as one would expect. The Resolve value (the measure of the unit’s desire to stick in a fight) for both types is great at 7/10, and as for Elan (the desire to take the fight to the enemy), both are at an average 5/10. The MLAB is cheaper at 4 points, versus the MMAB cost of 5 points. Having two types of artillery give a lot of flexibility to a player or to myself as a GM.
The MLAB’s SKU is #OZZ-106. All of the figures are metal and 28mm in size. Artillery batteries in Wars of Ozz games are composed of 5 figures plus the gun. While an infantry or cavalry regiment has 5 bases – each of which can take 4 hits per base – a battery can only take 5 hits (one per figure). Each hit removes a figure and loses a die for the unit when it fires. The scale is 28mm and these figures are metal.
As with the Landwehr, I did not take many WIP shots, but I’ll share what I have and then go into some eye candy.
WIP shots…
Painted MLAB figures gluing to MDF sabot base inserts.
After varnishing and flocking.
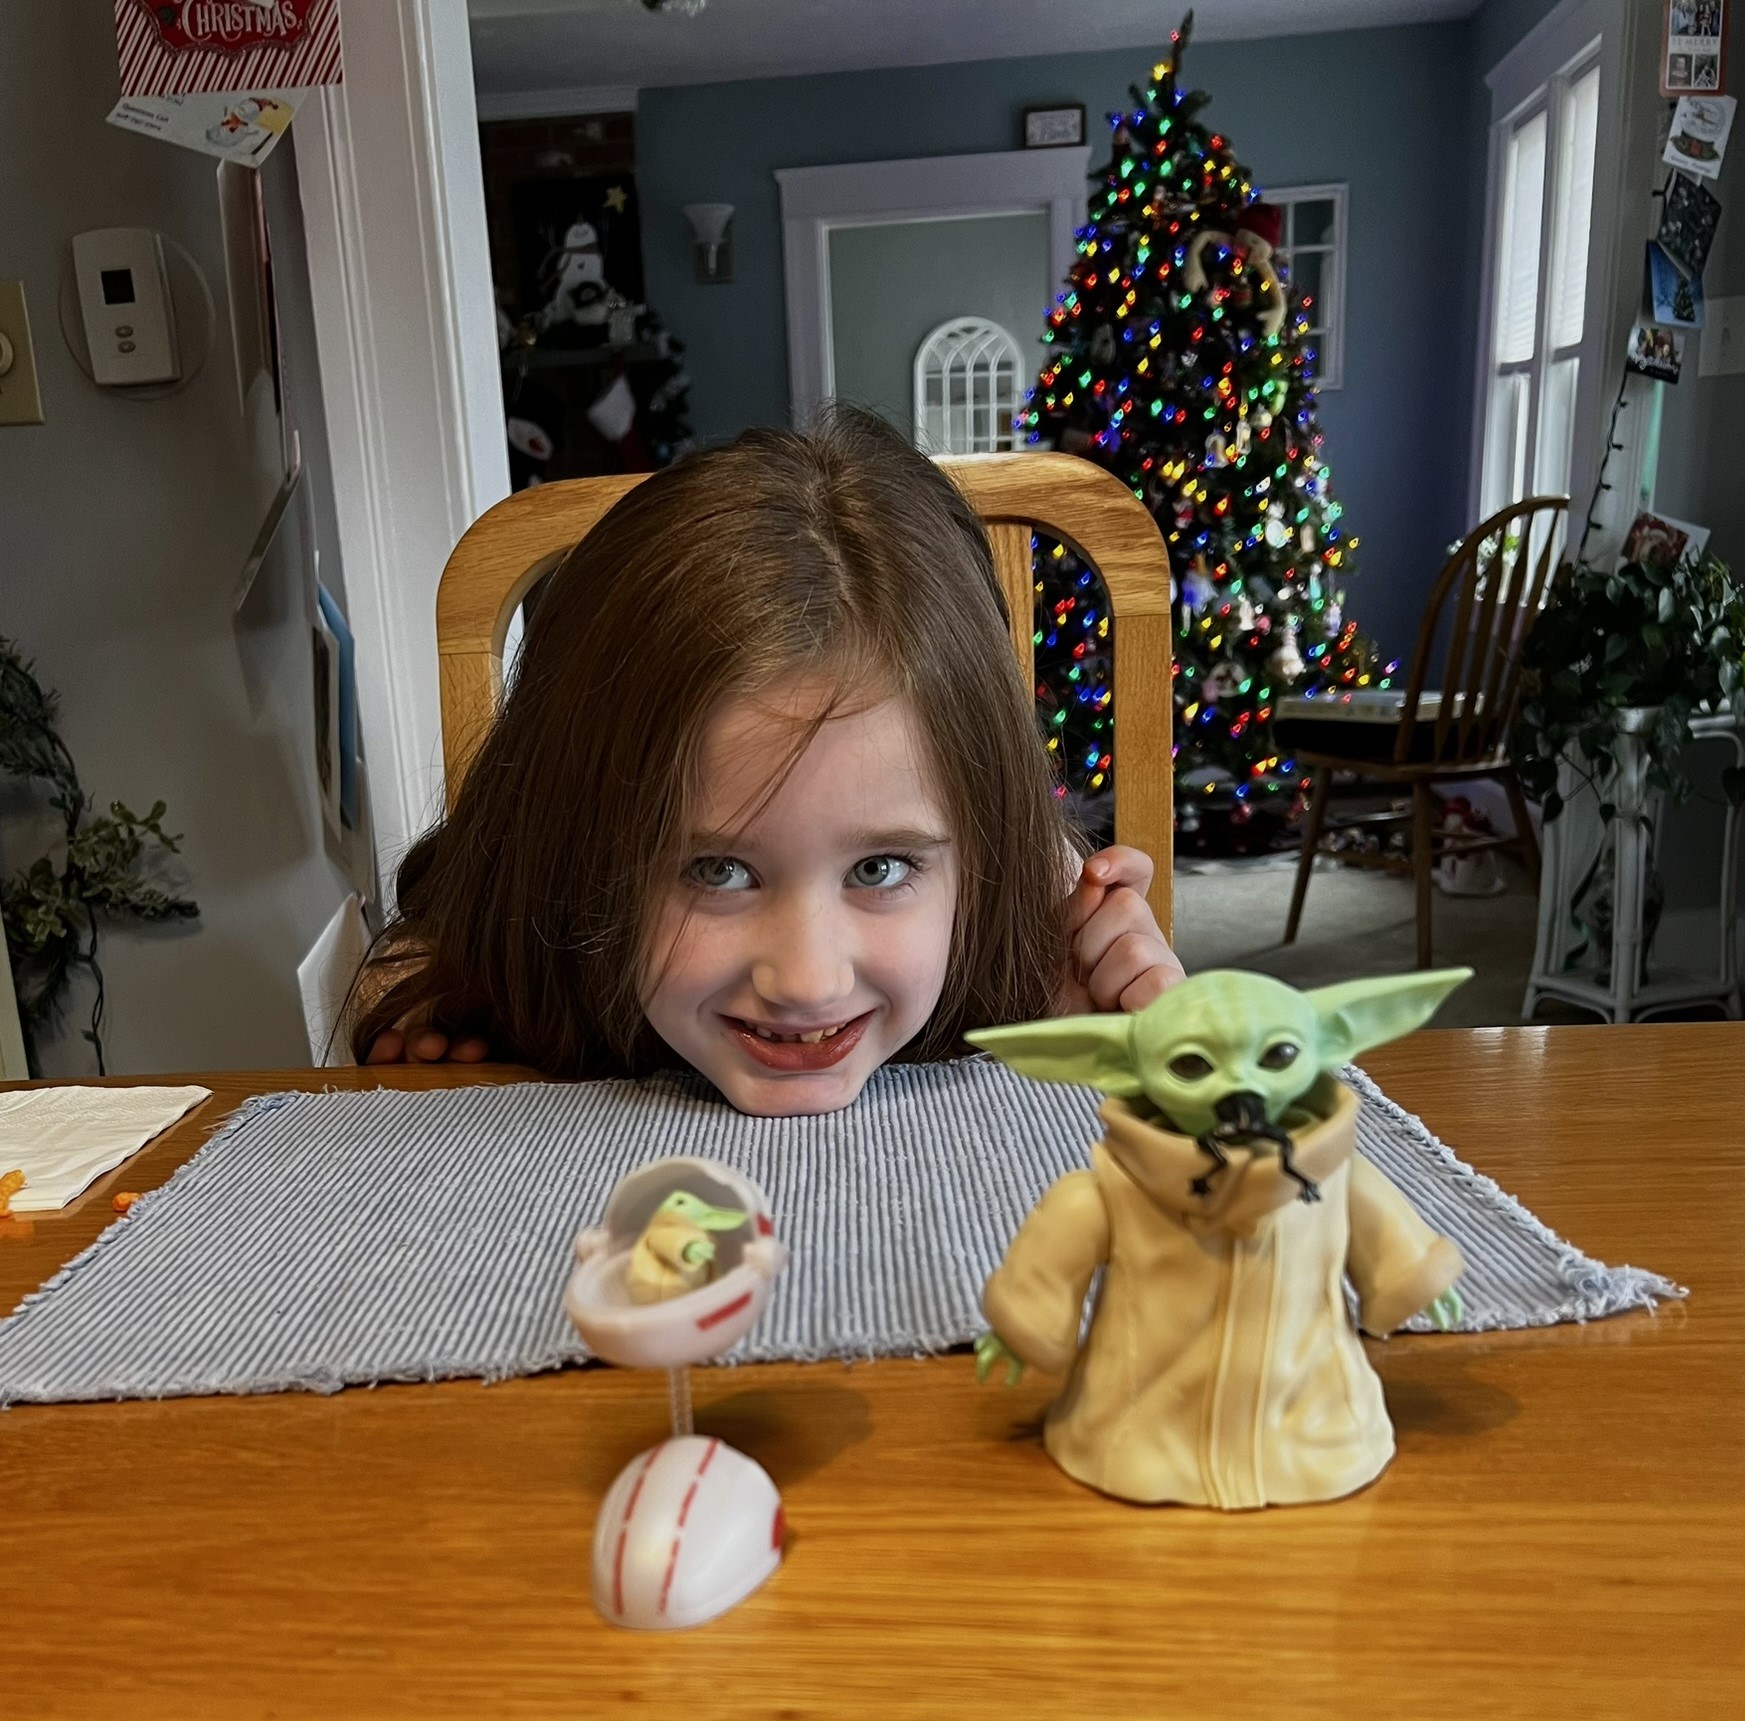
This was also a time to work on models with my grandaughter post-Christmas. We built a Pokemon Mew model, and then a Grogu. She just turned 7, so I was impressed with how well she did. Yes, this was fun too!
Back to the MLAB, here are some…
Eye Candy
The crew and gun without the sabot base.
Detail of the MDF sabot base, showing the bloody spots for future casualties as the figures get removed.
The MLAB on its base, frontal view.
The MLAB on its base, left front view.
The MLAB on its base, right side view.
The MLAB on its base, top view.
Both the MLAB and MMAB for comparison.
This project’s completion brings my completed forces for the Munchkins to 8 units and 3 individuals (not counting the 4 Adventurers of Ozz):
I appreciate your looking at this artillery unit. Next up I’ll be doing my annual 2023 year end round-up and 2024 goal-setting post. That’s mainly for me to hold myself accountable! (somebody has to…)
Thanks for checking this post out and please let me know what you think in the comments section. Yes, I still have more to come…
Miscellaneous details and references for those interested in that sort of thing:
For all of my previous posts on Wars of Ozz games, figures, units, and other related projects – please see this page.
PAINTS, INKS, GLAZES, SHADES, WASHES, PIGMENTS, FLOCKING, GLUES AND MORE THAT I USED ON THIS MUNCHKIN LIGHT ARTILLERY BATTERY:
MDF Artillery sabot base from Wars of Ozz Miniatures
Elmer’s PVA Glue
1/2″ x 1/2″ square steel bases from Wargames Accessories (#16)
1 1/4″ x 1″ square steel bases from Wargames Accessories (#FOW1)
Poster tack
Vallejo “Flow Improver”
Vallejo “Airbrush Thinner”
Vallejo Premium Primer “White”
Secret Weapon Washes “Heavy Body Black” (wash)
Citadel “Nuln Oil” (wash)
1/8″ neodymium magnets
3/4″ steel washers
Vallejo Model Color “White”
The Armory “Dark Blue”
Vallejo “Thinner Medium”
Army Painter “Speed Paint – Hoard Bronze 2.0”
Army Painter “Speed Paint – Crusader Skin 1.0”
DecoArt “Peacock Pearl”
Gorilla Glue
Citadel “Nuln Oil GLOSS” (wash/shade)
Vallejo Model Color “Dark Prussian Blue”
Army Painter “Blue Tone” (wash)
P3 “Brown ink” (ink)
Citadel “Contrast Paint – Contrast Medium”
Citadel “Contrast Paint – Apothecary White”
Vallejo Mecha Color “Off White”
Citadel “Contrast Paint – Bad Moon Yellow”
Citadel “Contrast Paint – Baal Red”
Citadel “Contrast Paint – Karandras Green”
Pendraken 12mm dice frame
Army Painter “Speed Paint – Hardened Leather 1.0”
Vallejo Model Color “Wood Grain”
Army Painter “Speed Paint – Glittering Gold 2.0”
Vallejo Mecha Color “SZ Red”
Martha Stewart Crafts “Brushed Bronze”
Vallejo Model Air “Steel”
P3 “Midland Flesh”
Citadel “Blood fro the Blood God”
Army Painter “Speed Paint – Royal Robes 2.0”
Citadel “Contrast Paint – Aggaros Dunes”
Army Painter “Flesh Wash” (wash)
Battlefront “Sherman Drab”
Vallejo Mecha Varnish “Gloss Varnish”
Vallejo Mecha Varnish “Matte Varnish”
Army Painter “Battlefield Grass Green” (flocking)
Small stones
Twig
Pillow batting
Gamers Grass “Green Meadow Set”
Army Painyer Battlefield XP “Woodland Tufts”
Army Painter “Battlefields Field Grass” (flocking)
Shadow’s Edge Miniatures “6mm Dark Forest Dark Blue Tufts” (flocking)
Shadow’s Edge Miniatures “6mm Dark Forest Light Blue Tufts” (flocking)
As you may want to check out the Wars of Ozz figures’ range – there are two places to get them and the rules (and I make no money from this btw). The game rules and the figures are available from the following two places:
As I have been recovering from pre-Christmas knee surgery, my painting opportunities have been touch and go. As my painting habit is to do so while standing up at a workbench, I have needed to pay attention to my body and go carefully. I do not paint while sitting. The good news (at least for me) is that I recovery is going well and that I have been able to work in painting figures here and there.
Luckily for me, Dave Stone is also currently running another of his painting challenges. It is called the “PAINT WHAT YOU GOT CHALLENGE 2023/2024”, and it runs from December 26th, 2023 to February 29th, 2024. It’s always fun to be part of his challenges – and it’s a lot of work on his part to collect and collate all the entries from around the globe (and it is much appreciated Dave!). My plan is to complete as many Wars of Ozz units and individuals as possible – both for the challenge – and for the multiple gaming conventions that I plan on supporting as a GM.
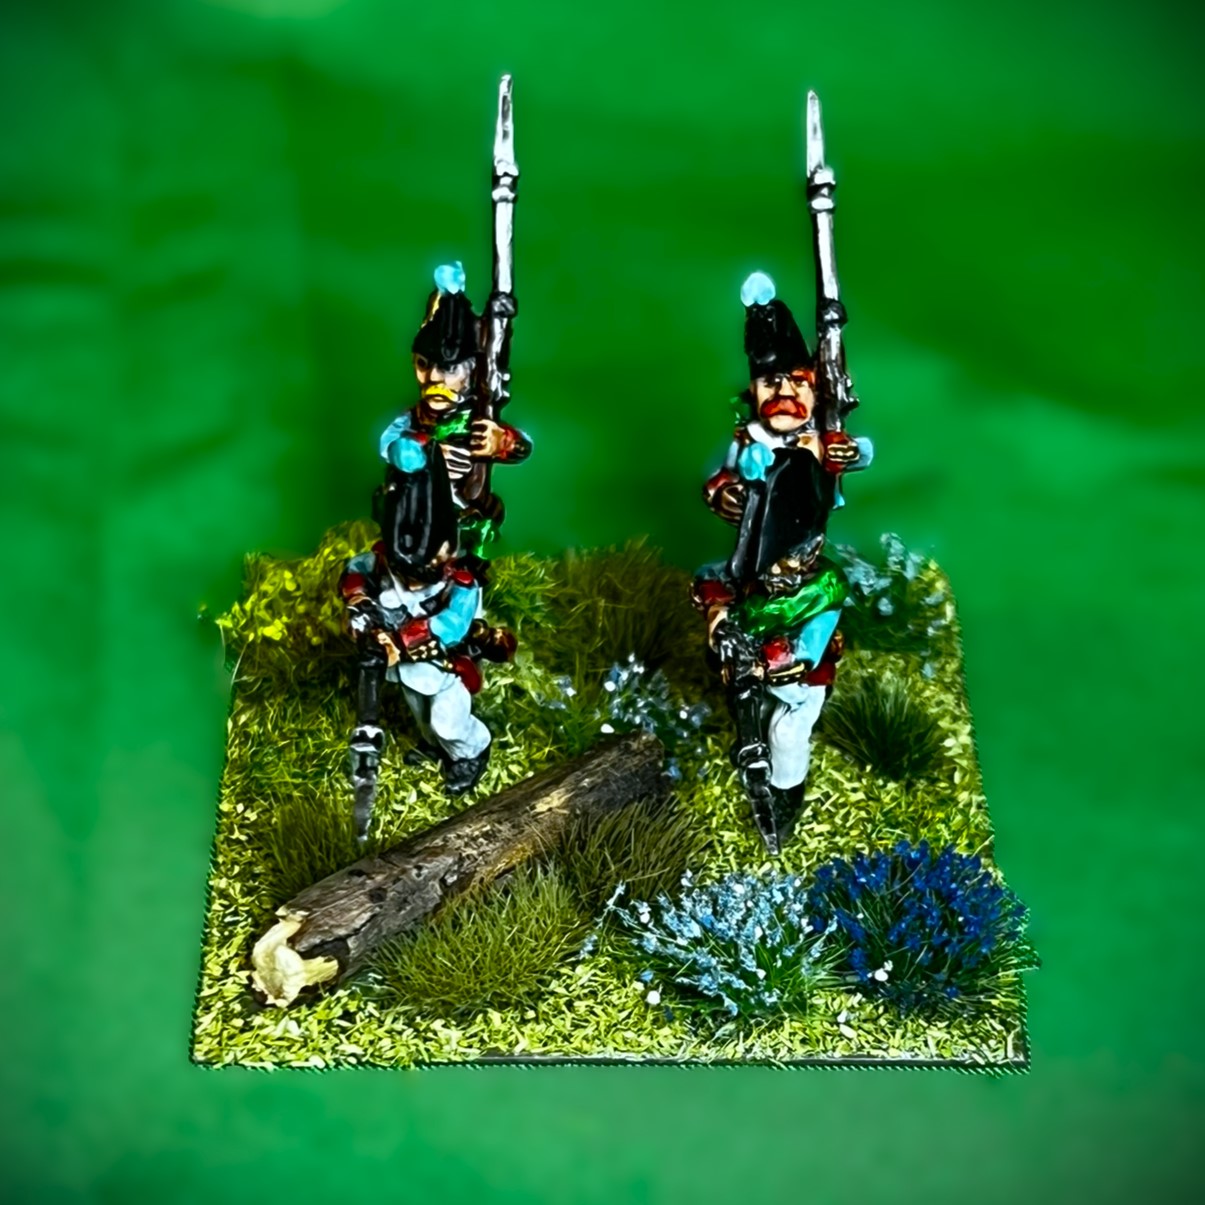
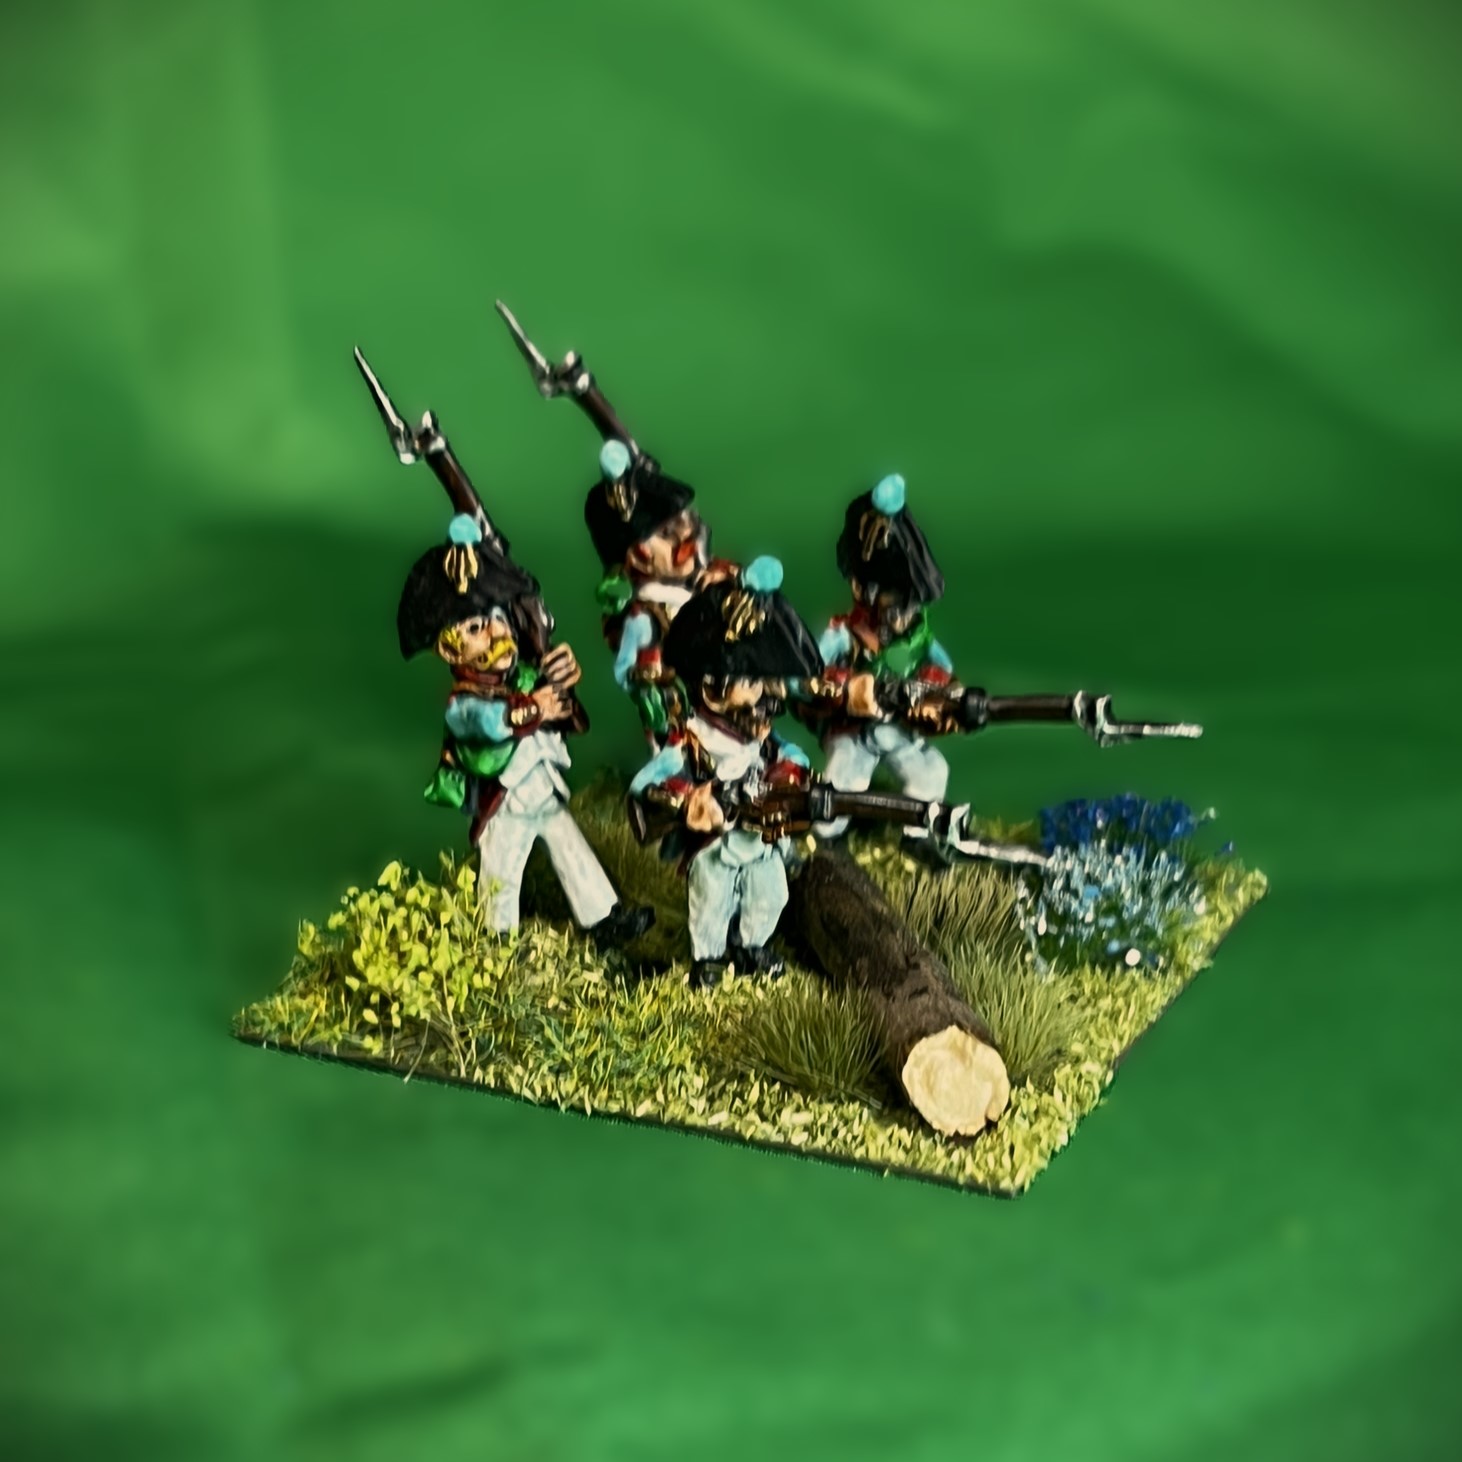
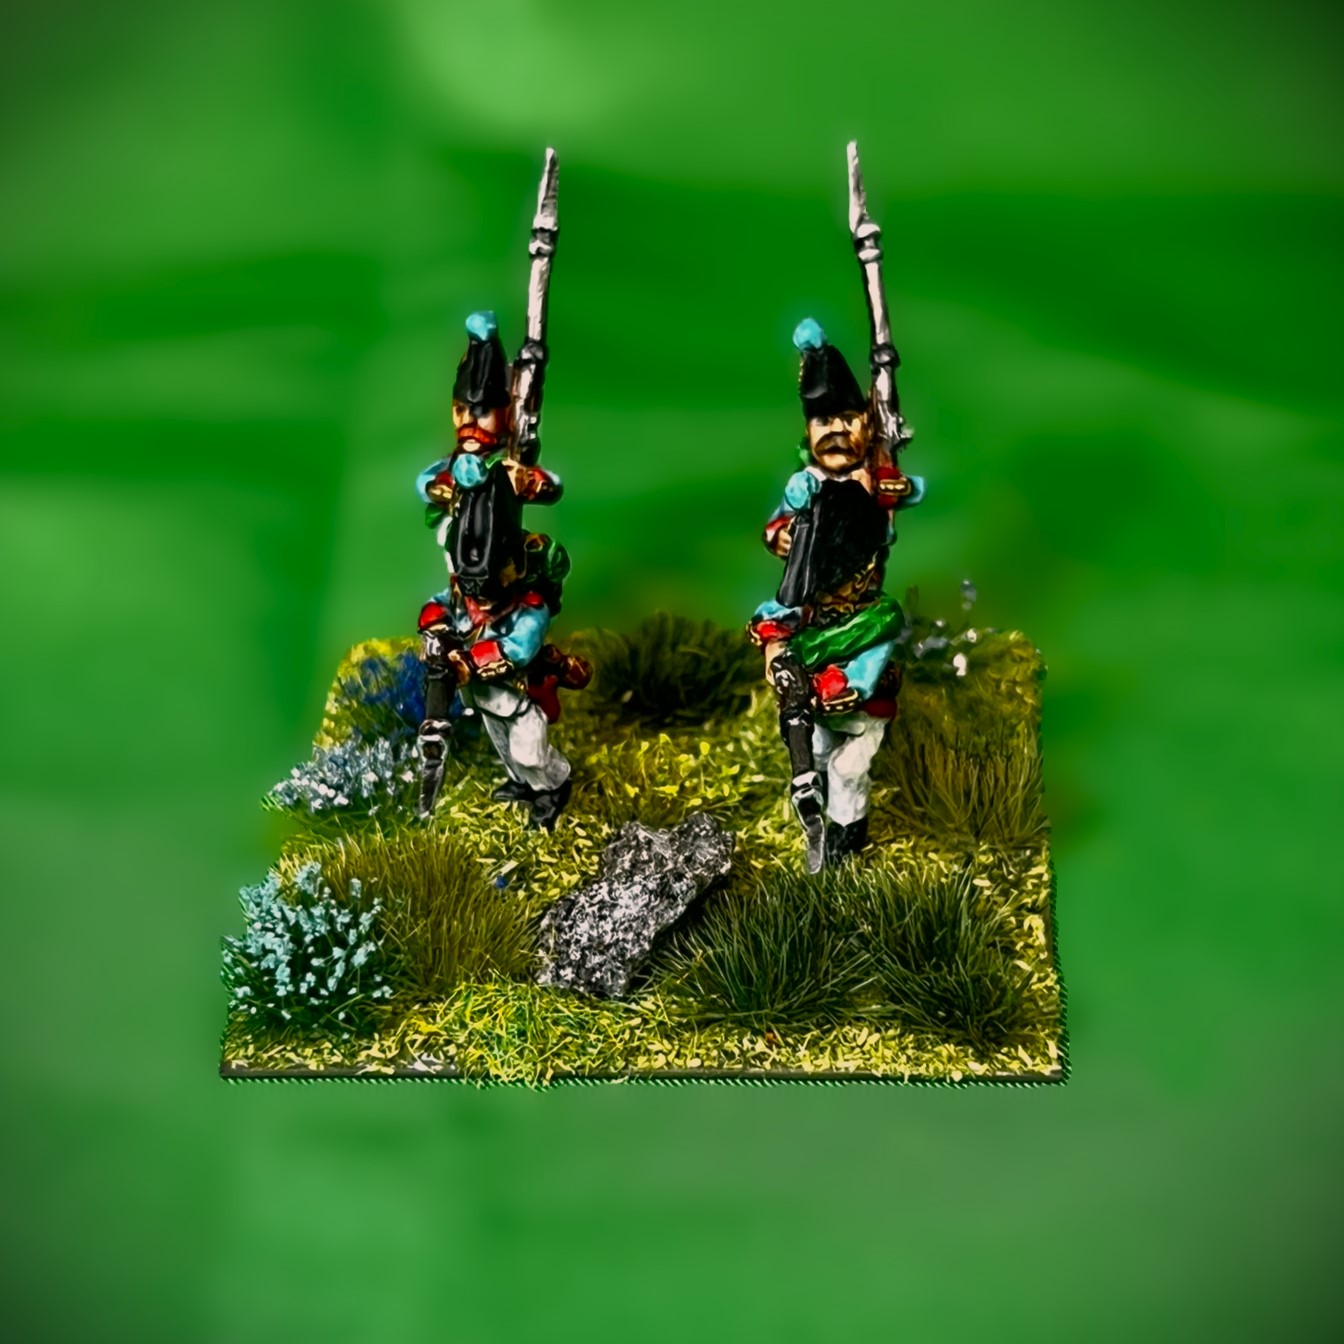
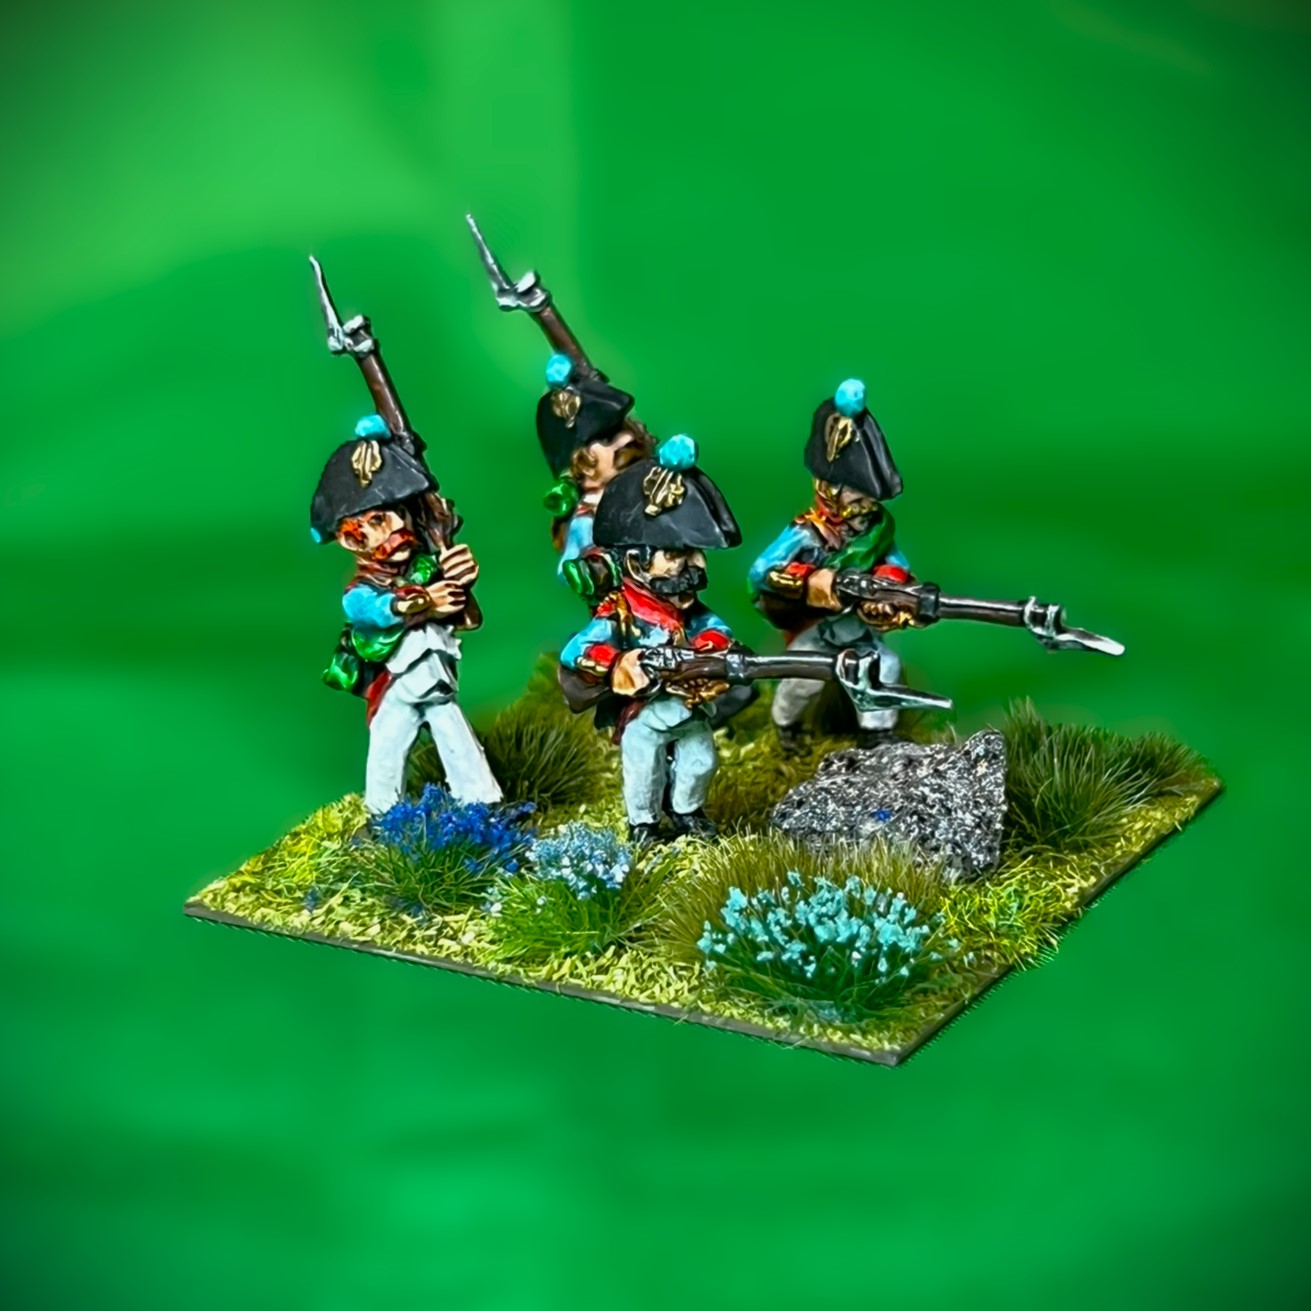
My first entry in the challenge is the subject of this post – and it is a very nice Munchkin Landwehr Infantry Regiment. I had been wanting to get another “cheaper” infantry unit for my Wars of Ozz games. This would enable me to round out my Munchkin forces to about 2 brigades which gives me more flexibility and variety for game play. In the game, Munchkin Landwehr units are basically militia/national guard-type units. What is nice is that there are two types of Landwehr infantry regiments that are visibly indistinguishable from each other – but that have very different costs and stats. One type is called National Guard (Landwehr) and the other is called Dubious National Guard (Landwehr). The former is a better-trained unit, but one that is more expensive than the latter.
The better Landwehr regiment is good at missile combat with their muskets – having a Marksmanship value of 6/10. The Dubious Landwehr only has a Marksmanship value of 4/10 (they need time on the firing range). With regards to Melee, the better Landwehr are below average at 4/10, but the Dubious Landwehr are even worse at only a 3/10 (they need more hand-to-hand combat training). The Resolve value (the measure of the unit’s desire to stick in a fight) for the better Landwehr is okay at 6/10, but their lesser trained Dubious brother’s Resolve is a poor 4/10. As for Elan (the desire to take the fight to the enemy), the better Landwehr are an average 5/10, while the Dubious Landwehr cower on the tabletop at a 3/10. The only advantage that the Dubious Landwehr over regular Landwehr is in terms of point cost. A Dubious Landwehr Regiment can be had at 3 points, while a normal Landwehr regiment will cost 5 points. This gives a lot of flexibility to a player or a GM as a unit can be designated as either type at the game’s set up.
All of the figures are metal and 28mm in size. Interestingly, every convention game with Munchkin troops that I have ever set up in the past has attracted a passerby who thinks I have mixed scales on the tabletop! Yes, the Munchkins are indeed smaller, but 28mm!
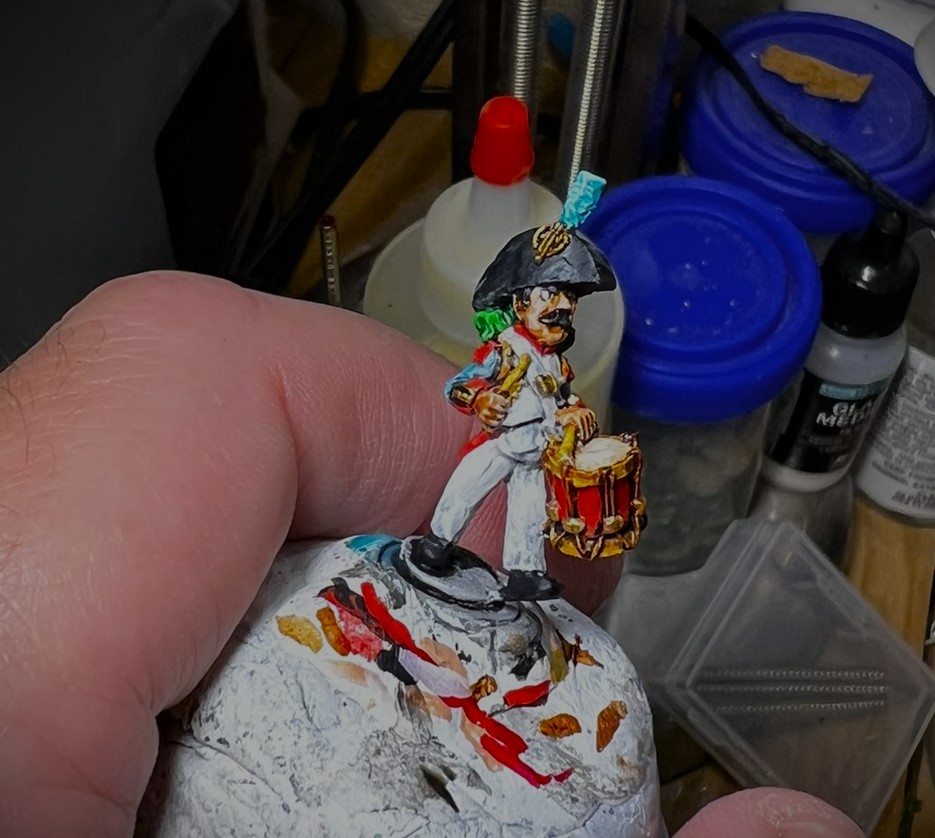
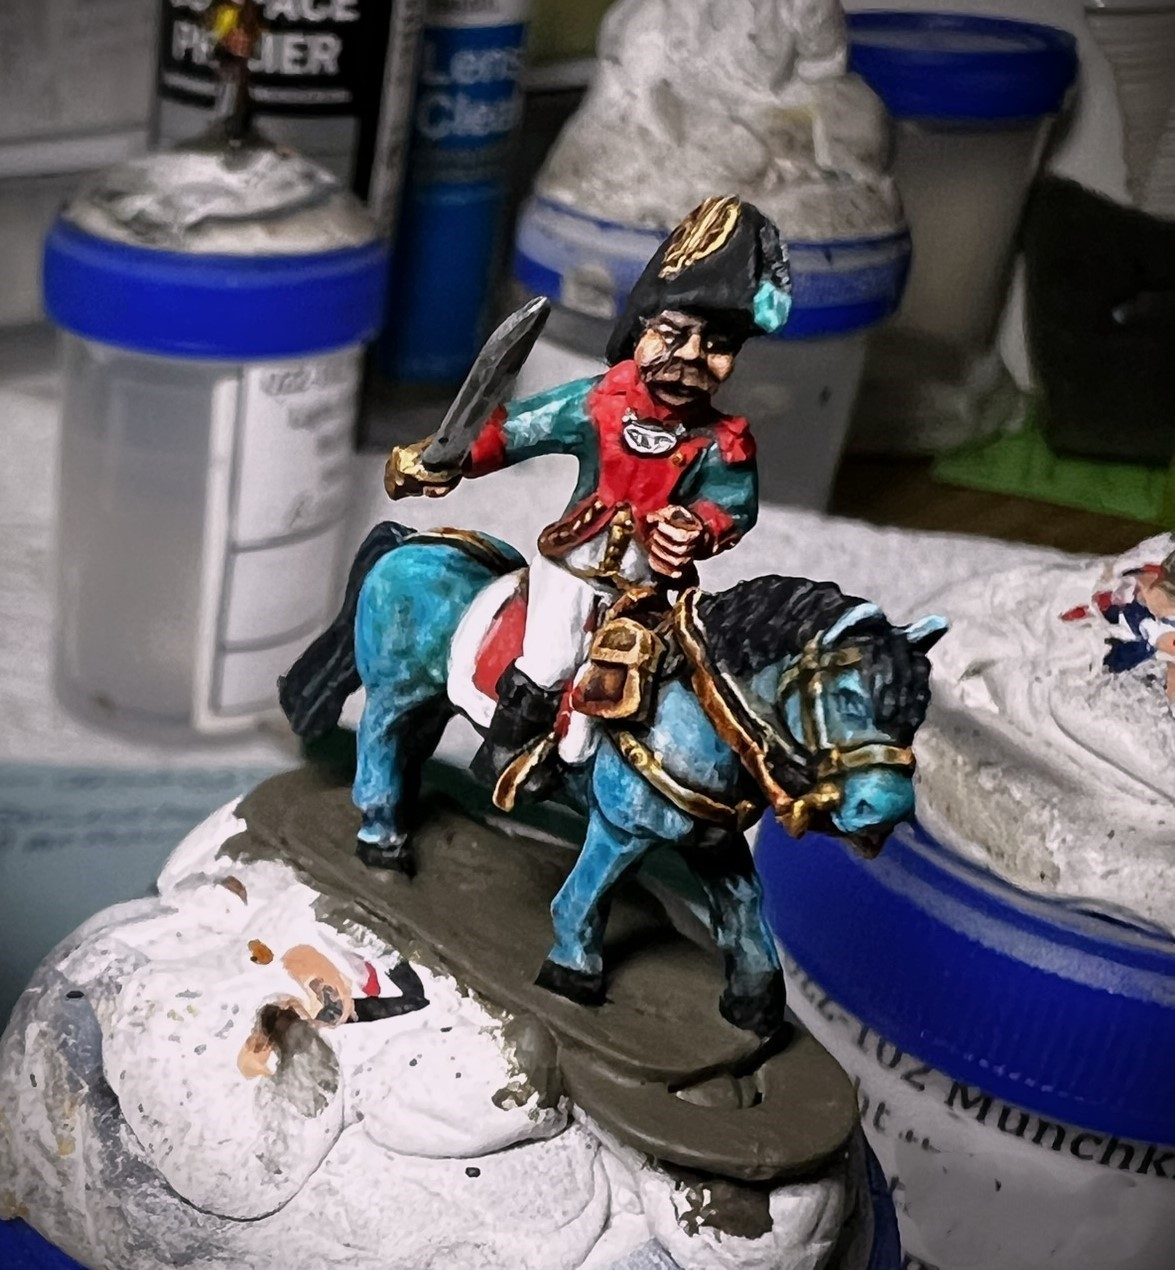
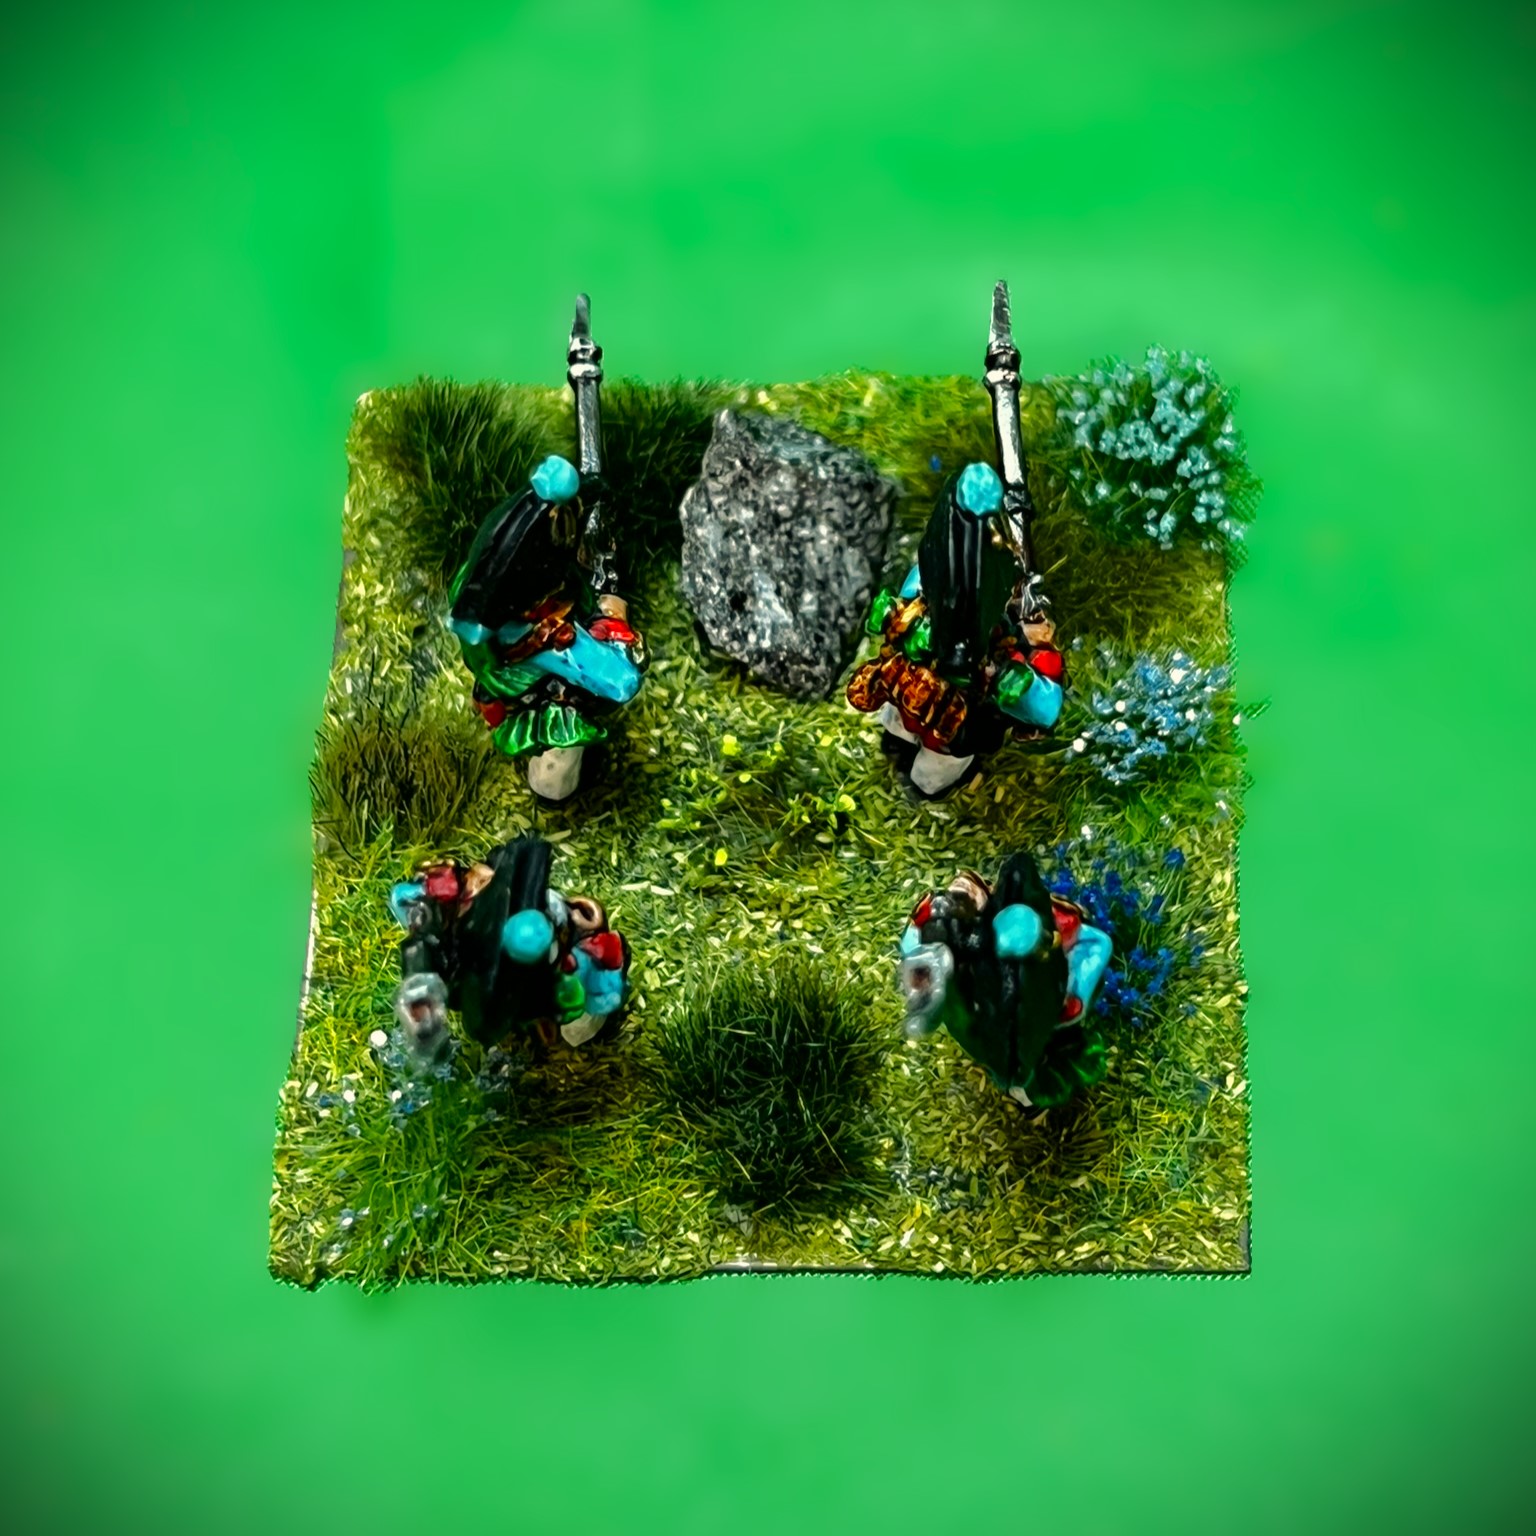
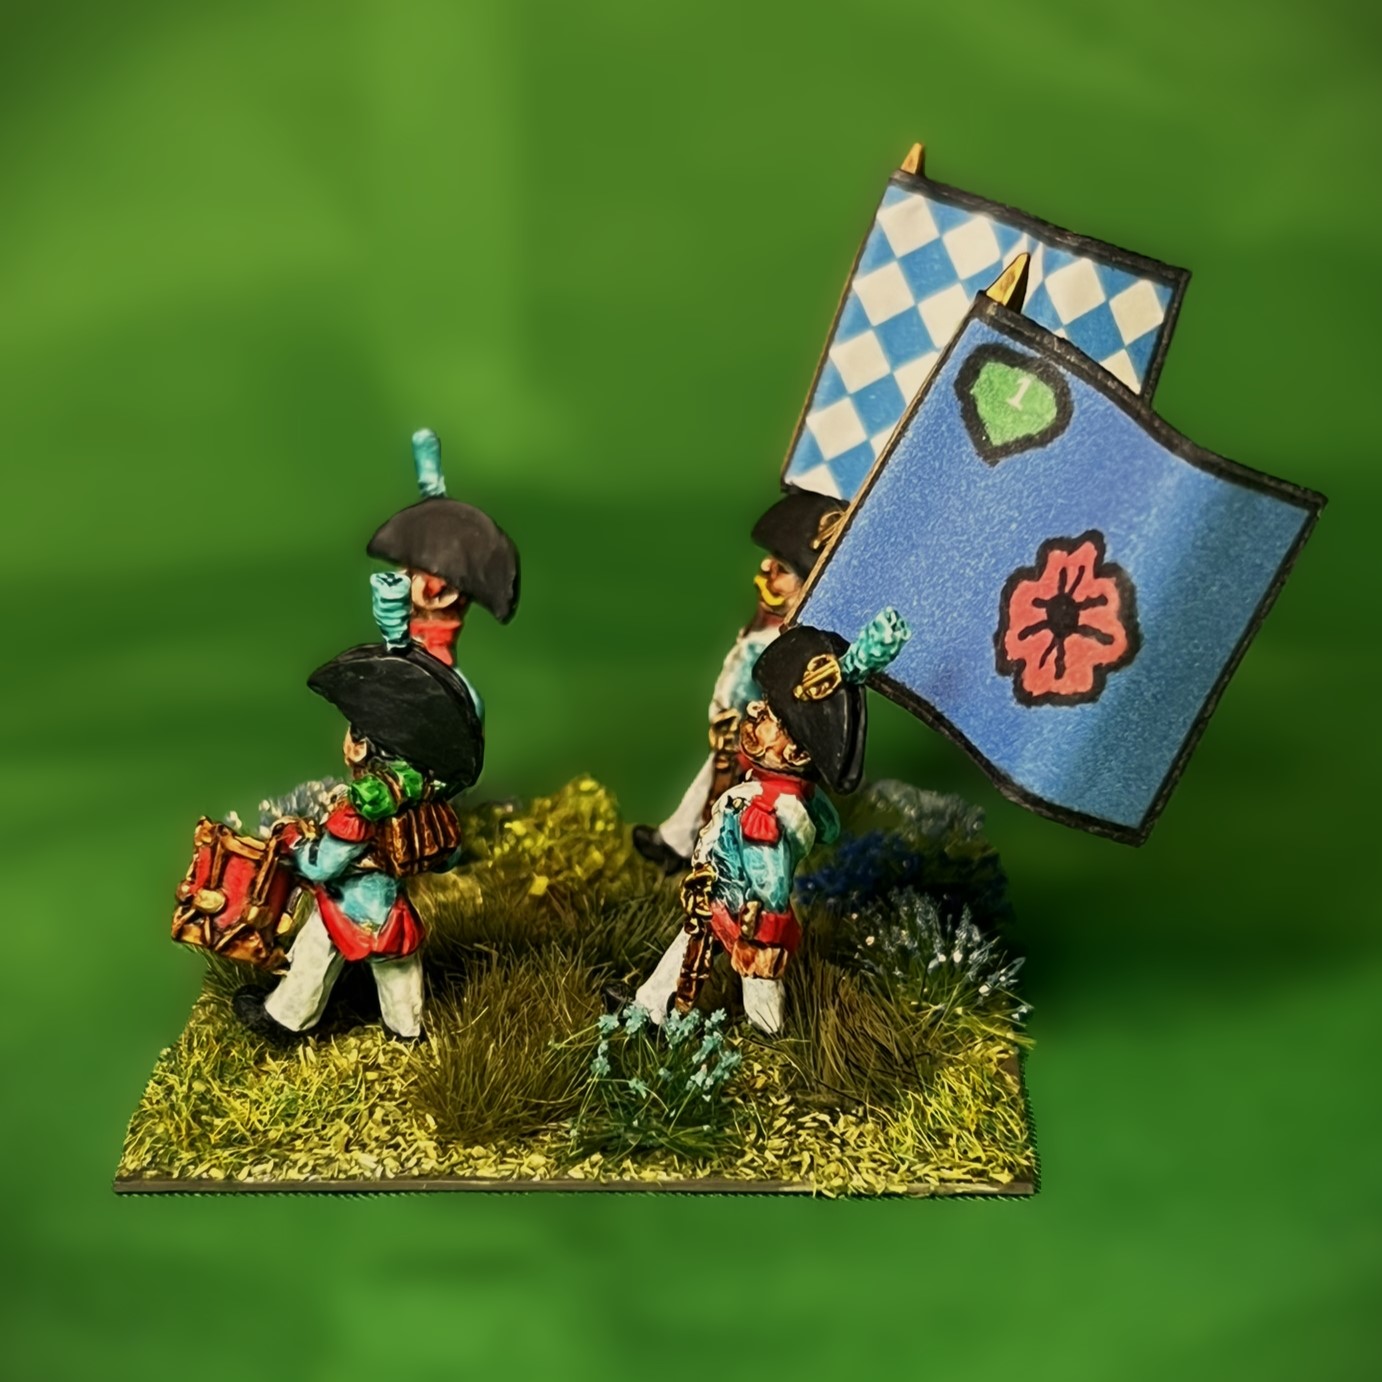
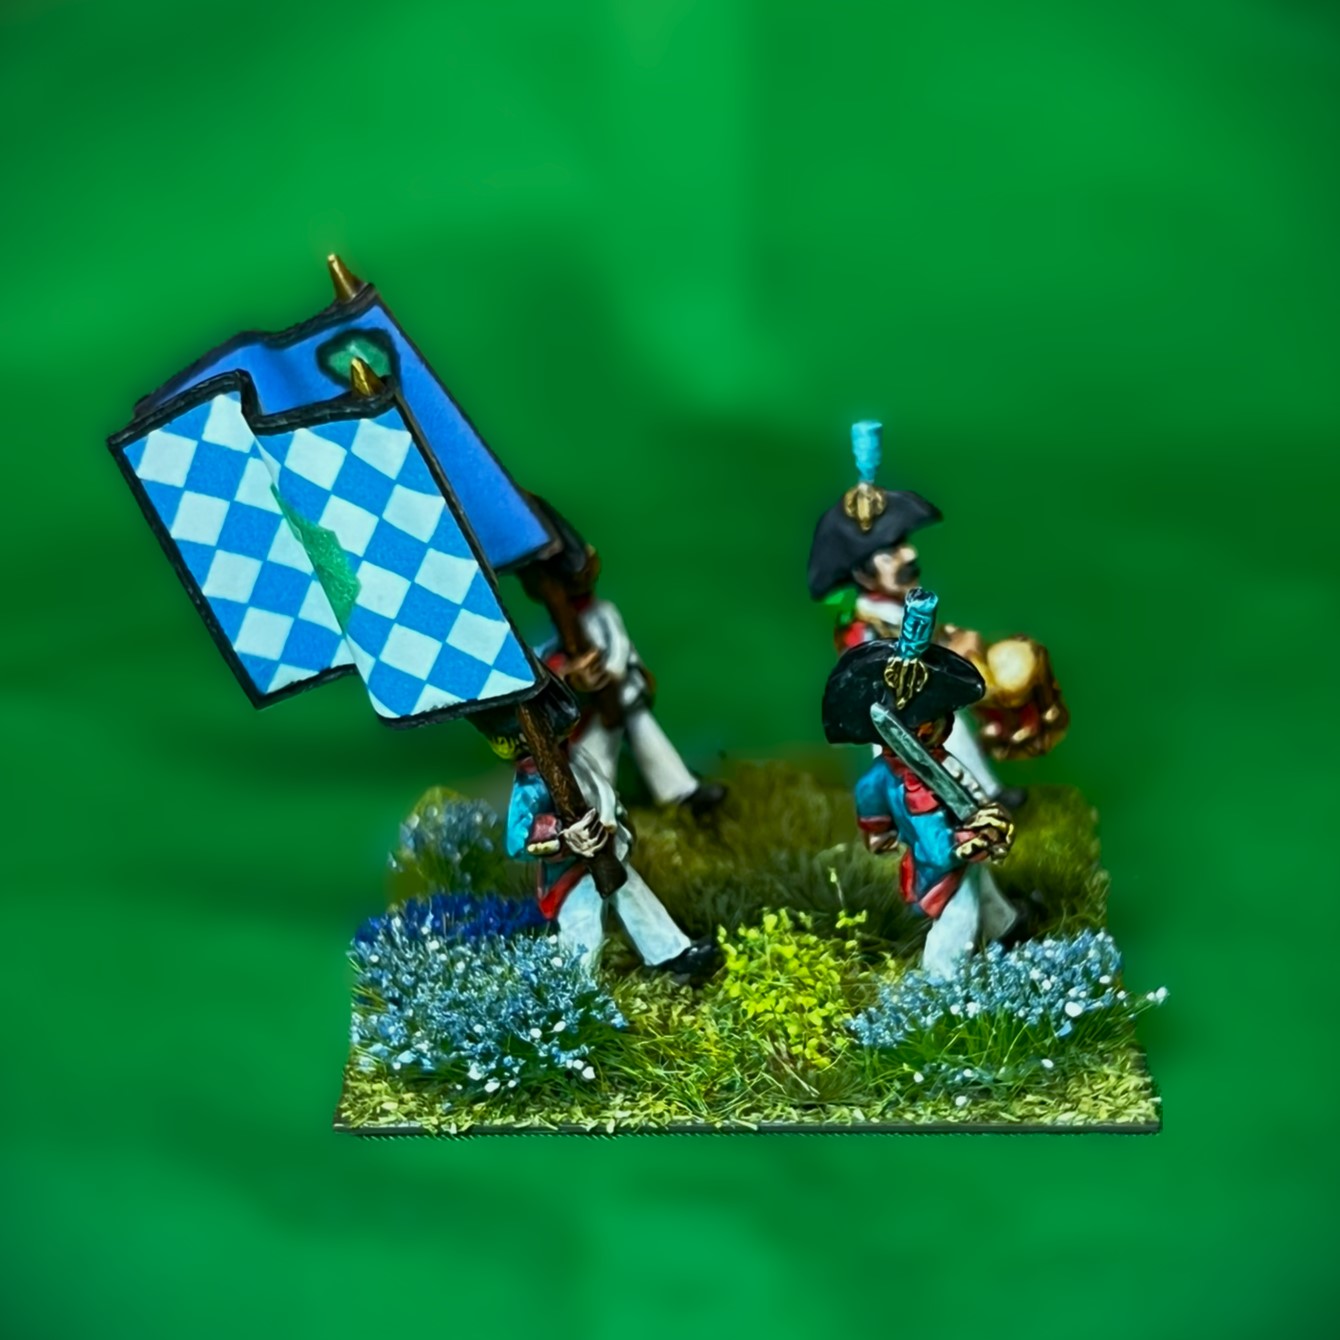
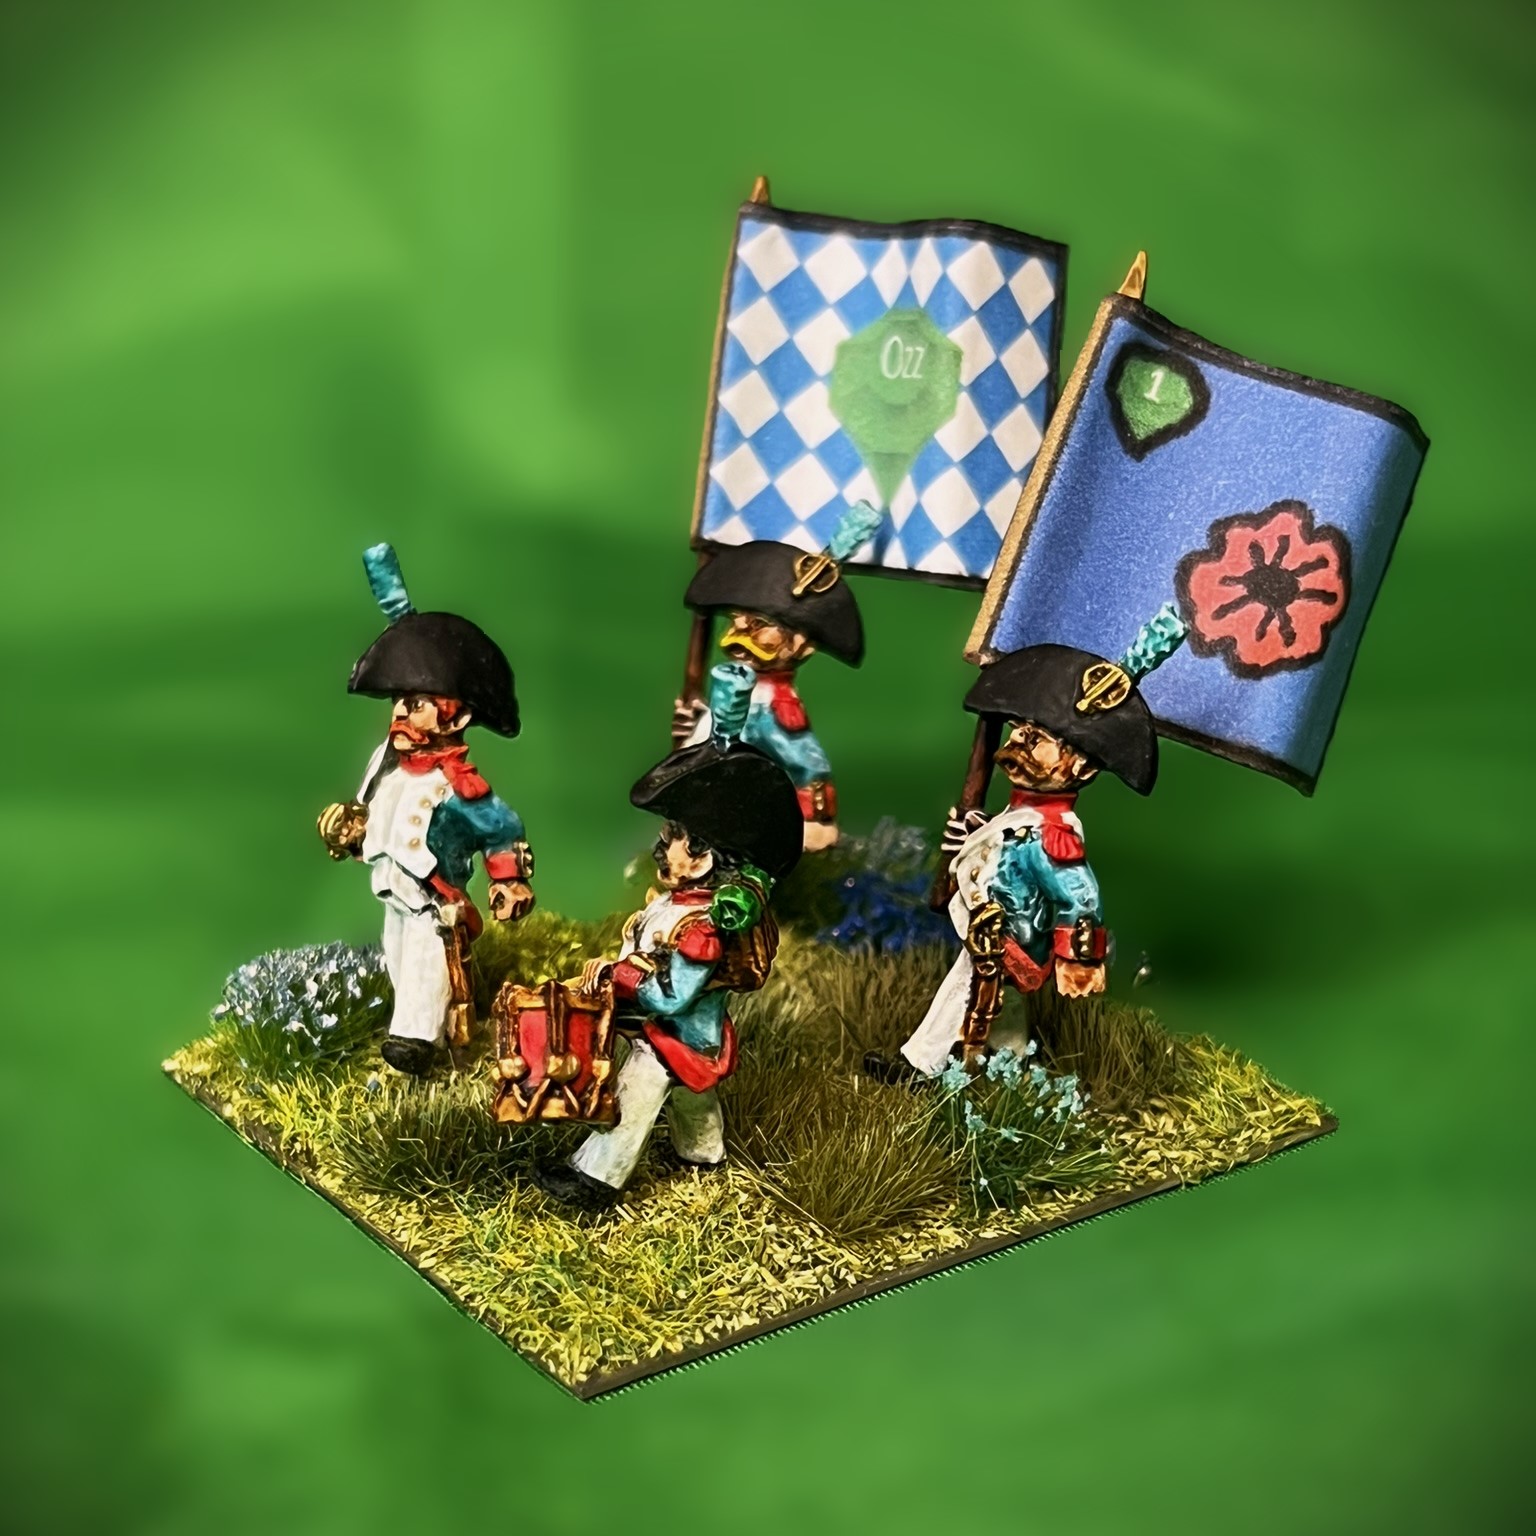
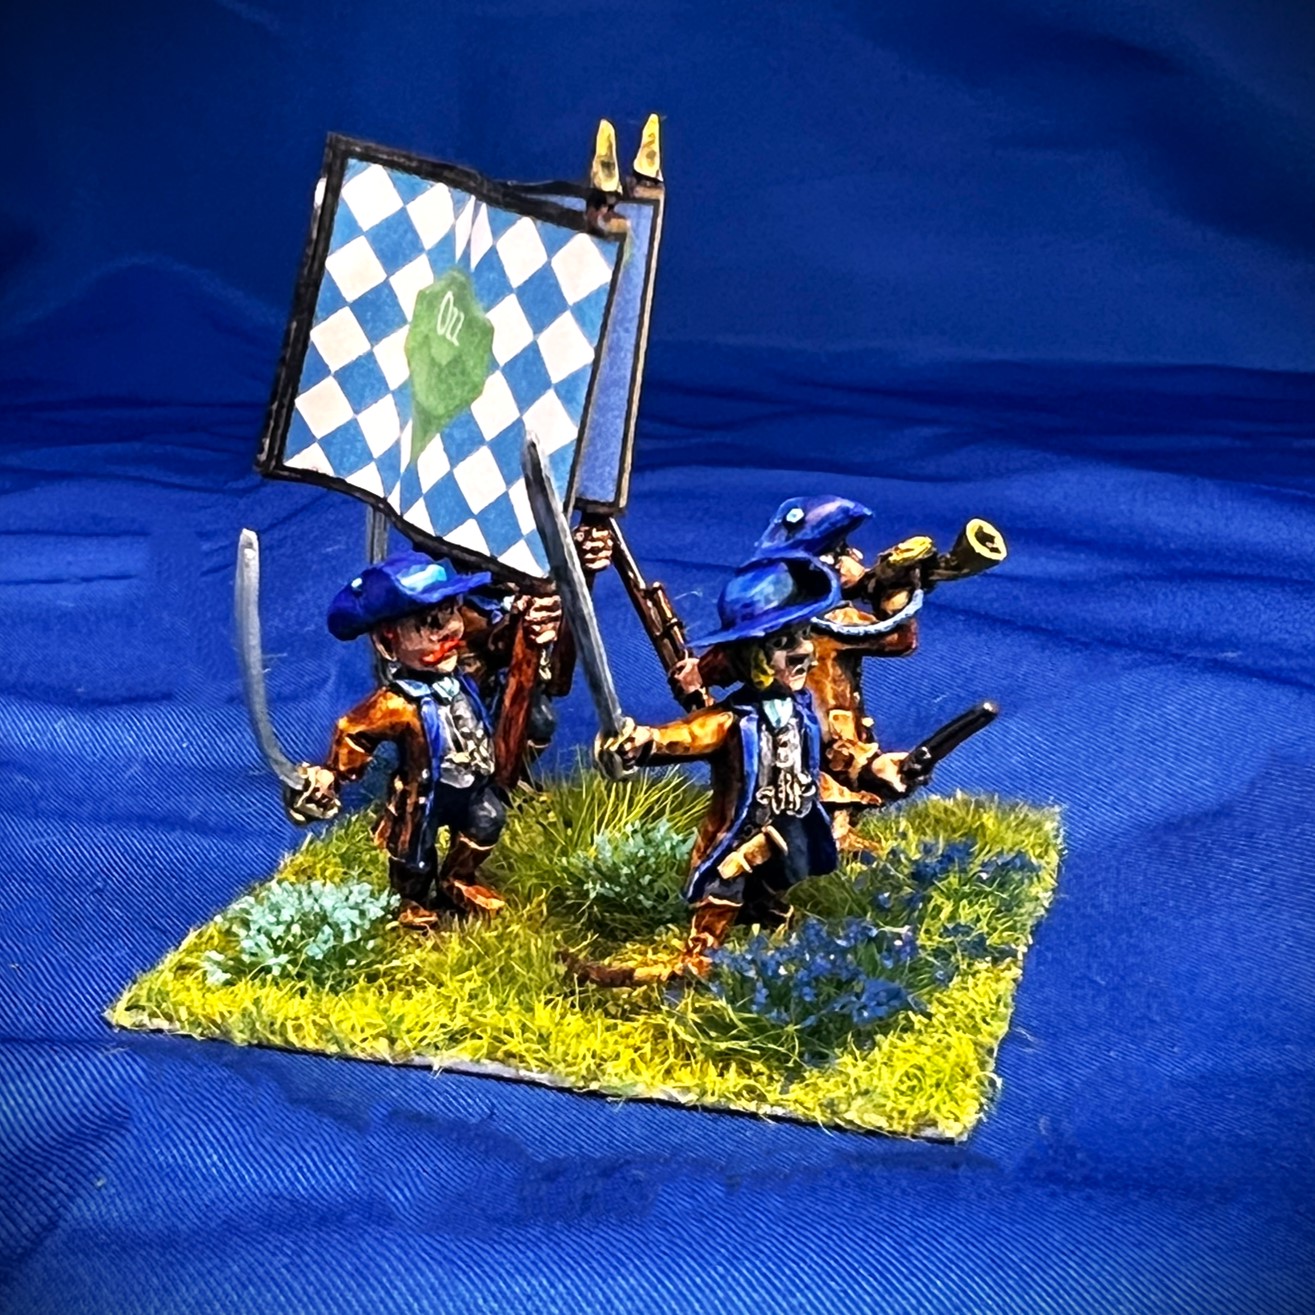
Like all other Ozz units, they are based 4 apiece to a 2″ square base – so five bases for the regiment plus the regimental commander on his own separate MDF base. I designated this unit as the 1st Poppy Fields Landwehr Infantry Regiment – mainly because I liked the regimental standard. No assembly was required for the unit other than to add the flags and to assemble the regimental commander. As I always do, I mixed and matched the figure types and poses such that no two bases of the five in the regiment were identical. The SKU for the regiment is OZZ-105. There are 21 figures for the regiment – this includes the mounted regimental commander and 20 figures. I think that the sculpts are phenomenally well done, especially the faces and weapons. They have a lot of character.
I did not take many WIP shots, but I’ll share what I have and then go into some eye candy.
WIP shots
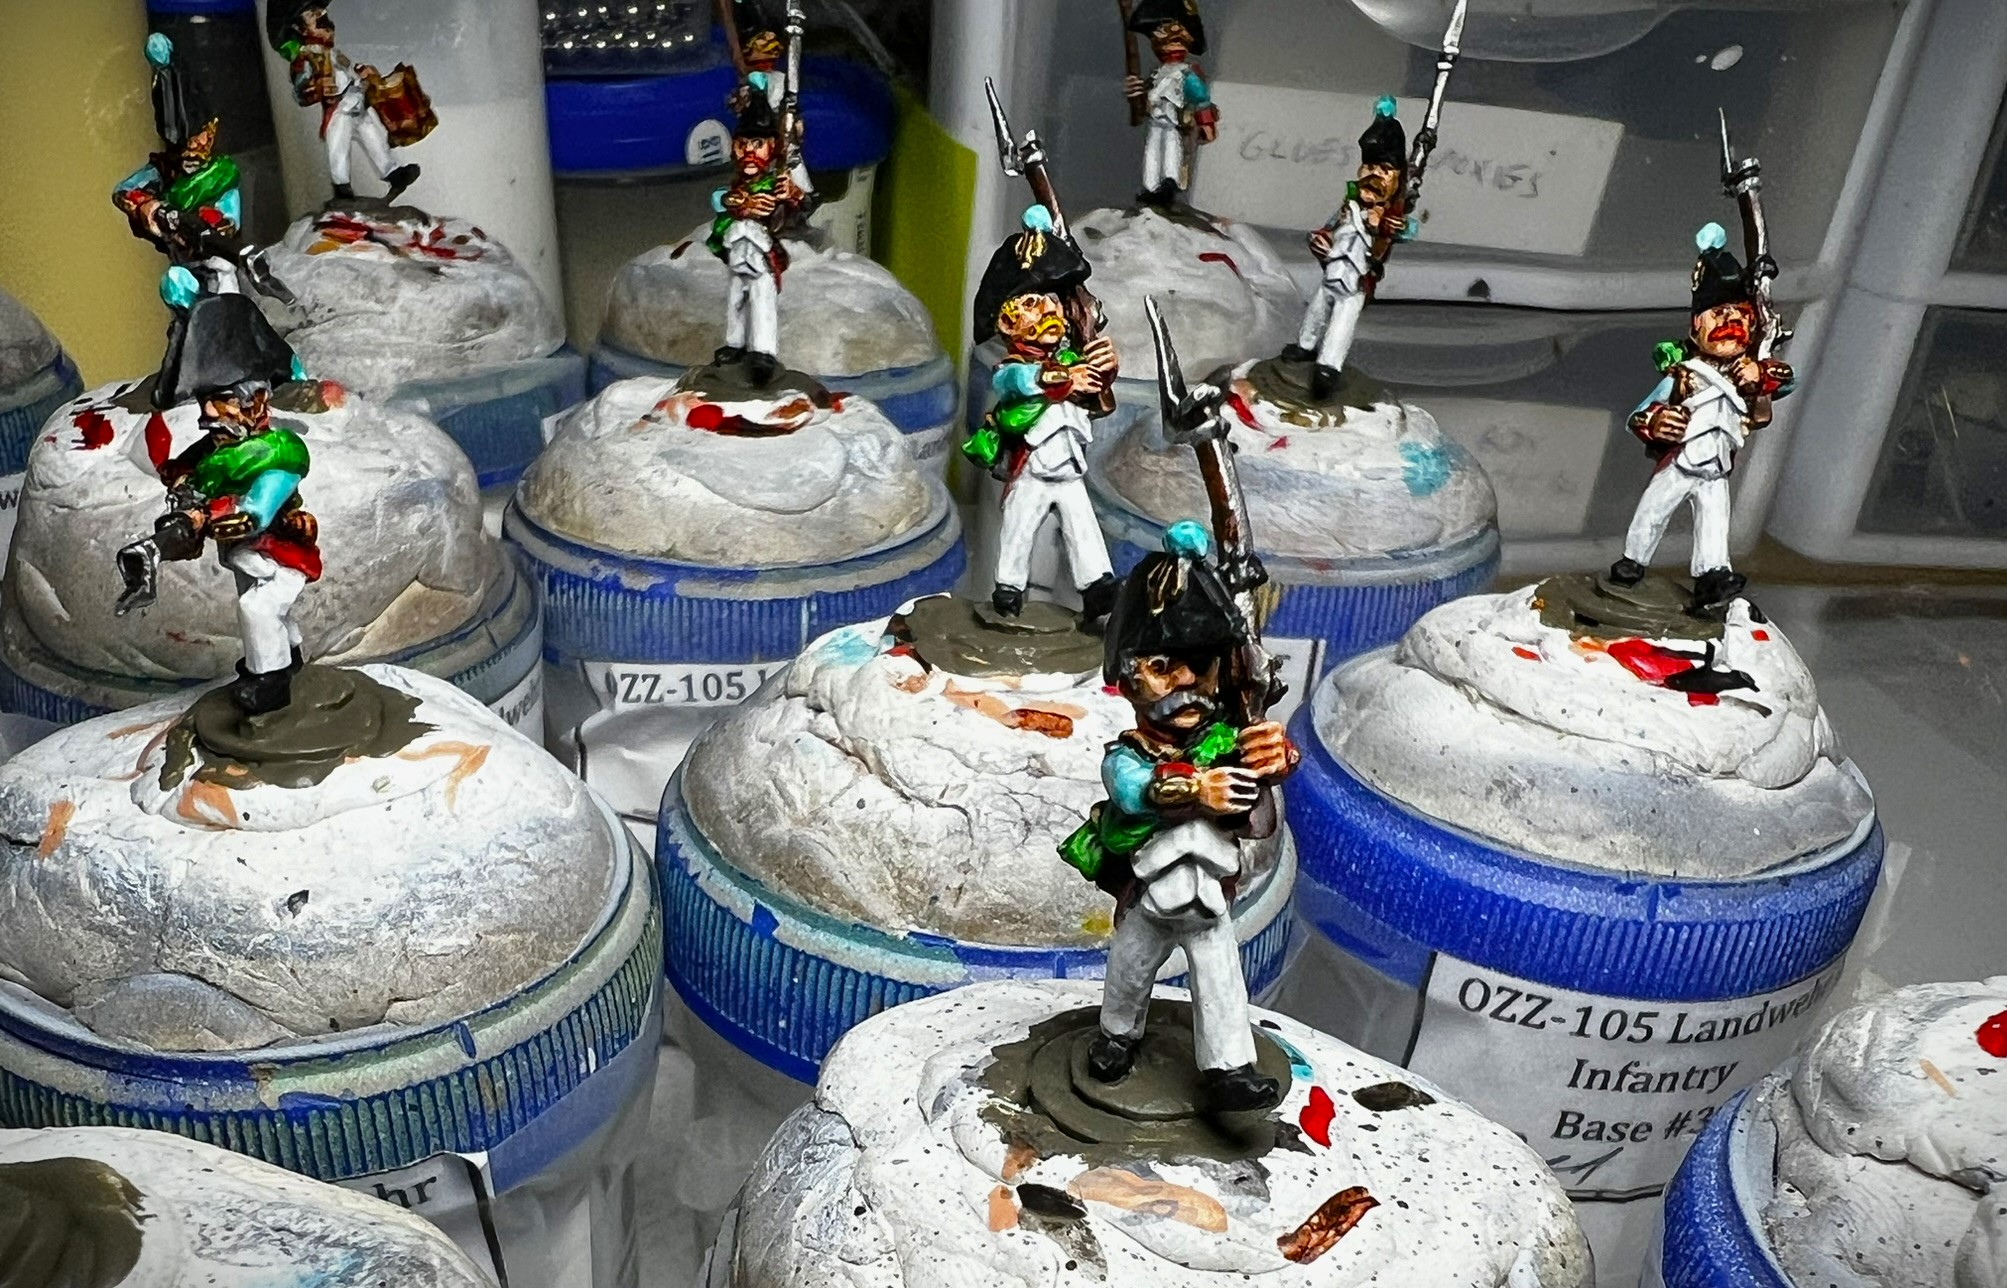
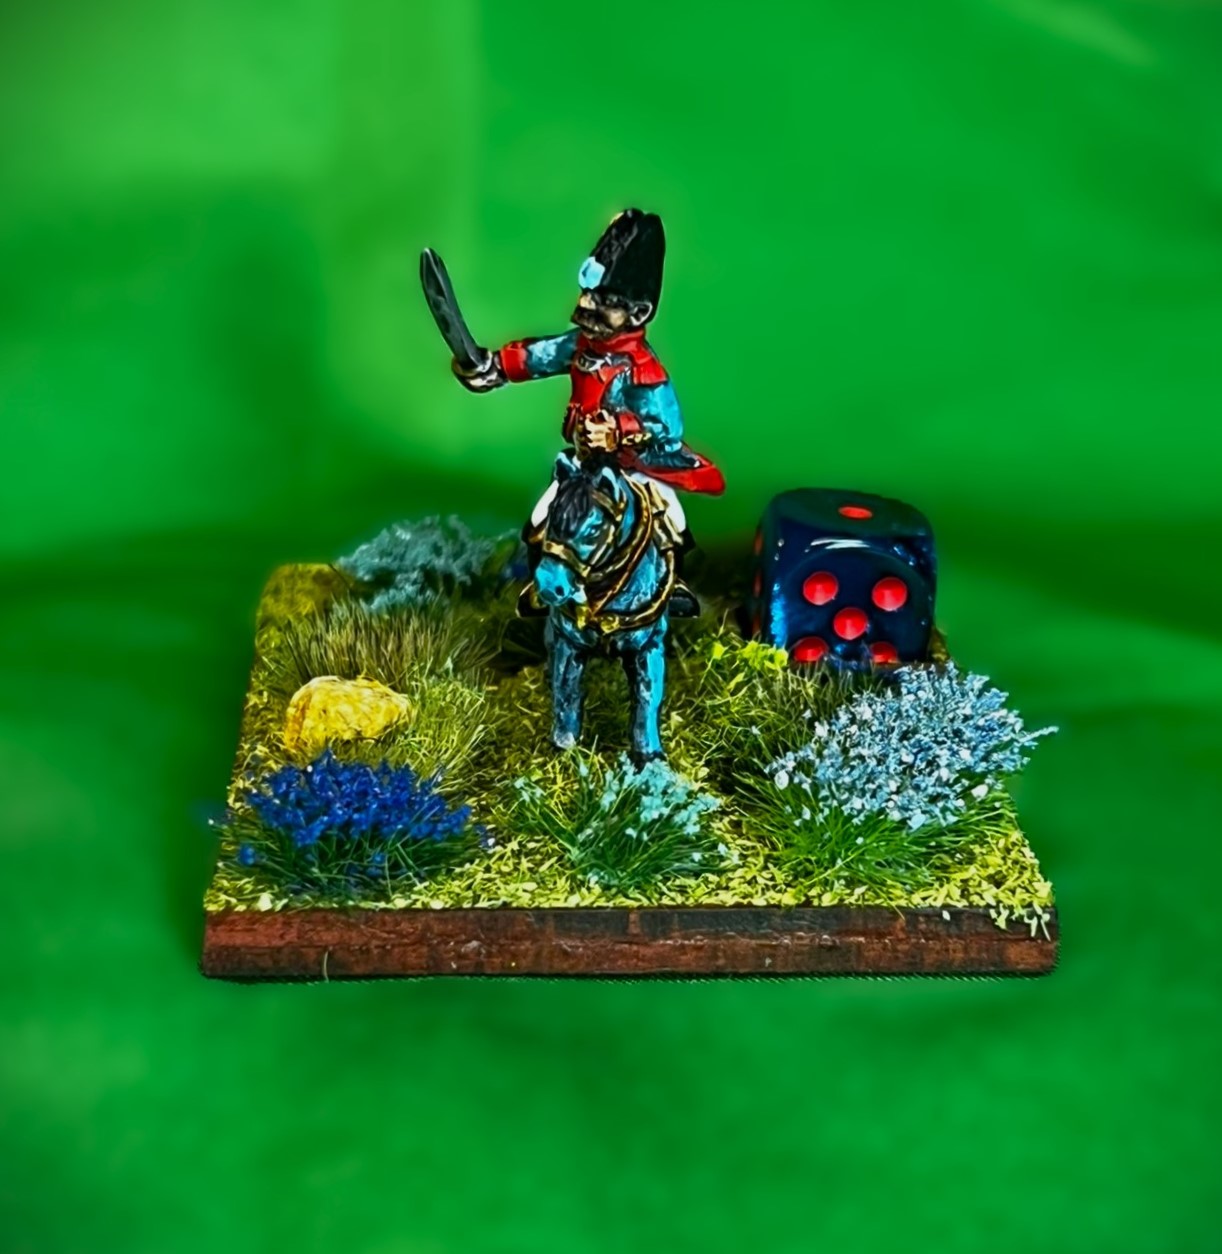
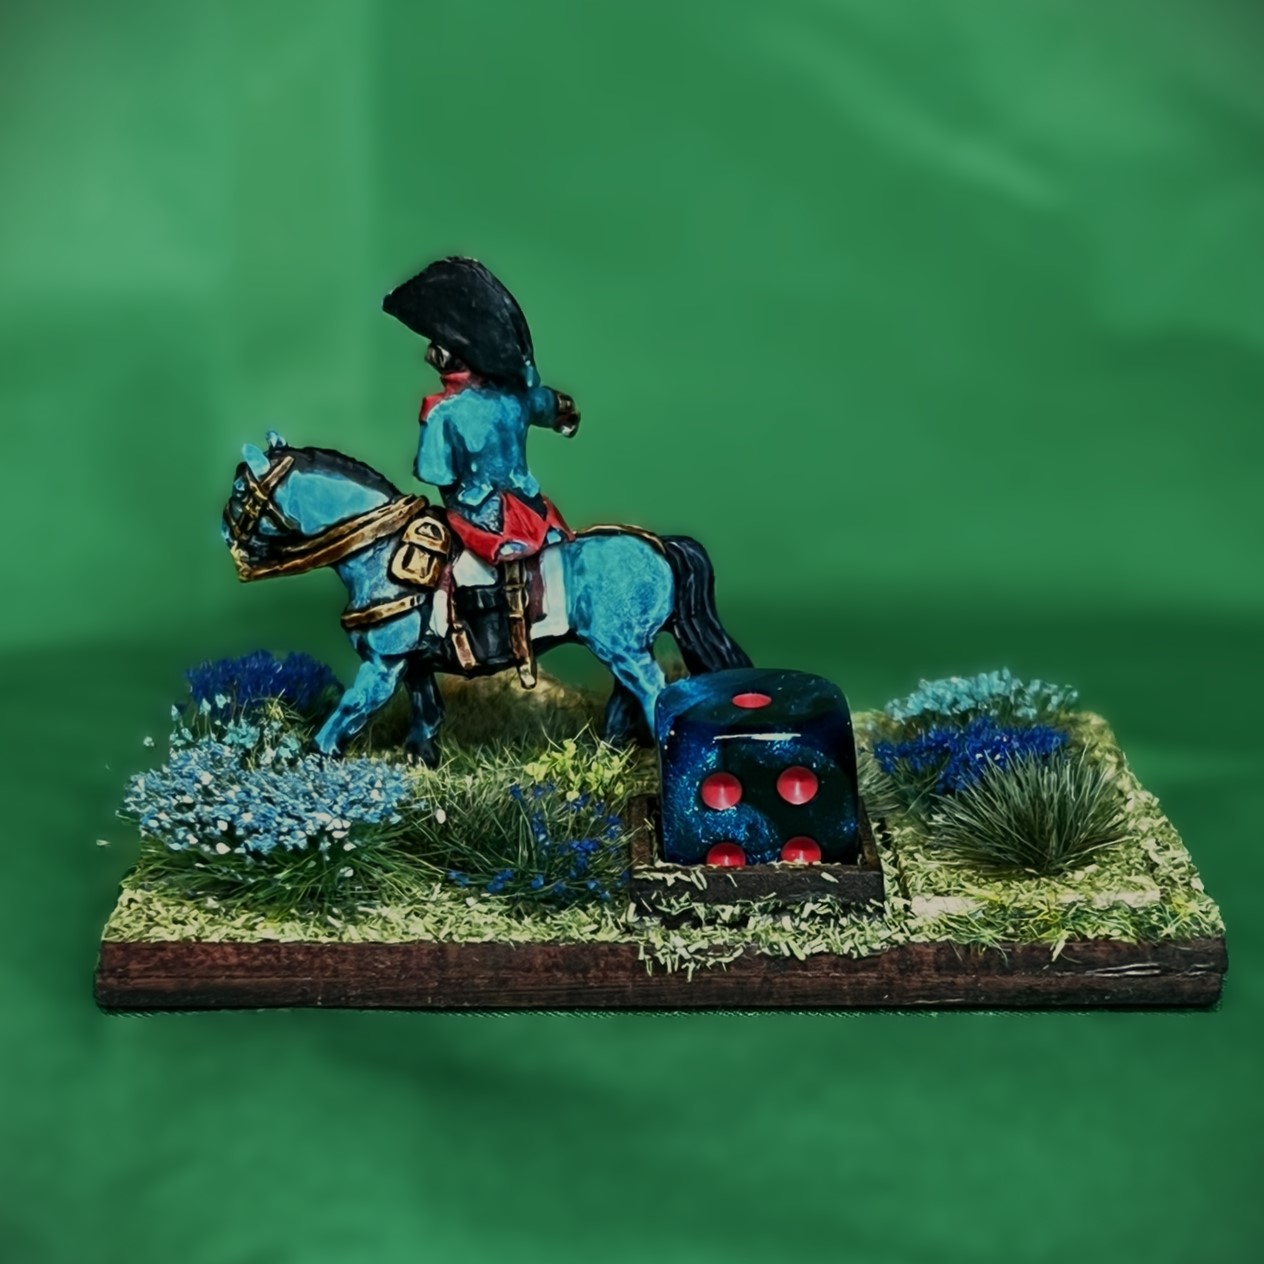
First, here are some shots of a few of the figures before I varnished them. And yes, the horse (really a pony) is of a different color (this is Ozz of course).
Of course, varnish improves everything! The next two images are post-varnish but pre-flocking. Note the variety of hair colors – and yes, I do paint the eyes. I am glad that I did here.
Then, I mocked up the varnished figures on their bases as shown below.
Mocked up on their respective bases.
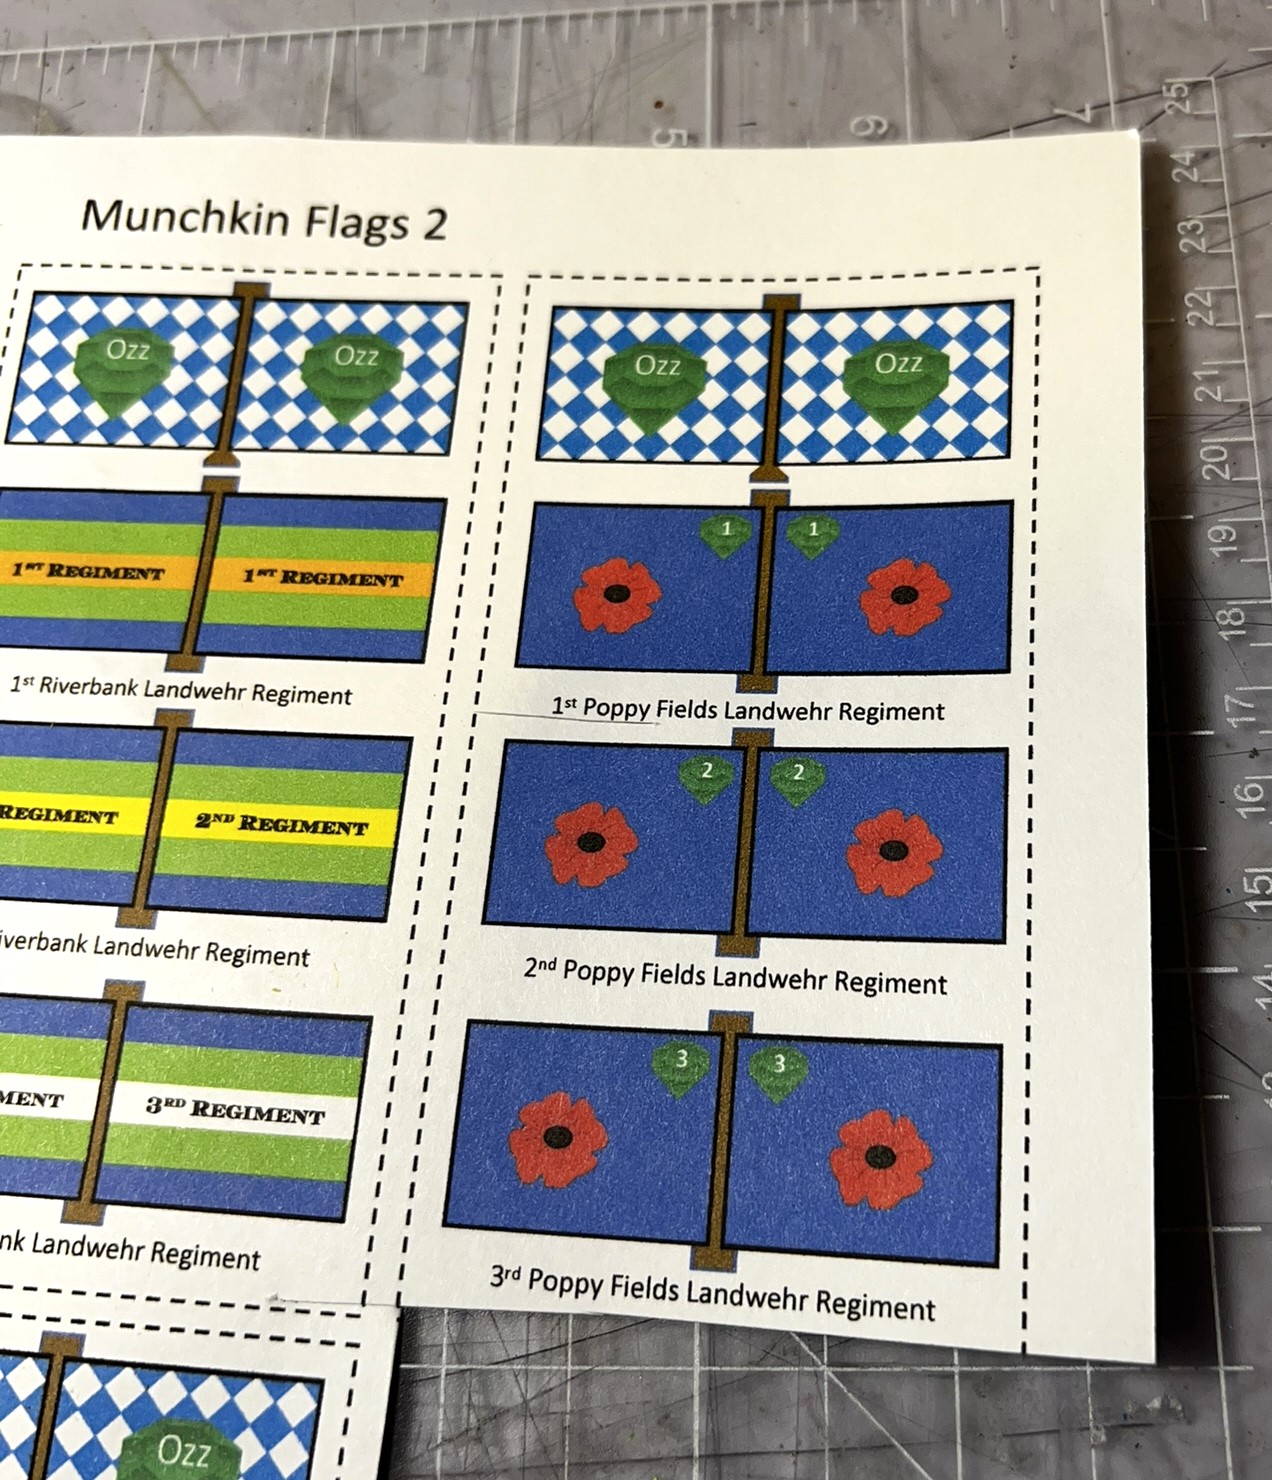
Then I needed to name the unit and cut out the standards. The Poppy Fields standard was my choice.
Lots of options for the Landwehr!
Flocked and with the Ozz and regimental standards mounted. I added a little extra “ink” from a fine-tipped black Sharpie to enhance the regimental standard and edge it & the Ozz standards.
Lots of blue flowers and tufts to create a field environment. Assembled and done – and ready for eye candy!
Eye Candy
Select and click on any photo for a better look.
Regimental Commander Base
Base 1
Base 2
Base 3
Base 4
Command Base
Here now are a few:
Group Shots
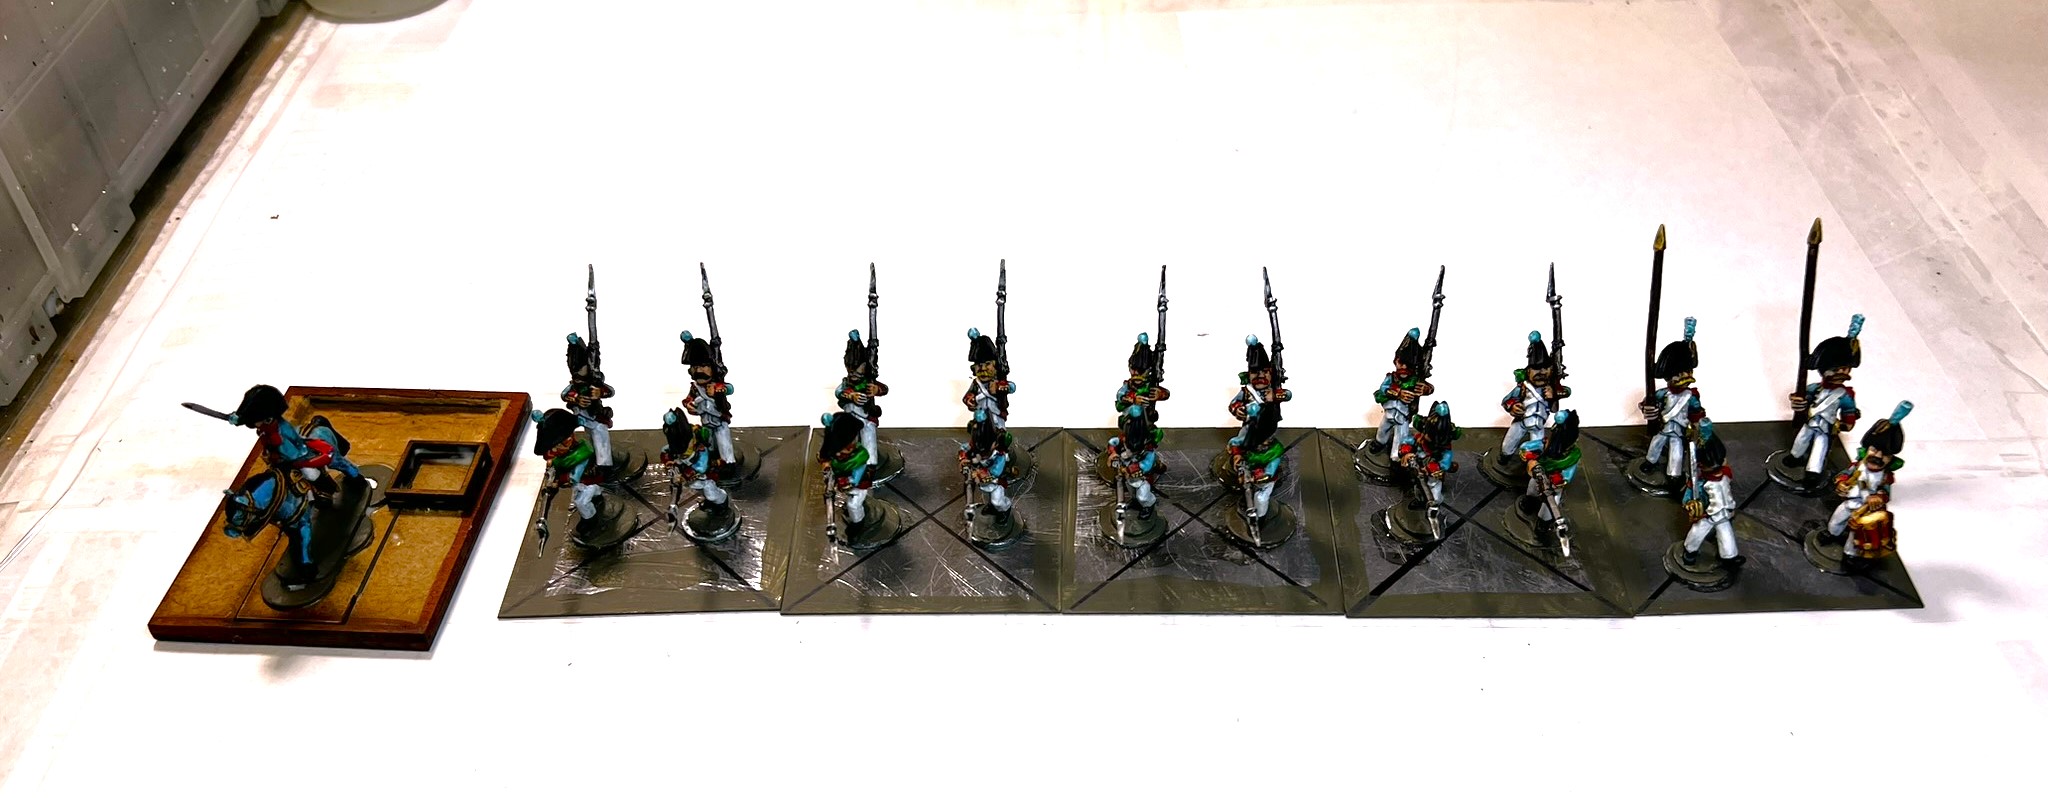
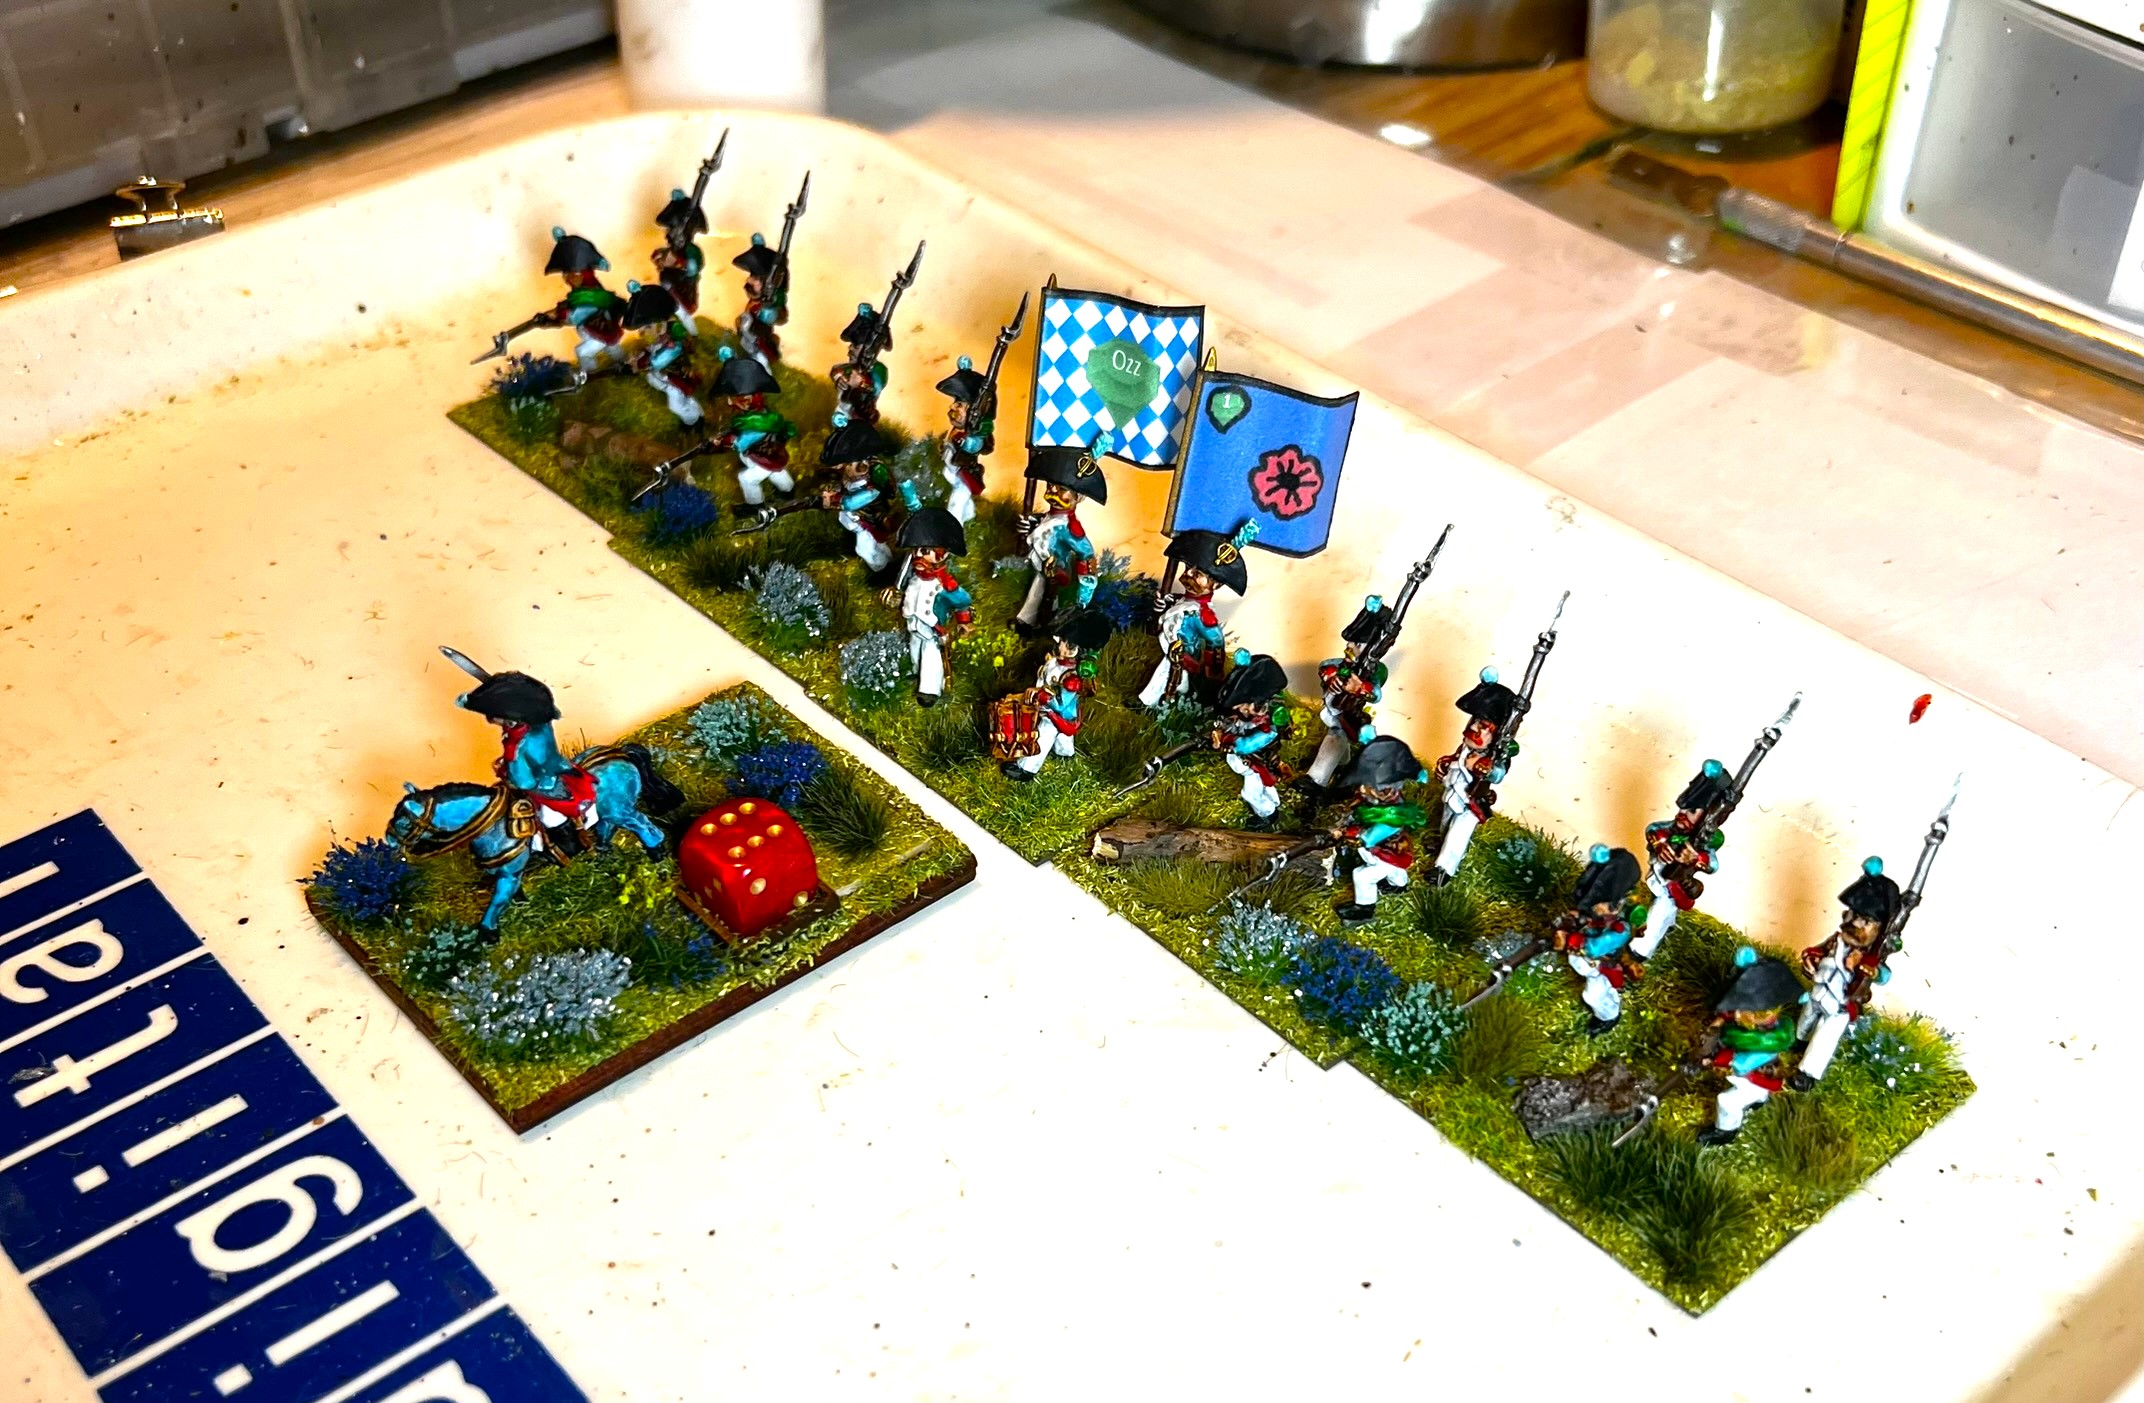
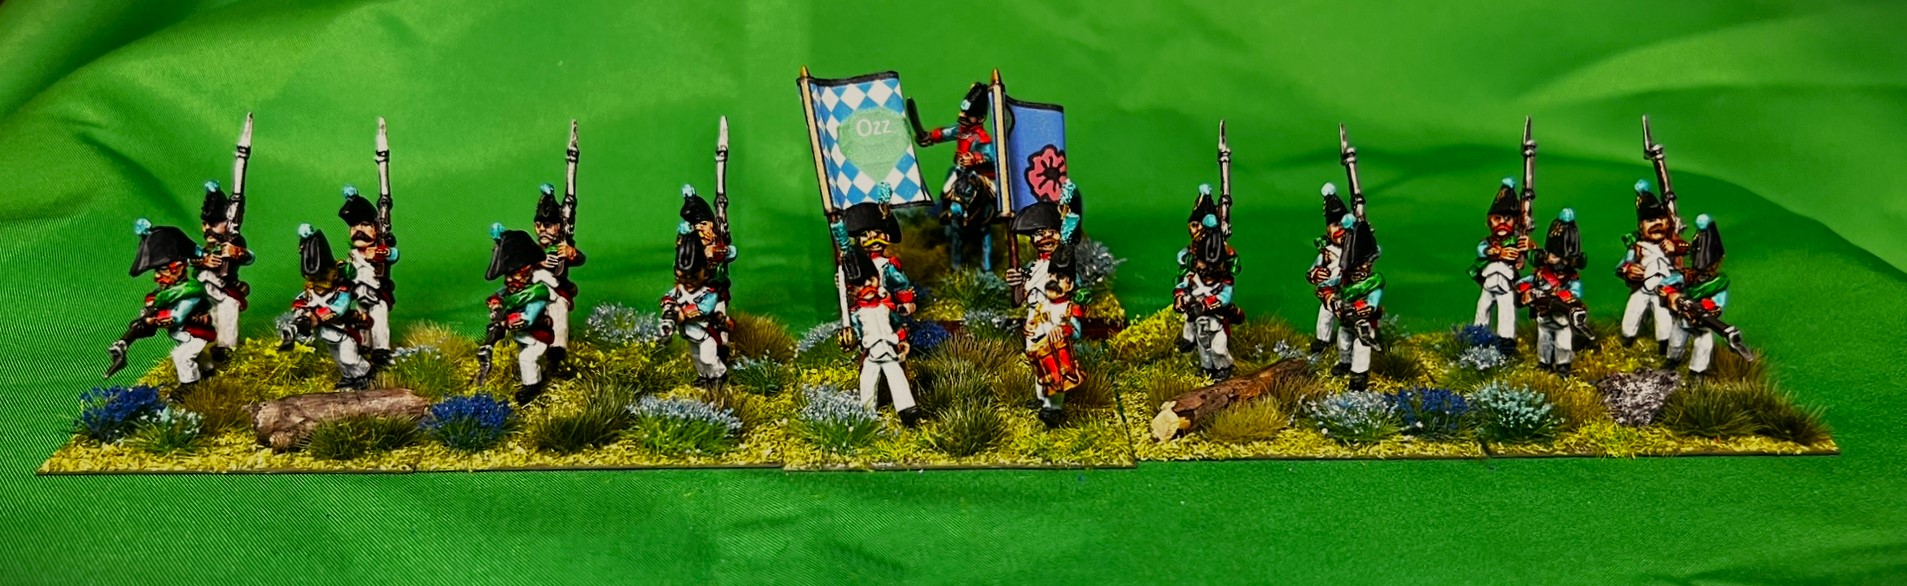
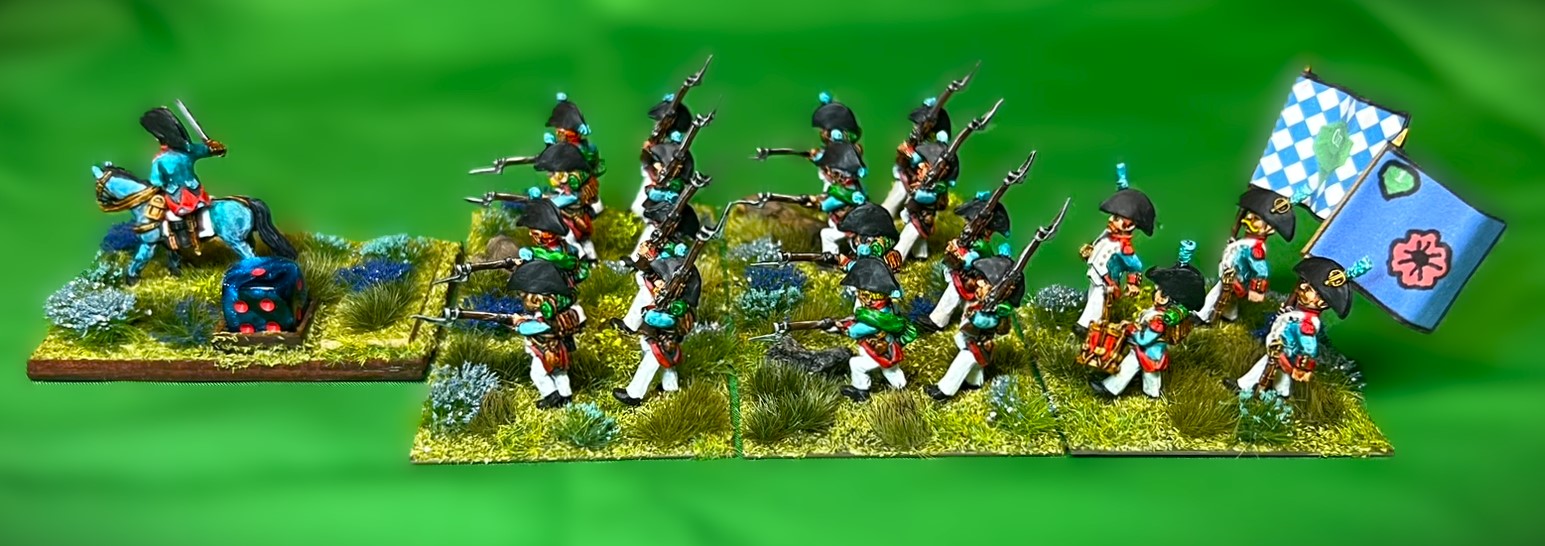
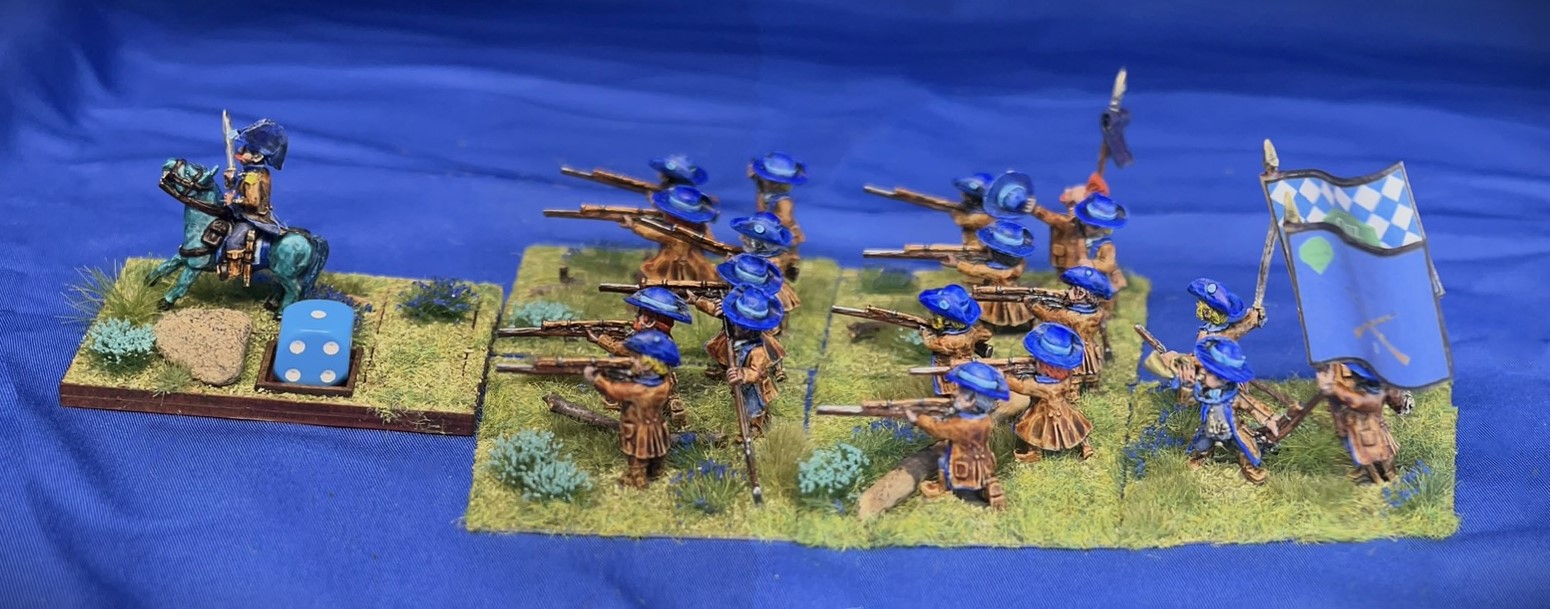
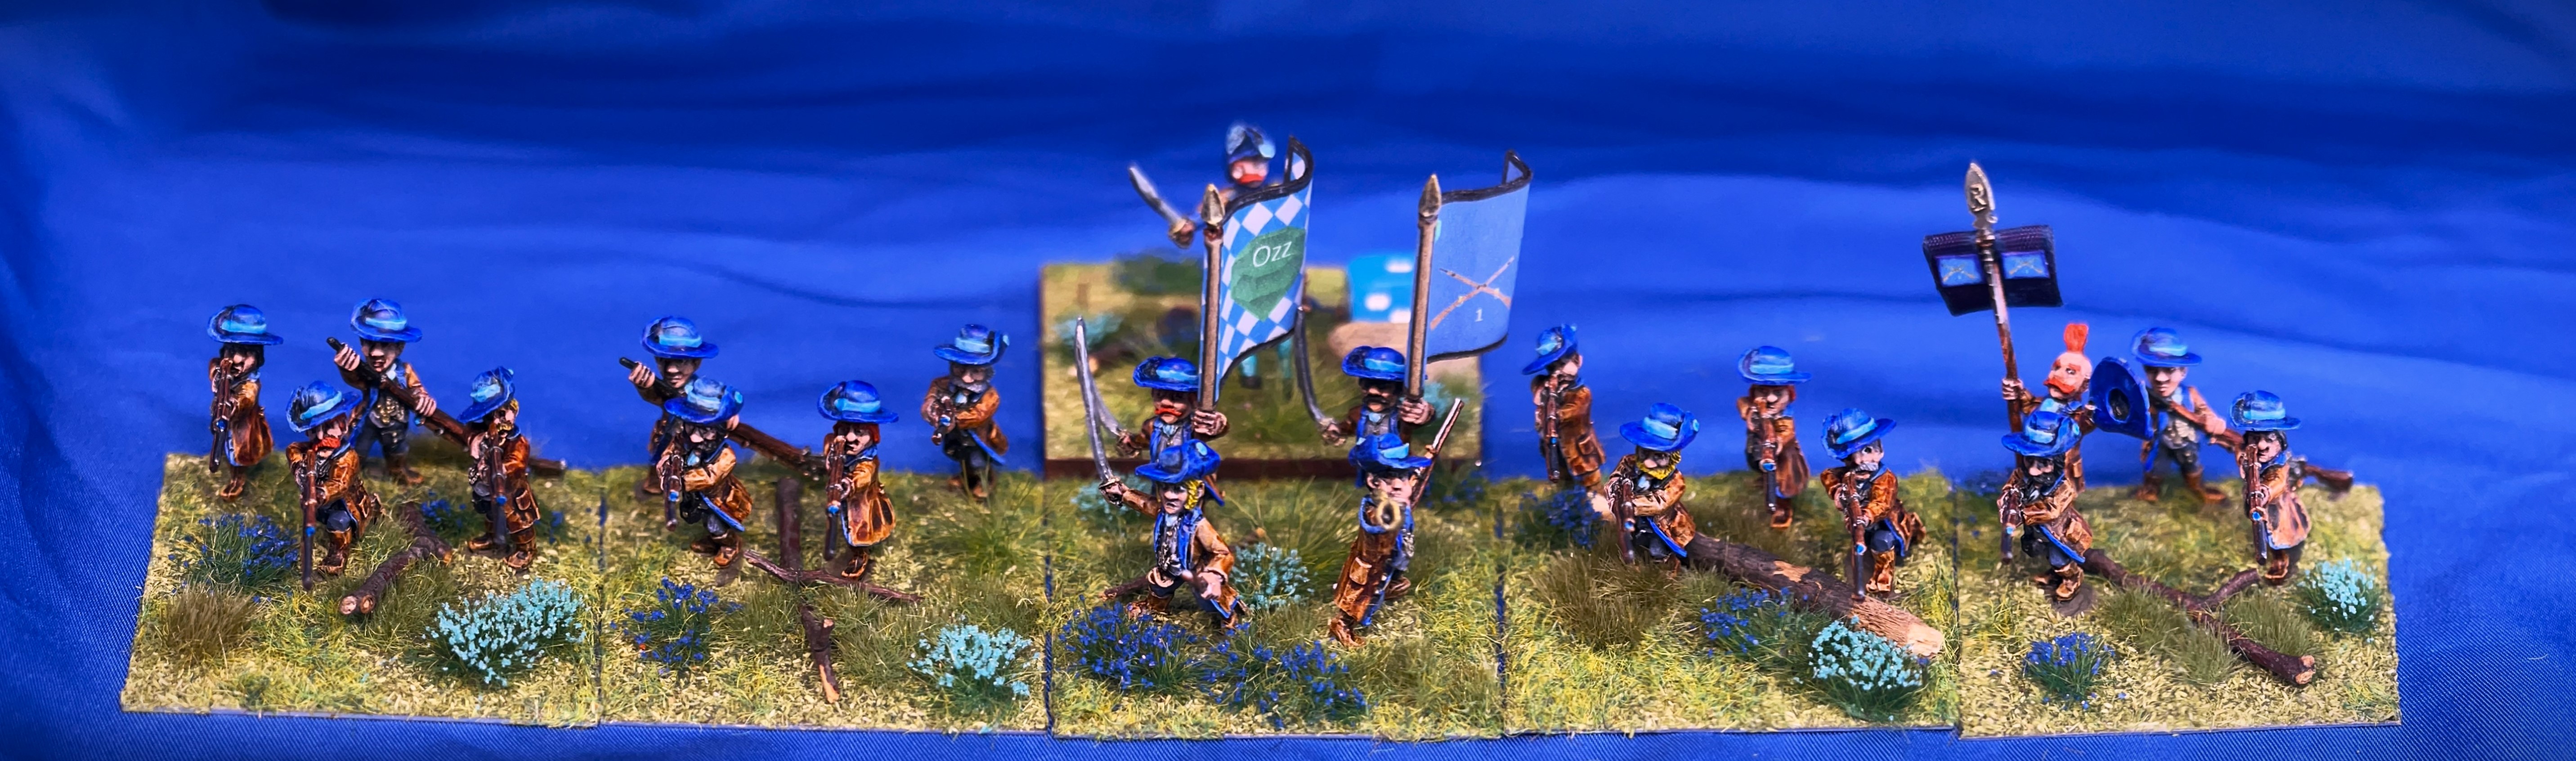
The 1st Poppy Fields Landwehr Infantry Regiment in line formation directly behind their commander.
The 1st Poppy Fields Landwehr Infantry Regiment in line formation in front of their commander.
The 1st Poppy Fields Landwehr Infantry Regiment in column formation directly behind their commander.
The 1st Poppy Fields Landwehr Infantry Regiment in column formation directly behind their commander – and now heading in the other direction!
In the long run, I’d be tempted to paint up another Landwehr unit. But for now, this will do. I have others to paint first.
I do hope that you enjoyed seeing this unit and reading the post. Next up will be another Munchkin artillery unit for Dave’s challenge – and soon. Thanks for looking!
And yes, I still have much more Ozz to come…
Miscellaneous details and references for those interested in that sort of thing:
For all of my previous posts on Wars of Ozz games, figures, units, and other related projects – please see this page.
PAINTS, INKS, GLAZES, SHADES, WASHES, PIGMENTS, FLOCKING, GLUES AND MORE THAT I USED ON THE 1ST POPPY FIELDS LANDWEHR INFANTRY REGIMENT:
Rectangular Brigade MDF base (used as a Regimental base) from Old Glory
2″ square steel bases from Wargames Accessories (#21)
1.25″ x 1″ square steel base from Wargames Accessories (#FOW1)
1/2″ Everbilt steel washers
3/4″ Everbilt steel washers
Gorilla Glue
Poster tack
Vallejo Premium Primer “White”
Vallejo “Flow Improver”
Vallejo “Airbrush Thinner”
Secret Weapon Washes “Heavy Body Black” (wash)
Citadel “Nuln Oil” (wash)
Vallejo Mecha Color “Off White”
P3 “Brown Ink” (ink)
Citadel “Contrast Paint – Karandras Green”
Army Painter “Speed Paint – Glittering Loot 2.0”
Citadel “Contrast Paint – Aethermatic Blue”
Citadel “Contrast Paint – Contrast Medium”
Citadel “Contrast Paint – Black Templar”
Vallejo Mecha Color “SZ Red”
Reaper MSP “Blue Liner”
Vallejo Model Color “Black”
Vallejo Model Color “White”
Army Painter “Speed Paint – Hardened Leather 1.0”
Army Painter “Speed Paint – Crusader Skin 1.0”
Vallejo Model Air “Steel”
Vallejo “Thinner Medium”
Citadel “Contrast Paint – Ironjawz Yellow”
Army Painter “Speed Paint – Fire Drake 2.0”
Citadel “Contrast Paint – Magmadroth Flame”
Vallejo Model Color “Light Brown”
Army Painter “Speed Paint – Ashen Stone 2.0”
Army Painter “Warpaint – Gun Metal”
Vallejo Model Air “Black Metallic”
Martha Stewart Crafts “Brushed Bronze”
P3 “Midland Flesh”
Vallejo Model Color “English Uniform”
Vallejo Model Color “Wood Grain”
Citadel “Contrast Paint – Pylar Glacier”
Vallejo Model Color “Light Flesh Tone”
Citadel “Seraphim Sepia” (wash/shade)
Citadel “Contrast Paint – Apothecary White”
Citadel “Nuln Oil GLOSS” (wash/shade)
Army Painter “Flesh Wash” (wash)
Black Sharpie pen
Blue Sharpie pen
Brown Sharpie pen
Battlefront “Sherman Drab”
Vallejo Mecha Varnish “Gloss Varnish”
Vallejo Mecha Varnish “Matte Varnish”
Elmer’s PVA Glue
Pendraken 12mm dice frames
Army Painter “Battlefield Grass Green” (flocking)
Small stones
Twigs
Gamers Grass “Green Meadow Tufts” (flocking)
Army Painter “Battlefield XP Woodland Tuft” (flocking)
Gamers Grass “Wild Tufts” (flocking)
Shadow’s Edge Miniatures “6mm Dark Forest Light Blue Tufts” (flocking)
Shadow’s Edge Miniatures “6mm Dark Forest Dark Blue Tufts” (flocking)
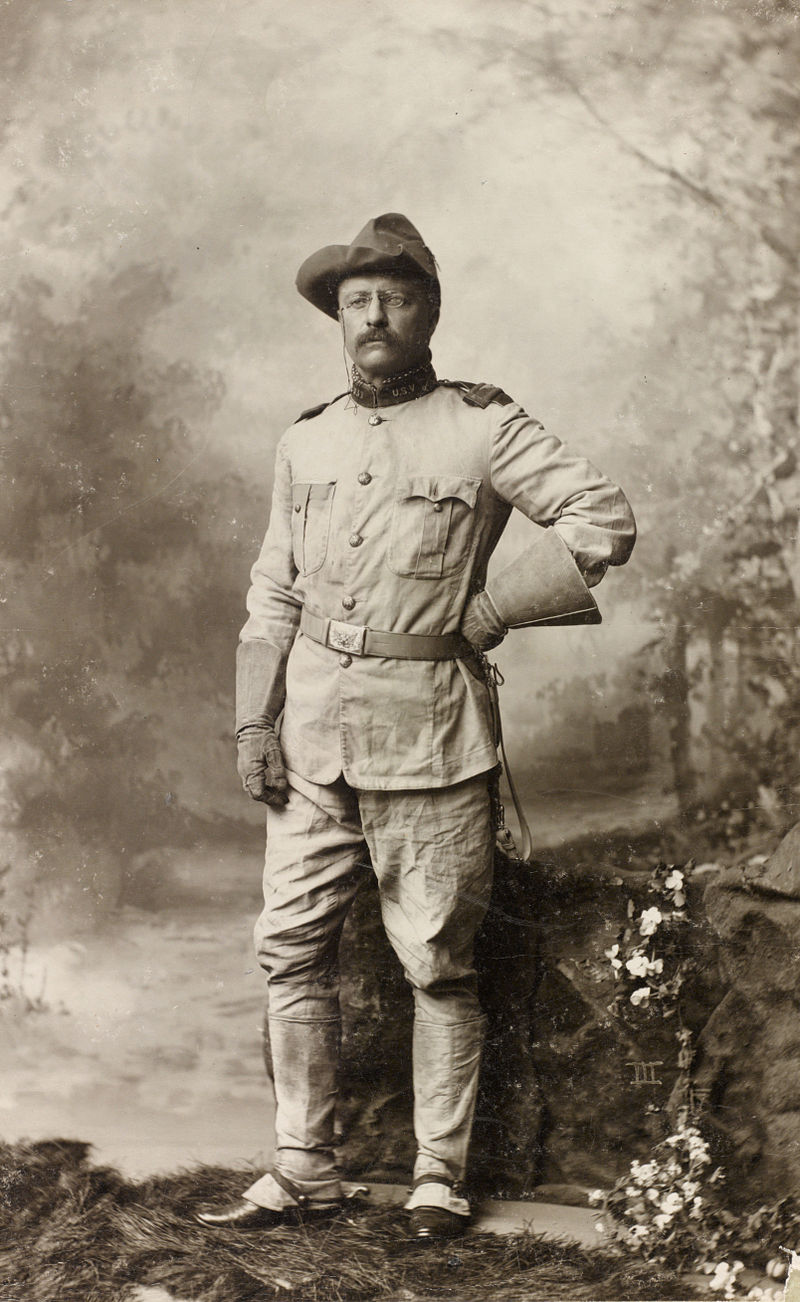
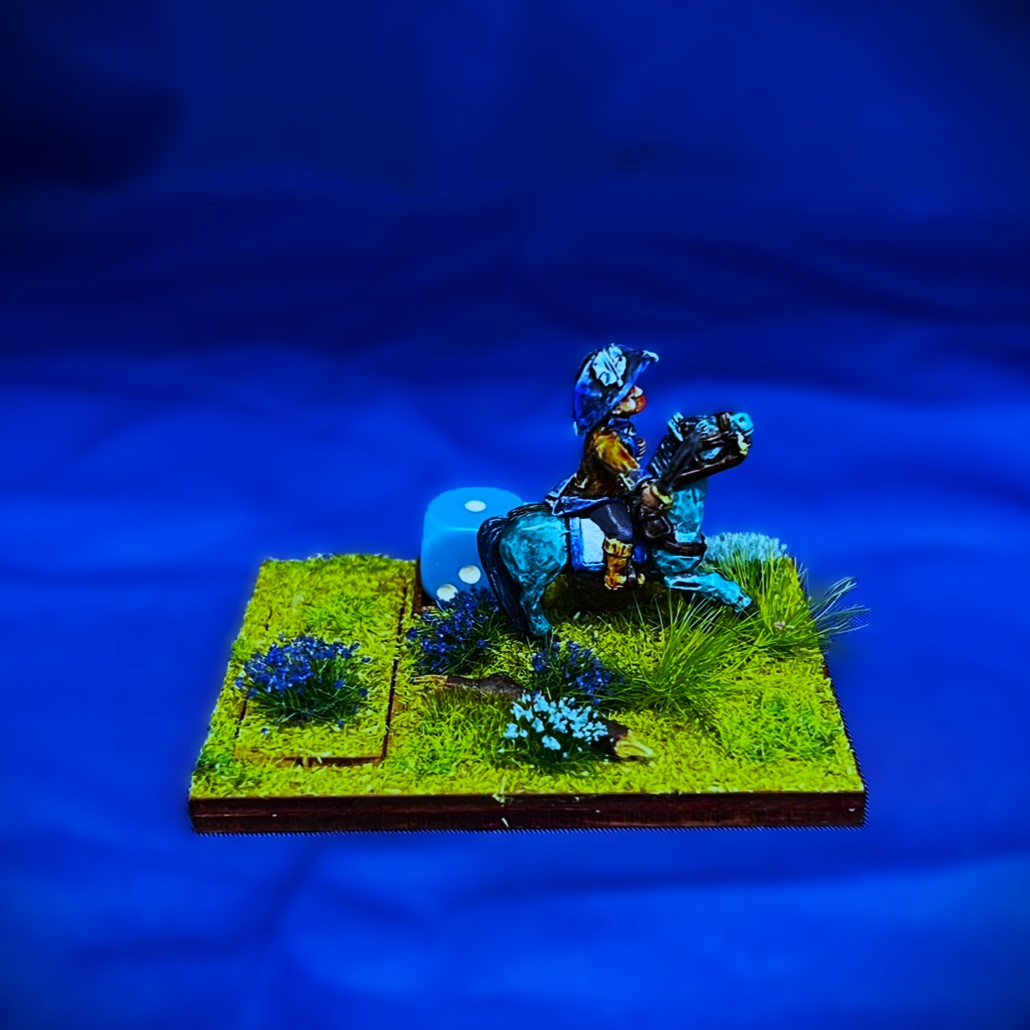
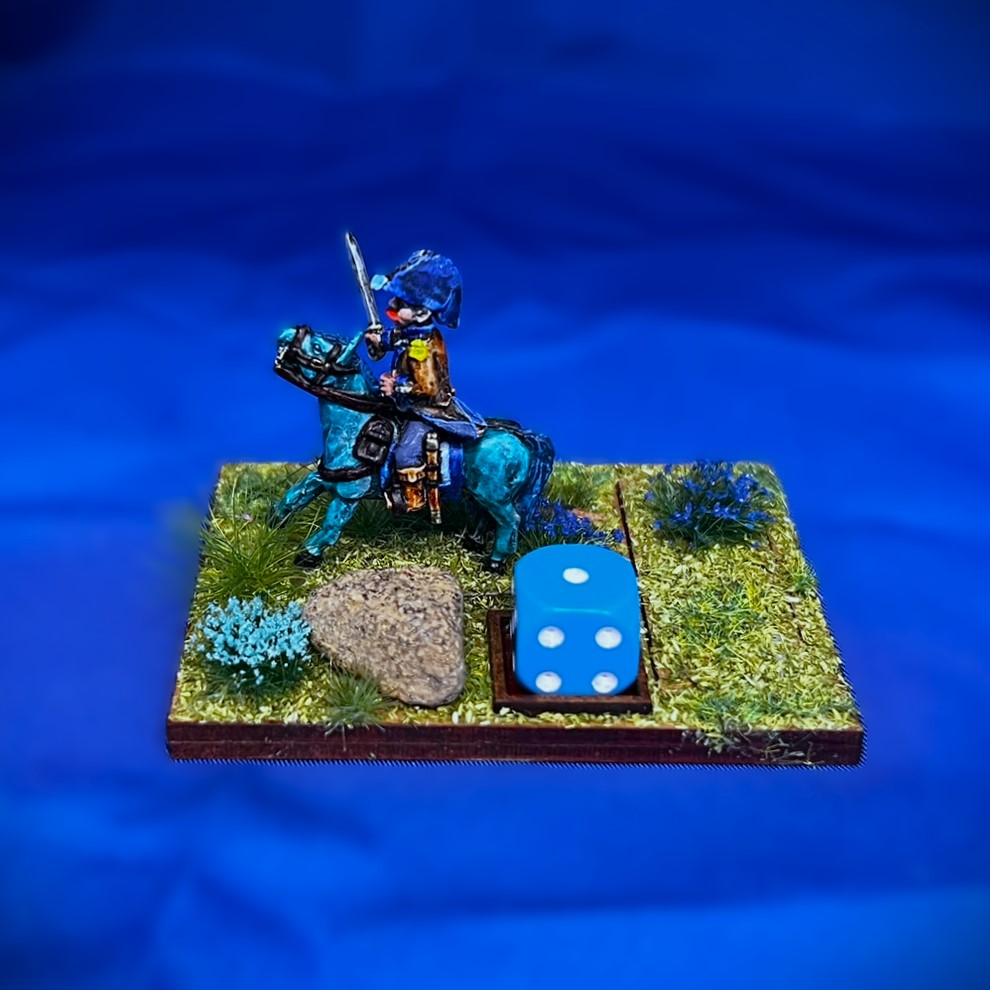
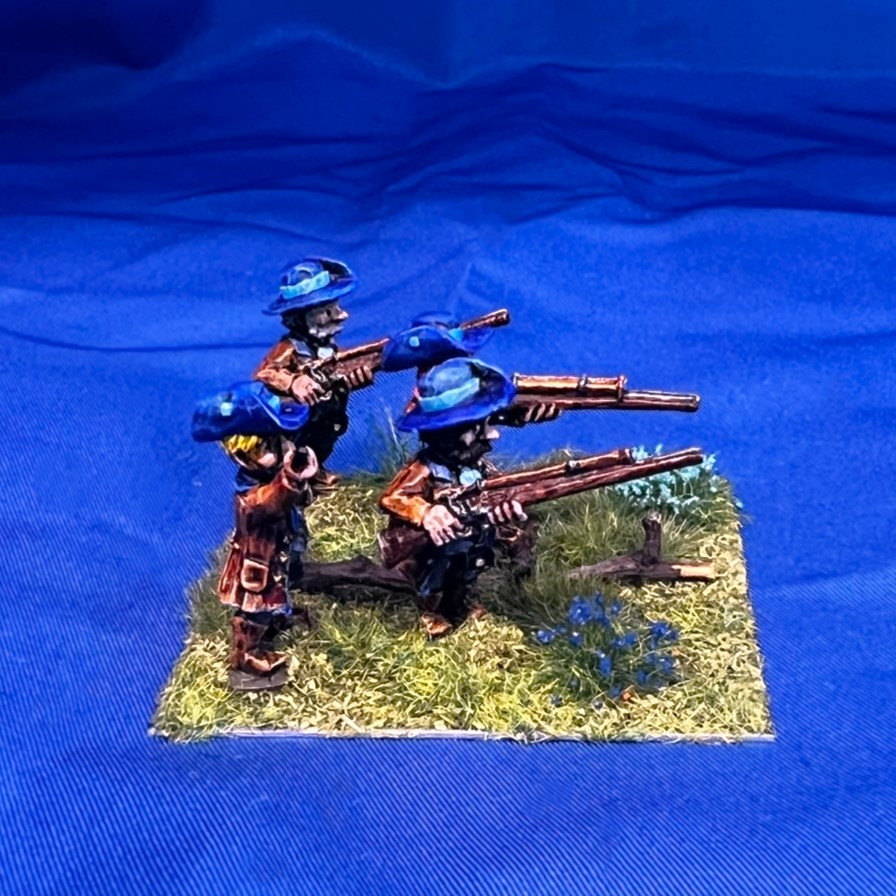
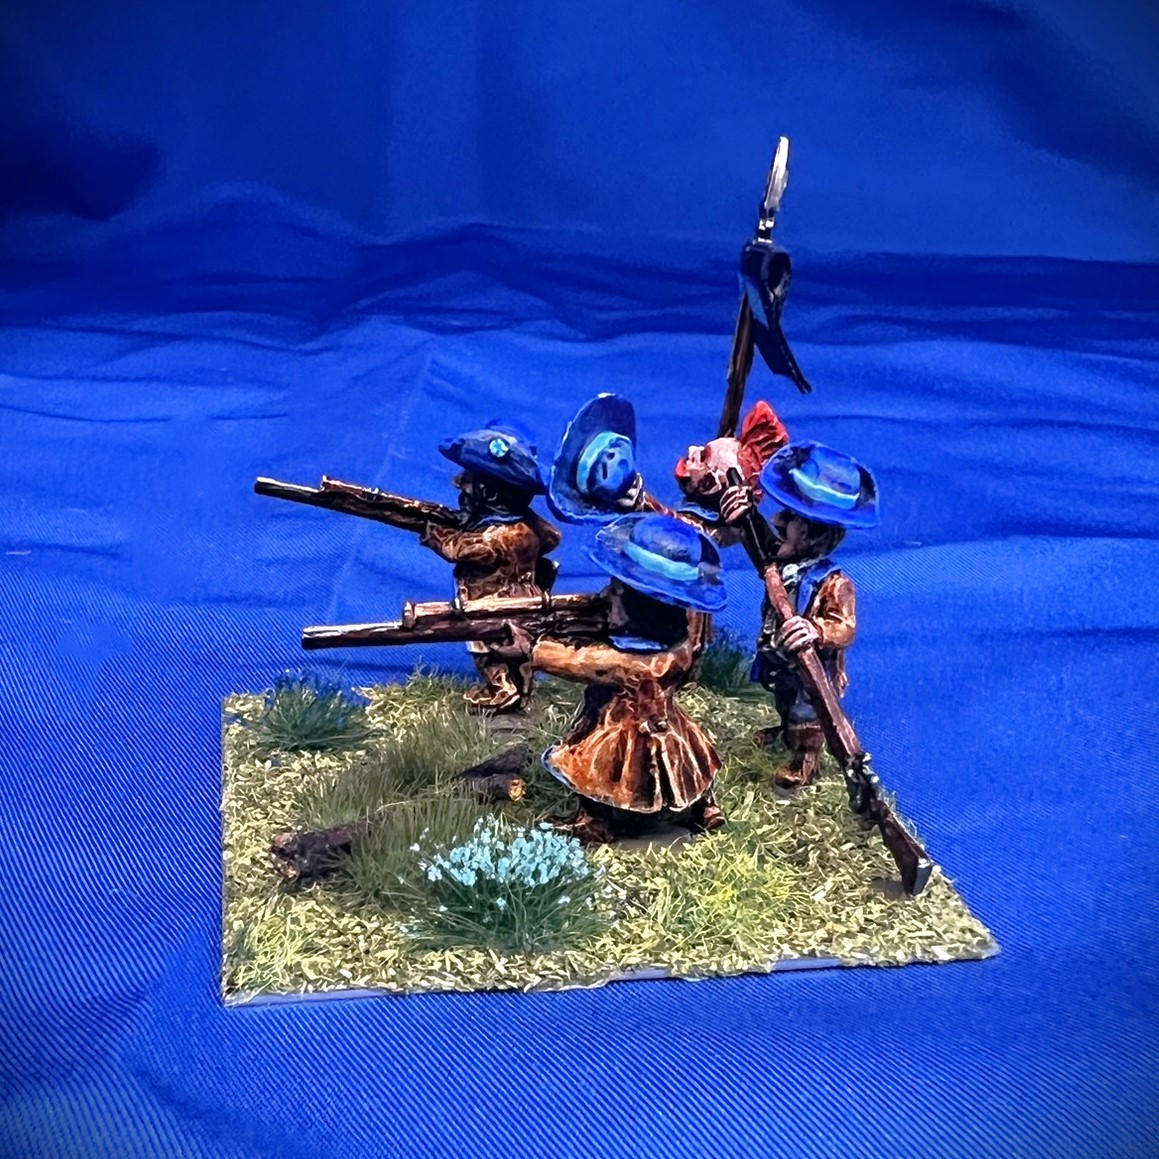
This regiment to me resembles the Munchkin equivalent of Teddy Roosevelt’s Rough Riders, especially with their hats. That historical unit was composed mostly of cowboys, which (as officially designated as the 1st United States Volunteer Cavalry) fought in Cuba in 1898 mostly without any mounts. As the Munchkin Sharpshooters are also dismounted save the regimental commander – the similarity for me holds – except for height.
Colonel Roosevelt in his Rough Rider uniform.
The 1st Munchkin Sharpshooter Regiment is SKU OZZ-116. There are 21 figures for the regiment – including the mounted regimental commander and 20 riflemen. Yes, these guys have RIFLES with scopes, not muskets. As such, their range is the same as troops with muskets, but they can fire at the equivalent of short range all the way out to long range. Normally, at greater than 7″, missile fire effective strength is halved. Not these guys! They can fire at full power out to 14″.
All of the figures are metal and 28mm in size. They are based 4 apiece to a 2″ square base – so five bases for the regiment plus the regimental commander on his own separate MDF base. No assembly was required for the unit other than to add the flags and for a small modification I made to an NCO figure that you’ll see below. The regiment is good at missile combat with their rifles – having a Marksmanship value of 6/10 with that great range. As for Melee, they are really weak with a poor value of 3/10 (maybe they needed bayonets!). Their Resolve value is okay at 6/10, but their Elan value is lousy at 4/10. The unit costs 6 points. As I always do, I mixed and matched the figure types and poses such that no two bases of the five in the regiment were identical.
I am currently expected to be waylaid because of minor knee surgery. So, in terms of painting and blogging, I decided to hurry up and paint these and post them now. I’ll be able to read your posts and replies of course, but the painting and blog creation booths are to be closed for a couple of weeks – so Merry Christmas to you all! I am hoping to participate in Dave Stone’s Wargamesculptors Blog “PAINT WHAT YOU GOT CHALLENGE 2023/2024” painting challenge as I should be ok by then.
Also, I did not take any WIP shots, so I’ll just go right into eye candy. Apologies as I had some struggles with my lighting – but I think the photos are getting a bit better, just not as consistent as I’d like.
Eye Candy
Regimental Commander Base
Base 1
Base 2
Base 3
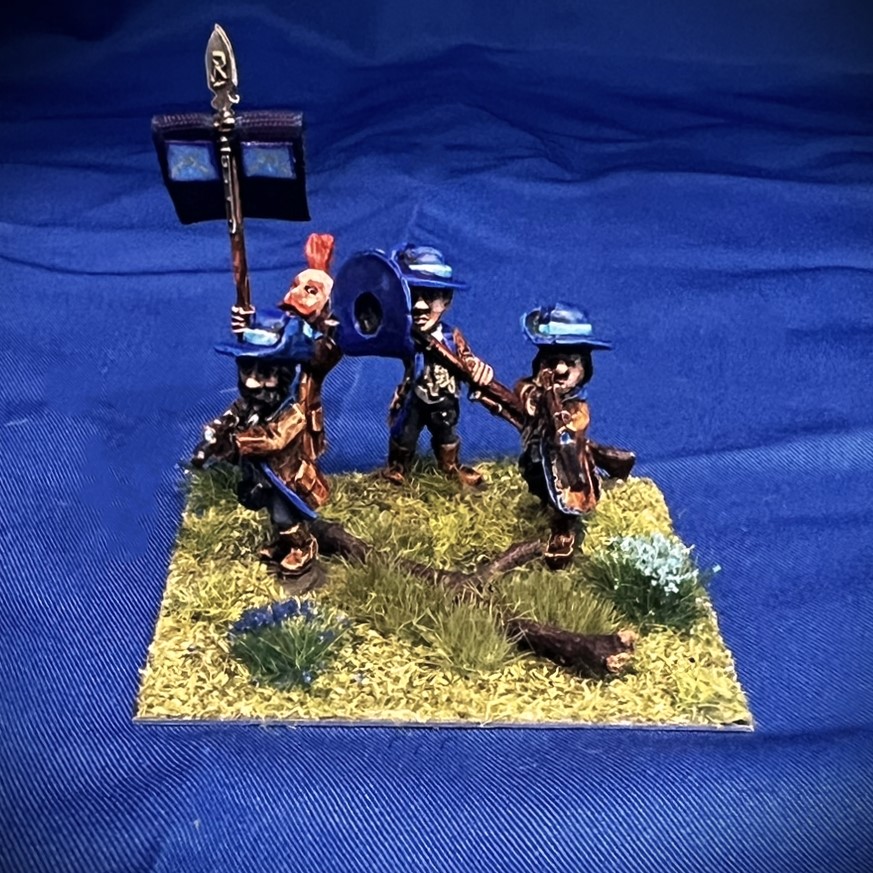
This base 3 had a unique figure – he is probably supposed to be an NCO. He is the bald guy. Instead of a rifle, he is holding what looks to be a guidon/spear/streamer signaling thing – and that looked too plain to me. So I added a couple of ribbons and a shrunken down pair of crossed rifle images with the “1” insignia on card stock to its cross bar.
The added ribbons – each of the two ribbon pieces is only 1/4″ wide by 1/2″ long. Note the tiny added crossed rifles with the “1”.
Base 4
Base 5 – Command Base
Group Shots
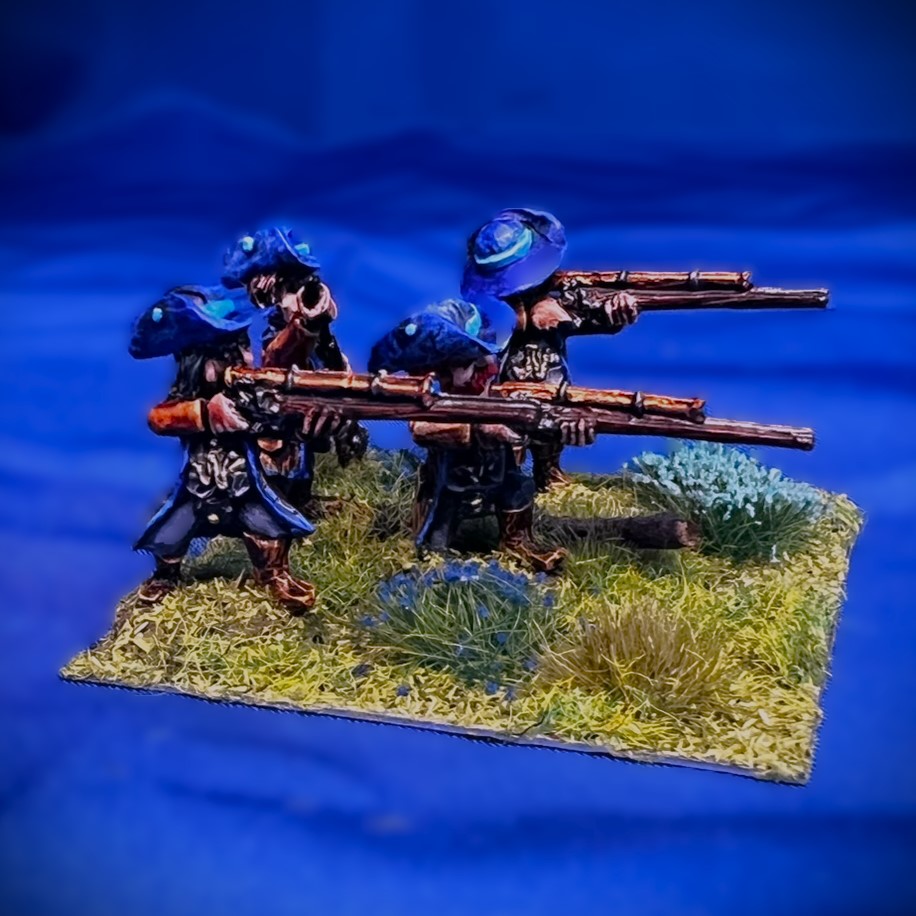
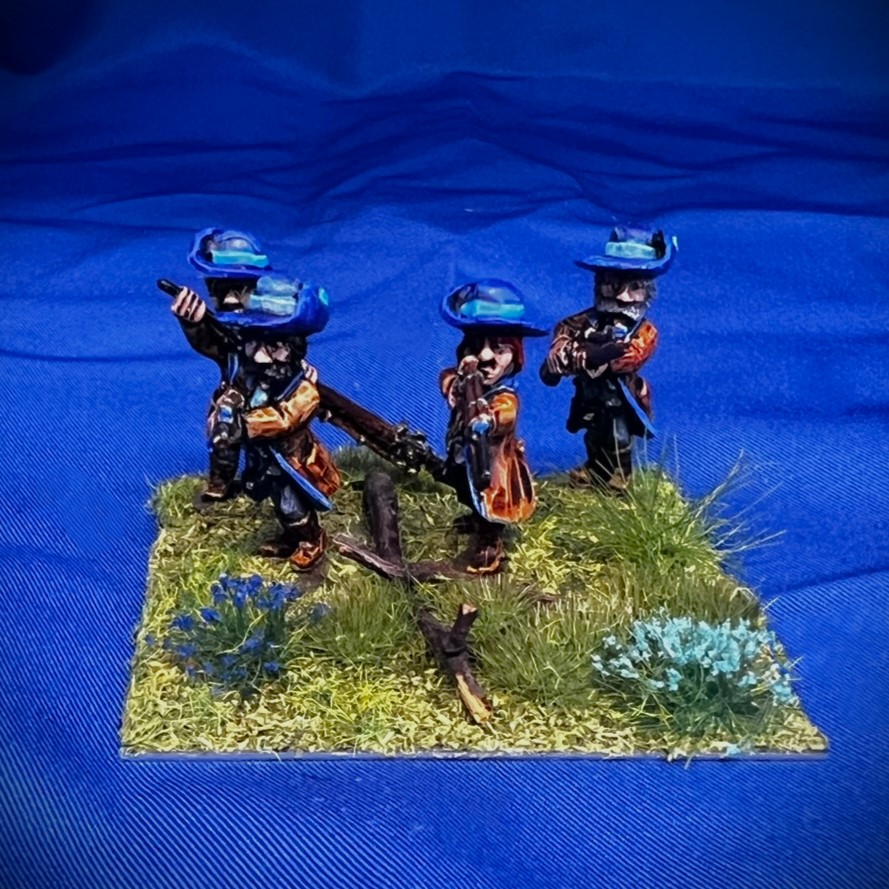
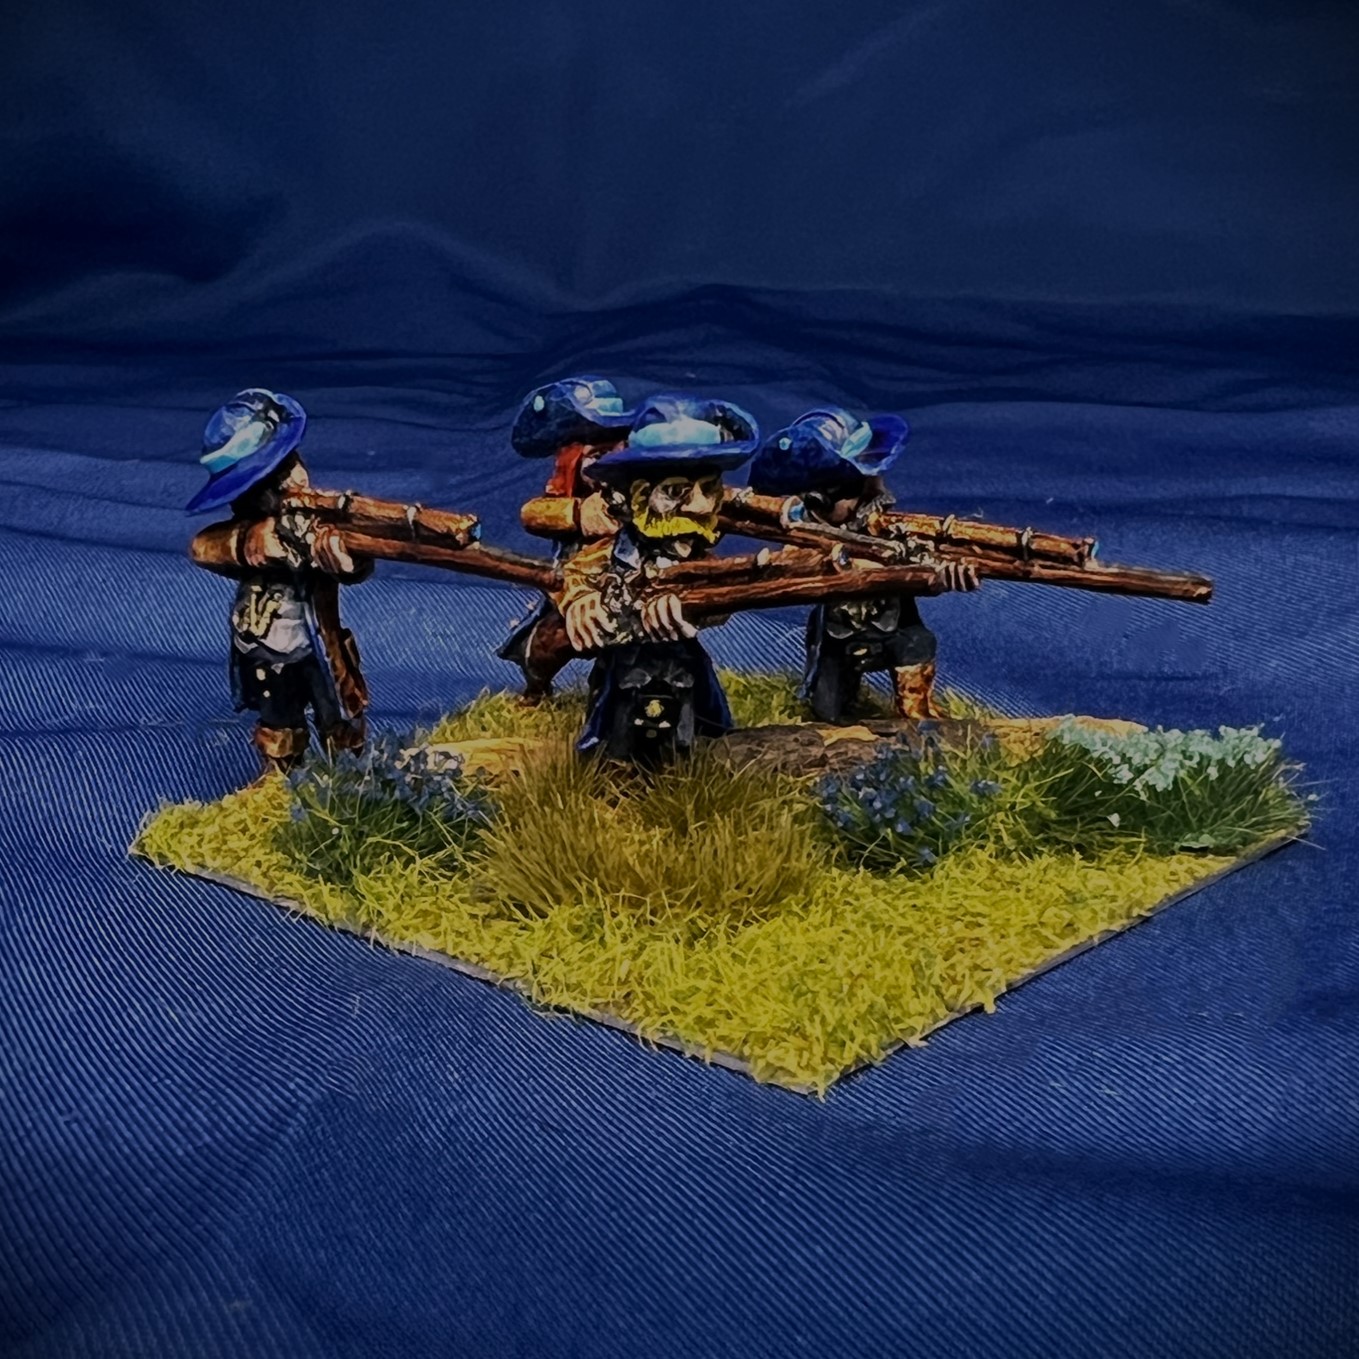
Top view of the 1st Munchkin Sharpshooter Regiment in line and ready to fire!
The 1st Munchkin Sharpshooter Regiment in column and on the march.
Frontal view of the 1st Munchkin Sharpshooter Regiment on line andready to fire!
I hope that you enjoyed seeing this unit – and I am happy that I was able to get this post in before I had to wait a while. I think when I recover I’ll be working on some Munchkin artillery and some Munchkin National Guard (Landwehr) for Dave’s challenge. Thanks for looking!
And yes, I still have much more Ozz to come…
Miscellaneous details and references for those interested in that sort of thing:
For all of my previous posts on Wars of Ozz games, figures, units, and other related projects – please see this page.
PAINTS, INKS, GLAZES, SHADES, WASHES, PIGMENTS, FLOCKING, GLUES AND MORE THAT I USED ON THE 1ST MUNCHKIN SHARPSHOOTER REGIMENT:
Rectangular Brigade MDF base (used as a Regimental base) from Old Glory
2″ square steel bases from Wargames Accessories (#21)
1.25″ x 1″ square steel base from Wargames Accessories (#FOW1)
1/2″ Everbilt steel washers
3/4″ Everbilt steel washers
Poster tack
Vallejo Premium Primer “White”
Vallejo “Flow Improver”
Vallejo “Airbrush Thinner”
Citadel “Nuln Oil” (wash)
Vallejo Mecha Color “Off White”
P3 “Brown Ink” (ink)
Army Painter “Speed Paint – Royal Robes 2.0”
Vallejo “Thinner Medium”
Citadel “Contrast Paint – Aethermatic Blue”
Citadel “Contrast Paint – Contrast Medium”
Vallejo Model Color “Black”
Citadel “Contrast Paint – Pylar Glacier”
Army Painter “Speed Paint – Crusader Skin 1.0”
Citadel “Contrast Paint – Magmadroth Flame”
Citadel “Contrast Paint – Ironjawz Yellow”
Army Painter “Speed Paint – Ashen Stone 2.0”
Citadel “Contrast Paint – Black Templar”
Army Painter “Speed Paint – Ruddy Fur 2.0”
Citadel “Contrast Paint – Cygor Brown”
P3 “Midland Flesh”
Citadel “The Fang”
Vallejo Model Air “Gun Metal”
Army Painter “Warpaint – Weapon Bronze”
Vallejo Mecha Color “Sky Blue”
The Armory “Dark Blue”
Vallejo Model Color “Wood Grain”
Army Painter “Speed Paint – Satchel Brown 2.0”
Army Painter “Speed Paint – Hardened Leather 1.0”
Army Painter “Speed Paint – Speed Paint Medium 1.0”
Yes, I understand – that was another less-than-short title – but I hope that you’ll find this post interesting as there will be a few surprises here – just wait!
First, it’s time to start with the lesser witches that I have just finished for my Wars of Ozz games. Lesser witches and wizards are cheaper than faction-based magic users – 2 points versus 3 points in cost. They do have to roll randomly for their available 2 spells (whereas faction-based witches and wizards get usually better spells automatically and then 3-4 of them to boot).
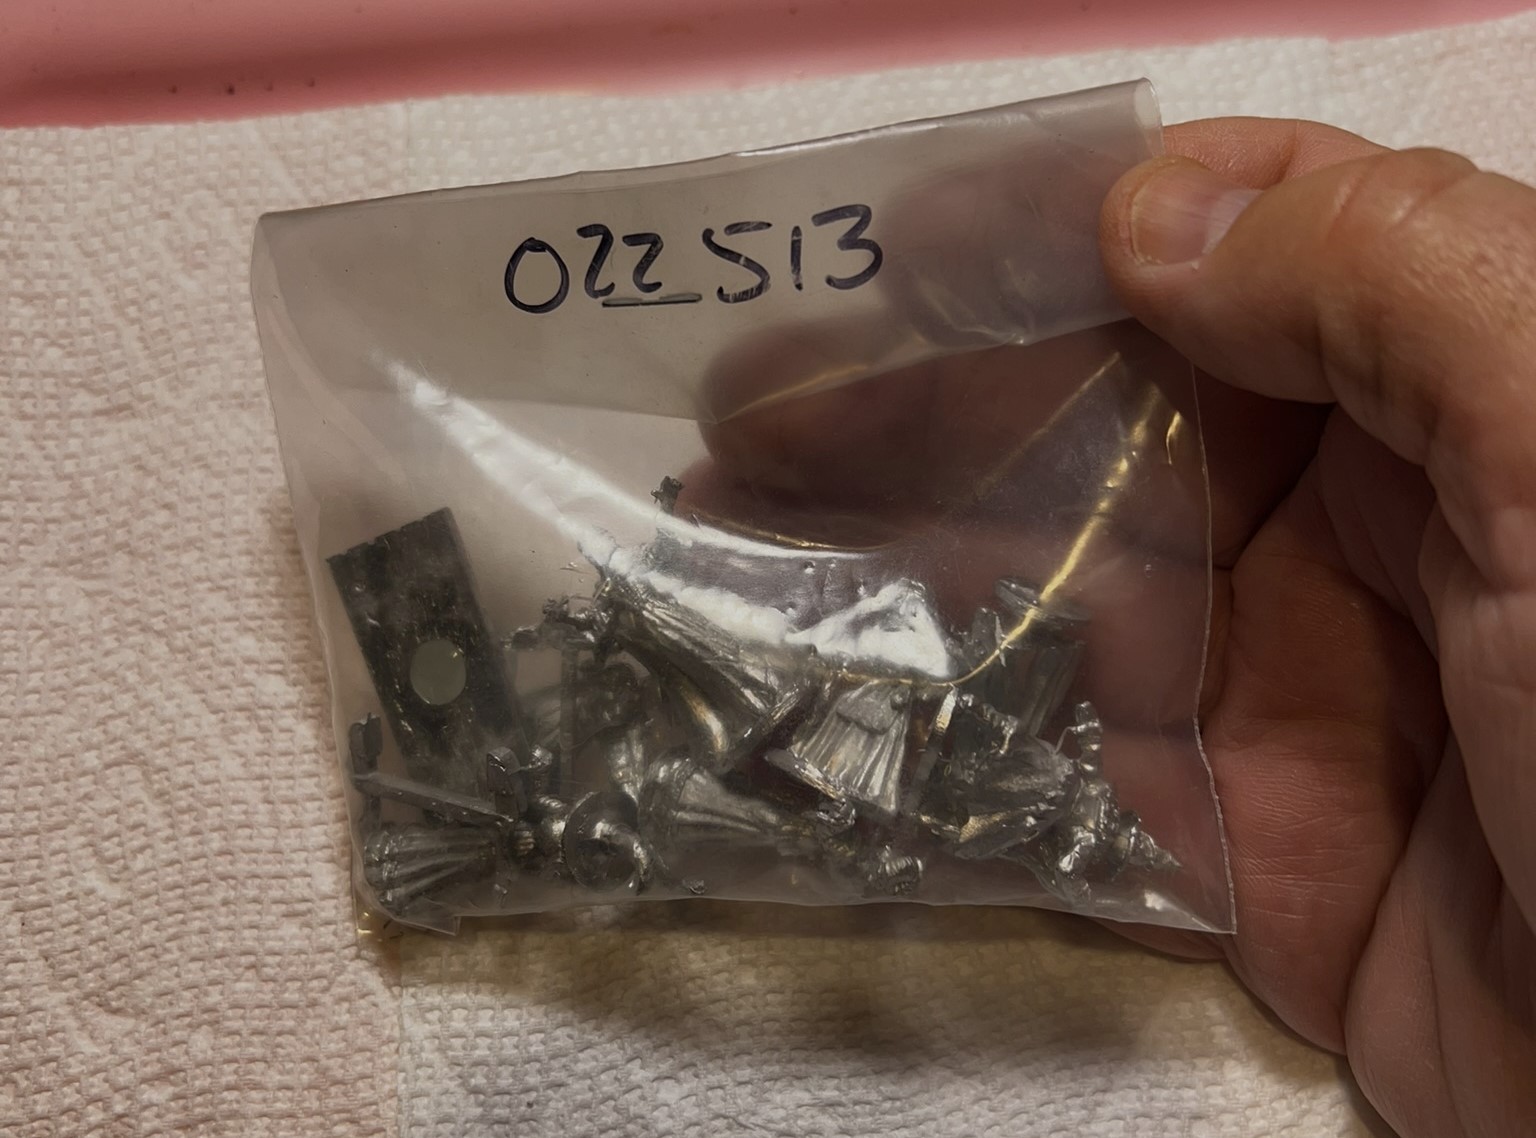
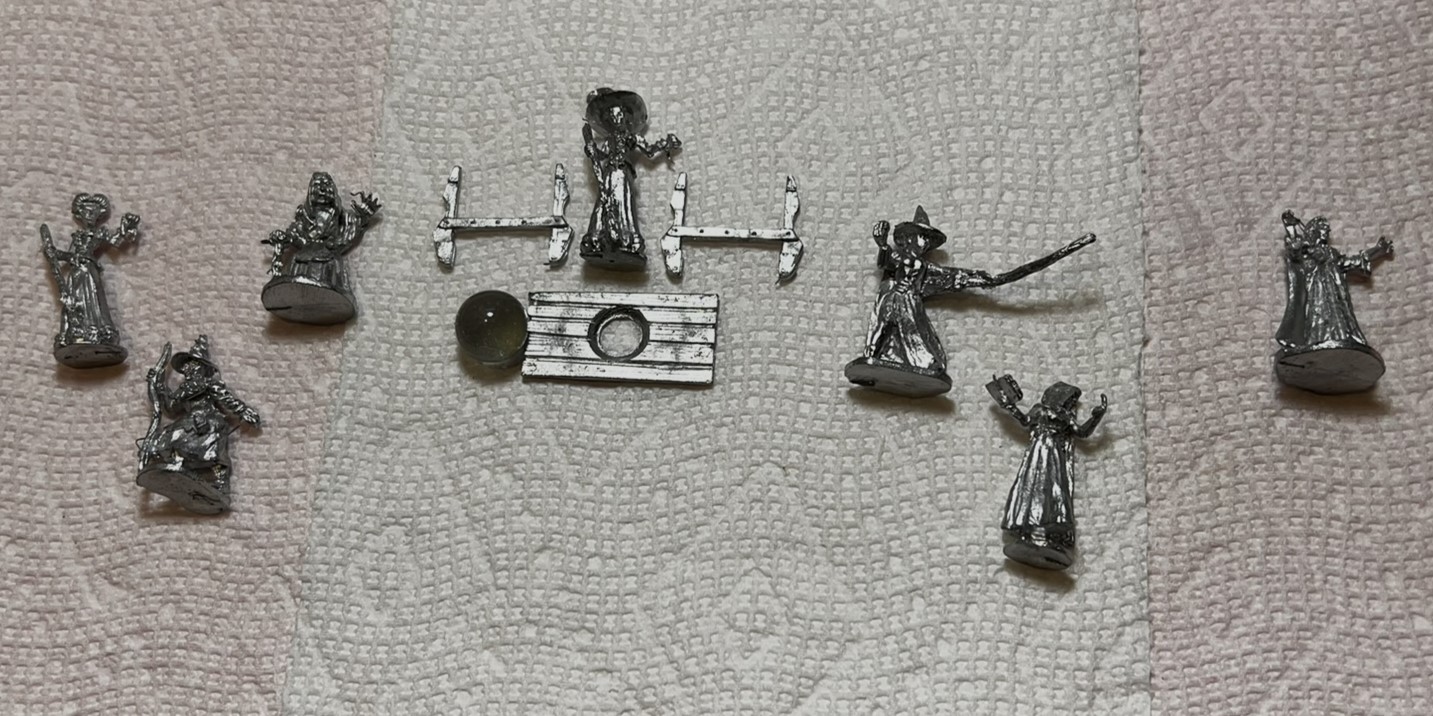
To add to the forces available, I chose to complete SKU #OZZ-513, Lesser Witches and Wizards. There are 7 witches (despite the name, there were no wizards that I could tell) in the kit. The figures are 28mm and in metal. Lesser witches could be a part of any faction, but only 1 per brigade is allowed. Lesser witches have a spell rating of 6/10, and a luck of 7/10. It would be possible therefore to have two witches in a brigade, one main and one lesser.
I previously did not have any “Lesser Witches”, so this addition will give me more flexibility in setting up games – as well as more variety for the players.
Currently, I am rushing to get all of the stuff I have in the queue painted and posted here – as I am headed for minor knee surgery next week. Therefore, my WIP shots for this SKU is a bit limited…
Lesser Witches WIP Shots
Website photoAs received.
Once again, I followed the same preparation and painting pattern as usual. Each witch has a different character – so I tried to vary how I painted, based, and indeed named them according to what I envisioned.
The SKU here shown after filing and washing the figures. One had a table and cool crystal ball.Assembled and ready to paint.Primed and dry brushed.
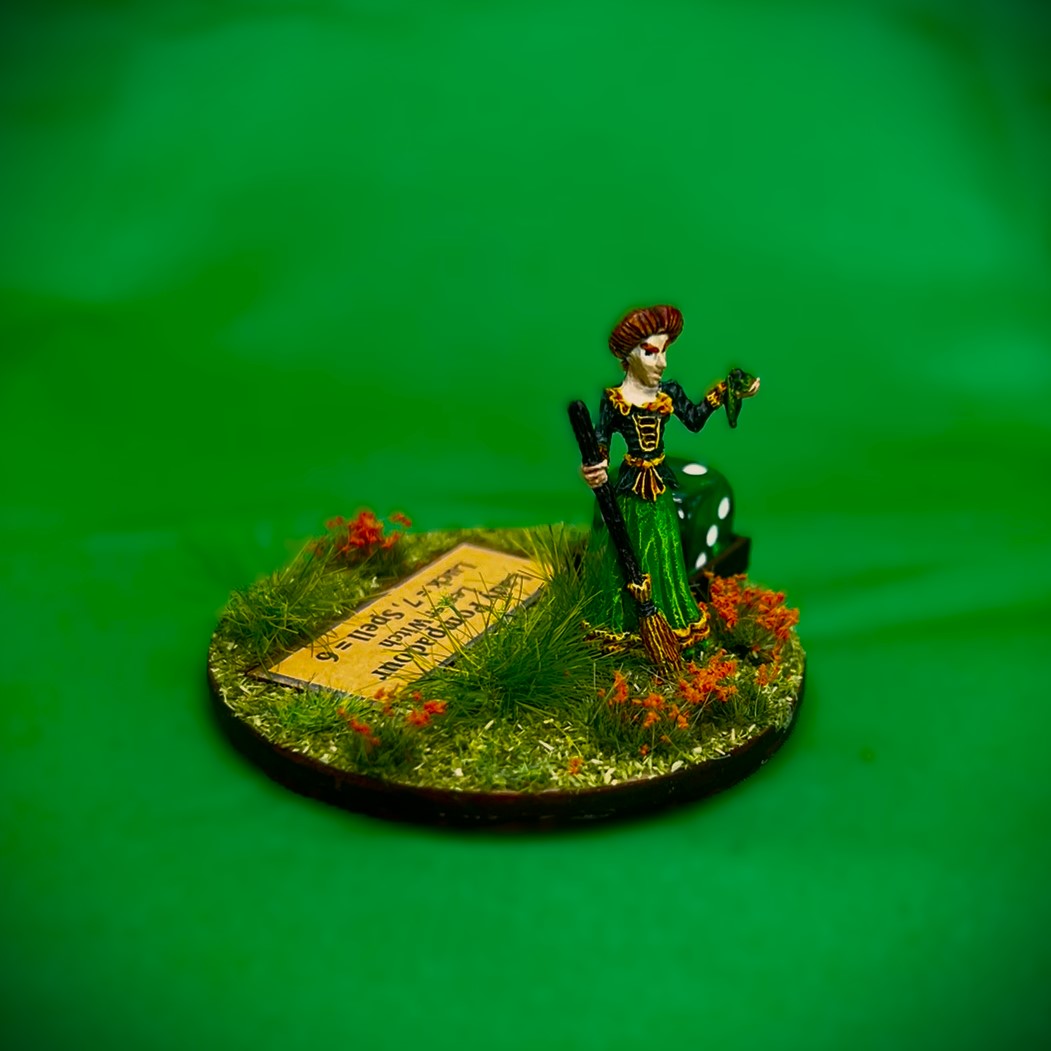
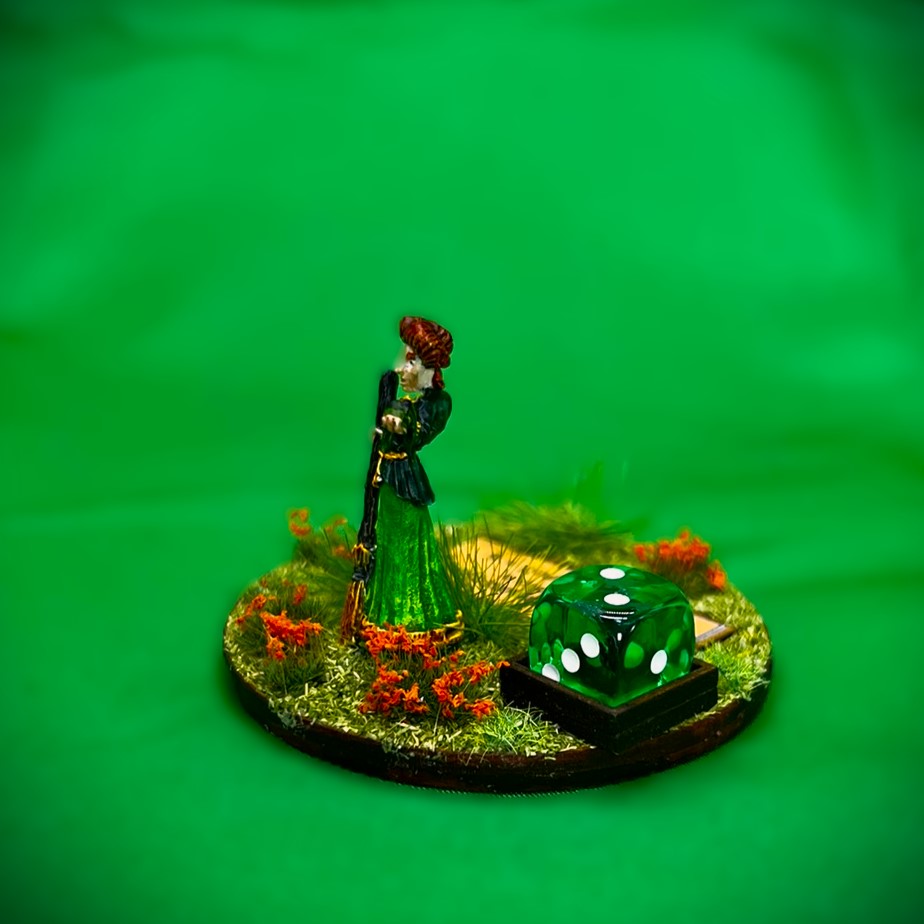
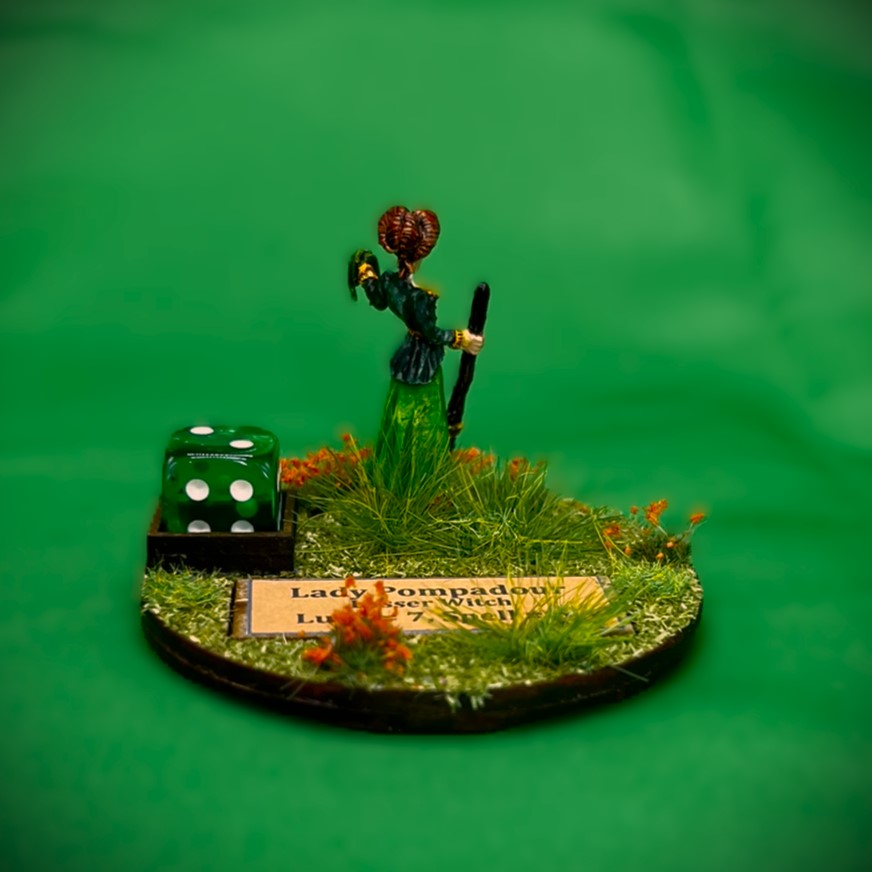
I started with the figures in order of the photo on the website. The first one I named “Lady Pompadour”.
Lady Pompadour painted.
As there are 7 witches (plus those surprises that I promised), let’s just move to them by name…
Lesser Witches and Wizards Eye Candy
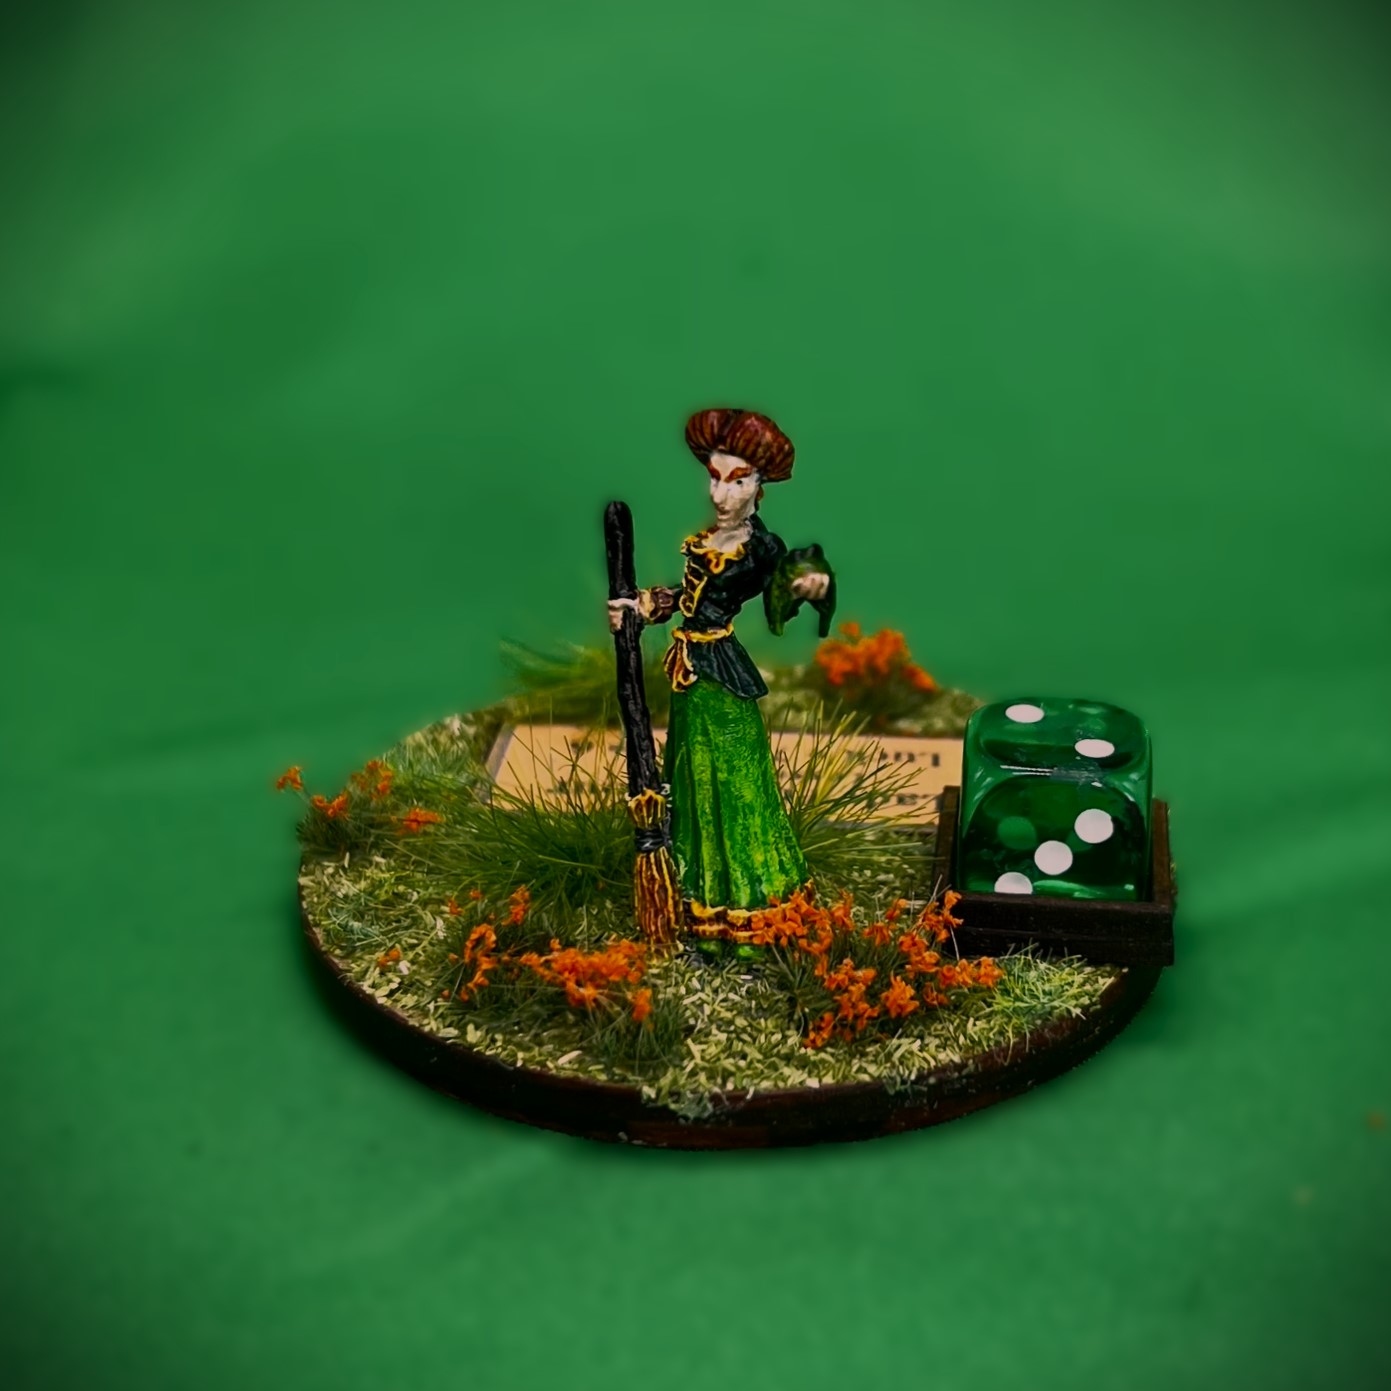
“Lady Pompadour”
Her hairstyle led me to her name. I thought her dress needed to be Ozz-green, as she is holding a frog.
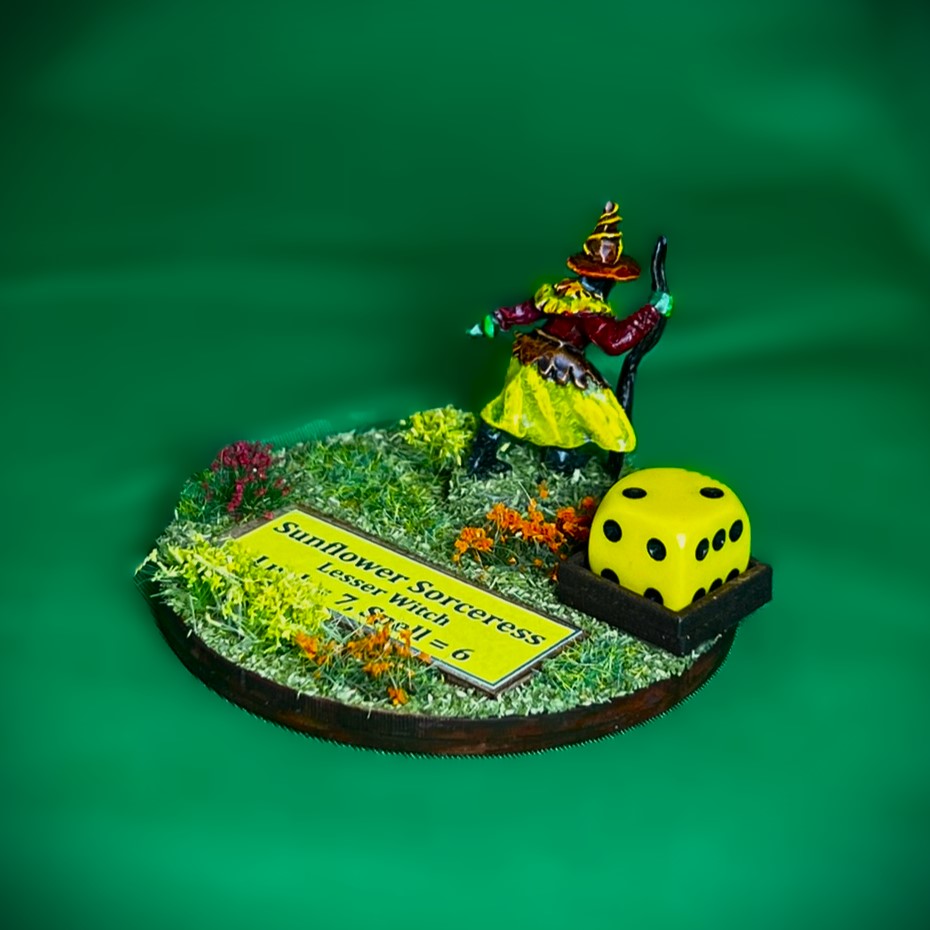
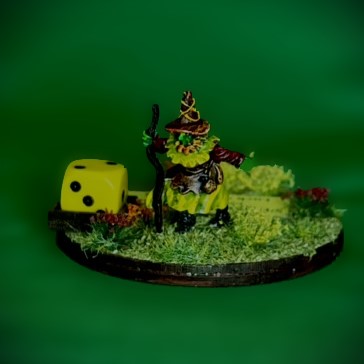
“Sunflower Sorceress”
This figure gave me pause at first – as I struggled to find a concept for her. Eventually, I decided that her clothing layers lookd like a flower – hence her name and color scheme. Her flesh could be Gillikin or Winkie in origin, but any brigade could have her sunny disposition.
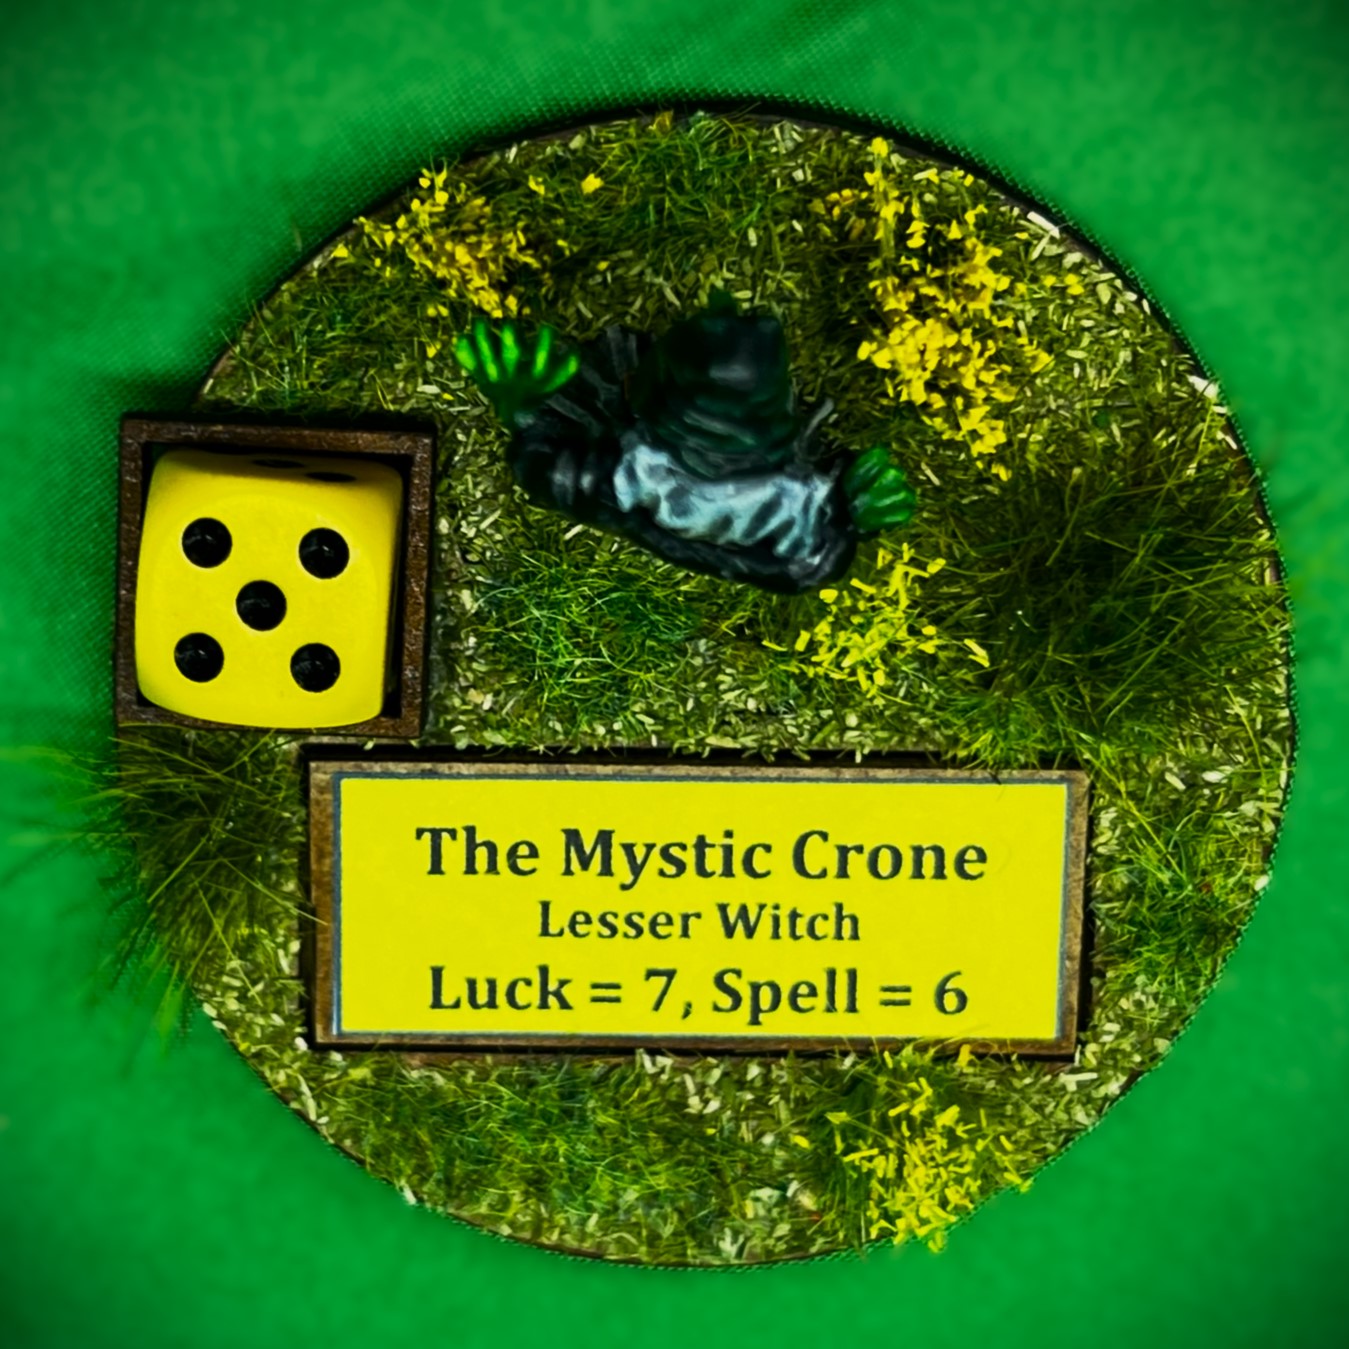
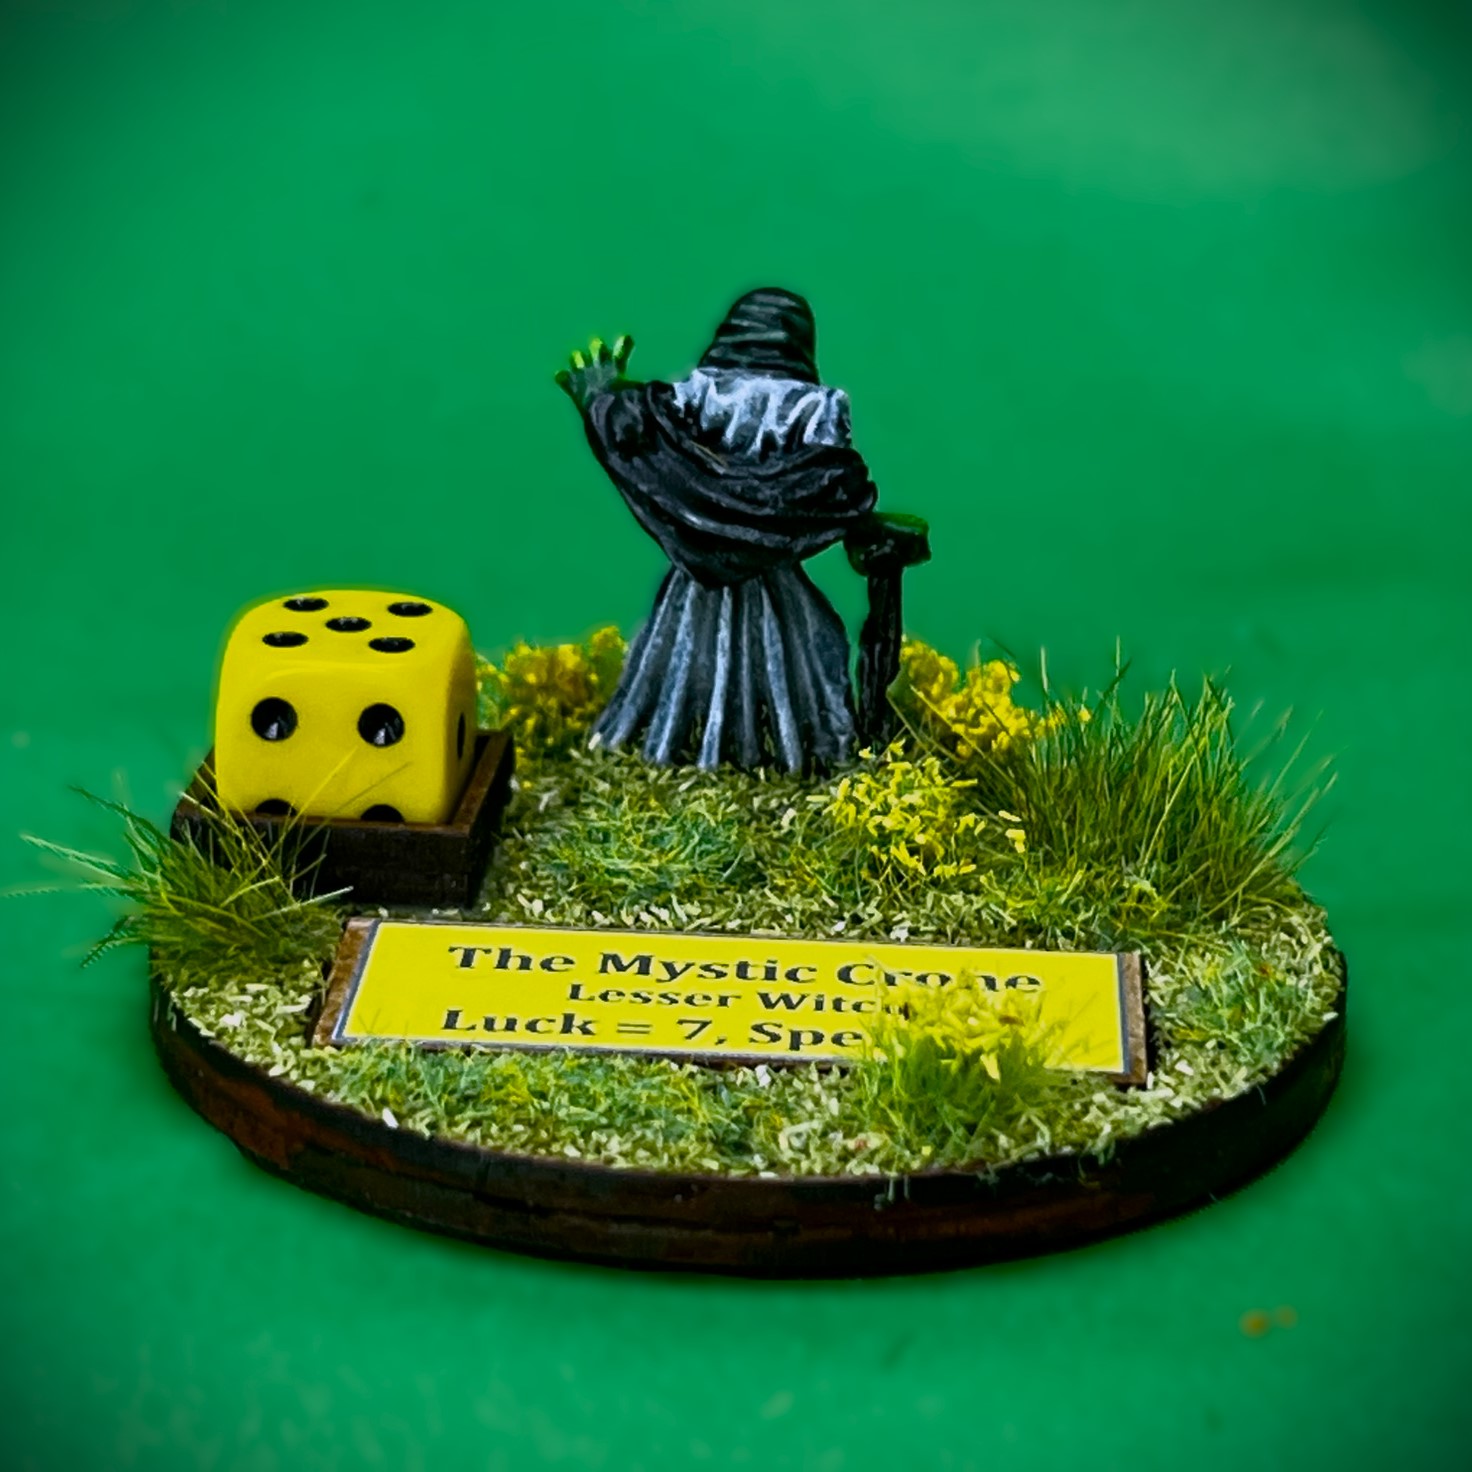
“The Mystic Crone”
This one was easy – looked like the stereotypical Hansel and Gretel witch from the forest. She’s also probably a Gillikin or a Winkie.
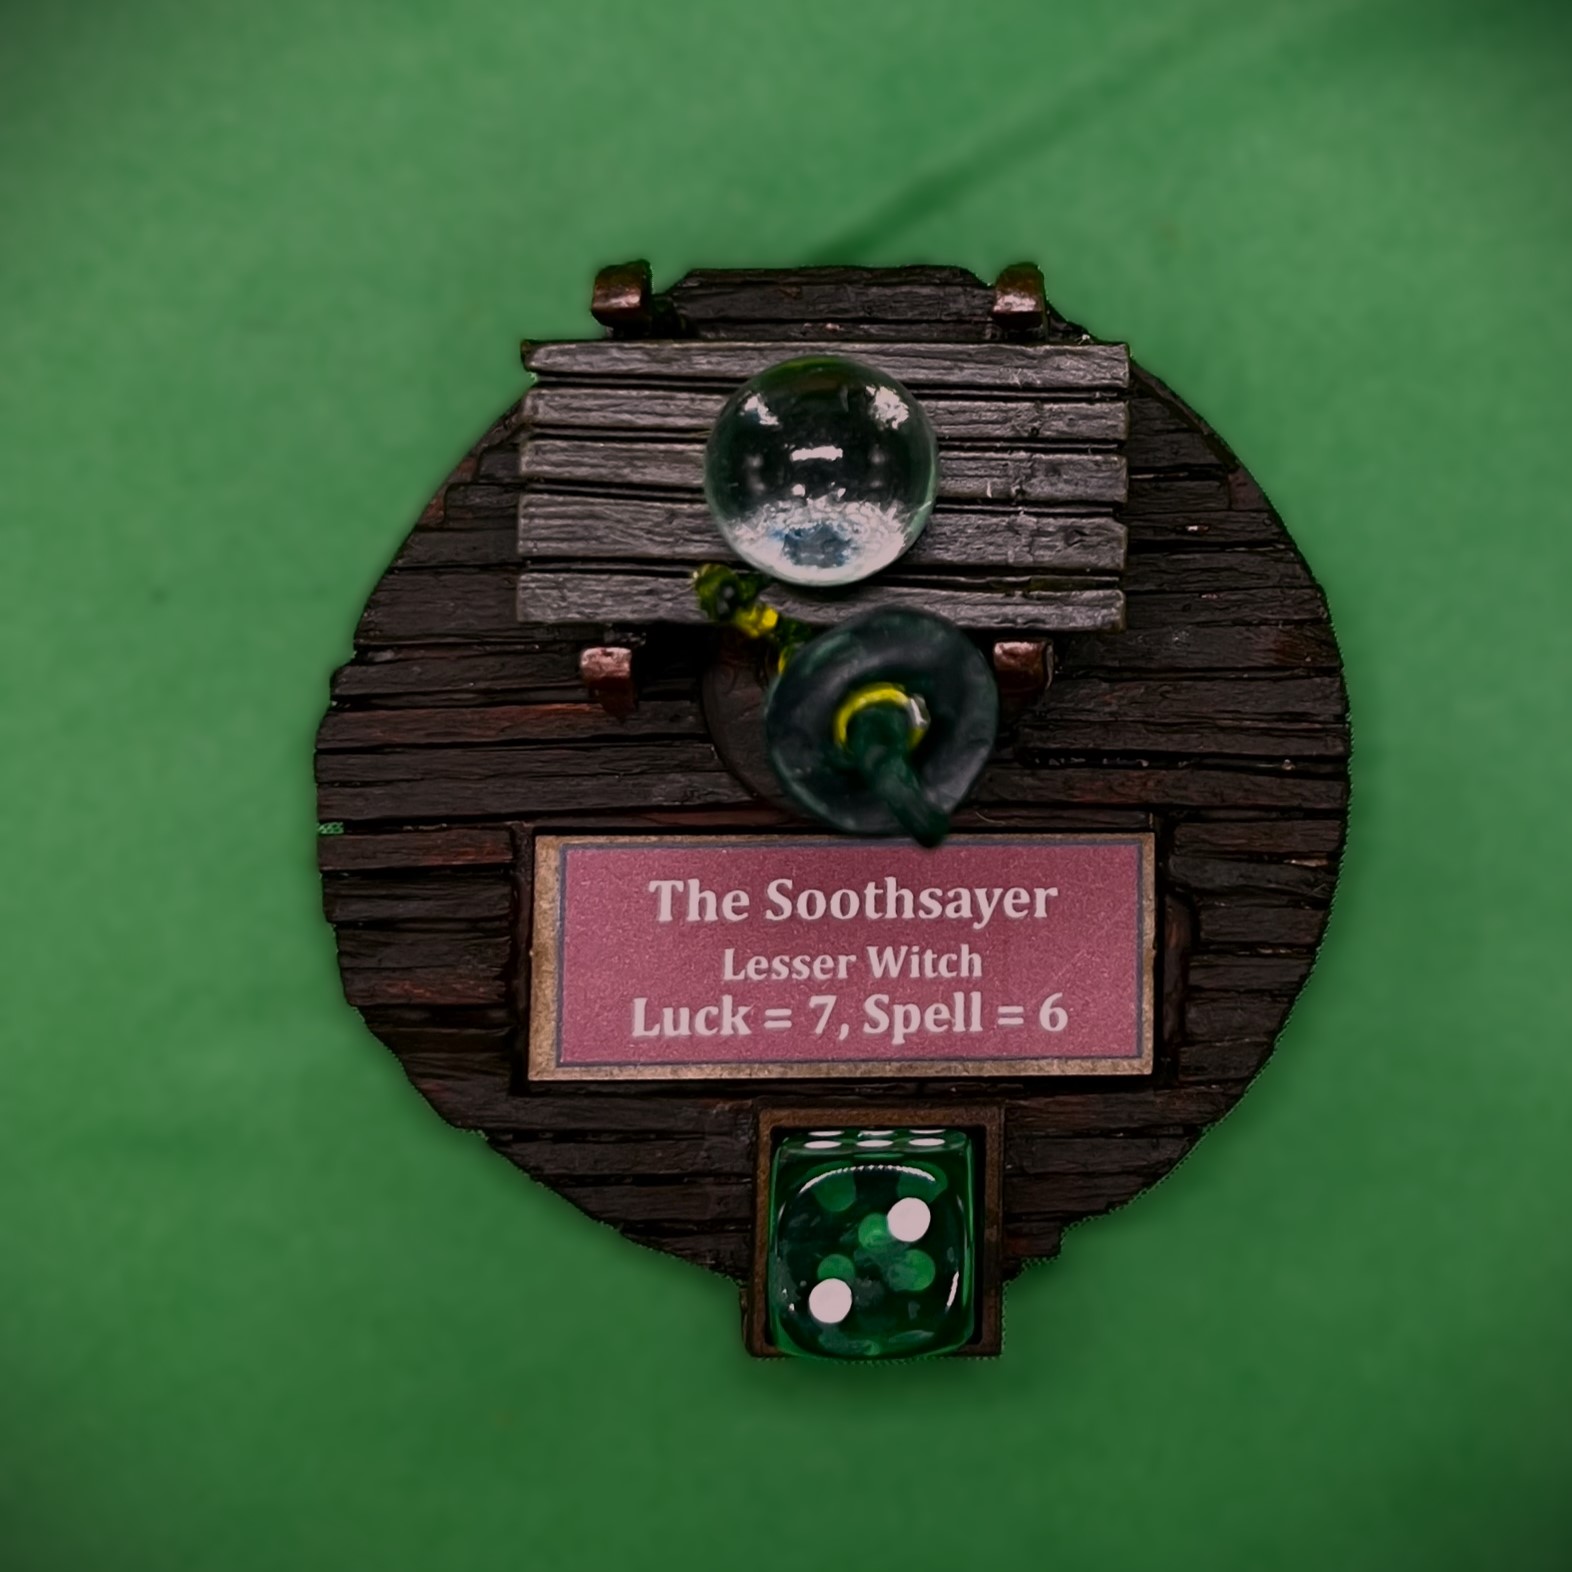
“The Soothsayer”
This figure had a table and the cool crystal ball – but I did not think it appropriate for her to be in a field for a base. Who brings a table to the field? Therefore, I took her MDF base and built a wooden floor with matchsticks. I did not glue in her crystal ball to the table because that might destroy its light bending properties – so I have a tiny little plastic baggie for that in her storage box. As for flesh, her face was not well-defined – so I went with a zombie-type flesh. Perhaps her fortune telling drew out much of her life force over the years. Whatever her origin, she’s a bit necrotic now. Like Lady Pompadour, she also holds a frog.
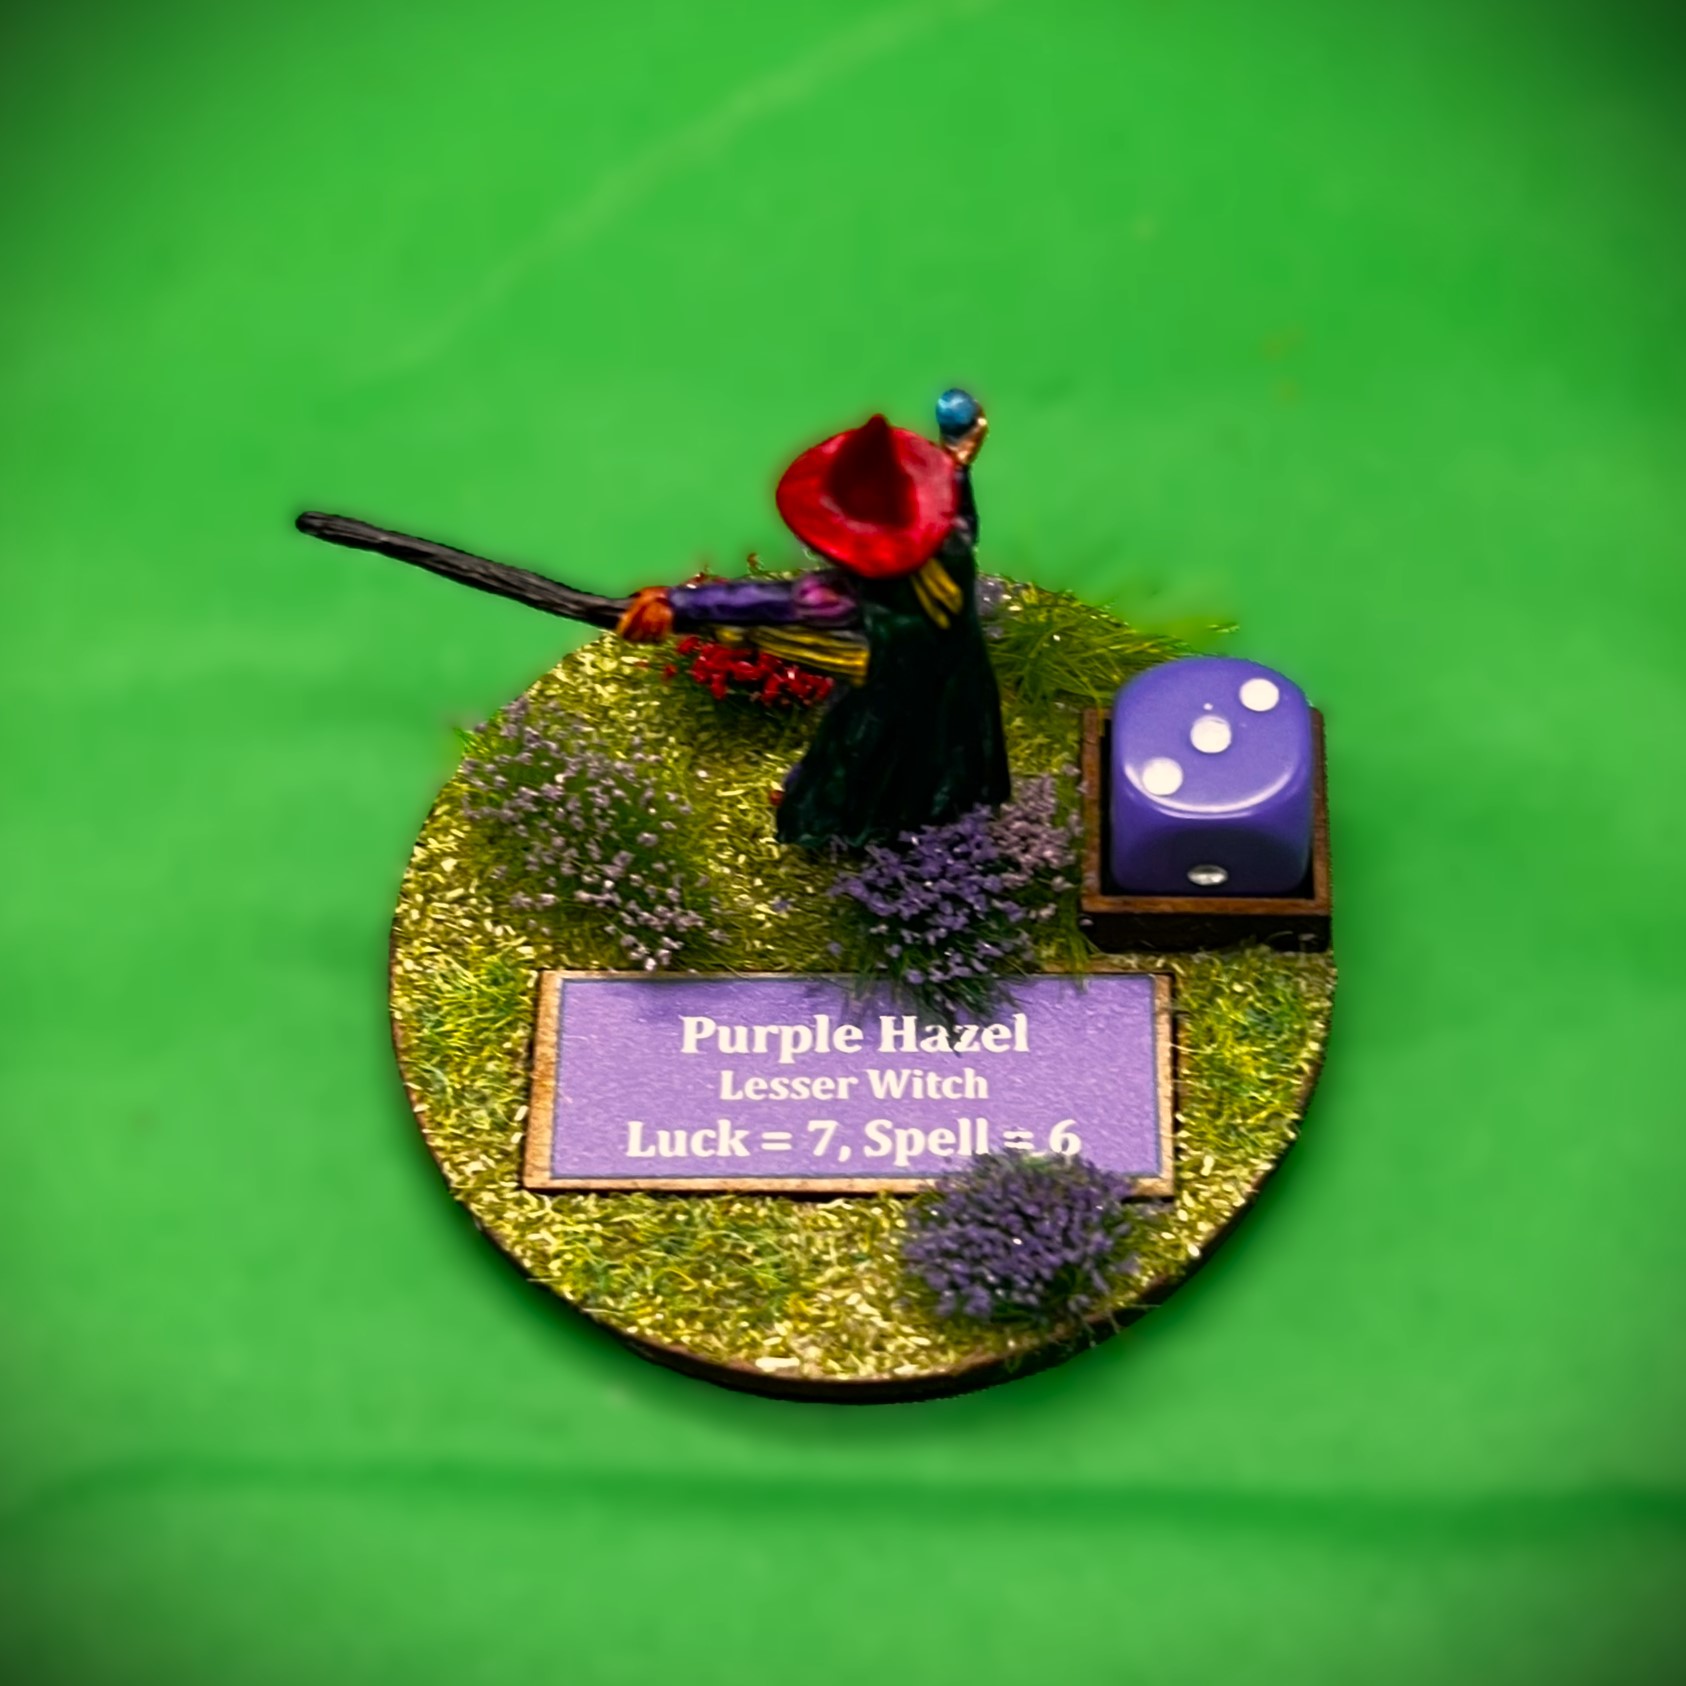
“Purple Hazel”
This is the same figure that I painted as “Lady Thistlethorne, Harvest Witch” for the Great Land of Harvest forces. Clearly, this figure had to have a much different look. You can’t get much more different here from my previous effort. Purple, pink, and red – and while I’m pretty sure she is not from is not from Electric Ladyland (apologies to Jimi Hendrix), for her name, I went with “Purple Hazel”. Yes, I know that song is not on that album. She has a little crystal ball in her hand, and a big broom. I went with a ruddy complexion as her facial features are not too pronounced. She’s probably Quadling in origin.
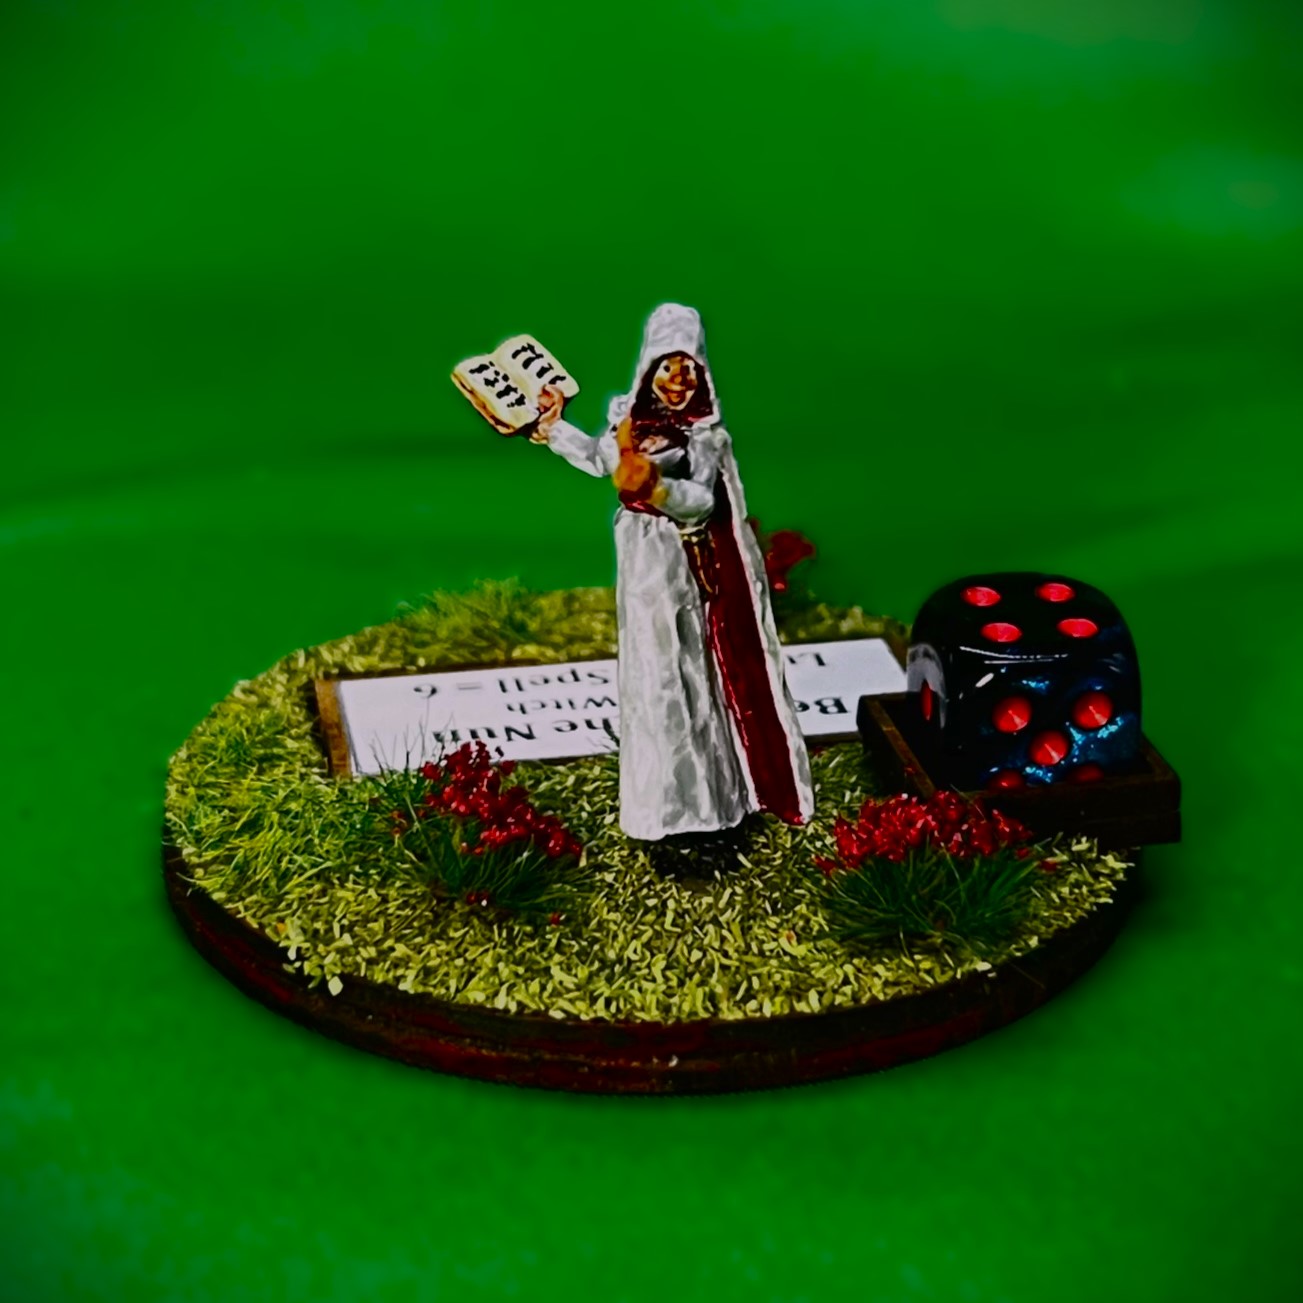
“Belinda the Nun”
I’m not sure that I could have come up with a different color scheme here for this model – the one on the website was white and red. As none of the other lesser witches were this different, I went with that scheme. Her beckoning long finger invites you to get closer while she holds the spell book. As for what cult she is a nun for, who knows! Maybe she’s just a devil woman, with evil on her mind… - apologies to Cliff Richard, circa 1976…
“Morta – Witch of the Undead”
This figure had the most facial detail. But, I thought, why not make her an Undead witch – hence the name “Morta – Witch of the Undead”. That’s acceptably creepy, and unlike the others. Her outfit made me think of a dress made from curtains from the 1970’s – so I purposefully painted it gaudy and a bit tacky. I’m pretty sure the undead have no fashion taste anyways.
Now that concludes the SKU, but not the witches – now it’s time for the first surprise! There is another witch! Here follows the story:
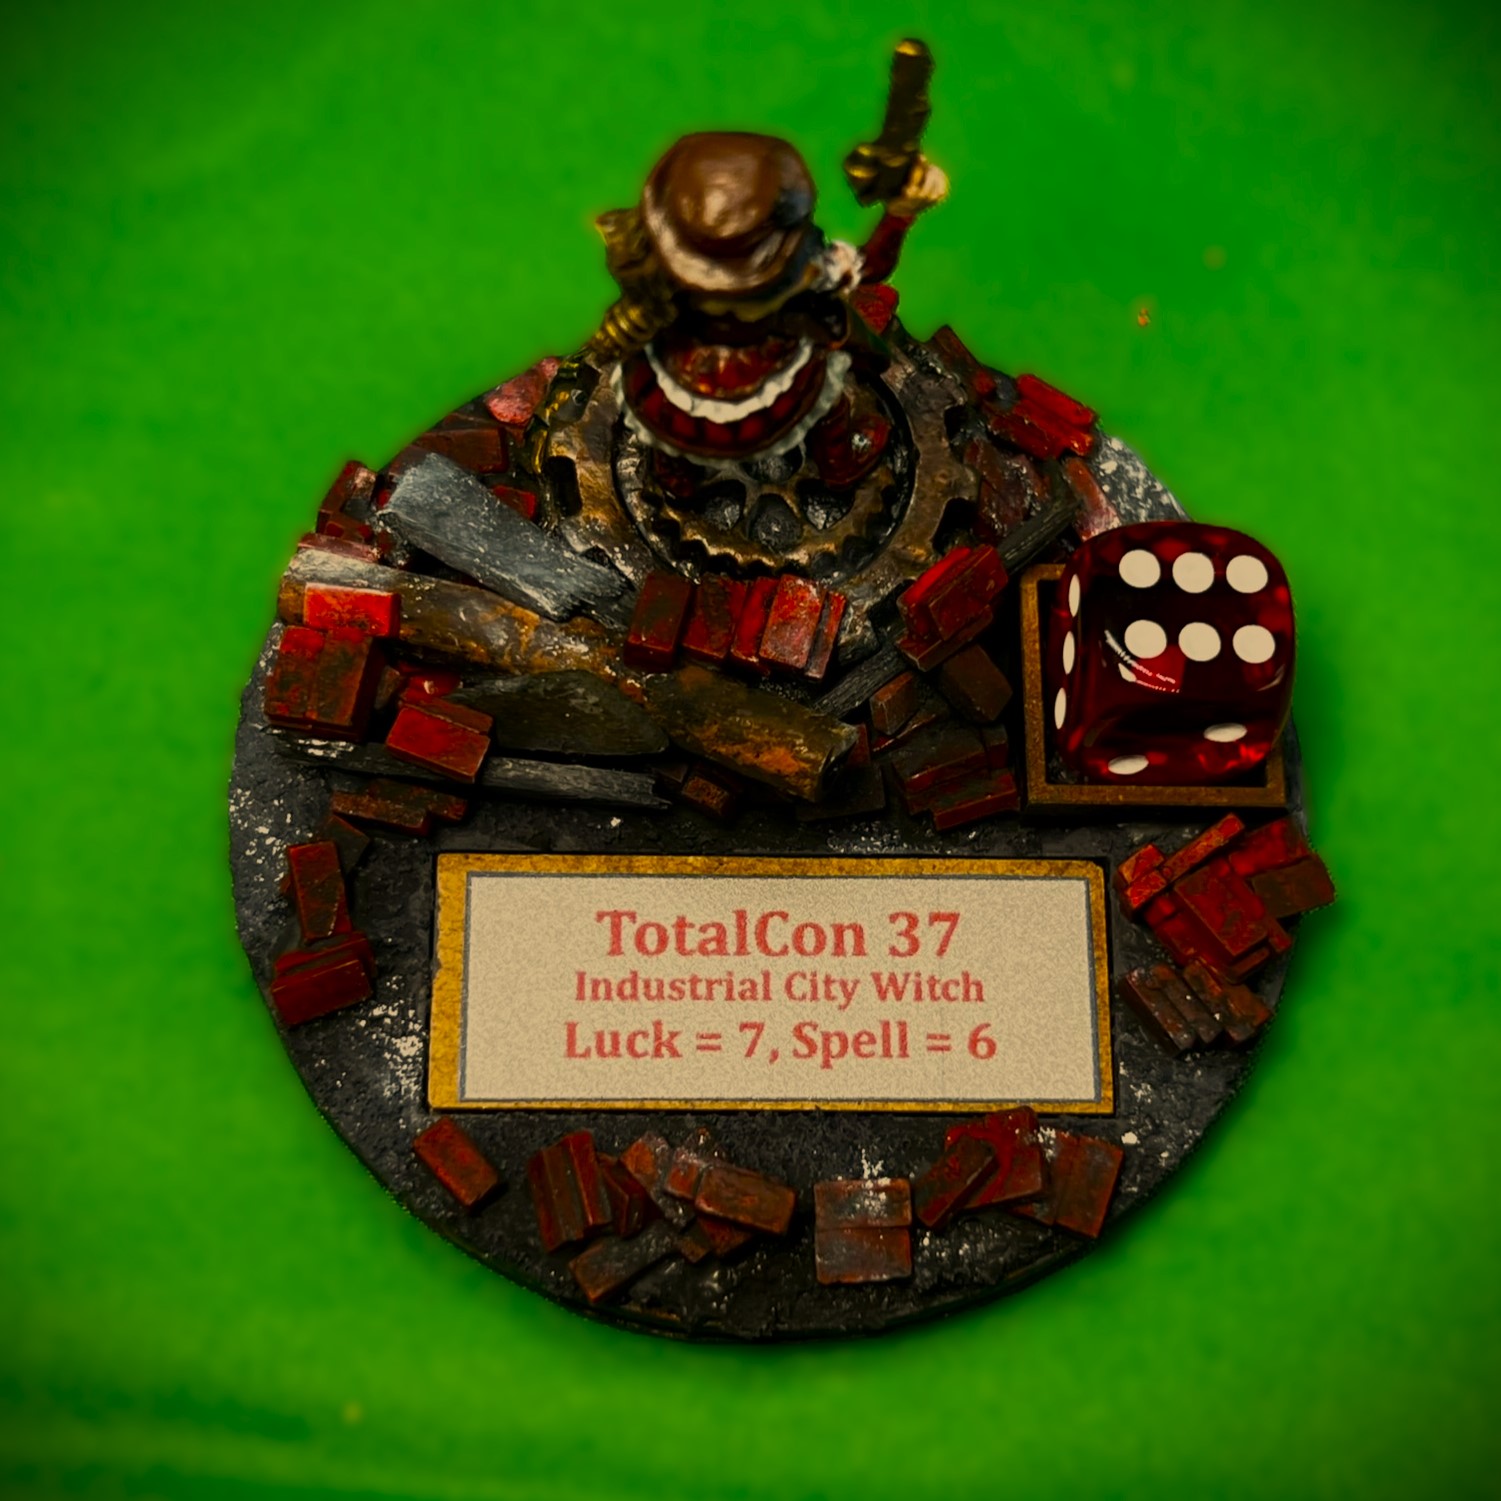
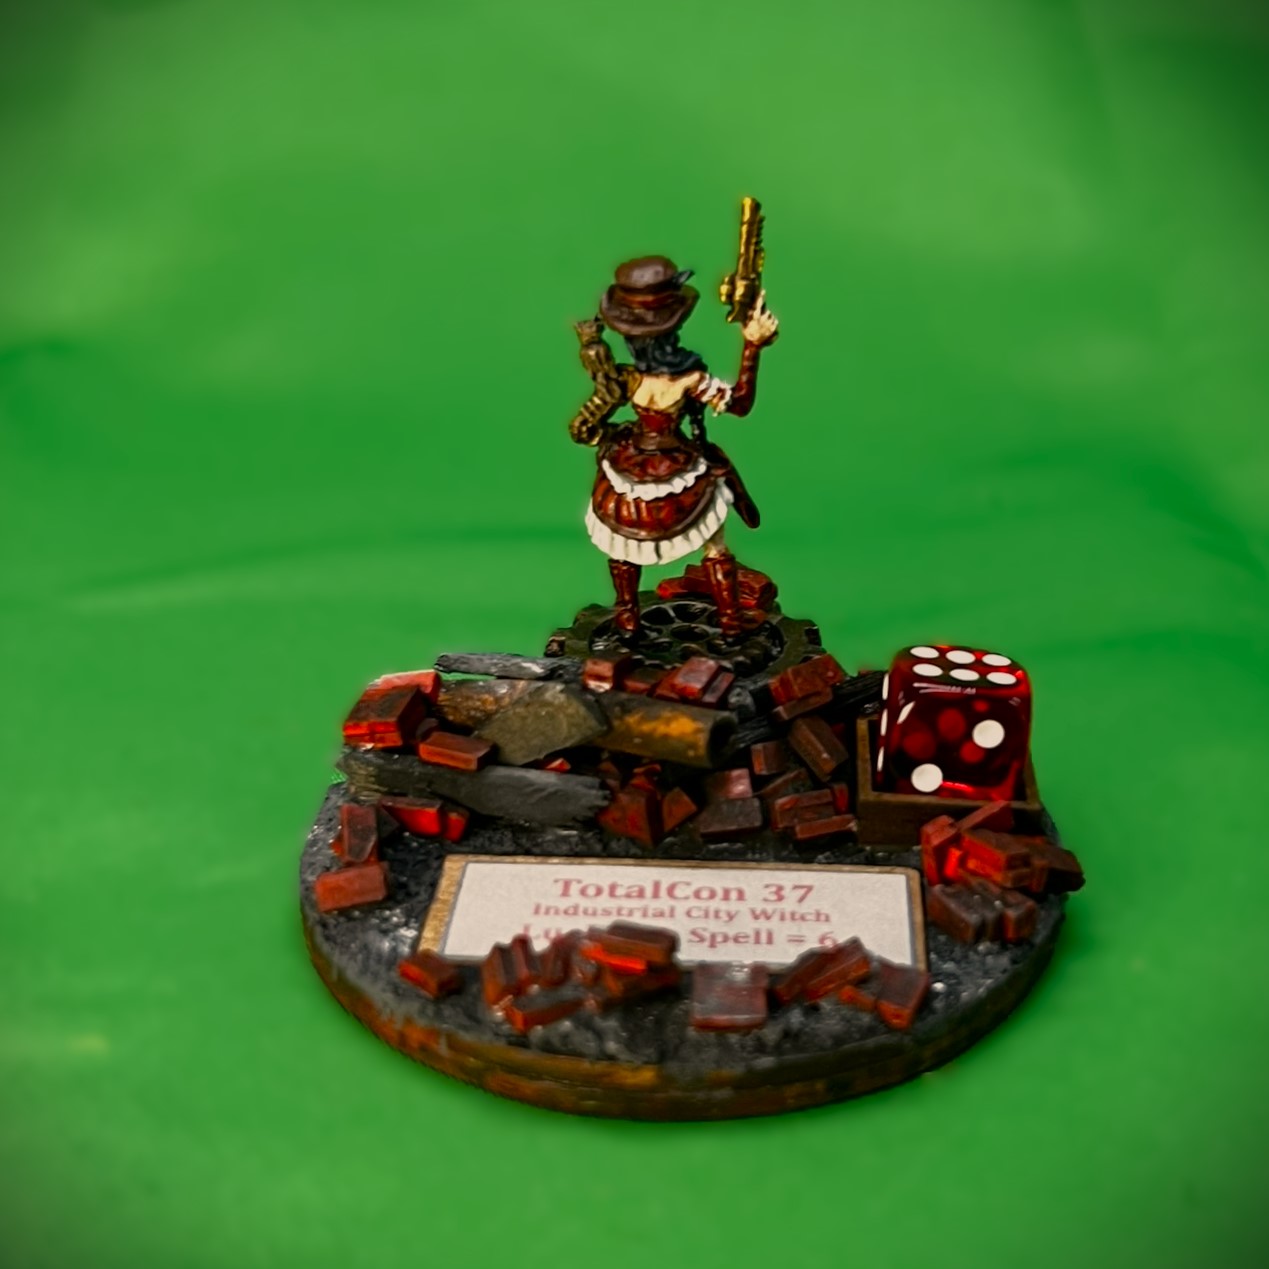
Last year at TotalCon 37, I got the miniature that the convention offered for sale at registration. It was a steampunk-themed woman with a pistol and a mechanical arm, with knee high boots, a miniskirt, and a mechanically-modified owl on her shoulder as a familiar. It was made by Dragonbait Miniatures. I kept the figure without any particular plan for her almost 9 months, until I painted up Professor Nitpick and his Mechanical Tin Axemen. Looking at the canon of the Industrial City, and that knowing that according to Russ Dunaway that old Nitpick will eventually have his own faction, I thought that this figure would be a good candidate for an ersatz lesser witch of the Industrial City. This way, when an official figure gets made, I can use her then as well. At Fall In, I got dispensation from Russ Dunaway to boot as for Ozz I do try to stay on canon.
As for her backstory – maybe she’s a survivor of all that the Madness Bombs did to the Industrial City, but one the Professor Nitpick helped with some arcane genetic manipulation or something similar? Now she serves Nitpick or anyone else who can help her keep up her fashion needs. She is a city girl after all, even if the city is in radioactive or mutagenic ruins. Anyways, here are some WIP shots of her – oh yeah, her name is “TotalCon 37” of course (it’s on her base, sounds fairly cyborg-y, so why not).
Industrial City Witch WIP
The TotalCon 37 flyer with the figure’s image. I used the same basic color scheme, except to give her rose-colored glasses.
As receivedHer gear-themed base with her name in front.Mounted for painting
I used the same basing scheme that I used for Professor Nitpick’s axemen regiment.
The painted figure pre-varnish in front of the image.
Now some eye candy for…
“TotalCon37, Industrial City Witch”
Here’s a group shot of all of the lesser witches:
But I promised a couple of surprises did I not? Well, the last was one that I’ll share was on me as well – and it involved one package with two painted and based figures in it.
My good friend Buck Surdu, the rules creator of Wars of Ozz, went on a website (I think Heroforge) and created two custom minis for Ozz.
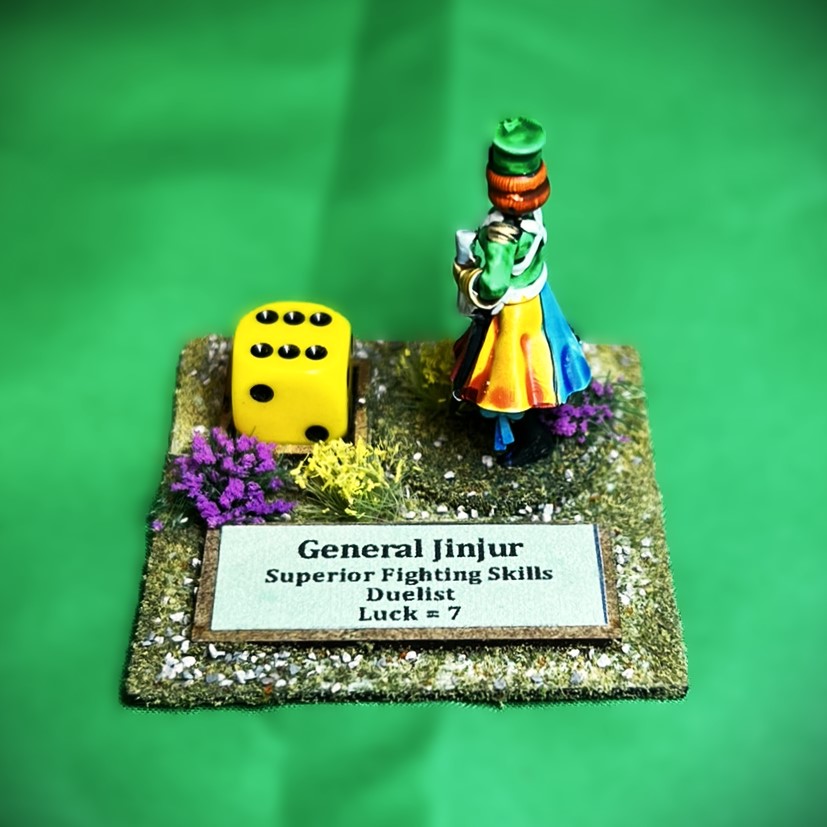
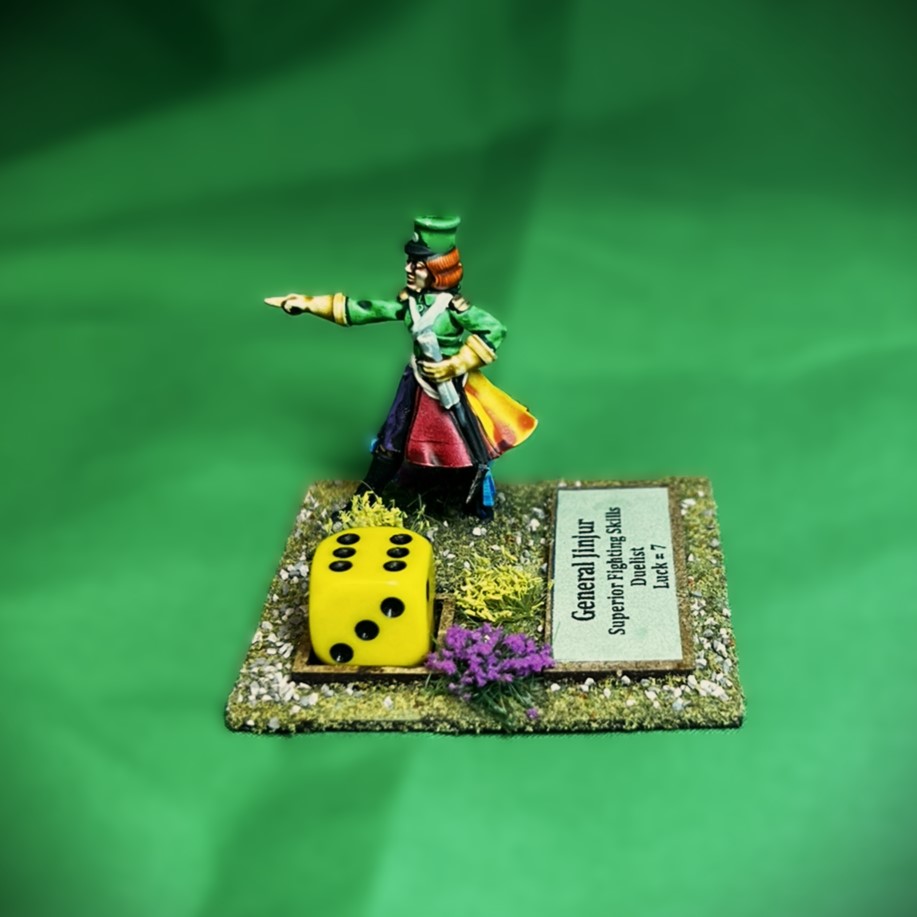
The first is inspired by the original Baum Oz books – General Jinjur, who in the books commands an army of knitting-needle-armed females from all races from all over the world of Oz. Hence her 4 – colored skirt (blue for Munchkins, red for Quadlings, yellow for Winkies, and purple for Gillikins). Here, she allows an attached unit to fight at +1, plus as a Duelist she can more easily dispatch an enemy attached leader in Melee with her unit (presumably with a knitting needle in the eye). I can use her as a Brigade commander for Jinjur troops or elsewhere. I love the way Buck painted her, plus the knitting needles!
“General Jinjur”
The second figure that Buck created and gifted me was inspired by, well, ME!
Buck and I had joked about how many Wars of Ozz games I have run at conventions and our club, as well as the sharing I have done on this blog. Somehow the moniker “Mark, the Herald of Ozz” came up at some point. So Buck created “Ma’k, the Herald of Ozz”. The “Ma’k” is a play of how I pronounce my first name as a good resident of central Massachusetts, or rather how it sounds to everyone outside of Massachusetts…
I’m biased, but I really LOVE this figure. First, he’s armed with a GOLF CLUB!! (looks like my Ping driver). Second, he allows a player to attach him to any unit and then CHOOSE the attribute that he gives an attached unit a +1. That’s pretty neat. Lastly, well, the gift warmed my heart.
“Ma’k the Herald of Ozz”
In any case, I am glad to have the both of them and will use them in my games – I do believe that Buck will be adding them to the army lists too – which you can see on the Wars of Ozz Facebook page here (you do have to join the private page to see them). THANK YOU BUCK!!
That’s up all for now. Next up I will be hopefully posting about a new Munchkin unit – assuming I have enough time before going under the knife.
As for this post, please feel free to vote for your favorite lesser witch in the comments section! I’d be interested in your favorite witch, favorite name, favorite outfit, or anything you’d care to share.
And yes, I still have much more Ozz to come…
Miscellaneous details and references for those interested in that sort of thing:
For all of my previous posts on Wars of Ozz games, figures, units, and other related projects – please see this page.
PAINTS, INKS, GLAZES, SHADES, WASHES, PIGMENTS, FLOCKING, GLUES AND MORE THAT I USED ON THE LESSER WITCHES:
Round regimental MDF base from Old Glory
1.25″ x 1″ square steel base from Wargames Accessories (#FOW1)
3/4″ Everbilt steel washer
Poster tack
Vallejo Premium Primer “White”
Vallejo “Flow Improver”
Vallejo “Airbrush Thinner”
Secret Weapon Washes “Heavy Body Black” (wash)
Battlefront “German Black Brown Camouflage”
Vallejo “Thinner Medium”
Vallejo Model Color “White”
P3 “Brown Ink” (ink)
Vallejo Model Color “Light Flesh”
Battlefront “European Skin”
Citadel “Contrast Paint – Ork Flesh”
Citadel “Contrast Paint – Plaguebearer Flesh”
Army Painter “Speed Paint – Fire Giant Orange 1.0”
Army Painter “Battlefields Field Grass” (flocking)
Printed Avery labels
PAINTS, INKS, GLAZES, SHADES, WASHES, PIGMENTS, FLOCKING, GLUES AND MORE THAT I USED ON THE FIGURES FOR TOTALCON 37:
Round regimental MDF base from Old Glory
1.25″ x 1″ square steel base from Wargames Accessories (#FOW1)
Elmer’s PVA Glue
Gorilla Glue
3/4″ steel washers
Poster tack
Vallejo White Surface Primer
Vallejo “Flow Improver”
Vallejo “Airbrush Thinner”
Secret Weapon Washes “Heavy Body Black” (wash)
Vallejo Model Color “White”
P3 “Brown Ink” (ink)
Army Painter “Speed Paint – Hoplite Gold 2.0”
Vallejo Model Color “Light Flesh”
Vallejo “Thinner Medium”
Battlefront “Dark Leather”
Vallejo Model Air “Brown”
Reaper MSP Core Colors “Pure Black”
Citadel “Contrast Paint – Imperial Fist”
Citadel “Balor Brown Air”
Battlefront “Battlefield Brown”
Army Painter “Speed Paint – Aztec Gold 2.0”
Citadel “Contrast Paint – Apothecary White”
Citadel “Contrast Paint – Contrast Medium”
P3 “Flesh Wash” (wash)
Vallejo Model Color “Medium Flesh Tone”
Battlefront “European Skin”
Citadel “Agrax Earthshade” (wash)
Citadel Technical “Spritstone Red”
Citadel “Nuln Oil GLOSS” (wash)
Citadel “The Fang”
Vallejo Model Air “Gun Metal”
Citadel “Astrogranite Debris” (texture)
Pendraken 12mm dice frame
Army Painter “Speed Paint – Talos Bronze 2.0”
Army Painter “Warpaints – Shining Silver”
Army Painter “Warpaints – True Copper”
Citadel “Contrast Paint – Ironjawz Yellow”
Vallejo Model Air “Black Metallic”
Small polystyrene tubing pieces
Popsicle stick shards
Juweela® 1:48/1:50 terracotta bricks
Army Painter Warpaints “Rough Iron”
Vallejo Mecha Weathering “Rust Texture”
Vallejo Mecha Weathering “Dark Rust Wash”
Vallejo “Pigment Binder”
Vallejo “Carbon Black” (pigment)
Vallejo “Old Rust” (pigment)
Vallejo “Titanium White” (pigment)
Vallejo Mecha Varnish “Gloss Varnish”
Vallejo Mecha Varnish “Matte Varnish”
Printed Avery label
Again, as you may want to check out the Wars of Ozz figures’ range – there are two places to get them (and I make no money from this btw). The game rules and the figures are available from the following two places:
Winkies are the orc analogues of the world of Ozz. I have not recently added any Winkie units to that faction’s forces – in fact not since last March July when I finished up the Winkie Light Cavalry (on carniverous giant birds called Zilks). My current Winkie forces have been adequate up until recently. My forces are composed of 43 points worth as listed below.
As I mentioned in my last post, for the most part, most brigades in the Wars of Ozz are 20-30 points. As with my Munchkin additions, I have decided to get to the point where I could field two full Winkie brigades. This means that I would need to add more troops and field another Brigade commander – especially if I could also use that commander as a Division or Army Commander for the Winkies. Currently, I only have the one unnamed brigade commander. So that I can deploy two full Winkie brigades, I have started to build:
8 Lesser witches (these could go to any faction, at 2 each = 16 points)
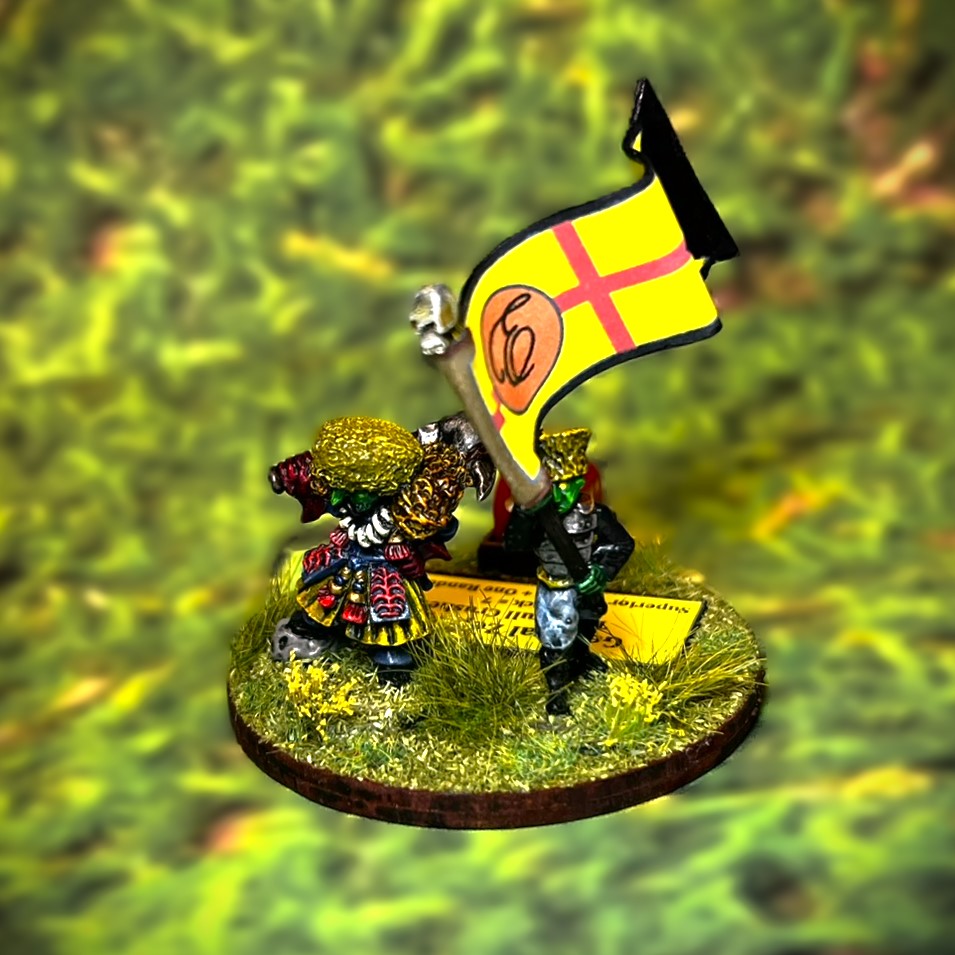
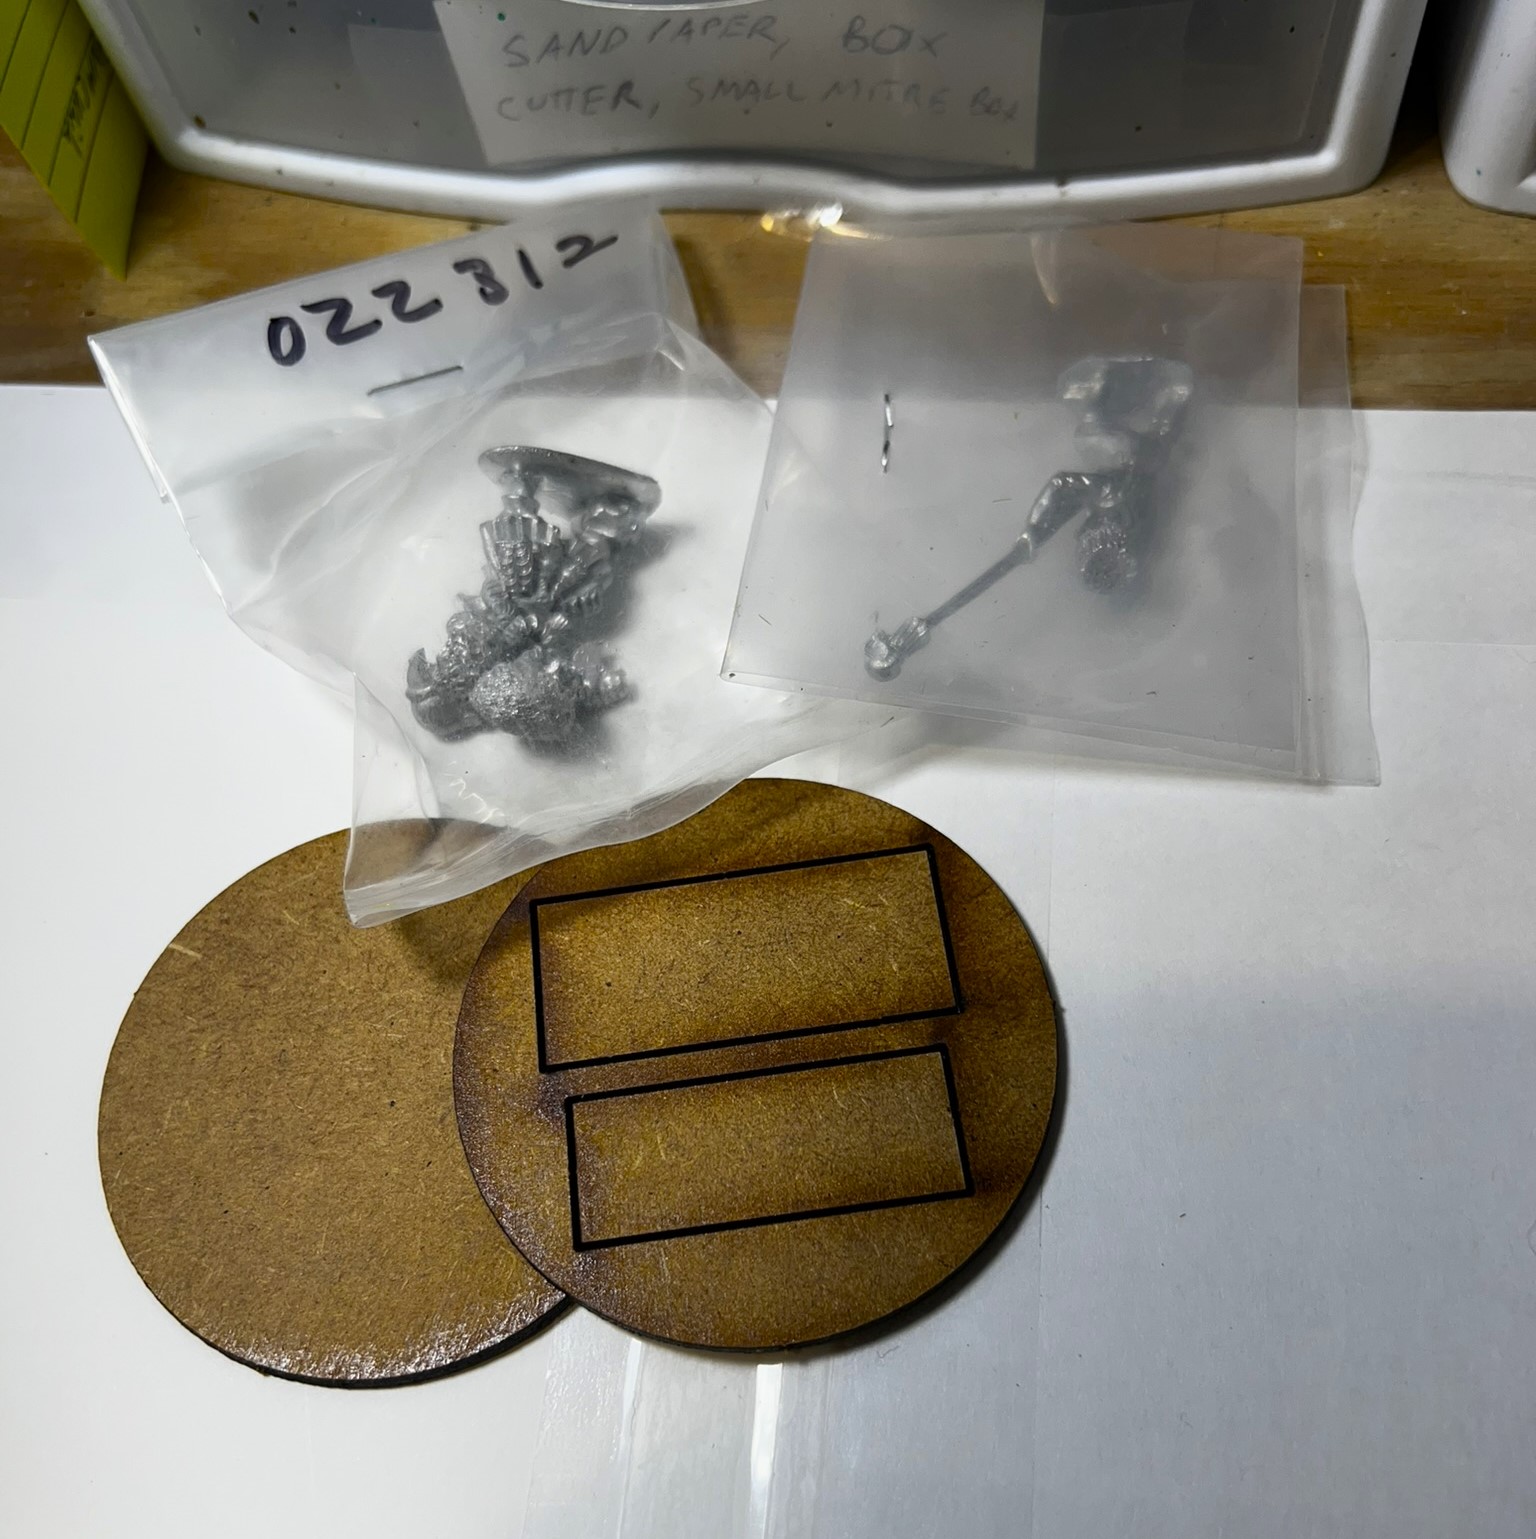
This would give me more troops, but the Winkie leadership deficit remains. When I built my Winkie Infantry Regiment, the baggie was missing a single standard bearer. Russ Dunaway of Old Glory was decent enough to replace the figure for me. Then about two weeks later, a second standard bearer showed up in the mail. I guess maybe he wanted to make sure I got the missing figure – but now I had an extra. As I thought about getting annother figure to act as a brigade or army commander, I thought “wouldn’t it be cool to have a standard bearer for an army commander?”. I could base two figures on an MDF base as an army commander – all I needed was a Winkie figure and an army banner. For the latter, thanks to Buck Surdu, who created an Army banner with an “E” for Evora the Witch on it (Empress of the Winkies), and for the former…
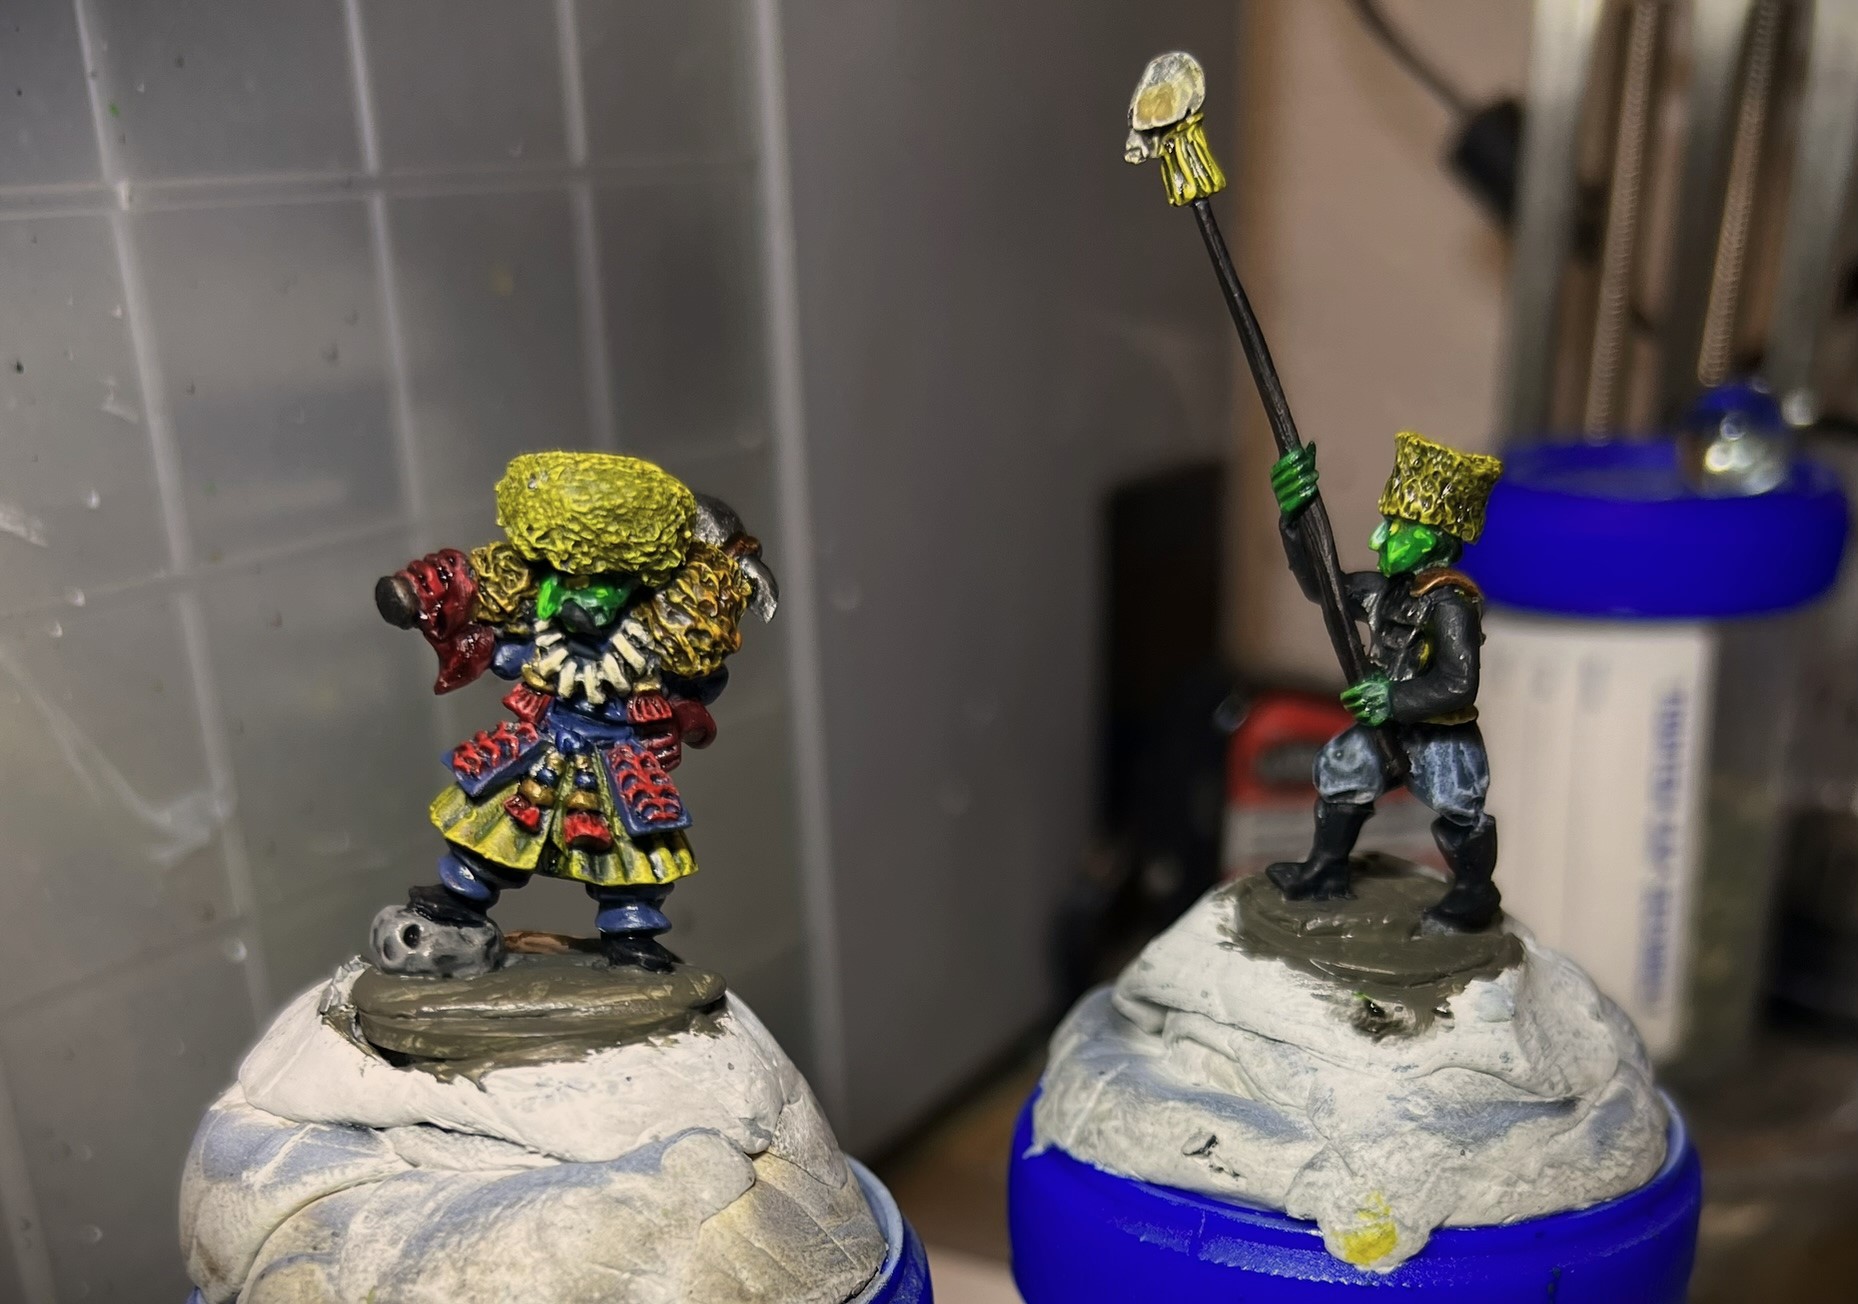
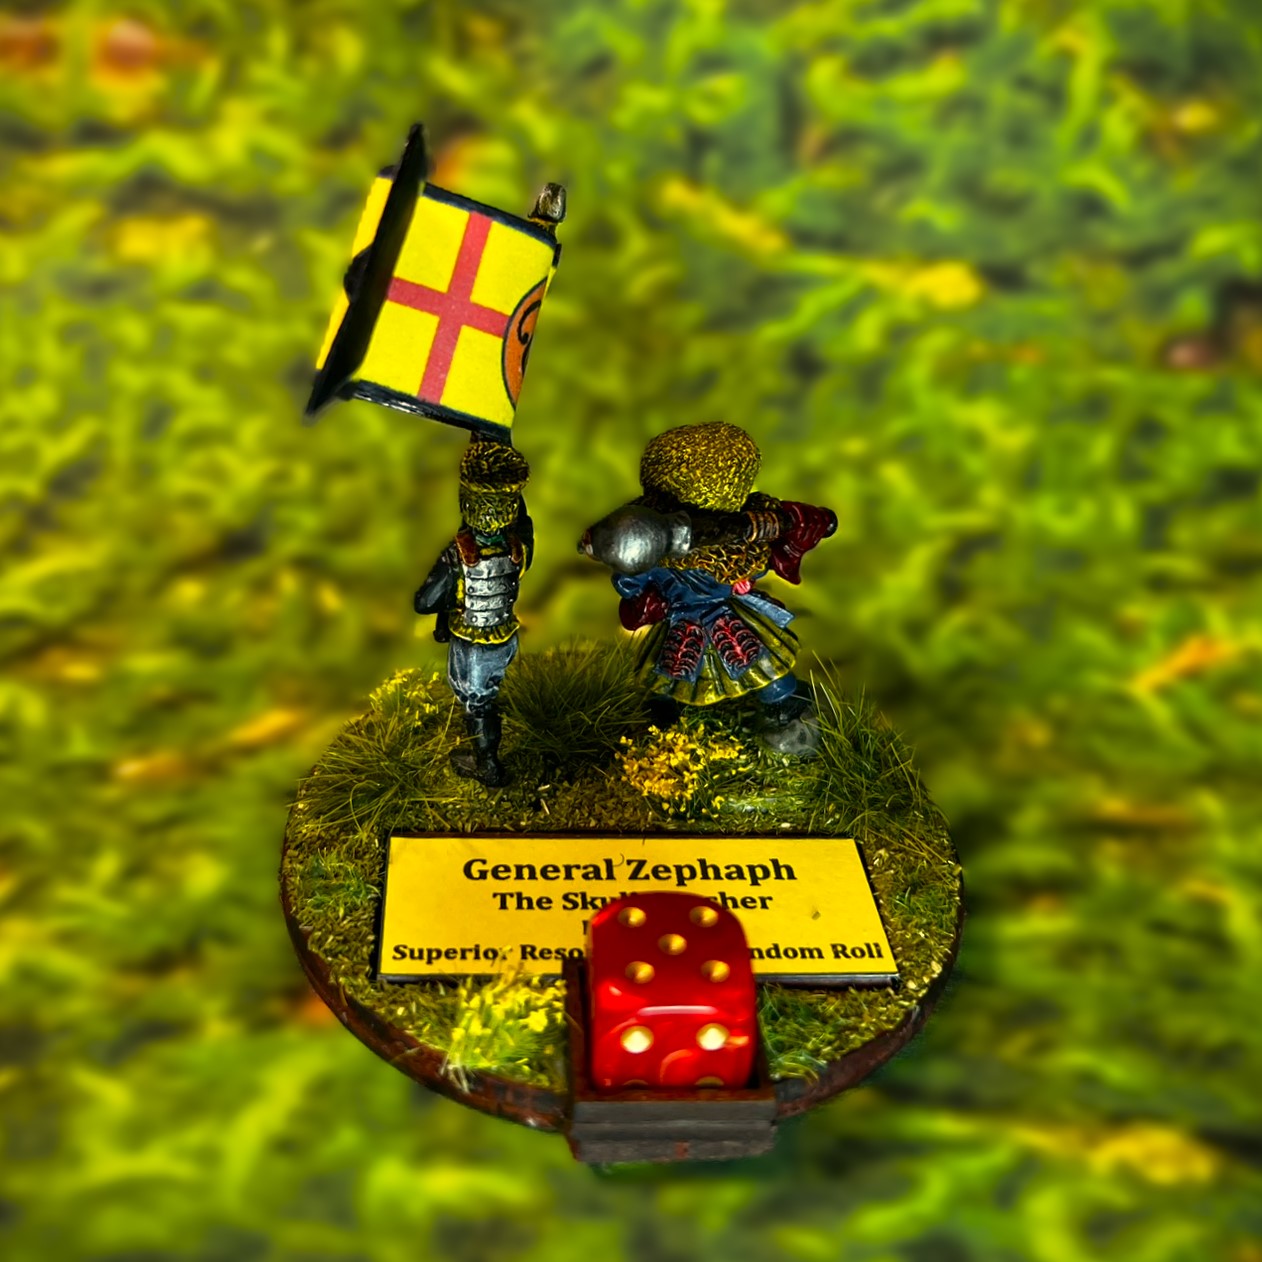
Enter General Zephaph the Skull Crusher, SKU# OZZ-312, worth 2 points. It is a nice bulky figure, looking very much as one would expect from a Winkie general. He is armed with a massive mace, and has a huge bulky hat and appropriate clothes. The figure is cast in metal and 28mm in size. In the game, he would be based on his own individual MDF leader base, but I did add the standard bearer. No assembly was required other than for the MDF base.
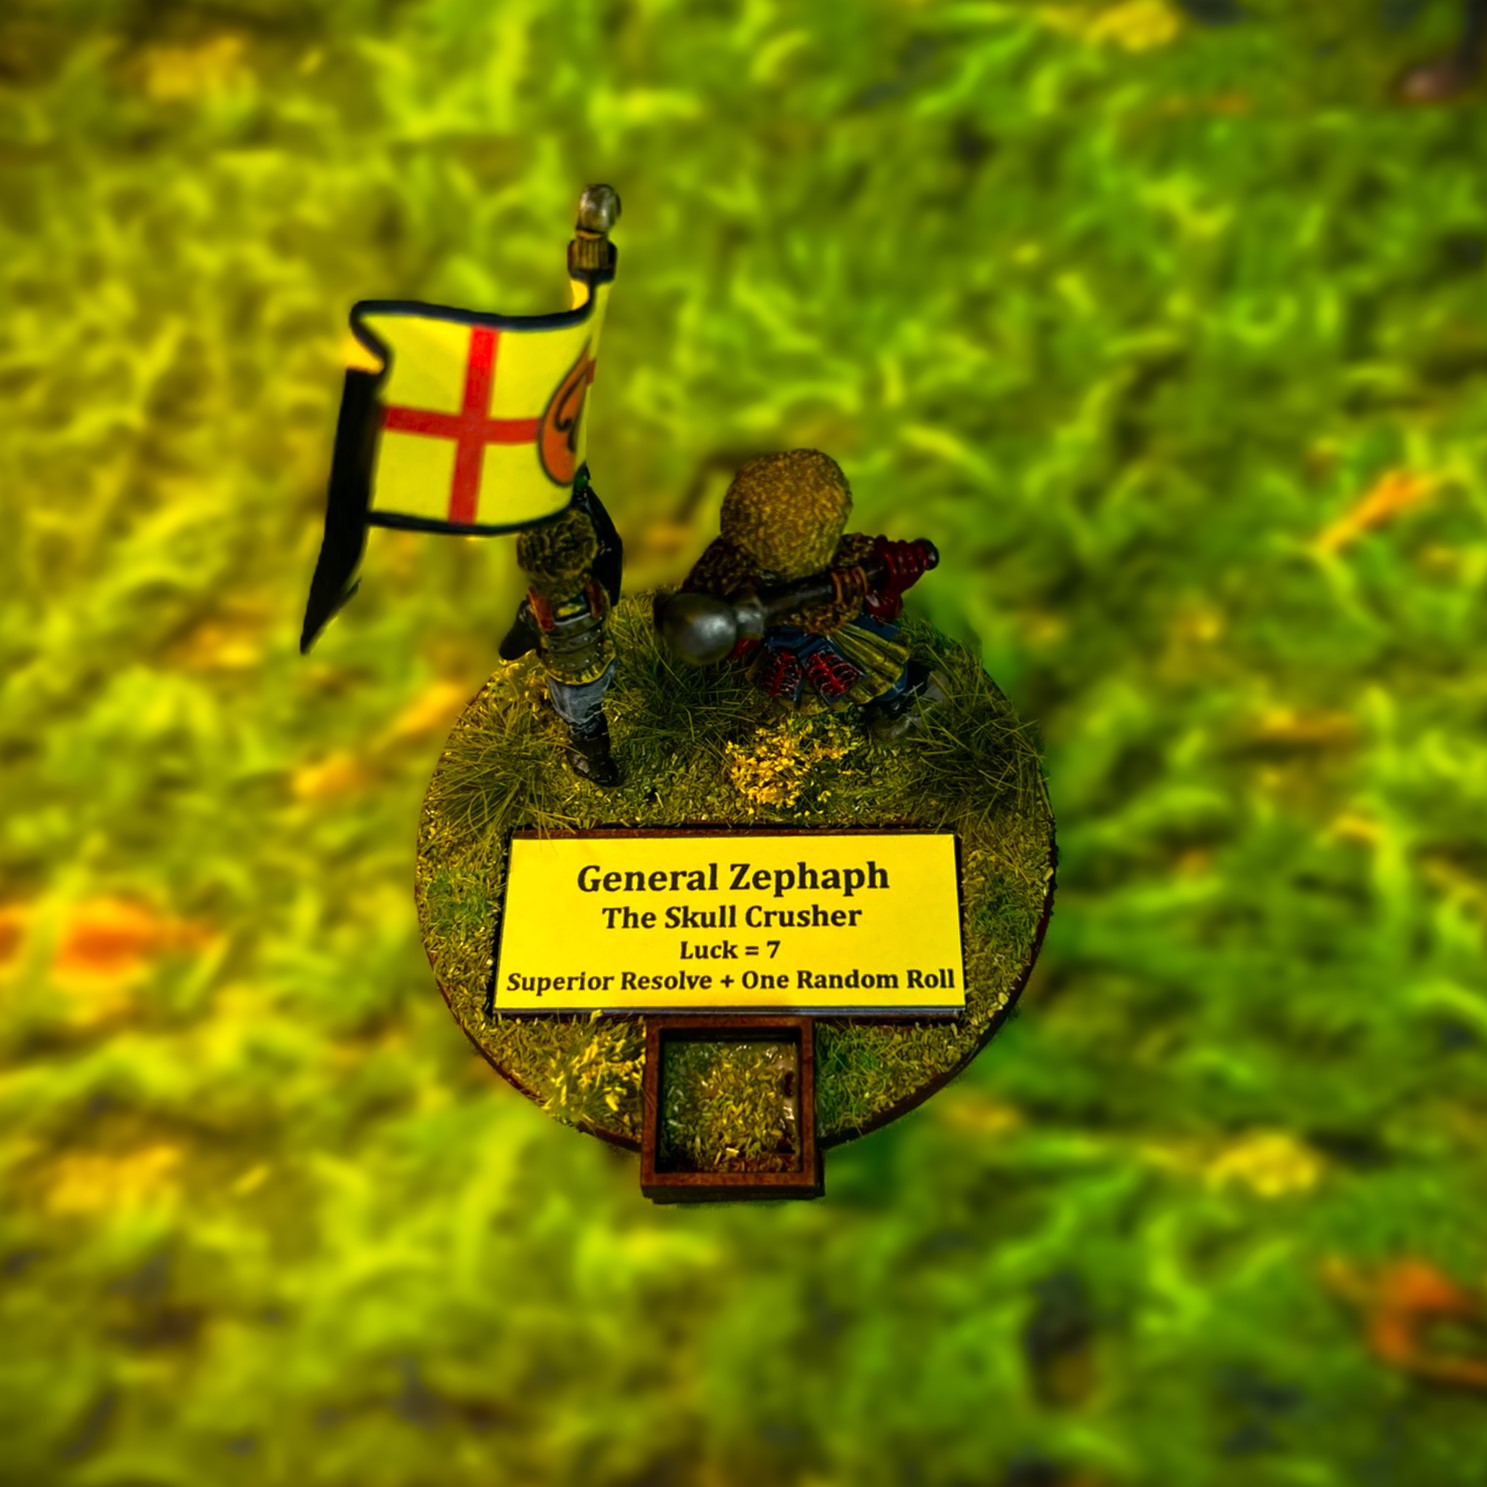
Brigade leaders control dice pools for their units. General Zephaph has no combat values other than what he can do if he is attached to a unit. Here, he gives an attached unit two abilities – first, Superior Resolve (which means that the unit would be less likely to cut and run away from a fight) and second, one ability that is determined at random in each game. This is why he costs 2 points. His luck is 7/10, which is average for most leaders.
WIP Shots
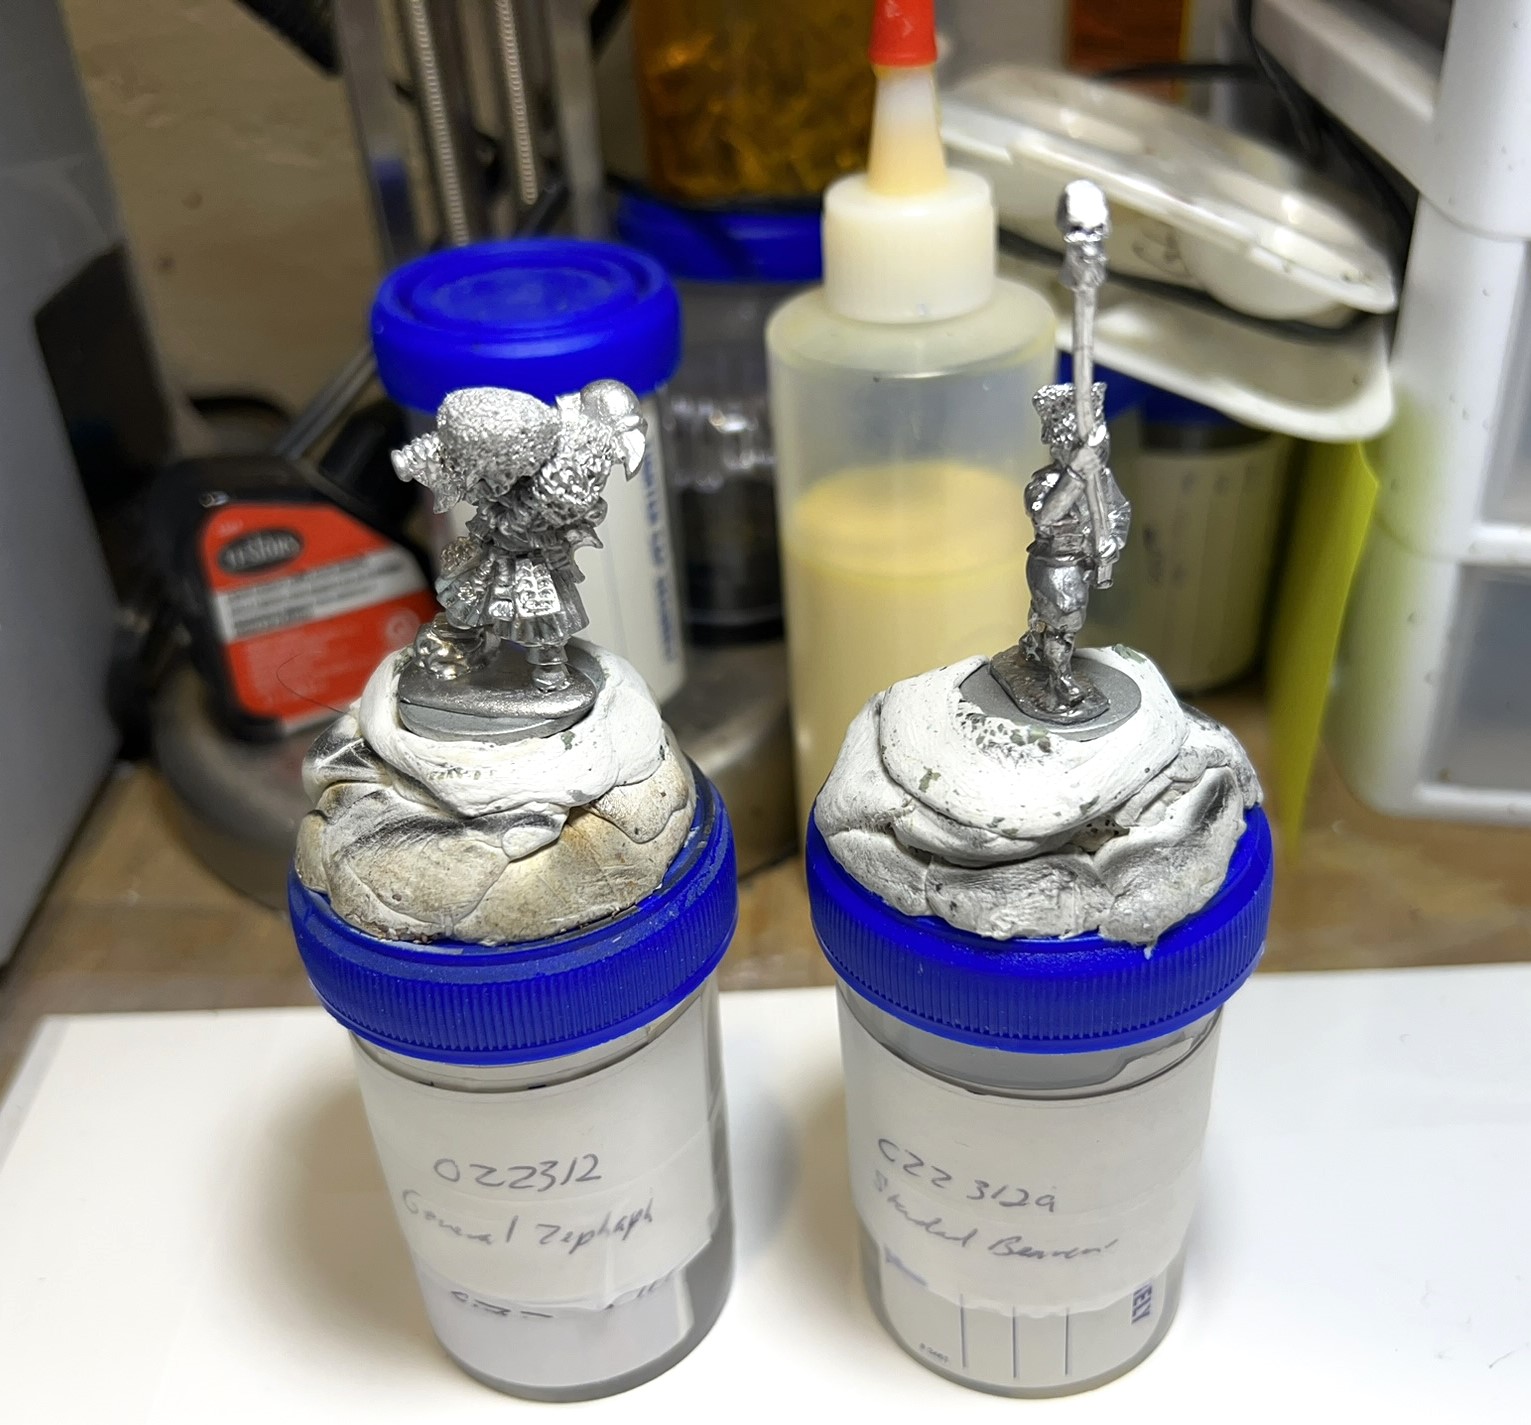
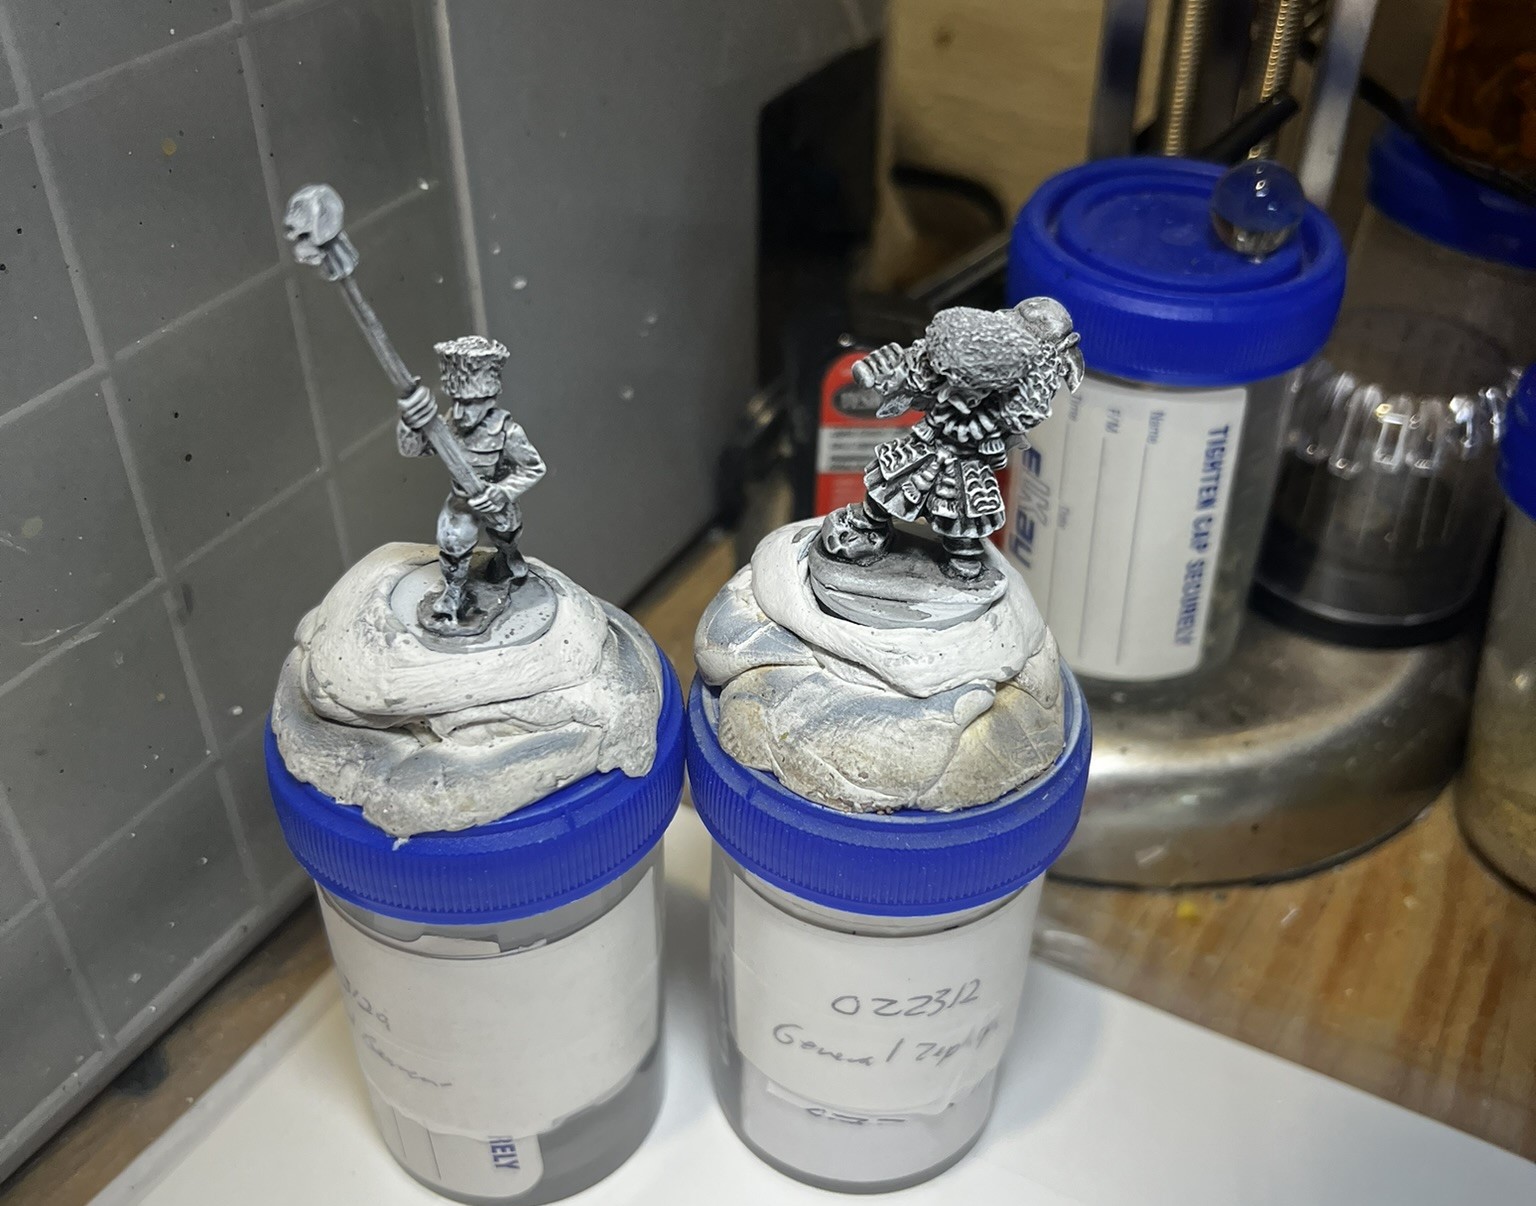
As I followed the same basic painting pattern that I usually use, WIP shots here will be few. I used a lot of yellows, as that is the Winkie faction’s color.
Starting off- two figures and an MDF base.Clean up any mold lines and flash (there were very few issues), and mount for painting.Prime in white, wash with a dark wash, then dry brush in white before adding any other colors.All painted up and ready for varnishing, basing, and flocking.
I now can share some…
Eye Candy
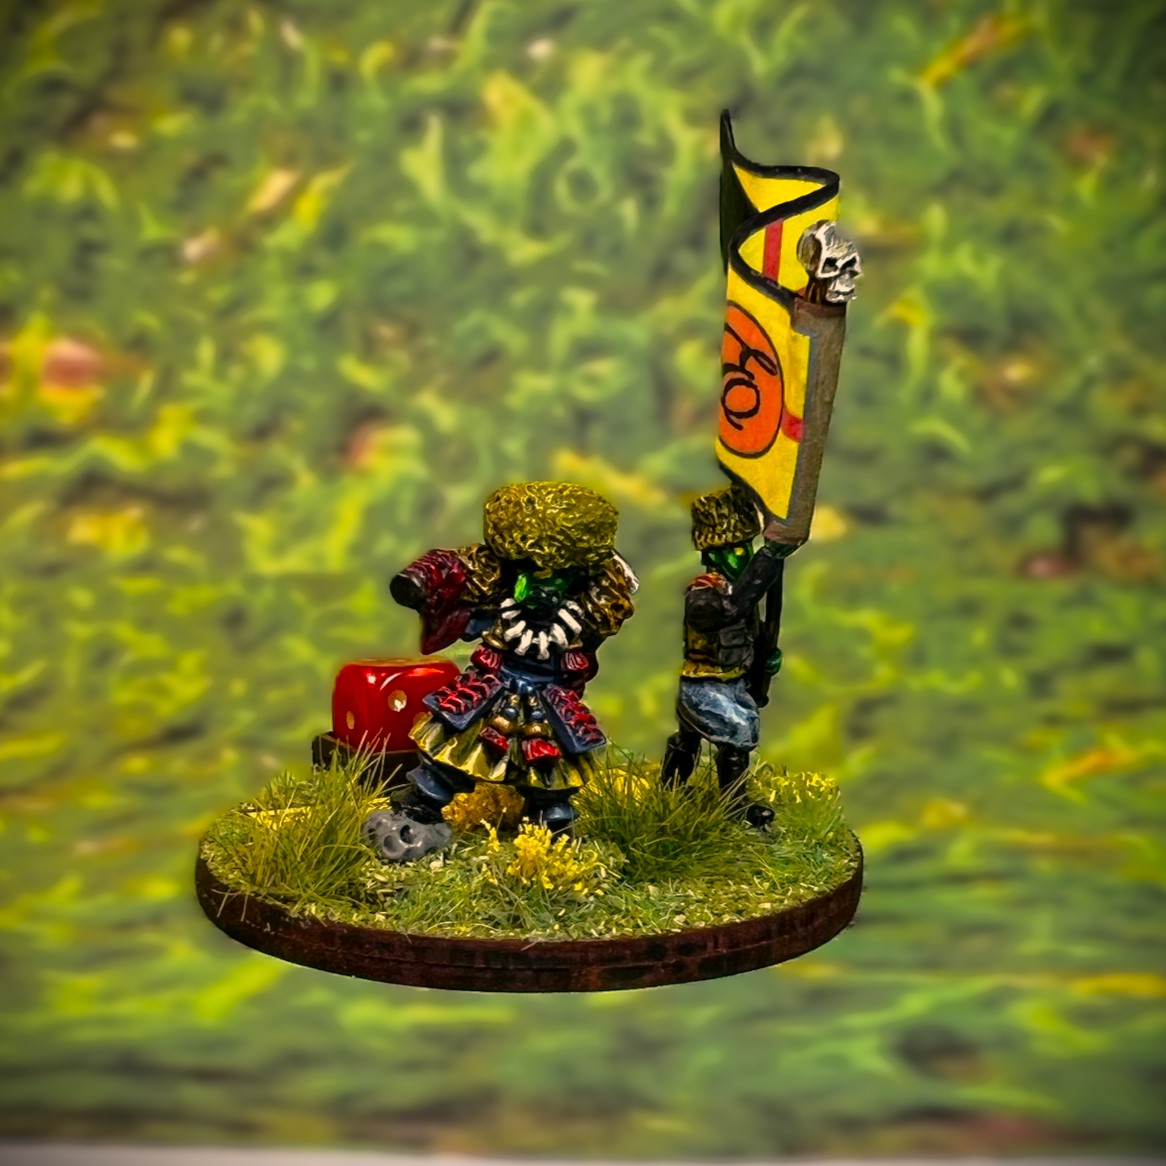
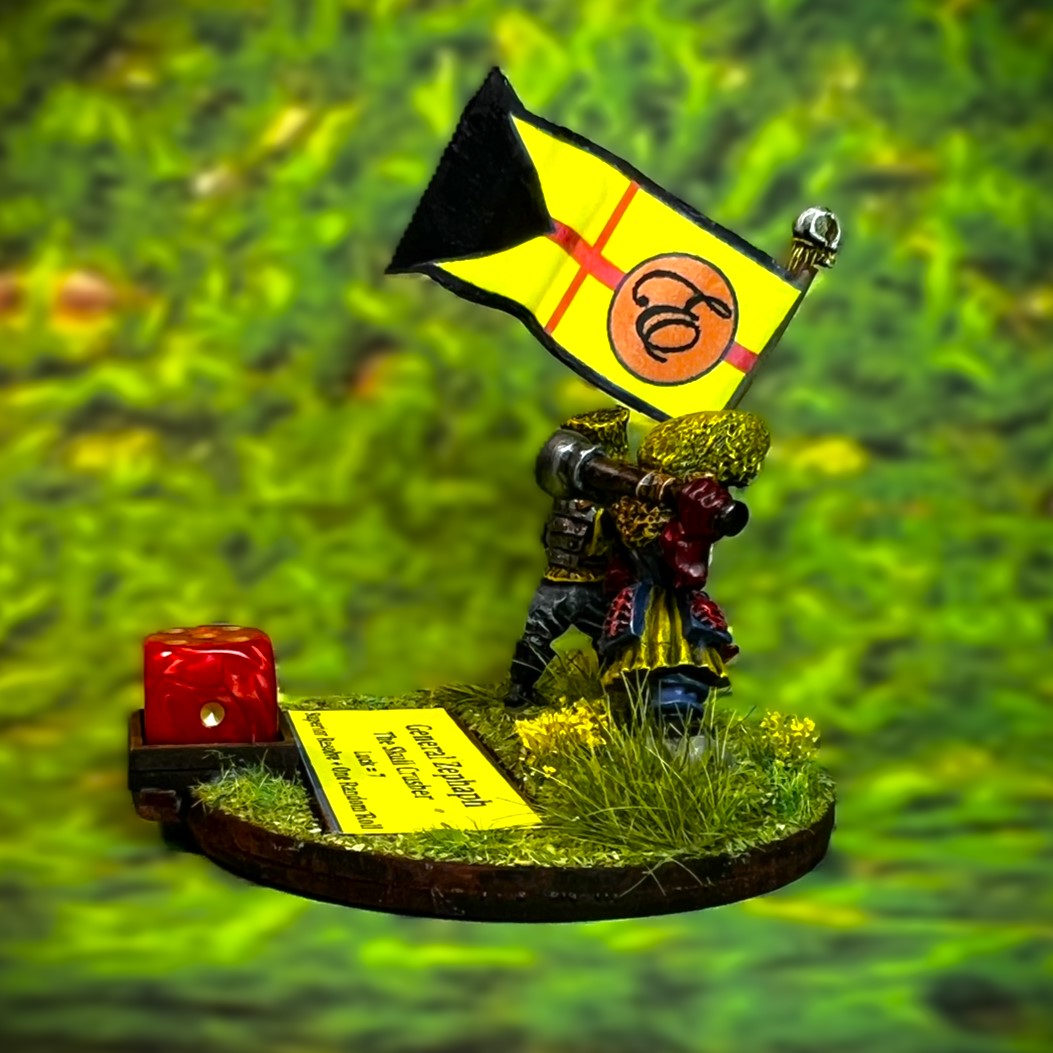
A topside rear view showing the data placard and the banner. I extended out the pendraken die frame with a little extra MDF.The view of the stand from the front. The general’s face is pretty well obscured by his hat!Right front view of the base. Yes – those are yellow flowers for the Winkie general.Right side view showing the big banner that Buck designed – I really like it.Angled view of the back showing some more details.
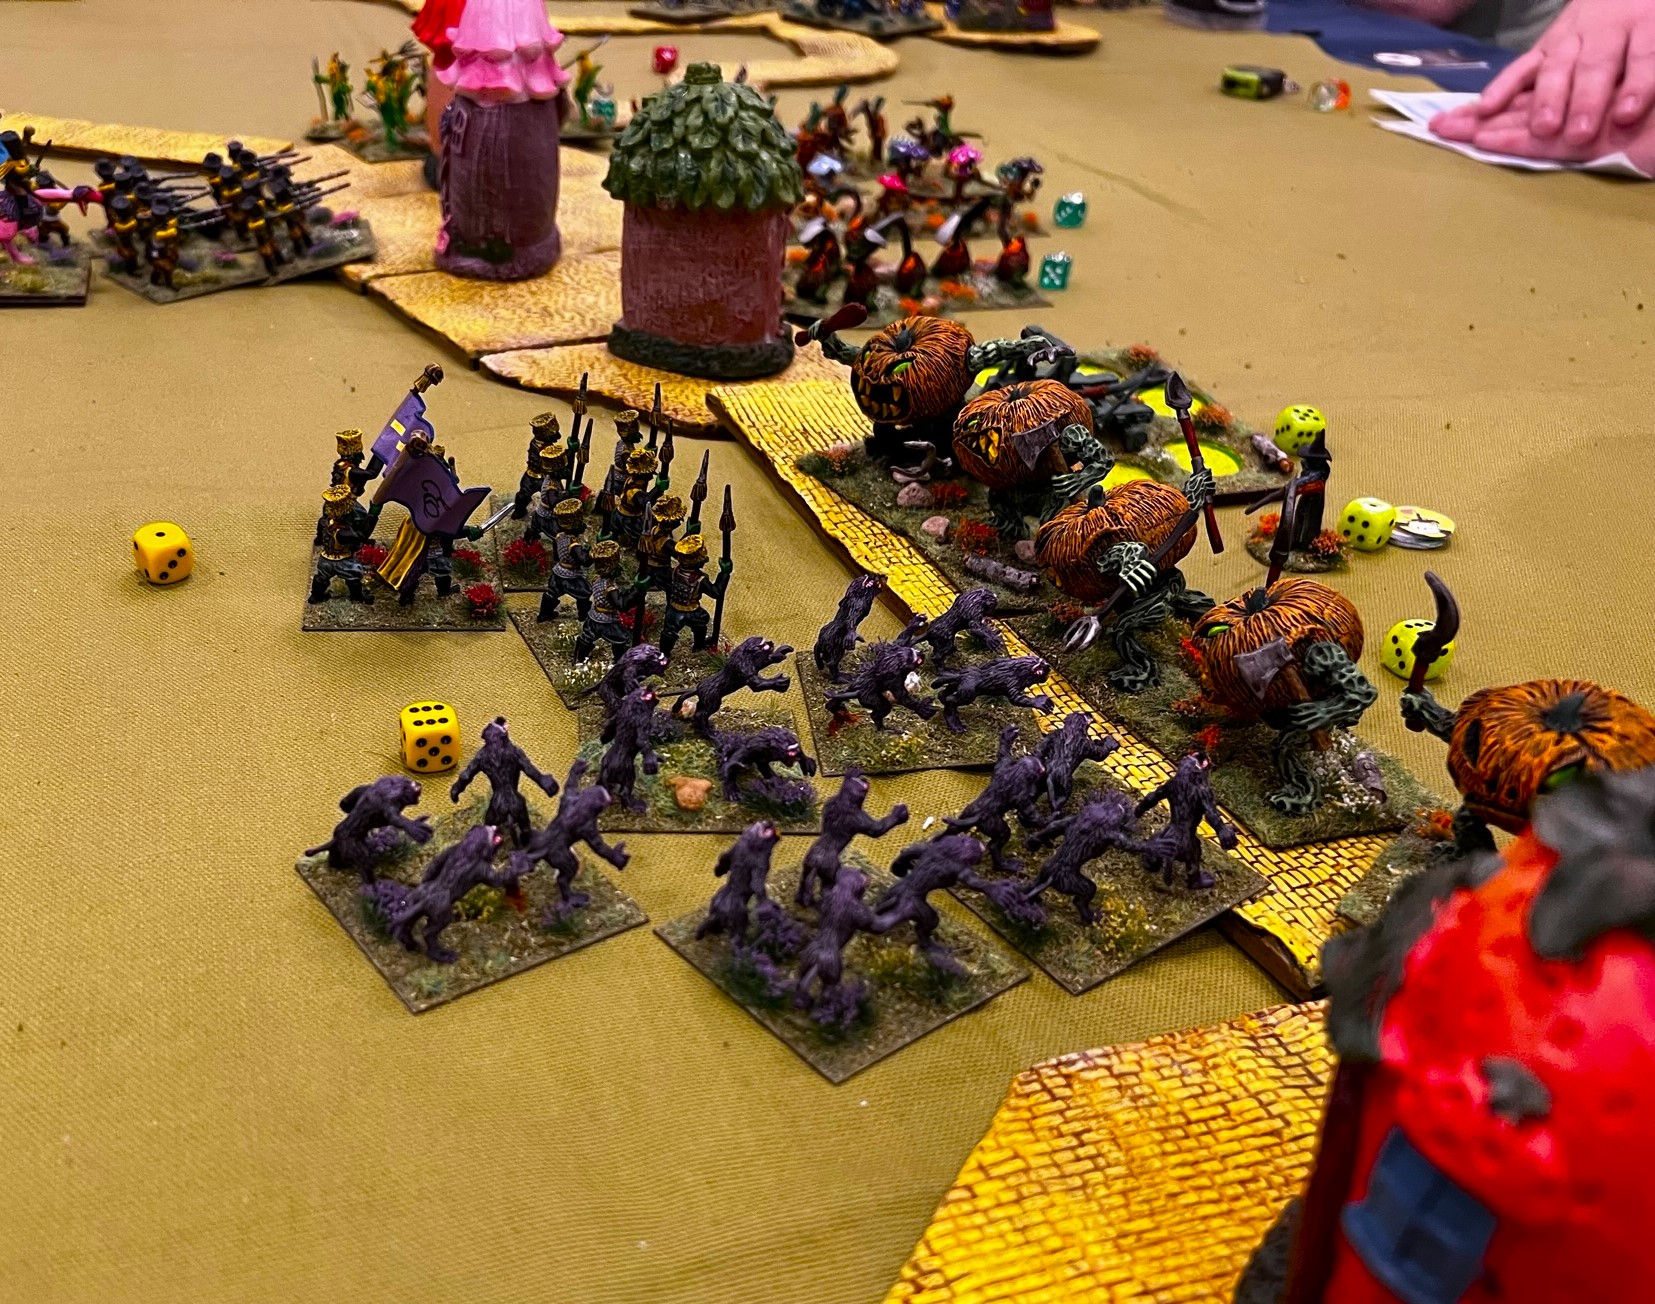
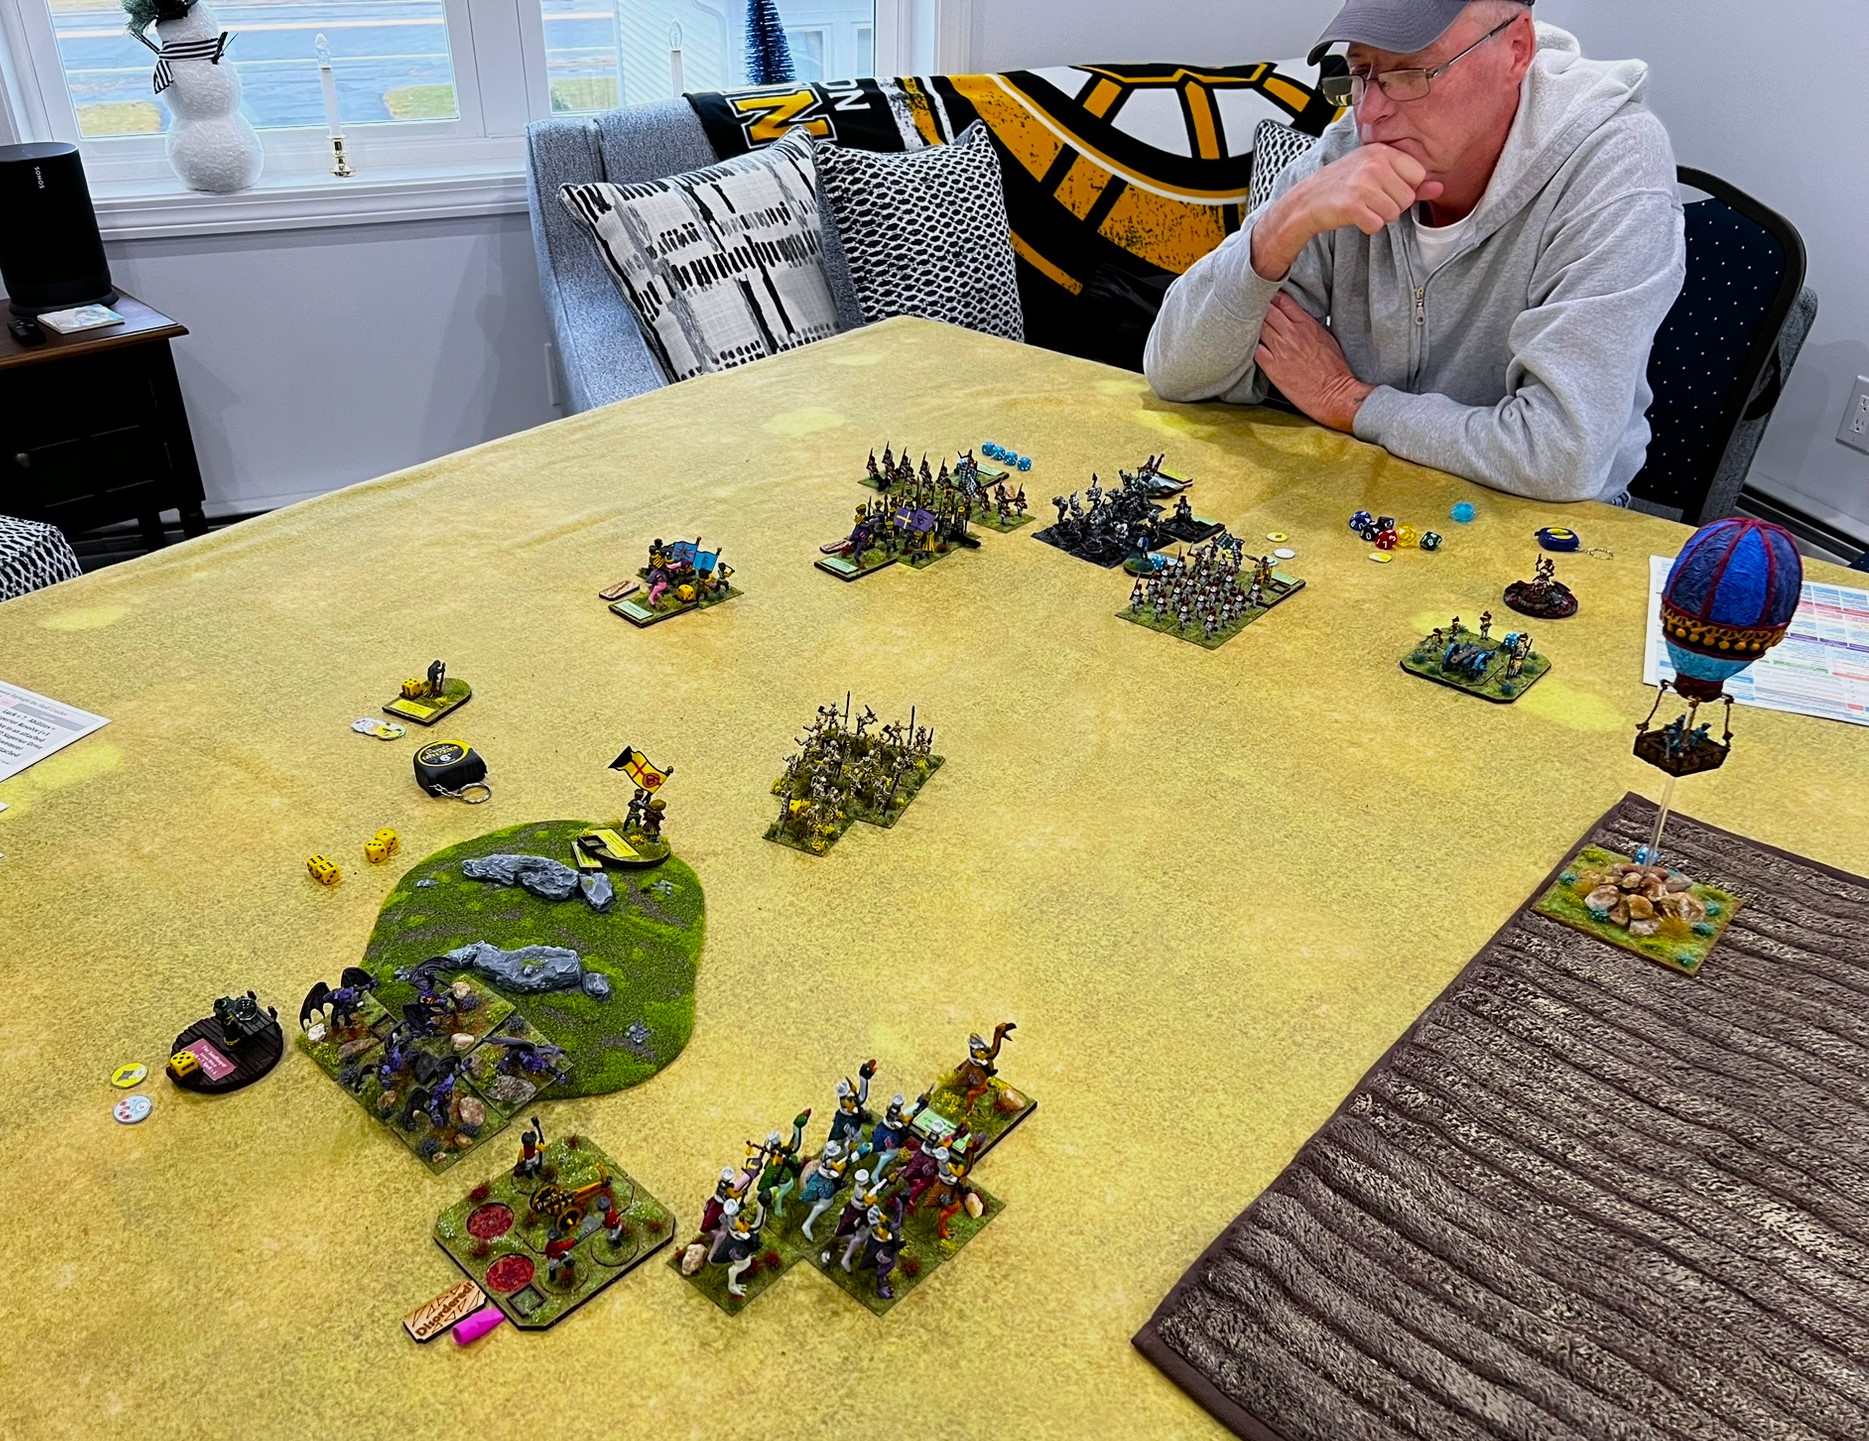
As a bonus, here is the general at the last game – being defeated by Colonel Sourdough (played by Mike as you see below).
Mike (the Munchkin player with Colonel Sourdough) watches General Zephaph (played by Brad) on the hill as he leads the assault on the Munchkins. It would not go well for the Winkies.
That’s all I have for Genearl Zephaph the Skull Crusher. Thanks to Russ and to Buck for making this possible! I may add another Winkie Brigade/Army leader in the future, but for now I will be set.
Next up I will be sharing several Lesser Witches who could be part of any faction’s forces.
And yes, I still have more Ozz to come…
Miscellaneous details and references for those interested in that sort of thing:
For all of my previous posts on Wars of Ozz games, figures, units, and other related projects – please see this page.
PAINTS, INKS, GLAZES, SHADES, WASHES, PIGMENTS, FLOCKING, GLUES AND MORE THAT I USED ON GENERAL ZEPHAPH THE SKULL CRUSHER AND HIS STANDARD BEARER:
Round MDF base from Old Glory
1.25″ x 1″ square steel base from Wargames Accessories (#FOW1)
Army Painter “Battlefields Field Grass” (flocking)
Vallejo Mecha Varnish “Gloss Varnish”
Vallejo Mecha Varnish “Matte Varnish”
Gamers Grass “Yellow Flowes” (flocking)
Printed Avery label
Army Painter “Battlefields Meadow Flowers” (flocking)
Shadow’s Edge Miniatures “Green Tufts” (flocking)
Army Painter “Battlefield Field Grass” (flocking)
Shadow’s Edge Miniatures “6mm Dark Forest Light Blue Tufts” (flocking)
Black Sharpie pen
Brown Sharpie Pen
Winkie Flags from Buck Surdu printed on card stock
Vallejo Game Ink “Black Ink” (ink)
Again, as you may want to check out the Wars of Ozz figures’ range – there are two places to get them (and I make no money from this btw). The game rules and the figures are available from the following two places:
I have not painted any Munchkins since last July when I built the Aerostat. Since the start of my Ozz journey, I have painted up a decent-sized Munchkin collection at this point, 33 points worth as shown below.
But, these are all – for the most part – pretty good units that have done well in recent games. I decided that it would be a good idea to add forces to the Munchkins to vary them from game to game or at least to create a wider range of player choices.
As most brigades are 20-30 points, I have decided that adding newer troops would also add this variety. To do this – and to have the capability of deploying two full Munchkin brigades, I have started to build:
8 Lesser witches (these could go to any faction, at 2 each = 16 points)
The additional three purely Munchkin units would bring me to 48 points just for them – but more importantly, their addition would leave them in need of another brigade and/or divisional commander figure. After all, the poor Munchkin Mayor would have his hands full with 50 points! (I did hint in my last post that I needed some of these).
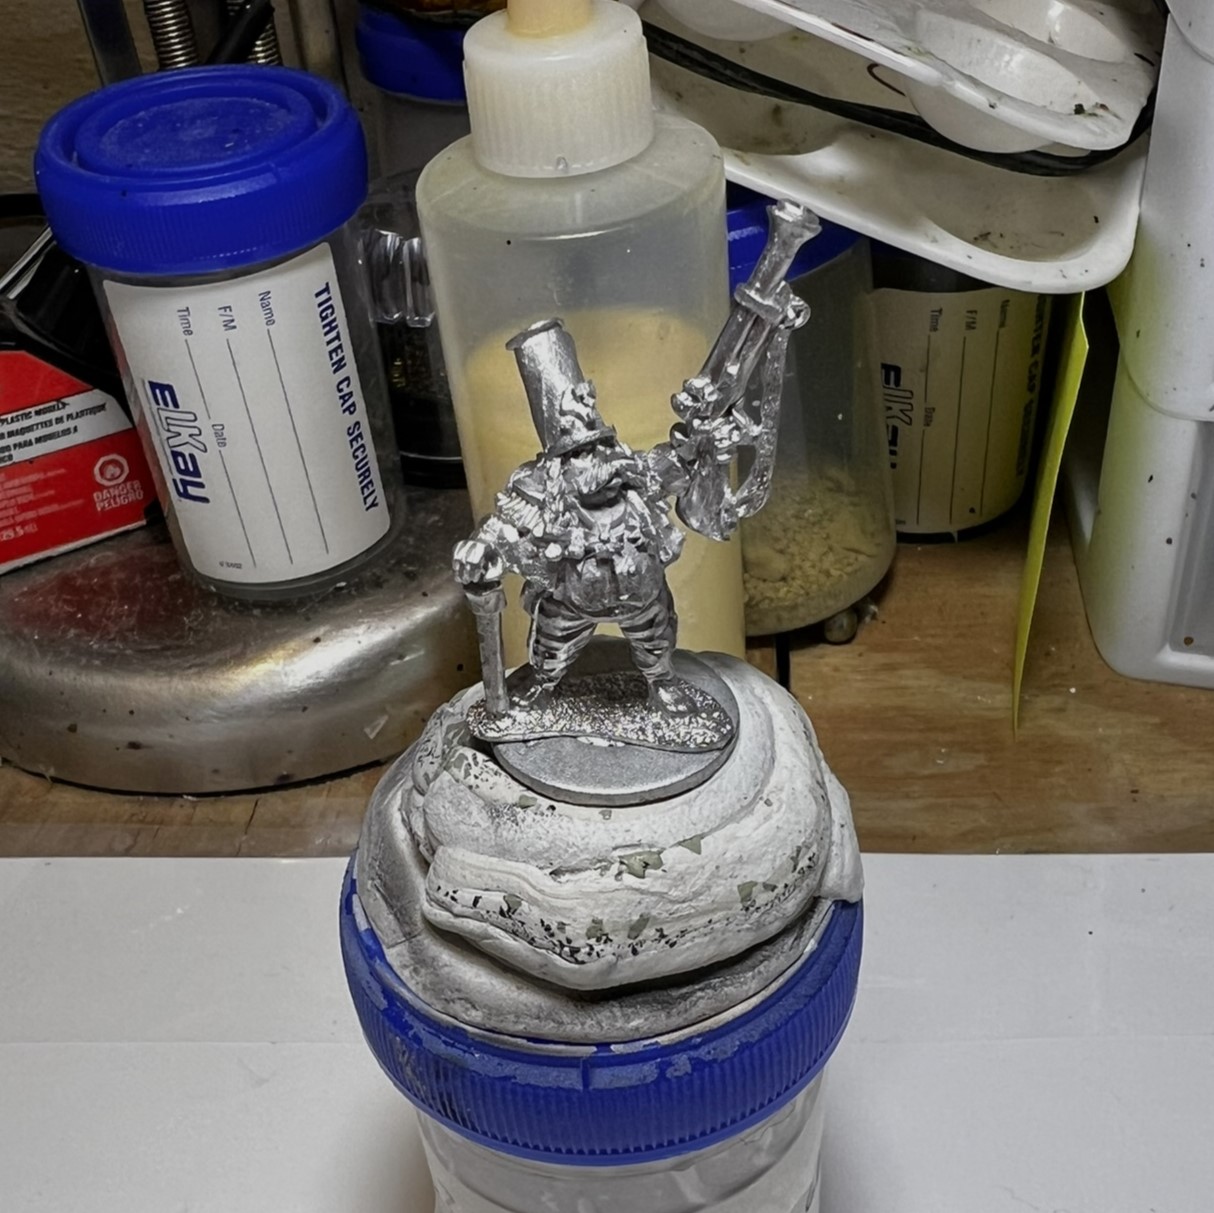
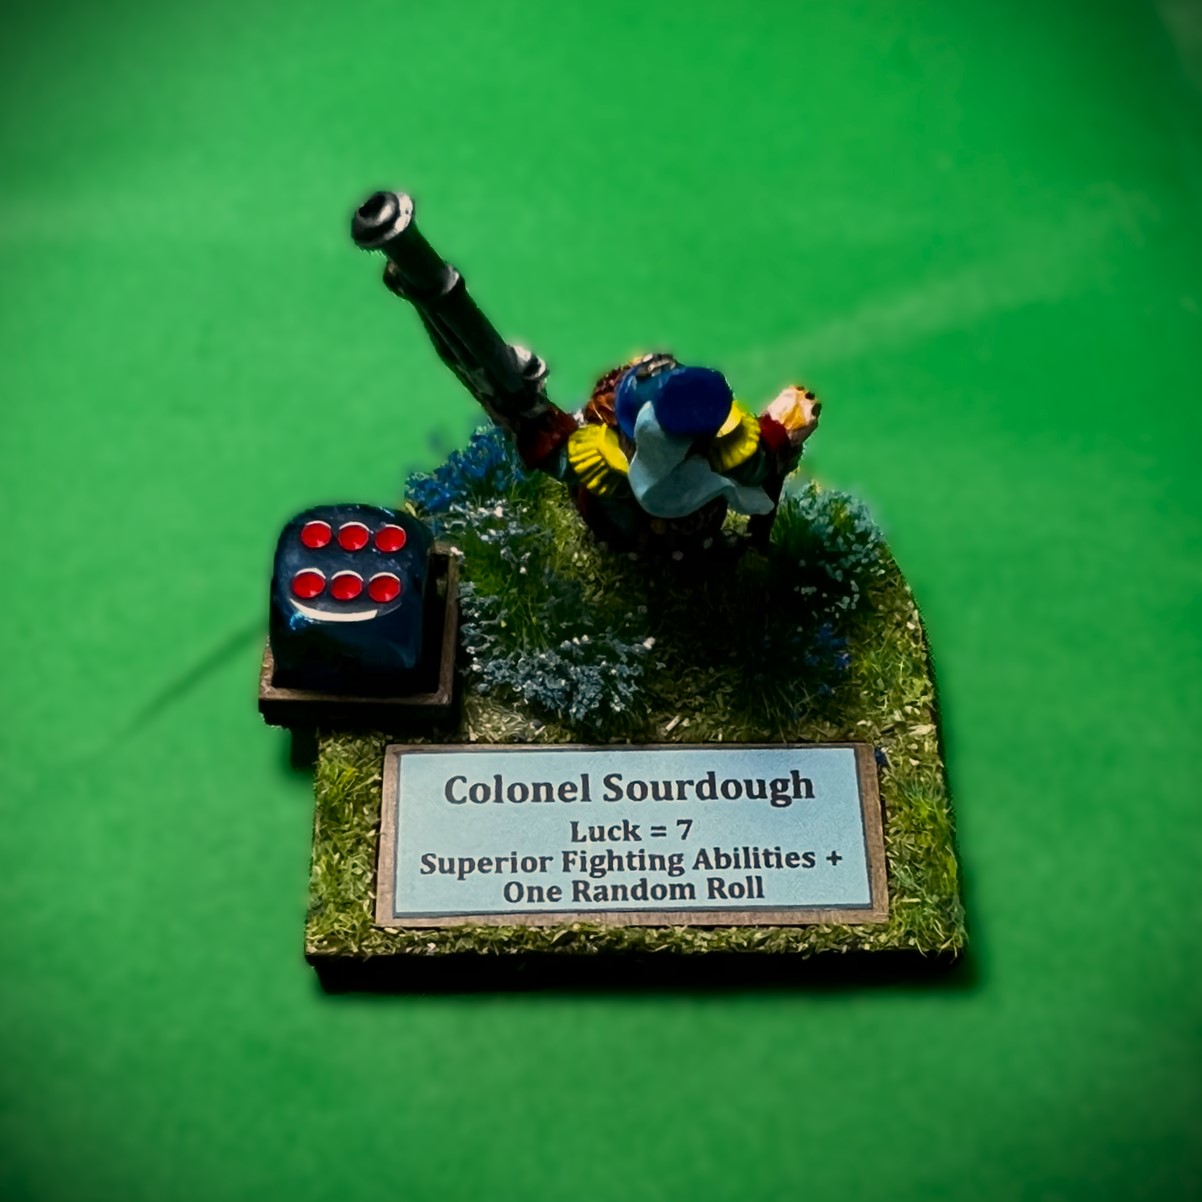
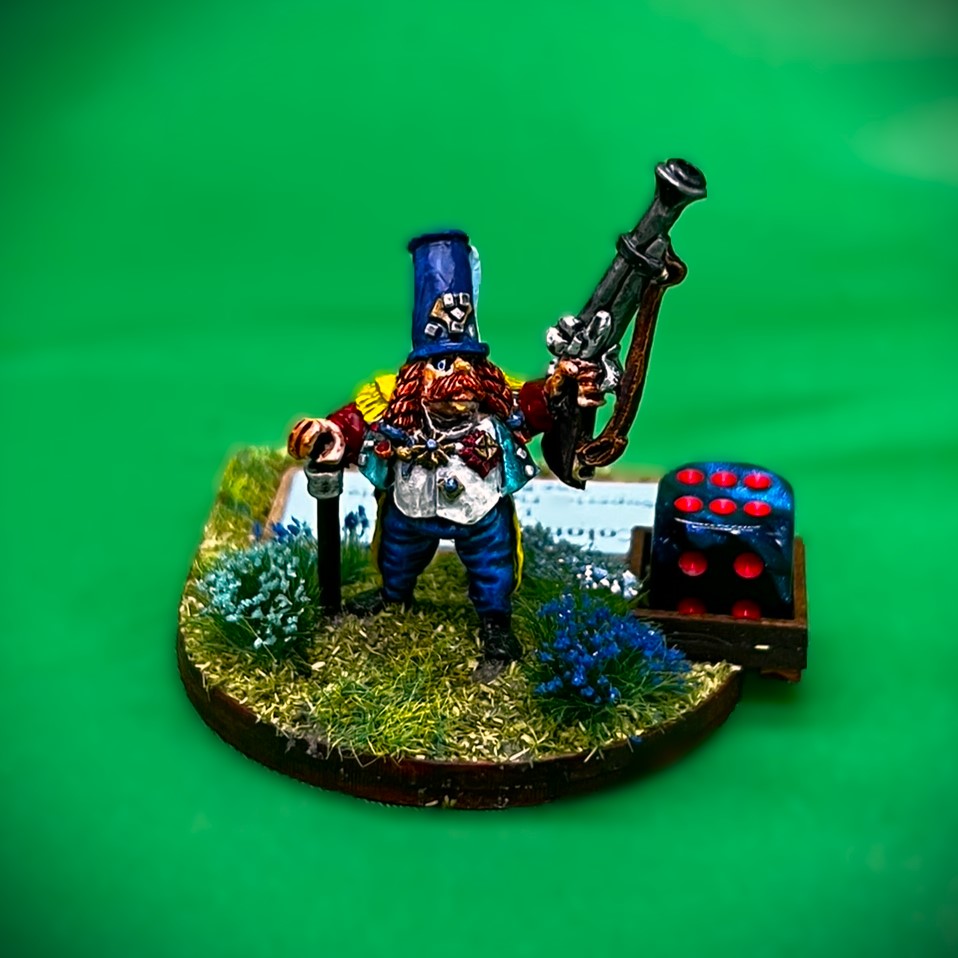
Enter Colonel Sourdough, SKU# OZZ-114, worth 2 points. It is a nice figure, with a lot of medals and a big blunderbuss/musket. He looks rather big for a Munchkin, but as a leader he looks the part. He is cast in metal and 28mm in size. In the game, he would be based on his own individual MDF leader base. No assembly was required other than for the MDF base.
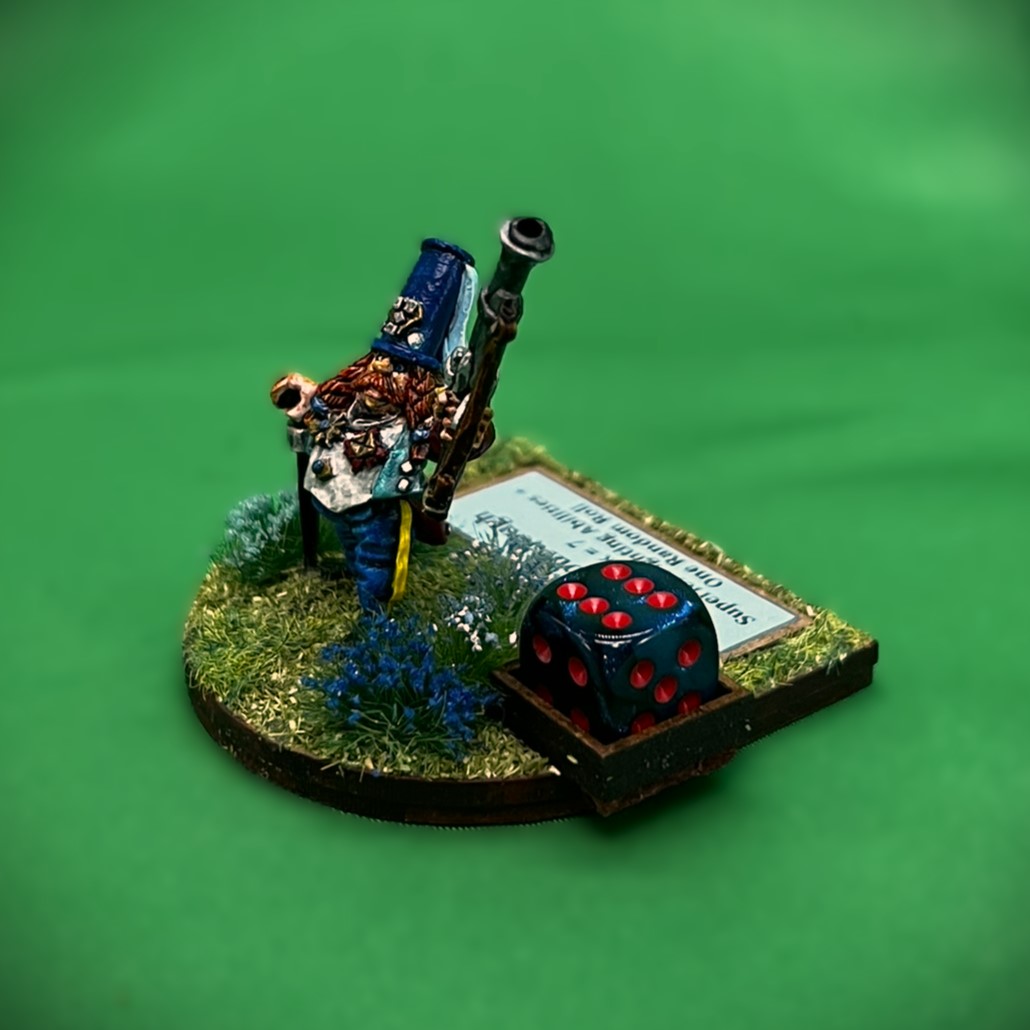
Brigade leaders control dice pools for their units. Colonel Sourdough has no combat values other than what he can do if he is attached to a unit. In that case, he gives that unit Superior Fighting Abilities and one random ability that is determined at random in each game. This is why he costs 2 points. His luck is 6/10, which is lower than most leaders.
WIP Shots
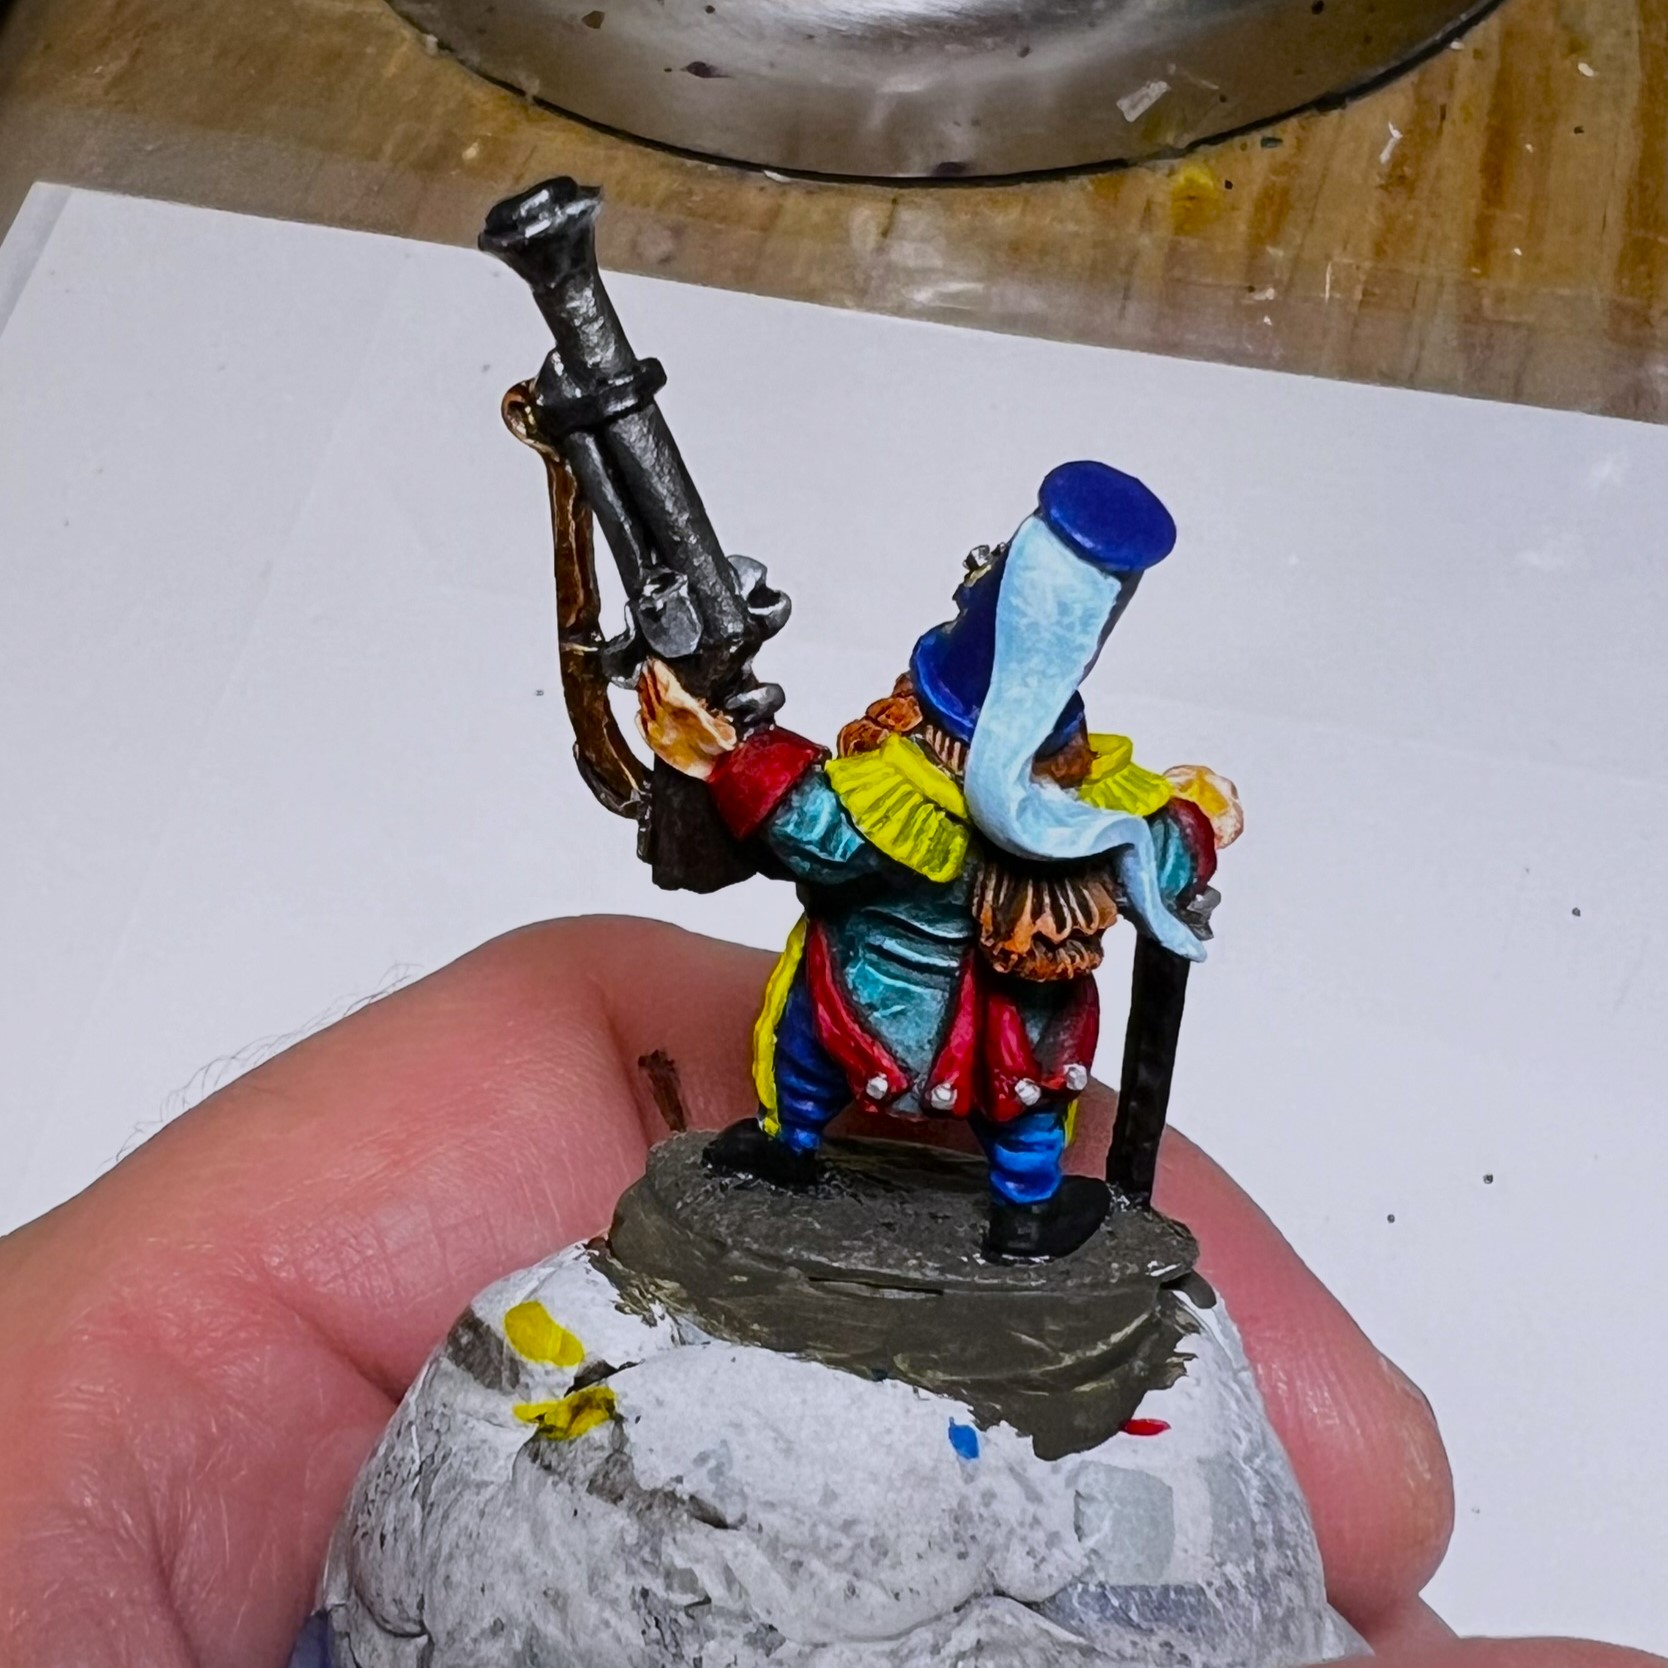
I followed the same basic painting pattern as is my habit, so WIP shots here will be brief. I used a lot of blues. I also thought that he could handle his alcohol – so ruddy faced he would be!
The Colonel and his MDF base (purchased separately).The Colonel mounted for paintingThe Colonel primed, washed with a dark wash (see the list of paints that I used at the end of this post if interested), and dry brushed white.Painted front pre-varnish and pre-basing……and the back view at the same point in time.
For the completed Colonel Sourdough, here is some…
Eye Candy
Colonel Sourdough top view showing the base that I built for him to include a label for the ease of play. The 12mm die gives an idea of his actual size.The frontal view – Munchkins are supposed to love blue.Left front view.Right front view.Rear view with better detail of the figure’s back.
That wraps up the good Munchkin Colonel. I may add another Munchkin Brigade/Army leader in the future, but for now I will be set.
Next up I will be sharing a similar addition for my Winkie forces. That’s only fair, right?
And yes, I still have more Ozz to come…
Miscellaneous details and references for those interested in that sort of thing:
For all of my previous posts on Wars of Ozz games, figures, units, and other related projects – please see this page.
PAINTS, INKS, GLAZES, SHADES, WASHES, PIGMENTS, FLOCKING, GLUES AND MORE THAT I USED ON COLONEL SOURDOUGH:
Regimental MDF base from Old Glory(I use regimental bases for brigade leaders and brigade bases for regimental leaders as they look and work better that way).
1.25″ x 1″ square steel base from Wargames Accessories (#FOW1)
Elmer’s PVA Glue
3/4″ Everbilt steel washer
Poster tack
Vallejo Premium Primer “White”
Vallejo “Flow Improver”
Vallejo “Airbrush Thinner”
Secret Weapon Washes “Heavy Body Black” (wash)
Vallejo Model Color “White”
P3 “Brown Ink” (ink)
Vallejo Model Air “Gun Metal”
Battlefront “European Skin”
The Armory “Dark Blue”
Army Painter “Speed Paint – Fire Giant Orange 1.0”
Army Painter “Speed Paint – Dark Wood 2.0”
Vallejo Mecha Color “Metallic Blue”
Citadel “Contrast Paint – Bad Moon Yellow”
Vallejo Mecha Color “Sky Blue”
Citadel “Contrast Paint – Aethermatic Blue”
Army Painter “Speed Paint – Poppy Red 2.0”
Citadel “Contrast Paint – Talassar Blue”
Vallejo Game Air “Dead White”
Army Painter “Speed Paint – Hardened Leather 1.0”
Army Painter “Speed Paint – Polished Silver 2.0”
Vallejo “Glaze Medium”
Army Painter “Warpaints – Shining Silver”
Vallejo Model Air “Black Metallic”
Vallejo Model Air “Steel”
Vallejo Model Air “Bright Brass”
Vallejo Model Color “Brown Rose”
Army Painter “Speed Paint – Crusader Skin 1.0”
Pendraken 12mm dice frame
Army Painter “Battlefield Field Grass” (flocking)
Vallejo Mecha Varnish “Gloss Varnish”
Vallejo Mecha Varnish “Matte Varnish”
Shadow’s Edge Miniatures “6mm Dark Forest Light Blue Tufts” (flocking)
Shadow’s Edge Miniatures “6mm Dark Forest Dark Blue Tufts” (flocking)
Army Painter “Battlefields Field Grass” (flocking)
Printed Avery label
Again, as you may want to check out the Wars of Ozz figures’ range – there are two places to get them (and I make no money from this btw). The game rules and the figures are available from the following two places:
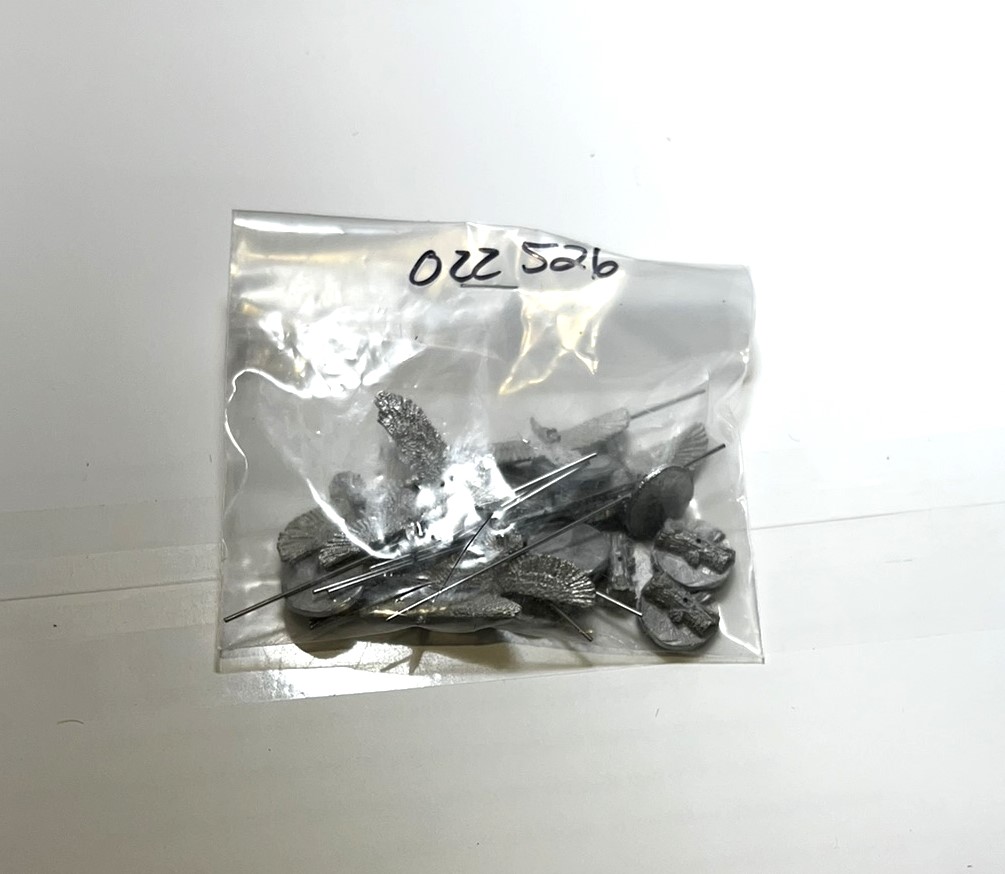
For all of the factions that I have in the game of Wars of Ozz, I want similar types of troops. That is, all should have access to infantry, cavalry, artillery, and magic users. Additionally, I want all factions to have at least some access to flying units. While I can add my Great Owls to any faction (as they belong to none and exist as potential allies), I wanted the Great Land of Harvest to have their own flyers – and they do – SKU #OZZ-526, “Great Flying Eagles”. I recently aquired this unit and wanted to get it battle-ready for upcoming club and convention games. And assembling them and painting them is the best way that I know of to acccomplish just that!
In OZZ-526, there are 10 figures – with no regimental commander. All of these are cast in metal and 28mm in size. Despite the fact that they are fliers, they are treated as infantry in the game. The eagles are based 2 apiece to a 2″ square base – so five bases for the 10-figure regiment.
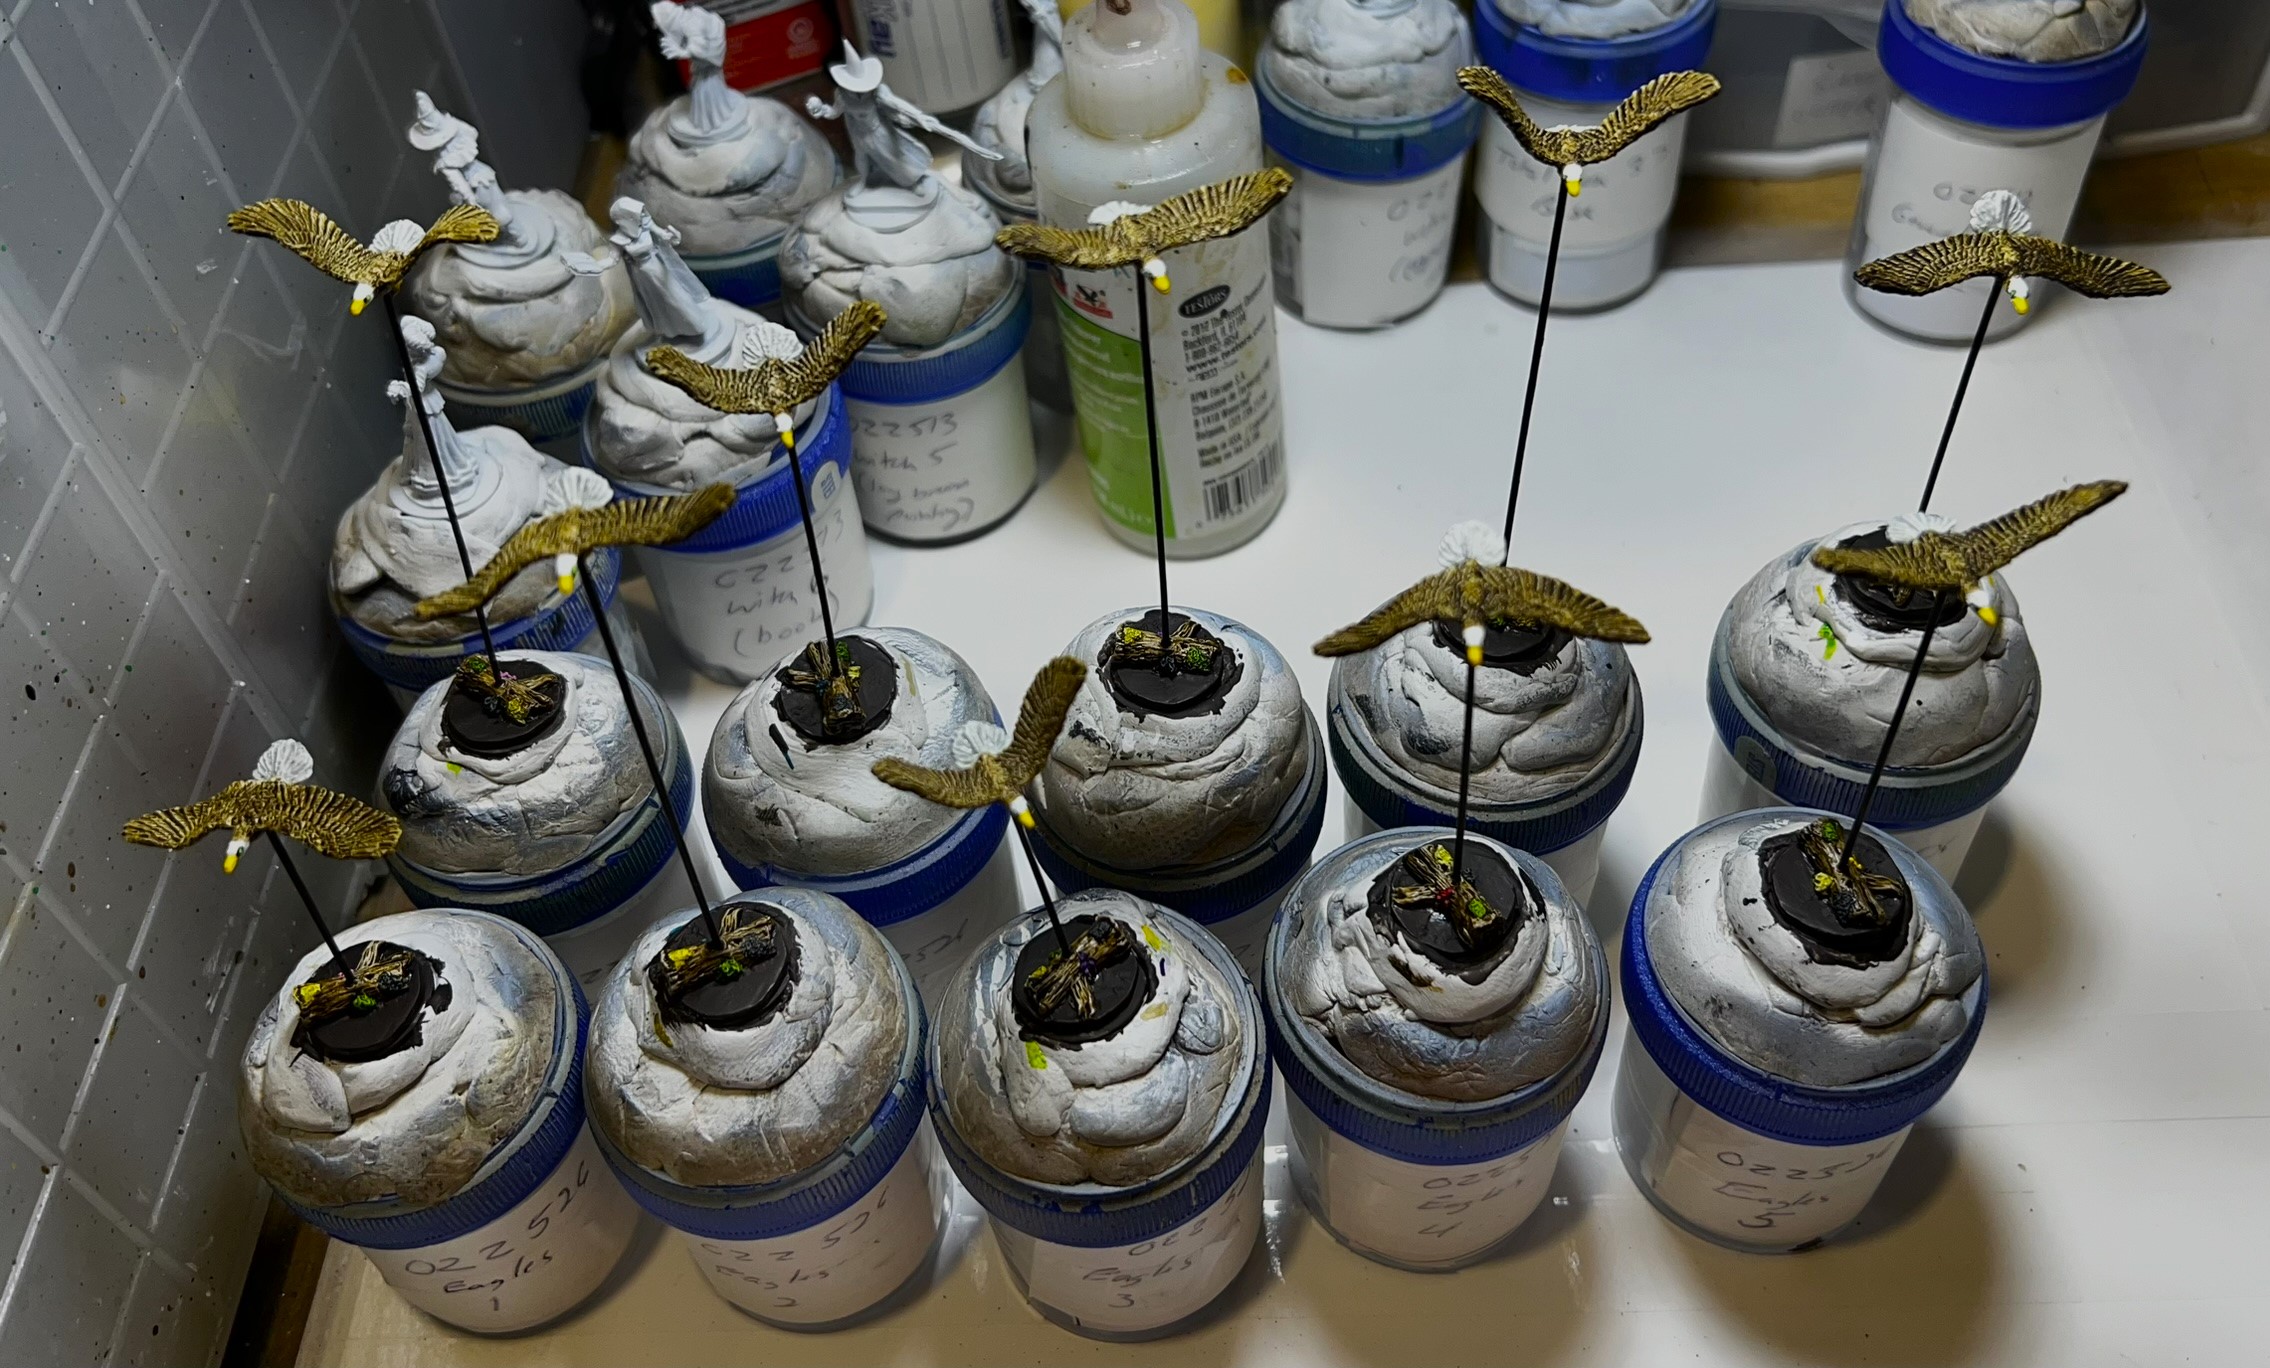
Similar to the Great Owls figures, the figures come in three pieces. The eagles, a flight stand, and a log flight base. After some minor assembly, the unit was ready to prime and paint. I also bent the wings to provide them with a more movement-like appearance.
WIP Shots
As received – note the bases and flight stands.The Great Flying Eagles (as opposed to the walking kind I guess), assembled and mounted for painting. You can see the bends I made in the wings.
Painting went fairly smoothly – I did deviate from the American Bald Eagle in terms of eye coloration – as all of my Great Land of Harvest troops have haunting green eyes – so would these birds. I also gave the bases more color with regards to the mushrooms, moss, and mold on the tree branch bases. My flocking approach was to have them resemble more of a woodland ground scheme (with no flowers) than a field.
After painting and awaiting varnish and flocking.
A Great Flying Eagle regiment has excellent mobility with a base movement of 4″. Plus, like all flyers, they can fly over an enemy and hit them from the rear. The regiment has a solid Melee value of 7/10, and a good Elan value of 6/10 as well. Where they are average is at Resolve (not running away from a fight) – with value of 5/10. The unit costs 4 points which is pretty cheap, and they can serve as allies to another faction per the rules.
Now, I for a brief show of some flying eye candy. As the figures are pretty uniform, I am sticking with larger group shots for this post.
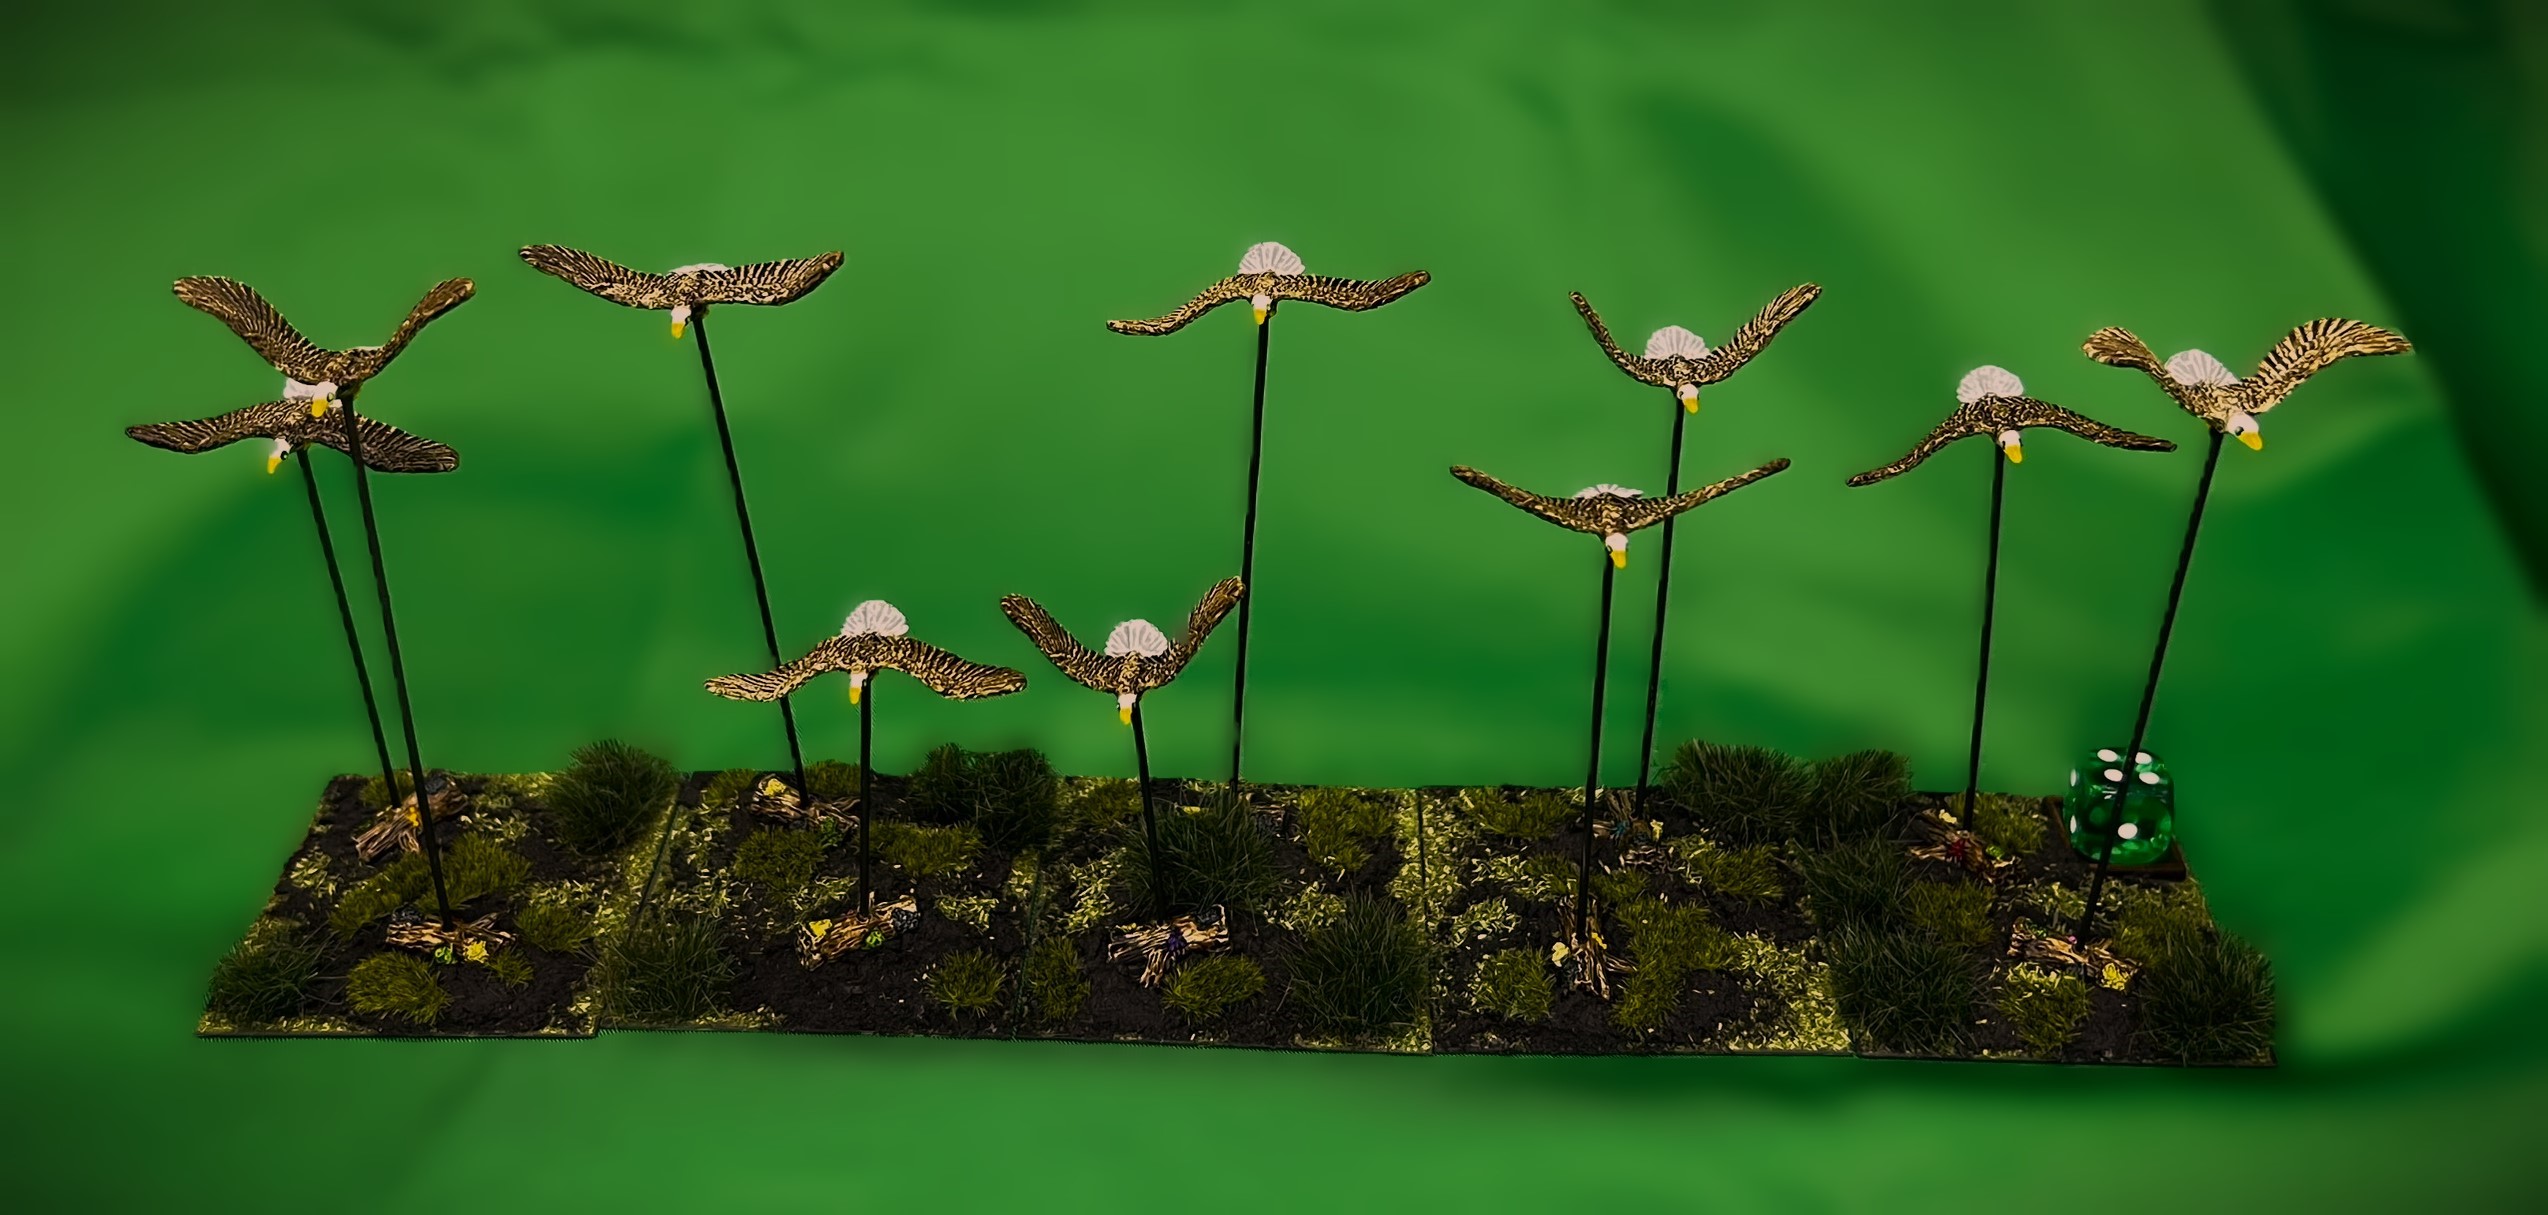
Eye Candy
Group shot from the front.Side shot of the eagles in column formation.A top view of the eagles in column.
As with many Ozz units, these birds were fun and very quick to do.
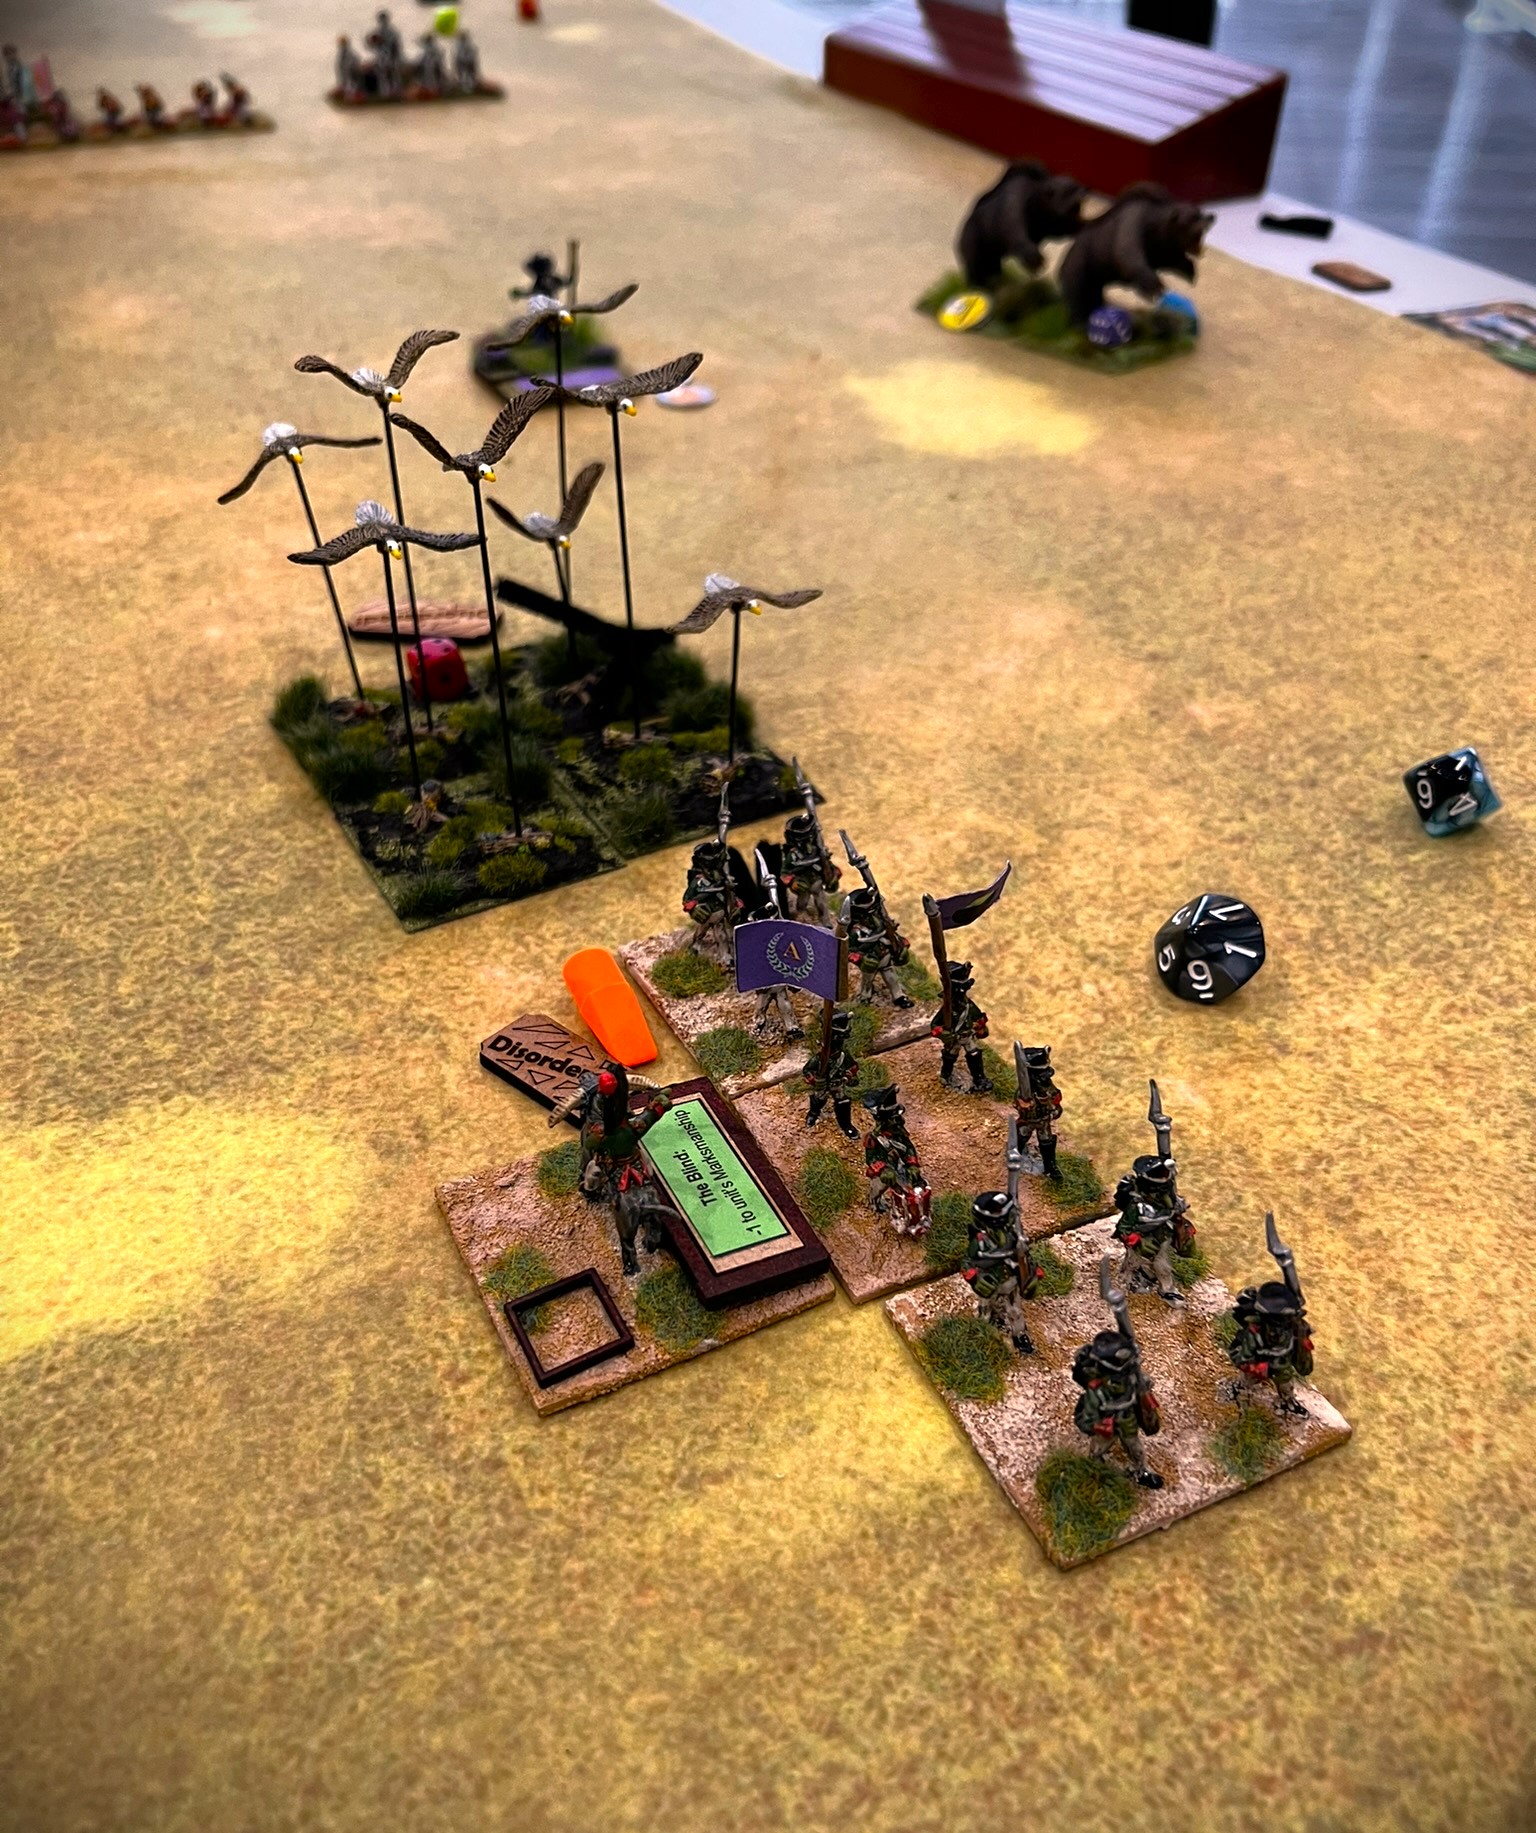
As a bonus shot, last weekend they saw their tabletop debut on the side of the Impkins as an ally. They routed a Gillikin Infantry Regiment – shown below routing from the eagles. The Gillikins were driven fom the field of battle by the eagles.
Even with a base loss, these eagles decimated this Gillikin Regiment.
Next up will be some thing new for my Ozz armies – lot’s of individual figures for leadership and magic!
And yes, I still have more Ozz to come…
Miscellaneous details and references for those interested in that sort of thing:
For all of my previous posts on Wars of Ozz games, figures, units, and other related projects – please see this page.
PAINTS, INKS, GLAZES, SHADES, WASHES, PIGMENTS, FLOCKING, GLUES AND MORE THAT I USED ON THE FIGURES FOR THIS GREAT FLYING EAGLE REGIMENT:
Gorilla Glue
Everlast 3/4″ steel washers
War Games Accessories 2′ square steel bases (#21)
Poster tack
Vallejo Premium White Primer
Vallejo “Flow Improver”
Vallejo “Airbrush Thinner”
Battlefront “Sherman Drab”
Vallejo “Thinner Medium”
Battlefront “German Camouflage Black Brown”
Vallejo Model Color “White”
Citadel “Contrast Paint – Garaghak’s Sewer”
Citadel “Contrast Medium”
Reaper MSP Colors “Pure Black”
Citadel “Contrast Paint – Bad Moon Yellow”
Citadel “Ushabti Bone”
Army Painter “Speed Paint – Ghillie Dew 2.0”
Army Painter “Speed Paint – Burnt Moss 2.0”
Army Painter “Speed Paint – Malignant Green 2.0”
Army Painter “Speed Paint – Familiar Pink 2.0”
Army Painter “Speed Paint – Raging Sea 2.0”
Army Painter “Speed Paint – Purple Swarm 2.0”
Army Painter “Speed Paint – Poppy Red 2.0”
Citadel “Contrast Paint – Imperial Fist”
Army Painter “Speed Paint – Brownish Decay 2.0”
Army Painter “Speed Paint Medium 1.0”
Citadel “Agrax Earthshade” (wash)
Citadel “Tesseract Glow” (technical)
Citadel “Contrast Paint – Apothecary White”
Elmer’s PVA Glue
Army Painter “Battlefield Field Grass” (flocking)
Pendraken 12mm dice frames
Vallejo Mecha Varnish “Gloss Varnish”
Vallejo Mecha Varnish “Matte Varnish”
Citadel “Stirland Battlemire” (texture)
Gamer’s Grass “Strong Green XL” (flocking)
Gamer’s Grass “Green Moss 2mm” (flocking)
Again, as you may want to check out the Wars of Ozz figures’ range – there are two places to get them (and I make no money from this btw). The game rules and the figures are available from the following two places: