M5 Stuart tanks for “Operation Torch: Vichy Mounts an Armored Counterattack” Game

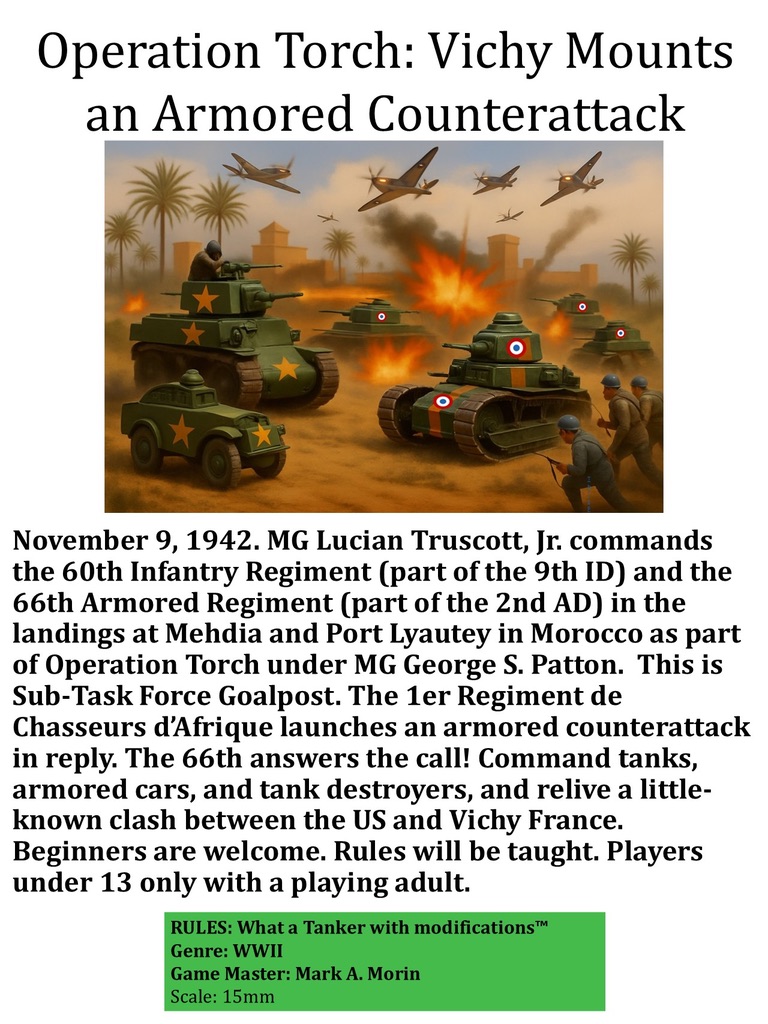
I promised back in August that I would post about my US M5 Stuart tanks. These would be the linchpin of my US forces in my “Operation Torch: Vichy Mounts an Armored Counterattack” games.

M5 Stuart in Casablanca.

Yes, the US and UK did briefly engage French forces of Vichy in North Africa in WWII. After the US Operation Torch landings, Vichy did put up a resistance. Technically they were supposed to be neutral after the 1940 Armistice. However, the Soviets were dealing with massive battles on the Eastern Front, and the US/UK allies were not yet ready to successfully invade Fortress Europe. As the Dieppe raid showed, it would have been a catastrophic failure in 1942.

The idea was to take off some of the pressure on the Soviets by getting in the war somewhere and tie down the Germans. French North Africa became the chosen option, with the hope that the Vichy French would welcome the US/UK invaders as liberators and not invaders. For a brief period in November 1942, both of these two options played out in Morocco, Tunisia, and Algeria – until the French there decided to cease resisting the Allies. Subsequently, back in Europe, Hitler was enraged at the Vichy capitulation and ordered his forces to invade the remaining southern part of France that was not yet occupied.

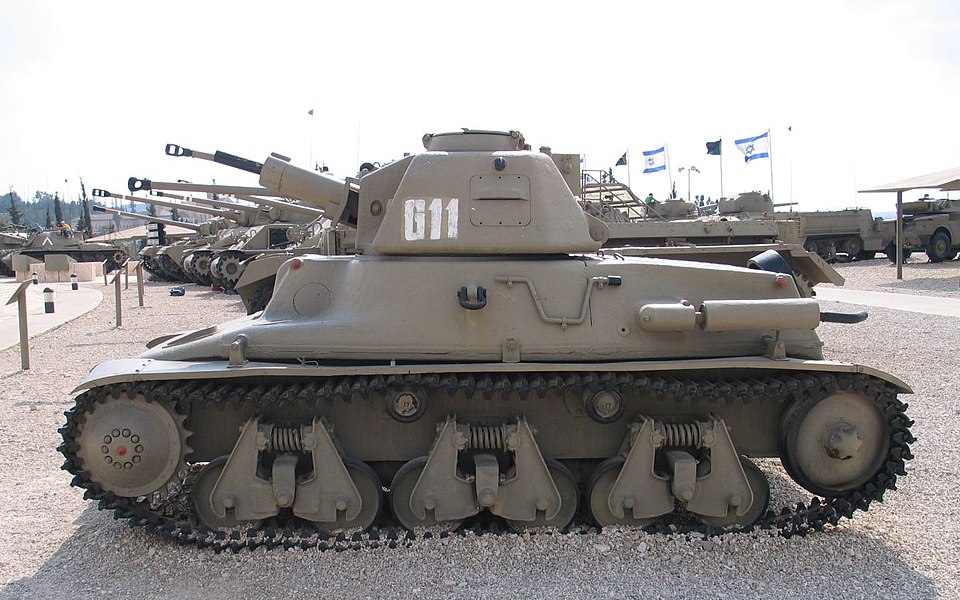
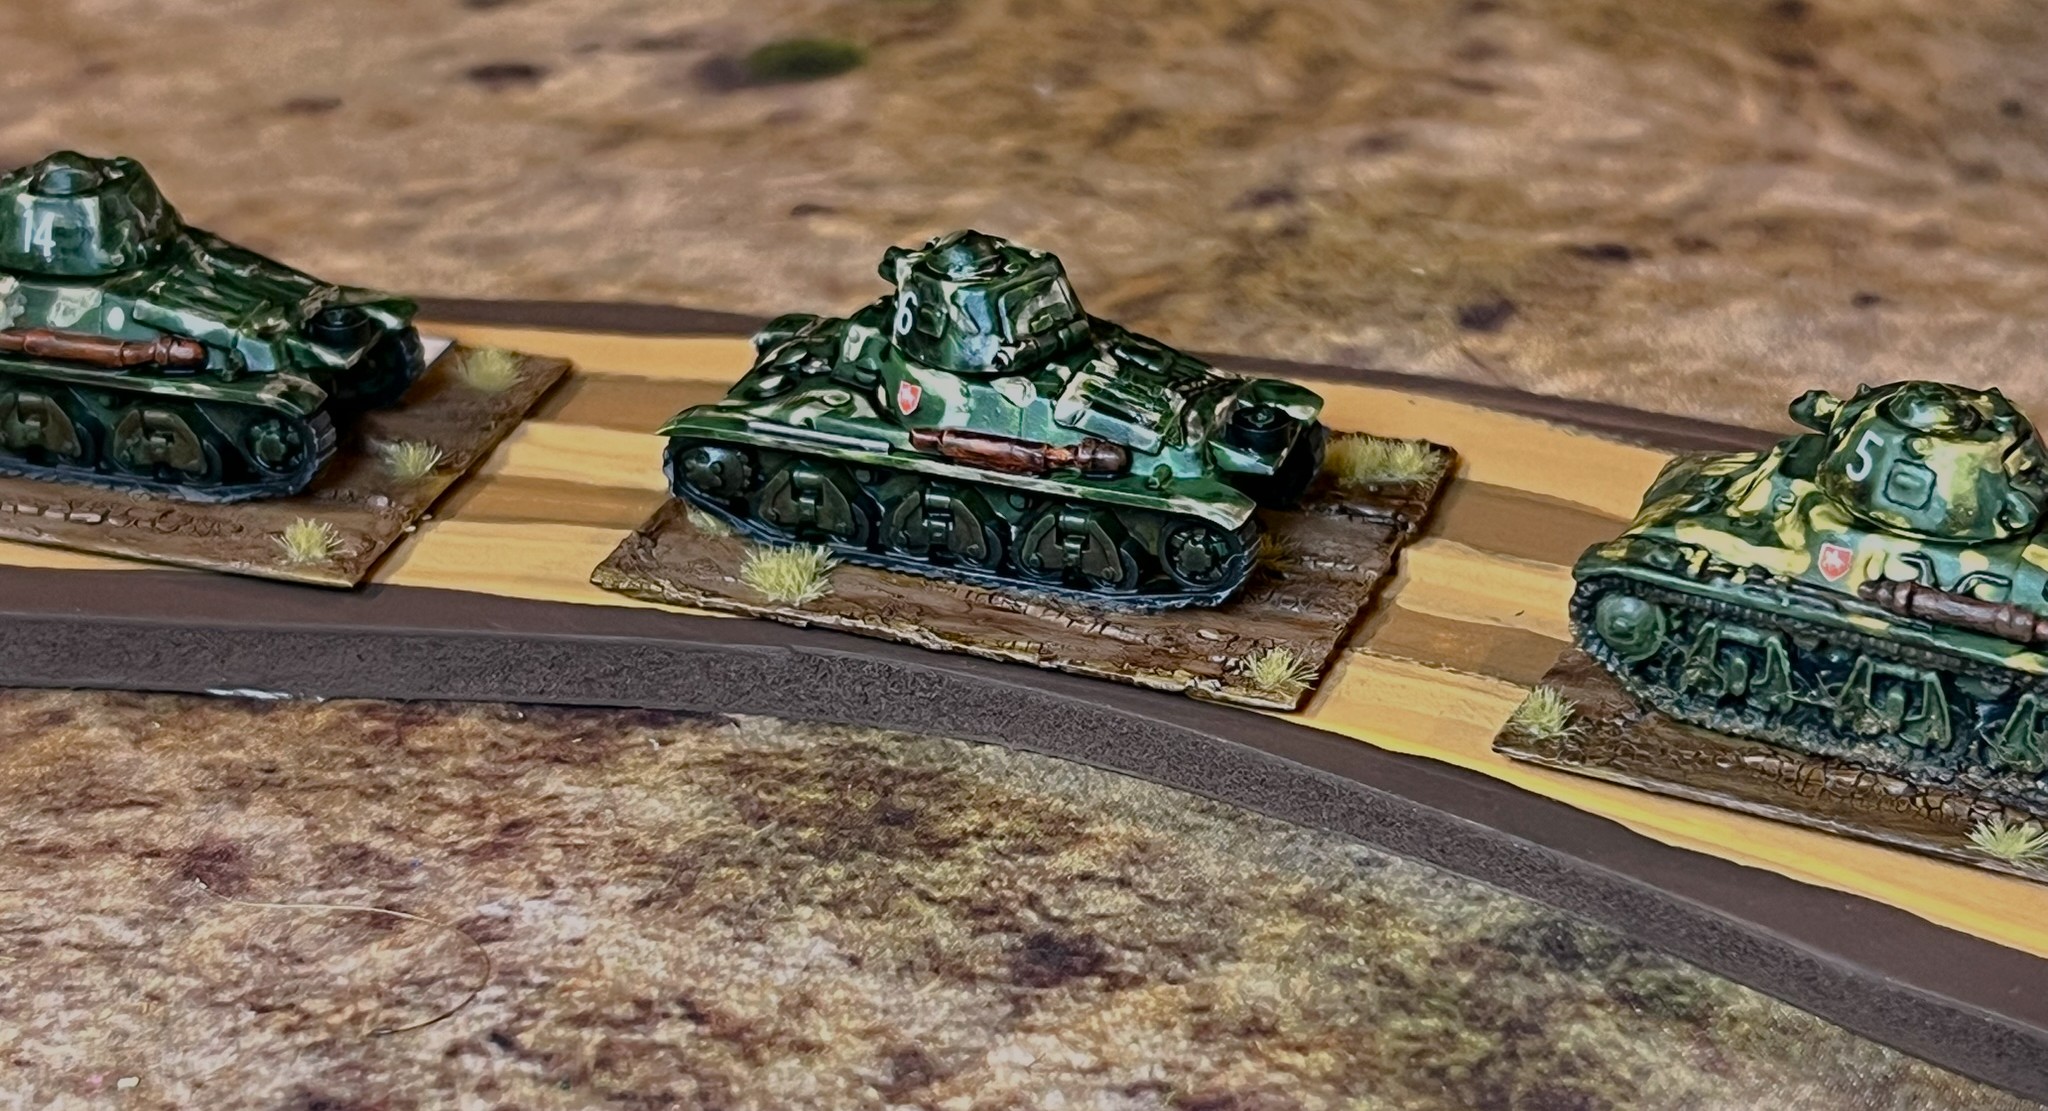
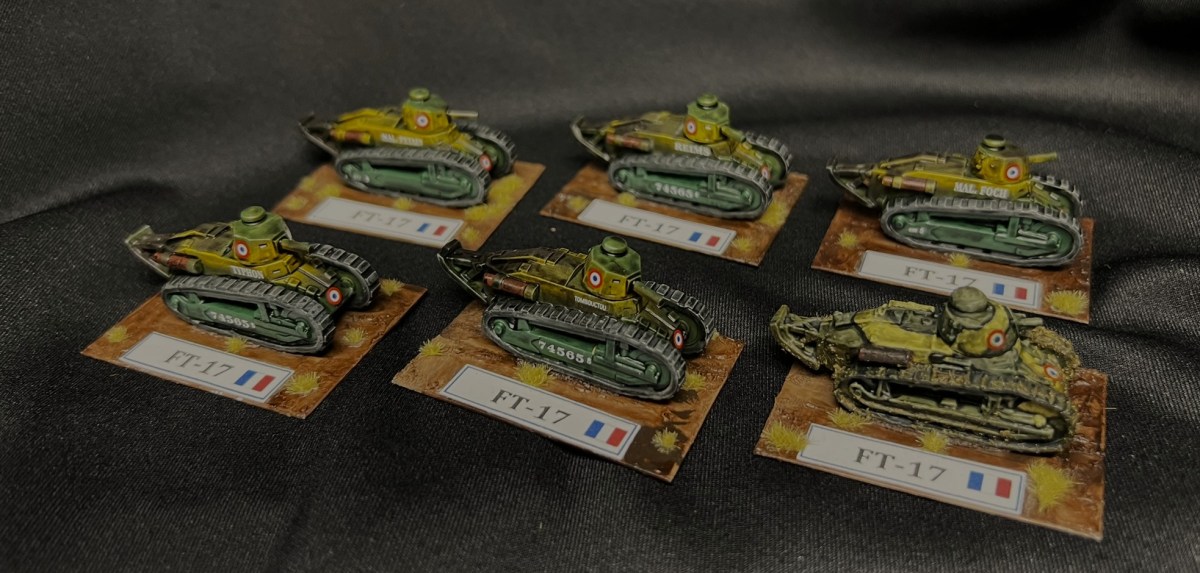
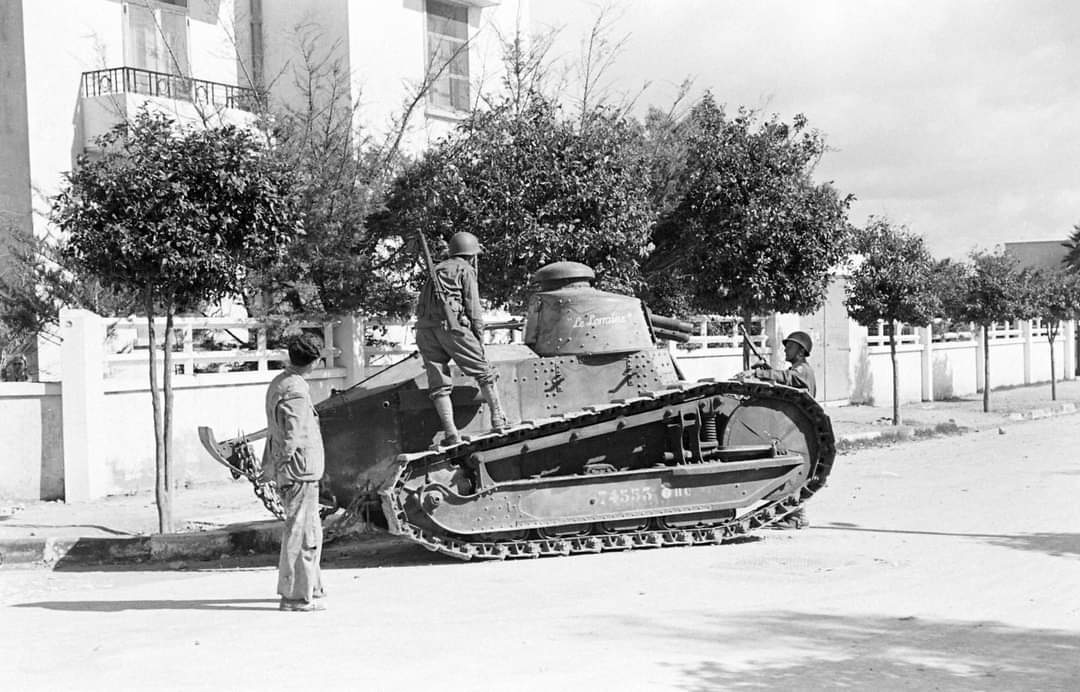
Back in North Africa in November 1942, one of the more obscure incidents of the conflict was in Morocco – where the French 1er Regiment de Chasseurs d’Afrique launched an armored counterattack towards the landing beaches. At that critical juncture, the 66th Armored Regiment of the 2nd Armored Division (and Sub-Task Force Goalpost) had just 7 M5 Stuart tanks that it could cobble together to intercept the French. Their M4 Sherman tanks needed a port to unload, and that had not happened yet.

I found this article/post by Patrick Chaisson to be an excellent description of the combat that happened in November 1942.

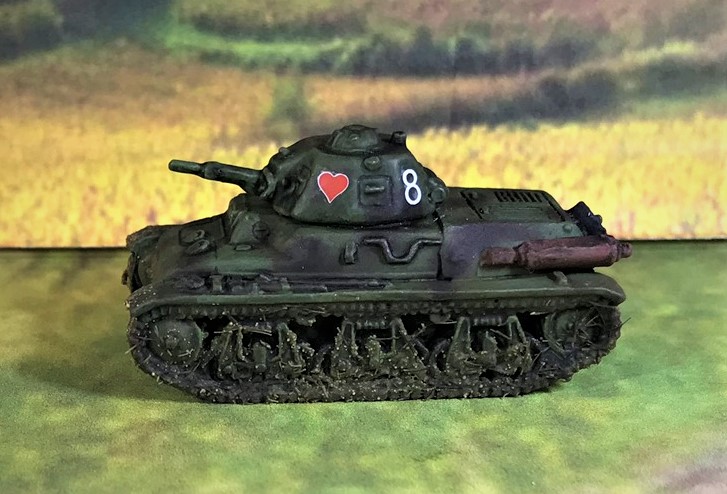
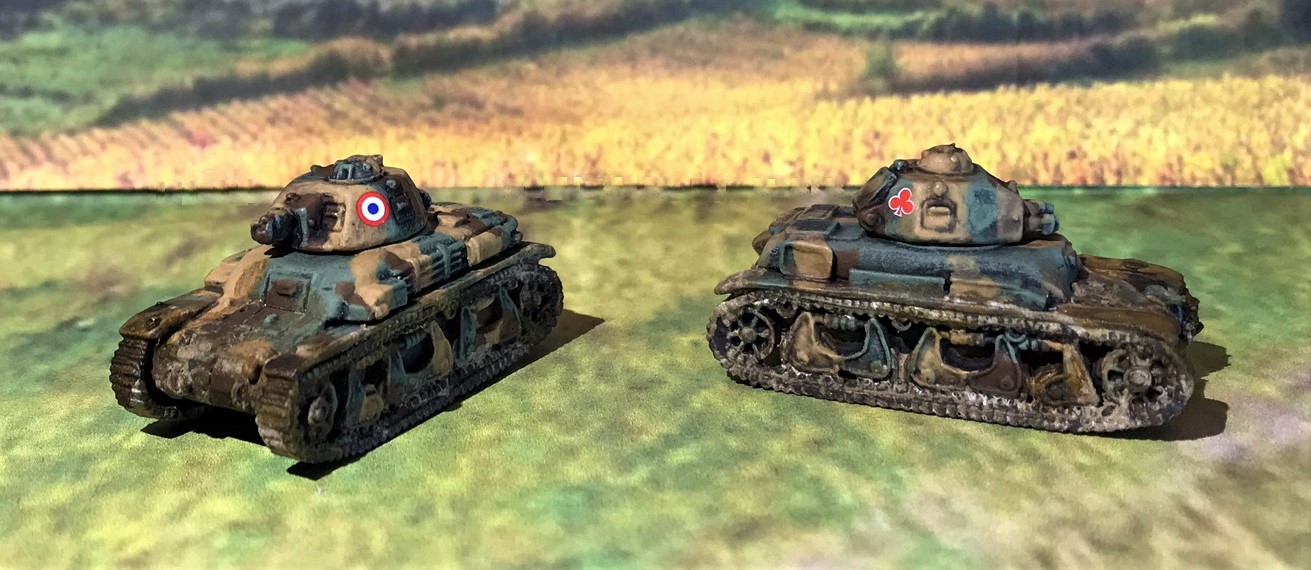
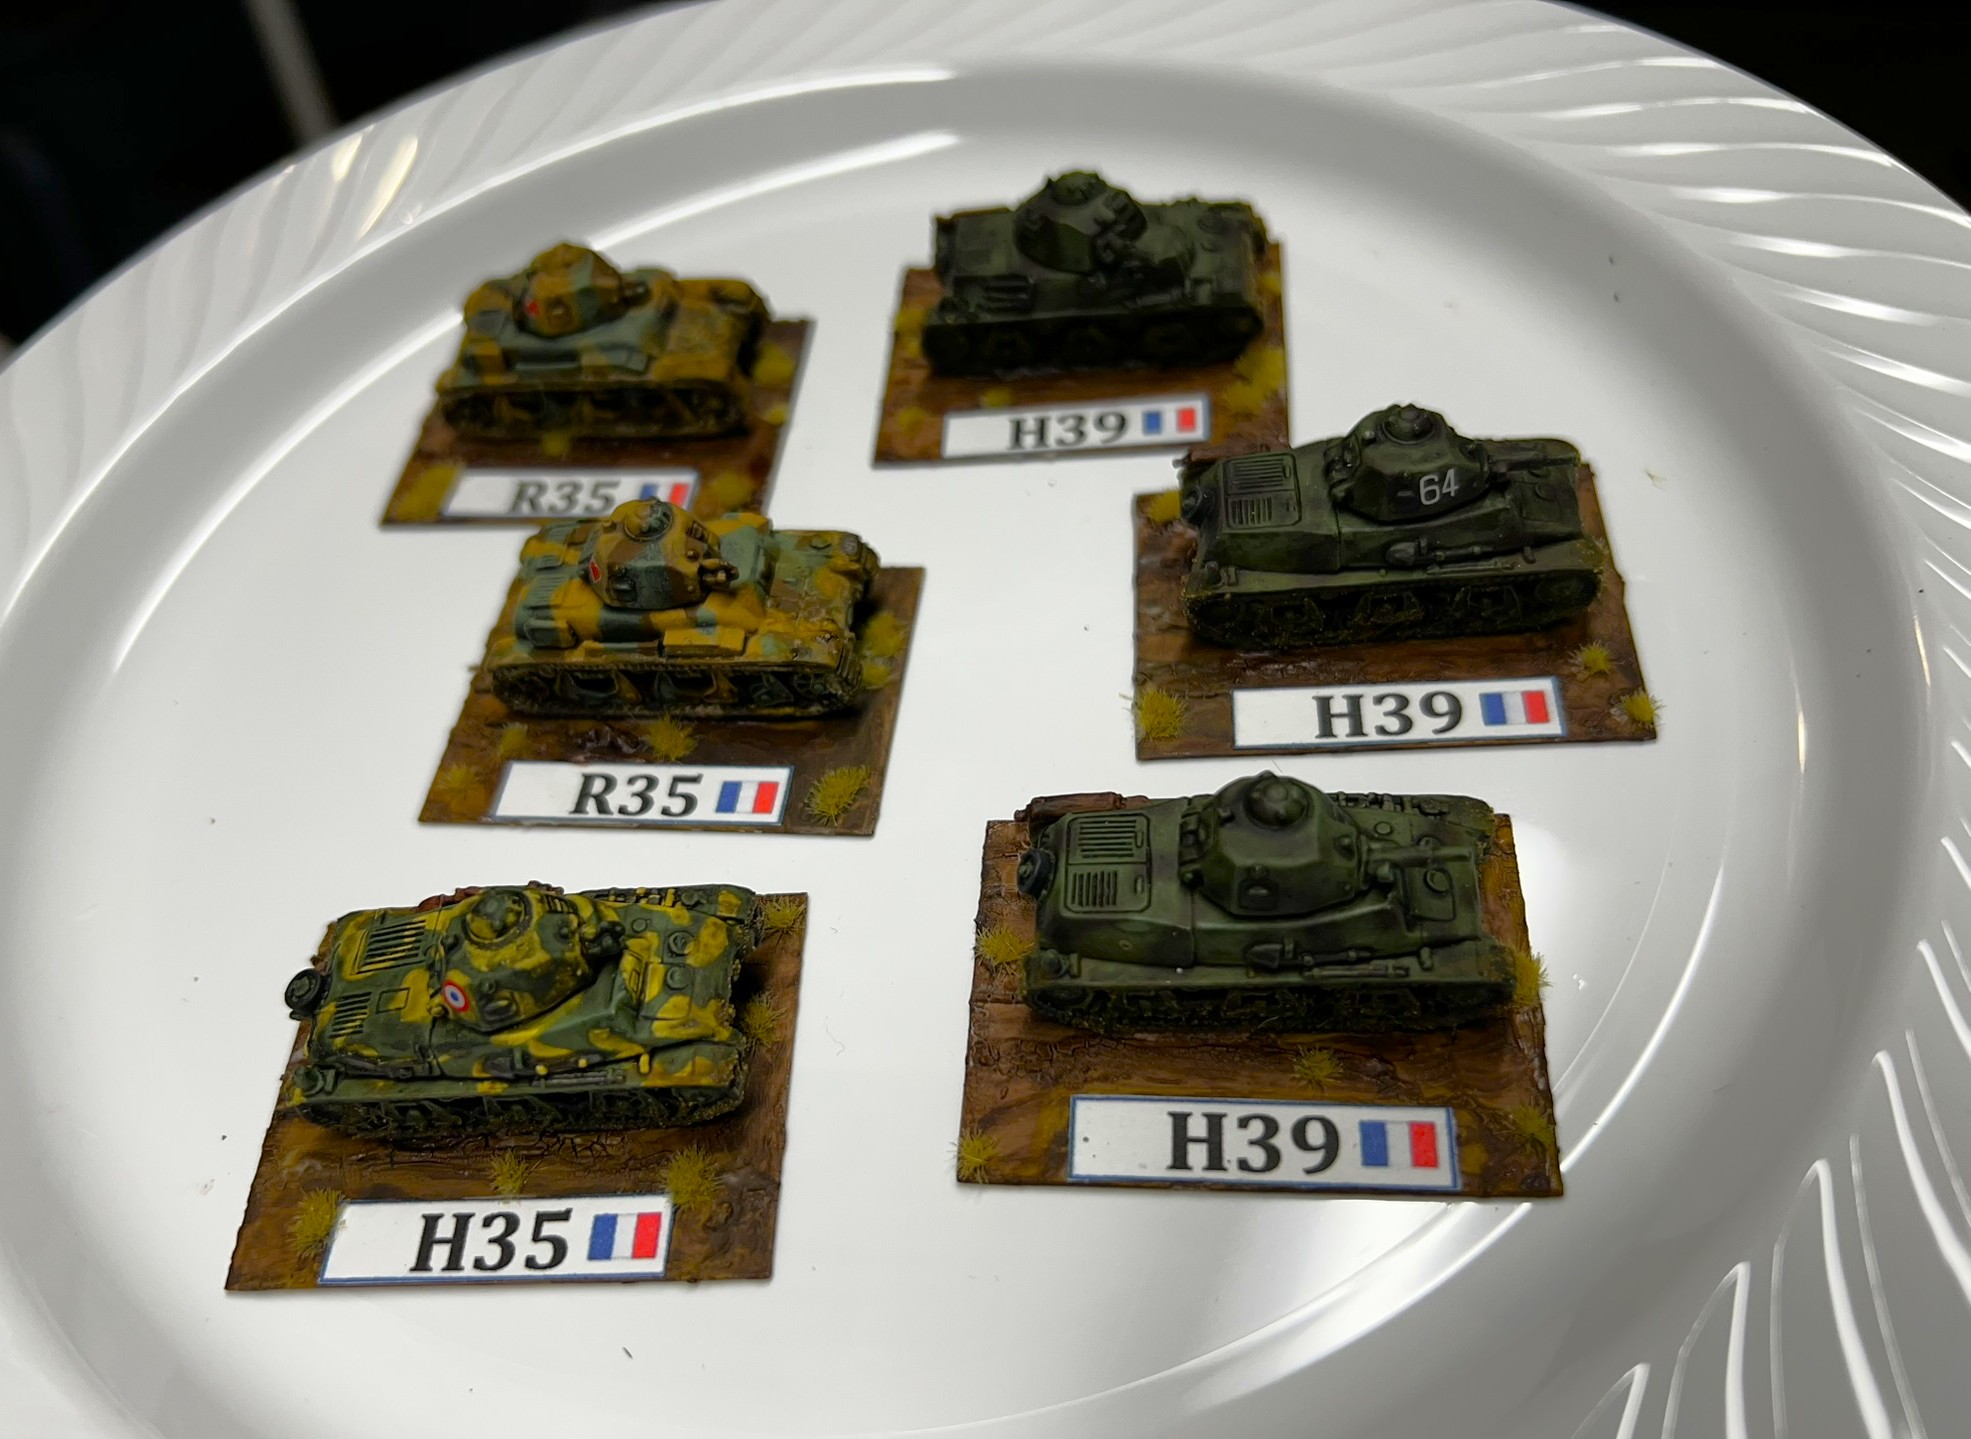
As far as a concept for a wargame, I liked the idea of a game that would recreate this clash of armor – especially as one side was green as hell, and the other fielded such a hodgepodge of elderly and obsolescent armor.

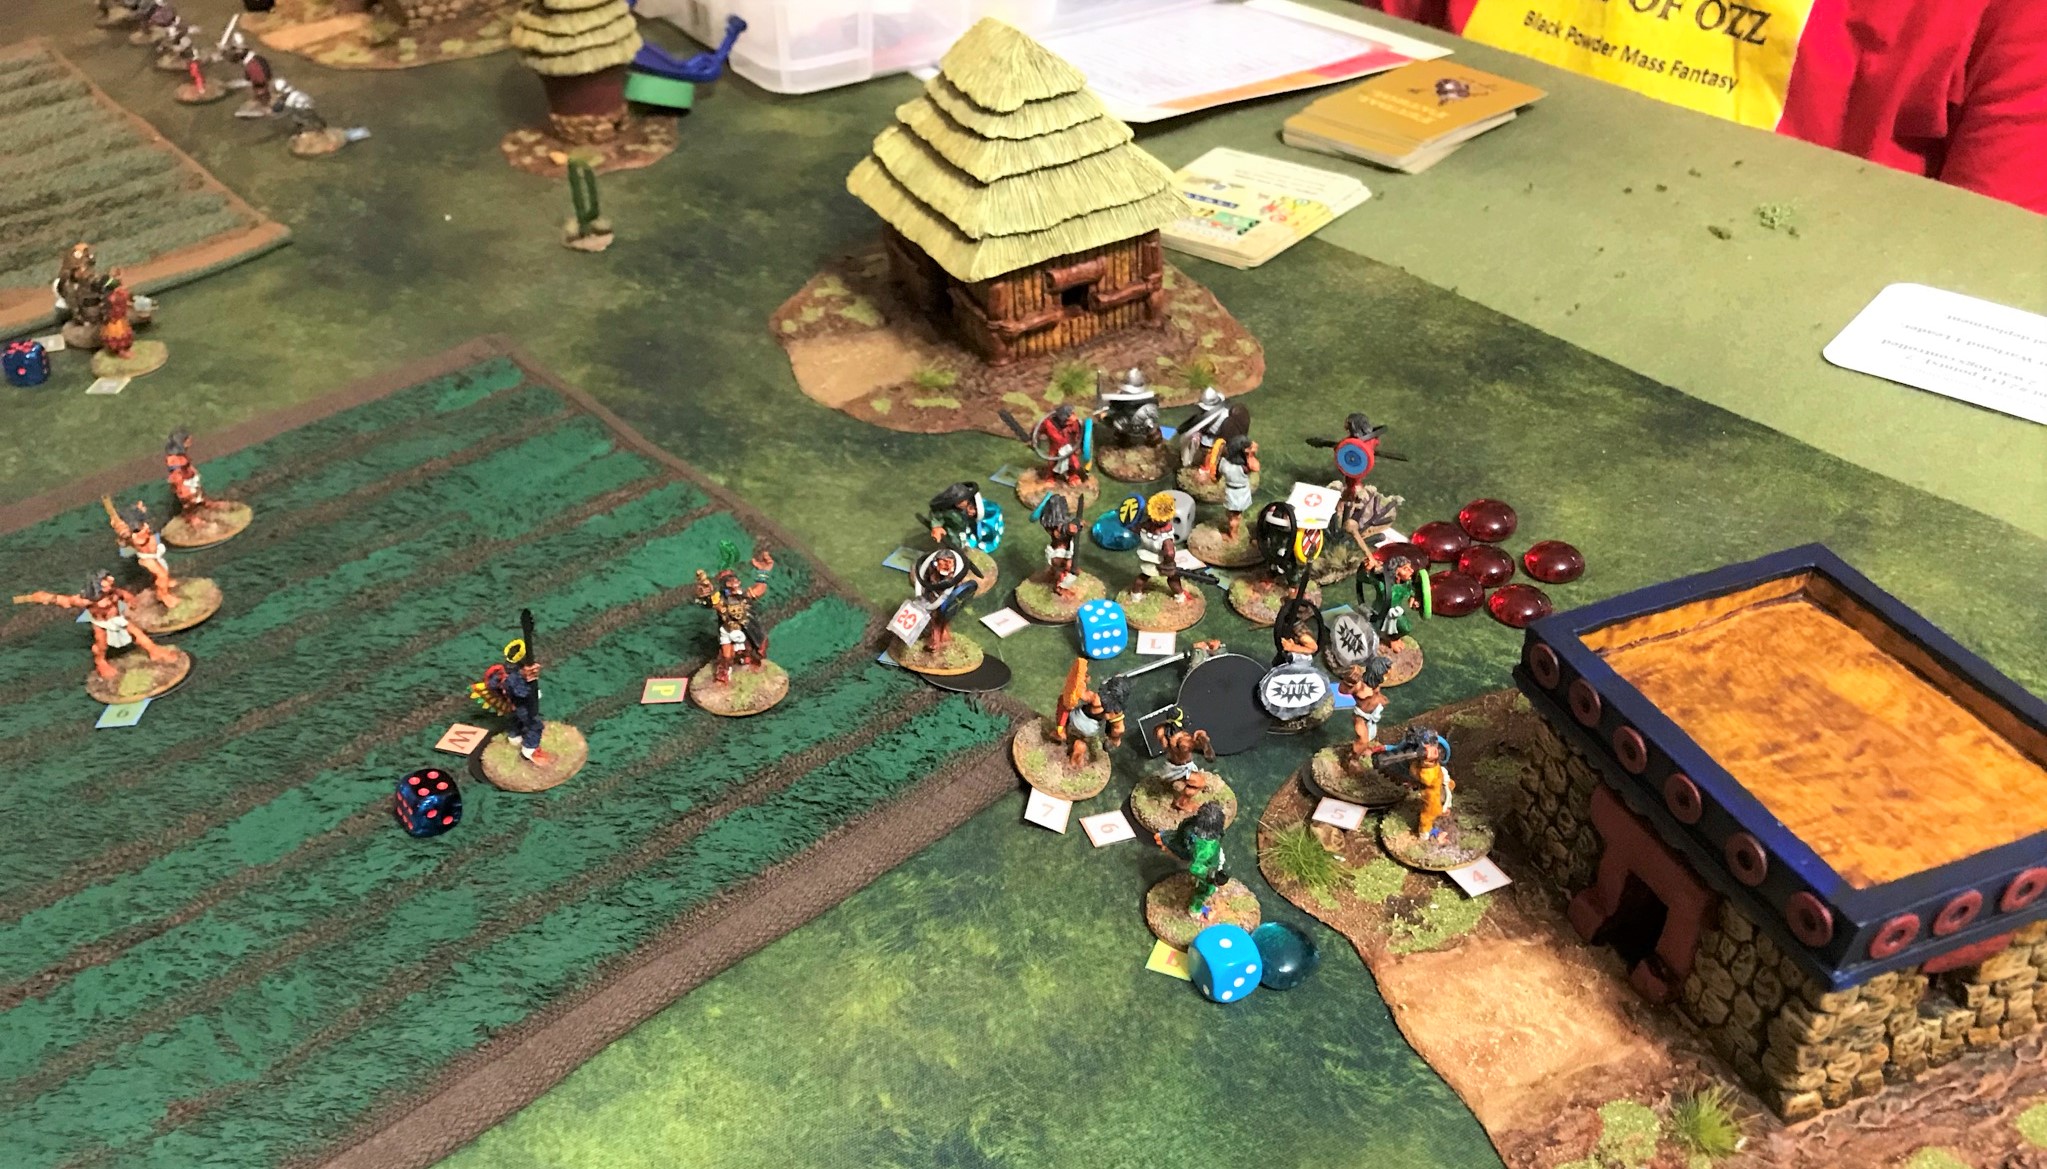
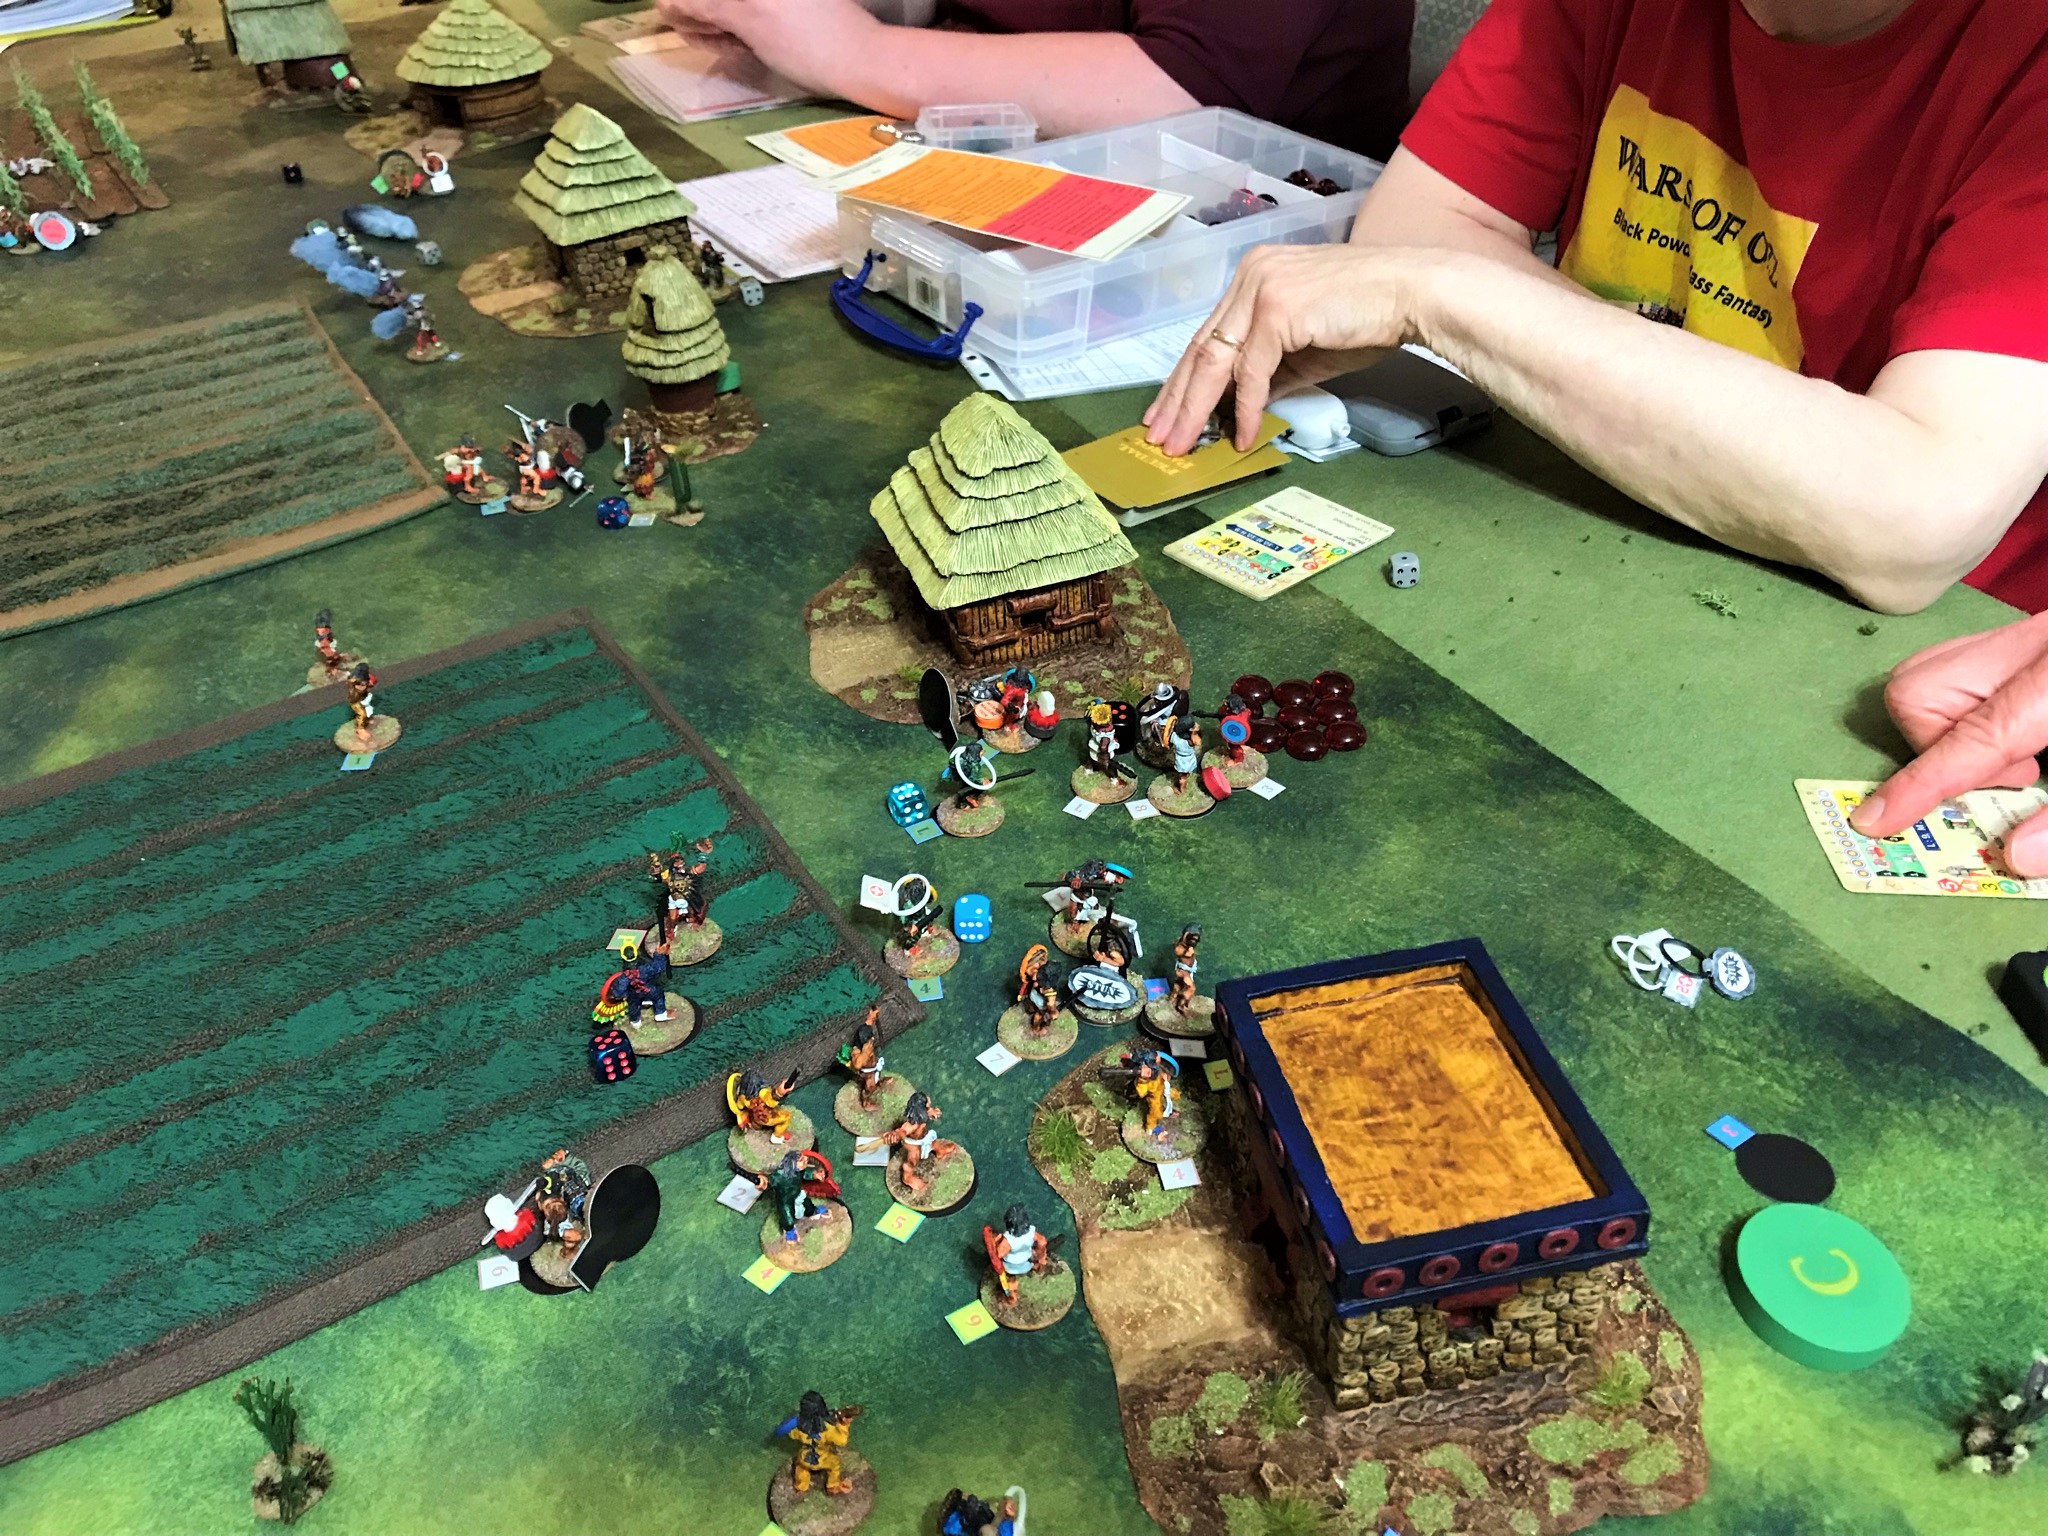
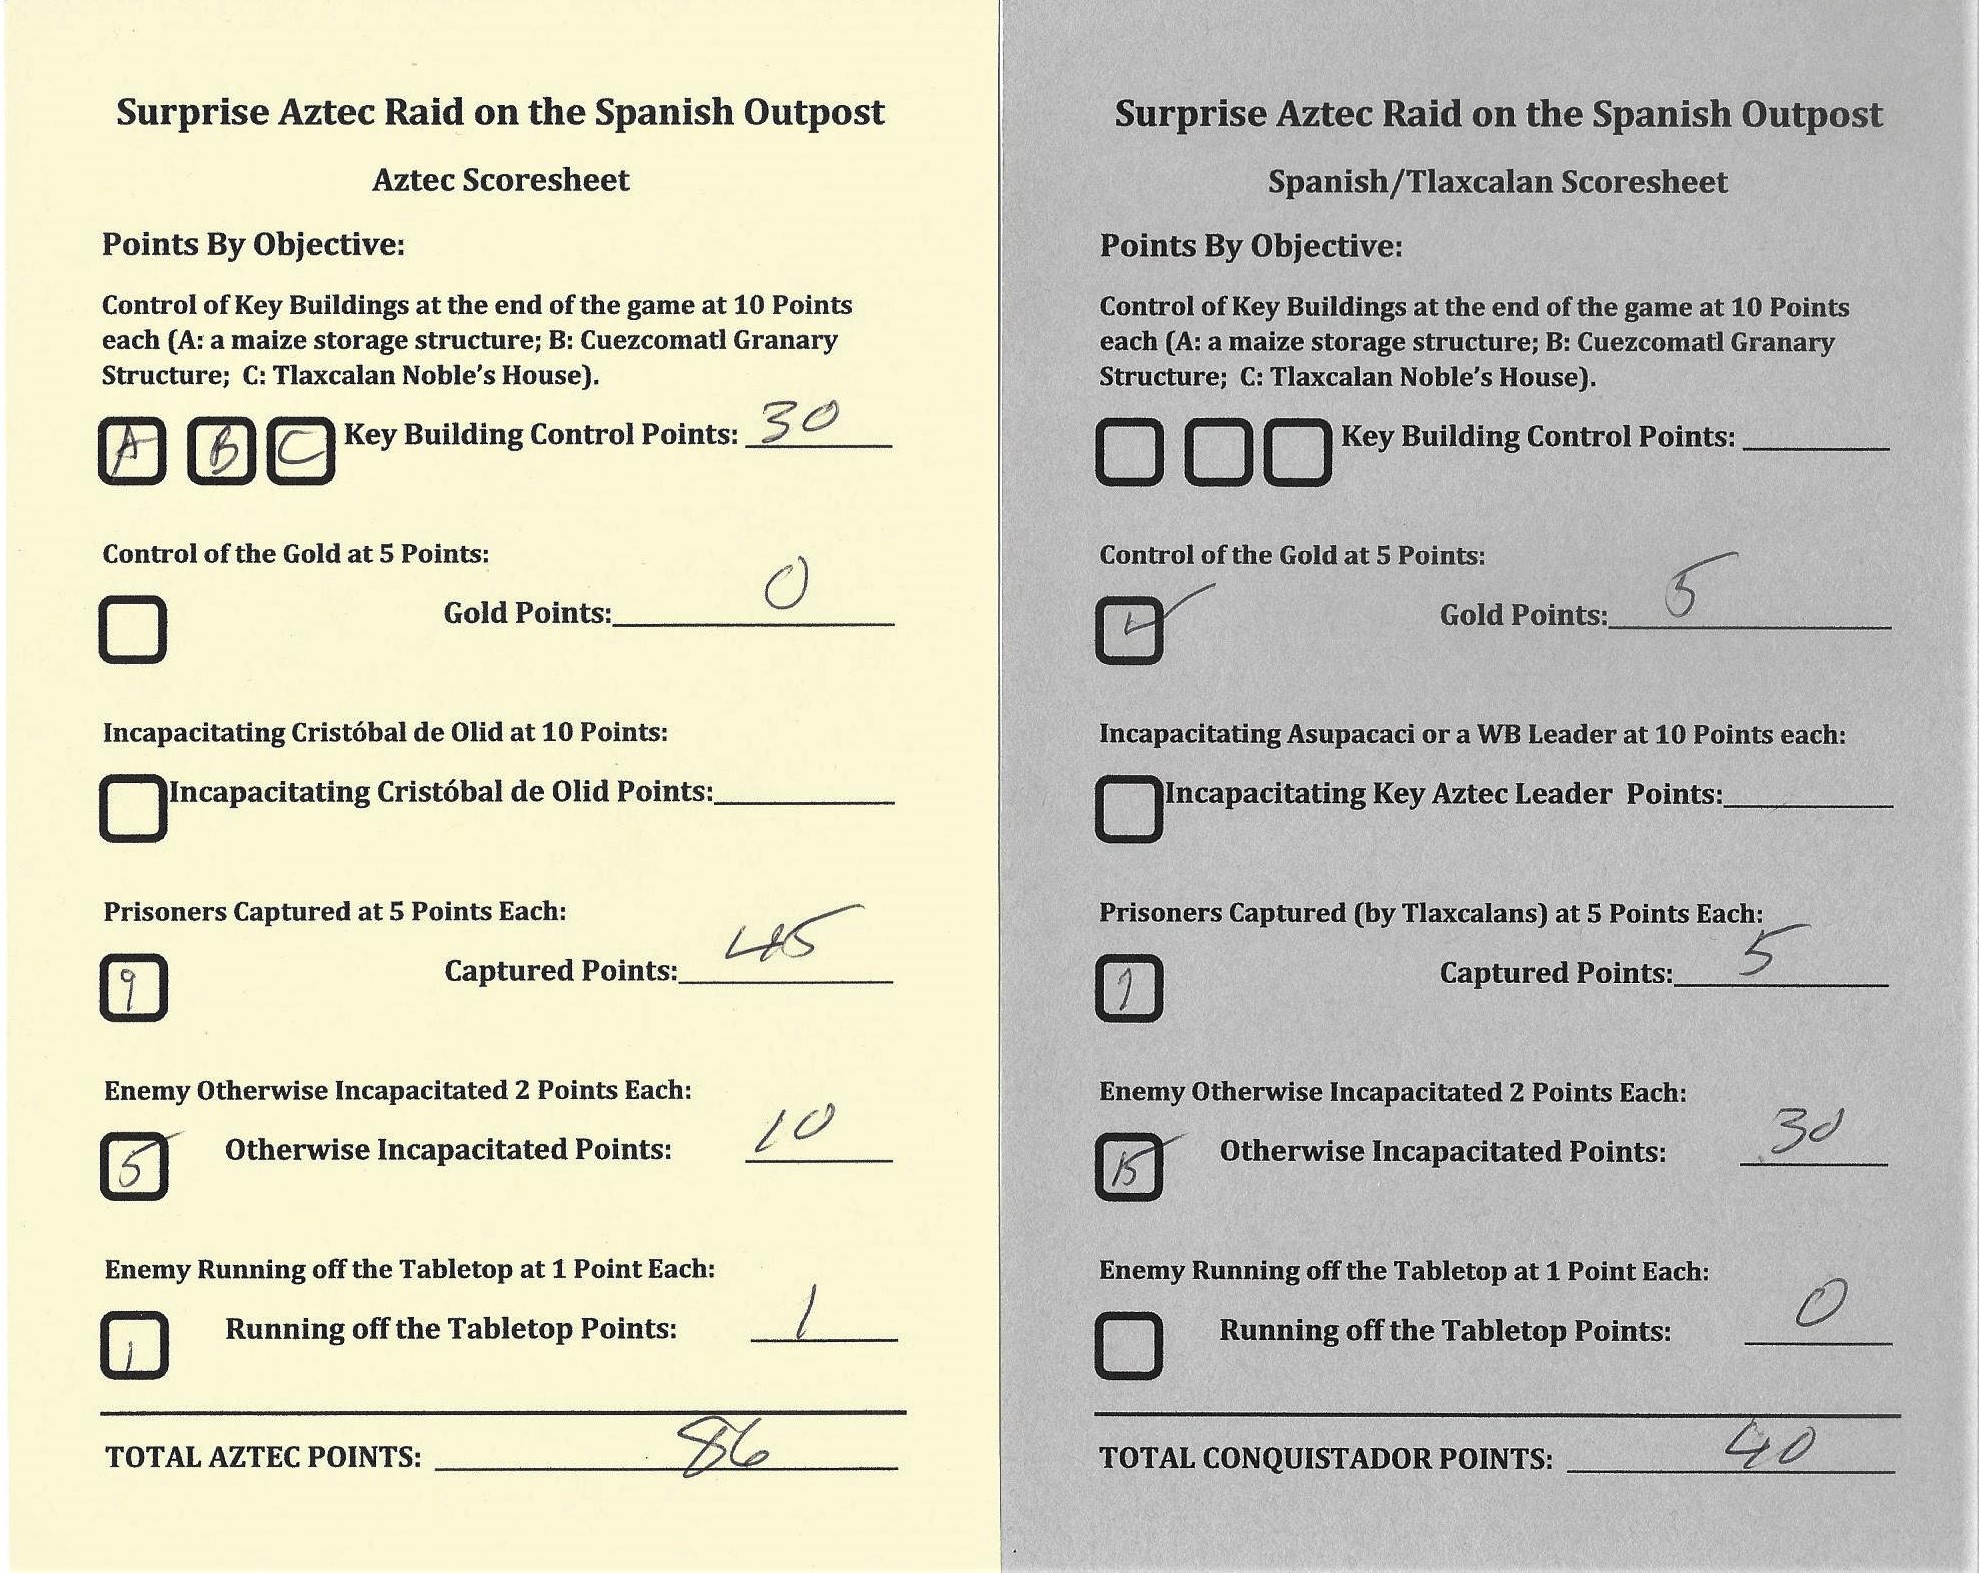
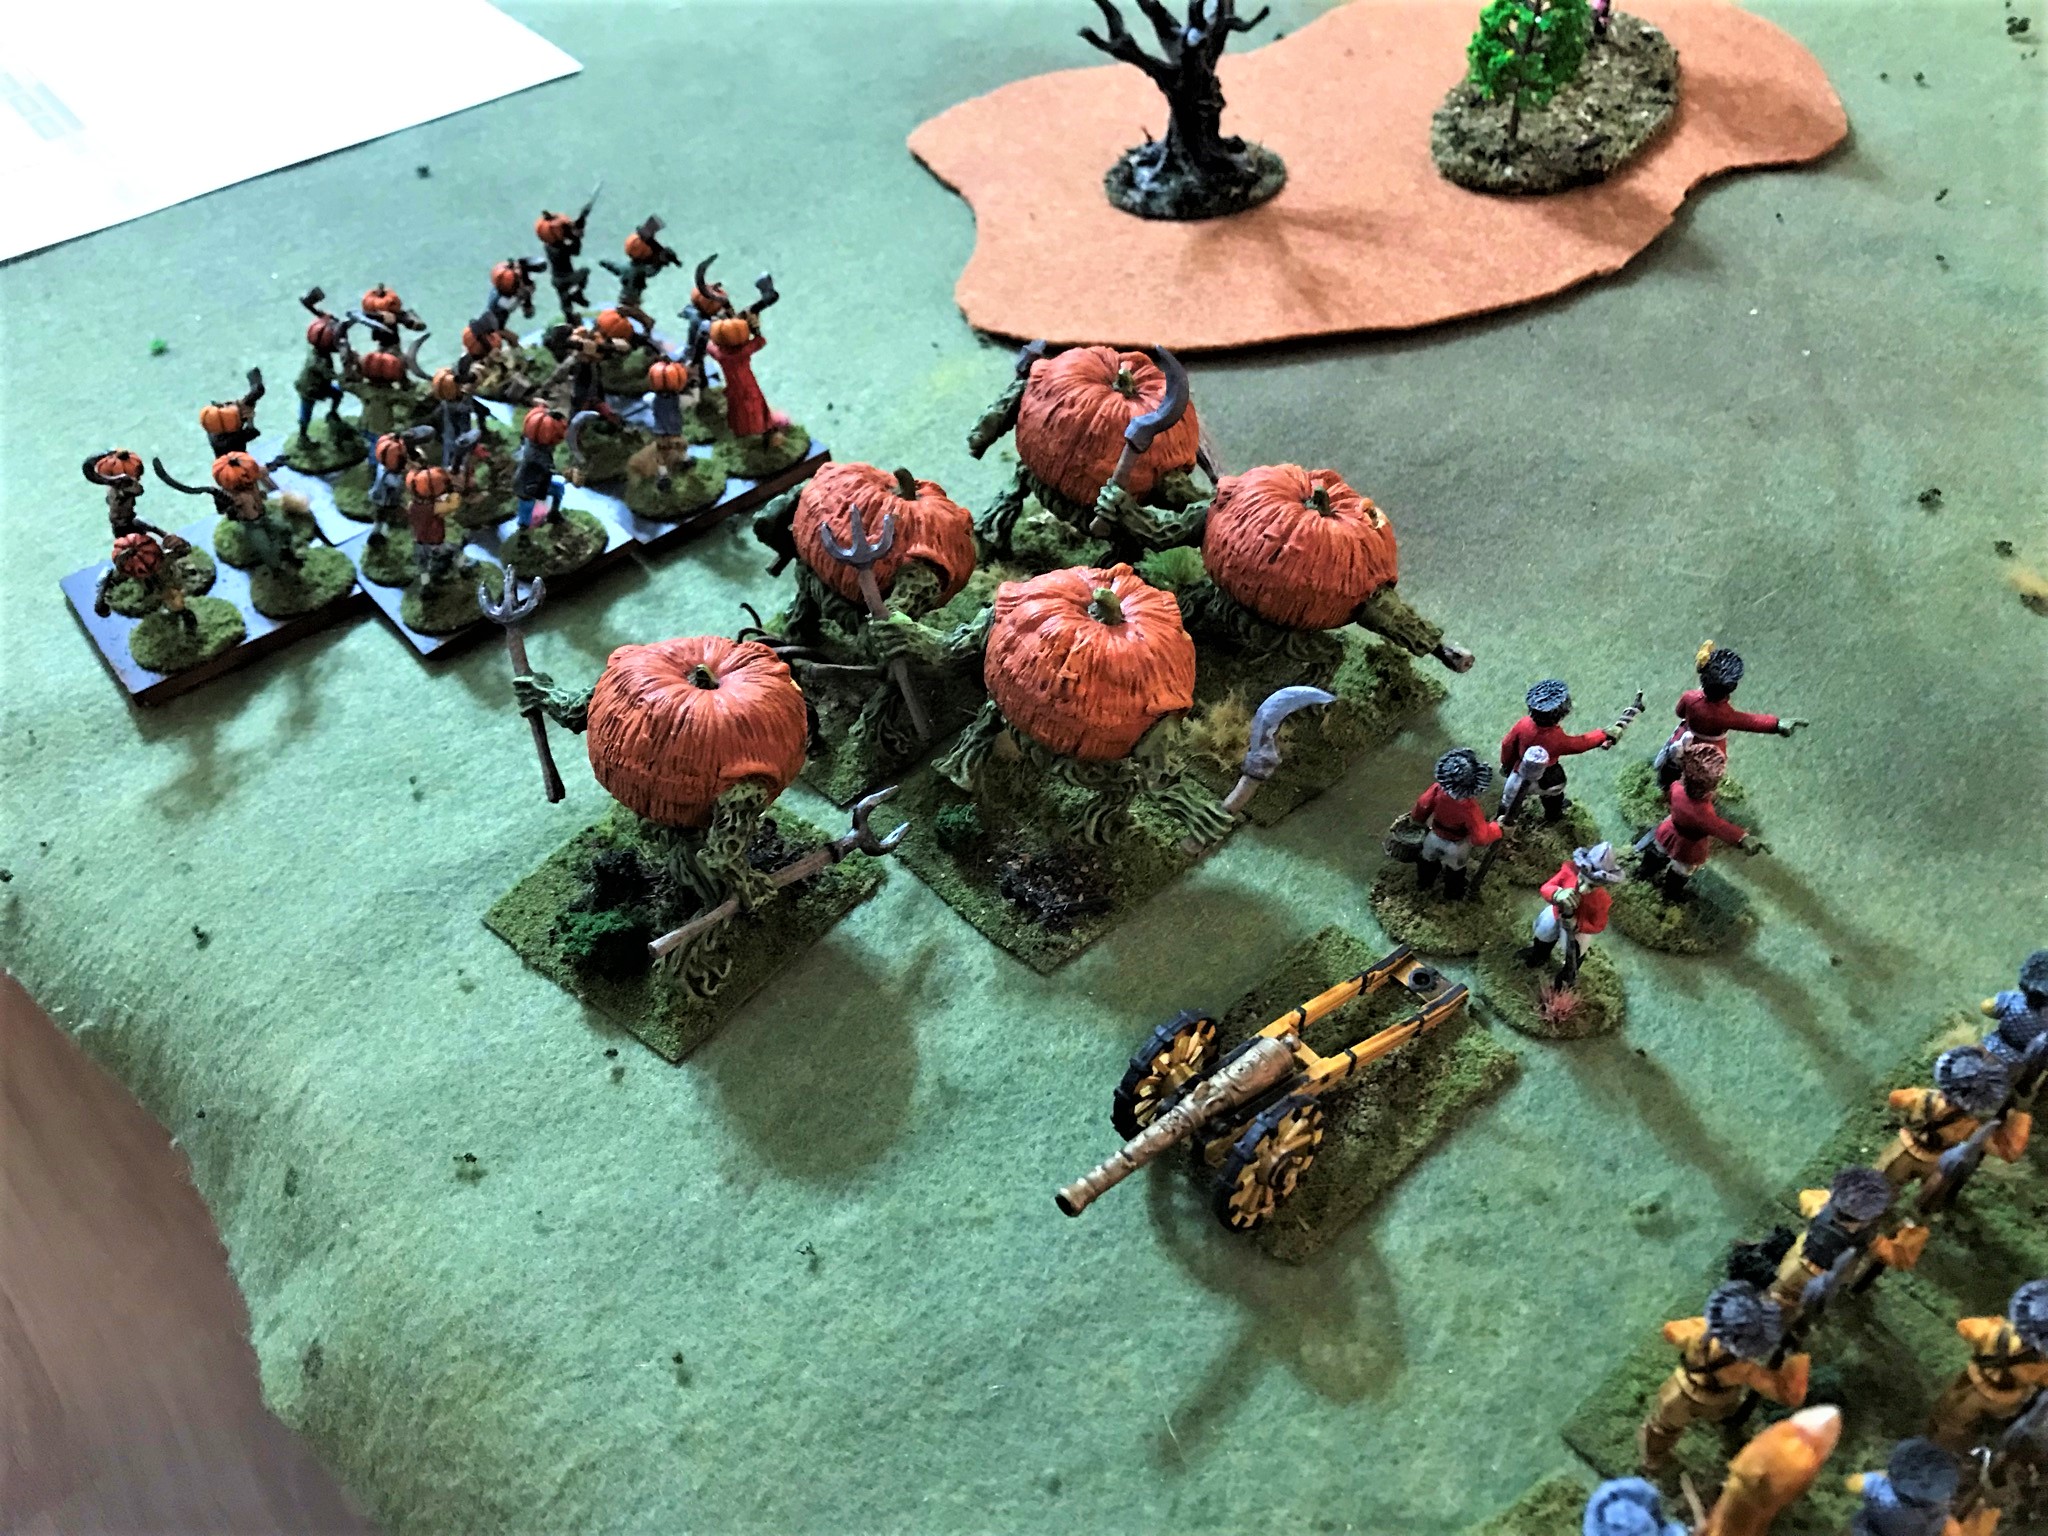
I ran this game twice at HISTORICON 2025, along with two Wars of Ozz games. All went well. I hope to post some convention shots in my next post (albeit very late). Unfortunately golf season was very busy this summer (well, fortunately for my golf game and not my hobby projects). Still, I keep my word. I thought I’d add a bit about the game as well, while saving specific game/convention photos for the next post. However, the game is coming back!

I will be running the game again twice at HMGS Fall In this November. Here are the inks – one is on Friday afternoon and one is on Friday night. I can handle up to 10 players per game – and I can scale it for fewer as well. as of this writing, there are still slots available.

My game poster. It marks my first foray using AI (Freepik) to generate an image. I wasn’t completely thrilled with the result, but it’s OK for a flyer.

The game uses modified What a Tanker rules. The major modifications that I use are:

  • Using Bonus Attack Cards to simulate infantry, anti-tank, artillery, naval gunfire, and air actions. These are deployed by scout cars according to each sides’ historical capabilities. Bonus Attack Cards are purchased with “Tanker Bucks”, which also play into Victory Conditions. Having more Tanker Bucks at the games end is better. Yet, you need to use resources to take out the enemy. So, a balancing act exists for the players. Do they hoard their Tanker Bucks, or use them effectively against their opponent?
  • Representing the French vehicles’ advanced age and mechanical unreliability. “OLD” French vehicles that try to move and roll a 5 or less will lose 1 die to temporary damage. Mathematically, there is an 11% chance of that happening. So the Vichy Forces are indeed slow. But there are more of them, and not all of the French tanks are OLD.
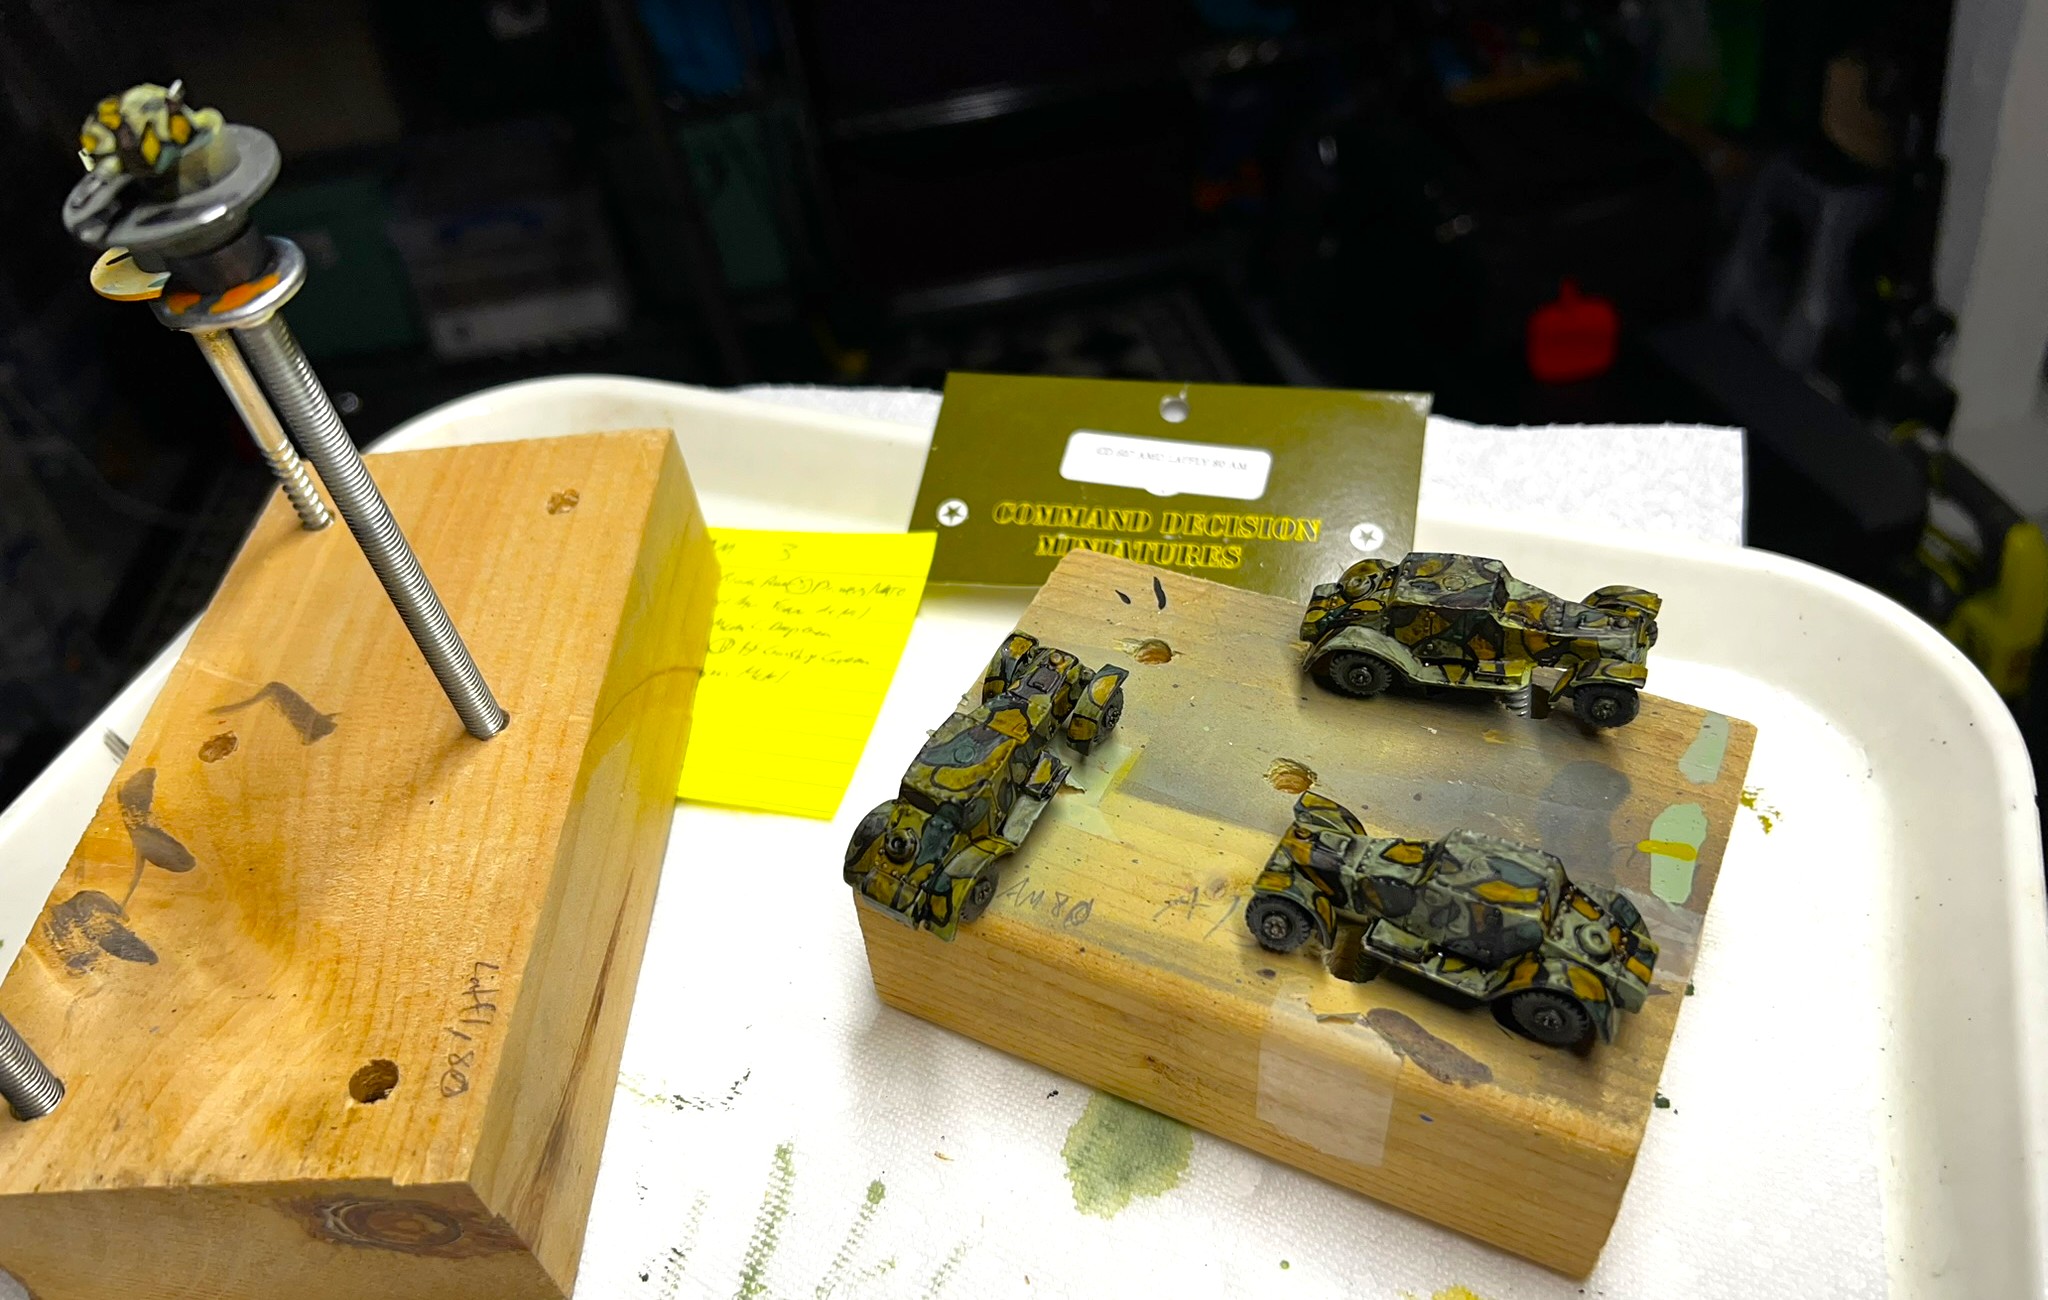
  • Creating a way for armored cars to engage other armored cars – and tanks, with heavy machine guns or Bonus Attack Cards. Also I have rules that show how devastating any cannon fire would have been against thin-skinned vehicles.
  • Representing the US Army as being totally GREEN at this point in the war. Their base roll needed to hit goes from needing a 6 on 2d6 added together to a 7. Add to that the concept that most of the French vehicles are SMALL, necessitating an addition +1 to hit at short range, and another +1 at long range. Oh yeah, the Stuarts have just a 37mm gun. This means that the US has a tough time making damaging hits at long range against French tanks.
  • The US use of Bonus Attack Cards is limited to just the US and French Armored Cars. The M5 Stuart’s radios got wet during the landings and were not working. Many French tanks in North Africa did not have radios.
  • Use of Bonus Attack Cards also represented that the US had both carrier-based air support as well as naval gunfire from the USS Savannah. I added F4F Wildcat’s and Avenger TBF’s for US air support. The F4F’s can provide air superiority, which allows them to also do limited close air support missions. Having air superiority enables the US player to deploy the Avengers, which can act as spotter planes for both artillery and naval gunfire. The Avengers can also bomb the French vehicles with depth charges (yes that happened). The French can contest the US air superiority by deploying Dewoitine D.520’s.
  • Modifying the activation sequencing methodology by using Buck Surdu’s “Double Random Activation” method. It’s the same one used with Wars of Ozz, Feudal Patrol, and Combat Patrol games.

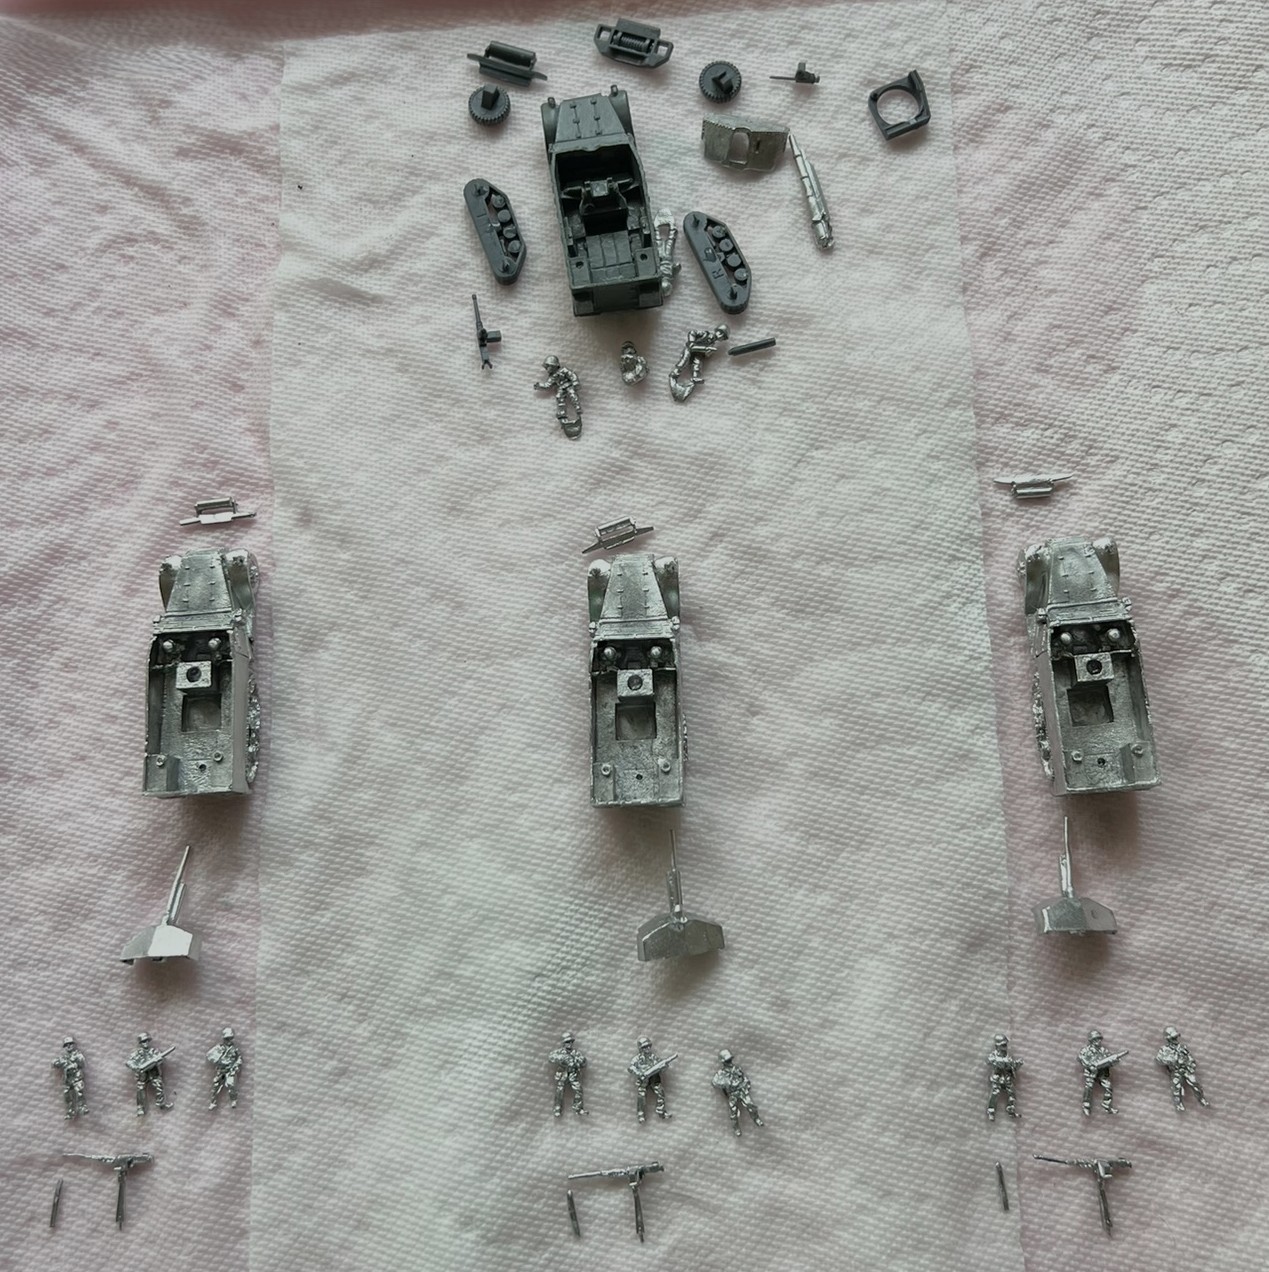
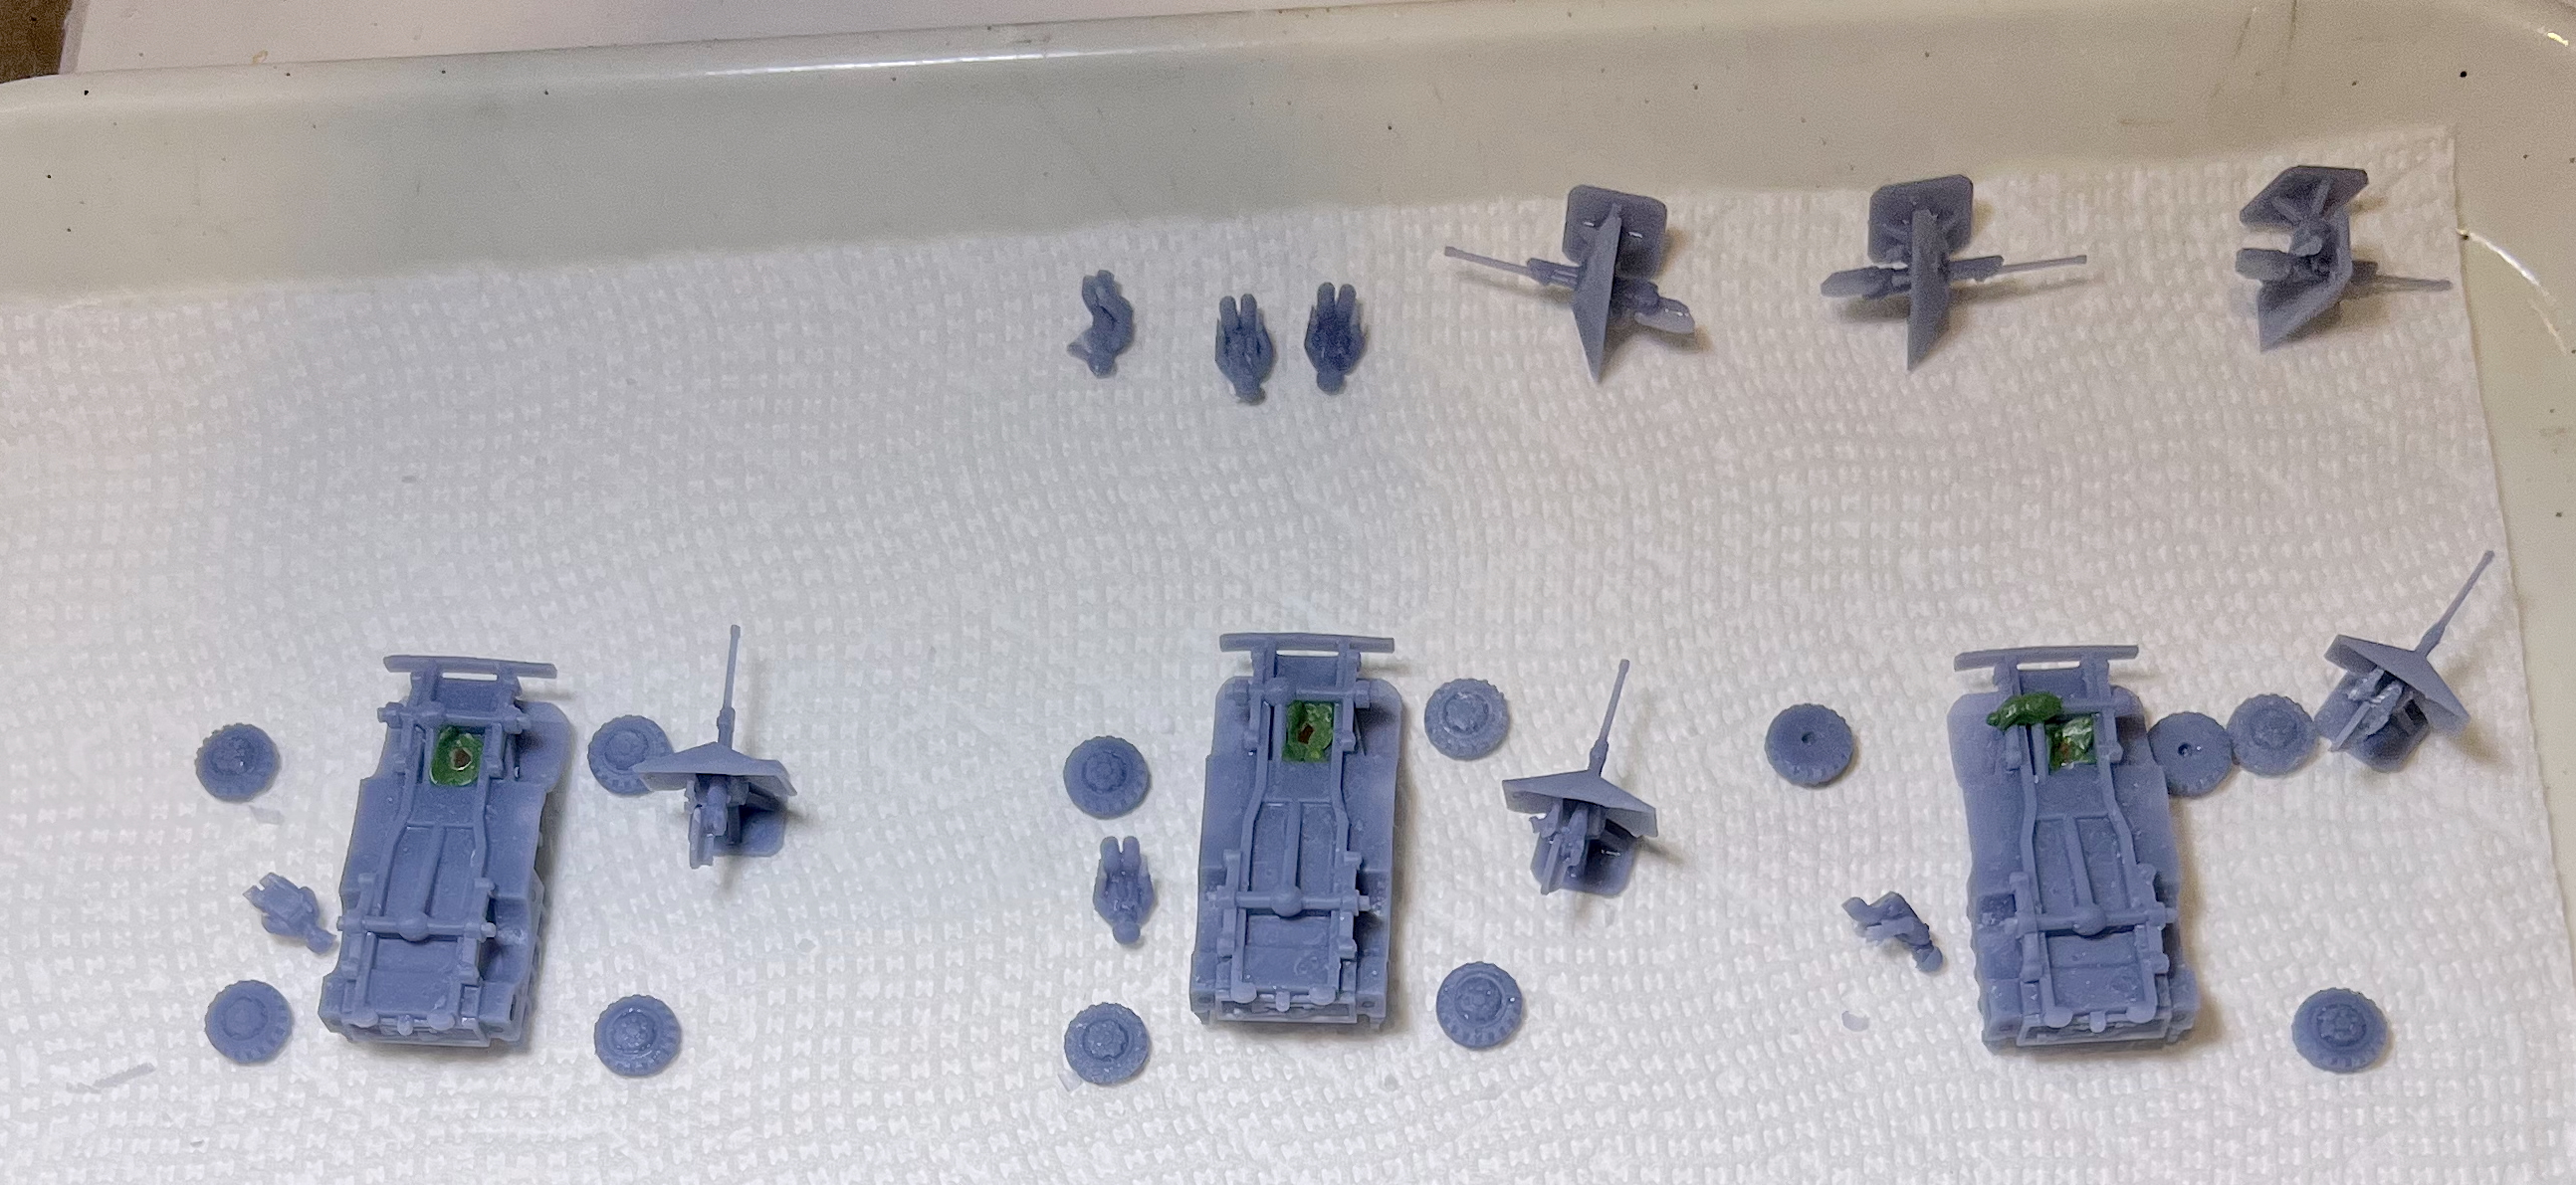
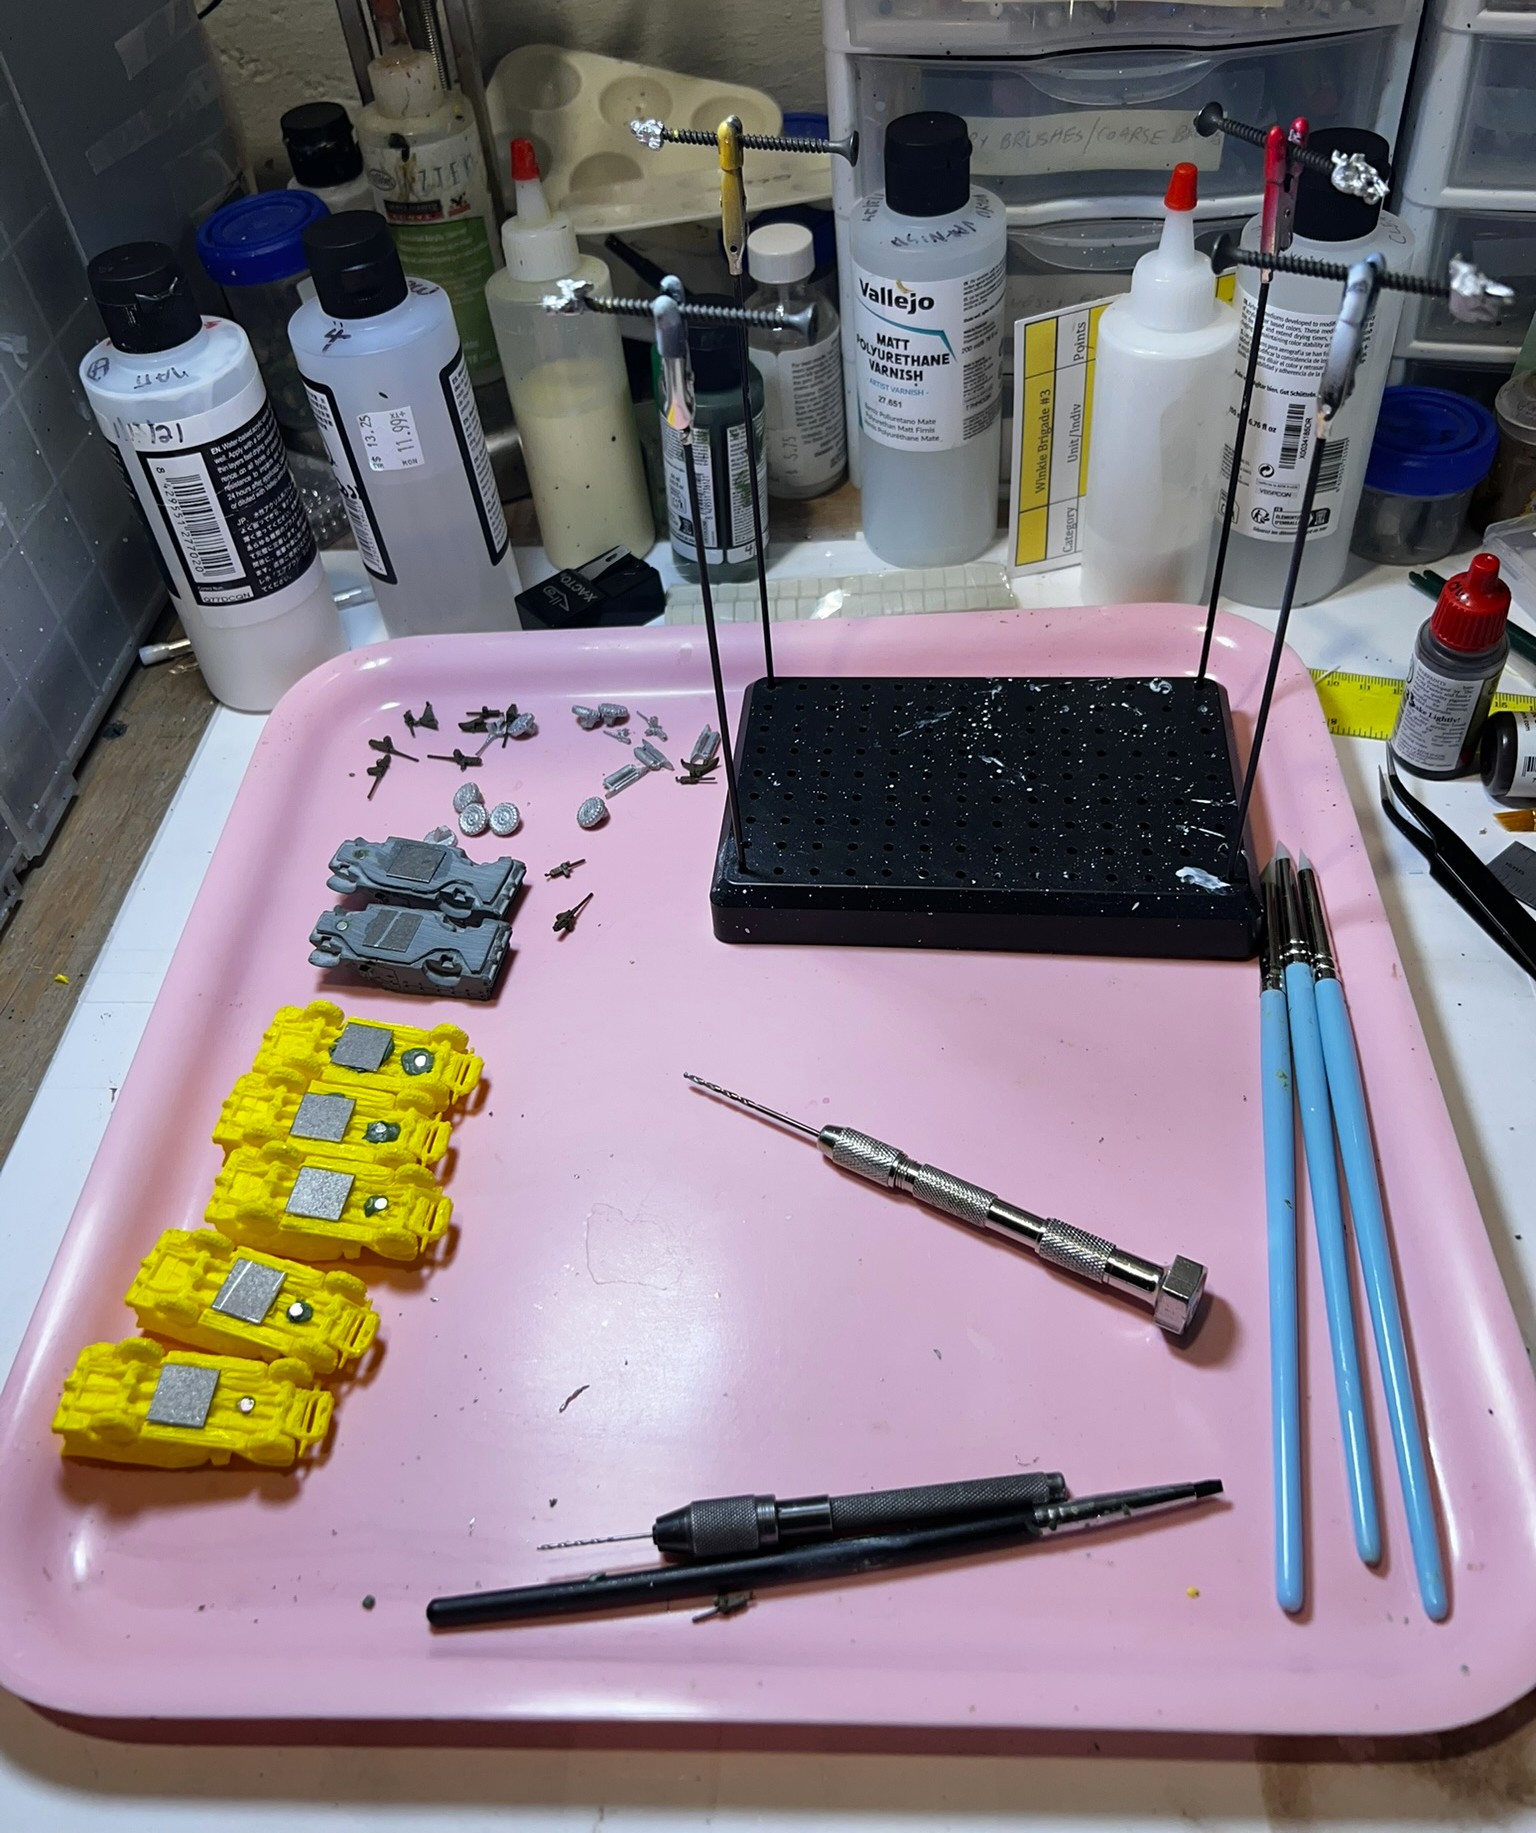
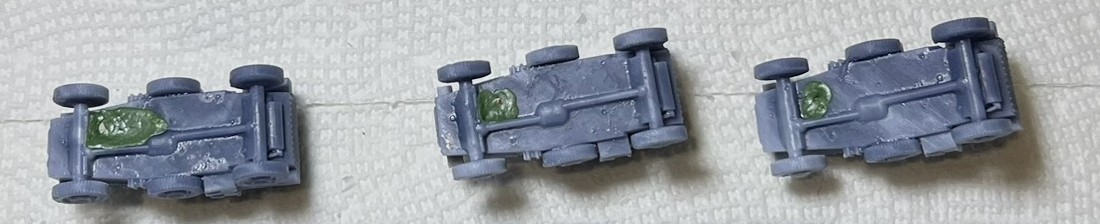
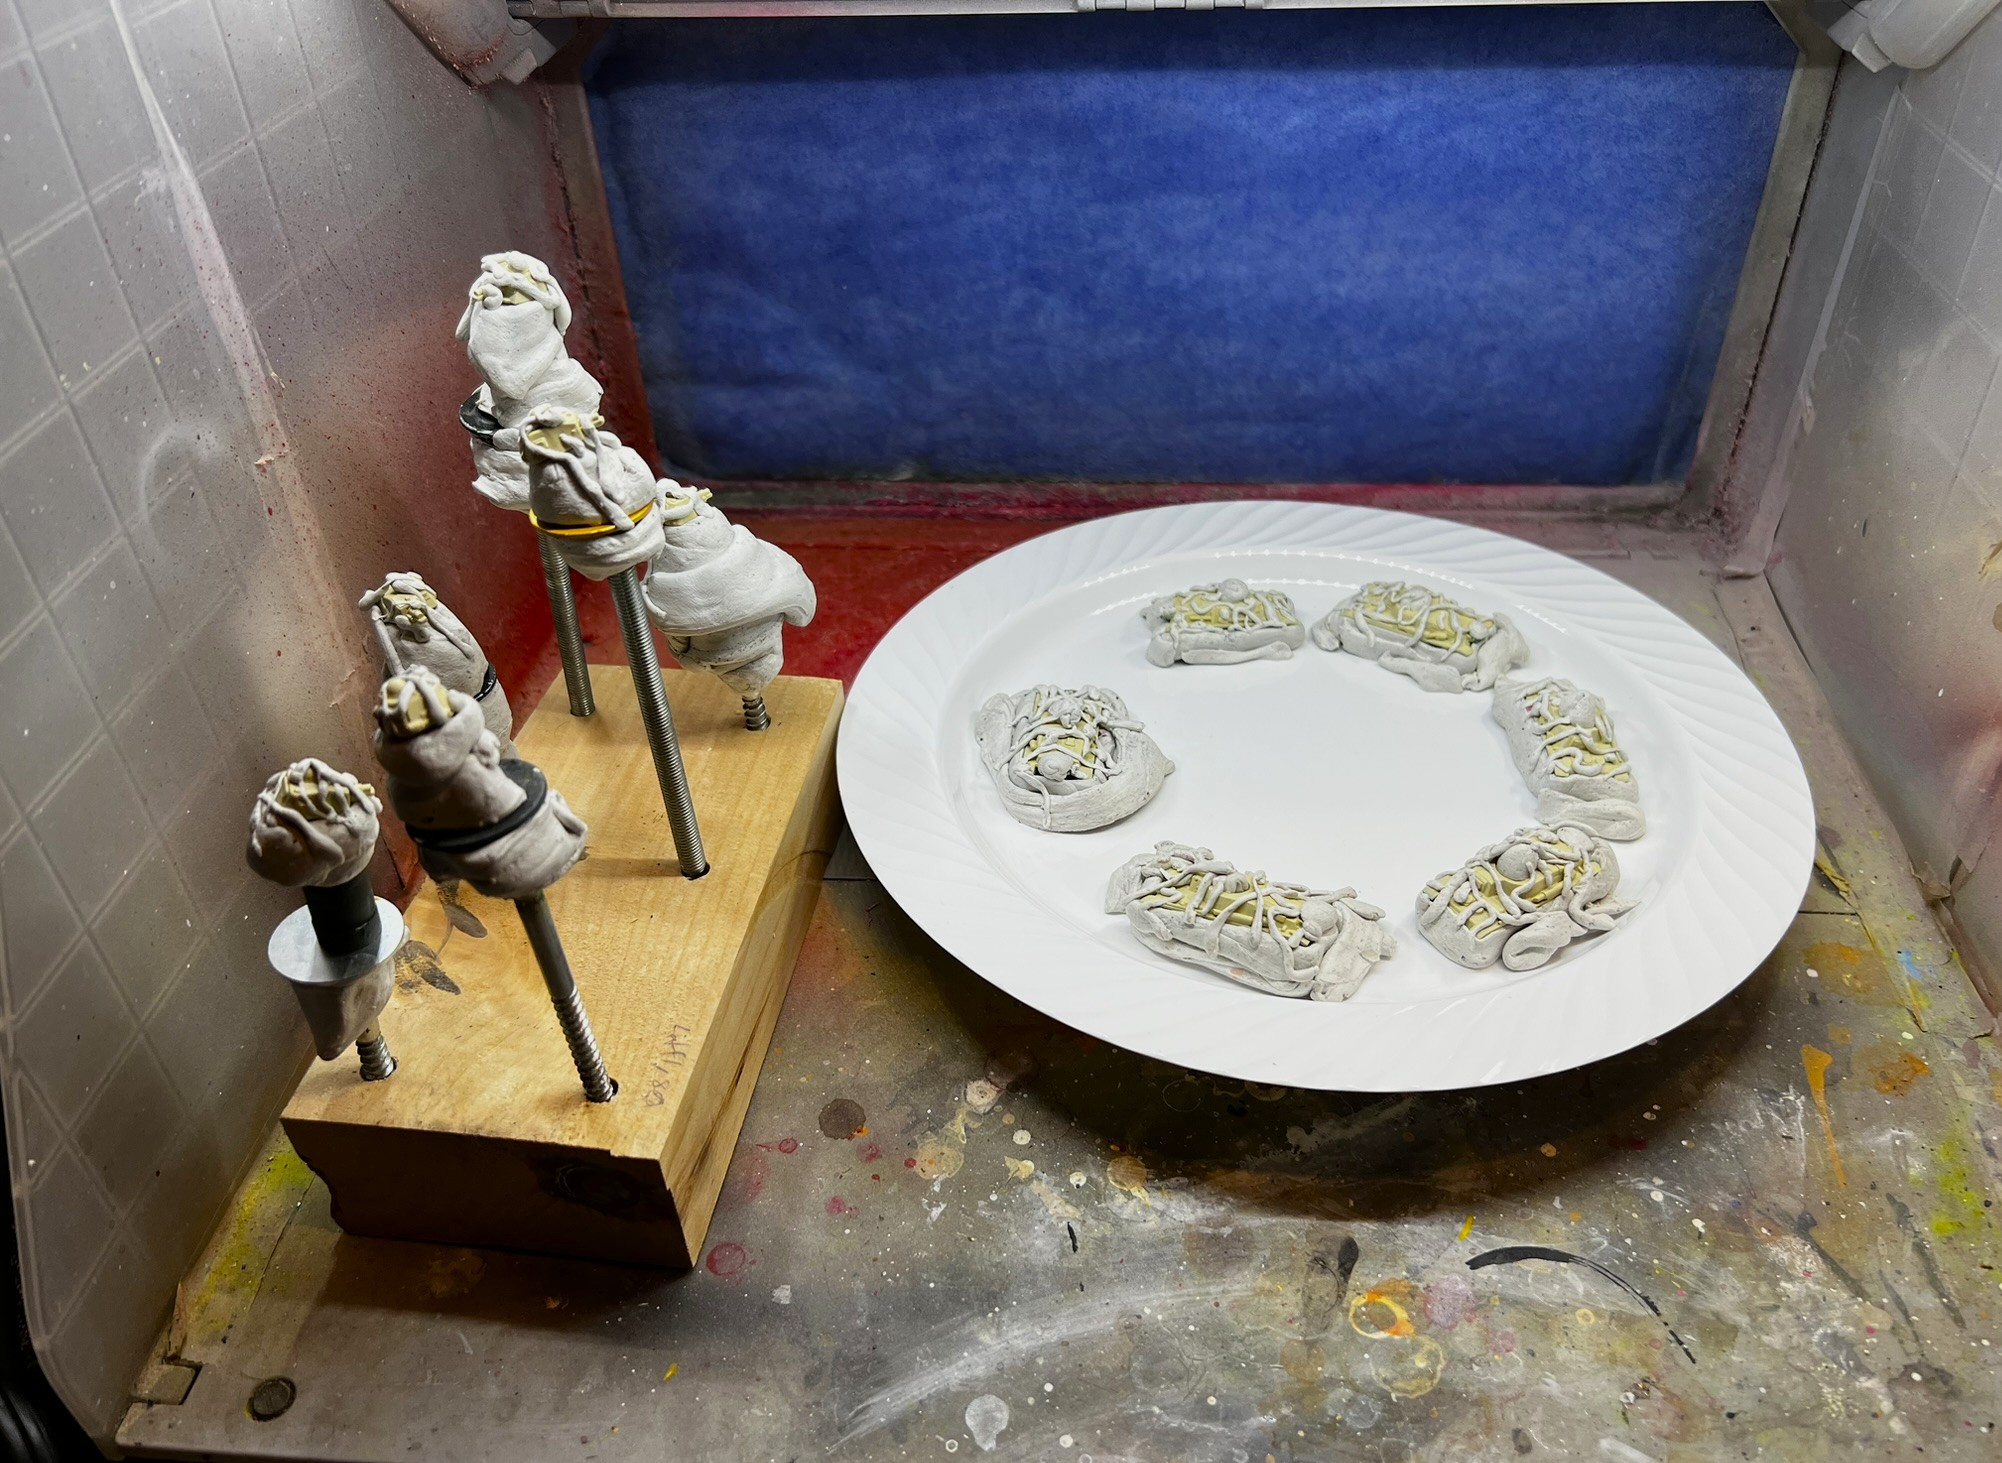
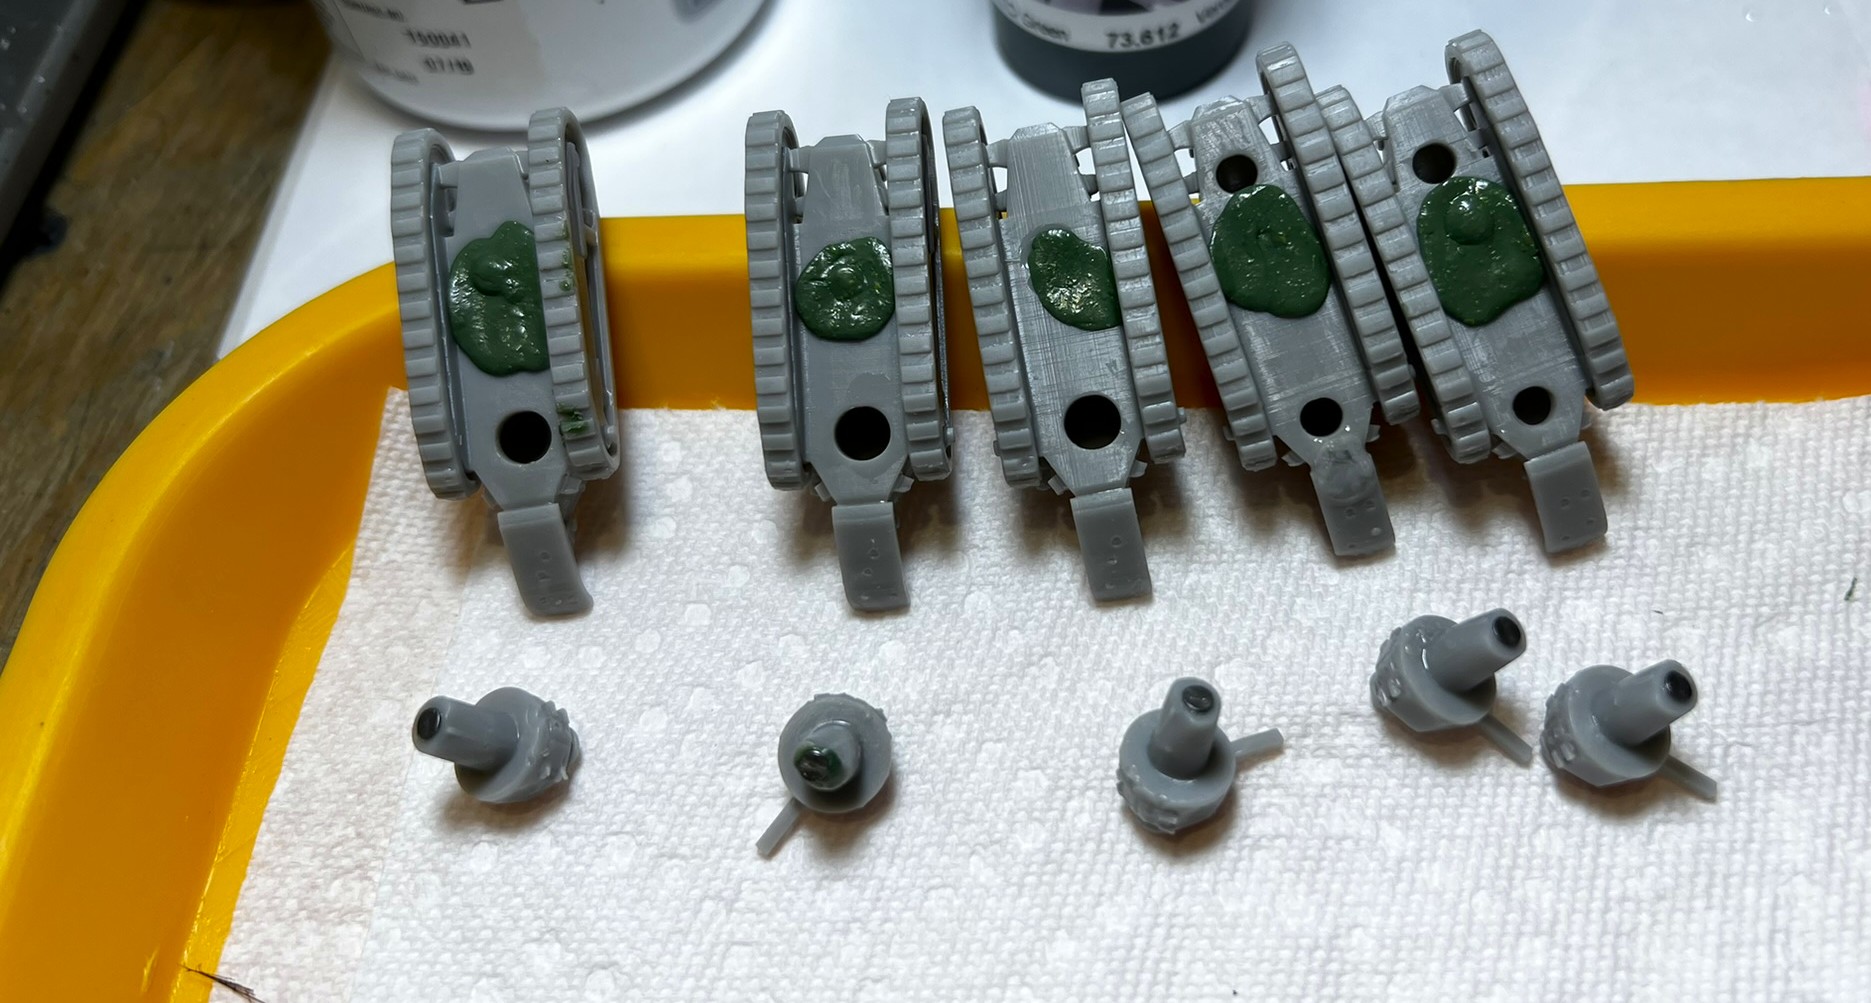
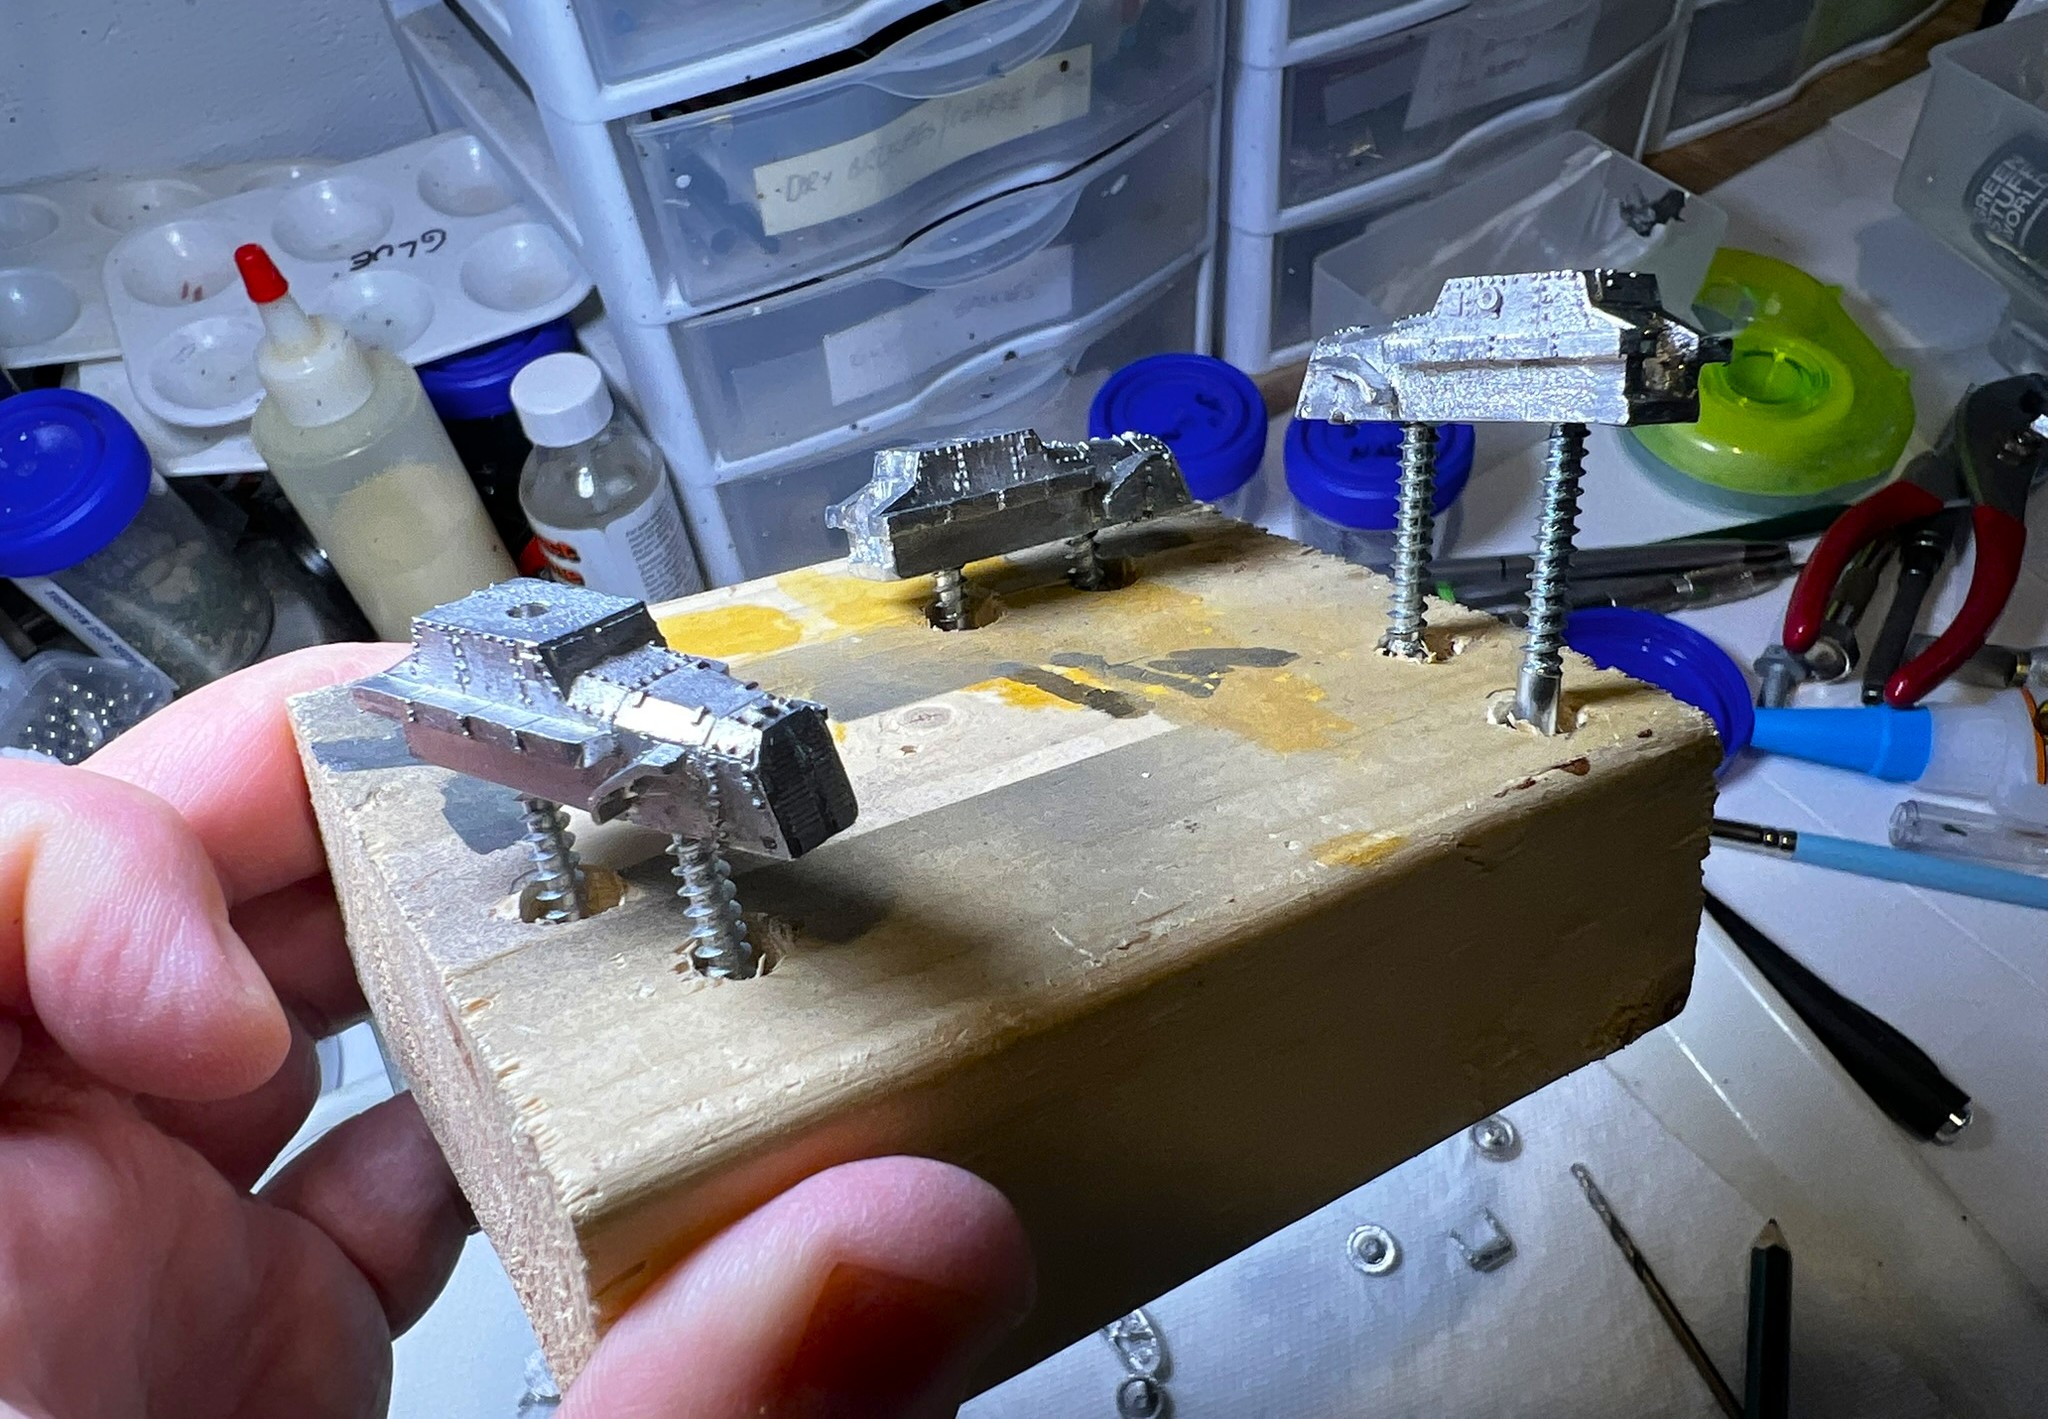
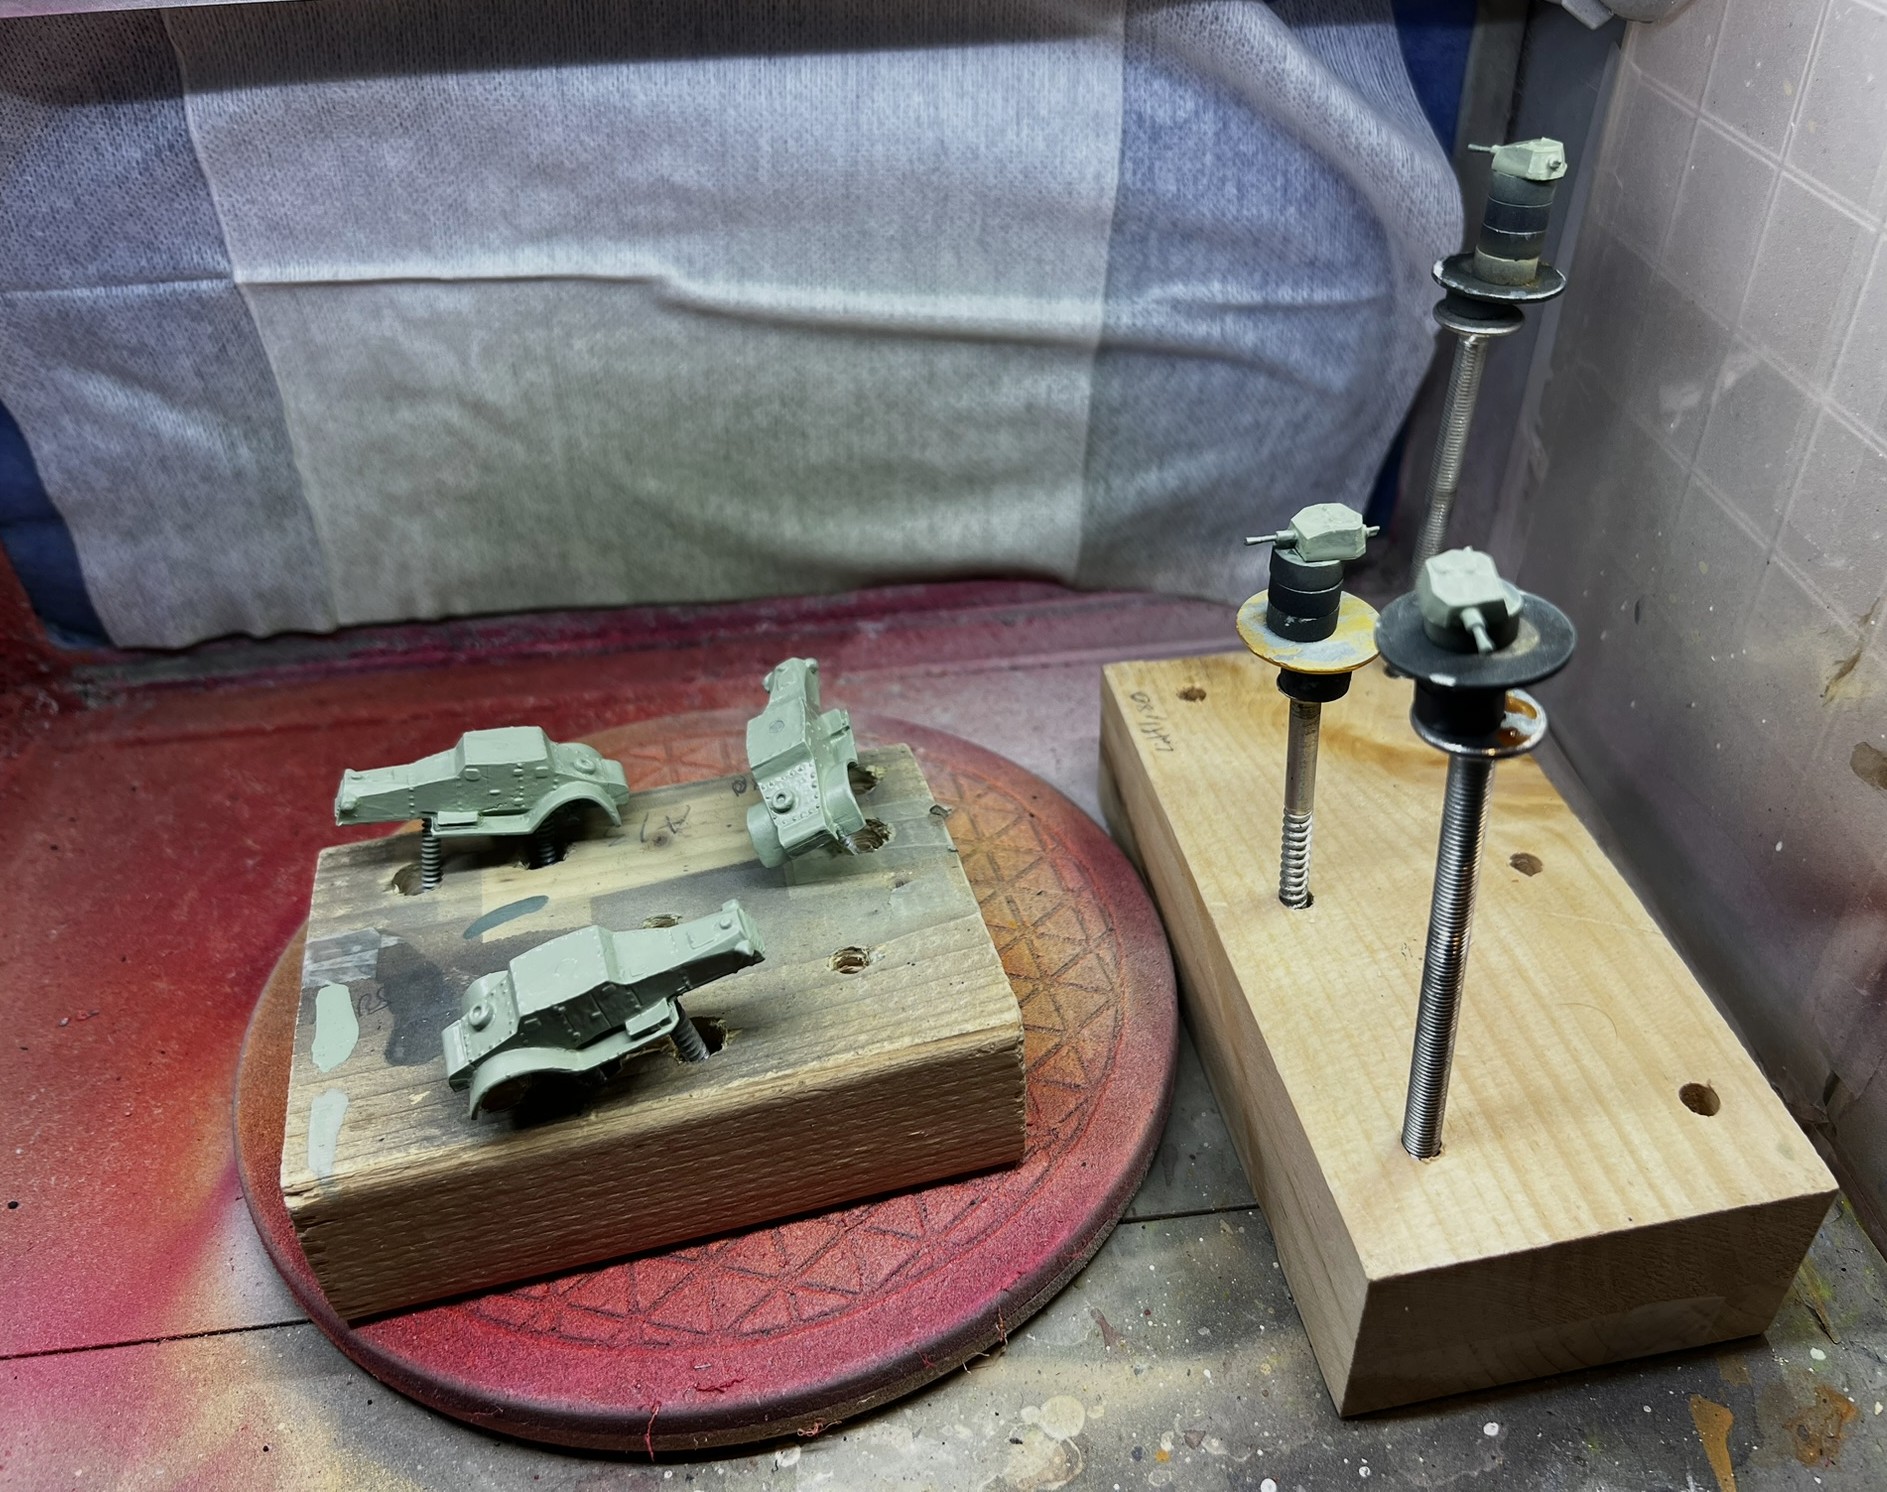
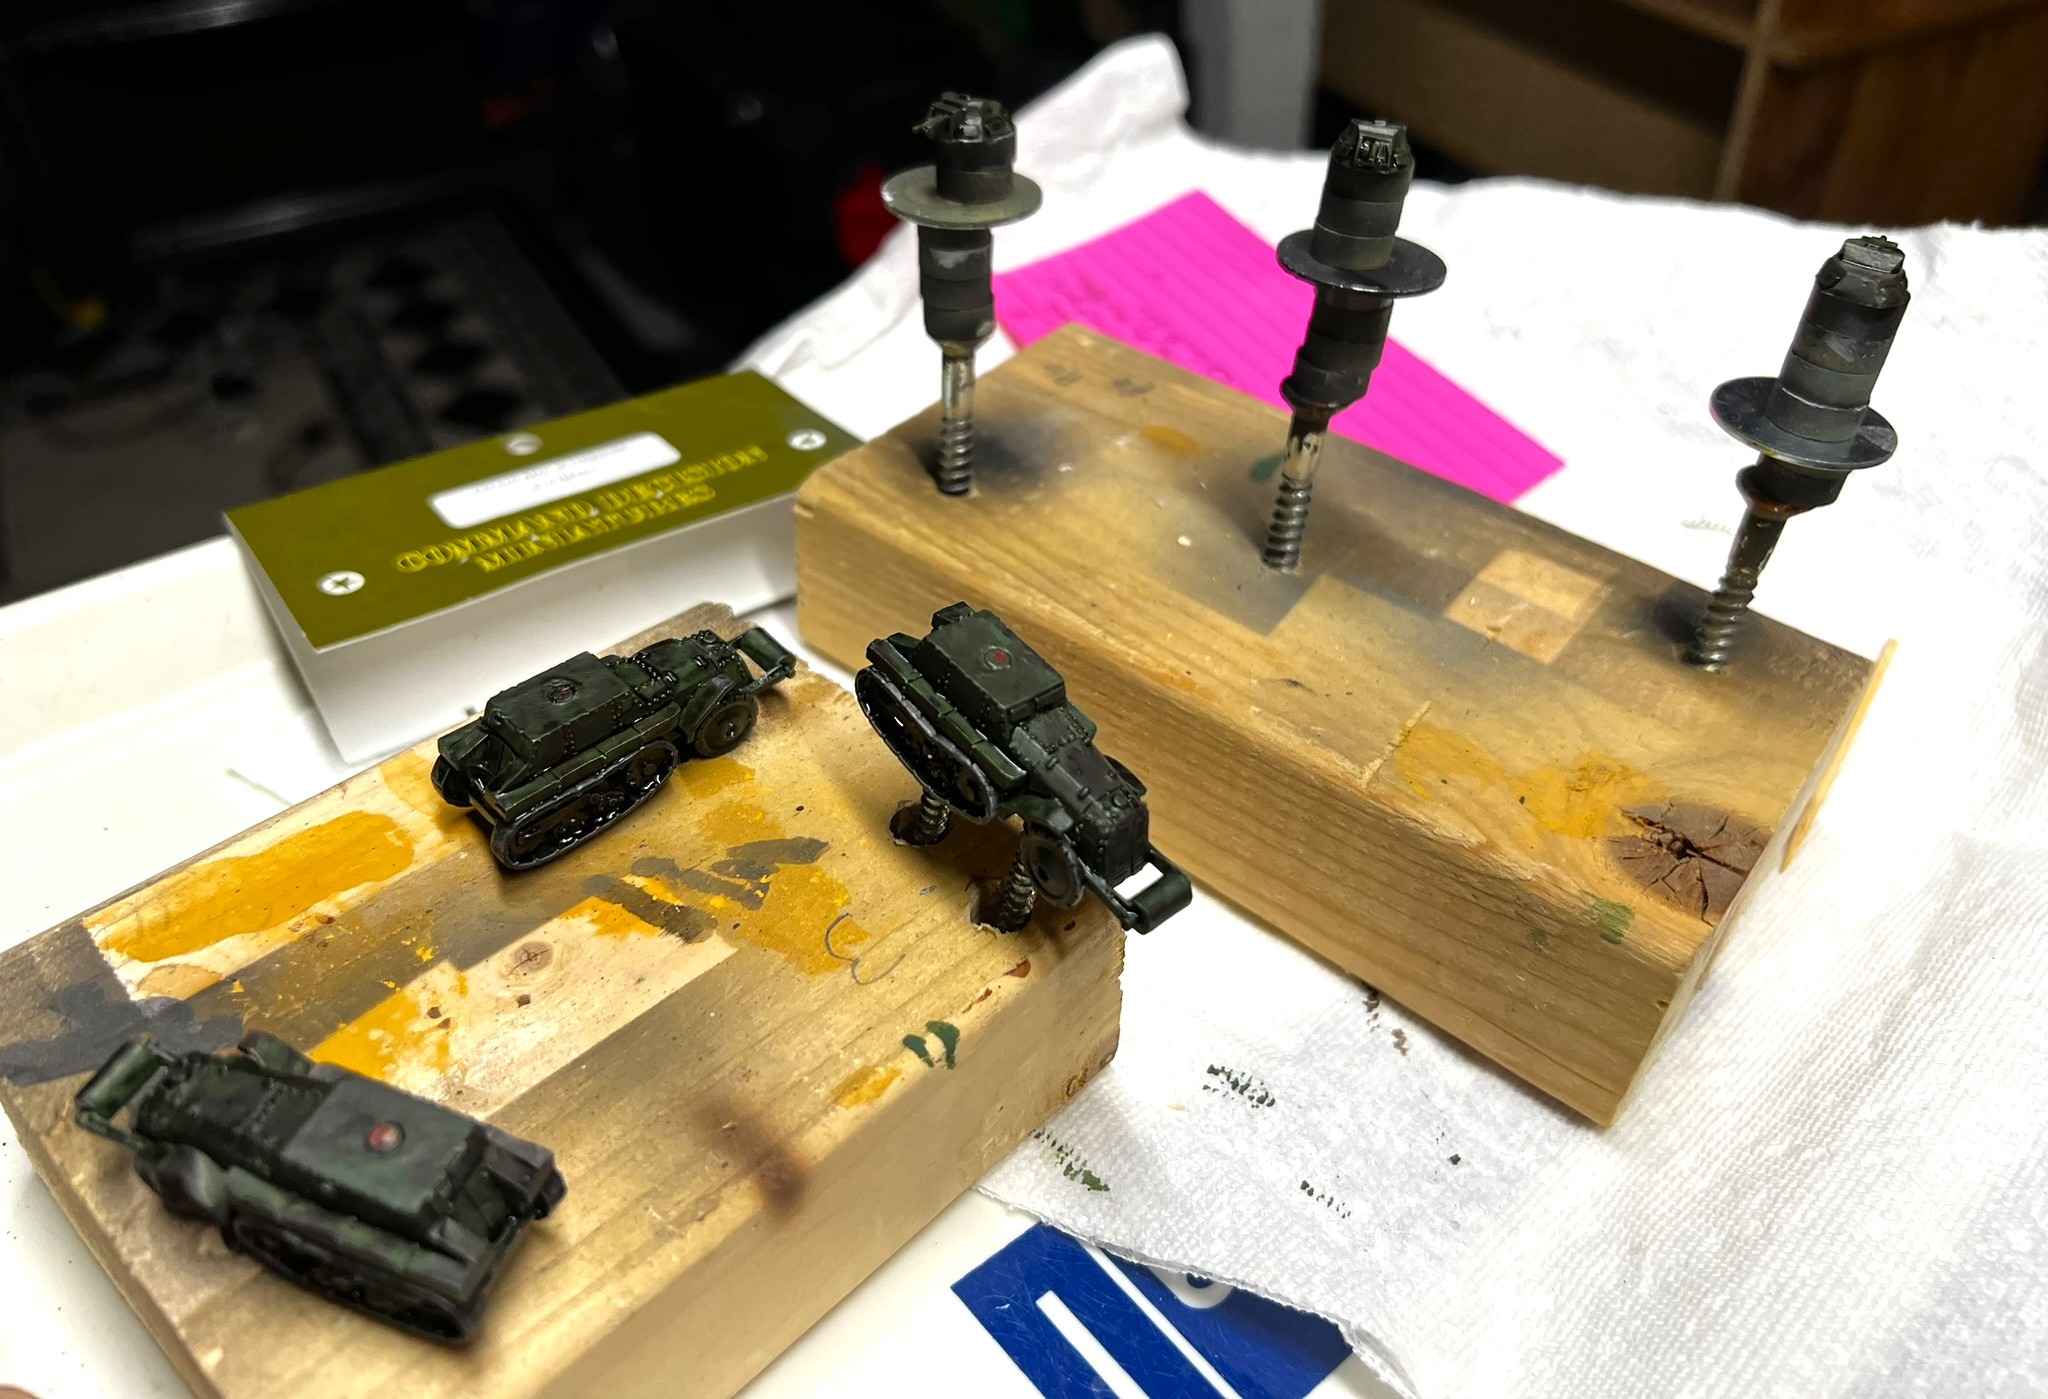
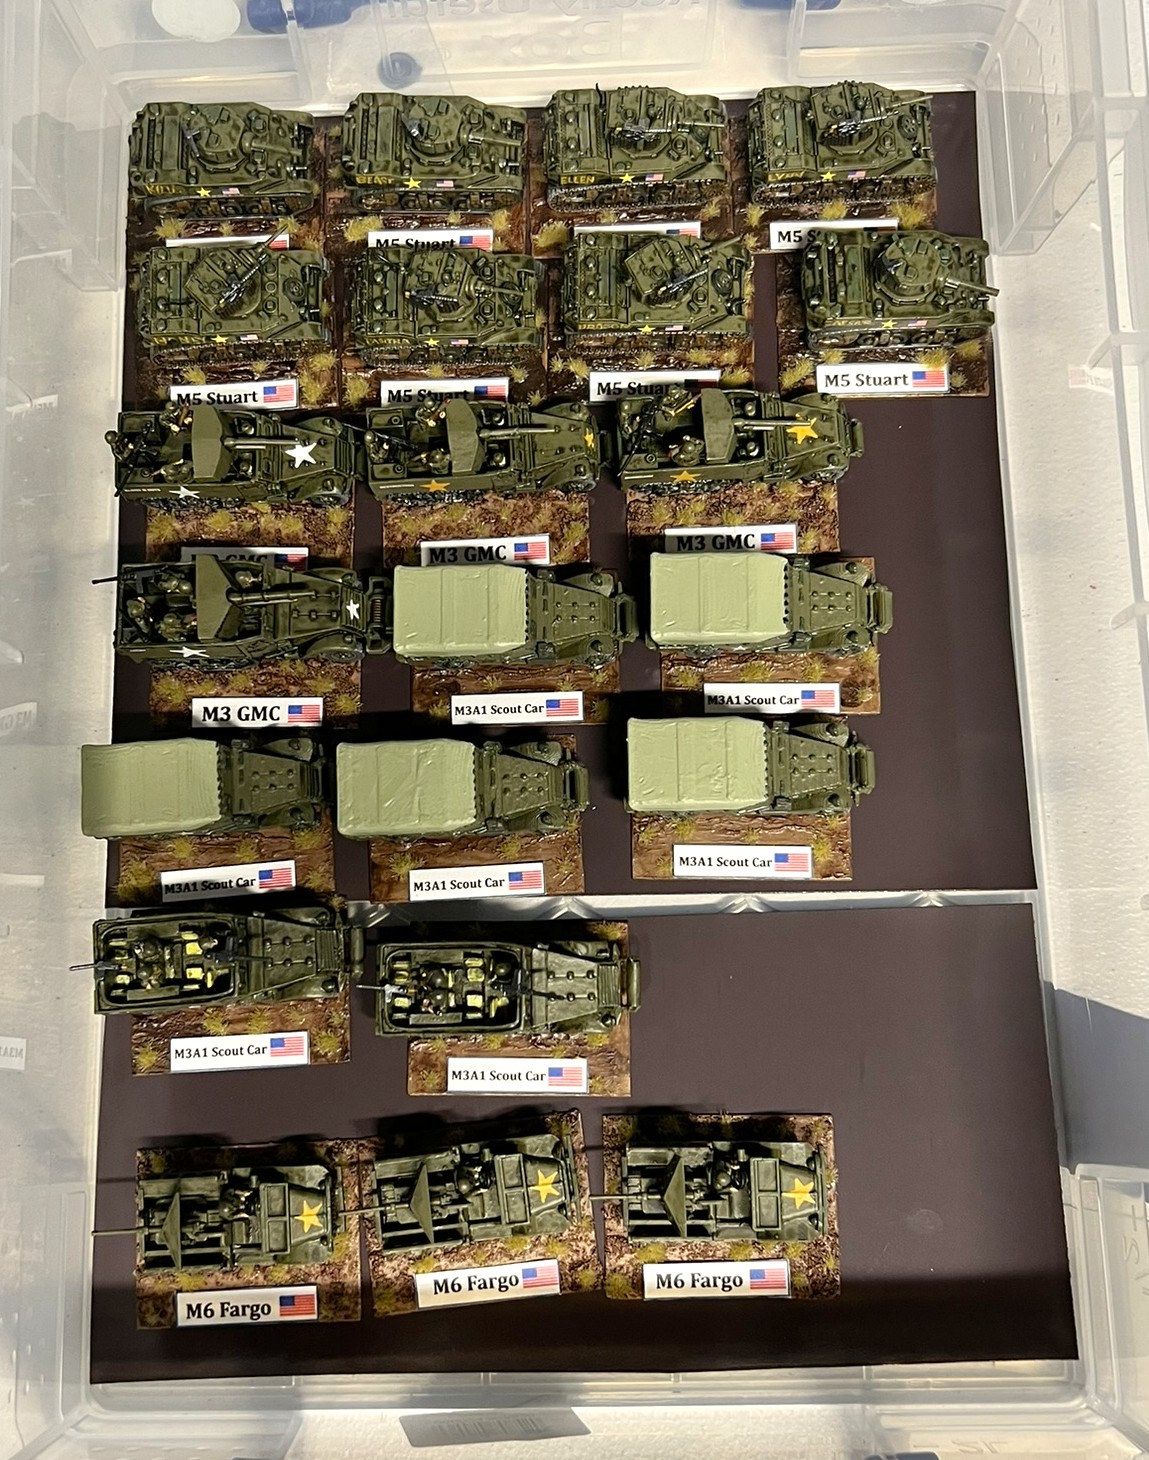
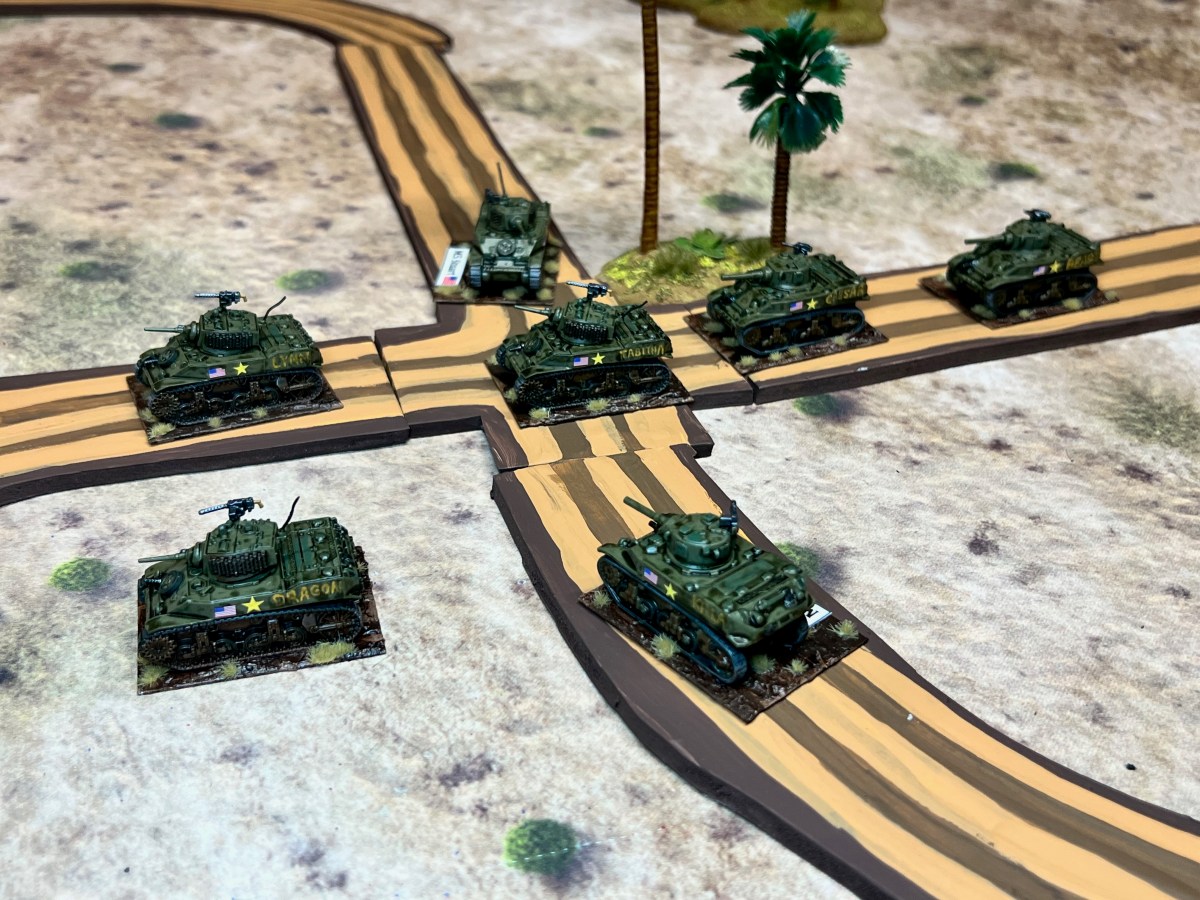
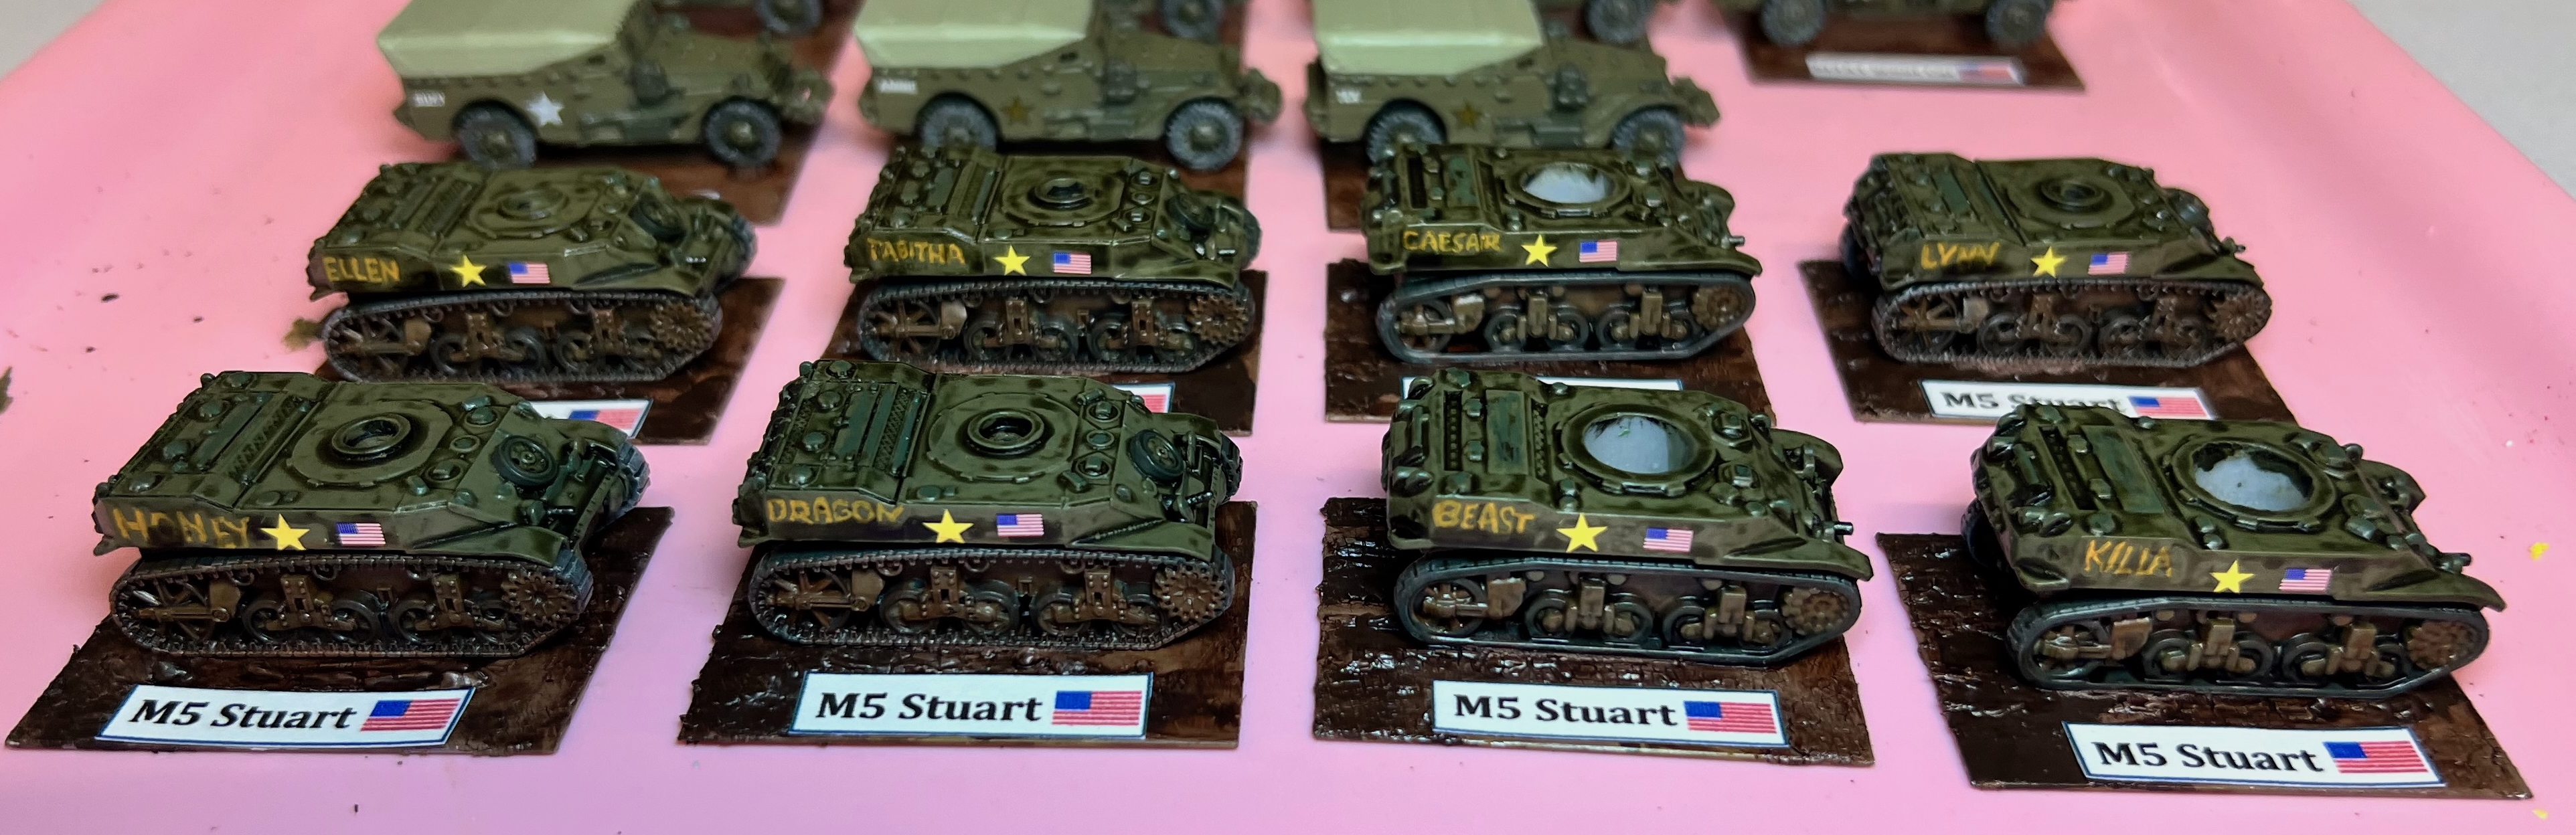
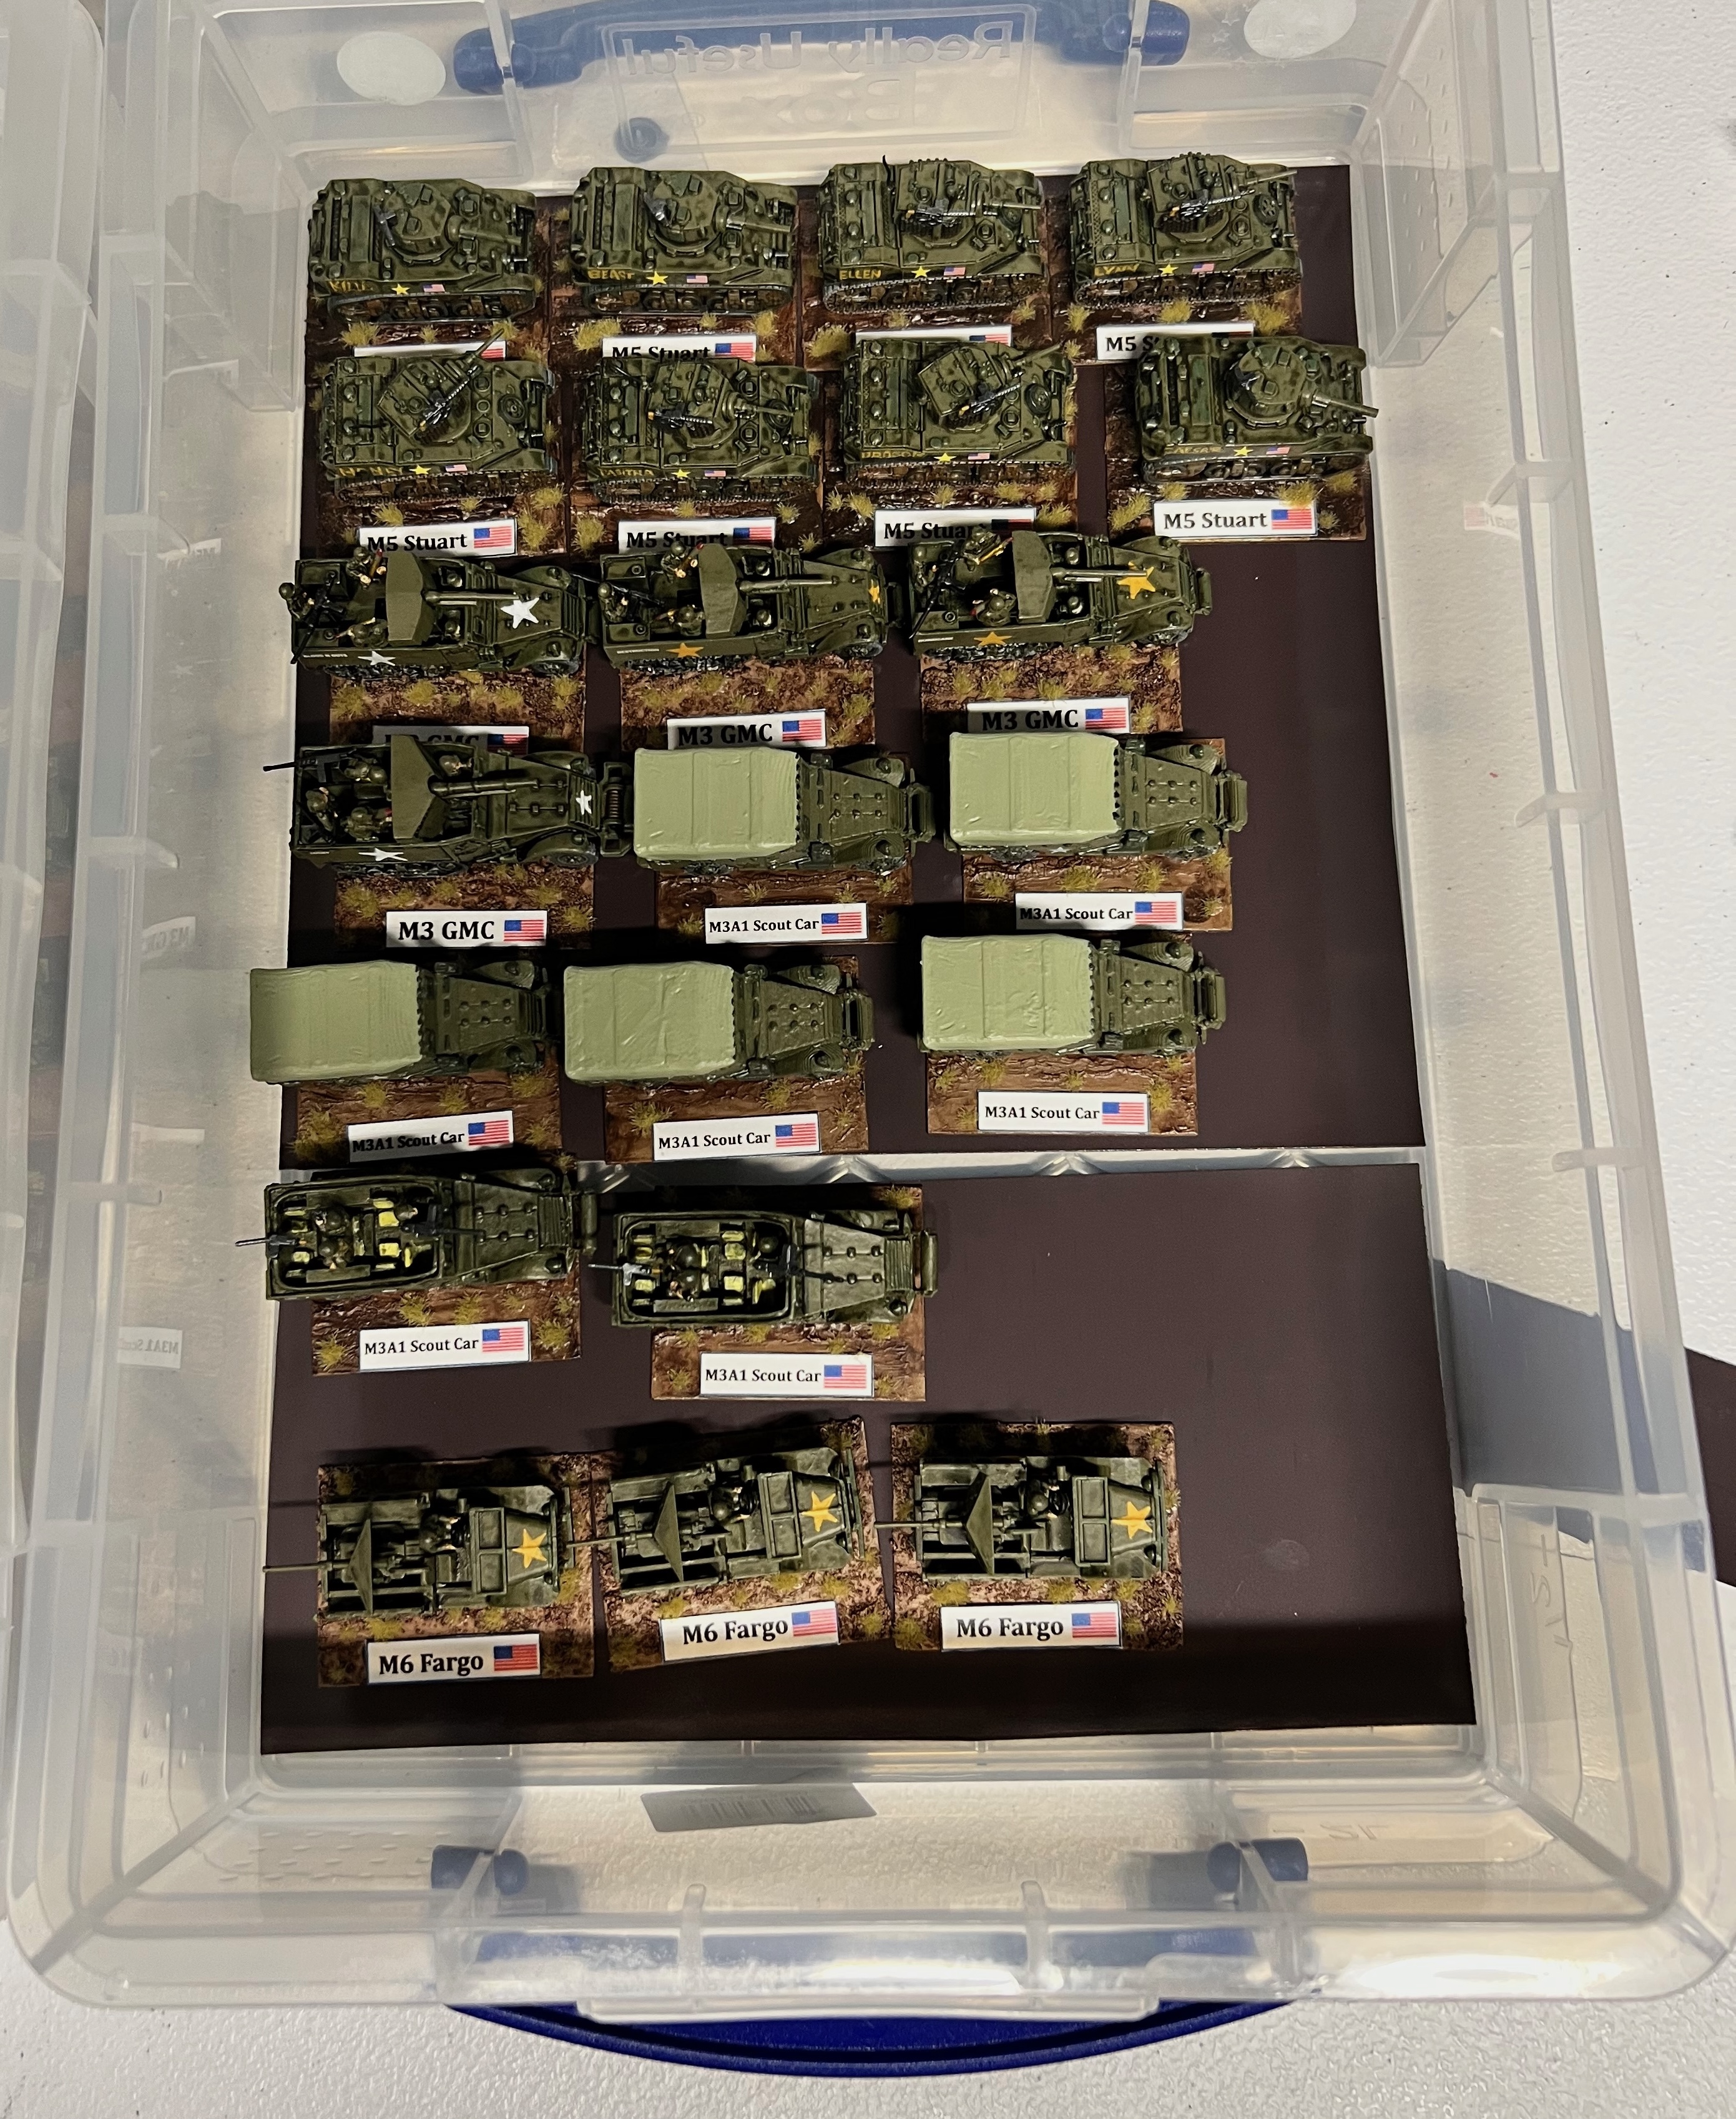
Back to the Stuarts. The M5 vehicles are 15mm/1:100 scale. I sourced them from two places. I got an OOP Flames of War 5-tank platoon (plastic) from Noble Knight Games. I also bought five 3D-printed resin models on eBay from HobbyHouse&Miniatures LLC. The plastic models were fun to work on, and I was glad to have the additional resin ones. Historically, 7 M5 Stuarts were sent to counter the Vichy counterattack. When I drilled out the resin models for magnet installation, two broke in half (not the fault of the model, just me. In the end, I had 3 of those, making 8 models in total, which was fine given that seven were originally sent along with some M3 and M6 tank destroyers.

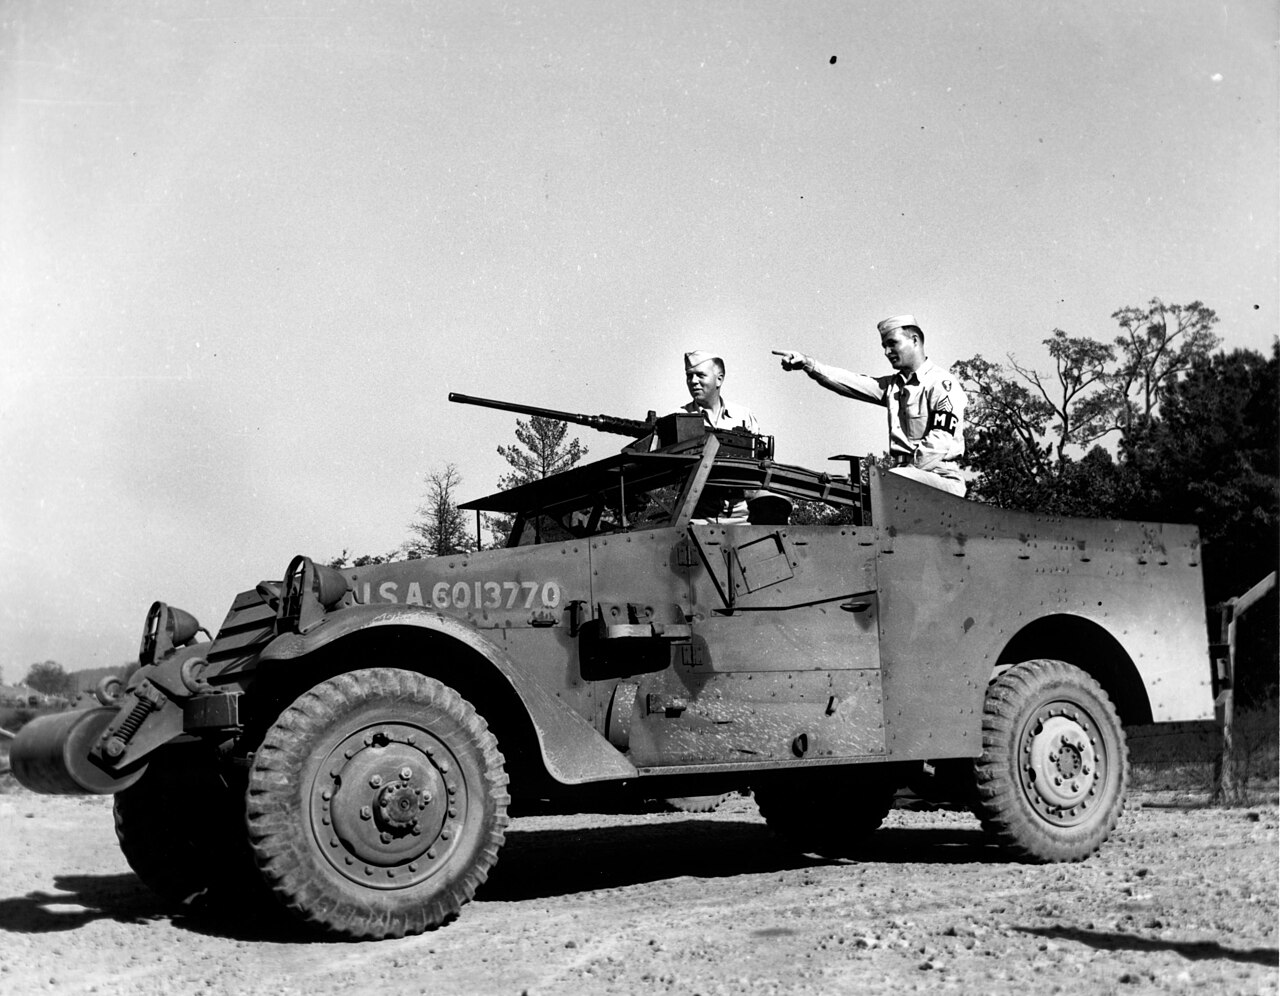
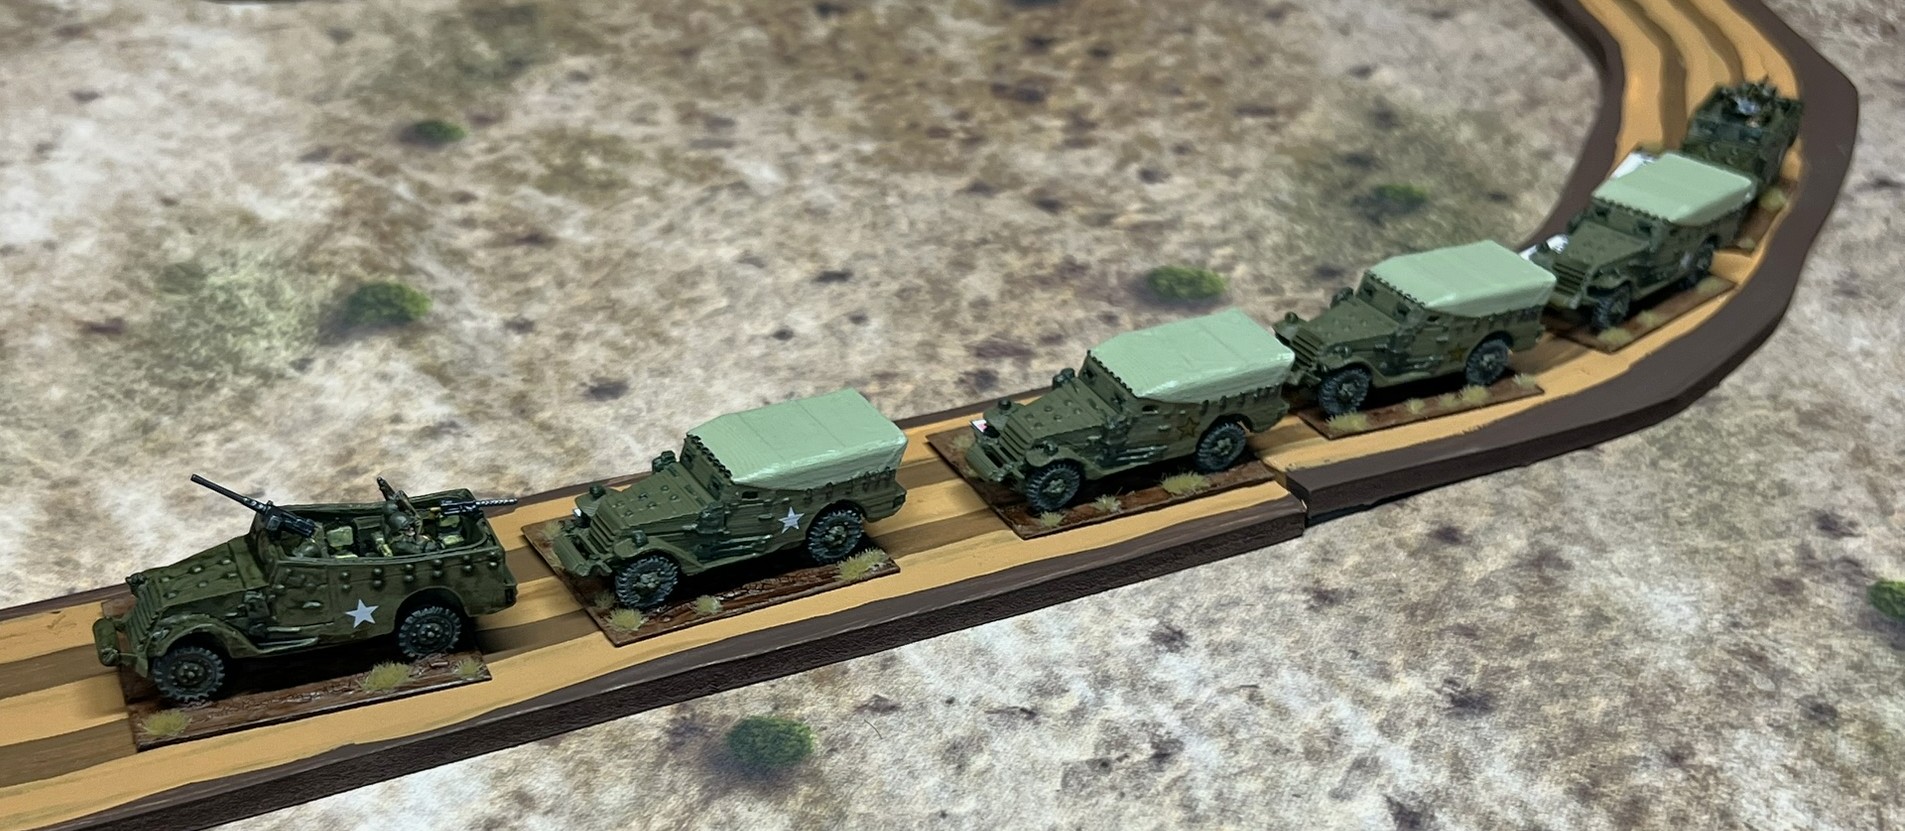
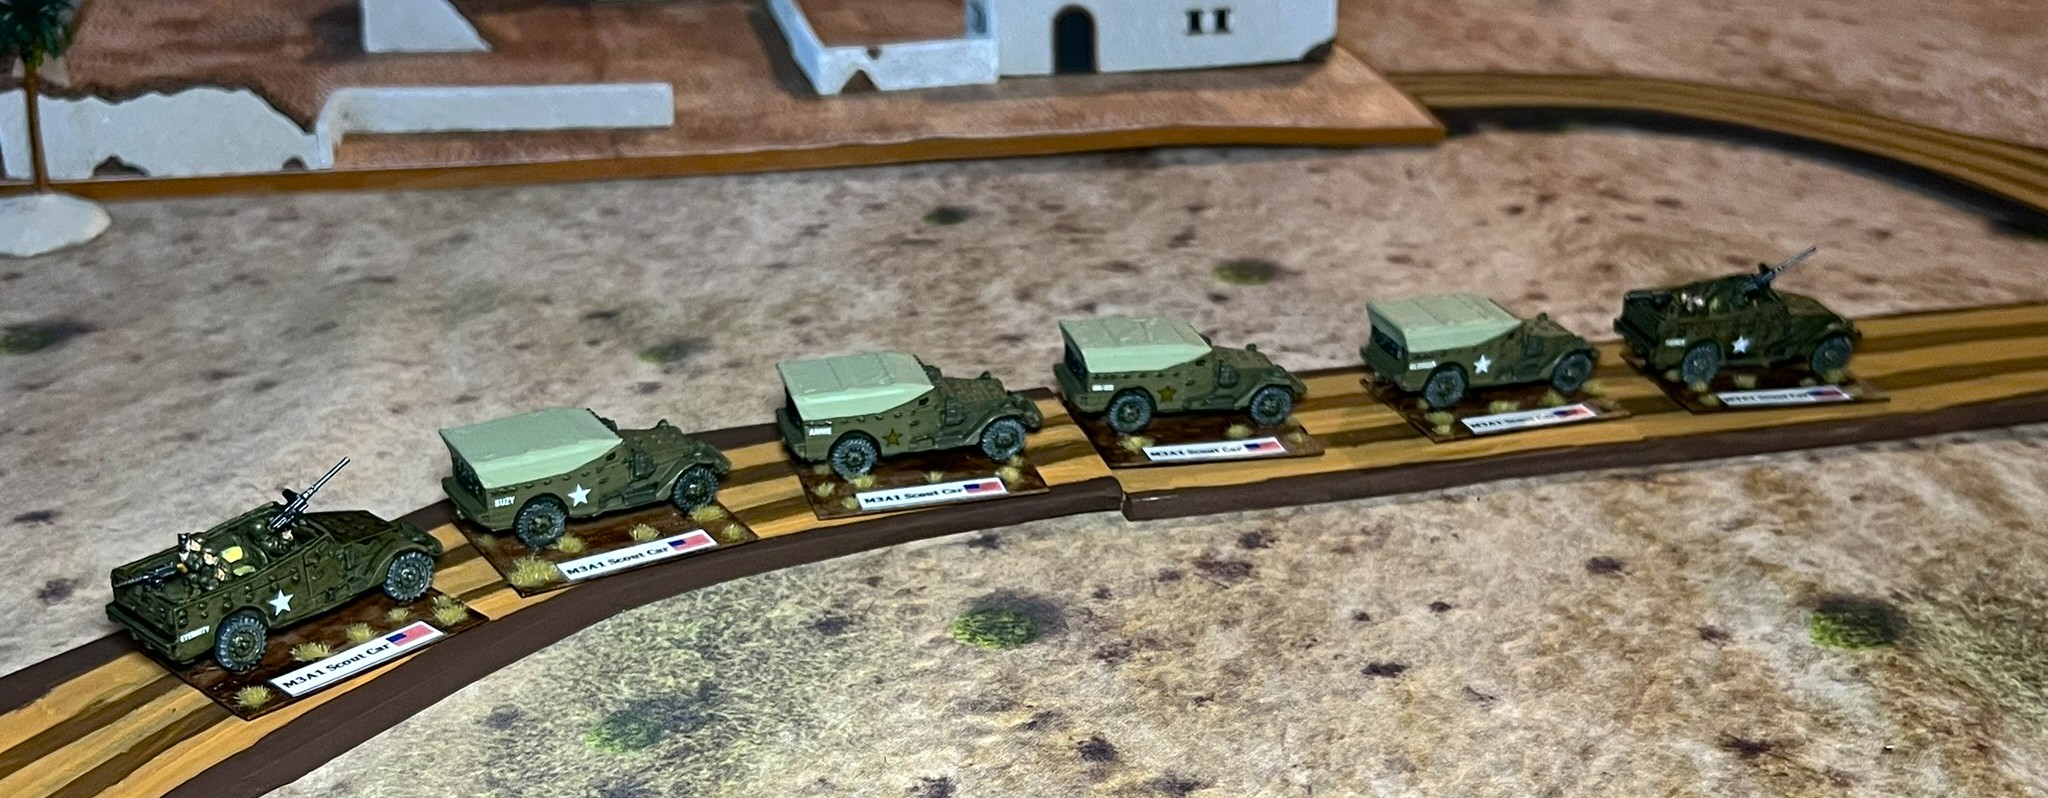
I worked on the M5 tanks in parallel with the M3A1 Scout Cars and the M3 and M6 Tank Destroyers that I have discussed previously. I tried to incorporate the gold stars and US flags that were unique to that period of the war. I also decided to give the vehicles hand-painted names:

  • Honey (my Mom’s nickname)
  • Dragon
  • Beast
  • Killah
  • Ellen (my daughter’s name)
  • Tabitha (my granddaughter’s name)
  • Caesar (my late cockatiel’s name)
  • Lynn (for my ever-so-tolerant wife)
The M5’s without their turrets, showing the basing and details. I list the paints and other materials used at the end of this post.
The eight M5’s completed.
The 22 US Army vehicles for my game in a Really Useful Box.
The 8 M5’s on my tabletop.

This wraps up this post on my 8 M5’s. If you have any feedback – please let me know in the comments section!

Lastly, for all of my posts on WWII games and projects – there is a consolidated list of posts and their links located here.

MATERIALS USED

PAINTS, INKS, GLAZES, SHADES, WASHES, PIGMENTS AND FLOCKING USED ON THE FIVE BATTLEFRONT/FLAMES OF WAR PLASTIC M5 TANK MODELS AND THE THREE HOBBYHOUSE&MINIATURES LLC 3D-PRINTED RESIN M5 TANK MODELS:

  1. Green Stuff
  2. Paper Clip wire
  3. War Games Accessories Steel Bases Number 16 (½” x ½”)
  4. Wooden Blocks, steel bolts, steel washers, magnets, steel screws
  5. Neodymium magnets (⅛” and ¼”)
  6. Gorilla Glue
  7. Tamiya Extra Thin Cement
  8. Daisy BB’s
  9. Plastic broom bristles
  10. Vallejo Surface Primer “Black”
  11. Vallejo Surface Primer “USA Olive Drab”
  12. Vallejo Model Air “Black Metallic”
  13. Army Painter “Military Shader” (shade/wash)
  14. Hataka “Vert Fonce”
  15. Vallejo Model Color “USA Olive Drab”
  16. Vallejo Model Air “Tire Black”
  17. Vallejo Model Color “Dark Sea Grey”
  18. Vallejo Model Air “Gun Metal”
  19. Vallejo Model Air “Wood”
  20. Vallejo Mecha Weathering Effects “Dark Rust Wash”
  21. War Games Accessories Steel Bases Number 23 (1½” x 2″)
  22. Vallejo Surface Primer “German Green Brown”
  23. Citadel “Agrellan Earth” (texture)
  24. Army Painter “Mid Brown” (shade/wash)
  25. Reaper MSP Core Colors “Blackened Brown”
  26. Vallejo Thinner Medium
  27. Citadel “Averland Sunset”
  28. Vallejo “Mecha Varnish Gloss”
  29. Microscale Industries “Micro Set”
  30. Microscale Industries “Micro Sol”
  31. Microscale Industries “Liquid Decal Film”
  32. Battlefront US Army decals
  33. Vallejo “Gloss Acrylic Varnish”
  34. Citadel “‘Ardcoat”
  35. Vallejo “Gloss Acrylic Varnish”
  36. Vallejo Flow Improver
  37. Vallejo Thinner
  38. Vallejo “Matte Polyurethane Varnish”
  39. Printed labels on card stock
  40. Gamers Grass “Tiny Beige 2mm Tufts” (flocking)
  41. PVA Glue

US Vehicles for Operation Torch: TANK DESTROYERS – M3 GMC’s and M6 GMC Fargo’s

The US Army had a lot of catching up to do at the start of World War II. This was true both in terms of vehicles and doctrine in the way of armored warfare. This included anti-tank units.

Initially, the US Army experienced internal squabbles about anti-tank troops and control. These were among the infantry, cavalry, and artillery branches. They disputed over which would control what were then-called “anti-tank battalions”. Interestingly, the Armor Branch (created in 1940) had little interest in that fight. It desired to stay focused on offensive operations.

The September 1941 Louisiana Maneuvers demonstrated the efficacy of anti- tank battalions. In June 1942, the Army created a new branch for this force. They also developed a doctrine to support their use (Field Manual 18–5, Tactical Employment, Tank Destroyer Unit). Tank destroyer battalions were then created and began to be fielded.

Developing doctrine is one thing – fielding self-propelled anti-tank equipment is another. When Operation Torch was launched, there were not any of the tank destroyers that you saw in later battles. No M10 Wolverines, M18 Hellcats, or M36 Jacksons – or even towed M1 57mm or M5 guns – took part in Torch.

Nope, at the start of the war, the US Army fielded just two models of tank destroyer. One was on an M3 half-track, which mounted the venerable 75mm Canon_de_75_modèle_1897. This combination was called the M3 Gun Motor Carriage (GMC). The other was the M6 Gun Motor Carriage (GMC). This was a Dodge Fargo truck with a rear-mounted M3 37mm gun. Defensively, needless to say, both of these types were not well-armored at all.

Offensively, while the 75mm gun could still pack an anti-armor punch, the 37mm was well on its way to complete obsolescence. Add to that the M6 GMC was rearward-facing. It would have to be turned around to fire, That would have been quite a challenge in combat. I imagine that it was inspired by the British use of portee anti-tank weapons. However, the main reason was probably the urgency of fielding something to fight in the anti-tank role. Add to that – US industrial might had not yet reached full production capacity seen later in the war.

M3 GMC
M6 GMC

But you go to war with the Army you have. Tank Destroyer battalions were formed, consisting of a headquarters company, a reconnaissance company (including a pioneer platoon – Engineers!), and 3 twelve-vehicle tank destroyer companies. Each company fielded each one platoon of M6 Fargo GMC’s and two platoons of M3 GMC’s. Each M6 platoon had 4 vehicles, and each of both of the M3 platoons had 4. These would see combat starting in November 1942 during Operation Torch.

At that point, doctrinally, tank destroyers were by nature defensive forces. They were supposed to blunt any enemy armored attack or counterattack – obviously by destroying tanks. This would allow for counterattack by US tanks and infantry. Operation Torch would be the first test.

For my What a Tanker games for Operation Torch at HISTORICON 2025, I needed both types of tank destroyers. For the M3 GMC’s, I bought 6 from Old Glory (SKU CD-223A) and assembled and painted up just 3. I also found one Battlefront/FOW model (SKU US101) at HAVOC that joined the mix. Now I had 4 M3 GMC’s for gaming. M6 GMC were not easy to source – and I also had never heard of them. So my friend Greg Priebe agreed to 3D-print some for me. You may remember that Greg printed the French vehicles for me I previously wrote about here. He made Panhard 175 TOE’s and Berliet VUDB’s for me.

Thanks again Greg!

I was able to put together 3 M6 GMC’s with what Greg sent me. I worked on these in June as well.

June was a crazy month – and I was able to get these together before HISTORICON 2025. As for photos – well you’ll see what I have.

M3 GMC

The three Old Glory models are metal, while the FOW model is metal and resin. all are 15mm/1:100 scale. Painting the crews was challenging (and fun)!

Three Old Glory M3 GMC models are on the bottom, with the FOW model at the top of the photo.

I painted them up with both gold and white stars. The gold stars were unique to the North African campaign. I thought they gave a more authentic Operation Torch look. Apparently in November of 1942, standardization to white stars was not yet part of the US Army’s official painting scheme. Unlike my M3A1 Scout Cars, I freehand painted the stars. I found they looked better than my decals. For more variation, I either painted the stars on the hood or the grills. Also, each got a name – I used the decals that I had available. The names of these were:

  • BLOOD N GUTS
  • DESTRUCTION
  • HURRICANE
  • LUCKY
My 4 M3 GMC’s. From left to right, BLOOD N GUTS, HURRICANE, DESTRUCTION and LUCKY (the only FOW model).
Close ups of DESTRUCTION and HURRICANE.

M6 GMC (FARGO)

These were all 3D-printed resin in 15mm/1:100 scale. I wish that I had been able to add crew to these. They were already so fiddly and small, that I satisfied myself with just having a driver. Even at that I had to do a good amount of surgery to get him to fit in his seat!

The M6 GMC’s washed after putting in magnets and ready for assembly and painting. I added magnets to each M3 and M6 to allow brewed-up markers to stick to the vehicles on the tabletop.
The M6 GMC’s shown here painted staring at the back end of my Berliet VUDB’s. The M6’s are awaiting basing work and varnishing.

Like with the M3 GMC’s, I gave names to these as well. These names were the only differentiator for these models. The names were:

  • BUCK (for Buck Surdu)
  • DUKE
  • TEX
A close up of two completed models. Here, BUCK is maneuvering into a hide firing position. It would of course have to turn around to fire. Behind is DUKE moving up the road.
A closer view of BUCK.

While the M3 GMC was partially effective in North Africa, the M6 was not. Clearly, both were very vulnerable to direct and indirect fire. As time progressed, they were both replaced by self-propelled vehicles with turrets and better protection. The M3 GMC’s were converted back into half-tracks. The M6 GMC’s were stripped of their guns, and were later used as just trucks.

In conclusion, I had some tank destroyers for Operation Torch games of What a Tanker! I also hope that you enjoyed this post on my early war tank destroyers. All that I have left to share on this project are my 8 American M5 Stuart tanks. I will also share a bit about my games at HISTORICON.

What did you think of these tank destroyers? Did anything surprise you? Motivate you to get some for yourself? Please let me know your thoughts in the comments section!

Lastly, you can find all of my posts on WWII games and projects in one place. There is a consolidated list of posts and their links located here.

The next lists are what I used on these vehicles. I review these lists for my own uses on future projects. For some of you, they may also be helpful.

MATERIALS USED

PAINTS, INKS, GLAZES, SHADES, WASHES, PIGMENTS AND FLOCKING USED ON THE ONE BATTLEFRONT/FLAMES OF WAR RESIN M3 GMC MODEL AND THE THREE OLD GLORY M3 GMC MODELS:

  1. Green Stuff
  2. Vallejo Surface Primer “Black”
  3. Vallejo Surface Primer “USA Olive Drab”
  4. Gorilla Glue
  5. Battlefront “European Skin”
  6. Vallejo Thinner Medium
  7. War Games Accessories Steel Bases Number 23 (1½” x 2″)
  8. War Games Accessories Steel Bases Number 16 (½” x ½”)
  9. Green Stuff Wooden Blocks, steel bolts, steel washers, magnets, steel screws
  10. Neodymium magnets (⅛” and ¼”)
  11. Vallejo Surface Primer “German Green Brown”
  12. Army Painter “Mid Brown” (shade/wash)
  13. Reaper MSP Core Colors “Blackened Brown”
  14. Vallejo Model Color “USA Olive Drab”
  15. Army Painter “Flesh Wash” (shade/wash)
  16. Vallejo Model Color “Brass”
  17. Vallejo Model Air “Tire Black”
  18. Vallejo Model Color “Dark Sea Grey”
  19. Vallejo Primers “NATO Green”
  20. Army Painter “Military Shader” (shade/wash)
  21. Reaper MSP “Pure White”
  22. Citadel “Averland Sunset”
  23. Vallejo Mecha Color “Dark Steel”
  24. Army Painter “Dark Tone” (wash/shade)
  25. Citadel “Agrellan Badlands” (texture)
  26. Citadel “Agrellan Earth” (texture)
  27. Vallejo Mecha Weathering Effects “Dark Rust Wash”
  28. Vallejo “Mecha Varnish Gloss”
  29. Microscale Industries “Micro Set”
  30. Microscale Industries “Micro Sol”
  31. Microscale Industries “Liquid Decal Film”
  32. Gin Fritter US Army decals
  33. Battlefront US Army decals
  34. Vallejo “Gloss Acrylic Varnish”
  35. Citadel “‘Ardcoat”
  36. Vallejo “Gloss Acrylic Varnish”
  37. Vallejo Flow Improver
  38. Vallejo Thinner
  39. Vallejo “Matte Polyurethane Varnish”
  40. Printed labels on card stock
  41. Gamers Grass “Tiny Beige 2mm Tufts” (flocking)
  42. PVA Glue

PAINTS, INKS, GLAZES, SHADES, WASHES, PIGMENTS AND FLOCKING USED ON THE THREE RESIN M6 GMC MODELS (FARGO’S):

  1. Gorilla Glue
  2. Green Stuff Neodymium magnets (⅛”)
  3. Wooden Blocks, steel bolts, steel washers, magnets, steel screws
  4. Vallejo Surface Primer “Black”
  5. Vallejo Surface Primer “USA Olive Drab”
  6. Battlefront “European Skin”
  7. Vallejo Thinner Medium
  8. War Games Accessories Steel Bases Number 23 (1½” x 2″)
  9. Vallejo Surface Primer “German Green Brown”
  10. Army Painter “Mid Brown” (shade/wash)
  11. Reaper MSP Core Colors “Blackened Brown”
  12. FolkArt “Champagne”
  13. Army Painter “Flesh Wash” (shade/wash)
  14. Vallejo Model Air “Tire Black”
  15. Vallejo Model Color “Dark Sea Grey”
  16. Vallejo Primers “NATO Green”
  17. Army Painter “Military Shader” (shade/wash)
  18. Citadel “Averland Sunset”
  19. Citadel “Agrellan Badlands” (texture)
  20. Citadel “Agrellan Earth” (texture)
  21. Vallejo “Mecha Varnish Gloss”
  22. Microscale Industries “Micro Set”
  23. Microscale Industries “Micro Sol”
  24. Microscale Industries “Liquid Decal Film”
  25. Battlefront US Army decals
  26. Vallejo “Gloss Acrylic Varnish”
  27. Citadel “‘Ardcoat”
  28. Vallejo “Gloss Acrylic Varnish”
  29. Vallejo Flow Improver
  30. Vallejo Thinner
  31. Vallejo “Matte Polyurethane Varnish”
  32. Printed labels on card stock
  33. Gamers Grass “Tiny Beige 2mm Tufts” (flocking)
  34. PVA Glue

Thanks for checking this out!

US Vehicles for Operation Torch: M3A1 Scout Cars

Now that I have shared all of the Vichy French vehicles that I completed on this blog, it is time for me to add the American models. These will also be used in my What a Tanker games for Operation Torch at HISTORICON 2025. I am starting with the American reconnaissance scout car – the M3A1 Scout Car.

It was designed and built by the now-defunct White Motor Company, with the chassis interestingly being a product of the Diebold Lock and Safe Company. It was a 4×4, and could do up to 50 mph on the road (80 kph). Many of you will notice how similar the M3A1 is to the M3 half-track. And for good reason, as the M3 half-track was a development of the M3A1 Scout car.

It typically carried a Browning M2 .50 caliber machine gun plus up to two additional Browning M1919 .30 caliber machine guns. It was open-topped with armor on the chassis up to 13mm/.5″ in thickness. It could carry up to 6 soldiers in addition to the driver. A canvas cover was available for protection against the elements. The M3A1 was intended to be a reconnaissance vehicle, but its lack of protection made it less desirable than the M3 half-track in that role. In US use, it was relegated to rear-echelon uses after Operation Torch and Operation Husky (the invasion of Sicily). Over 21,000 were made, with over half of that number going as Lend-Lease, mainly to the British Commonwealth and the Soviet Union.

I found David Doyle’s book, M3A1 Scout Car: The US Army’s Early World War II Reconnaissance Vehicle (Legends of Warfare: Ground, 8), very interesting and useful.

For my Operation Torch What a Tanker games, I decided that these would serve as the cavalry scouts that would run into those quirky French armored cars that I’ve been posting about recently.

Sourcing of the M3A1 models came from two different places. I got two Battlefront Flames of War models (SKU US 300) from a flea market at the HAVOC gaming convention in April. These models came with crew and machine guns. As the Battlefront model seems to be out-of-production, I needed to look elsewhere for more models. I went to eBay as a second source.

There from Wolverine3d.com I found models with the tarpaulin covers on. Given that a) these were different from the Battlefront models, b) there would be no crew to paint (saving time), and c) very reasonably-priced, I ordered 5, bringing my total available to 7 M3A1’s. They were not too crisp, and made of PLA plastic, but good enough for tabletop use. I started work on them all on May 23rd, and finished them on June 2nd. As I was hurrying to complete the entire project, photography of in-progress work took a backseat. I did work on multiple types of US vehicles concurrently as well. I judged doing separate posts for each type was better for me and you dear reader!

I cleaned up the models and washed them. For ease of painting I then mounted a small 1/2″ square steel base under each M3A1 model. This would allow me to use magnets to support the vehicles while I painted them. I also drilled out and installed small neodymium magnets (secured with green stuff) so that I would be capable of using my equally-magnetized blast markers on any that got brewed up in a game. As for crew- I used my alligator clip stand and some wood screws on them as supports – in a painful way for them (if they were capable of pain of course).

May 23rd – the work begins.

After painting I added decals and labels. Each M3A1 got a different name. Because in Operation Torch there was a mixed use of gold and white stars on US vehicles, I varied their application as well with some home-made gold star decals. They were ok – but not 100% to my liking, and you will see the different approach that I took on the other US vehicles (in future posts).

The seven M3A1’s before I added any tufts as final flocking. The bases are 1.5″ x 2″.

Once completed, I took a few photos of them assembled on my tabletop set up.

M3A1’s in convoy from the drivers’ sides.
M3A1’s in convoy from the other side.
Close up shot of M3A1 “Fierce”. Each Battlefront model had a driver and two soldiers in the back. I also replaced some of the bendy metal machine guns with plastic ones from another kit.

This wraps up this post on my 7 M3A1’s. Remaining are I have 8 American tanks and 6 tank destroyers to share. Which ones? You can probably guess – rightly or wrongly! What did you think of the M3A1’s? Did you learn anything? Maybe I motivated you to get some for yourself? Please let me know your thoughts in the comments section!

Lastly, for all of my posts on WWII games and projects – there is a consolidated list of posts and their links located here.

MATERIALS USED

PAINTS, INKS, GLAZES, SHADES, WASHES, PIGMENTS AND FLOCKING USED ON THE TWO BATTLEFRONT/FLAMES OF WAR RESIN M3A1 MODELS AND THE FIVE WOLVERINE3D.COM M3A1 3D-PRINTED MODELS:

  1. Green Stuff
  2. War Games Accessories Steel Bases Number 23 (1½” x 2″)
  3. Vallejo Surface Primer “German Green Brown”
  4. War Games Accessories Steel Bases Number 16 (½” x ½”)
  5. Gorilla Glue
  6. Alligator clips and stand
  7. Wooden Blocks, steel bolts, steel washers, magnets, steel screws
  8. Neodymium magnets (⅛” and ¼”)
  9. Vallejo Surface Primer “Black”
  10. Vallejo Surface Primer “German Green Brown”
  11. Plastic machine guns from Battlefront M5 Stuart Platoon kit
  12. Vallejo Surface Primer “USA Olive Drab”
  13. Citadel “Agrellan Earth” (texture)
  14. Army Painter “Mid Brown” (shade/wash)
  15. Reaper MSP Core Colors “Blackened Brown”
  16. Vallejo Model Air “Tire Black”
  17. Vallejo Model Color “Dark Sea Grey”
  18. Battlefront “Tommy Green”
  19. Vallejo Model Air “Ivory”
  20. Vallejo Model Color “Off White”
  21. Citadel “Tallarn Sand”
  22. Reaper MSP “Pure Black”
  23. Battlefront “European Skin”
  24. Vallejo Model Air “Black Metallic”
  25. Vallejo Model Color “Wood Grain”
  26. Vallejo Model Air “Wood”
  27. Army Painter “Flesh Wash” (shade/wash)
  28. Army Painter “Military Shader” (shade/wash)
  29. Hataka “Vert Fonce”
  30. Vallejo Model Color “USA Olive Drab”
  31. Vallejo “Mecha Varnish Gloss”
  32. Microscale Industries “Micro Set”
  33. Microscale Industries “Micro Sol”
  34. Microscale Industries “Liquid Decal Film”
  35. Expert’s Choice Ink Jet Clear Decal Paper
  36. Gin Fritter US Army decals
  37. Battlefront US Army decals
  38. Vallejo “Gloss Acrylic Varnish”
  39. Citadel “‘Ardcoat”
  40. Vallejo “Gloss Acrylic Varnish”
  41. Vallejo Flow Improver
  42. Vallejo Thinner
  43. Vallejo “Matte Polyurethane Varnish”
  44. Printed labels on card stock
  45. Gamers Grass “Tiny Beige 2mm Tufts” (flocking)
  46. PVA Glue

French Armor for Operation Torch: Panhard 175 TOE’s, Laffly S15 TOE’s, and Berliet VUDB’s

Yes – more armored cars of French origin are coming your way right here and now!

This post will cover off on the last three vehicle types that I built and painted for Vichy French forces during Operation Torch. All three here are armored cars, but each is definitely different and not commonly seen in tabletop wargames. I thought that that aspect alone would make for some interesting historical interest as well as game aesthetics.

Like the other inter-war armored cars – including the White-Laffly AMD 80’s and the Schneider AMC P16’s that I posted about here – these three were all models of AFV that were “good enough for the colonies”. The French Army certainly considered them as not good enough for defending against a potential German attack. Some were in France during 1939-1940, but most were in North Africa and the Levant. All of these were at least armed with machine guns, with the Panhard having a 25mm cannon as well.

Certainly finding appropriate 15mm/1:100 scale models of these was not easy. Luckily I managed to enlist the help of my friend Greg Priebe who 3D-printed two of these types. I did get the third type (Laffly S15 TOE) from Butlers’ Printed Models. Let’s look at each vehicle and model in turn.

Panhard 175 TOE

Photo from https://tank-afv.com/ww2/france/panhard-165-175.php

The Panhard 165 and 175 TOE’s shared similar frames – with the 175 version being a modification/upgrade. The acronym “TOE” stood for théâtres d’opérations extérieurs – i.e. designed for foreign theaters of operations like the colonies. Greg printed for me two Panhard 175’s that I assembled and painted. In reality, it was, as you can see, very tall (9.1′). That’s just 1′ 2″ shorter than the M3 Lee!

Do not confuse the 175 with the more well-known Panhard AMD 178. The 165 TOE type was built in the early 1930’s with the 175 TOE upgrades happening around 1934. Maybe 60 or so were initially built and then so upgraded. It did have a 25mm antitank gun, so it possessed some light antiarmor capability. Armor-wise, it had just 6-9mm of riveted armor, so not much. These were really designed to work to keep France’s colonies in line.

Greg sent me a bag of the models that he printed in late April. I was able to cobble together two good vehicles from the pieces. After a good (but gentle) washing (I needed to be careful of the fiddly fenders), I drilled out and installed small magnets as you see below. This was to make the turrets movable – as well as to hold smoke markers if they got brewed up or knocked out in a game. For a painting scheme. I used a green primer base with yellow camouflage stripes, akin to my H35’s. All of my paints used are listed as references at this post’s end for those interested in such stuff.

Panhard 175 TOE’s drilled out with installed magnets.
Panhard 175 TOE’s painted but before tufts and final base work was completed.
Completed Panhard 175 TOE models completed, shown here in cover scouting for approaching US vehicles during an Operation Torch game of What a Tanker.

Laffly S15 TOE

Photo from https://cartalana.com/033-15.php

This was yet another Laffly-modified truck. These were common civilian truck chassis developed into a range of different military types, one of which was the Laffly S15 TOE. It was designed for colonial use in 1934, but was not delivered to the French Army until 1938 or 1939. It had a single machine gun – a Reibel 7.5 mm light machine gun located inside of a domed turret. I thought it had a unique look.

I really was impressed with my examples from Butlers’ Printed Models. Here is the link for the model.

Unfortunately, my original purchased models were lost in transit. Yet, the company quickly sent me another pair of models – great customer service! They were crisp and very nice resin models. As I was rushing to finish all these vehicles (yes I am repeating that issue!), I have no WIP shots! For a painting scheme, I went with a sandy look.

My finished Laffly S15 TOE Models.

Berliet VUDB

The last type of Vichy French armored car that Greg printed up for me was a trio of Berliet VUDB’s. This type was made by – the Berliet company – which was in competition with Laffly and Panhard for French government contracts. It seems that all three companies got some business. One can only imagine what having so many armored car variants would do to logistics and the need for spare parts.

Berliet VUDB – photo from https://cartalana.com/033-15.php

As you can see, it was a 4×4 armored car with a big spare tire. Some credit this vehicle with the accolade of being the first armored personnel carrier as it had space for a driver and seven soldiers. The vehicle even had ports on the sides from which soldiers could fire their rifles while riding inside. It was armed with two Fusil-mitrailleur Modèle 1924 Modifié 29 machine guns (the standard French light machine gun at the beginning of WWII). Armor was just 7mm thick.

Detail from the Berliet VUDB wikipedia page – which is in French (luckily my second language).

” VUDB” is a French acronym for “voiture de prise de contact“, or “contact vehicle”. It was a scout car in US parlance and use. Sixty-two were produced between 1929 and 1932 – and originally were looked at to be used in the pacification of Morocco in the early 1930’s after the Rif War. There were a number of them in Morocco in November 1942.

As for the models, these were very solid resin prints. No assembly was required except for my usual drilling out holes for neodymium magnets.

My three Berliet VUDB’s at the start.
Painted Berliet VUDB’s before I added labels and flocking on the bases. While a Berliet VUDB could have had two machine guns sticking out, the model only had the one out.
Berliet VUDB’s on tabletop heading to the front.

That finishes off the 31 AFV’s that I assembled and painted for my Operation Torch What a Tanker game. All are in their glory…well their box…below.

31 French tanks and armored cars!

I have now caught up on all my French vehicles! It’s time to move on to the Americans next!

I have 22 American tanks, tank destroyers, or armored cars to write about next. All were used in Operation Torch in November 1942. These vehicles will be the topics of my next posts.

Please, I’d love to hear any feedback – were you surprised at anything here? Learn anything? Get inspired?

Let me know your thoughts in the comments section!

Lastly, for all of my posts on WWII games and projects – there is a consolidated list of posts and their links located here.

MATERIALS USED

PAINTS, INKS, GLAZES, SHADES, WASHES, PIGMENTS AND FLOCKING USED ON THE TWO PANHARD 175 TOE MODELS 3D-PRINTED BY GREG PRIEBE:

  1. Green Stuff
  2. War Games Accessories Steel Bases Number 23 (1½” x 2″)
  3. Neodymium magnets (⅛”)
  4. Gorilla Glue
  5. Vallejo Surface Primer “Black”
  6. Wooden Blocks, steel bolts, steel washers, nails, magnets, steel screws
  7. Vallejo Primers “Desert Tan”
  8. Vallejo Model Color “Dark Yellow”
  9. Vallejo “Thinner Medium”
  10. Vallejo Surface Primer “German Green Brown”
  11. Reaper MSP Core Colors “Blackened Brown”
  12. Army Painter “Mid Brown” (shade/wash)
  13. Citadel “Agrellan Badlands” (texture)
  14. Vallejo Primers “NATO Green”
  15. Vallejo Model Air “Tire Black”
  16. Vallejo Model Color “Dark Sea Grey”
  17. Poster tack
  18. Reaper MSP Core Colors “Blackened Brown”
  19. Army Painter “Mid Brown” (shade/wash)
  20. FolkArt “Champagne”
  21. Vallejo “Mecha Varnish Gloss”
  22. Microscale Industries “Micro Set”
  23. Microscale Industries “Micro Sol”
  24. Microscale Industries “Liquid Decal Film”
  25. Flames of War French Decal Set (FR940)
  26. Peddinghaus-Decals 1/100 2181 “World of Flames French tanks early war”
  27. Citadel “‘Ardcoat”
  28. Vallejo “Gloss Acrylic Varnish”
  29. Vallejo Mecha Weathering Effects “Dark Rust Wash”
  30. Army Painter “Dark Tone” (wash)
  31. Vallejo Flow Improver
  32. Vallejo Thinner
  33. Vallejo “Matte Polyurethane Varnish”
  34. Printed labels on card stock
  35. Gamers Grass “Tiny Beige 2mm Tufts” (flocking)
  36. PVA Glue

PAINTS, INKS, GLAZES, SHADES, WASHES, PIGMENTS AND FLOCKING USED ON THE TWO LAFFLY S15 TOE MODELS FROM BUTLERS’ PRINTED MODELS:

  1. No. 19 x ½” flat head nails
  2. War Games Accessories Steel Bases Number 23 (1½” x 2″)
  3. Gorilla Glue
  4. Green Stuff
  5. Neodymium magnets (⅛”)
  6. Daisy BB’s
  7. Vallejo Surface Primer “Black”
  8. Wooden Blocks, steel bolts, steel washers, nails, magnets, steel screws
  9. Vallejo Surface Primer “German Green Brown”
  10. Army Painter “Mid Brown” (shade/wash)
  11. Vallejo Primers “Desert Tan”
  12. Vallejo Model Color “Black”
  13. Vallejo Model Air “Tire Black”
  14. Vallejo Model Color “Dark Sea Grey”
  15. Battlefront “Oxide Red”
  16. Reaper MSP “Carrot Top Red”
  17. Vallejo “Thinner Medium”
  18. Vallejo Mecha Color “Dark Steel”
  19. Vallejo Mecha Color “Sand Yellow”
  20. Army Painter “Dark Tone” (wash)
  21. FolkArt “Champagne”
  22. Citadel “Agrellan Earth” (texture)
  23. Citadel “Agrellan Badlands” (texture)
  24. Reaper MSP Core Colors “Blackened Brown”
  25. Vallejo “Mecha Varnish Gloss”
  26. Microscale Industries “Micro Set”
  27. Microscale Industries “Micro Sol”
  28. Microscale Industries “Liquid Decal Film”
  29. Flames of War French Decal Set (FR940)
  30. Peddinghaus-Decals 1/100 2181 “World of Flames French tanks early war”
  31. Citadel “‘Ardcoat”
  32. Vallejo “Gloss Acrylic Varnish”
  33. Vallejo Mecha Weathering Effects “Dark Rust Wash”
  34. Vallejo Flow Improver
  35. Vallejo Thinner
  36. Vallejo “Matte Polyurethane Varnish”
  37. Printed labels on card stock
  38. Gamers Grass “Tiny Beige 2mm Tufts” (flocking)
  39. PVA Glue

PAINTS, INKS, GLAZES, SHADES, WASHES, PIGMENTS AND FLOCKING USED ON THE THREE BERLIET VUDB MODELS 3D-PRINTED BY GREG PRIEBE:

  1. Green Stuff
  2. War Games Accessories Steel Bases Number 23 (1½” x 2″)
  3. Neodymium magnets (⅛”)
  4. Gorilla Glue
  5. Vallejo Surface Primer “Black”
  6. Wooden Blocks, steel bolts, steel washers, nails, magnets, steel screws
  7. Vallejo Primers “Desert Tan”
  8. Vallejo Model Color “Dark Yellow”
  9. Vallejo “Thinner Medium”
  10. Vallejo Surface Primer “German Green Brown”
  11. Battlefront “Oxide Red”
  12. Reaper MSP “Carrot Top Red”
  13. Vallejo Model Air “Tire Black”
  14. Vallejo Model Color “Dark Sea Grey”
  15. Vallejo Mecha Color “Dark Steel”
  16. Army Painter “Mid Brown” (shade/wash)
  17. Reaper MSP Core Colors “Blackened Brown”
  18. Citadel “Agrellan Badlands” (texture)
  19. Vallejo “Mecha Varnish Gloss”
  20. Microscale Industries “Micro Set”
  21. Microscale Industries “Micro Sol”
  22. Microscale Industries “Liquid Decal Film”
  23. Flames of War French Decal Set (FR940)
  24. Peddinghaus-Decals 1/100 2181 “World of Flames French tanks early war”
  25. Citadel “‘Ardcoat”
  26. Vallejo “Gloss Acrylic Varnish”
  27. FolkArt “Champagne”
  28. Vallejo Mecha Weathering Effects “Dark Rust Wash”
  29. Vallejo Flow Improver
  30. Vallejo Thinner
  31. Vallejo “Matte Polyurethane Varnish”
  32. Printed labels on card stock
  33. Gamers Grass “Tiny Beige 2mm Tufts” (flocking)
  34. PVA Glue

French Armor for Operation Torch: Hotchkiss H35’s, H39’s, and Renault R35’s

In November 1942, the Vichy French had a 8 division’s worth of troops in her colonies – from Morocco to the Levant. Under the terms of the Armistice of 22 June 1940, Vichy France was still obligated to defend its unoccupied lands as a neutral state.

And yes, they had more tanks than just the FT-17’s you saw in my last post. In addition to those old WWI relics, Vichy had Hotchkiss H35 and H39 tanks, as well as Renault R35’s. Both of the Hotchkiss models were “cavalry” tanks, in that they had been forced as a light tank on the French cavalry in the 1930’s (and later forced on infantry tank regiments as stopgaps). Contrastingly, the R35 was an “infantry tank”. After the Armistice, the Vichy Army had both types in the colonies. I did read somewhere that some R35’s were hidden away under hay bales behind horse barns to keep prying German and Italian officers of the Armistice Commission from finding them.

The H35, or Char léger modèle 1935 H, was a two-man tank, armed with the same cannon as the FT-17 (the Puteaux SA18 37mm cannon). The H39, or Char léger modèle 1935 H modifié 39, was a 1938 upgrade of the H35 that also got a better engine, and a newer and longer 37mm gun – the SA38 cannon, that supposedly had increased armor penetration over the SA18 (how much I cannot find!). Both variants were in North Africa in November 1942. There are only two observable differences to an outsider between the two models. Both have different engine deck configurations and the mufflers of H35’s point forward – while H39 mufflers point rearward.

An H35 tank. Note the engine deck and the forward-pointing muffler.
An H39 tank shown in Israeli markings at Yad La-Shiryon (officially: The Armored Corps Memorial Site and Museum at Latrun in Israel. Note the rearward-pointing muffler.

As for the R35, or Char léger Modèle 1935 R, it was an infantry tank under French Army doctrine. It too had a two-man crew, and was also armed with the Puteaux SA18 37mm cannon. It was thought to be slightly better mechanically than the H35/H39 variants. As the Armistice forbade Vichy from having pure tank units, these and the Hotchkiss tanks would be spread around into combined-arms units. These Vichy tanks and armored cars would play a role in Operation Torch in November 1942 against US forces in Morocco (and Algeria as well).

R35 tank at Saumur Museum in France.

In gathering appropriate models for my What a Tanker game for HISTORICON, I started with looking for H35 and H39 metal or 3D-printed models in resin. I found a two listings for some on eBay. One was for Sarge_s Stuff – he had H35’s that could be bought individually – and I ordered 4 of them. The other site was the same one I bought the FT-17’s from earlier – jacobsminis (aka HobbyHouse&Miniatures.LLC). I ordered 5 from HH&M as that was the minimum order. The tanks from HH&M were (and still are) listed as H39’s, but when I got them I realized that they were actually H35’s. Unlike their excellent FT-17 models, some of these had printing errors, and I ended up using just 2 of these. However, I did use all 4 of the Sarge_s Stuff ones as H35’s. For H39’s and R35’s, I decided to rebase the ones that I painted a few years ago. I had 1 H35 and 3 H39’s (documented here) and 2 R35’s (documented here). I rebased all 6 of these.

One of my 3 H39’s before I rebased.
My R35’s before rebased them.
All rebased!

This left me with 6 H35’s to paint to round out the tanks for Vichy (more armored cars would be coming!). As I was also working on many other vehicles at the time, plus running for reelection (I won), plus preparing for and attending HUZZAH, AND prepping for HISTORICON…plus golf…I was BUSY in April, May and even June and July. I am sure that you get the picture, and ironically I have few WIP pictures! But I’ll share what I have.

I used neodymium magnets and flat-head nail again to mount the turrets. The two H35 turret prints were slightly different, but I adapted with green stuff.

The 6 H35’s primed with the first desert sand color.

I used poster-tack again for masking/making camouflage patterns over the initial color. I did experiment with using Silly Putty as masking as I had seen someone do that – but it did not work for me. So I went back to what I knew would work – poster tack and touching up afterwards..

Poster-tack covered!
Then I applied a second prime with a NATO Green. Al paints are listed at the end of this post.
Now I had 6 H35’s. The third one from the left is one from an earlier project that I rebased, with the other 5 being new. The yellow is different on that older one, but ok enough I think for a game.

Now, I can share some limited…

Eye Candy

H35’s in column on my game tabletop.
Close up of the H35 column.

I am indeed – as promised – catching up on the posts I have backlogged for my What a Tanker Operation Torch game project- and yes there are more AFV’s to come. I do appreciate you, my readers. Of the eventually-painted 31 Vichy vehicles I had for the game, this brings me up to 24 Vichy combat vehicles that I have covered to date in this blog. I have 8 remaining Vichy armored cars to write about before I get to the USA. Those 8 will be the topic of my next post. Please, if you want, I’d love to hear any feedback – feel free to let me know your thoughts in the comments section.

For all of my posts on WWII games and projects – there is a consolidated list of posts and their links located here.

MATERIALS USED

PAINTS, INKS, GLAZES, SHADES, WASHES, PIGMENTS AND FLOCKING USED ON THESE H35 MODELS:

  1. Green Stuff
  2. War Games Accessories Steel Bases Number 23 (1½” x 2″)
  3. No. 19 x ½” flat head nails
  4. Vallejo Surface Primer “German Green Brown”
  5. Neodymium magnets (¼”)
  6. Gorilla Glue
  7. Wooden Blocks, steel bolts, steel washers, nails, magnets, steel screws
  8. Citadel “Agrellan Earth” (texture)
  9. Vallejo Primers “NATO Green”
  10. Vallejo Surface Primer “Black”
  11. Vallejo Primers “Desert Tan”
  12. Vallejo Surface Primer “German Green Brown”
  13. Reaper MSP Core Colors “Blackened Brown”
  14. Army Painter “Mid Brown” (shade/wash)
  15. Vallejo Mecha Color “Dark Steel”
  16. Battlefront “Oxide Red”
  17. Reaper MSP “Carrot Top Red”
  18. Army Painter Speed Paint 1.0 “Dark Wood”
  19. Army Painter “Dark Tone” (wash)
  20. Vallejo Mecha Weathering Effects “Dark Rust Wash”
  21. Vallejo Model Air “Tire Black”
  22. Vallejo Model Color “Dark Sea Grey”
  23. Vallejo “Mecha Varnish Gloss”
  24. Microscale Industries “Micro Set”
  25. Microscale Industries “Micro Sol”
  26. Microscale Industries “Liquid Decal Film”
  27. Flames of War French Decal Set (FR940)
  28. Peddinghaus-Decals 1/100 2181 “World of Flames French tanks early war”
  29. Citadel “‘Ardcoat”
  30. Vallejo “Gloss Acrylic Varnish”
  31. Citadel “Agrellan Earth” (texture)
  32. Army Painter “Mid Brown” (shade/wash)
  33. Reaper MSP Core Colors “Blackened Brown”
  34. Vallejo Flow Improver
  35. Vallejo Thinner
  36. Vallejo “Matte Polyurethane Varnish”
  37. Printed labels on card stock
  38. Gamers Grass “Tiny Beige 2mm Tufts” (flocking)
  39. PVA Glue

French Armor for Operation Torch: Renault FT-17’s

Vichy France had many different old or at least obsolete combat vehicles in their colonies. While more than half of Metropolitan France was occupied by the Germans, under the Armistice of 22 June 1940, Vichy was still obligated to defend its unoccupied lands as a neutral state.

As such, while Vichy was denied armored units, she was allowed to have integrated combined-arms units in the colonies – forces that had armored vehicles. These Vichy tanks and armored cars would play a role in Operation Torch in November 1942 against US forces in Morocco (and Algeria as well).

Abandoned / damaged Vichy French Renault FT-17 tanks are examined by curious US Personnel in Safi Morocco during Operation Torch – November 1942 – from https://www.reddit.com/r/WW2info/comments/17rn03o/abandoned_damaged_vichy_french_renault_ft17_tanks/

My last post covered two older (by November 1942 standards) armored cars used by Vichy forces – the White-Laffly AMD 80 and the Schneider AMC P16. Vichy also had tanks in North Africa, one of the most common was the WWI-vintage Renault FT-17.

For this post, I will discuss the venerable Renault FT-17’s that I built and painted up for my Operation Torch game of What a Tanker that I ran at HISTORICON 2025.

3,000 FT-17’s were built by France between 1917 and 1919. Indeed, she had so many old FT-17’s that the development and acquisition of newer tanks was negatively affected. Simply put, the French budgetary bean counters saw that the French Army had plenty of tanks available on paper, so why build too many more expensive ones? This would not bode well when May-June 1940 came around. Of course, French military doctrine was as least as equally to blame for the Fall of France (read BG Doughty’s The Seeds of Disaster: The Development of French Army Doctrine 1919-1939). After that debacle, Vichy did have many FT-17’s still in her colonies.

For my game, I had to have some FT-17’s. Historically, some were armed with the Puteaux SA18 37mm cannon, others with machine guns and even a very few with a short-barreled 75mm howitzer. For my game-design purposes, I decided that all should be armed with the 37mm cannon. I did have one completed 15mm/1:100 scale metal FT-17 from Peter Pig that I could rebase and use – it was described in my blog here.

To augment that, I purchased a 5-vehicle FT-17 platoon on eBay from jacobsminis (aka HobbyHouse&Miniatures.LLC). The tanks were nice crisp resin models. I ordered them on April 8th, and they arrived on April 14th. I started to work on them on April 28th (while concurrently working on all of the other vehicles for the project).

After washing the models, I drilled out and installed neodymium magnets in the hulls with green stuff. I also drilled out the turret bases to accommodate small flat-headed steel nails. These would work with the magnets in the hulls to both allow rotation and keep the turrets relatively secure. Priming and painting followed.

As I was working on many other vehicles, photo time got to be rare for me. Therefore, I do not have much in terms of WIP shots. I adopted the same airbrush painting pattern as I used for the Peter Pig model. The only difference was that I did not add a lot of mud to the tracks.

The main painting is done. You can see the turrets are semi-mounted temporarily on magnets and steel washers for painting purposes.

Then it was on to the decal and basing phases, which were like those that I employed and shared in my last post. I did end up with similar numerical decals on different tanks – but I did vary the sides and the other decals. Each one had a distinct name.

As an example, here is “MARECHAL PETAIN”. Each steel base is 1½” x 2″.

I’m sure that you’d like some better “eye candy”, so…

FT-17’s

“REIMS”

“MARECHAL FOCH”

“MARECHAL PETAIN”

“TYPHON”

“TOMBOUCTOU”

Group Shots

Below are all my FT-17’s, including the Peter Pig model on the front right. It has no name – but it does have mud!

Another view of the opposite side of the tanks – the Peter Pig model is on the bottom right here as well.

With terrible armor – yet the same 37mm gun as many other Vichy French AFV’s – these antique FT-17’s did indeed engage the US in battle in November 1942.

And an Instagram link for a video: https://www.instagram.com/p/DMwIOgMNcpD/

I do want to dedicate this post to my good friend Leif, who adores the FT-17 more than anyone else I know. When we play, it’s an easy choice as to which side he wants. He also helps me immensely at conventions – so this post is for you!

To all of you, thanks for looking! I will have share more Vichy vehicles soon. I eventually painted up 31 Vichy – and so far I’ve covered just 12 of them (6 FT-17’s, 3 White-Laffly AMD 80’s, and 3 Schneider AMC P16’s). More to come as I catch up. And there of course will be US vehicles. As always, if you want, I’d love to hear any feedback – feel free to let me know your thoughts in the comments section.

For all of my posts on WWII games and projects – there is a consolidated list of posts and their links located here.

Next up – Hotchkiss 35’s, 39’s, and Renault 35’s. Until my next post!

Eventually I do get these in games!

MATERIALS USED

PAINTS, INKS, GLAZES, SHADES, WASHES, PIGMENTS AND FLOCKING USED ON THESE FT-17 MODELS:

  1. Vallejo “Flow Improver”
  2. Green Stuff
  3. War Games Accessories Steel Bases Number 23 (1½” x 2″)
  4. No. 19 x ½” flat head nails
  5. Neodymium magnets (⅛” and ¼”)
  6. Gorilla Glue
  7. Vallejo Surface Primer “Black”
  8. Wooden Blocks, steel bolts, steel washers, nails, magnets, steel screws
  9. Vallejo Model Air “Dark Brown”
  10. Vallejo Primers “NATO Green”
  11. Vallejo Premium Color “Yellow Ochre”
  12. Hataka “Vert Fonce”
  13. Vallejo Model Air “Tire Black”
  14. Vallejo Model Color “Dark Sea Grey”
  15. Battlefront “Oxide Red”
  16. Army Painter “Dark Tone” (wash)
  17. Vallejo Mecha Weathering Effects “Dark Rust Wash”
  18. Vallejo “Mecha Varnish Gloss”
  19. Microscale Industries “Micro Set”
  20. Microscale Industries “Micro Sol”
  21. Microscale Industries “Liquid Decal Film”
  22. Flames of War French Decal Set (FR940)
  23. Peddinghaus-Decals 1/100 2181 “World of Flames French tanks early war”
  24. Citadel “‘Ardcoat”
  25. Vallejo Surface Primer “German Green Brown”
  26. Vallejo “Gloss Acrylic Varnish”
  27. Citadel “Agrellan Earth” (texture)
  28. Army Painter “Mid Brown” (shade/wash)
  29. Reaper MSP Core Colors “Blackened Brown”
  30. Vallejo Flow Improver
  31. Vallejo Thinner
  32. Vallejo “Matte Polyurethane Varnish”
  33. Printed labels on card stock
  34. Gamers Grass “Tiny Beige 2mm Tufts” (flocking)
  35. PVA Glue

French Armor for Operation Torch: White-Laffly AMD 80’s & Schneider AMC P16’s

Having decided to run an Operation Torch game of What a Tanker at HISTORICON 2025, I had to get working back in March and early April. It was time to gather enough vehicles and paint them up. As you will see in these entries, it was not always easy, especially for some of the esoteric/rare Vichy vehicles.

This blog will, as I promised, catch you up on the myriad of US and Vichy French vehicles that I assembled and painted for that recent convention. If I had stopped to blog about them at the time, I don’t think I would have gotten everything done. I had not built any tanks in many years, so I was excited!

After the Fall of France, there were still French Army units defending the colonies. So let’s start with some of these Vichy French vehicles for November 1942.

I will start with two types of Old Glory models. Both are metal and 1:100 in scale (15mm).

The first one is SKU CD607, “White-Laffly AMD 80“. This vehicle was a twice-modified holdover from WWI, and it looks it. Around 28 were reworked in 1934. It was rearmed with three machine guns. One heavy machine gun replaced the Puteaux SA18 37mm cannon in the turret that its predecessor, the AMD 50, had. AMD stands for “automitrailleuse de decouverte” – basically “armored scout car” in English. By the time war broke out in Europe, all of these were in North Africa in the colonies. This was a common fate for all older French armaments.

The second one is SKU CD610, “Schneider AMC P16“. Like the White-Laffly AMD 80, this was a cavalry vehicle. Unlike it, its designation was AMC, or “automitrailleuse de combat” (combat armored car). 100 were produced. It had an innovative Kegresse suspension system that made it into a half-track. It also kept its turret-mounted Puteaux SA18 37mm cannon. This was the most common cannon on French tanks, so this gave it some anti-armor punch. Some P16’s did met the Wehrmacht in Germany, but many were similarly dispersed to the colonies before 1939.

The Old Glory Command Decision models as received. There were 3 of each type. I printed off some examples of paint schemes to start with them.

I got the models in April, and started work on them on the 26th. I did the usual drilling and washing in preparation for assembling and painting. I also used small magnets to affix the turrets. These magnets also serve to help to hold the brewed-up markers (also on magnets) that I use to indicate knocked-out tanks.

The White-Laffly AMD 80 models drilled and washed.
The Schneider AMC P16 models drilled and washed.

Metal miniatures don’t always cast perfectly. In the case of the AMD 80’s, the headlights were not great, but fixable.

Close up example of a missing White-Laffly headlight.

I used a little green stuff and they started looking old again!

Headlights are back!

I also used green stuff and to fill the cavities under the vehicles. I waited until the green stuff had hardened just slightly, then inserted screws as you can see. Once that had fully set, I had a nice way of setting up the models on wooden blocks for painting, as the screws would come out easily later.

I ended up with a typical French camouflage pattern on the AMD 80’s as opposed to the pattern in the reference.

The P16’s got a brown and green camouflage pattern.

The Schneider AMC P16’s got a darker green – shown here ready for decals.

To be efficient and productive, I worked on these (and others you will see shortly in future posts) at the same time. I ended up deciding to base these on steel bases so as to allow each type a label. Let’s face it, I can’t expect most gamers at a convention to recognize these old and rare types. Labels help. I just needed to explain to the players that the bases are irrelevant to targeting the vehicles.

Decals and labels applied, still needed an application of matte varnish, some tufts and their turrets!

I managed to finish these on May the 8th.

Eye Candy

White-Laffly AMD 80

White-Laffly AMD 80 right side.
White-Laffly AMD 80, frontal view.
Group shot of the three White-Laffly AMD 80 models completed.

Here is my Instagram White-Laffly AMD 80 video link: https://www.instagram.com/p/DMtJSygOJqJ/

Schneider AMC P16

Right side of a Schneider AMC P16.
Left side of a Schneider AMC P16.
Group shot of the three Schneider AMC P16 80 models completed.

Here is my Instagram Schneider AMC P16 video link: https://www.instagram.com/p/DMtJ_a1OSg4/

Thanks for looking!

For all of my posts on WWII games and projects – there is a consolidated list of posts and their links located here.

I hope you enjoyed the post – there are several more entries coming soon! I’d love to hear any feedback – feel free to let me know your thoughts in the comments section.

MATERIALS USED

PAINTS, INKS, GLAZES, SHADES, WASHES, PIGMENTS AND FLOCKING USED ON THE WHITE-LAFFLY AMD 80 MODELS:

  1. Vallejo “Flow Improver”
  2. Green Stuff
  3. War Games Accessories Steel Bases Number 23 (1½” x 2″)
  4. Neodymium magnets (⅛” and ¼”)
  5. Gorilla Glue Vallejo Surface Primer “Black”
  6. Wooden Blocks, steel bolts, steel washers, magnets, steel screws
  7. Vallejo Primers “NATO Green”
  8. Vallejo Model Air “Duck Egg Green”
  9. Vallejo Model Air “Dark Brown”
  10. Vallejo Mecha Weathering Effects “Dark Rust Wash”
  11. Vallejo Mecha Color “Deep Green”
  12. Vallejo Model Color “Dark Yellow”
  13. Vallejo Model Color “Black”
  14. Battlefront “Gunship Green”
  15. Vallejo Mecha Color “Sky Blue”
  16. Vallejo Model Air “Gun Metal”
  17. Vallejo Model Air “Tire Black”
  18. Vallejo Model Color “Dark Sea Grey”
  19. Army Painter “Dark Tone” (wash)
  20. Vallejo “Mecha Varnish Gloss”
  21. Microscale Industries “Micro Set”
  22. Microscale Industries “Micro Sol”
  23. Microscale Industries “Liquid Decal Film”
  24. Flames of War French Decal Set (FR940)
  25. Peddinghaus-Decals 1/100 2181 “World of Flames French tanks early war”
  26. Citadel “‘Ardcoat”
  27. Vallejo Surface Primer “German Green Brown”
  28. Vallejo “Gloss Acrylic Varnish”
  29. Citadel “Agrellan Earth” (texture)
  30. Army Painter “Mid Brown” (shade/wash)
  31. Reaper MSP Core Colors “Blackened Brown”
  32. Vallejo Flow Improver Vallejo Thinner
  33. Vallejo “Matte Polyurethane Varnish”
  34. Printed labels on card stock
  35. Gamers Grass “Tiny Beige 2mm Tufts” (flocking)
  36. PVA Glue

PAINTS, INKS, GLAZES, SHADES, WASHES, PIGMENTS AND FLOCKING USED ON THE SCHNEIDER AMC P16 MODELS:

  1. Green Stuff
  2. War Games Accessories Steel Bases Number 23 (1½” x 2″)
  3. Neodymium magnets (⅛” and ¼”)
  4. Gorilla Glue
  5. Vallejo Surface Primer “Black”
  6. Wooden Blocks, steel bolts, steel washers, magnets, steel screws
  7. Steel ball bearings
  8. Vallejo Primers “NATO Green”
  9. Vallejo Model Air “Dark Brown”
  10. Vallejo Mecha Weathering Effects “Dark Rust Wash”
  11. Vallejo Model Air “Tire Black”
  12. Vallejo Model Color “Dark Sea Grey”
  13. Army Painter “Dark Tone” (wash)
  14. Vallejo “Mecha Varnish Gloss”
  15. Microscale Industries “Micro Set”
  16. Microscale Industries “Micro Sol”
  17. Microscale Industries “Liquid Decal Film”
  18. Flames of War French Decal Set (FR940)
  19. Peddinghaus-Decals 1/100 2181 “World of Flames French tanks early war”
  20. Citadel “‘Ardcoat”
  21. Vallejo “Gloss Acrylic Varnish”
  22. Vallejo Surface Primer “German Green Brown”
  23. Citadel “Agrellan Earth” (texture)
  24. Army Painter “Mid Brown” (shade/wash)
  25. Reaper MSP Core Colors “Blackened Brown”
  26. Vallejo Flow Improver
  27. Vallejo Thinner
  28. Vallejo “Matte Polyurethane Varnish”
  29. Printed labels on card stock
  30. Gamers Grass “Tiny Beige 2mm Tufts” (flocking)
  31. PVA Glue

Operation Torch: Planning My WWII Gaming Experience for HISTORICON

It’s been a while for the return of several blog-related things here.

First, this marks the first hobby post I have done in a while. The last one I did was on Professor Nitpik’s Mechanical Mini Swarm back in April. I also never got around to a recap of my games at HUZZAH in May (but I hope to at some point as I do have a good number of photos).

Secondly, I have not done any WWII-related hobby work since March of 2020 (wow 5 years!). After my last What a Tanker tank project, I did a lot with my Feudal Patrol Mesoamerican project (Aztecs, Conquistadors, Maya), and then Wars of Ozz. Luckily for me (and maybe you), I catalog and link all my posts by genre on multiple pages for easy recall. As an aside, for new readers, here are the links for all of these:

There are others as well, and these pages help me to remember how I did certain aspects of projects in terms of painting and assembly (and anything else).

Additionally, as many of you know, the US Army is celebrating its 250th Anniversary. The Historical Miniatures Gaming Society (HMGS) is celebrating that anniversary as its theme for this year’s HISTORICON gaming convention. As a proud US Army veteran, I just HAD to get a game or two together for it. As game submission was back in March, that might seem like plenty of time to get such an endeavor together. But I had HAVOC, HUZZAH, a Florida trip, my reelection, and golf in between then and now! Blogging took a back seat to actually finishing off any projects. Until now!

I usually try to create scenarios and run games that are not common or run-of-the-mill. For the US Army, there is a wide swath of stuff to choose from.

I ended up deciding on looking into the early days of WWII. I dug into Operation Torch, the Allied invasion of North Africa. I further read up on the combat in Morocco, where the US and Vichy France actually fought for several days before agreeing to an armistice and coming over to the Allies’ side. I chose to focus on the Western Task Force under then-MG George S. Patton, that invaded Morocco in three places. My specific focus would be on Sub-Task Force Goalpost, which was led by MG Lucien Truscott, Jr. – and what really intrigued me, as I did my research, was his response to a Vichy armored counterattack. Apparently the Vichy French launched an armored counterattack with what they had to interdict one of the US landing beaches. Truscott sent all his armor (7 M5 Stuart tanks) and some support to stop the threat, which outnumbered him by more than 2:1. Now I had a game concept!

As for research, here are all the books I read and used:

Certainly a lot of Steven Zaloga here, and the Breuer and Osprey books were the most helpful. There indeed was significant armored Vichy forces in the North African colonies. In Morocco was a motley assortment of tanks (WWI -era FT-17’s, Hotchkiss H35’s and H39’s, plus some R35’s that had been hidden from the German and Italian Armistice Commission). Sources vary as to what was available, but certainly these types were in Morocco in November 1942. There also were multiple old armored cars dating back to the 1920’s and early 1930’s. Vichy also had naval assets there, plus any of their air force that had flown there to escape Armistice terms. A good number of Dewoitine D.520 fighter planes and others made up a strong air component for Vichy.

The US here did not have M3 Lee’s or M4 Sherman tanks available to stop he counterattack. Those were on large ships that needed a port to unload, unlike the M5 Stuarts. The US had the Stuarts, M3 GMC’s, M3A1 Scout Cars, and the weird stopgap M6 Fargo. On the other side, the US had F4F Wildcats and Avenger TBF’s. Offshore were these significant naval assets that I would also add to the game design. Interestingly, many French tanks were hit with impact-fused depth charges from the air – plus naval gunfire from the USS Savannah.

The US Army in November 1942 was seeing its first real amphibious landing and combat in the ETO, so I incorporated that with regards to their shooting abilities. The Stuarts had gotten their radios wet, and hence inoperable, in the landing – so that was another aspect I added. The French had a lot of very worn out vehicles, and I did add an aspect of mechanical unreliability to them as well.

With these equipments as my baseline, I resurrected my WaT rules. Sourcing all of the vehicles took time, and I will chronicle each of the types in successive posts. My thought is that its better to focus on each vehicle type with a short post than a massive one now that blurred the lines. Writing all of these will take some time, and I also hope to share a review of my HISTORICON 2025 experience. If you are at the convention, I will be in the H.A.W.K.’s room as below. While my games are “sold out”, you never know if space becomes available! Besides my two Ozz games on Thursday and Friday, I’ll be running the “Operation Torch: Vichy mounts a Counterattack” game twice on Saturday. Come by!

Here is a tease on the 31 French and 22 American vehicles that I have amassed and painted for the game since March. All are 15 mm/1:100 scale. They will get their own posts in the next few weeks (I hope).

Vichy French Vehicles
US Vehicles for the game

I do want to join in a couple of painting challenges – like Fort Syllabub’s “Jagpanther Juni”, and Dave’s annual “Season of Scenery” at Wargames Terrain Workshop. With HISTORICON looming, my hope is to get these individual posts out as I can. It is golf season…

Plus I have MANY of my fellow blogger’s posts to catch up on – I have been reading them and there is some great work out there!

I hope I’ve piqued your interests! Let me know!

My WWII posts master list is again here for your enjoyment.

Until next post!

Historicon 2021 — War Across the Ages, and other dark horrors

Below is a blog post from borderguy190 that some of you may not have seen – I am reblogging it with his permission. I (Mark) met him (Harry) at Historicon and he was a player in my Aztec/Conquistador game. I think he did a nice player review of my game as well as a superb review of the convention. His blog site is here – and I highly recommend you take a look! Now, here is his Historicon post:

One of the biggest joys of my year is getting to attend Fall In!, or as in the case this year, Historicon. Last year was a complete bust for conventions, and here in Michigan, the small local cons got called off for C19 earlier this year. Fall In! was my last hope. At some point […]

Historicon 2021 — War Across the Ages, and other dark horrors

Historicon 2021, Christoricon, and Axis & Allies

This post will cover my wargaming over the extended Veteran’s Day weekend – hopefully you will enjoy the discussion and the photos of the games here. Hell, grab a beer or a wine or whatever! Some cool pics and links to be sure.

I had been planning to attend the last Historicon – but it got moved (I think there was a pandemic or something, I (try) to forget). The event was then rescheduled for November. As Historicon and the other HMGS events have been on my bucket list, I wanted to go as a GM anyways and player too.

Also, as followers of this blog know – I have been deep into building out a series of games for the Spanish Conquest over the last year-and-a-half. This has involved many aspects – writing a rules supplement, painting figures, and building a series of games and battlefields much more for the for Feudal Patrol games for the period of the Spanish Conquest in Mesoamerica 500 years ago. I also recently rewrote my supplement Civilizations Collide – which will be a free download (as will a scenario booklet with multiple historic scenarios that I am working on now). So, I was very much looking forward to Historicon 2021.

Therefore, I signed up to run two games – both of which are scenarios on my in-progress booklet. I planned on running both my “Surprise Aztec Raid on the Spanish Outpost” and “Cortes’ Causeway Escape Attempt” games on Thursday night and Saturday morning respectively.

The Maryland-based H.A.W.K.’s were kind enough to admit me as a game master and share their room. I have been long-time friends with two members, Dave Wood (my old West Point roommate) and Buck Surdu (who also has been a friend since our West Point days which are now going back aways). Buck is also the author of many games, to include  Feudal Patrol and Wars of Ozz© (see a nice review of Ozz here).

My friend Craig Hogan, myself, and Dave Wood back at USMA – probably Ring Weekend in the Fall of 1983. Craig sadly was killed a few years ago now in a private plan crash.
Thanksgiving 1987 in Hagenbach, Rhineland-Pfalz, West Germany, Buck, myself, and my daughter Ellen (who is 34 now). We got together for gaming and the holiday. Buck came up from Vicenza, Italy where he was stationed to my place with a buddy, and we gamed and we had fun.

Through Dave and Buck, I have been lucky to make new friends with others of the H.A.W.K.’s, like Greg Priebe, Chris Palmer, and Duncan Adams (and many more too – like Zeb, Don, Eric and others – please don’t feel left out if I did not mention you). Due to my ongoing garage+ build (of which there are a number of updates that are listed here), I missed BARRAGE in September. So, I was pretty stoked about the opportunity to get together with friends (and make new ones) and push lead around the tabletop.

However, as fate would have it, some folks would not be able to attend Historicon due to personal reasons. As seeing and gaming with friends are as much a draw for me as the convention itself, I needed to make a change in plans. We had a Zoom call, and collectively arrived at a new plan. I would drive down from Massachusetts and meet Dave in Maryland for a gaming afternoon on the 11th at my hotel room. Then on Friday morning I would run my “Surprise Aztec Raid on the Spanish Outpost” game in Chris Palmer’s gaming room in Maryland, and then play in an Ozz game afterwards until I needed to leave for Historicon (about 90 minutes away). Friday night I would drive up to Valley Forge, Pennsylvania to set up my “Cortes’ Causeway Escape Attempt” game for Saturday morning play.

So, on a 28-degree morning in Massachusetts, I defrosted my loaded car (12 boxes of terrain, plus 2 mats, a wagon, plus a suitcase) and headed to Maryland – arriving around mid-day – where it was 4o degrees warmer. Ah, New England!

Frosty morning departure.

Axis & Allies

Dave and I have now gamed since 1982 – so coming up on 40 years. We have played Avalon Hill’s “Victory in the Pacific” (as well as other titles) dozens of times over the years. On Thursday, after I arrived, we decided to be different and try Milton Bradley’s “Axis & Allies” this time – a board game with plastic miniatures that we have discussed many times but never played before. I got this game back in the mid-80’s. At one point there was an on-line version but we never got around to playing that either. For this game, we picked sides at random, and Dave played the Axis, and I the Allies. It was Veteran’s Day, and as we are obviously both vets, it was a nice add.

The game went back and forth. A lot. I managed to keep Russia in the game – and built an industrial complex in India for the British. This allowed me to build 3 units per turn there in an attempt to keep the Japanese off the Russian’s back.

After the first turn, I had consolidated a nice position in Mother Russia to try to thwart Dave. And yes, the shirt says what I am impressed with – Dave has run dozens of marathons and many runs up to 50 miles and maybe more in distance.
We had a back and forth fight over the Karelia territory that had a factory I did not want to lose. Eventually, I did.

Meanwhile, my Indian gambit attracted a lot of Japanese attention – maybe too much. Dave hammered away at it and while the Japanese were unsuccessful he did attrite my forces and that prevented me from exploiting my force buildup.

Dave made multiple attacks on India supported by carrier-based fighters and land-based bombers. I had sent the American-supported Chinese infantry in to help defend. Meanwhile, Russia fell.

Dave kept hammering away at India, and eventually had his Germans violate Afghan neutrality – hitting India for the decisive blow. Yes, the Germans took India by blitzing panzers through Afghanistan…

I built India up and flew in American air support, but the next turn it fell.

I did desperately roll for Weapon’s Development for both the Americans and the British – with only the British succeeding in getting 3 – Rockets, Super Subs, and Strategic Bombers. My rocket and strategic bomber attacks slowed the German’s production, but it was too late…congrats to Dave!

Christoricon – Surprise Aztec Raid on the Spanish Outpost

Originally I was supposed to run my one of my games at Historicon on Thursday night – that being a rural one where Aztecs are making a surprise raid on a Tlaxcalan village (acting as a Conquistador supply depot) – only to see that there were indeed some Spanish there. Instead, we went to Chris Palmer’s house and I ran the game on early Friday morning. We joked and called it “Christoricon”. I hosted and there were 5 players – Buck, Duncan Adams, and Dave for the Aztecs, and Chris and Greg Priebe for the Spanish/Tlaxcalans. The defending Spanish/Tlaxcalans had one Warband of three Elements – 23 figures worth 41 points. The attacking Aztecs had two Warbands of 3 Elements each – 53 figures worth 78.25 points. Buck has already written a great post about this game and the others that day on his blog here – and his write-up and pics are great. I took some photos that you see below, but for me, simultaneously being a GM and a photographer is not easy – so I do recommend you take a look. Meanwhile, here are my pics.

The game is ready to begin. Chris and Greg elected to place the Conquistador Element armed with arquebuses further away from their leader in their secret deployment in lieu of their Element of Sword & Buckler men. This meant that they were “pinned” with their black powder weapons only activating at best on half of the turns. They could have “unpinned” but as luck would have it the dice did not let that happen. Note also that Franco the unlucky Conquistador made the trip!

Chris chose to send out his war dogs towards Dave’s Aztecs as a screen, and they promptly took atlatl damage. Dave, Duncan and Buck moved up quickly, while Greg took up a position in the maize field with his dangerous Tlaxcalan bowmen.

Dave moves up his “twinned” Elements of veteran/novice warriors towards a wounded war dog.

The Spanish then had their Catholic Priest take possession of the gold (possession of the gold was one of the game objectives) and drag it to a more secure location while they contested the Noble House (another objective) – (insert joke here).

Battle starting at the Noble House – the war dogs are already going down here. Their priest has already dragged away the gold to a safer location.

Buck’s advancing Elite Cuahchicque (“Shorn Ones”) took the full volley of arquebus fire from the less-activating pinned Spanish. Despite these Elite Aztecs taking a lot of damage and having a ton of Morale checks to overcome, Buck was able to rally his troops successfully against the odds twice. Meanwhile Duncan moved his Jaguar and Eagle Warriors against Greg’s Tlaxcalan bowmen in the cornfield – hoping to best them in melee.

Dave and Buck confer while surveying Duncan’s advance – and their chances at victory – with concern. This shows the second volley that Buck’s Elite Shorn Ones took and the blue beads are Morale checks he needed to pass. He did. Twice.

Slowly, the tide of battle started turning in the Aztecs’ favor. Dave’s attack on the Aztec right was making headway, and they were gaining control of the objectives.

Priest still dragging the gold away here.
Lots of carnage on the tabletop.

Eventually, the Spanish and Tlaxcalans were overwhelmed.

The game ended as a resounding Aztec win, as they had control of three objectives, as well as dragging off 9 pour souls for sacrifice, killing 2 more, and making one run away. The Spanish had only the gold, but did dispatch 15 Aztecs and capture one more. The final score was 86-40 as you see below. I think the players had a good game. Congrats to Dave, Buck, and Duncan!

Christoricon – Ozz

After the Aztec/Spanish game, Chris Palmer ran a Wars of Ozz© game that I played in briefly – again, Buck’s blog post has an excellent account as I left after having stymied Dave’s advance a bit (though I was pretty well smashed force-wise in that effort). I commanded a force of Winkies with allies (Greater and Lesser Pumpkinhead Warriors). My sacrifice was not in vain, and it allowed Chris and Greg to smash the Munchkin center.

I love the Ozz figures!

I then drove to Historicon, and set up for Saturday morning’s game.

Historicon – Cortes’ Causeway Escape Attempt

The drive up to Valley Forge Resort Casino was uneventful – though finding the H.A.W.K.’s room was a challenge. The gaming was not located in one location at the resort. Unfortunately, it was also a Friday night at a casino and all the close parking was gone. Luckily, I have a little collapsible wagon and was able to get into the room with my stuff in a few trips and set up the terrain and the troops for Saturday morning’s game, Cortes’ Causeway Escape Attempt.

My game flyer

You can see a short Instagram video of the set up here.

It’s a BIG battle. The Spanish/Tlaxcalans have three Warbands of three Elements (2 Spanish, 1 Tlaxcalan) plus support – 77 figures (including the 4 war wagons) worth 161.75 points. The Aztecs have five Warbands of 2-3 Elements each – 109 figures worth 154.25 points. 186 figures in total. This battle is Cortes’ second attempt to escape. He would do a second on the following day, and three days later a third – La Noche Triste. Originally, on the Historicon listings, the game was supposed to be La Noche Triste – which again happened three days later (and of which I will have that scenario written soon) – but I needed war canoes for that one. Those I don’t have yet, and will be mentioned here in a bit.

Back to the game set up. As I was setting up, I had a number of people come by to remark positively on the game visuals – terrain and figures. They had seen my posts on different forums (or fora both are ok!). To all of you, thank you so much for your kind words and interest.

Besides all of the cityscape – and it’s a lot I know – but with everything predeployed I just needed to put players on their troops and let them know what they needed to do on their part of the battlefield.

As I mentioned before, I had previously needed to cancel my Thursday game – and I got a comment from one of our blog community – Harry (aka borderguy190)- that he was disappointed as he had signed up for the game. I apologized, as I wish I could have ran that too at Historicon as well. But the good news was that he would be playing in this game!

He joined 7 other players. They seemed to grasp the concepts of the game quickly – and I did get some help from Greg Priebe and Buck Surdu in the early turns before they had to help run an Ozz game.

The game set up.
Troops deployed and dashboards out. My undermagnets and game markers really have proven their worth – especially in big melee scrums.

In this game, the Conquistadores are surrounded, and need to fight their way out from the Palace of Axayacatl where they were holed up with their hostage/puppet Montezuma II. They have war wagons, and while these are helpful in providing cover against missile weapons, they are also rickety and slow – and prone to breaking. In fact, all of them broke during the game and were unable to move afterwards. The Aztecs are trying to get to the Conquistadores and avenge the massacre that the Spanish perpetrated at the Festival of Toxcatl. Their Tlaxcalan allies are mostly on the other end of the tabletop and trying to break into Tenochtitlan to help their Spanish allies escape.

There were ups and downs for both sides all over the table. The Conquistadores breakout went slowly, but they did take out a lot of Aztecs. On the other end where the Tlaxcalans were trying to help, the two sides traded missile fire and got into a scrum but were unable to change the status quo.

Lots of action! Harry (in red) ponders his next move.
Aztecs swarm the war wagons and wound the crossbowmen and arquebusiers inside.
Thinks get more contested in Tenochtitlan.

One of the aspects of the game is the importance of The Banner of Cortes. It provides inspiration to the Conquistadores and helps them to reduce negative Morale effects. However, I also made its capture (as well as incapacitating Cortes and dragging him off for sacrifice) game objectives. The Aztecs took some heavy losses BUT were able to take out the bannerman and seize the banner. This lead to the Spanish having to try to satisfy Honor and retake the banner. However, this did not happen before the game’s end. As it was worth 50 points (see below), it was decisive.

The Banner of Cortes is taken!
Aztecs won 78-35. The 50 points for the capture of The Banner of Cortes made all the difference!

Thanks so much to all who played! I did not win any awards for the game – though many said I should have. Anyways, the best reward is happy gamers afterwards – and I got that in abundance!!

The gamers! Very cool group – thanks to all!

After the game, I got a lot of positive feedback, and learned of some areas to help make the play easier. Those suggestions have already have already been acted upon when I got home (mainly on the dashboards such as linking the undermagnet colors to the dashboards).

After the game, I then went with Greg and Buck to the vendors and the Flea Market. It was nice to go to the Badger Games booth and actually be remembered! Also, I was looking for canoes to use as war canoes, but only found one from Firelock Games that was $20. That is way too expensive when you need as many as do. I also found one in the Flea Market – a balsa wood scratch-built one from an estate sale- for $3. I am going to use both for gaming and as ideas on how to make my own. Of importance, Greg is a big lover of his 3D printer – and in exchange for me painting up some Viking figures for him, he will make me a good number of canoes! Win-win! So, my next job will be to paint those up.

I look forward to returning to the gaming and convention scene as a GM and a gamer. I hope you found this interesting – thanks for looking.

For all of my previous posts on games, units, and other projects for my 16th Century Spanish Conquest supplement for Feudal Patrol™ – “Civilizations Collide” – please see this page.

Despatches from Fort Syllabub

An account of fictional adventures on the North West Frontier - and other times and places, real or imagined

Man of Tin blog

Toy soldiers, gaming, Imagi-Nations

Zauberwurfs Blog

Ein Blog über Tabletop und Miniature Wargames.

Frank Tank Rants

musings of a fat old bloke on tanks and wargames

Dragons of Lancasm

Games, miniatures, painting, books and more games

Tiny Painted Heroes

The Adventures of a lifelong Tabletop Gamer, Game Design hobbyist, and full-time Software Engineer

Steve's Paint Brush

Grimdark model making and mini painting

Wargamesculptors Blog

Life, Golf, Miniatures, & Other Distractions

Dead Dick's Tavern and Temporary Lodging

Life, Golf, Miniatures, & Other Distractions

Guru Pig - the gaming Guru

Guru's thoughts on wargaming, life, and the universe!

Wisely lead... without a head!

History, Miniatures and Wargaming

Kuribo's Painting

Fallout Wasteland Warfare, Warhammer, and Hellboy Painting, Terrain, Dioramas, and Battle Reports

Don't Give Greg Ideas

Seriously, just don't

War Across the Ages, and other dark horrors

A discussion of miniatures collecting, painting and gaming.

Classic Warhammer 40K

Painting diary focused on Warhammer 40K 2nd ed., 5th ed. WHFB, related GW games, and miscellaneous whimsy

Colonel Mustard

WW2 Modelling in 1/72 Scale

Bogenwald

Random painting and terrain making.

Pat's 1:72 Military Diorama's

Scale diorama tips and ideas

Arcade Dreams

Building the Arcade Dream

P.B.Eye-Candy

Phil's 20th century wargame pages

SP's Projects Blog

A futile fight against entropy or 'Every man should have a hobby'? Either way it is a blog on tabletop wargames, board games and megagames

30mmdave

Wargaming Plausible reality?

The Imperfect Modeller

Miniature Figure Painting and Diorama Modelling

Double Down Dice

Painting miniatures and rolling dice!

Just Needs Varnish!

My ongoing wargames projects!

miniaturepopcorns

Sculpting some worlds

Despertaferres

Wargaming with the ability of a dull nine year old

Dawn of the Lead

Miniature wargaming and the occasional zombie

Rantings from under the Wargames table

Wargames, Figures, Sculpting and Converting Miniatures

Simple as War

Miniatures & Terrains

Buck's Blog

Life, Golf, Miniatures, & Other Distractions

IRO aka Imperial Rebel Ork

- I model - therefore I am -

Azazel's Bitz Box.

Painting, Modelling, Miniatures, 1:6, Games... Whatever else I find interesting.

diggingforvictoryblog

Smallholding and Wargaming.......not always at the same time!

Shamutantis

Nørdblog numero uno