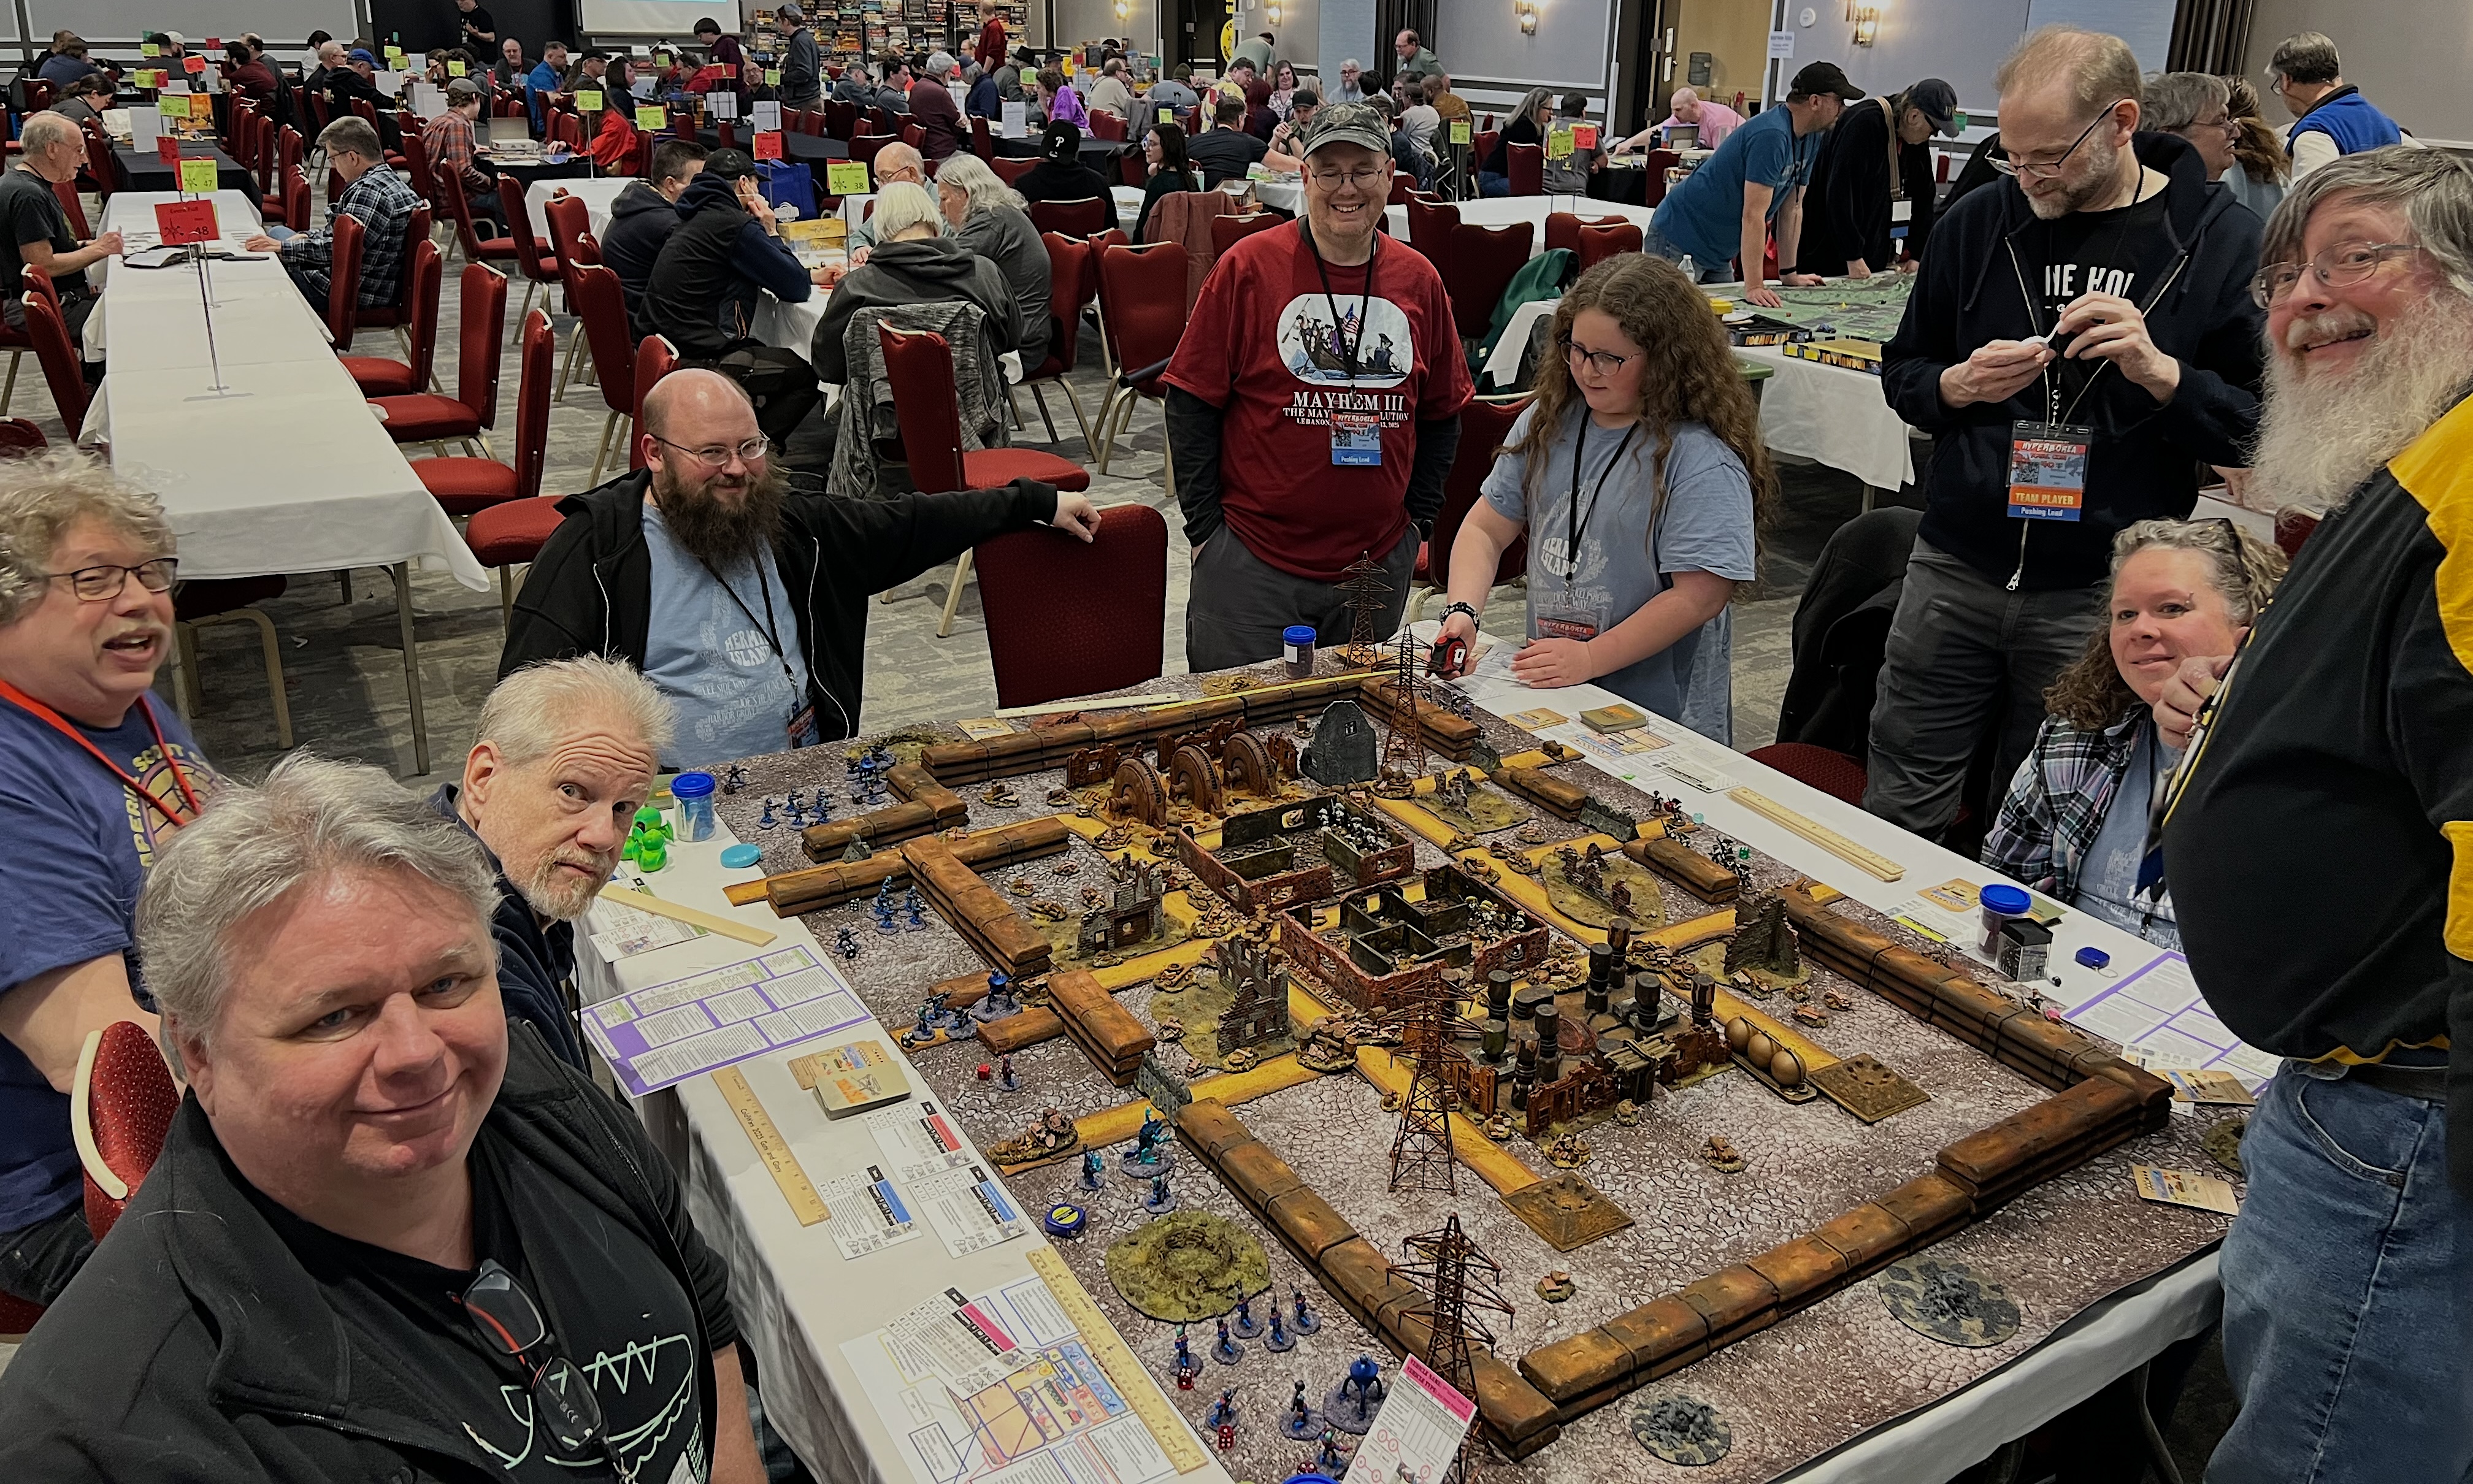
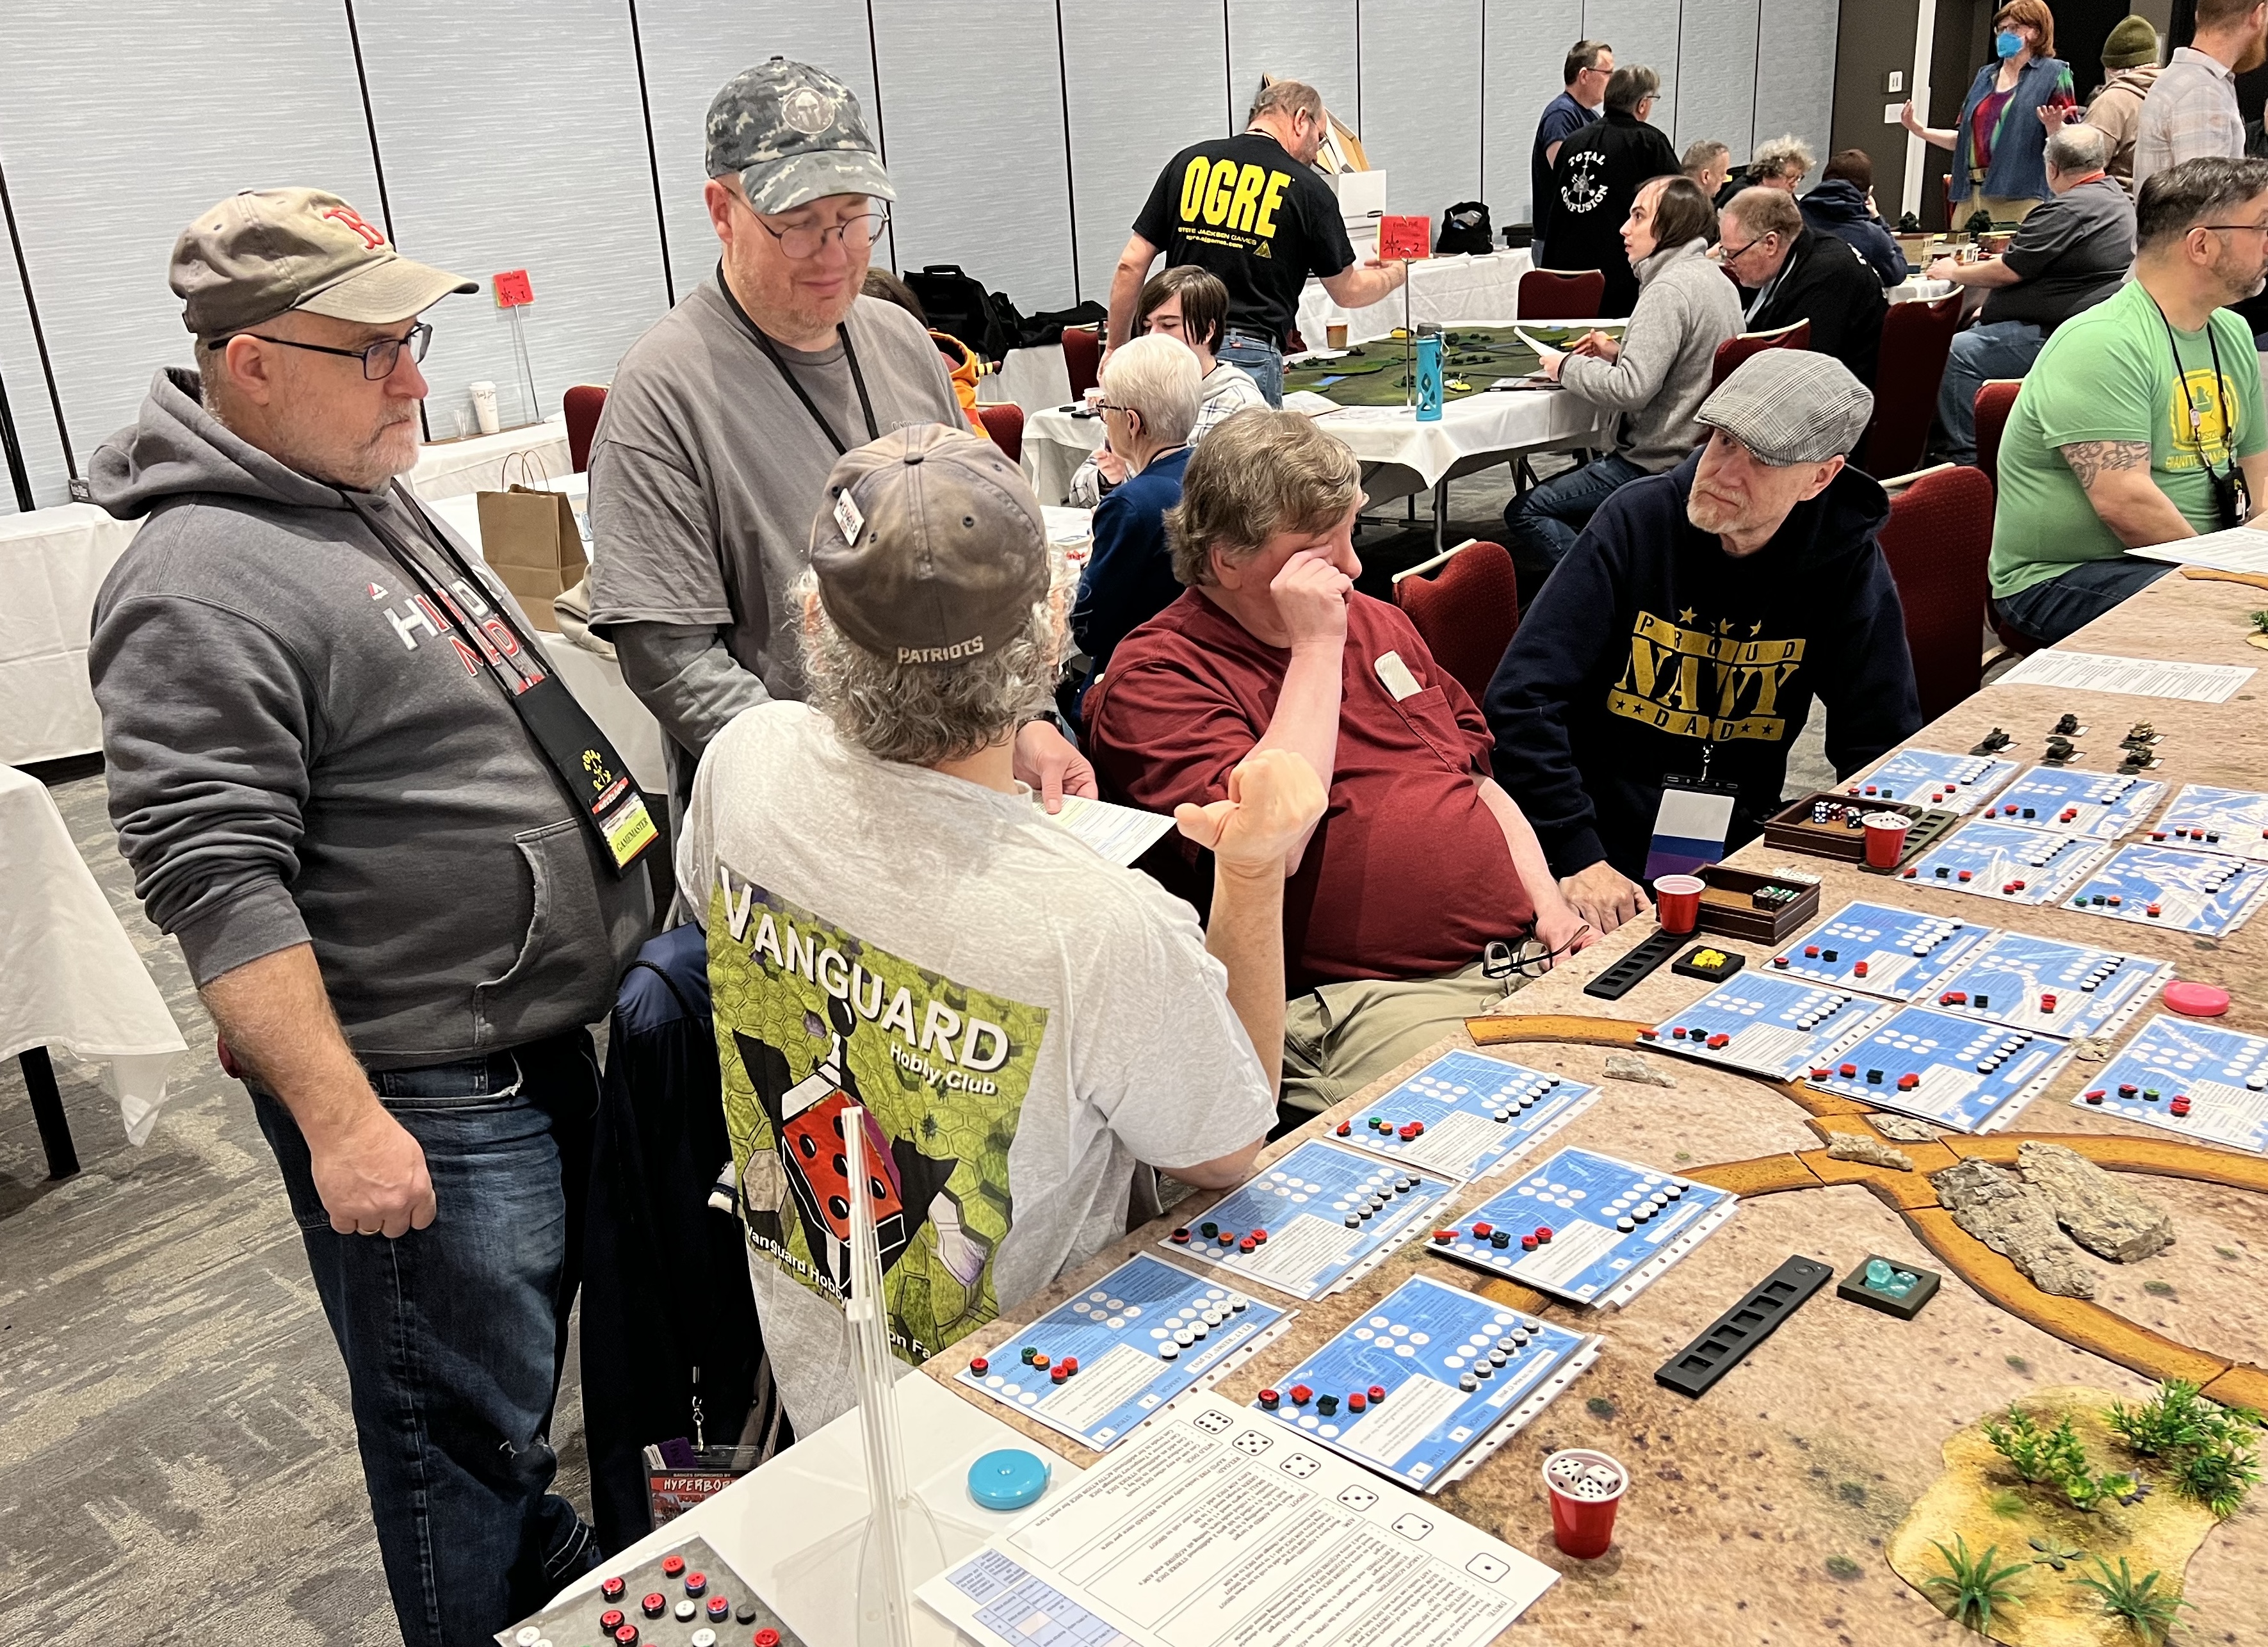
TotalCon 40 is an annual gaming convention that is held in Marlborough, MA at the Best Western Conference Center. There are events for miniature games, board games, RPG’s, and much more. Attendance is well over 1,000.
This year it was held between February 19th and 22nd of 2026. I usually run several tabletop miniatures games there. This year was no exception. I ran eight 4-hour games across the 4 days.
Several players who participated in my games are eager to see some game shots. Not to disappoint, his post will be picture heavy and text light!
On Thursday of every TotalCon, there is a large flea market in an adjoining room to the main hall. From Friday to Sunday, I get a very big table in that room. Because of the flea market’s need for space, I settle for a smaller footprint on Thursday. That smaller table was fine for two games (afternoon and evening).
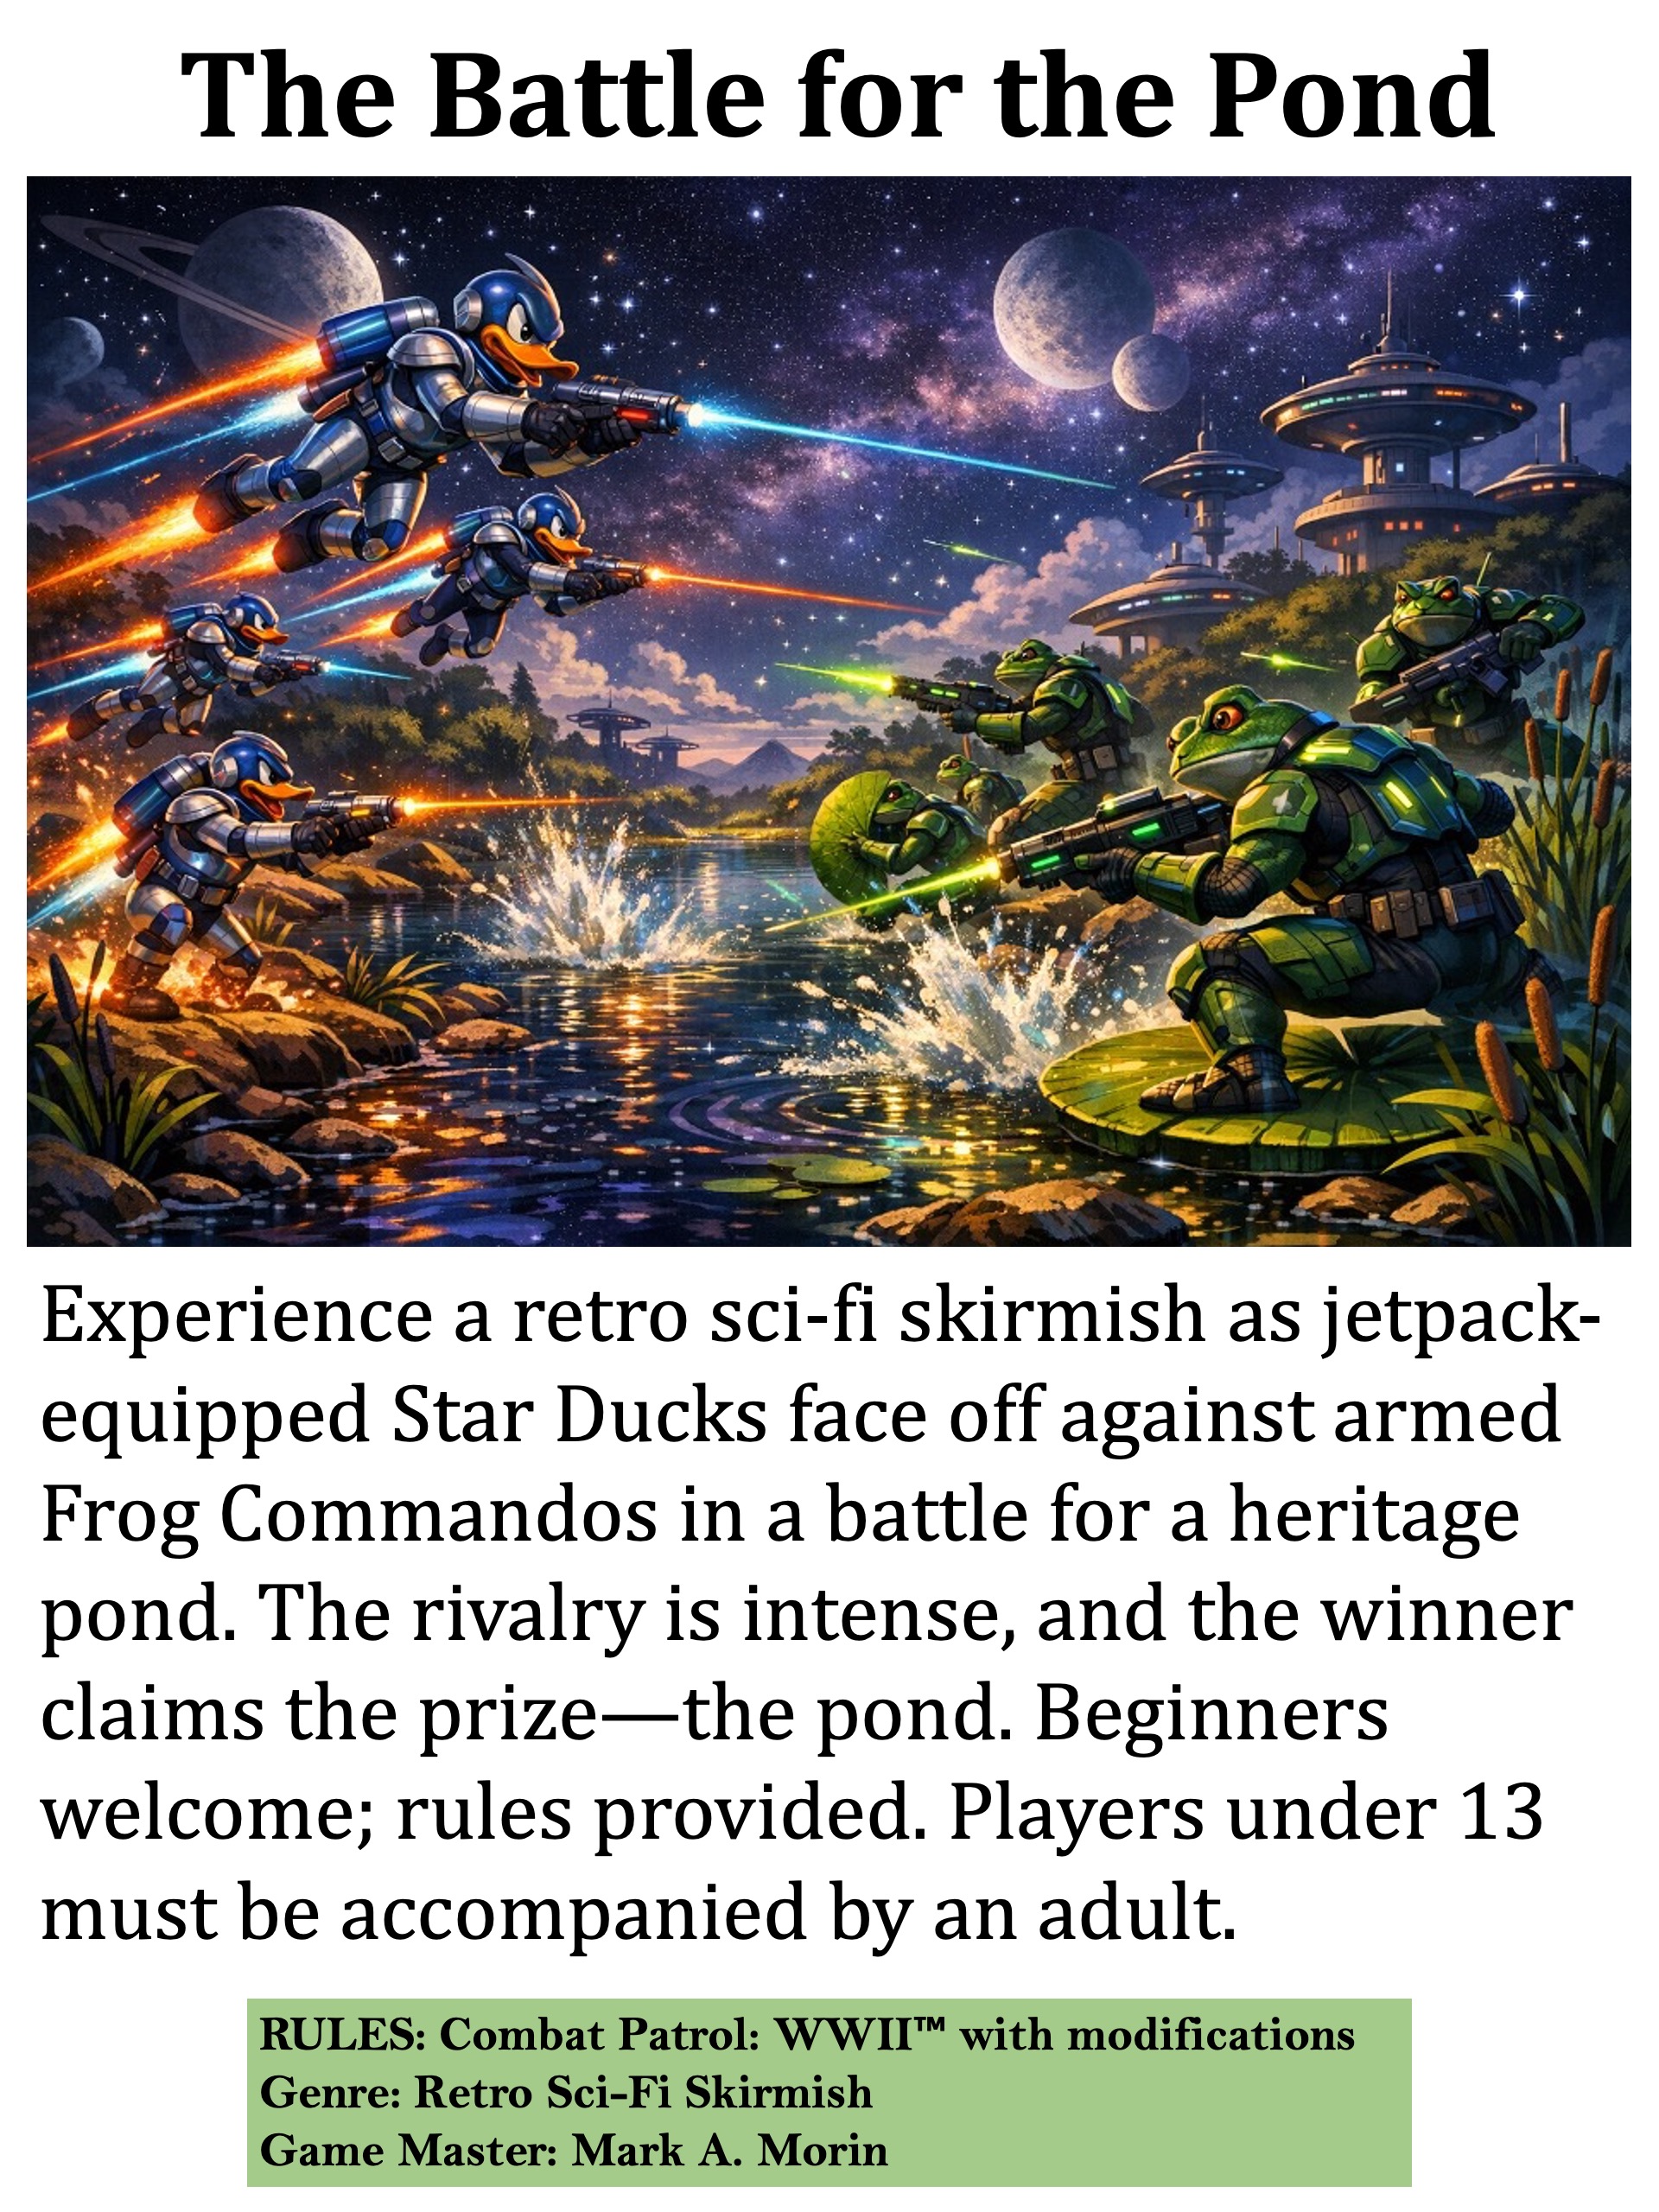
Battle for the Pond
This was a Combat Patrol:WWII retro sci-fi game using the pond that I described in my last post.
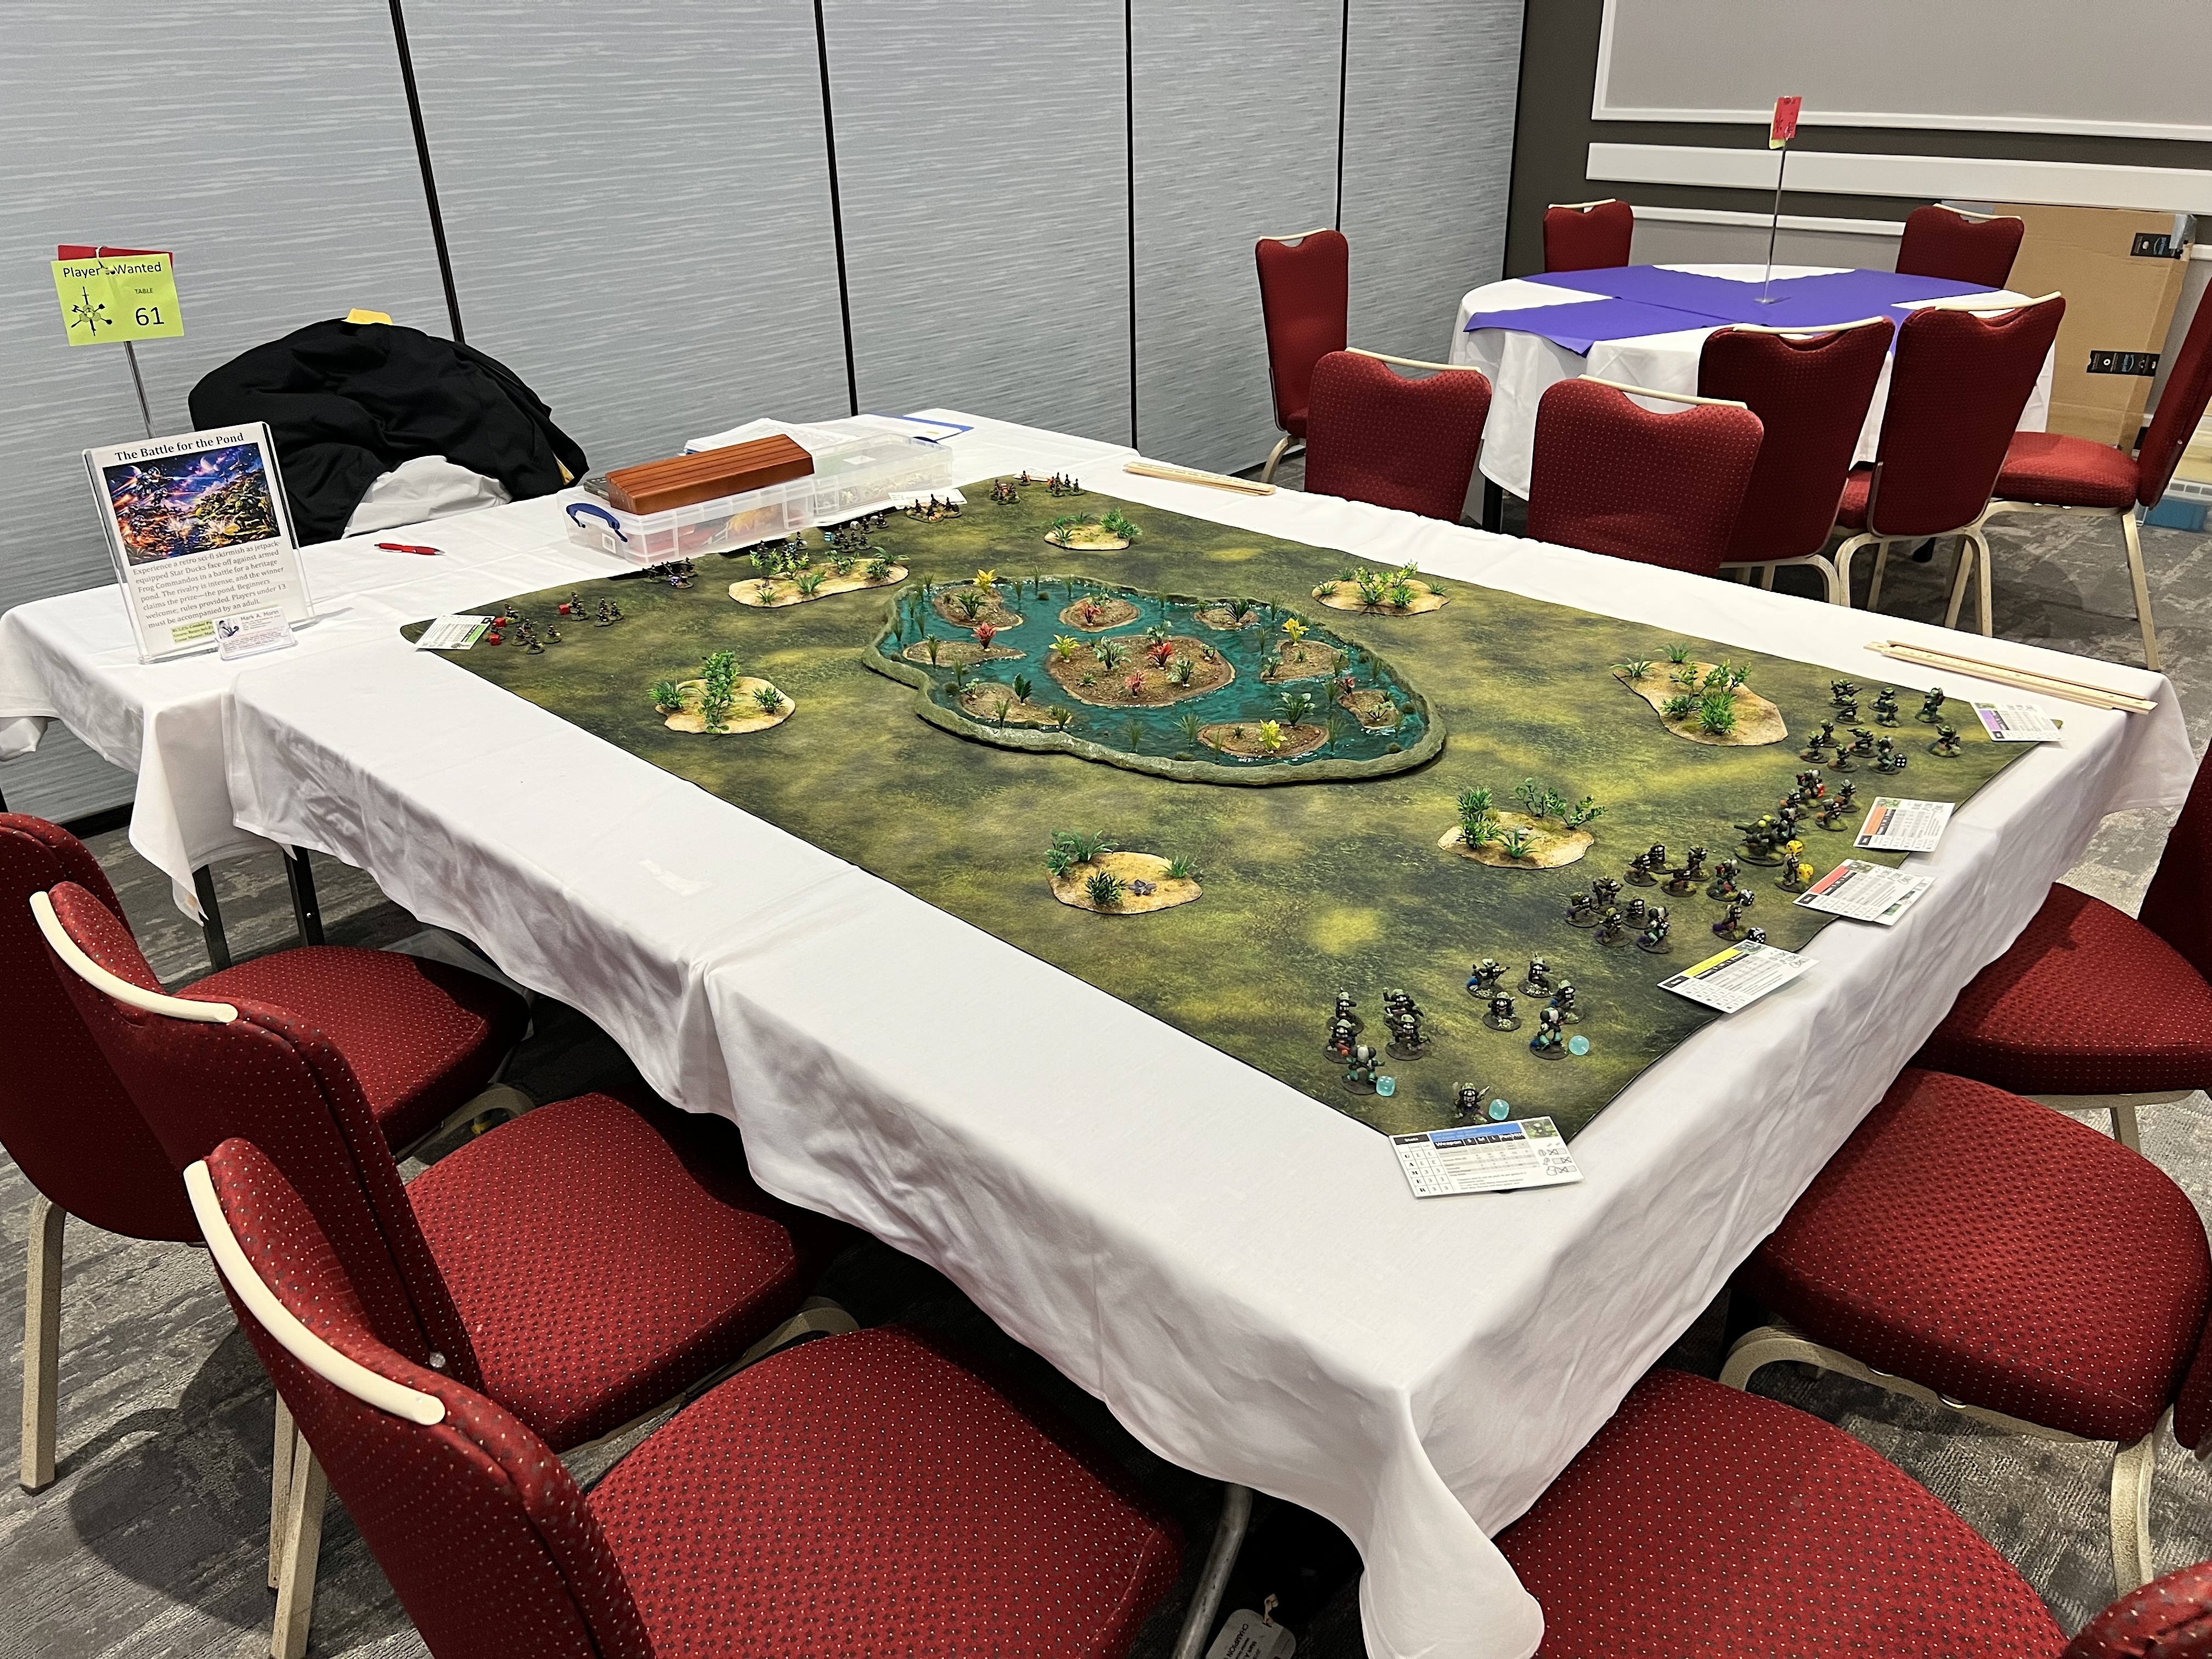
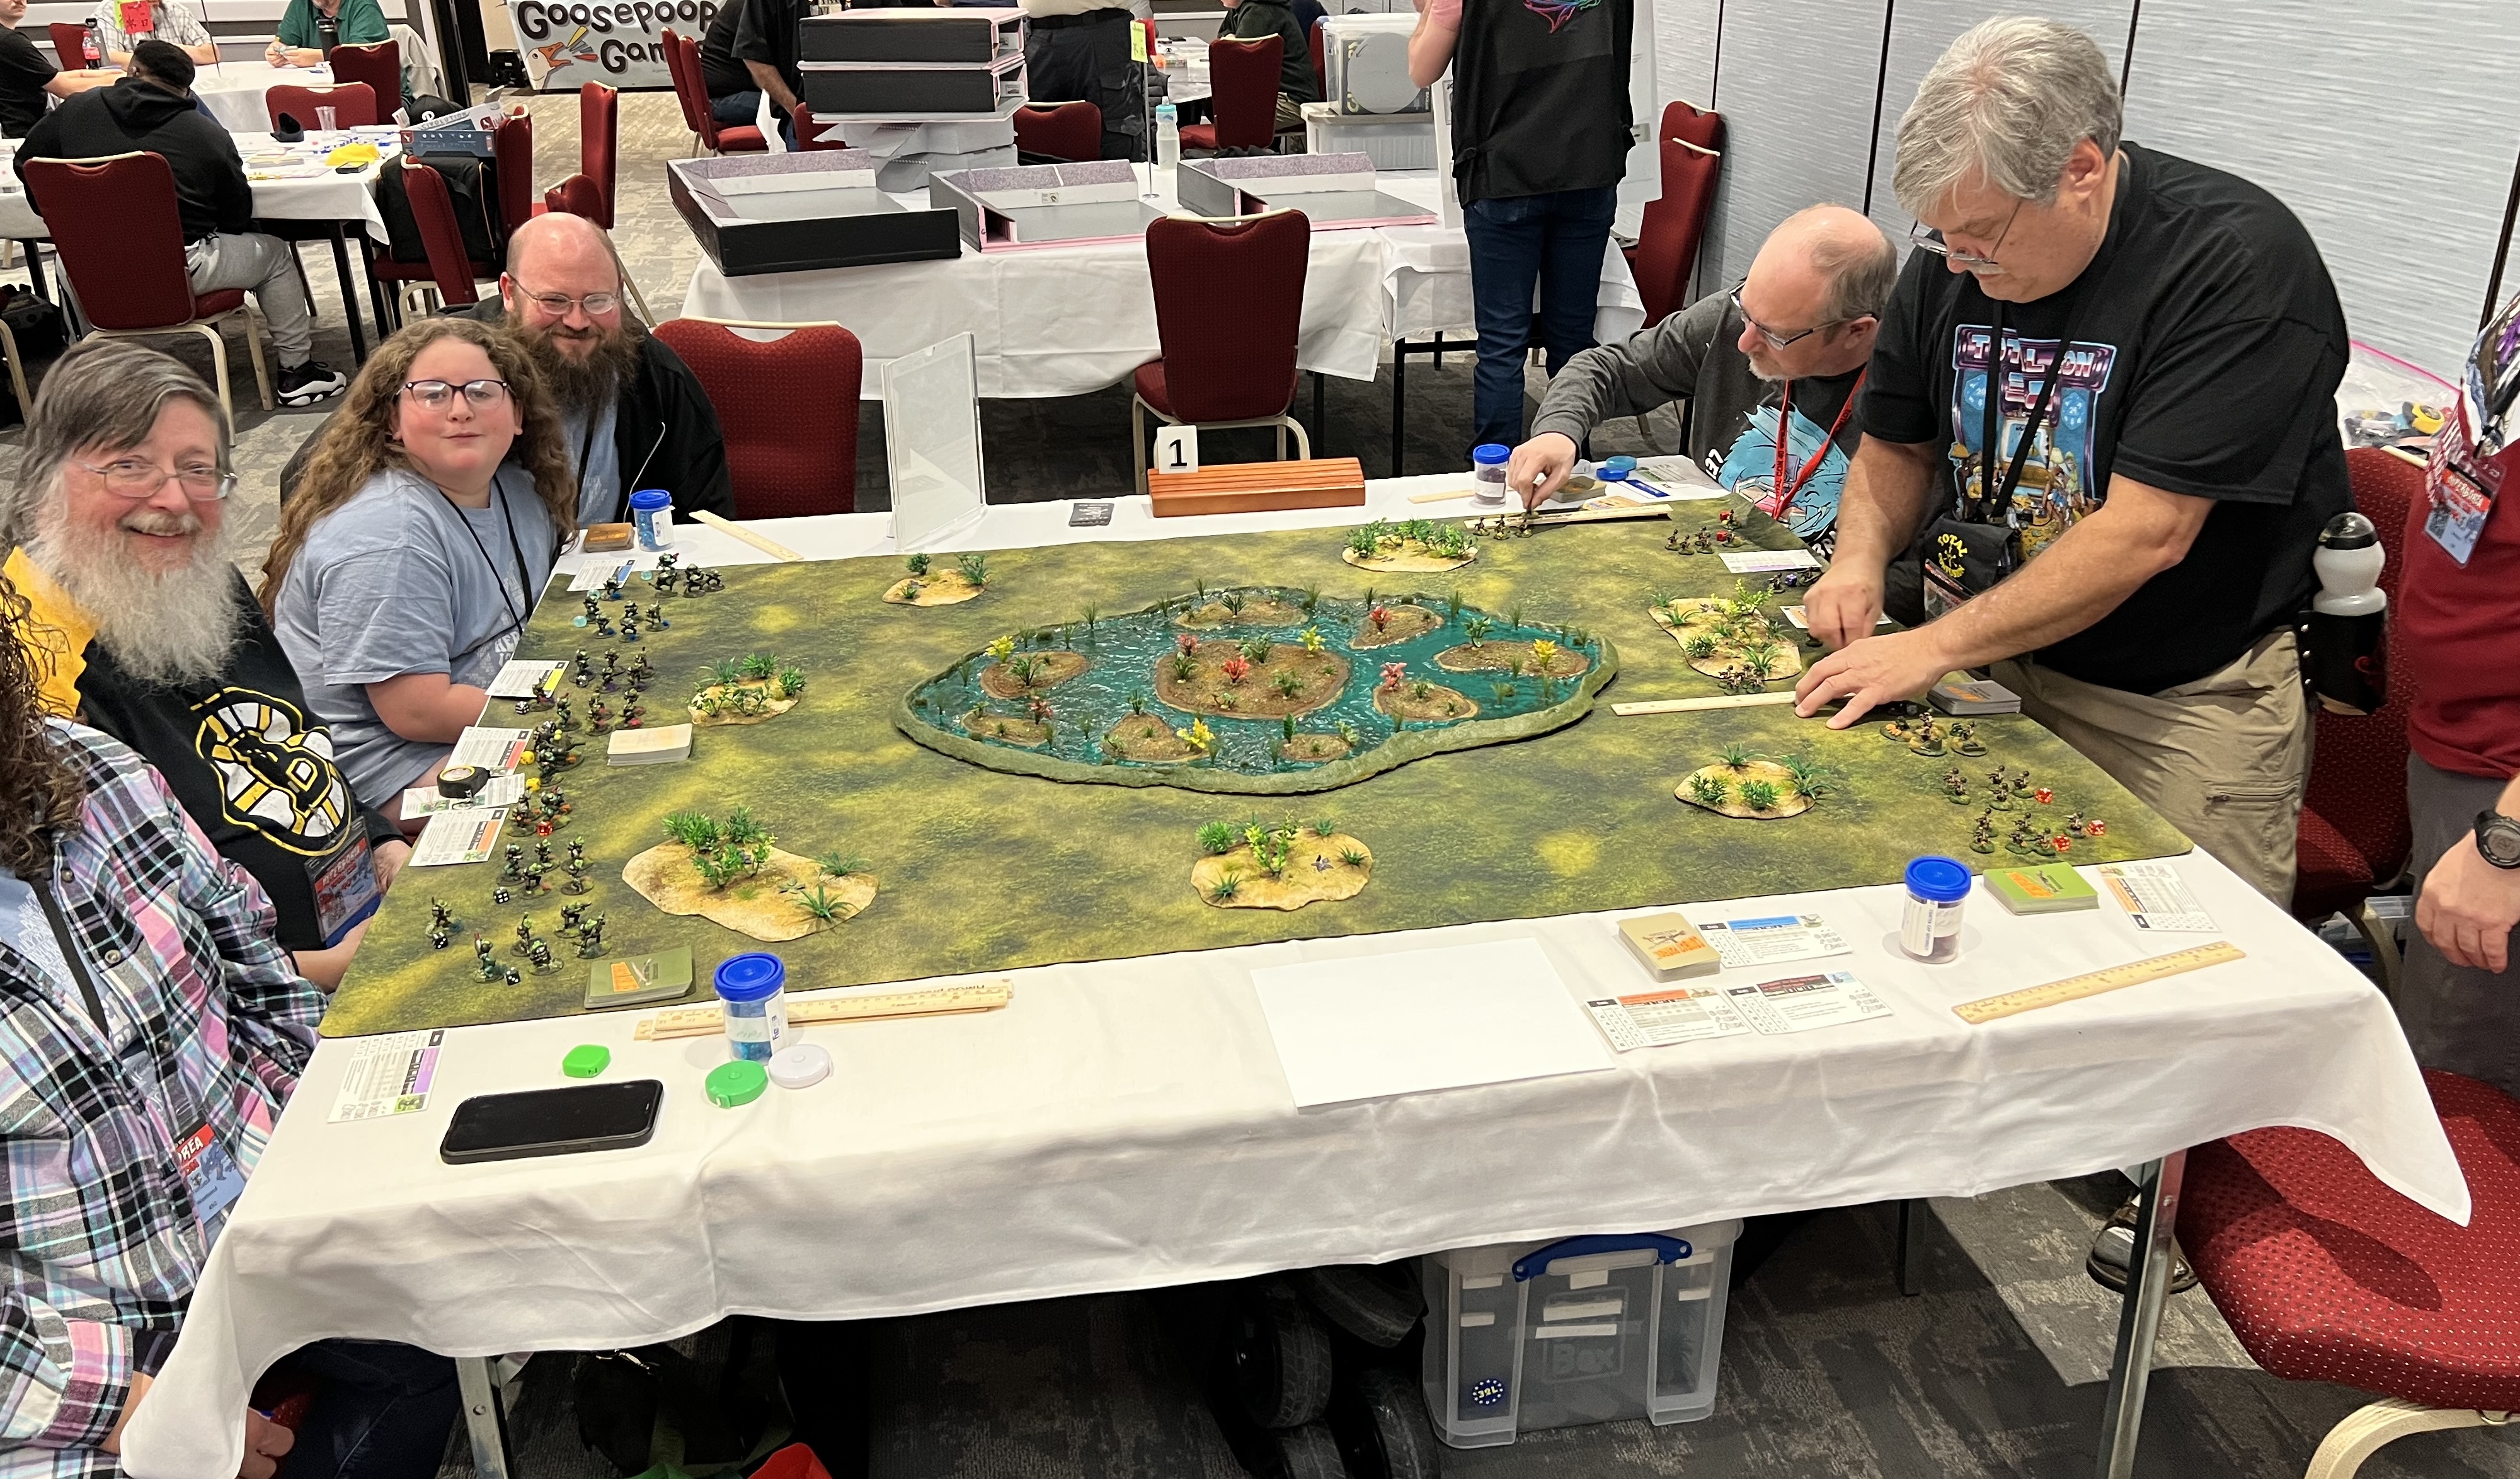
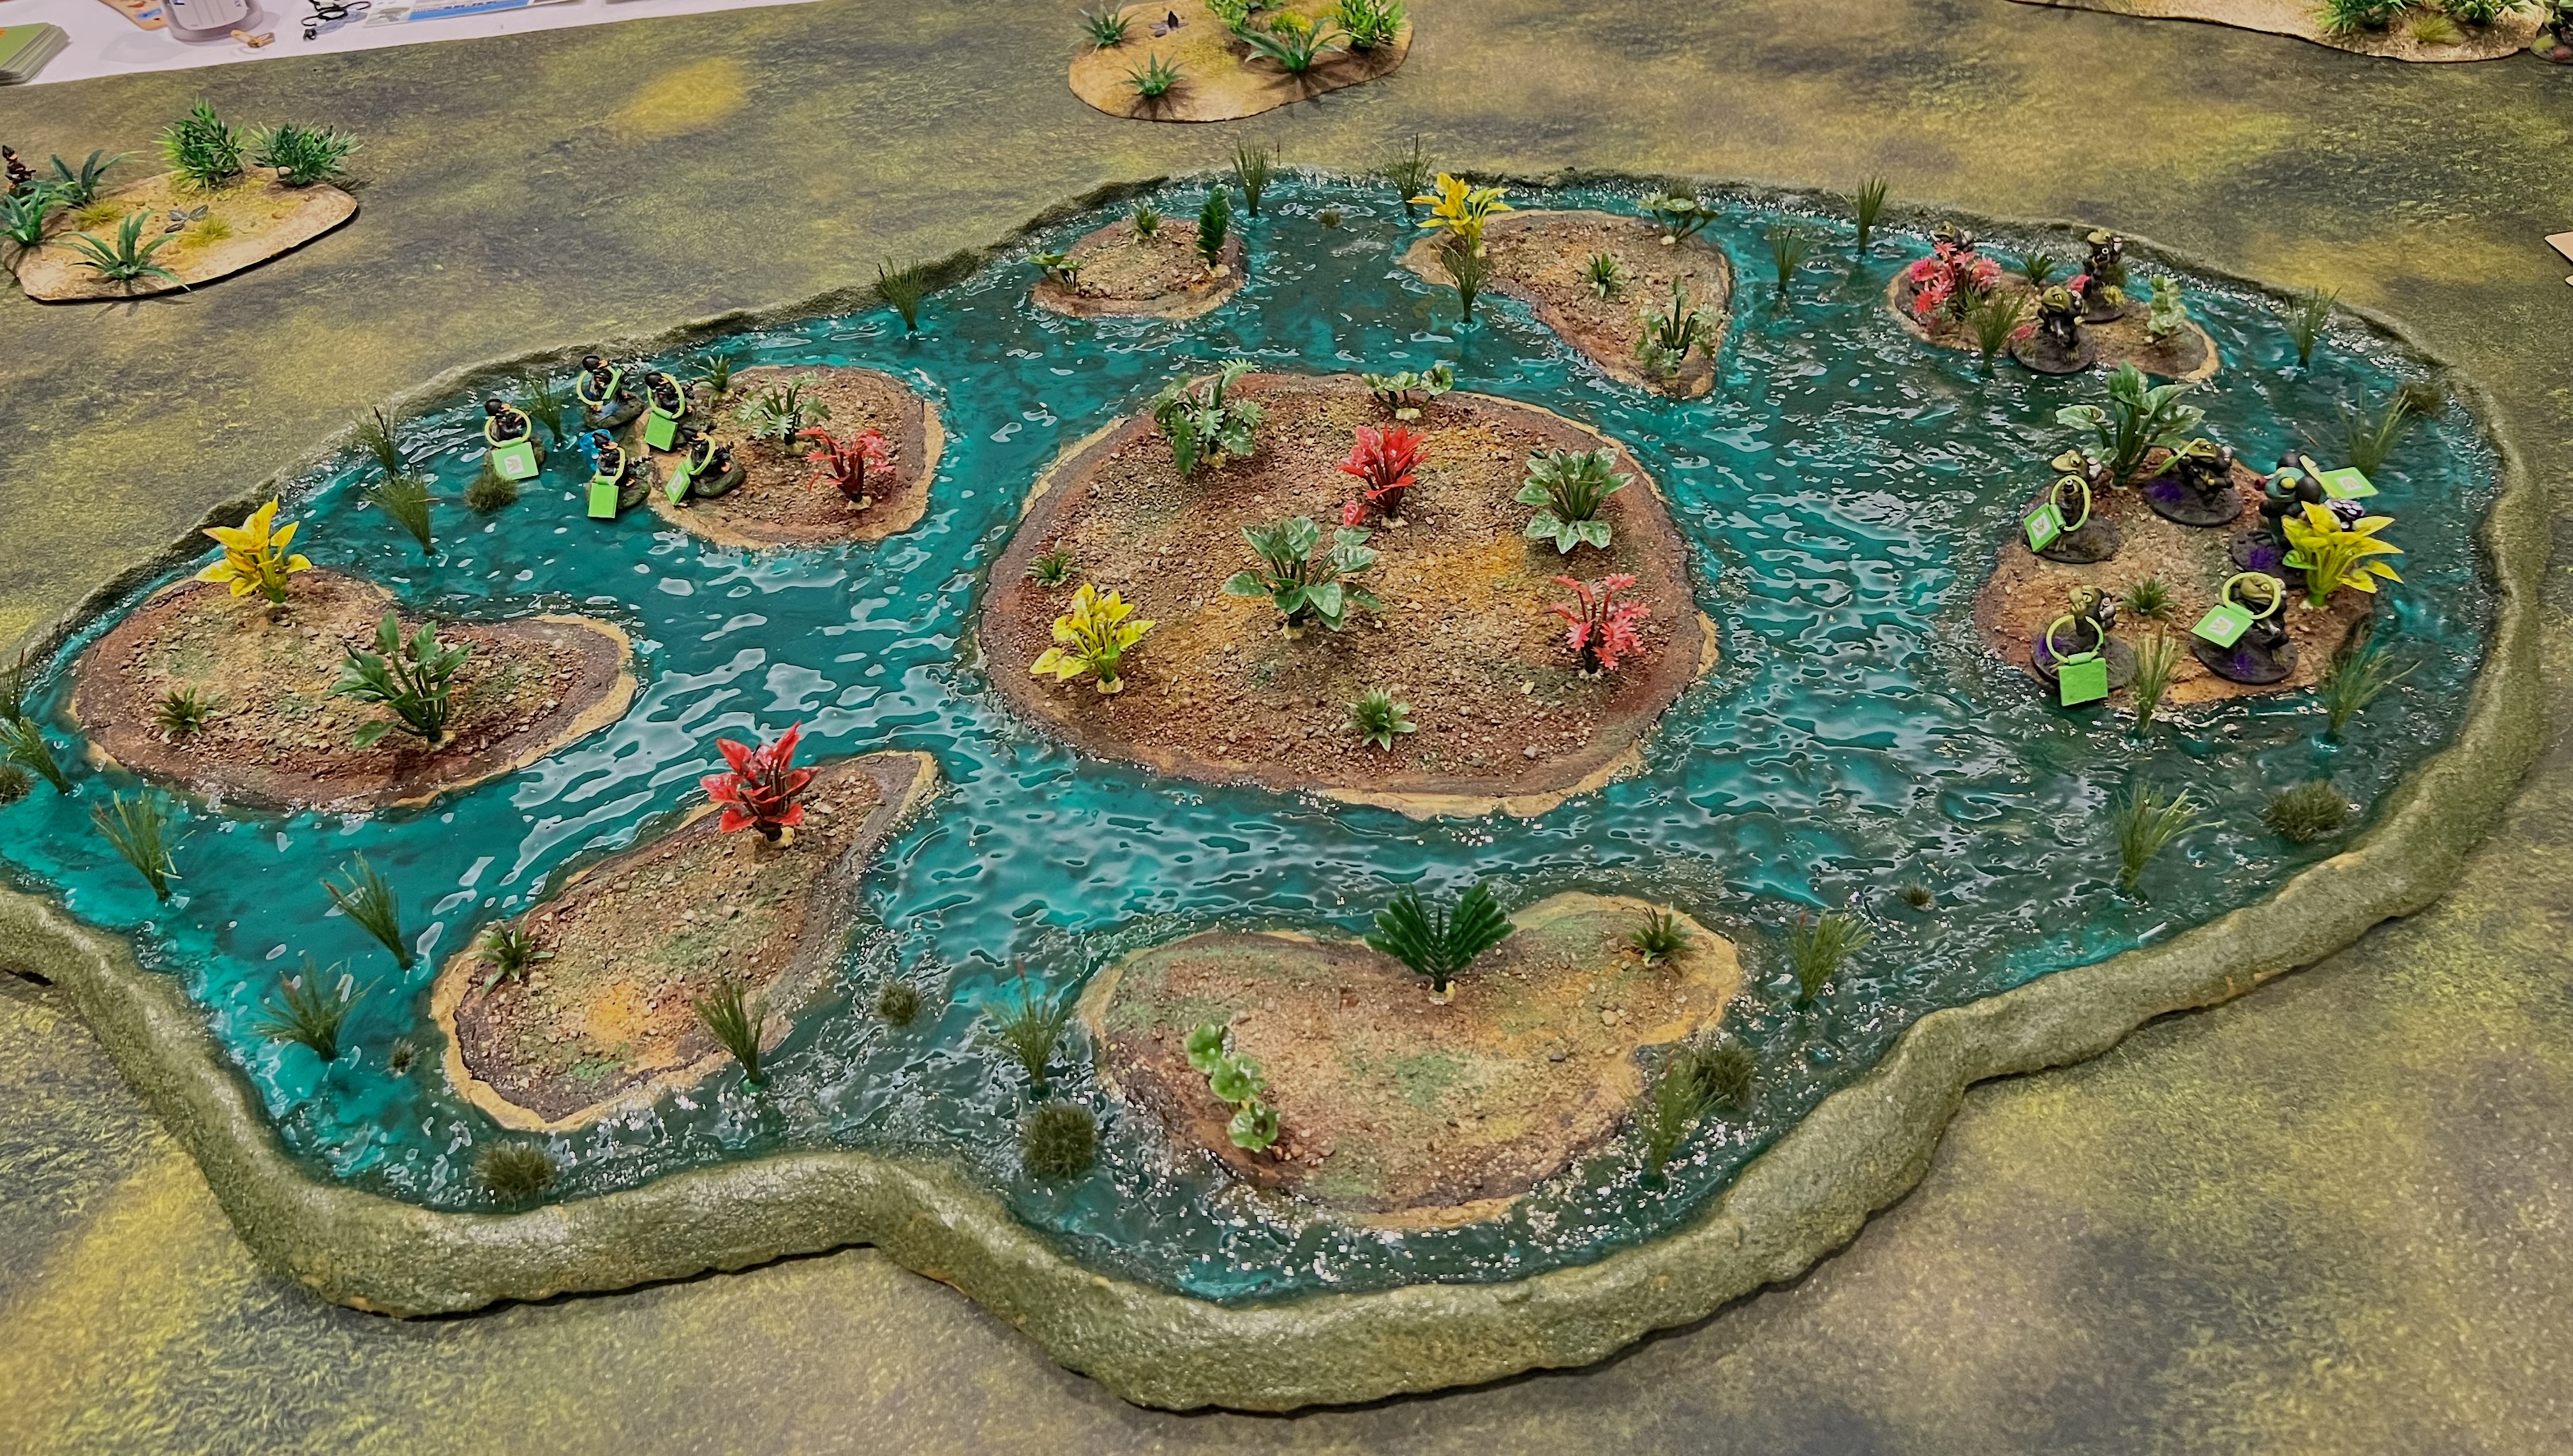
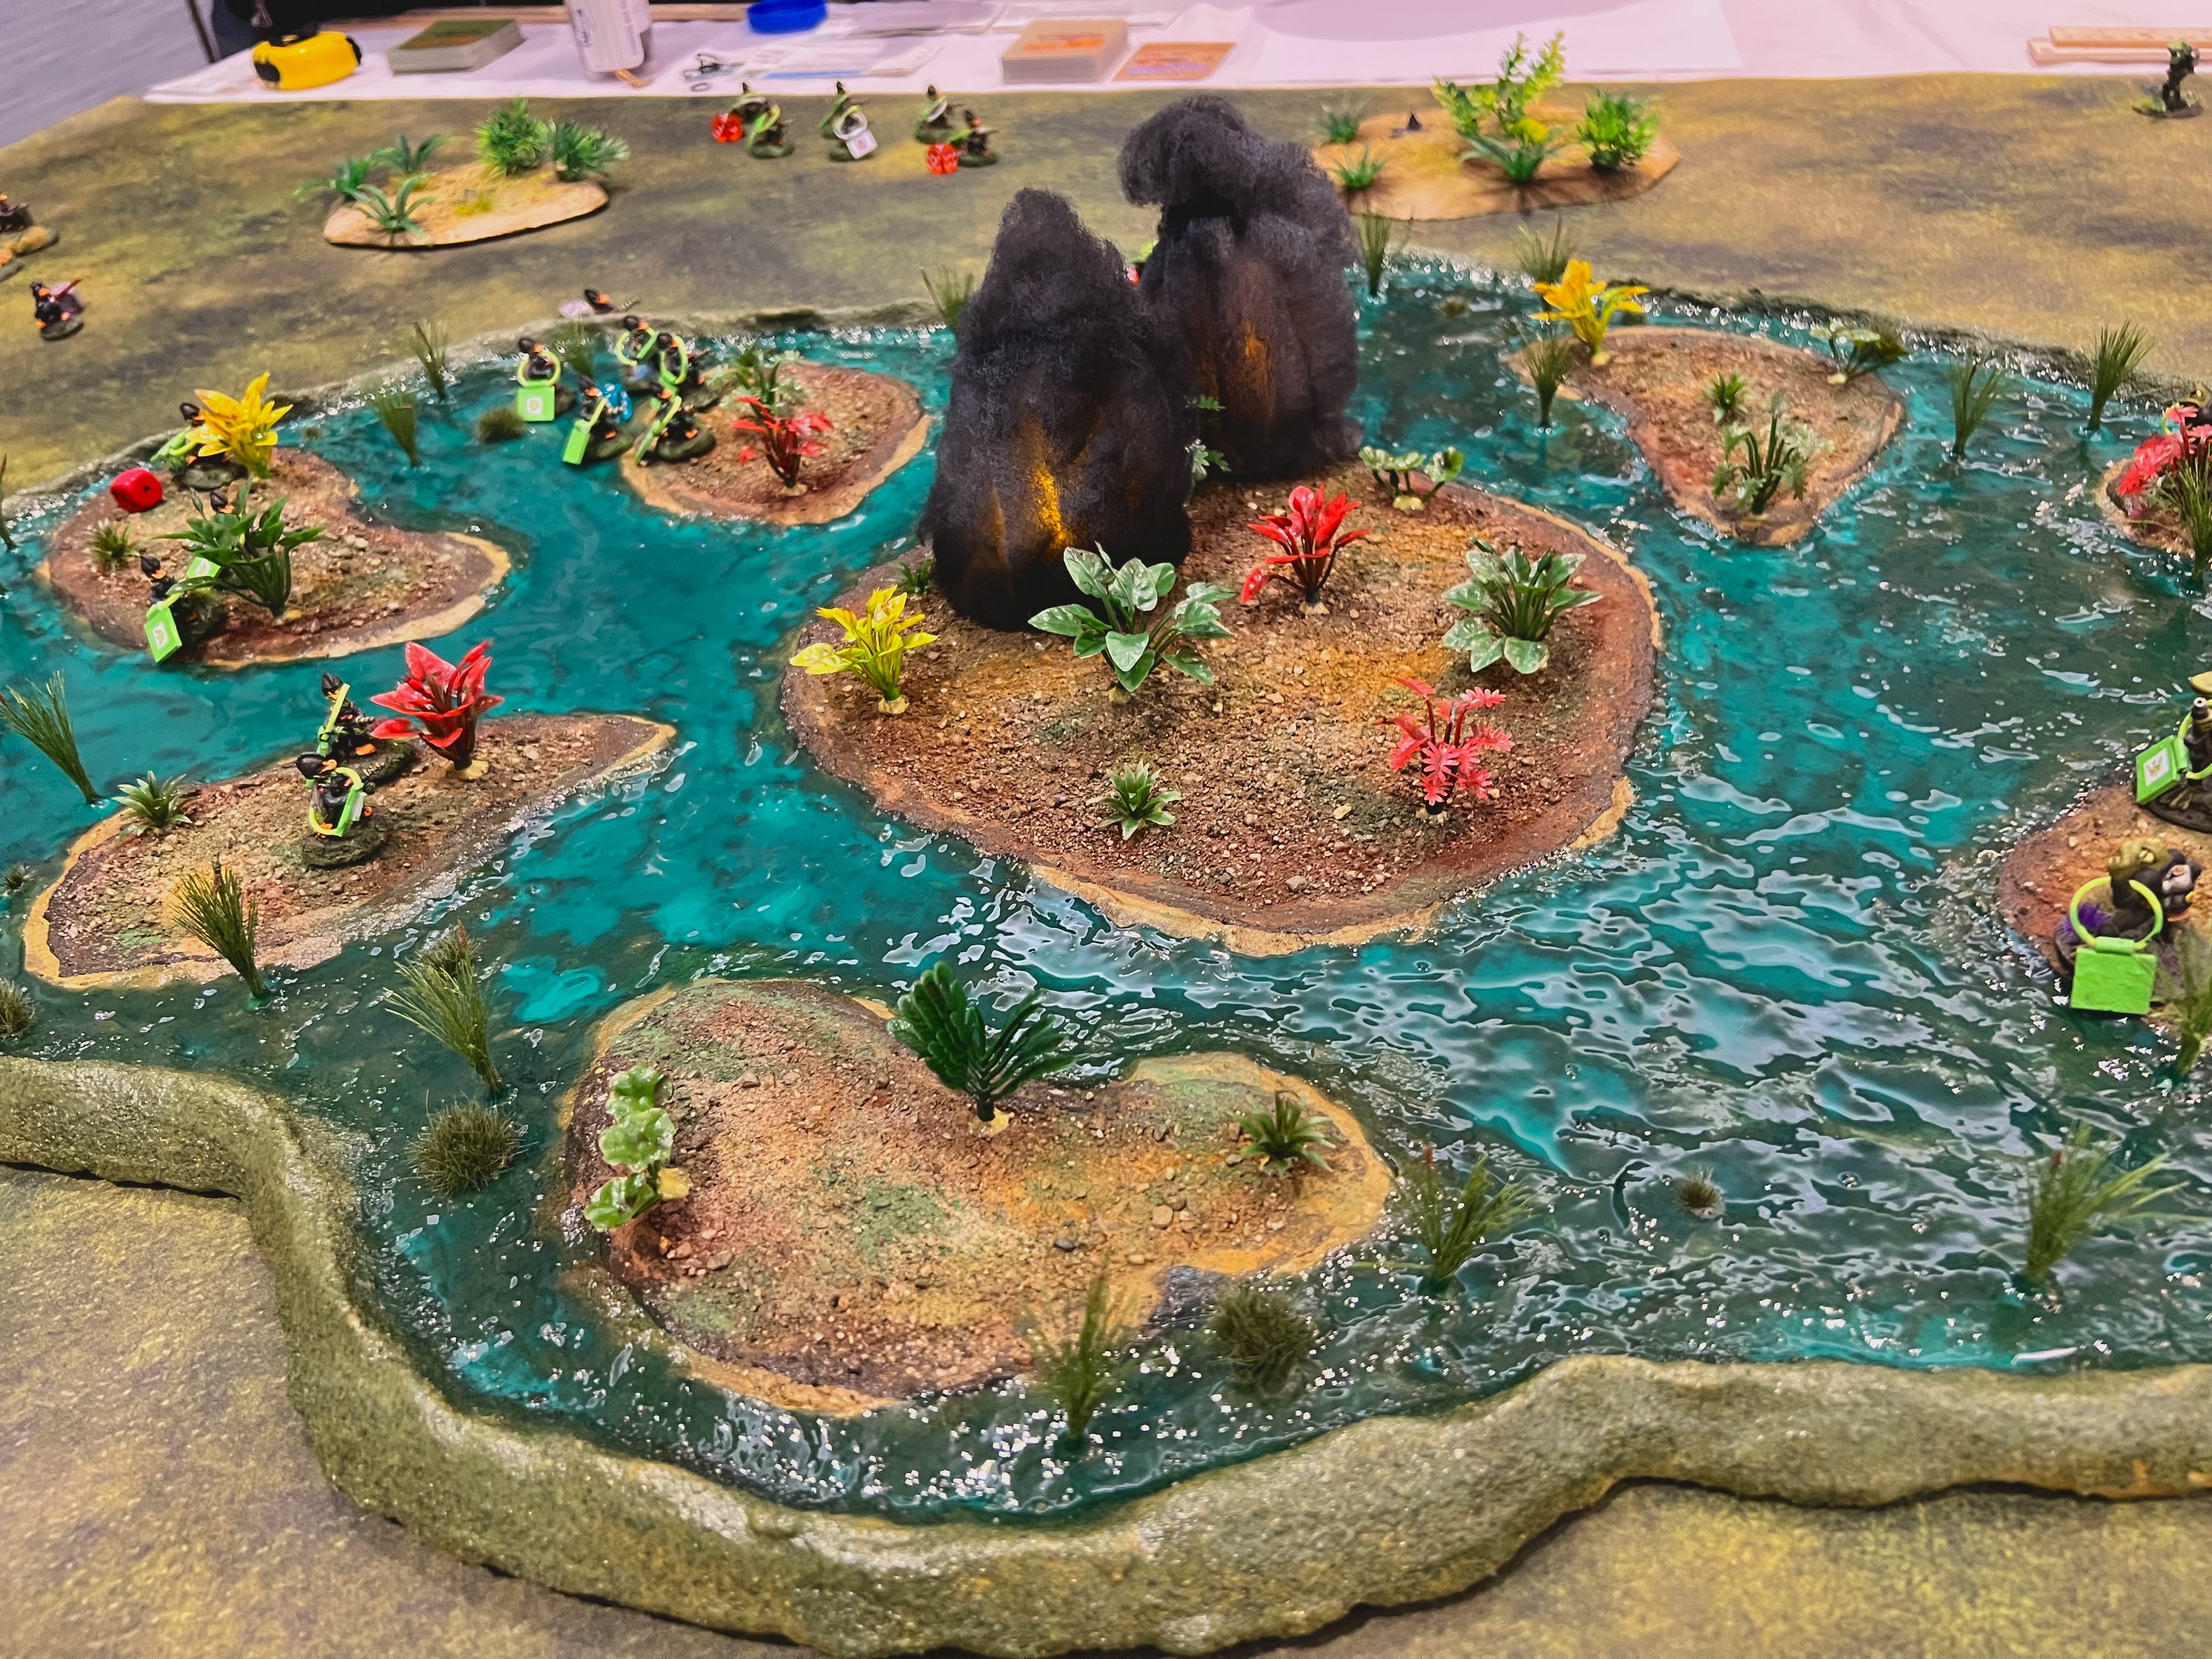
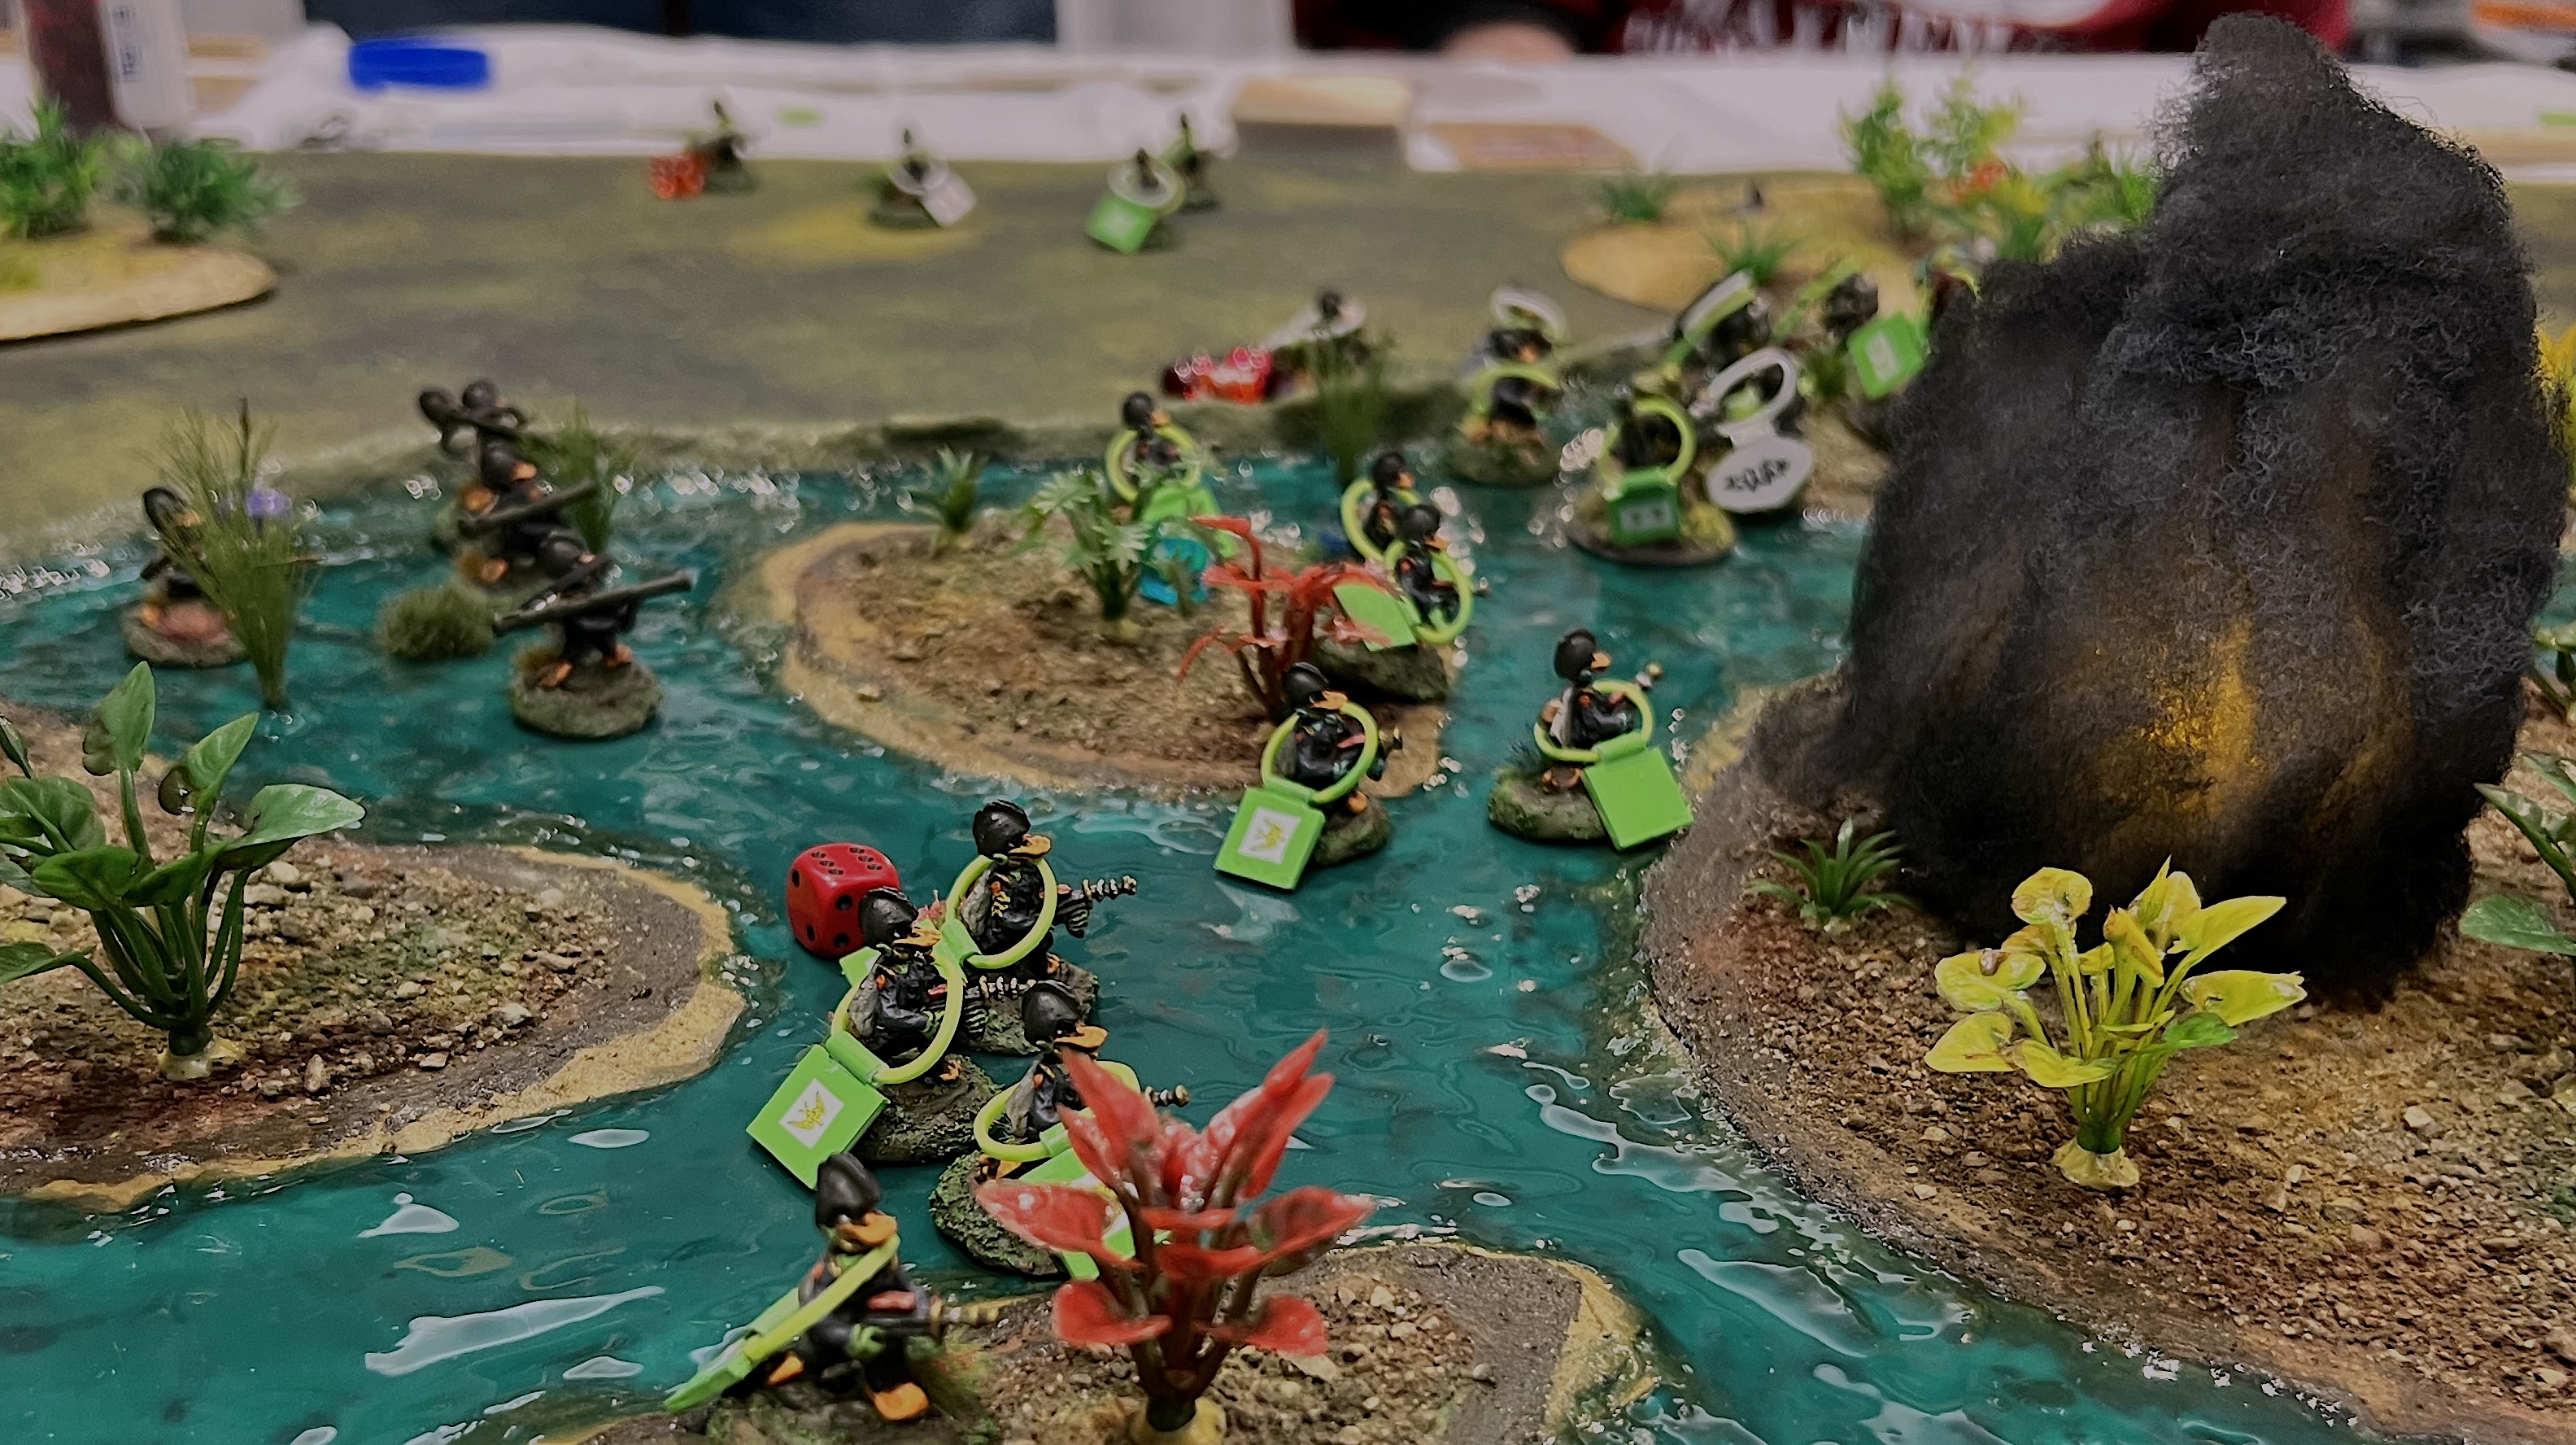
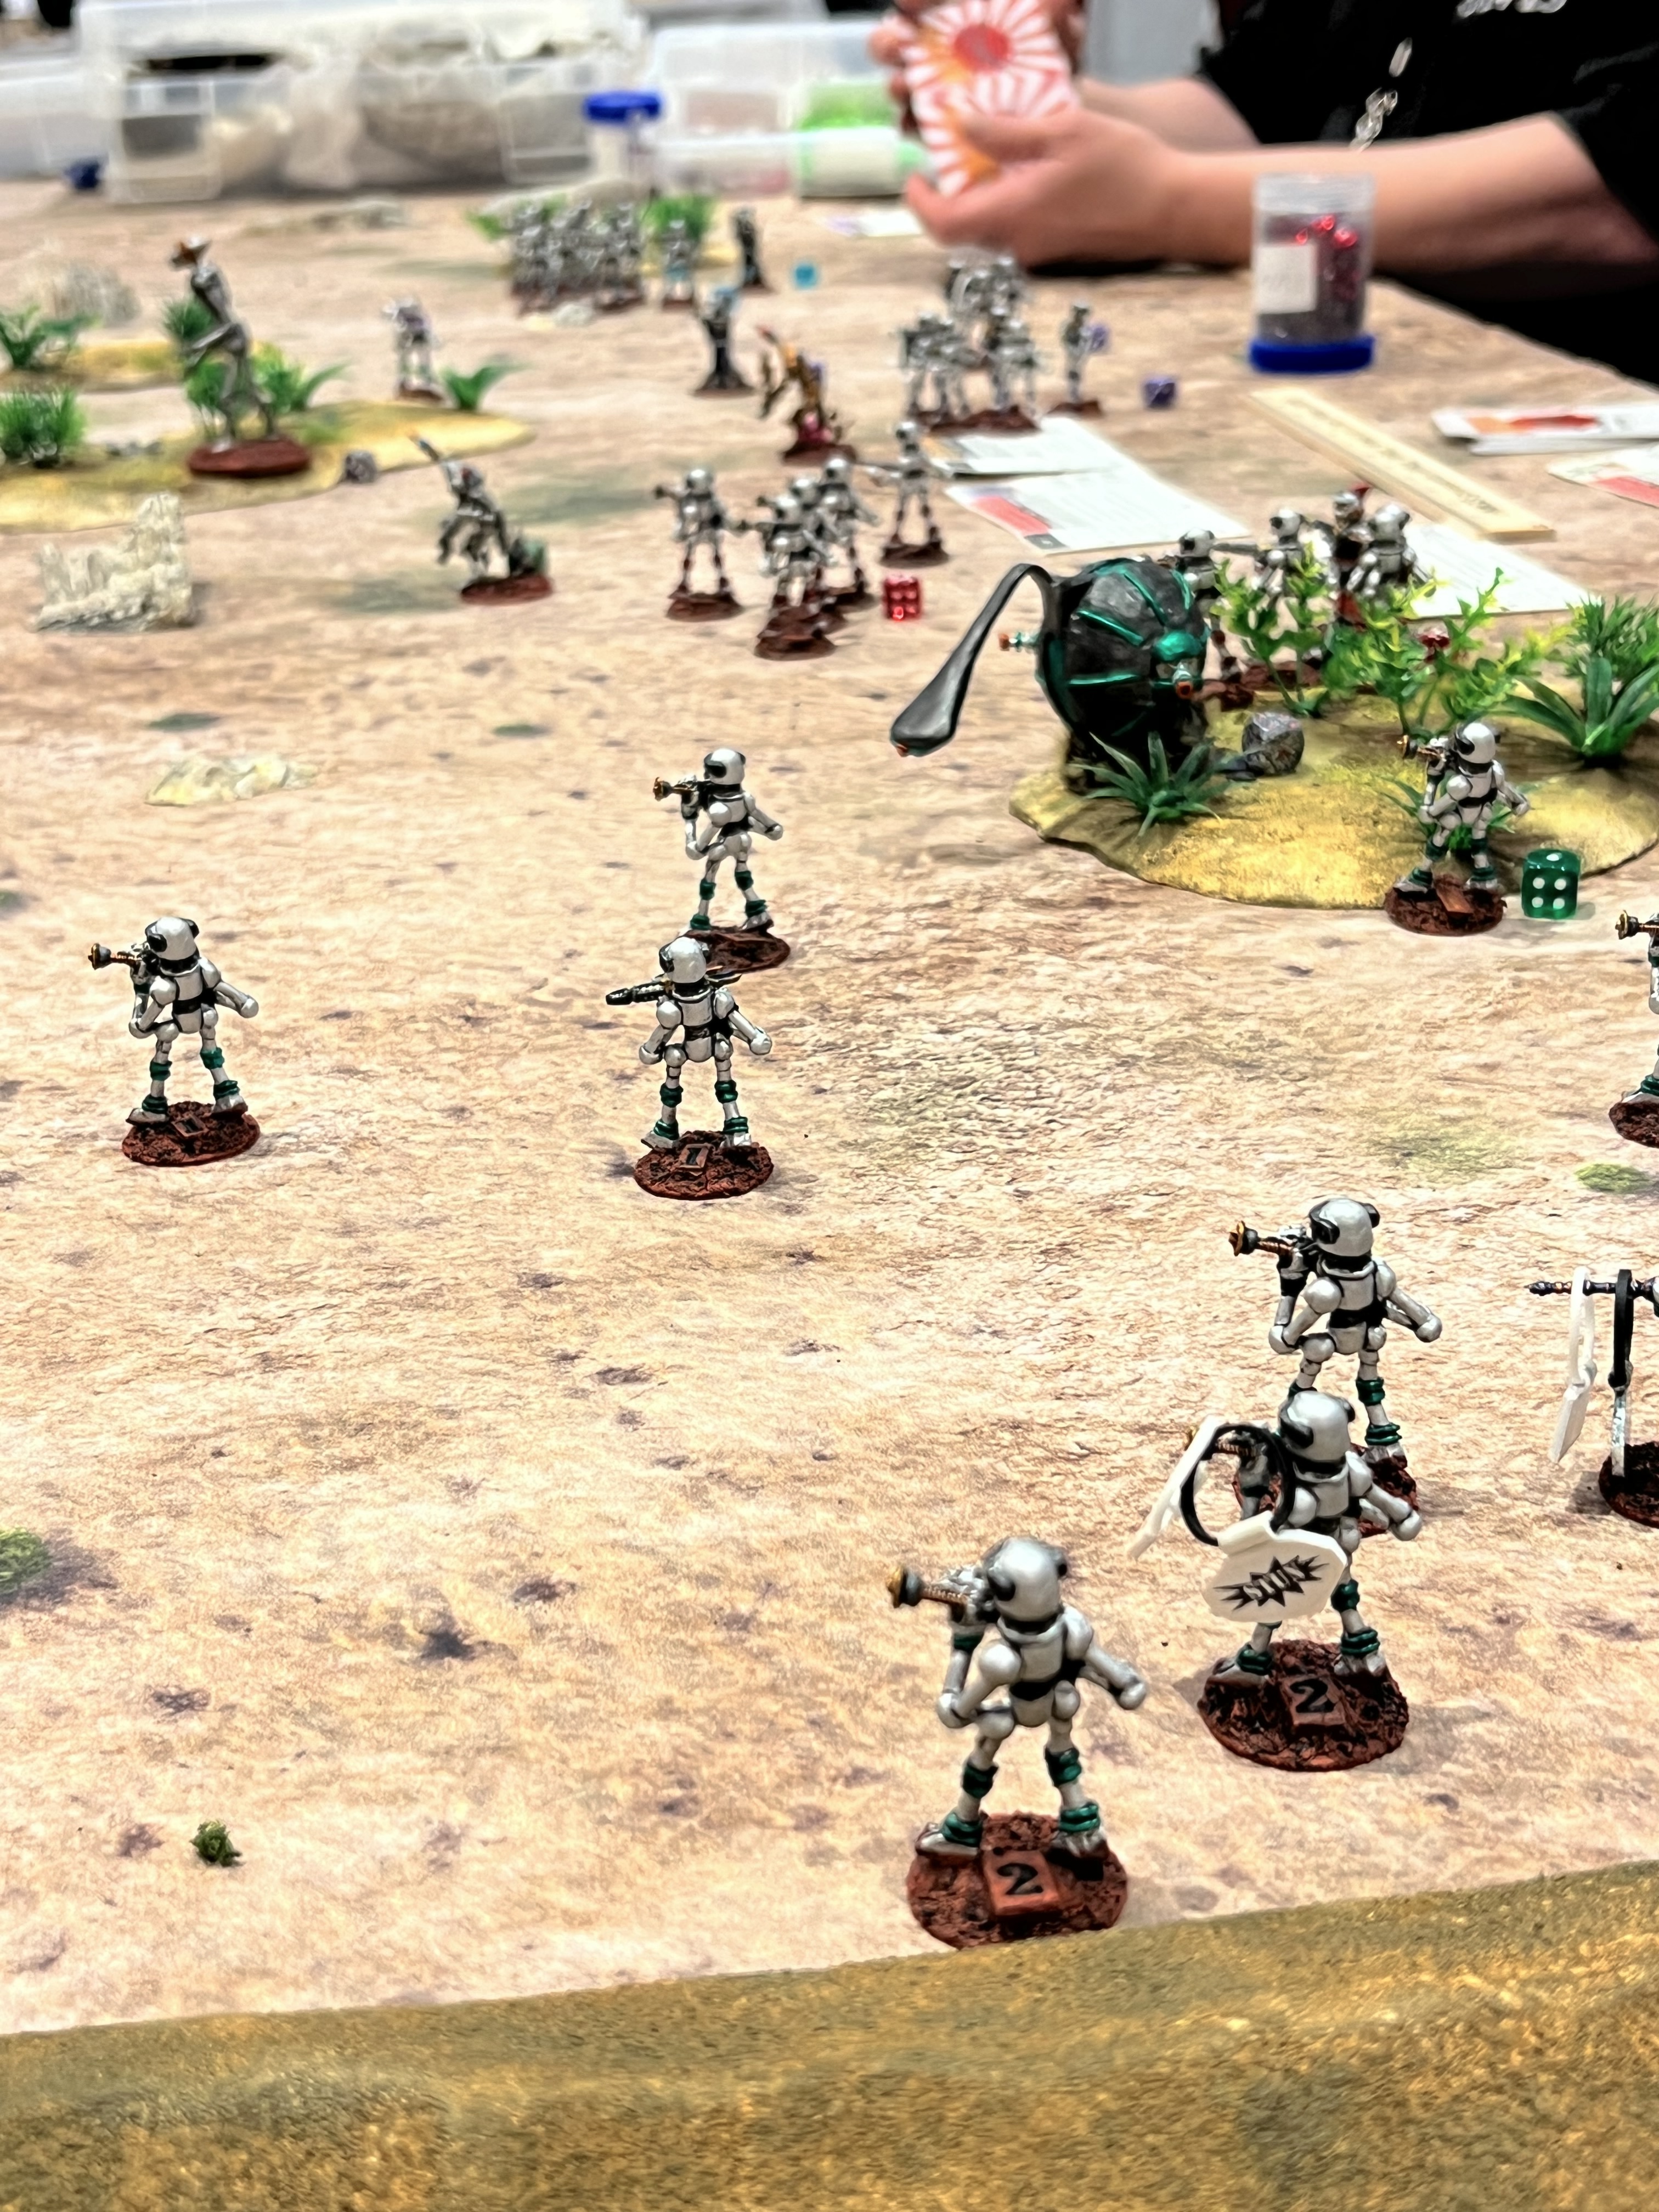
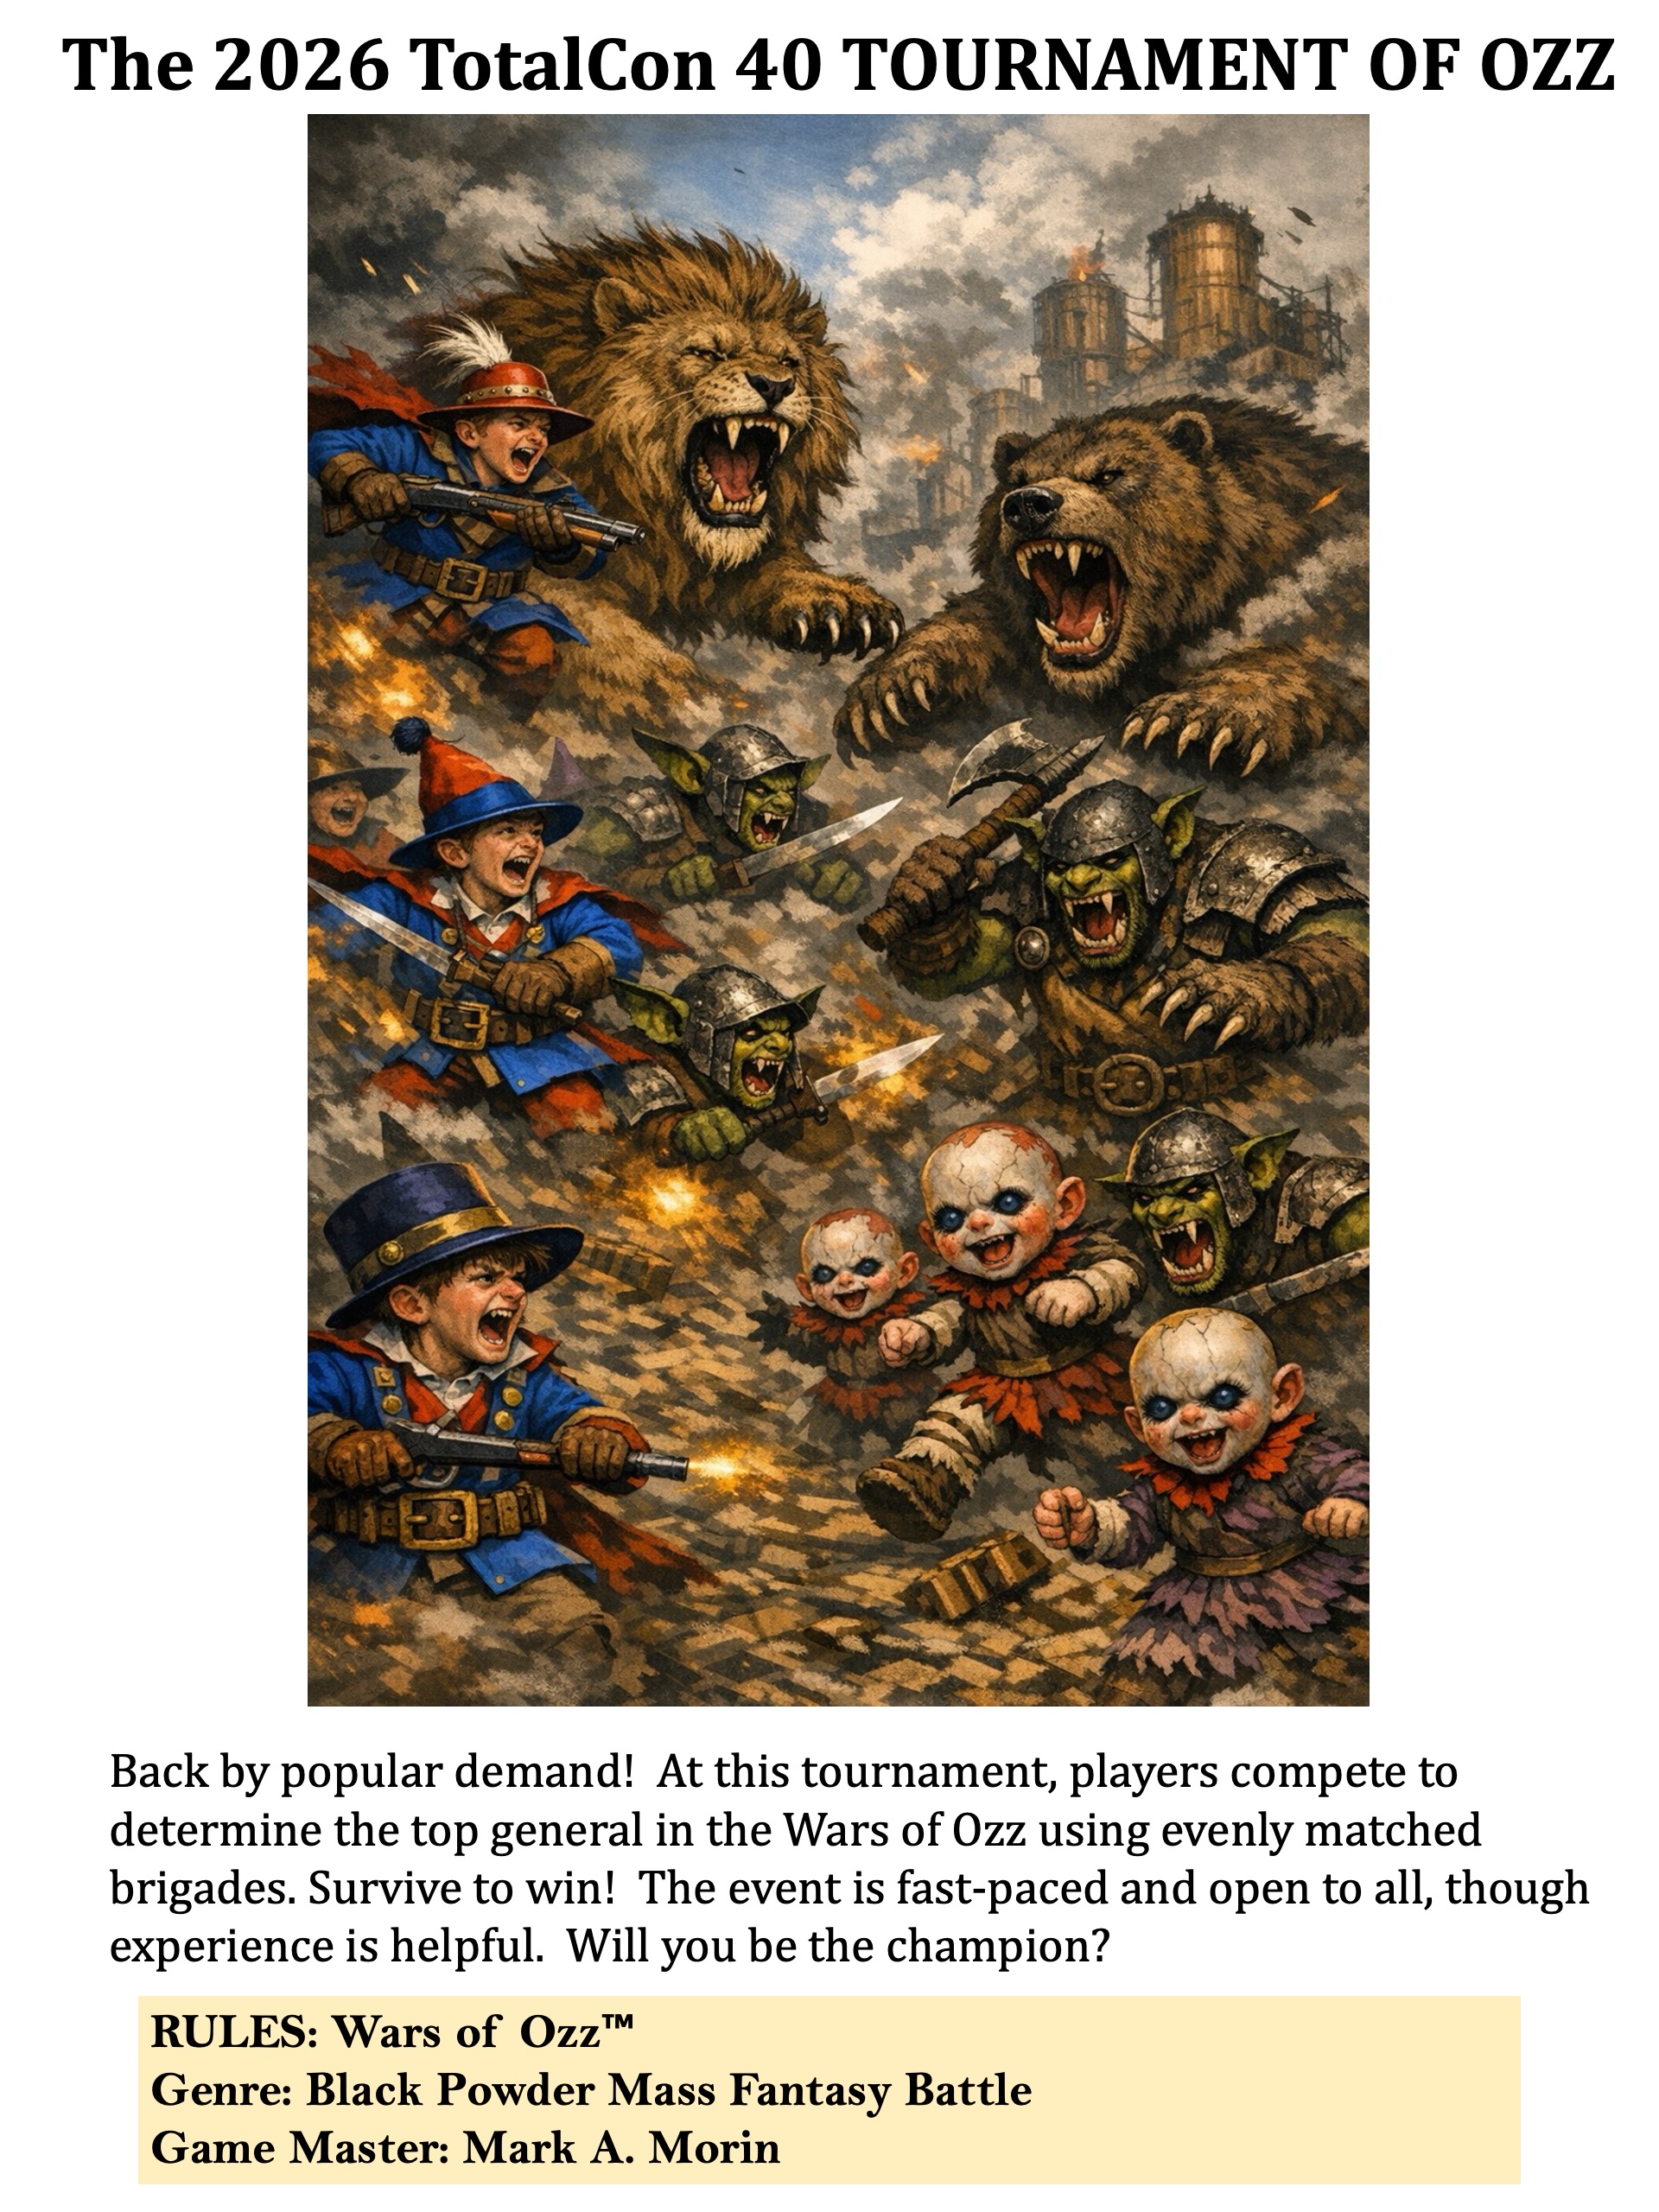
My game flyer.The tabletop set up for action. The F.R.O.G. Commandos are on the near side, with the Star Ducks on the far end. The Star Ducks are Archive Miniatures Star Rovers figures from the late ’70’s/early 80’s. The Frogs are Critter Commandos figures from the early 1990’s.The Star Duck players move up.The Star Ducks use one of their two jet pack moves to occupy islands. In the game, control of the smaller islands was worth 5 points. Controlling the largest island earned players 10 points.The Frogs were also jet packing. The Star Ducks used mortars to lay down a protective smoke screen against their automatic weapons fire.In the end, the luck of the cards deserted the Frogs, with almost every island in Star Duck control.
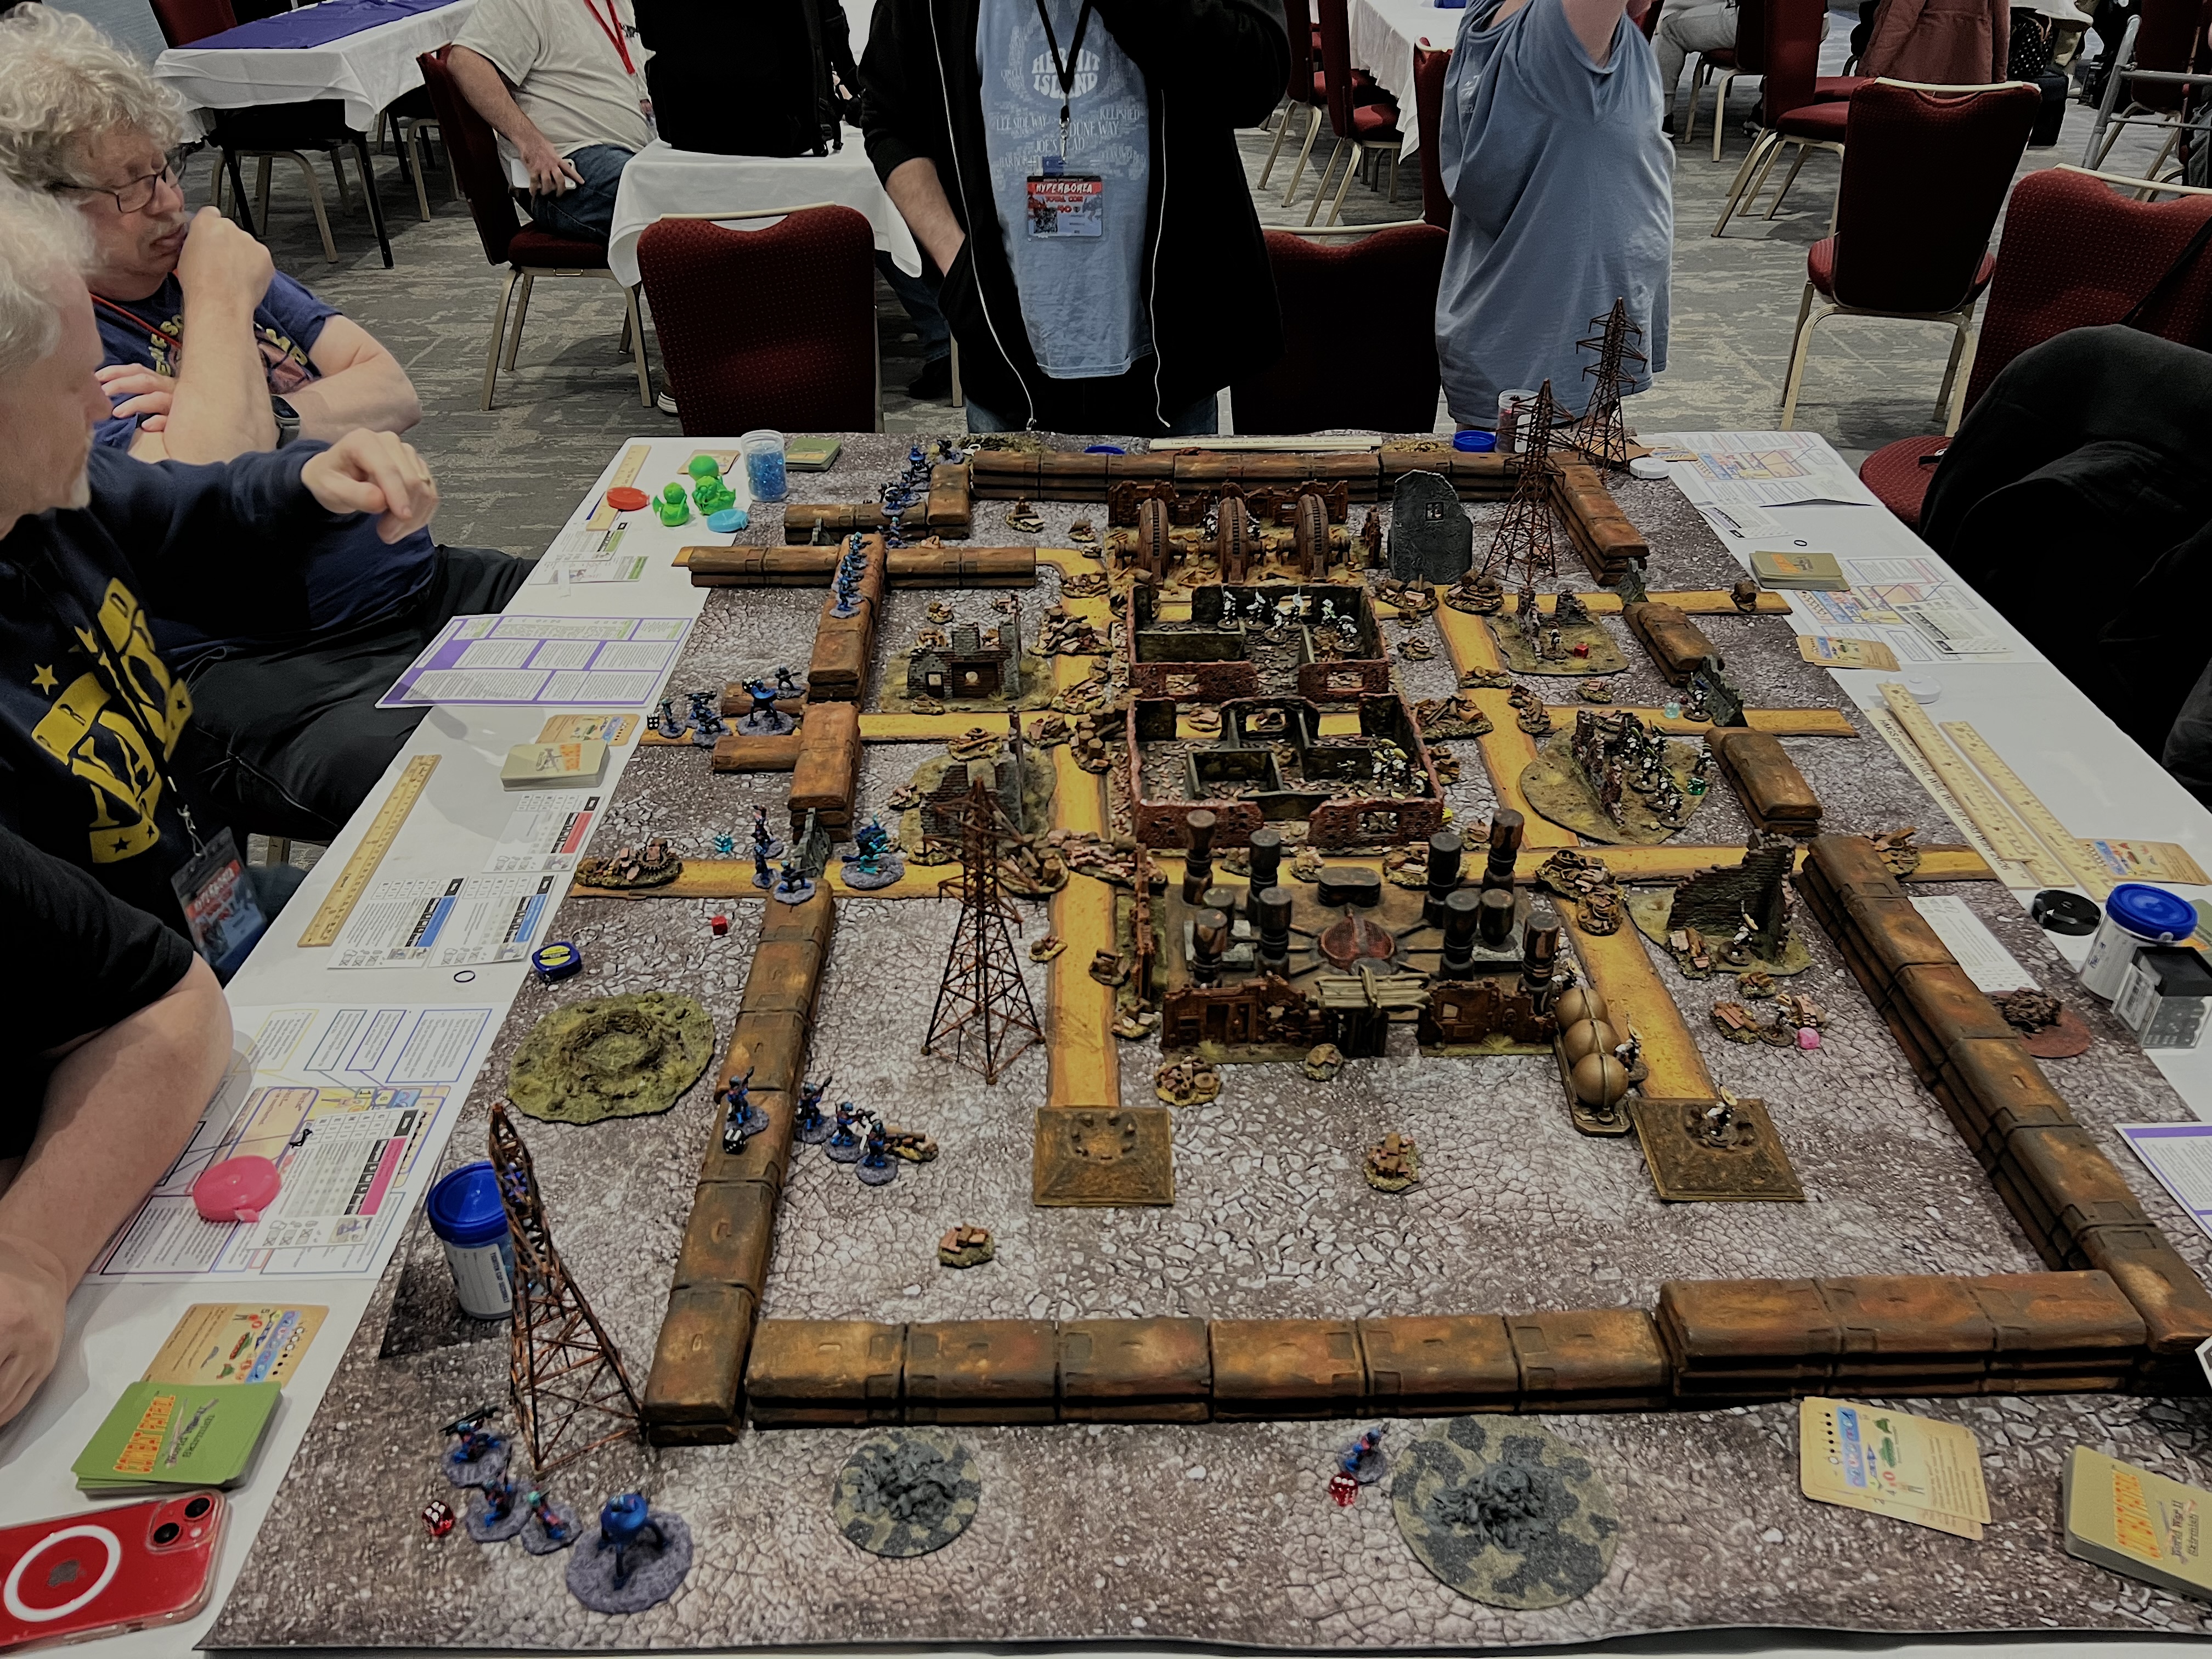
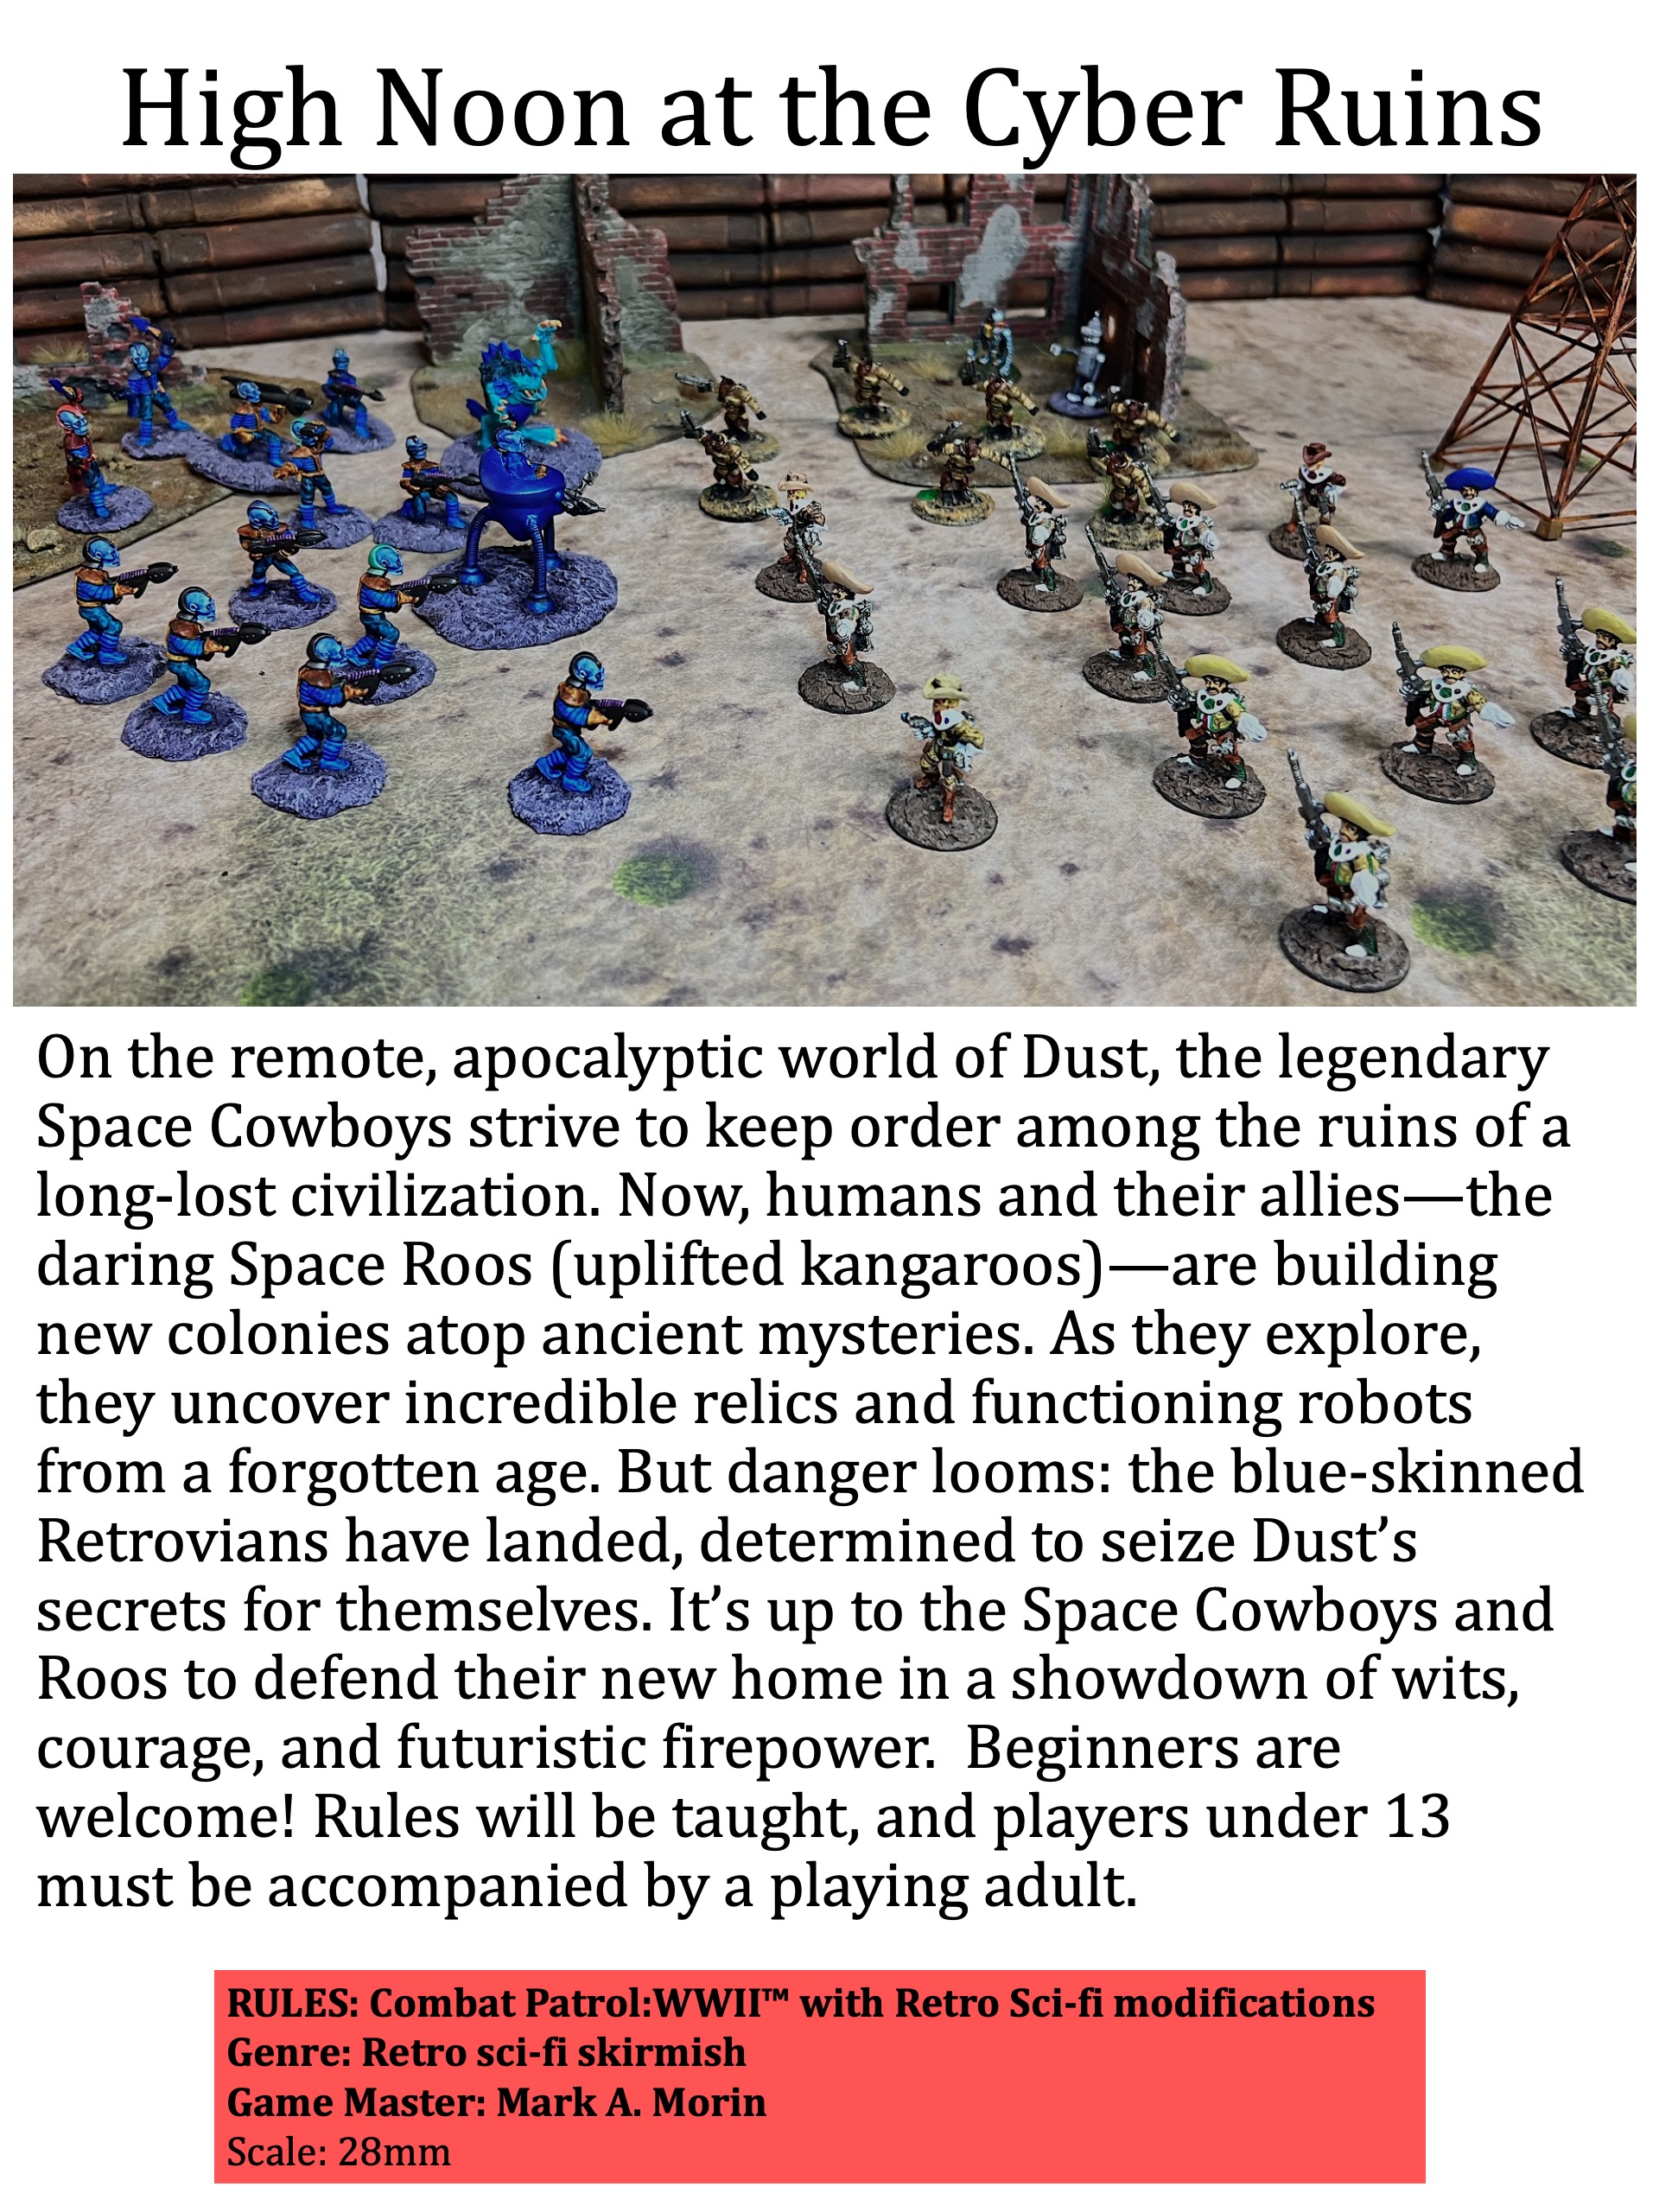
High Noon at the Cyber Ruins
I ran this Combat Patrol retro sci-fi game at Cold Wars, but on a bigger table. I used a different mat and adapted the game to a smaller footprint.
Game flyer.
To win the game, both sides get credit (victory points) for inflicting enemy casualties and finding hidden ancient robots.
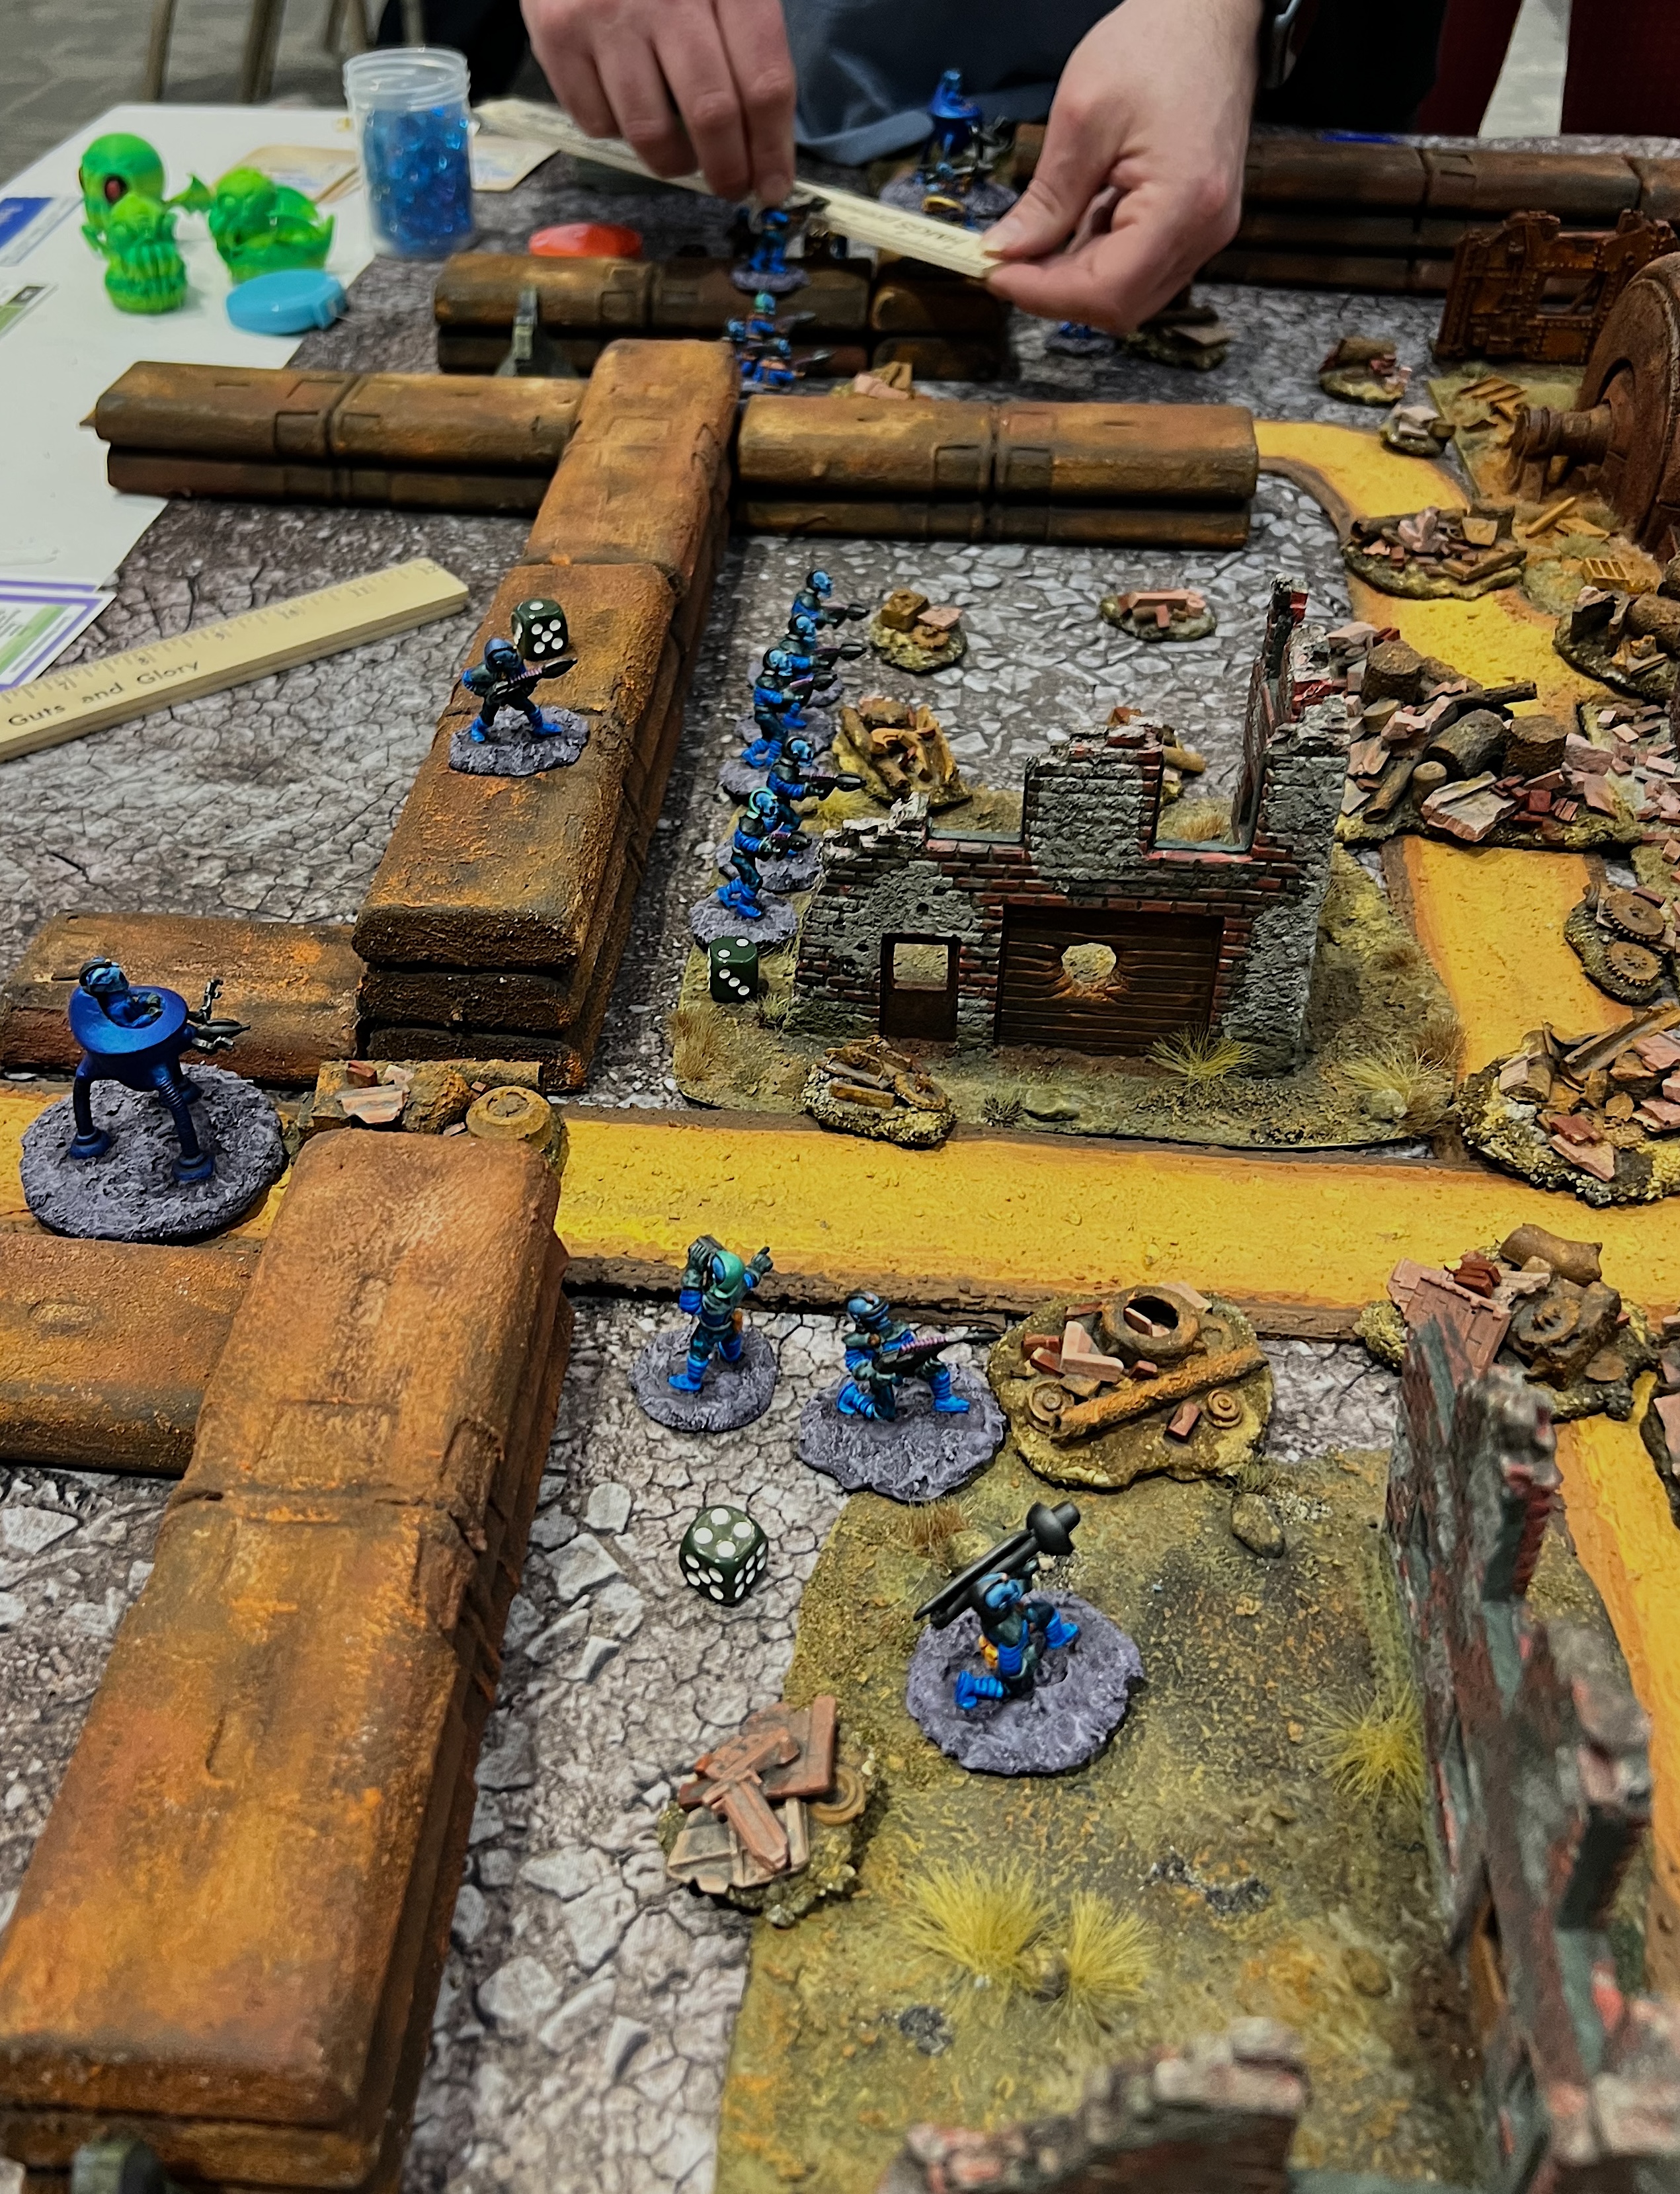
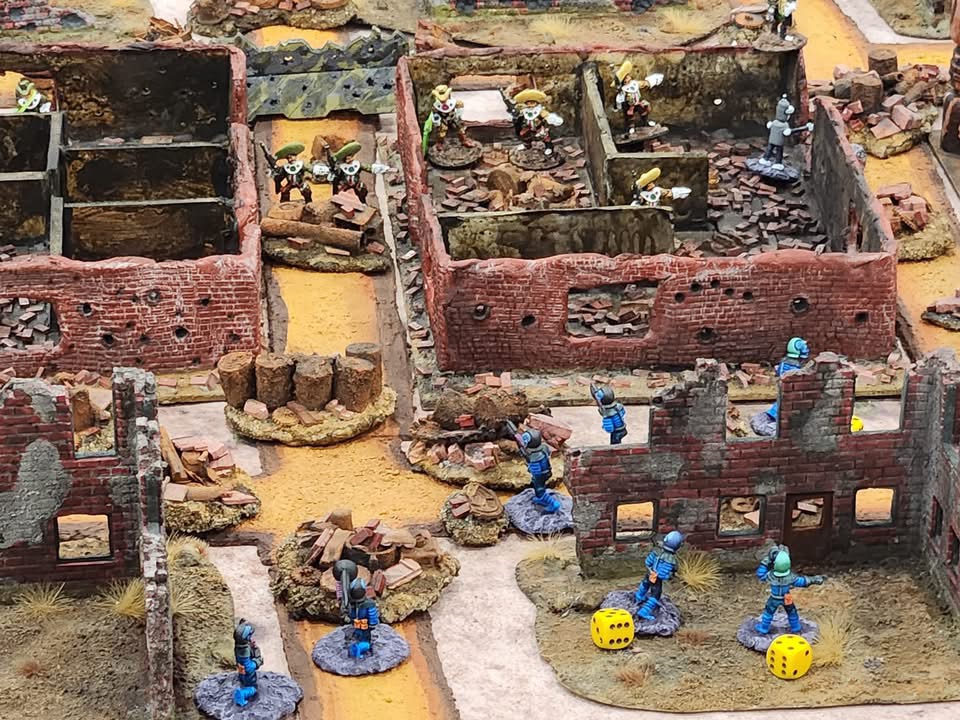
The game was definitely full!Retrovians and Space Cowboys move into the ruined city.The Space Cowboys find a robot (an Archive Robot Cook) and get it to join their side.Reinforcements arrive! Here come the Space Roos.Retrovians take cover under fire while trying to clear the walls.Retrovian infantry move into the city.
In the end, the casualties on both sides were high. But, the Space Cowboys possession of robots allowed them a narrow 15-10 victory. That wrapped up Thursday’s games.
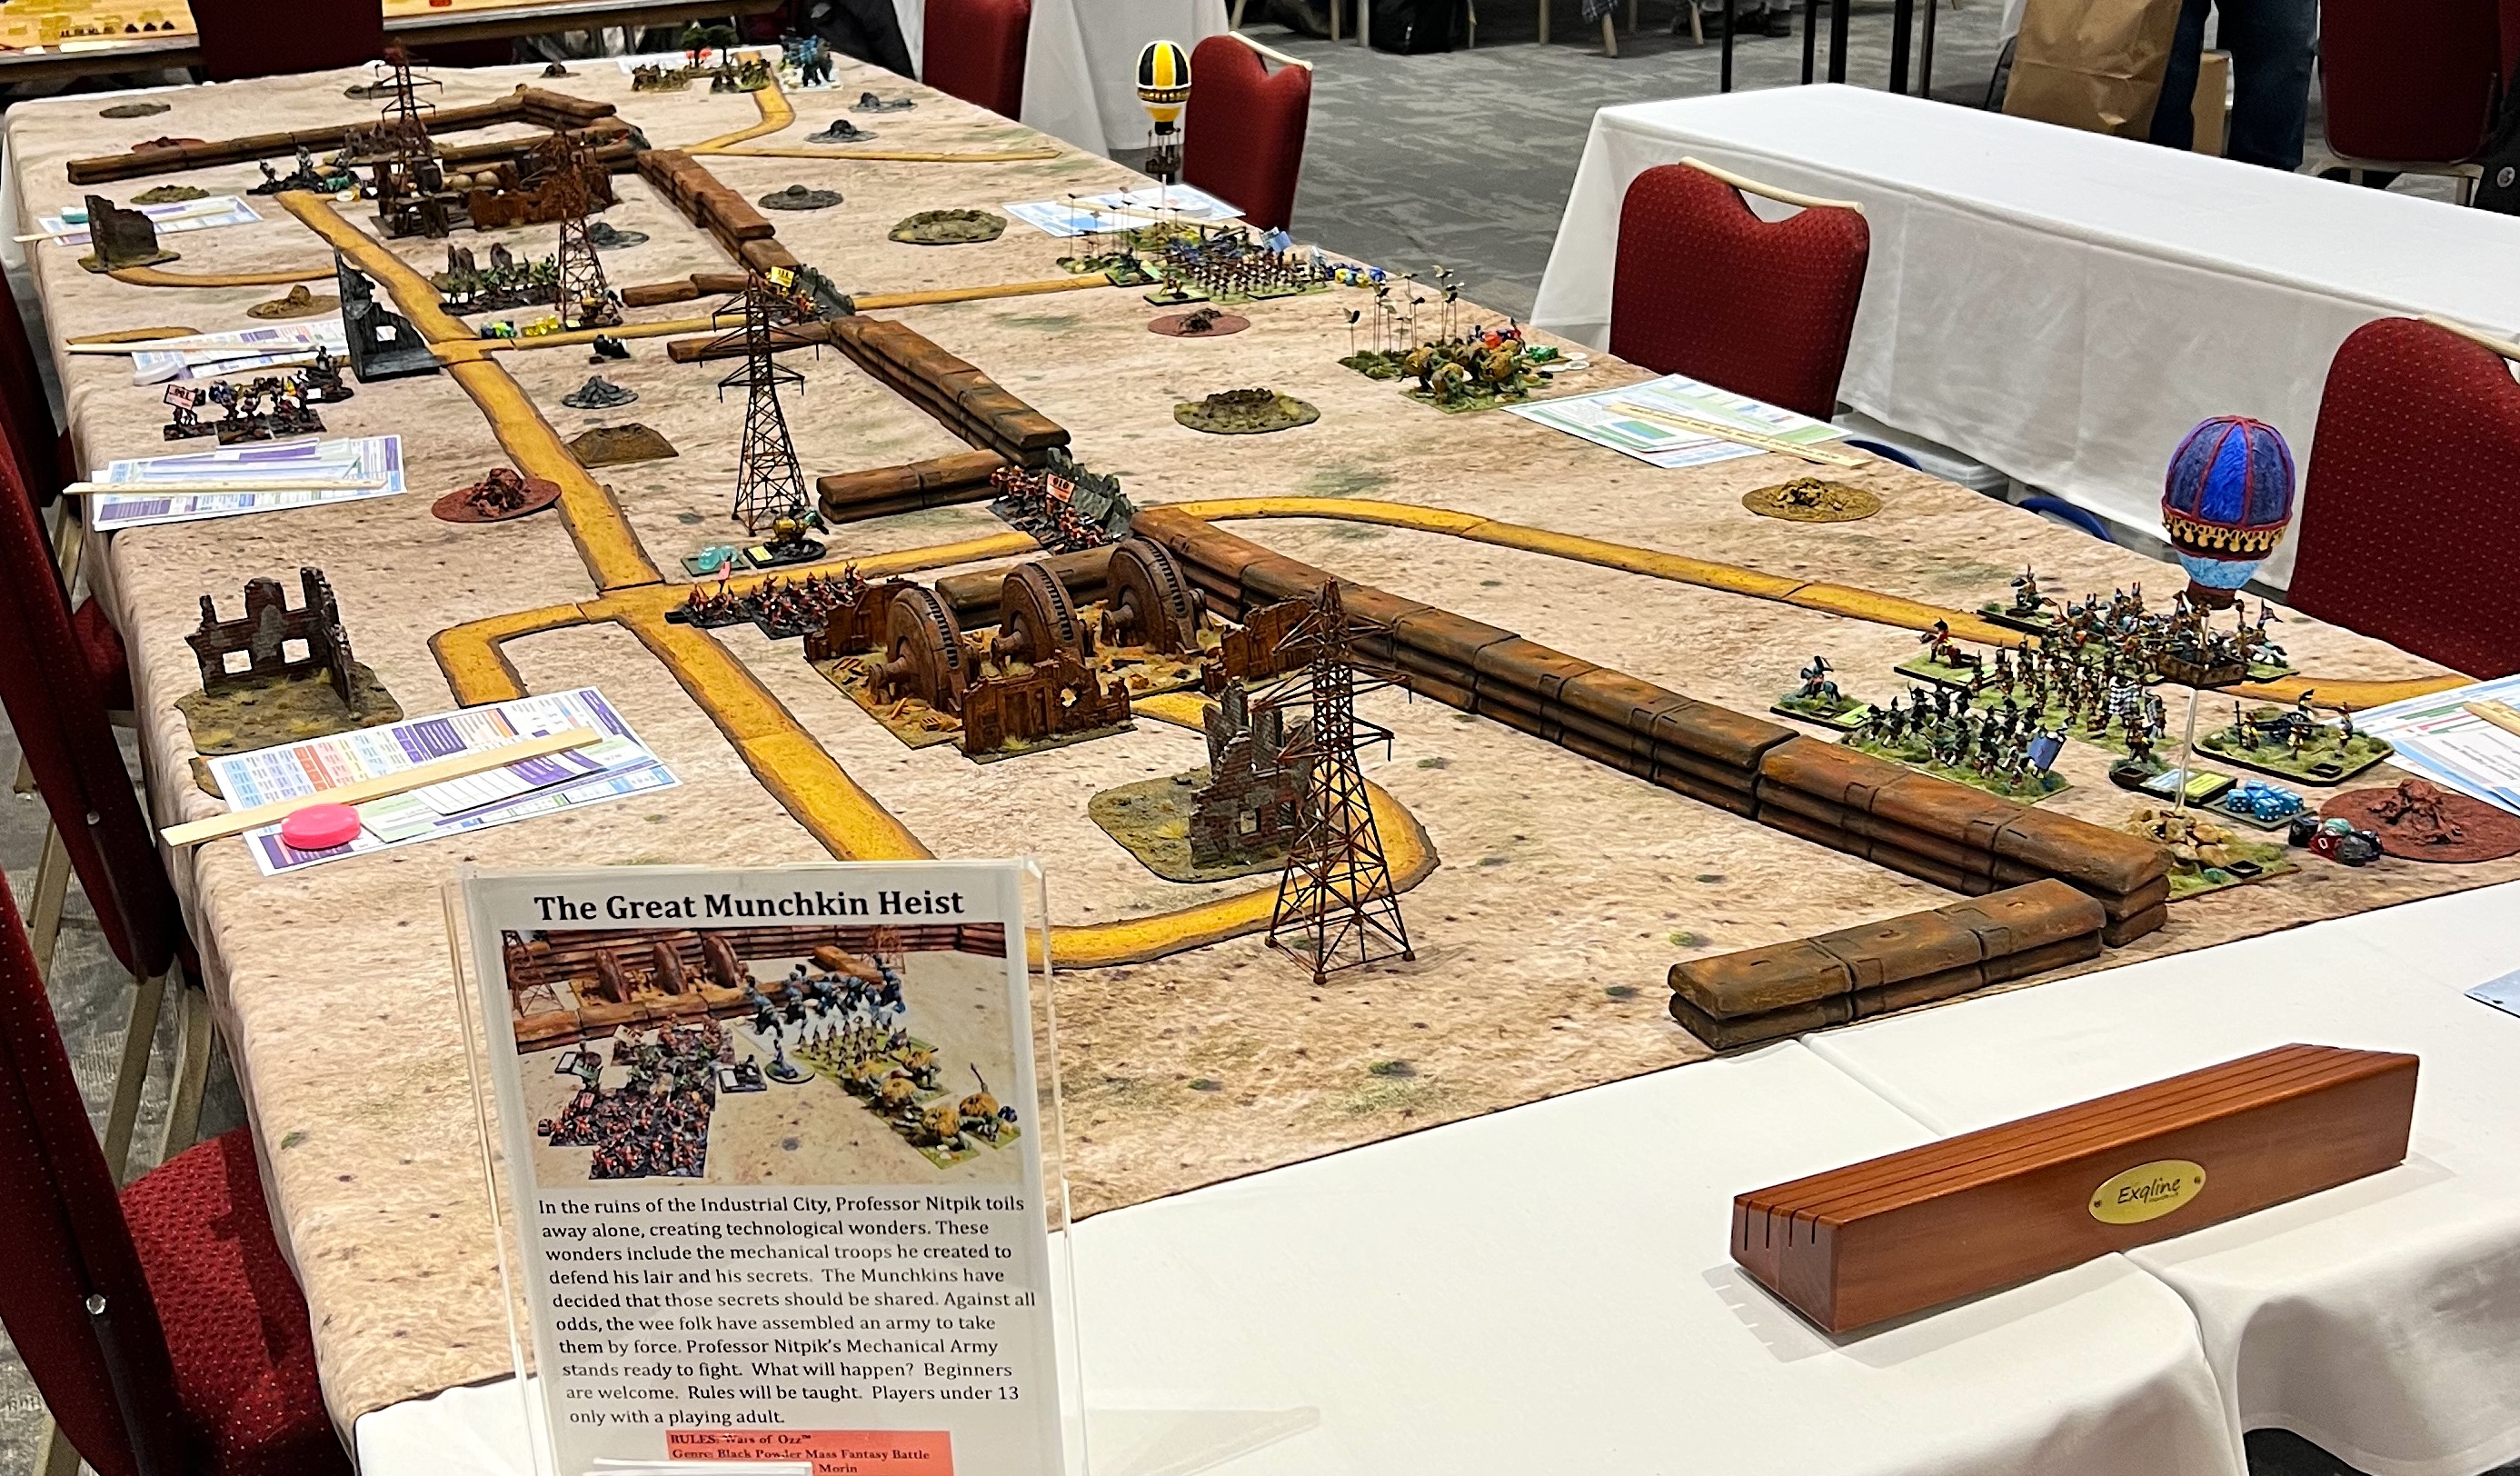
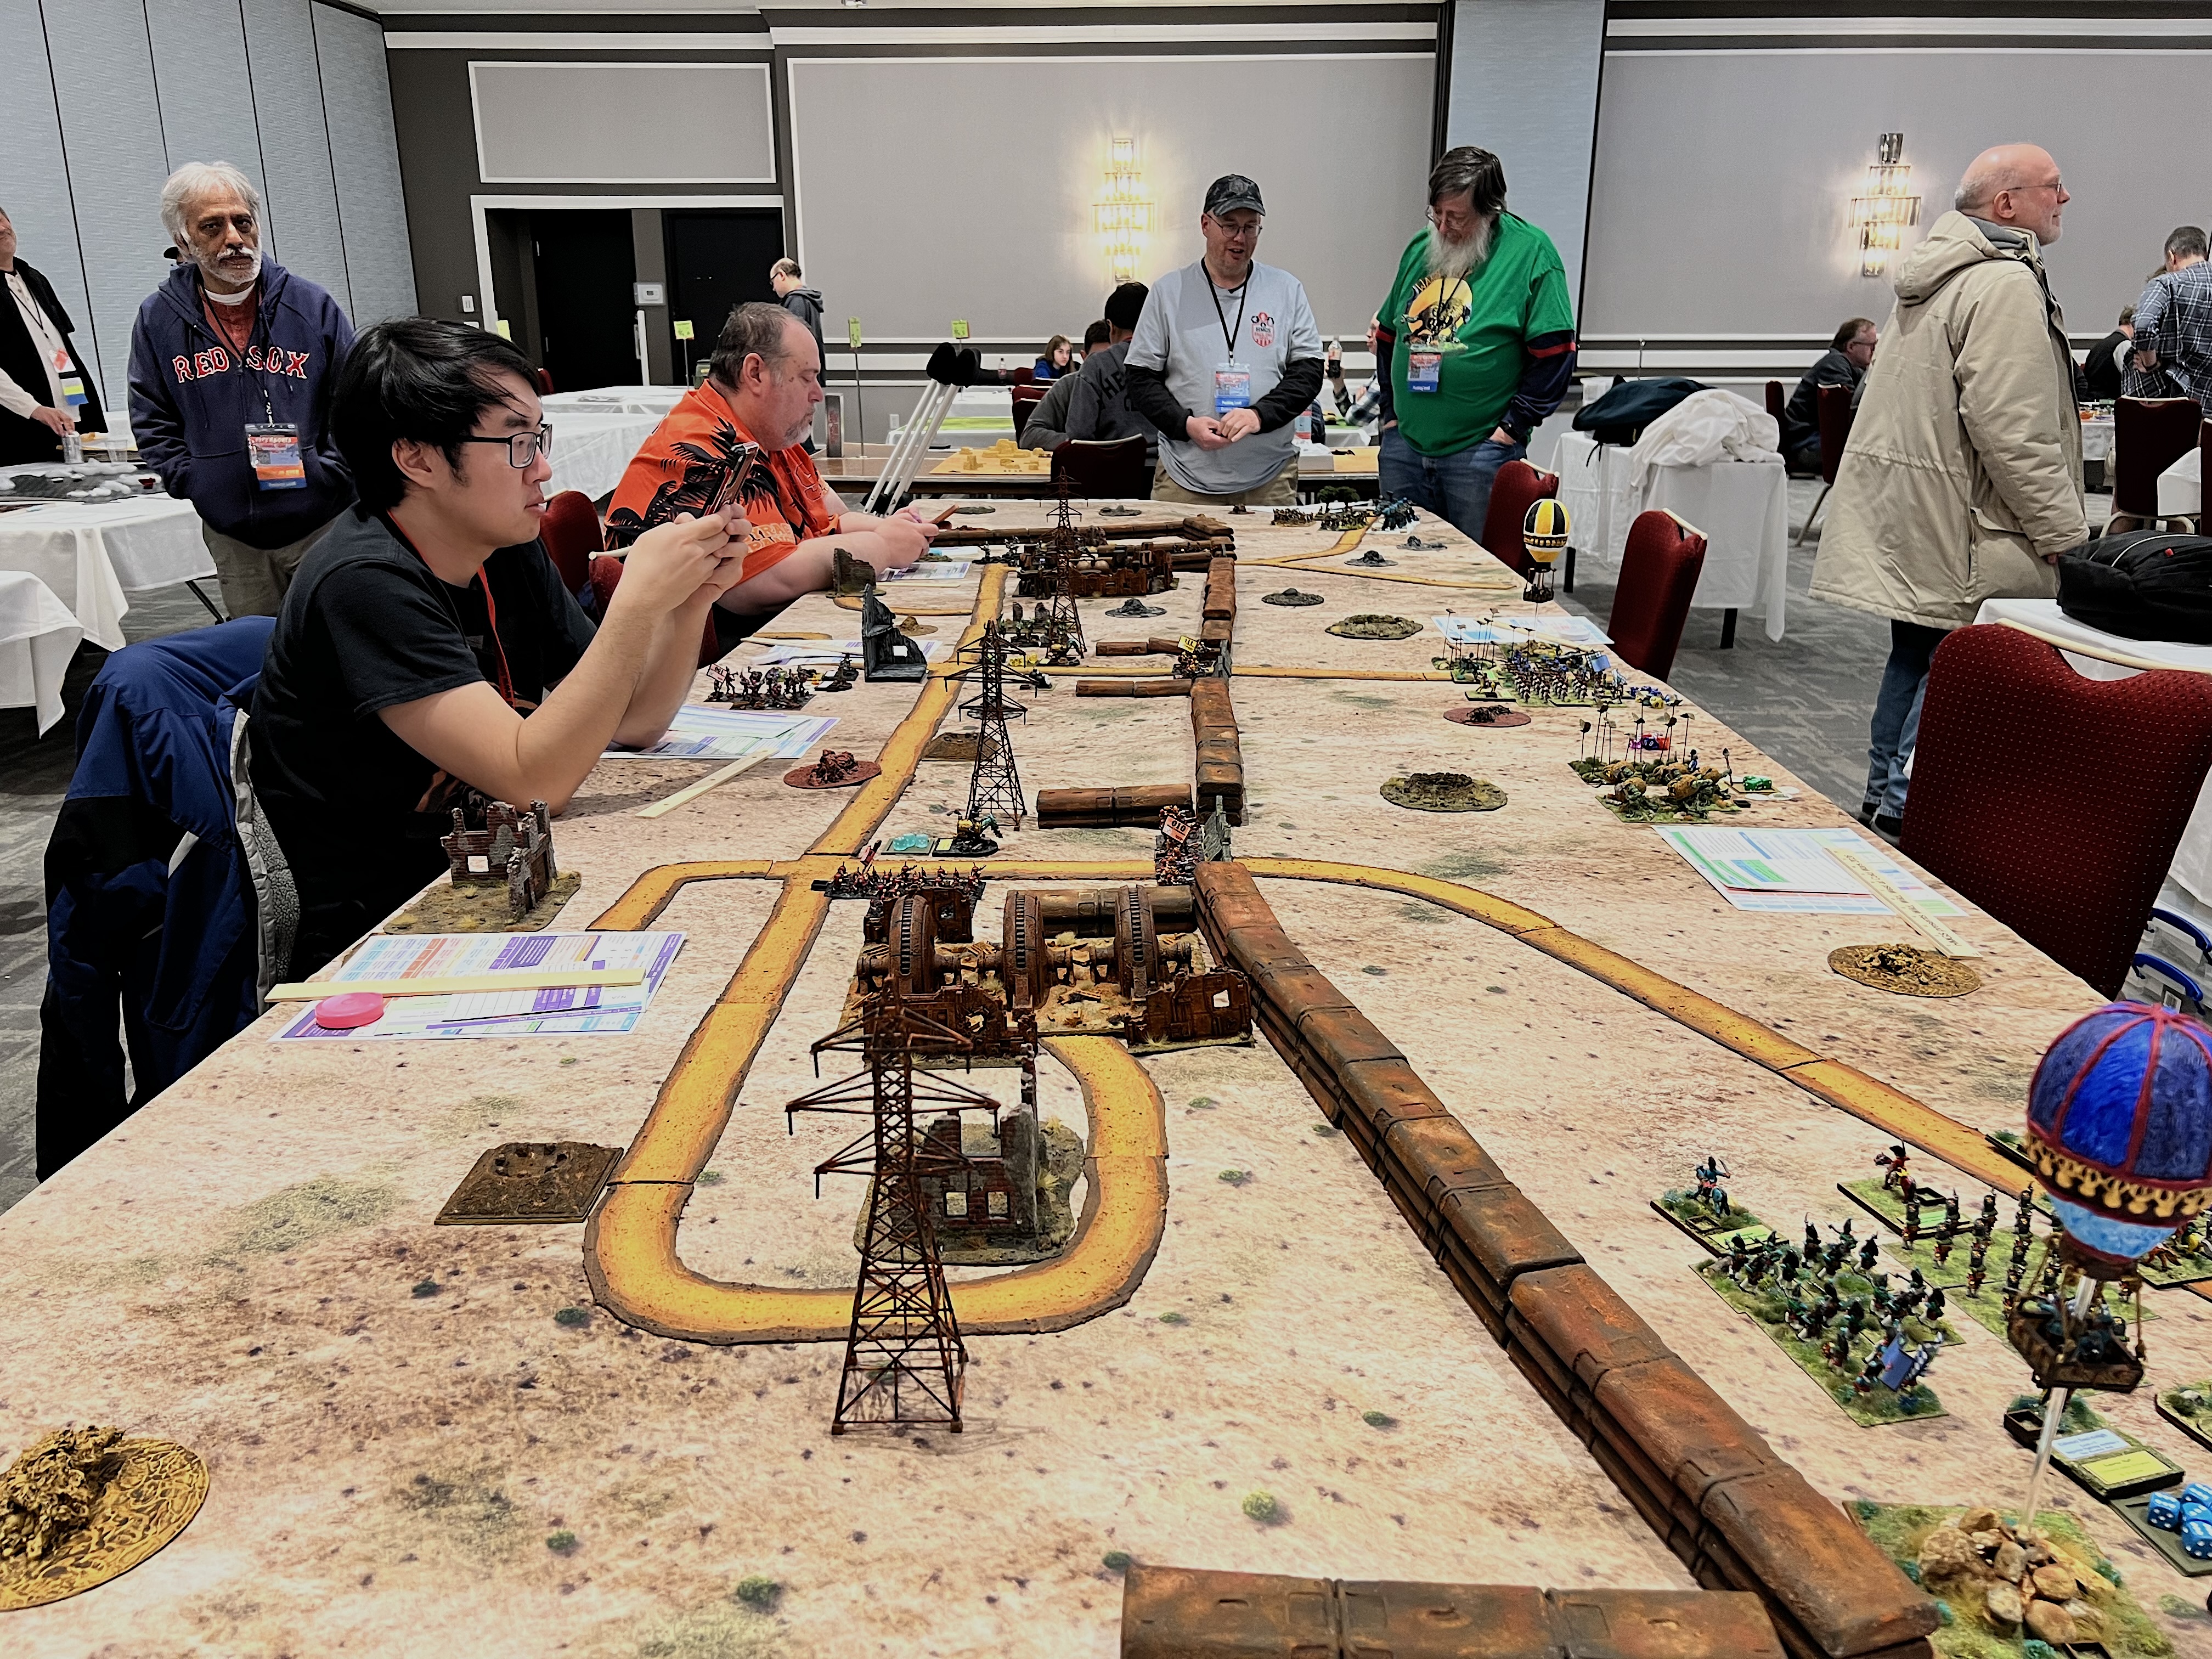
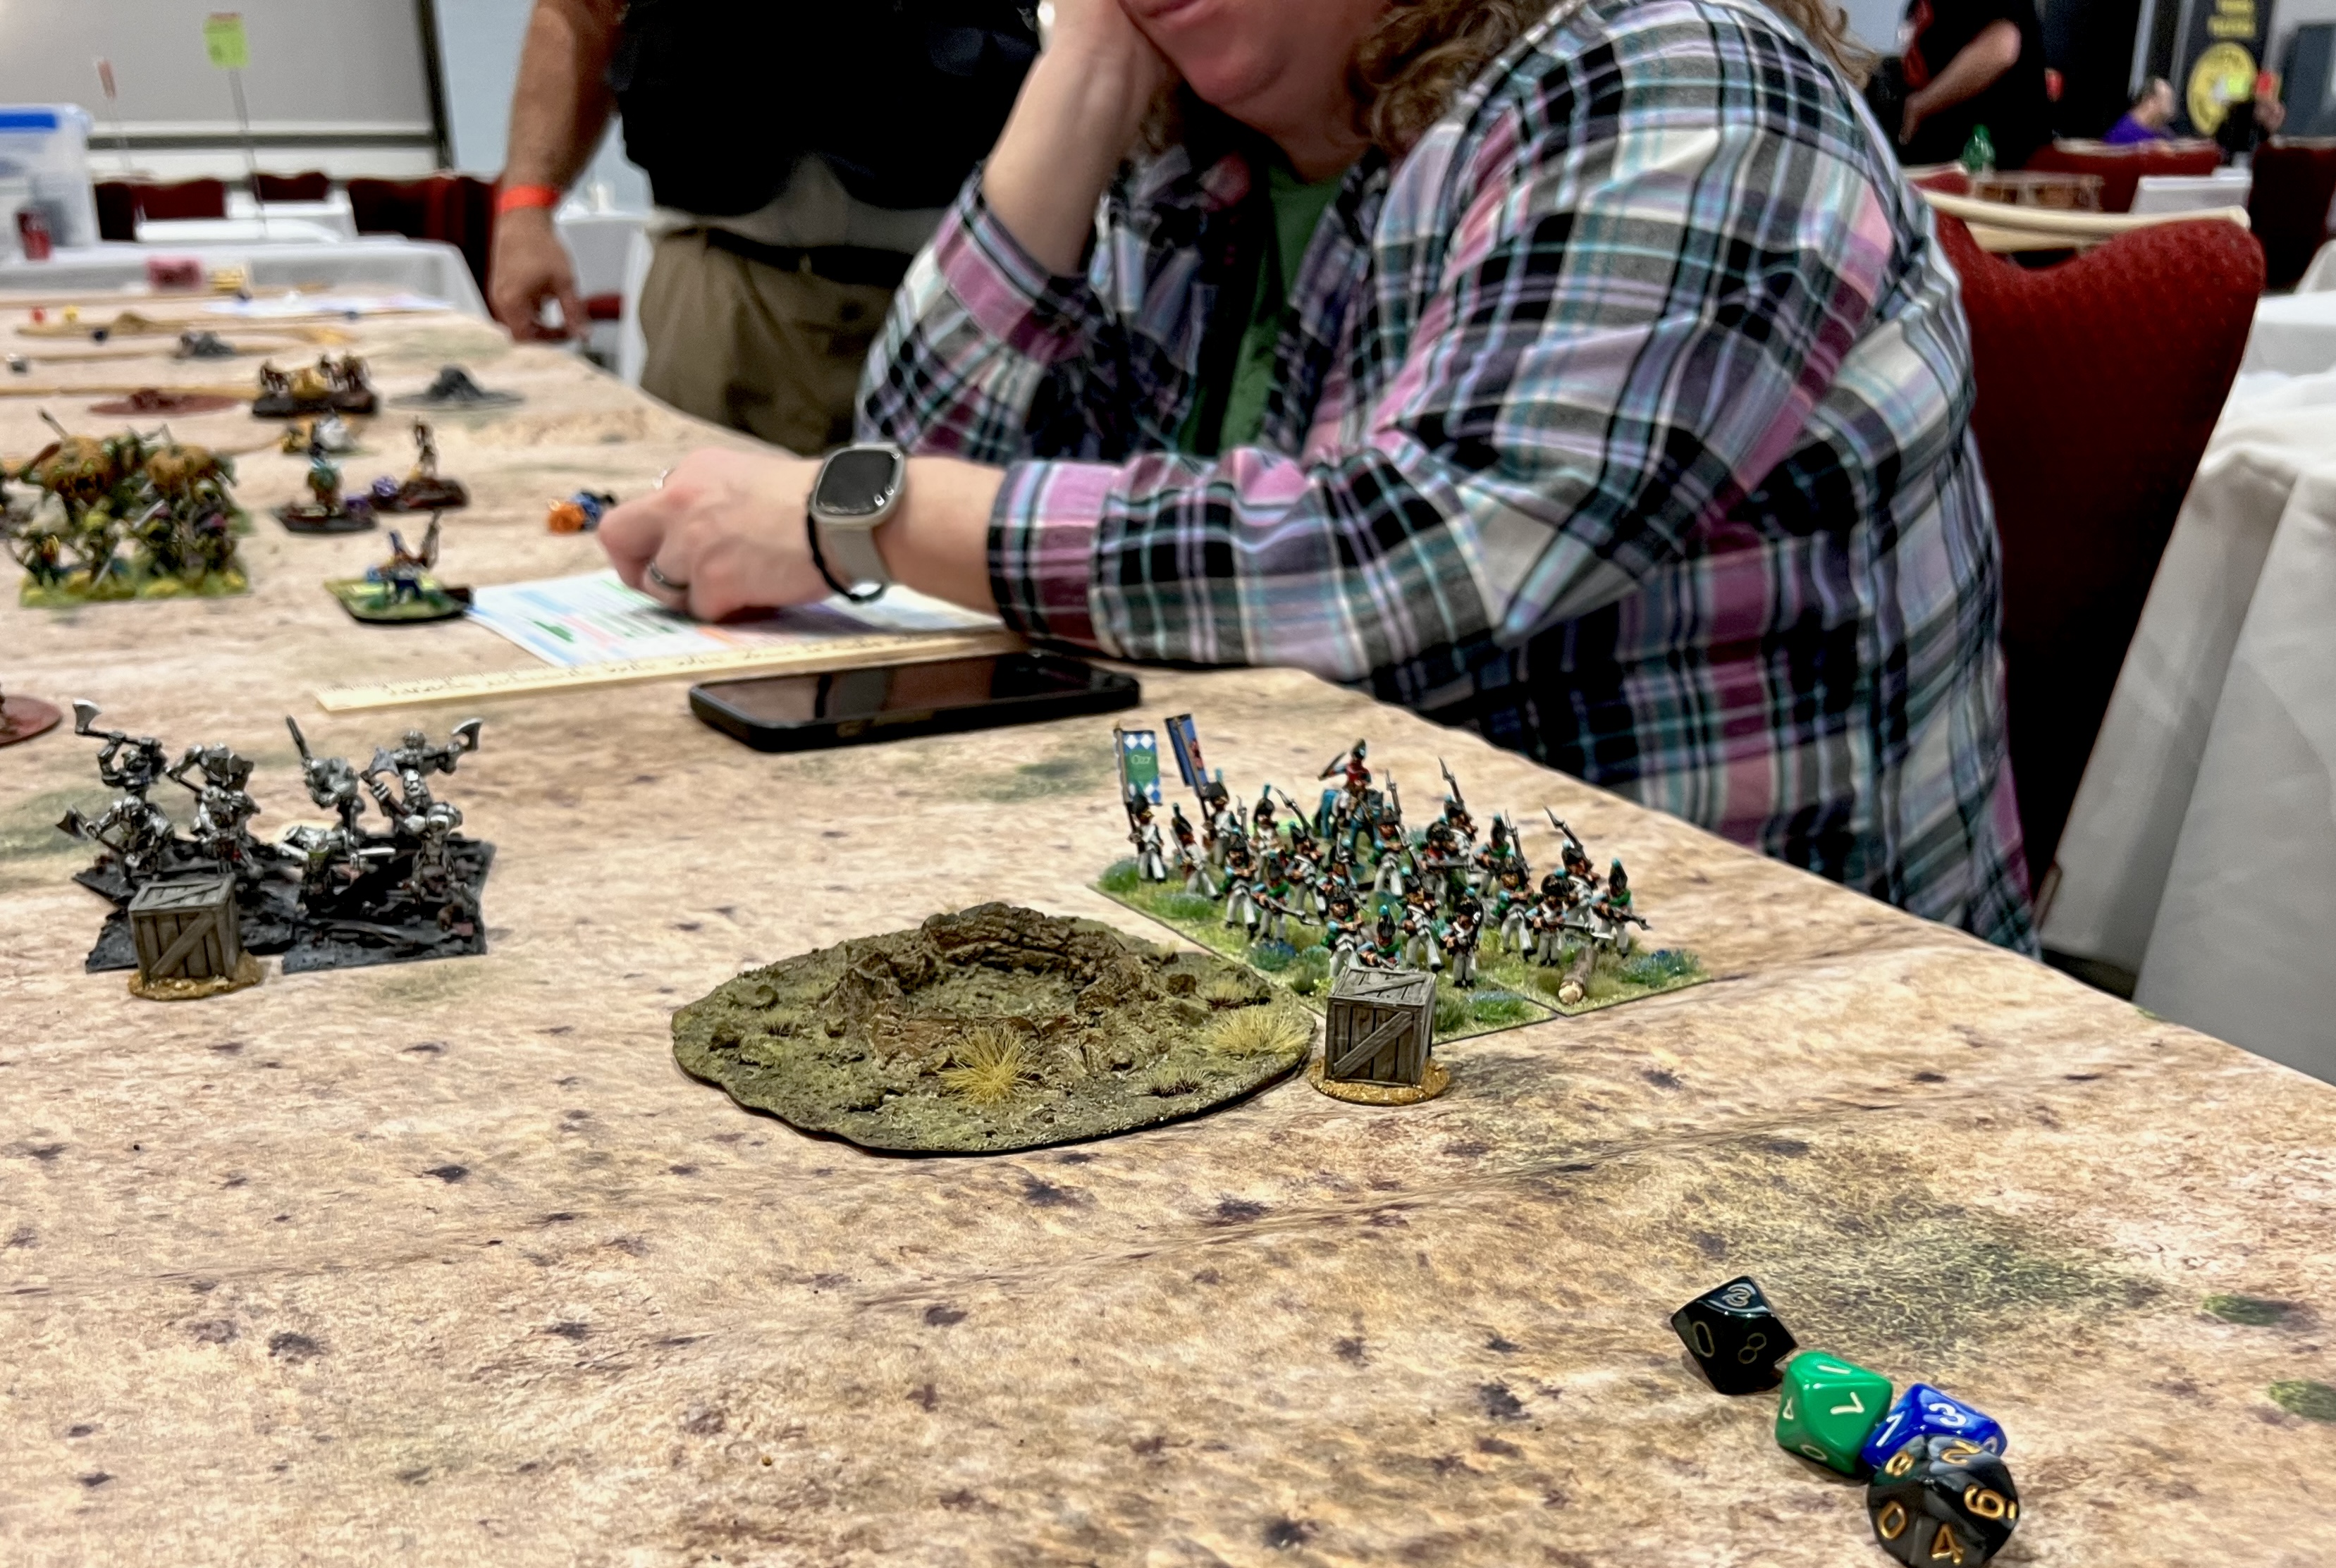
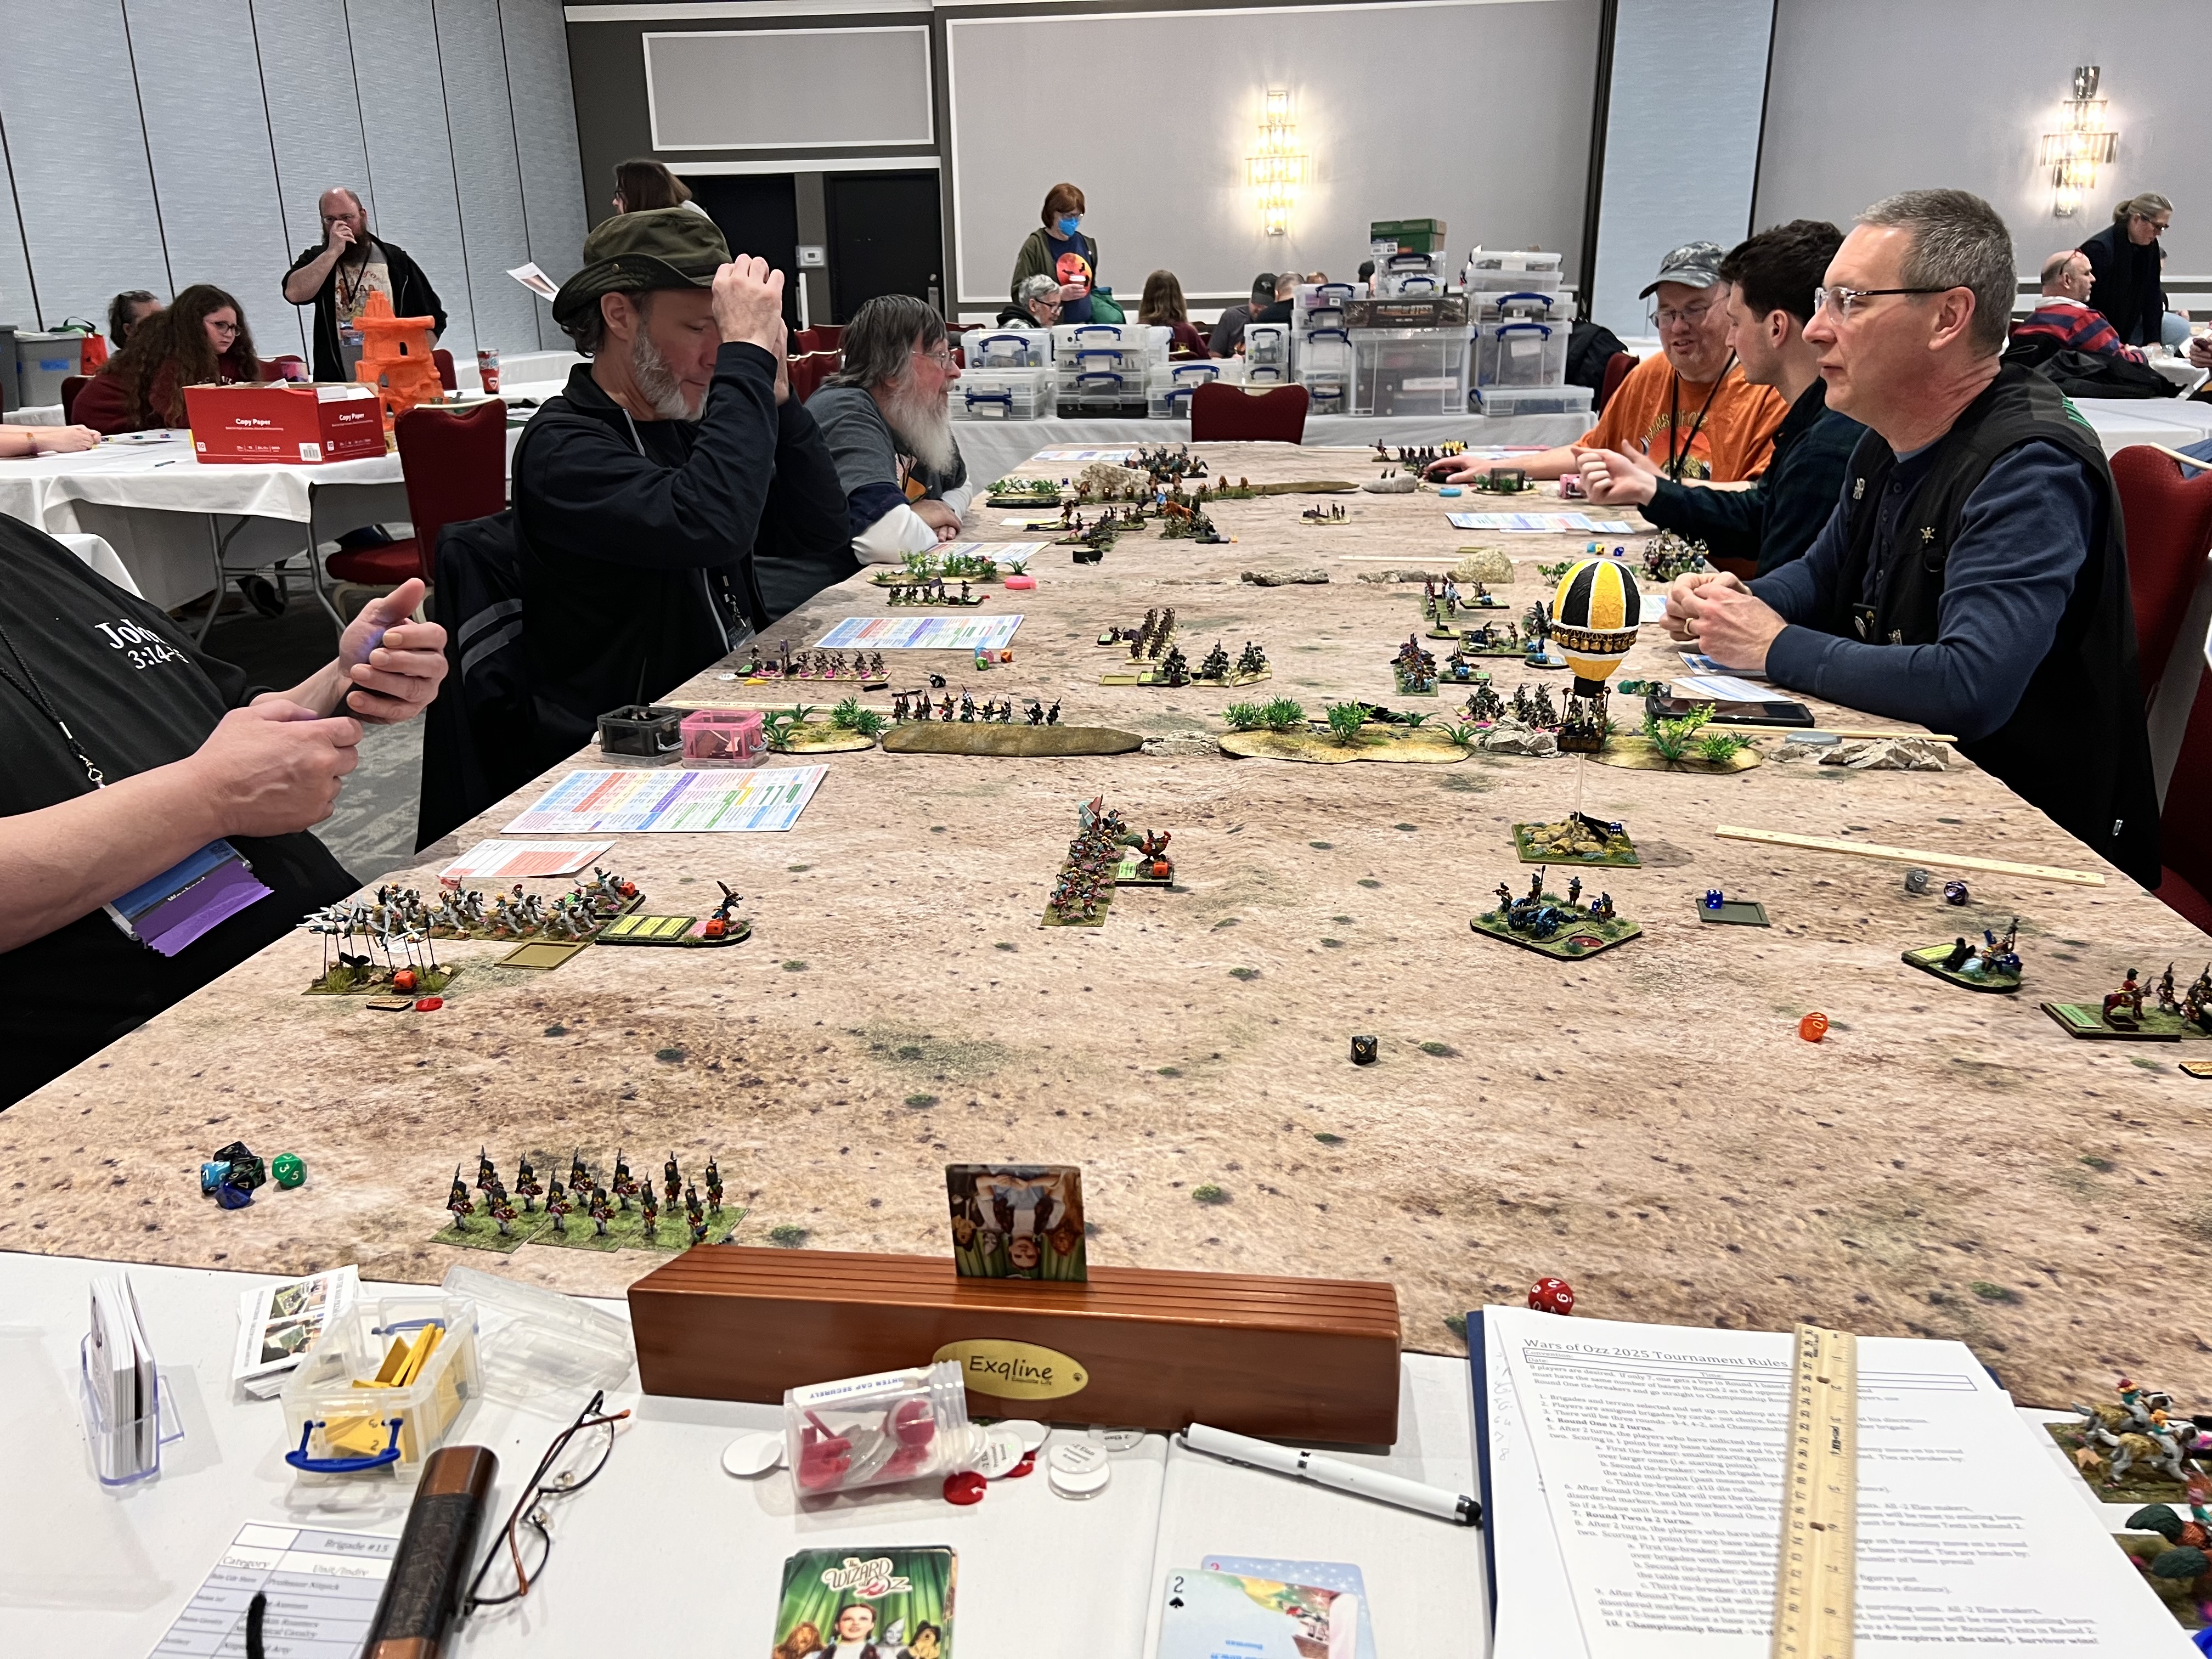
I decided not to run a Friday morning game this year. Last year, resetting the flea market room took too much time. It interfered with my morning game setup. Instead, I had plenty of time to move everything into the “big room” and set up on the “big table”. My first game was a Wars of Ozz game. It was titled “The Great Munchkin Heist”. I had also run it at Cold Wars. This time I had an even bigger table than I had there!
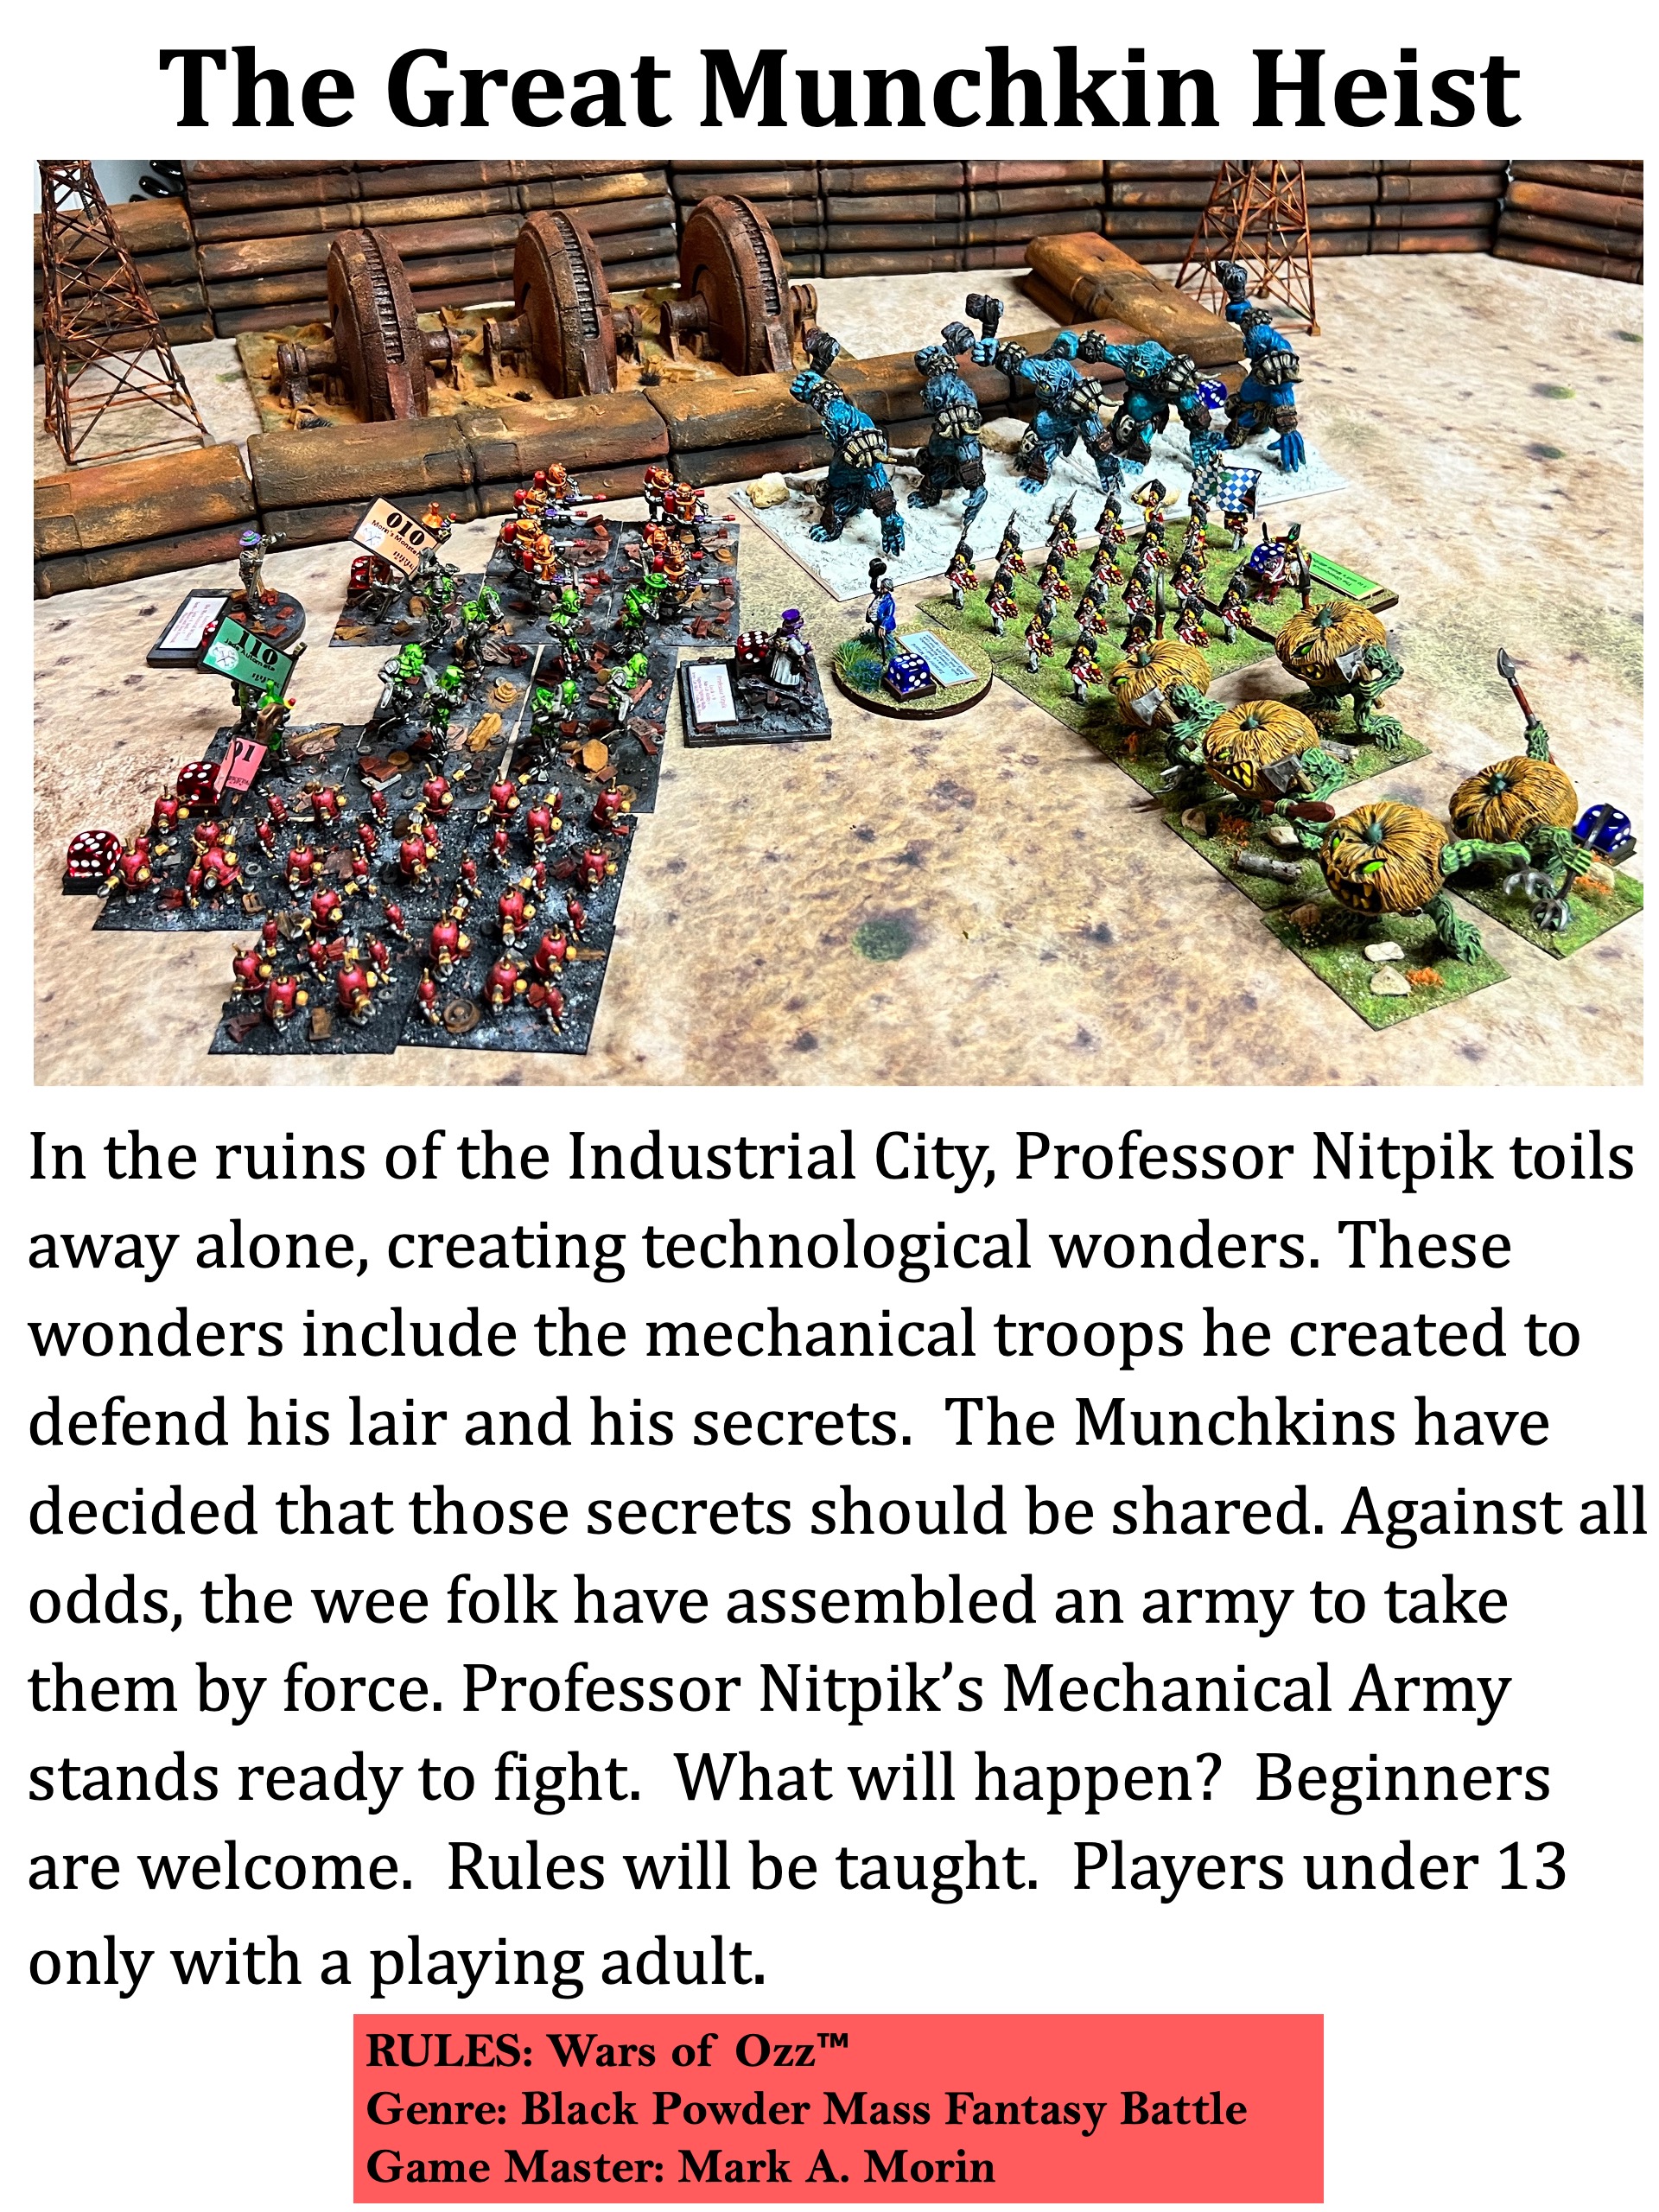
The Great Munchkin Heist
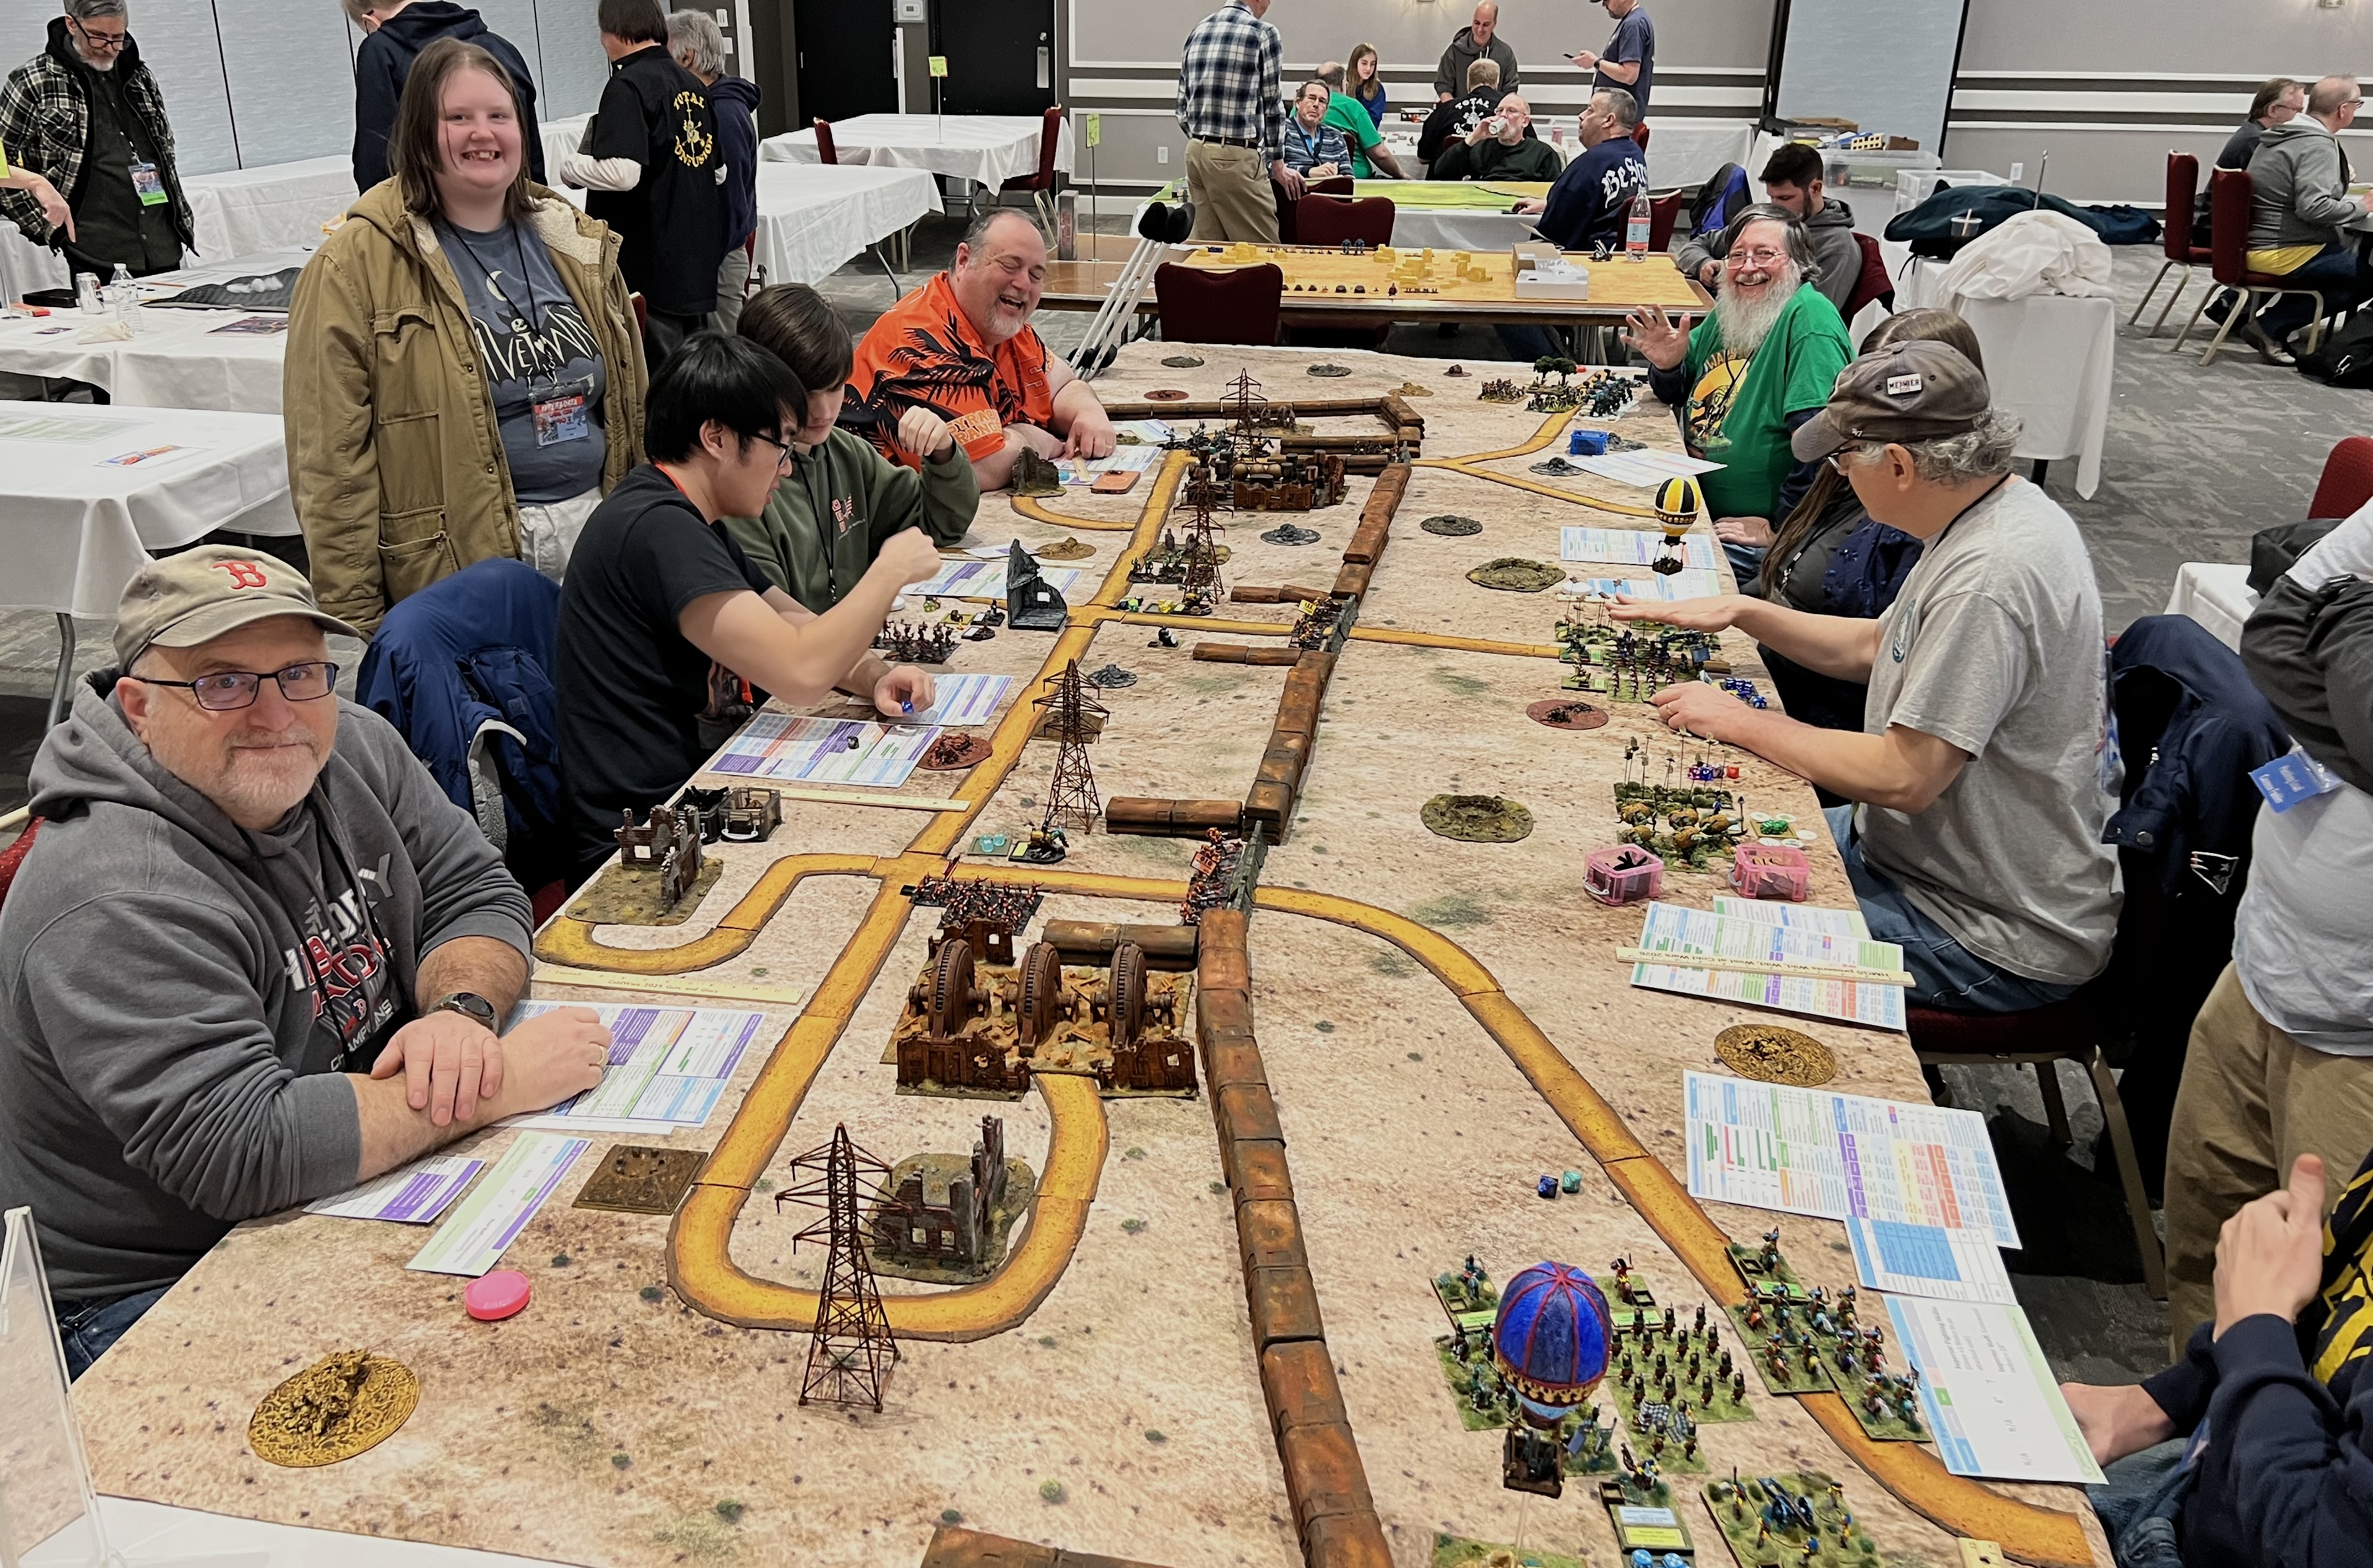
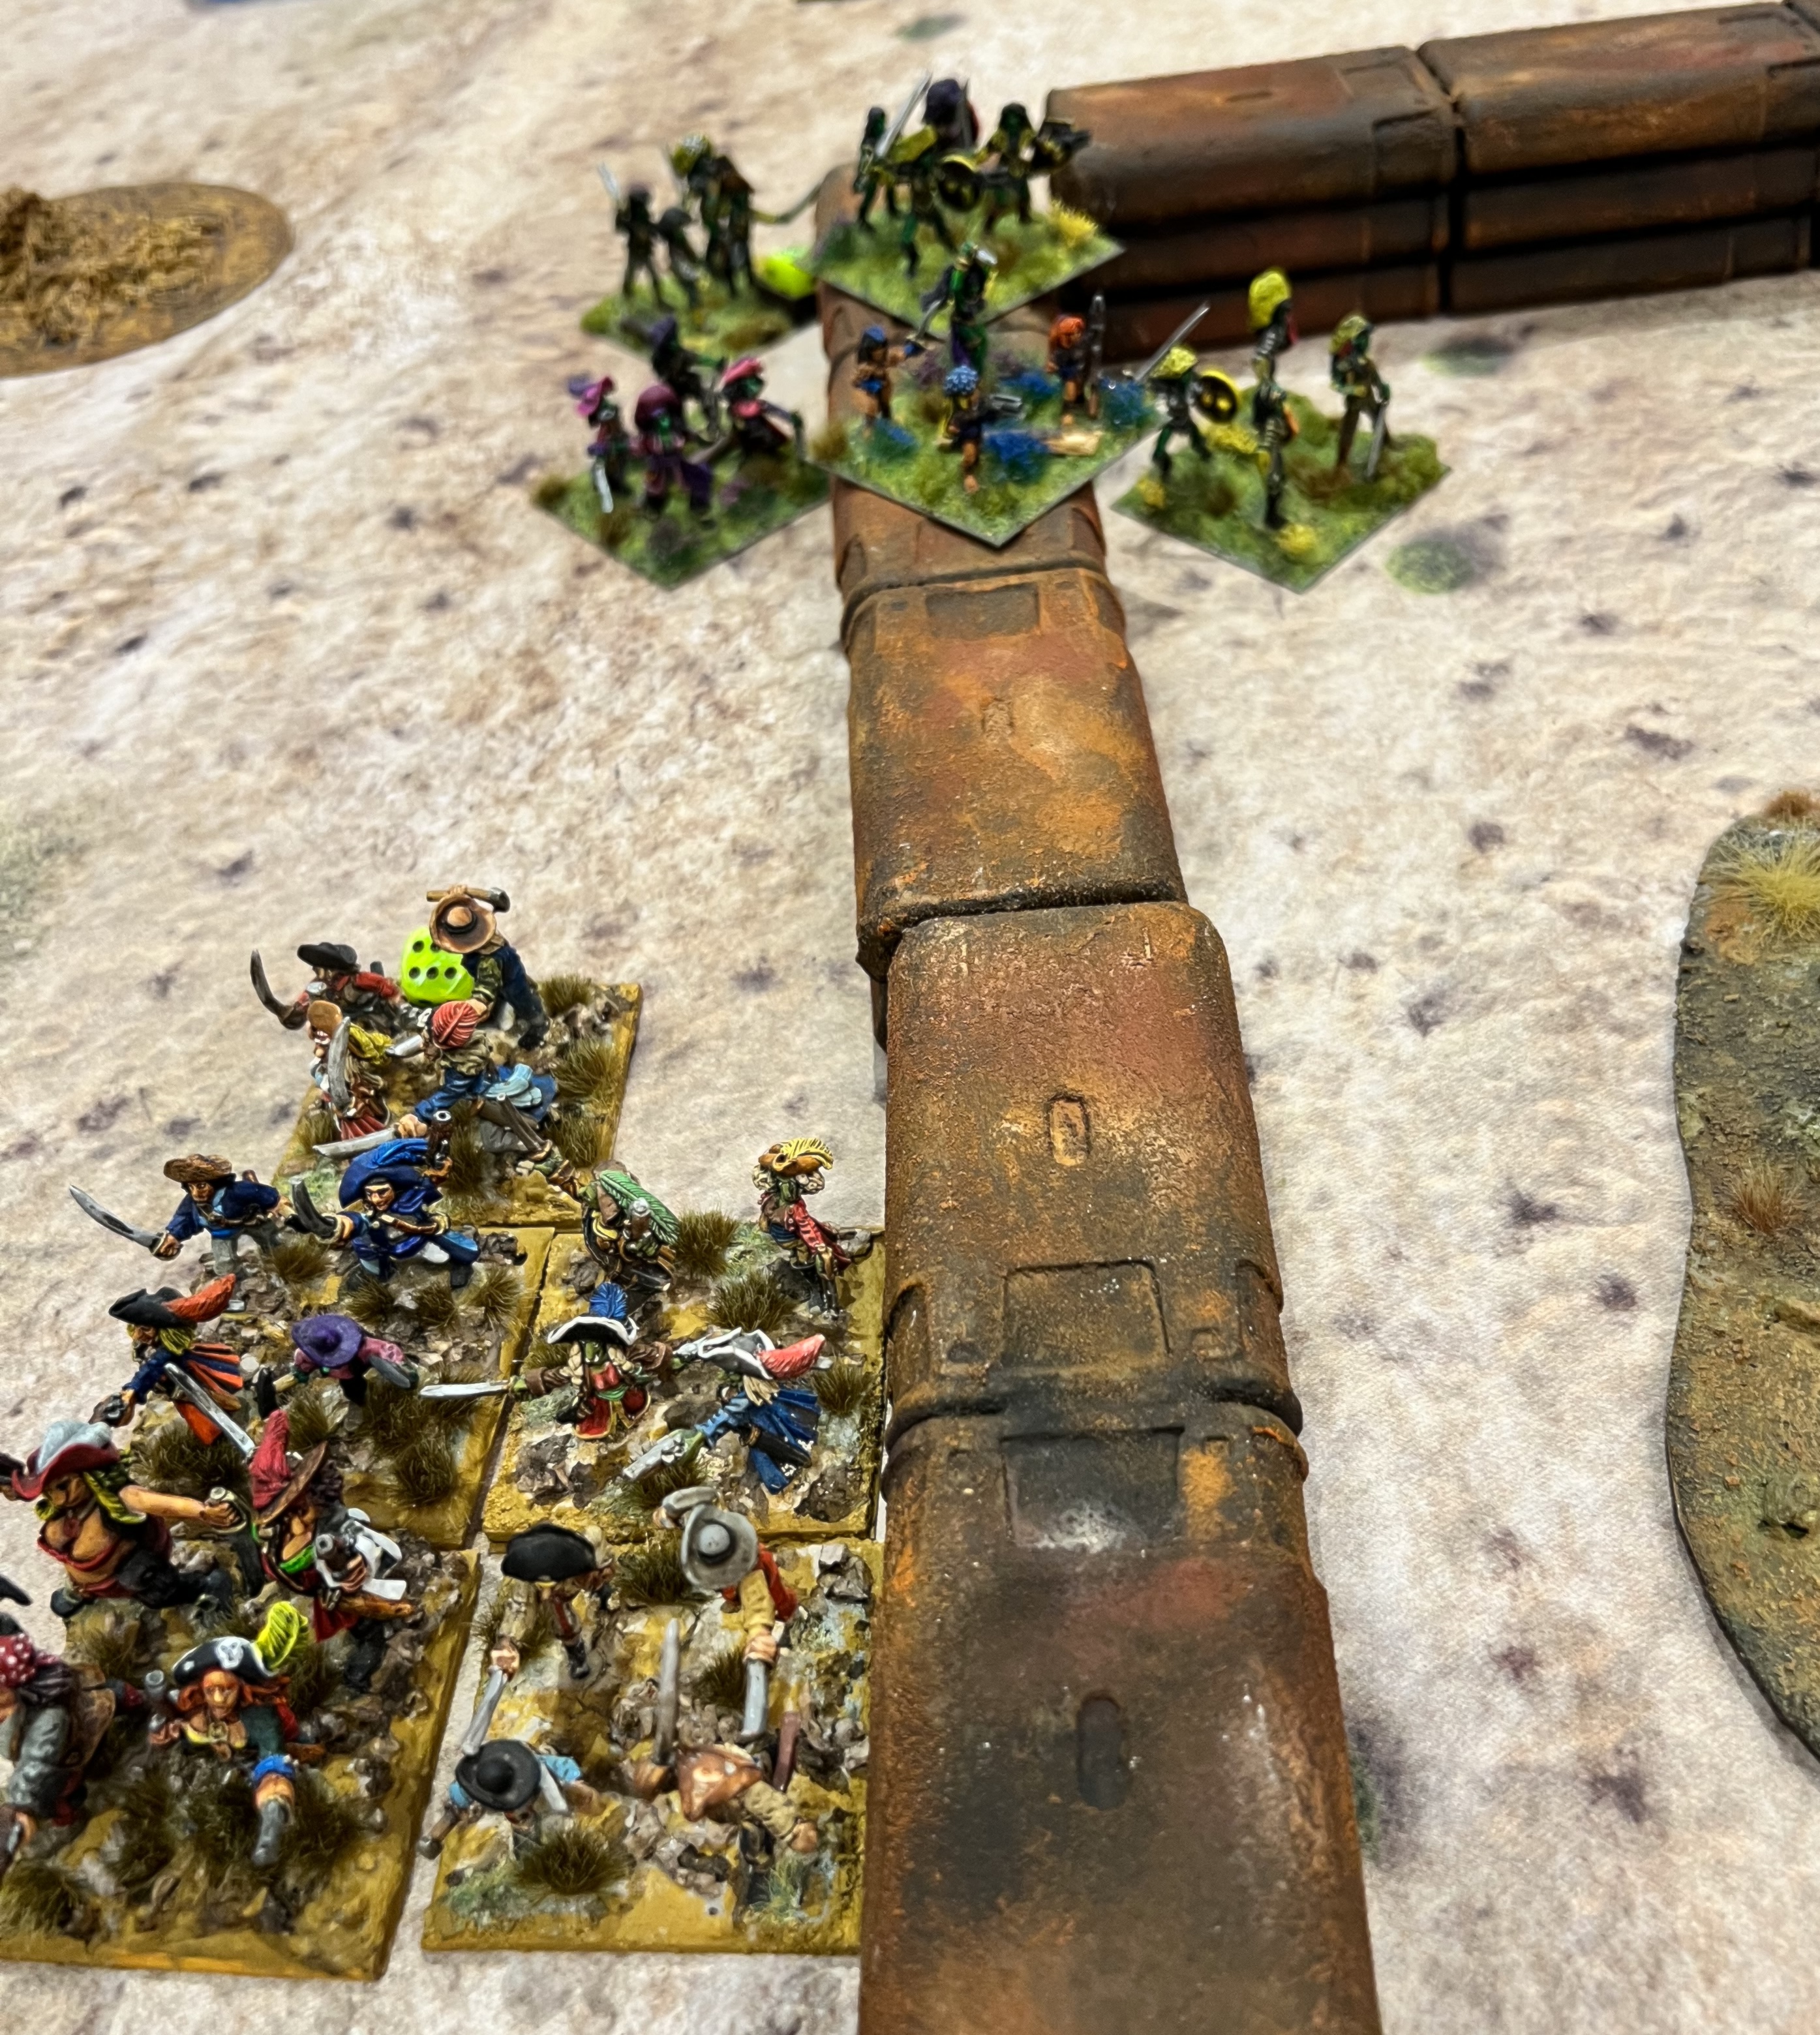
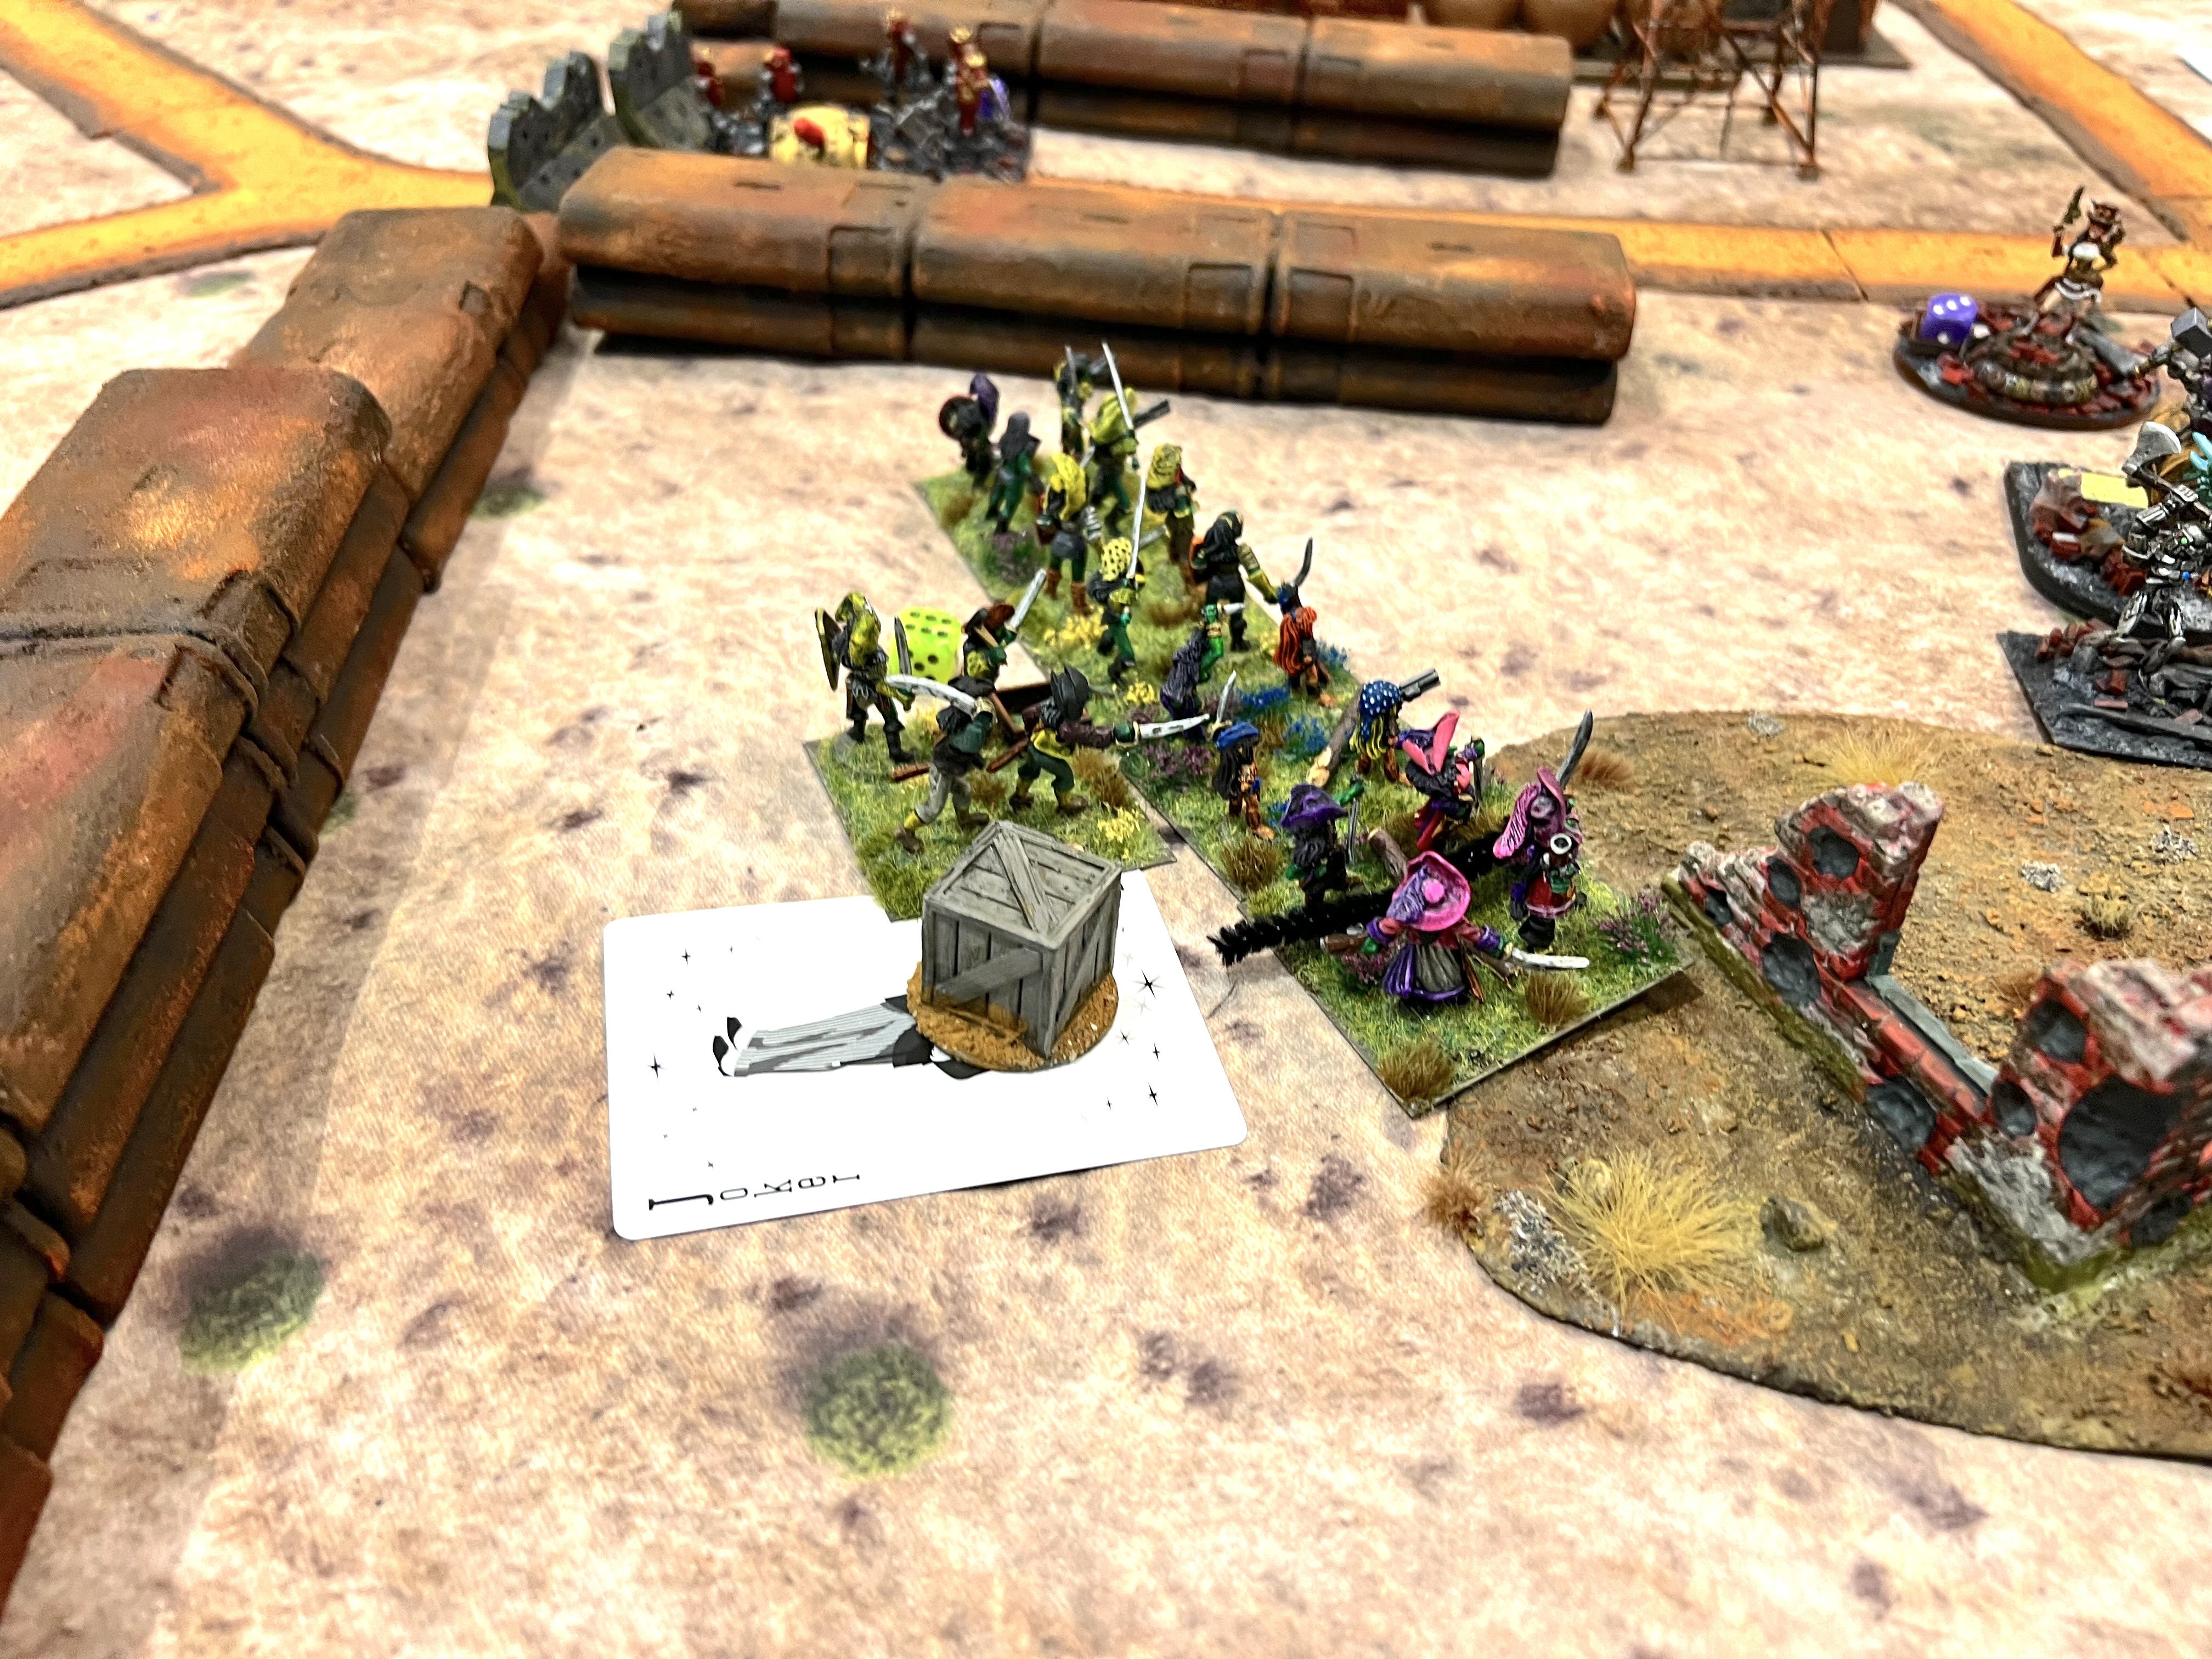
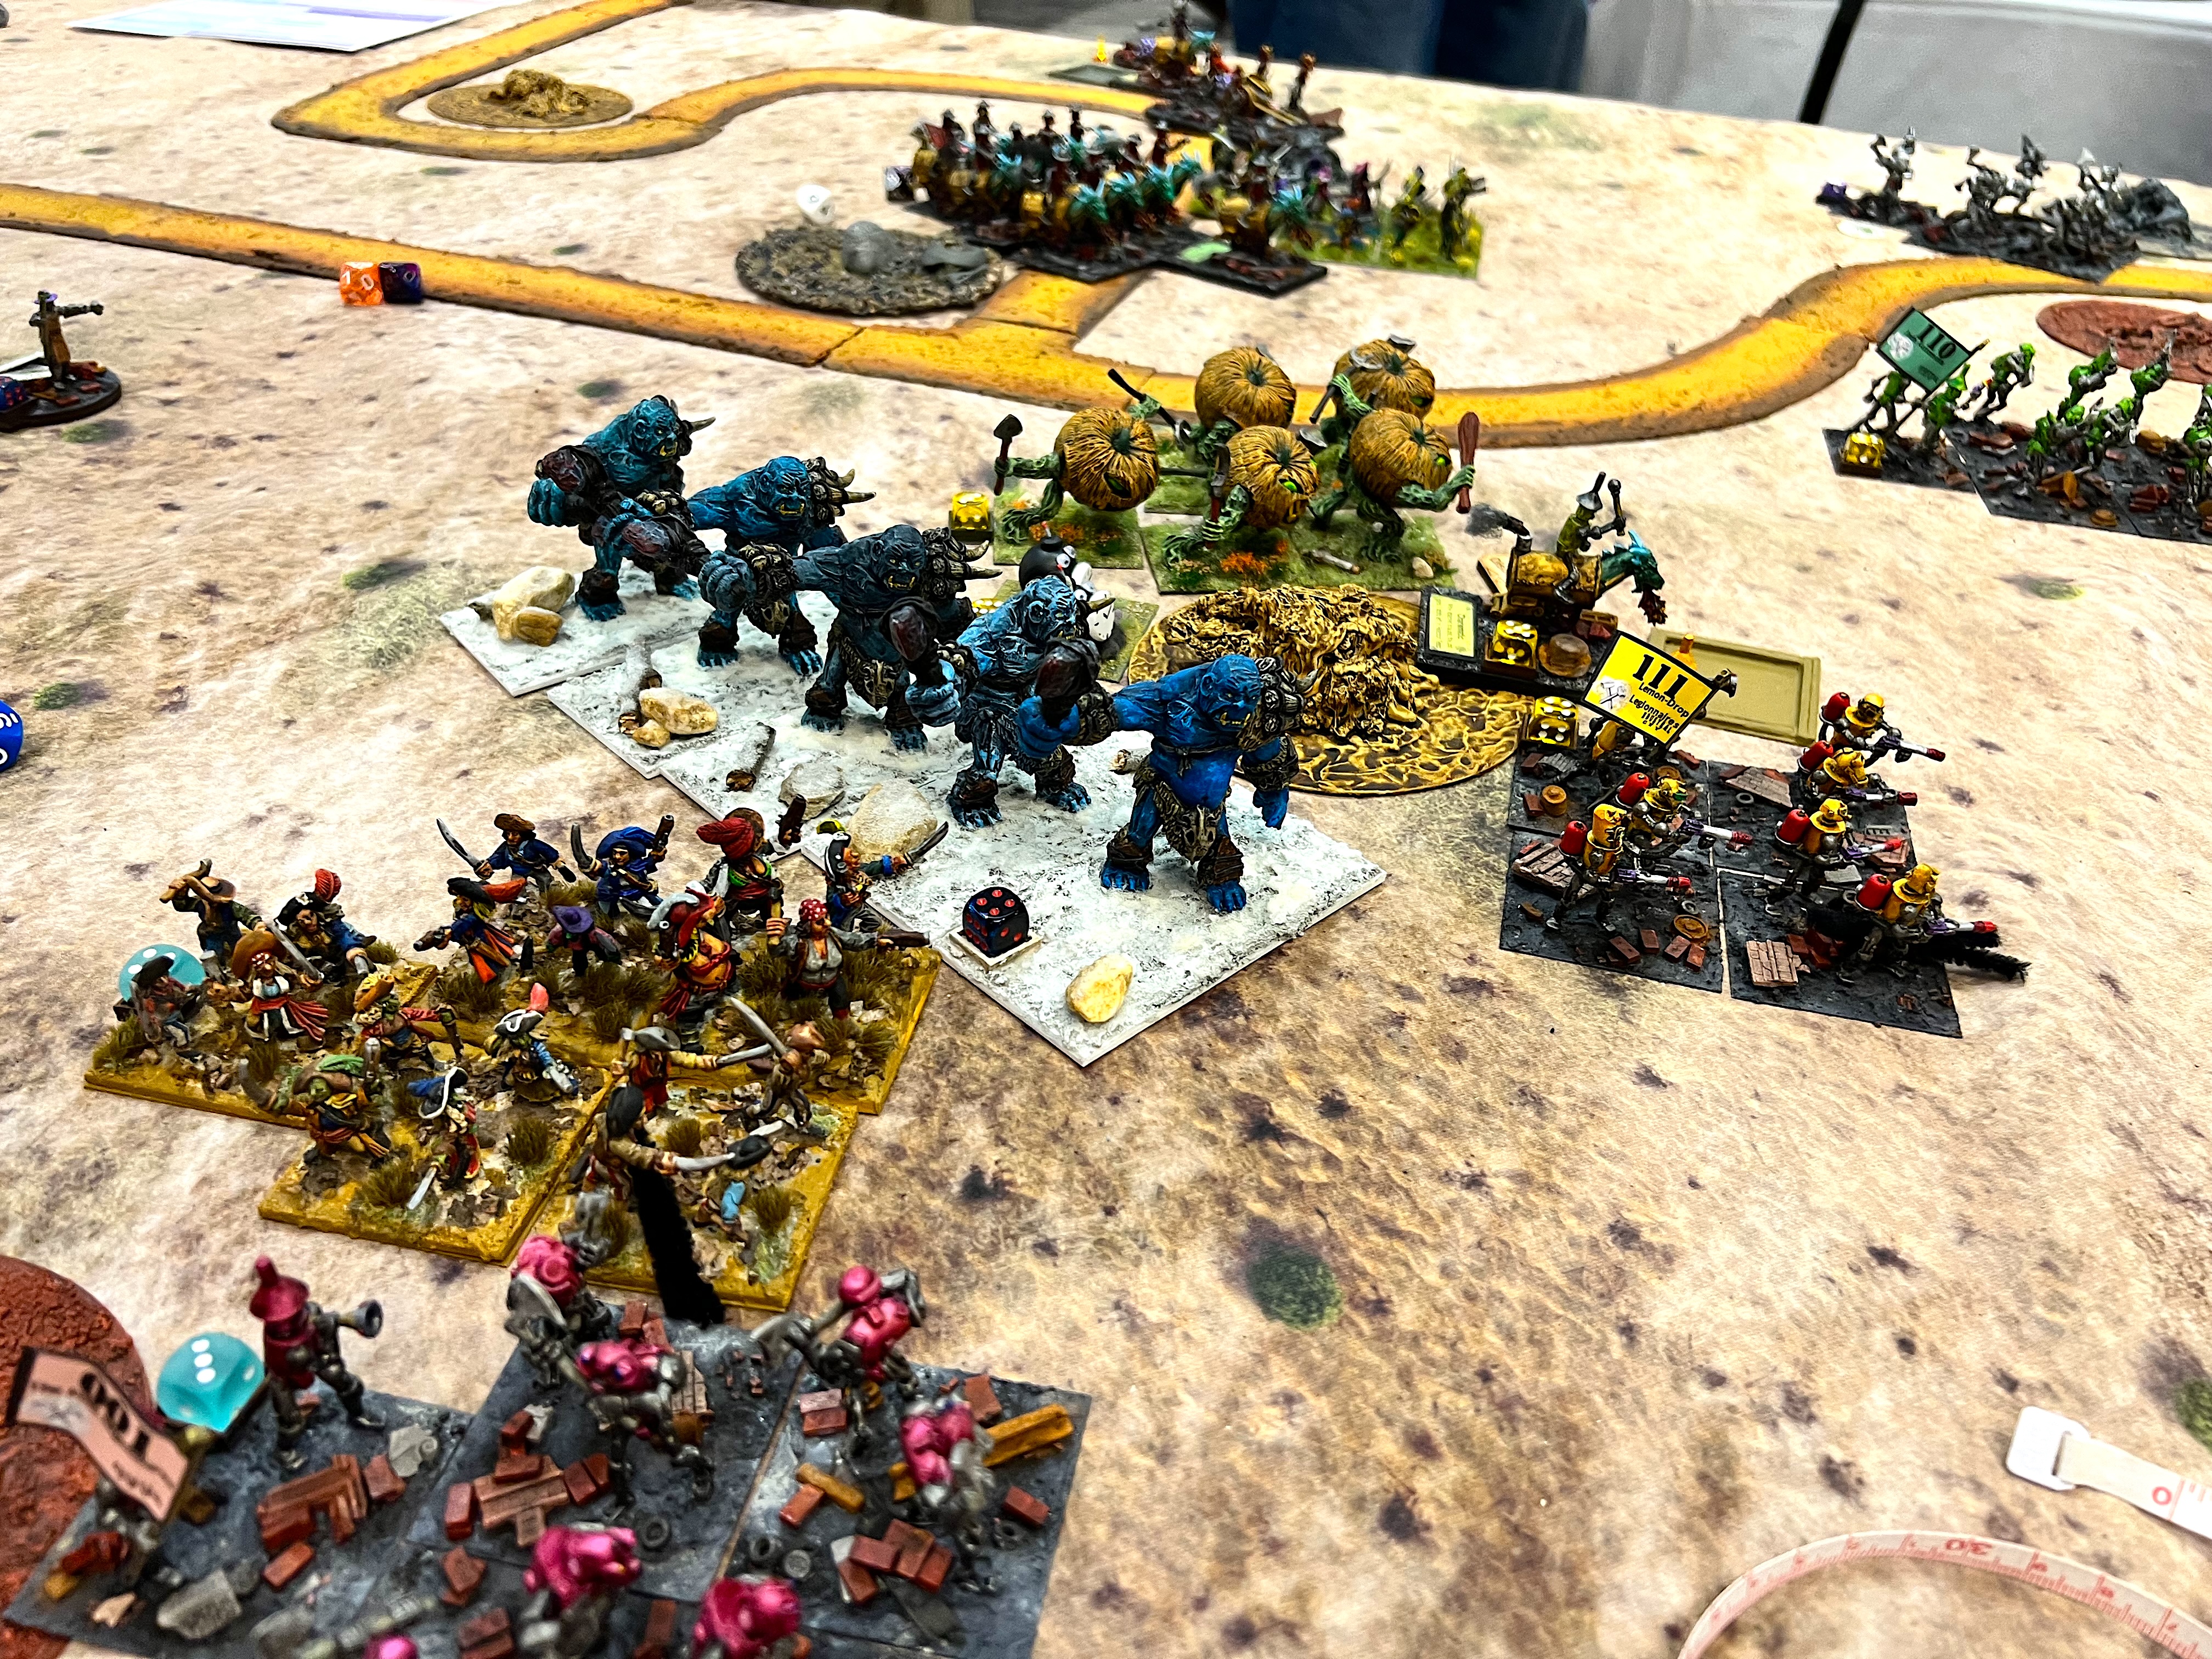
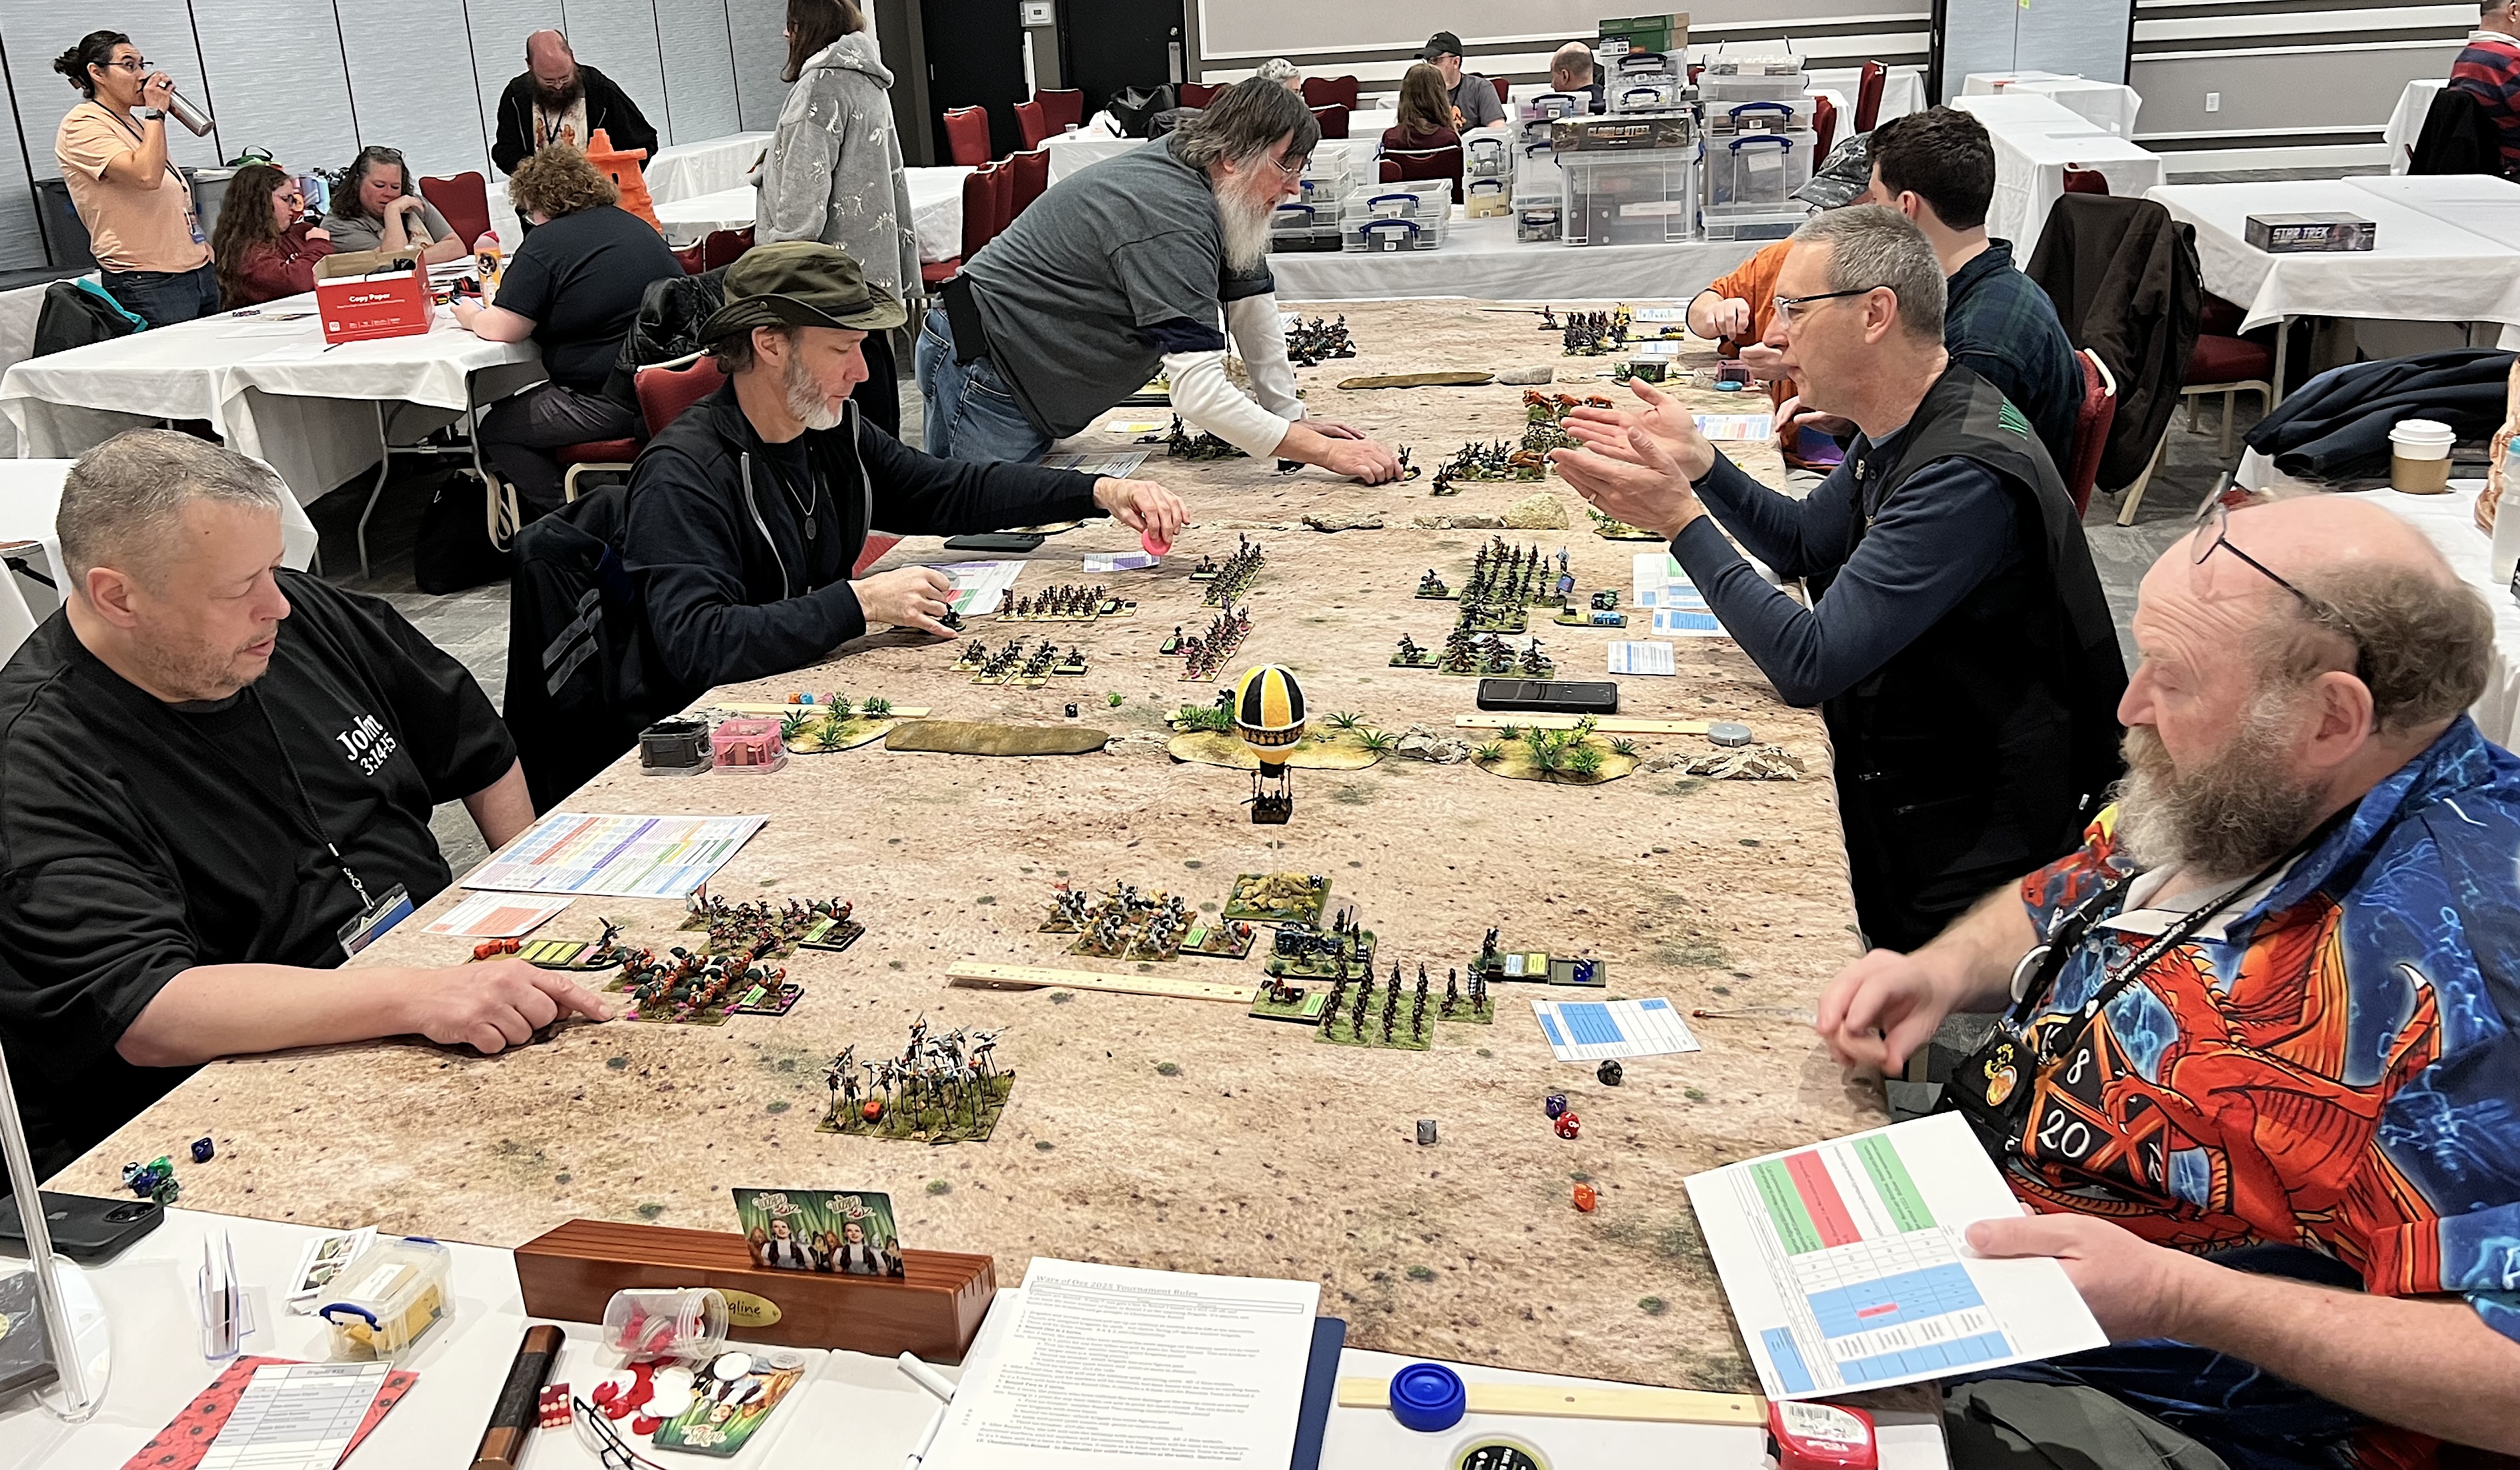
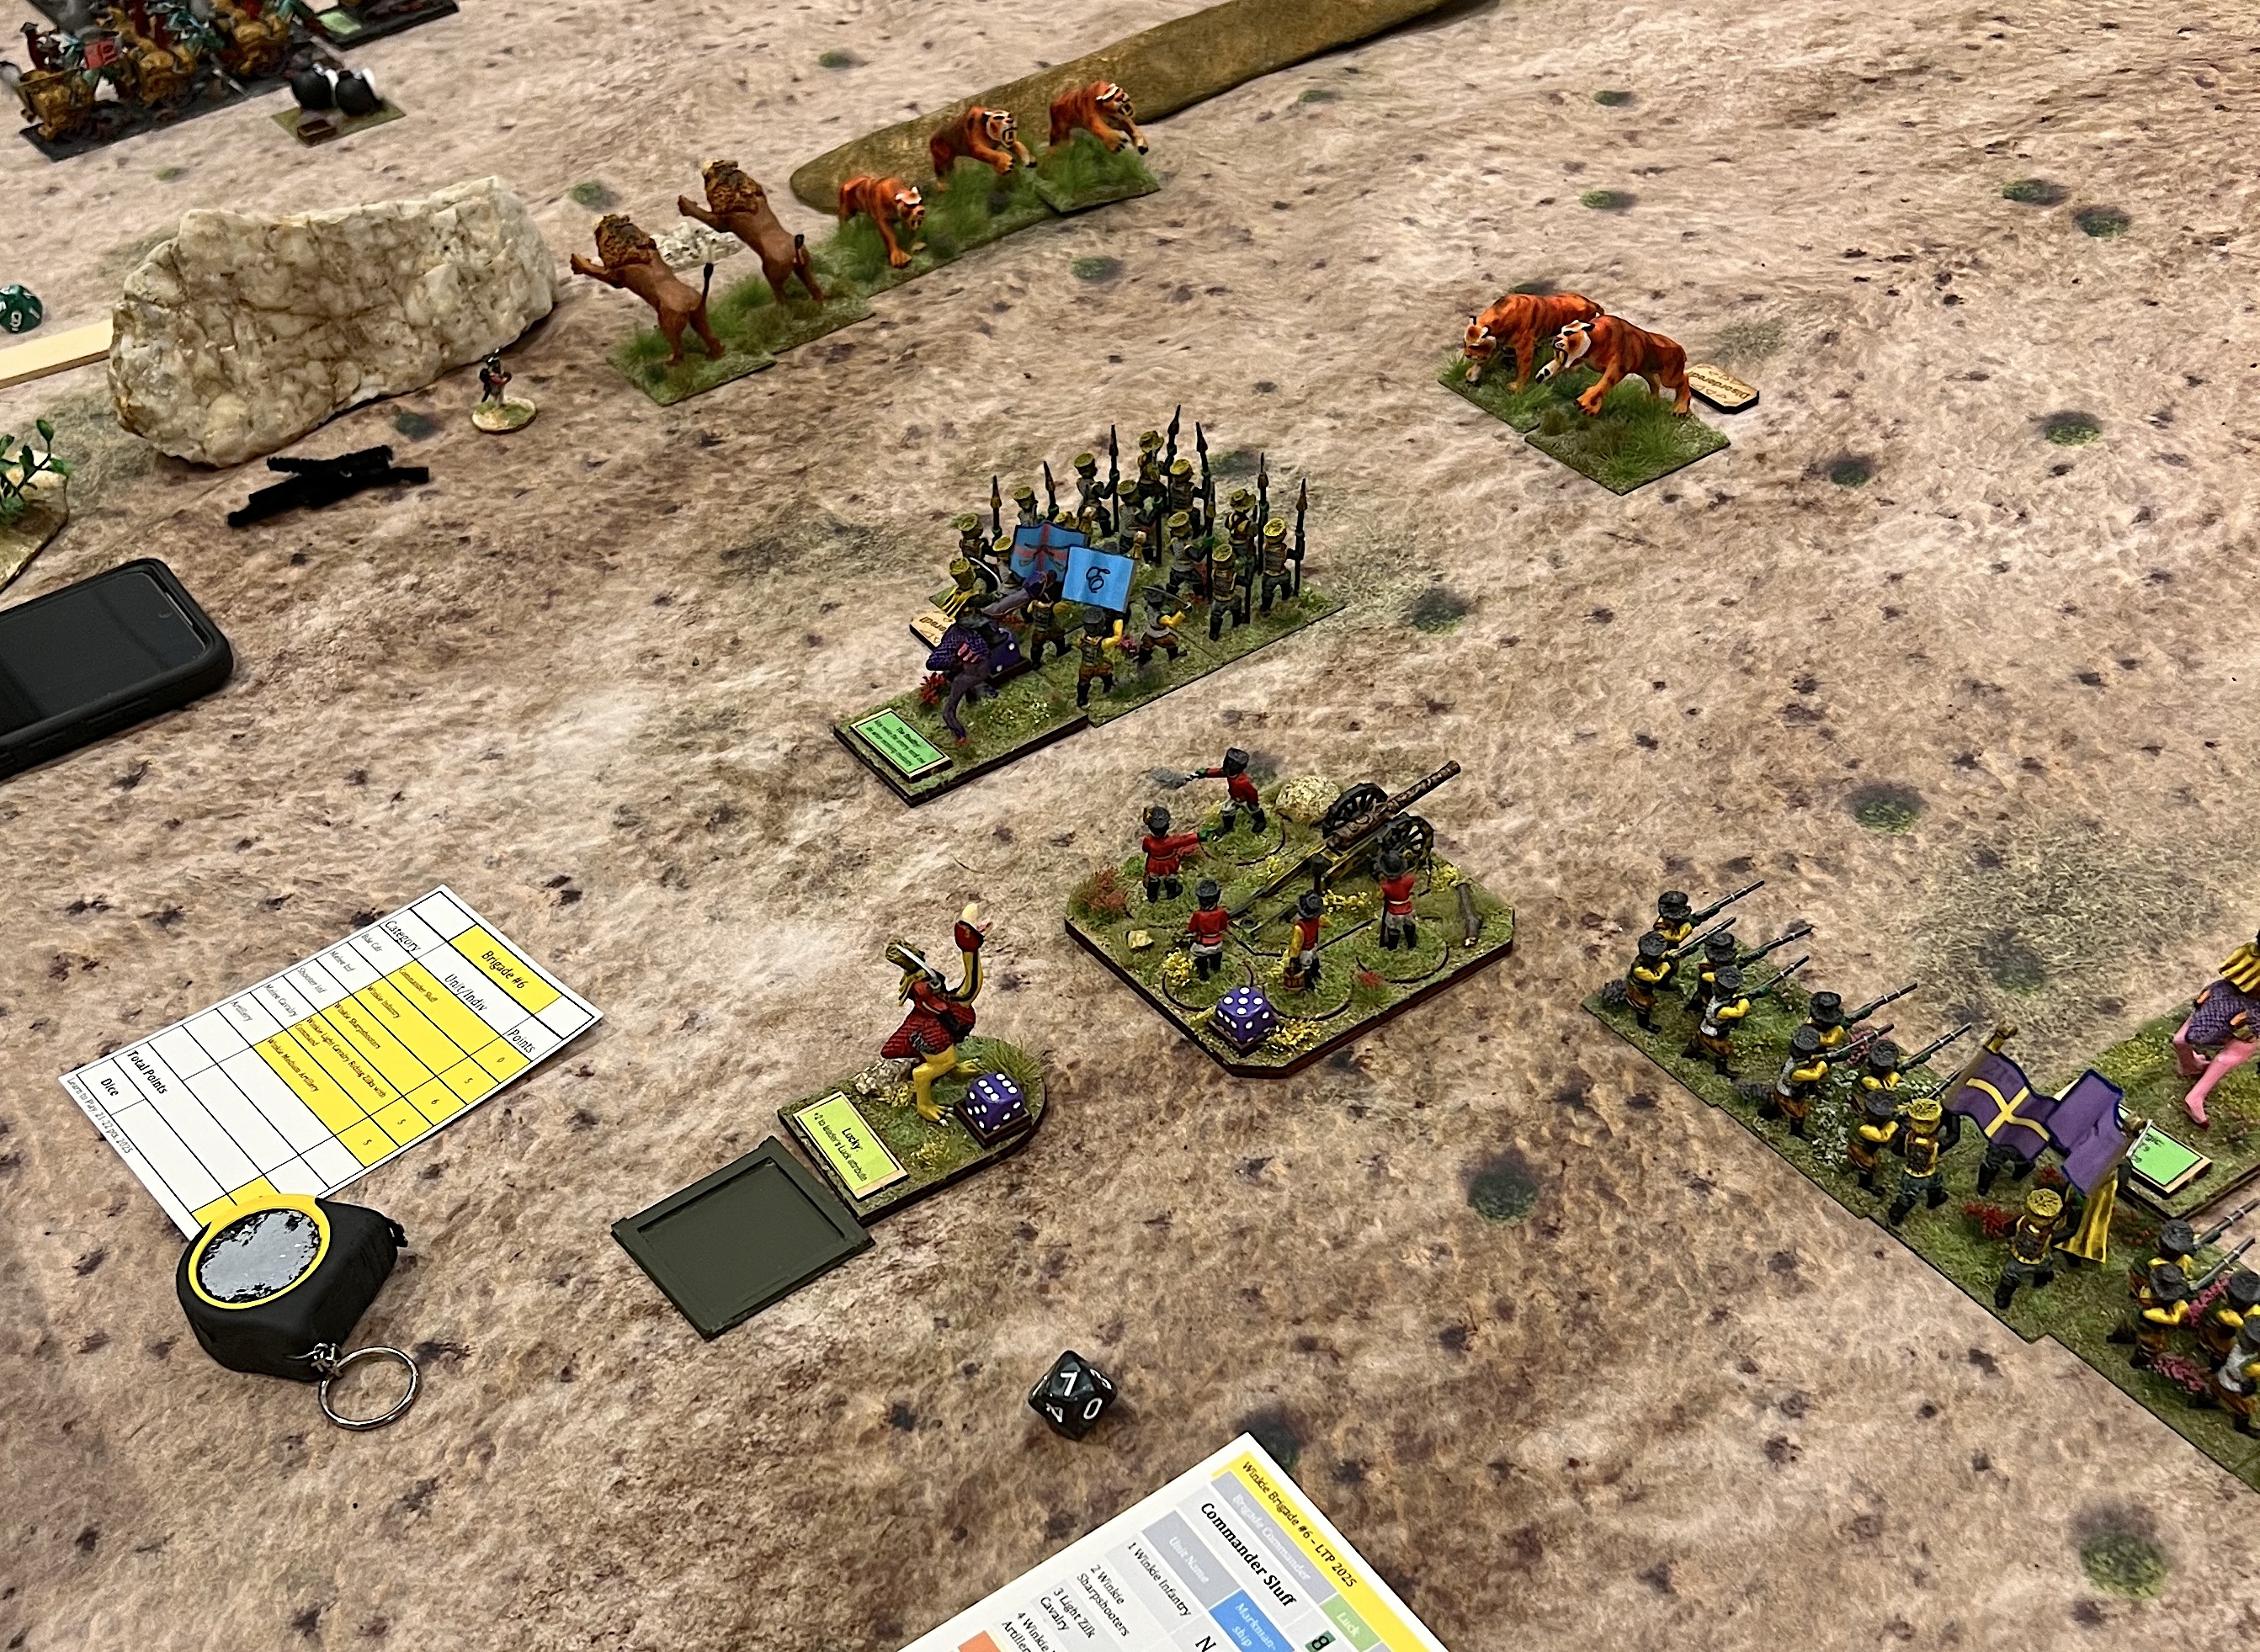
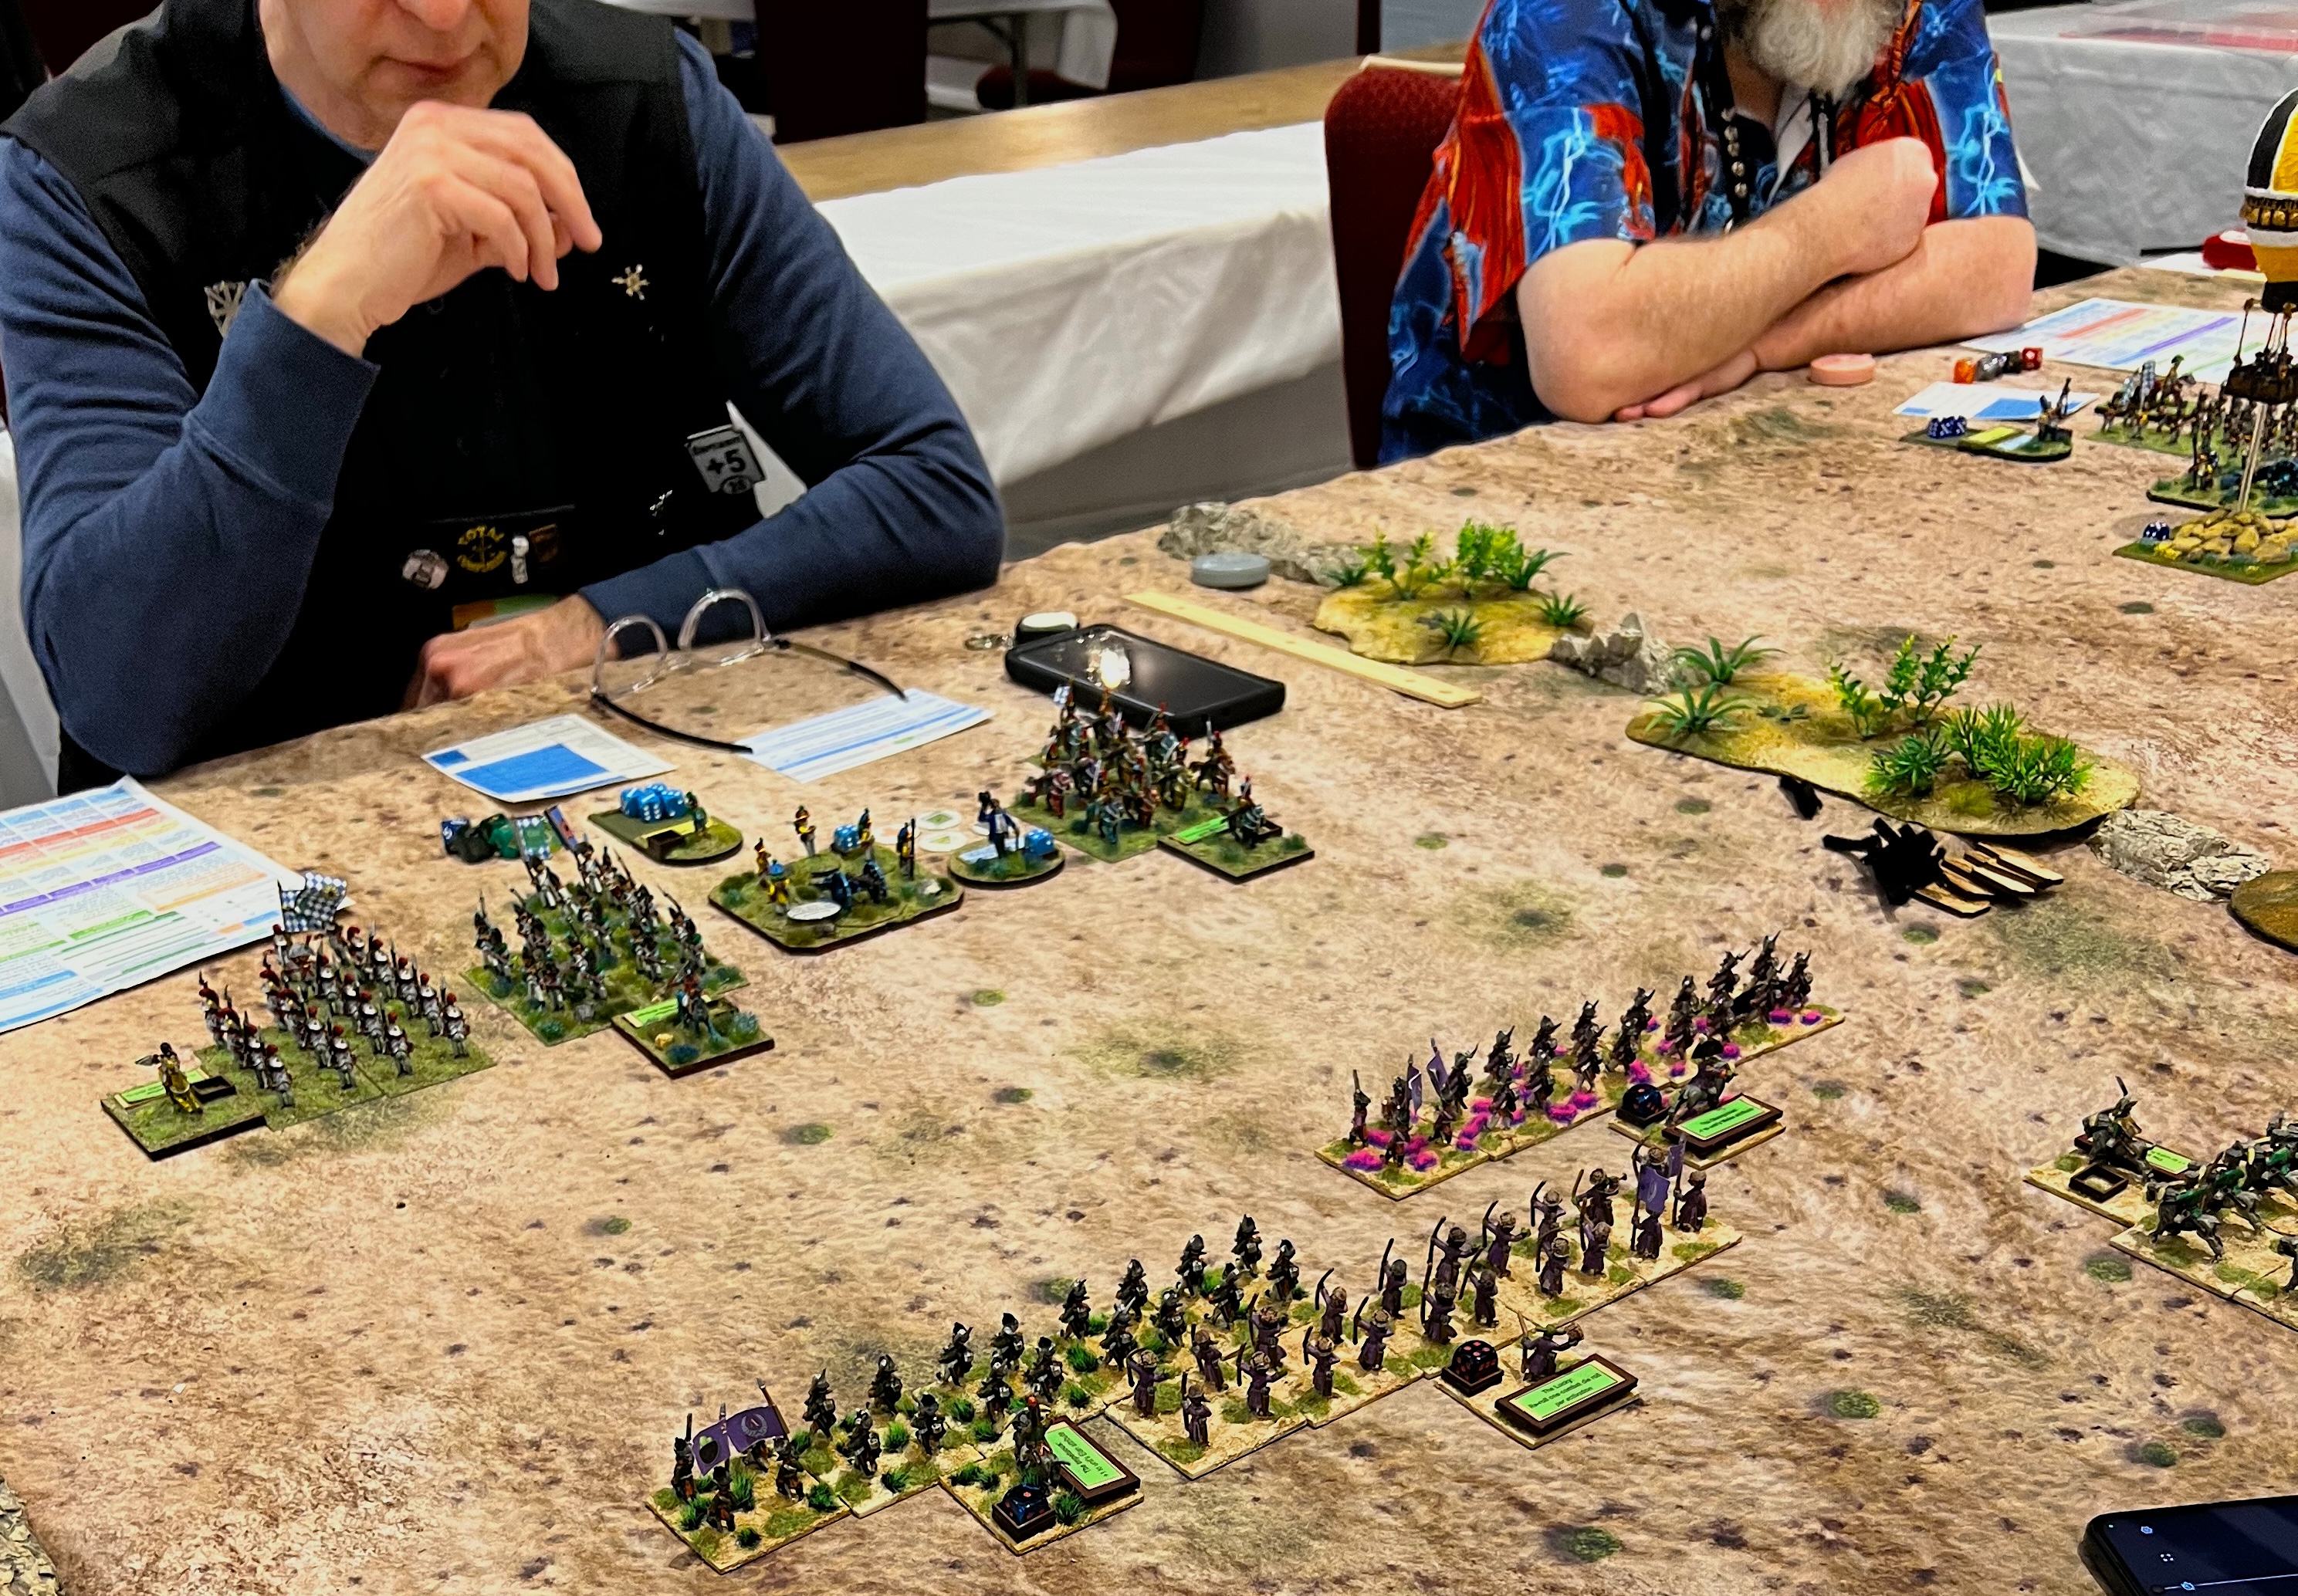
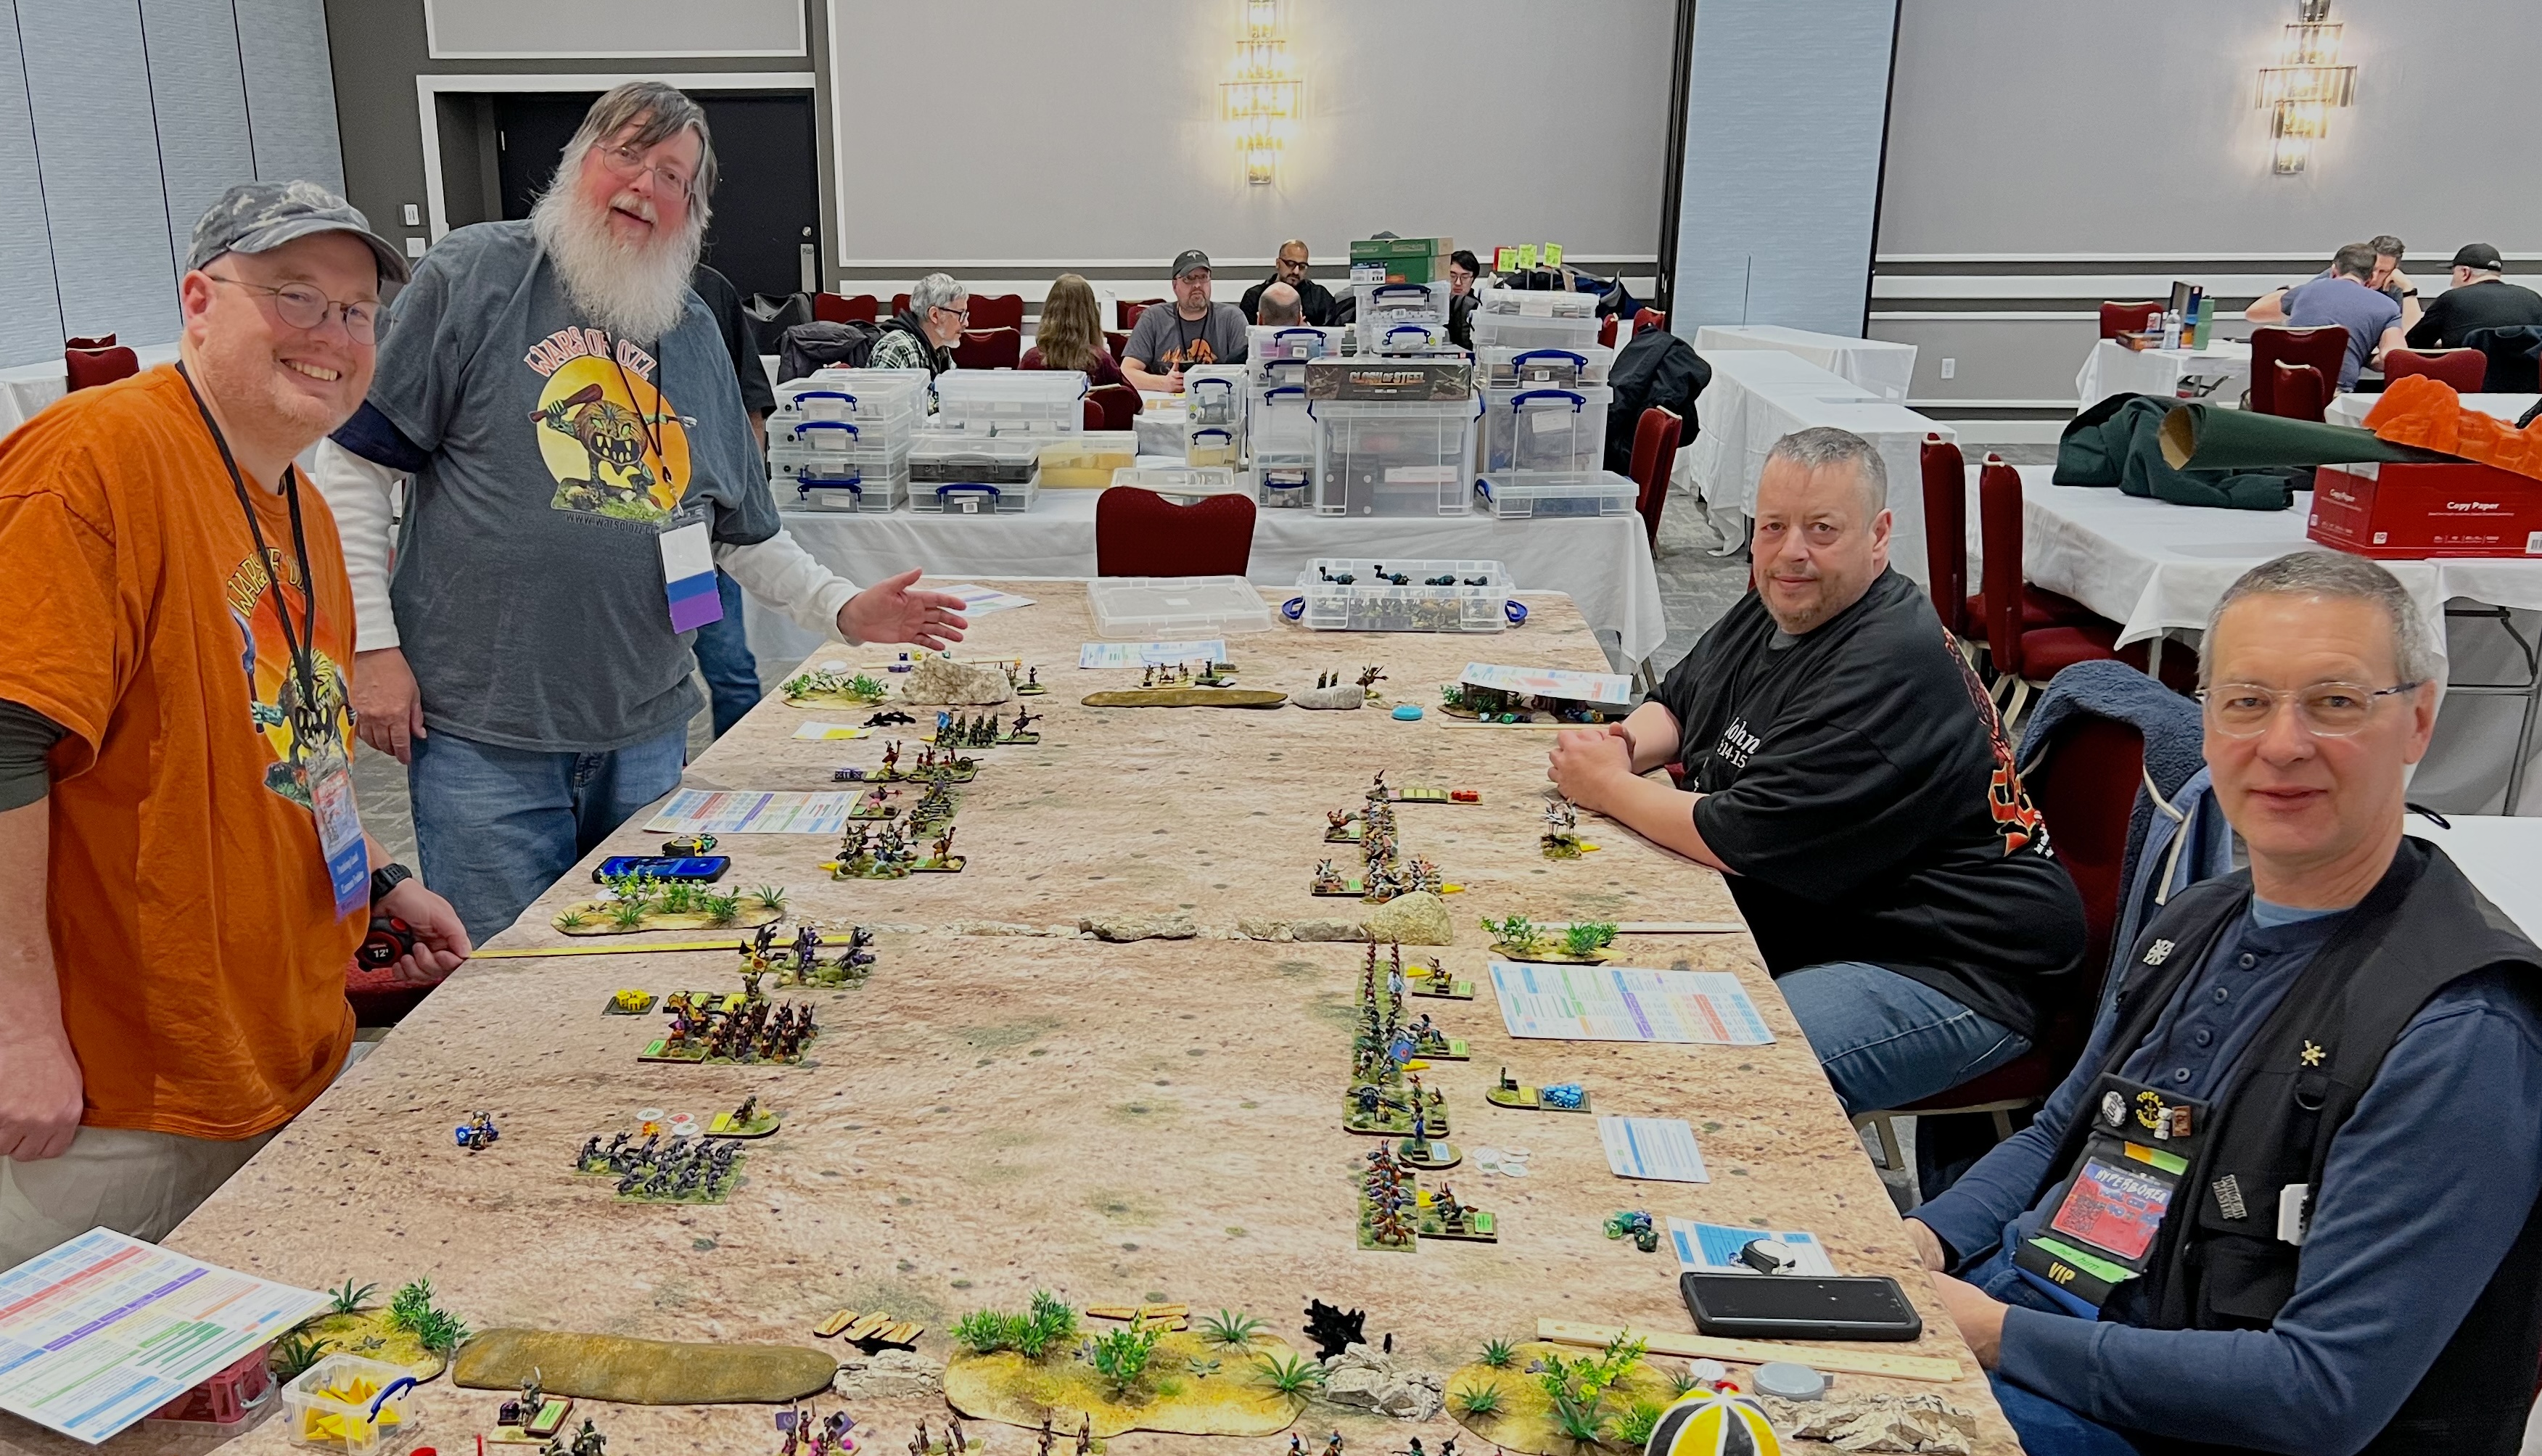
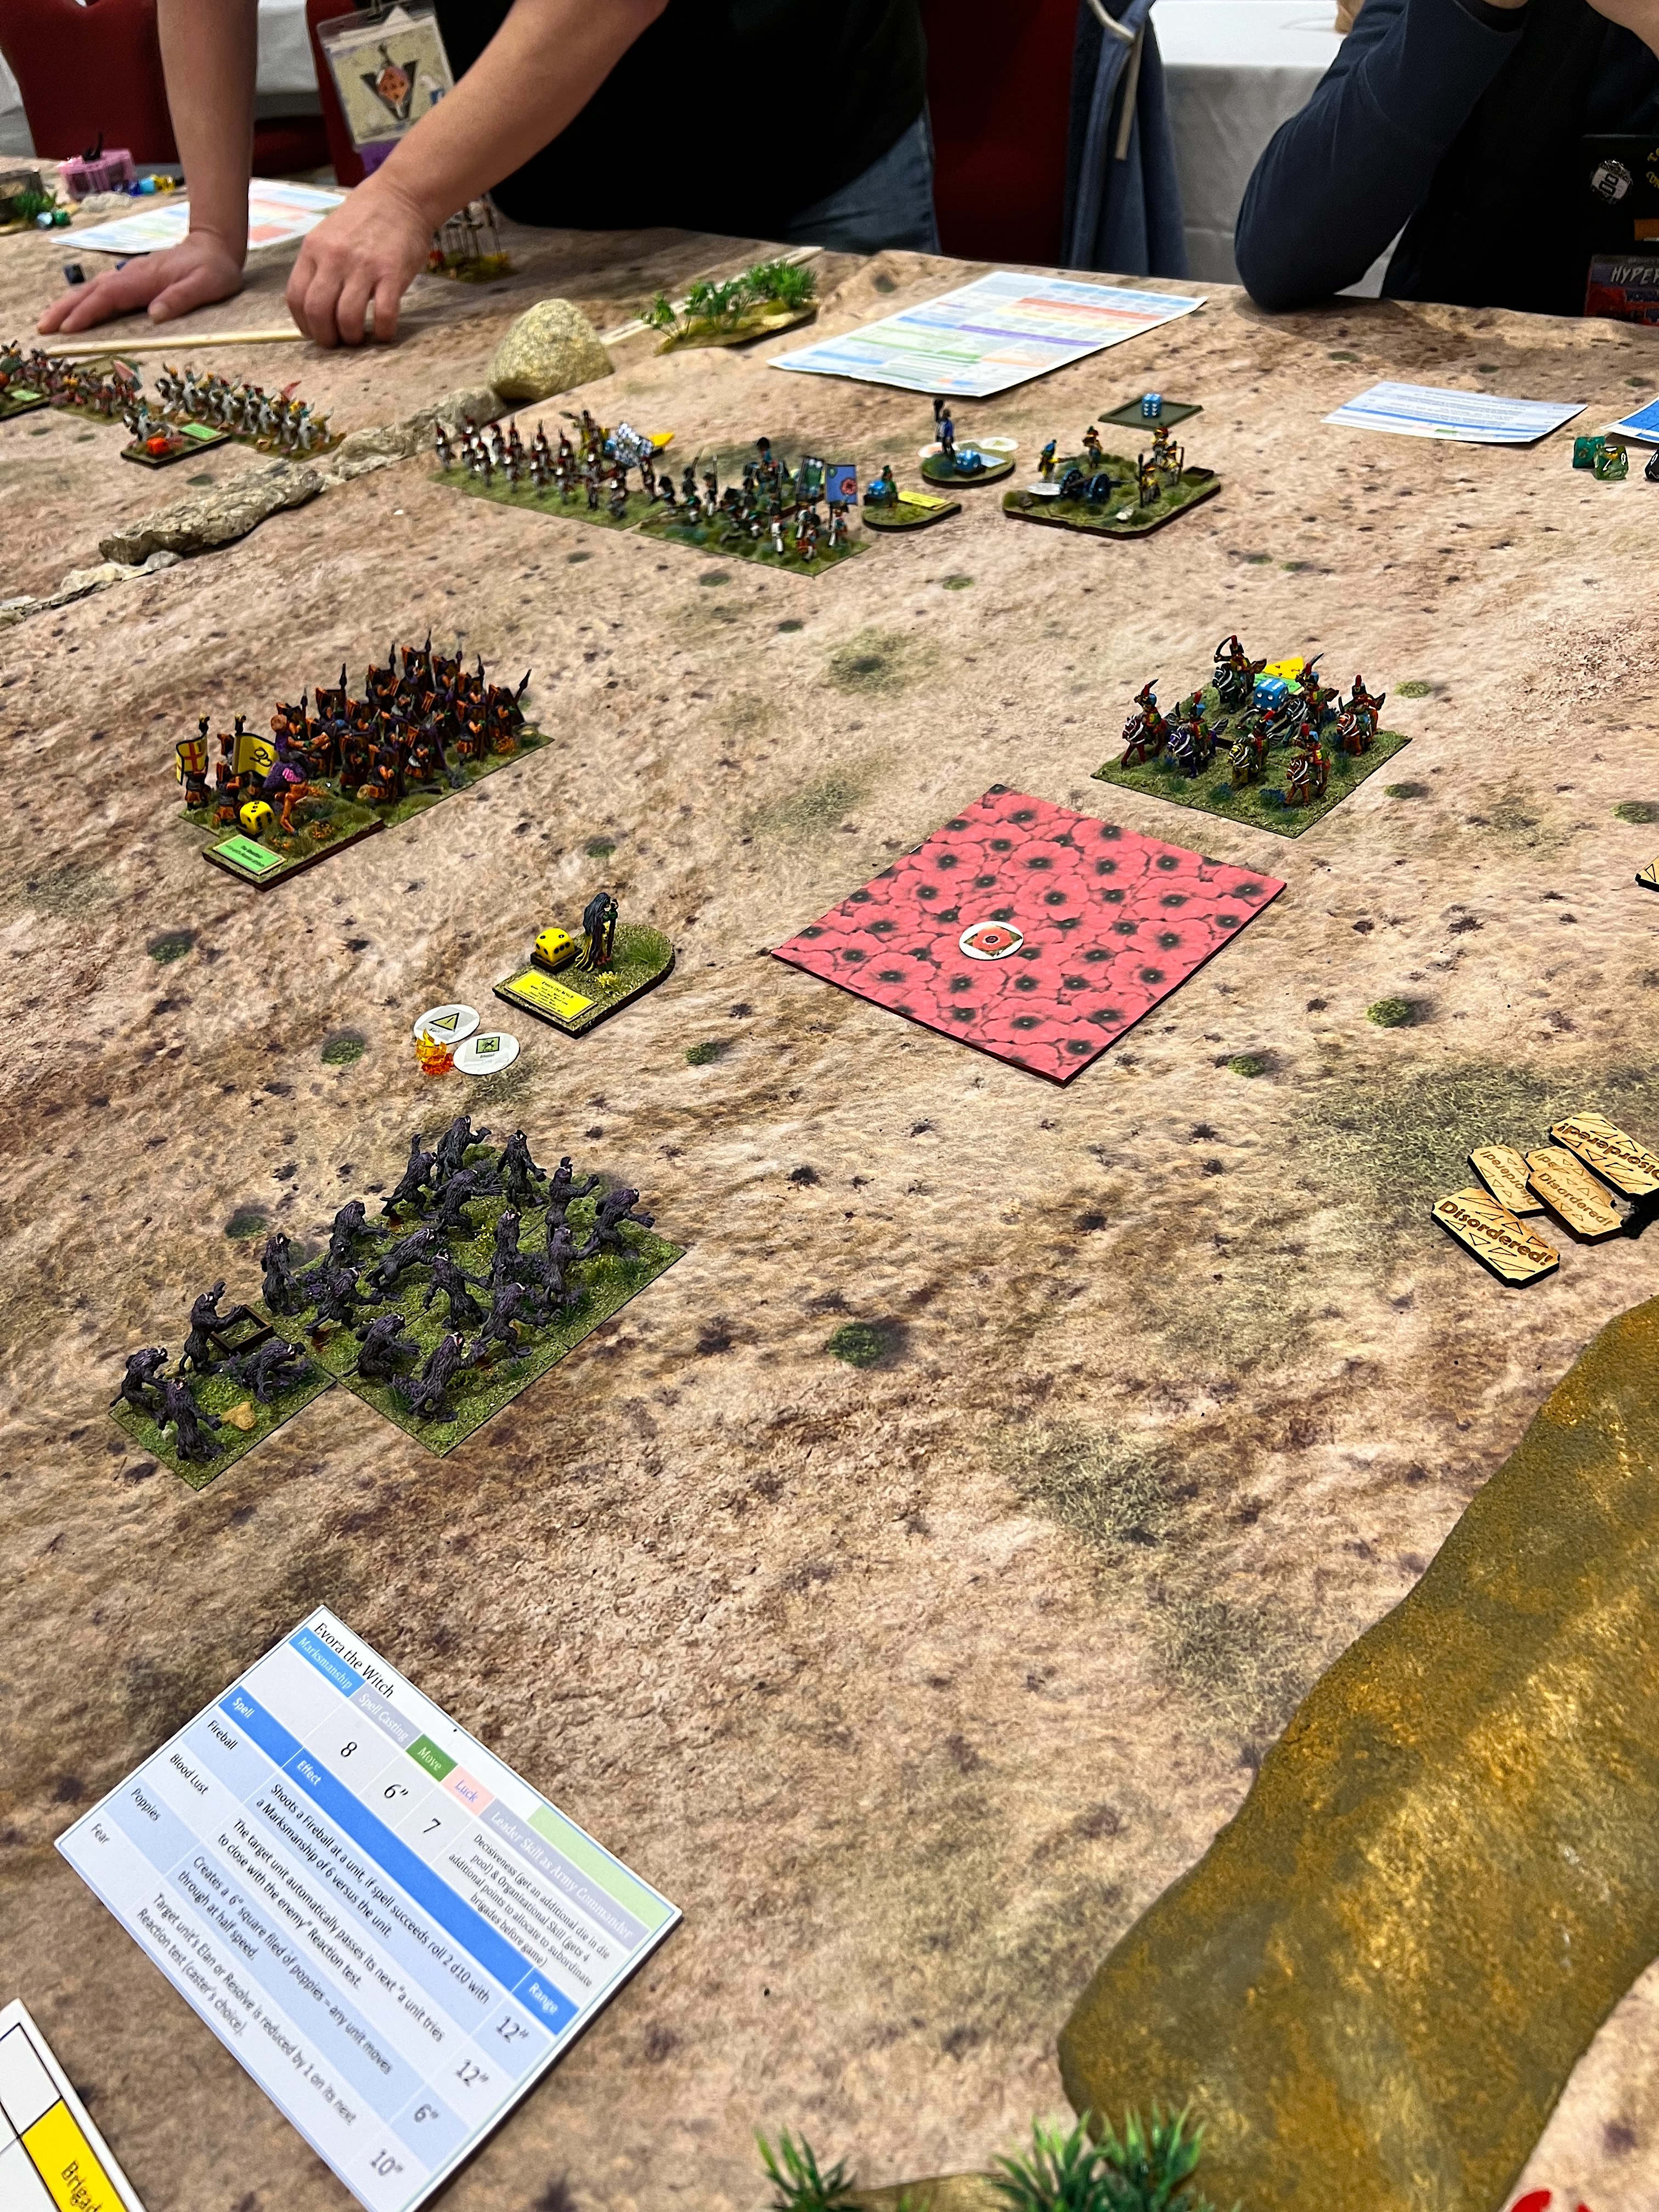
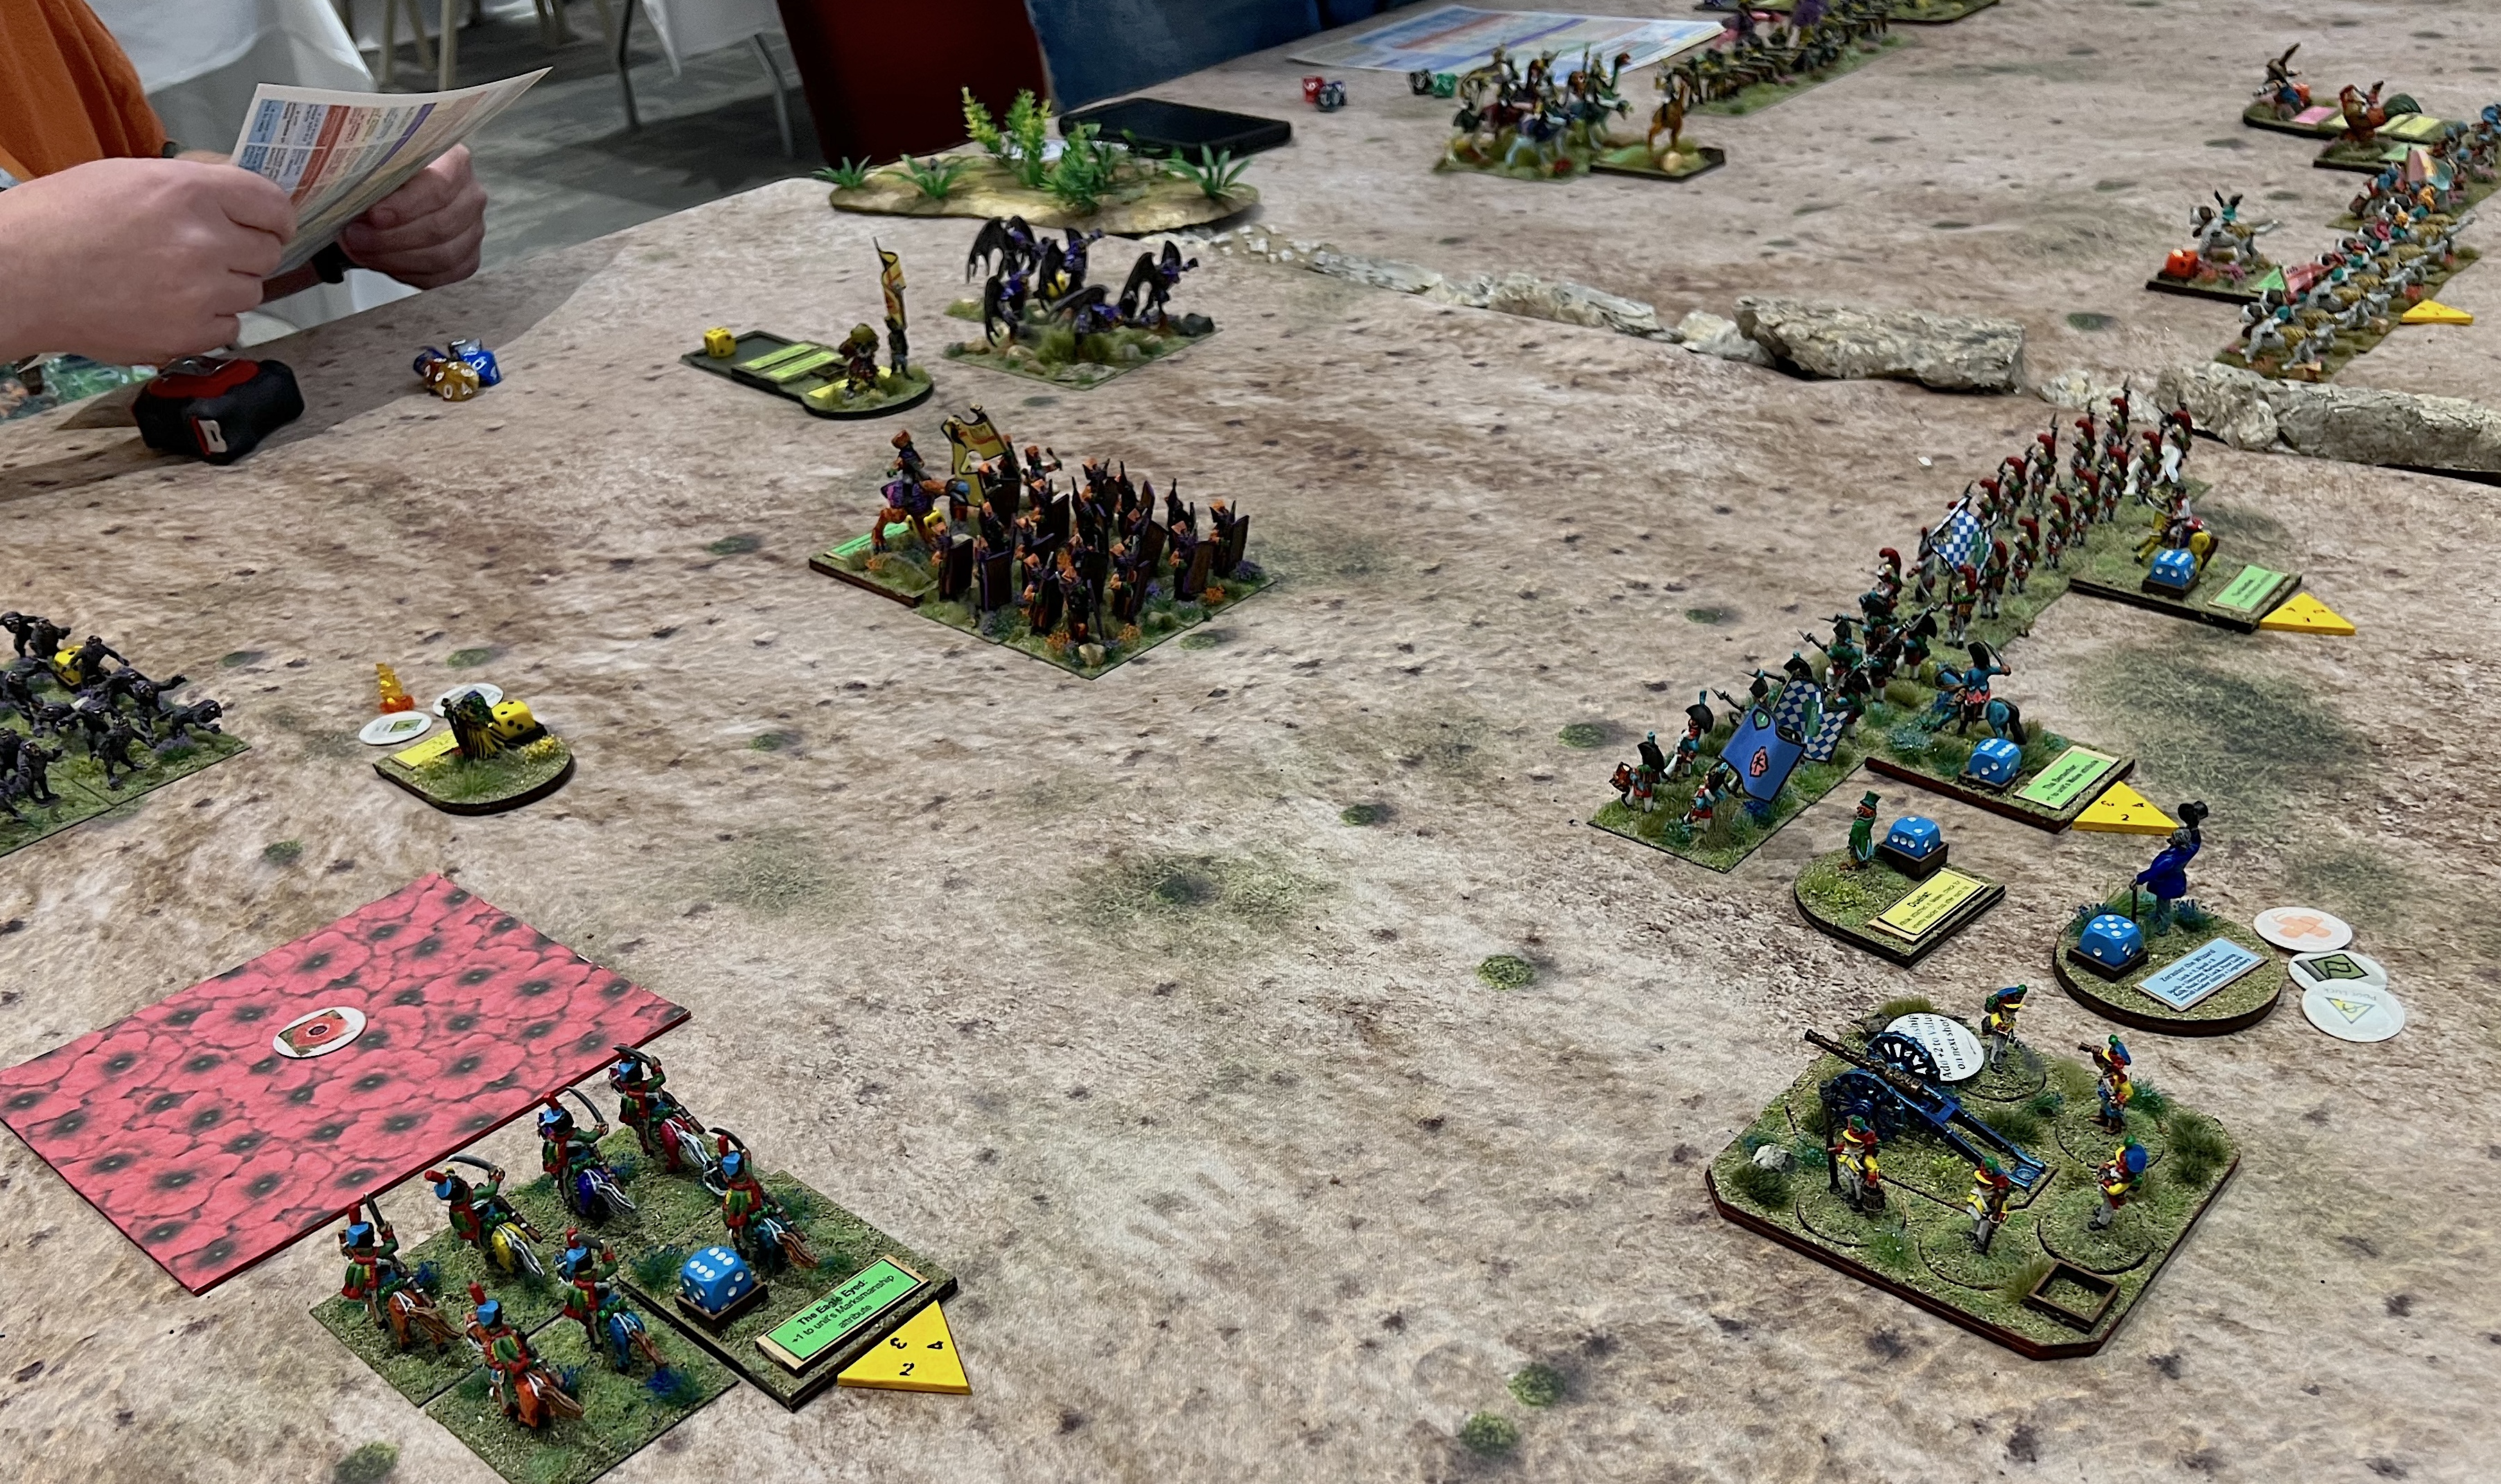
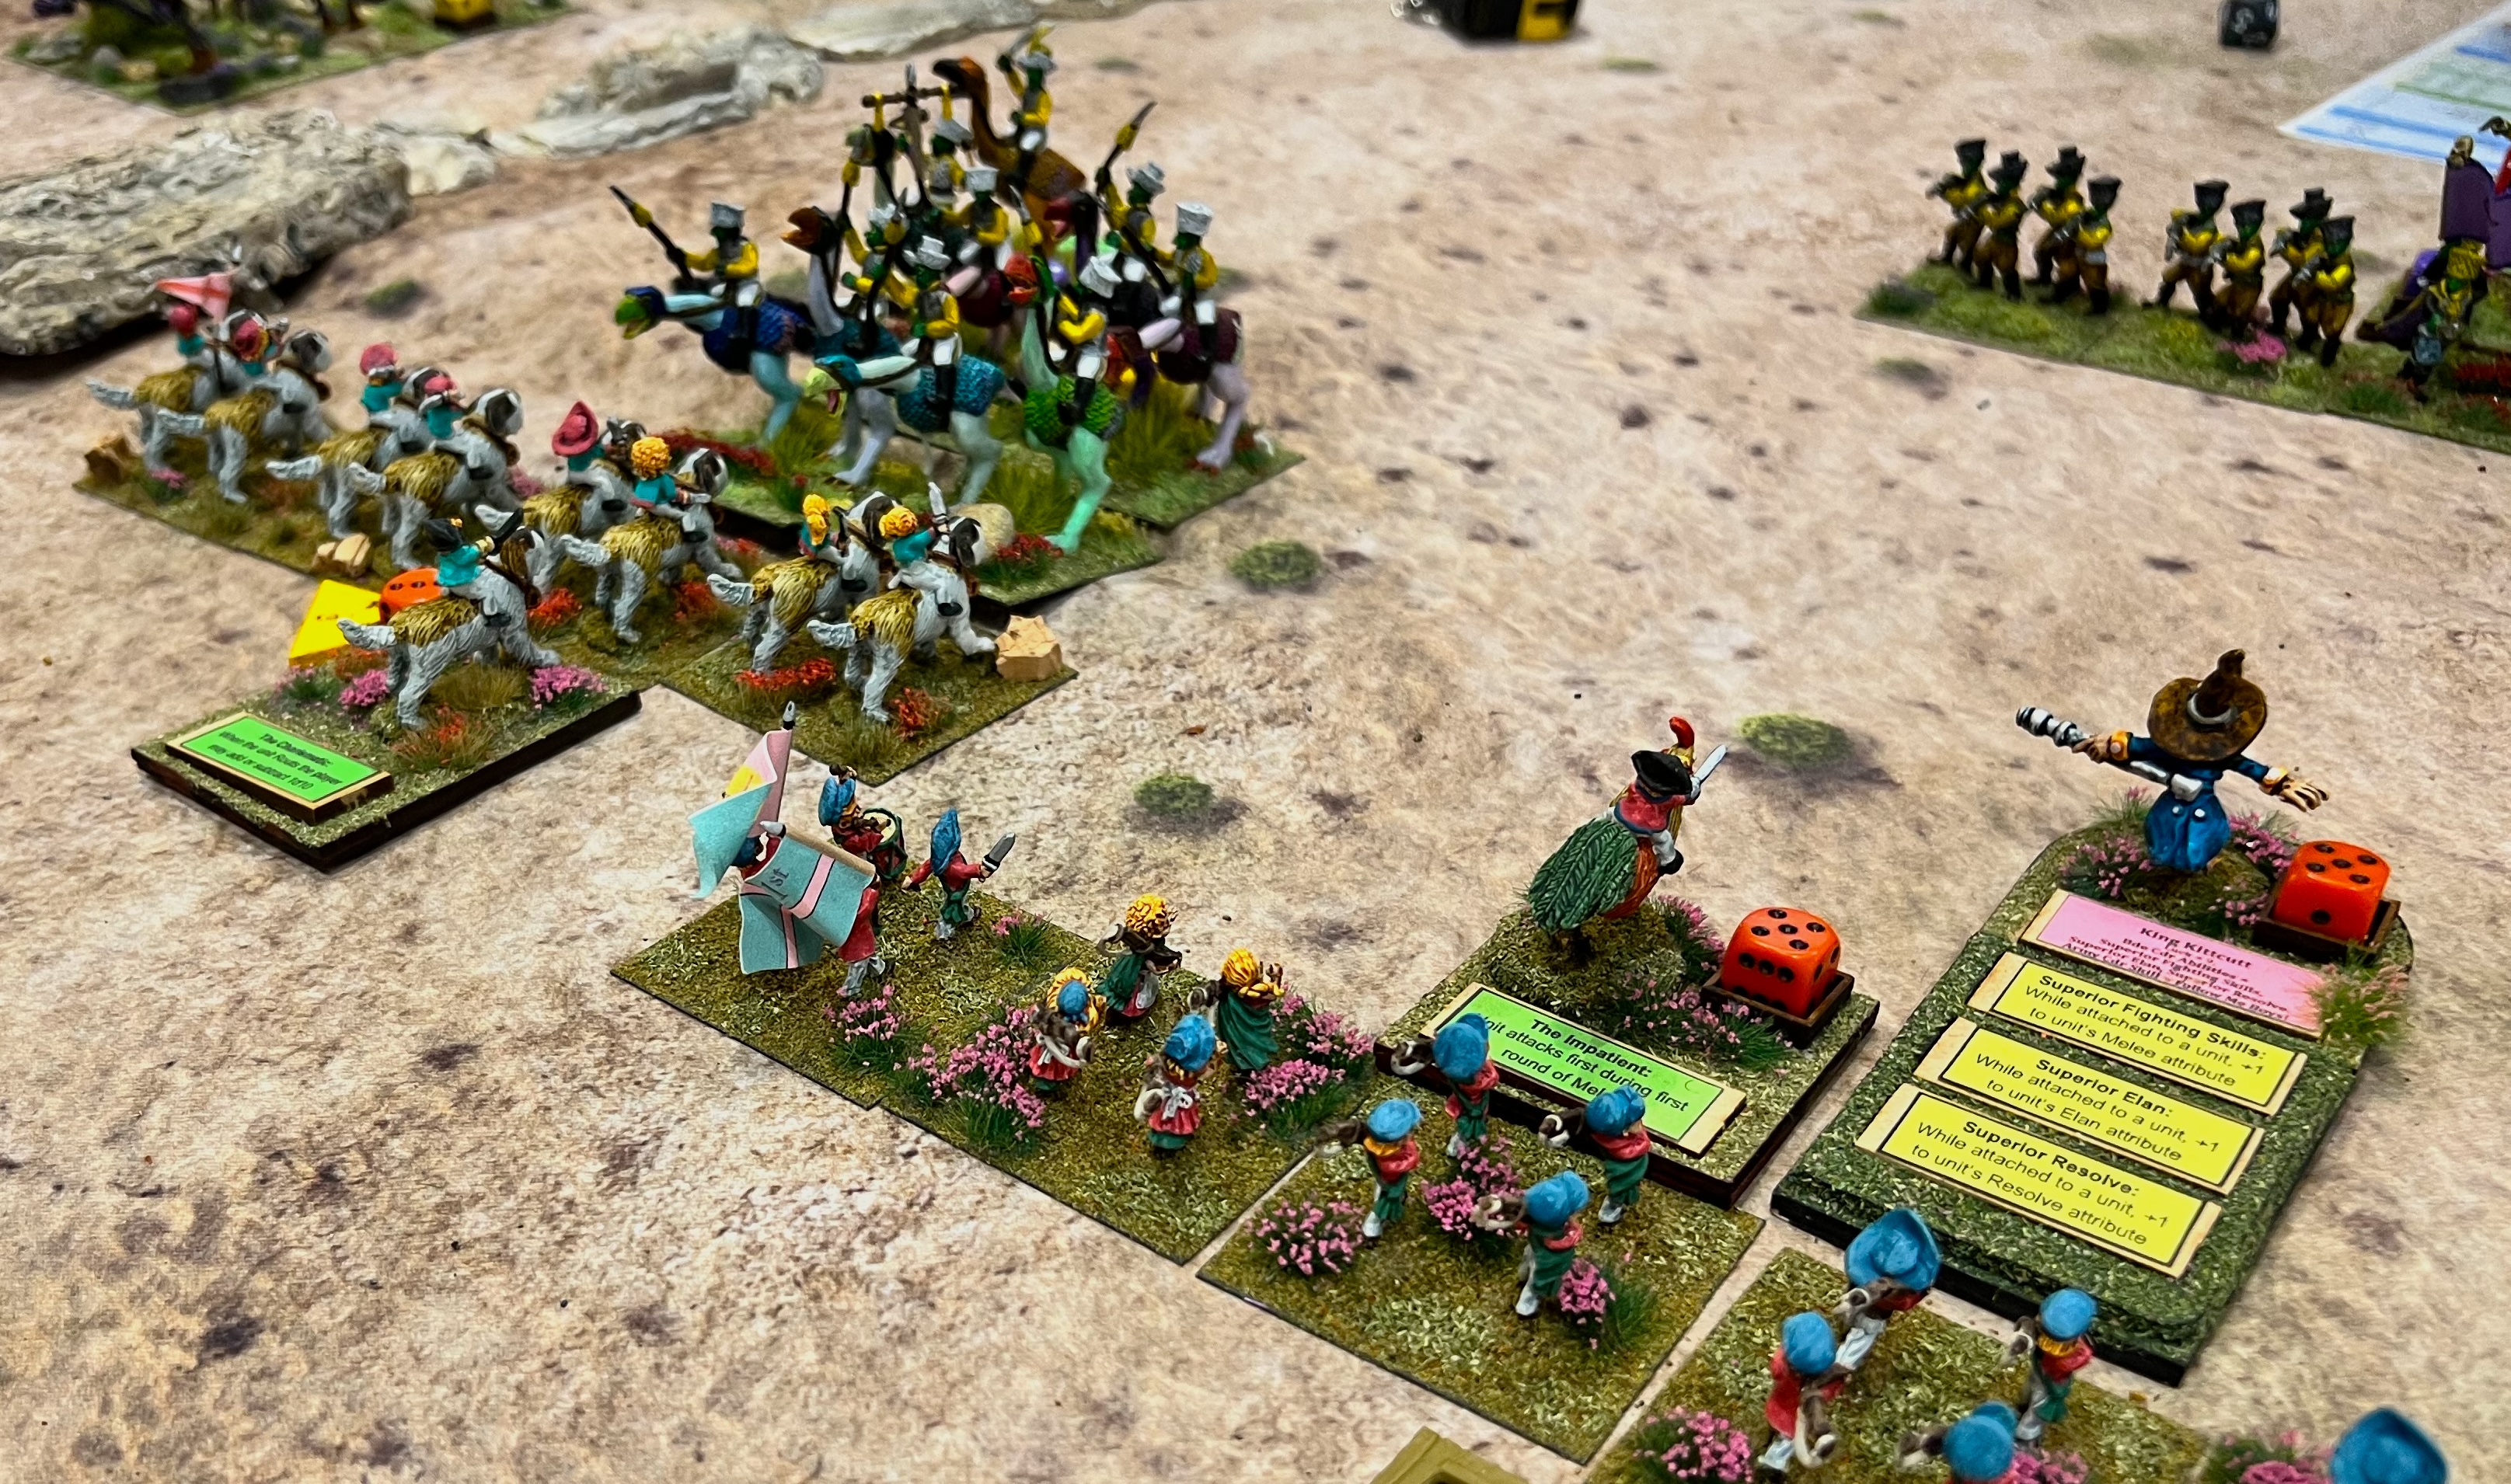
The game set up – I loved creating this panoramic expanse!Players arrive – once again demand to play was high!1st Munchkin Brigade set upThat’s a full game!Nitpik’s “Morin’s Monsters” armed with napalm blasters hope to cook up some Great Pumpkinheads.A regiment of Great Owls (Munchkin allies) overflies the Lemon Drop Legionnaires and hits them in the rear!Jinjur regiments (female pirates and Munchkin allies) breach the wall.The Munchkins breach the western gate and their light cavalry pours through to look for technological treasures.In the center, two axe-wielding Nitpik regiments have had enough of the Munchkins. The Jade Automata and the Pink Nightmare regiments charge over their defensive wall. Their counterattack wipes out the Munchkin artillery and drives two Munchkin infantry regiments from the game.Another view of that mechanical counterattack.Meanwhile, the cleaver Jinjur pirates locate some of Nitpik’s technological wonders in a wrecked building.
The game ended – in a dead tie 23-23! A real nail-biter to be sure!
The next game builds on this one. The Munchkins have found technology, but welshed on their agreement to share! Thus, they betrayed their allies. As a result, their former allies have jumped over to the Nitpik side. The Munchkins are fleeing to safety, with Nitpik in hot pursuit.
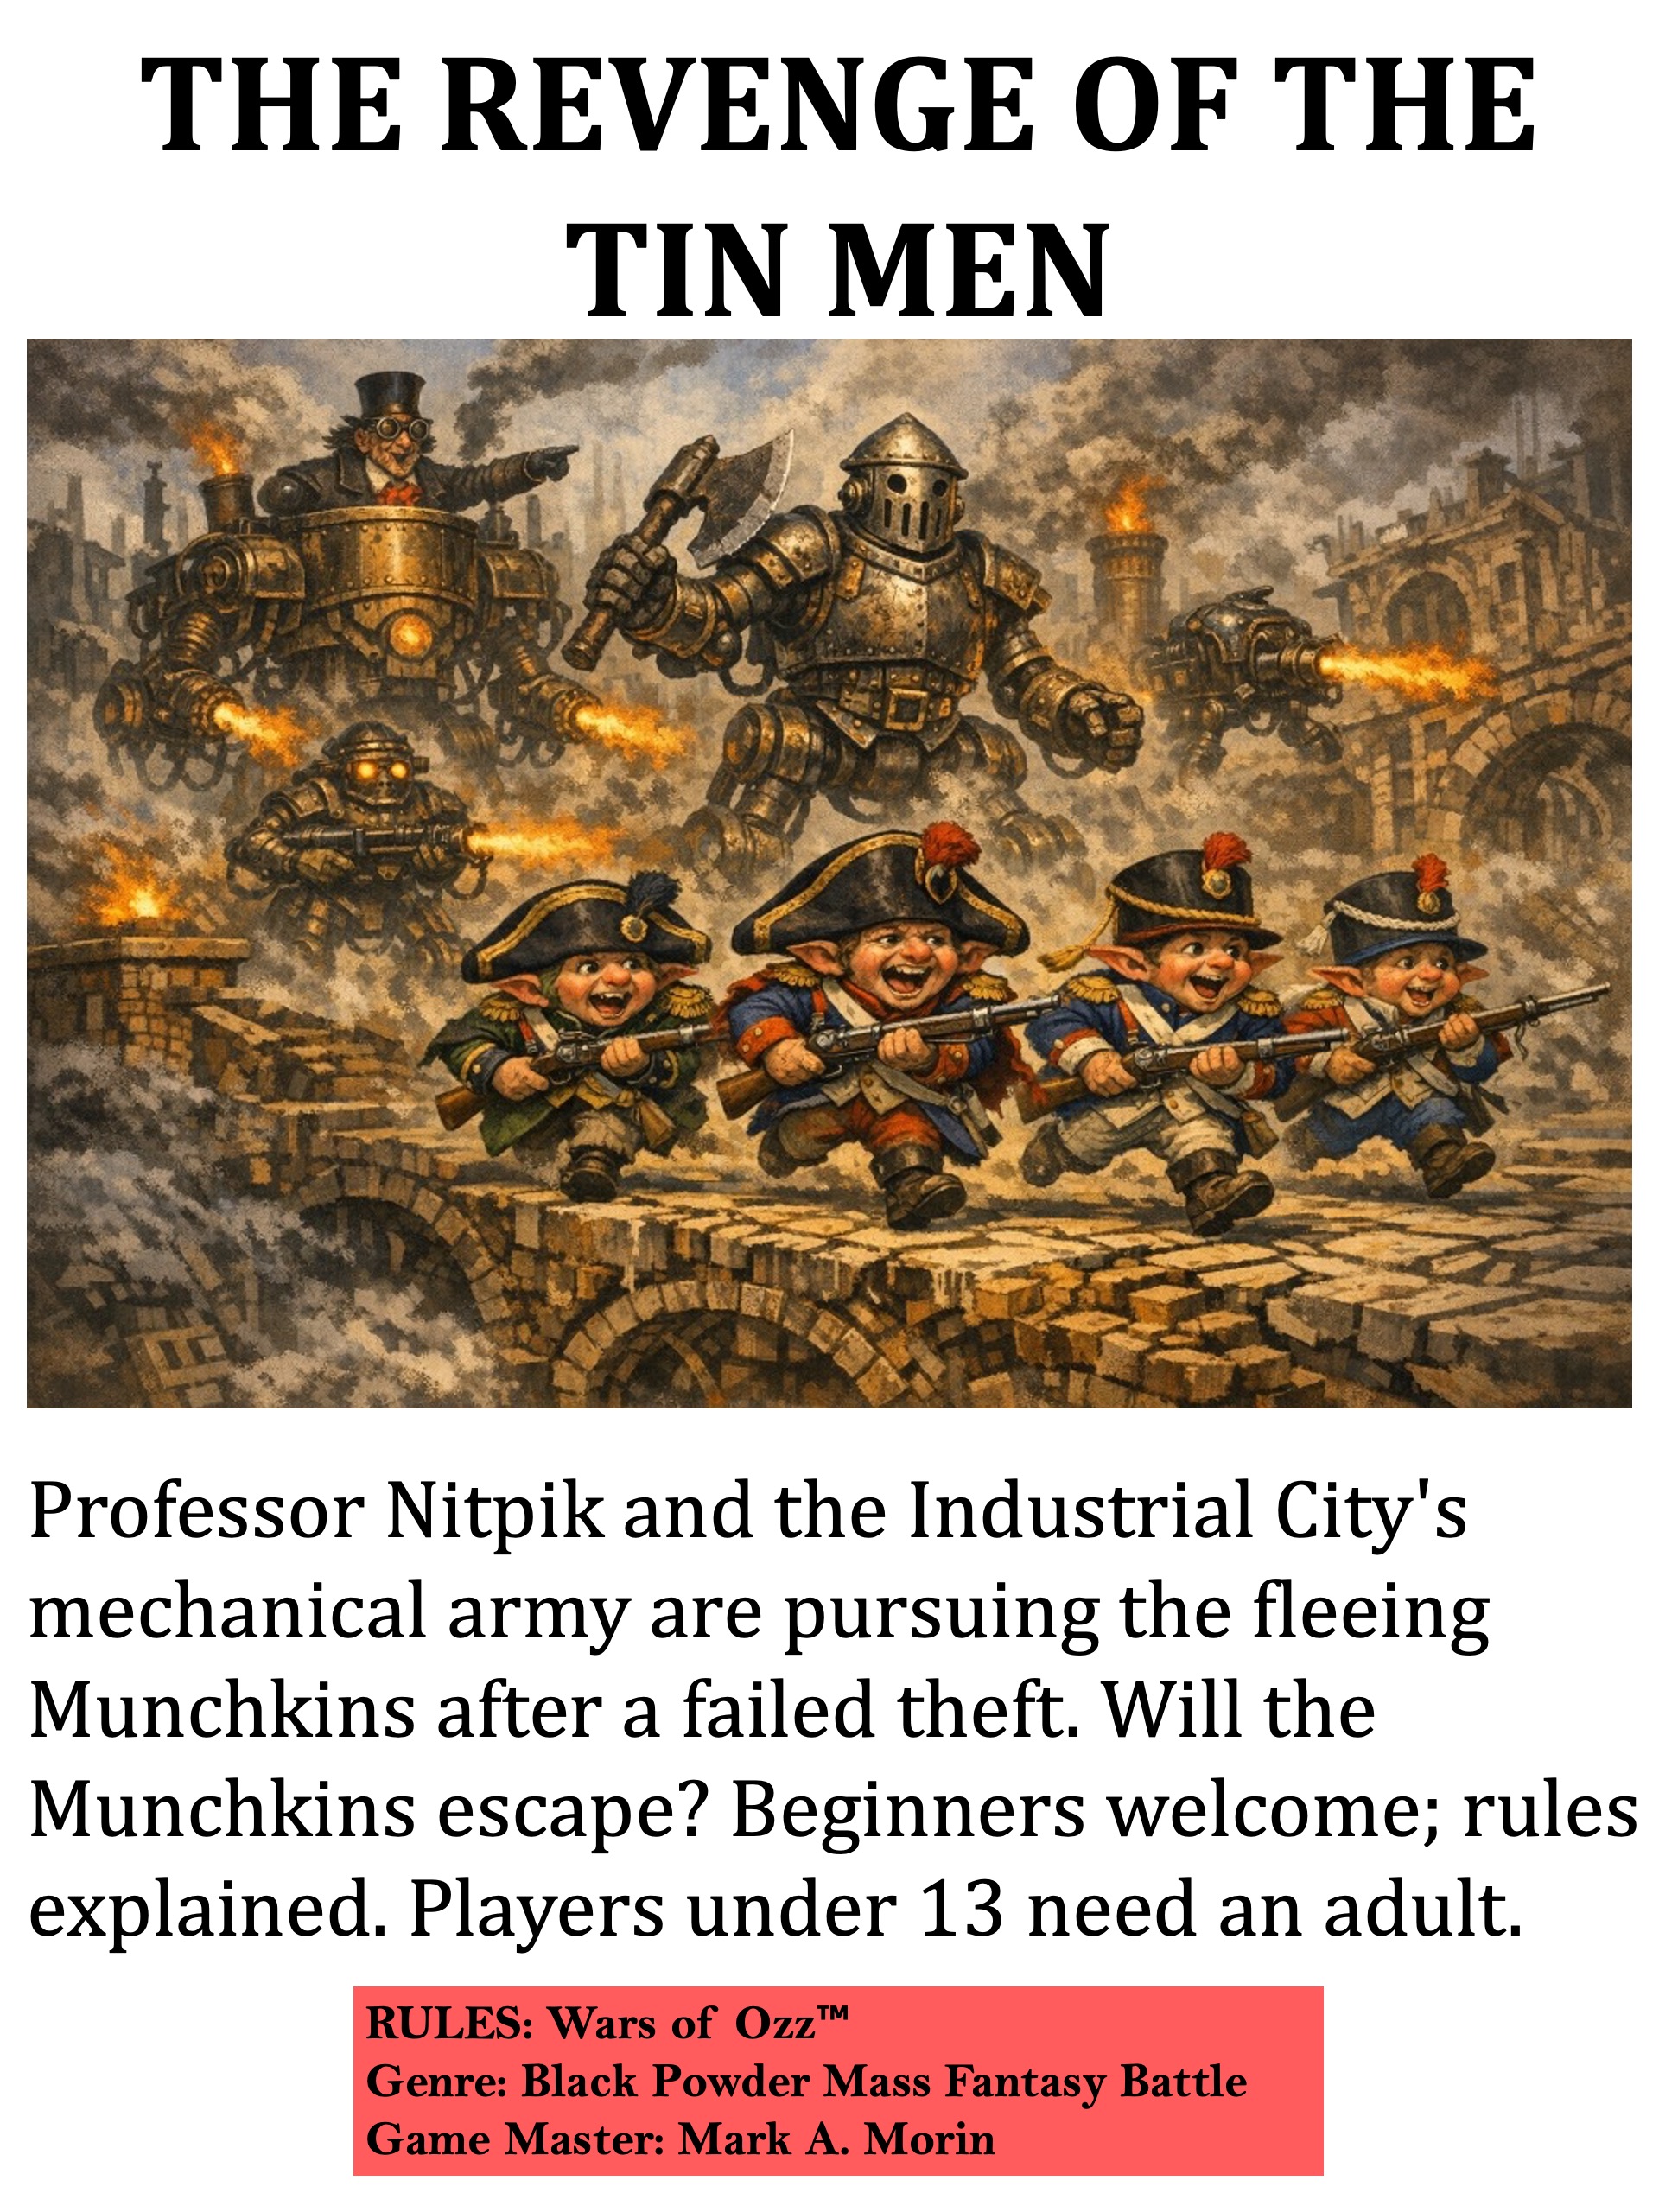
Revenge of the Tin Men
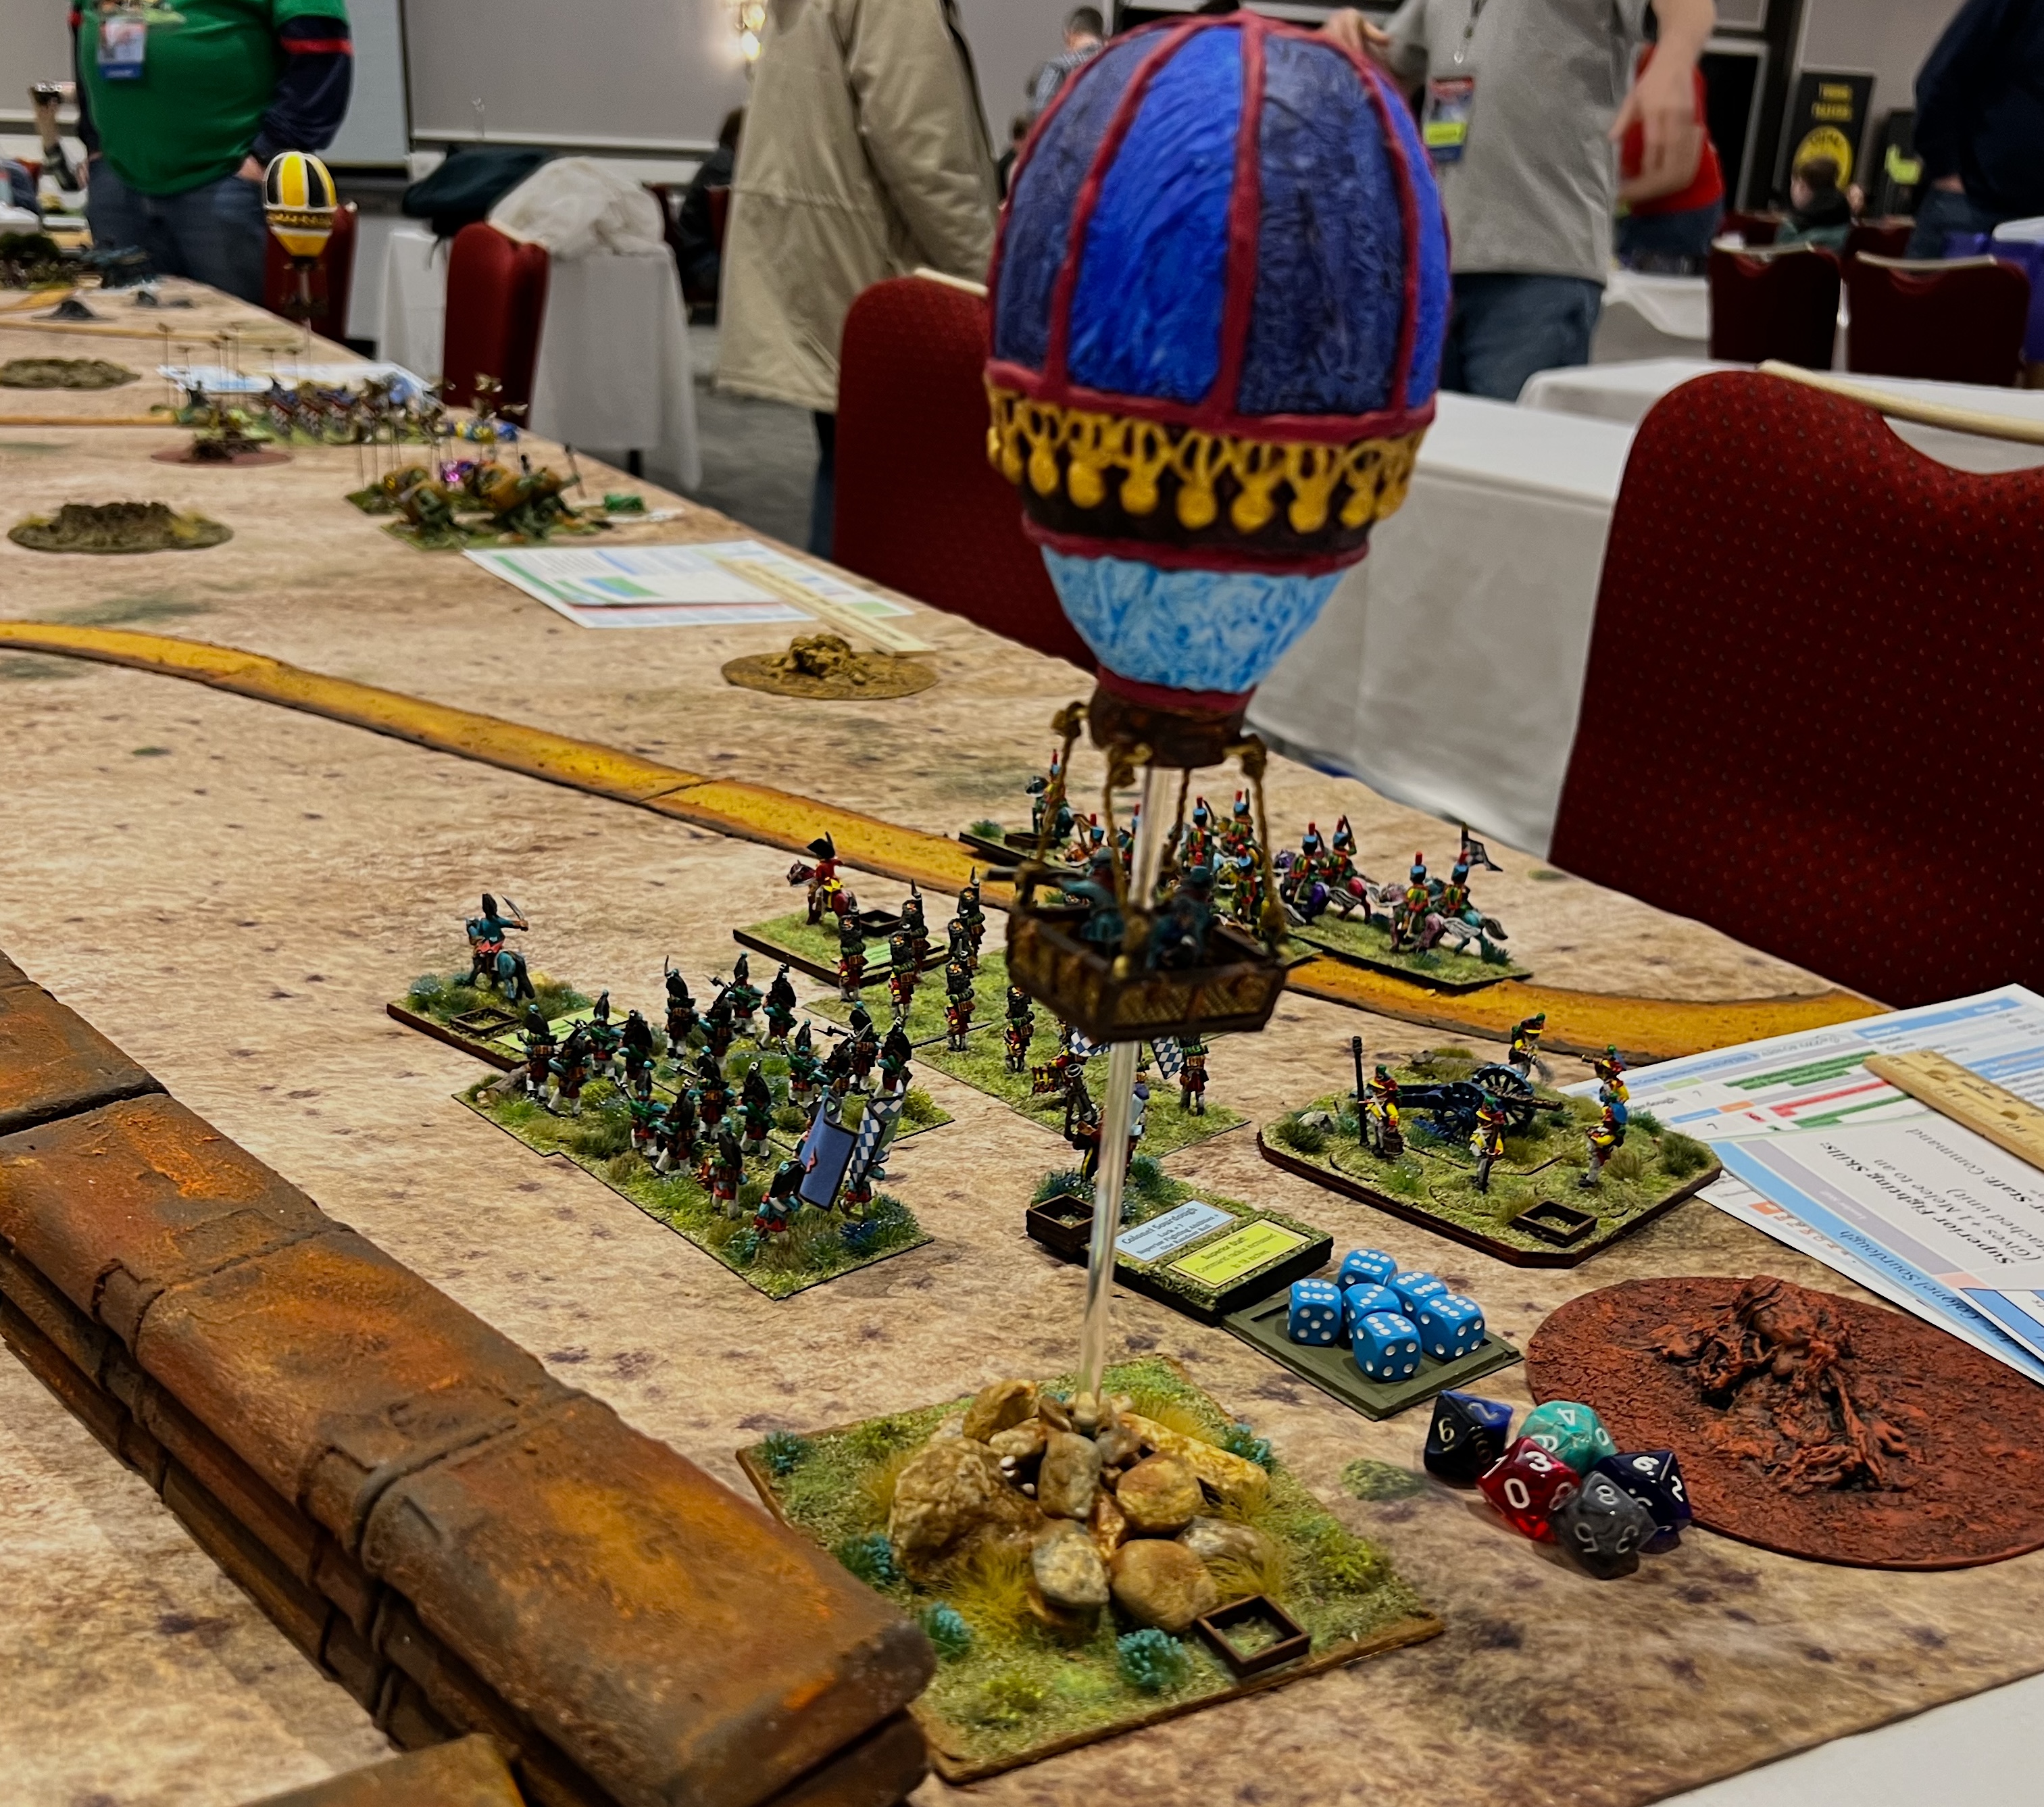
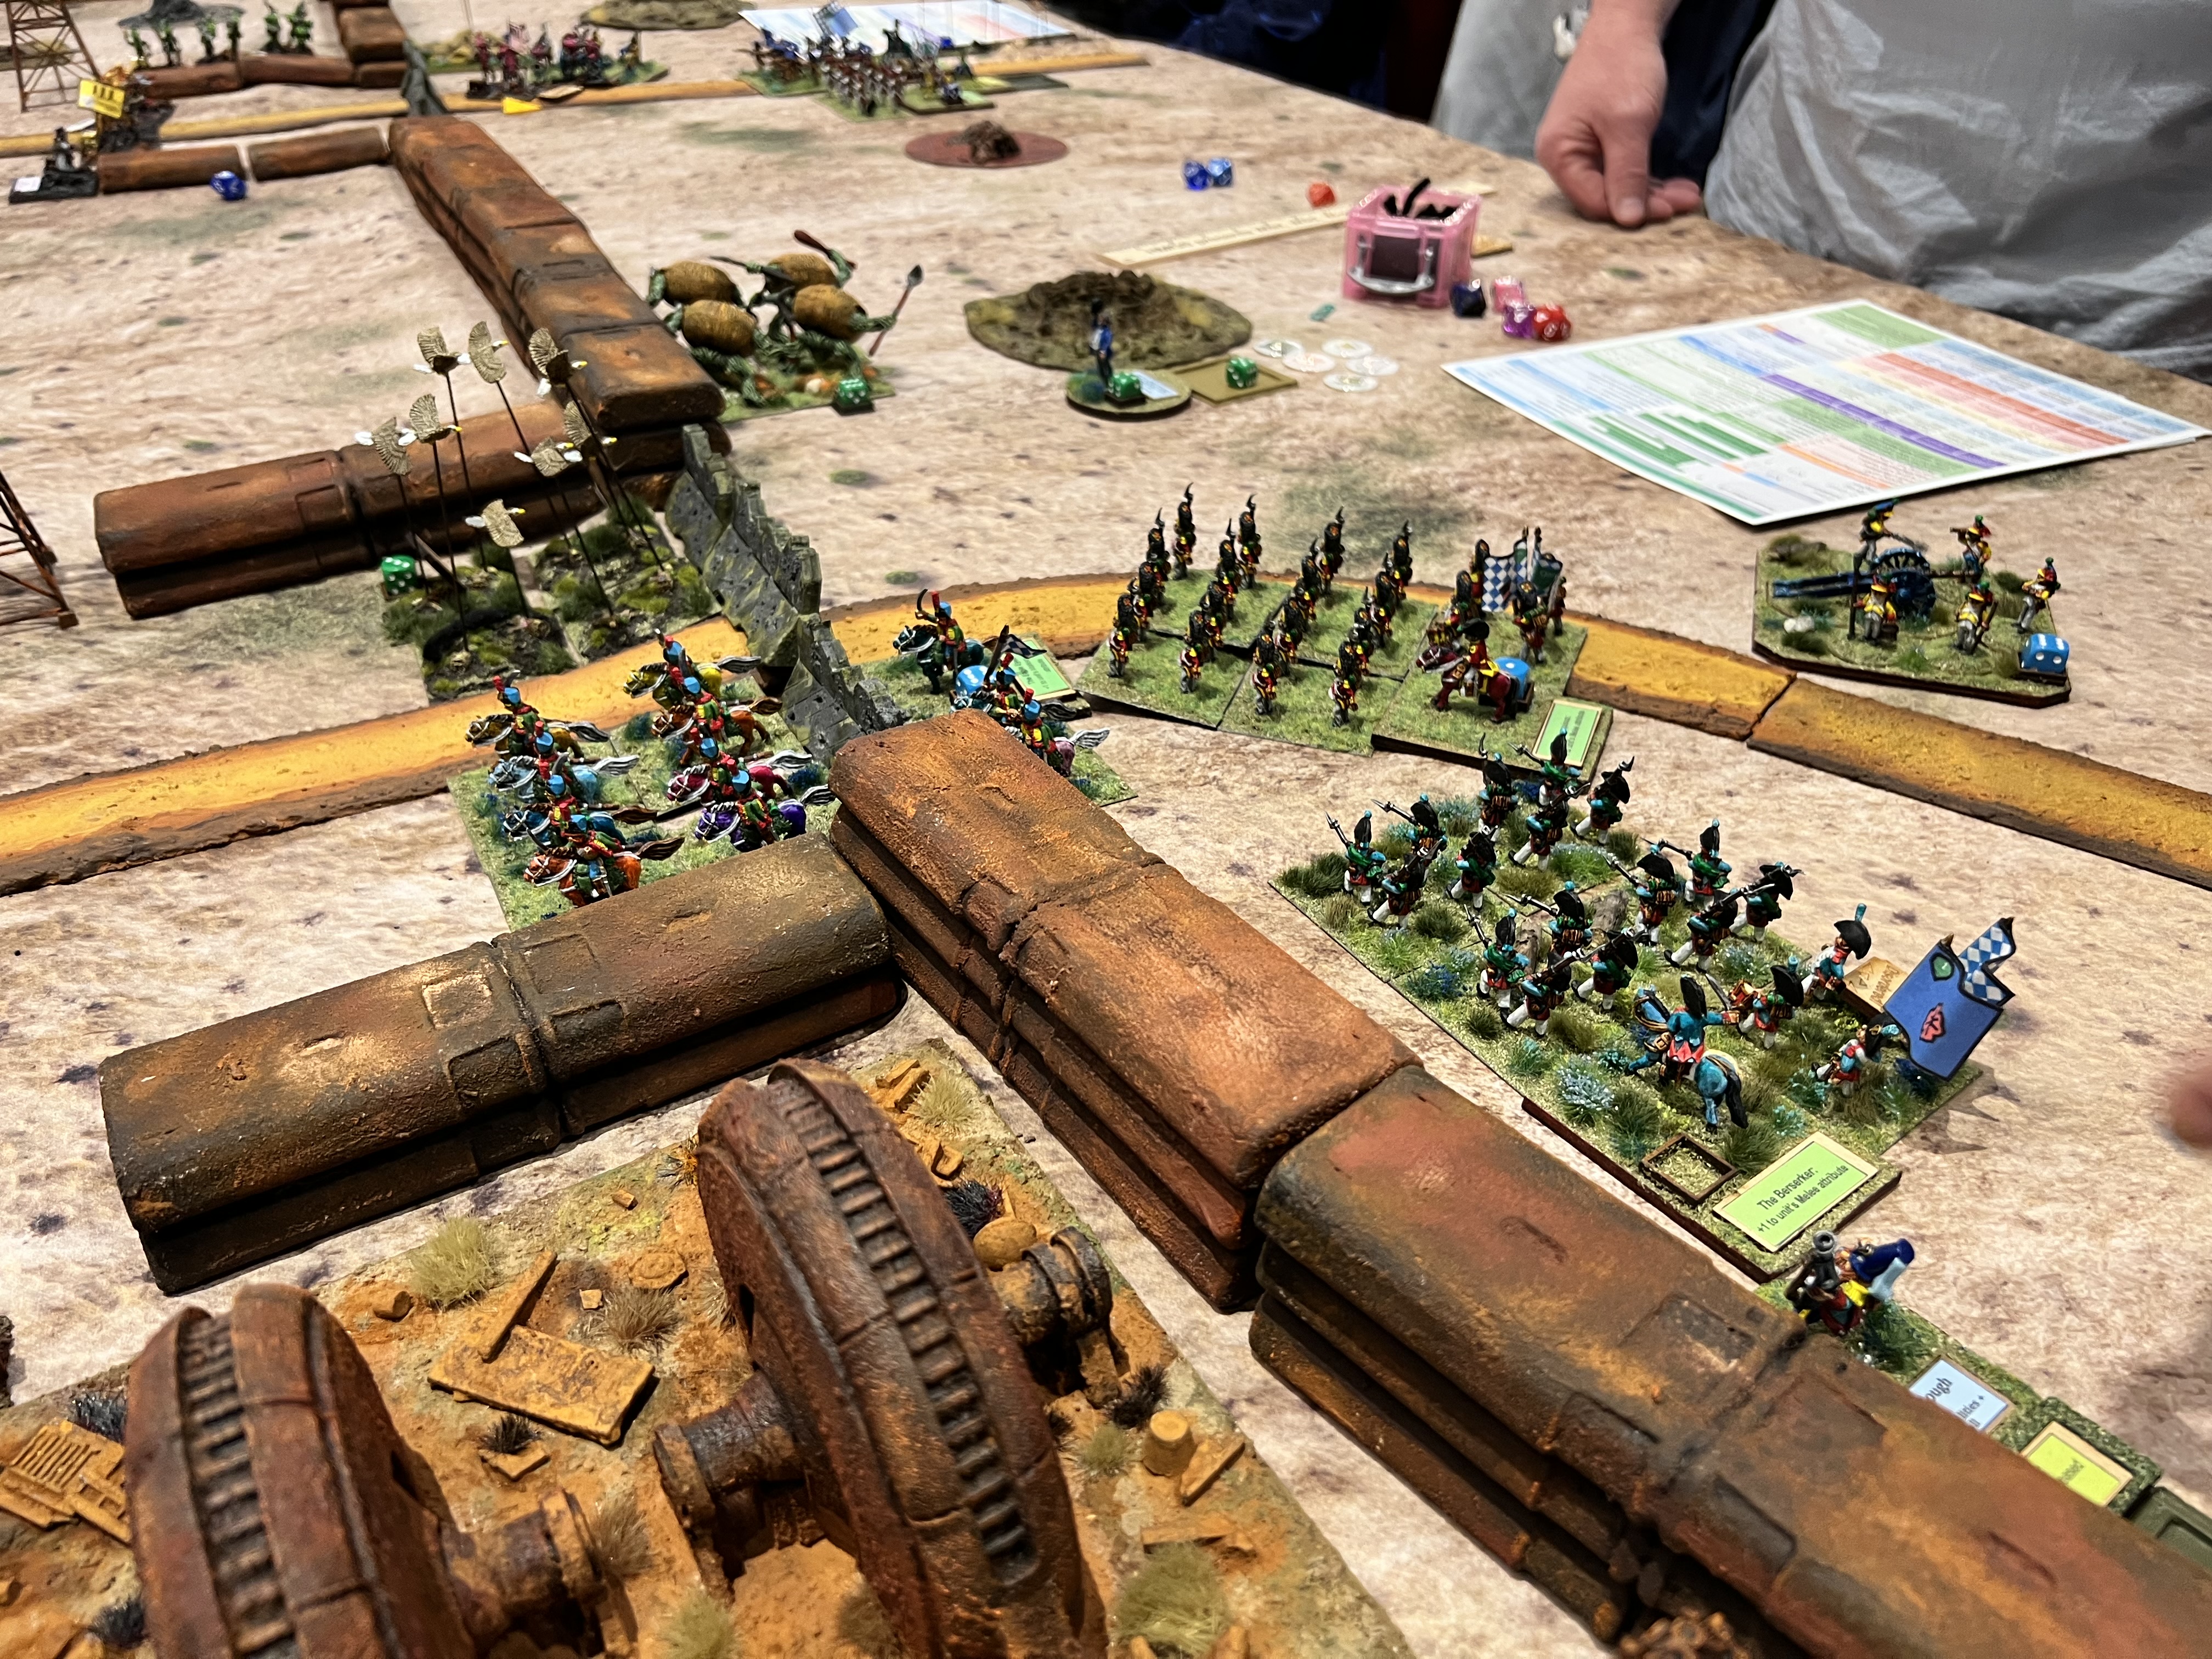
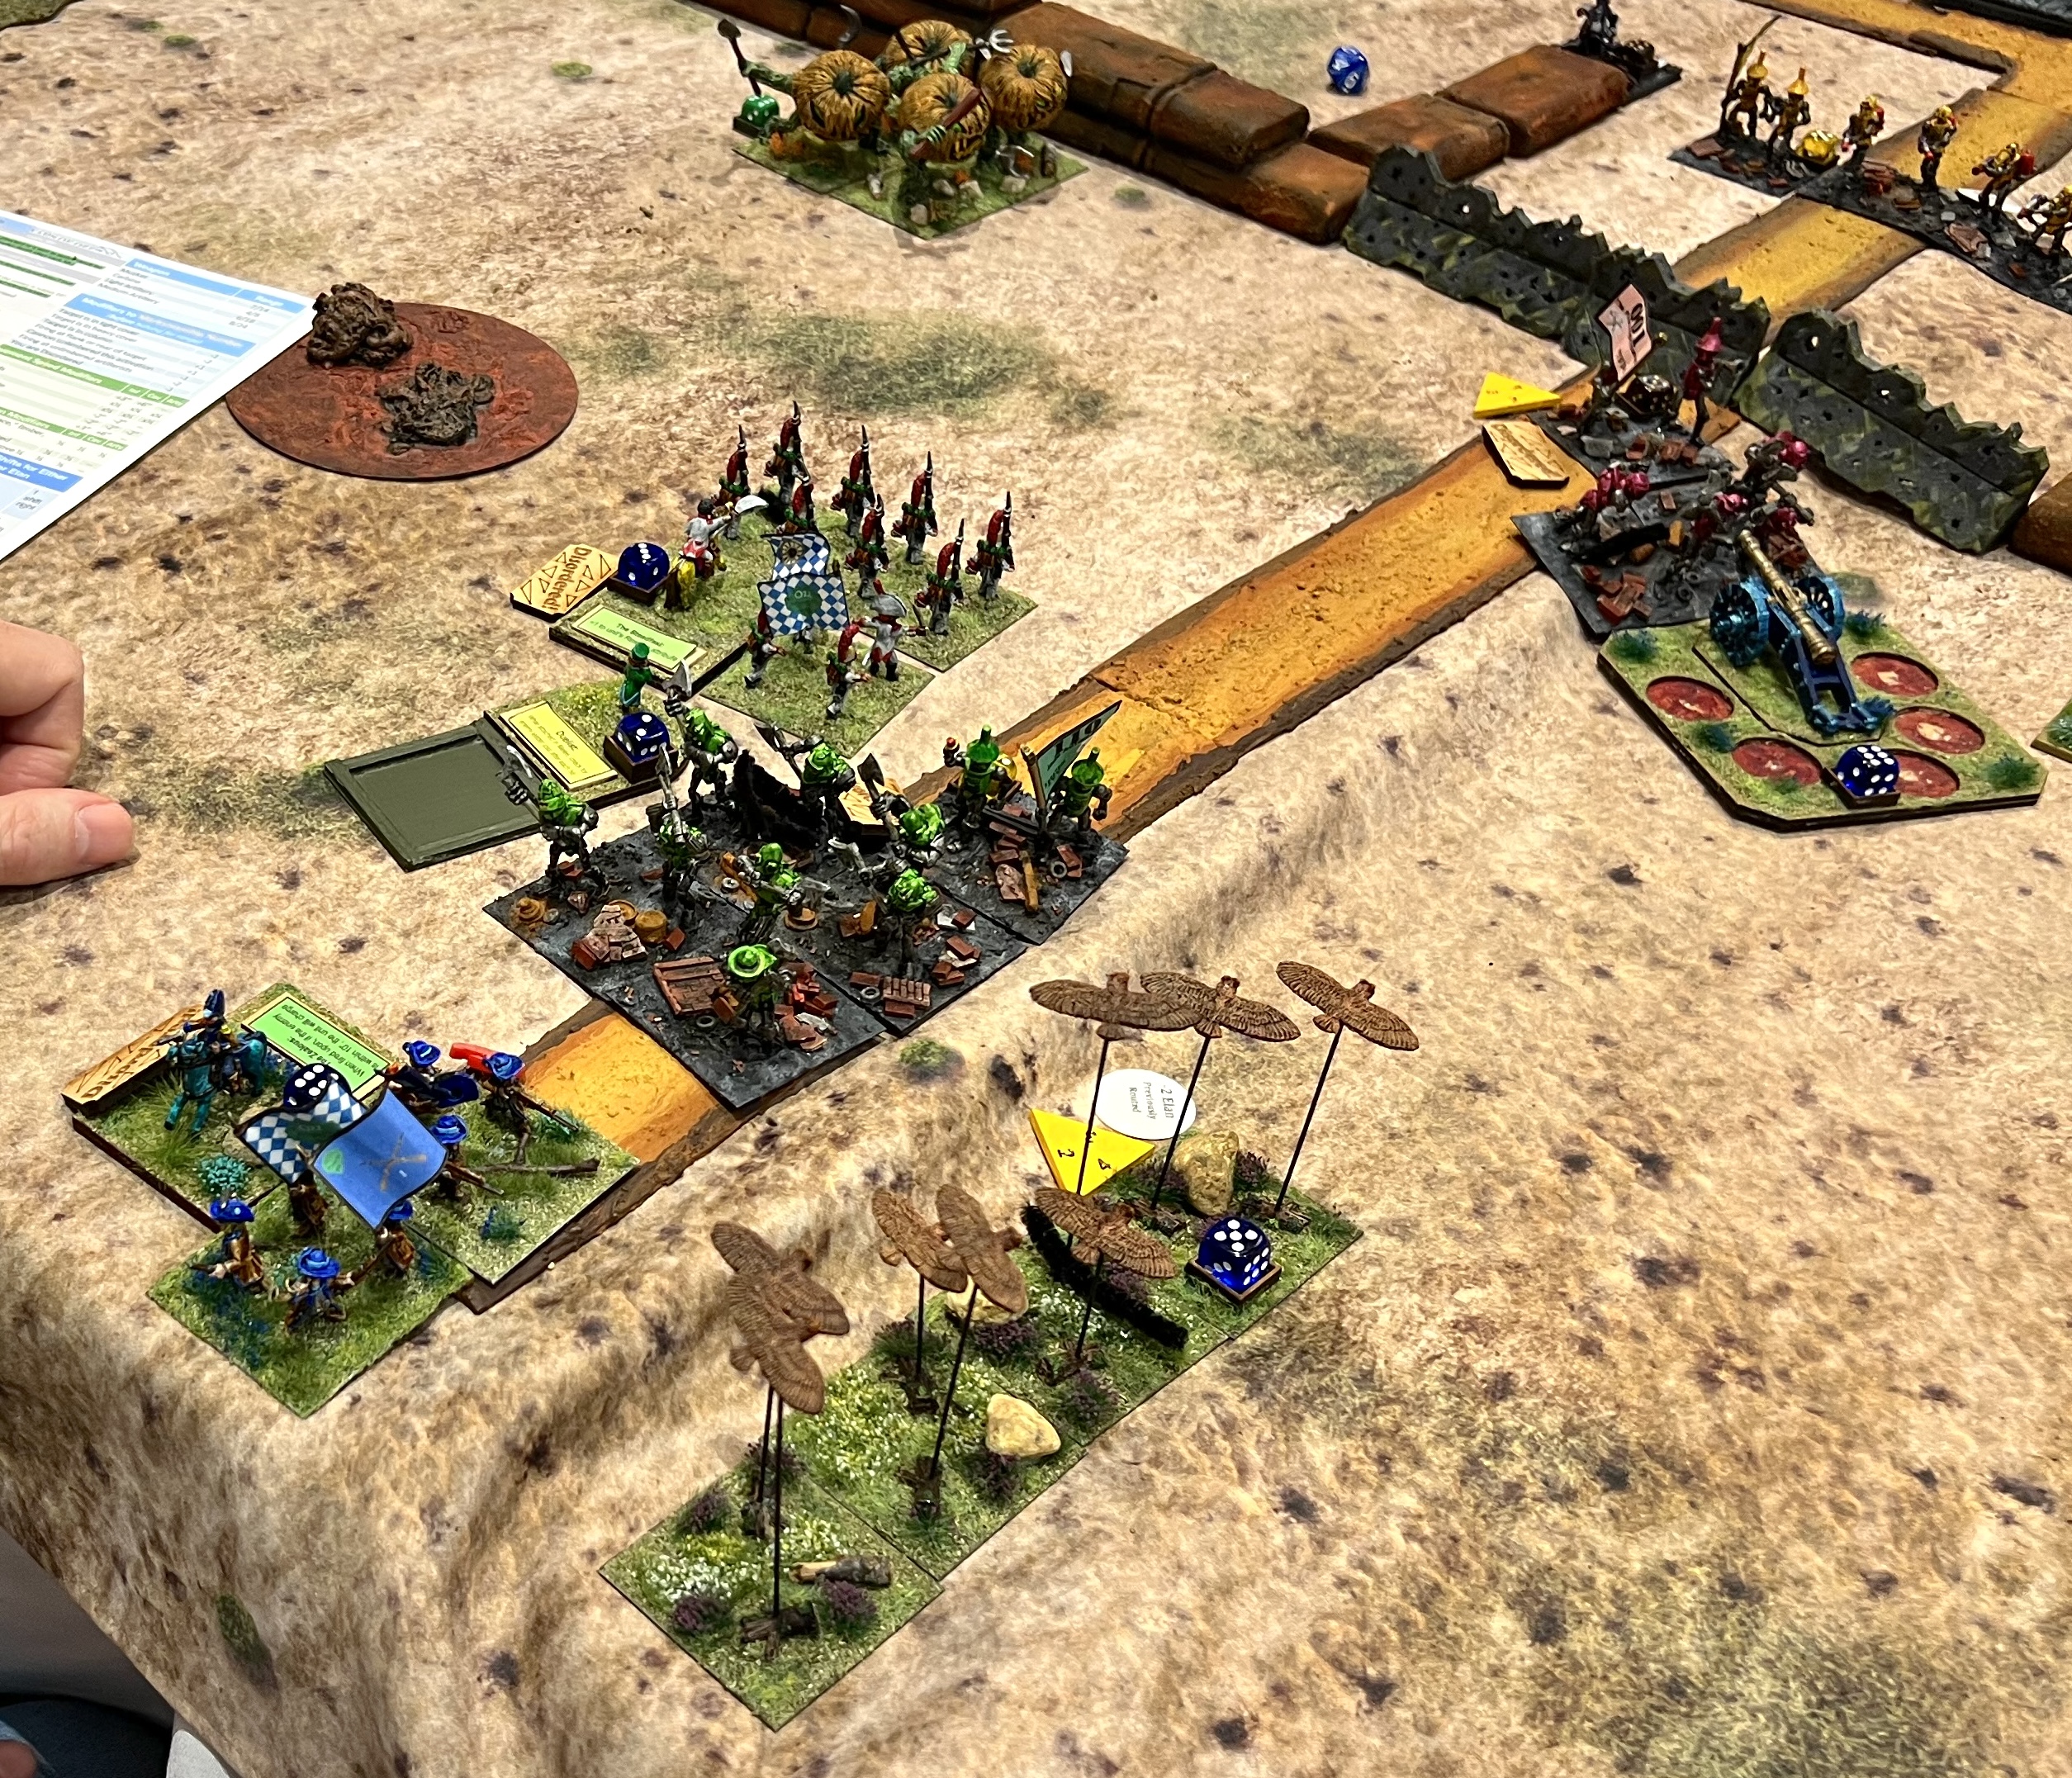
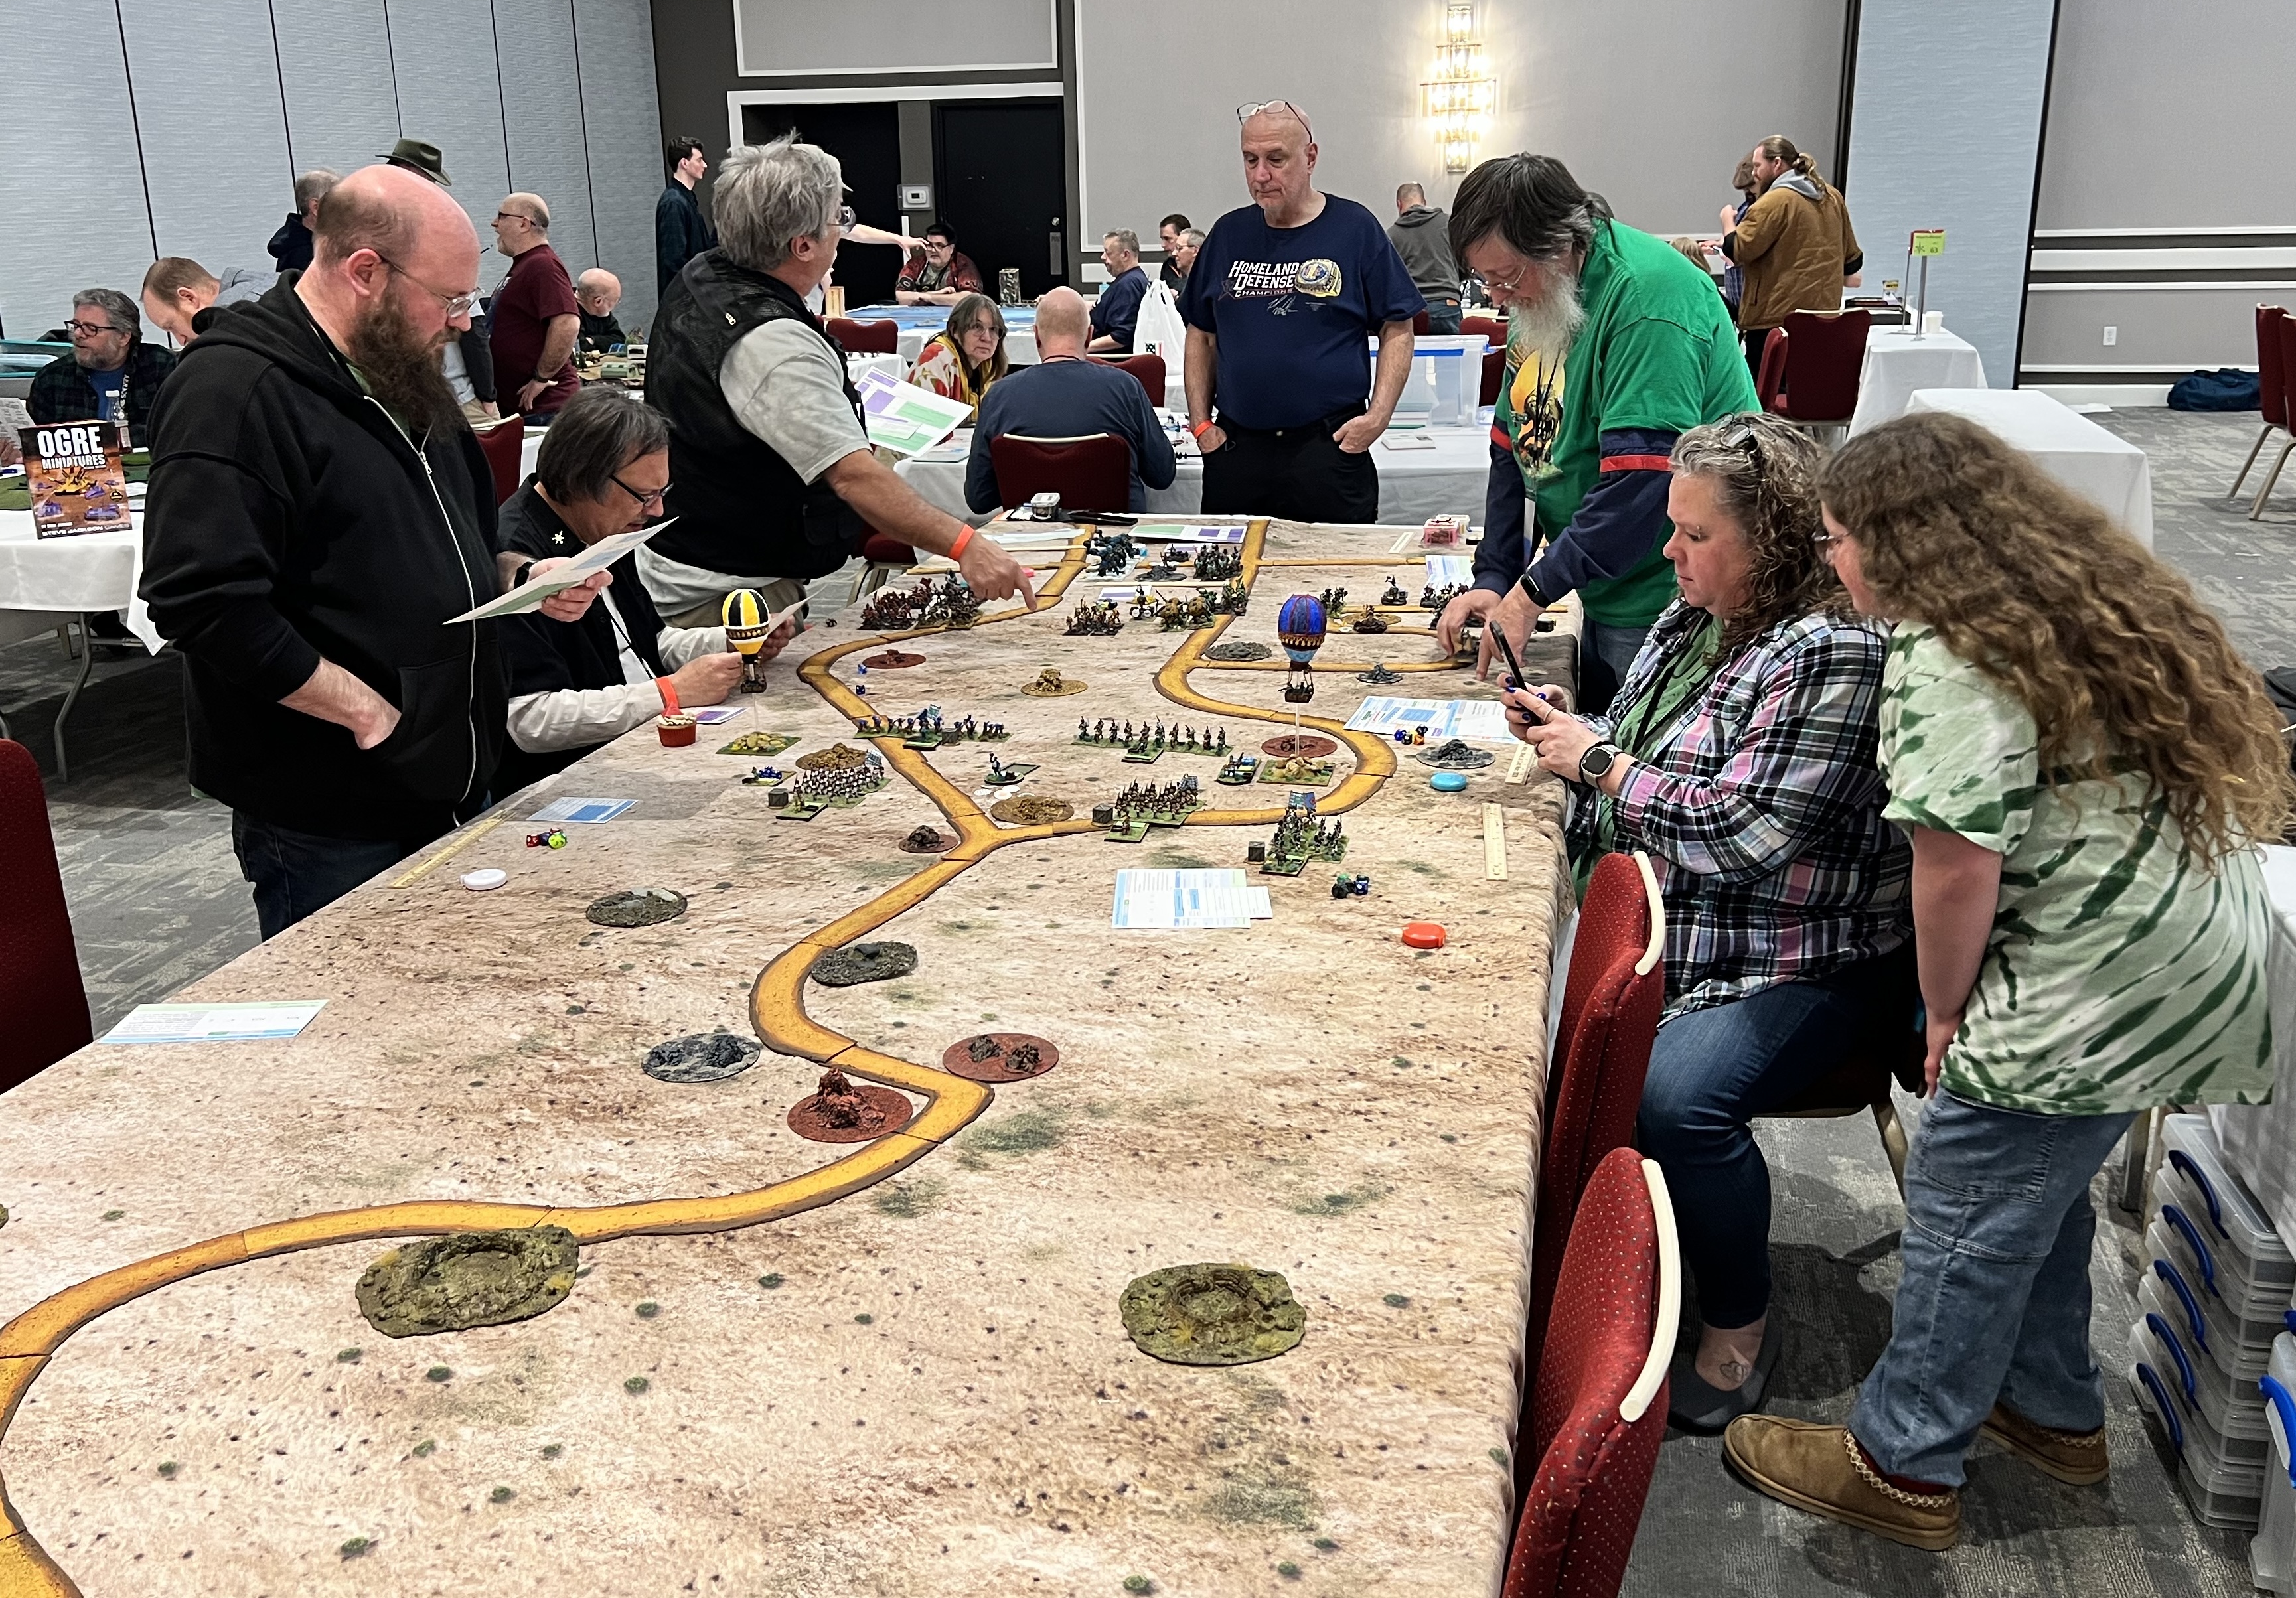
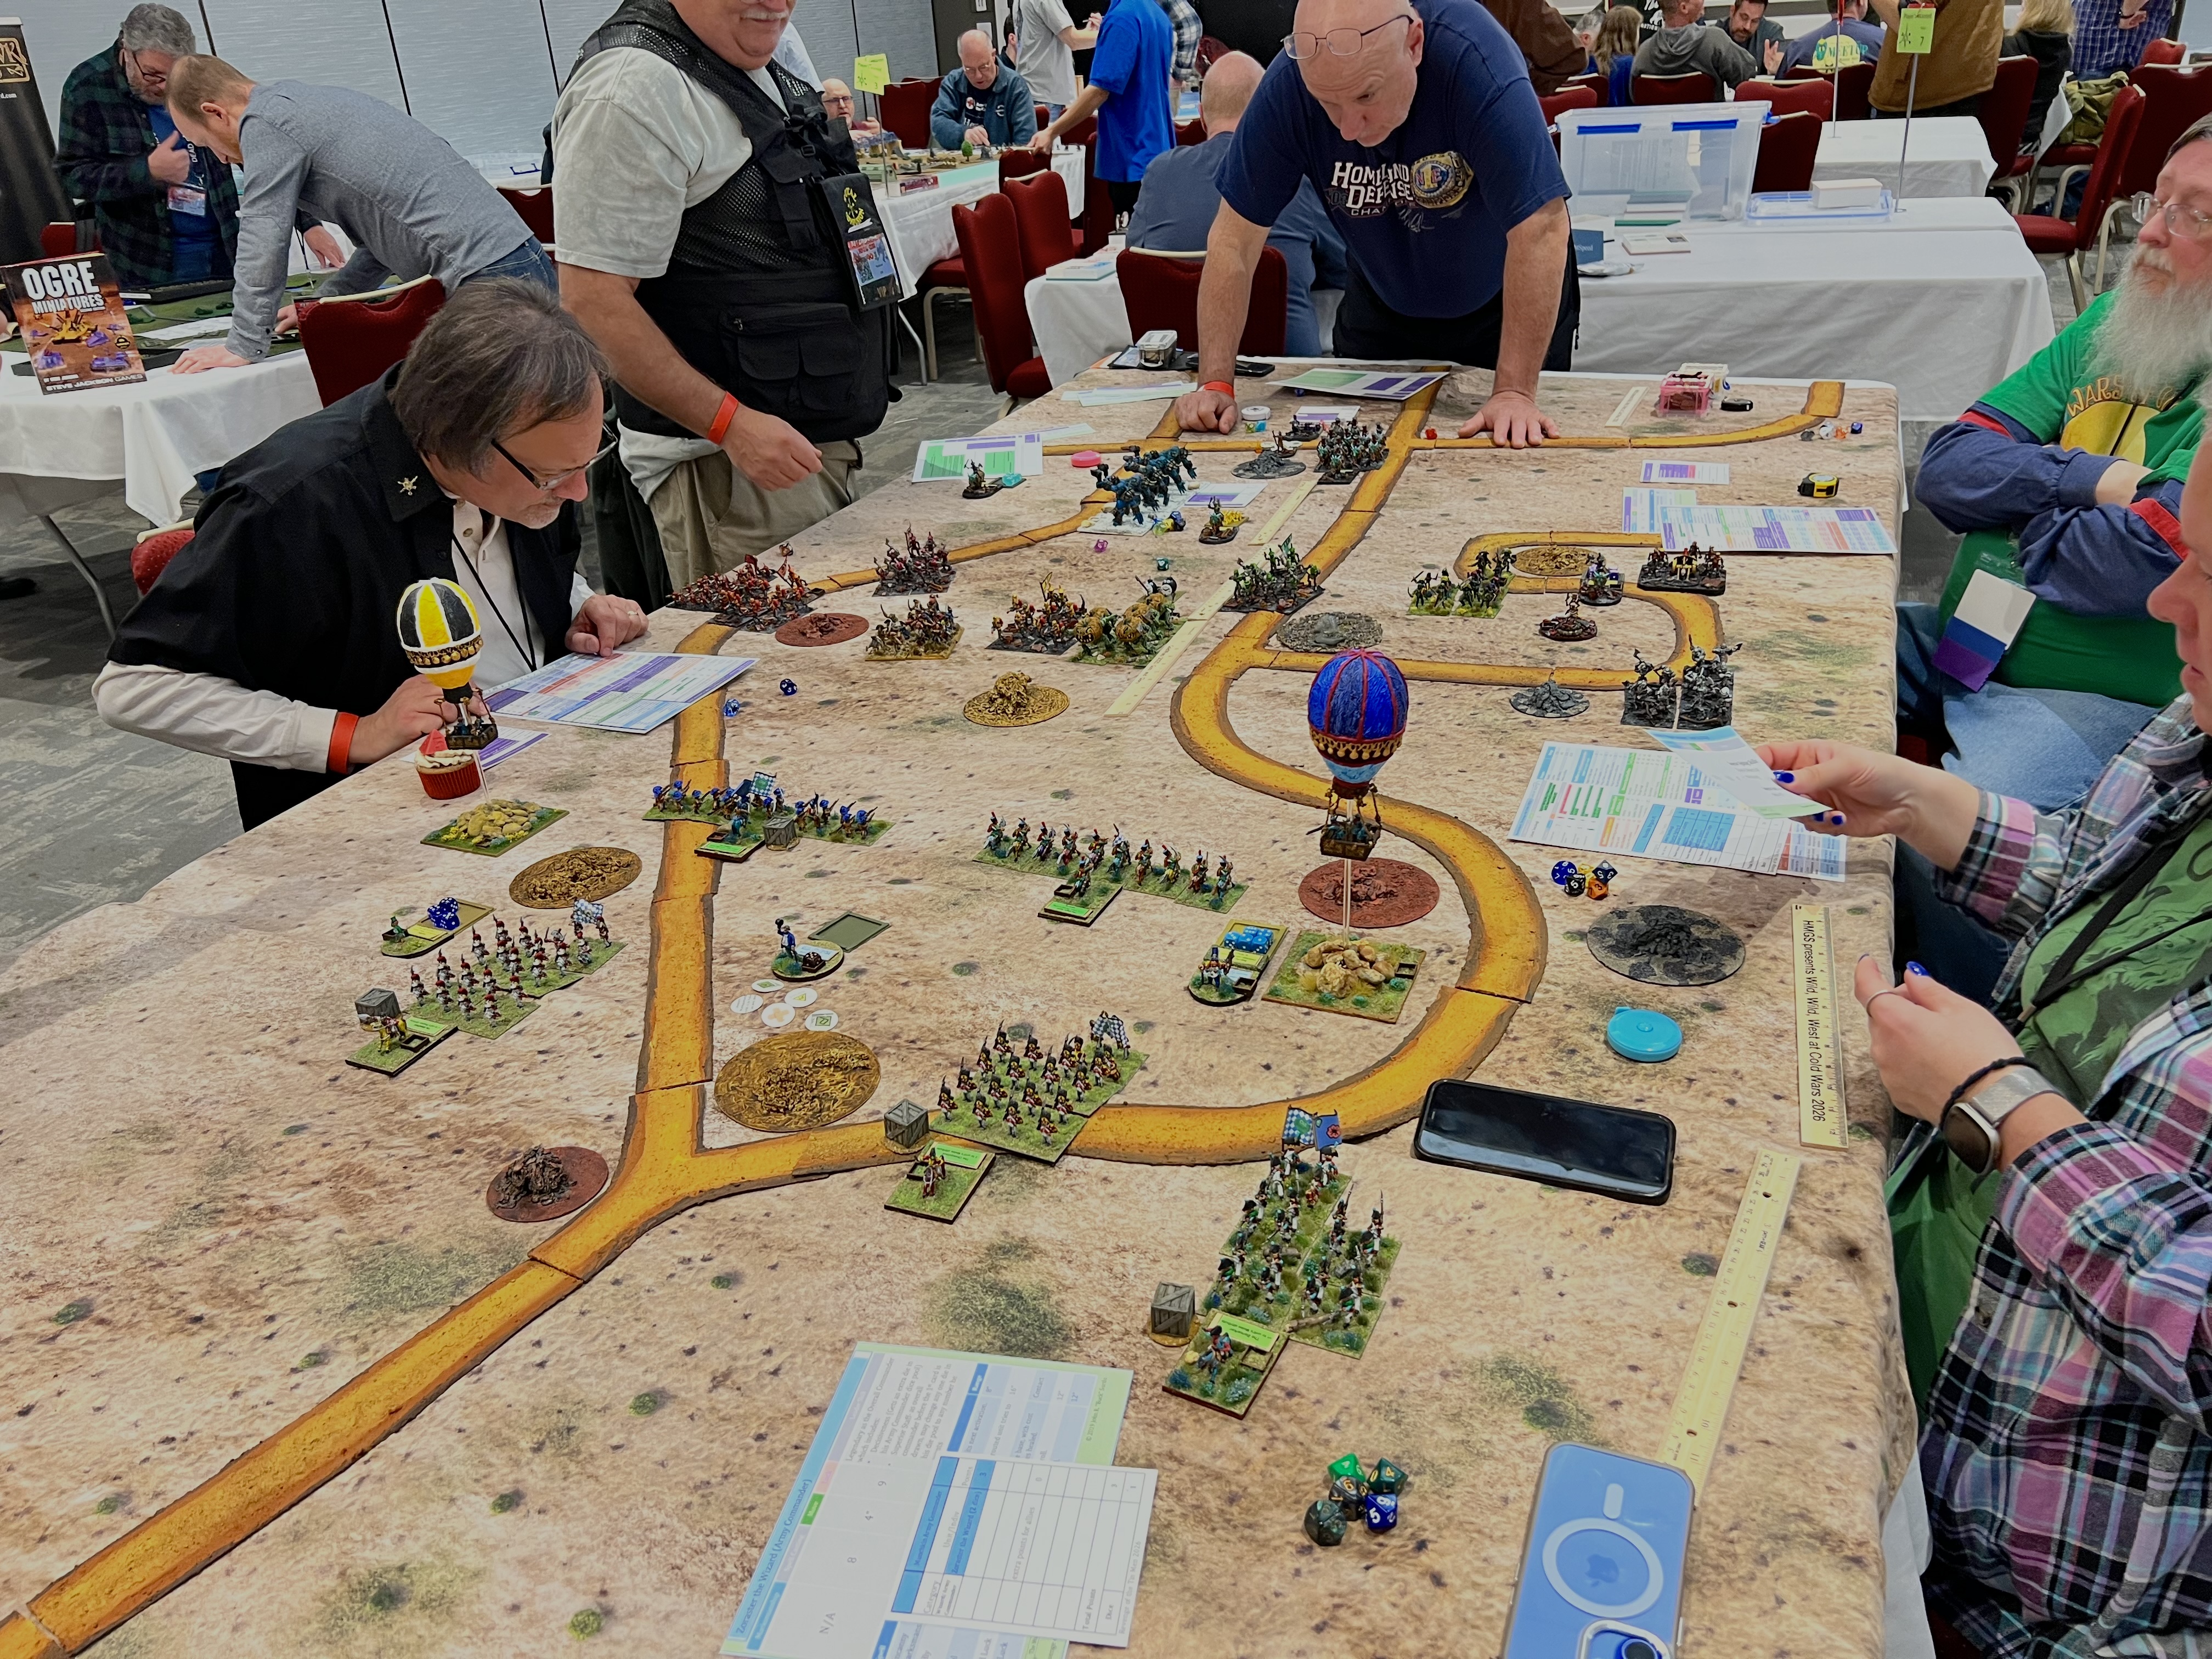
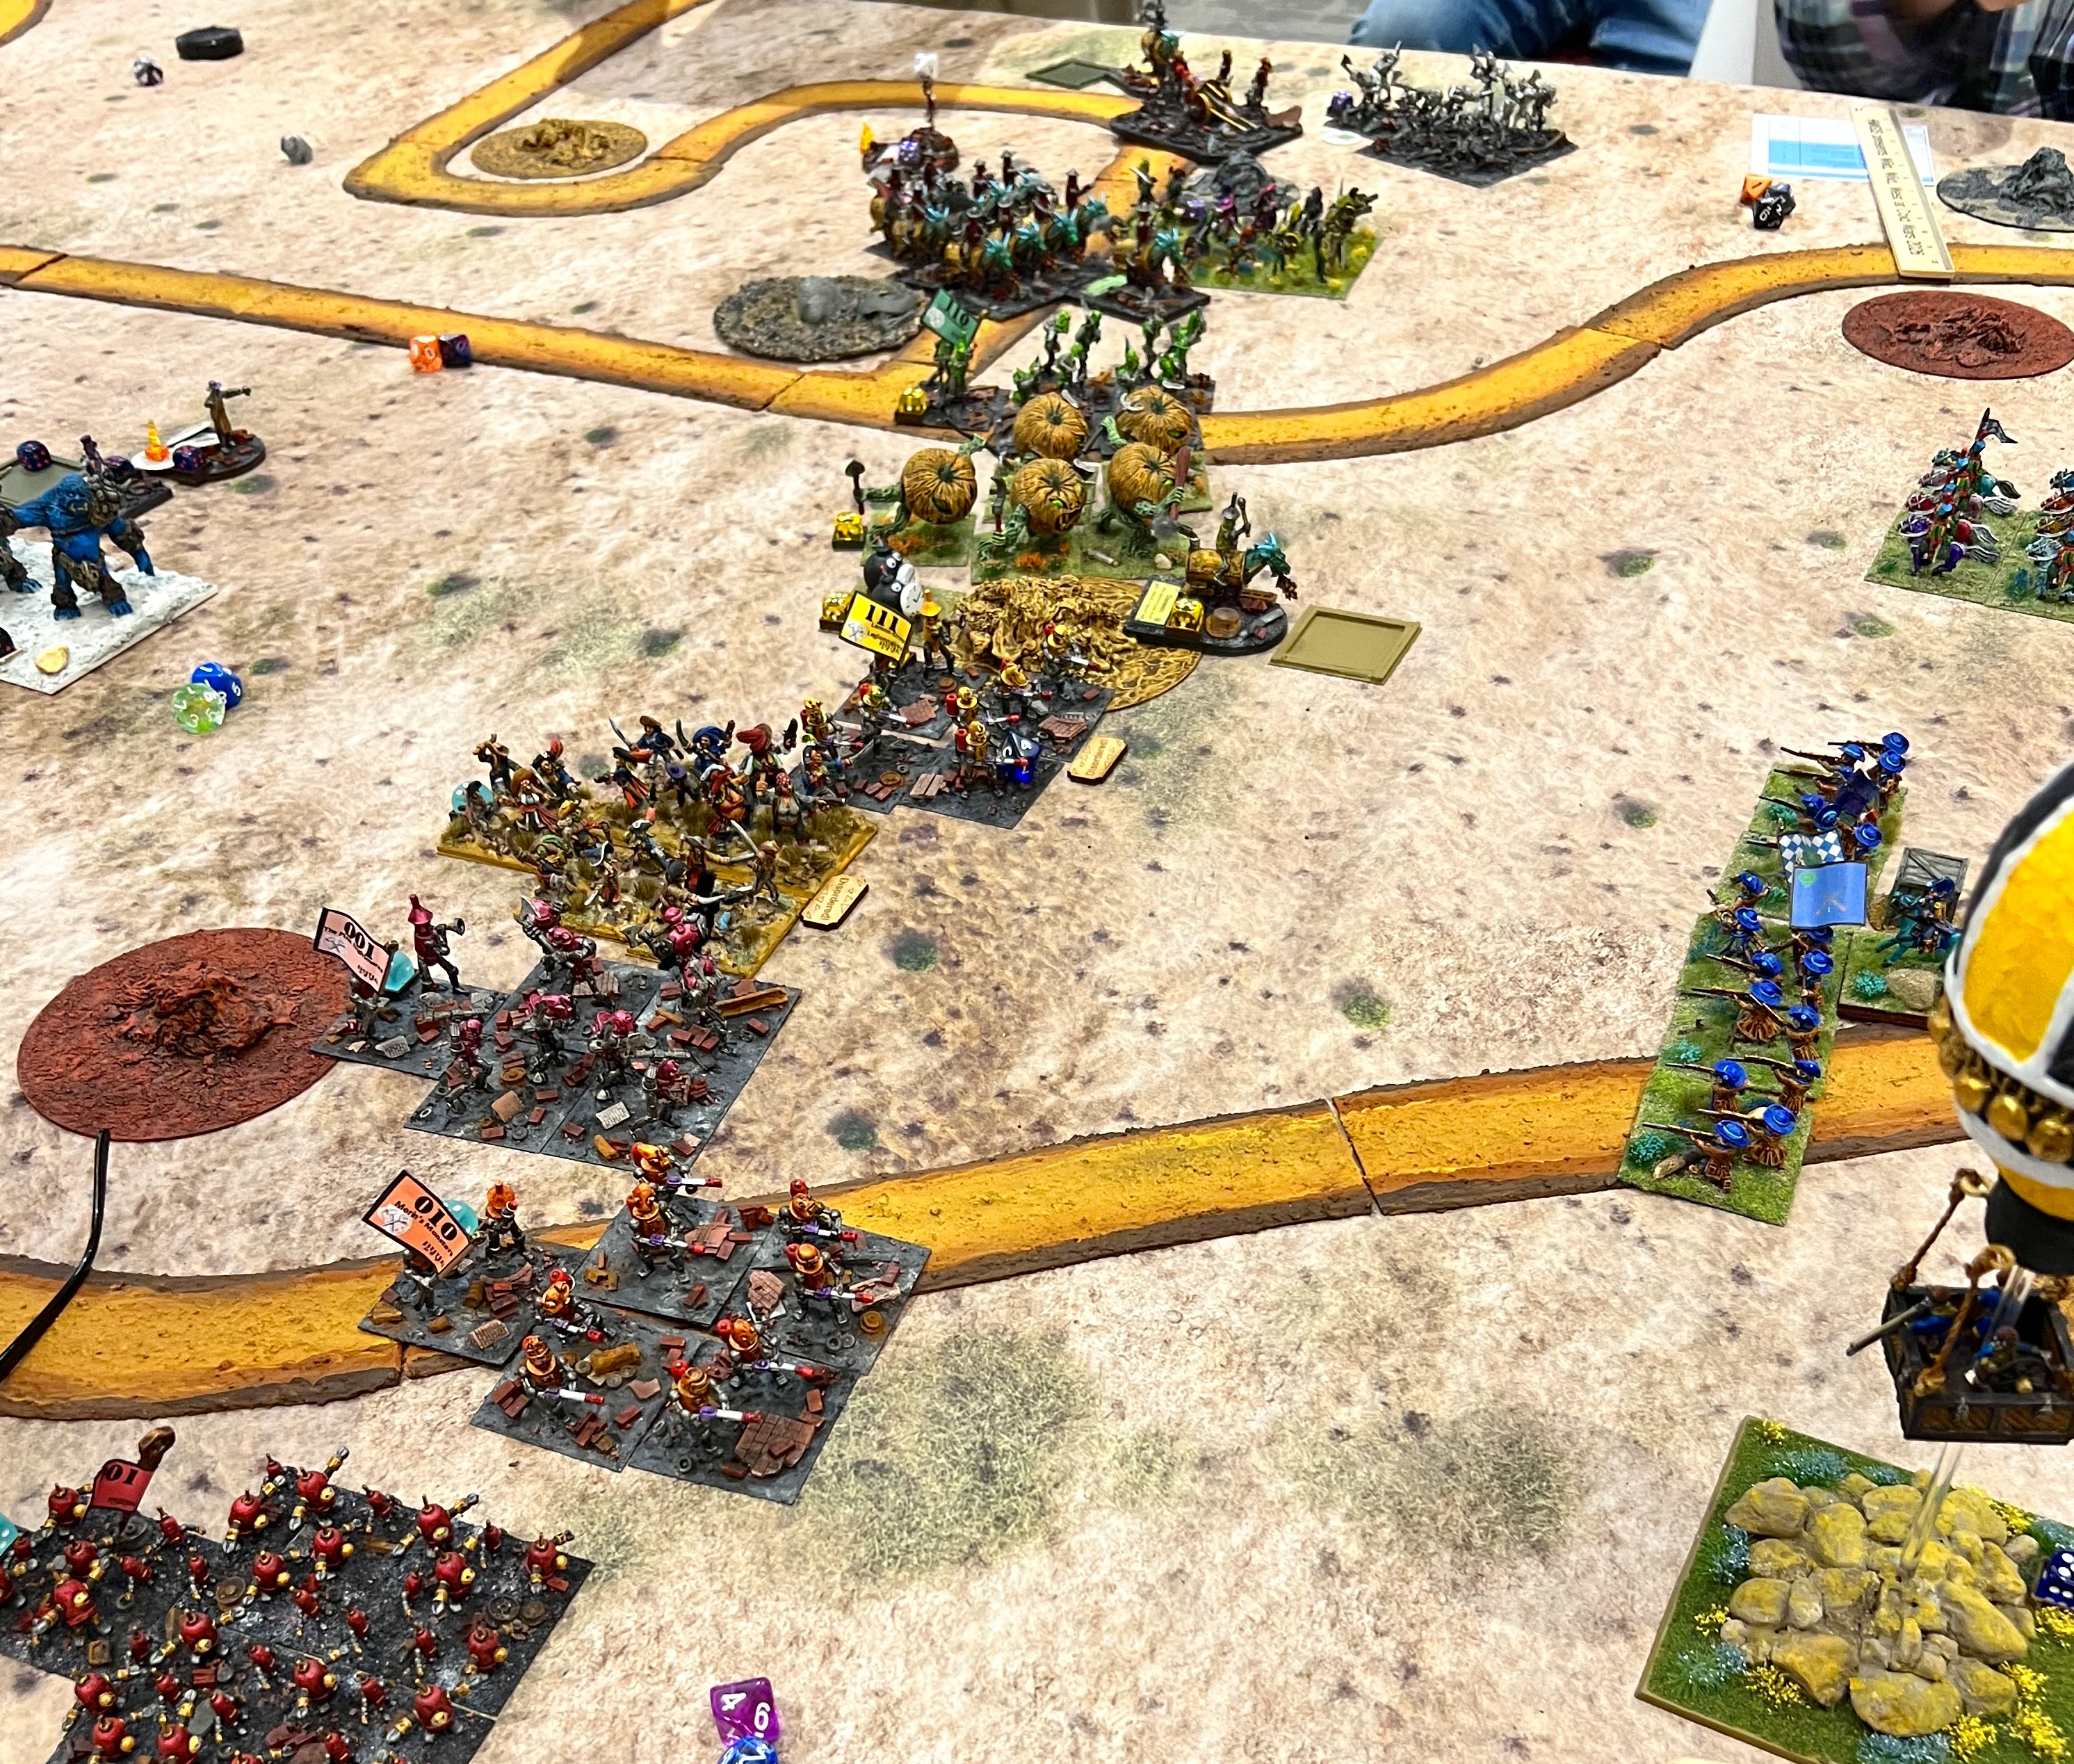
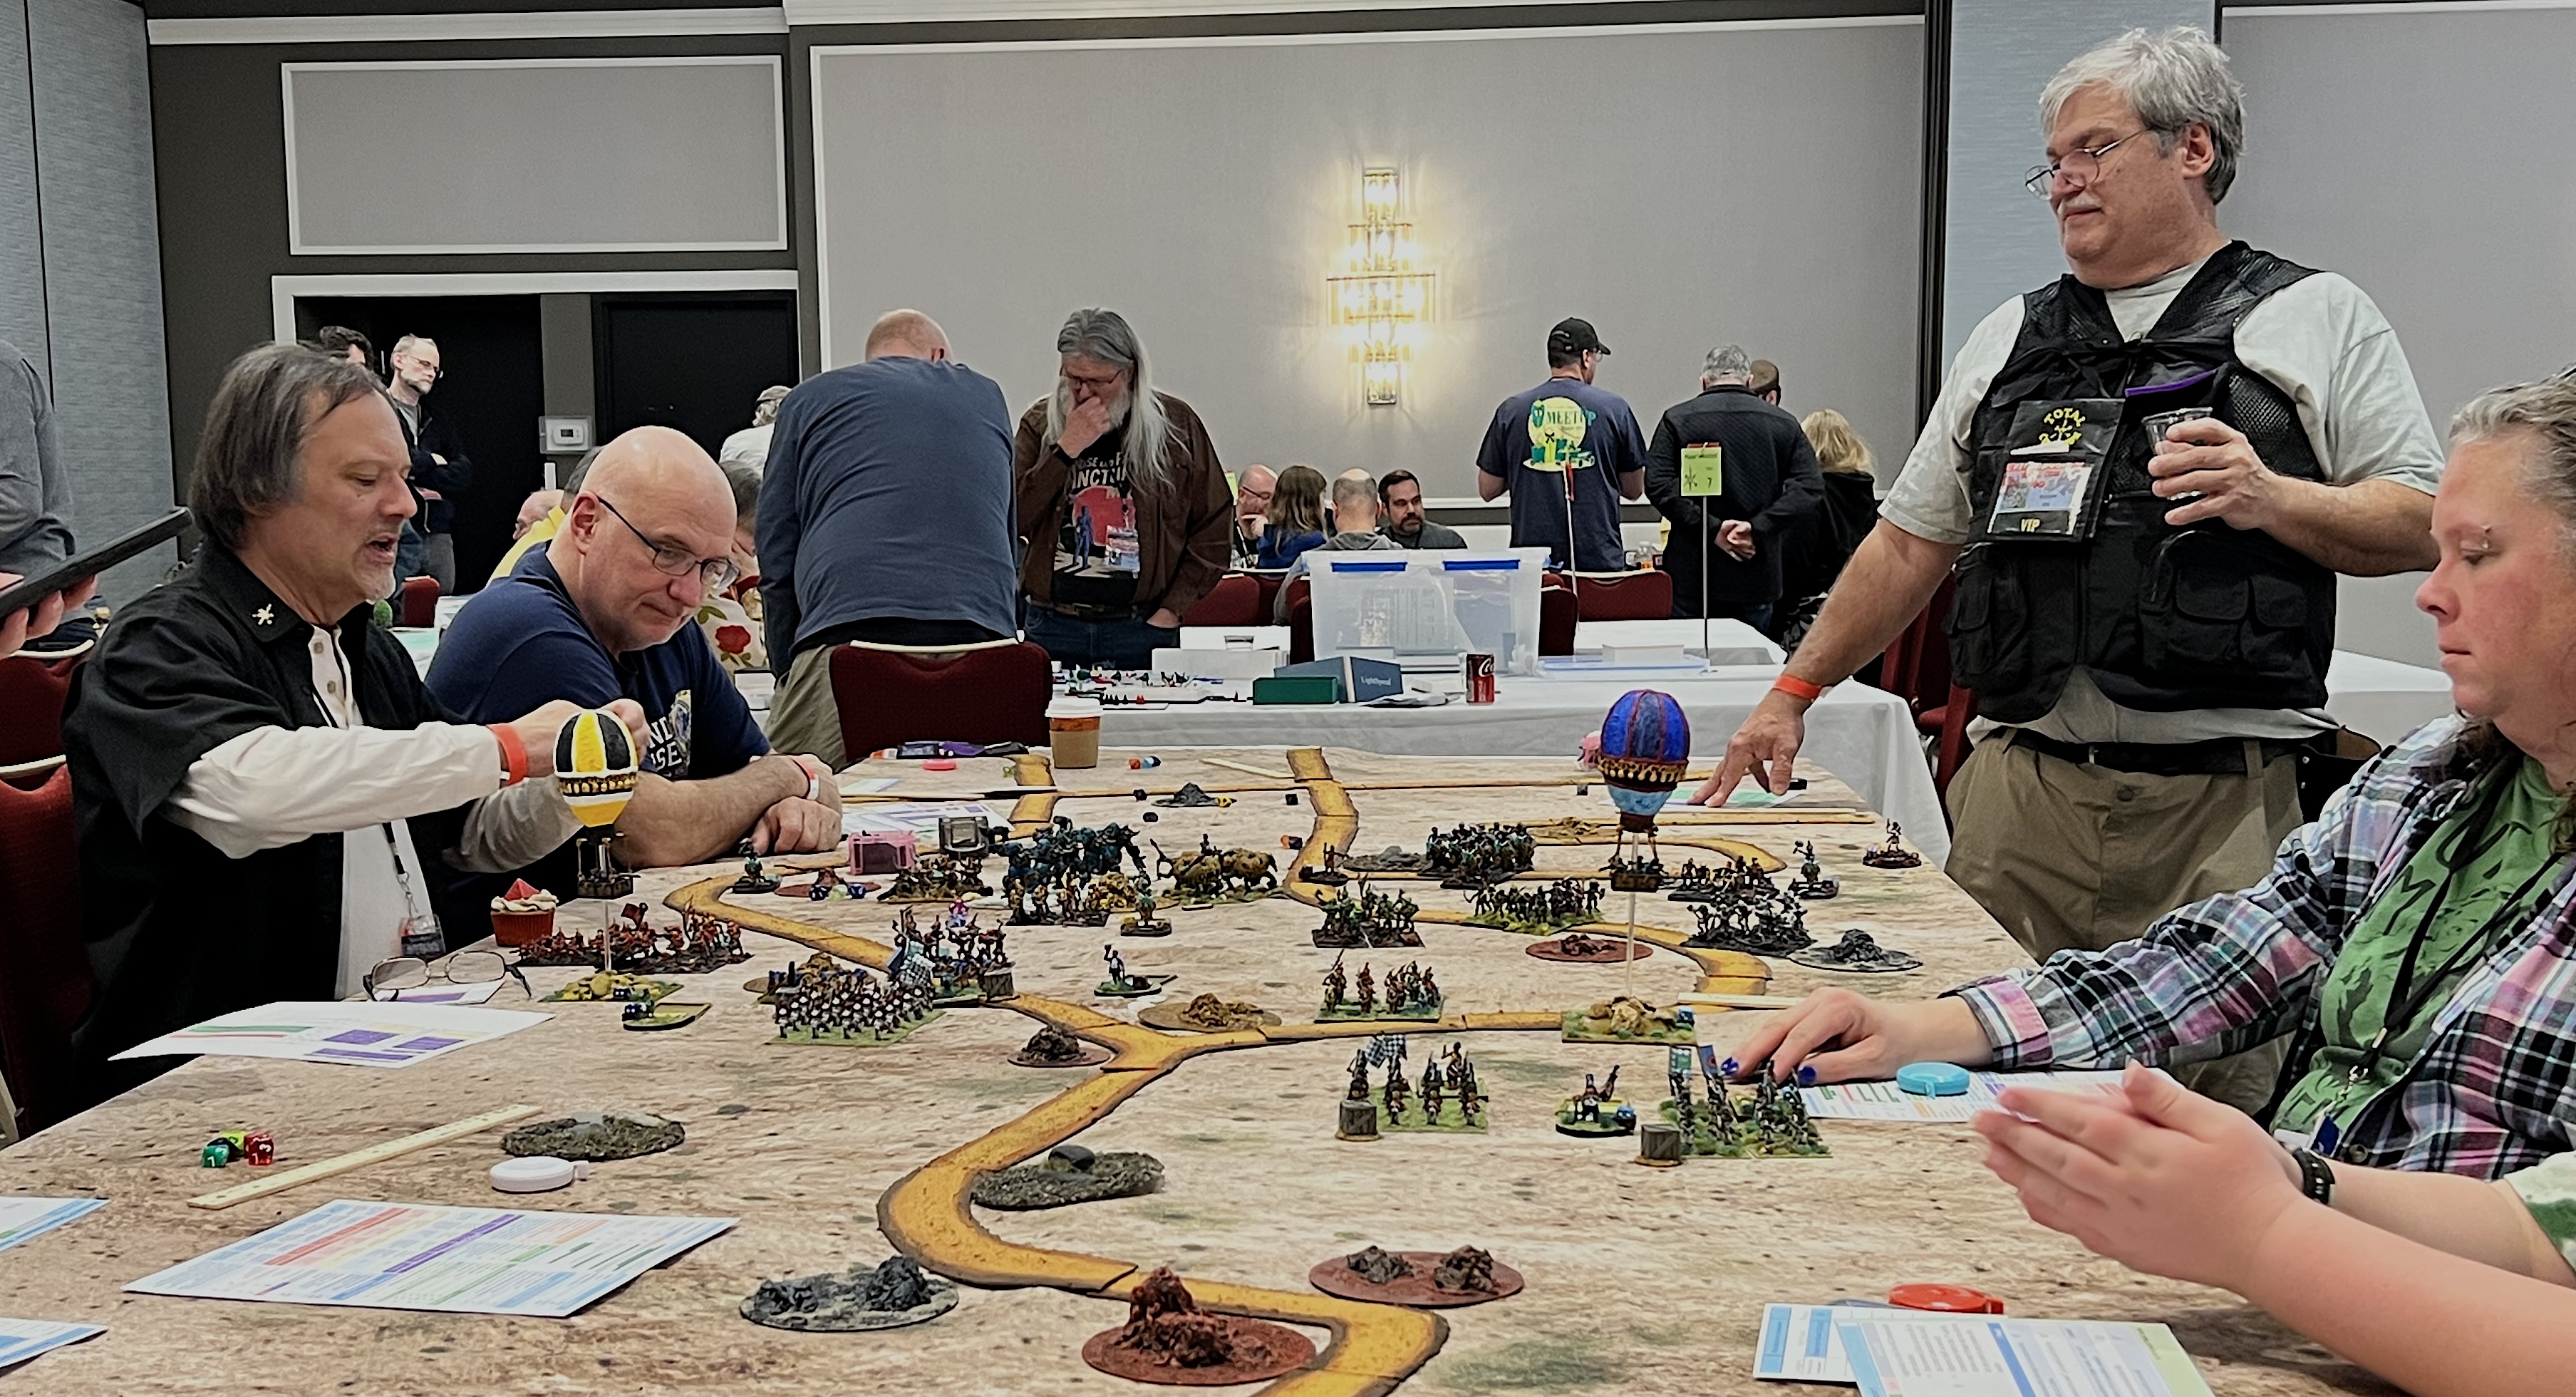
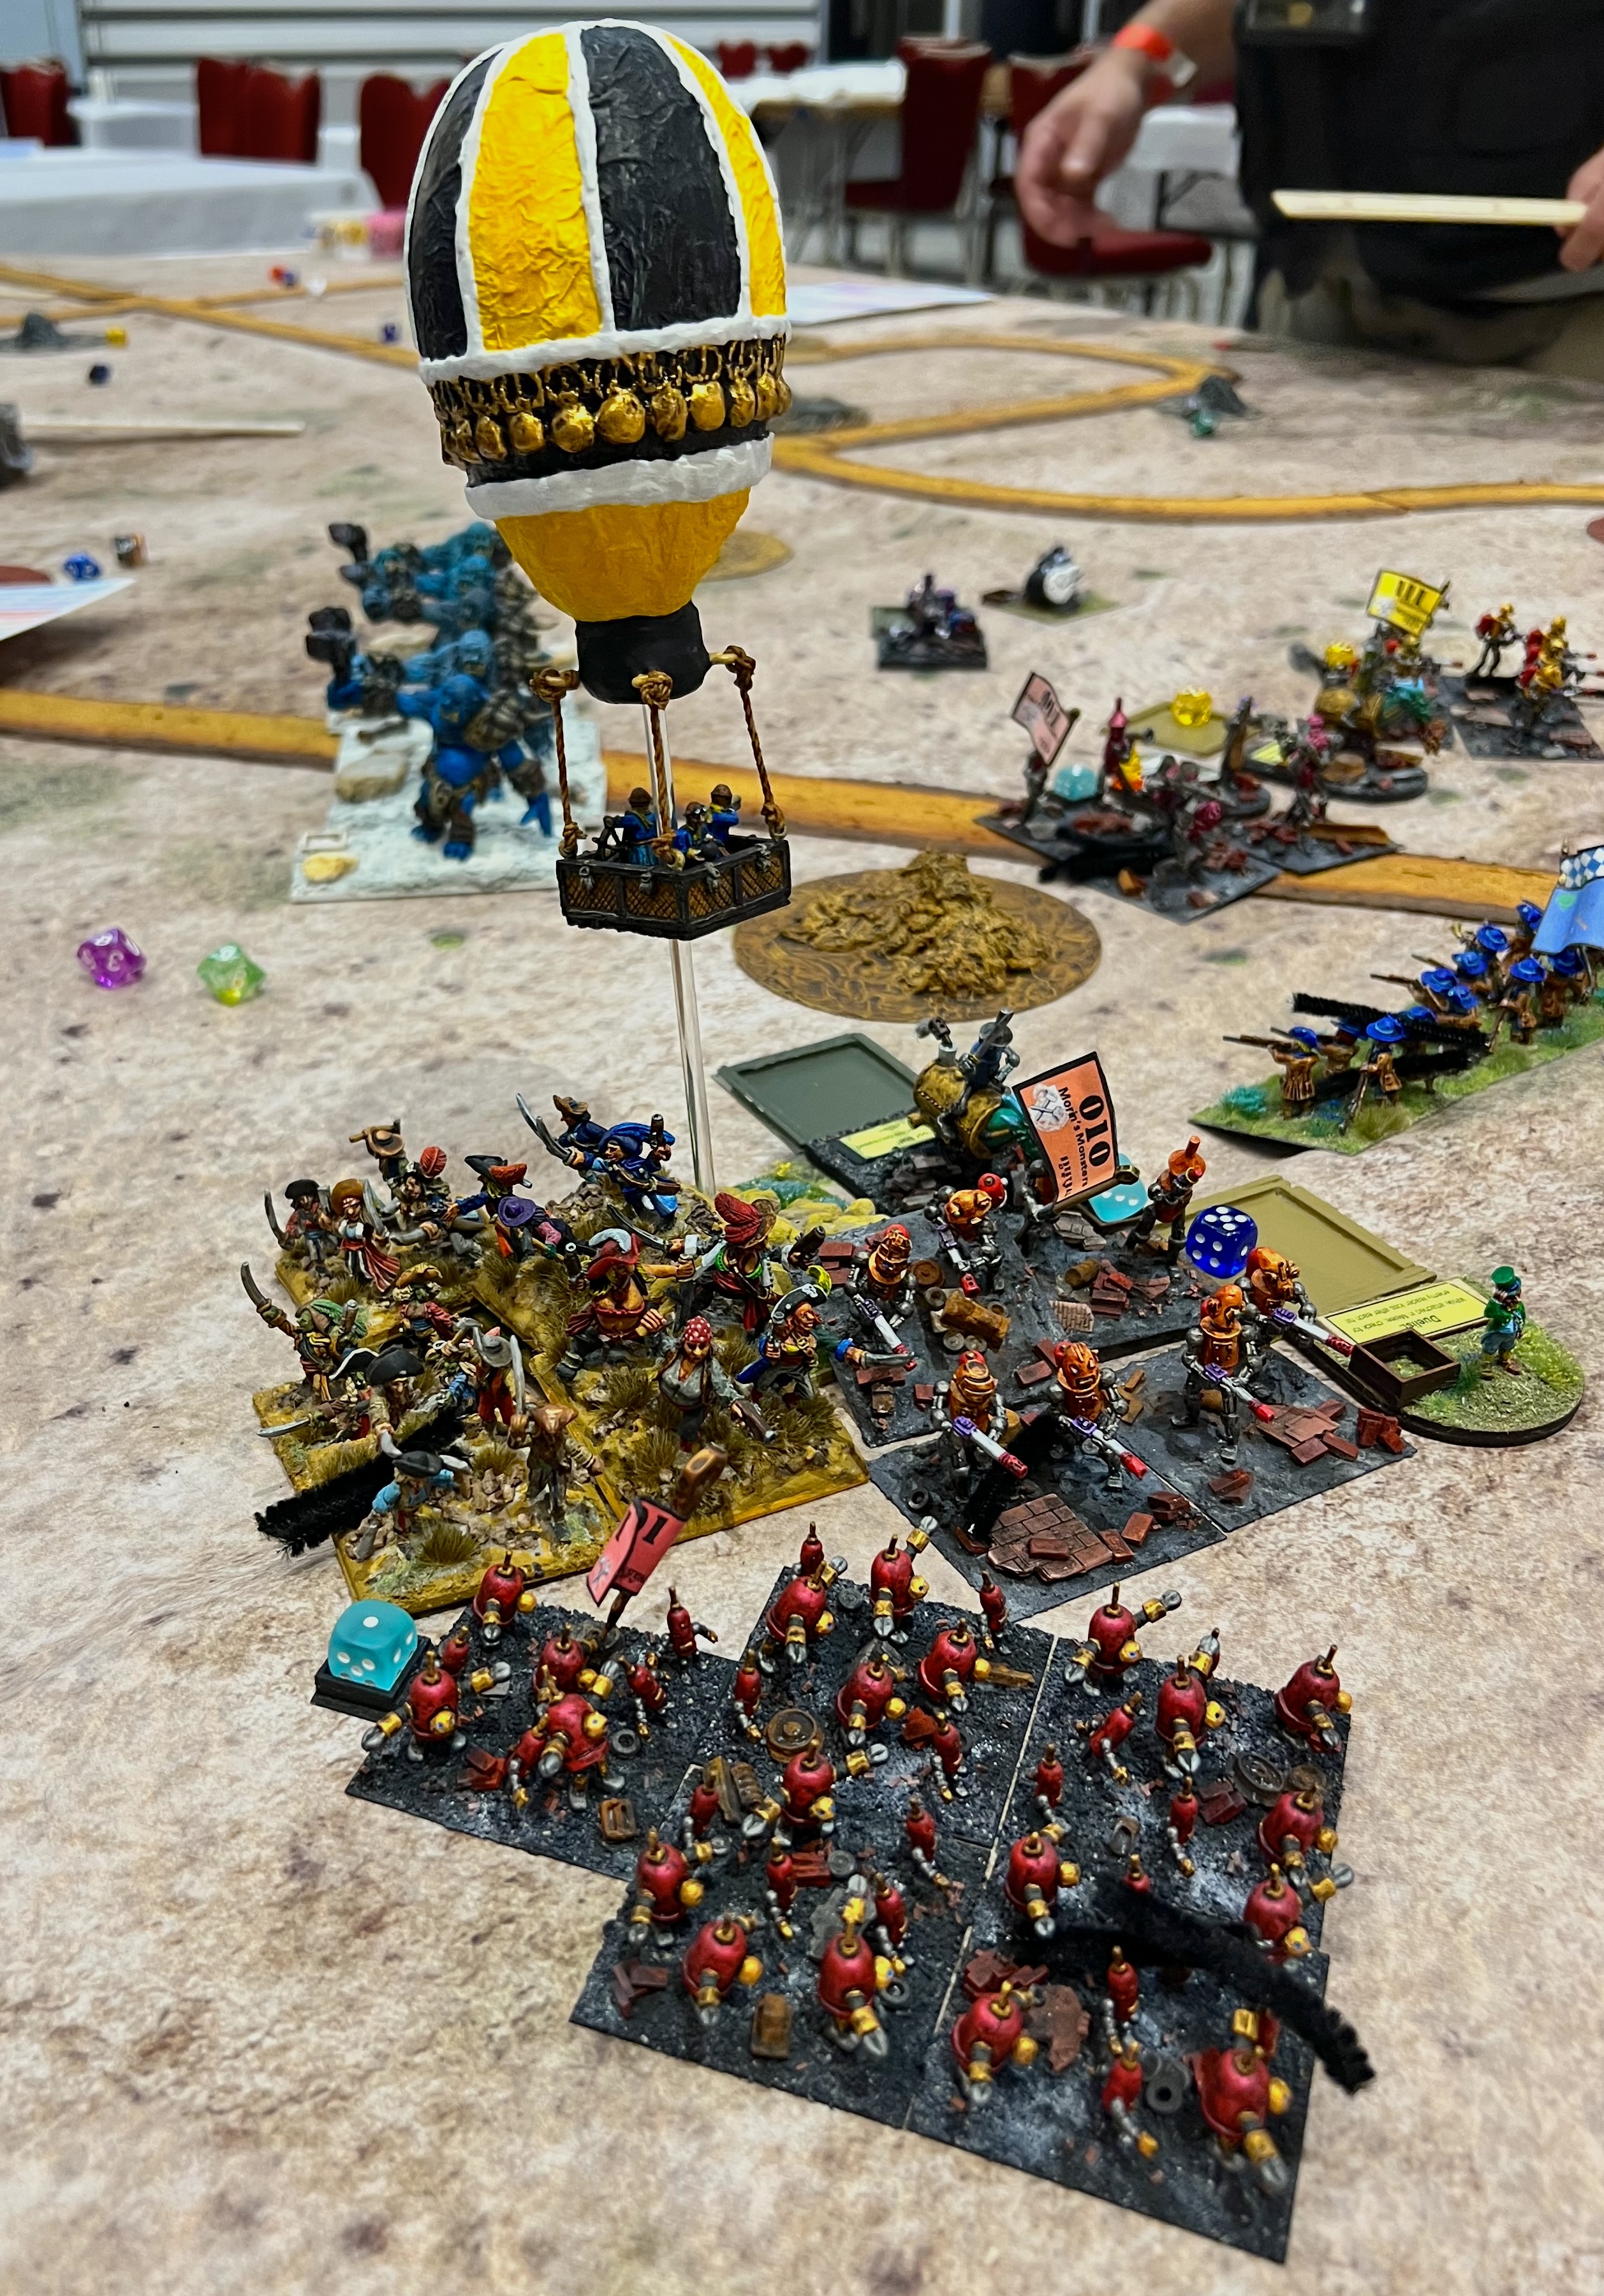
Another big game! The players plan.The Munchkins have 4 heavy crates of technology carried by 4 regiments. The crates slow down the Munchkins. The little folk need to cross a line with the crates safely to gain victory points. Additionally, each Munchkin base that escapes the Nitpik pursuers gets a point. Nitpik gets points for recovering crates and for eliminating Munchkin bases. The Munchkins have set up a delaying picket line of light cavalry and sharpshooters between the two balloons. This is to give those fleeing a chance to escape the Nitpik and allied horde.On the right, the Munchkin picket line. On the left, the pursuers!There were many Nitpik pursuers. This included those who switched alliances, like Frost Ogres, Great Pumpkinheads, and Jinjur pirates. Traffic control became a challenge as they tried to catch the Munchkins.The pursuers coordinate their movements.The Munchkin Aerostat frustrated several Nitpik regiments. As they tried to advance, the Aerostat laid down effective disruptive musketry on the mechanical men. Nitpik cavalry broke through and tried to run the Munchkins down. Several crates were lost as the Munchkins routed in disarray.The game ended with this scene showing Sam disappointed. The Munchkins nearly won the game. Her unit only needed 1 more inch to cross the line of the crater with the crate. So close! (well played though Sam!!) In the end, Nitpik won a VERY narrow 12-10 victory.
That wrapped up Friday night. The next game would happen Saturday morning set in North Africa.
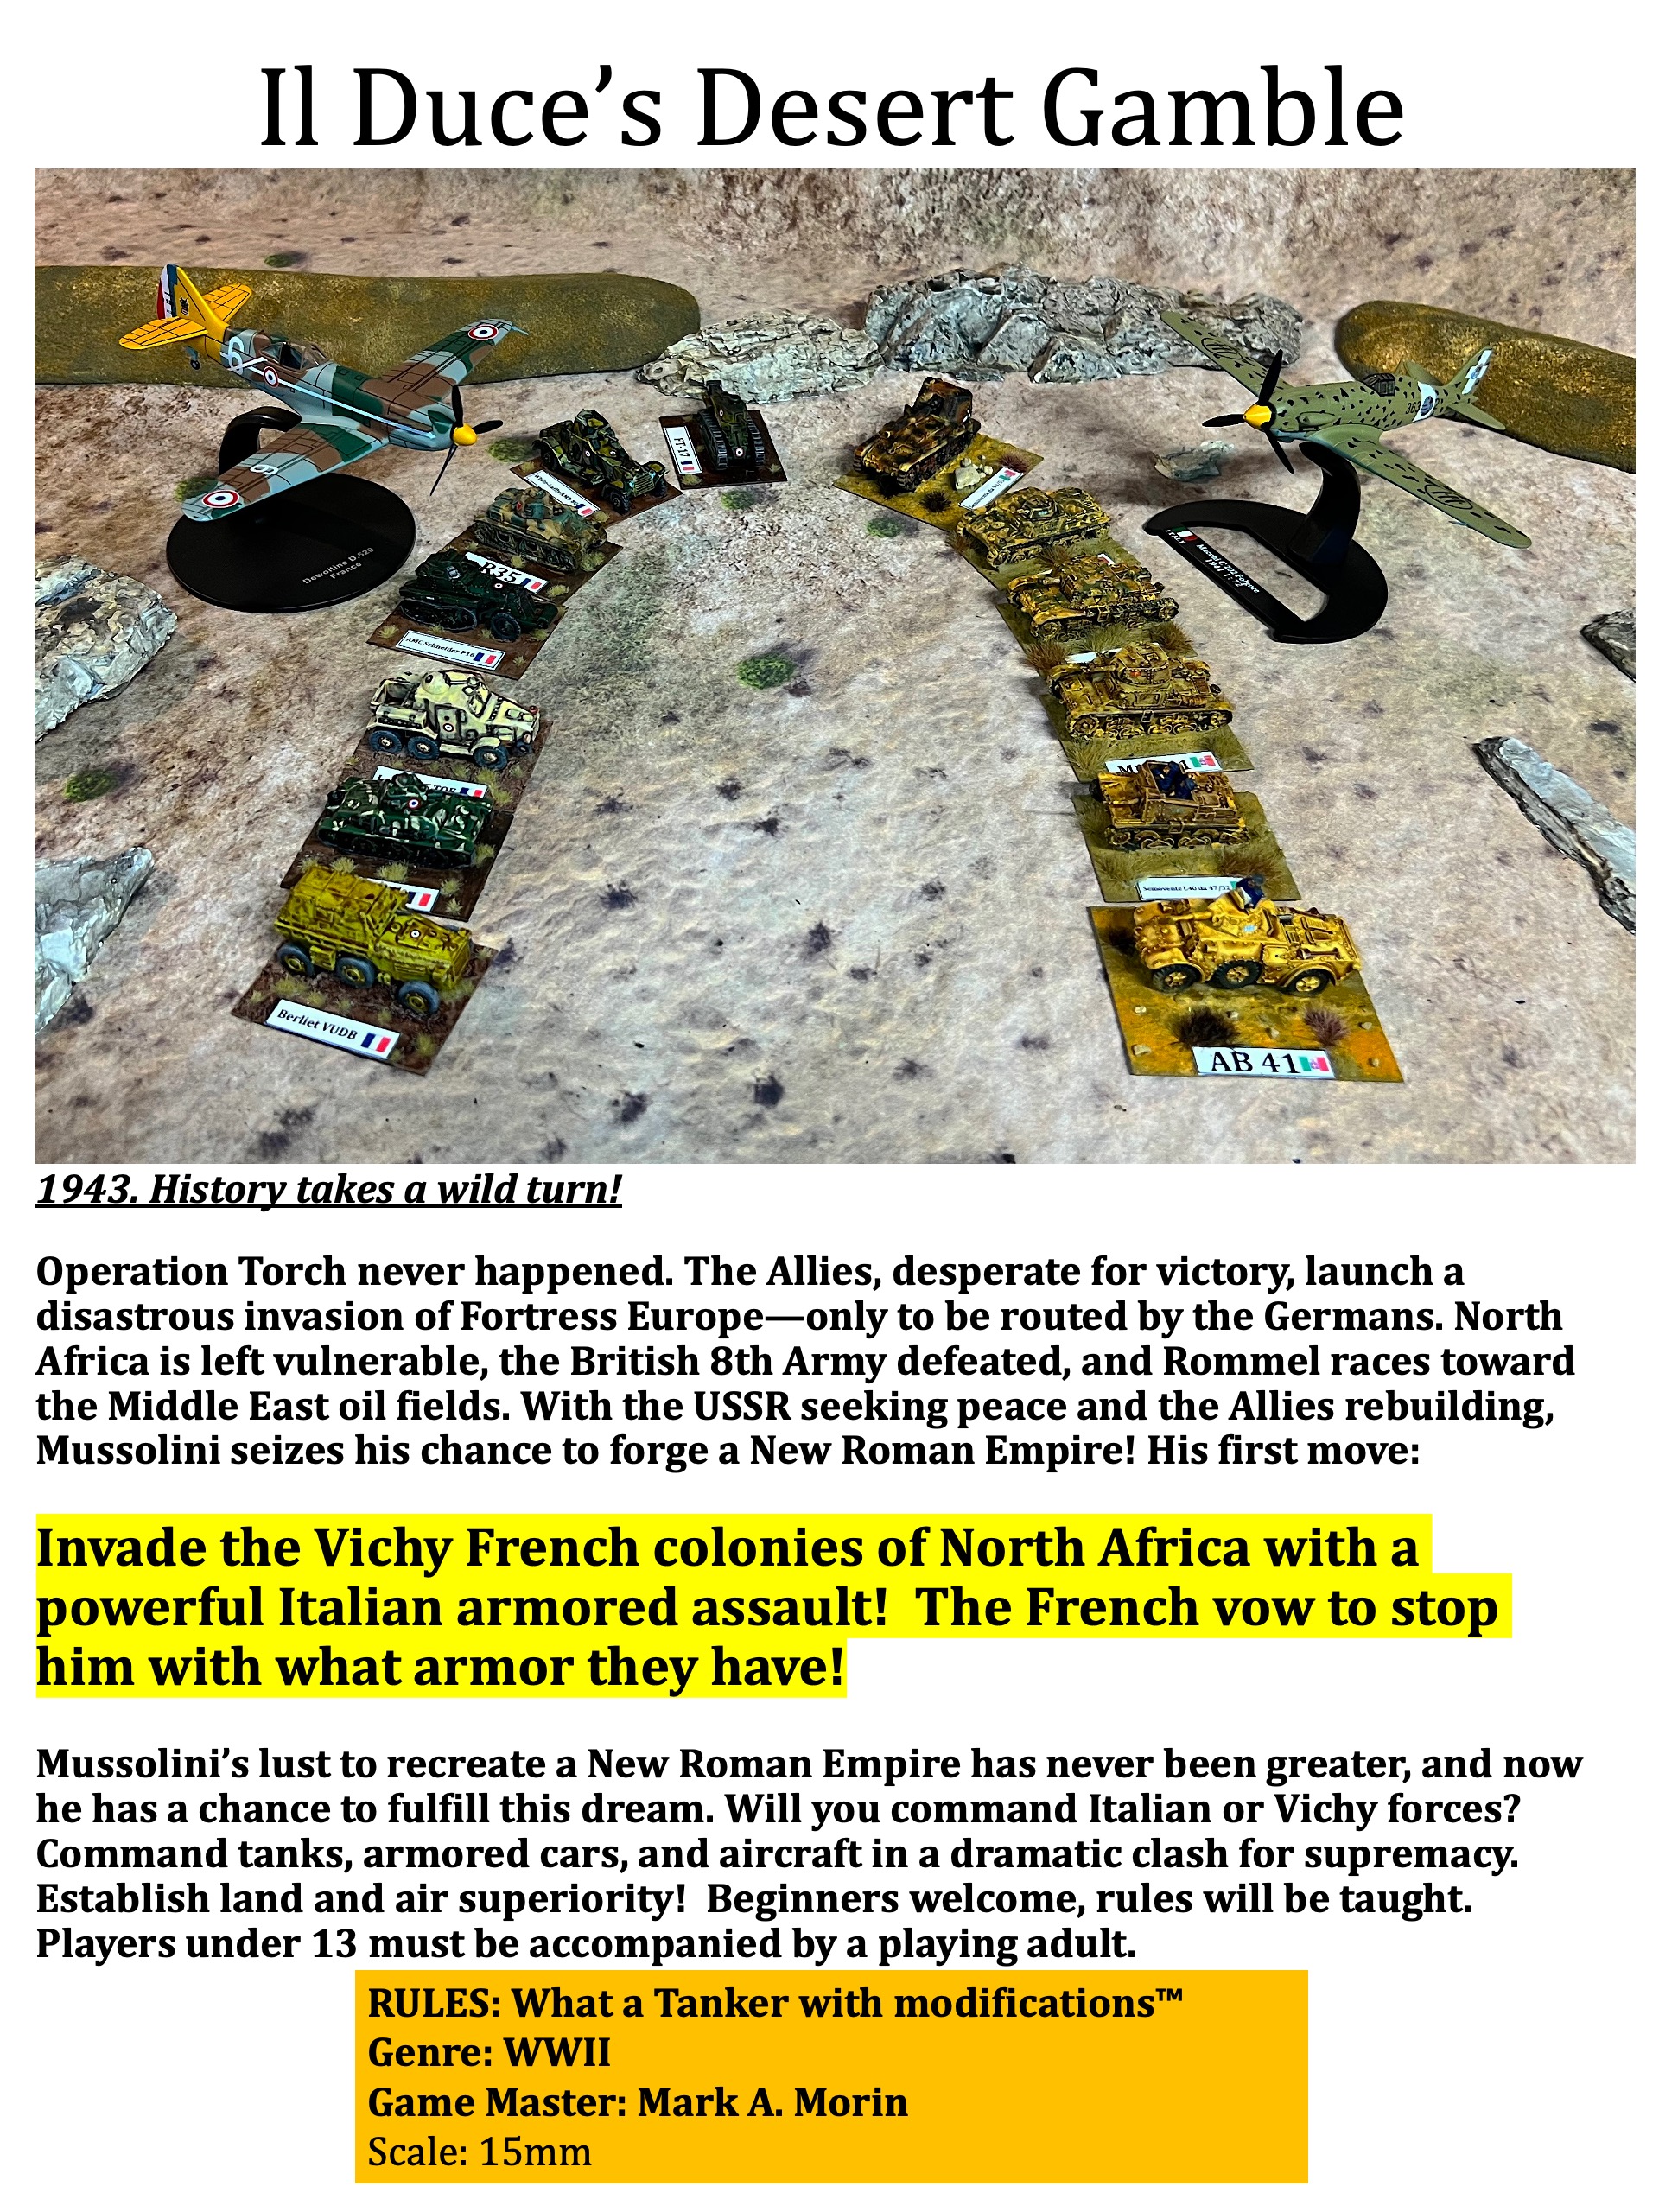
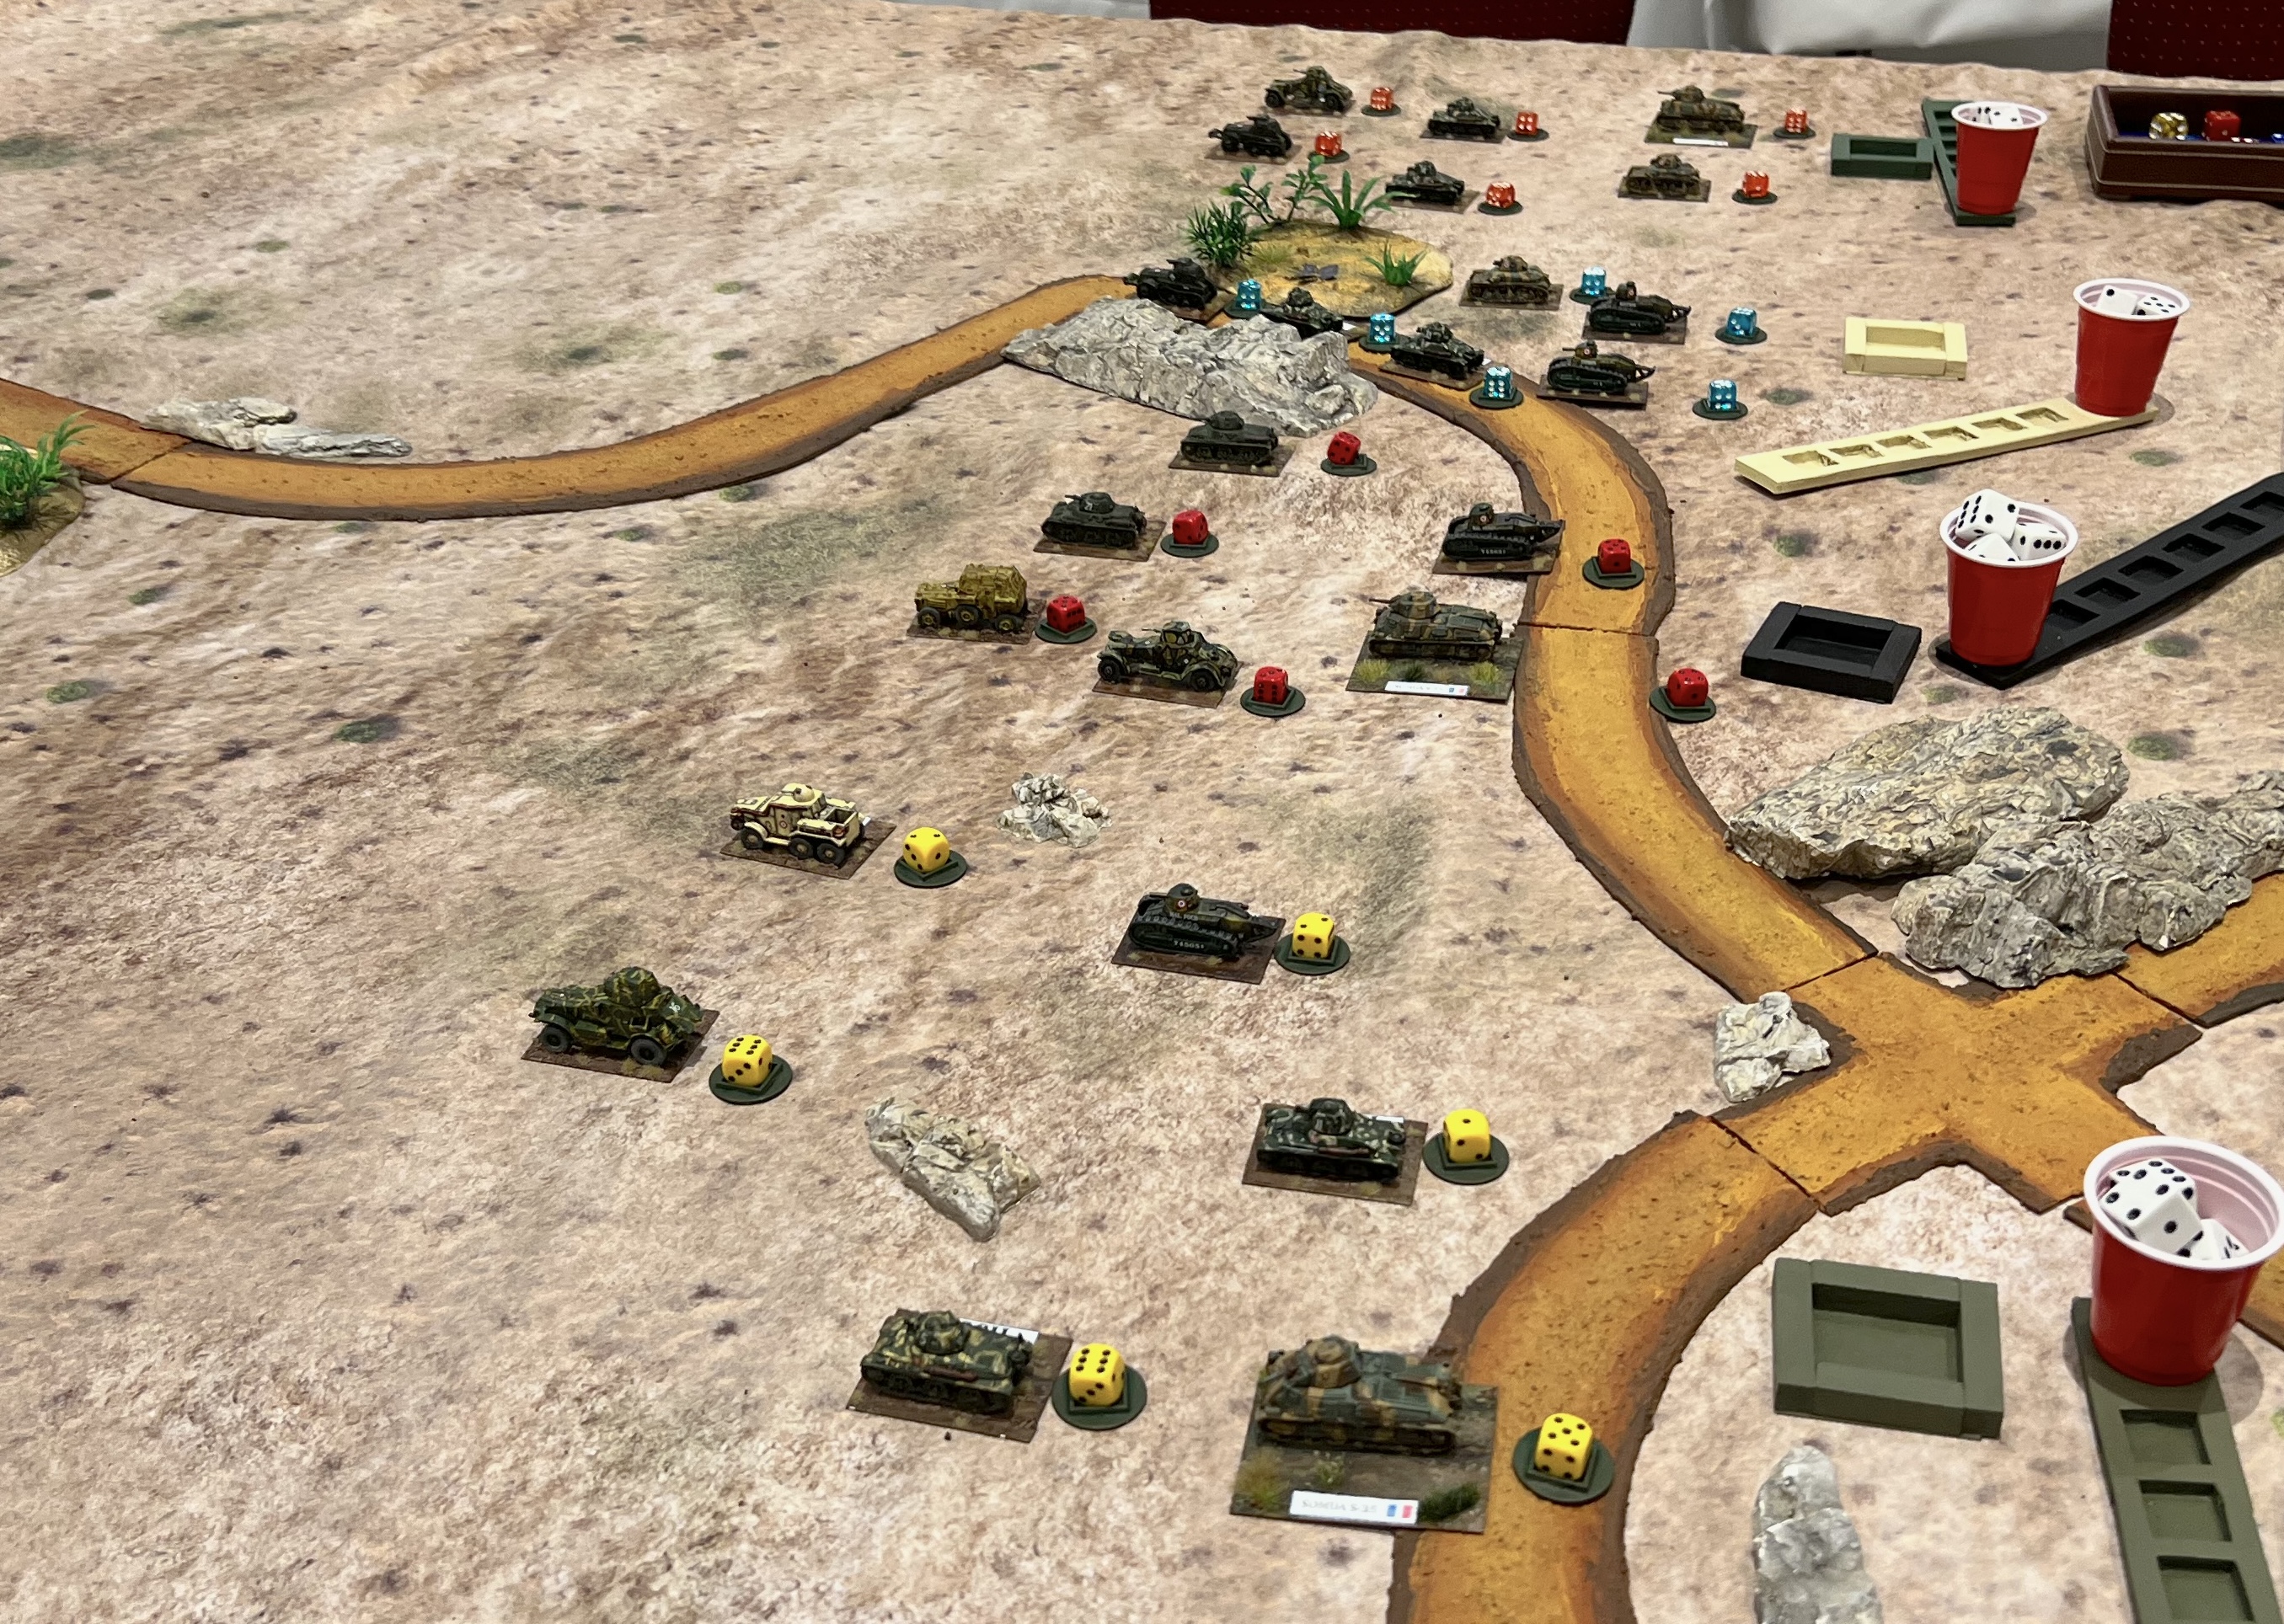
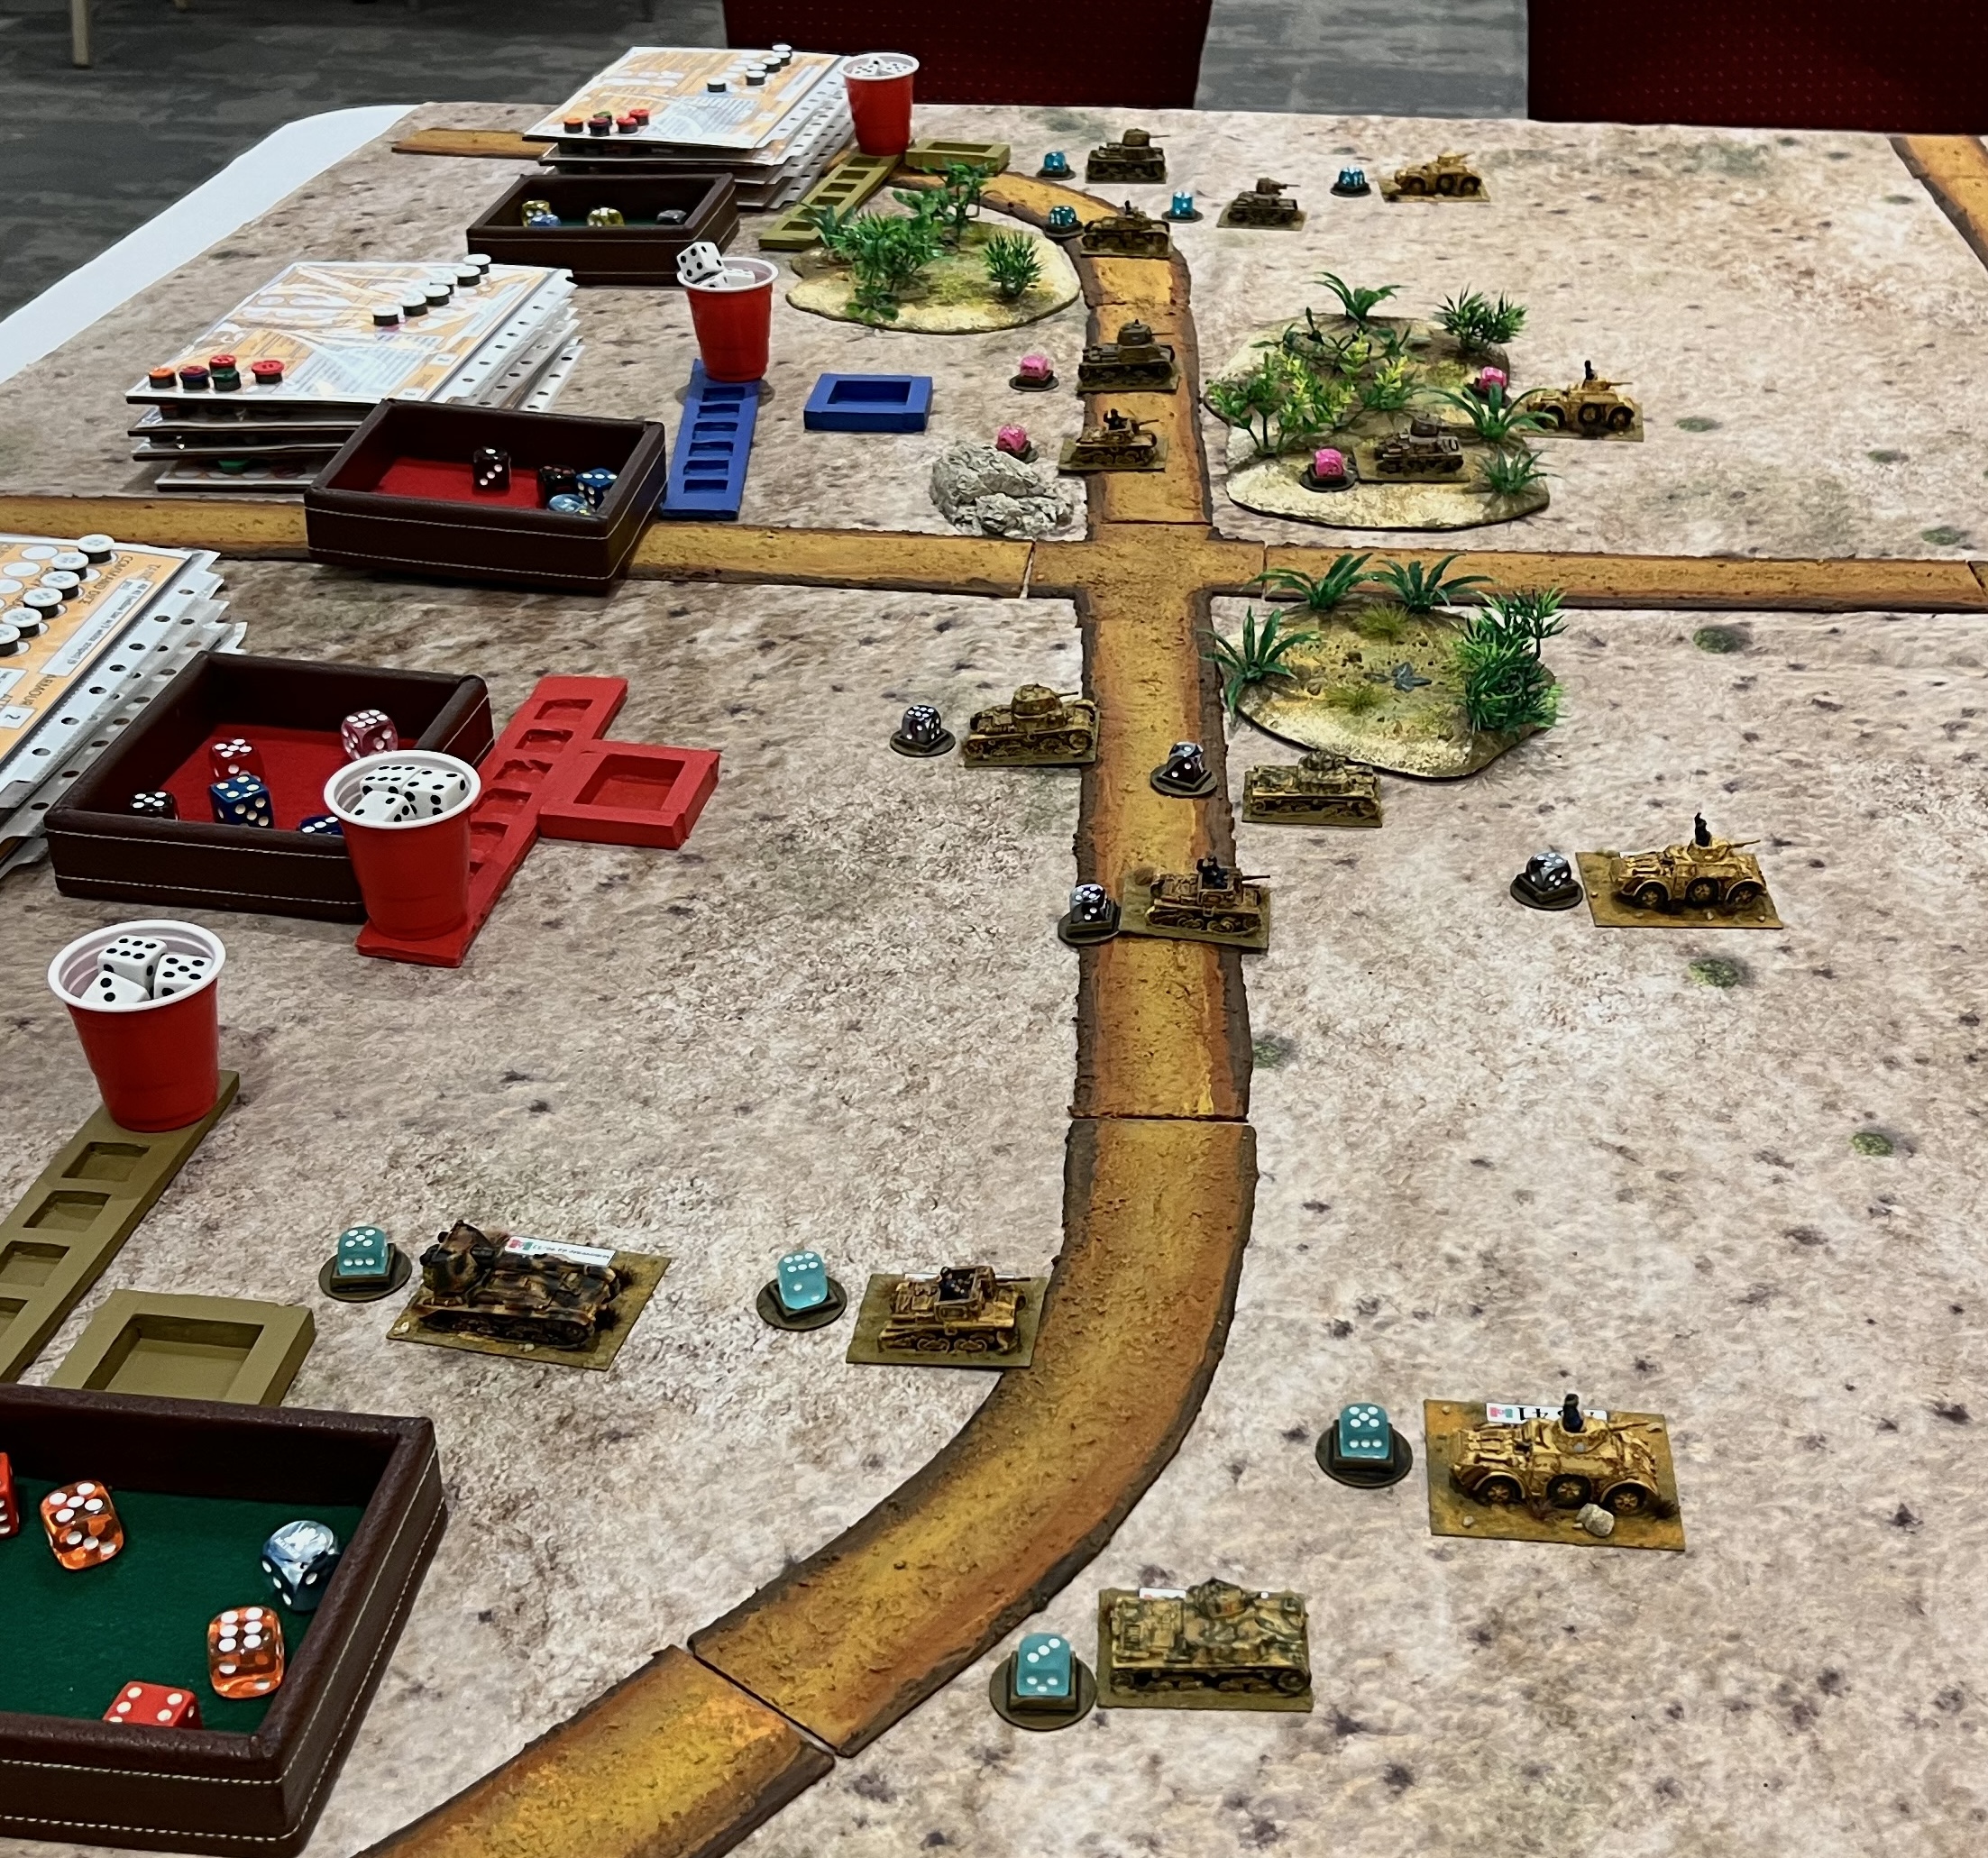
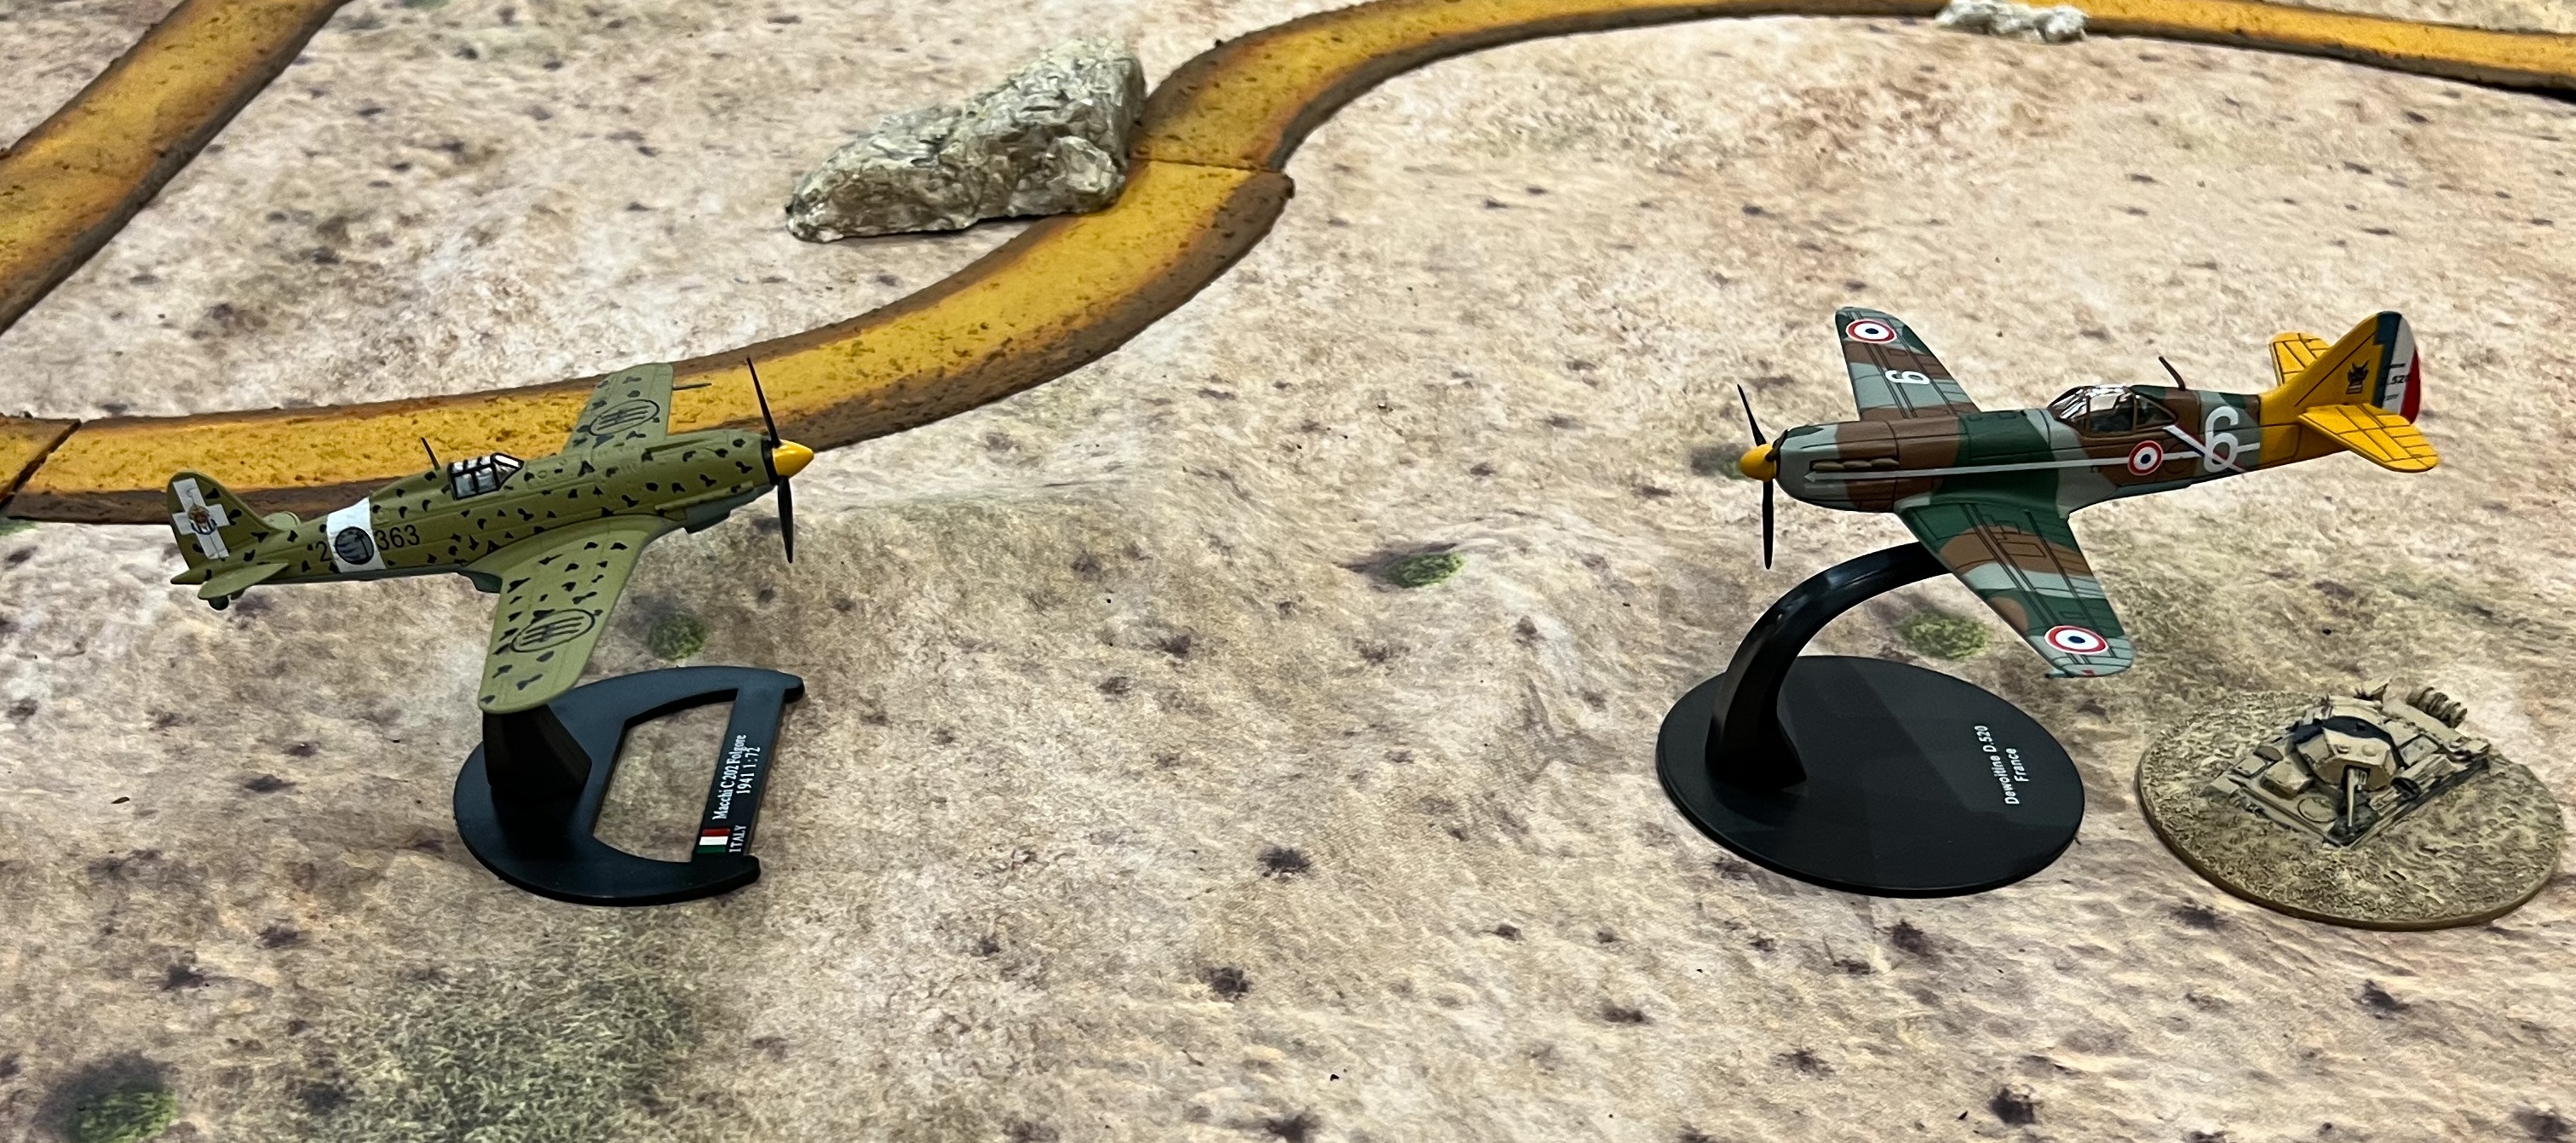
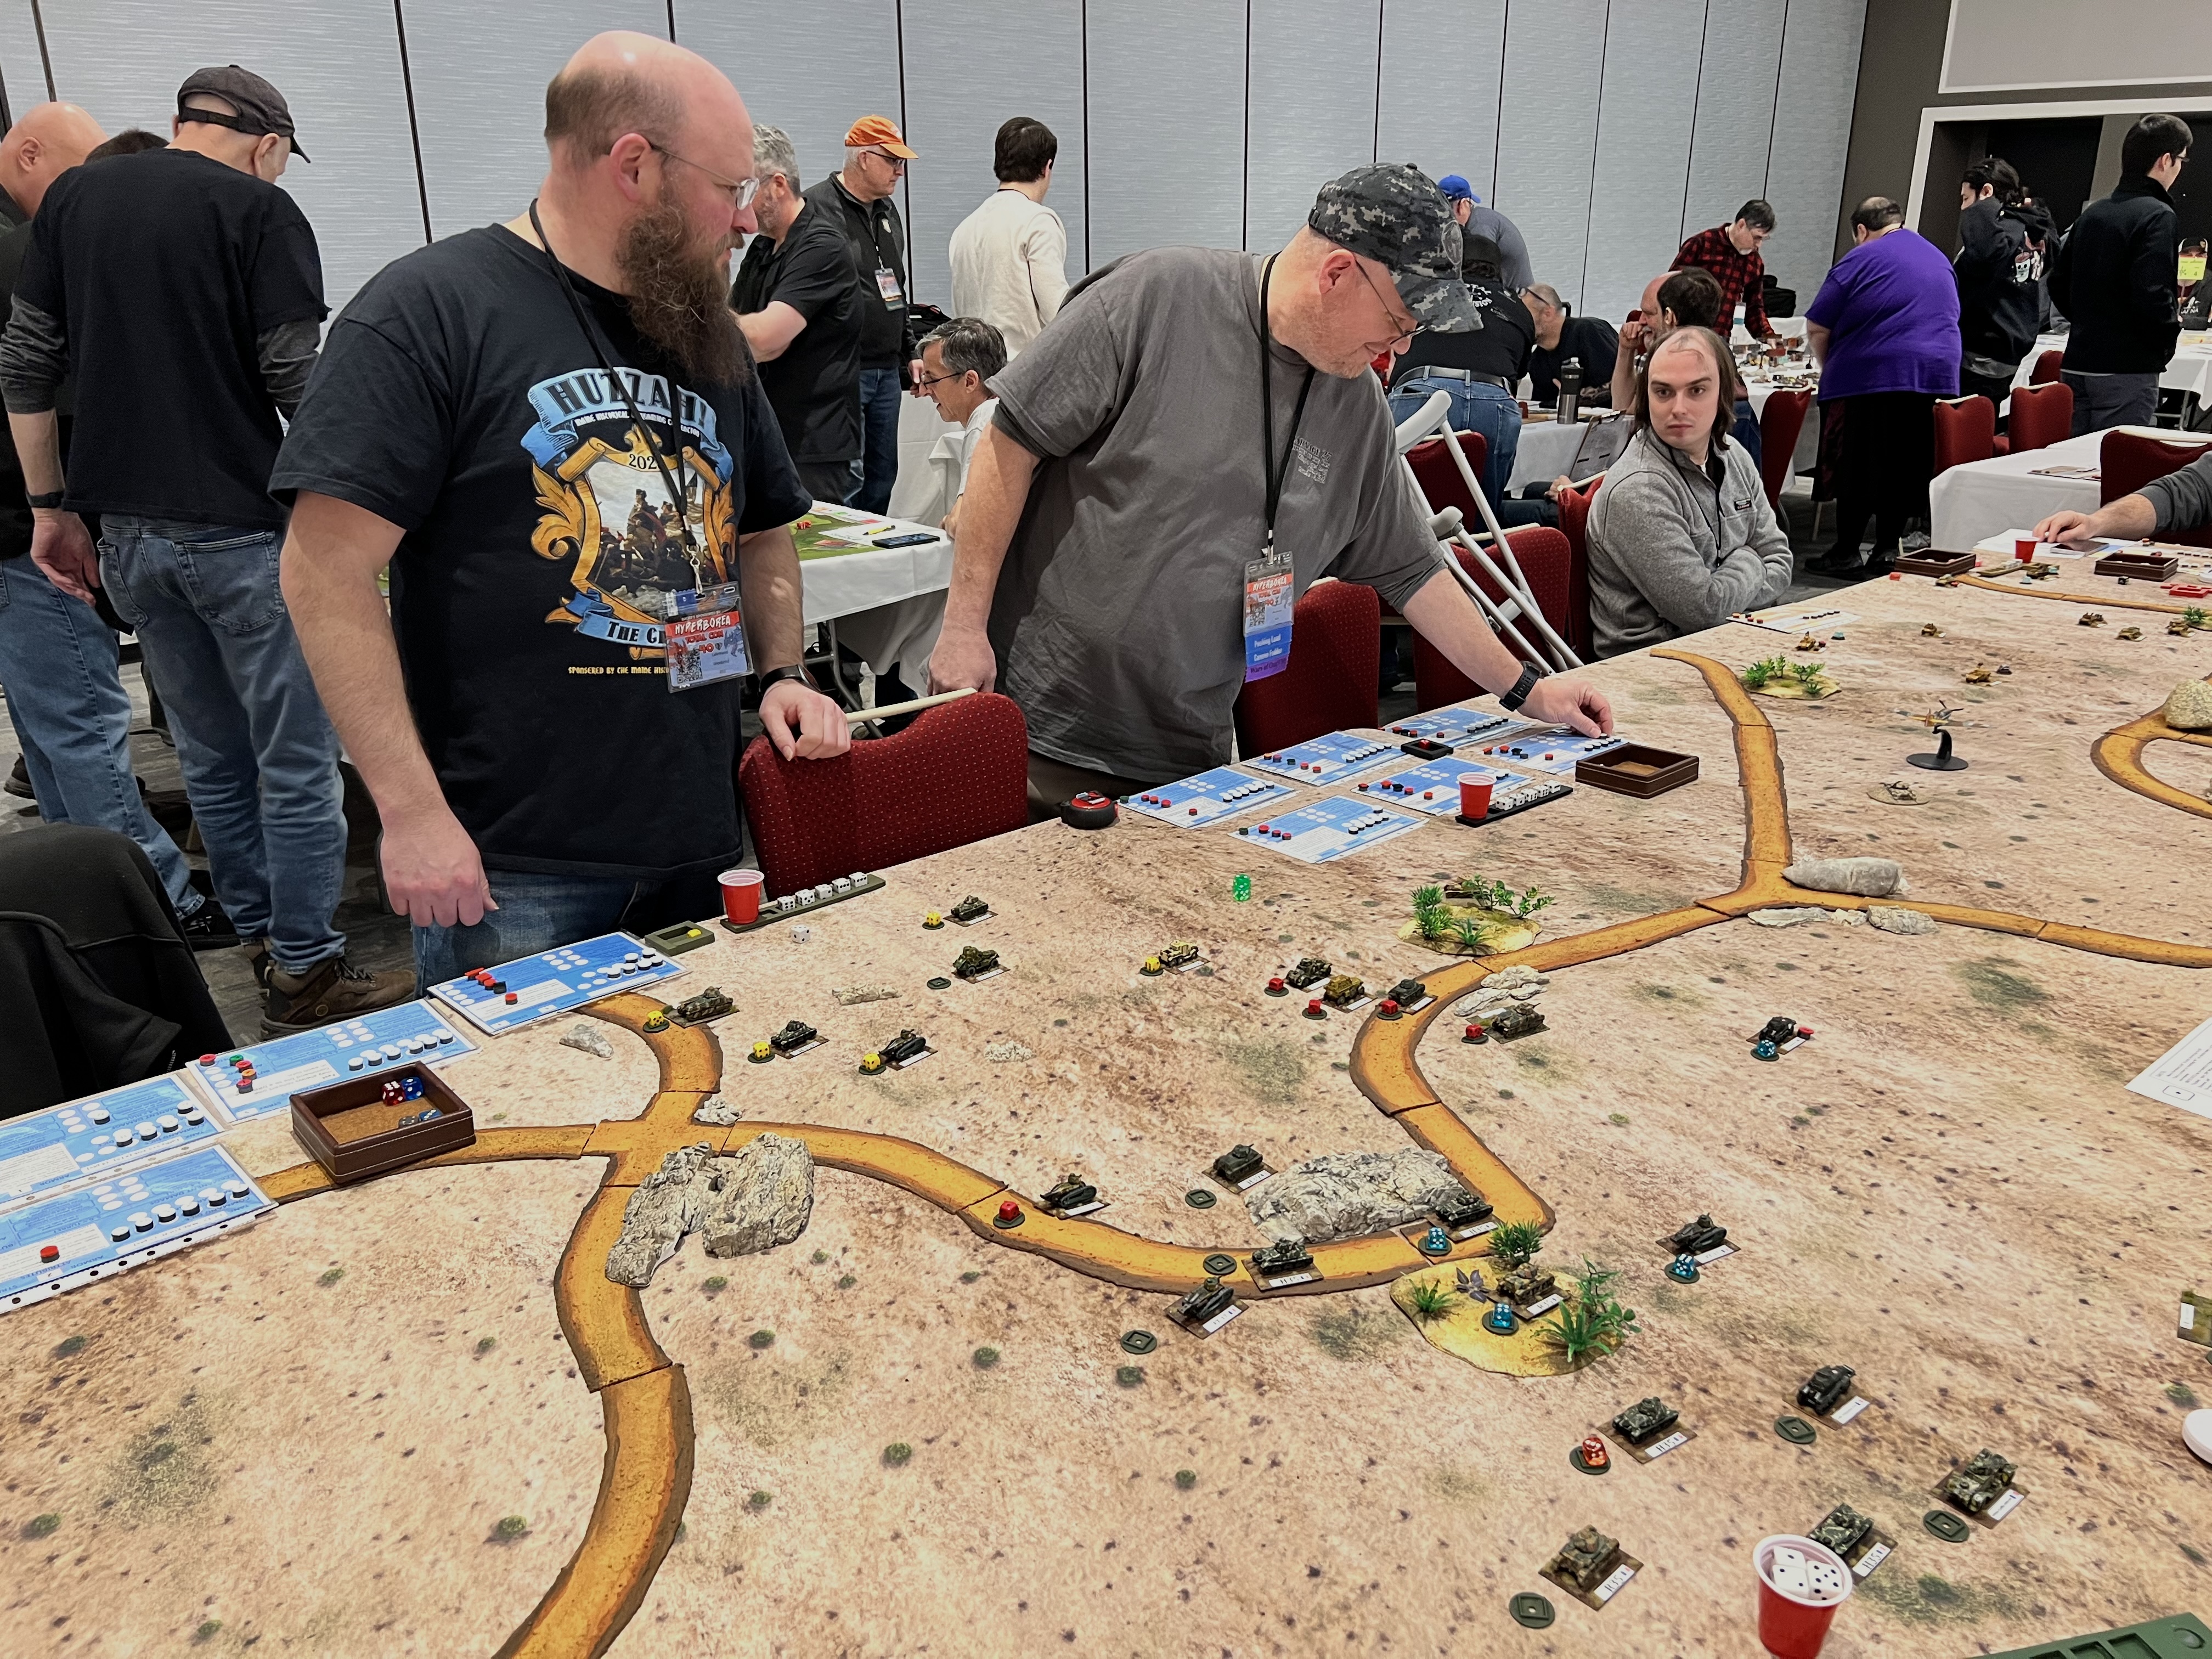
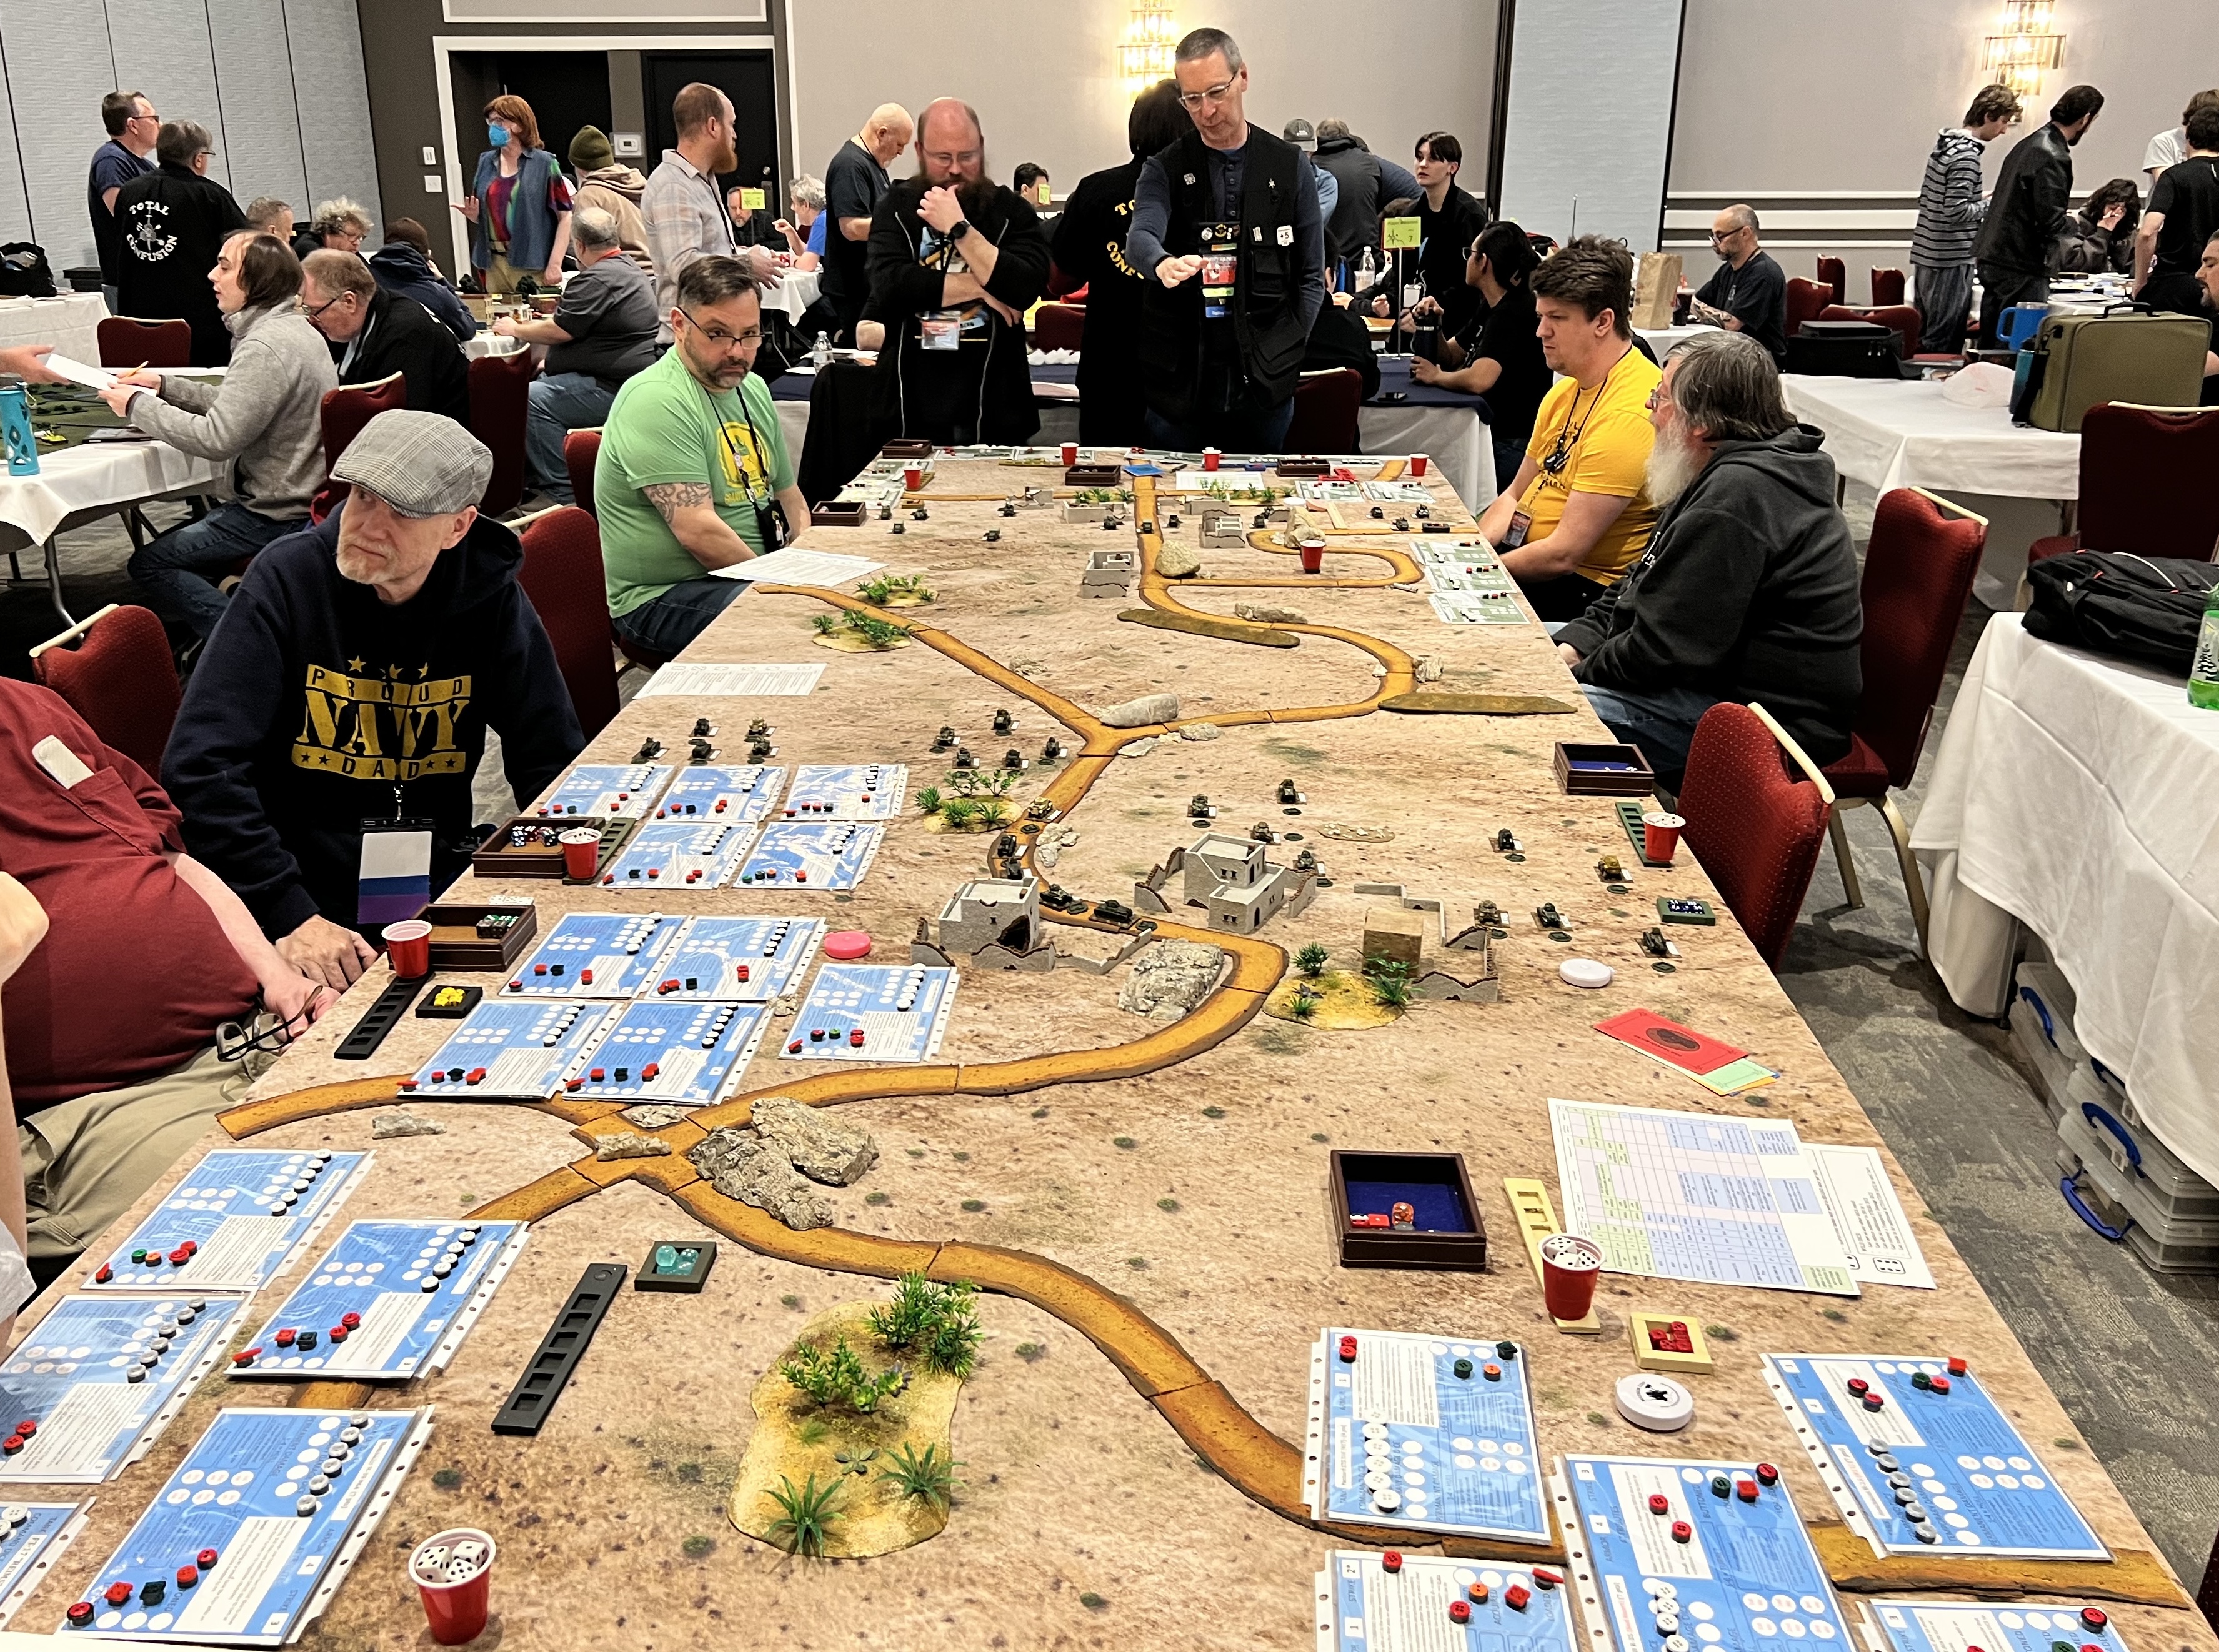
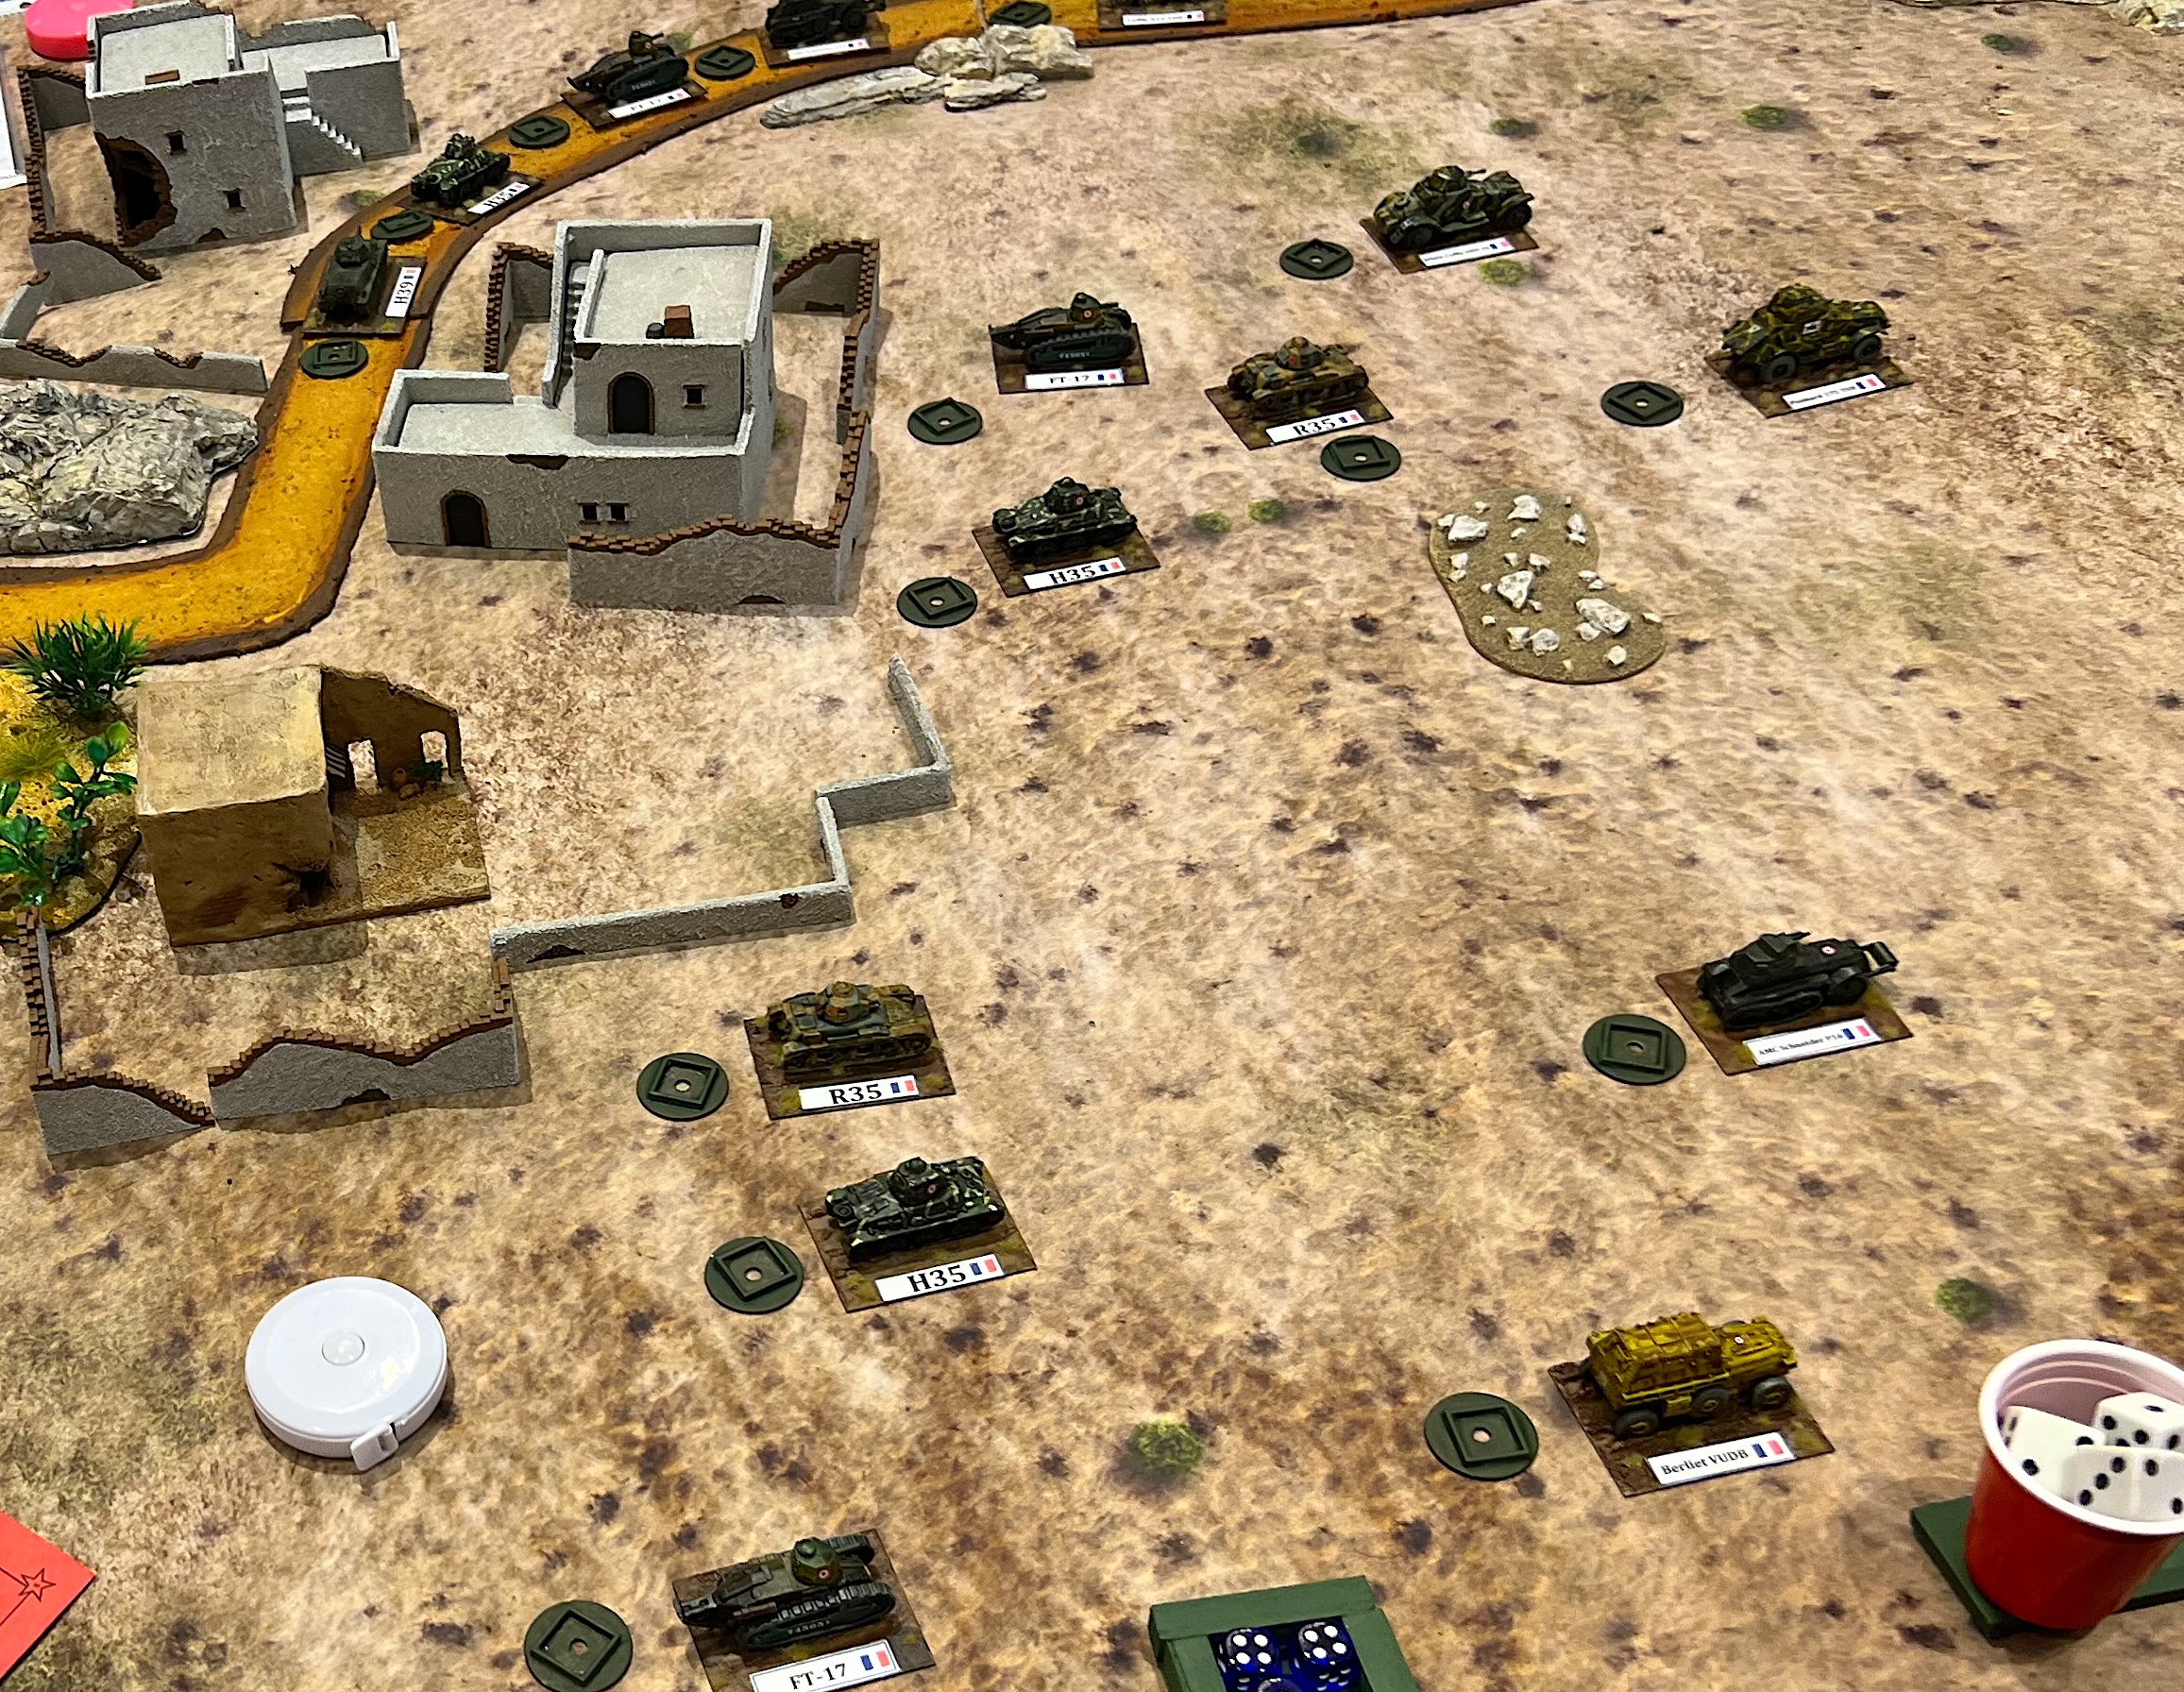
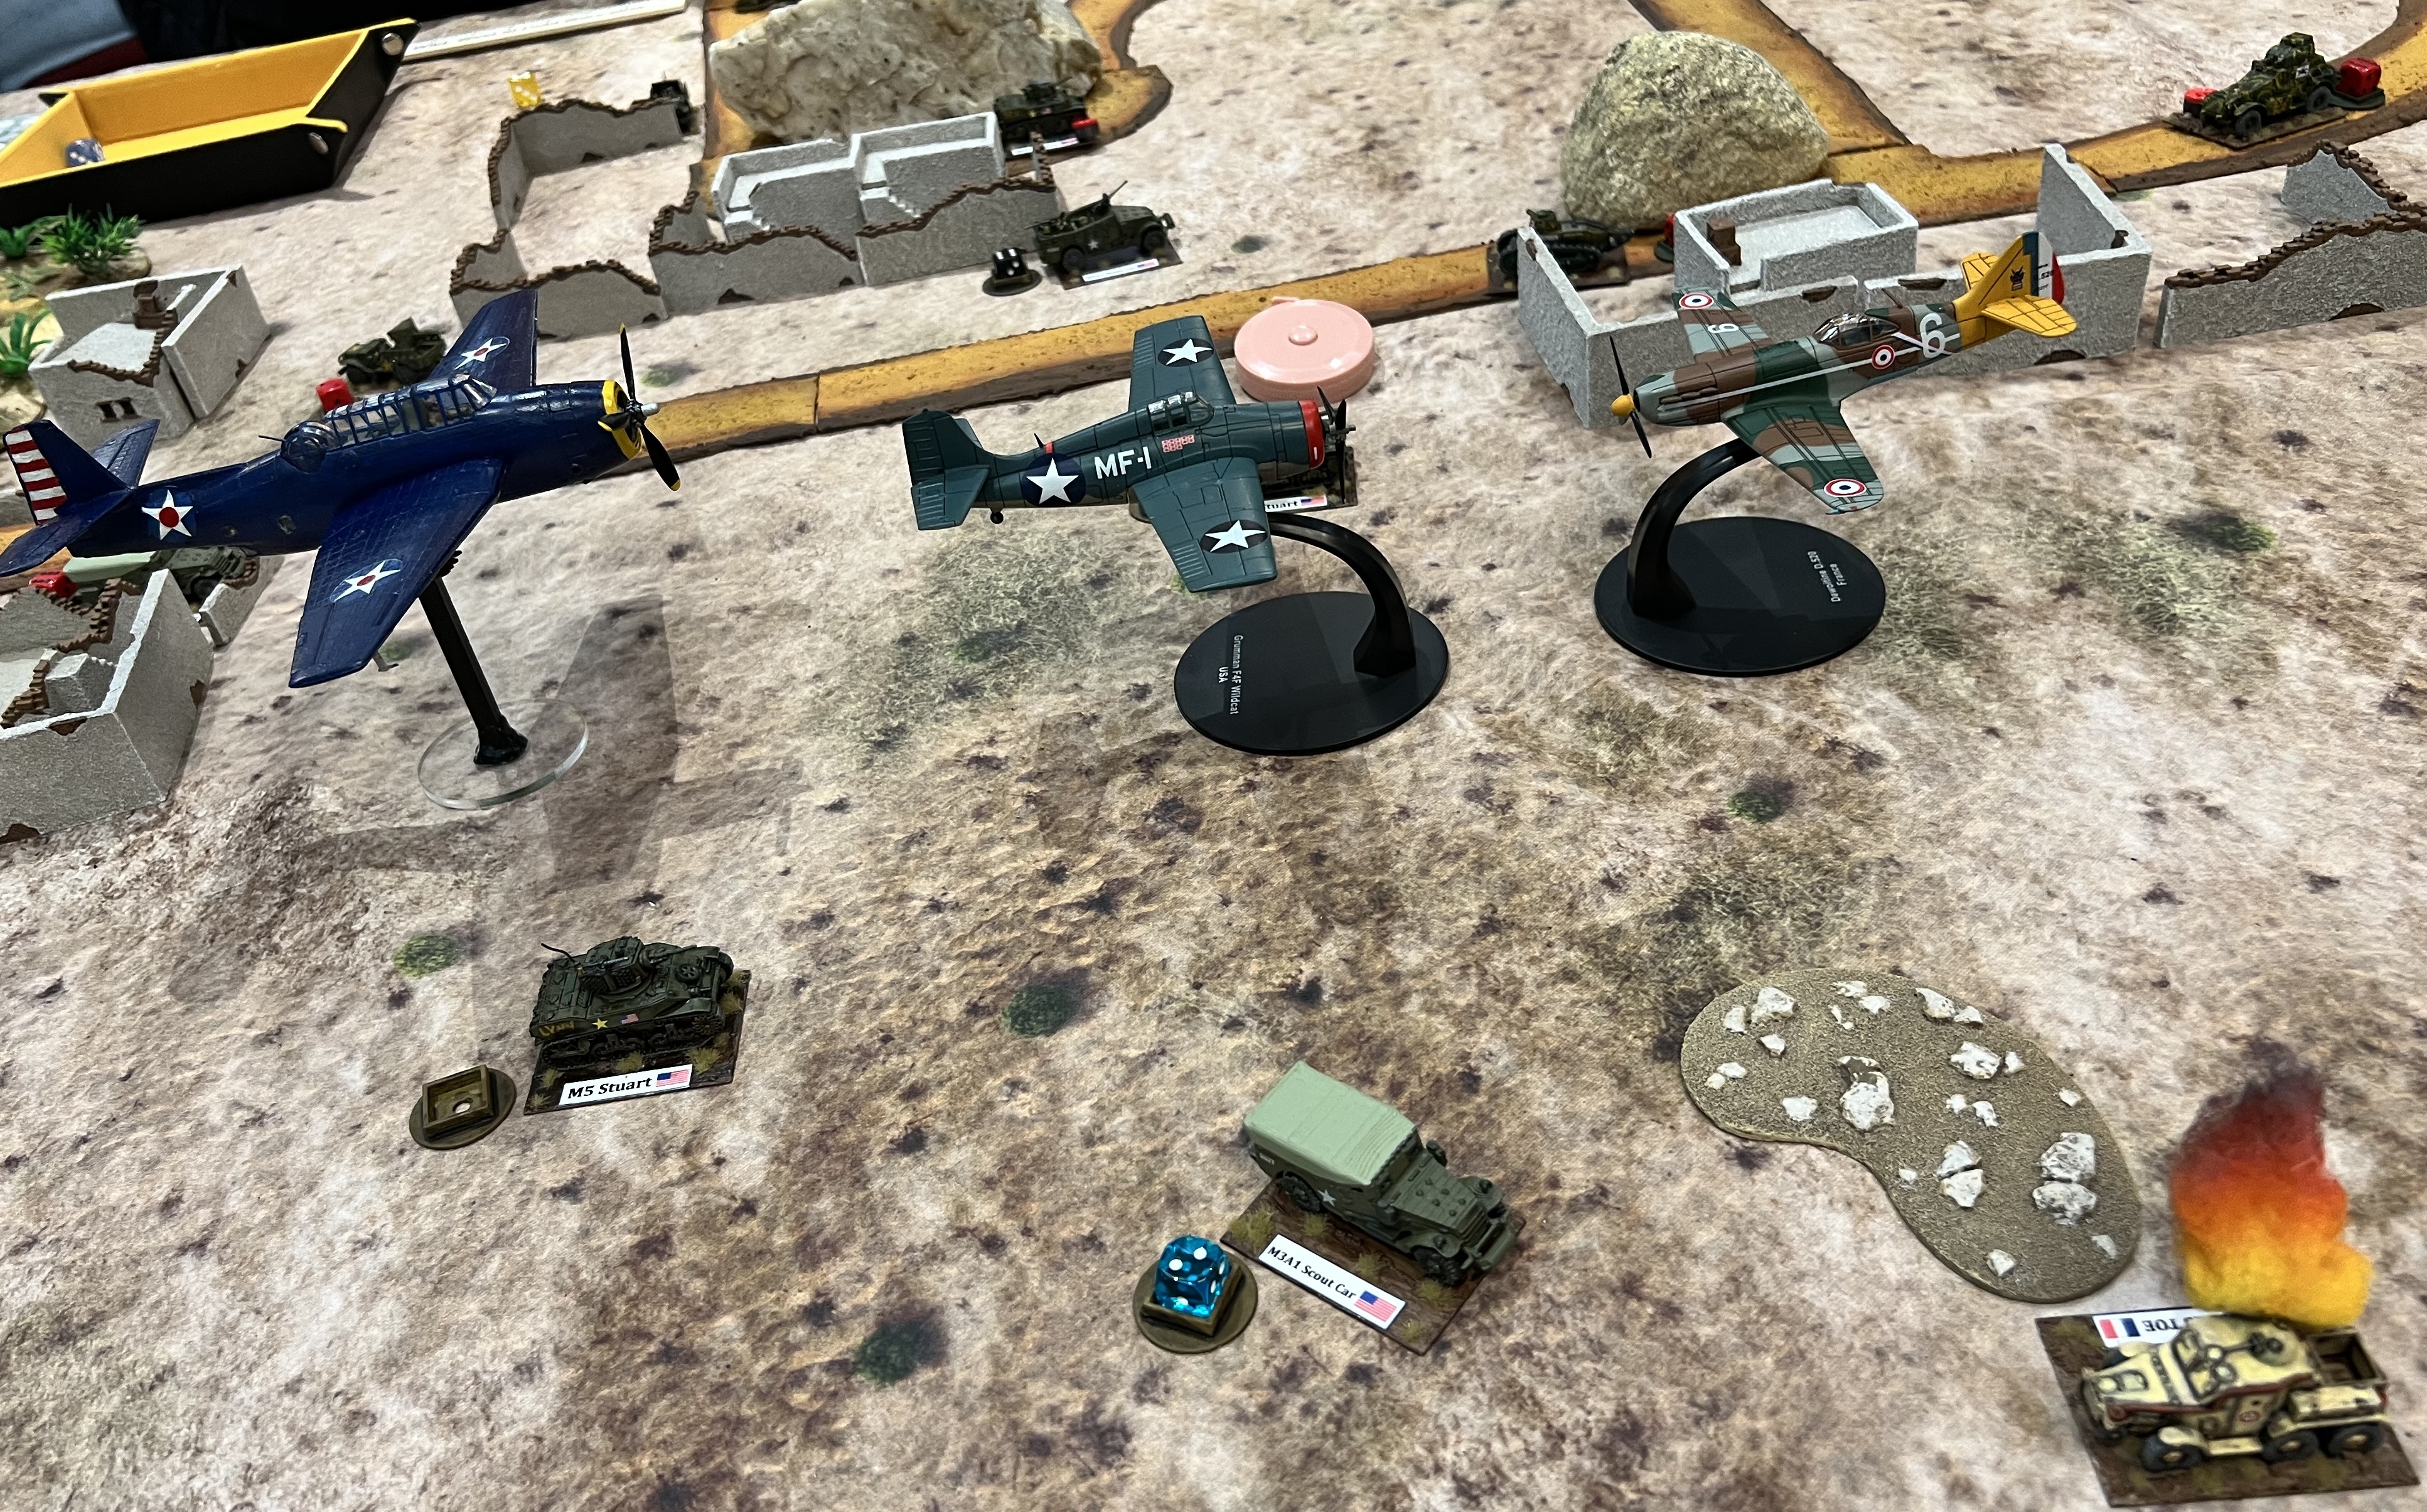
Il Duce’s Desert Gamble
This what-if modified What a Tanker scenario also filled up quickly as well.
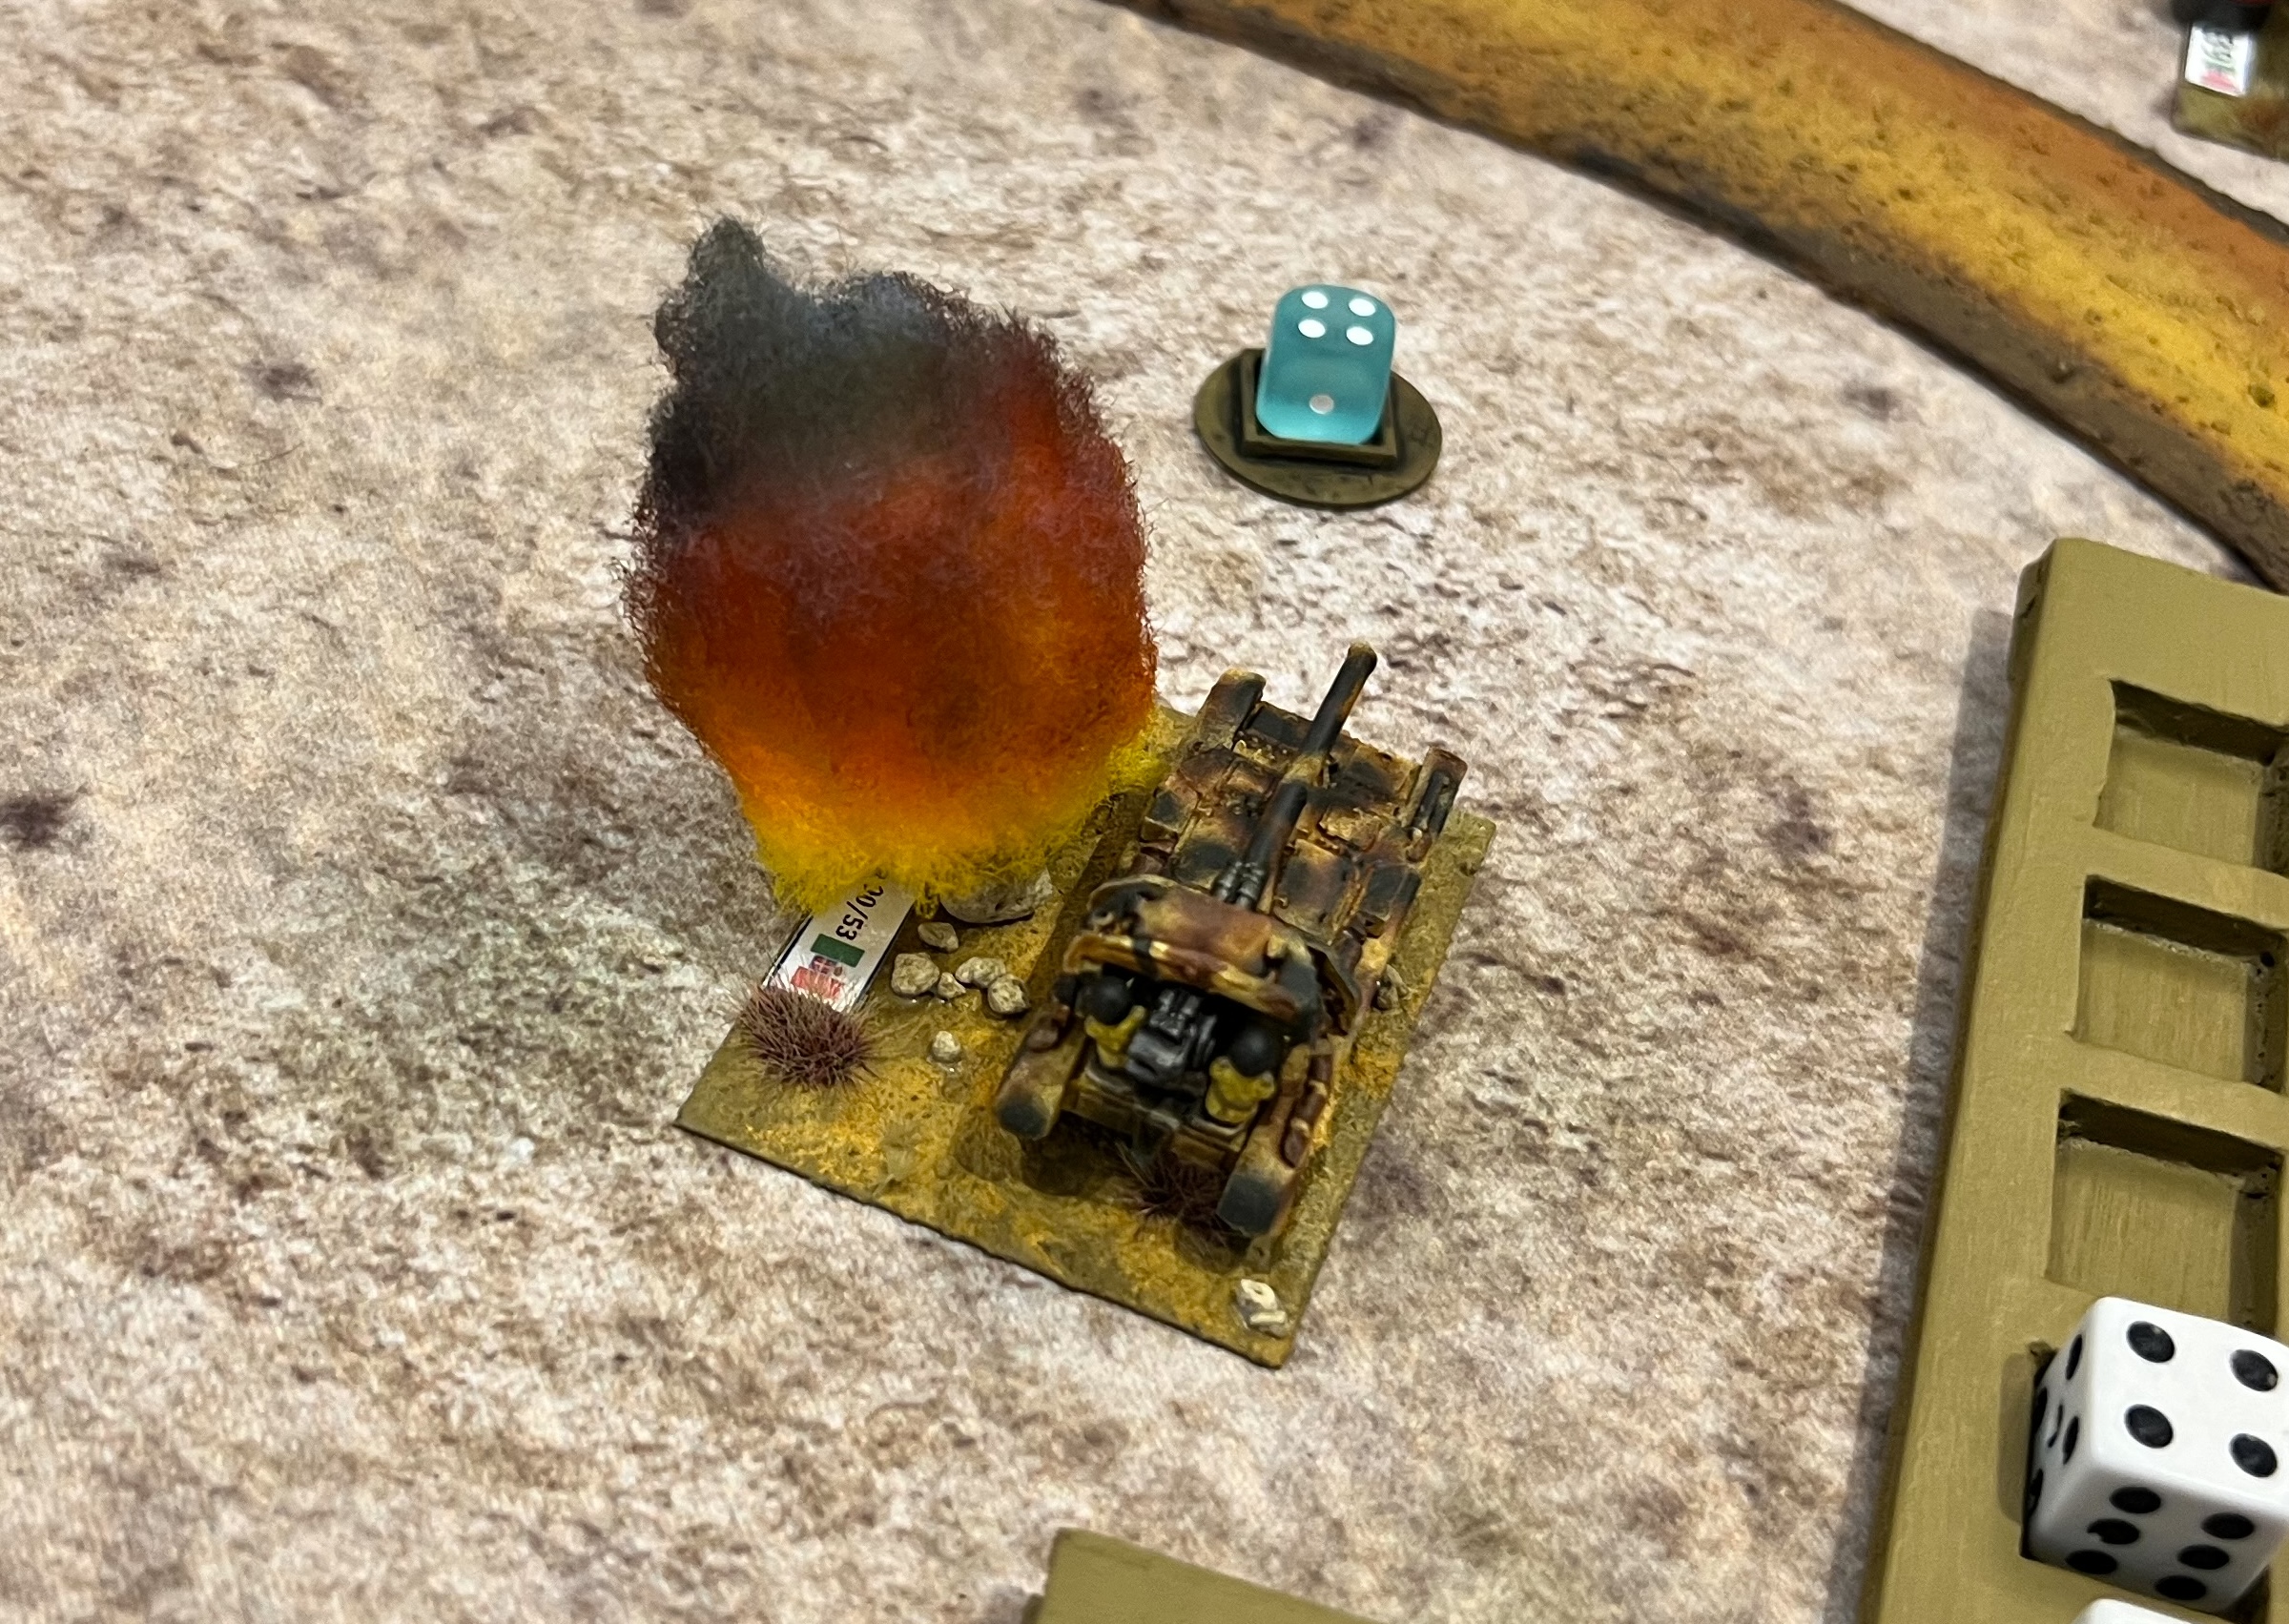
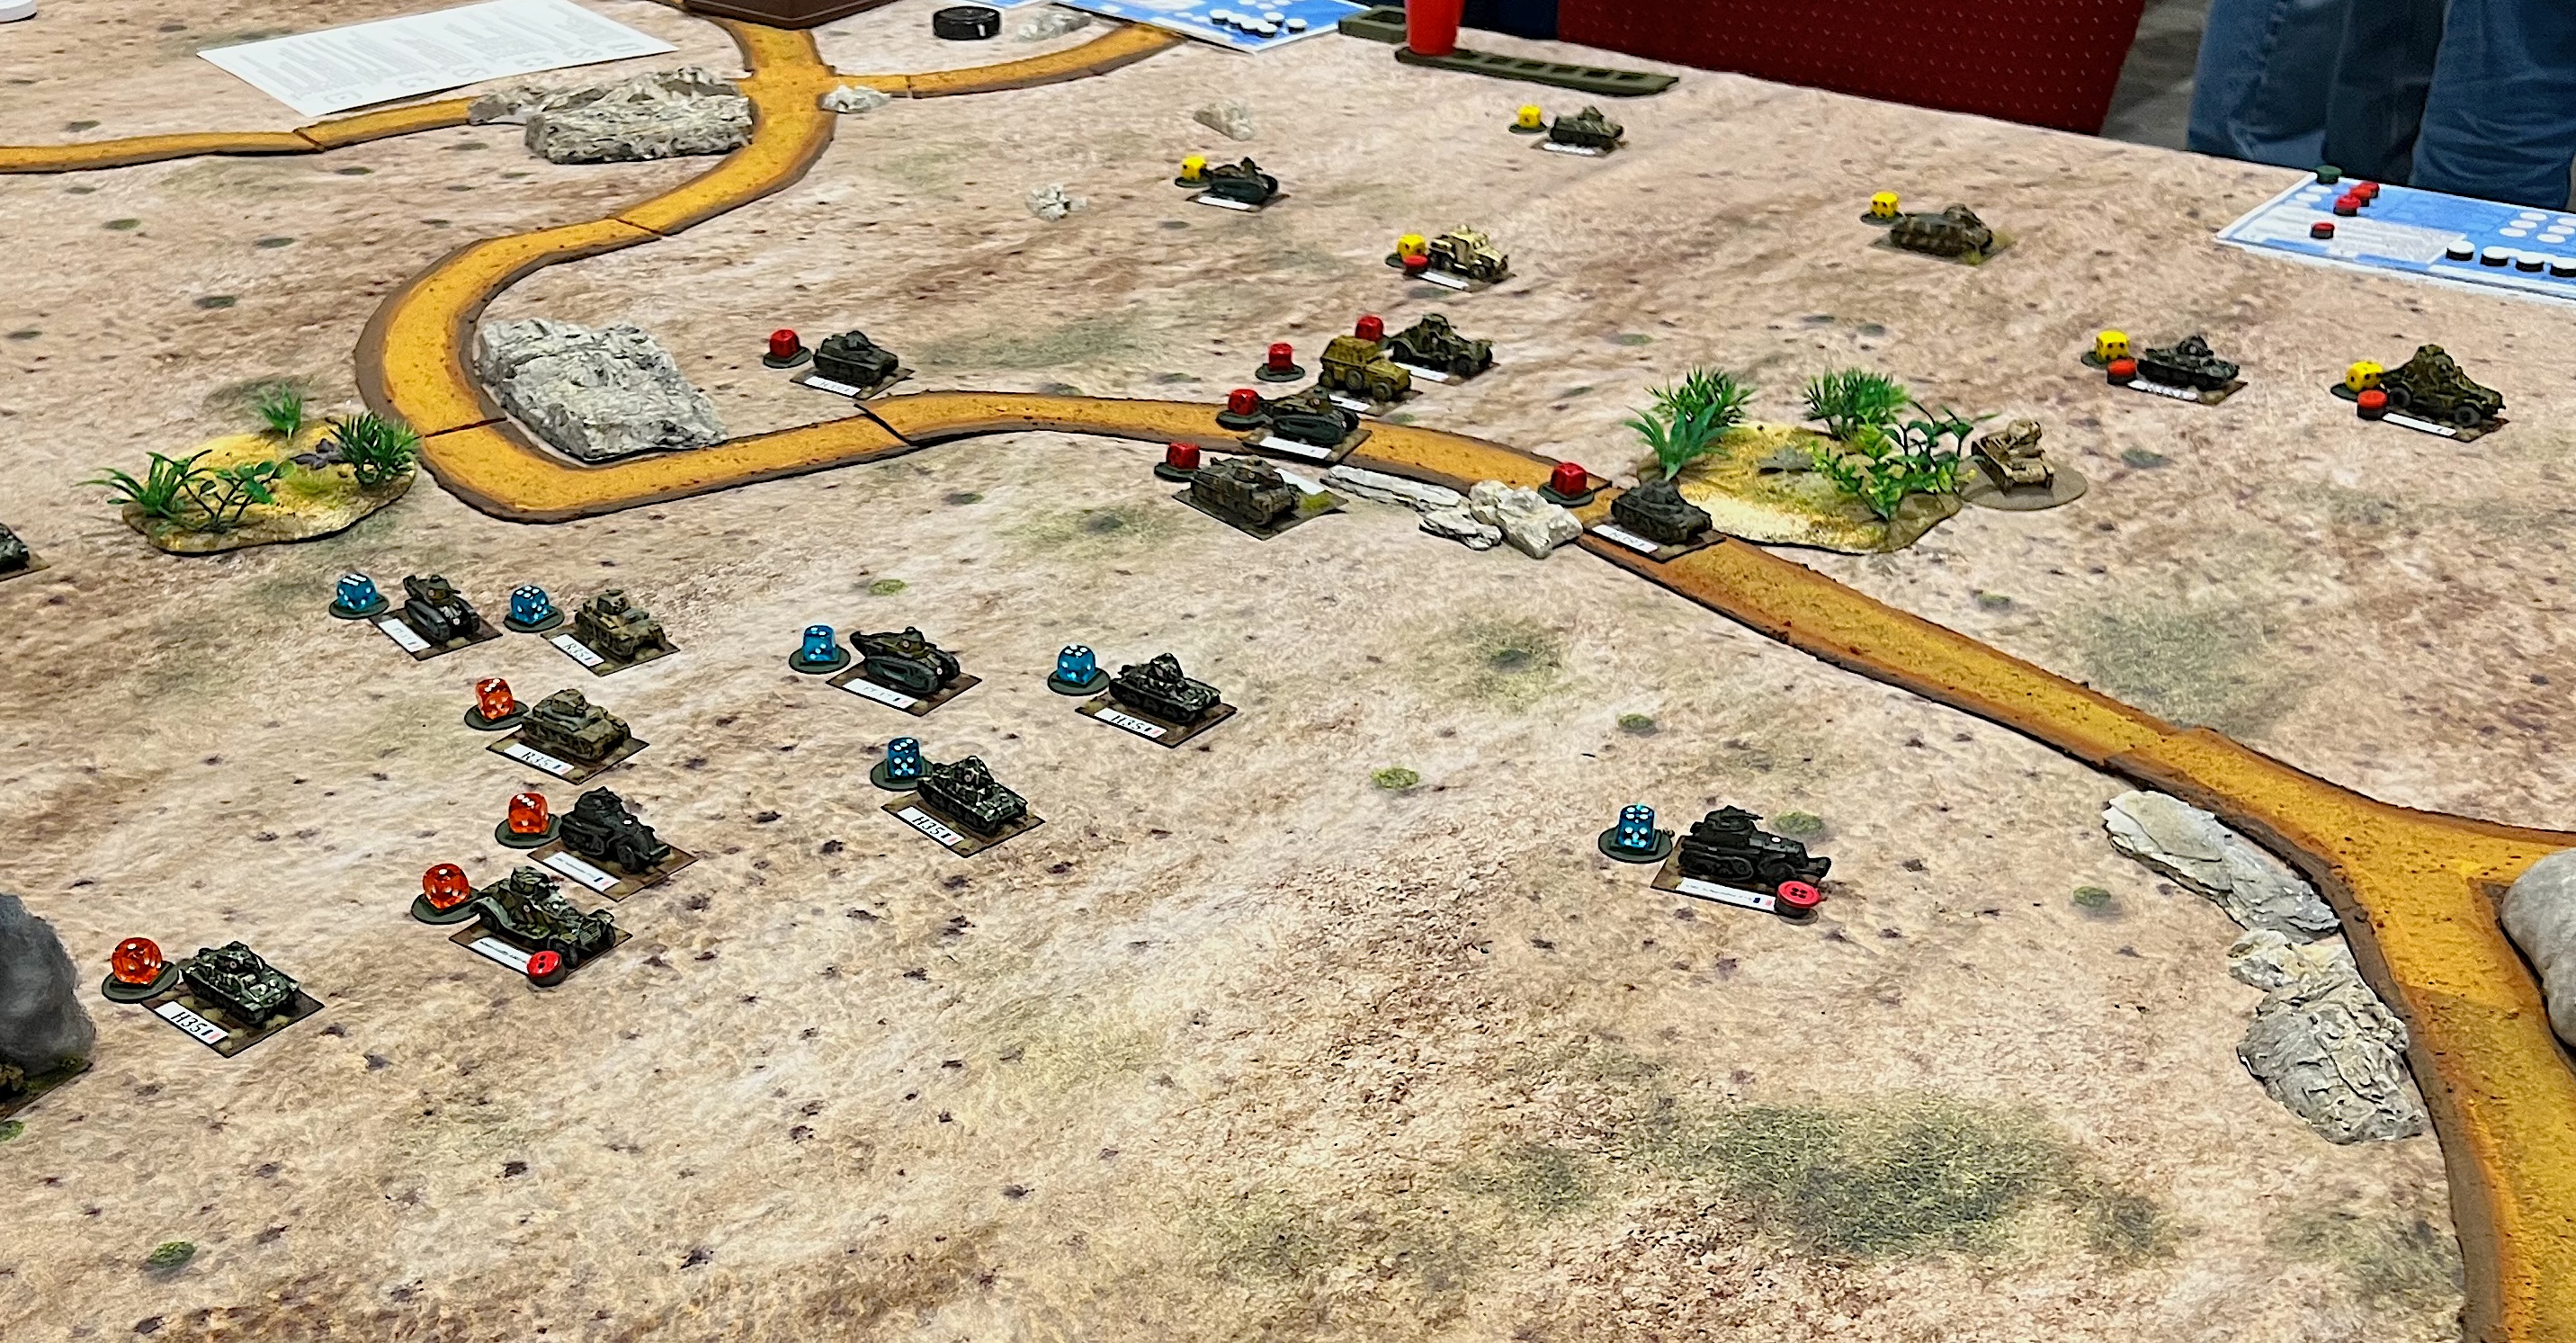
Vichy French armor facing the Italians.Royal Italian Army armor facing the French.The players plot their moves.An Italian Macchi C.202 Folgore (Italian “thunderbolt”) dogfights a Vichy Dewoitine D.520.Leif smiles as he records temporary damage on his tank. The damage was caused by Leif’s very bad dice rolling for a very old and worn out French FT-17!A Vichy SOMUA S35 knocks out an Italian Semovente 90/53.French forces advance.
The game ended with Vichy winning 540-440.
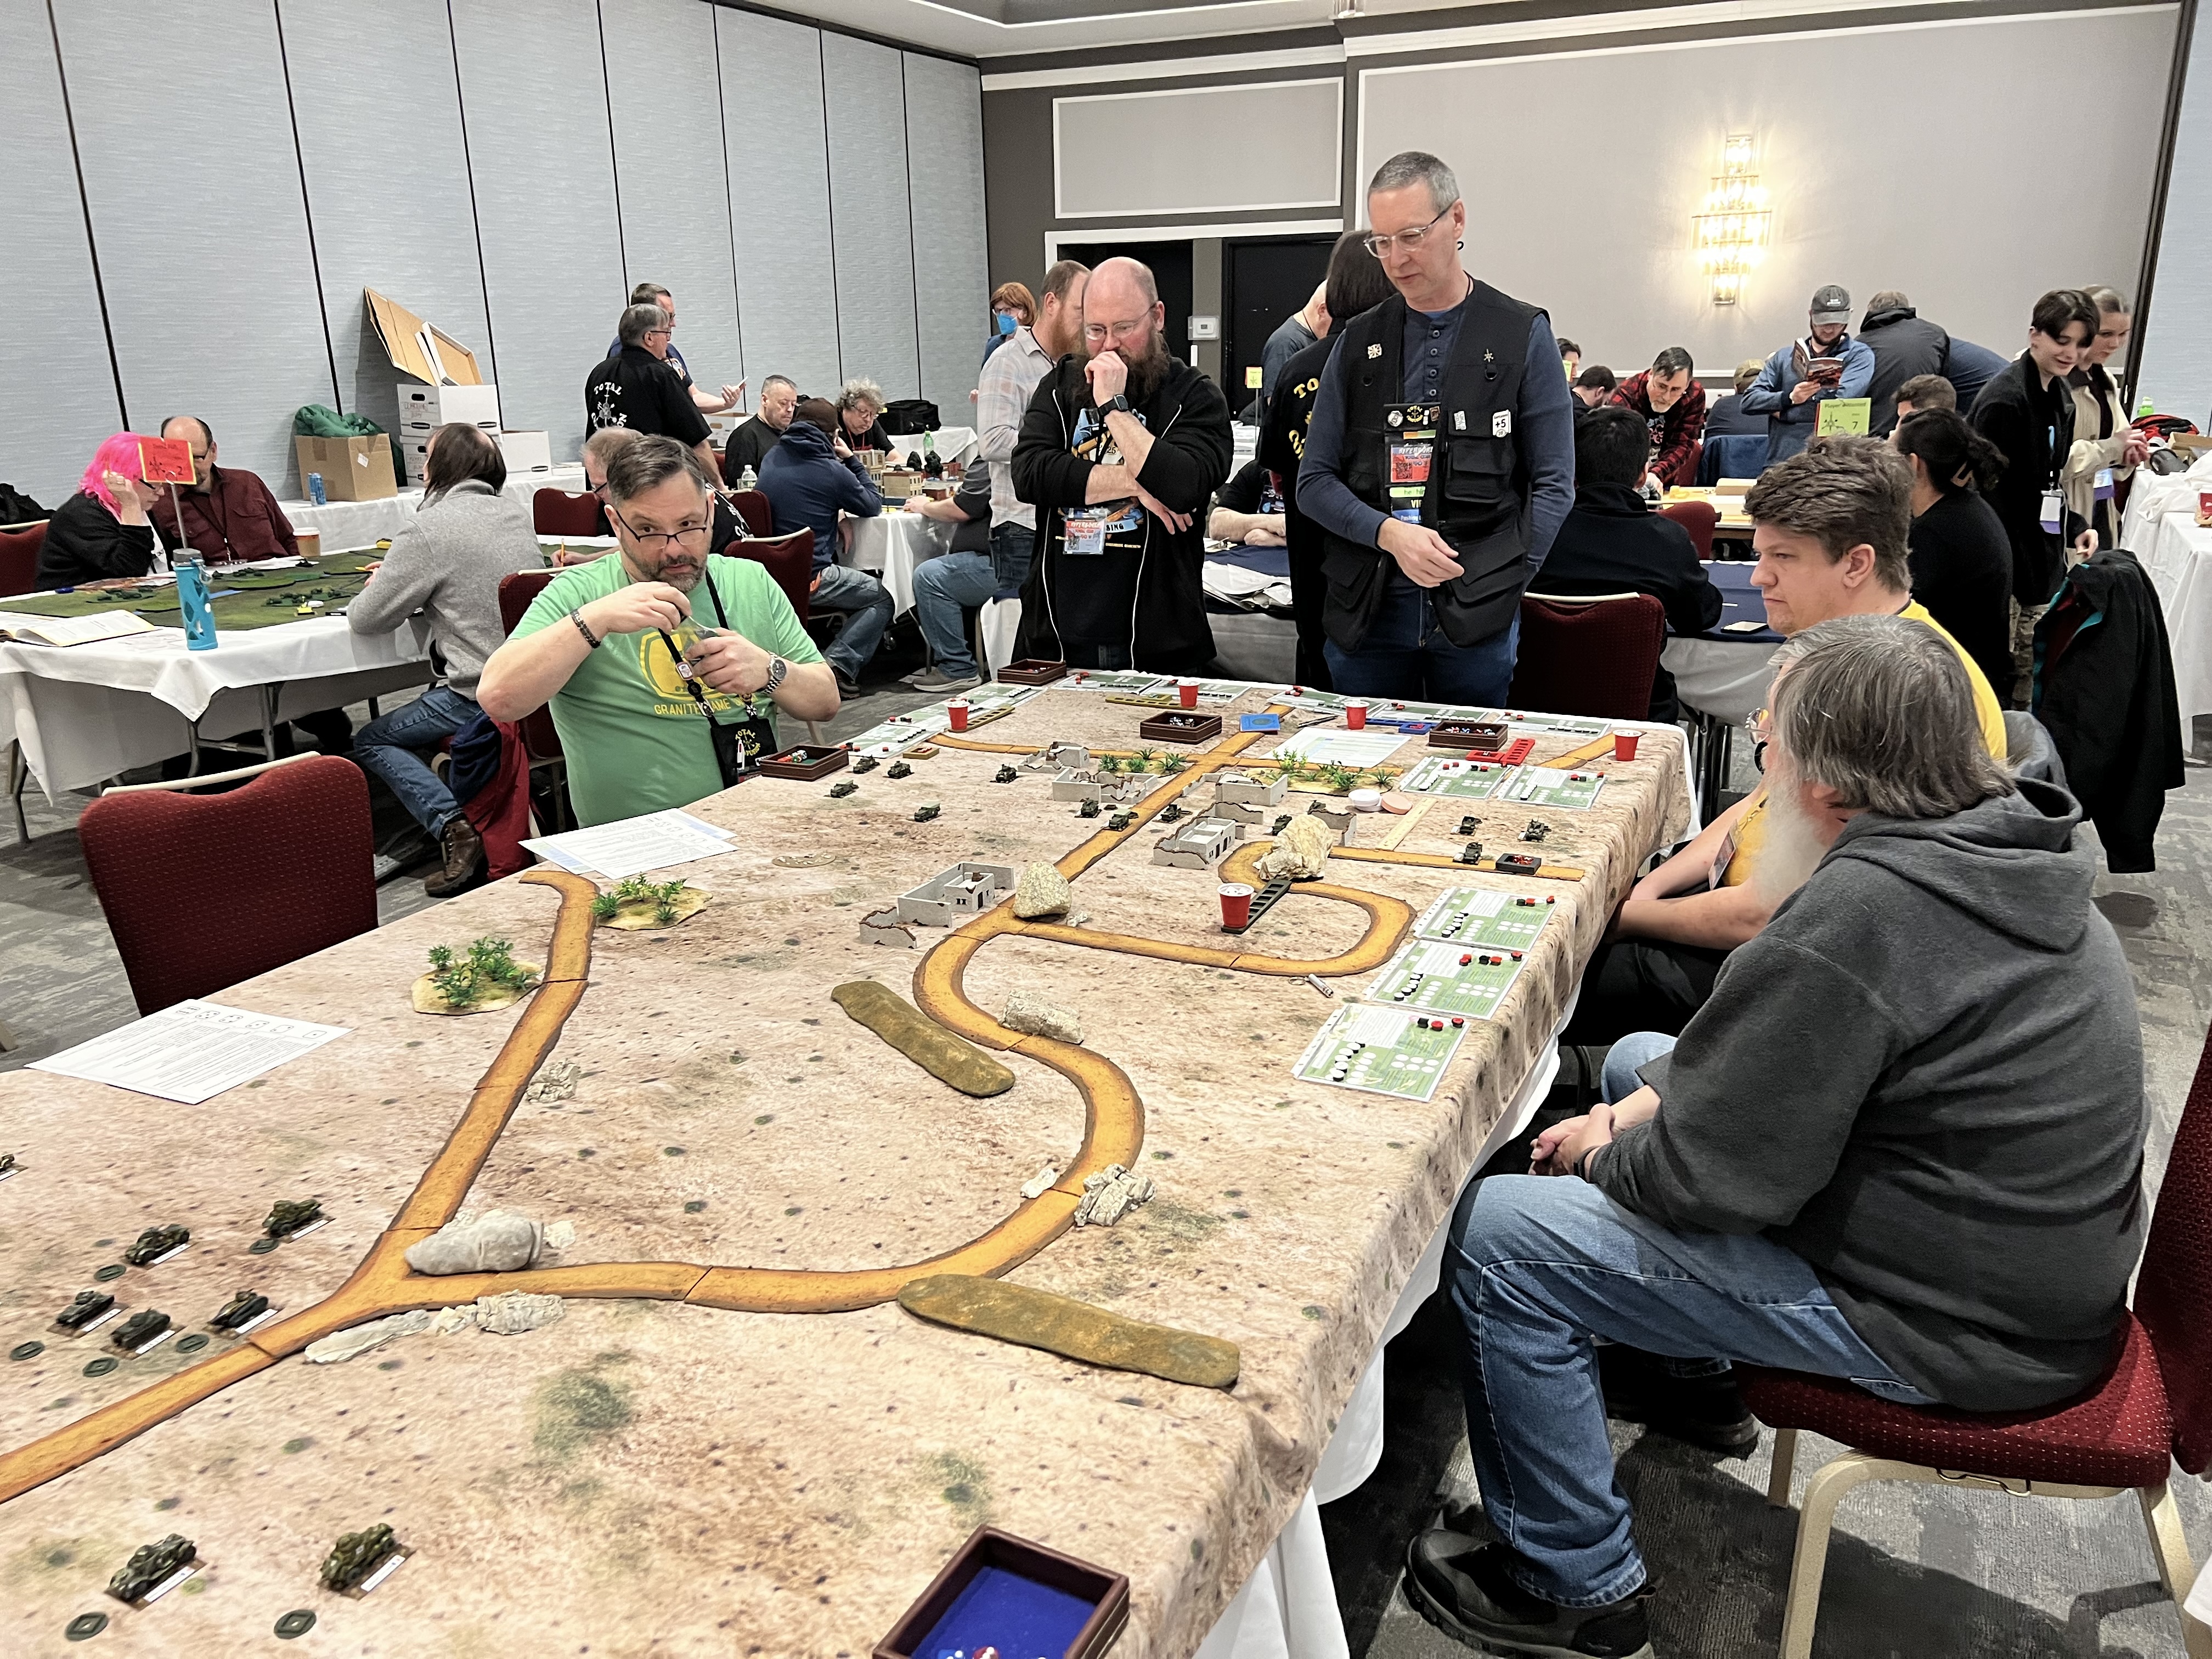
For Saturday afternoon, I ran Operation Torch: Vichy Mounts an Armored Counterattack. This was also a modified What a Tanker game.
Operation Torch: Vichy Mounts an Armored Counterattack
The Vichy players plan their assault.The American players are ready!The Americans watch as the Vichy French get closer. They have plans of getting air cover and naval gunfire on the French!Knowing this, the French spread out to avoid massing a big target.Mal considers his next move.Aircraft are deployed, but the US Navy rules the skies. This allows for the Avenger to call in naval gunfire from the USS Savannah. This destroys multiple Vichy vehicles.
The US air superiority and naval gunfire carried the day – with the US winning a significant victory.
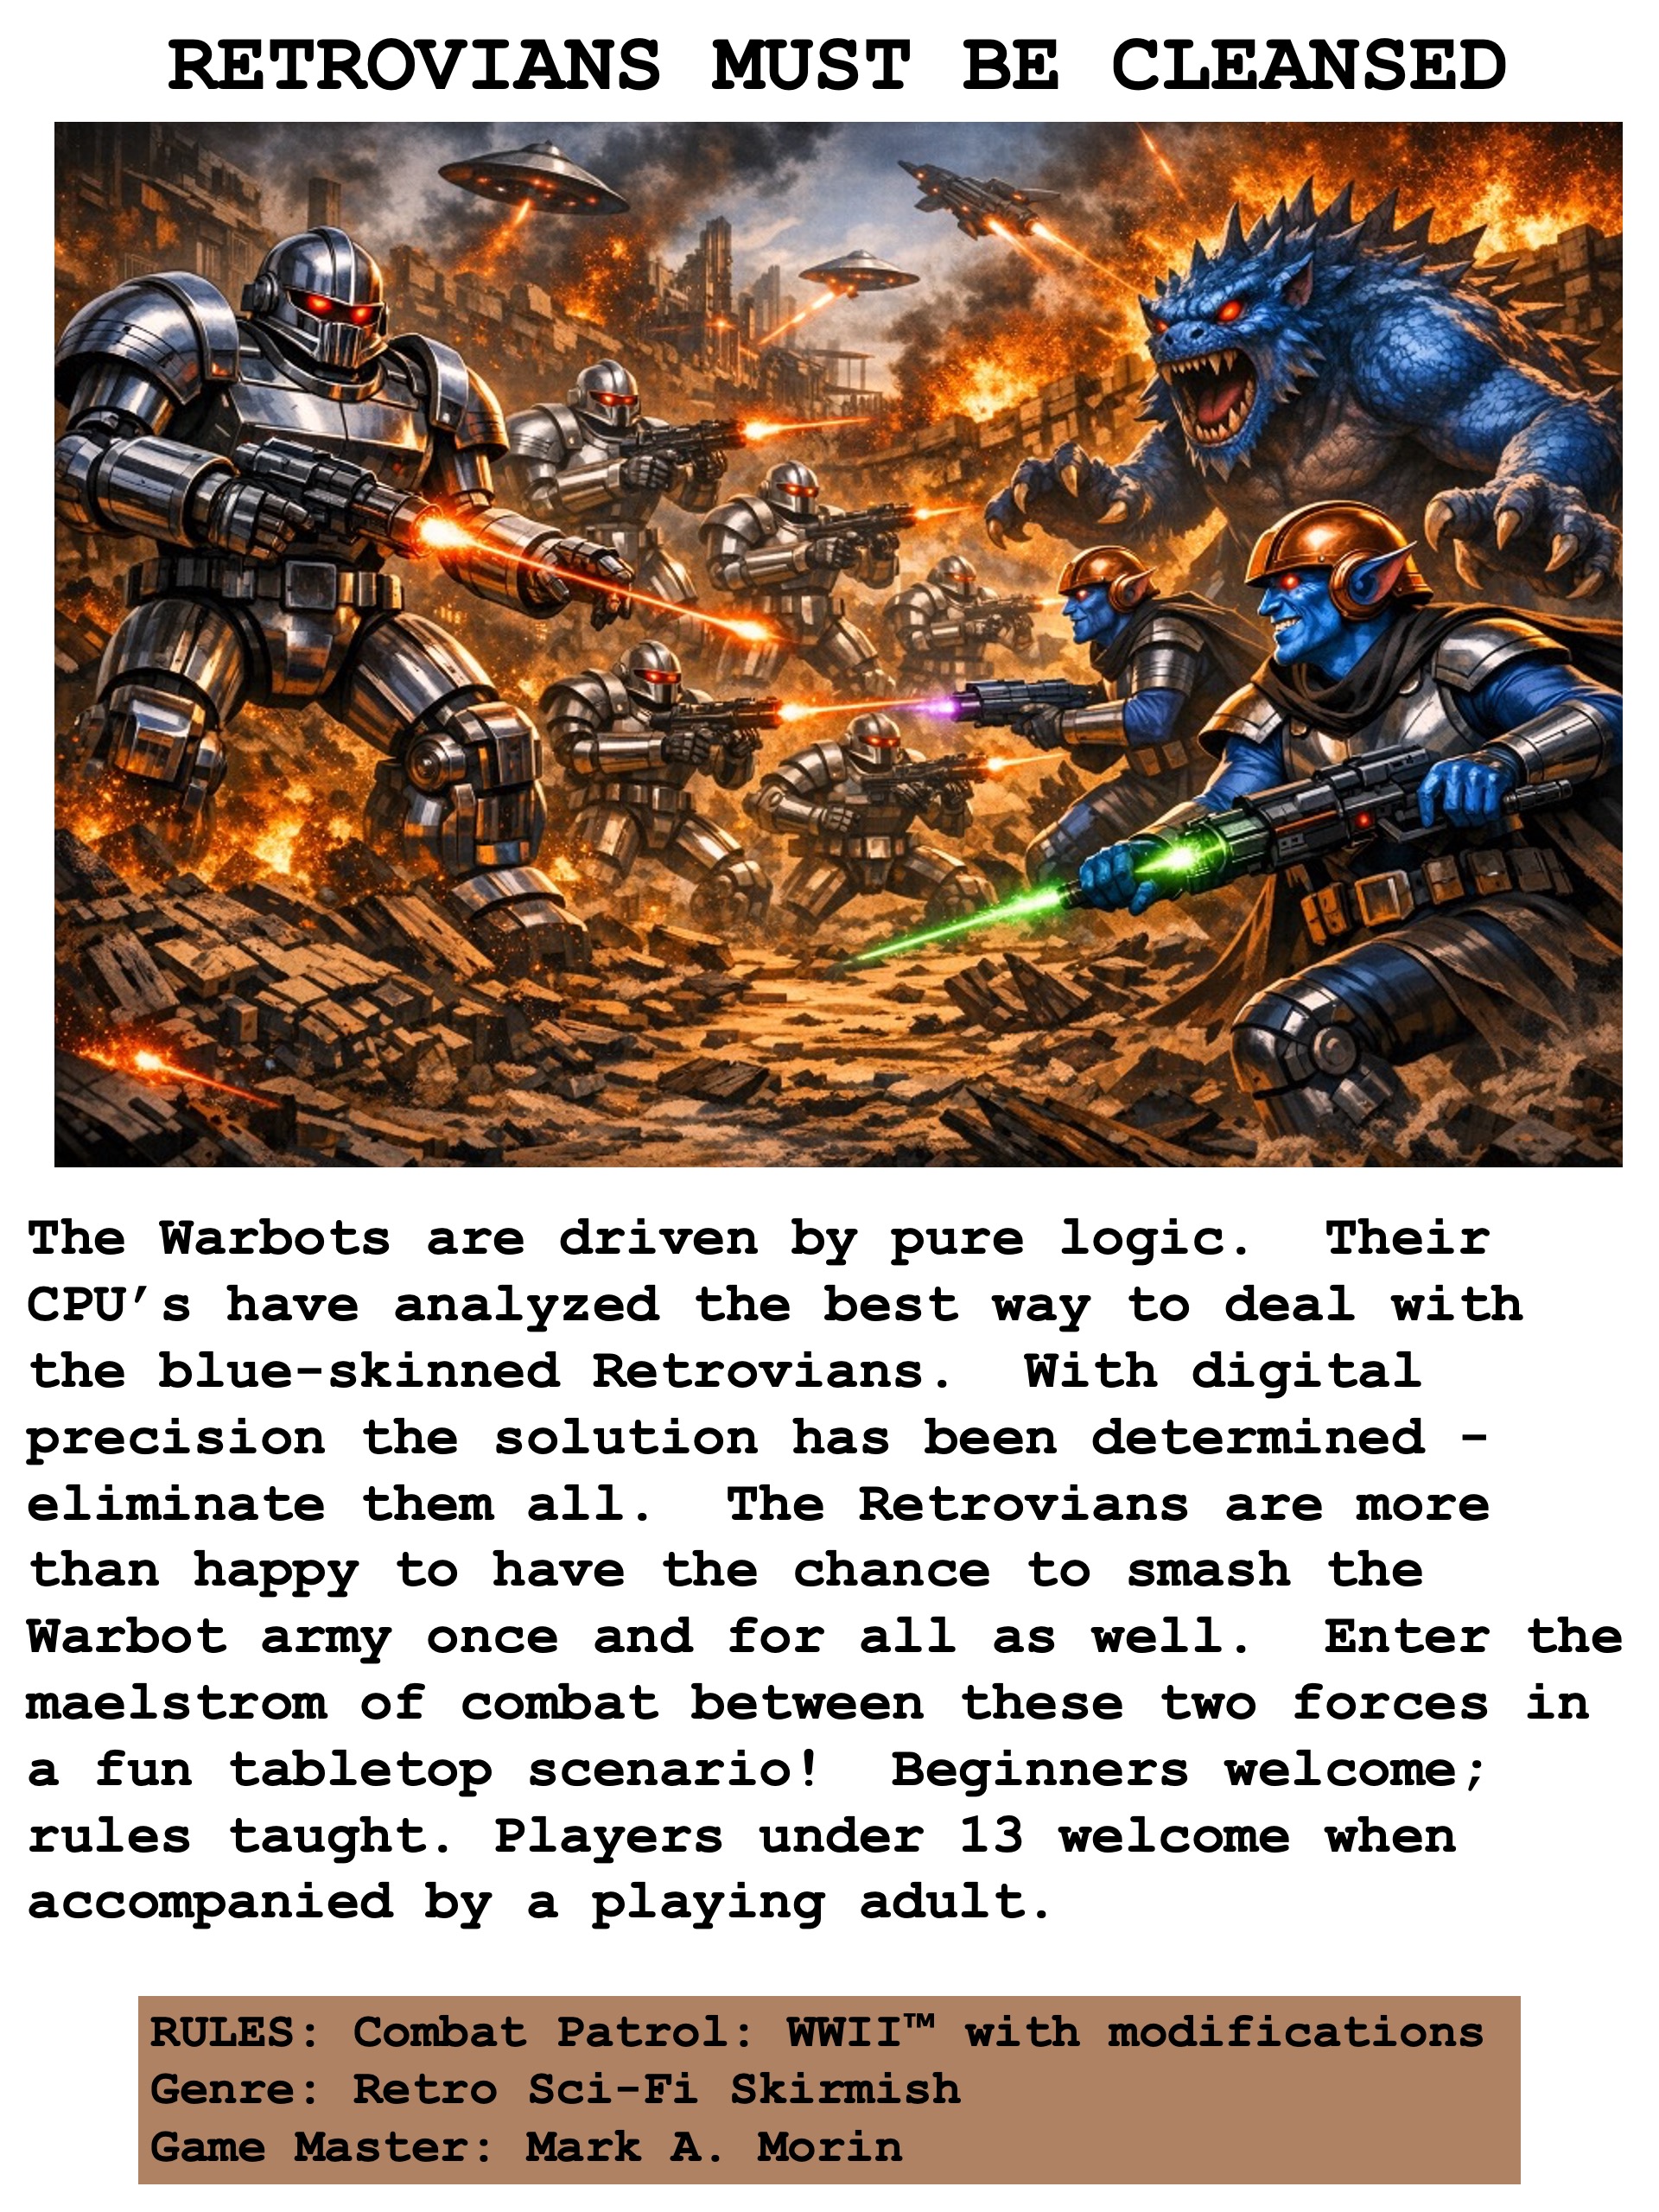
RETROVIANS MUST BE CLEANSED
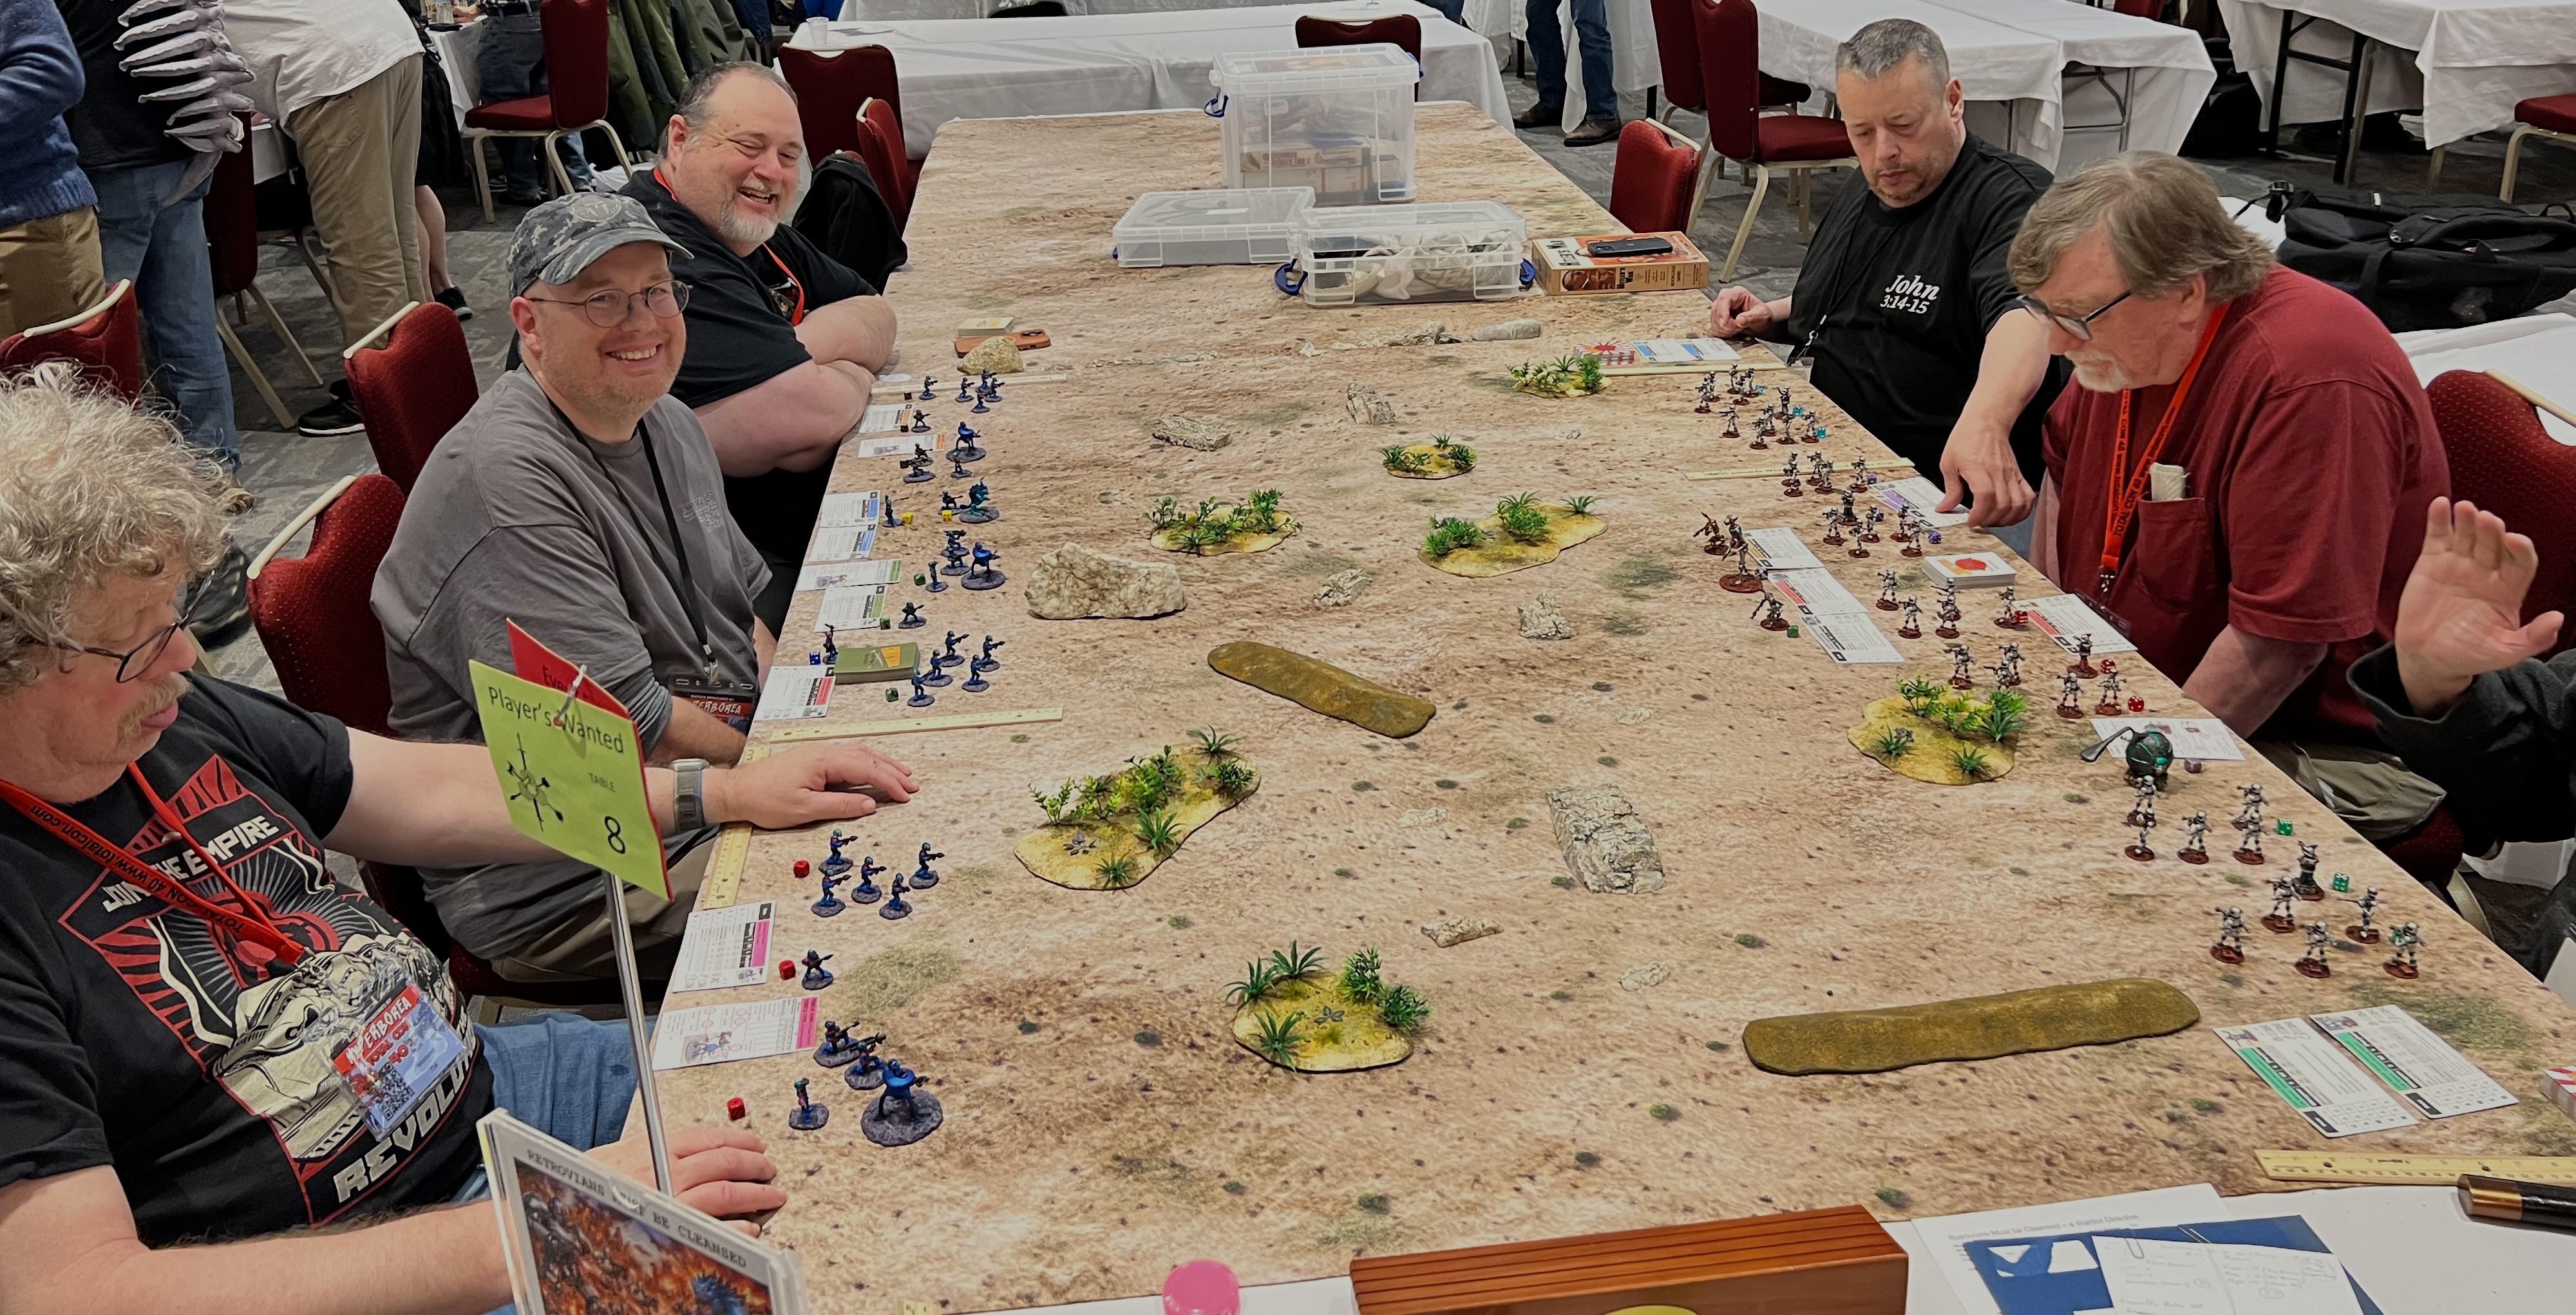
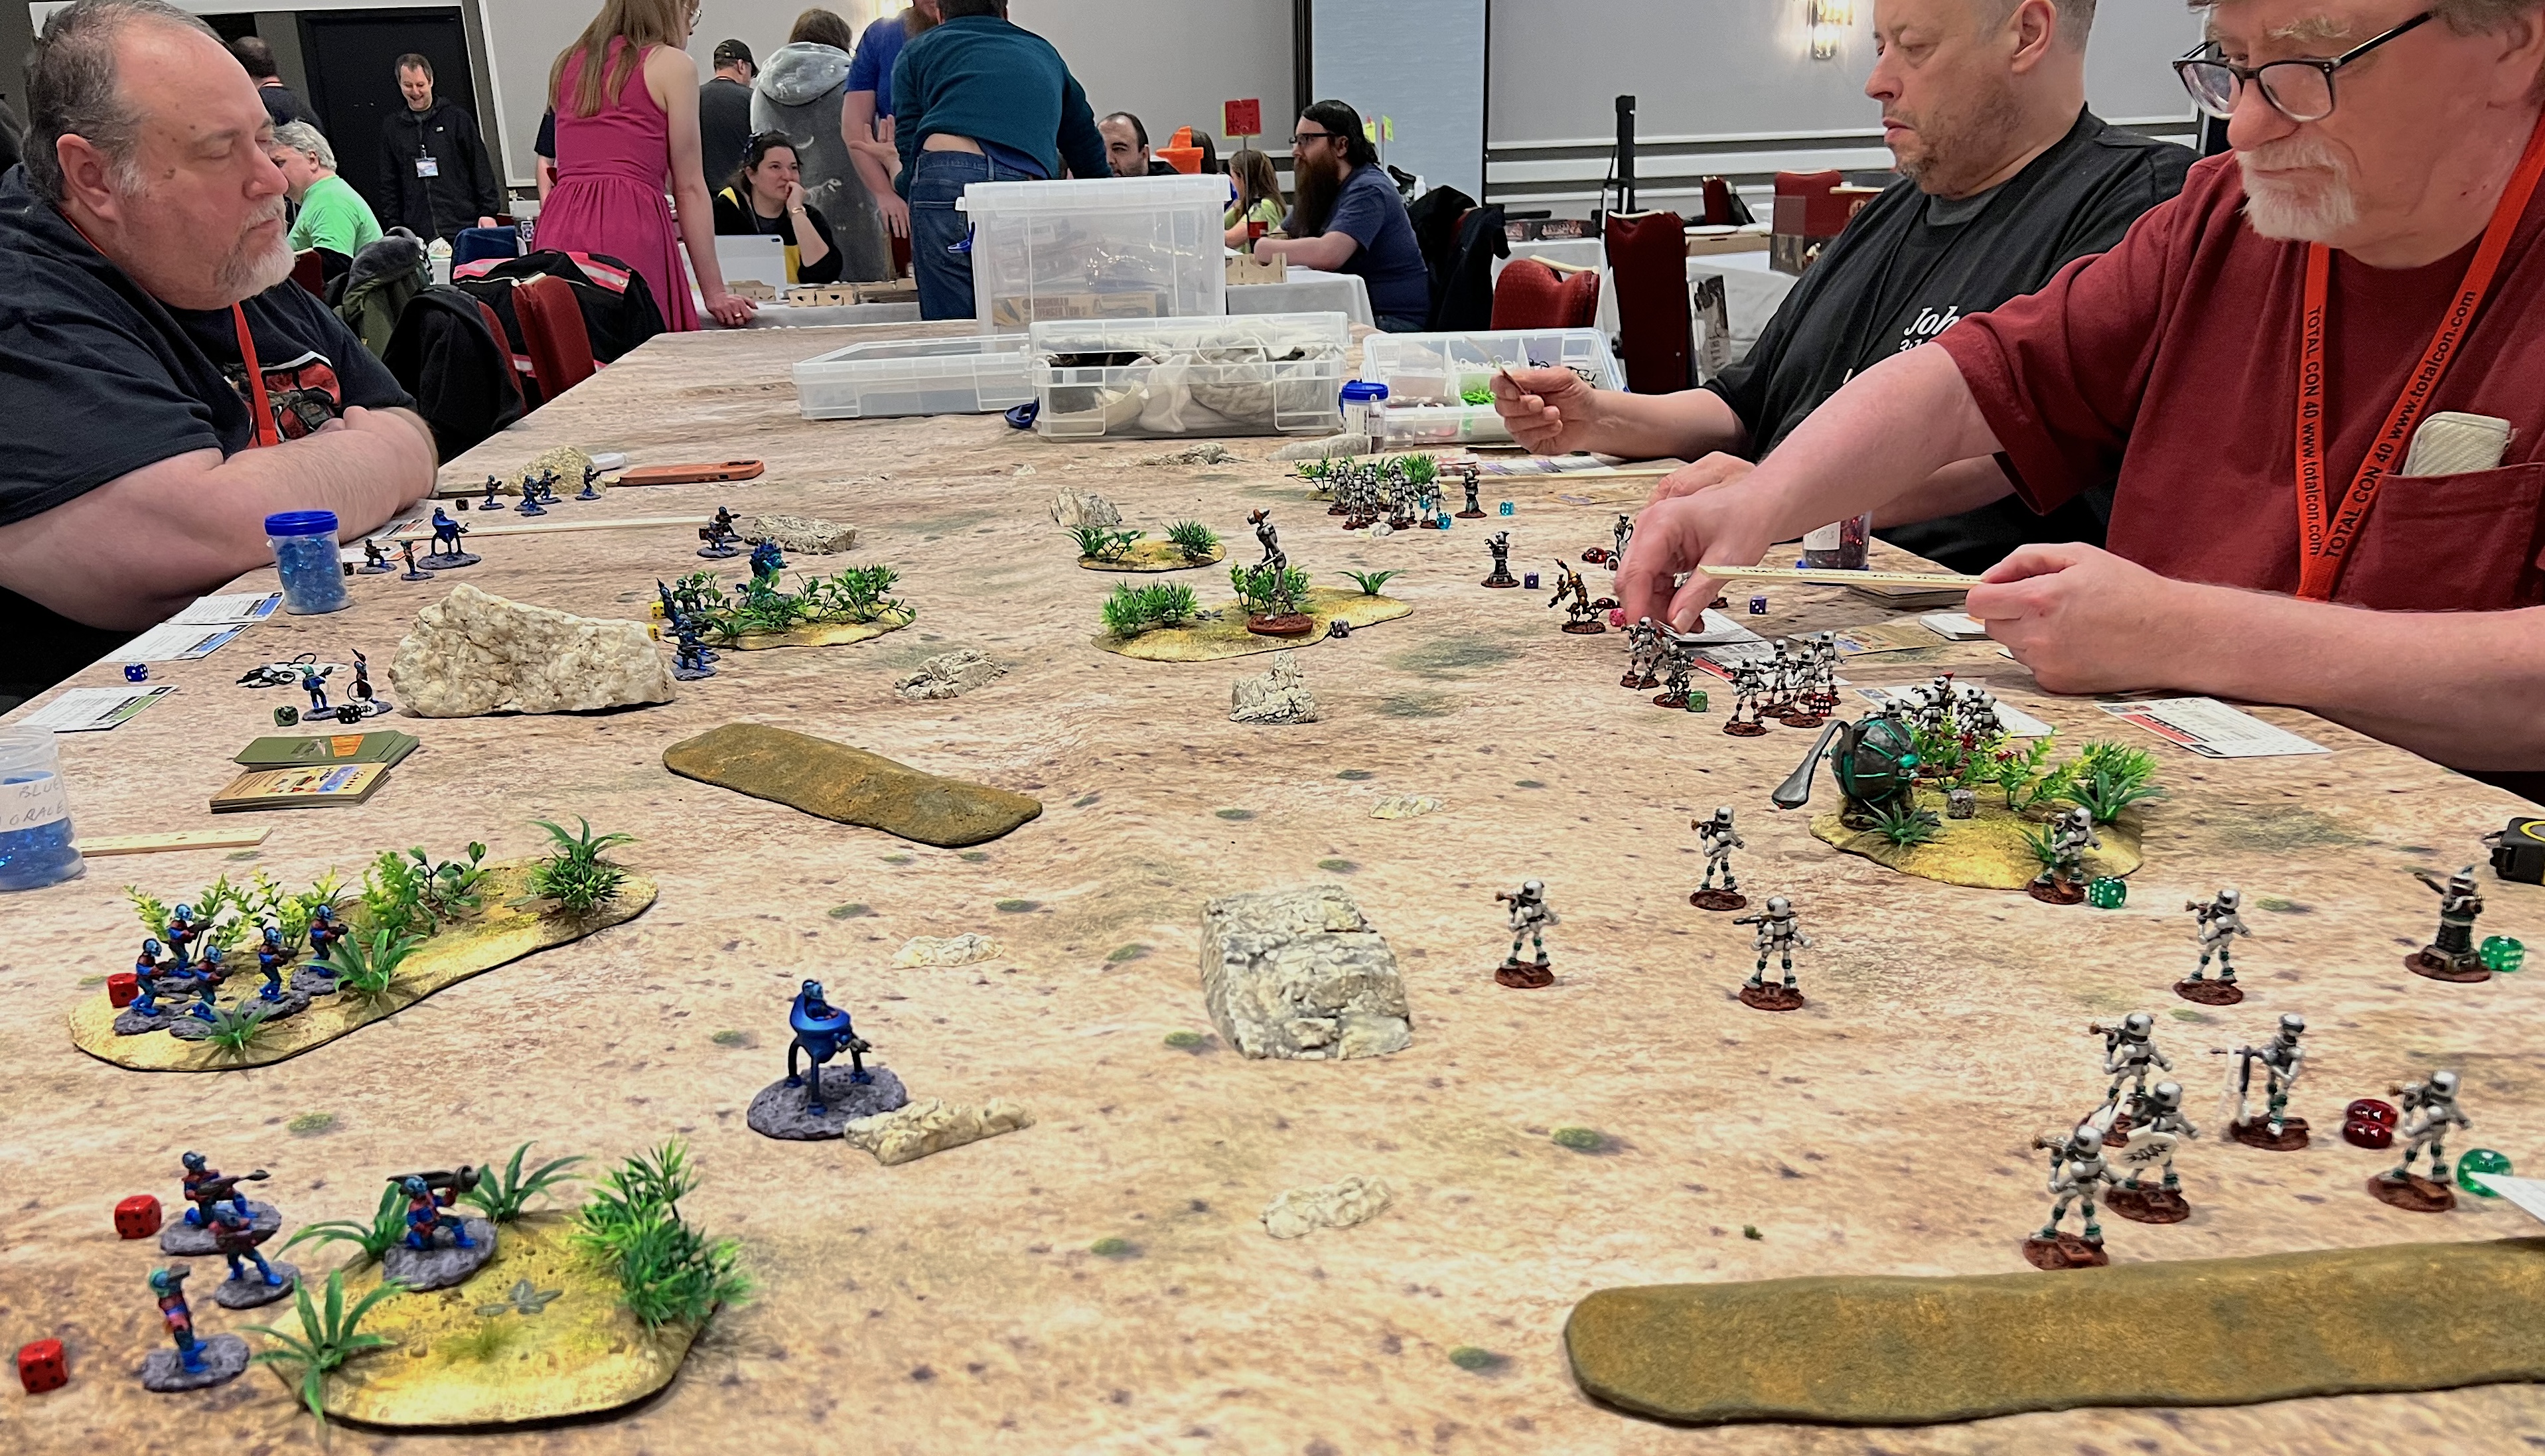
Saturday night’s game was upon me, and I had decided to run another Combat Patrol retro sci-fi game. This time, the Retrovians would face the Archive Star Rovers Warbots. They would also confront my own creation – the Mark 1 Sphere tank.
Happy Gamers at the start! Retrovians are on the left, Warbots on the right.A Retrovian Bra’sheer tripod moves out front of its infantry. The Mark 1 takes up a supporting position as the Warbots march forward to glory.The Mark 1 safely delivers machine gun fire from its sponsons. Meanwhile, the Warbots also take fire and are stunned.
I did not take many pictures of this game. I do believe that the Warbots wore down the Retrovians. Yes, they were “cleansed”. It was nice to see these figures back on the tabletop.
This was the penultimate game for me of TotalCon 2026. I headed off to my room. I was ready for the 2026 TotalCon “Tournament of Ozz” on Sunday morning.
I had 7 out of a possible 8 players. At random, one player got a “bye” in round one. The match-ups were done at random and 7 different 21-point brigades were assigned at random. Inflicting the most damage on the enemy was the victory condition to move forward in the tournament. Tie breakers were also in play if that was needed.
Glory on the Line!
In Round 1 – the match ups were:
Impkins (Ken) versus Munchkins (Eric)
Munchkins (Bob) versus Gillikins (Dave)
Winkies (Brad) versus Gillikins (Jacob)
Winkies (Leif) got the round 1 bye
Round 1 begins!Brad’s Winkies devastate Jacob’s GillikinsBob’s Munchkins get into a shooting match with Dave’s Gillikins.Round 1 winds down.
The Round 1 results were:
Impkins (Ken) defeated Munchkins (Eric)
Munchkins (Bob) defeated Gillikins (Dave)
Winkies (Brad) defeated Gillikins (Jacob)
Winkies (Leif) got the round 1 bye
Yielding the semifinals as:
Impkins (Ken) versus Winkies (Brad)
Munchkins (Bob) versus Winkies (Leif)
The semi-finalists!Leif casts a poppies spell to thwart Bob’s cavalry,Bob’s Munchkins prepare to unleash musketry on Leif’s Winkie Guard. They would rout!Meanwhile, Ken’s Impkins got hit hard by Brad’s Winkies.
The Round 2 (semifinals) results were:
Winkies (Brad) defeats Impkins (Ken)
Munchkins (Bob) defeats Winkies (Leif)
Yielding the FINALS as:
Munchkins (Bob) versus Winkies (Brad)
Brad and Bob get ready to rumble!
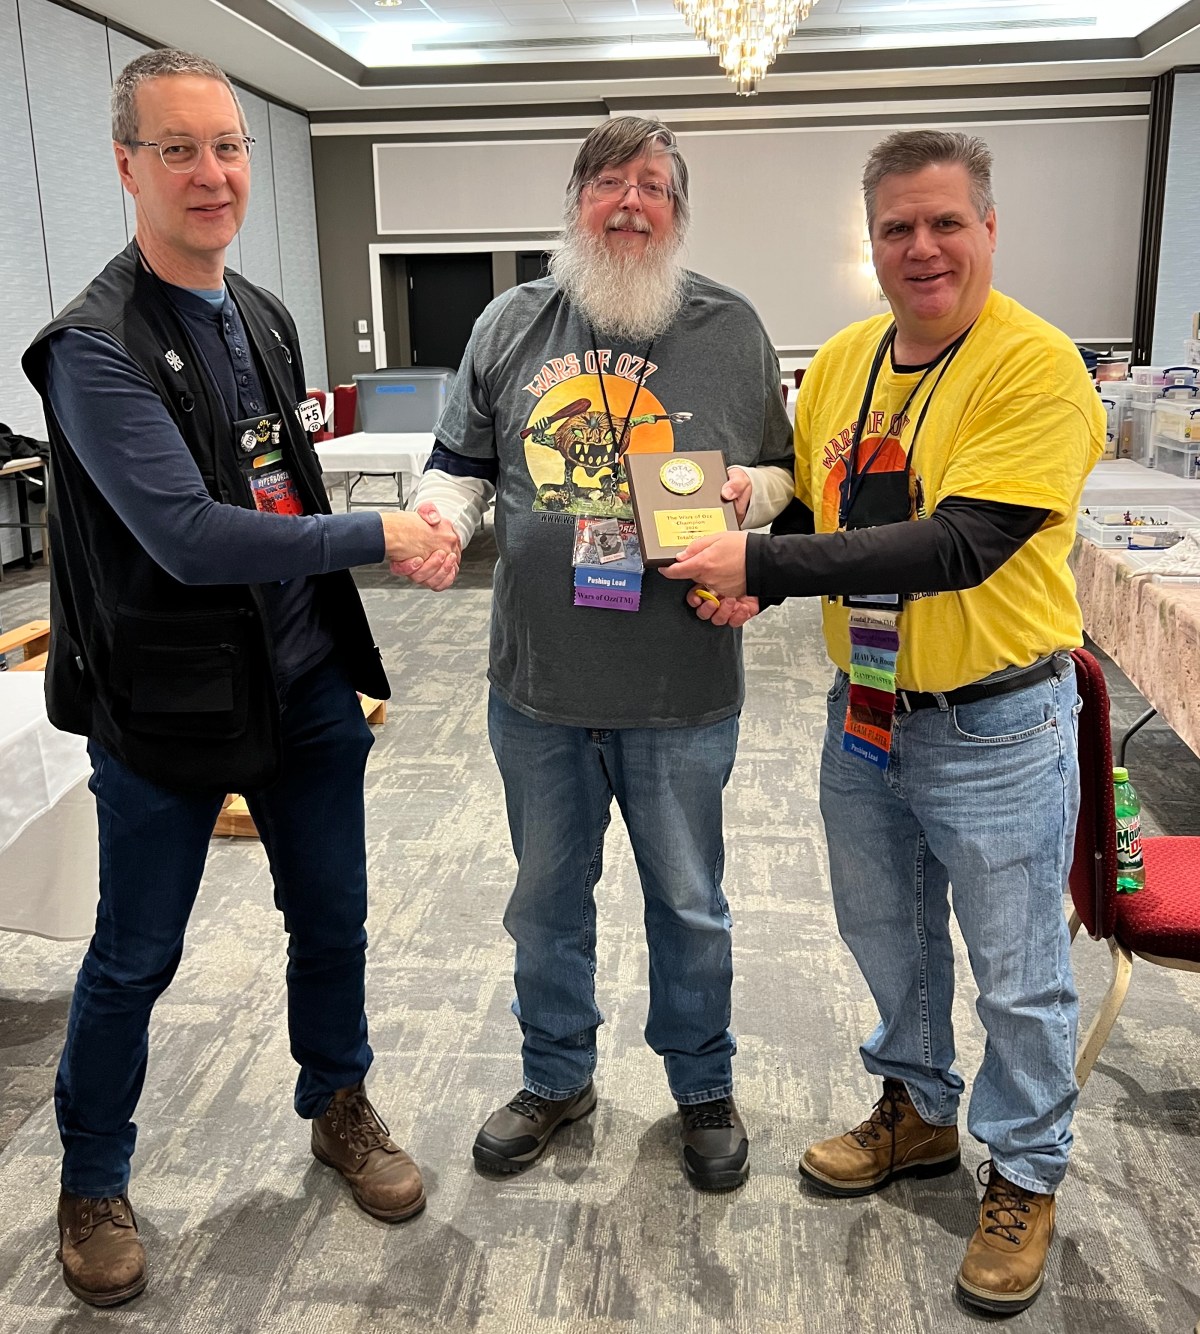
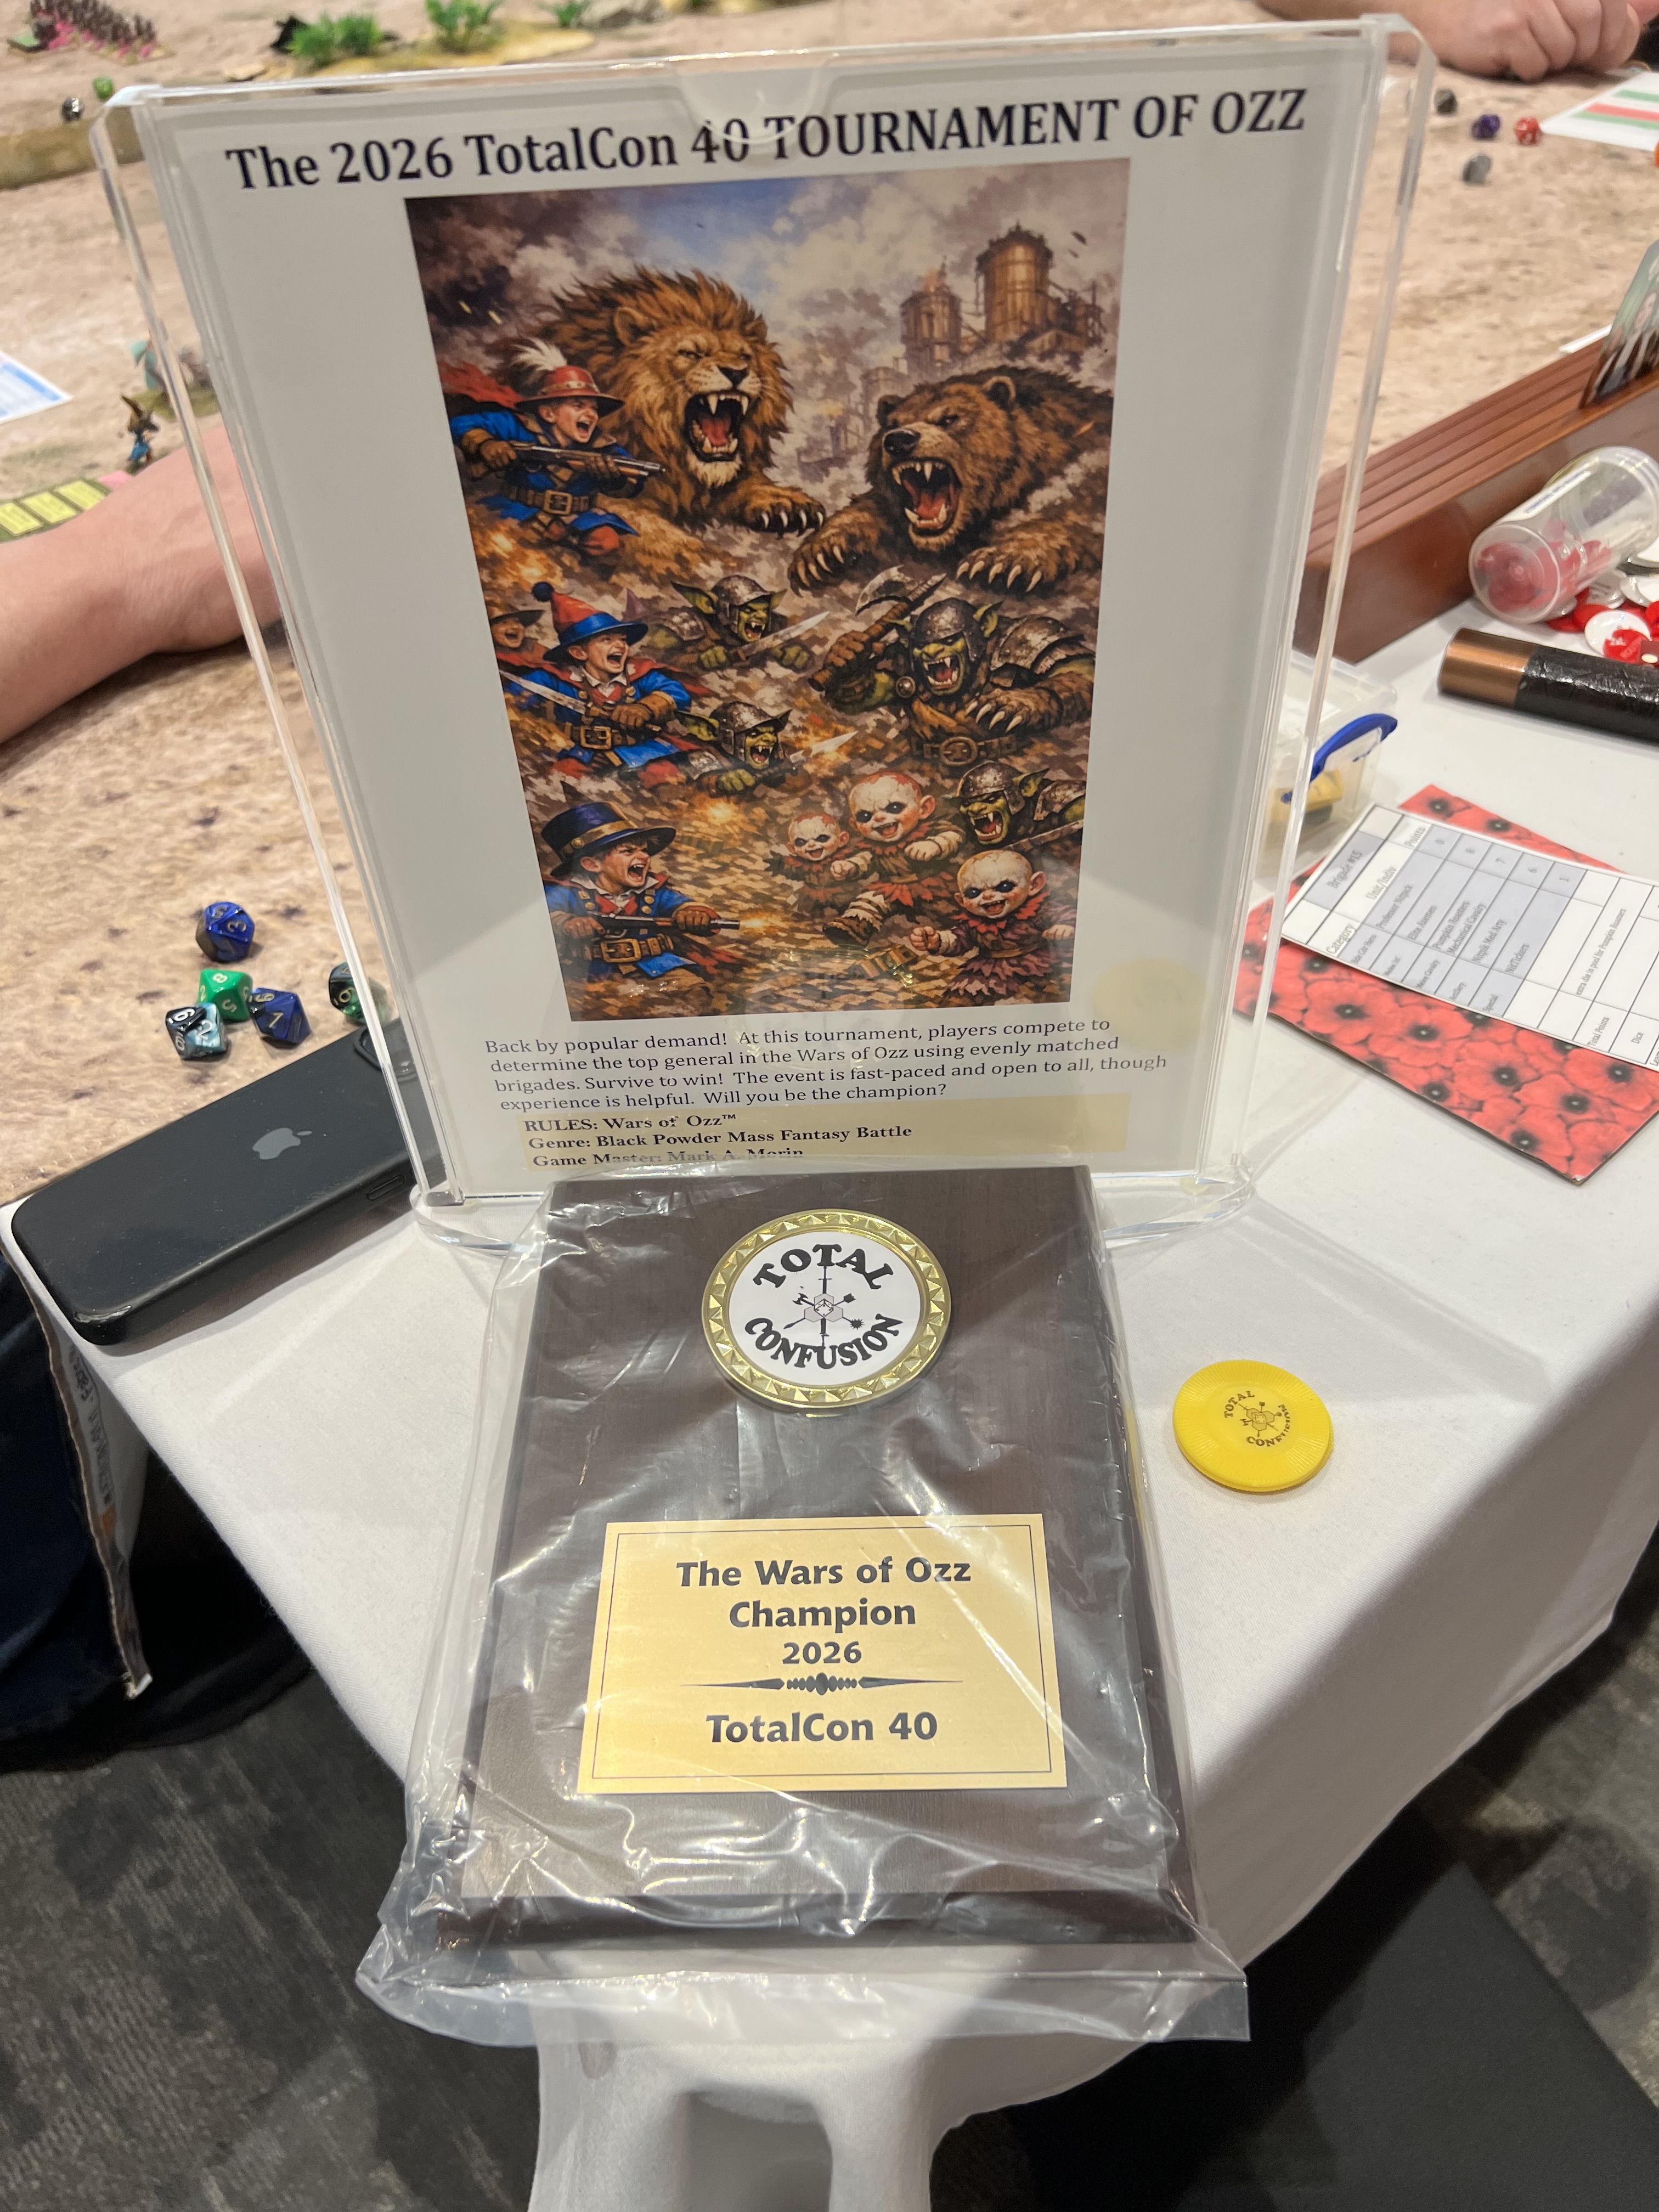
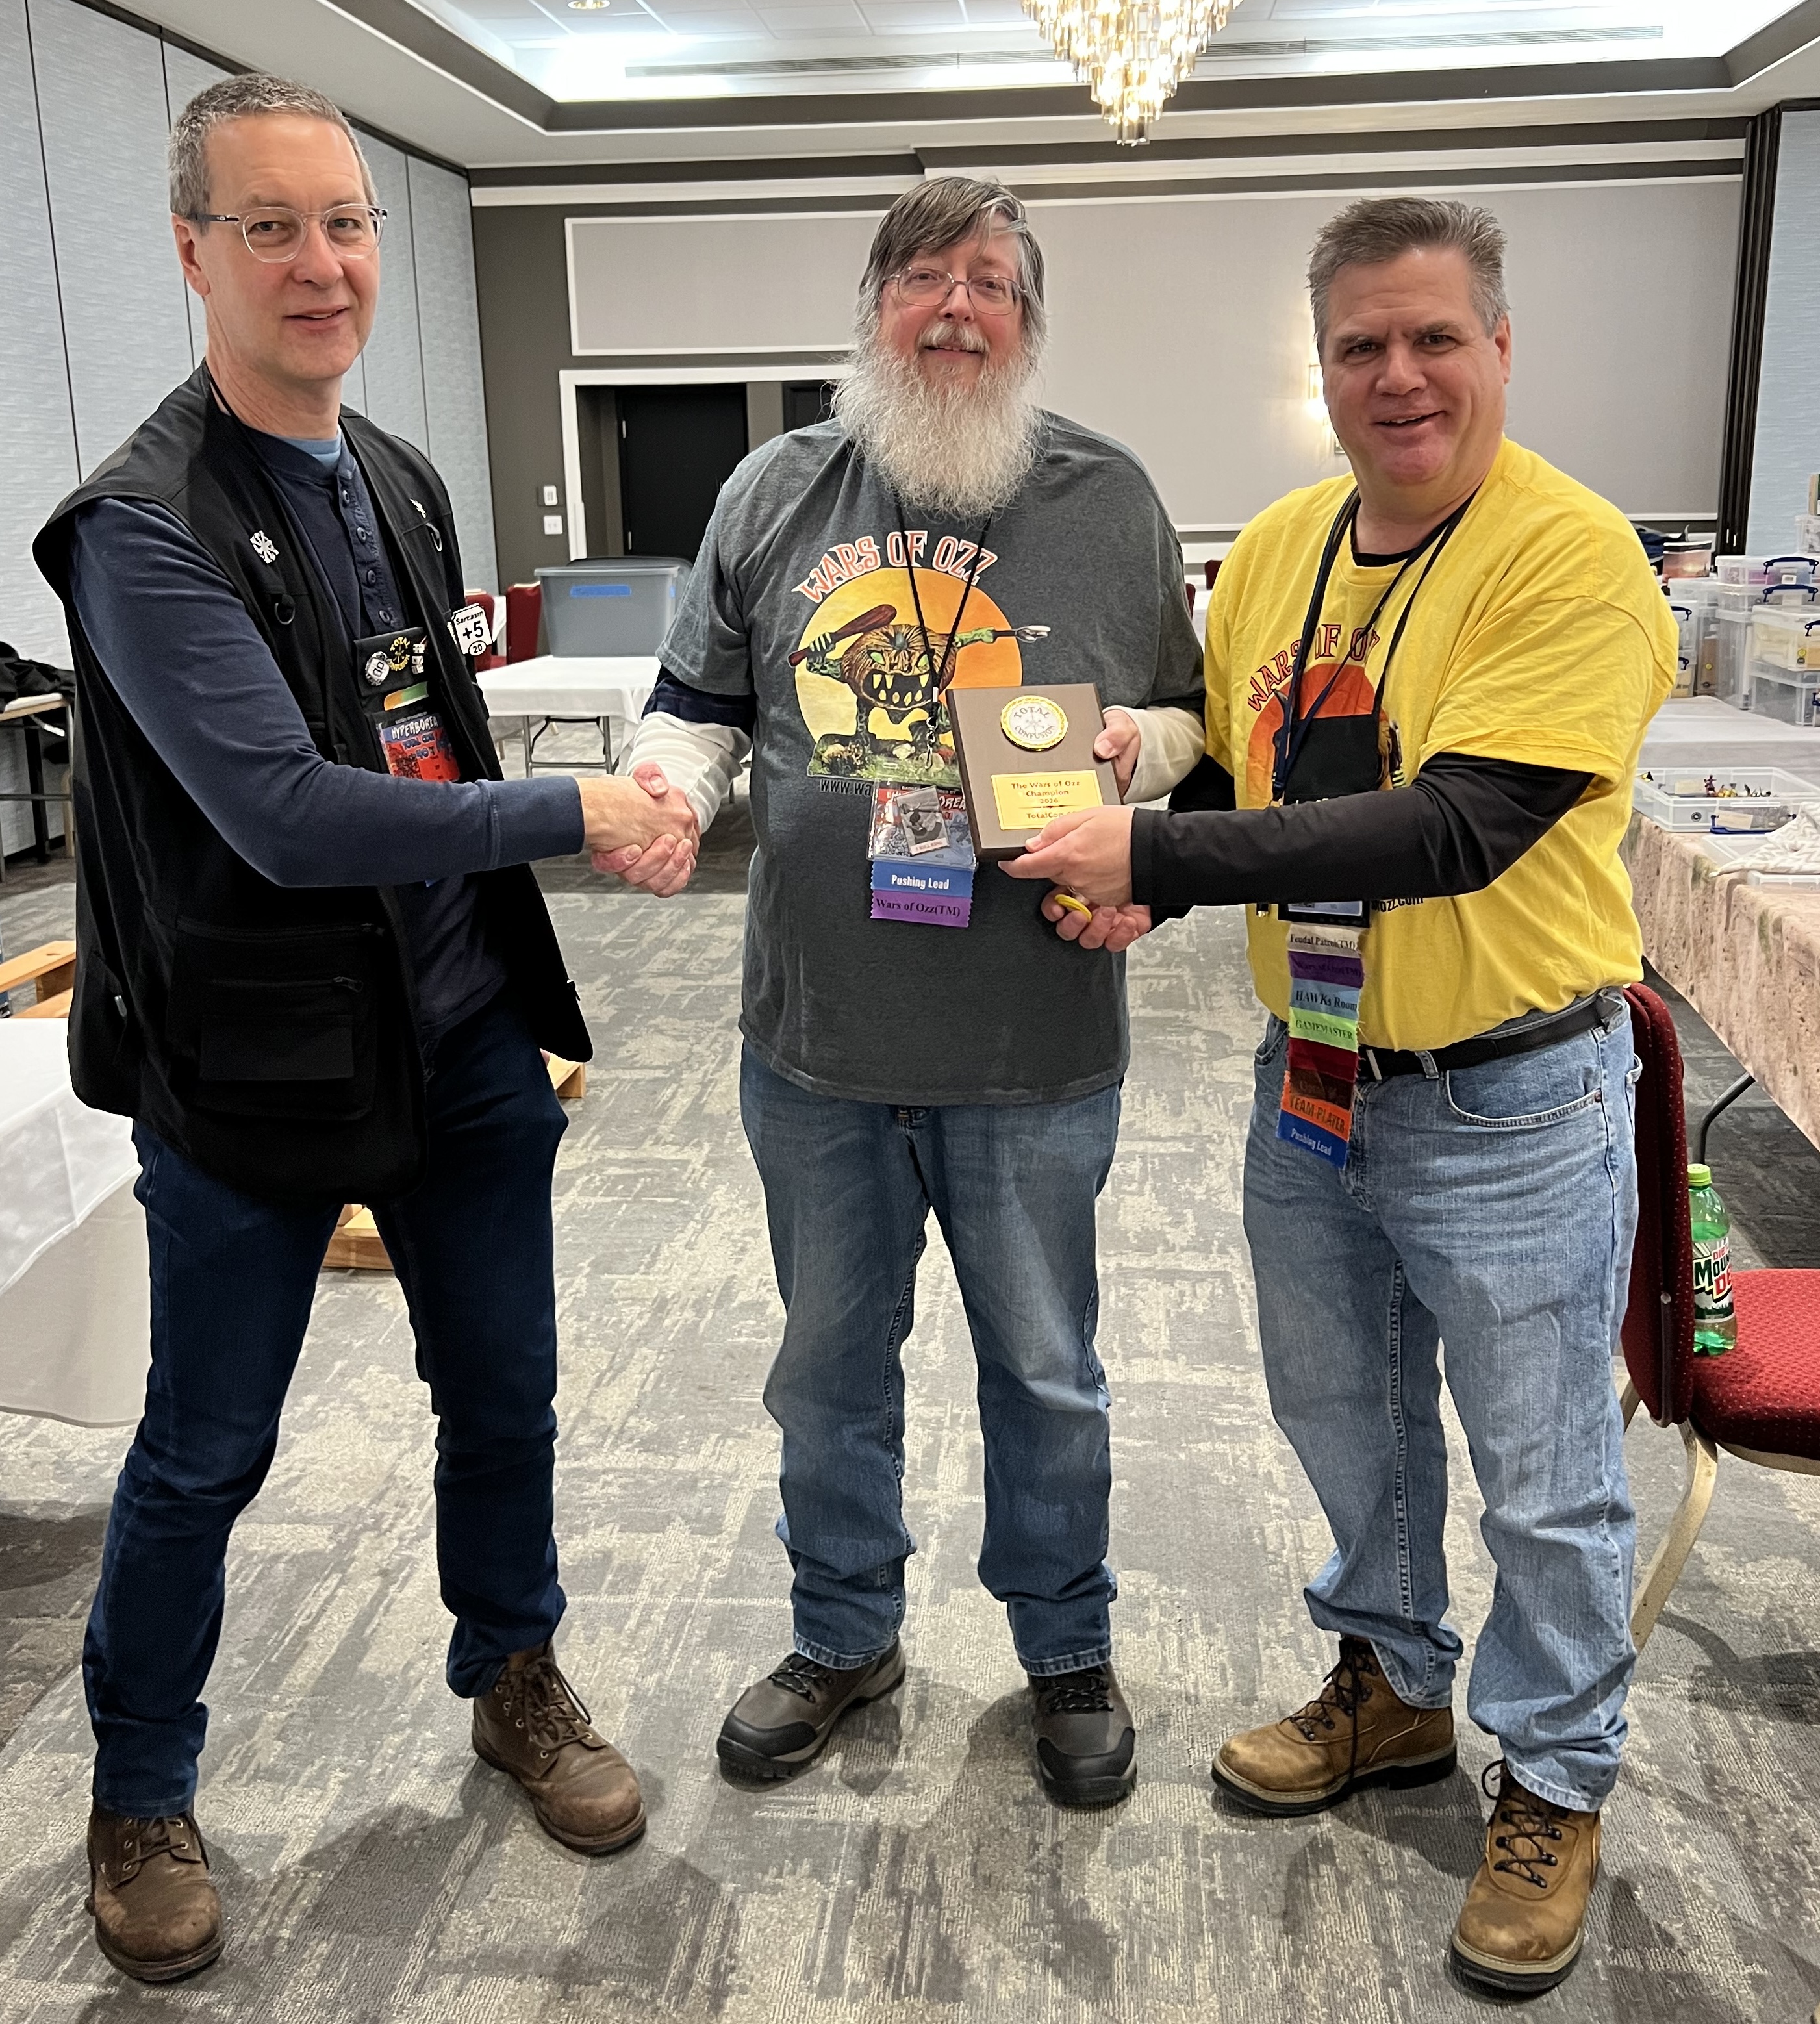
In the end, Brad outlasted Bob – though it was close! Congratulations to Brad as the 2026 TotalCon Wars of Ozz Champion! Congrats to Brad!
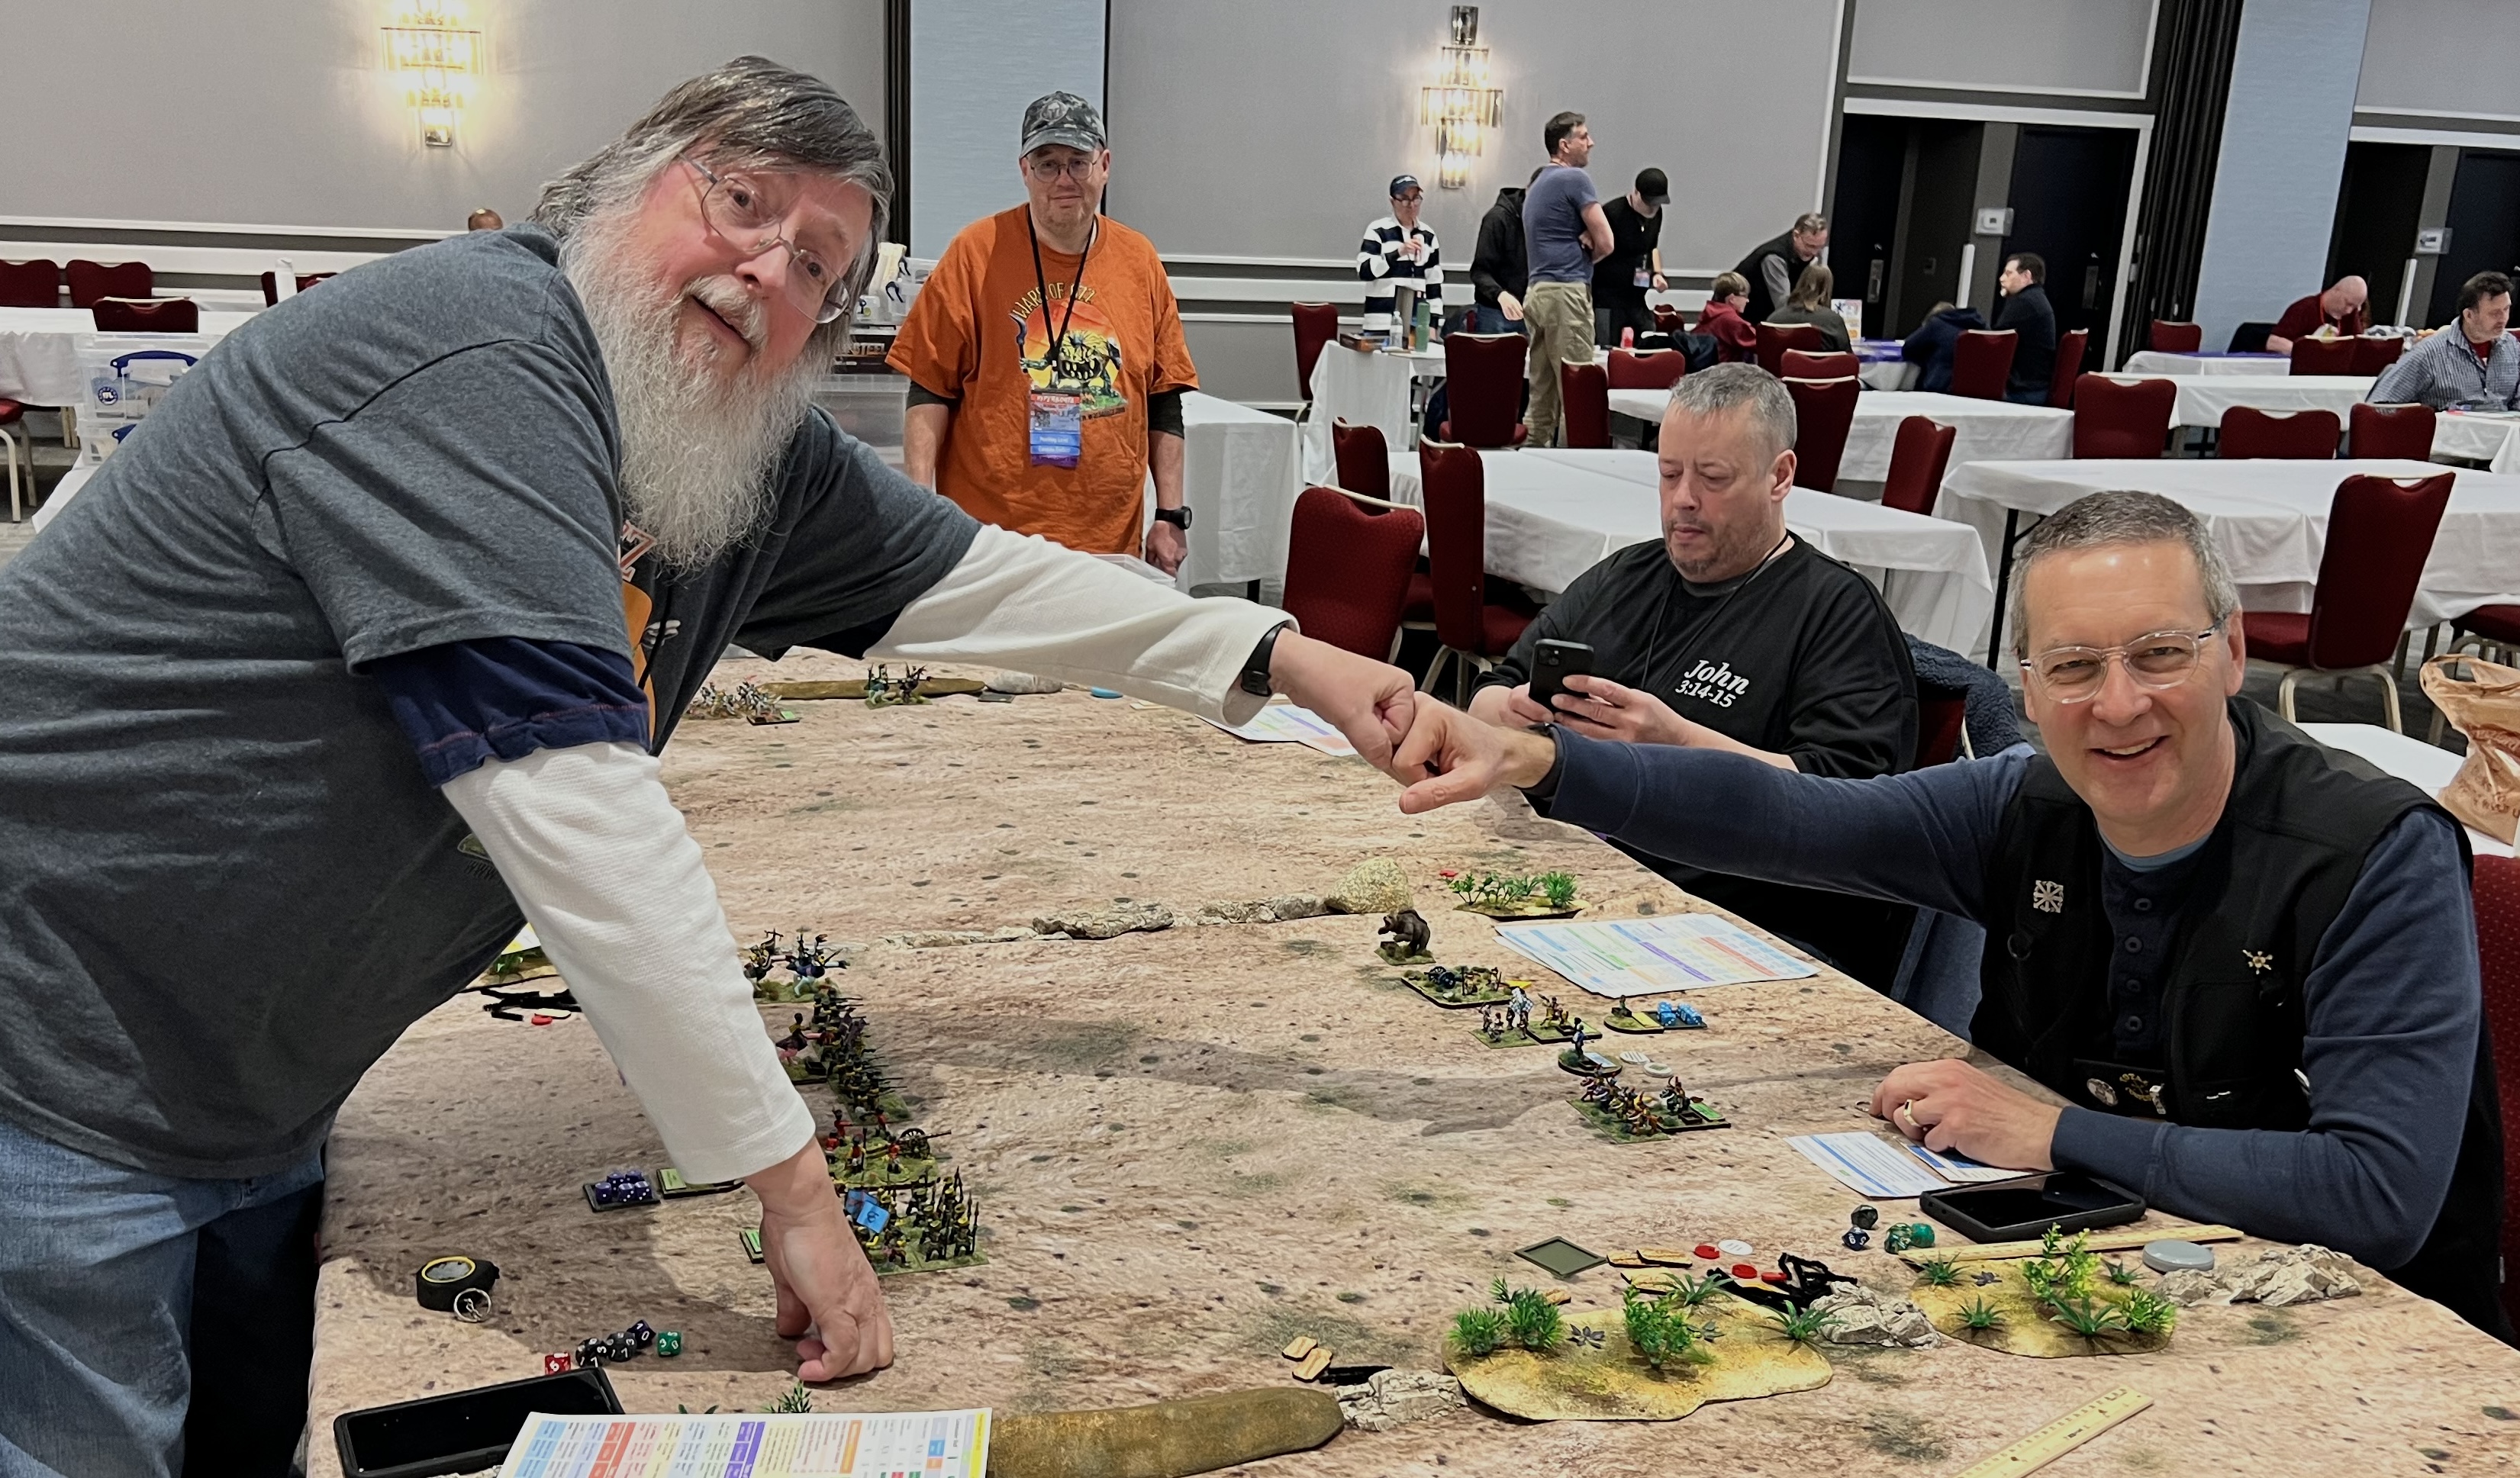
The 2026 runner up Bob, the 2026 champion Brad, and your happy GM.
Thank you to all who helped me at the convention. Special thanks to Leif and Brad.
I also want to extend a very special thanks to Bryan Clauss, Steve Parenteau, Kevin Baumann, and the entire TotalCon staff. They do a magnificent job running a great convention! BIG THANKS!!
Lastly, a few areas that you can check out if you dare:
Followers of this blog have seen several posts showing my “rusty” preparations. I have been getting ready for my numerous games at 2026 tabletop wargaming conventions. That preparation involves painting up figures and terrain for scenarios that involve a good amount of ruins and wreckage.
In a previous post, I shared how I built transmission towers and rusty walls for a Wars of OzzTM game involving Professor Nitpik’s Industrial City (the Robotic Sanctum). I ran that game at Cold Wars and will share more about that convention shortly. The theme for Cold Wars this year was “The Wild West”, so I also had planned to run a game involving Space Cowboys (technically Archive Texican Space Rangers” from Star Rovers).
I don’t run western games, but I could cobble together a retro sci-fi game using Buck Surdu’s Combat Patrol:WWIITM gaming system (with my modifications). In my game Archive “Space Cowboys”, and uplifted kangaroos (“Space ‘Roos” ) combat blue-skinned “Retrovians” (from War Games Supply Dump). Both armies are searching for hidden ancient robots in the apocalyptic ruins of a long-dead civilization on a newly-colonized world called Dust.
To really make the ancient ruined industrial panorama that I wanted, I needed more buildings and structures than just my transmission towers, rusty walls, rusty generators and ruined chemical plant. I also wanted a lot of wreckage strewn about as terrain.
To those ends, I ended up making two ruined factory buildings, two industrial structures, and 61 scatter bases of industrial wreckage. These were all built at the same time. This enabled me to work around issues like drying and curing times as time was short. Oh yeah, and we had a few snow storms here in Massachusetts along the way that ate up some hobby time (not helpful at all).
I wanted to share my project and all its components here with you. As these were simultaneous efforts, you will see multiple project stages here. You may notice that I used a lot of repurposed bits of metal and plastic and Juweela products. The lists will be at the end of this post as is my habit. My concept was to achieve a Stalingrad-like look.
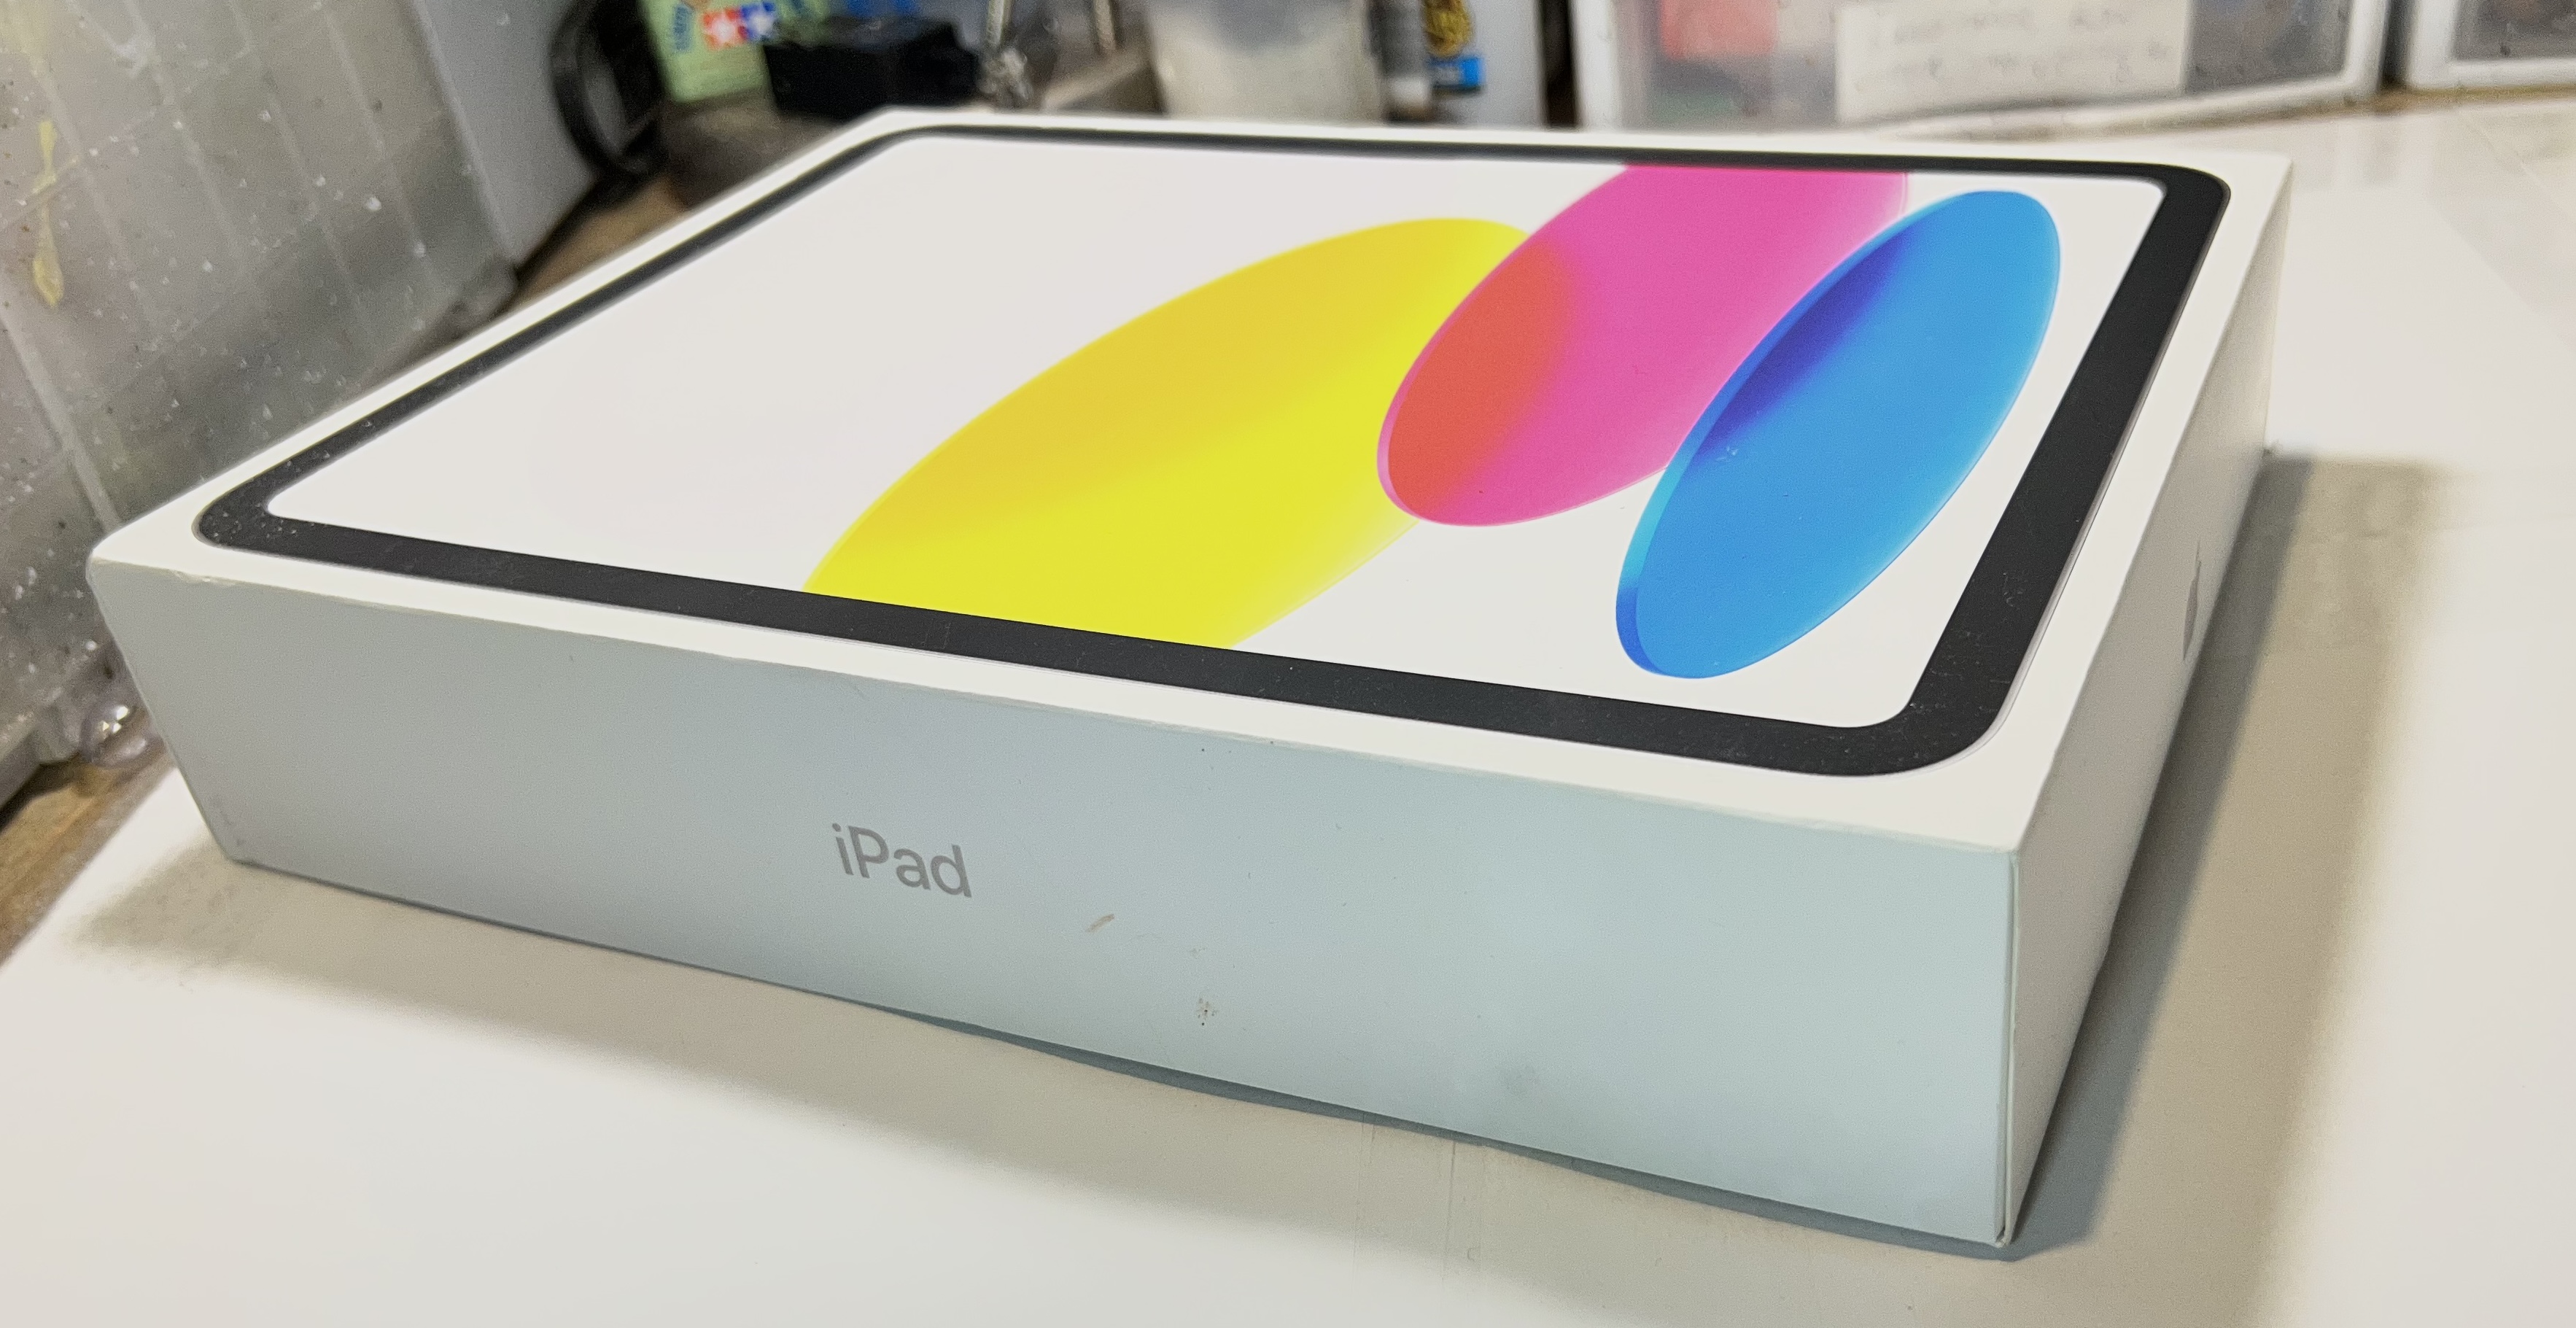
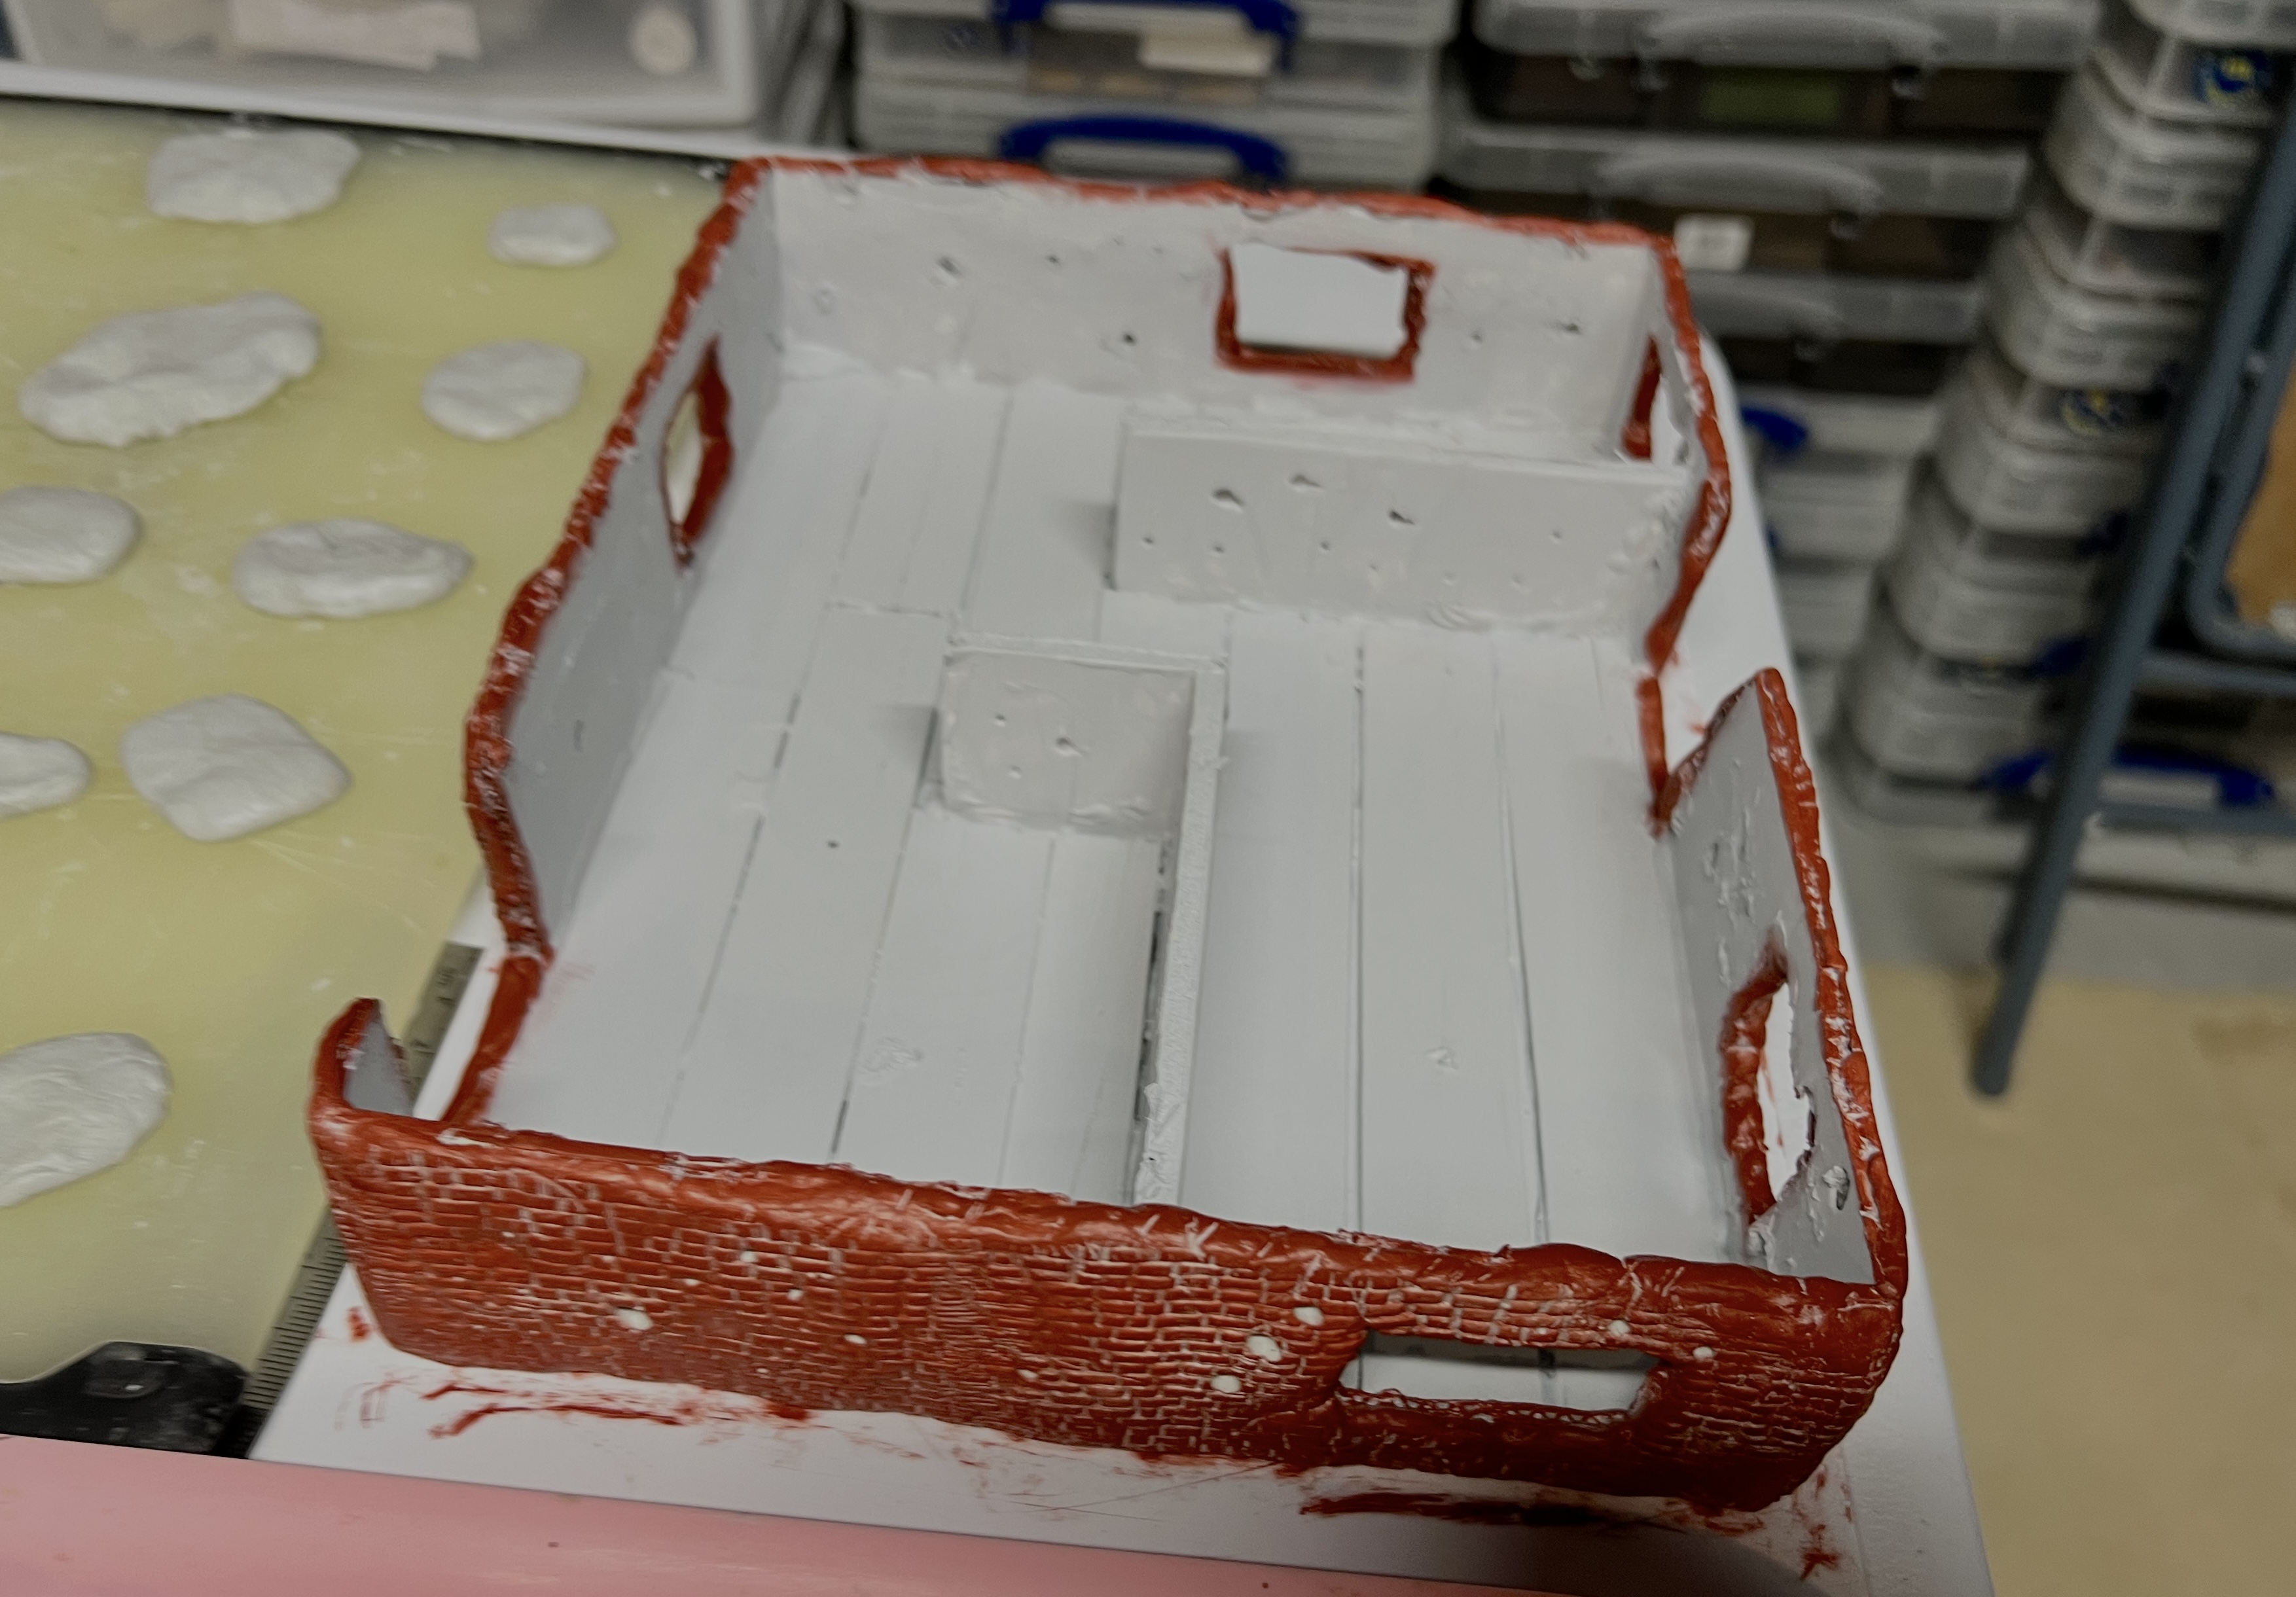
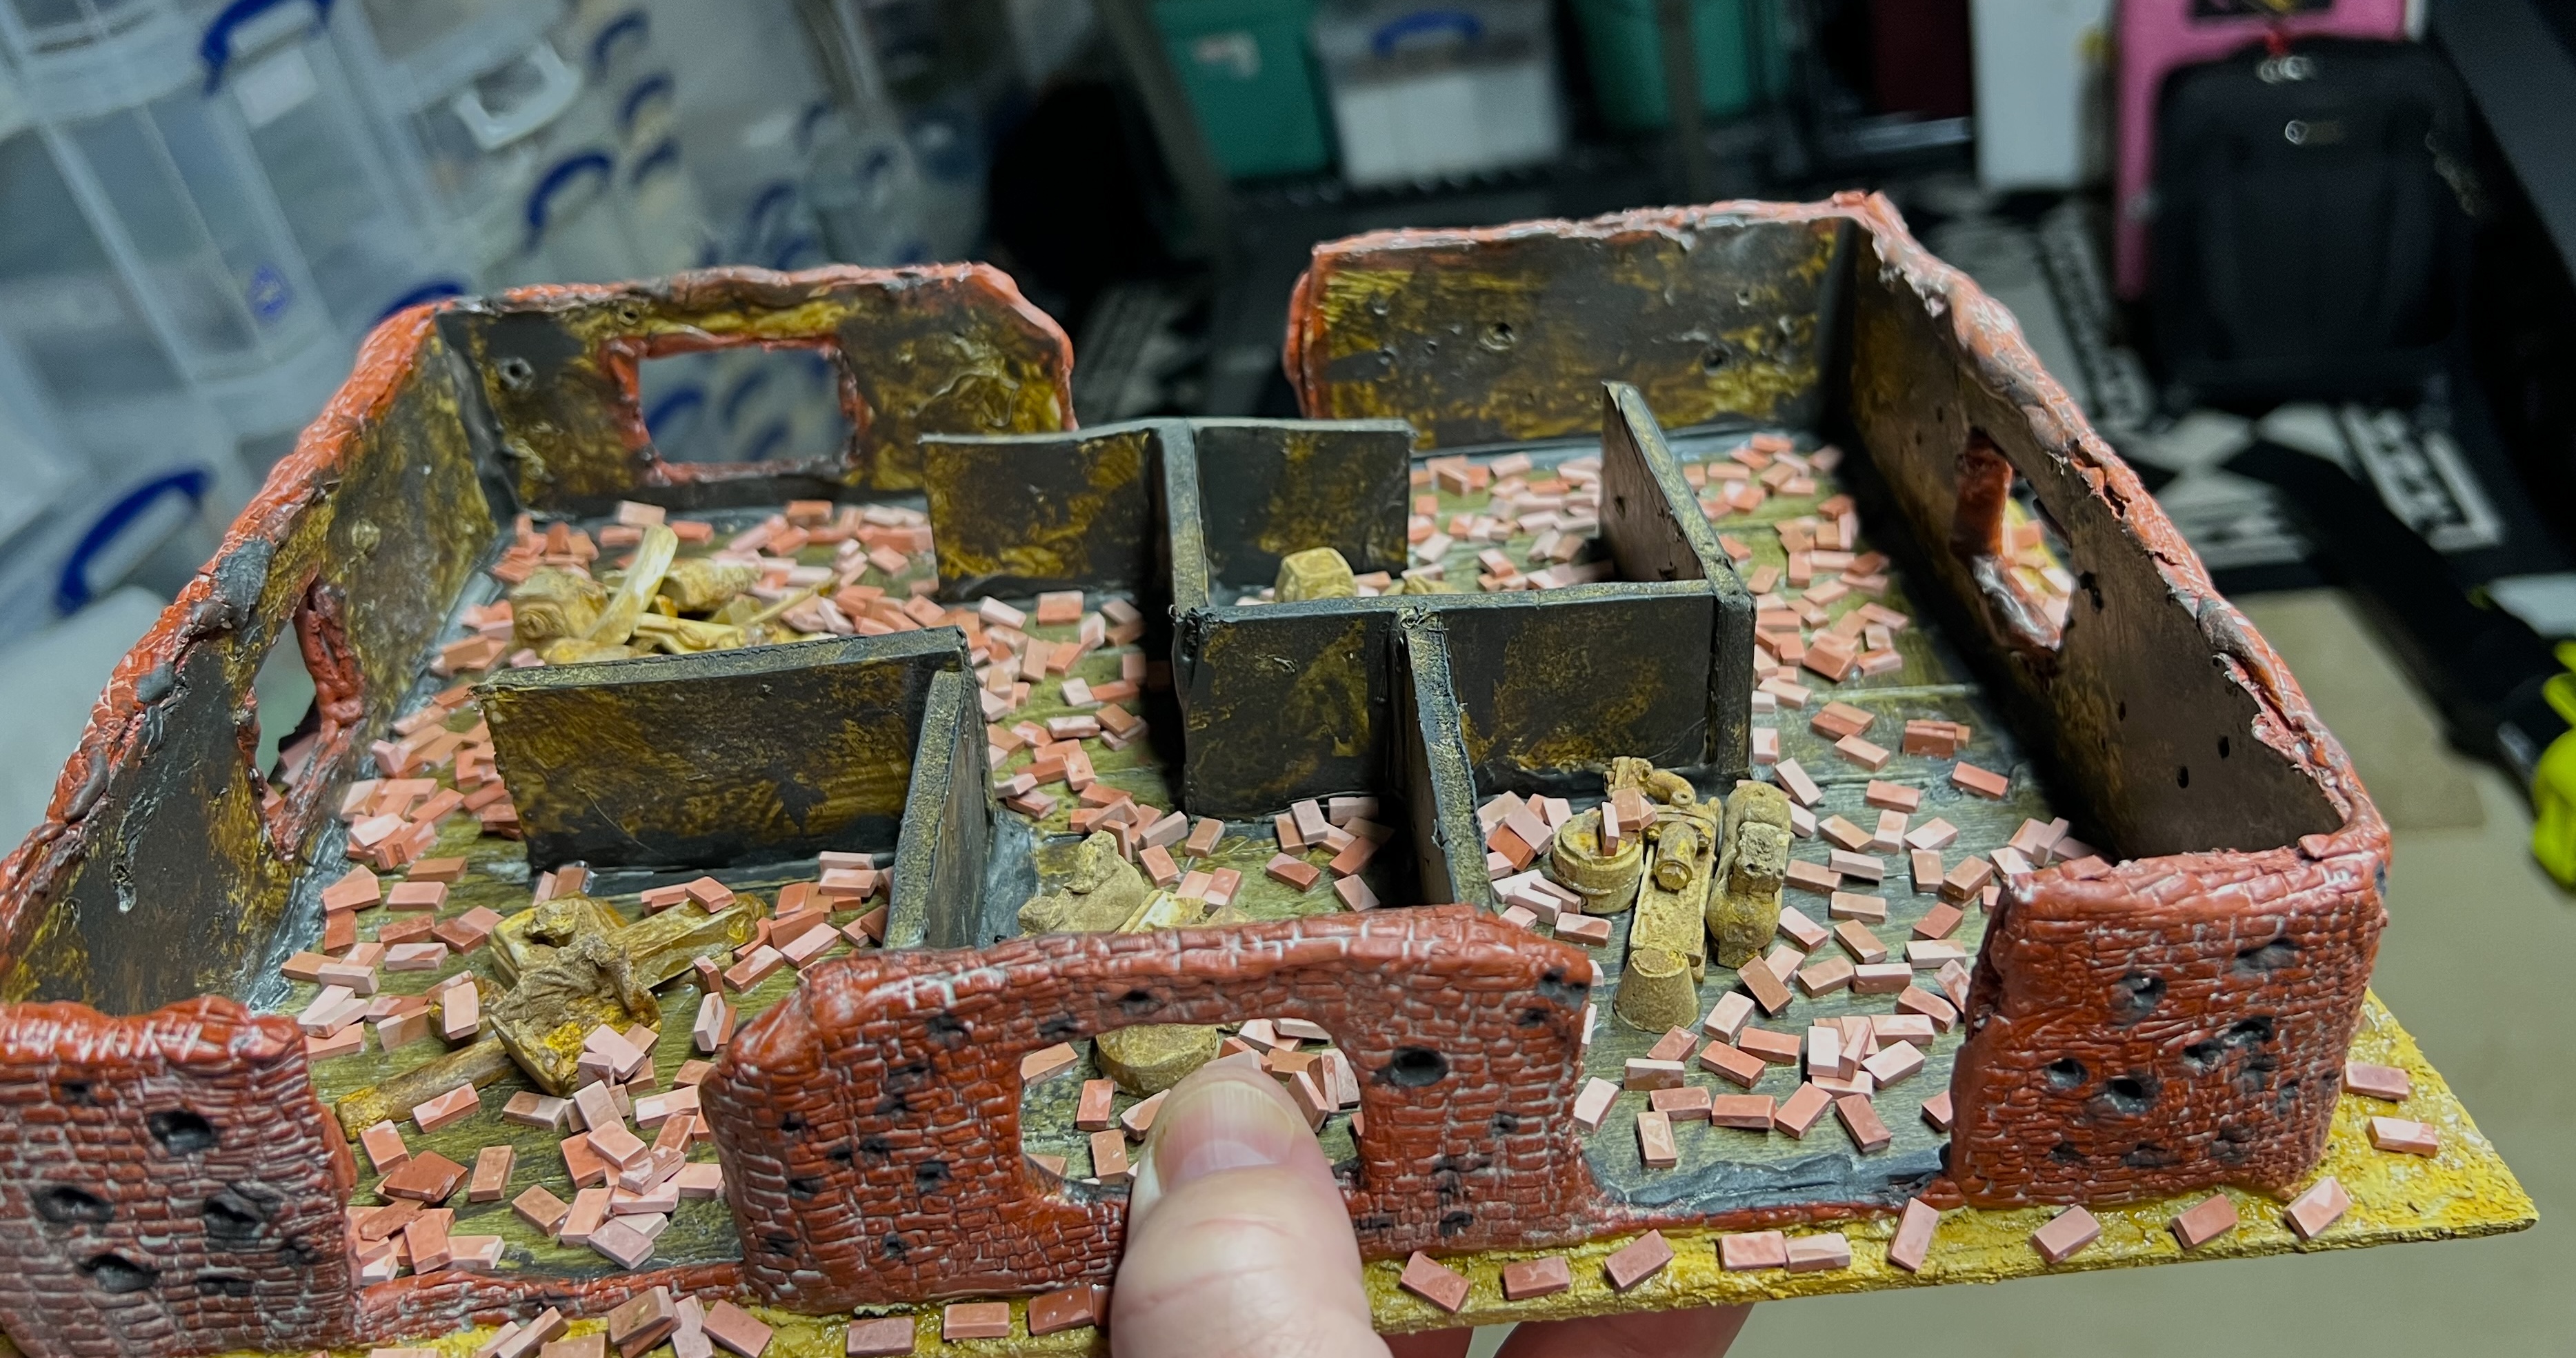
For the two buildings, I converted an iPad 16 box top and bottom. I used Apoxie Sculpt, steel washers, sand, multiple pieces of plastic, desiccant cylinders, and a lot of Juweela items to make the 61 scatter bases. And for two flat industrial structures, I reused two pieces of packing materials to repurpose them as flat rusted structures.
I started out with this iPad 16 box. I would use the top and bottom of this. It is plastic and cardboard.
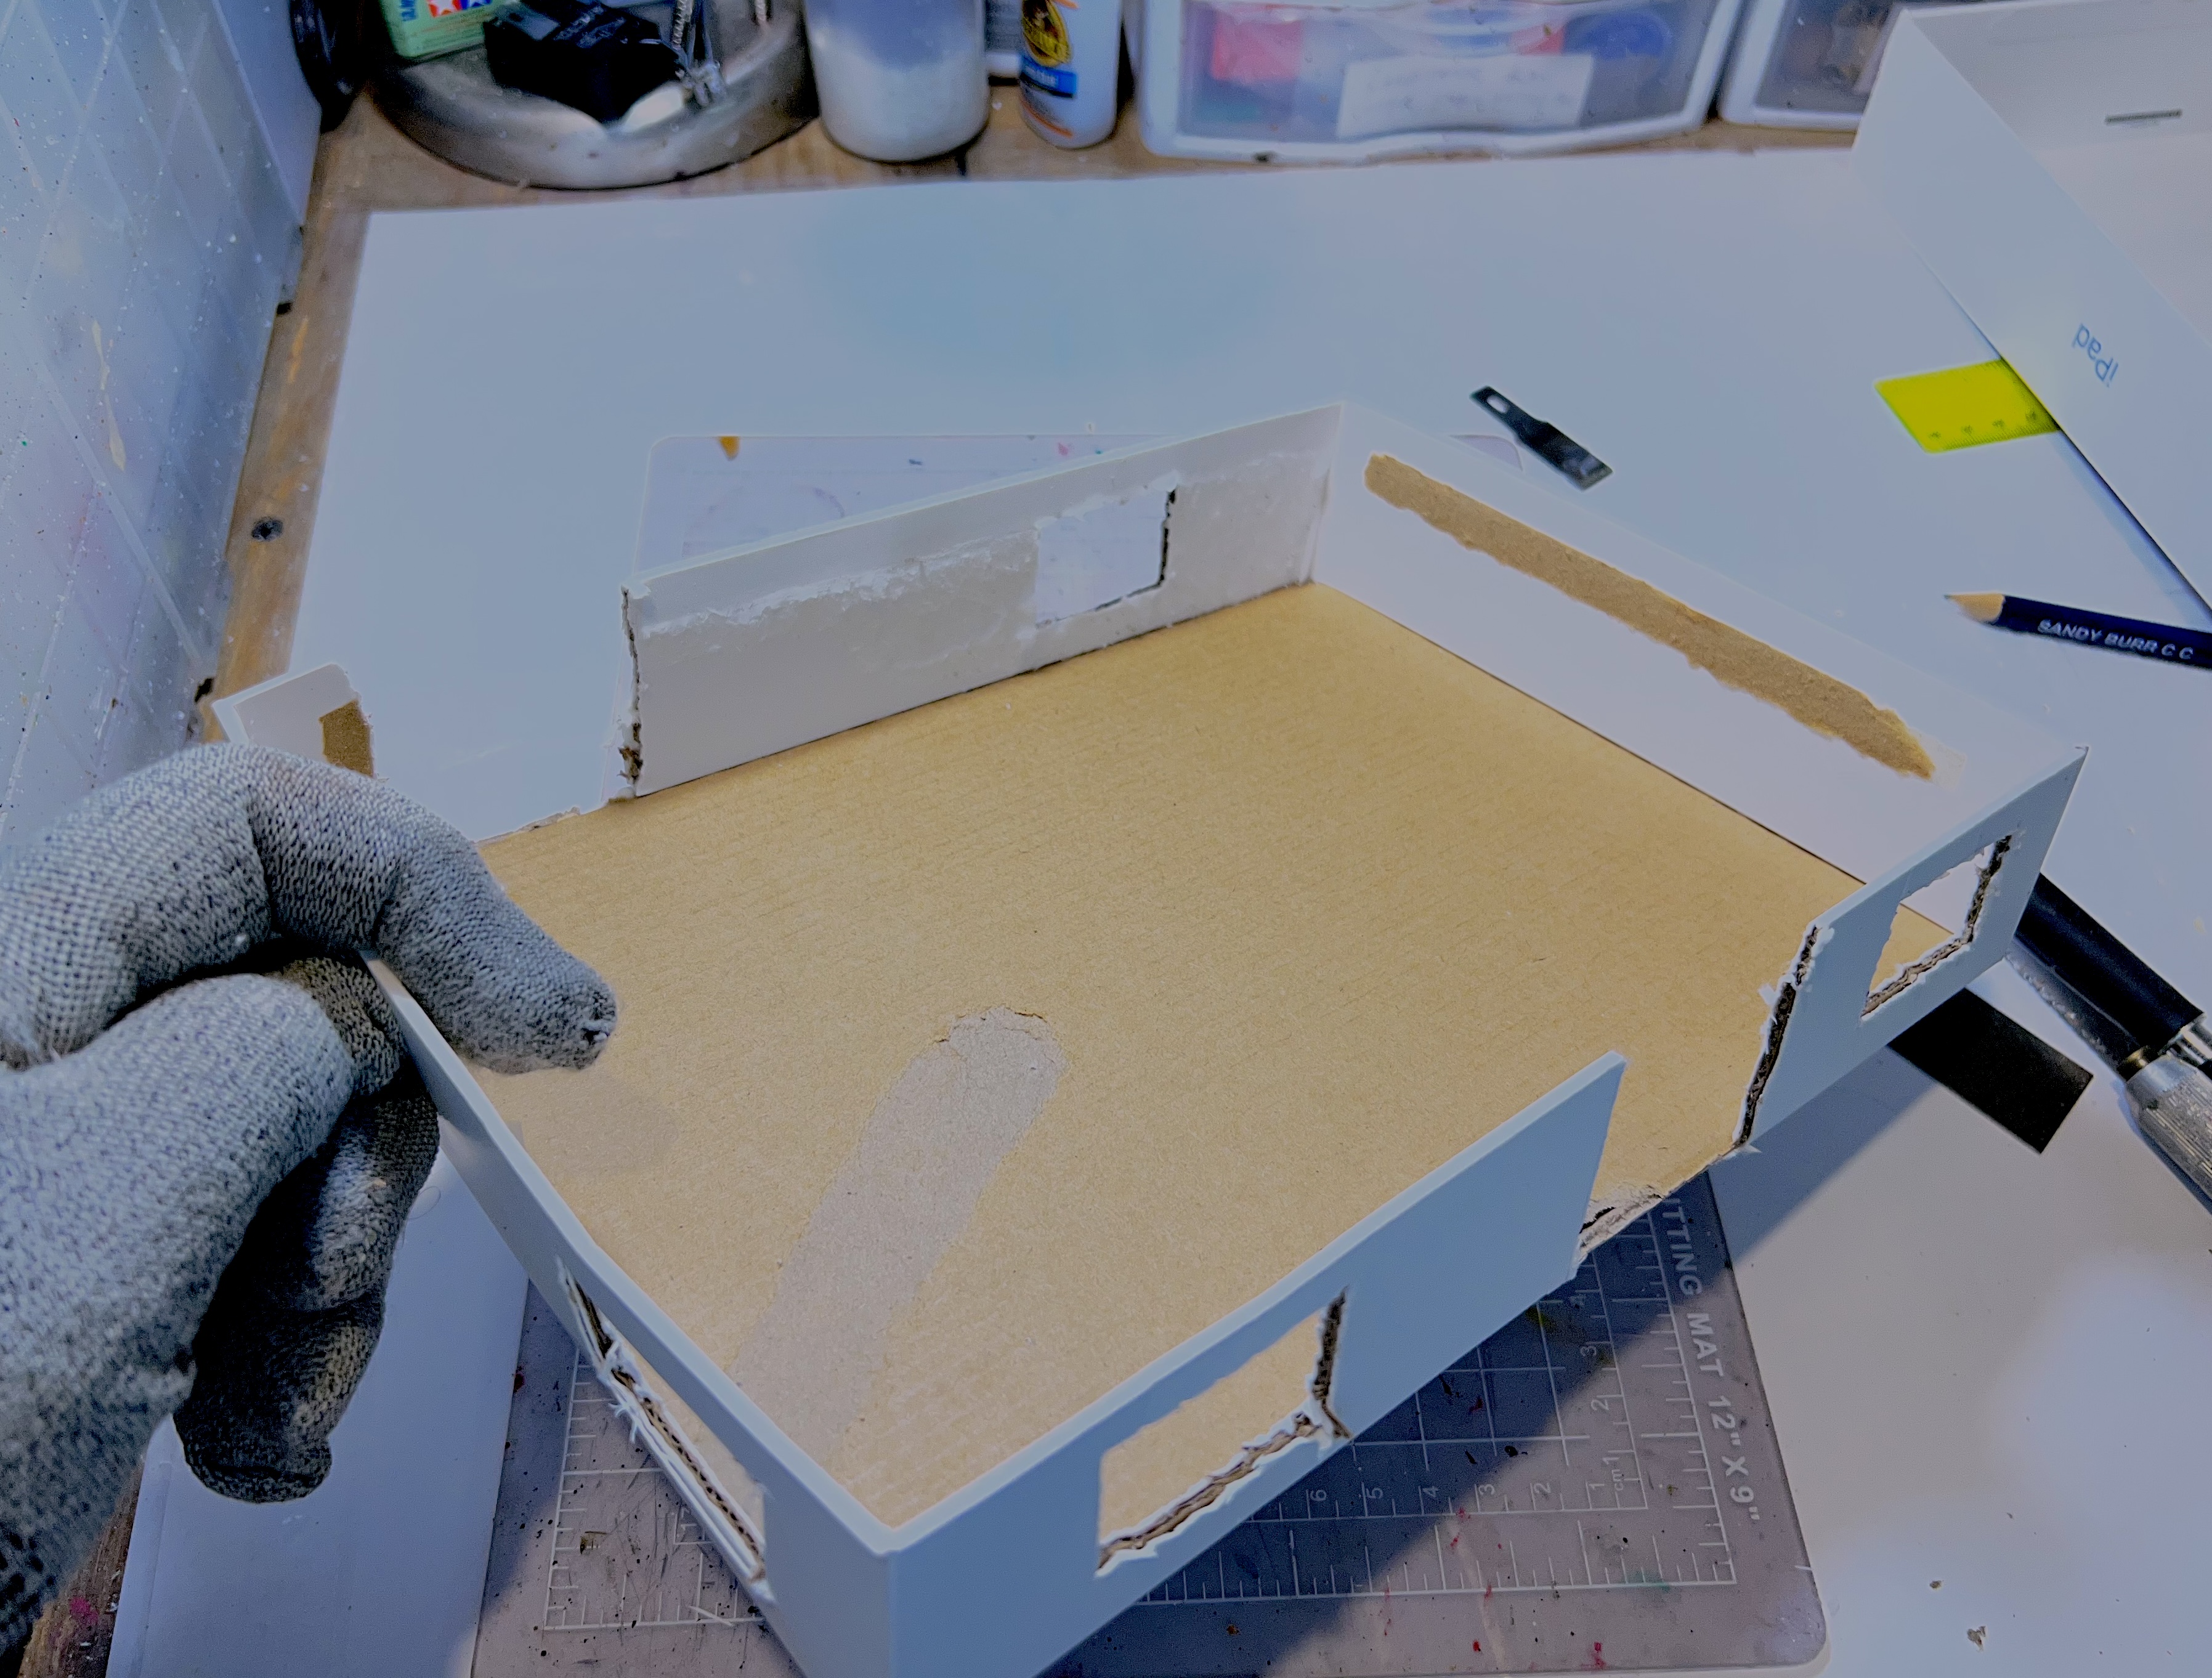
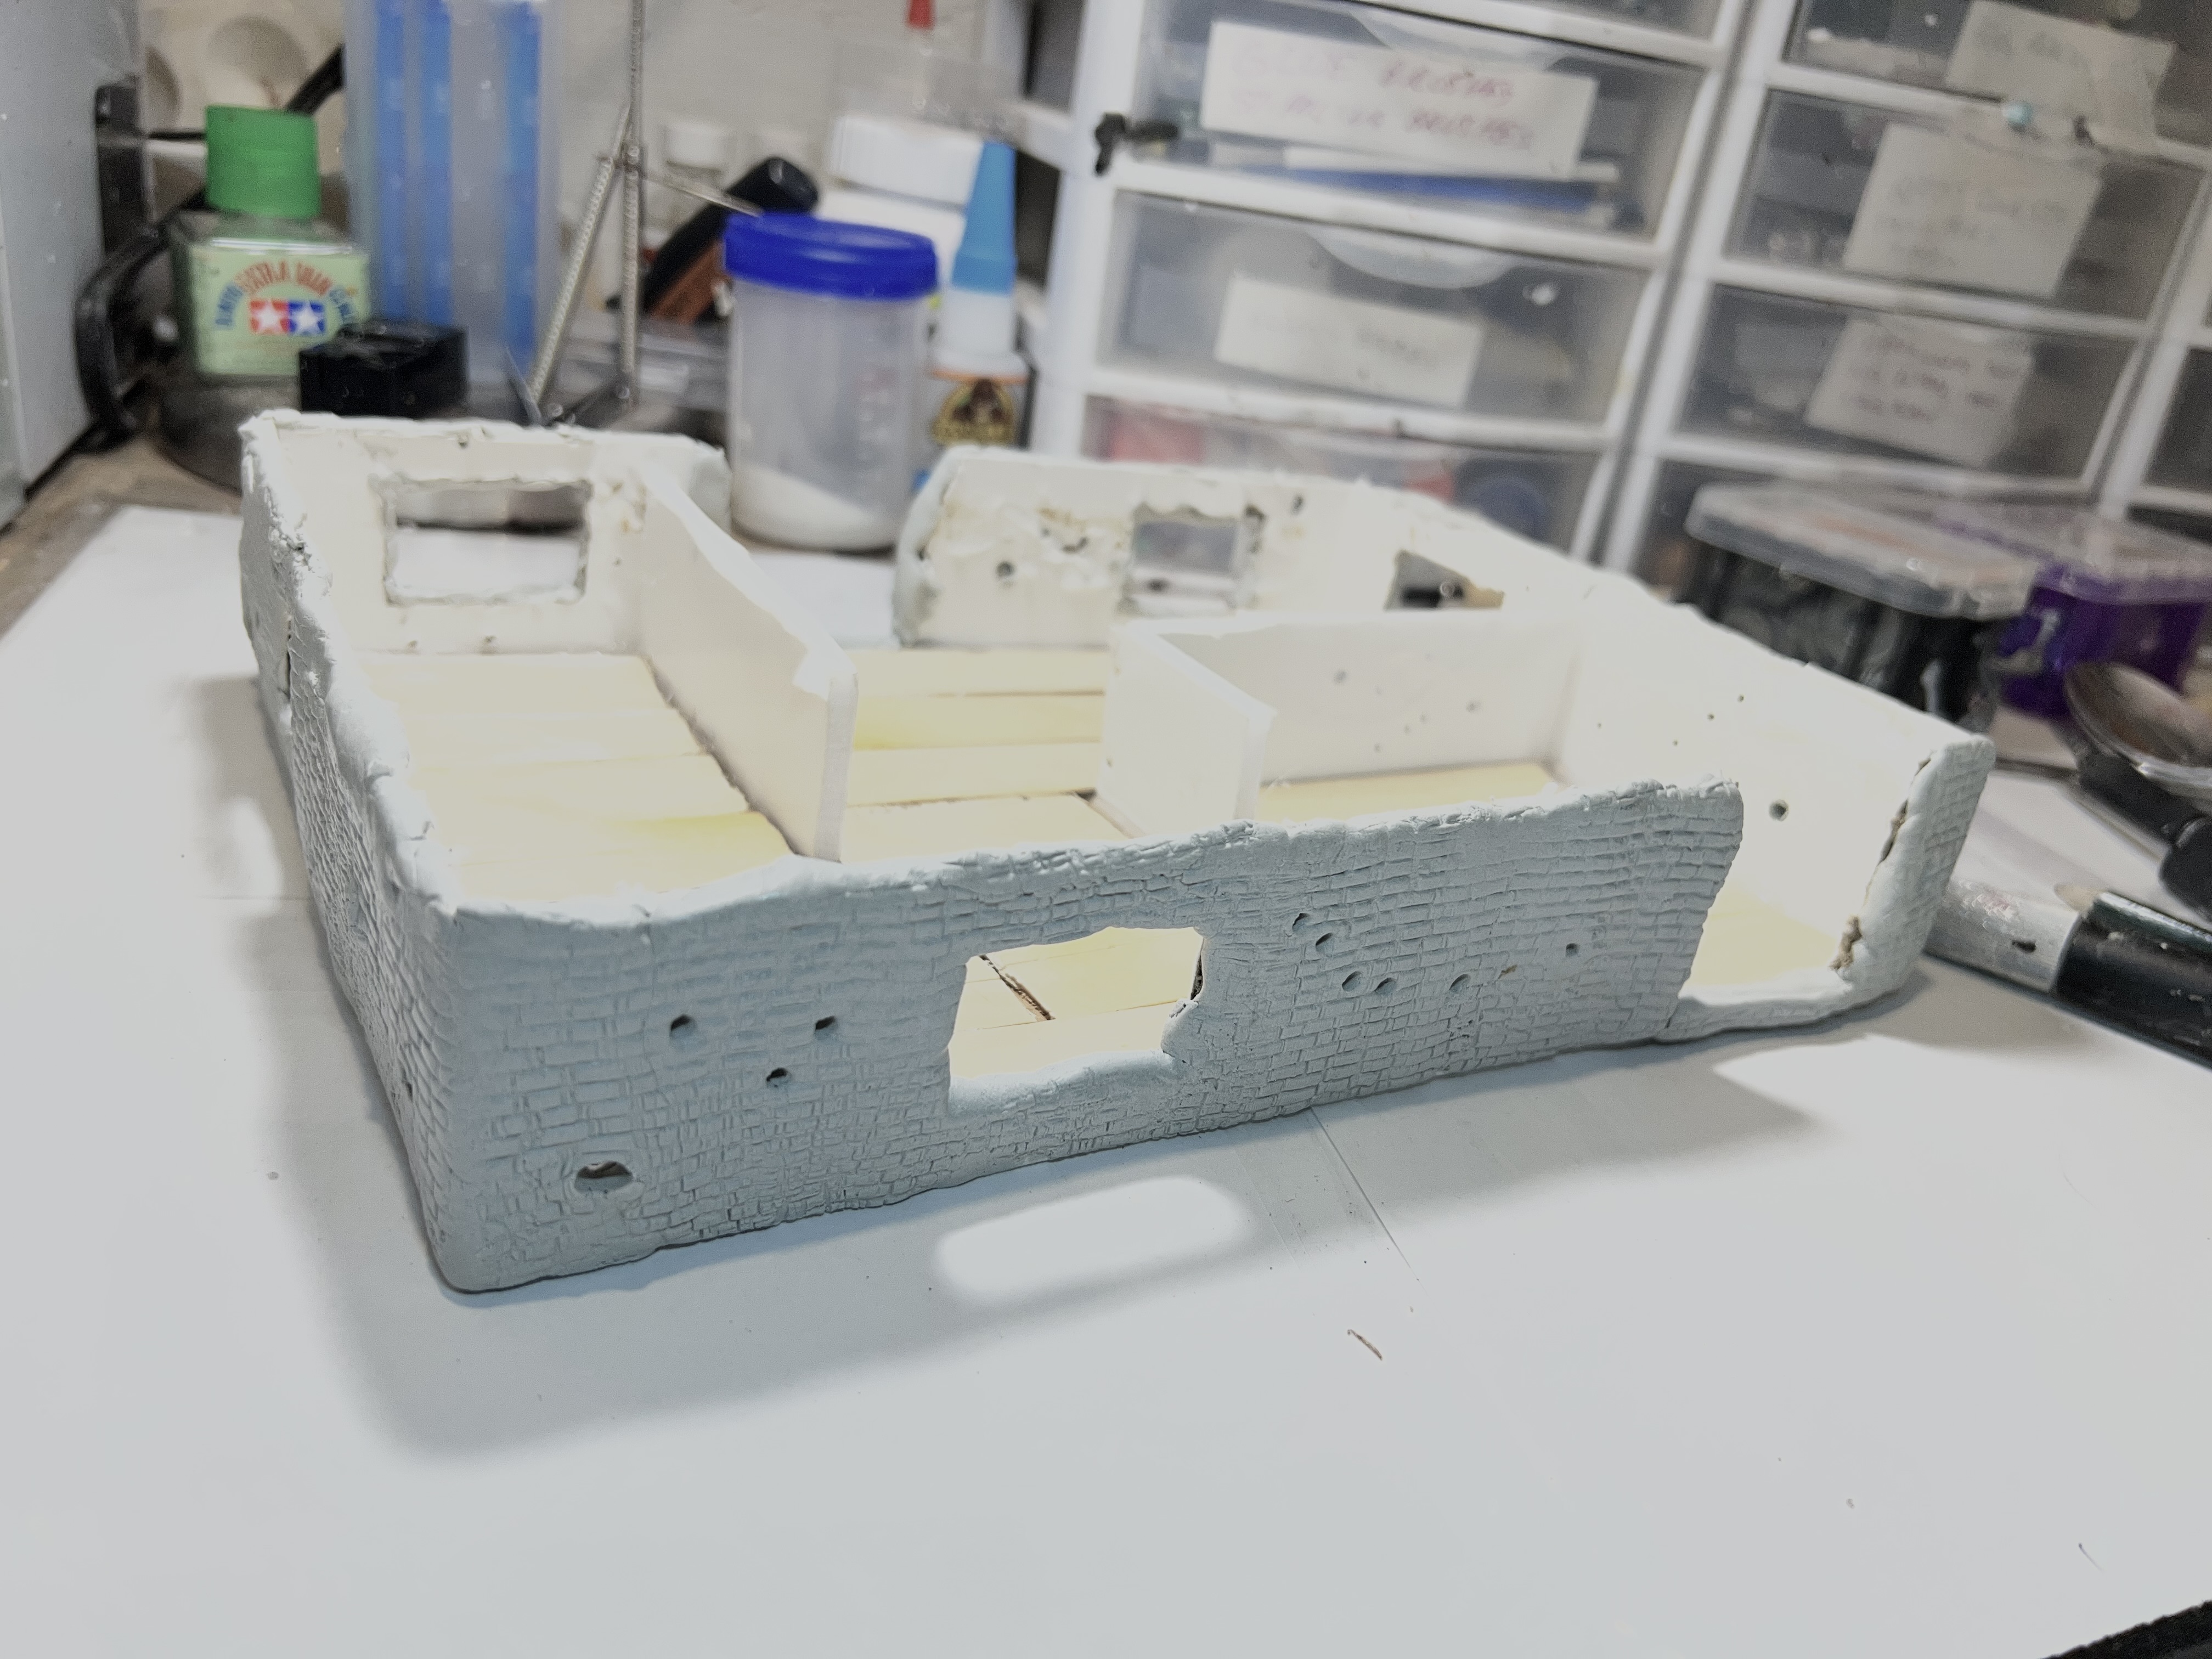
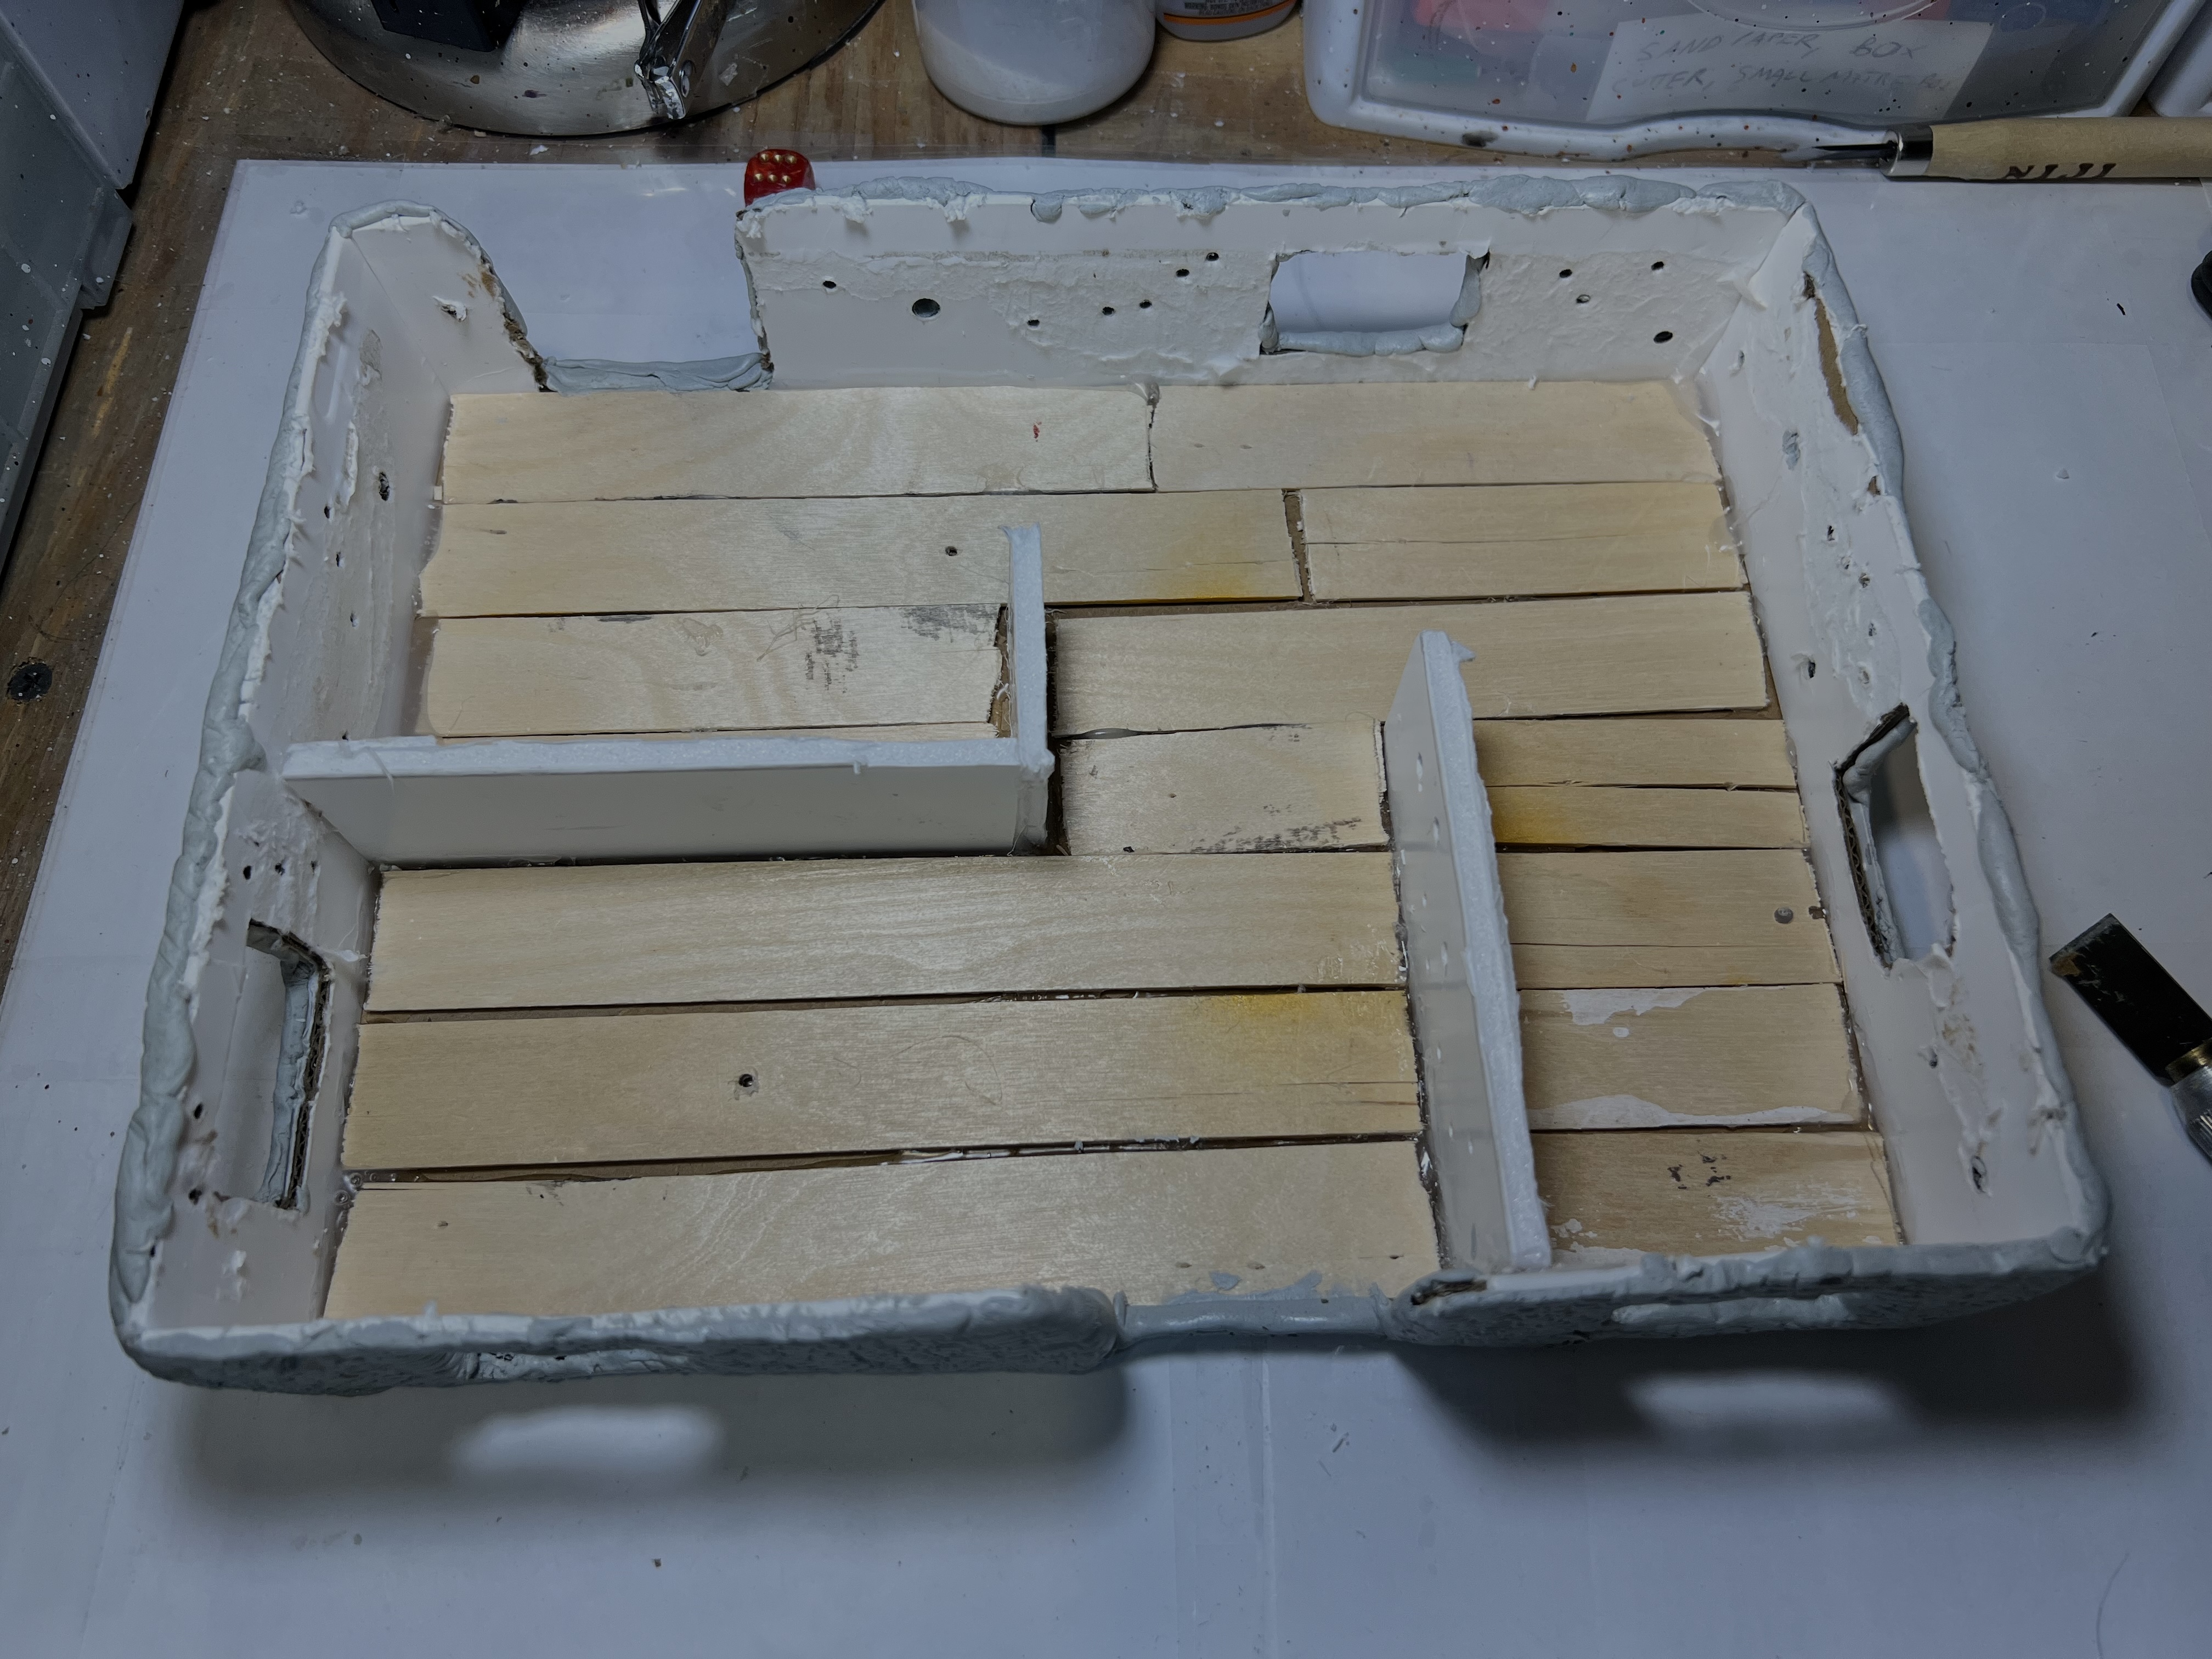
I sawed out windows and doors on both box pieces and made each a bit differently in terms of architectural arrangement. I then hot-glued foam board to make rooms. For flooring, I broke up old popsicle sticks. These I had used previously to mount figures for painting on other projects. Lastly, I drilled out holes in the walls to simulate old bullet holes.
Cutting out the windows and doors on the first building.Adding the walls, bullet holes, and flooring.
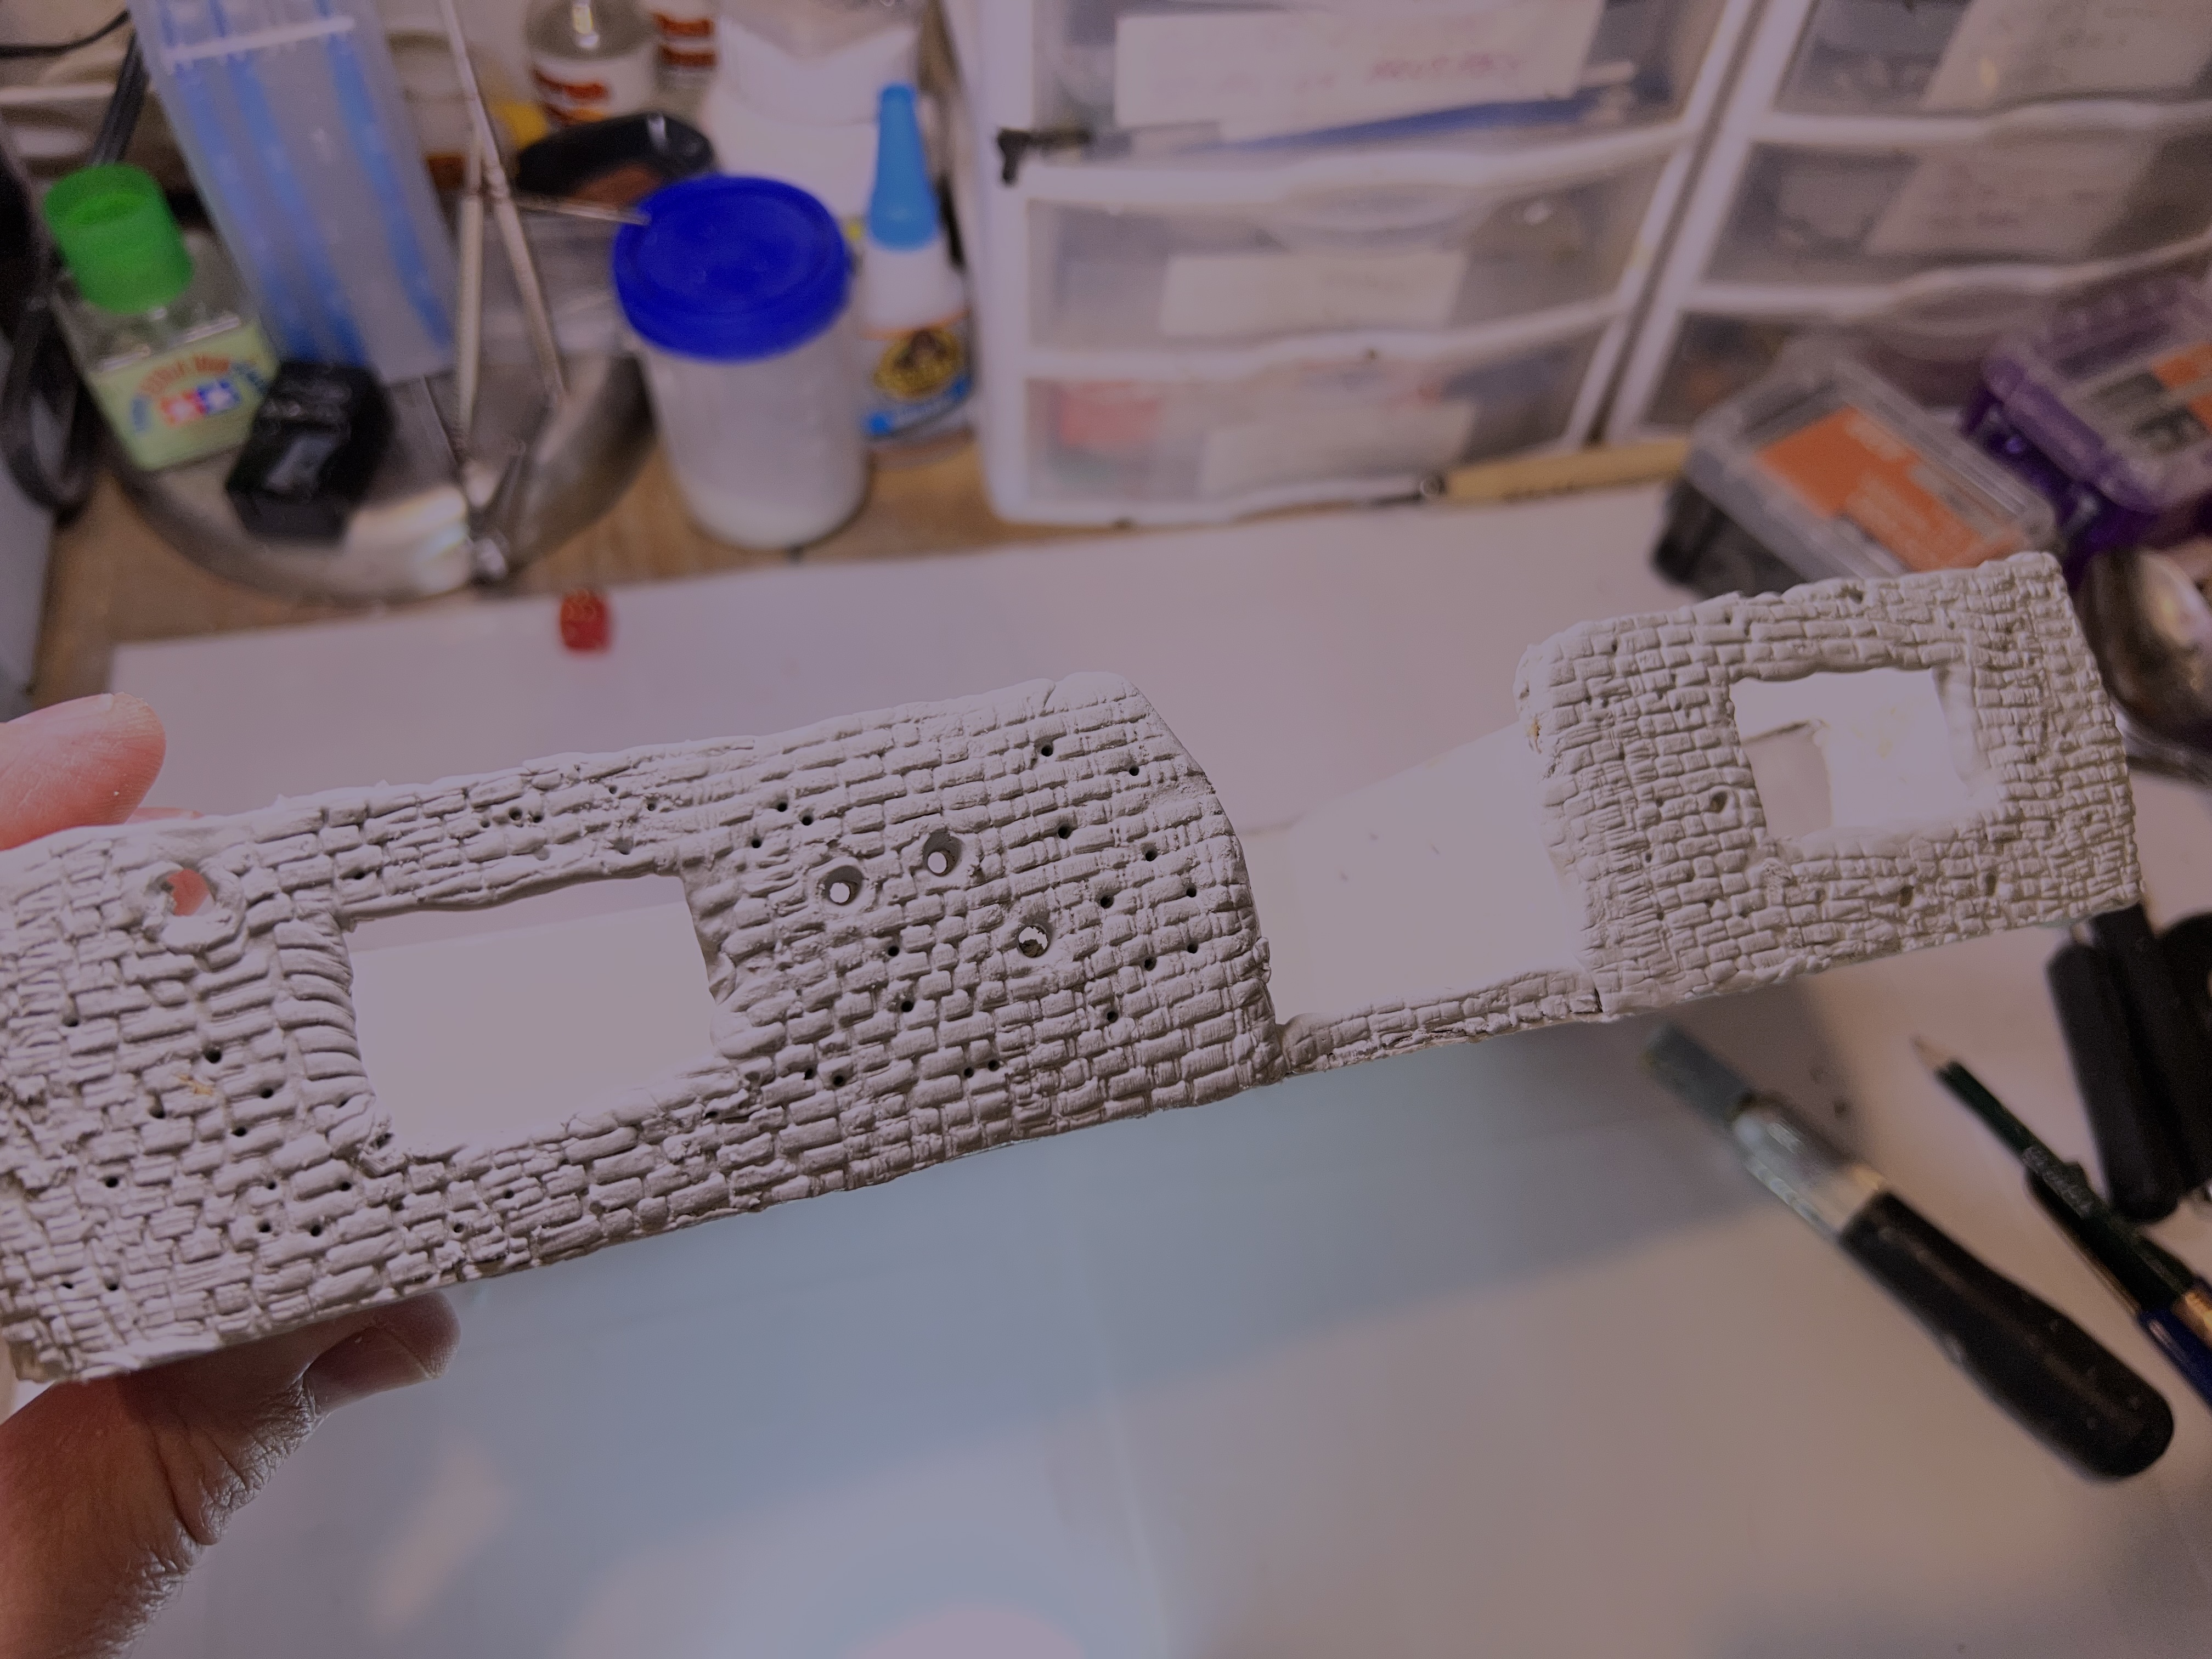
Then it was on to sculpting the outside walls. I did each building separately from here on so as to handle both curing times and to learn as I went as to best practices. Apoxie Sculpt and a Green Stuff World brick roller worked well.
Sculpting the walls. I used an awl to create and shape shell and bullet impacts on the outside.Using the windows as gripping spots made the sculpting easier. I did need to then wait for curing.
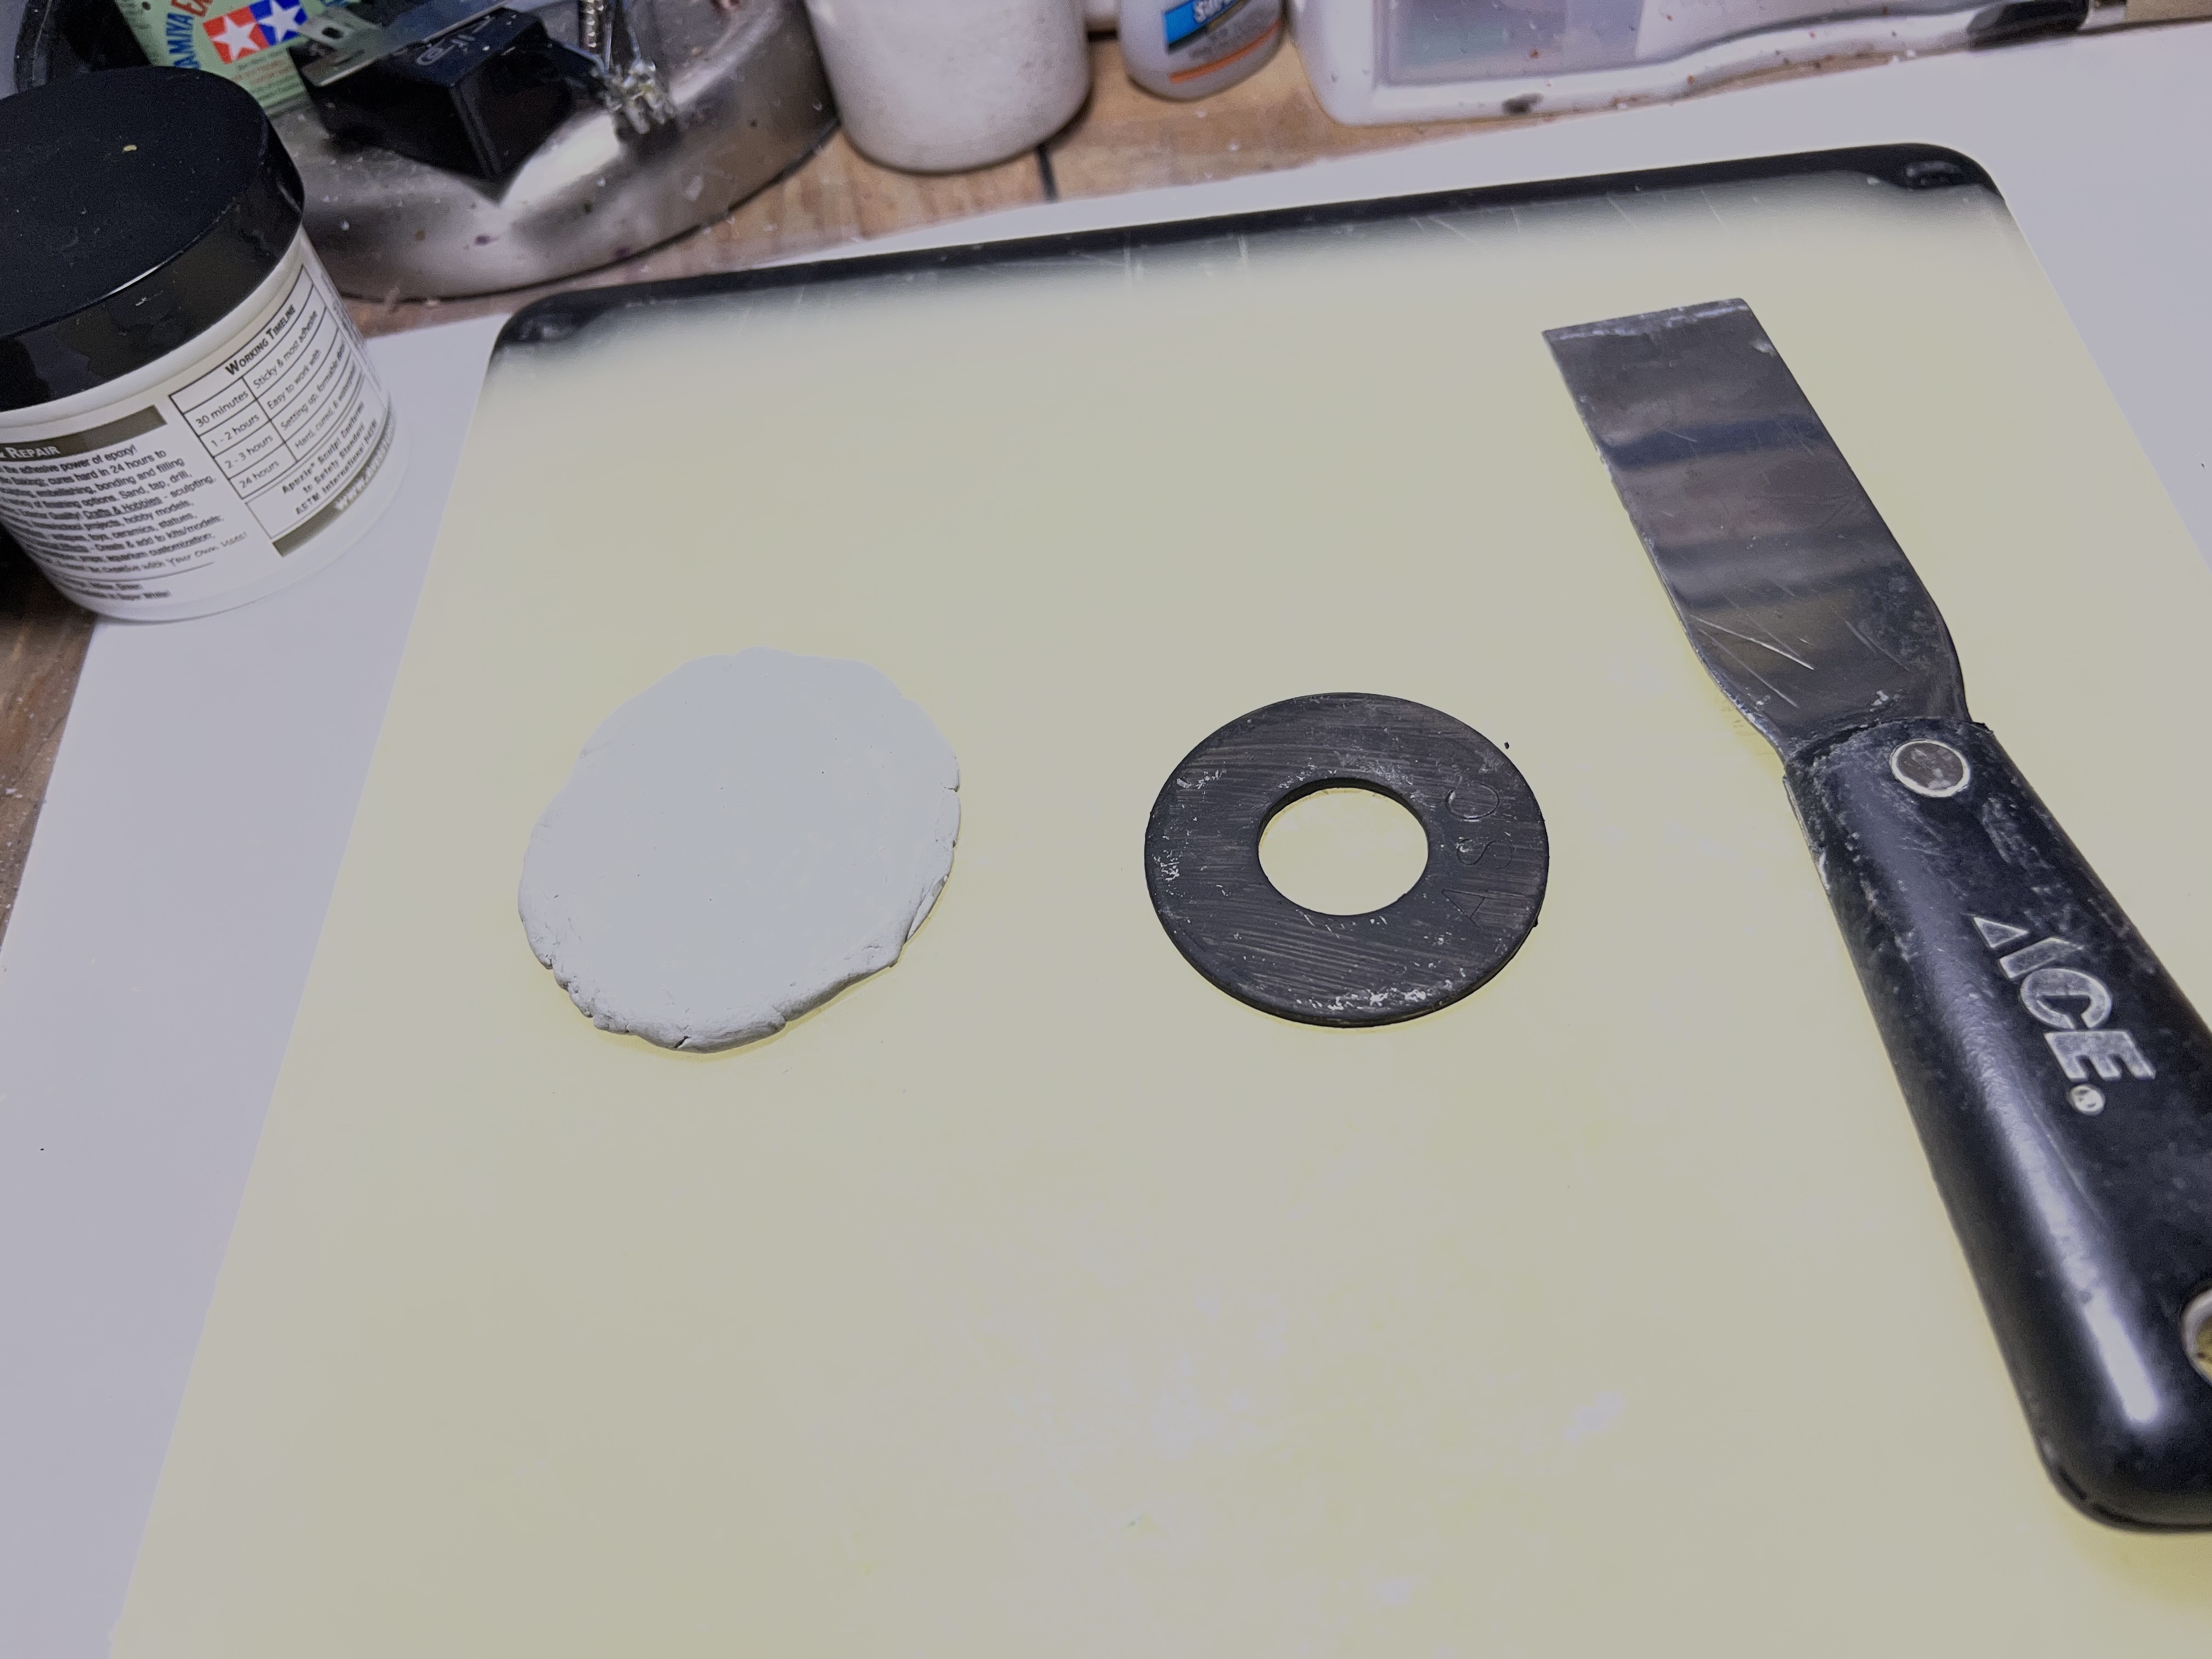
While the walls cured, I worked on the wreckage bases – also using Apoxie Sculpt. I made the bases differently in terms of both size and shape. It helped to use one or more steel washers underneath the base sculpts. Using different sizes helped to make the shapes varied.
The biggest washer that I used and a base covered with Apoxie Sculpt.Examples of the other sizes and shapes – all with steel washers underneath.
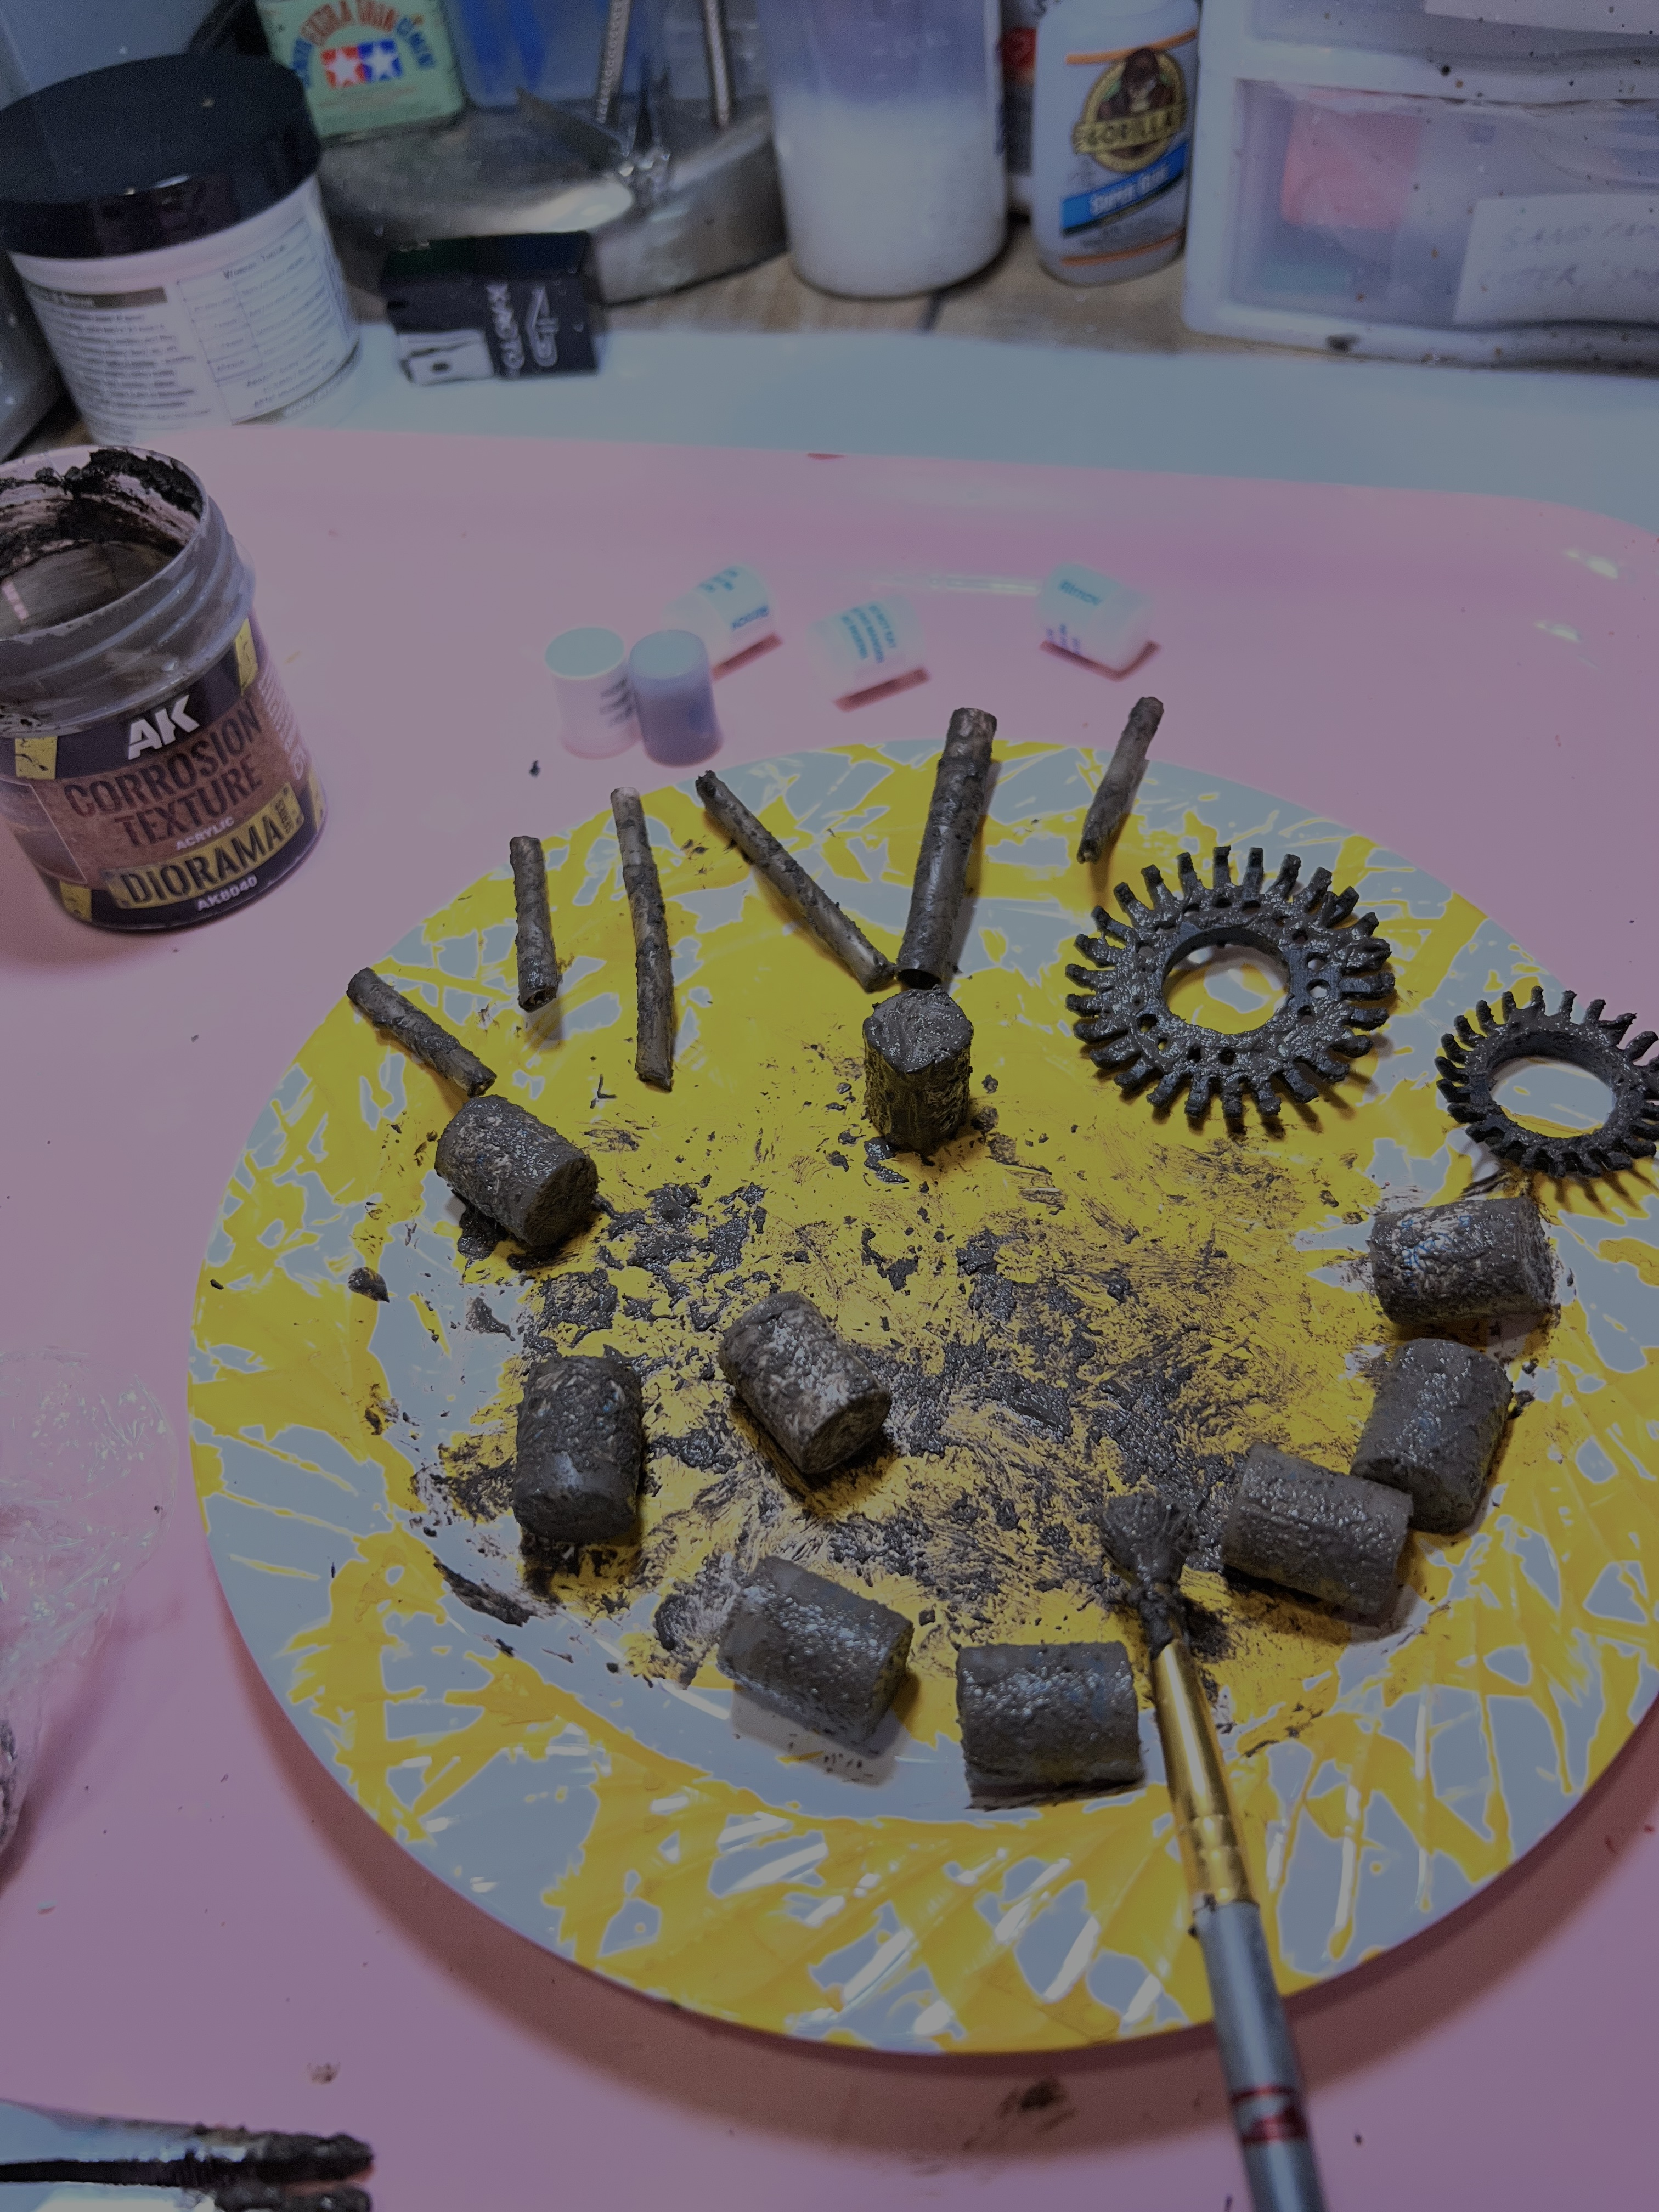
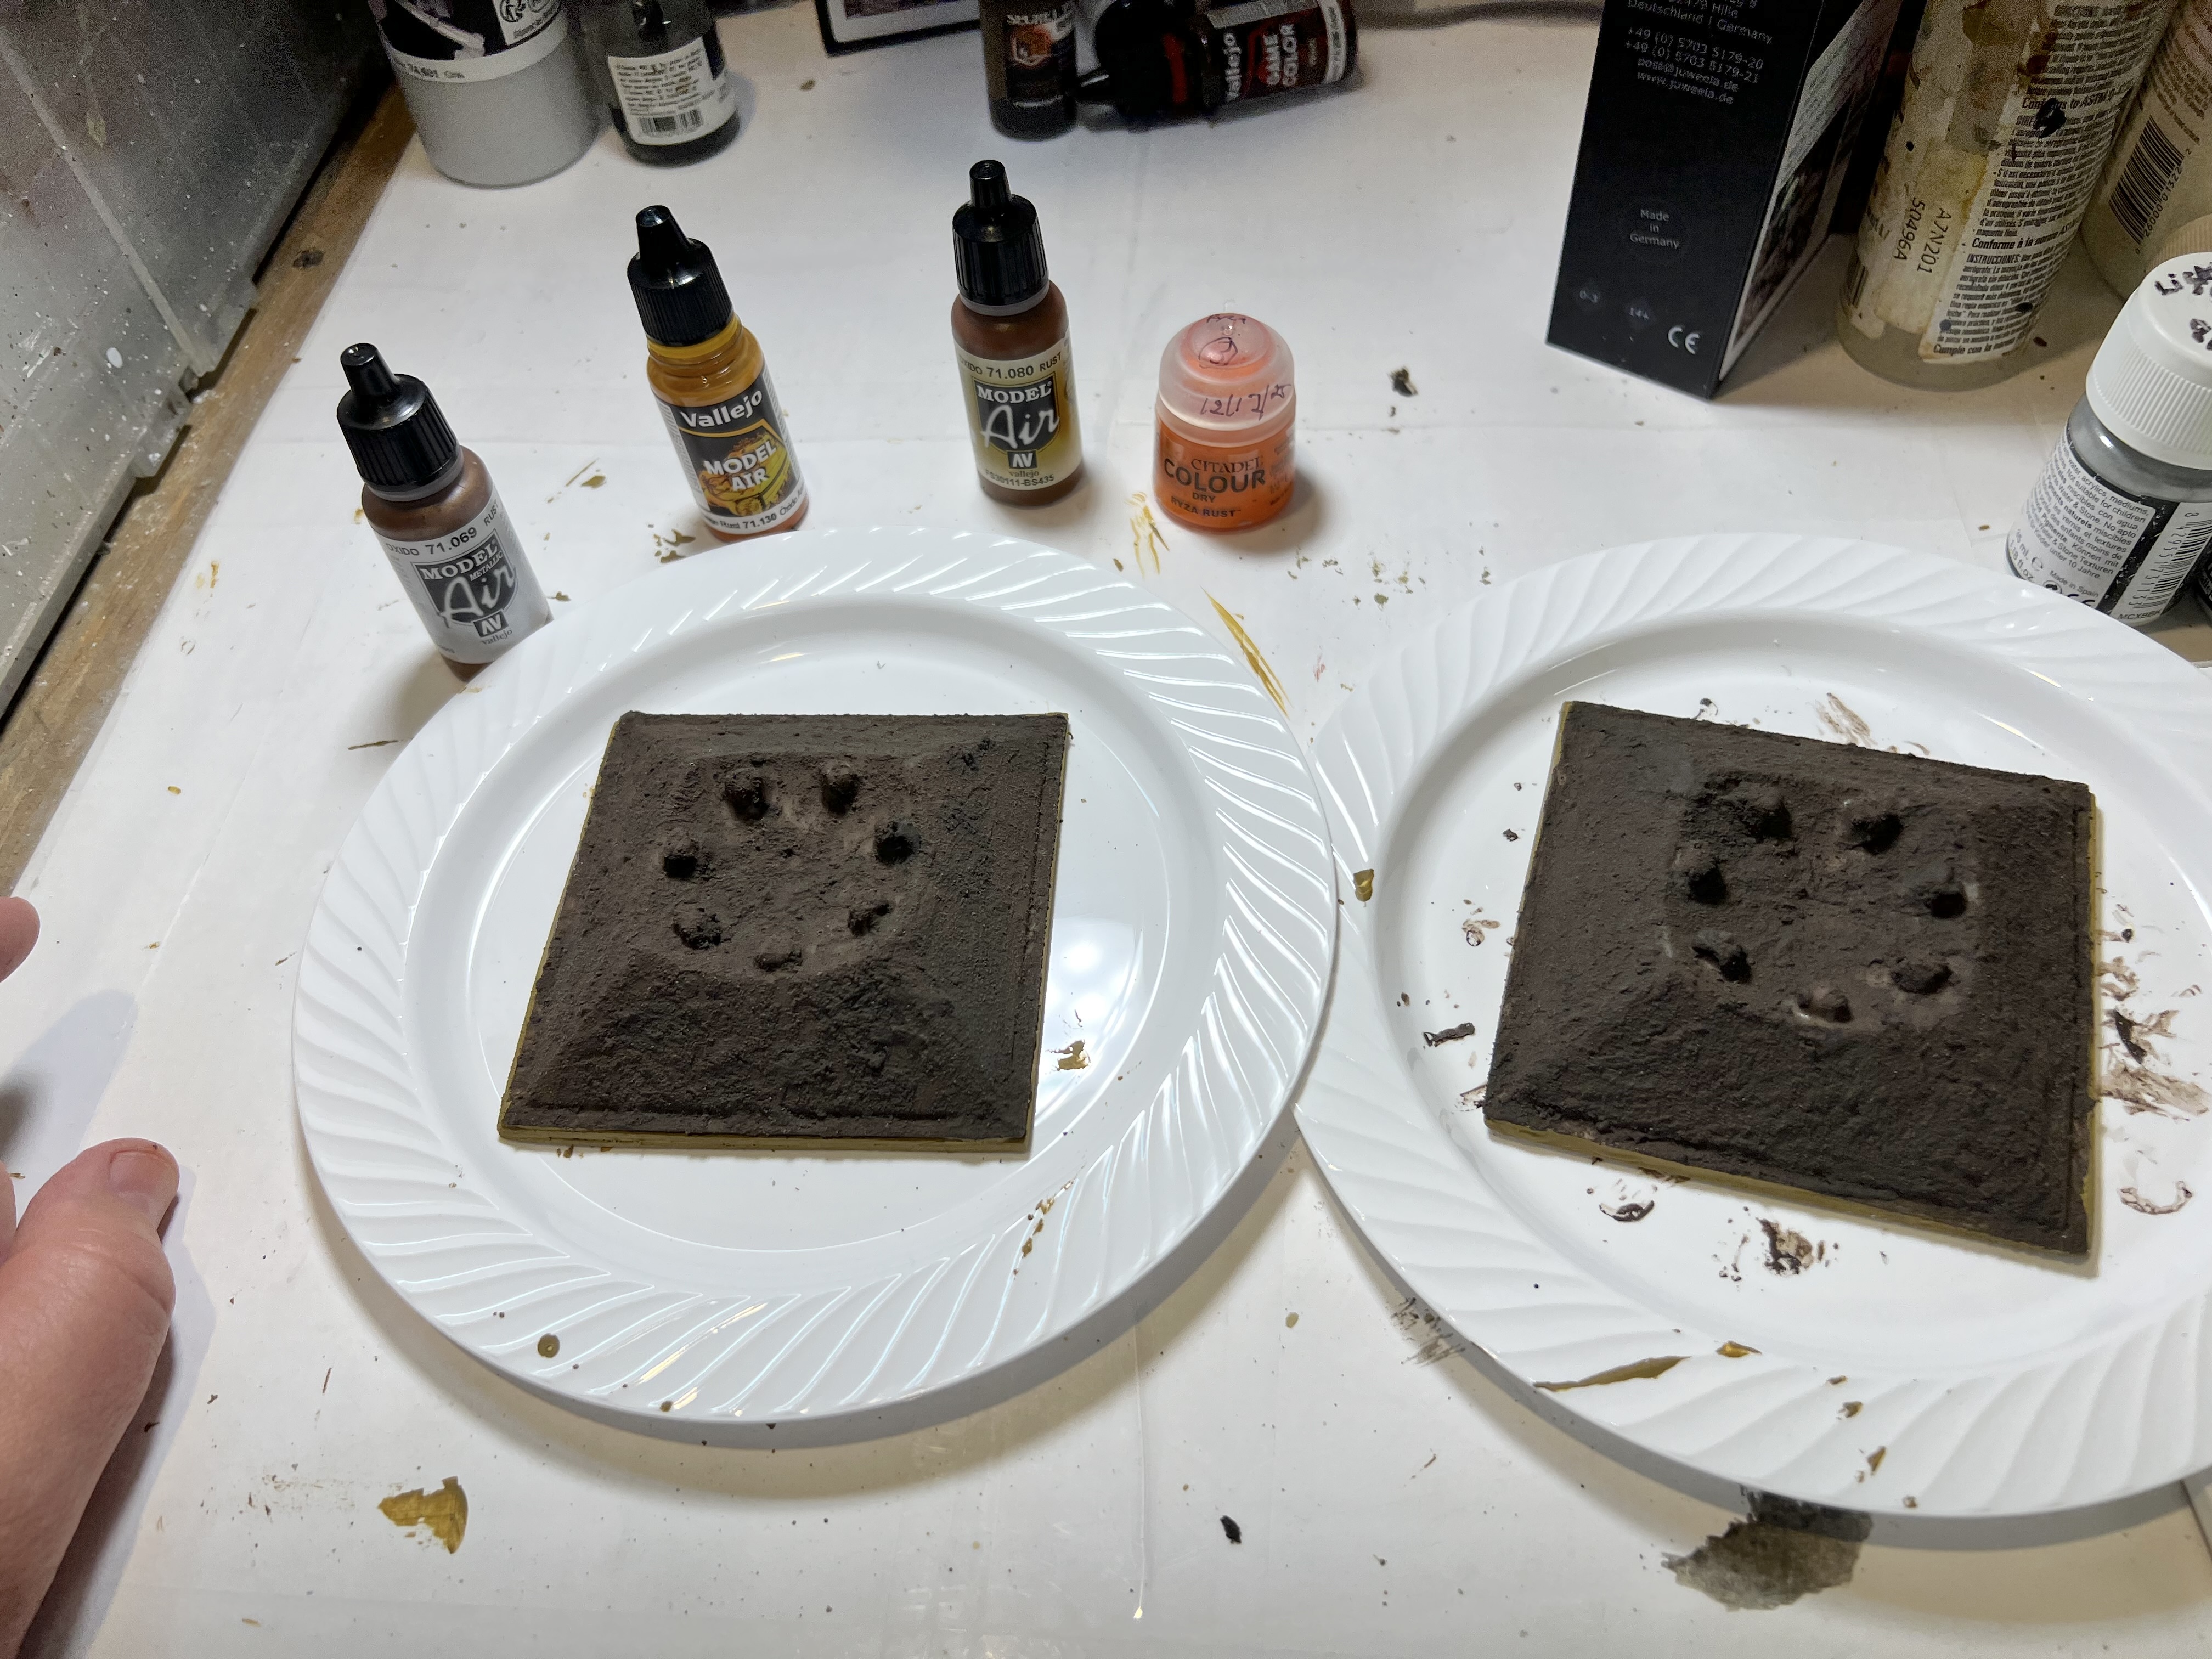
As the corrosion texture paint takes time to dry as well, I started adding that to various pieces of debris that I had saved up. I like to use a cheap old brush that could serve no other purpose – especially as it usually destroys it. The corrosion paint needed to dry and then got a second application.
Using the AK Corrosion Texture paint. Here I am using it on desiccant cylinders (from pill bottles), crushed plastic straw sections, and rubber inserts from a drain plug replacement.
After a day, the Apoxie Sculpt on the first building had cured. But I wanted there to be a small outside rim to it that could hold wreckage and brick debris. While a sheet of polystyrene was gluing to its bottom, I worked on the second building.
First building cured.Bottom view – I needed more here underneath…but before that I finished the second building’s outside.Second building outside sculpting…….and second building flooring installation.
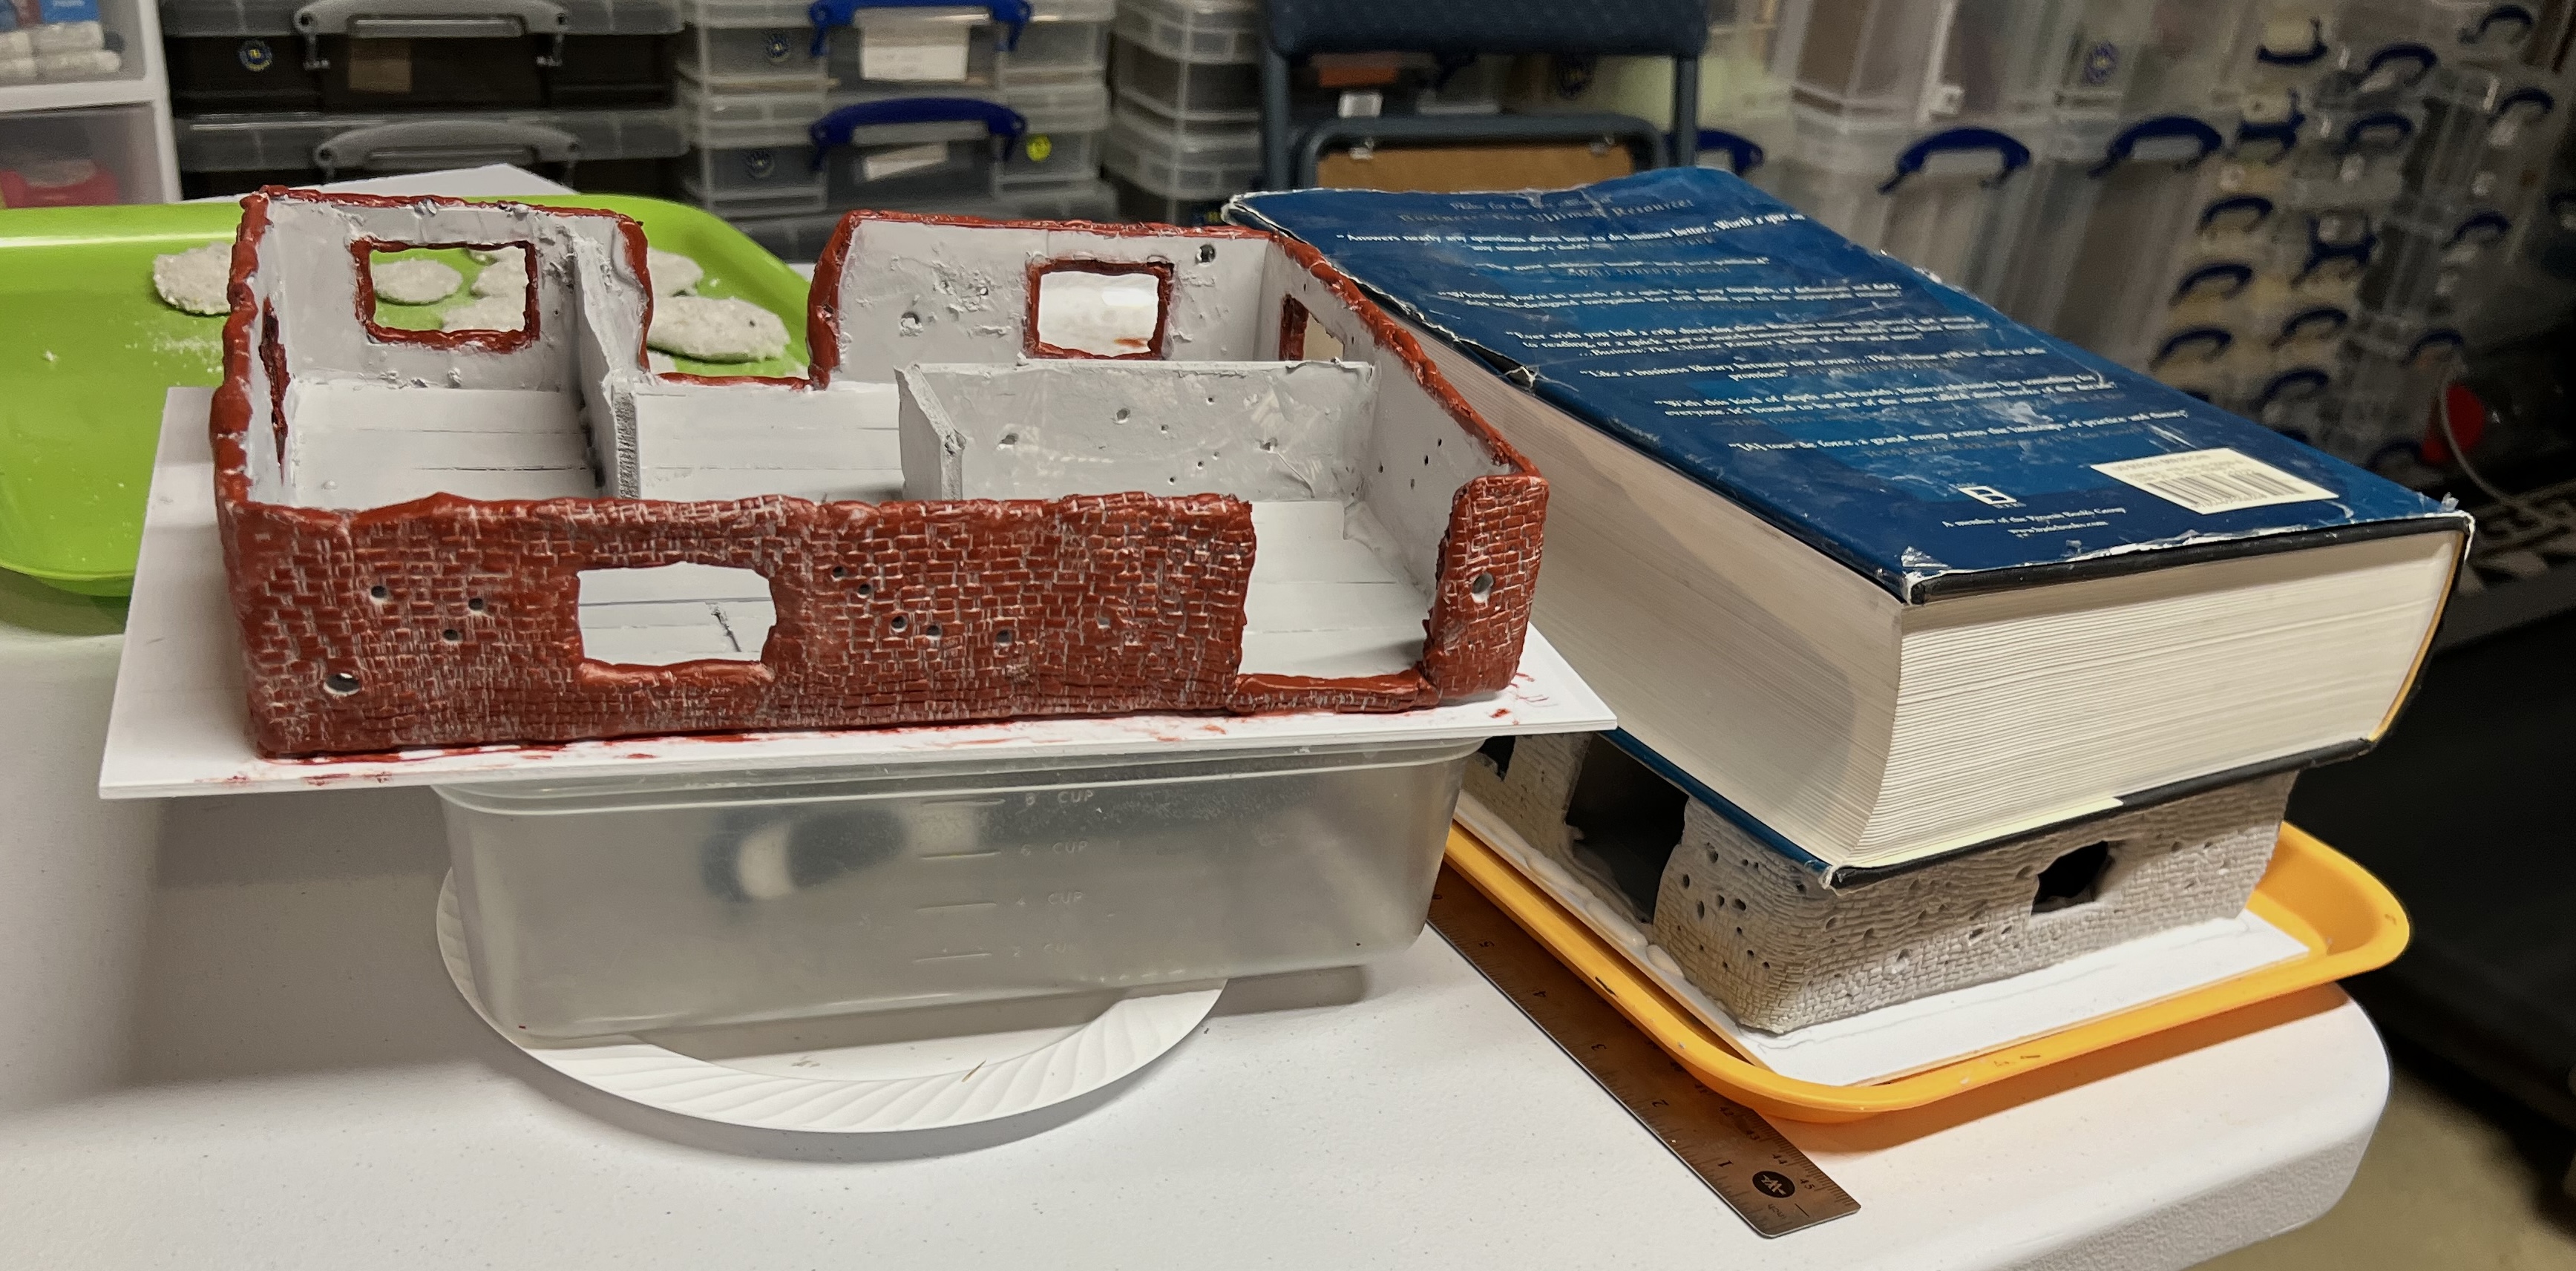
As the first building had cured, I started to paint it. Then I was able to glue a polystyrene base to building number 2.
Building number one with early paint work, and building number two being glued to the PS sheet under a heavy textbook.
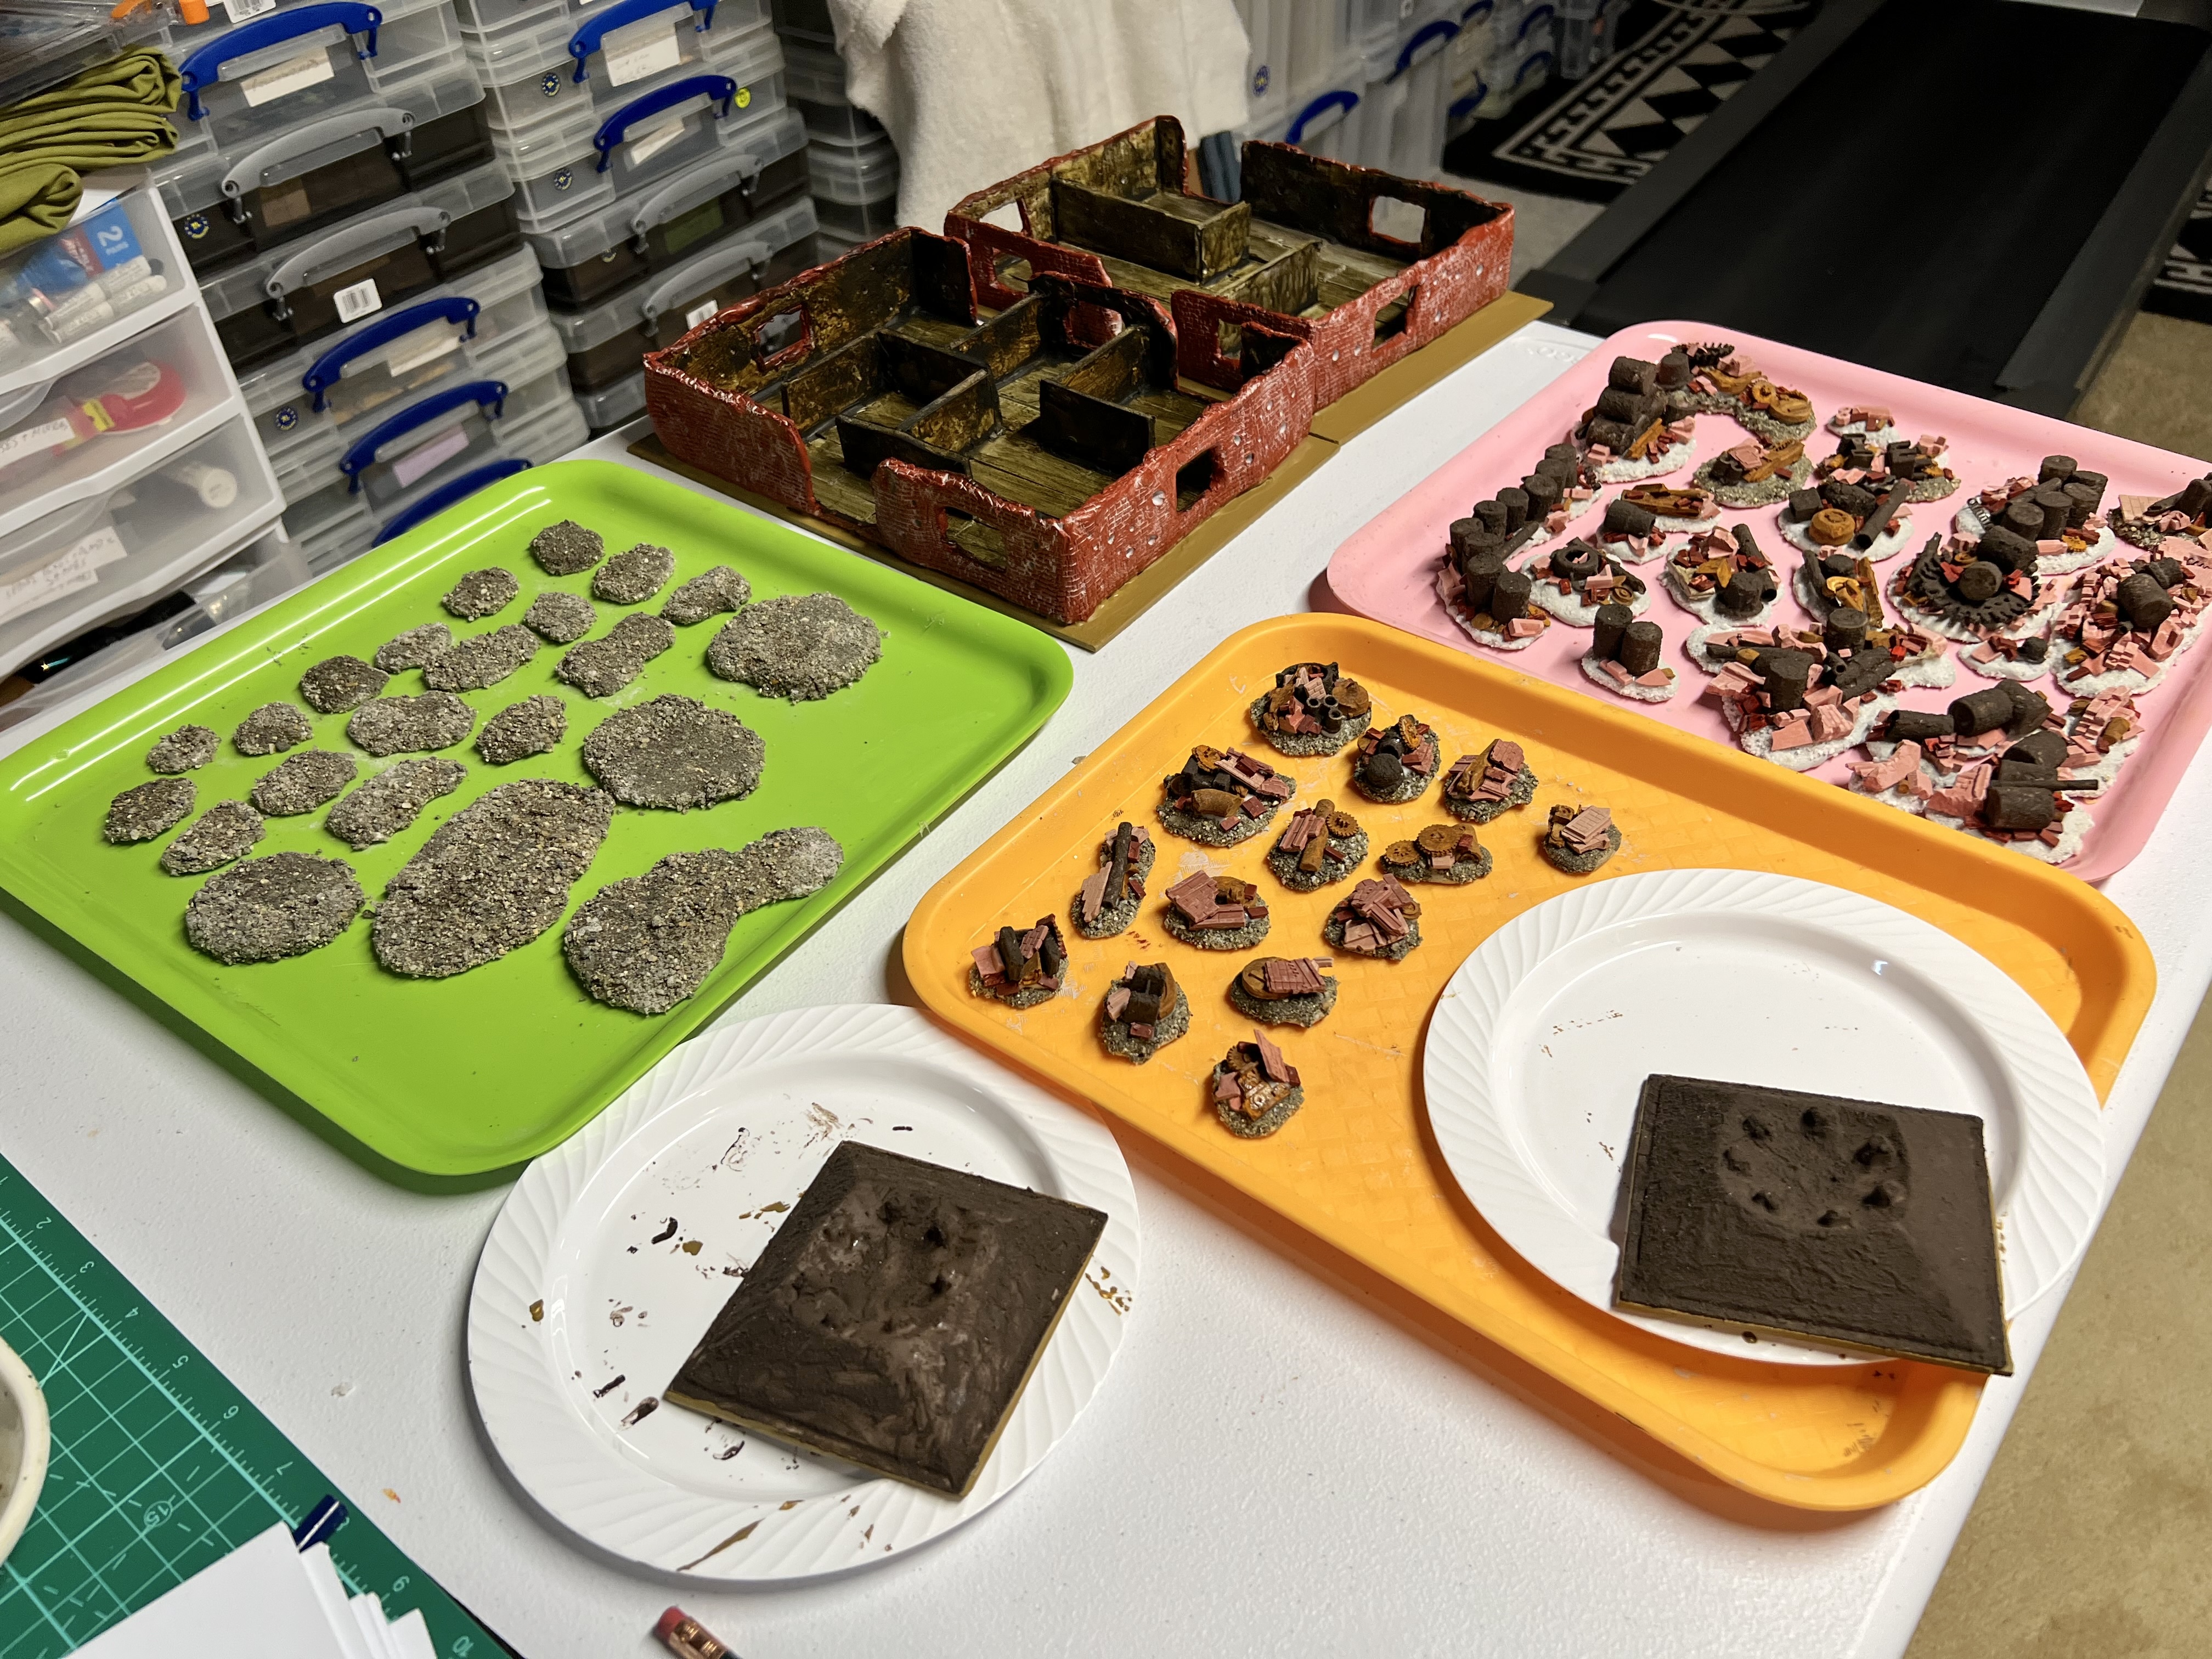
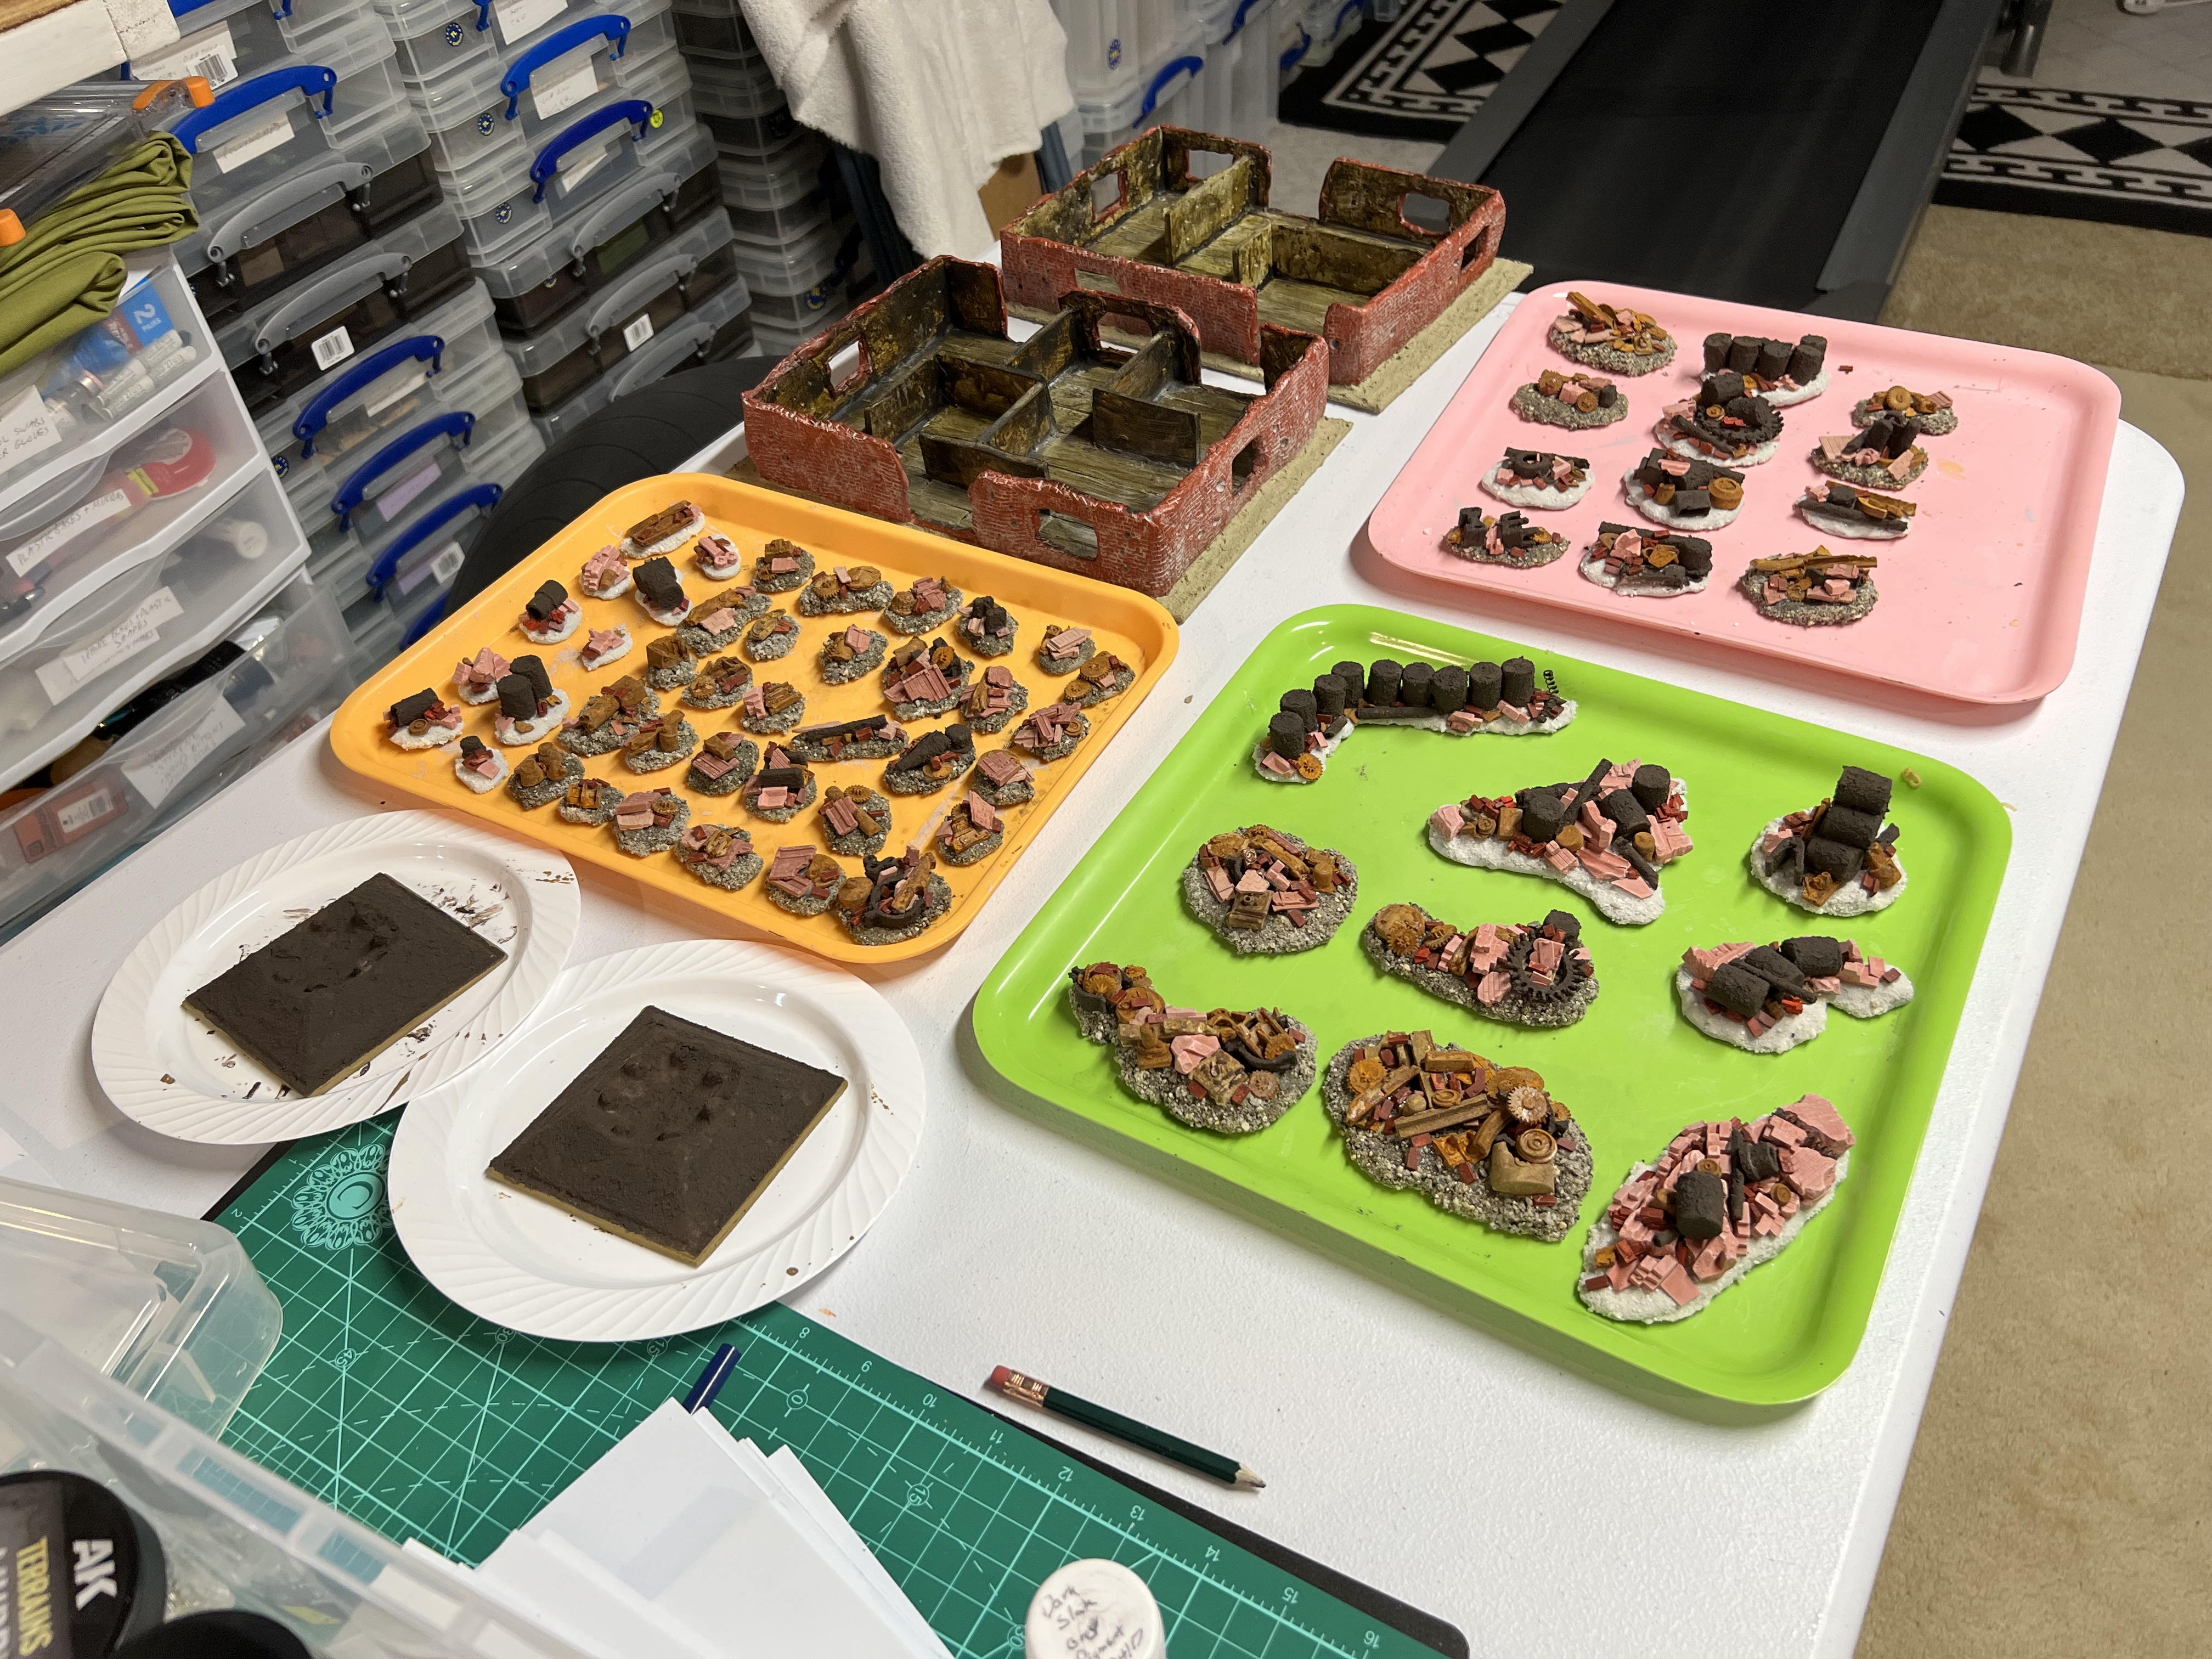
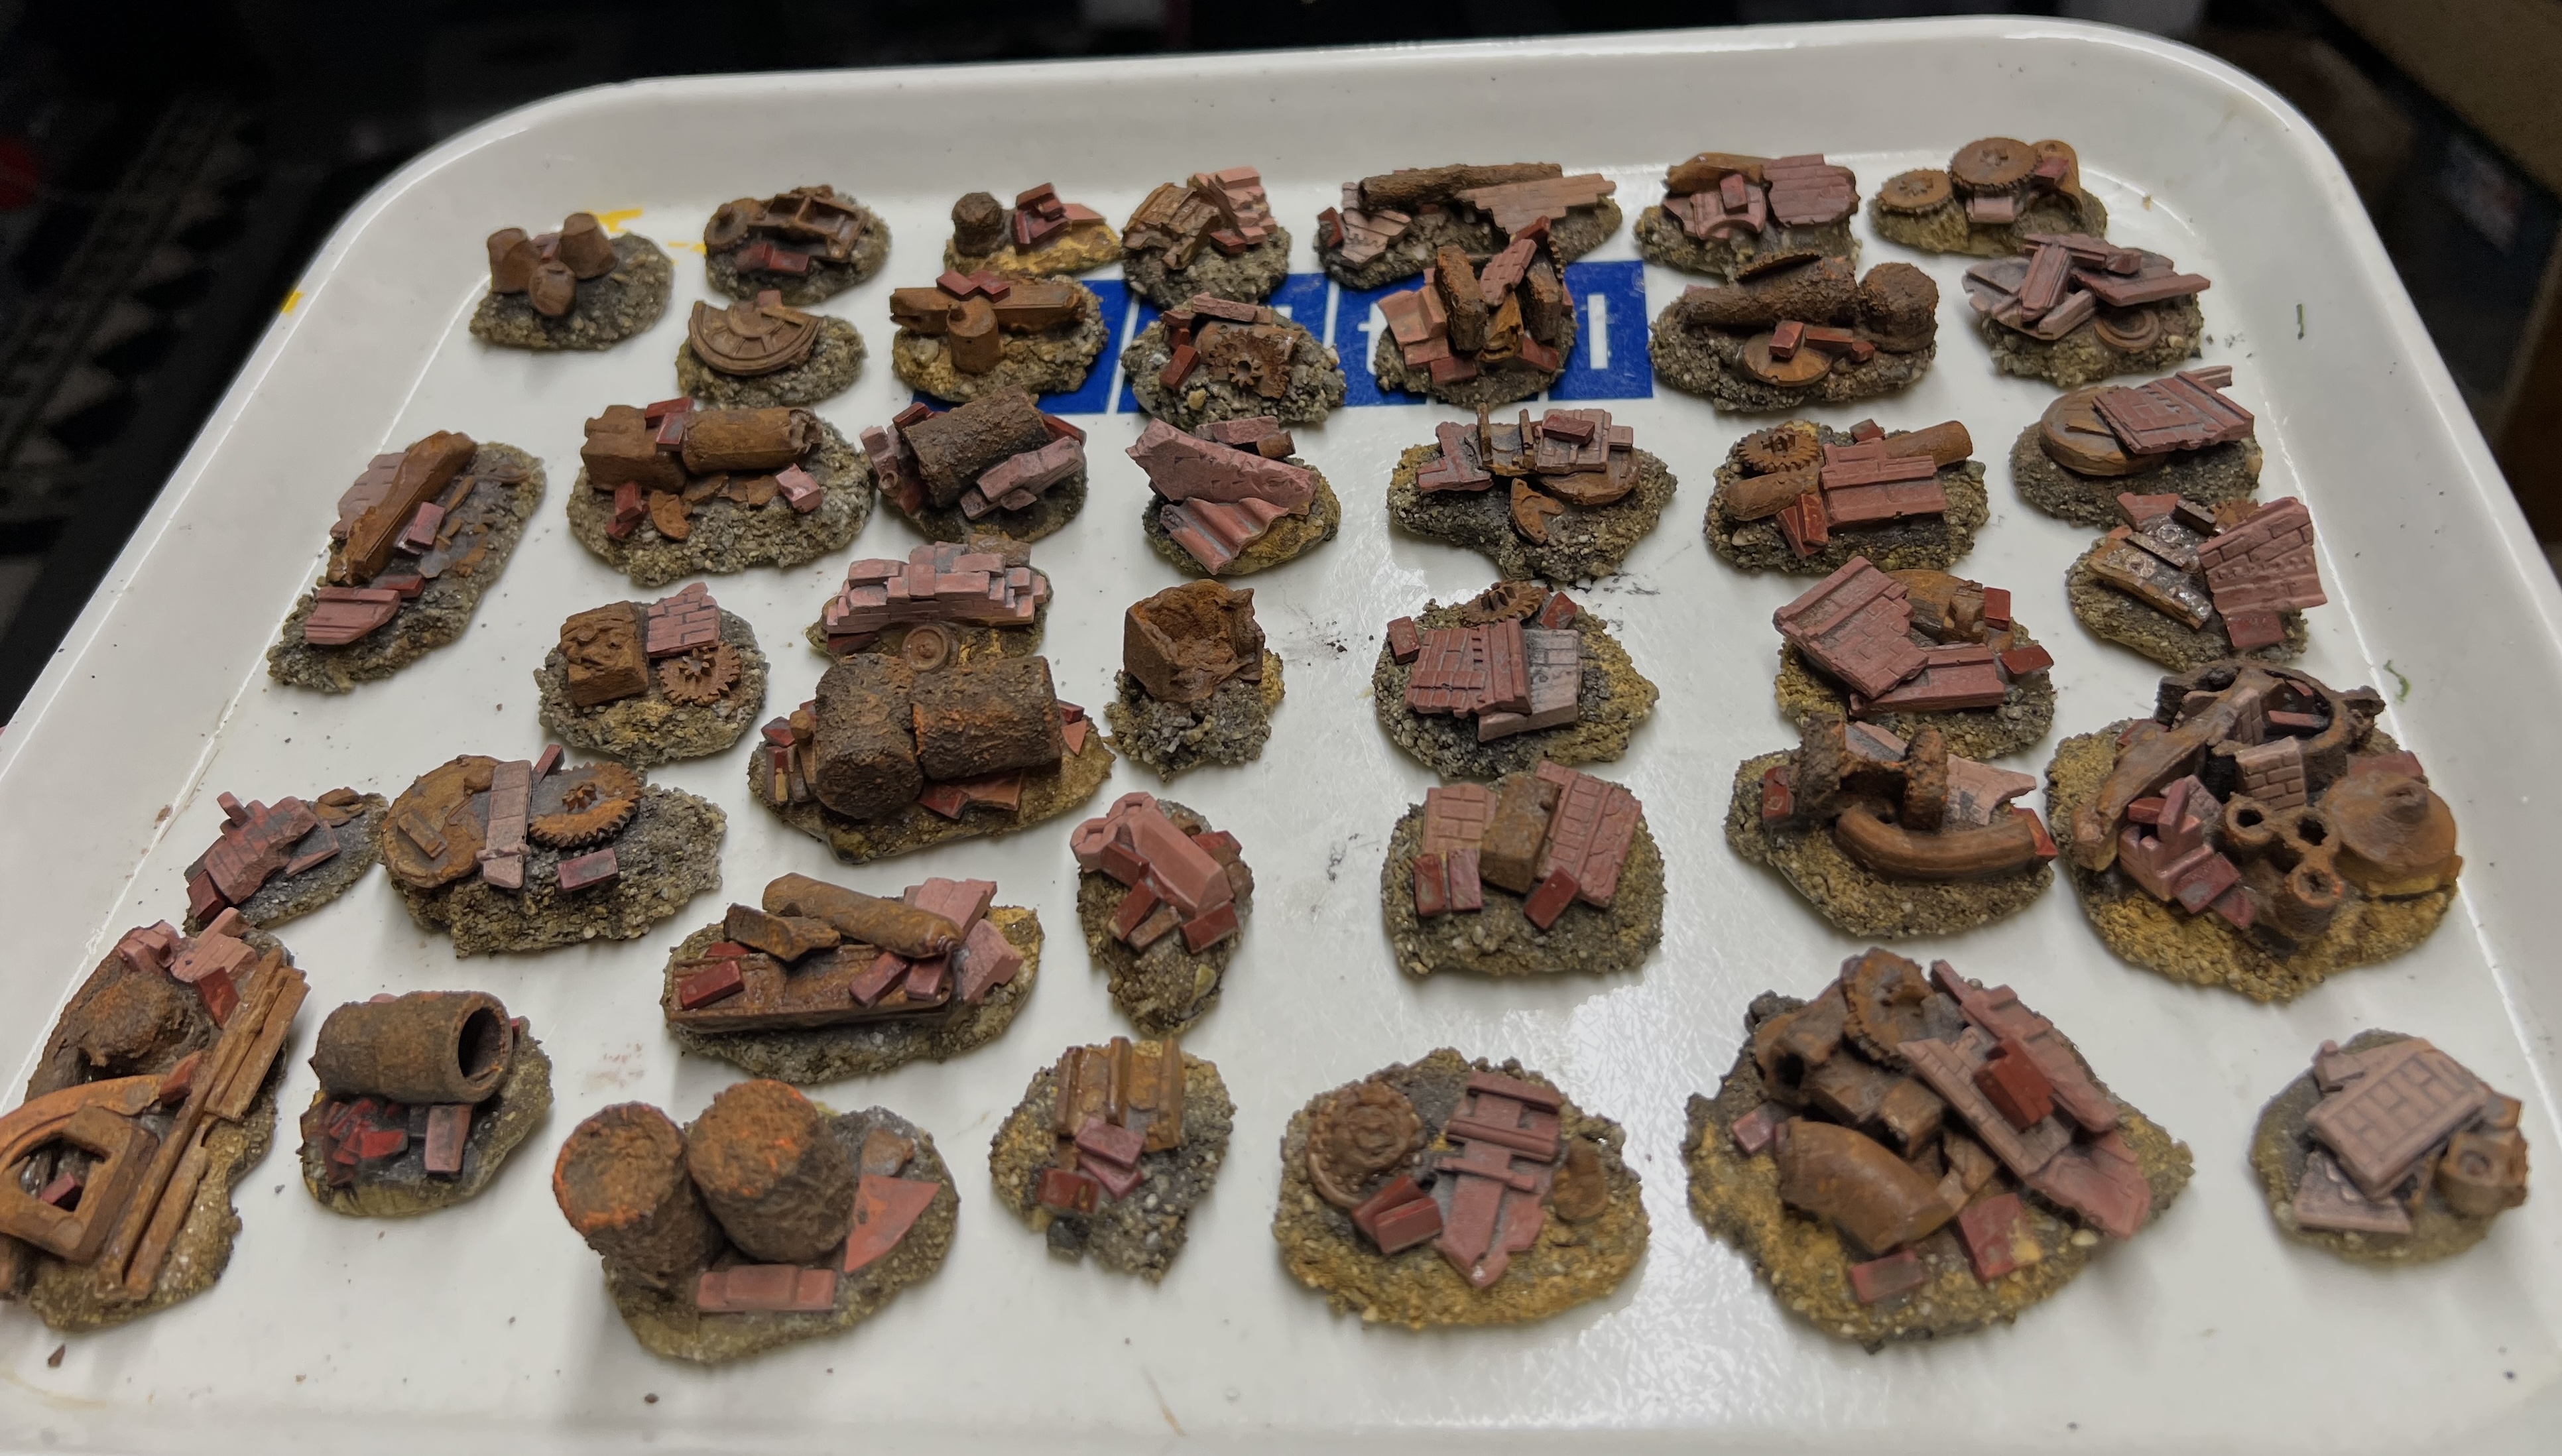
As I was again dealing with drying and curing times, I went back to work on the wreckage bases. I used up some white sand on the Apoxie Sculpt bases and applied with PVA. Once that had dried, I added as much wreckage as I could to each.
Wreckage bases – I started with the largest. The two buildings are shown in progress as are the next batch of sculpted bases curing.Close up shot of the larger wreckage bases in progress. Glue must dry…Close up of building one with insides primed.
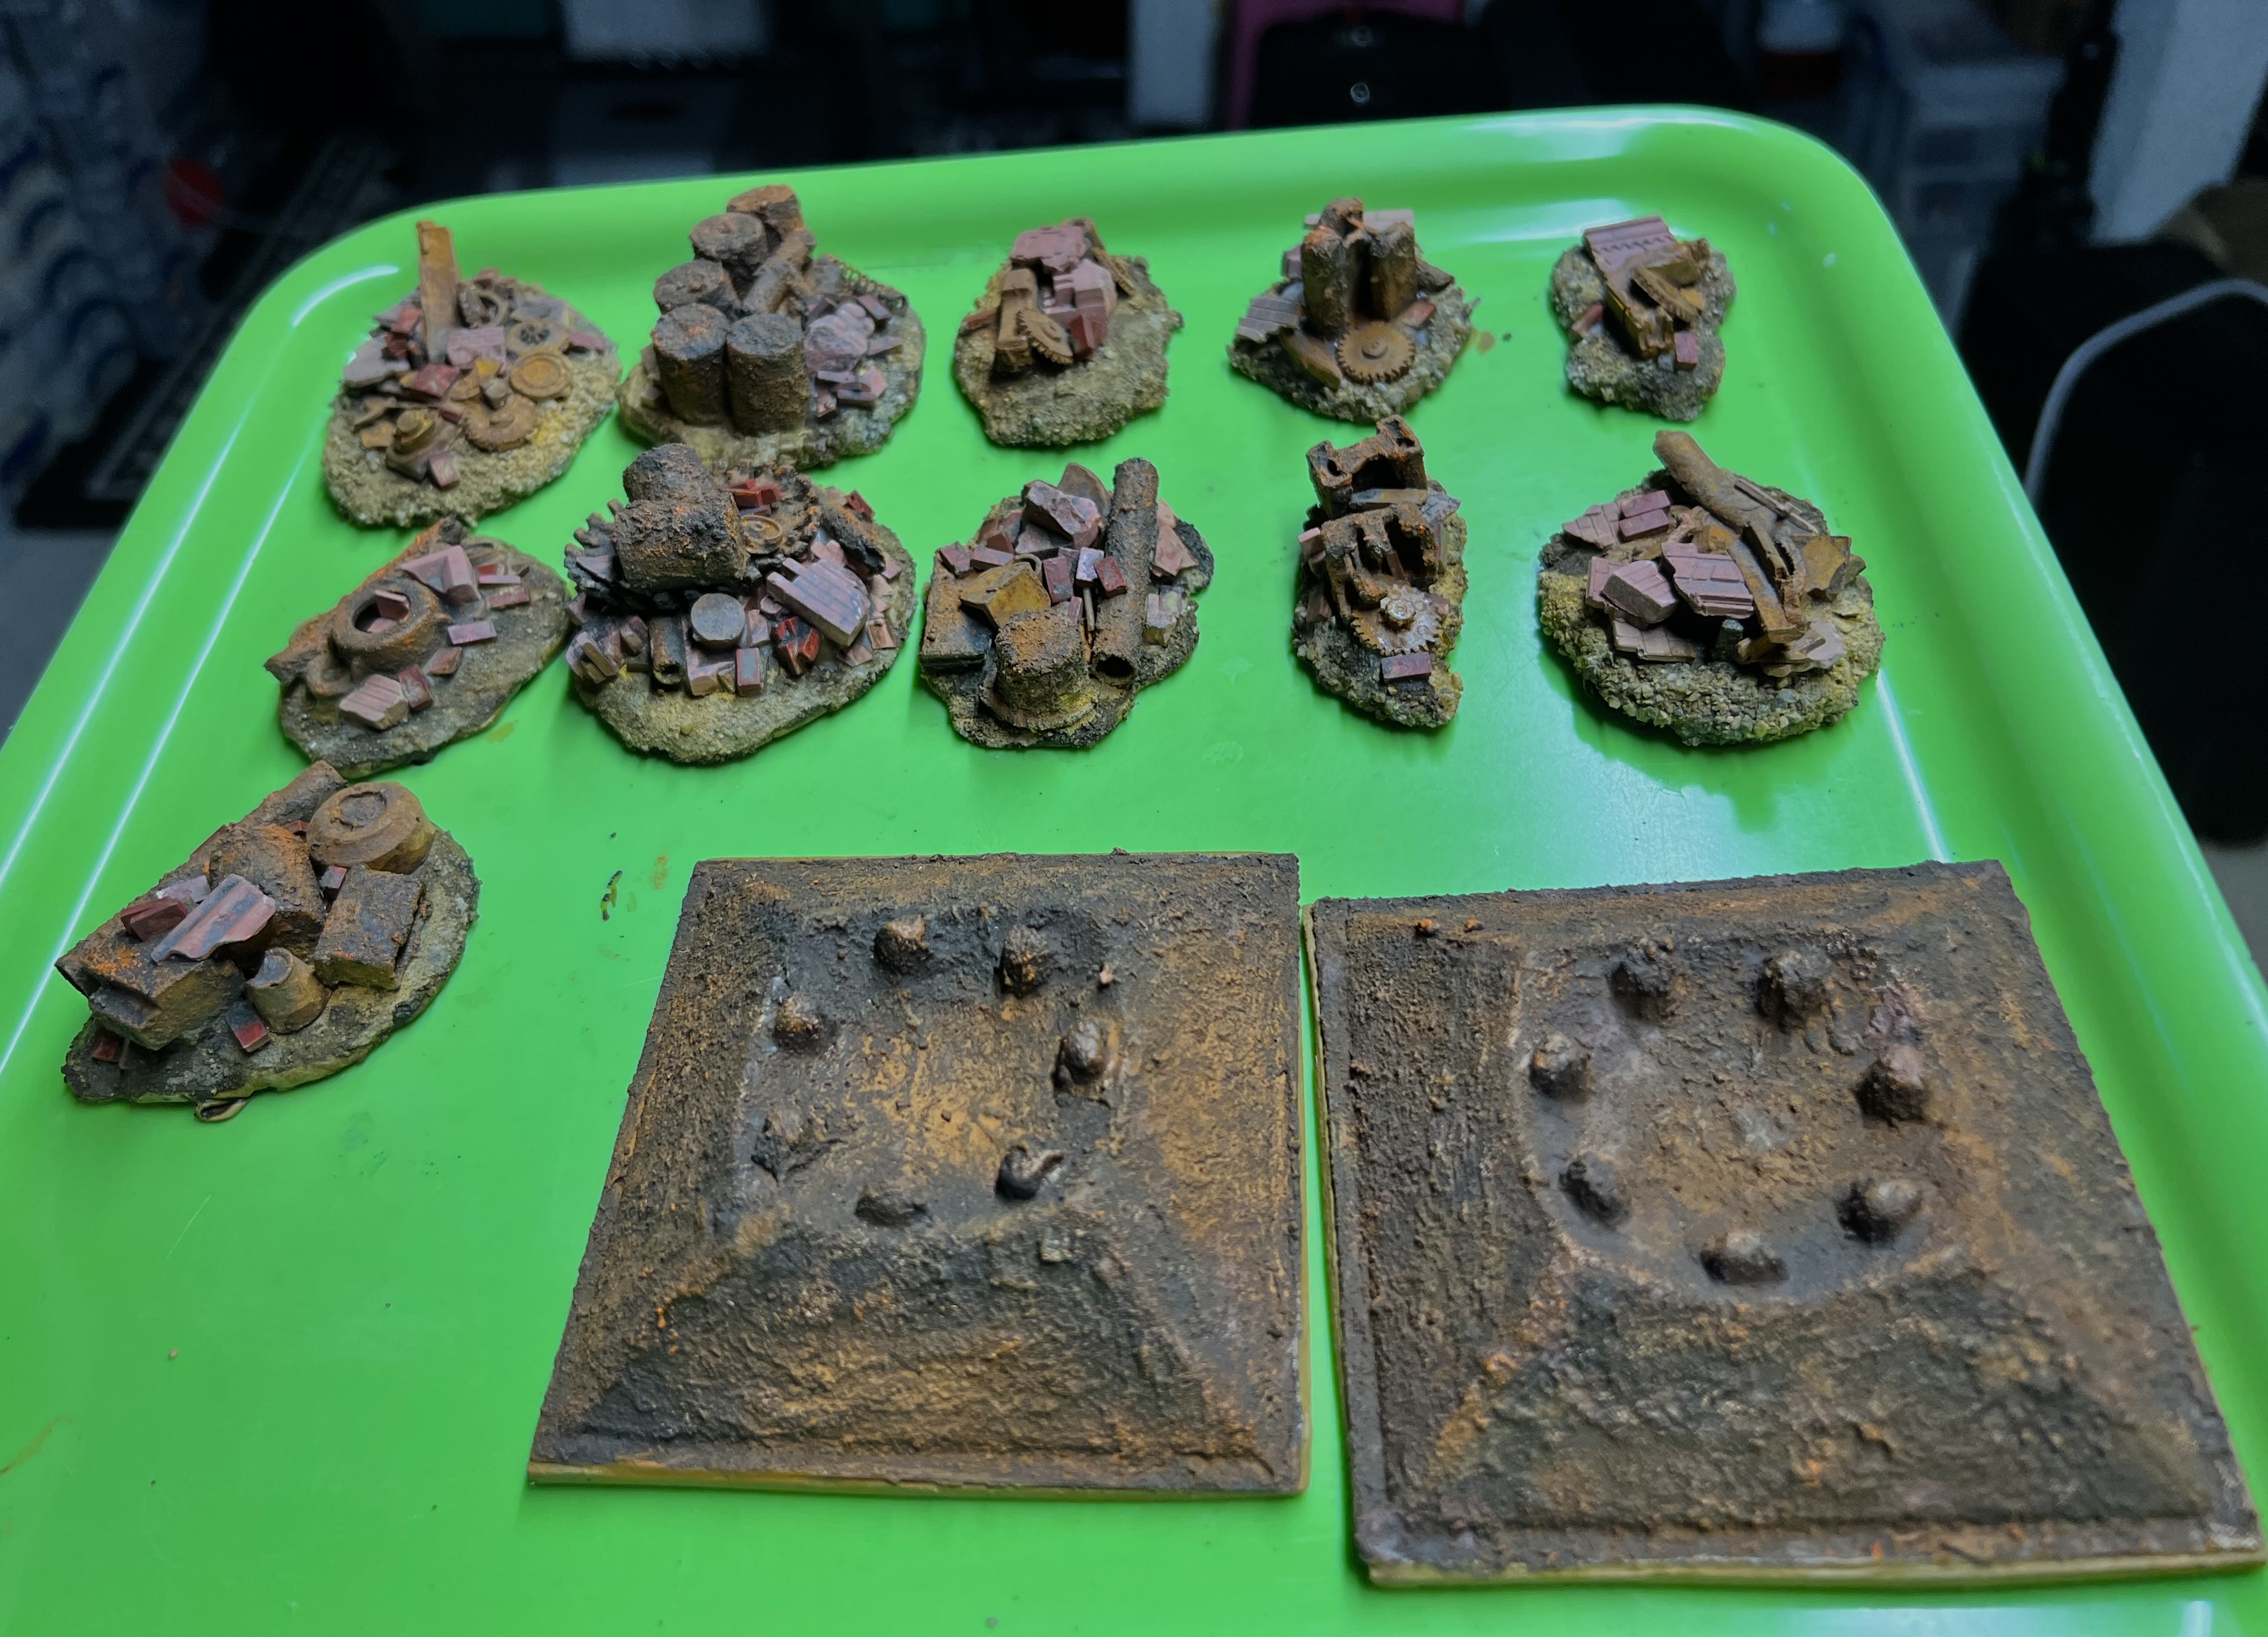
At this point, I added the flat clear plastic packing material to two square pieces of polystyrene by clamping and gluing them in preparation for corrosion texture. Then it was back to the wreckage bases. I had run out of white sand, so the next batch of wreckage bases got a PVA/grey sand application. As I used a lot pigments later, this made zero difference. At the same time, I also dirtied up the interior building walls and flooring using a sponge and various dark washes. The rim outside the buildings got a sandy texture paint covering.
The dark sand drying on the next wreckage bases, the flat structures with first application of corrosion texture, other bases in progress, and the buildings in the back.A second coat of corrosion paint has been applied to the flat structures here. I also sorted the wreckage bases by size before adding pigments.The flat structures and some other rusty paints I would add before augmenting with pigments.
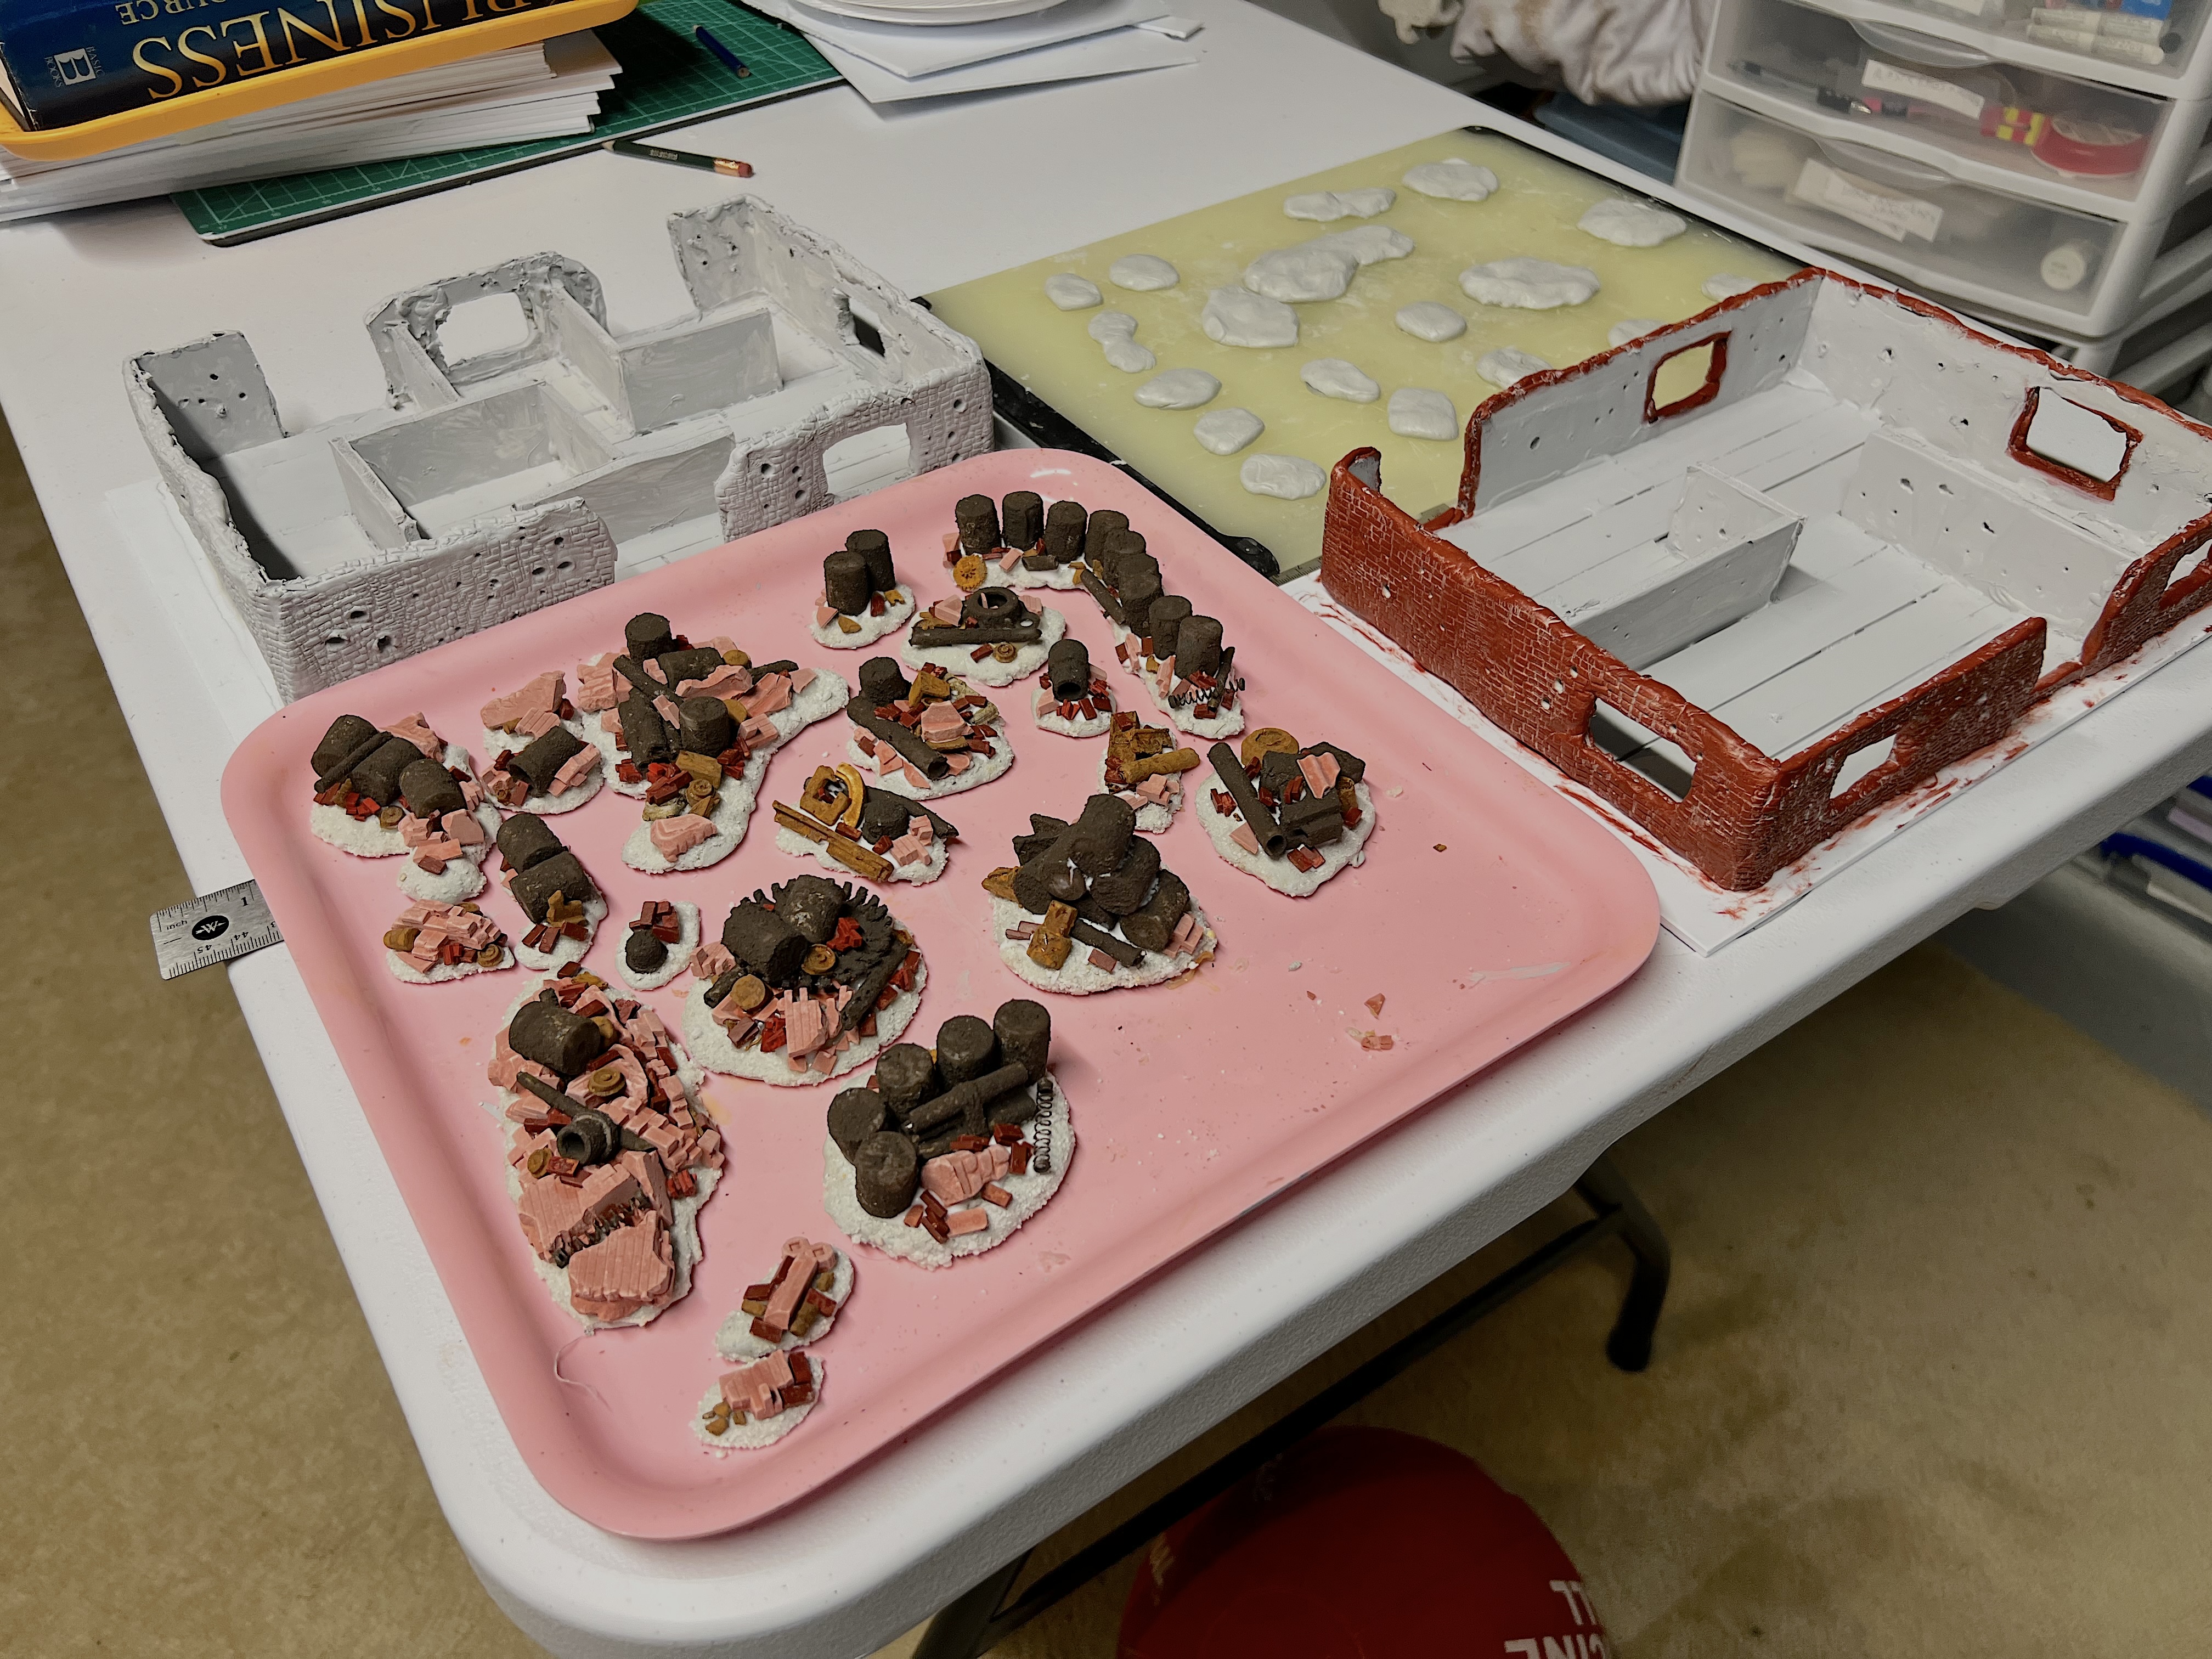
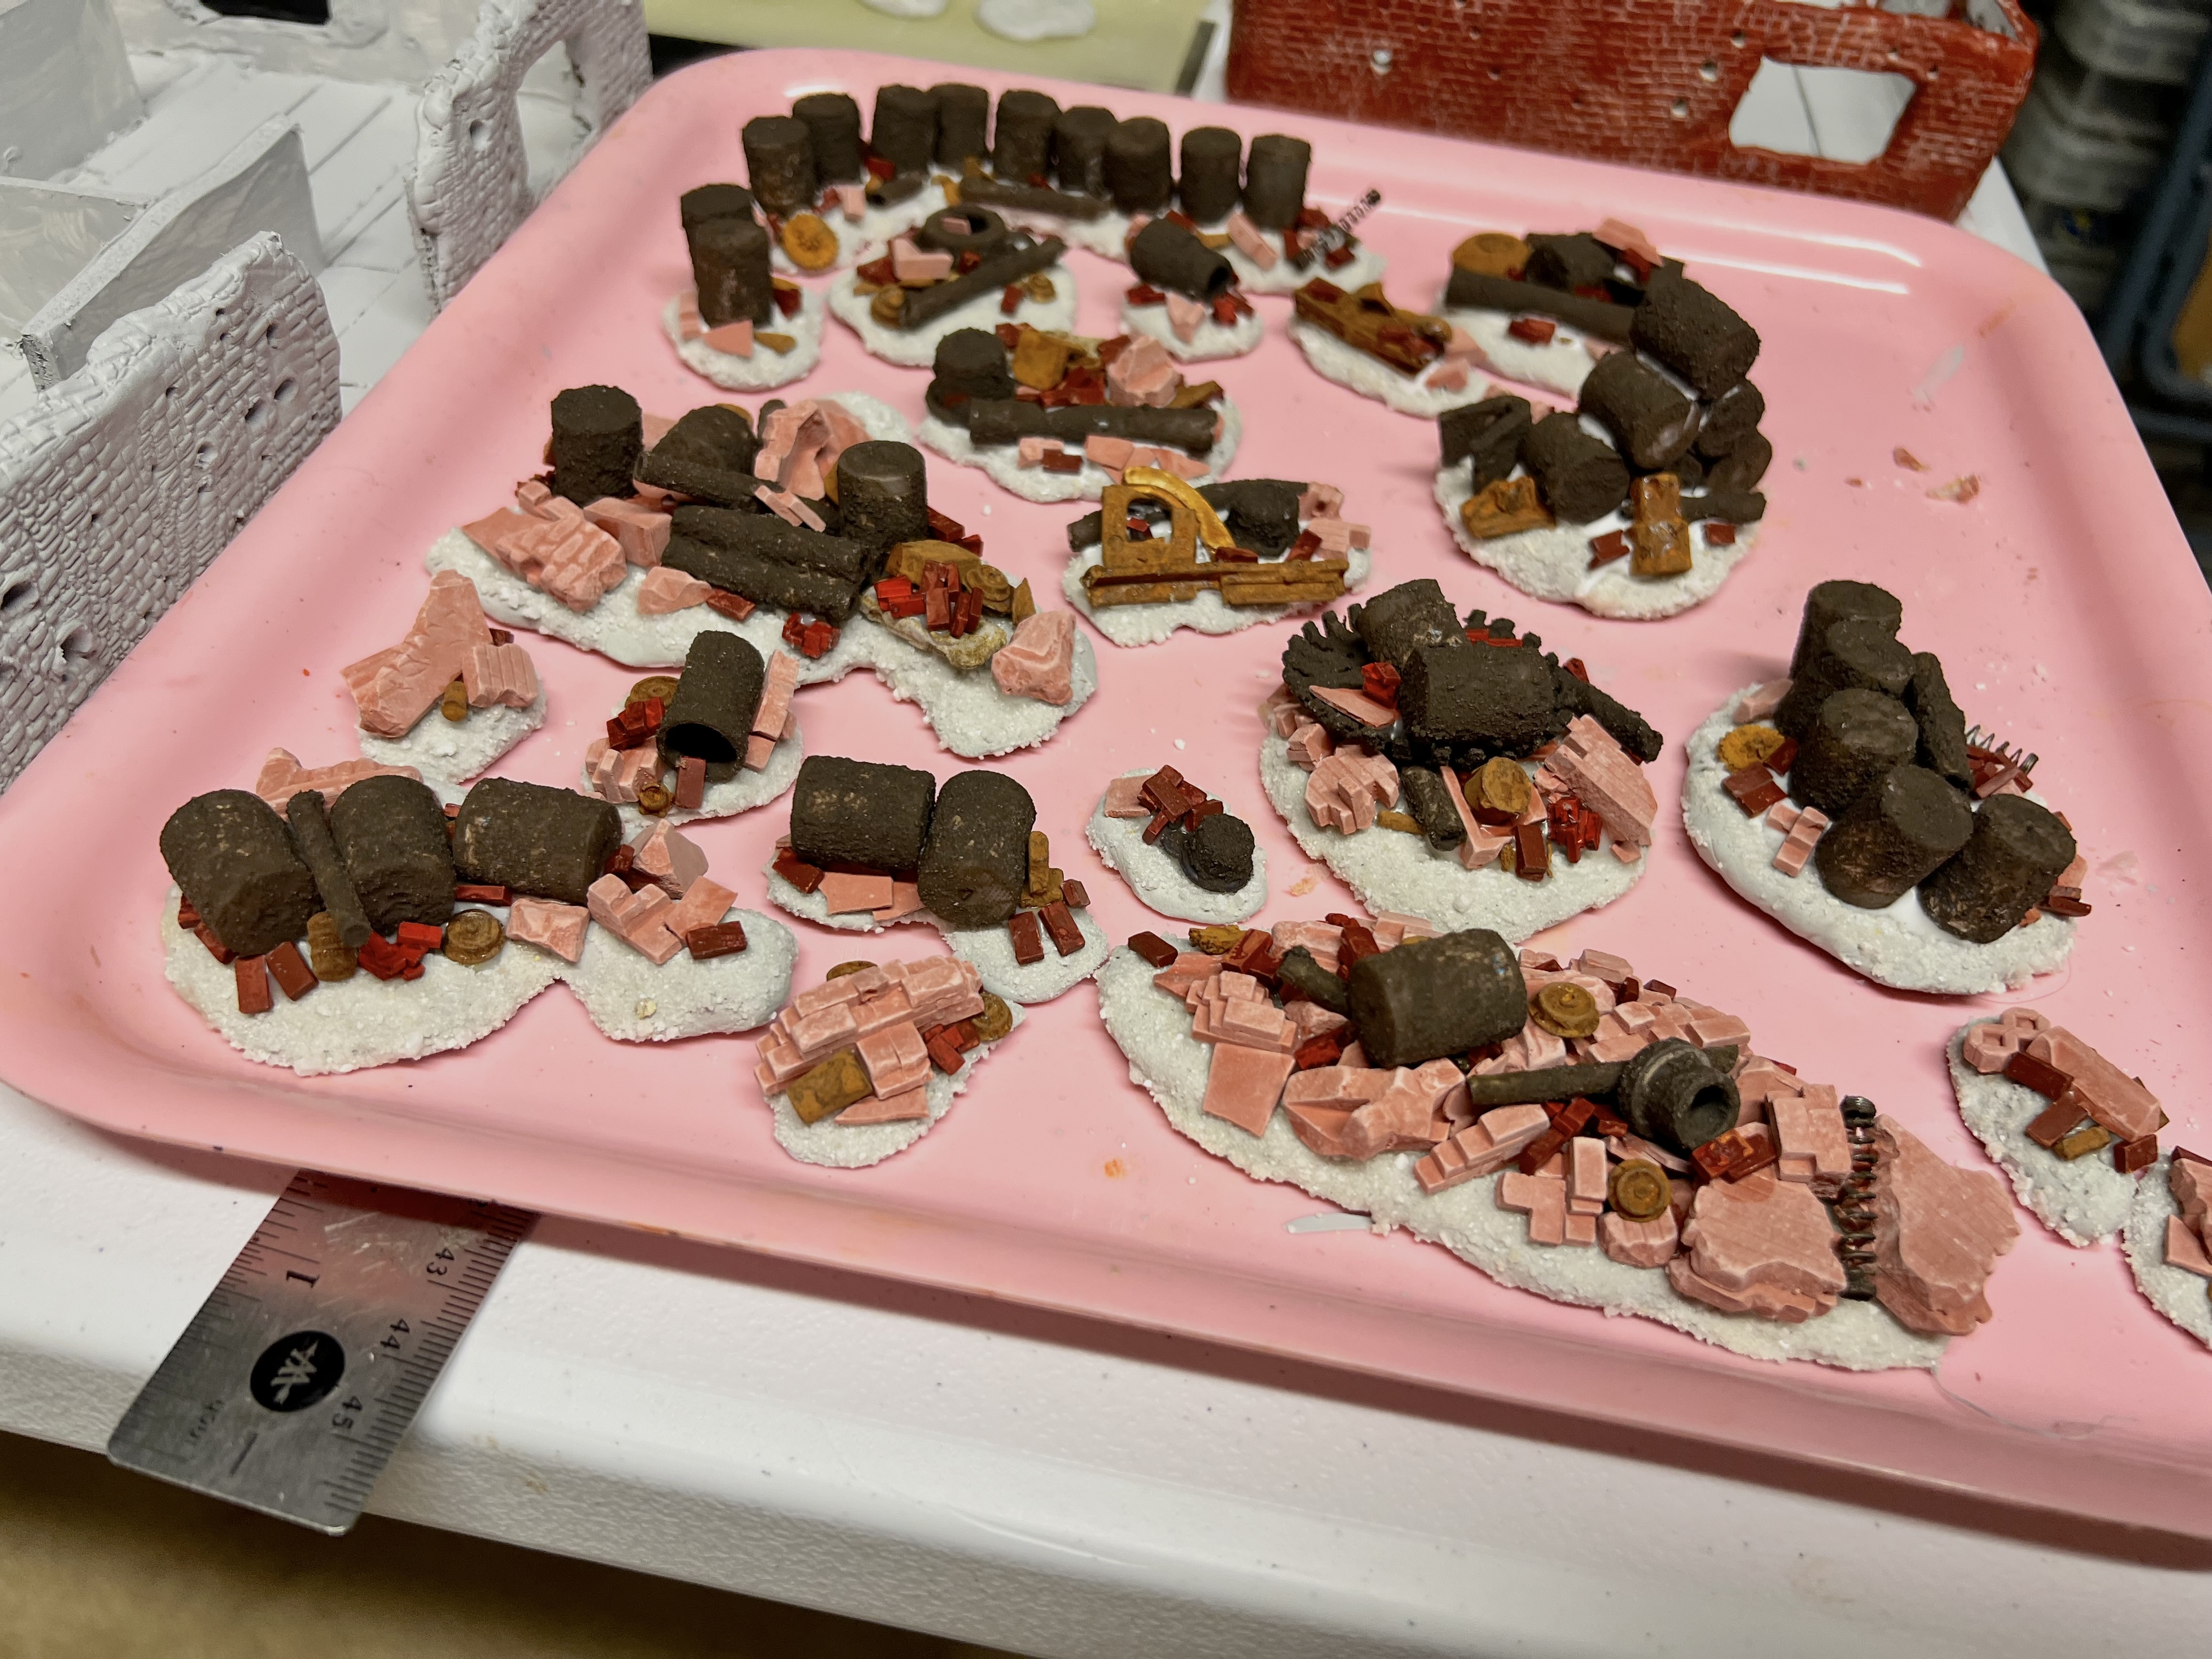
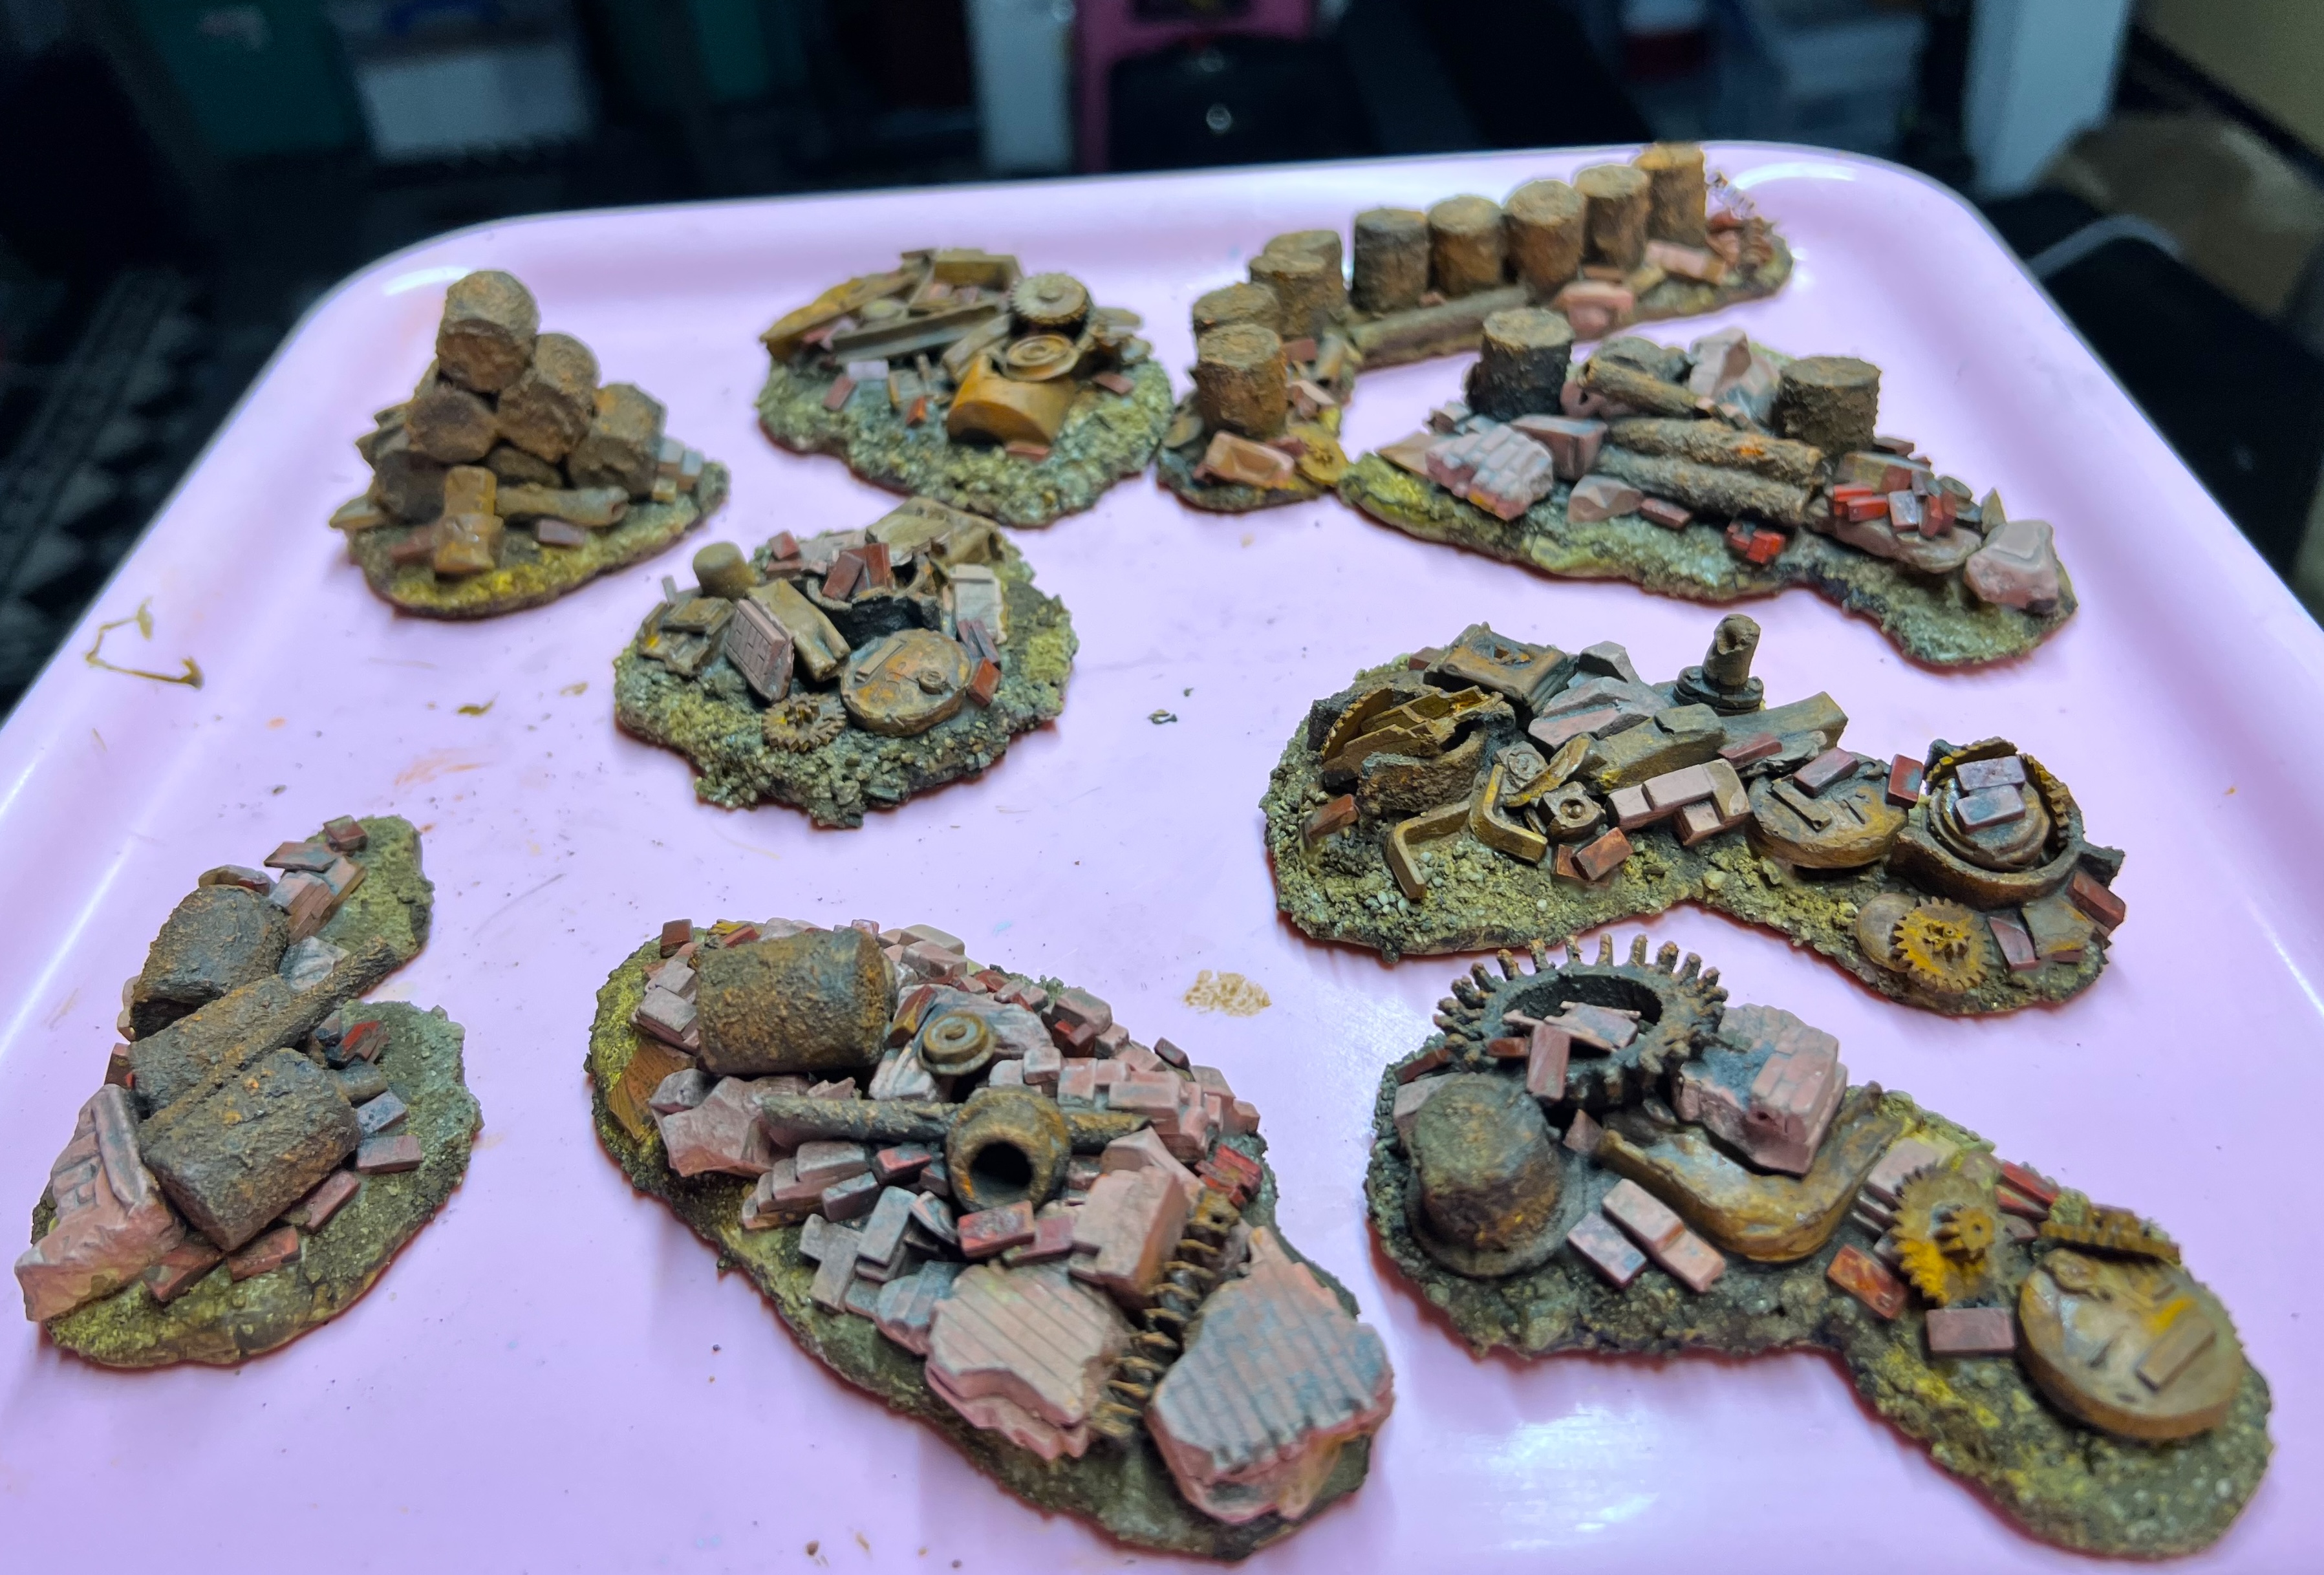
Below you can see the wreckage bases after I added pigments to them. I fixed the pigments with Vallejo Thinner applied with a spray from a lens cleaning bottle.
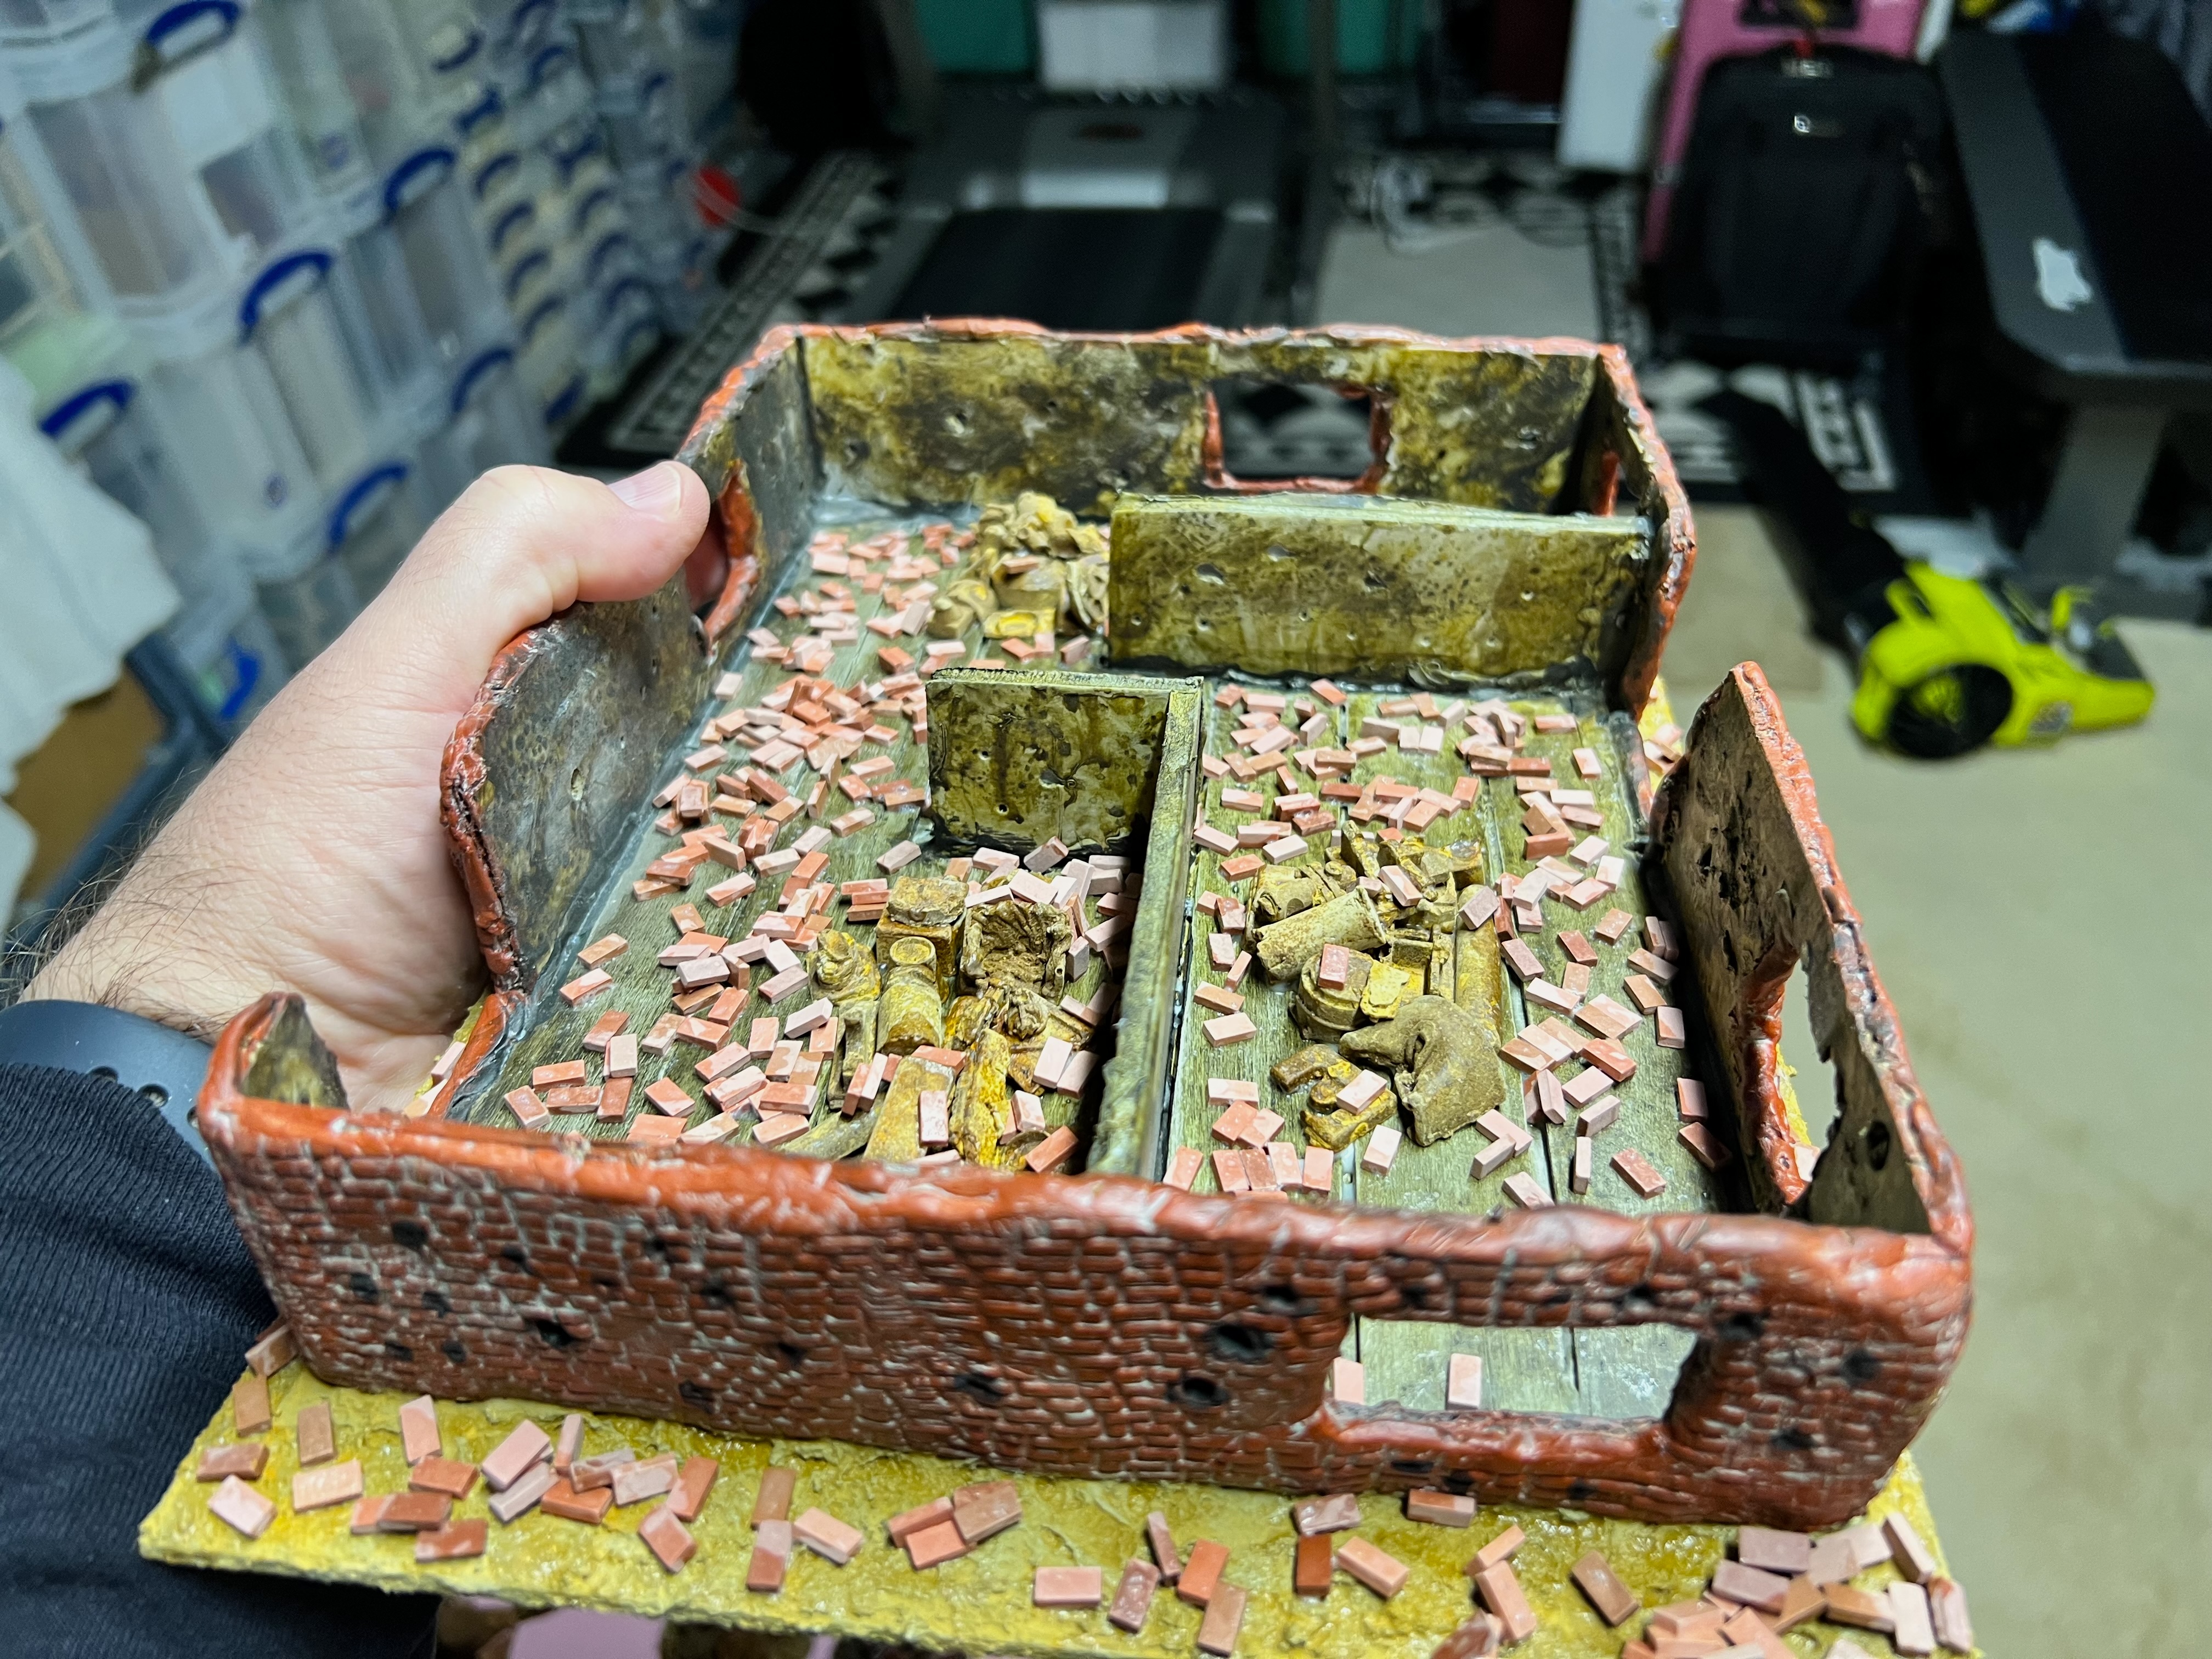
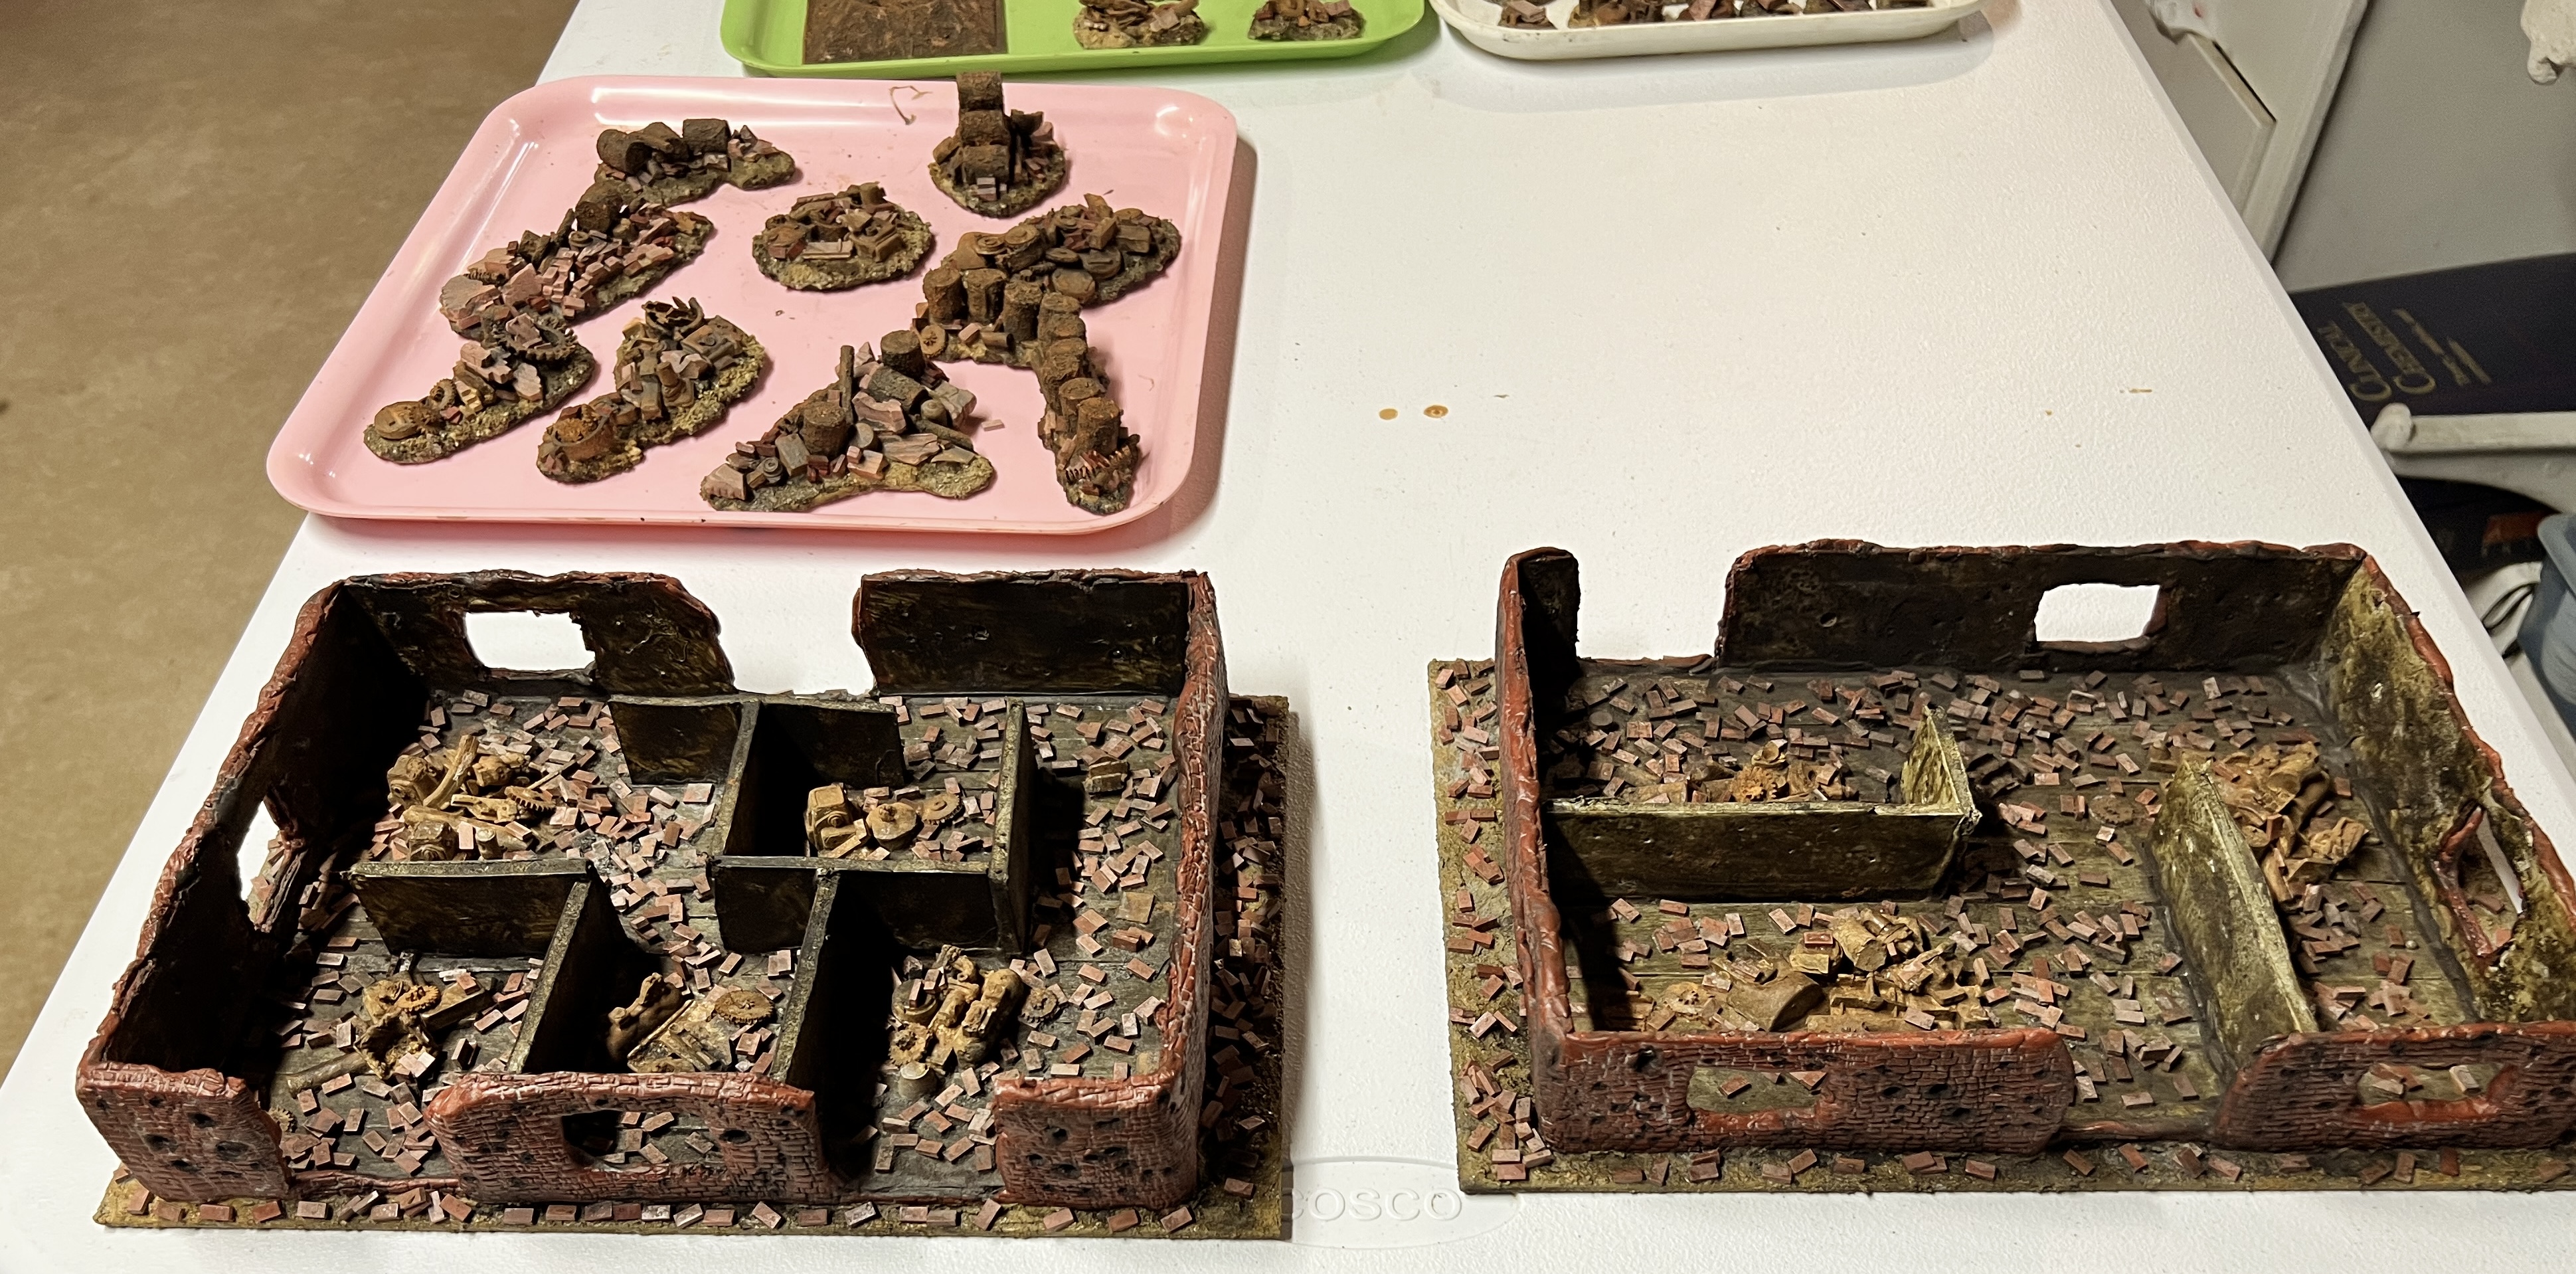
Next, I added rusty industrial wreckage and scattered bricks to the buildings’ interiors.
After adding industrial wreckage and bricks to building 1……and building 2.
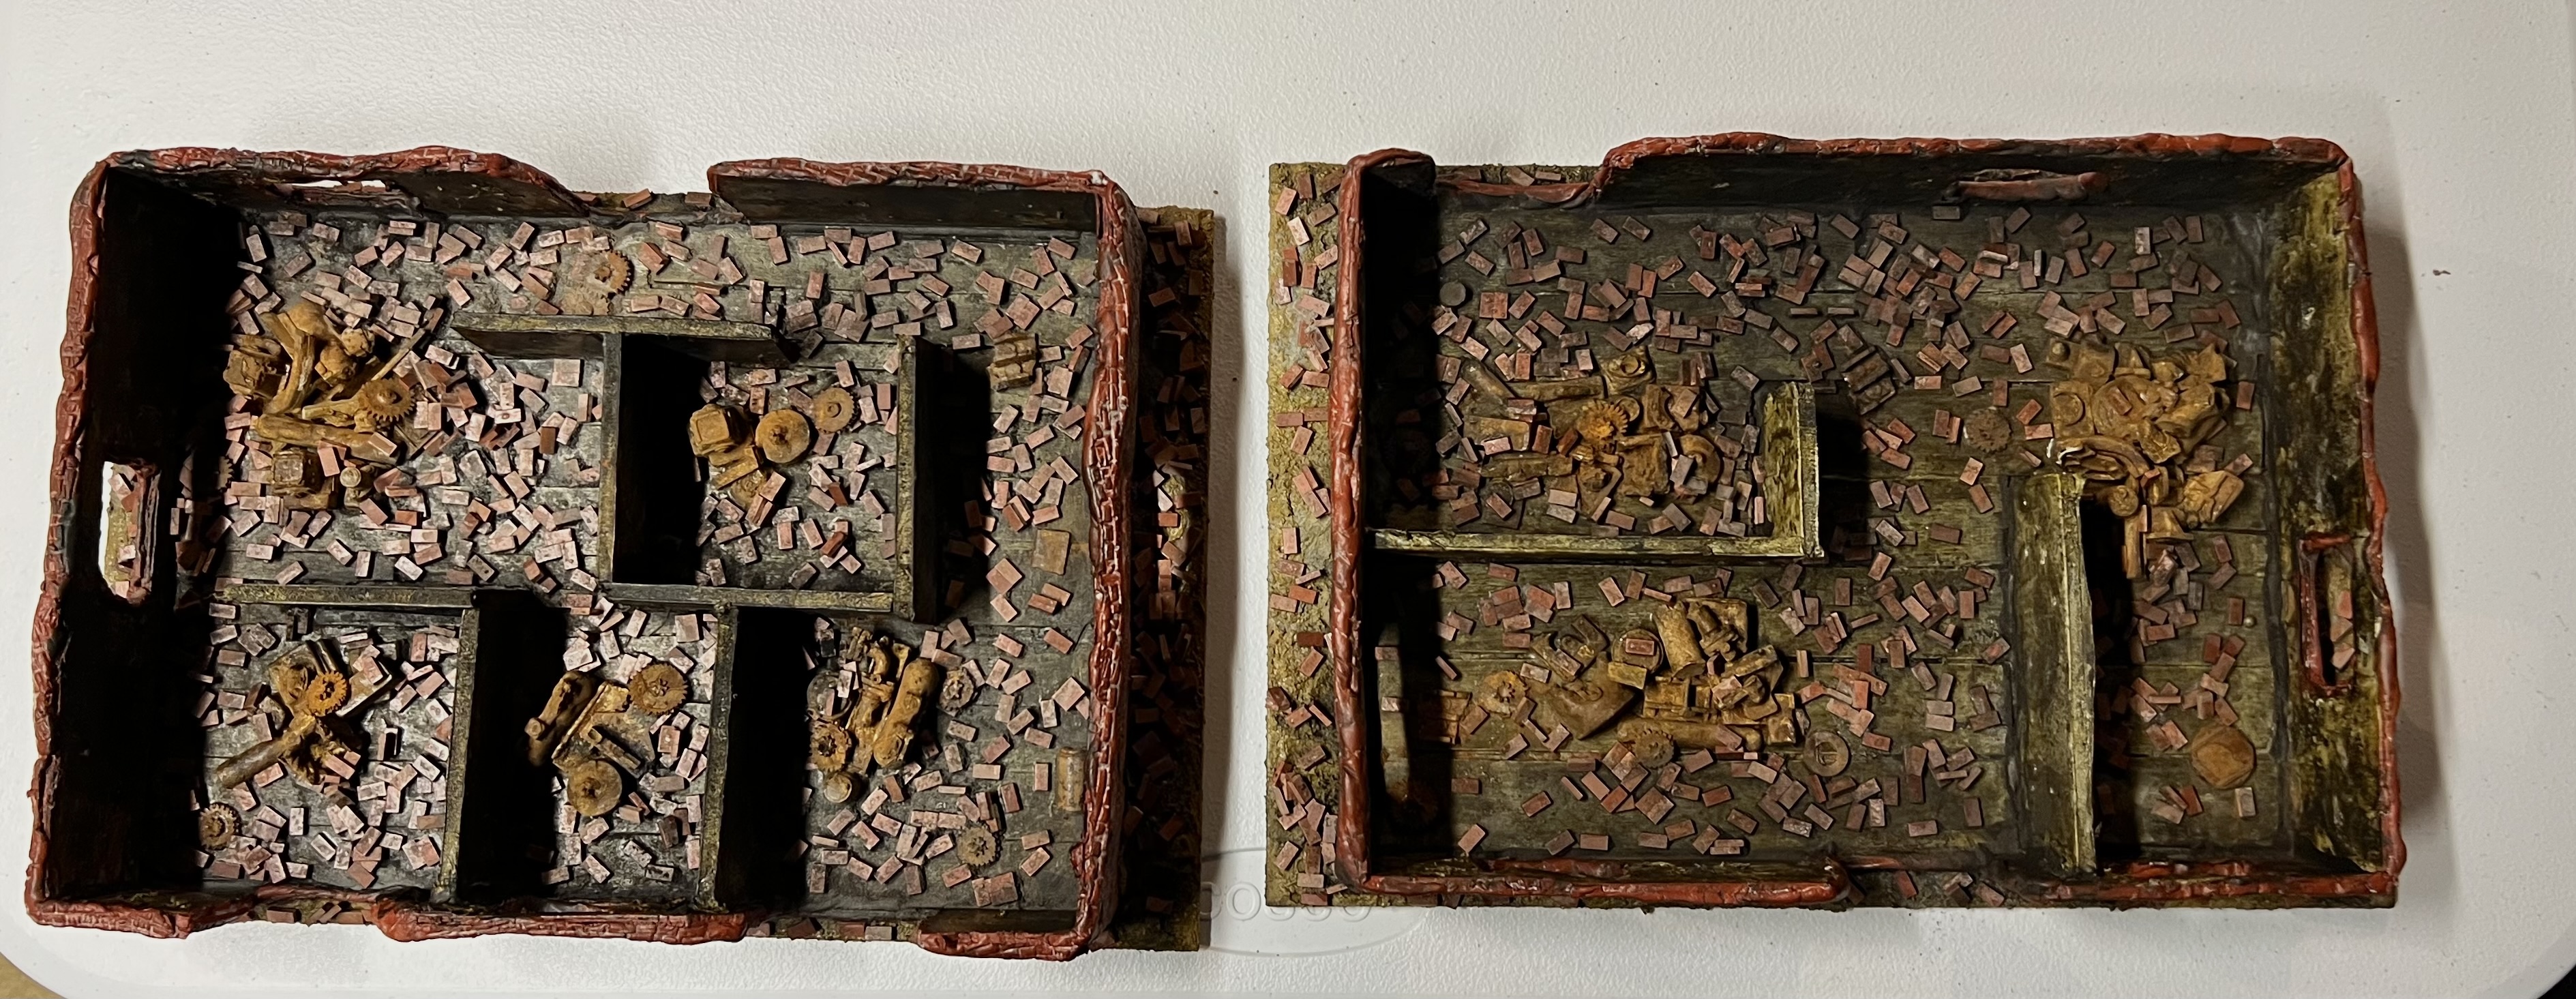
Clearly, pigments were needed at this point to make the bricks and wreckage look older and dirtier. More pigments and dark washes to the rescue!
The buildings after adding the pigments and washes to dirty and rust up everything.Top view of both buildings as completed.
I was now ready to mock up the tabletop with everything! But first, the flyer for the game – which I finished before this project:
Game flyer.
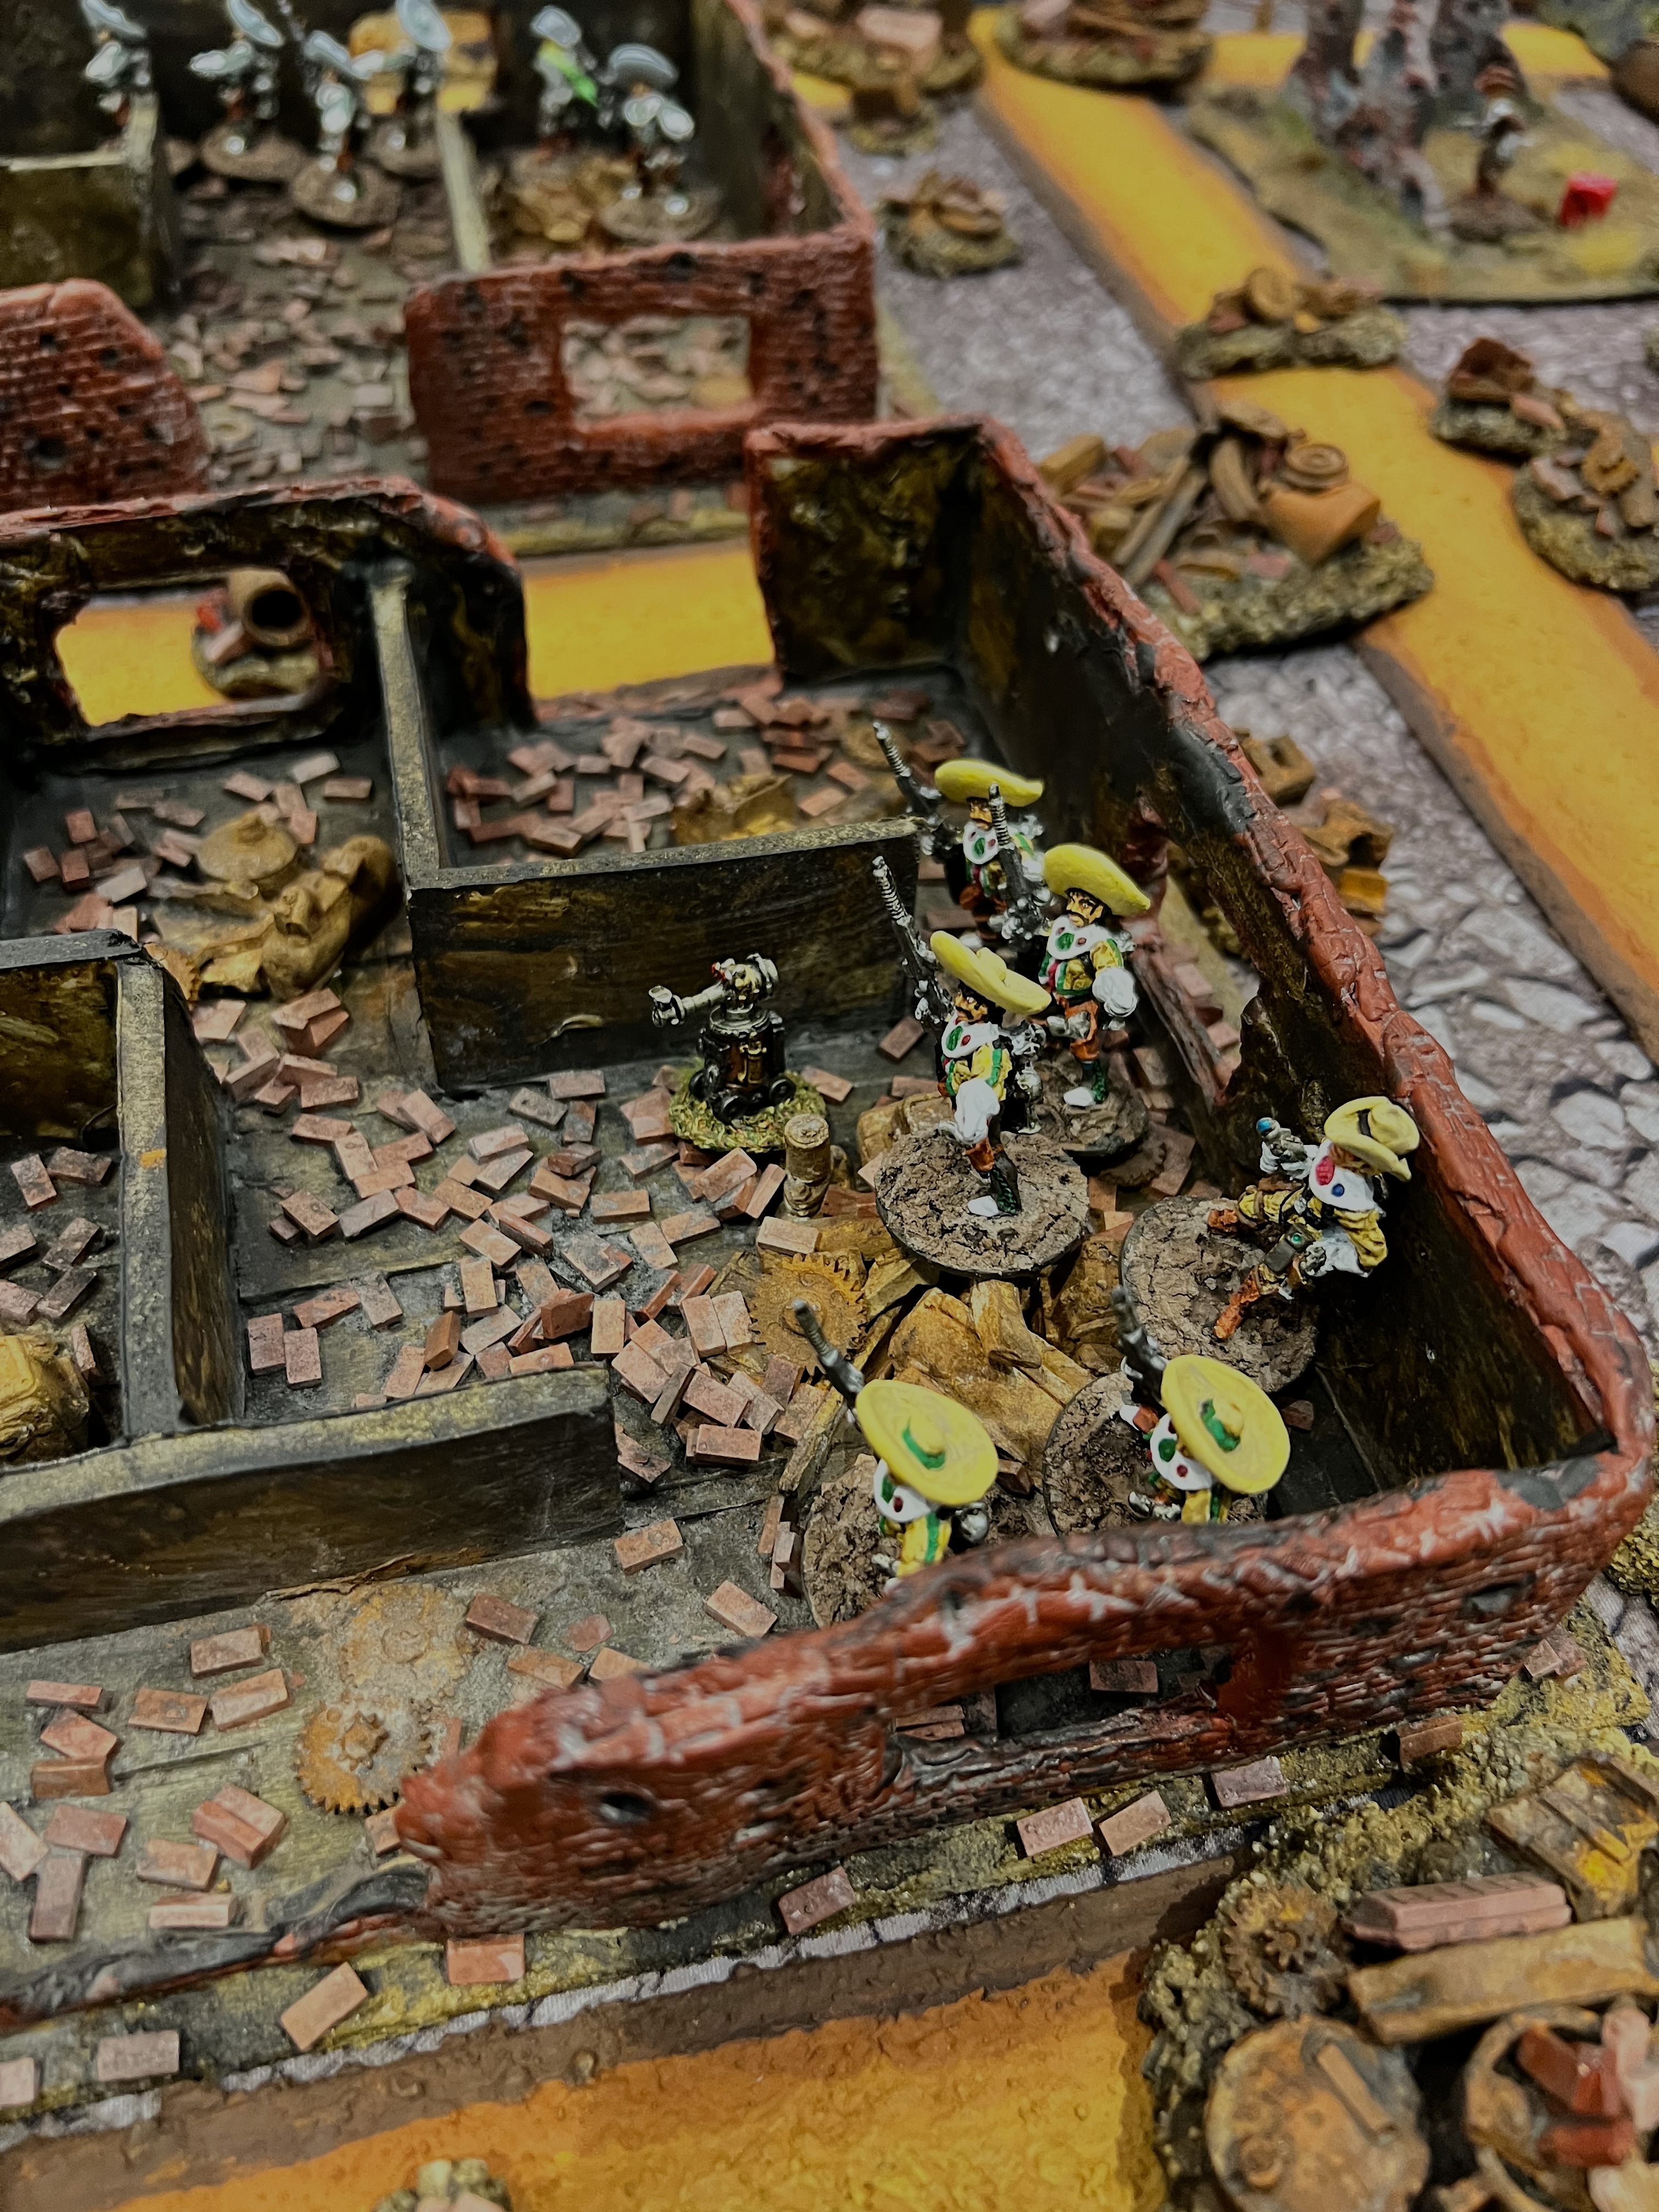
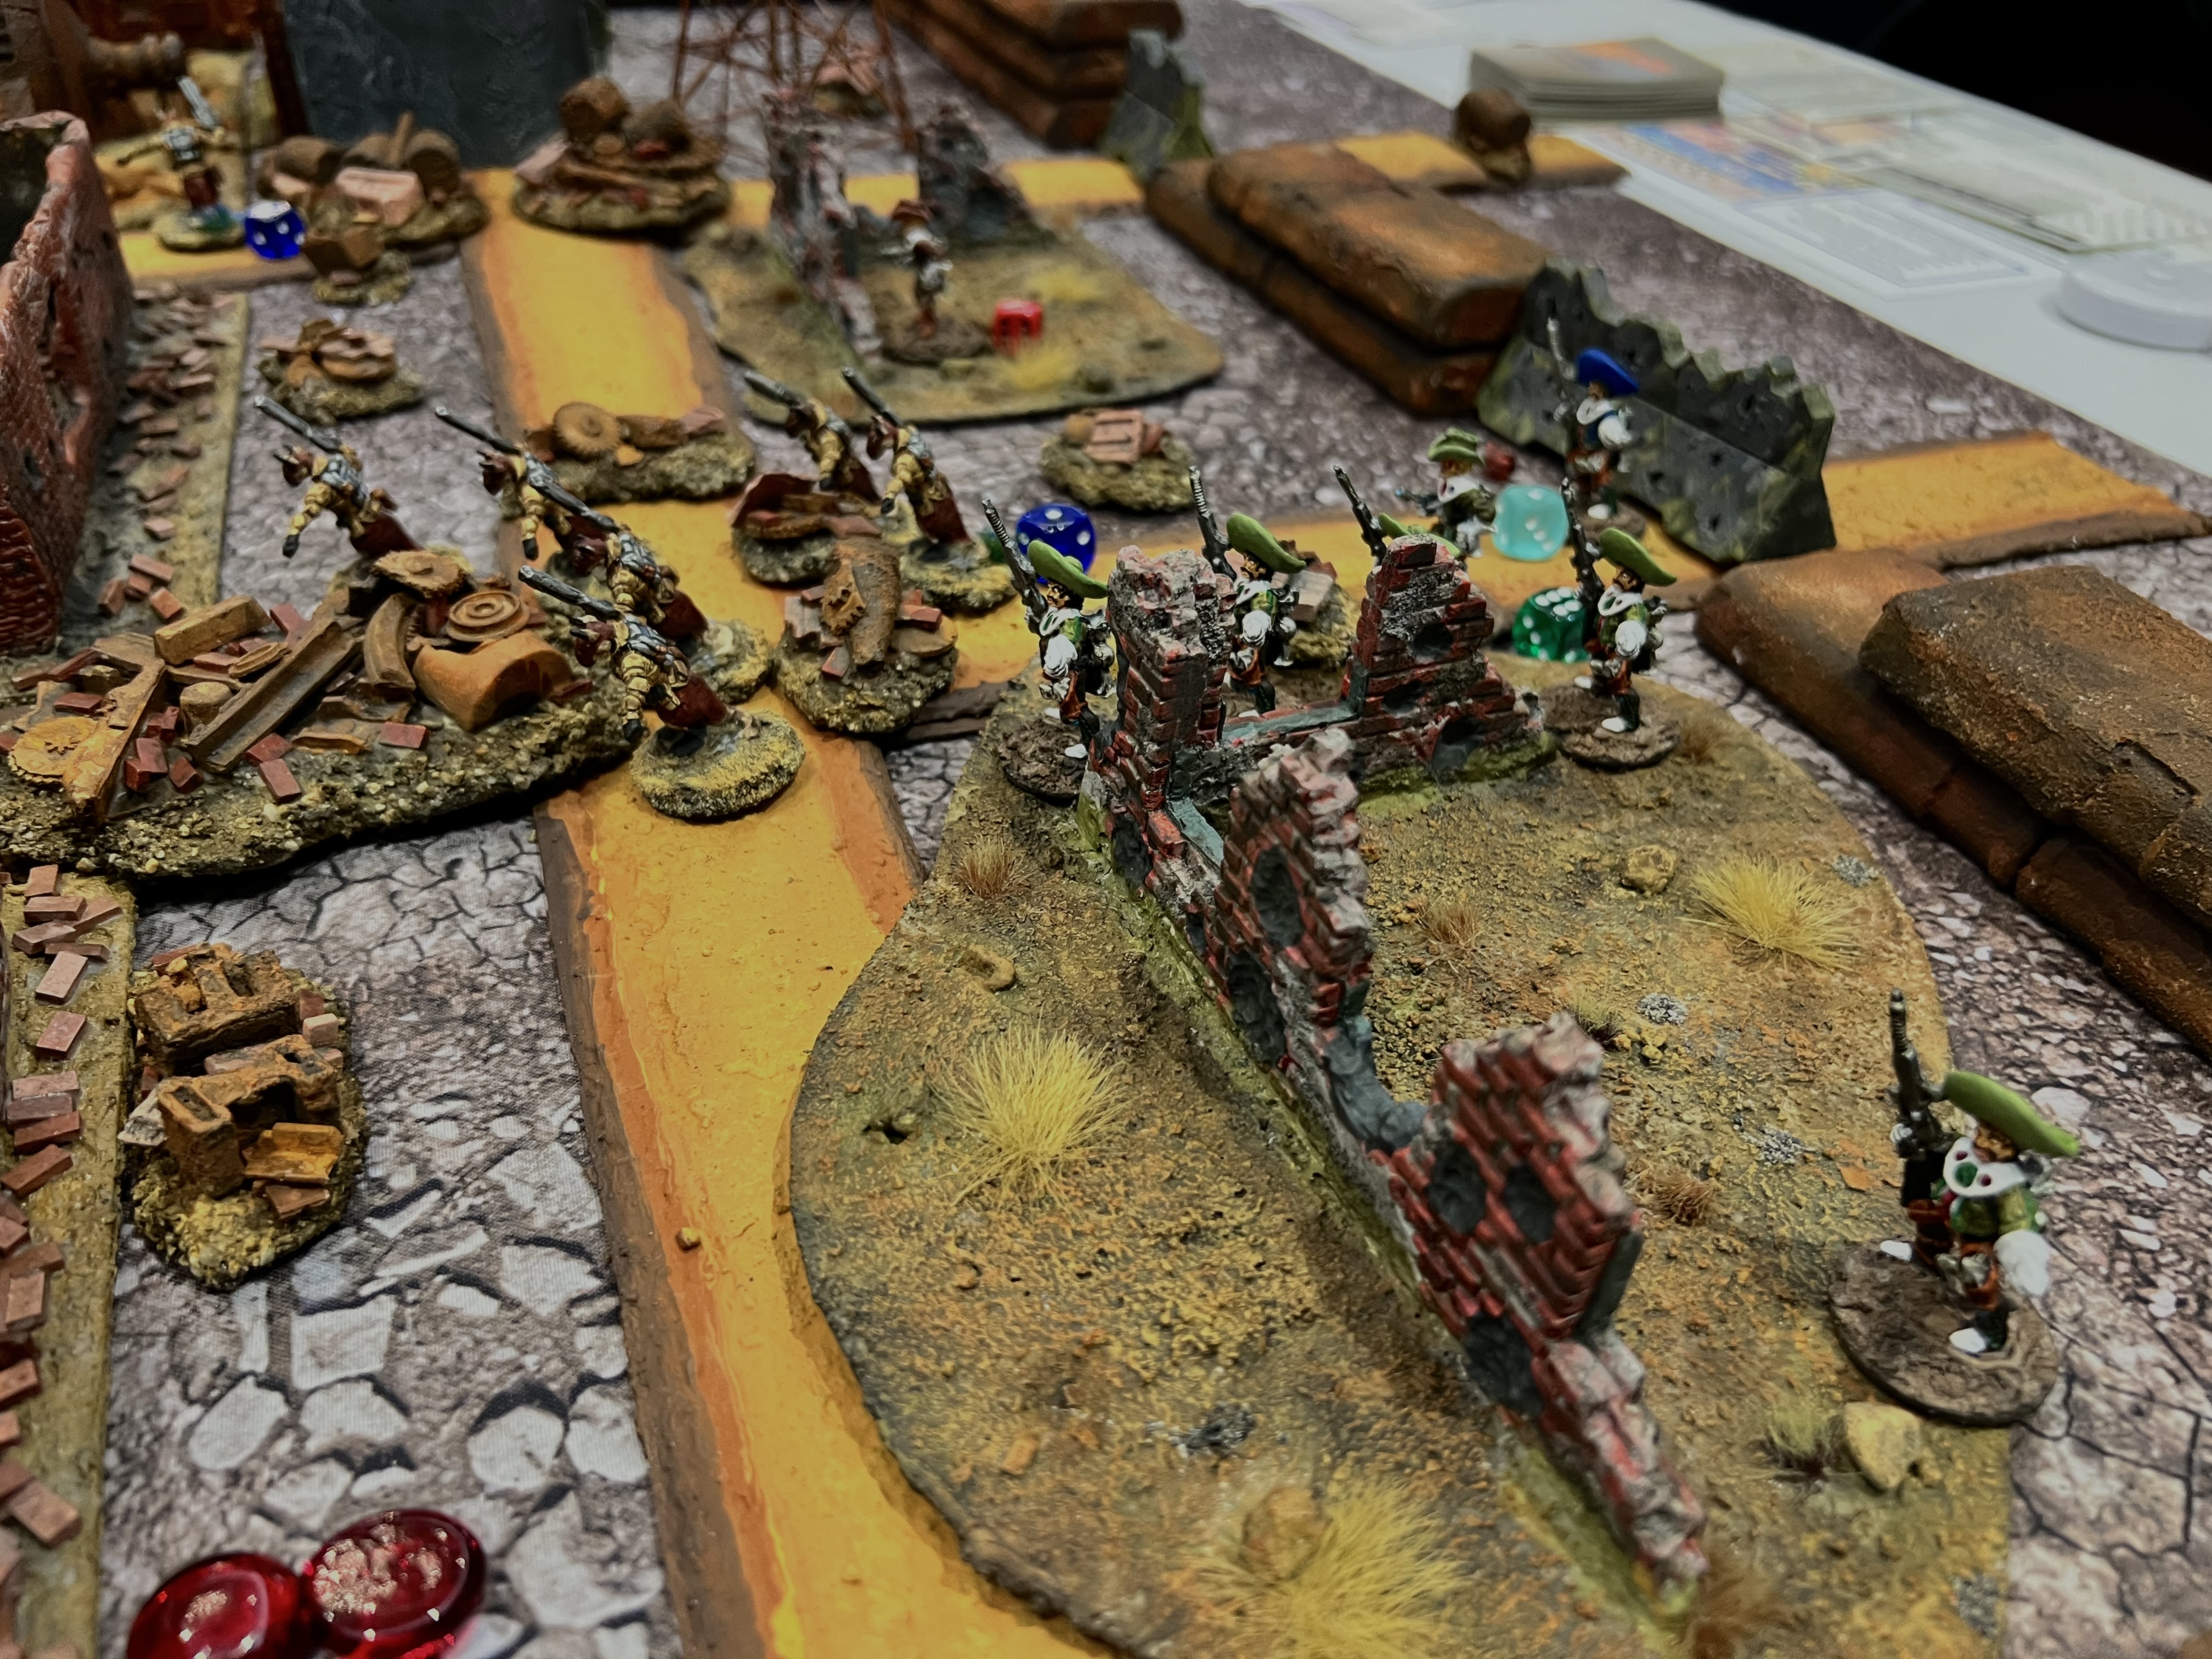
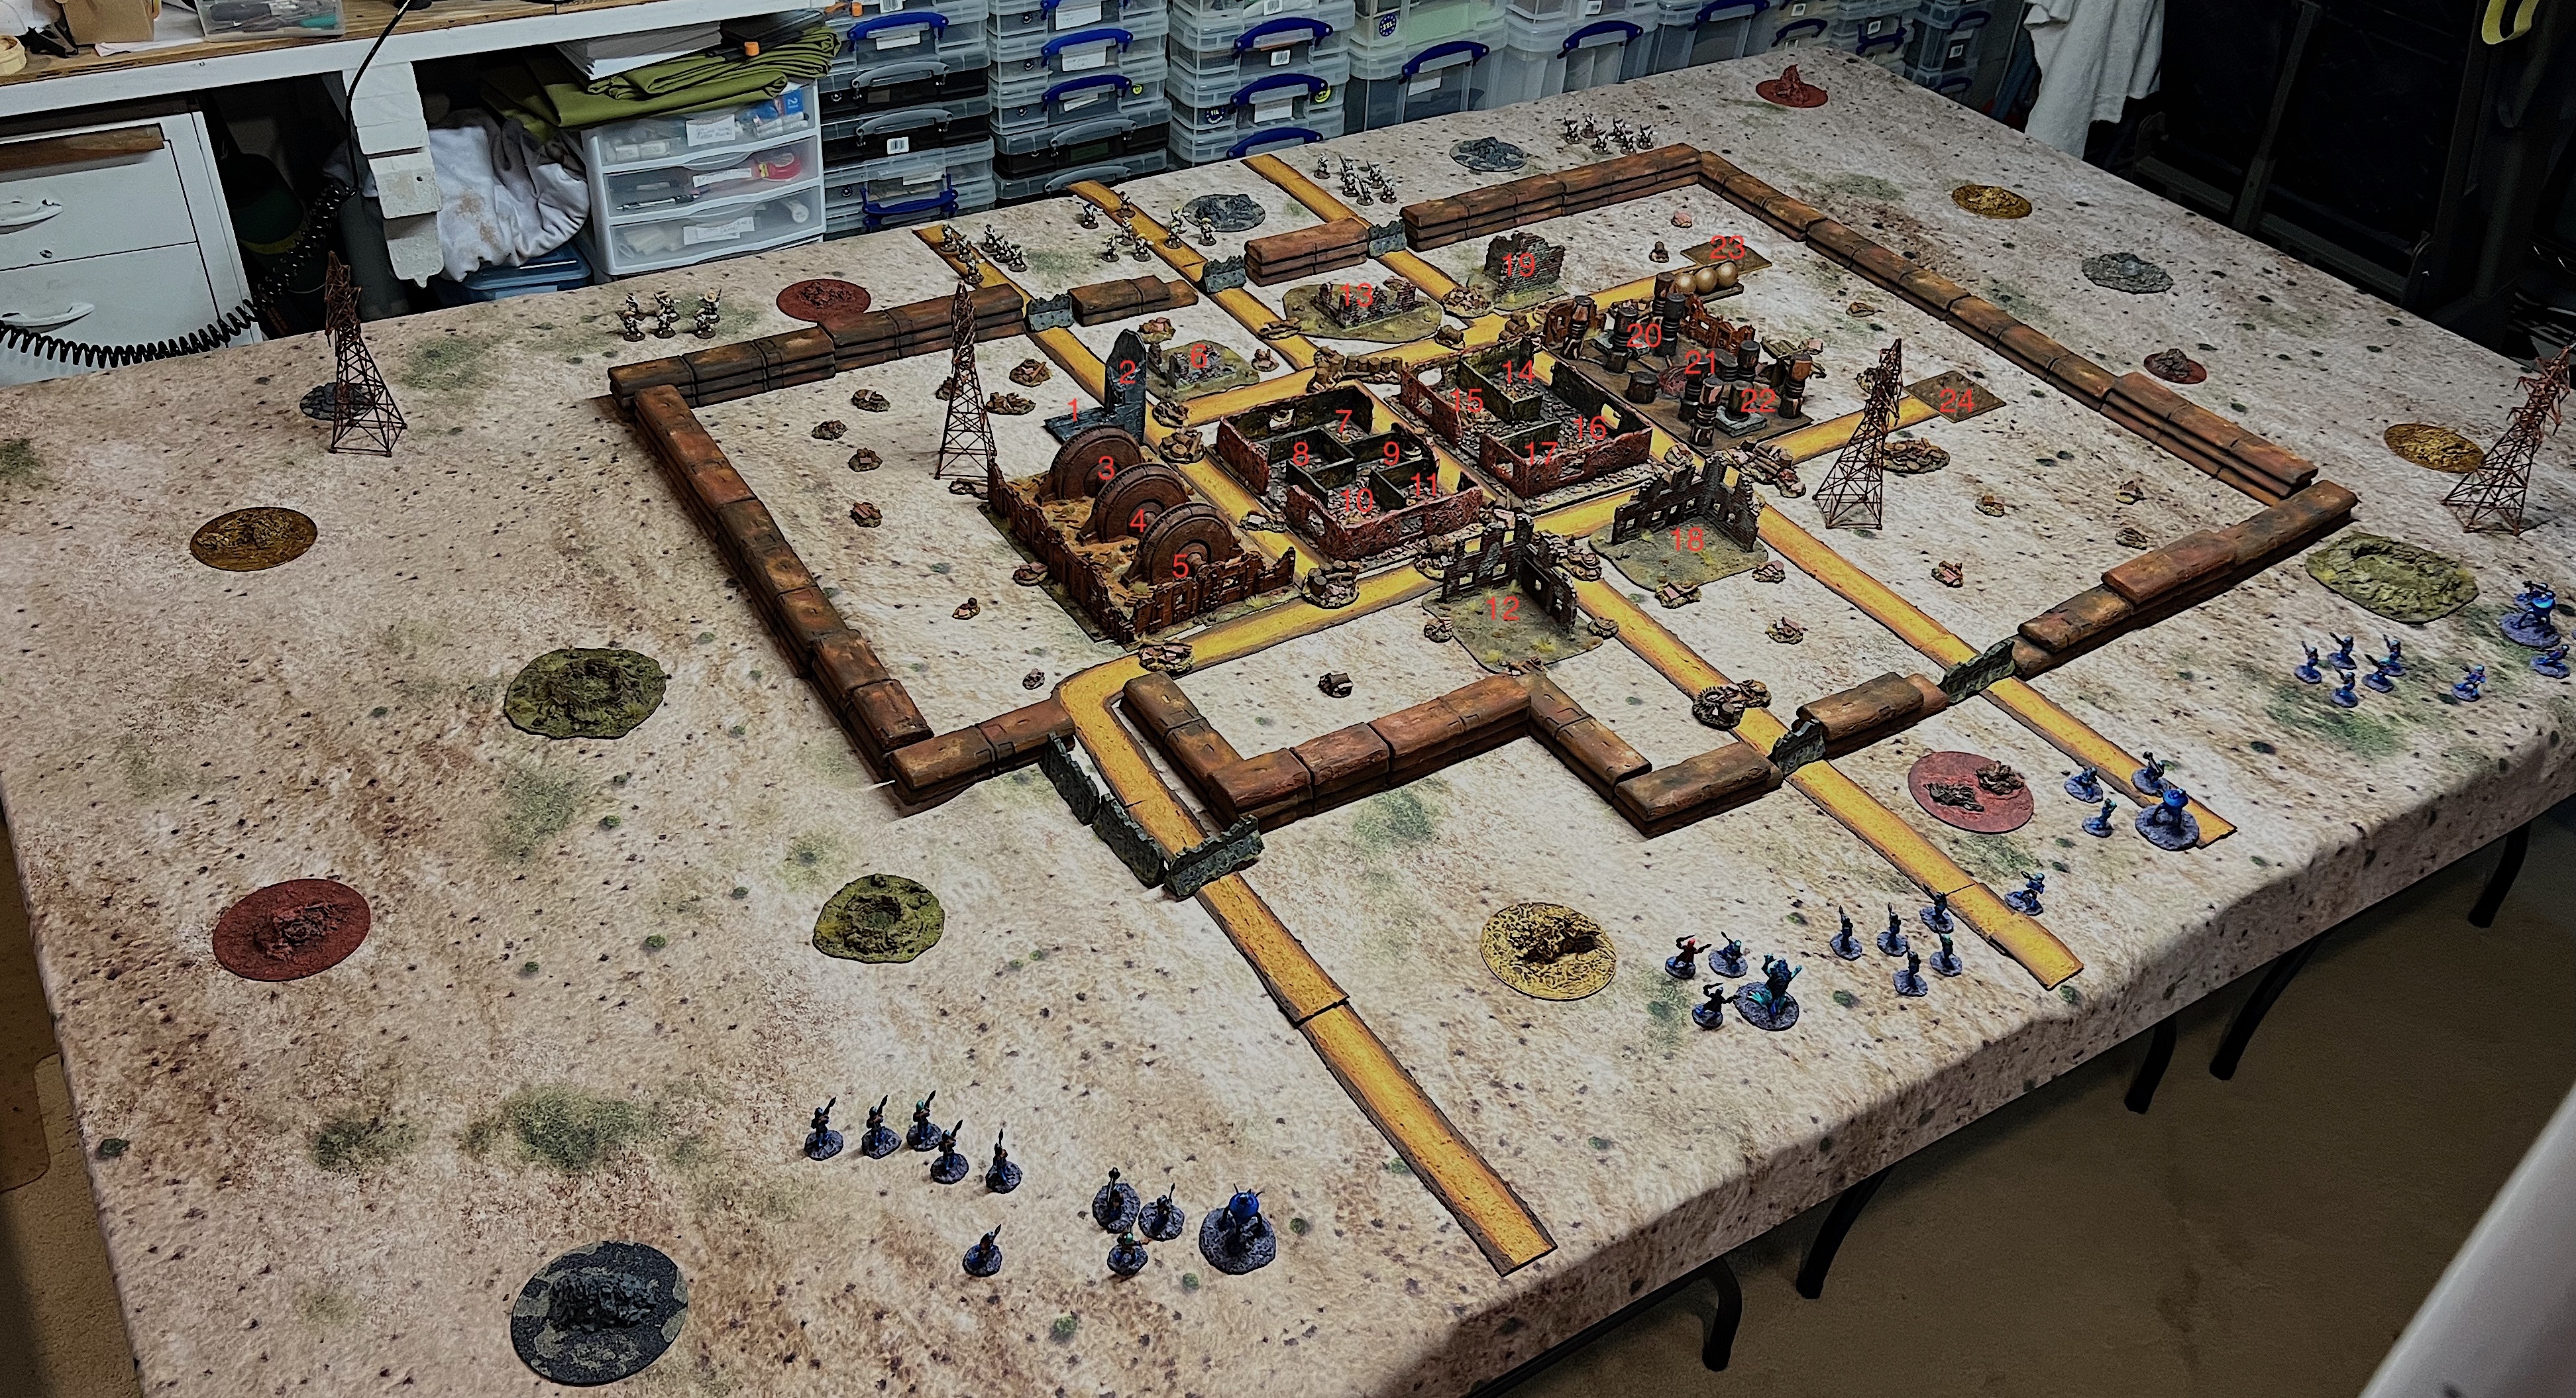
The wreckage (all 61 pieces and the buildings really helped complete my vision. There are 24 possible search locations for the 4 ancient robots, known only to the GM. The four ancient robots I used were: “Folder Bot 3000” (aka Bender) from Armorcast Terraform Terrain Ltd.’s “Robot Townies” collection; and “RT22” from old Archive miniatures Star Rovers line circa 1977; and two Archive Miniatures Robot Cooks also circa 1977 (also Star Rovers).
The four ancient robots! Folder Bot 3000, RT22, and the two Robot Cooks.
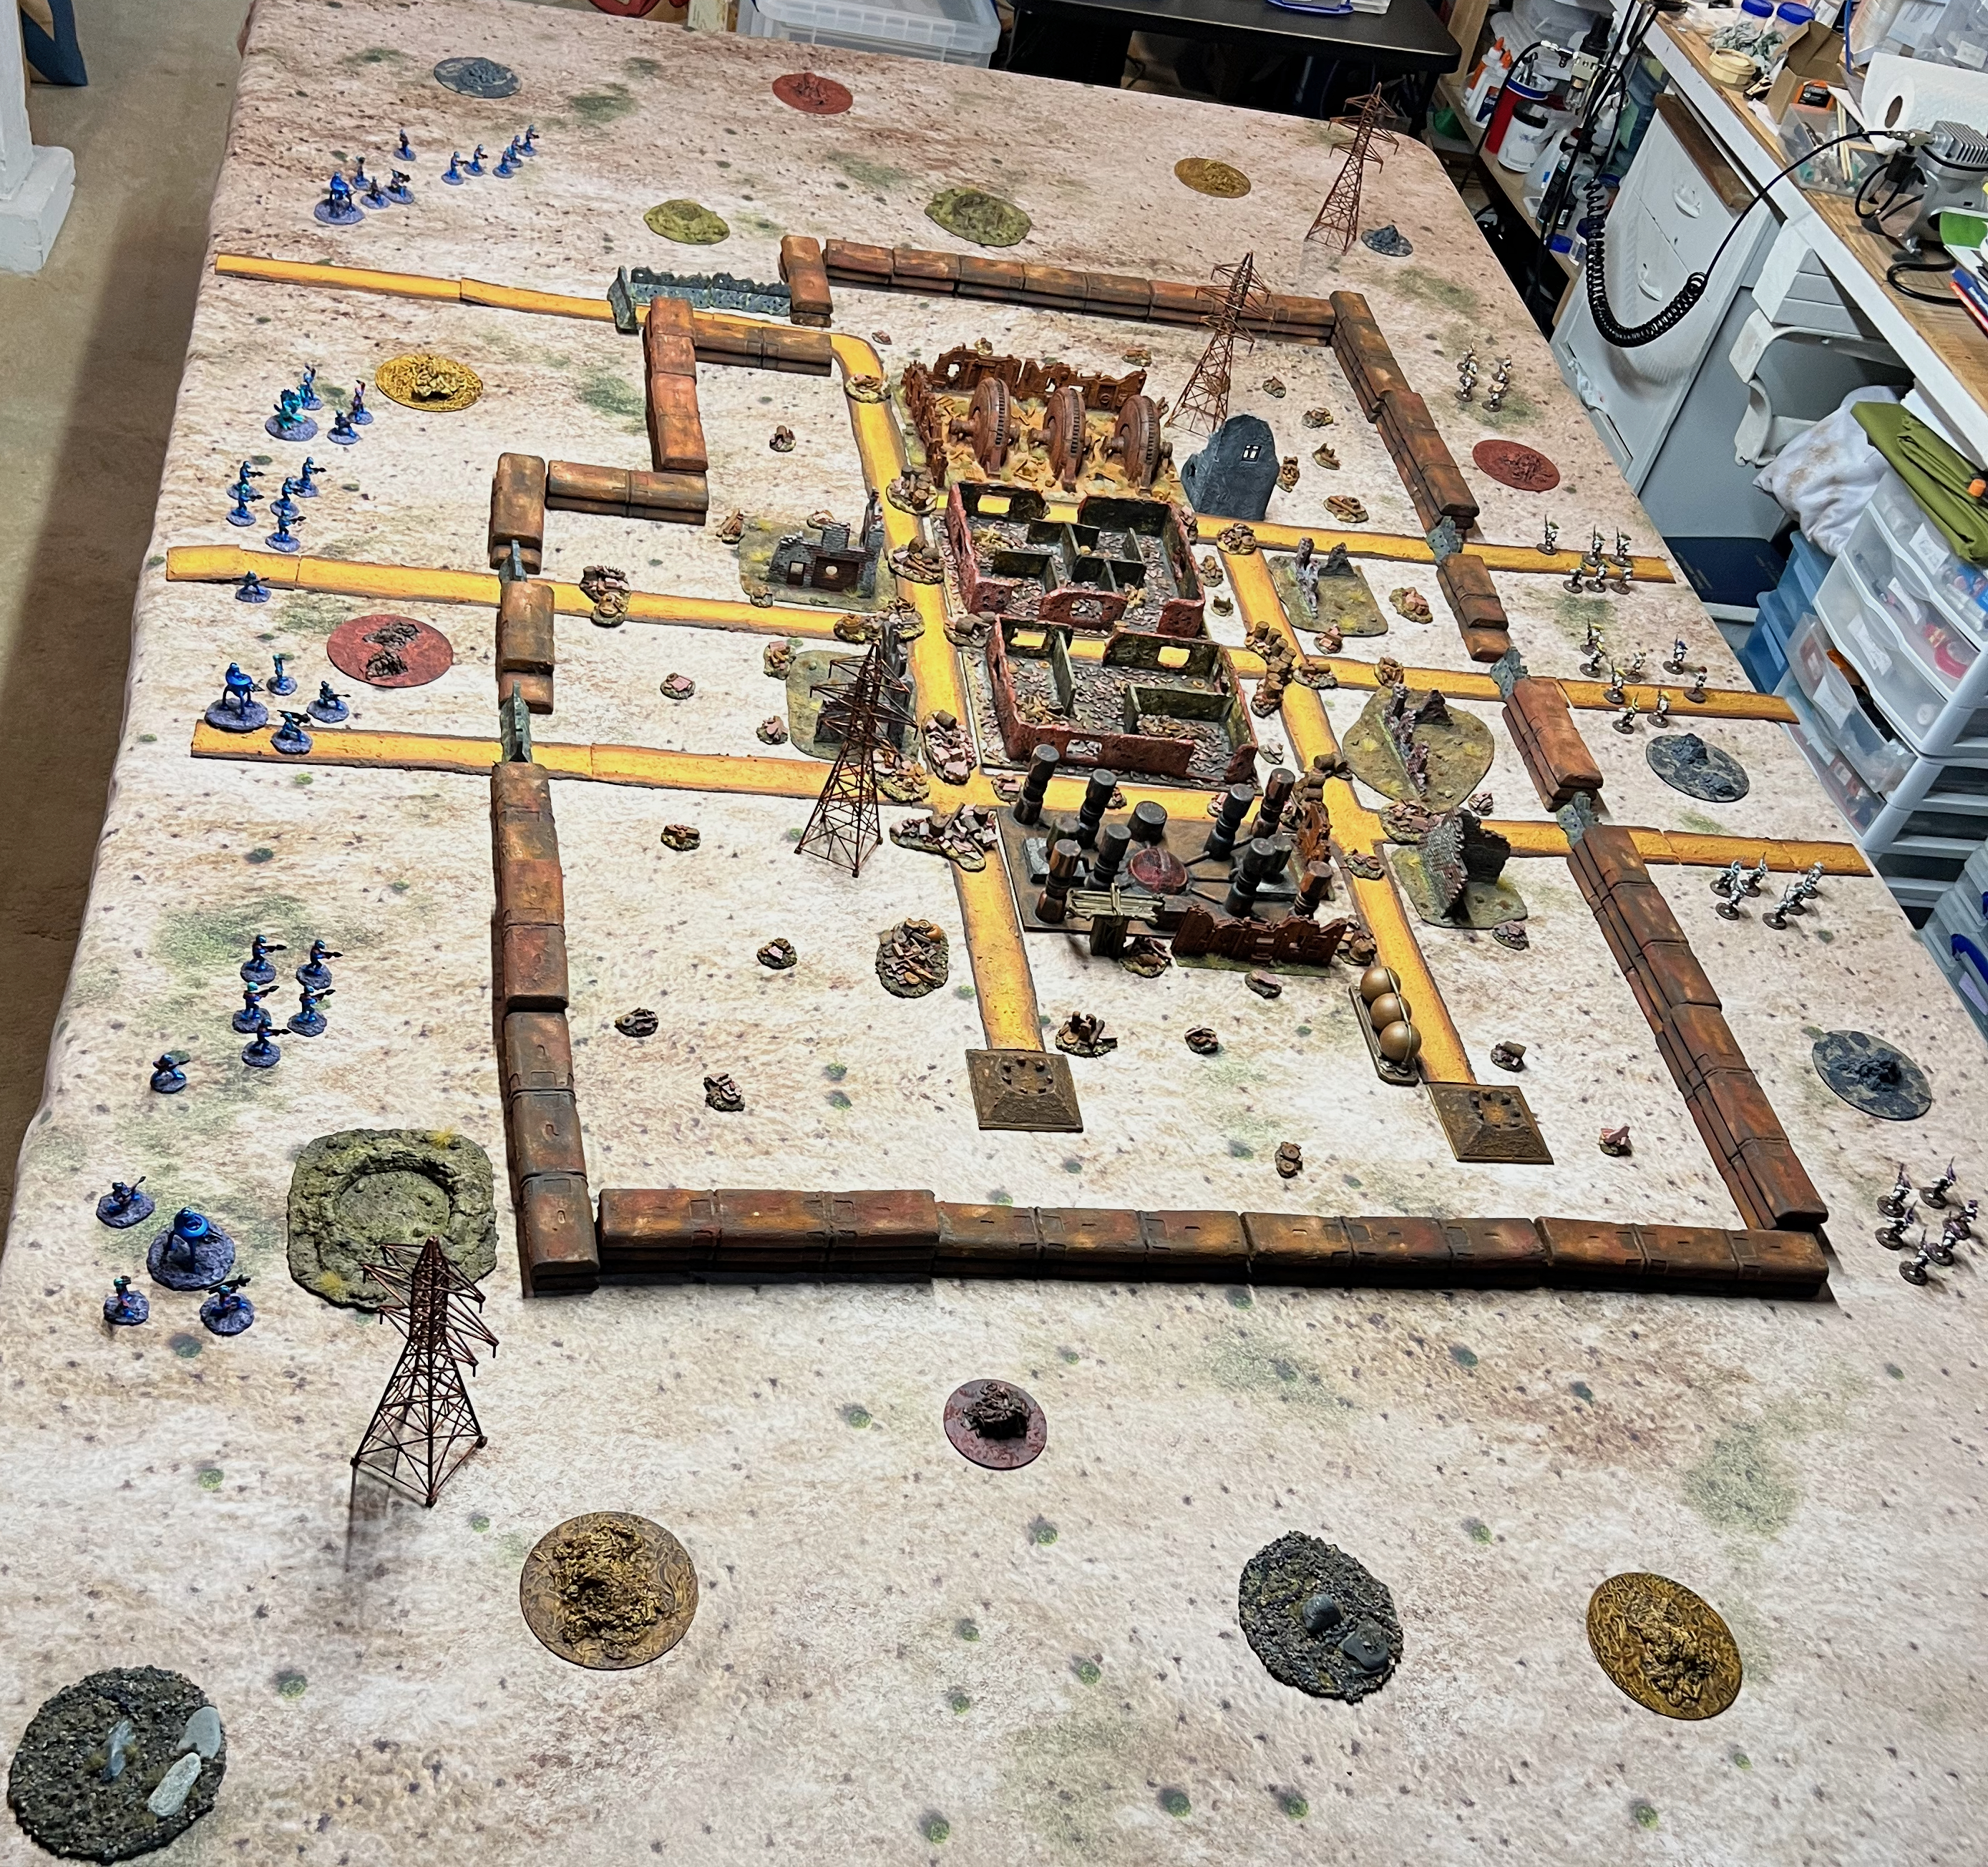
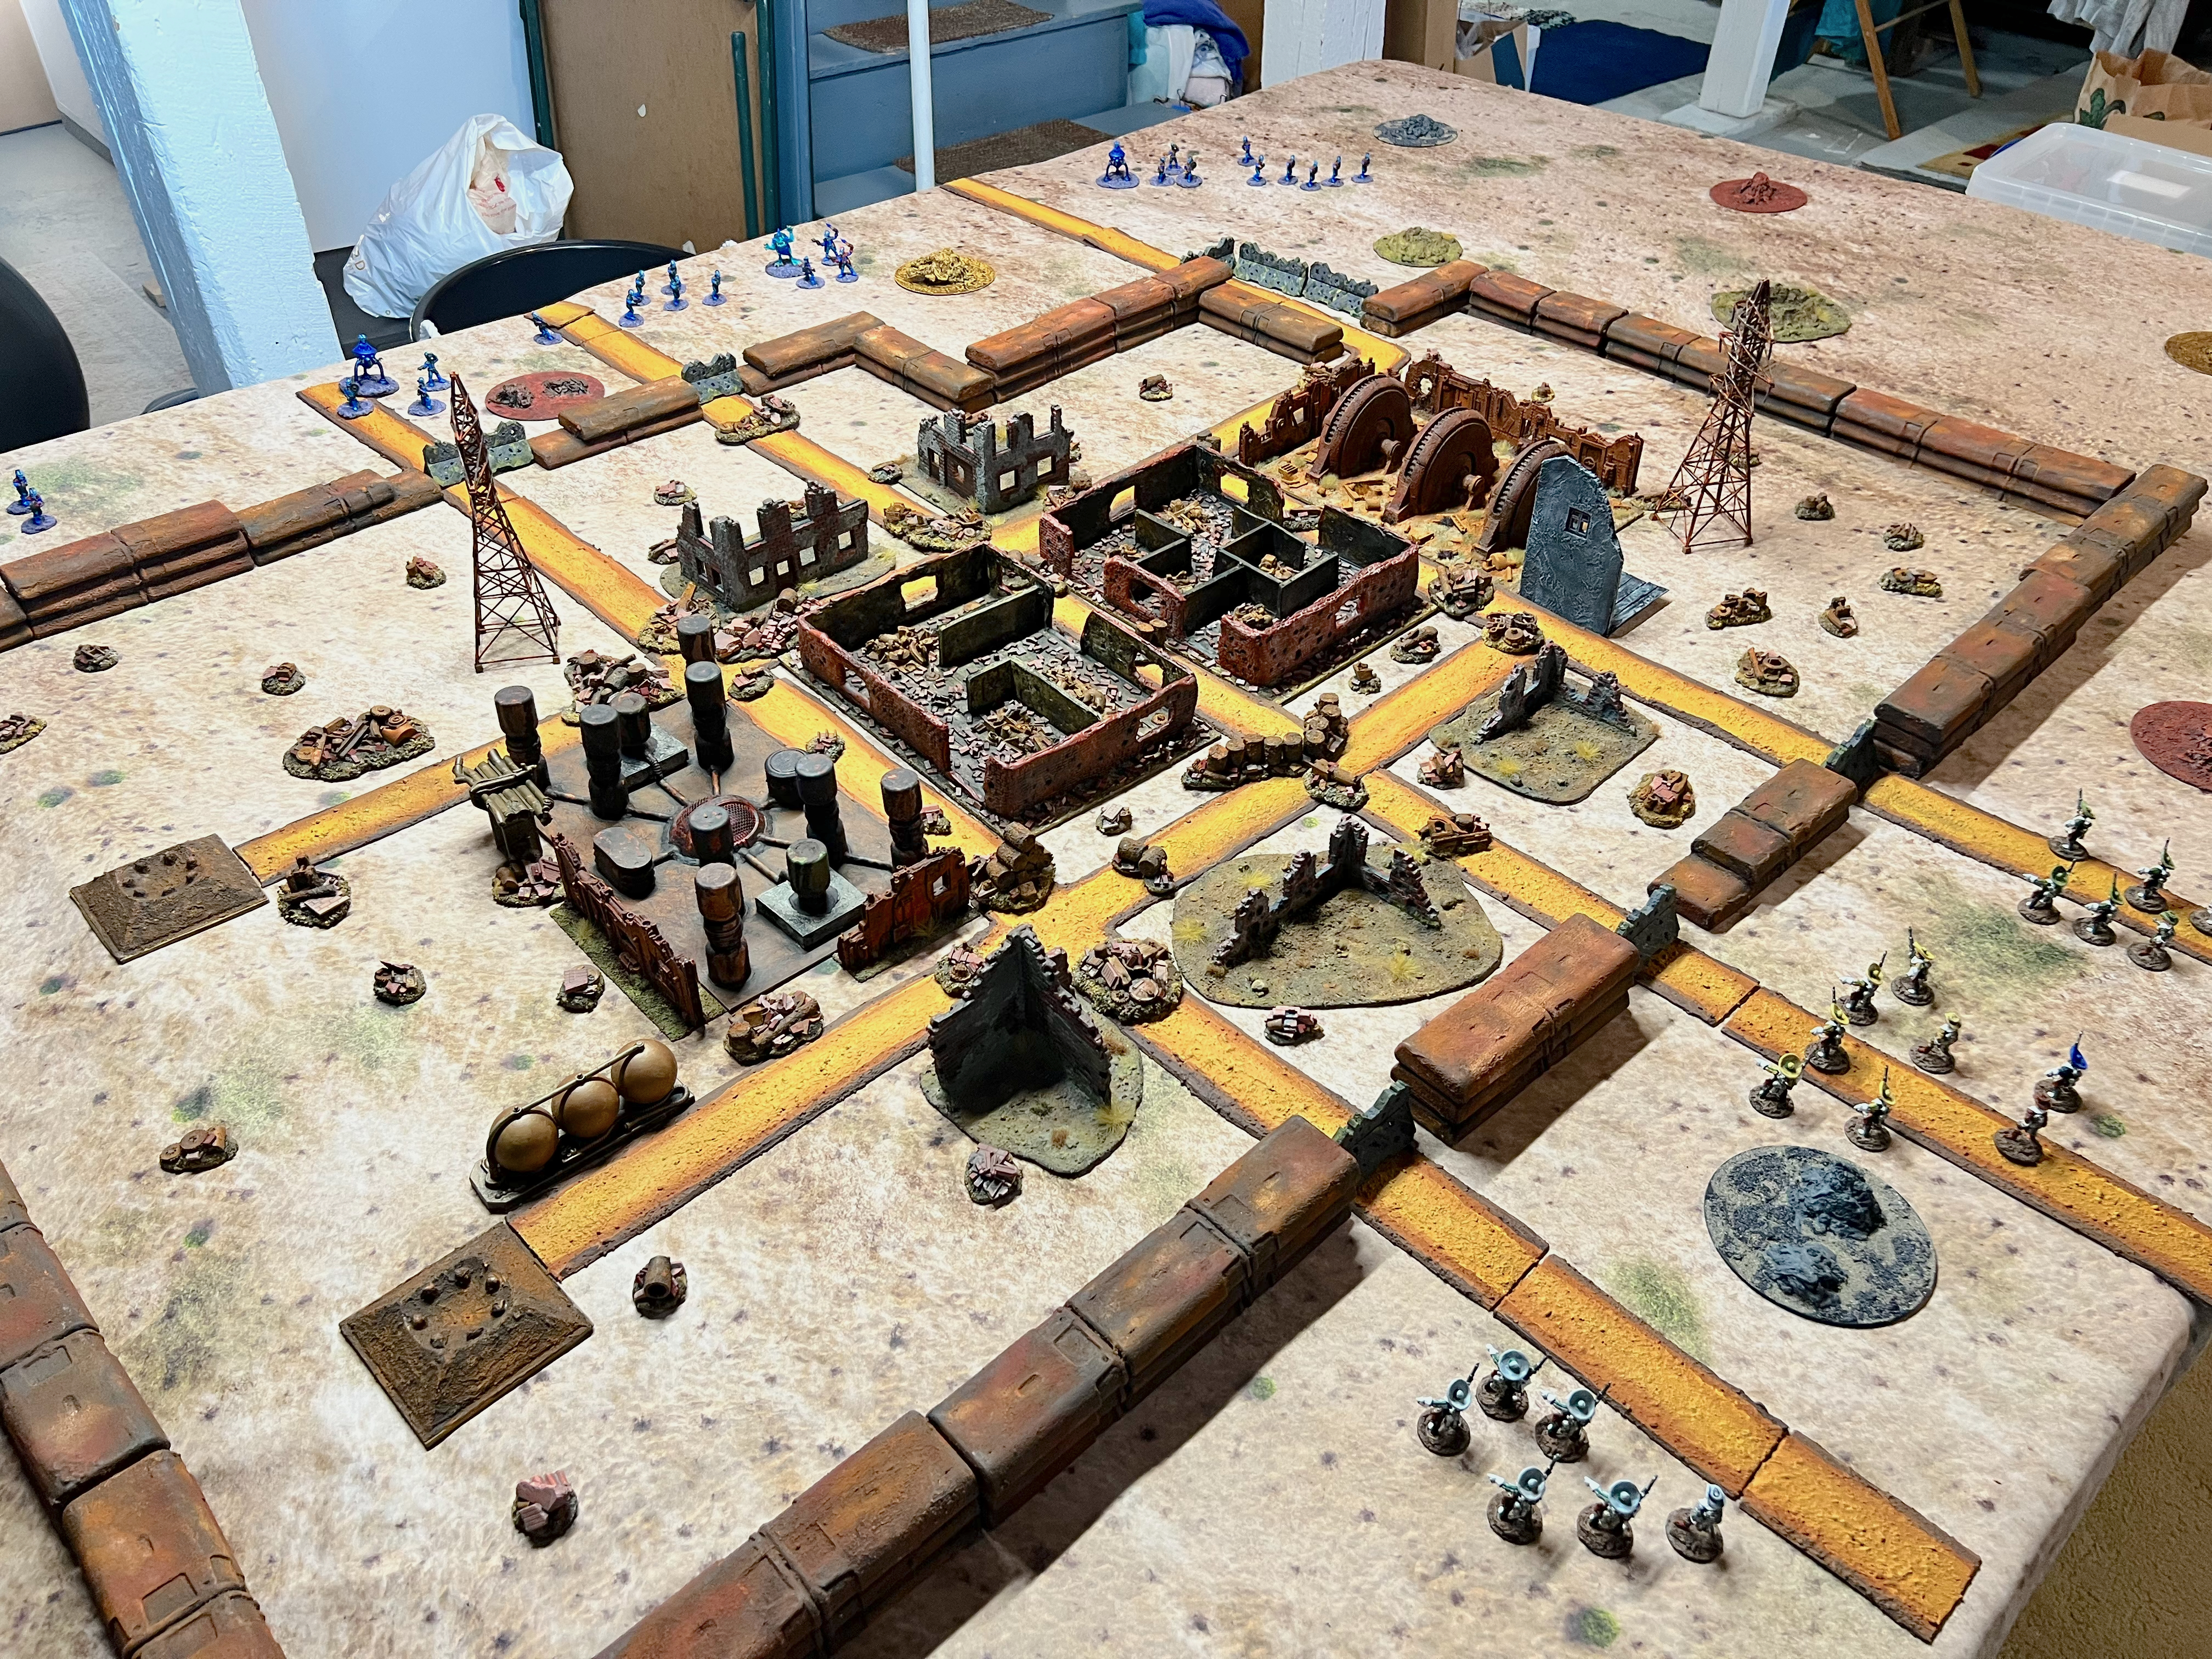
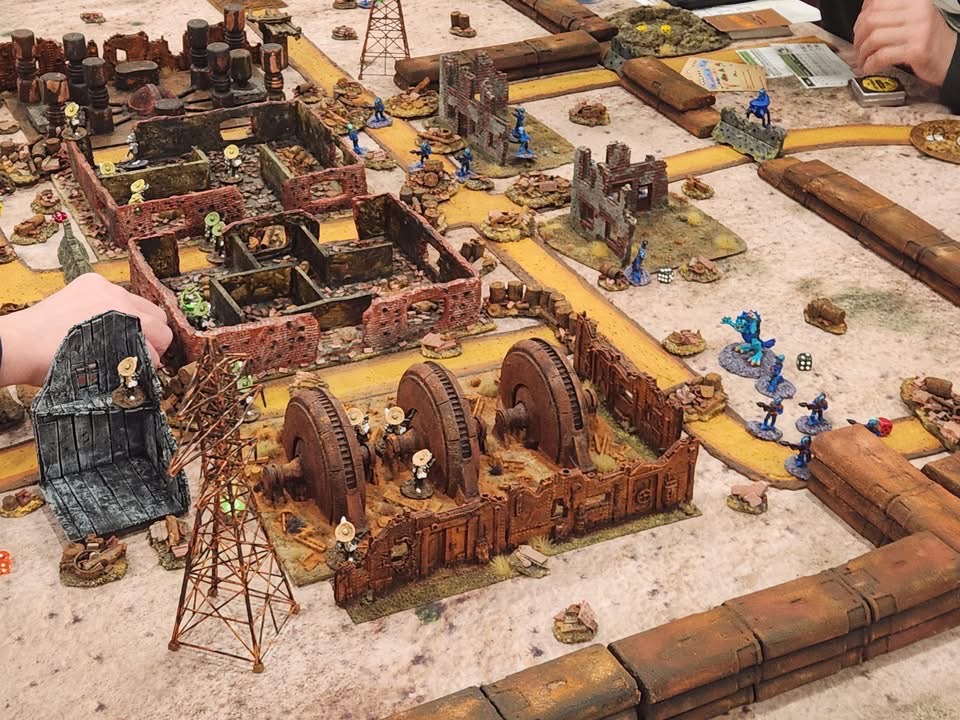
I randomly select the locations for the four robots (see numbers on the map below). My playtest worked well, and here are some shots of the mock-up tabletop.
The mock up of the tabletop for the game. The Retrovians three squads and command group are in the forefront. The Space Cowboys are at the opposite side.A side view.View from the Space Cowboy’s side.Generator side view.
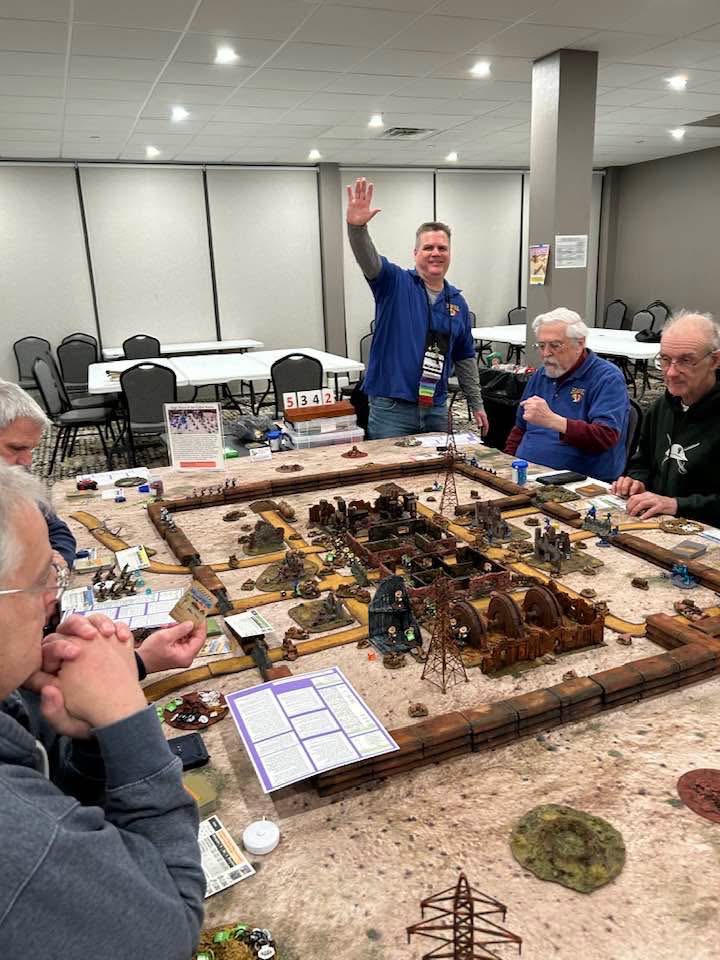
I did not use all of the wreckage in the mock-up. I will share a Cold Wars post soon. However, as a preview here are a couple of shots of the game set up at Cold Wars in all its glory:
Photo of the game in progress at Cold Wars with me as the GM. (photo courtesy of Ken Howe).Space Cowboys and Retrovians start searching for the robots.The shoot out starts – while one robot has been found in the upper right. This was Bender, and he was not happy to be found and attacked and killed a Space Cowboy.
More about Cold Wars soon in a future post.
I hope you enjoyed reading this and seeing my rusty panorama come to life – on the tabletop anyways. If this WIP post helps you in any way, that is great! I am including these terrain pieces in Dave Stone’s PAINT WHAT YOU GOT 2025/2026 Challenge as these were completed in early February. For now, that’s it, until next time!
329 miles to Lancaster, PA and Cold Wars!
The materials are listed below as a reference for me (and you maybe).
For all of my previous posts on terrain projects, please see this page. For all of my previous posts on sci-fi projects, please see this page…for any of my previous posts on scratch-building, see this page.
PAINTS, INKS, GLAZES, SHADES, WASHES, PIGMENTS, FLOCKING, GLUES AND MORE THAT I USED ON THE TWO RUINED BUILDINGS:
iPad 16 Box (top and bottom)
Hot glue
Foam Board
Toothpicks
Popsicle sticks
Apoxie sculpt
Vallejo Surface Primer “Grey”
SIBE AUTOMATION “White Polystyrene 8″ X 12″ X 1/8″ Plastic Sheet”
PVA
Huge Miniatures “Brick Red”
MSP “Brown Liner”
Vallejo Game Color “Sepia” (wash/shade)
Vallejo Wash FX “Dark Grey” (wash/shade)
Liquitex “Burnt Umber” (ink)
Secret Weapon Washes “Sewer Water”
Vallejo Thinner
Vallejo Surface Primer “German Green Brown”
Vallejo “Light Slate Grey” (pigment)
AK “Dry Ground” (texture)
Vallejo “Carbon Black” (pigment)
Juweela Metal Scrap Rusty Industry (23336)
Juweela Debris Assortment (23316)
Juweela Debris Brick Red (23315)
Juweela Debris Assortment (23315)
Juweela Bricks (23034)
Juweela Metal Scrap Rusty Gear Wheels (23317)
Army Painter “Red Tone” (wash)
Secret Weapon Washes “Red Black” (wash)
Secret Weapon Washes “Ruby” (wash)
P3 “Red Ink” (ink)
Vallejo Game Air “Red Terracotta”
PAINTS, INKS, GLAZES, SHADES, WASHES, PIGMENTS, FLOCKING, GLUES AND MORE THAT I USED ON THE 61 WRECKAGE BASES/PILES:
Play sand
Apoxie sculpt
PVA
Various scrap plastic pieces
Cylindrical desiccant holders
Rubber sink stopper rim
Juweela Metal Scrap Rusty Industry (23336)
Juweela Debris Assortment (23316)
Juweela Debris Brick Red (23315)
Juweela Debris Assortment (23315)
Juweela Bricks (23034)
Juweela Metal Scrap Rusty Gear Wheels (23317)
AK “Corrosion Texture” (texture)
Vallejo Model Air “Rust” (71.080)
Vallejo Model Air “Rust” (71.080)
Vallejo Model Air “Rust” (71.069)
Vallejo Model Air “Orange Rust”
Citadel “Ryza Rust” (dry)
Vallejo “Old Rust” (pigment)
Vallejo “Pigment Binder”
Vallejo Thinner
Vallejo “Dark Slate Grey” (pigment)
Vallejo “Dark Yellow Ochre” (pigment)
Vallejo Game Color “Sepia” (wash/shade)
Secret Weapon Washes “Sewer Water”
Army Painter “Red Tone” (wash)
Secret Weapon Washes “Red Black” (wash)
Secret Weapon Washes “Ruby” (wash)
P3 “Red Ink” (ink)
Vallejo Game Air “Red Terracotta”
PAINTS, INKS, GLAZES, SHADES, WASHES, PIGMENTS, FLOCKING, GLUES AND MORE THAT I USED ON THE 2 FLAT INDUSTRIAL STRUCTURES:
SIBE AUTOMATION “White Polystyrene 8″ X 12″ X 1/8″ Plastic Sheet”
Imagine an industrial cityscape – an apocalyptic one. One that shows that “something really terrible happened here”. Now add 300 years to it and an arid desolate climate with a lot of rust. Lastly, add mystery – “what am I looking at?”, and you are here.
These were the thoughts that I had last month as I prepared to create and build components for such a wasteland ruin. As my 2026 “convention season” was nearing, I needed to build terrain for my tabletop games. For games of Wars of OzzTM, my goal was to build terrain pieces for Professor Nitpik’s Industrial City (aka the Robotic Sanctum). I also wanted to get back into some retro sci-fi games using Buck Surdu’s Combat Patrol:WWIITM gaming system (with my modifications). One of the games I envisioned for that would be using Archive “Space Cowboys”, my converted “Space ‘Roos” defending against an invasion of blue-skinned “Retrovians”. Click those links to learn more about those forces – and more about them in a future post. For now, I needed more rust than just my rusty generators and my ruined chemical plant.
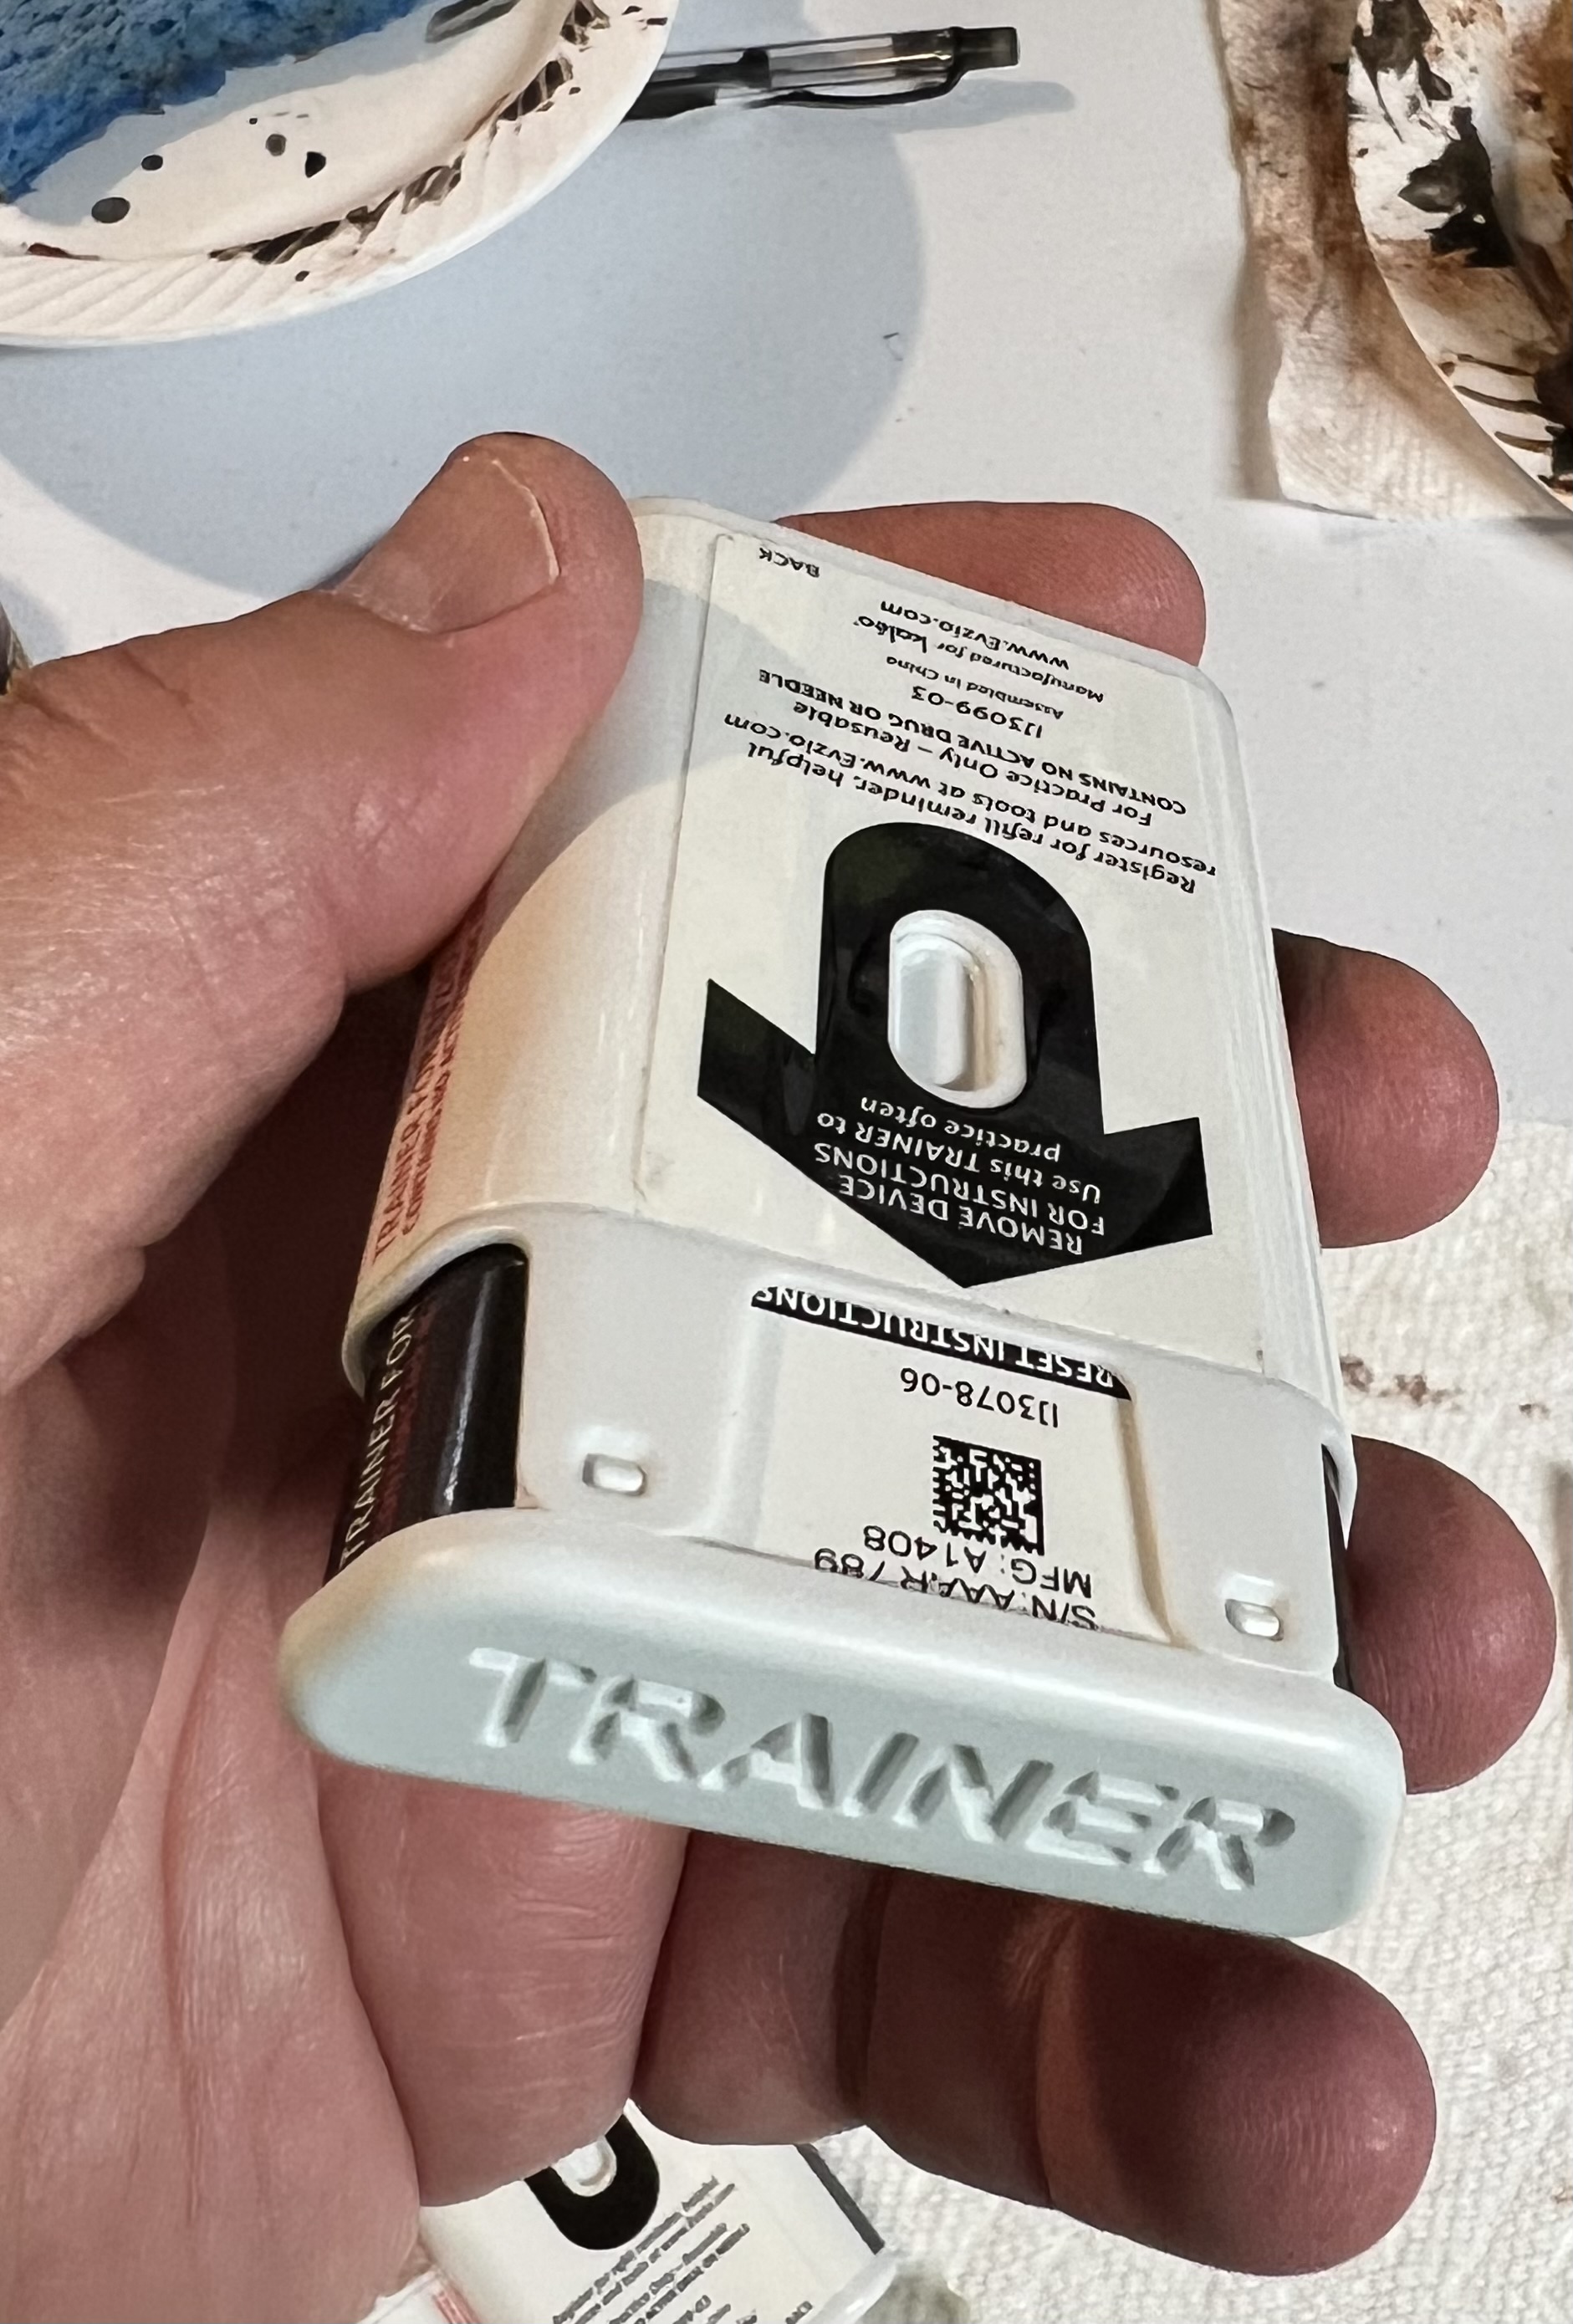
I’ve been retired now since 2019. I got laid off of my last job when the company I was working for pulled the product line off the market. Never found a replacement gig. Back to the product I was selling – it was a pharmaceutical autoinjector device. We had dozens of electronic trainer devices we handed out to potential customers. These trainers acted like the real thing except without any needles or drug inside. After the layoff happened, I had a bunch of them, and was told by my former employer to just throw them away. They had a unique shape, like a cross between a card deck and a tapered brick. The outer layer was plastic, with a label glued on to it. I was running retro sci-fi games, and thought these would be good for making walls. I saved them, and they waited to fulfill their destiny until December 2025!
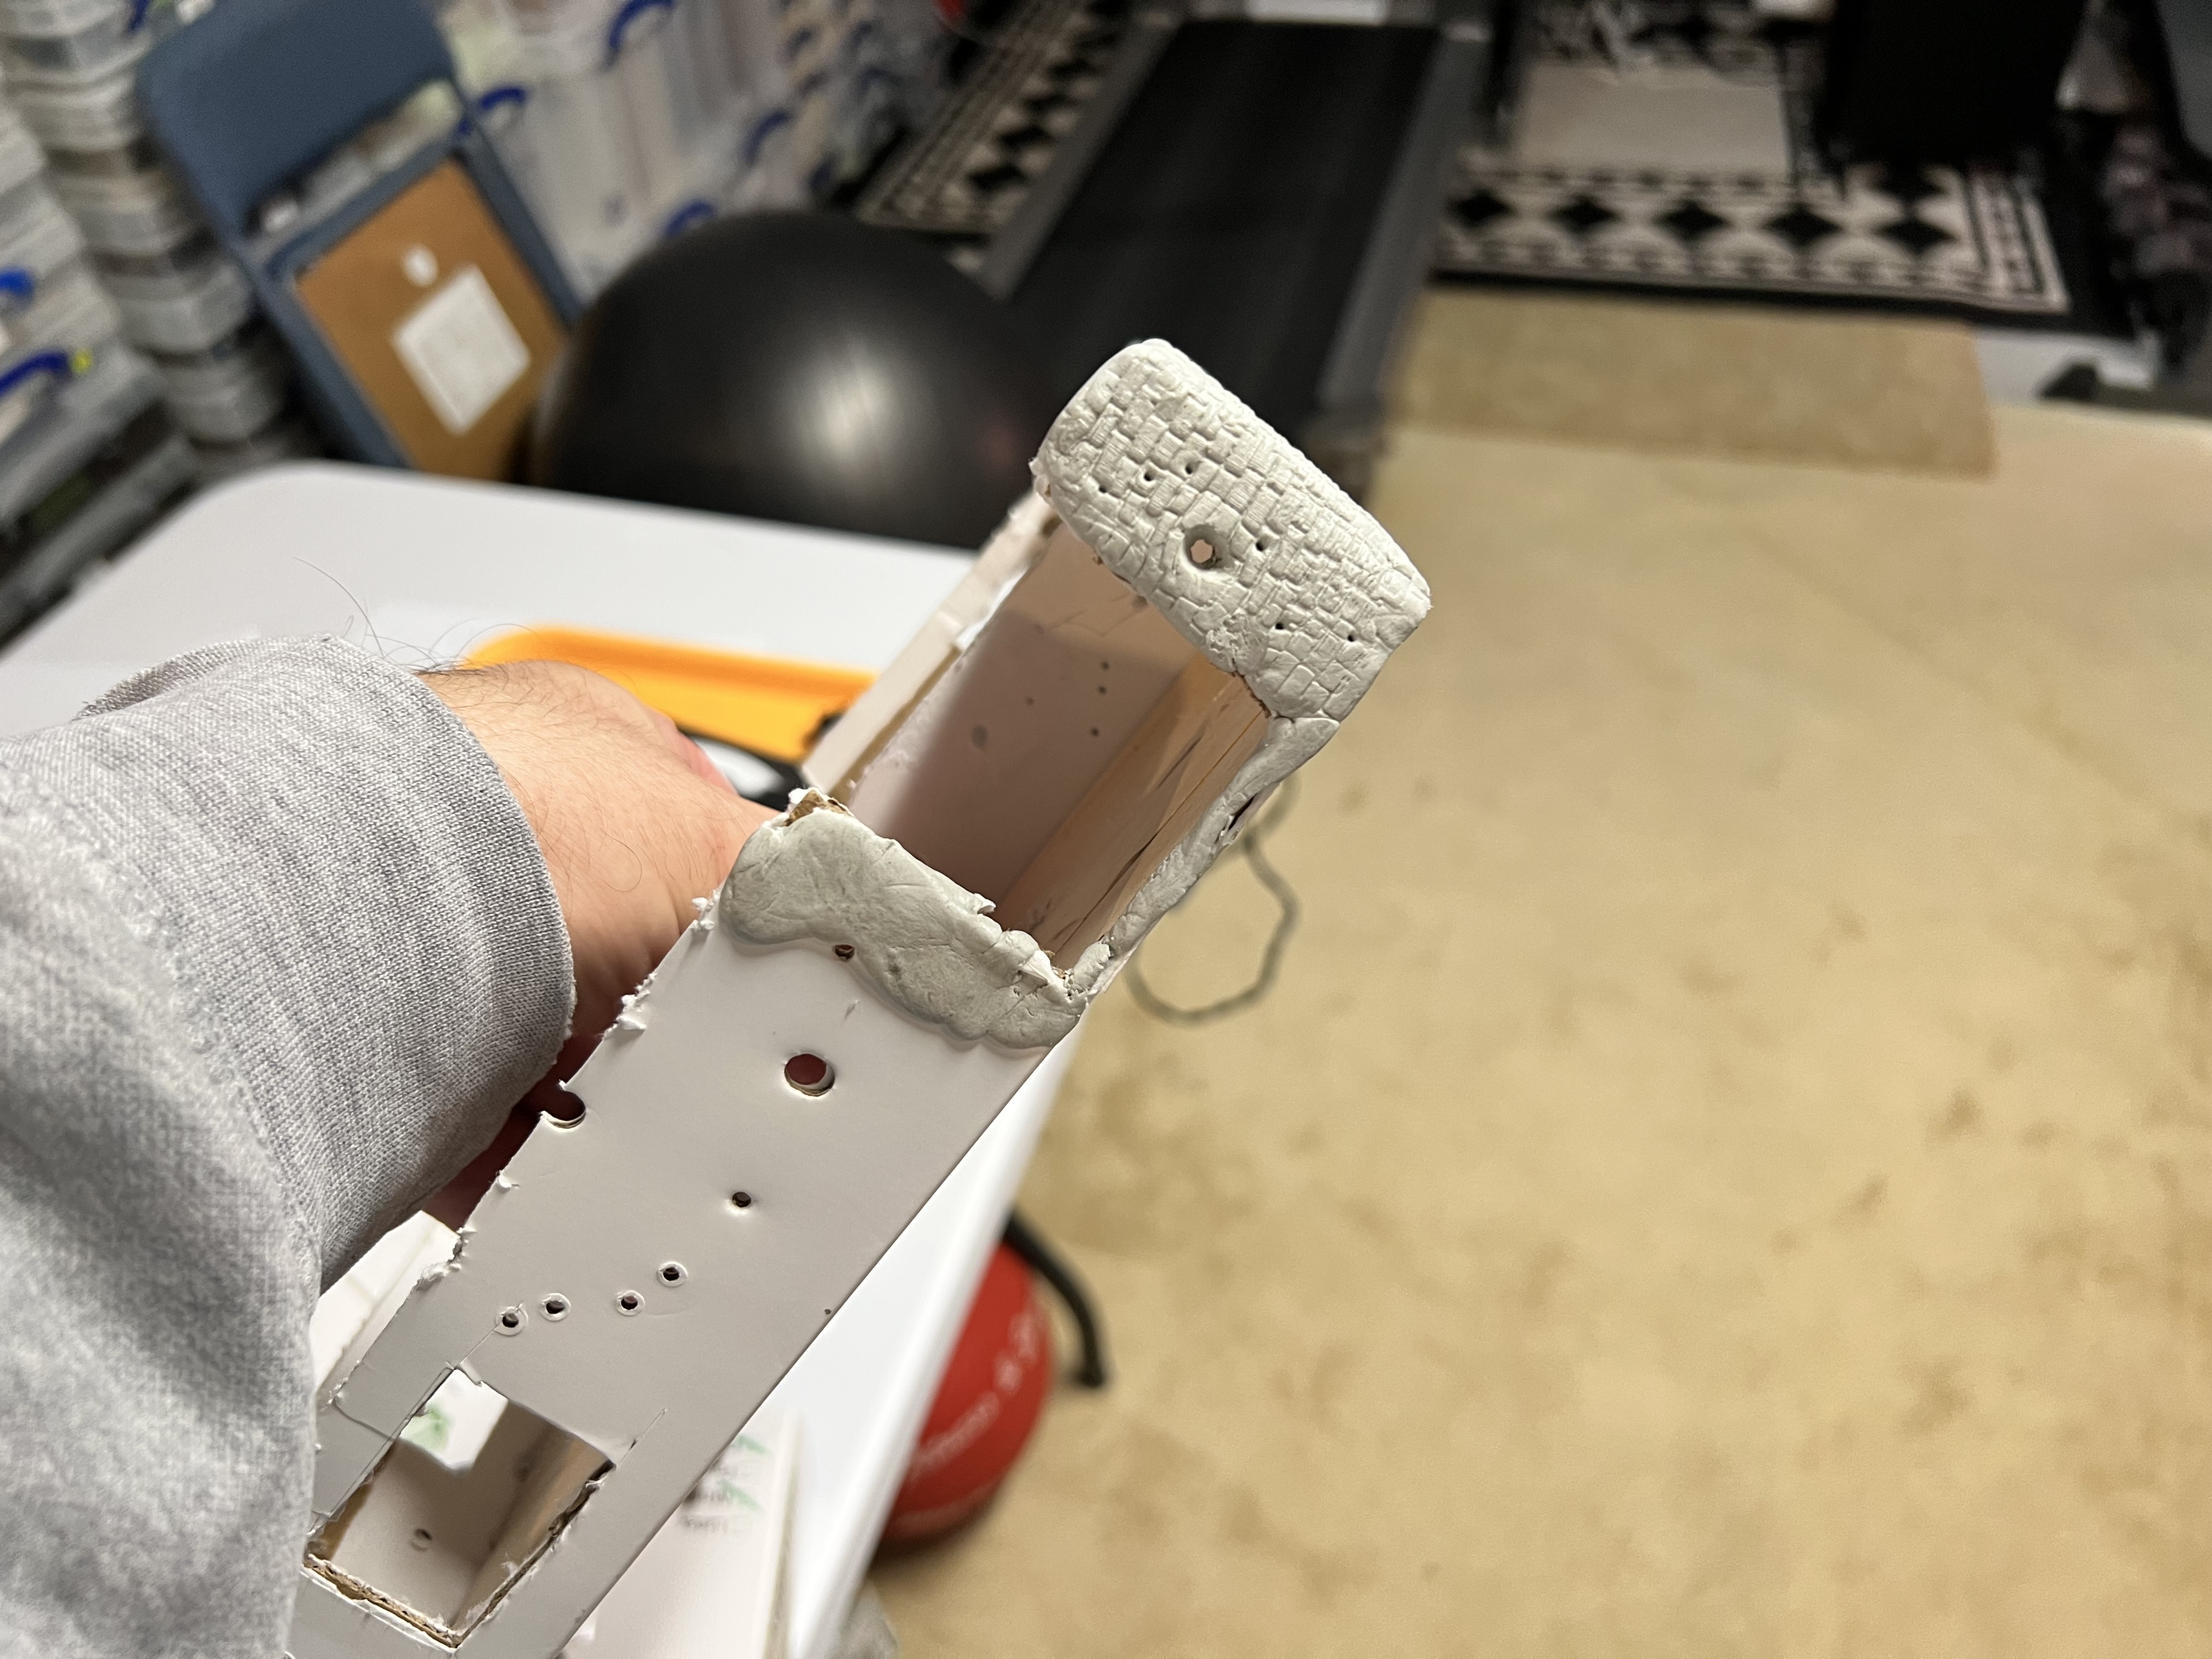
An example of the trainer.
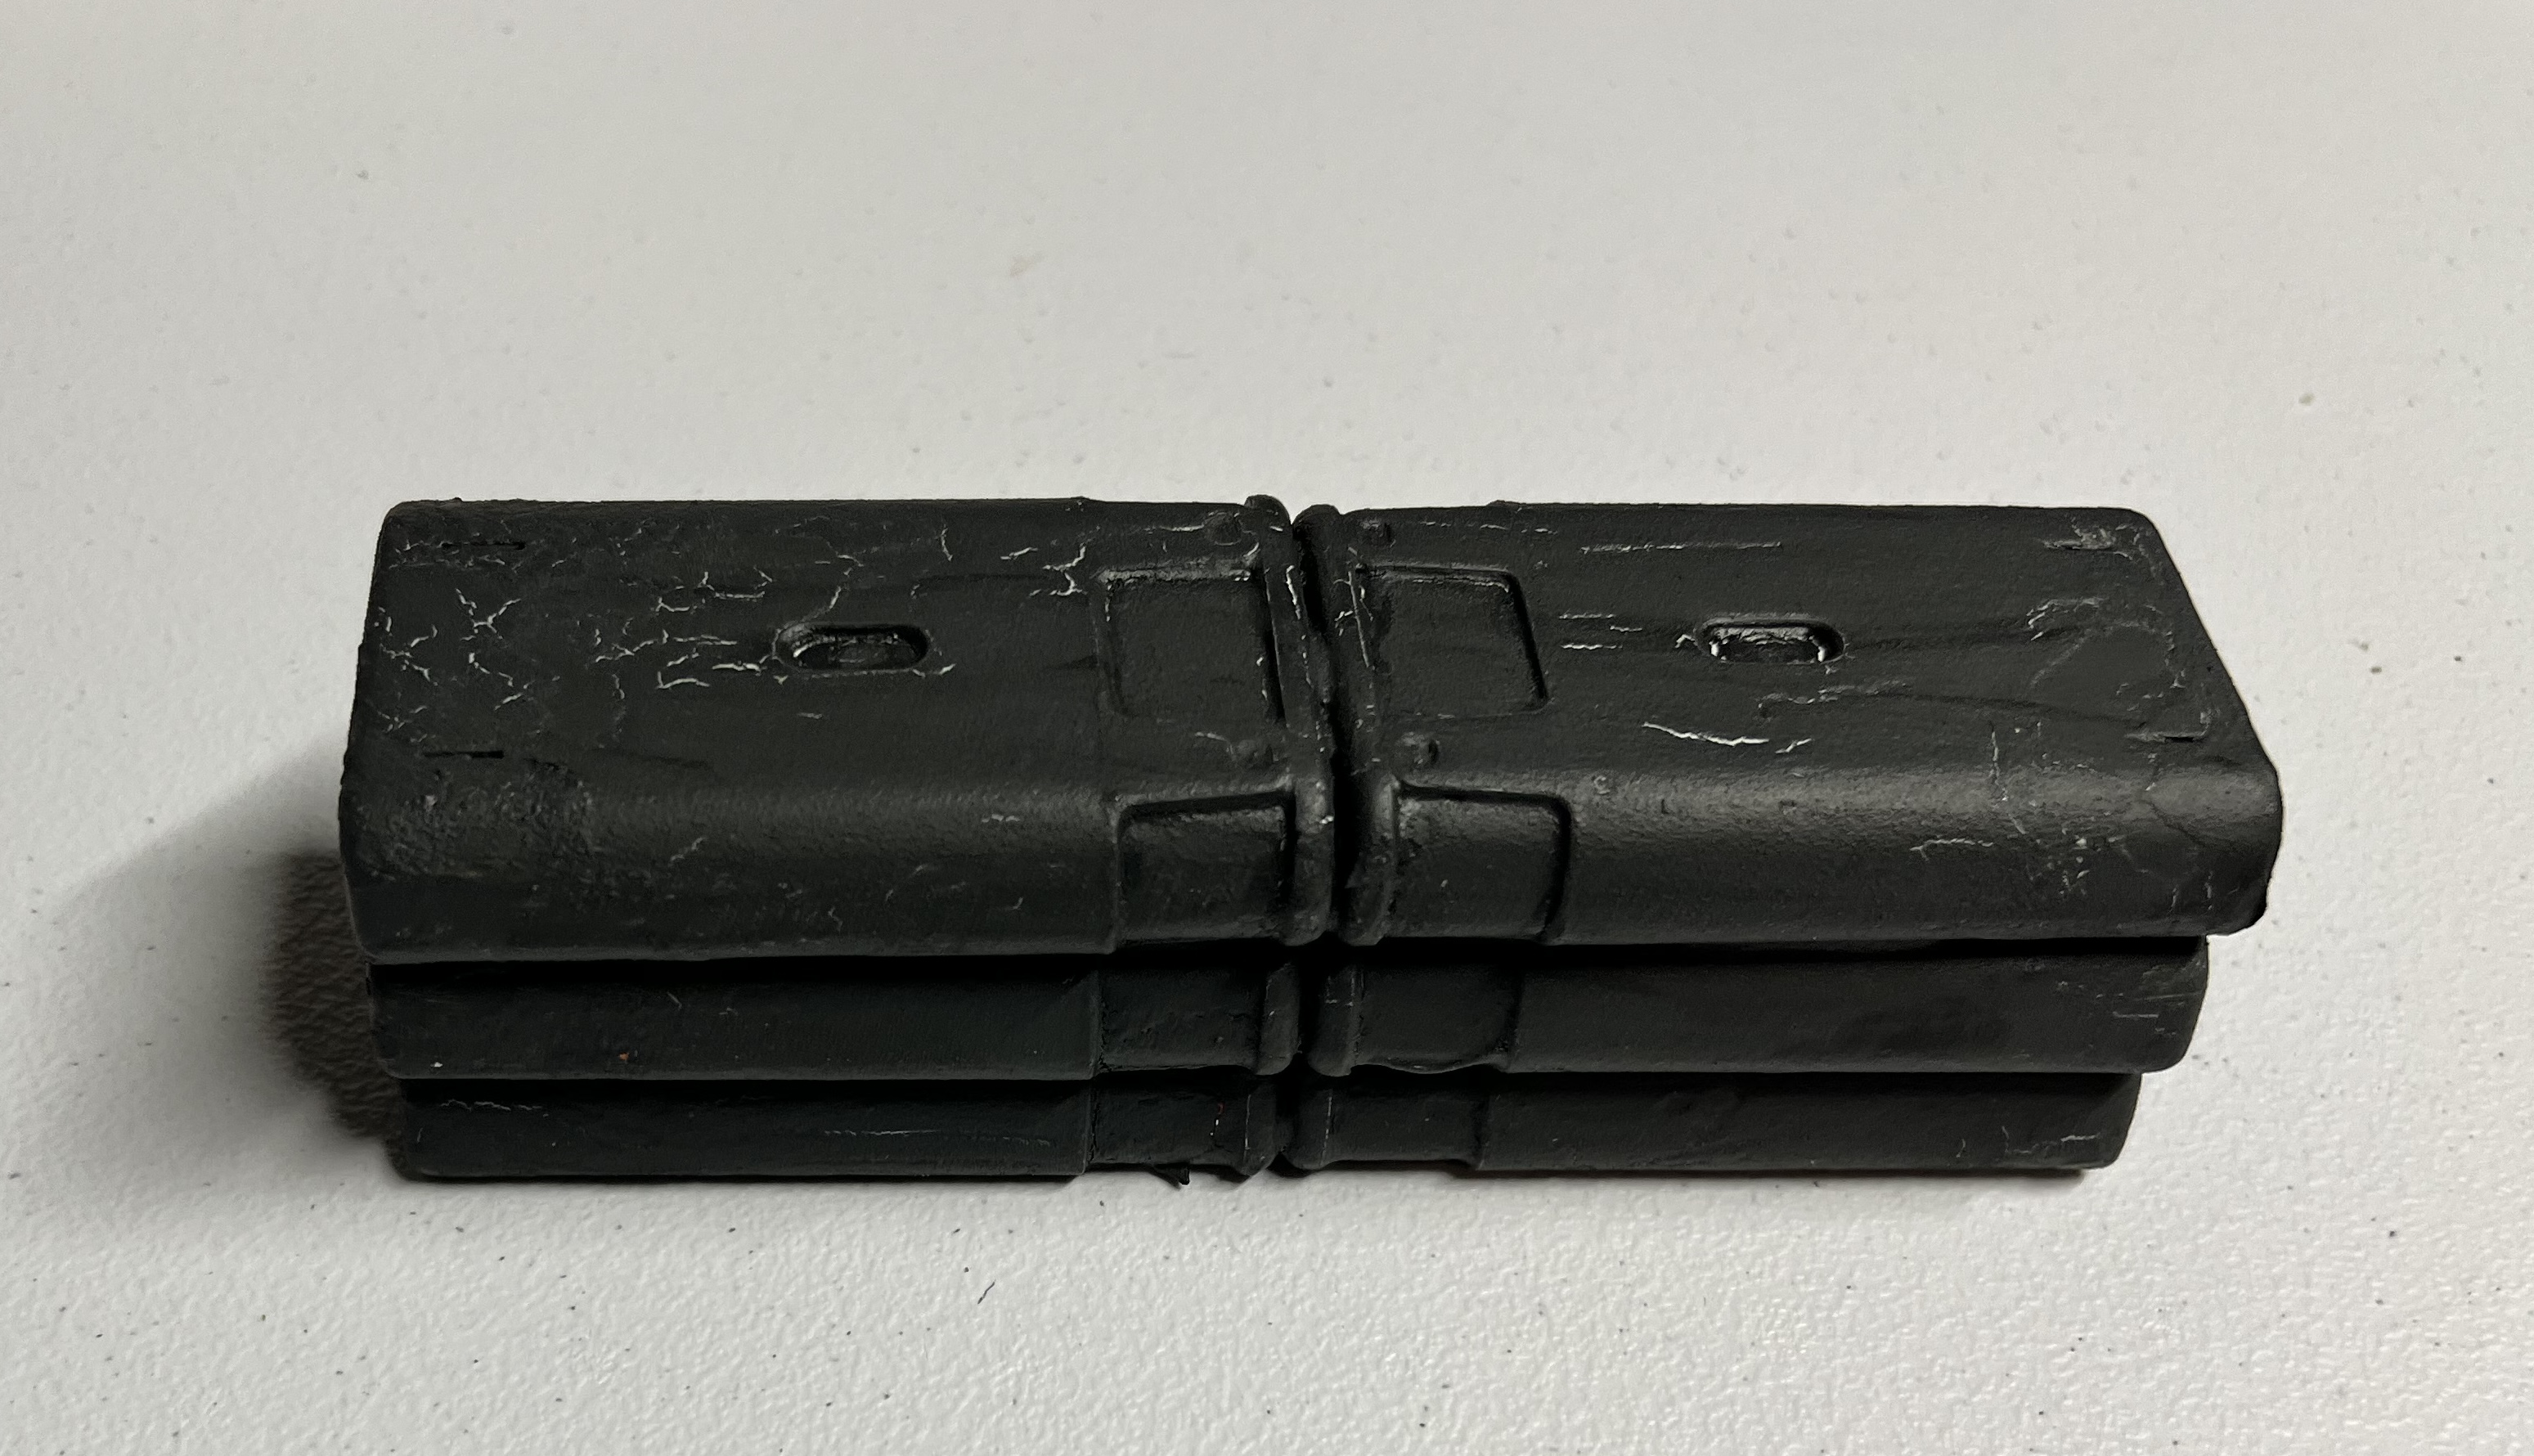
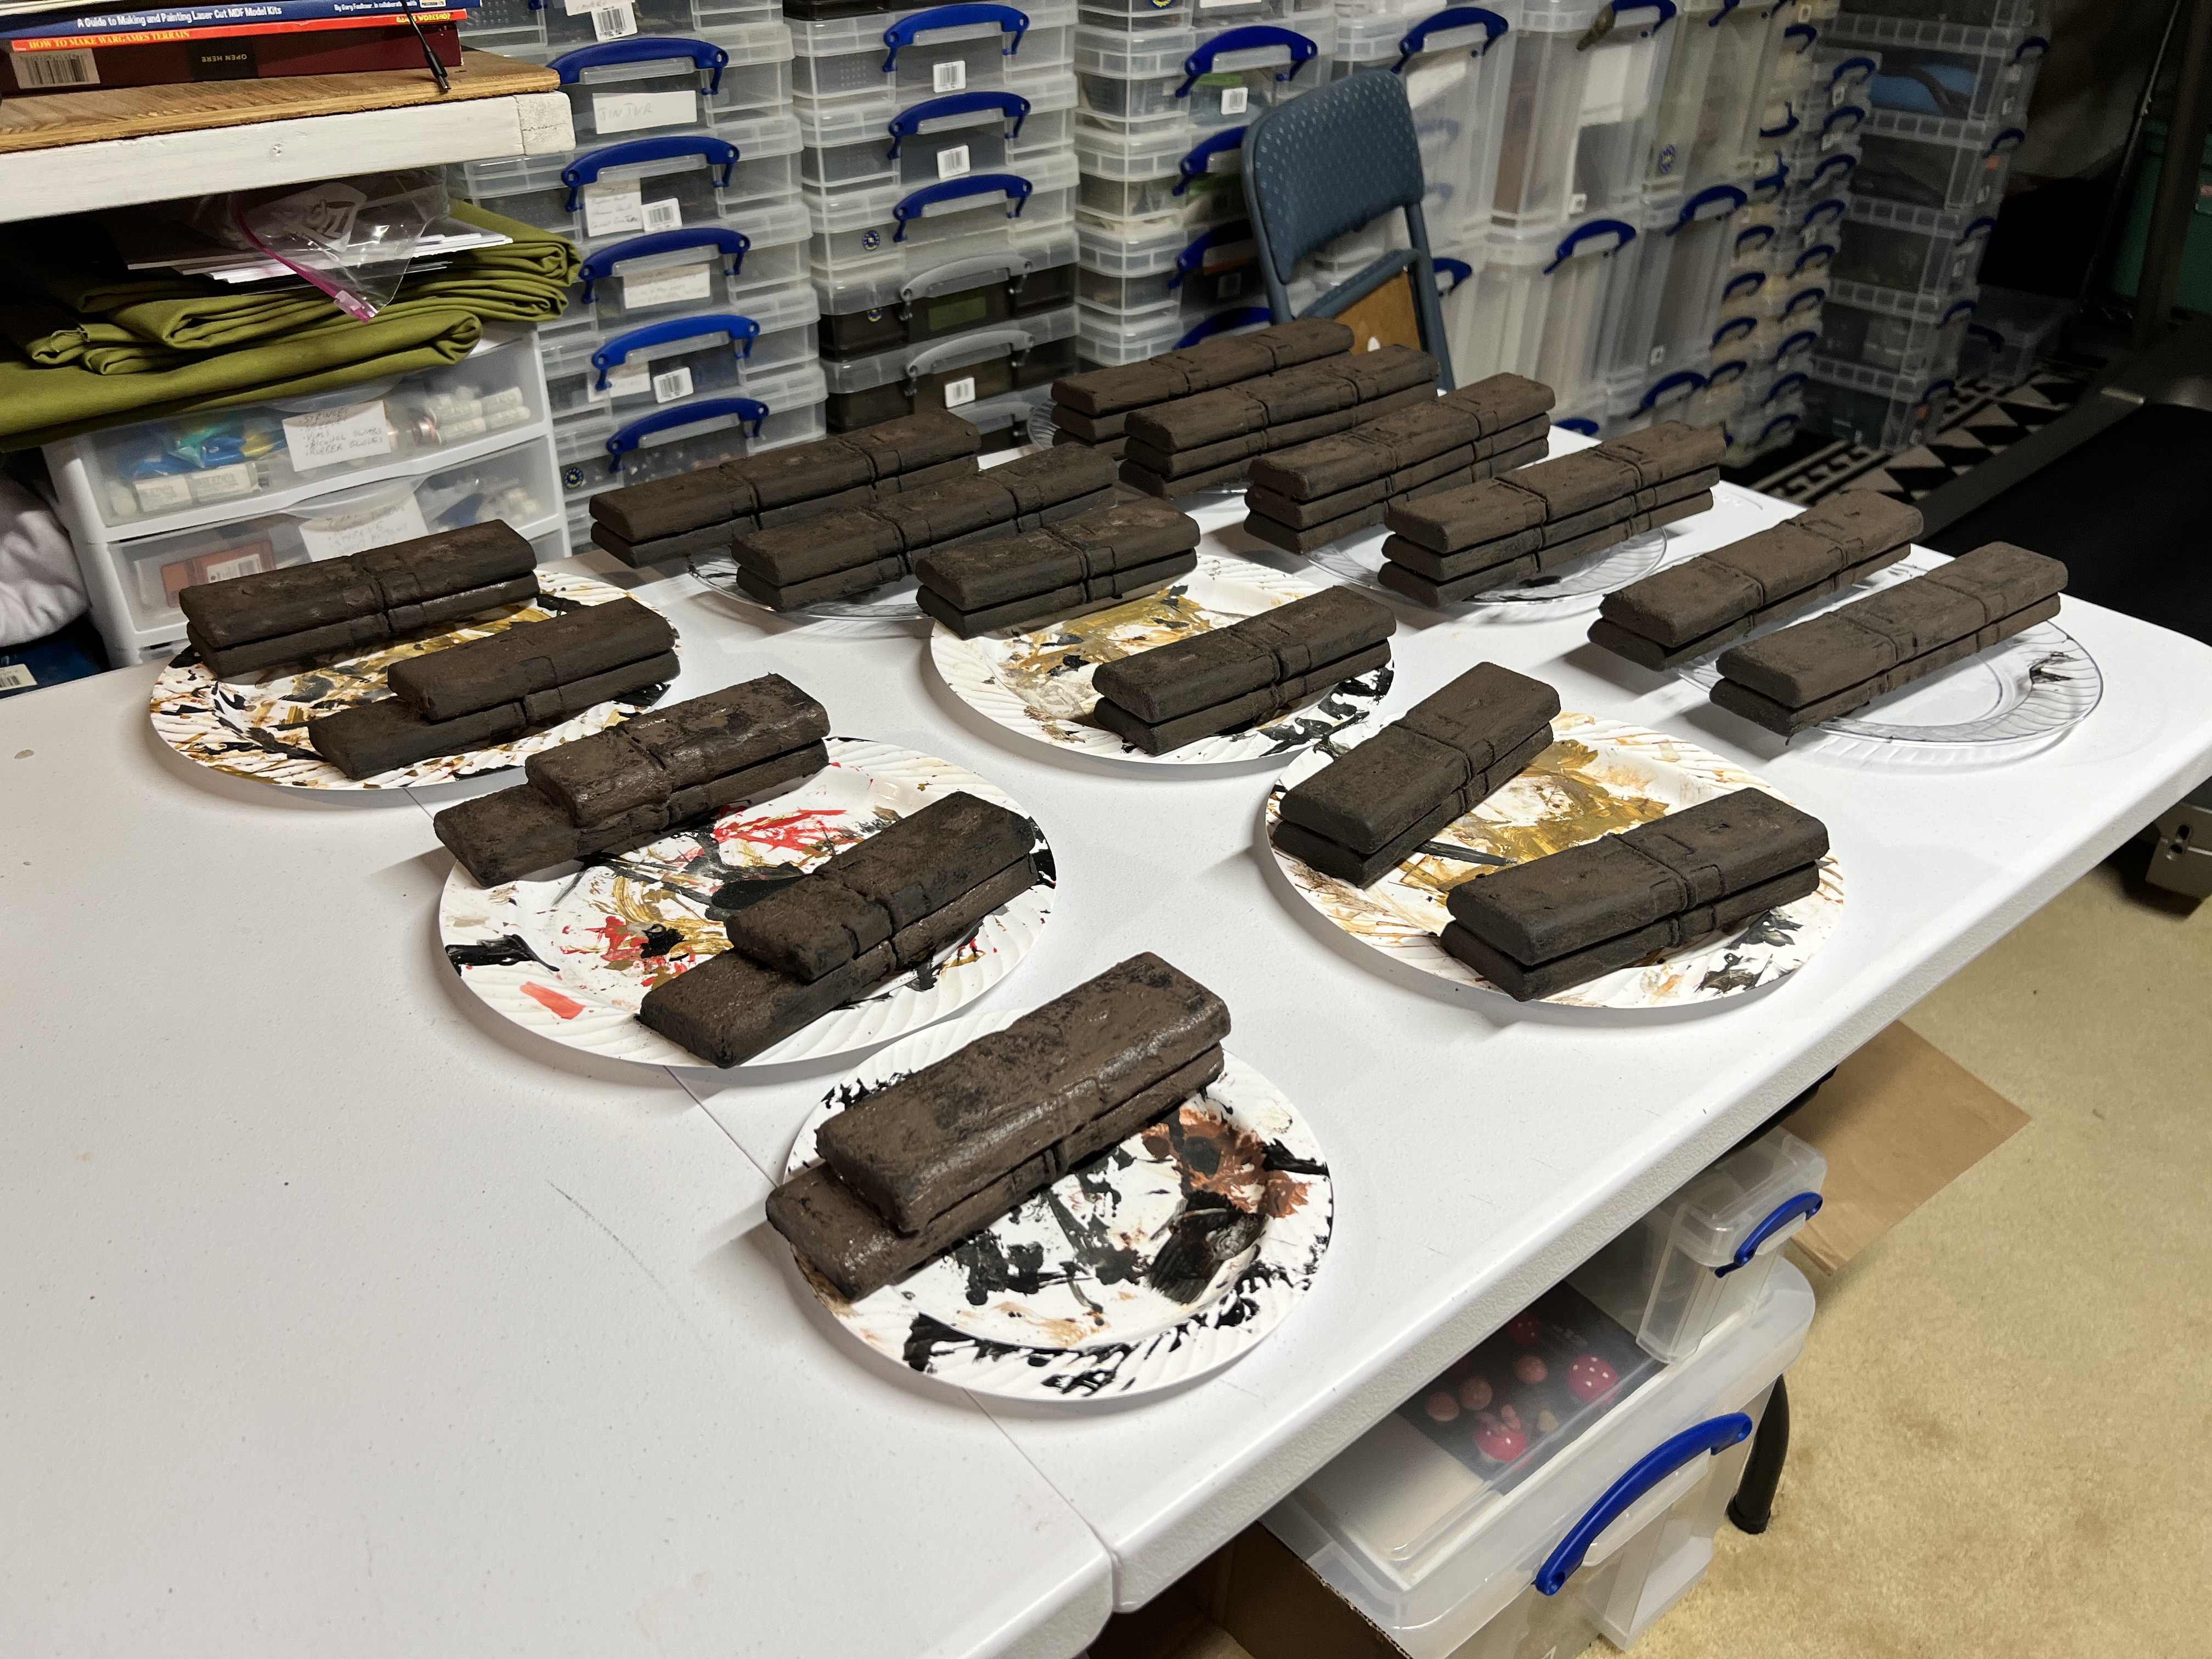
To make sure what I wanted to do would work (and to learn from any errors), I went with a prototype. I used an Exacto blade to remove the outer label. Then, I sanded the exterior to make it rough. To attach multiple units together, green stuff was the solution. After that hardened, I coated the outside of the attached trainers with PVA – followed by a dusting of chinchilla dust on the glue. When that combination had hardened, I primed the combinations with black primer.
First prototype primed.
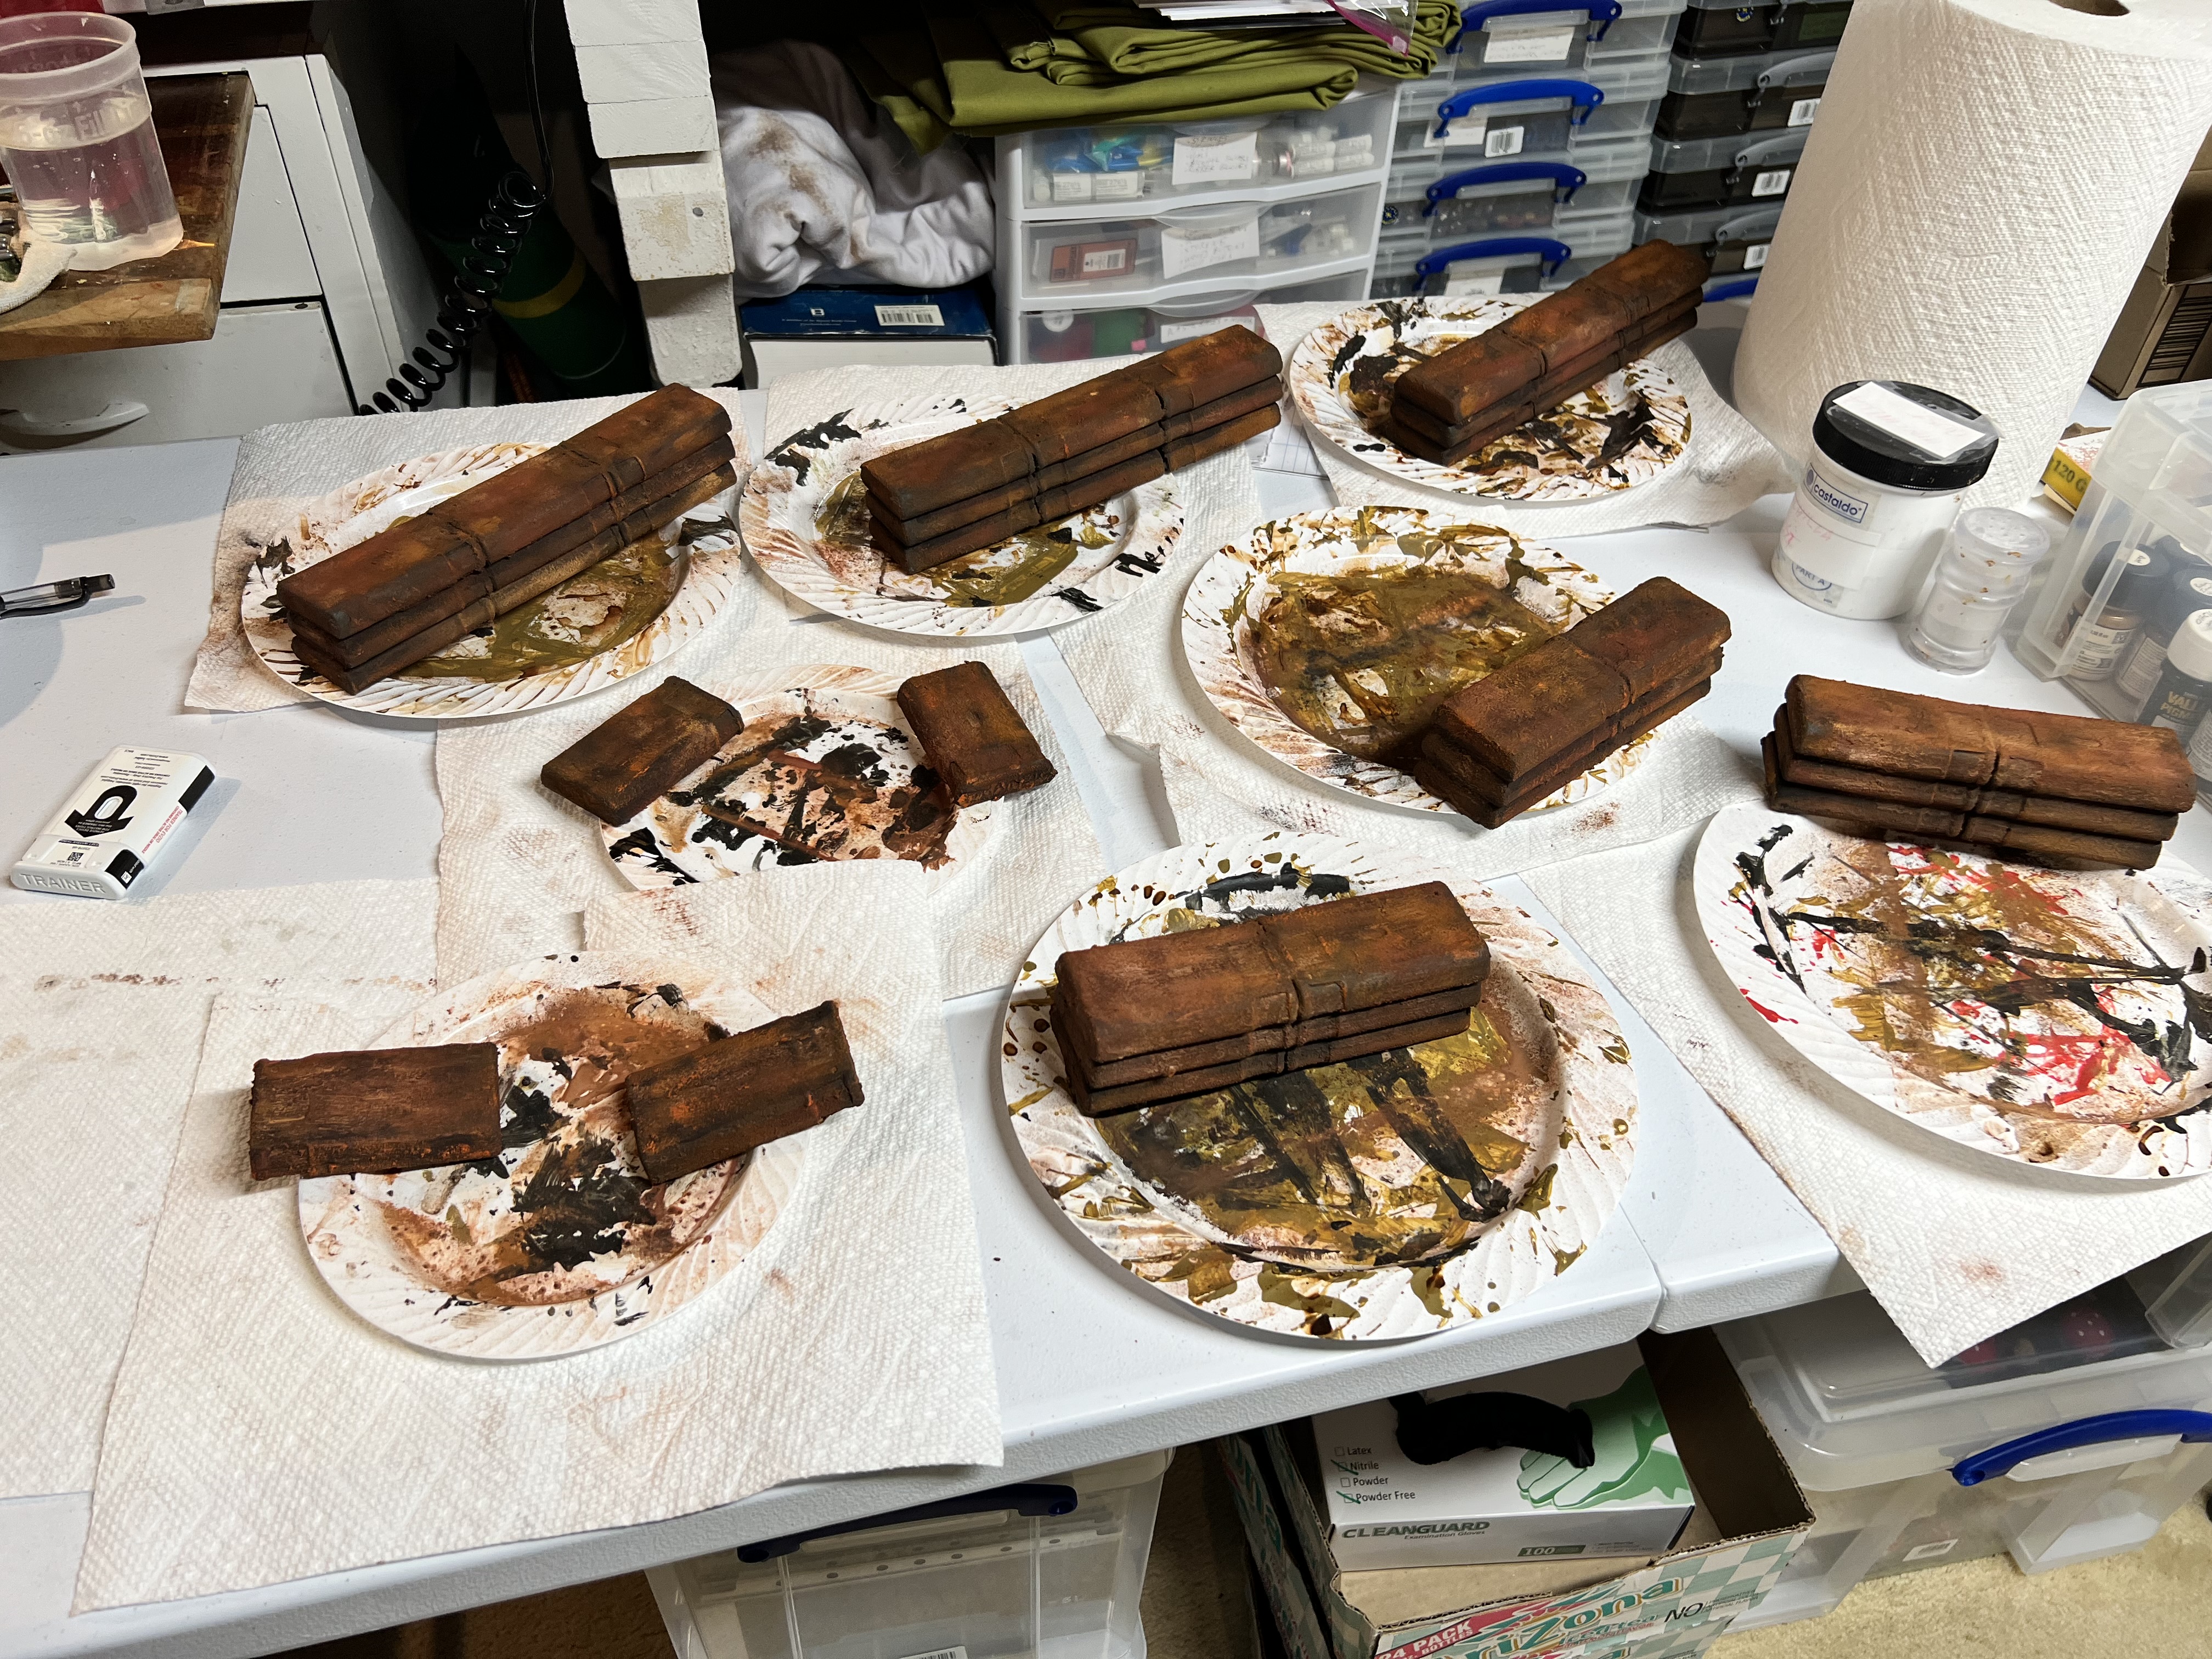
From this point, I used corrosion texture paint(let that harden), then used a number of rusting paints and pigments. I really liked the results and moved on to making two large batches of different combinations.
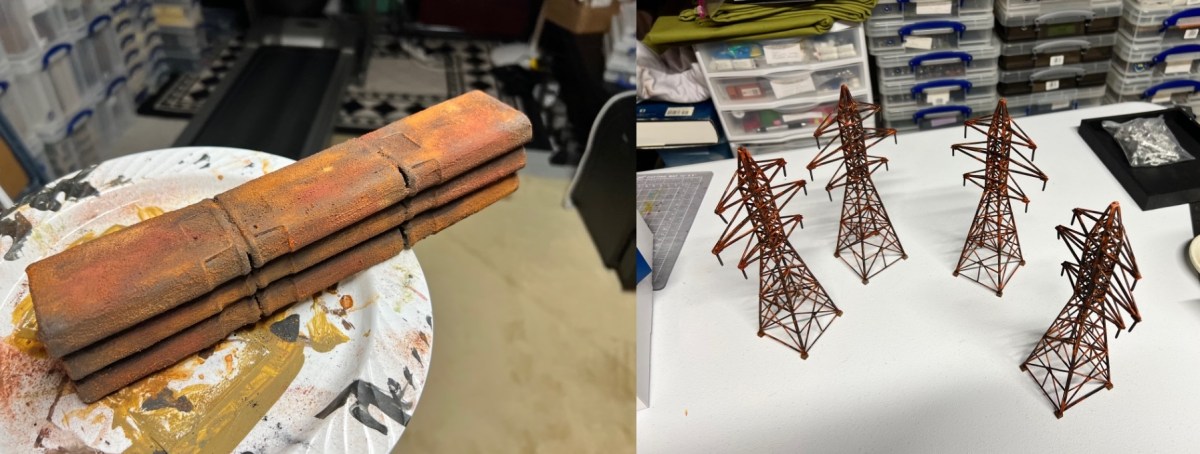
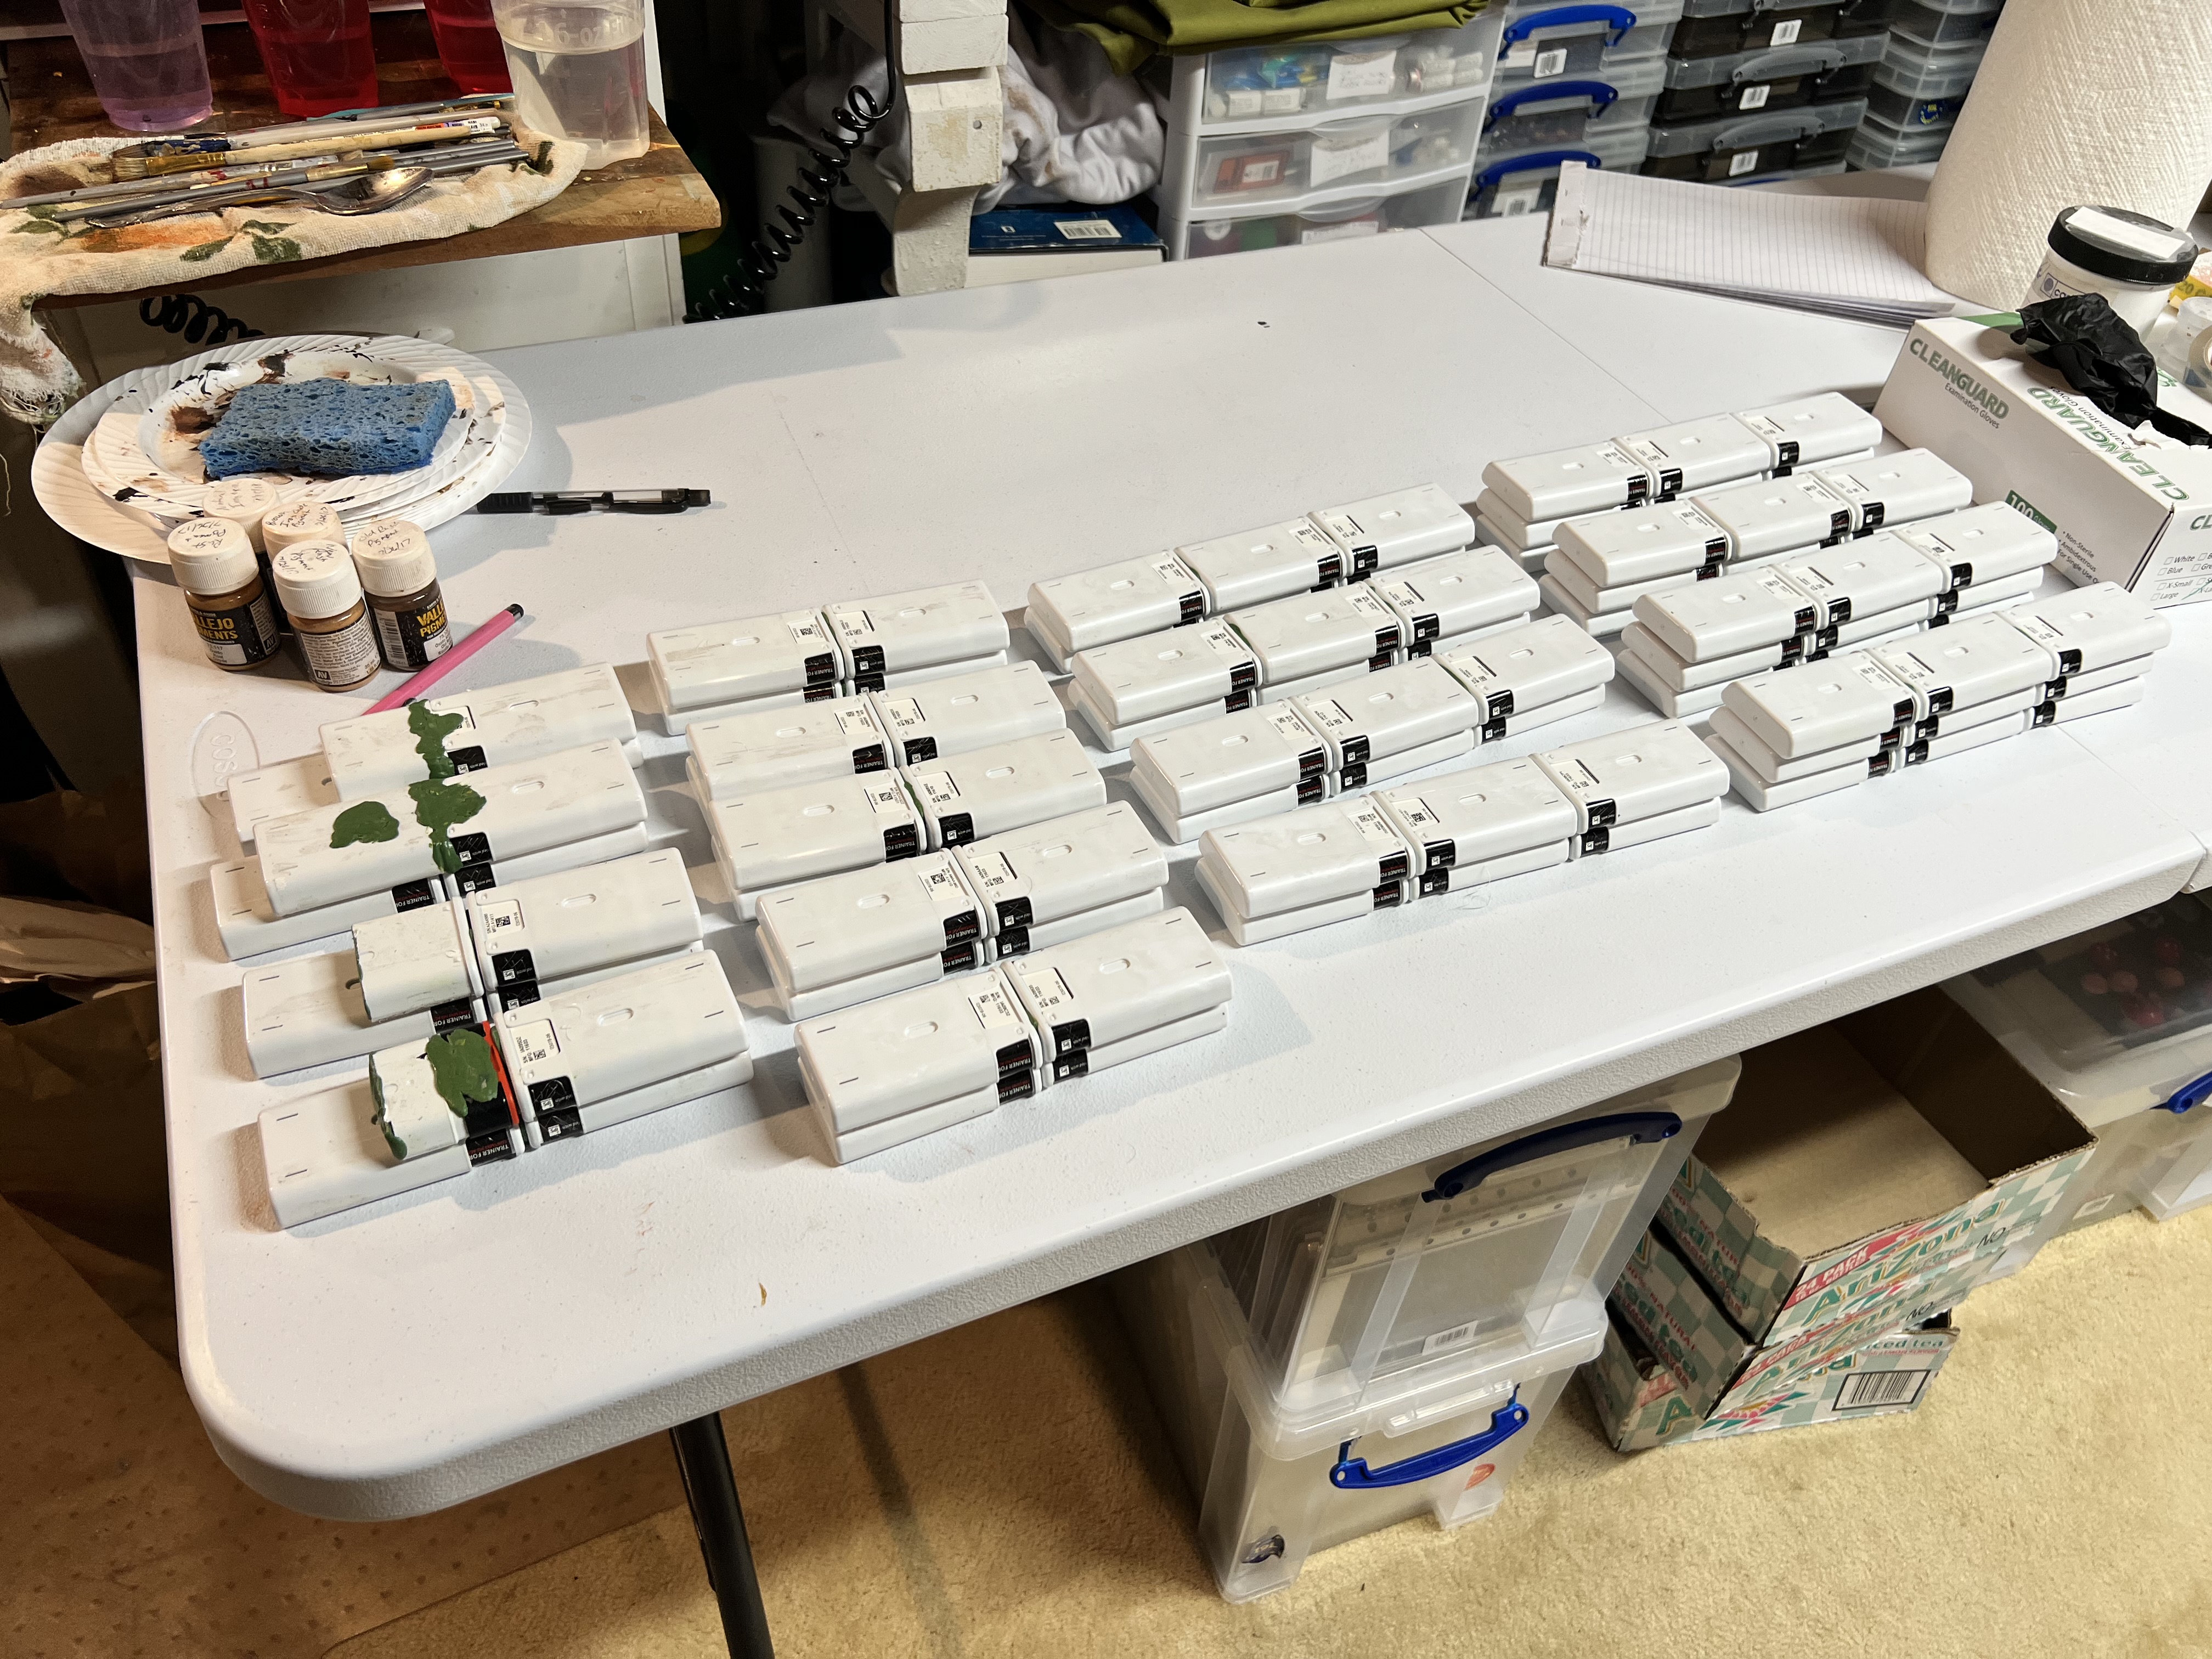
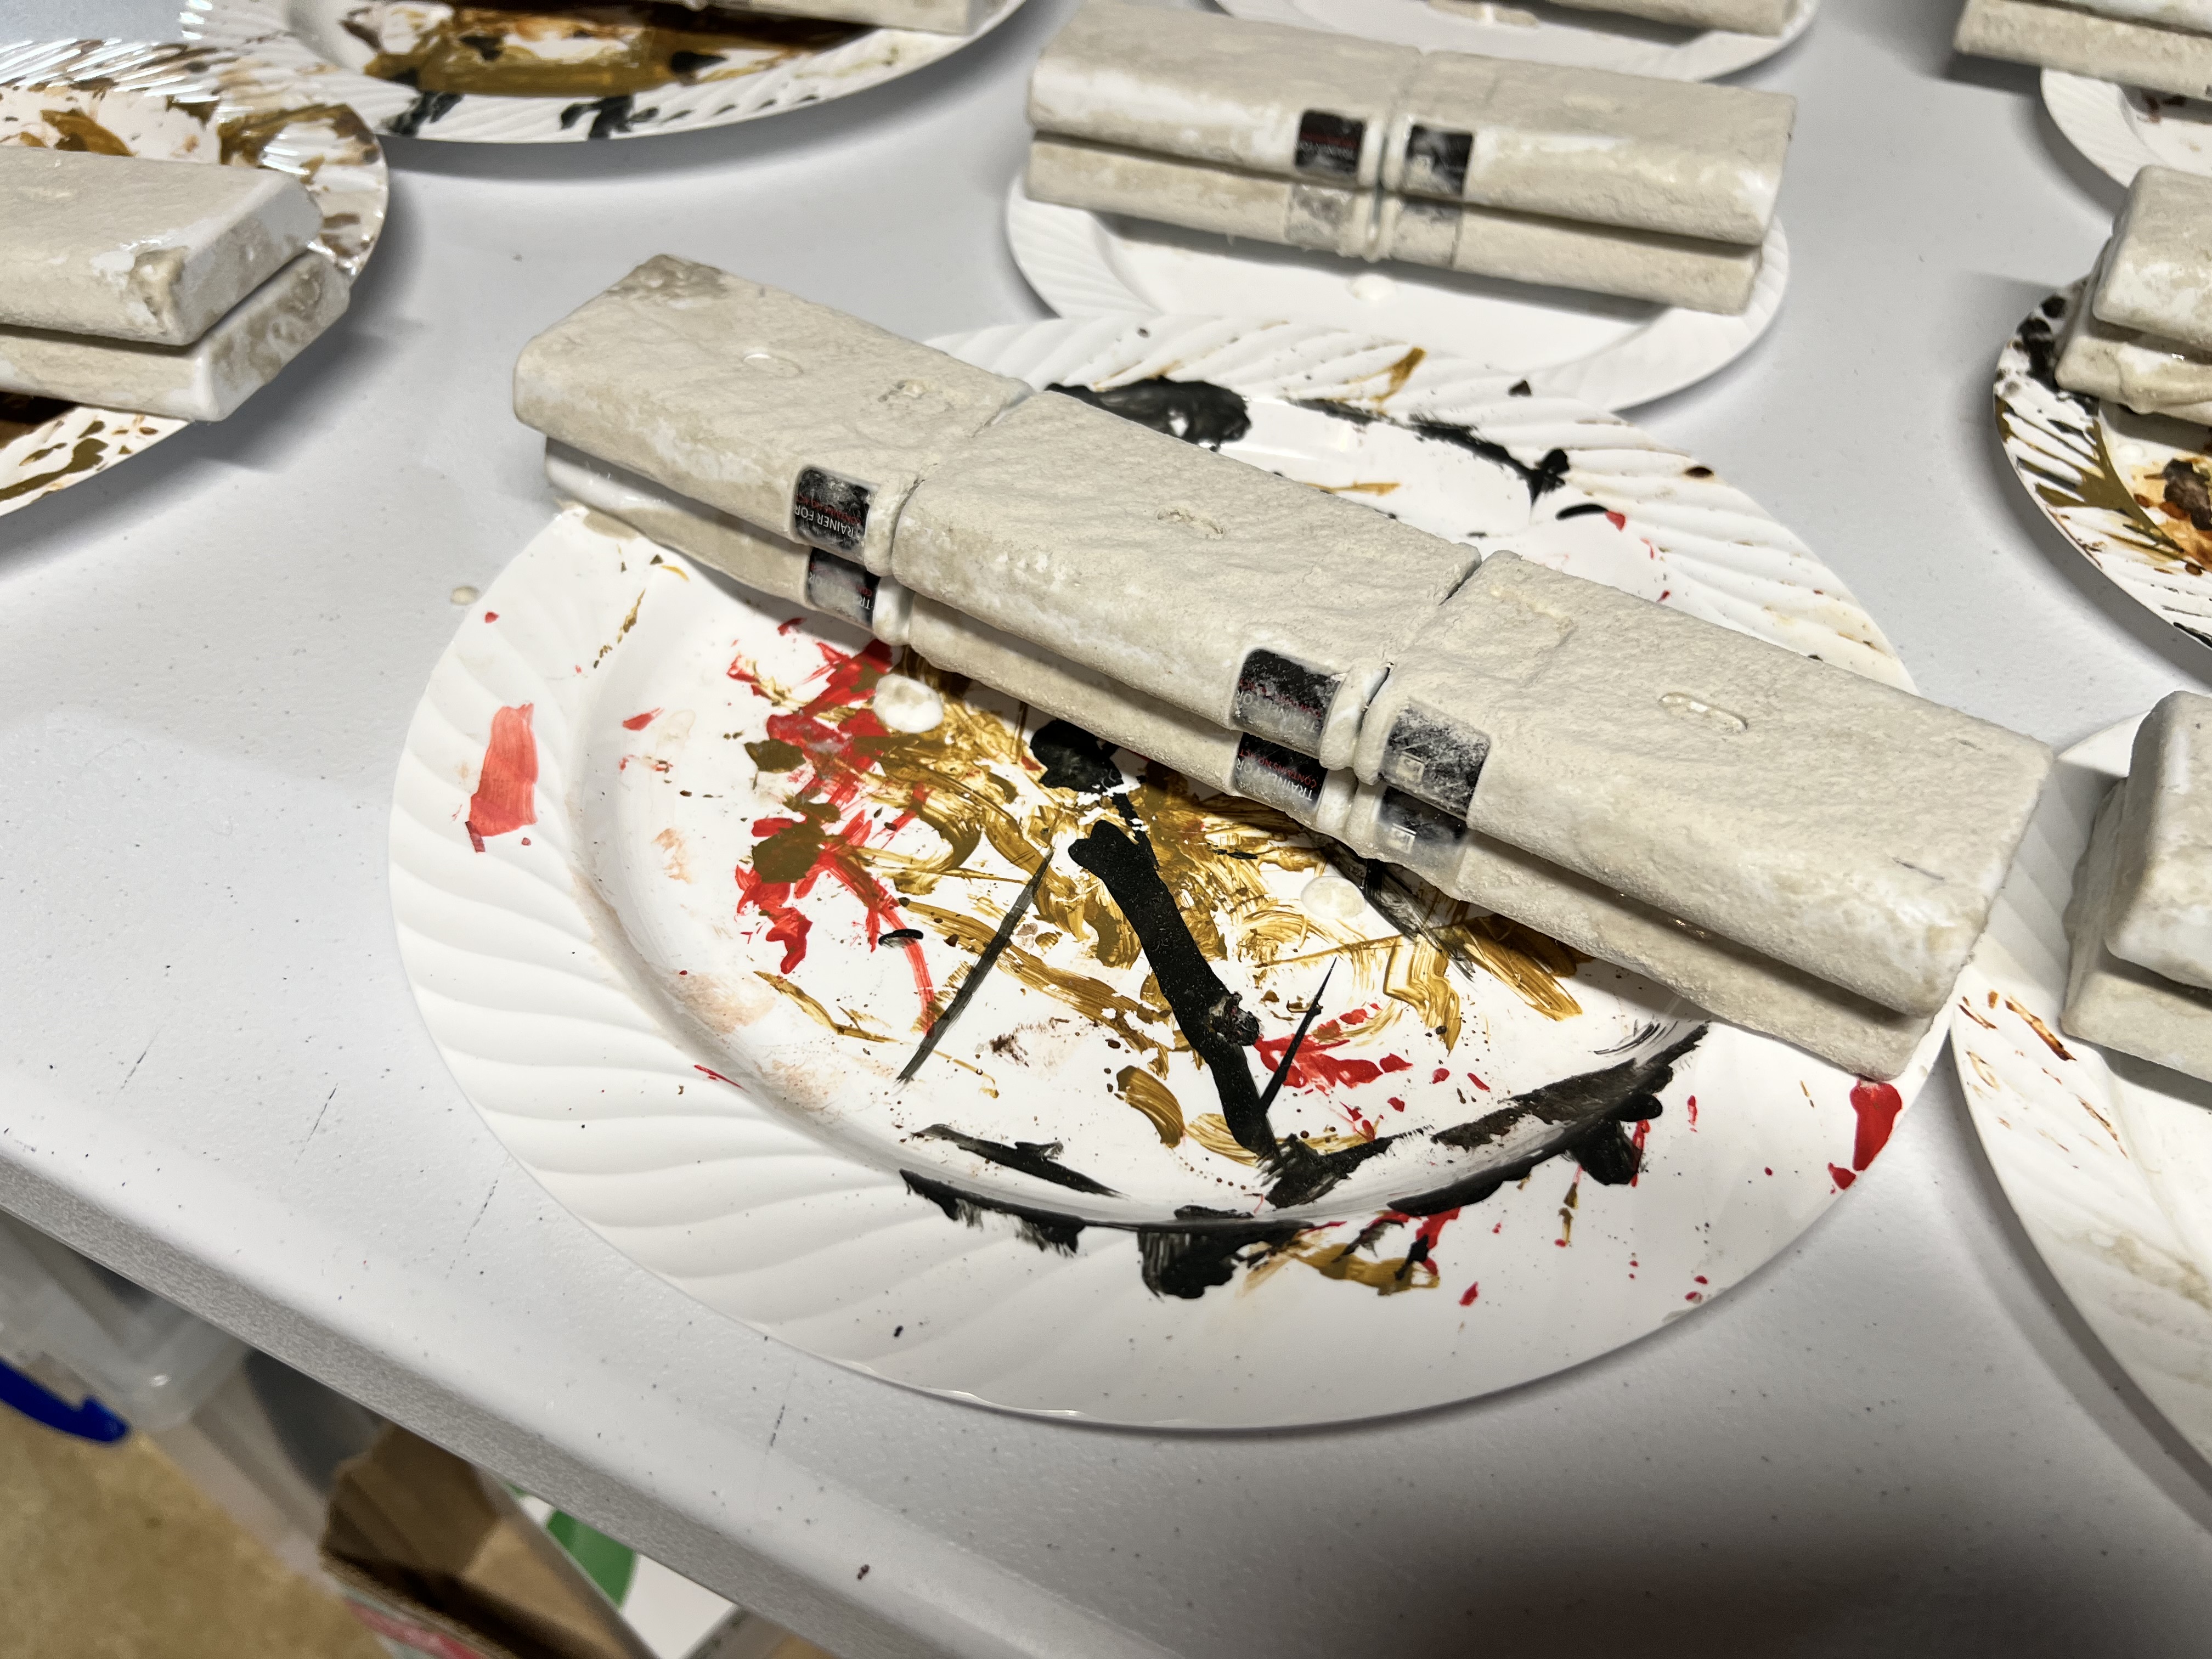
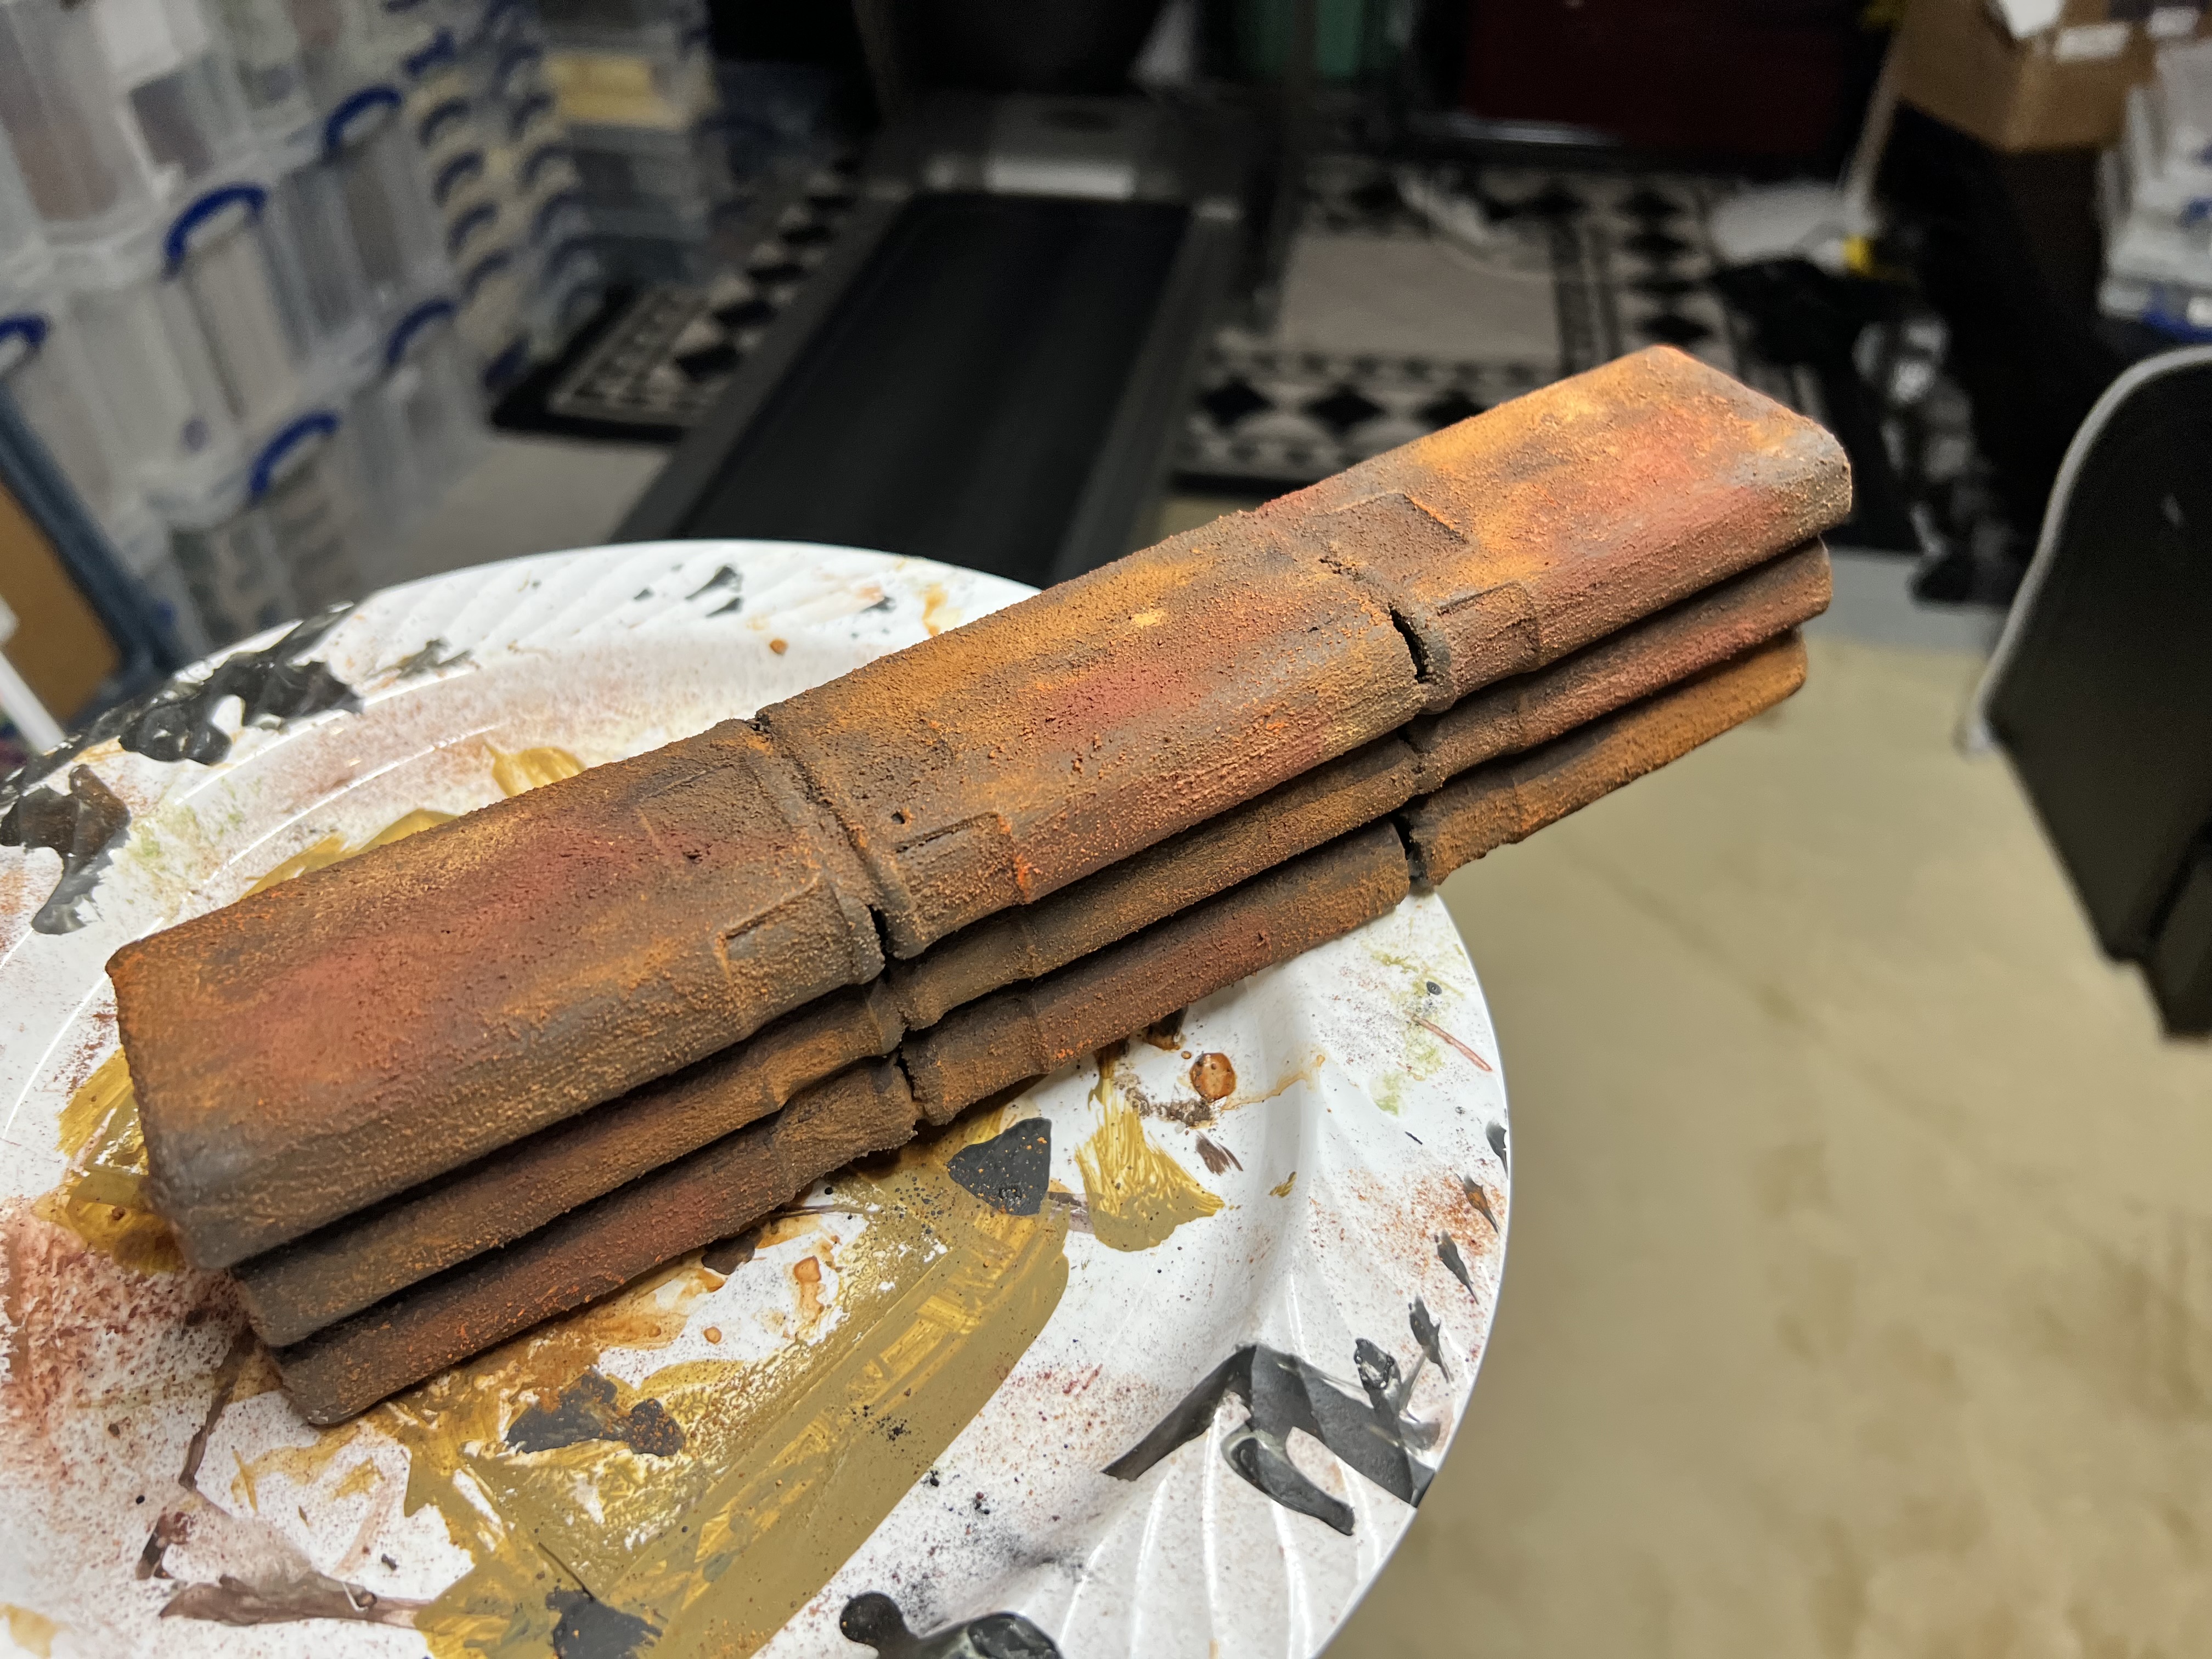
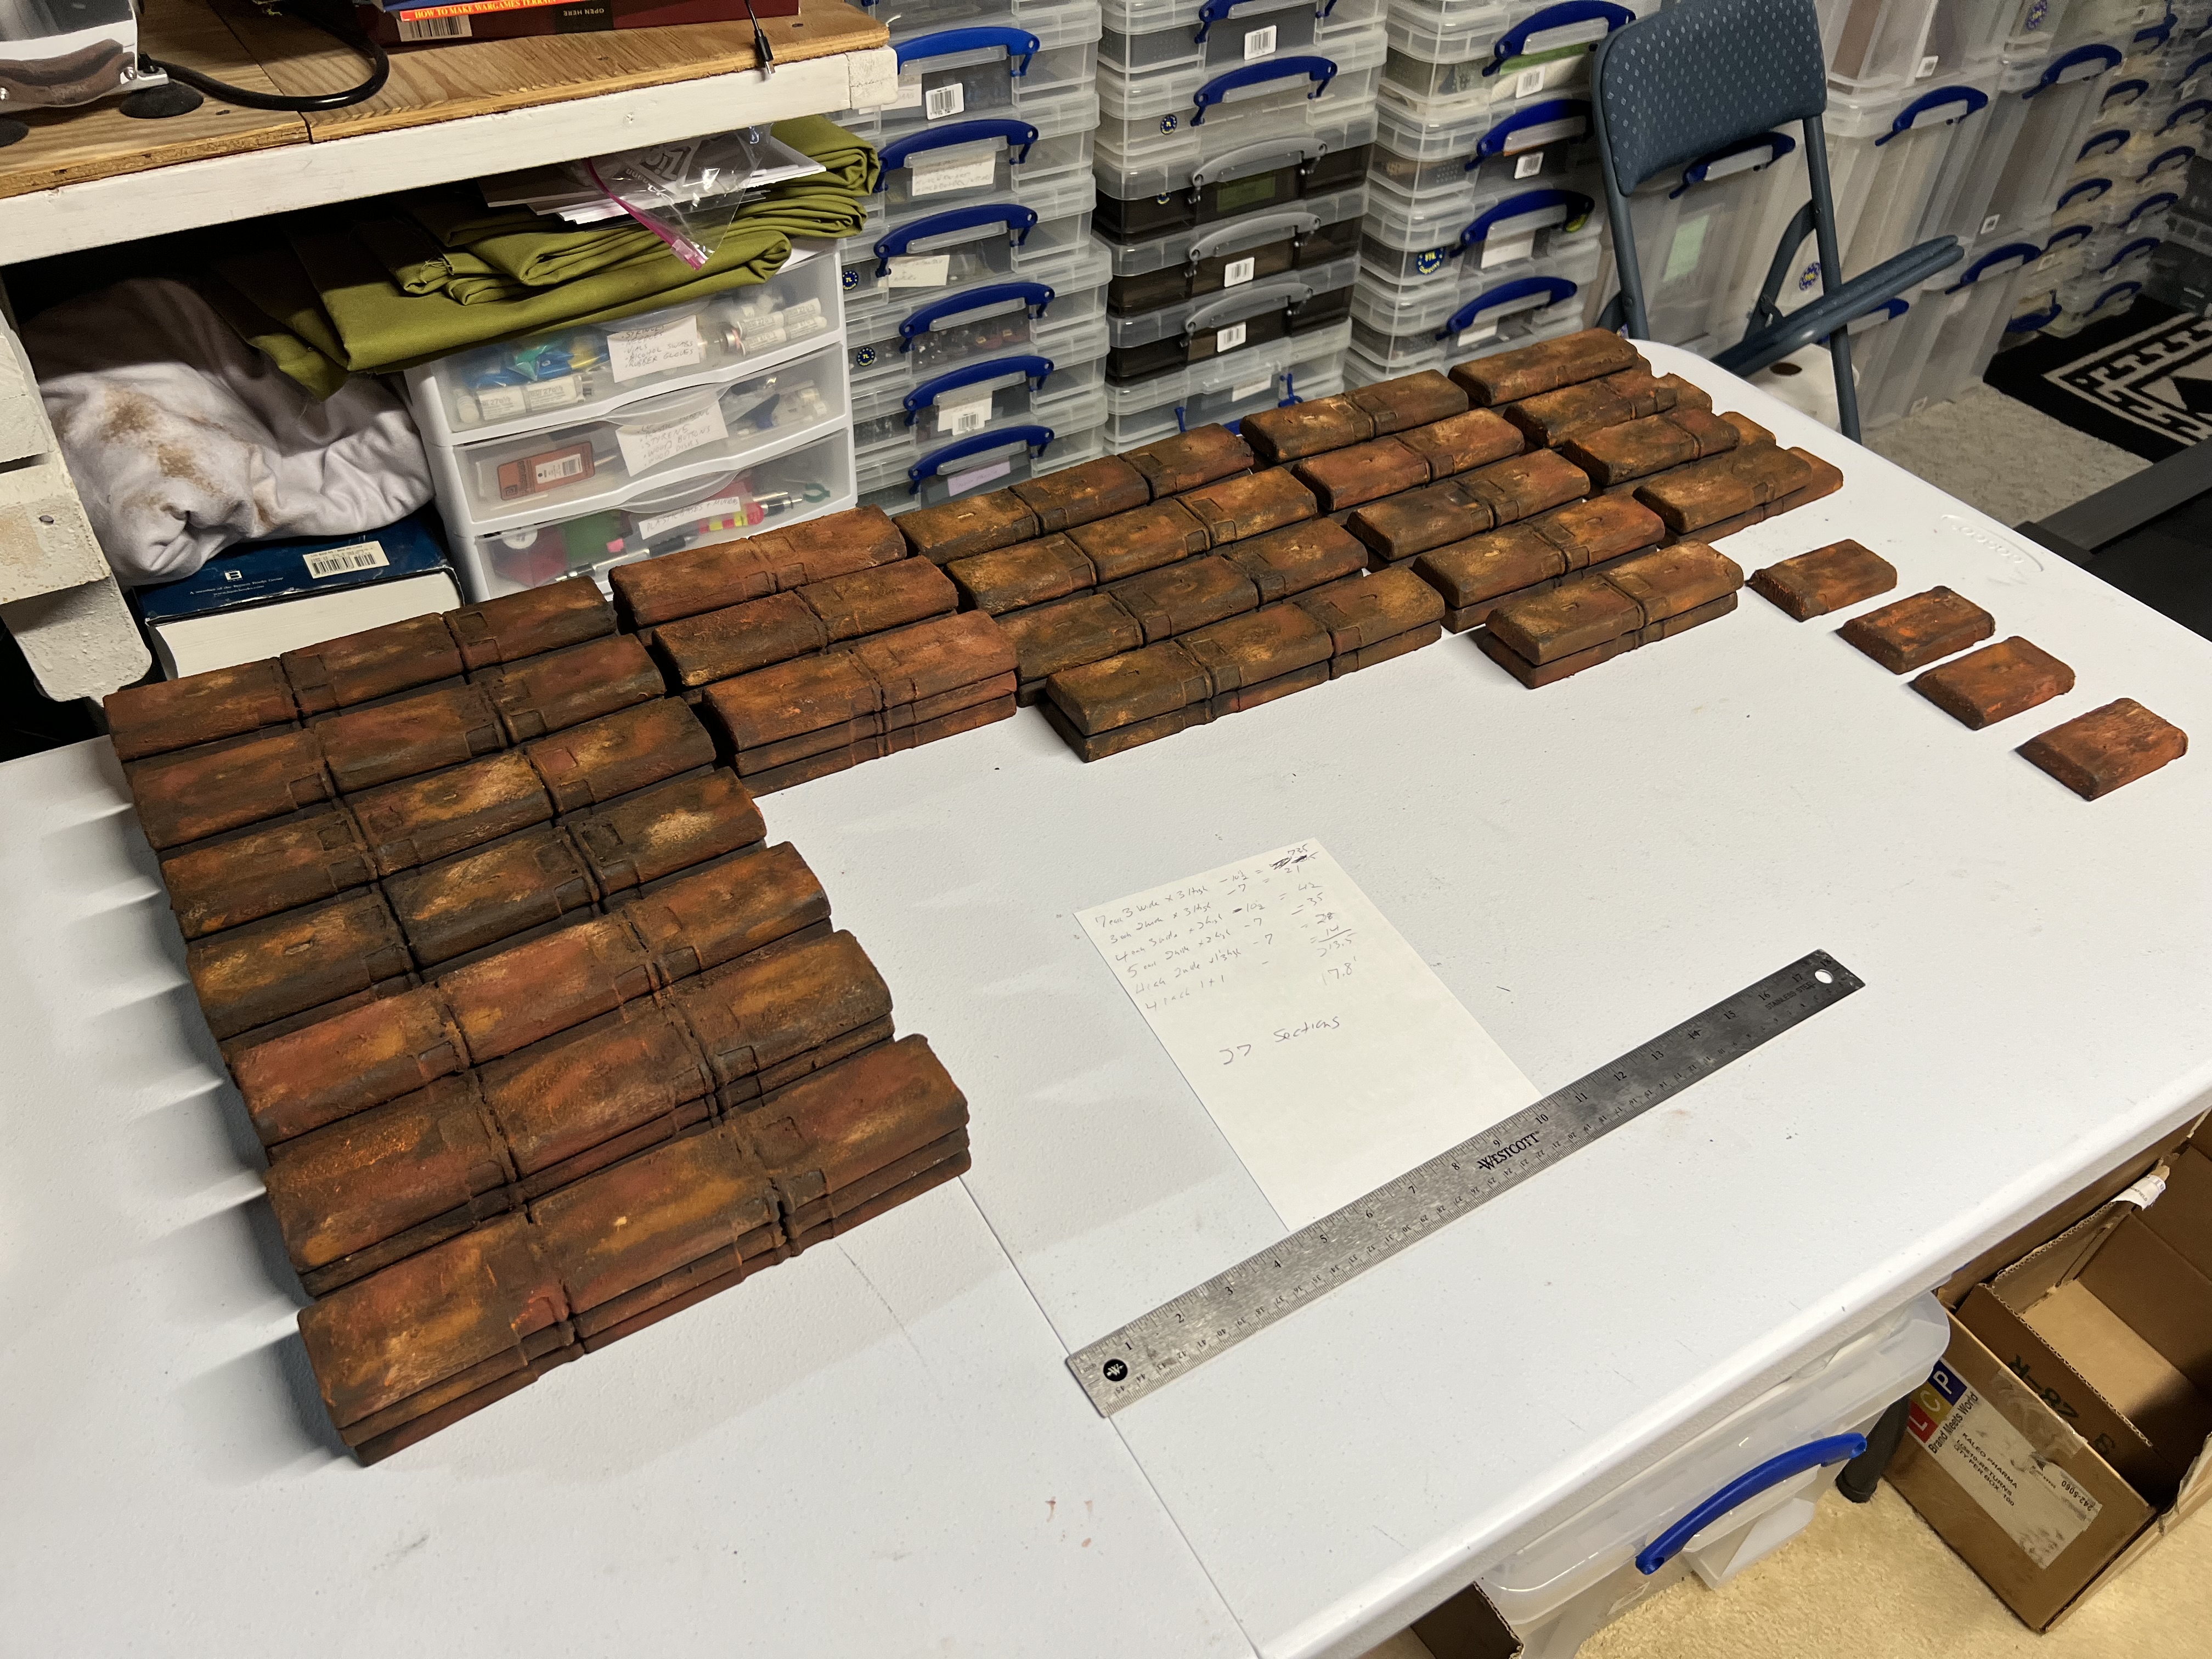
Walls after labels removed and sanded.PVA and chinchilla dust application.Corrosion texture paint applied and drying.First half-batch of walls after being rusted up.Close up shot of a 3×3 combination.Second half batch done.
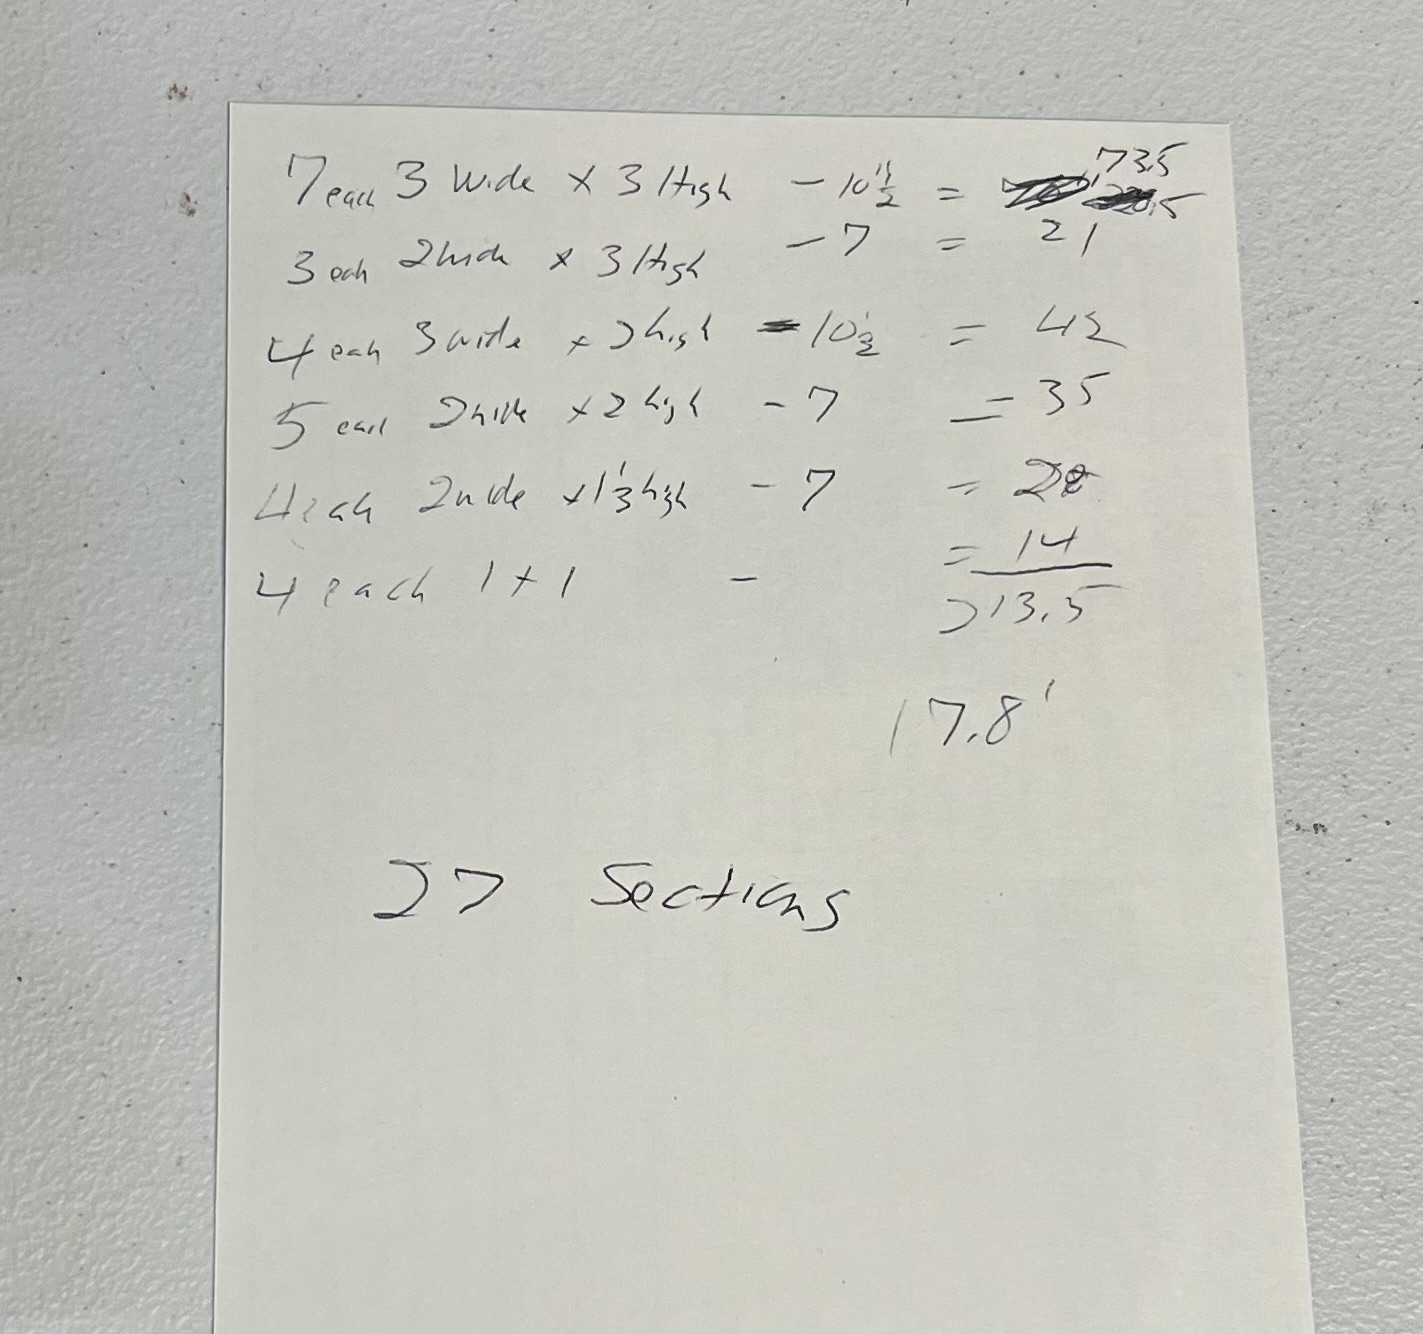
I ended up with 27 sections = a total of 17.8′ worth of rusty wall.
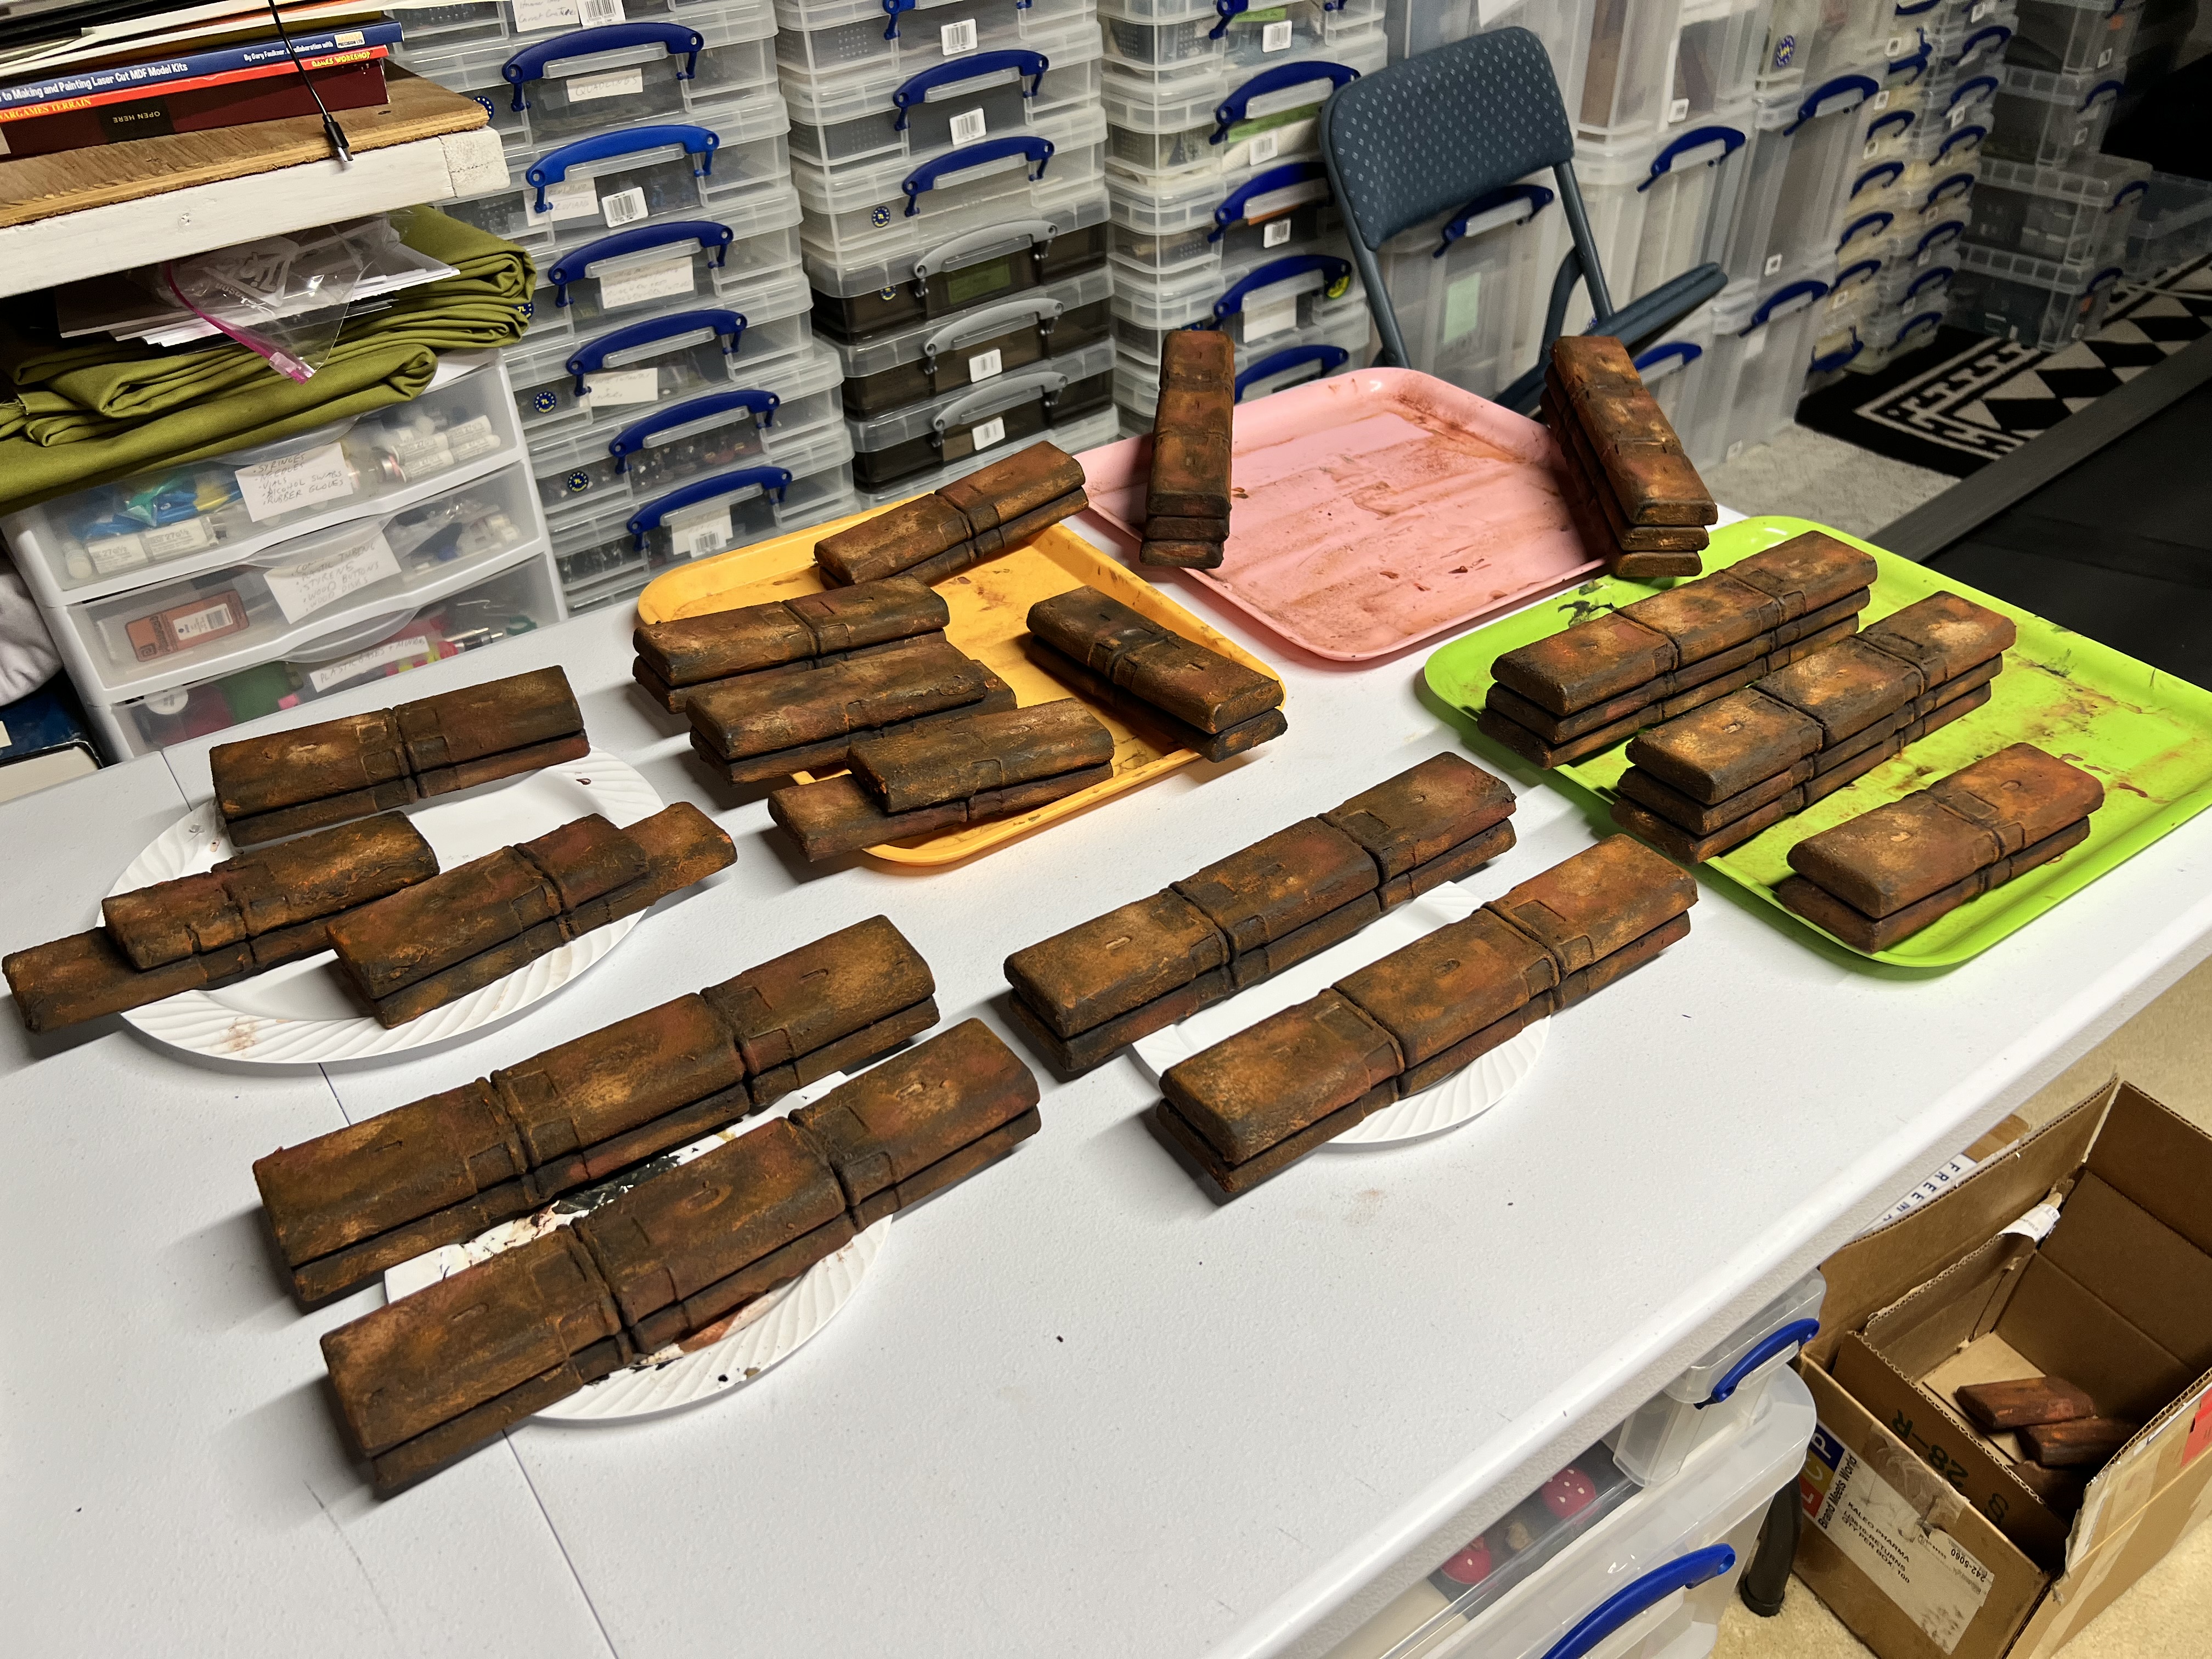
And here they are in total finished up mid-December.:
27 sections of rusty walls!
With the walls done, it was time to get some verticality for the tabletop. And get them done BEFORE Christmas.
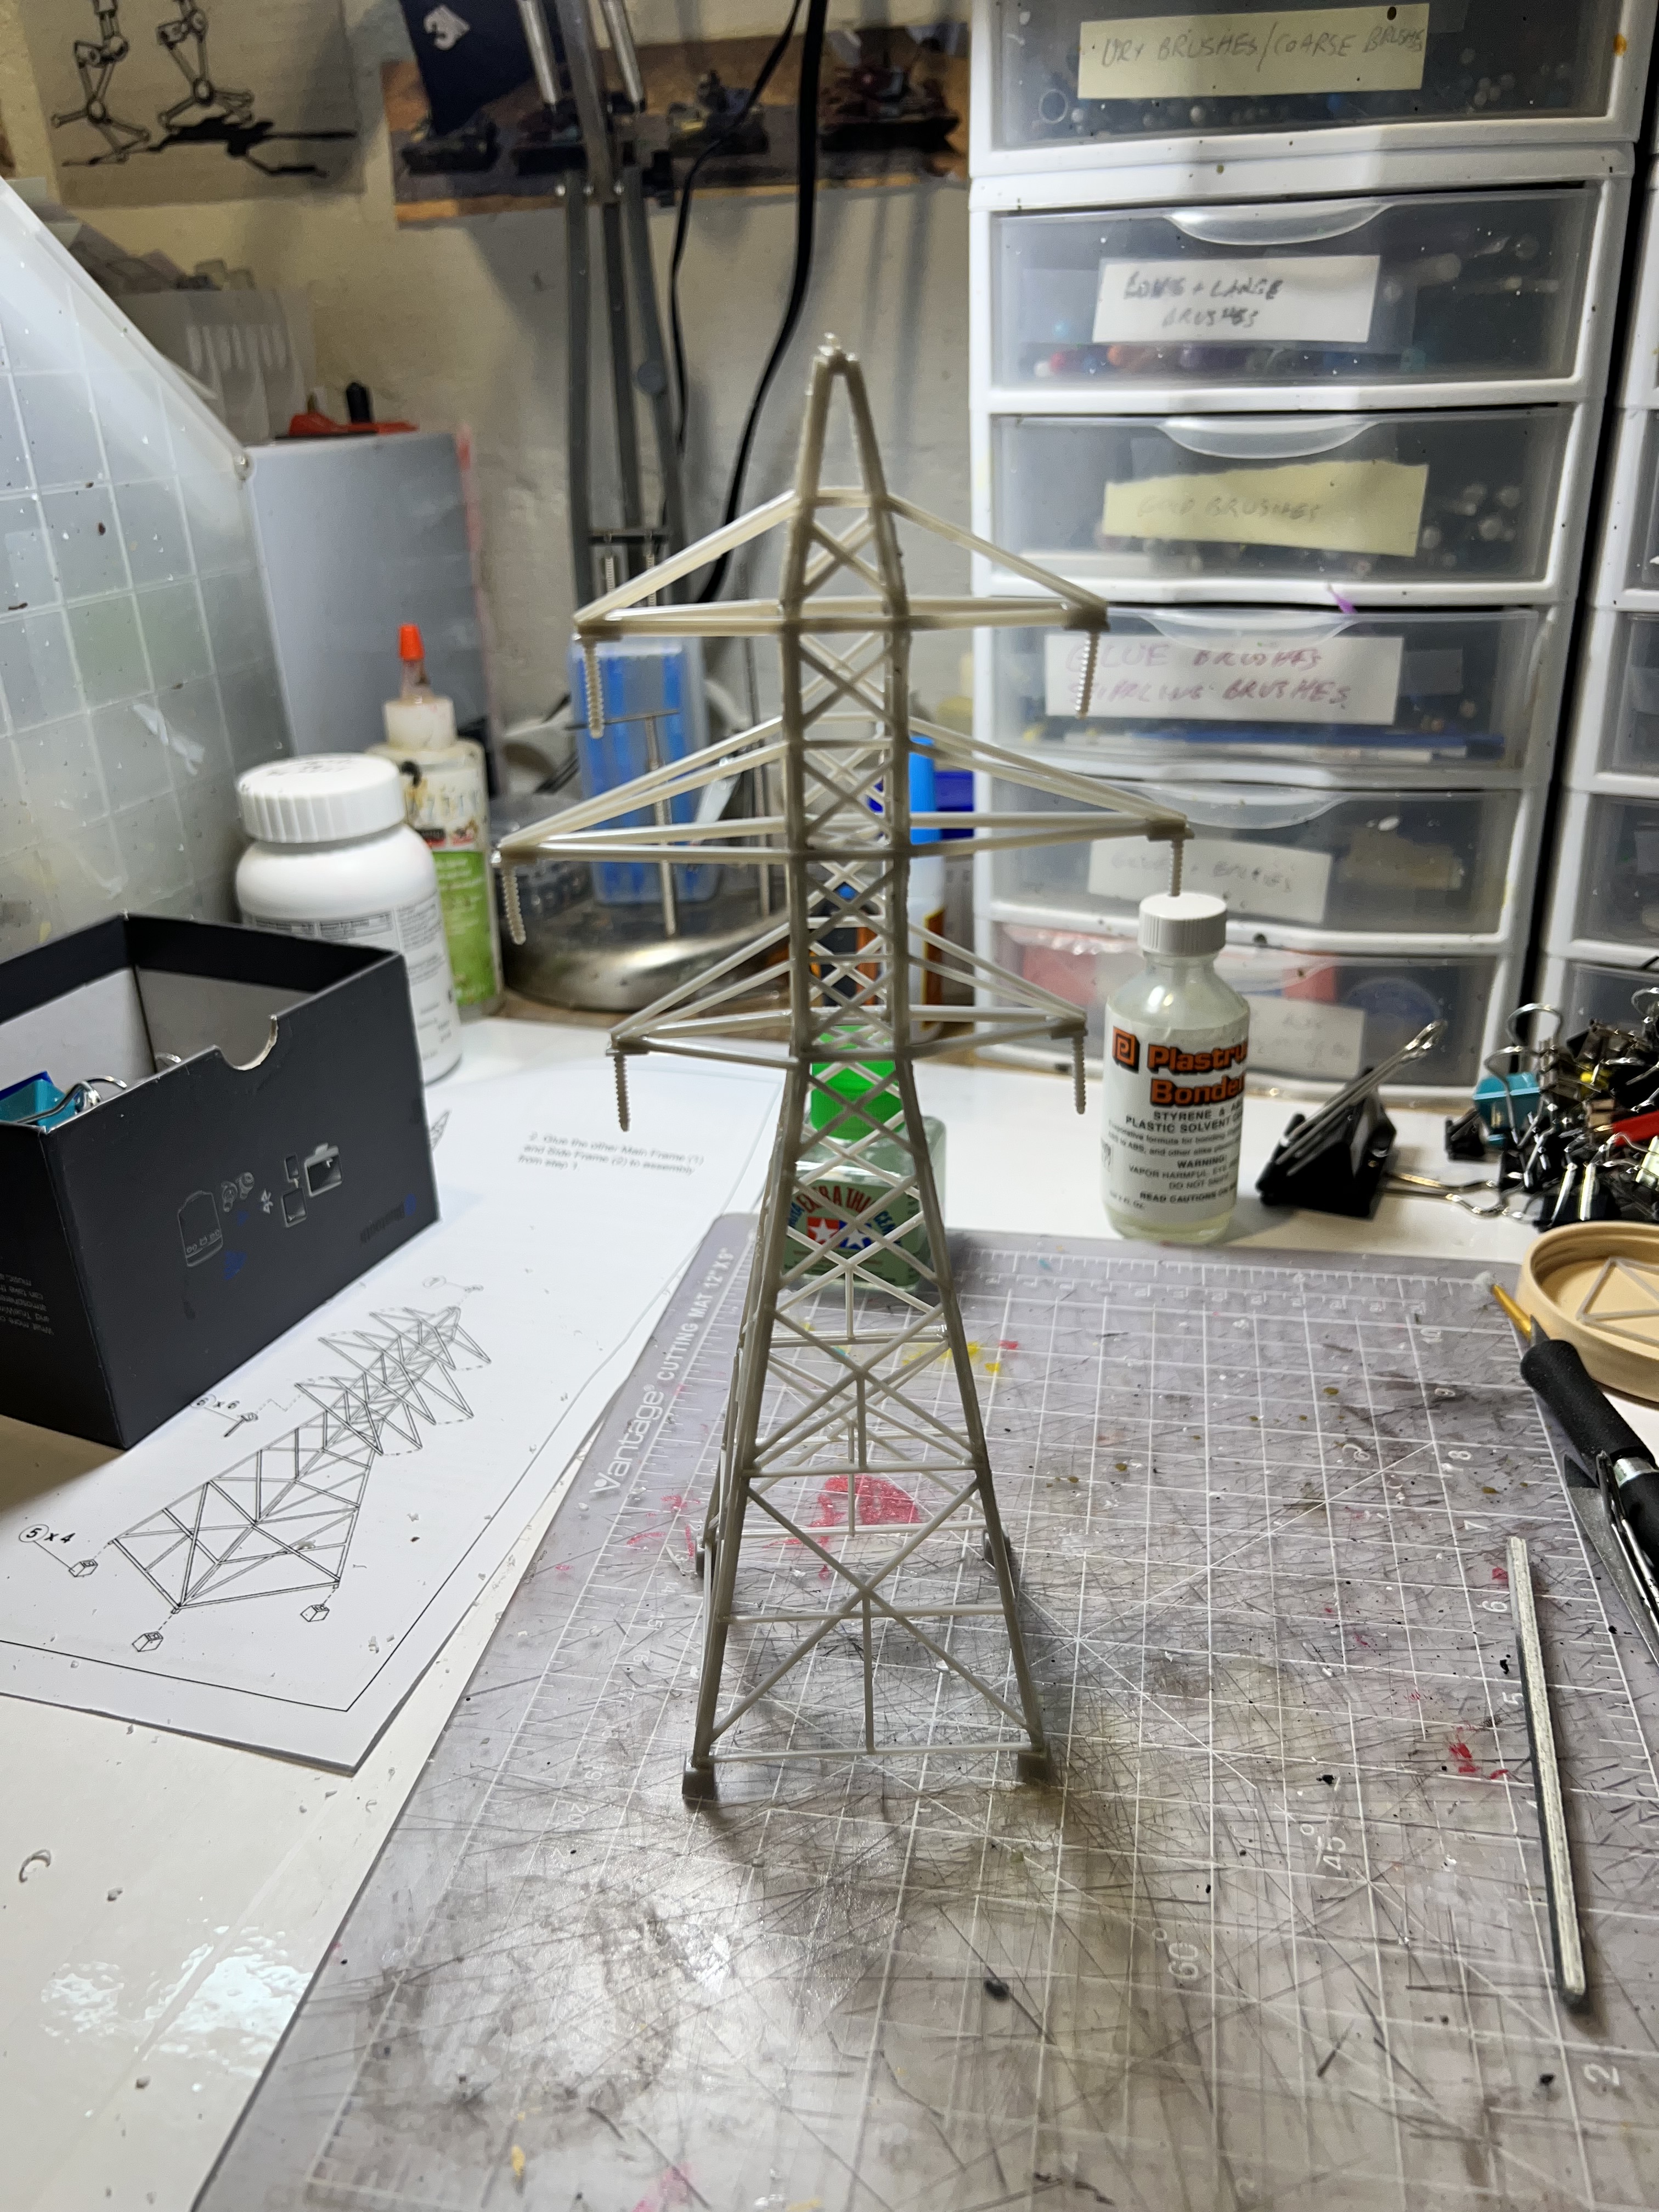
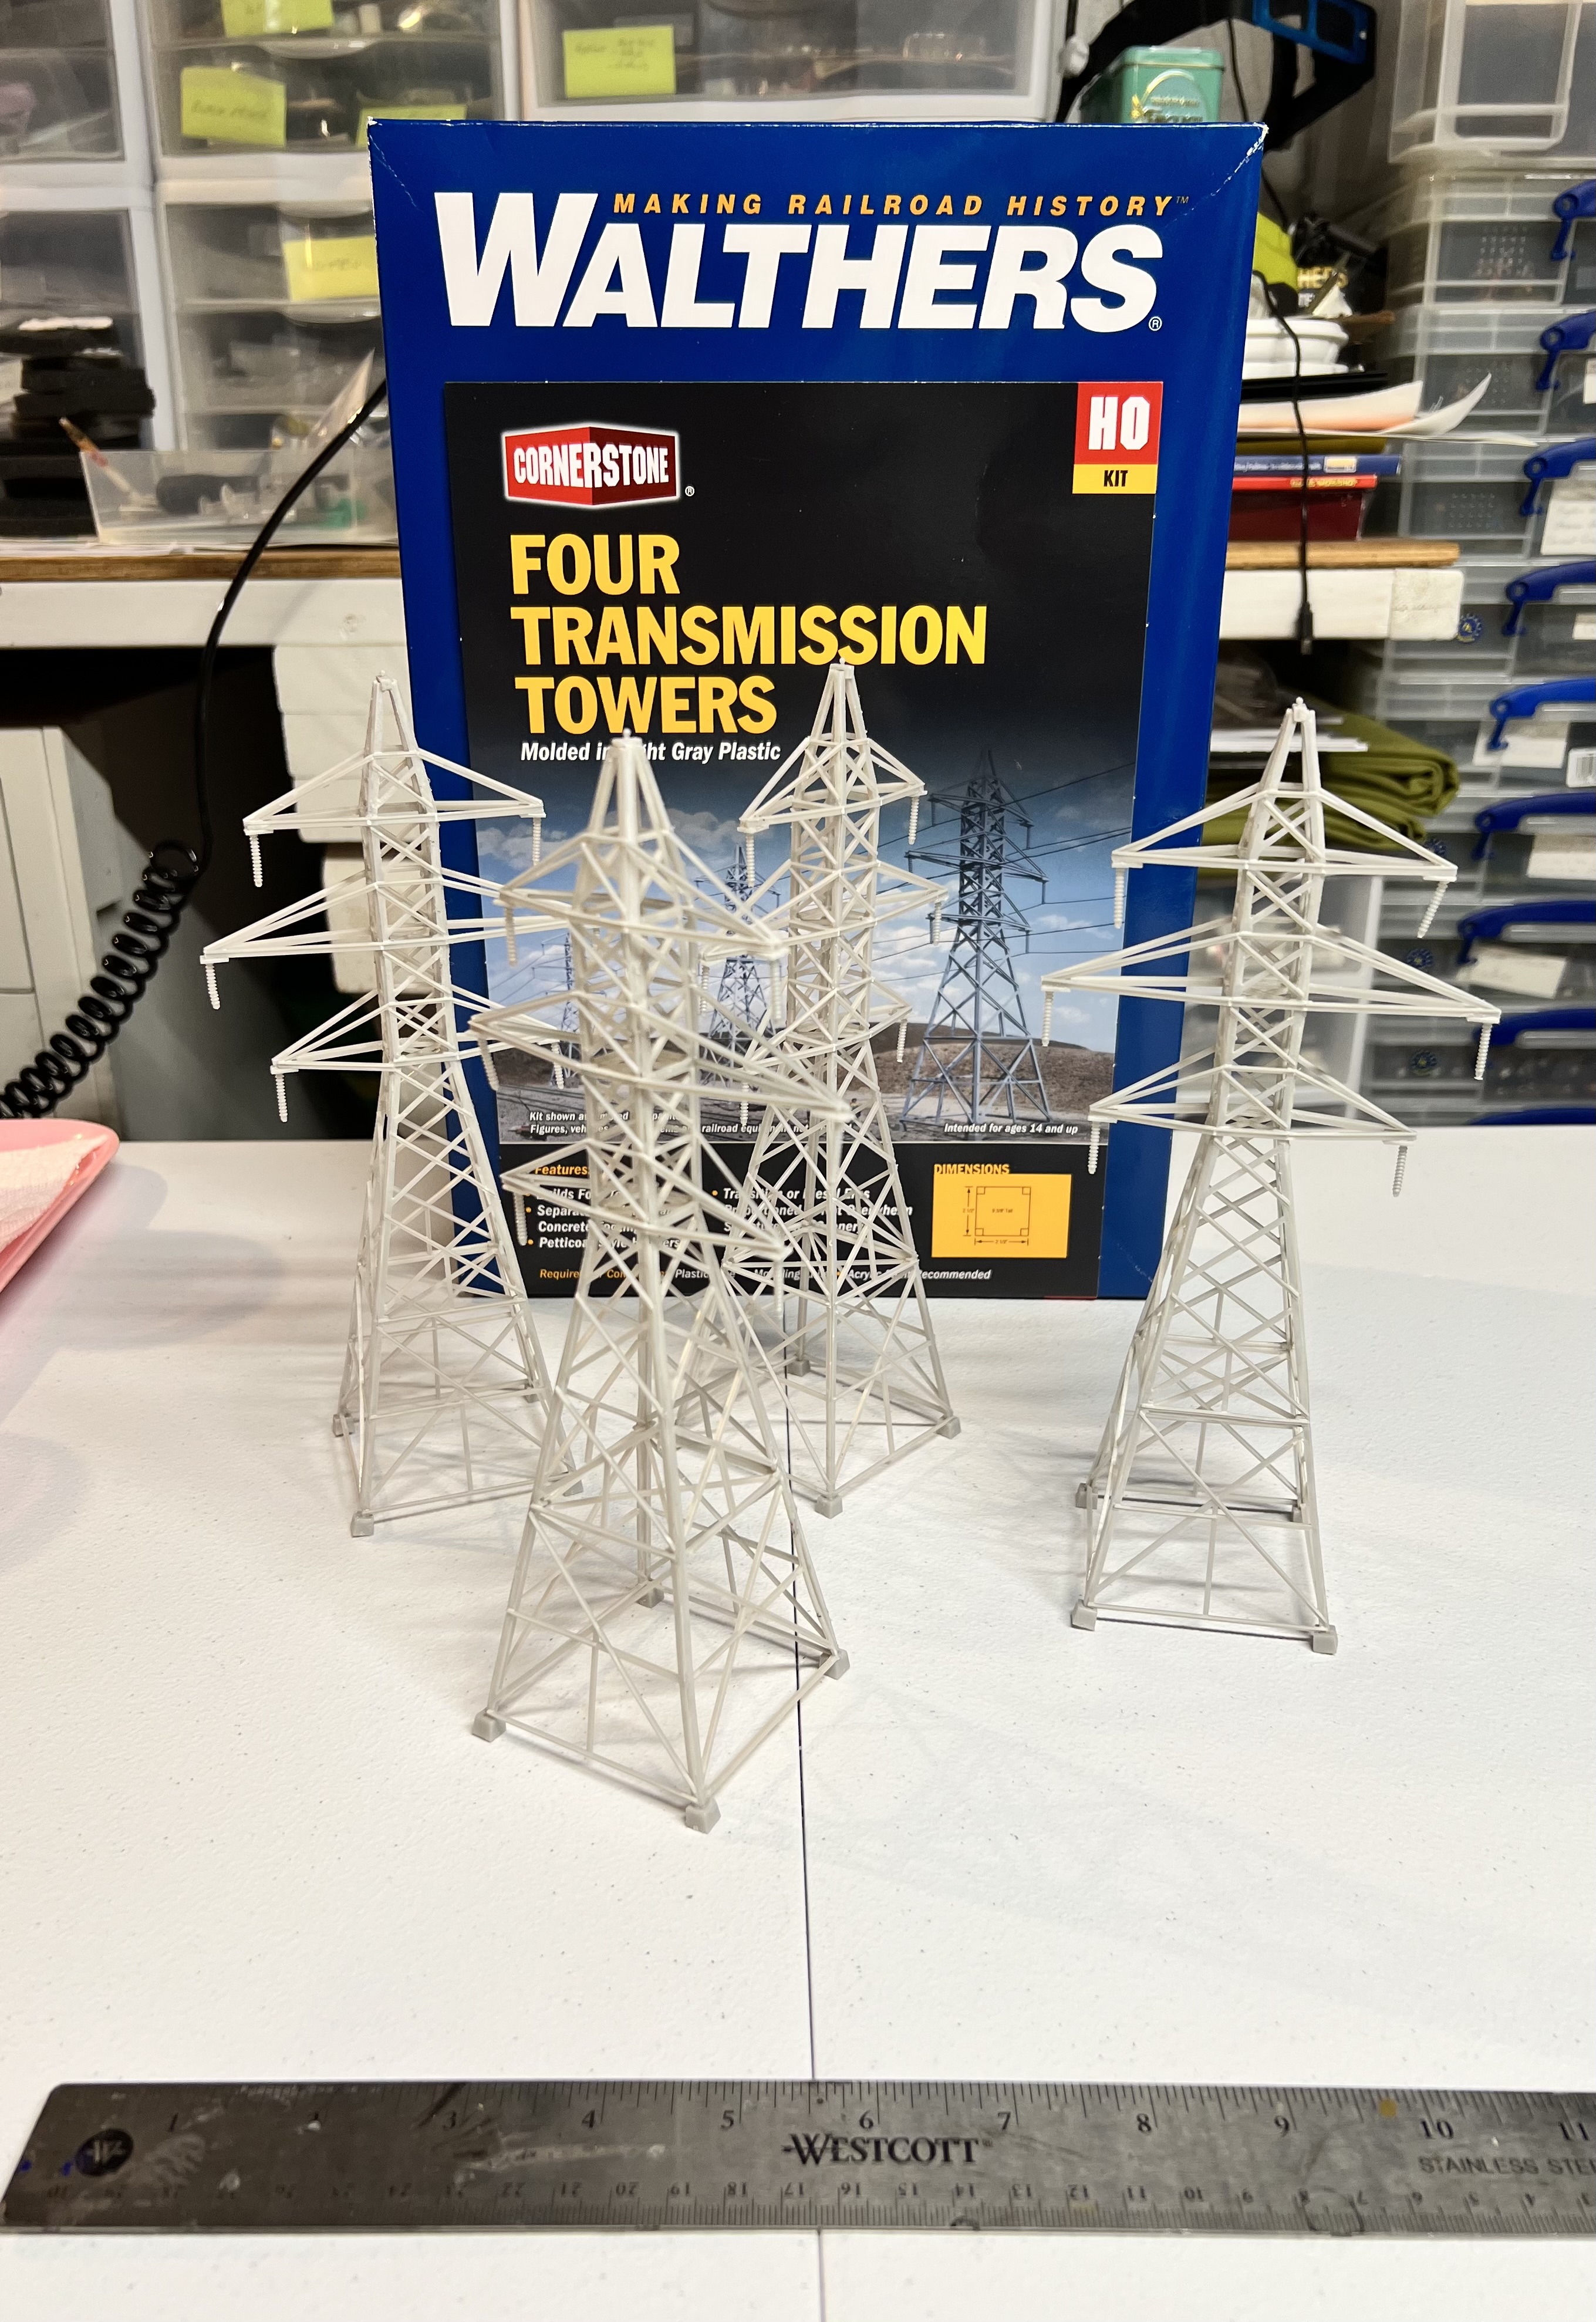
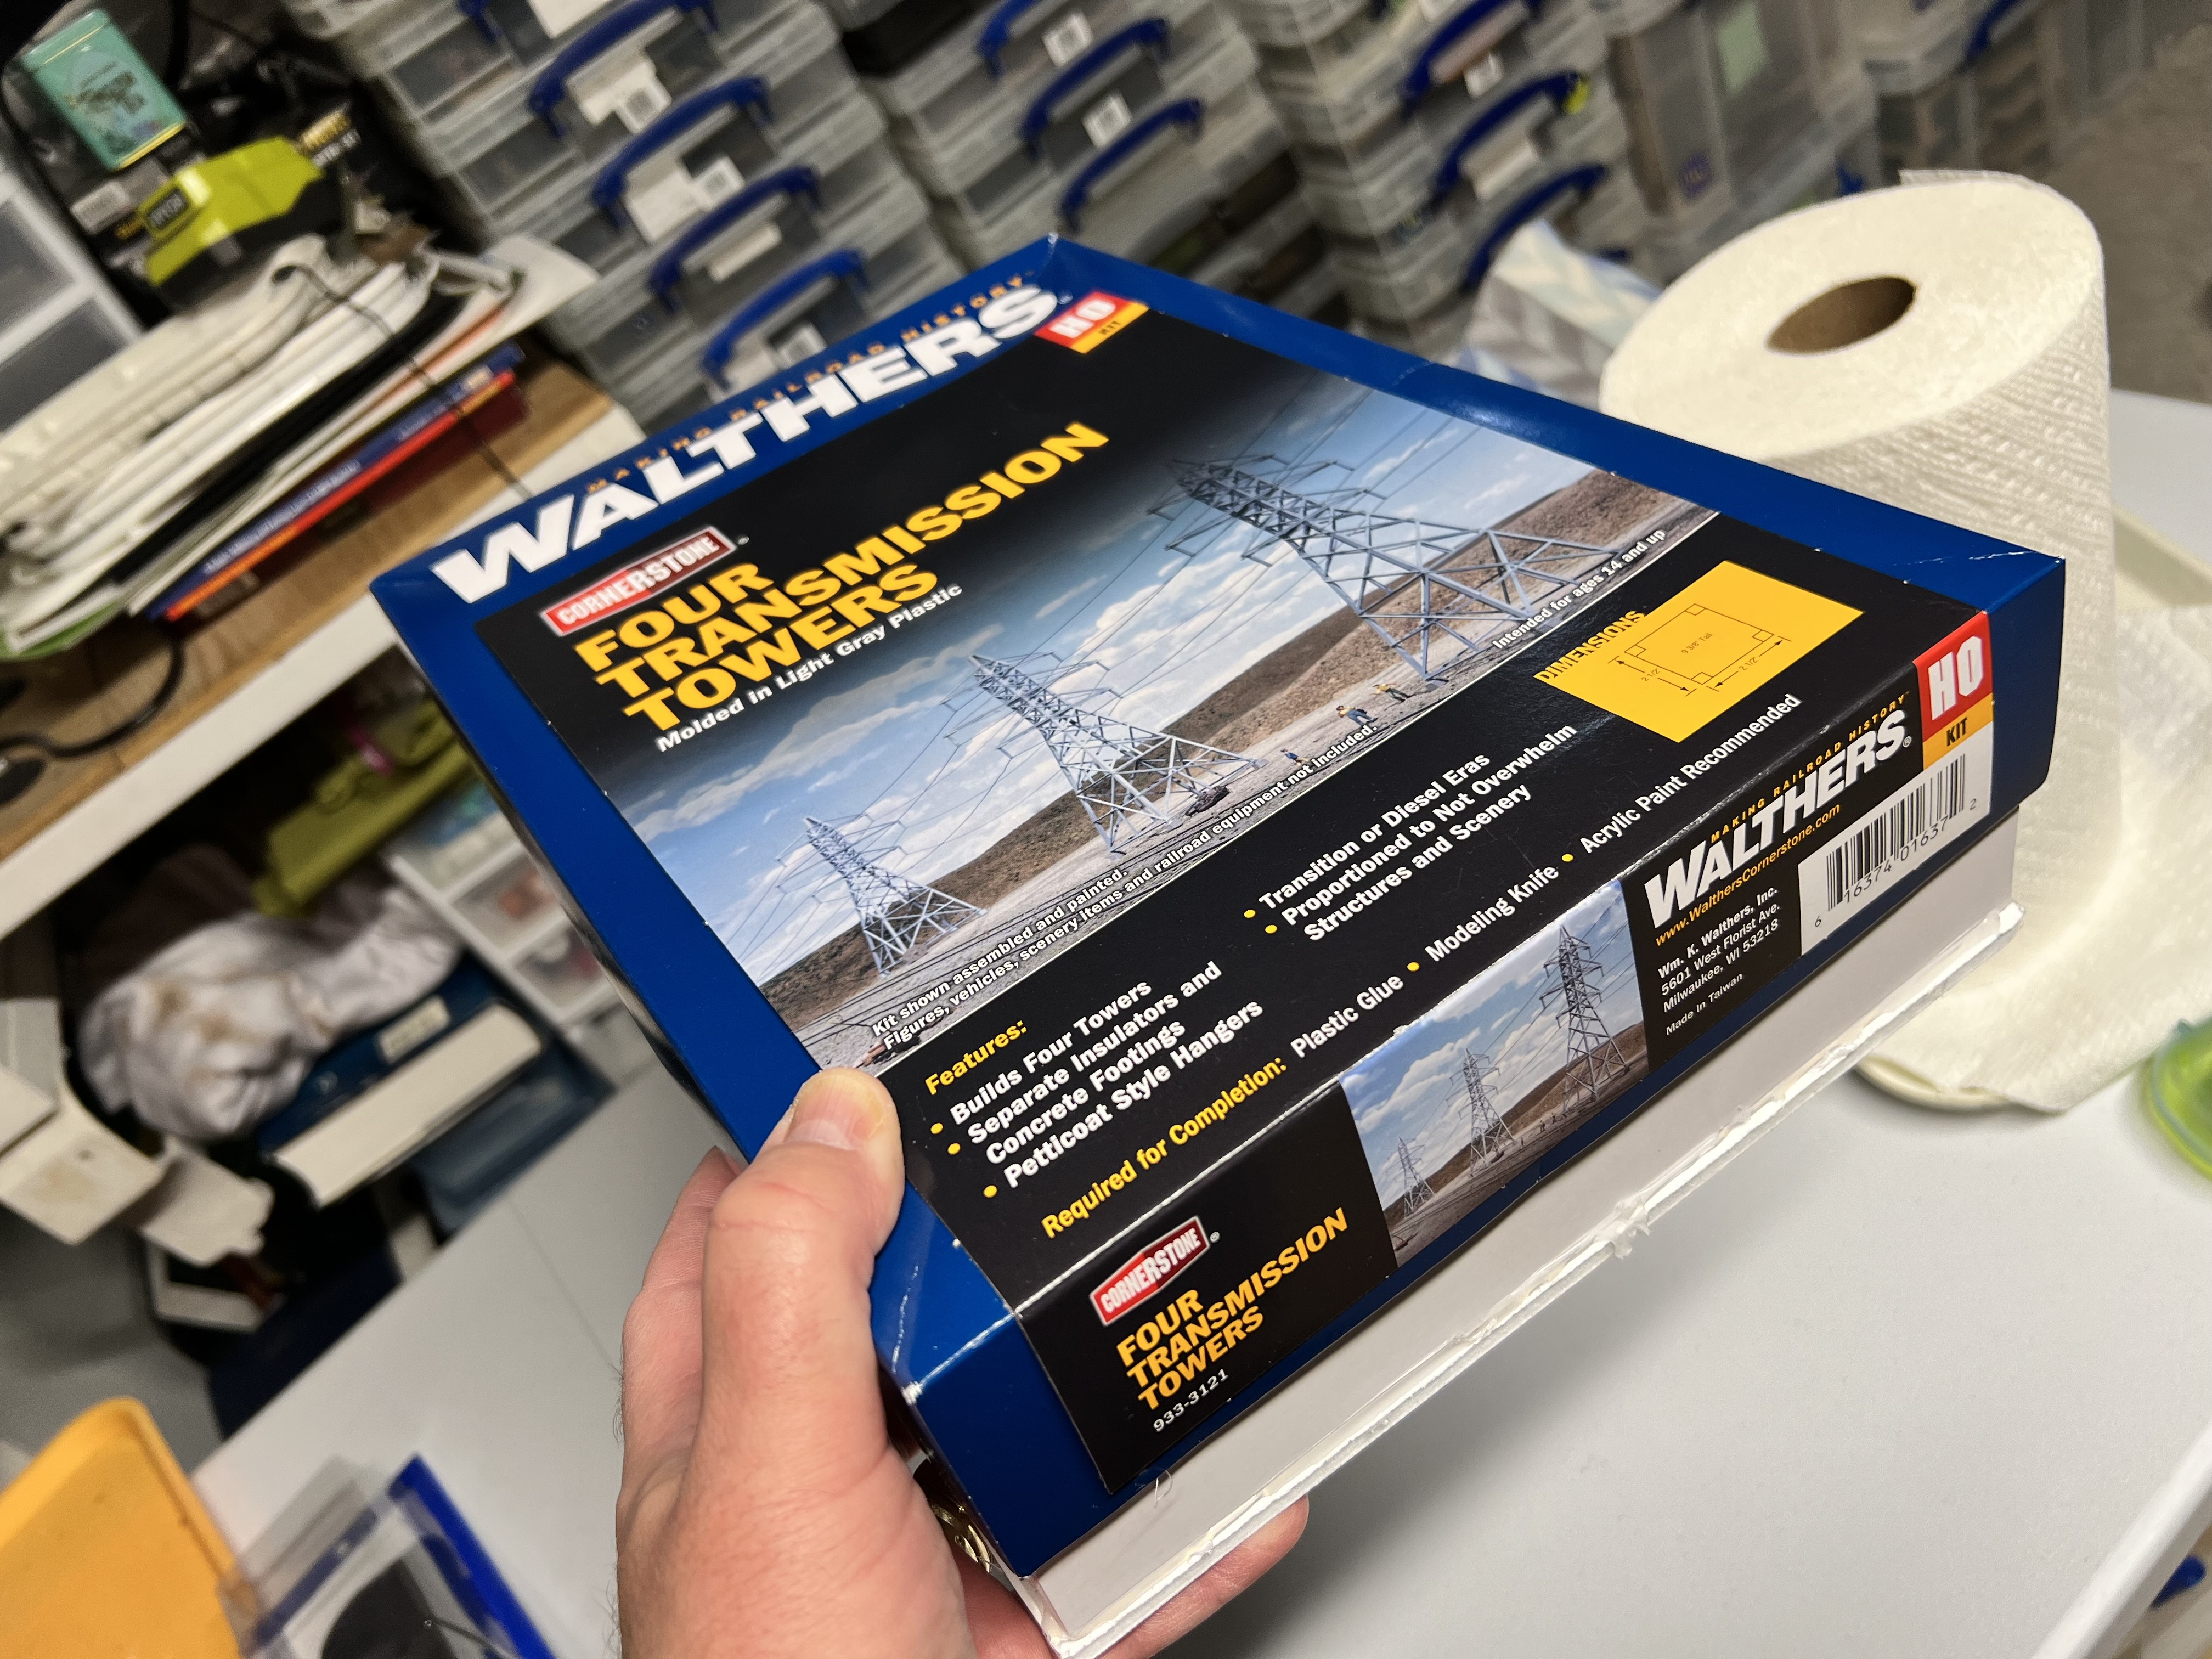
I thought transmission towers – rusty ones – would be great in that role. I found a railroad terrain kit on eBay. It was HO scale. It would go well with the other pieces of rusty fun. These were “Walther’s Cornerstone Four Transmission Towers”.
The transmission towers kit.
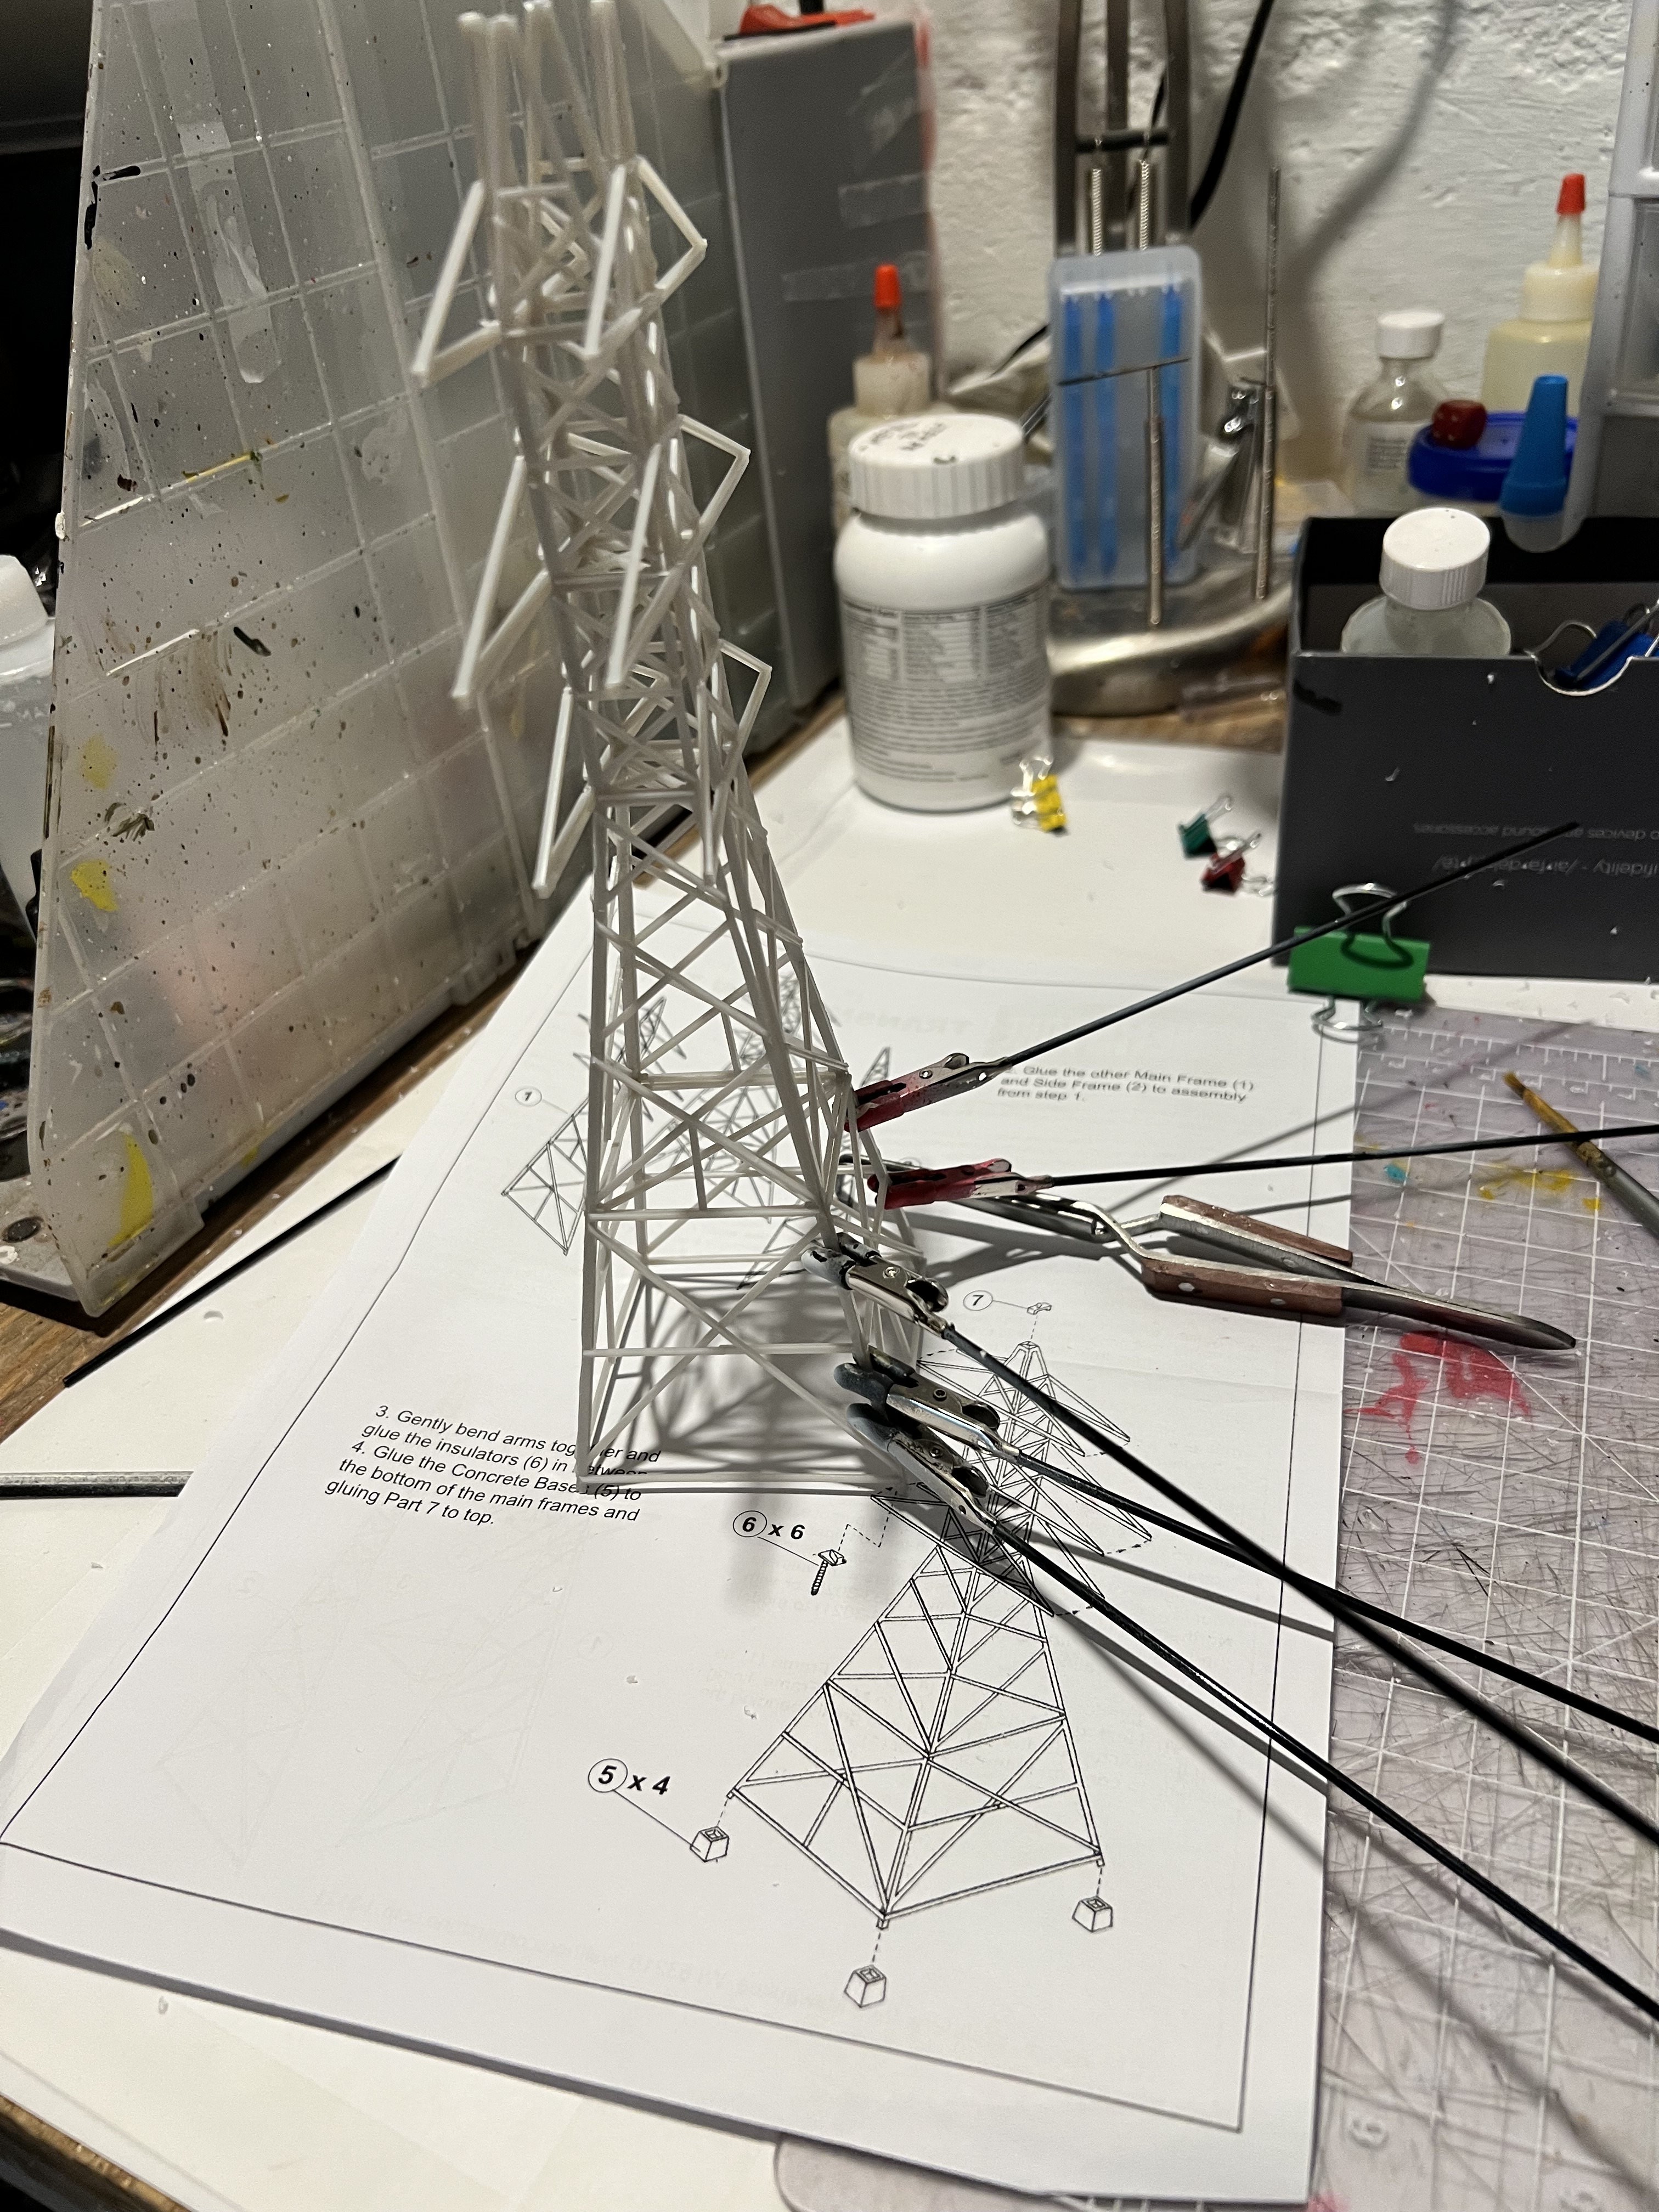
Assembly was a bit fiddly but manageable. It was not immediately clear to me which sides were front or back – but by the fourth iteration I got it down. Luckily, plastic cement covers any mistakes in assemble. I did find using rubber-shoed alligator clips to hold sections together while the cement set to be VERY helpful.
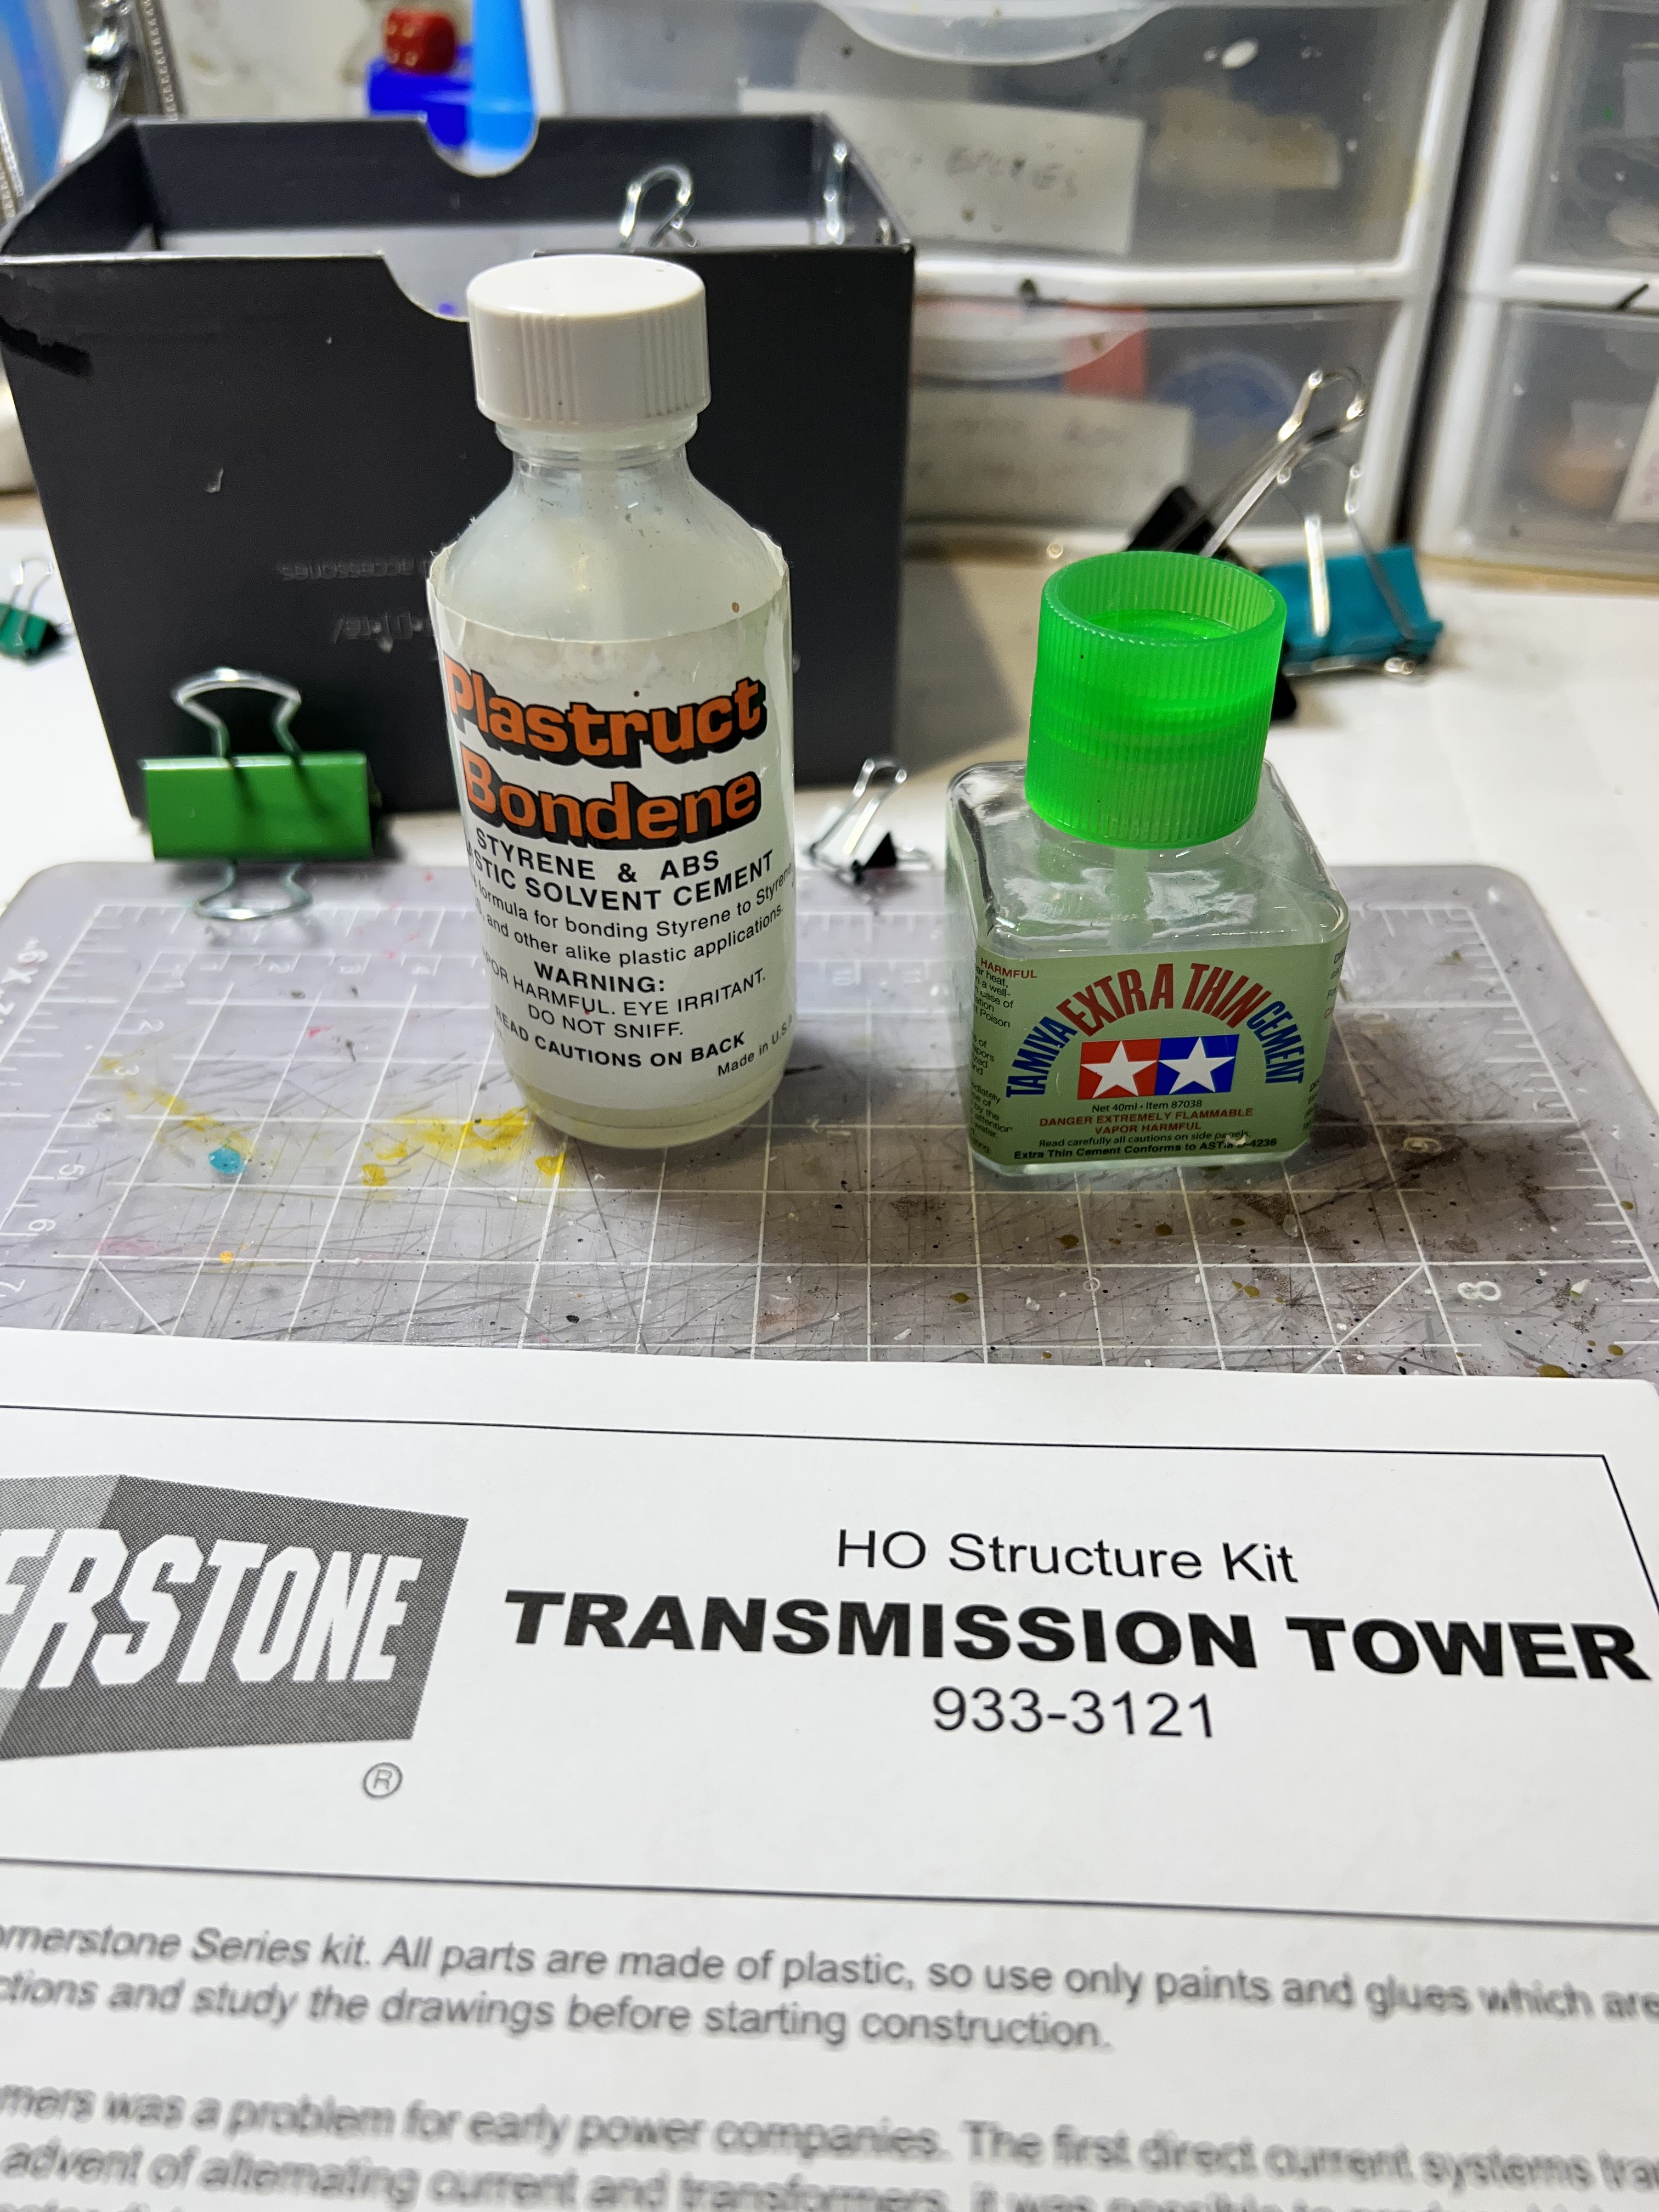
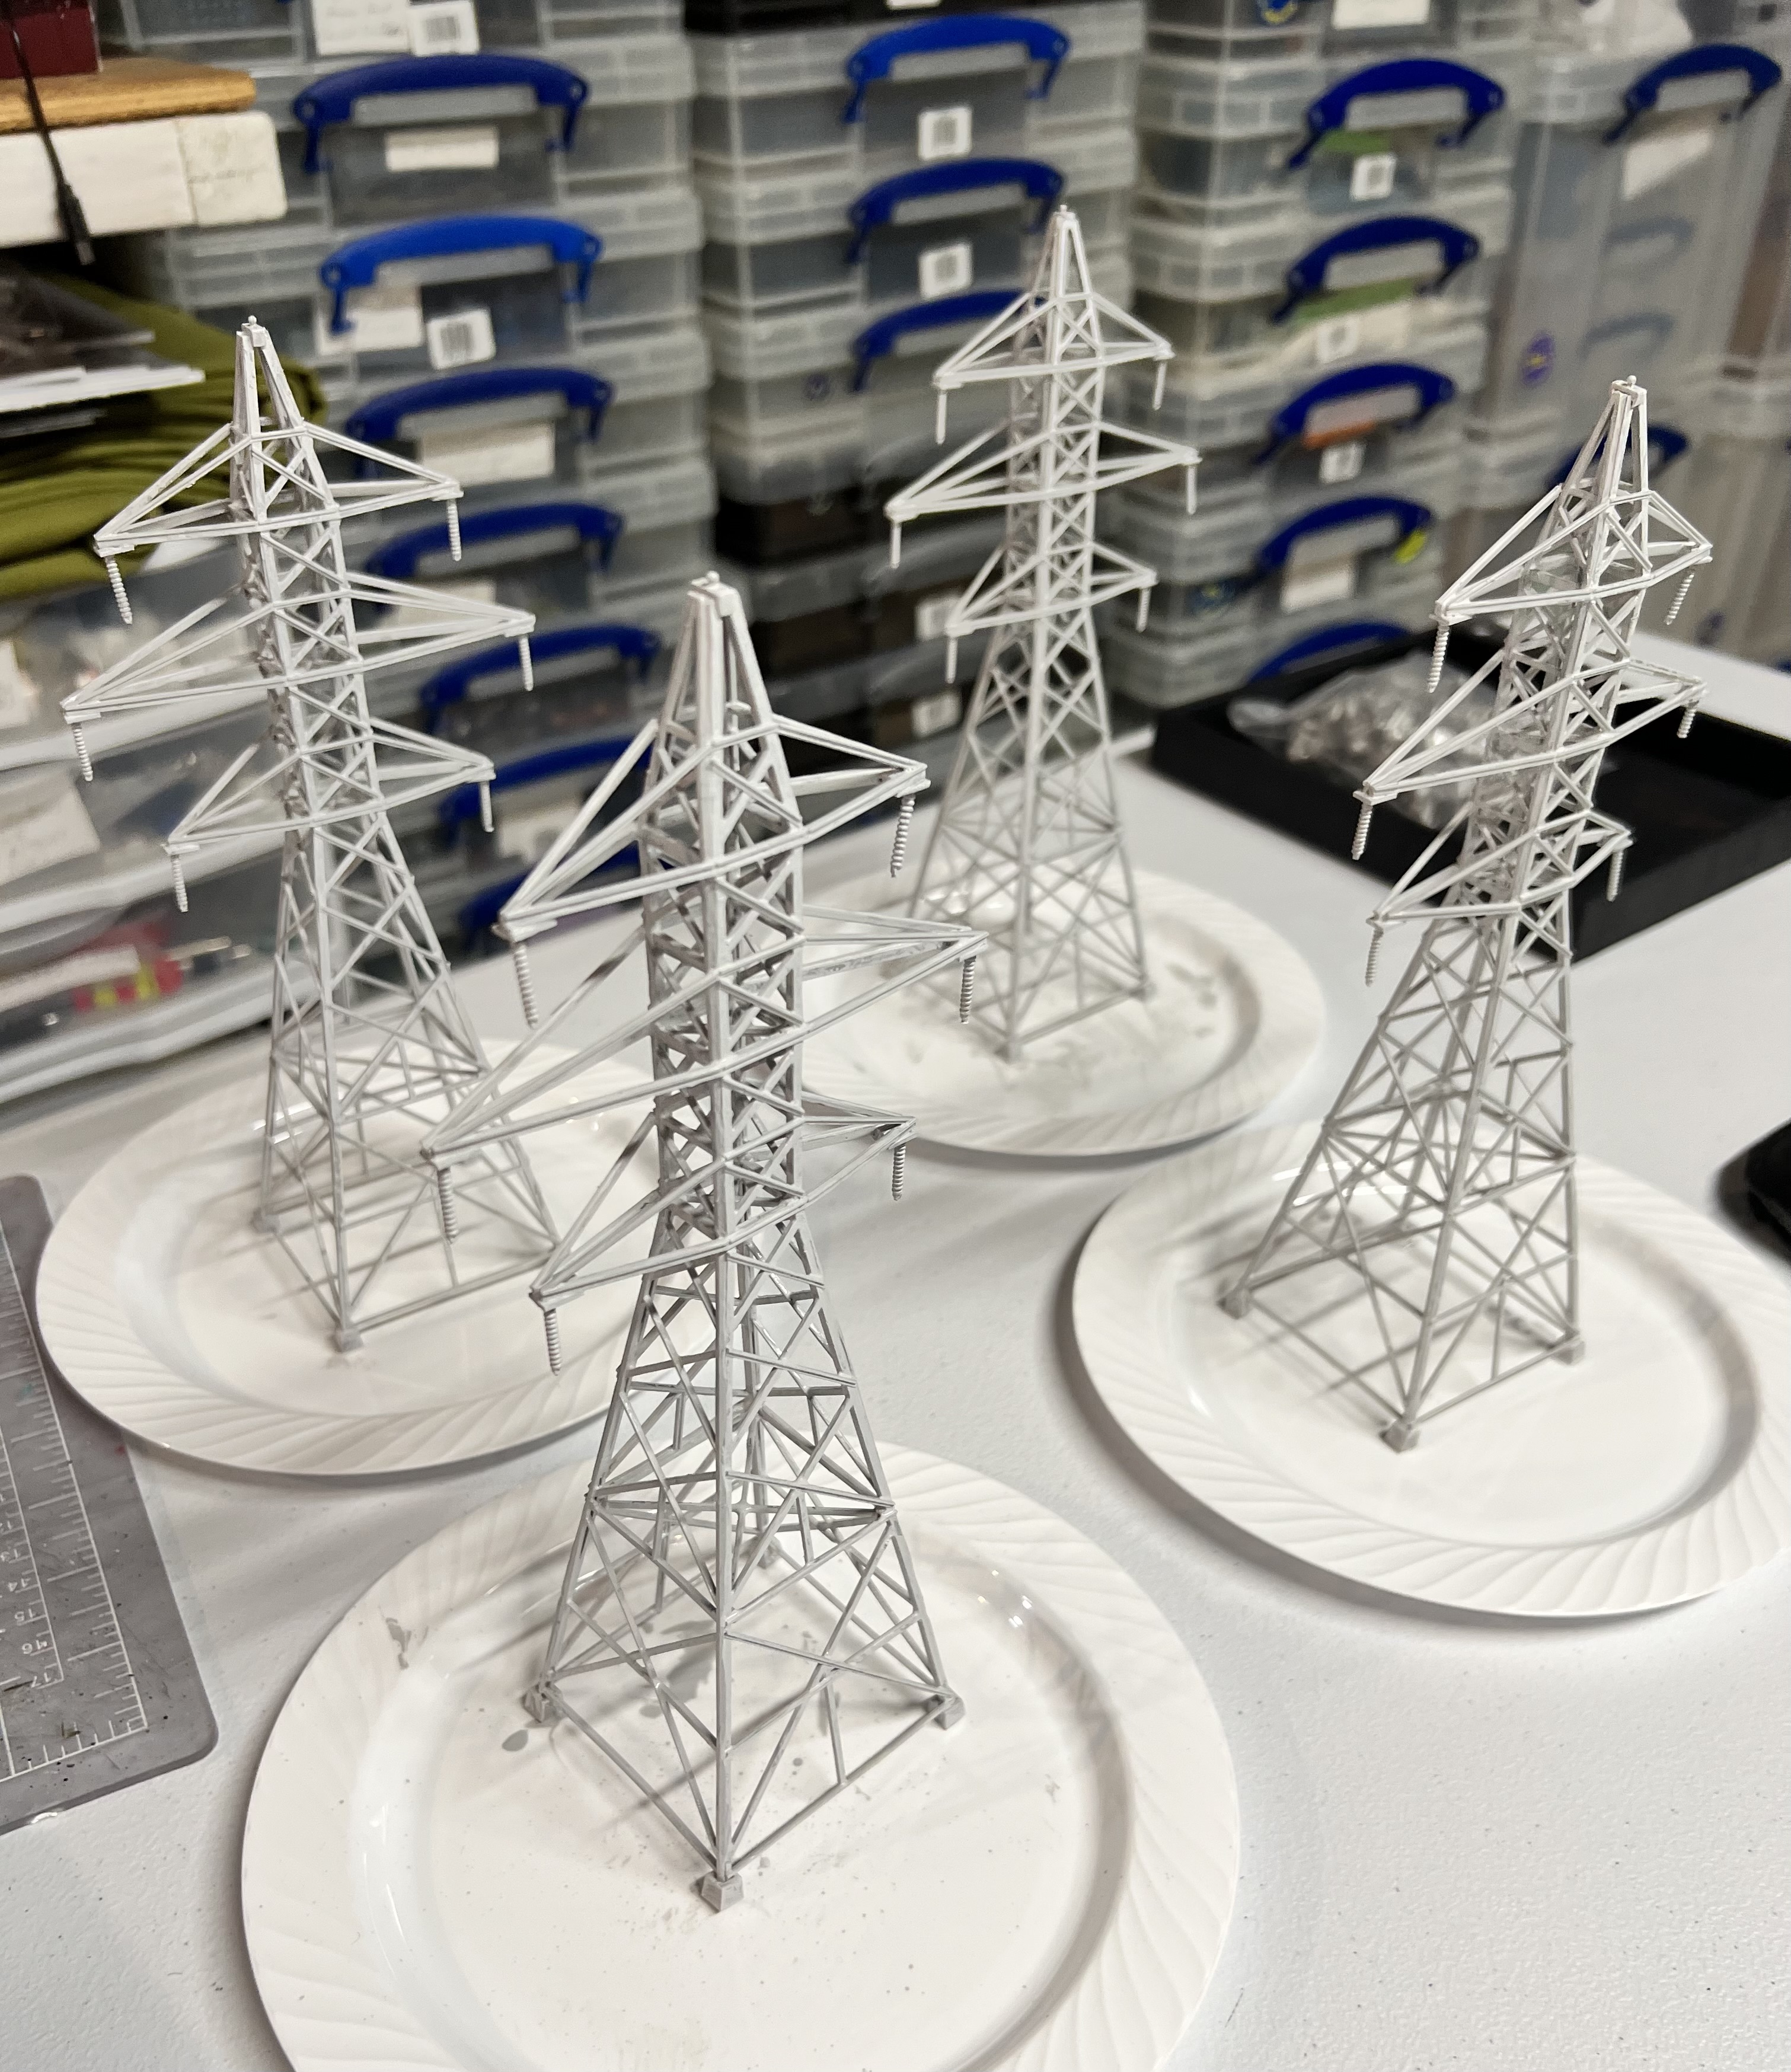
The first assembly went smoothly……the second was off (again figuring out which side went where was a bit confusing). Alligator clips to the rescue!All four assembled.The cements I used.The towers primed in grey.
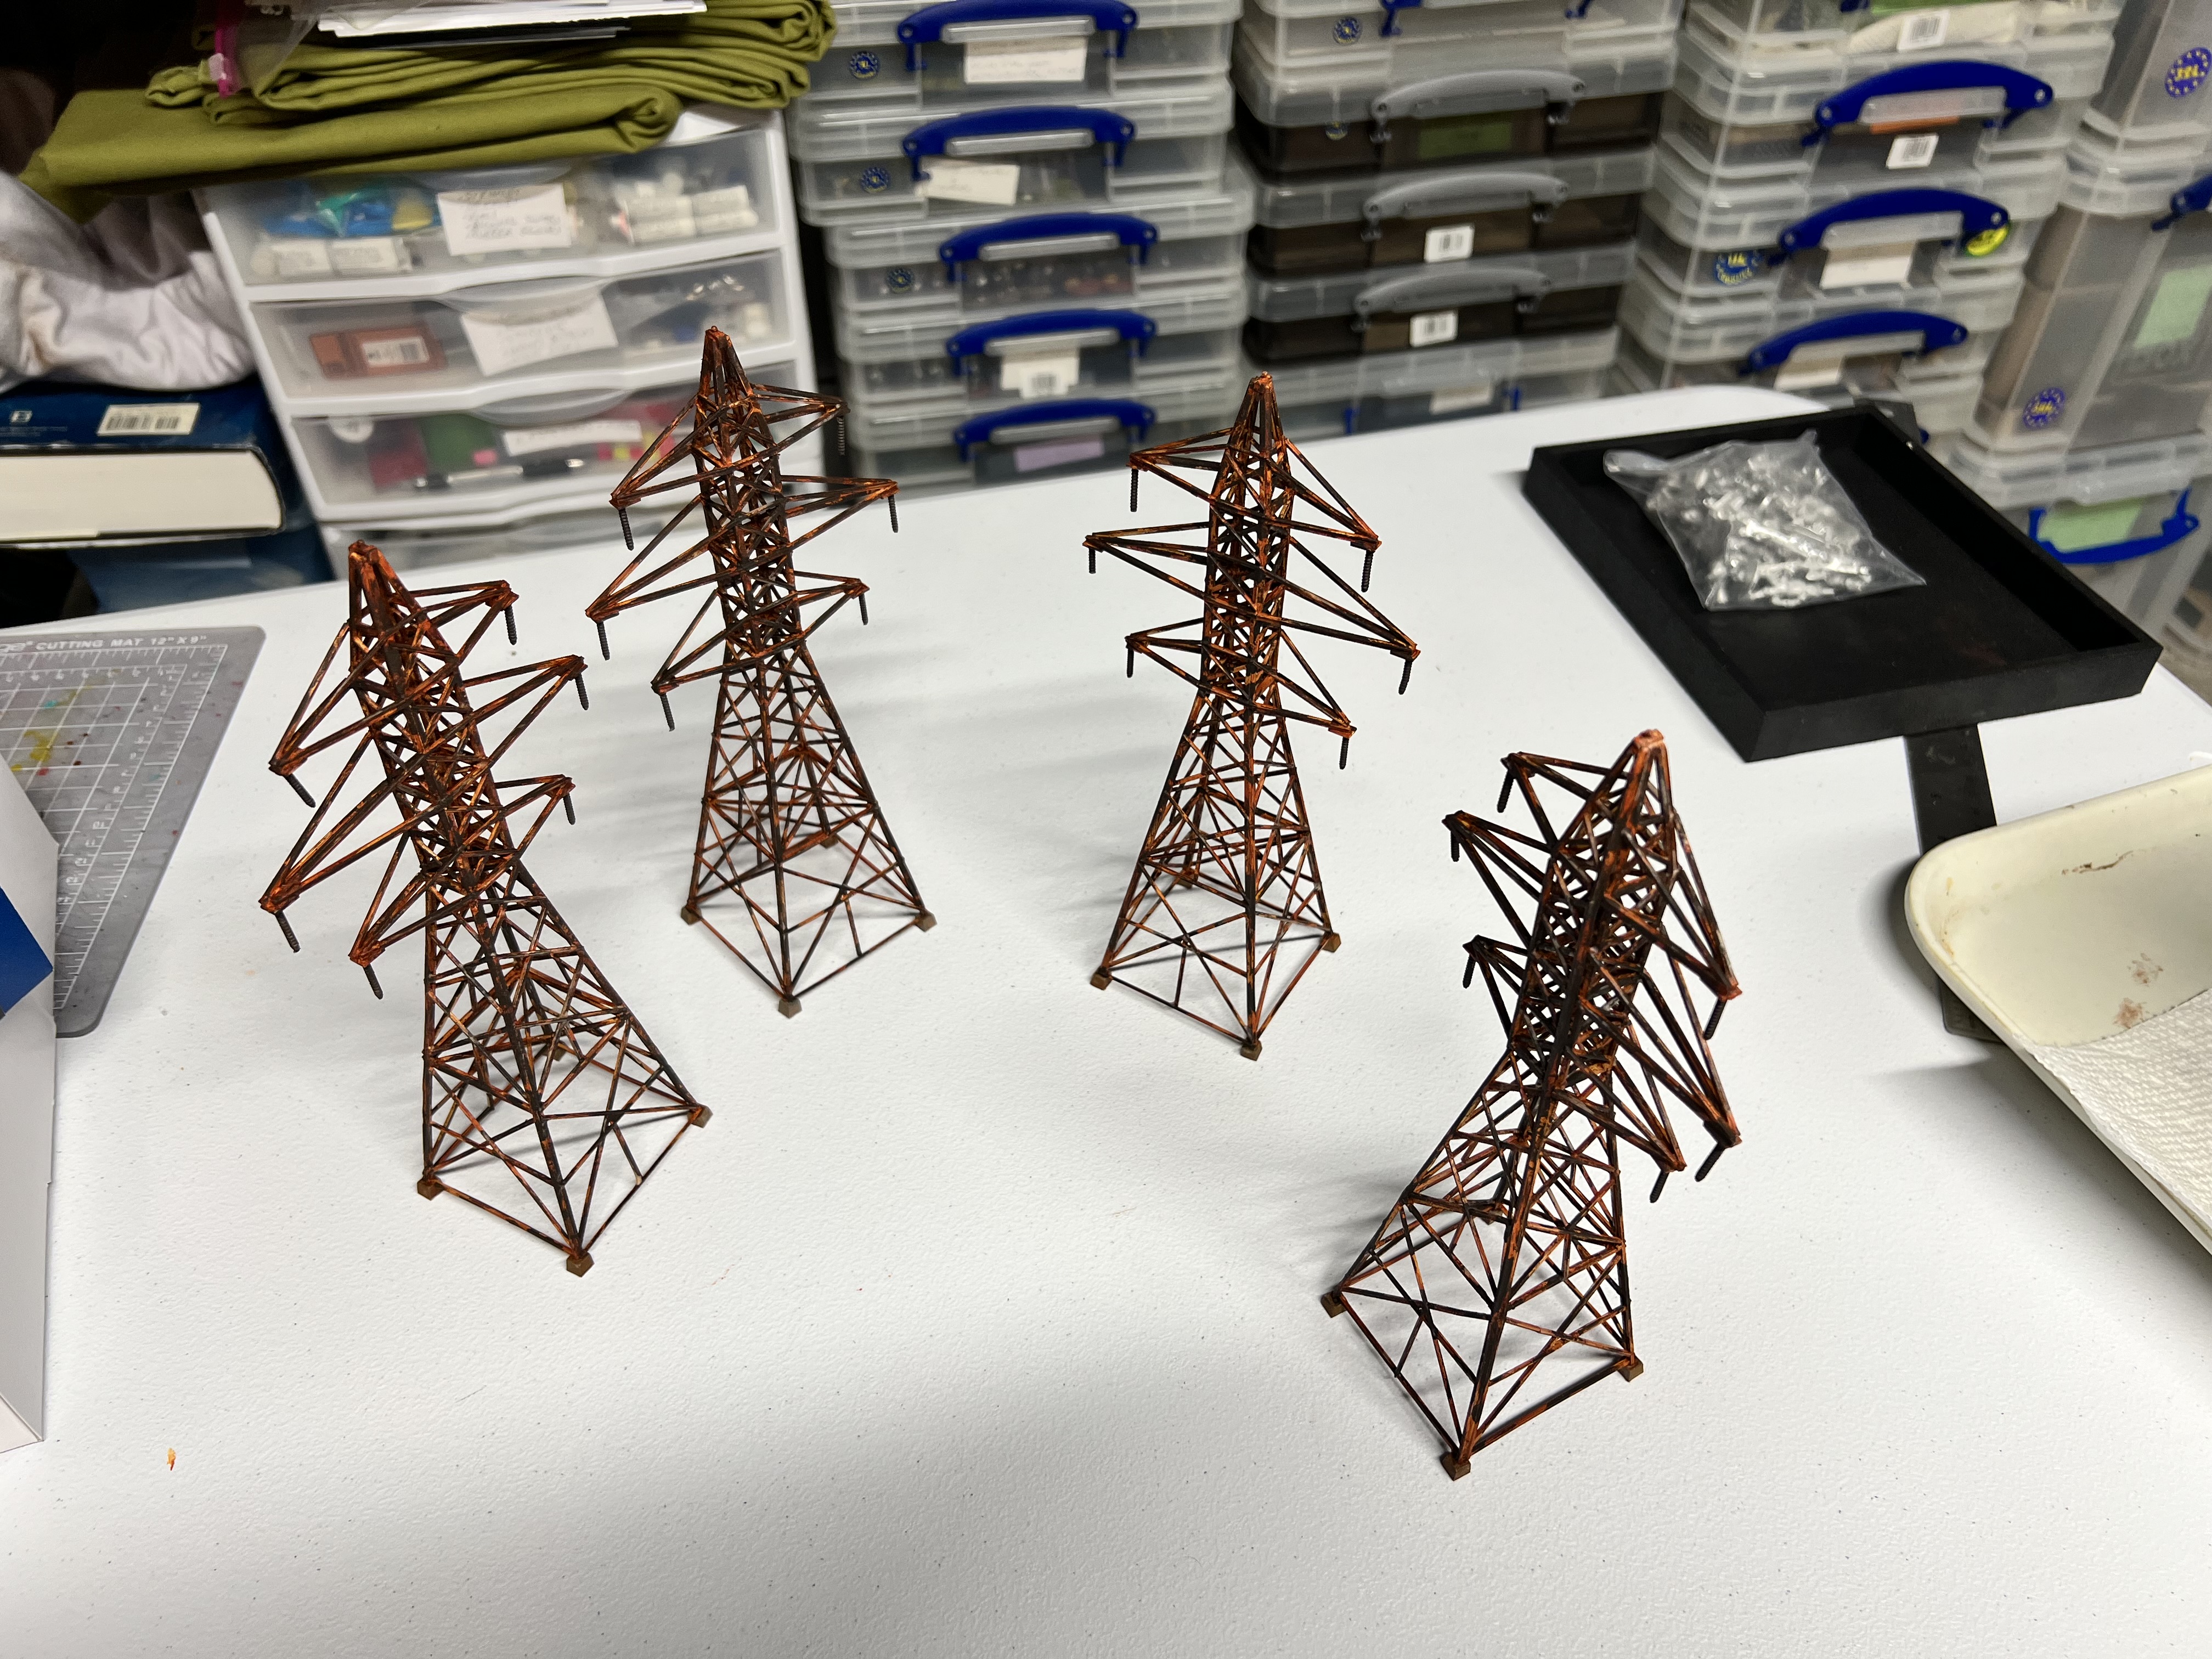
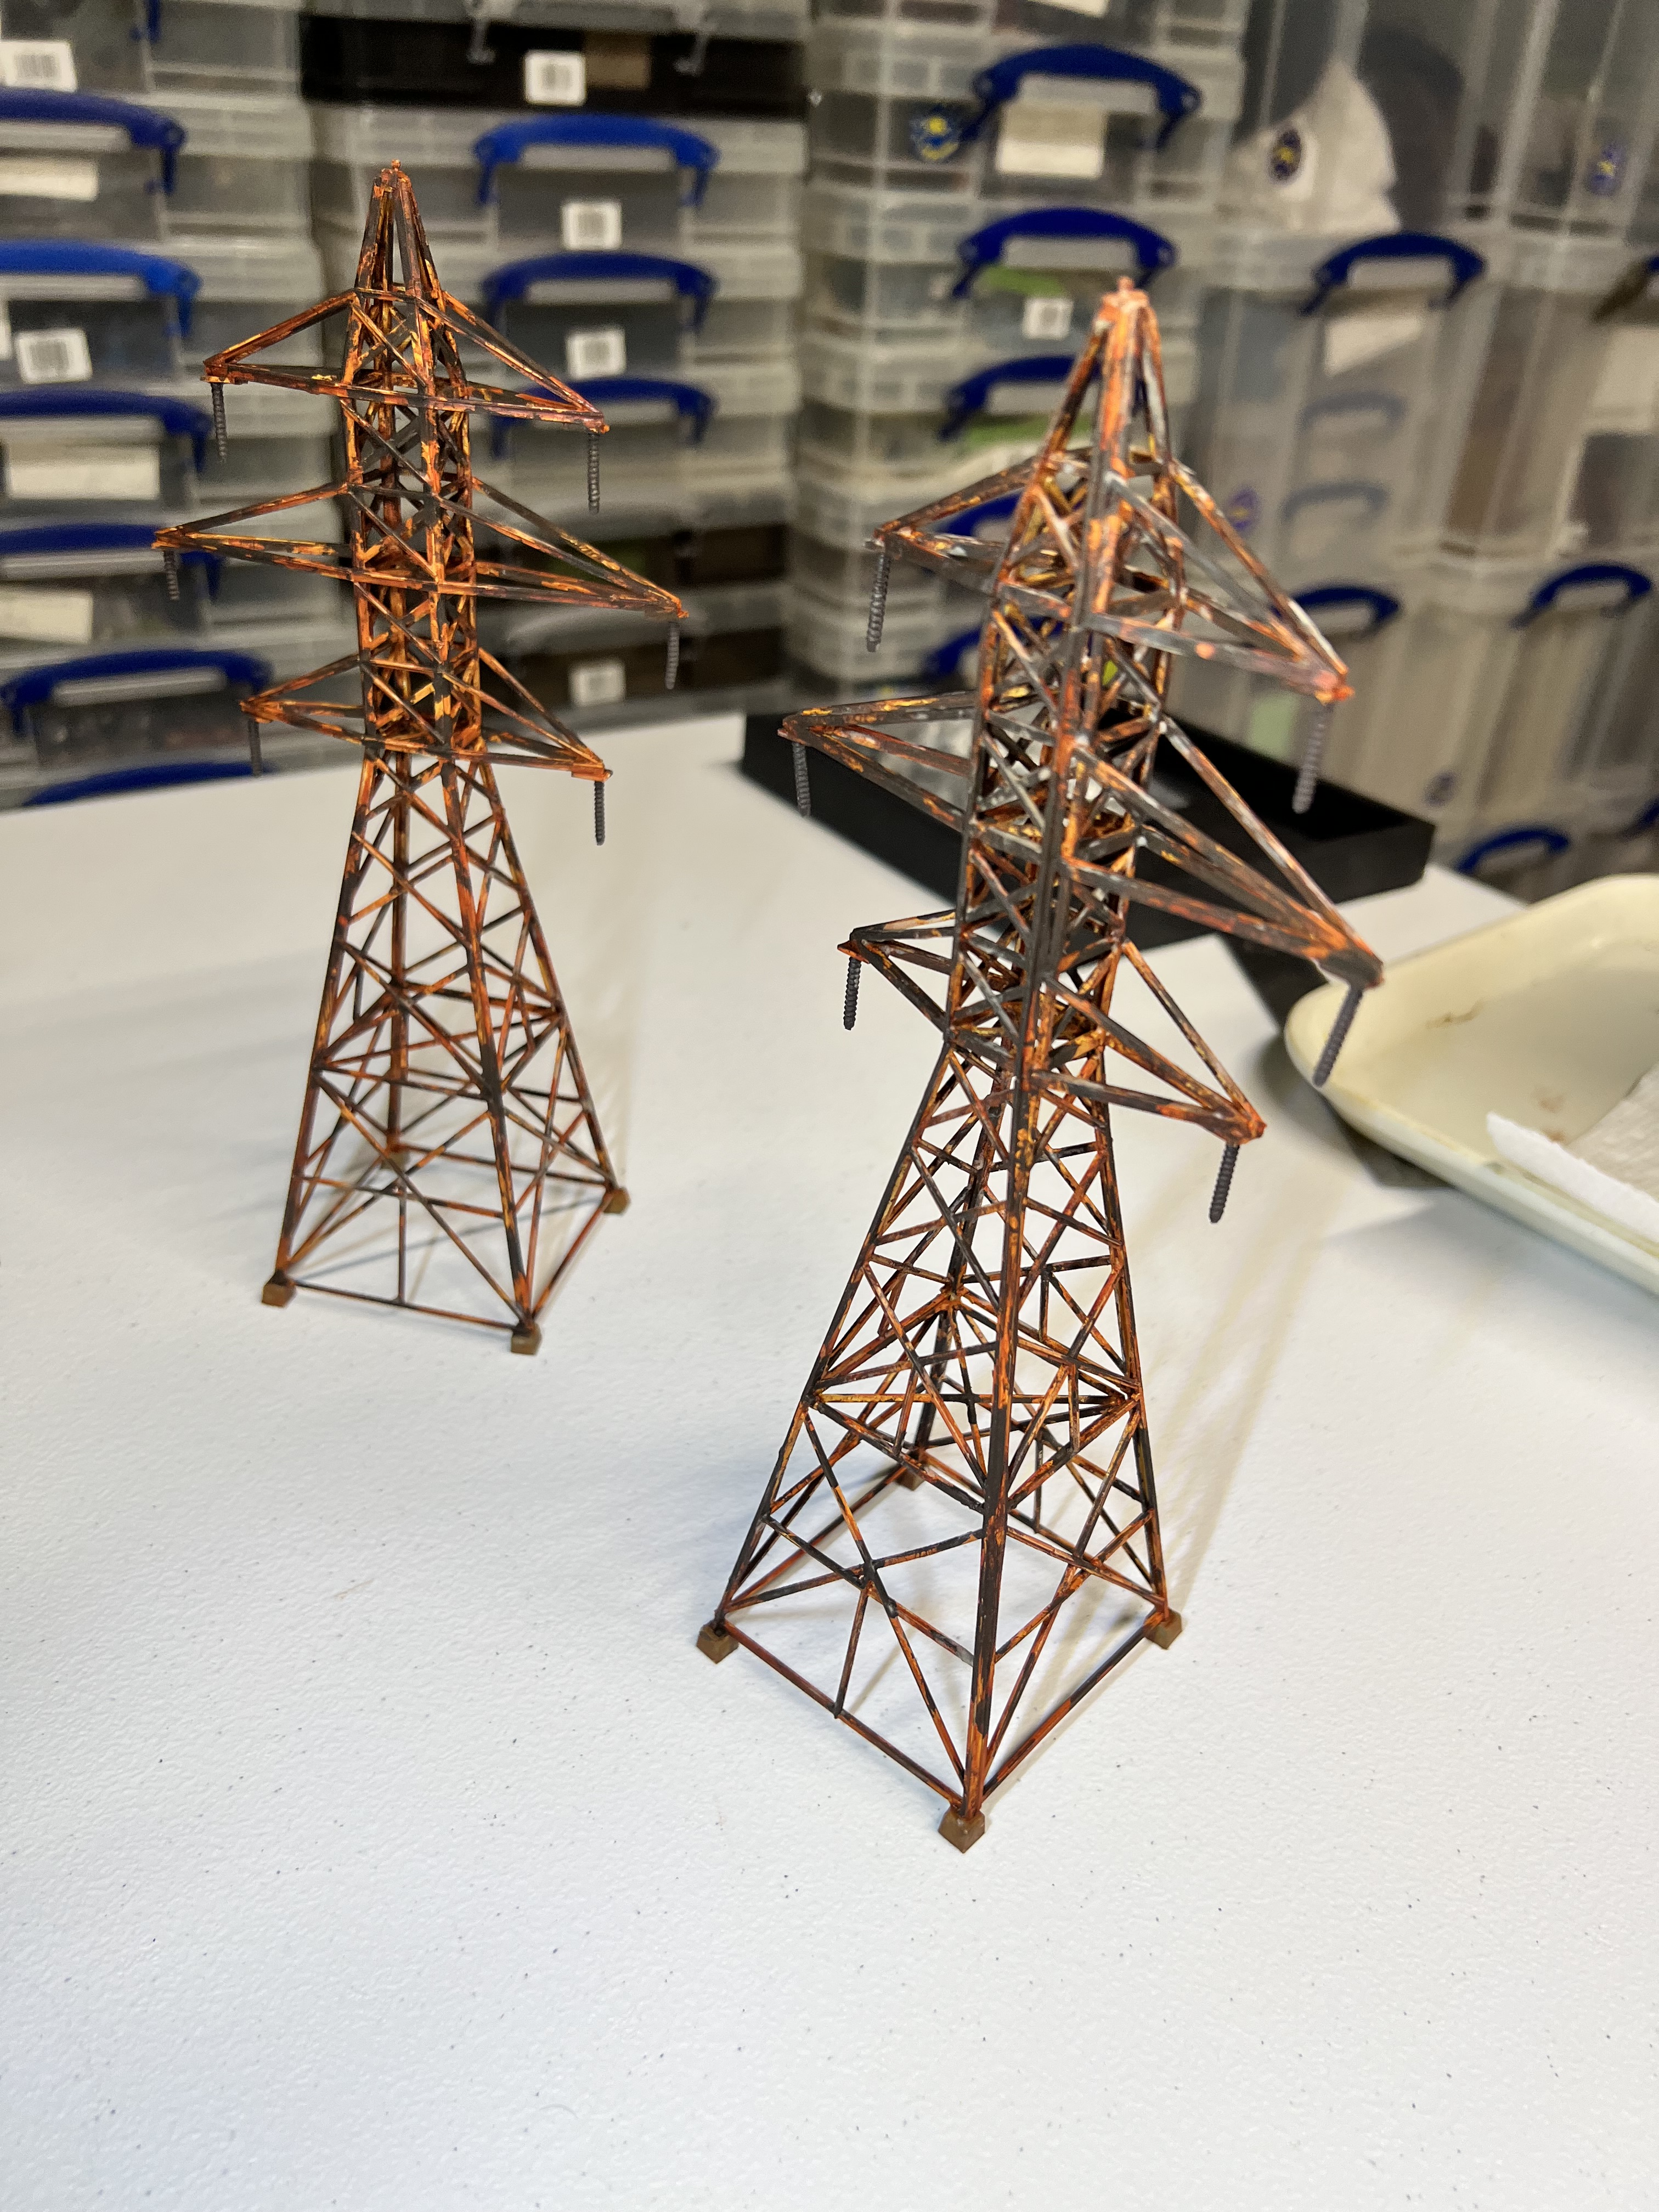
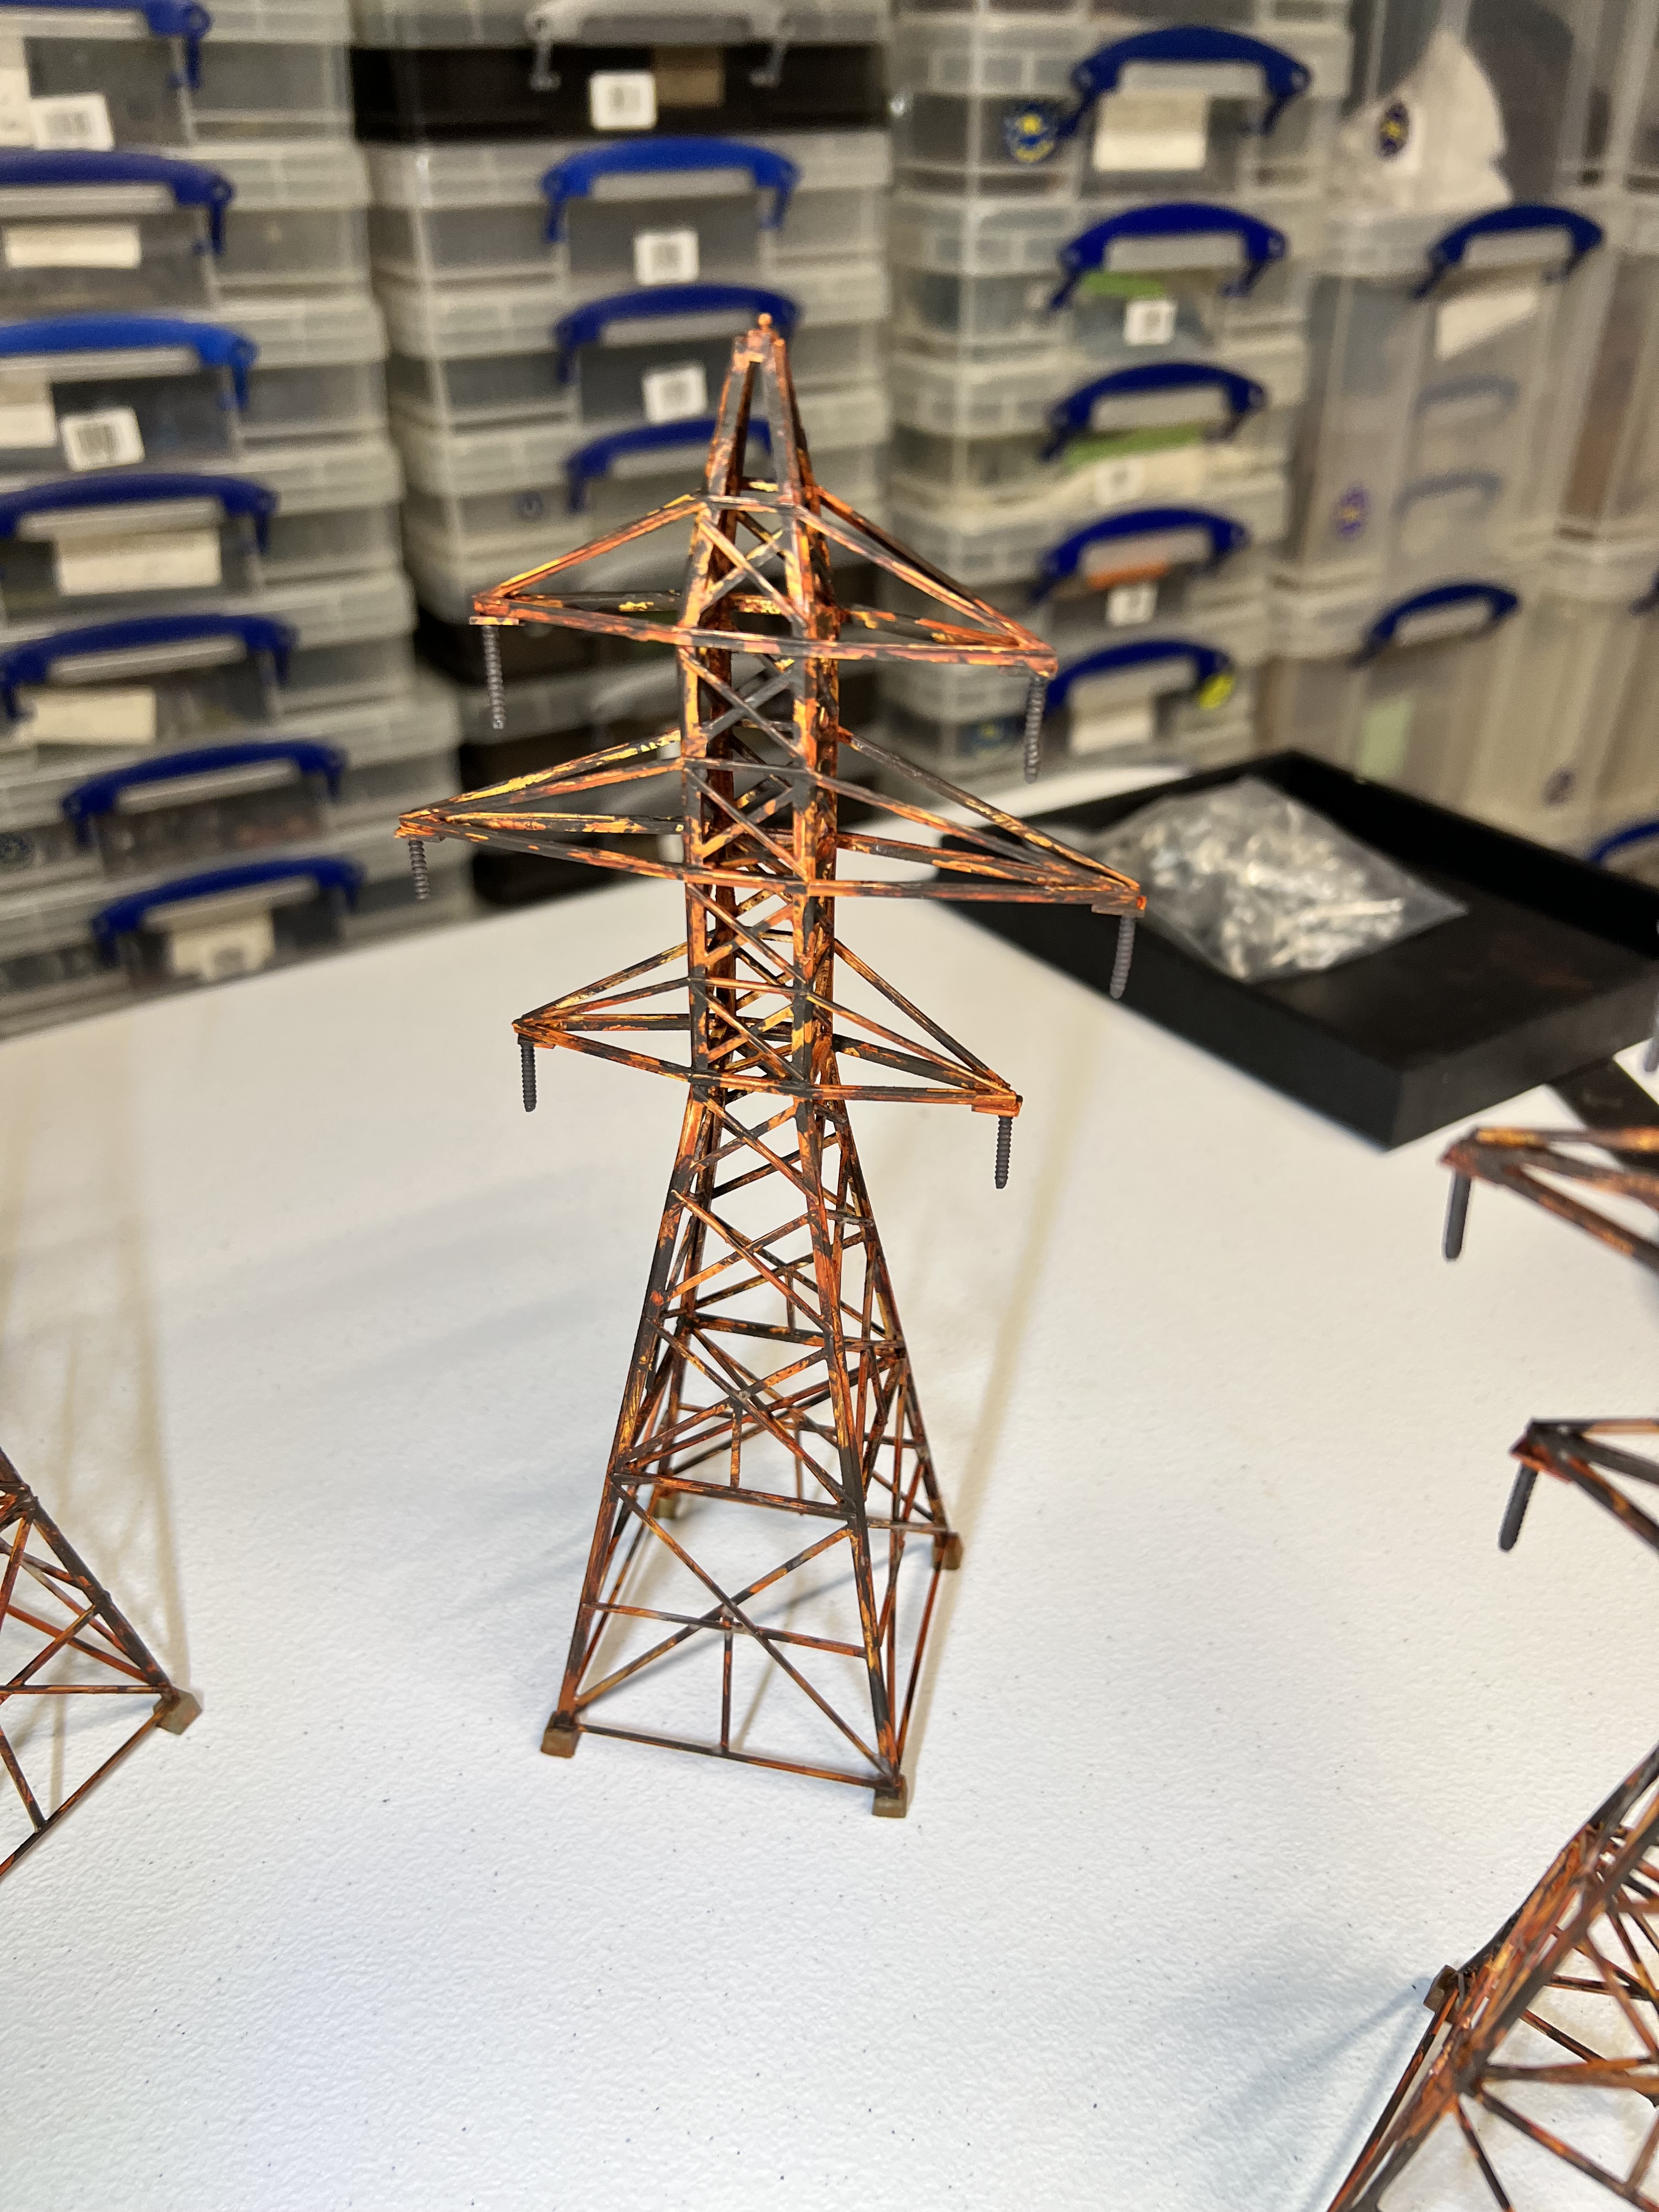
Rusting them up was similar to the walls – basically minus the use of the corrosion texture paint. The lists of what I used for these and the walls will be listed at the end of this post.
Rusted up!Close up shot of two.View of one from a slightly different angle.
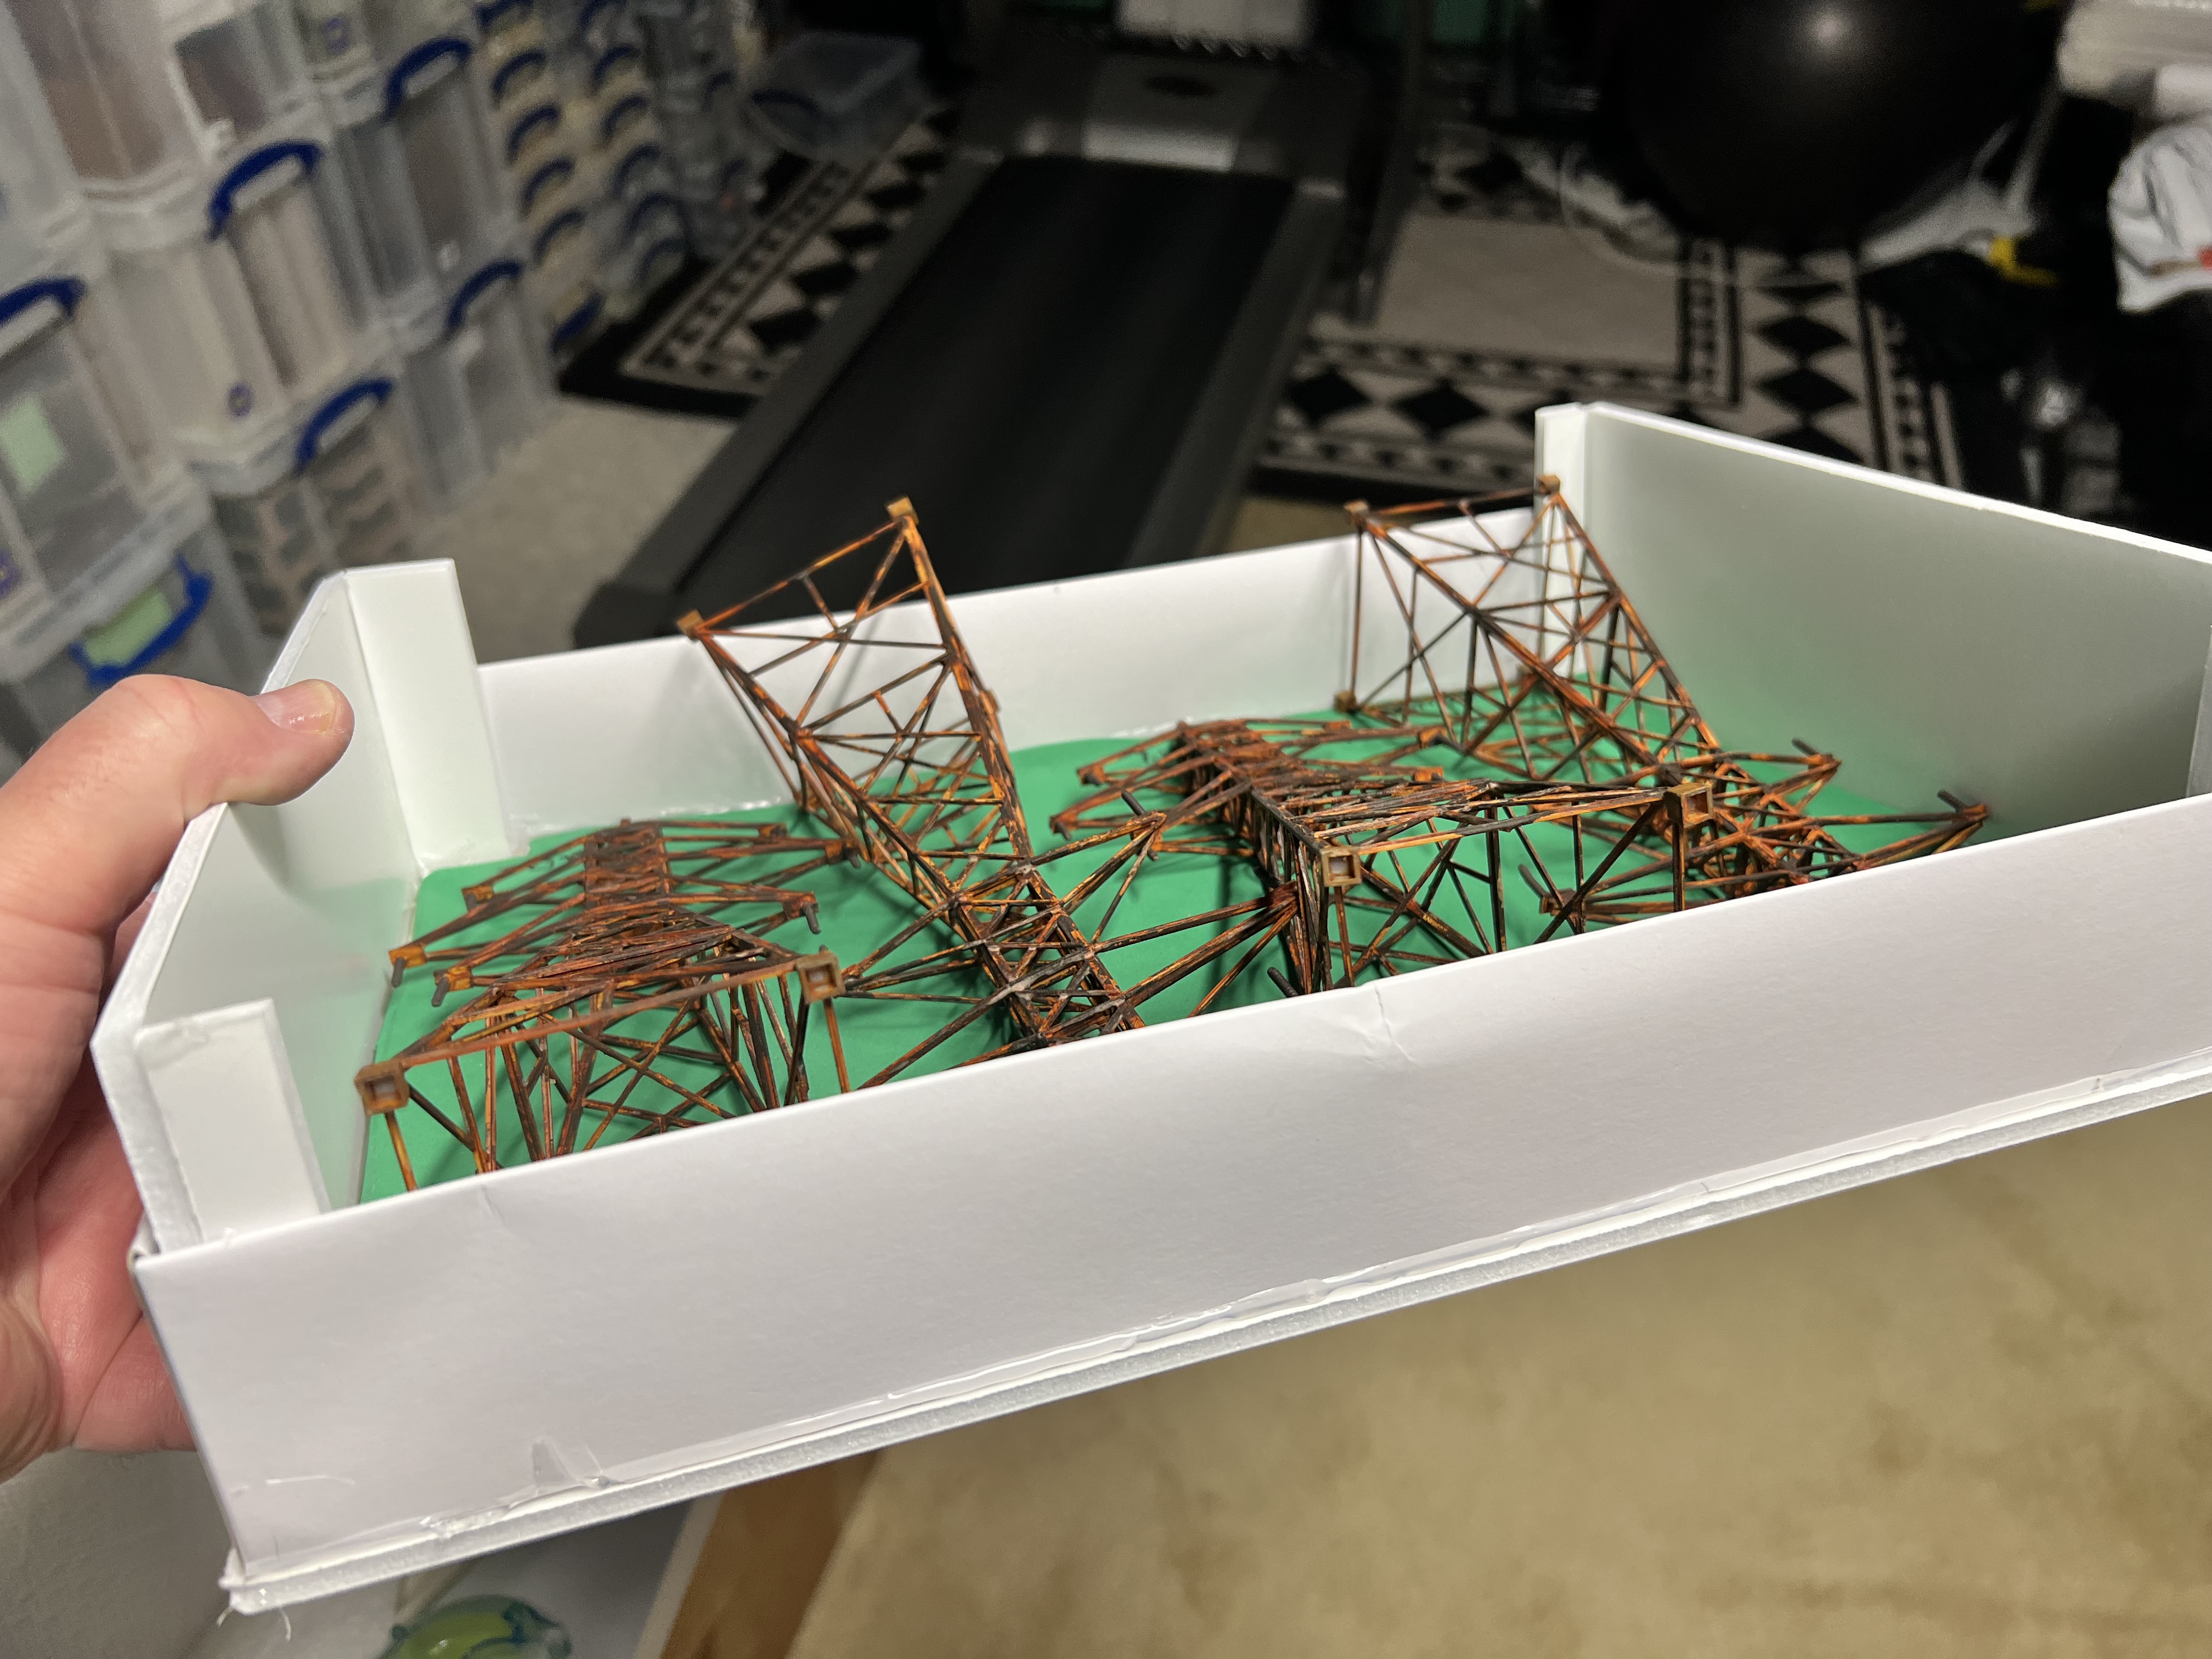
As you can see these are just plastic models and vulnerable to damage in transport! Unlike the walls, which went into a cardboard wine bottle box with some foam padding between levels, these needed a sturdy solution. They required something strong. I decided to modify the original box to accommodate the greater height needed when the models were lying down. I used more foam padding on the box bottom, and foam board to extend and strengthen the box as you see below:
Top view of the original box modifications with a sheet of green foam padding on the bottom. The sides and corners were reinforced by adding foam board set with hot glue on the insides.Side view – here you see the added height with the foam board.The original box top fit like a glove – and is significantly stronger than its original configuration.
That’s about it for this rusty old post. I hope it inspired you to rust up some stuff yourself!
As I teased, I will be sharing how these fit into both of the tabletop set ups for 2026. I’ll also be sharing some of the new 2026 units of mechanical tin men that will find these structures as part of their apocalyptic homes. Until next time.
For all of my previous posts on terrain projects, please see this page. For all of my previous posts on sci-fi projects, please see this page…for any of my previous posts on Wars of Ozz, see this page.
PAINTS, INKS, GLAZES, SHADES, WASHES, PIGMENTS, FLOCKING, GLUES AND MORE THAT I USED ON THE RUSTY WALLS PIECES:
Old autoinjector trainers
Green stuff
Chinchilla dust
PVA Glue
Vallejo Surface Primer “Grey”
AK “Corrosion Texture”
Citadel “Typhus Corrosion” (Technical)
Citadel “Ryza Rust” (Dry)
Vallejo “Old Rust” (pigment)
Vallejo “Brown Iron Oxide” (pigment)
Vallejo “Natural Iron Oxide” (pigment)
Vallejo Model Air “Rust 73.117” (pigment)
Vallejo Model Air “New Rust 73.118” (pigment)
Vallejo Thinner
Vallejo Model Color “Dark Rust”
Vallejo “Natural Umber” (pigment)
PAINTS, INKS, GLAZES, SHADES, WASHES, PIGMENTS, FLOCKING, GLUES AND MORE THAT I USED ON THE RUSTY TRANSMISSION TOWER MODELS:
Walther’s Cornerstone Four Transmission Towers (HO Scale)
My recent efforts on the hobby front have been focused on multiple projects. Some of these are figures and vehicles, others are terrain-oriented. These are all in support of the games I will run at multiple 2026 gaming conventions.
This year, I will be running Wars of Ozz and What a Tanker games. I am also getting back into retro sci-fi skirmish games with Combat Patrol:WWII. I have not run these games in a while and they were always a lot of fun. To that end, I decided to add more terrain to the mix.
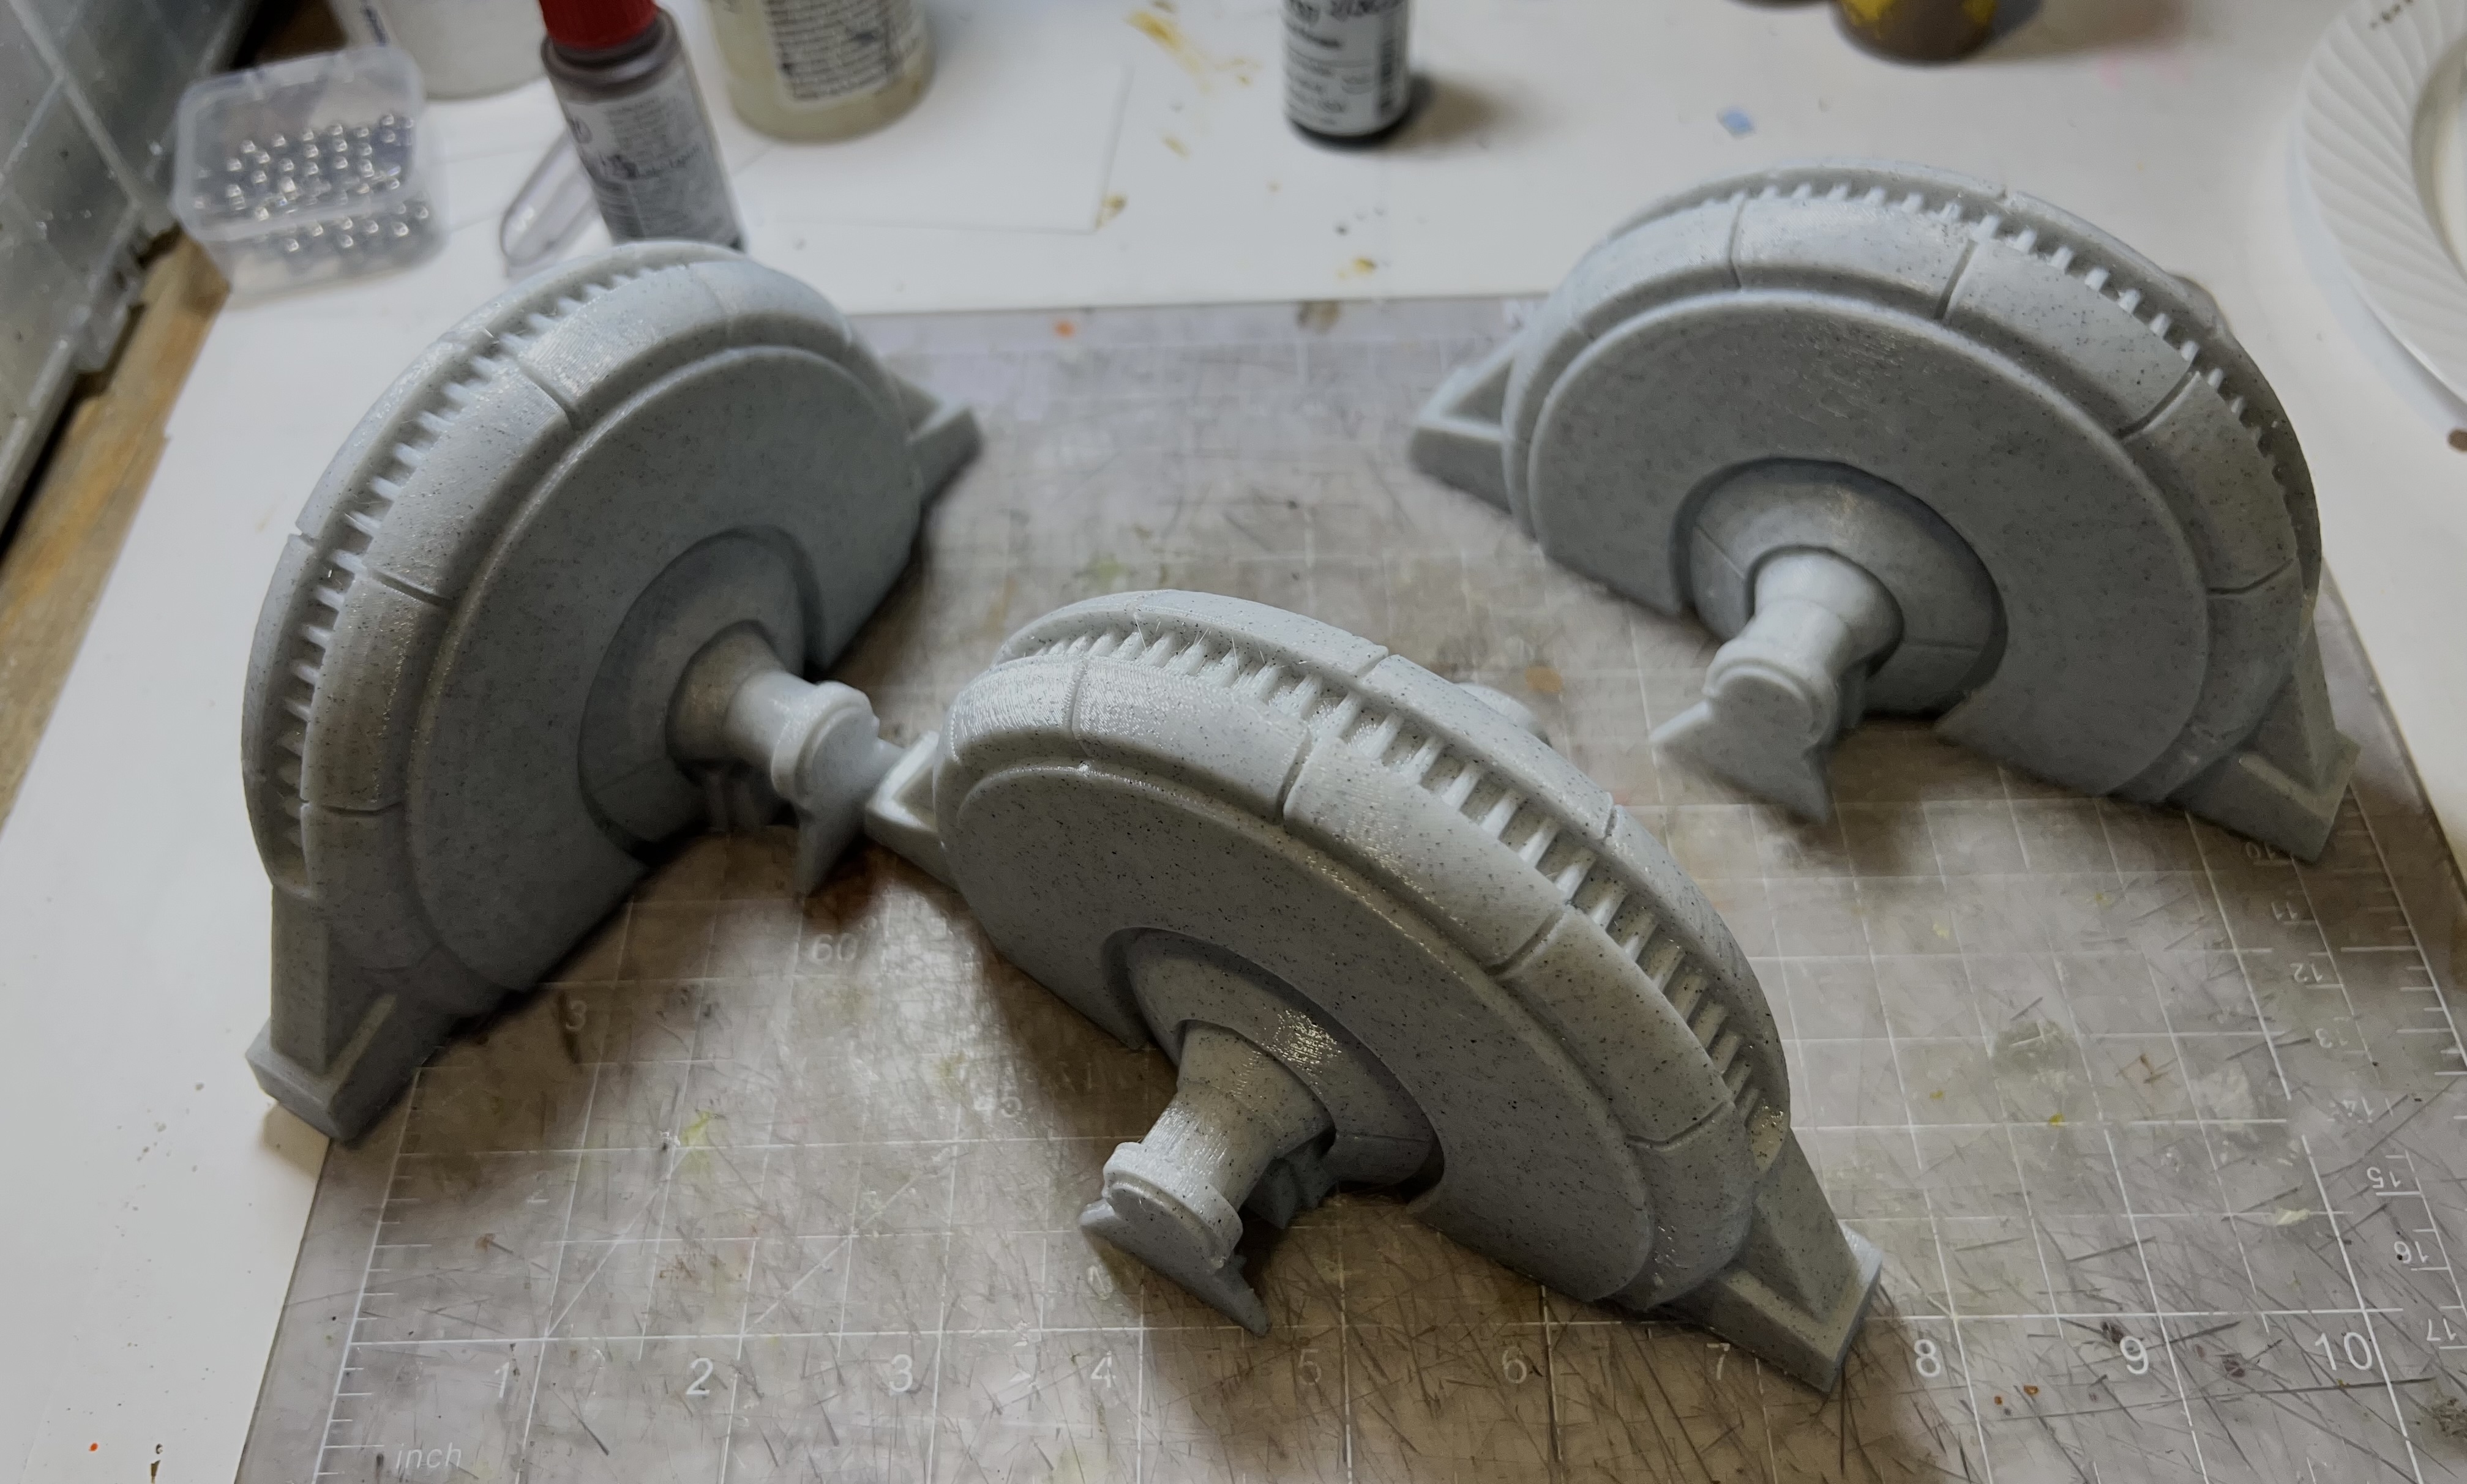
As background, a friend, Chris Rett, 3D-printed three excellent generators for me way back in 2018 (I think). These were great terrain pieces. At that point I was still immersed in retro sci-fi skirmish gaming with Combat Patrol:WWII as my preferred system. However, I was on the cusp of jumping my focus to WWII What a Tanker games. Thus, the generators took a back seat. My gaming then went in sequence to What a Tanker, then Feudal Patrol for the Spanish Conquest in Mesoamerica. Finally, I moved on to Wars of Ozz. Recently, I felt a need for a bit more variety as I mentioned – so terrain is what I hit first.
The three generators would be useful for retro sci-fi apocalyptic planet scenarios. They would also be useful for some Wars of Ozz scenarios. This includes any involving Professor Nitpik and the Industrial City. That city was wrecked over 300 years ago in the “Last Great War”. Plus I could use it as part of a “Space Cowboys” apocalyptic scenario.
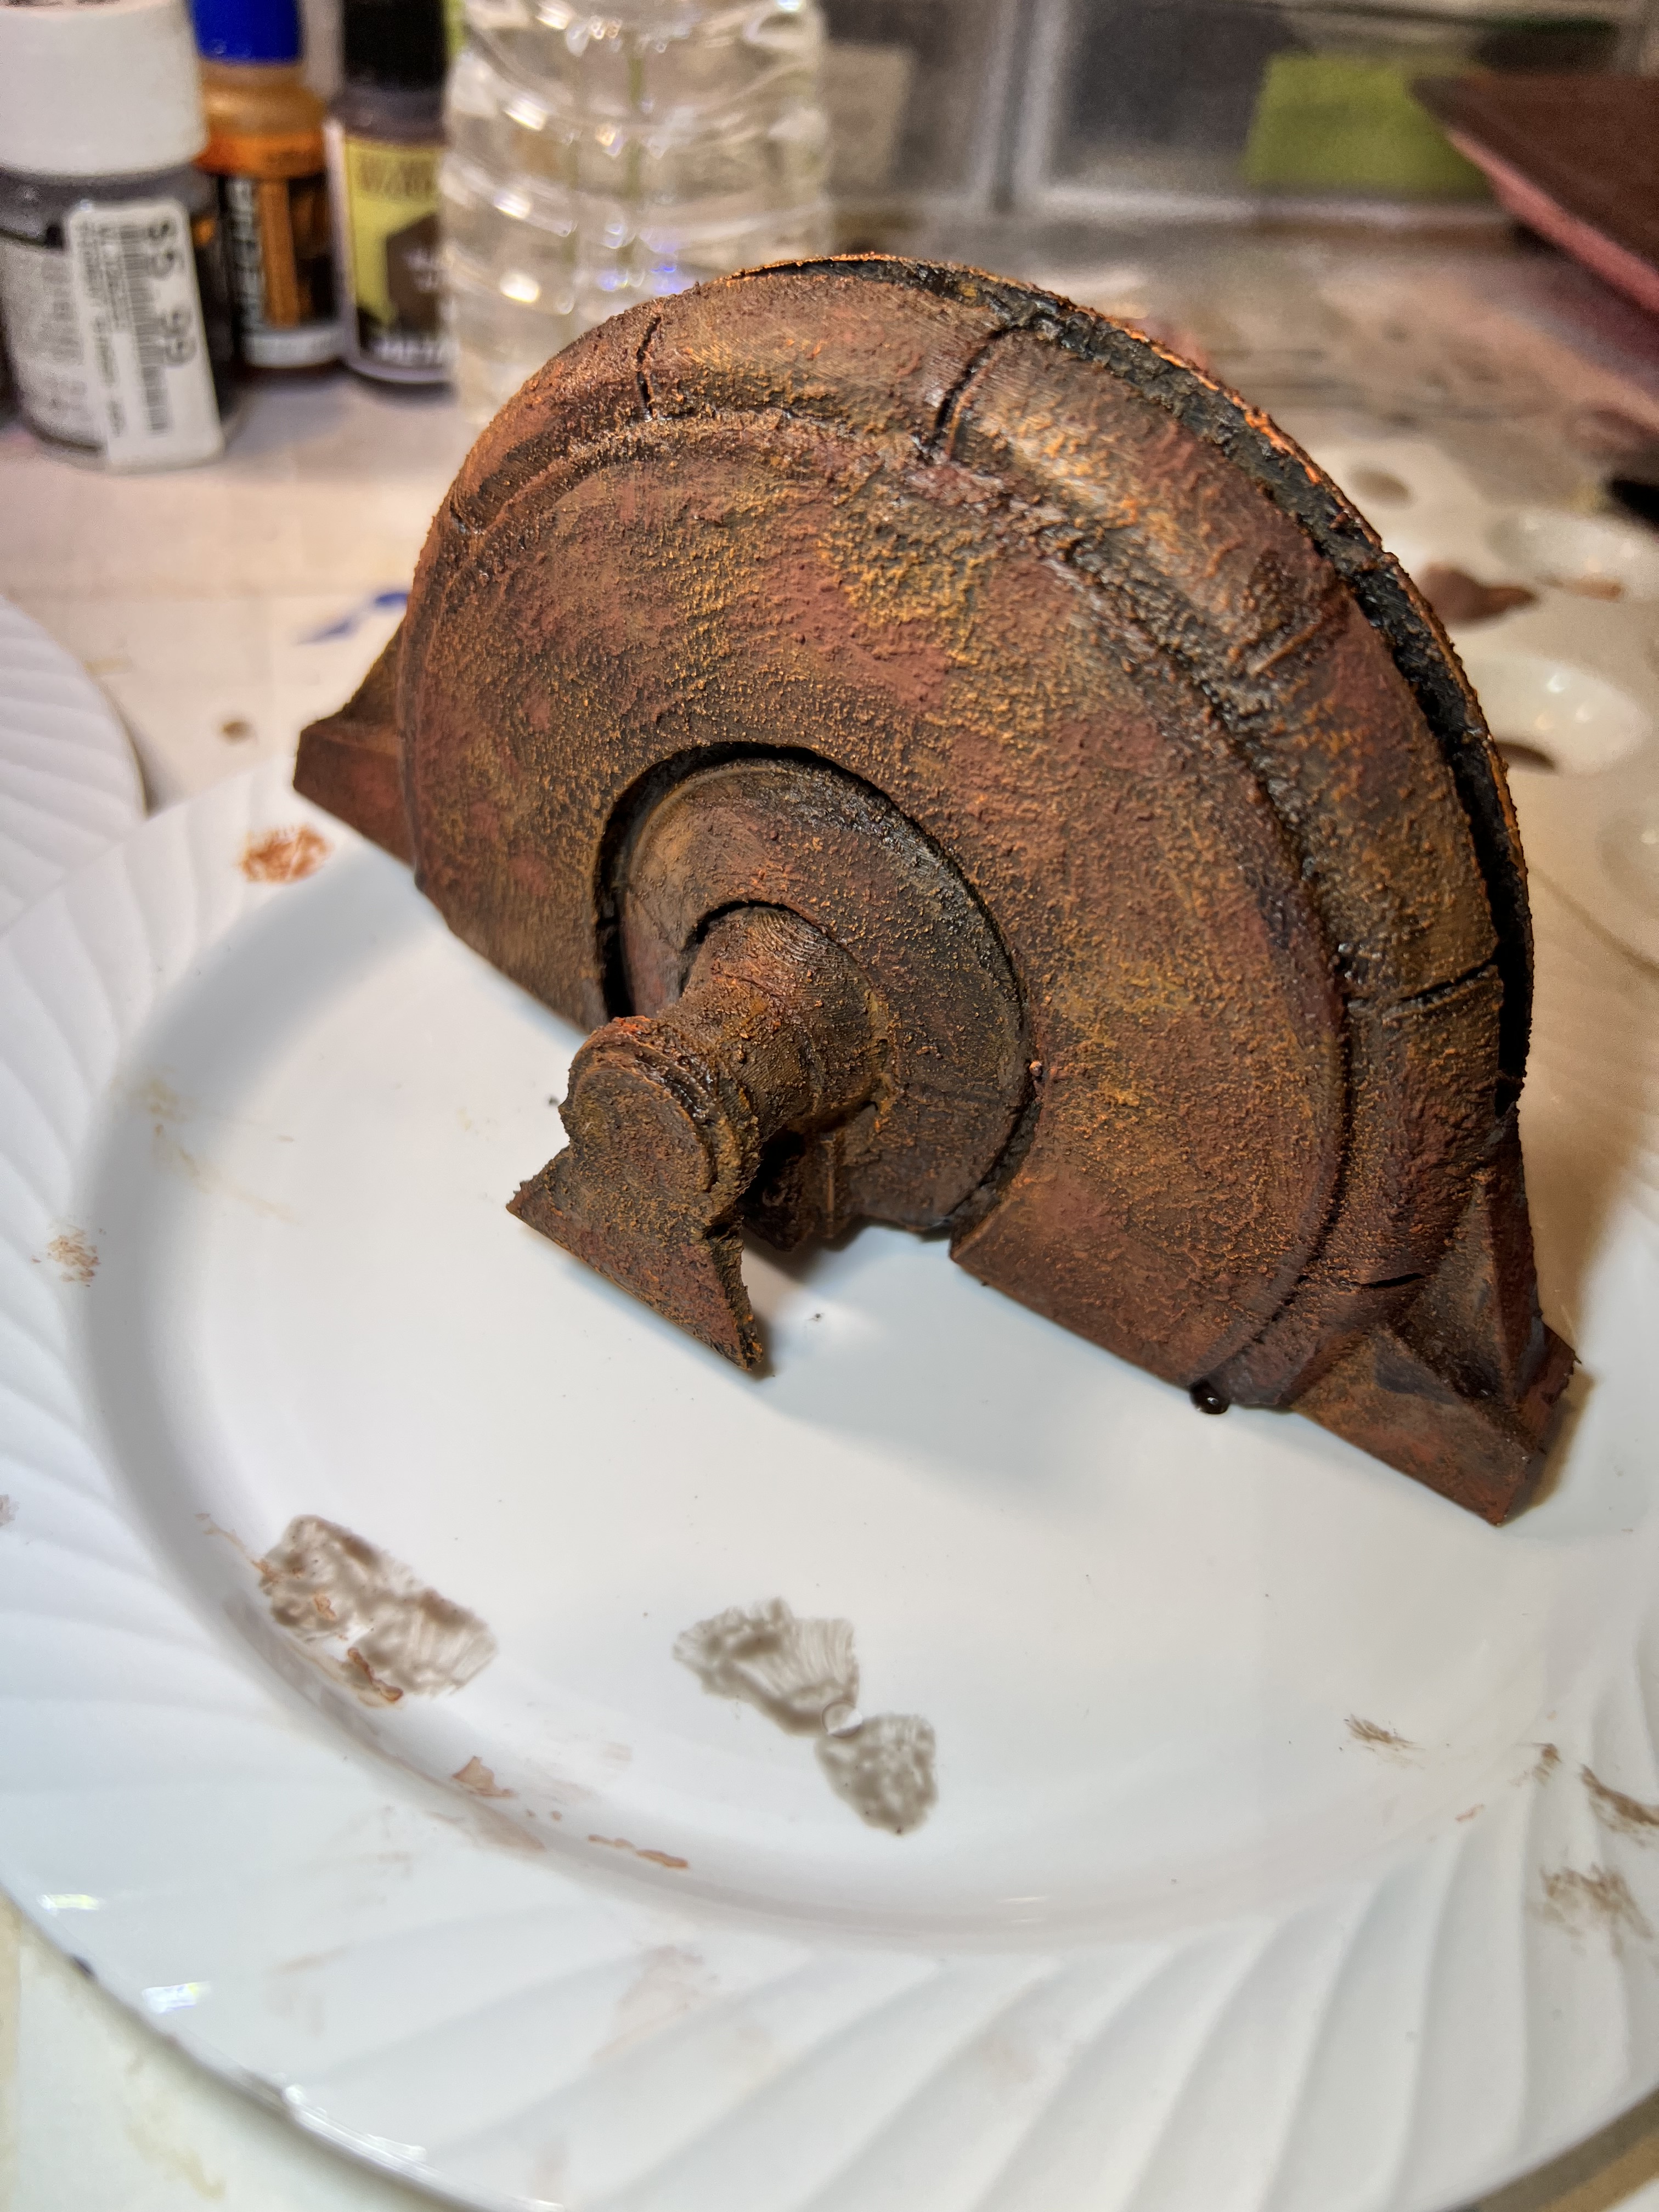
The generators at the start of the project.
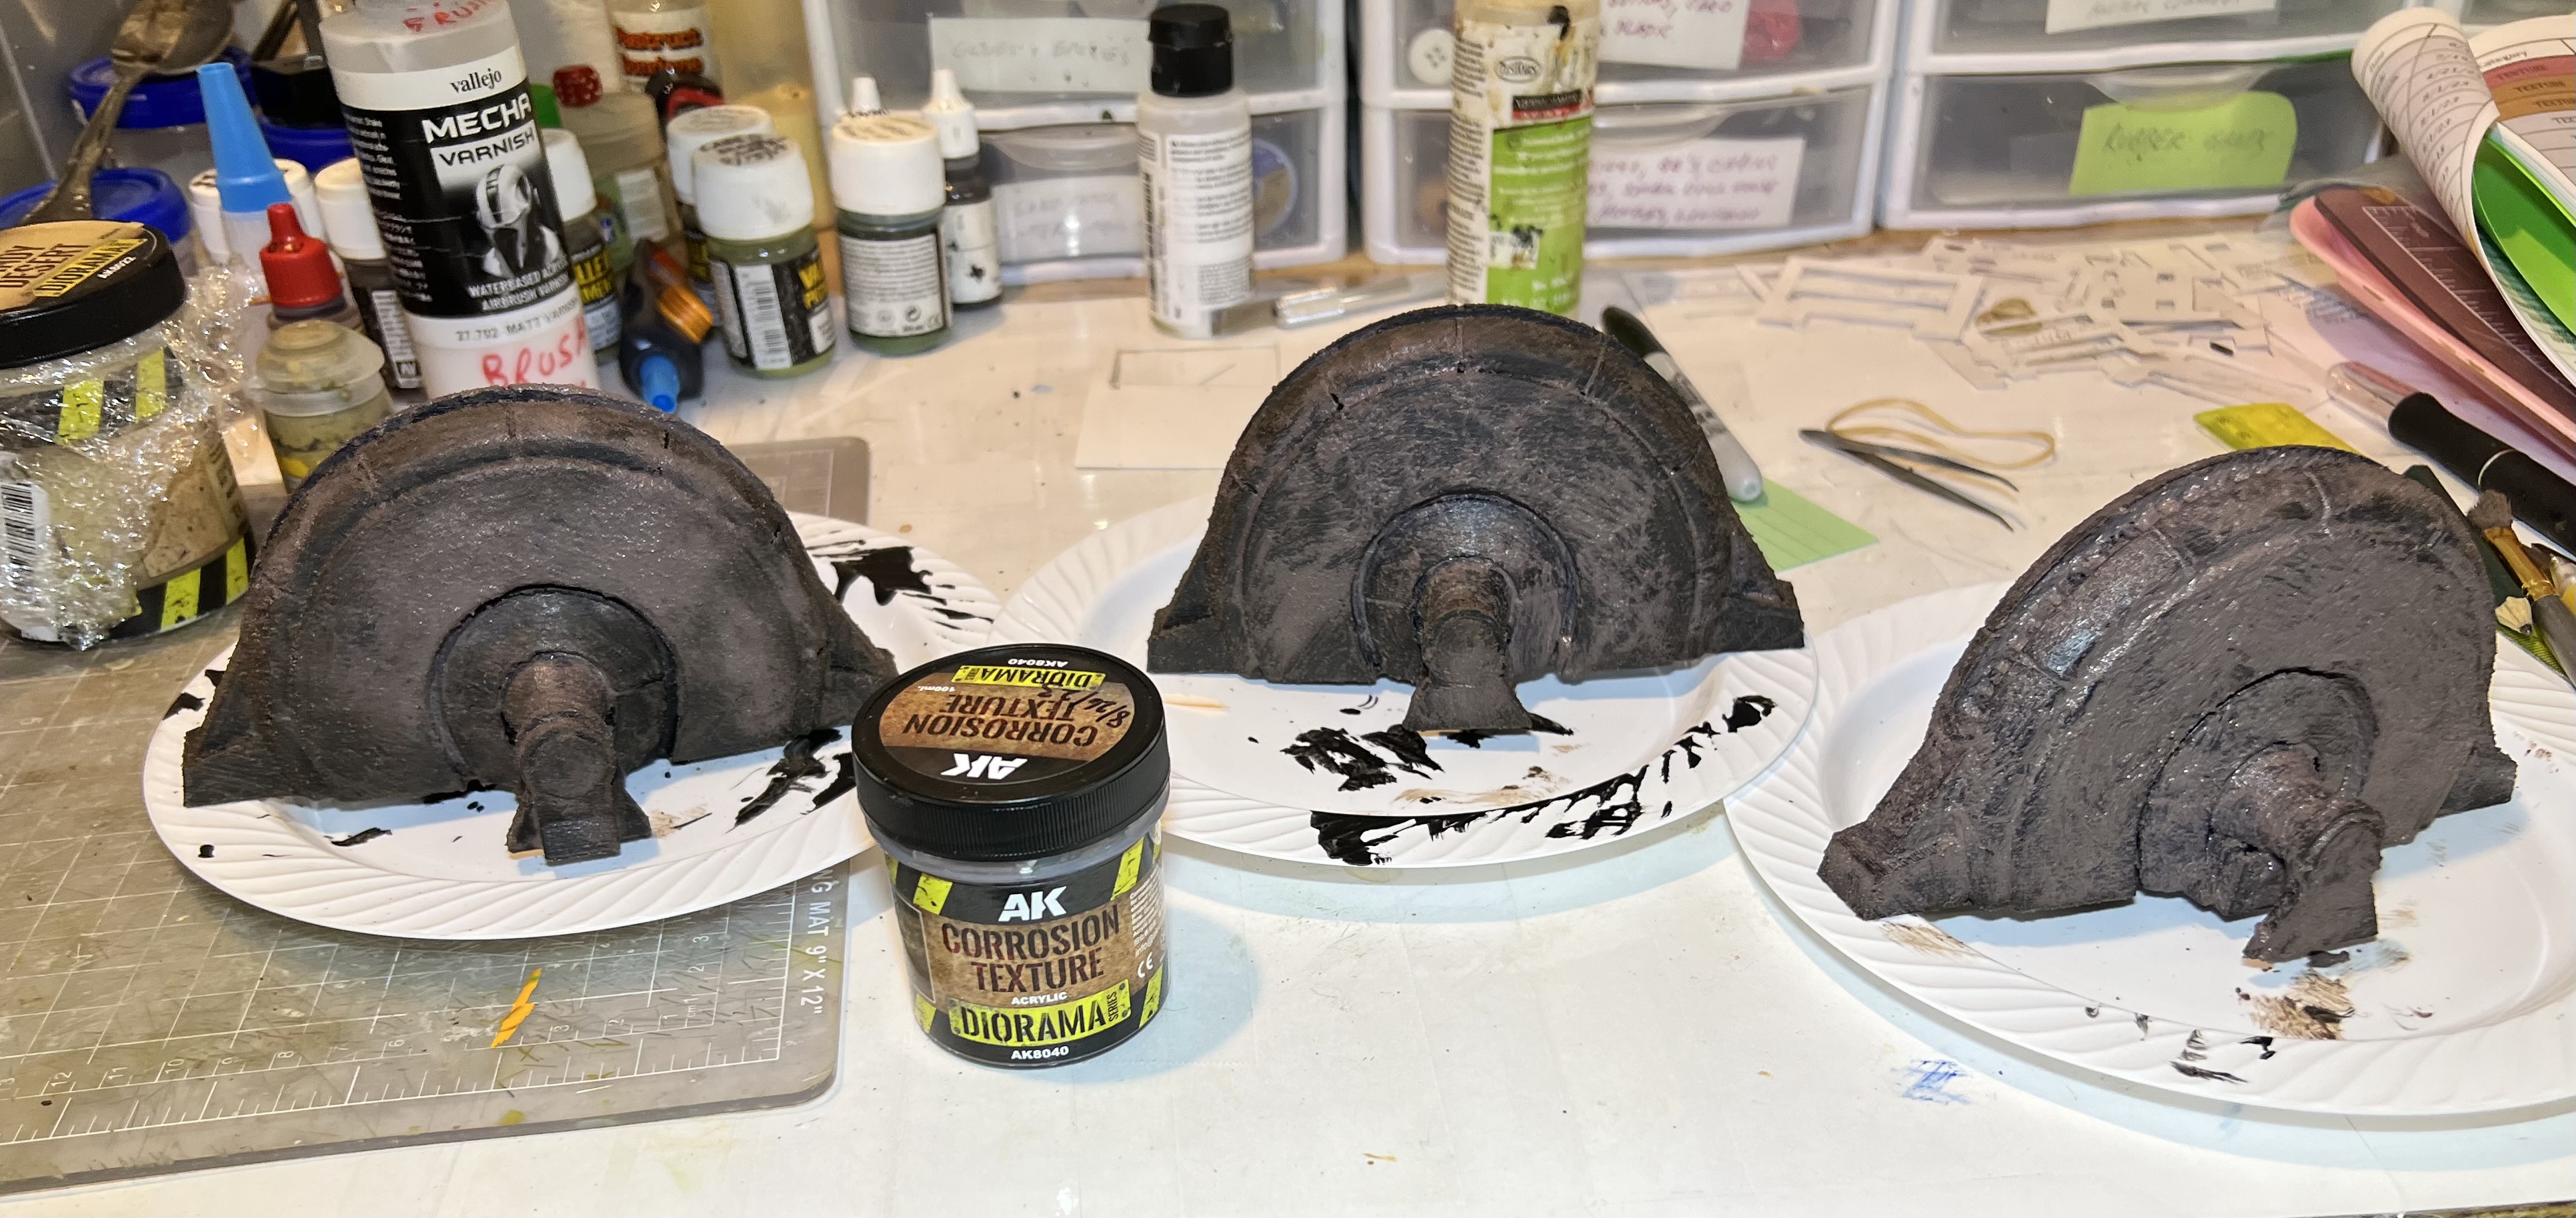
I primed the pieces. Then I used AK “Corrosion Texture” on it. This allowed me to use different rust pigments and paints on it.
Primed with corrosion texture added and drying here.
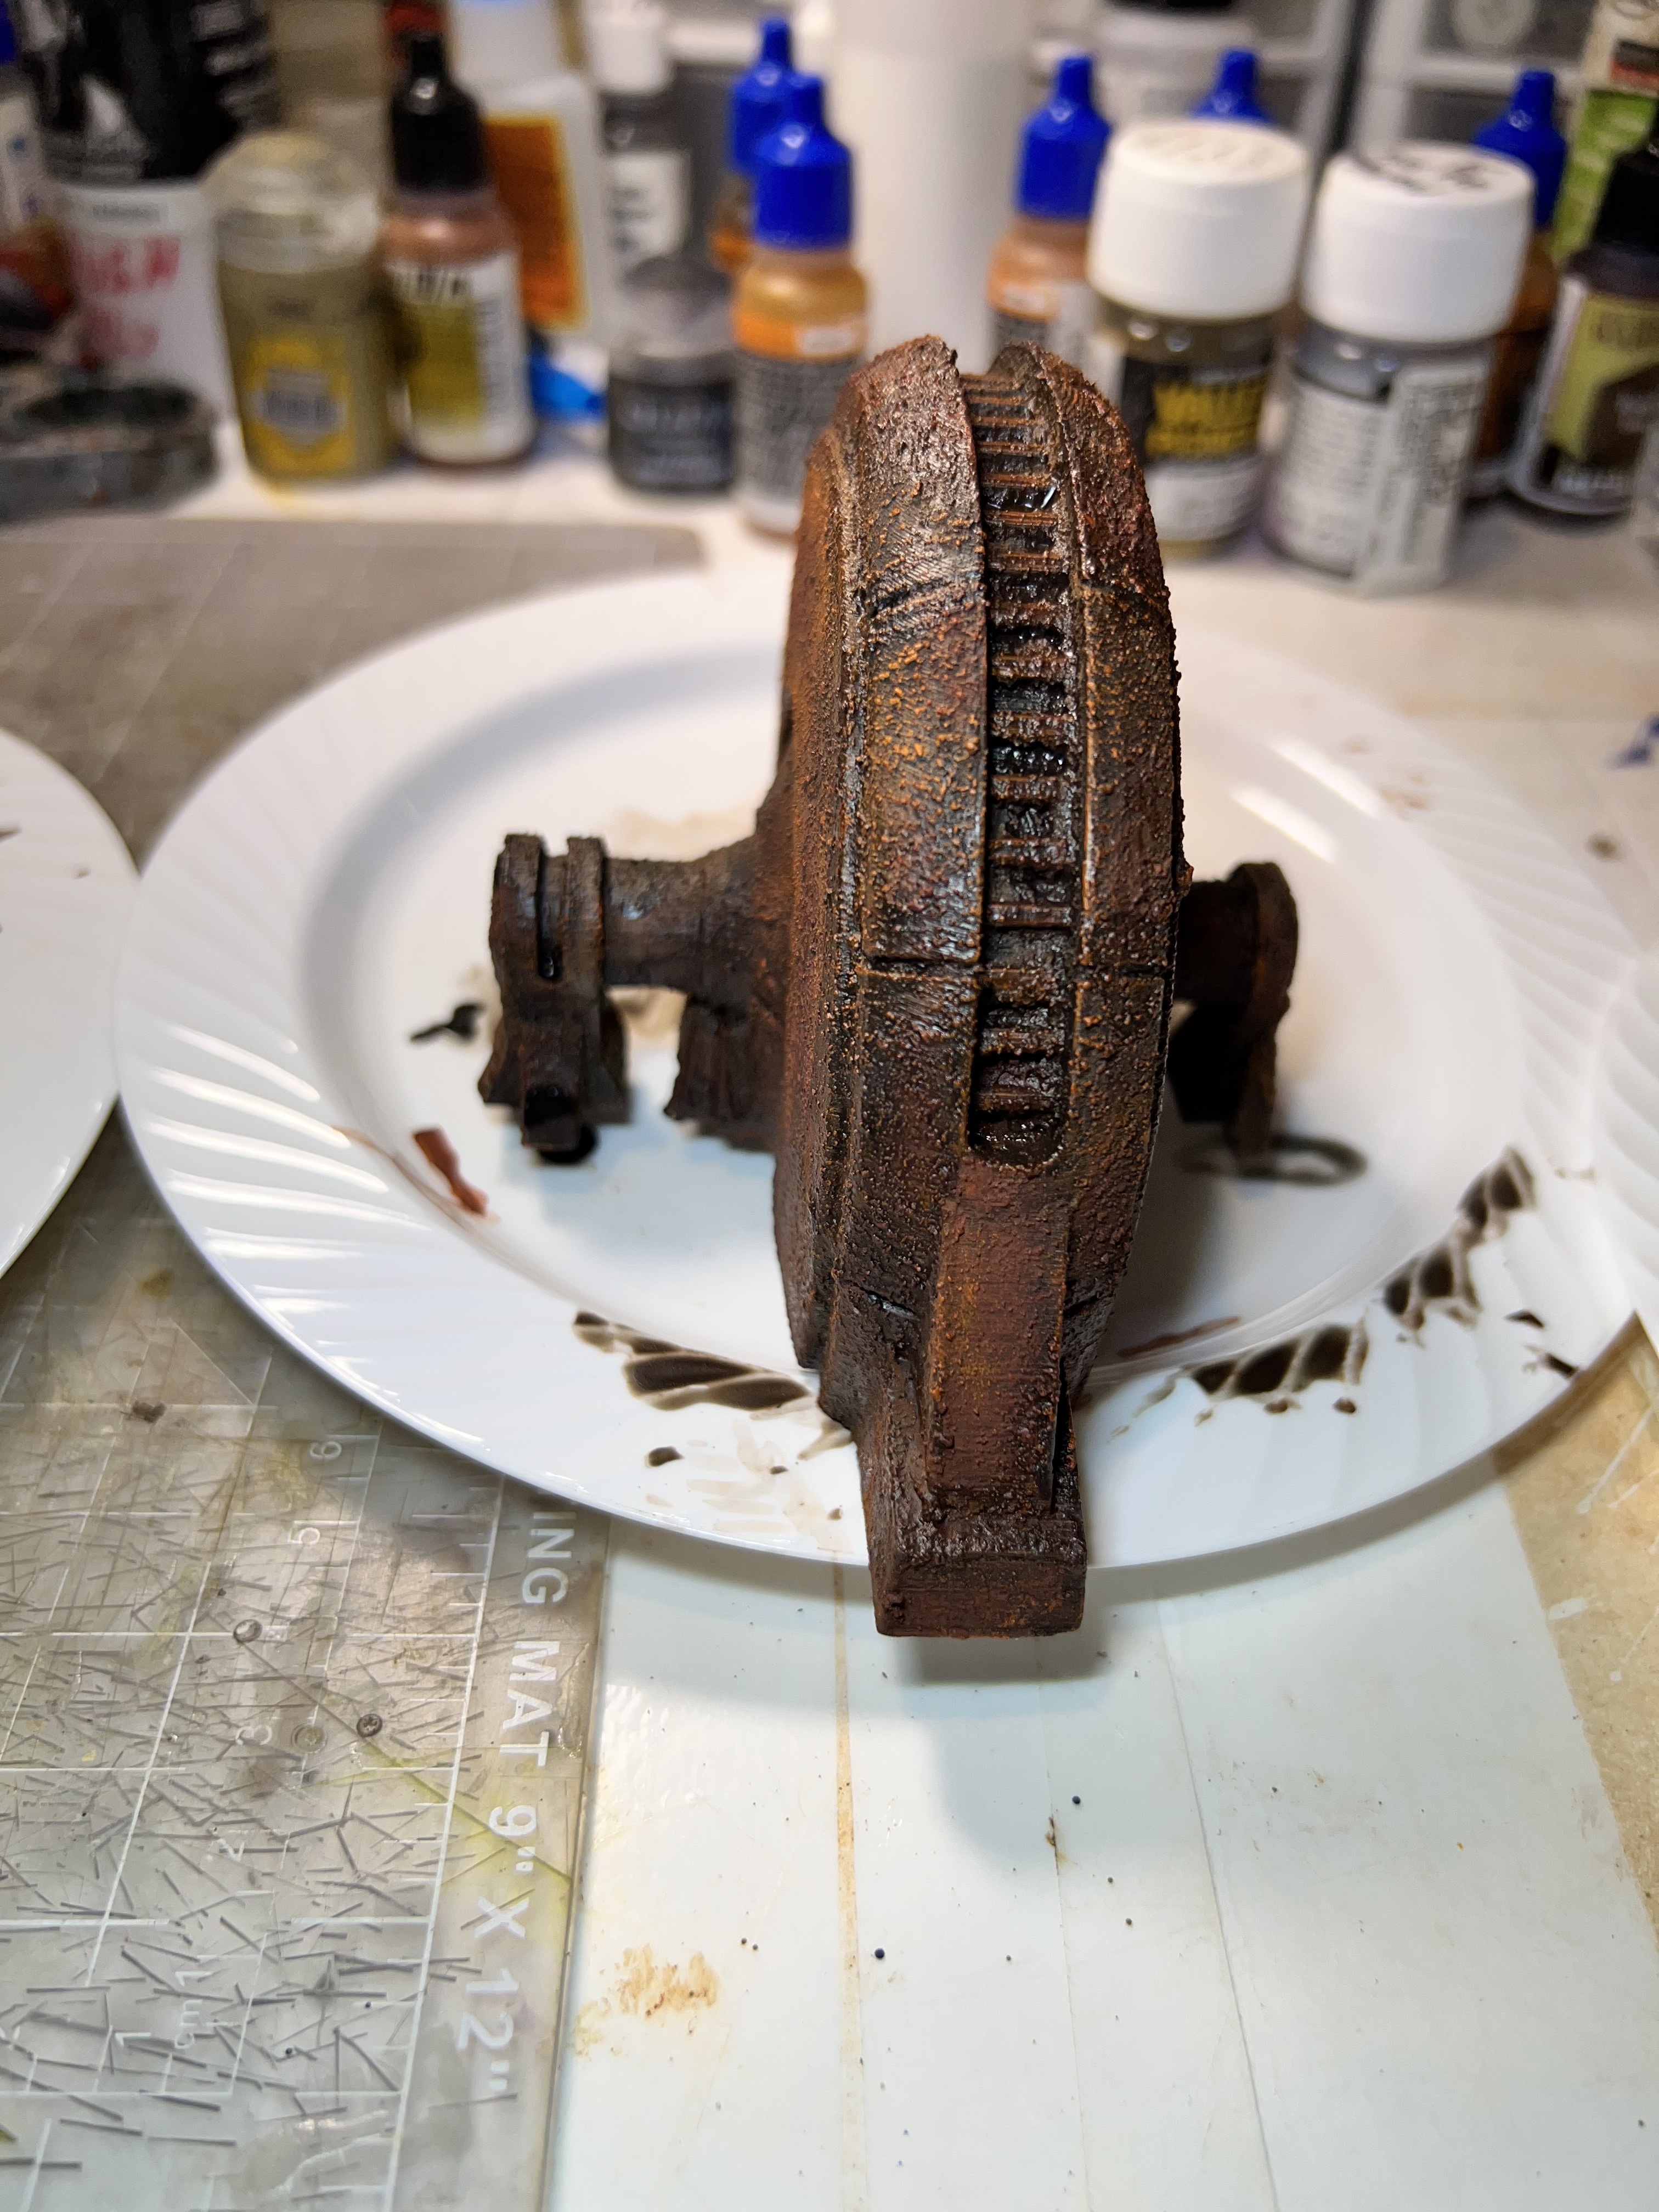
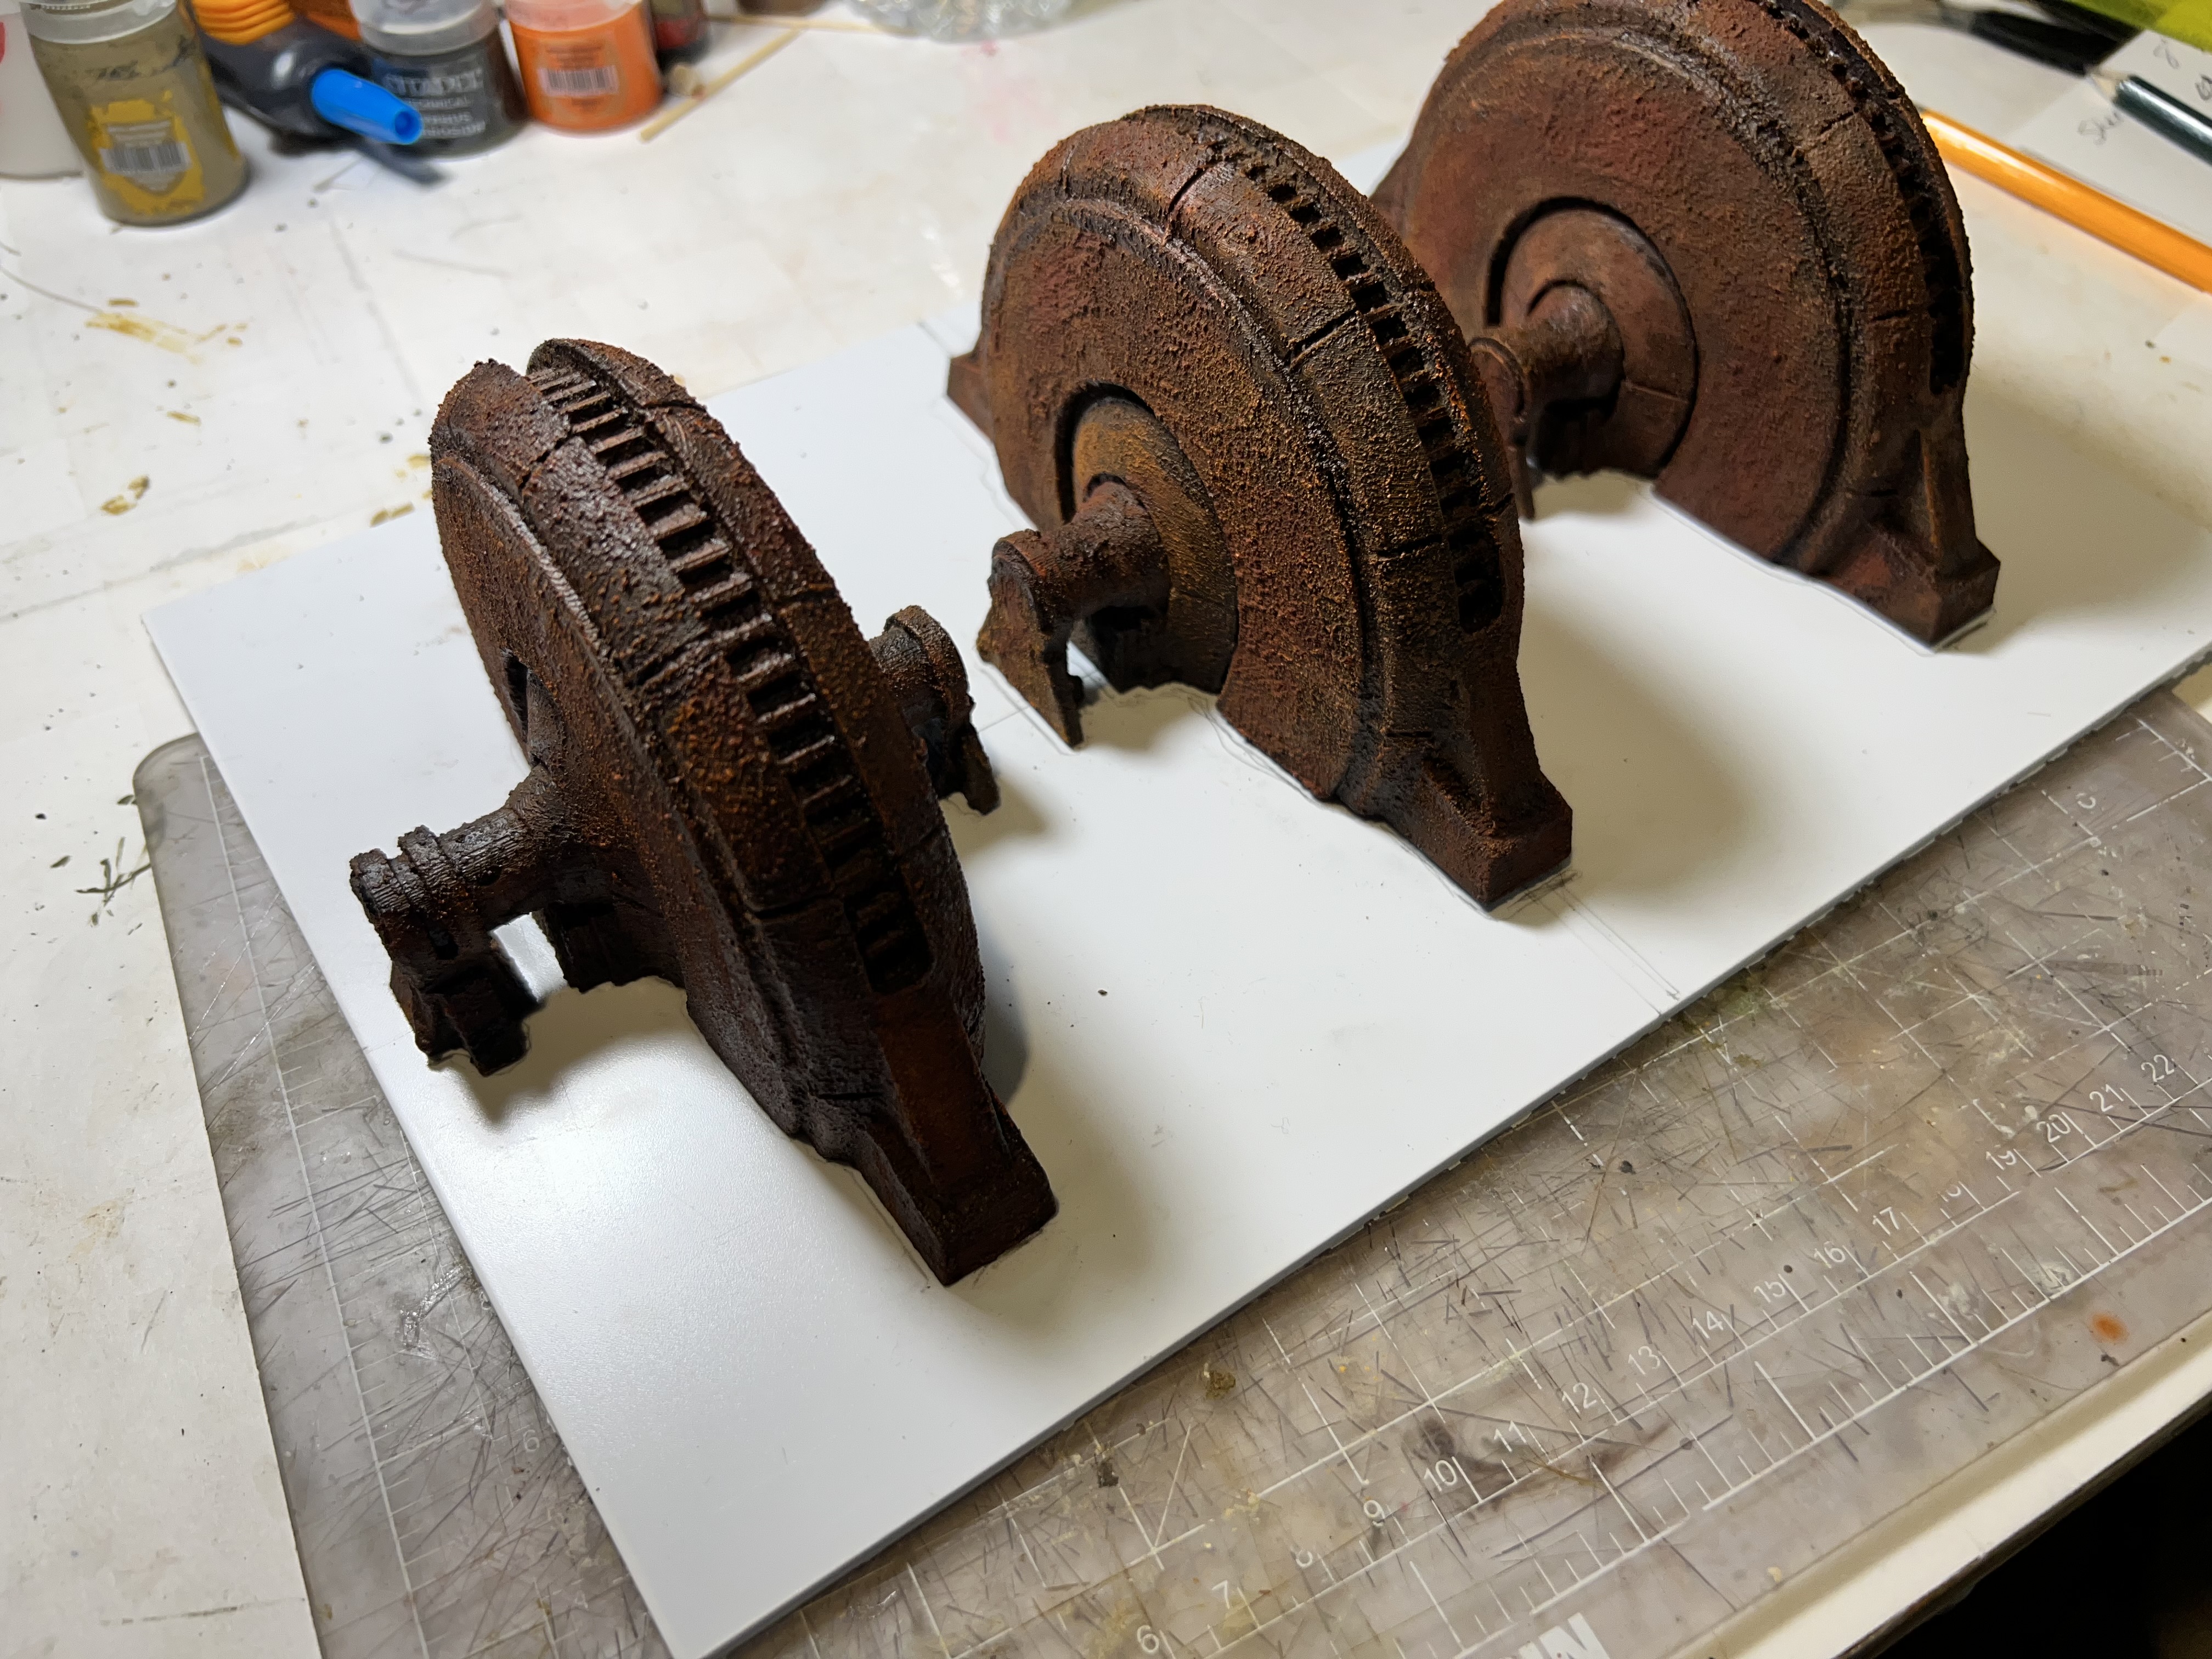
After the corrosion texture dried, I used the paints and pigments to “rust them up”.
All rusted up!
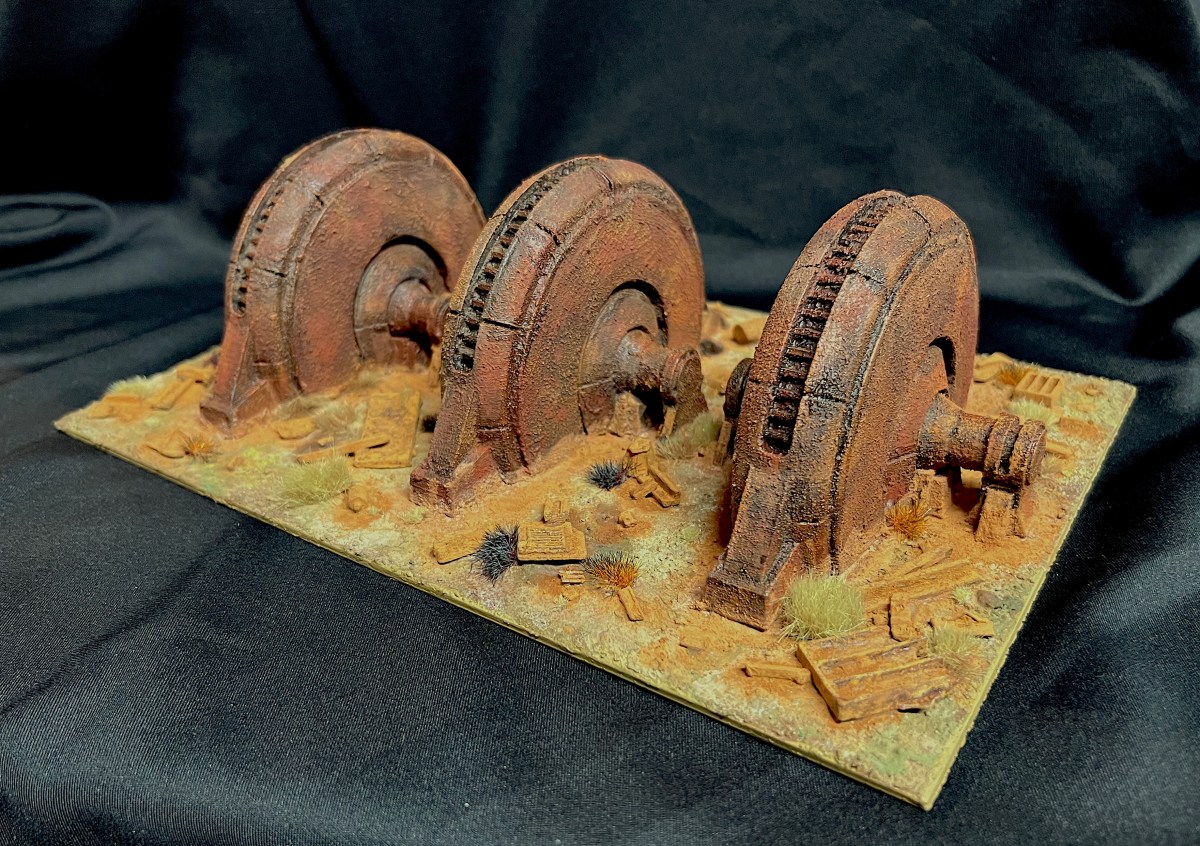
Two of the models were identical – so I planned on using them symmetrically on a polystyrene base. Using sand and PVA, I had a substrate for the rust pigments.
Here I measured carefully to align the three equidistantly on the base. Then, I traced out on the base where they would be glued. The one odd generator is in the center.Here you see the sand applied over the PVA. Note that where the generators would go is not covered with any glue/sand mixture.
Once the sand mix had hardened, I assembled the pigments as you see below. I fixed all the pigments with pigment binder, as I have found that other liquids can dissolve the PVA/sand bonds.
Ready for gluing down the generators. Then, adding pigments to the base. As is my habit, I list all the materials that I used at the end of this post. This practice served me well here as older posts I did on rusty walls had some pearls that I forgot.
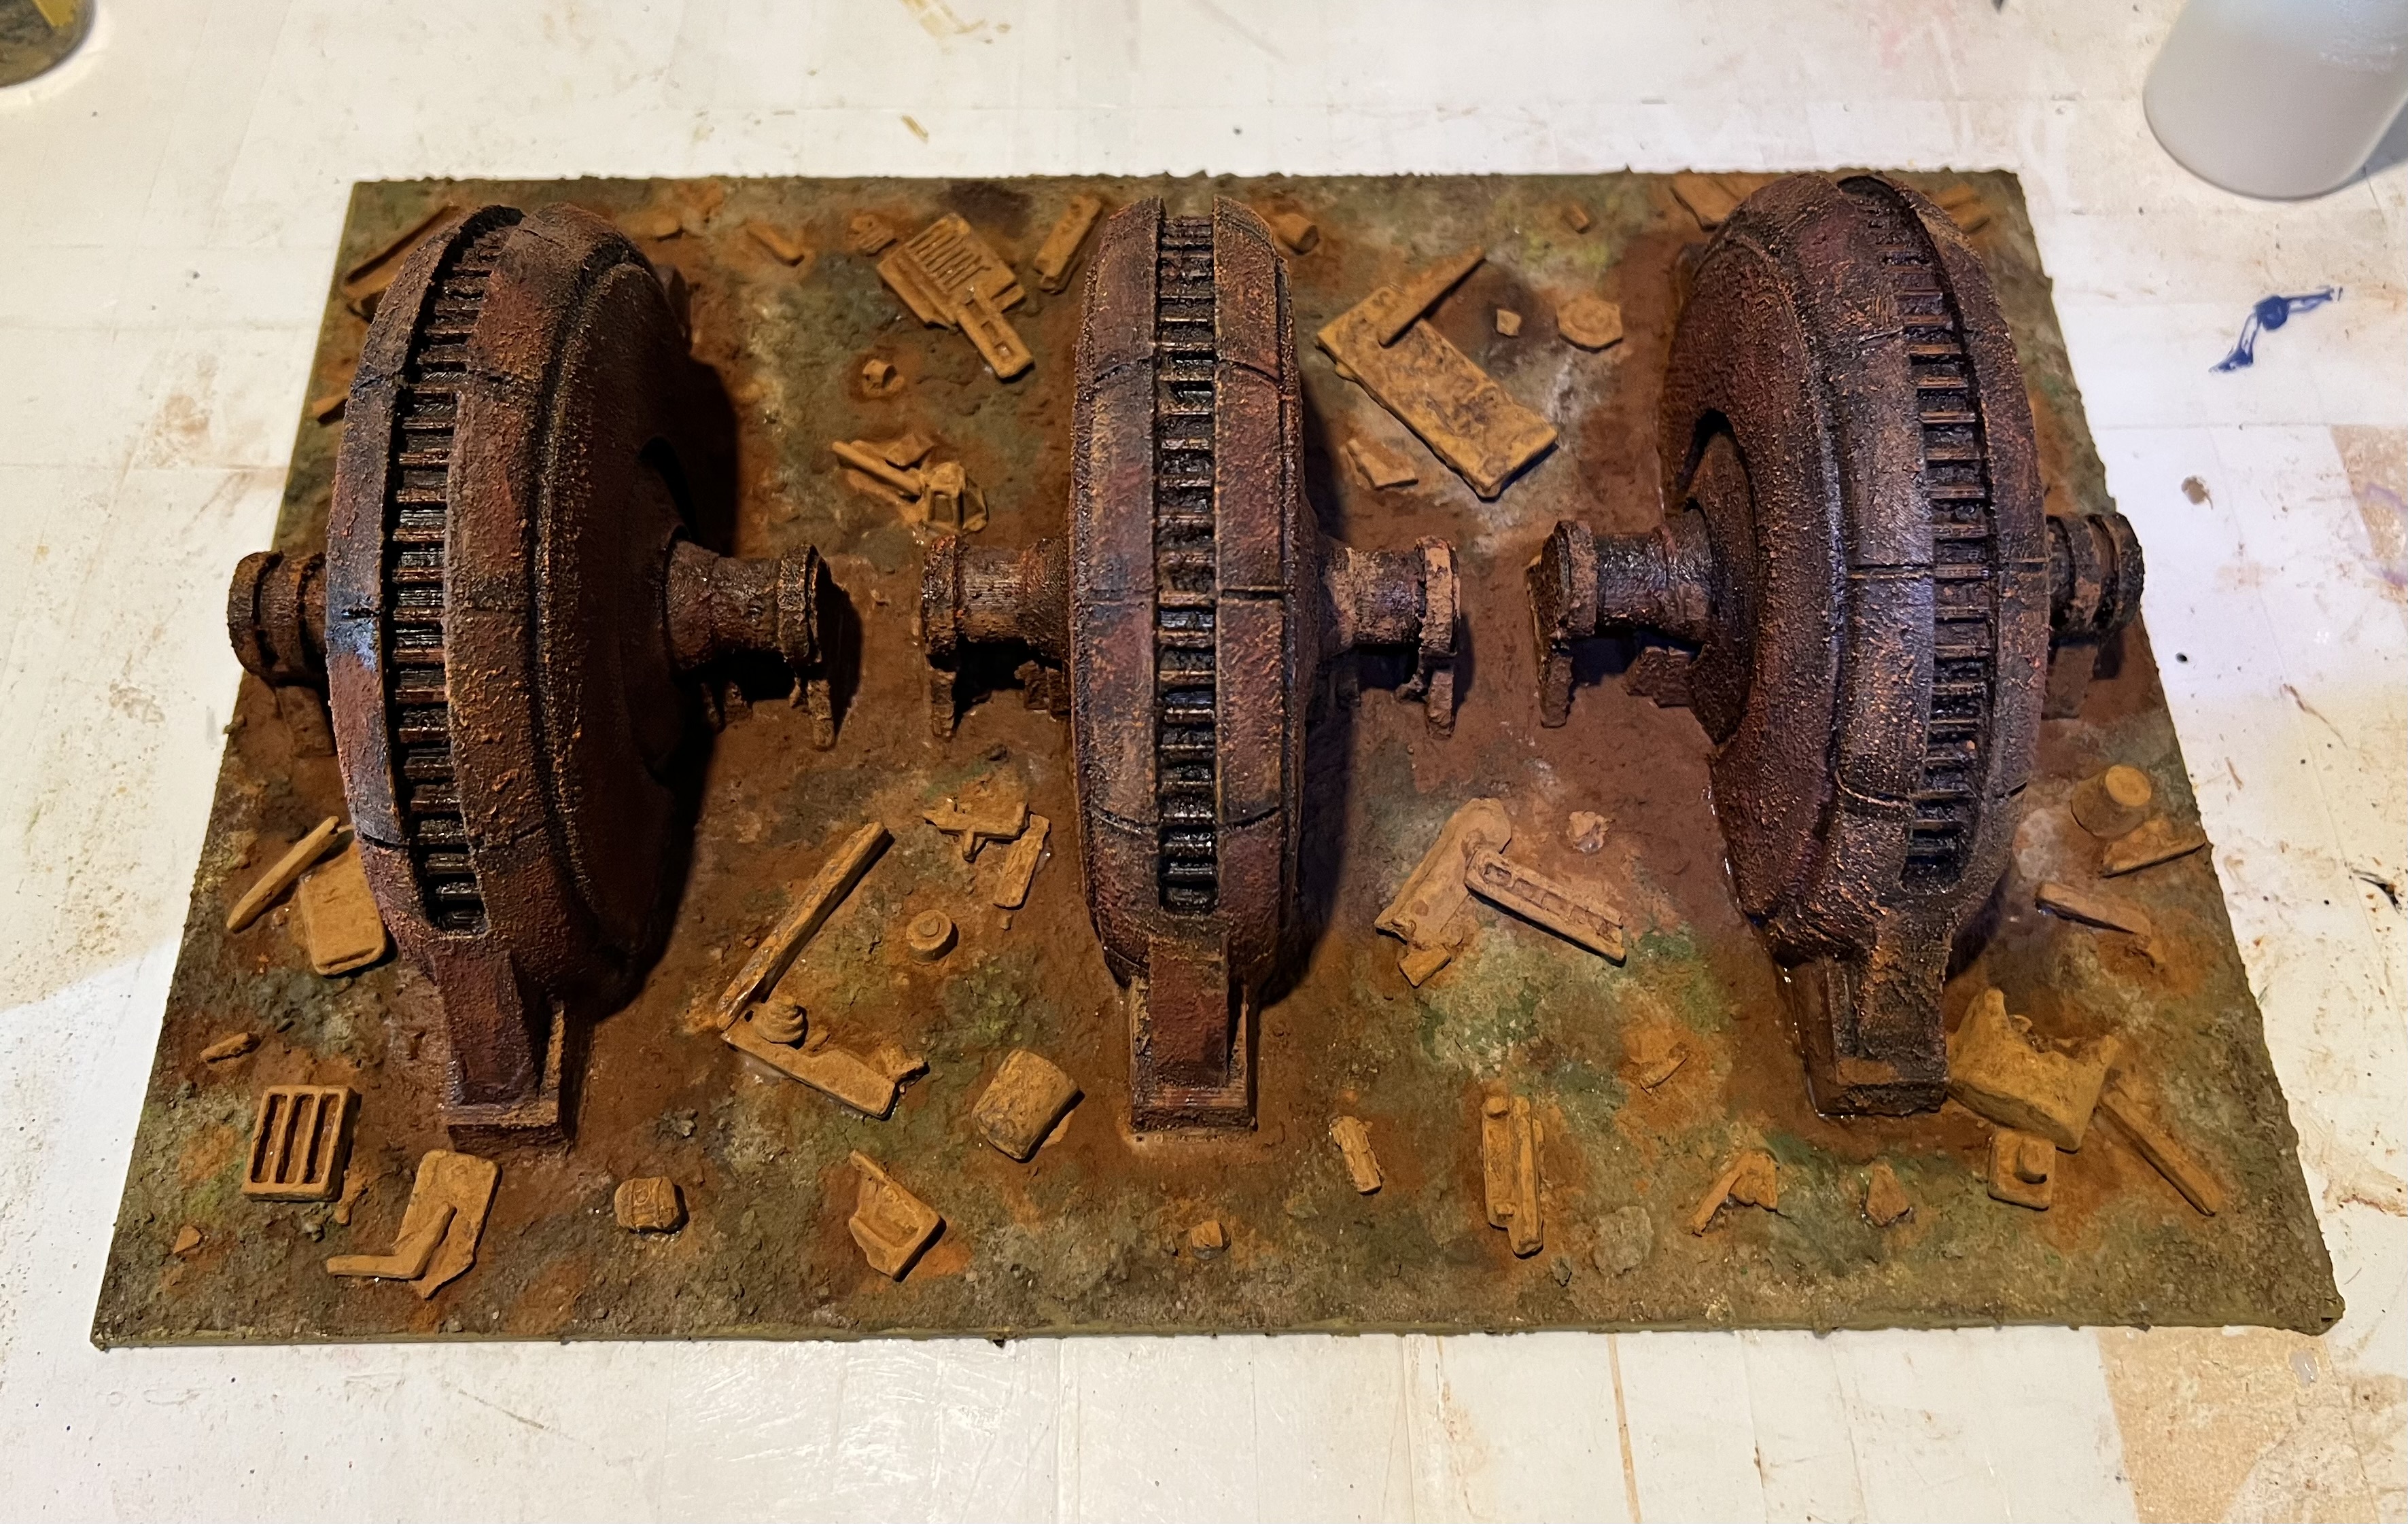
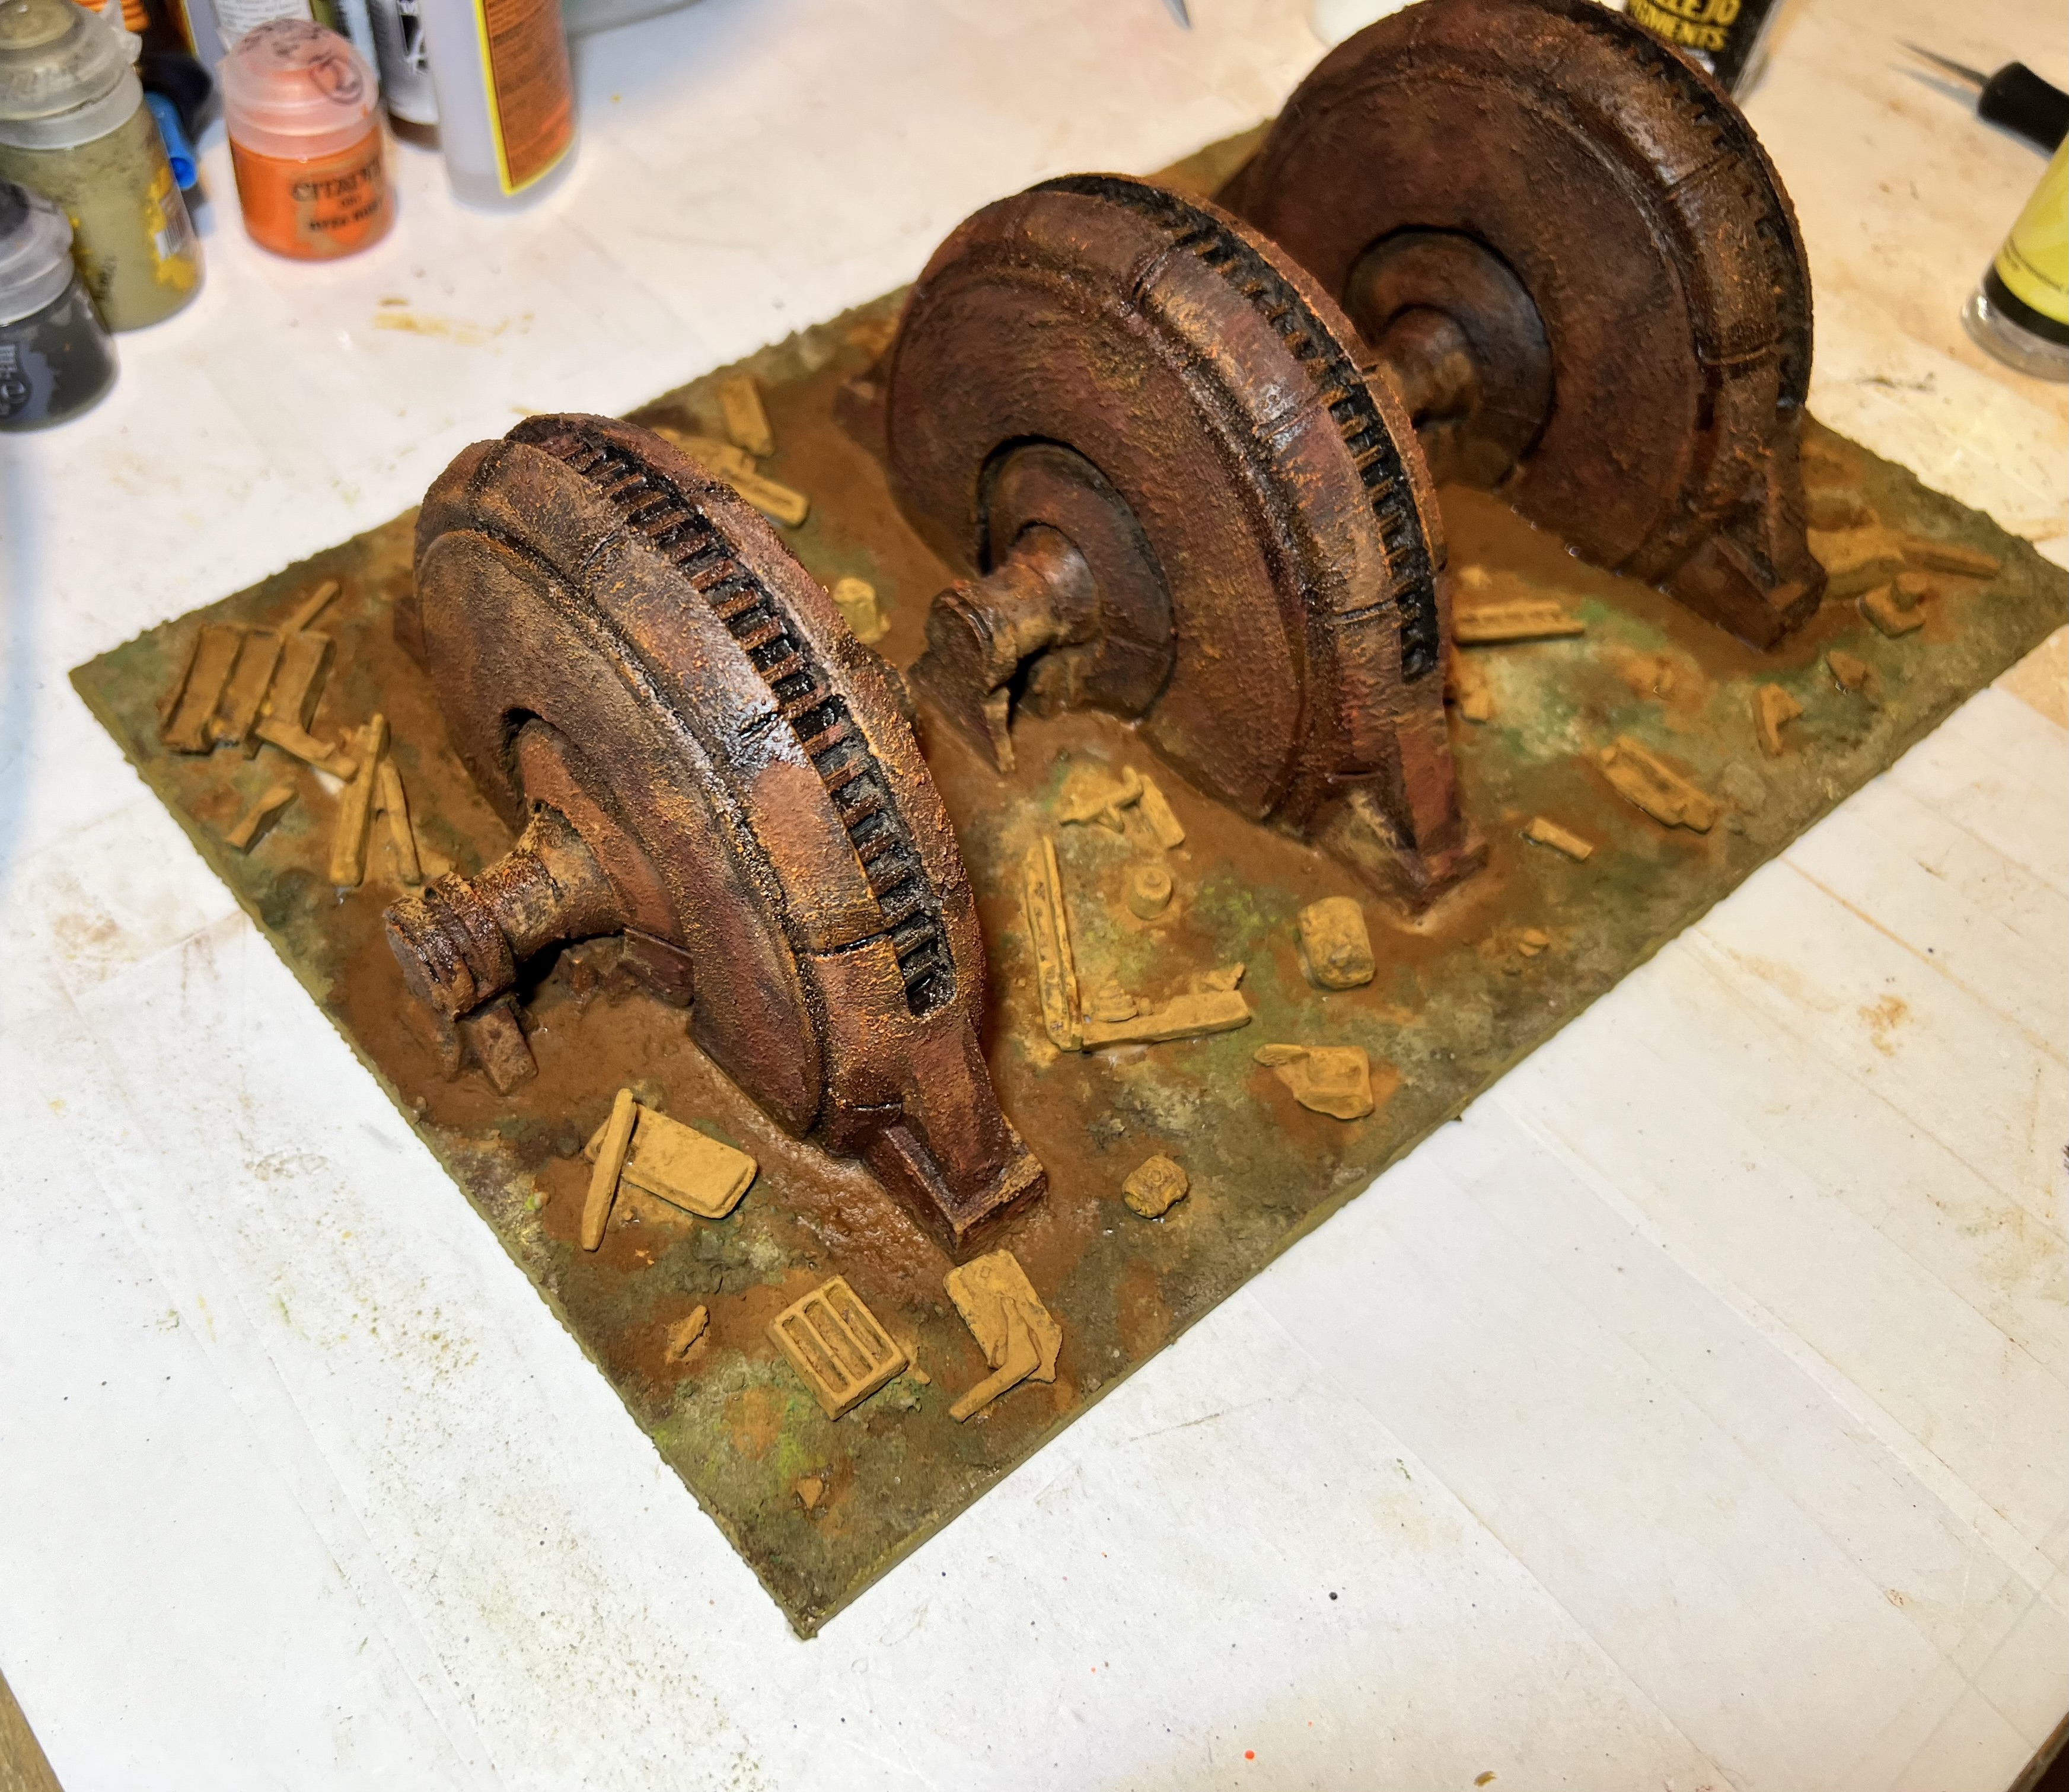
The generators were secured to the base by Gorilla Glue. Once that dried, I added the pigments to the base and fixed them with the binder. I then decided that there should be more detritus and wreckage here. I added some of my rusty Juweela scrap pieces. Then, I applied more rust pigments to them. These actions are shown in the gallery below.
Finally, in an effort to add some wasteland life to the piece, I added multiple different flocking tufts. Here are some finished shots.
Thanks again to Chris Rett for this gift, and sorry it took me so long to finally complete it!
I’m looking forward to having this on the tabletop. It will be a companion piece to my rusty walls and ruined buildings. It will also complement my ruined chemical plant. I will be making other pieces soon. Stay tuned! I hope that you found this interesting or useful. Let me know in the comments section.
Until next time.
For all of my previous posts on terrain projects, please see this page.For all of my previous posts on sci-fi projects, please see this page..
PAINTS, INKS, GLAZES, SHADES, WASHES, PIGMENTS, FLOCKING, GLUES AND MORE THAT I USED ON THIS MODEL
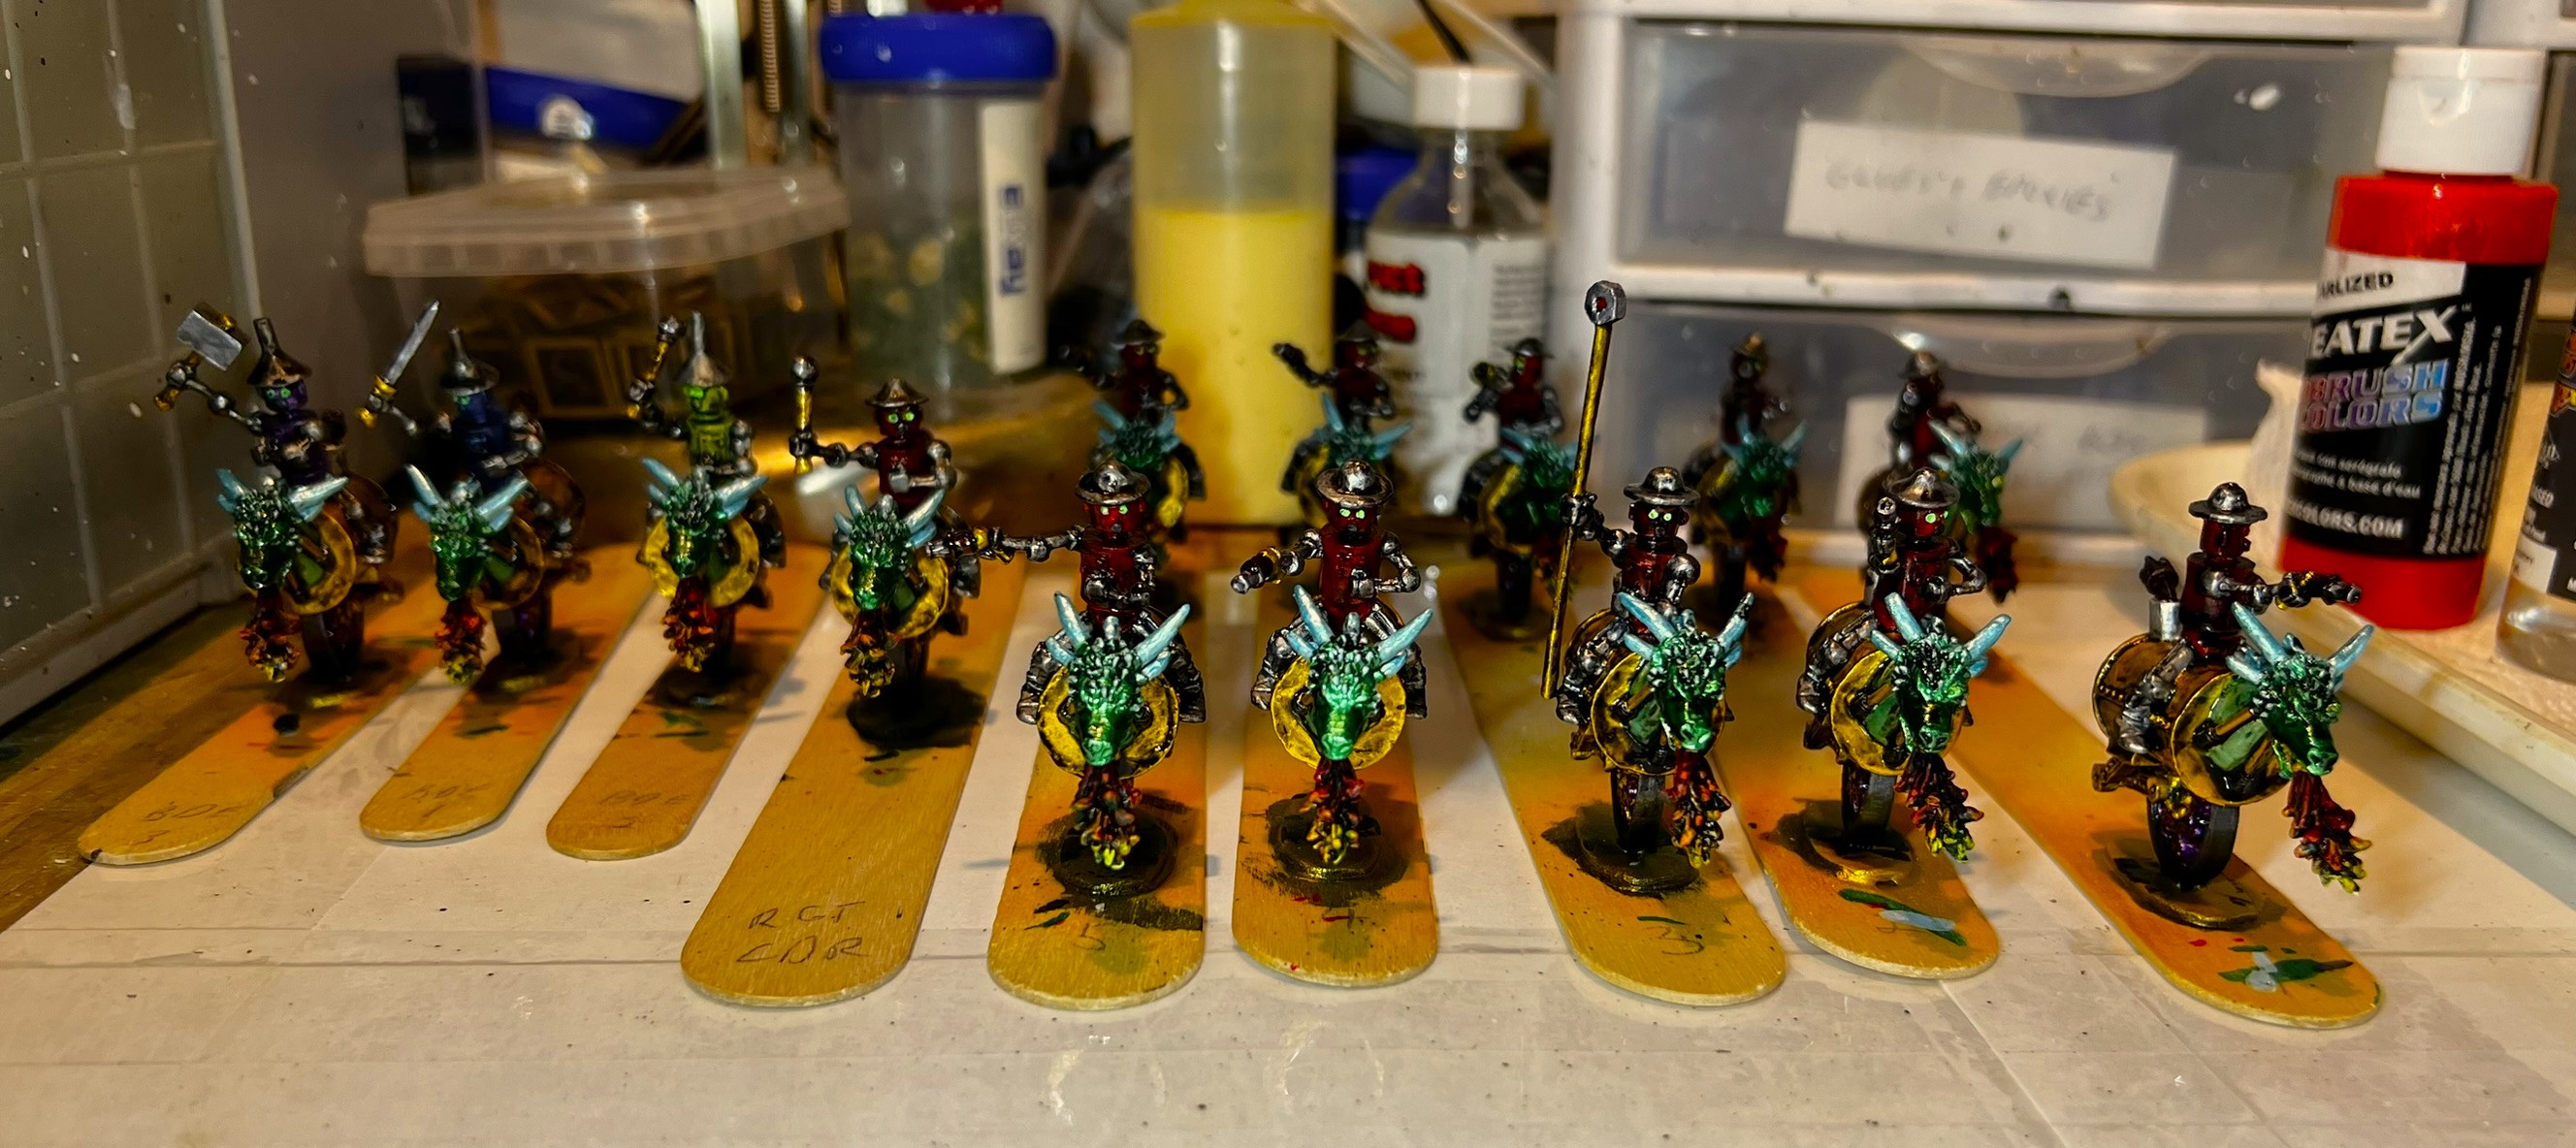
Professor Nitpik is back and has his own Industrial City faction for the Wars of Ozz. I painted up his infantry in 2023. But now he has his own faction with new troops, stats, (and new spelling). Right before TotalCon 39, I finished 11 figures for the cavalry regiment and three brigade commanders.
Interestingly, as a new faction they have a totally new chart with new Resolve and Elan results – to include “Reboot” and “Caracole”. The former makes the mechanical soldiers pause and gives an enemy a free hit on them. The latter results in a cavalry charge that stops short of contact with all figures firing their pistols at the enemy.
As I have been DEEP into convention prep this month, I am just going to be brief here and show you some WIP and the finished products. For these, I chose a lot of pearlized airbrush and craft paints. I also decided to make them sooty, oily, and grimy over their shiny metal coats.
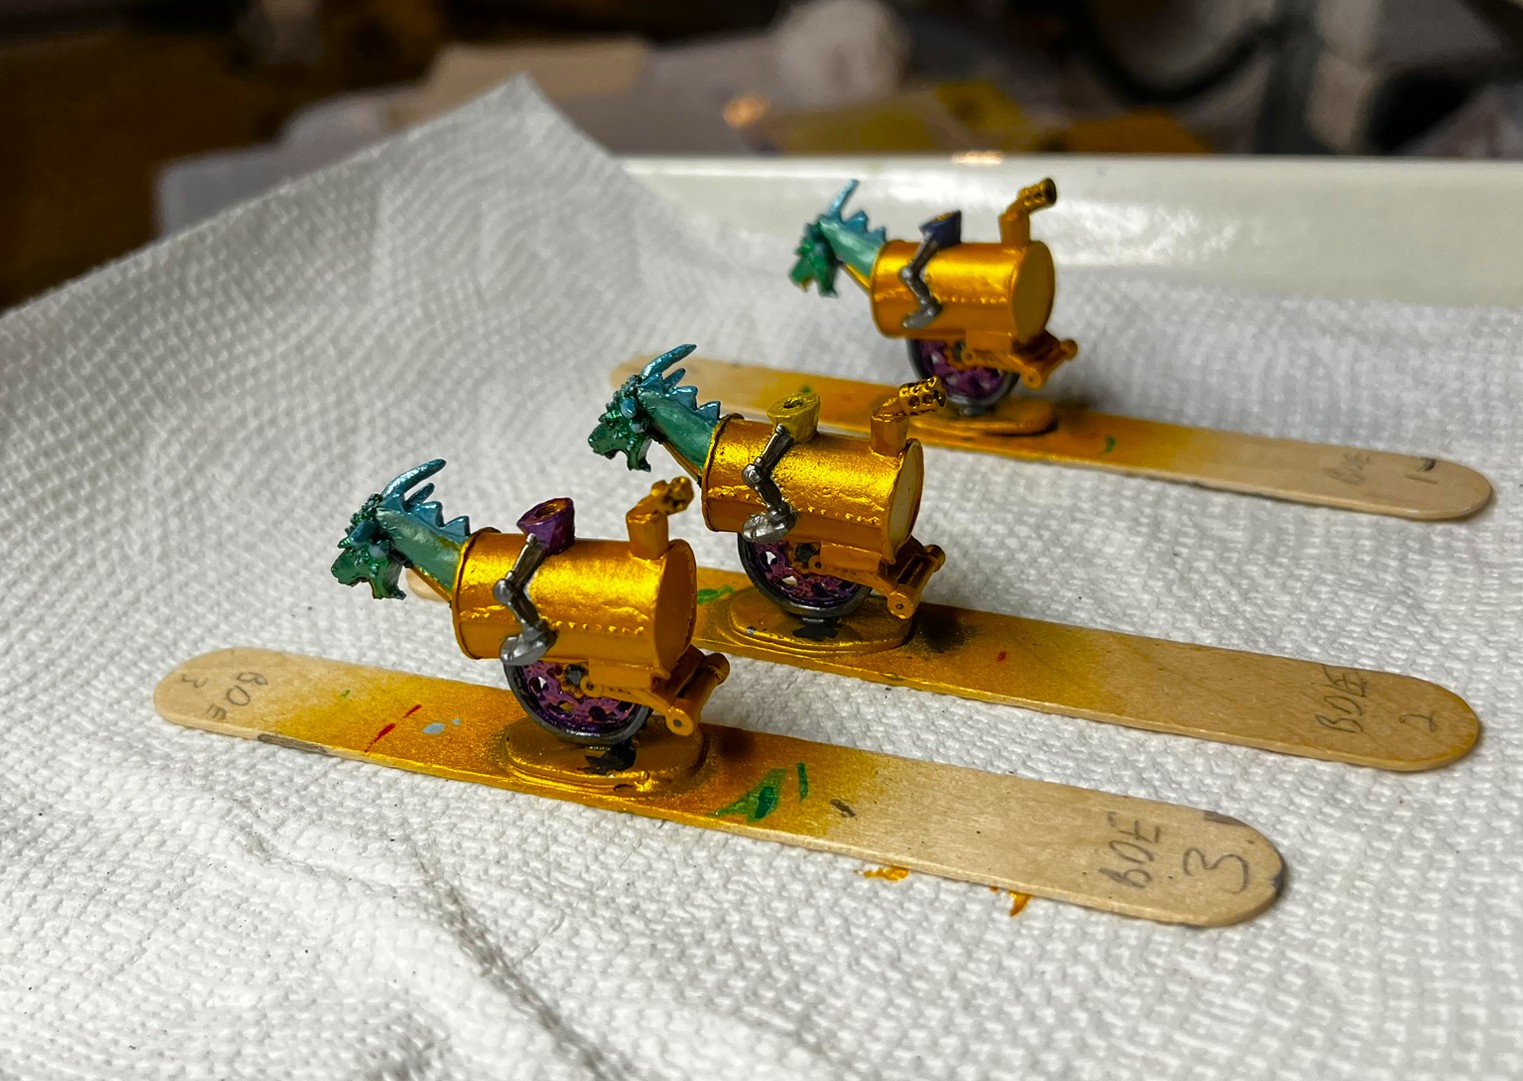
Using my airbrush I applied the pearlized copper as an undercoat over the primer. For the riders, I used a pearlized red. The brigade commander riders got pearlized blue, yellow, and purple paints. The mounts for all were painted identically.
Mechanical Cavalry early on.Brigade Commanders early on.Mechanical cavalry riders in progressFlame breaths and brigade commanders in progress
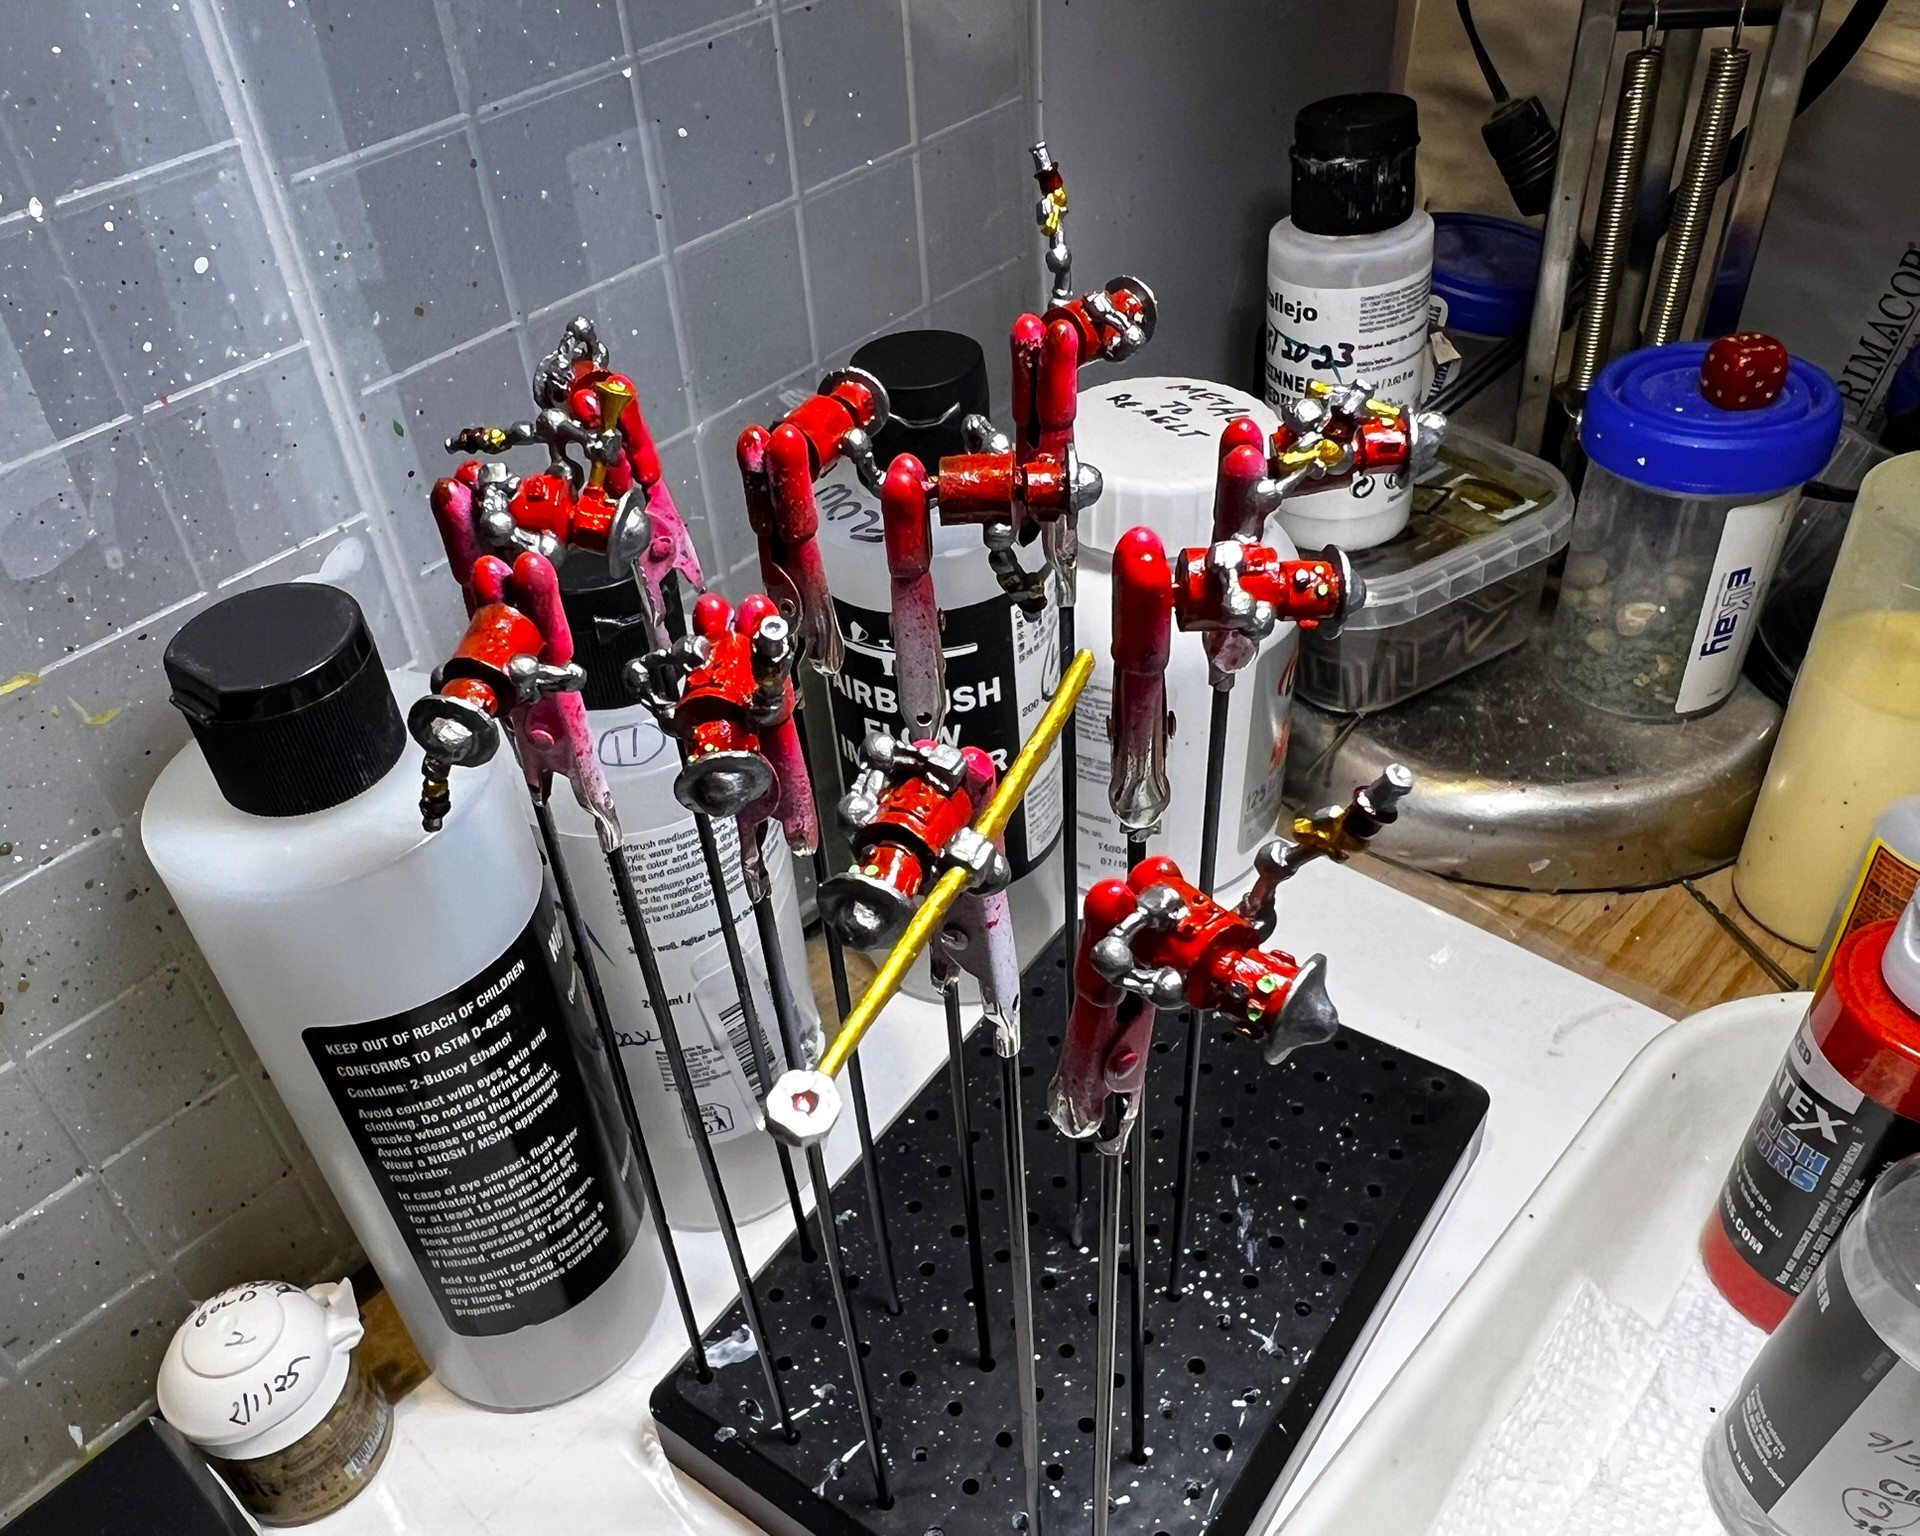
Next, I added various metallic craft and airbrush paints – mostly also pearlized. Then, I assembled them all.
Below you can see that progress before varnishing. Citadel “Nuln Oil GLOSS” provided a nice spilled/burned diesel sheen. Here are some close ups:
A cavalry trooper before varnishing
I varnished the figures with a gloss and a matte coating. I mounted the figures on their steel and MDF bases. Then, I added flocking material to “rubble up” the bases. This approach shows the ruins of the Industrial City from where they originated.
I like these railroad diorama rusted pieces.
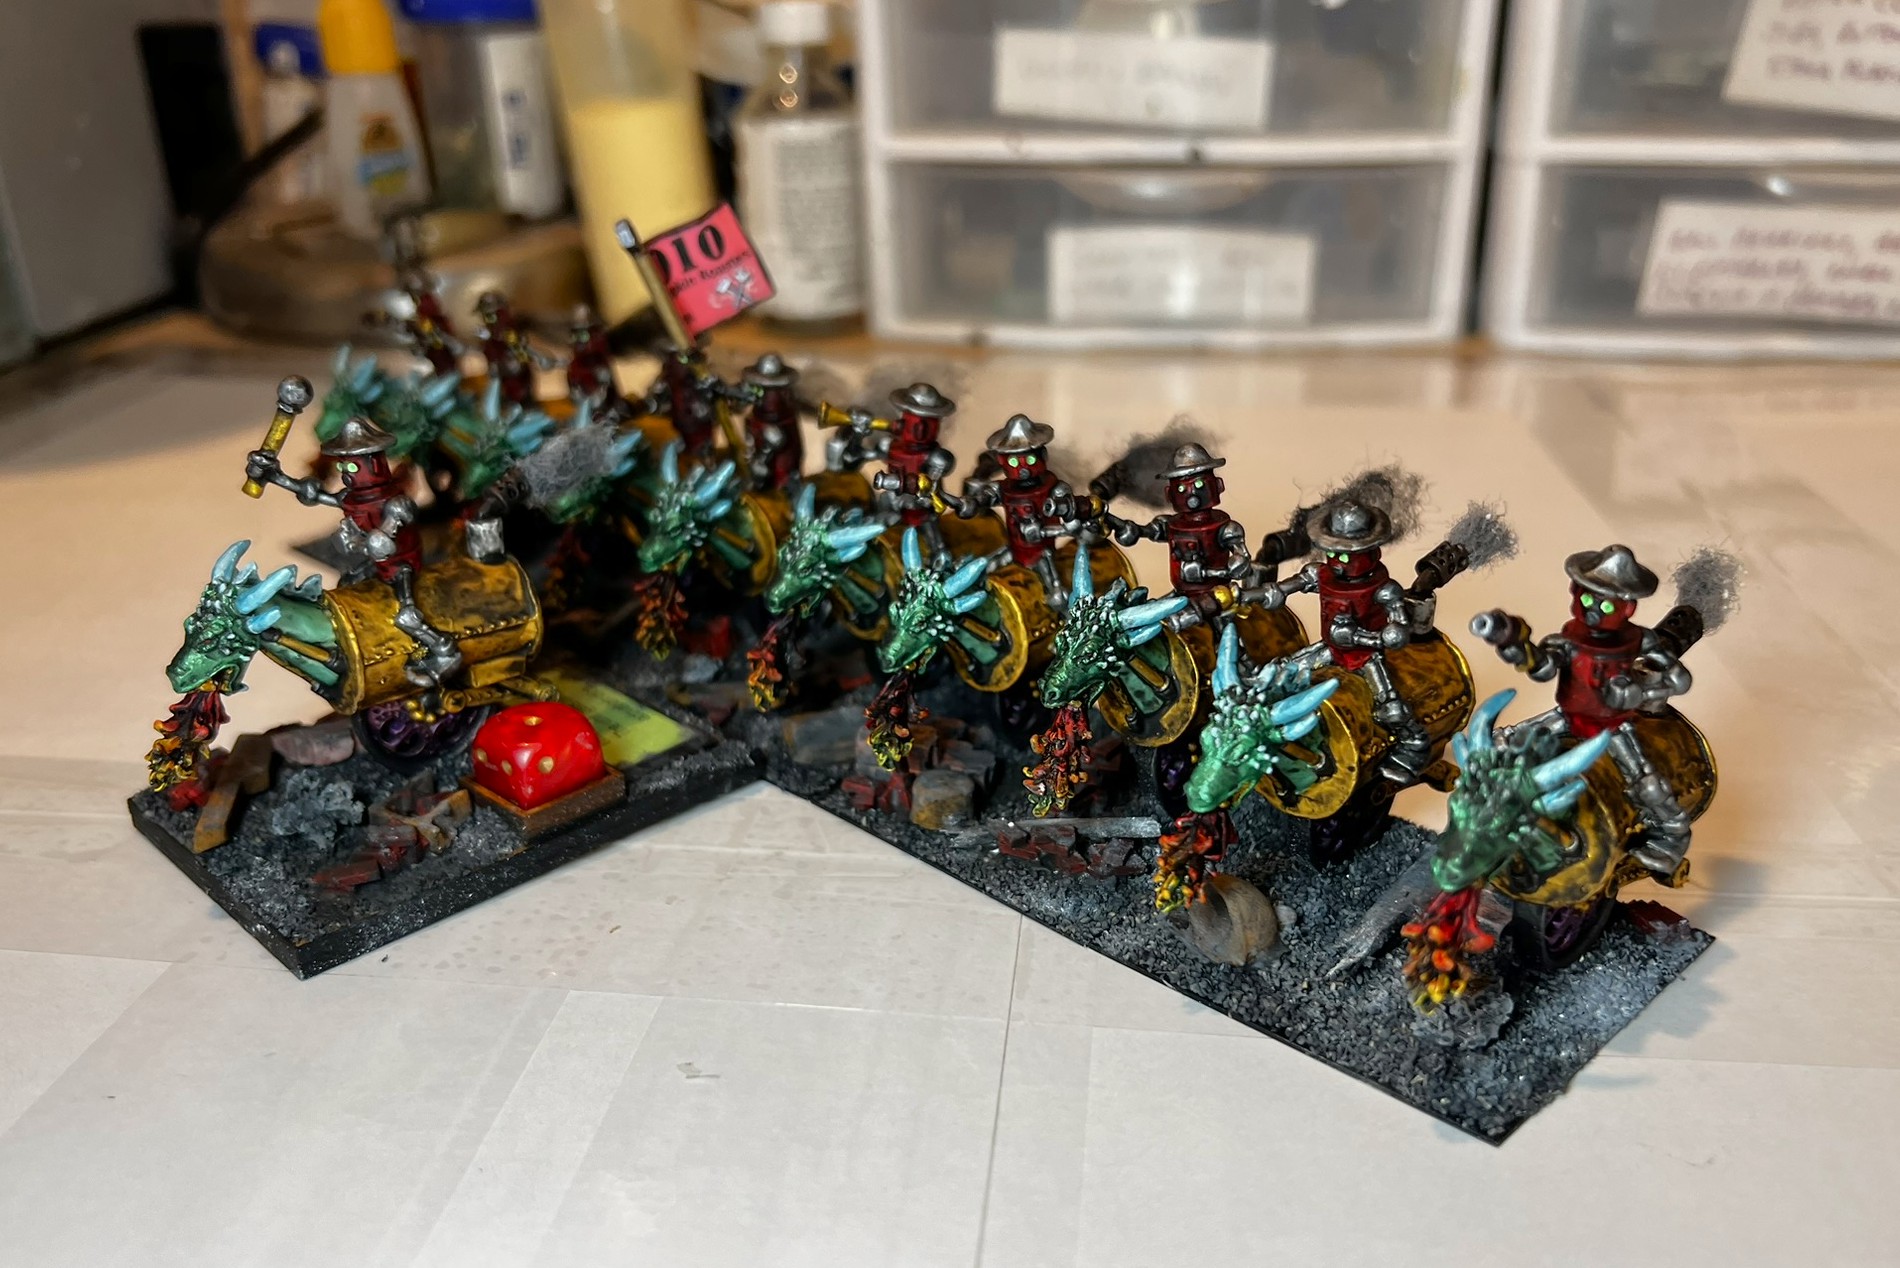
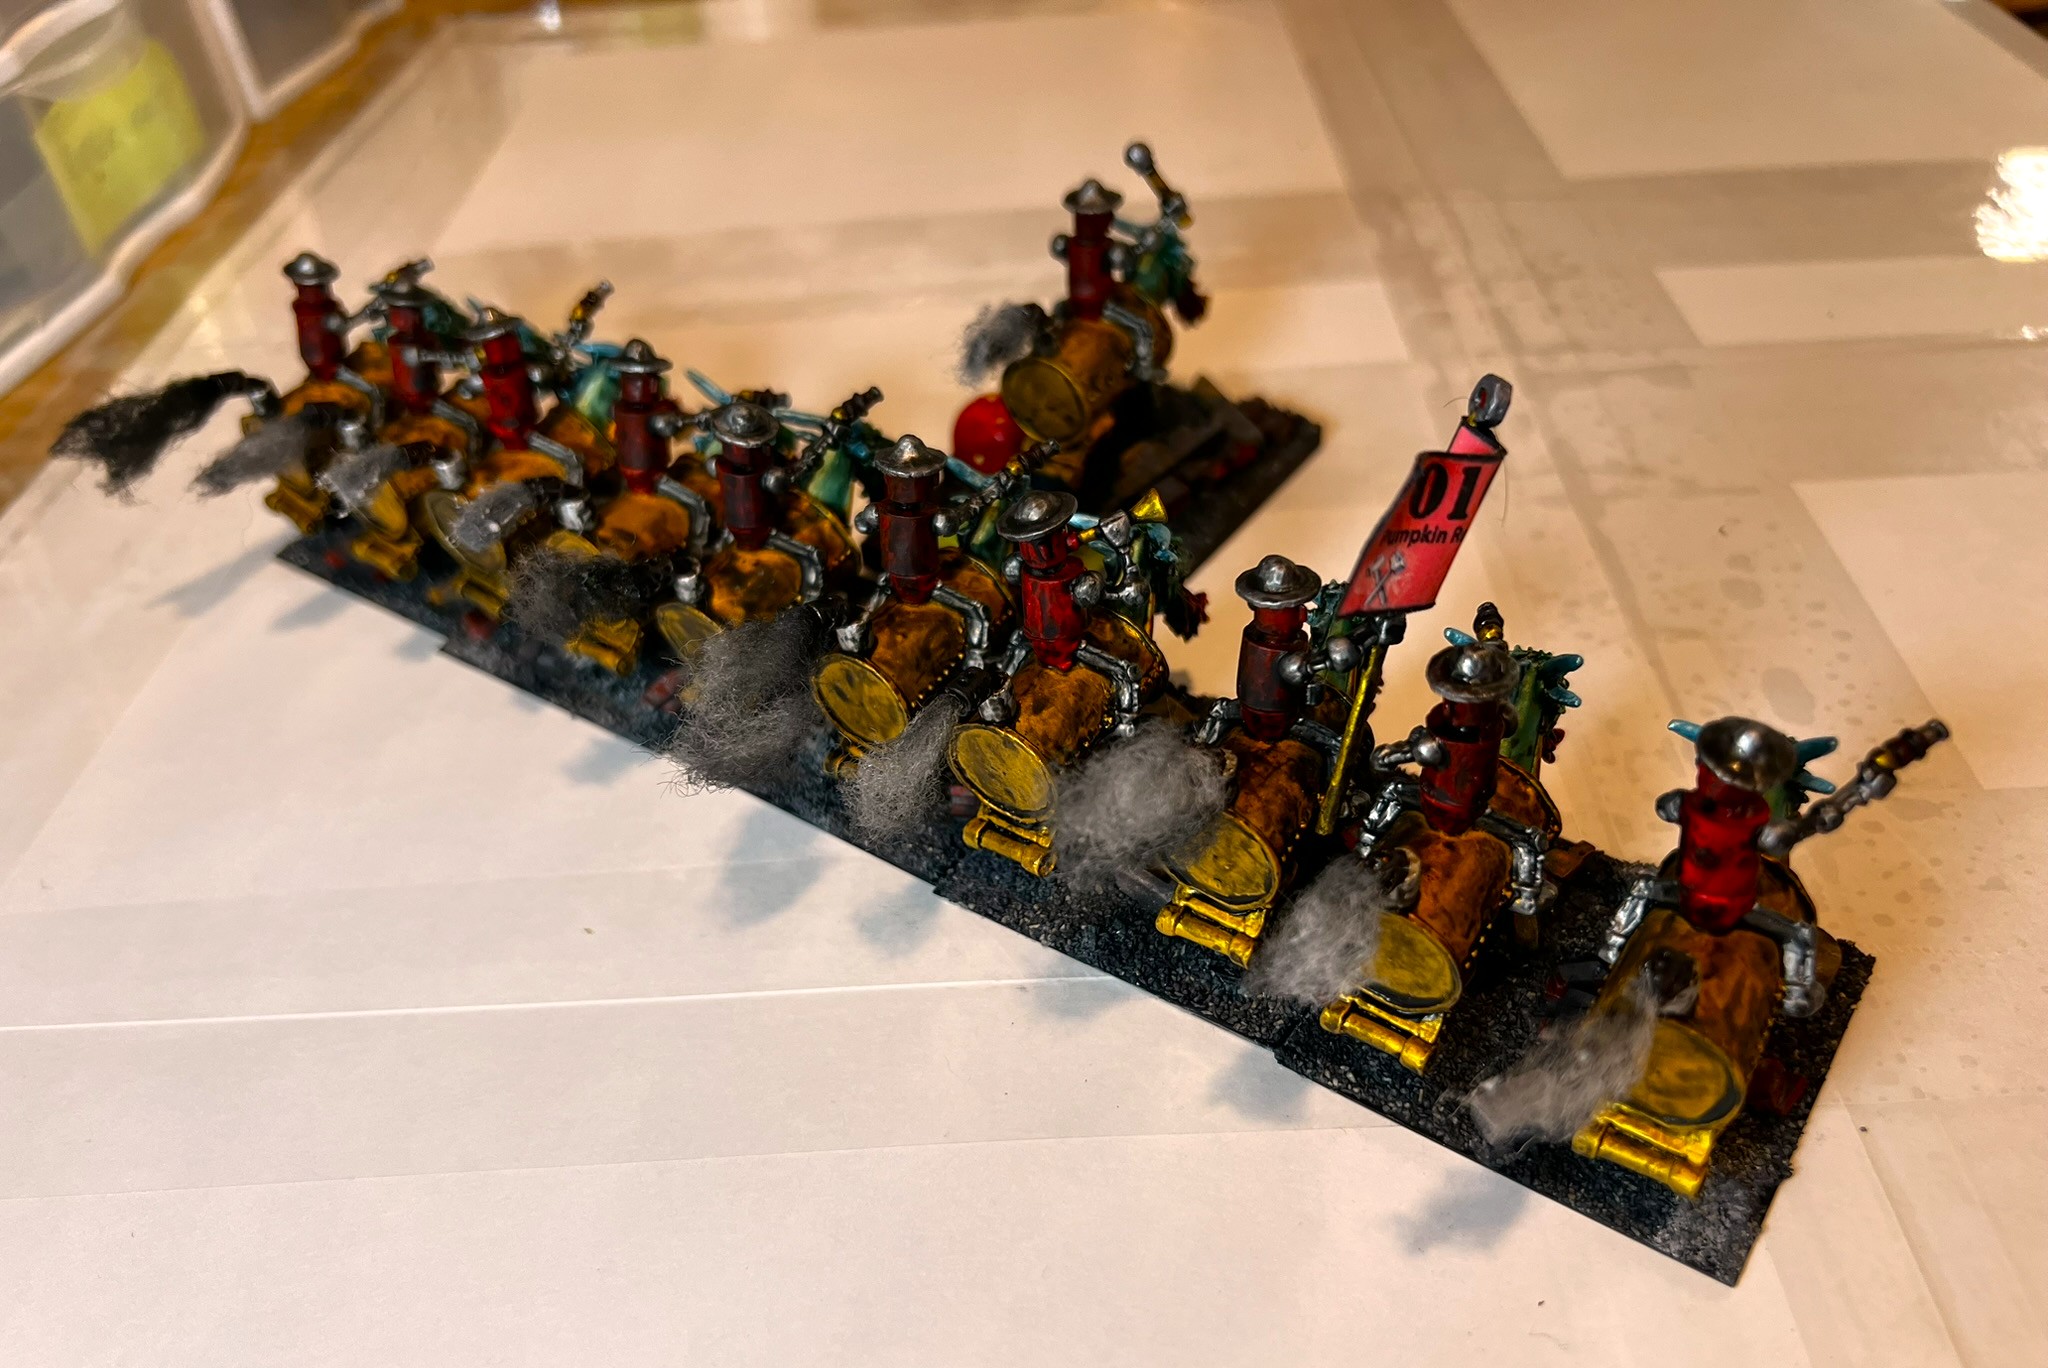
I flocked these with junk. Then, I added pigments to the base rubble. This gave them a dirty and sooty look. Lastly, I added painted pillow batting exhaust fumes.
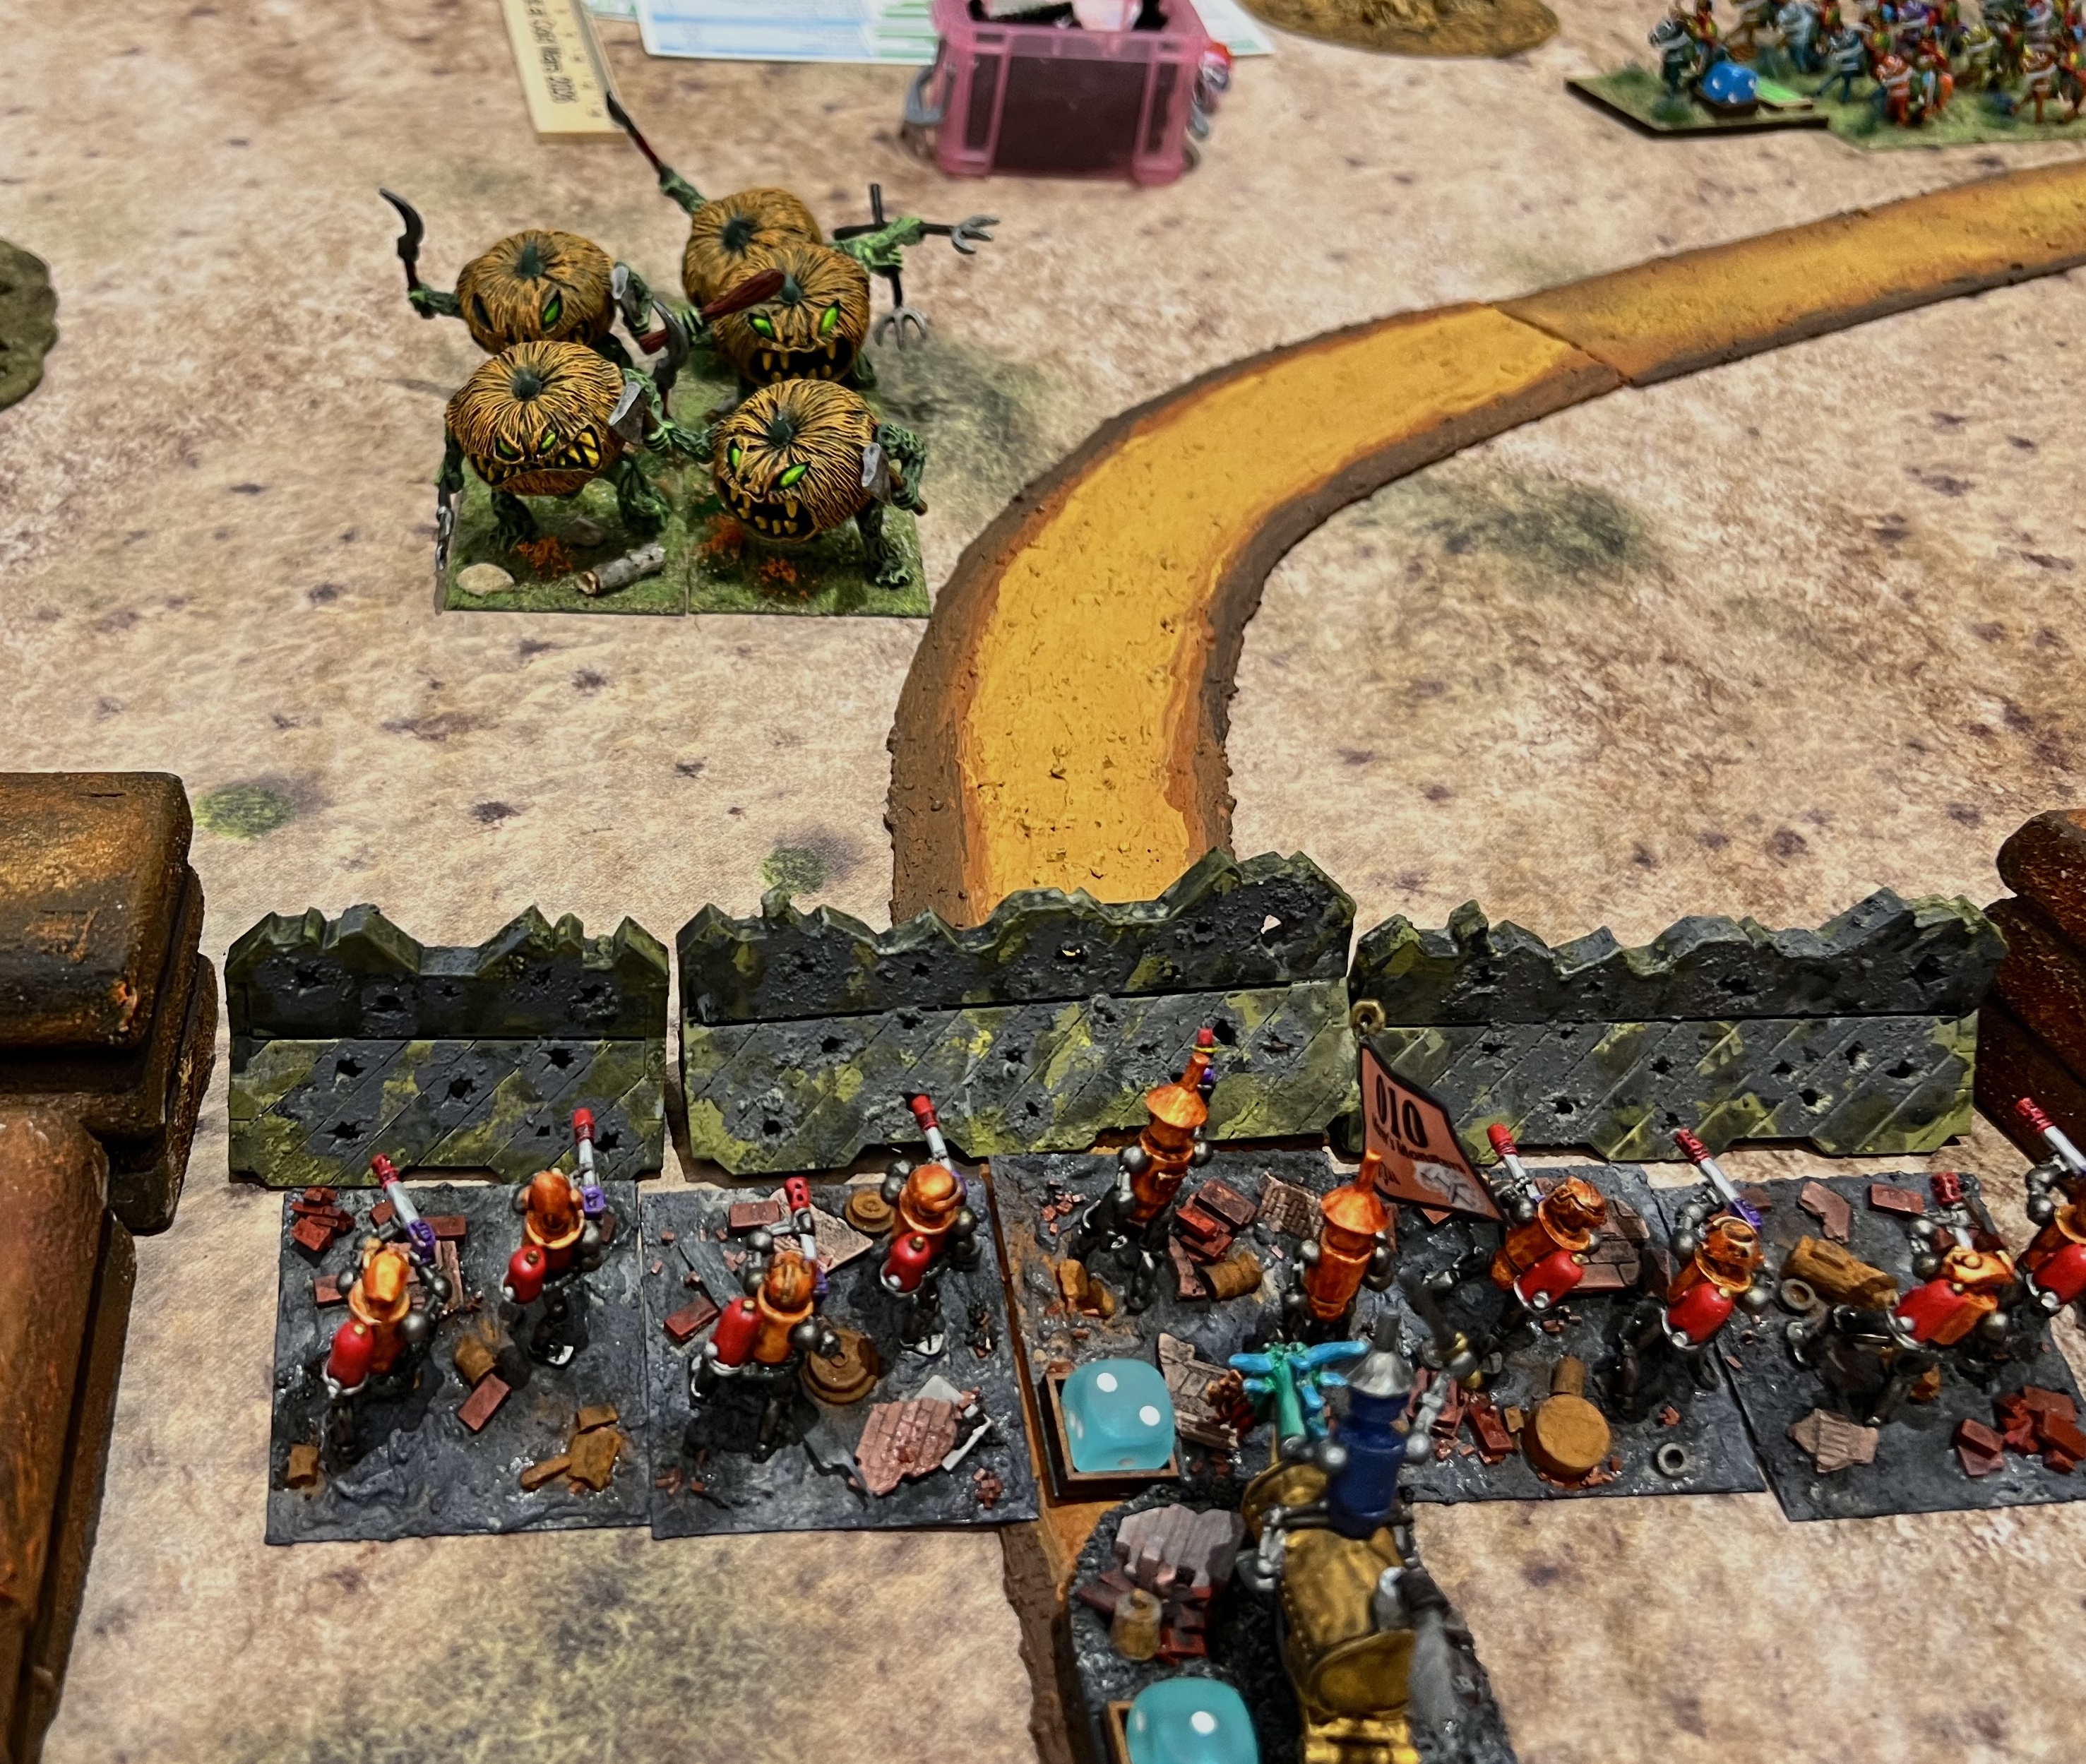
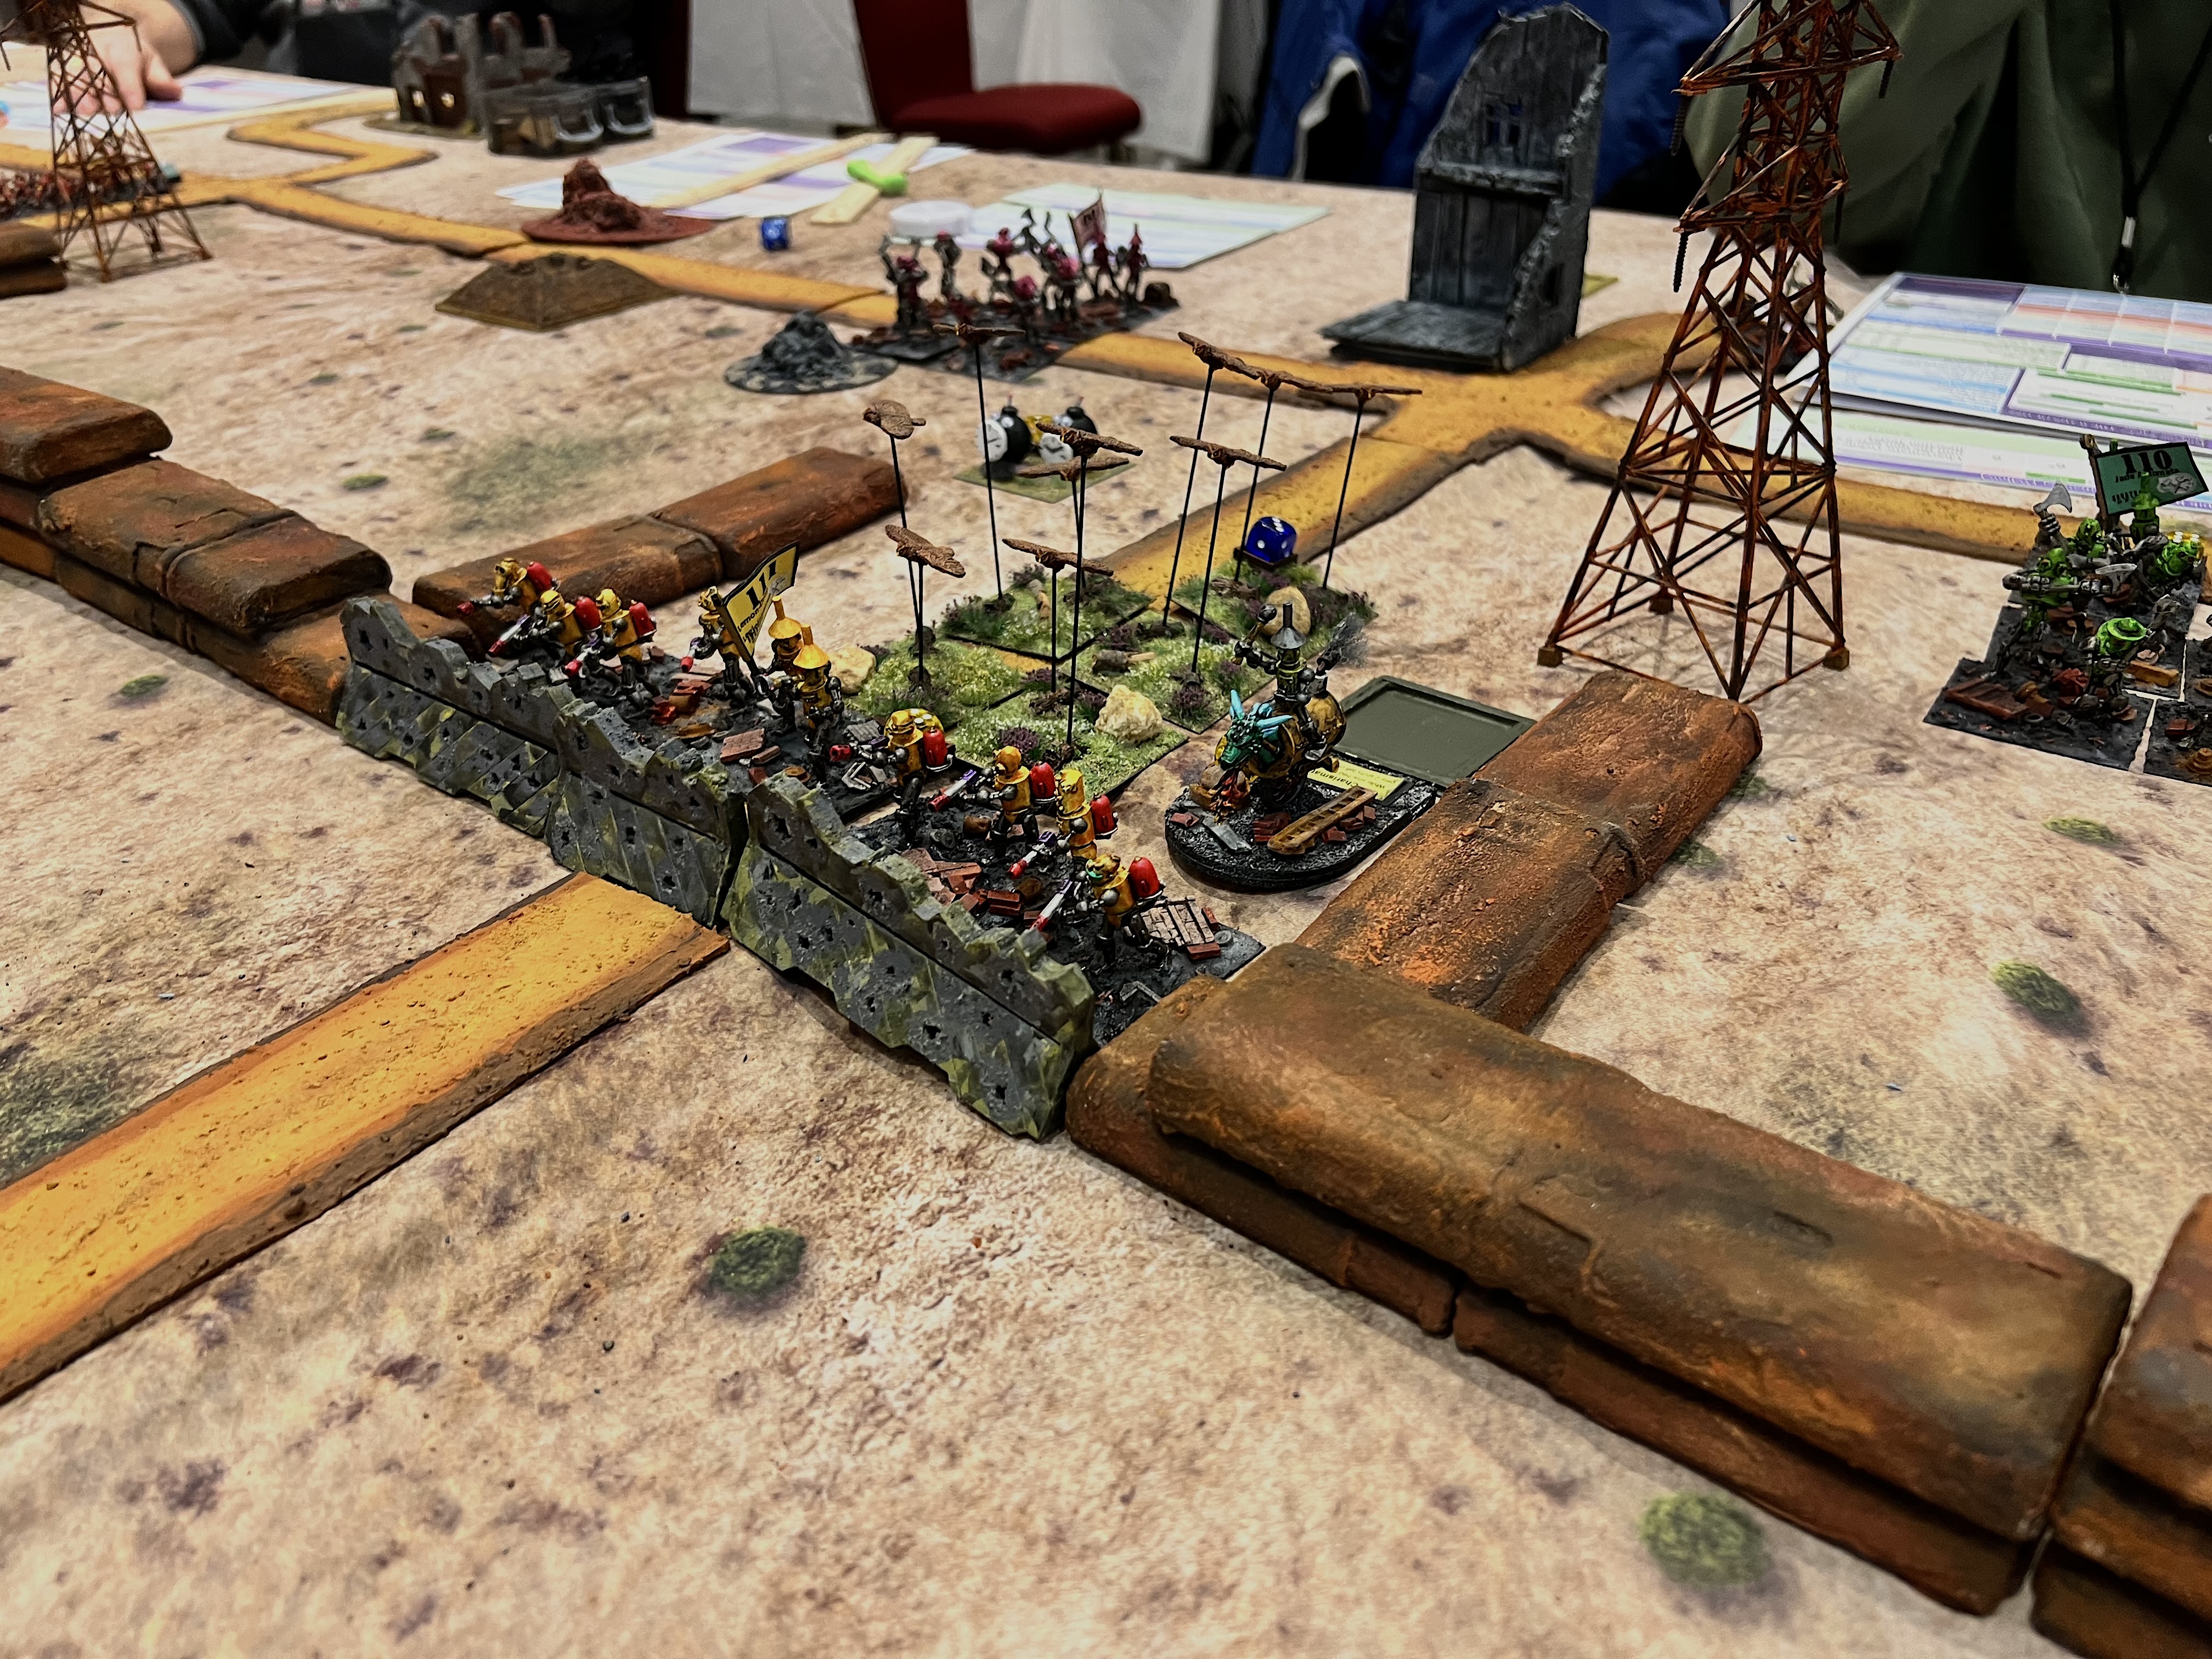
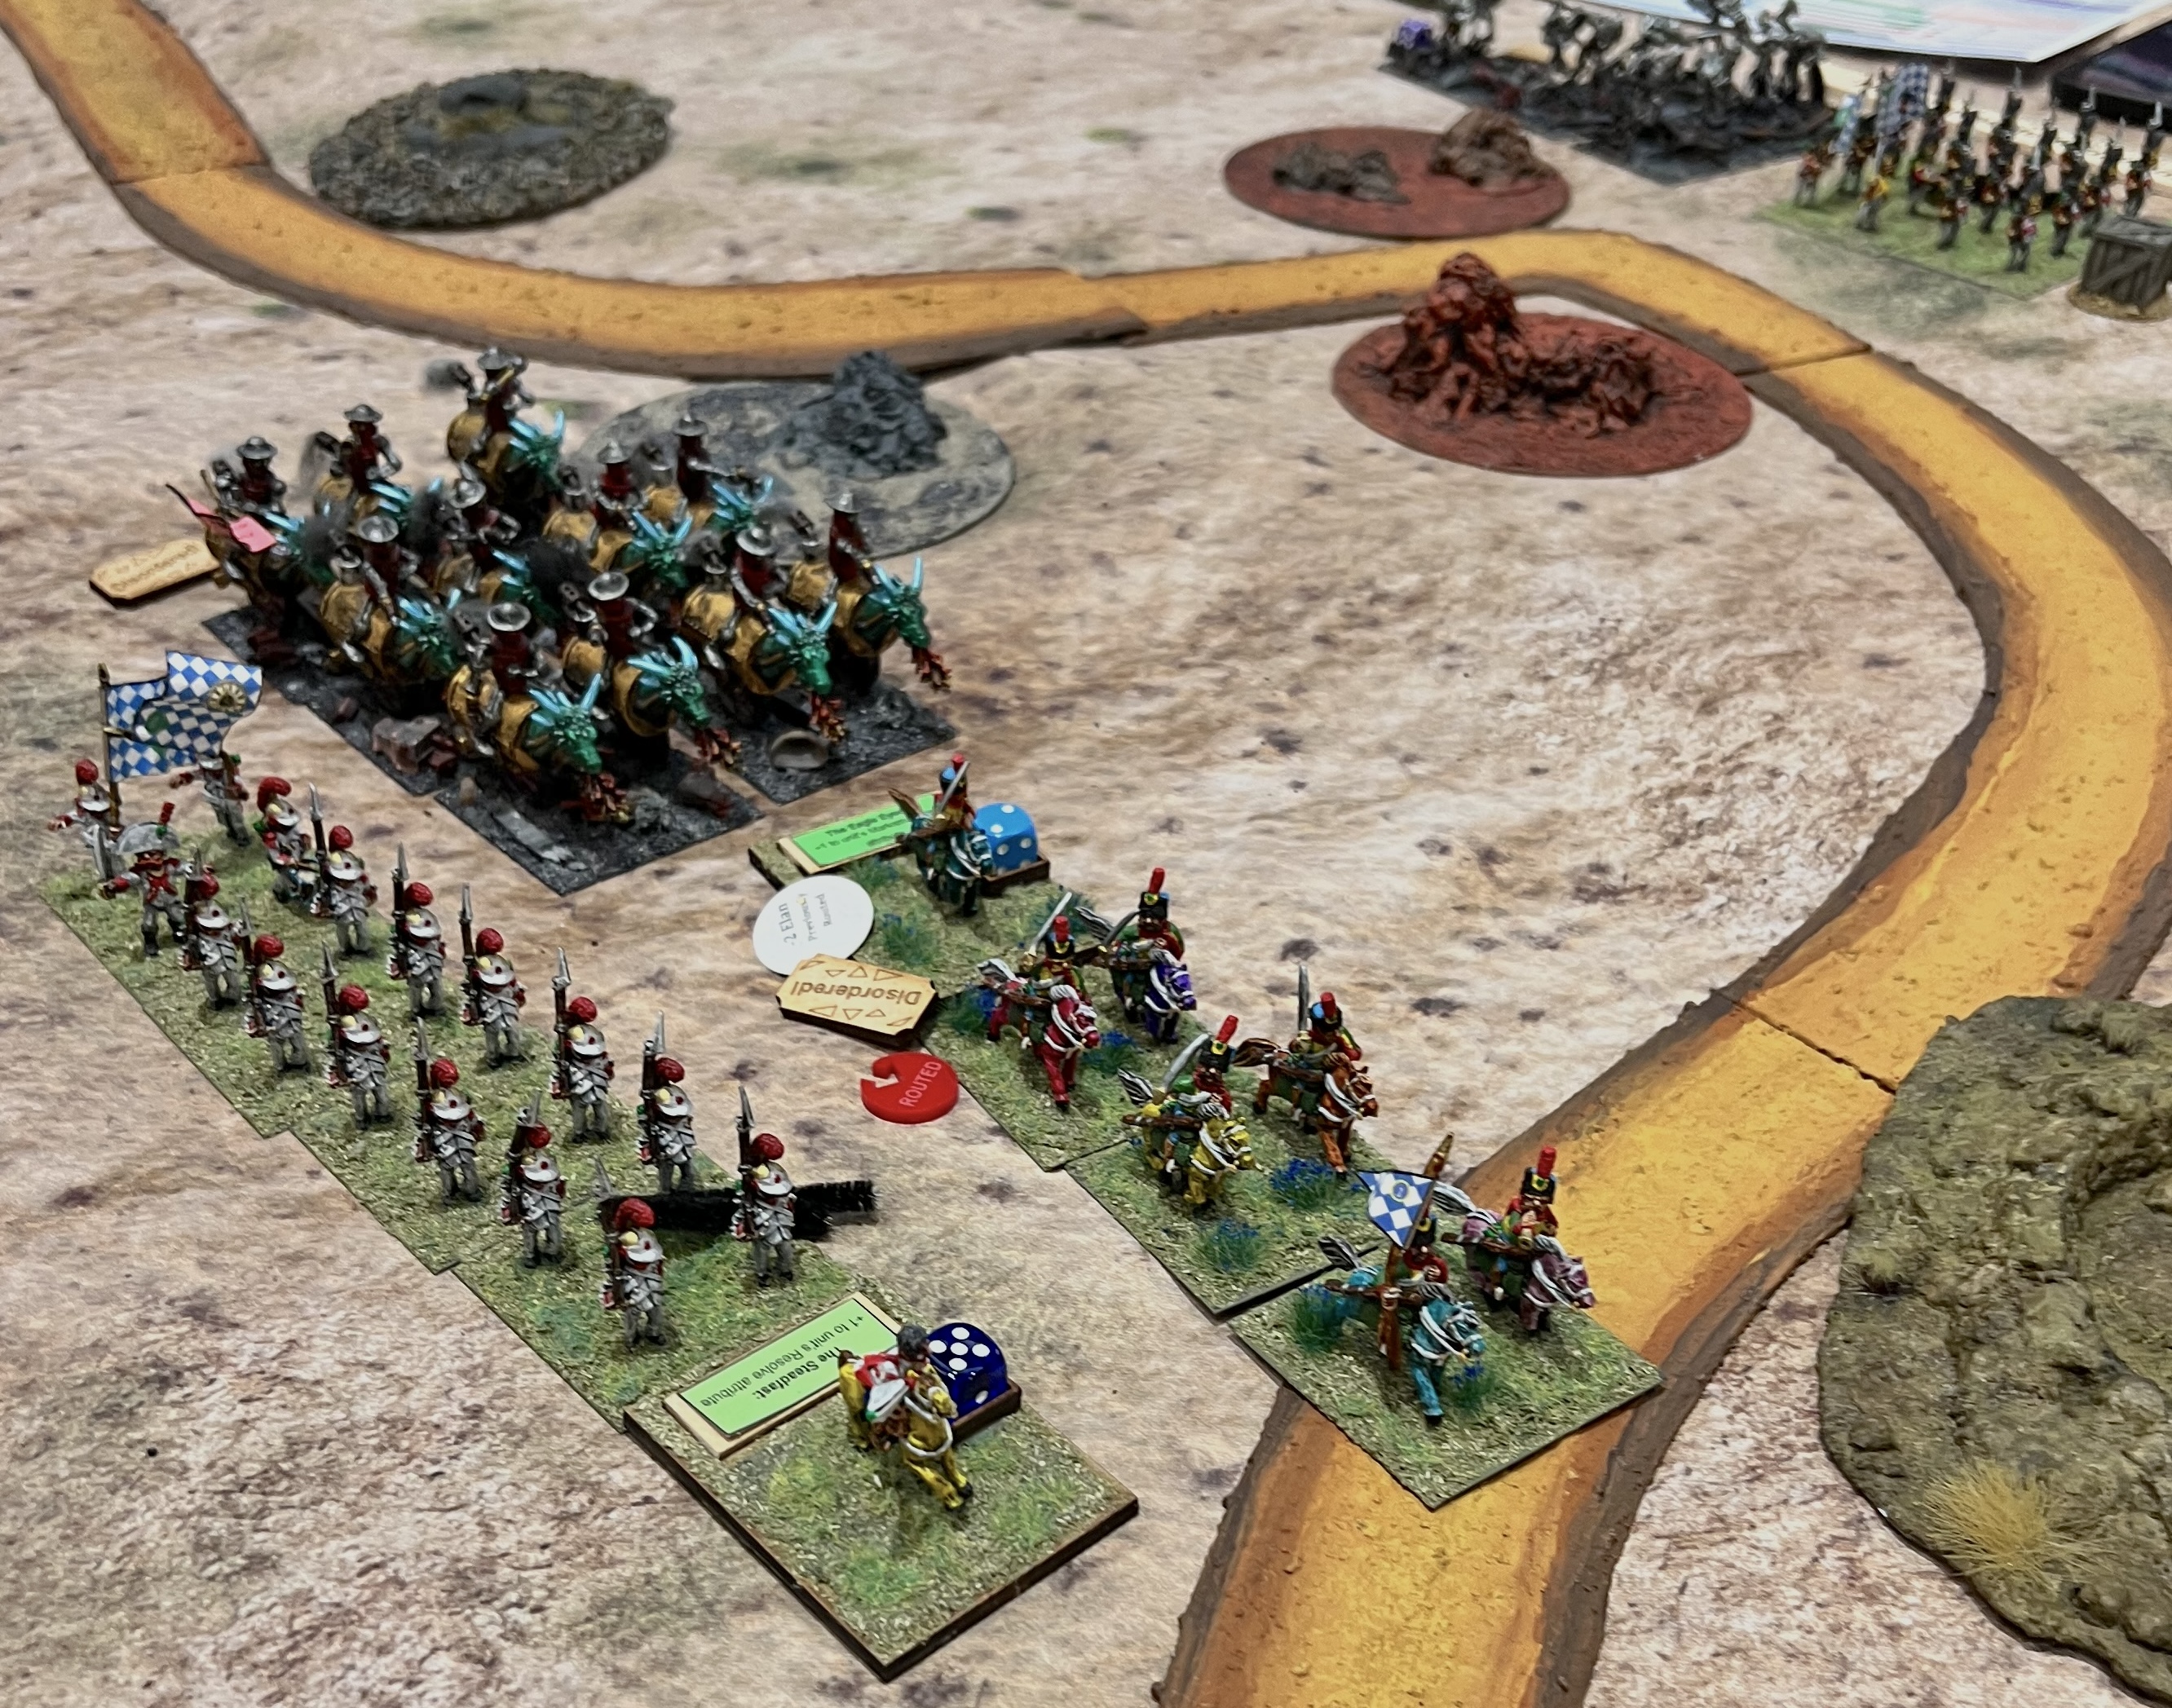
The 010 “Pumpkin Roaster” Mechanical Cavalry. So named because of their victory over the Great Pumpkinheads in a past battle.Opposite side view.Rear view showing the exhaust plumes.
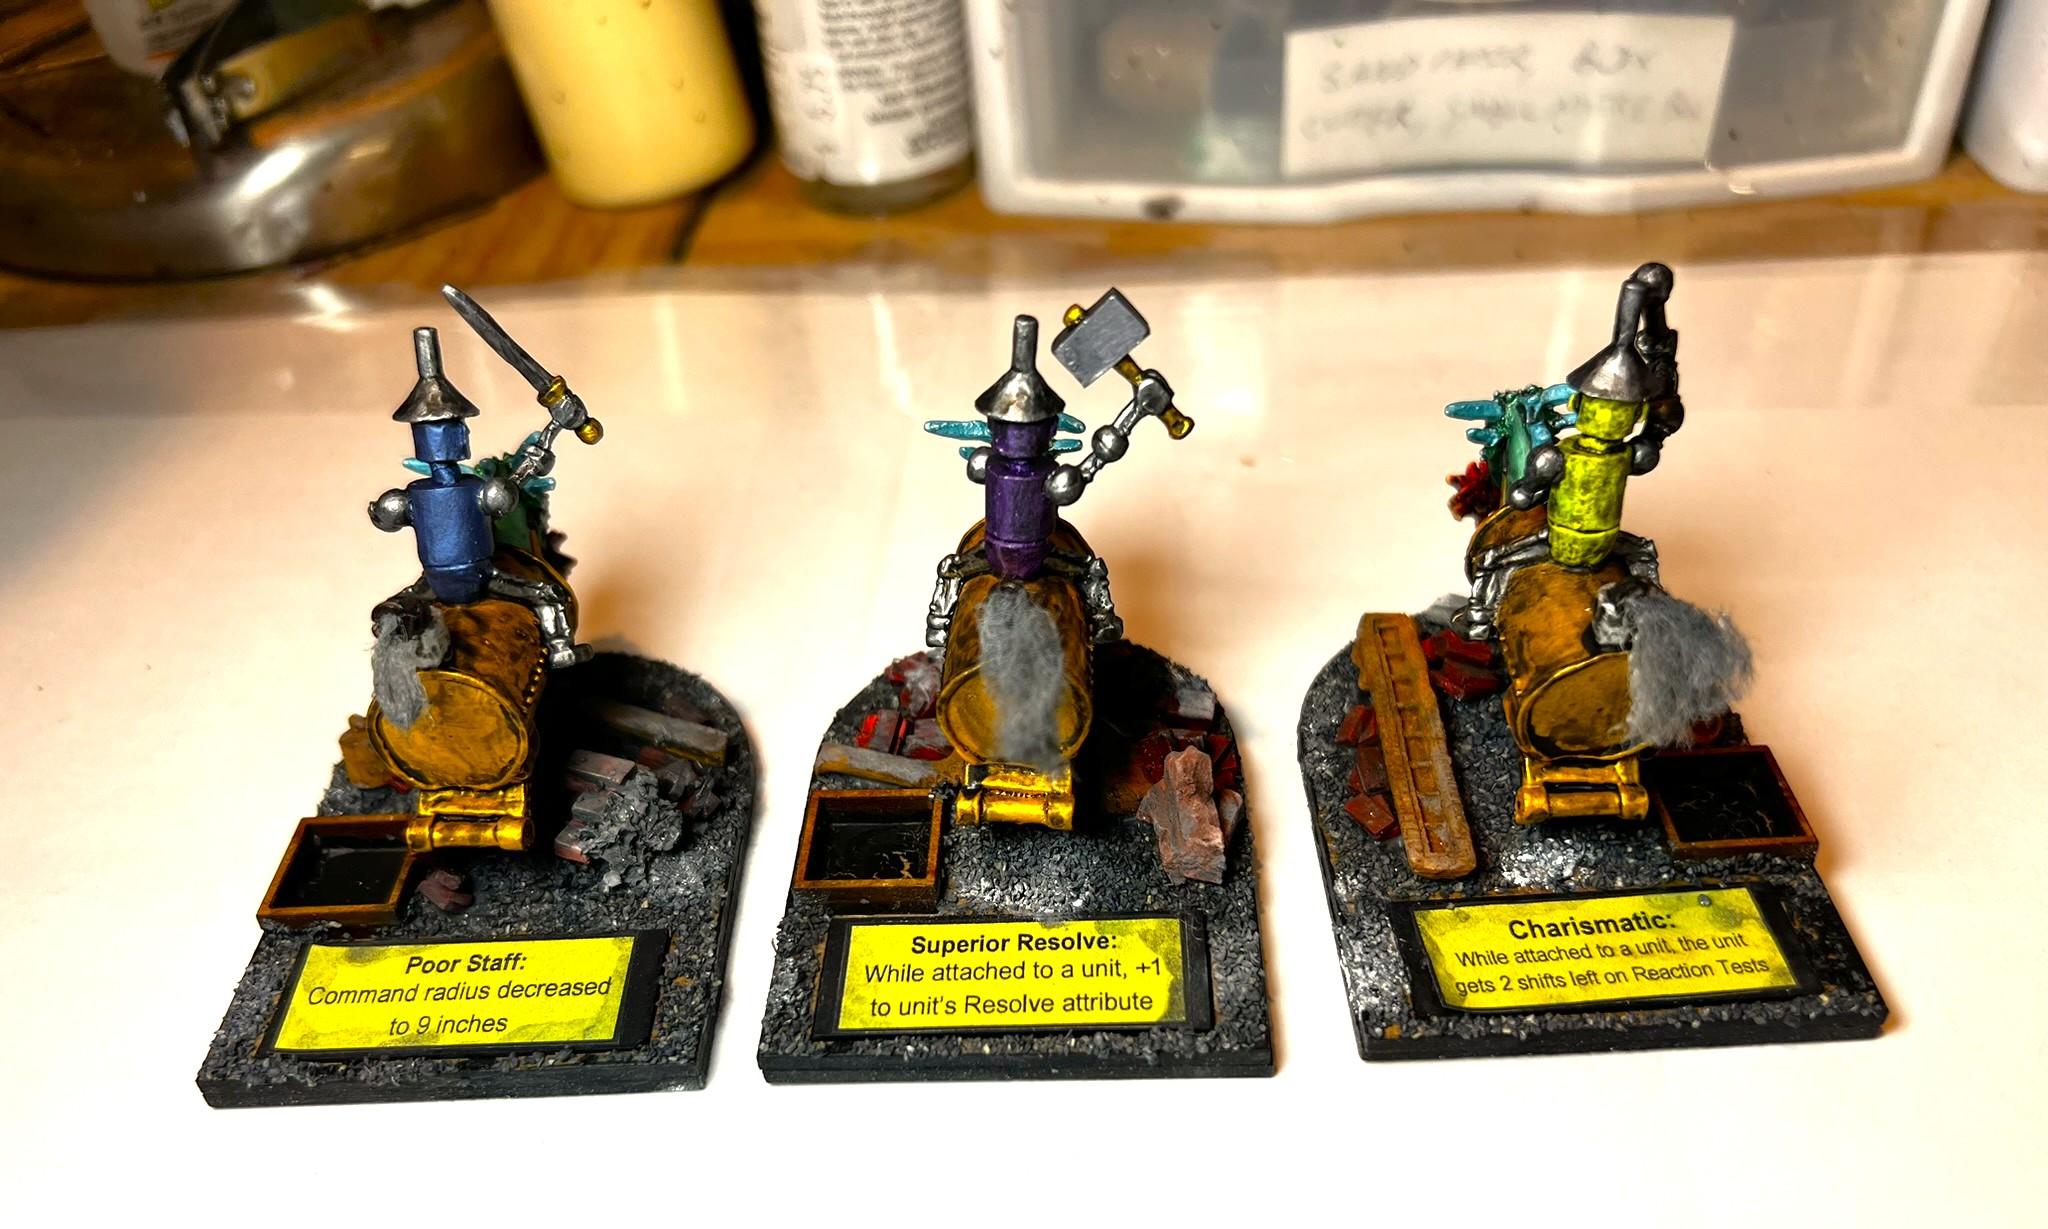
The three brigade commanders were completed similarly, and given their abilities as you see below..
Lastly, here is a video of the unit and the brigade commanders:
Video of the brigade commanders for Professor Nitpik (OZZ-544) and the Pumpkin Roasters Mechanical Cavalry.
These 14 figures statues also qualify for Dave Stone’s annual “Paint What You Got Challenge”. Check it out! I’ll say it again. Dave is a great guy. I guess he’d prefer “solid bloke.” He runs this every year between Christmas and the end of February.
These were a lot of fun to build and paint up. I hope that you enjoyed them and that you will share any of your feedback in the comments section.
Final Note
Want to learn more about Ozz? If you want to check out the excellent Wars of Ozz figures’ range, there are two places to get them. You can also get the rules there. (I make no money from this.) The game rules and the figures are available from the next two places:
Below you’ll see the list of paints and the like that I used on this project. They are more useful for me when I need to recreate a color scheme in the future. They might not be as useful for you. In any case, that’s why I post them.
Miscellaneous details and references for those interested in that sort of thing:
For my earlier posts on Wars of Ozz games, view this page. It includes figures, units, and other related projects.
PAINTS, INKS, GLAZES, SHADES, WASHES, PIGMENTS, FLOCKING, GLUES AND MORE THAT I USED ON THESE PROFESSOR NITPIK MECHANICAL CAVALRY AND BRIGADE COMMANDERS:
PVA Glue
Popsicle sticks
Gorilla Glue
Alligator clips and stands
MDF Bases
2″ Square War Games Accessories Steel Bases (21)
War Games Accessories Steel Bases (FOW1)
Vallejo Surface Primer “Black”
Createx Wicked Colors “Pearl Red”
Createx Airbrush Colors “Pearl Copper”
Createx Airbrush Colors “Pearl Green”
Createx Airbrush Colors “Pearl Plum”
Vallejo Mecha Color “Sky Blue”
Army Painter “Dark Tone” (wash)
Vallejo “Metal Medium”
DecoArt “Peacock Pearl”
Vallejo Mecha Color “Metallic Green”
Vallejo Mecha Color “Metallic Blue”
Vallejo Model Air “Gun Metal”
Martha Stewart “Duckling Pearl”
Vallejo Model Color “Off White”
Army Painter “Dark Tone” (wash)
Vallejo Mecha Color “Off White”
Vallejo Model Color “Brass”
Army Painter Speed Paint 2.0 “Brazen Copper”
Army Painter Speed Paint 2.0 “Polished Silver”
Army Painter Warpaints Fanatics Effects “Data System Glow” (effect)
Army Painter Speed Paint 1.0 “Blood Red”
Army Painter Speed Paint 1.0 “Fire Giant Orange”
Army Painter Speed Paint 1.0 “Zealot Yellow”
Army Painter Warpaints Air “Neon Yellow”
Vallejo Model Air “Chrome”
Army Painter Warpaints “Rough Iron”
Vallejo Thinner Medium
Citadel “Nuln Oil GLOSS” (wash/shade)
Battlefront “Black”
Vallejo Mecha Varnish “Gloss”
Vallejo Flow Improver
Vallejo Thinner
Army Painter “Black Battlefields” (flocking)
Juweela 1:35 Debris
Juweela Metal Scrap Rusty
Pillow batting
Vallejo “Carbon Black” (pigment)
Vallejo “Titanium White” (pigment)
Vallejo “Pigment Binder”
Vallejo Premium Color “Matte Varnish”
Black Sharpie pen
Brown Sharpie pen
Nitpik flag design from Wars of Ozz Facebook page (printed on card stock)