It’s been a while since I posted anything about painted figures. As I mentioned in my last post, October 2023 found me busier than I have been for quite some time. In addition to finishing up my Ozz terrain and a storage box for it, I managed to finish off two Wars of Ozz units for use at HMGS Fall In!®. This post is about the first one – the Savage Apple Trees.
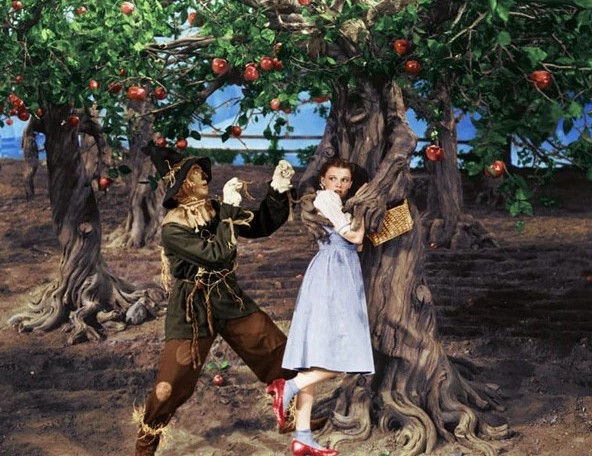
In the 1939 Movie, The Wizard of Oz, most of us may remember Dorothy and the scarecrow being assaulted by grumpy apple trees as they picked apples.
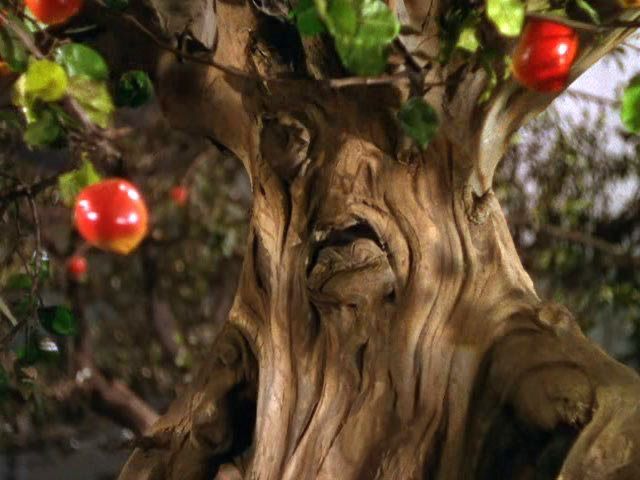
The apple trees attack – from the 1939 MGM movie, The Wizard of Oz.Close up of a grumpy apple tree- from the 1939 MGM movie, The Wizard of Oz.
In the Ozz world, these apple trees are part of the forces of the Great Land of Harvest. They are listed on the Wars of Ozz miniatures site as OZZ-523, Savage Apple Trees. In the game, they have both melee abilities and missile attacks (thrown apples of course). Additionally, they have the opportunity for secret deployment on the tabletop on a predetermined section of woods. This does give them the advantage of showing up unexpected on an enemy rear or flank.
Another advantage is that they are less affected by musketry (but not cannon). Their main disadvantages are twofold. First, the ranges for thrown apples is slightly worse than carbines – with only 4″ for short range with a maximum of 6″ for long range. Second, they also move relatively slowly as befits a tree unit. They are listed in the “Allies and Mercenaries” section on the website, and in the rules are listed under the Great Land of Harvest.
In the game,they are average melee troops, with Melee values of 5/10, Resolve values of 6/10, and Elan values of 6/10. They are even just average apple throwers, with a marksmanship of only 5/10. On the plus side, the unit is relatively inexpensive at only 4 points. As trees, they can pass through woods without any penalty, though still are slow.
The figures are all large enough to fit 1 figure each on a 2″ square base. They come 5 to a unit, are 28mm in scale, and are metal. All needed assembly and foliage attachments. There are two types of branches that can be added, plus the branches on the main trunk. Additionally, there is a base for each tree and 50 apples that can be mounted on the trees or scattered on the bases. Each figure, once assembled, can have its branches bent to allow both nesting of the completed figures in a formation (without hitting a neighboring tree base) as well as to give some degree of individuality. There are no faces on the trees.
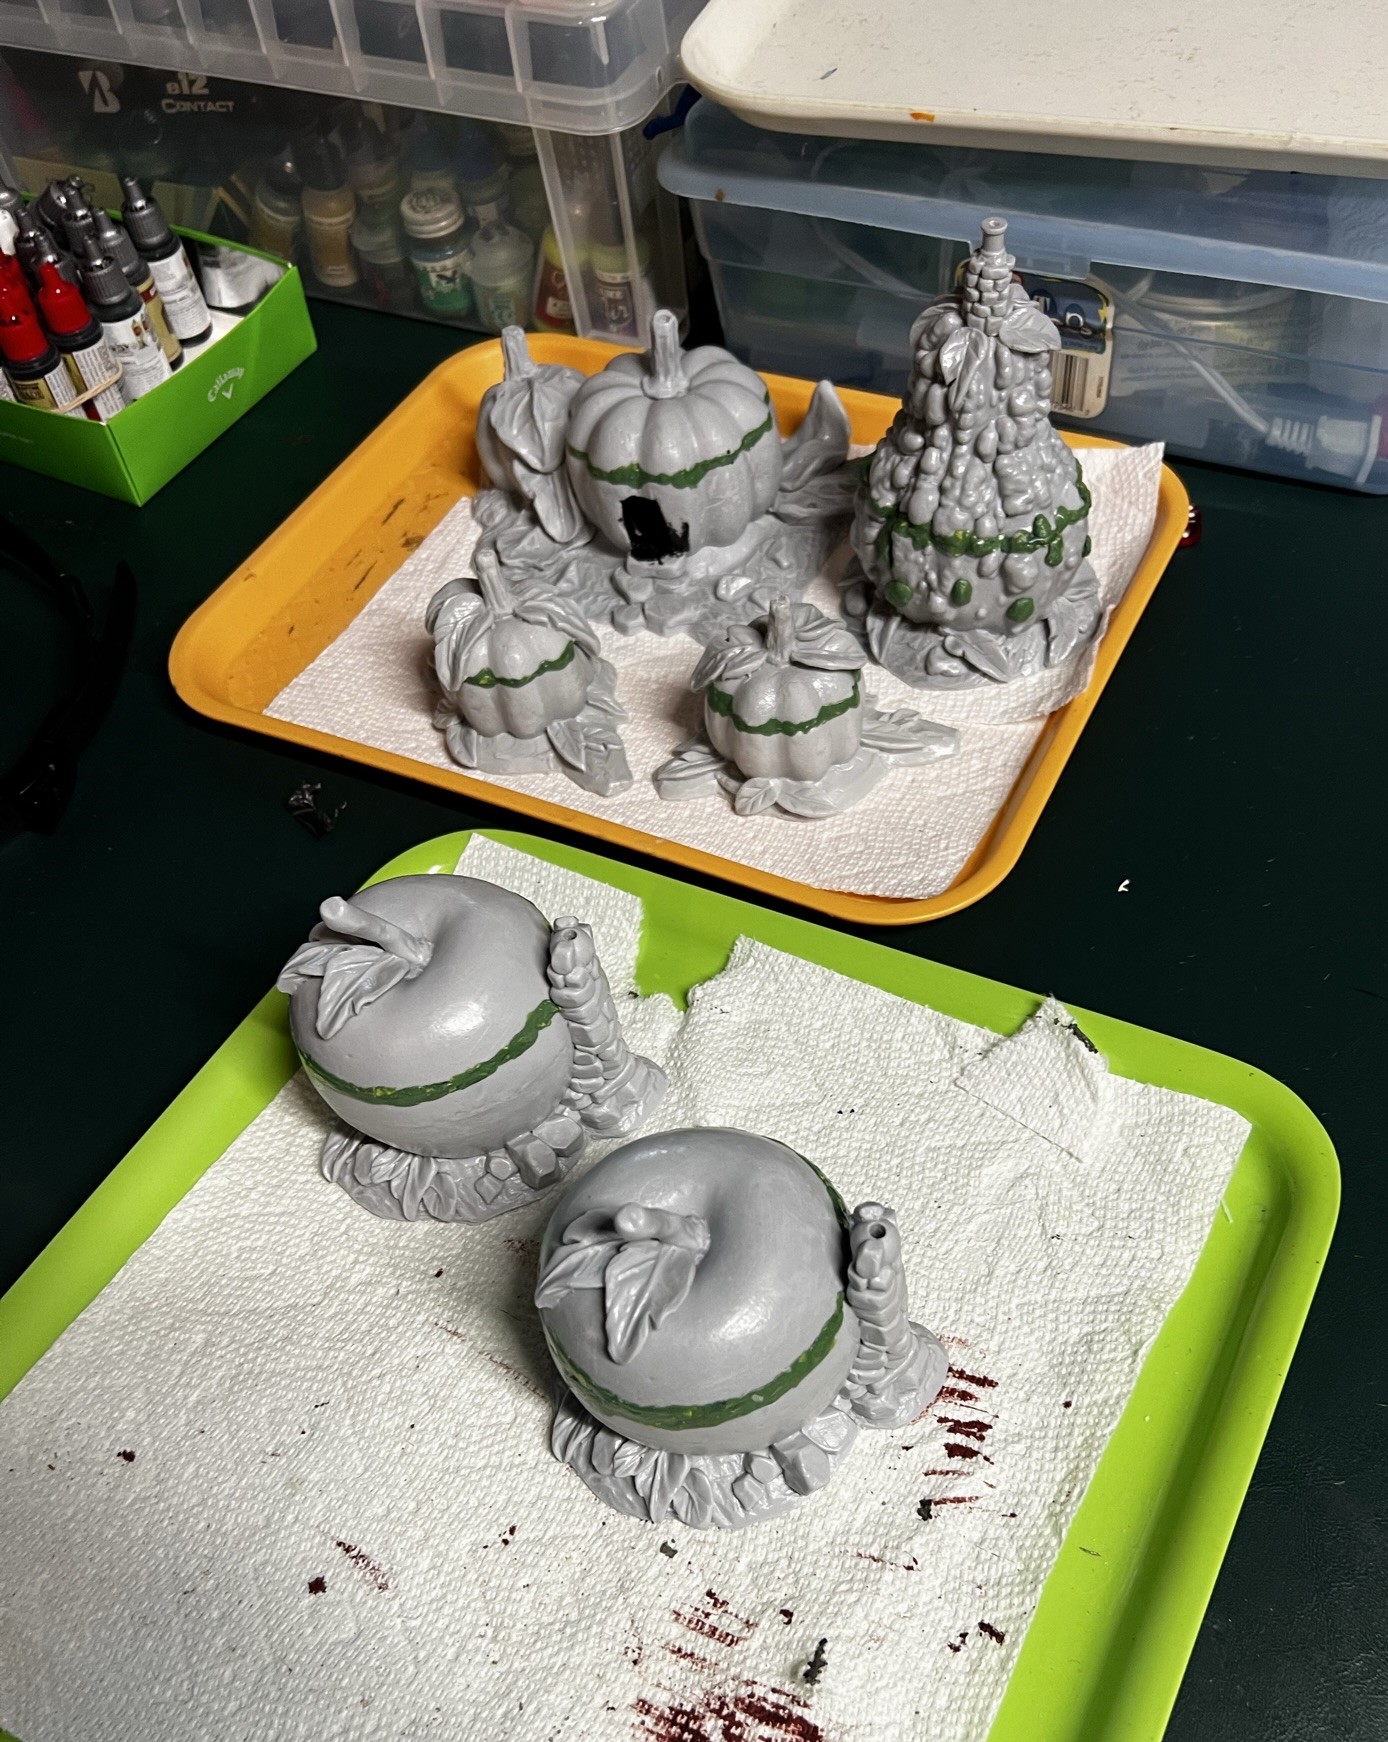
WIP Shots…
As received.The Savage Apple Trees after cleaning up of any mold lines and a good washing.
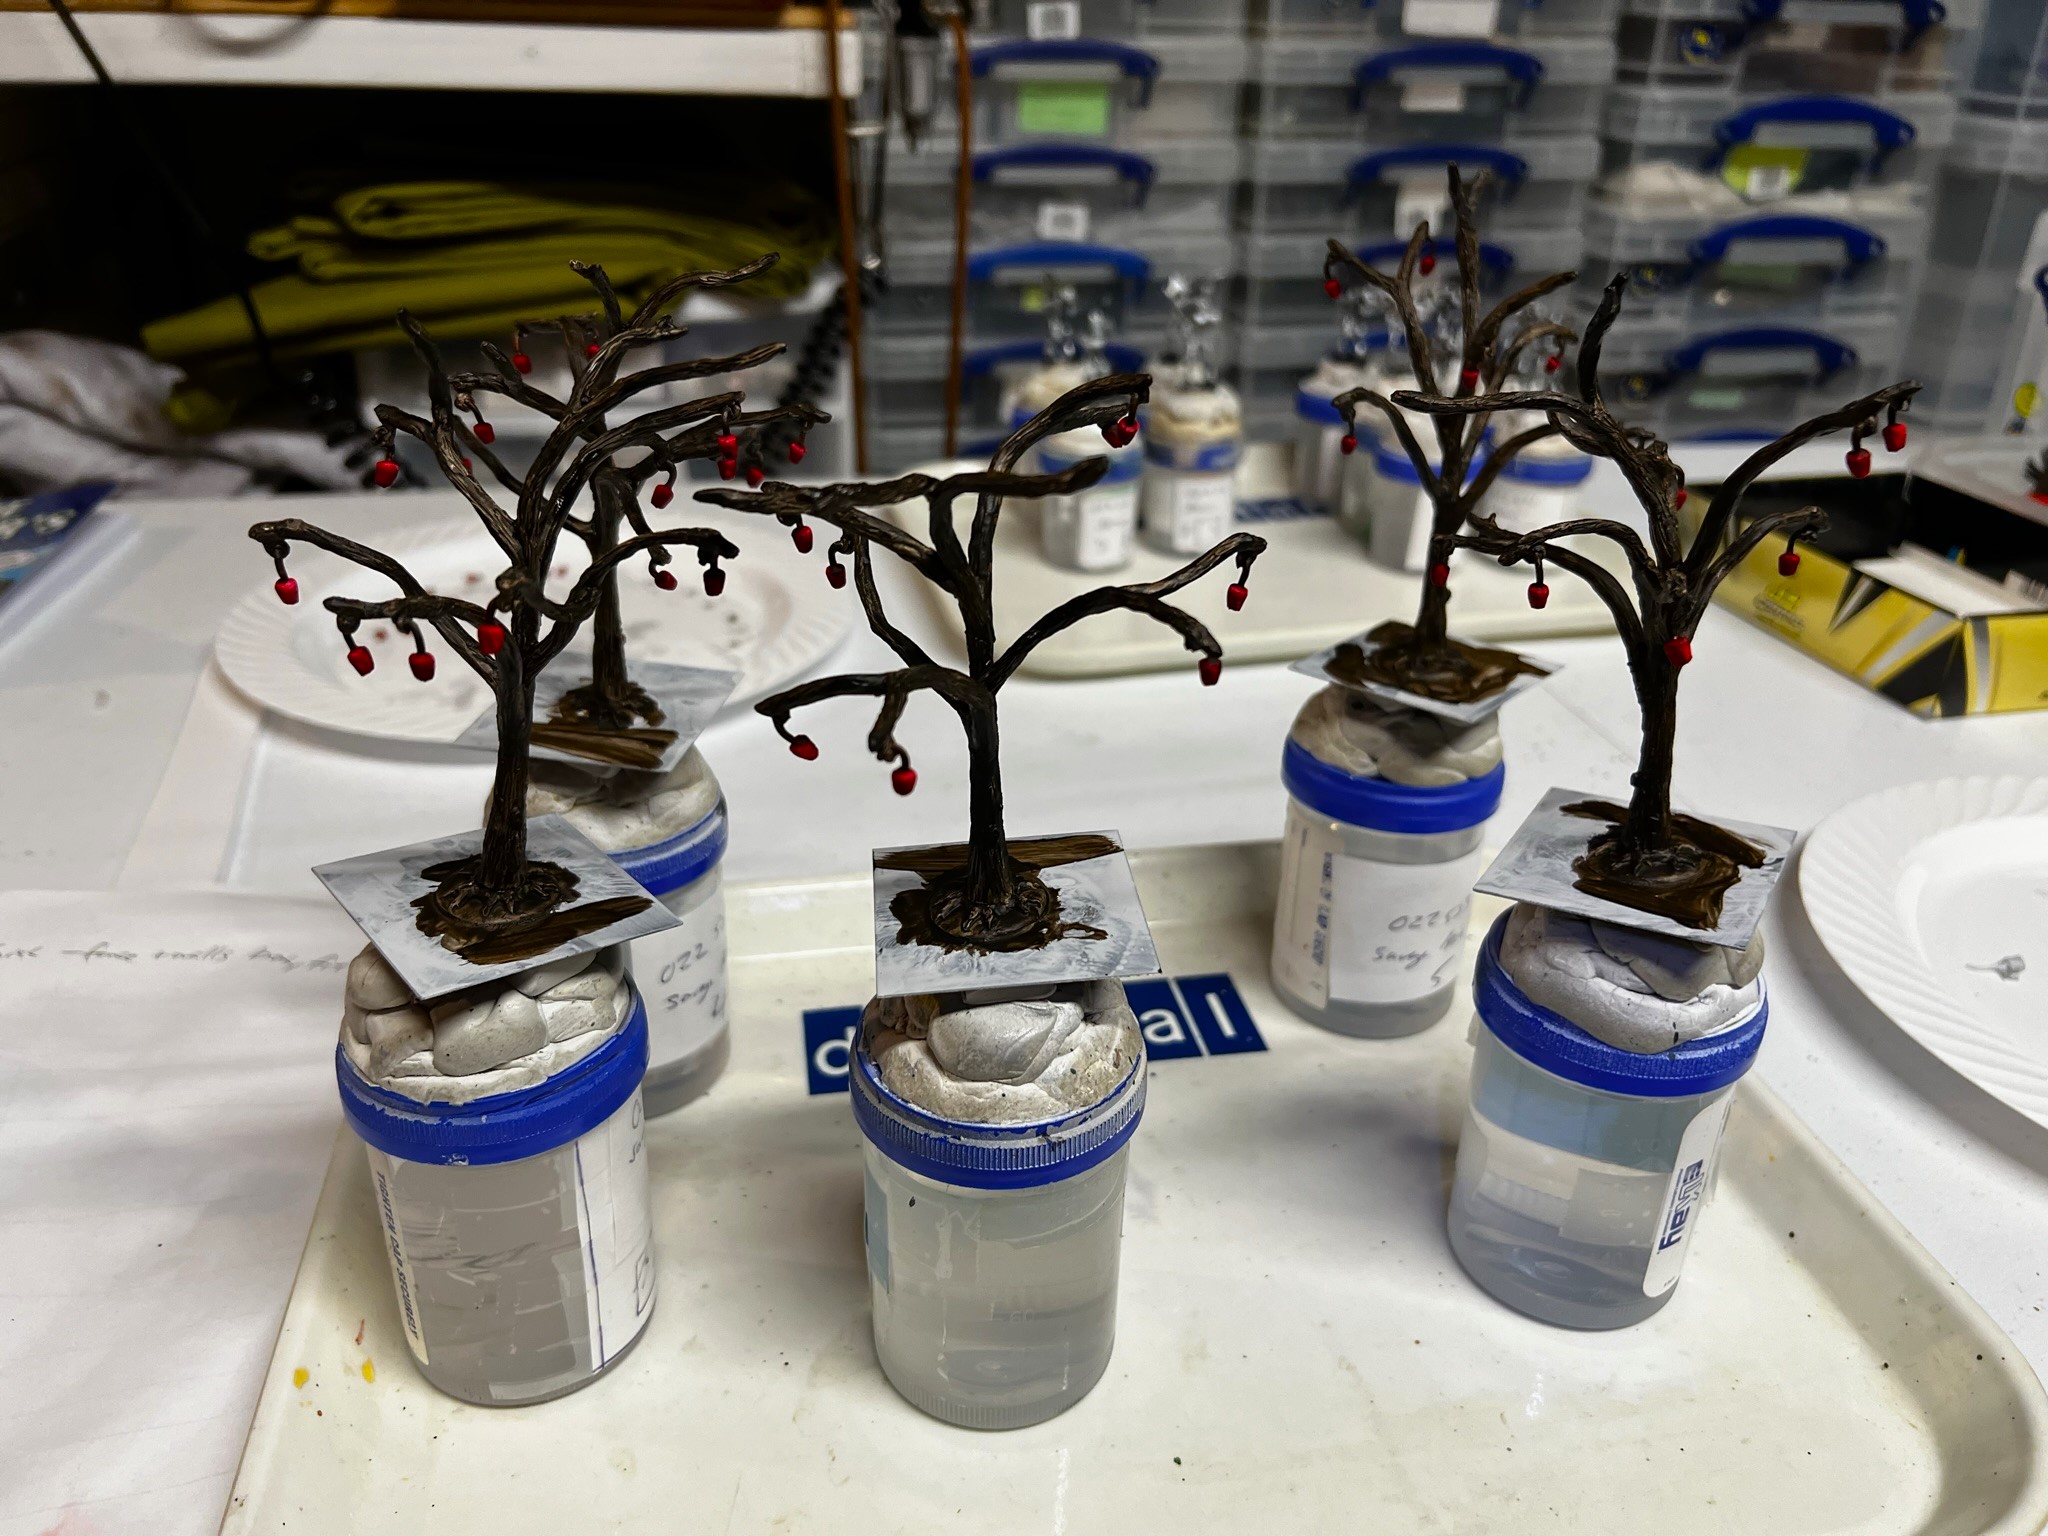
The challenge of their assembly needed a bit of planning on my part. Initially, I decided to assemble the trees, then paint them fully, then add foliage. For attachment of the limbs and bases, I first went with green stuff – but that proved to be ineffective – as the subsequent act of bending the tree branches for nesting detached a few trunks and branches. Ugh! So, I went back to drilling out and pinning the component branches and bases and gluing with trusty Gorilla Glue. I was also able to mount the trees onto their steel 2″ bases for painting – which helped with my validating their nesting arrangements to a large degree.
The next step was to paint the assembled trees on their bases and the extra apples on a plate, which was pretty straightforward.
Early painting. The extra apples are on the plate.Later painting – I found that I needed to bend the limbs and branches here much more than shown here to facilitate nesting in a game formation. Even though the green stuff had cured, that bending led to repair and pinning!WIth the branches and apples rebent and repaired for nesting prior to the addition of foliage.
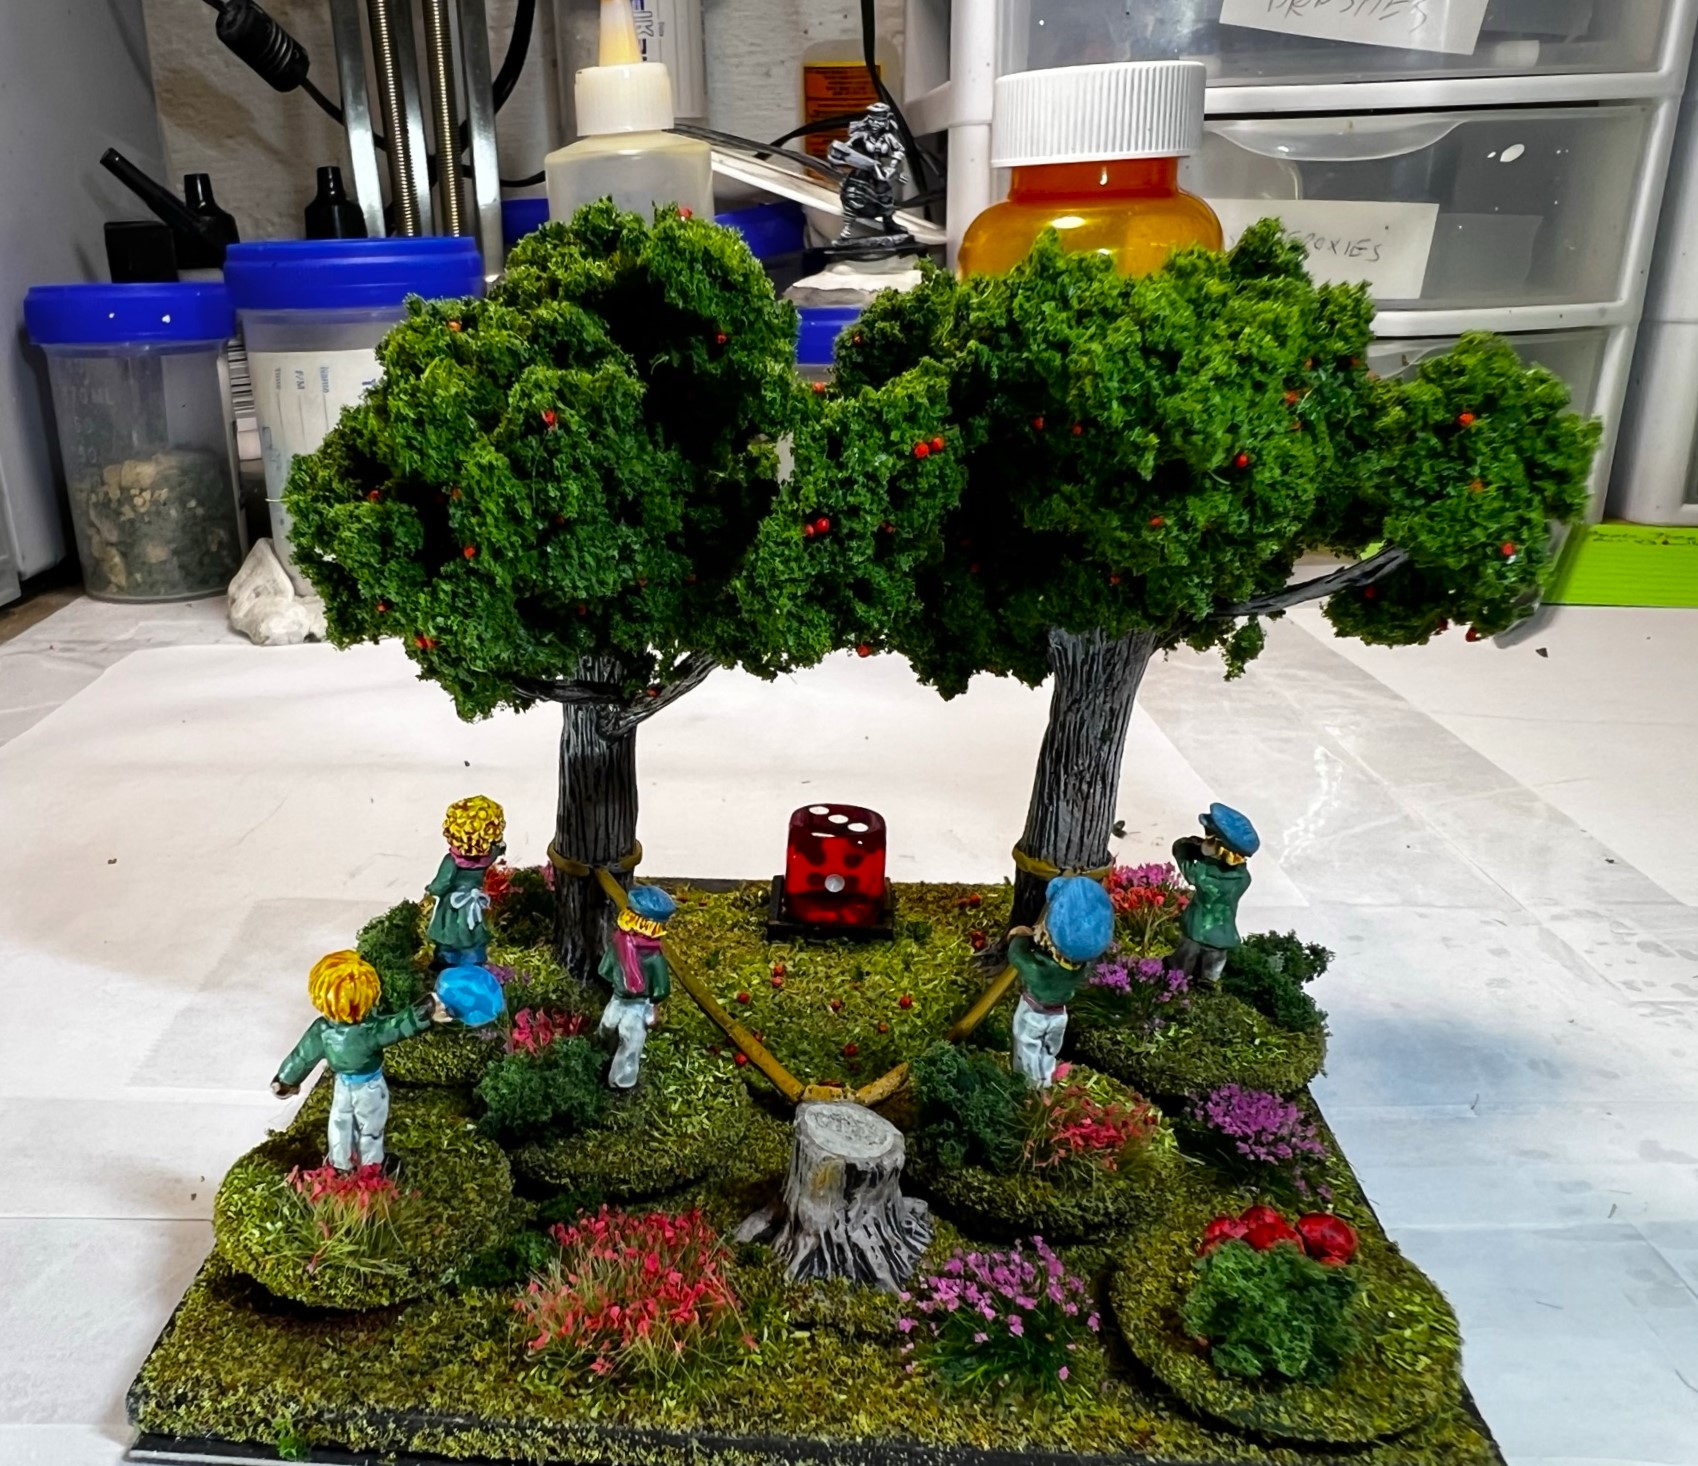
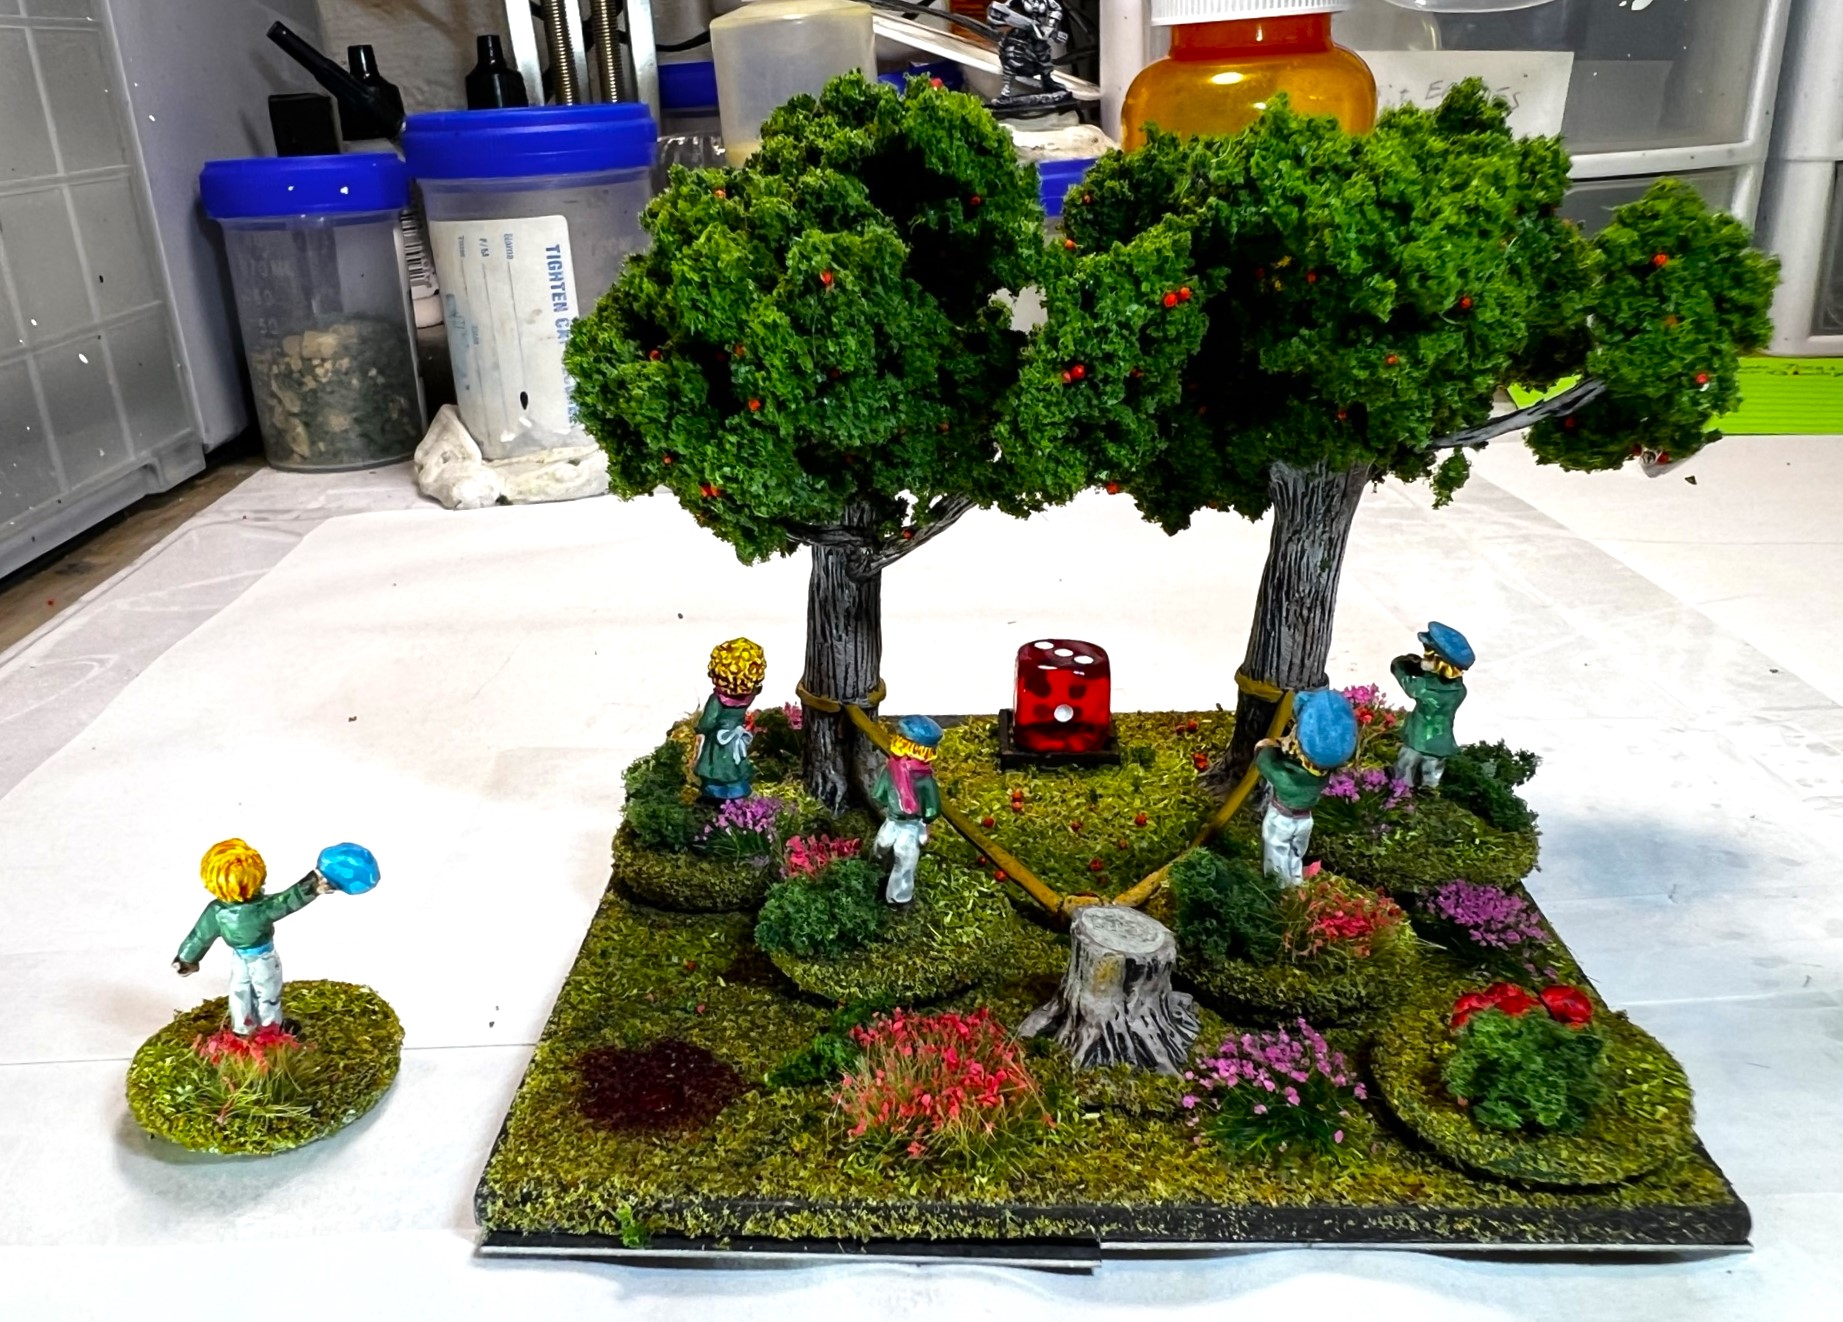
After painting, it was on to varnishing and adding foliage and flocking. As for the foliage, I had gotten some good experience with the repair of the Impkin Artillery (slingshot) that I discussed in my last post.
Impkin Artillery before foliage……and after adding foliage and apples.
Based on what I learned from IRO, and what I saw in this You Tube video, I ended up using three types of glue/adhesive. First, I applied Woodland Scenics “Hob-e-tac” to the painted branches and let that dry clear per the instructions. Then I added small bits of mid-green foliage clumps one at a time by pinching them onto the Hob-e-tac. I then let that dry, then followed that step with more Hob-e-tac on the nearby branches. As the foliage grew, I added sprays of Woodland Scenics “Spray-Tac” as well as sprinking little apples from Woodland Scenics “Fruit Apples and Oranges”, and let that dry. In between, I’d also add a few lines of PVA onto the foliage clumps so as to create stronger bondsand “bridges” between the foliage clumps that I was building up. This was tedious as I needed to let the different glues on the foliage dry and harden before moving on to another step. Also, when you use the Spray-Tac, you need to wash out the nozzle and its assembly. As a side note, my nozzle assembly came apart during this process which was a pain to reassemble – so beware! I still do like the Spray-Tac as it dries matte.
The last step was to flock the bases. For this, I added some grass, some scattered random metal and Woodland Scenics apples, some pieces of clump foliage, and some twigs. I have been adding Pendraken 12mm dice frames to my units as well (just one as any unit only needs one).
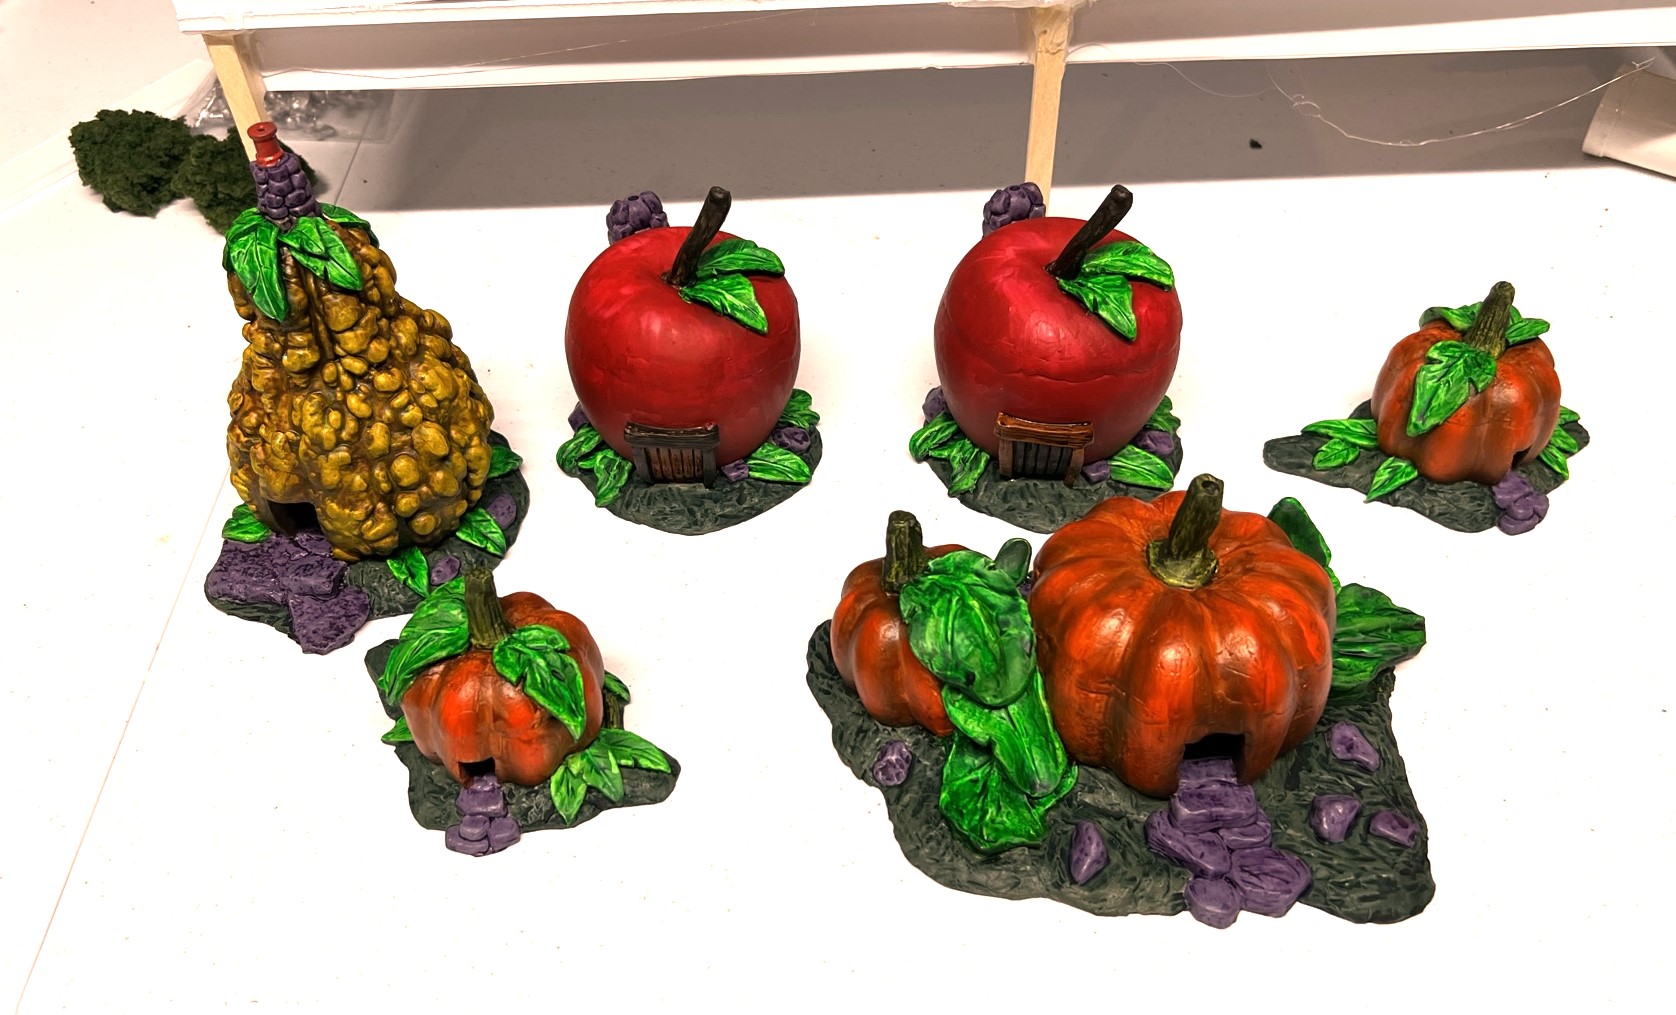
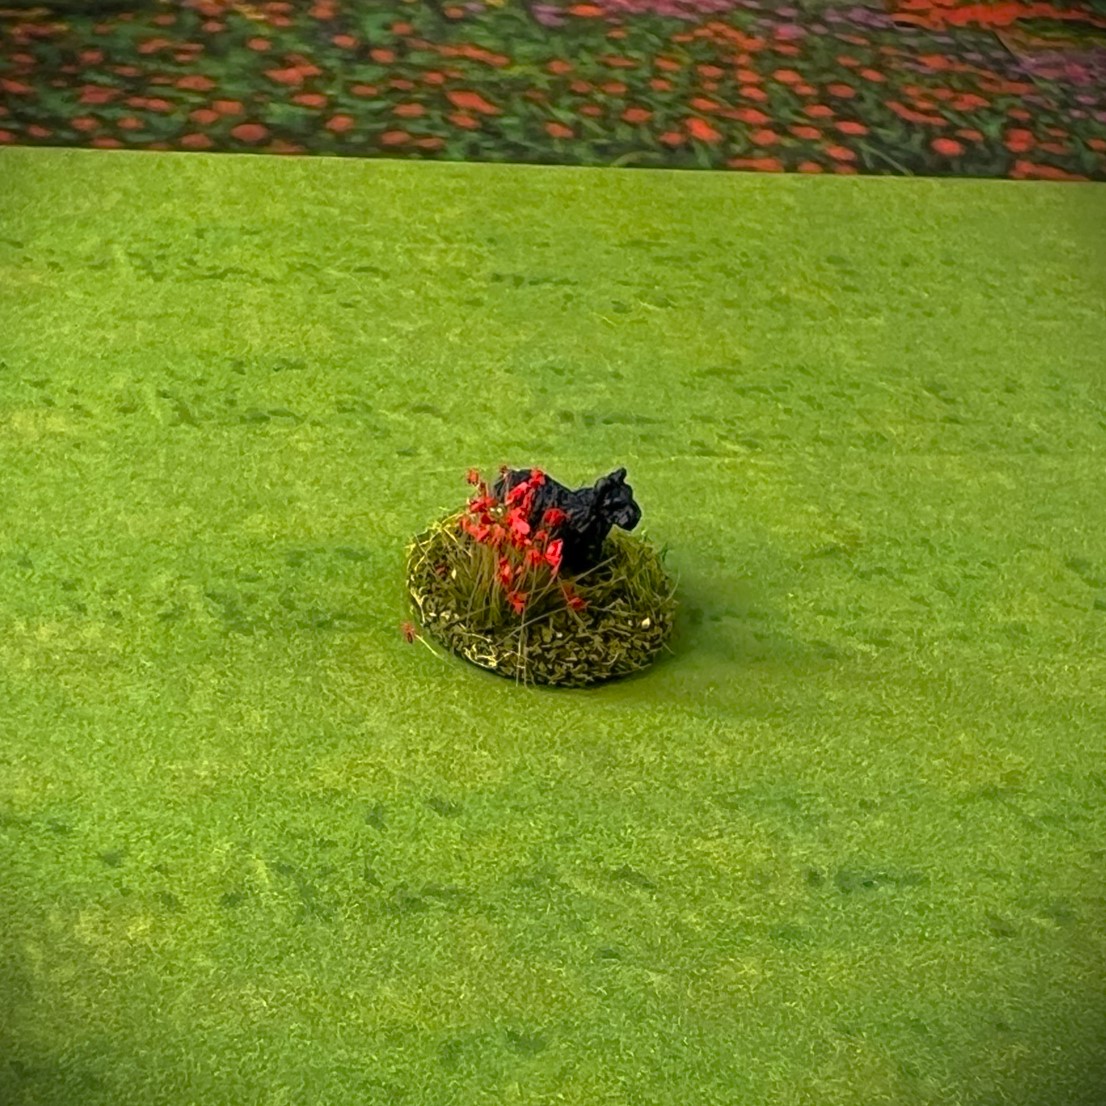
Eye Candy
The Savage Apple Trees as completed.
They saw their tabletop combat debut last weekend at HMGS Fall In!®. I hope to share some photos of that convention in an upcoming post. I can even see using these in mass fantasy battle games of Wars of Orcs and Dwarves.
I hope that you found this somewhat post interesting and maybe even helpful. Most diorama builders are probably laughing a bit at my challenges here – as they are more used to using the foliage and associated glues than I was.
Next up is Professor Nitpick and his Mechanical Tin Axemen, then a Fall In recap!
And yes, I still have more to come…
Miscellaneous details and references for those interested in that sort of thing:
For all of my previous posts on Wars of Ozz games, figures, units, and other related projects – please see this page.
PAINTS, INKS, GLAZES, SHADES, WASHES, PIGMENTS, FLOCKING, GLUES AND MORE THAT I USED ON THESE SAVAGE APPLE TREE FIGURES:
Savage Apple Trees
2″ square steel bases from Wargames Accessories (#21)
Green Stuff (kneadatite)
Poster tack
Gorilla Glue
Vallejo Grey Surface Primer
Citadel “Contrast Medium”
Citadel “Contrast Paint – Wyldwood”
Vallejo Model Color “Wood Grain”
Army Painter “Speed Paint – Poppy Red”
Vallejo Model Air “First Light”
Citadel “Warpfiend Grey”
Citadel “Skrag Brown”
Battlefront “Firefly Green”
Battlefront “Tommy Green”
Vallejo “Flow Improver”
Vallejo “Airbrush Thinner”
Vallejo “Thinner Medium”
Vallejo Varnish “Matte Varnish”
Pendraken 12mm dice frame
Elmer’s PVA Glue
Woodland Scenics “Hob-e-Tac Adhesive”
Woodland Scenics “Clump Foliage-Medium Green”
All Game Terrain “Foliage Clumps-Medium Green”
Woodland Scenics “FS645 Spray-Tac”
Woodland Scenics “Fruit Apples and Oranges” (just used the apples)
Army Painter “Battlefield Field Grass” (flocking)
Gamer’s Grass “Red Flowers” (flocking)
Small twigs
Again, as you may want to check out the Wars of Ozz figures’ range – there are two places to get them (and I make no money from this btw – I just love this stuff).
The game rules and the figures are available from the following two places:
Now that is a pithy title! Indeed, October saw me having a number of projects happening – almost simultaneously – in preparation for the HMGS Fall In! convention this week. It was nearly overwhelming, especially given that I was also involved in multiple golf tournaments as a player and as an organizer/committee member, plus a number of big events that were nice – but I’ll spare you those details for now.
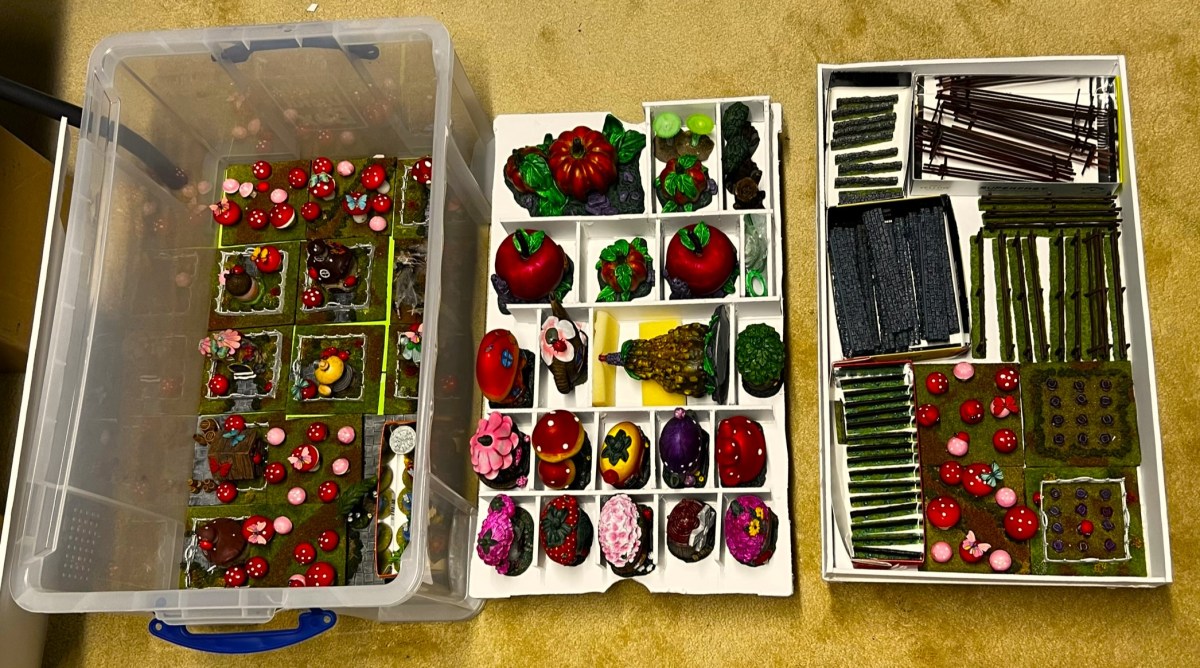
So much terrain!
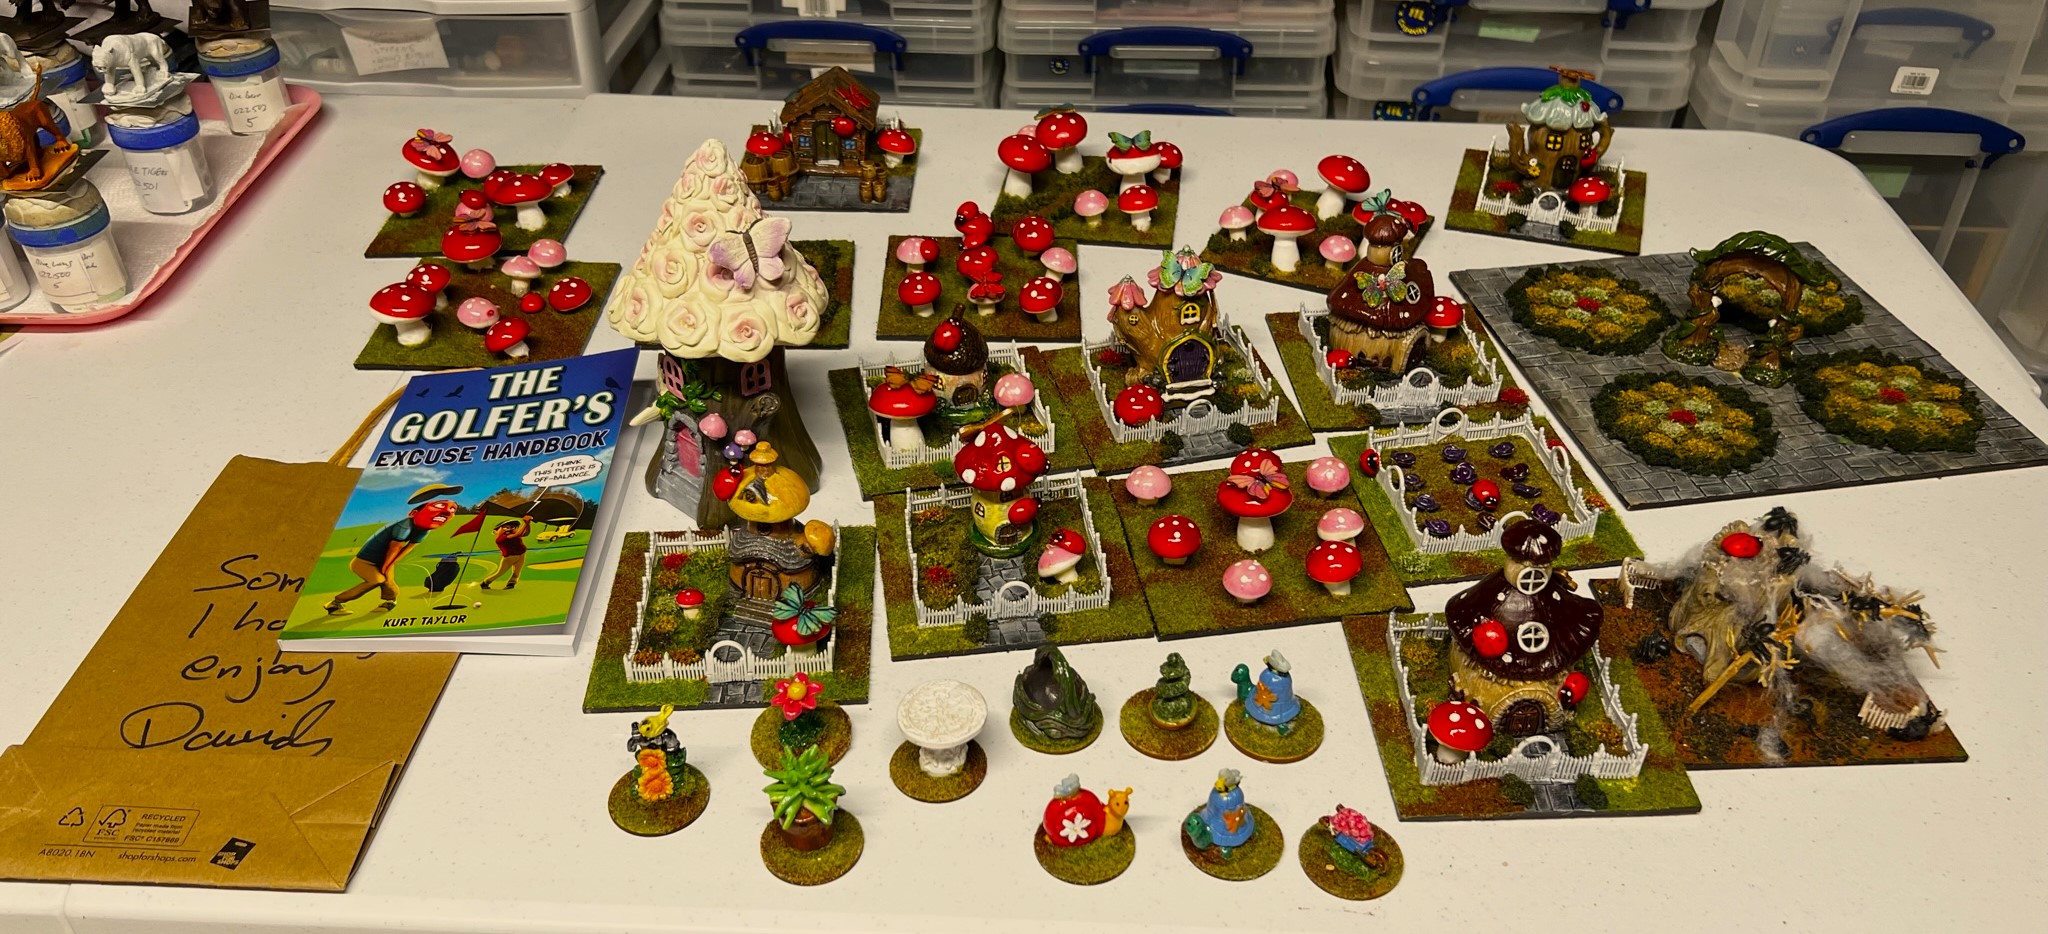
I had been previously gifted a good number of some wonderful Acheson resin buildings from Russ Dunaway that were perfect for the Great Land of Harvest or the world of the Wars of Ozz. Also, as I mentioned here last month, I received a wonderful gift of some new terrain from Dave in Australia. His blog is Guru PIGS blog and it was a collection from his Mouse Metropolis project. I also got a gift of couple of glowing Mushrooms from Buck Surdu that I also loved! Also my purchase of some walls and fences from Pendraken showed up. Add to this at this point I had around 26 Fairy-style prepainted resin buildings I had gotten from the Dollar Tree store – including a tall one from Dave/Guru. Something had to be done – I could neither store, use, or transport all of this goodness effectively. Plus some of the Pendraken stuff and some of my own stone walls and fences needed an upgrade. Add to this, I got a new brigade of Impkins for Ozz from Buck – more on that shortly – let’s stay on terrain for the moment.
Aussie Dave’s Mouse Metropolis giftBuck’s cool glowing mushrooms – and an appropriate cozy he got for me at an HMGS South convention in Florida.All the terrain I had – minus walls and fences…
My first solution to this issue was to share the bounty. I shipped off half of the Acheson resin buildings and half of my fairy buildings to my Tennessee buddy (and former West Point roommate) Dave Wood for use in his Wars of Ozz games. My next step was to finish the resin buildings, fences, and walls so that I could craft a storage and transport solution for them. I also wanted to repaint/upgrade my remaining haphazardly prepainted Dollar Tree buildings. So on to what I managed to do with all of that…
Here are some of the Acheson buildings that I kept. I also kept a tall gourd building that is not shown here. I decided to assemble them and attach the roofs permanently.
After a LOT of scuffing and sandpapering the surfaces of the resin buildings (for proper primer adhesion), I assembled them with green stuff. You can see the gourd building here left of the black Sharpie pen.Here are all of the ones that I kept – here assembled and awaiting a priming – which I did twice. The buildings are nice, but resin is so fickle.
As shown above, the priming took a couple coats (plus some more touch up) as resin is, well, resin. I tried to minimize the lines where the roofs met the model bottoms – but they still showed up a bit. Still as tabletop terrain, it think its ok, especially as the roofs won’t come off.
Here below are how they came out after painting:
Three pumpkin buildings.The two apple buildingsA tall gourd building.All of the resin – done!
Then I had some Pendraken MDF snakerail fences to assemble and paint
28mm snakerail fences.
I also got some plastic walls and plastic fences from Pendraken that I flocked and gave some minor washes to in order to make them look a bit better. I also repeated this process with some older used 3″ walls and fences that I already had that were in desperate need of an upgrade. Next, I repainted my remaining 13 Dollar Tree Store Fairy buildings (to varying degrees depending on what could be done).
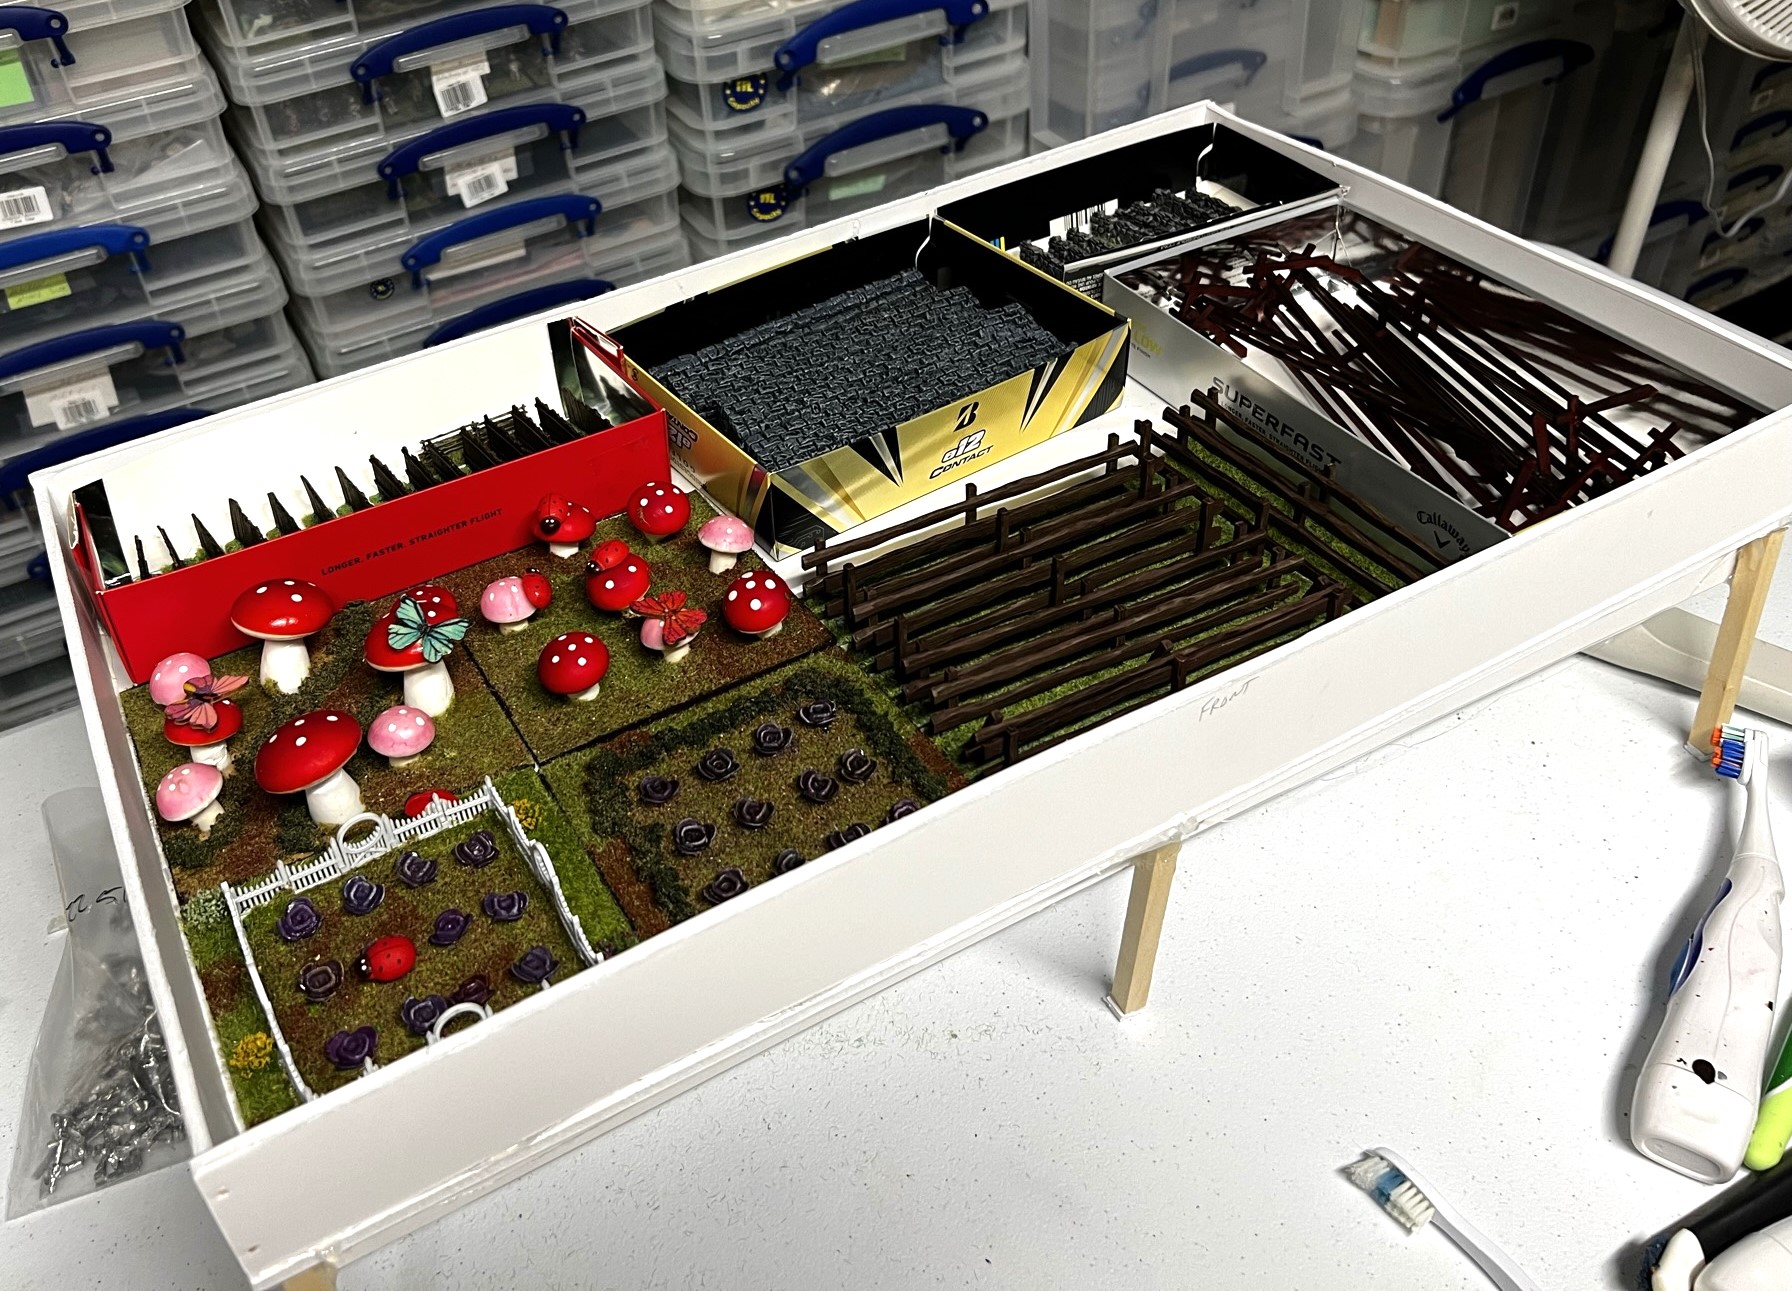
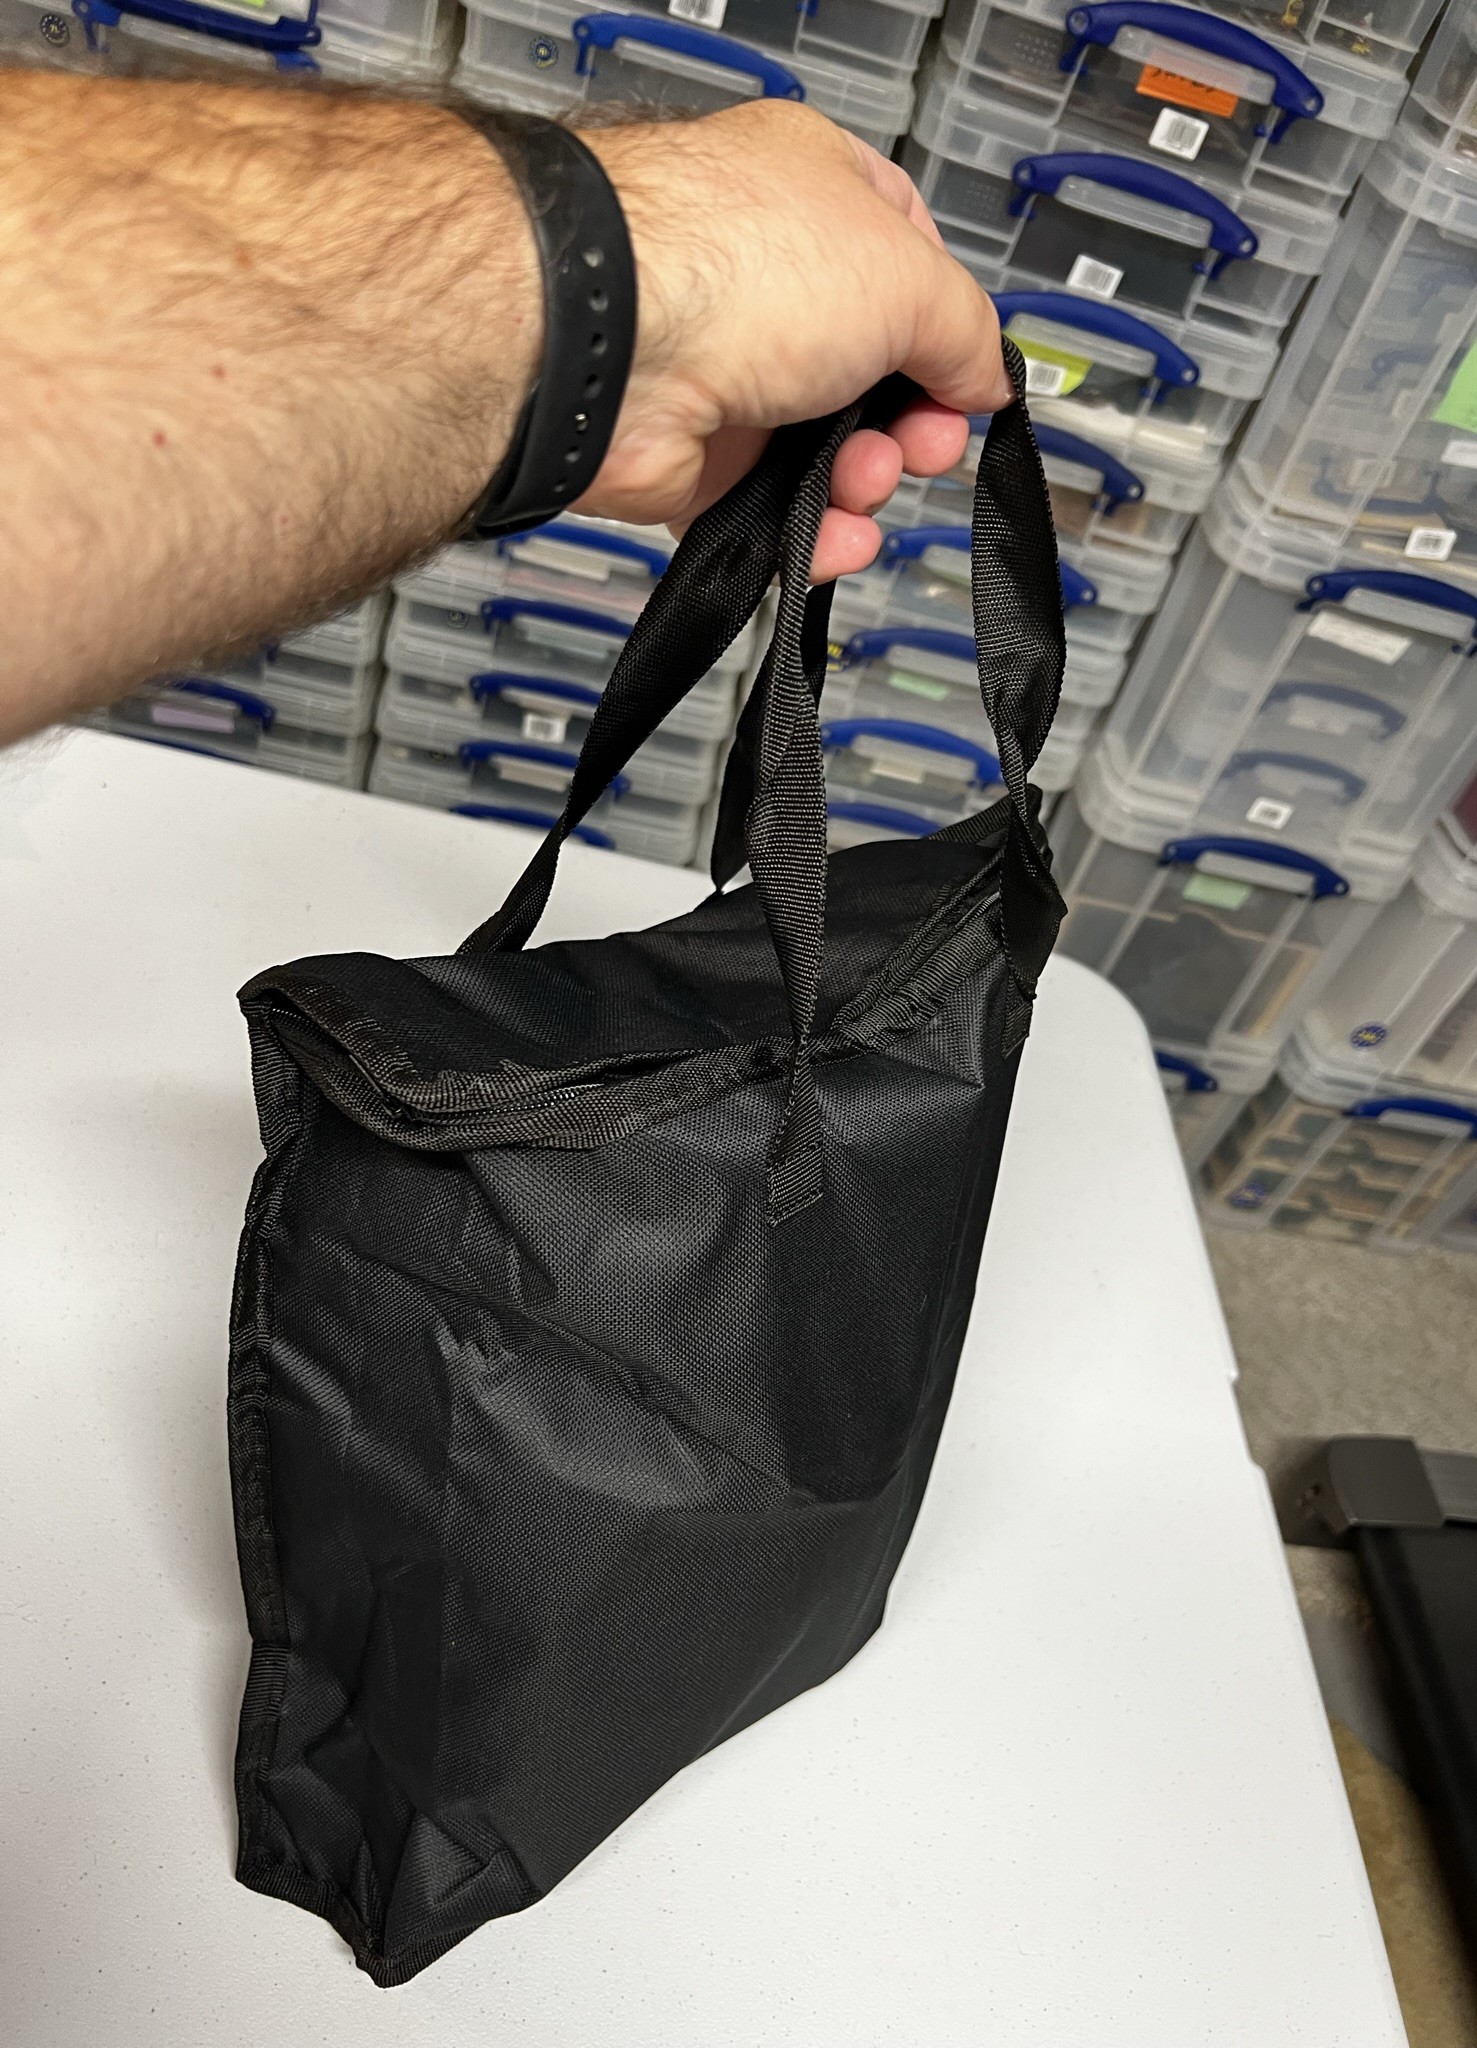
Now, I was ready for a storage solution. I went with a 64-liter Really Useful Box, and built and installed three custom-made levels to transport and store all of this goodness. Serially, I mocked up each level on sheets of foam board, and used hot glue and toothpicks to secure walls of foam board on each level. The underneath supports were square wooden dowels. I also incorporated empty golf ball boxes for storage on the top level. (very useful too). It’s maybe good I lose golf balls from time to time…
The bottom level was easy – as I only needed to fit the Mouse Metropolis pieces down there. Then it was on to the middle layer – where all the taller pieces like the bigger buildings would be housed.
The middle level as constructed.Mocking up the top level. Here you can see some of the fences and walls that I upgraded with washes and flocking.The top level as completed.
Below you’ll see all three levels and how compact it all is in the 64-L box – which weighs about 5-7 pounds full.
All three levels separate……and all three layers safely stored.
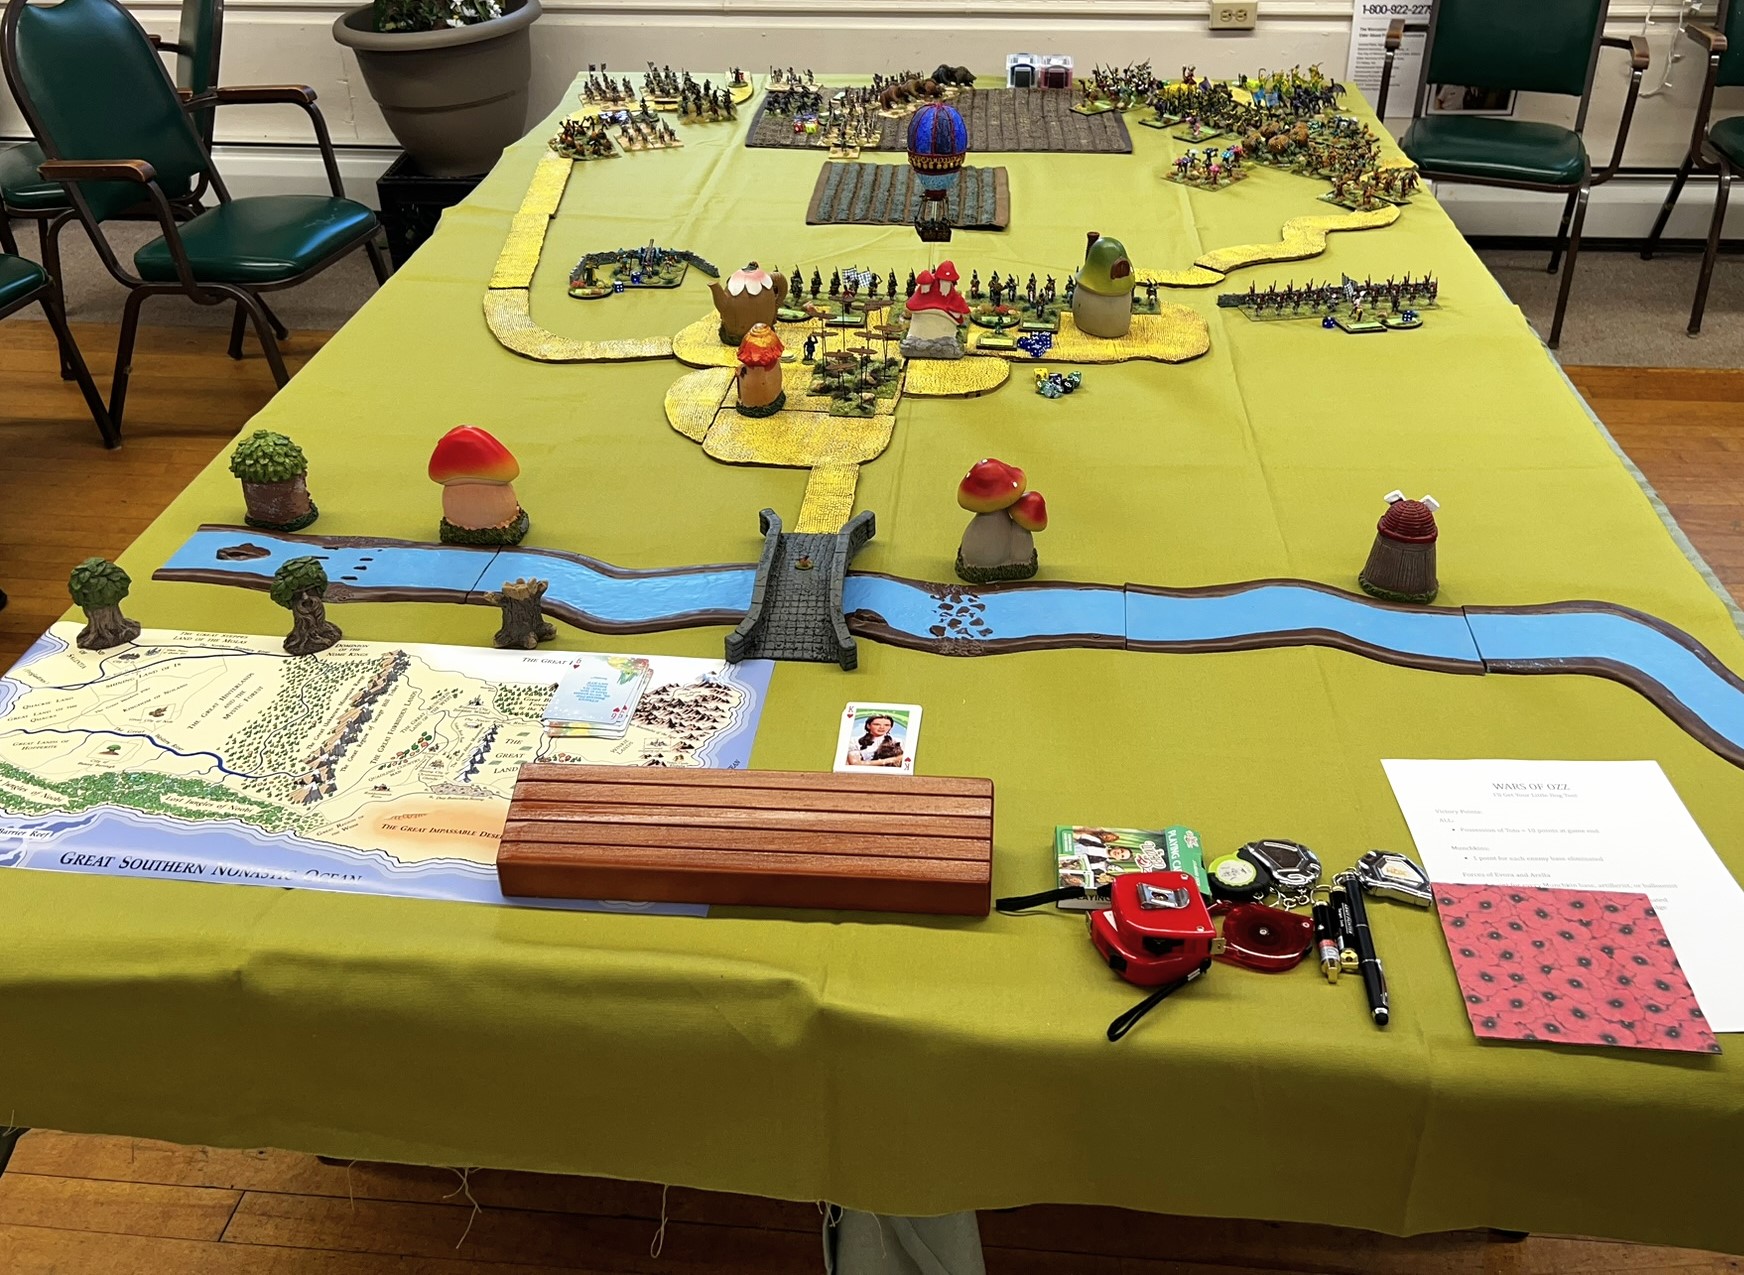
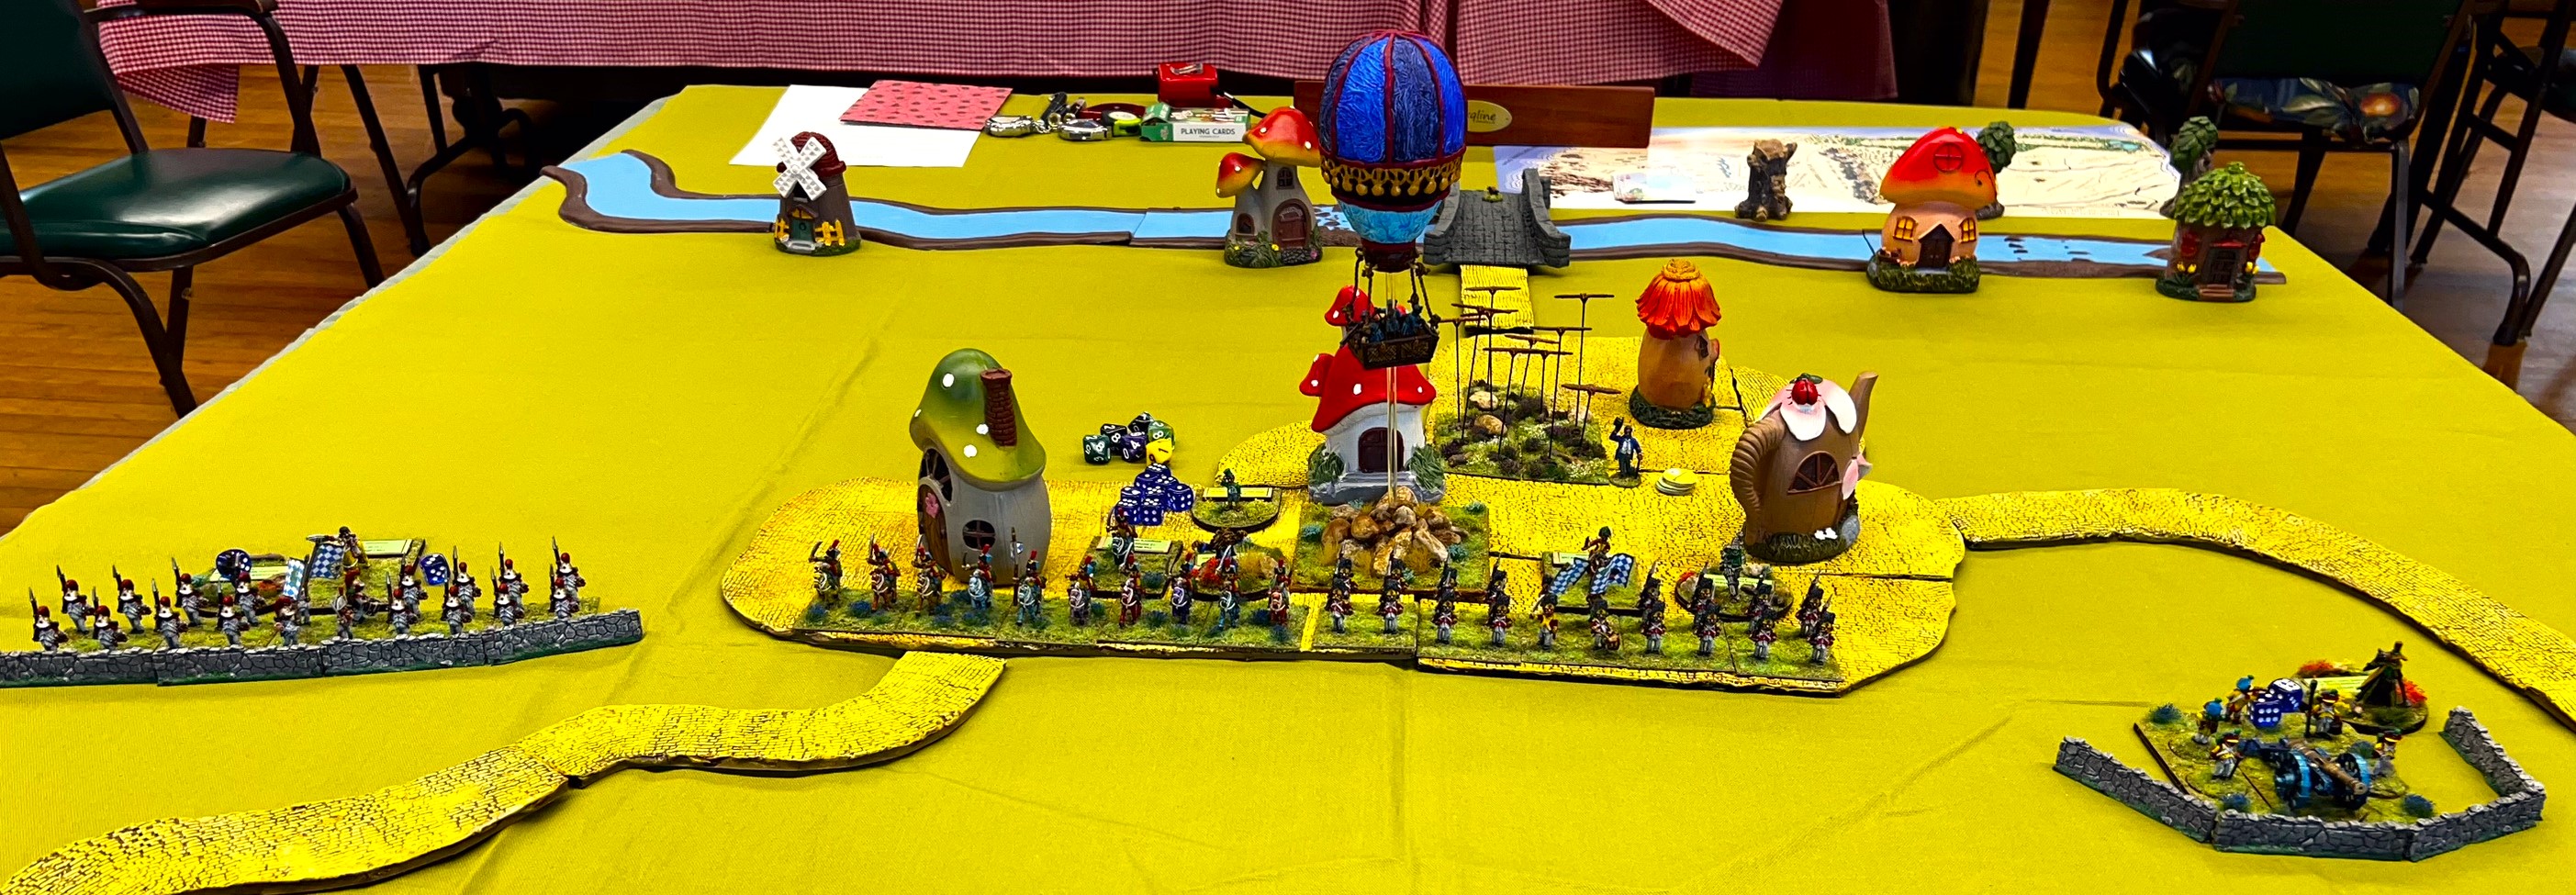
As terrain was the order of the day for my Fall In preparation, I also ordered two Cigar Box Battles 4′ x 6′ + Grassland Battle Mats as I needed a bigger tabletop area. The terrain will go on this mat for my upcoming game of The Wars of Ozz – the scenario is The Battle for Toto – but I have upgraded it as well. Herebelow are some shots as a sneak preview of what I will start with at Fall In.
Overview of my approximately 12′ x 4″ battlefield for “The Battle for Toto”.A view from the attackers’ side.A view of the town the Munchkins are defending – which holds Toto. But where?
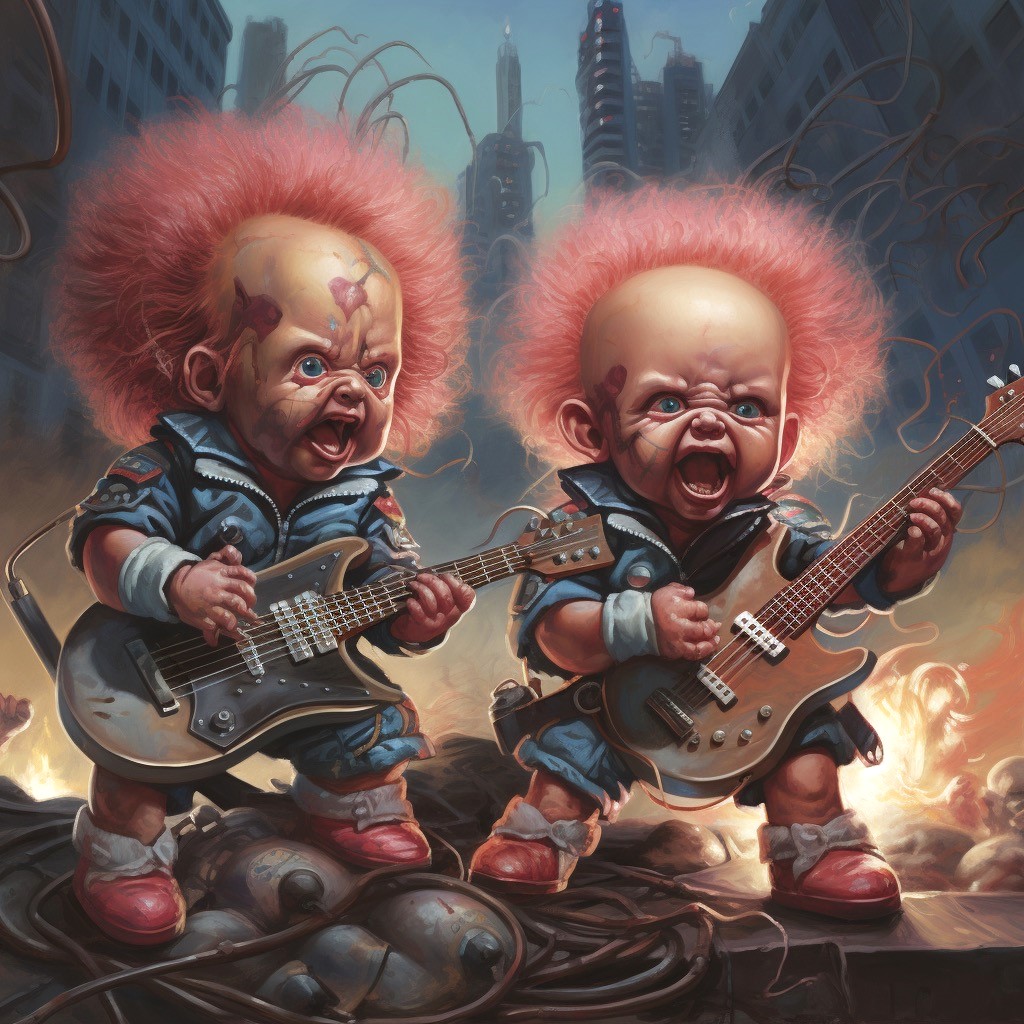
The terrain gifts that I got were not the only ones I got. Buck Surdu had painted up an entire brigade of Impkins – and asked our little group on our group text if there was any interest. I of course jumped at the chance to get some wonderful Buck Surdu originals! In the discussion, it came out from someone that they reminded somebody of “creepy fighting baby dolls”. I suggested to Greg Priebe, that sounded like an 80’s metal band – and could he put that into AI somehow? He could, and without further ado, and with a bit of hilarity, here is the CFBD’s in concert:
The Creepy Fighting Baby Dolls
Ah Greg, they definitely make me laugh! A band worthy of IRO for sure down under – at least image-wise!
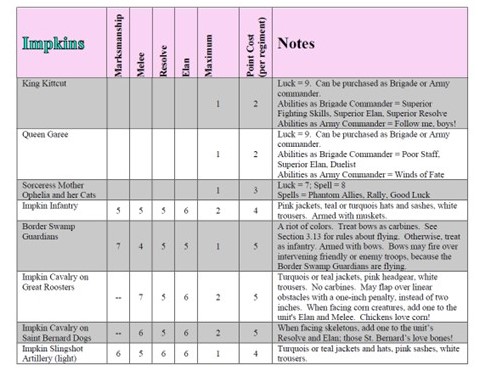
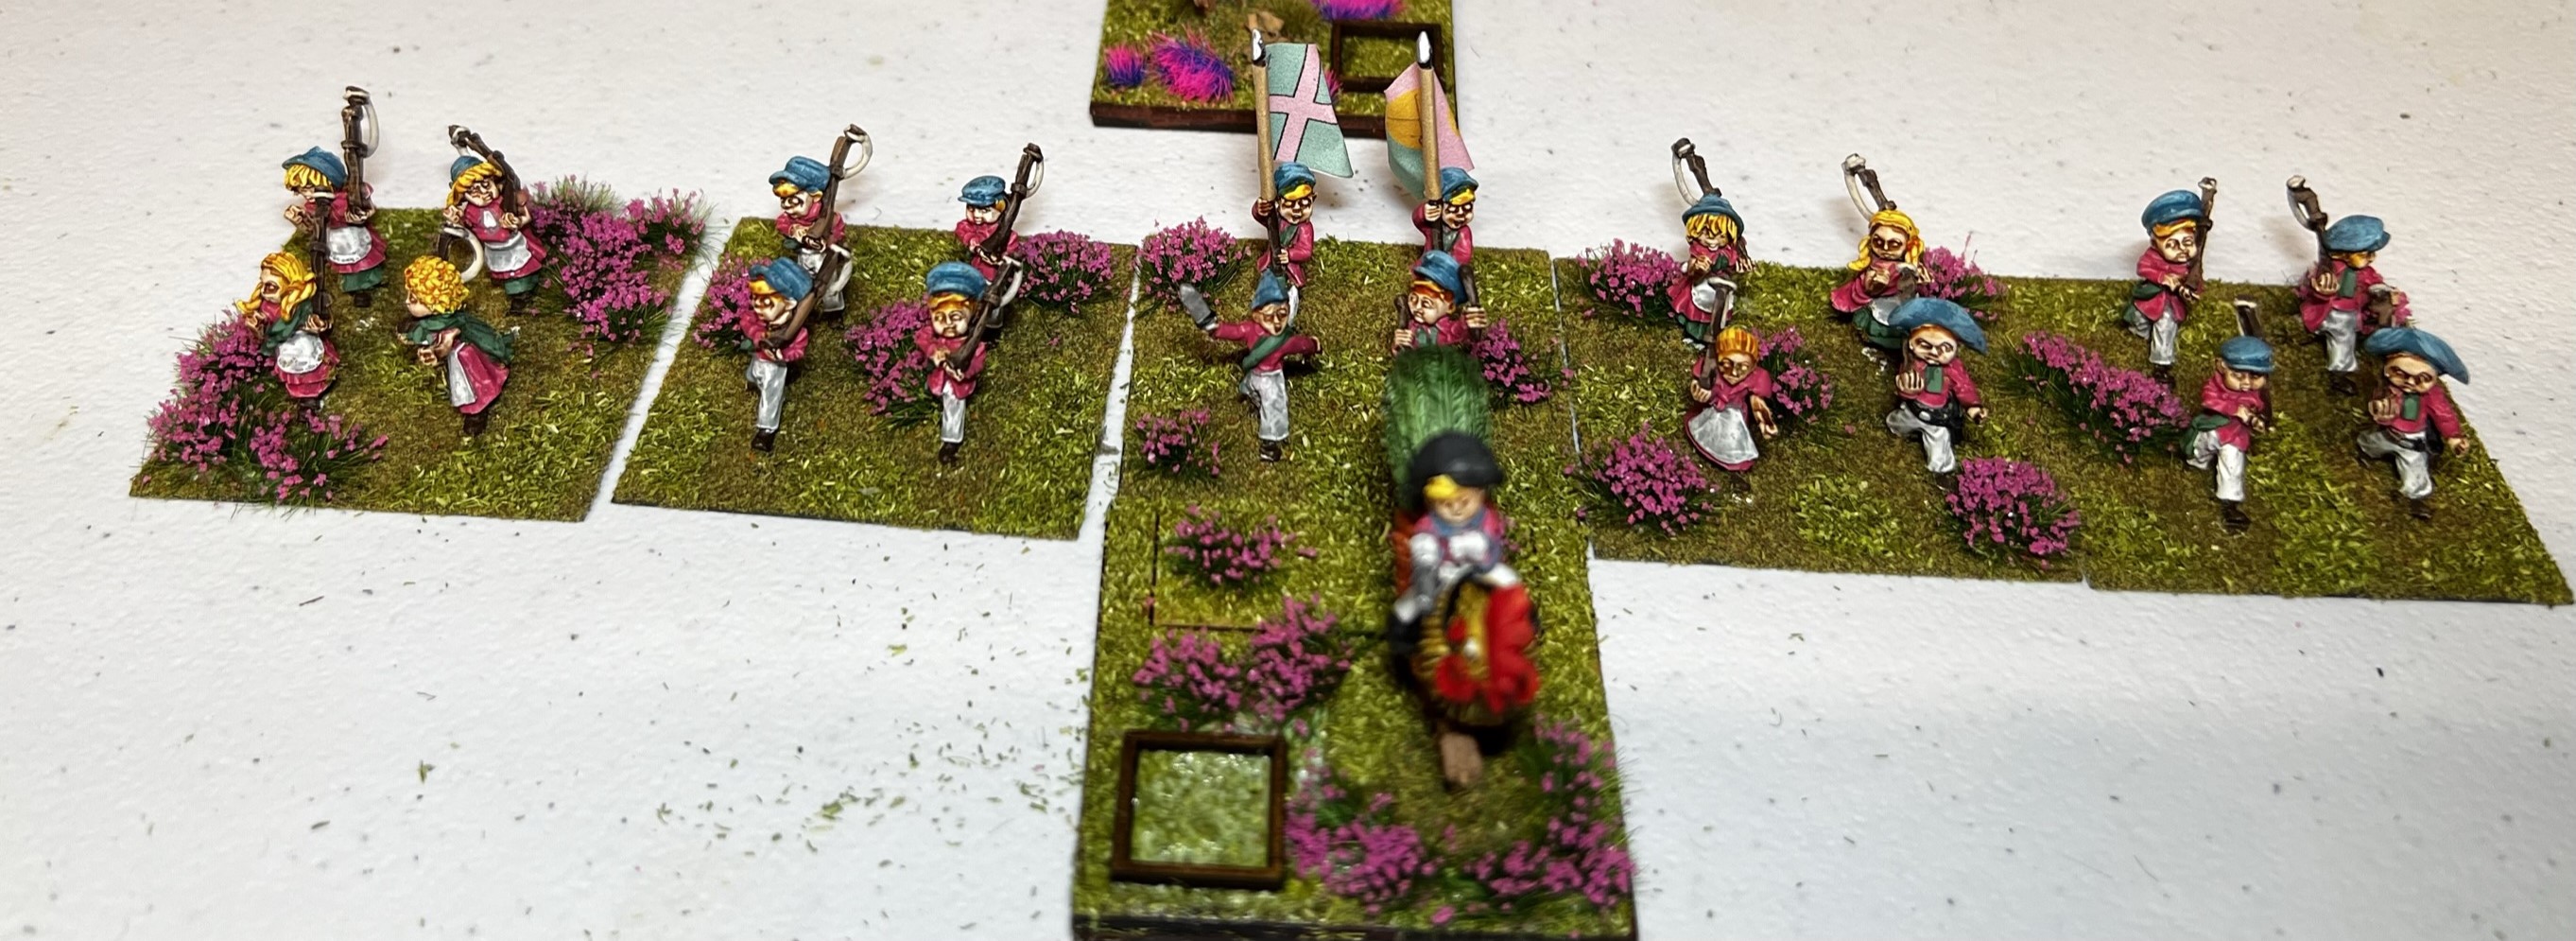
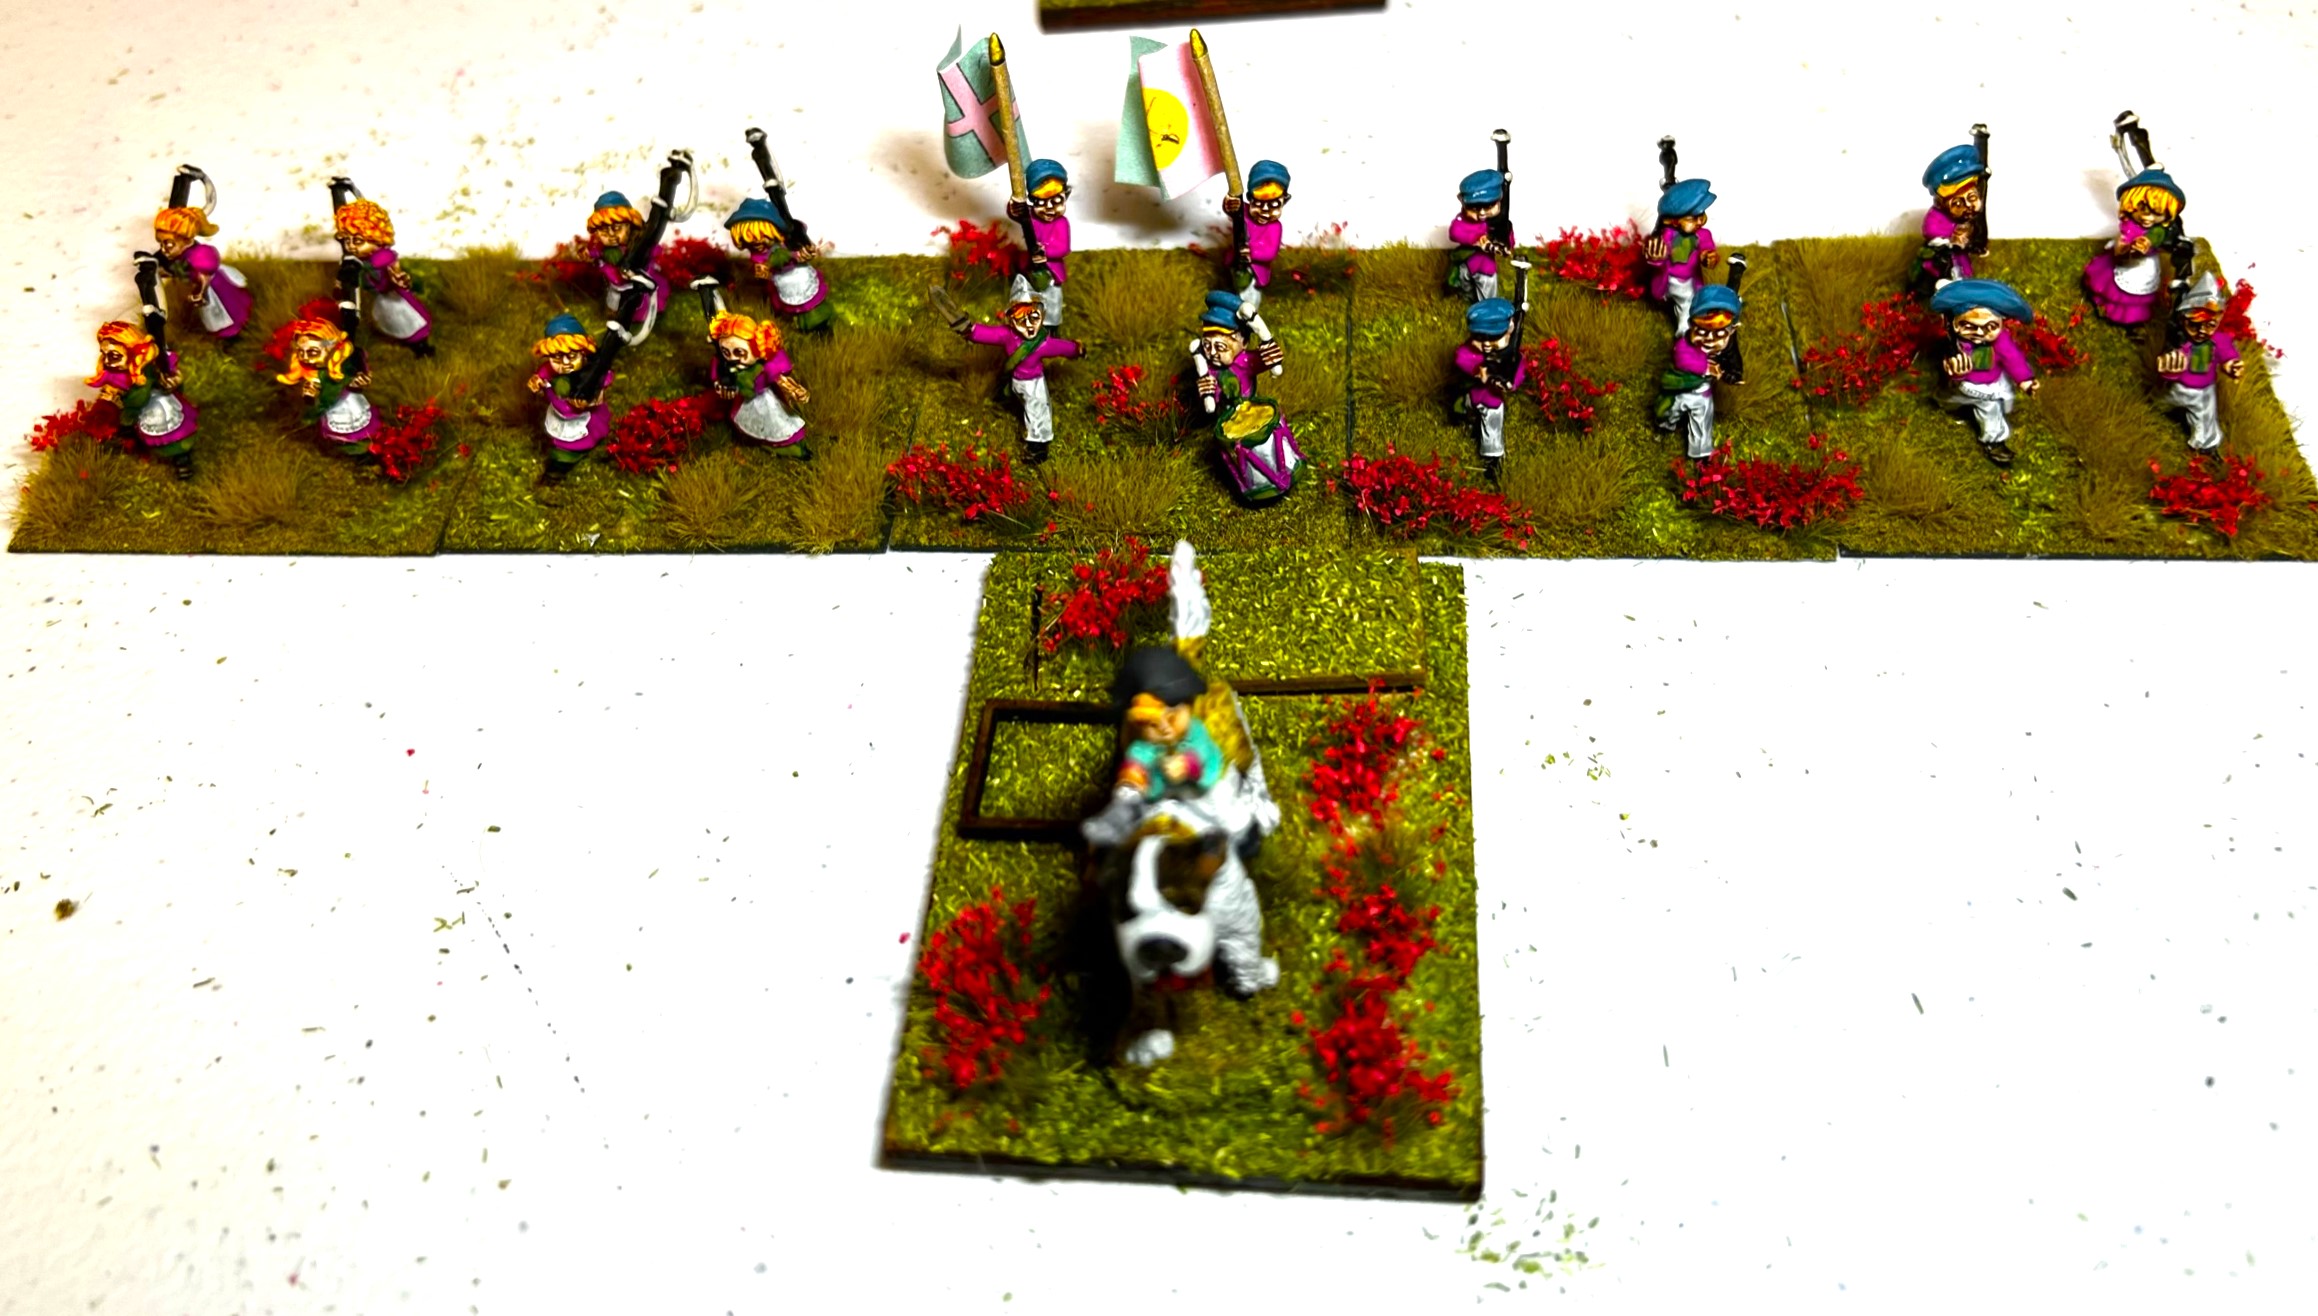
Anyways, in the midst of all else that I had happening in October, this VERY complete brigade arrived in the mail in two packages. The painting was fantastic – Buck’s painting work is always amazing. There were two regiments of infantry, two of cavalry (one riding roosters, and one riding St. Bernard dogs), one Border Swamp Guardian Fairy (flying) regiment with bows, a cool slingshot light artillery battery, two leaders, and a sorceress:
There was minor damage to the units in the mail, and most was easy to fix with some glue. The biggest challenges were twofold. One, I wanted to add some flocking to the bases for tabletop differentiation – and two, I wanted to upgrade the slingshot unit. By upgrade, I mean that the base was not magnetized for the placement of crew, and the trees supporting the slingshot had lost their foliage (see below). I was inspired by – again – IRO, who recently had a cool post about making model trees. He had advised me about the right glue to use and more – so I used that information as best as possible.
Without further ado, here is my….
Gift of Impkins
The first shipment came – and I was excited – the base with the slingshot and the fairies came second.
The two infantry units looked a bit similar – even though one has a rooster-mounted commander and the other one on a St. Bernard. So in addition to adding a Pendraken 12mm dice frame, I added different flocking:
The Swamp Guardian Fairy (flying) regiment was really cool. I mainly had to drill out some of the wires that came loose and reattach a few wings.
There were two cavalry regiments:
I think those will be easy to differentiate!
There were the three individuals – King Kittcut, Queen Garee, and Sorceress Mother Ophelia and her Cats. I based all three on MDF bases and printed out placards for them.
Queen Gare, King Kittcut, and in the back Sorceress Mother Ophelia and her Cats on the MDF bases. Buck’s painting on all of these is phenomenal.
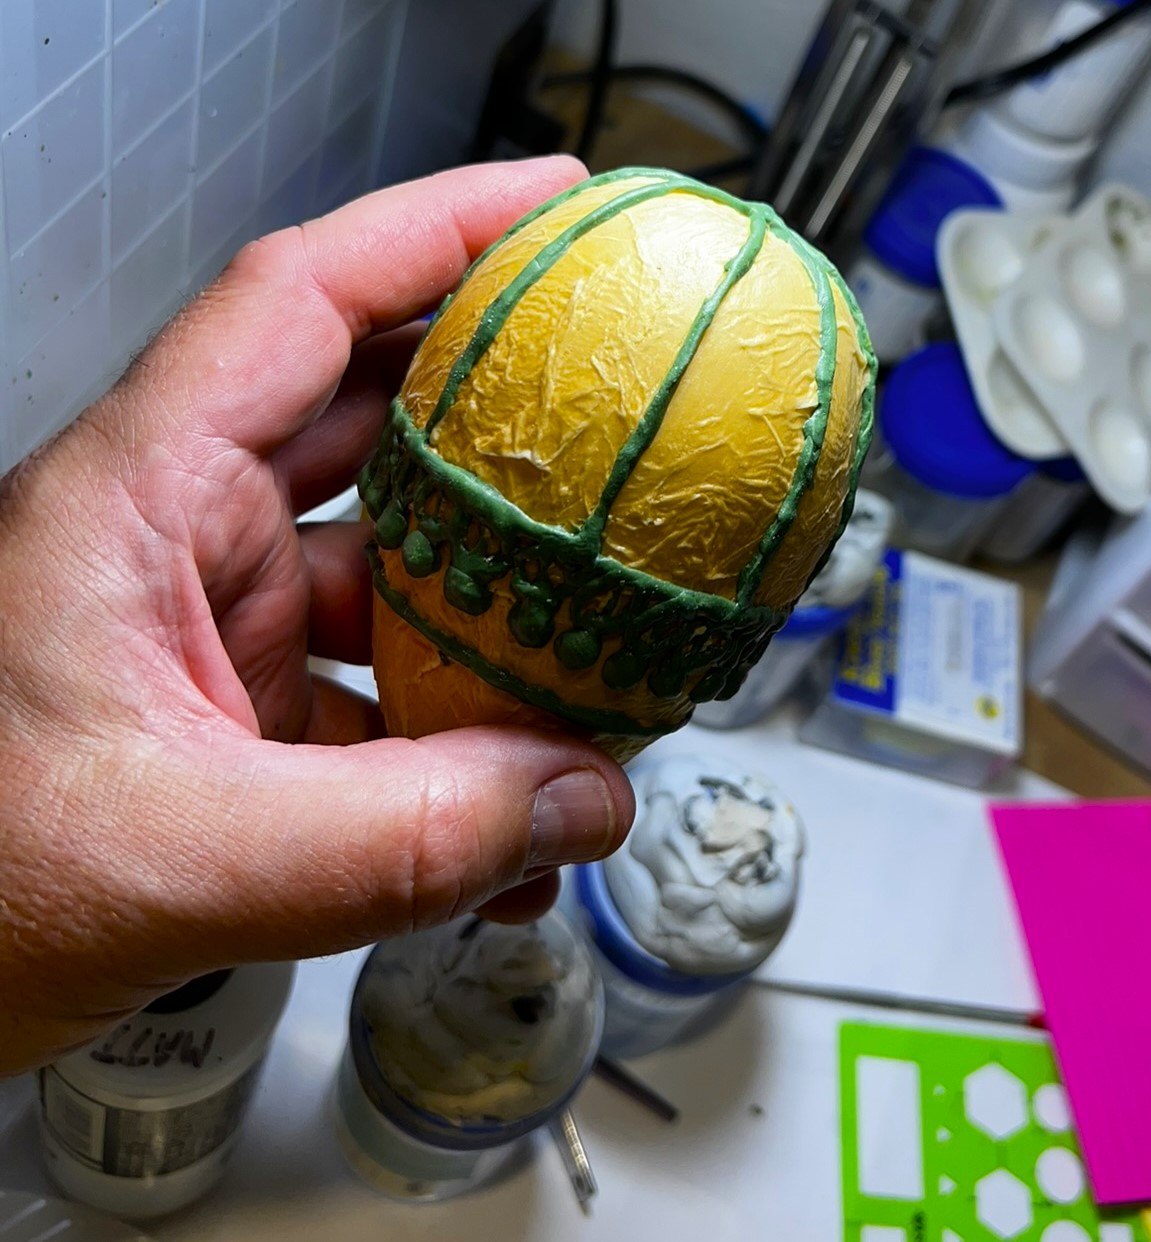
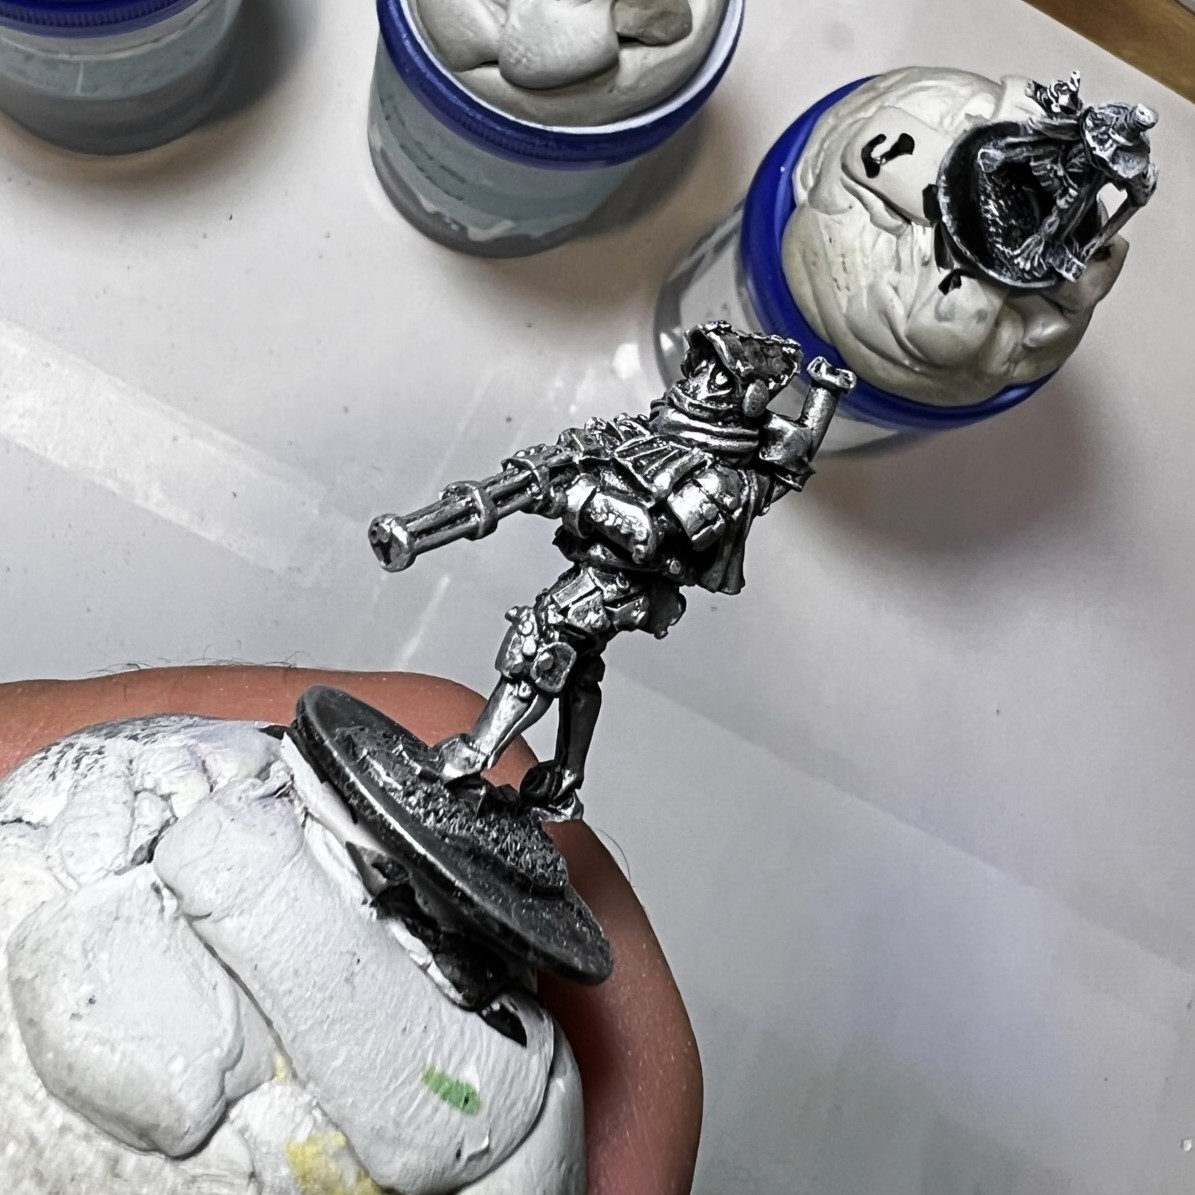
This leaves the Impkin “Artillery”. It’s a slingshot firing apples – that moves on the battlefield- somehow. So how, I don’t know, it just acts like a light artillery piece – so suspend belief – it’s Ozz! Anyways, I magnetized the base for the crew, and added some blood stains under the figures for when they are casualties. I also redid the foliage per IRO’s suggestions and added some Woodland Scenics apples for effect. It was fun and a bit messy, but good preparation for a subsequent project I hope to blog about soon – Savage Apple Trees (to come soon)
Here is the Impkin artillery base shorn of the foliage on the trees. I drilled out the base, added magnets for the crew and flocking. The dice square glue is shown drying here.After finishing up the re-foliage and the apples – voila! I was very happy.Side view.Rear view.The figures – once removed as casualties – display a blood stain on the grass.
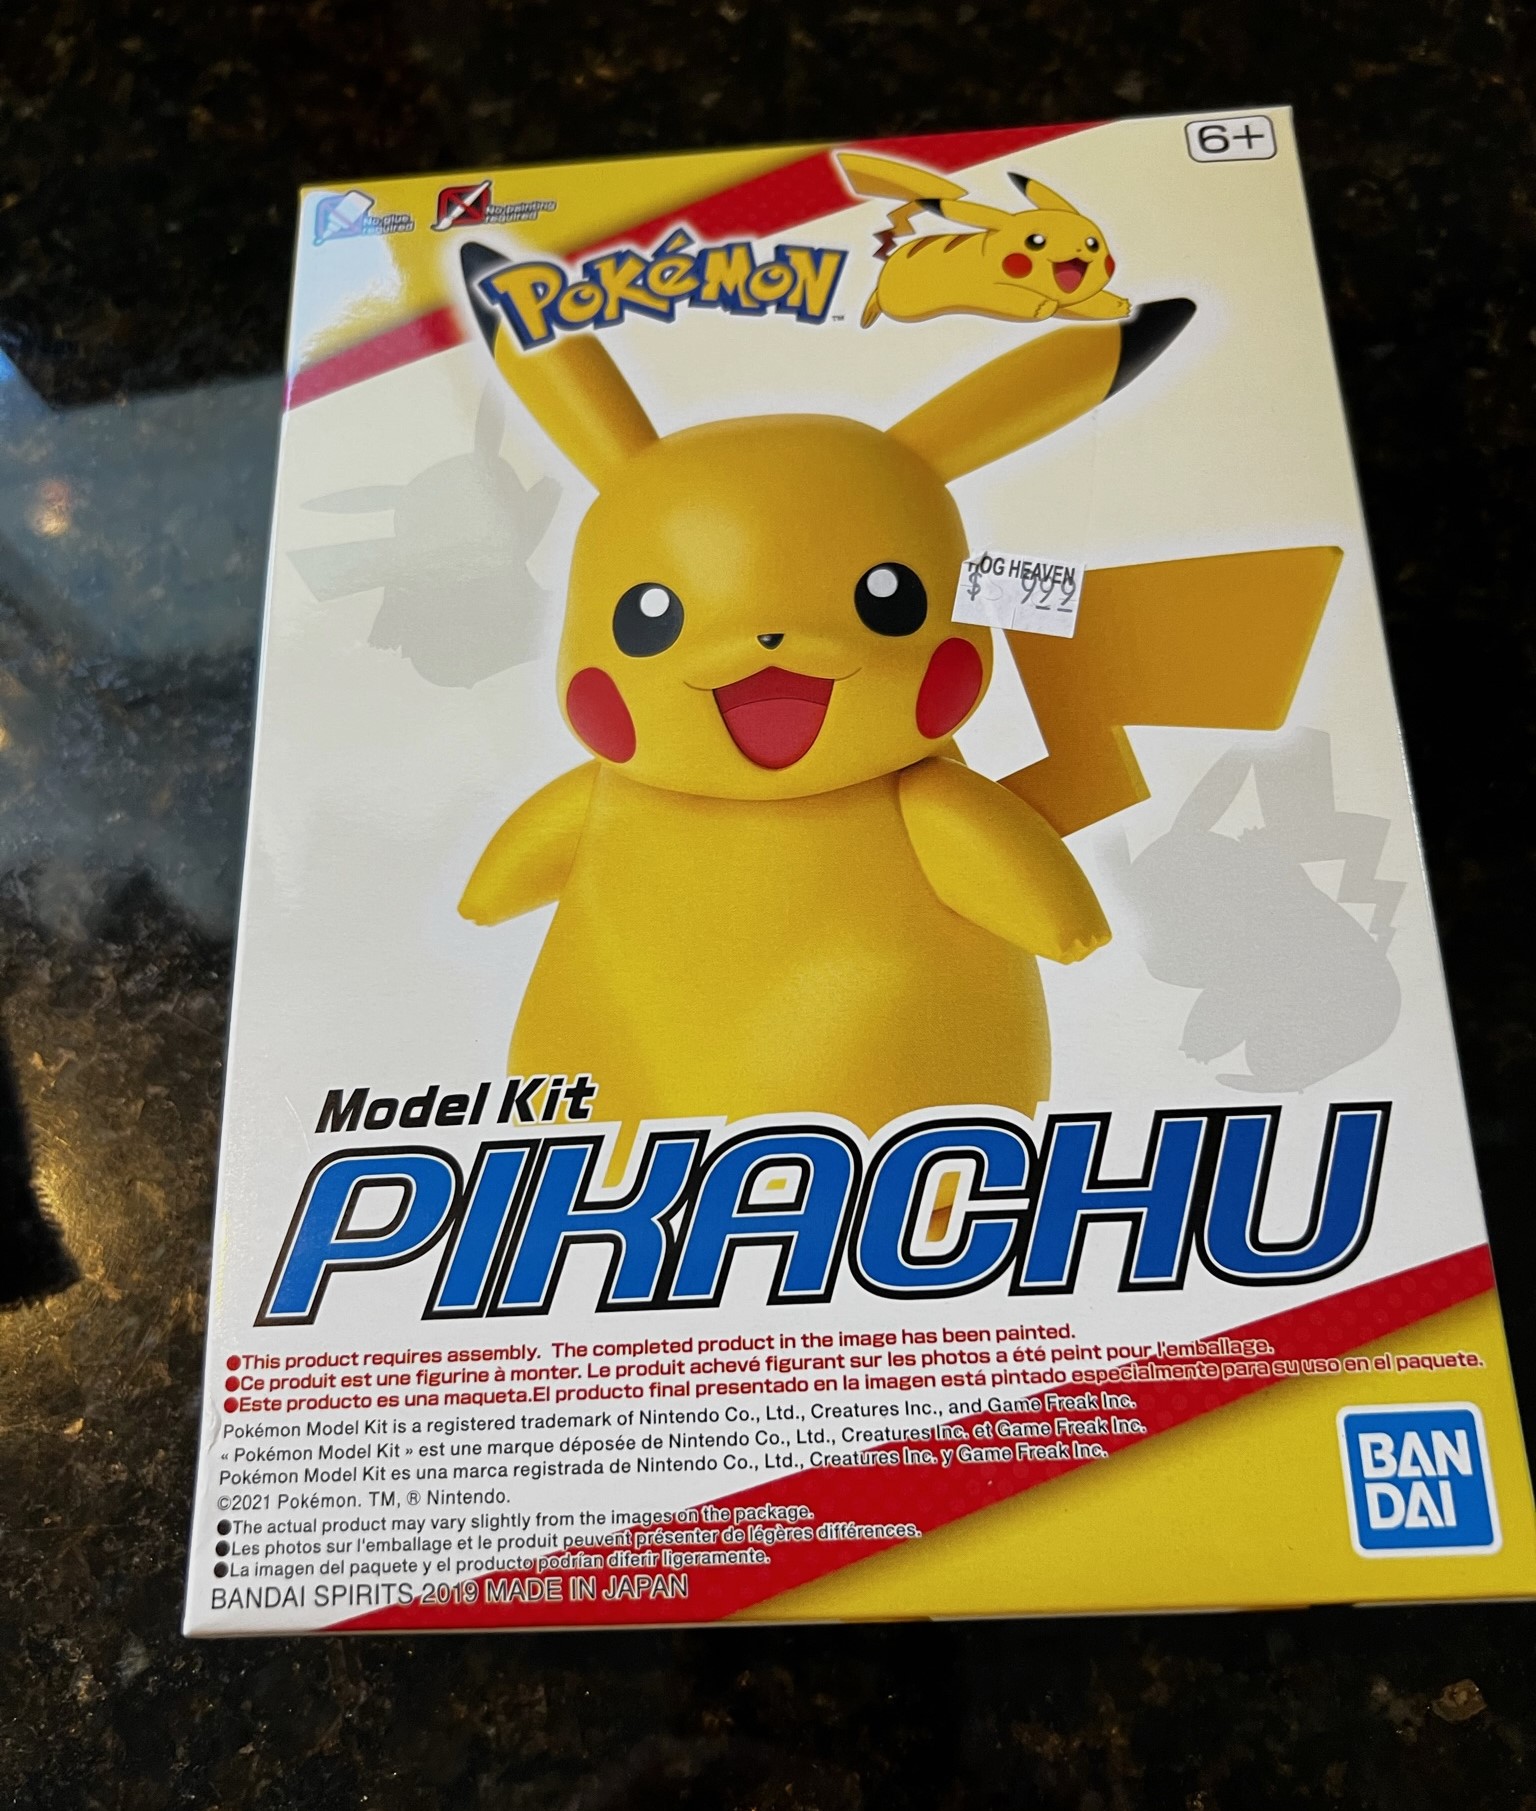
Gifts also went from me! One more model that I worked on was a Pokemon Pikachu model that I assembled together with my 6-year old (nearly 7) grandaughter. It was fun, but the tail broke off easily. No worries, Papa repaired it and affixed to two points on the model such that it should not twist off again. She loves it, and it was a fun modeling experience for her.
The model.Love this kid!Guess who she was for Halloween?
Sending Guru Dave the Wars of Ozz & Wars of Orcs and Dwarves rulebooks, and a Mark 1 Sphere Tank Down Under
I did want to reciprocate Dave’s great selfless terrain gift – and I knew he loves rule books. So unbeknownst to Guru Dave, I sent him the rulebooks for both the Wars of Ozz and Wars of Orcs and Dwarves. As he was into Xenos Rampant, I also sent him a cast of my Mark 1 Sphere Tank Down that he could use there. You can read about his reactions in his post here.
Much thanks to Russ Dunaway, to Dave (Guru), to Buck Surdu , to Greg Priebe, to IRO, and to Chris Comeau for all that you did to make this all work! I appreciate you allso very much.
As I finish this post, I am about to pack for Fall In, with all the Ozz stuff you see. I do have a couple more units to post about once I have gotten back, as well as an October golf roundup. I’m sure that I will have a Fall In! post as well to do. My apologies to those whose blogs I am behind in catching up on – I will get there. I hope that this post was enjoyable for you and that maybe I can meet some of you at Fall In!
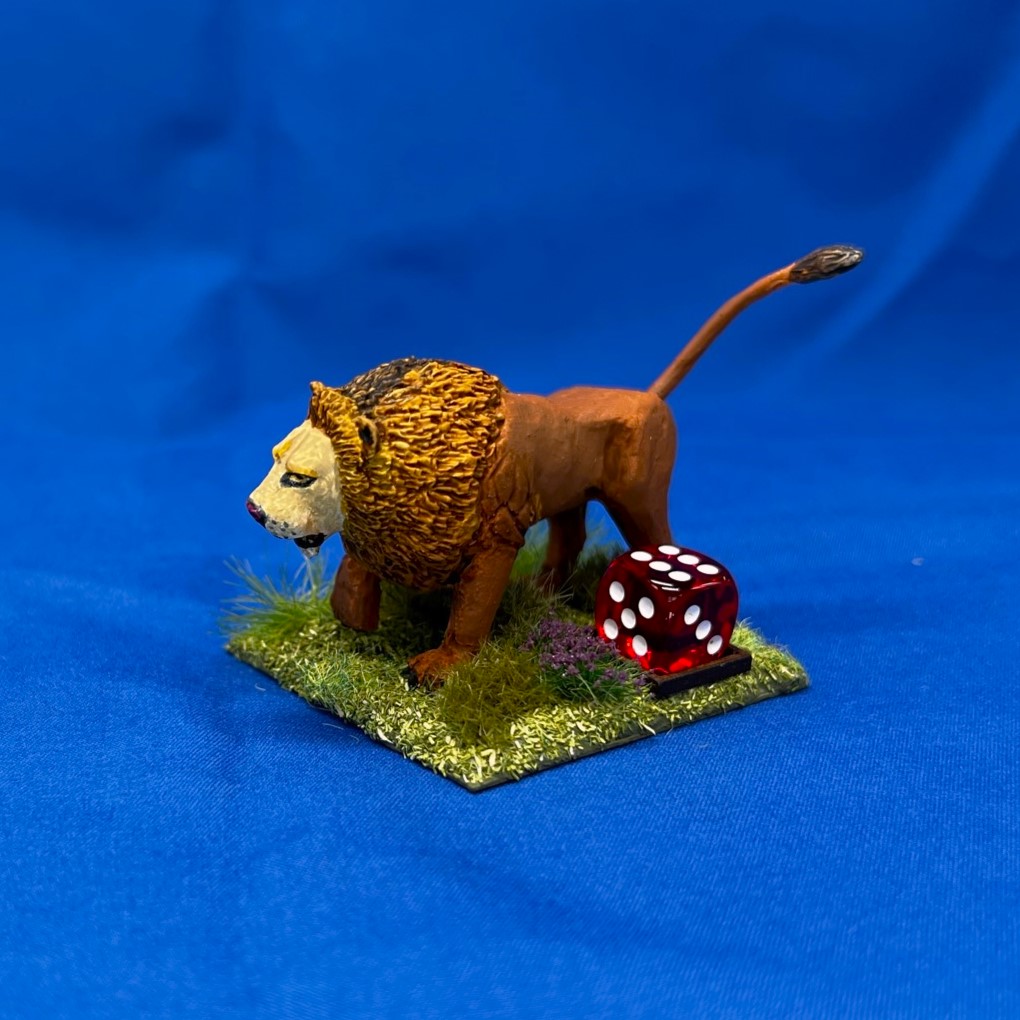
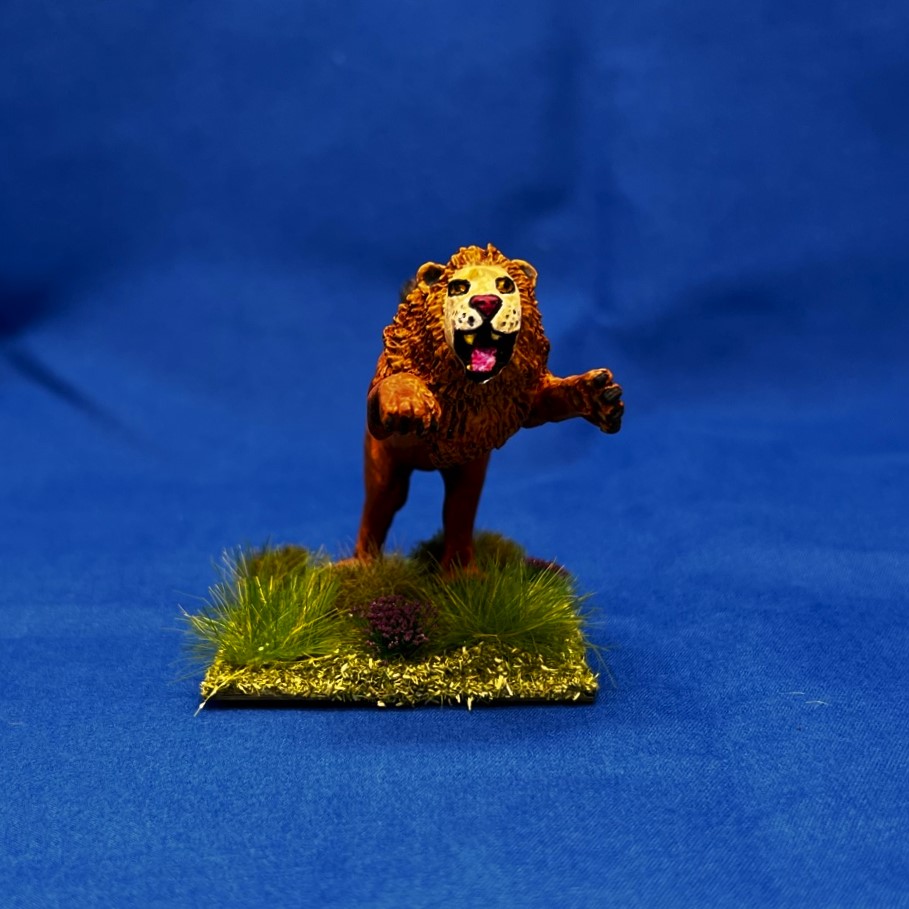
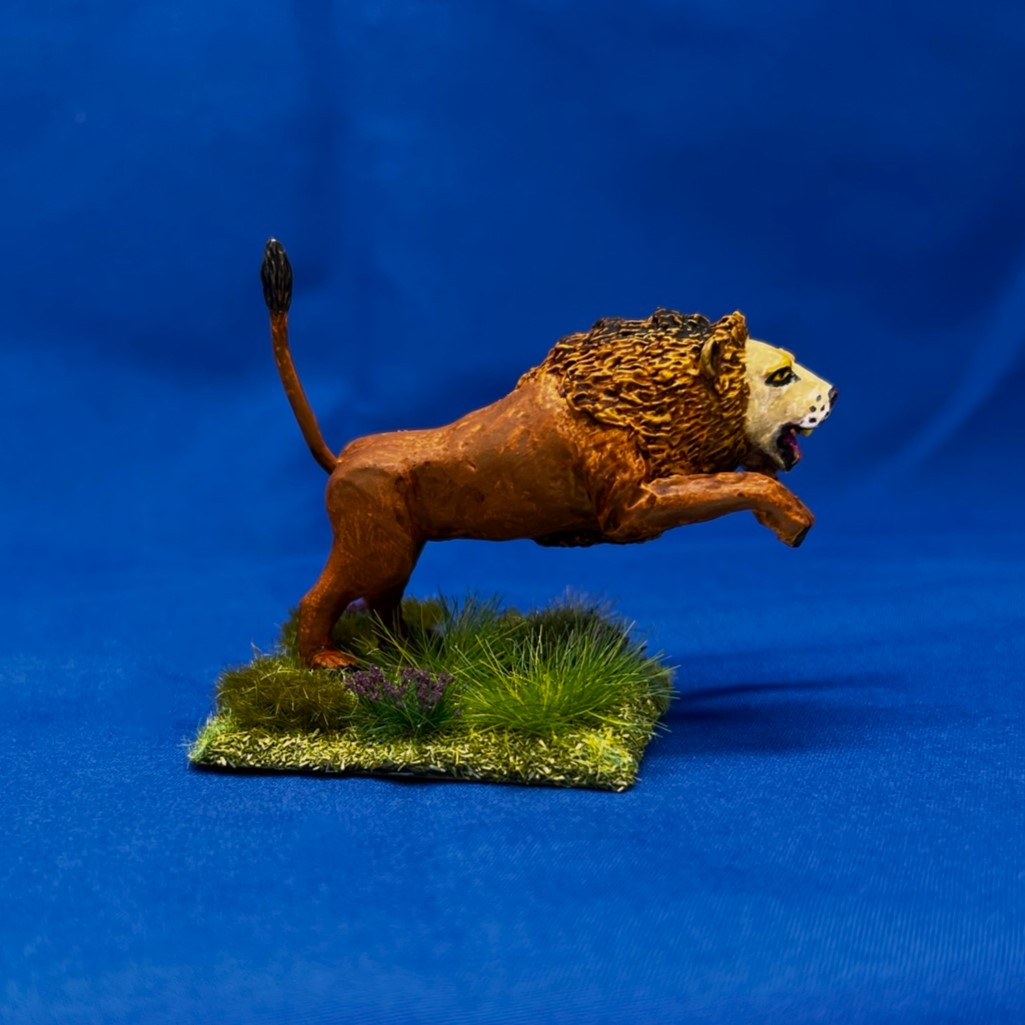
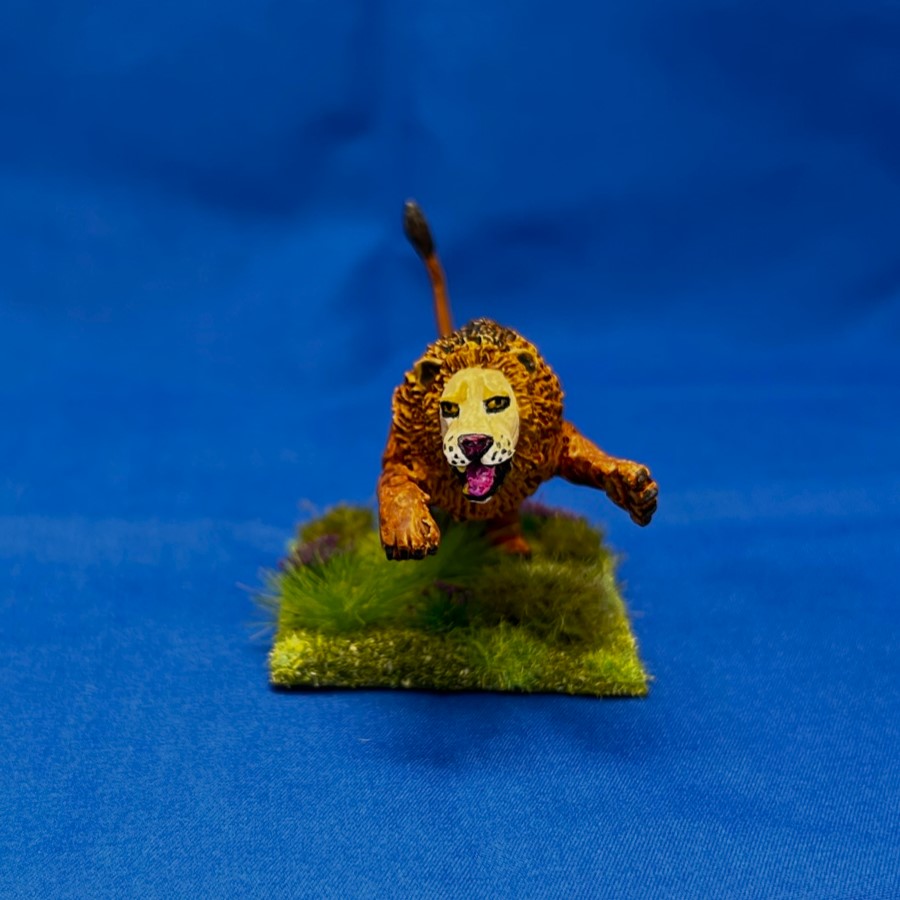
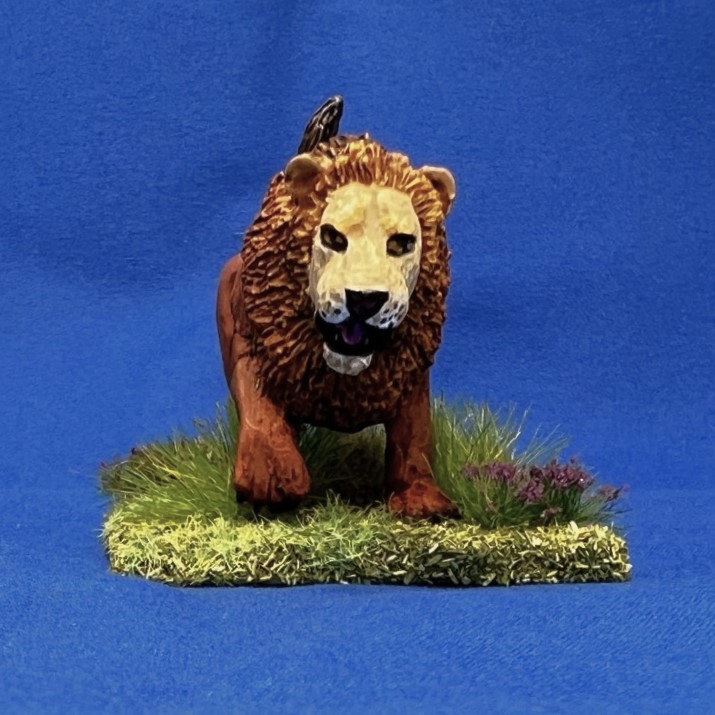
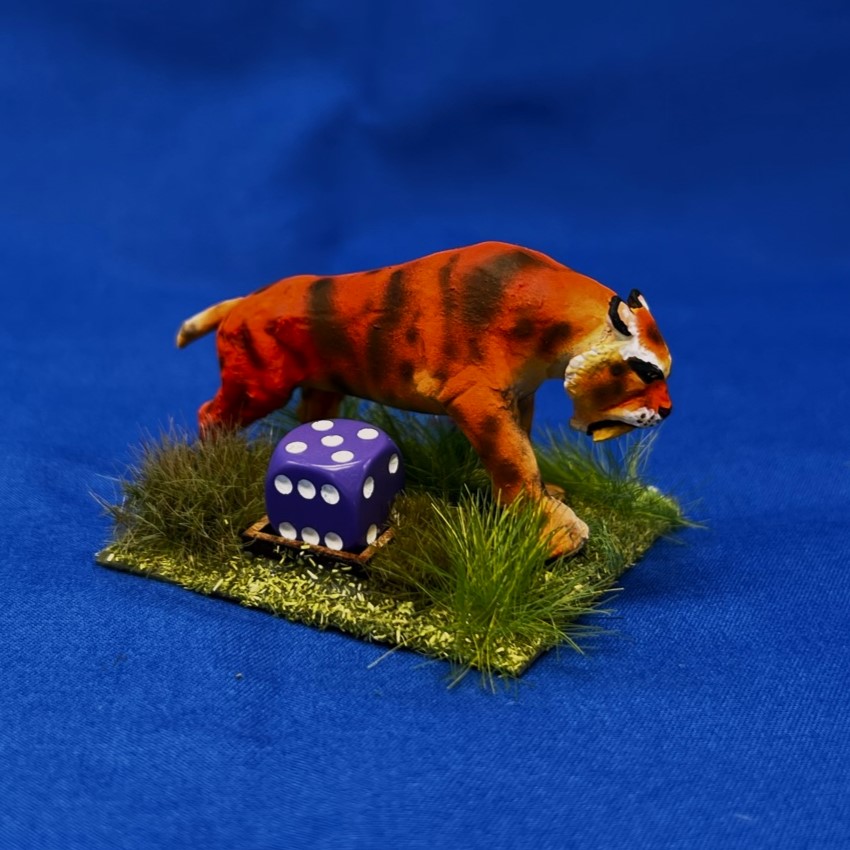
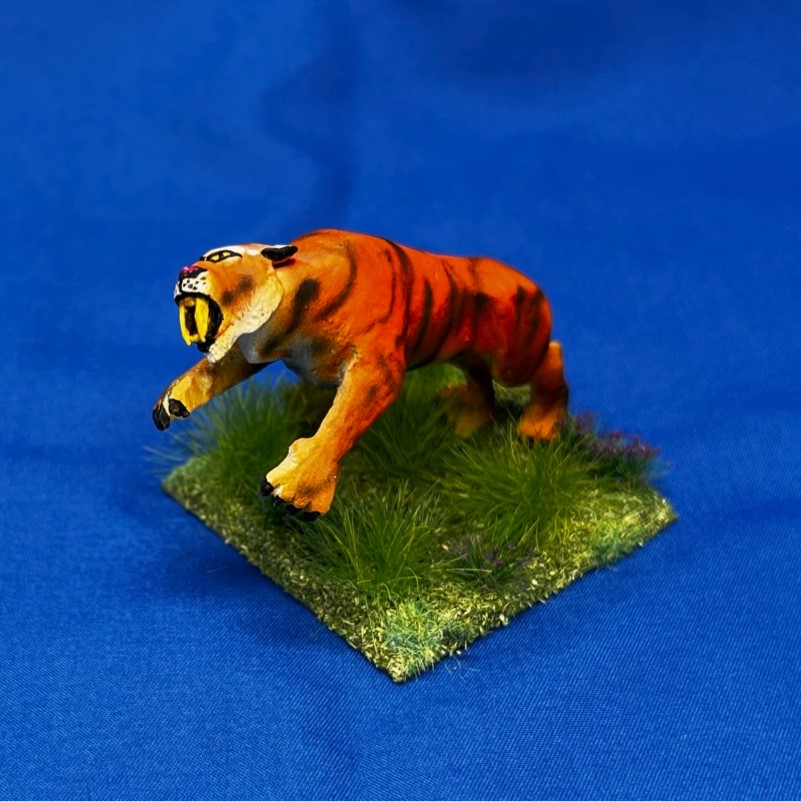
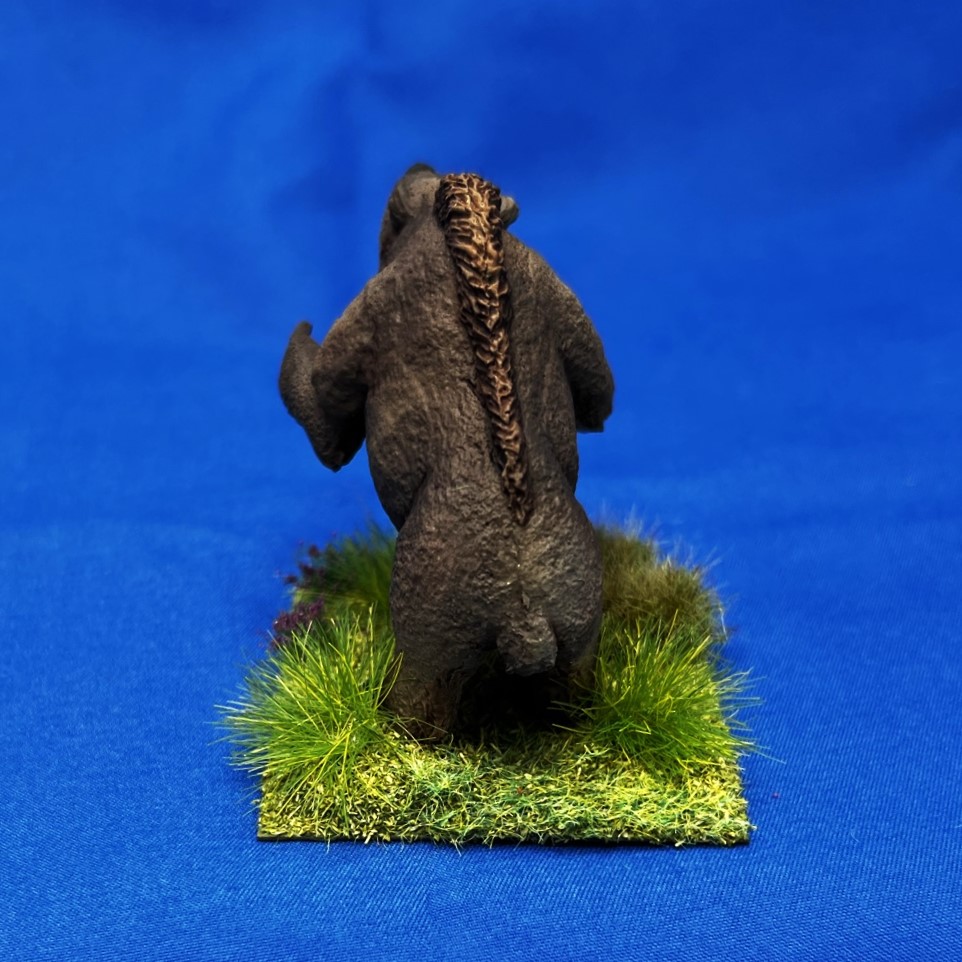
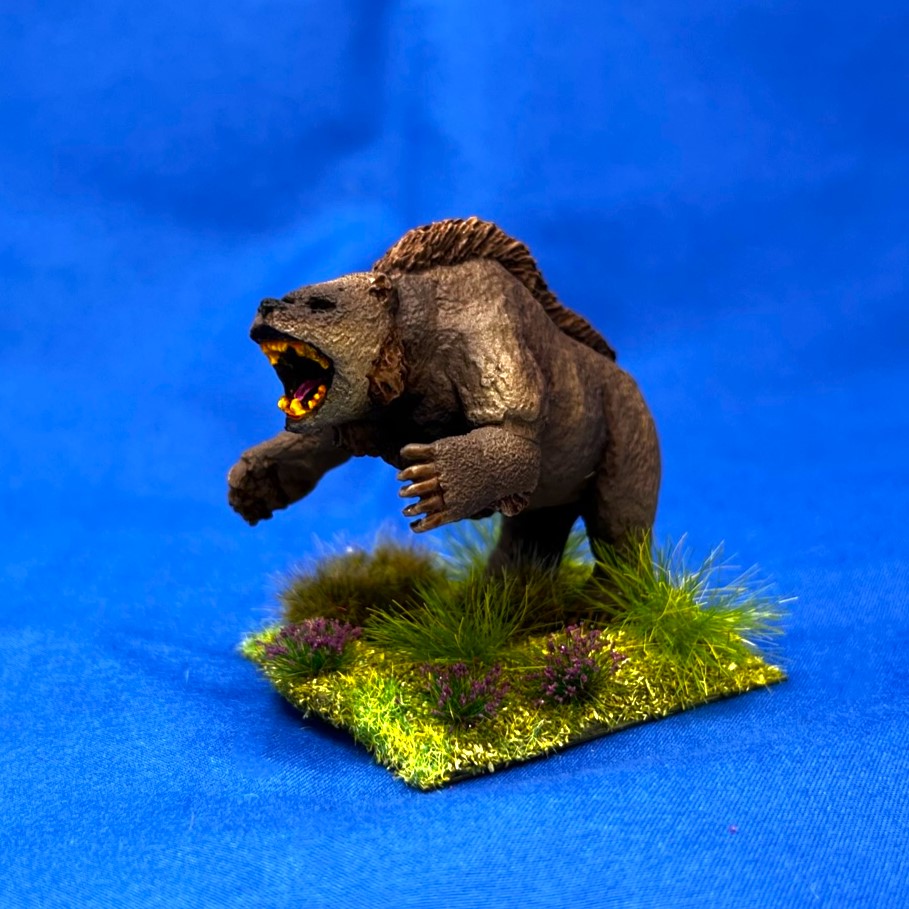
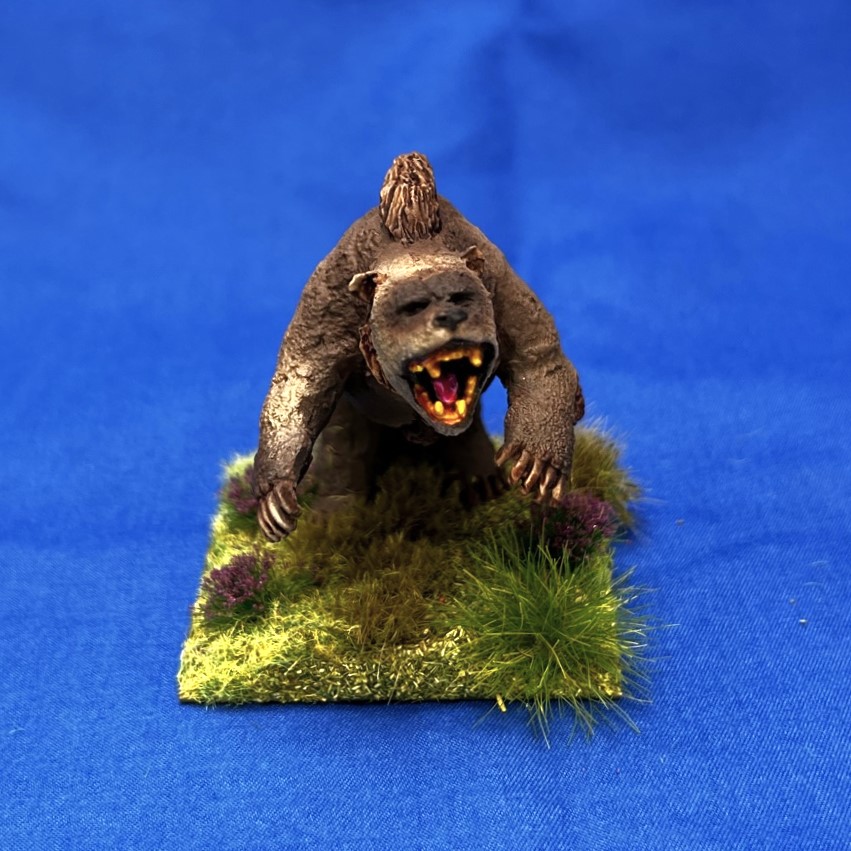
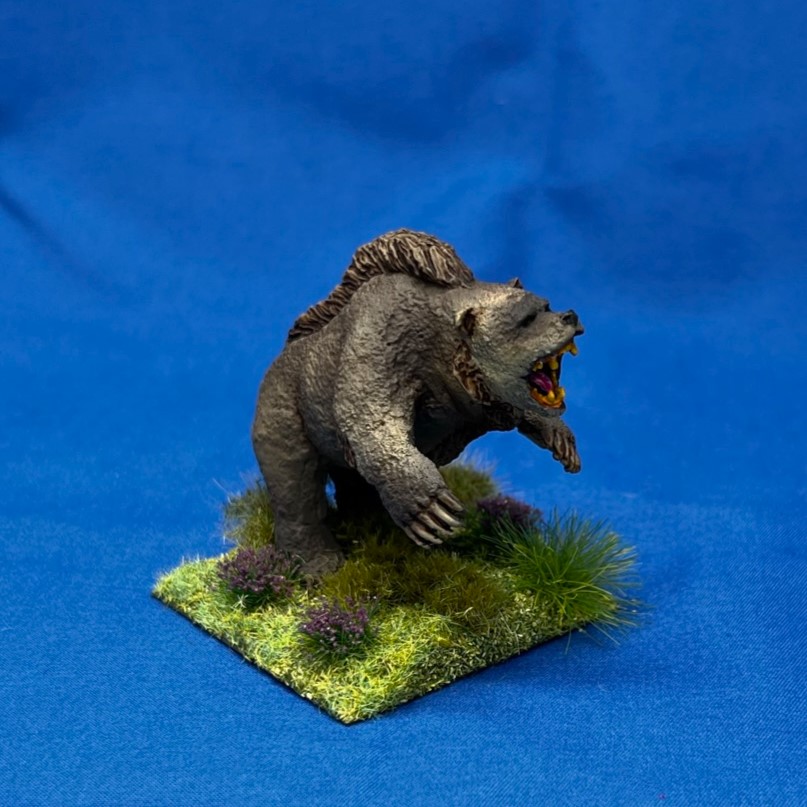
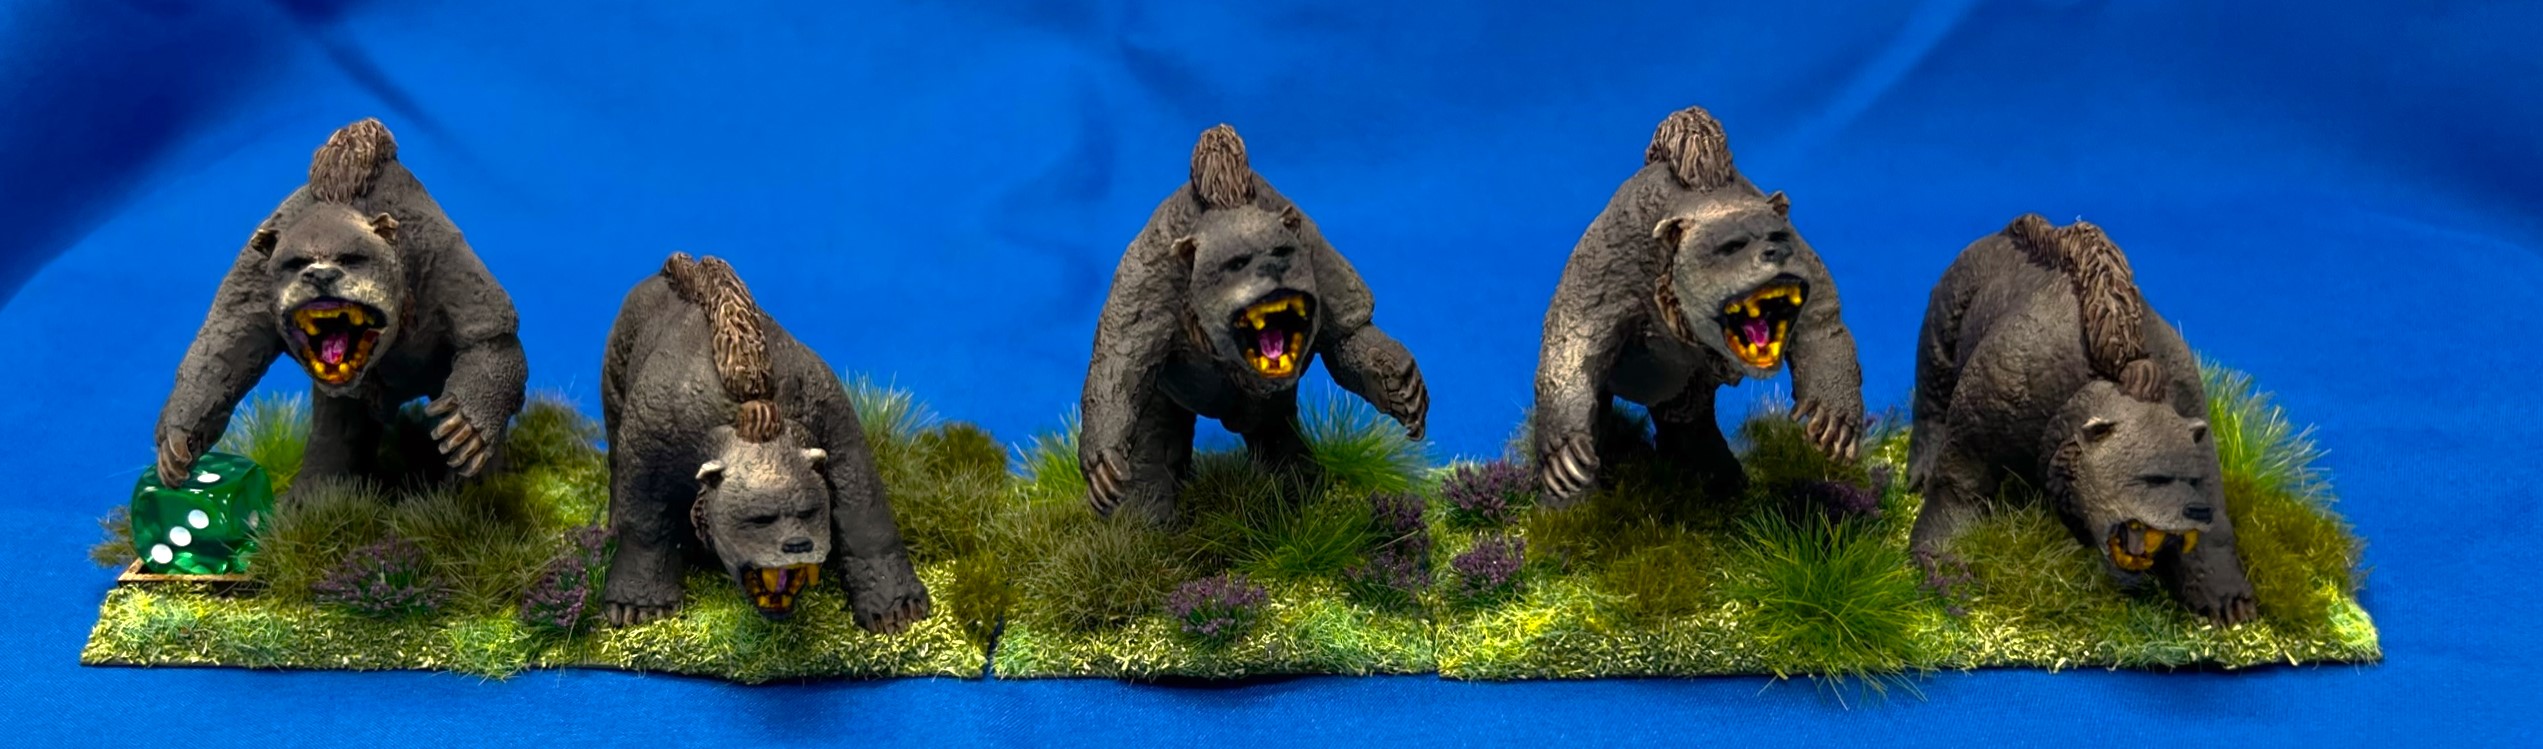
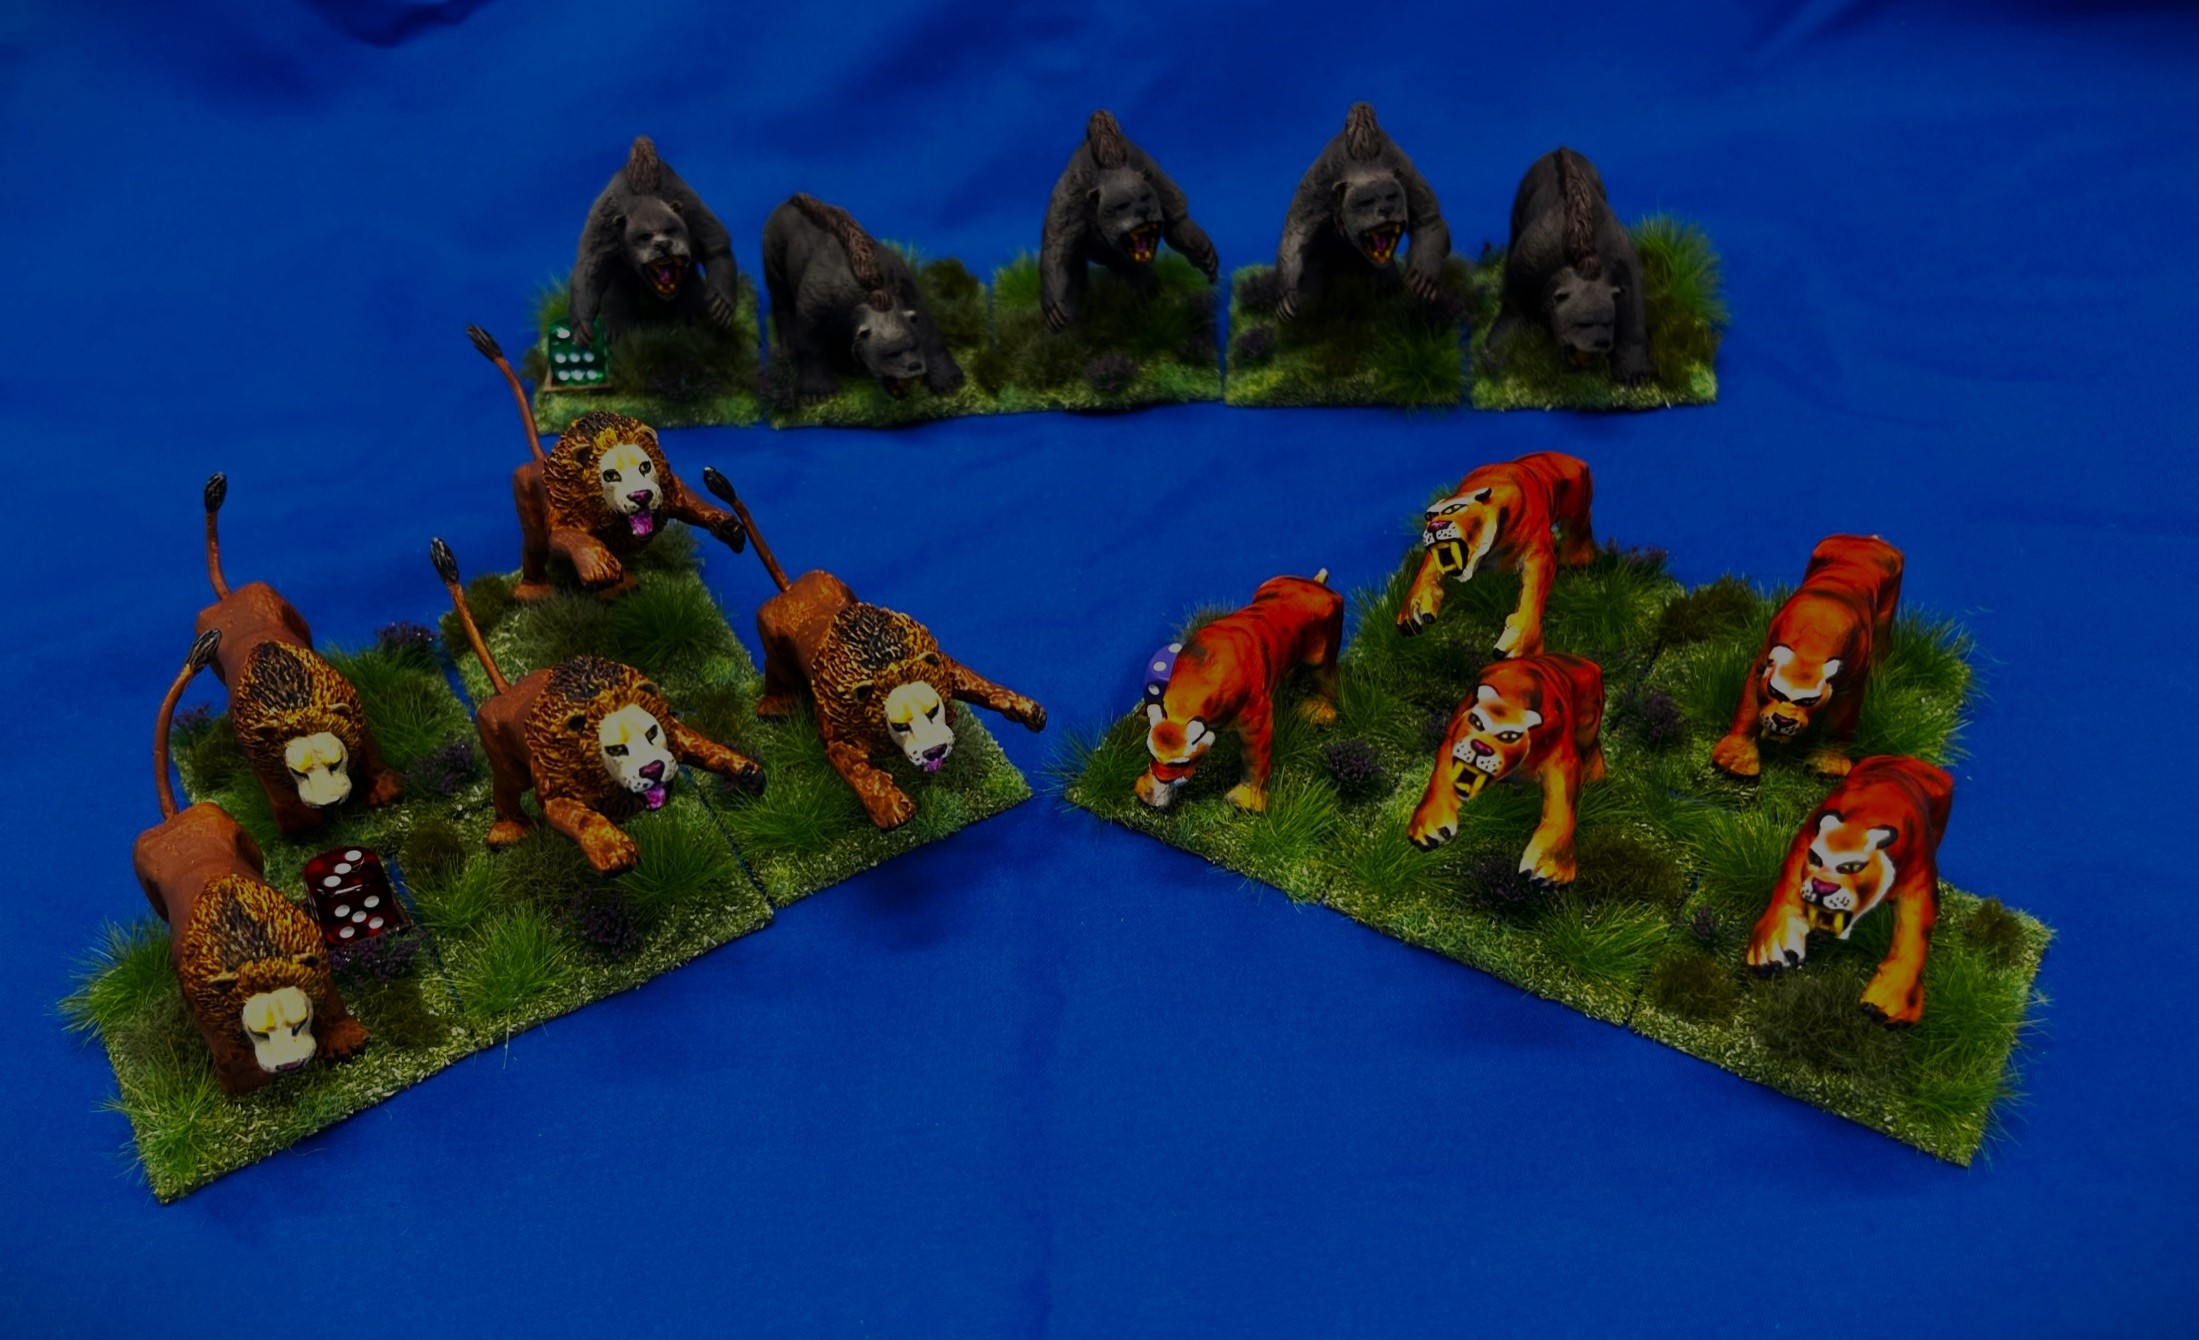
I have not painted any Ozz figures since last month – and while I did run a Wars of Ozz game at the Hobby Bunker, and finished my Frost Ogres for WOOD, it was time to jump back on my Ozz stuff. I wanted to finish off my last Gillikin units – which are not really Gillikins but are aligned to them in the game as allies. These would be the Dire Lions (OZZ-500), Dire Tigers (OZZ-501), and Dire Bears (OZZ-502), all large intelligent beasts that normally fight alongside the Gillikins. They are listed in the “Allies and Mercenaries” section on the website, and in the rules are listed under the Gillikins as well as in the “Allies and Mercenaries section”.
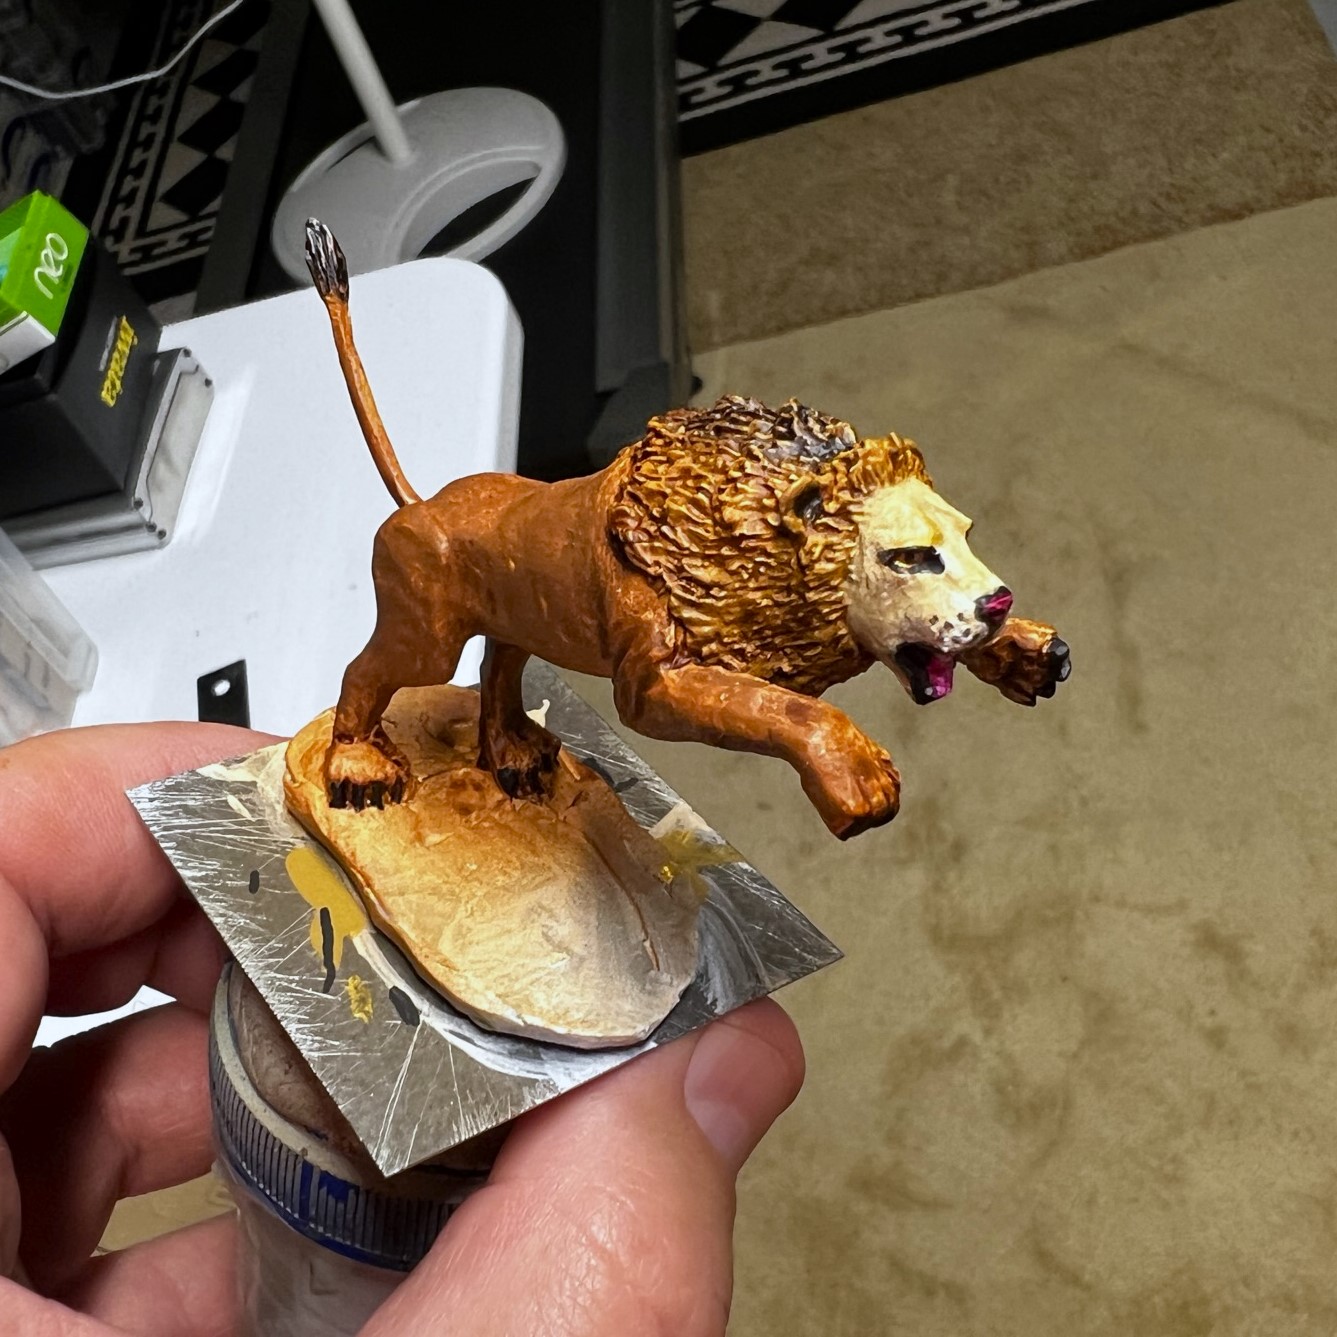
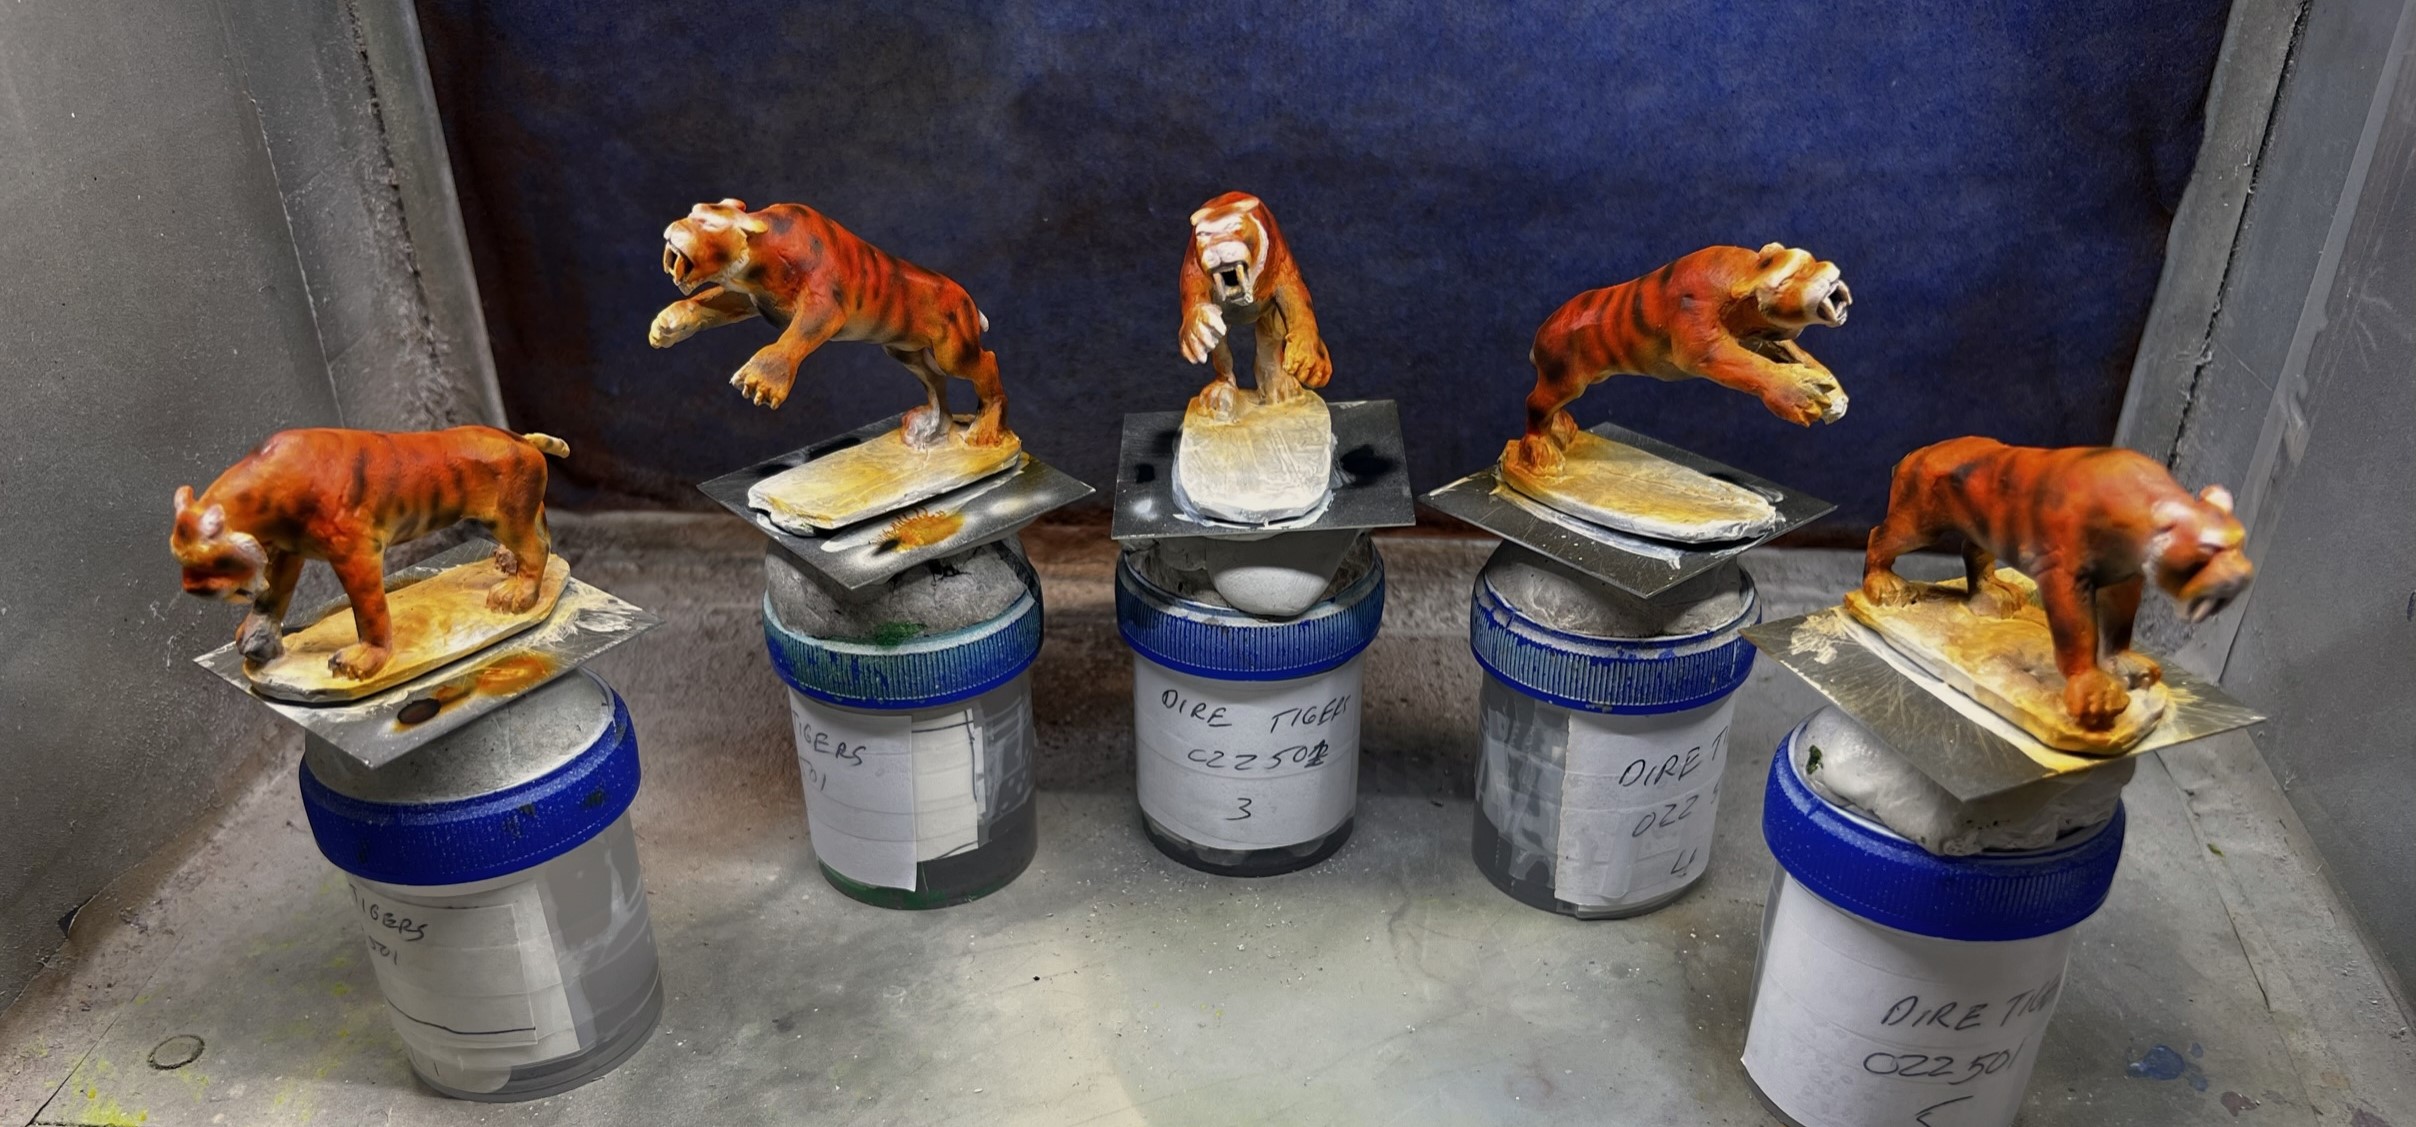
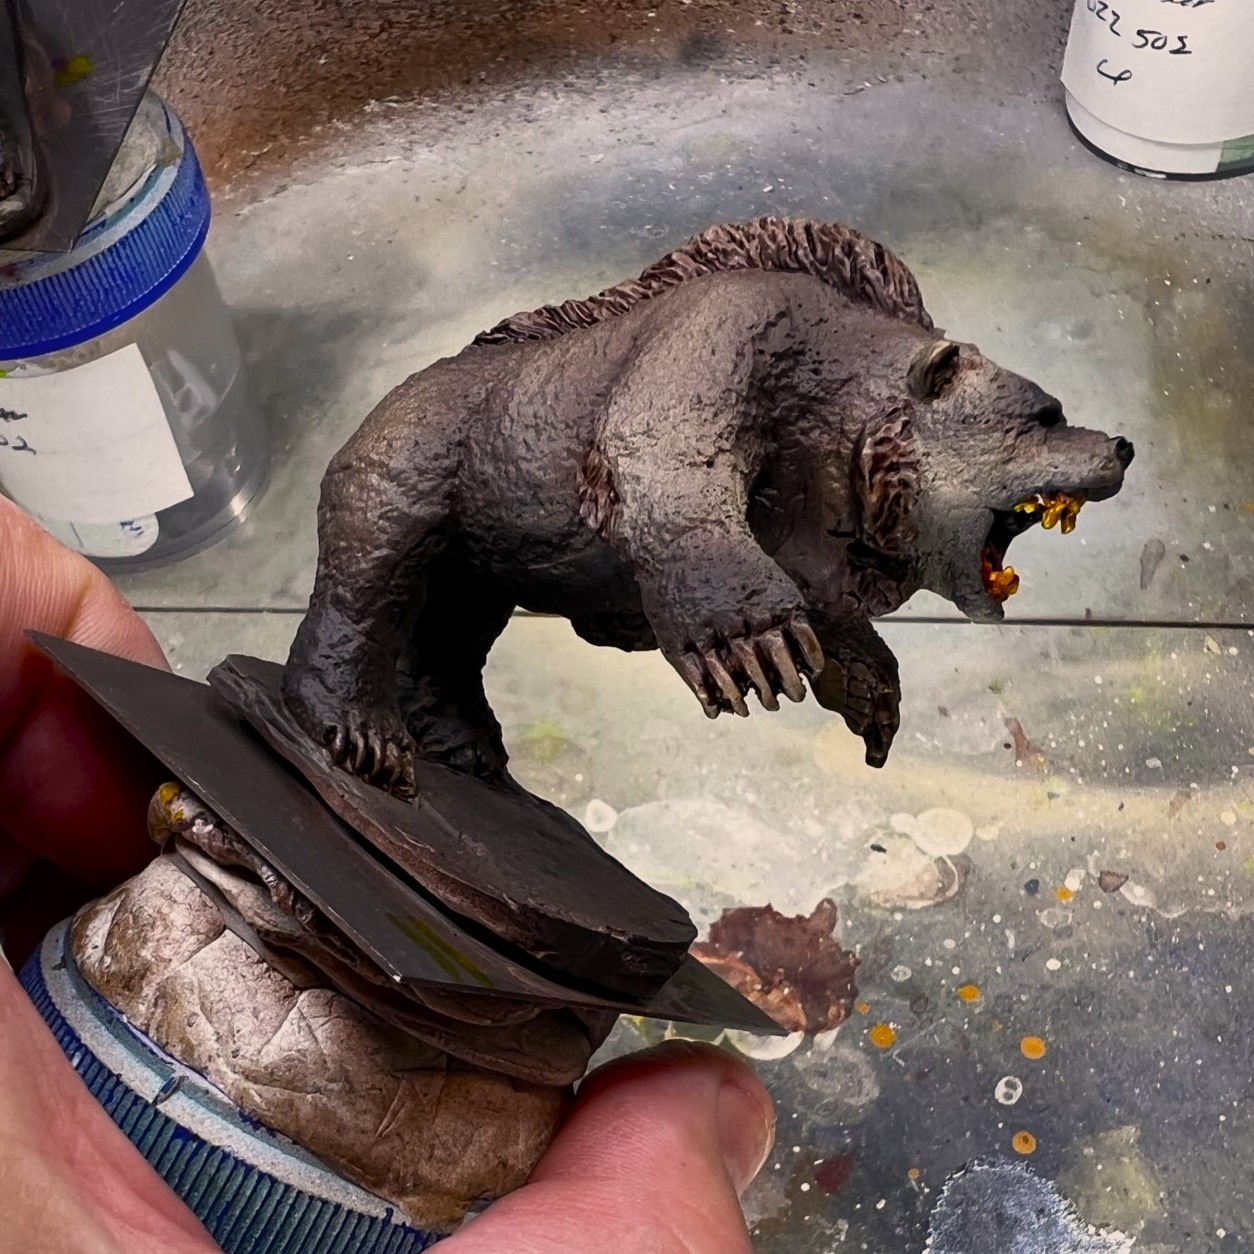
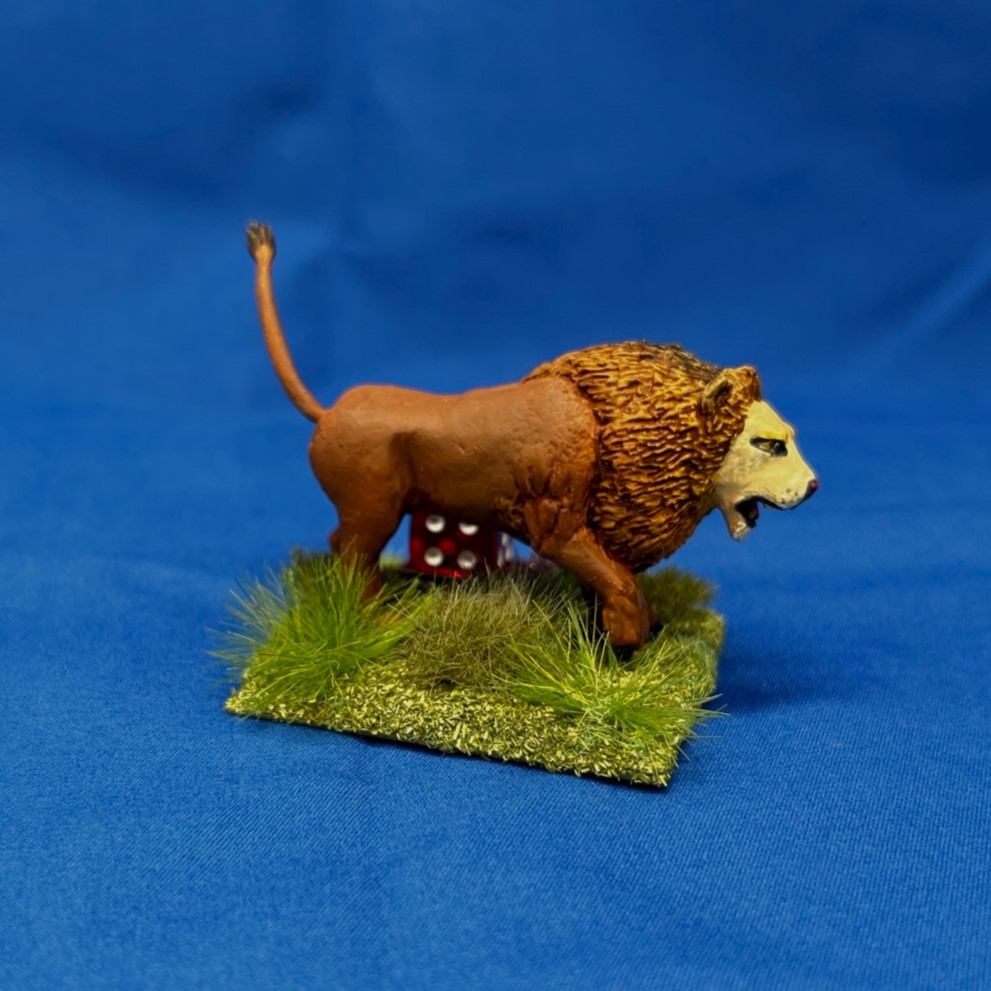
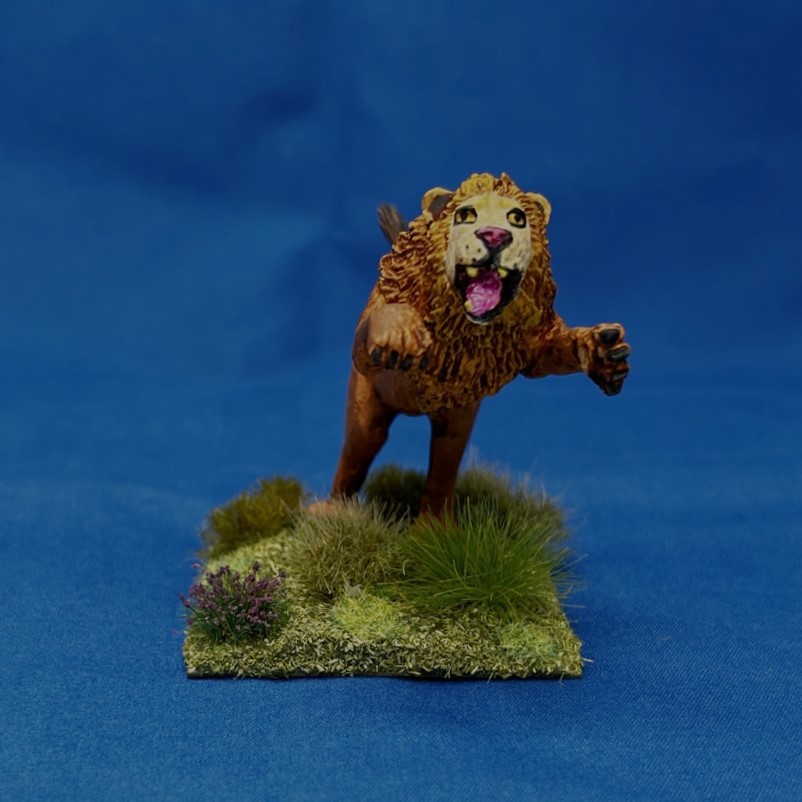
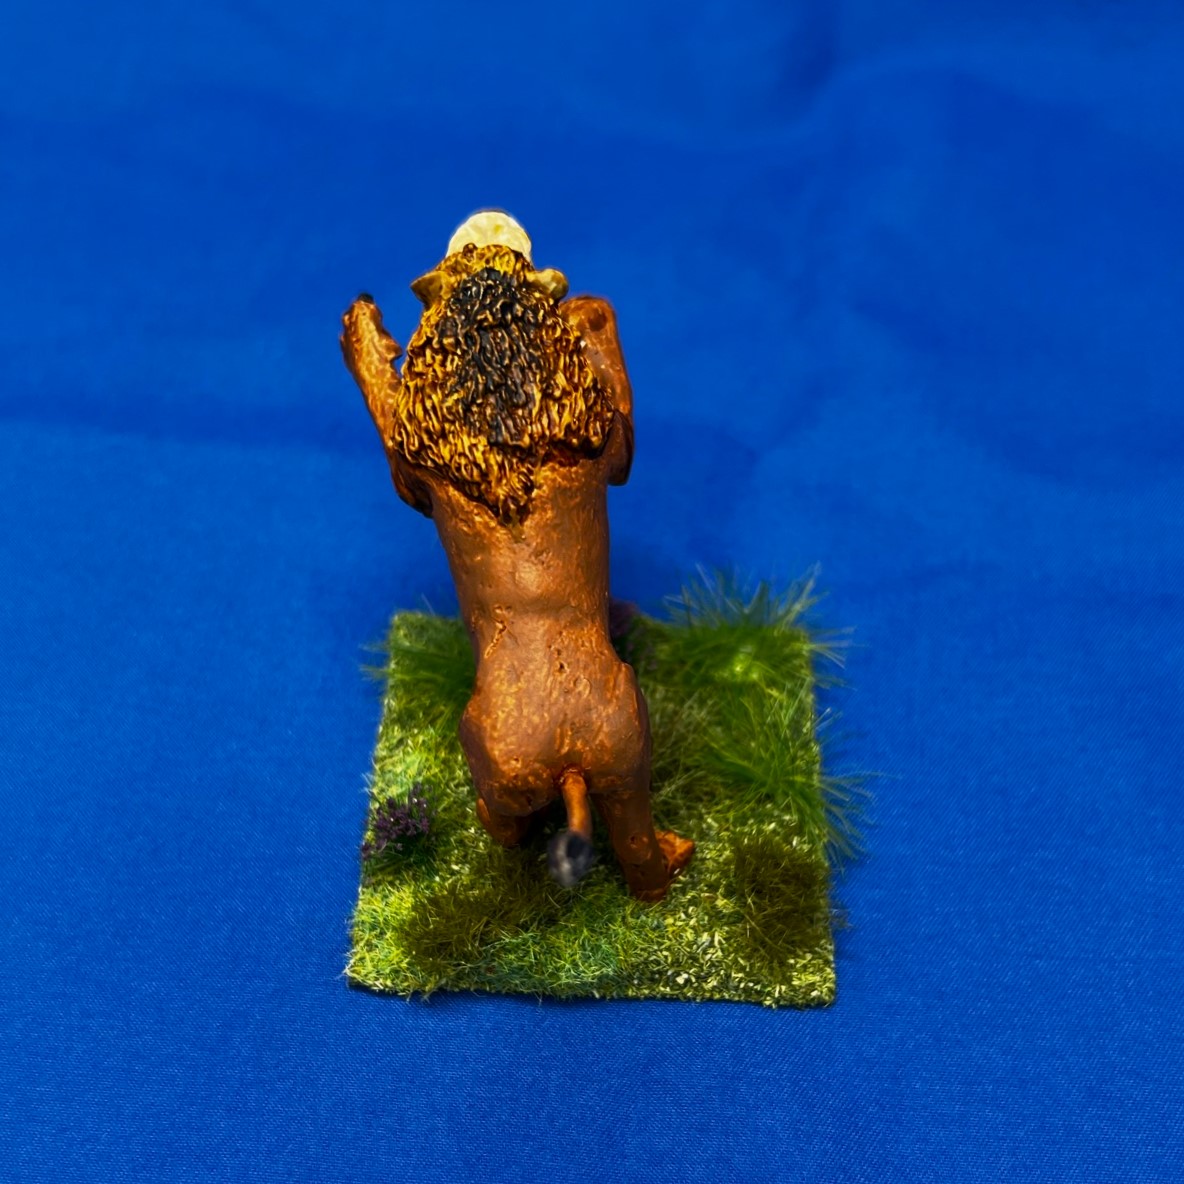
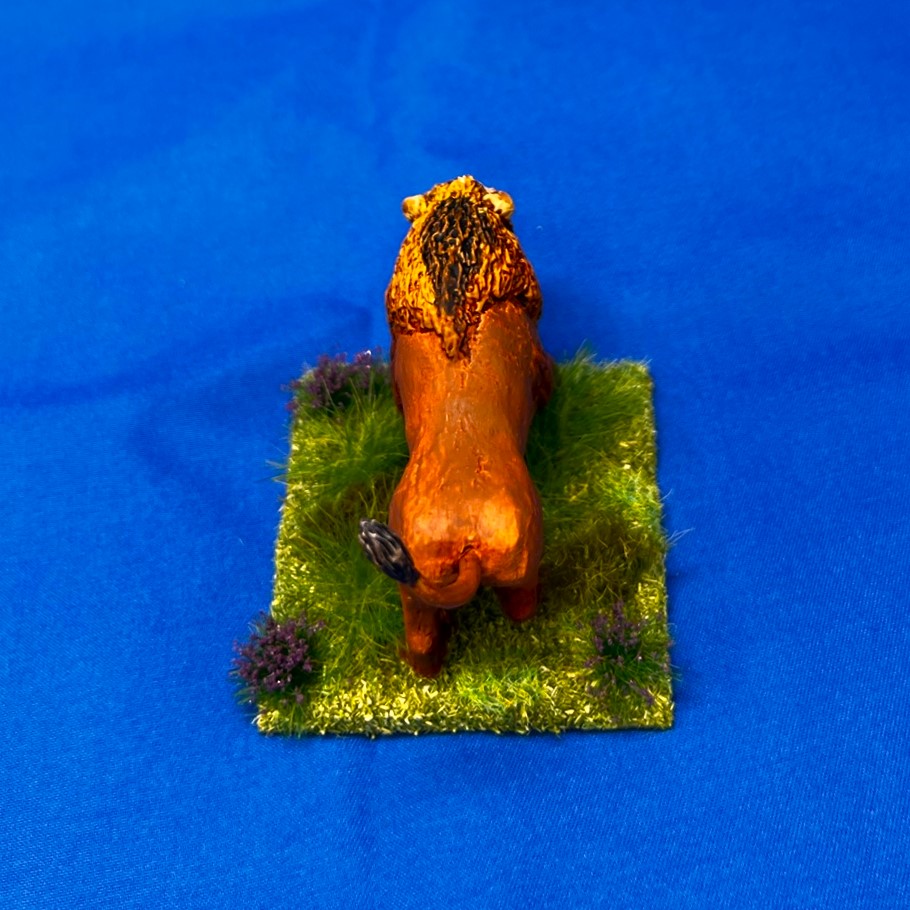
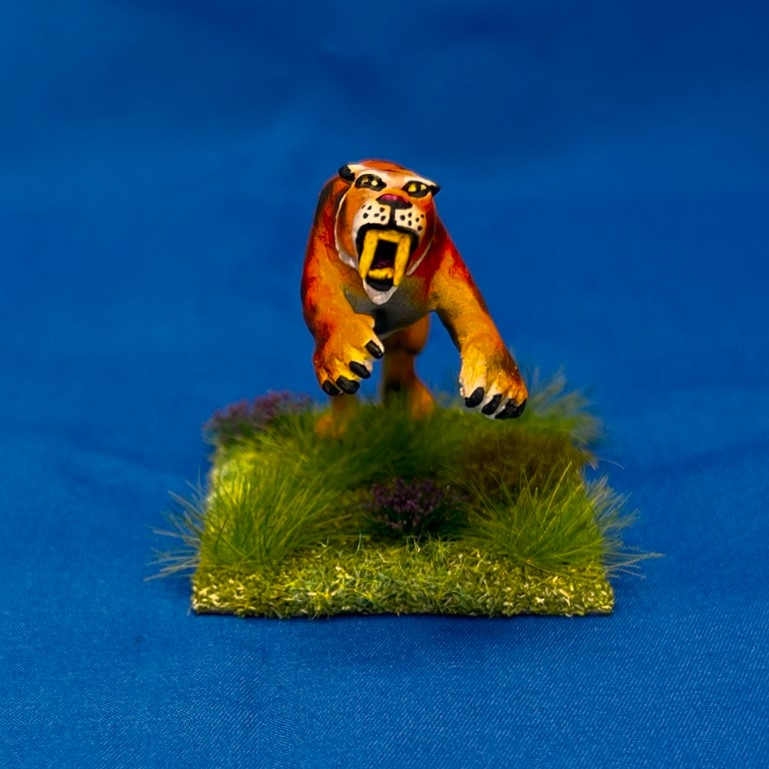
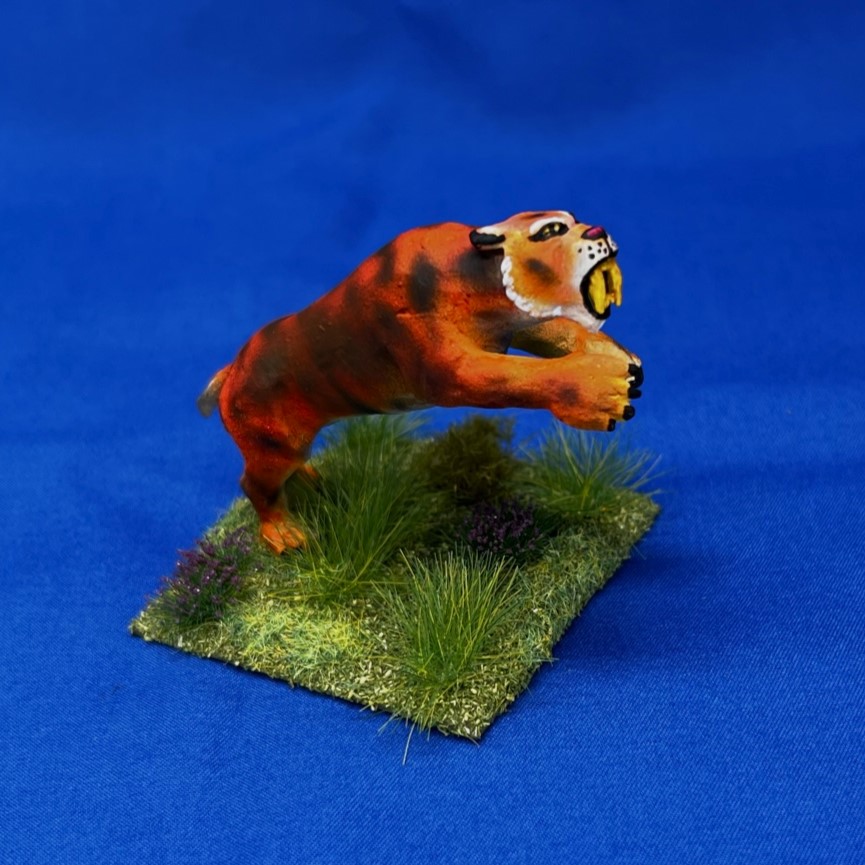
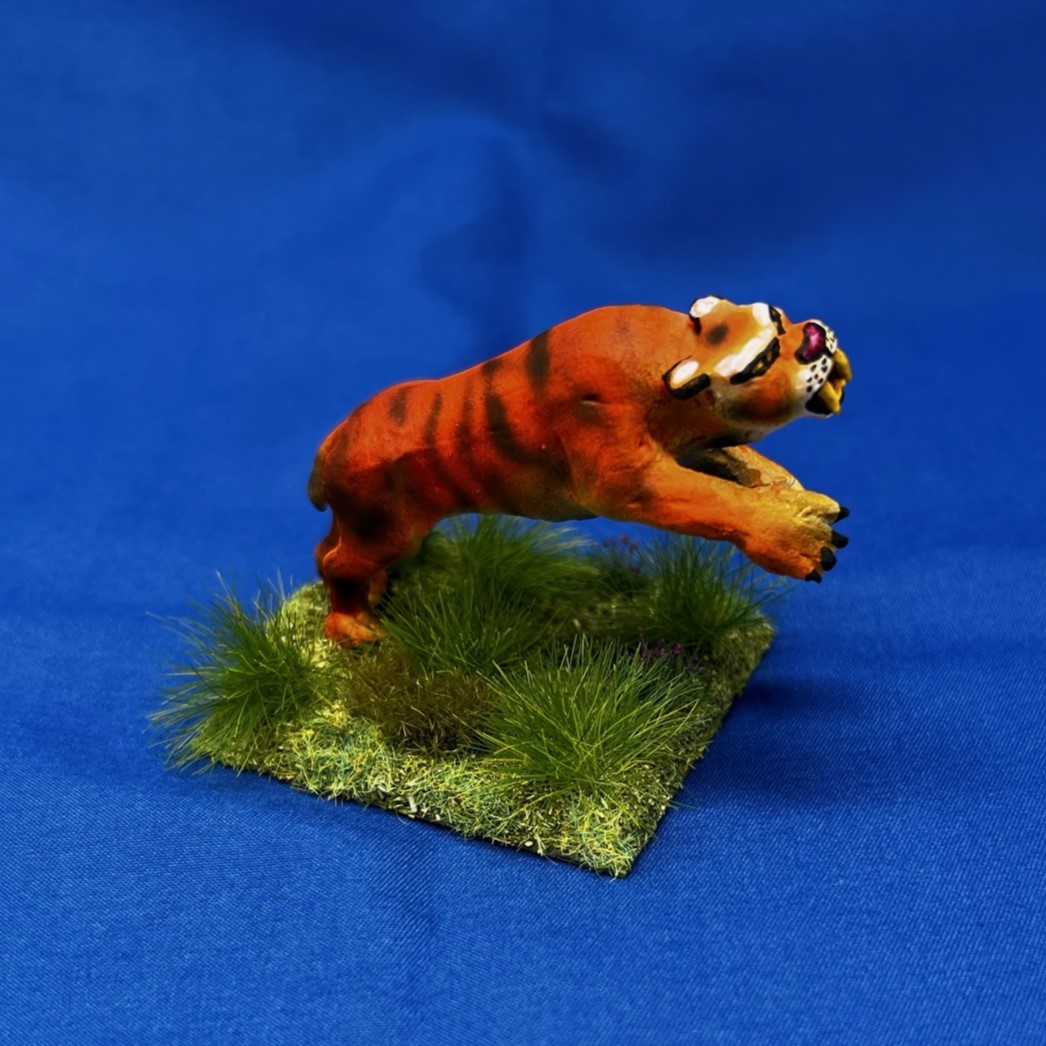
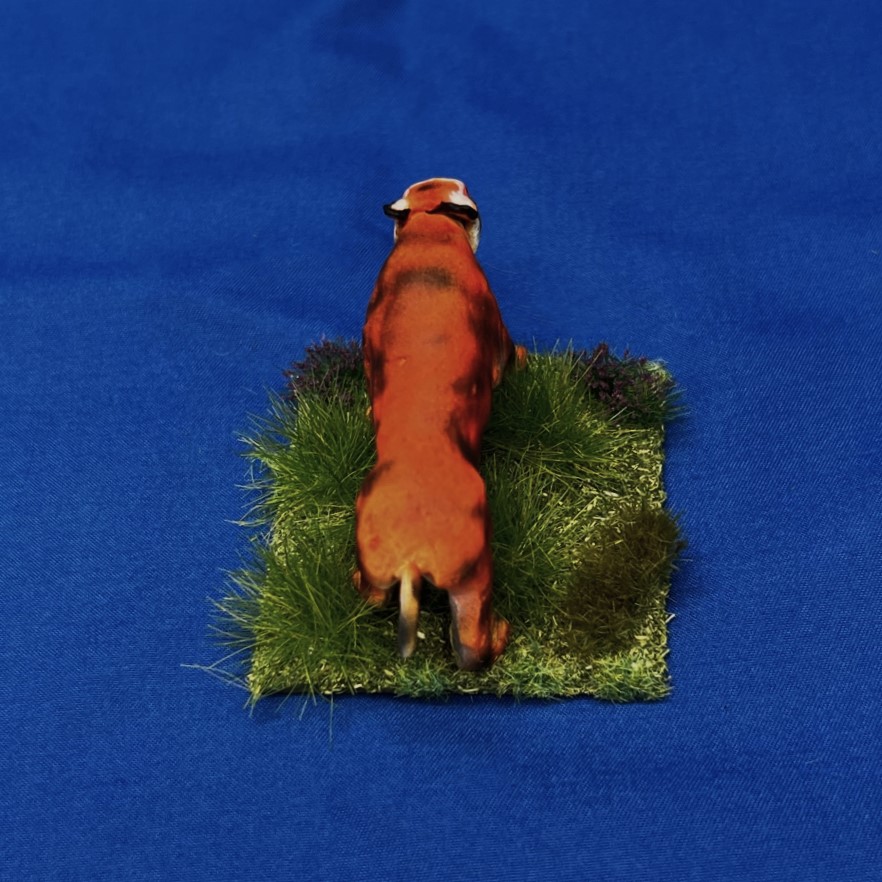
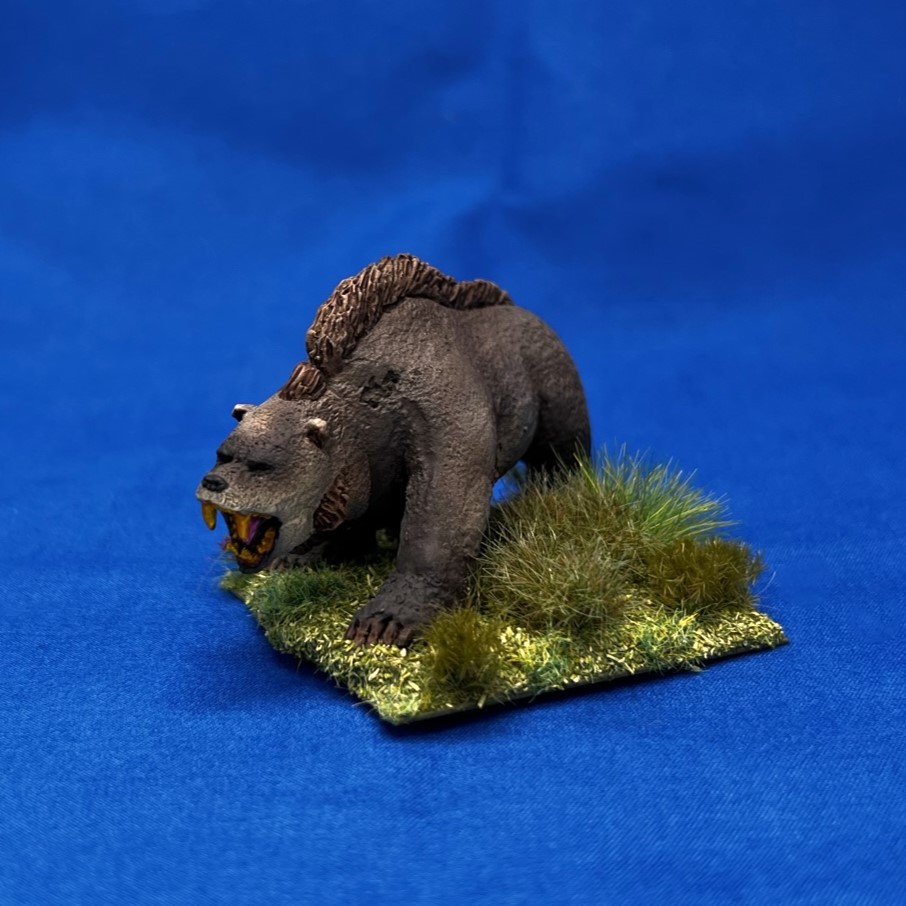
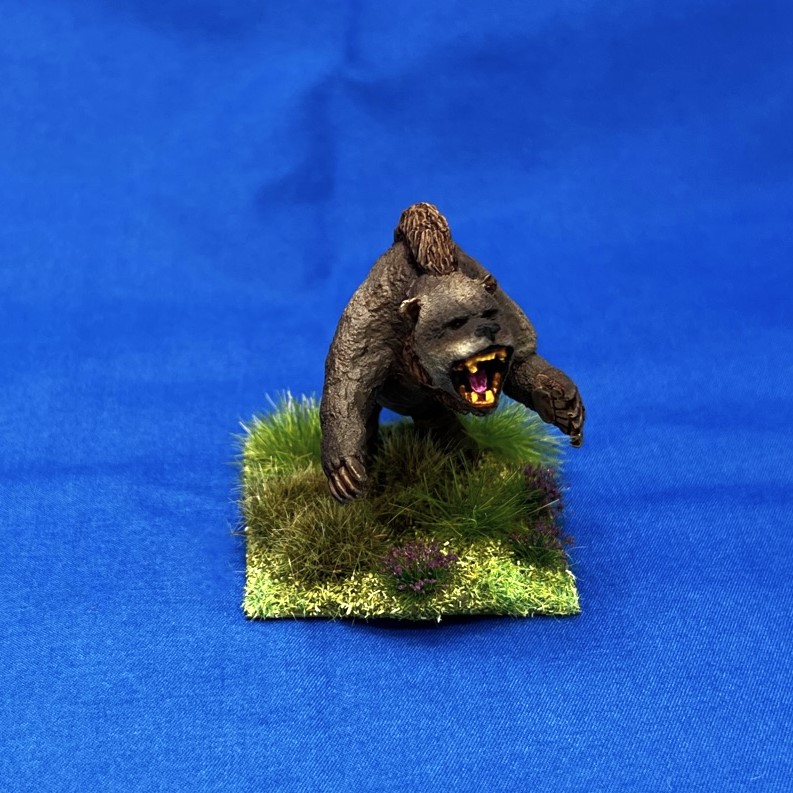
These figures are all large enough to fit 1 figure apiece on a 2″ square base. They come 5 to a unit, are 28mm in scale (for giant beasts that is) and are resin and metal – and most needed some minor assembly and prep. Each grouping of five had two types of poses – one with the animals on their rear haunches in an attack position and one with three or four paws on the ground. After cleaning them, I used a blow dryer to heat the legs of the lunging ones and bend them so as to make them even taller. I also assembled those with metal heads in various and slightly different positions so they would be facing forward somewhat askew from each other.
A big difference with what I did with these figures versus my normal painting process was that I resolved to use my three airbrushes as much as possible. For priming and varnishing I used my Iwata Eclipse HP-CS with a 0.5mm needle. For large areas, I used my Iwata Neo with a 0.35mm needle. And for detail, I used my Iwata Custom Micron CM-B with a tiny 0.18mm needle. At the end of this post, I’ll share all the different paints, and other supplies that I used. I also did some detail work with regular brushes. My goal here was to airbrush as much of the figures as possible to achieve fur blending and a different level of detail.
As with all Ozz infantry units, they are based on 2″ square bases – so five bases for each regiment. There is no regimental commander for any of the units, but I did add a Pendraken dice frame to one base of each unit.
As one would expect, in the game,they are good melee troops across the board, with Melee values of 6/10, 6/10, 8/10, Resolve values of 5/10, 5/10, and 6/10, and Elan values of 6/10, 7/10, and 6/10 for the Dire Lions, Dire Tigers, and Dire Bears respectively. The Dire Lions are cheapest at 4 points, with the Dire Tigers and Dire Bears costing 5. All can move sideways or backwards with no movement costs, and all can pass through woods without any penalty.
I started these on September 4th and completed them on the 26th. I’ll share some WIP shots and then some eye candy pics below.
WIP Shots…
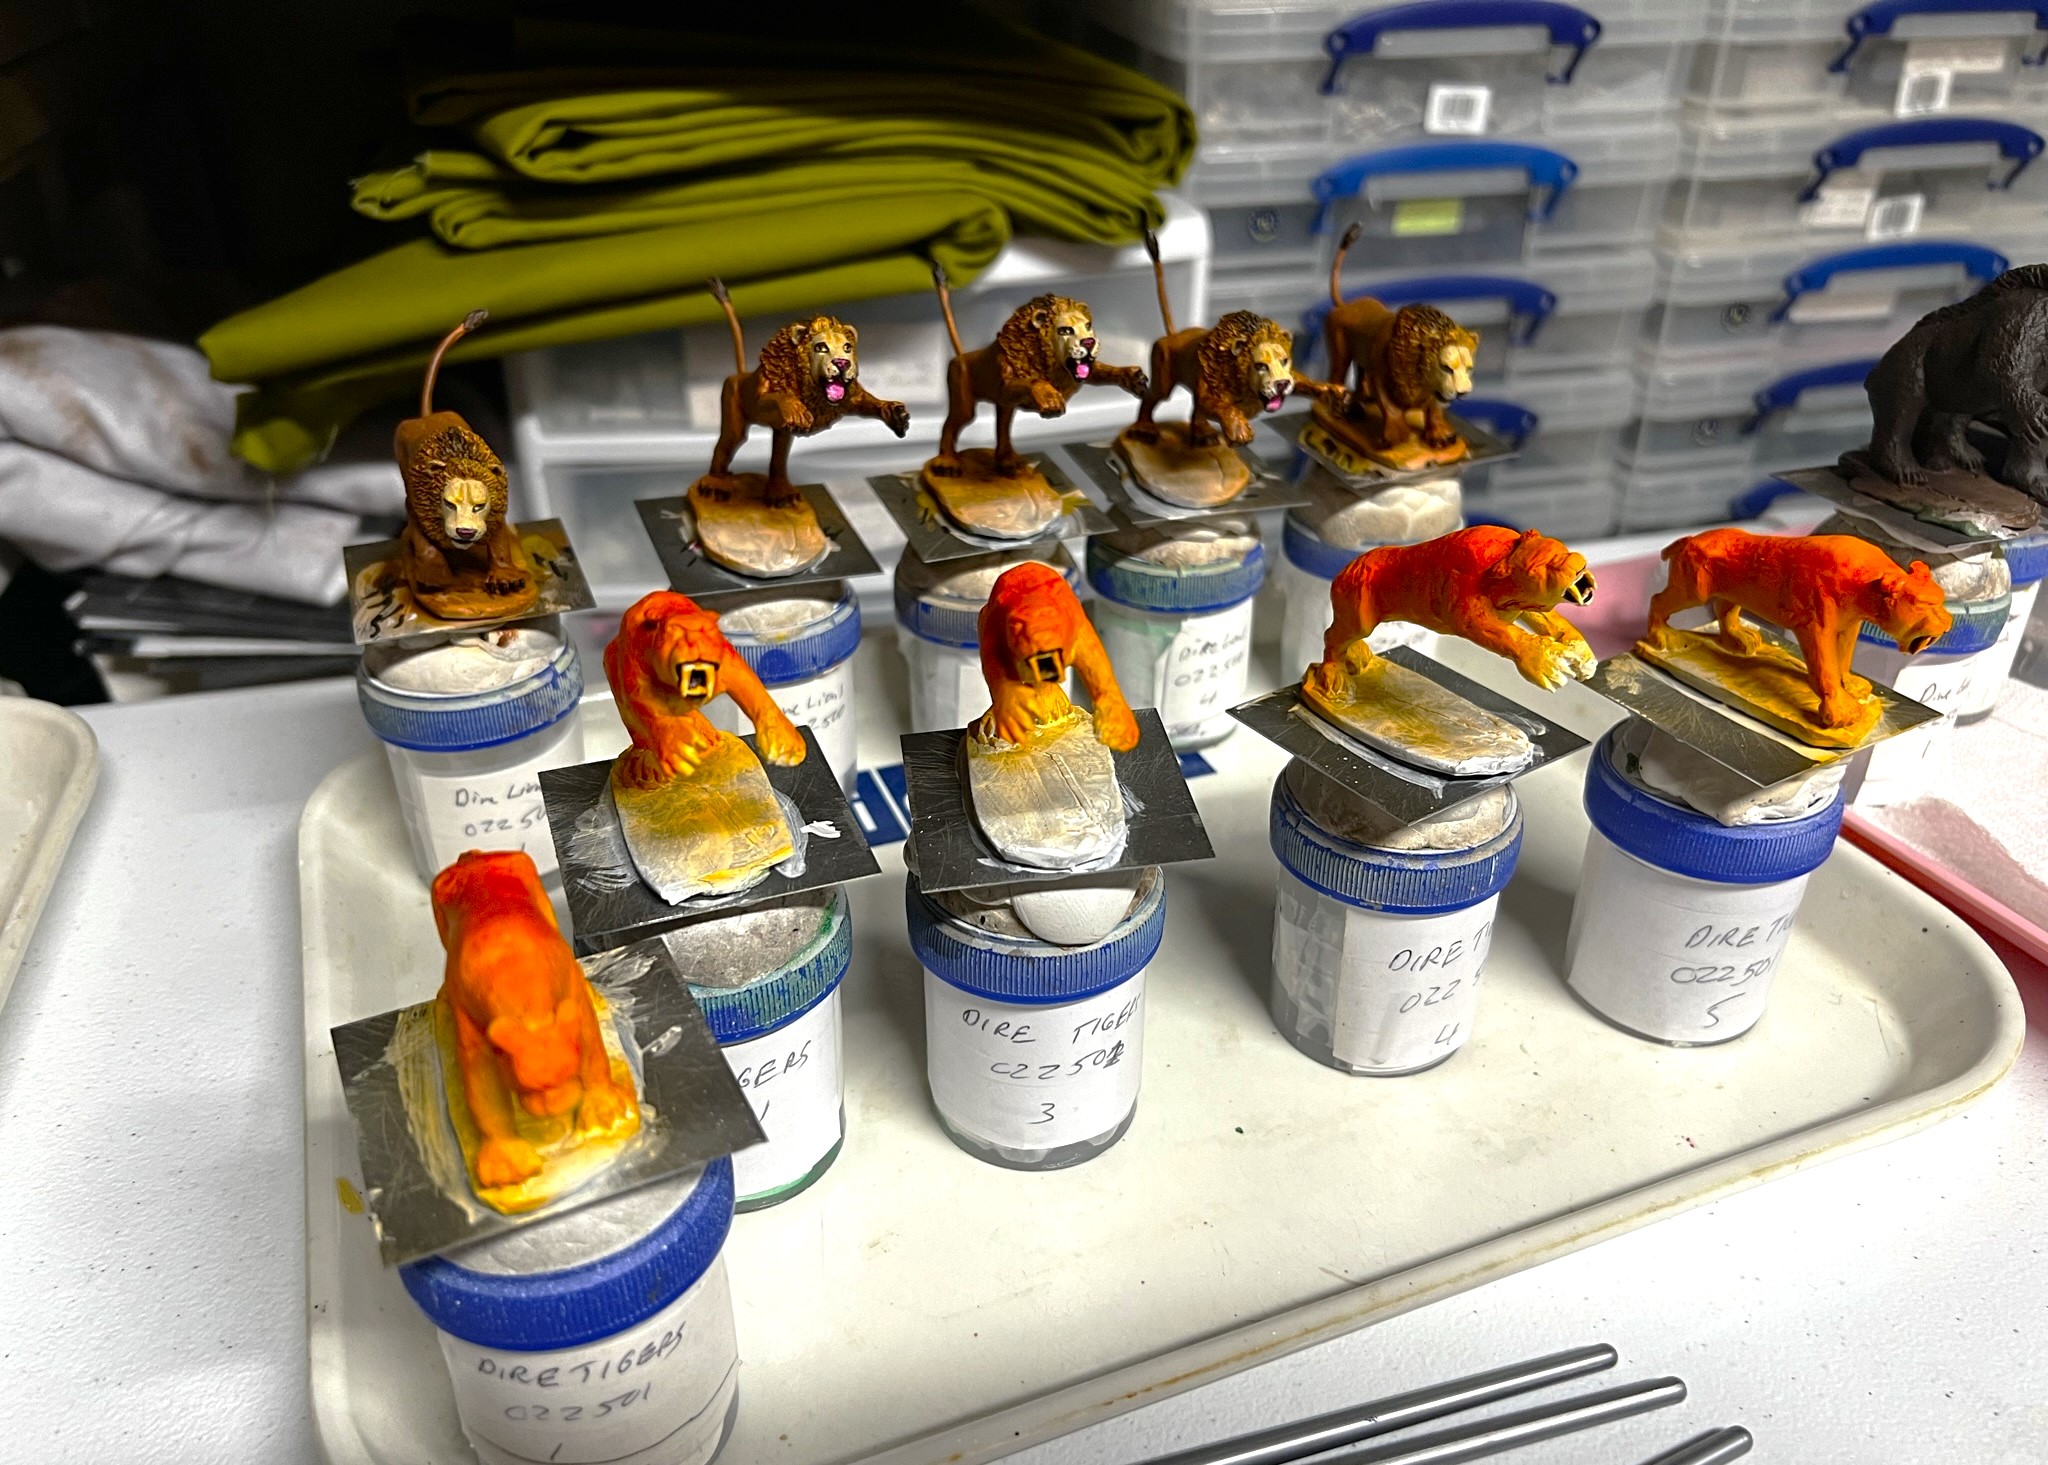
My first step was to have a decent painting plan – so I downloaded some photos of the animals as guides. Of course, the models differed slightly as befits Ozz, but a good start nonetheless. I primed the models all in white.
The figures primed in white and surrounded by the photos that I used as painting guides.
I initially decided to go with the painting order of “Lions, and Tigers, and Bears” for some reason…but I did apply a base coat to the bears before the tigers. When I painted the tigers, I kept hearing “Eye of the Tiger” in my head…
Early airbrush work on the lions and bears.
As for order of work though, I primarily stayed with the order with the lions first and the bears last with the tigers in the middle.
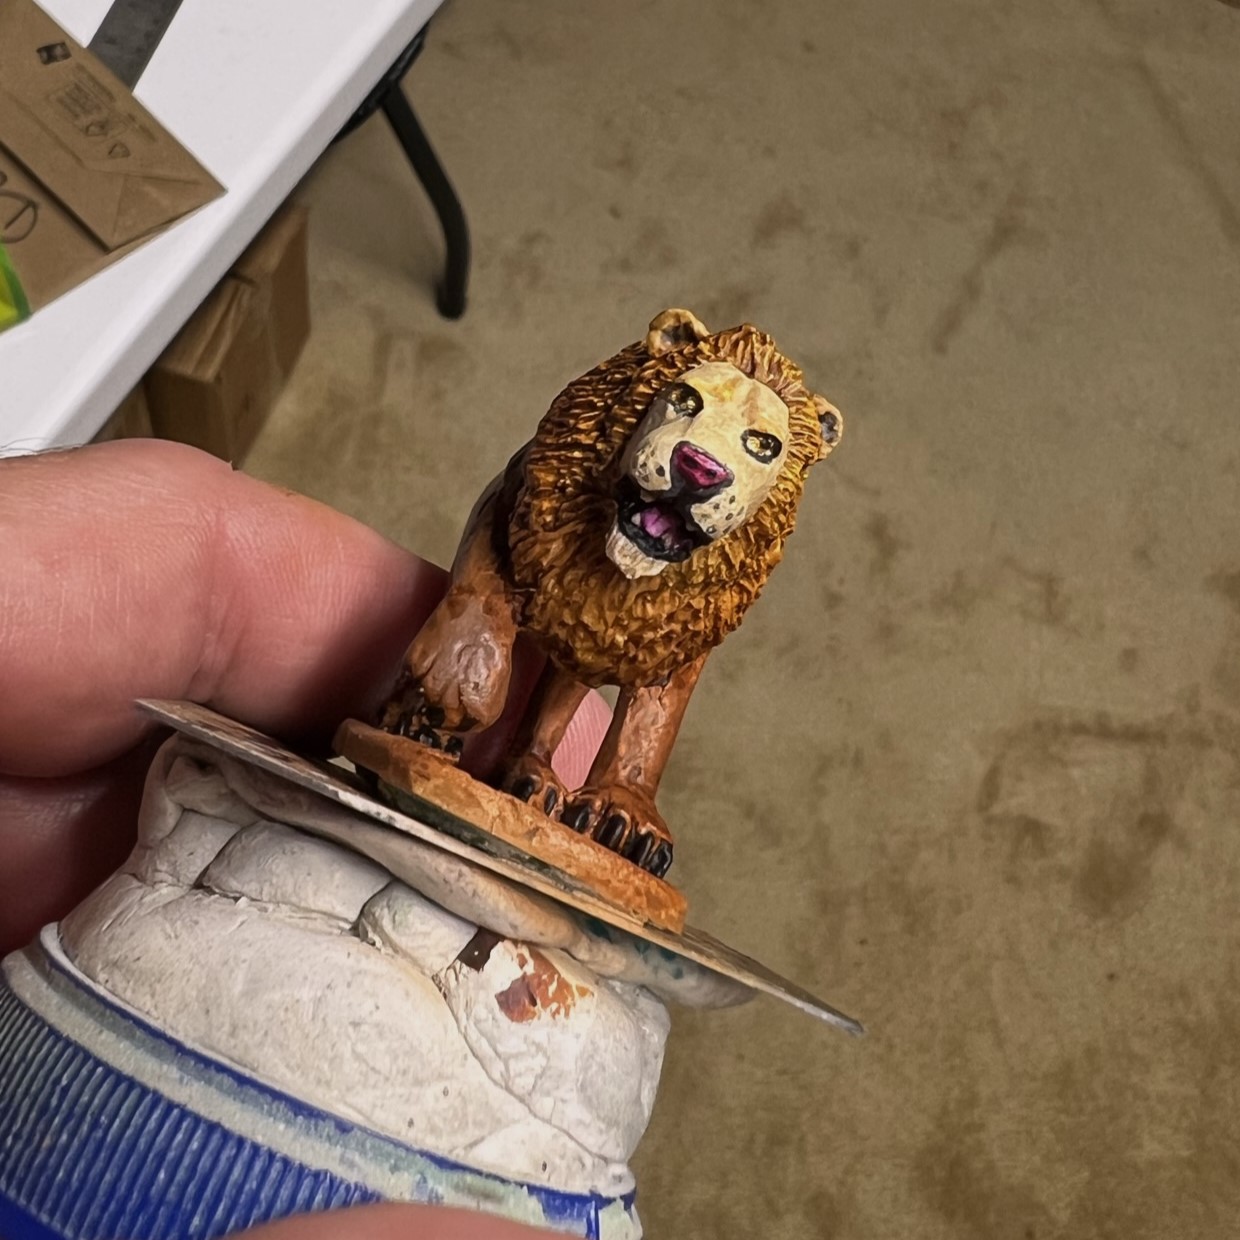
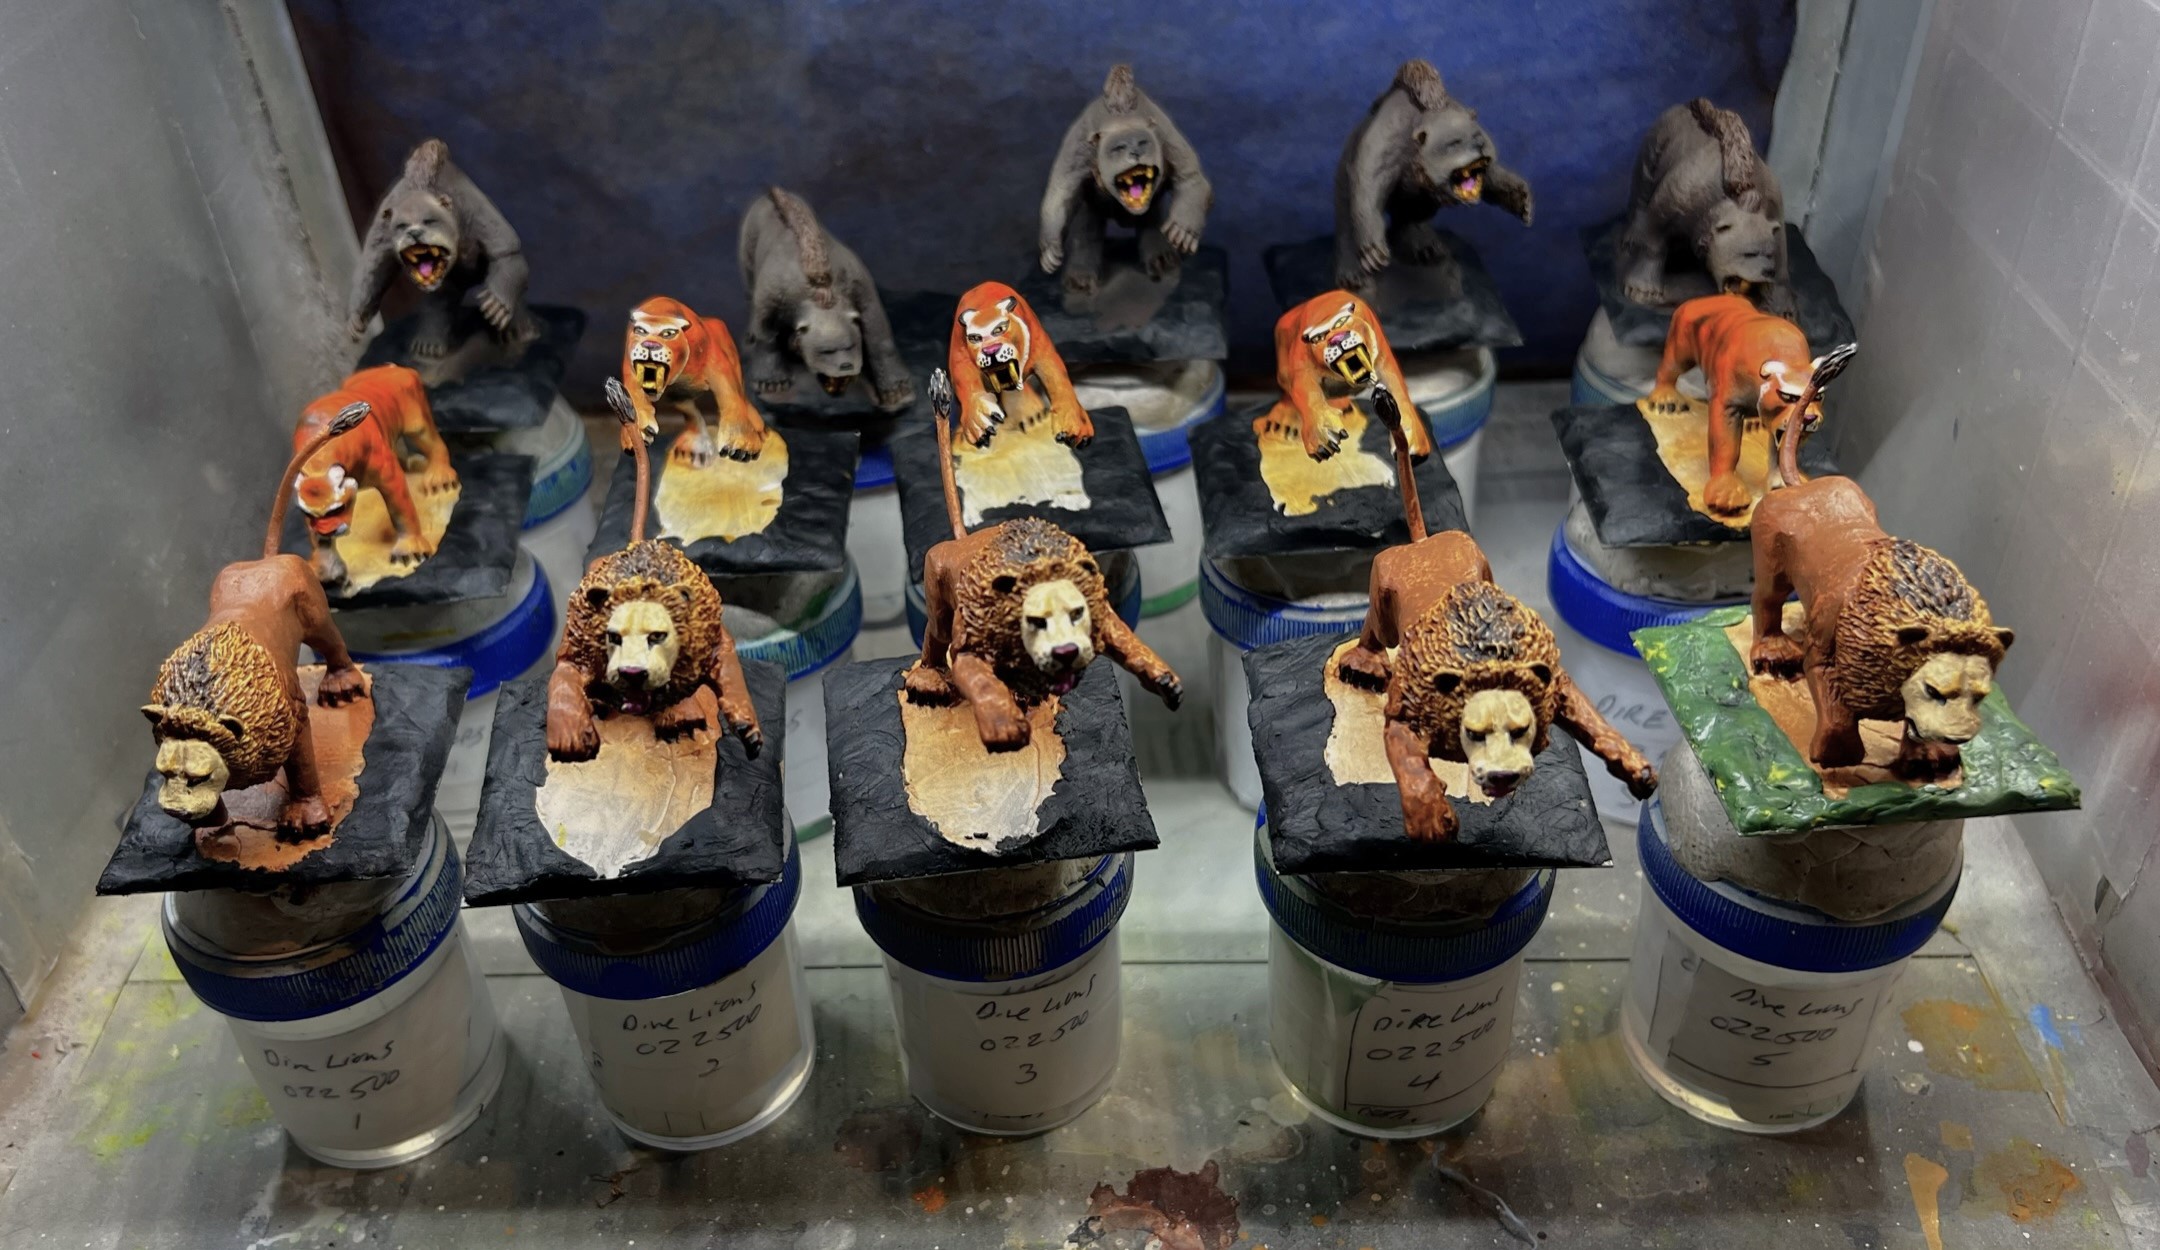
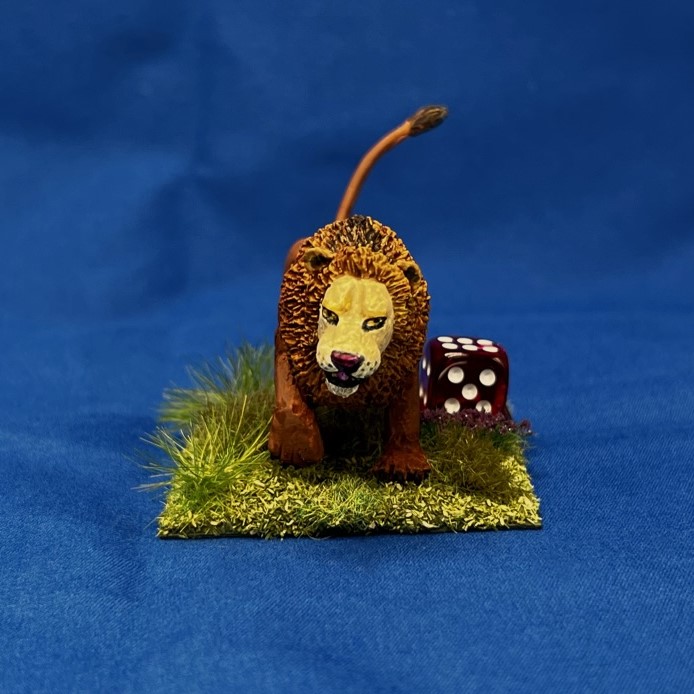
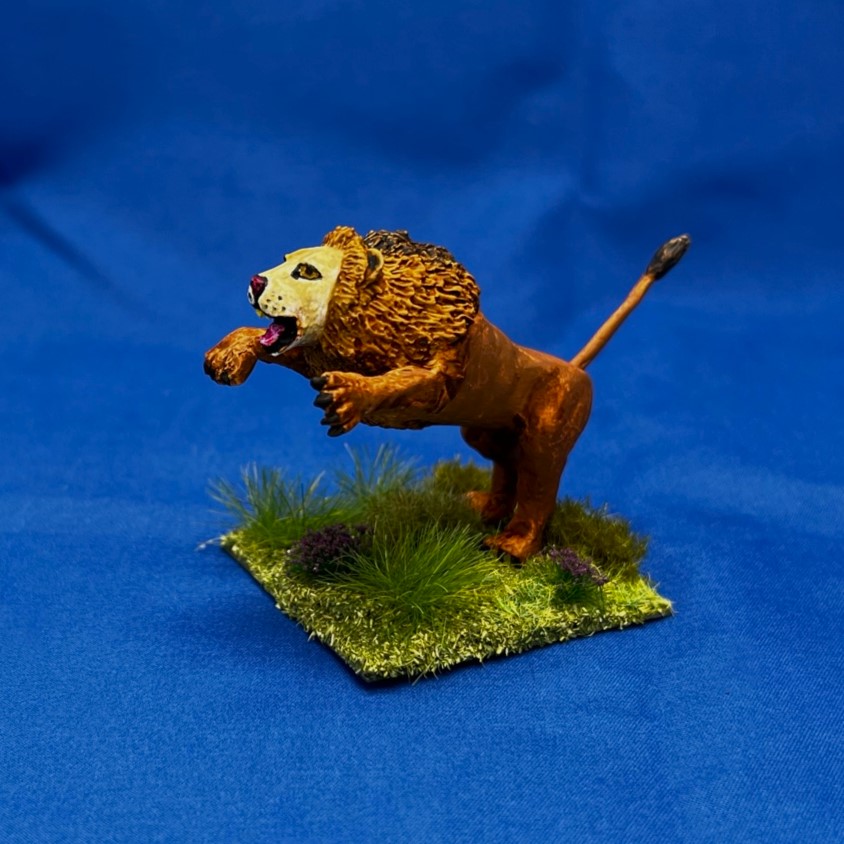
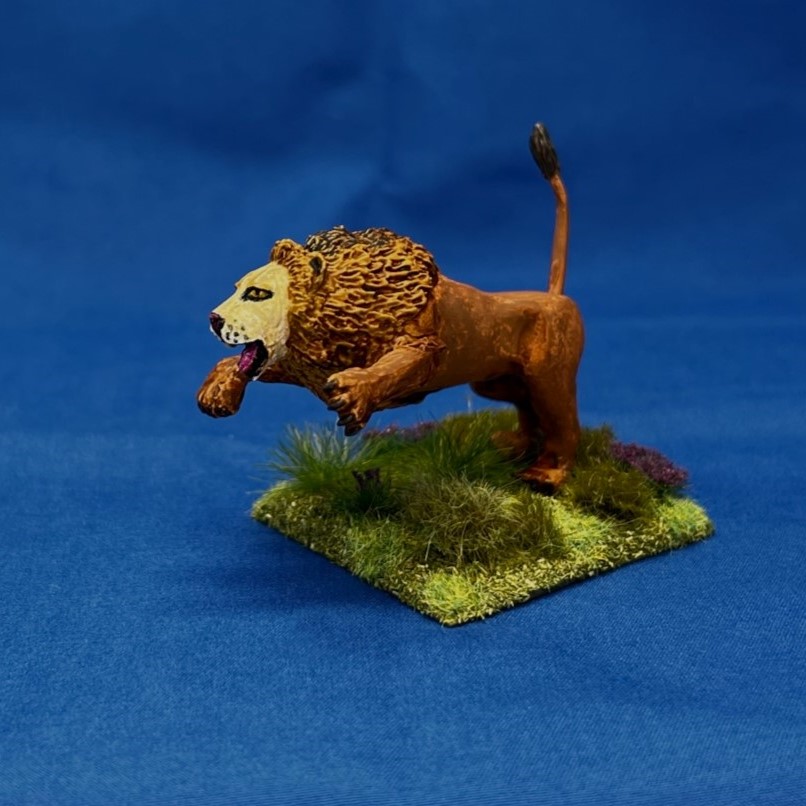
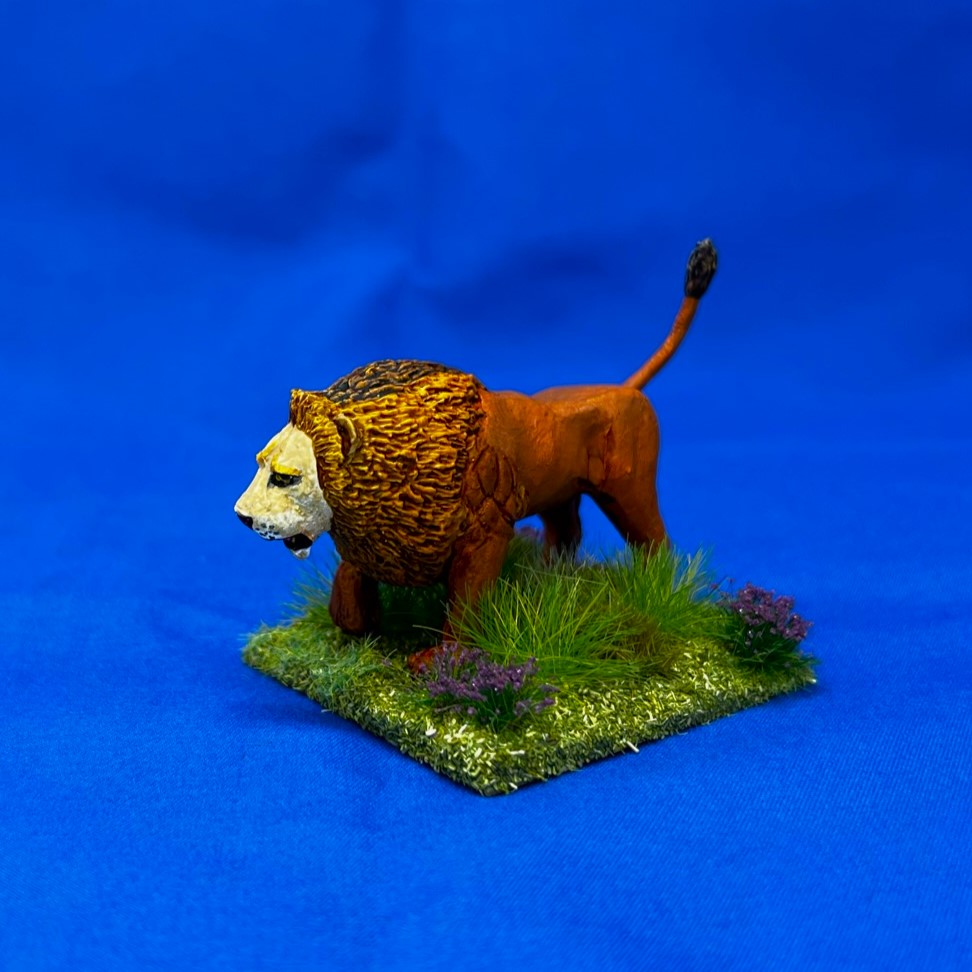
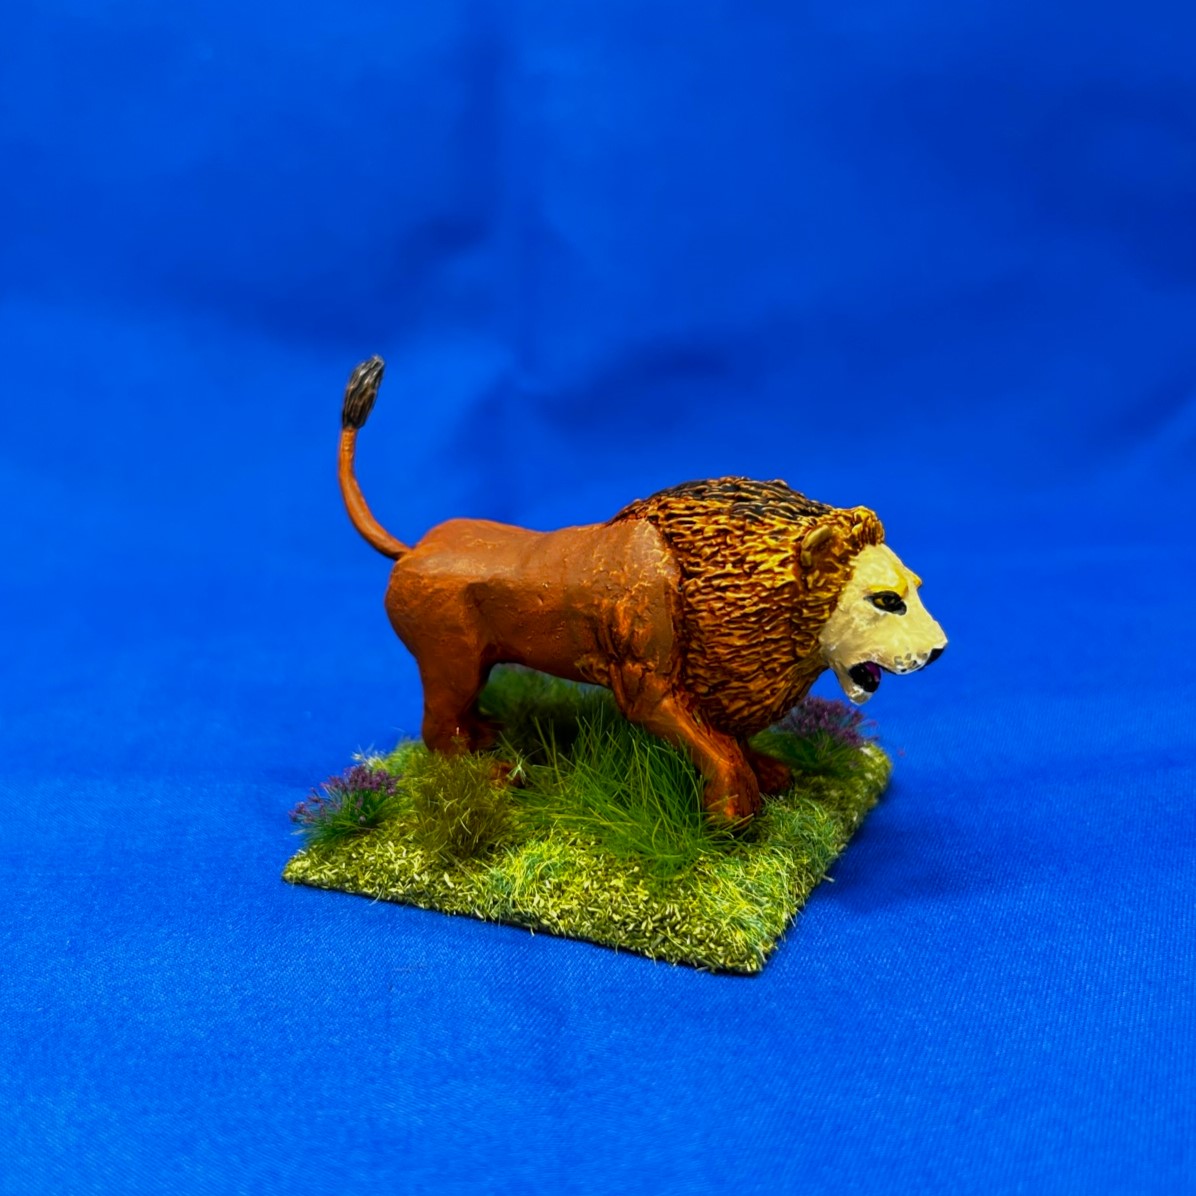
The Dire Lions mostly painted – less some highlights and washes.Lunging pose.Three paws on the ground pose.
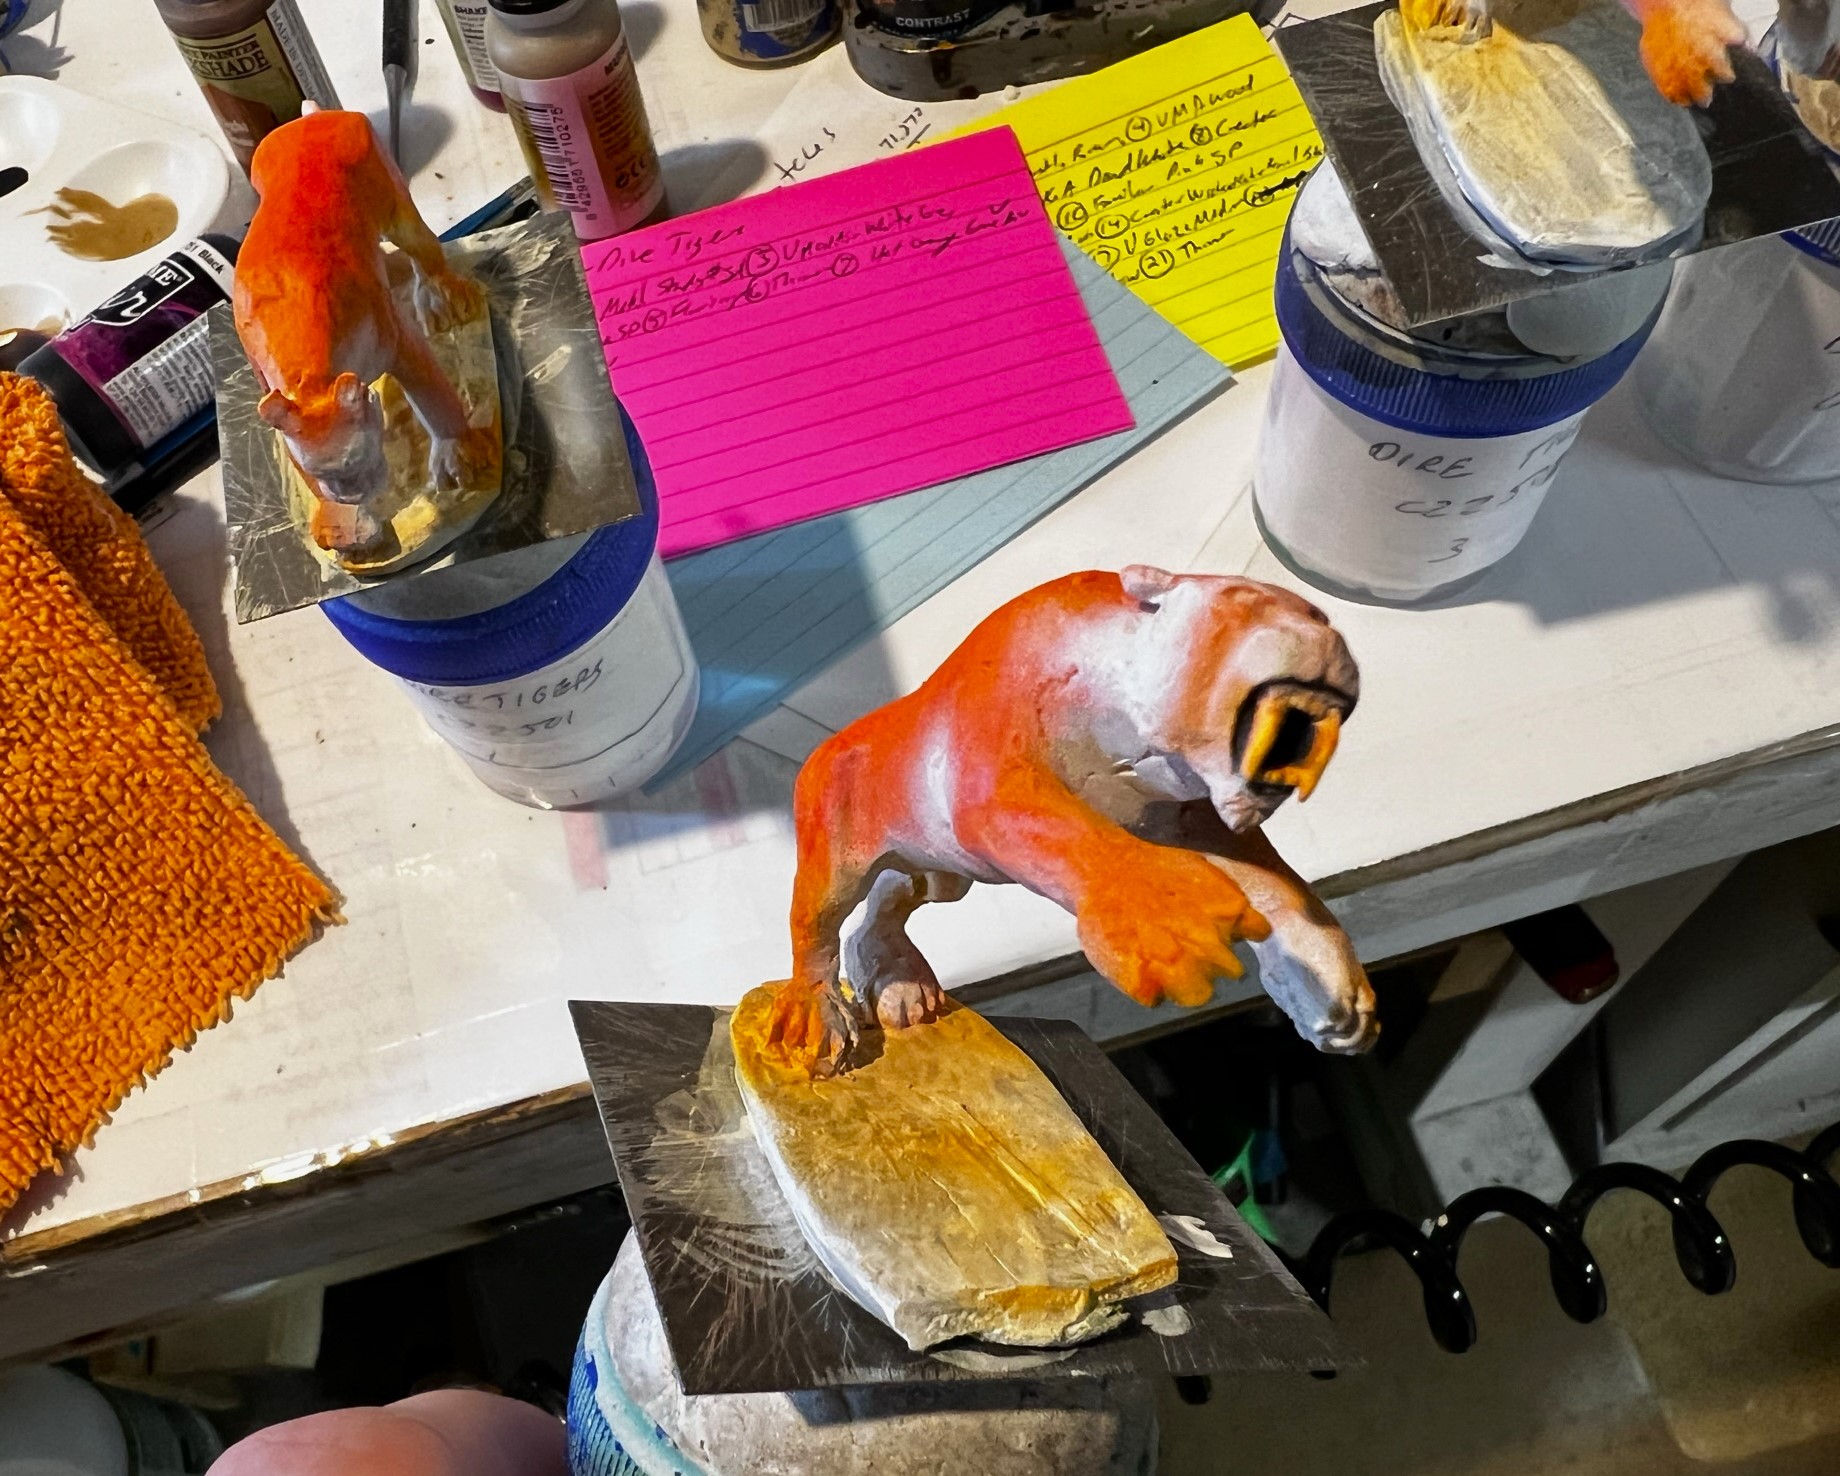
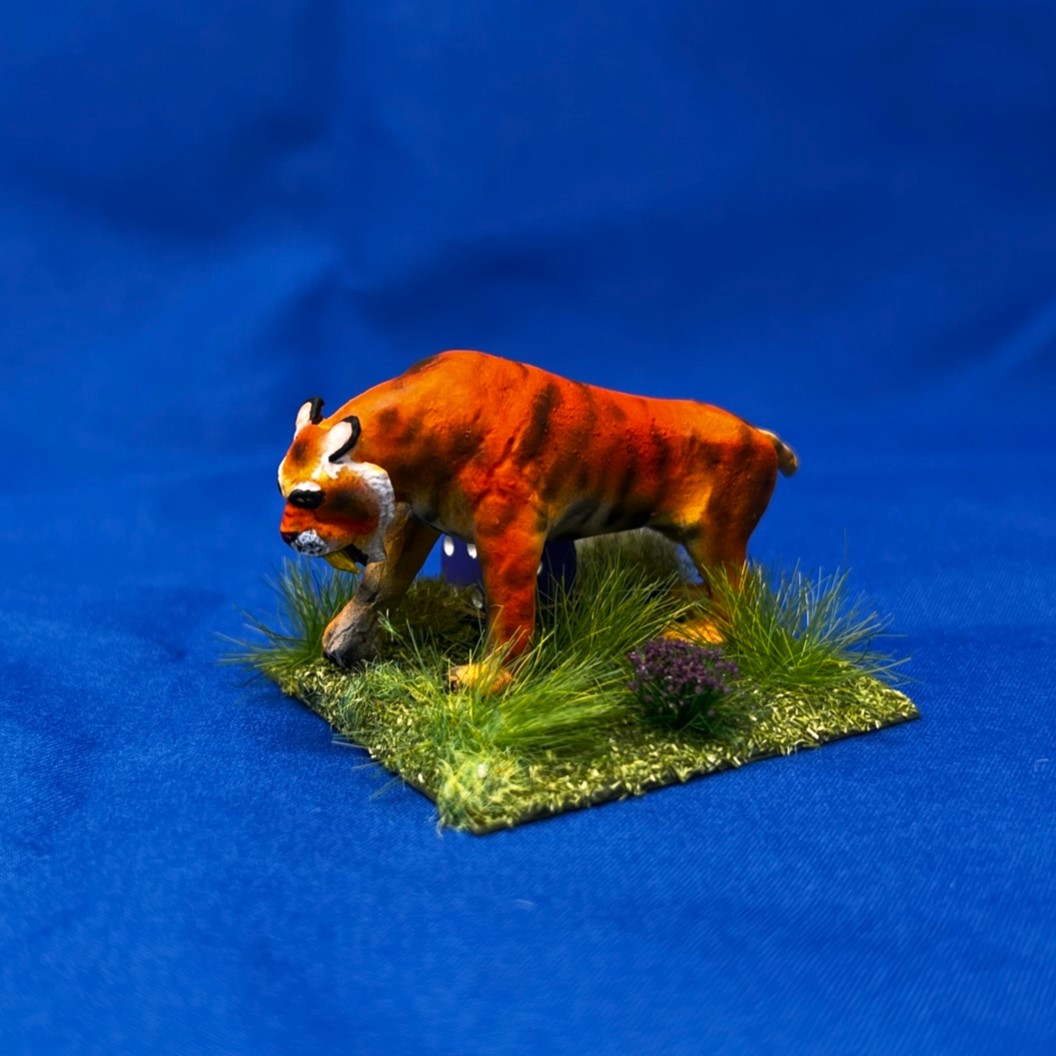
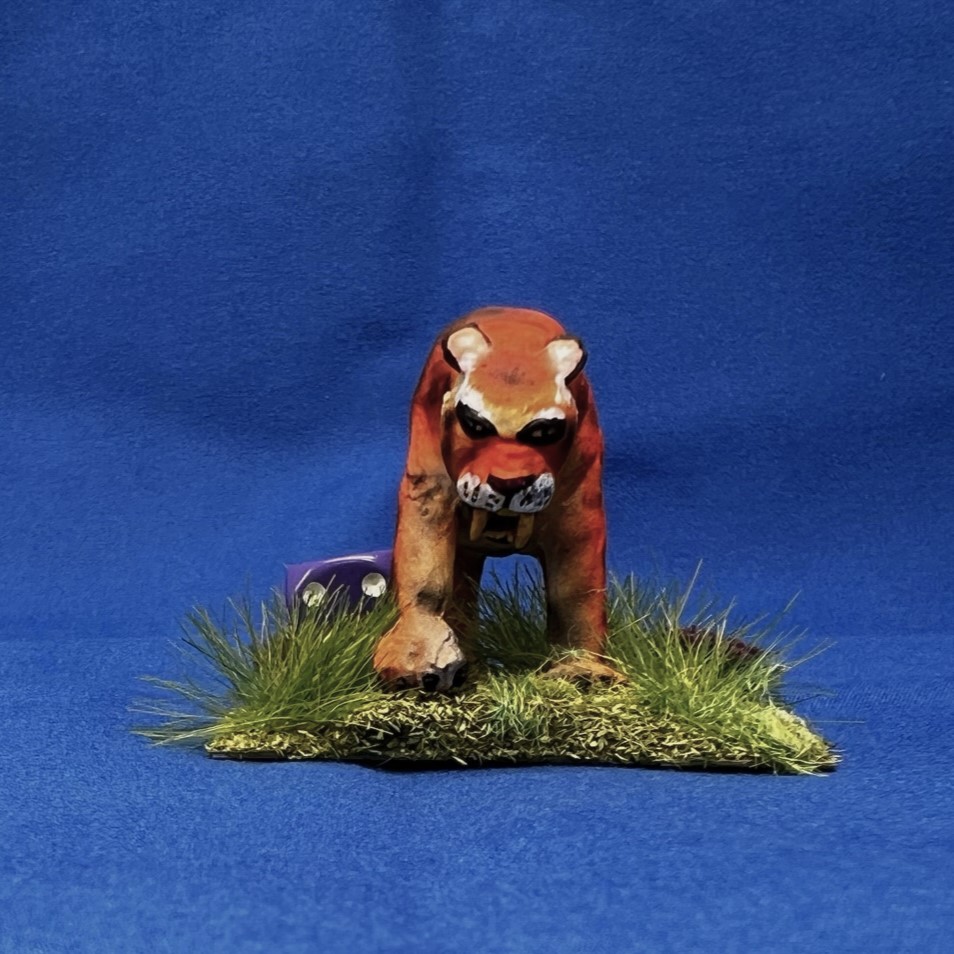
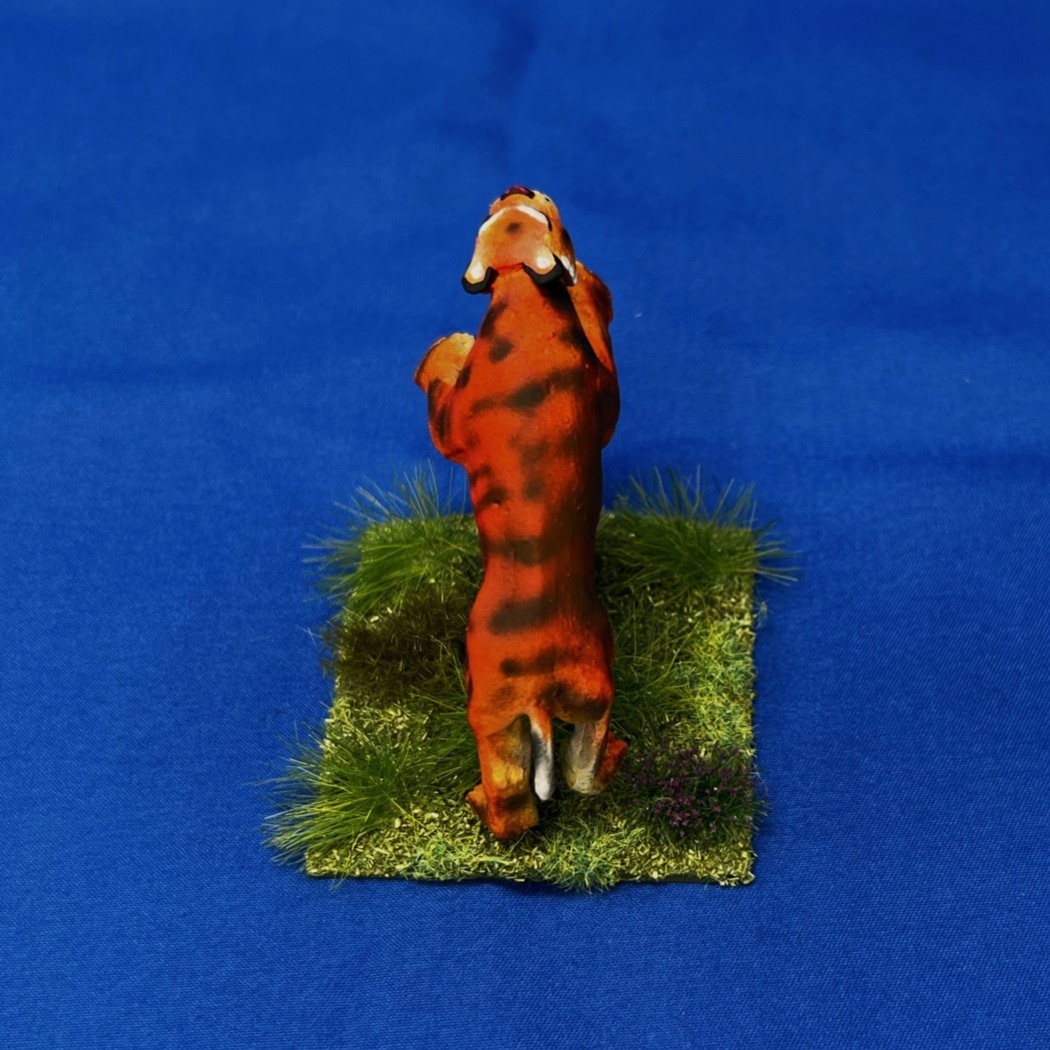
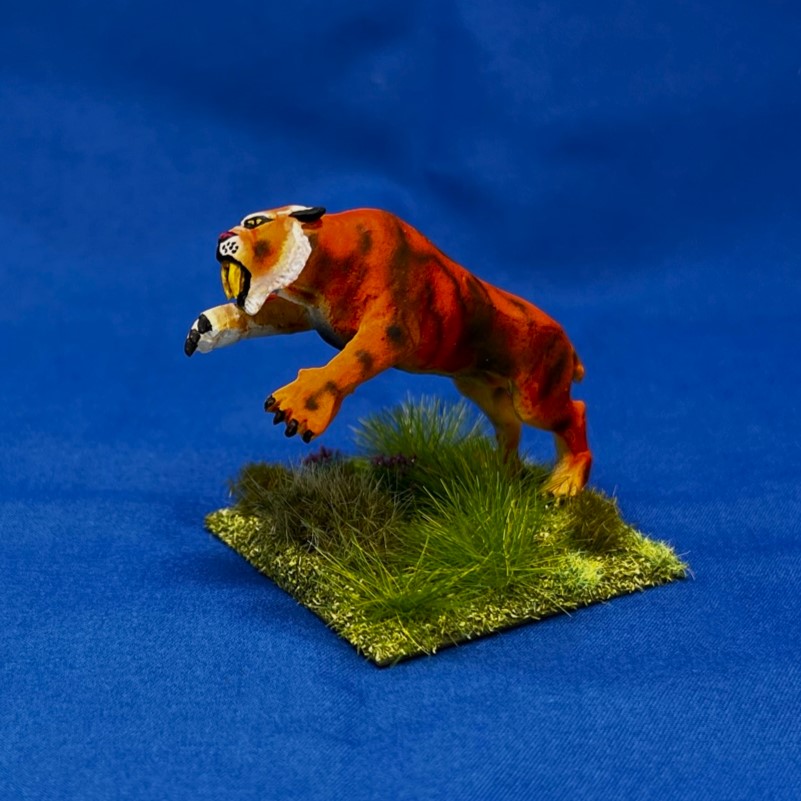
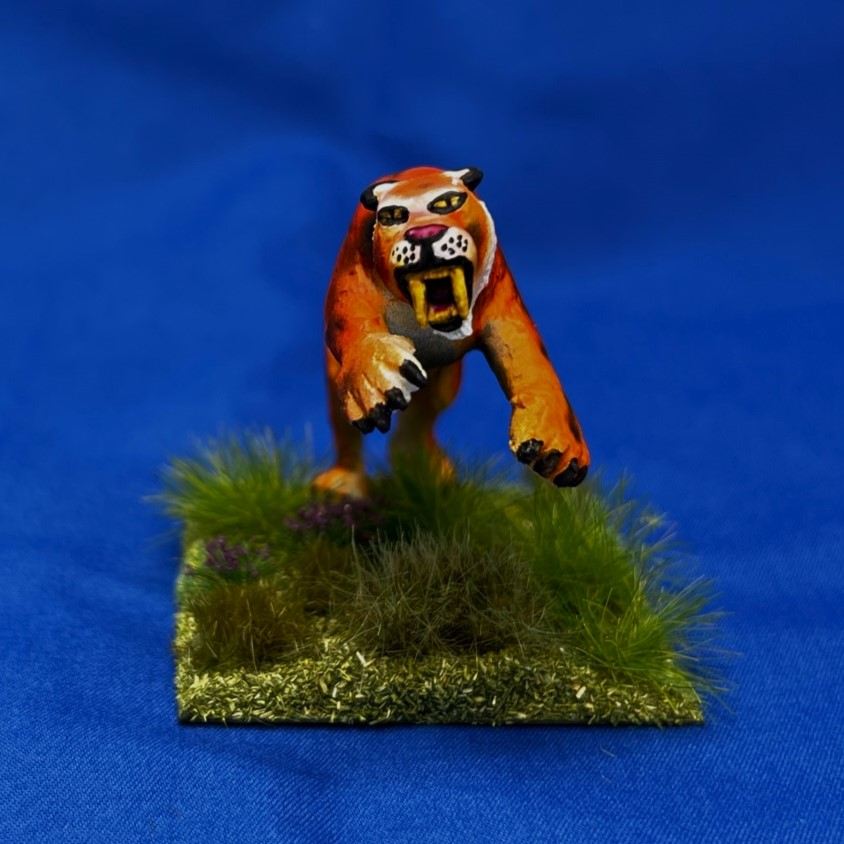
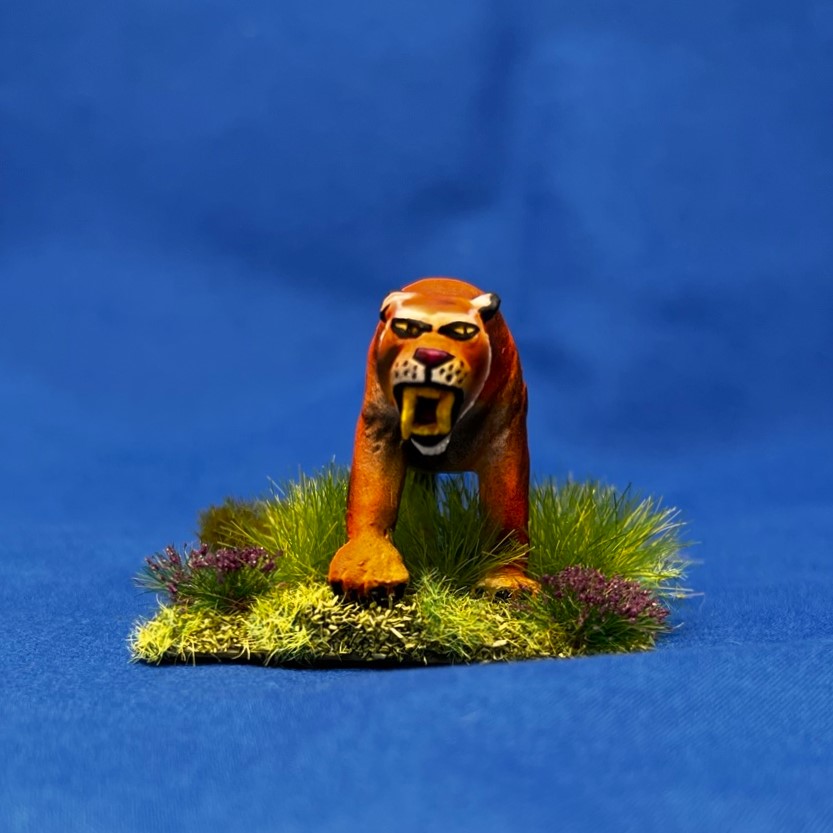
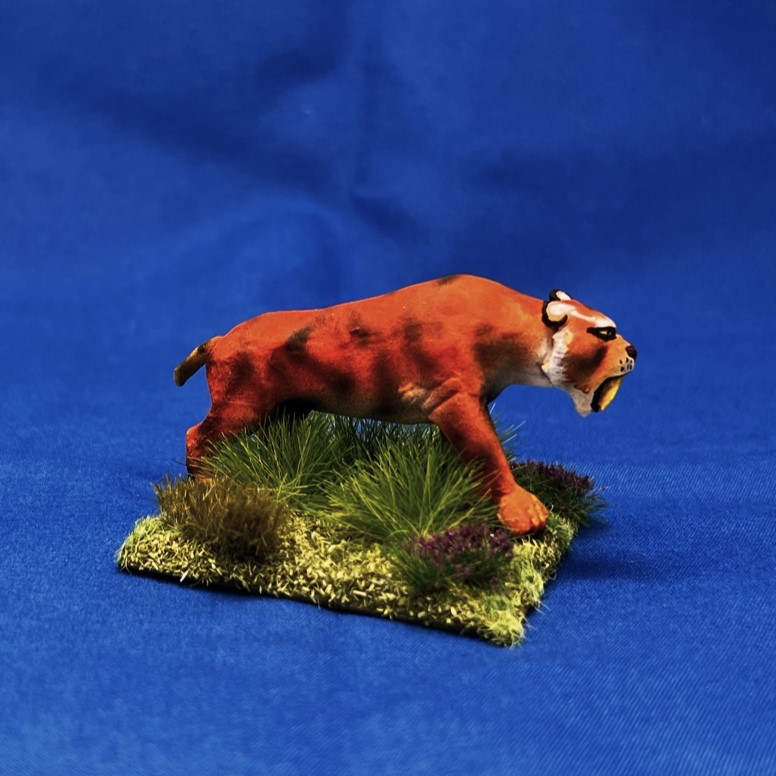
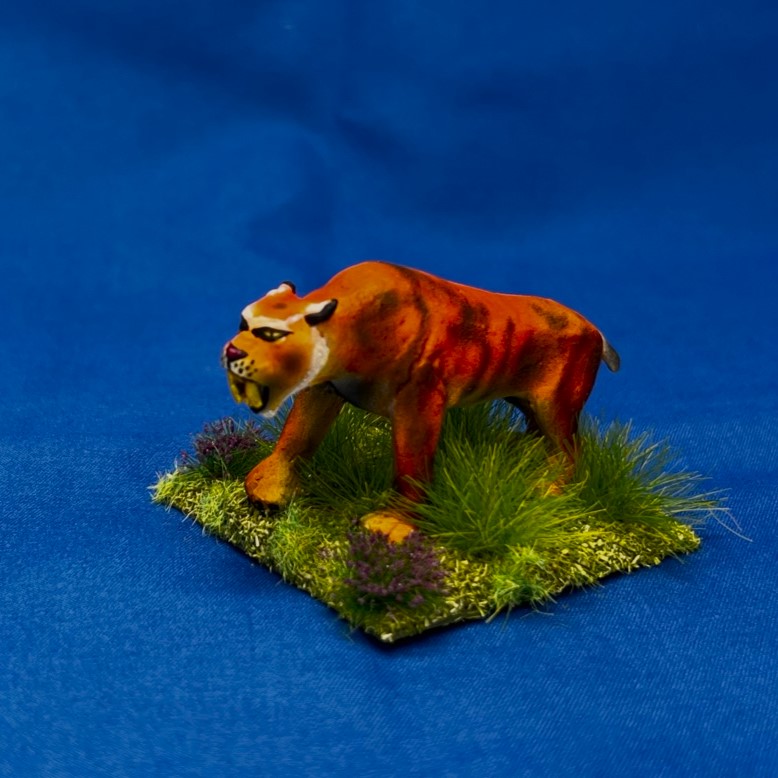
Then, it was on to the Dire Tigers, where getting the right mix of orange, black, and white on the fur was really made easier with my airbrushes. They were also saber-toothed, which was a cool aspect of the sculpts.
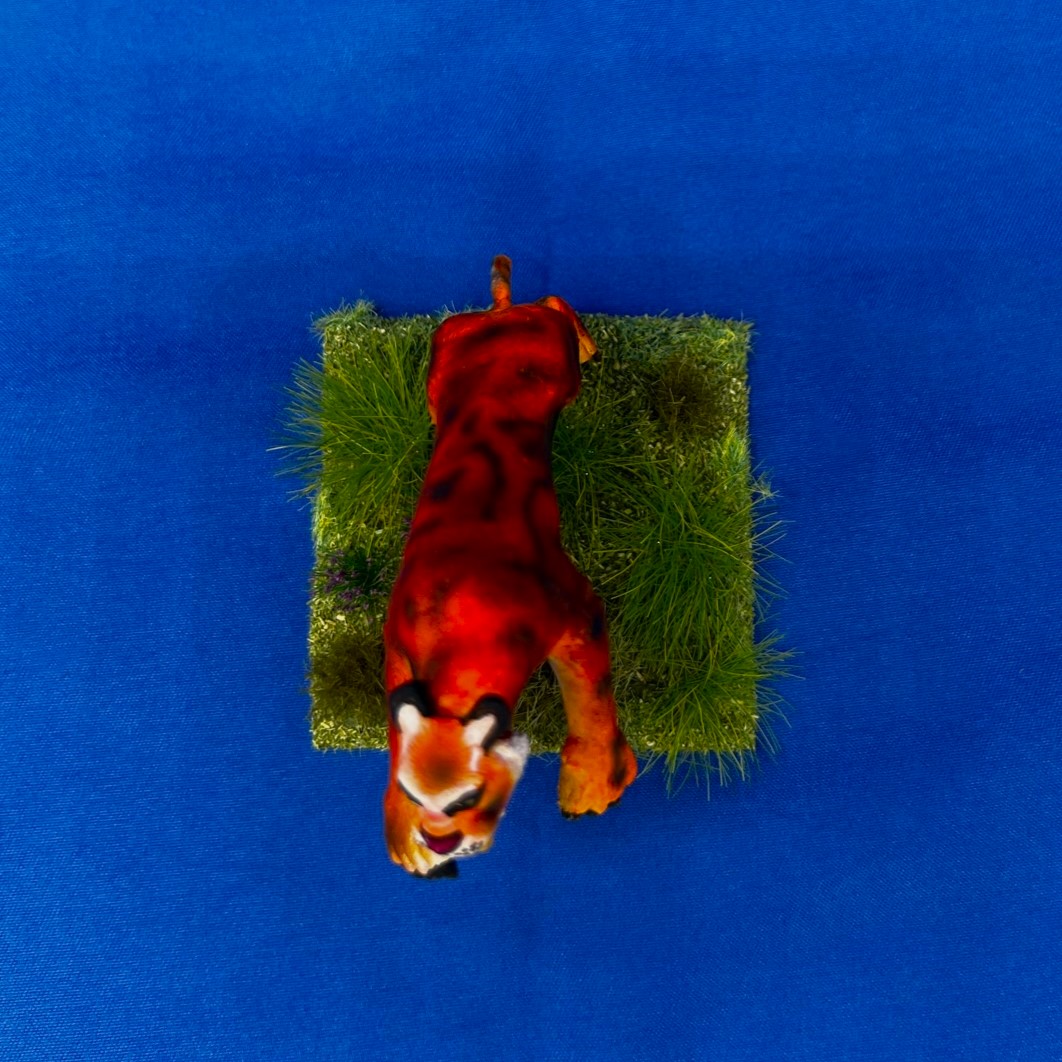
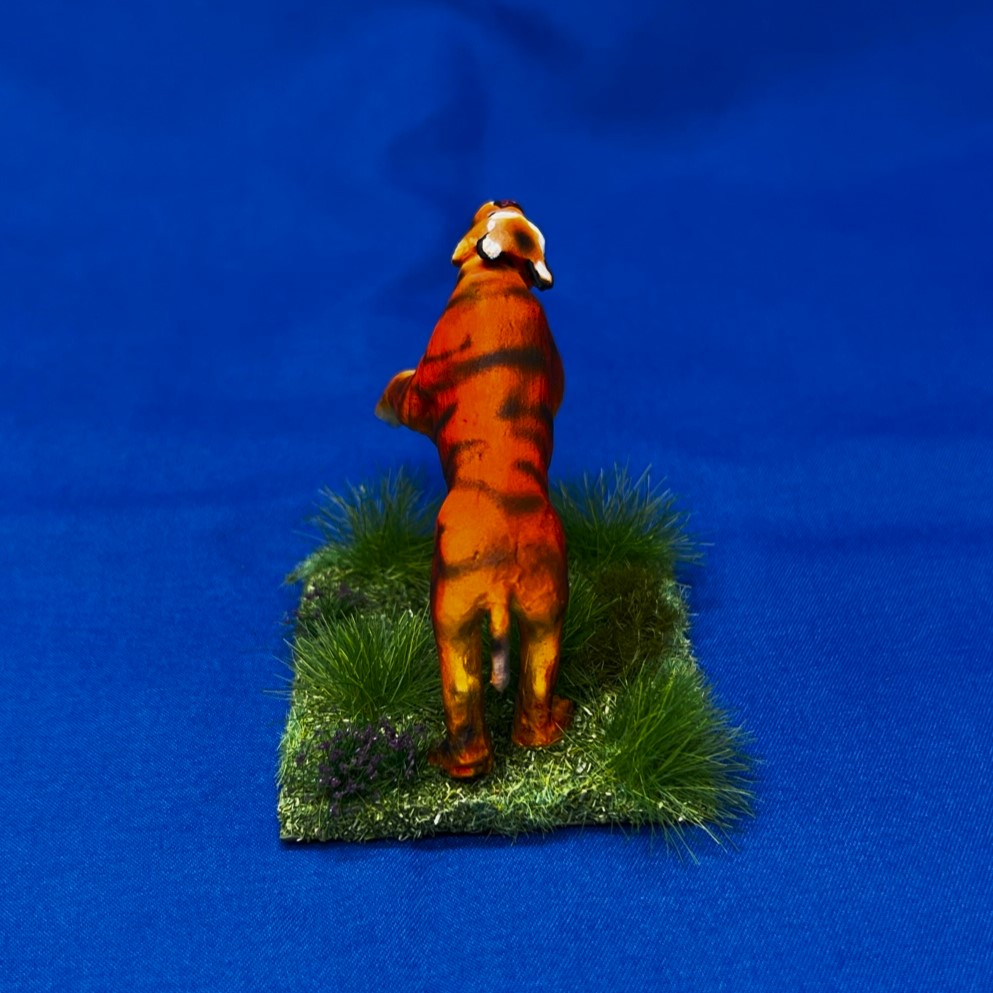
First, I applied a base of orange with the Iwata Neo airbrush then white details with the Iwata Custom Micron airbrush – multiple coats were needed for blending.Added white……then some black tiny stripes with the Micron.Ready for faces!Faces added with both brushwork and airbrush.Pose with paws on ground.Lunging pose.
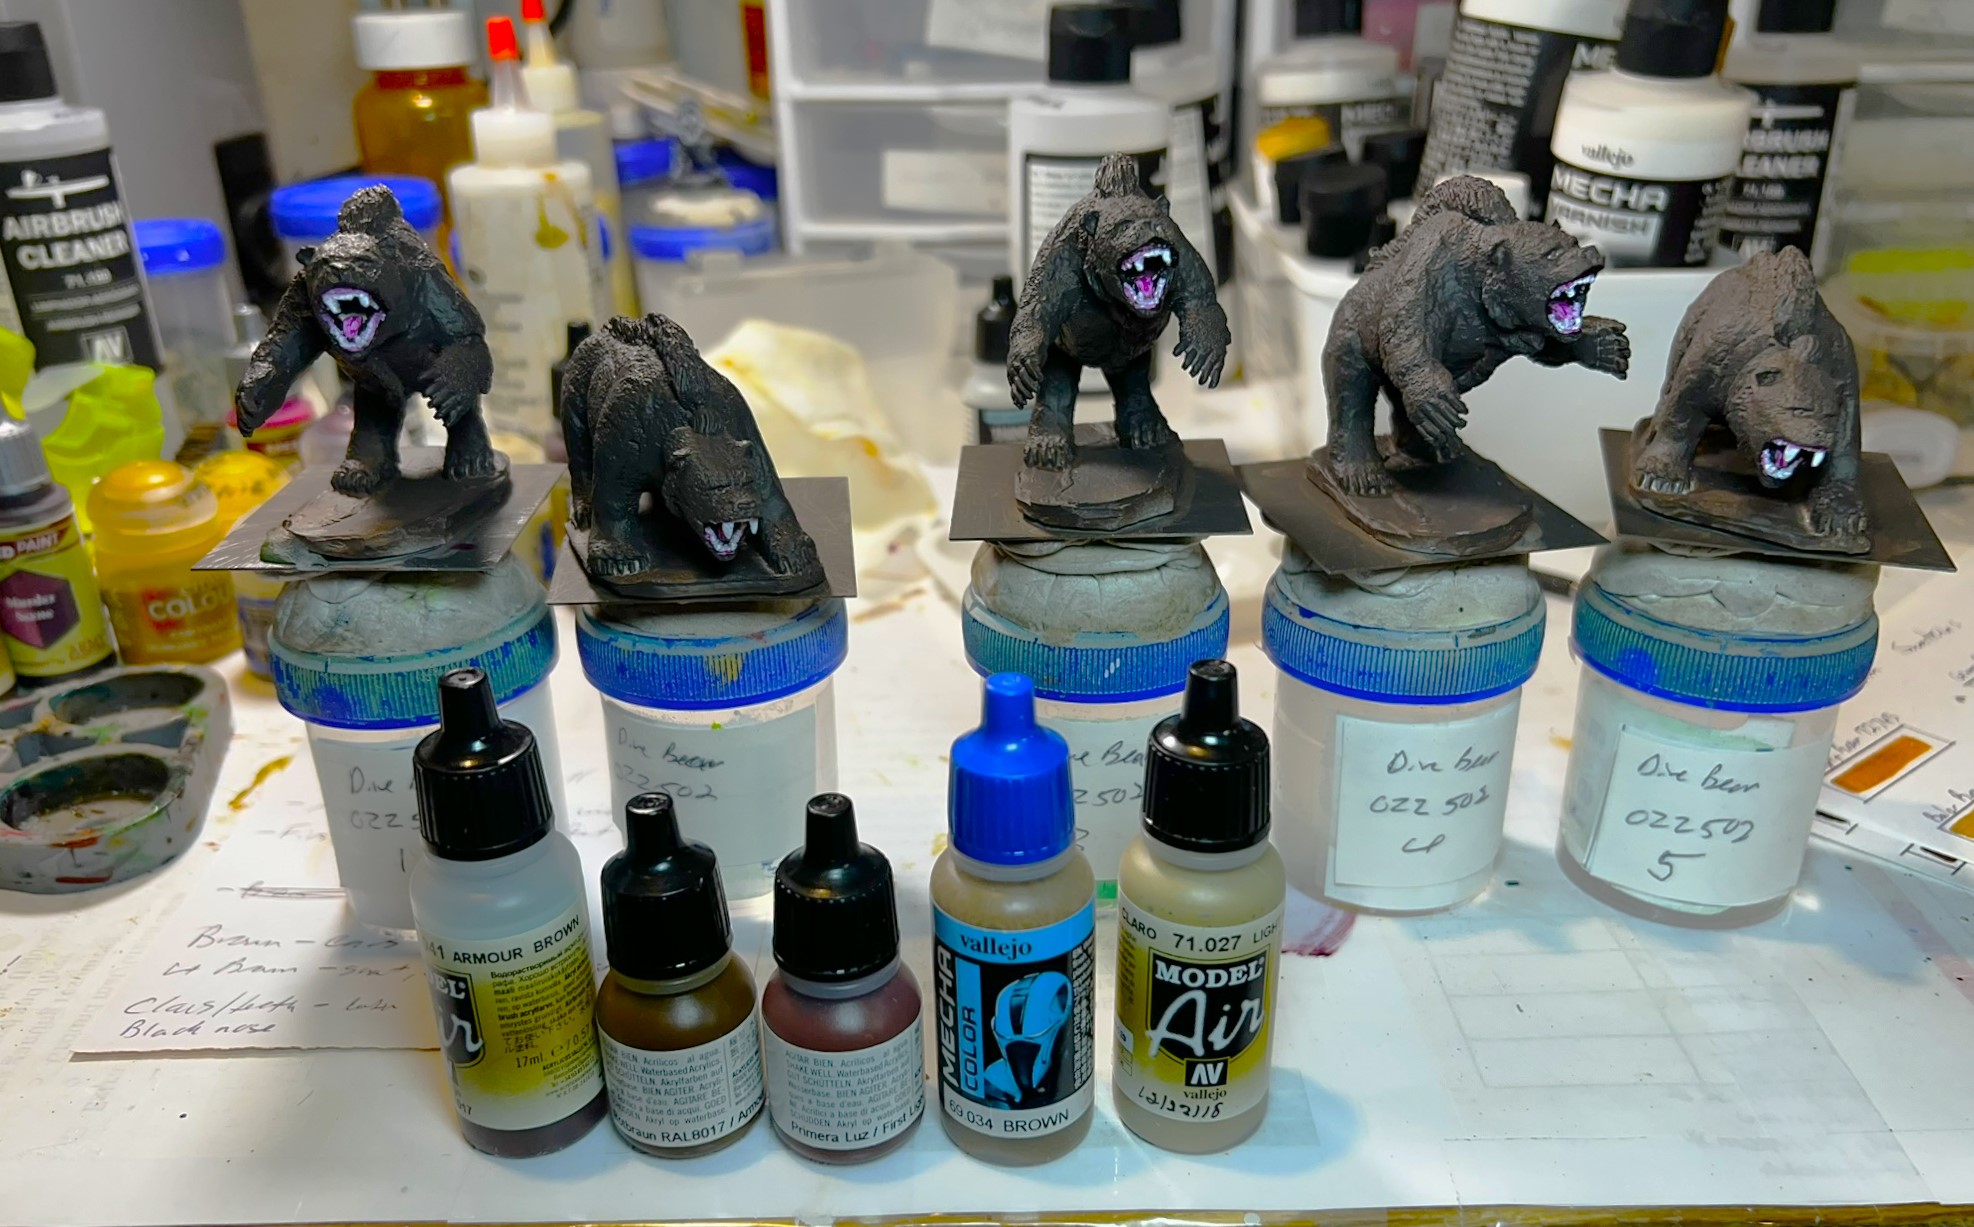
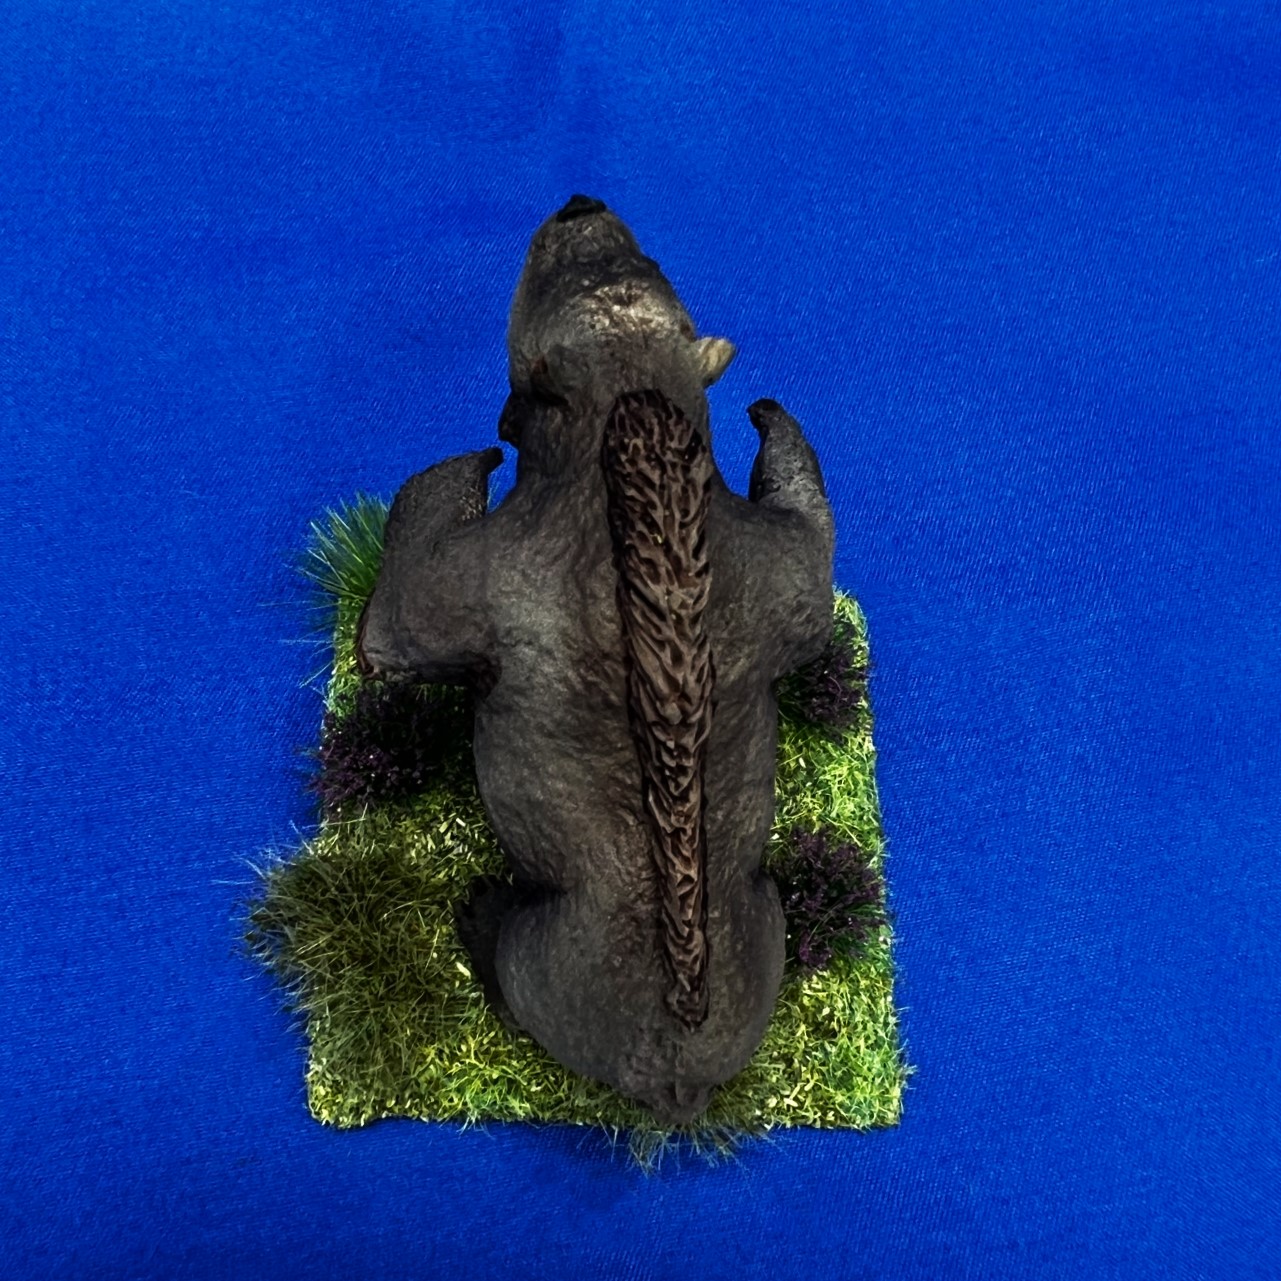
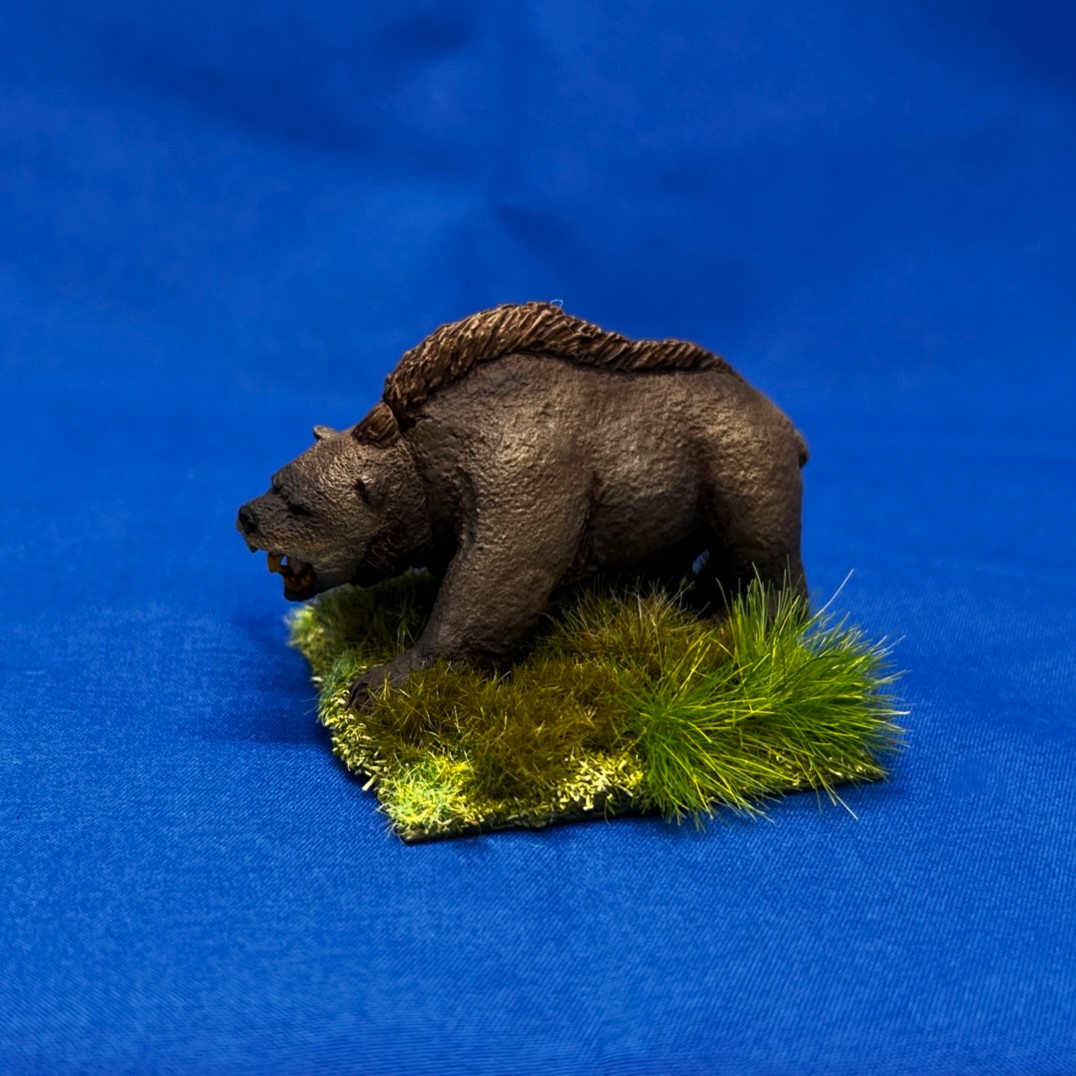
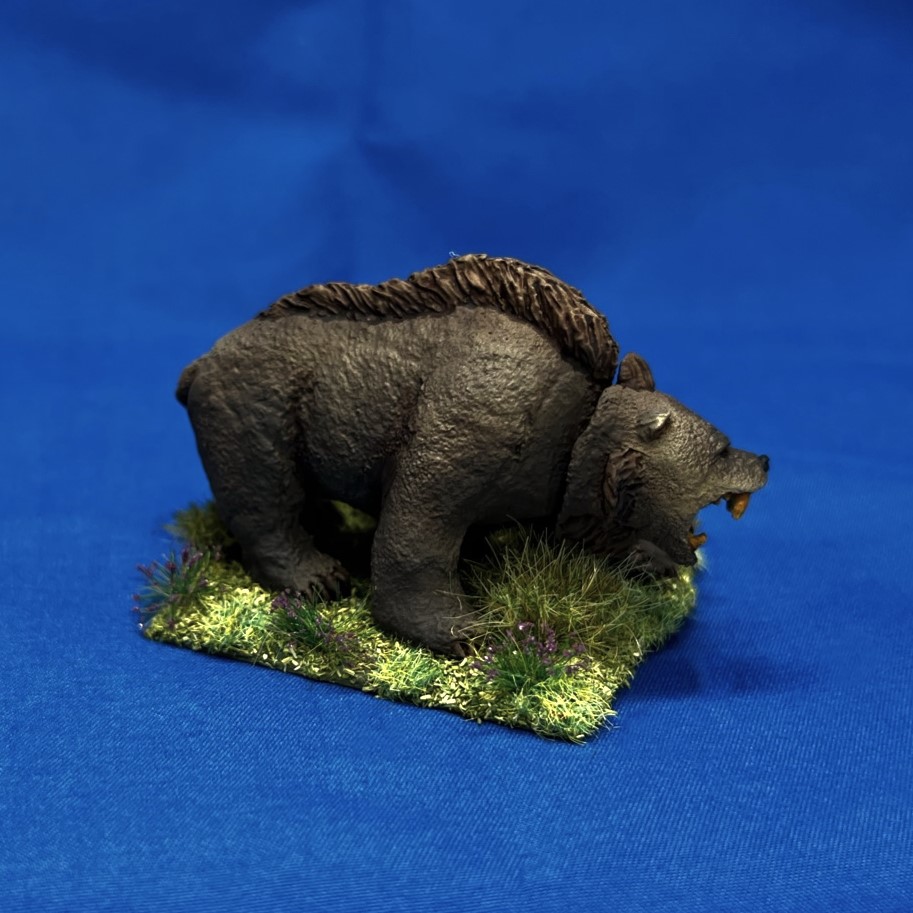
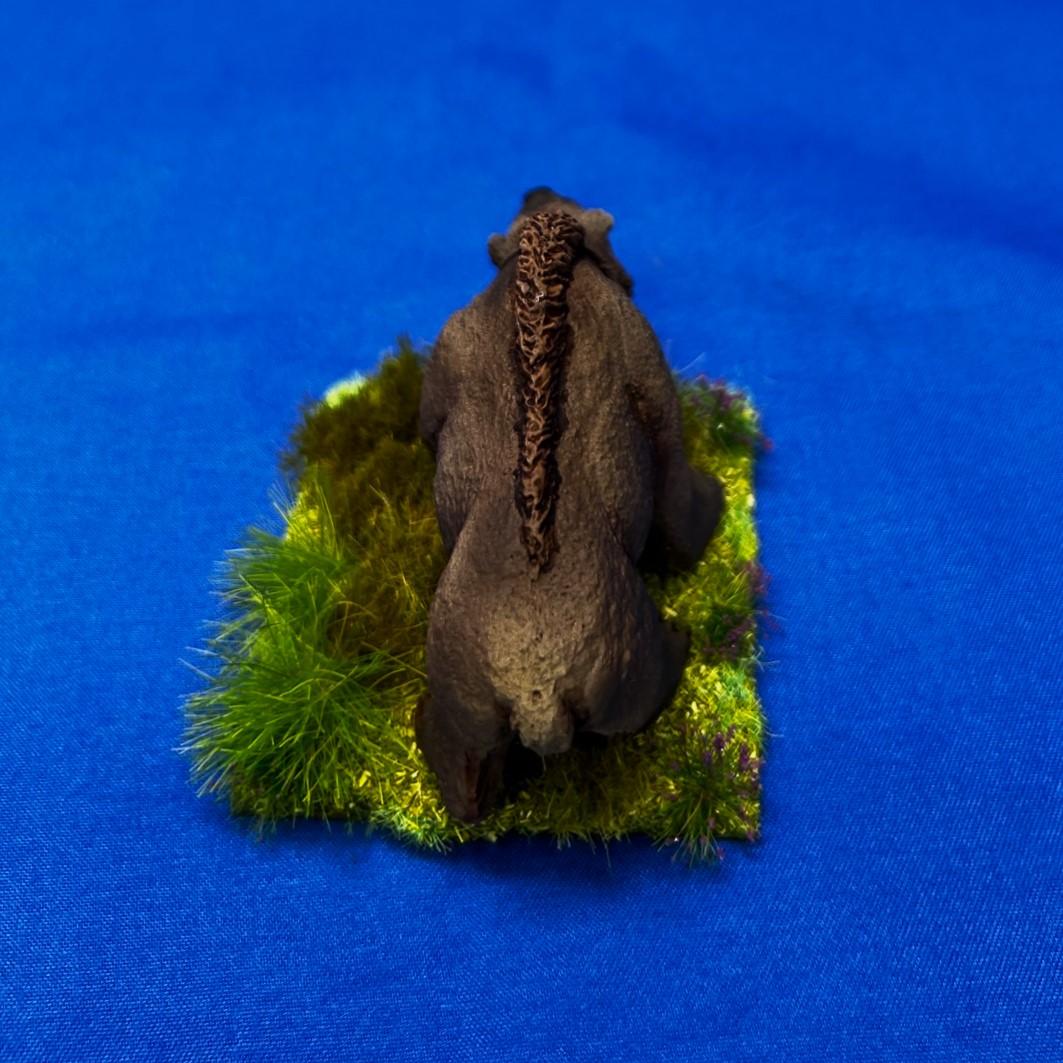
Next, I moved on to the Dire Bears. Here I wanted a brownish blended paint job – which sounds easier than it was.
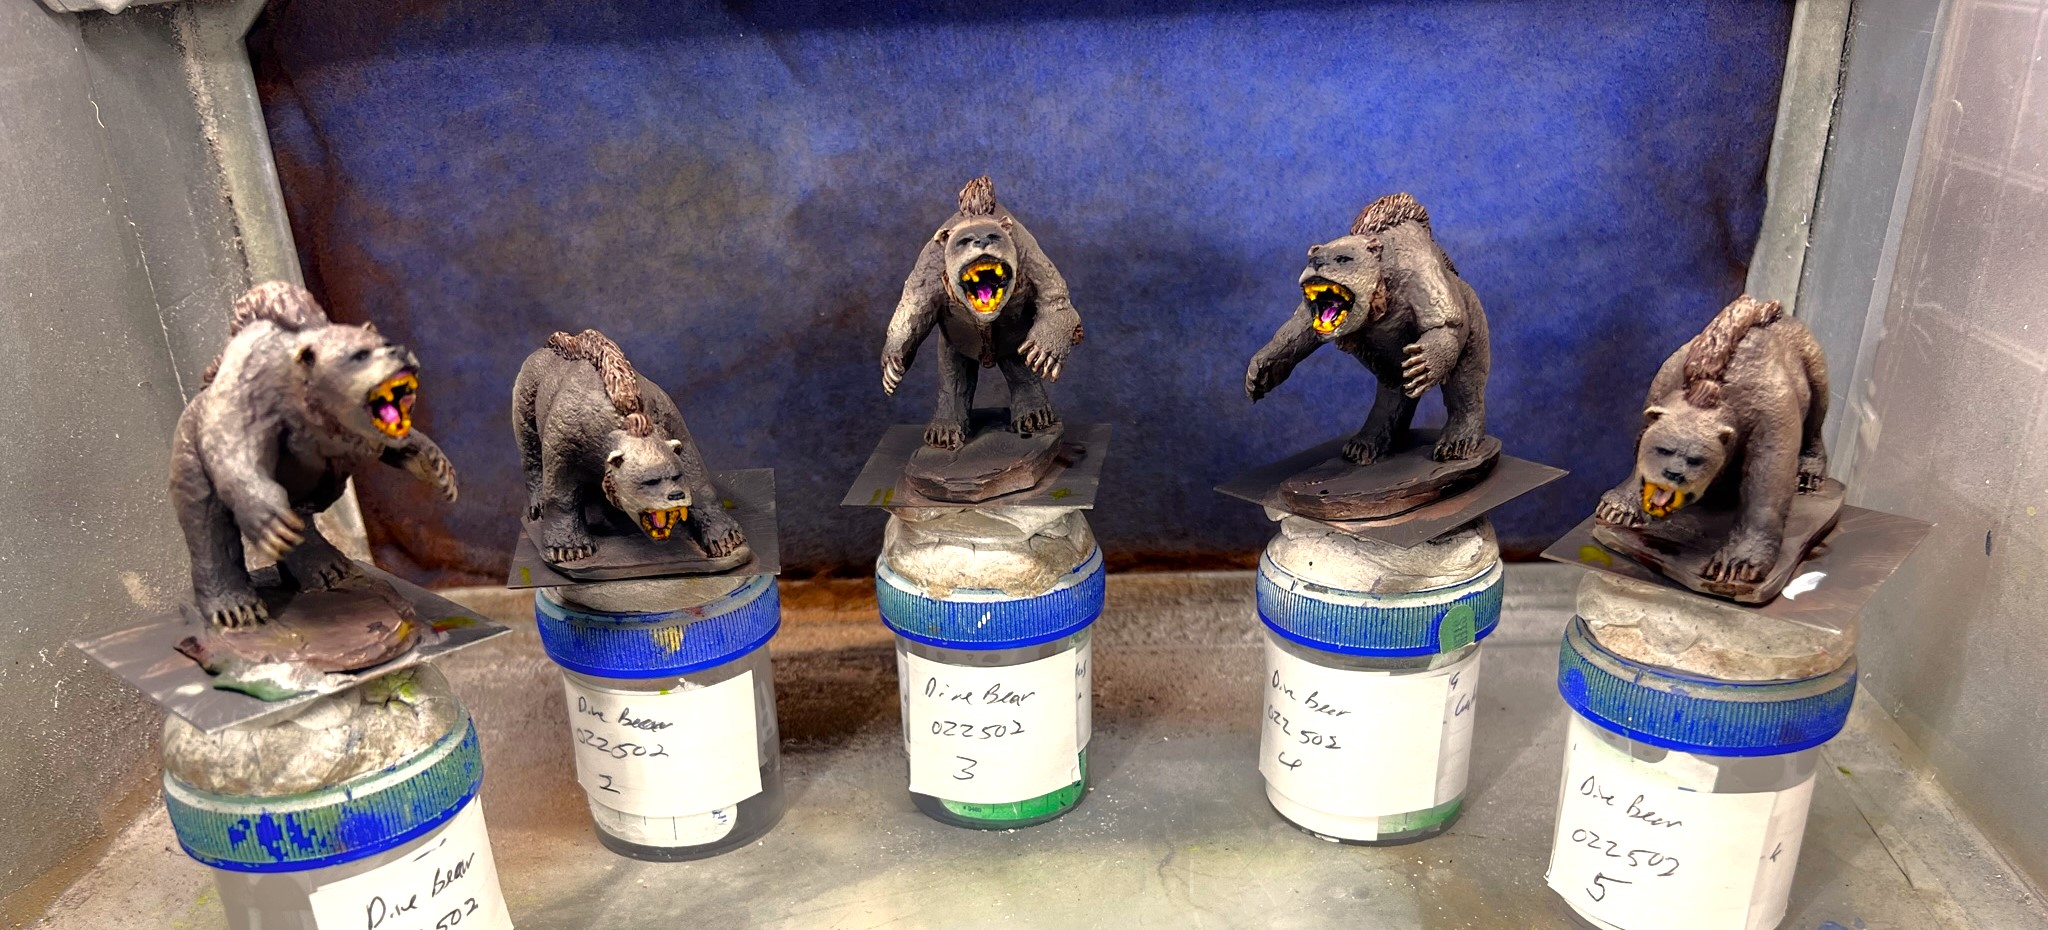
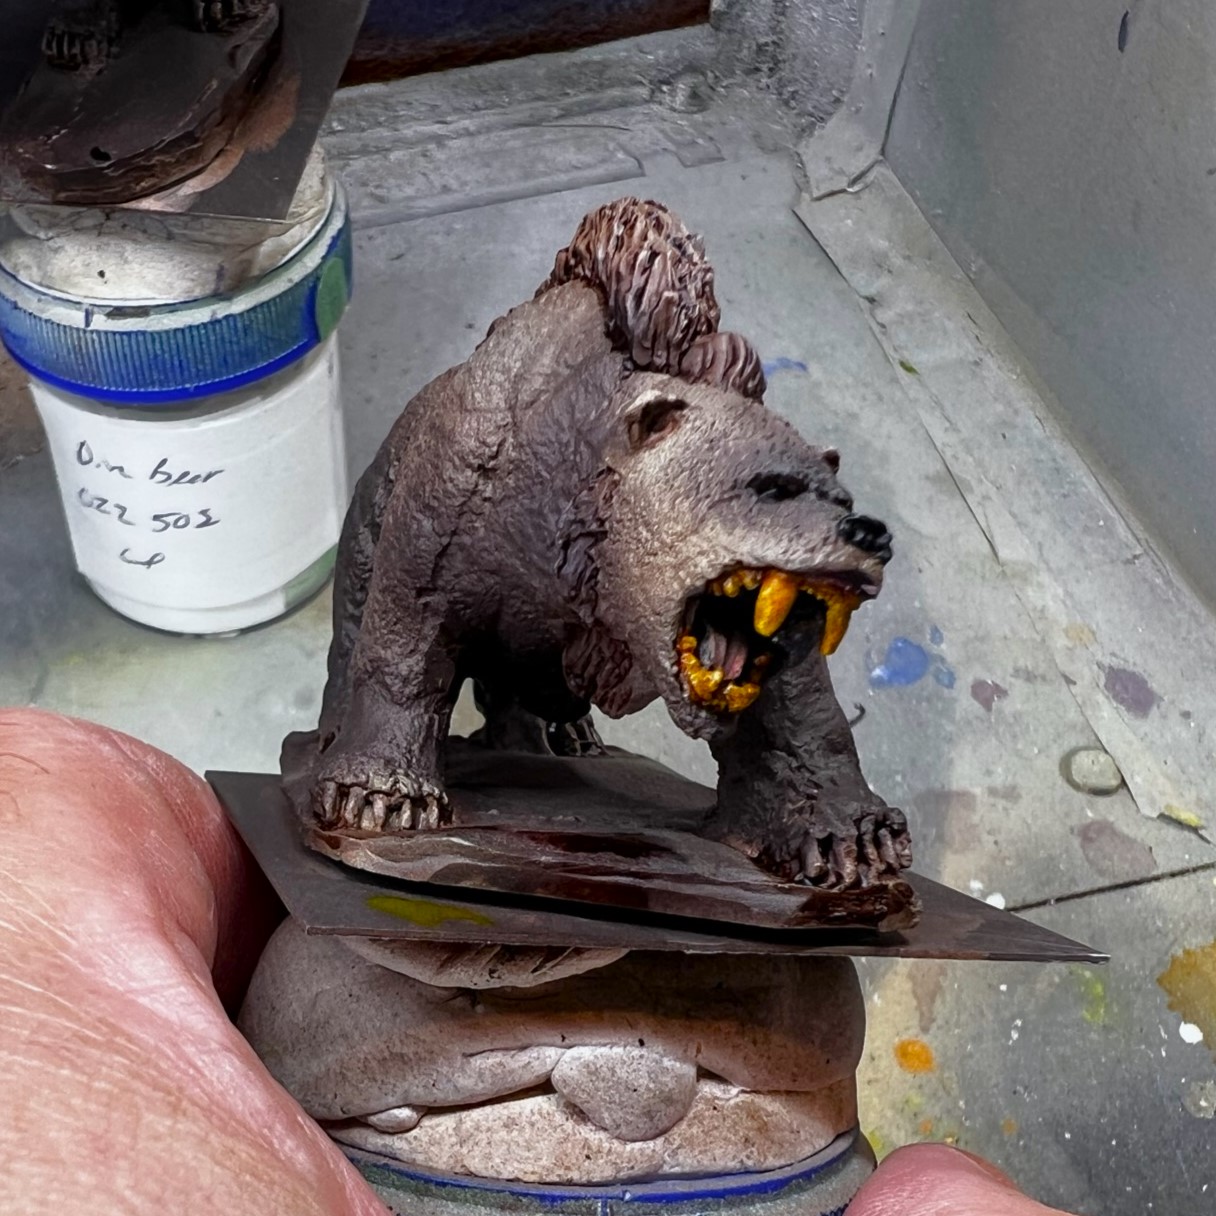
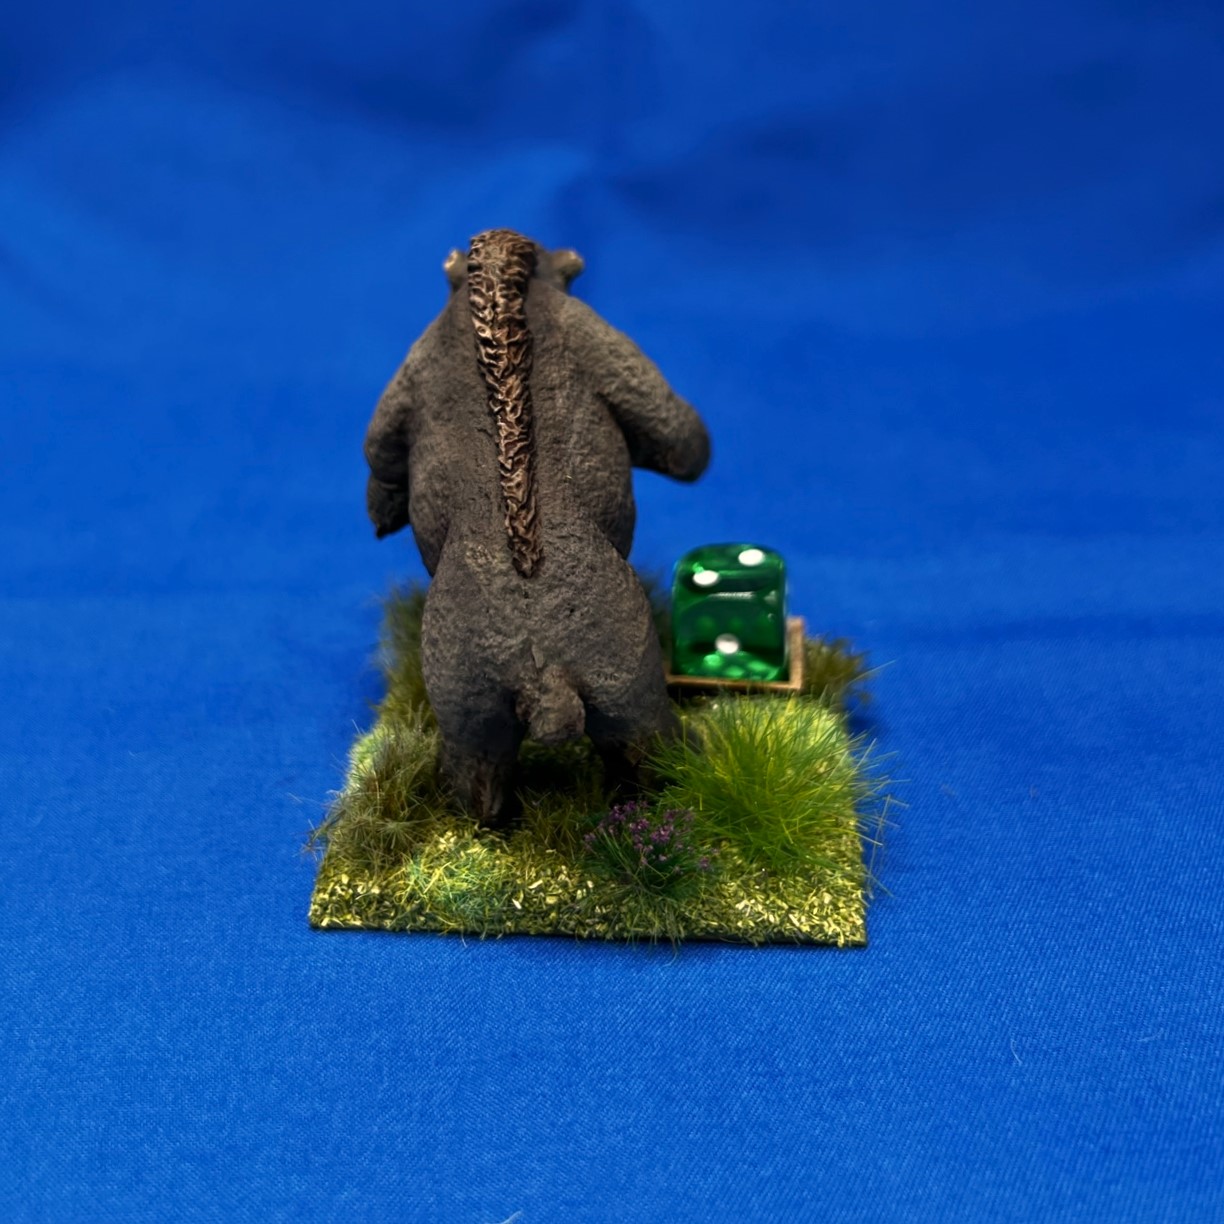
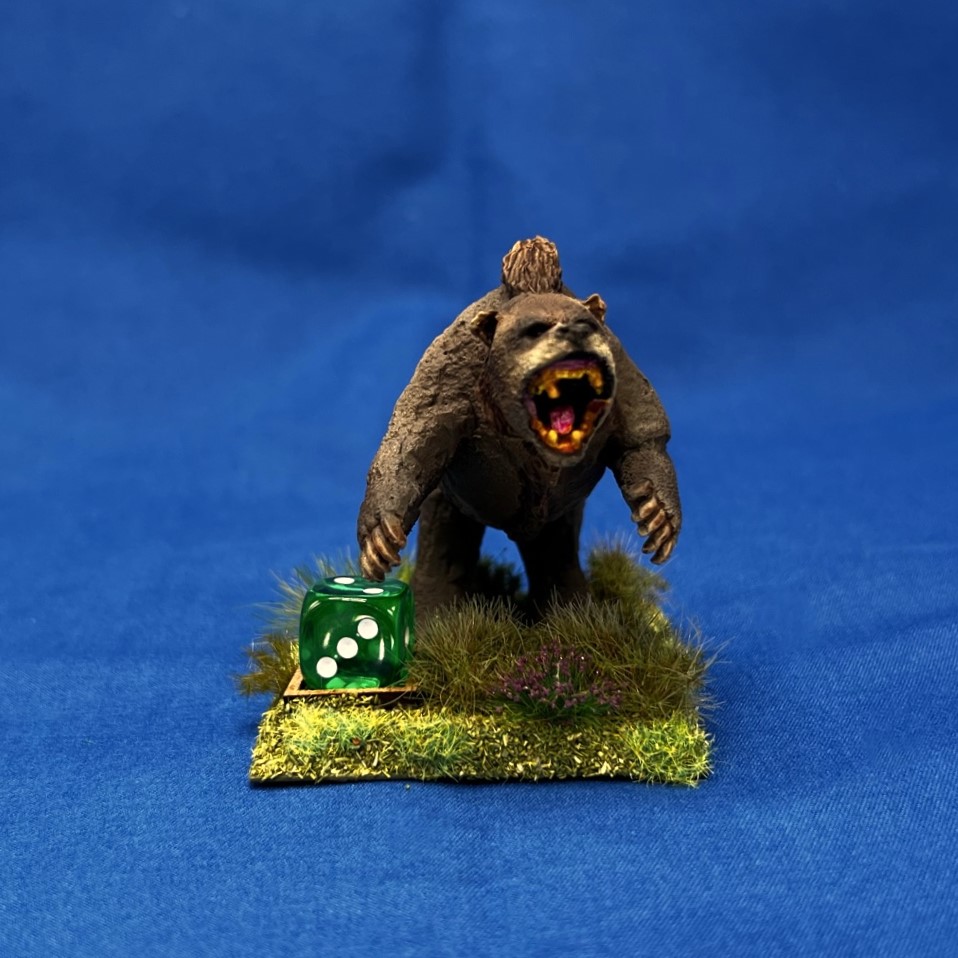
I painted the mouths by hand, then proceeded to try to blend the fur on the Dire Bears to resemble grizzly bears.After painting, this and the gallery below show the results before varnishing.Paws on the ground pose.Reared up pose.
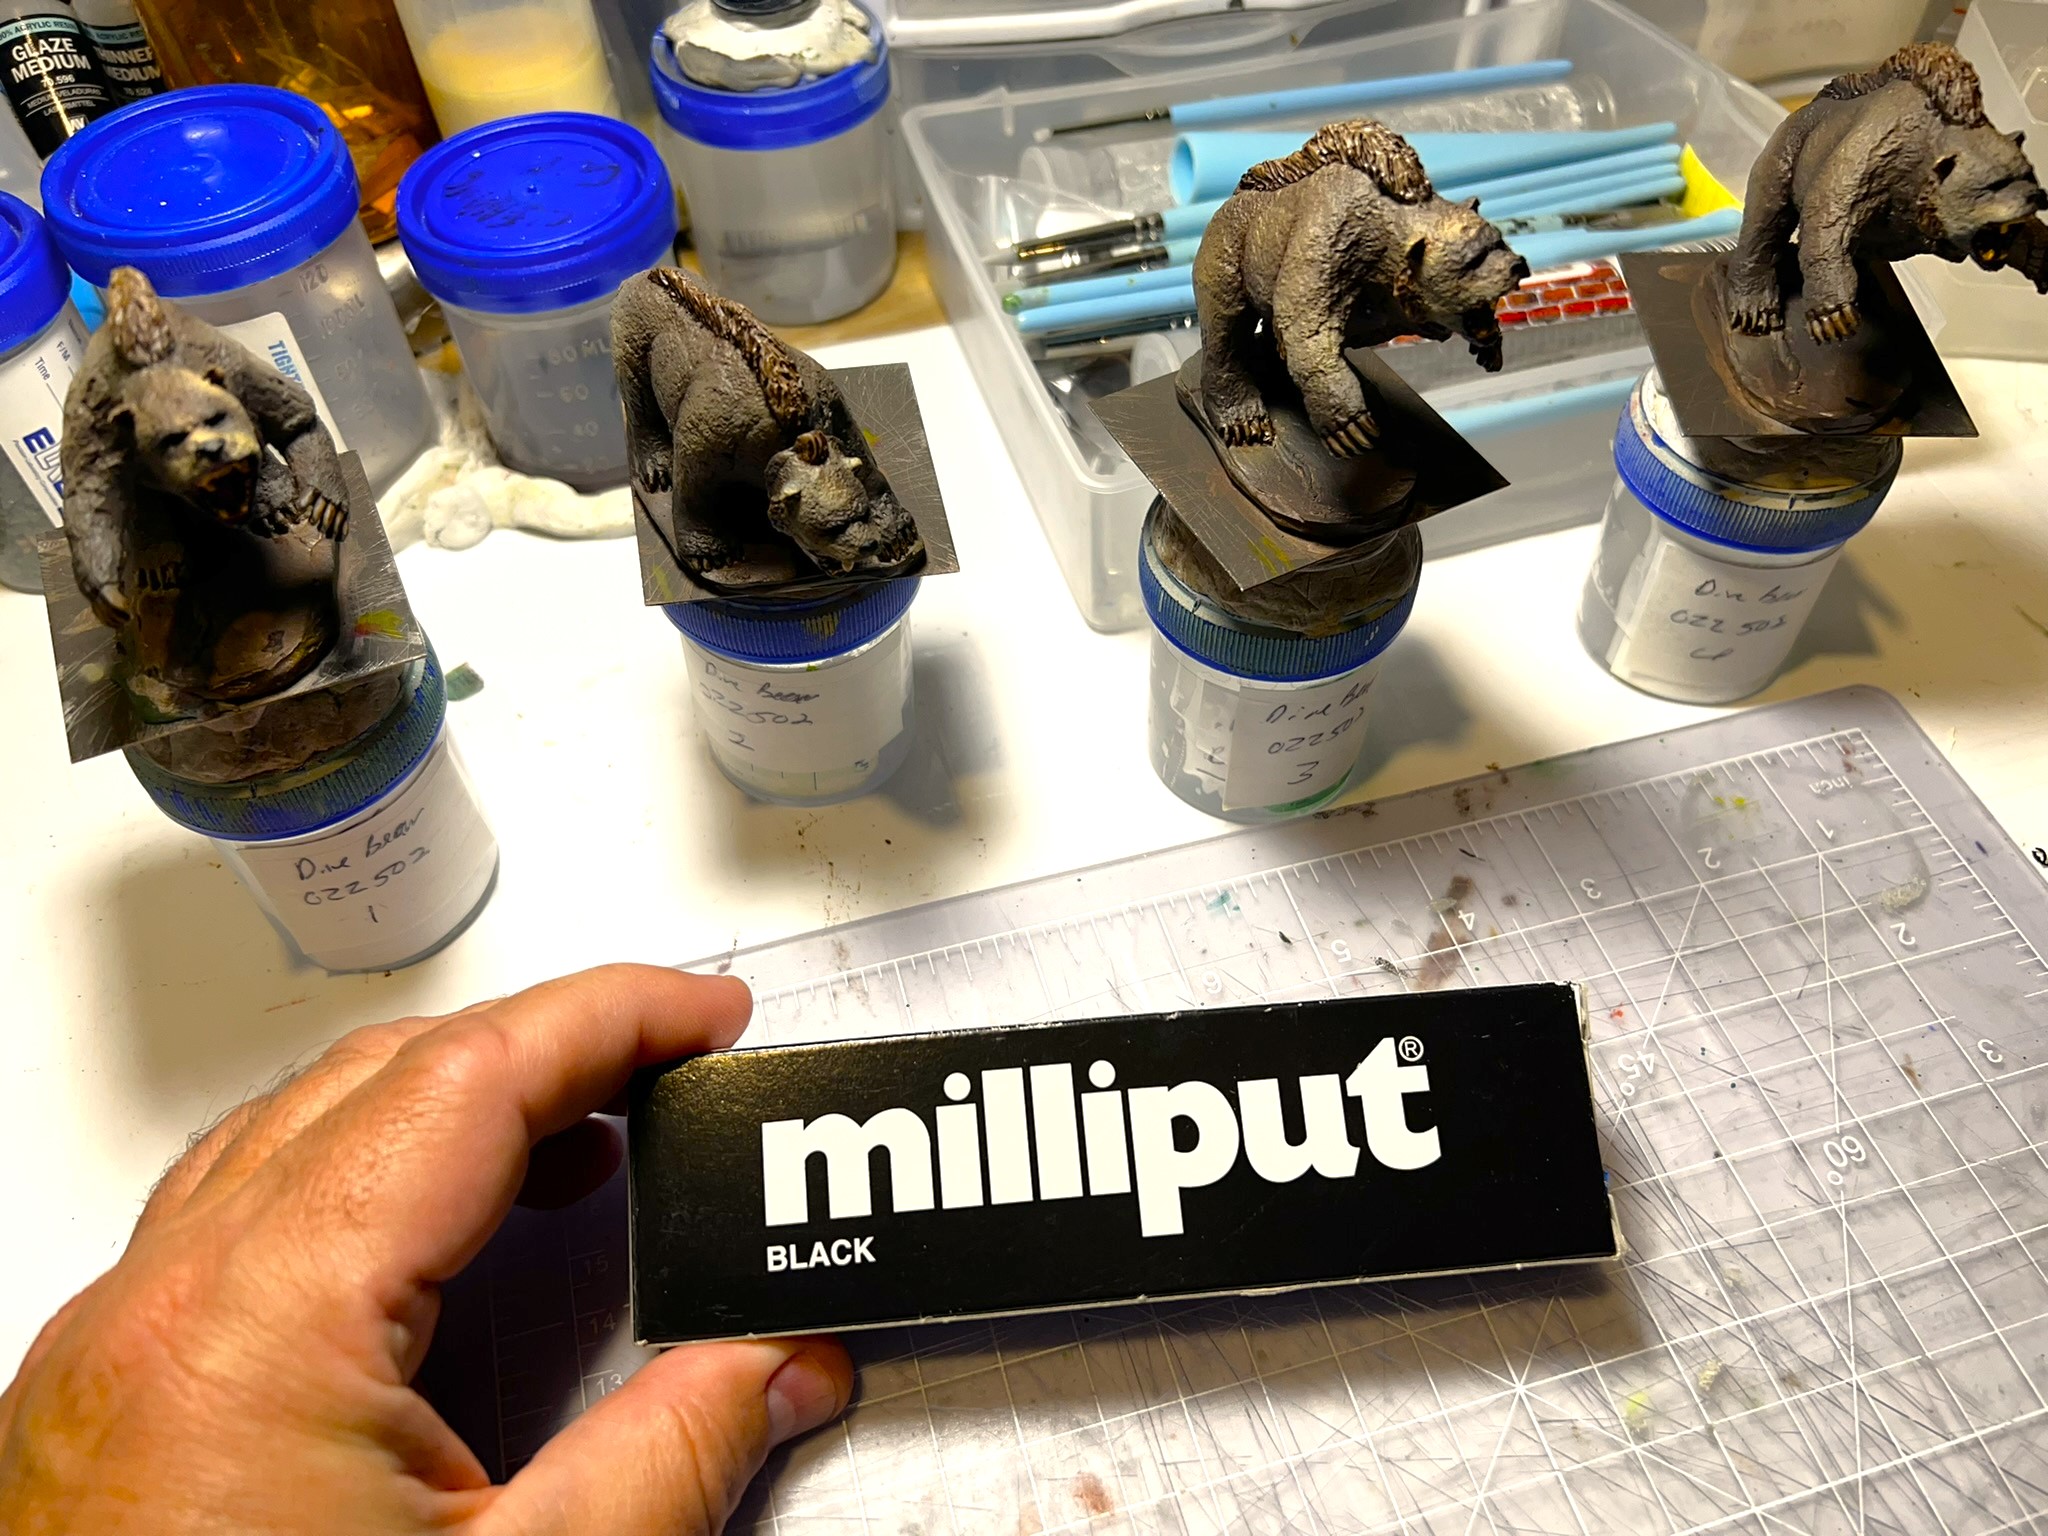
At that point, I could begin to finish the bases. The models’ bases on the steel bases were raised up and in some cases overlapping the 2″ steel bases. To level it all out, I used up an umopened box of black Milliput that I had hanging around -and ended up running out of it on my last Lion – so I used green stuff there on the last lion.
Base work time!Bases all leveled out and ready for a coat of green to go under future flocking. Guess where the black Milliput ran out…After varnishing with the Iwata Eclipse HP-CS and ready for flocking!
Before I get to the eye candy – a brief and happy segue. I had a fun chat with Dave – (aka Guru from Guru PIGS blog down under in Australia). A wonderful package from Dave subsequently made the 10,470 mile trip to my home. What, pray tell, was in the package? Well, just a great collection of whimsical hand-made stuff! The most wonderfully Ozz-appropriate terrain, a “Mouse Metropolis”, along with a fun golf book (for you know I love golf). Thanks so much Dave, I look forward to incorporating this great collection into my games! I just have to figure out a boxing solution (which I will of course!). You can see Dave’s blog post on the Mouse Metropolis here. So much appreciated Dave, thank you! You are a gentleman and a scholar!
Wonderful!
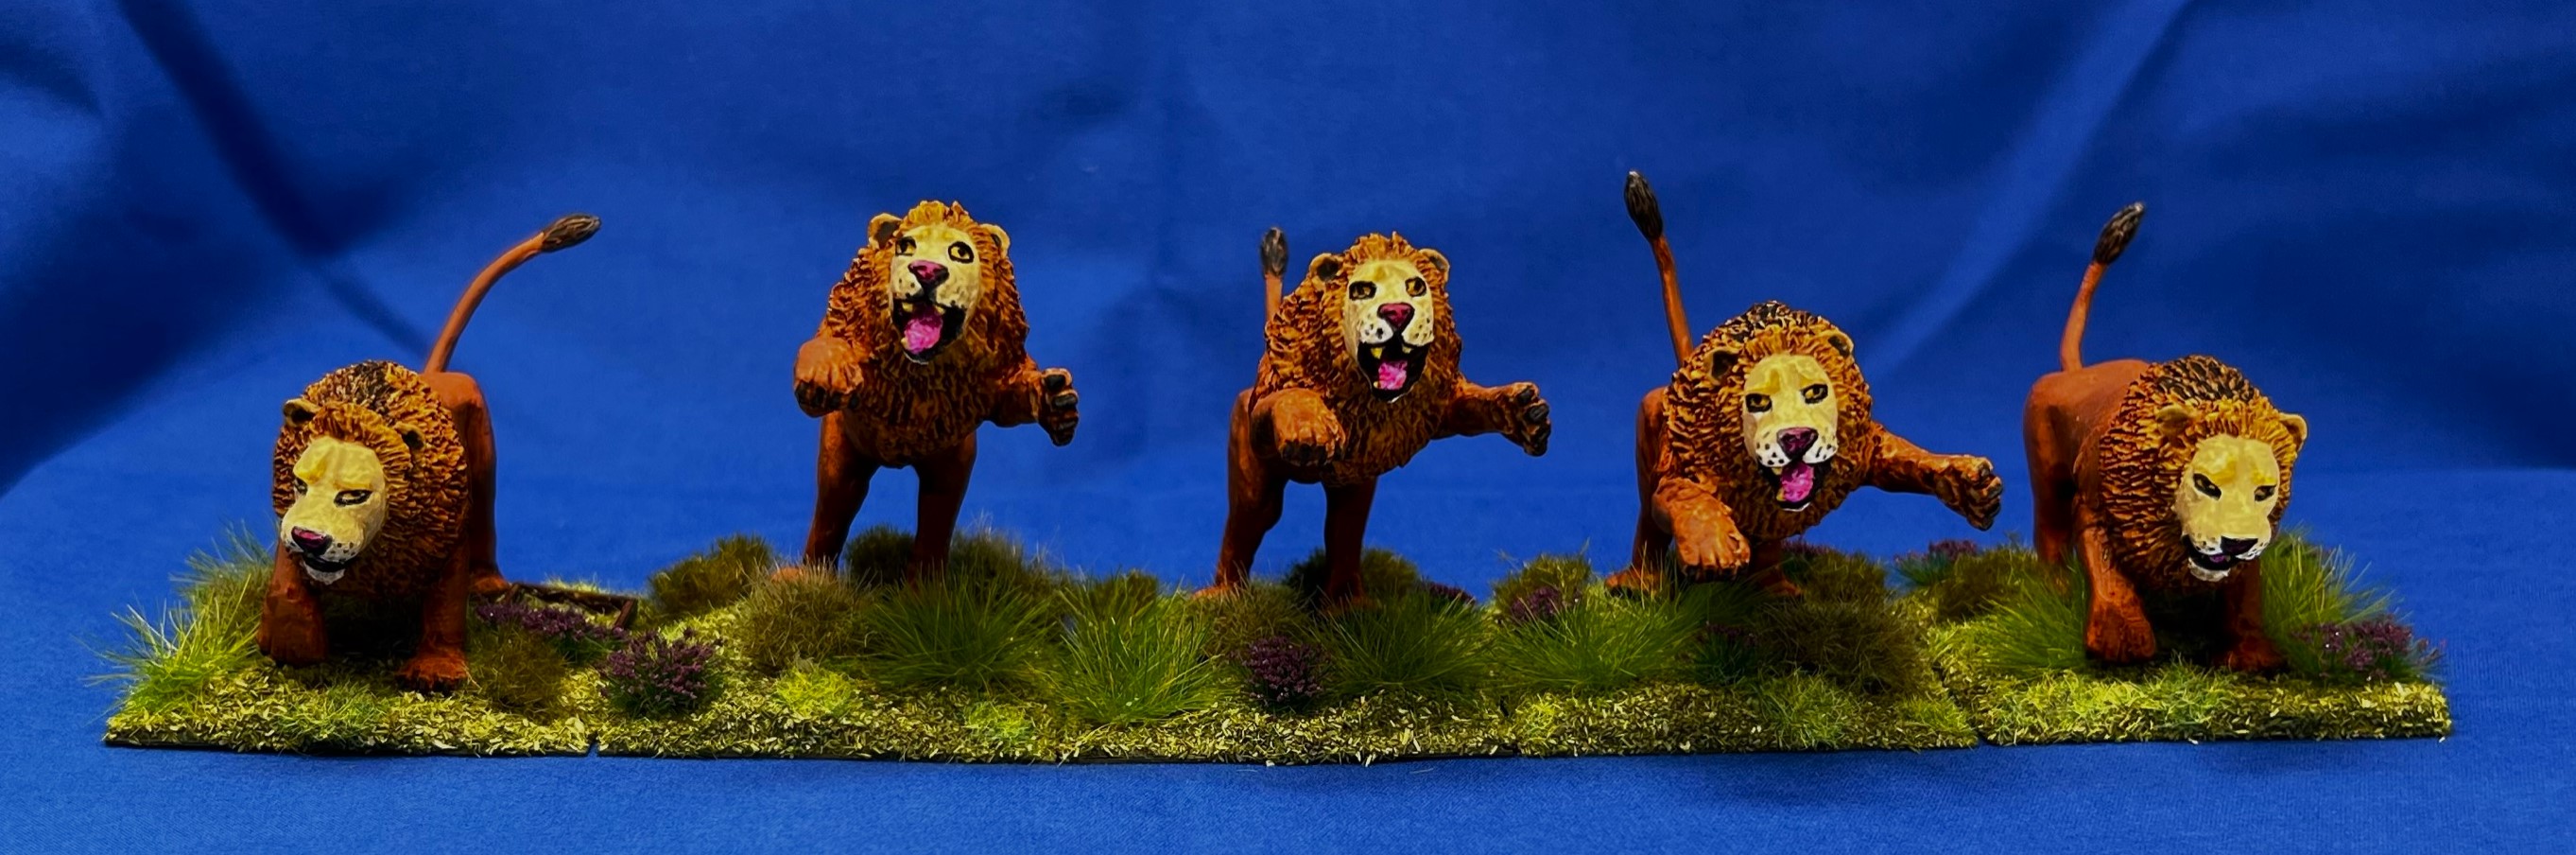
Back to the dire beast models at hand – and the flocking. As Gillikins love purple, I added some purple flowers to each base, along with different grass ans grassy tufts to give an “beast in ambush mode” feel to the miniatures. Without further ado, let’s look at some…
Eye Candy
Dire Lions
Base 1
Base 2
Base 3
Base 4
Base 5
Dire Lions Group Shot
Dire Tigers
Base 1
Base 2
Base 3
Base 4
Base 5
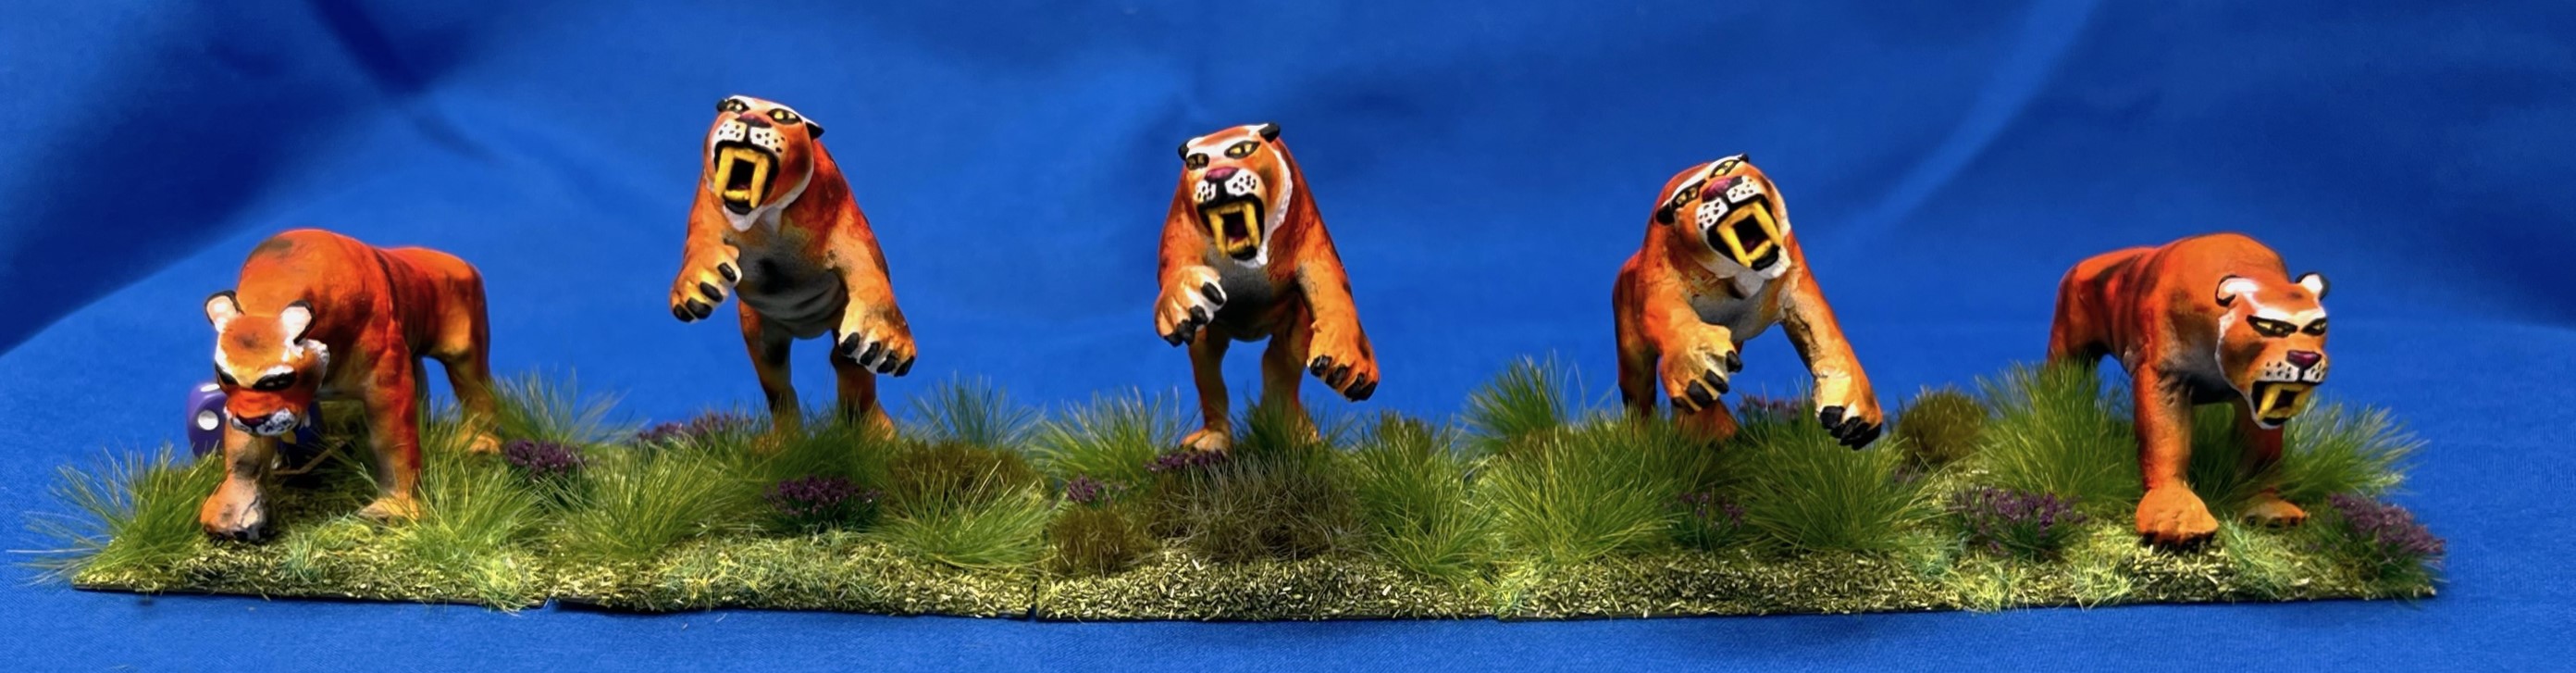
Dire Tigers Group Shot
Dire Bears
Base 1
Base 2
Base 3
Base 4
Base 5
Dire Bears Group Shot
Dire Beasts Group Shots
I now have 2 regiments of Dire Bears, and one each of Dire Wolves, Dire Lions, and Dire Tigers – a Dire Beast Brigade!
All of my Dire Beasts in a Really Useful Box!
I hope that you found this somewhat post as interesting as I found painting these figures. I do have another Harvest unit to do, then some terrain and then maybe the Quadlings. I have 394 painted Ozz figures to date, and 200 this year alone.
And yes, I still have more to come…
Miscellaneous details and references for those interested in that sort of thing:
For all of my previous posts on Wars of Ozz games, figures, units, and other related projects – please see this page.
PAINTS, INKS, GLAZES, SHADES, WASHES, PIGMENTS, FLOCKING, GLUES AND MORE THAT I USED ON THESE FIGURES:
Dire Lions
2″ square steel bases from Wargames Accessories (#21)
Again, as you may want to check out the Wars of Ozz figures’ range – there are two places to get them (and I make no money from this btw). The game rules and the figures are available from the following two places:
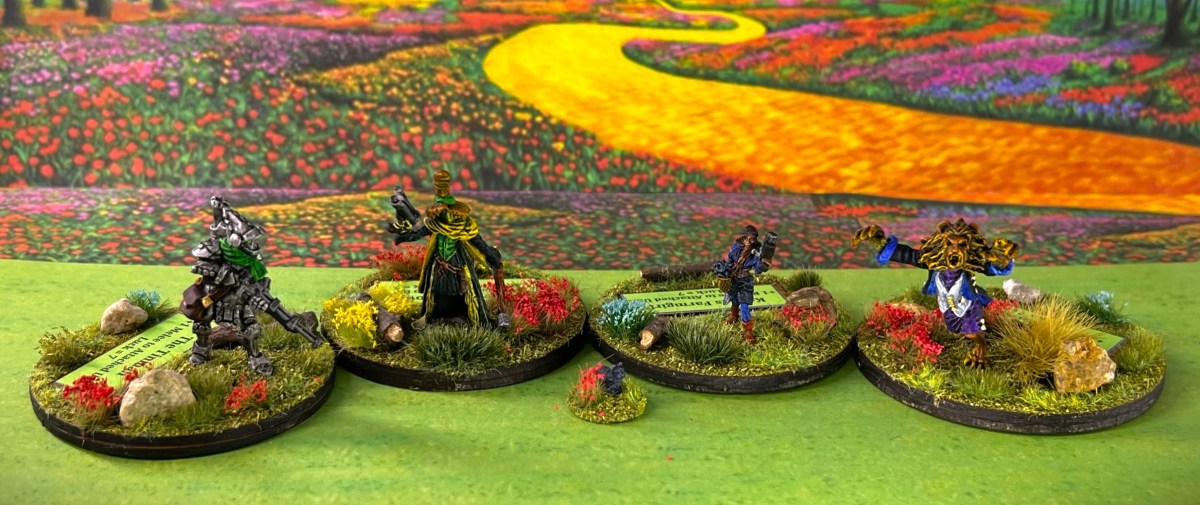
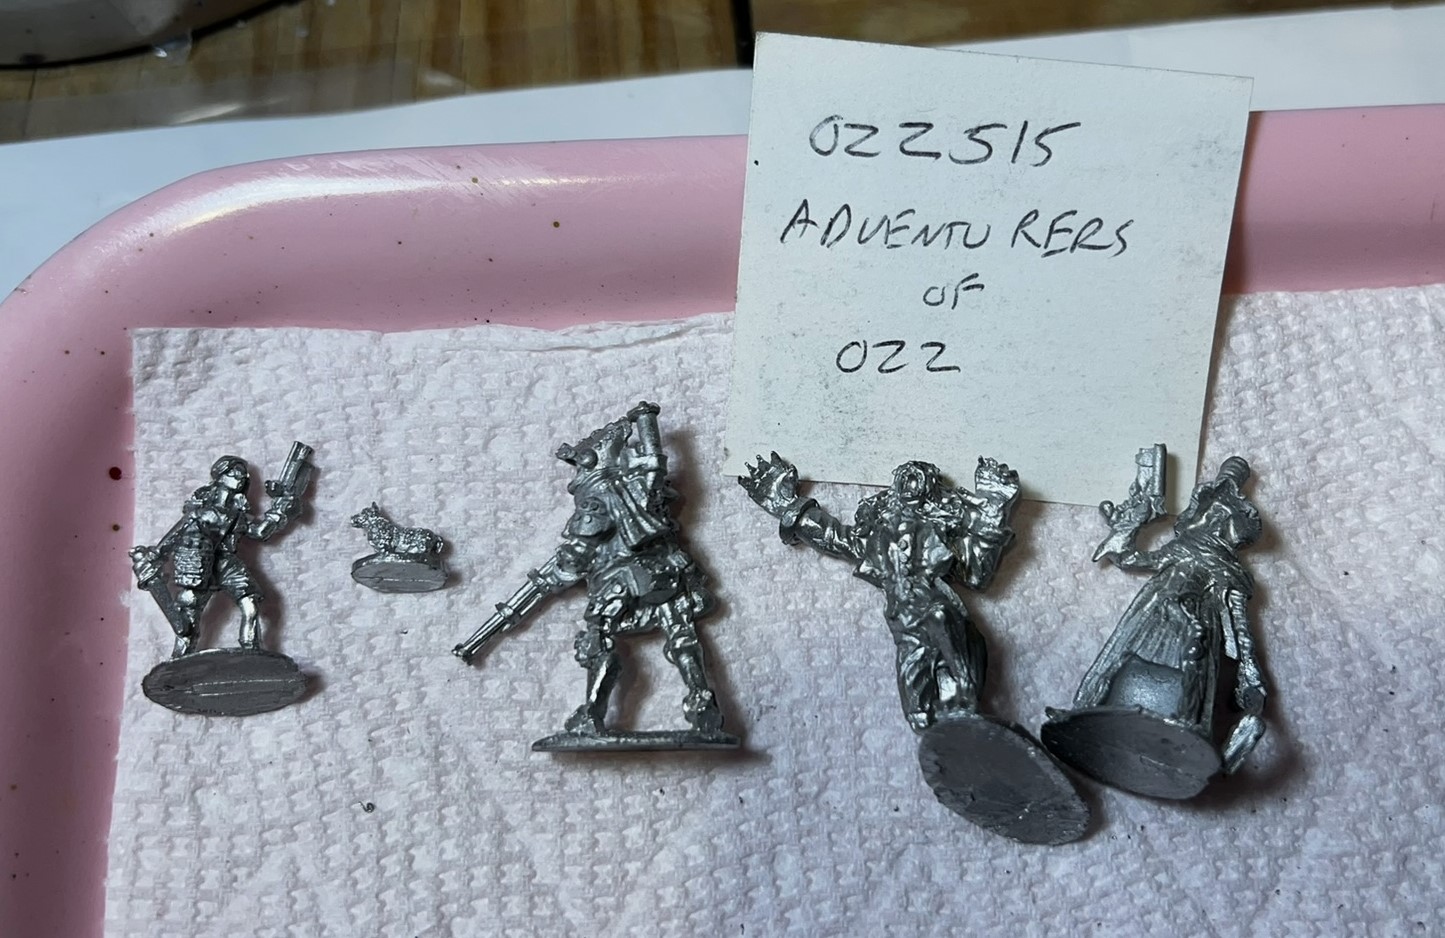
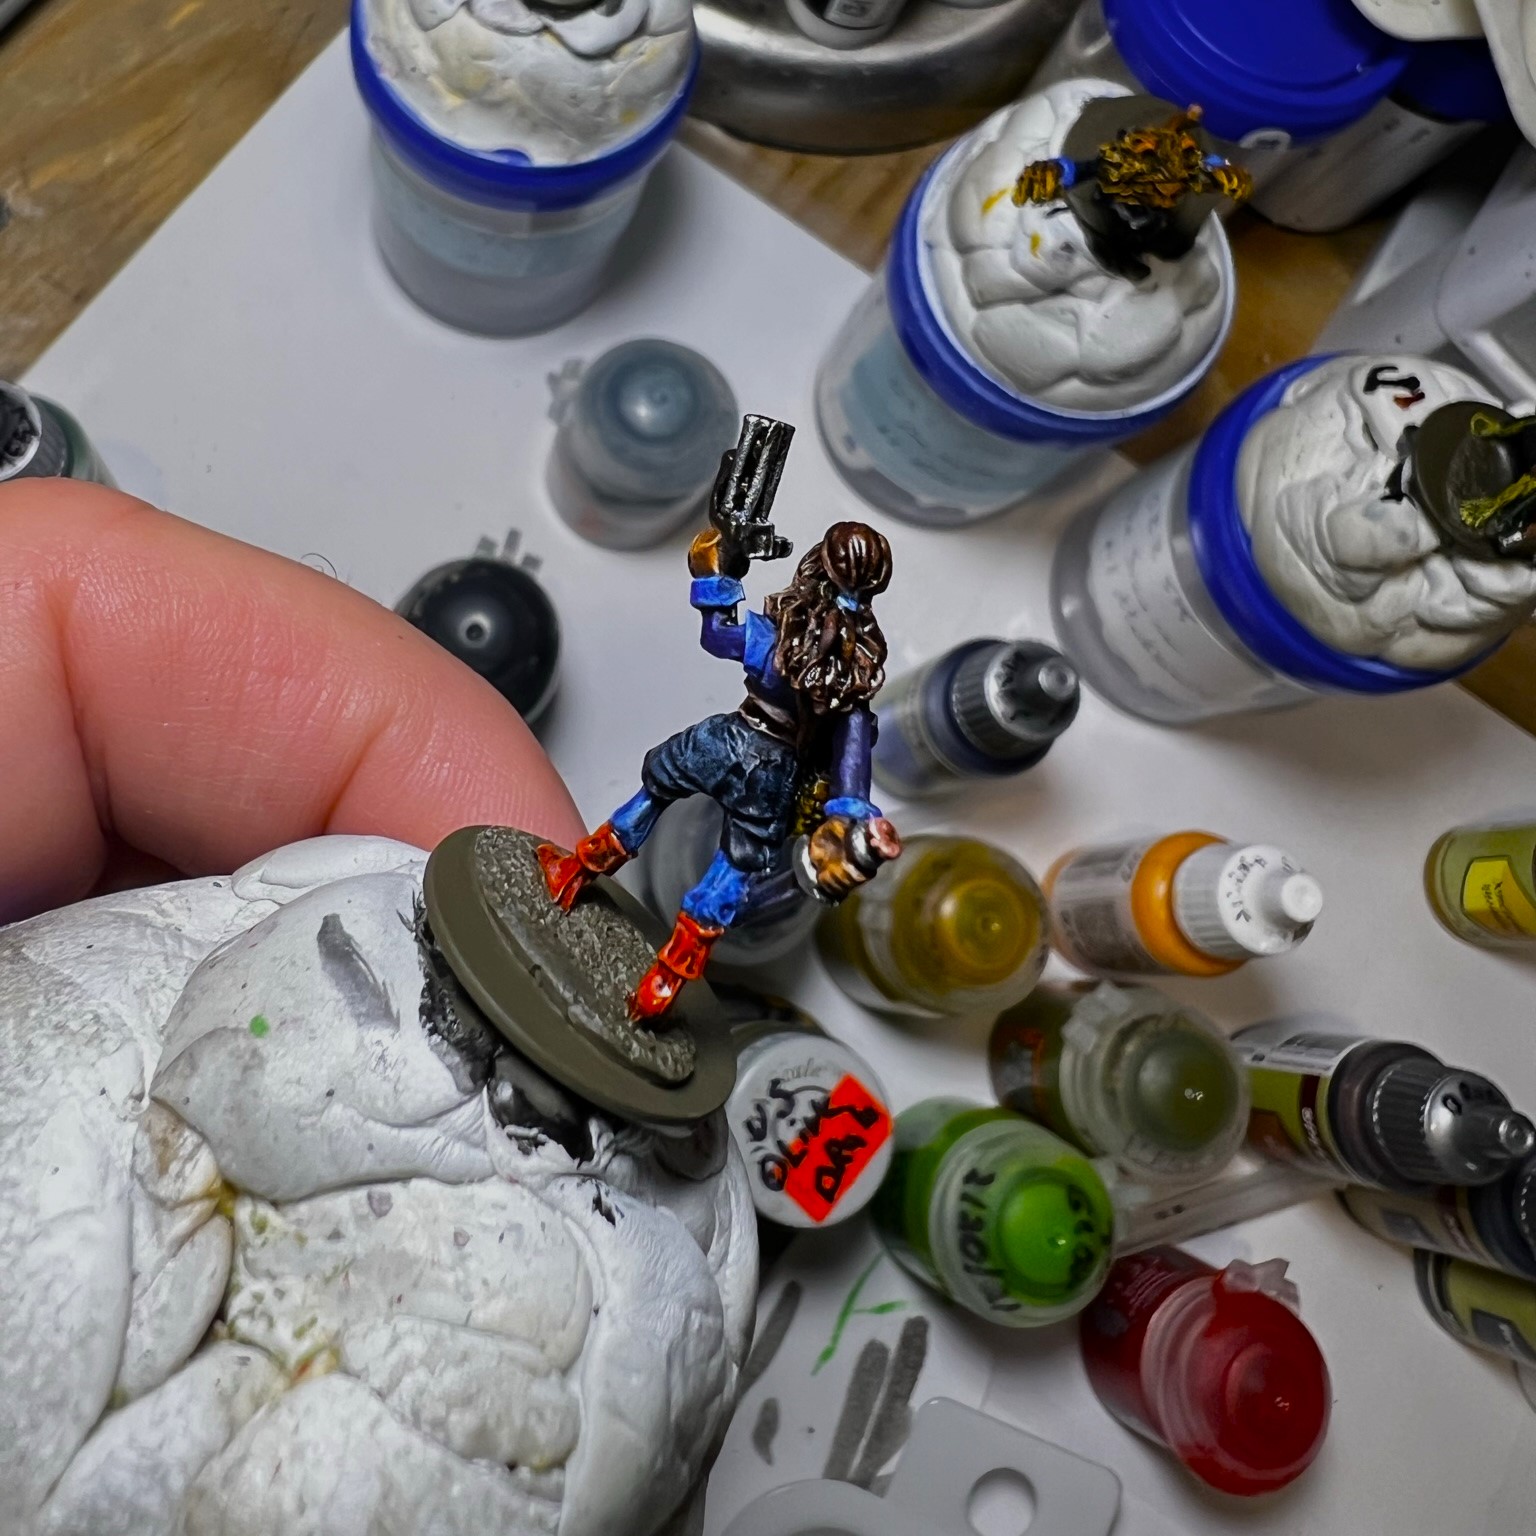
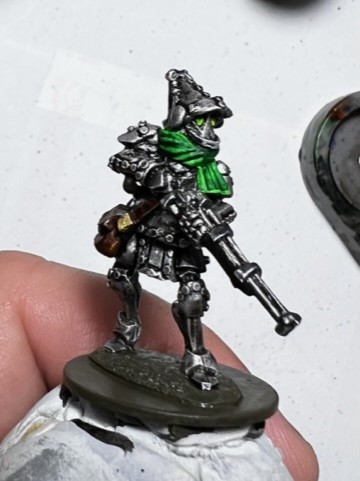
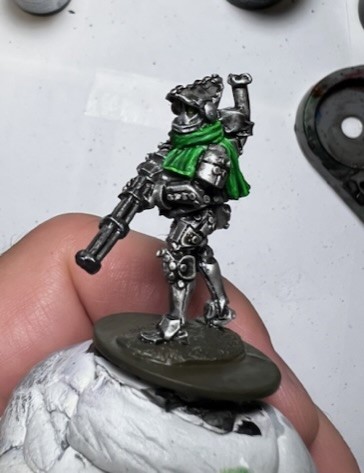
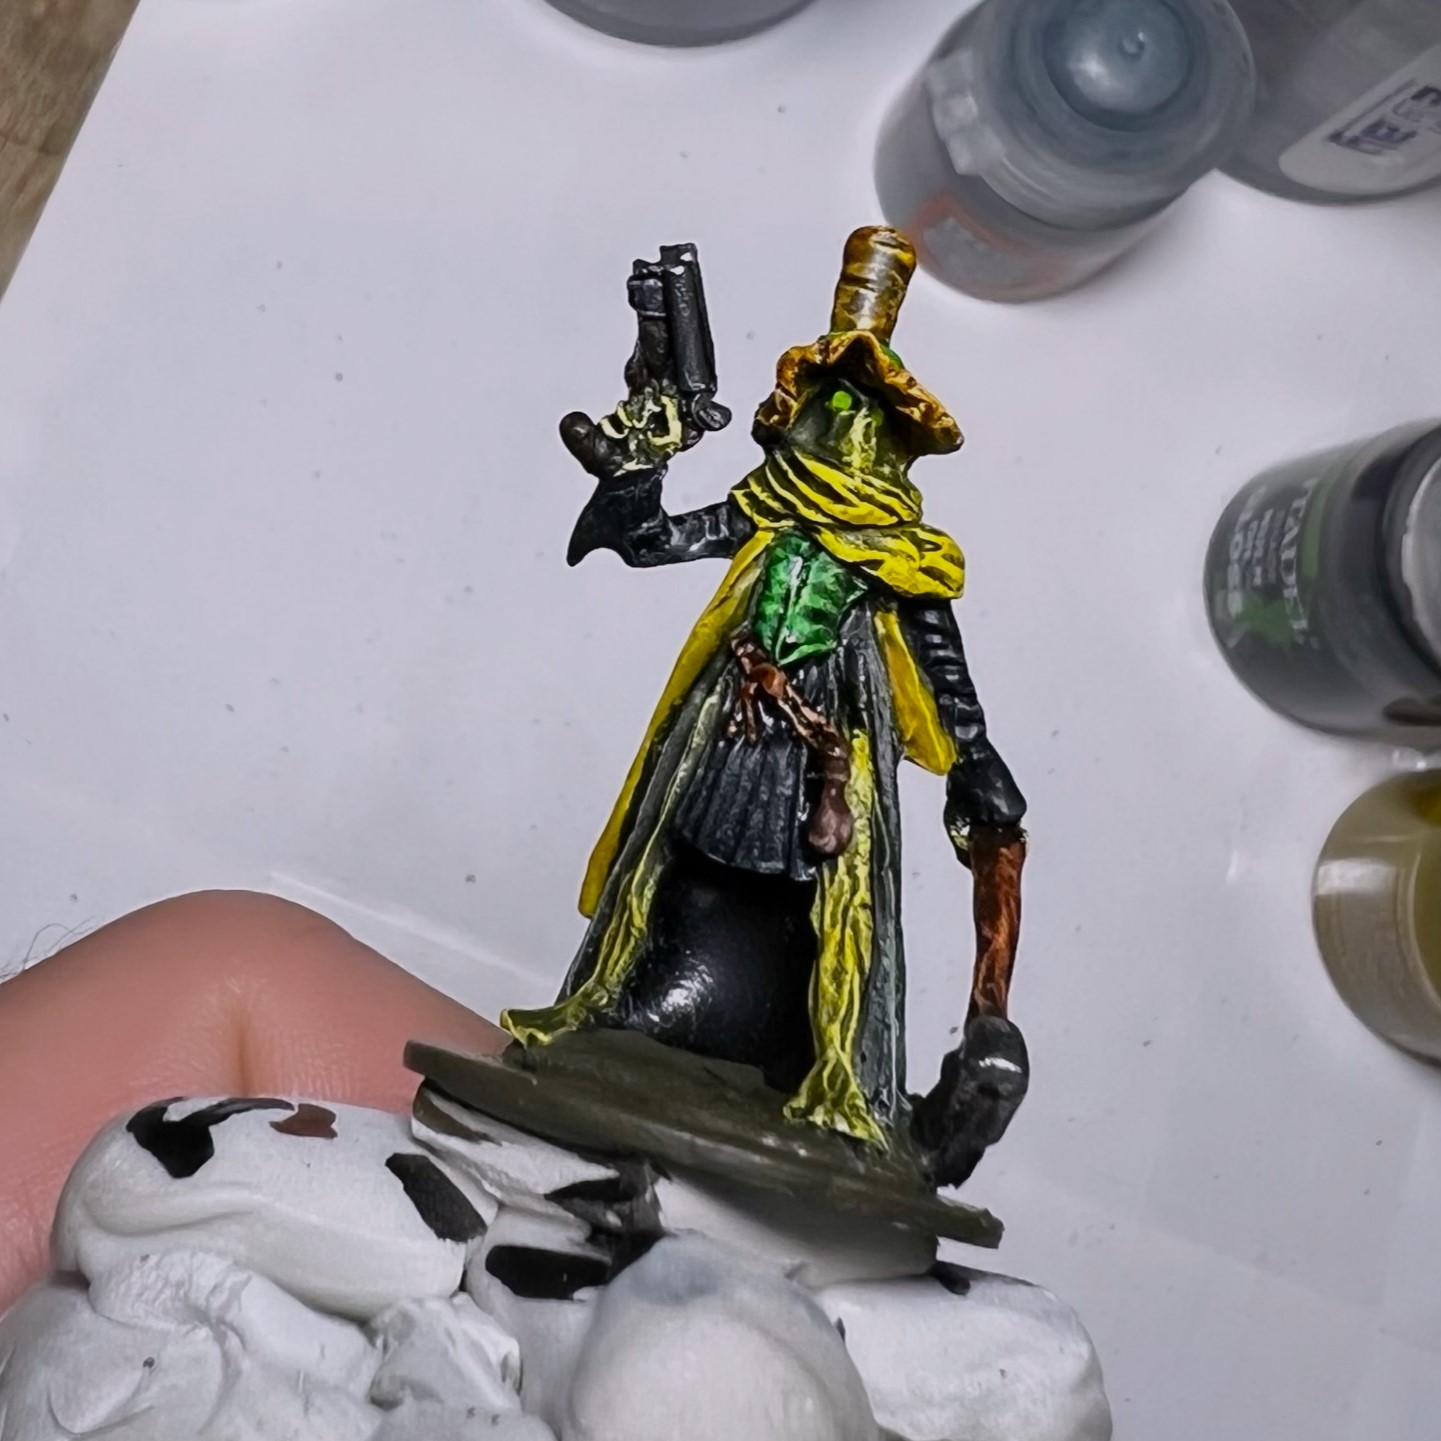
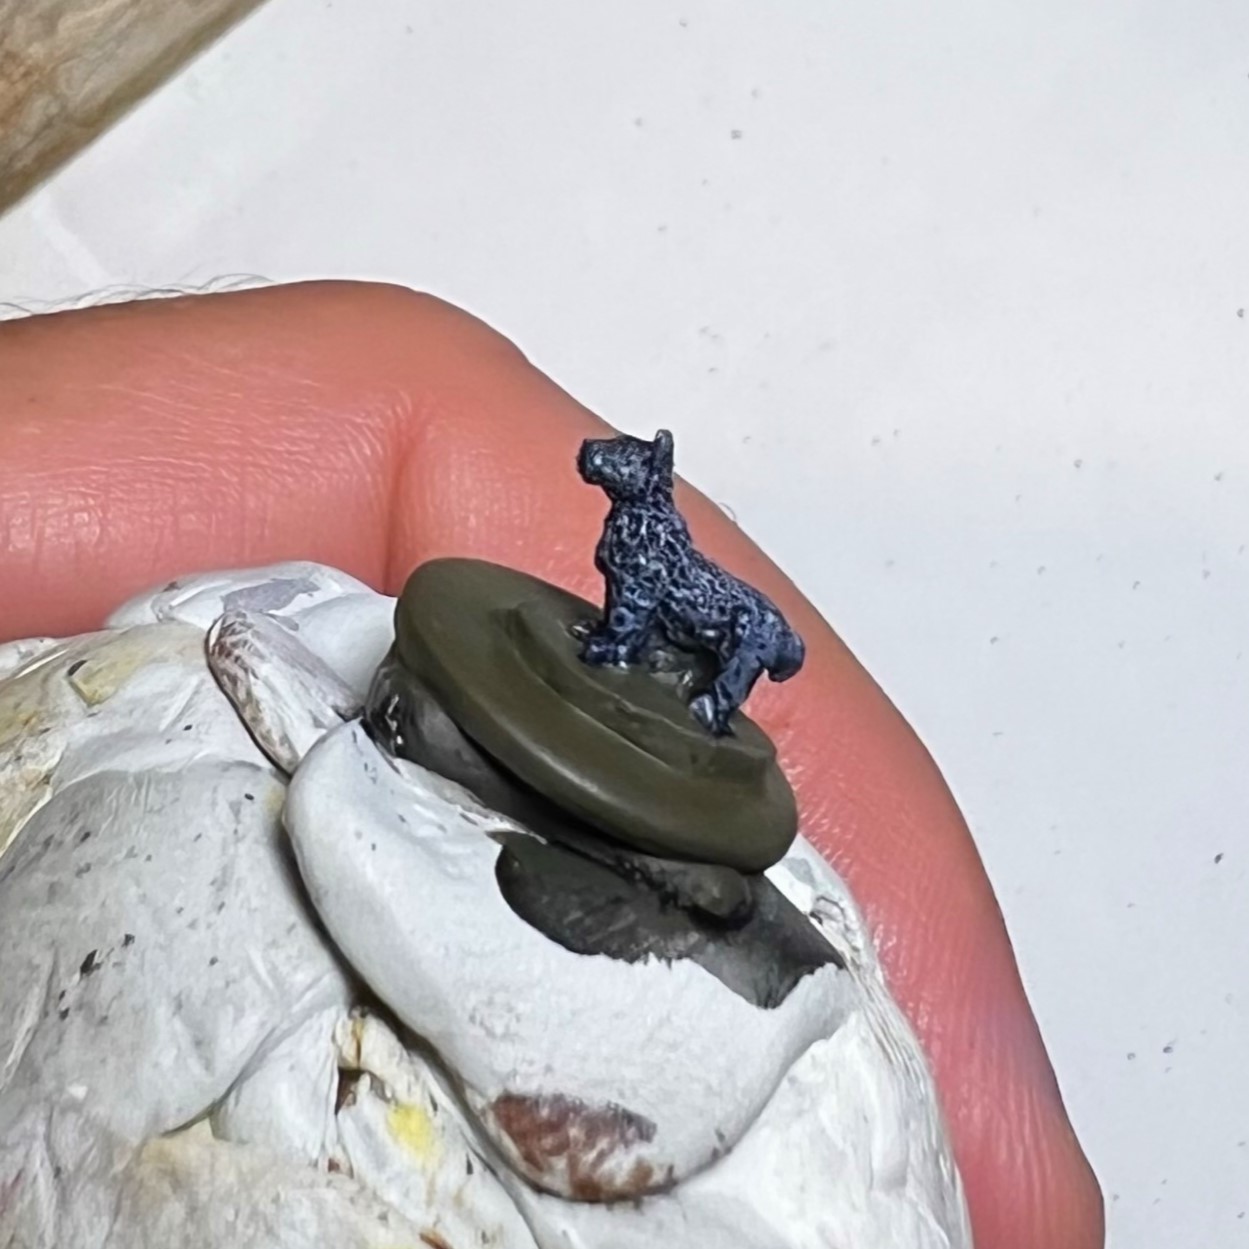
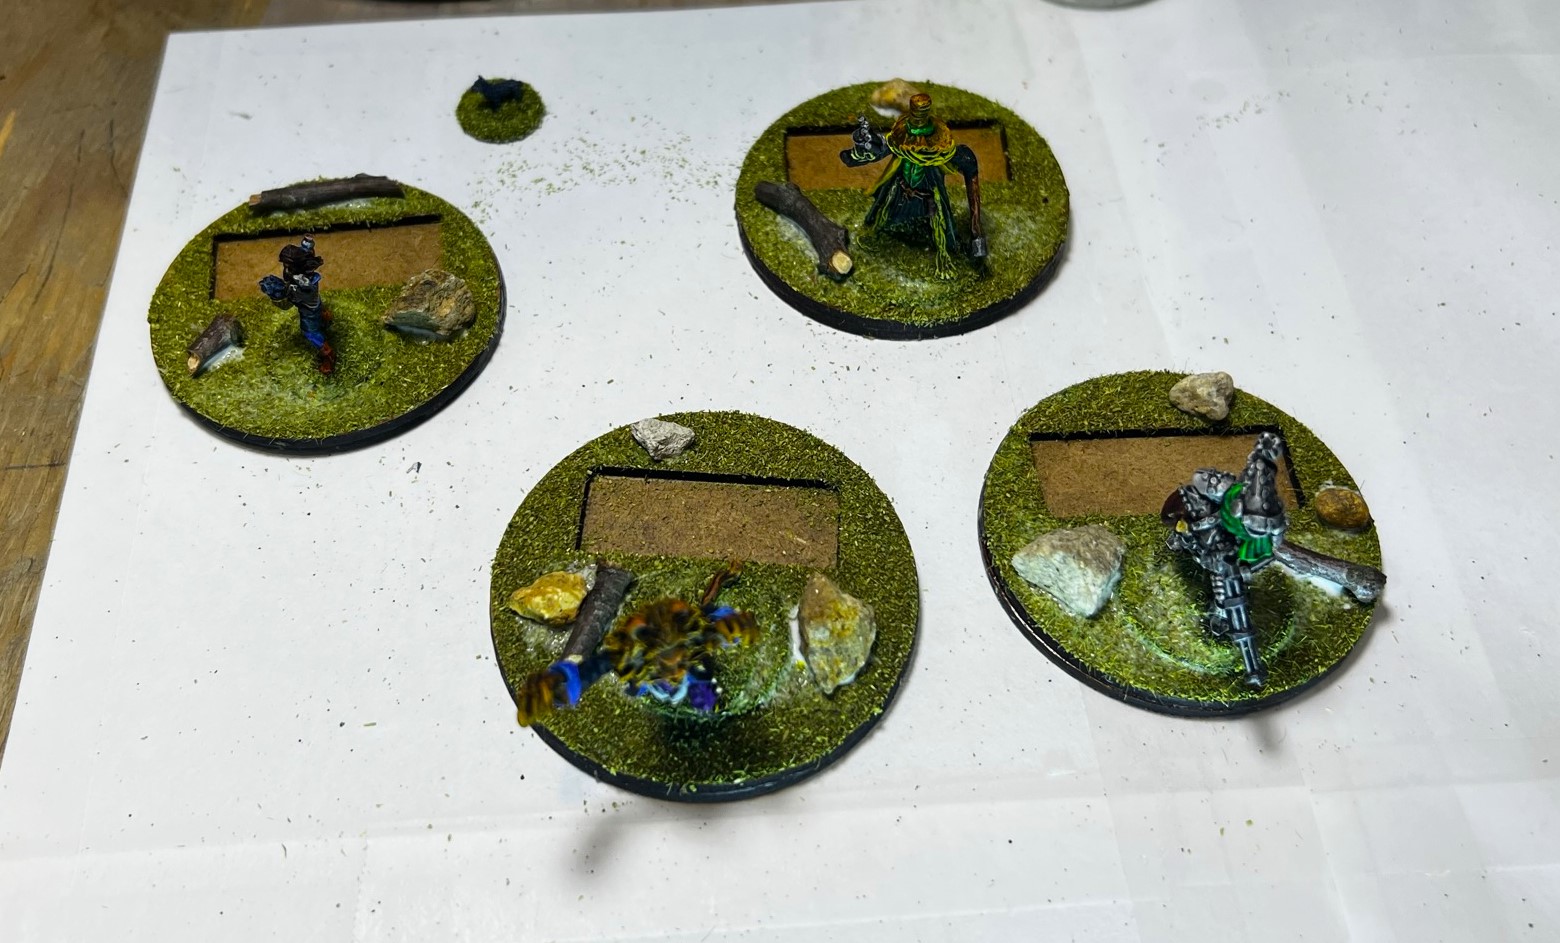
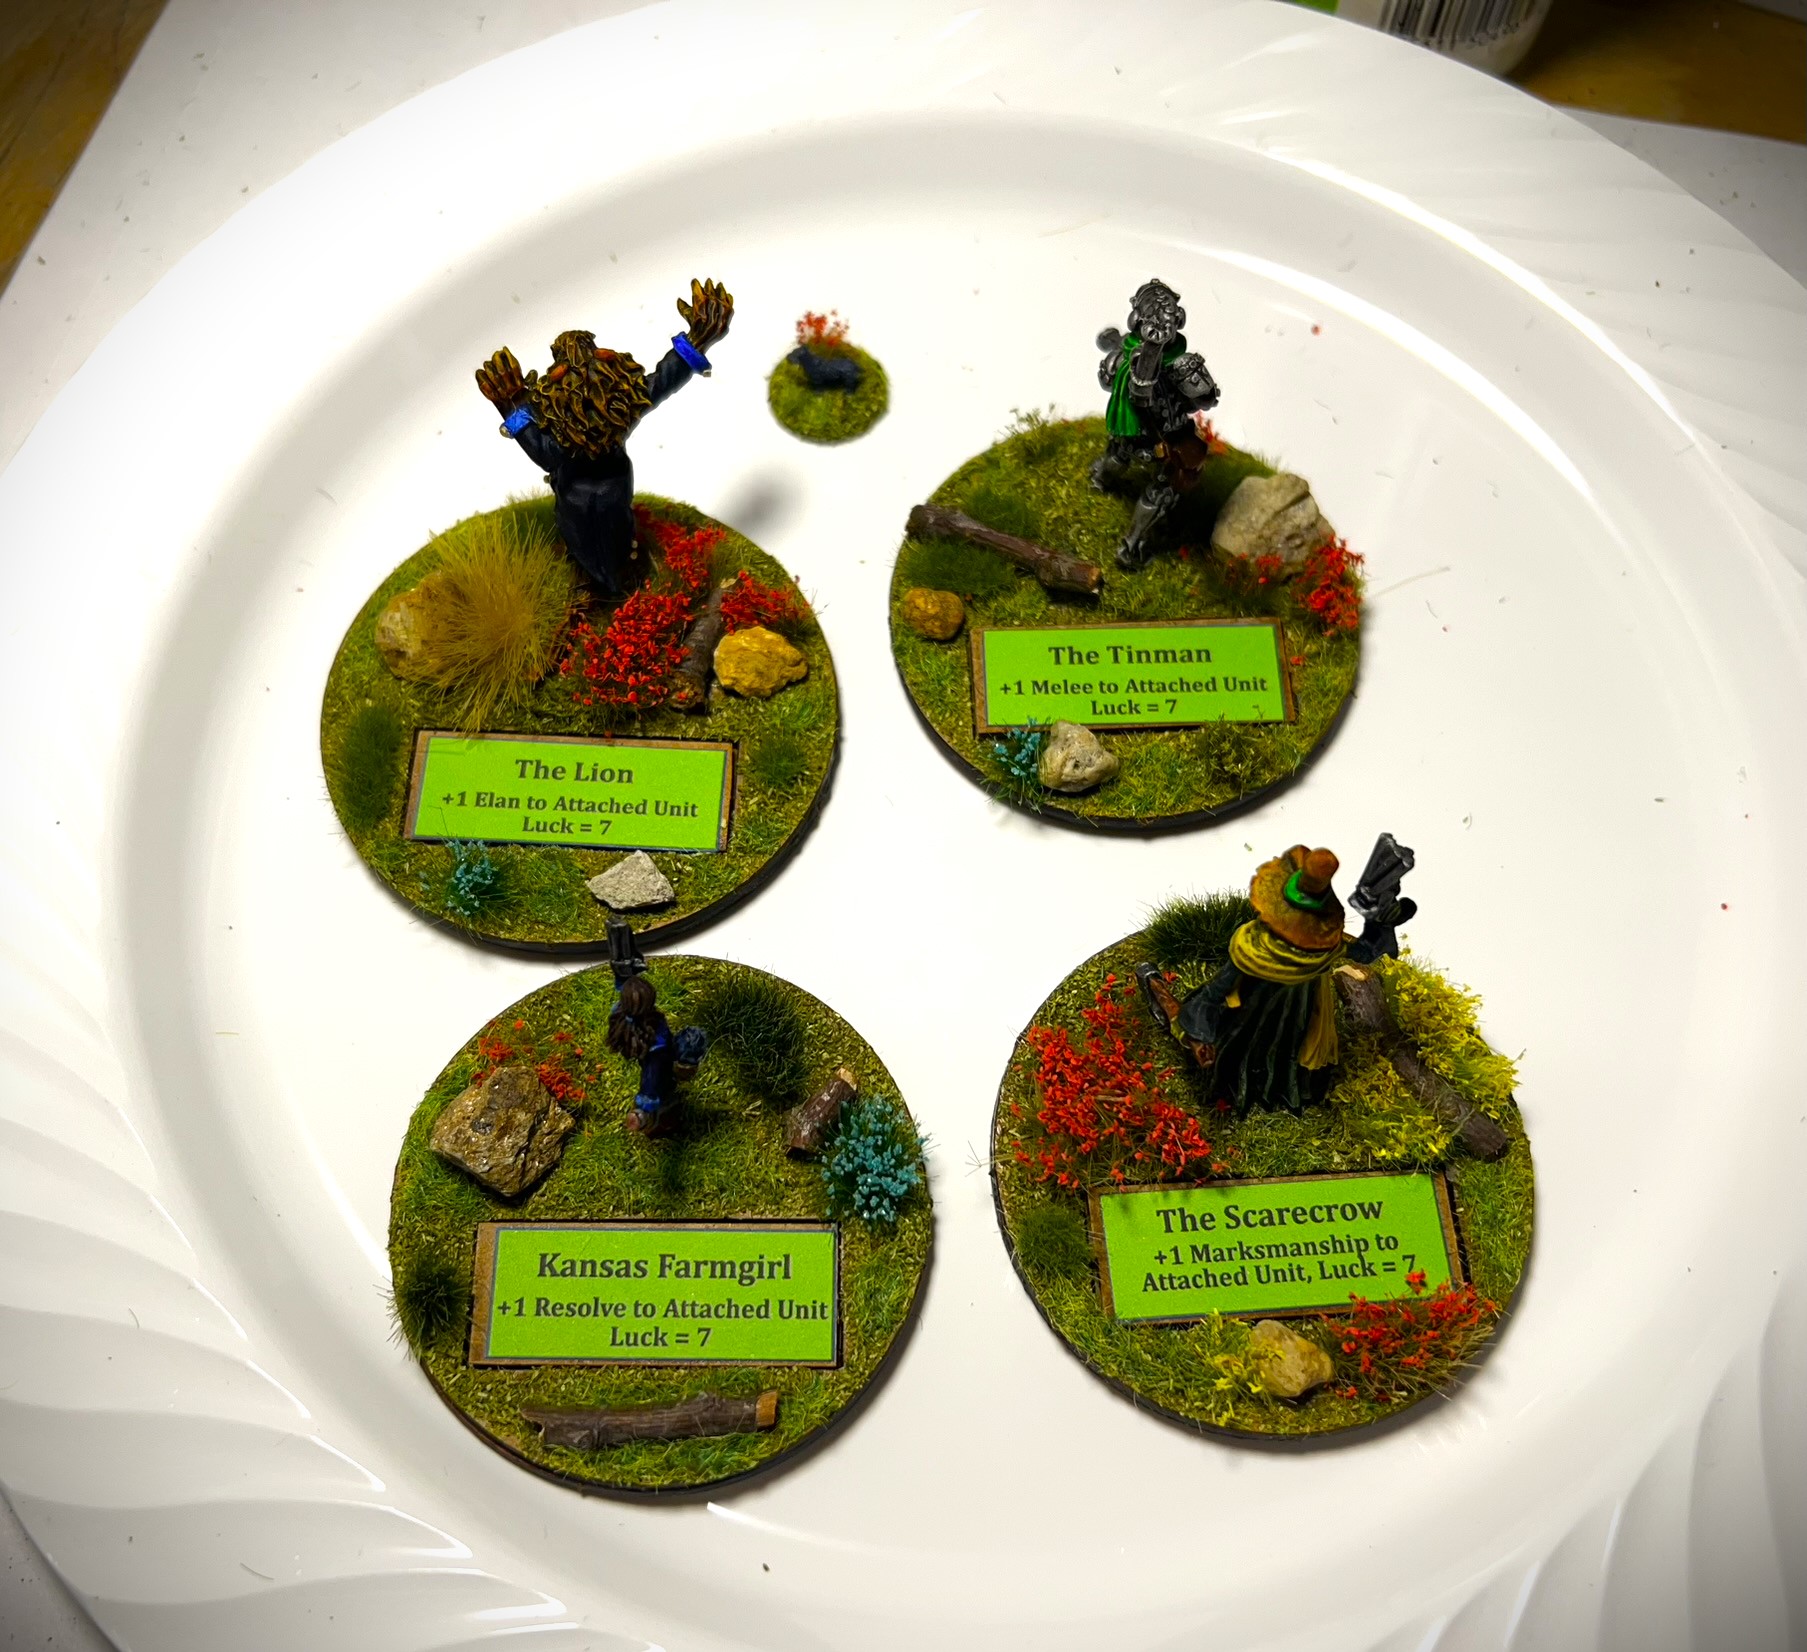
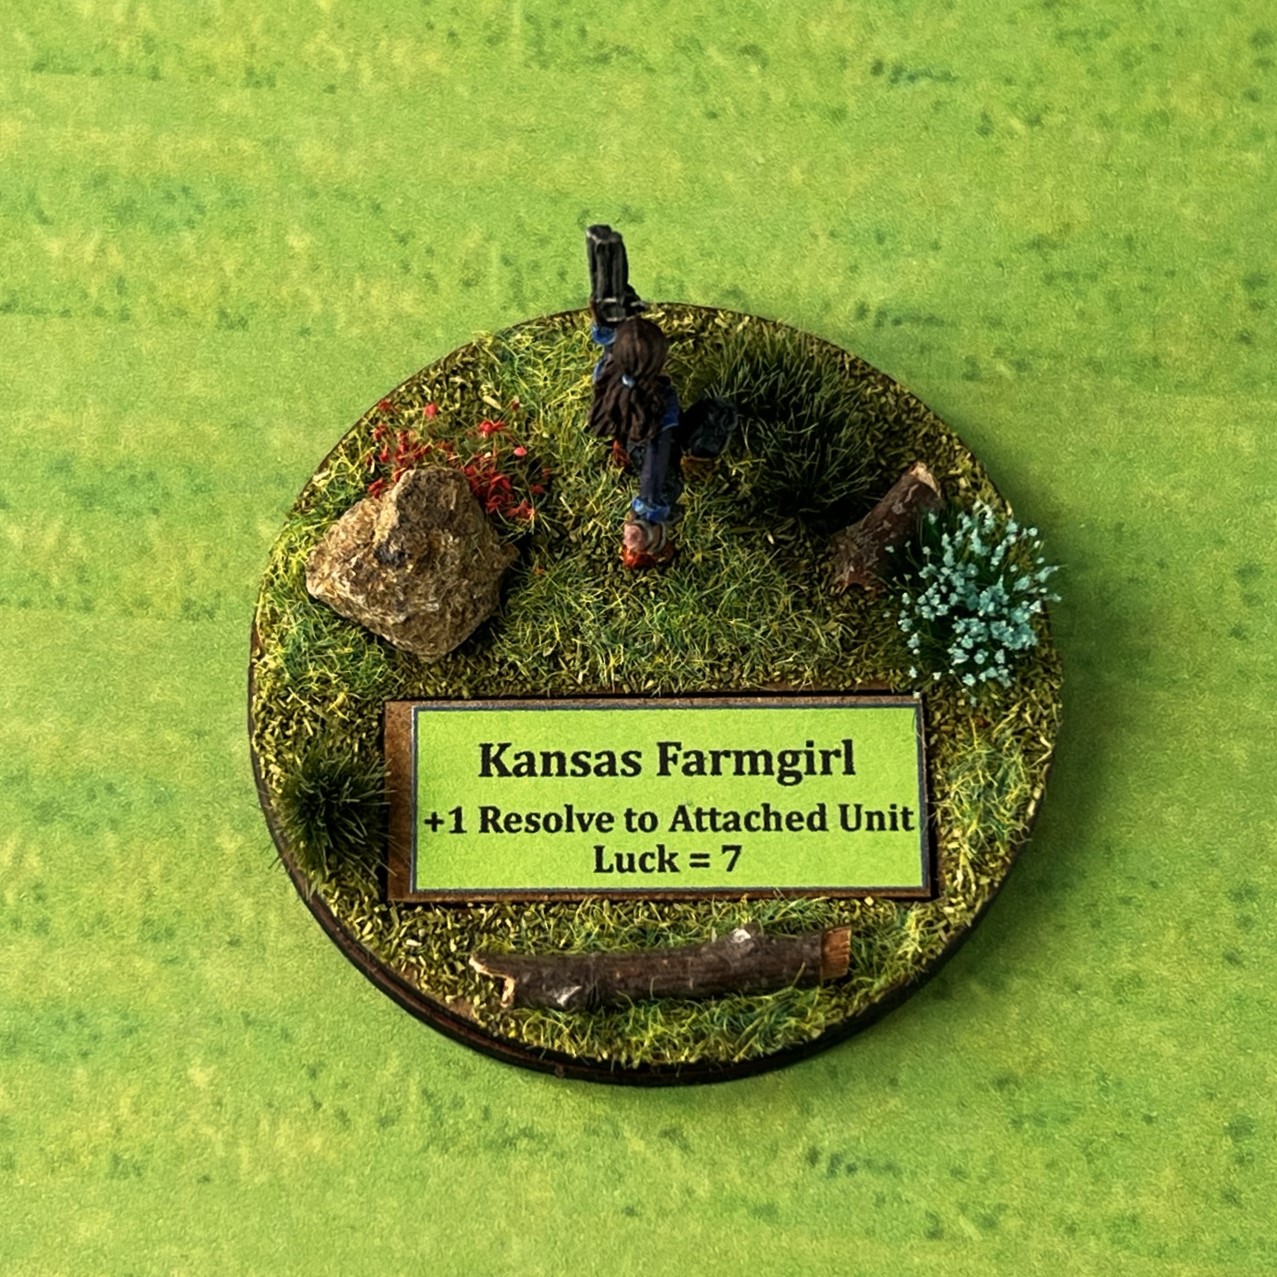
I have been developing a Wars of Ozz scenario to use at upcoming gaming conventions, especially at Fall In!® in Pennsylvania in November. The genesis of the idea for it came to me when I painted up the Adventurers of Ozz figures. The Kansas Farmgirl figure (probably “Dorothy”😁 ) had a small dog in a basket on her waist – and there was yet an extra separate Toto figure in the group. Well, I decided that I could use the other separate Toto as an objective marker – which led to my wanting a scenario for that use. And here we are!
The scenario title is “The Battle for Toto” – I’ll get you my pretty, and your little dog too!”. My flyer with the game description is below.
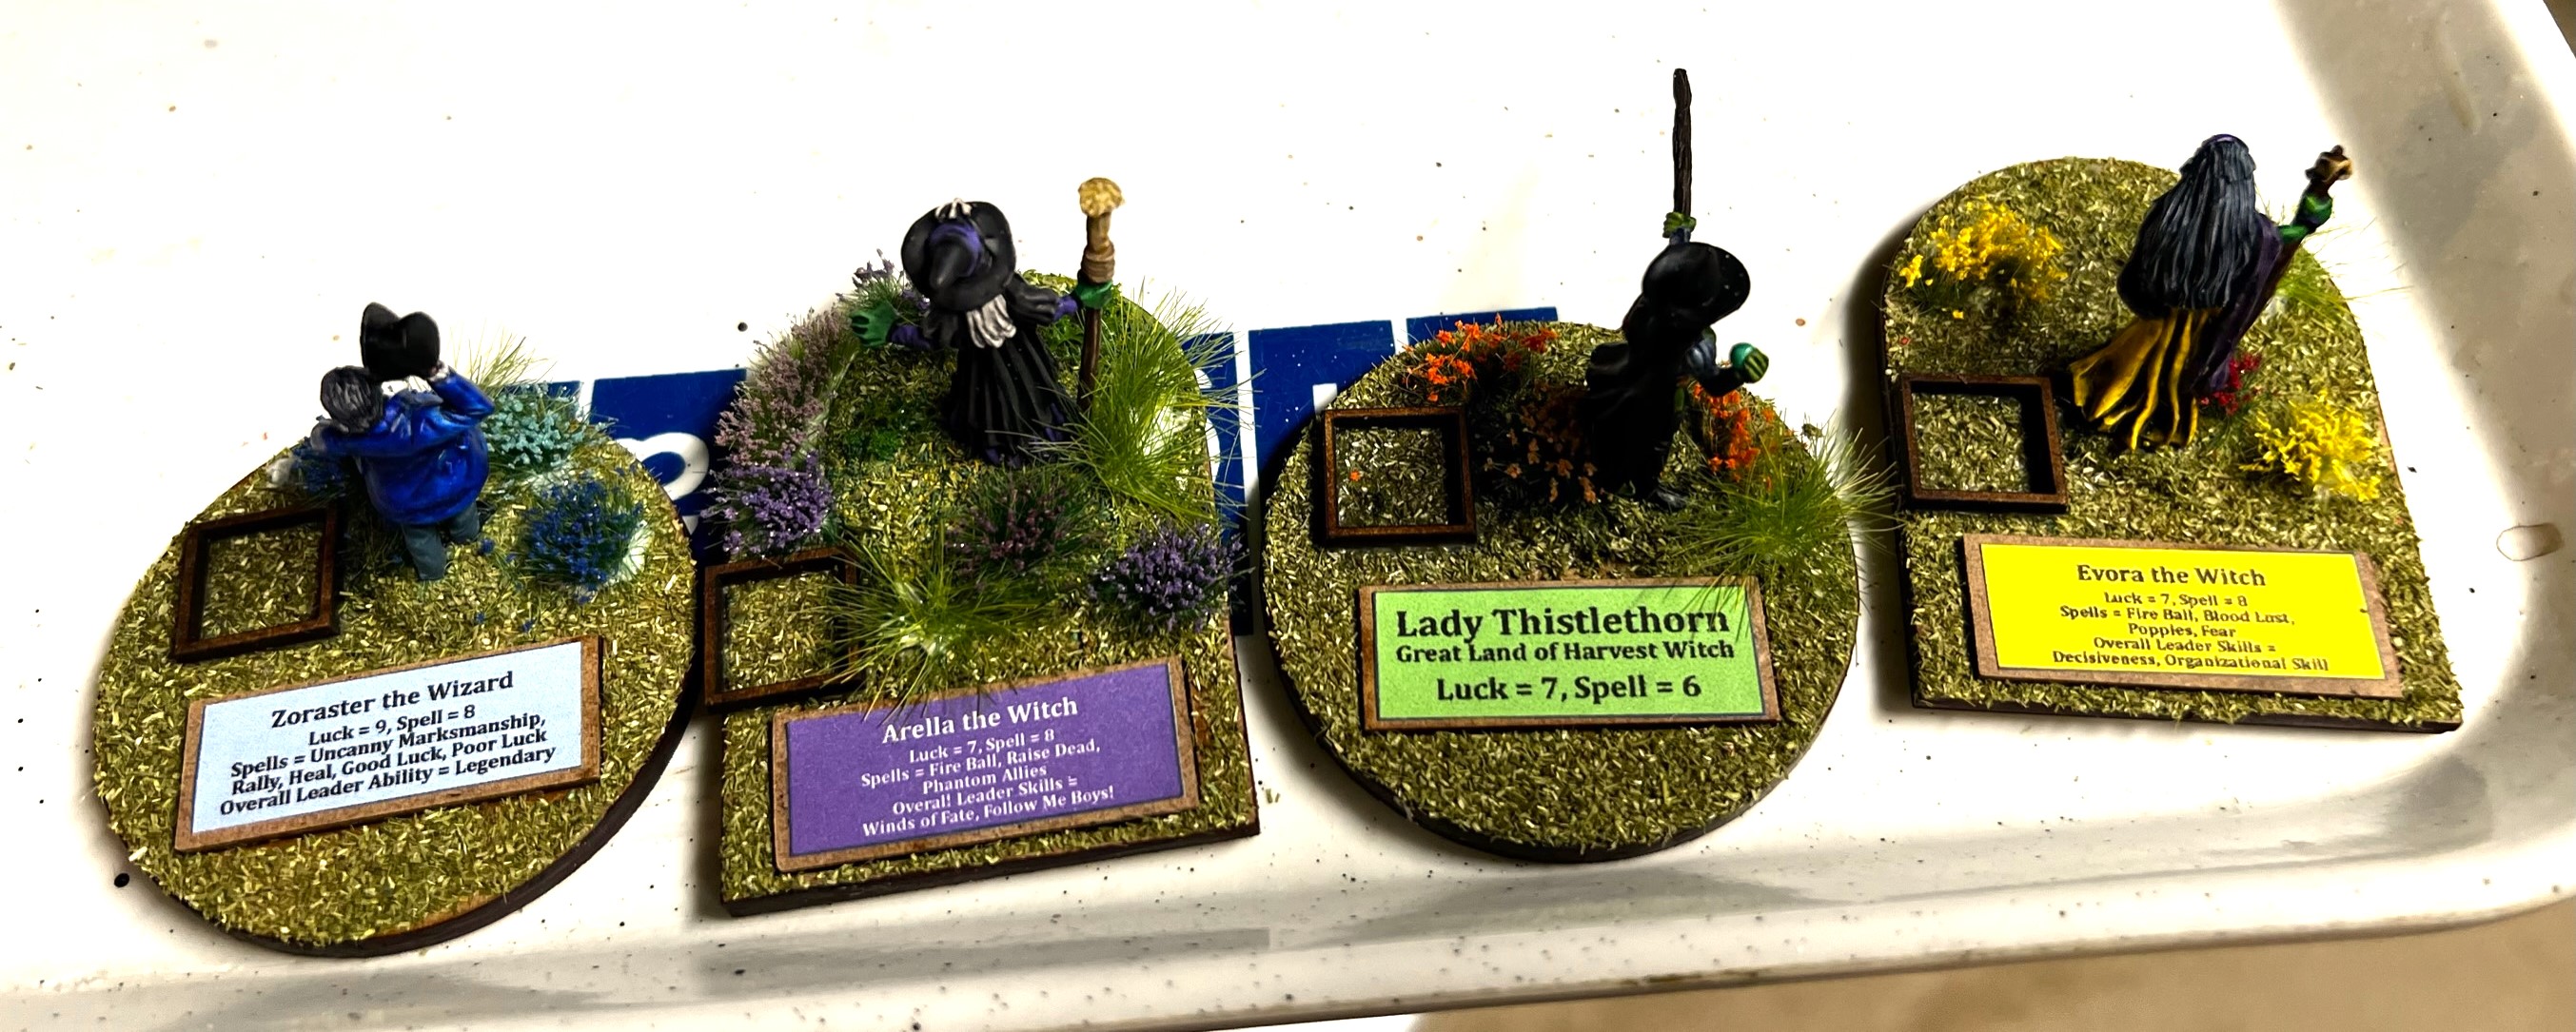
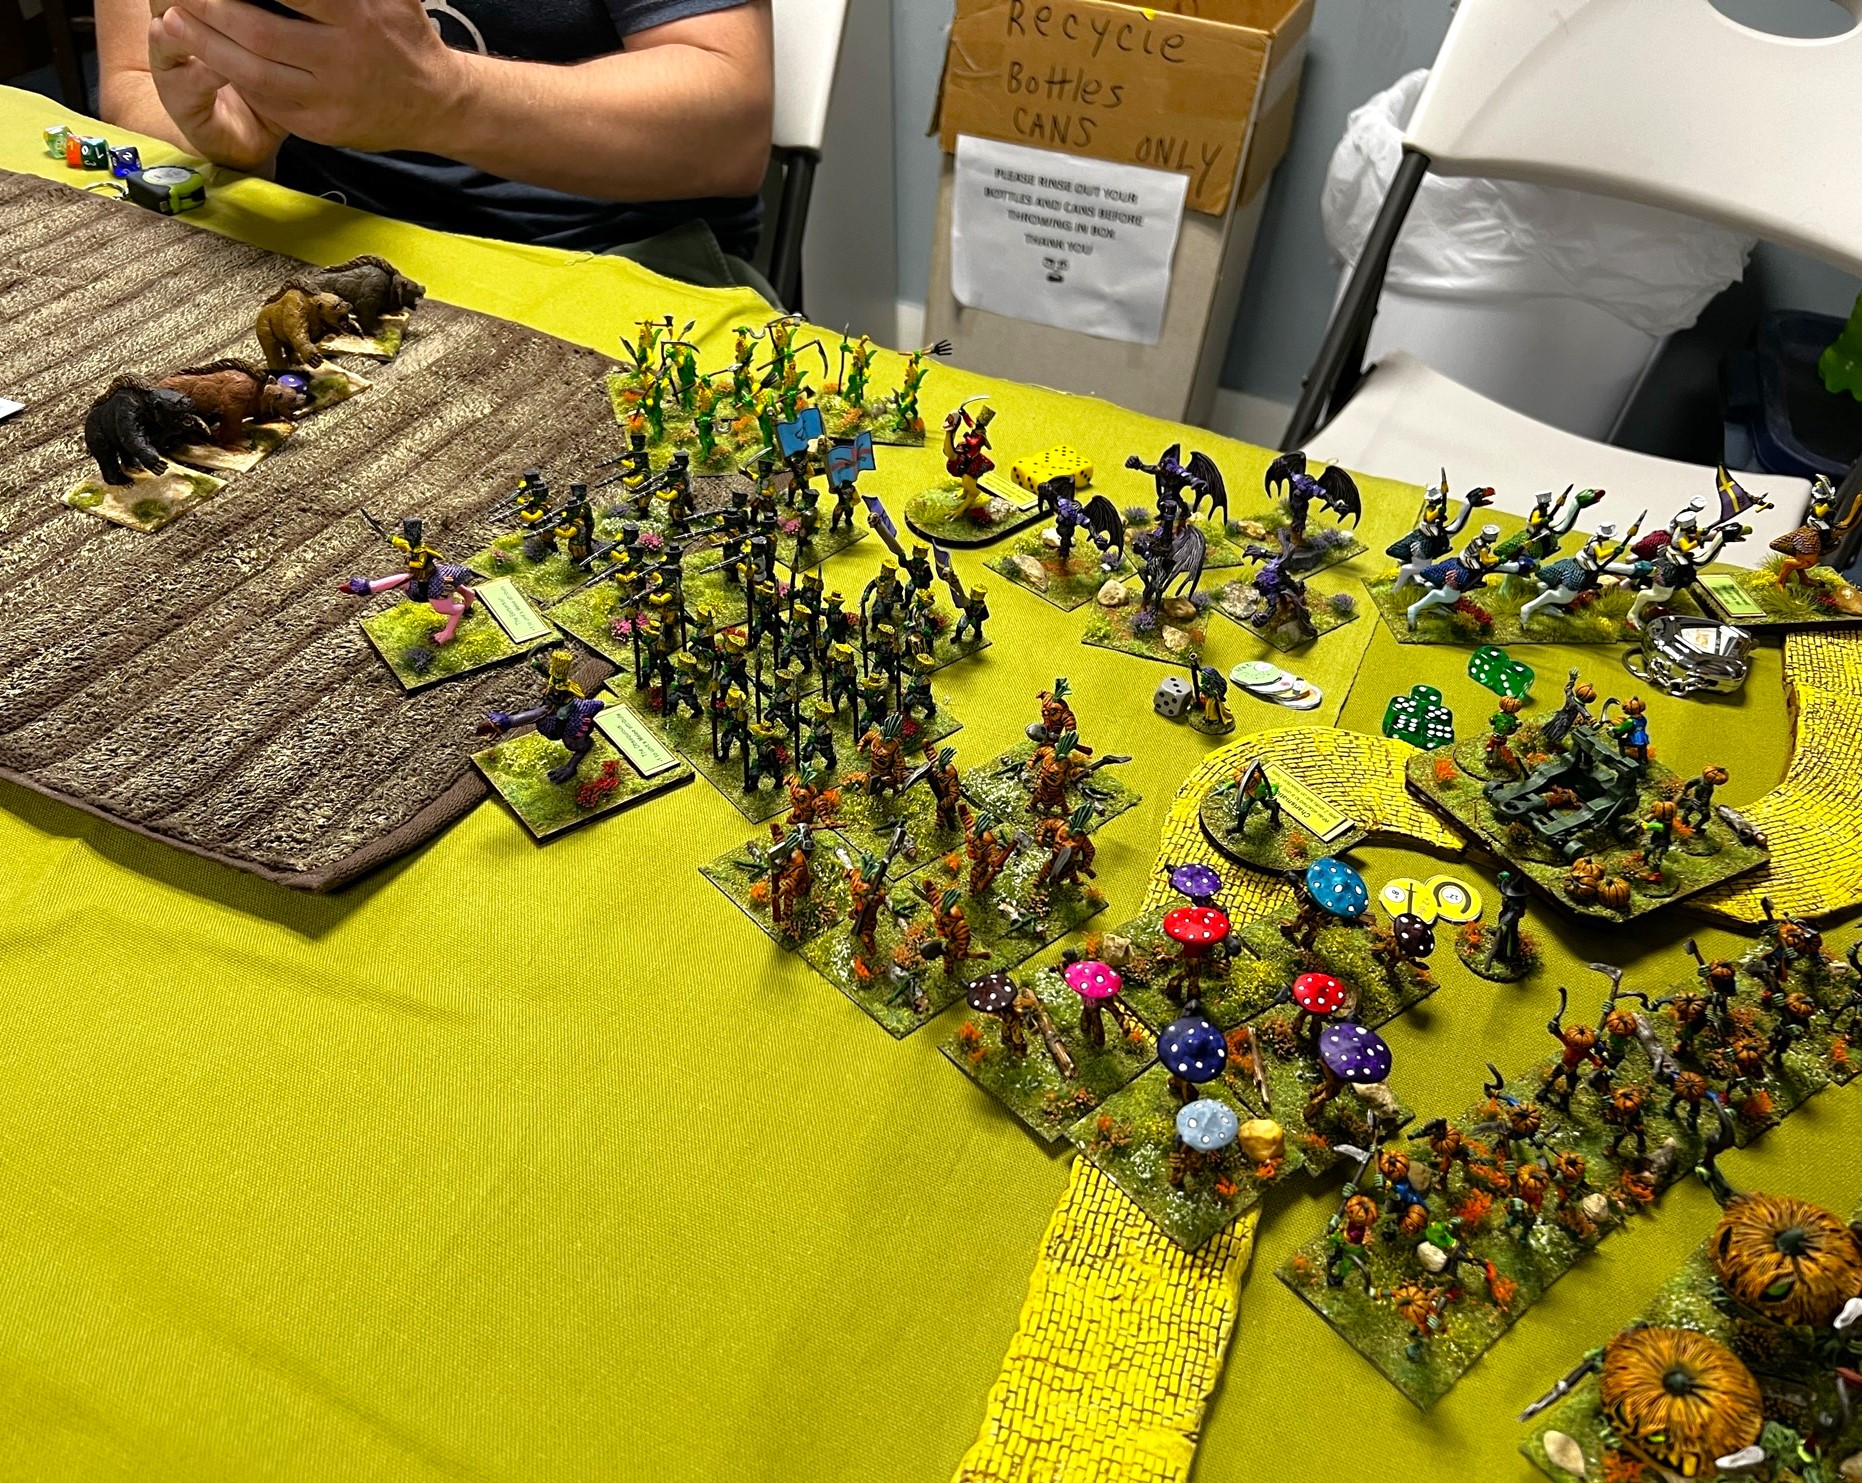
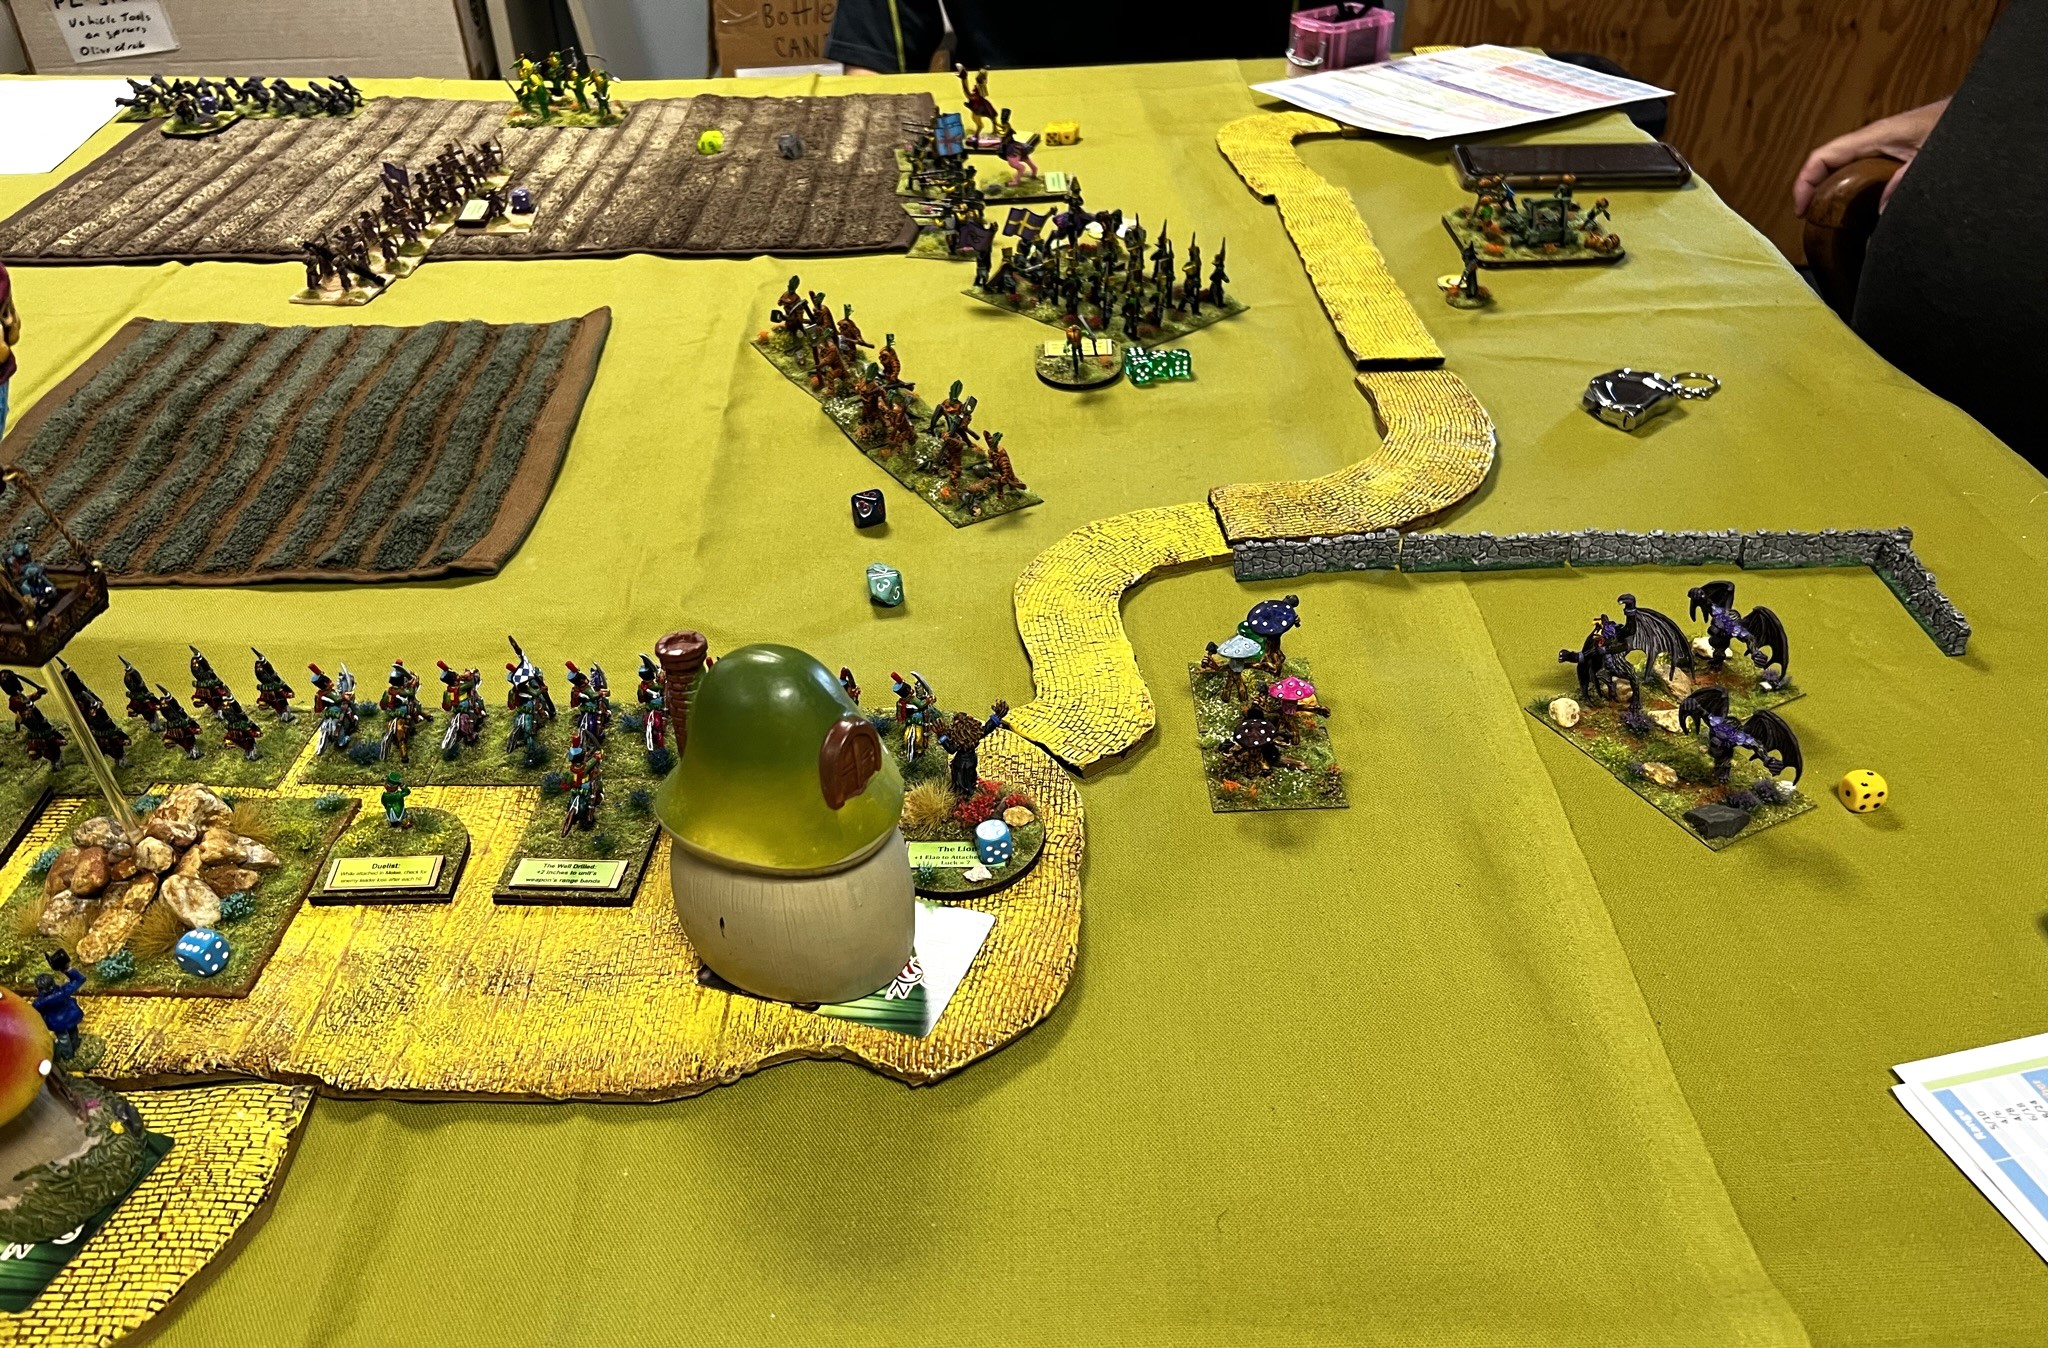
The scenario involves two converging – yet potentially opposing -attacking forces and one defender. On one side, are the Gillikins under Arella the Witch with two reinforced brigades. On the other side, under Evora the Witch, are the combined Winkie/Great Land of Harvest forces consisting of two allied brigades.
Meanwhile, a single reinforced Munchkin brigade is holed up in a nearby small town and some surrounding defensive cover outside of that town. Also hidden in that town – in an unknown location – is the Kansas Farm Girl’s little dog, Toto – the object of the game of course.
The Gillikins and the Winkies can choose to fight each other or collaborate and go for the Munchkins. To simulate the “sibling rivalry” aspect of the game, I allowed Victory Points for the two attackers differently. If the attackers took out a Munchkin base, it was worth 1 point, while taking out a sibling’s base was worth 1.5 points. While collaboration between the attackers is possible, I created an incentive here for sororicidal tendencies to assert themselves (never used that word before!). The point values for the game are shown below:
The biggest point value is possession of Toto at the end of the game at 10 points. Toto is placed randomly and secretly under one of the buildings using playing cards face down. Even I, as the GM, won’t know where Toto is.
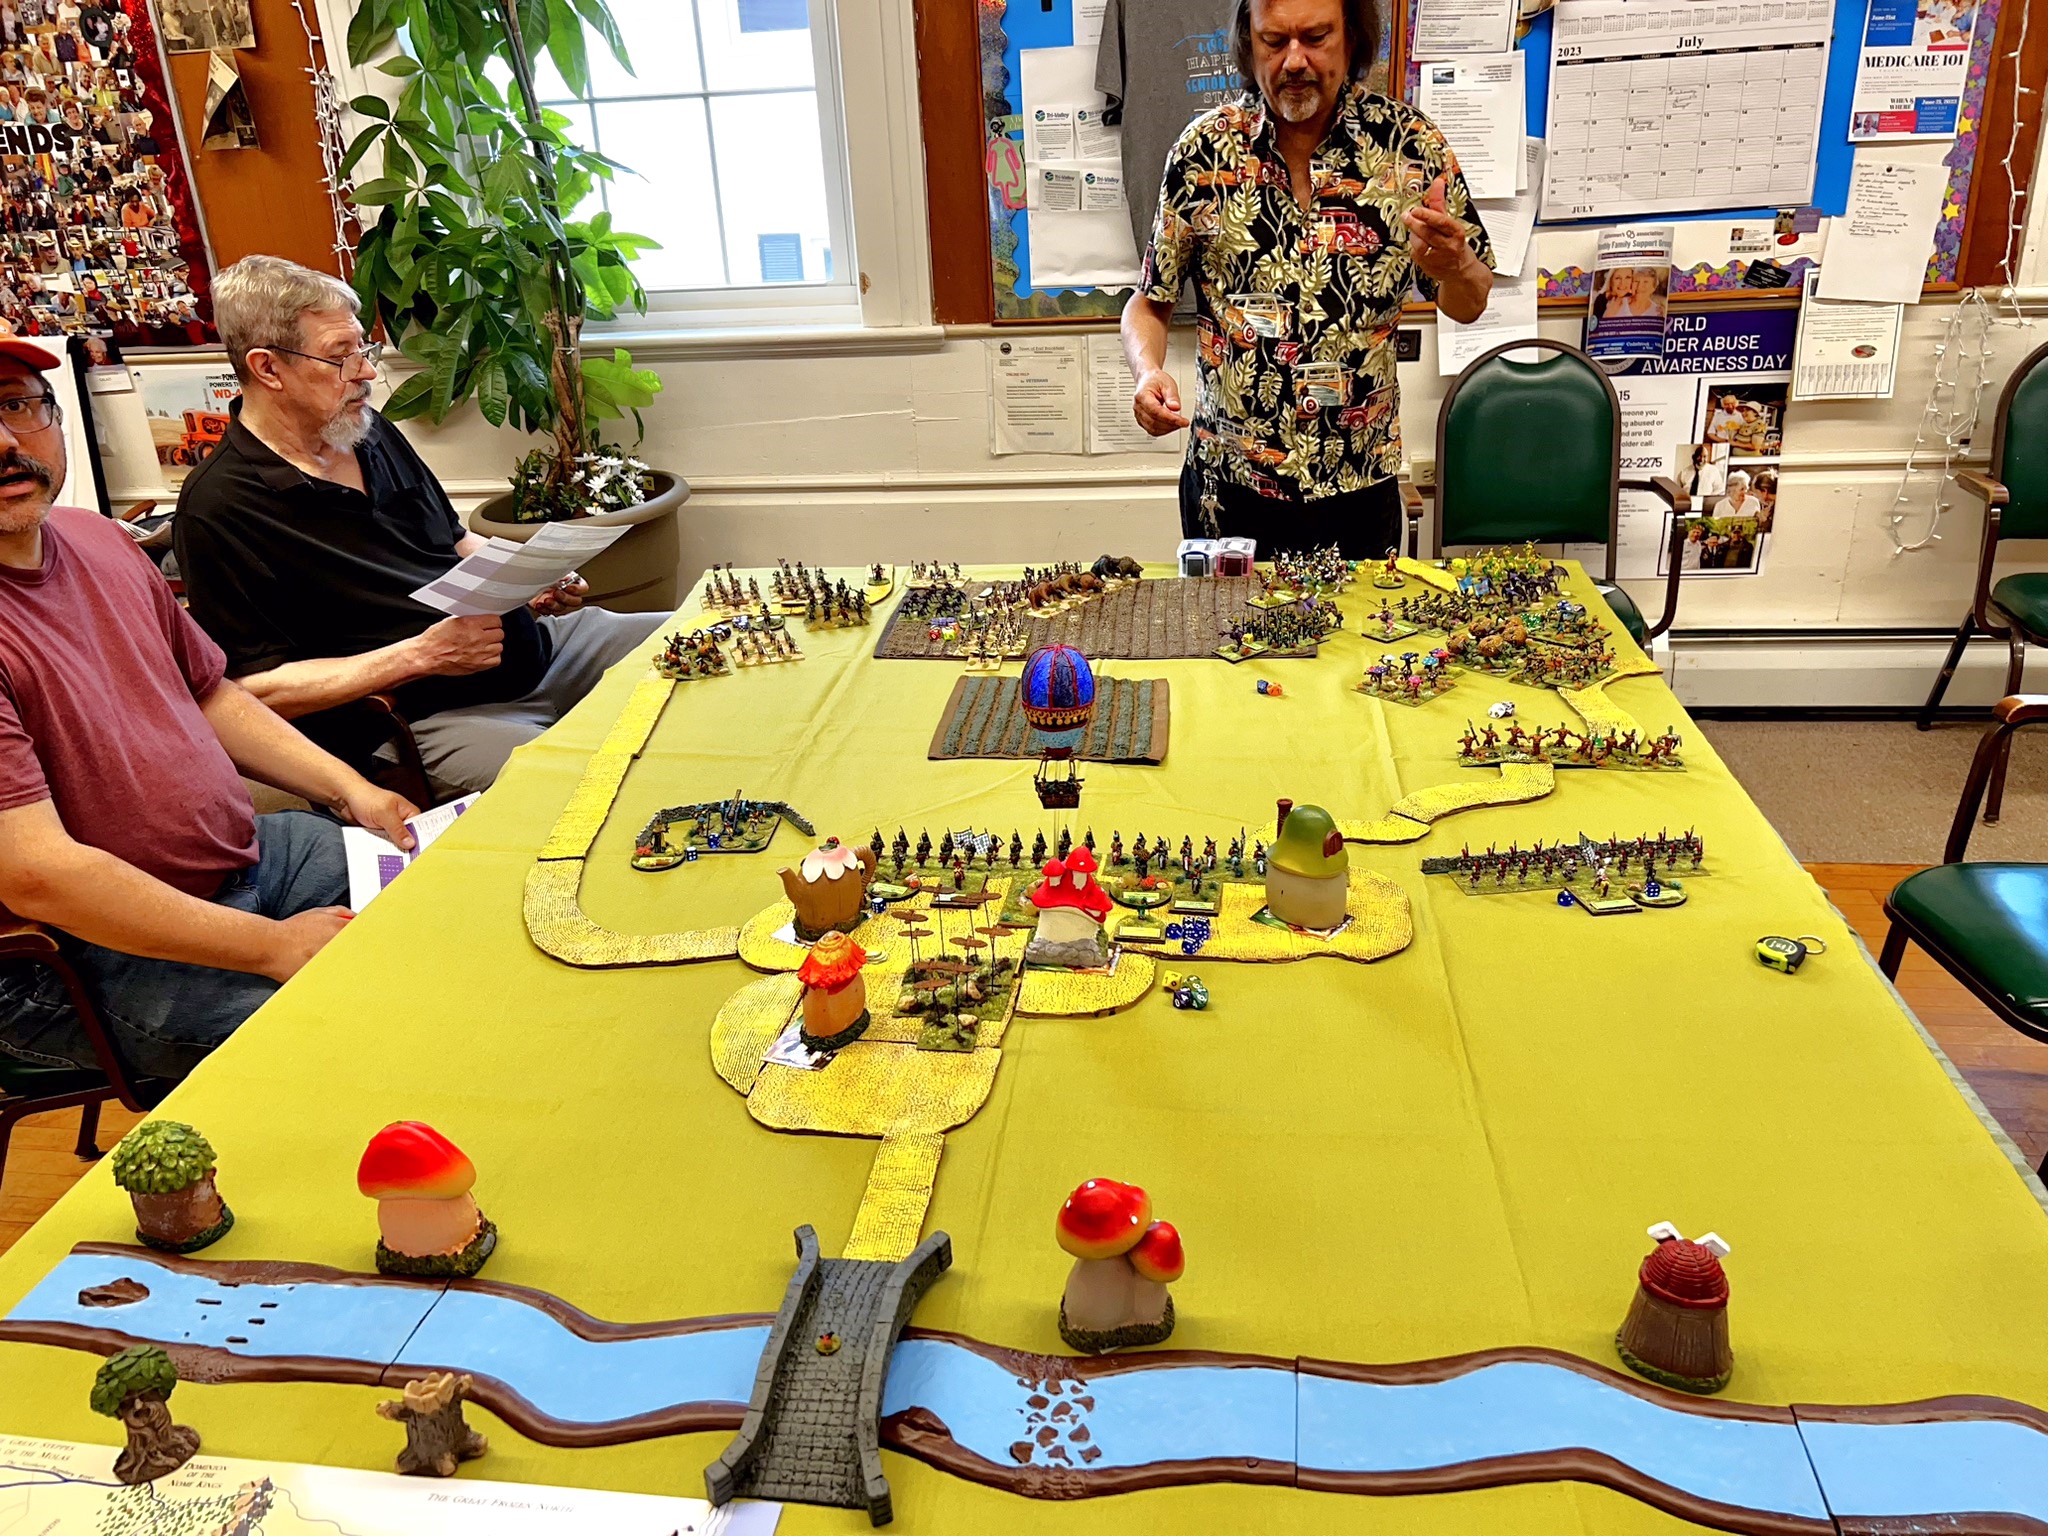
I have GM’ed this game twice. I ran it at a Mass Pikemen game day back in July on the 22nd, and also at the Hobby Bunker Game Day event on August 26th. I took a few pictures but as always when you’re the GM it’s difficult to be a great photographer and run the game effectively. I always prefer to be an effective GM and as good a photographer as possible. Still, I think you’ll find these pictures interesting – and this post will be photo-heavy.
As is my wont, after each game, I tweak it a bit for the next iteration based upon player feedback my own observations. In both of the games here, I acted as the GM and the Munchkin commander. If I had more players, I would defer. As I would expect the Munchkins to take advantage of their initial hard cover, little movement on their part is expected. This leaves more game time for the attackers, as the Munchkin’s actions during their activation tends to be over pretty quickly for the most part.
A quick aside – I needed to determine a special order of play with three sides. Normally, in Wars of Ozz, for activation purposes, there is an activation deck of cards with 12 cards: 1-6 red and 1-6 black. They determine the order in which a side can activate a unit or individual based on a dice pool controlled by the brigade commander. The number of dice in a brigade commander’s dice pool corresponds to the number of units or individuals that the player controls. So if a 6 is pulled on a card – the player can choose a unit to activate with any available sixes on the dice. For this three-way game, to see who would go first, I needed to set up a special order of play. I used red cards for the Munchkins (which would let them go first on a red card) and odd black-numbered cards for the Gillikins and even black-numbered cards for the Winkie/Harvest brigades. Each turn, all get activated, it’s just the order of activation that is affected. For example, if a black 3 card was pulled, all Gillikin 3’s would activate, followed by Winkie/Harvest 3’s, followed by Munchkin 3’s. If the next card was a red 6, the activation order of play would then be Munchkin 6’s, followed by Winkie/Harvest 6’s (as an even number), followed by Gillikin 6’s (who only go first on odd numbers). As all 12 cards are played each turn – it does evens out.
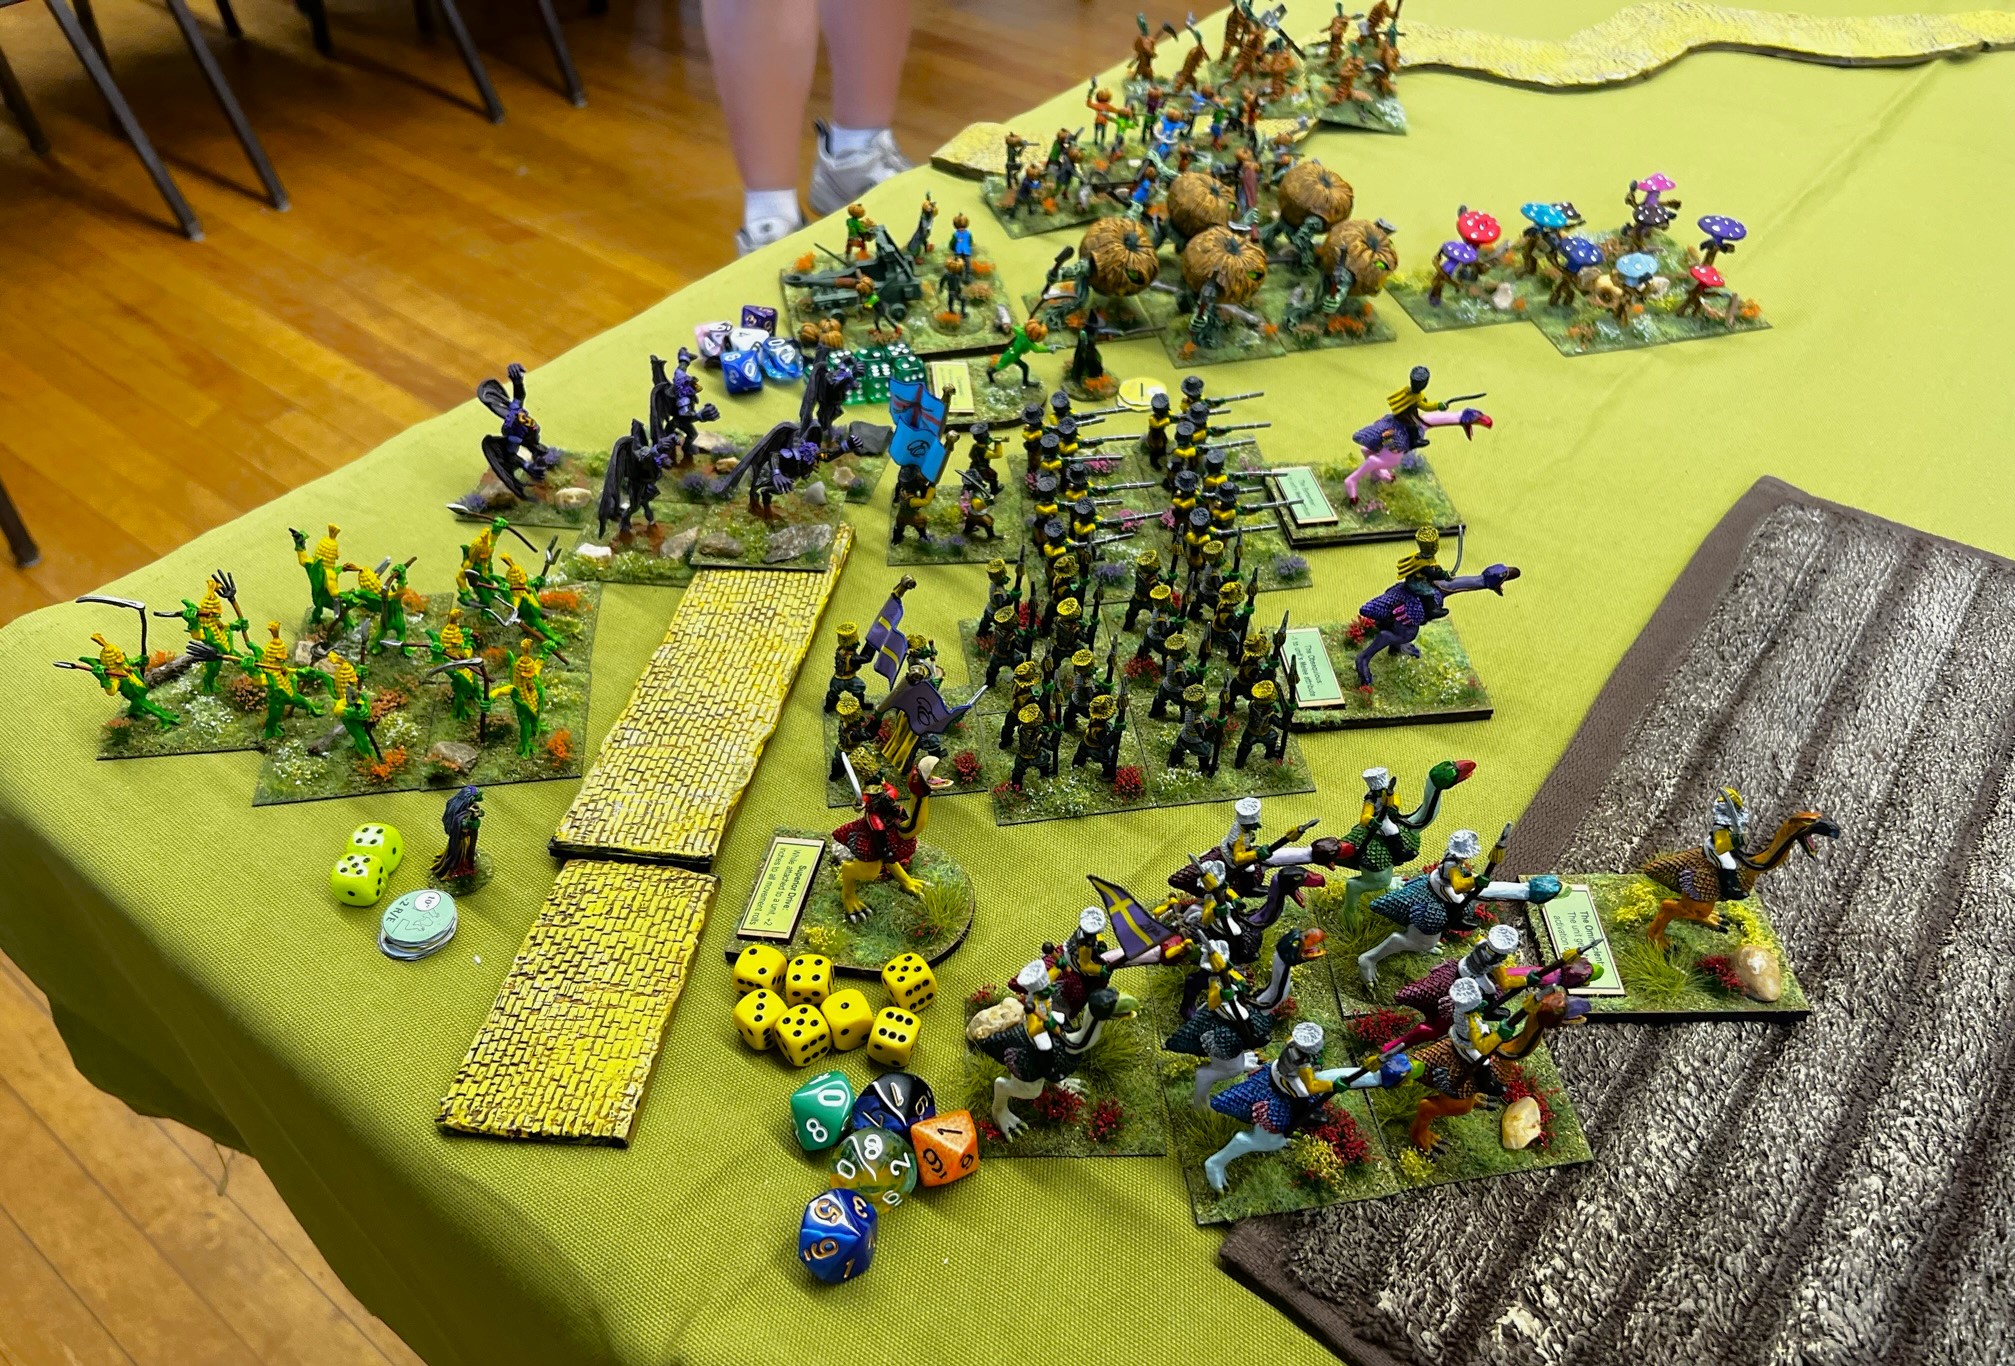
I will share the pics below and give some descriptions – though it is far from a complete battle report to be sure. I just thought you folks would enjoy the photos and the flavor of the games.
Mass Pikemen Game Day – July 22nd
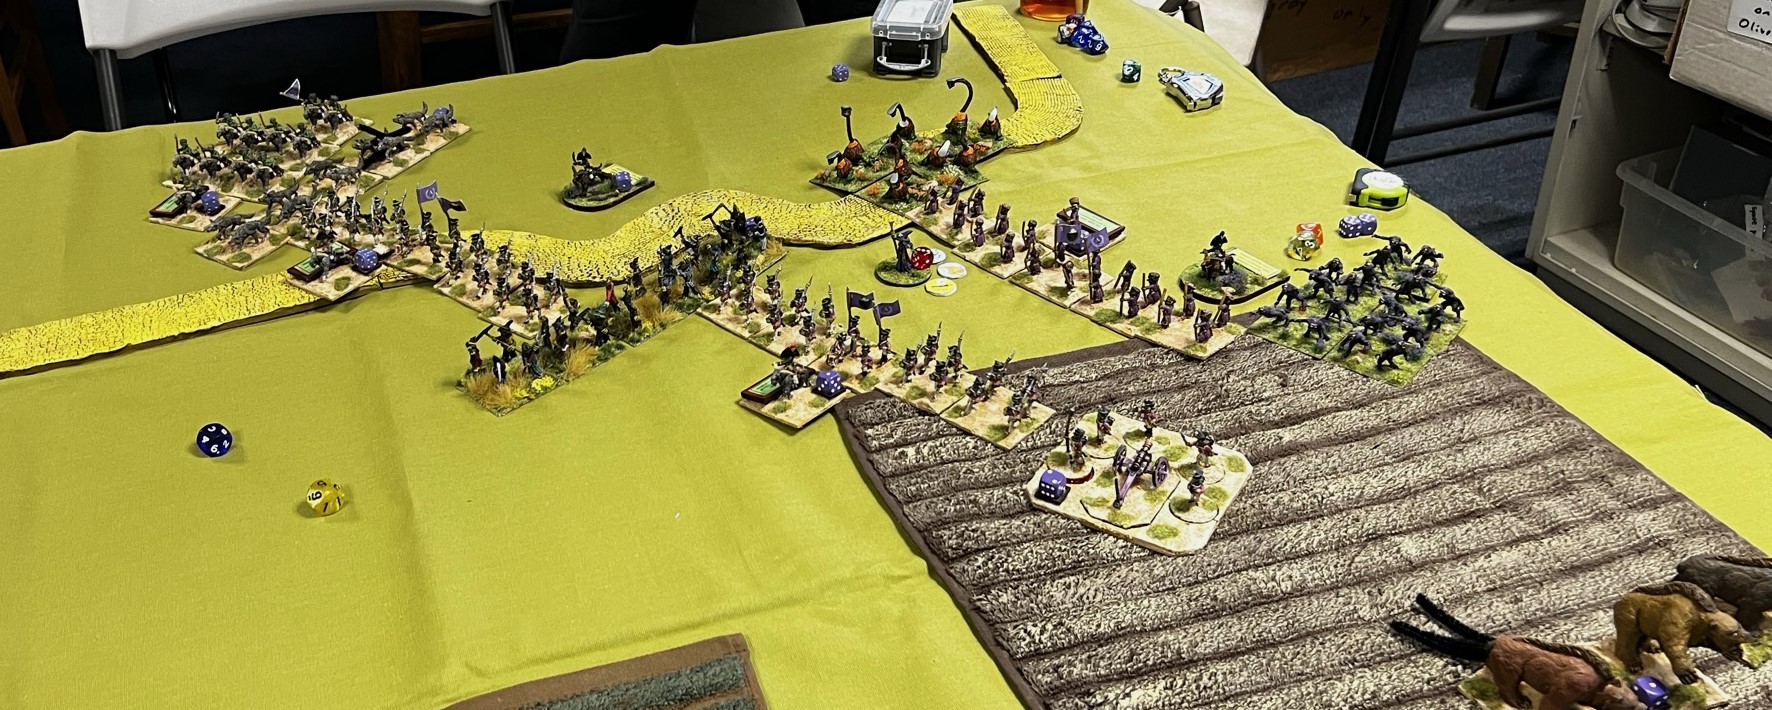
Here is the game as set up:
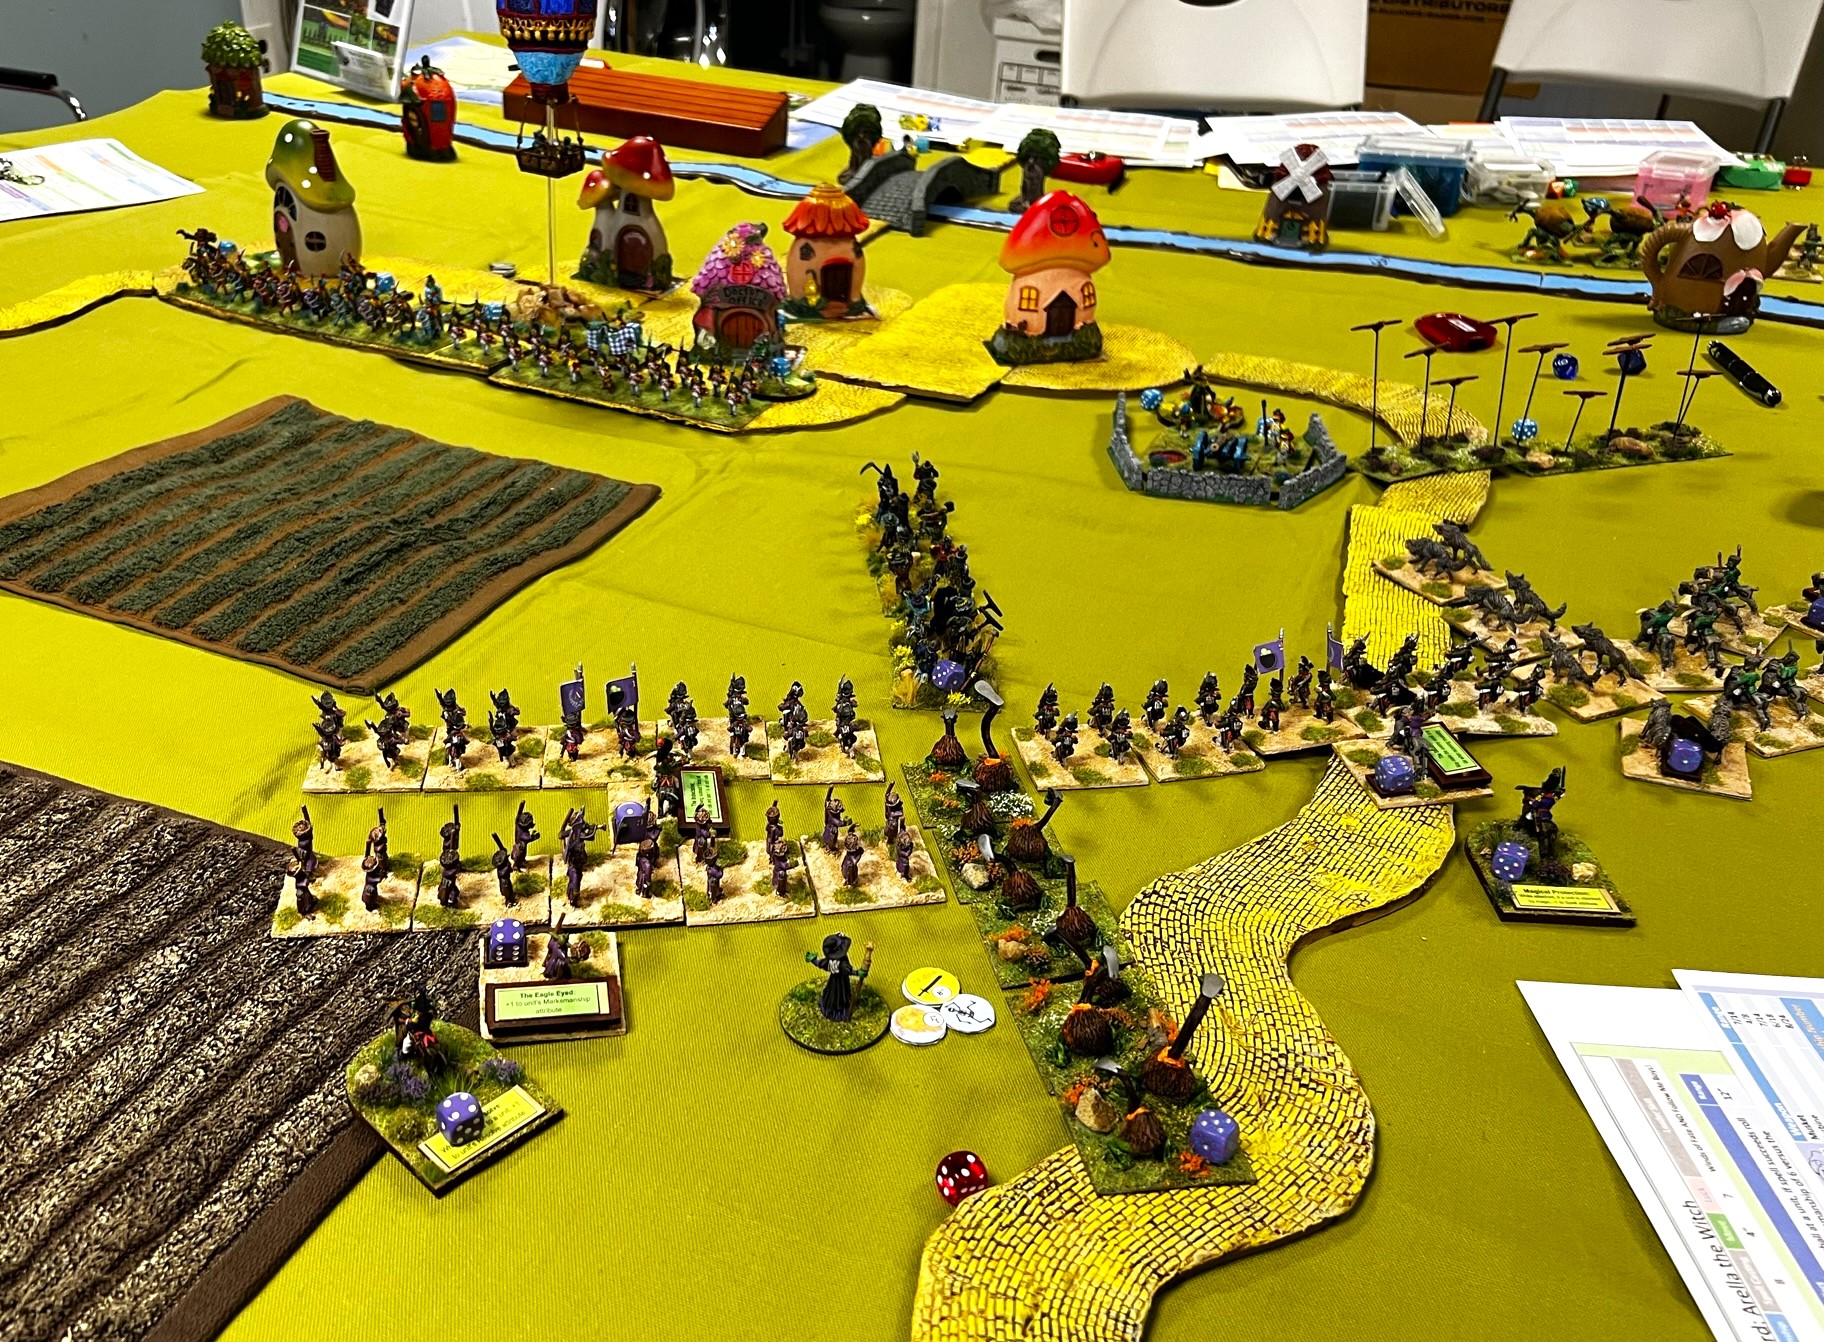
Winkie/Harvest on the left – Gillikins on right, Munchkins in town and behind walls on right and left of the town.
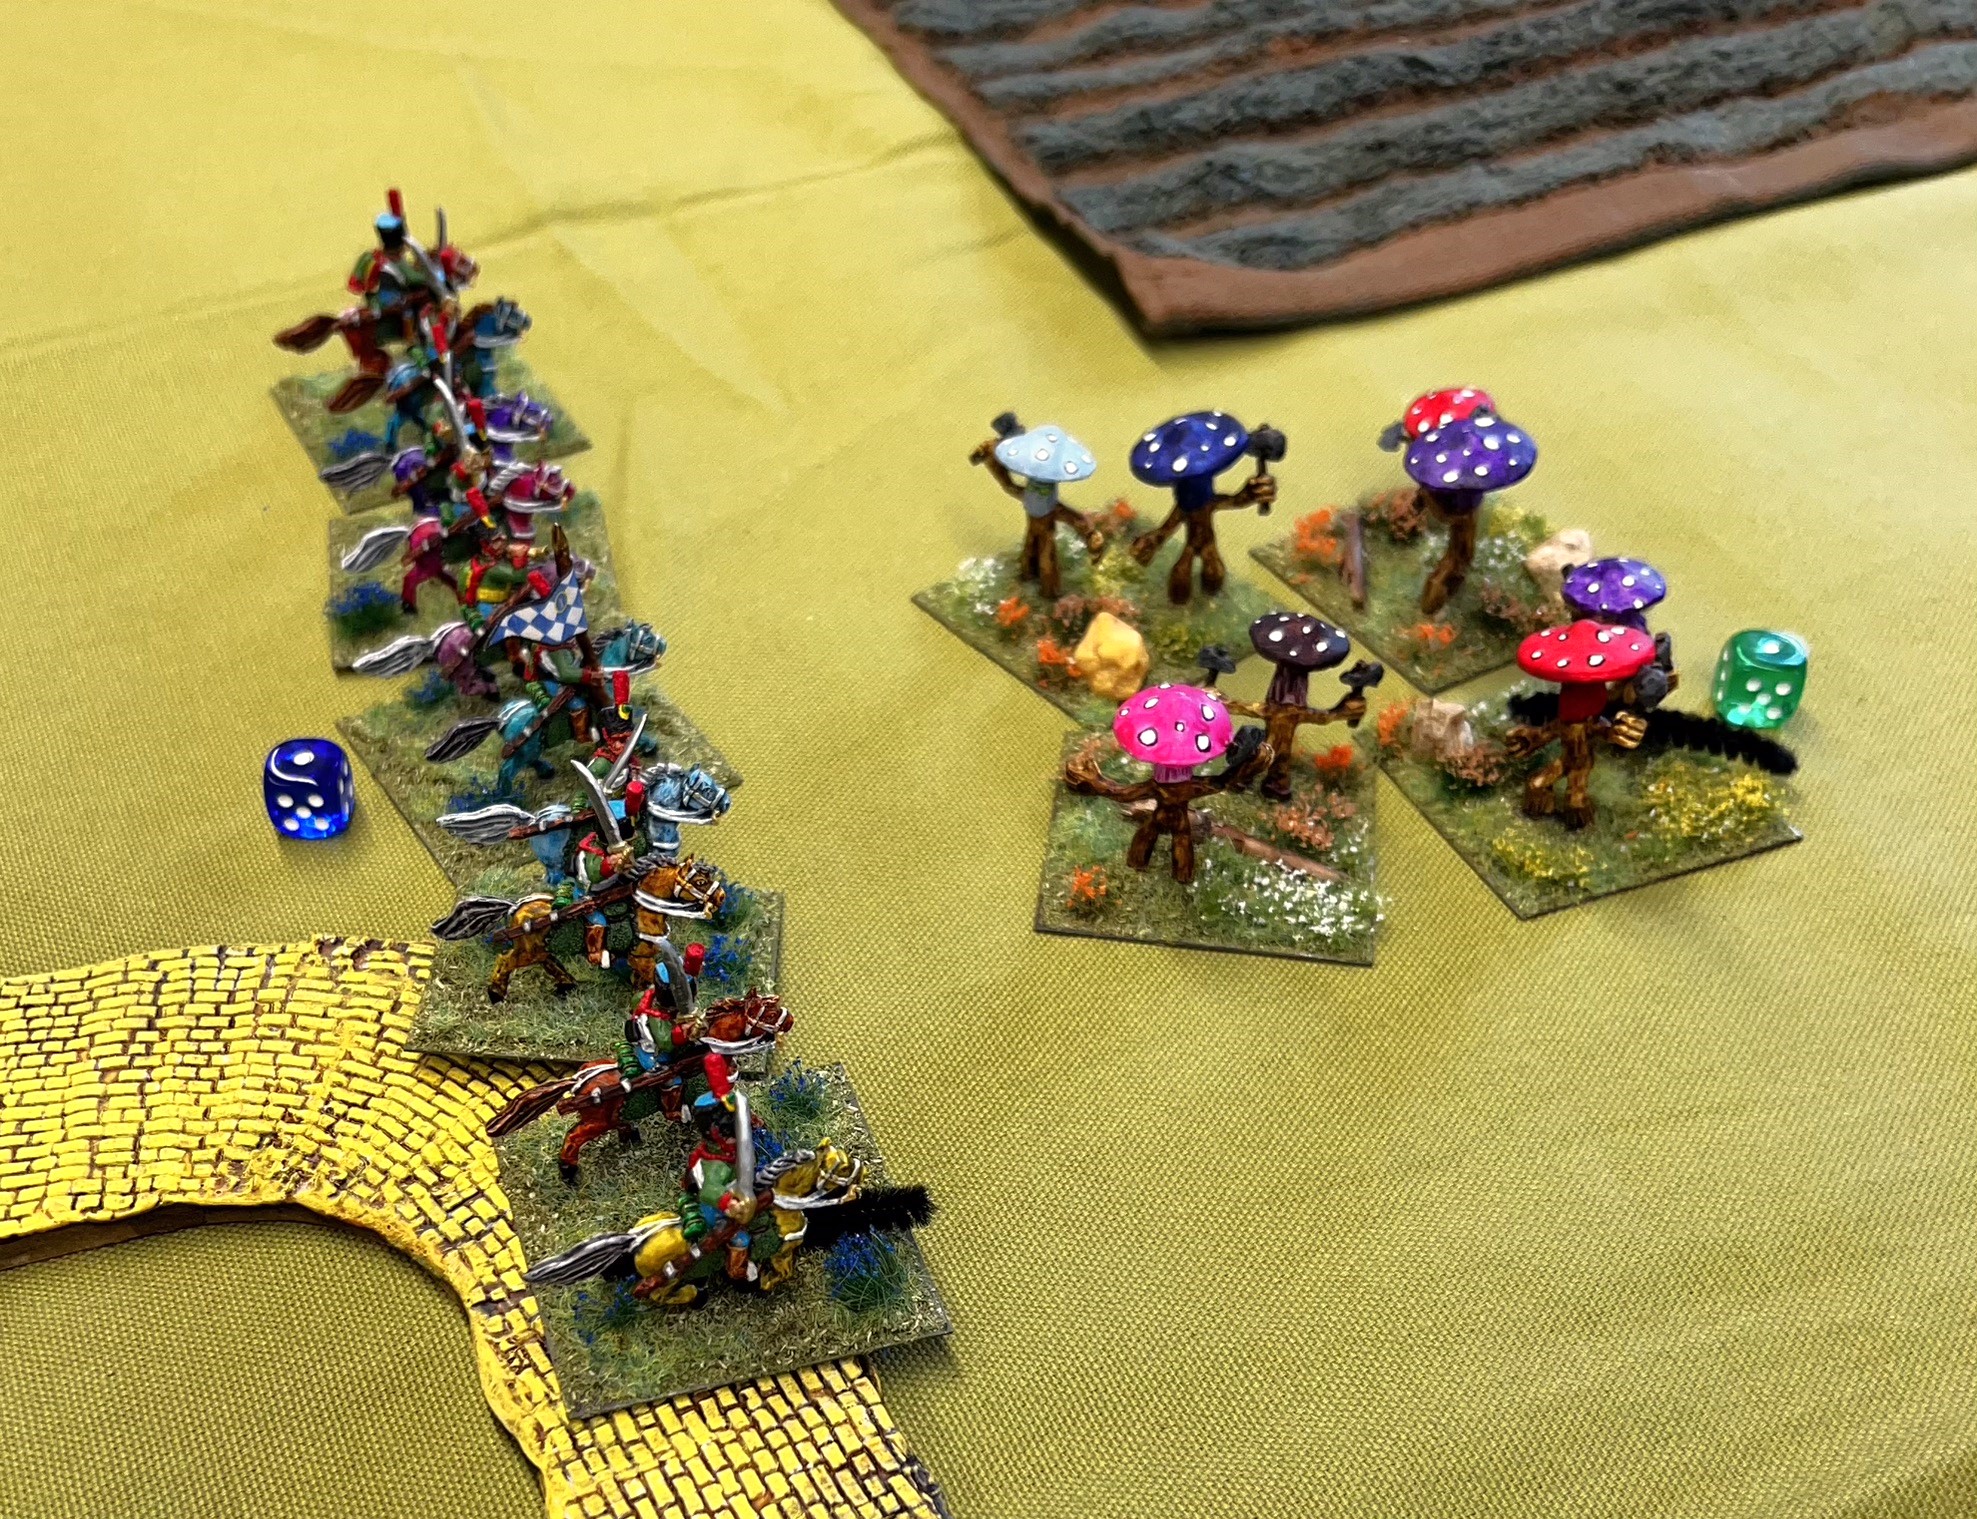
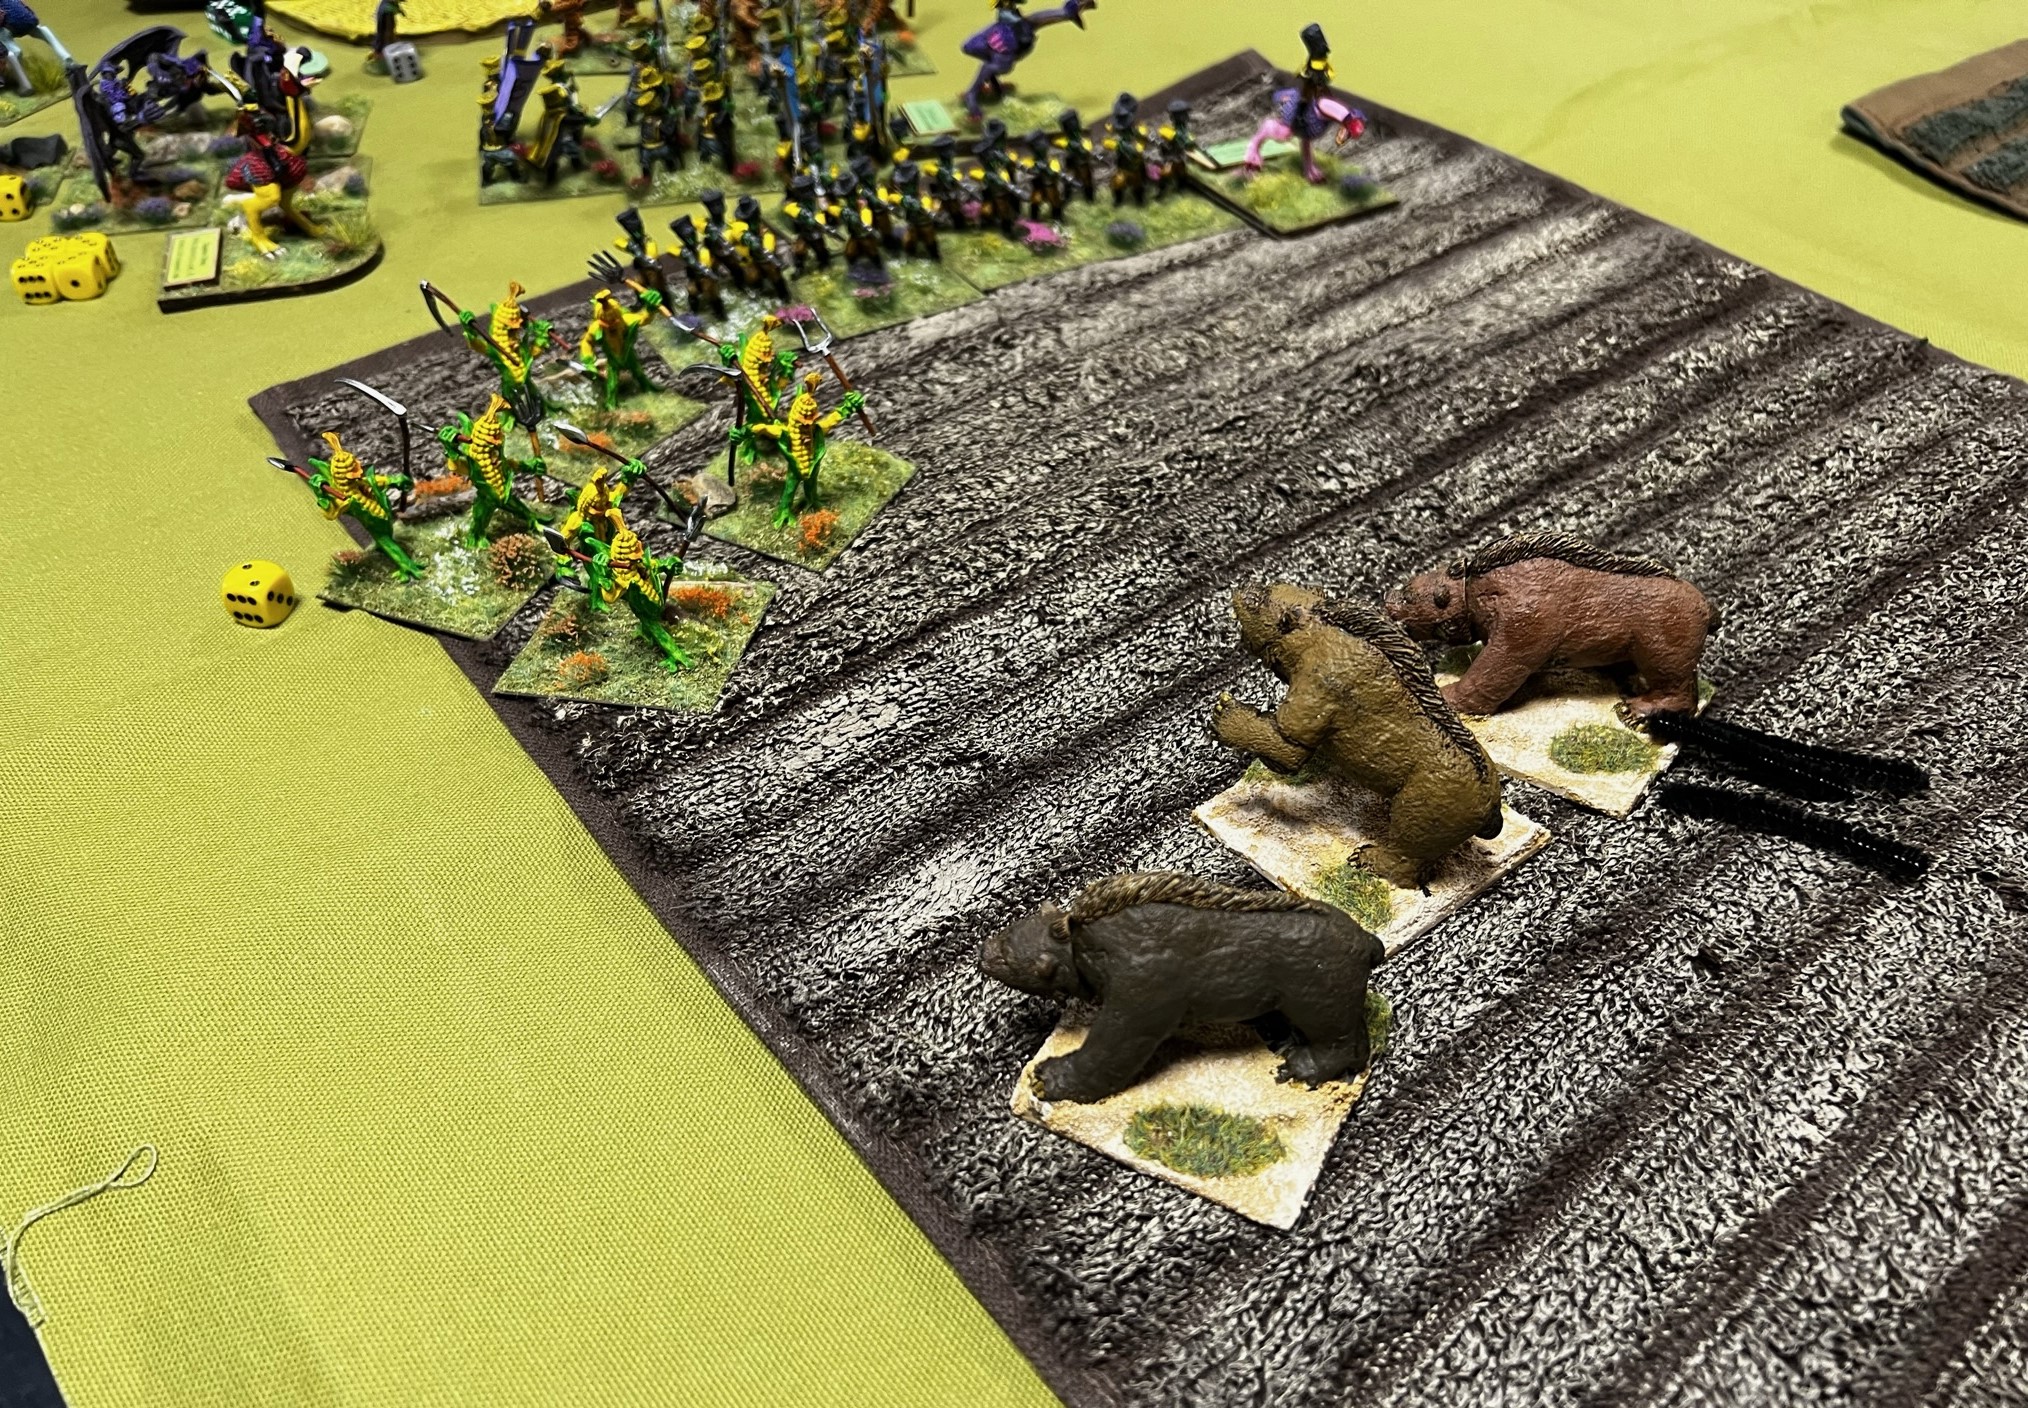
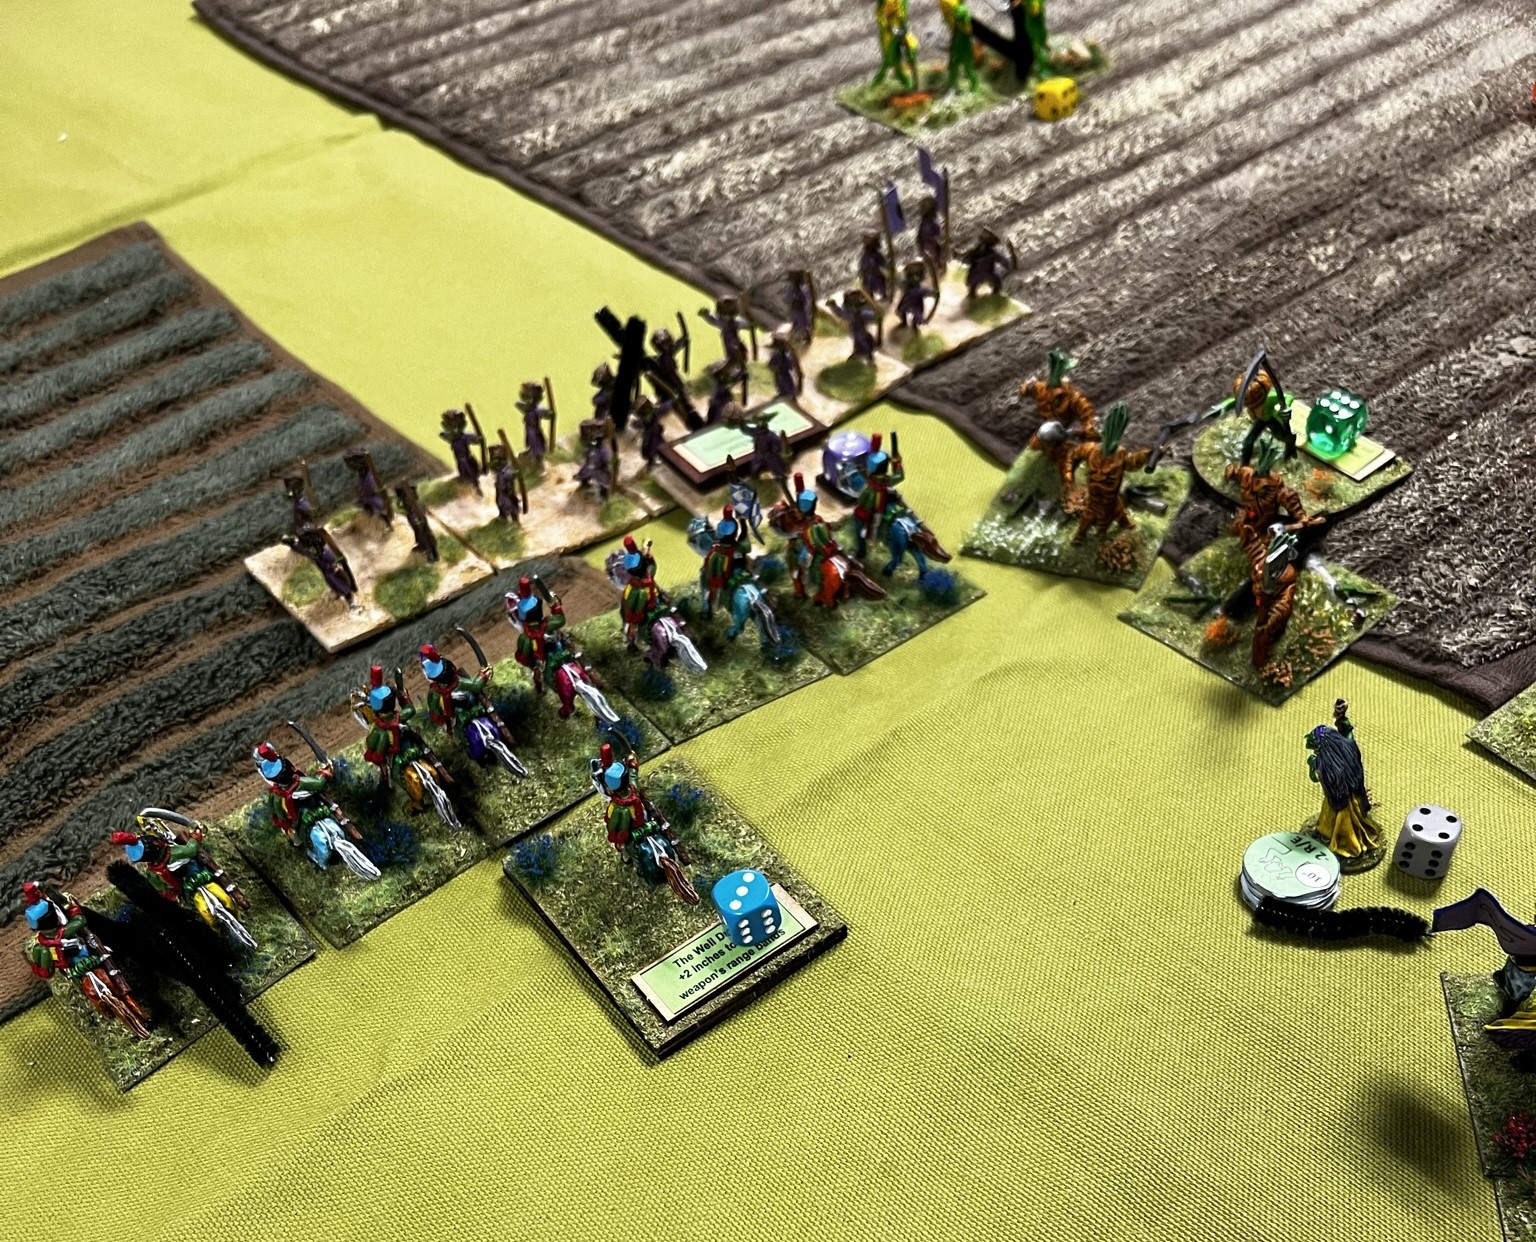
Close ups of the attackers are shown below at the start of the scenario – the Winkies are screening their flank with zilk cavalry, while the Gillikins are doing the same with a regiment of giant Dire Bears.
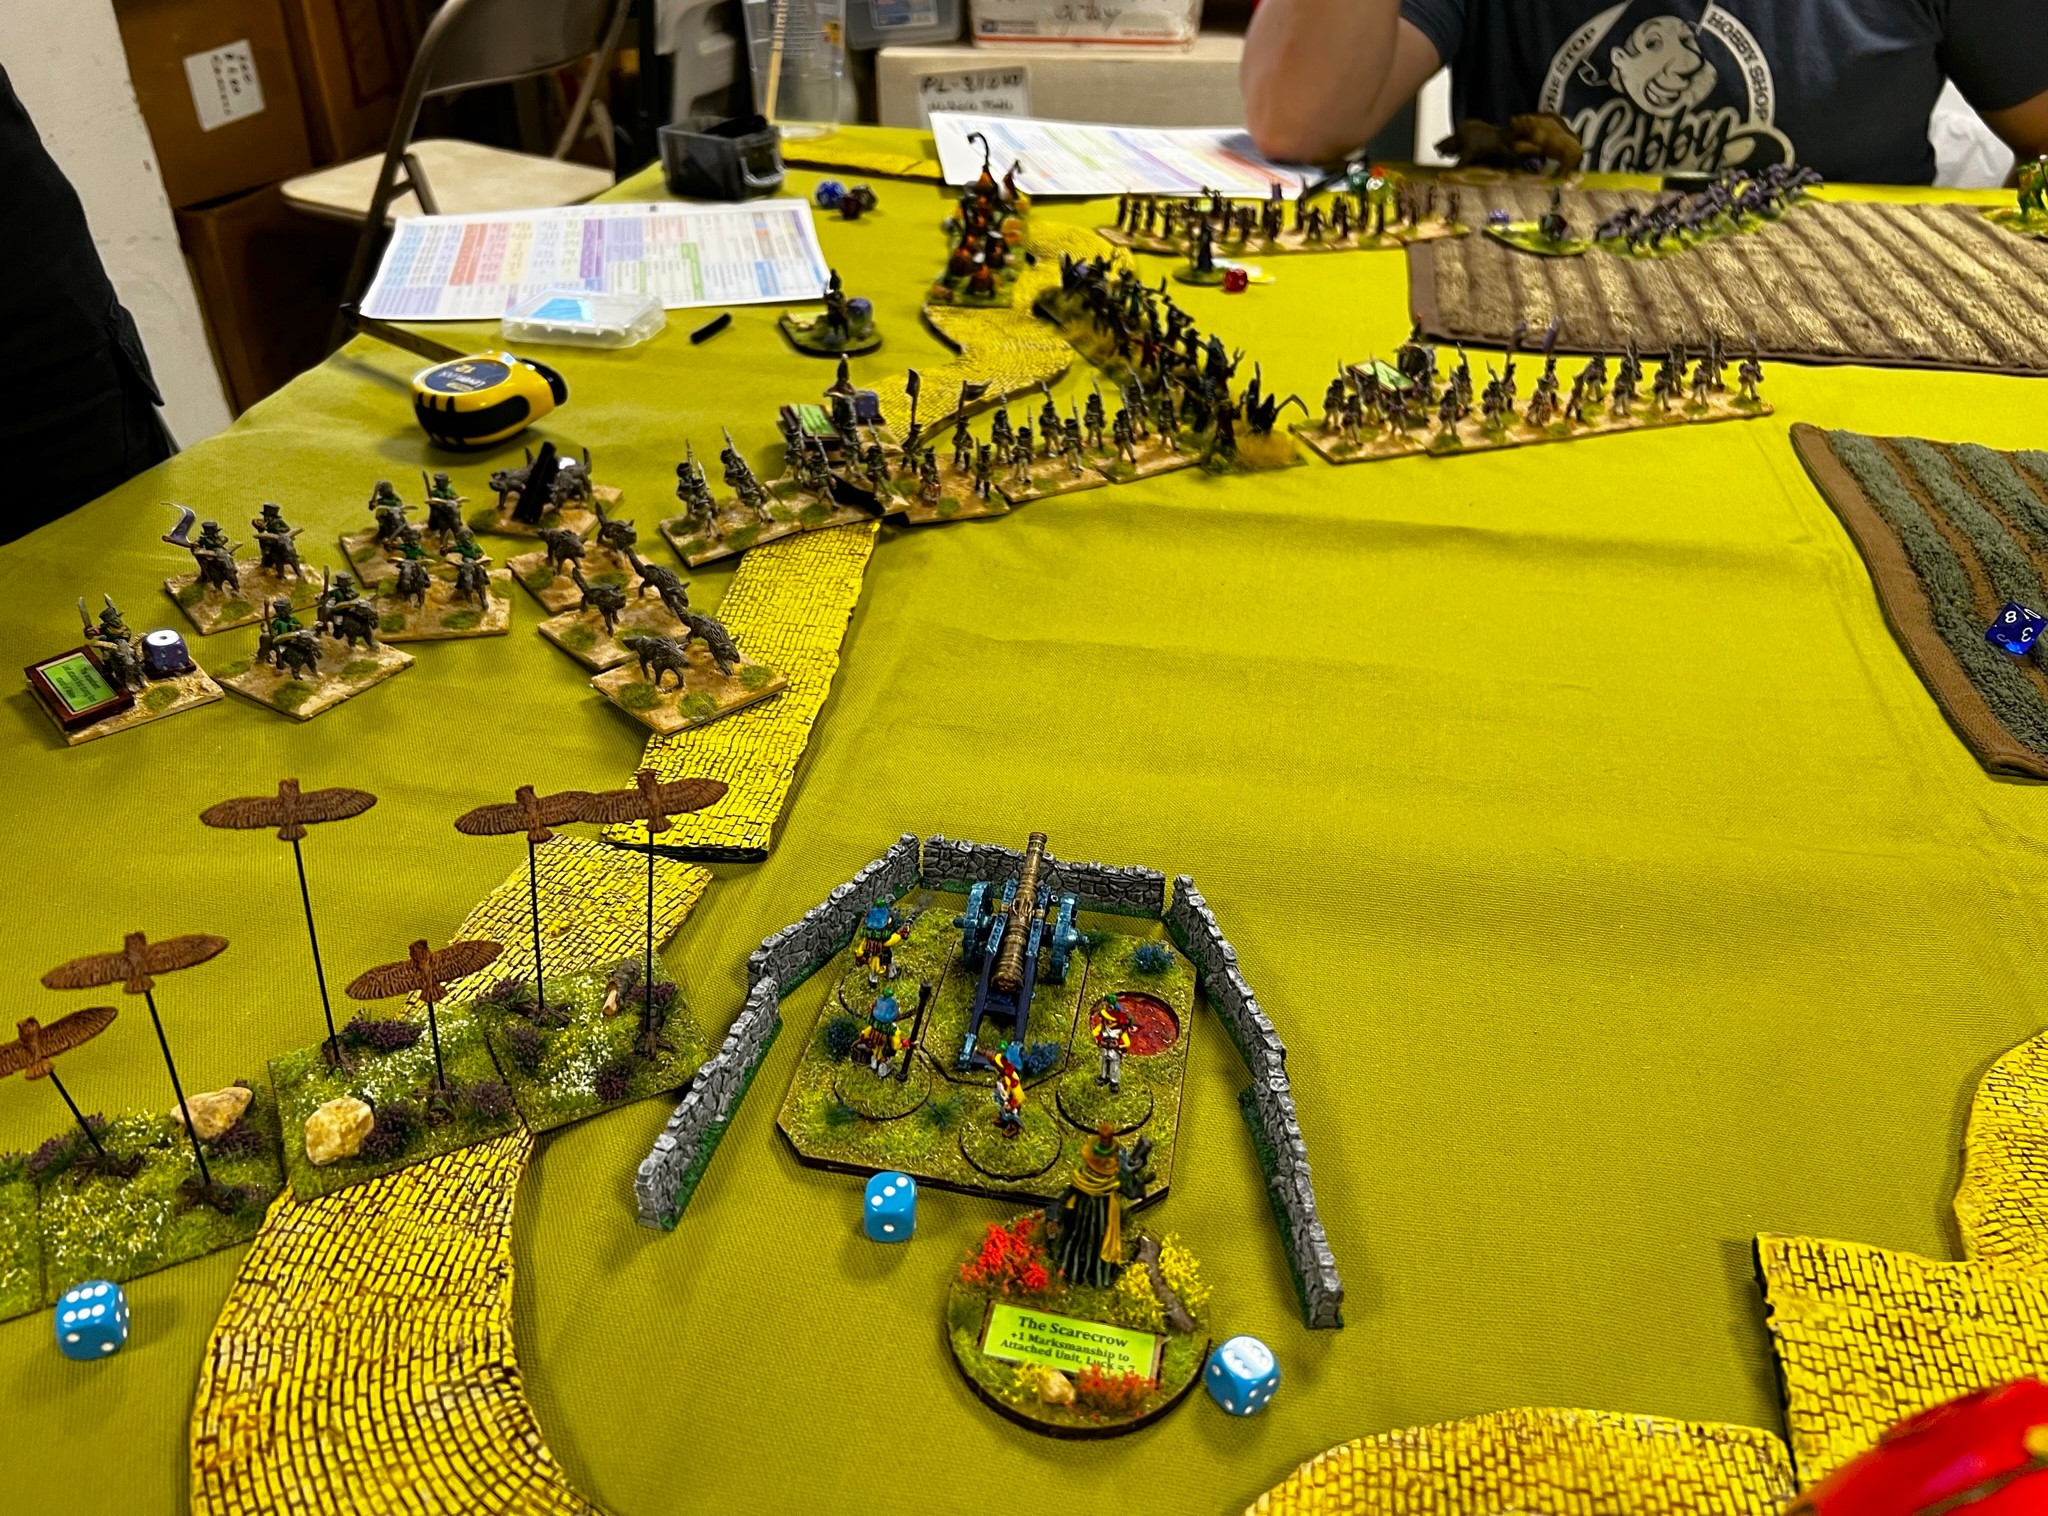
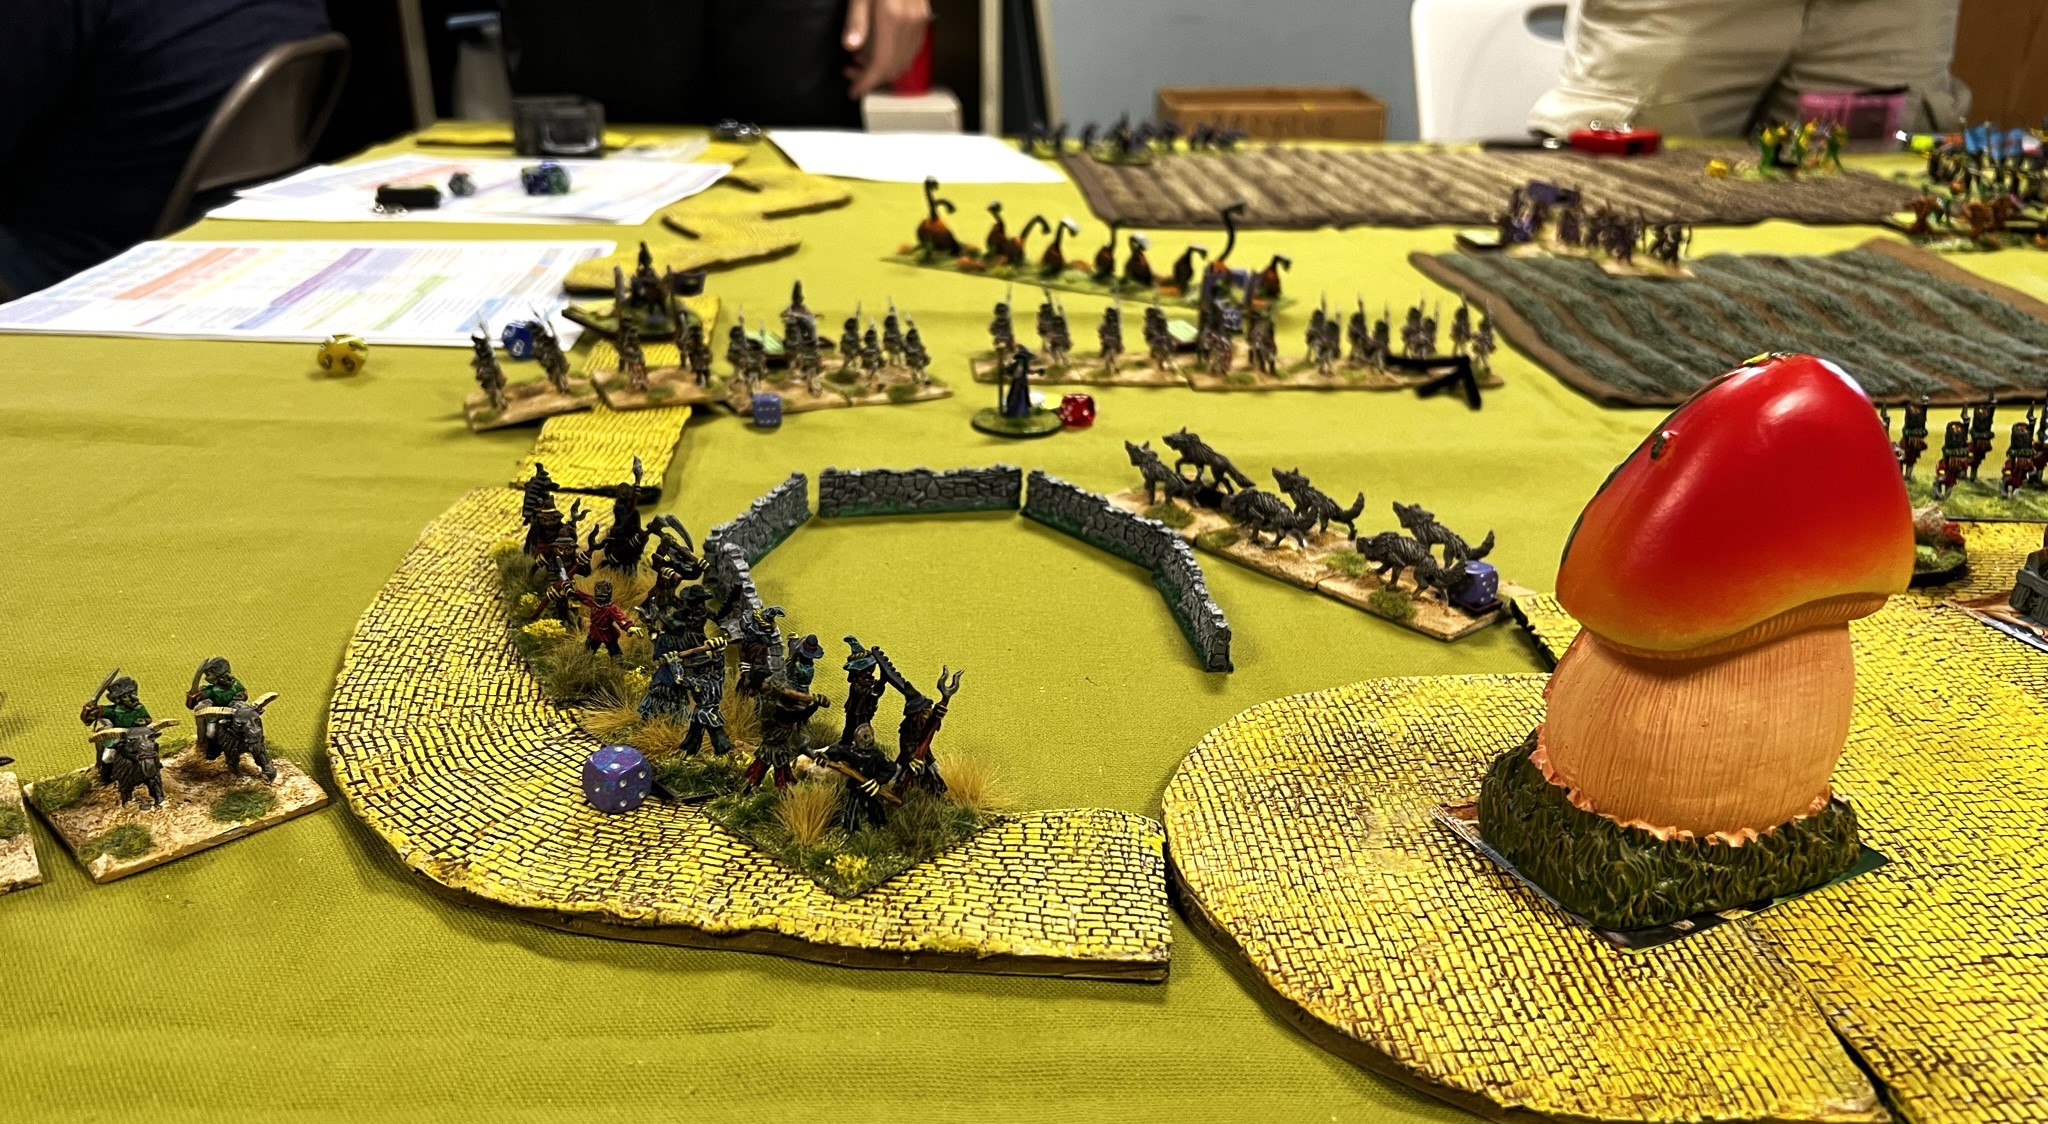
The Munchkins are in good cover – with Colonel Tik Tok and a medium battery both in defensive positions on the town’s flanks in a walled positions. In the town are a light cavalry regiment with carbines, the Munchkin Guard infantry, a wizard, and the Aerostat providing overwatch musketry. In reserve are the Great Owls. In this first game, I used 4 buildings in the town as possible Toto locations, so there was a 25% chance that Toto was in any one building.
Now, some play shots:
The start of the game – would the attackers join forces or would sibling rivalry take precedence?
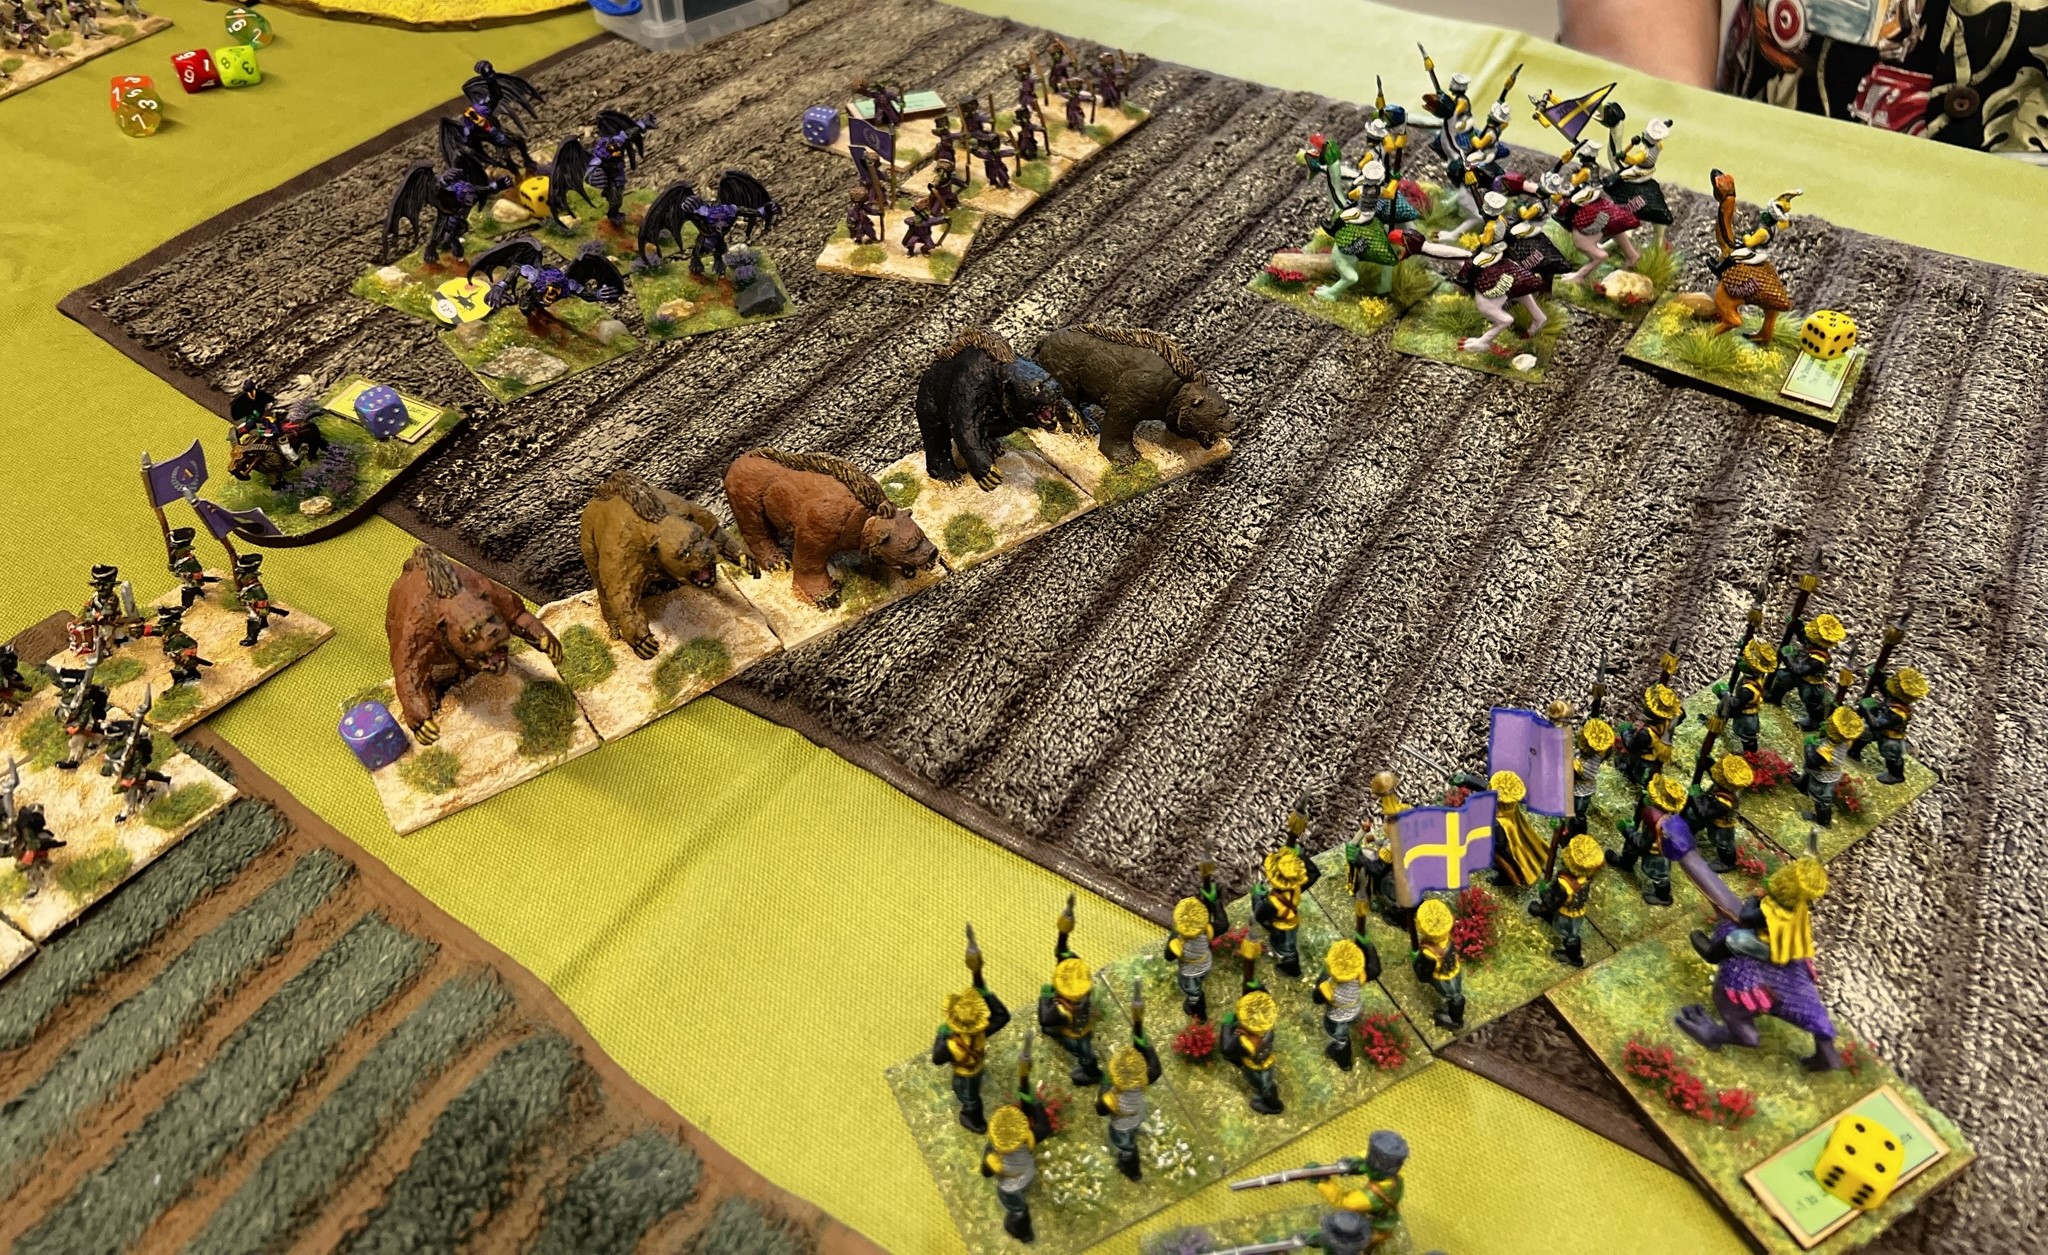
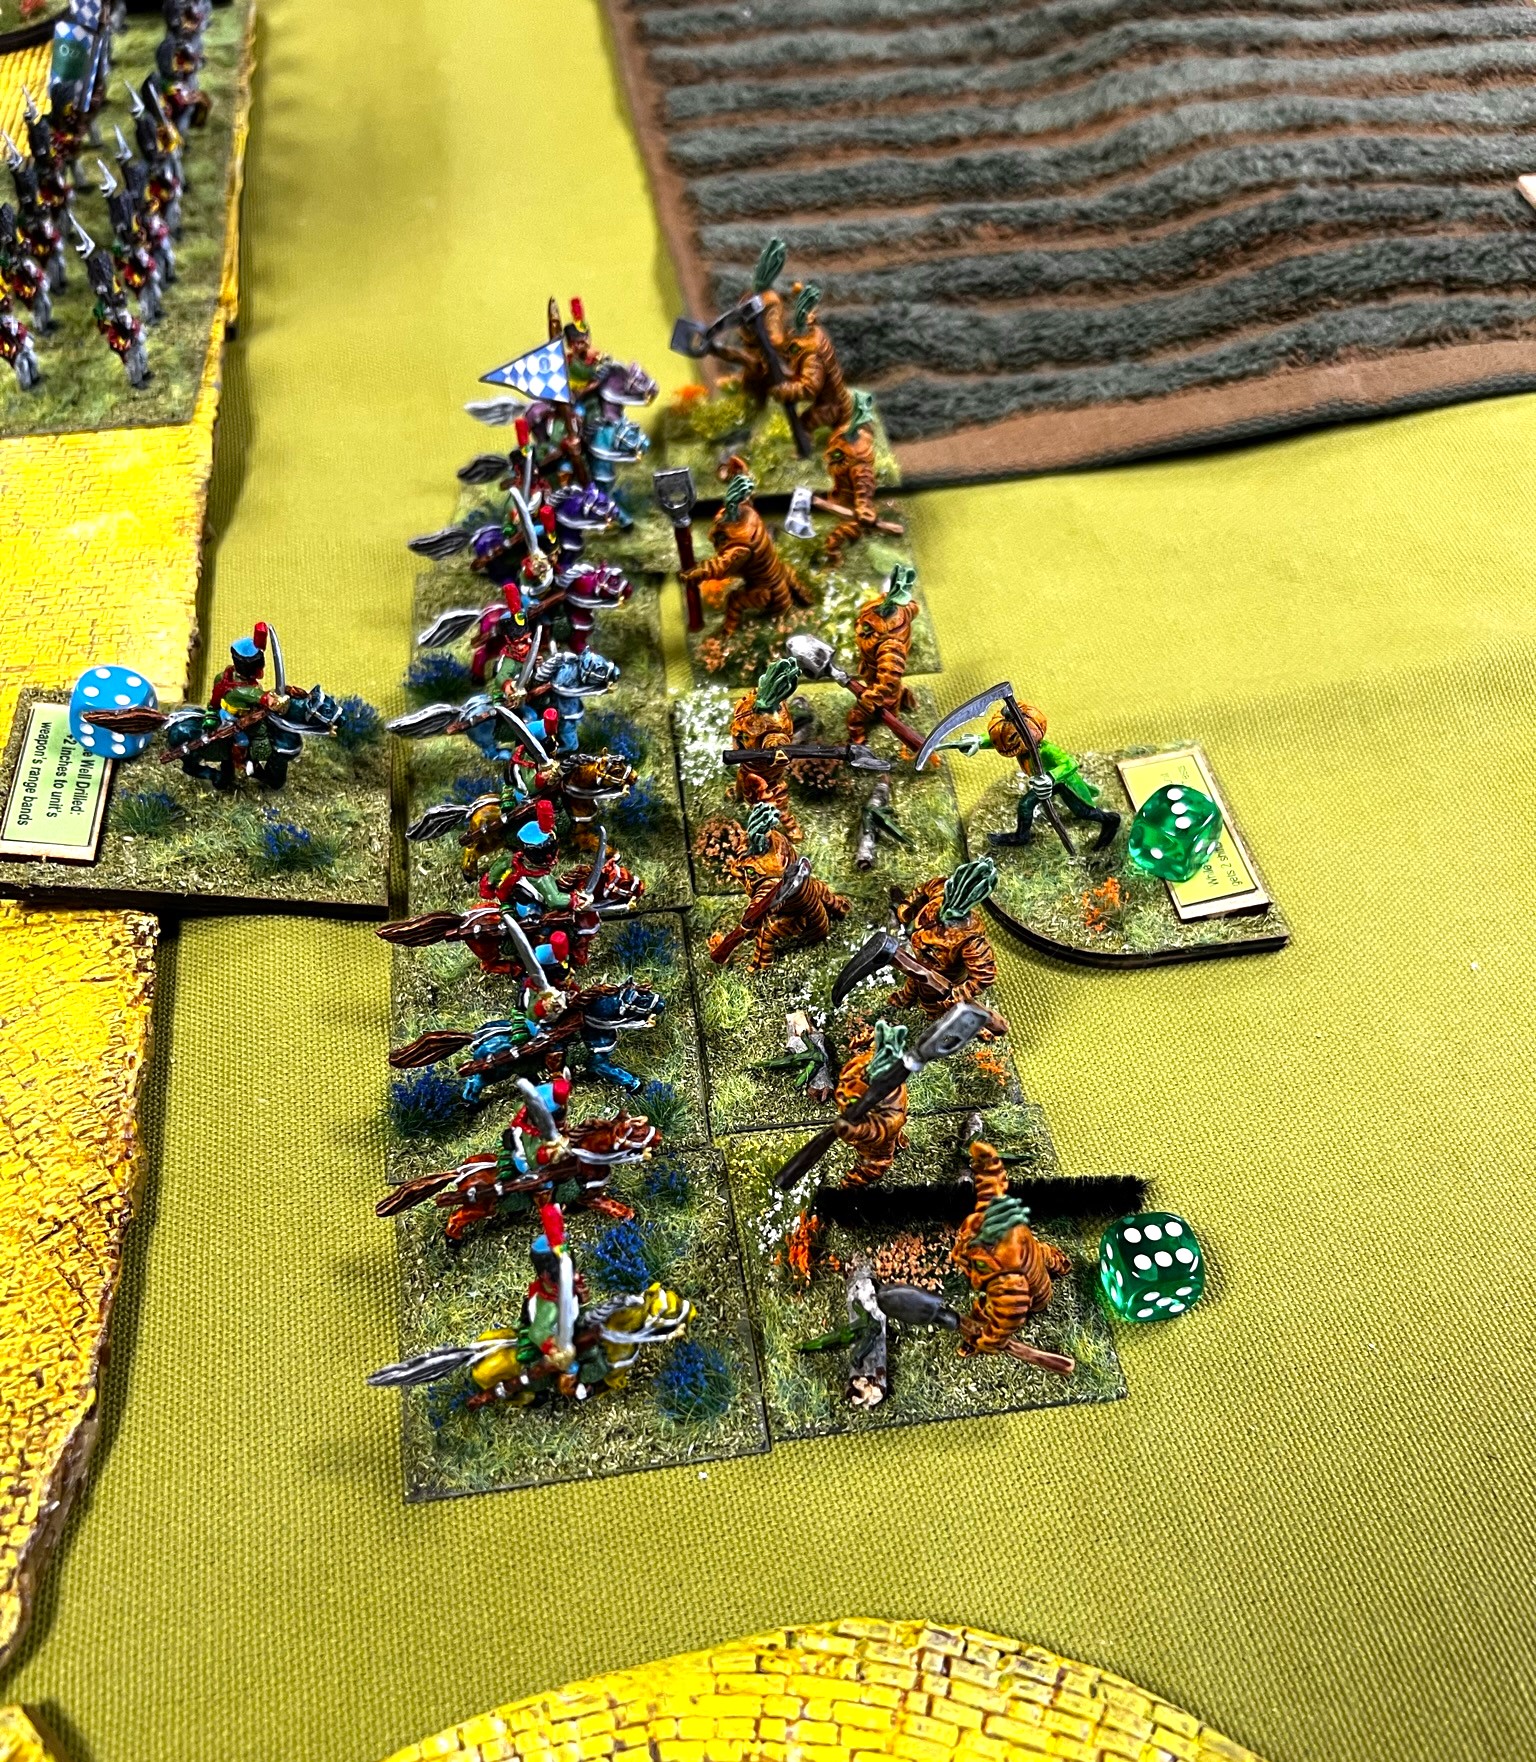
Very quickly, sibling rivalry did take over as the Winkie Light Cavalry got the initiative and attacked the Gillikin longbows once the Dire Bears moved forward and left them open.
Winkie Cavalry drives back the Gillikin longbows while the Dire Bears wait to counterattack.
This move also left open the cavalry’s flank, and the Dire Bears subsequently hit them on that flank. In short order, after a few rounds the Winkie cavalry was routed by the Dire Bears and was eventually driven off the board. The loss of this key unit would haunt the Winkies, but now there was definitely a 3-way fight on the tabletop.
The Dire Bears successfully drive the Winkie cavalry from the field of battle.
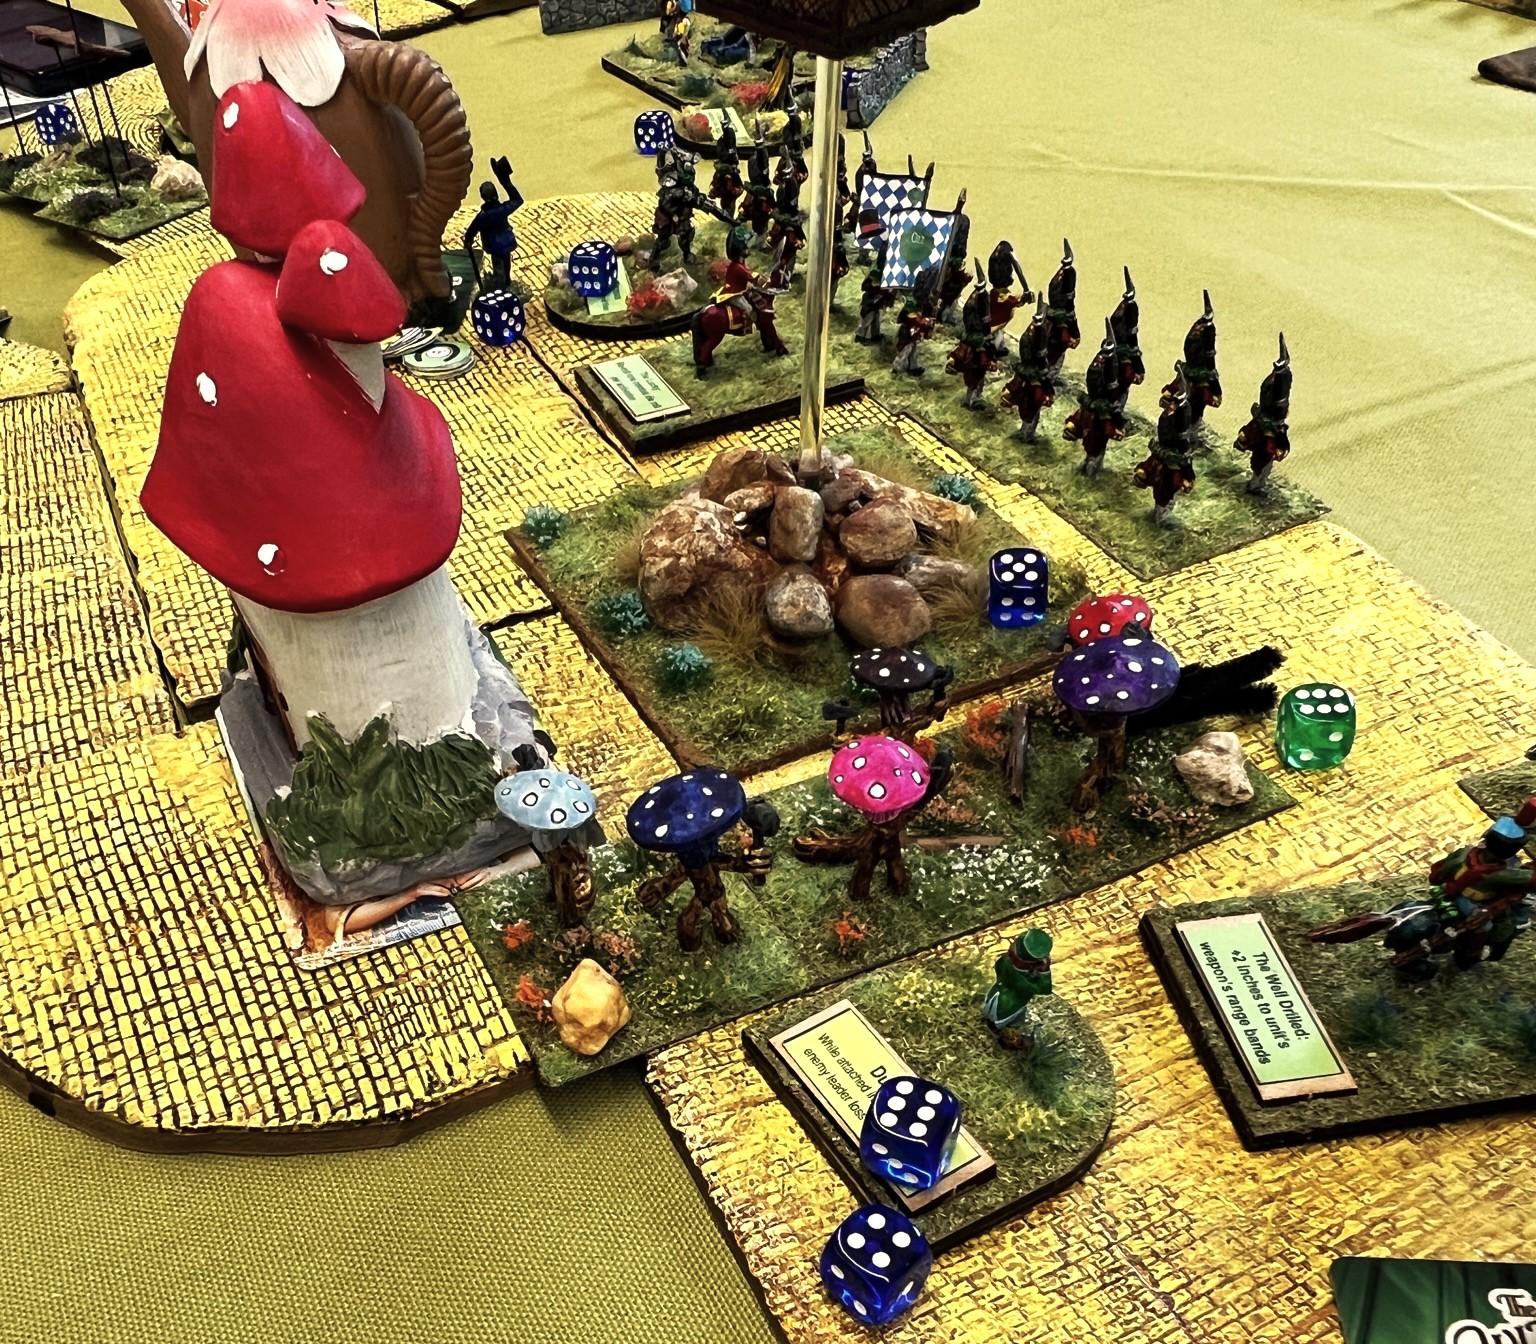
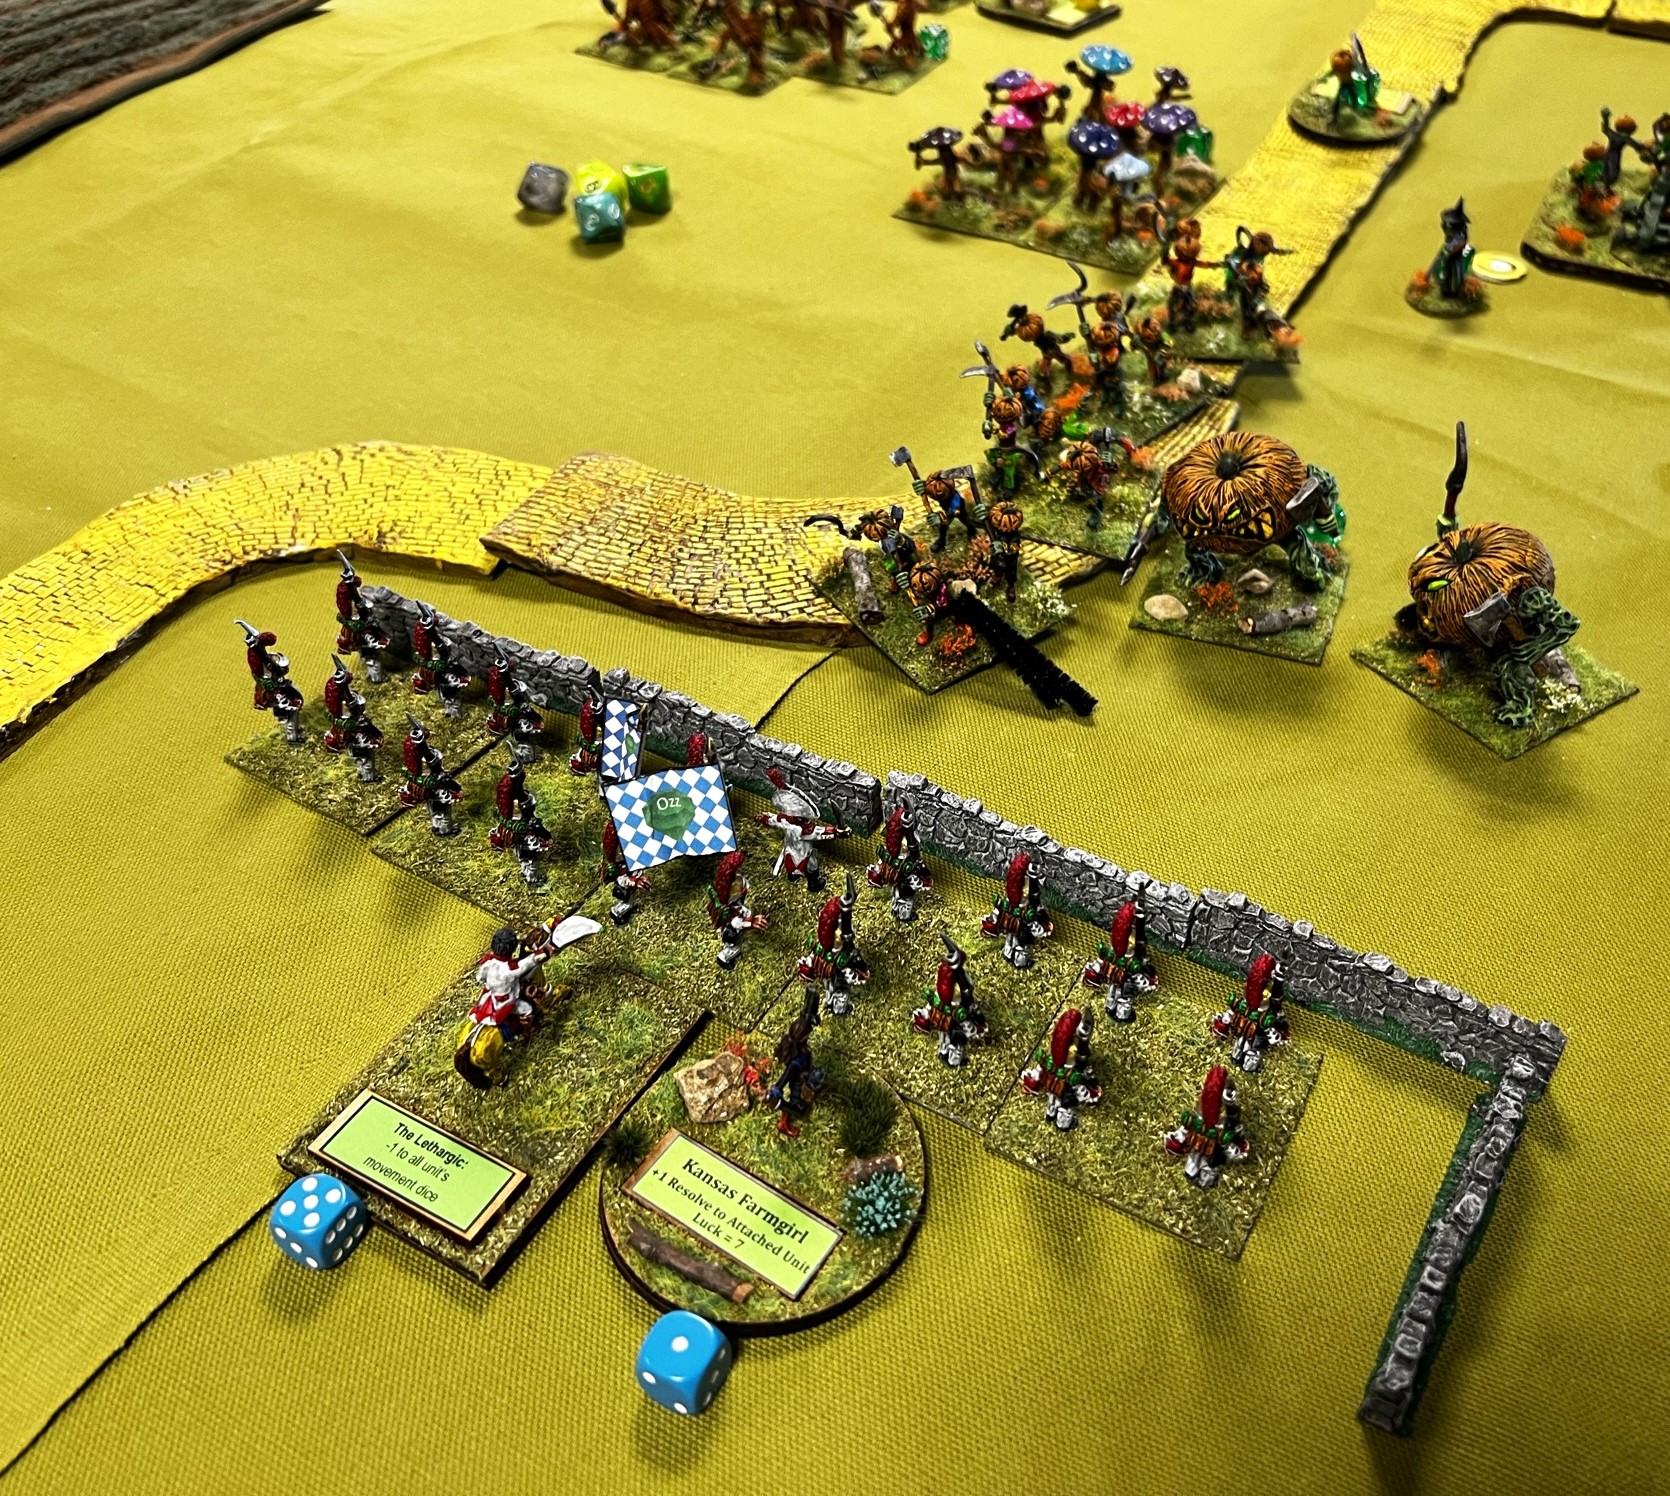
At the town, the Munchkin Aerostat kept up covering fire from a safe location, as Harvest melee troops hit the defenders in waves. One such attack triggered the Munchkin Light Cavalry to charge out of the town and hit the Mushroom Regiment.
Munchkin cavalry sortie – this was caused by a Reaction test that went an undesired way for the Munchkins.
The Carrot Creatures Regiment routs after a failed assault on Colonel Tik Tok’s Regiment. Eventually, the Harvestland Artillery (pumpkin chucker) would pummel Tik Tok, causing them to flee, and notably also take out the Kansas Farmgirl when a base loss occurred. Yes, she did indeed buy the farm..
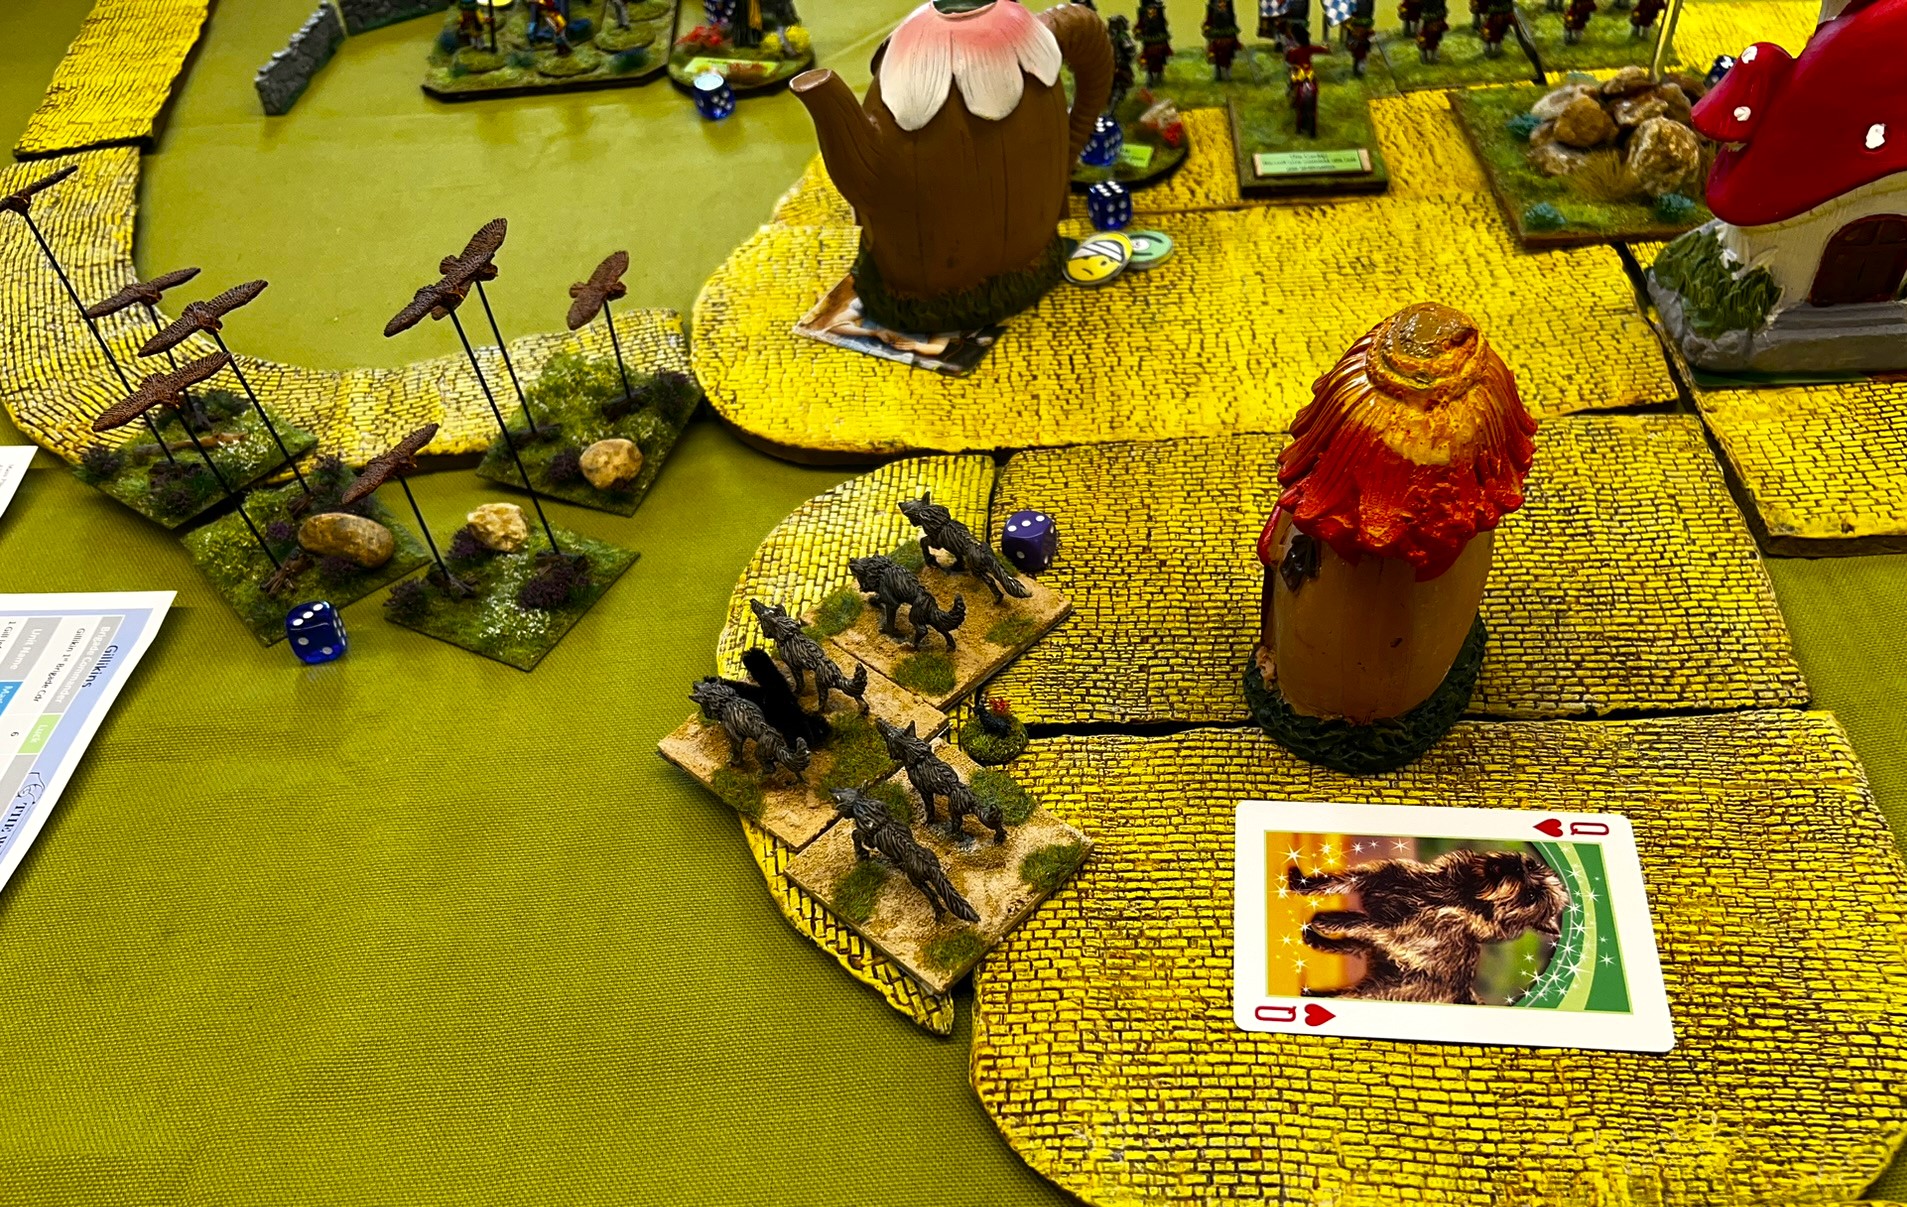
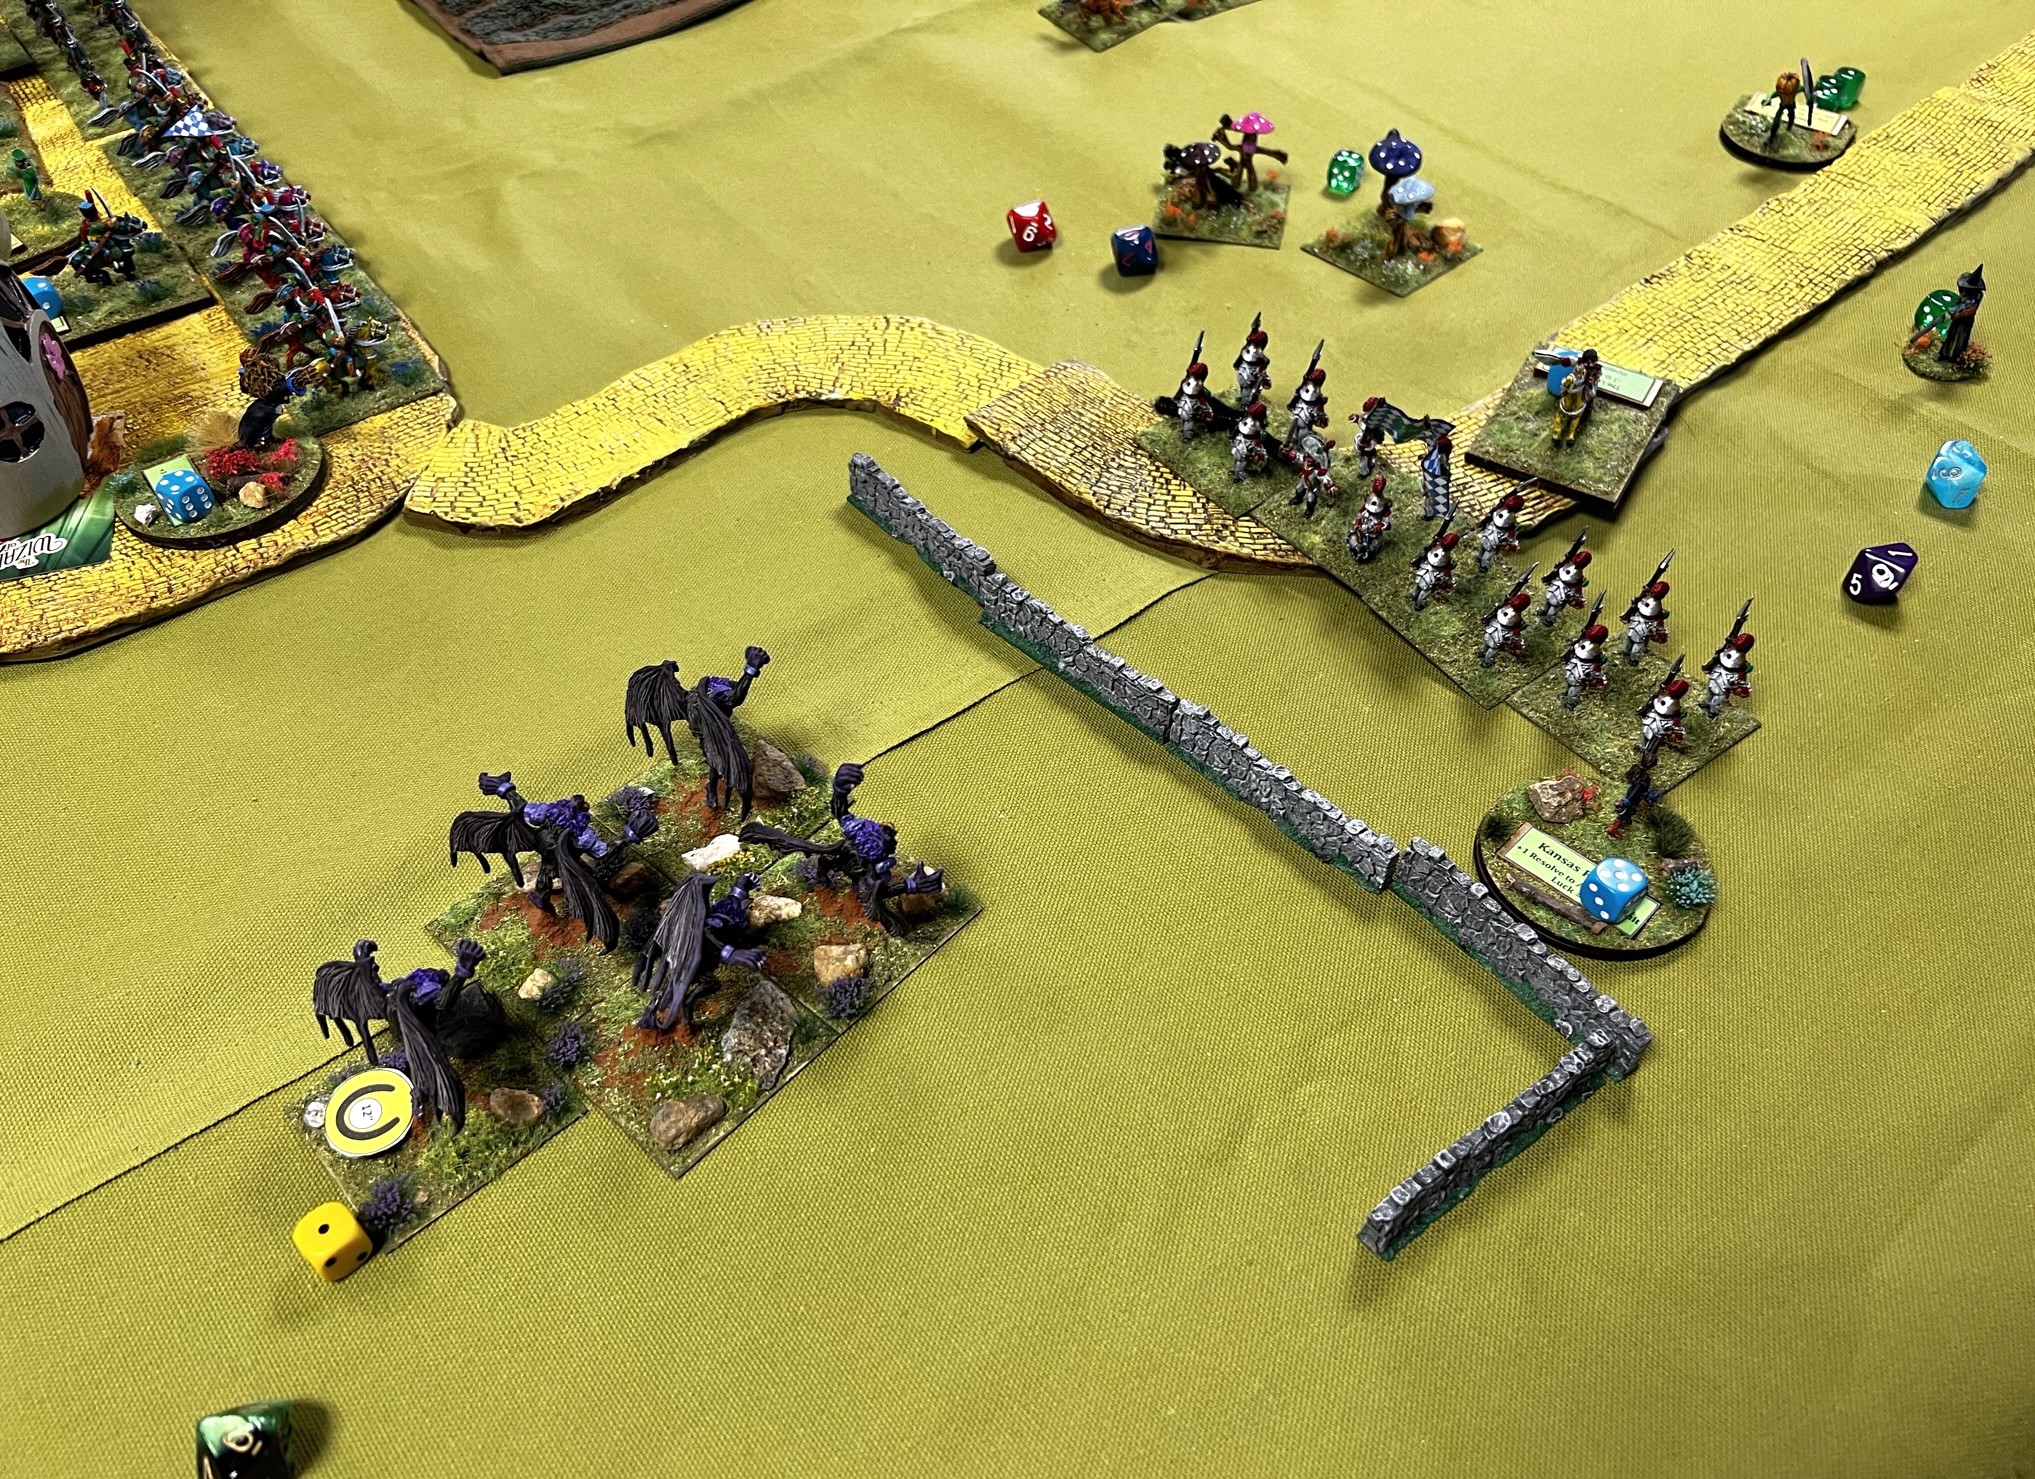
Meanwhile, on the Munchkin’s left flank, the Munchkin medium battery took a toll on multiple Gillikin units. The Gillikins sent out their Dire Wolves to flank the battery, and the Munchkins countered with their mobile reserve – the Great Owls.
Dire Wolves threaten the medium battery and the Great Owls respond.
With the main objective in mind, the Dire Wolves ran around the Great Owls to the town (Dire Wolves are FAST), where they prepared to search a building for Toto.
Would the card underneath show that Toto was there? It was a 1 in 4 chance…
Similarly, the regrouped Mushrooms stormed a gap in the town’s defenses (left by the undesired sortie of the Munchkin Light Cavalry who kept charging away at other enemies). The Mushrooms prepared to search yet another building.
Mushrooms make it to another building.
The next activation, the Dire Wolves found Toto – and carried him away.
Toto is found!
The game ended, with the Gillikins winning, the Munchkins in second place, and the Winkies/Harvest in third. I think the points were Gillikins 28 (with 10 for Toto), Munchkins 19, and Winkies/Harvest 18.
After this game, I added some 12 mm Pendraken dice square frames to some of the Gillikin regimental commanders and to one base apiece of regiments that do not have regimental commanders. I got the Gillikin regiments from an estate sale in the UK. I had wanted to have a number of Gillikins, so they were not painted by me – but were quite good. I also made MDF placard holders for the Gillikin regiments with commanders and glued them to their bases as it would have been too impractical and time consuming to rebase the figures. This would make play easier because having the placards on the regimental commanders’ bases negates having them fall off during movement. I also updated some player charts to one piece of card stock. I was then ready for the:
Hobby Bunker Game Day – August 26th
Matt of the the Hobby Bunker store in Wakefield ran a game day on August 26th. I ran an Aztec game here last year but did not do a blog post on it, but it was well-attended. For this one, I volunteered to run the Battle for Toto scenario twice – once at 10 AM and again at 2 PM.
Unfortunately, turnout was a bit low, and we also started late, so I ended up running the game just one time across both time slots. That is to say, I kept the tabletop as it was at 2 PM and rotated in new players. It saved time as the game was still developing, and resetting the game was not a good option for the time we had left. In the end, it worked.
The game went similarly to the previous iteration – but not totally. I did modify some of the troops initial locations within the brigades, plus the table was of a slightly different size than I had in July.
Once again, at the start, witch sibling rivalry took over – though this time it was the Gillikin’s Dire Bears hitting first instead of the Winkies. And once again dice rolls favored the Gillikins and saw the Winkie Cavalry being routed and ultimately driven off of the board! (As Boston Bruins fans know – don’t poke the bear). Also, that cavalry rout went through several other Winkie units, disordering them and slowing their initial movements in the game.
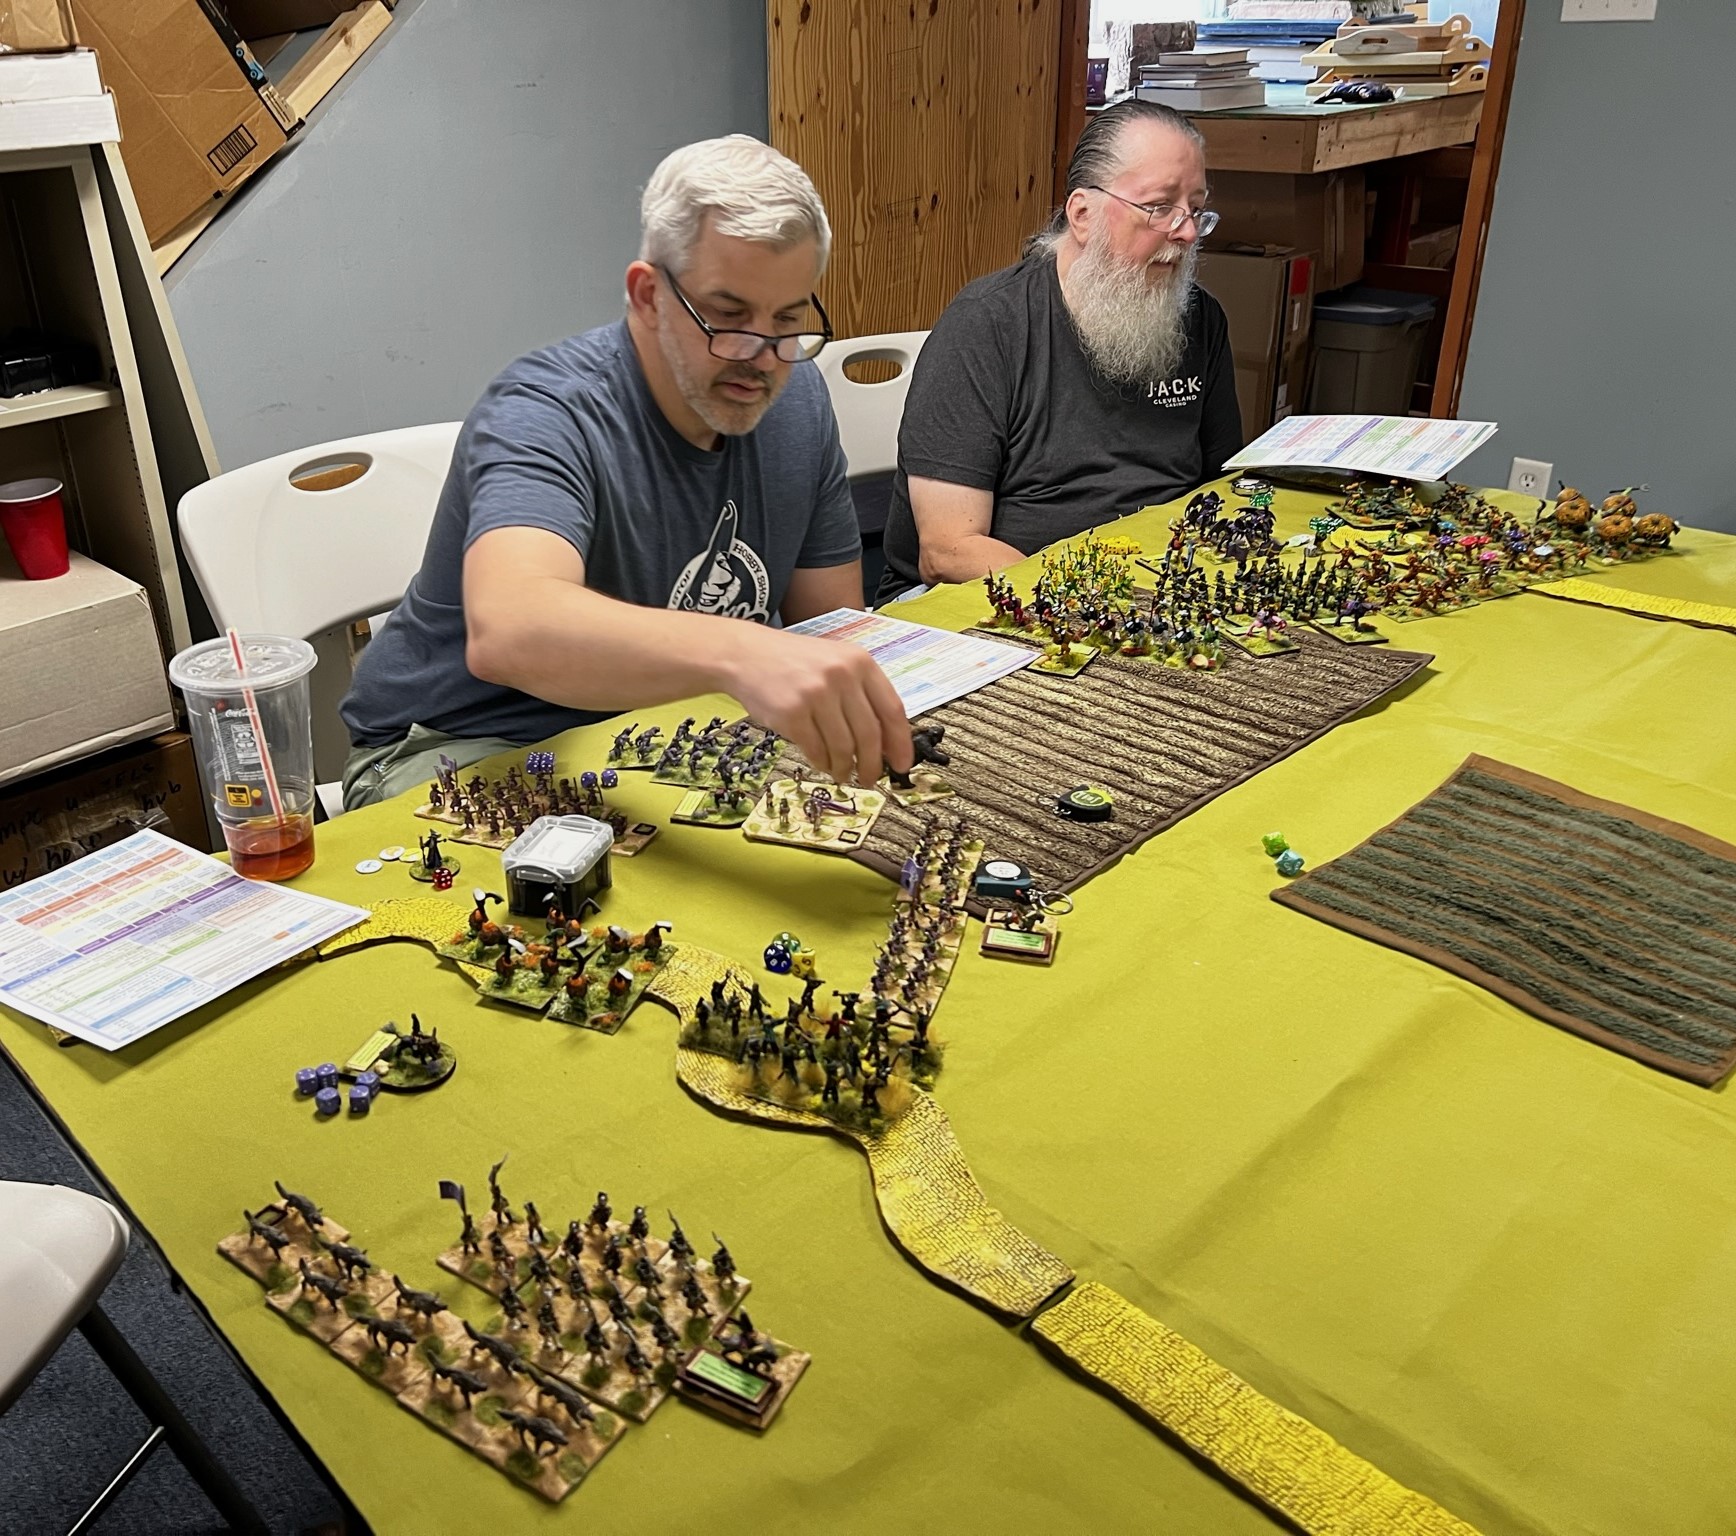
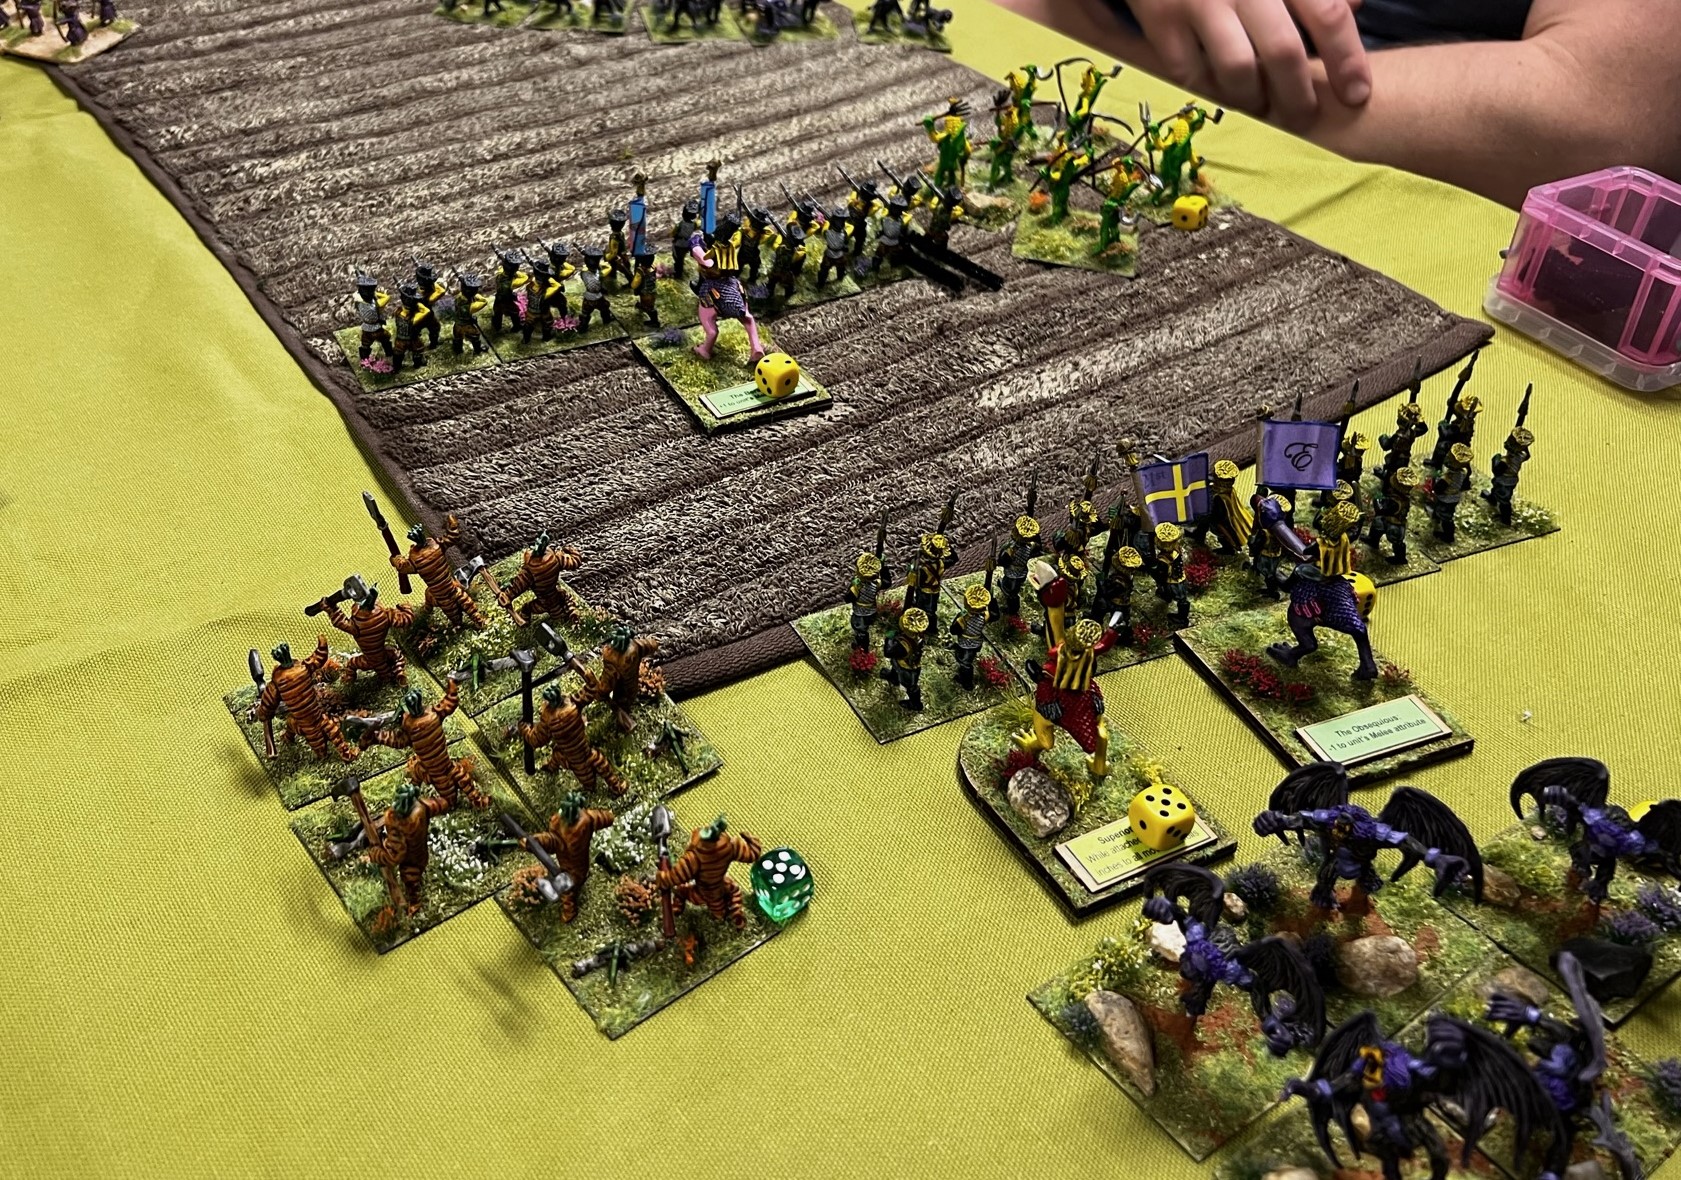
Matt controlling his 2nd Gillikin Brigade, while Brad controls the Winkie/Harvest forces.The Winkie cavalry (upper right in this photo) rout disordered multiple Winkie units.Colonel Tik Tok’s Infantry Regiment faces an onslaught of waves of Greater and Lesser Pumpkinheads and other vegetable regiments.The Winkies responded with furious musketry from their Sharpshooters, as well as a spear volley from their allied Corn Creatures. This took out two Dire Bear bases and heavily damaged a third.
Meanwhile, on the Munchkin’s left flank, the Gillikins moved up their forces into an effective attack formation with their musket-armed infantry in line (for better musketry) and melee forces in column (for better movement towards the town0. They detailed a small force to hold the Winkies at bay on their left flank.
Gillikin attack formations.Evan, commanding the Gillikin 1st Brigade, moves his troops.A view of the Gillikins movement and alignment from the opposite angle.Meanwhile, back on the right flank, waves of Greater and Lesser Pumpkinhead attacks fail to dislodge Colonel Tik Tok’s Regiment.Unfortunately, a subsequent Reaction test causes the Munchkins to break discipline and leave their nice protected wall and countercharge the Lesser Pumpkinheads – with the Kansas Farmgirl in tow as she was attached.Back on the left flank, the Munchkin medium battery – assisted by the attached Scarecrow -kept up fire at the units of the advancing Gillikin horde – but there were a lot of them. The Great Owls moved up to secure the left flank of the battery – with nothing on the right of the battery. The Gillikins noticed this!Back in the center of the table, the fight between the Winkies and the Gillikins continued as both sides had settled into a flank-protecting action while going after the Munchkins with their other forces.Back on the Munchkin’s left flank, the Harvesters move quickly in single column towards the unprotected side of the medium battery…
After this movement, the Harvesters activated again, and were able to change formation and hit the medium battery – wiping it out completely.
The Harvesters eliminate the medium battery. As GM, I should have left the gun on the tabletop – oh well, I forgot.Back on the right flank, the Great Flying Apes took advantage of Colonel Tik Tok’s departure from the wall, and fly over and behind them in anticipation of a devastating hit in their rear. The Munchkins managed to do an about face towards the Apes, but were not able to fire. They would then be attacked in melee.
The fight went badly for Tik Tok. The Regiment lost two bases and a third was heavily damaged. Even the Kansas Farmgirl took damage.
The Great Flying Apes hit devastates Colonel Tik Tok’s Regiment (And the Kansas Farmgirl). And now they were in sights of the Harvestland Artillery (pumpkin chucker)…
The Harvestland Artillery activated, and hit the Munchkins, eliminating yet another base, and routing the unit. Alas, the Kansas Farmgirl also took damage, and yes, again, sadly bought the farm…
Both Munchkin flanks had now been compromised – and as the Gillikin Goat Riders were in the process of routing the Great Owls, things were not looking up for the Munchkins. At 2 PM we rotated in new players to take over.
The Great Owls flee, and the Harvesters move up to search the town.New players join the fray.As the Munchkin’s right flank was gone, the remaining survivors of the Mushroom Creatures regiment and the Great Flying Apes eye a building for search for Toto. The Carrot Creatures Regiment changes its target from the Gillikins and would wheel towards the Munchkin Light Cavalry in the town’s front.
The Carrot Creatures decided to fire their bows at and then charge the Munchkin Light Cavalry. The Munchkin Light Cavalry’s Reaction test to that fire dictated that they would countercharge the Carrots – with impetus and double hits…the result was massive damage to the Carrots, who also quickly fled the battlefield in a hurry.
A dramatic and somewhat desperate charge of the Munchkin Light Cavalry against the Carrot Creatures Regiment.
The Munchkin cavalry then took a reaction test, which made them continue to attack the nearest unit – which ended up being the Gillikin Longbows. The bowmen damaged the cavalry and broke up their attack with little damage. Subsequently, Evora successfully hit them in the rear with a fireball, taking out a base. A terrible Reaction test die roll then sent the Munchkin Cavalry fleeing.
Here the Munchkin cavalry hits the Gillikin Longbows, and Evora is ready with her fireball.The Aerostat fired muskets at the Dire Wolves, which then turned and fled. But, the Harvesters were able to then make it to the building shown here unmolested – and search for Toto. On the other flank, the Mushroom Regiment was prepared to search for Toto in another building, so three of the five buildings remained in Munchkin hands and were not searched.
In the end, Toto by chance was in the building searched by the Harvesters. The little dog was seized, and put under the control of Arella and the Gillikins.
The final scores were:
Gillikins 37.5 (including 10 points for Toto)
Munchkins 25
Winkies/Harvest 24
Obviously, possession of Toto by any of the three sides would have resulted in victory. Yet again, the Gillikins won, but it was definitely a different battle. I like the scenario and will tweak it for Fall In!®. I am hoping to realign the forces a bit and add a few surprises. I will also have some new terrain and possibly a new gaming mat. The core of the scenario will remain as I think it works and I think is fun.
At Fall In!® I will be running the game in the HAWKS room twice – on Friday morning and also on Saturday morning. I will also team up with Chris Palmer on Friday night for another Ozz game – featuring the Harvest folks seeking seasonal revenge – “The Vegetables are Revolting”.
Thanks for looking at this longer post. Next up (hopefully by this weekend) will be a special post on the Challenge Ogres “Paint What We All Have” painting challenge organized by Roger from “Rantings from Under the Wargames Table” in conjunction with Dave Stone of “Wargames Terrain Workshop” . Dave sculpted the figures and Roger set out the painting challenge.
Any feedback from you – let me know!
Miscellaneous details and references for those interested in that sort of thing:
For all of my previous posts on Wars of Ozz games, figures, units, and other related projects – please see this page.
Earlier this year, two UK bloggers, Roger from “Rantings from Under the Wargames Table” in conjunction with Dave Stone of “Wargames Terrain Workshop” set out a painting challenge poll. I think Roger came up with the idea of a painting challenge where we all would paint the same figure. Roger sent out a poll on what type of figure would be chosen, and Dave volunteered to sculpt it.
The poll results ended up with the selection of a common figure for us all to paint and share by the September in a “Paint What We’ve All Got” painting challenge. That figure selection ended up being an ogre: “Savage, armoured fantasy Ogre with a hand weapon”.
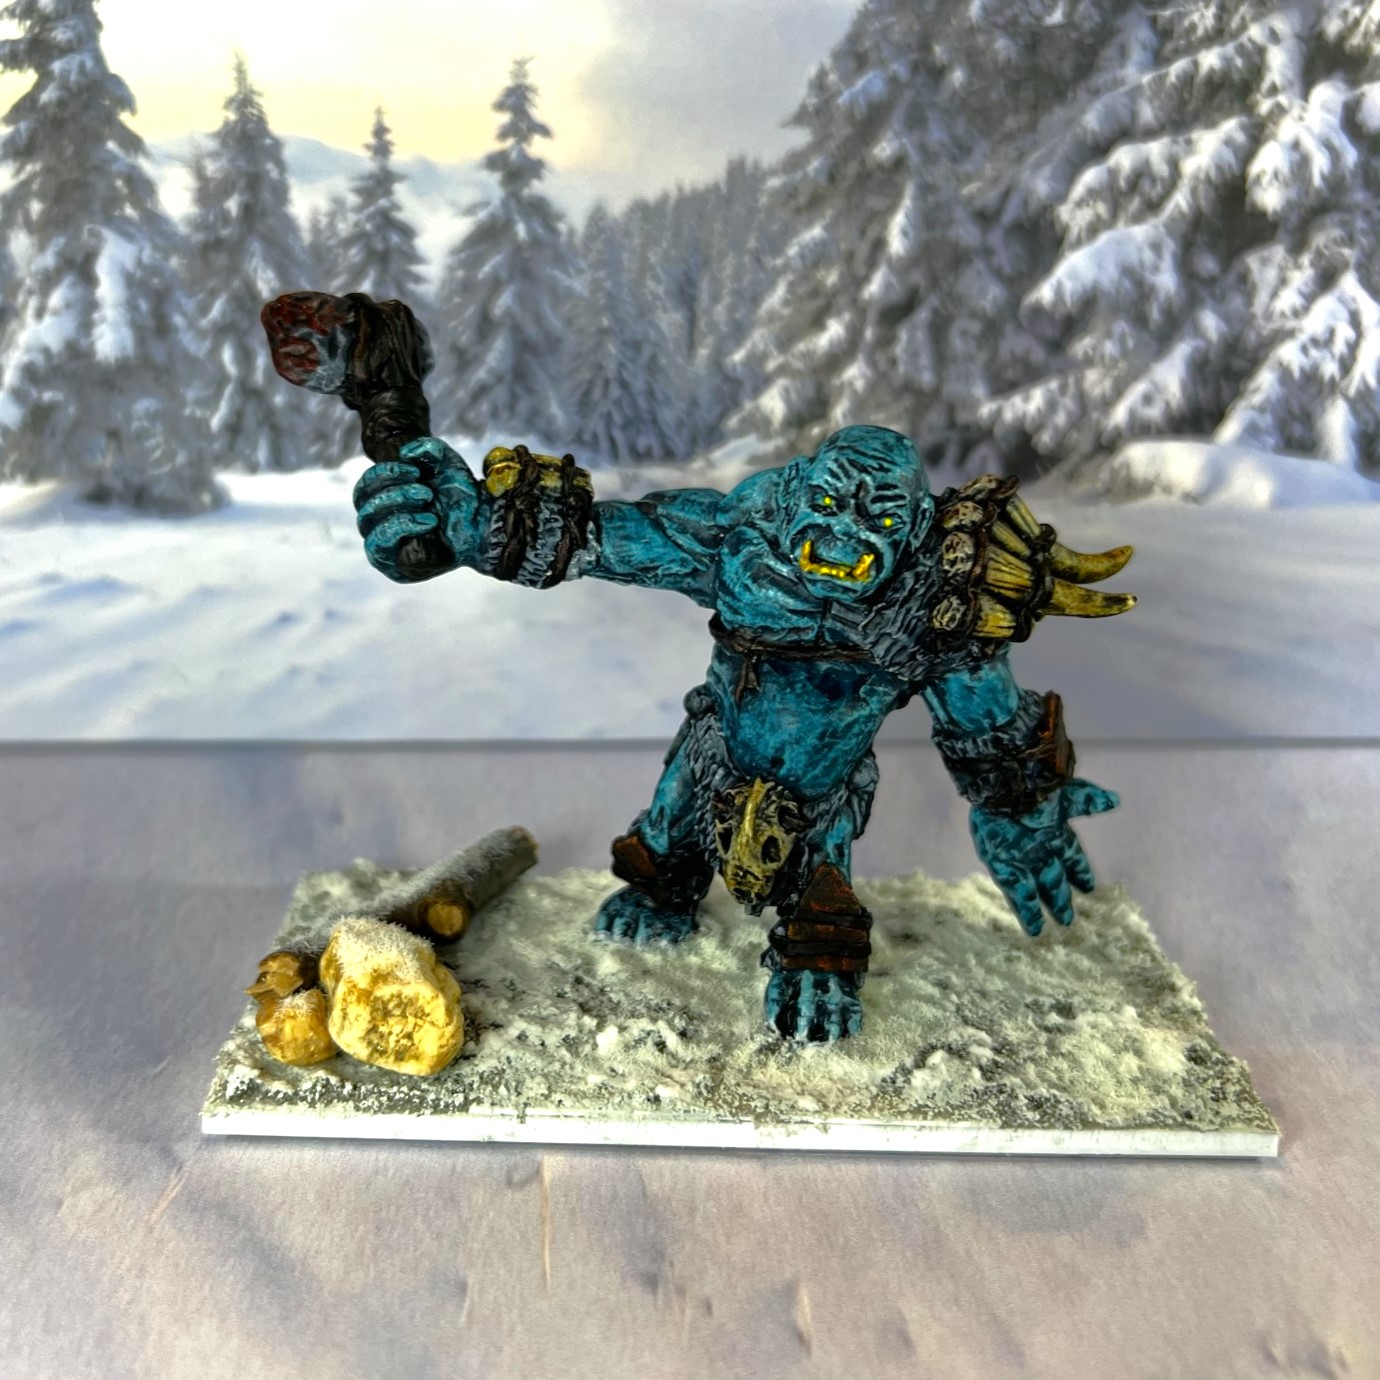
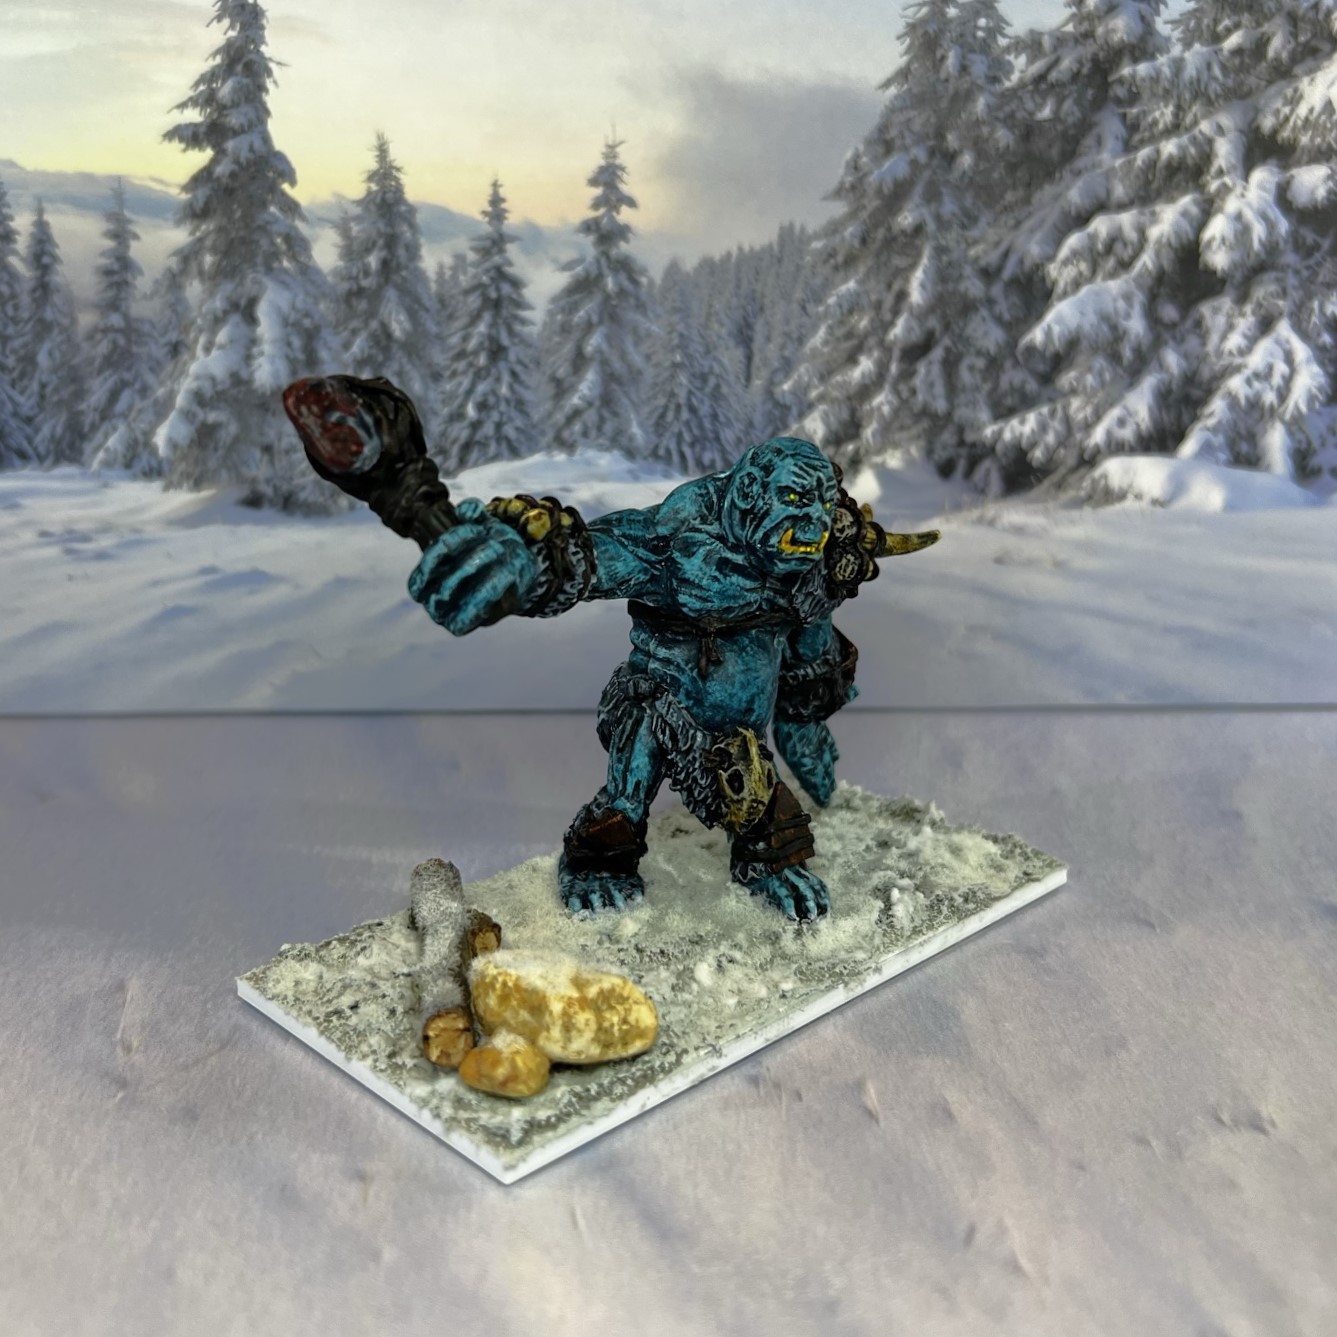
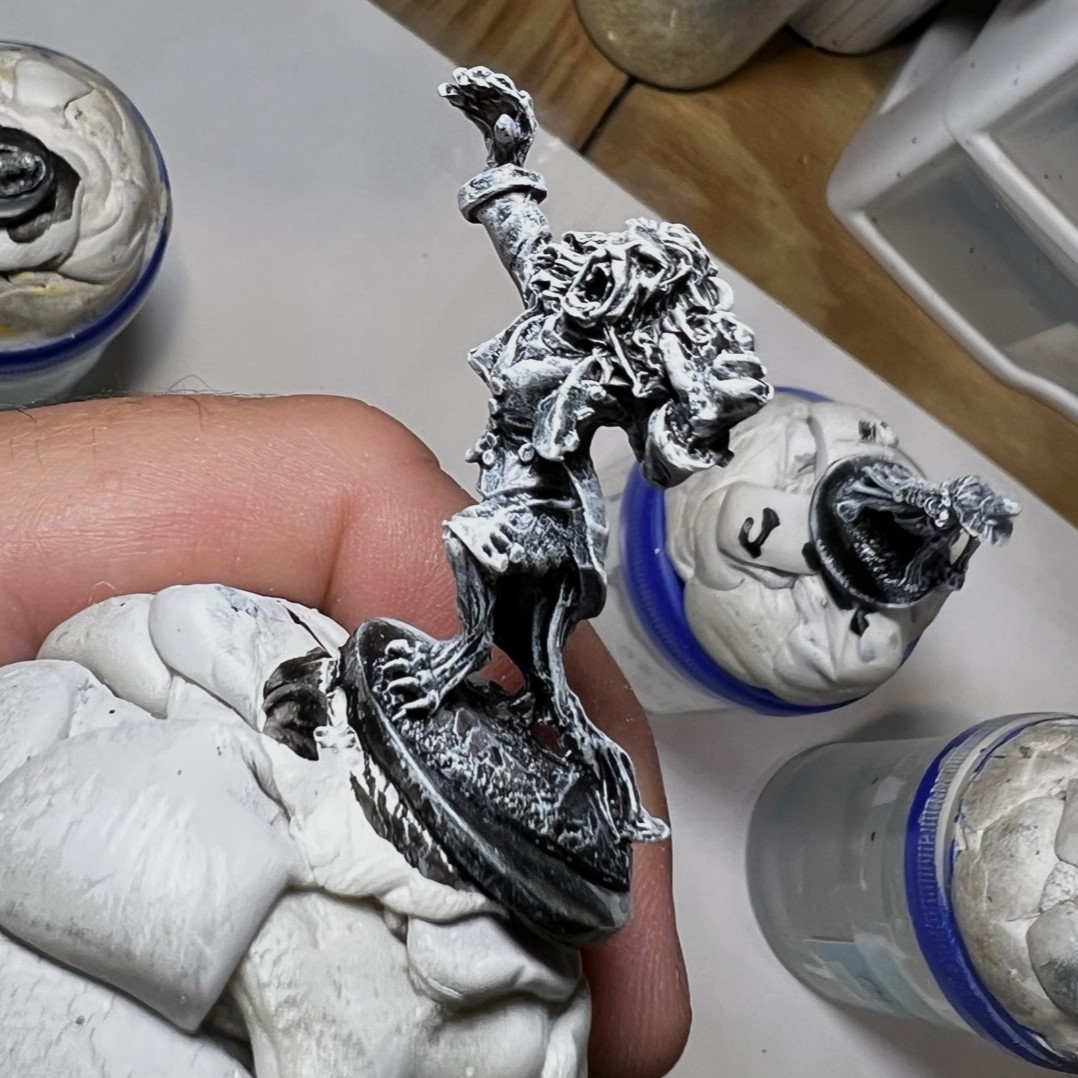
The genesis of this was Roger’s post on back on March 8th with the aforementioned readers’ poll. Dave’s March 28th post on the Challenge Ogre is here. Roger followed up on his blog here. Dave, who is a masterful sculptor and modeler, came up with the figure. The ogre figure carries a massive stone ax. He wears lots of bones on his wrists, and an animal pelt on his lower torso and a shoulder pelt. The shoulder pelt is festooned with multiple animal horns as well. Dave went with a Norse motif with the sculpt. Here is the original photo of the ogre sculpt from his blog:
Photo from Dave Stone’s blog showing the original sculpt that he then cast.
Once the challenge was set, I contacted Dave Stone and ordered five of the figures, which arrived in the spring. Why 5? So that I could have an entire regiment of them!
I had no idea as to when I would get to painting them -until recently – when I had decided that this was a good opportunity to accomplish a few things. First, this would let me have a small “palette cleansing” (pun intended) chance to paint something a little different than all the Ozz stuff that I have been painting lately. I do love the Ozz stuff but variety is the spice of life as they say.
Second, painting up a unit of these would be useful for a game of WOOD (Wars of Orcs and Dwarves). WOOD is basically a similar set of rules by Buck Surdu using his Wars of Ozz engine for mass fantasy battles with a few changes.
Lastly, it was an opportunity to participate in an intriguing and fun painting challenge with fellow bloggers across the globe.
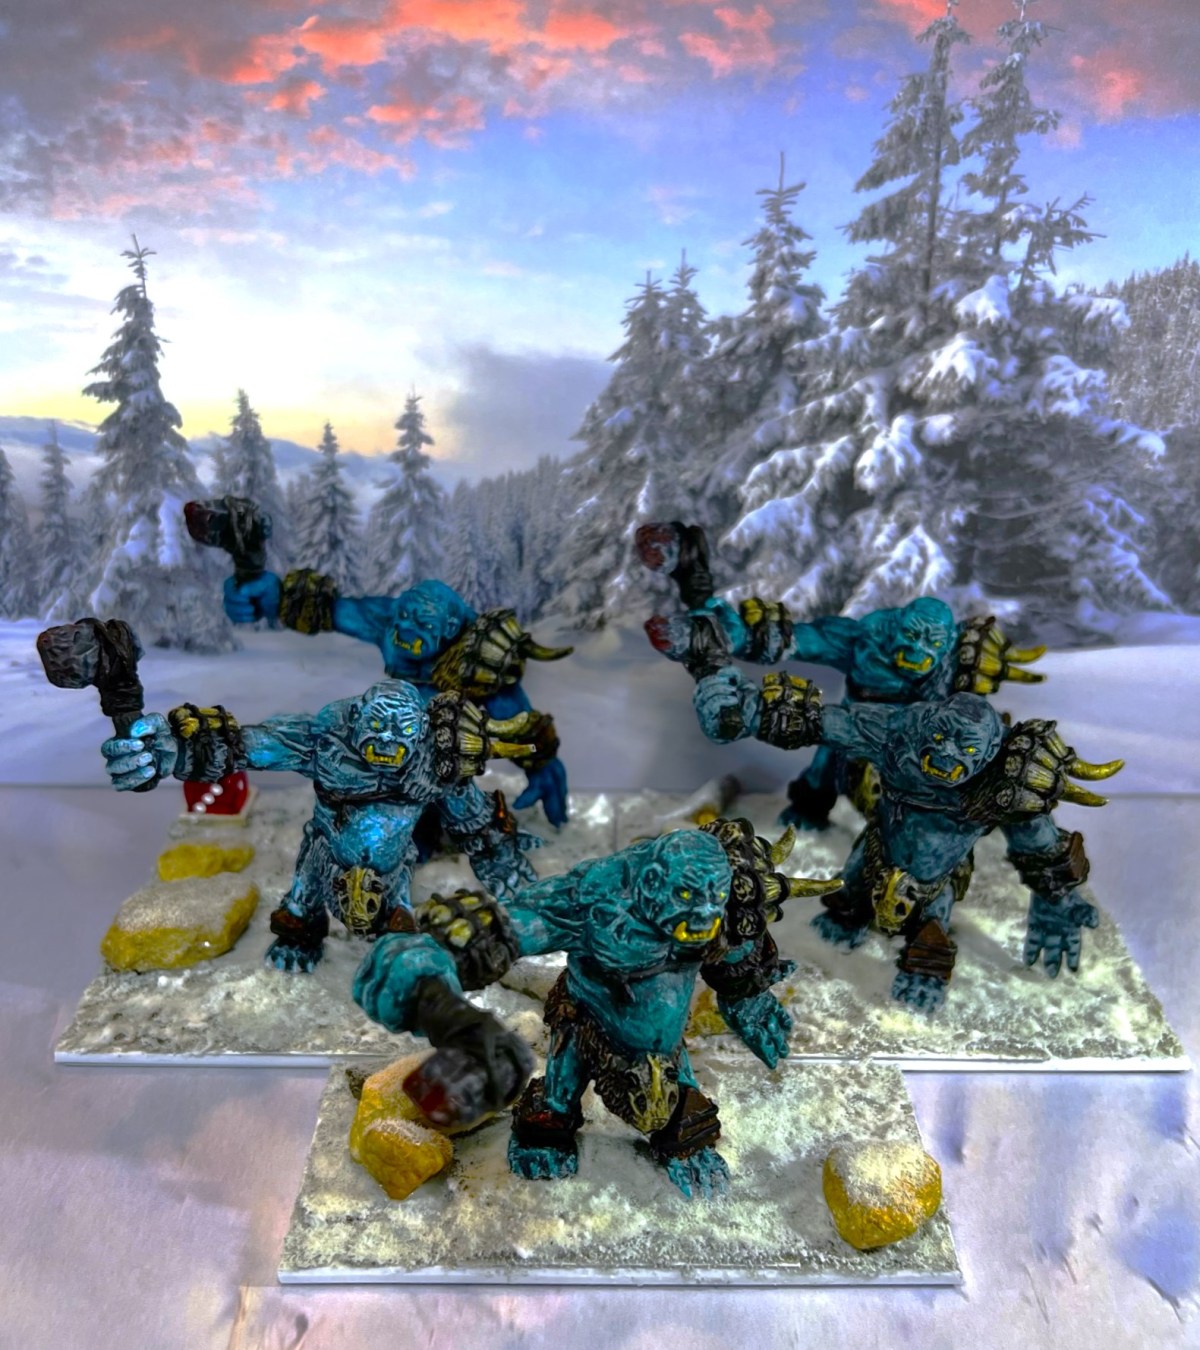
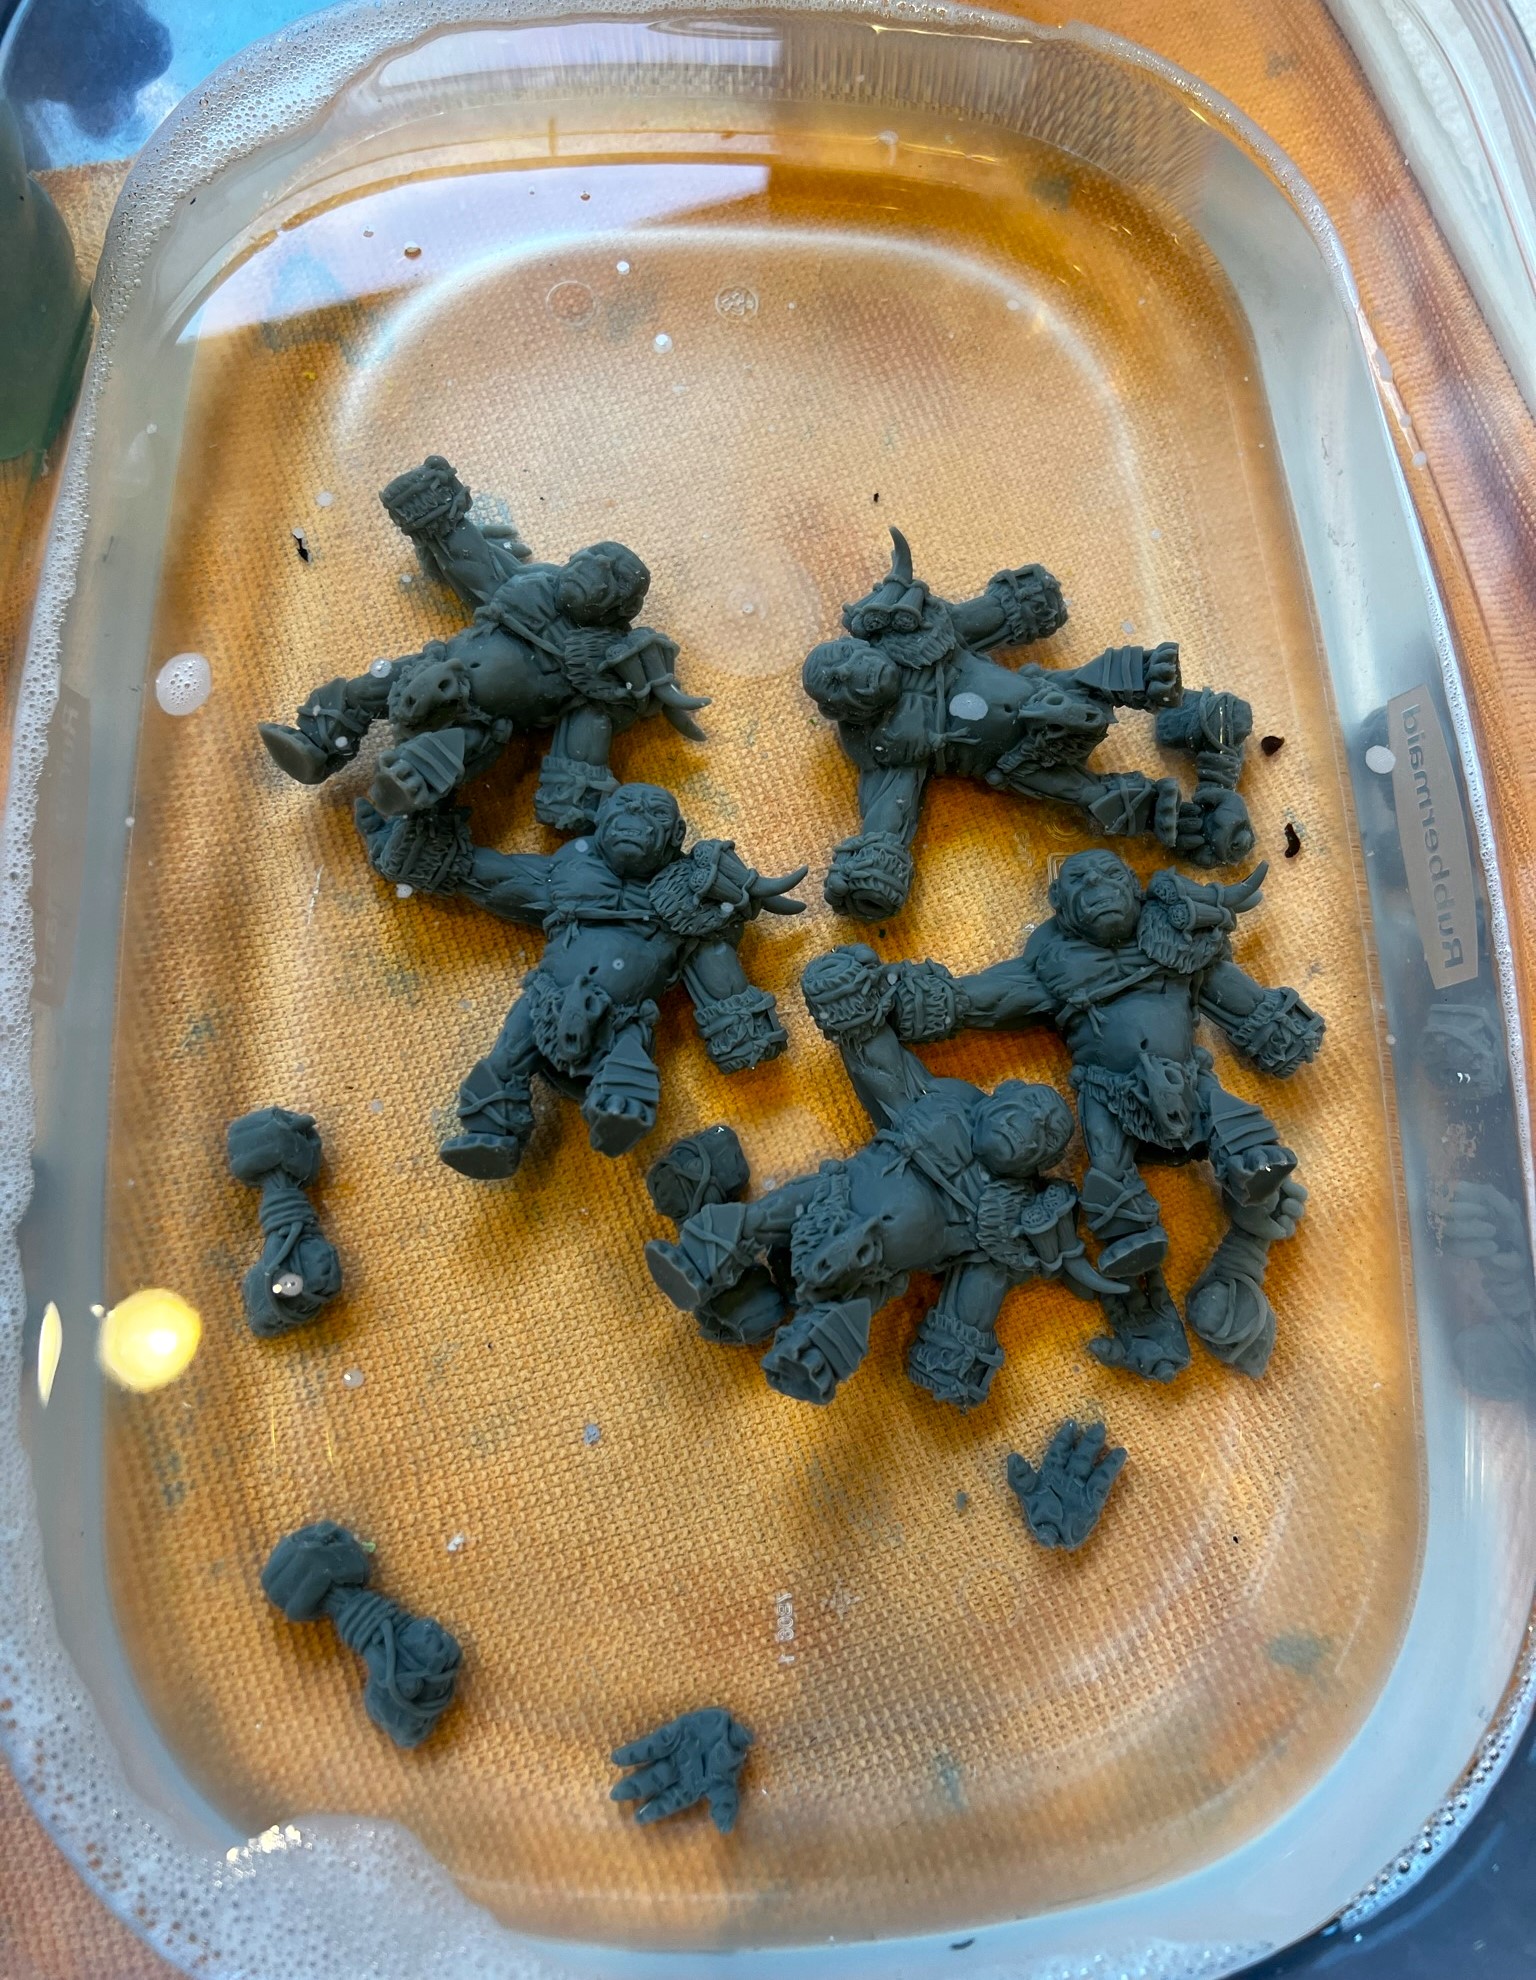
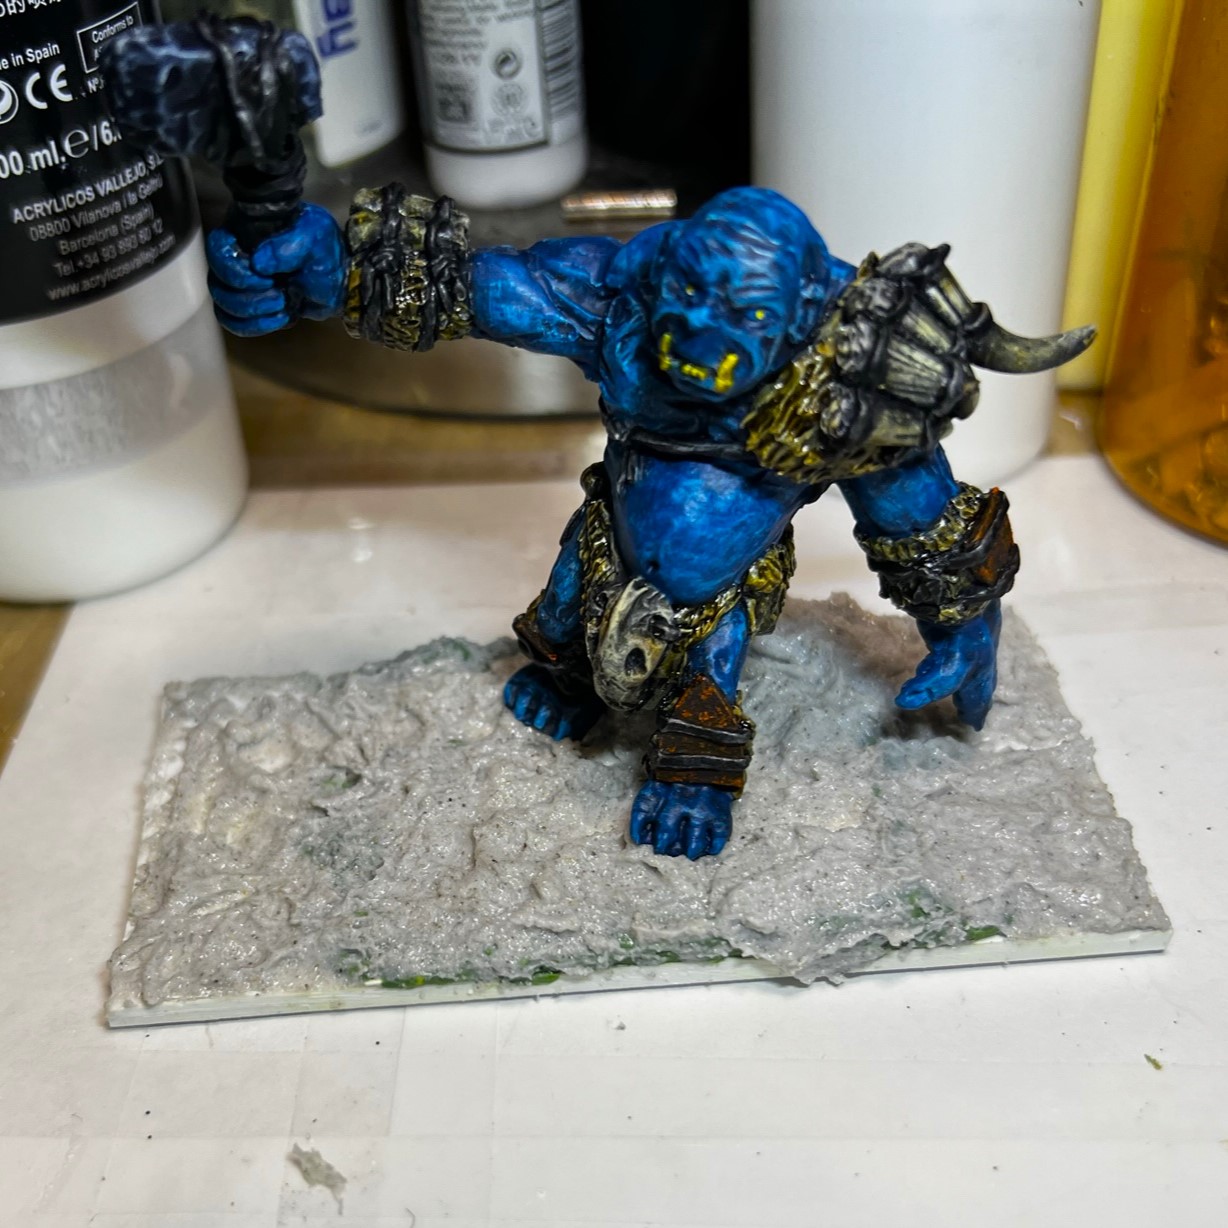
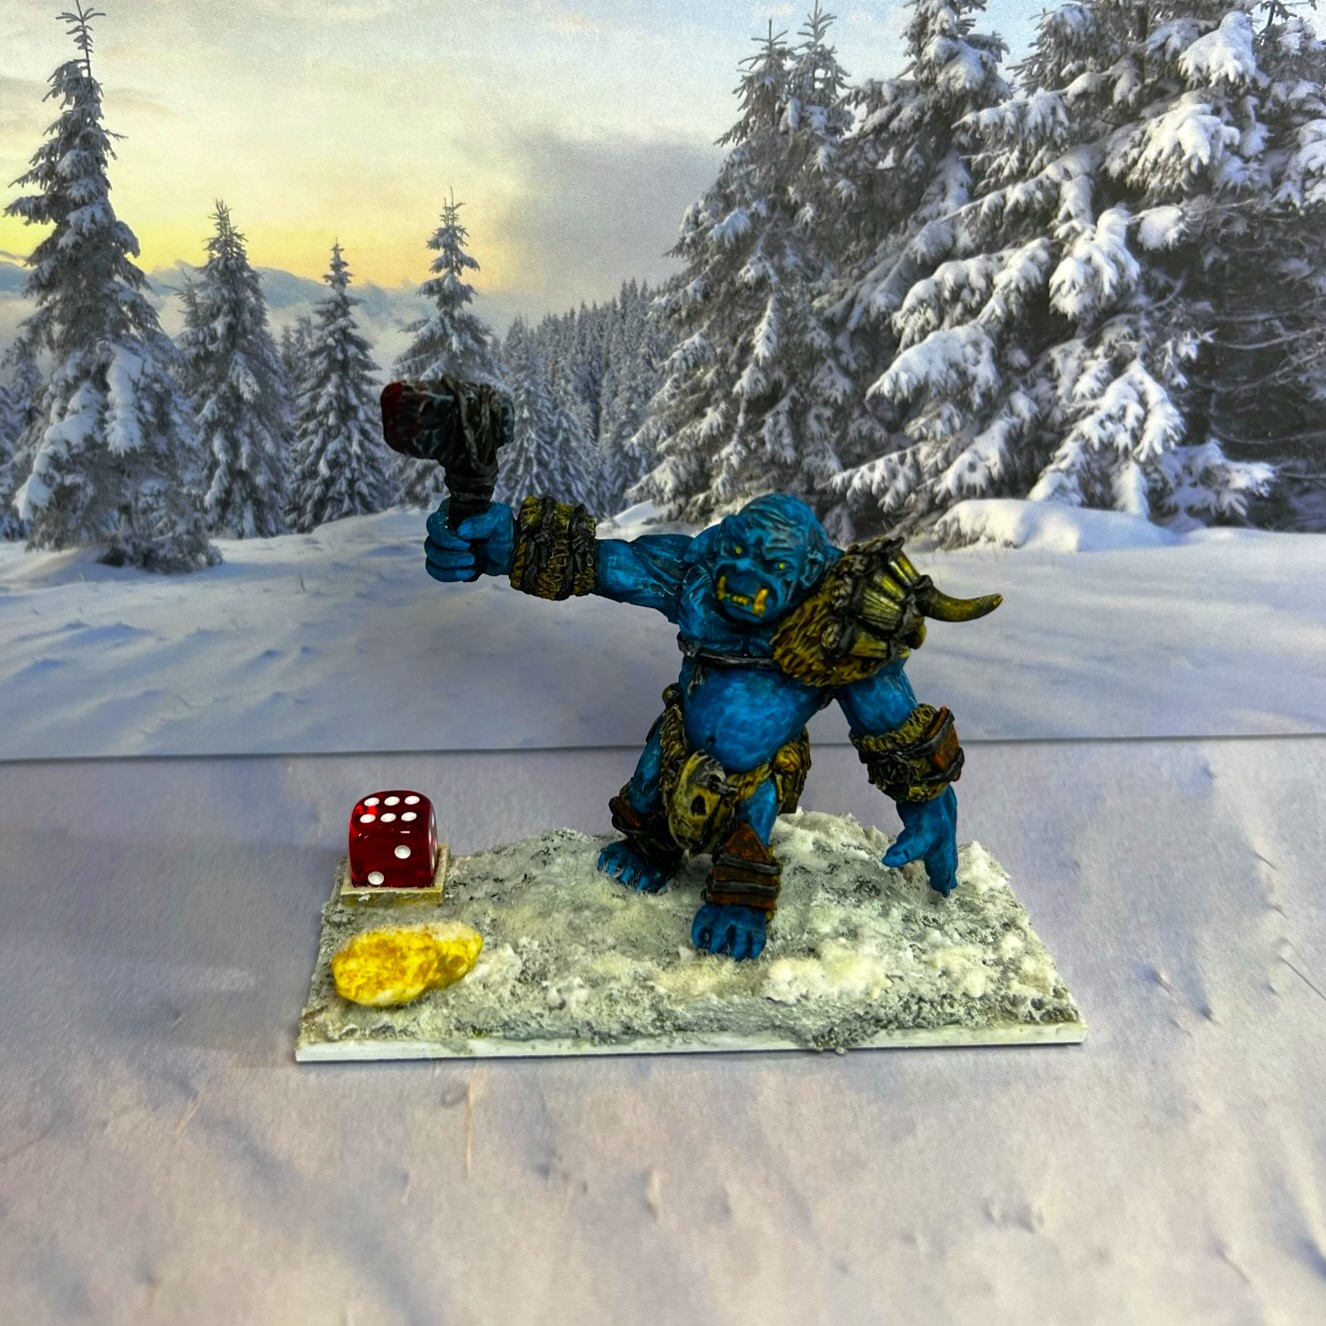
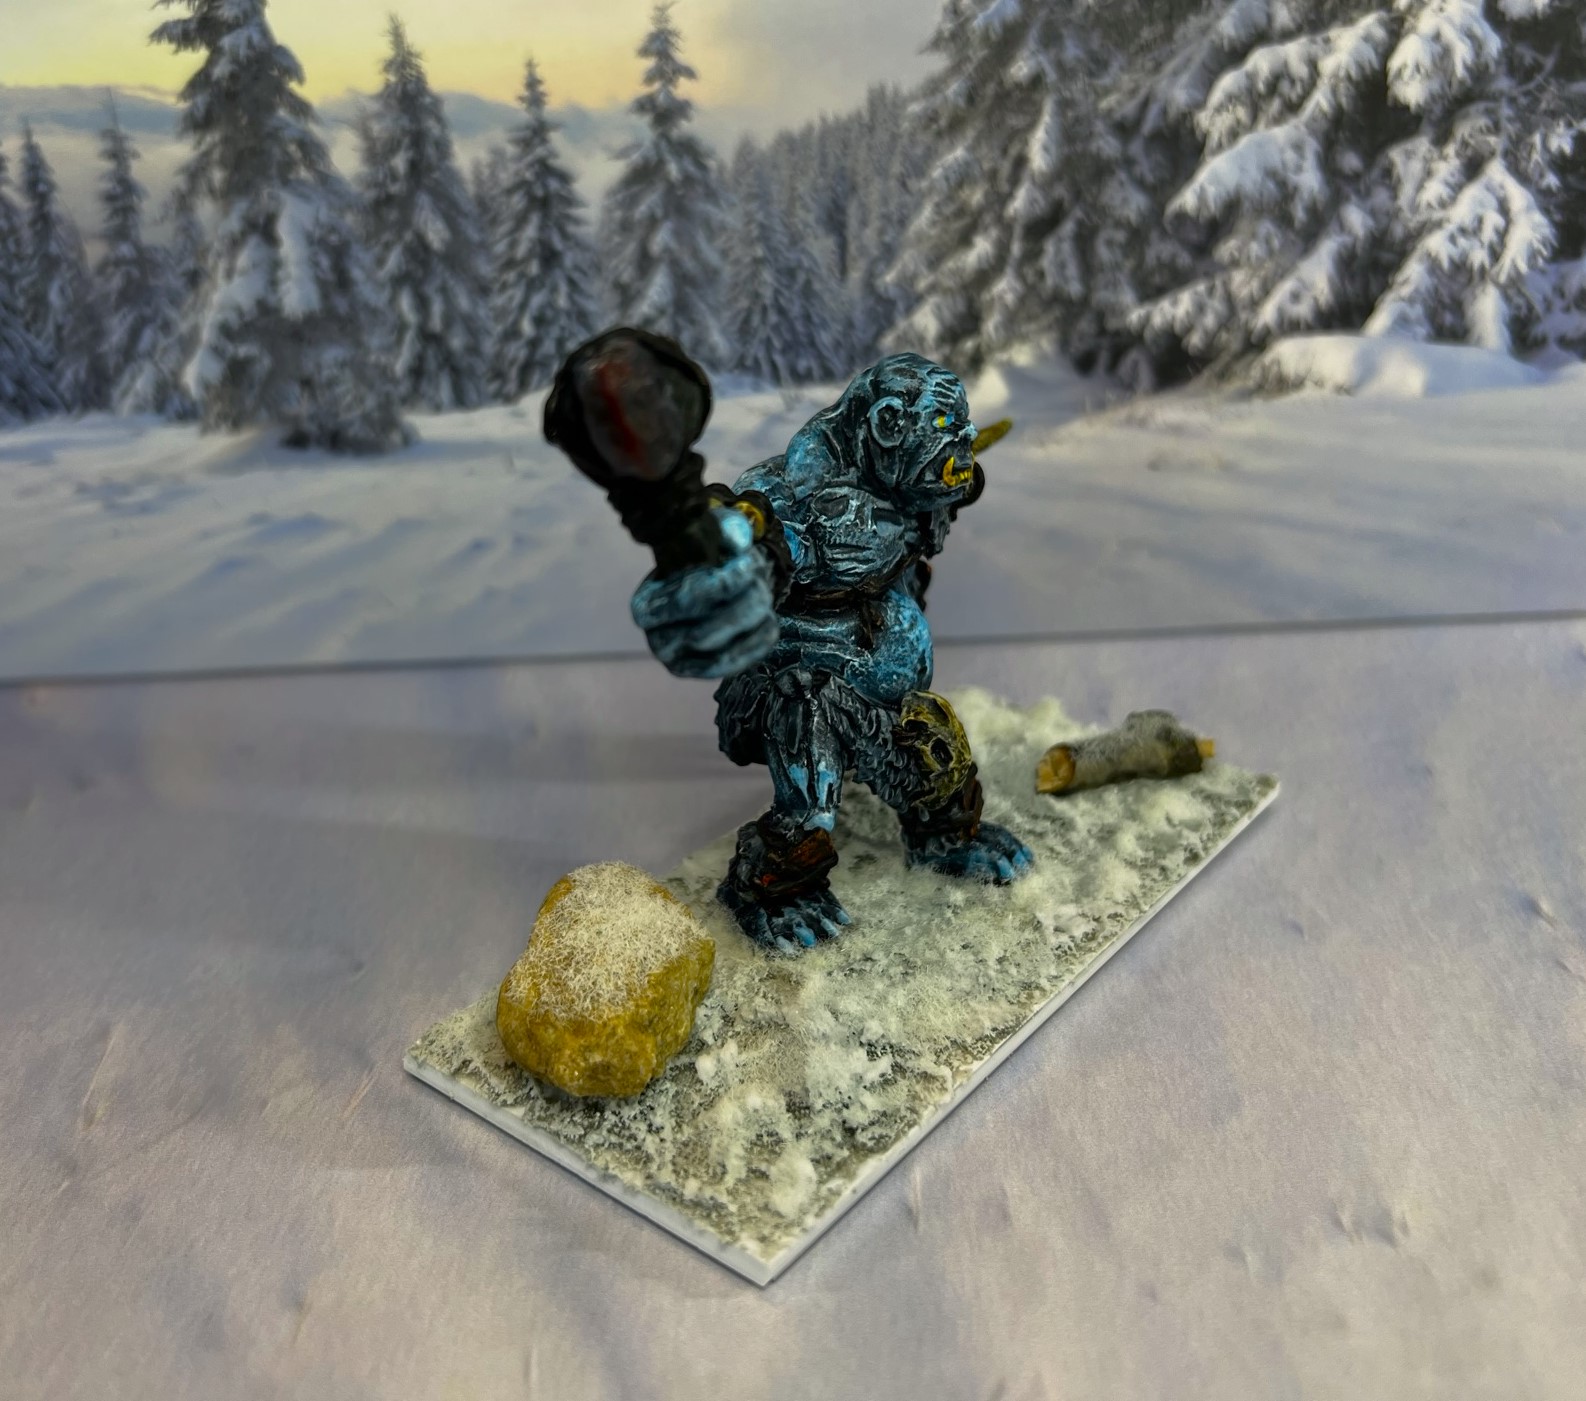
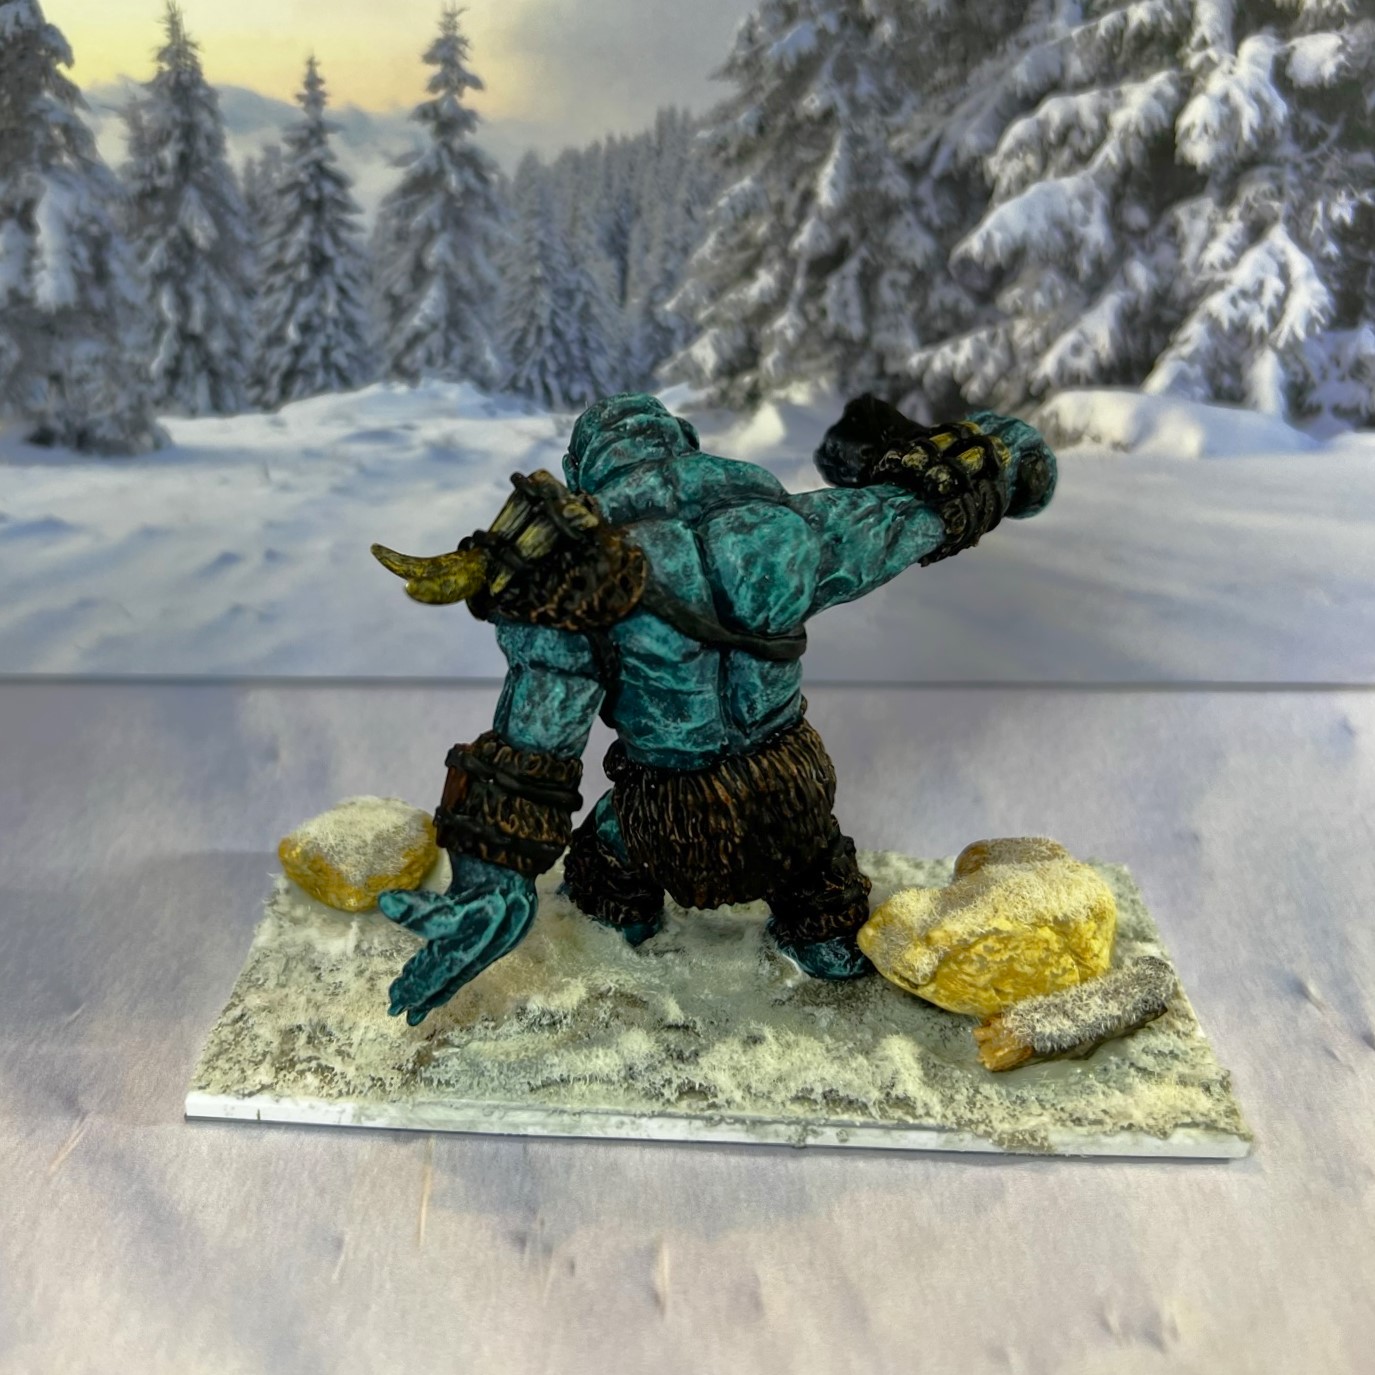
Again, the figures arrived sometime back in the late spring/early summer timeframe. Since then, I worked on other things that you’ve seen this blog. The packing Dave did of the figures was outstanding – they all arrived in excellent condition. After looking at the figures, I decided that I wanted to make them “frost ogres”, as they looked to me to be perfect for a winter environment. I debated between ice ogre and frost ogre. In the end I went with Frost Ogre. Yes, I know there are frost giants, ice trolls, and the like, but for fantasy stuff you can do whatever you want!
I gave them all a good scrubbing as I hate when paint does not stick well to resin.
Getting a good soak after scrubbing.Drying before assembly.
As far as basing goes, I knew that I would have to base them on larger bases than the 2” x 2” normally used for Ozz and WOOD. The figures are too large otherwise. And the WOOD rules happily accommodates such a situation. After some consultation with both Dave Wood and Buck Surdu, I decided to go with 2″ x 4″ in terms of basing. Instead of taking 4 hits like a 2” x 2” base, each Frost Ogre base will take 8 hits. So this will be a mighty regiment of Frost Ogres.
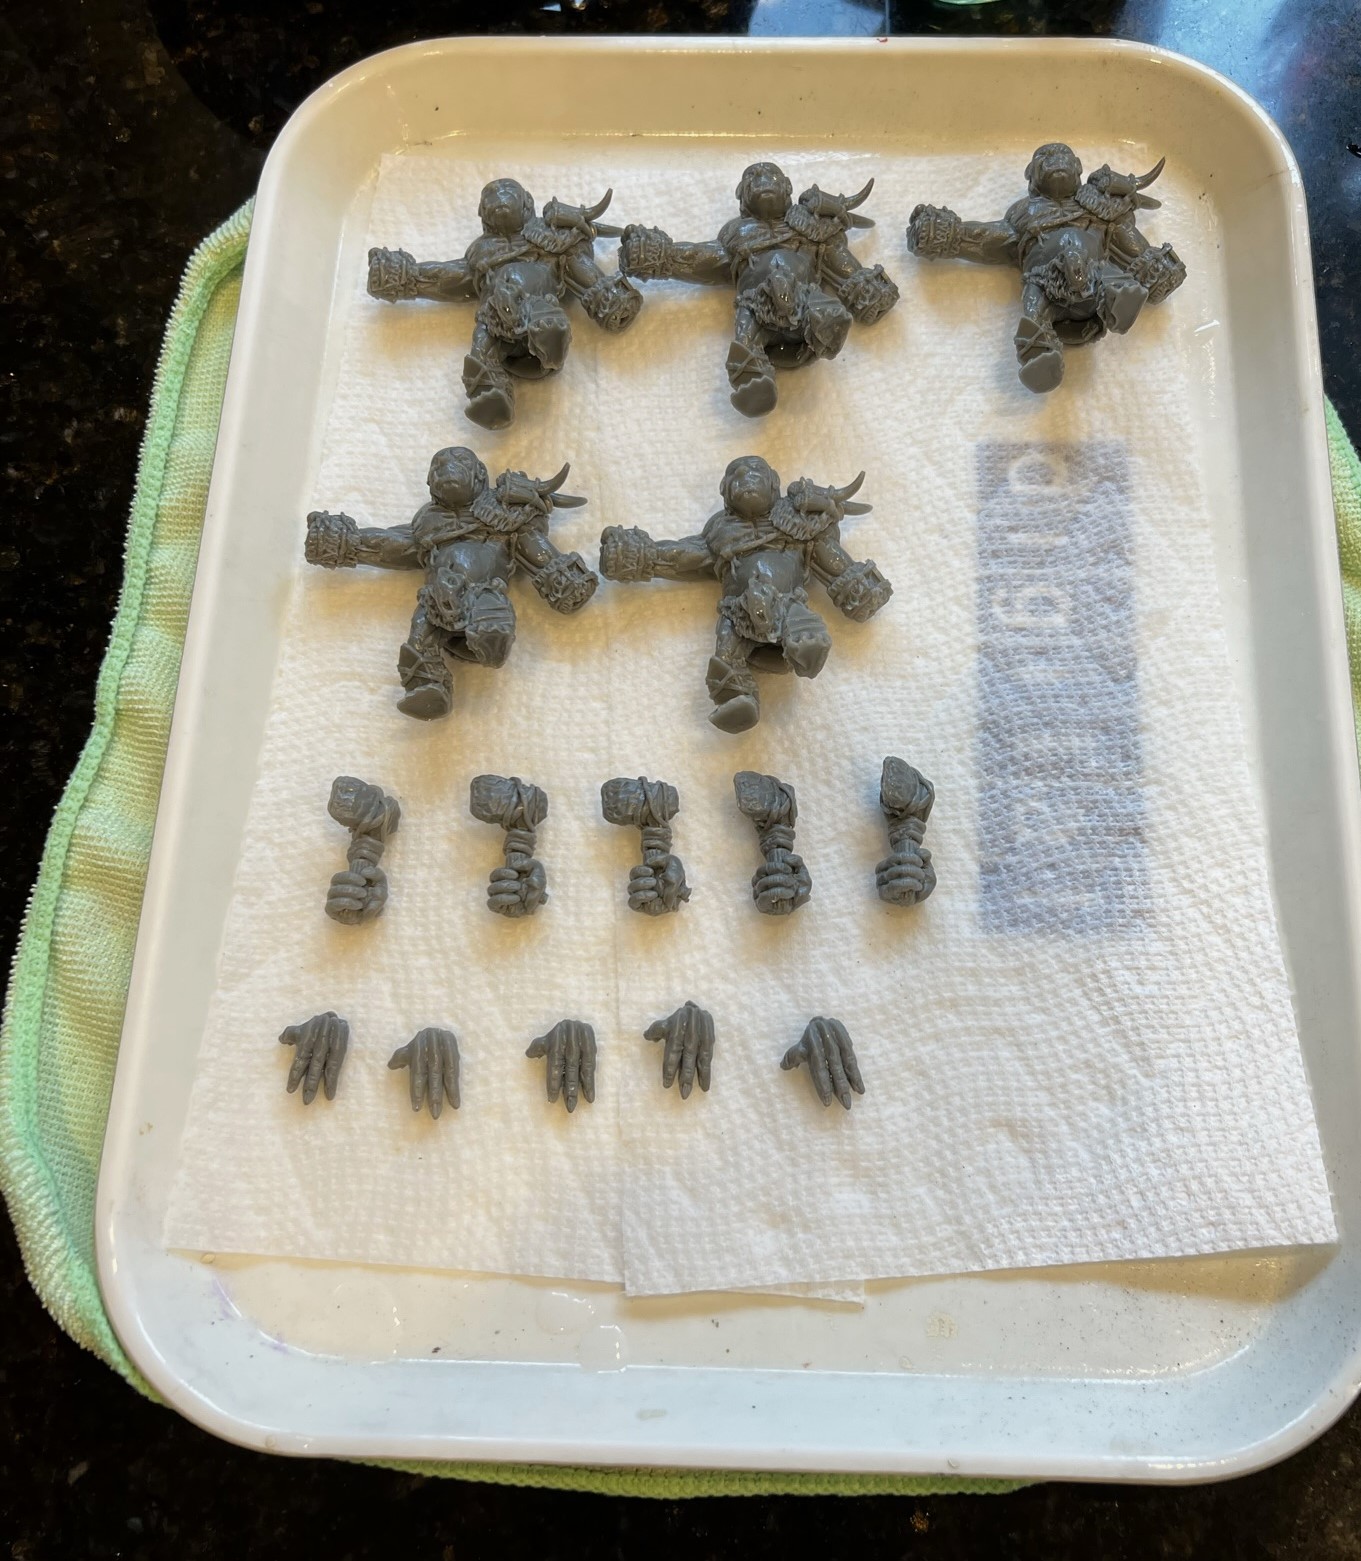
The figures themselves were 28mm scale and resin with wire internal supports (nice call on that Dave). They required a little bit of assembly as both hands needed to be attached. I assembled the figures by using green stuff instead of glue to affix the hands and to attach the feet to the steel bases. I’m not sure if that was a right or wrong decision, but I always feel a little bit cautious with regards to resin figures in terms of what might work for glue. As I ordered them without bases, so I could base them appropriately for WOOD, I would need to deal with that aspect, too. Initially, I considered adding a few secondary weapons in their left hands. However, as those hands has wide open palms, I eventually passed on doing so because it just didn’t look right. I initially based the figures on 2″ x 2″ steel bases for painting – with an eye to then base them permanently on 2″ x 4″ bases.
Assembled with the right and left hands in slightly different positions.
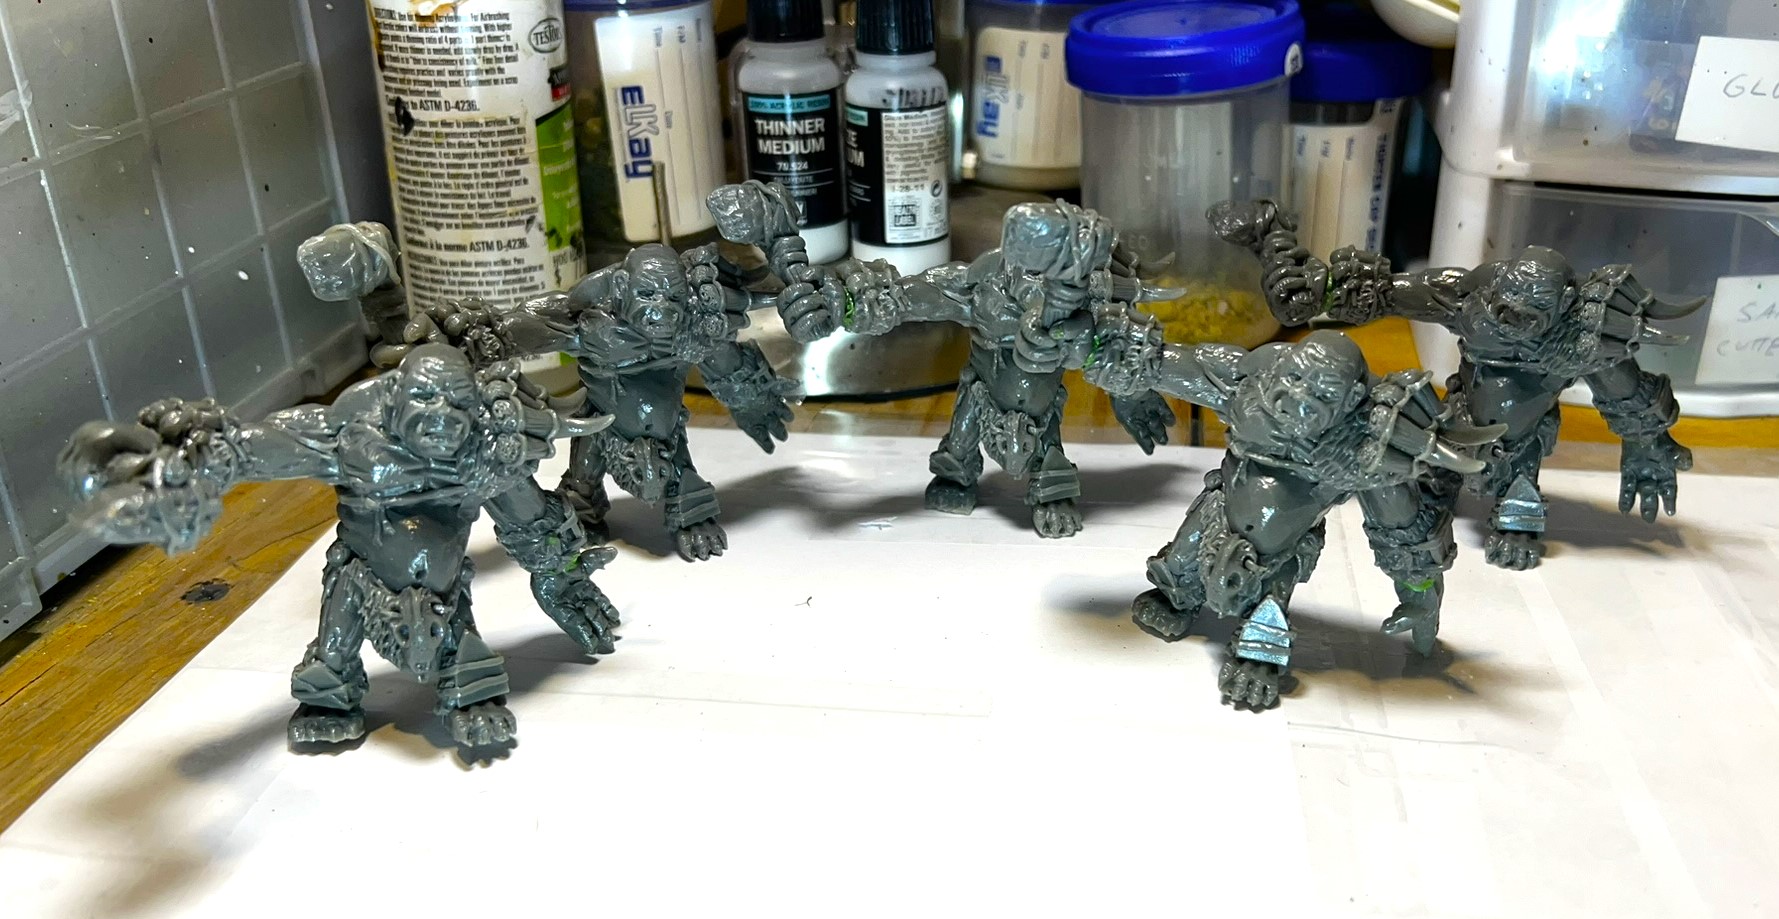
While giving them secondary weapons would have given me a chance to differentiate the figures, I decided that I would differentiate them instead by altering the position of the hands as well as through painting. By painting, I thought that I would give each of the ogres a slightly different bluish, flesh color, as befits a Frost Ogre. I would also differentially paint their pelts.
I started dabbling with/working on them at different times since June while I worked on this, that, and the other Ozz thing. While I am definitely not a hobby butterfly (apologies to IRO, I have nothing against hobby butterflies!), I did want to finish more of the Ozz stuff that I was working on that I’ve shared previously. But, finally, it was time for a short break to work on these…but in the process of working on them, I accidentally tipped over and broke one of the figures horns on the shoulder pad. This ticked me off – as it was shattered and not easily repairable. I didn’t want to risk resculpting the horn as I knew whatever I did would never look as good as what Dave done originally. In any case, I think that damage just added to the figures’ differentiation because the horn looked like it was battle damaged in the end. You can be the judge when you see the final figures in a bit.
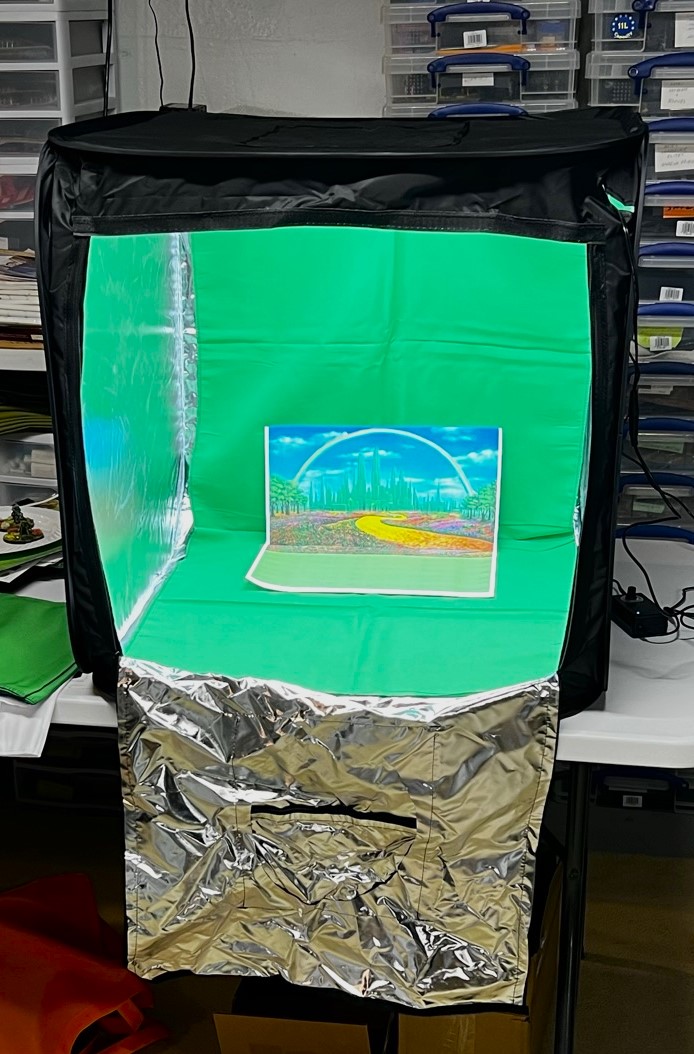
Below, you’ll see some work in progress, pictures, and then afterwards, I’ll show some eye candy with a new background that I printed off that I think shows off the Frost Ogres in a nice winter environment.
WIP Shots
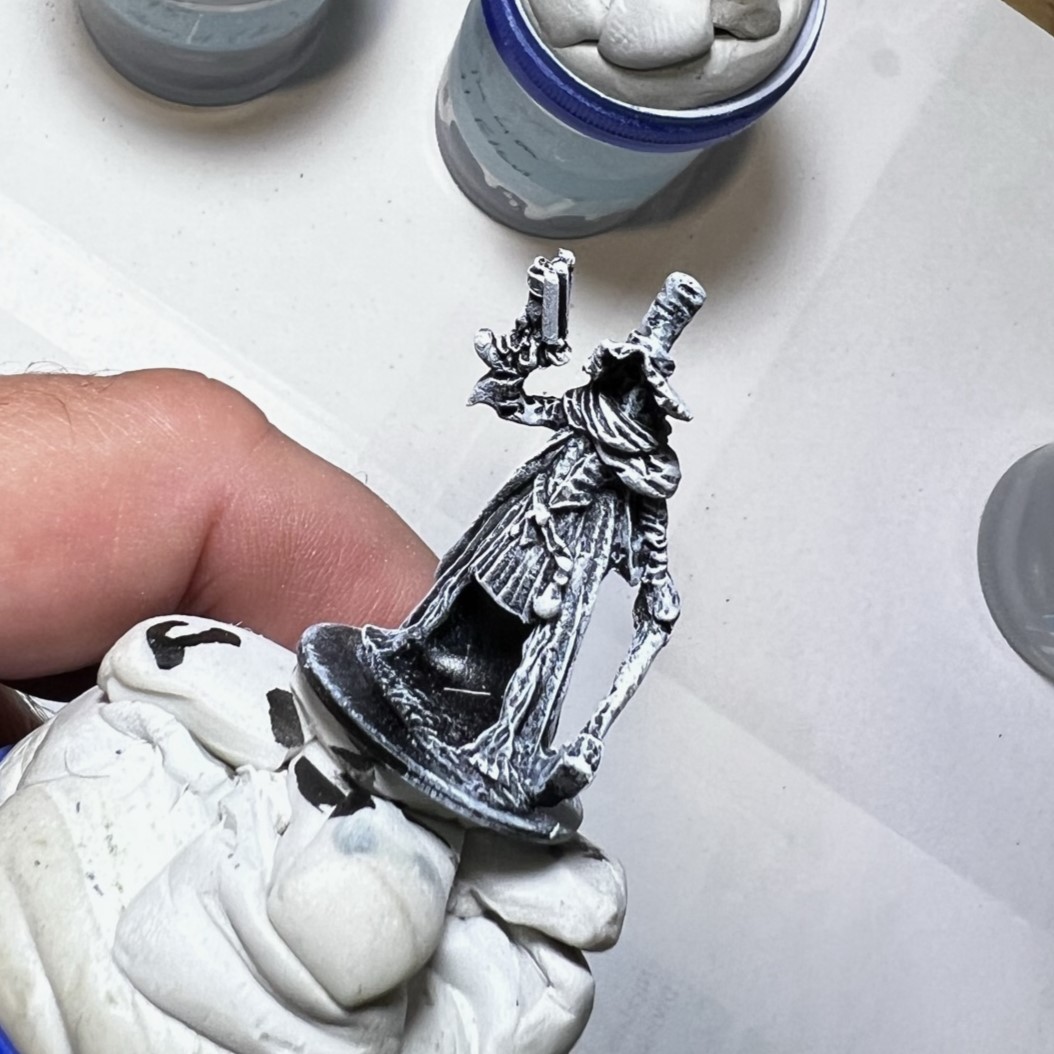
My approach to painting was to manually prime these with some white Vallejo primer that was left over. It wouldn’t flow through my airbrush anymore, but was still useful. Then, I washed the non-flesh parts with a dark wash, and the flesh parts with a Reaper MSP blue liner. That blue liner had laid unused in my paint collection for at least 5 years. This blue liner, I hoped, would give me an appearance/depth of color underneath for the future flesh tones.
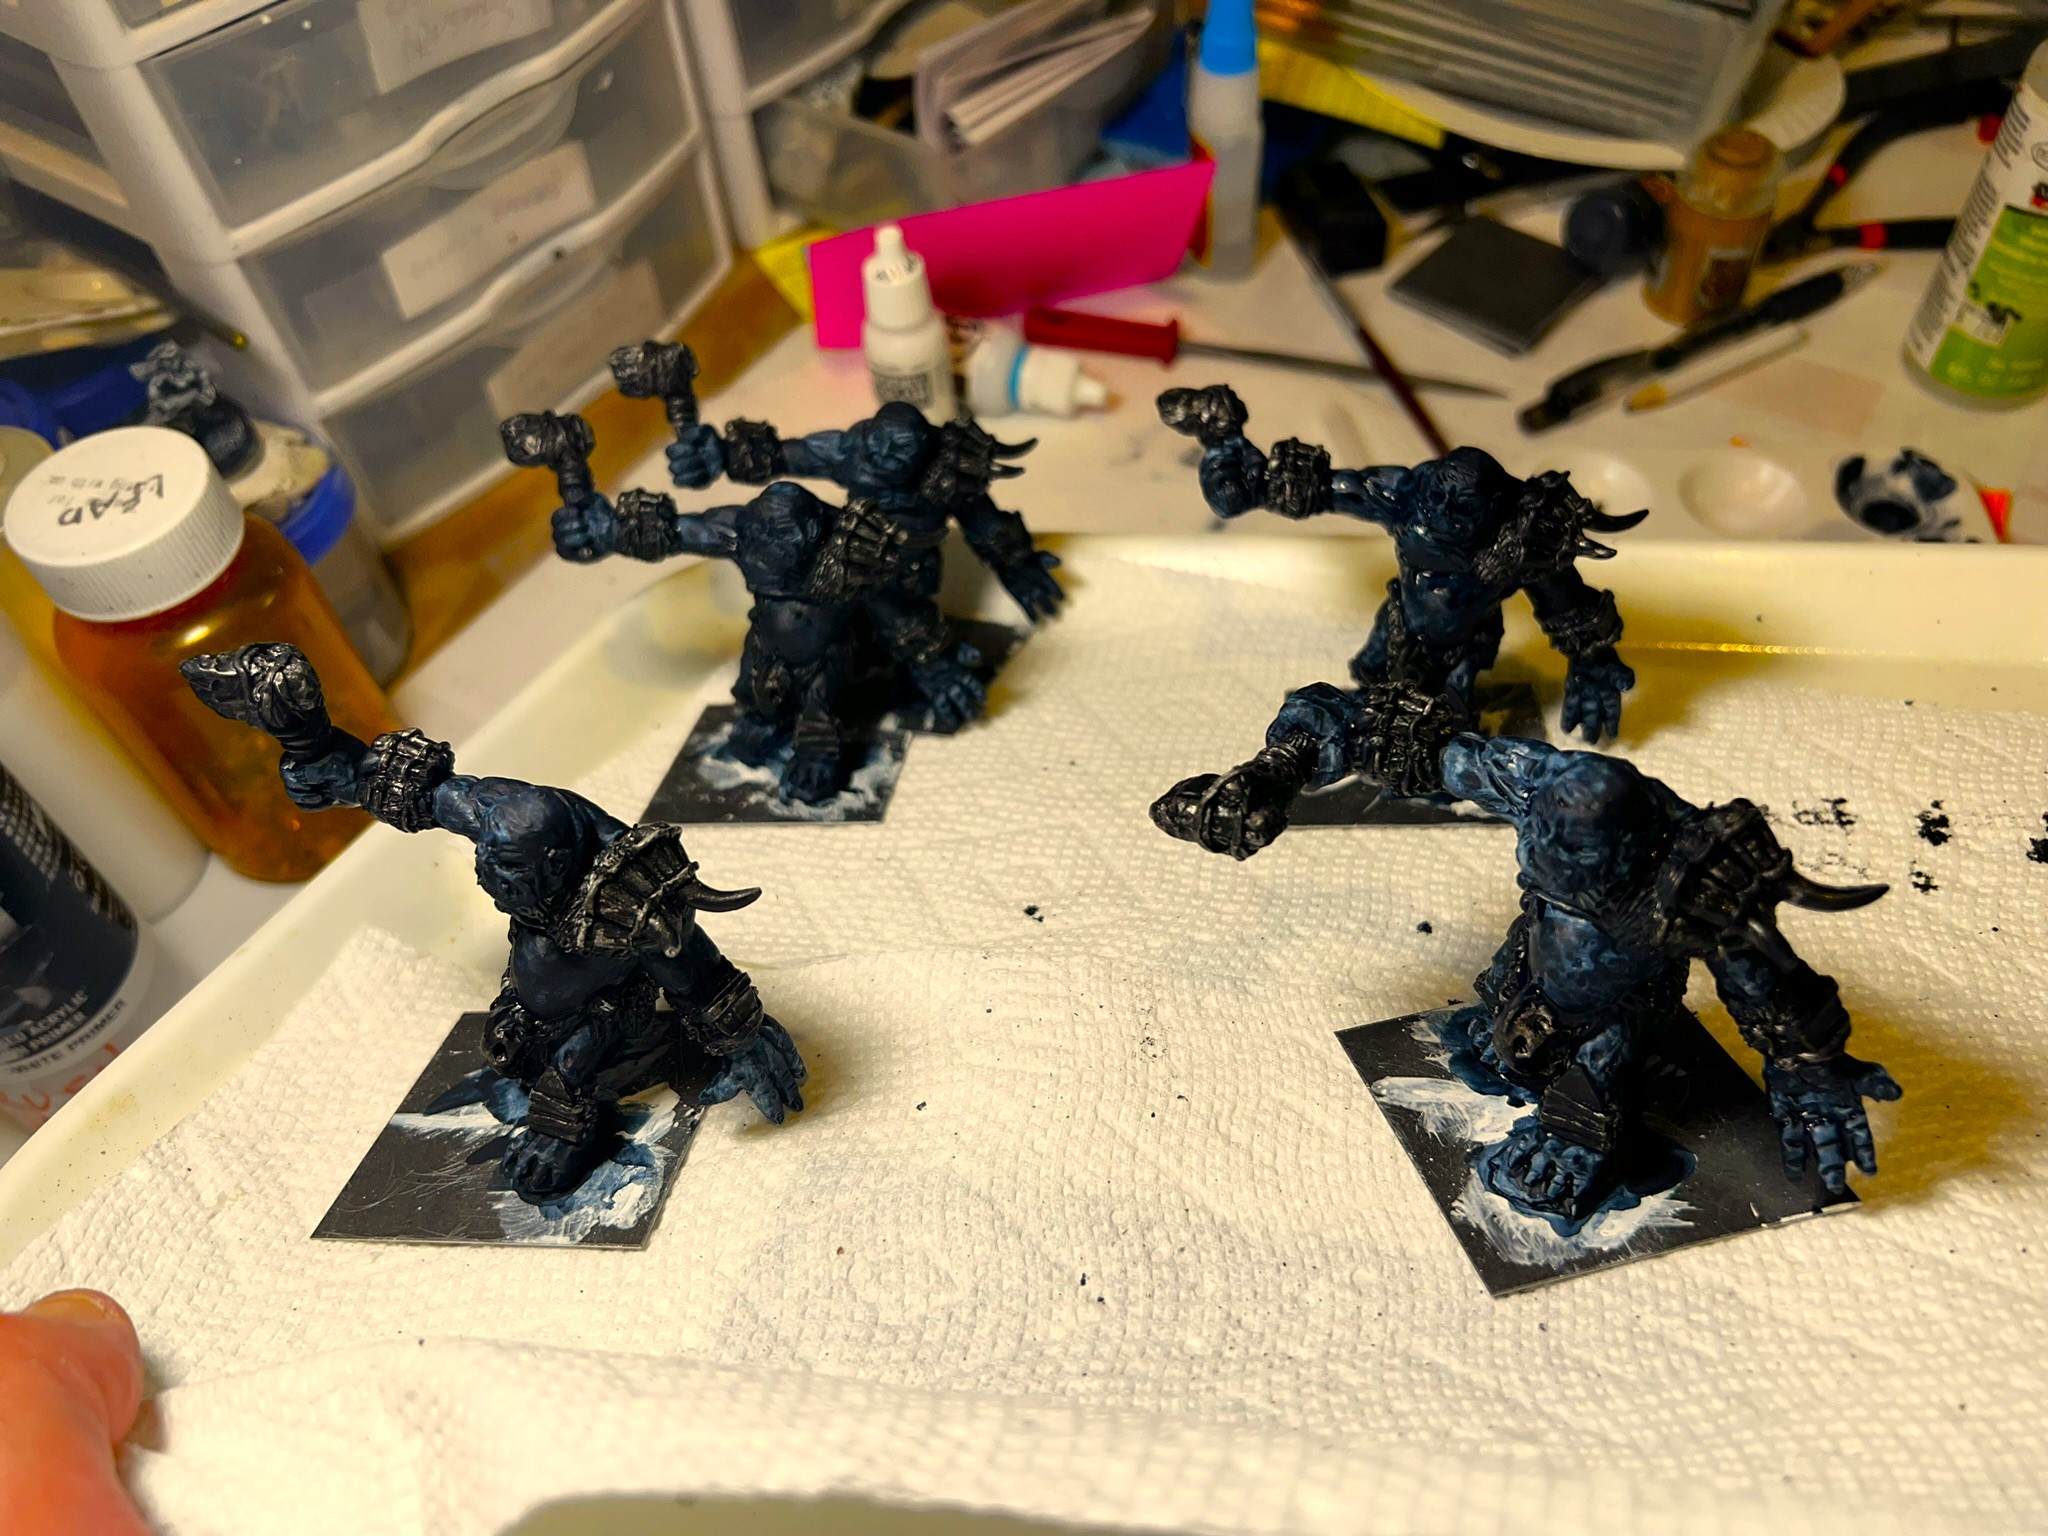
Frost Ogres primed with black wash on non-flesh.Frost Ogres after blue liner on flesh.
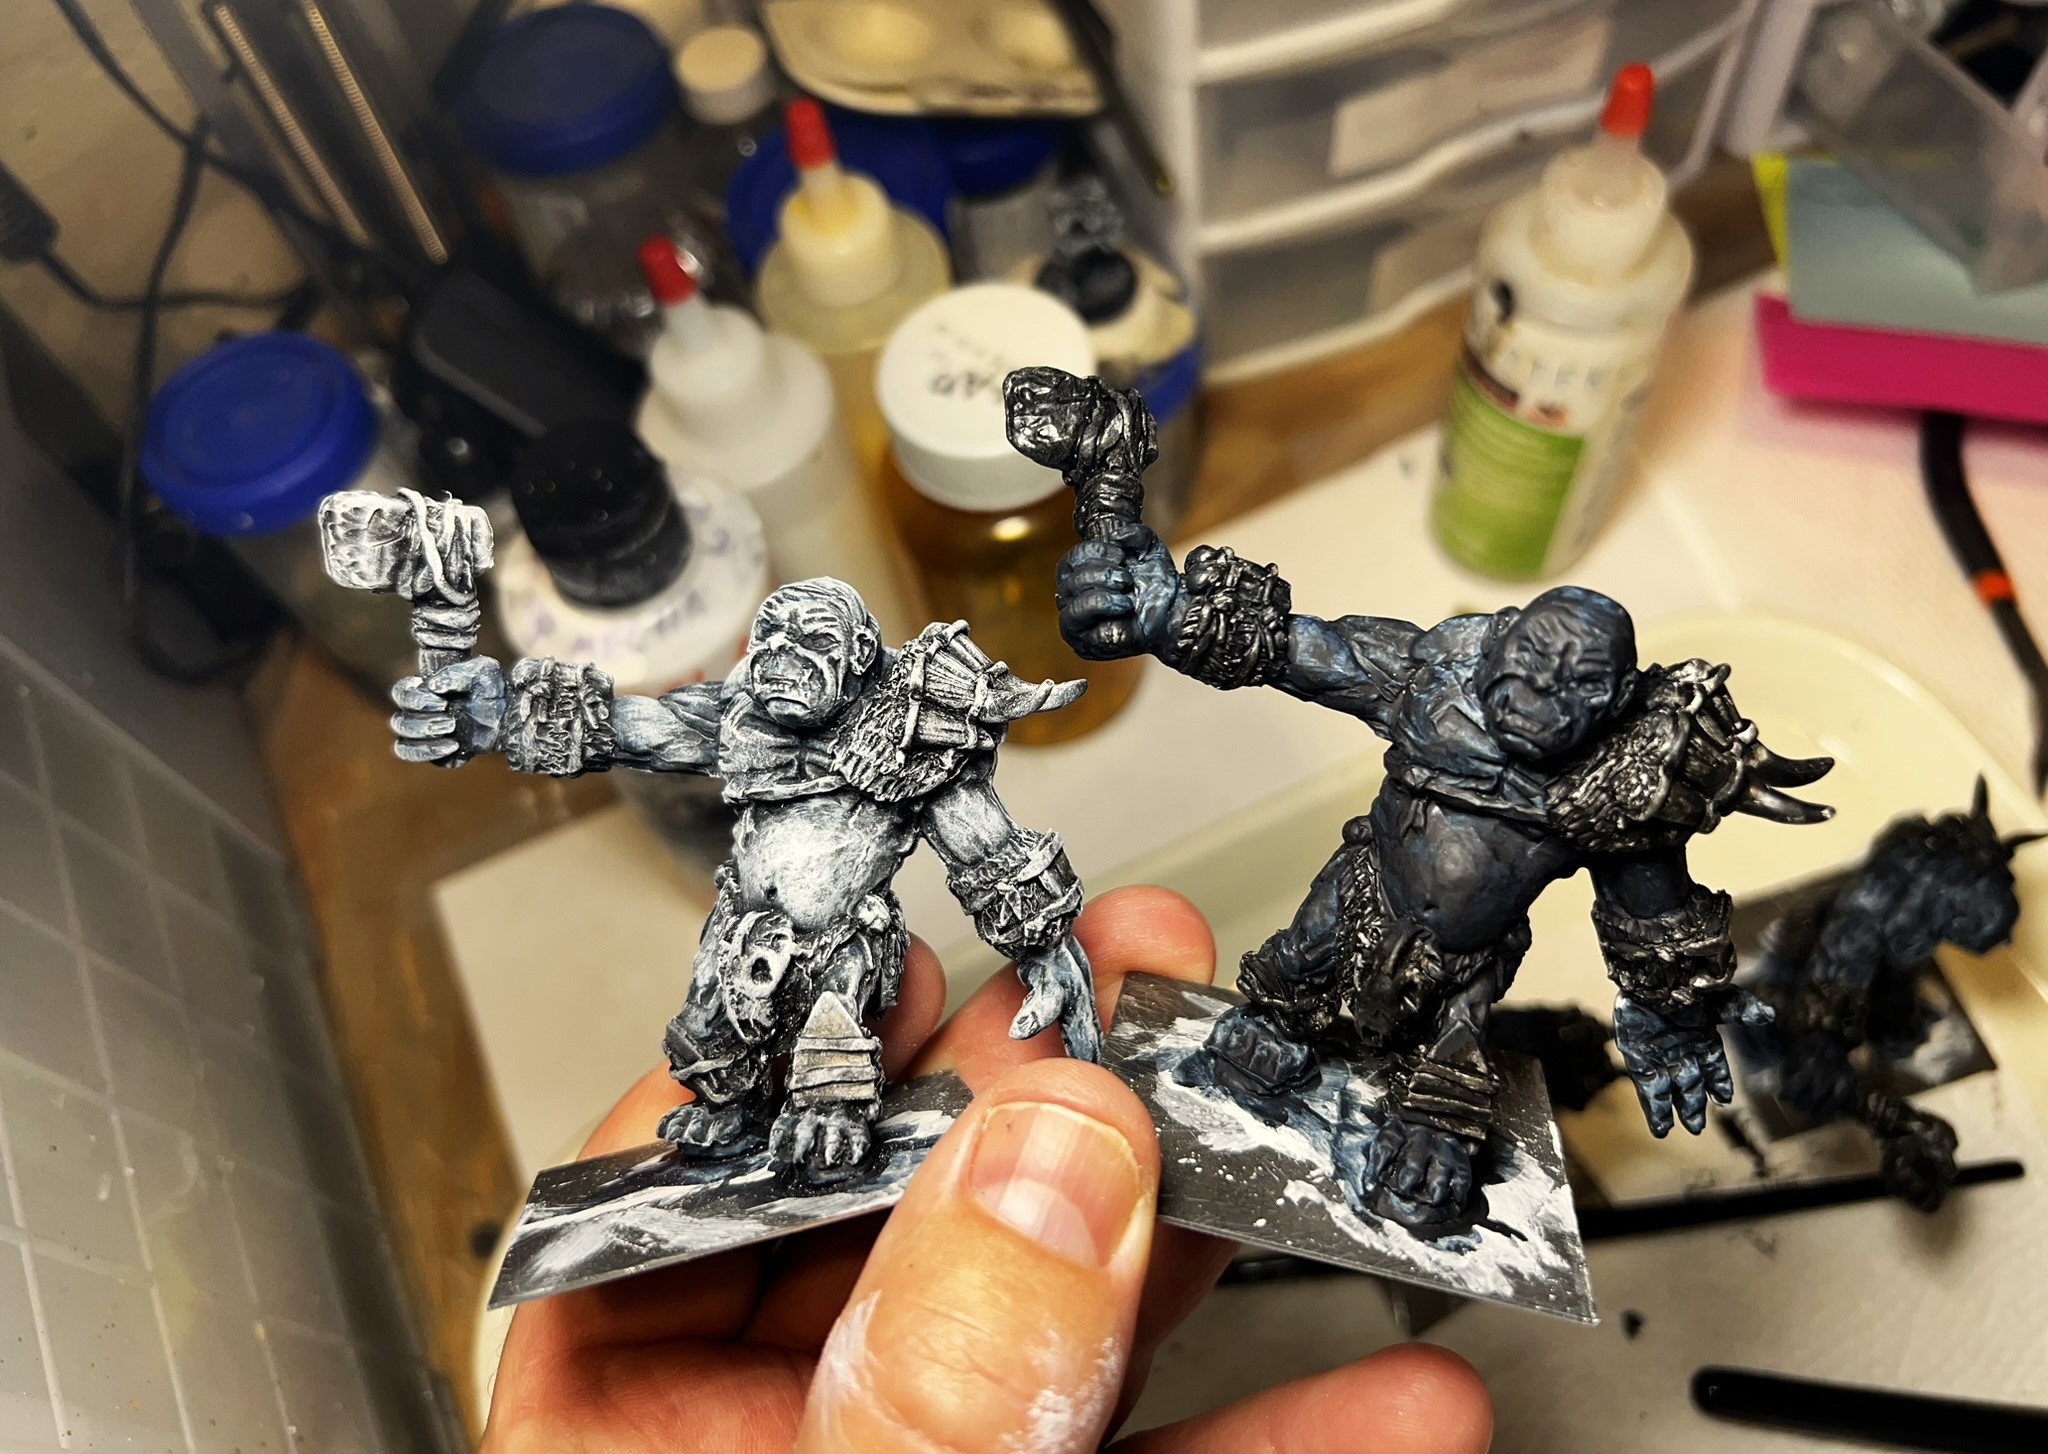
Subsequent to this, I would dry brush back over the blue and the dark with white.
The figure on the left has been dry brushed after the blue and black washes, while the one on the right has not yet gotten the white dry brush application.
Then I focused on the non-flesh areas of the models – horns, bones, pelts, and weapons.
Let’s get blue!
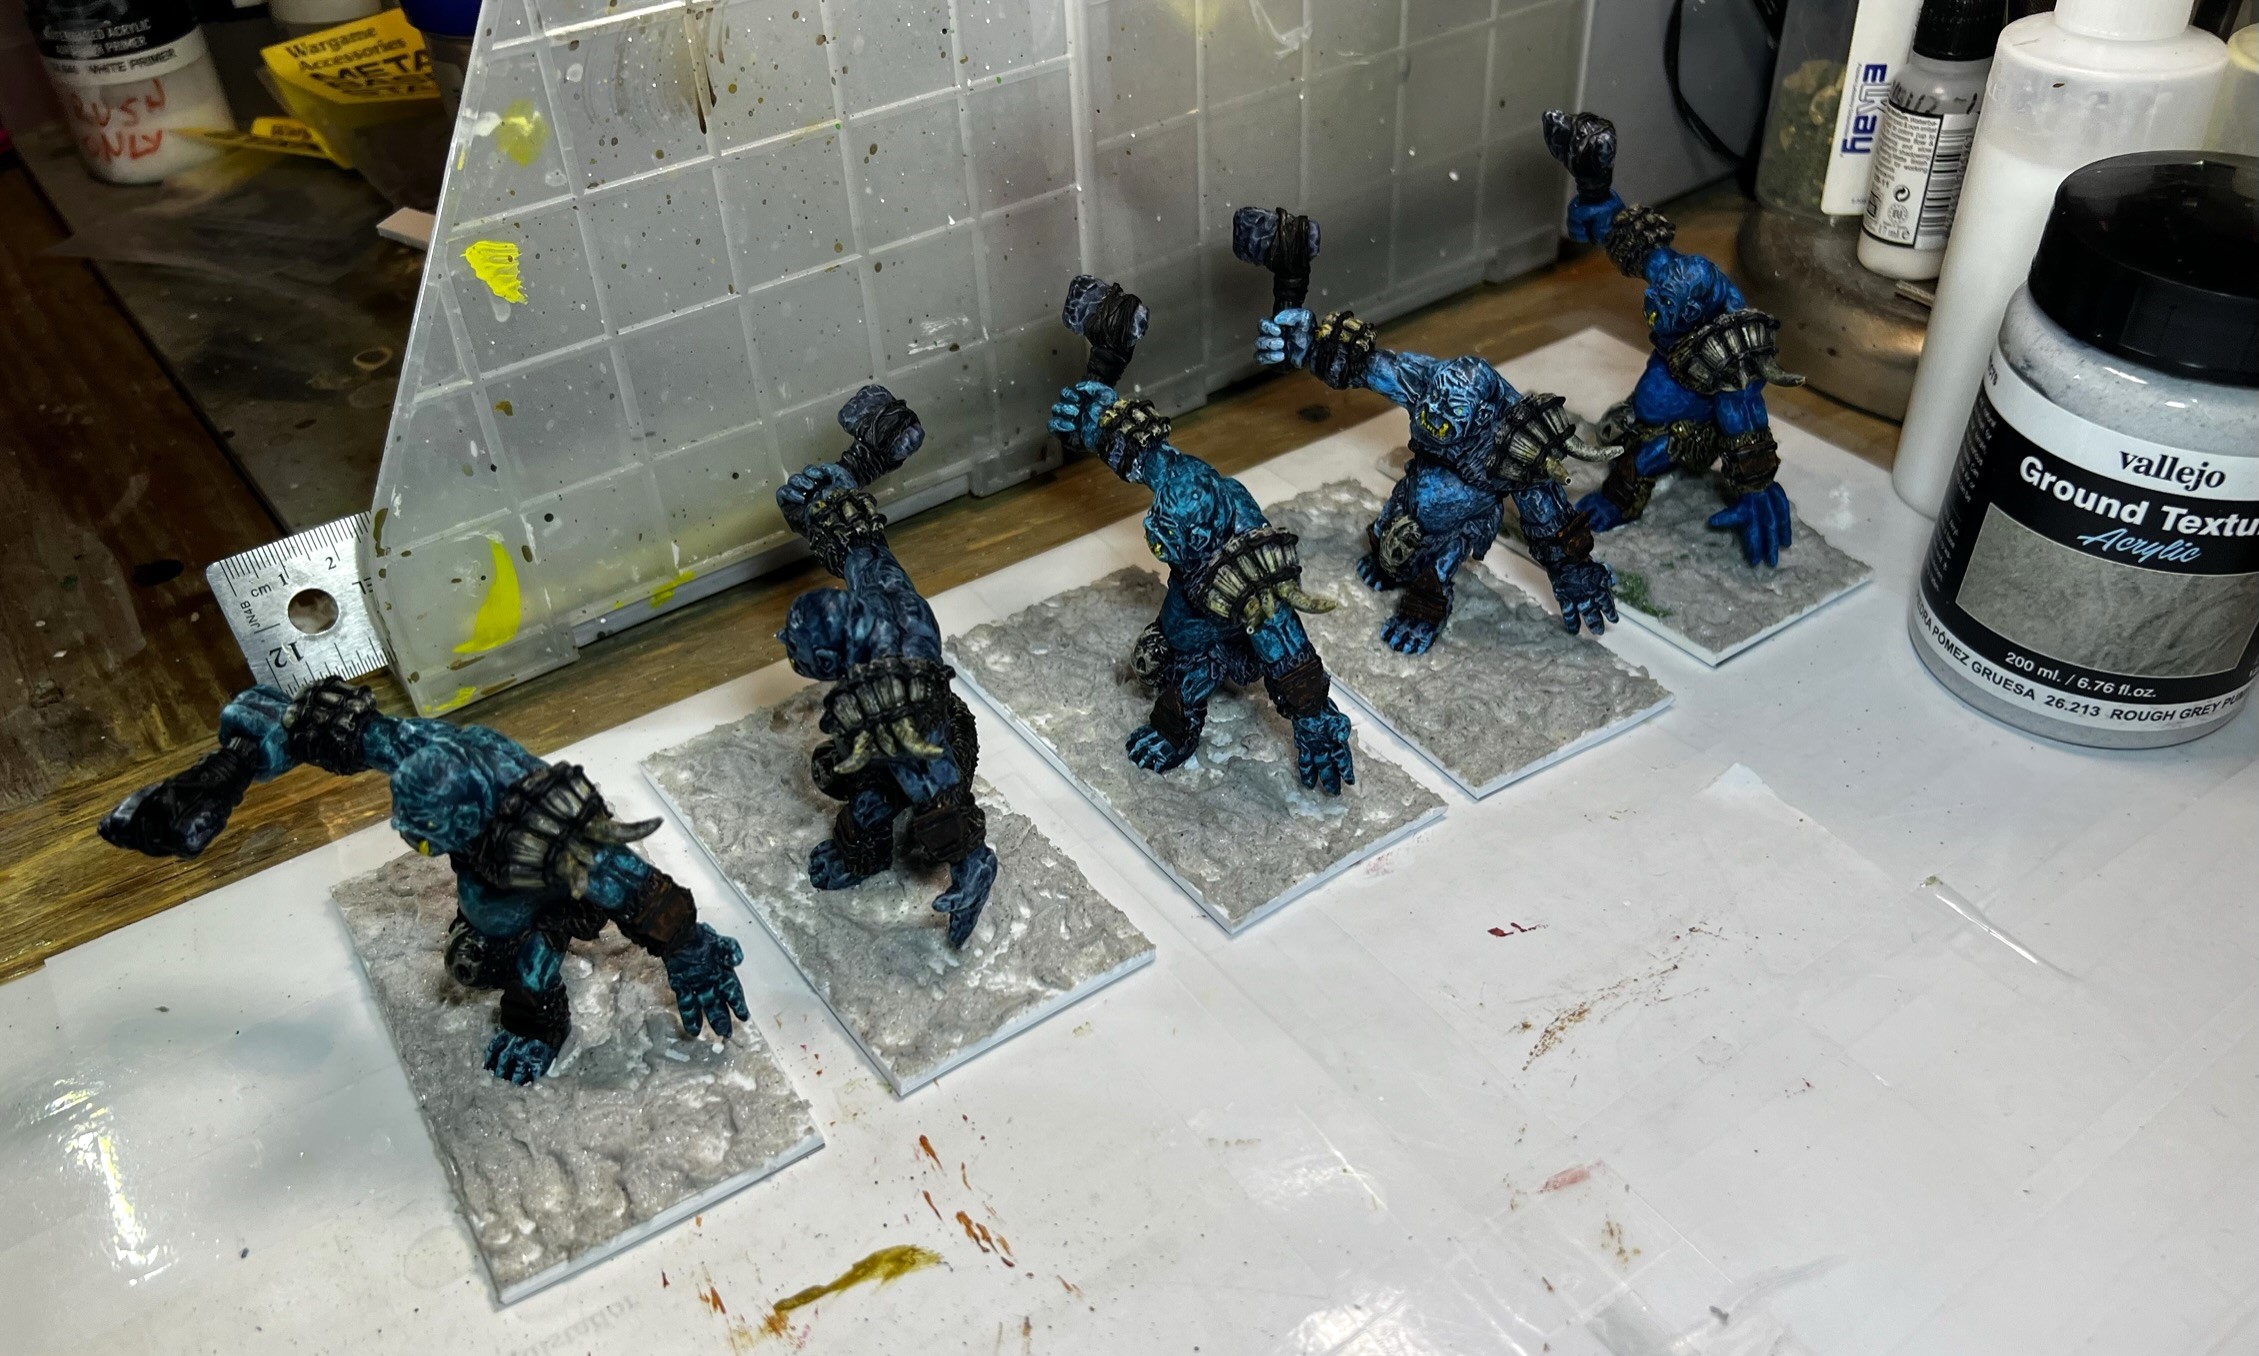
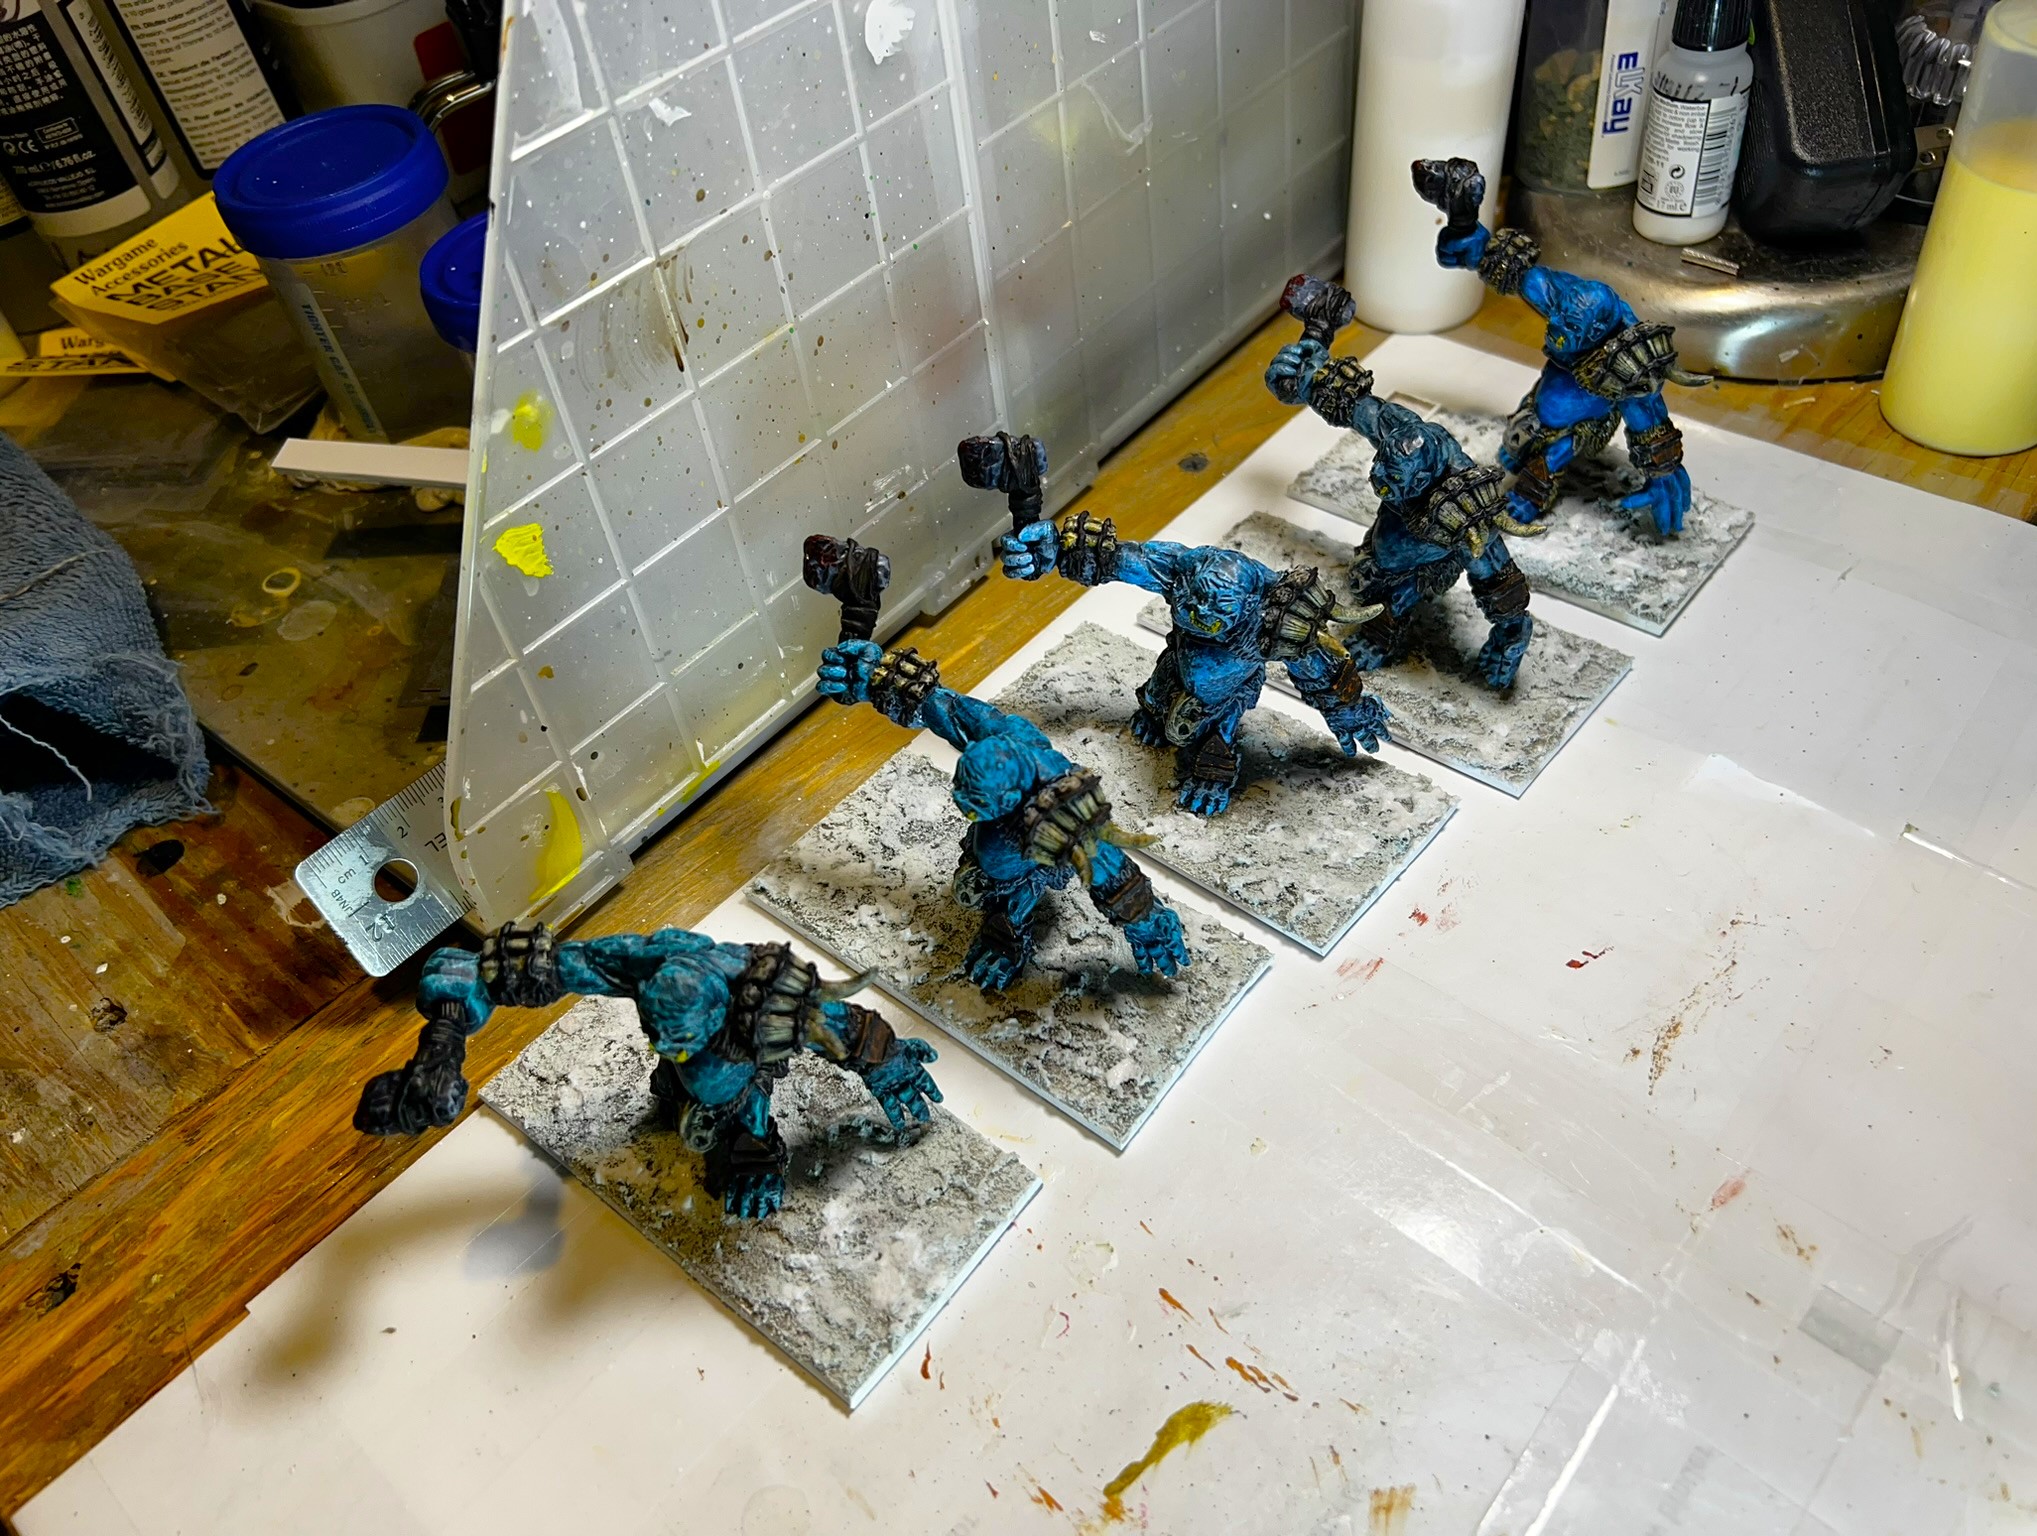
Lastly, I would then go with colors over the white that hopefully would be speed or contrast paints, washes, and highlights that could help with the looks I wanted. I initially chose the five colors below for flesh tones:
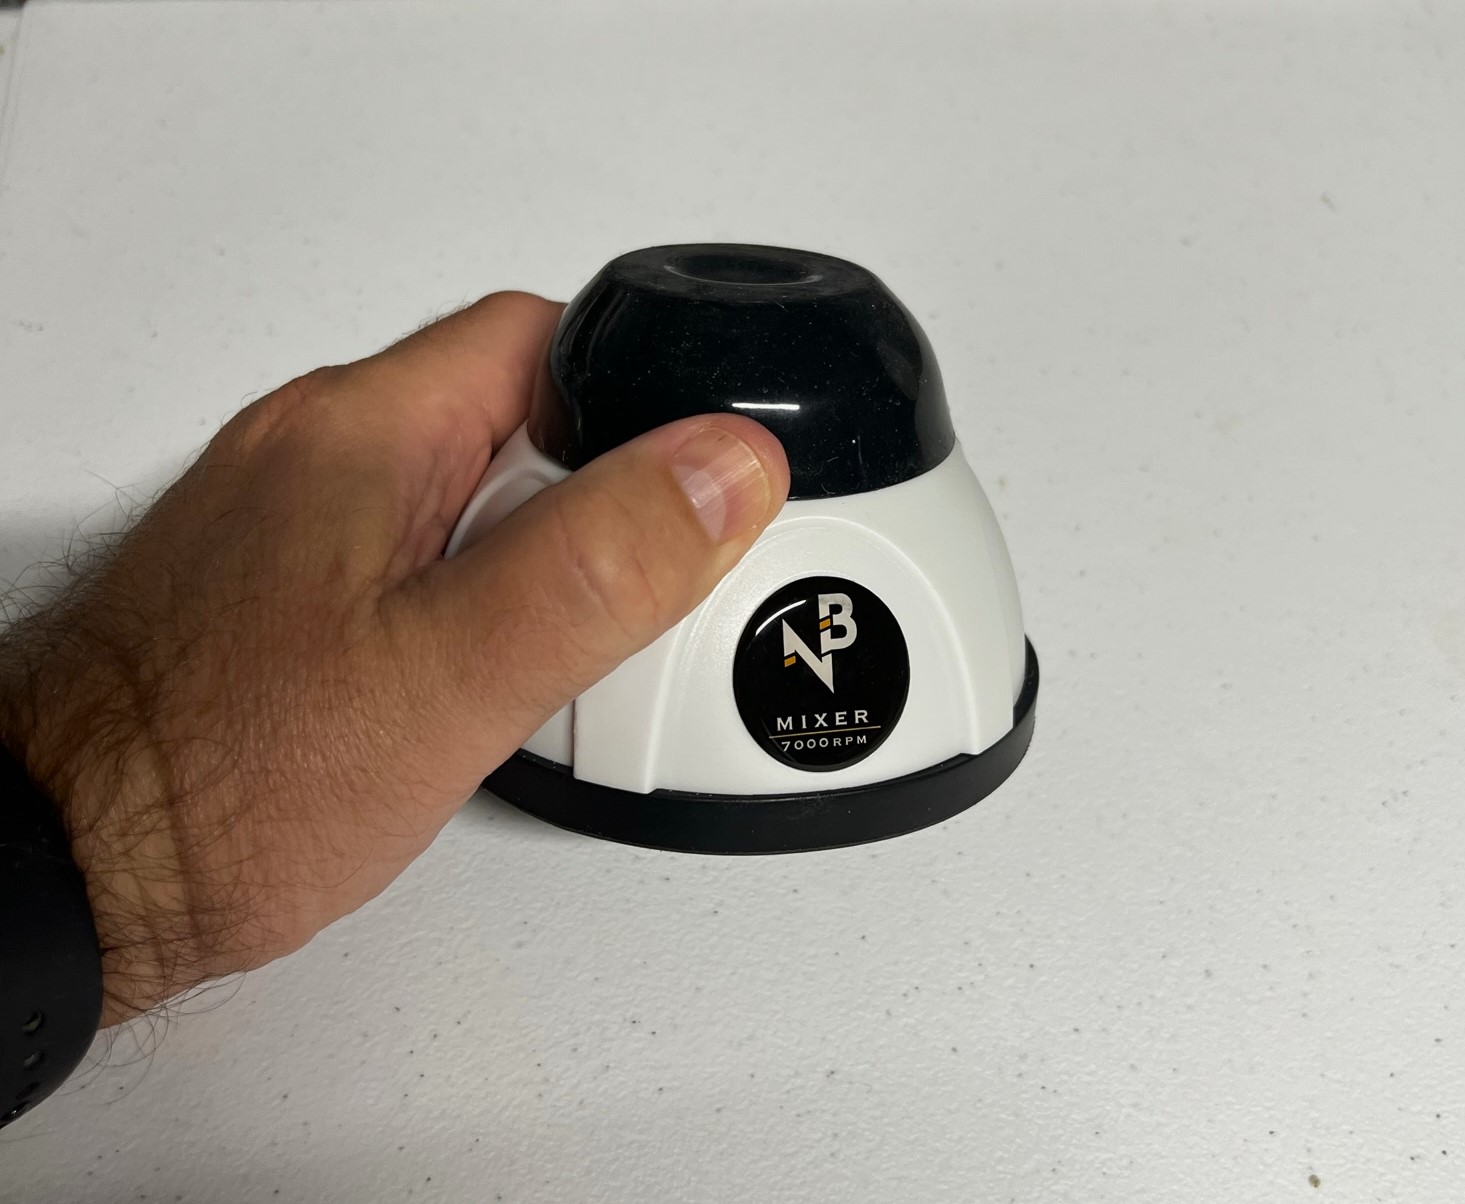
All were fine, except for the Citadel “Briar Queen Chill”, which was really more of a ghoulish green. I applied it, as I though “chill” and “frost” went together. But, I was not very happy. It was not bluish in the least – it was green. As I did not want one figure to look like the Incredible Hulk, I just went over this green with a Citadel “Drakenhof Nightshade” blue shade, which gave it a nice, somewhat turquoise-looking color. Not being a GW guy, I really wasn’t aware of what a briar queen was! I guess it’s sort of a witch. Another item, I also used a 7,000 RPM paint shaker on these – and it worked great to get the pigments really shaken up. The Army Painter speed paints all have steel balls in them, but the shaker is something I highly recommend, especially for the paints that tend to settle out a bit. At $46 US, its pretty good – you just have to recharge it with a USB cable.
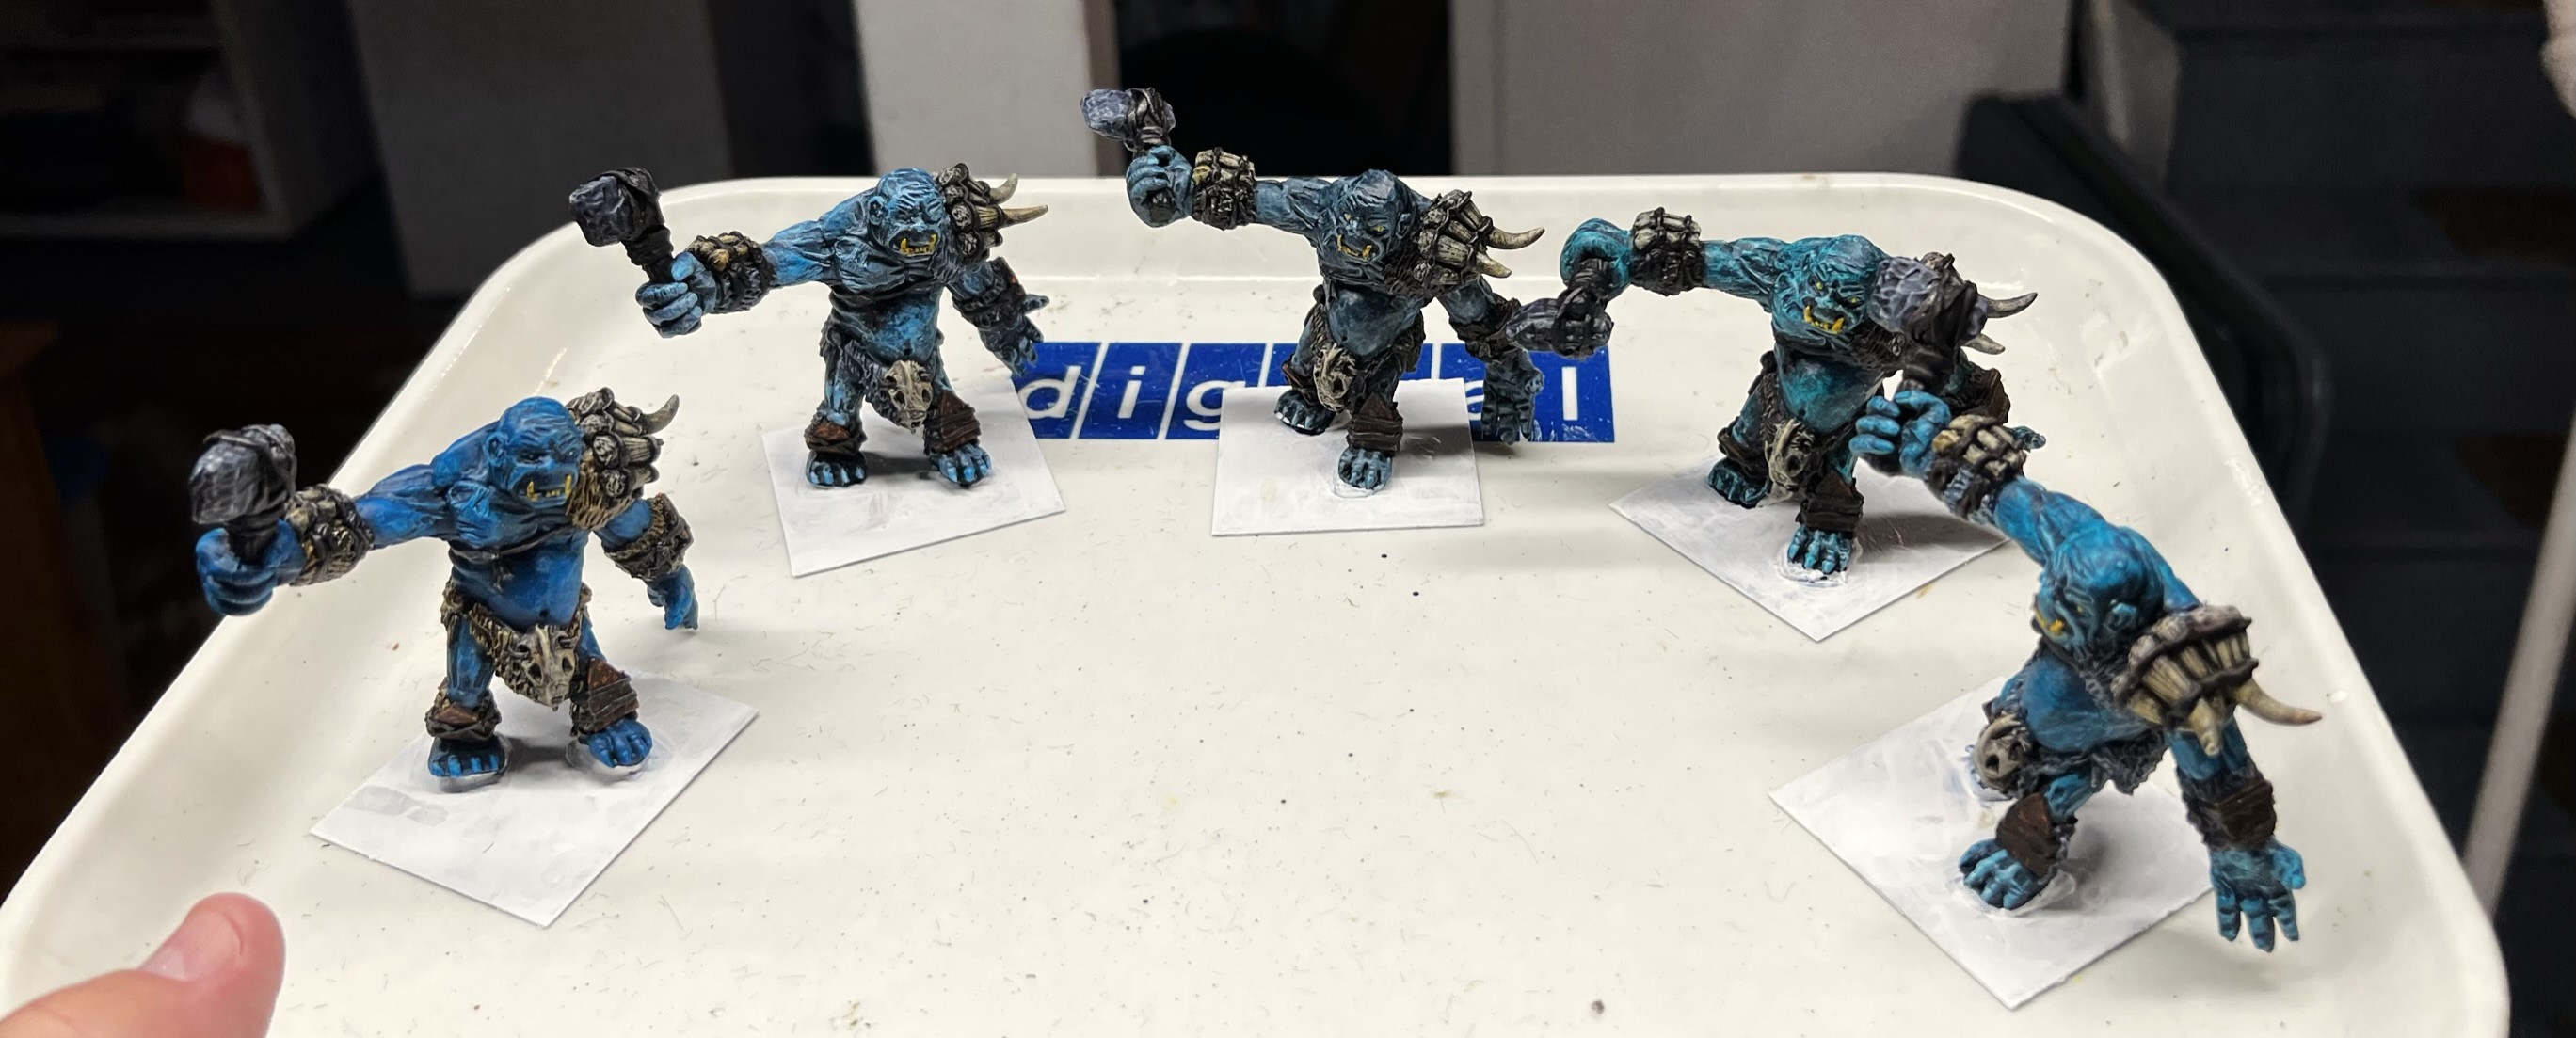
Back to the models. As I went “blue” with these, I made sure that the colors would vary.
All slightly different with flesh tones.
One of the major challenges in this project was dealing with the left hands. On one figure (base one), I had assembled the left hand too low to the ground. So, when I adjusted the basing to the 2″ x 4″ bases it, I just used some green stuff to alter its pose. I added each Frost Ogre’s Wargames Accessories 2″ square steel base (which I had mounted the ogres to with green stuff initially) to a 2″ x 4″ polystyrene plastic base. Then, I added two more steel 2″ bases underneath for transport/storage and magnetic attraction purposes.
Remounted on the larger 2″ x 4″ bases – time for varnish and flocking. There are also a pair of 2″ square steel bases under each figures polystyrene base.
As for the snow flocking on the bases, I used several products. I started the gray Vallejo Ground Texture “Rough Grey Pumice”, followed by two Citadel texture paints (Mourn Mountain Snow” and “Valhallan Blizzard”. You can see all the paints that I use. at the end of this blog, for that special person who wants to know what I used, or for me because when I want to re-create an effect – or a painting scheme – I will never remember – unless I write it down. I also added a Pendraken 12mm dice frame to one figure, plus some rocks and oak twigs. And lastly, I sprinkled some Citadel “Snow” that had been in my supplies unused since 2015 over a light PVA on the bases.
Given that I used a number of contrast and speed paints in this project, and that I did not want to have any bleed, I did take a lot of time in between steps to let things dry. Or that’s just an excuse because I went golfing…
Grey pumice addedAll with grey pumiceAdded the 2 Citadel texture paintsWith dice frame and snowAdding twigs, rocks and snowCitadel SnowDry, baby, dry…it’s cold out there!
As promised, here is some:
Eye candy
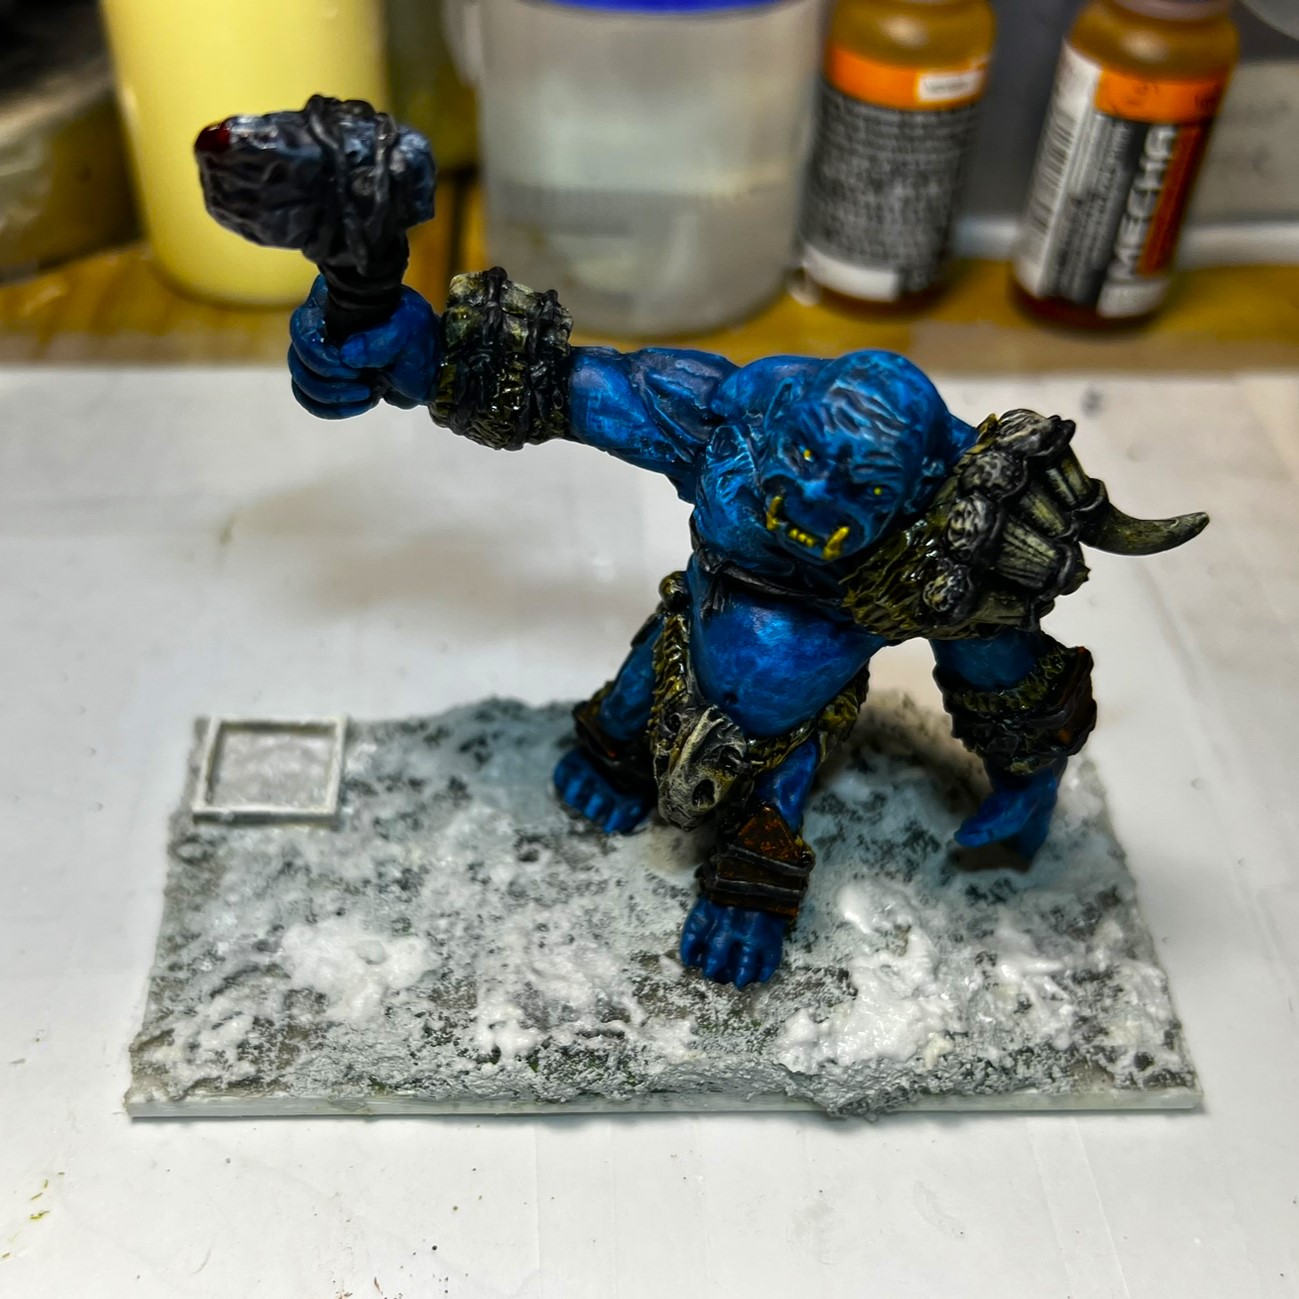
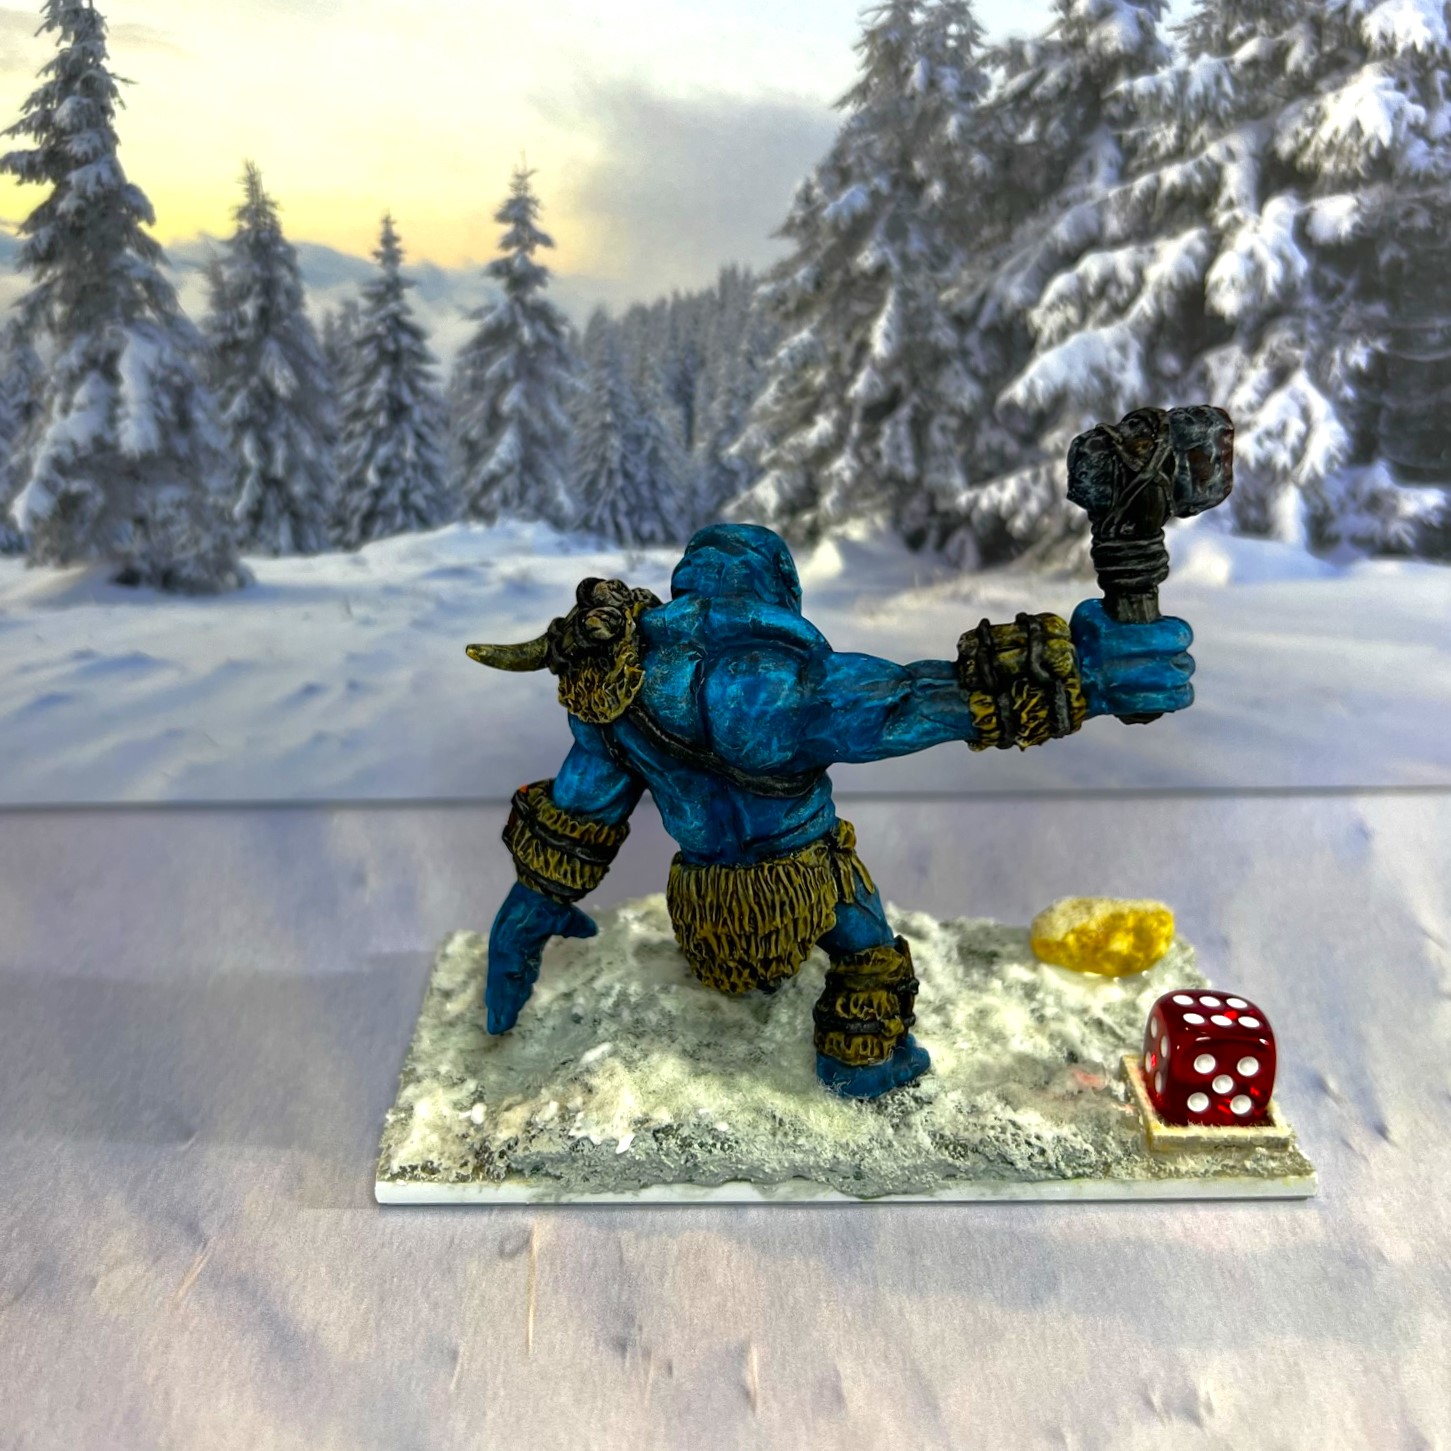
Base 1
This is the base with the broken horn. Flesh tone is primarily Citadel “Frost Heart”. I gave this, the most blue figure, the dice frame.
Base 2
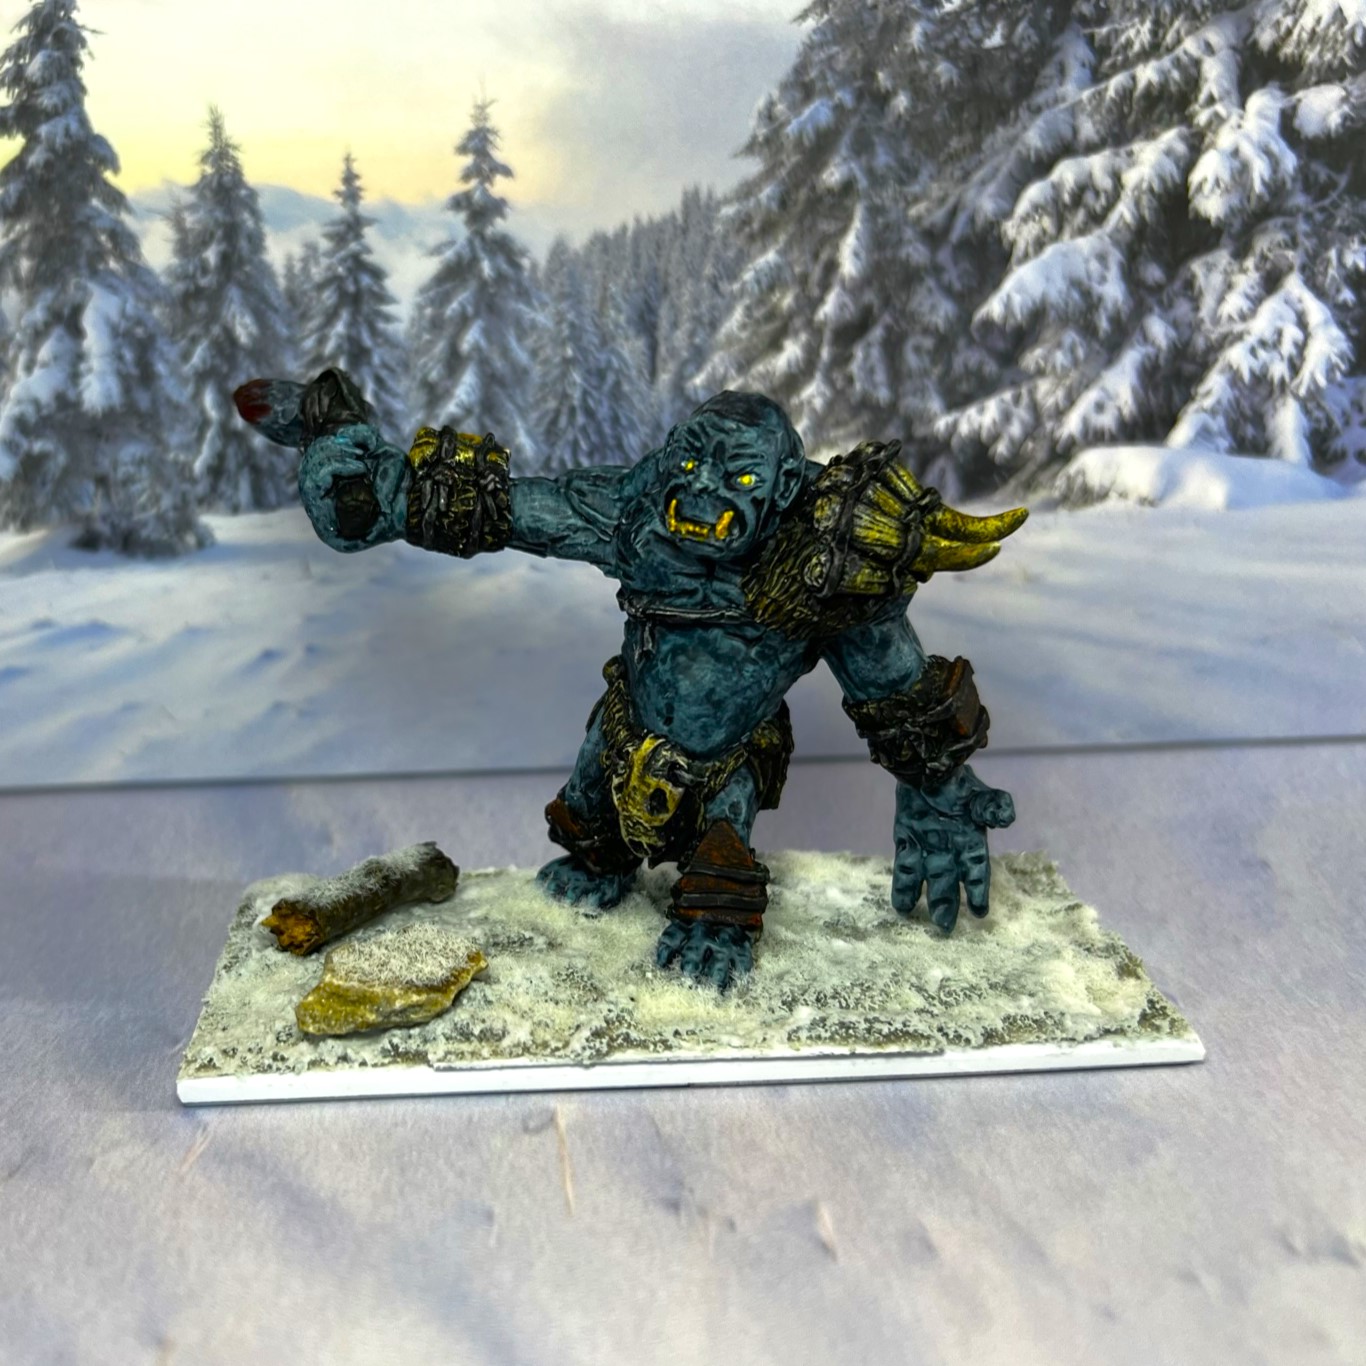
Flesh tone is primarily Citadel “Pylar Glacier”.
Base 3
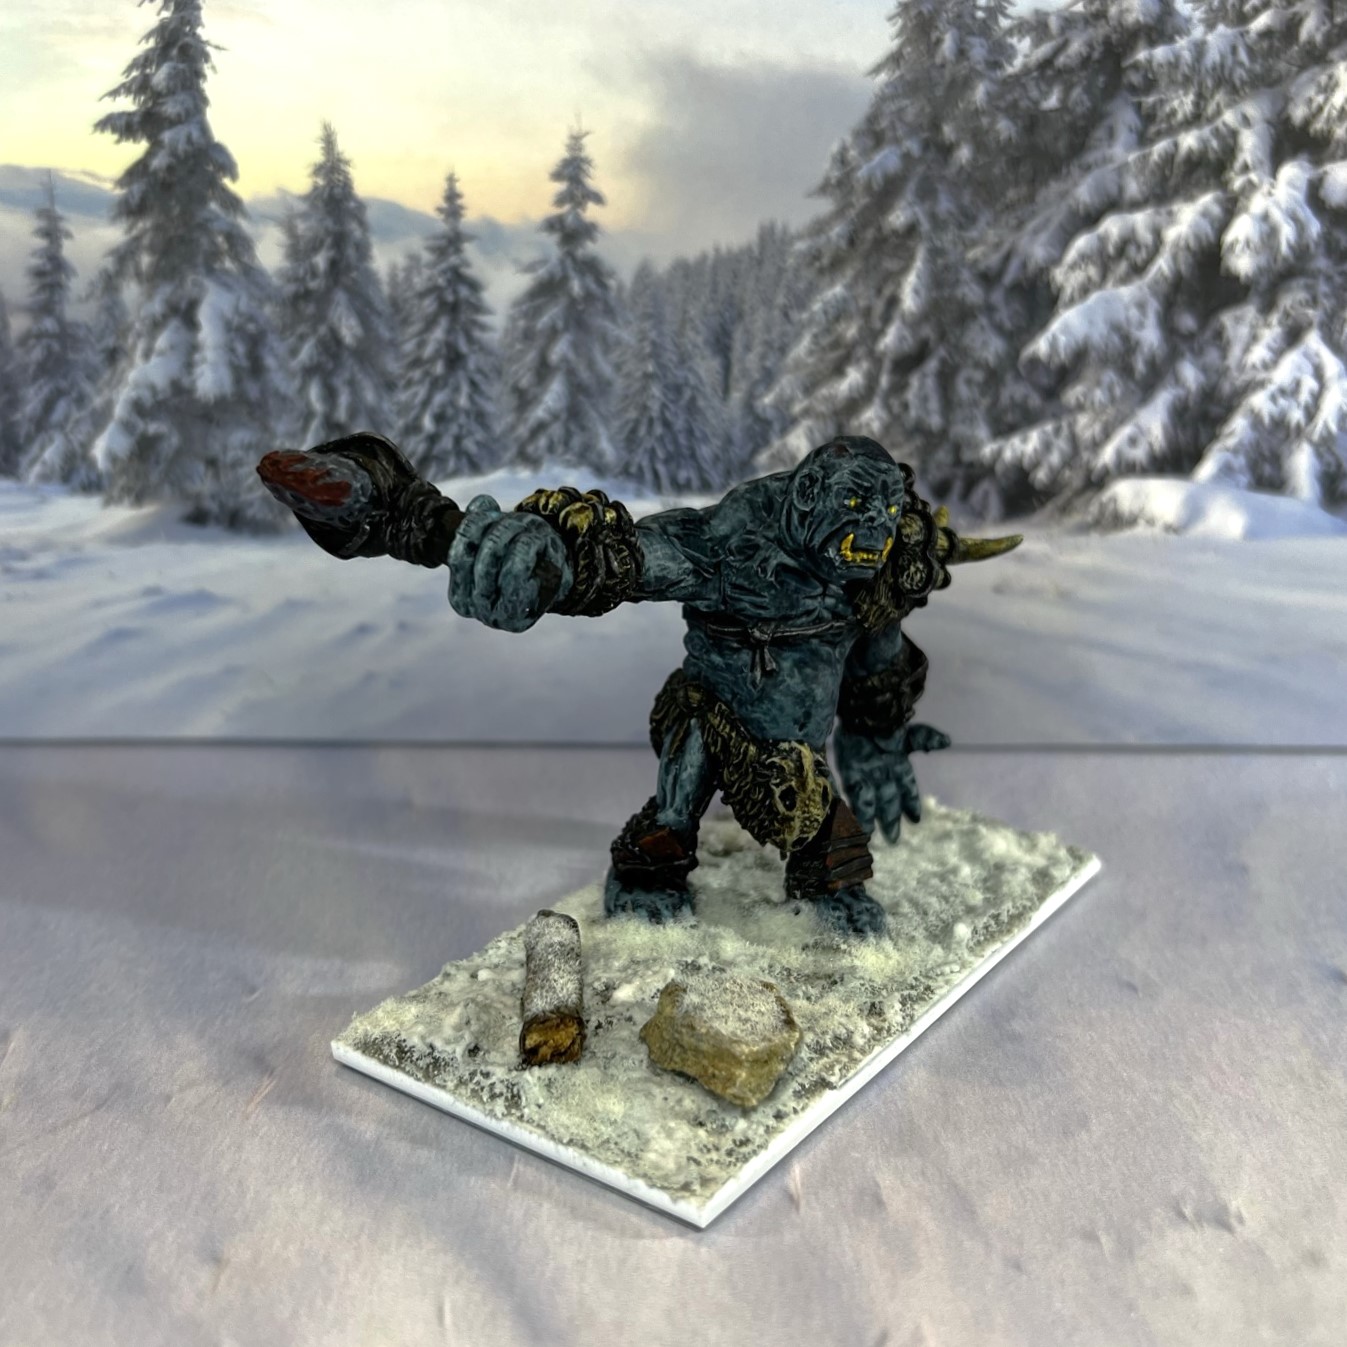
Flesh tone is primarily Citadel “Briar Queen Chill” washed with “Drakenhof Nightshade”.
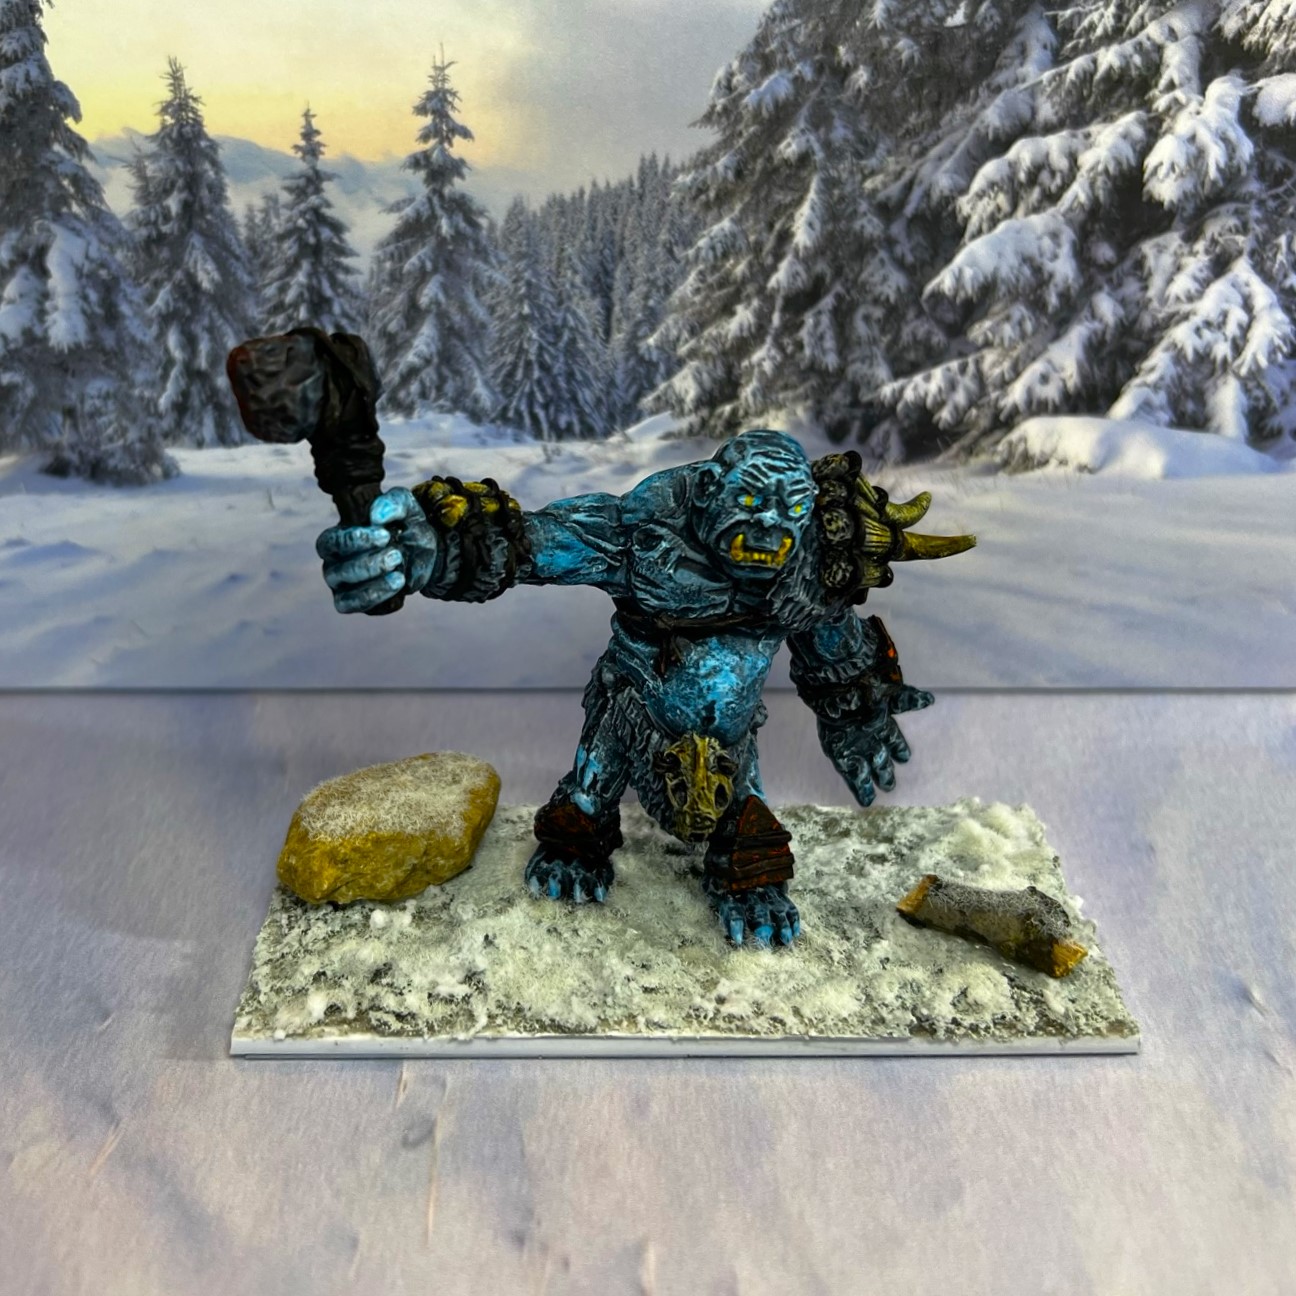
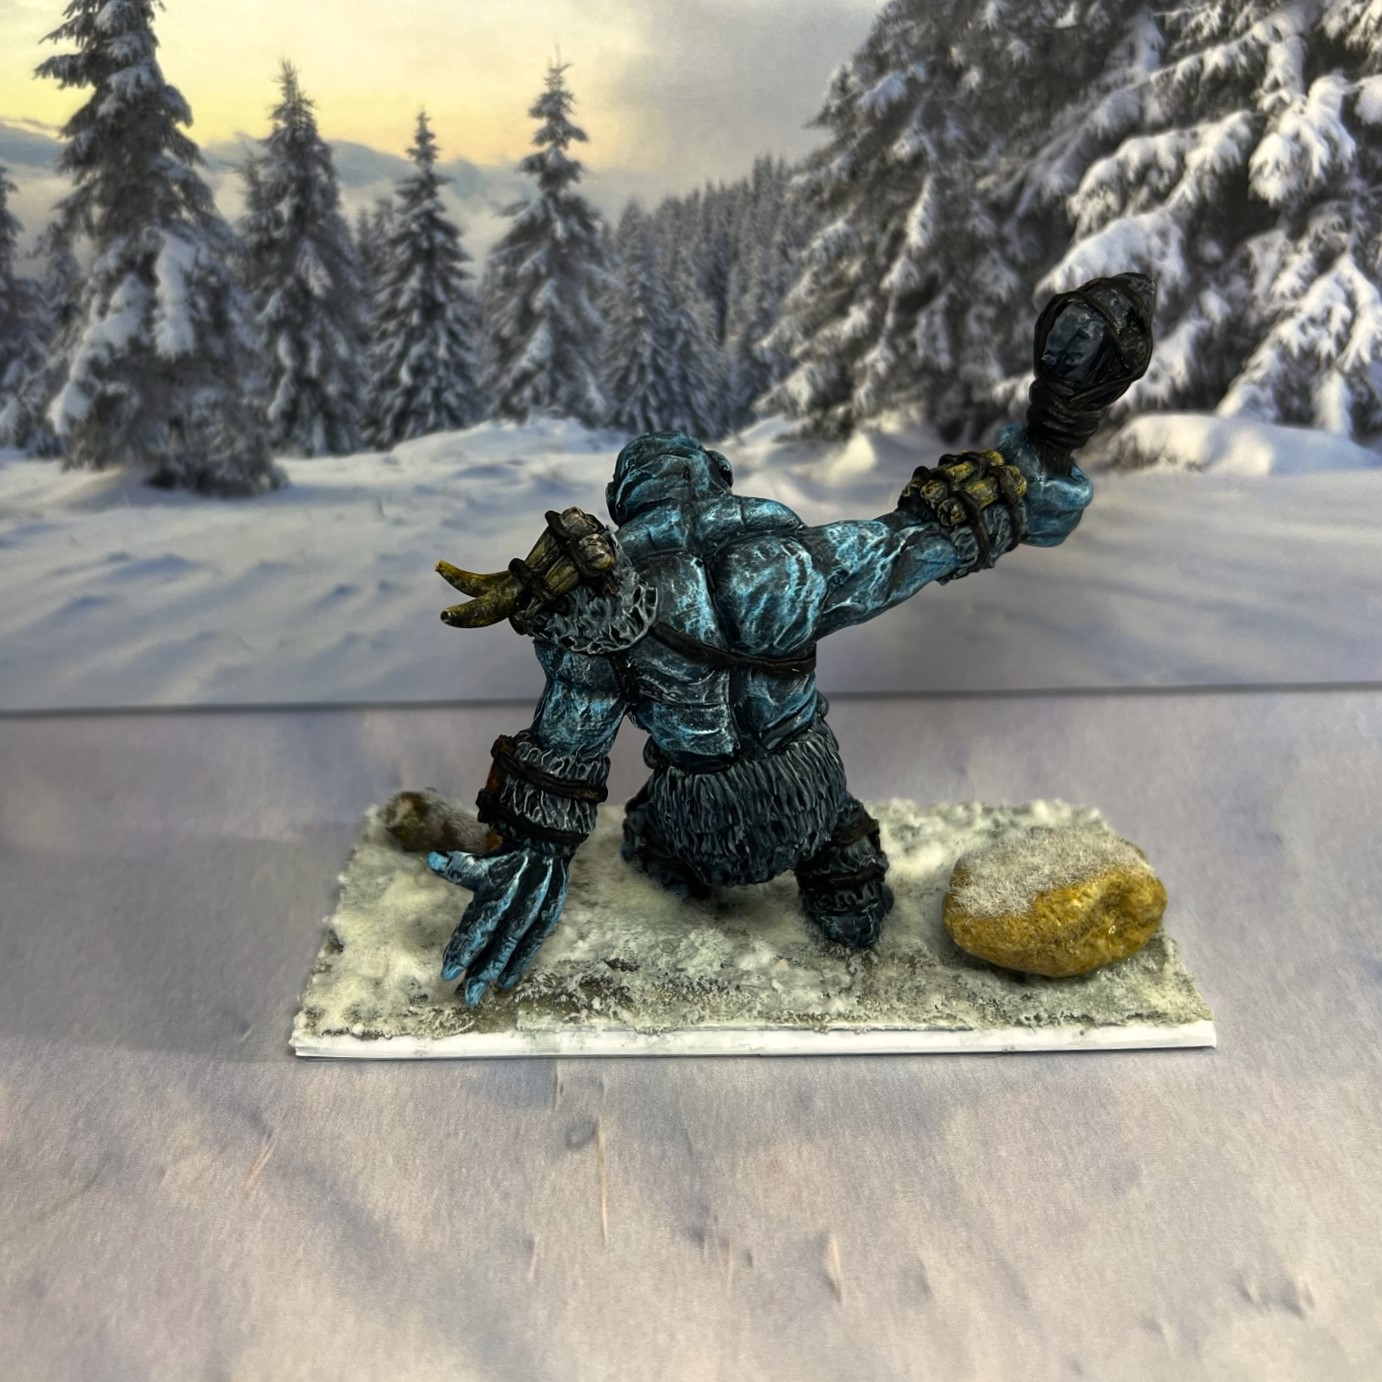
Base 4
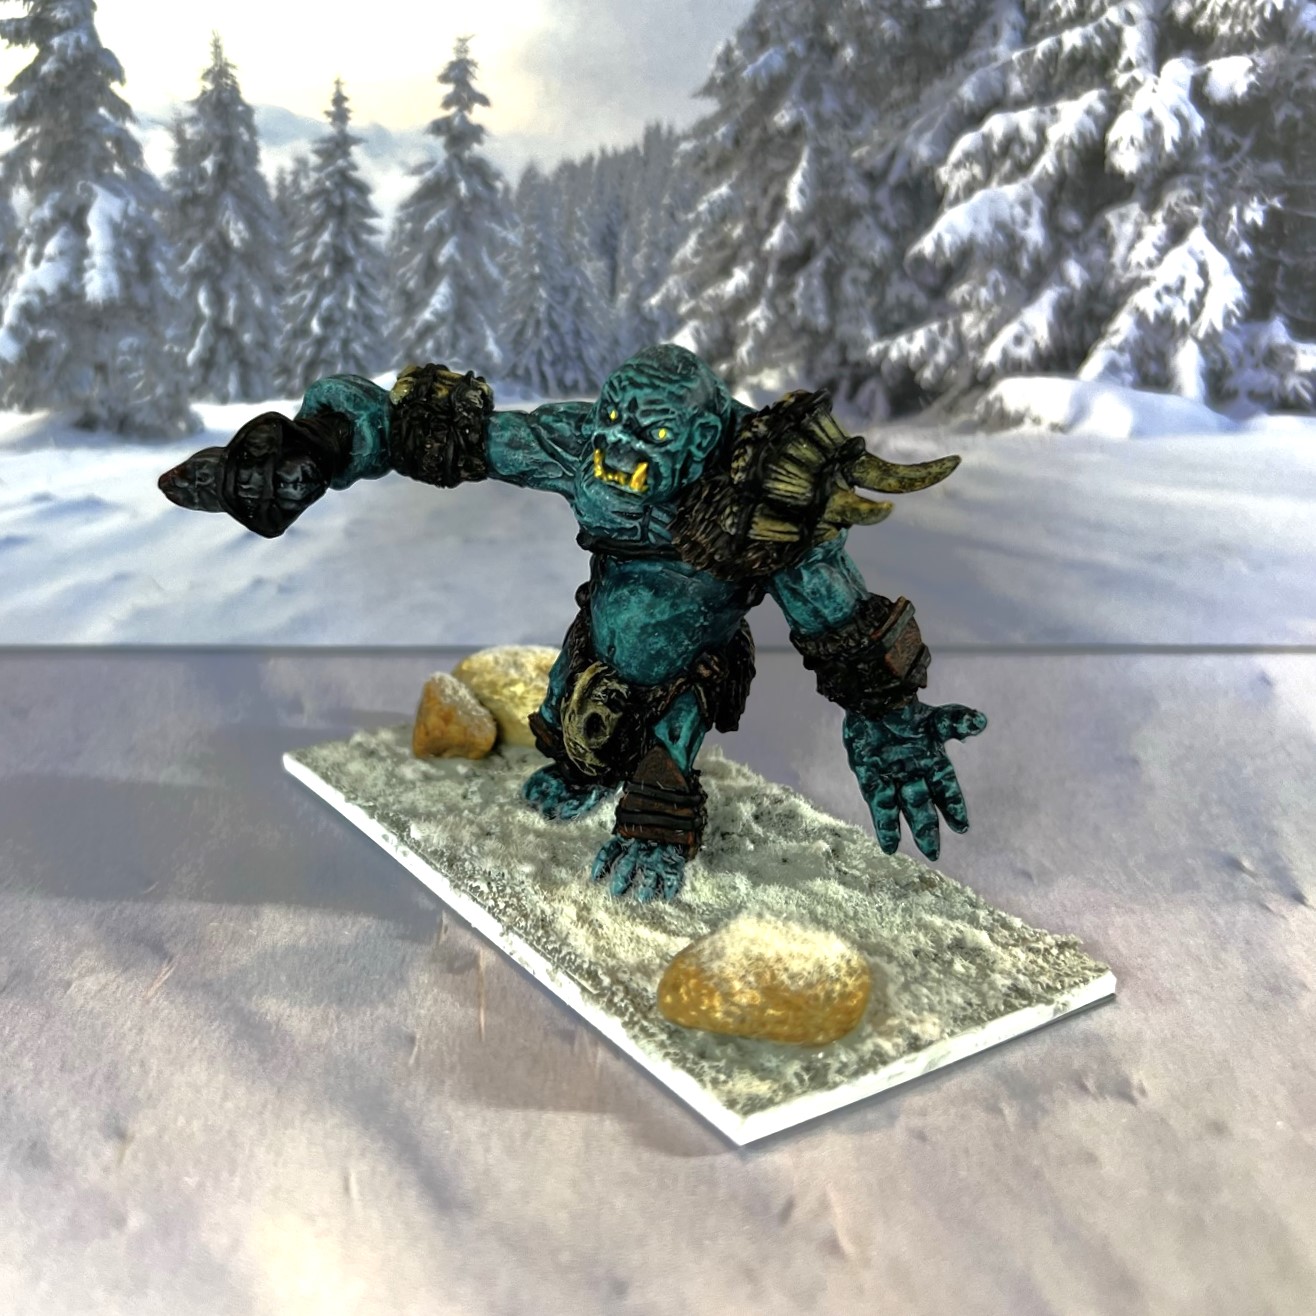
Flesh tone is primarily Citadel “Aethermatic Blue”.
Base 5
Flesh tone is primarily Army Painter “Caribbean Ocean”.
Group Shot
Thanks so much to Dave and to Roger for the opportunity to work on these! I am sure that there will be others’ entries which will put these to shame – and I do look forward to seeing everyone else’s take.
Meanwhile, I hope that you found these interesting! I am very happy to have the unit ready for a game of WOOD, even though that game may be far off in the future. I do have a number of older fantasy figures that I do plan on painting and basing or just rebasing for WOOD going forward. But this was the first unit that I decided to give a shot at doing because of the wonderful painting challenge. Again, I’m really looking forward to my fellow bloggers take on these ogres as well, PLUS the bonus of seeing yours!
If you have any comments, as always, let me know in the blog comment section below. As for my next project, I think I am going to get to some more Gillikin beasts completed as well as finish off the Great Land of Harvest forces for Ozz . Appreciate your taking a look here!
Miscellaneous details and references for those interested in that sort of thing:
For all of my previous posts on Wars of Ozz games, figures, units, and other related projects – please see this page.
For all of my previous posts on Wars or Orcs and Dwarves (WOOD), fantasy battle games, figures, units, and other related projects – please see this page.
PAINTS, INKS, GLAZES, SHADES, WASHES, PIGMENTS, FLOCKING, GLUES AND MORE THAT I USED ON THESE FROST OGRE FIGURES:
2″ square steel bases from Wargames Accessories (#21)
If want to acquire the rules for Wars of Orcs and Dwarves, there are two options (and I make no money from this btw).
You can get the rules from Sally 4th as a book (here) or as a PDF (here). Also, Noble Knight Games in the US has them – though currently they are listed as out of stock (as of September 2, 2023). They are due to have more hard copies in soon – and that link is here.
As I promised in my last post…I now present to you some creepy and scary scarecrows for the Great Land of Harvest Army! These are from OZZ-507, “Harvesters – Fearsome Scarecrows of the Night”. They are listed in the “allies and mercenaries” section on the website, and in the rules are listed under the “Land of Harvest”.
There are 20 figures, all are metal and 28mm in size. They look like creepy scarecrows – and they do bear a strong resemblance to many of the Lesser Pumpkinhead figures. In the game, the Harvesters are infantry, but they are less affected by musketry (not cannon though). I assume that is because bullets pass through them relatively easily. They are based 4 to a 2″ square base – so five bases for the regiment. There is no regimental commander. No assembly was required for the unit other than the basing. They are reasonably good melee troops with a Melee value of 6/10, a Resolve value of 7/10, and an Elan value of 7/10 as well. The unit costs 4 points.
They are armed with a motley assortment of weapons – rakes, scythes, pitchforks, sickles, axes, hatchets, and even a hoe. As you will see below, I based them so as to mix and match the poses and the figure types such that no two bases of the five were identical. I needed to get these done for a game and I got them in under the wire – and I will share a post on that game soon.
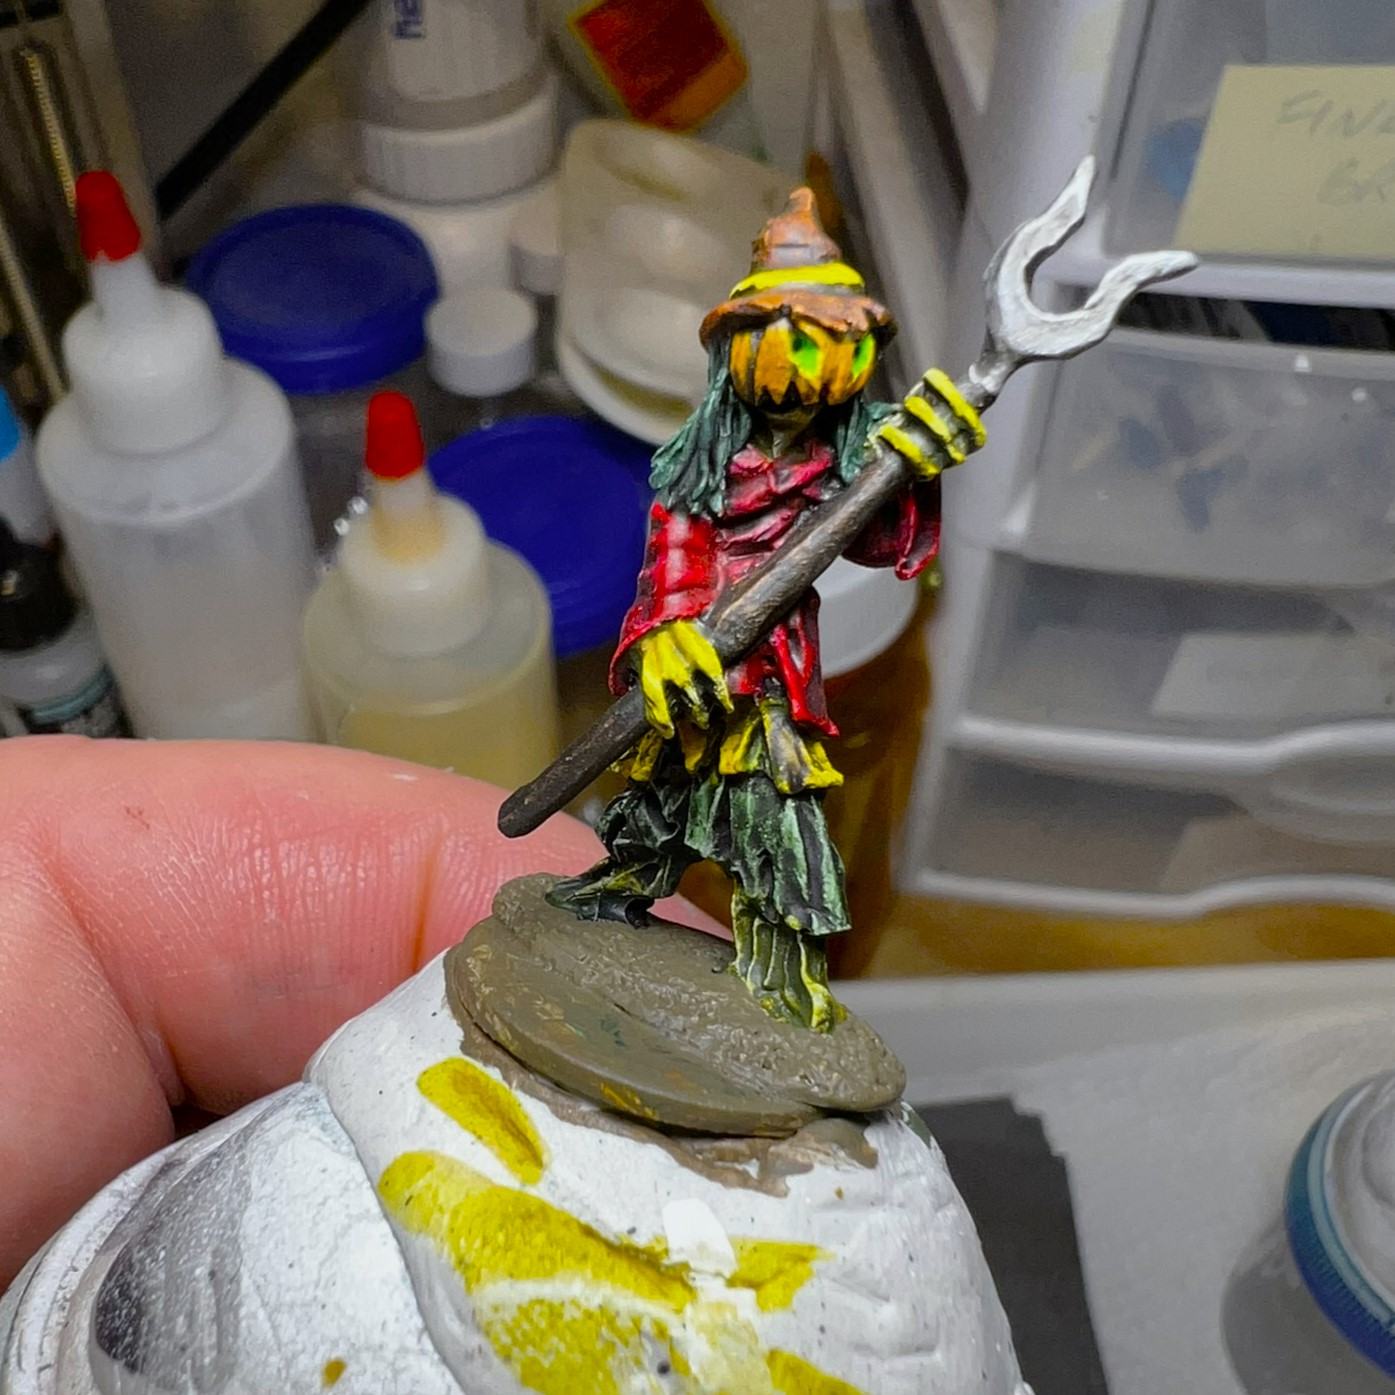
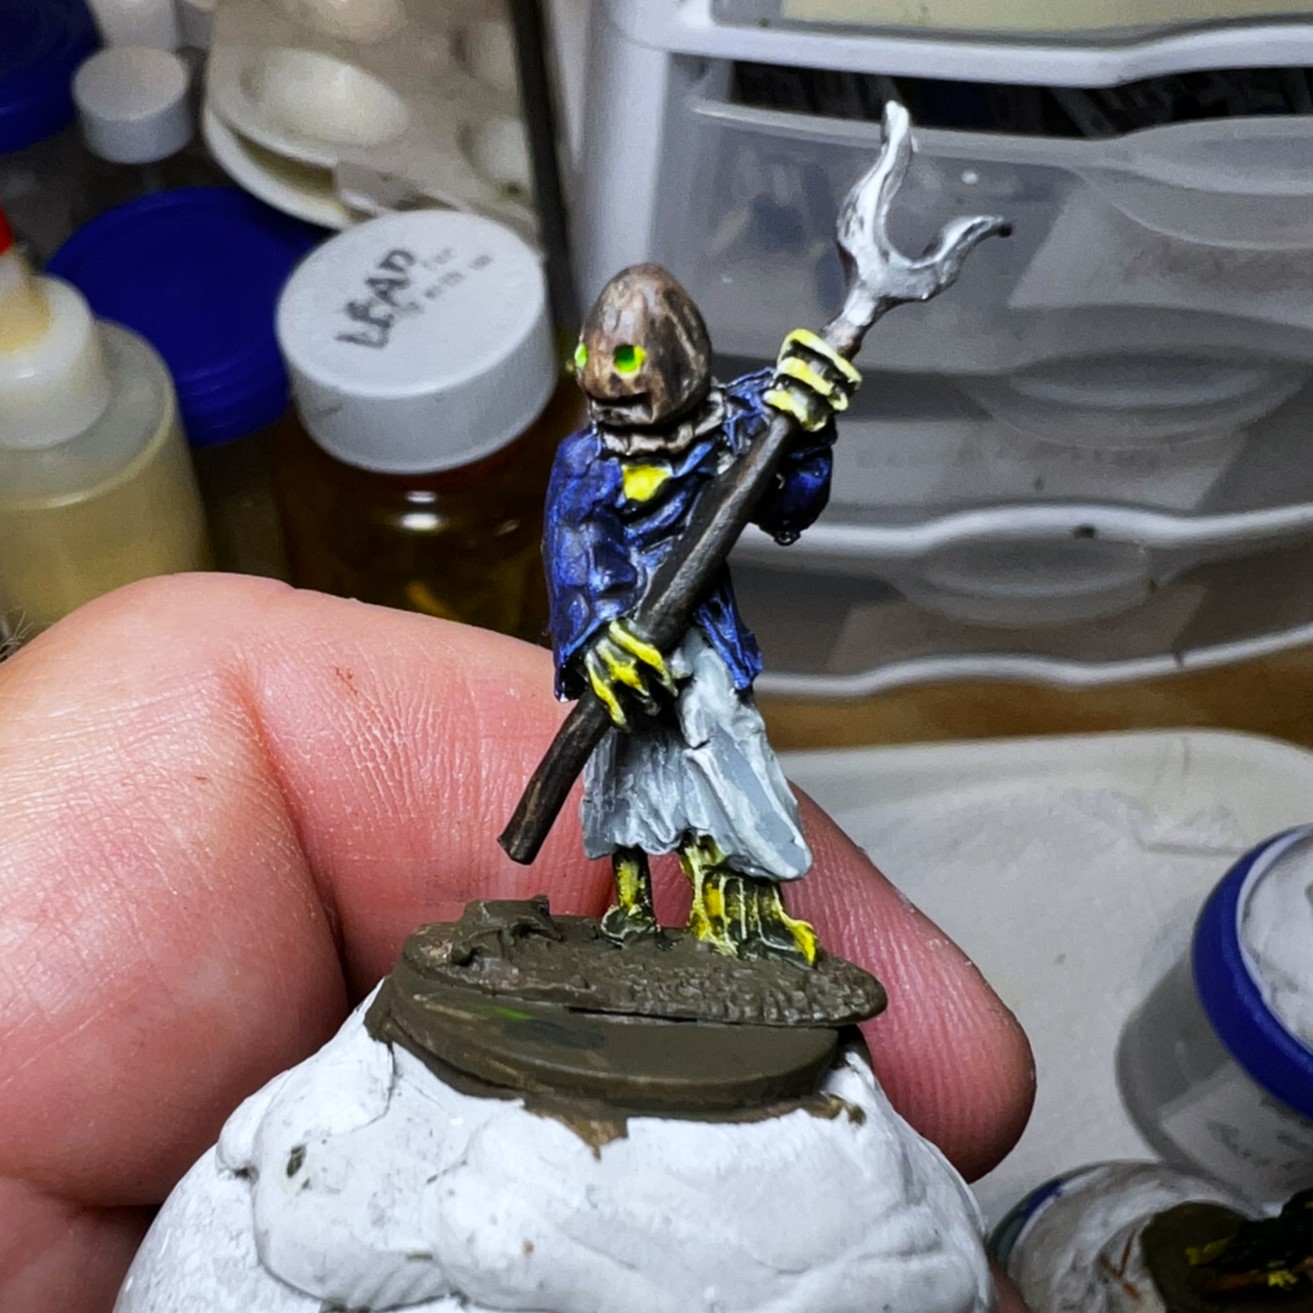
Harkening back to my Scarecrow figure from the Adventurers of Ozz, and my other Harvest figures, I gave these zombie-colored flesh and glowing eyes. Some of the figures had pumpkin heads but I still gave their limbs a zombie flesh treatment. Other figures had hoods or sacks over their heads, so the glowing eyes tied them together too. I made sure that their clothes varied in color as after all, these are scarecrows.
I wanted them to appear as if they were coming out of a grassy overgrown field, so my basing choices reflected that in terms of the mixed flocking you’ll see. I also wanted to hide their feet as I felt that would look more creepy in the grass. You can decide for your self if that worked. Lastly, for playability, I added a small stone at the back of each base for alignment – as it’s not easy to see which way is “forward” given the rabble-look in which I arranged these guys.
I started these in June and worked on these in July – and finished them up in July. Let’s see some WIP shots and some more pics below!
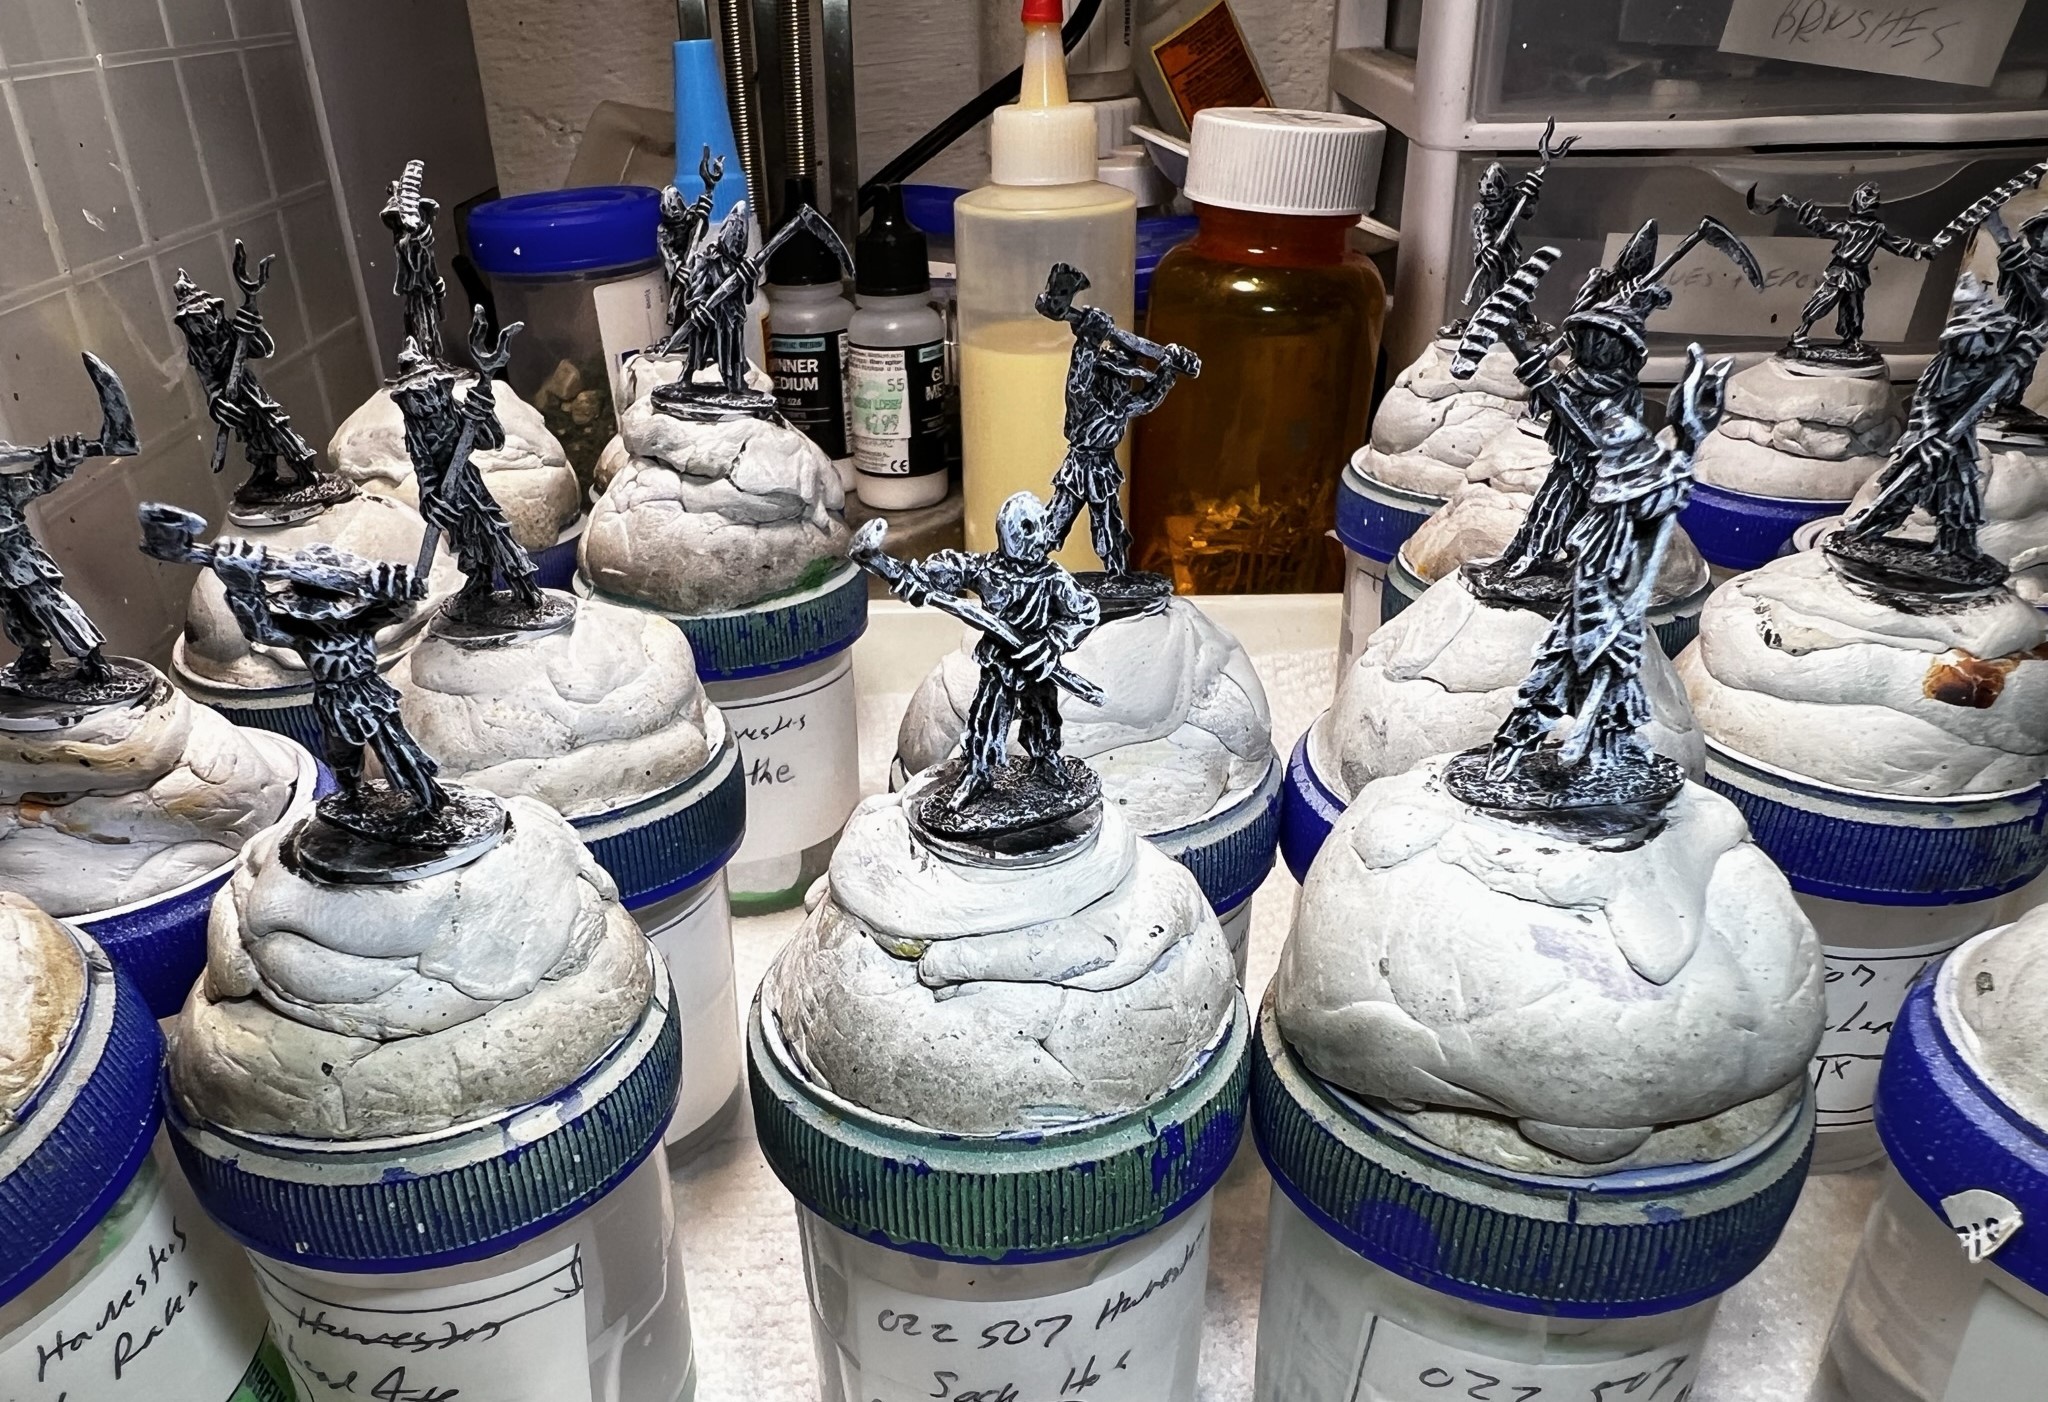
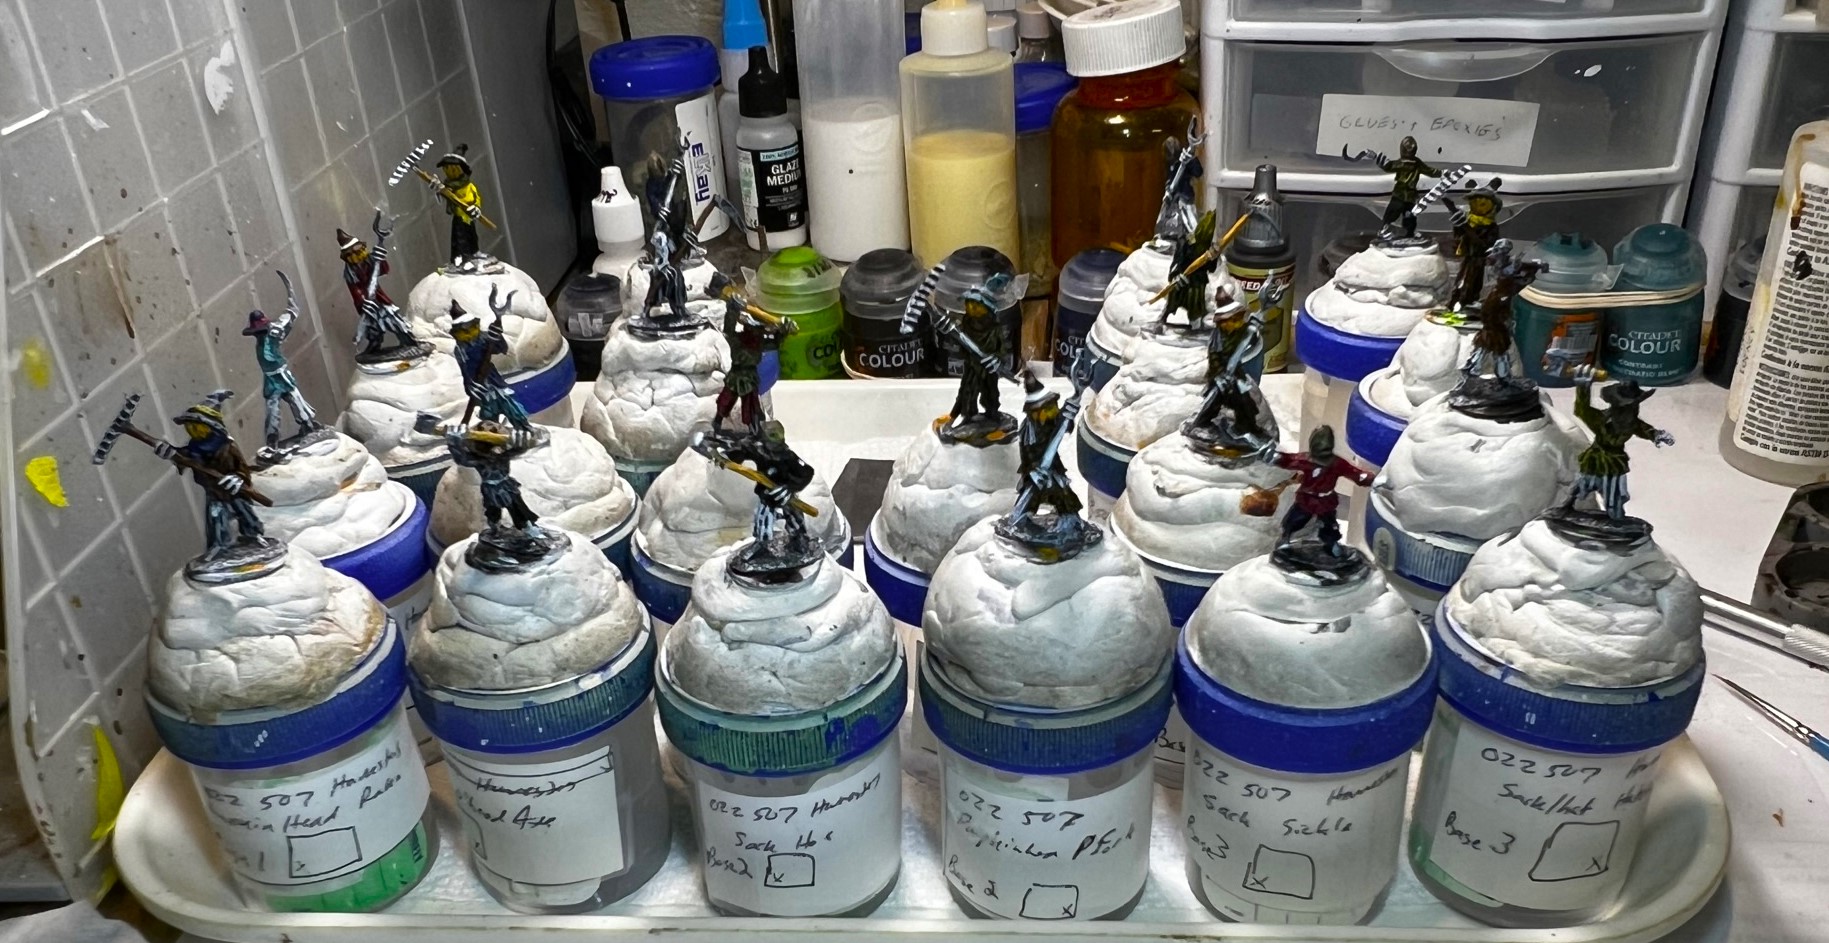
WIP Shots…
The Harvesters as received – organized by type. As you can see, there was a motley assortment of figures and weapons.Clean up!On washers for mounting and subsequent painting.My rough plan and layout on June 26th. I would get delayed over the July 4th holidays!Managed to get them primed July 5th.July 8 celebration! We have the fireworks in our town the weekend after Independence Day – they save money and get a better show (more “bang” for the buck. My wife Lynn and our granddaughter Tabitha shown here after watching the parade go by our house. So, no painting!Back at it on July 9 – dry brushing over a dark wash.They waited for me to get back at them – a July 16 restart.
I was able to finish painting them on July 18th, as seen below.
After varnishing them and letting them dry, I mounted them on the bases and went to town on the flocking – and to hide the feet.
Finished!Top view.
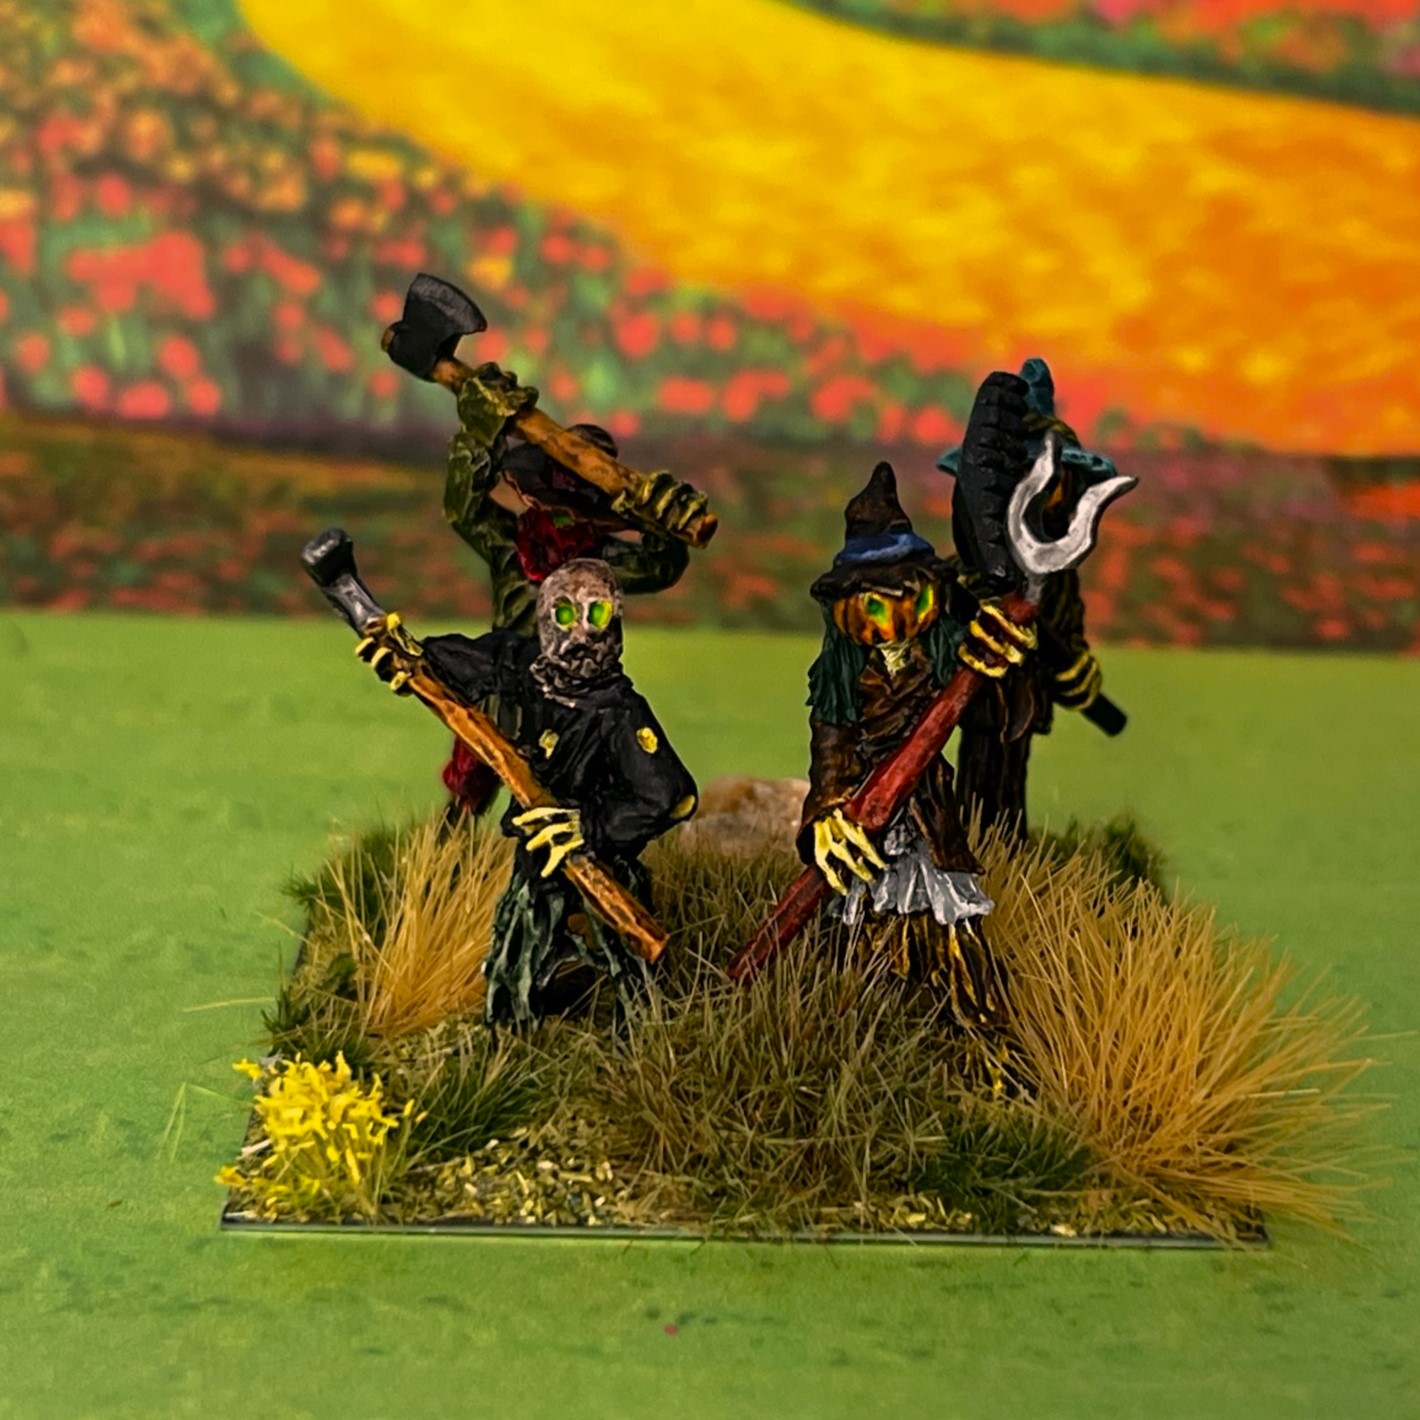
Eye Candy
Base 1
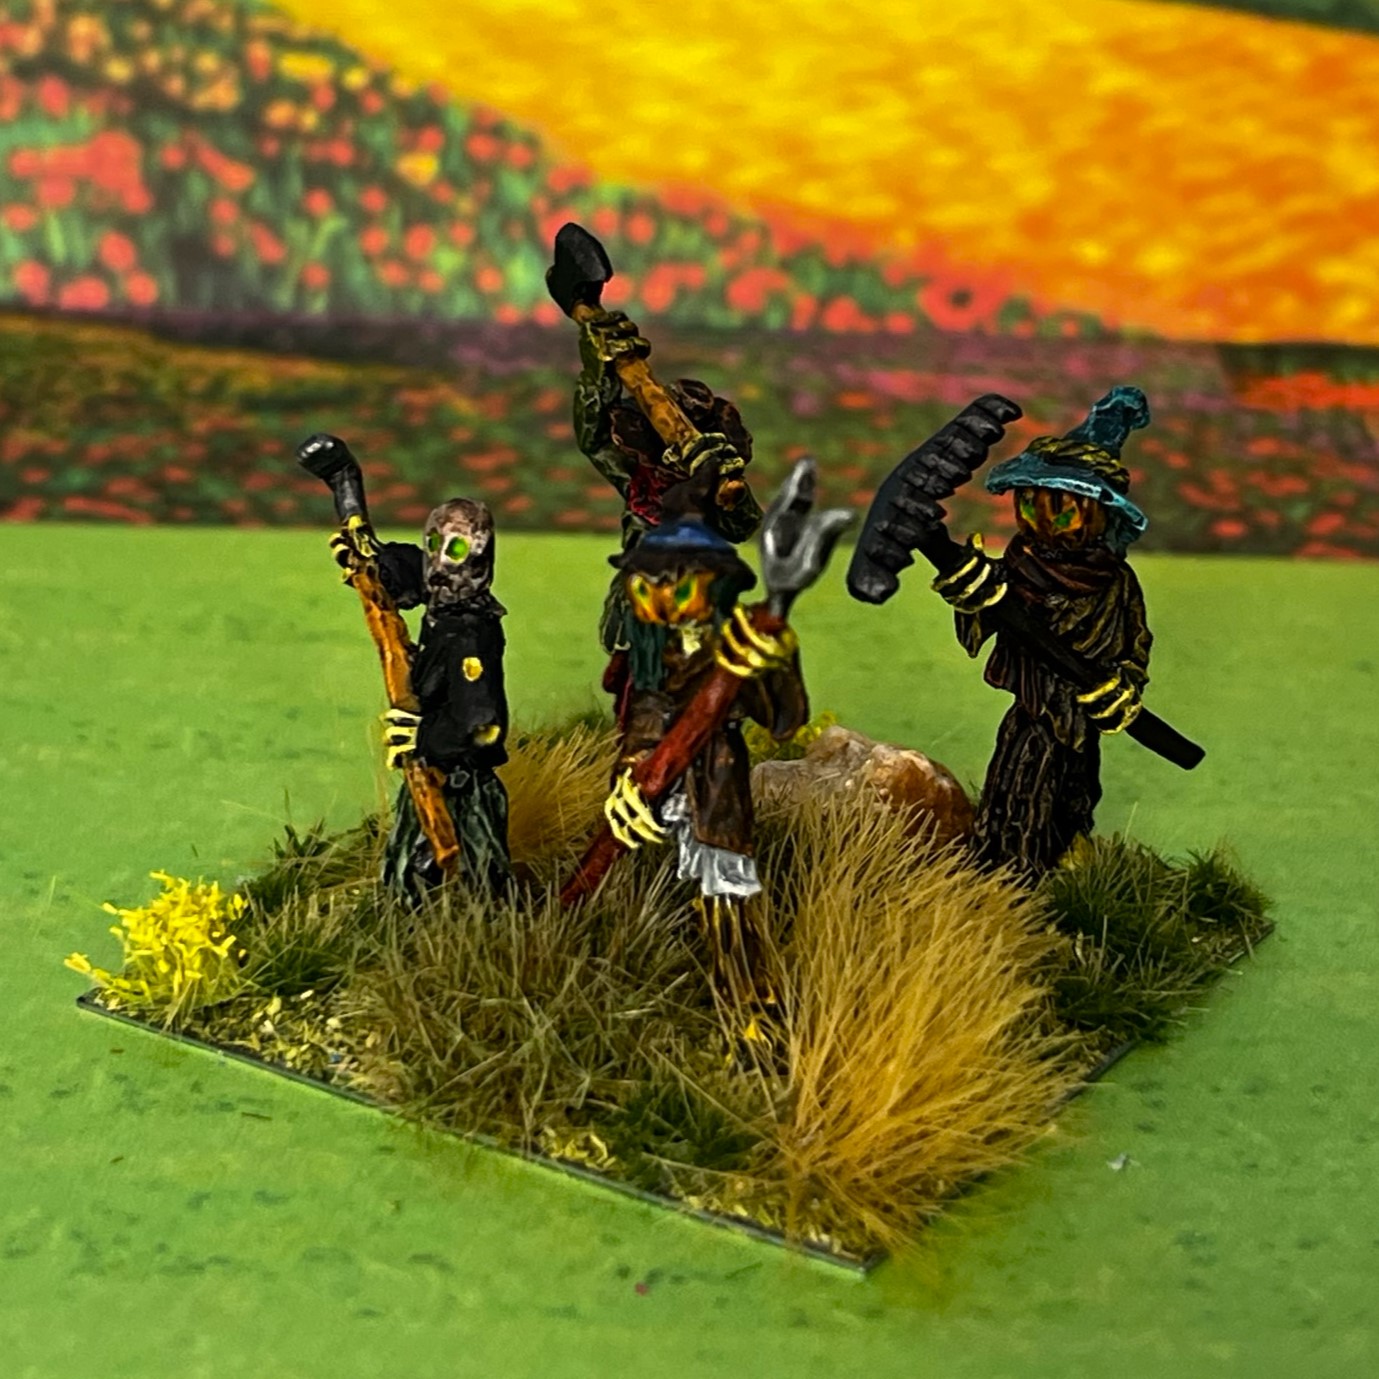
Base 2
Base 3
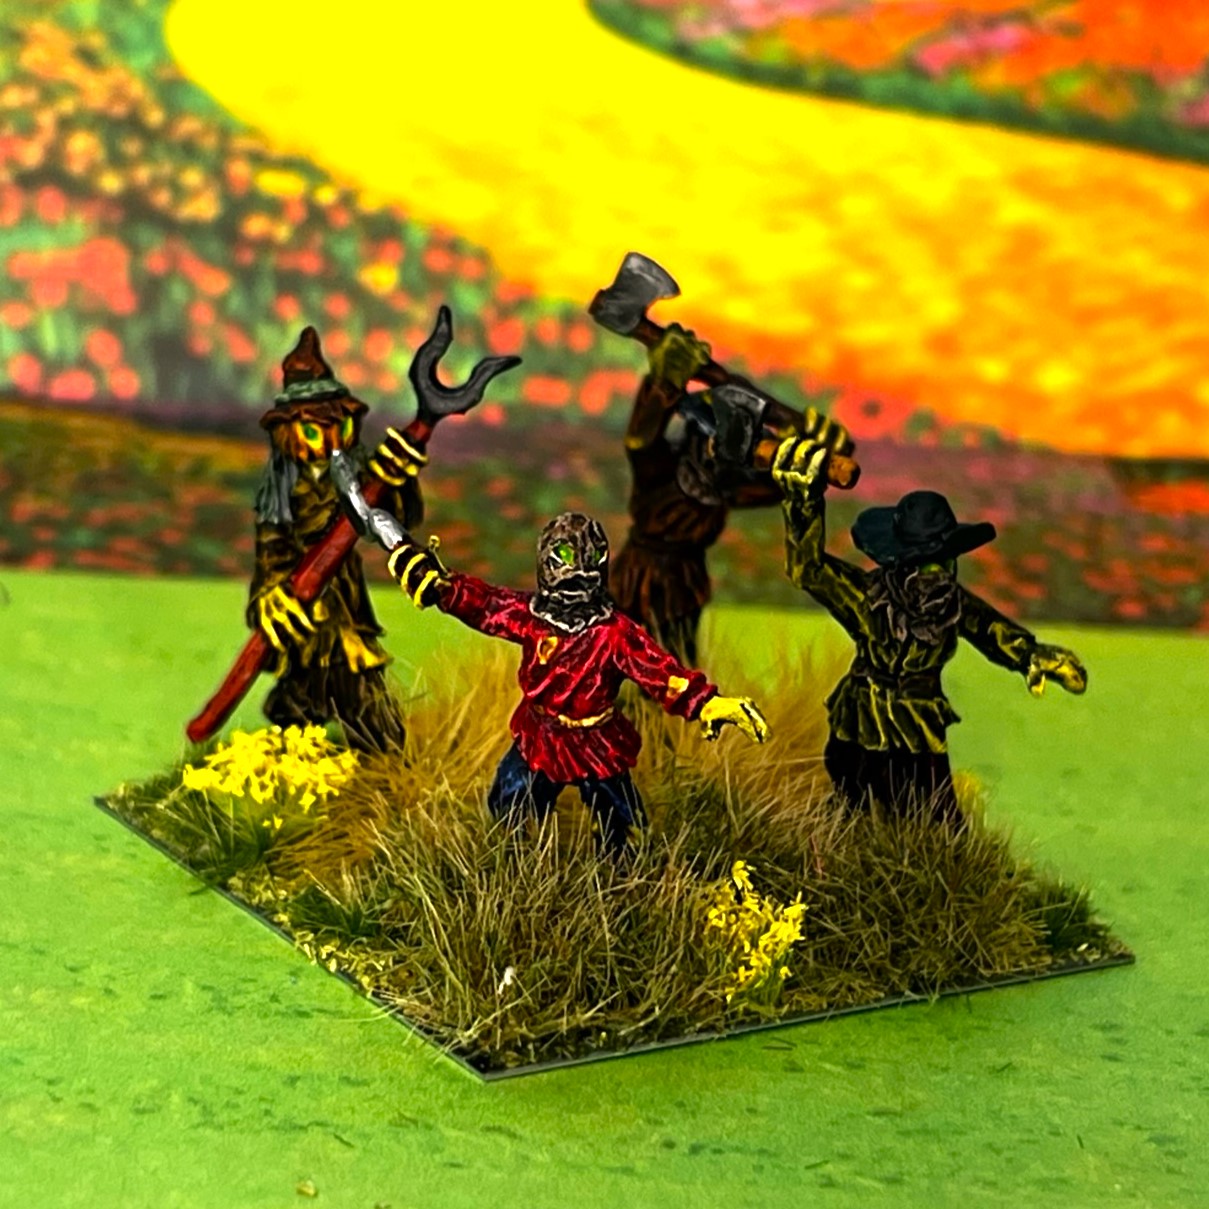
Base 4
Base 5
Group Shot
I hope that you found this somewhat late post interesting. Next, I hope to share a post of their first battle at the Mass Pikemen Gaming Club.
And yes, I still have more to come…
Miscellaneous details and references for those interested in that sort of thing:
For all of my previous posts on Wars of Ozz games, figures, units, and other related projects – please see this page.
PAINTS, INKS, GLAZES, SHADES, WASHES, PIGMENTS, FLOCKING, GLUES AND MORE THAT I USED ON THESE HARVESTER FIGURES:
Gorilla Glue
3/4″ steel washers
Poster tack
Vallejo Mecha Surface Primer “White”
Secret Weapon Washes “Heavy Body Black”
Vallejo Model Color “White”
Reaper MSP Core Colors “Pure White”
Citadel Technical “Tesseract Glow”
Army Painter “Speed Paint – Runic Grey”
Citadel “Contrast Paint – Snakebite Leather”
Citadel “Contrast Paint – Ultramarine Blue”
Citadel “Contrast Paint – Black Legion”
Citadel “Contrast Paint – Contrast Medium”
Army Painter “Speed Paint – Brownish Decay”
Citadel “Contrast Paint – Gore Grunta Fur”
Citadel “Contrast Paint – Aethermatic Blue”
Citadel “Contrast Paint – Dark Angels Green”
Citadel “Contrast Paint – Militarum Green”
Army Painter “Speed Paint – Charming Chartreuse”
Army Painter “Speed Paint – Oche Clay”
Tamiya “X-6 Orange”
Tamiya “X-20A Thinner”
Army Painter “Speed Paint – Bony Matter”
Citadel “Contrast Paint – Ironjawz Yellow”
Army Painter “Speed Paint – Poppy Red”
Vallejo Model Air “Wood”
Citadel “Contrast Paint – Wyldwood”
Vallejo Model Air “Brown”
Army Painter “Speed Paint – Camo Cloak”
Army Painter “Speed Paint – Murder Scene”
Citadel “Contrast Paint – Apothecary White”
Citadel “Contrast Paint – Skeleton Horde”
Citadel “Contrast Paint – Plaguebearer Flesh”
Vallejo Model Color “Black Green”
Vallejo Model Color “Neutral Grey”
Citadel “Nuln Oil” (wash)
Vallejo Game Ink “Black Green”
Vallejo Model Air “Black (Metallic)”
Vallejo Model Air “Gun Metal”
Vallejo Model Air “Steel”
Battlefront “Dark Leather”
PS Model Color “USAAF Olive Drab”
Vallejo “Flow Improver”
Vallejo “Airbrush Thinner”
Vallejo Varnish “Satin Varnish”
Vallejo Mecha Varnish “Matte Varnish”
Black Sharpie pen
2″ square steel bases from Wargames Accessories (#21)
Elmer’s PVA Glue
Army Painter “Battlefields Grass Green” (flocking)
Shadow’s Edge Miniatures “12mm Tan Tufts” (flocking)
Army Painter “4mm Wilderness Tufts” (flocking)
Gamer’s Grass “Autumn XL” (flocking)
Army Painter “Yellow Meadow Flowers” (flocking)
Army Painter “Battlefield Field Grass” (flocking)
Army Painter “Lowland Shrubs” (flocking)
Small stones (flocking)
Again, as you may want to check out the Wars of Ozz figures’ range – there are two places to get them (and I make no money from this btw). The game rules and the figures are available from the following two places:
With regards to my available troops for Wars of Ozz games, I have pretty much gotten some of the main factions. I have Munchkins, Winkies, and a lot of Harvest. This is fine – except for the Gillikins and the Quadlings. I do have an unpainted Quadling Brigade that I got from Greg Priebe that is in my painting queue. What I did not have – until recently, was a Gillikin Brigade.
Gillikins soldiers and forces are more known as “the Imperial Gillikin Army”. Gillikins are humans who have mutated into the goblin-like inhabitants of Ozz after the Last Great War.
They serve under Arella the Witch, also known as the mistress of Beasts. She is the witch sister of Evora, the ruler of the rival Winkies. Theirs is indeed a fierce rivalry. Arella has subjugated multiple tribes of Gillikins, and created her Army. It is composed of four branches: Infantry, Cavalry, Beast, and Sorcerer League. The Infantry Branch is composed of units fashioned mostly after those of the Munchkins. The Munchkins had previously defeated Arella’s attempt at conquest, hence Arella’s desire to up her conquest game by copying her rival. The Cavalry Branch is made up of goat-riding Gillikins. The Beast Branch is composed of giant allied (or subjugated) intelligent animal units – such as Dire Lions, Dire Tigers, Dire Bears, (oh my)…as well as Dire Wolves. The Sorcerer League is made up of various lesser witches and wizards.
I have the Lions, the Dire Tigers, and the Dire Bears in my painting queue. And, as discussed on two of my previous game posts, here and here, I have been lucky enough to have been able to borrow Gillikins from my good friend Chris Comeau. But, I really needed to have some of my own. However, my current unpainted Ozz lead hill is already at nearly 400 figures – and I did not want to increase its size – or wait to get Gillikin troops.
Enter eBay. Several quite decently painted units – and really whole armies have come up on eBay for Wars of Ozz in the last few months. It is my understanding that they are part of an estate sale – but I could be mistaken. In any case, I was lucky enough to win the auction for the forces (7 regiments) below:
2 Gillikin infantry regiments
1 Gillikin longbow regiment
1 Gillikin goat-rider cavalry regiment
1 Gillikin light battery
1 Dire Wolf regiment
1 Dire Bear regiment
My new Gillikin army! (photo from eBay)
They are painted quite nicely, and despite the fact that they were sent from the UK, arrived in pretty good shape. I did need to repair a couple, and the bears needed a bit of a rehab paint job, but they were what I needed…
EXCEPT…
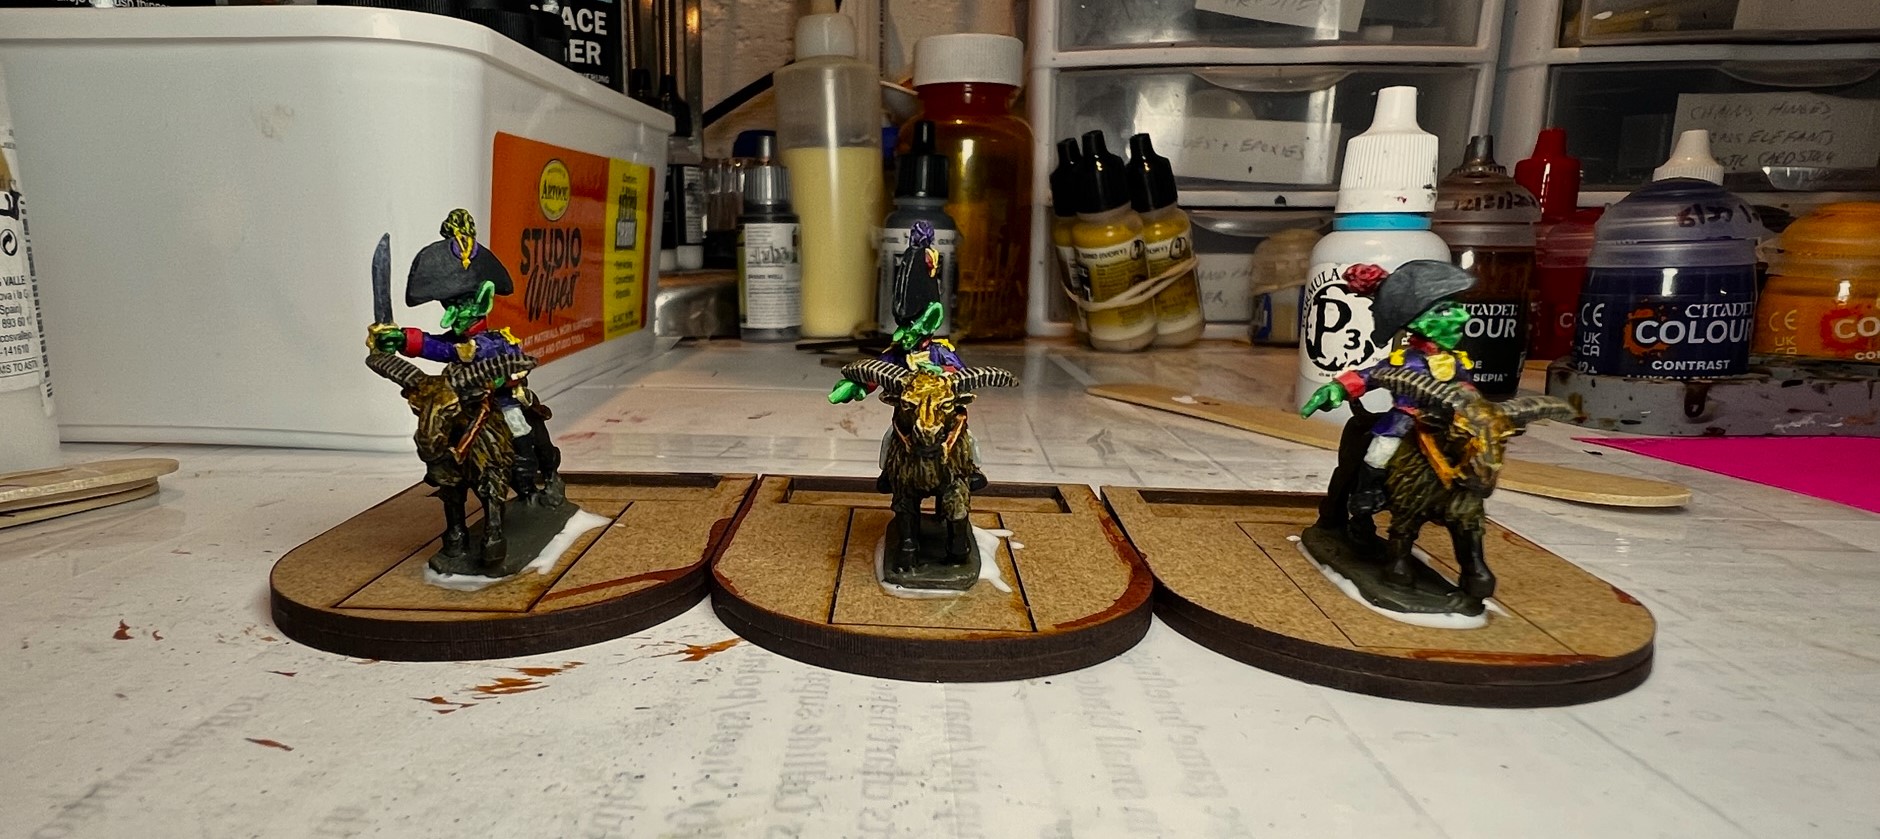
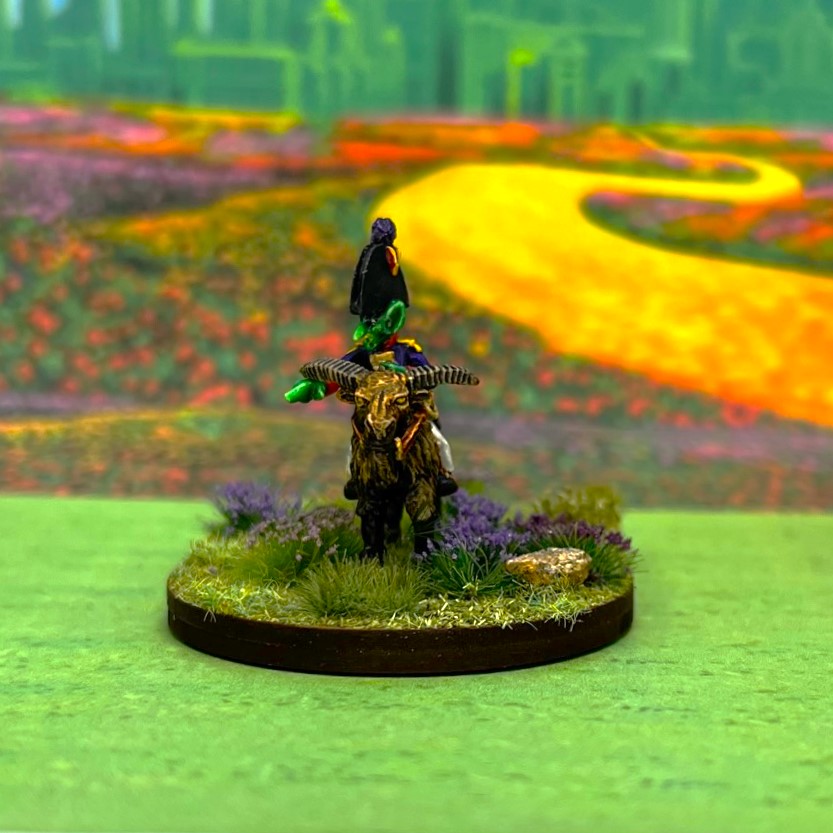
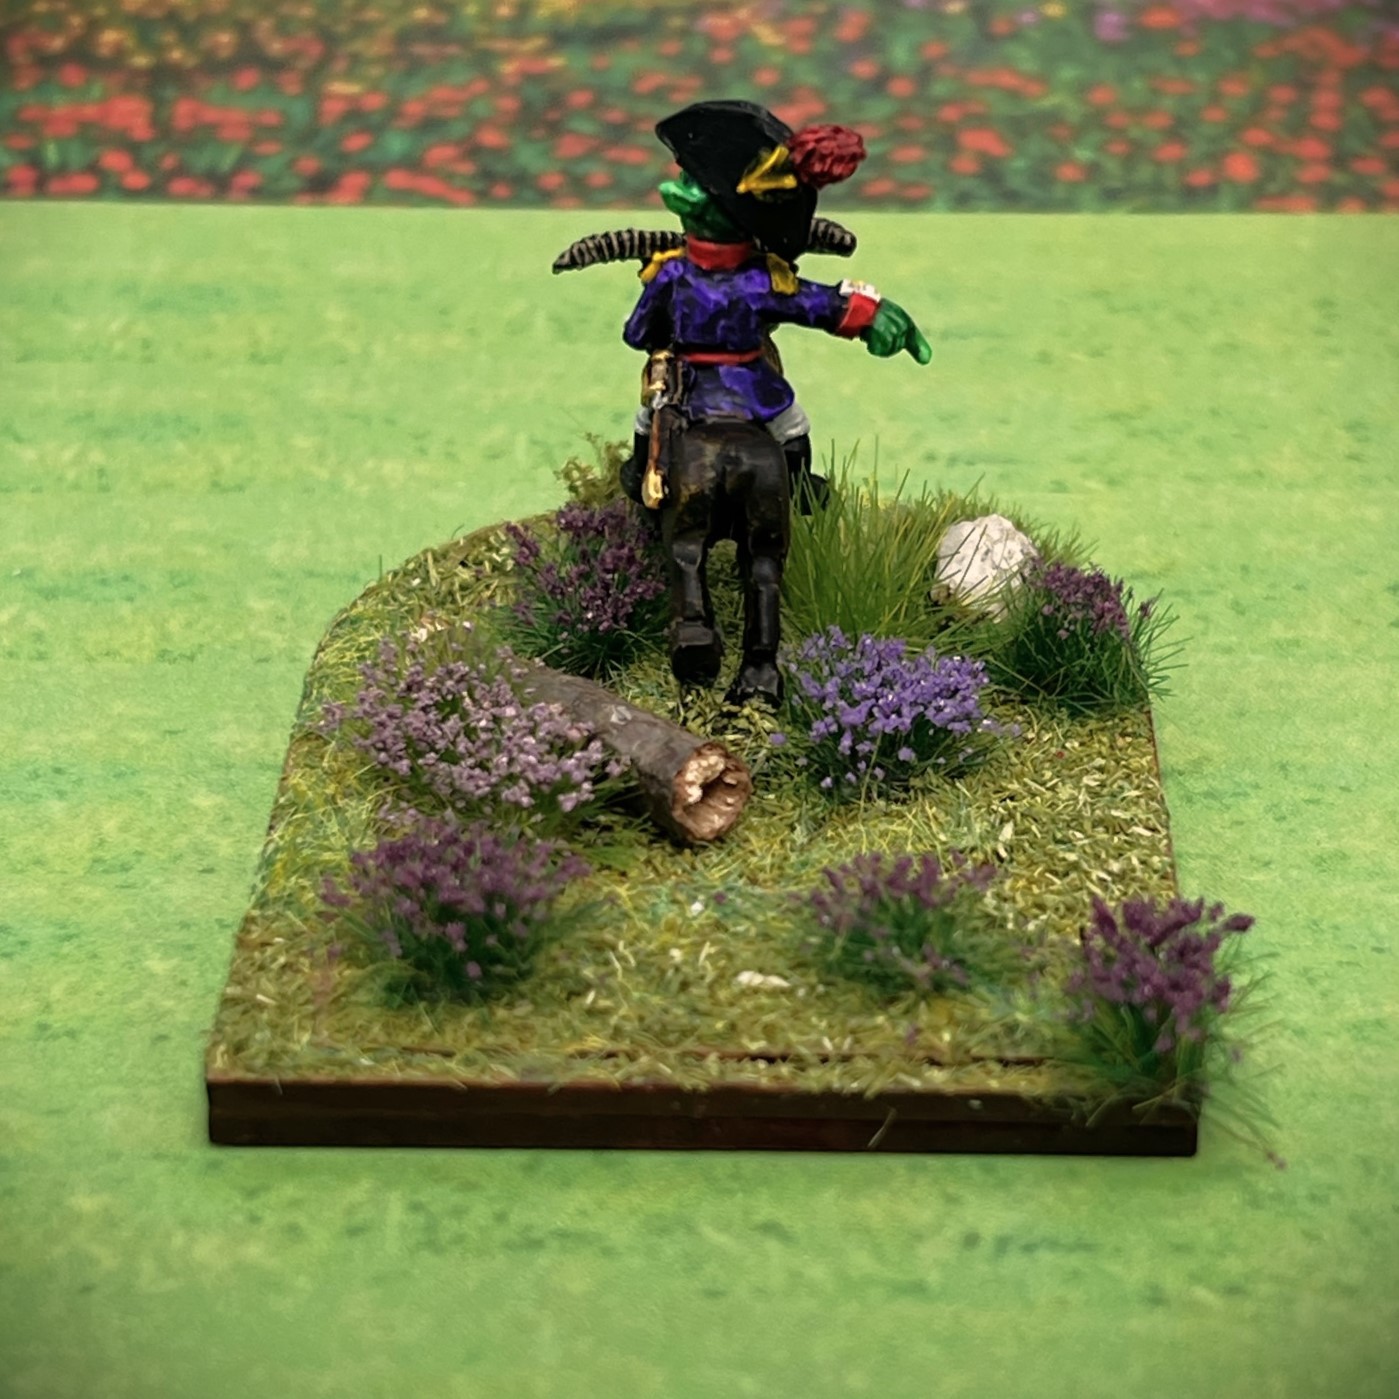
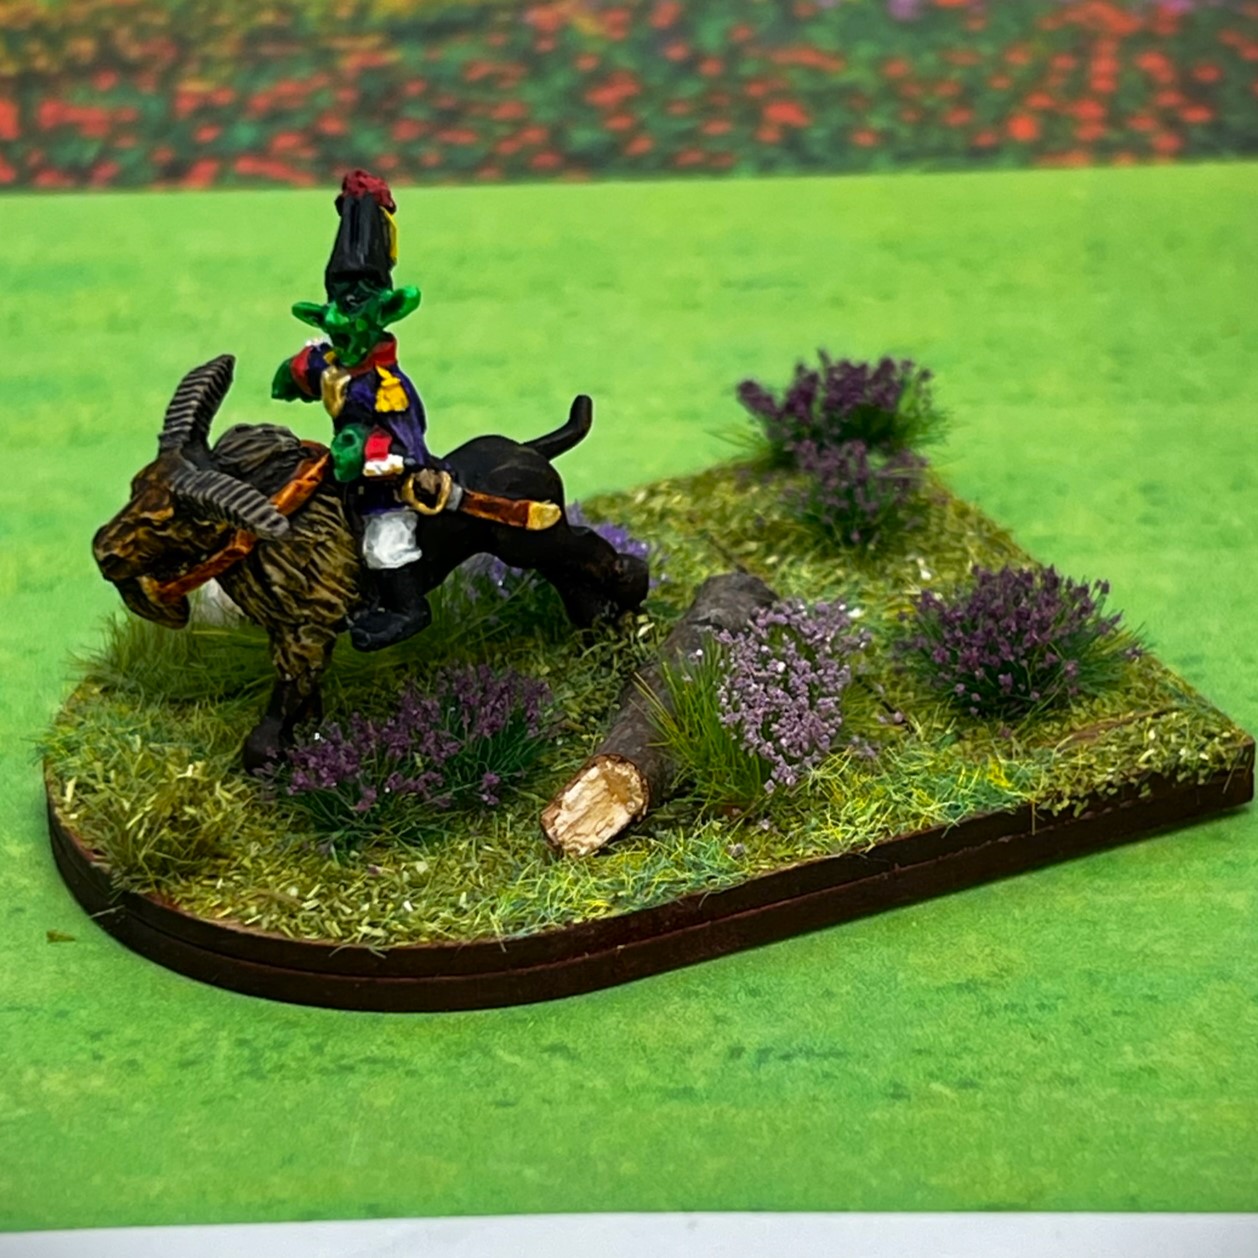
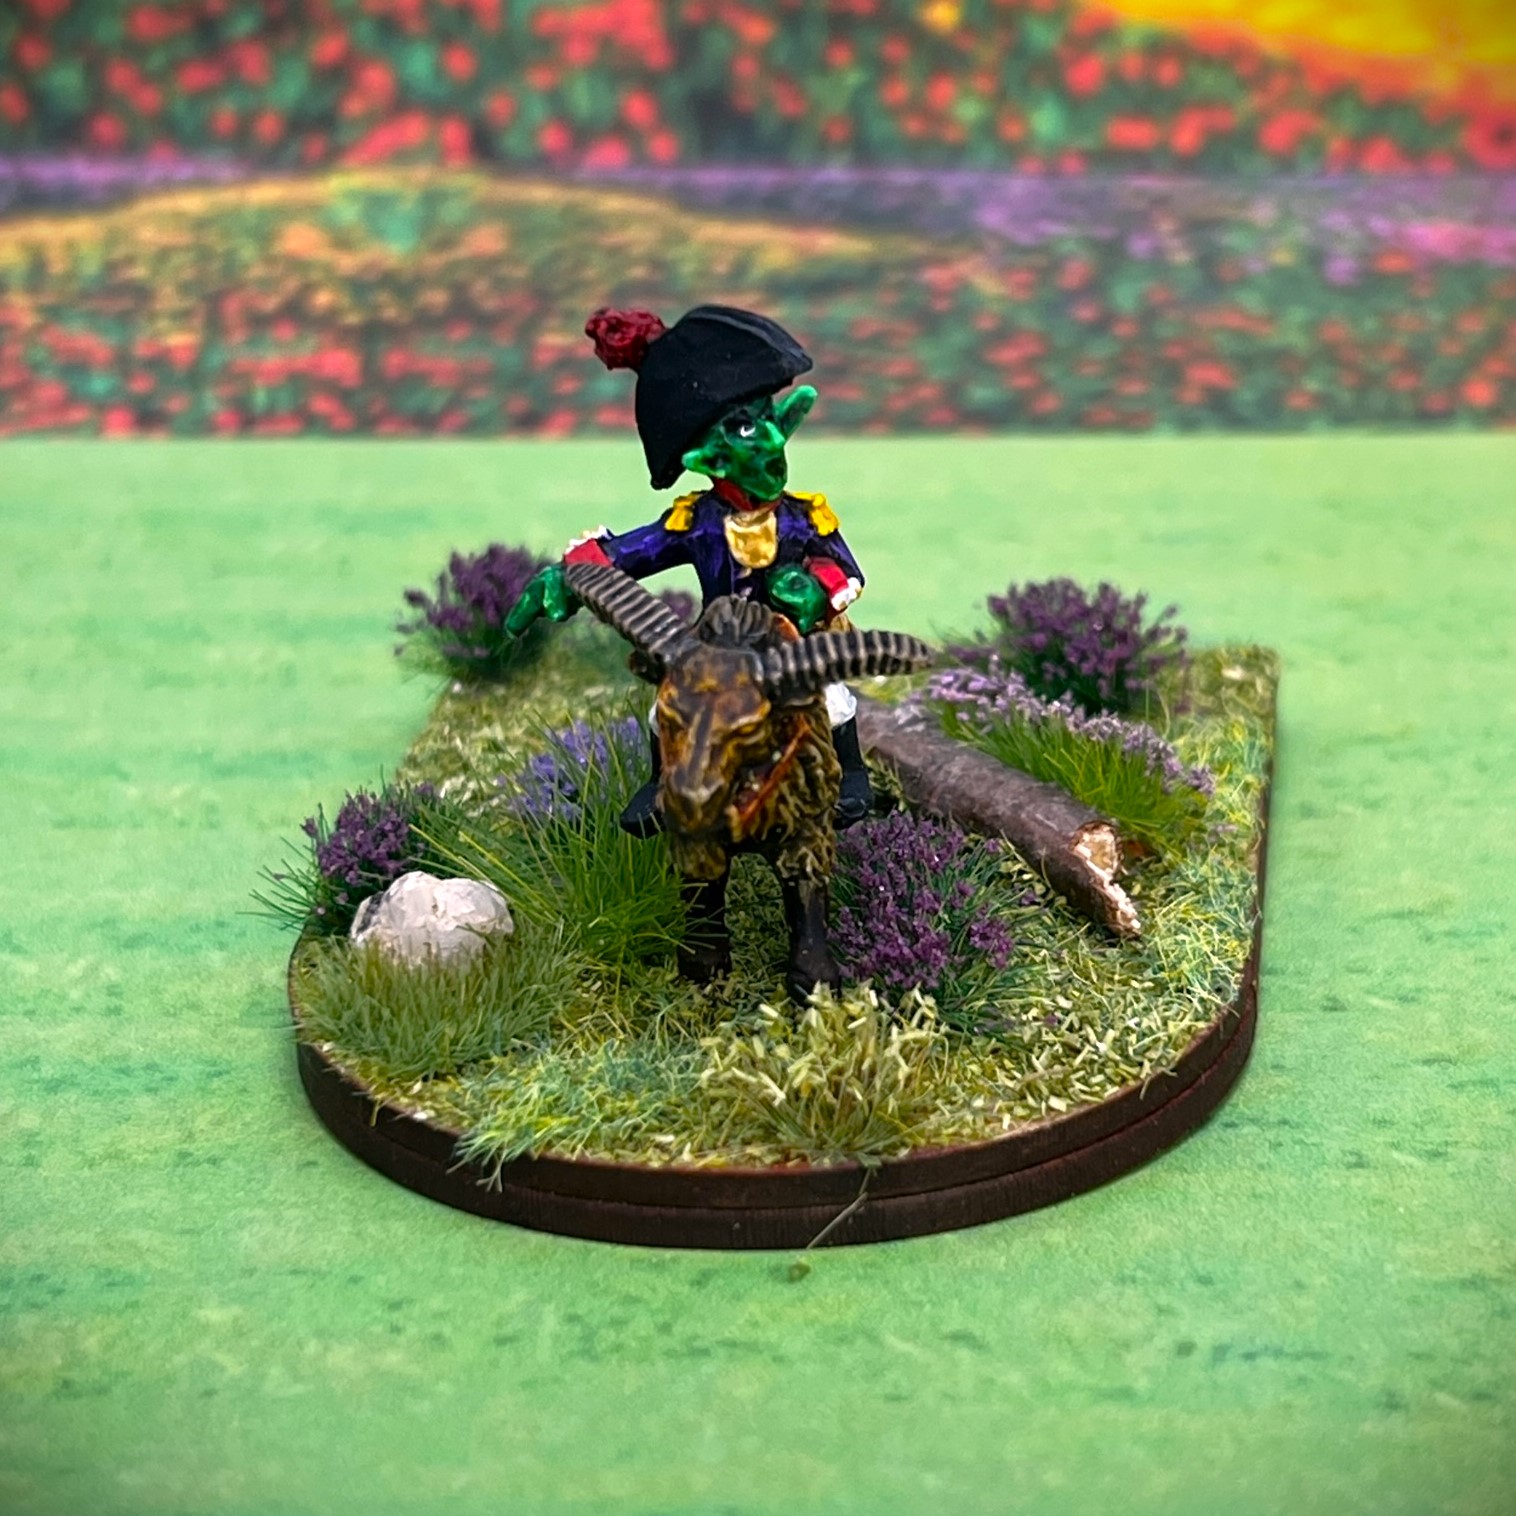
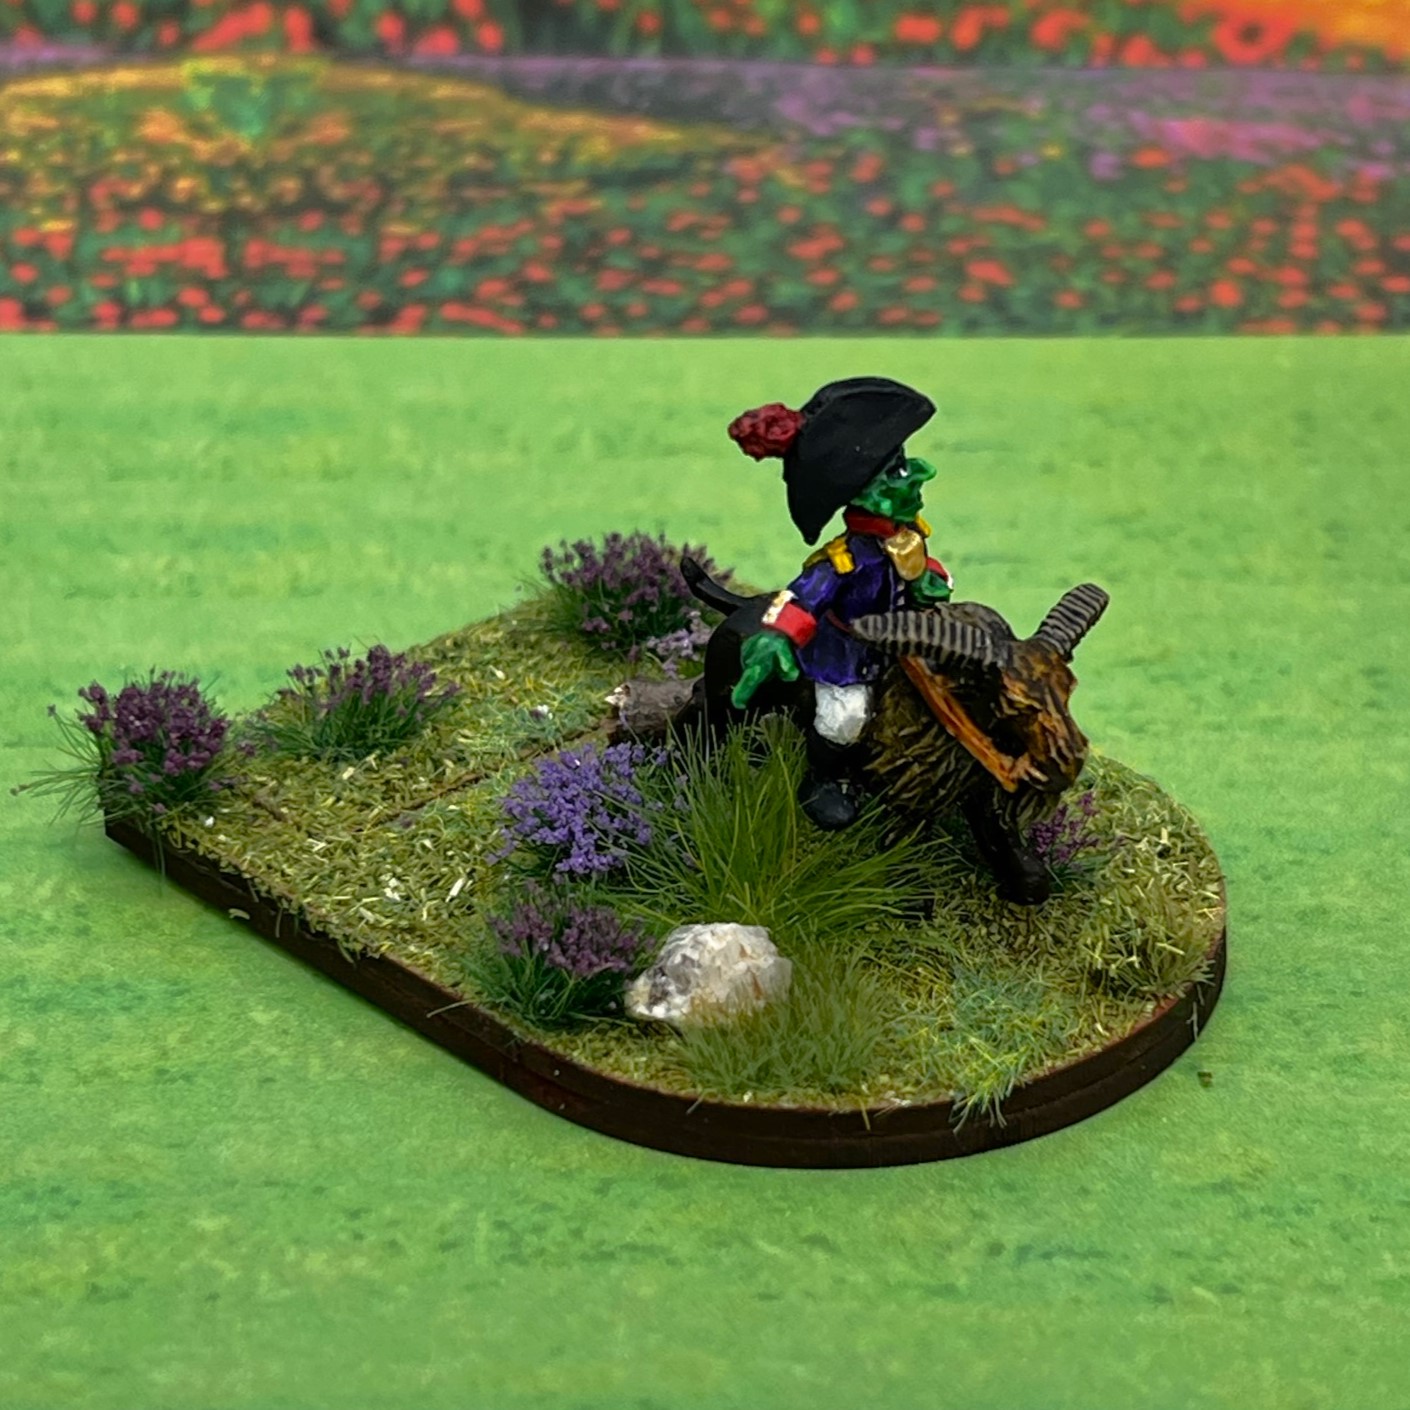
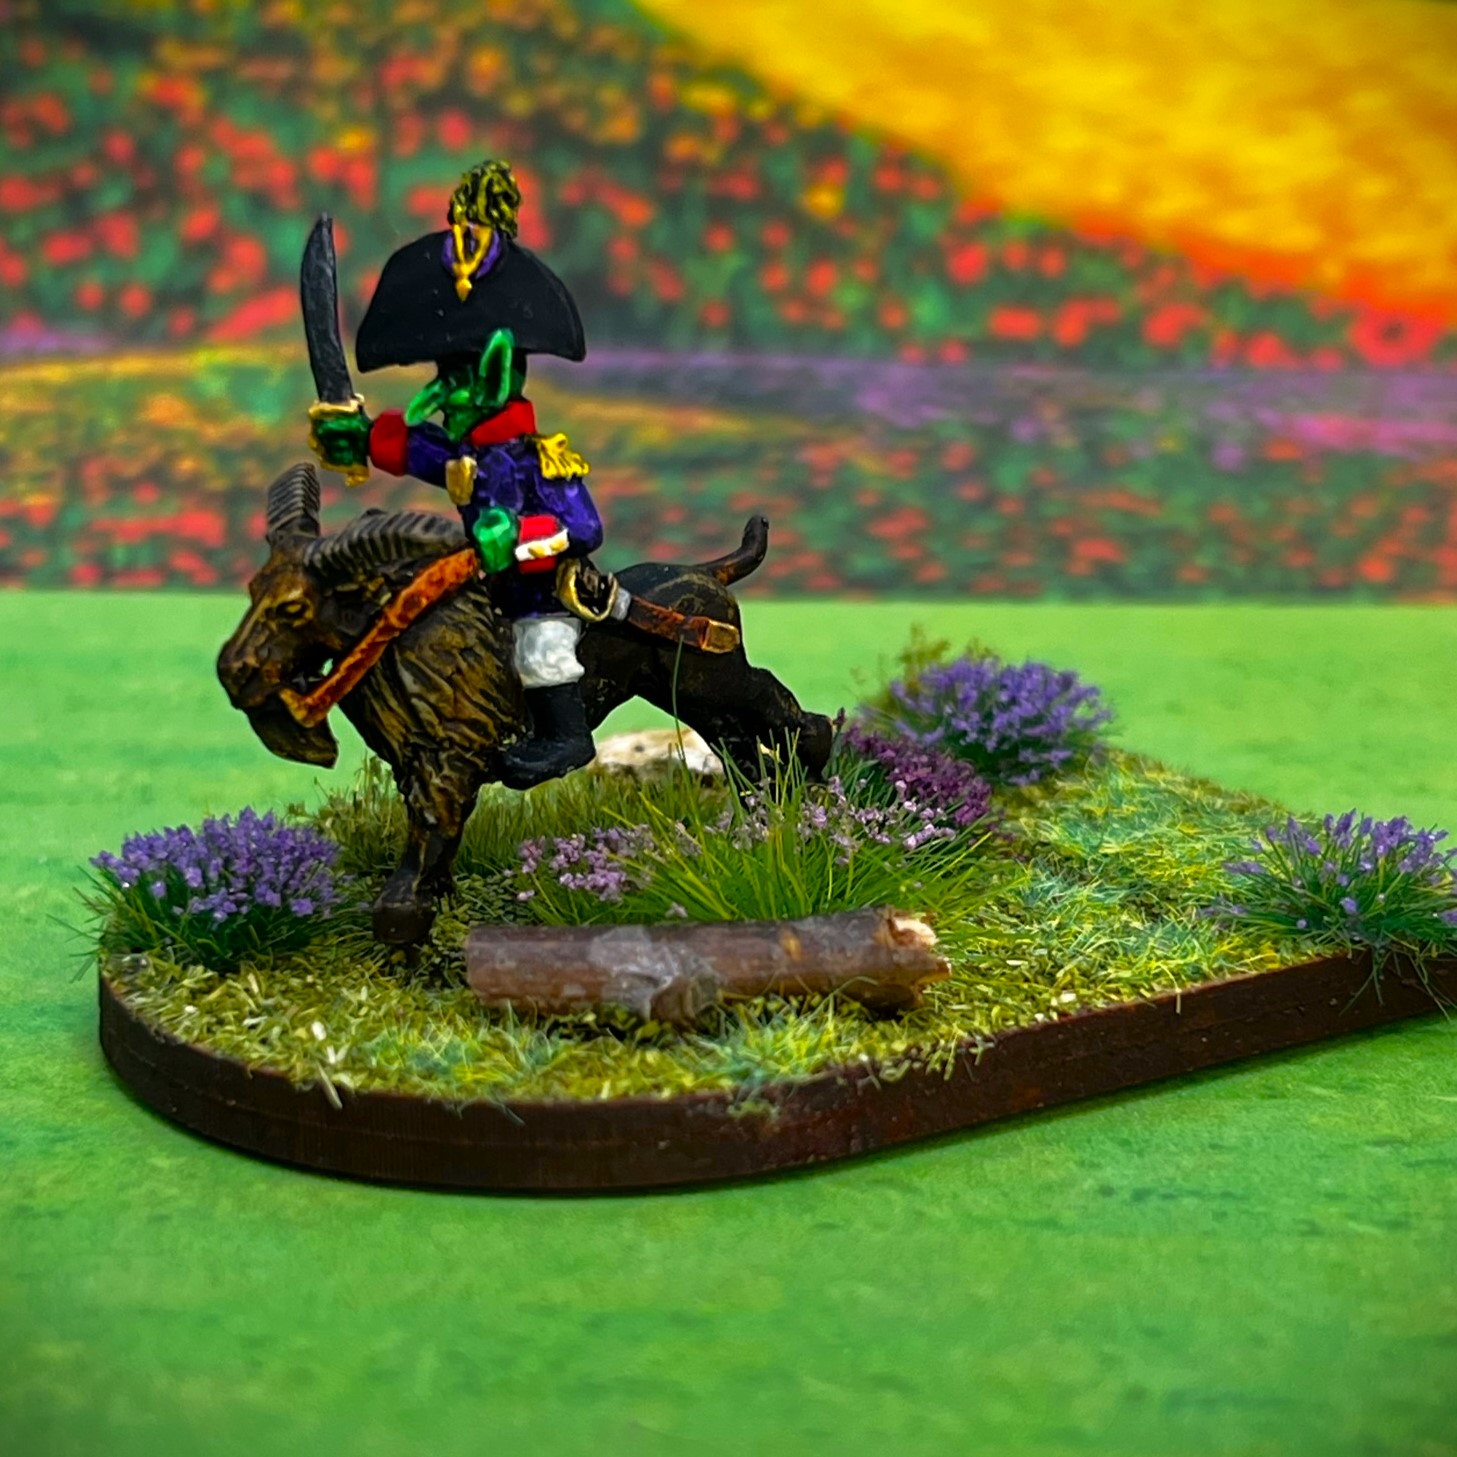
I had no brigade commanders or an Arella figure! Back to help from great friends, Greg Priebe had an extra OZZ-405 “Gillikin Mounted Officers on Goats” – and offered it to me as he did not plan on painting them in the near term. There were three officers mounted on goats and suitable for use as brigade commanders. The figures are metal, 28mm in scale, and came in two pieces. As for Arella, I would borrow that from Chris and then he gifted it to me! More on her in a future post.
With a Mass Pikemen Gaming Club Ozz game in the near future, I wanted, no I NEEDED to finish at least two of the three for my newly acquired Gillikins. I’ll share below the WIP process that I took and some eye candy of the finished paint jobs.
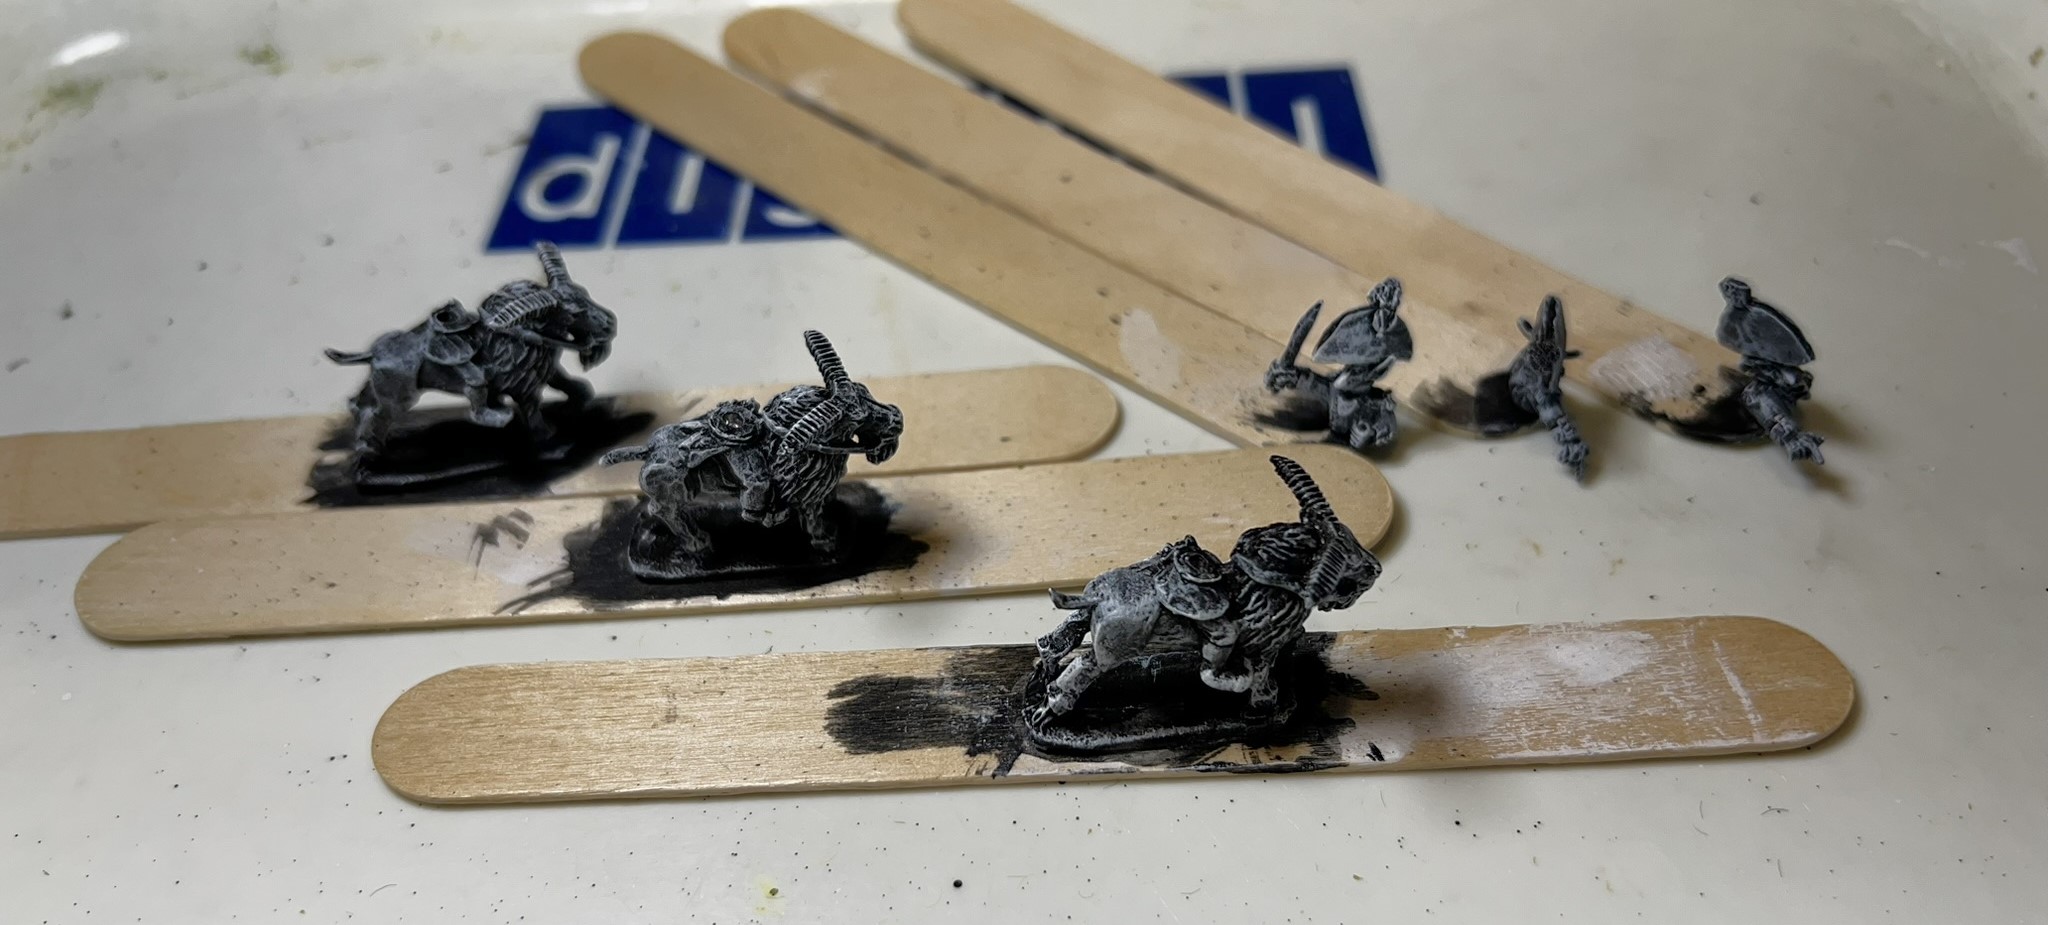
WIP Shots…
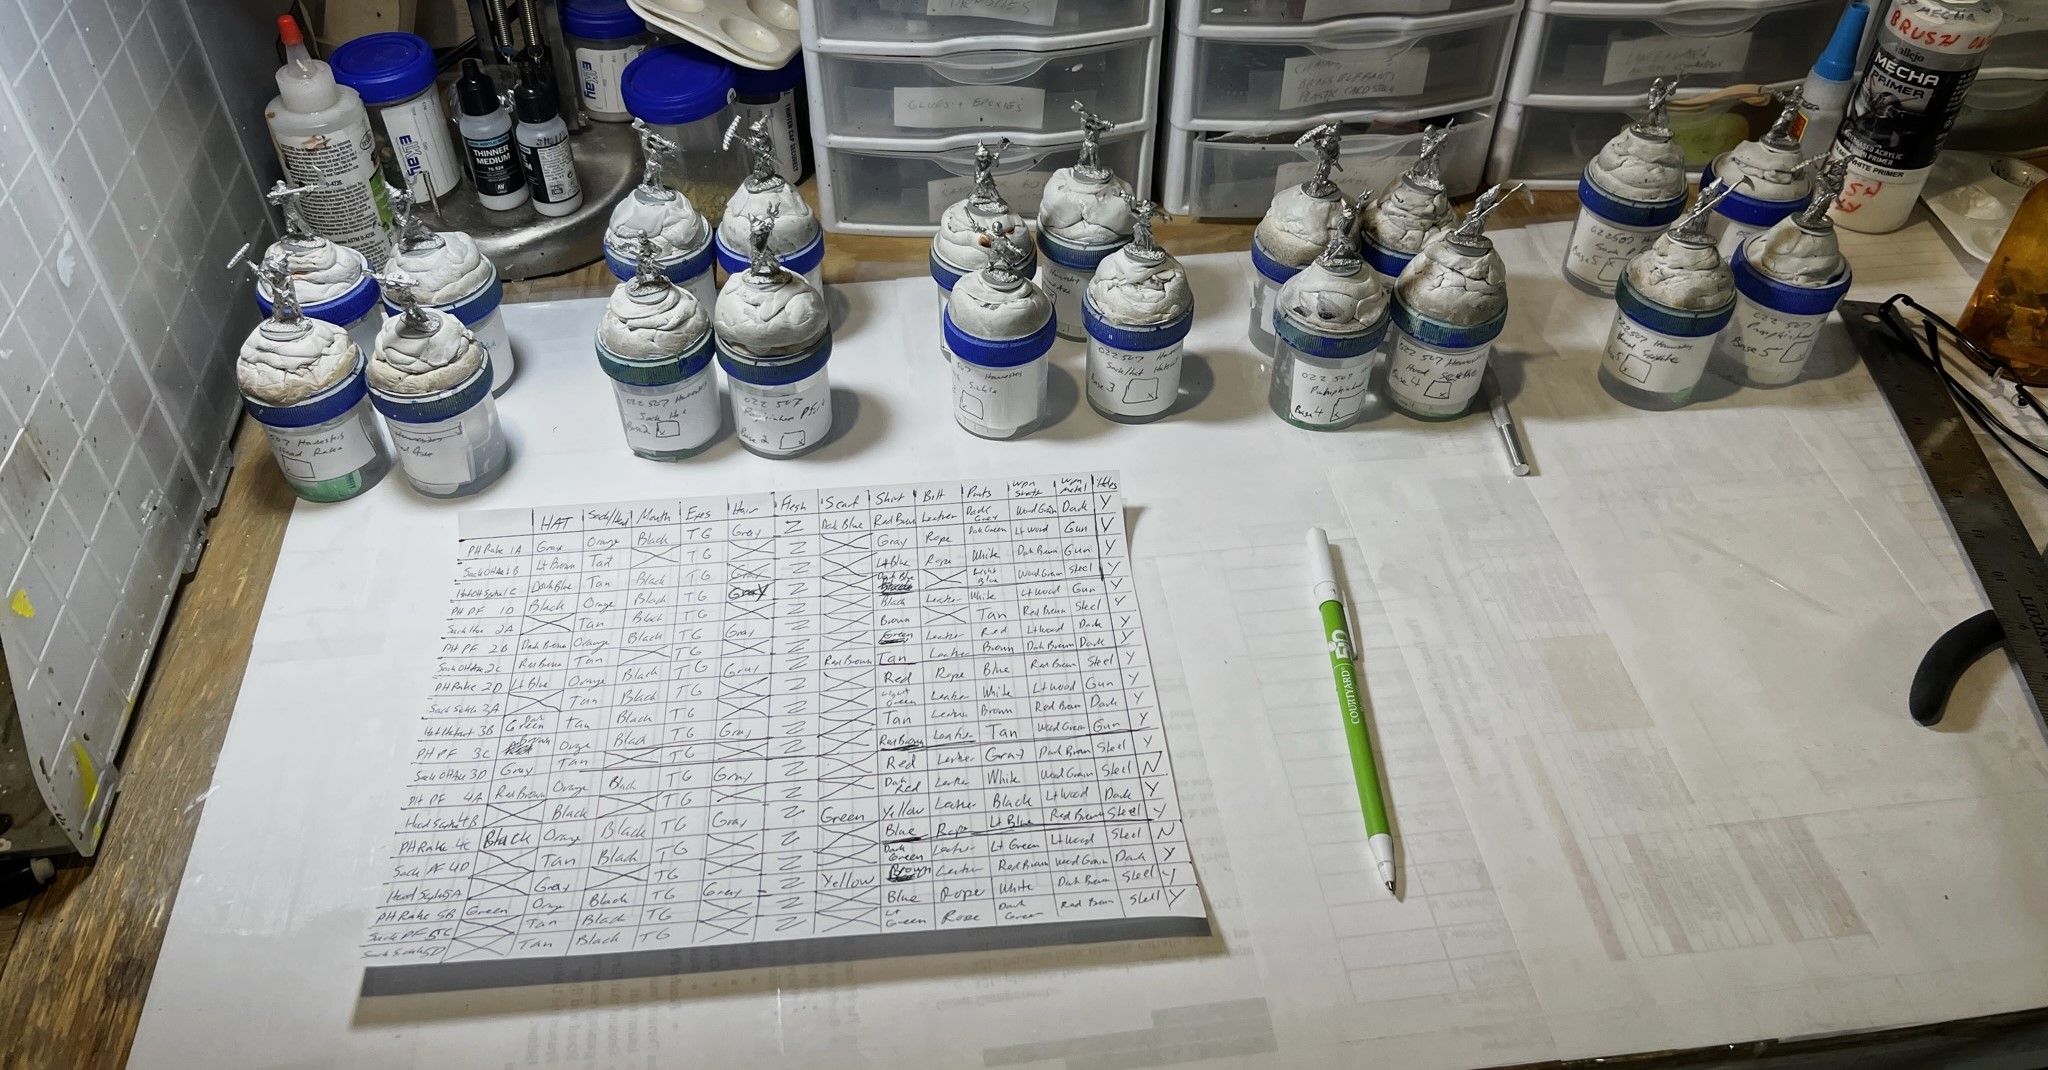
The Gillikin officers as received from Greg – in the original packaging. I use the 3″ x 5″ card to record which paints I use so that I can share them with you on my blog posts – (and so I can recreate similar painting schemes on future projects).
For mounting, I went with popsicle sticks instead of my usual specimen jars with poster tack. This made painting each half easier – especially as the legs are already on the mounts. I brush primed them, then let that cure. The following day, I gave everything a dark wash, then after sufficient drying time, dry brushed over the wash with white.
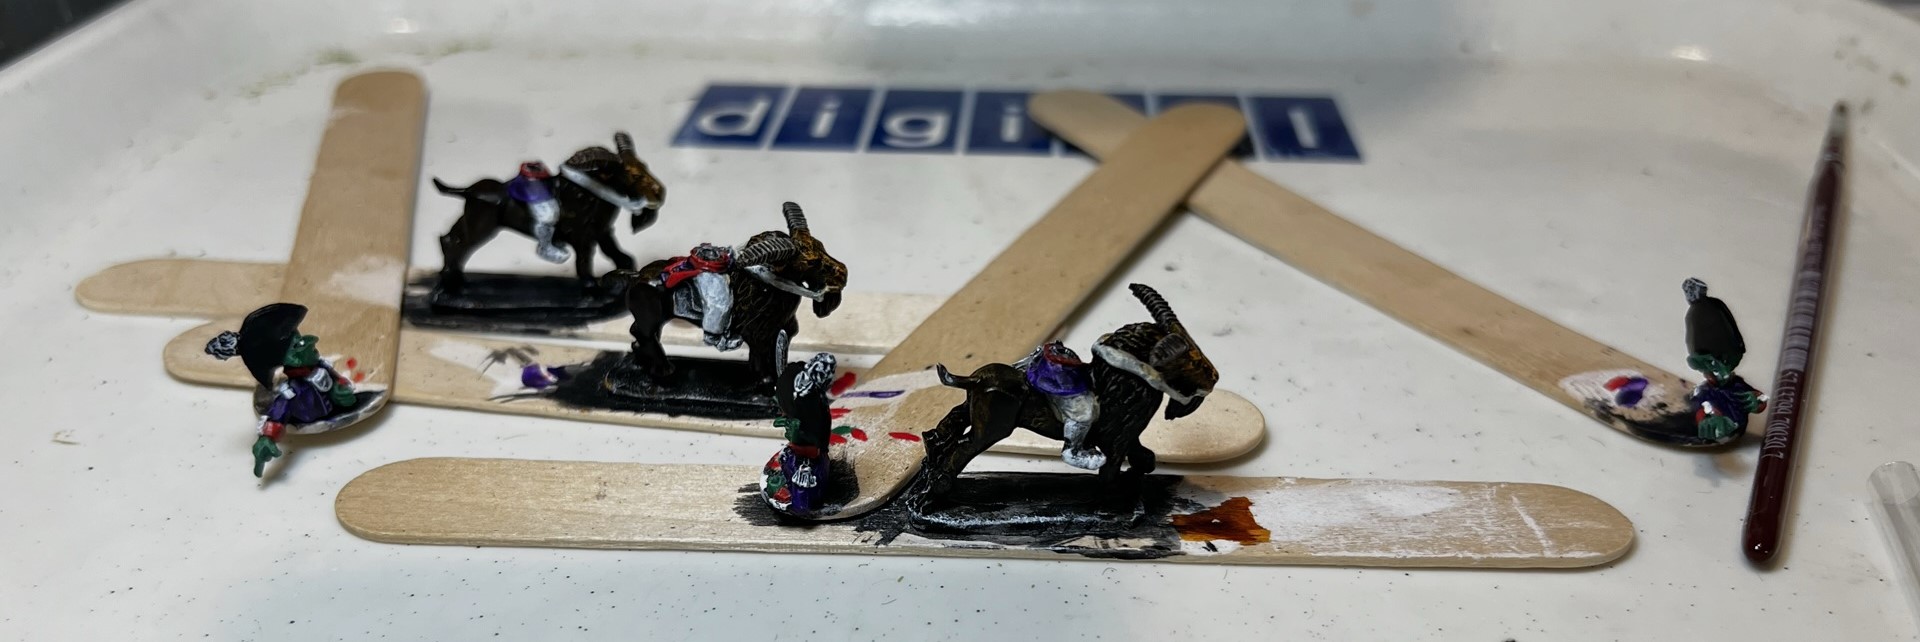
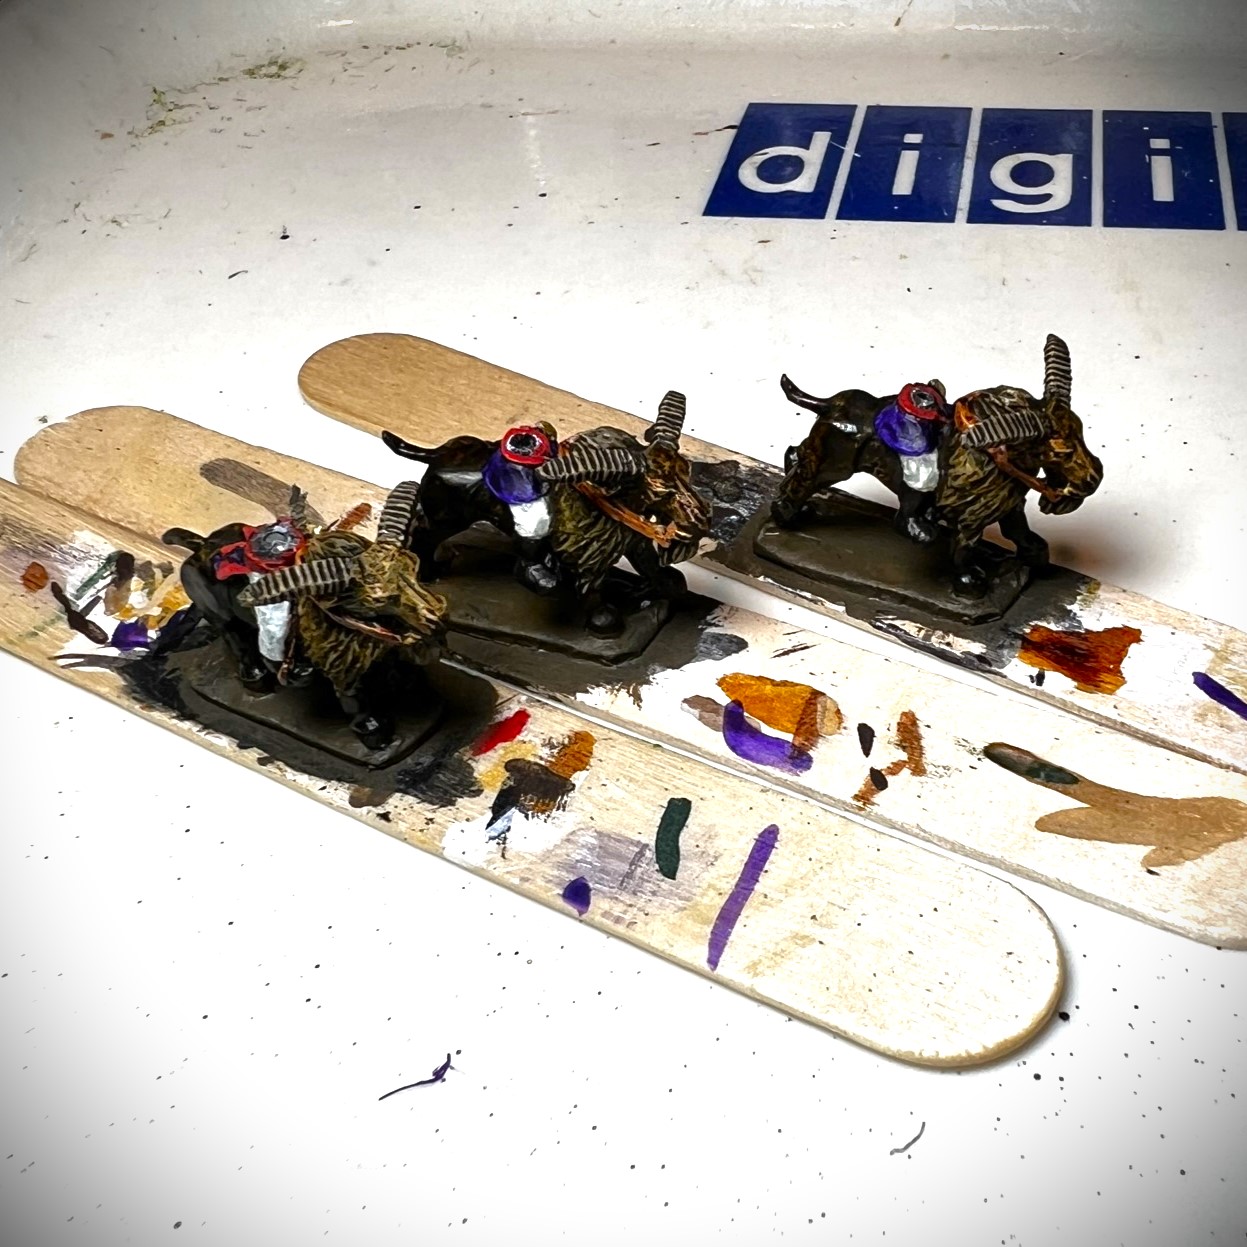
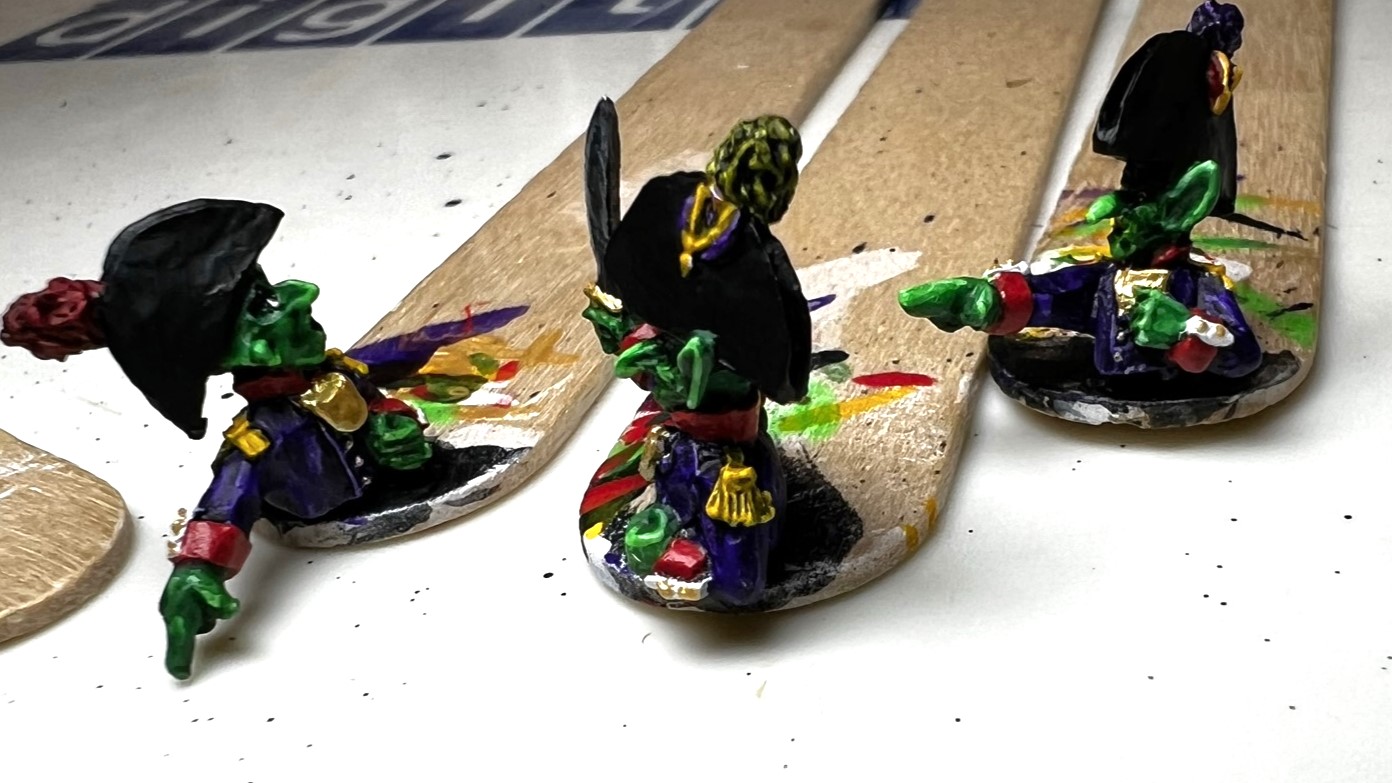
The figures after dry brushing.Early painting progress.Goats done……and torsos…
I assembled them as shown below.
Then, I assembled the three MDF bases from Wars of Ozz miniatures. I use the round-edged front bases for brigade commanders and the rectangular ones for the regimental commanders – though that is reverse of what is on the website catalog. I find it to be an improvement, as the rectangular bases match up better against the units with square bases.
The MDF bases gluing.
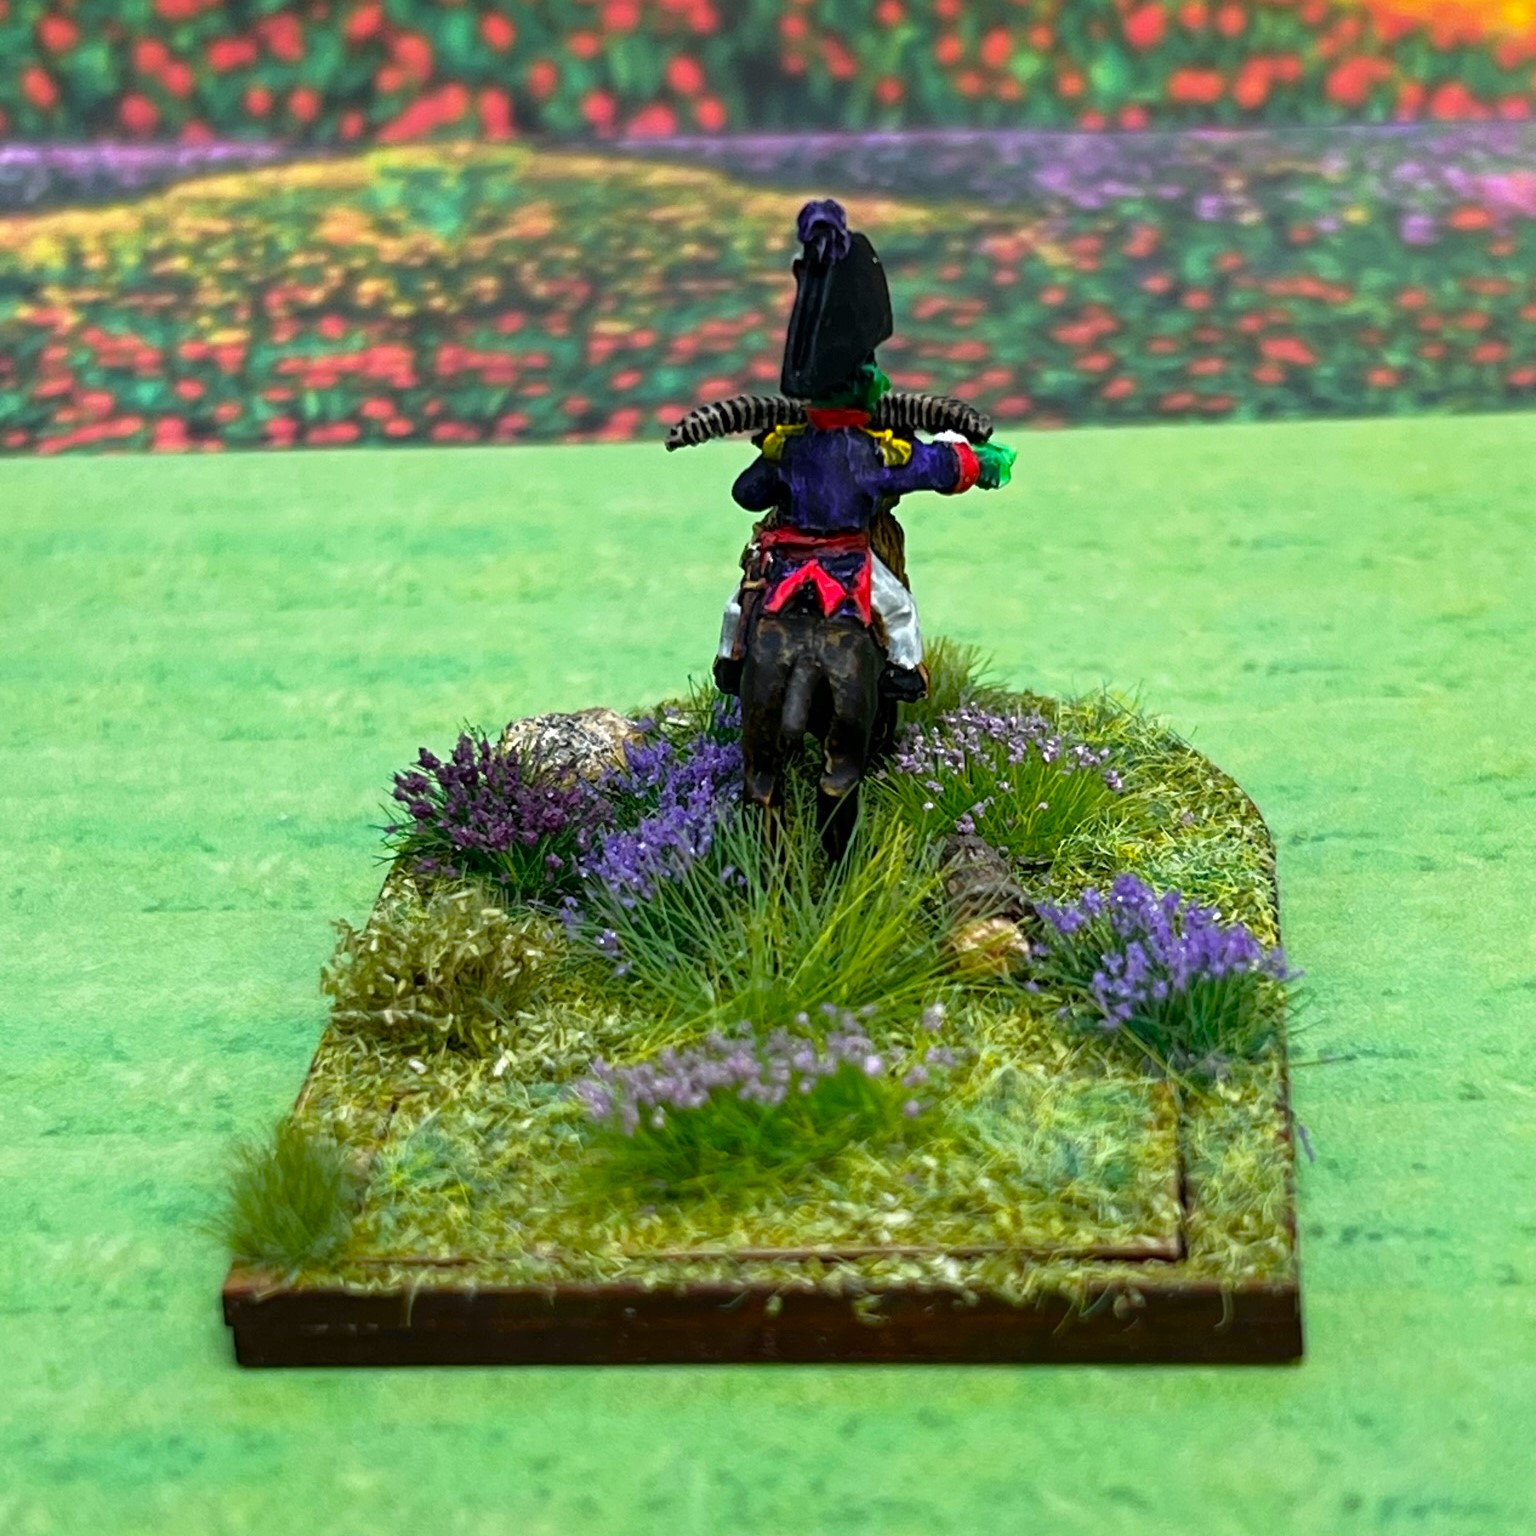
After the glue on the MDF bases were dry, I added a brown ink wash to the outside to minimize the cut marks. This worked very well as the MDF drinks that up. Then I mounted the figures and prepped them for flocking.
Mounted the Gillikin offices and more waiting for glue to dry!
As previously, I varnished these with a single coat of satin followed by one of matte and let them dry. Once the varnish dried overnight, I glued the figures to the assembled MDF bases. And waited for more drying. And once that dried, I began serial flocking work.
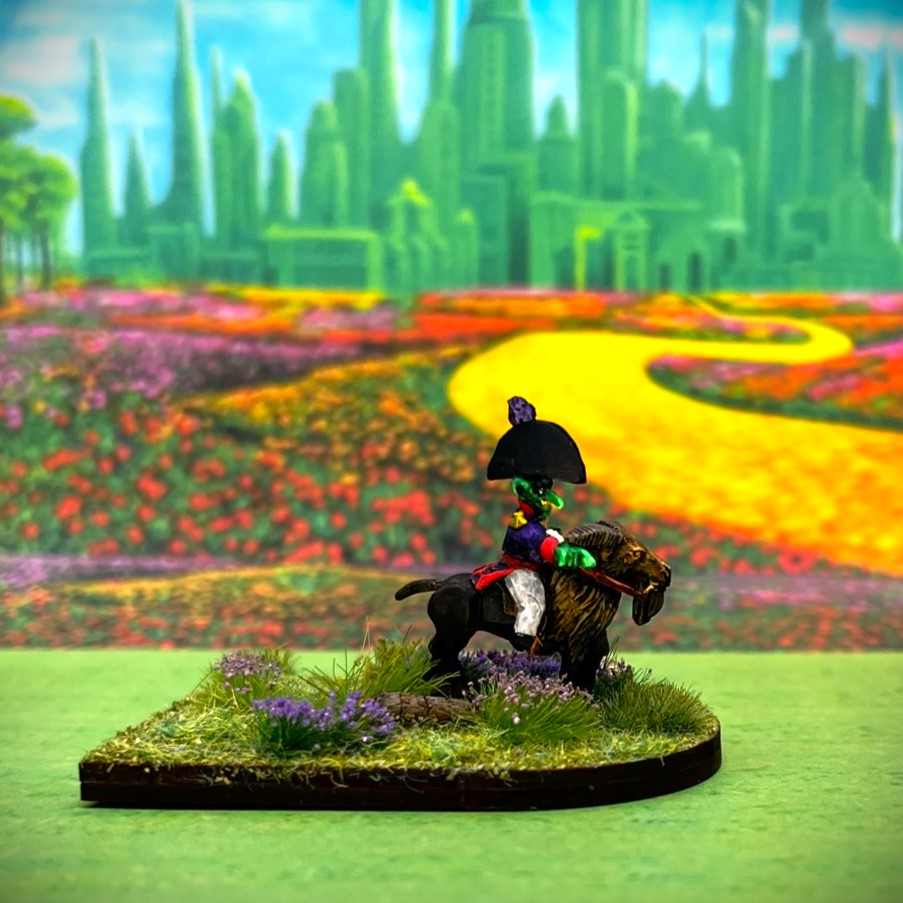
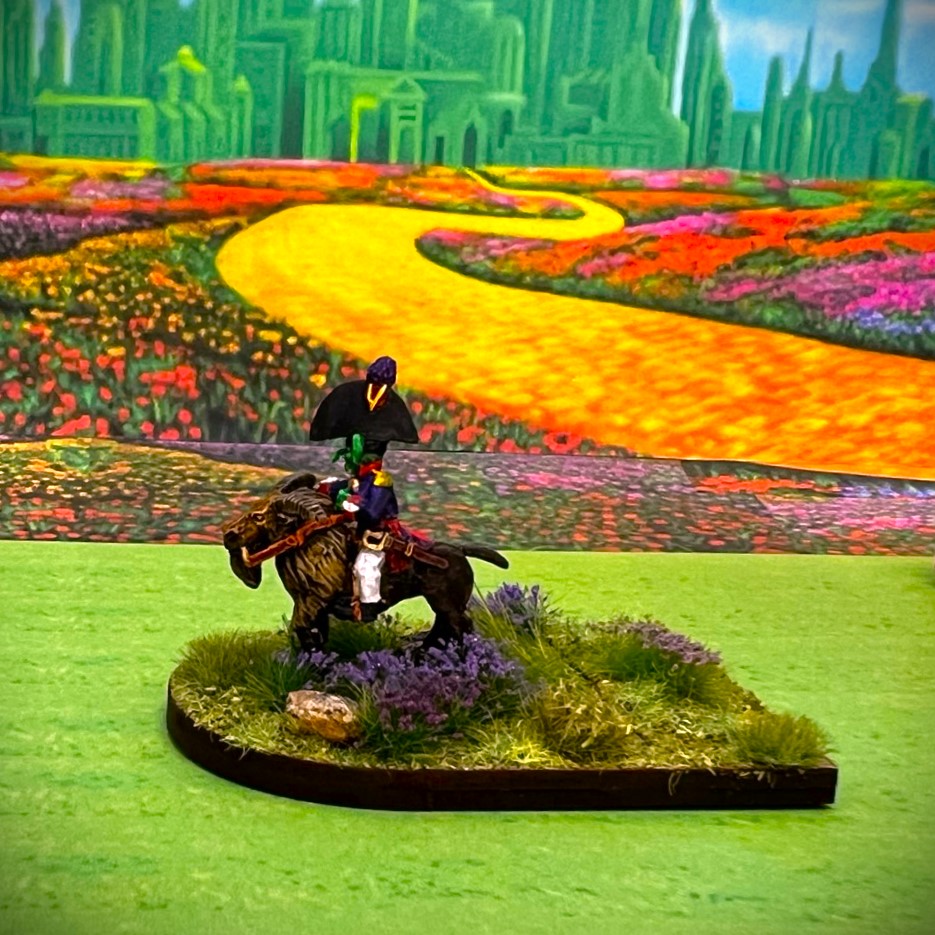
Without further ado, here’s some Gillikin Mounted Officer…
Eye Candy
Officer 1
Officer 2
Officer 3
Group shots
I just got two of these into an Ozz game last weekend, but that recap will be in a few posts as I am a bit behind. Yes, I blame golf. Or rather my addiction to golf…stay tuned, I’ll get there…
Thanks again to Greg Priebe and Chris Comeau…and to Russ Dunaway and Buck Surdu for bringing this all to life. I’ll still need to get some witches for a Sorcerer’s League in due time…
I hope that you found these fun. Up next…some creepy and scary scarecrows for the Great Land of Harvest Army!
And yes, I still have more to come…
Miscellaneous details and references for those interested in that sort of thing:
For all of my previous posts on Wars of Ozz games, figures, units, and other related projects – please see this page.
PAINTS, INKS, GLAZES, SHADES, WASHES, PIGMENTS, FLOCKING, GLUES AND MORE THAT I USED ON THESE GILLIKIN MOUNTED OFFICER FIGURES:
Green stuff (kneadatite)
Popsicle sticks
Vallejo Mecha Surface Primer “White”
Secret Weapon Washes “Heavy Body Black”
Vallejo Model Color “White”
Army Painter “Speed Paint – Ghoul Green”
Citadel “Contrast Paint – Ratling Grime”
Citadel “Contrast Paint – Contrast Medium”
Citadel “Contrast Paint – Black Legion”
Army Painter “Speed Paint – Bony Matter”
Army Painter “Speed Paint – Sand Golem”
Citadel “Contrast Paint – Luxion Purple”
Vallejo Mecha Color “SZ Red”
Battlefront “Black”
Citadel “Contrast Paint – Baal Red”
Army Painter “Speed Paint – Charming Chartreuse”
Army Painter “Speed Paint – Purple Swarm”
Citadel “Contrast Paint – Imperial Fist”
Vallejo Mecha Color “Green Fluorescent”
Martha Stewart Crafts “Pale Bronze”
Army Painter “Speed Paint – Hardened Leather”
Citadel “Warpfiend Grey”
Hataka “Gris Claire Neutre”
Reaper MSP Core Colors “Blackened Brown”
Citadel “Ushabti Bone”
Vallejo Model Air “Ivory”
Vallejo Model Air “Gun Metal”
Army Painter “Speed Paint – Broadsword Silver”
Vallejo Model Color “Black Green”
Vallejo Game Ink “Black Green”
Vallejo Model Air “Bright Brass”
Vallejo Game Ink “Yellow”
Citadel “Contrast Paint – Apothecary White”
Citadel “Seraphim Sepia” (wash)
Citadel “Agrax Earthshade” (wash)
Gorilla Glue
PS Model Color “USAAF Olive Drab”
Paper clip wire
P3 “Brown Ink”
Vallejo “Flow Improver”
Vallejo “Airbrush Thinner”
Vallejo Varnish “Satin Varnish”
Vallejo Mecha Varnish “Matte Varnish”
MDF bases from Wars of Ozz miniatures
Wargames Accessories Steel Bases FOW#1
Elmer’s PVA Glue
Army Painter “Battlefields Grass Green” (flocking)
Army Painter “Battlefields Green Grass” (flocking)
Gamer’s Grass “Wild” (flocking)
Shadow’s Edge Miniatures “6mm Light Blue Tufts” (flocking)
Army Painter “Meadow Flowers” (flocking)
Small stones (flocking)
Small oak twigs (flocking
Again, as you may want to check out the Wars of Ozz figures’ range – there are two places to get them (and I make no money from this btw). The game rules and the figures are available from the following two places:
In building out my available troops for my Wars of Ozz games, I have focused on infantry, cavalry, and artillery units for the most part. I started with the Munchkins in this vein, then moved onto other factions as I have shared in previous posts in this blog. My Munchkin forces are excellent with musketry, but as far as mobility on the battlefield goes, well, they do have very small feet and do not move quickly…
Meanwhile, as you may remember, the Winkies (the oh-we-oh dudes) in Wars of Ozz have very mobile units, especially in terms of cavalry and the Great Flying Apes.
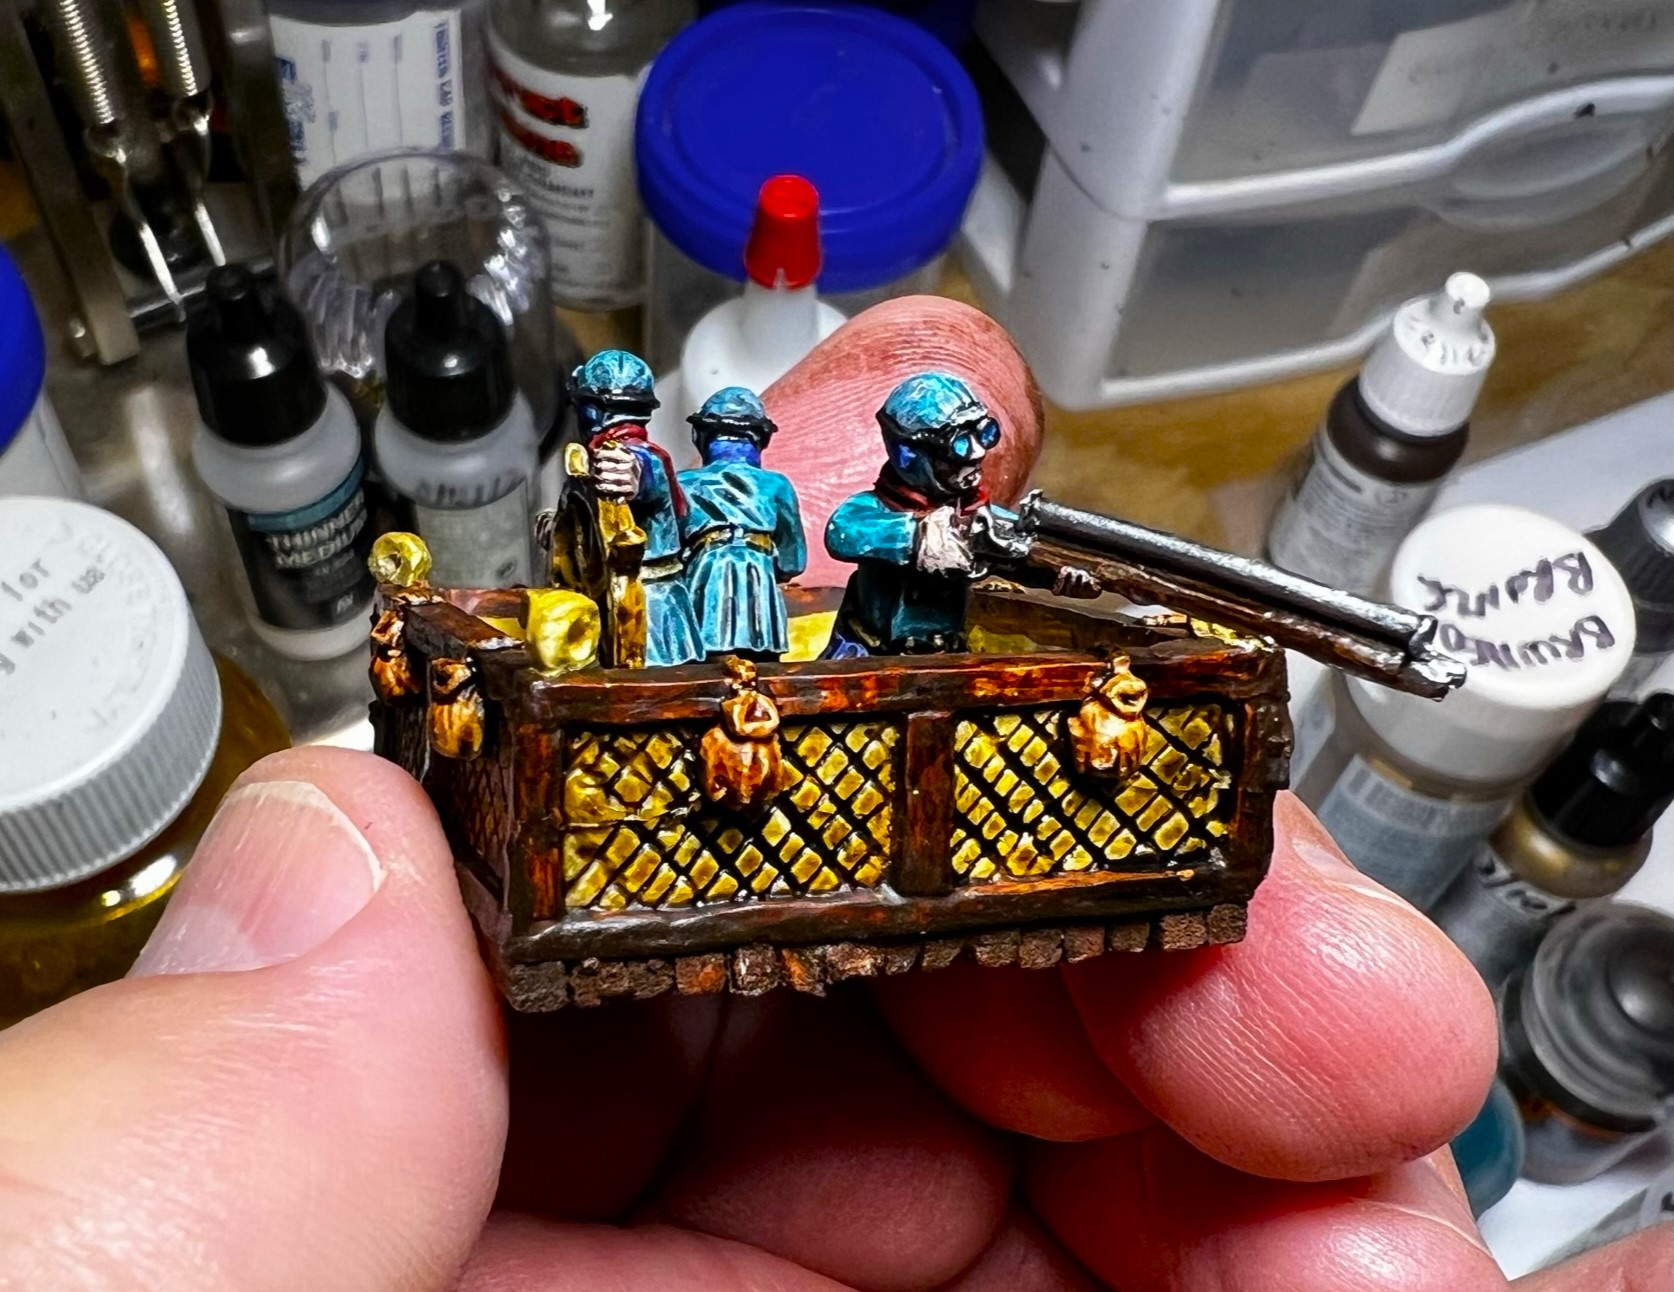
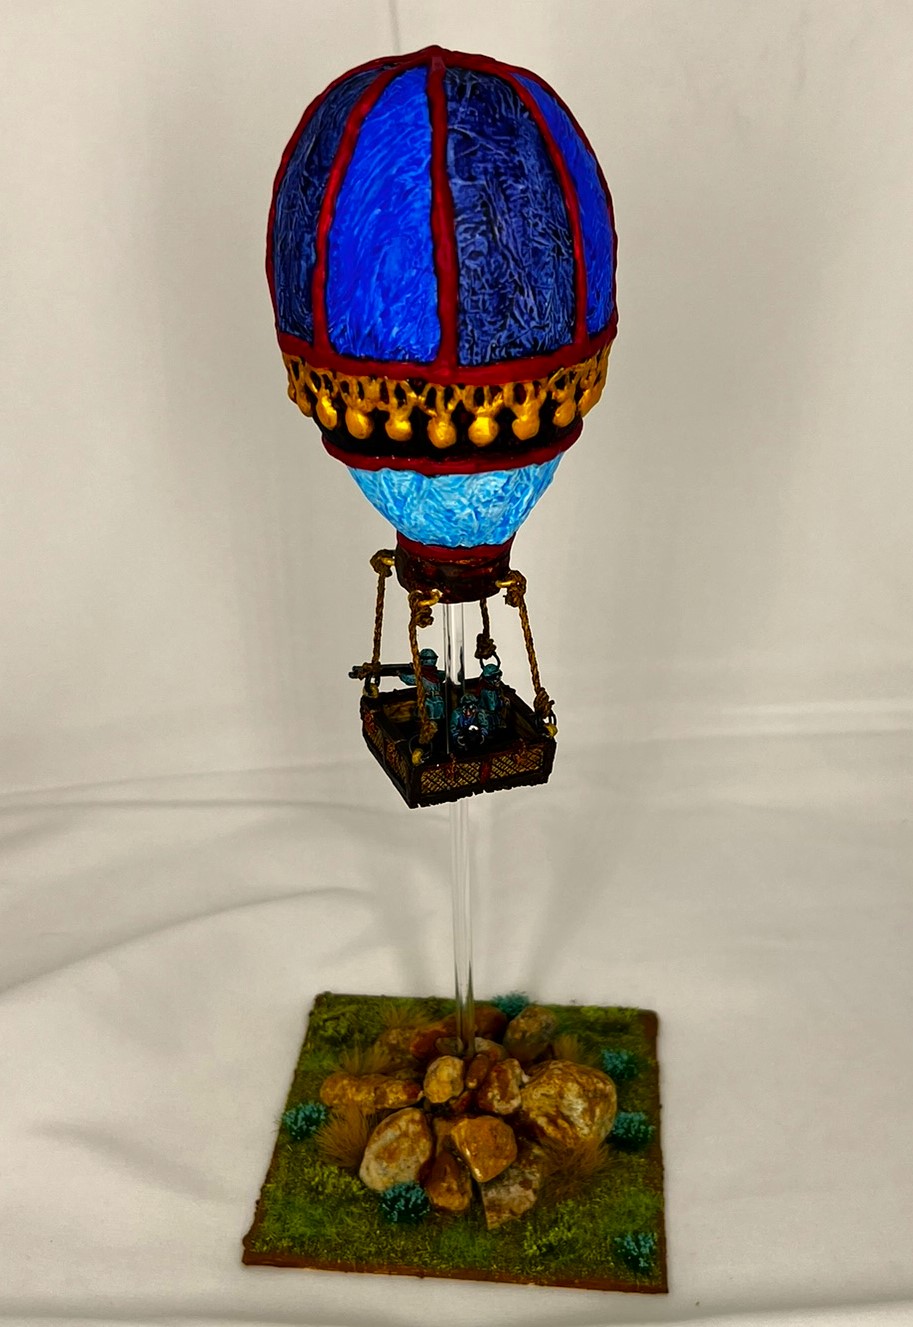
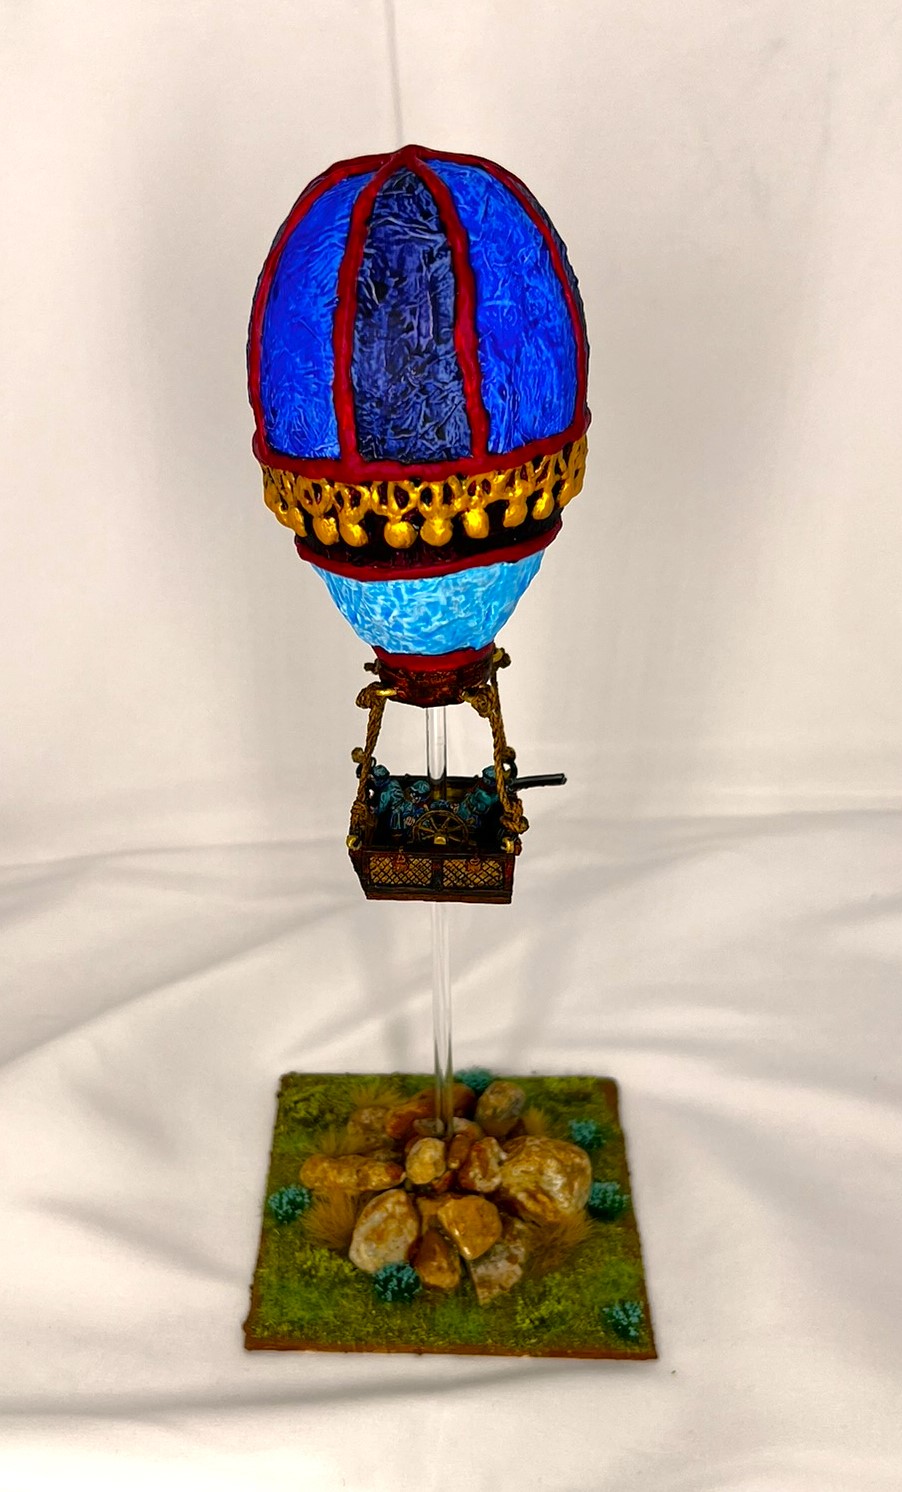
I decided that it was high time that I got the Munchkins some air power of their own. While I have in some games given them allies (like the Great Owls), there is one organic flying unit available to the Munchkins. It is OZZ-110 “Hot Air Balloon & Crew“. The model consists of a foam balloon, three crewmen, a basket, and some wires. In the game, it is called a part of the Munchkin Aerostat Corps” located at the Emerald City. The Aerostat Corps is commanded by Professor Wogglebug. Balloons in the game are 360-degree aerial sharpshooter firing platforms for the Munchkins. They are faster than the Munchkin infantry and their movement is described as semi-magical (not just by the wind). While they cannot under normal circumstances engage in melee, other flying units may engage them in melee. As befits a sniping unit, they just engage the enemy with harassing attacks of sharpshooters and bombs – from above. While there are only three figures in the basket, it takes 5 hits on the balloonists to eliminate the unit – the balloon itself cannot be shot down.
This post will be quite WIP photo heavy as this was a stiff modeling challenge for me to be sure. I started on June 20th and finished on July 3rd.
I bought the model a while back and decided after looking at it to delay working on it until I had a few more other Ozz units done. I really wanted to make it cool (in my own way) – and I could see this would take some effort – so it languished in my collection of unpainted Ozz stuff – daring me to take it on. It is 28mm in scale. The figures and the basket are metal, while the balloon is a foam casting. There is an acrylic dowel as a stand that goes into a metal flight stand base, plus some wires for attaching the basket to the balloon. The rules stipulate that the base should be 4″ x 4″, so I used styrene for that..
The kit as received with the styrene sheets. I did not end up using the metal bases seen here under the styrene.
WIP Shots…
I had visions of trying to recreate the font on the balloon to match that of the movie, but I decided otherwise as this is Ozz not Oz, and the foam cast needed some TLC.
The balloon close up before starting.
Now, I take on modeling challenges not expecting that everything would be perfect – and here is a good example. You have to be reasonable as what you buy is a starting point, not a finish line. Let me be clear:
I LOVE THIS MODEL!!!! I highly recommend it!
However, there were a number of voids that needed to be fixed, and I just channeled my innovative juices. I needed to address that – as well as how exactly would I mount the basket and more that you’ll see shortly. The figures themselves are really nice. So what to do?
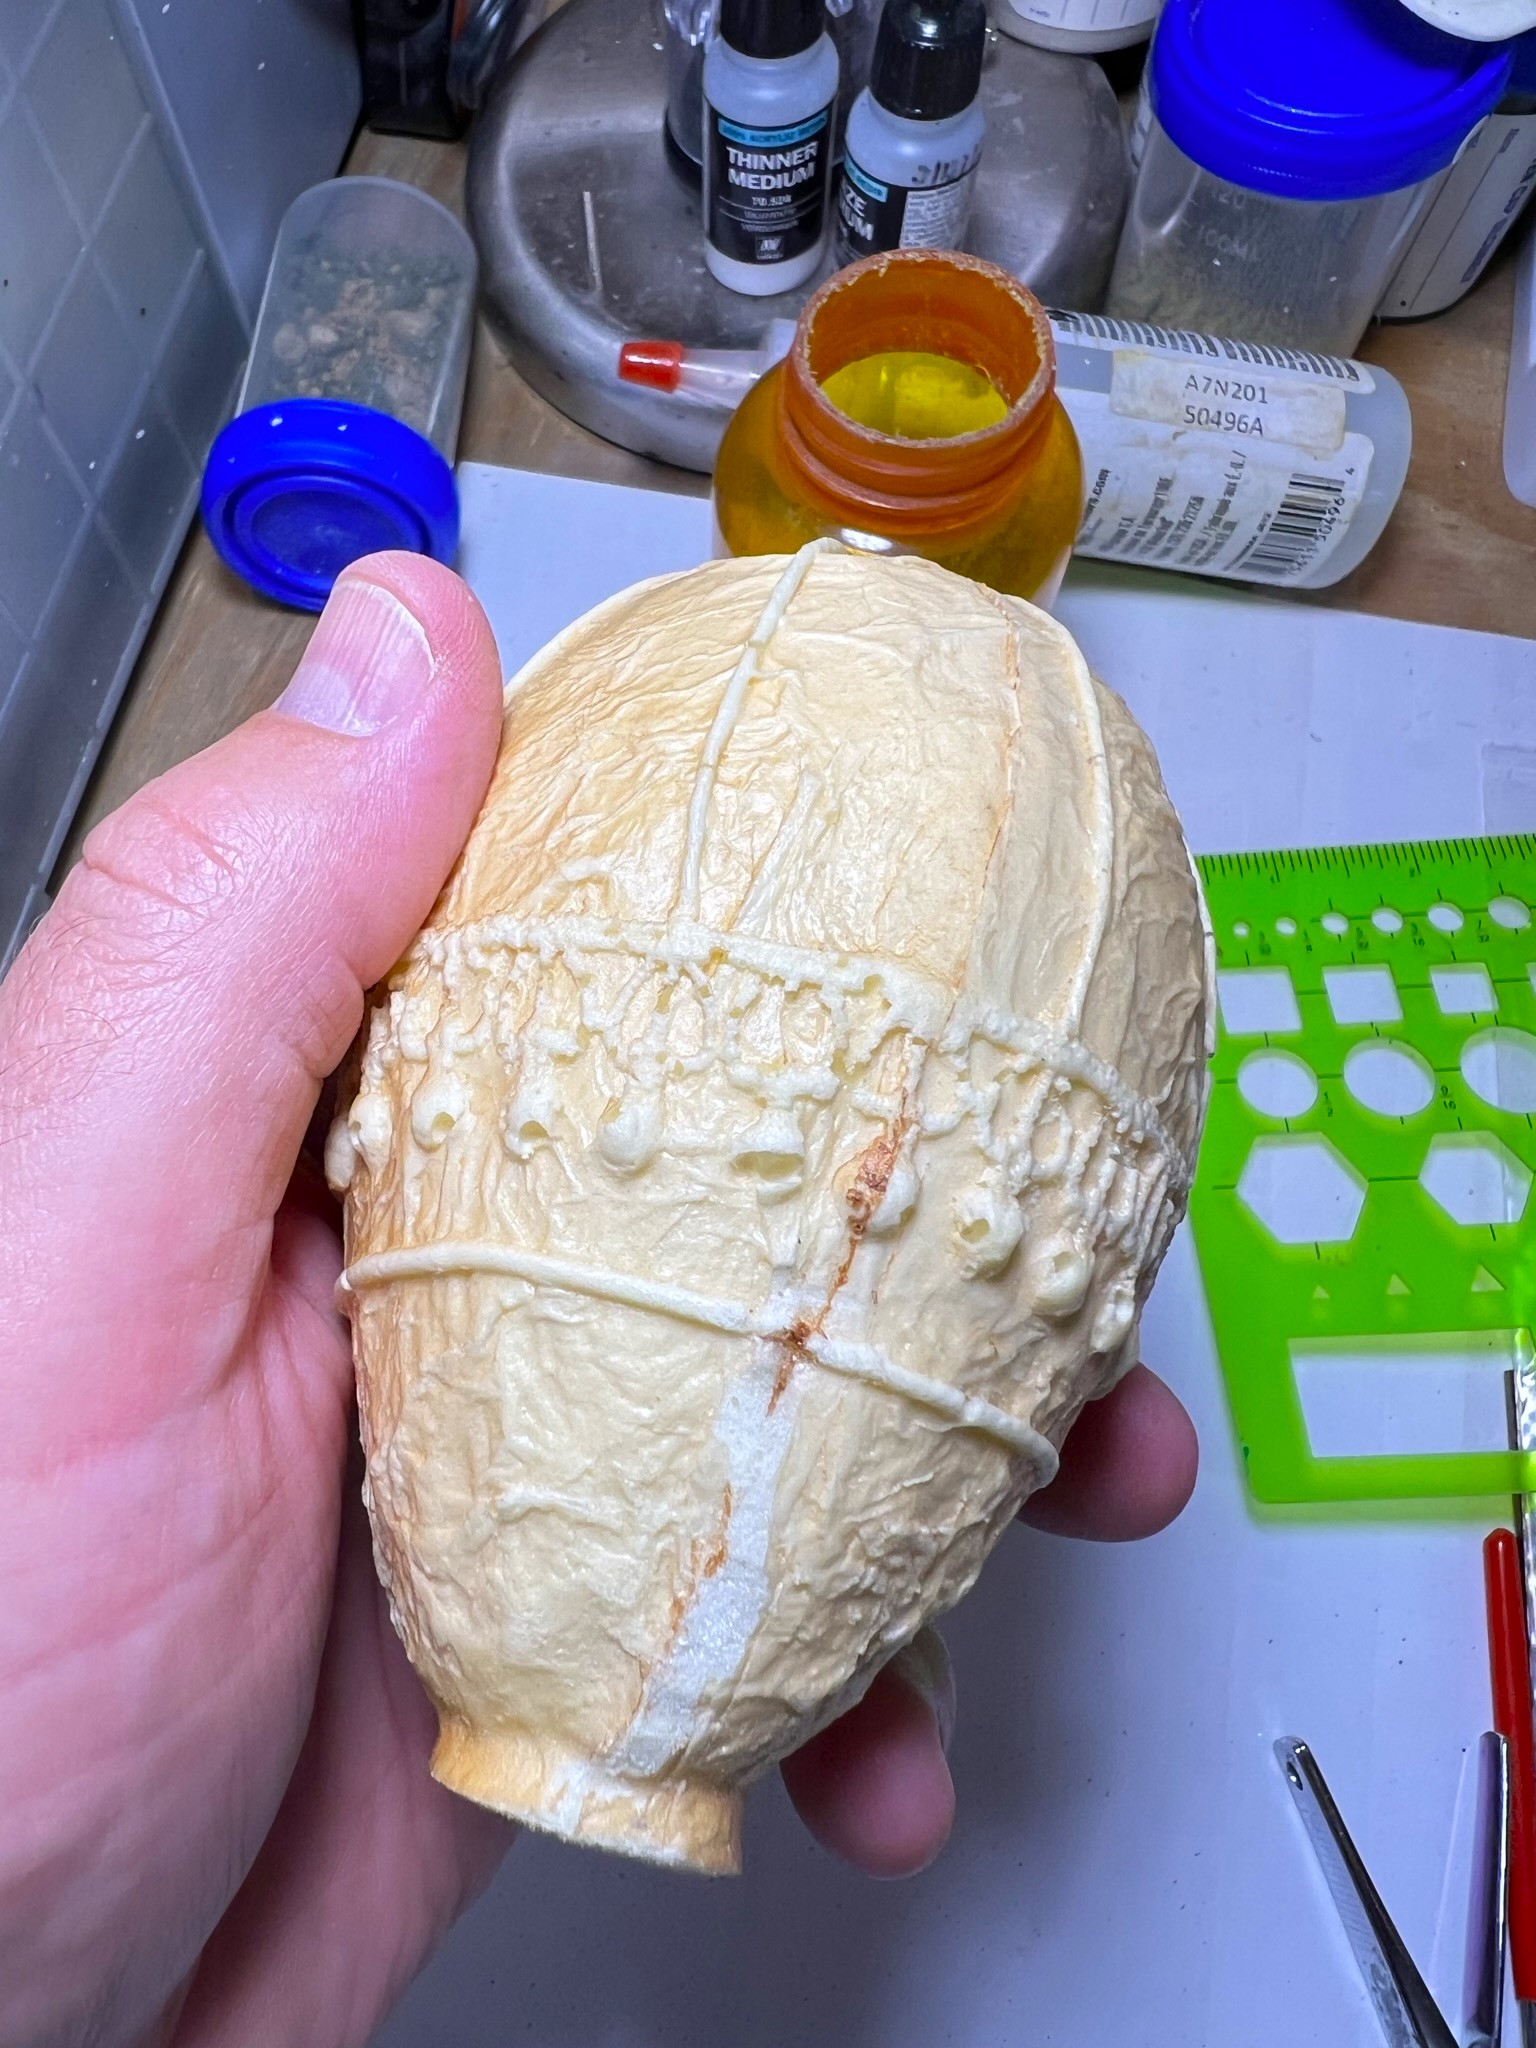
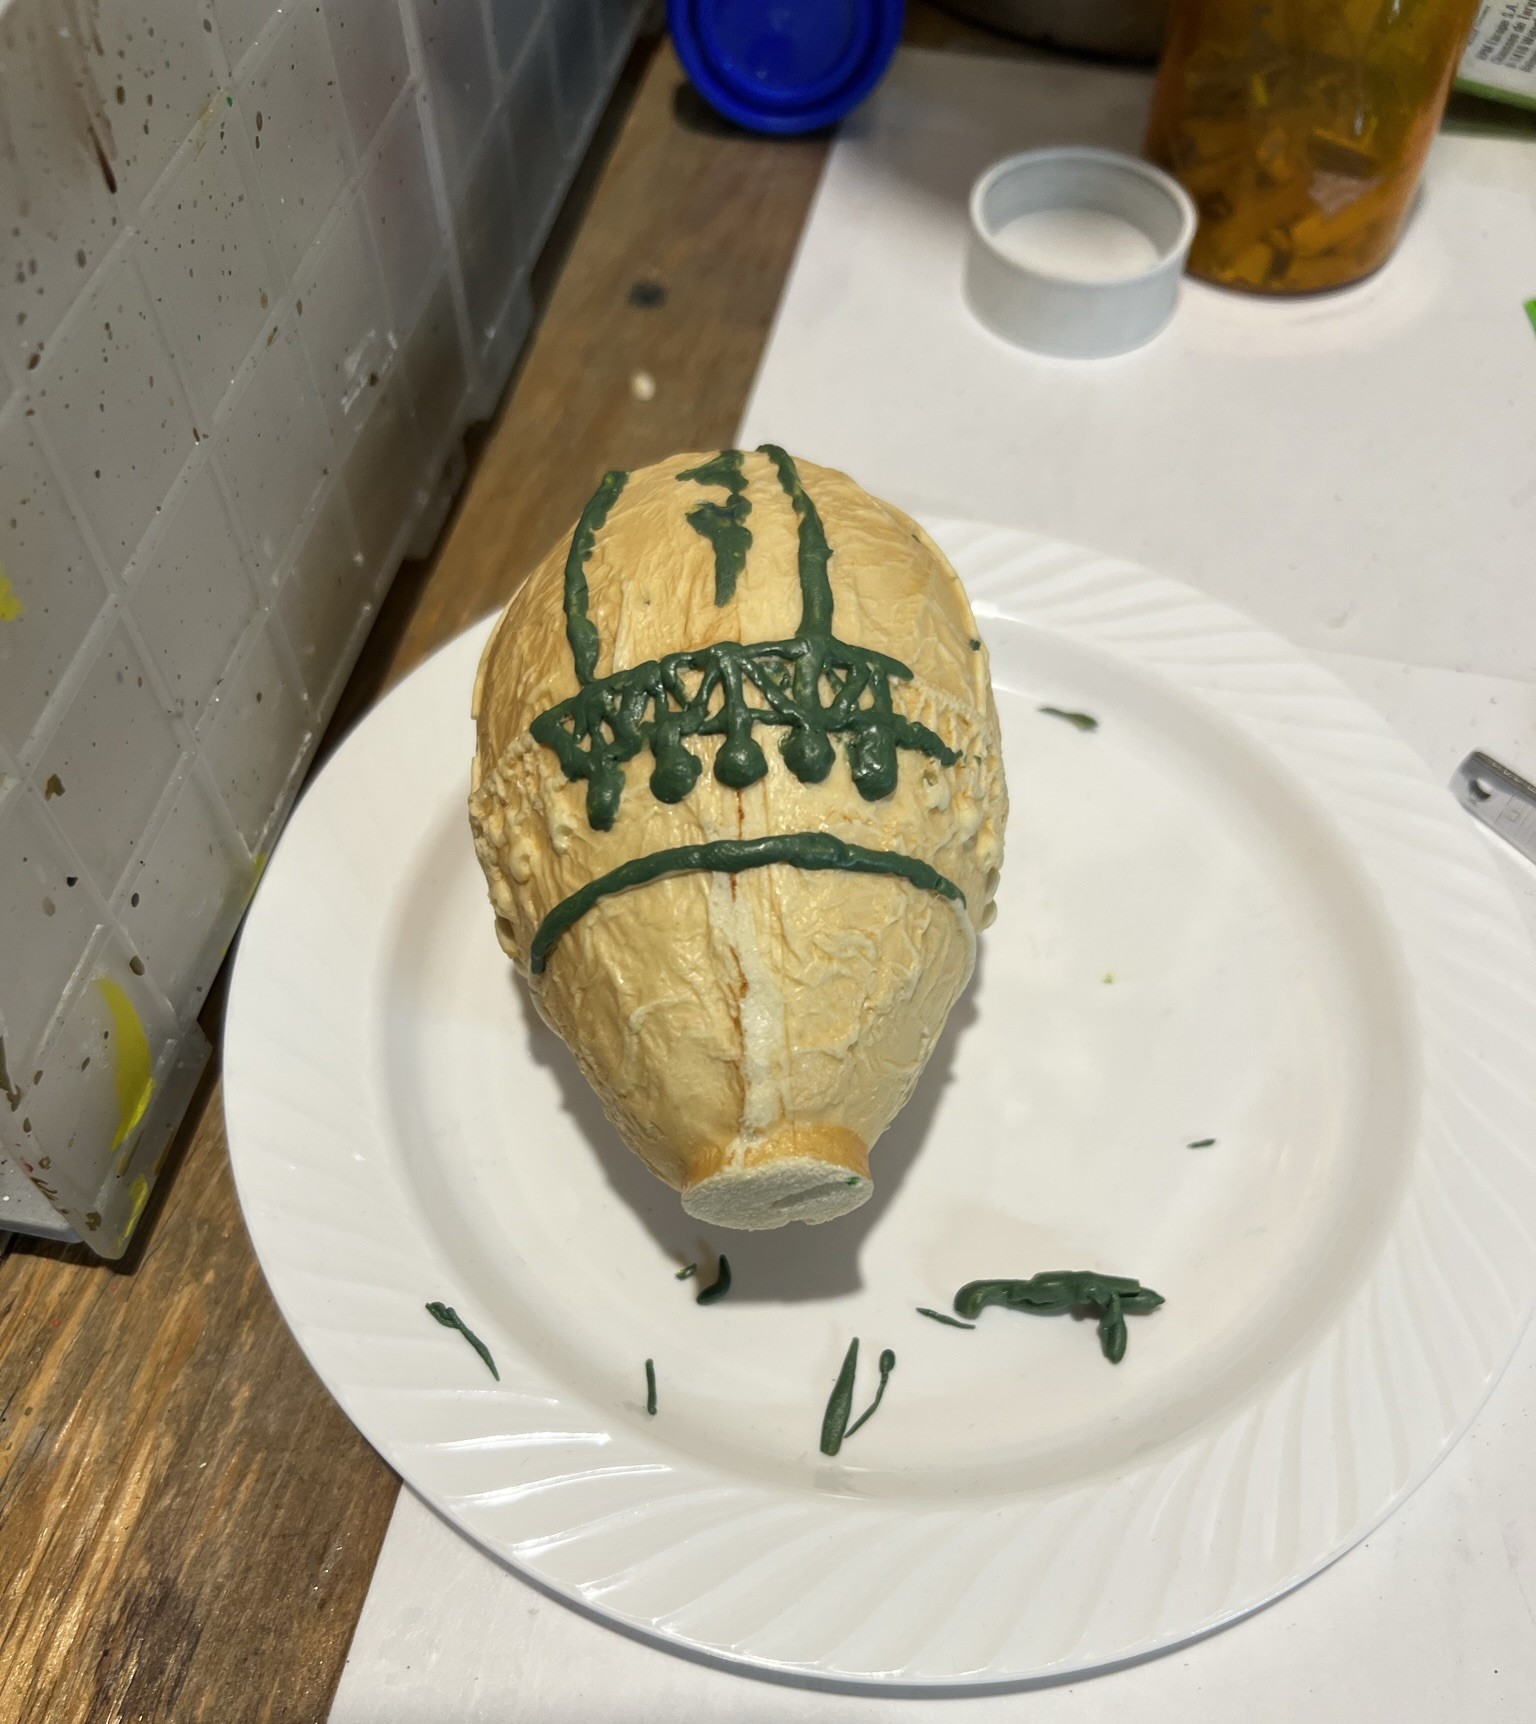
Sculpt with green stuff! That would allow me to bulk out the sculptor’s intended design as well as make the balloon “pop”…ok sorry about that…
Initial green stuff work.Completed green stuff modifications.
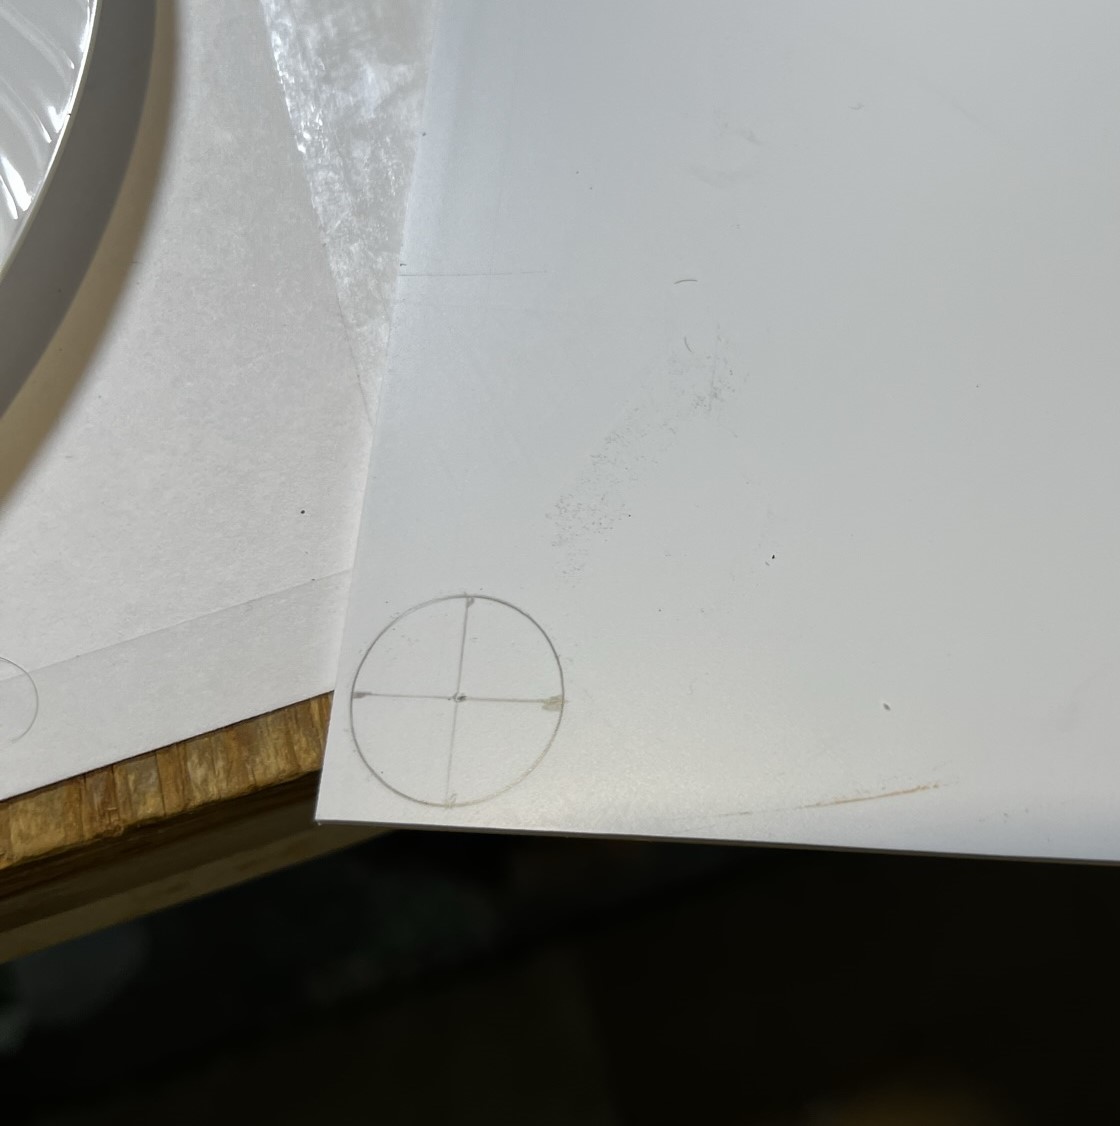
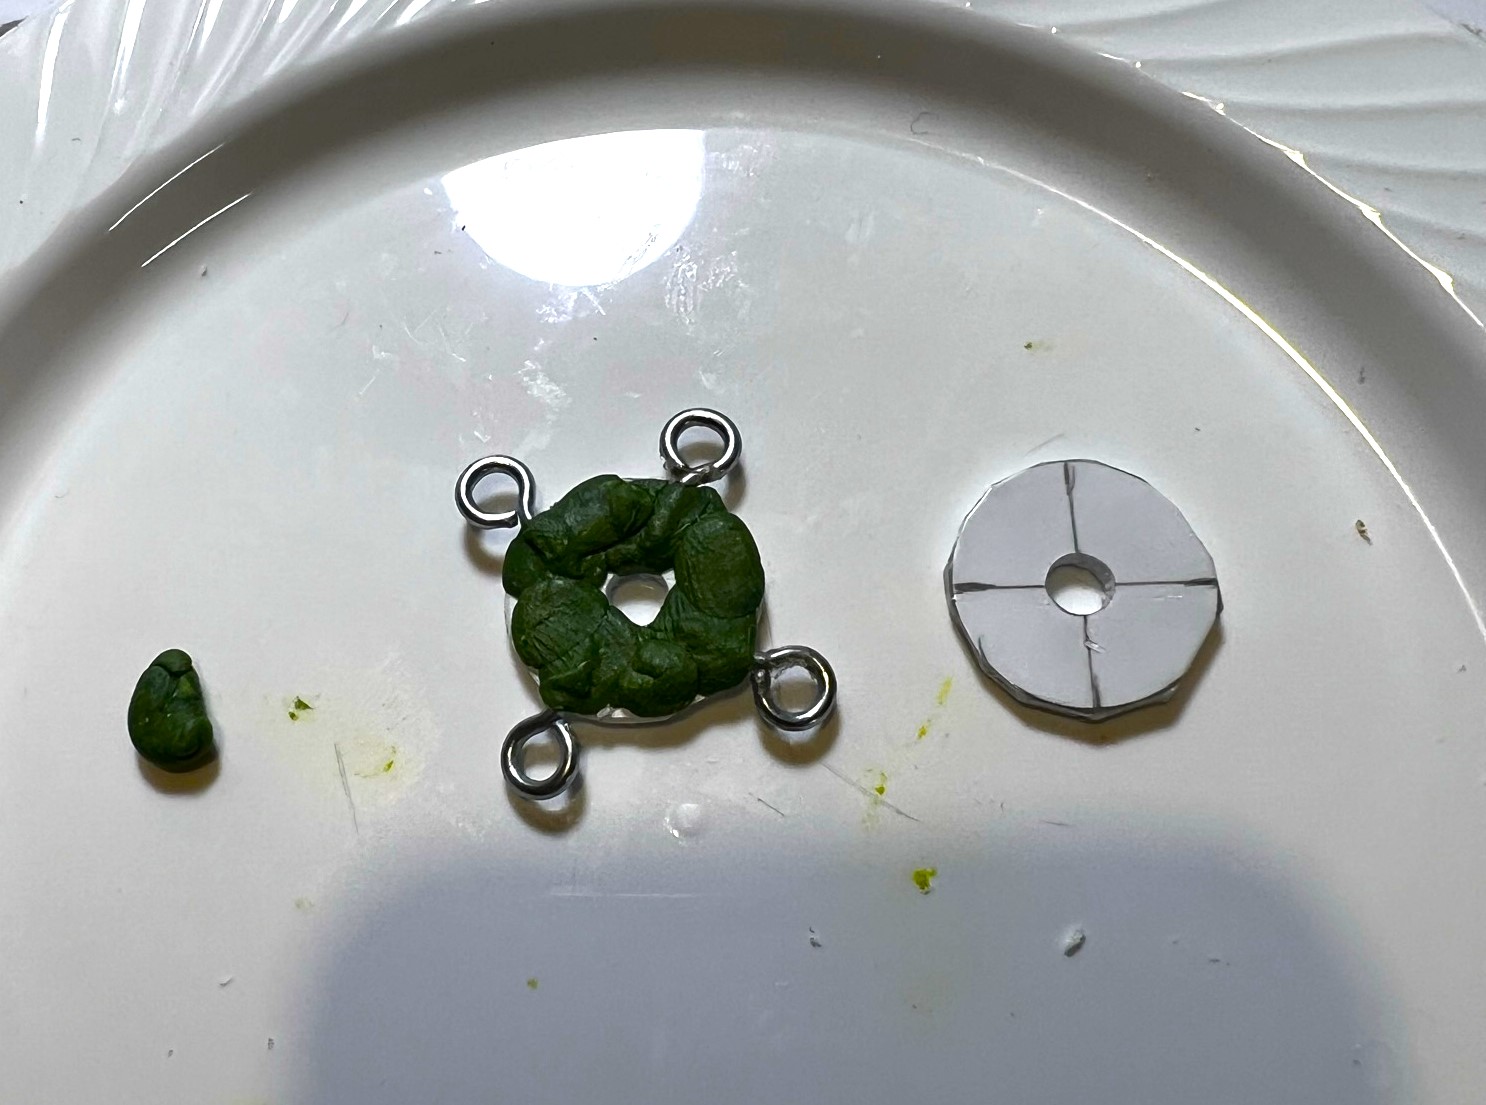
This took more time than I wanted but I did need to let one part cure before moving on and this was a 360-degree operation. Once this was done, the mounting options swirled around in my head. I did not like the idea of using the wires – plus I was hesitant to run the wires through the foam balloon itself. I wanted the look of ropes – and that meant something to tie the ropes onto – so I made an “oreo cookie” of sorts with styrene, green stuff, and screw eyes to fit the bottom of the balloon, and let that cure. Then I drilled lined-up holes in the middle of the cookie and the balloon for the insertion of the acrylic flight pole. Once these lined up, I affixed the cookie with more green stuff and made it part of the balloon itself.
Made 2 styrene circles……drilled out holes in both pieces……inserted green stuff and aligned 4 screw eyes……used an old paint brush handle to align with the hole in the balloon body, and glued that to the balloon overnight.
After this had cured, I covered the outside with more green stuff to make it match the balloon body.
Sculpting done on balloon.
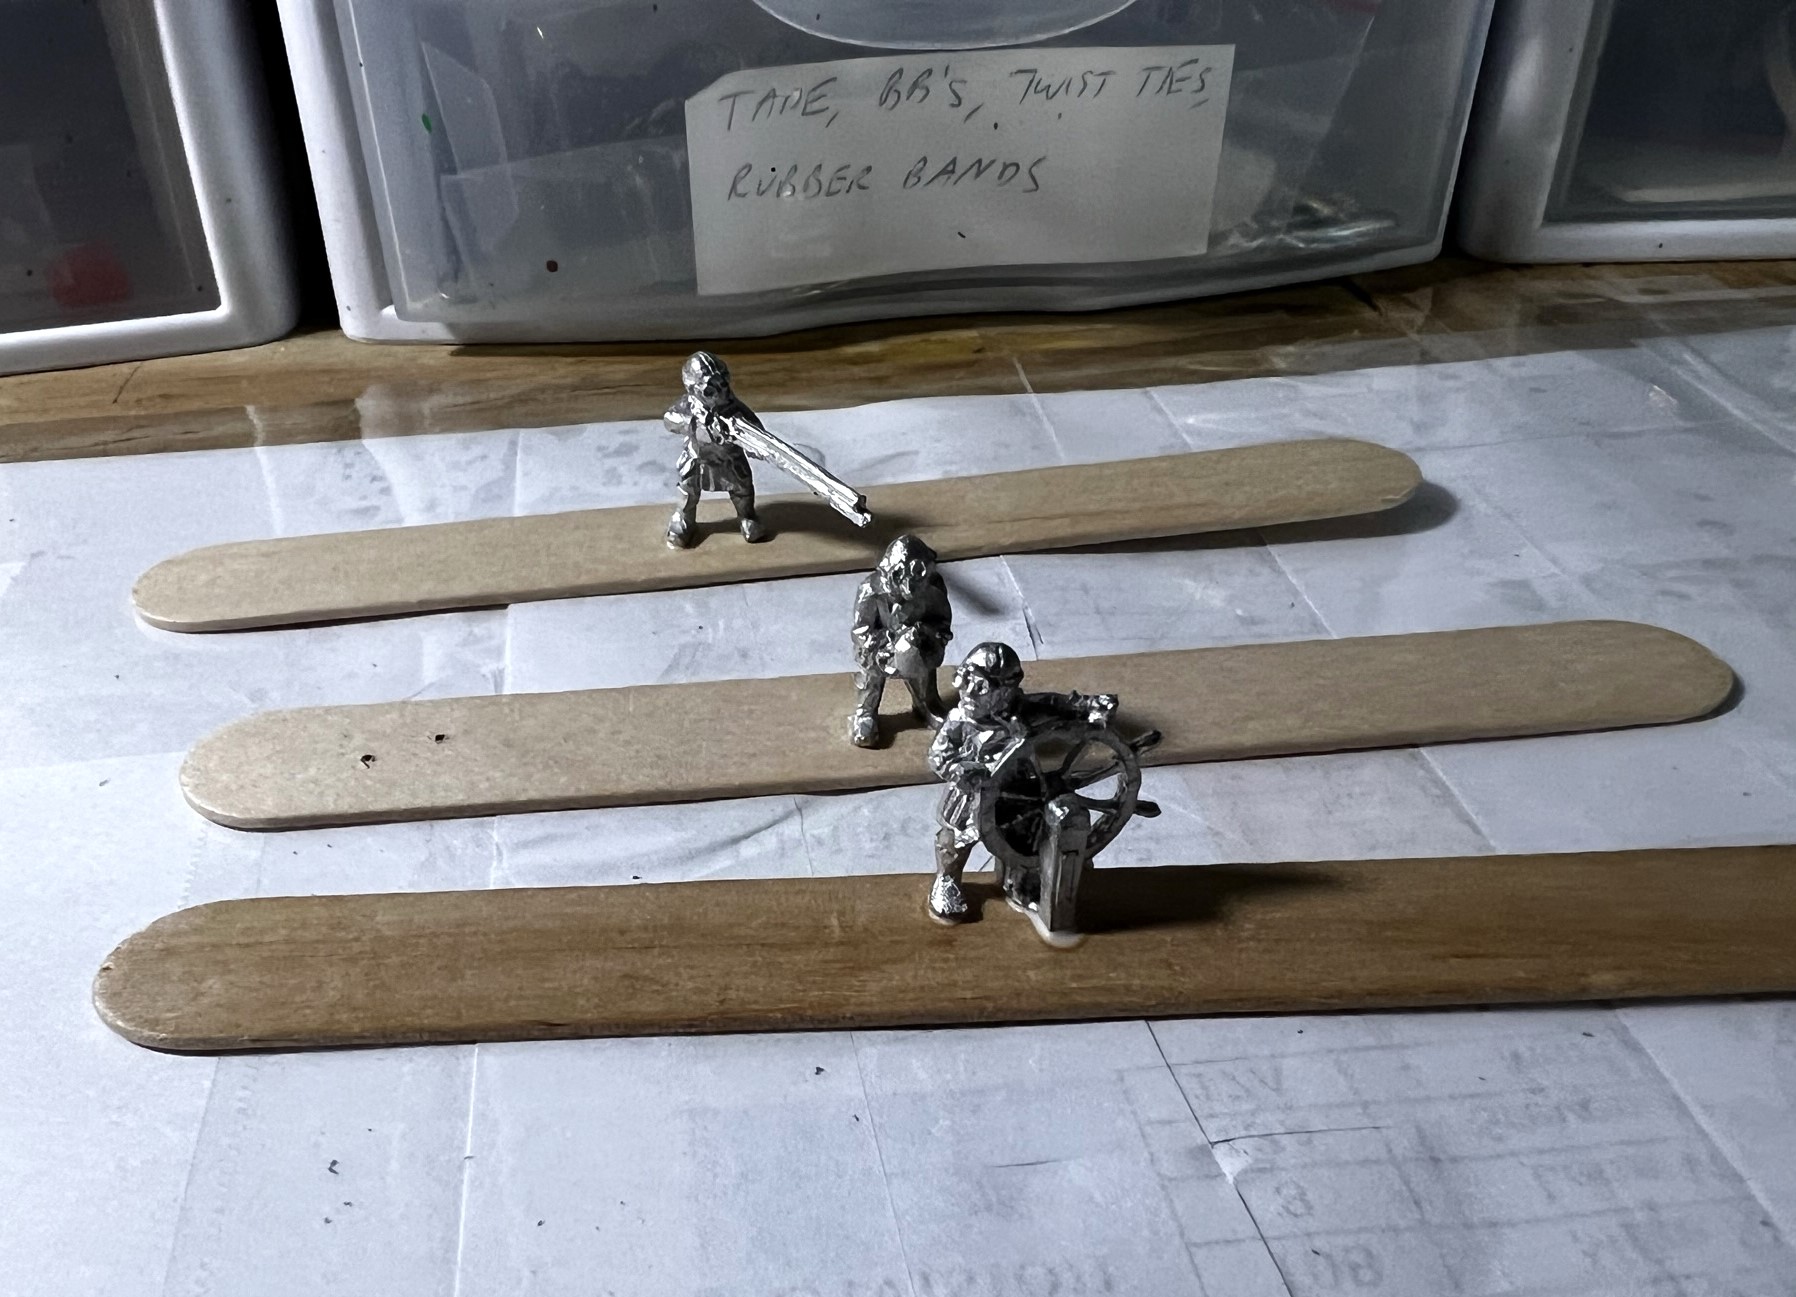
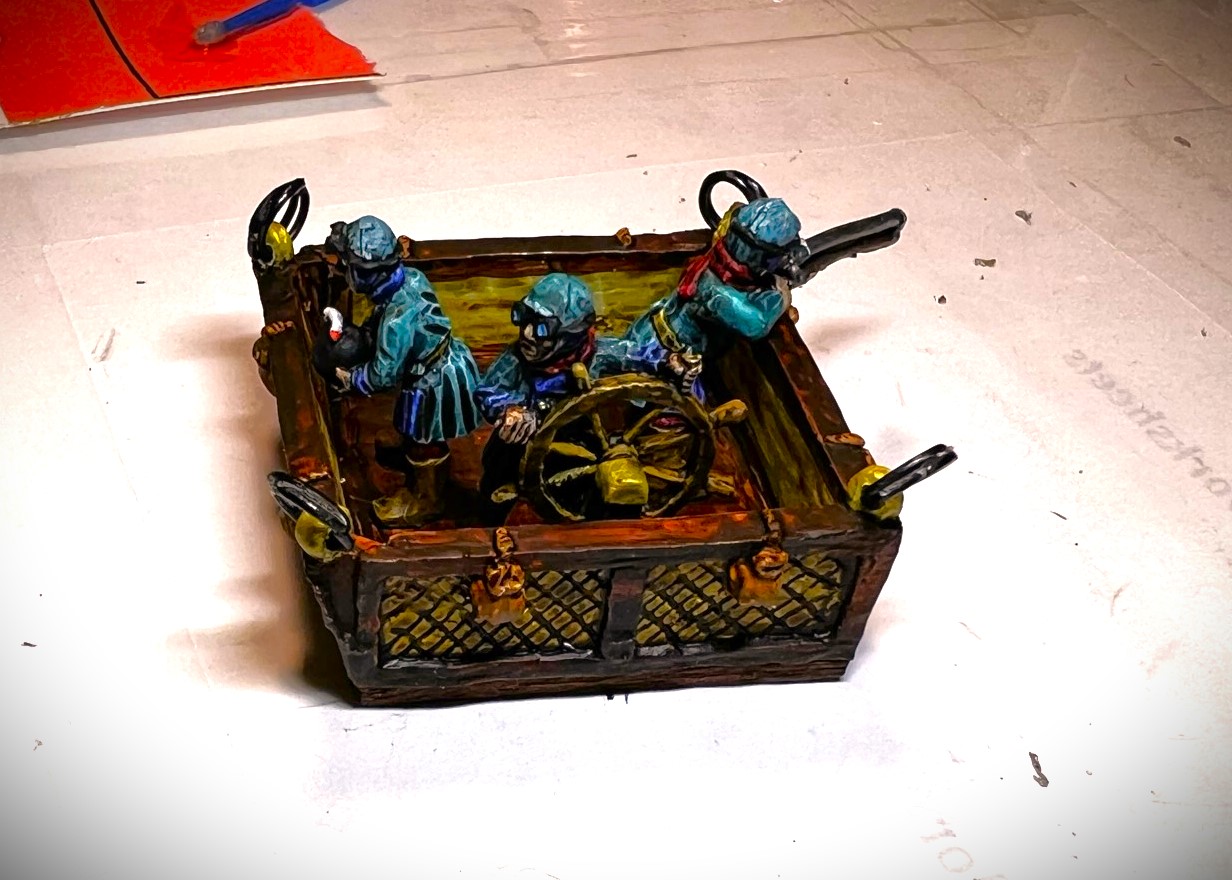
At this point I moved on to the crew and the basket. Because there were tiny prongs on the boots of the crew and corresponding tiny holes on the basket floor for their mounting, I took two approaches. One was to use a pin vise to drill tiny holes on three popsicle sticks to accommodate the boot prongs and secured the crew with a drop of PVA glue. The second was to modify the basket bottom with matchsticks so as to hide the holes in the basket bottom.
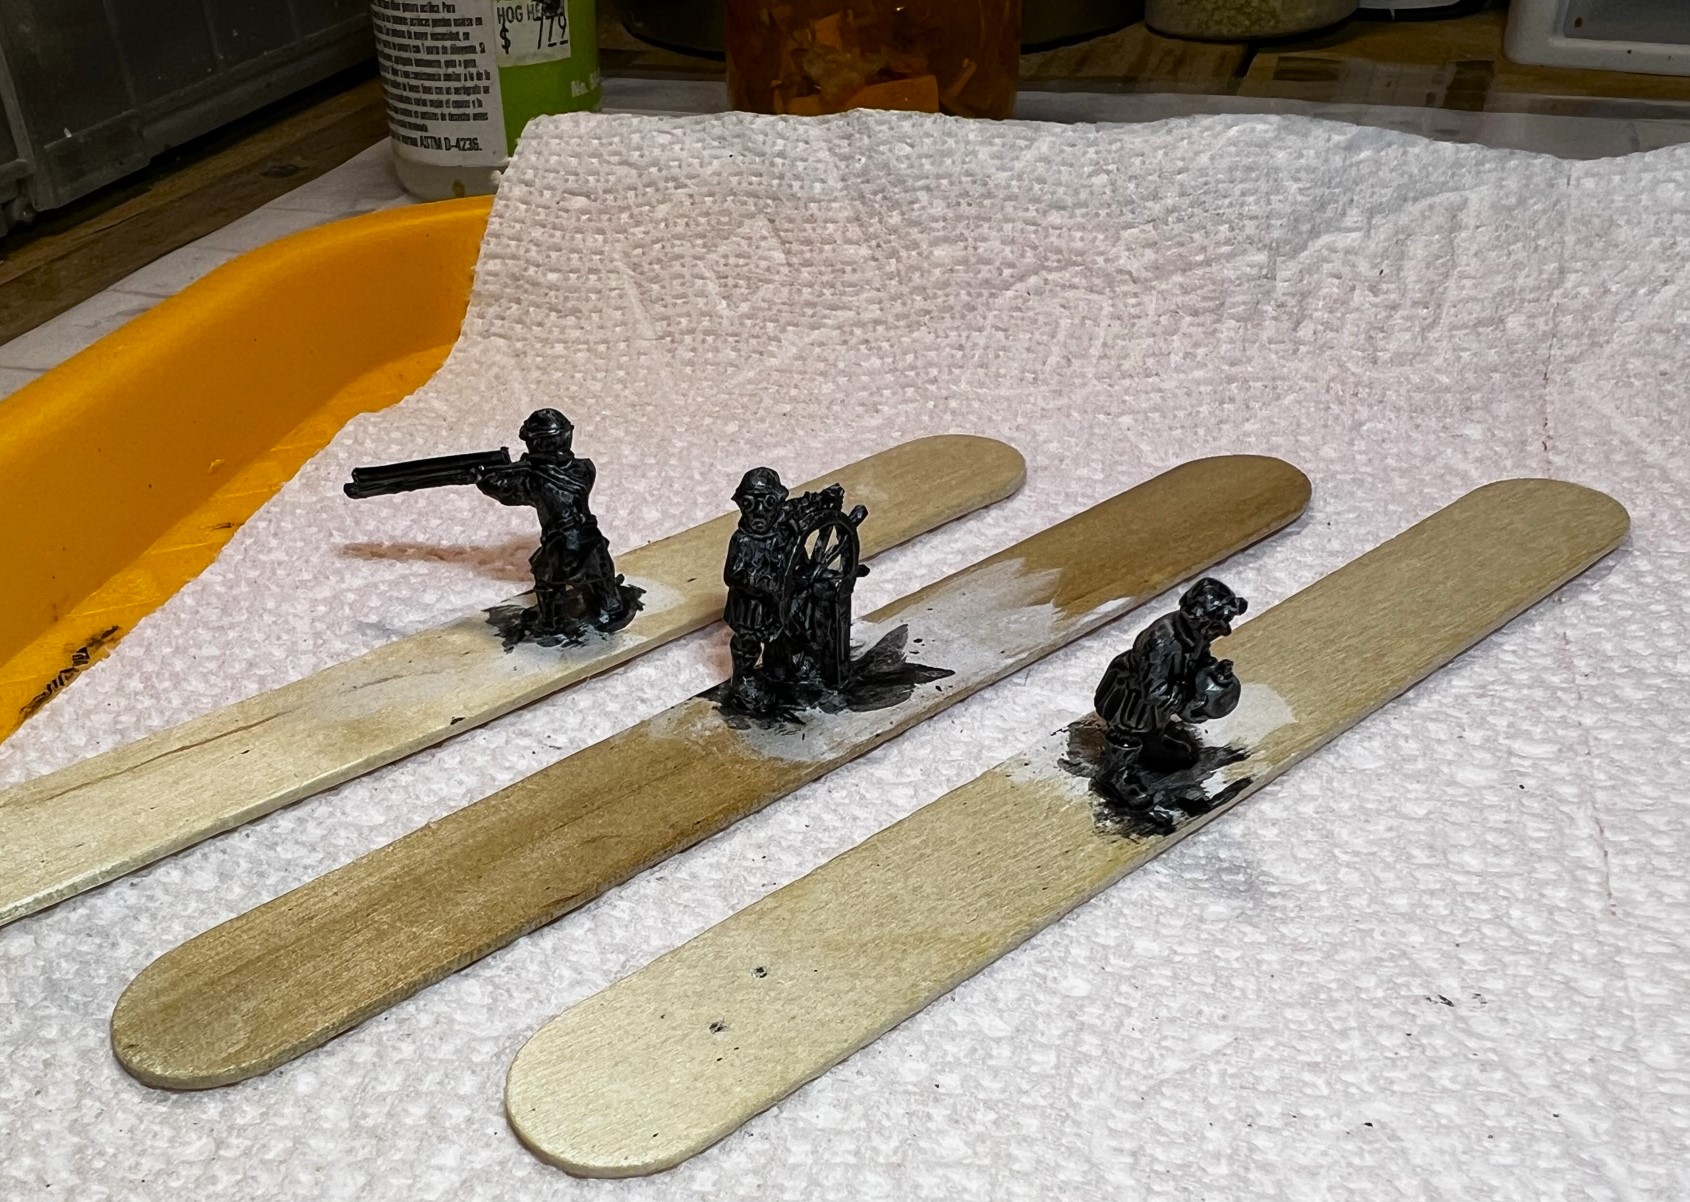
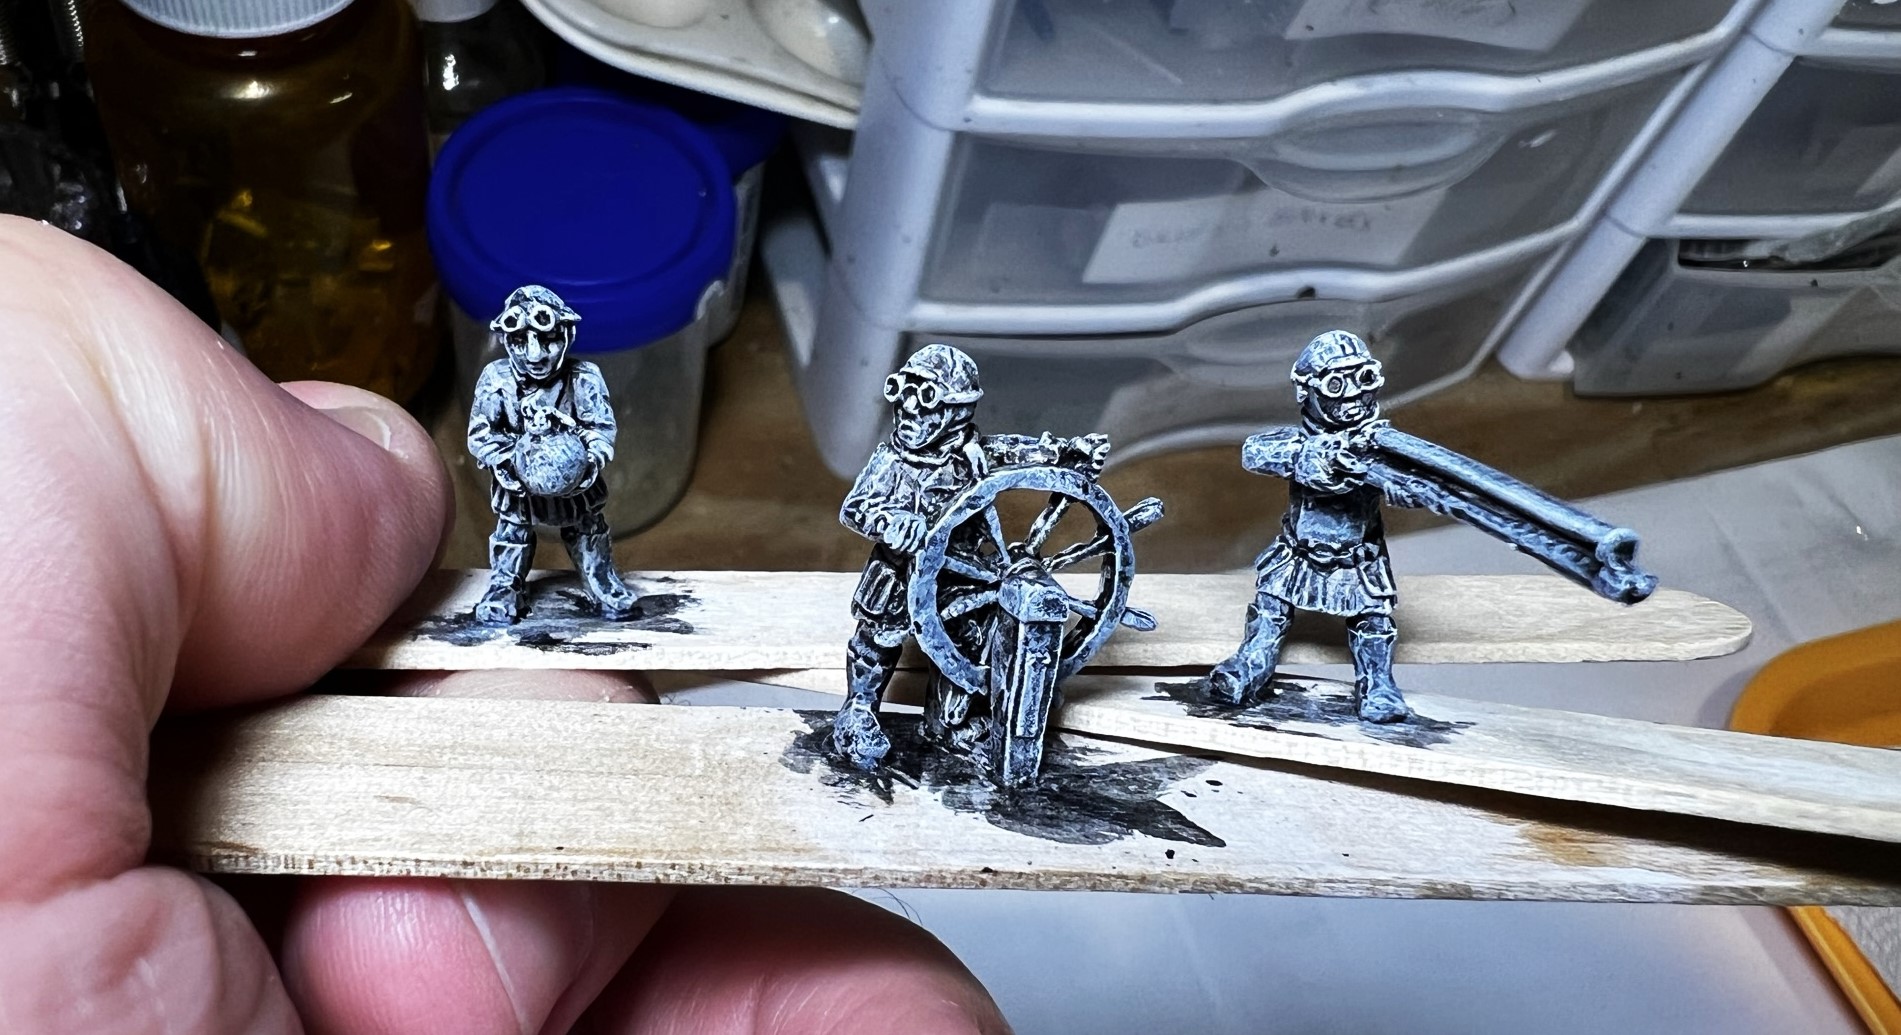
The crew mounted for painting.The basket bottom, primed, showing the holes.The basket bottom after some initial painting with the matchsticks glued to the bottom.
Back to the crew, I primed them then covered them with a dark wash (Secret Weapon Washes “Heavy Body Black”. Once this had dried, a strong white dry brush application was made.
After a dark wash applied……then a white dry brush.
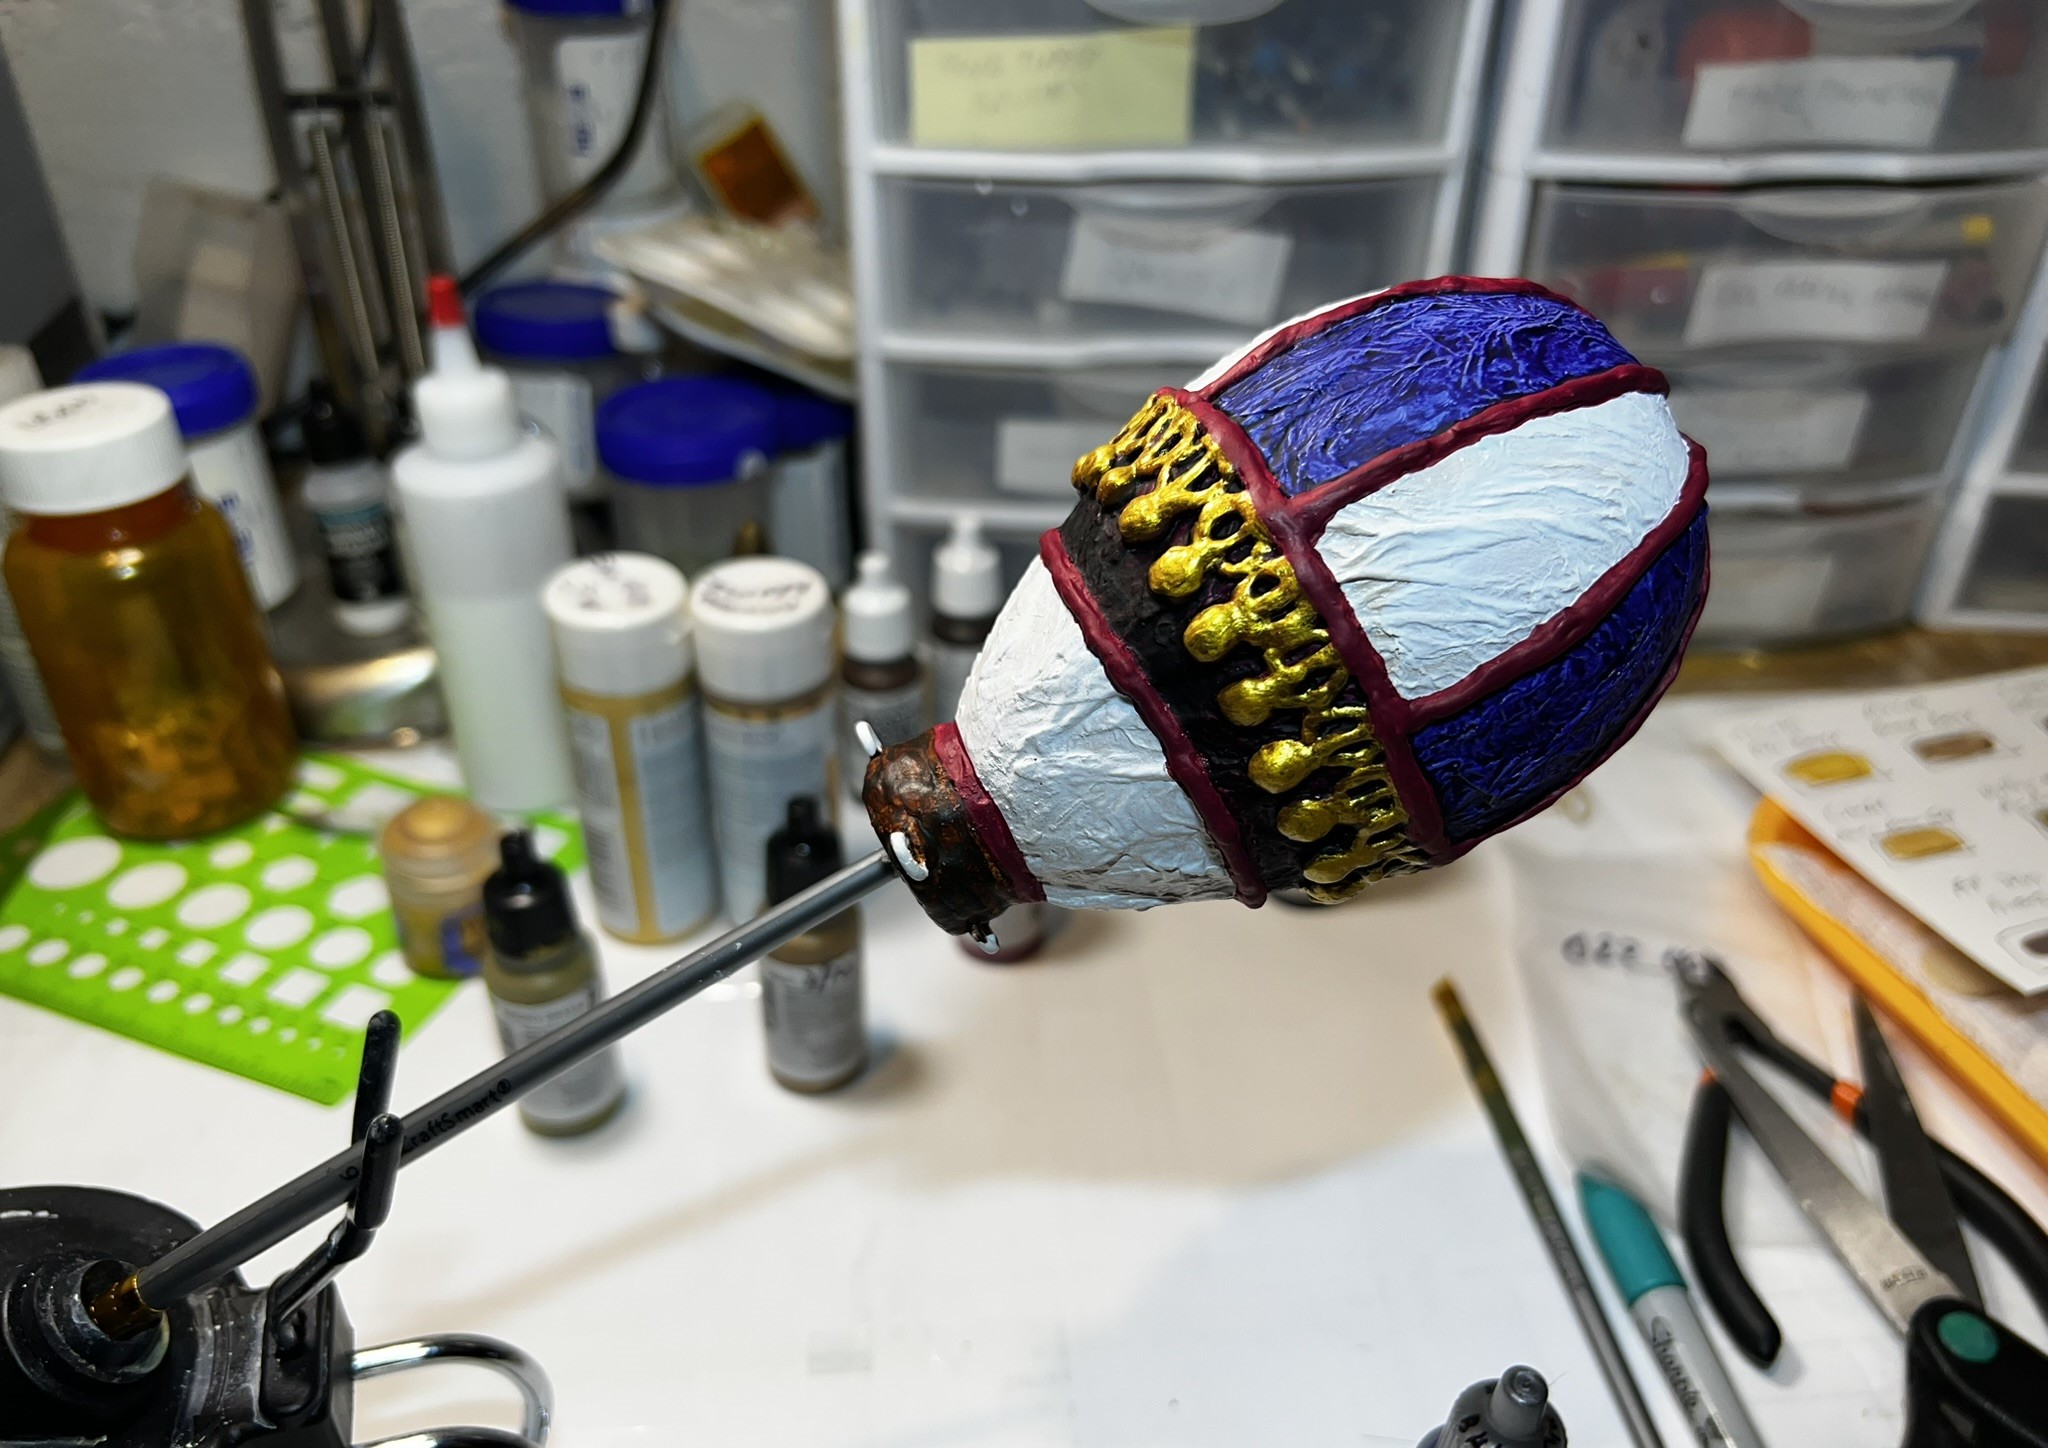
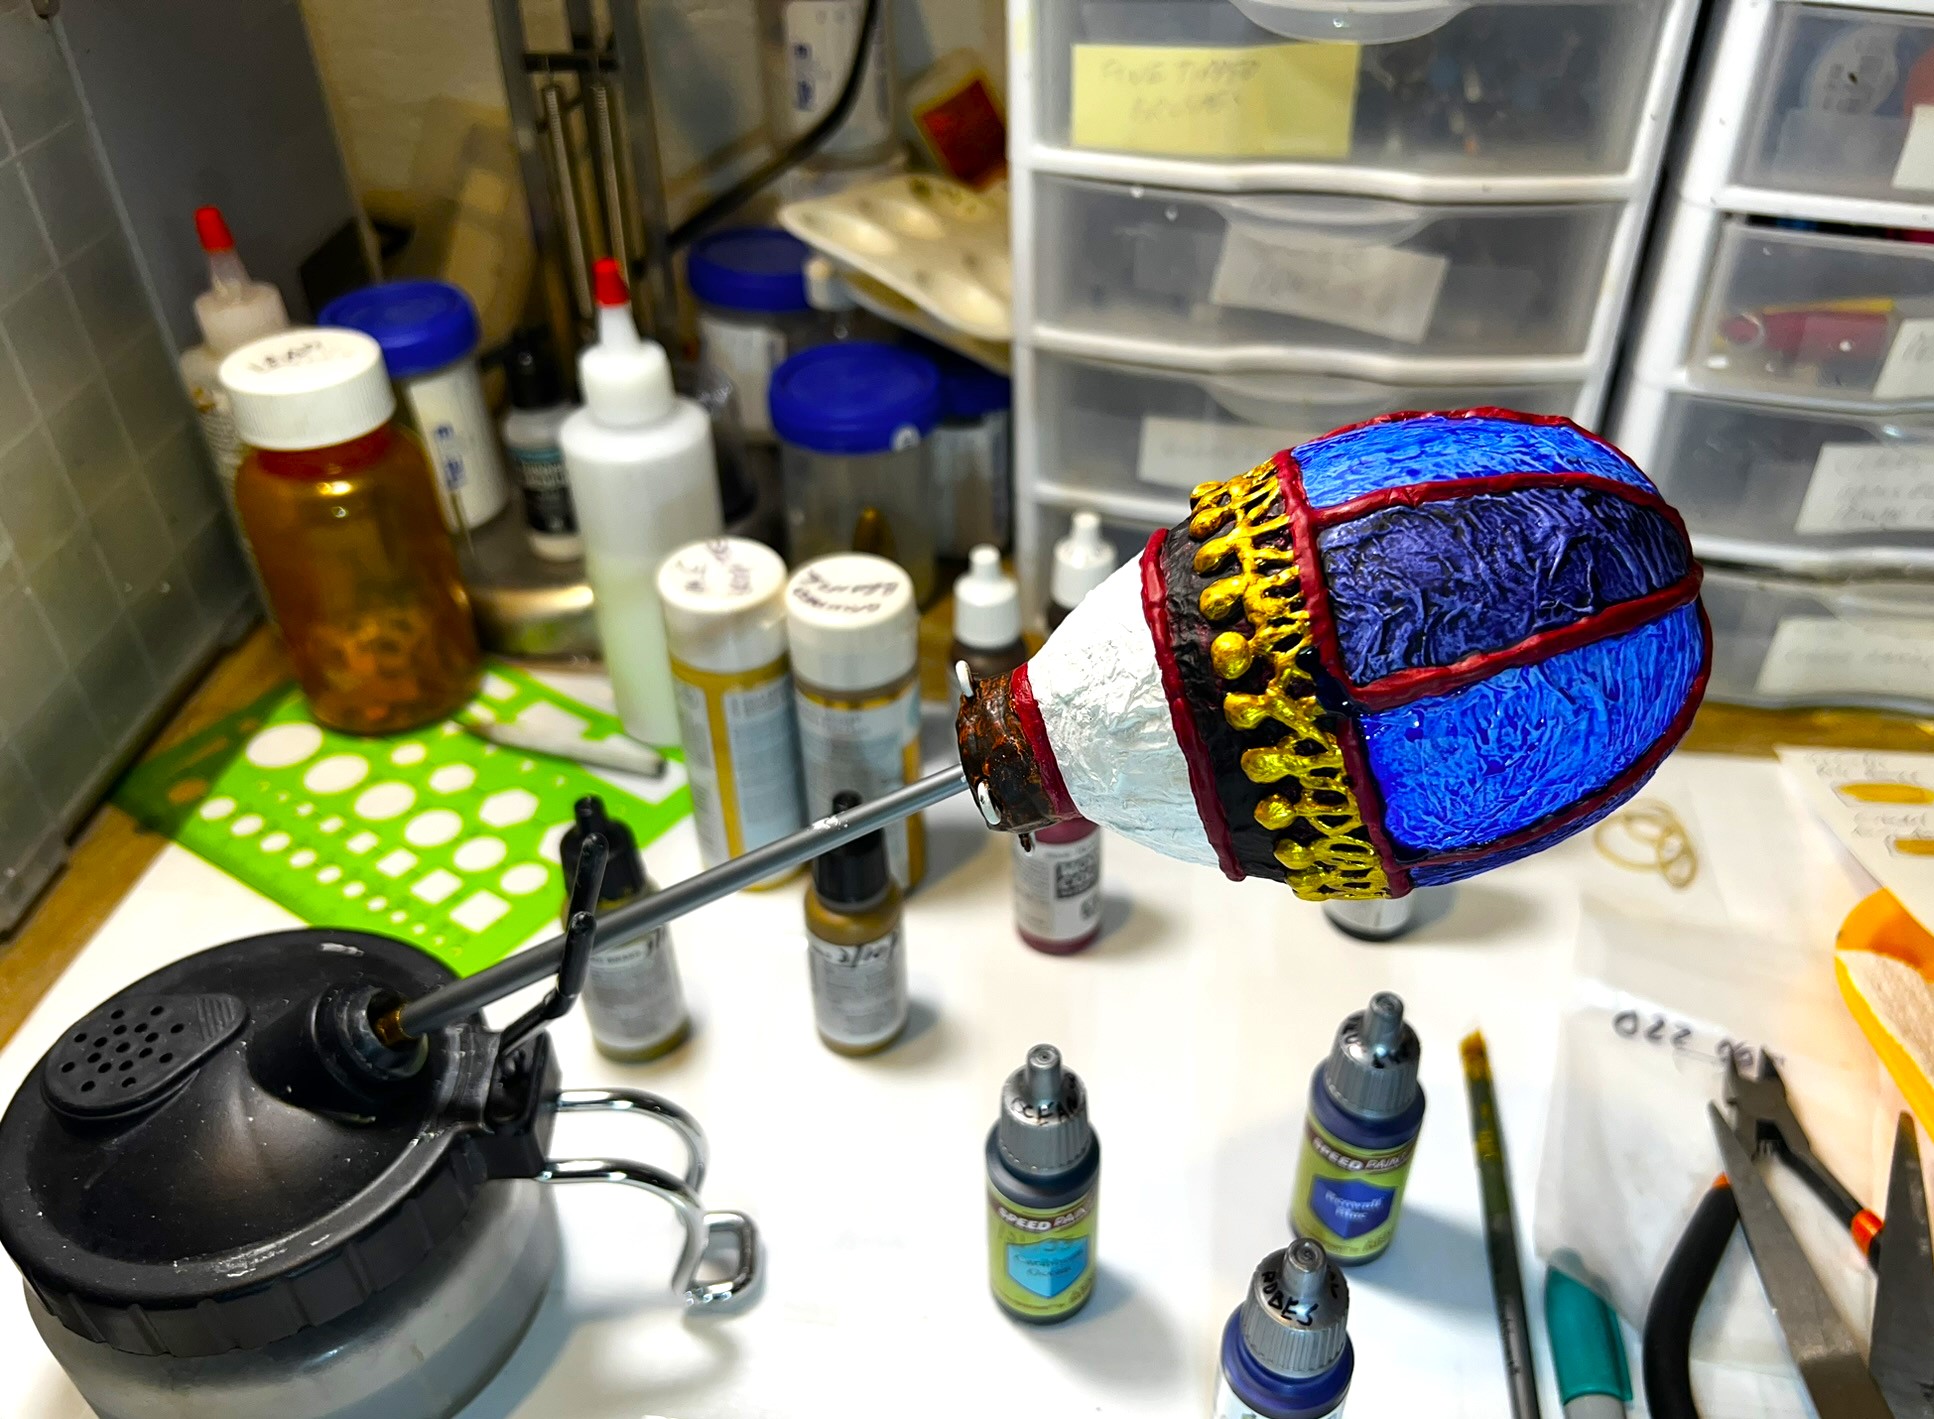
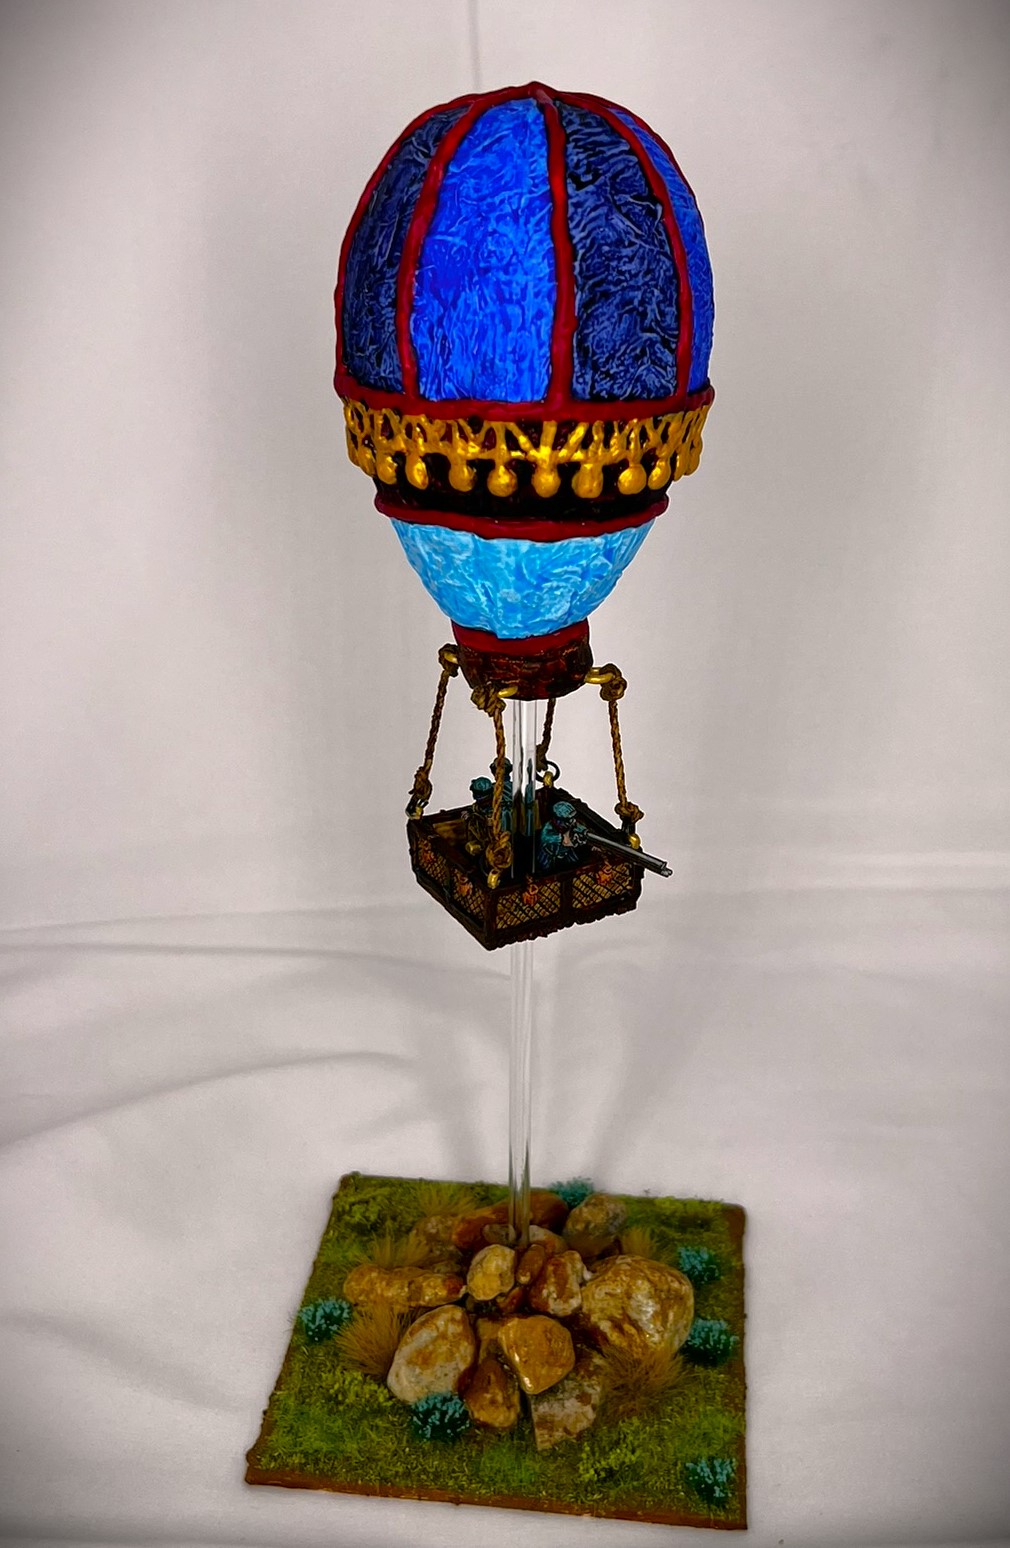
Returning to the balloon, I used my airbrush cleaning pot and an old brush handle to mount for priming and painting. As Munchkins love blue, I decided to follow the pattern of colors shown on the OZZ-110 “Hot Air Balloon & Crew“ picture on the website. I did have some trouble with one panel section that necessitated a repriming and repaint as the light blue contrast paint did not fully adhere – but that worked out fine (after a bit of repainting frustration of course). The basic sequence is shown in the gallery below.
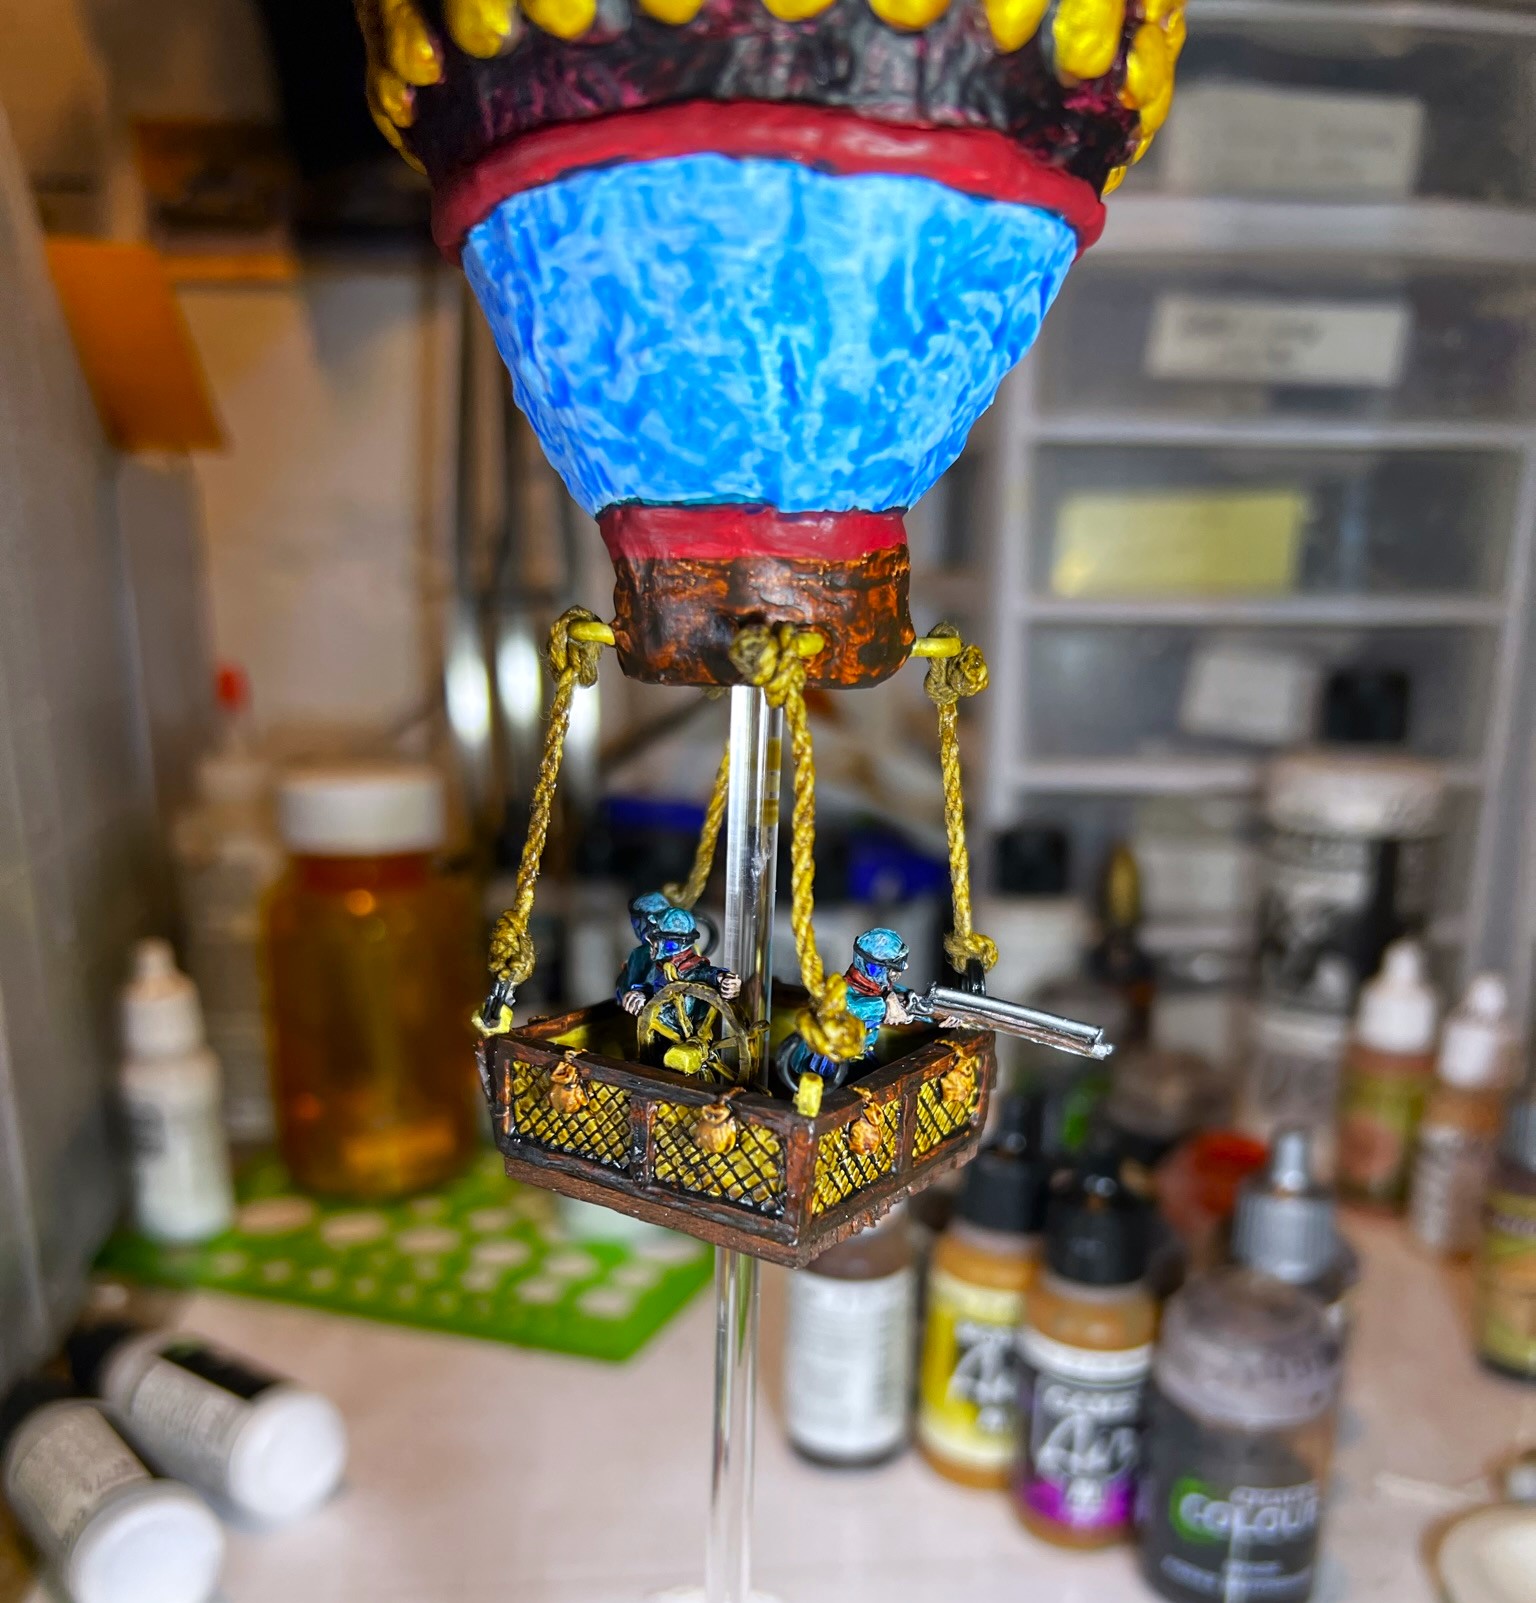
Moving back to the crew and the basket – I painted each separately then assembled them. As I mentioned before, I wanted to use ropes (using twine) instead of the wires to connect the balloon to the basket. That required drilling out the four mounting holes on the basket and inserting two jewelry rings into each hole. The rings in each hole were then glued to each other with Gorilla Glue as shown in the sequence below.
As for the acrylic flight stand pole and the metal base, they were affixed to the styrene 4″ x 4″ base. I then added small stones and green stuff to support the pole as it was not overly supported by just the metal stand. I tried to level it out as best as I could.
The next section I dreaded doing, because rigging a balloon like this could easily come out horribly if not relatively level. I went slowly with the twine and measures out lengths carefully and tried to use appropriate knots.
Initial rigging – relatively level.
I gave the twine a coat of PVA for stiffening, then gave them a speed paint hue to represent rope.
Then it was time to flock the base.
Base flocked.
Eye Candy
First, the balloon in it’s entirety from three angles.
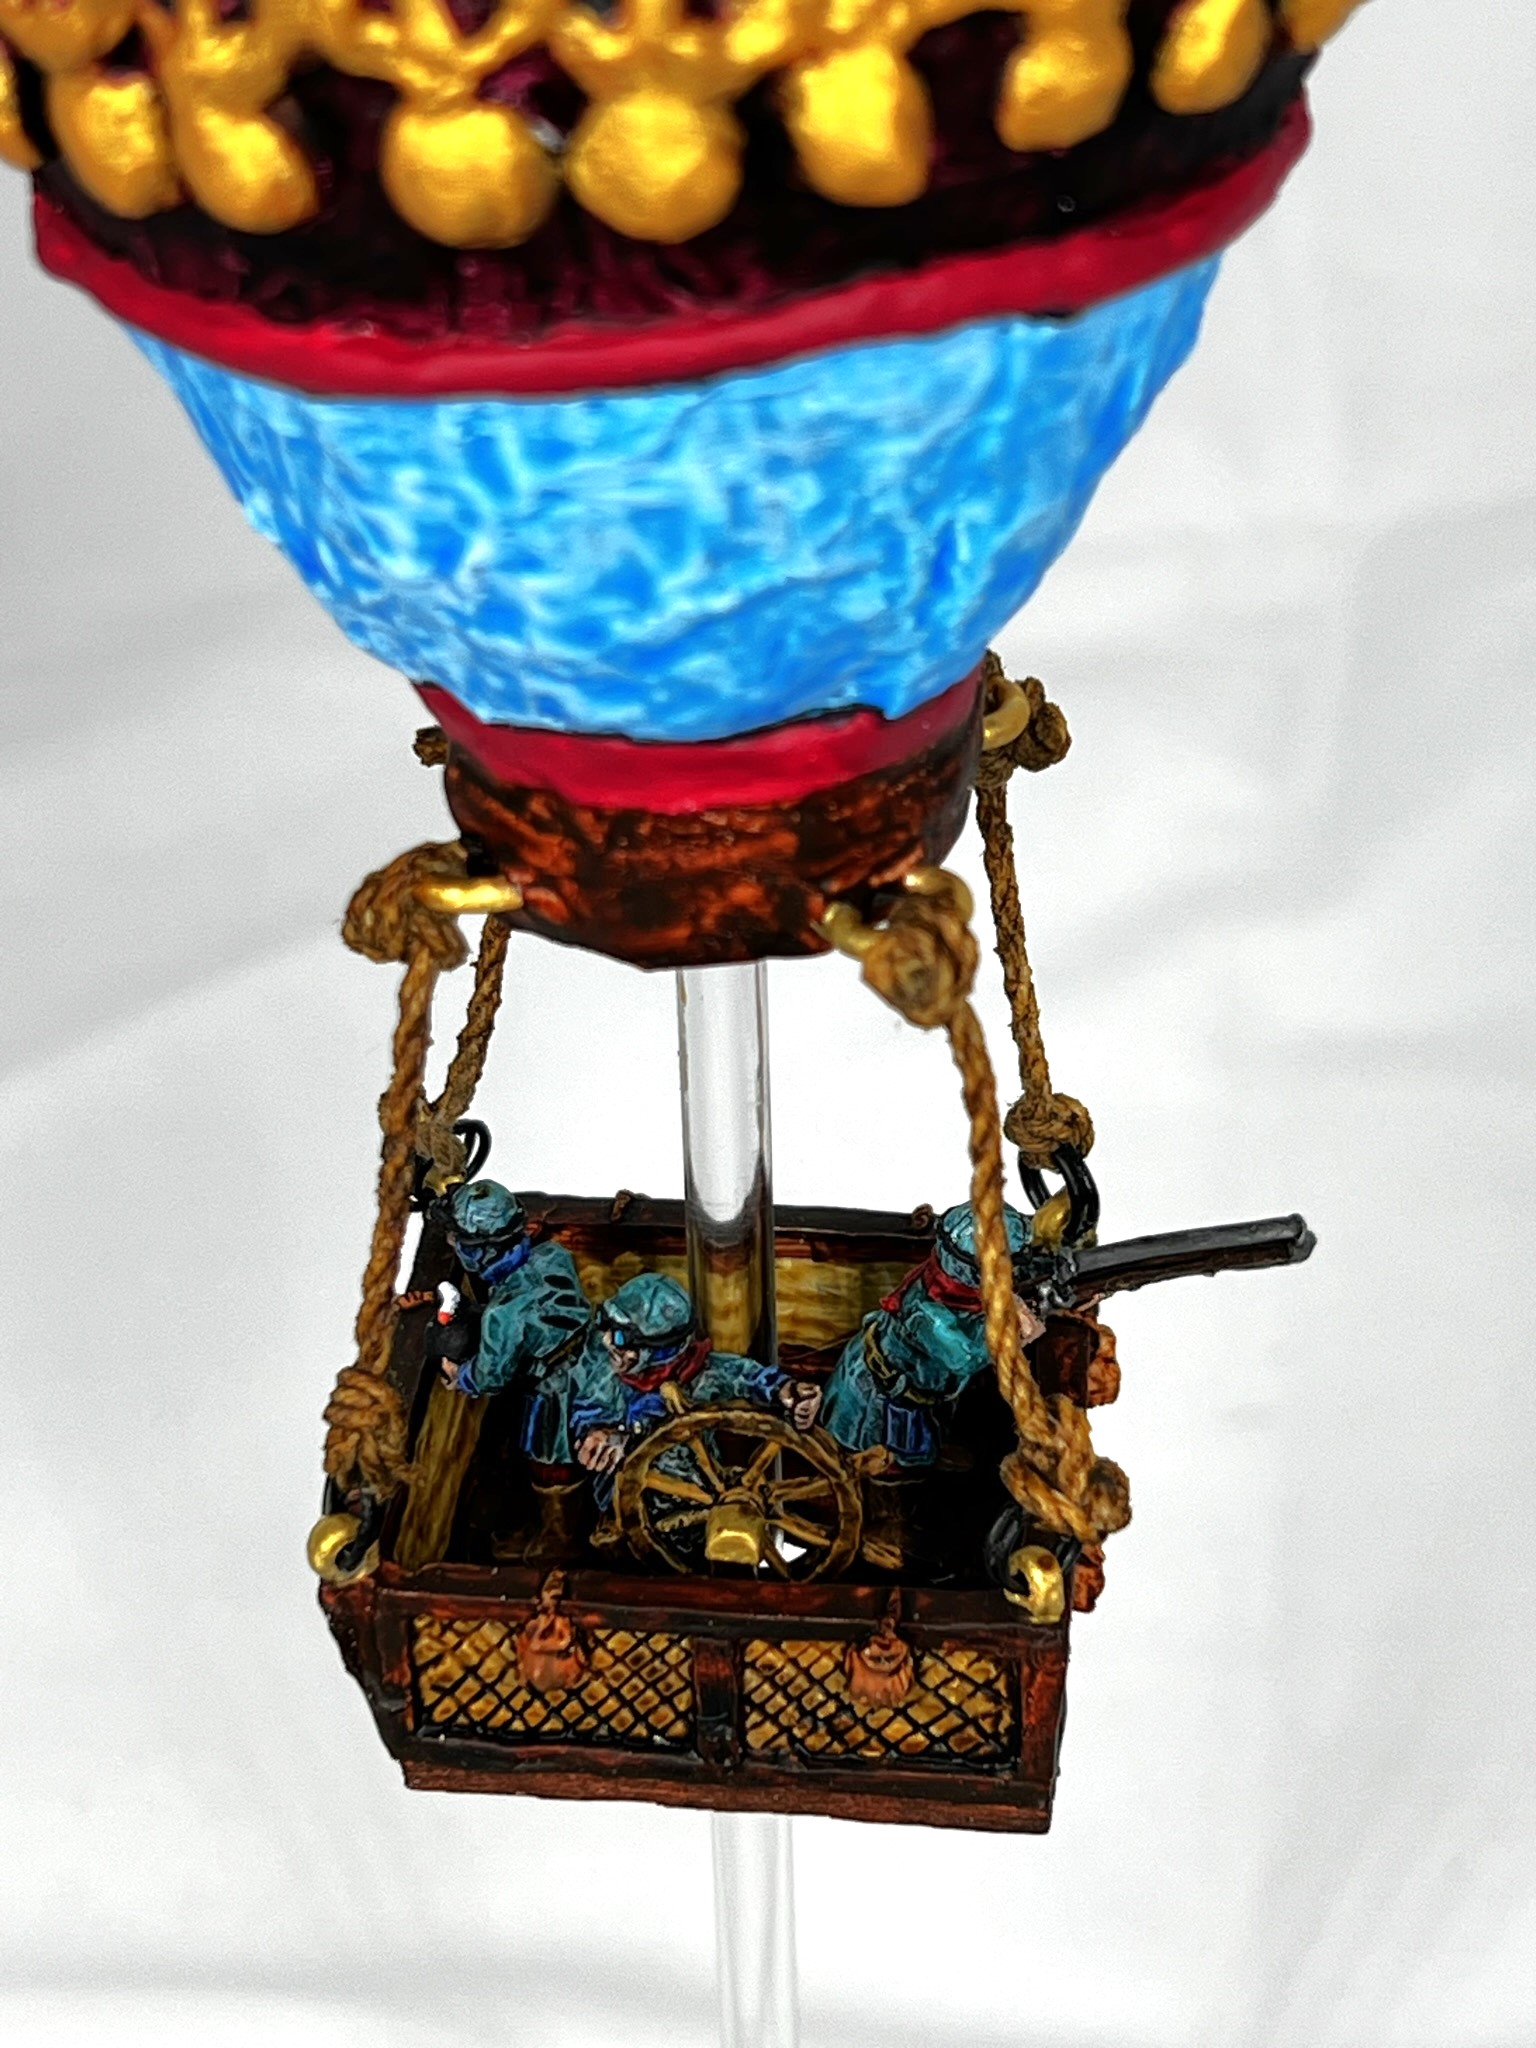
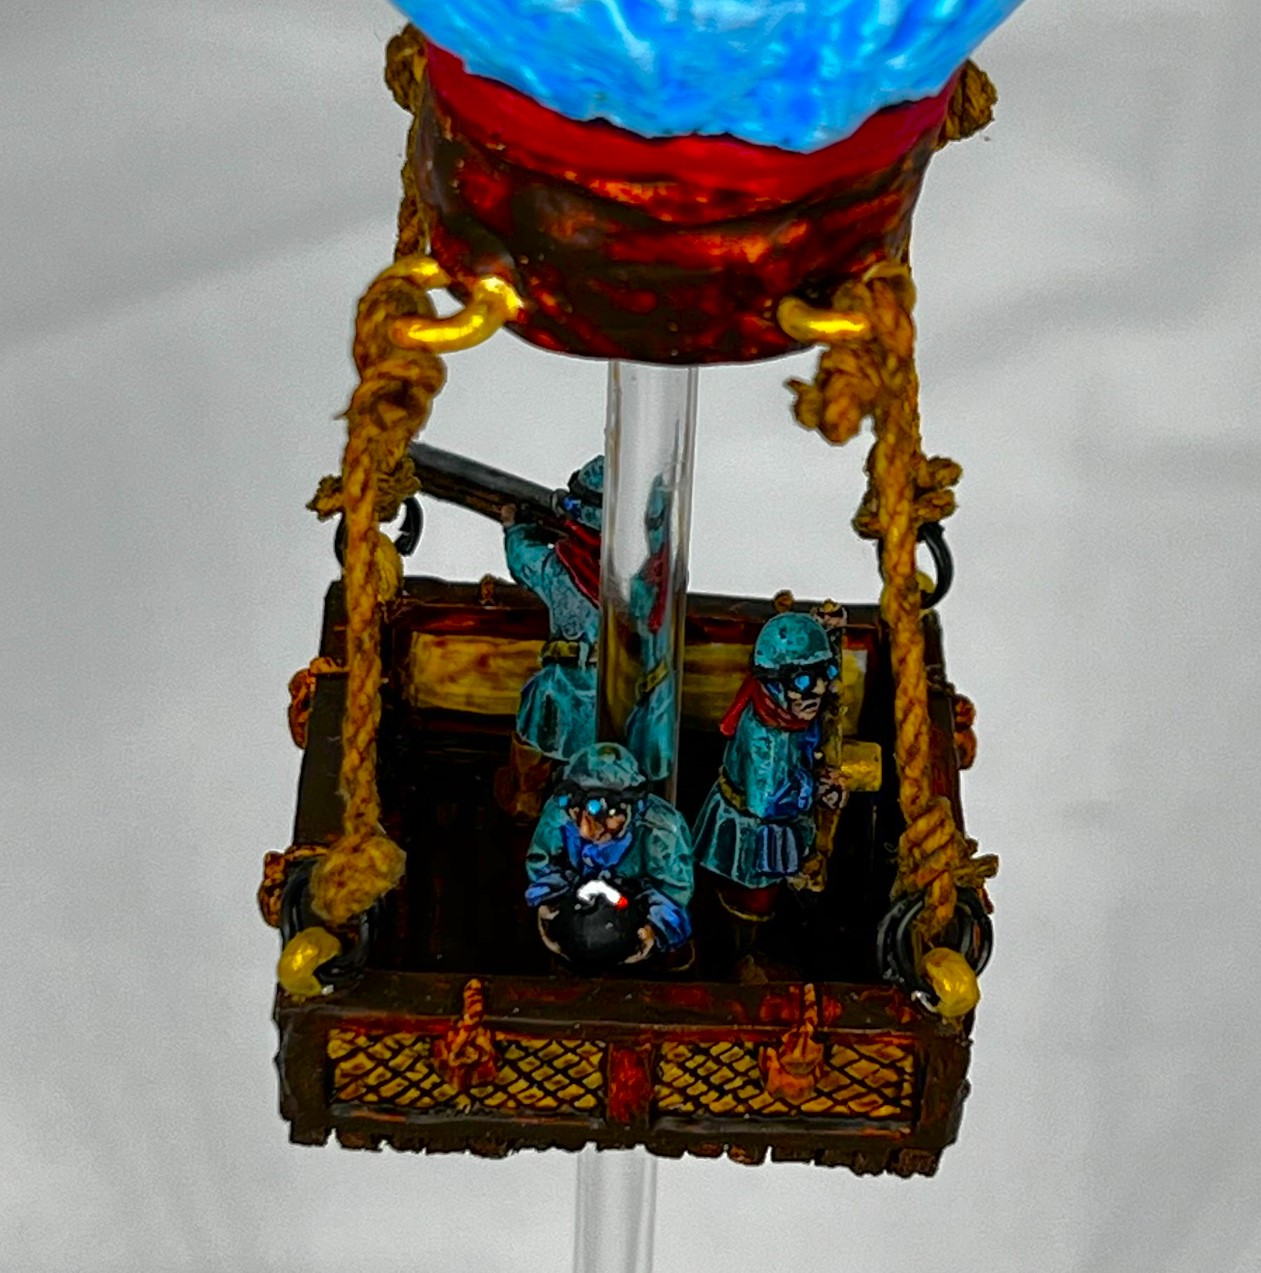
And three close-ups of the crew in the basket:
The CoxswainThe SharpshooterThe Bombardier
I really was happy to finally get this done – but wait – I need to transport this contraption! So, I took a 6.5 liter Really Useful Box, customized some foam padding, and voila!
This was a project that I am certain will be a lot of fun on the tabletop – until Great Flying Apes or similar attack – or the balloonists get shot up!
Next up – Gillikin stuff!
And yes, I still have more to come…
Miscellaneous details and references for those interested in that sort of thing:
For all of my previous posts on Wars of Ozz games, figures, units, and other related projects – please see this page.
PAINTS, INKS, GLAZES, SHADES, WASHES, PIGMENTS, FLOCKING, GLUES AND MORE THAT I USED ON THIS MUNCHKIN AEROSTAT & CREW:
Green stuff (kneadatite)
Plastruct styrene sheet
Vallejo Mecha Surface Primer “White”
Vallejo “Airbrush Thinner”
Gorilla Glue
Elmer’s PVA Glue
4 small screw eyes
Secret Weapon Washes “Heavy Body Black”
Vallejo Model Color “White”
Vallejo Model Color “Red”
Army Painter “Speed Paint – Murder Scene”
Vallejo Model Color “Wood Grain”
Battlefront “Black”
Vallejo Game Air “Beastly Brown”
Citadel “Auric Armour Gold”
Army Painter “Speed Paint – Beowulf Blue”
Army Painter “Speed Paint – Royal Robes”
Army Painter “Speed Paint – Caribbean Ocean”
Citadel “Contrast Paint – Aggaros Dunes”
Army Painter “Speed Paint – Crusader Flesh”
Citadel “Contrast Paint – Aethermatic Blue”
Citadel “Contrast Paint – Pylar Glacier”
Army Painter “Tanned Flesh”
MSP Core Colors “Fair Shadow”
Citadel “Contrast Paint – Baal Red”
Citadel “Contrast Paint – Snakebite Leather”
Citadel “Contrast Paint – Contrast Medium”
Citadel “Contrast Paint – Magmadroth Flame”
Vallejo Model Air “Gun Metal”
Martha Stewart Crafts “Pale Bronze”
Vallejo Model Air “Wood”
Army Painter “Speed Paint – Hardened Leather”
Vallejo Model Air “Bright Brass”
Citadel “Agrax Earthshade” (wash)
Citadel “Nuln Oil GLOSS” (wash/shade)
Vallejo “Flow Improver”
Vallejo Varnish “Satin Varnish”
Vallejo Mecha Varnish “Matte Varnish”
Small jewelry rings
Wooden matchsticks
Cotton twine
Citadel “Contrast Paint – Skeleton Horde”
Small rocks
Vallejo Earth Texture “Brown Earth Gel”
Army Painter “Battlefields Grass Green” (flocking)
Army Painter “Battlefield Field Grass” (flocking)
Shadow’s Edge Miniatures “Tan Tufts” (flocking)
Shadow’s Edge Miniatures “6mm Light Blue Tufts” (flocking)
Gamers Grass “Wild”
Again, as you may want to check out the Wars of Ozz figures’ range – there are two places to get them (and I make no money from this btw). The game rules and the figures are available from the following two places:
There was one group of miniatures that I did not get a chance to finish before my trip to HUZZAH! 2023 last month. It was the “Adventurers of Ozz“, OZZ-515. There are five figures in the SKU – the Kansas Farmgirl, The Tinman, the Lion, and the the Scarecrow – plus a little Toto-like dog.
These are all very useful figures to add as point roundups or just as themselves to add depth to a game. When attached to a unit, each figure (except Toto) increases different attributes of that unit. Speaking of Toto, the Kansas Farmgirl (think “Dorothy”) already has a small dog in her basket on the figure itself. So, after thinking of how to handle that duplication – I decided to make Toto as a separate game/objective marker instead of mounting him with The Kansas Farmgirl on the same base. I can foresee games with saving Toto as an objective perhaps.
As for the attributes, at 1 point of cost, each of the figures gives a special bonus:
Kansas Farmgirl – adds one to the Resolve of an attached unit (Resolve is basically a unit’s capacity to stay in the fight and face the enemy).
The Tinman – adds one to the Melee of an attached unit (Melee is fighting hand to hand).
The Lion – adds one to the Elan of an attached unit (Elan is basically a unit’s desire to close with the enemy or rally after taking losses).
The Scarecrow – adds one to the Marksmanship of an attached unit (Marksmanship is a measure of a unit’s accuracy with missile weapons).
I had really liked seeing the figures on the website – but decided to take a different painting tack on them than what you see there. I think mine are a bit more serious, maybe even dark. This was purposeful, as I wanted to be able to add them to any side’s forces, not just the Munchkin’s or Quadlings.
I also decided early on that they would get mounted on the round MDF bases from Wars of Ozz miniatures, and that I would get their bonus abilities/attributes printed off to be placed on the little MDF tabs that go on the MDF bases. This would give me flexibility in future games – so that if I wanted to make one of these a brigade or army commander for example – I could.
There was no assembly needed on these. As I have before, I’ll share a few WIP shots and then some eye candy of the Adventurers of Ozz. All of the paints that I used will be listed at the end as I normally do for those interested in that level of detail. As the 5 figures were very different, I used many different paints.
WIP Shots…
The figures as received.
I airbrush primed them white, and then used some SWW “Heavy Body Black” as a wash. I had this wash for a few years, and figured I’d use it instead of another before it turned to sludge.
After the wash applications had dried, I dry brushed all of them with white except for the Tinman, who I dry brushed in flat aluminum.
After this it was on to painting each figure one at a time. First up is the Kansas Farmgirl. I did choose to paint her without a headscarf as I thought the brown hair looked better. And yes, those are “ruby boots”.
Then, I moved onto the Tinman – which was my favorite figure. Love the weaponry, the tailpipe, the face! Why he has a scarf is a mystery – but I made that an Ozz green.
My next figure was the Lion – who I decided to give a “royal treatment” to in terms of rich purples and blues.
As for the Scarecrow – he looked quite creepy to me. So I decided to give him zombie flesh tones and cloak him in dark shades of green with a yellow scarf . I love that all of the weapons are so multi-barreled and weird.
Lastly, Toto the objective marker!
I subsequently varnished these with a coat of satin followed by one of matte and let them dry. Once dry, I glued them to the assembled MDF bases. Once that dried, I began serial flocking work.
First stage of 3 or 4 of flocking the bases.
While the first PVA/flocking coat dried, I went to my computer and used PowerPoint to make the abilities tabs.
Abilities tabs.
After the flocking dried, I had a pretty nice collection of Adventurers of Ozz!
The group from above (finished).Close up of the Lion.
On a side note, I had decided that I needed to up my photographic game. I had been using my airbrush spray booth as a photo booth, but wanted better. Therefore, I bought a moderately-priced photo booth that stores easily.
The new collapsible 24″ x 24″ booth. You can move the booth lights to come in from the side as well. I still need to work with it – but I do like it.
Plus here it is packed away:
It’s all in this little bag.
So, how about some eye candy from the new booth?
Eye Candy
Kansas Farmgirl
The Tinman
The Lion
The Scarecrow
Toto (the objective marker)
Group Shot
Hopefully, I can get these into a game soon. And I hope that my booth helps my photography too.
These were a lot of fun to paint. I hope that you liked enjoyed the post and the figures. Thanks for taking a look and any feedback is always appreciated. Do YOU have a favorite? I’d love to know!
What’s next for me hobby-wise – well I am not sure – but I might be going airborne…or not…
And yes, I still have more to come…
Miscellaneous details and references for those interested in that sort of thing:
For all of my previous posts on Wars of Ozz games, figures, units, and other related projects – please see this page.
PAINTS, INKS, GLAZES, SHADES, WASHES, PIGMENTS, FLOCKING, GLUES AND MORE THAT I USED ON THESE ADVENTURERS OF OZZ FIGURES:
1.25″ steel fender washers
1/2″ steel fender washer (Toto)
Gorilla Glue
Poster tack
Vallejo “Flow Improver”
Vallejo “Airbrush Thinner”
Vallejo Mecha Surface Primer “White”
Vallejo Premium Surface Primer “White”
Army Painter Airbrush Primer “White”
MDF round bases from Wars of Ozz miniatures
Secret Weapon Washes “Heavy Body Black”
Vallejo Model Color “White”
Tamiya “Flat Aluminum”
Army Painter “Speed Paint – Peachy Flesh”
Army Painter “Speed Paint – Fire Drake”
Army Painter “Speed Paint – Beowulf Blue”
Army Painter “Speed Paint – Royal Robes”
Citadel “Contrast Paint – Baal Red”
Citadel “Contrast Paint – Contrast Medium”
Vallejo Model Air “Gun Metal”
Citadel “Contrast Paint – Wyldwood”
Army Painter “Speed Paint – Hardened Leather”
Battlefront “Dark Leather”
Vallejo “Thinner Medium”
Army Painter “Speed Paint – Tyrian Navy”
Army Painter “Speed Paint – Broadsword Silver”
Citadel “Contrast Paint – Nazdreg Yellow”
Army Painter “Speed Paint – Cloudburst Blue”
Army Painter “Speed Paint – Talos Bronze”
Citadel “Spritstone Red” (Technical)
Citadel “Agrax Earthshade” (wash)
Vallejo Mecha Color “Steel”
Citadel “The Fang”
Vallejo Model Color “Neutral Grey”
Vallejo Model Color “Sunny Skin Tone”
Citadel “Nuln Oil GLOSS” (wash/shade)
PS Model Color “US Olive Drab”
Army Painter “Speed Paint – Ancient Honey”
Citadel “Contrast Paint – Flesh Tearers Red”
Citadel “Contrast Paint – Iyanden Yellow”
Army Painter “Speed Paint – Purple Swarm”
Citadel “Contrast Paint – Ironjawz Yellow”
Citadel “Contrast Paint – Apothecary White”
Martha Stewart Crafts “Pale Bronze”
Citadel “Contrast Paint – Plaguebearer Flesh”
Army Painter “Speed Paint – Camo Cloak”
Army Painter “Speed Paint – Shamrock Green”
Vallejo Model Color “Wood Grain”
Citadel “Tesseract Glow”
Vallejo Varnish “Satin Varnish”
Vallejo Mecha Varnish “Matte Varnish”
Elmer’s PVA Glue
Army Painter “Battlefields Grass Green” (flocking)
Army Painter “Battlefield Field Grass” (flocking)
Gamer’s Grass “Green Meadow” (flocking)
Gamer’s Grass “Wild” (flocking)
Shadow’s Edge Miniatures “6mm Light Blue Tufts” (flocking)
Army Painter “Battlefields Field Grass” (flocking)
Army Painter “Battlefields Meadow Flowers” (flocking)
Army Painter “Lowland Shrubs” (flocking)
Army Painter “Meadow Flowers” (flocking)
Brown Sharpie pen
Small stones (flocking)
Small oak twigs (flocking)
Avery shipping labels
Again, as you may want to check out the Wars of Ozz figures’ range – there are two places to get them (and I make no money from this btw). The game rules and the figures are available from the following two places: