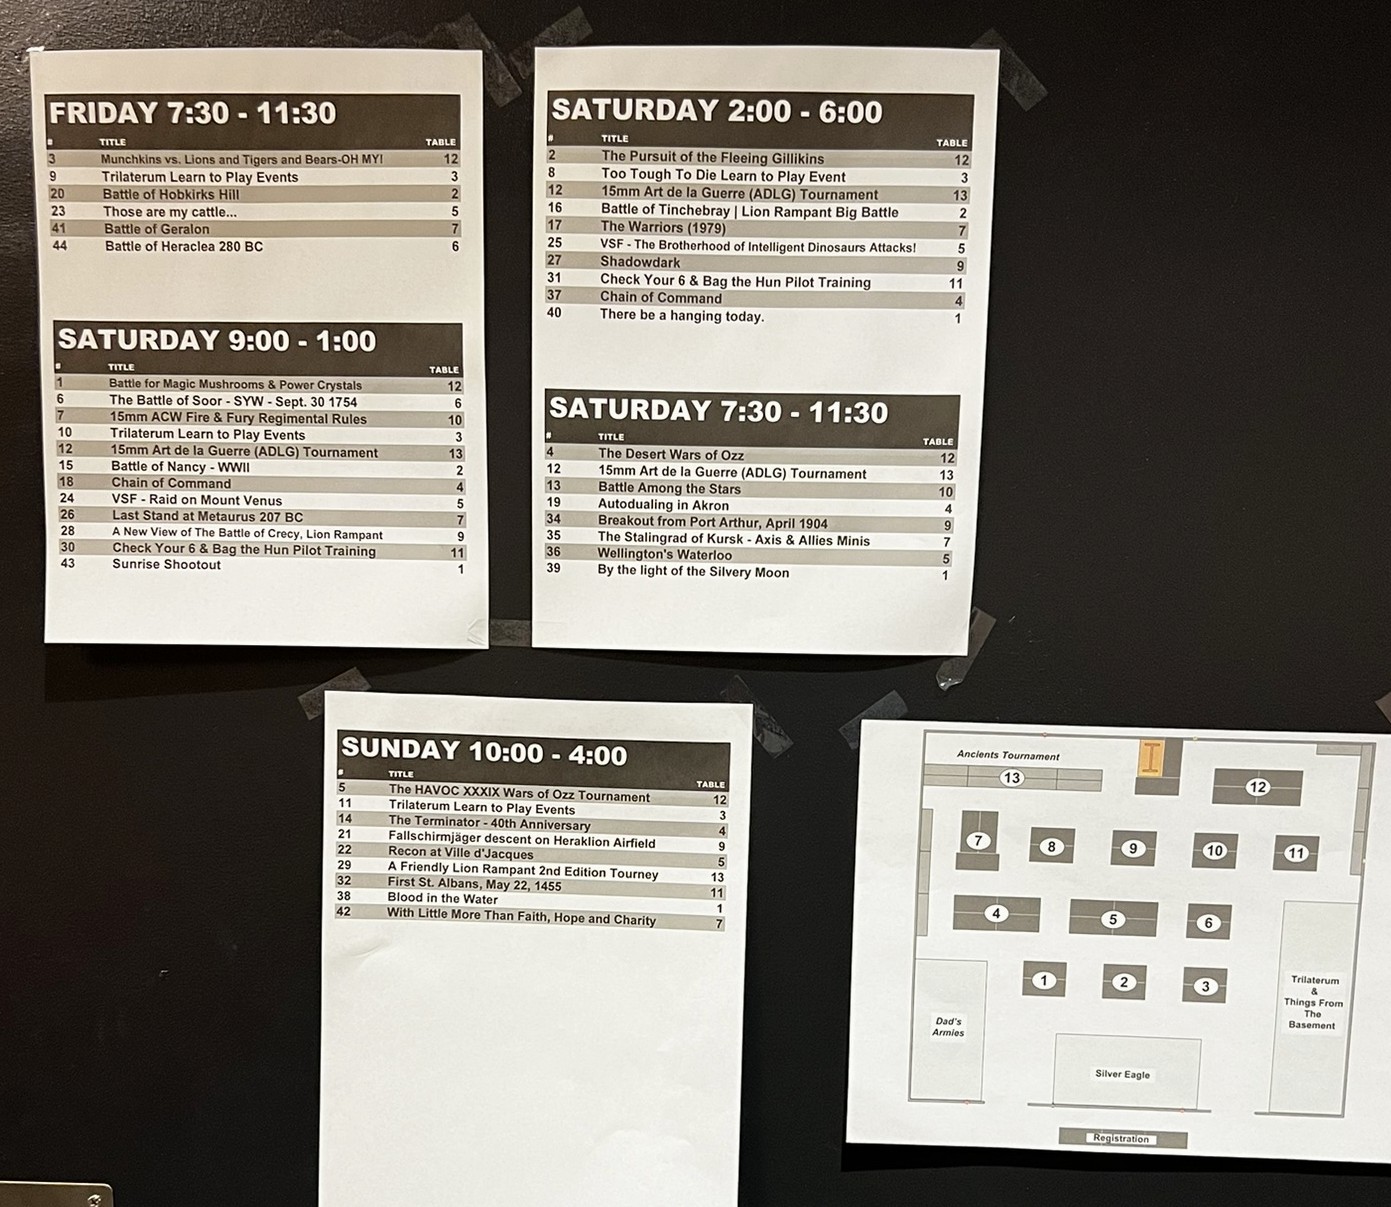
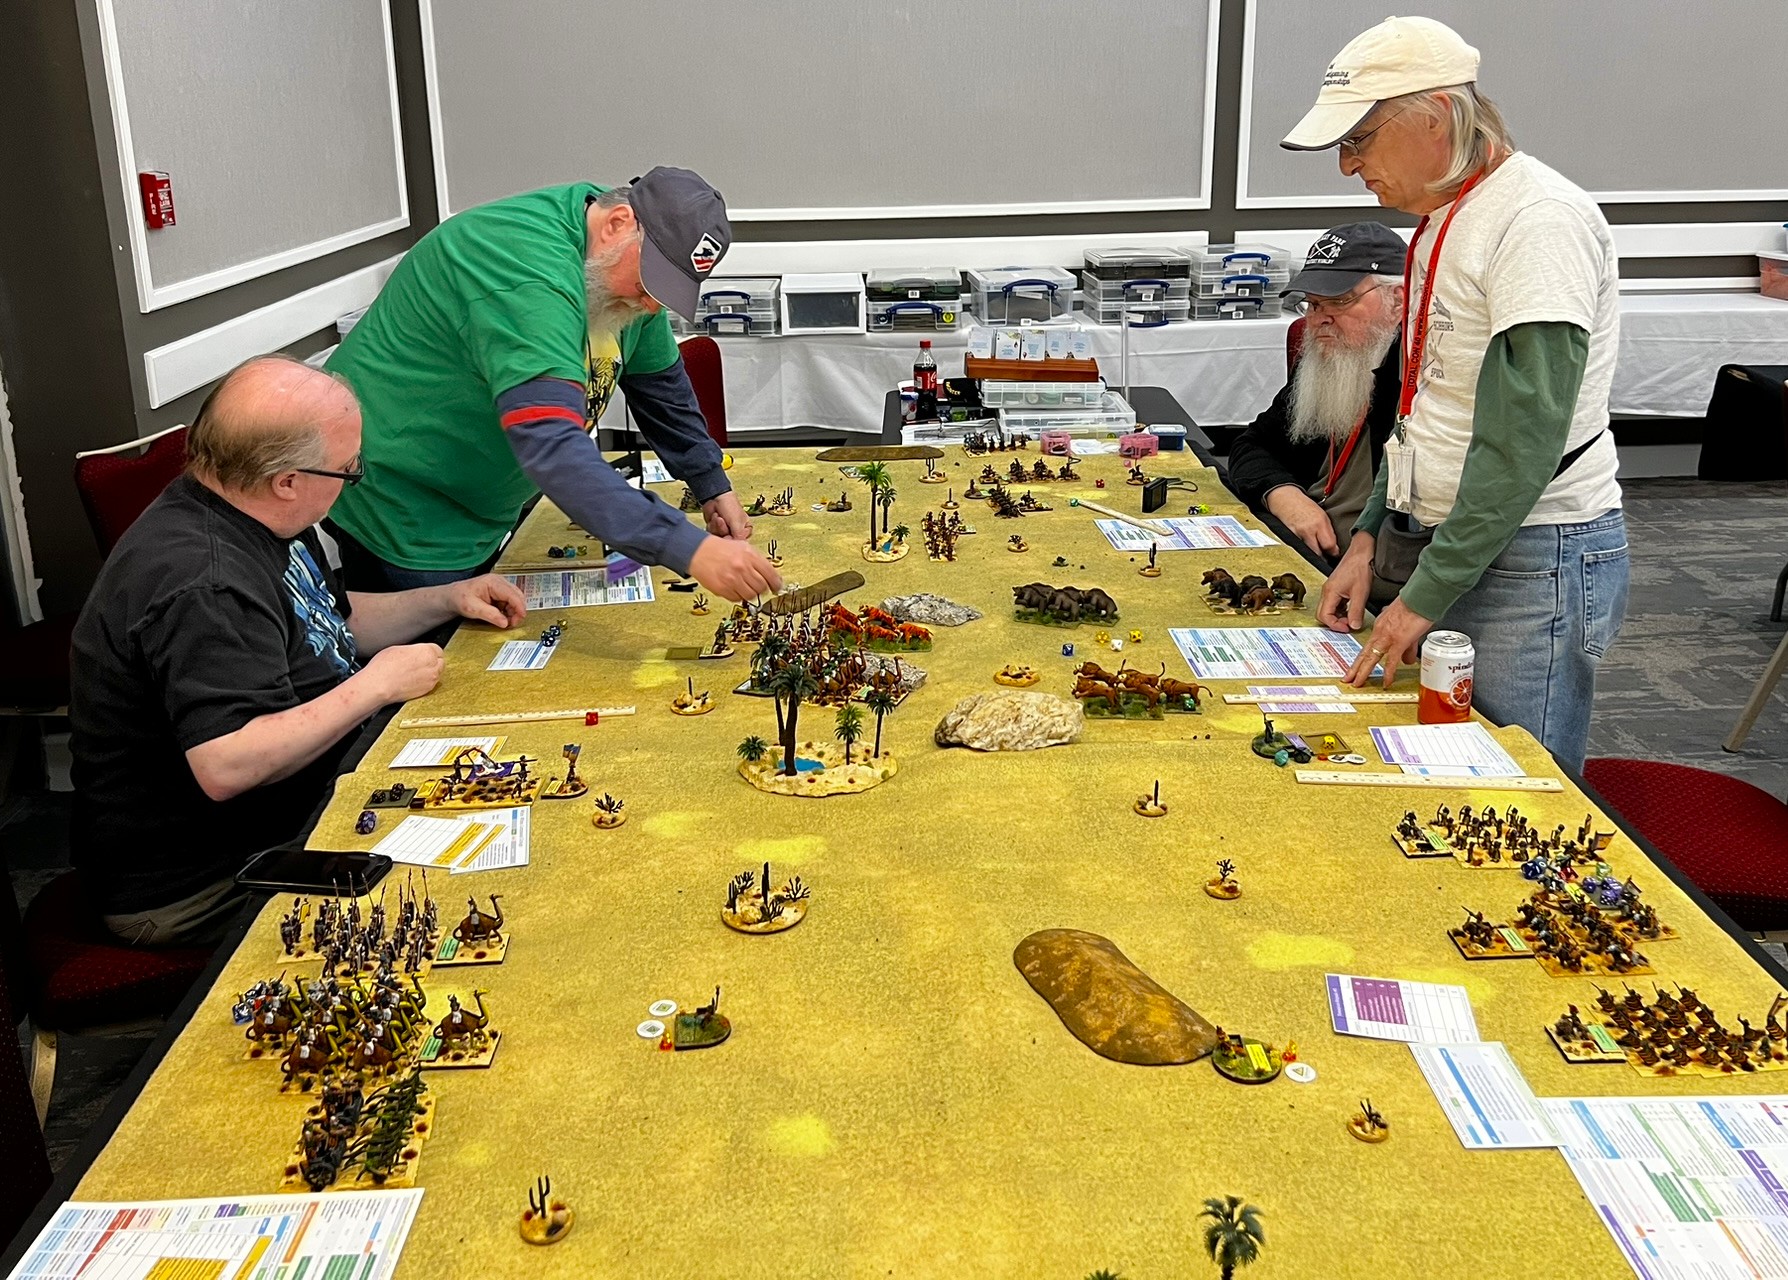
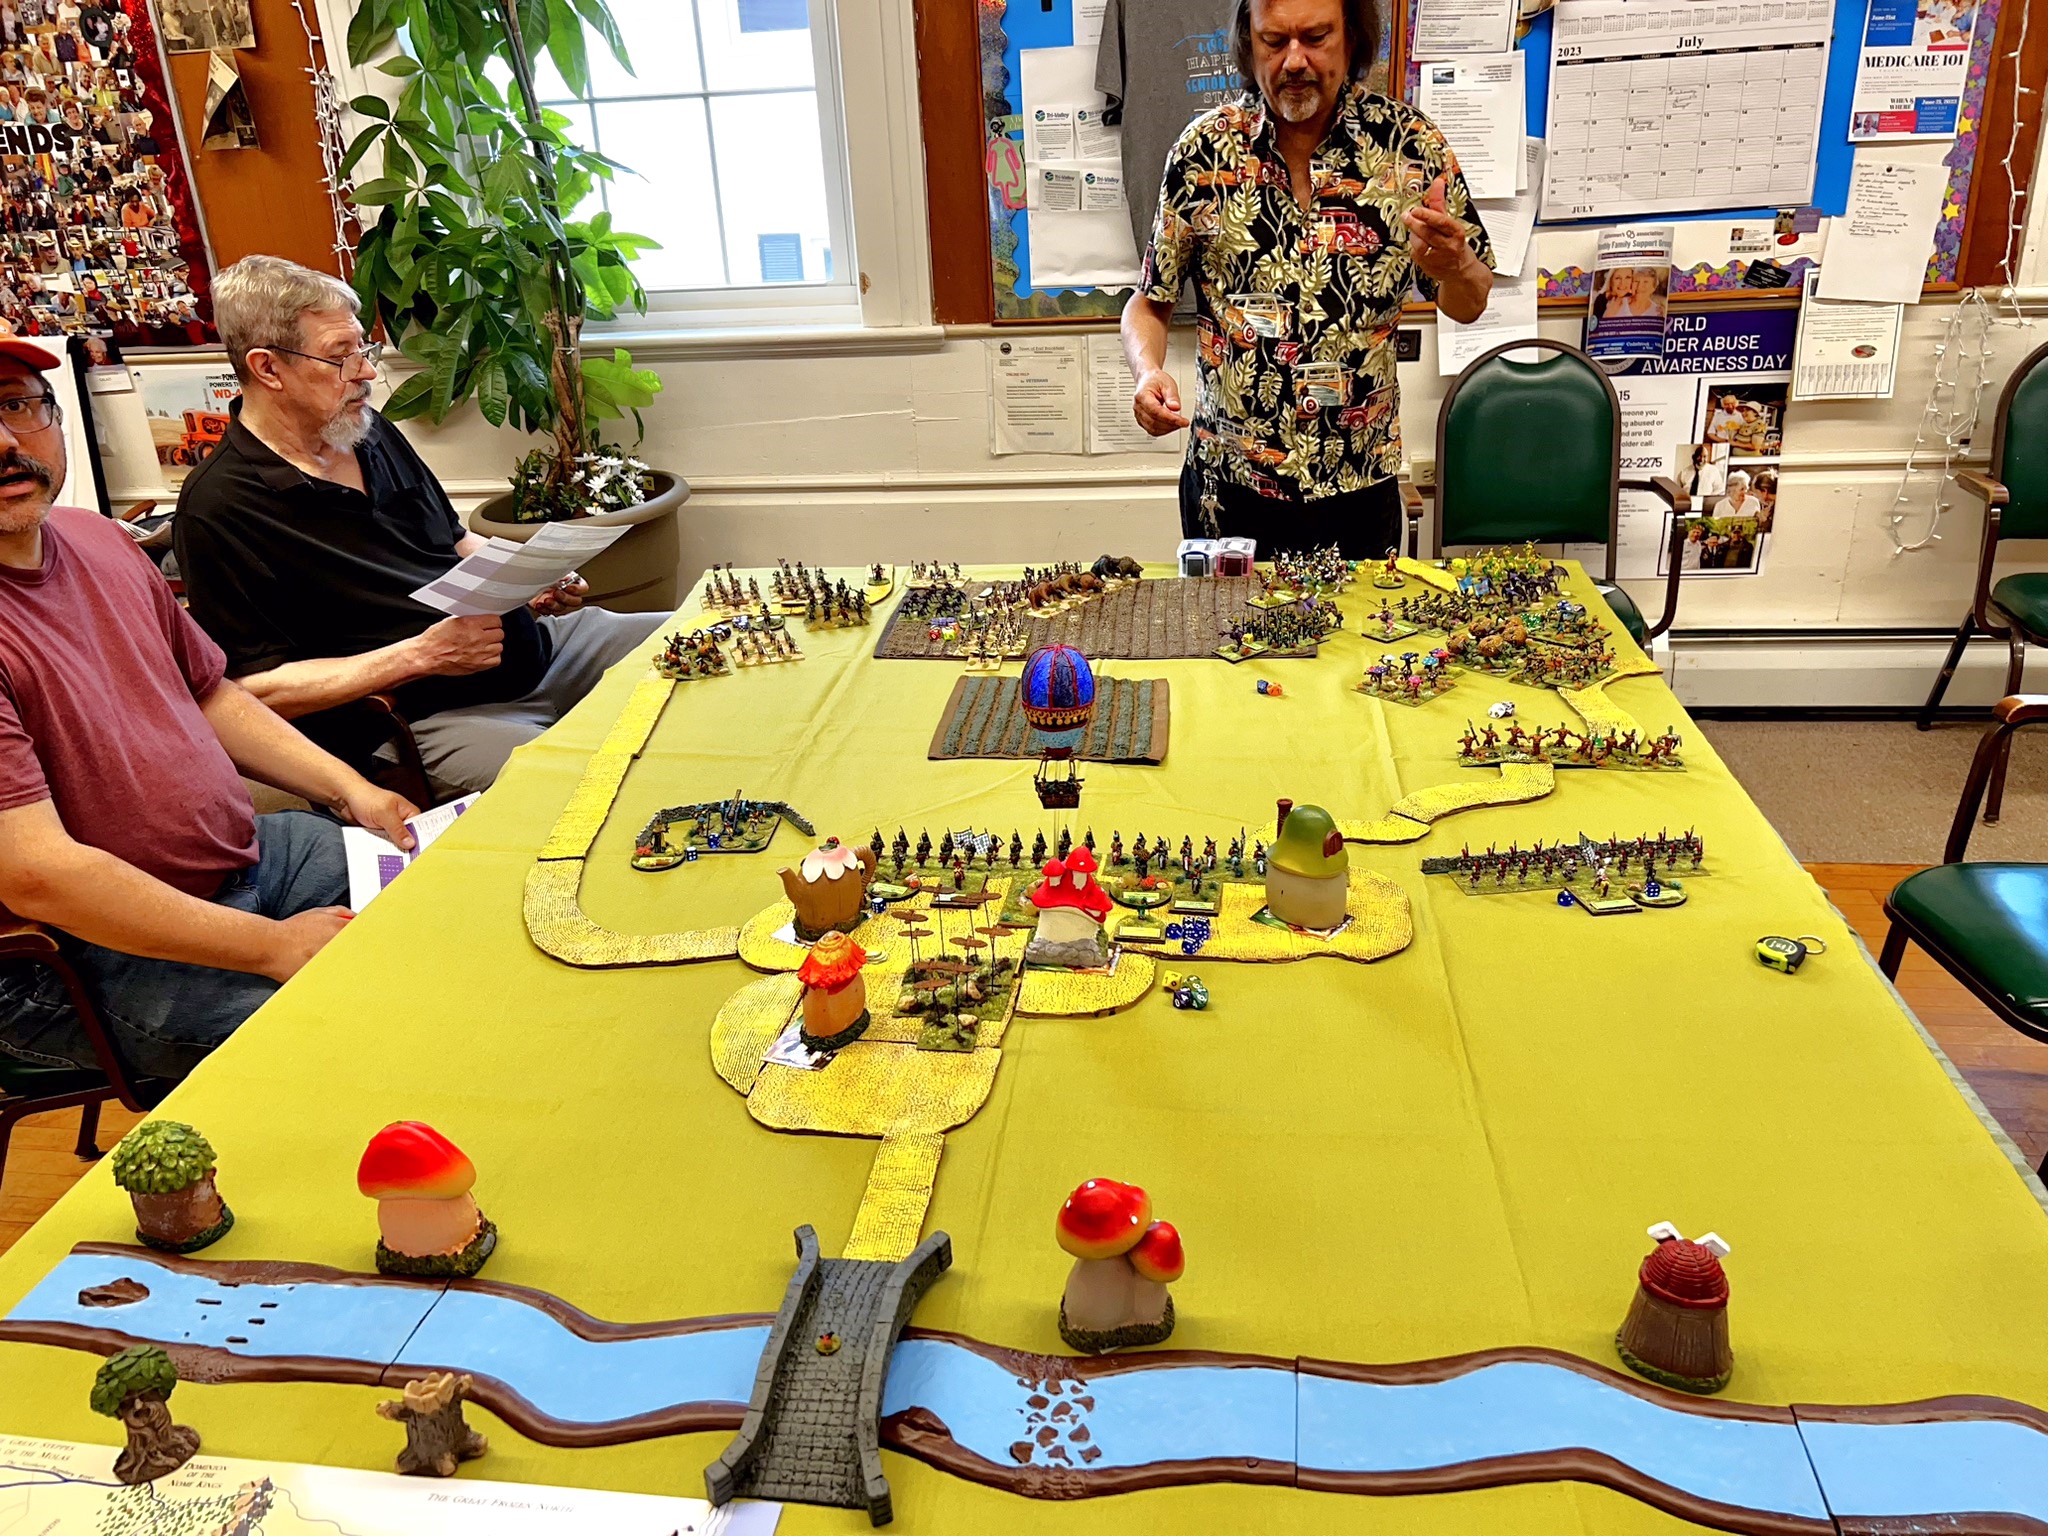
HAVOC XXXIX (aka HAVOC 2025) was held on the weekend of April 4-6, 2025 in Marlborough, Massachusetts. It is the annual tabletop wargaming convention for Battlegroup Boston (BGB). There were 36 4-hour games scheduled at the event. I ran 5 games of Wars of Ozz (one game on Friday, three on Saturday, and one on Sunday). Overall I think I had 27 players across my games.
The HAVOC XXXIX game line up
The Wars of Ozz games that I ran were titled:
Friday evening: Munchkins versus Lions and Tigers and Bears – OH MY!
Saturday morning: Battle for the Magic Mushrooms & the Ancient Crystals of Power
Saturday afternoon: Rear Guard Action – The Pursuit of the Fleeing Gillikins
Saturday evening: The Desert Wars of Ozz
Sunday morning: The HAVOC XXXIX Wars of Ozz Tournament
Running so many games is indeed a challenge. I wish I could have posted about the other conventions I attended in February. These included COLD BARRAGE (3 games), TotalCon (10 games), and COLD WARS (3 games). These were done on three consecutive weekends in a row! So my apologies- blogging took a back seat. I hope to upload some photos of those events on Facebook. Yes hope.
For now, let’s take a look at each game at HAVOC 2025. Russ Dunaway had kindly supported my efforts with some prizes and giveaways that you’ll see.
Munchkins versus Lions and Tigers and Bears – OH MY!
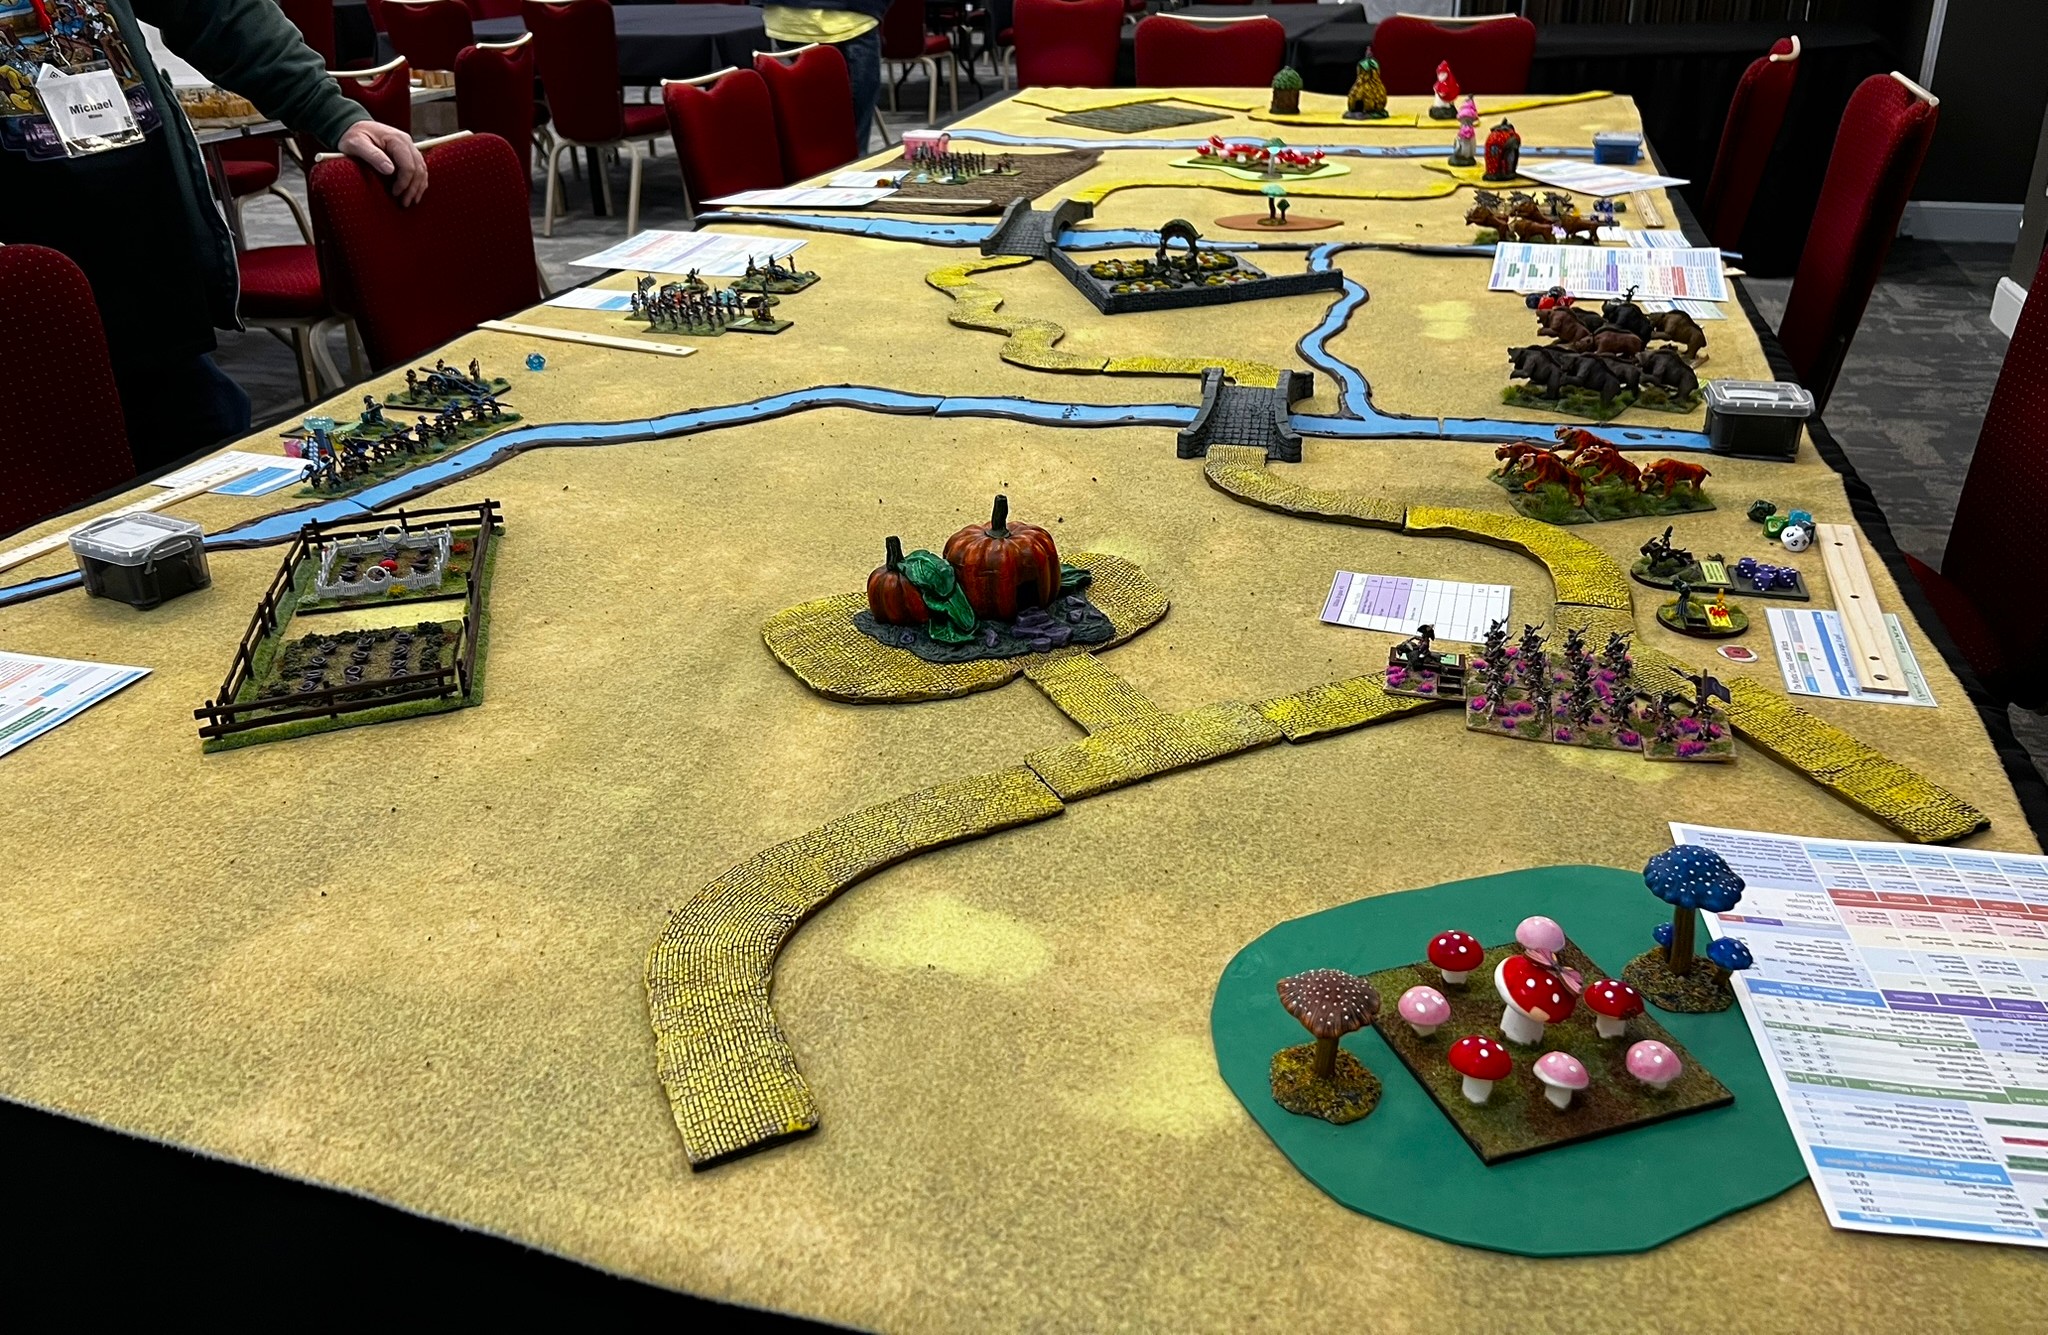
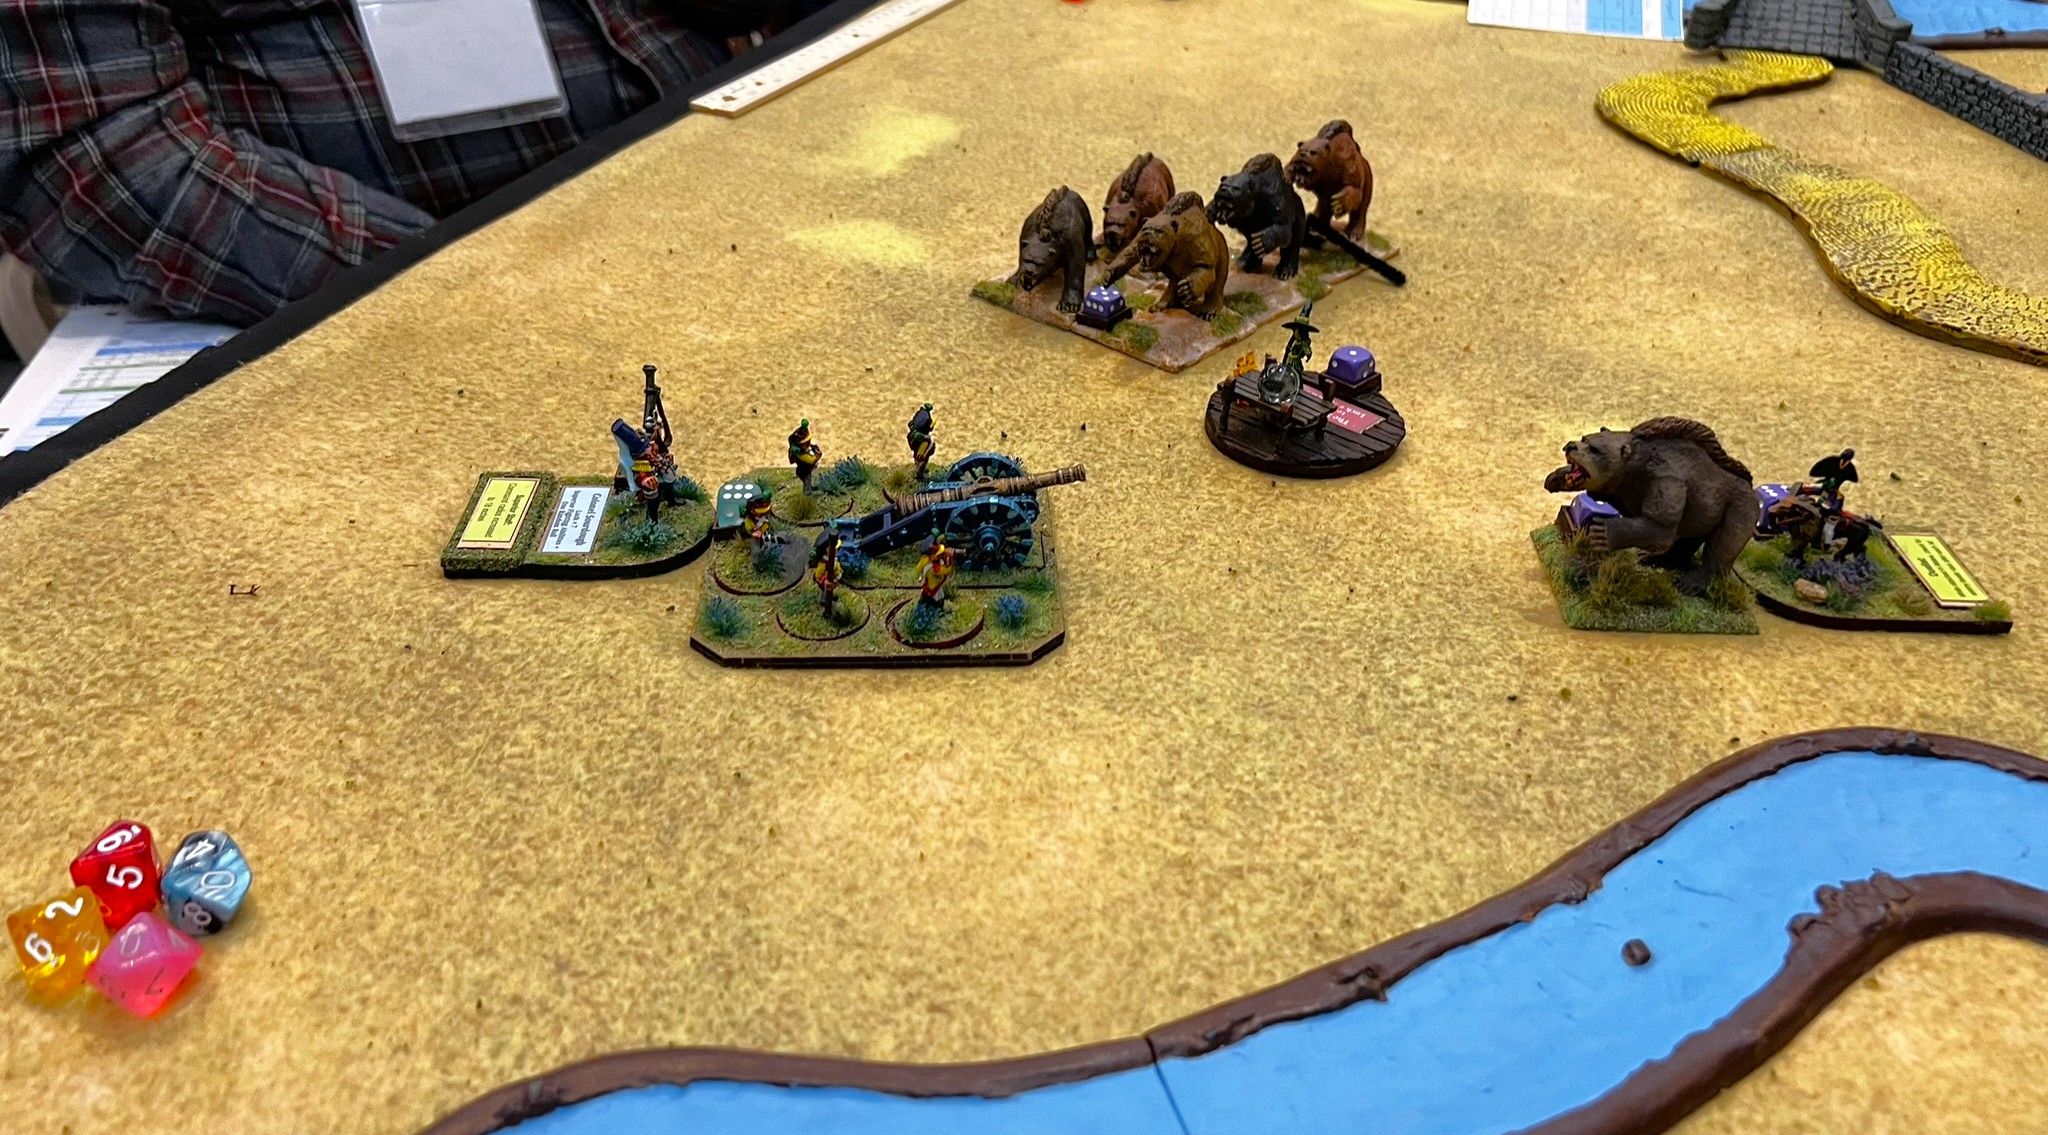
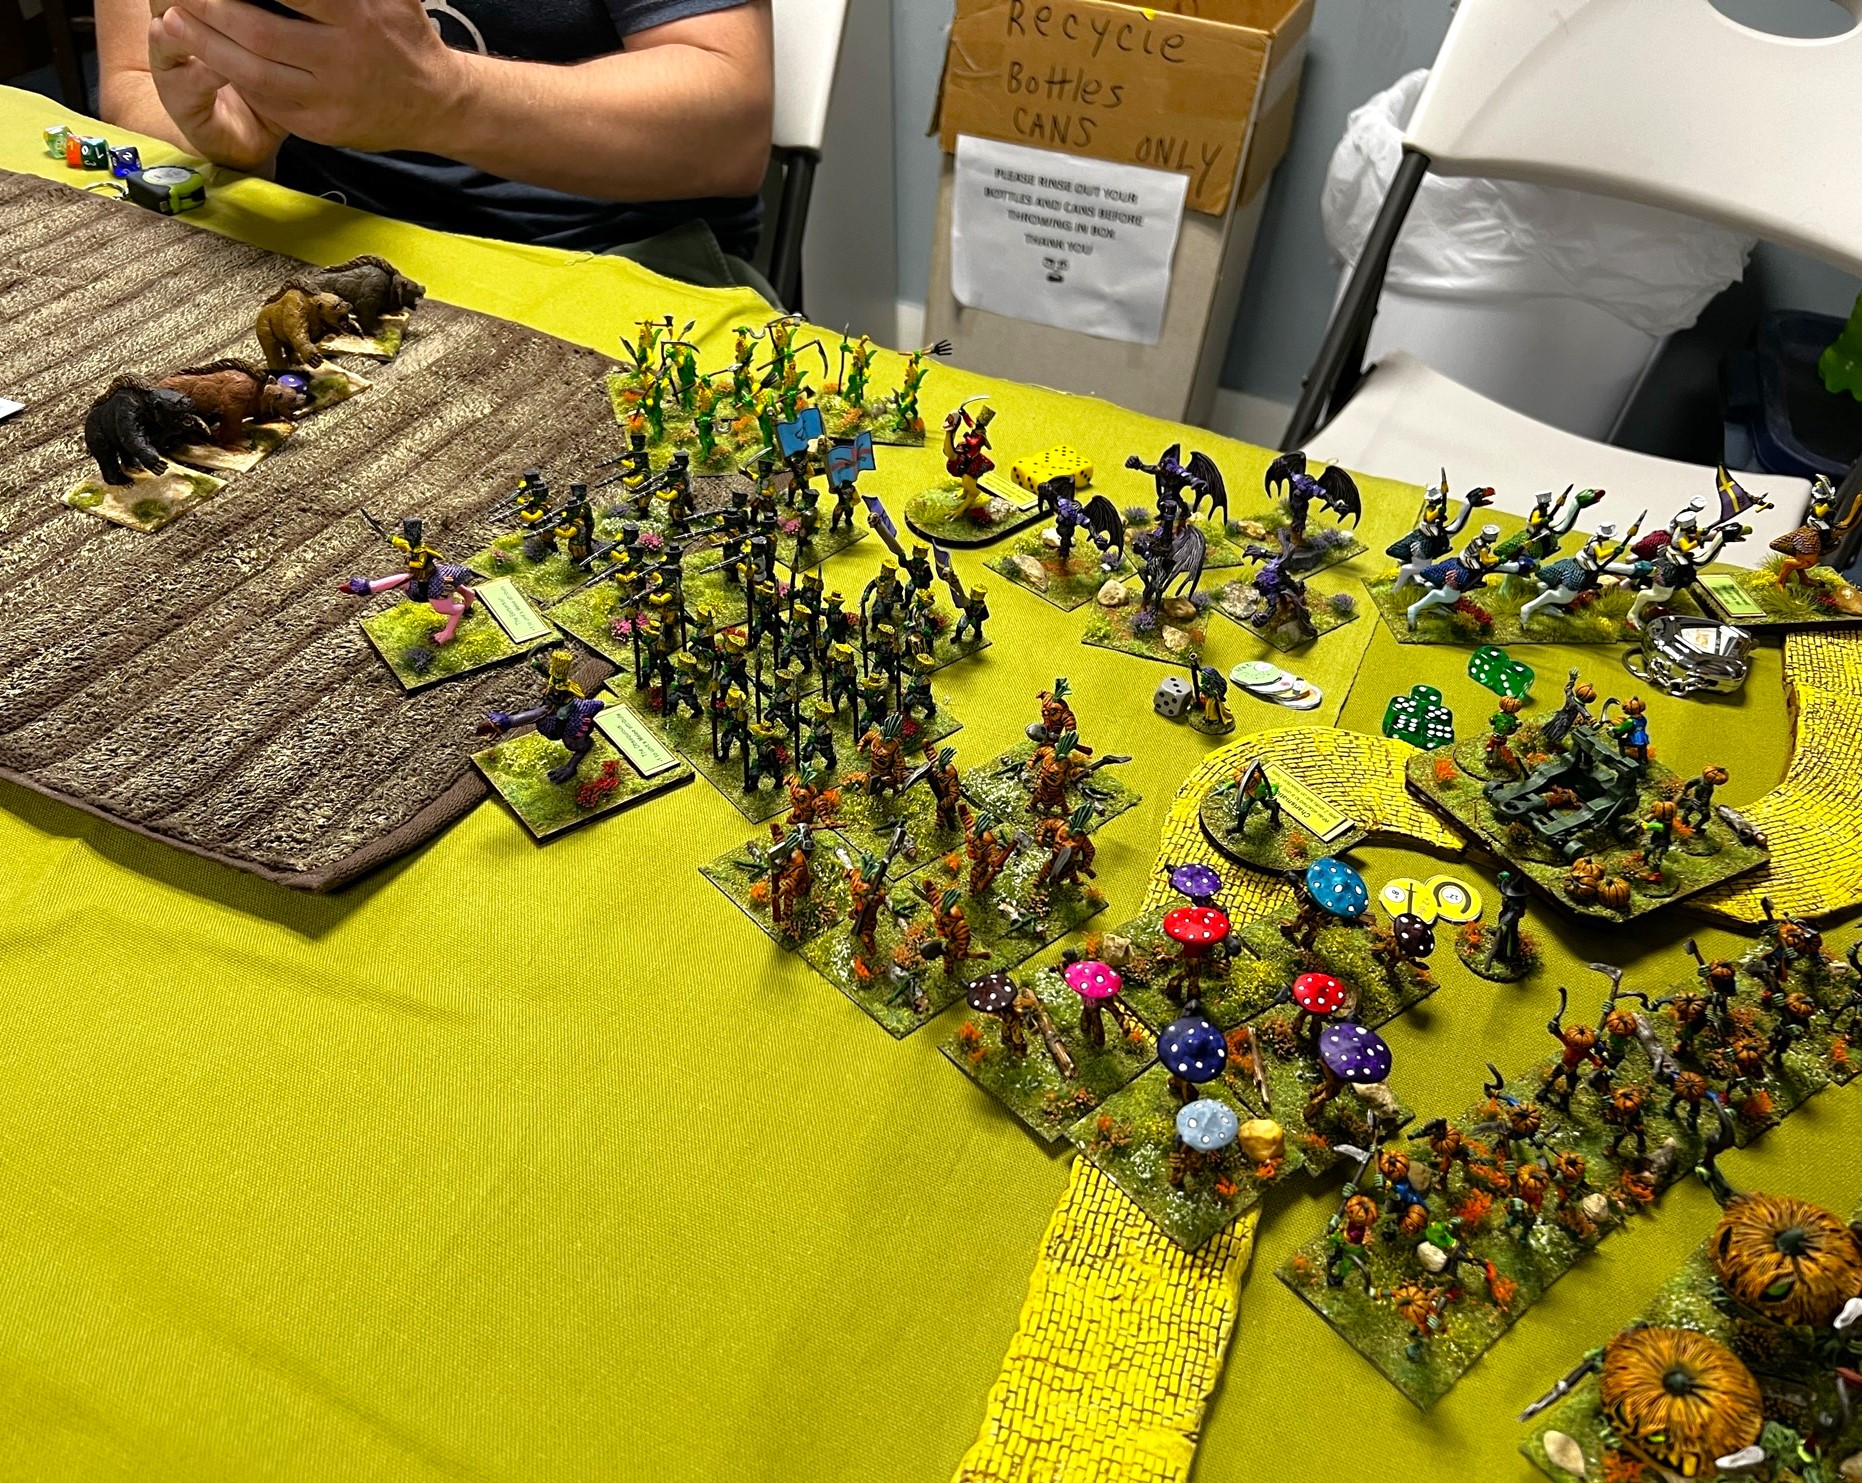
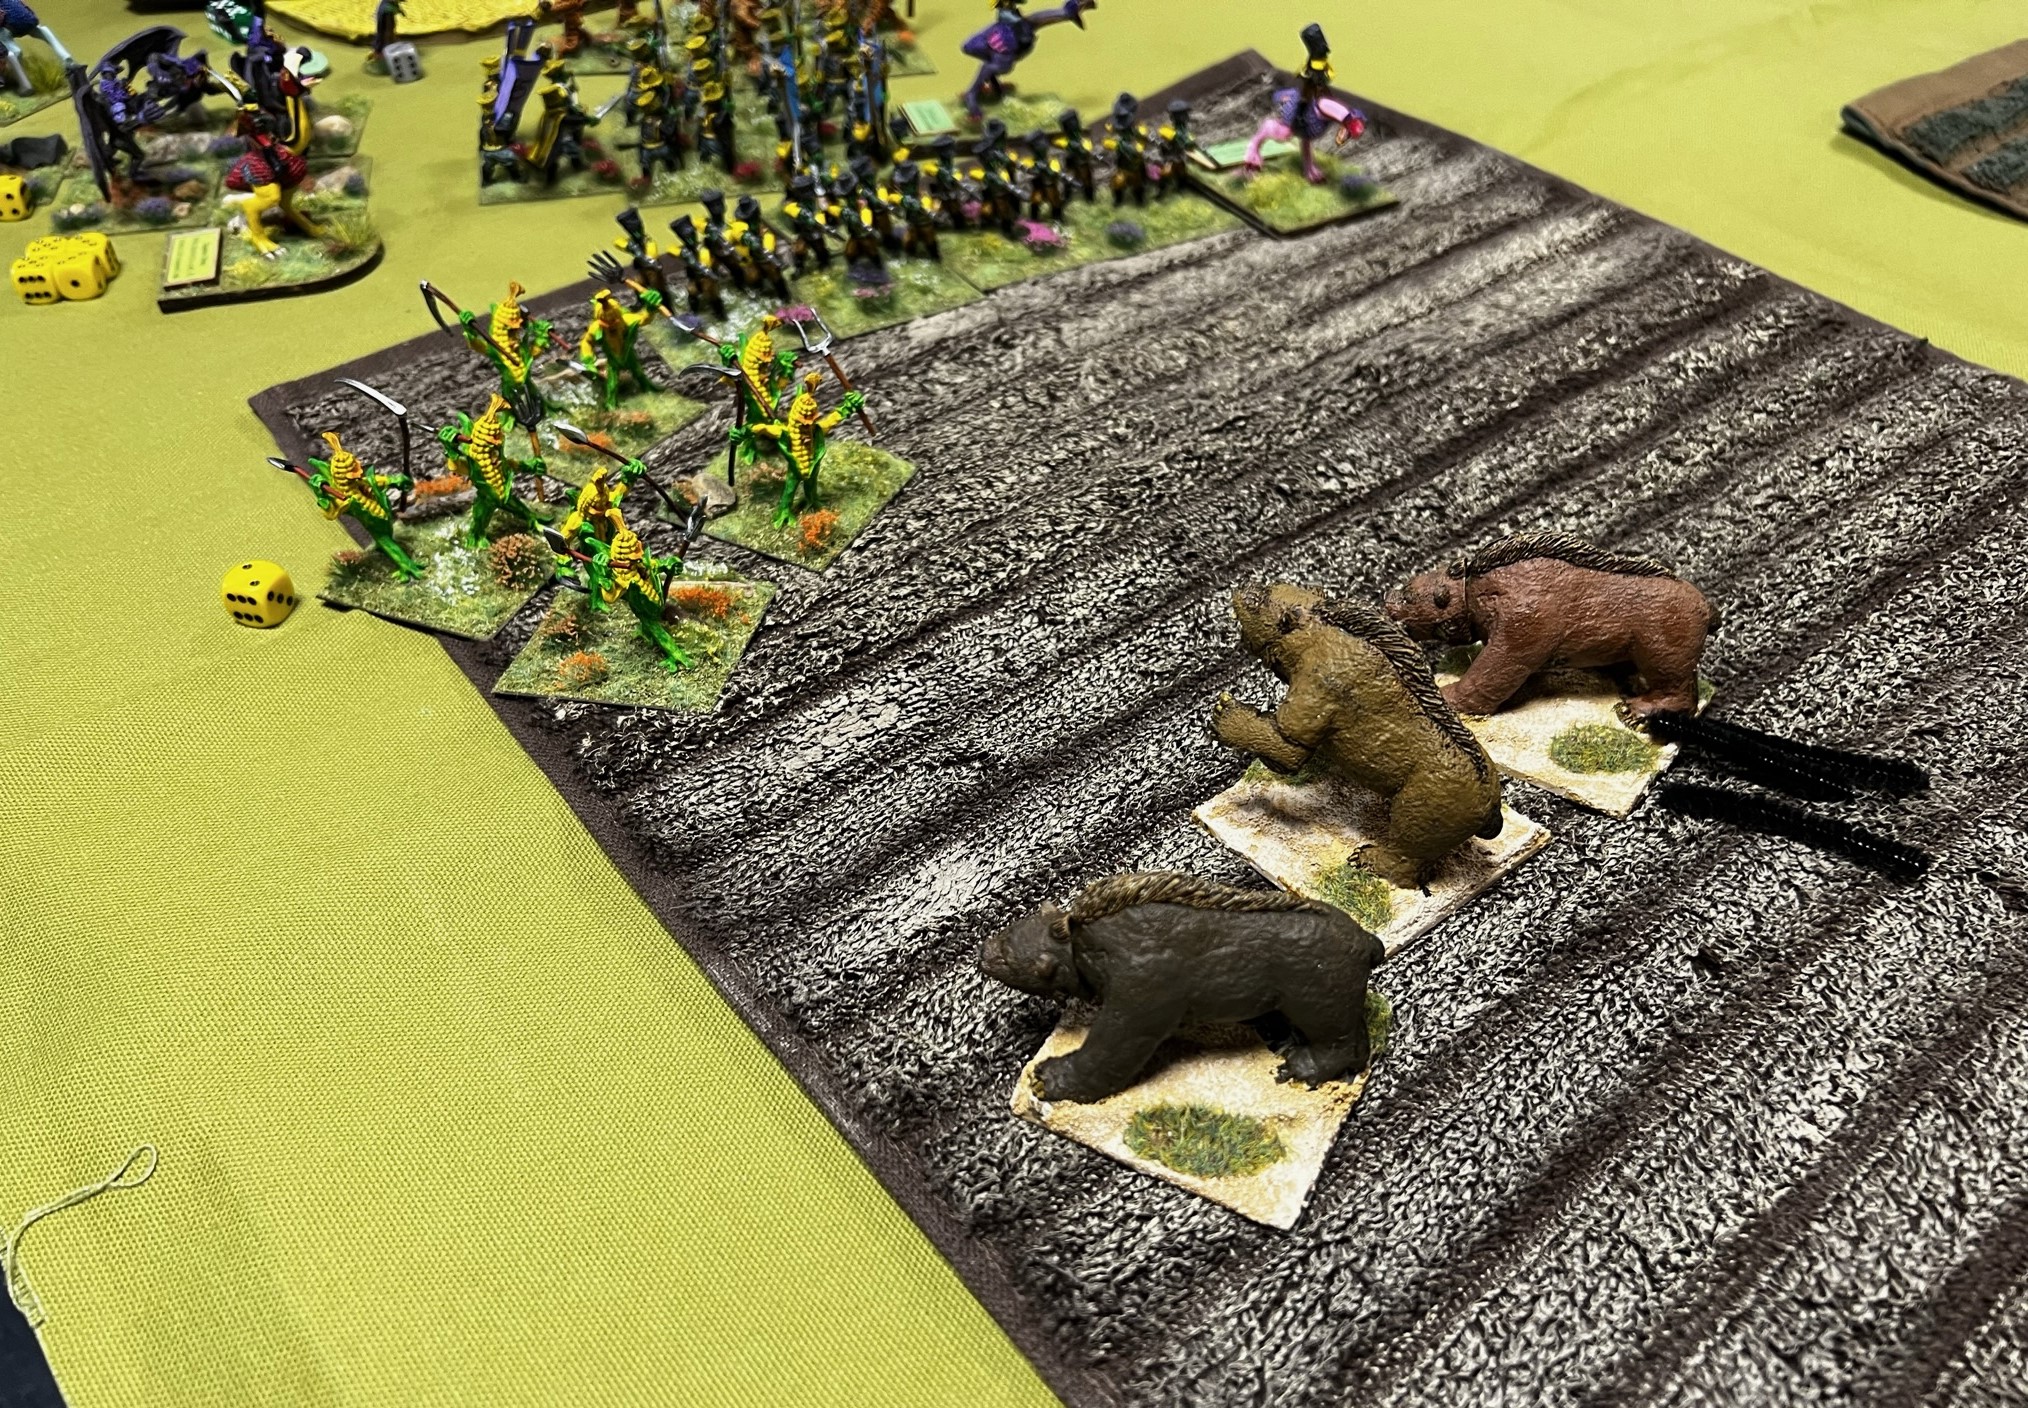
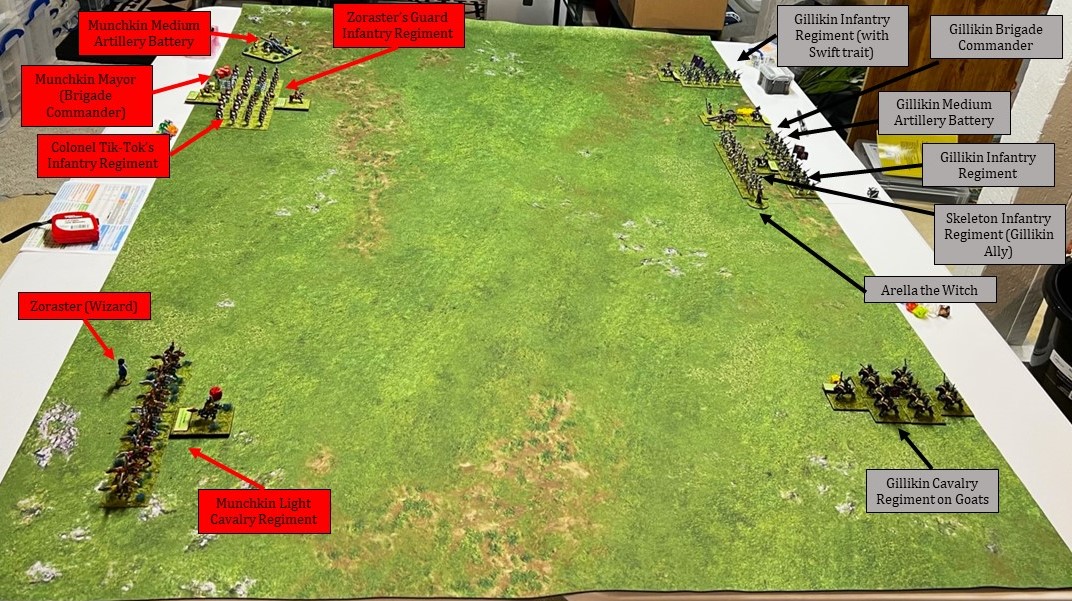
The Munchkins are fighting the Gillikin’s Lions and Tigers and Bears (OH MY!). This is a quick session of Wars of Ozz suitable for all ages, new players and experienced ones. Will move very quickly!
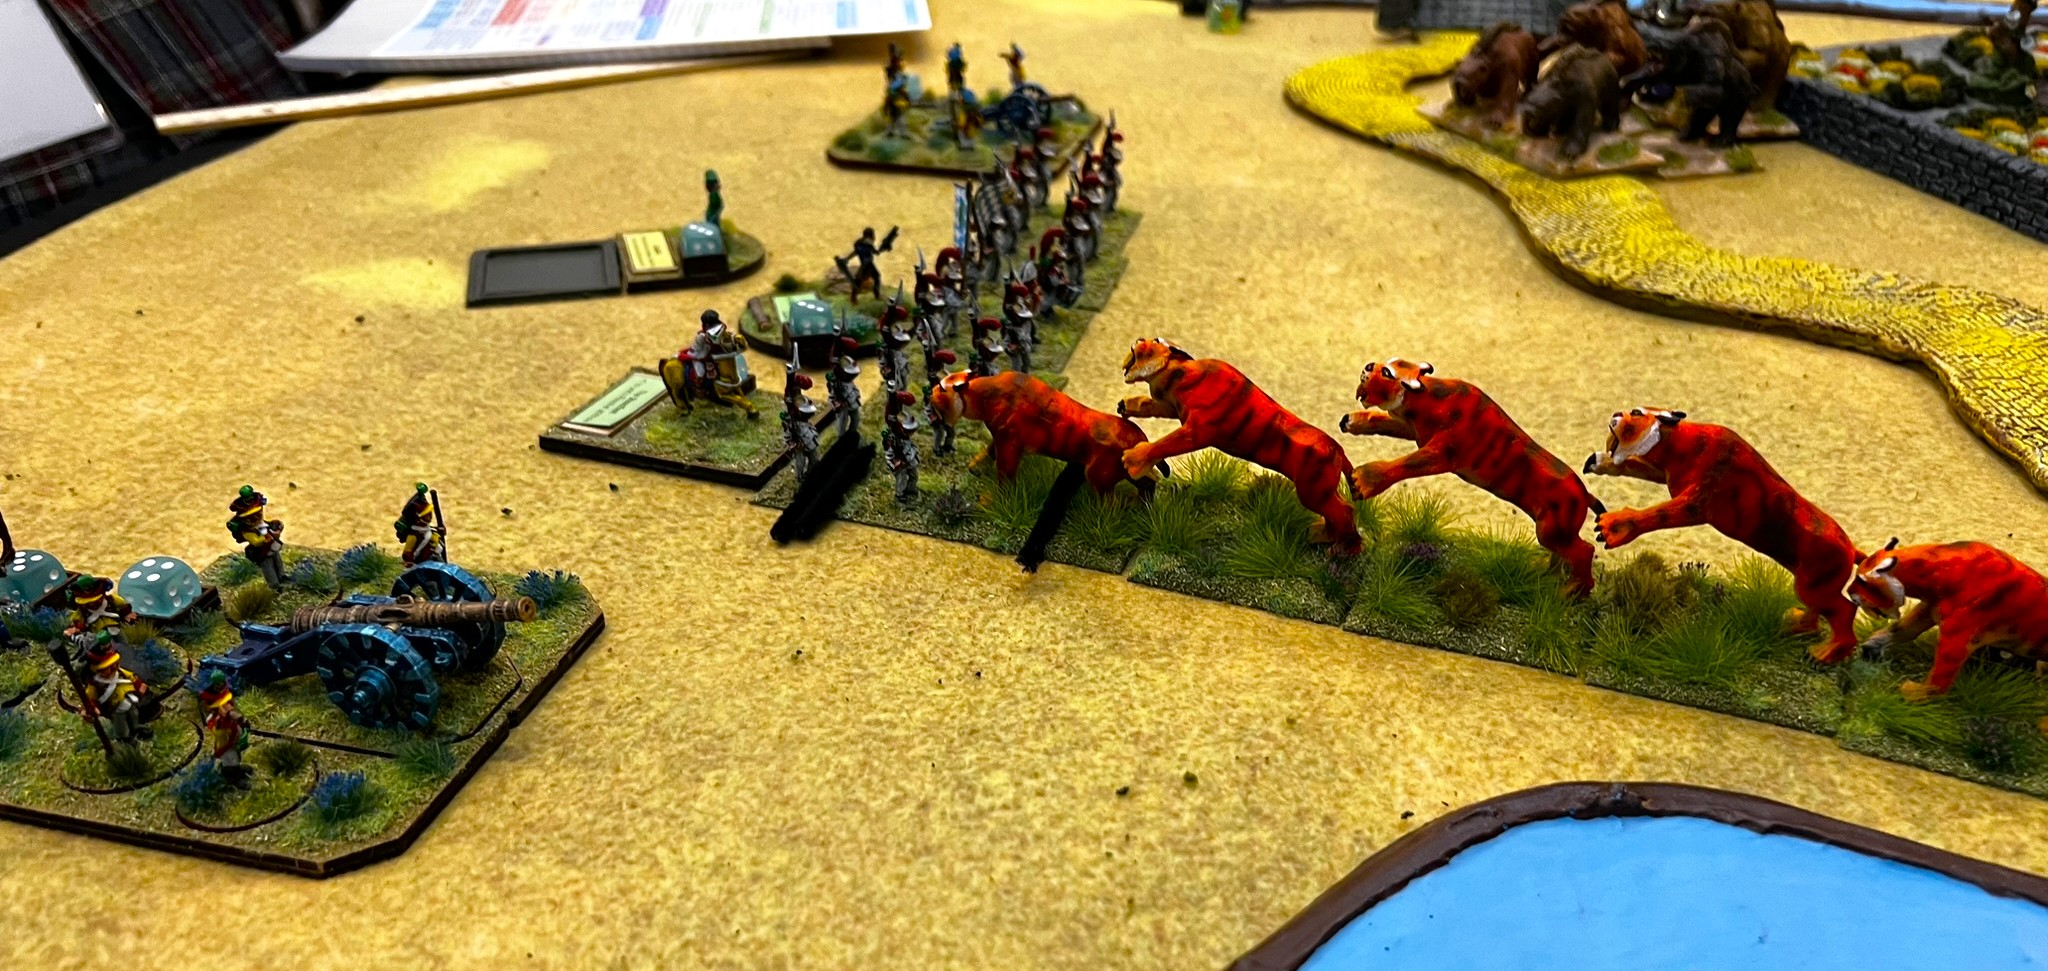
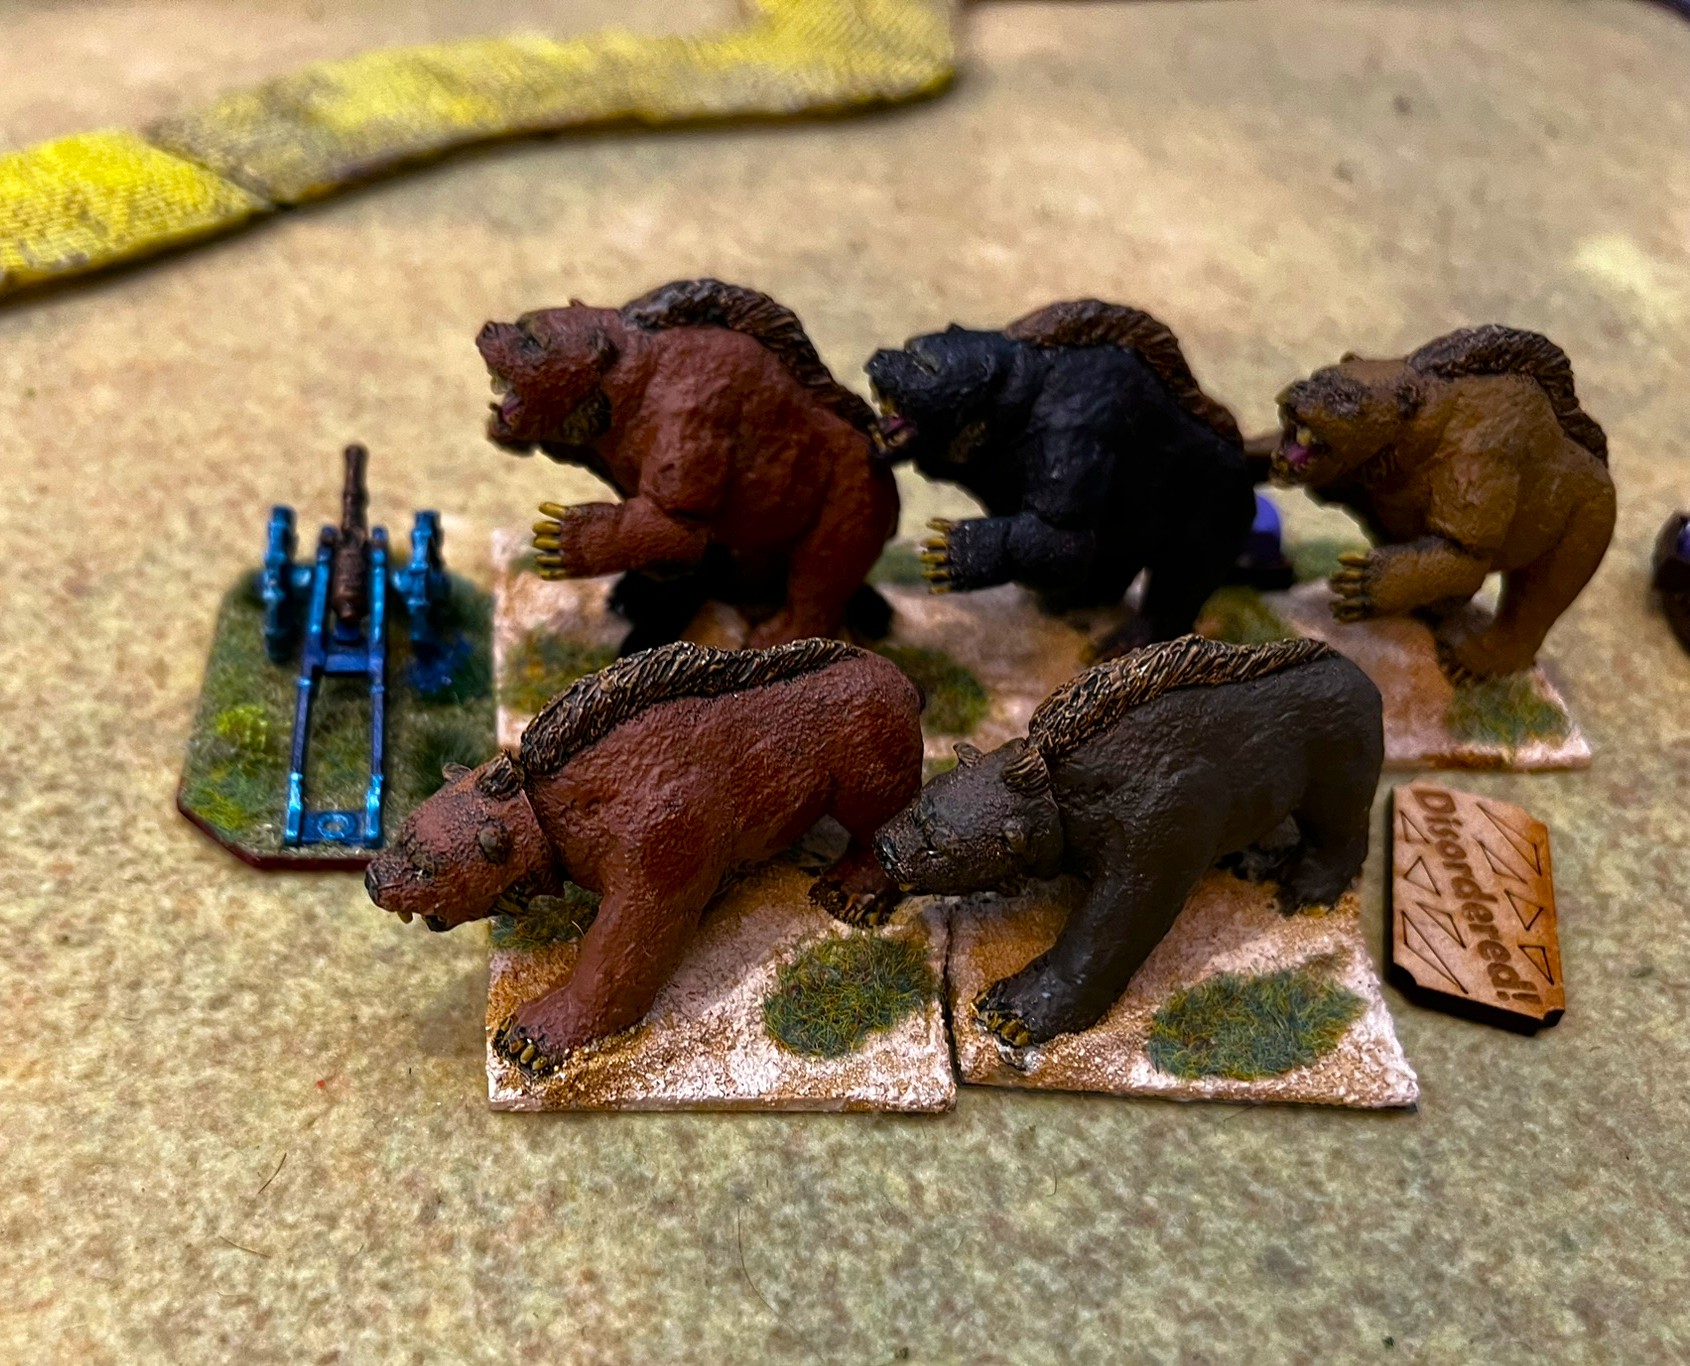
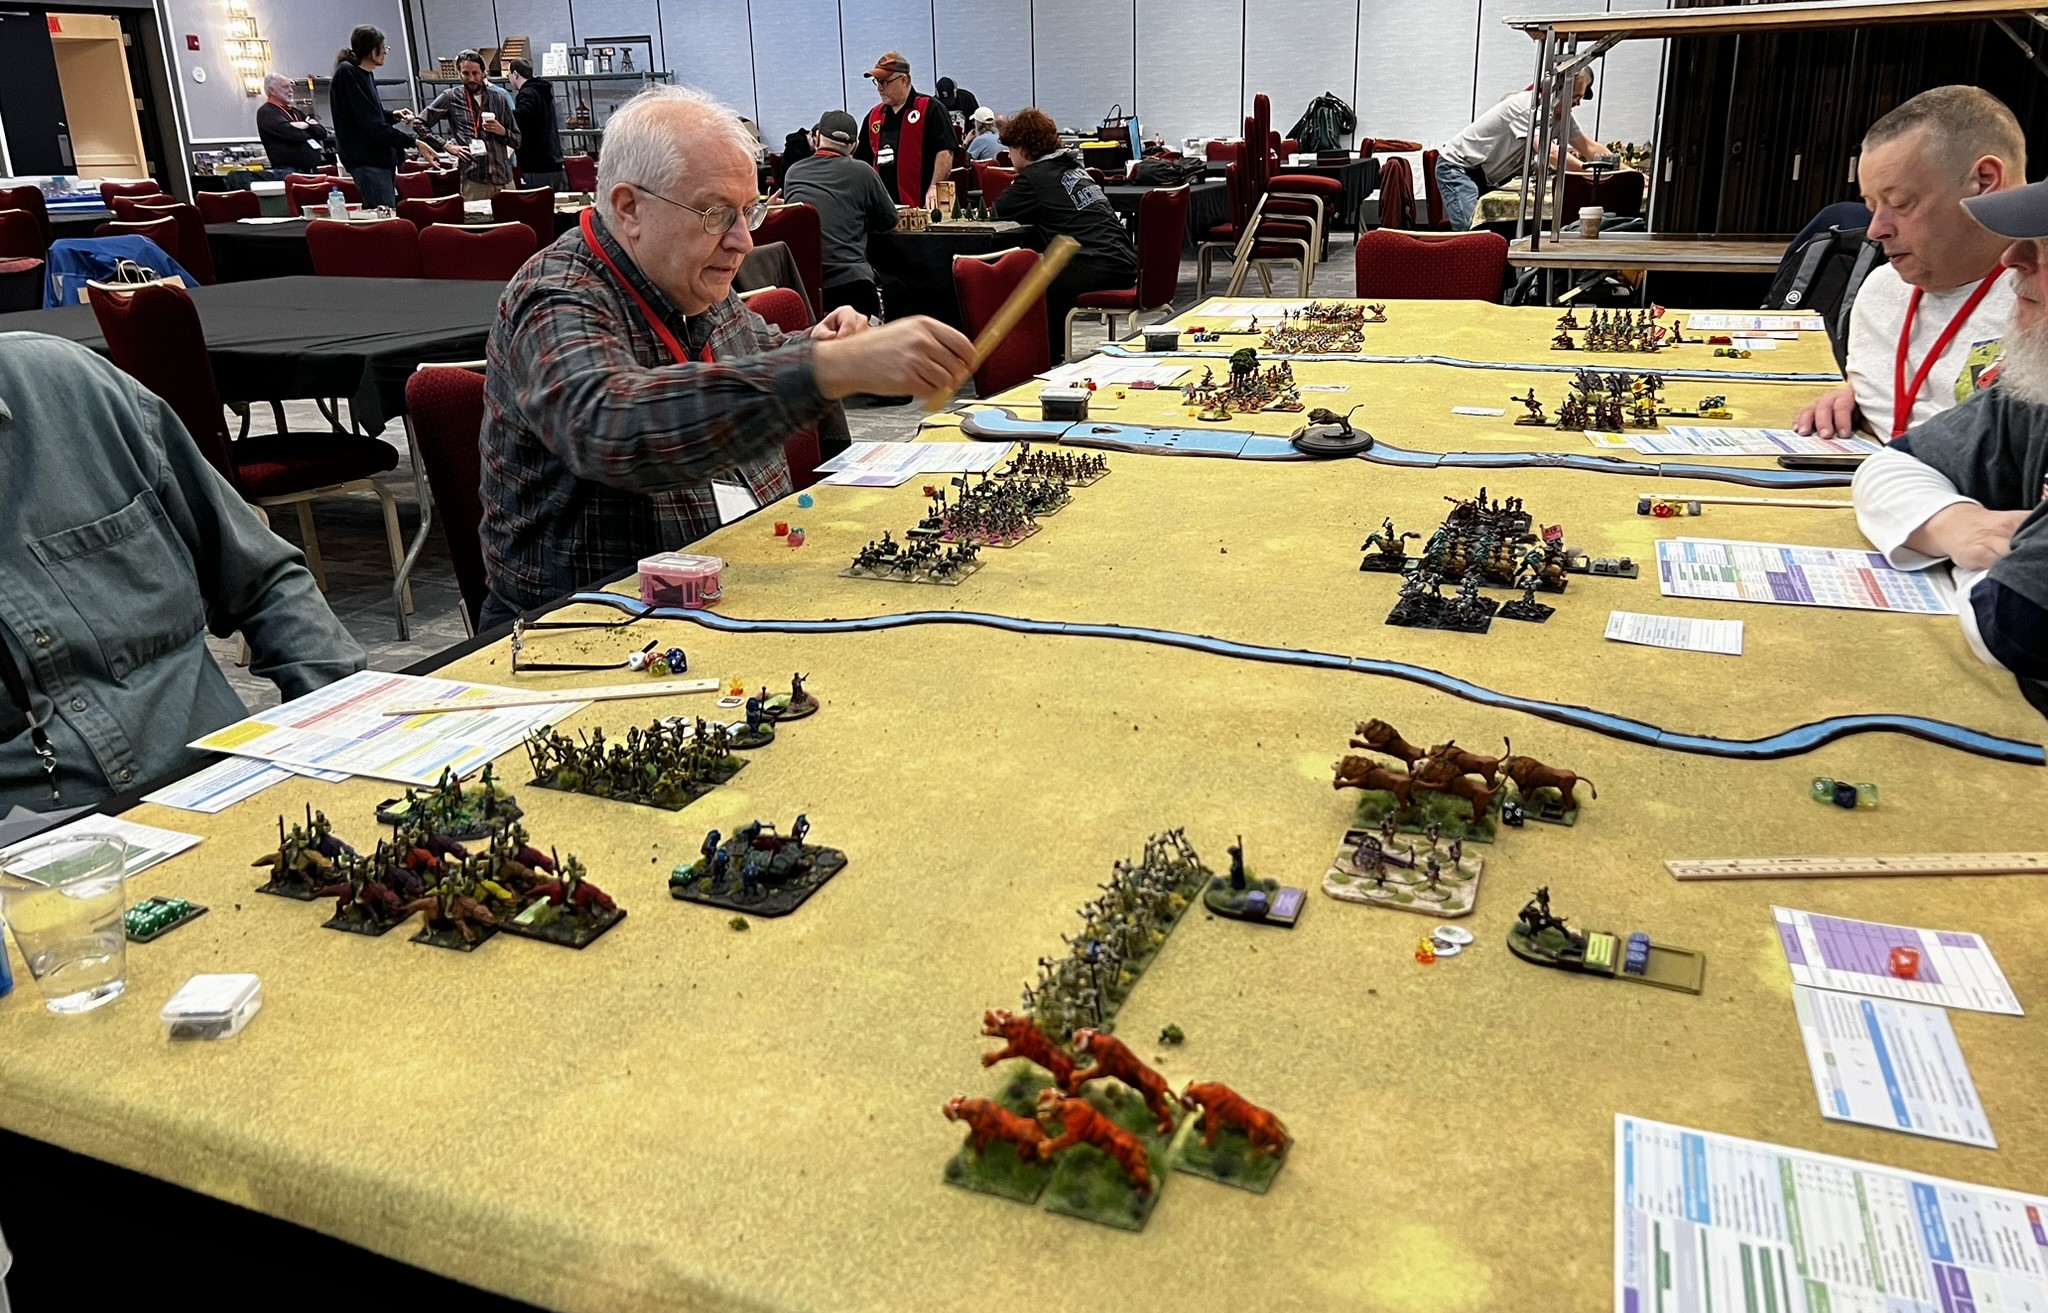
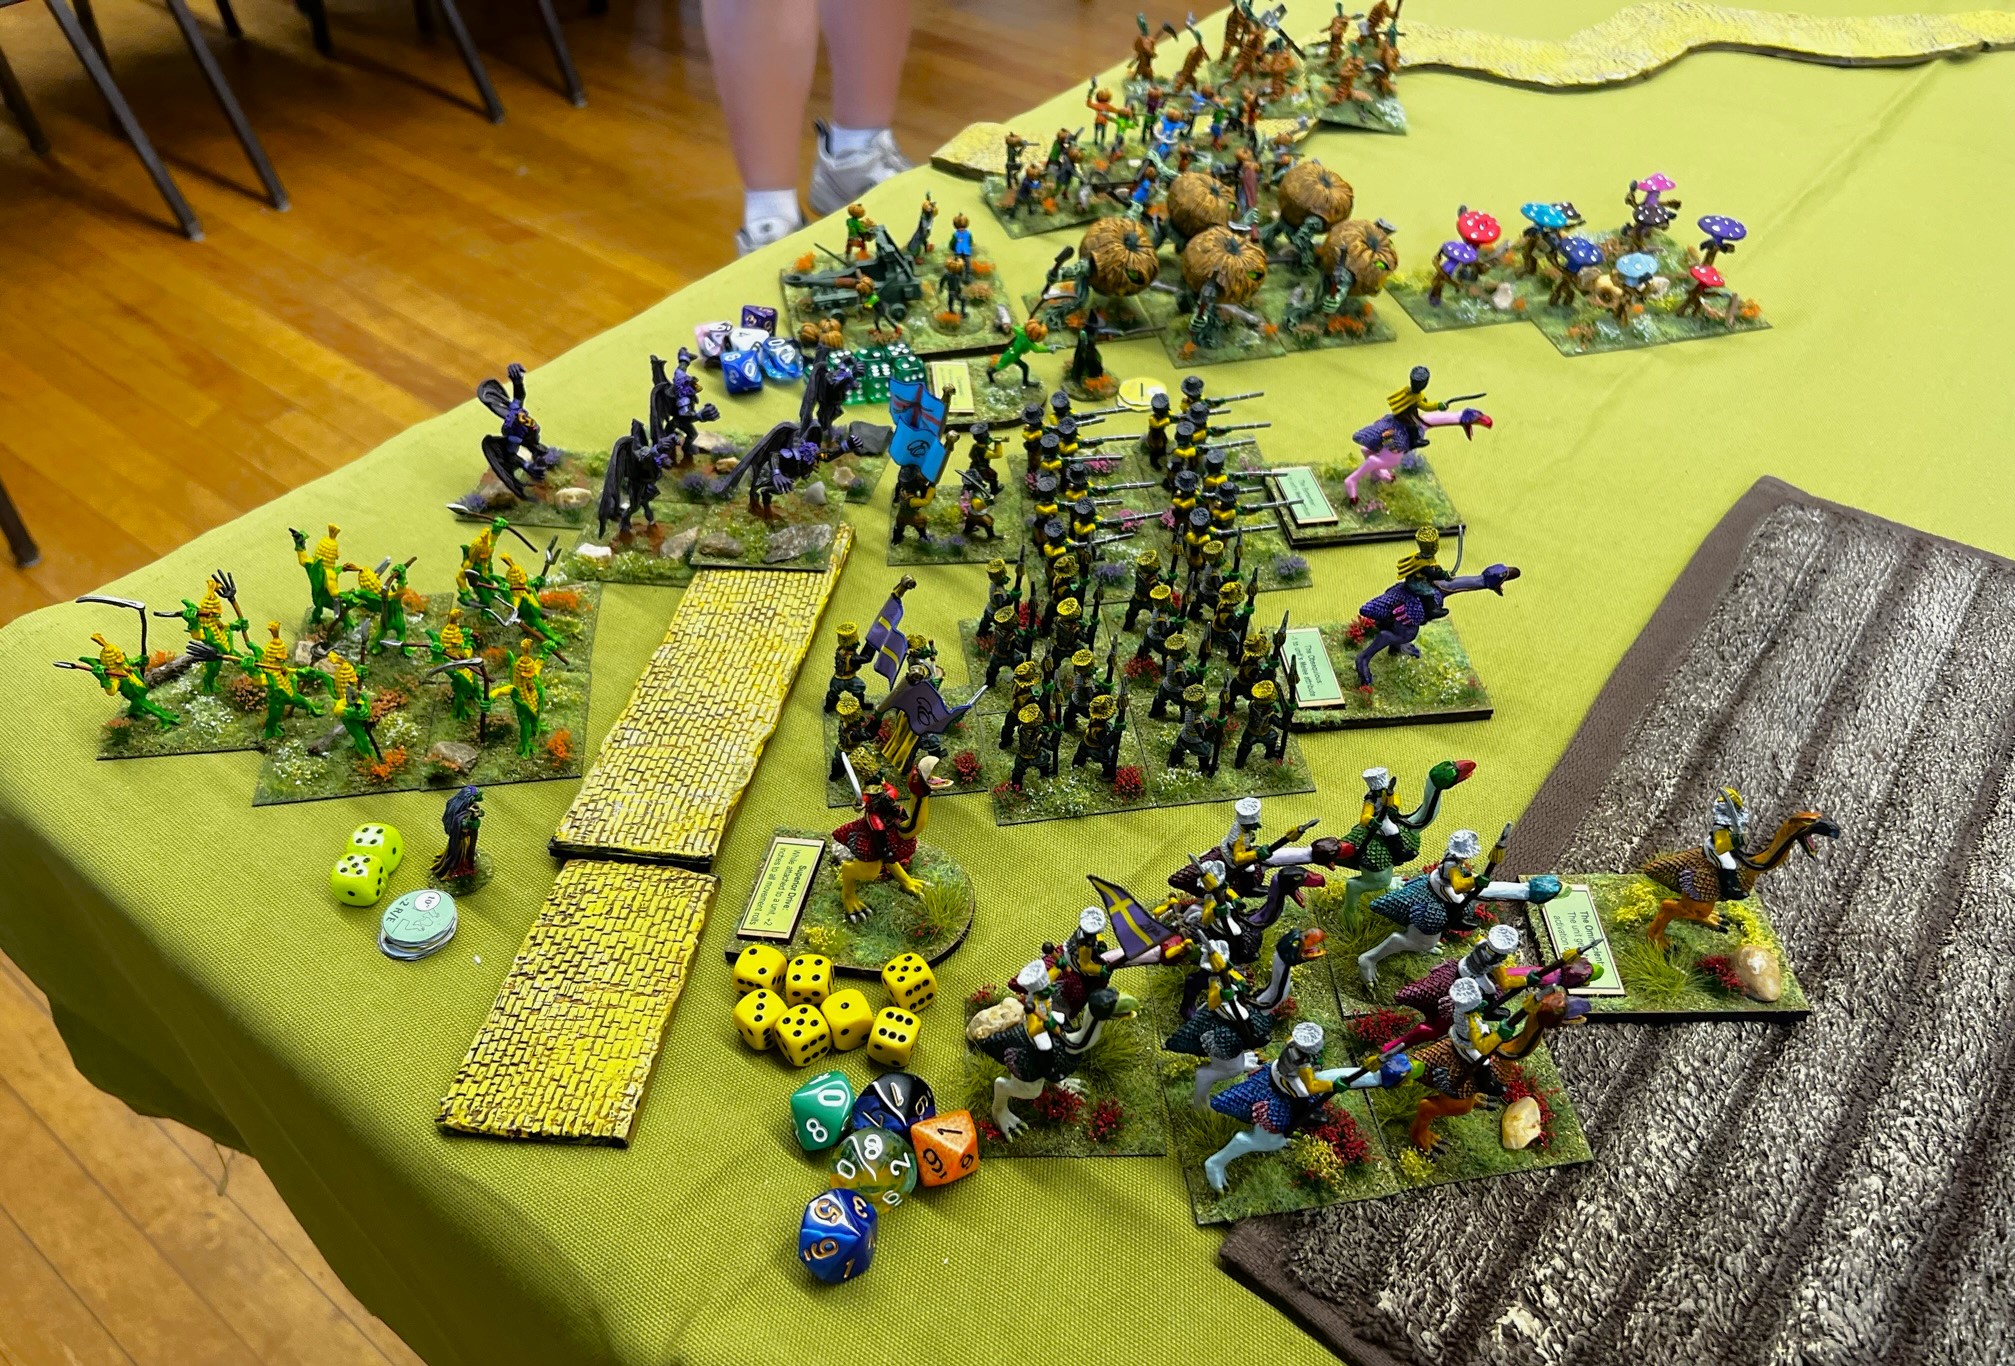
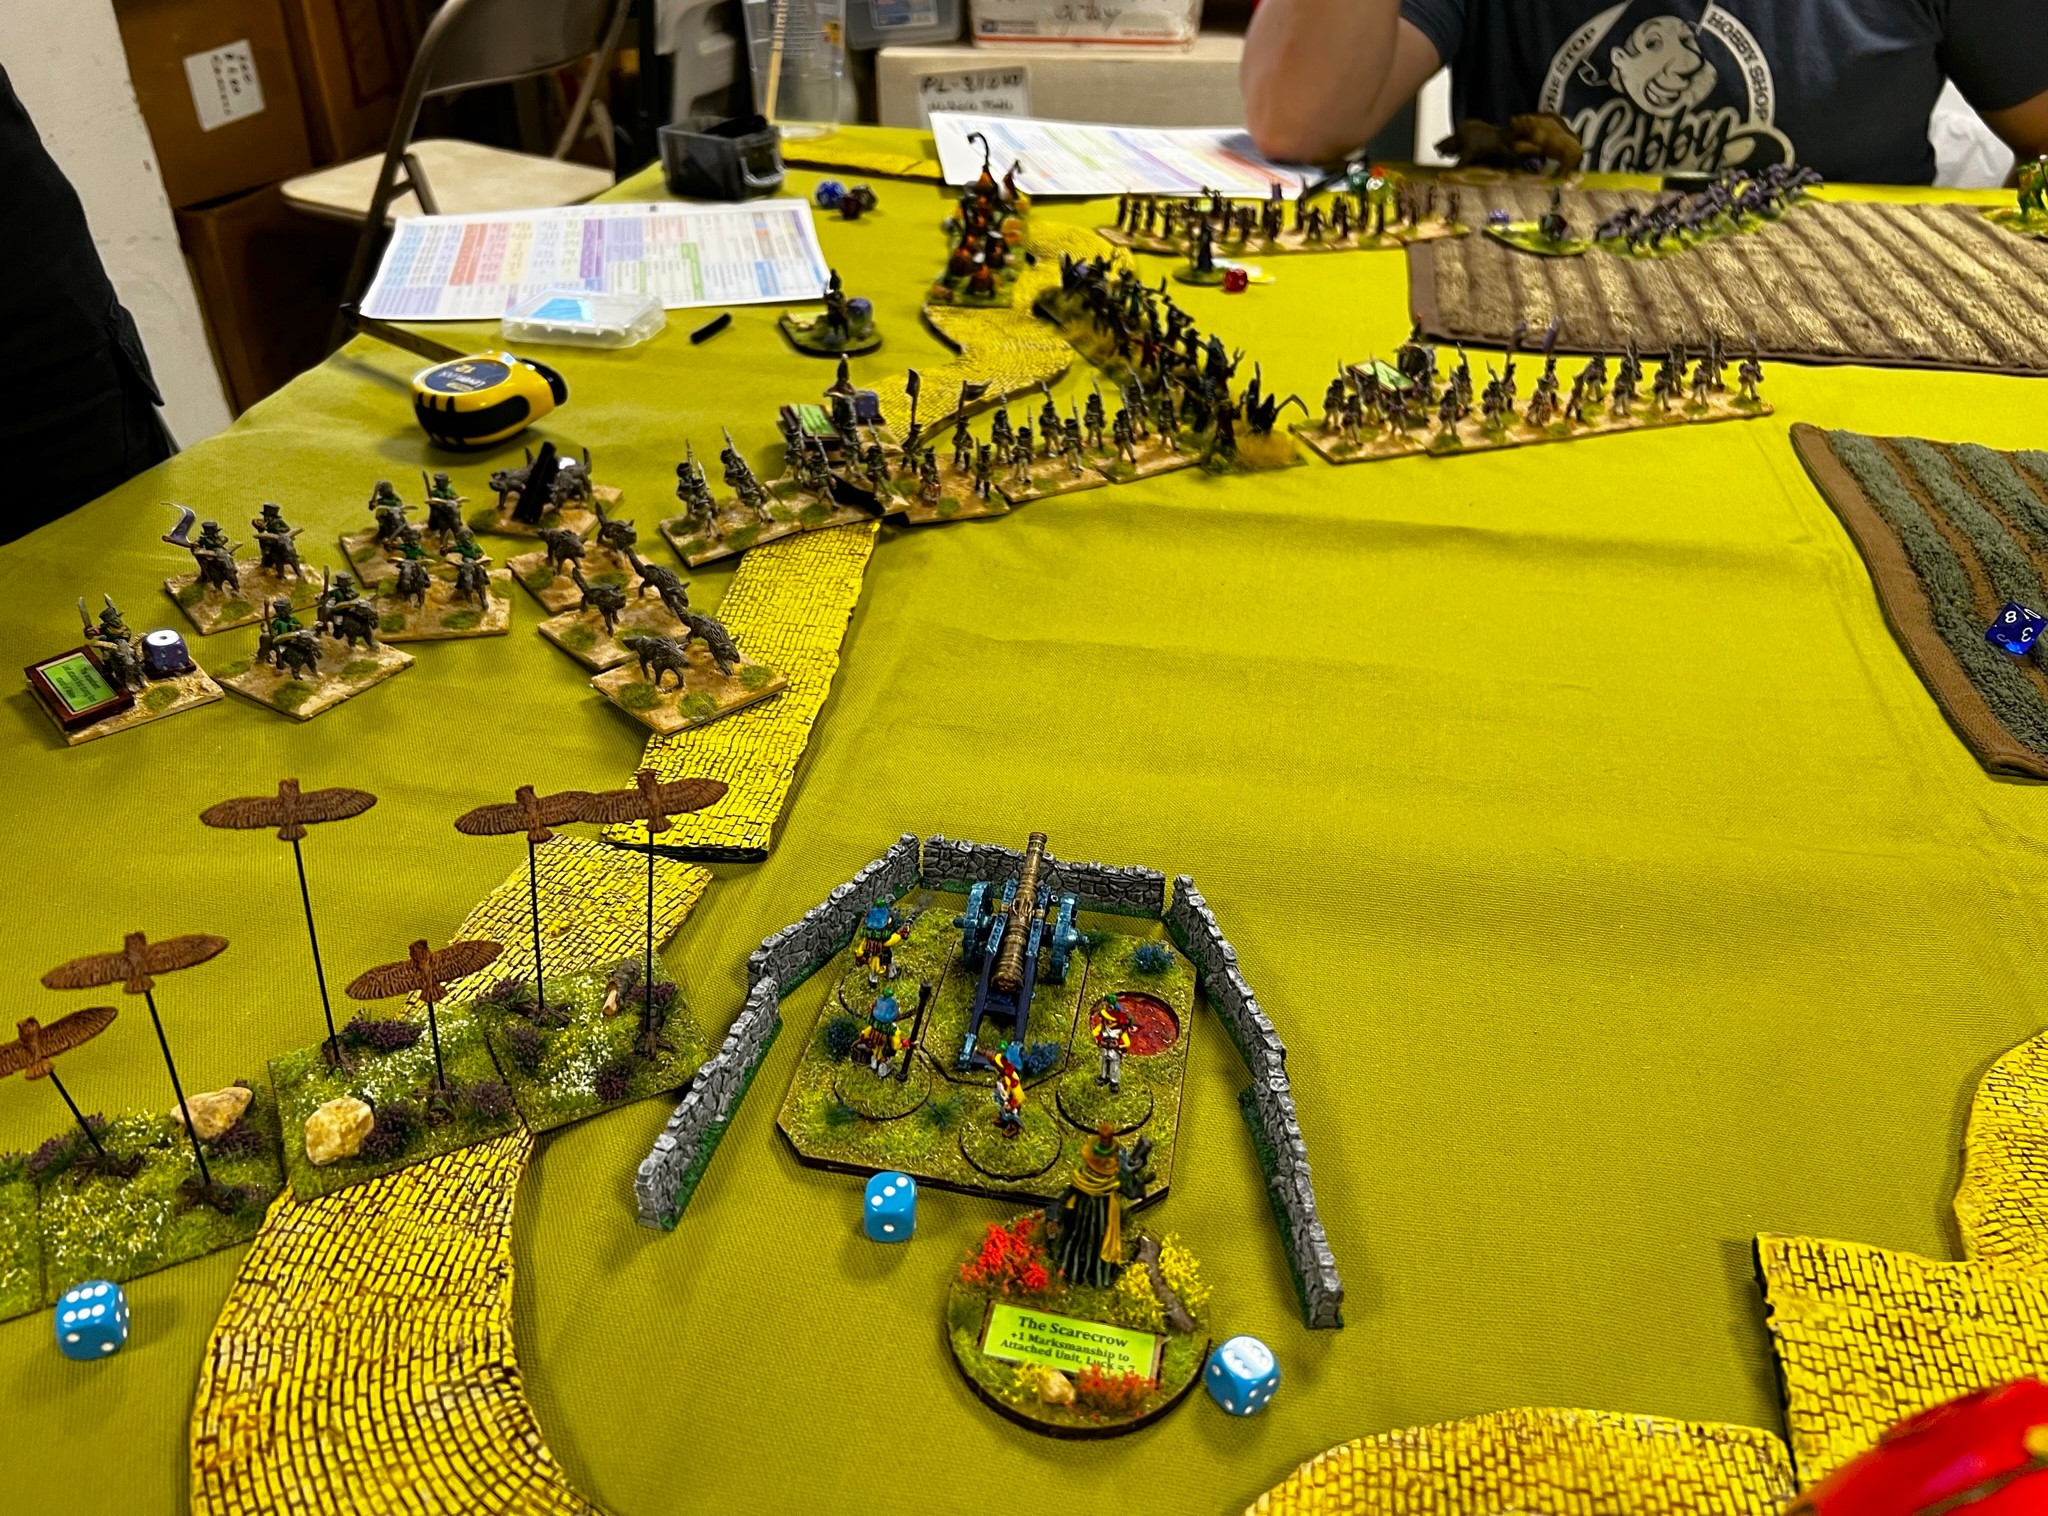
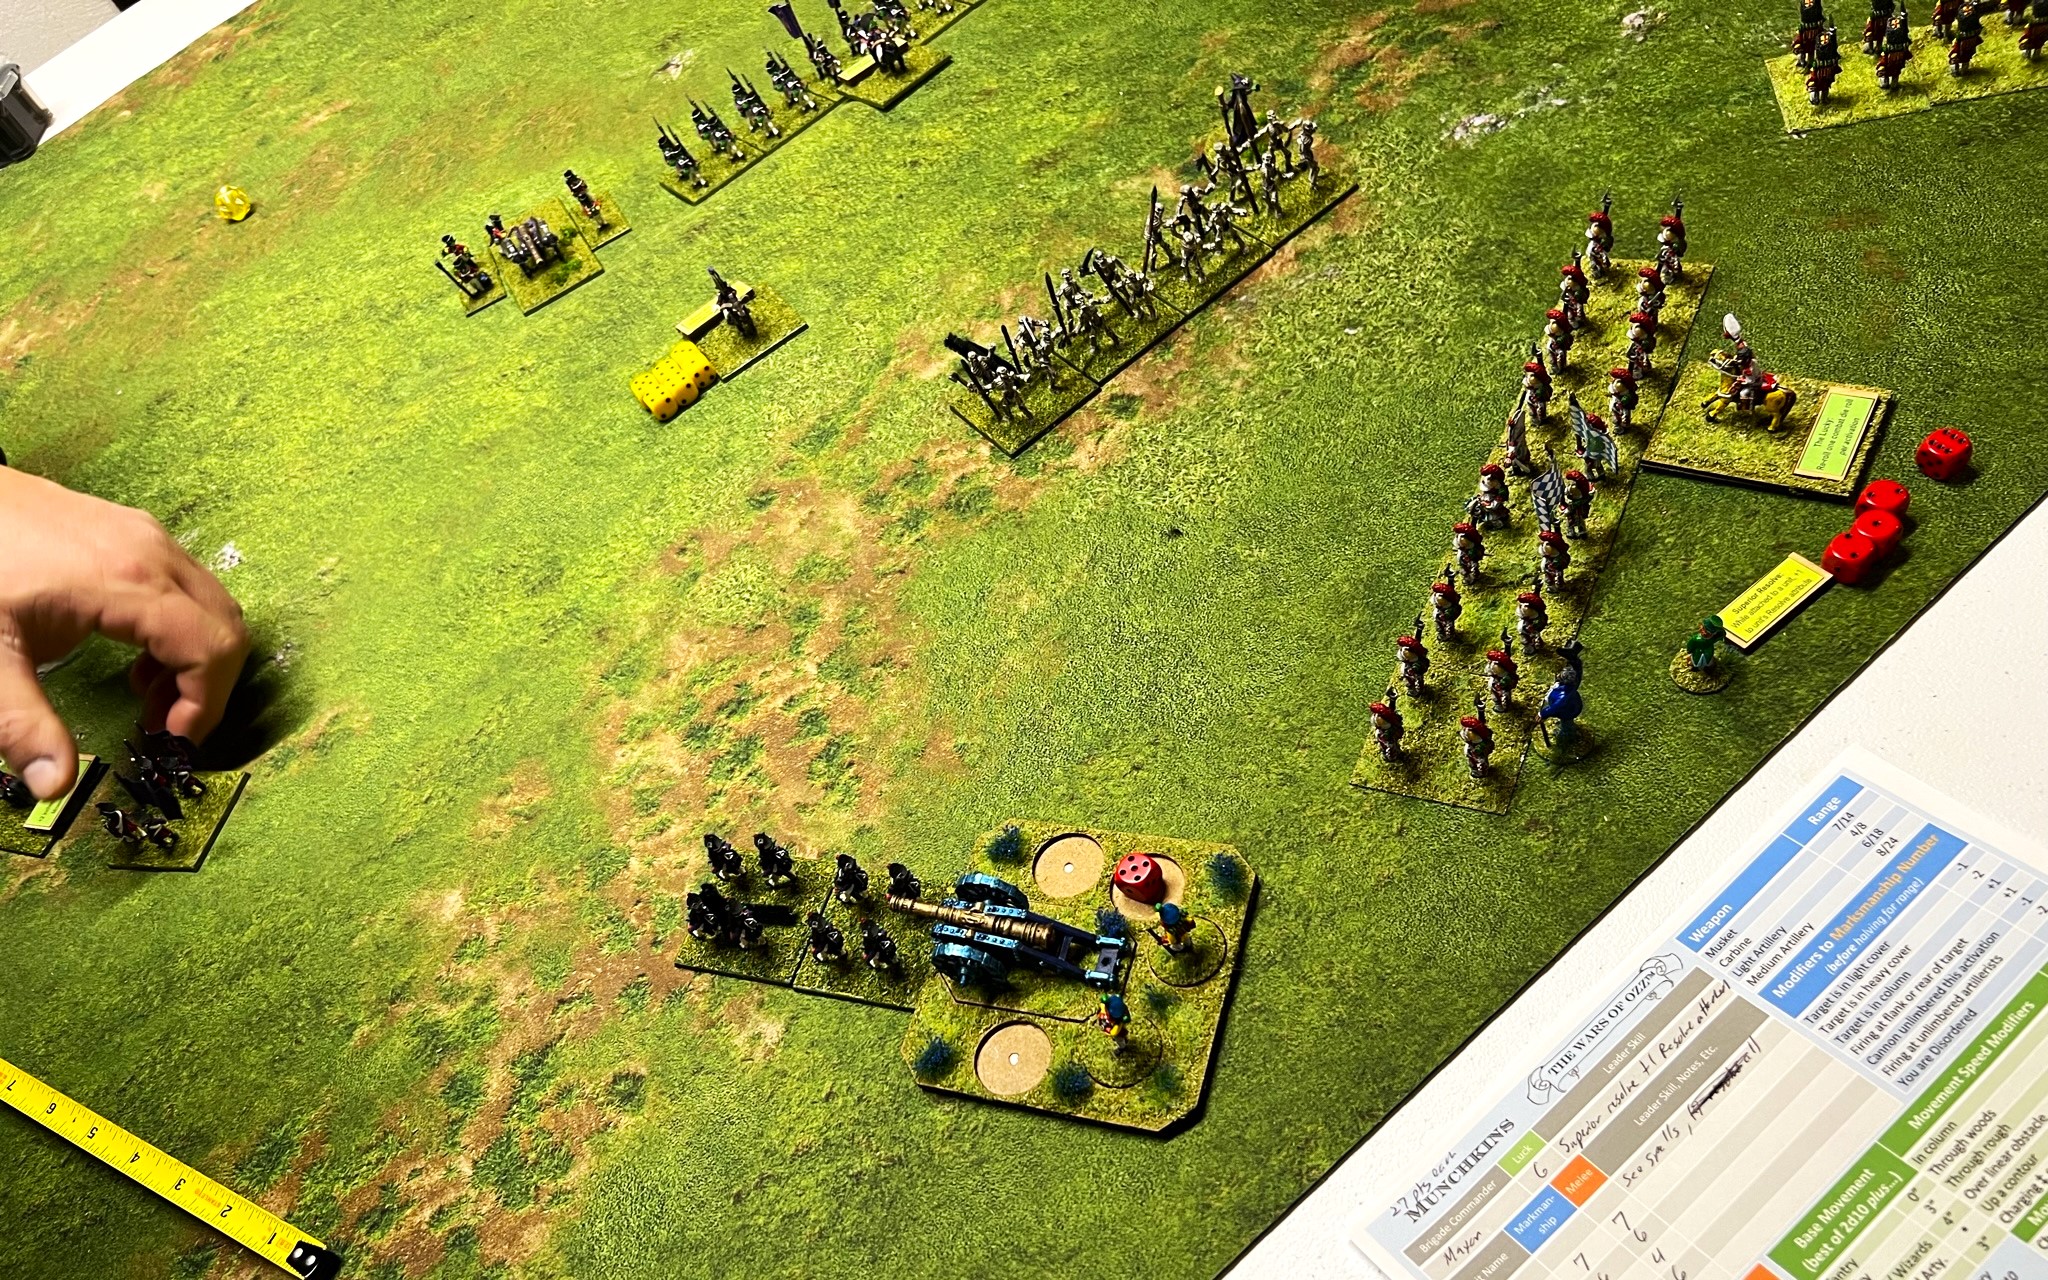
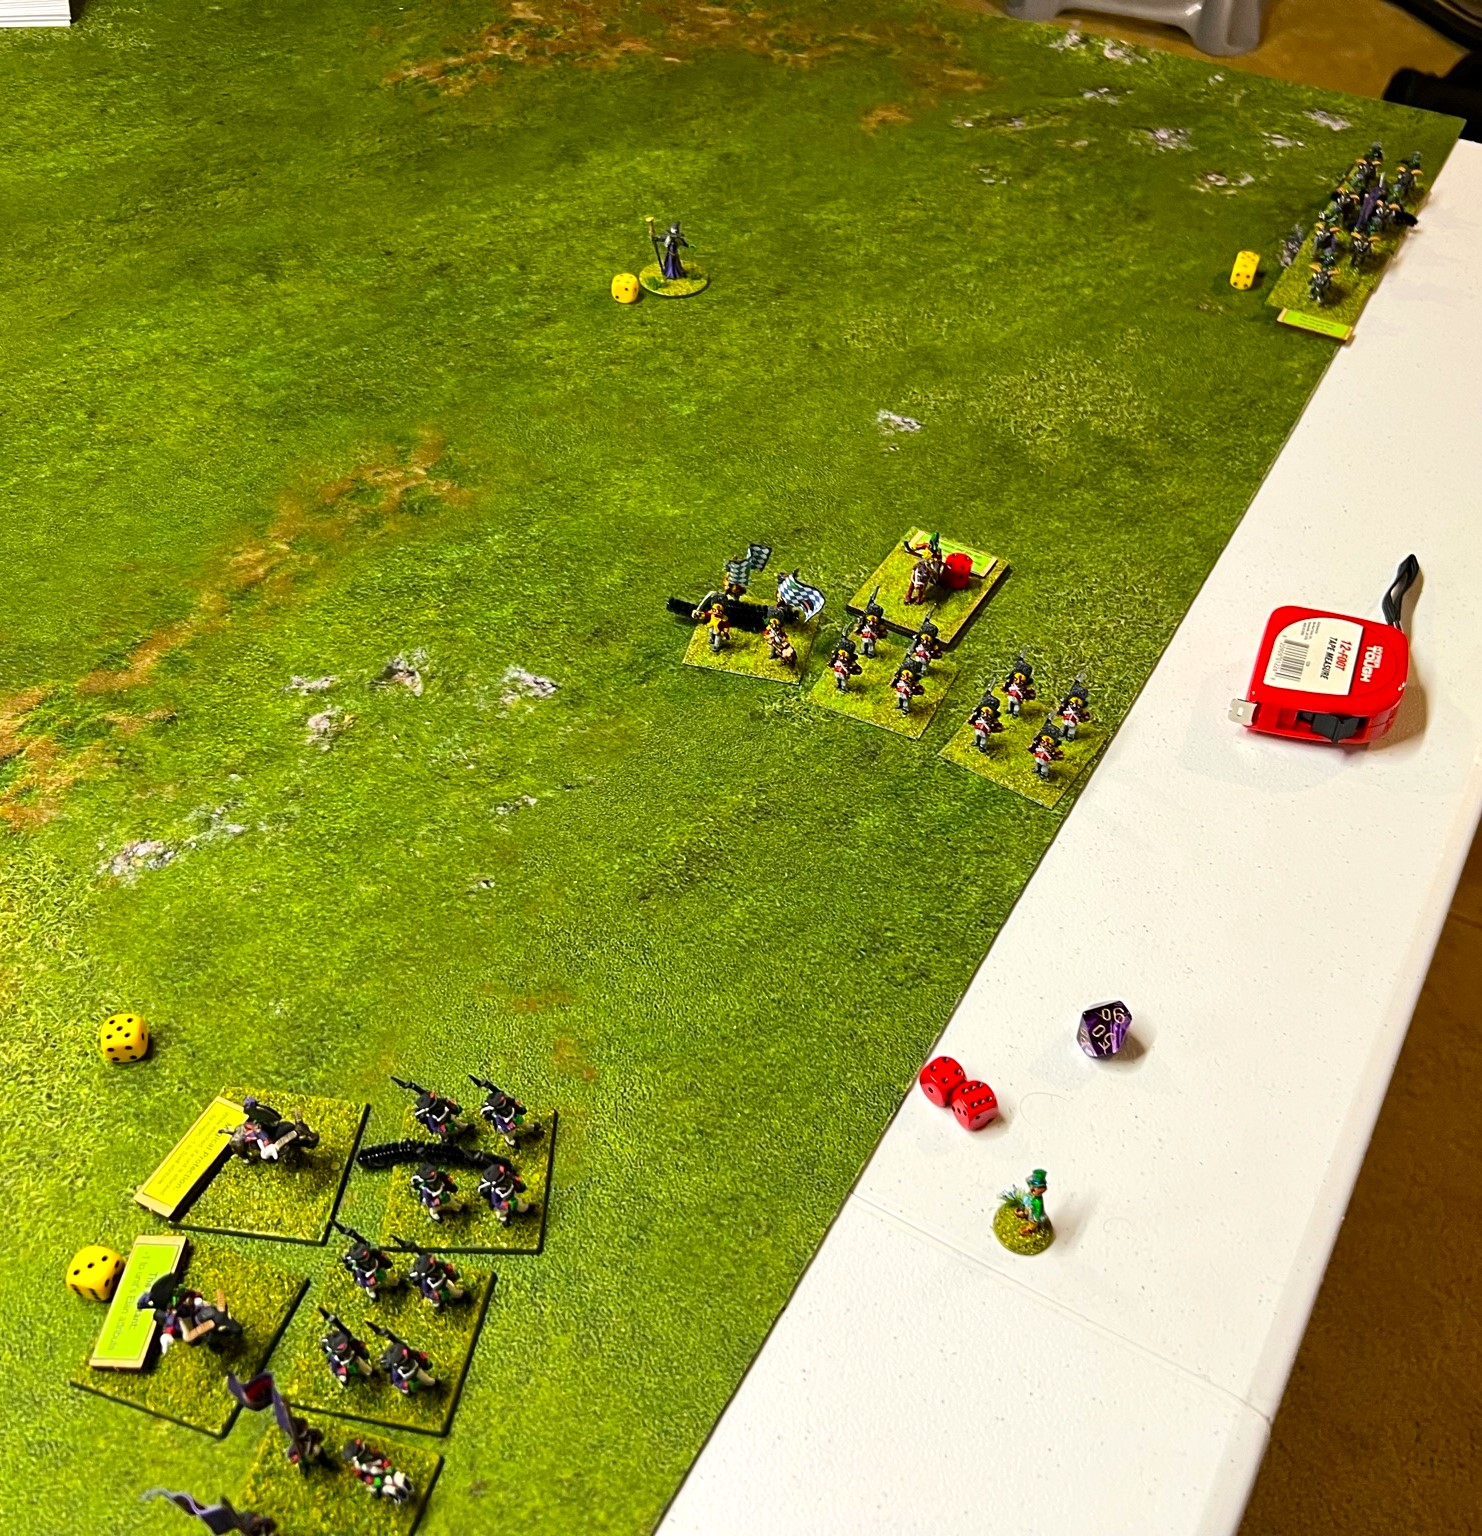
The set up. There were 3 Munchkin brigades (left side) versus 3 Gillikin brigades (right side). Each Gillikin Brigade was dominated by units of Dire Lions, Dire Bears, and Dire Wolves. The Gillikins had only 1 regiment with muskets. However, the Munchkins had artillery and excellent musketry. All brigades were small – 11 to 13 points each, with each side worth 35 points.The 6 players strategize.The Gillikins assault the Munchkins directly with their regiments of dire beasts. One regiment of musketry moves to move around a town to hit their right flank (at bottom of photo).The Munchkin Sharpshooter Regiment takes up position behind a river, flanked by a medium battery.The Gillikin 1st Infantry and the Mystic Crone (a witch) make their move to flank the sharpshooters. The town screened their approach.Colonel TikTok’s regiment was on the medium battery’s left. They watch as the first Dire Bear regiment approaches…their fire halts them……but the Dire Tigers make contact!Both the Tigers and Bears take hits coming in. The Munchkin infantry takes heavy damage. They hope one of the two artillery batteries will act quickly! Alas, a Dire Bear regiment dispatches the Munchkin Light Battery. Their gun is left behind to be torn asunder.The medium battery is now threatened! It too would be destroyed……as shown here.
All the Munchkins had left was an intact infantry regiment. That unit was on the far left flank and had been successful at holding off Dire Lions and Dire Wolves. Meanwhile, the sharpshooters position was finally taken by the Gillikin Infantry (commanded by Dan Eustace). Dan’s flanking maneuver had been one of the keys to their final victory. The final score was 13-11 in favor of the Lions, Tigers, and Bears of the Gillikins. Dan was awarded a set of the Wars of Ozz rules for his efforts!
Congrats Dan!
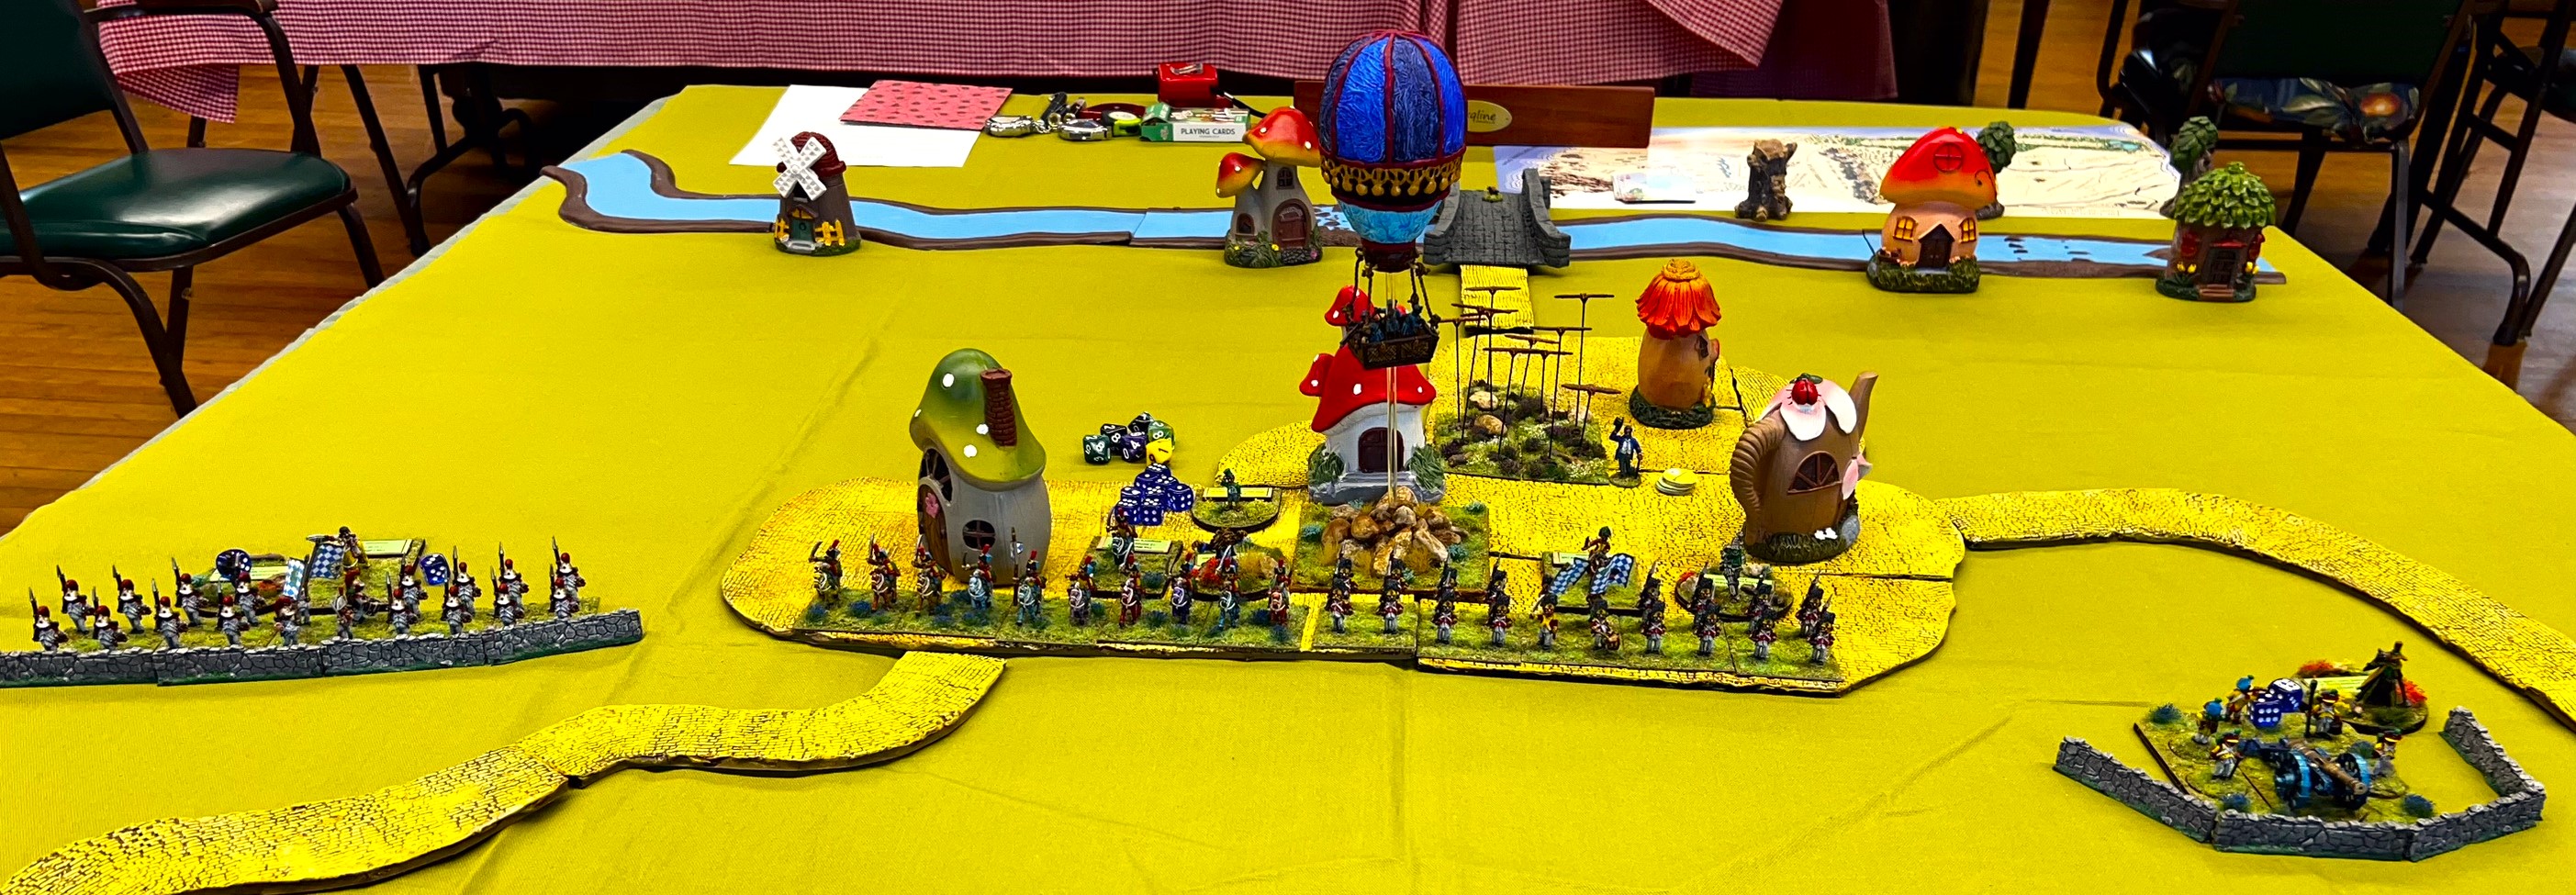
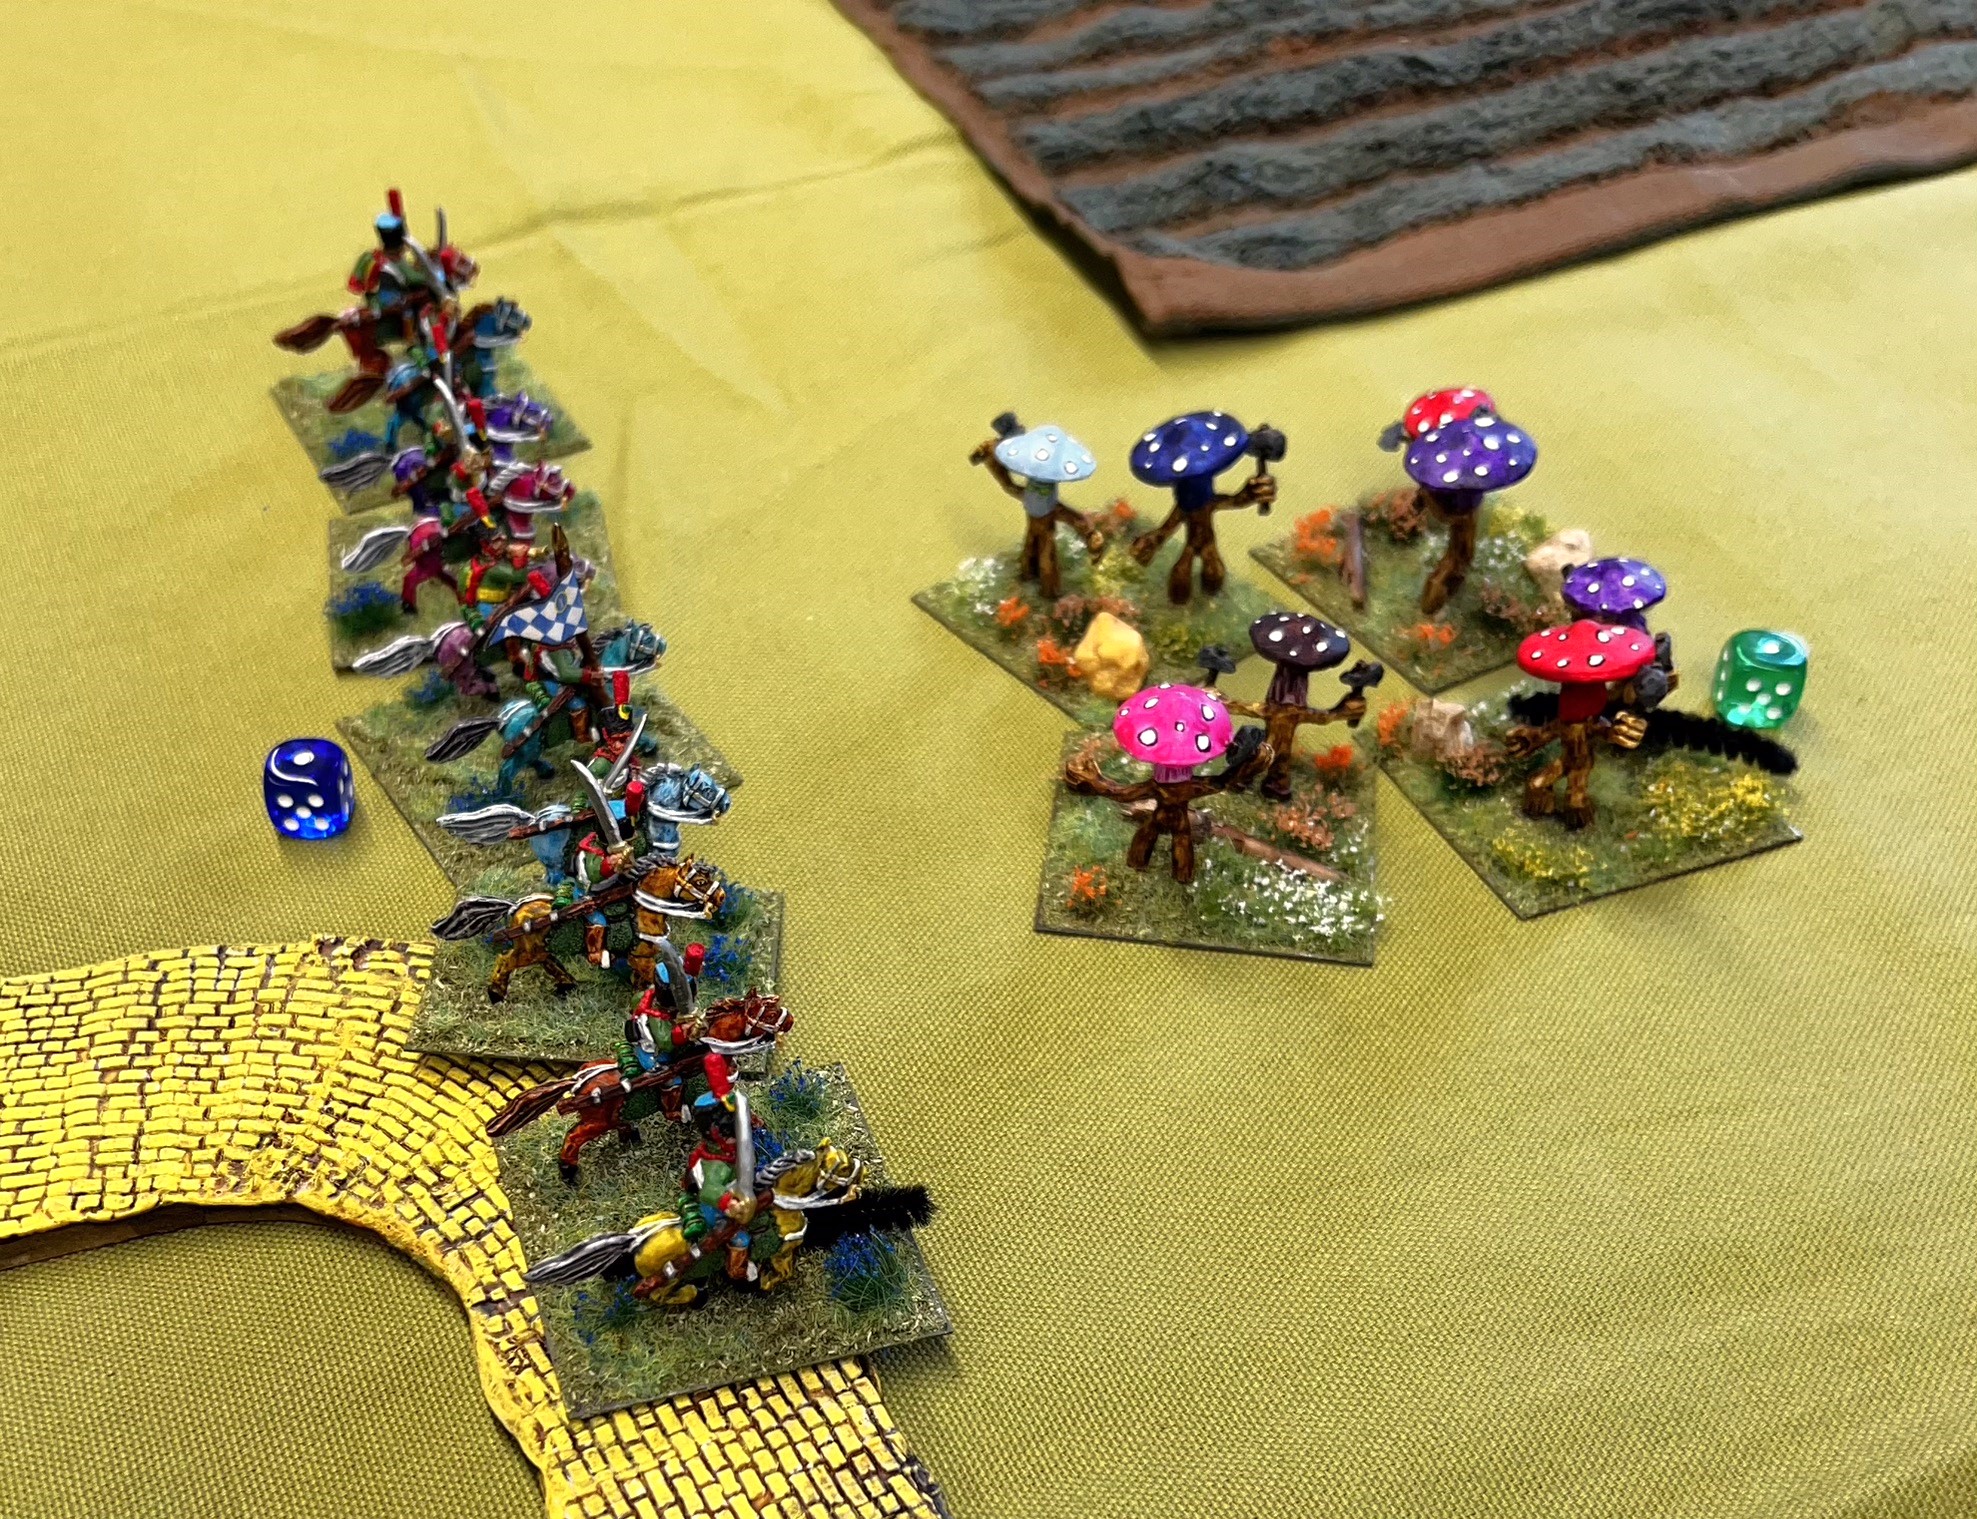
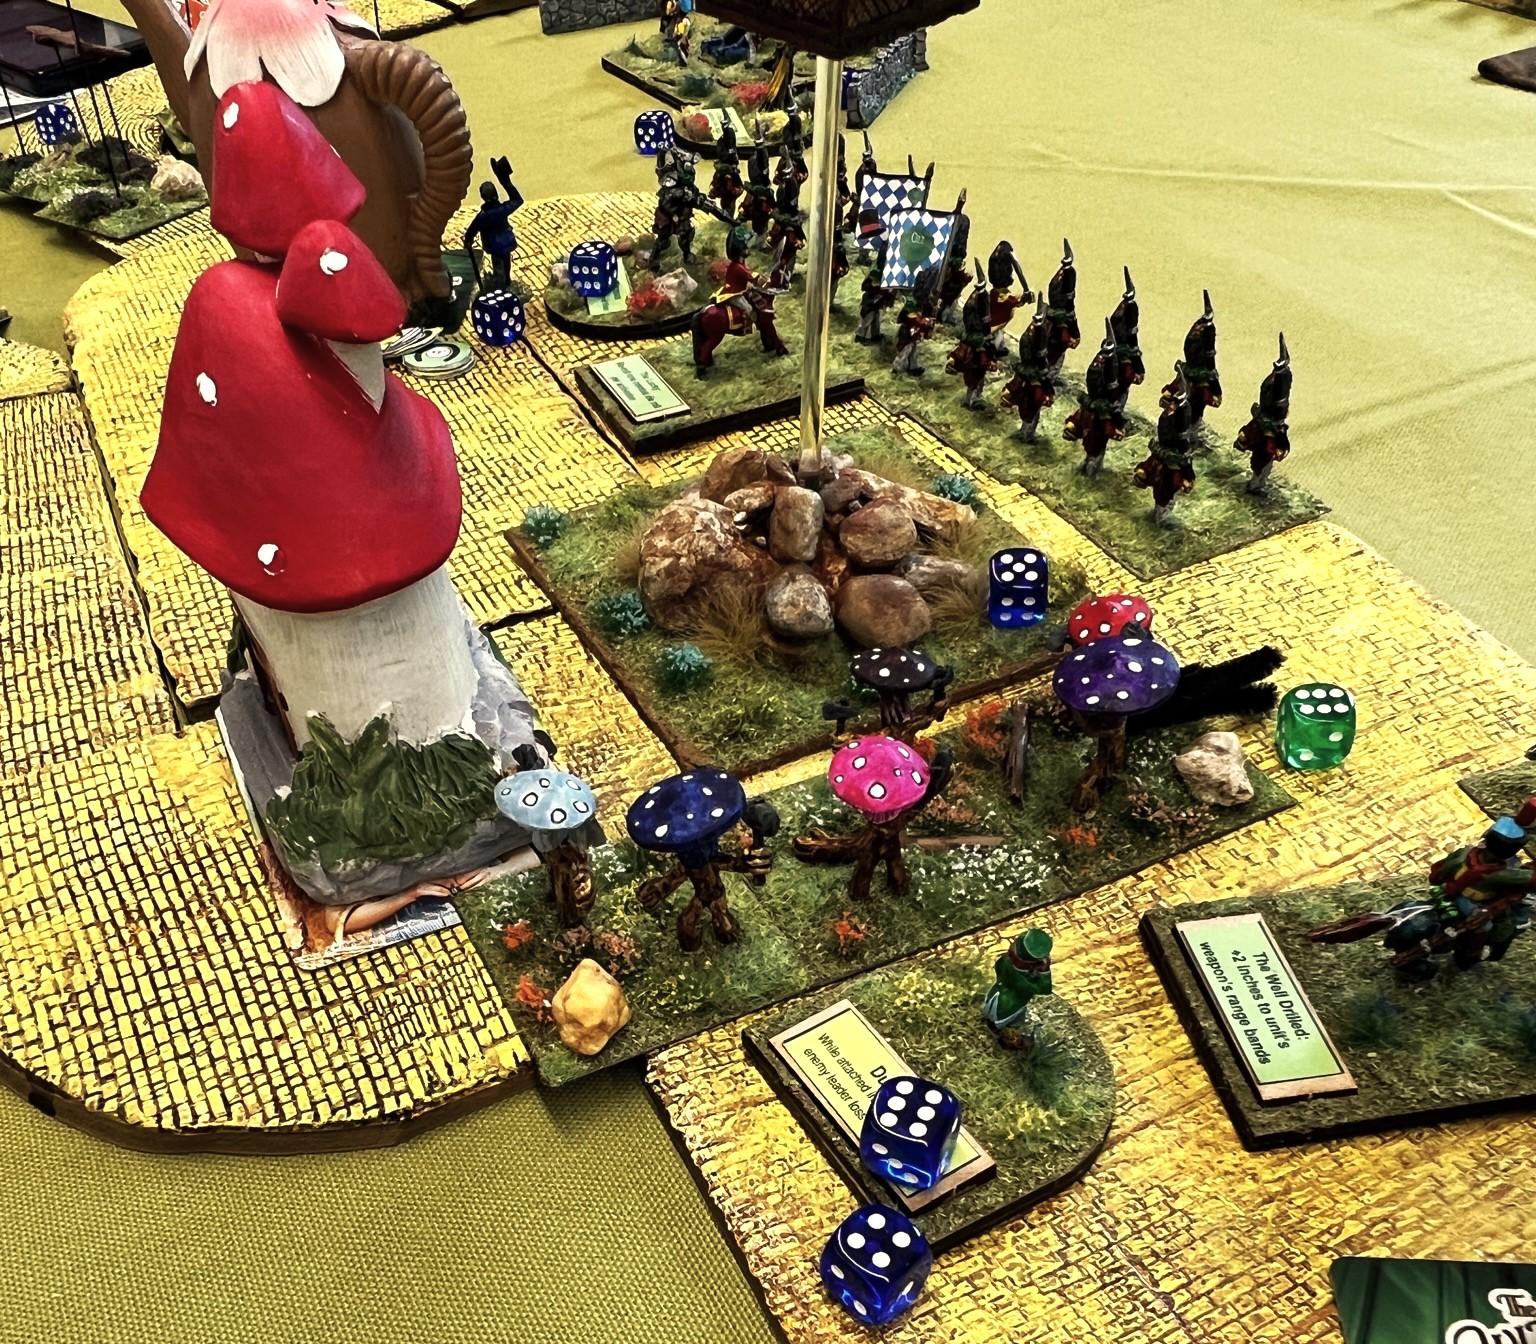
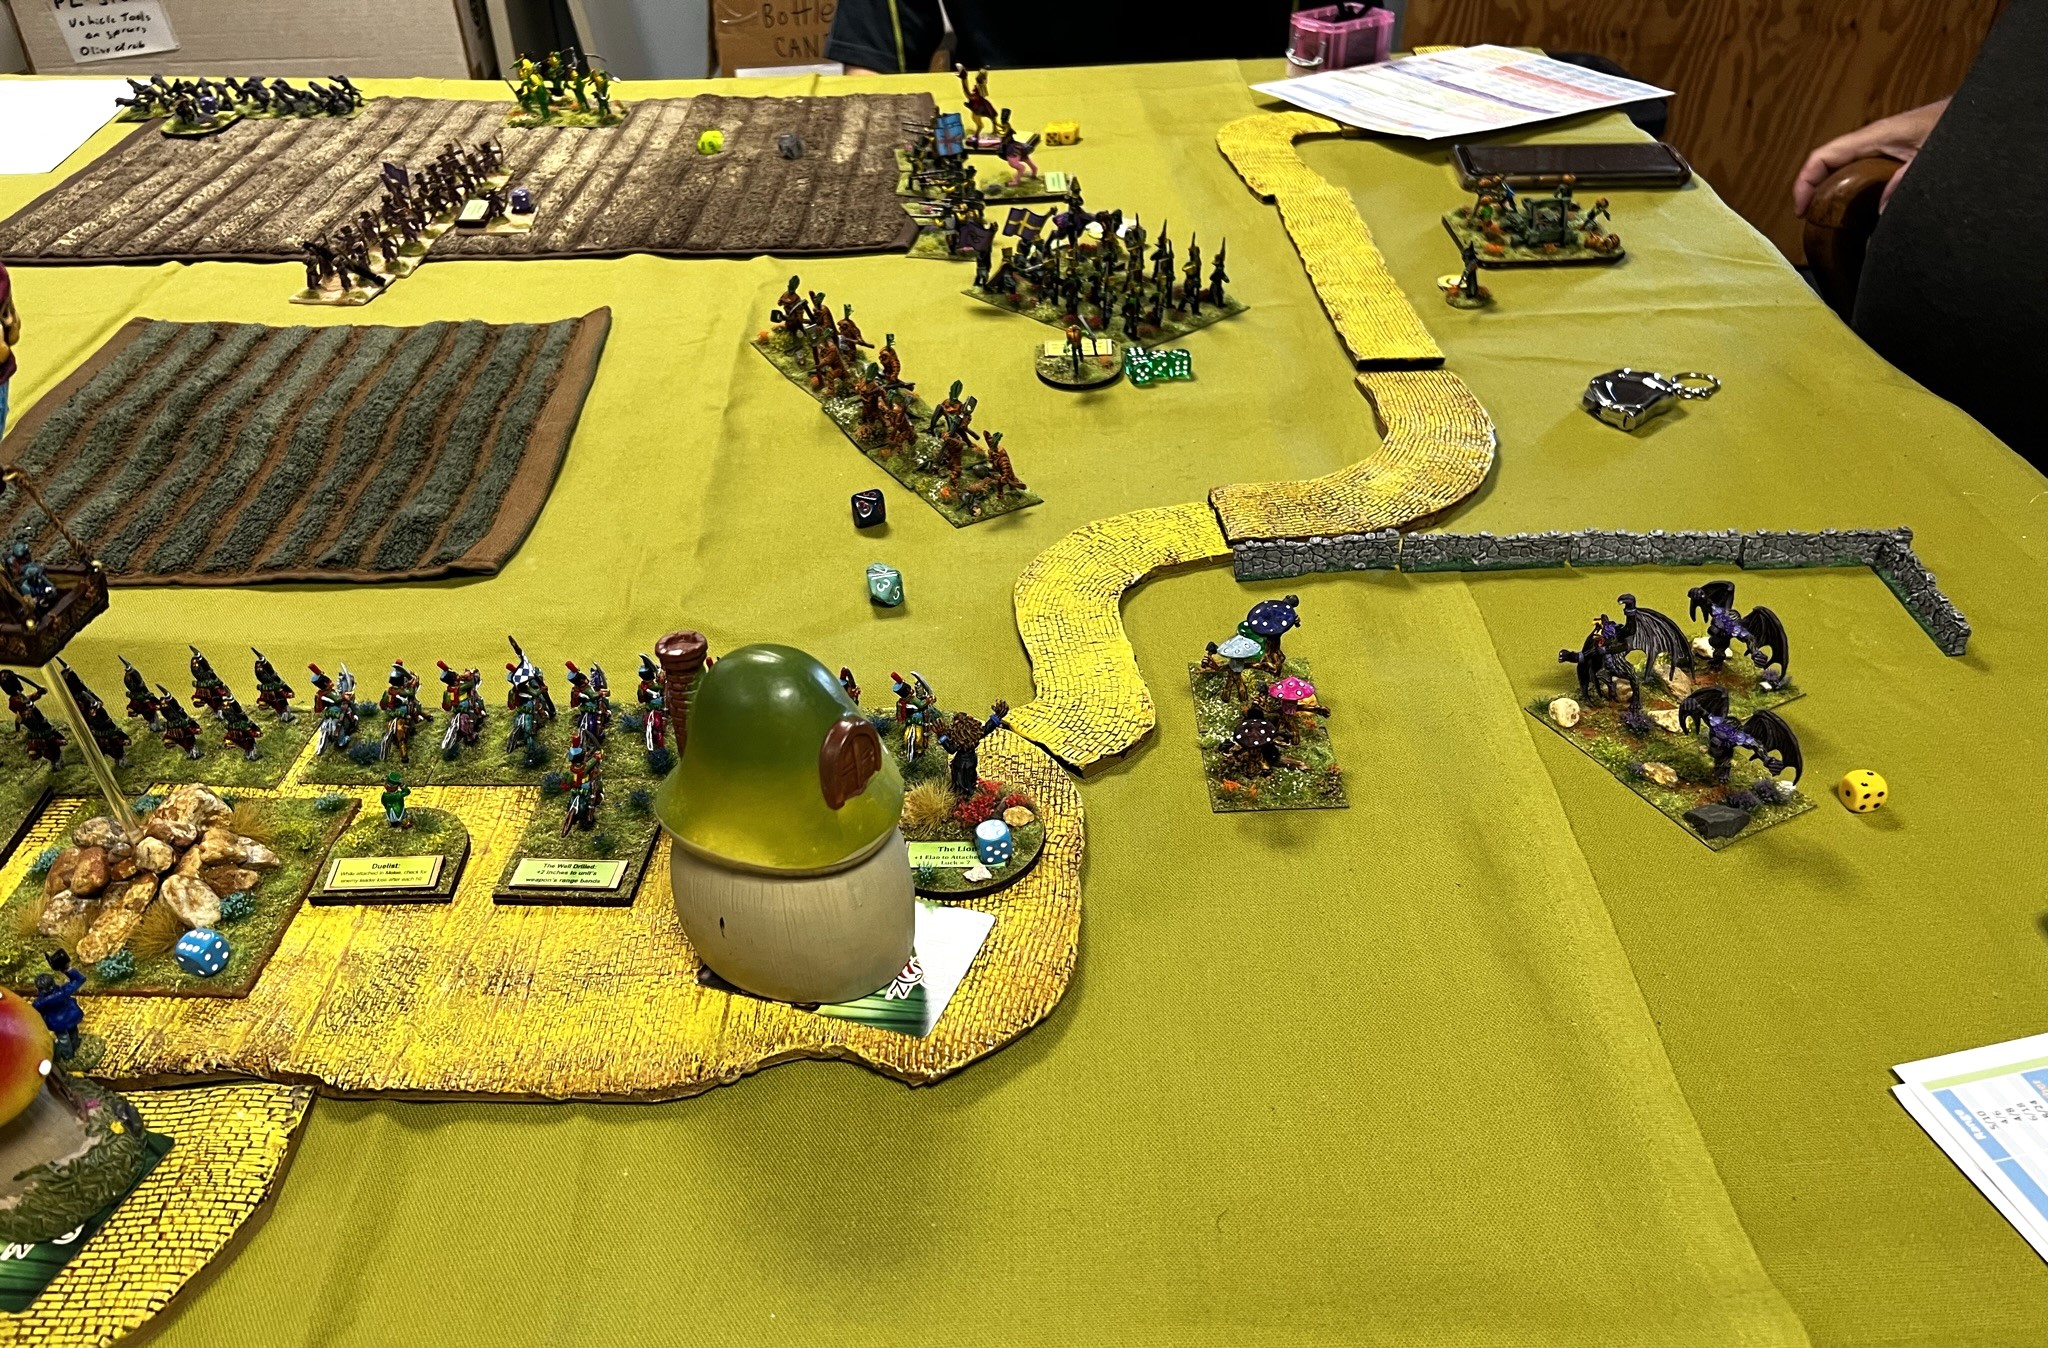
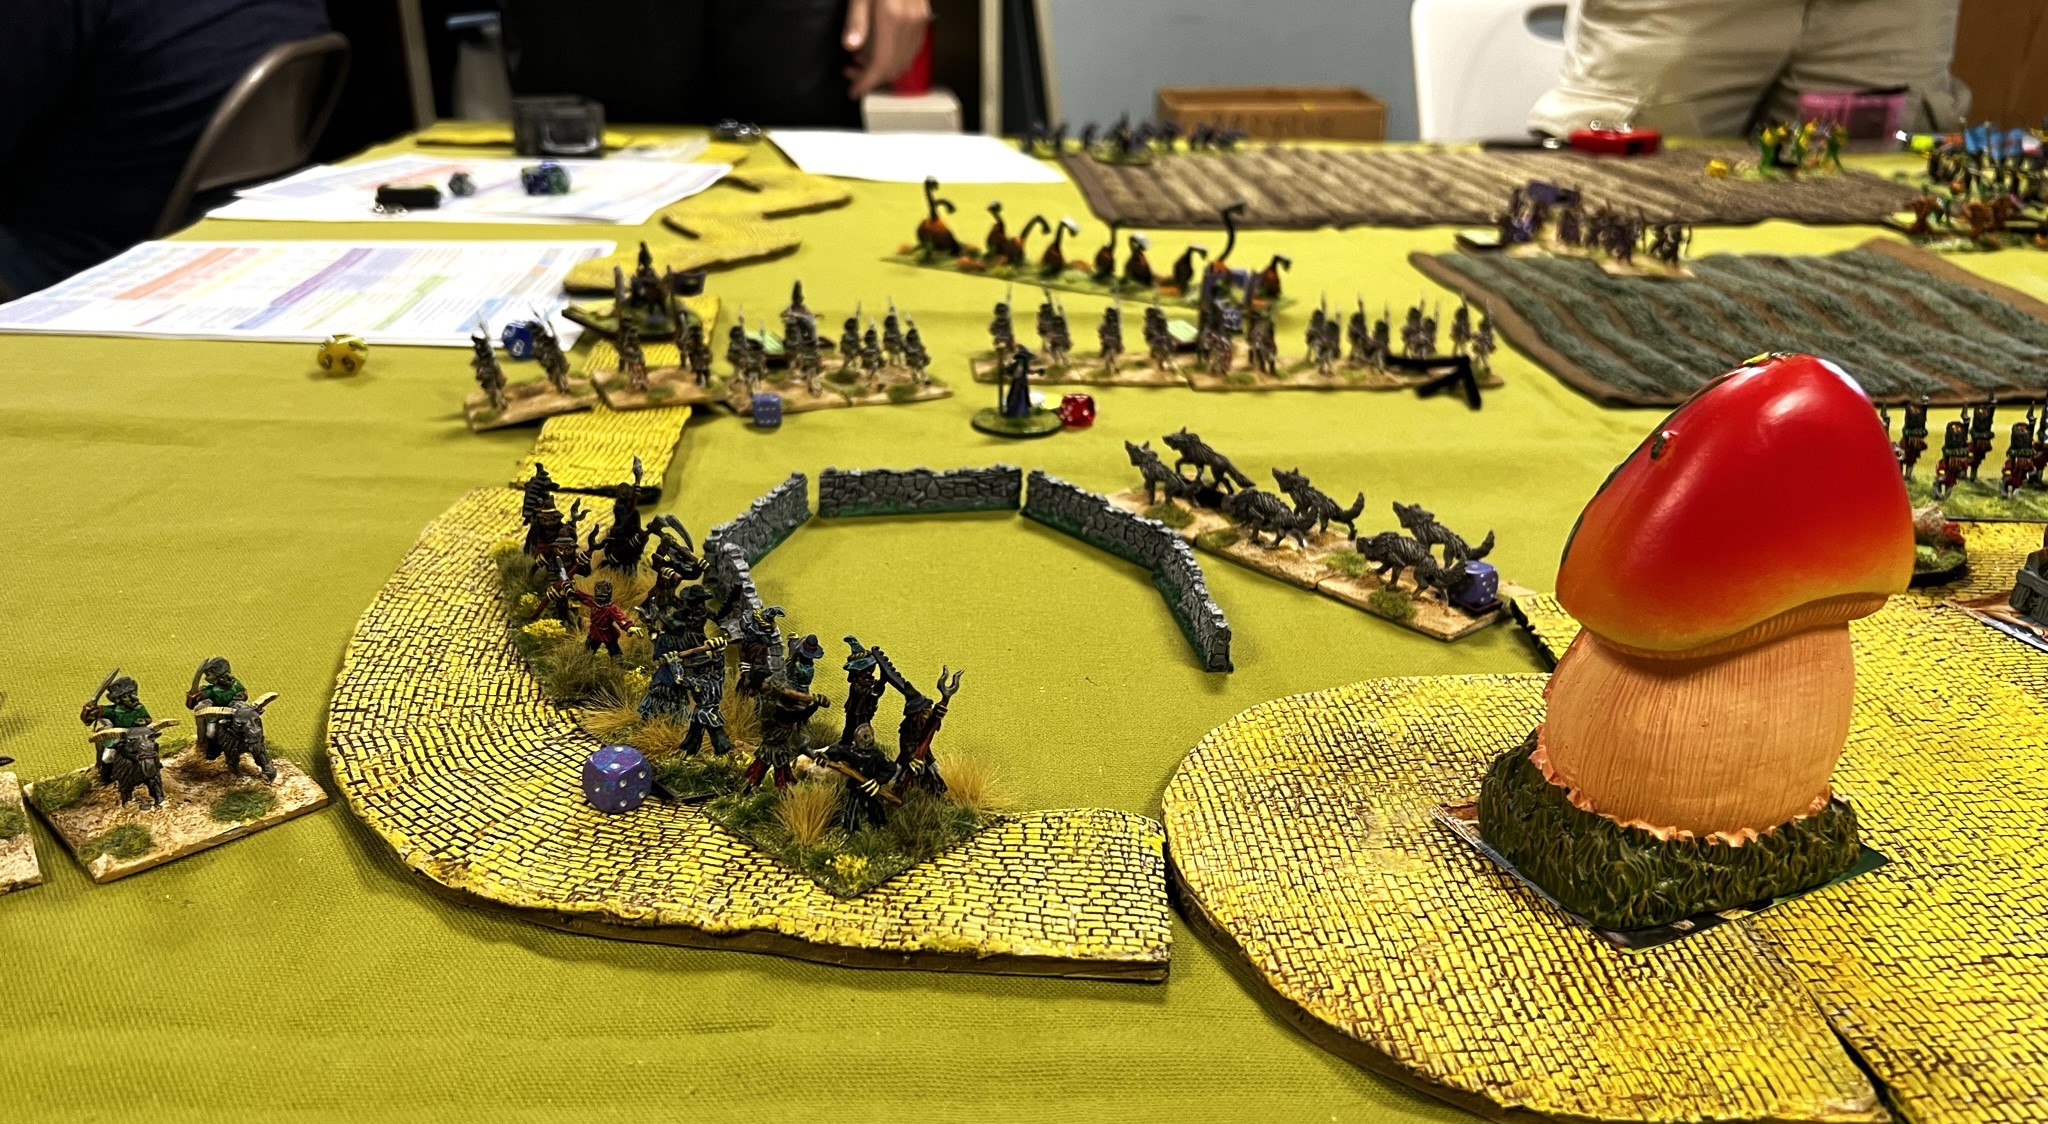
Battle for the Magic Mushrooms & the Ancient Crystals of Power
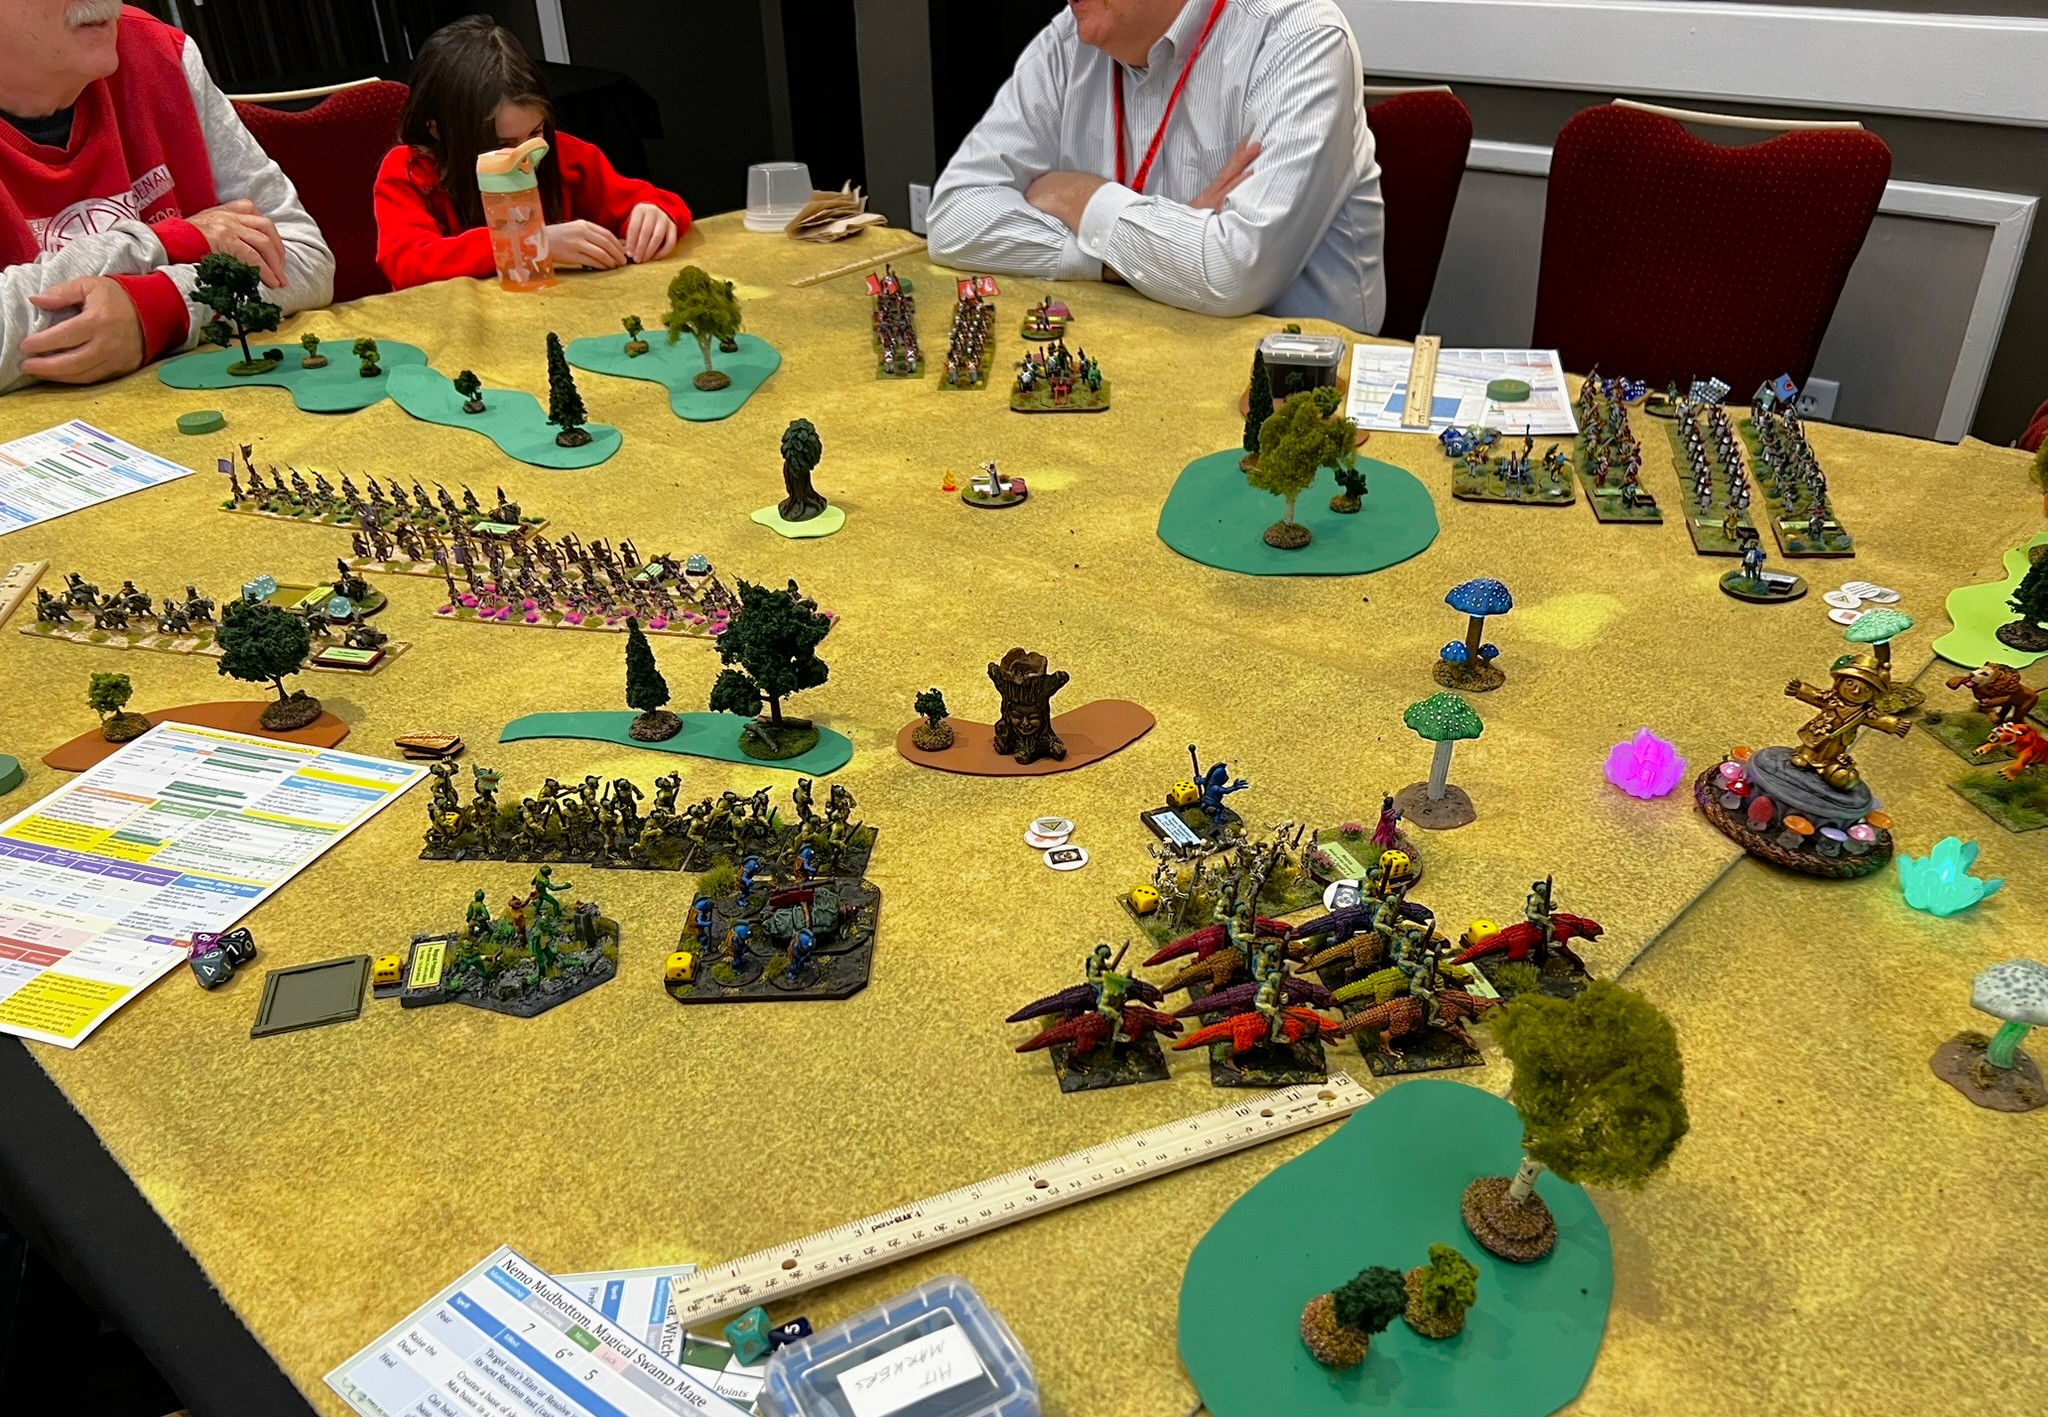
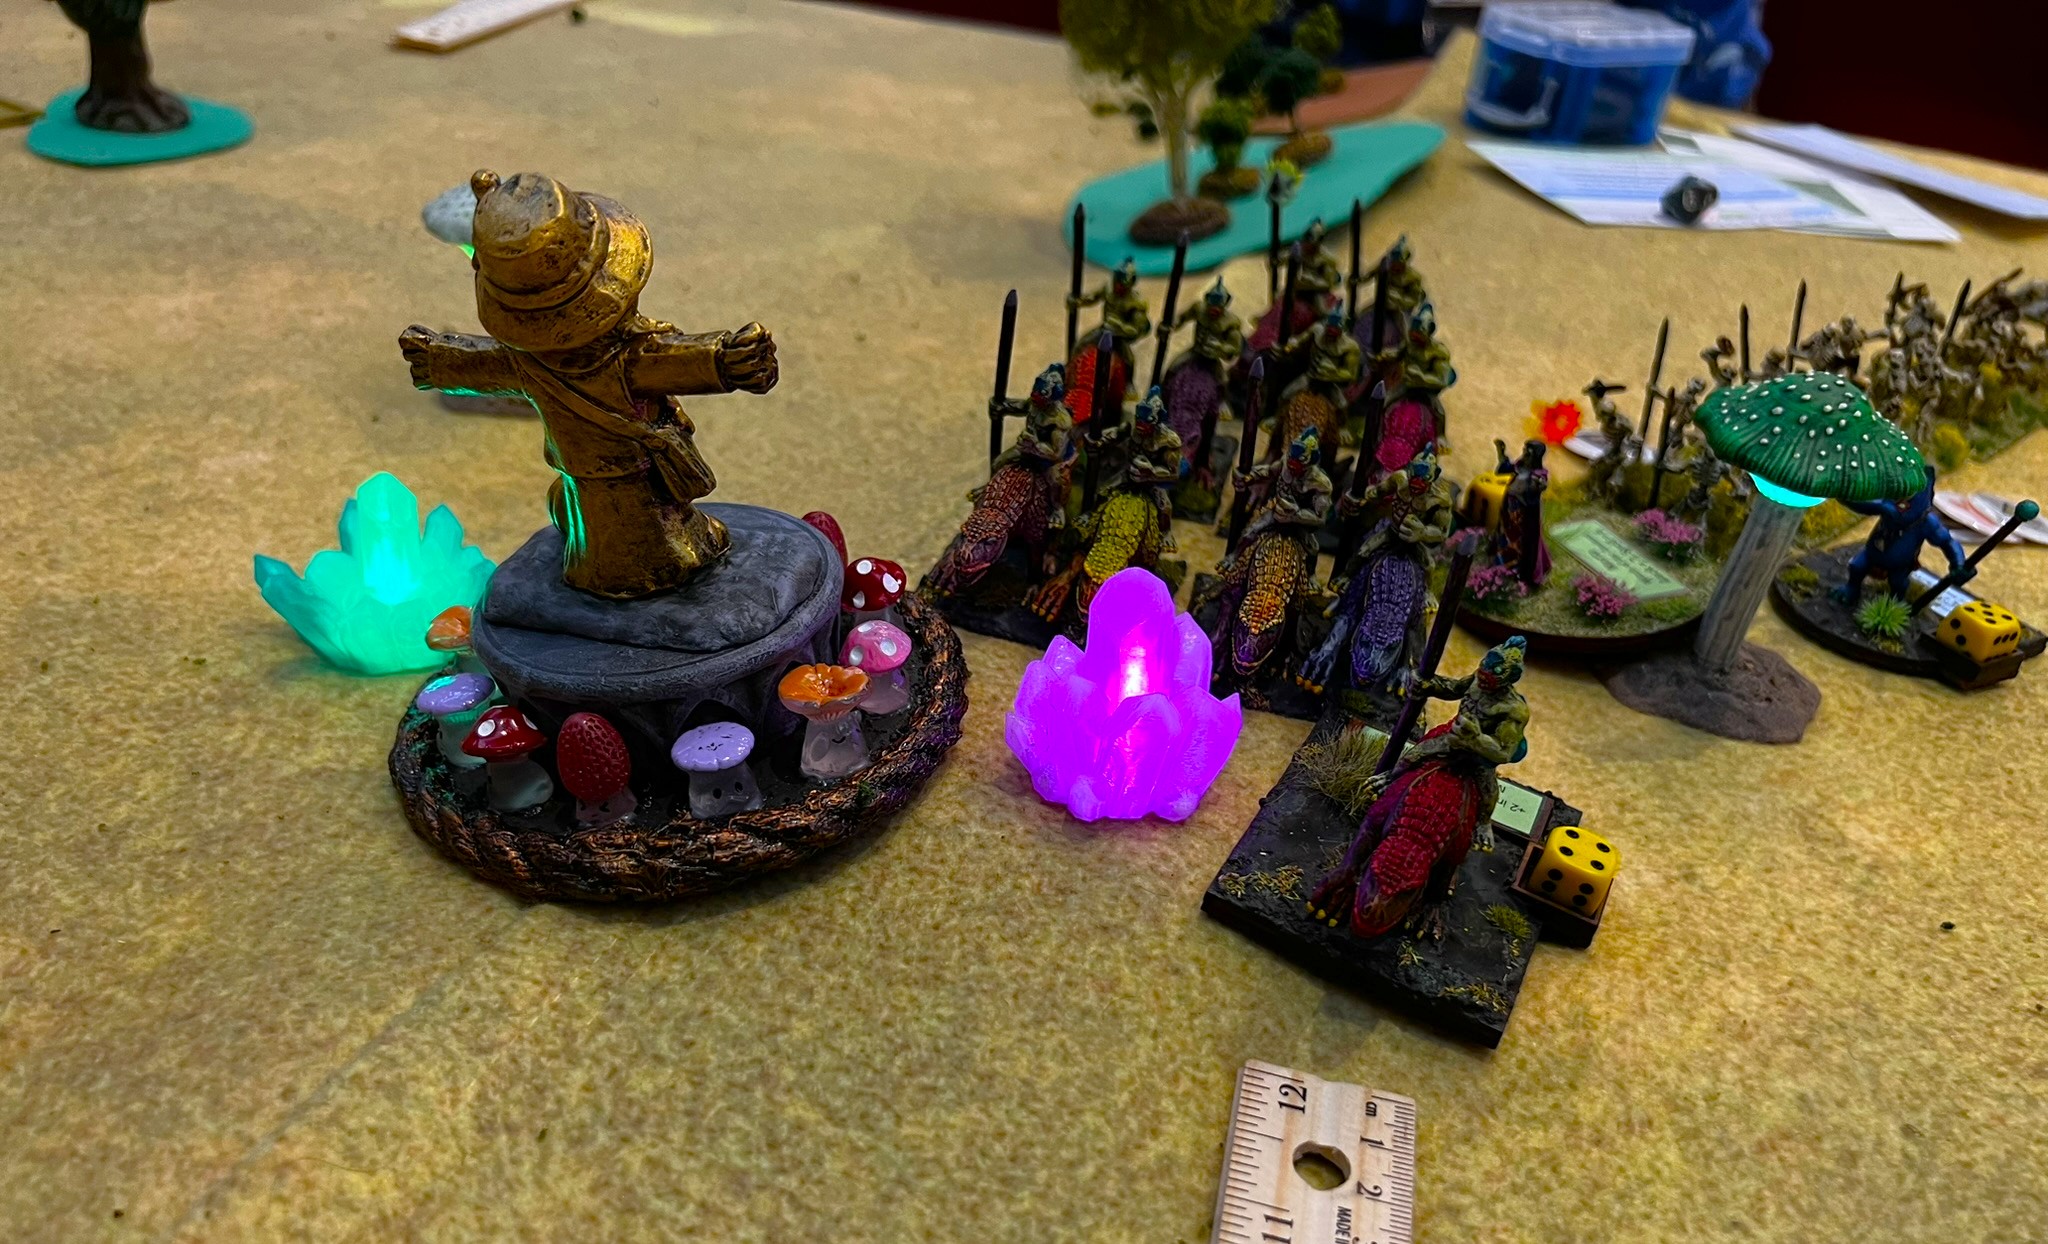
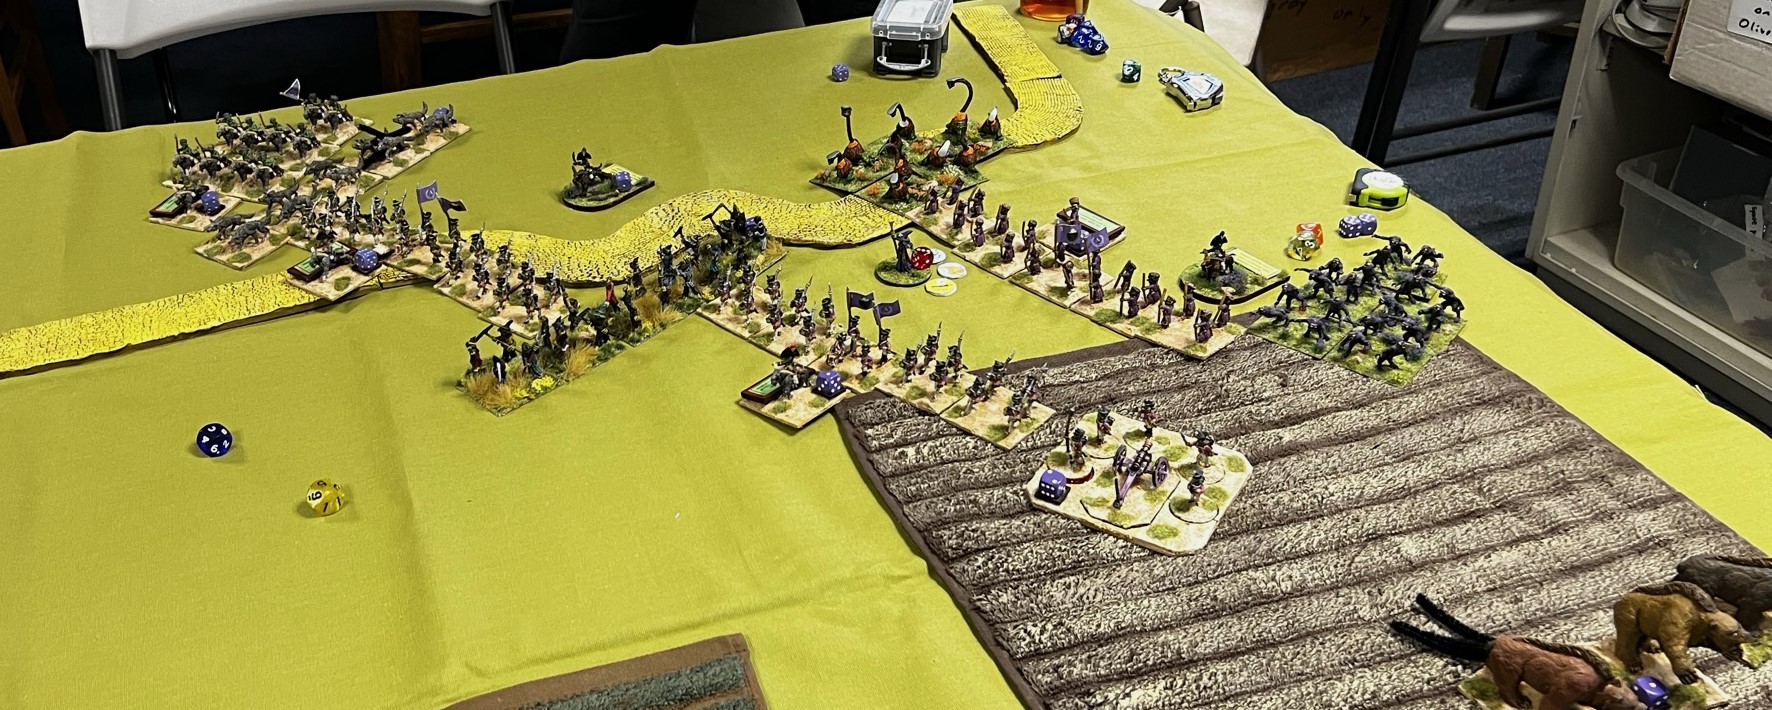
The world of Ozz is nothing if not magical – and there are many talismans & powerful weapons that spring up everywhere. In a remote section of Ozz, a wonderful magical find of a field of Magic Mushrooms near some rare Crystals of Power – has led to an Ozzian “Gold Rush”. Here, several Ozzian nations are scrambling to take seize & control of them. Factions have teamed up & are ready to fight to get these valuable resources and deny their capture by their enemies, but what will happen? Beginners are welcome. Rules will be taught. Players under 13 only with a playing adult.
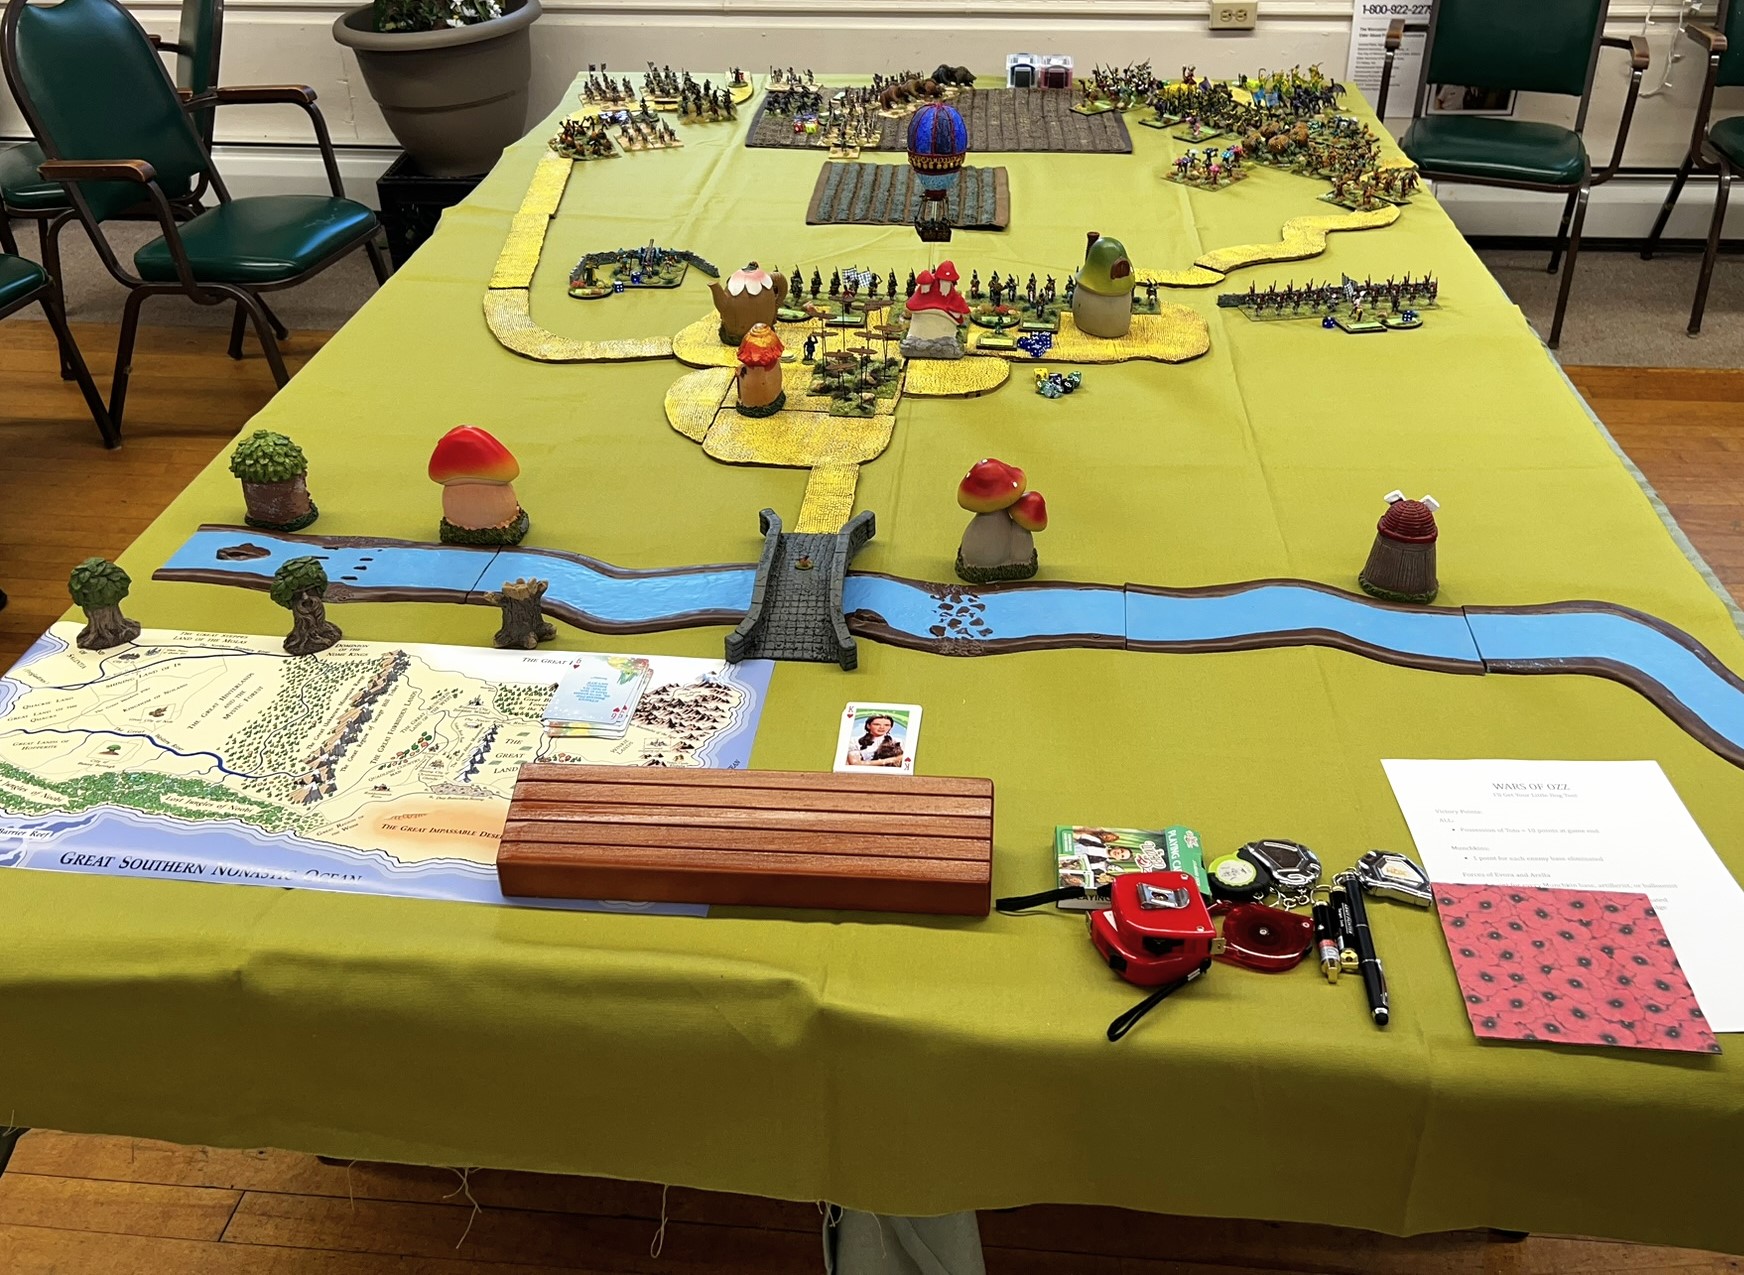
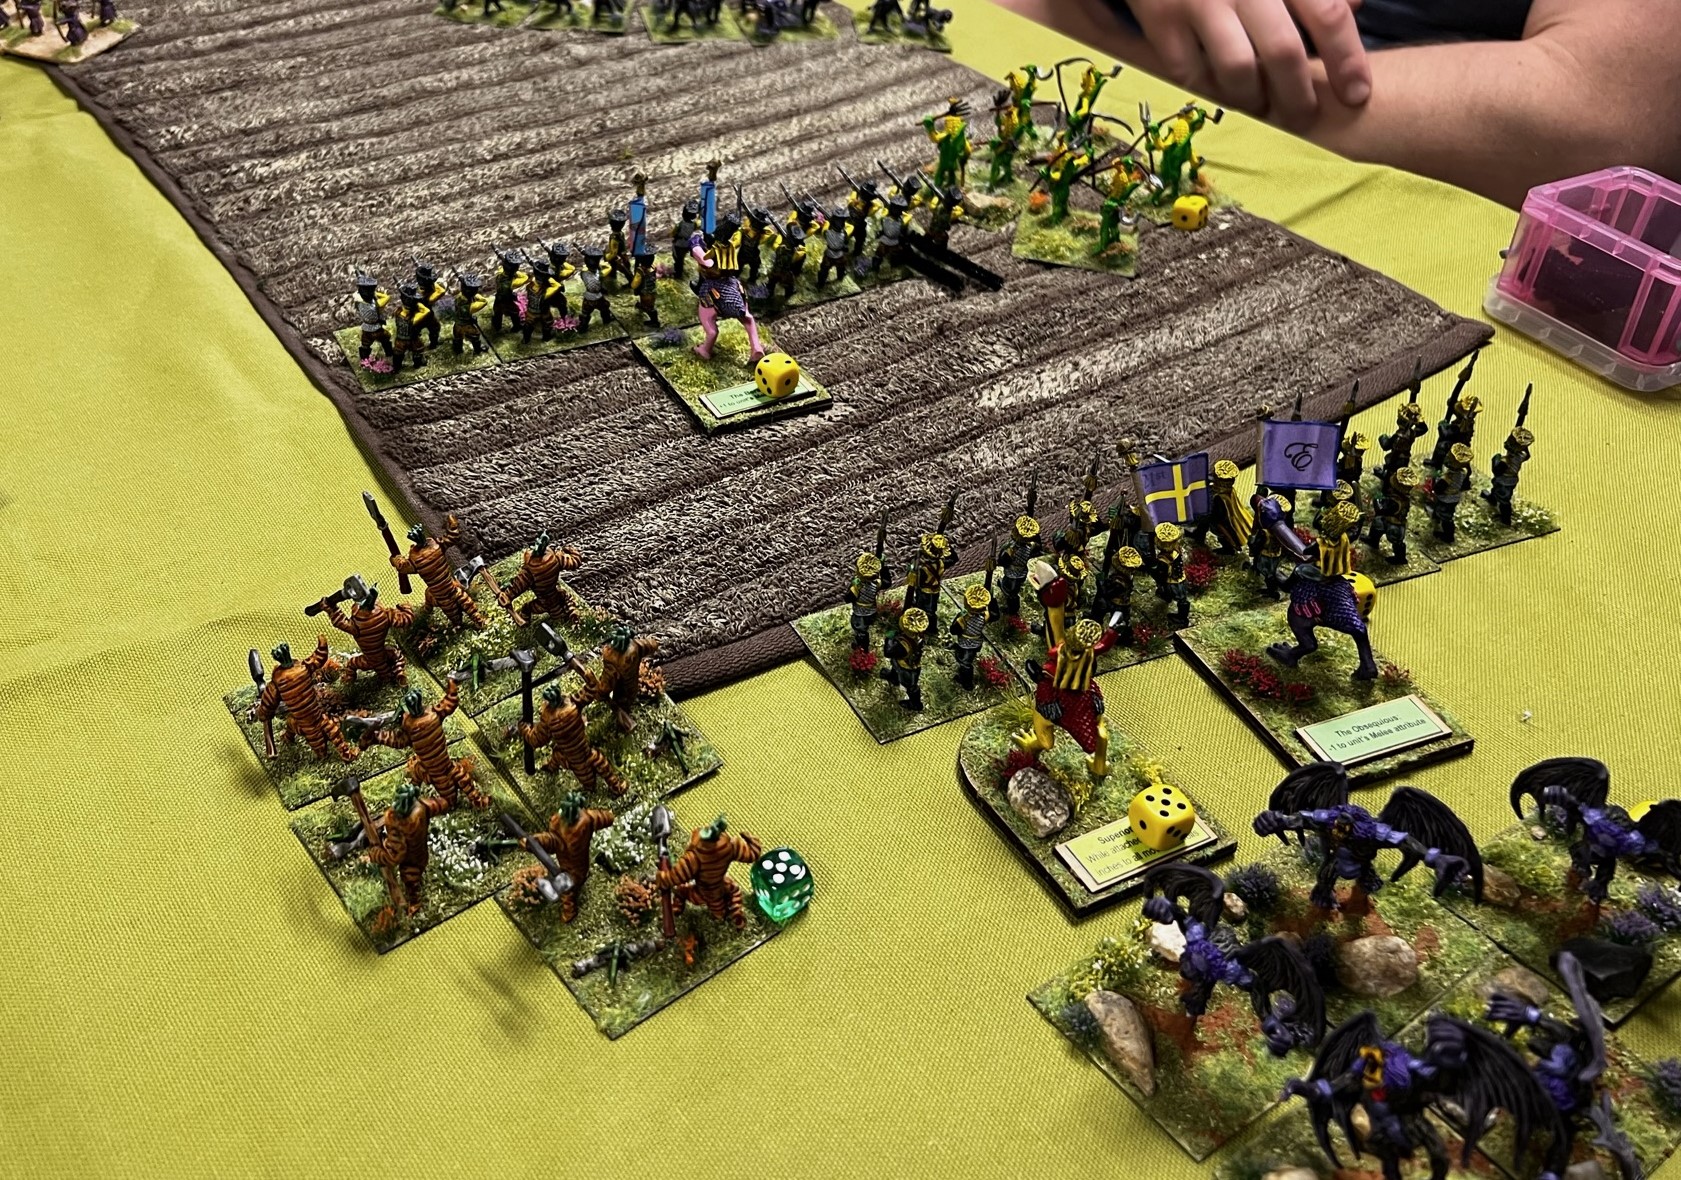
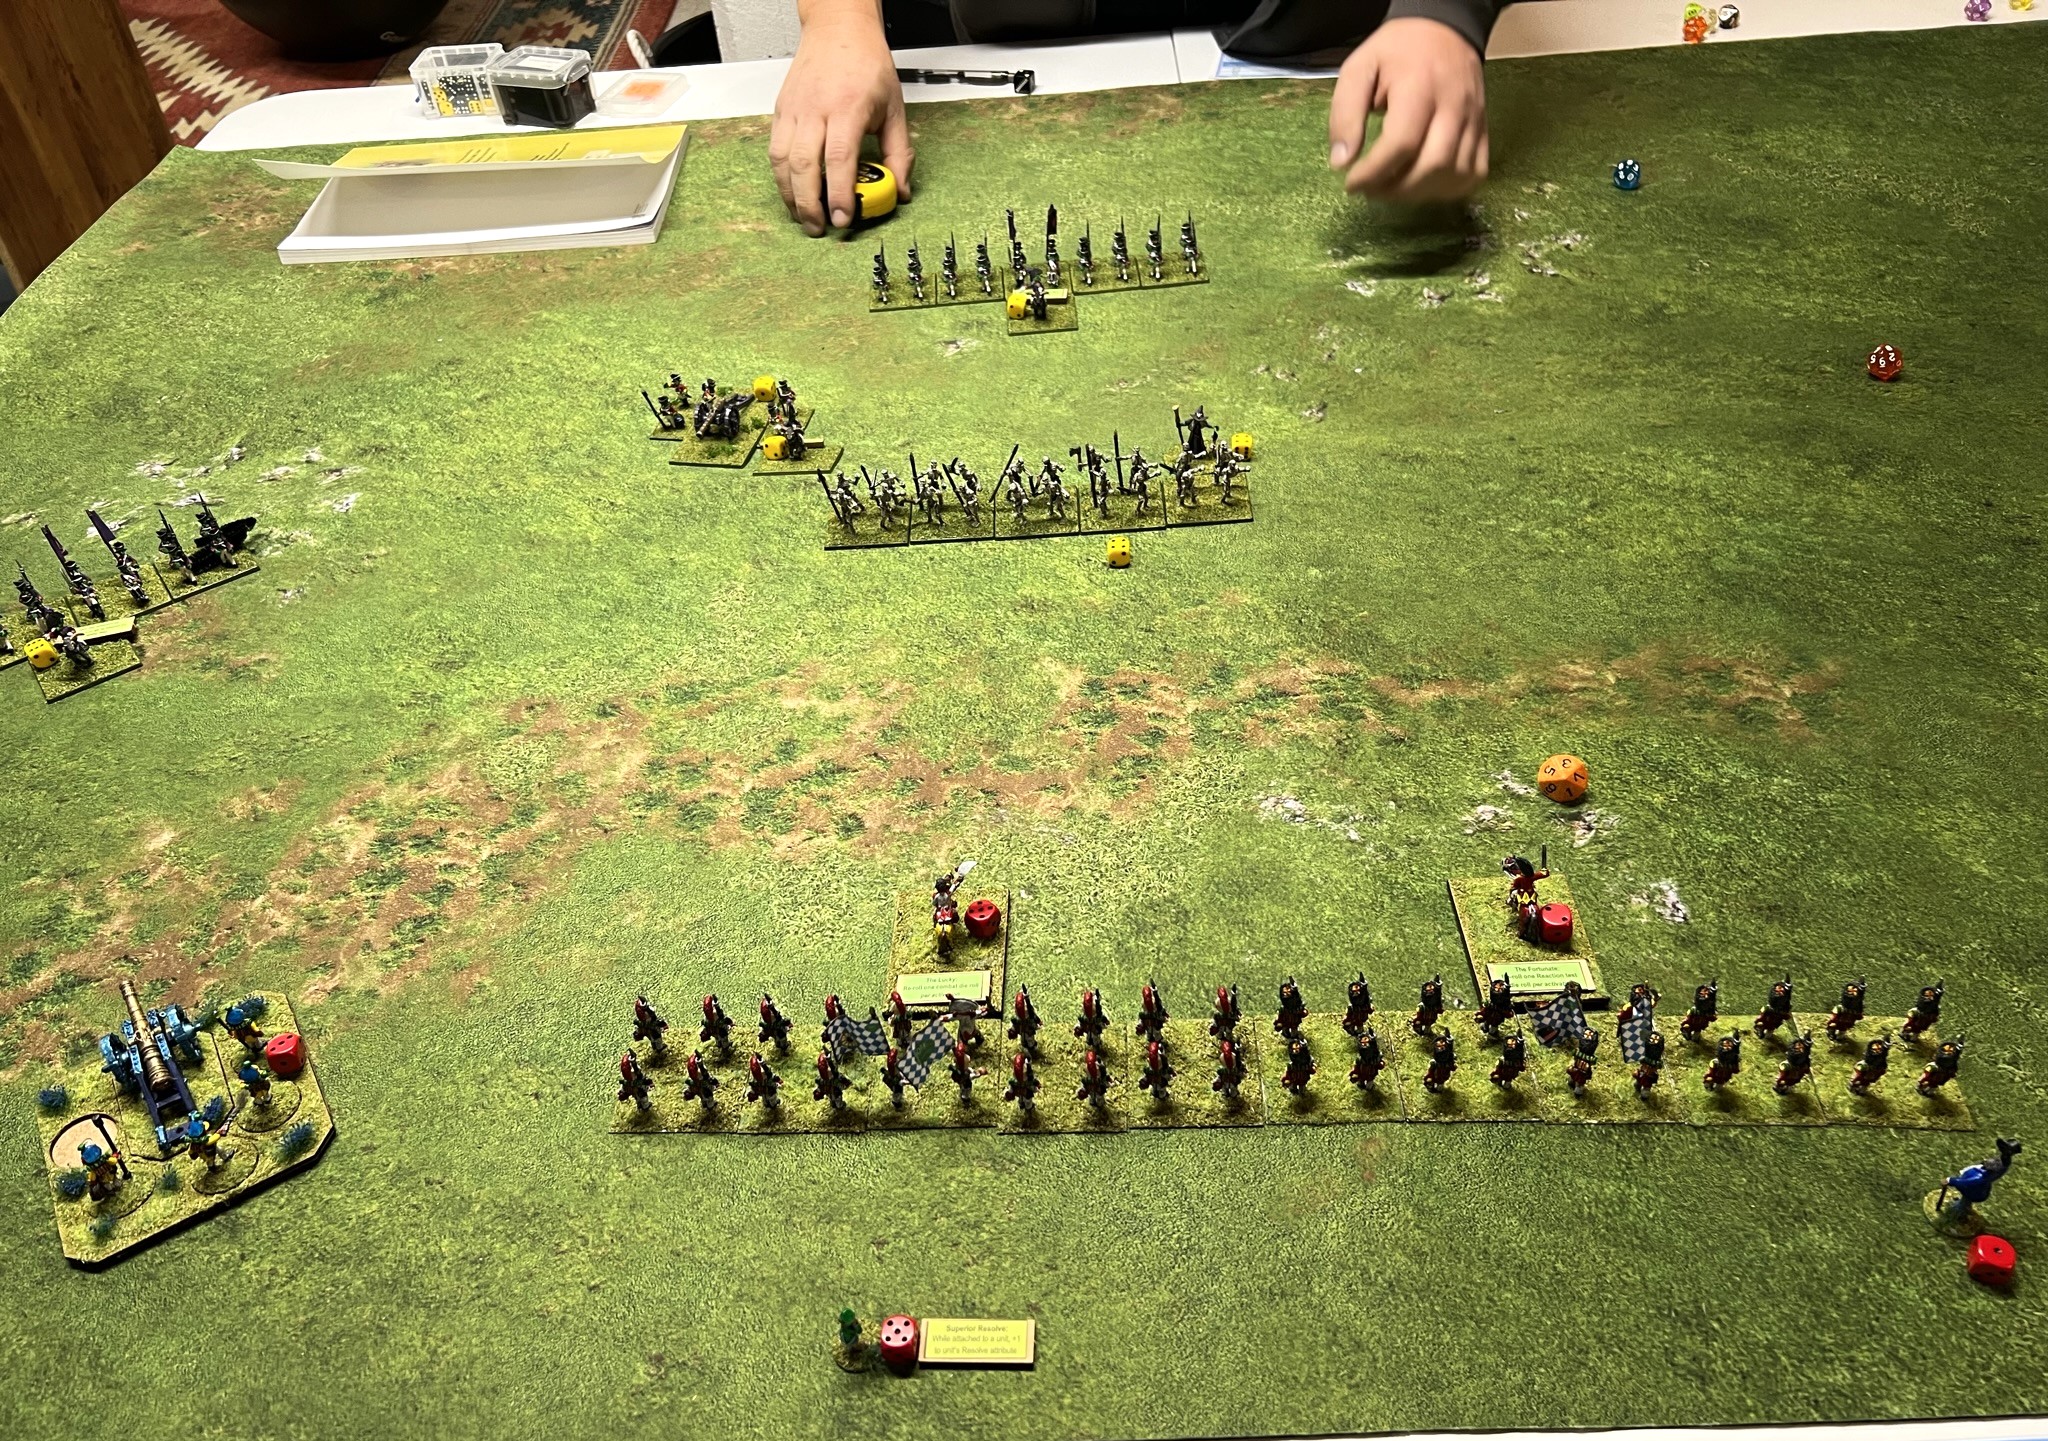
I set this game up for 8 players. I ended up with two brigades being unused and two players acting as a team. So, 6 brigades competed here against each other. Here is a video of the set up:
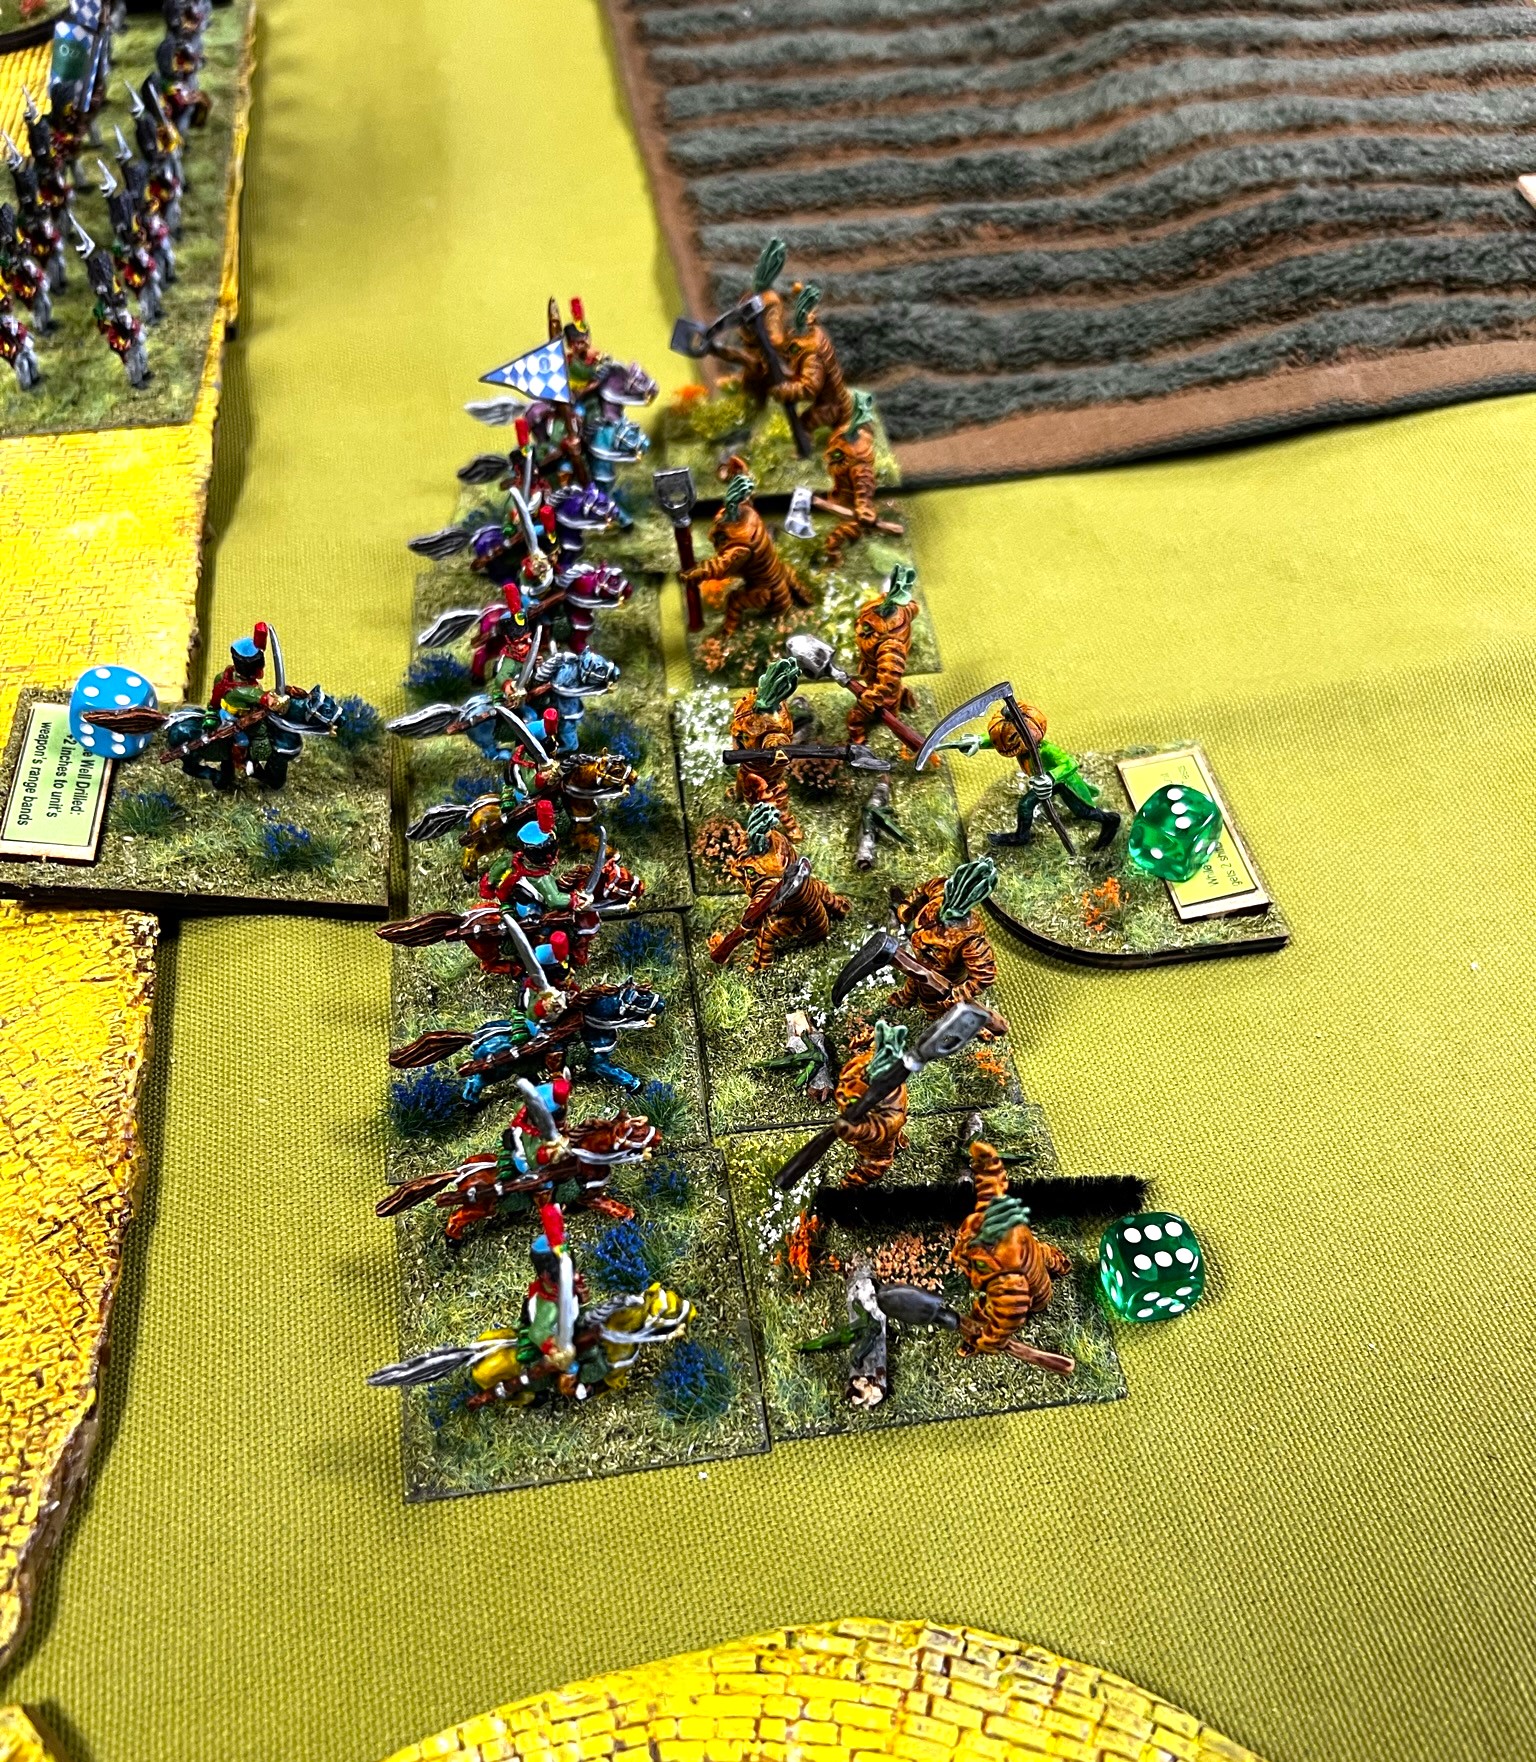
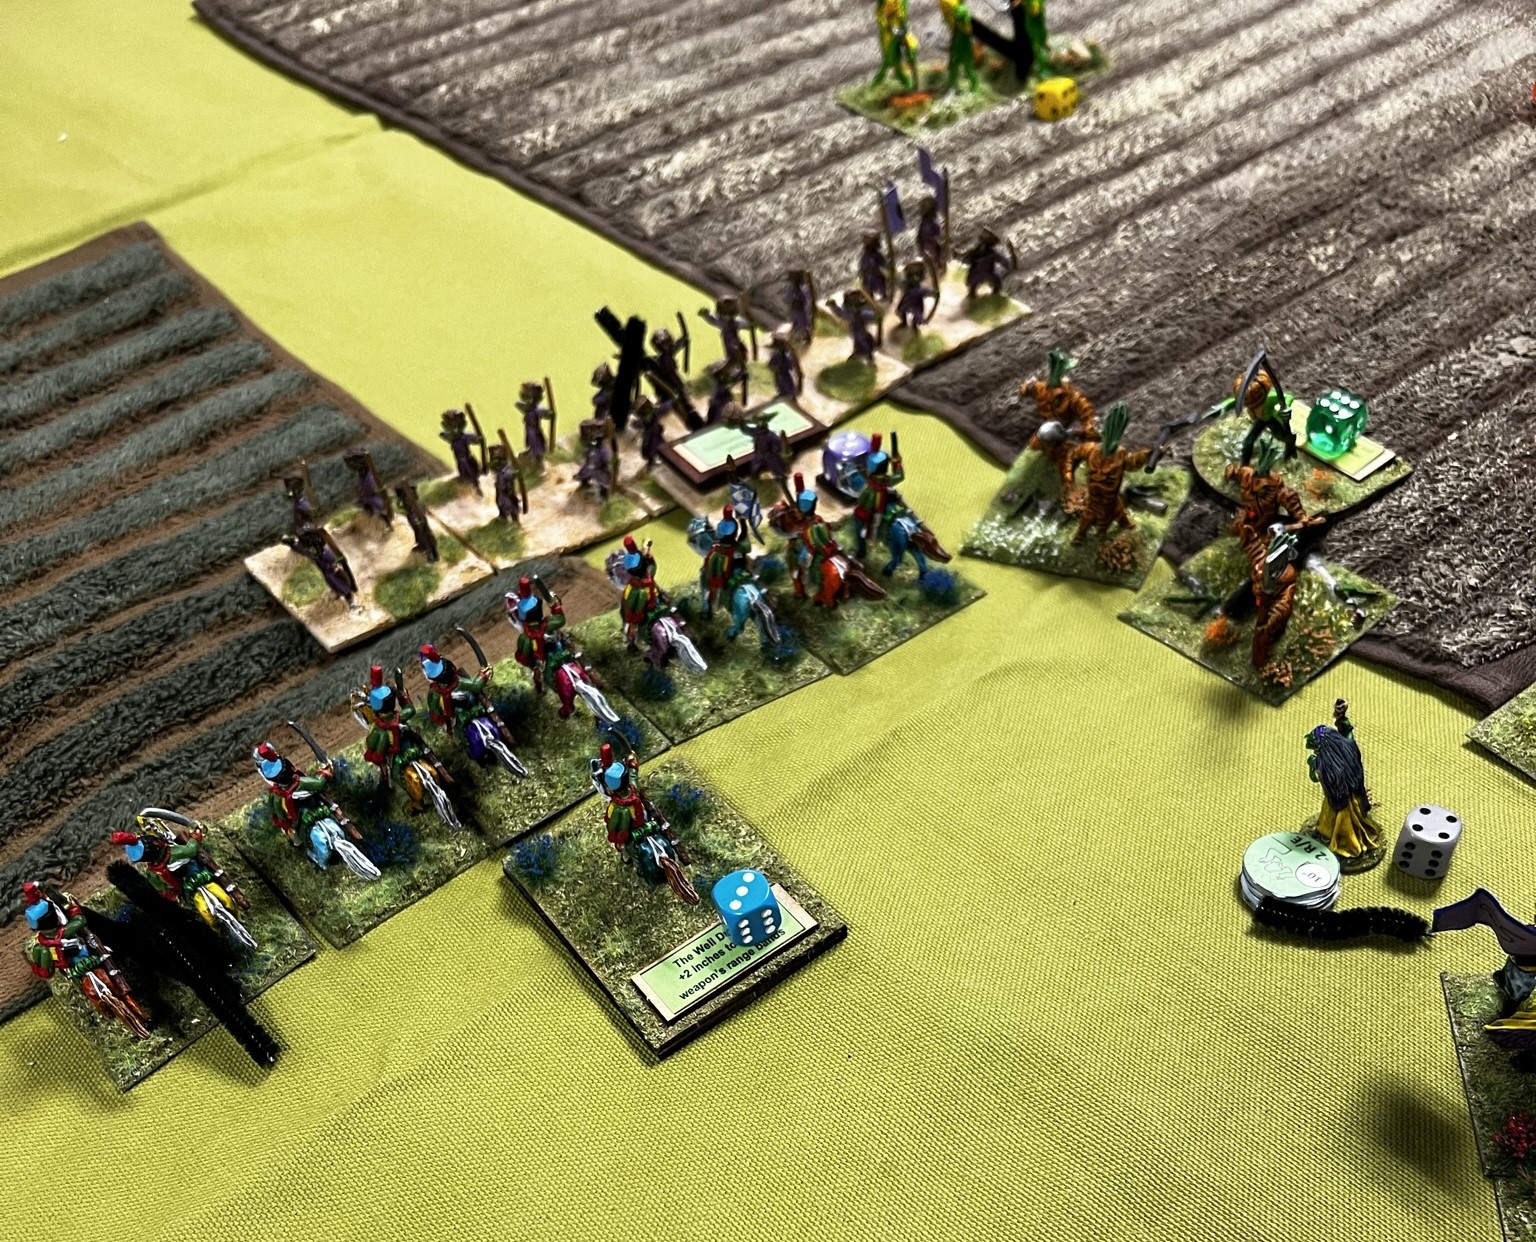
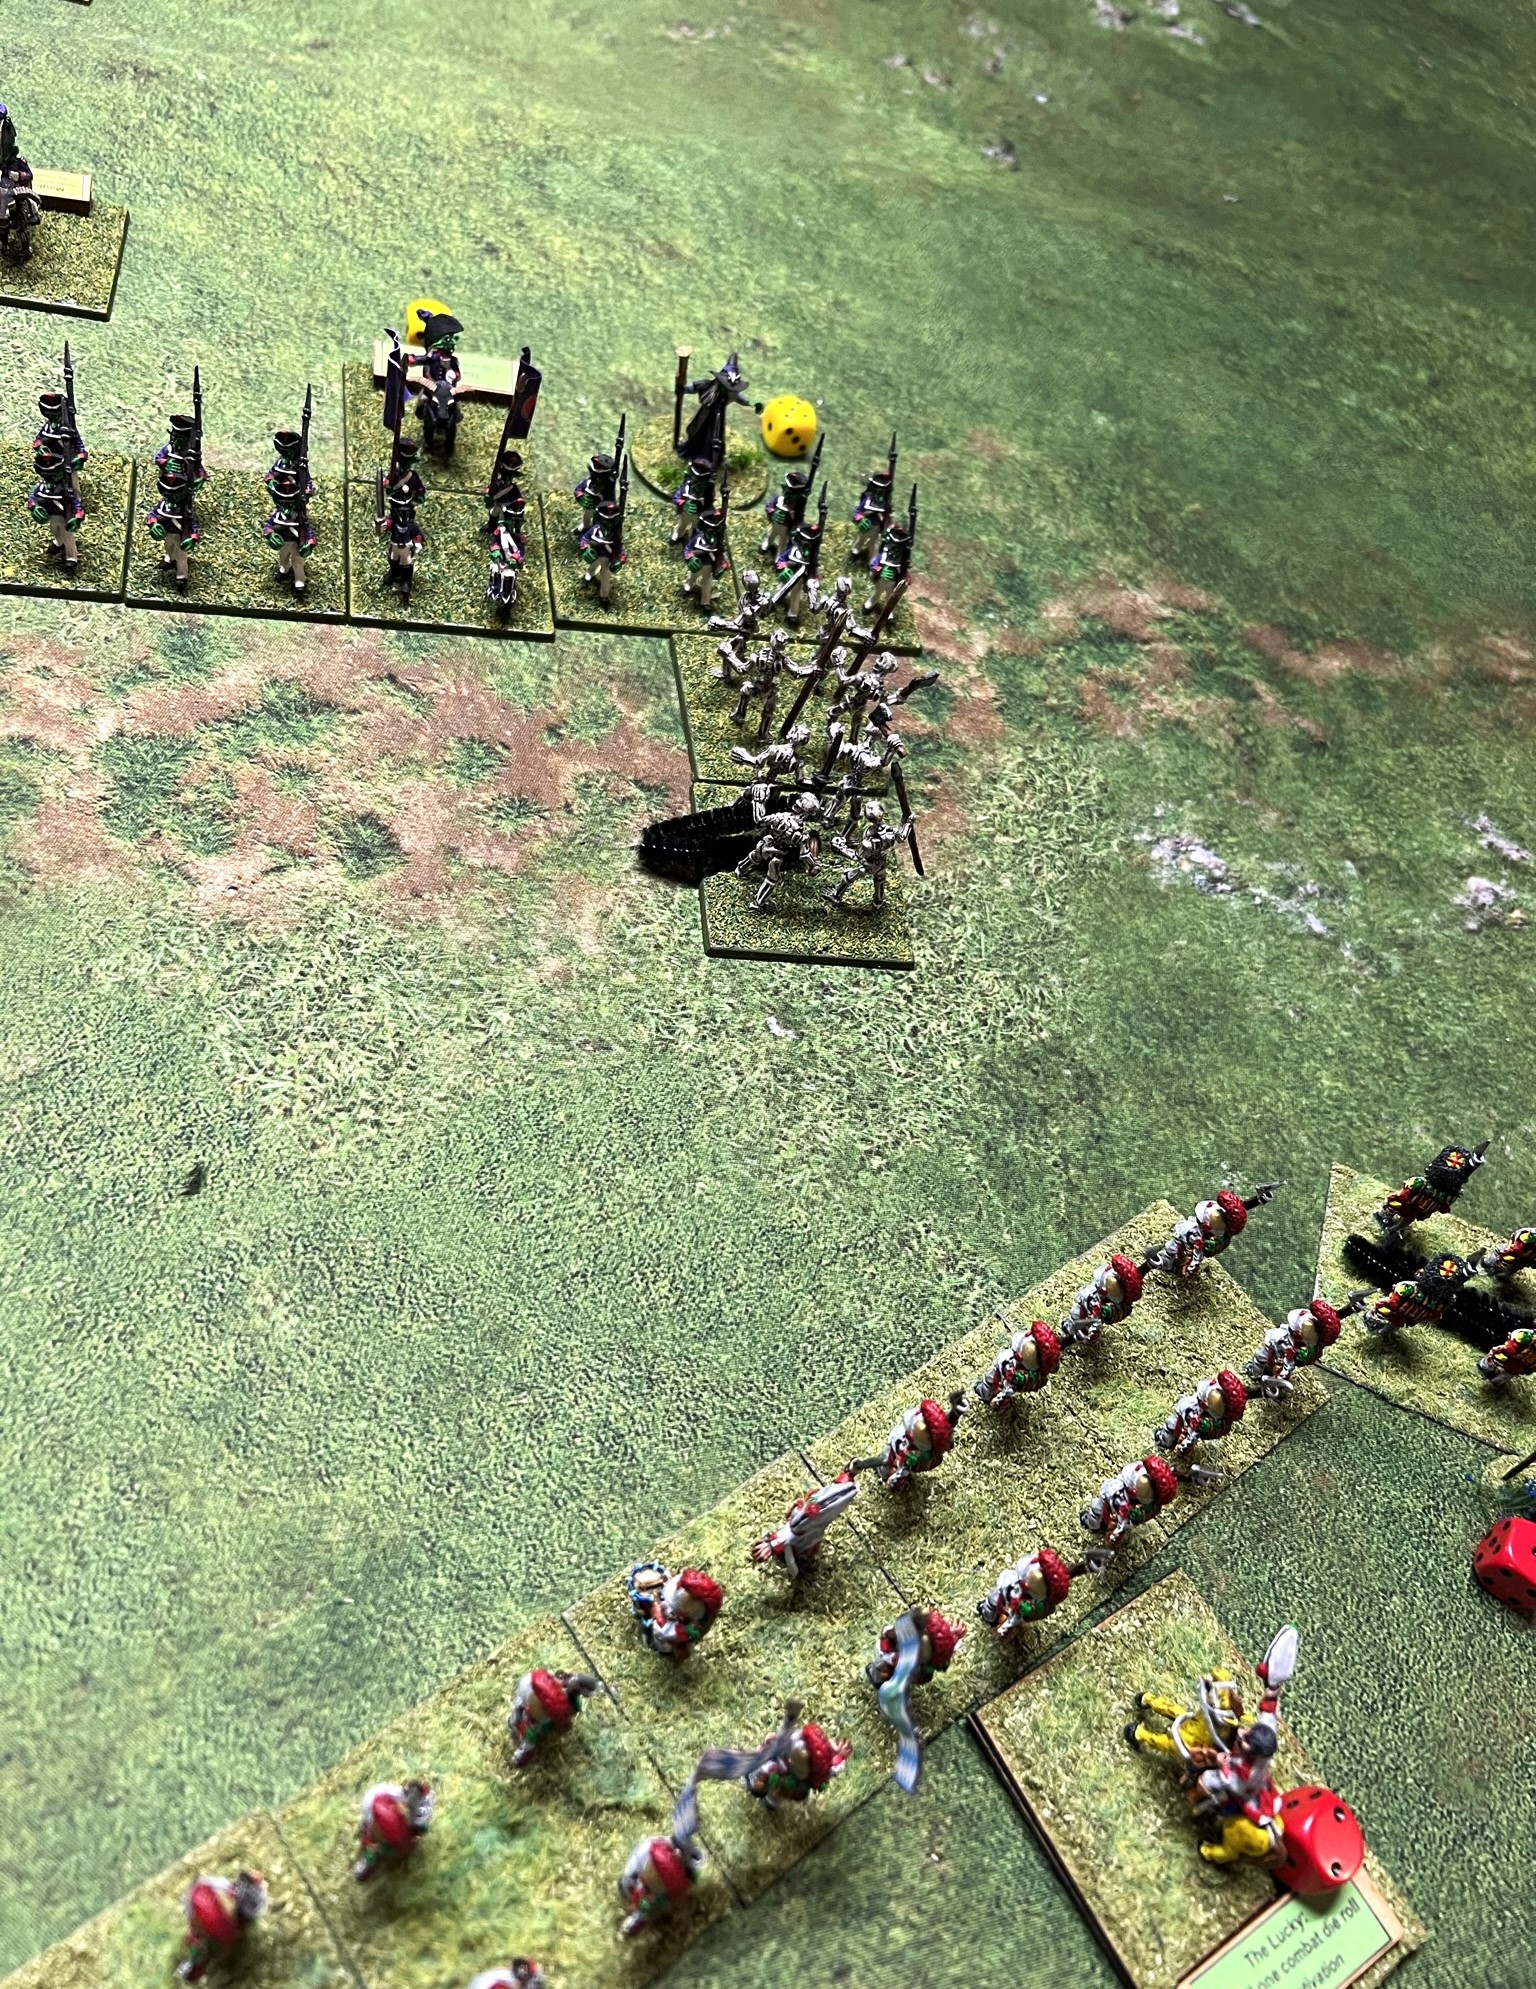
Players checking out their forces at the start.Charles moves his Impkins towards the objectives. They are menaced by Professor Nitpik’s advance to their left, and the Gillikin’s advance to their right.Carter’s Pollywomp brigade moves towards the objectives, while Gillikins and Quadlings try to catch up.The Nitpik cavalry takes flanking artillery fire from both the Impkins and the Gillikins – and routs away!In revenge, the Elite Axemen move towards the Impkin infantry, who form line.Meanwhile, the 1st brigade of Gillikin’s Tigers seize a cache of crystals. They are shot at by Nitpik artillery, and rout – dropping their crystals. Their compatriot Lions grab a stash of mushrooms and hope to escape with their booty.Across the table, Carter deftly deploys a blocking force of Pollywomp infantry against the approaching 2nd Gillikin brigade. The Quadlings try to sneak through the woods unmolested.Carter’s block worked – and his cavalry seizes crystals while his infantry grabs mushrooms.On the other side of the table, the Tigers recover quickly. They grab mushrooms dropped by the Lions, who had been routed. The Gillikin’s skeletons grab the crystals previously dropped by the Tigers.
At that point the game ended due to time. Crystals were worth 10 points and mushrooms 5. Carter’s (on the left) Pollywomps and Tim and his wife’s Gillikins were tied for the win(they played together). Carter chose a Zoraster the Wizard miniature for his win, and the couple got a set of the rules.
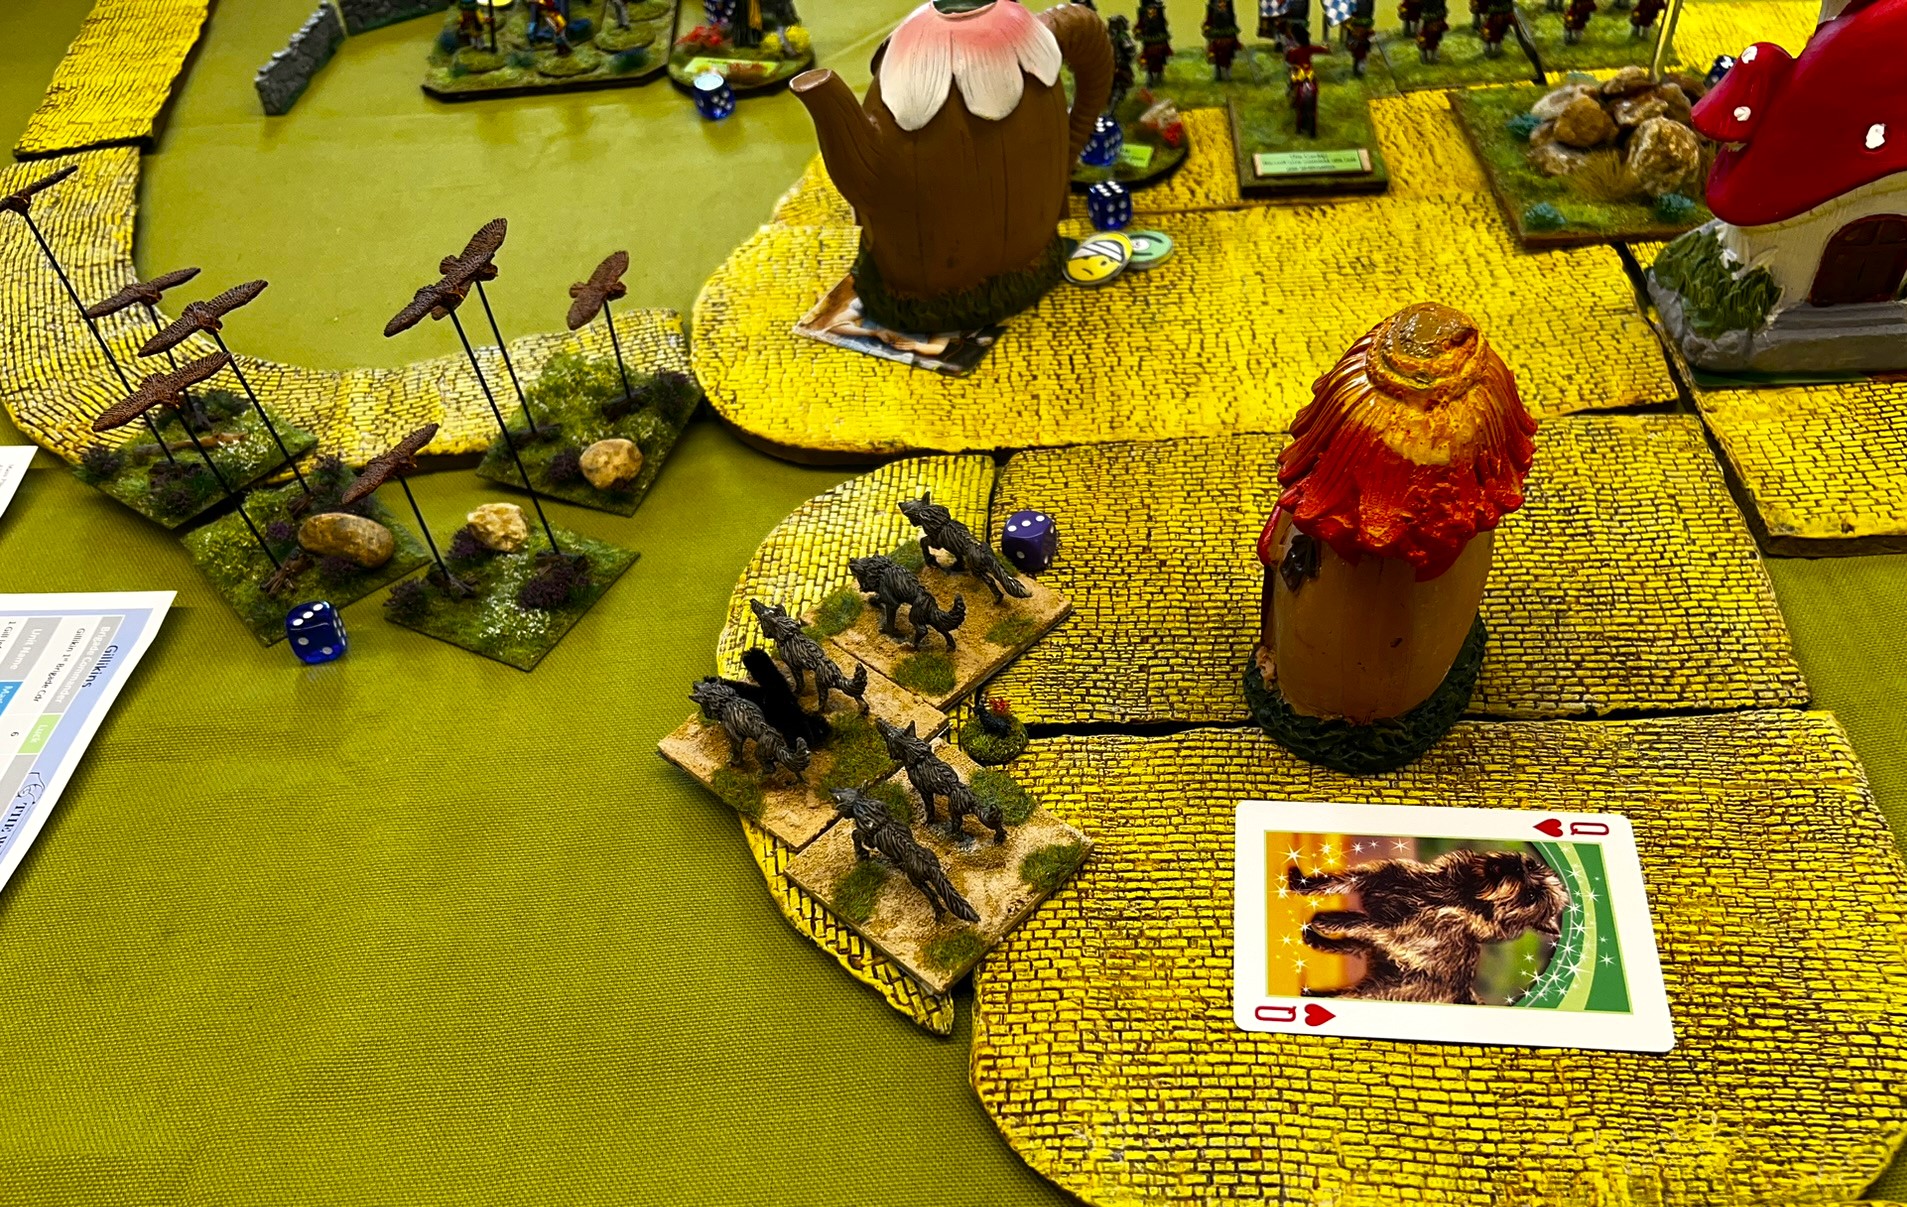
Rear Guard Action – The Pursuit of the Fleeing Gillikins (Wars of Ozz)
This is one of my favorite scenarios.
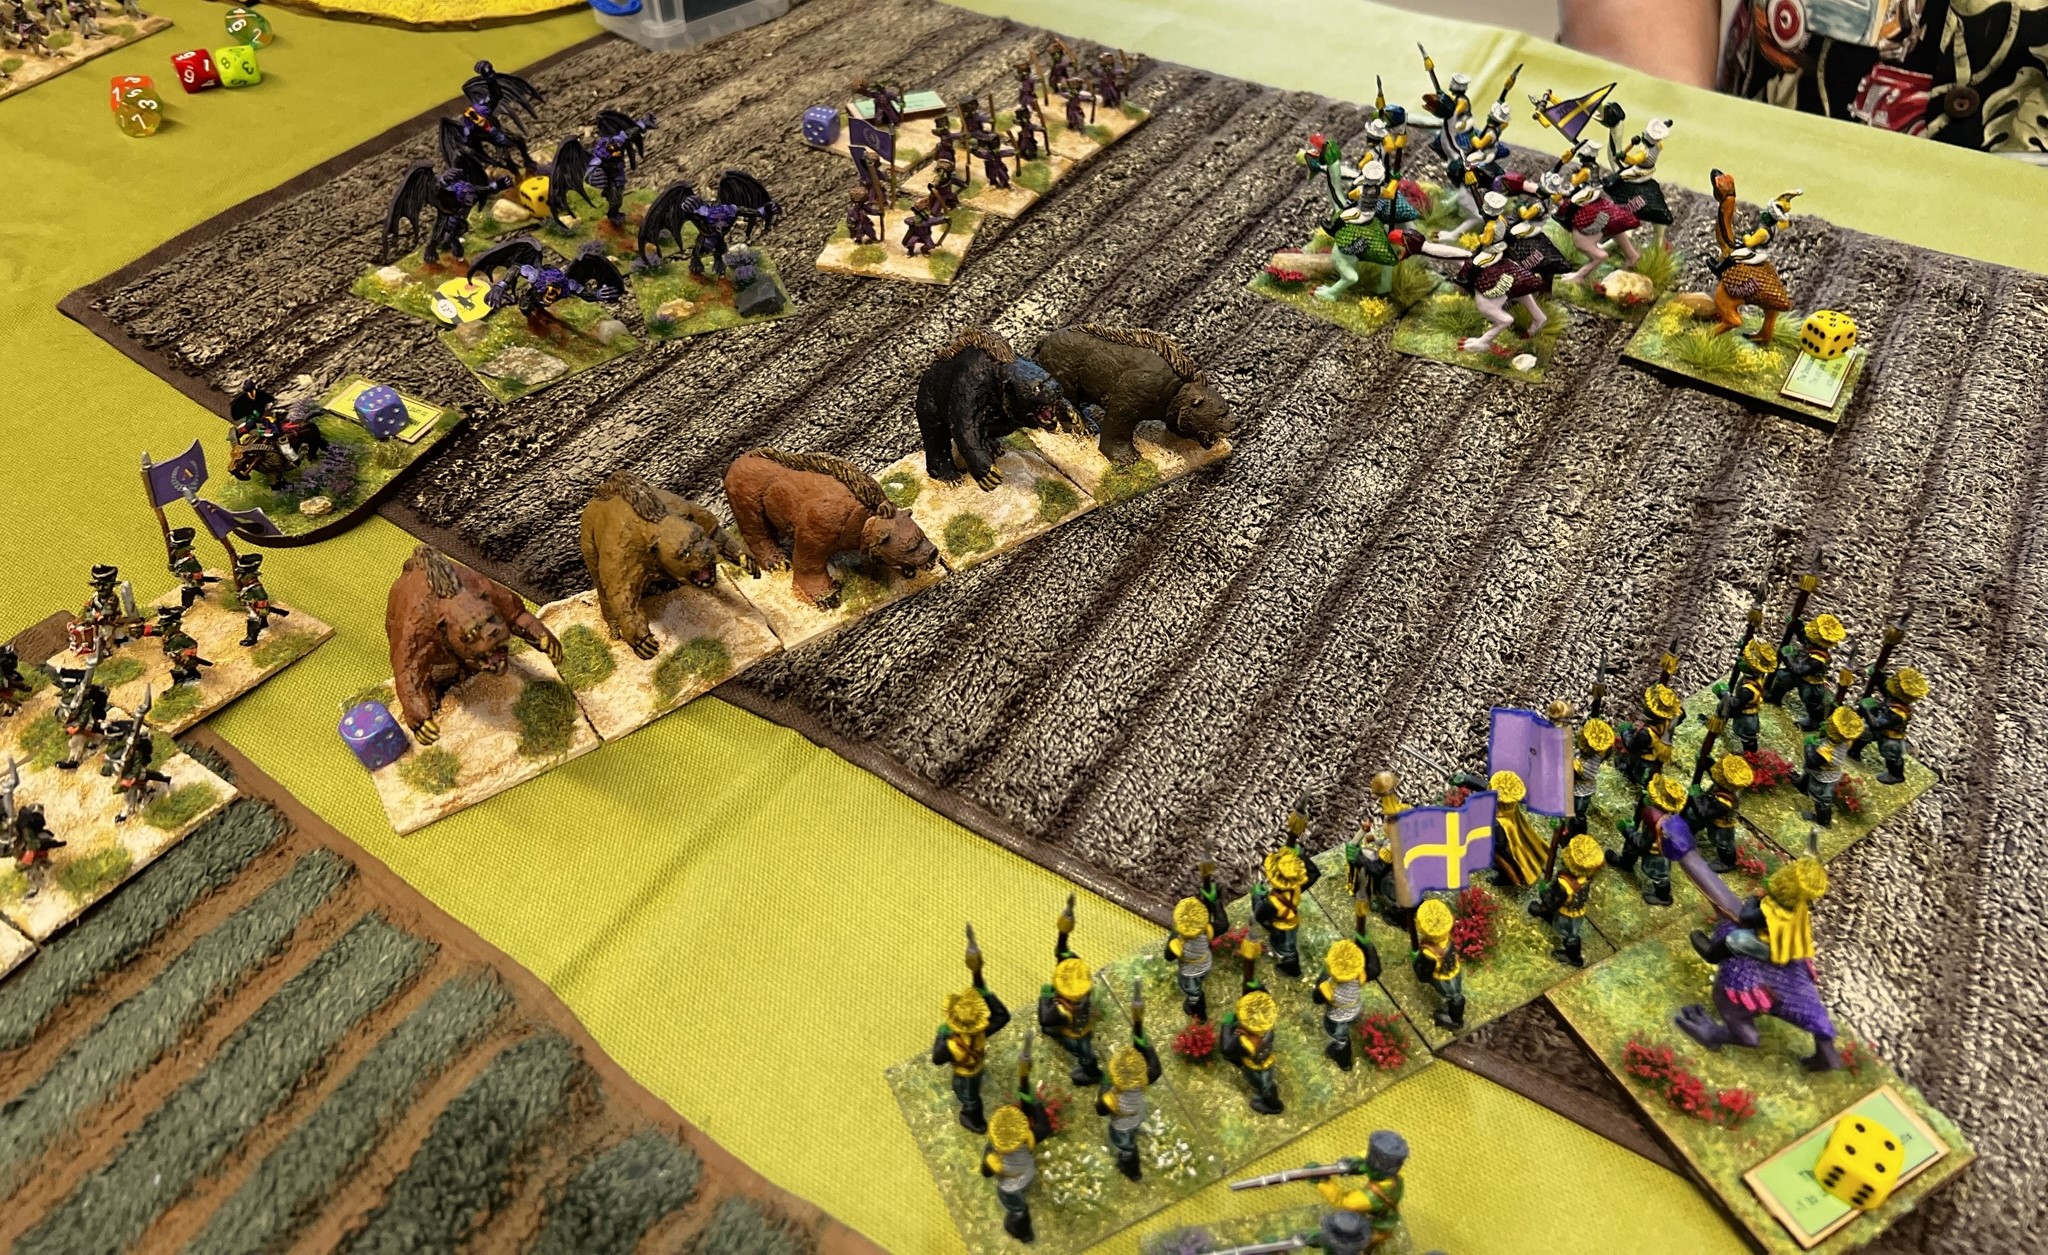
The Gillikins have recently been defeated by the Munchkins and their allies in a major battle. The remnants of the Gillikin forces are desperately trying to withdraw to the safety of their lands. The Gillikins Empress, Arella the Witch, has her Summoning Bell to call up the Undead to join her troops in retreat. Their Munchkin enemies – as well as their Nitpik and Impkin allies – are in hot pursuit. Can the Gillikins make it to safety, or will the Munchkins prevail? Beginners are welcome. Rules will be taught. Players under 13 only with a playing adult.
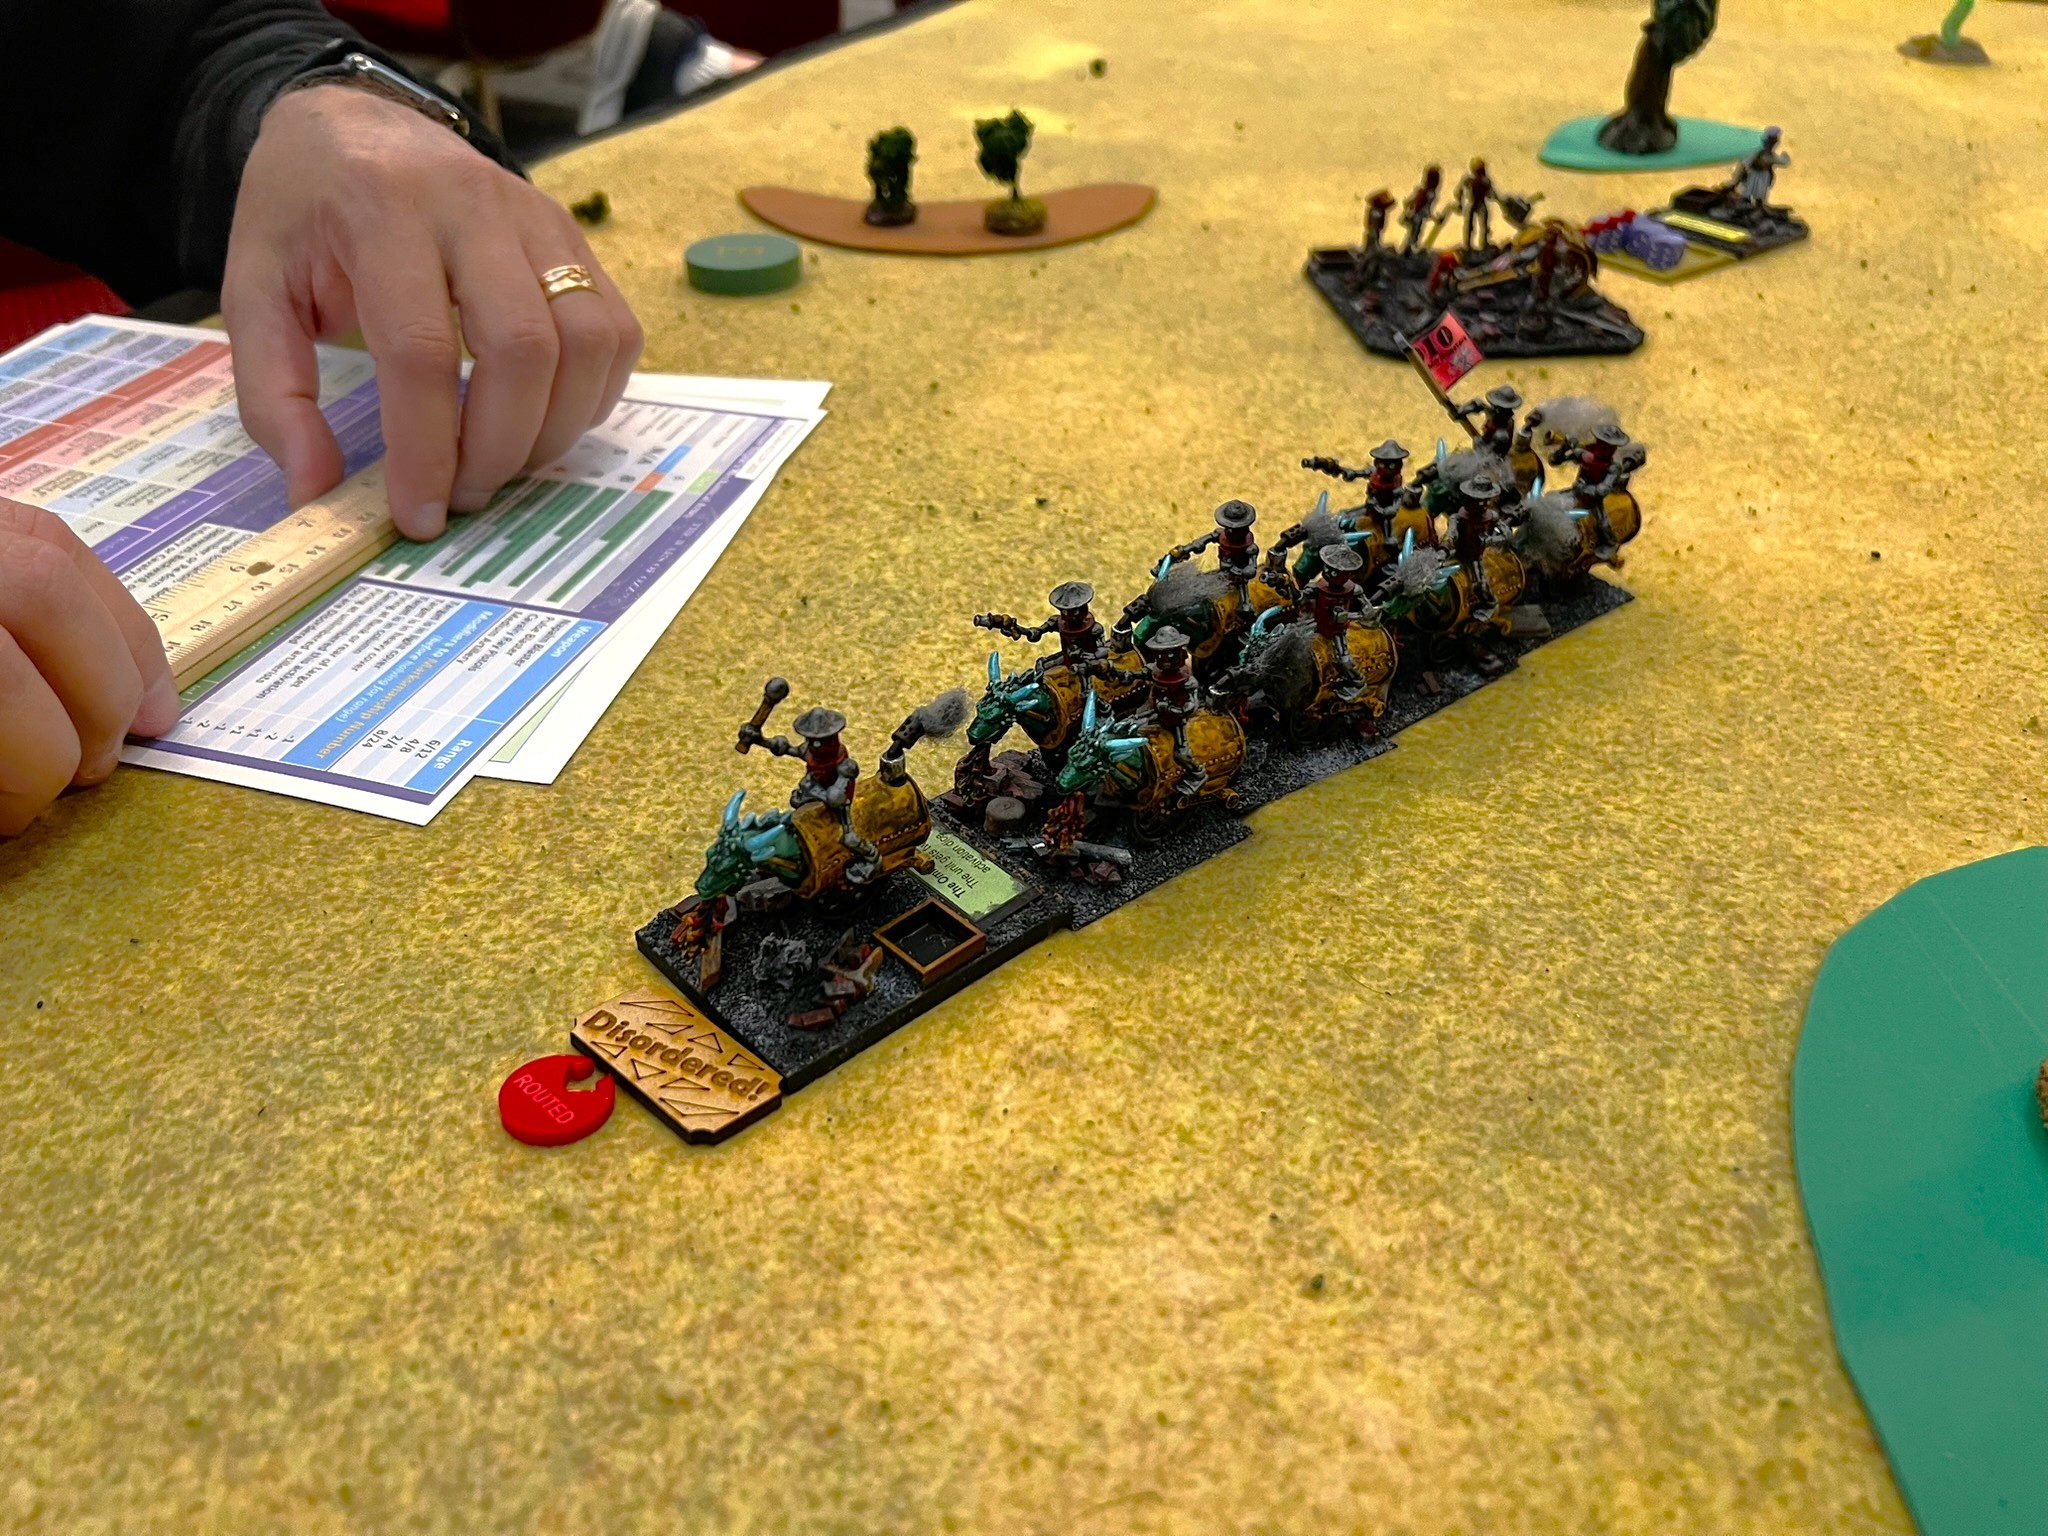
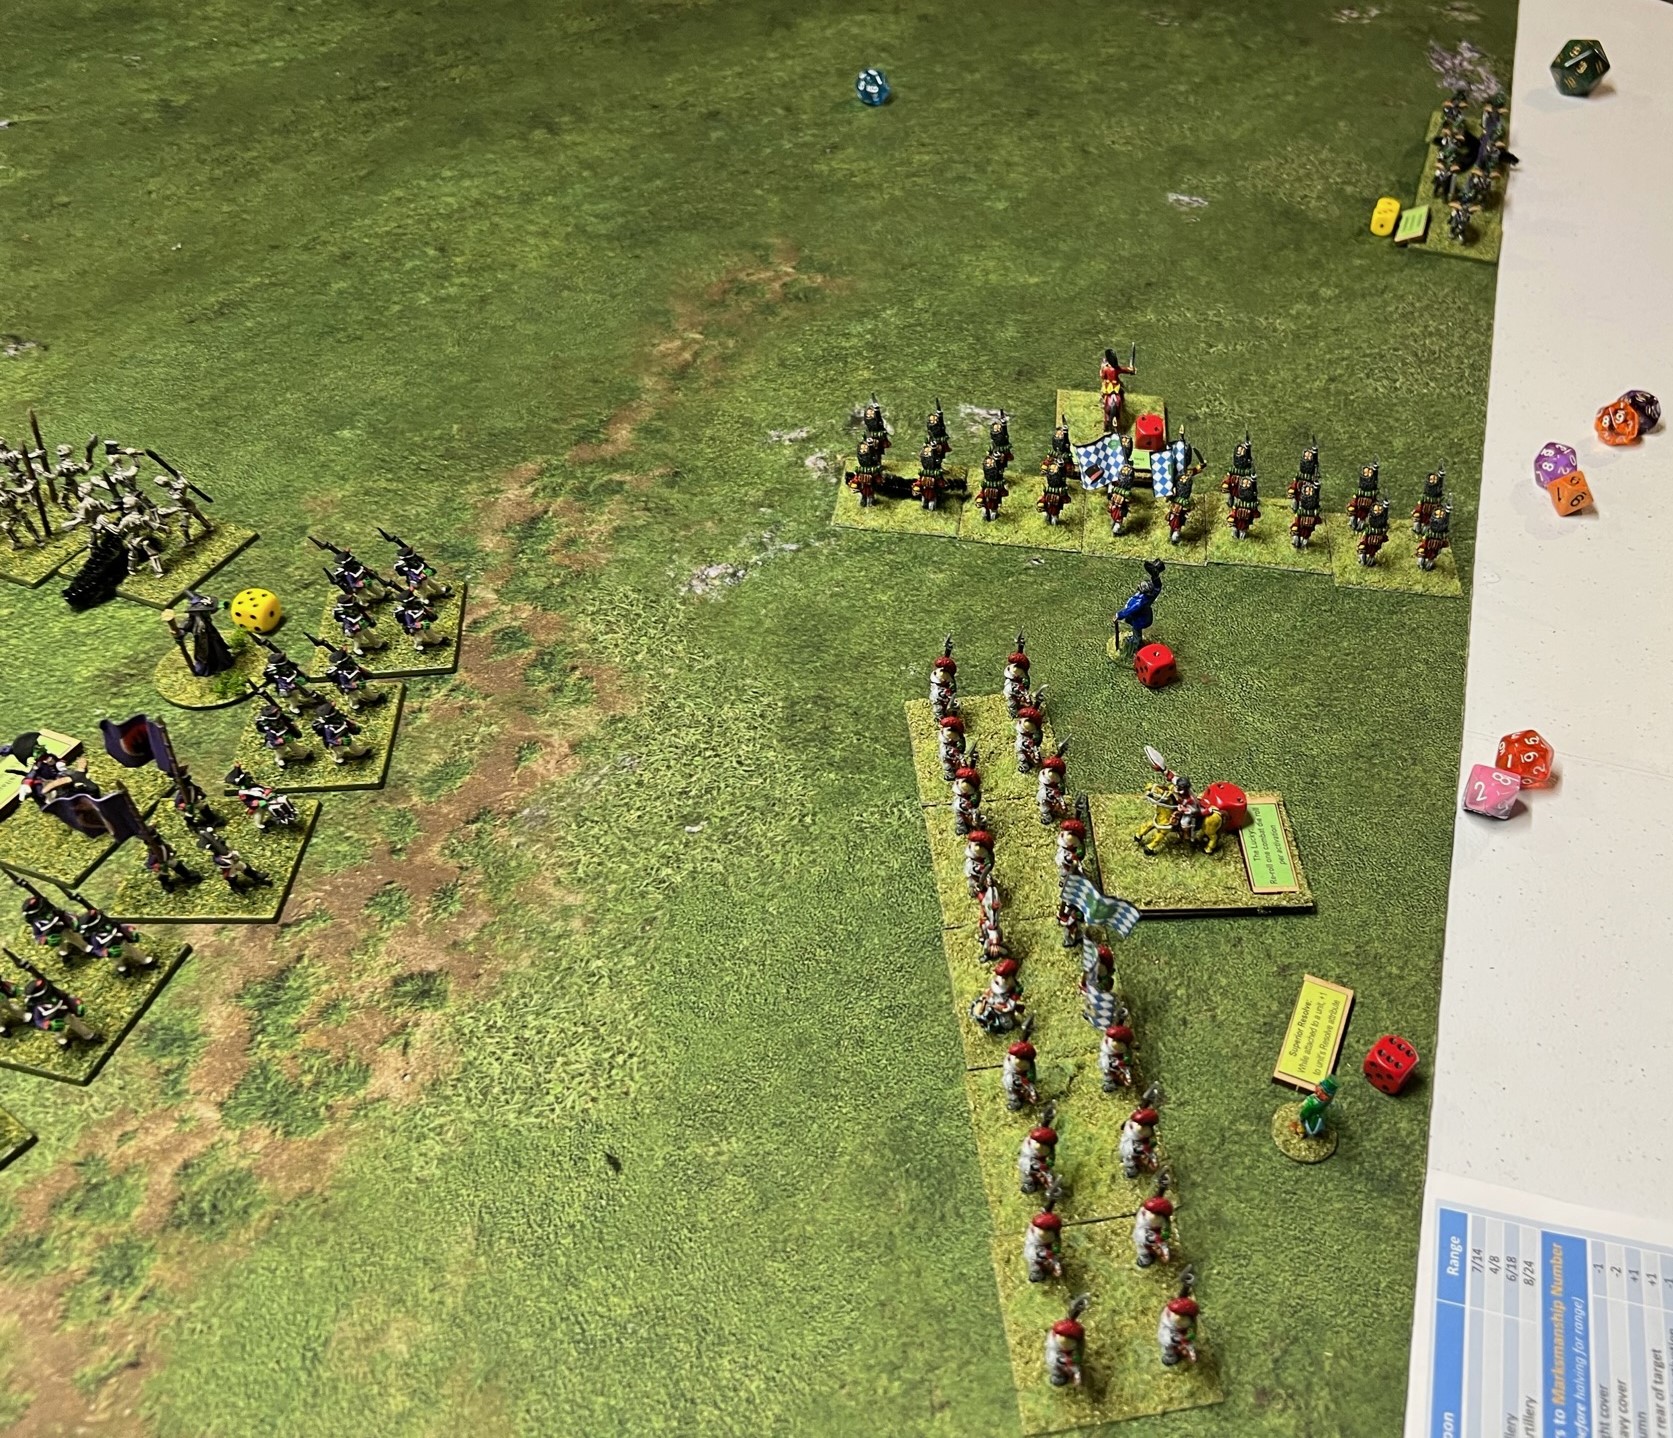
A full table for the start!Brad moves his Nitpik troops towards the Gillikins.The fleeing Gillikins and their Summoning Bell move forward towards safety.Slow-moving Munchkins do their best to catch the Gillikins on their left flank.Brad’s Nitpik cavalry wipes out a skeleton regiment and moves to hit the bell. The bell would not survive the encounter.Meanwhile, the Gillikins had successfully exited multiple regiments off the table. The Munchkin alliance had destroyed many Gillikins as well. The Munchkins moved to block the road to safety, leaving a Dire Bear regiment’s remnants to be destroyed.
The game ended in a tie! 26 bases were saved by the Gillikins and 26 bases were destroyed by the Munchkin Alliance! What a nail-biter!
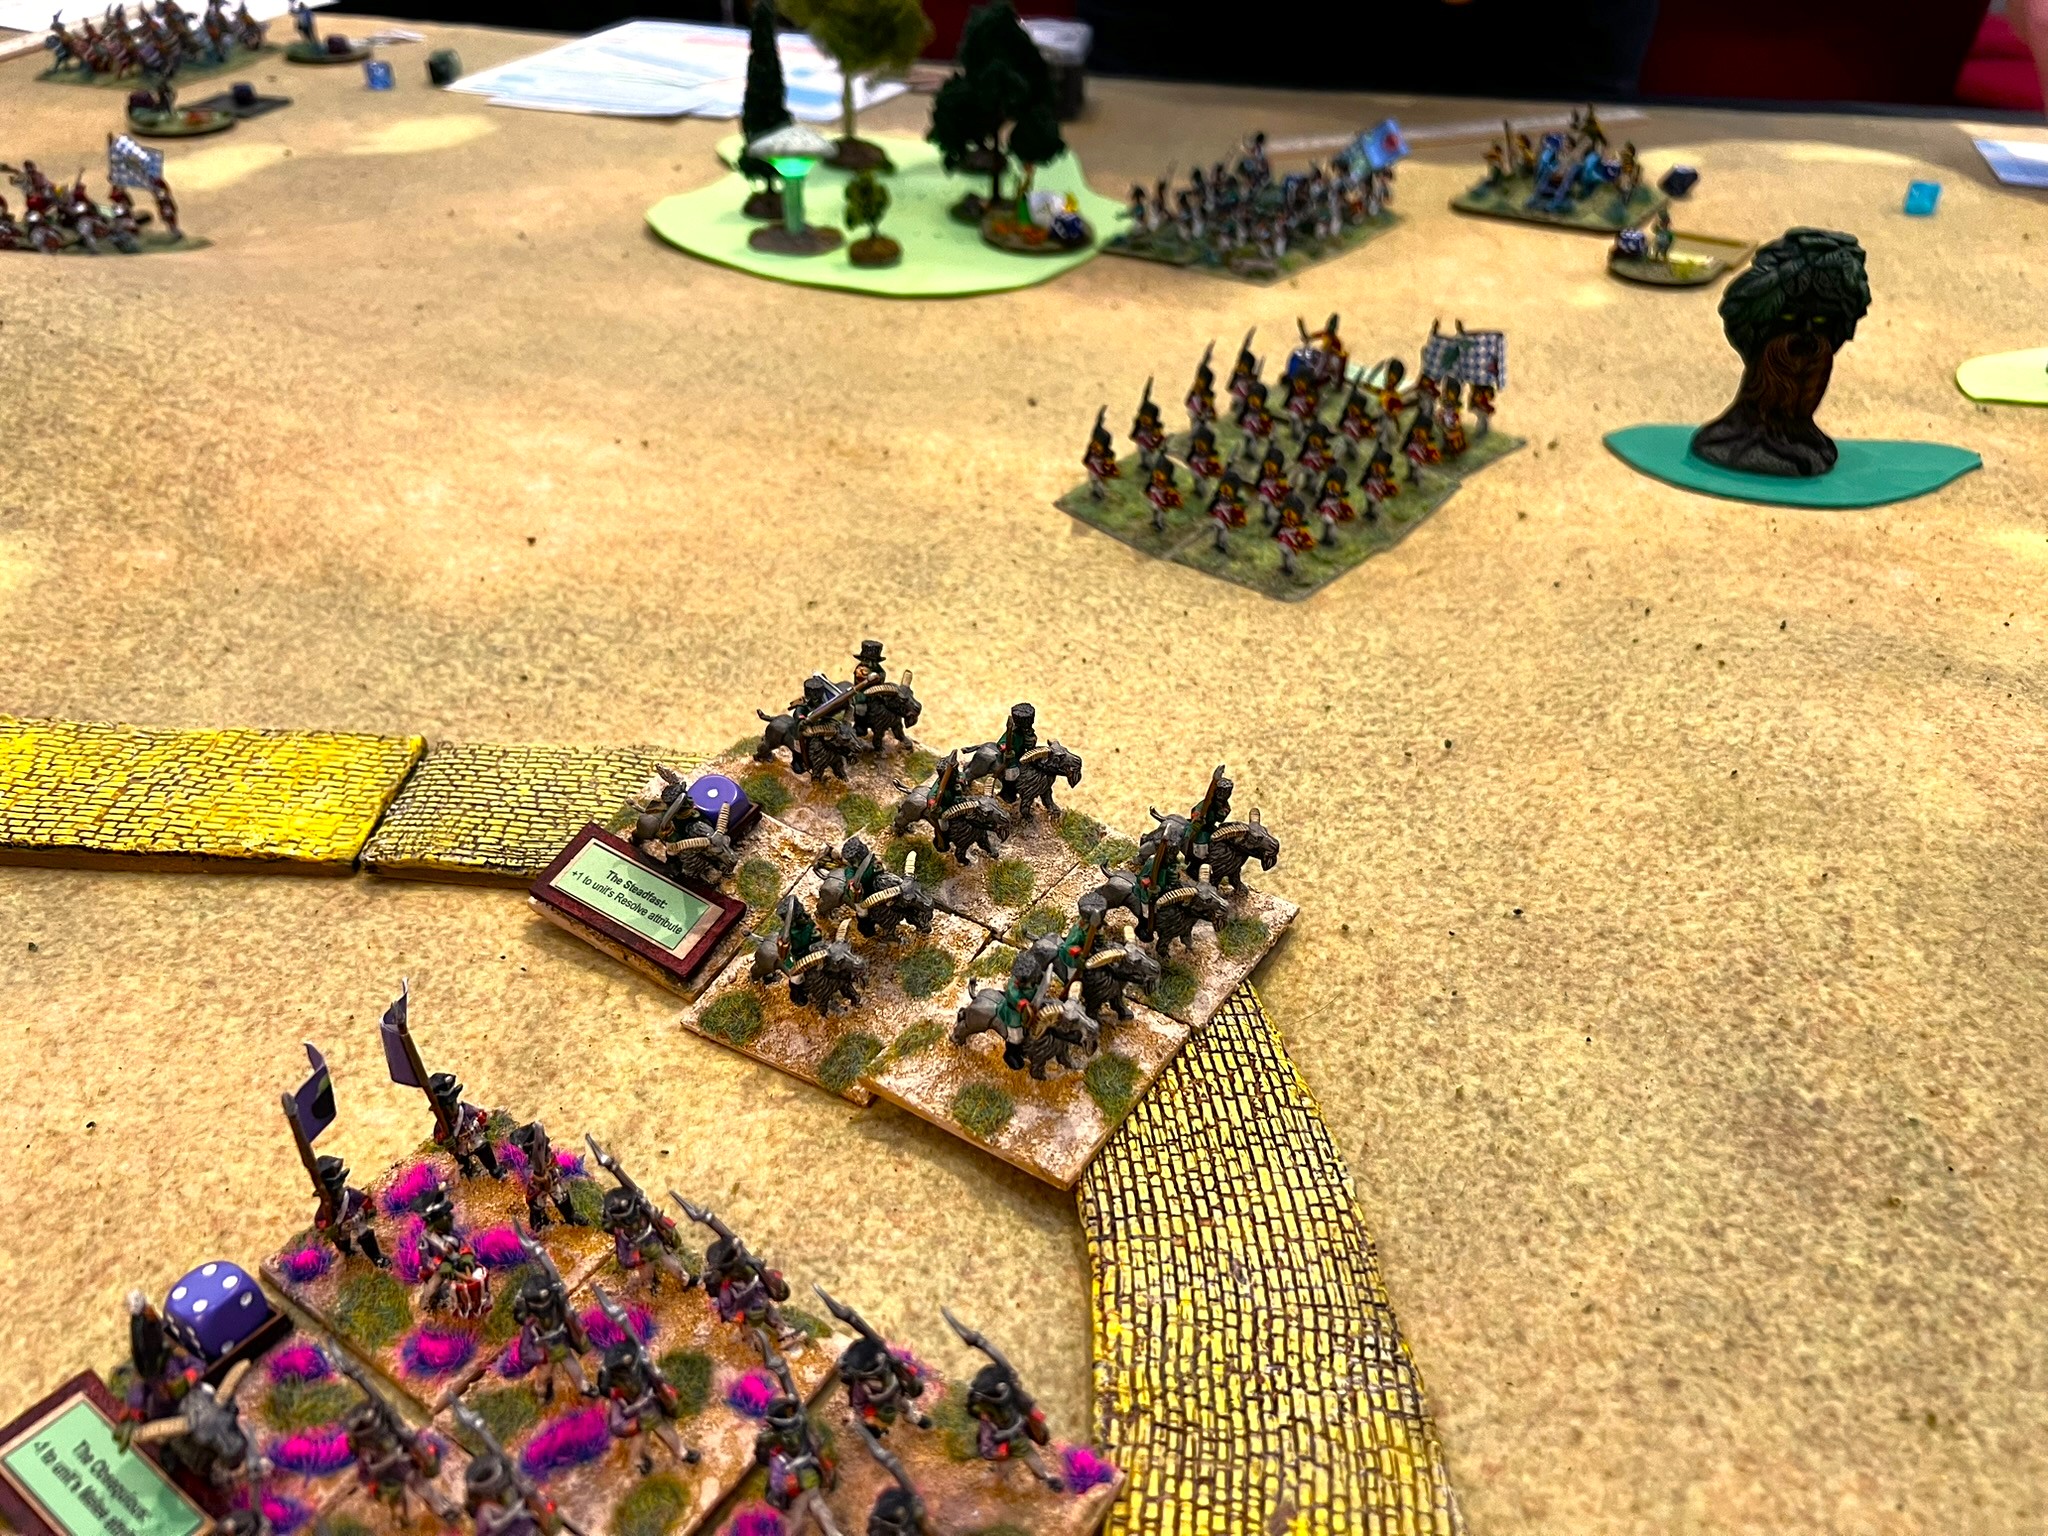
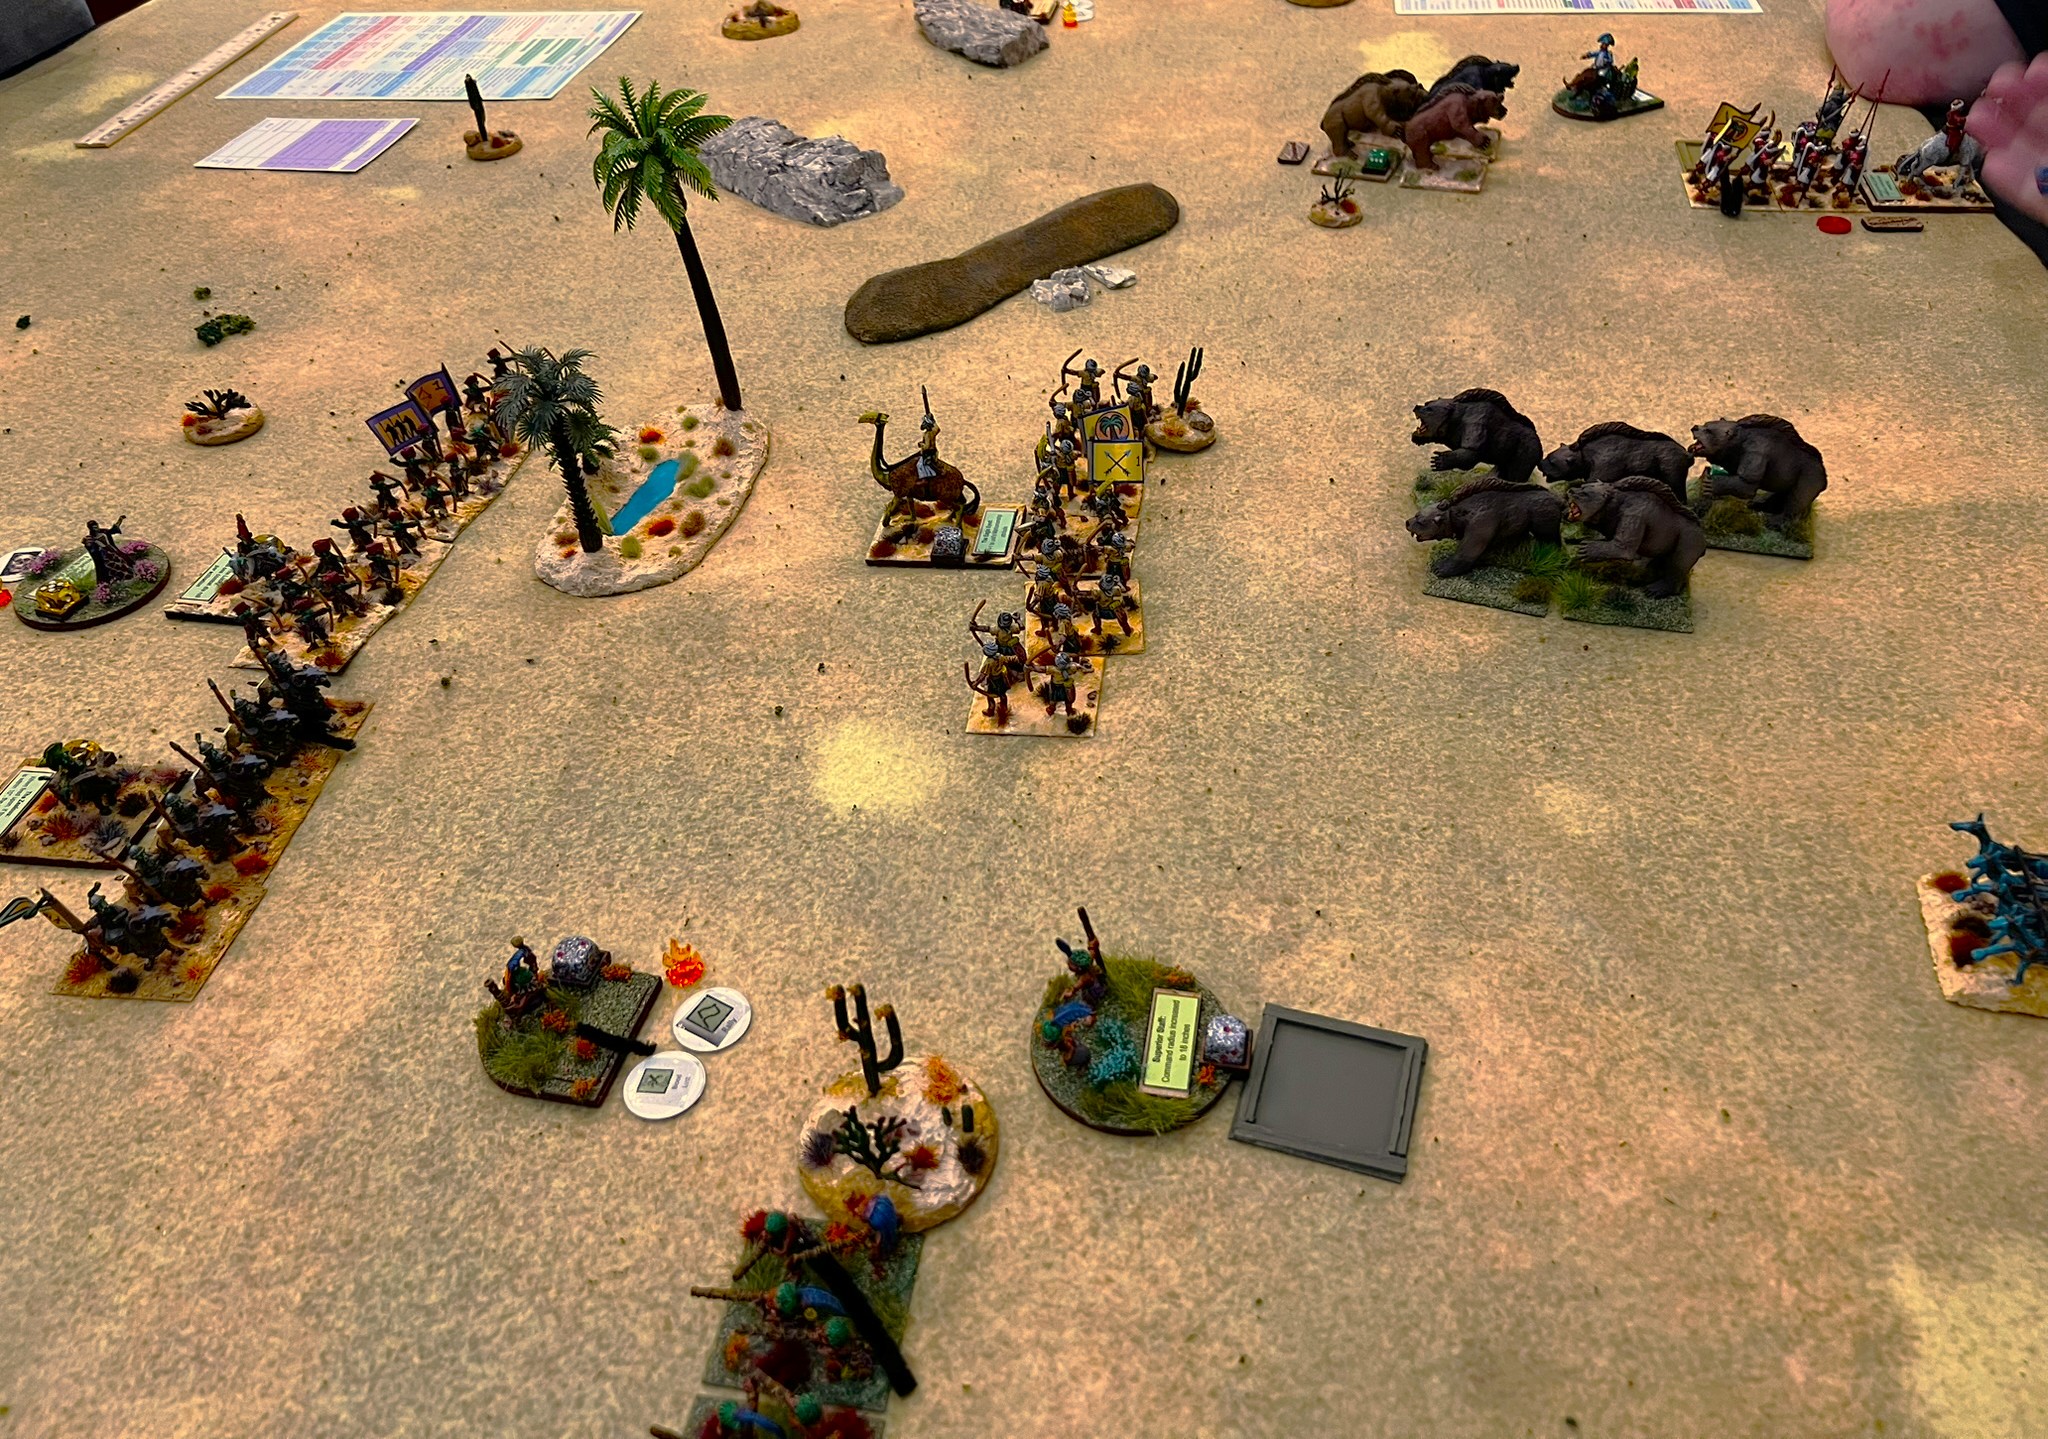
The Desert Wars of Ozz
Ozz has vast deserts, but they are not uninhabited. In fact, several races such as the Whim Whim and their mortal enemies the Temujicans vie for supremacy over these sandy tracts. Join this sweeping desert battle to control the deserts of Ozz and their hidden marvels and treasures. Will you be successful and prevail over your enemies – find out! Beginners are welcome. Rules will be taught. Players under 13 only with a playing adult.
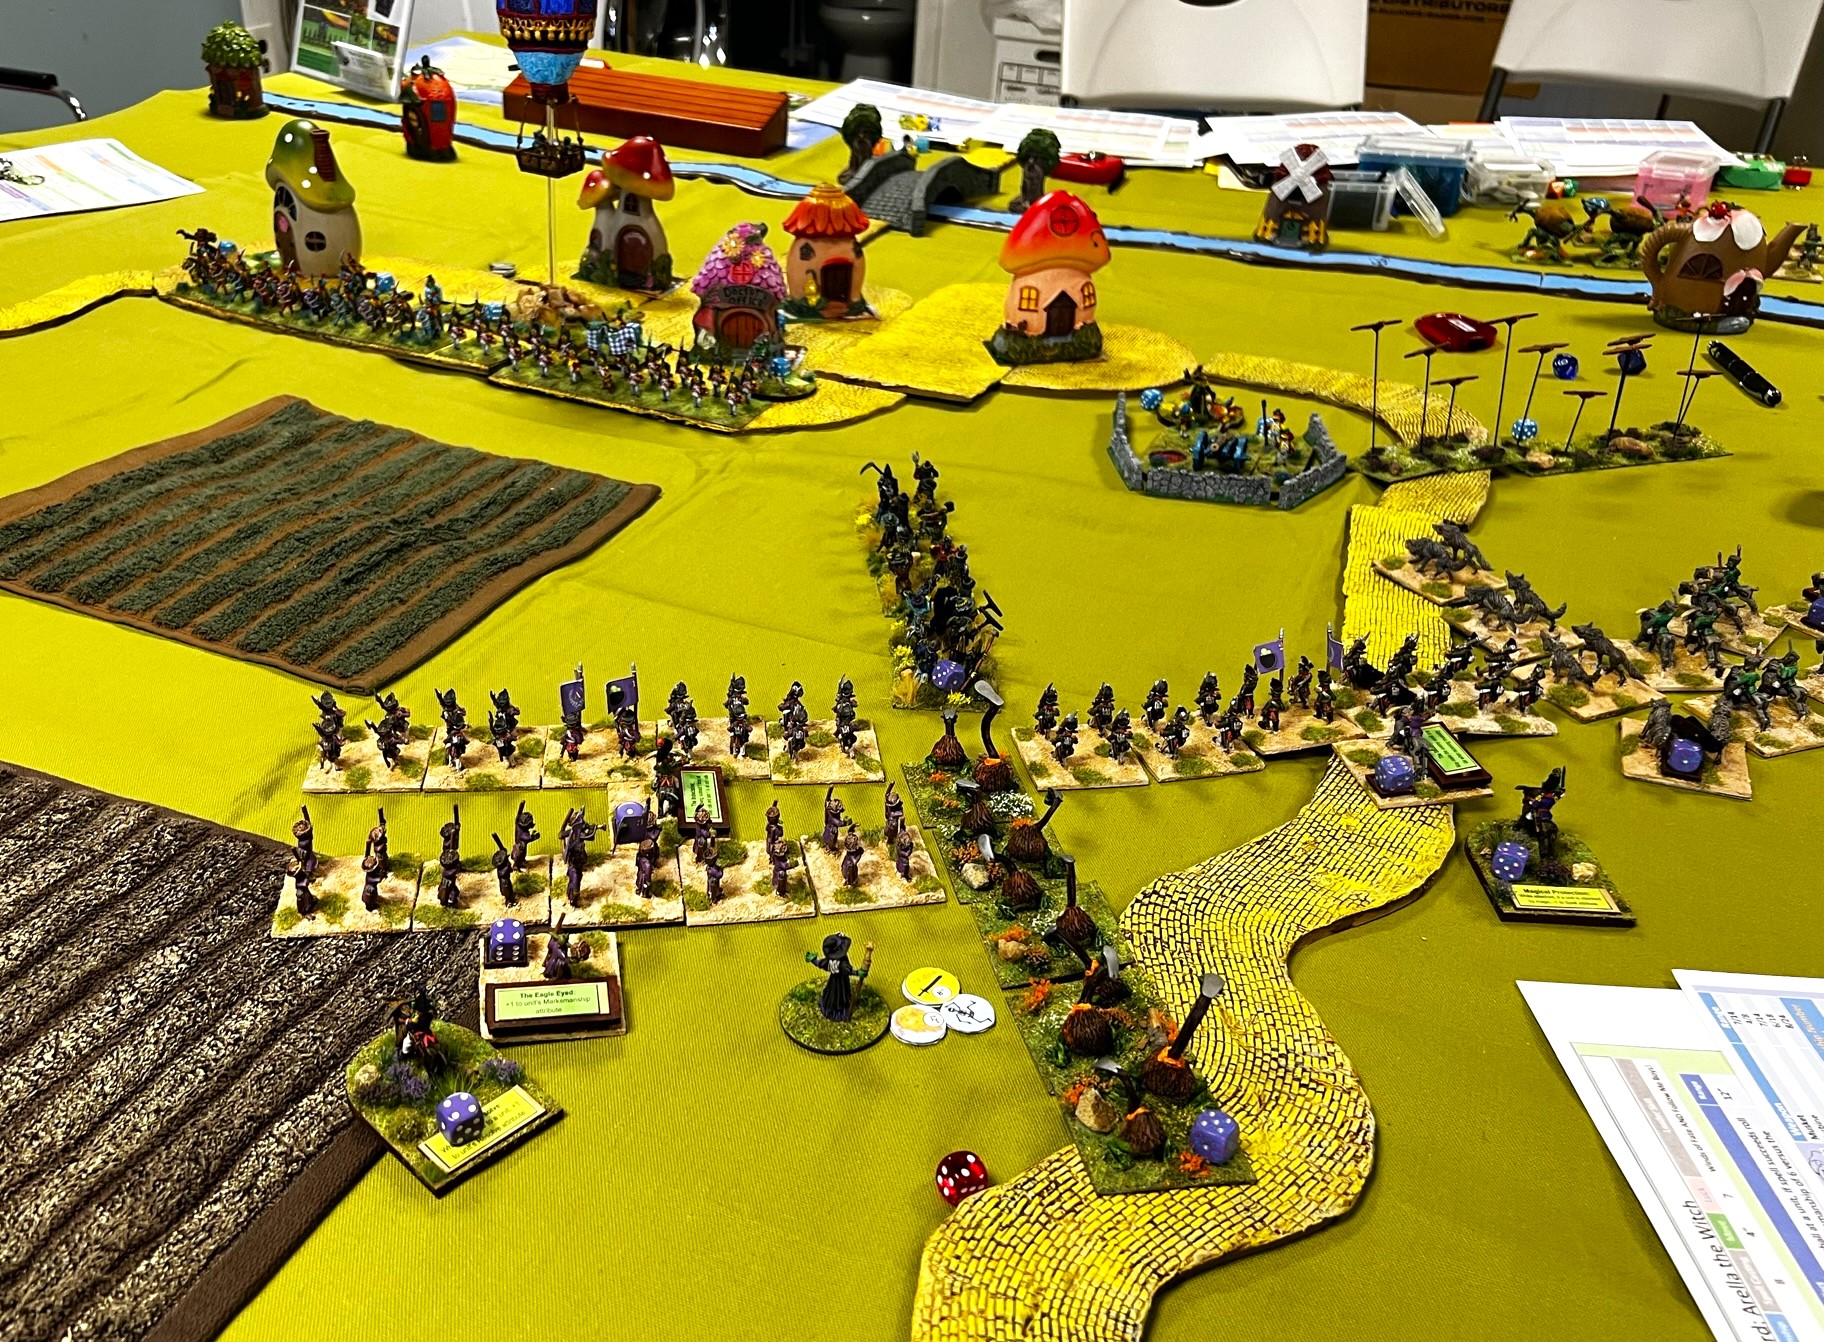
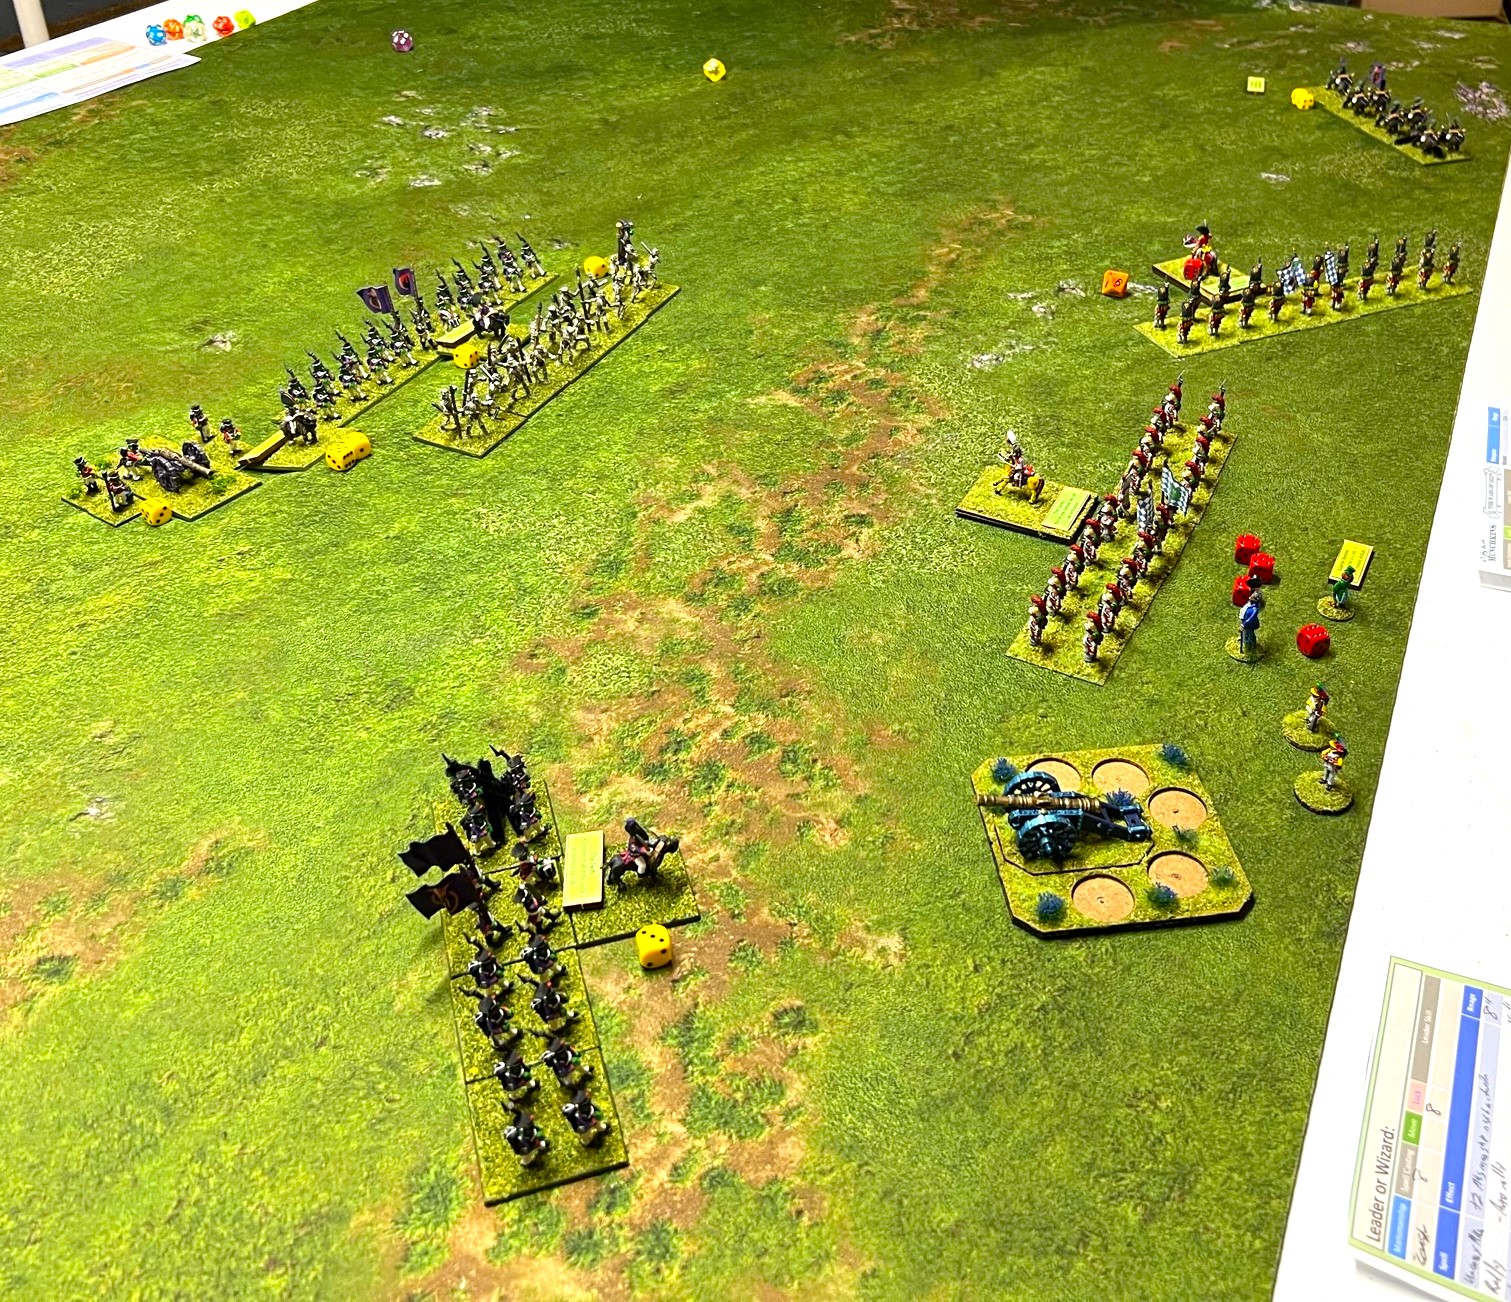
This Saturday night game was set up to accommodate 8 players. I only had 4 – so I scaled it down. The game’s objective was control of a single oasis. The contestants were a Temujican Brigade and a Gillikin brigade versus 2 Whim Whim brigades.
Brad moves his Whim Whim up, while teammate Mark and opponents Mike and Richard watch.The game became a mini-slugfest. In the end, the Temujican/Gillikins controlled the oasis for the win!
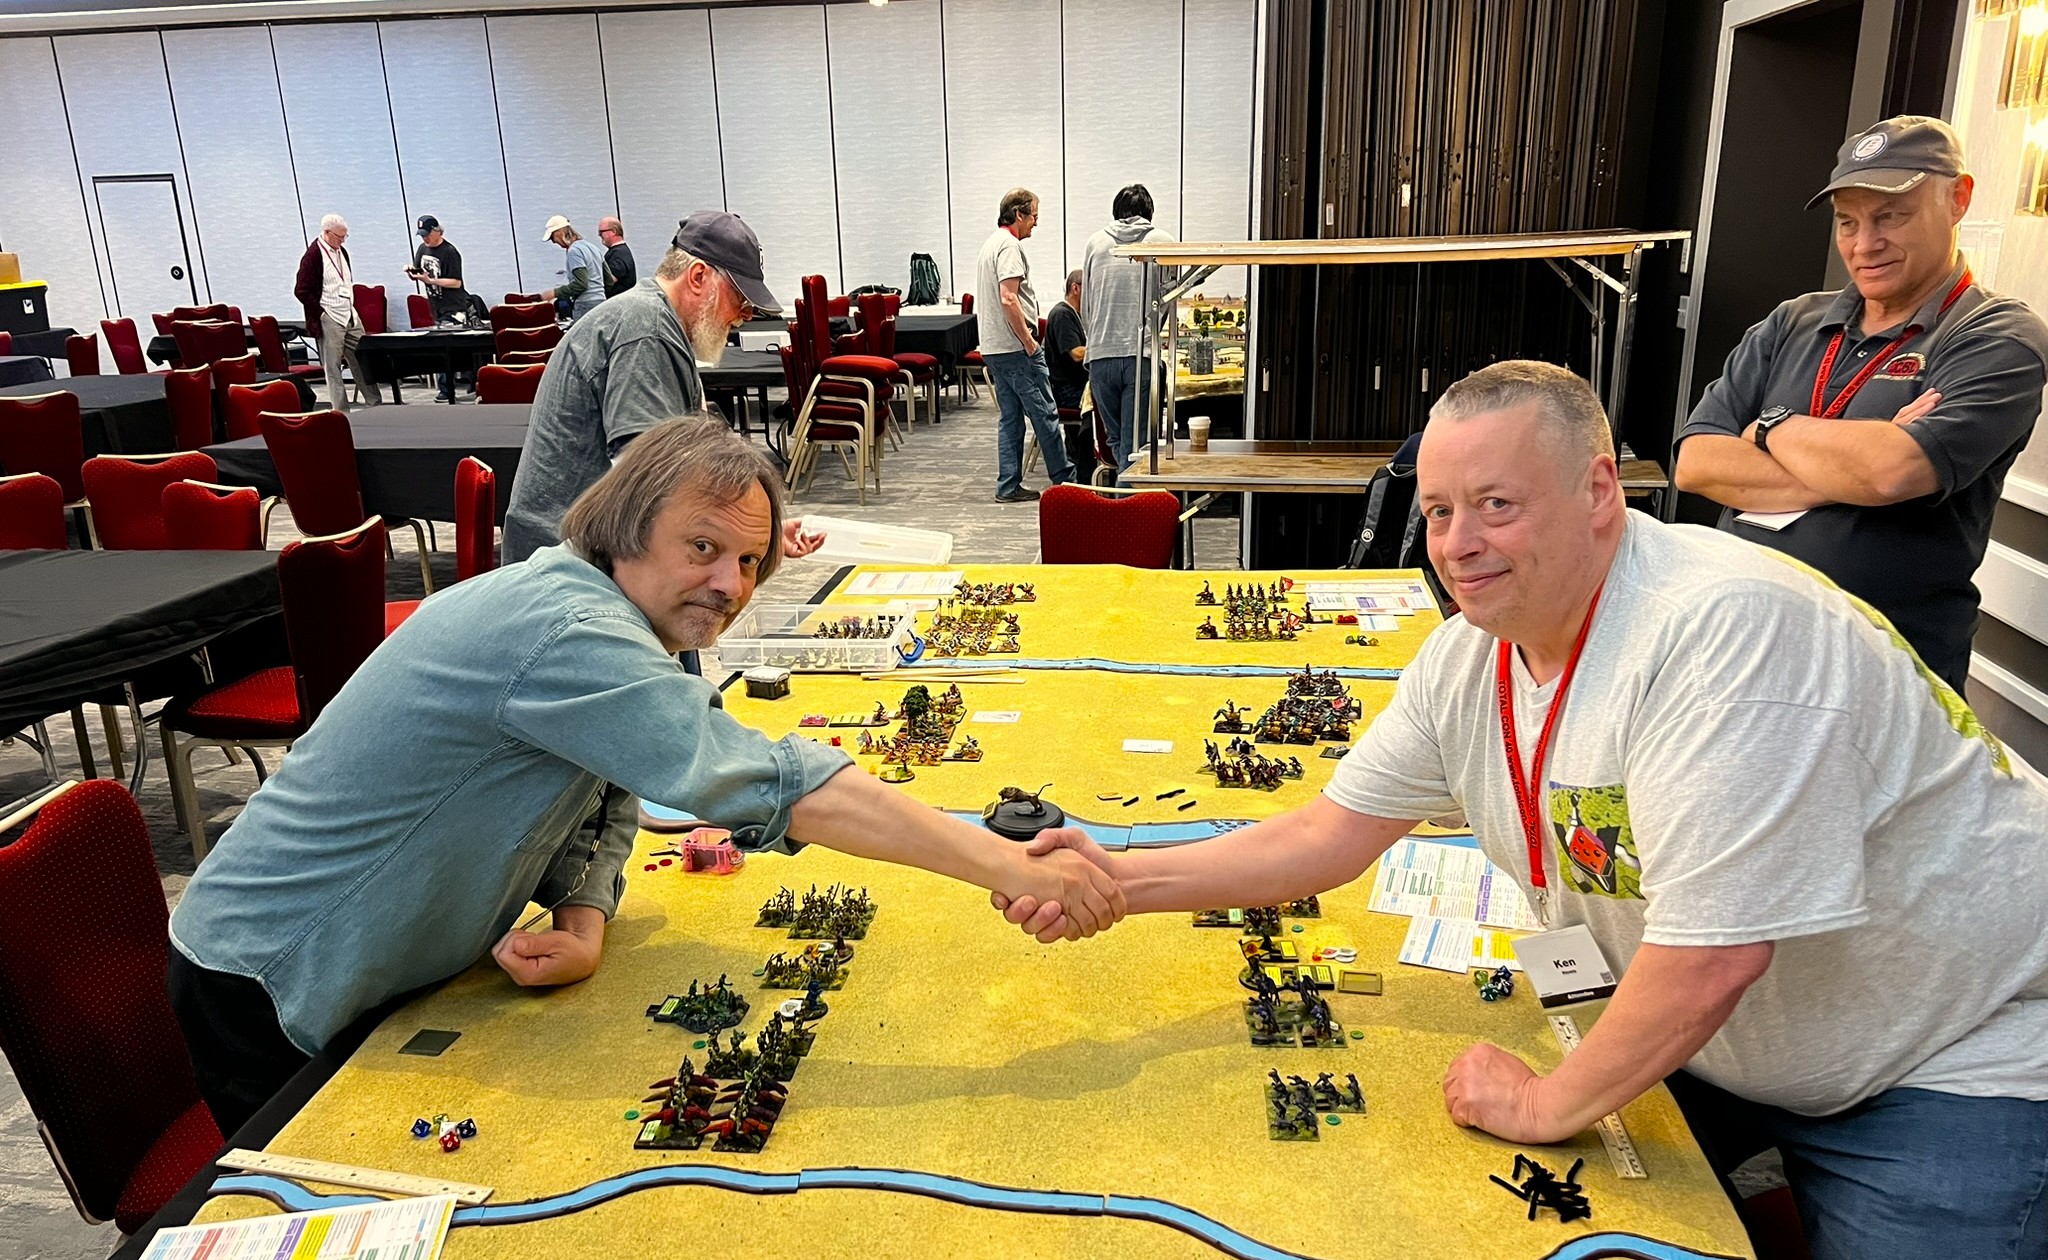
The HAVOC XXXIX Wars of Ozz Tournament
This was the final game of the convention.
At this tournament, players will be tested to see who is the best general in the Wars of Ozz. This is a playoff of evenly-valued brigades. This will be fast-paced. New players and old are welcome – but experience is a BIG plus – and there will be glory for the winner (and possibly prizes)! Do you have what it takes? Find out!
I can accommodate 8 players here, but only had 5. Each gets a 21-22 point brigade from a different faction at random. Each enemy base taken out is worth a point, with routed ones being worth half a point.
So based on a die roll, 4 players went into round one with 1 player getting a bye.
Each round lasted two turns. The winners in round one were the top three brigades so 1 player was eliminated. The player with the bye would face the strongest survivor from round 1. Bases would be made even in that match. Round two would reduce 4 players to just 2 players for the final championship. Lost bases would be lost forever and not make it into subsequent rounds.
The tournament begins!
Here is a video of the set up (not all brigades were used as described previously):
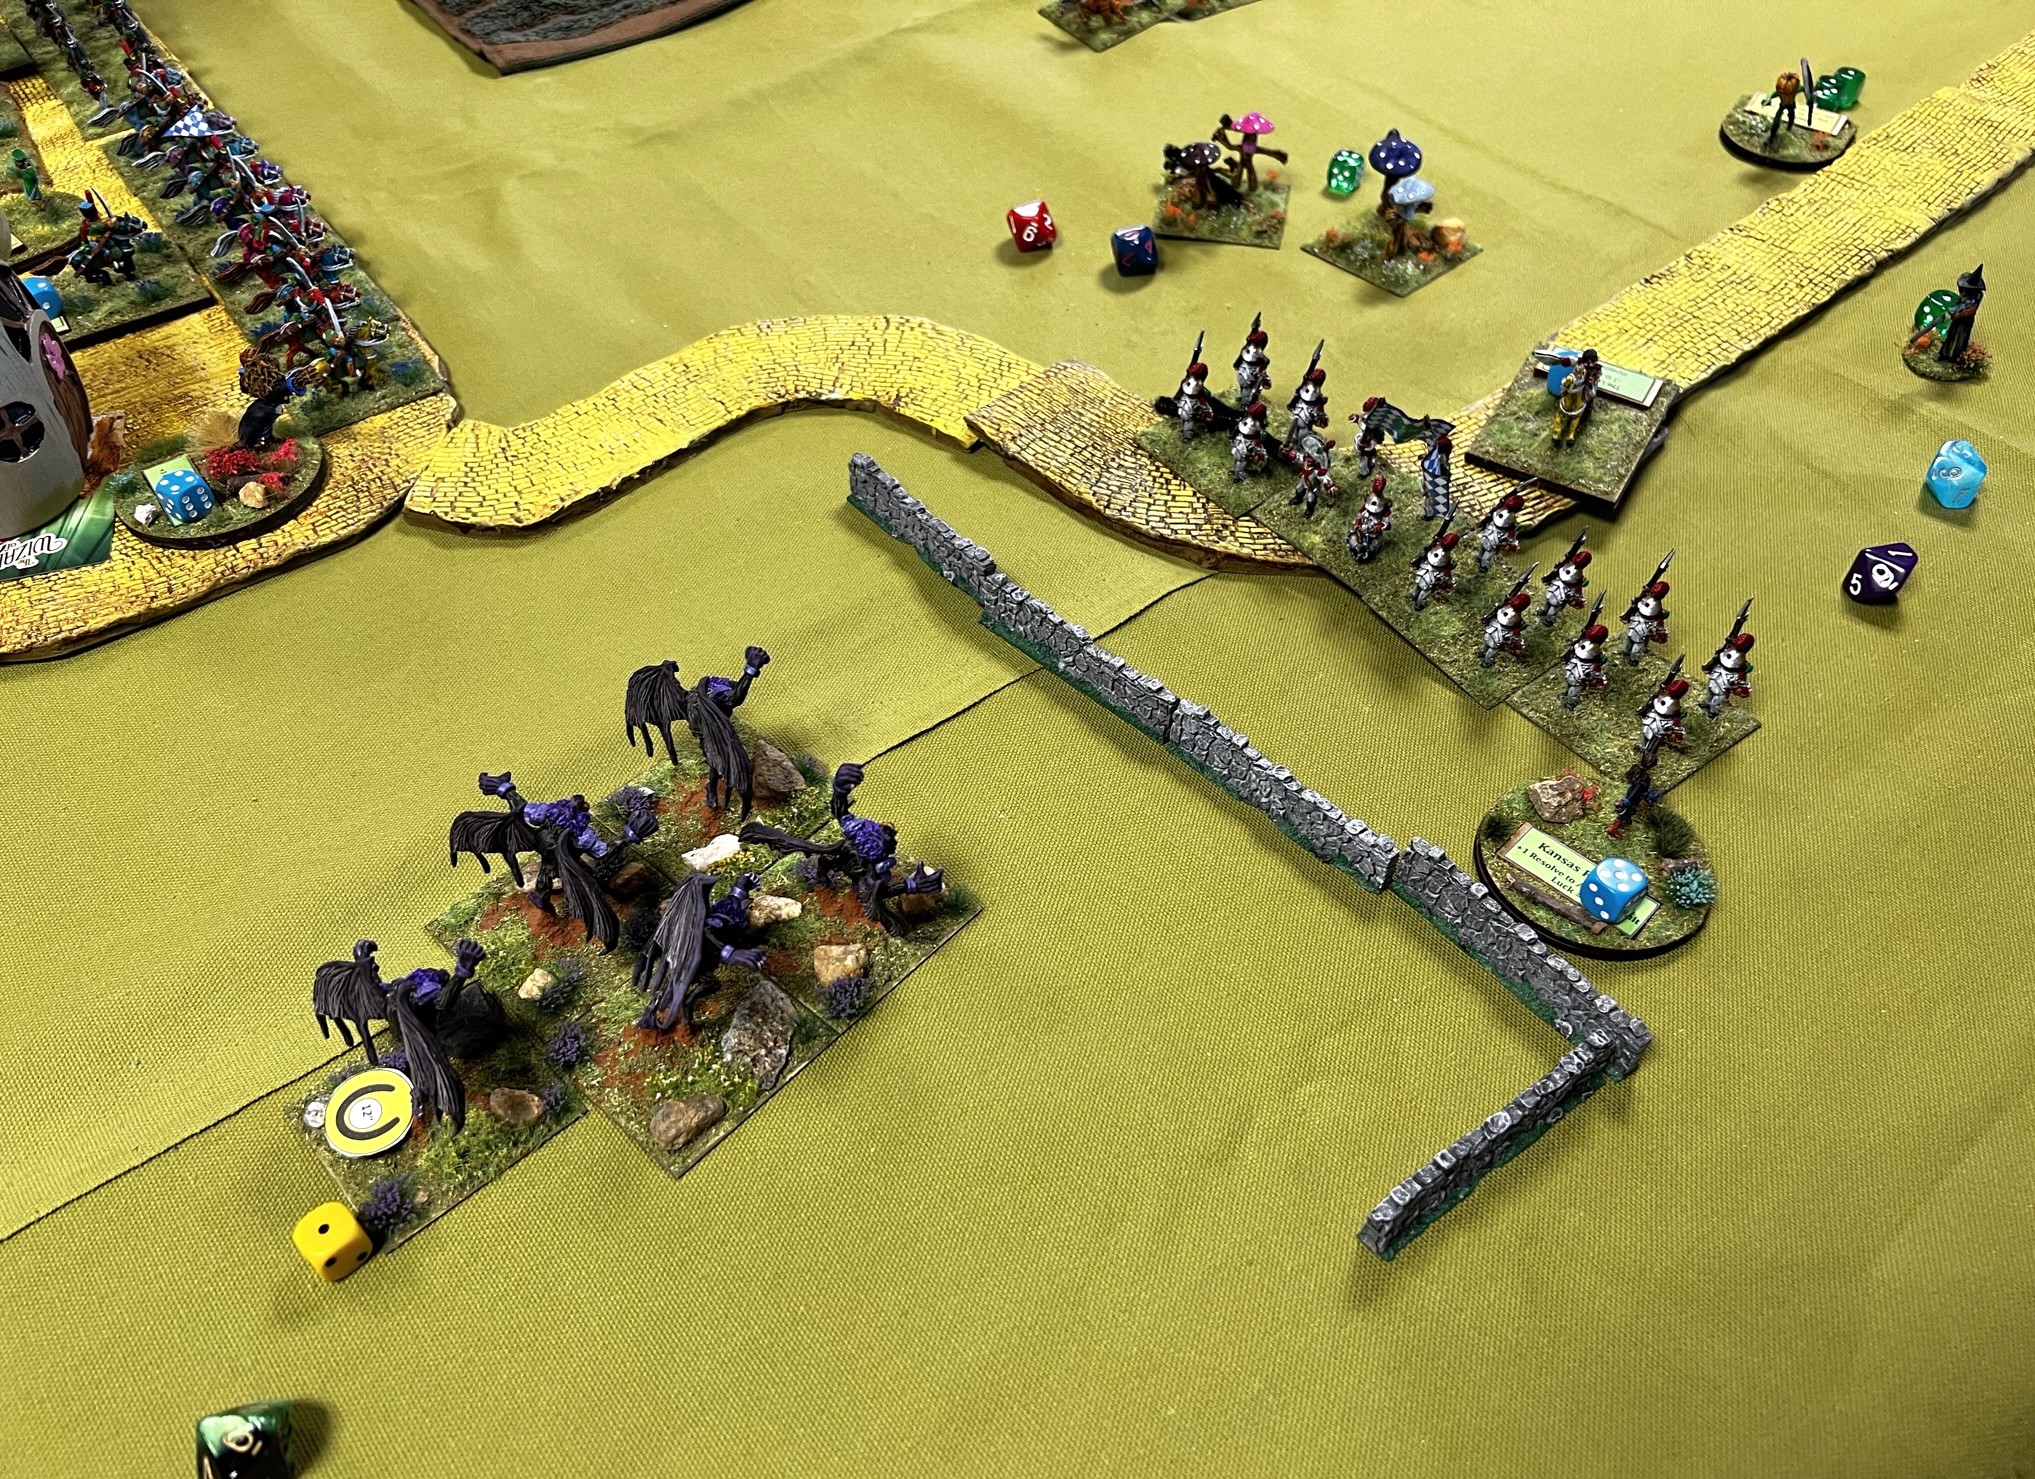
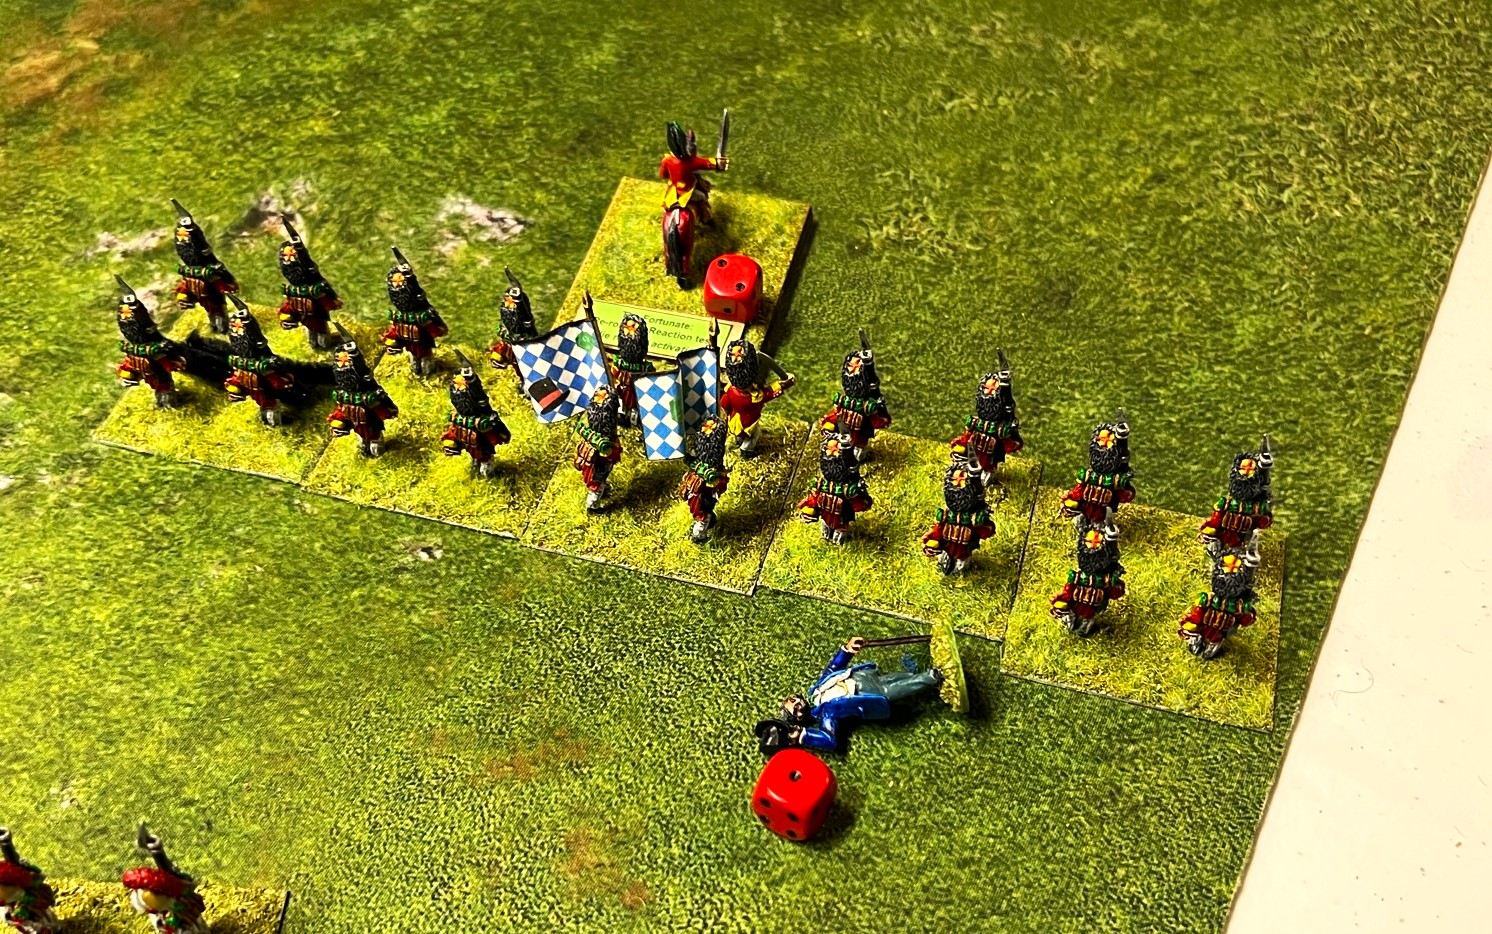
Pollywomps (Gregg) versus Gillikins (Eric). Gregg defeats Eric.
Gillikins (Rich) versus Nitpik (Brad). Rich defeats Brad.
Bye – Ken (Winkies)
After round 1, Rich graciously asked Brad to command his Gillikins in Round 2. Gregg and Eric were left to a rematch with their damaged units. However, Gregg was able to raise a number of Undead units with his spellcasters to offset his losses.
In Round 2, the match ups were:
Pollywomps (Gregg) versus Gillikins (Eric). Gregg defeats Eric again.
Gillikins (Brad) versus Winkies (Ken). Ken defeats Brad.
This set up the final round between Gregg’s Pollywomps and Ken’s Winkies – to the DEATH.
After a tough fight, Gregg’s Pollywomps came out on top! Congrats!
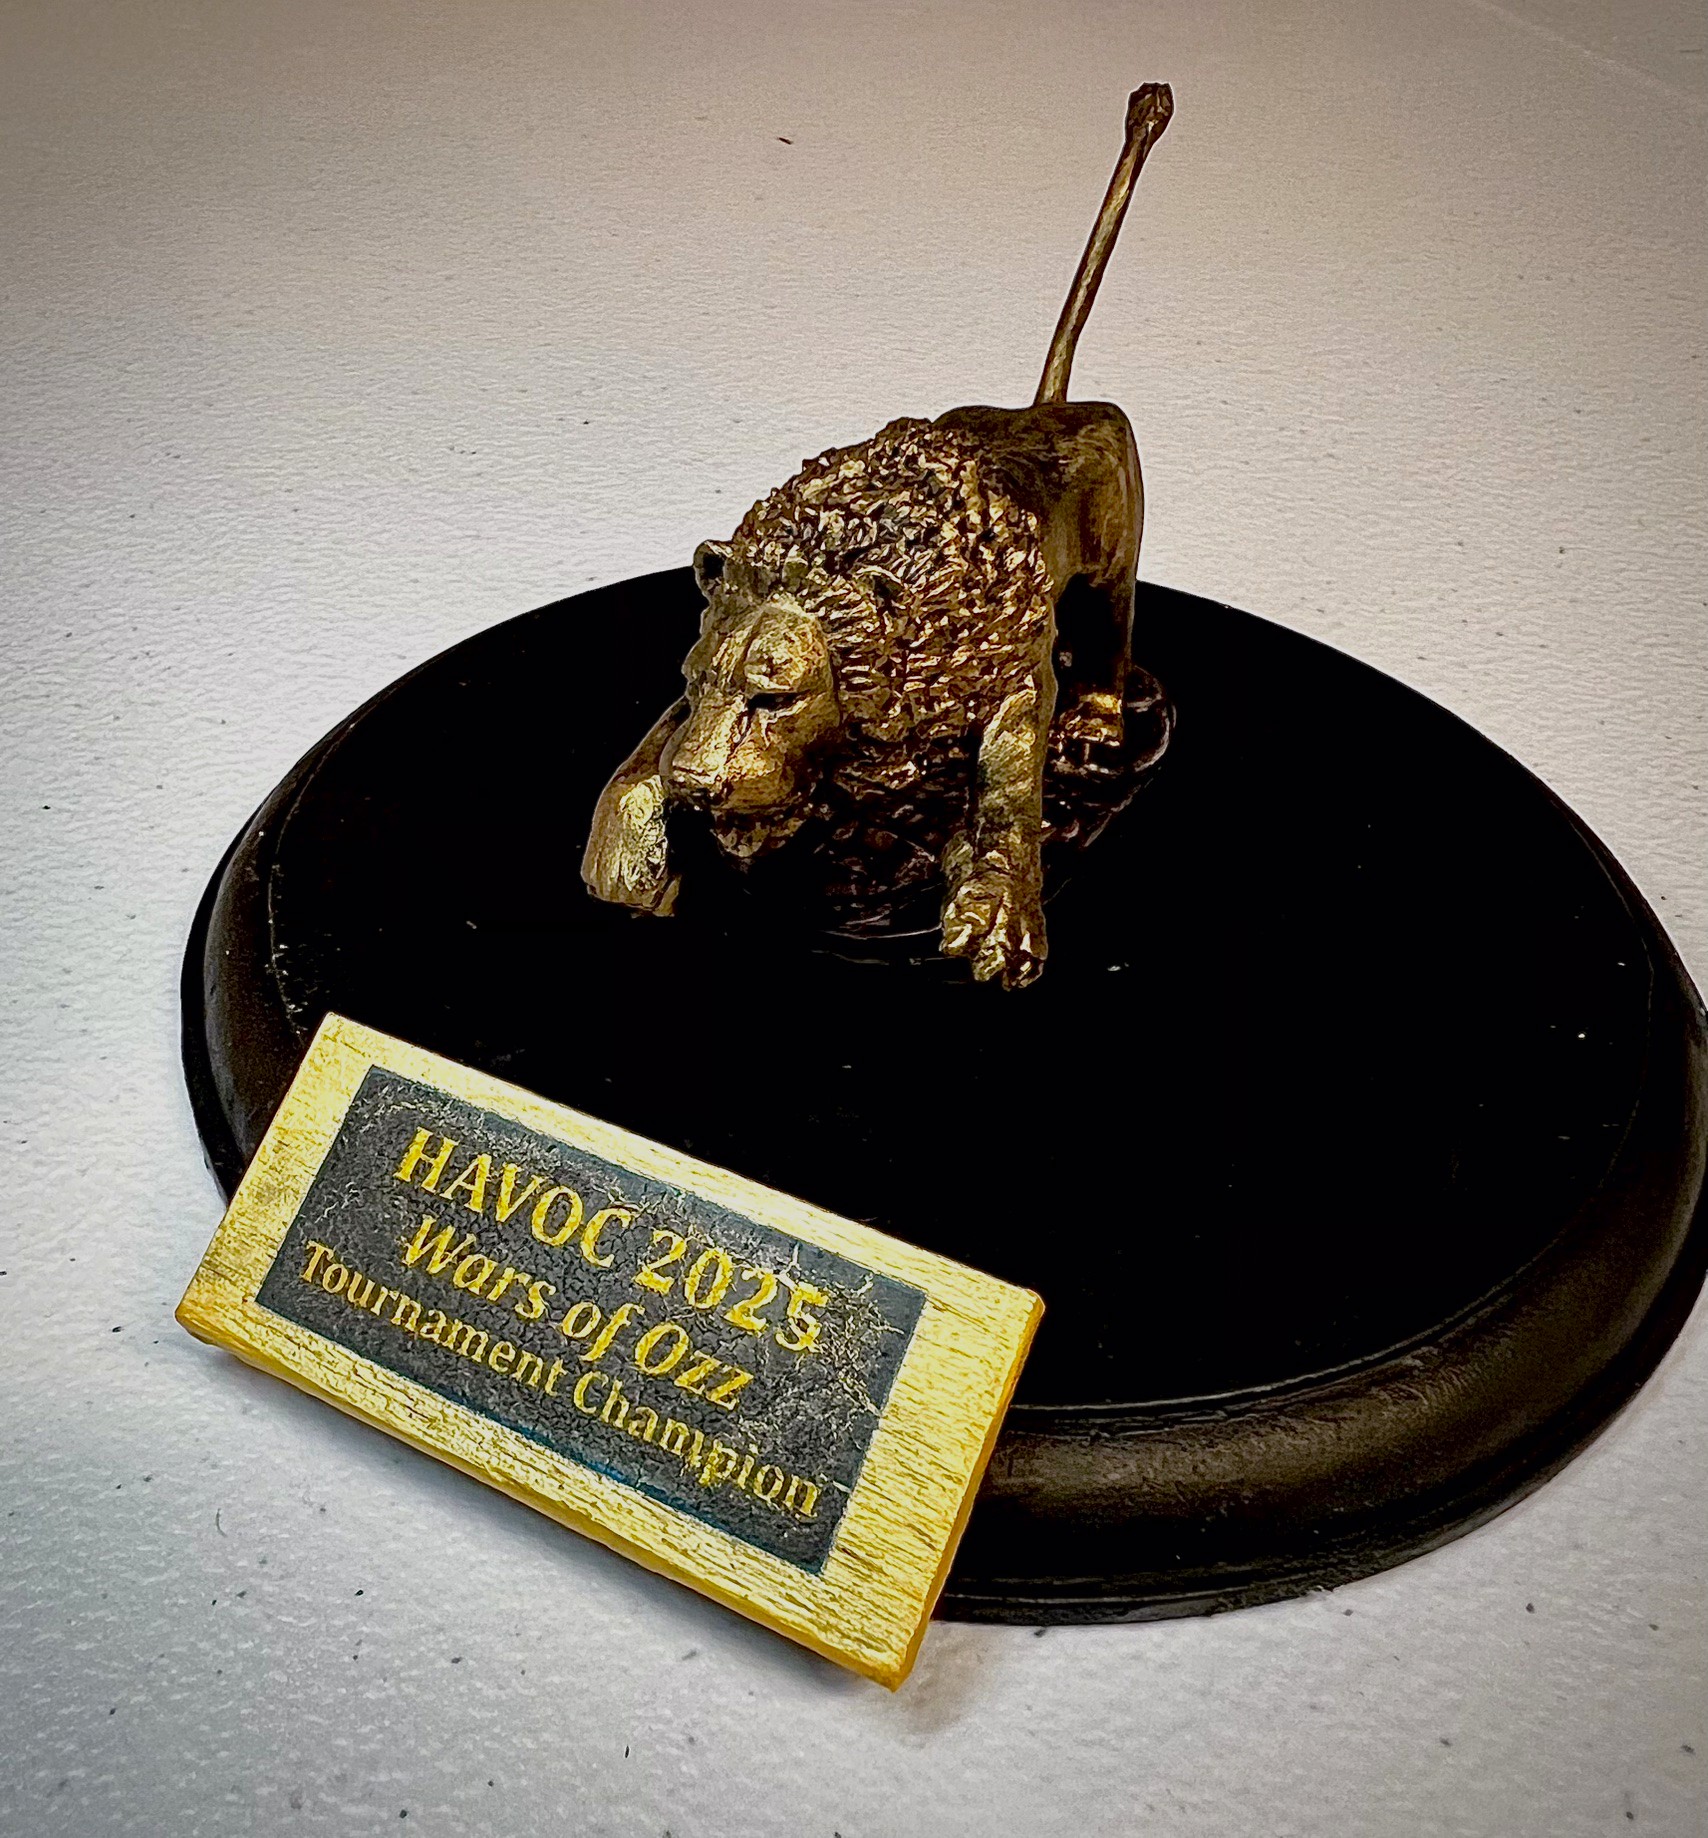
To the VICTOR! Gregg received the trophy – which I had made with a Dire Lion figure donation from Russ Dunaway!Gregg’s winning prize!
As a side note, there will be similar prizes awarded at HUZZAH 2025.
Thanks to all at Battle Group Boston for a great event and to Russ Dunaway for his support. Thanks to ALL the players.
Special thanks to Brad Gosselin for being an outstanding wingman for the ENTIRE convention…you rock buddy!!
Next up is MAYHEM, where some of these games will be run – then HUZZAH!
Thanks for looking – and feel free to share this post and or comment!
Miscellaneous details and references for those interested in that sort of thing:
For my earlier posts on Wars of Ozz games, view this page. It includes figures, units, and other related projects.
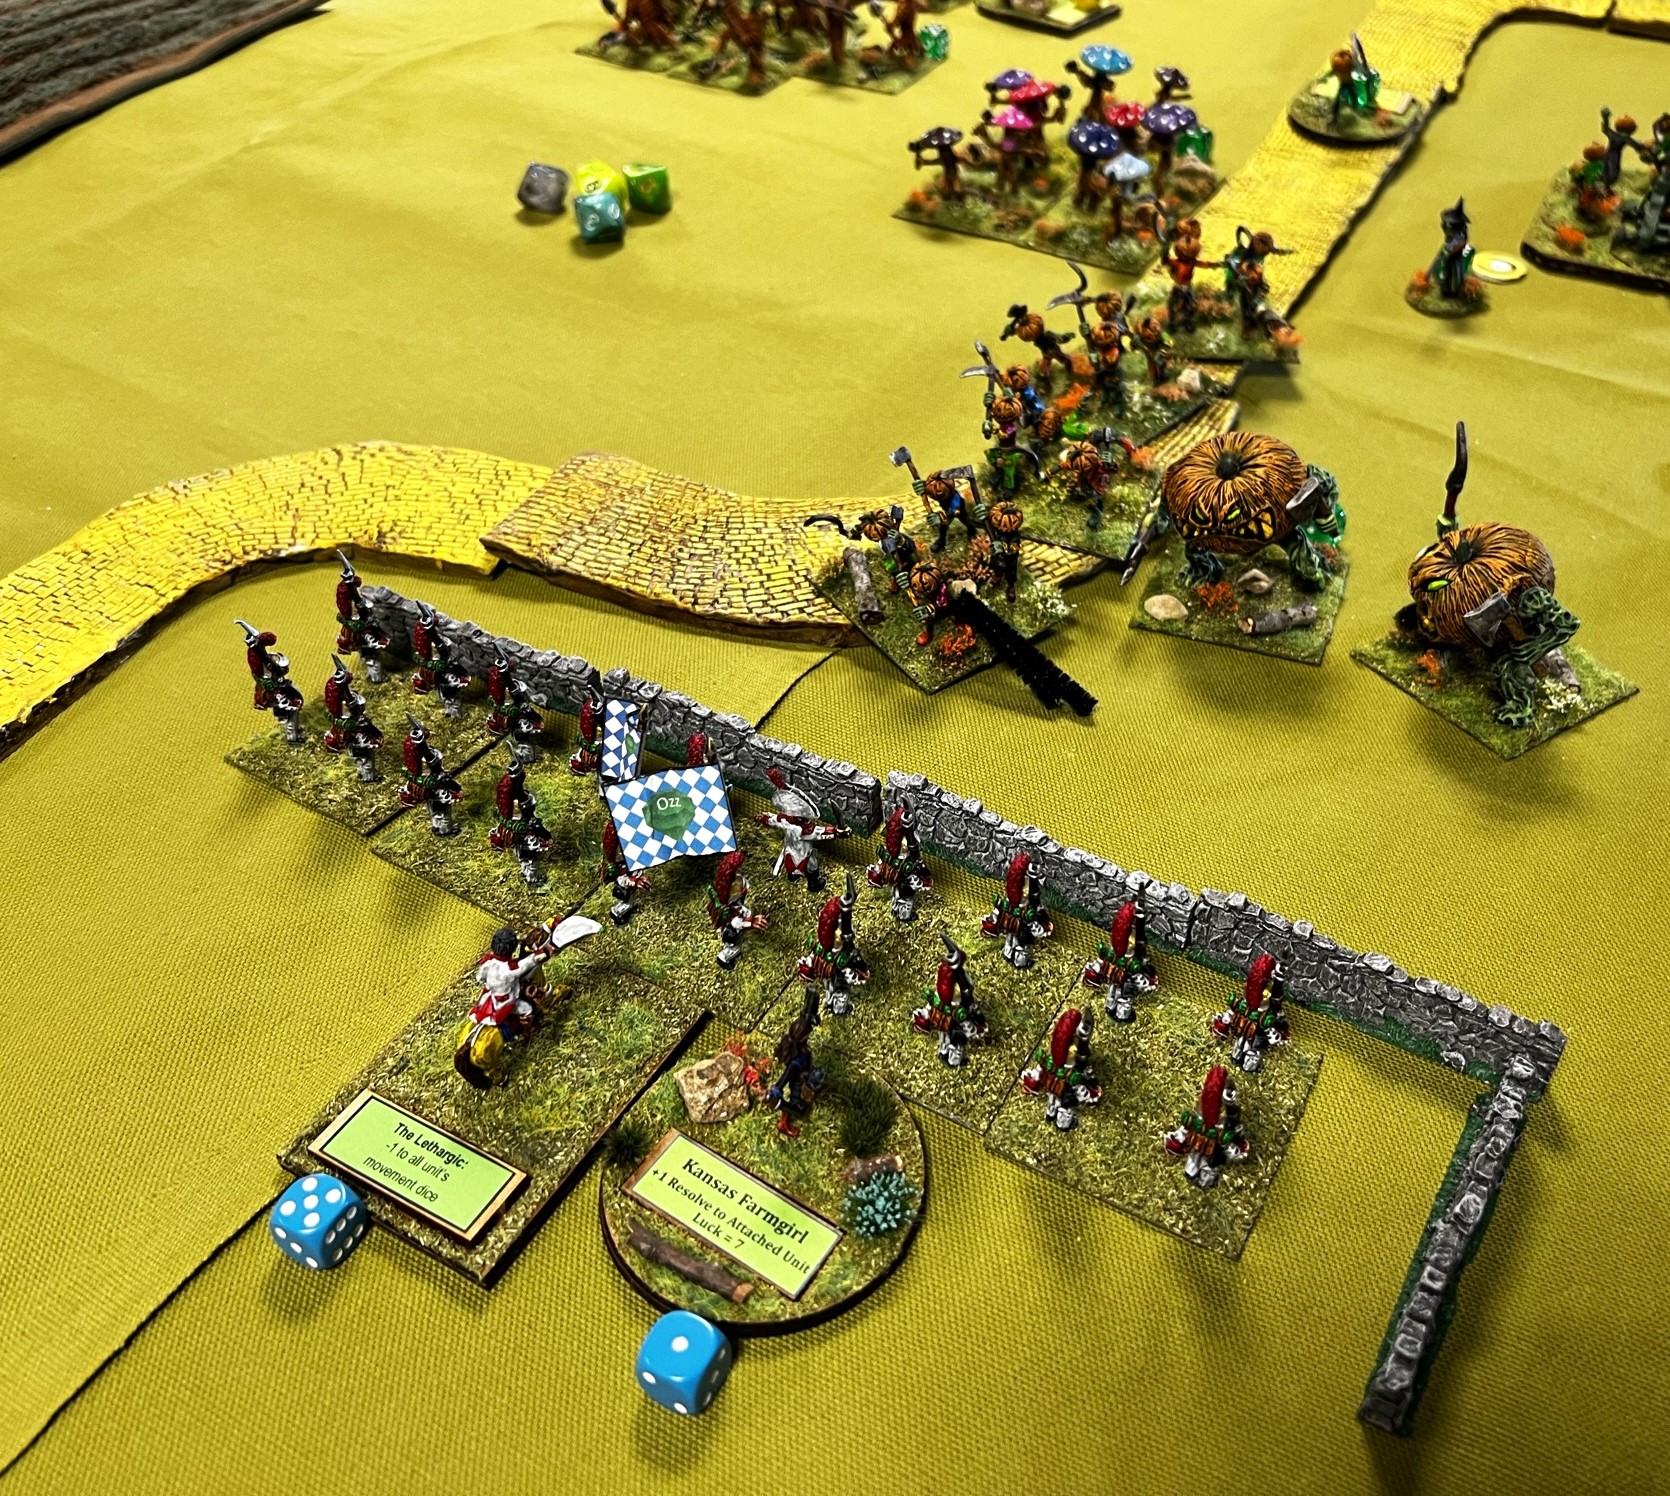
I have been developing a Wars of Ozz scenario to use at upcoming gaming conventions, especially at Fall In!® in Pennsylvania in November. The genesis of the idea for it came to me when I painted up the Adventurers of Ozz figures. The Kansas Farmgirl figure (probably “Dorothy”😁 ) had a small dog in a basket on her waist – and there was yet an extra separate Toto figure in the group. Well, I decided that I could use the other separate Toto as an objective marker – which led to my wanting a scenario for that use. And here we are!
The scenario title is “The Battle for Toto” – I’ll get you my pretty, and your little dog too!”. My flyer with the game description is below.
The scenario involves two converging – yet potentially opposing -attacking forces and one defender. On one side, are the Gillikins under Arella the Witch with two reinforced brigades. On the other side, under Evora the Witch, are the combined Winkie/Great Land of Harvest forces consisting of two allied brigades.
Meanwhile, a single reinforced Munchkin brigade is holed up in a nearby small town and some surrounding defensive cover outside of that town. Also hidden in that town – in an unknown location – is the Kansas Farm Girl’s little dog, Toto – the object of the game of course.
The Gillikins and the Winkies can choose to fight each other or collaborate and go for the Munchkins. To simulate the “sibling rivalry” aspect of the game, I allowed Victory Points for the two attackers differently. If the attackers took out a Munchkin base, it was worth 1 point, while taking out a sibling’s base was worth 1.5 points. While collaboration between the attackers is possible, I created an incentive here for sororicidal tendencies to assert themselves (never used that word before!). The point values for the game are shown below:
The biggest point value is possession of Toto at the end of the game at 10 points. Toto is placed randomly and secretly under one of the buildings using playing cards face down. Even I, as the GM, won’t know where Toto is.
I have GM’ed this game twice. I ran it at a Mass Pikemen game day back in July on the 22nd, and also at the Hobby Bunker Game Day event on August 26th. I took a few pictures but as always when you’re the GM it’s difficult to be a great photographer and run the game effectively. I always prefer to be an effective GM and as good a photographer as possible. Still, I think you’ll find these pictures interesting – and this post will be photo-heavy.
As is my wont, after each game, I tweak it a bit for the next iteration based upon player feedback my own observations. In both of the games here, I acted as the GM and the Munchkin commander. If I had more players, I would defer. As I would expect the Munchkins to take advantage of their initial hard cover, little movement on their part is expected. This leaves more game time for the attackers, as the Munchkin’s actions during their activation tends to be over pretty quickly for the most part.
A quick aside – I needed to determine a special order of play with three sides. Normally, in Wars of Ozz, for activation purposes, there is an activation deck of cards with 12 cards: 1-6 red and 1-6 black. They determine the order in which a side can activate a unit or individual based on a dice pool controlled by the brigade commander. The number of dice in a brigade commander’s dice pool corresponds to the number of units or individuals that the player controls. So if a 6 is pulled on a card – the player can choose a unit to activate with any available sixes on the dice. For this three-way game, to see who would go first, I needed to set up a special order of play. I used red cards for the Munchkins (which would let them go first on a red card) and odd black-numbered cards for the Gillikins and even black-numbered cards for the Winkie/Harvest brigades. Each turn, all get activated, it’s just the order of activation that is affected. For example, if a black 3 card was pulled, all Gillikin 3’s would activate, followed by Winkie/Harvest 3’s, followed by Munchkin 3’s. If the next card was a red 6, the activation order of play would then be Munchkin 6’s, followed by Winkie/Harvest 6’s (as an even number), followed by Gillikin 6’s (who only go first on odd numbers). As all 12 cards are played each turn – it does evens out.
I will share the pics below and give some descriptions – though it is far from a complete battle report to be sure. I just thought you folks would enjoy the photos and the flavor of the games.
Mass Pikemen Game Day – July 22nd
Here is the game as set up:
Winkie/Harvest on the left – Gillikins on right, Munchkins in town and behind walls on right and left of the town.
Close ups of the attackers are shown below at the start of the scenario – the Winkies are screening their flank with zilk cavalry, while the Gillikins are doing the same with a regiment of giant Dire Bears.
The Munchkins are in good cover – with Colonel Tik Tok and a medium battery both in defensive positions on the town’s flanks in a walled positions. In the town are a light cavalry regiment with carbines, the Munchkin Guard infantry, a wizard, and the Aerostat providing overwatch musketry. In reserve are the Great Owls. In this first game, I used 4 buildings in the town as possible Toto locations, so there was a 25% chance that Toto was in any one building.
Now, some play shots:
The start of the game – would the attackers join forces or would sibling rivalry take precedence?
Very quickly, sibling rivalry did take over as the Winkie Light Cavalry got the initiative and attacked the Gillikin longbows once the Dire Bears moved forward and left them open.
Winkie Cavalry drives back the Gillikin longbows while the Dire Bears wait to counterattack.
This move also left open the cavalry’s flank, and the Dire Bears subsequently hit them on that flank. In short order, after a few rounds the Winkie cavalry was routed by the Dire Bears and was eventually driven off the board. The loss of this key unit would haunt the Winkies, but now there was definitely a 3-way fight on the tabletop.
The Dire Bears successfully drive the Winkie cavalry from the field of battle.
At the town, the Munchkin Aerostat kept up covering fire from a safe location, as Harvest melee troops hit the defenders in waves. One such attack triggered the Munchkin Light Cavalry to charge out of the town and hit the Mushroom Regiment.
Munchkin cavalry sortie – this was caused by a Reaction test that went an undesired way for the Munchkins.
The Carrot Creatures Regiment routs after a failed assault on Colonel Tik Tok’s Regiment. Eventually, the Harvestland Artillery (pumpkin chucker) would pummel Tik Tok, causing them to flee, and notably also take out the Kansas Farmgirl when a base loss occurred. Yes, she did indeed buy the farm..
Meanwhile, on the Munchkin’s left flank, the Munchkin medium battery took a toll on multiple Gillikin units. The Gillikins sent out their Dire Wolves to flank the battery, and the Munchkins countered with their mobile reserve – the Great Owls.
Dire Wolves threaten the medium battery and the Great Owls respond.
With the main objective in mind, the Dire Wolves ran around the Great Owls to the town (Dire Wolves are FAST), where they prepared to search a building for Toto.
Would the card underneath show that Toto was there? It was a 1 in 4 chance…
Similarly, the regrouped Mushrooms stormed a gap in the town’s defenses (left by the undesired sortie of the Munchkin Light Cavalry who kept charging away at other enemies). The Mushrooms prepared to search yet another building.
Mushrooms make it to another building.
The next activation, the Dire Wolves found Toto – and carried him away.
Toto is found!
The game ended, with the Gillikins winning, the Munchkins in second place, and the Winkies/Harvest in third. I think the points were Gillikins 28 (with 10 for Toto), Munchkins 19, and Winkies/Harvest 18.
After this game, I added some 12 mm Pendraken dice square frames to some of the Gillikin regimental commanders and to one base apiece of regiments that do not have regimental commanders. I got the Gillikin regiments from an estate sale in the UK. I had wanted to have a number of Gillikins, so they were not painted by me – but were quite good. I also made MDF placard holders for the Gillikin regiments with commanders and glued them to their bases as it would have been too impractical and time consuming to rebase the figures. This would make play easier because having the placards on the regimental commanders’ bases negates having them fall off during movement. I also updated some player charts to one piece of card stock. I was then ready for the:
Hobby Bunker Game Day – August 26th
Matt of the the Hobby Bunker store in Wakefield ran a game day on August 26th. I ran an Aztec game here last year but did not do a blog post on it, but it was well-attended. For this one, I volunteered to run the Battle for Toto scenario twice – once at 10 AM and again at 2 PM.
Unfortunately, turnout was a bit low, and we also started late, so I ended up running the game just one time across both time slots. That is to say, I kept the tabletop as it was at 2 PM and rotated in new players. It saved time as the game was still developing, and resetting the game was not a good option for the time we had left. In the end, it worked.
The game went similarly to the previous iteration – but not totally. I did modify some of the troops initial locations within the brigades, plus the table was of a slightly different size than I had in July.
Once again, at the start, witch sibling rivalry took over – though this time it was the Gillikin’s Dire Bears hitting first instead of the Winkies. And once again dice rolls favored the Gillikins and saw the Winkie Cavalry being routed and ultimately driven off of the board! (As Boston Bruins fans know – don’t poke the bear). Also, that cavalry rout went through several other Winkie units, disordering them and slowing their initial movements in the game.
Matt controlling his 2nd Gillikin Brigade, while Brad controls the Winkie/Harvest forces.The Winkie cavalry (upper right in this photo) rout disordered multiple Winkie units.Colonel Tik Tok’s Infantry Regiment faces an onslaught of waves of Greater and Lesser Pumpkinheads and other vegetable regiments.The Winkies responded with furious musketry from their Sharpshooters, as well as a spear volley from their allied Corn Creatures. This took out two Dire Bear bases and heavily damaged a third.
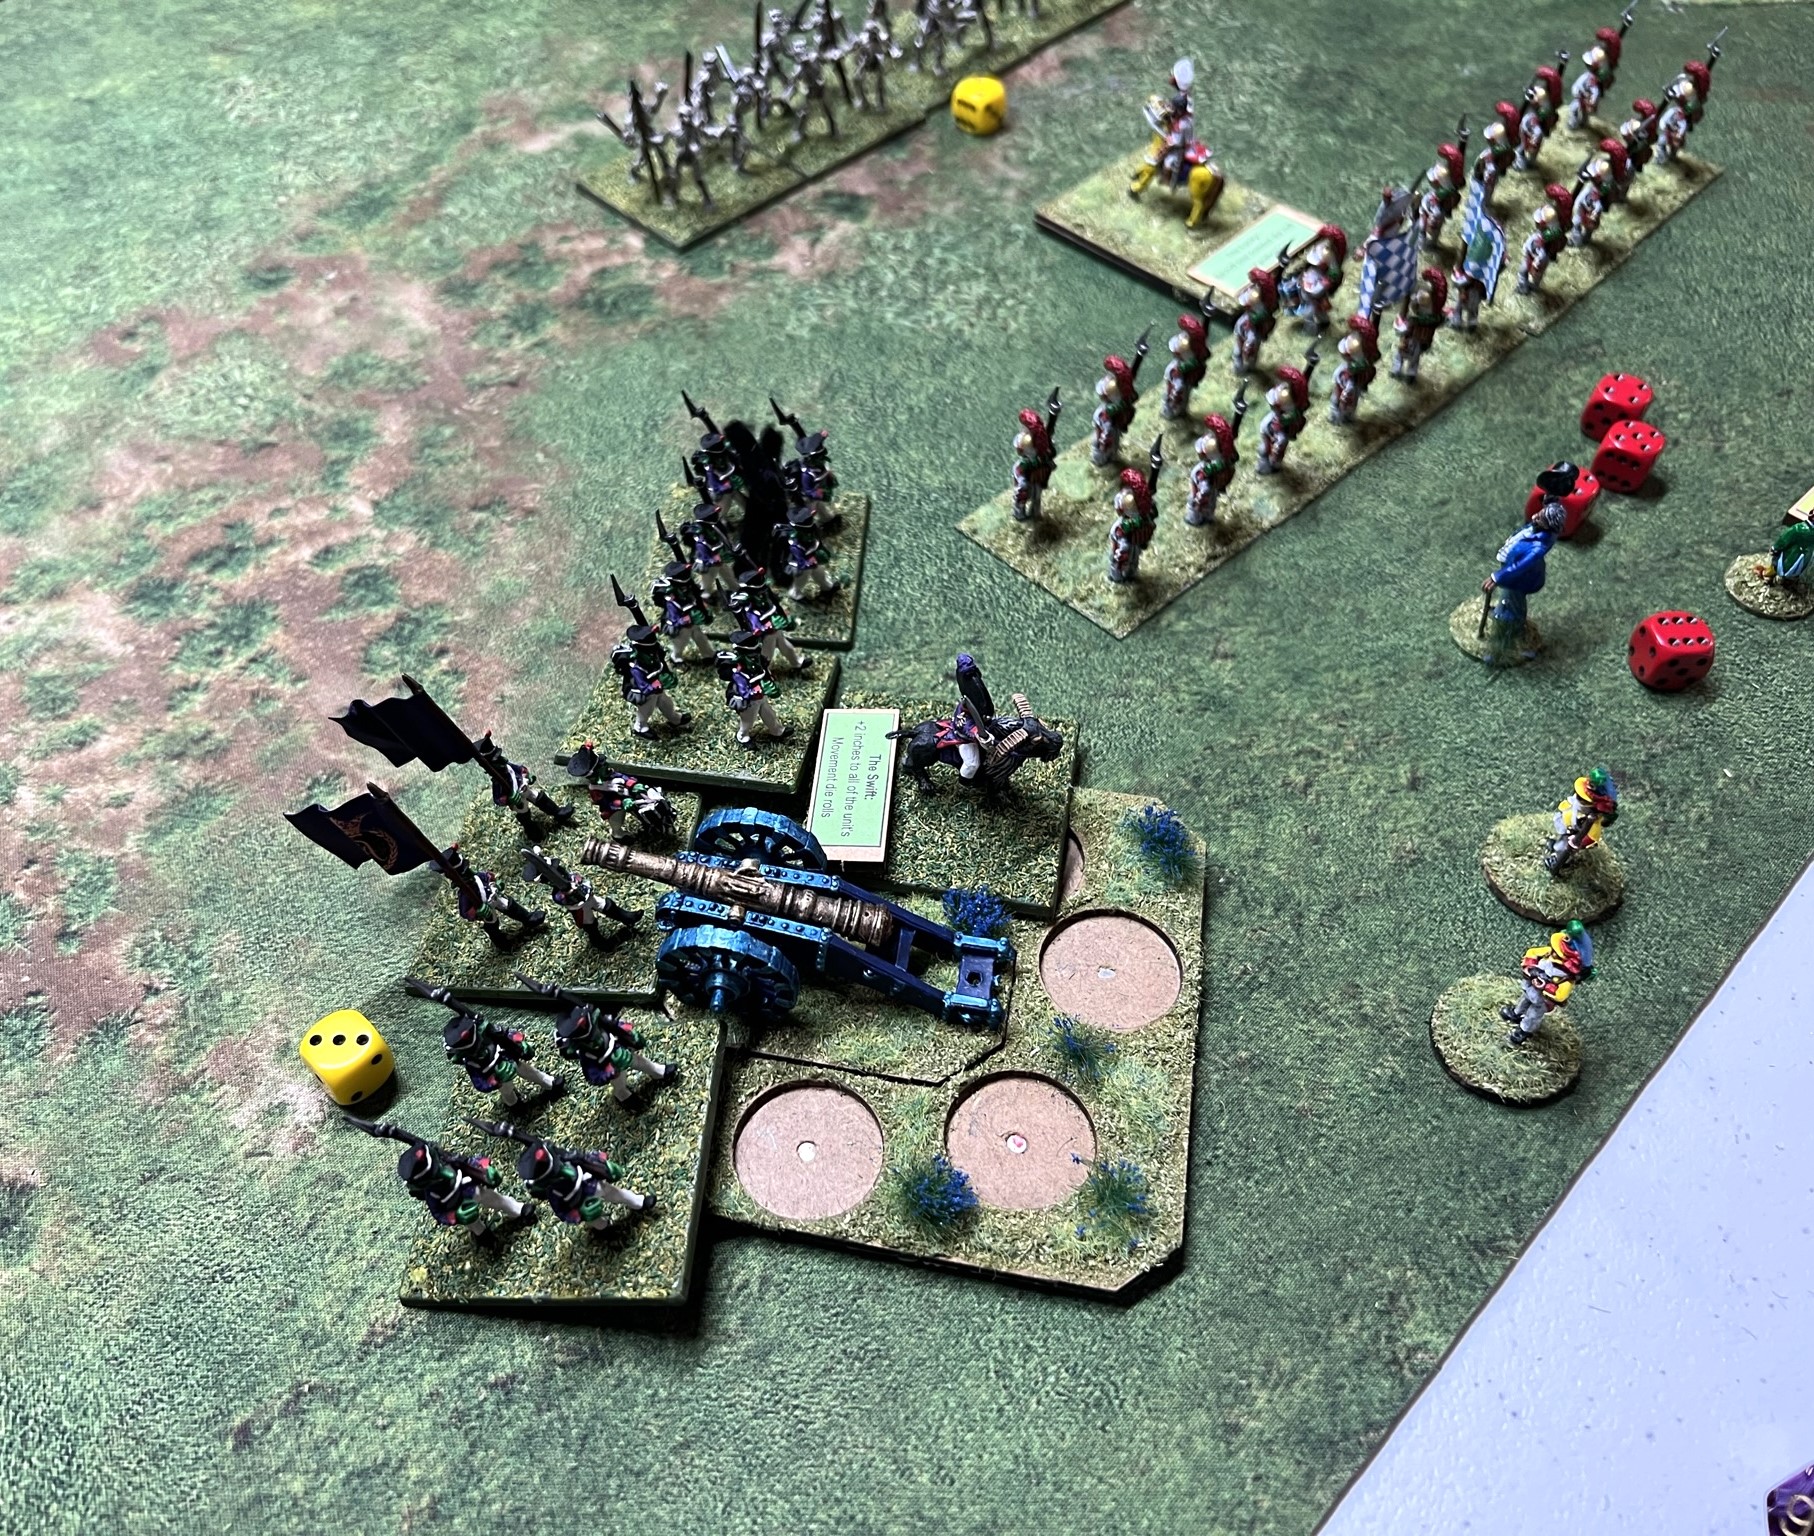
Meanwhile, on the Munchkin’s left flank, the Gillikins moved up their forces into an effective attack formation with their musket-armed infantry in line (for better musketry) and melee forces in column (for better movement towards the town0. They detailed a small force to hold the Winkies at bay on their left flank.
Gillikin attack formations.Evan, commanding the Gillikin 1st Brigade, moves his troops.A view of the Gillikins movement and alignment from the opposite angle.Meanwhile, back on the right flank, waves of Greater and Lesser Pumpkinhead attacks fail to dislodge Colonel Tik Tok’s Regiment.Unfortunately, a subsequent Reaction test causes the Munchkins to break discipline and leave their nice protected wall and countercharge the Lesser Pumpkinheads – with the Kansas Farmgirl in tow as she was attached.Back on the left flank, the Munchkin medium battery – assisted by the attached Scarecrow -kept up fire at the units of the advancing Gillikin horde – but there were a lot of them. The Great Owls moved up to secure the left flank of the battery – with nothing on the right of the battery. The Gillikins noticed this!Back in the center of the table, the fight between the Winkies and the Gillikins continued as both sides had settled into a flank-protecting action while going after the Munchkins with their other forces.Back on the Munchkin’s left flank, the Harvesters move quickly in single column towards the unprotected side of the medium battery…
After this movement, the Harvesters activated again, and were able to change formation and hit the medium battery – wiping it out completely.
The Harvesters eliminate the medium battery. As GM, I should have left the gun on the tabletop – oh well, I forgot.Back on the right flank, the Great Flying Apes took advantage of Colonel Tik Tok’s departure from the wall, and fly over and behind them in anticipation of a devastating hit in their rear. The Munchkins managed to do an about face towards the Apes, but were not able to fire. They would then be attacked in melee.
The fight went badly for Tik Tok. The Regiment lost two bases and a third was heavily damaged. Even the Kansas Farmgirl took damage.
The Great Flying Apes hit devastates Colonel Tik Tok’s Regiment (And the Kansas Farmgirl). And now they were in sights of the Harvestland Artillery (pumpkin chucker)…
The Harvestland Artillery activated, and hit the Munchkins, eliminating yet another base, and routing the unit. Alas, the Kansas Farmgirl also took damage, and yes, again, sadly bought the farm…
Both Munchkin flanks had now been compromised – and as the Gillikin Goat Riders were in the process of routing the Great Owls, things were not looking up for the Munchkins. At 2 PM we rotated in new players to take over.
The Great Owls flee, and the Harvesters move up to search the town.New players join the fray.As the Munchkin’s right flank was gone, the remaining survivors of the Mushroom Creatures regiment and the Great Flying Apes eye a building for search for Toto. The Carrot Creatures Regiment changes its target from the Gillikins and would wheel towards the Munchkin Light Cavalry in the town’s front.
The Carrot Creatures decided to fire their bows at and then charge the Munchkin Light Cavalry. The Munchkin Light Cavalry’s Reaction test to that fire dictated that they would countercharge the Carrots – with impetus and double hits…the result was massive damage to the Carrots, who also quickly fled the battlefield in a hurry.
A dramatic and somewhat desperate charge of the Munchkin Light Cavalry against the Carrot Creatures Regiment.
The Munchkin cavalry then took a reaction test, which made them continue to attack the nearest unit – which ended up being the Gillikin Longbows. The bowmen damaged the cavalry and broke up their attack with little damage. Subsequently, Evora successfully hit them in the rear with a fireball, taking out a base. A terrible Reaction test die roll then sent the Munchkin Cavalry fleeing.
Here the Munchkin cavalry hits the Gillikin Longbows, and Evora is ready with her fireball.The Aerostat fired muskets at the Dire Wolves, which then turned and fled. But, the Harvesters were able to then make it to the building shown here unmolested – and search for Toto. On the other flank, the Mushroom Regiment was prepared to search for Toto in another building, so three of the five buildings remained in Munchkin hands and were not searched.
In the end, Toto by chance was in the building searched by the Harvesters. The little dog was seized, and put under the control of Arella and the Gillikins.
The final scores were:
Gillikins 37.5 (including 10 points for Toto)
Munchkins 25
Winkies/Harvest 24
Obviously, possession of Toto by any of the three sides would have resulted in victory. Yet again, the Gillikins won, but it was definitely a different battle. I like the scenario and will tweak it for Fall In!®. I am hoping to realign the forces a bit and add a few surprises. I will also have some new terrain and possibly a new gaming mat. The core of the scenario will remain as I think it works and I think is fun.
At Fall In!® I will be running the game in the HAWKS room twice – on Friday morning and also on Saturday morning. I will also team up with Chris Palmer on Friday night for another Ozz game – featuring the Harvest folks seeking seasonal revenge – “The Vegetables are Revolting”.
Thanks for looking at this longer post. Next up (hopefully by this weekend) will be a special post on the Challenge Ogres “Paint What We All Have” painting challenge organized by Roger from “Rantings from Under the Wargames Table” in conjunction with Dave Stone of “Wargames Terrain Workshop” . Dave sculpted the figures and Roger set out the painting challenge.
Any feedback from you – let me know!
Miscellaneous details and references for those interested in that sort of thing:
For all of my previous posts on Wars of Ozz games, figures, units, and other related projects – please see this page.
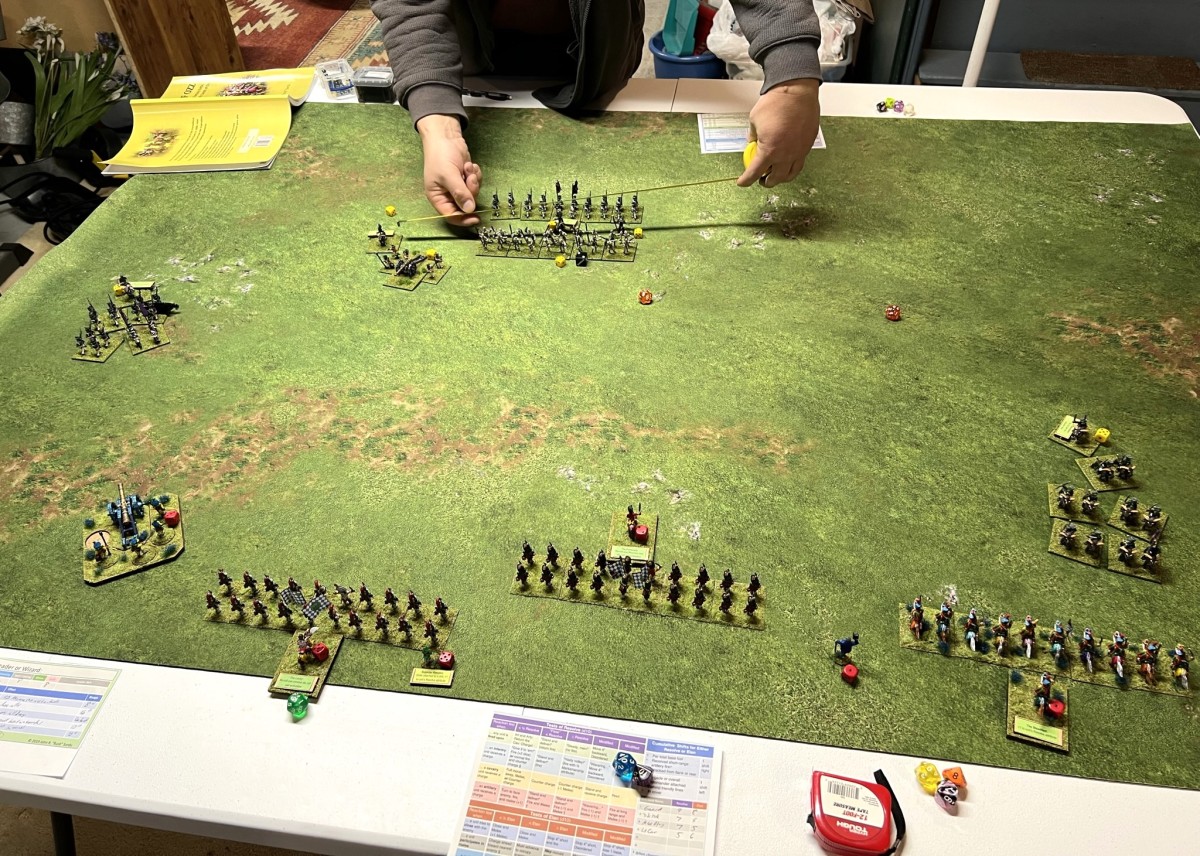
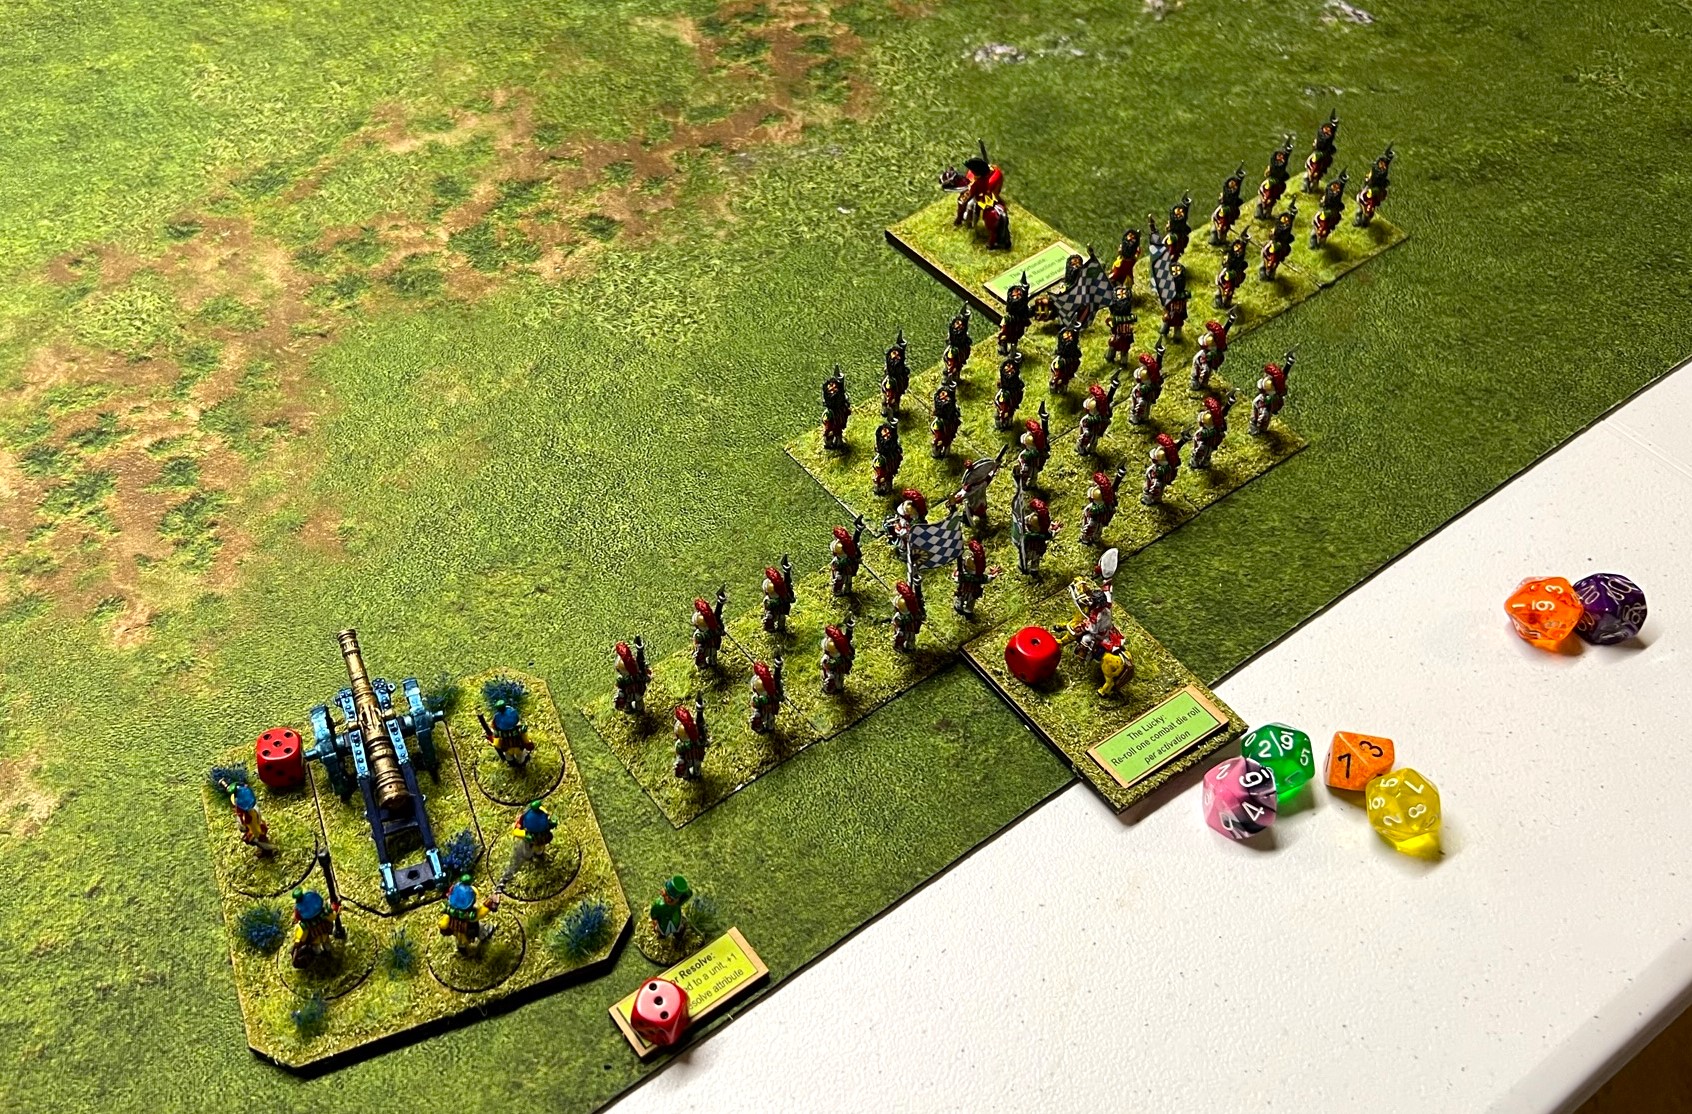
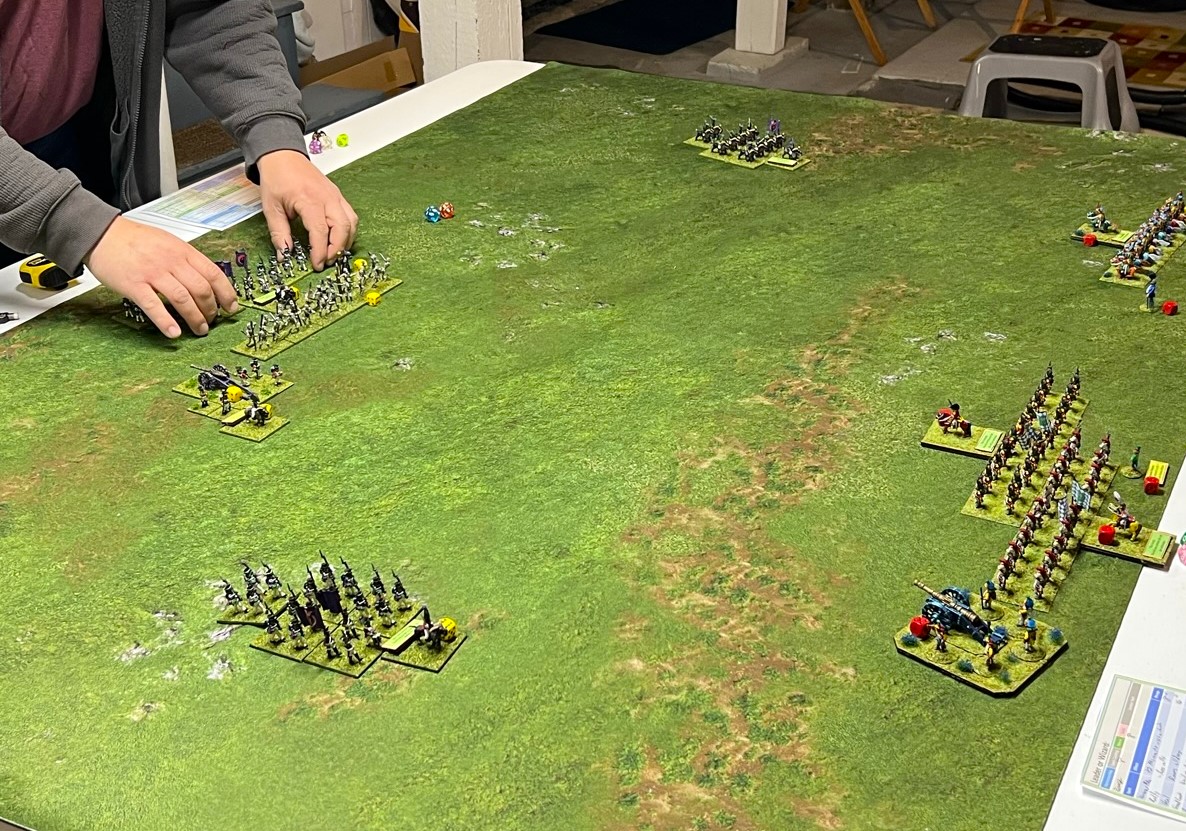
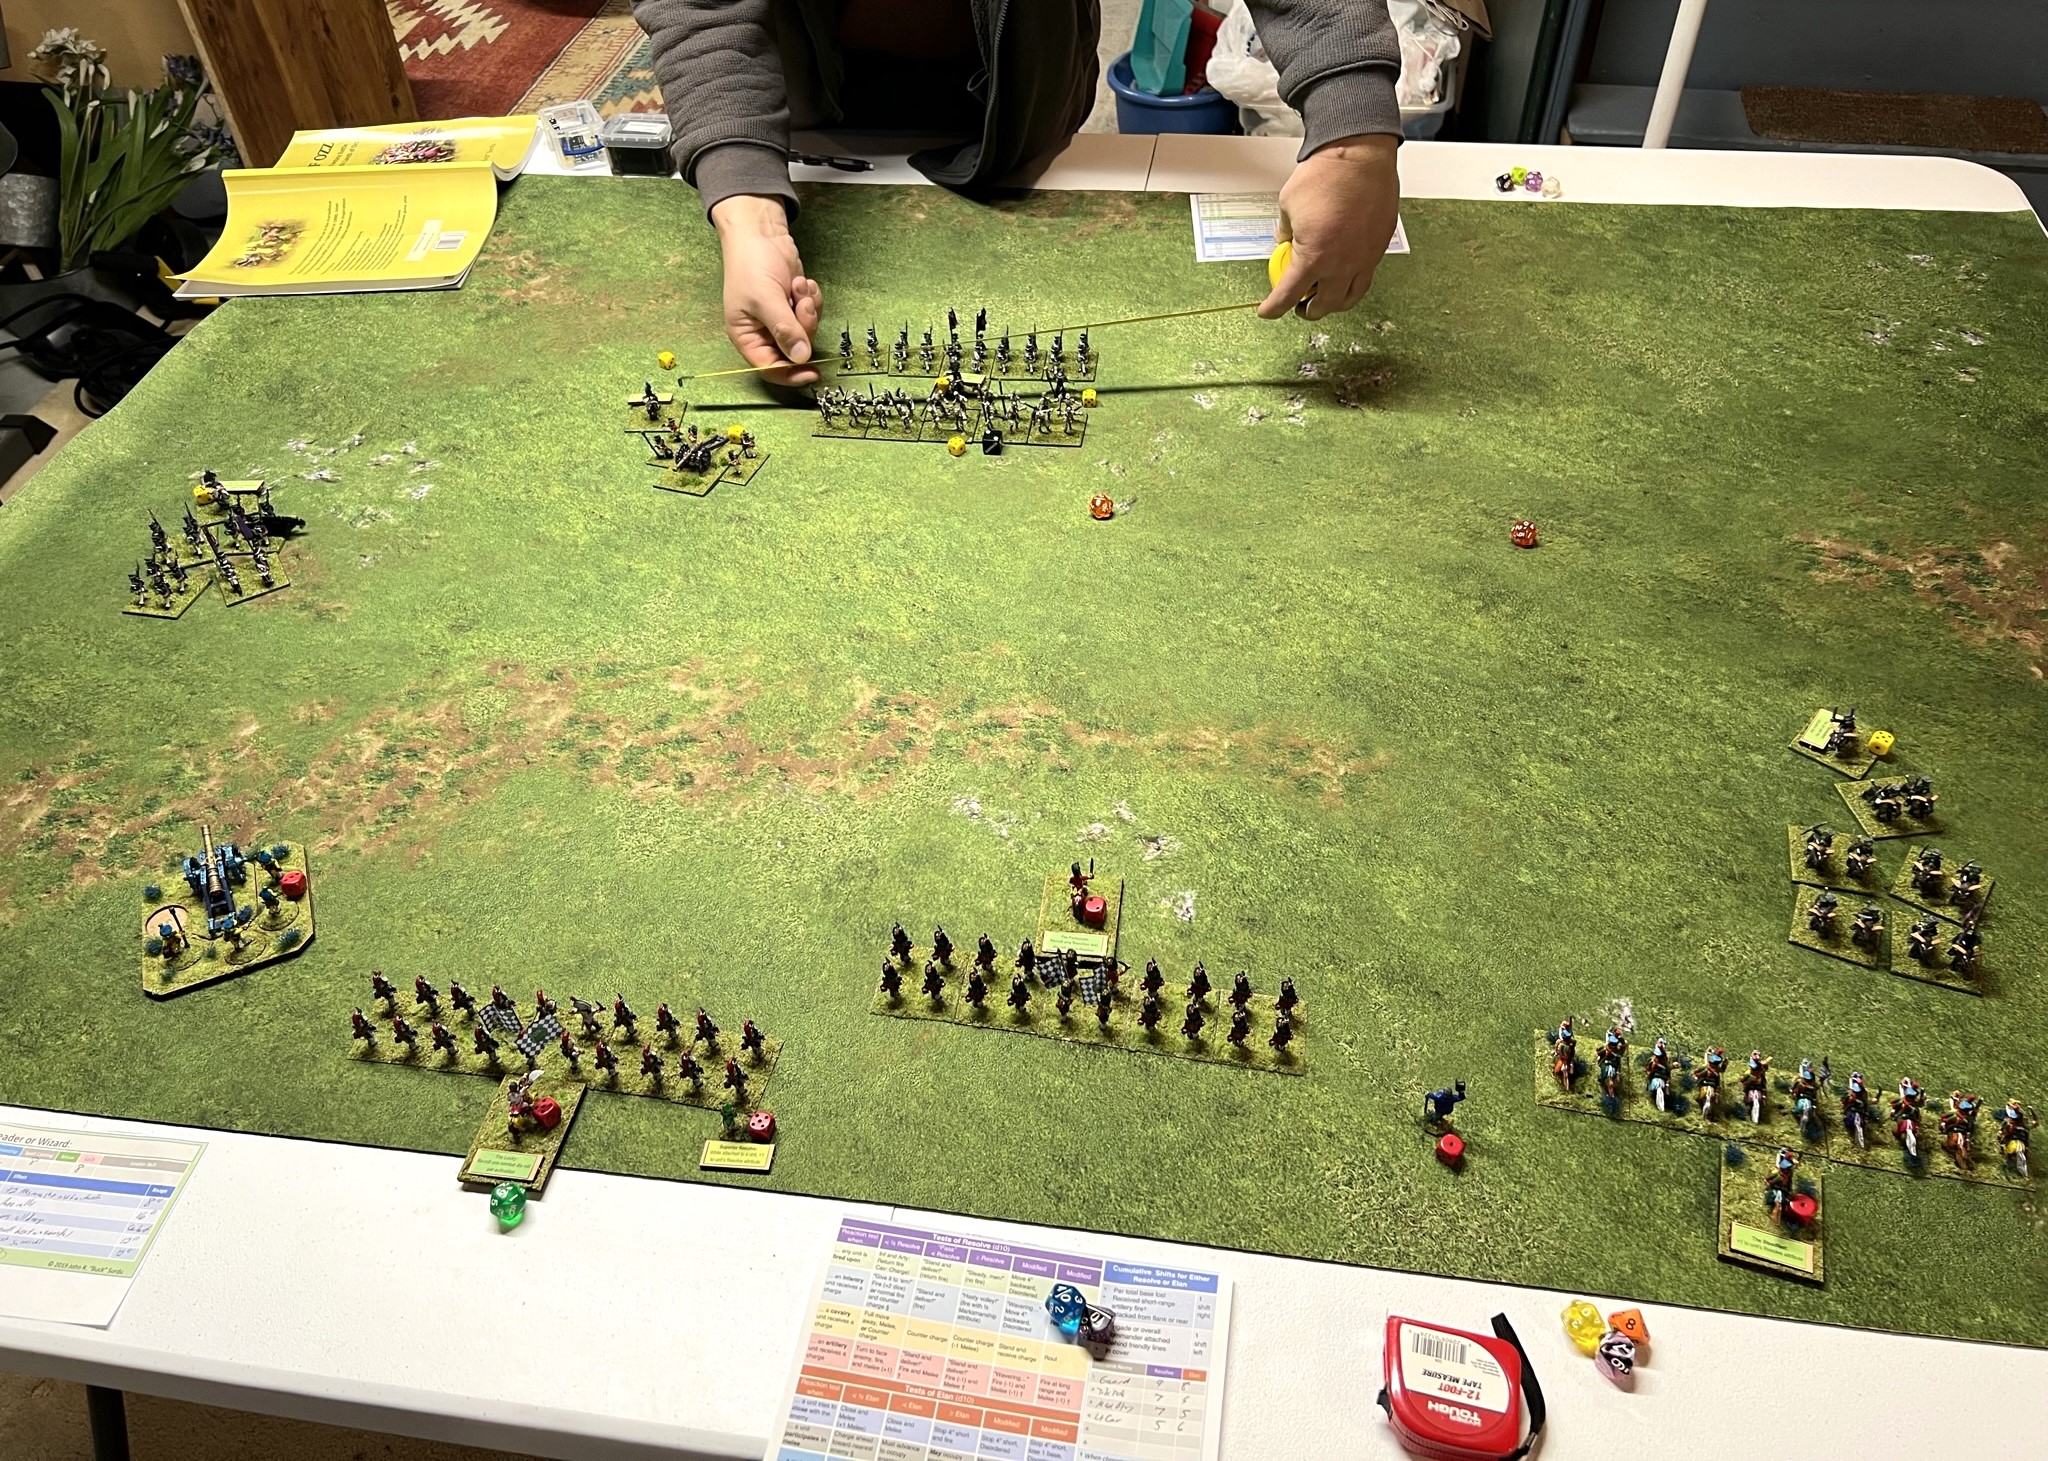
Last Saturday (January 14th) I was lucky to be able to have a game of Wars of Ozz with my friend Chris Comeau. We had each built brigades for the game – I had a Munchkin brigade of 27 points, and Chris had a Gillikin Brigade of 27 points. It was my first Ozz game outside of a convention, and it was Chris’ first ever. We decided to use the “Meeting Engagement” scenario on page 93 (section 6.1.4) with no terrain so that we could focus on playing the game and familiarizing ourselves with the rules. As I said, I have played several Ozz games with others who are more familiar with the rules, but I thought we could get more out of a simple set up. We had hoped to play in the new garage, but a nasty coating of ice on the stairs outside forced us into my cellar.
For scoring, each infantry or cavalry base lost would count as a point for the opposition, as would each artillery or individual figure taken out.
I will attempt here to provide a “cinematic” account of a pretty cool game – pictures do it best – though my cellar’s lighting was not optimal. Click on the pictures for a better view.
The Order of Battle
Chris’ Gillikin Brigade consisted of 5 units, 1 individual (Arella), and a Brigade Commander:
The deployment instructions call for each side to roll a die for each unit and individual, with the Brigade Commanders being placed in any desired zone. These units and individuals are then deployed on each side of the tabletop in six 10-inch deployment zones. The zones are centered on the middle of the tabletop, and no more than two units can be deployed in each zone (if you roll a number a thirds time you re-roll). We elected to have all of my units deploy first, then Chris’, but we could have also alternated our units. The results are seen below.
The initial deployment.
Both of our cavalry units by chance ended up on the far end of the tabletop. Munchkins are great marksmen, but not so great in melee – and they move somewhat slowly (short legs!). So, I decided to try to organize my forces around my firepower, but realigning my troops took a few turns as my two infantry regiments were in line and next to each other. Of course, there was no defensible terrain.
Chris decided to close on my positions while I reorganized.
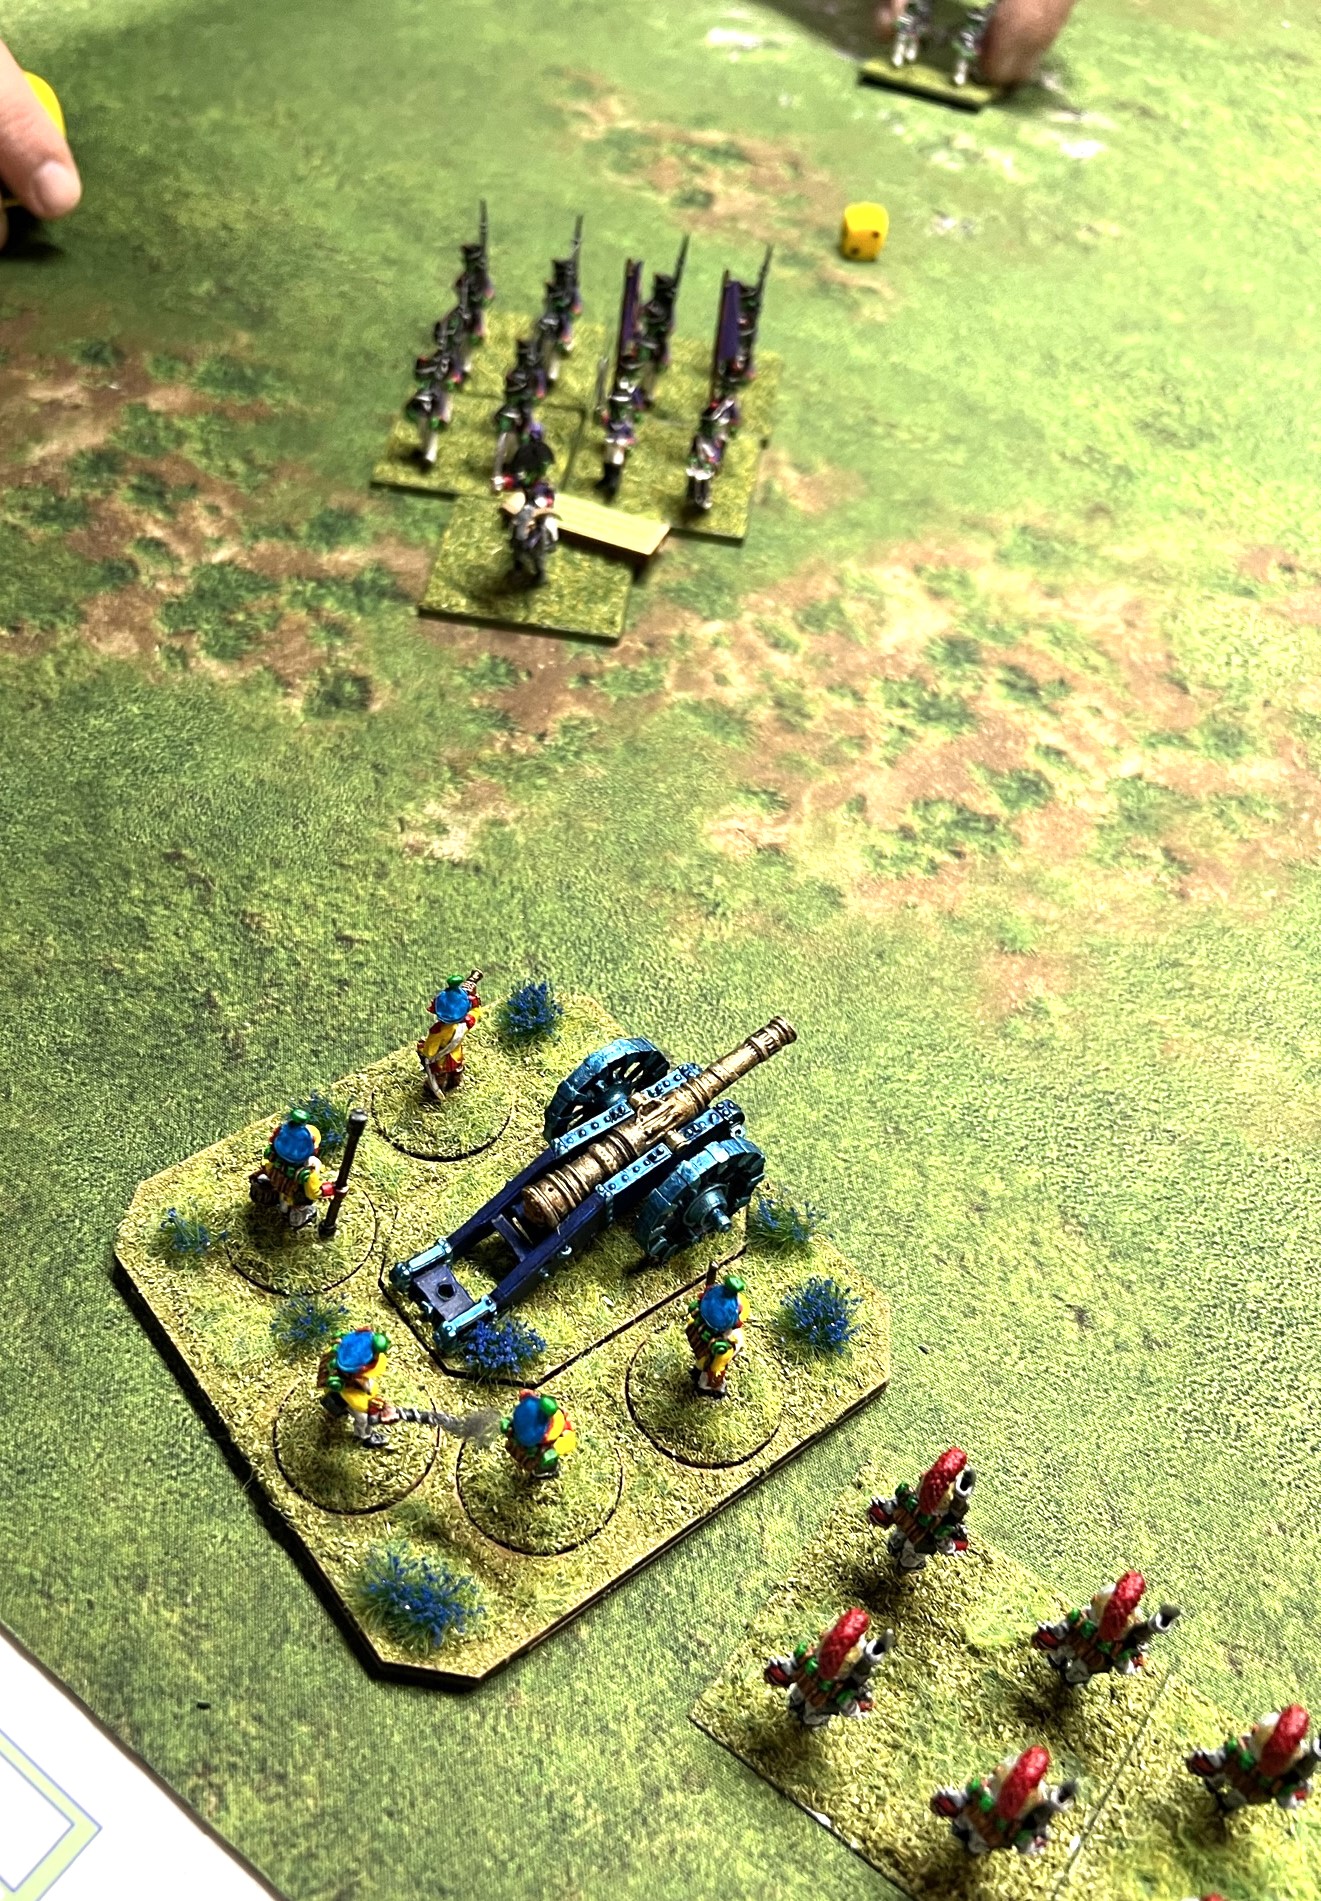
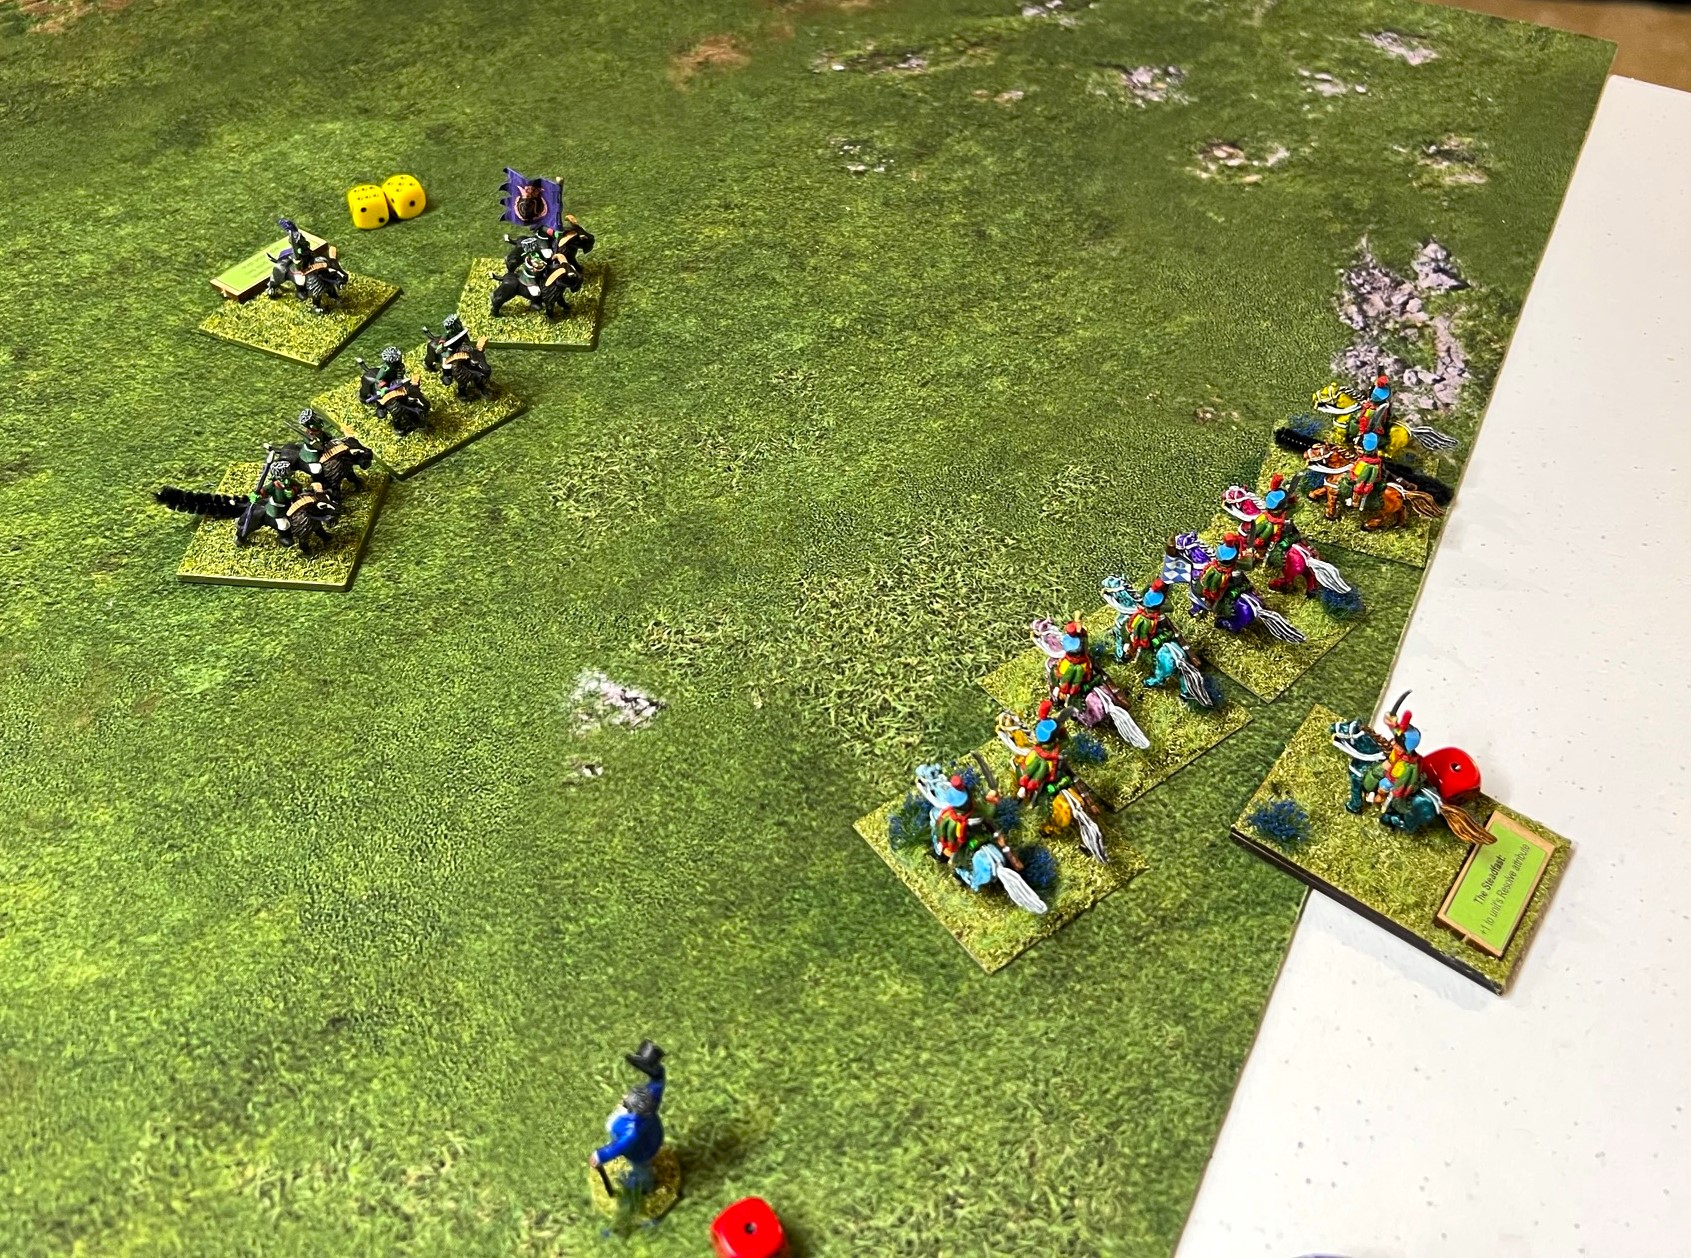
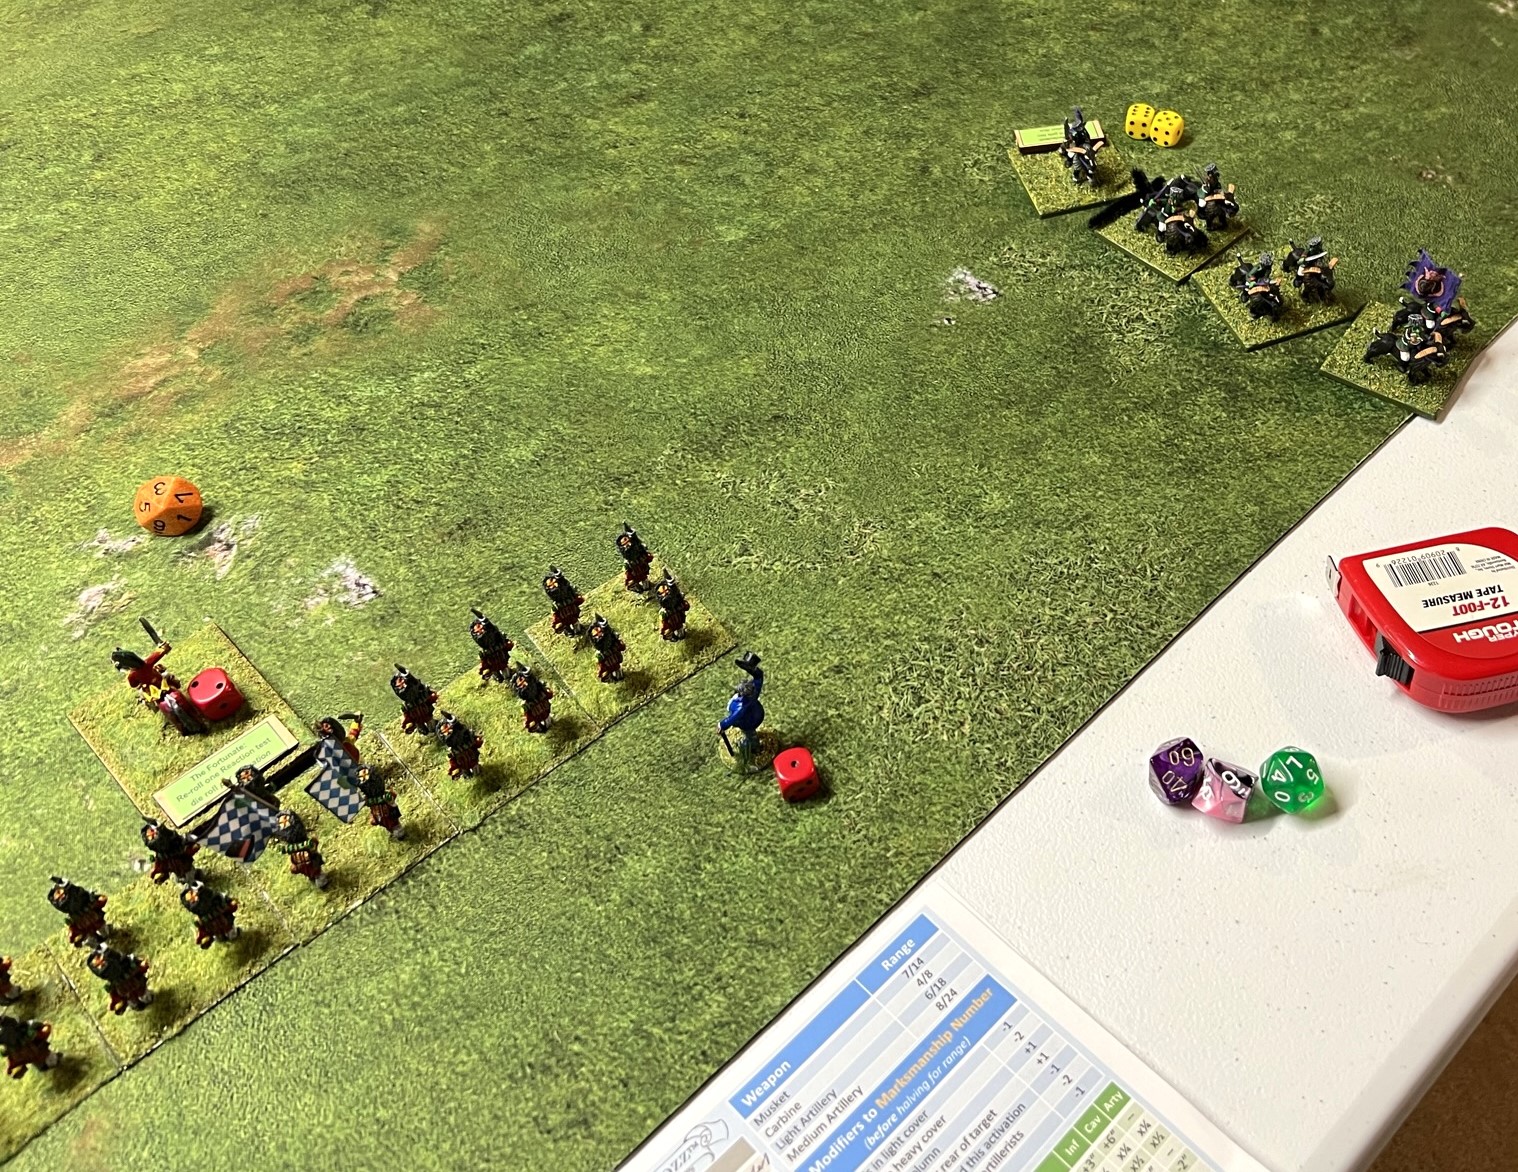
This is the north end of the tabletop. On the left, one of Chris’ Gillikin Regiments moves up – it had luckily received a “Swift” characteristic at the game start – so it moved fast and Chris had them in column which gave them additional movement versus being in line. He moved up his medium battery to extreme range. His Skeleton Regiment moved up in front of his second Gillikin Infantry Regiment, which had his witch, Arella, close and behind the skeletons.Meanwhile, I tried to align my forces on the north end to maximize firepower. My wizard, Zoraster, was on the far southern end with my light cavalry. This realignment went slowly.The swiftly advancing Gillikin Infantry Regiment went straight for my artillery battery, while in the background, his battery prepared to fire at long range. I was not too concerned as at long range he needed to roll a “1” on each of his 5 D10 shots to hit me. My ease was misplaced as you’ll see.Full view of initial movements.The Gillikins charged my gun, but failed to have enough movement. This left them out of breath and disordered at close range. My gun was at this point however aimed at the Gillikin battery, but the prospect of disordered enemy infantry in column right in front of me was too tempting. I rotated the battery and fired at the Gillikin infantry, immediately destroying one of its five bases (each base takes 4 hits before being destroyed). The Regimental Commander does not count as a combat base. That action only pushed them back and kept them disorganized.I subsequently activated again, and this fire at the Gillikin infantry exacted three hits on another base.
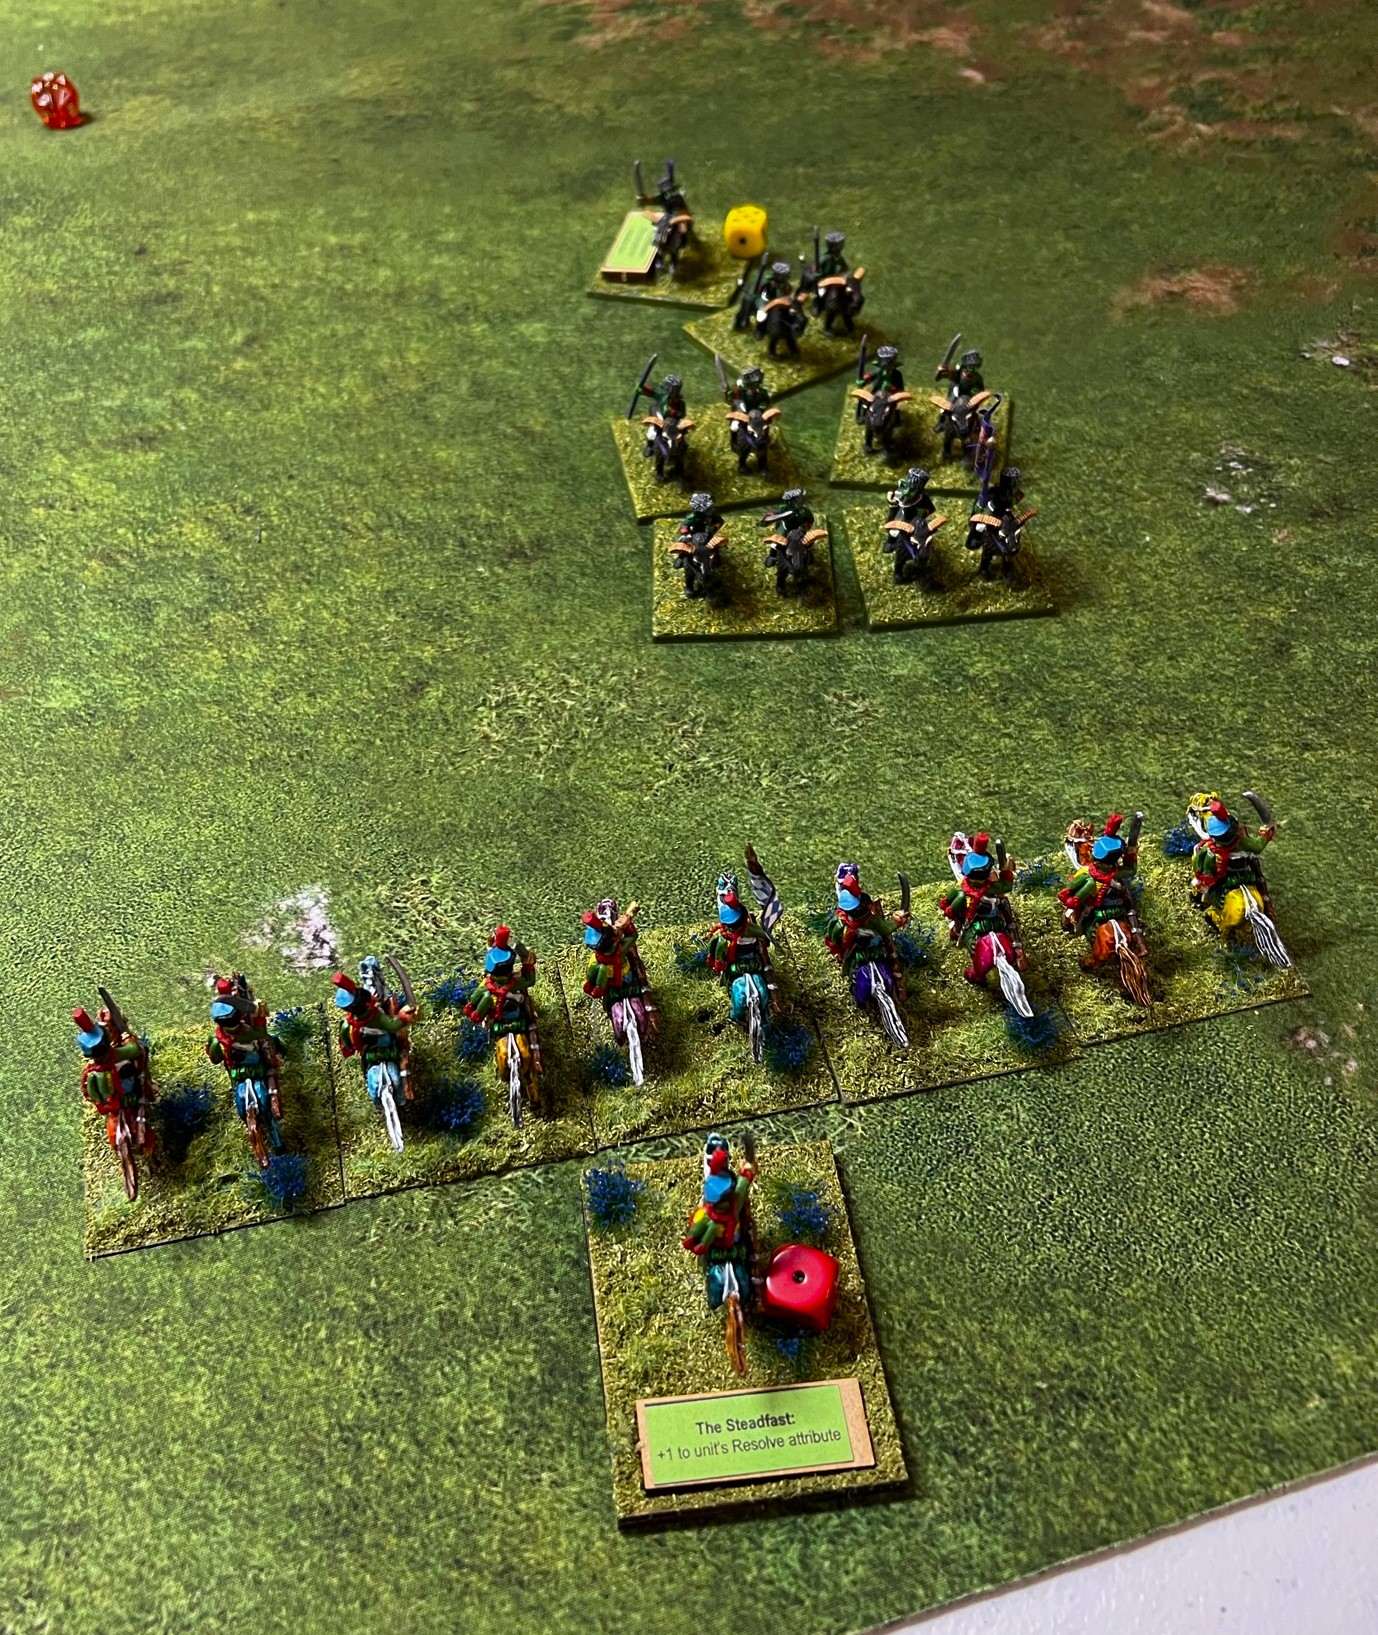
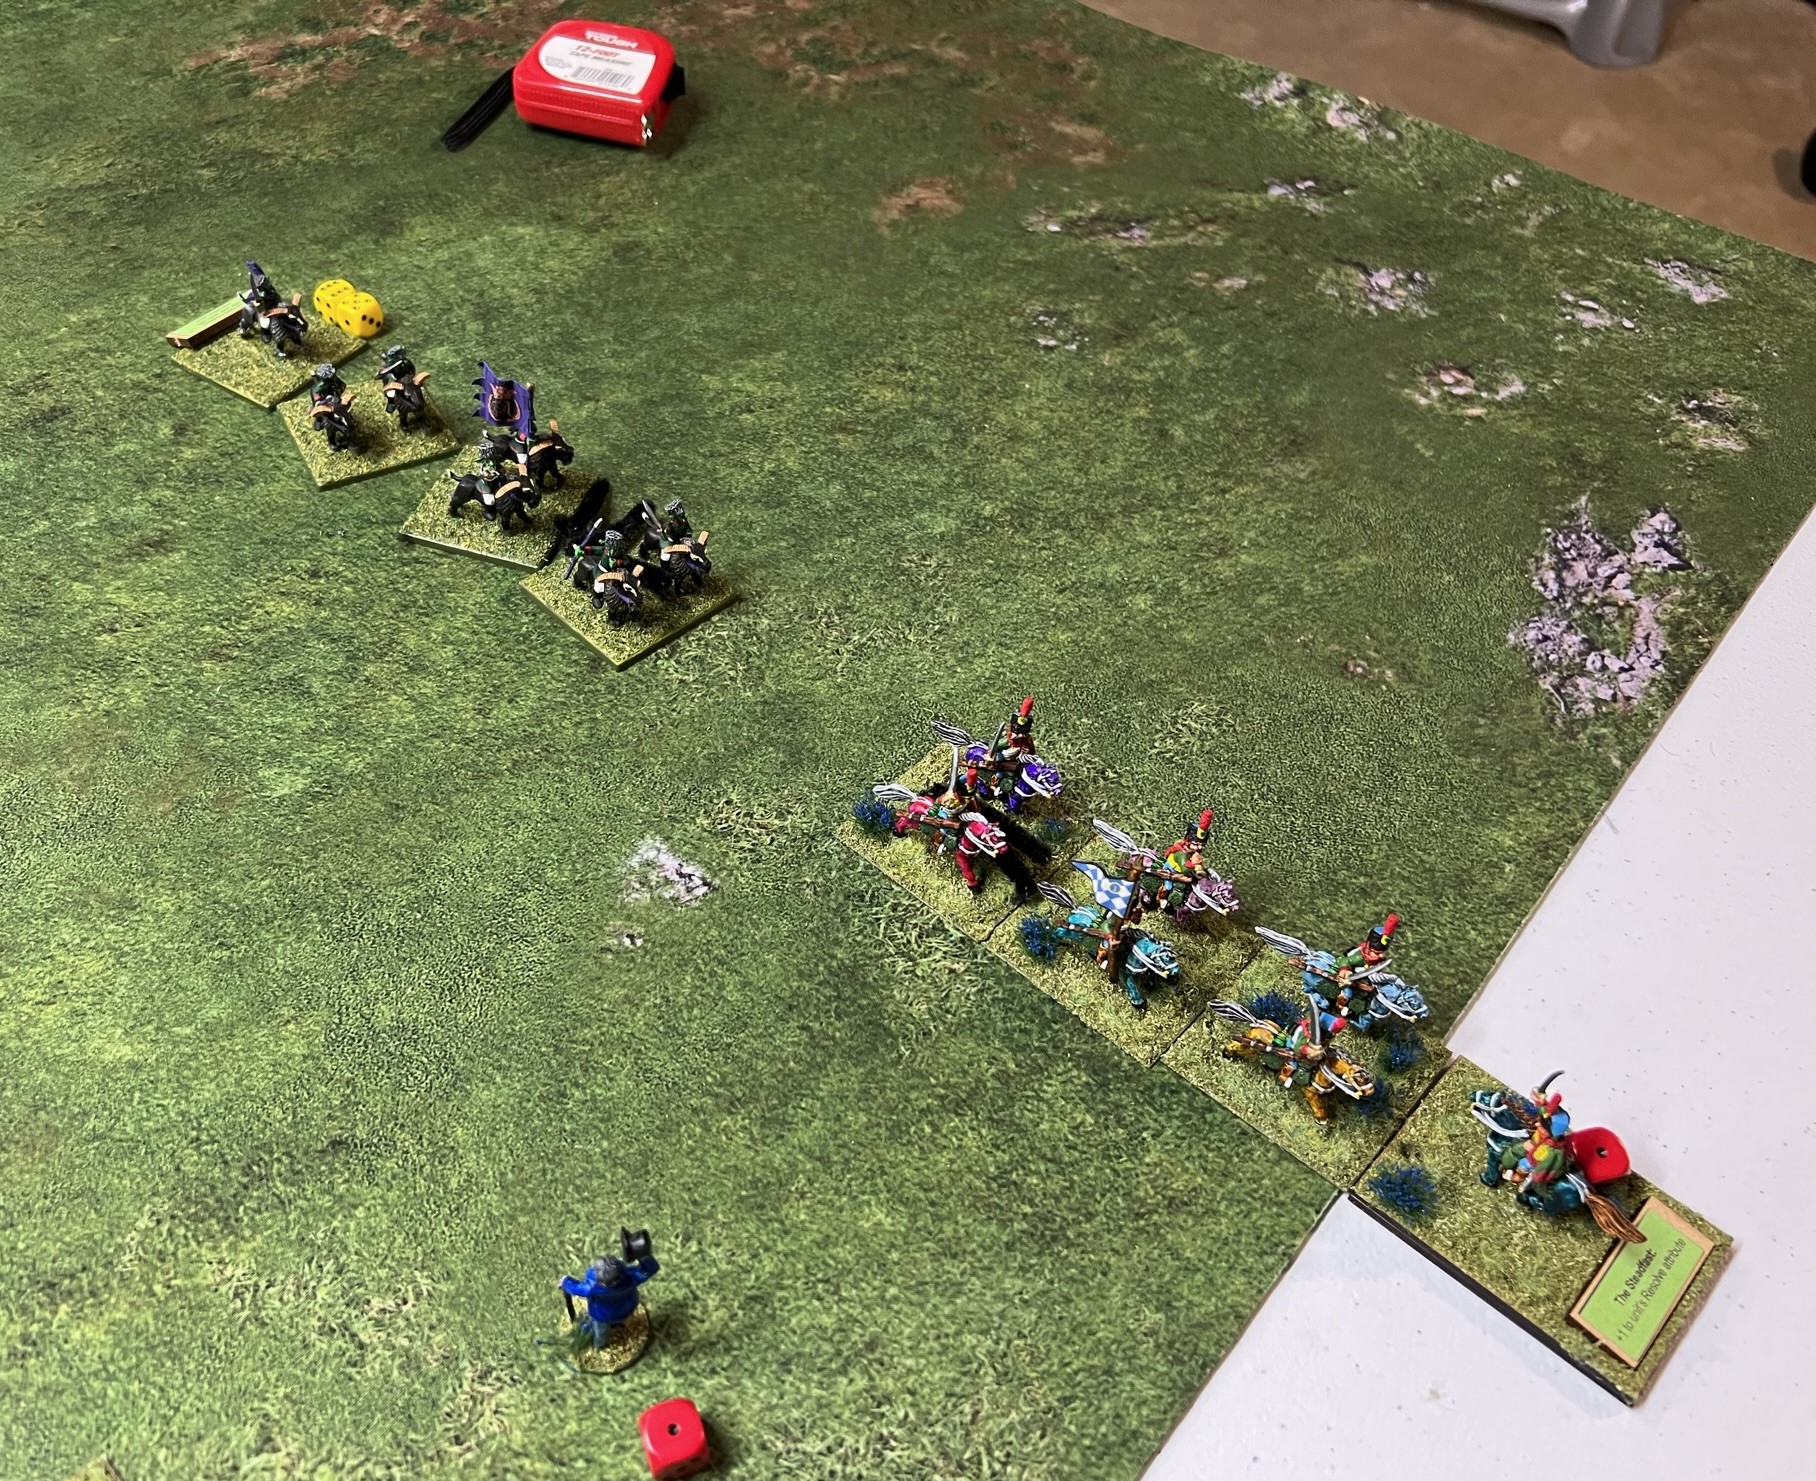
On the southern end of the tabletop, a cavalry battle ensued. Chris similarly moved up his cavalry, while I kept mine ready to screen and engage with their carbines. I was able to fire at his approaching goat-riders, and that disrupted that effort.
My cavalry carbines disrupt the Gillikin goat-riders attack.
next
A mid-battle tabletop view. My forces are consolidating – if slowly. So far, I am holding my own.
Then, the Gillikins managed to reform their cavalry and with a good activation roll were able to charge my cavalry – my reaction test was to countercharge at reduced efficiency. The Gillikins lost another base, and damaged mine slightly, but as I was near the tabletop edge, I was in danger of having them eliminated. The Gillikins managed to hold it together, reform again on yet another activation, and hit my now-disorganized cavalry, routing them. They had one chance left to rally, but that would depend on the activation sequence of the dice. I had Zoraster nearby, and one of his spells was an automatic rally – I just needed him to act before the Gillikin goat riders hit the fleeing Munchkin cavalry…
That did not happen in time. The Gillikin cavalry hit the Munchkins, and my cavalry ran away and headed for greener and safer pastures. This left my right flank open to a weakened but still deployed Gillikin cavalry – that Chris kept at a safe distance from any of my remaining musketry for most of the rest of the game.
My cavalry is pushed back to the tabletop end.The Munchkin Light Cavalry is routed – one chance to reform. Then the Gillikins drove them away.The Gillikin cavalry is on the right. Zoraster, having been denied the chance to rally the Munchkin cavalry, moved to the safety of the rear of his remaining infantry and the medium battery.I managed to get the infantry regiments in adjoining line formation facing the approaching skeletons. Unfortunately, Chris’ medium battery began hitting my battery, taking out one of its 5 bases (on left).
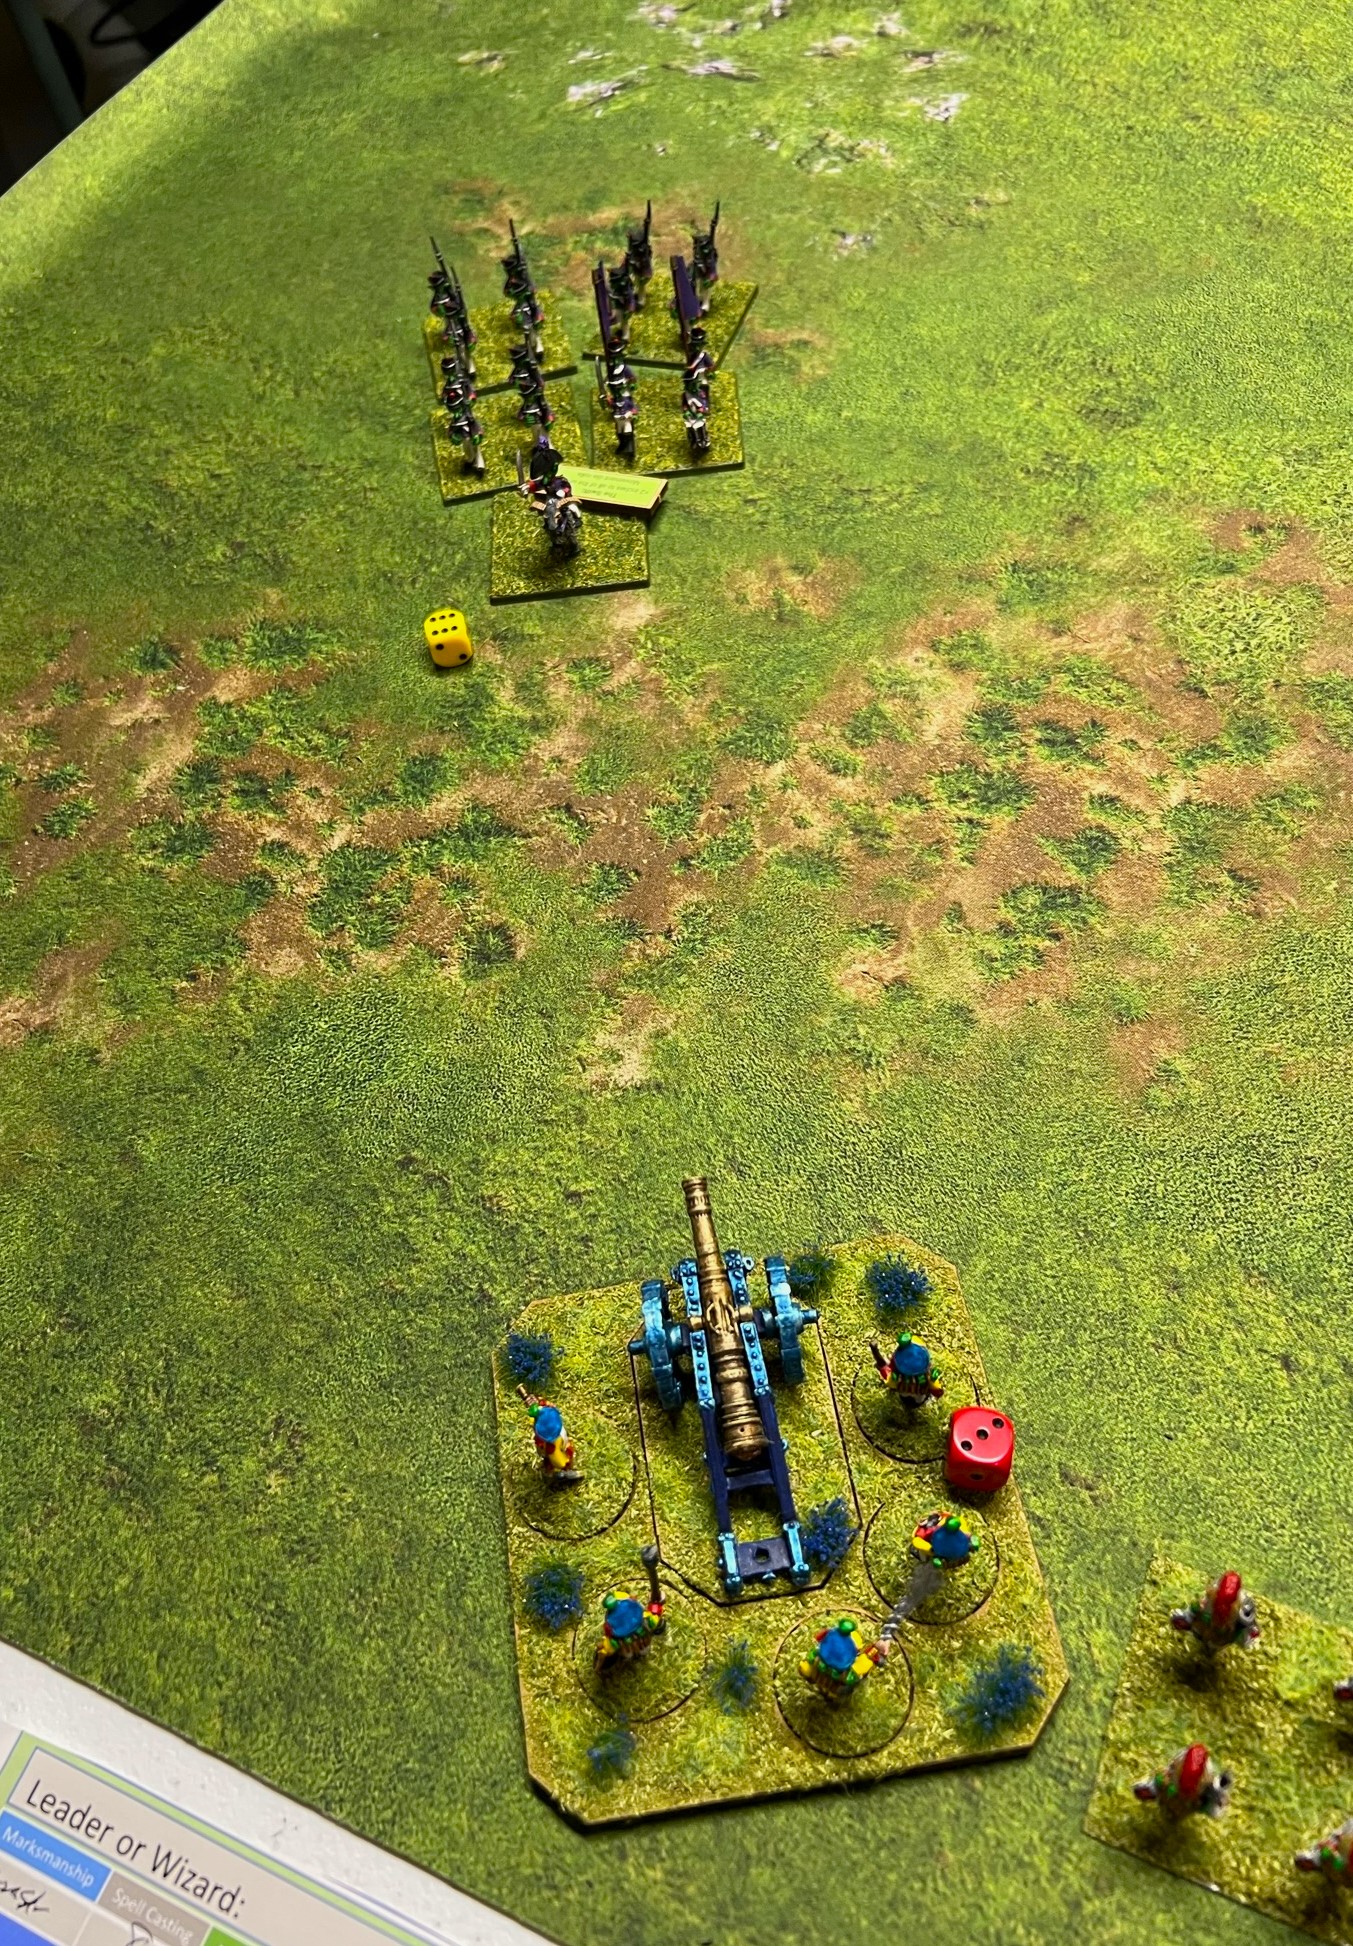
Seeing this, Chris reformed his infantry that had previously taken damage from my battery. Chris kept up his attacks with his medium battery – and despite being at long range, took out another two bases – leaving my battery nearly wiped out (2 out of 5 figures left). My medium battery gunners routed, abandoning the gun. The Gillikins sensed victory, and advanced, hoping to spike the gun and gain another victory point. They made it to the very front of the battery base.
The Munchkin gunners rout, abandoning the gun.
This time luck went on my side. Zoraster successfully threw a rally spell and the gunners were able to reman the gun and fire at point-blank range at the Gillikin infantry, sending them skedaddling!
Before the rally, the Gillikins hope to spike the gun……but the Munchkins rally, reman the gun, and drive off the Gillikins, who would flee the battlefield for good.
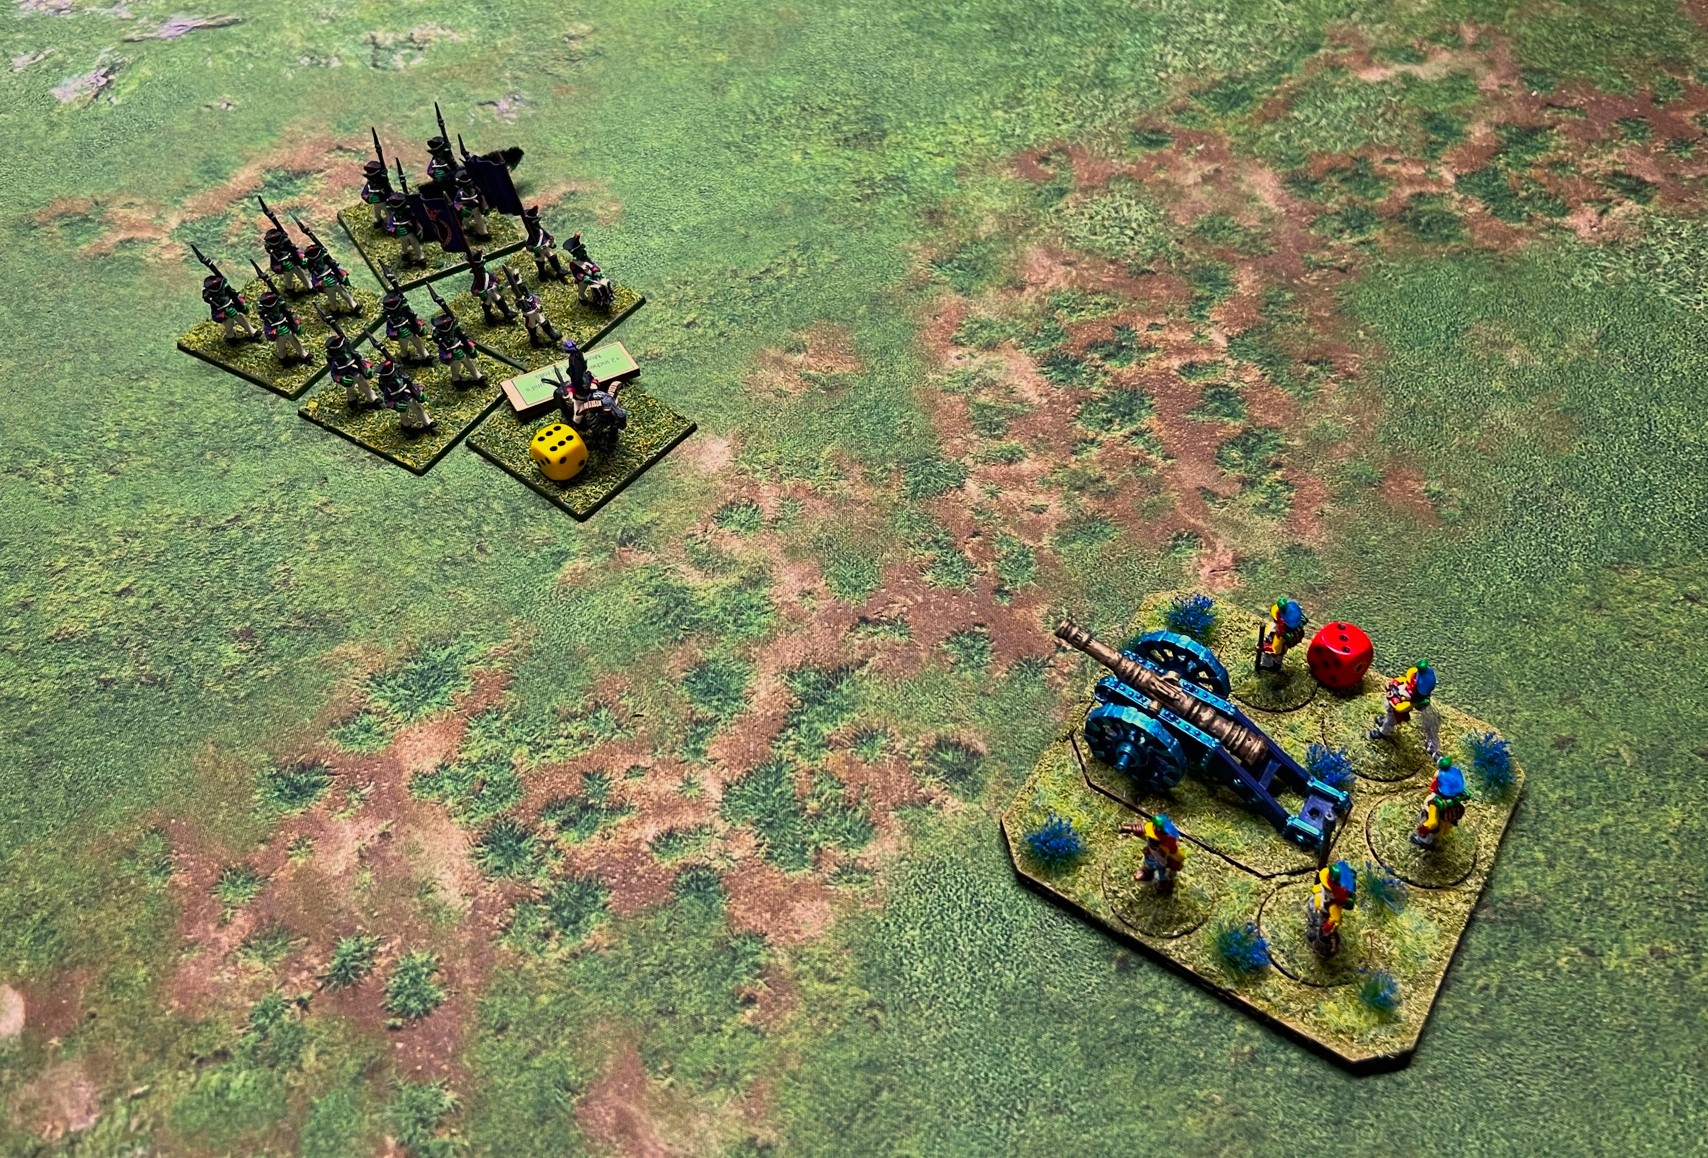
Then, unfortunately for me, the Gillikin Medium battery finished off my Medium battery with another hit.
Munchkin Medium Battery, RIP. Only the gun remains – while the Gillikin Infantry that it had dispatched run away.
I was down to two infantry regiments, plus a brigade commander and Zoraster. Zoraster successfully cast an “Uncanny Marksmanship” spell on Colonel Tik-Tok’s Infantry Regiment – which made their fire more effective against the advancing skeletons. Eventually, the skellies routed and disordered through the Gillikin Infantry Regiment following behind them.
After multiple musket volleys, Colonel Tik-Tok’s Infantry routs the skeletons.
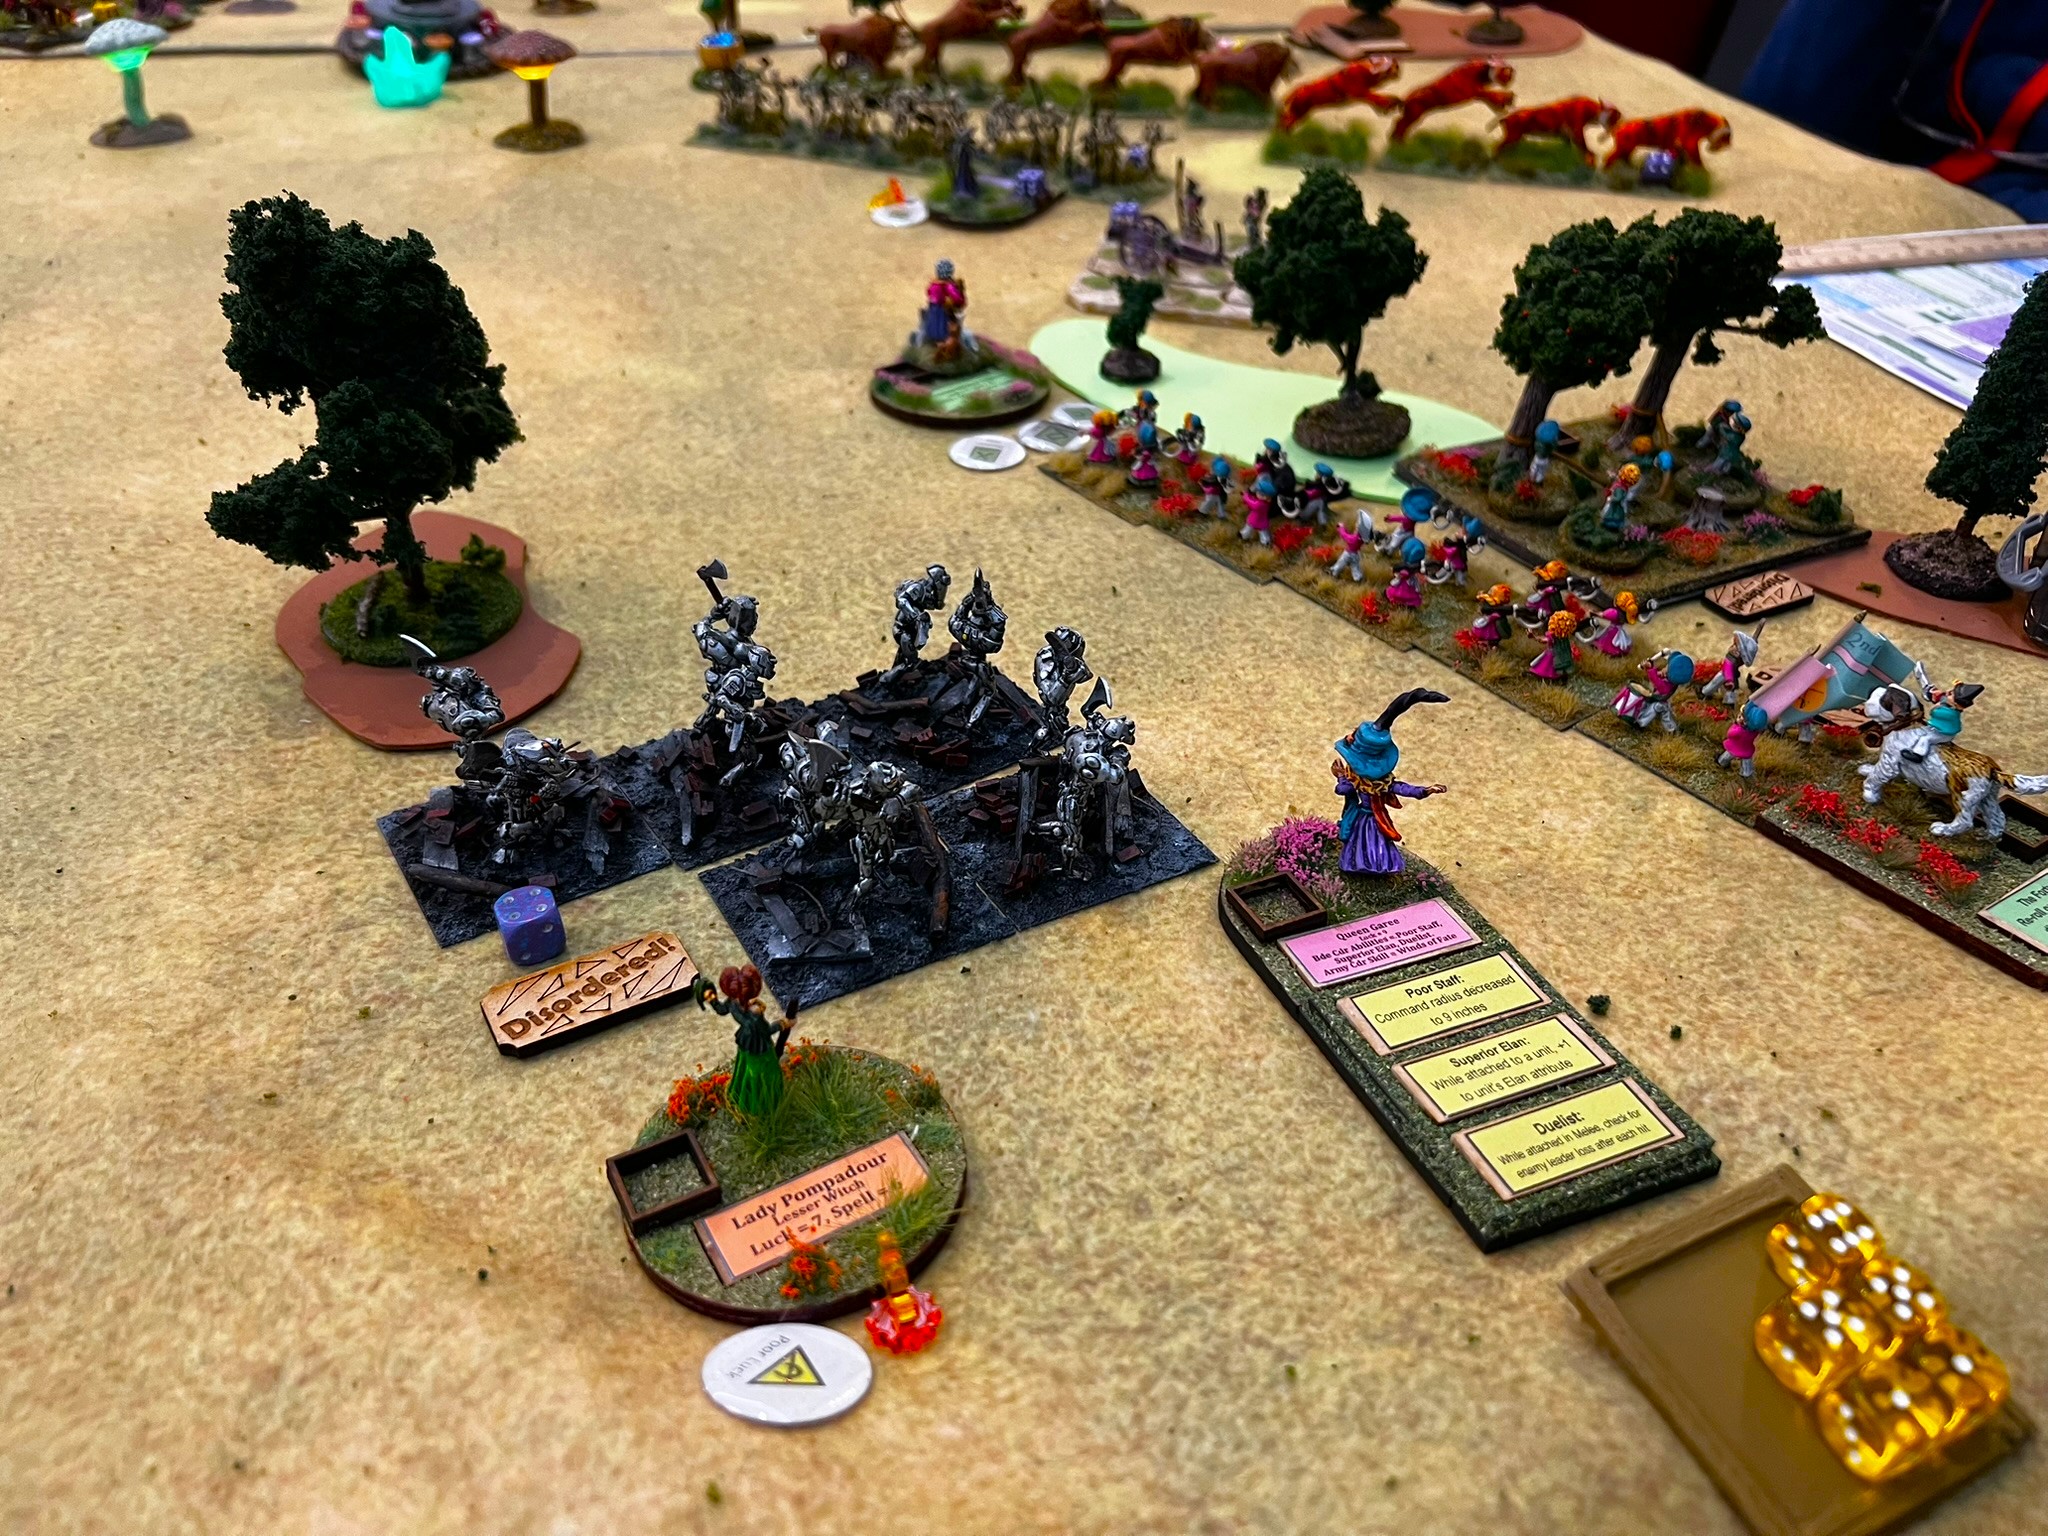
Chris then moved Arella around and threw three fireballs at Zoraster’s Guard Infantry Regiment’s flank, finally inflicting two casualties on one base (the first two shots failed). Zoraster, with a “Heal” spell, then attempted to recover these losses.
Zoraster moves behind Zoraster’s Guard Infantry Regiment to try to cast a “Heal” spell.
On a D10, he needed a 7. He rolled a 10, which is a “catastrophic spell failure” 8 or 9 just fail). Then I needed to roll a D20 on the “Spell Failure” for the catastrophic failure (i.e. rolling a 10). I rolled a 14, with the result :
“The spell fails but a friendly unit of woodland creatures joins the player’s army at the beginning of the next turn”.
Page 109, Wars of Ozz Spell Failure table
I had no idea how to adjudicate this – and I phoned Chris Palmer – who also had no idea if it was a joke result or not. In any case, as I had no stats for any such unit, we treated the failure as benign.
But Huzzah! I got another activation, to try the same action again! Good!!
ARGH!!! I rolled ANOTHER 10!!! Catastrophic failure #2 in a row!!!
Rolling on the “Spell Failure Chart”, I rolled a 20…the worst possible result..which said:
“Catastrophic failure: The spell-caster’s head explodes into a cloud of straw, bran, pins, and needles, killing him or her instantly. Remove the model from play.”
Page 109, Wars of Ozz Spell Failure table
Well, THAT was unfortunate!
The death of Zoraster.
The remaining Gillikin Infantry then charged into Colonel Tik-Tok’s Infantry Regiment in melee. After a couple of rounds, the casualties mounted on both sides. However, the Munchkins ended up taking too many casualties (including the now-attached Brigade Commander) and were wiped out. This left me with just Zoraster’s Guard Infantry, which tried to turn and avenge Tik-Tok’s loss.
Zoraster’s Guard Infantry (not well-named as now Zoraster was dead) tries to turn and hit the Gillikin Infantry.
It was not to be. Arella successfully hit the last regiment with another fireball in its rear and the resting goat riders finally made their move and charged into the rear of the regiment. This wiped out my last unit.
The games end – with my last regiment (Zoraster’s Guard Infantry) being driven down by goat riders.
Wow, what a game. It had more than a few twists and turns. In the end the score was 21-15, so the Gillikins were not unscathed. Still, it was a Gillikin victory over the Munchkins – nice job Chris! Hopefully we can throw down again soon and we can each get another brigade done too.
Postscript
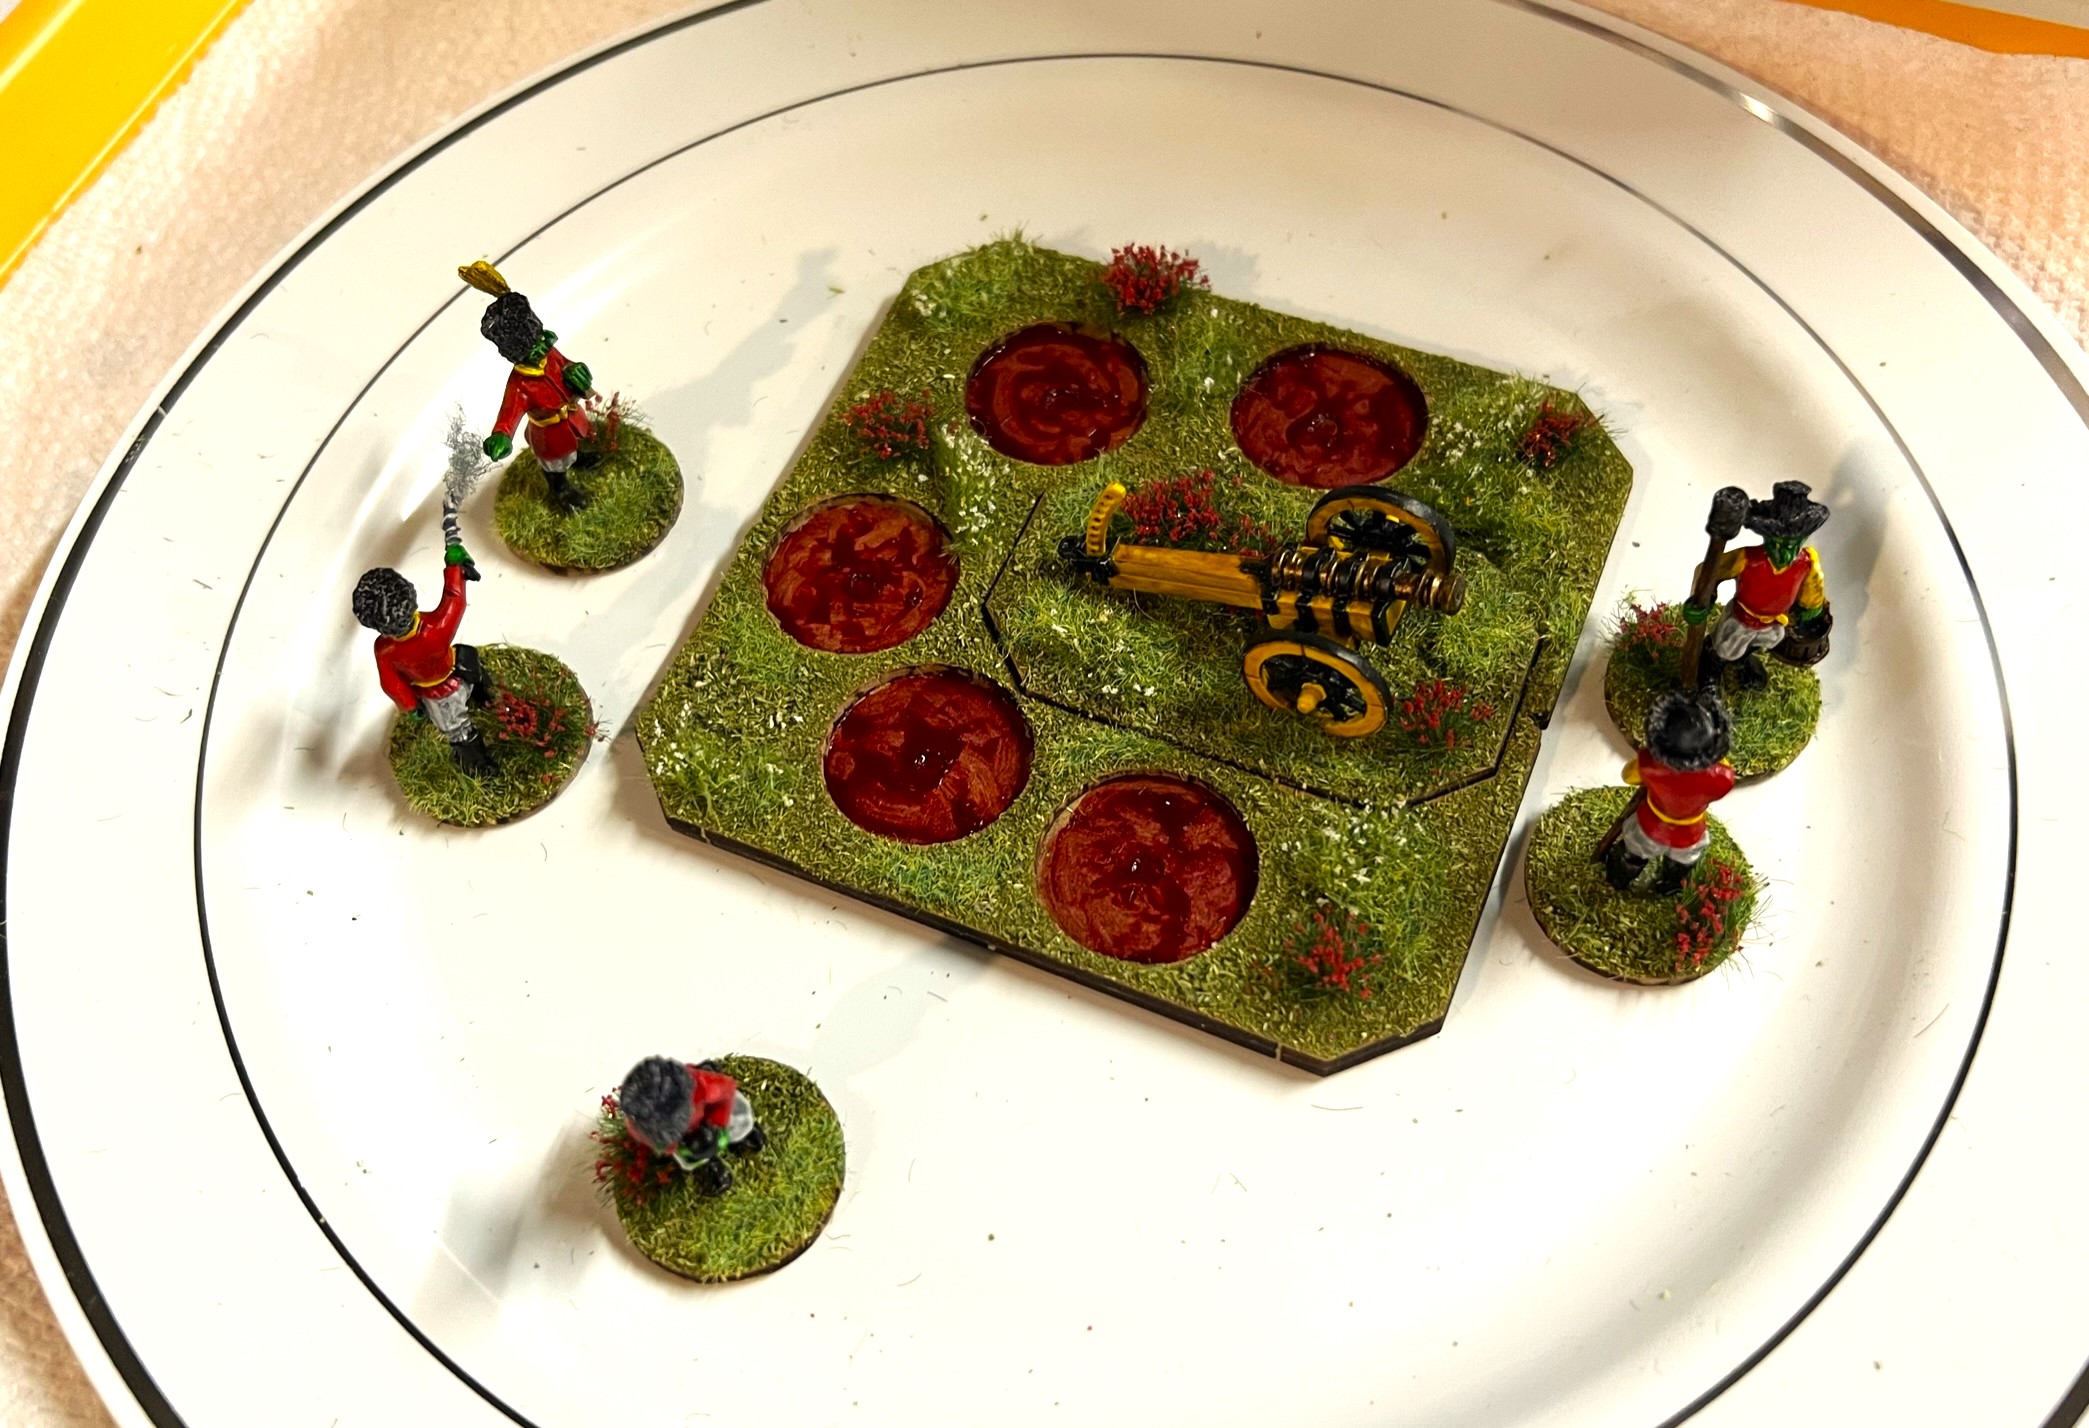
After the game, I decided to take Dave Stone’s suggestion and add some blood to the wells of the artillery sabot bases for both the Munchkins (shown here in this game) as well as my Winkie Light Battery. The Citadel “Blood for the Blood God” paint did serve this purpose.
Munchkin Medium Battery with painted wells.Winkie Light Battery with wells on sabot base painted for blood.